# Table of Contents
- [Open Source: Coder Docs | Coder](#open-source-coder-docs-coder)
- [Screenshots | Coder Docs](#screenshots-coder-docs)
- [Generate a Support Bundle | Coder Docs](#generate-a-support-bundle-coder-docs)
- [Support | Coder Docs](#support-coder-docs)
- [Quickstart | Coder Docs](#quickstart-coder-docs)
- [Code of Conduct | Coder Docs](#code-of-conduct-coder-docs)
- [Documentation | Coder Docs](#documentation-coder-docs)
- [Contributing | Coder Docs](#contributing-coder-docs)
- [Getting Started: Installation & Setup | Coder Docs](#getting-started-installation-setup-coder-docs)
- [AI Contribution Guidelines | Coder Docs](#ai-contribution-guidelines-coder-docs)
- [Security | Coder Docs](#security-coder-docs)
- [Modules | Coder Docs](#modules-coder-docs)
- [Coder CLI | Coder Docs](#coder-cli-coder-docs)
- [Frontend | Coder Docs](#frontend-coder-docs)
- [Templates | Coder Docs](#templates-coder-docs)
- [Install Coder with Docker: Step-by-Step Guide | Coder Docs](#install-coder-with-docker-step-by-step-guide-coder-docs)
- [Rancher | Coder Docs](#rancher-coder-docs)
- [Backend | Coder Docs](#backend-coder-docs)
- [Install Coder on Kubernetes with Helm | Coder Docs](#install-coder-on-kubernetes-with-helm-coder-docs)
- [User Guides | Coder Docs](#user-guides-coder-docs)
- [Unofficial Install Methods | Coder Docs](#unofficial-install-methods-coder-docs)
- [Upgrading | Coder Docs](#upgrading-coder-docs)
- [Deploy Coder on Azure with an Application Gateway | Coder Docs](#deploy-coder-on-azure-with-an-application-gateway-coder-docs)
- [Uninstall | Coder Docs](#uninstall-coder-docs)
- [Usage Data Reporting | Coder Docs](#usage-data-reporting-coder-docs)
- [Sunsetting Coder v1 and v2 Migration FAQ | Coder v1 Docs](#sunsetting-coder-v1-and-v2-migration-faq-coder-v1-docs)
- [Guides | Coder v1 Docs](#guides-coder-v1-docs)
- [Public API | Coder v1 Docs](#public-api-coder-v1-docs)
- [Workspace organization | Coder v1 Docs](#workspace-organization-coder-v1-docs)
- [Mobile development | Coder v1 Docs](#mobile-development-coder-v1-docs)
- [Command line | Coder v1 Docs](#command-line-coder-v1-docs)
- [1.37.1 | Coder v1 Docs](#1-37-1-coder-v1-docs)
- [Getting started | Coder v1 Docs](#getting-started-coder-v1-docs)
- [1.37.0 | Coder v1 Docs](#1-37-0-coder-v1-docs)
- [Changelog | Coder v1 Docs](#changelog-coder-v1-docs)
- [Images | Coder v1 Docs](#images-coder-v1-docs)
- [Customization | Coder v1 Docs](#customization-coder-v1-docs)
- [TLS certificates | Coder v1 Docs](#tls-certificates-coder-v1-docs)
- [Deployment | Coder v1 Docs](#deployment-coder-v1-docs)
- [Setup | Coder v1 Docs](#setup-coder-v1-docs)
- [Admin | Coder v1 Docs](#admin-coder-v1-docs)
- [Troubleshooting | Coder v1 Docs](#troubleshooting-coder-v1-docs)
- [Moving to Coder v2 | Coder v1 Docs](#moving-to-coder-v2-coder-v1-docs)
- [Organizations | Coder v1 Docs](#organizations-coder-v1-docs)
- [Workspaces | Coder v1 Docs](#workspaces-coder-v1-docs)
- [Admin | Coder v1 Docs](#admin-coder-v1-docs)
- [Coder for Docker | Coder v1 Docs](#coder-for-docker-coder-v1-docs)
- [Installation and setup | Coder v1 Docs](#installation-and-setup-coder-v1-docs)
- [Configure script | Coder v1 Docs](#configure-script-coder-v1-docs)
- [Create a workspace | Coder v1 Docs](#create-a-workspace-coder-v1-docs)
- [Administrators | Coder v1 Docs](#administrators-coder-v1-docs)
- [Deprecate and Decommission | Coder v1 Docs](#deprecate-and-decommission-coder-v1-docs)
- [File sync | Coder v1 Docs](#file-sync-coder-v1-docs)
- [1.43.0 | Coder v1 Docs](#1-43-0-coder-v1-docs)
- [Access control | Coder v1 Docs](#access-control-coder-v1-docs)
- [Architecture | Coder v1 Docs](#architecture-coder-v1-docs)
- [JFrog Artifactory | Coder v1 Docs](#jfrog-artifactory-coder-v1-docs)
- [1.42.0 | Coder v1 Docs](#1-42-0-coder-v1-docs)
- [Developers | Coder v1 Docs](#developers-coder-v1-docs)
- [Embeddable button | Coder v1 Docs](#embeddable-button-coder-v1-docs)
- [GPG forwarding | Coder v1 Docs](#gpg-forwarding-coder-v1-docs)
- [Lifecycle | Coder v1 Docs](#lifecycle-coder-v1-docs)
- [Workspace management | Coder v1 Docs](#workspace-management-coder-v1-docs)
- [Compute resources | Coder v1 Docs](#compute-resources-coder-v1-docs)
- [Registries | Coder v1 Docs](#registries-coder-v1-docs)
- [Usage metrics | Coder v1 Docs](#usage-metrics-coder-v1-docs)
- [IntelliJ | Coder v1 Docs](#intellij-coder-v1-docs)
- [1.41.0 | Coder v1 Docs](#1-41-0-coder-v1-docs)
- [System Requirements | Coder v1 Docs](#system-requirements-coder-v1-docs)
- [Auto-start | Coder v1 Docs](#auto-start-coder-v1-docs)
- [macOS keybindings | Coder v1 Docs](#macos-keybindings-coder-v1-docs)
- [Import | Coder v1 Docs](#import-coder-v1-docs)
- [1.40.0 | Coder v1 Docs](#1-40-0-coder-v1-docs)
- [Org management | Coder v1 Docs](#org-management-coder-v1-docs)
- [Activate JetBrains license in a browser | Coder v1 Docs](#activate-jetbrains-license-in-a-browser-coder-v1-docs)
- [1.39.0 | Coder v1 Docs](#1-39-0-coder-v1-docs)
- [Tags | Coder v1 Docs](#tags-coder-v1-docs)
- [Installation | Coder v1 Docs](#installation-coder-v1-docs)
- [Azure DNS | Coder v1 Docs](#azure-dns-coder-v1-docs)
- [Multiple JetBrains instances configuration | Coder v1 Docs](#multiple-jetbrains-instances-configuration-coder-v1-docs)
- [Cloudflare | Coder v1 Docs](#cloudflare-coder-v1-docs)
- [TLS certificates | Coder v1 Docs](#tls-certificates-coder-v1-docs)
- [1.36.0 | Coder v1 Docs](#1-36-0-coder-v1-docs)
- [Docker in workspaces | Coder v1 Docs](#docker-in-workspaces-coder-v1-docs)
- [Configuration | Coder v1 Docs](#configuration-coder-v1-docs)
- [Scaling Coder | Coder v1 Docs](#scaling-coder-coder-v1-docs)
- [Access URL | Coder v1 Docs](#access-url-coder-v1-docs)
- [Docker | Coder v1 Docs](#docker-coder-v1-docs)
- [Database migration | Coder v1 Docs](#database-migration-coder-v1-docs)
- [PostgreSQL | Coder v1 Docs](#postgresql-coder-v1-docs)
- [File download disabling | Coder v1 Docs](#file-download-disabling-coder-v1-docs)
- [Appearance | Coder v1 Docs](#appearance-coder-v1-docs)
- [Tailscale | Coder v1 Docs](#tailscale-coder-v1-docs)
- [Route 53 | Coder v1 Docs](#route-53-coder-v1-docs)
- [Configure TLS on Coder for Docker | Coder v1 Docs](#configure-tls-on-coder-for-docker-coder-v1-docs)
- [Account dormancy | Coder v1 Docs](#account-dormancy-coder-v1-docs)
- [GitHub OAuth integration | Coder v1 Docs](#github-oauth-integration-coder-v1-docs)
- [Remote terminal | Coder v1 Docs](#remote-terminal-coder-v1-docs)
- [1.35.0 | Coder v1 Docs](#1-35-0-coder-v1-docs)
- [Personalization | Coder v1 Docs](#personalization-coder-v1-docs)
- [Data scientists | Coder v1 Docs](#data-scientists-coder-v1-docs)
- [Proxies | Coder v1 Docs](#proxies-coder-v1-docs)
- [Security | Coder v1 Docs](#security-coder-v1-docs)
- [SAML 2.0 identity brokering | Coder v1 Docs](#saml-2-0-identity-brokering-coder-v1-docs)
- [PyCharm | Coder v1 Docs](#pycharm-coder-v1-docs)
- [Satellites | Coder v1 Docs](#satellites-coder-v1-docs)
- [Image registry | Coder v1 Docs](#image-registry-coder-v1-docs)
- [Environment variables | Coder v1 Docs](#environment-variables-coder-v1-docs)
- [Audit | Coder v1 Docs](#audit-coder-v1-docs)
- [Progressive web apps | Coder v1 Docs](#progressive-web-apps-coder-v1-docs)
- [Upgrade | Coder v1 Docs](#upgrade-coder-v1-docs)
- [Preferences | Coder v1 Docs](#preferences-coder-v1-docs)
- [Custom image creation | Coder v1 Docs](#custom-image-creation-coder-v1-docs)
- [Air-gapped deployment | Coder v1 Docs](#air-gapped-deployment-coder-v1-docs)
- [Dev URLs | Coder v1 Docs](#dev-urls-coder-v1-docs)
- [Editors and IDEs | Coder v1 Docs](#editors-and-ides-coder-v1-docs)
- [Direct workspace connections | Coder v1 Docs](#direct-workspace-connections-coder-v1-docs)
- [Helm charts | Coder v1 Docs](#helm-charts-coder-v1-docs)
- [Teardown | Coder v1 Docs](#teardown-coder-v1-docs)
- [1.17.0 | Coder v1 Docs](#1-17-0-coder-v1-docs)
- [1.34.0 | Coder v1 Docs](#1-34-0-coder-v1-docs)
- [VNC | Coder v1 Docs](#vnc-coder-v1-docs)
- [inotify watcher limit problems | Coder v1 Docs](#inotify-watcher-limit-problems-coder-v1-docs)
- [SSH access | Coder v1 Docs](#ssh-access-coder-v1-docs)
- [Terraform | Coder v1 Docs](#terraform-coder-v1-docs)
- [Coder for Docker | Coder v1 Docs](#coder-for-docker-coder-v1-docs)
- [TypeError: Failed to fetch | Coder v1 Docs](#typeerror-failed-to-fetch-coder-v1-docs)
- [Fallback shell | Coder v1 Docs](#fallback-shell-coder-v1-docs)
- [Structure | Coder v1 Docs](#structure-coder-v1-docs)
- [Image tag names | Coder v1 Docs](#image-tag-names-coder-v1-docs)
- [Vite and HMR | Coder v1 Docs](#vite-and-hmr-coder-v1-docs)
- [1.44.0 | Coder v1 Docs](#1-44-0-coder-v1-docs)
- [VS Code extensions | Coder v1 Docs](#vs-code-extensions-coder-v1-docs)
- [Workspace applications | Coder v1 Docs](#workspace-applications-coder-v1-docs)
- [SSH no mutual signature supported | Coder v1 Docs](#ssh-no-mutual-signature-supported-coder-v1-docs)
- [Workspace parameters | Coder v1 Docs](#workspace-parameters-coder-v1-docs)
- [Telemetry | Coder v1 Docs](#telemetry-coder-v1-docs)
- [Licensing | Coder v1 Docs](#licensing-coder-v1-docs)
- [Dev URLs | Coder v1 Docs](#dev-urls-coder-v1-docs)
- [Git integration | Coder v1 Docs](#git-integration-coder-v1-docs)
- [Templates | Coder v1 Docs](#templates-coder-v1-docs)
- [Prometheus integration | Coder v1 Docs](#prometheus-integration-coder-v1-docs)
- [Git configuration | Coder v1 Docs](#git-configuration-coder-v1-docs)
- [Coder installation from an archive | Coder v1 Docs](#coder-installation-from-an-archive-coder-v1-docs)
- [Google Cloud DNS | Coder v1 Docs](#google-cloud-dns-coder-v1-docs)
- [Logging | Coder v1 Docs](#logging-coder-v1-docs)
- [OpenID Connect with Azure AD | Coder v1 Docs](#openid-connect-with-azure-ad-coder-v1-docs)
- [NFS file mounting | Coder v1 Docs](#nfs-file-mounting-coder-v1-docs)
- [Admin password reset | Coder v1 Docs](#admin-password-reset-coder-v1-docs)
- [Organization roles | Coder v1 Docs](#organization-roles-coder-v1-docs)
- [Podman | Coder v1 Docs](#podman-coder-v1-docs)
- [Workspace providers | Coder v1 Docs](#workspace-providers-coder-v1-docs)
- [OpenID Connect with Google | Coder v1 Docs](#openid-connect-with-google-coder-v1-docs)
- [OpenID Connect with Active Directory Federation Services (ADFS) | Coder v1 Docs](#openid-connect-with-active-directory-federation-services-adfs-coder-v1-docs)
- [Node.js Projects | Coder v1 Docs](#node-js-projects-coder-v1-docs)
- [Storage | Coder v1 Docs](#storage-coder-v1-docs)
- [OpenID Connect with Okta | Coder v1 Docs](#openid-connect-with-okta-coder-v1-docs)
- [Workspace provider provisioning via CLI | Coder v1 Docs](#workspace-provider-provisioning-via-cli-coder-v1-docs)
- [Shared security responsibility | Coder v1 Docs](#shared-security-responsibility-coder-v1-docs)
- [Deployment | Coder v1 Docs](#deployment-coder-v1-docs)
- [Usage monitoring | Coder v1 Docs](#usage-monitoring-coder-v1-docs)
- [1.43.1 | Coder v1 Docs](#1-43-1-coder-v1-docs)
- [1.38.0 | Coder v1 Docs](#1-38-0-coder-v1-docs)
- [AWS RDS with IAM credentials | Coder v1 Docs](#aws-rds-with-iam-credentials-coder-v1-docs)
- [Workspace templates | Coder v1 Docs](#workspace-templates-coder-v1-docs)
- [Managed code-server Workspaces | Coder v1 Docs](#managed-code-server-workspaces-coder-v1-docs)
- [User management | Coder v1 Docs](#user-management-coder-v1-docs)
- [Authentication management | Coder v1 Docs](#authentication-management-coder-v1-docs)
- [Kubernetes | Coder v1 Docs](#kubernetes-coder-v1-docs)
- [Reference | Coder v1 Docs](#reference-coder-v1-docs)
- [Workspace management | Coder v1 Docs](#workspace-management-coder-v1-docs)
- [Docker in workspaces | Coder v1 Docs](#docker-in-workspaces-coder-v1-docs)
- [Archives | Coder v1 Docs](#archives-coder-v1-docs)
- [1.42.1 | Coder v1 Docs](#1-42-1-coder-v1-docs)
- [Default registry | Coder v1 Docs](#default-registry-coder-v1-docs)
- [Azure Container Registry | Coder v1 Docs](#azure-container-registry-coder-v1-docs)
- [SSH configuration | Coder v1 Docs](#ssh-configuration-coder-v1-docs)
- [Amazon Elastic Container Registry | Coder v1 Docs](#amazon-elastic-container-registry-coder-v1-docs)
- [Shutdown | Coder v1 Docs](#shutdown-coder-v1-docs)
- [Google Container Registry | Coder v1 Docs](#google-container-registry-coder-v1-docs)
- [1.41.1 | Coder v1 Docs](#1-41-1-coder-v1-docs)
- [1.39.2 | Coder v1 Docs](#1-39-2-coder-v1-docs)
- [Memory provisioning | Coder v1 Docs](#memory-provisioning-coder-v1-docs)
- [1.39.1 | Coder v1 Docs](#1-39-1-coder-v1-docs)
- [coder completion | Coder v1 Docs](#coder-completion-coder-v1-docs)
- [Manage satellites | Coder v1 Docs](#manage-satellites-coder-v1-docs)
- [1.36.2 | Coder v1 Docs](#1-36-2-coder-v1-docs)
- [coder config-ssh | Coder v1 Docs](#coder-config-ssh-coder-v1-docs)
- [Migrate to satellite deployments | Coder v1 Docs](#migrate-to-satellite-deployments-coder-v1-docs)
- [1.34.3 | Coder v1 Docs](#1-34-3-coder-v1-docs)
- [1.35.4 | Coder v1 Docs](#1-35-4-coder-v1-docs)
- [Offline documentation | Coder v1 Docs](#offline-documentation-coder-v1-docs)
- [1.33.6 | Coder v1 Docs](#1-33-6-coder-v1-docs)
- [1.38.3 | Coder v1 Docs](#1-38-3-coder-v1-docs)
- [Workspace template code completion | Coder v1 Docs](#workspace-template-code-completion-coder-v1-docs)
- [1.32.5 | Coder v1 Docs](#1-32-5-coder-v1-docs)
- [1.31.3 | Coder v1 Docs](#1-31-3-coder-v1-docs)
- [1.32.4 | Coder v1 Docs](#1-32-4-coder-v1-docs)
- [1.31.1 | Coder v1 Docs](#1-31-1-coder-v1-docs)
- [1.38.1 | Coder v1 Docs](#1-38-1-coder-v1-docs)
- [1.32.2 | Coder v1 Docs](#1-32-2-coder-v1-docs)
- [coder users | Coder v1 Docs](#coder-users-coder-v1-docs)
- [1.30.5 | Coder v1 Docs](#1-30-5-coder-v1-docs)
- [1.32.3 | Coder v1 Docs](#1-32-3-coder-v1-docs)
- [1.32.1 | Coder v1 Docs](#1-32-1-coder-v1-docs)
- [1.30.1 | Coder v1 Docs](#1-30-1-coder-v1-docs)
- [coder tunnel | Coder v1 Docs](#coder-tunnel-coder-v1-docs)
- [1.31.2 | Coder v1 Docs](#1-31-2-coder-v1-docs)
- [1.29.6 | Coder v1 Docs](#1-29-6-coder-v1-docs)
- [1.30.2 | Coder v1 Docs](#1-30-2-coder-v1-docs)
- [1.29.4 | Coder v1 Docs](#1-29-4-coder-v1-docs)
- [1.29.5 | Coder v1 Docs](#1-29-5-coder-v1-docs)
- [1.30.3 | Coder v1 Docs](#1-30-3-coder-v1-docs)
- [1.30.4 | Coder v1 Docs](#1-30-4-coder-v1-docs)
- [1.28.3 | Coder v1 Docs](#1-28-3-coder-v1-docs)
- [1.29.3 | Coder v1 Docs](#1-29-3-coder-v1-docs)
- [1.29.0 | Coder v1 Docs](#1-29-0-coder-v1-docs)
- [1.29.1 | Coder v1 Docs](#1-29-1-coder-v1-docs)
- [1.28.5 | Coder v1 Docs](#1-28-5-coder-v1-docs)
- [1.29.2 | Coder v1 Docs](#1-29-2-coder-v1-docs)
- [1.28.4 | Coder v1 Docs](#1-28-4-coder-v1-docs)
- [1.28.2 | Coder v1 Docs](#1-28-2-coder-v1-docs)
- [1.27.2 | Coder v1 Docs](#1-27-2-coder-v1-docs)
- [1.28.7 | Coder v1 Docs](#1-28-7-coder-v1-docs)
- [1.28.6 | Coder v1 Docs](#1-28-6-coder-v1-docs)
- [1.28.0 | Coder v1 Docs](#1-28-0-coder-v1-docs)
- [1.26.2 | Coder v1 Docs](#1-26-2-coder-v1-docs)
- [1.28.1 | Coder v1 Docs](#1-28-1-coder-v1-docs)
- [1.27.3 | Coder v1 Docs](#1-27-3-coder-v1-docs)
- [1.27.4 | Coder v1 Docs](#1-27-4-coder-v1-docs)
- [1.26.4 | Coder v1 Docs](#1-26-4-coder-v1-docs)
- [1.26.3 | Coder v1 Docs](#1-26-3-coder-v1-docs)
- [1.26.1 | Coder v1 Docs](#1-26-1-coder-v1-docs)
- [1.27.1 | Coder v1 Docs](#1-27-1-coder-v1-docs)
- [1.26.0 | Coder v1 Docs](#1-26-0-coder-v1-docs)
- [1.22.2 | Coder v1 Docs](#1-22-2-coder-v1-docs)
- [1.22.3 | Coder v1 Docs](#1-22-3-coder-v1-docs)
- [1.24.0 | Coder v1 Docs](#1-24-0-coder-v1-docs)
- [1.21.6 | Coder v1 Docs](#1-21-6-coder-v1-docs)
- [1.21.5 | Coder v1 Docs](#1-21-5-coder-v1-docs)
- [1.23.1 | Coder v1 Docs](#1-23-1-coder-v1-docs)
- [1.21.4 | Coder v1 Docs](#1-21-4-coder-v1-docs)
- [1.21.7 | Coder v1 Docs](#1-21-7-coder-v1-docs)
- [1.27.0 | Coder v1 Docs](#1-27-0-coder-v1-docs)
- [1.22.1 | Coder v1 Docs](#1-22-1-coder-v1-docs)
- [1.21.3 | Coder v1 Docs](#1-21-3-coder-v1-docs)
- [1.22.0 | Coder v1 Docs](#1-22-0-coder-v1-docs)
- [1.23.0 | Coder v1 Docs](#1-23-0-coder-v1-docs)
- [1.25.0 | Coder v1 Docs](#1-25-0-coder-v1-docs)
- [1.33.0 | Coder v1 Docs](#1-33-0-coder-v1-docs)
- [1.21.2 | Coder v1 Docs](#1-21-2-coder-v1-docs)
- [1.21.1 | Coder v1 Docs](#1-21-1-coder-v1-docs)
- [1.19.1 | Coder v1 Docs](#1-19-1-coder-v1-docs)
- [Rancher Kubernetes Engine | Coder v1 Docs](#rancher-kubernetes-engine-coder-v1-docs)
- [1.20.0 | Coder v1 Docs](#1-20-0-coder-v1-docs)
- [1.18.1 | Coder v1 Docs](#1-18-1-coder-v1-docs)
- [1.21.0 | Coder v1 Docs](#1-21-0-coder-v1-docs)
- [1.17.1 | Coder v1 Docs](#1-17-1-coder-v1-docs)
- [1.19.0 | Coder v1 Docs](#1-19-0-coder-v1-docs)
- [1.16.2 | Coder v1 Docs](#1-16-2-coder-v1-docs)
- [1.18.0 | Coder v1 Docs](#1-18-0-coder-v1-docs)
- [1.17.2 | Coder v1 Docs](#1-17-2-coder-v1-docs)
- [1.15.2 | Coder v1 Docs](#1-15-2-coder-v1-docs)
- [1.17.3 | Coder v1 Docs](#1-17-3-coder-v1-docs)
- [1.16.3 | Coder v1 Docs](#1-16-3-coder-v1-docs)
- [1.15.1 | Coder v1 Docs](#1-15-1-coder-v1-docs)
- [1.17.4 | Coder v1 Docs](#1-17-4-coder-v1-docs)
- [1.14.4 | Coder v1 Docs](#1-14-4-coder-v1-docs)
- [1.16.1 | Coder v1 Docs](#1-16-1-coder-v1-docs)
- [1.14.3 | Coder v1 Docs](#1-14-3-coder-v1-docs)
- [1.14.2 | Coder v1 Docs](#1-14-2-coder-v1-docs)
- [1.14.1 | Coder v1 Docs](#1-14-1-coder-v1-docs)
- [1.15.0 | Coder v1 Docs](#1-15-0-coder-v1-docs)
- [1.13.2 | Coder v1 Docs](#1-13-2-coder-v1-docs)
- [1.33.1 | Coder v1 Docs](#1-33-1-coder-v1-docs)
- [1.33.2 | Coder v1 Docs](#1-33-2-coder-v1-docs)
- [1.33.3 | Coder v1 Docs](#1-33-3-coder-v1-docs)
- [1.16.0 | Coder v1 Docs](#1-16-0-coder-v1-docs)
- [Update considerations | Coder v1 Docs](#update-considerations-coder-v1-docs)
- [1.44.1 | Coder v1 Docs](#1-44-1-coder-v1-docs)
- [1.33.5 | Coder v1 Docs](#1-33-5-coder-v1-docs)
- [1.14.0 | Coder v1 Docs](#1-14-0-coder-v1-docs)
- [External database setup | Coder v1 Docs](#external-database-setup-coder-v1-docs)
- [1.38.2 | Coder v1 Docs](#1-38-2-coder-v1-docs)
- [Upgrade | Coder v1 Docs](#upgrade-coder-v1-docs)
- [coder update | Coder v1 Docs](#coder-update-coder-v1-docs)
- [Red Hat OpenShift | Coder v1 Docs](#red-hat-openshift-coder-v1-docs)
- [1.34.2 | Coder v1 Docs](#1-34-2-coder-v1-docs)
- [Google Kubernetes Engine | Coder v1 Docs](#google-kubernetes-engine-coder-v1-docs)
- [Amazon Elastic Kubernetes Service | Coder v1 Docs](#amazon-elastic-kubernetes-service-coder-v1-docs)
- [1.35.1 | Coder v1 Docs](#1-35-1-coder-v1-docs)
- [1.33.4 | Coder v1 Docs](#1-33-4-coder-v1-docs)
- [Network setup | Coder v1 Docs](#network-setup-coder-v1-docs)
- [1.36.1 | Coder v1 Docs](#1-36-1-coder-v1-docs)
- [Feedback | Coder v1 Docs](#feedback-coder-v1-docs)
- [Azure Kubernetes Service | Coder v1 Docs](#azure-kubernetes-service-coder-v1-docs)
- [K3s | Coder v1 Docs](#k3s-coder-v1-docs)
- [1.34.1 | Coder v1 Docs](#1-34-1-coder-v1-docs)
- [1.35.3 | Coder v1 Docs](#1-35-3-coder-v1-docs)
- [coder sync | Coder v1 Docs](#coder-sync-coder-v1-docs)
- [1.35.2 | Coder v1 Docs](#1-35-2-coder-v1-docs)
- [Workspace limits | Coder v1 Docs](#workspace-limits-coder-v1-docs)
- [coder ssh | Coder v1 Docs](#coder-ssh-coder-v1-docs)
- [coder login | Coder v1 Docs](#coder-login-coder-v1-docs)
- [Workspace templates | Coder v1 Docs](#workspace-templates-coder-v1-docs)
- [coder workspaces | Coder v1 Docs](#coder-workspaces-coder-v1-docs)
- [Workspace process logging | Coder v1 Docs](#workspace-process-logging-coder-v1-docs)
- [coder urls | Coder v1 Docs](#coder-urls-coder-v1-docs)
- [coder logout | Coder v1 Docs](#coder-logout-coder-v1-docs)
- [Workspace provider management | Coder v1 Docs](#workspace-provider-management-coder-v1-docs)
- [CPU provisioning | Coder v1 Docs](#cpu-provisioning-coder-v1-docs)
- [IDE installation | Coder v1 Docs](#ide-installation-coder-v1-docs)
- [coder images | Coder v1 Docs](#coder-images-coder-v1-docs)
- [Global access URL configuration | Coder v1 Docs](#global-access-url-configuration-coder-v1-docs)
- [GPU acceleration | Coder v1 Docs](#gpu-acceleration-coder-v1-docs)
- [Self-contained workspace builds | Coder v1 Docs](#self-contained-workspace-builds-coder-v1-docs)
- [Extensions | Coder v1 Docs](#extensions-coder-v1-docs)
- [coder satellites | Coder v1 Docs](#coder-satellites-coder-v1-docs)
- [Local deployment | Coder v1 Docs](#local-deployment-coder-v1-docs)
- [coder tokens | Coder v1 Docs](#coder-tokens-coder-v1-docs)
- [coder users ls | Coder v1 Docs](#coder-users-ls-coder-v1-docs)
- [coder workspaces create-from-config | Coder v1 Docs](#coder-workspaces-create-from-config-coder-v1-docs)
- [coder workspaces create | Coder v1 Docs](#coder-workspaces-create-coder-v1-docs)
- [coder workspaces edit-from-config | Coder v1 Docs](#coder-workspaces-edit-from-config-coder-v1-docs)
- [coder workspaces edit | Coder v1 Docs](#coder-workspaces-edit-coder-v1-docs)
- [coder workspaces ls | Coder v1 Docs](#coder-workspaces-ls-coder-v1-docs)
- [coder workspaces ping | Coder v1 Docs](#coder-workspaces-ping-coder-v1-docs)
- [About | Coder v1 Docs](#about-coder-v1-docs)
- [coder workspaces policy-template | Coder v1 Docs](#coder-workspaces-policy-template-coder-v1-docs)
- [coder tokens create | Coder v1 Docs](#coder-tokens-create-coder-v1-docs)
- [coder tokens regen | Coder v1 Docs](#coder-tokens-regen-coder-v1-docs)
- [coder tokens ls | Coder v1 Docs](#coder-tokens-ls-coder-v1-docs)
- [coder workspaces rebuild | Coder v1 Docs](#coder-workspaces-rebuild-coder-v1-docs)
- [coder workspaces rm | Coder v1 Docs](#coder-workspaces-rm-coder-v1-docs)
- [coder tokens rm | Coder v1 Docs](#coder-tokens-rm-coder-v1-docs)
- [coder satellites create | Coder v1 Docs](#coder-satellites-create-coder-v1-docs)
- [Comparison | Coder v1 Docs](#comparison-coder-v1-docs)
- [coder satellites rm | Coder v1 Docs](#coder-satellites-rm-coder-v1-docs)
- [coder images ls | Coder v1 Docs](#coder-images-ls-coder-v1-docs)
- [coder satellites ls | Coder v1 Docs](#coder-satellites-ls-coder-v1-docs)
- [coder urls rm | Coder v1 Docs](#coder-urls-rm-coder-v1-docs)
- [coder workspaces watch-build | Coder v1 Docs](#coder-workspaces-watch-build-coder-v1-docs)
- [coder urls ls | Coder v1 Docs](#coder-urls-ls-coder-v1-docs)
- [coder urls create | Coder v1 Docs](#coder-urls-create-coder-v1-docs)
- [coder workspaces stop | Coder v1 Docs](#coder-workspaces-stop-coder-v1-docs)
---
# Open Source: Coder Docs | Coder
Opens in a new window Opens an external website Opens an external website in a new window
Close this dialog
This website utilizes technologies such as cookies to enable essential site functionality, as well as for analytics, personalization, and targeted advertising. To learn more, view the following link: [Privacy Policy](https://coder.com/legal/privacy-policy)
Close Cookie Preferences
[Install Coder](https://coder.com/docs/install)
[Quickstart Guide](https://coder.com/docs/tutorials/quickstart)
[About Coder](https://coder.com/docs/about)
Quick-Start
-----------
* [### Developers\
\
Learn how to create, access, and manage your workspaces in Coder.](https://coder.com/docs/user-guides)
* [### Template Admins\
\
Discover how to write templates, define team access, and wrangle infrastructure costs.](https://coder.com/docs/admin/templates)
* [### Deployment Admins\
\
Find out how to manage your deployment's users, control plane, provisioners, security, and authentication.](https://coder.com/docs/admin)
Ecosystem
---------
* [### Backstage\
\
Leverage the official Backstage plugin to use the Coder API when building developer portals.](https://github.com/coder/backstage-plugins)
* [### VS Code\
\
Start coding in VS Code with one click from your Coder deployment.](https://coder.com/docs/user-guides/workspace-access/vscode)
* [### JetBrains Gateway\
\
Access Coder remote environments from JetBrains IDEs such as IntelliJ and PyCharm.](https://coder.com/docs/user-guides/workspace-access/jetbrains)
* [### Dev Containers\
\
Build development environments with Dev Containers on Docker, Kubernetes, and OpenShift.](https://coder.com/docs/admin/templates/managing-templates/devcontainers)
Recent updates
--------------
[See changelog](https://coder.com/changelog)
1. [2 months ago\
\
#### Coder 2.29](https://coder.com/changelog/coder-2-29)
2. [3 months ago\
\
#### Coder 2.28](https://coder.com/changelog/coder-2-28)
3. [4 months ago\
\
#### Coder 2.27](https://coder.com/changelog/coder-2-27)
Reference
---------
[API docs](https://coder.com/docs/reference/api)
[CLI docs](https://coder.com/docs/reference/cli)
---
# Screenshots | Coder Docs
[Home](https://coder.com/docs "Home")
Screenshots
[](https://coder.com/docs/about/screenshots#log-in)
Log in
----------------------------------------------------------

Install Coder in your cloud or air-gapped on-premises. Developers simply log in via their browser to access their Workspaces.
[](https://coder.com/docs/about/screenshots#templates)
Templates
----------------------------------------------------------------
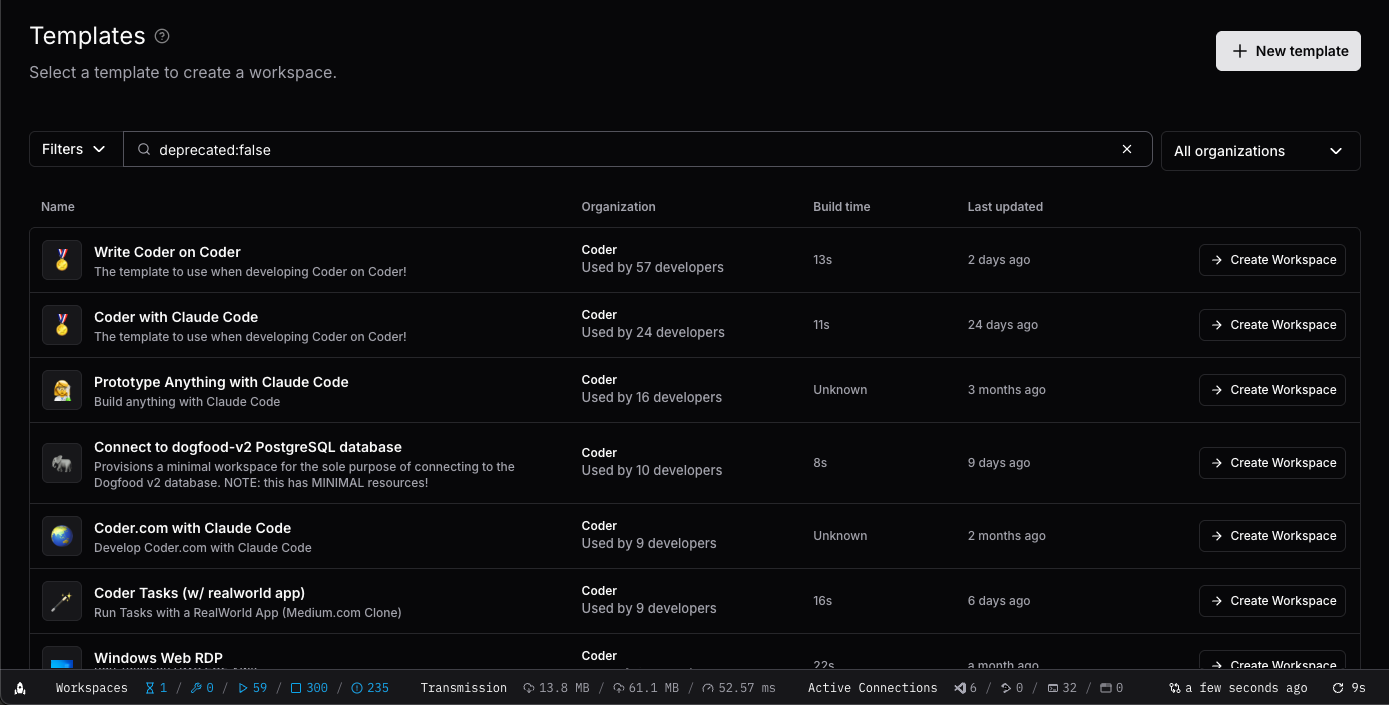
Developers provision their own ephemeral Workspaces in minutes using pre-defined Templates that include approved tooling and infrastructure.

Template administrators can either create a new Template from scratch or choose a Starter Template.

Template administrators build Templates using Terraform. Templates define the underlying infrastructure that Coder Workspaces run on.
[](https://coder.com/docs/about/screenshots#workspaces)
Workspaces
------------------------------------------------------------------

Developers create and delete their own workspaces. Coder administrators can easily enforce Workspace scheduling and autostop policies to ensure idle Workspaces don’t burn unnecessary cloud budget.

Developers launch their favorite web-based or desktop IDE, browse files, or access their Workspace’s Terminal.
[](https://coder.com/docs/about/screenshots#administration)
Administration
--------------------------------------------------------------------------

Coder administrators can access Template usage insights to understand which Templates are most popular and how well they perform for developers.

Coder administrators can control _every_ aspect of their Coder deployment.

Coder administrators and auditor roles can review how users are interacting with their Coder Workspaces and Templates.

Coder administrators can monitor the health of their Coder deployment, including database latency, active provisioners, and more.
##### On this page
---
# Generate a Support Bundle | Coder Docs
[Home](https://coder.com/docs "Home")
[Support](https://coder.com/docs/support "Support")
Generate a Support Bundle
When you engage with Coder support to diagnose an issue with your deployment, you may be asked to generate and upload a "Support Bundle" for offline analysis. This document explains the contents of a support bundle and the steps to submit a support bundle to Coder staff.
[](https://coder.com/docs/support/support-bundle#what-is-a-support-bundle)
What is a Support Bundle?
----------------------------------------------------------------------------------------------------
A support bundle is an archive containing a snapshot of information about your Coder deployment.
It contains information about the workspace, the template it uses, running agents in the workspace, and other detailed information useful for troubleshooting.
It is primarily intended for troubleshooting connectivity issues to workspaces, but can be useful for diagnosing other issues as well.
**While we attempt to redact sensitive information from support bundles, they may contain information deemed sensitive by your organization and should be treated as such.**
A brief overview of all files contained in the bundle is provided below:
Note
Detailed descriptions of all the information available in the bundle is out of scope, as support bundles are primarily intended for internal use.
| Filename | Description |
| --- | --- |
| `agent/agent.json` | The agent used to connect to the workspace with environment variables stripped. |
| `agent/agent_magicsock.html` | The contents of the HTTP debug endpoint of the agent's Tailscale Wireguard connection. |
| `agent/client_magicsock.html` | The contents of the HTTP debug endpoint of the client's Tailscale Wireguard connection. |
| `agent/listening_ports.json` | The listening ports detected by the selected agent running in the workspace. |
| `agent/logs.txt` | The logs of the selected agent running in the workspace. |
| `agent/manifest.json` | The manifest of the selected agent with environment variables stripped. |
| `agent/startup_logs.txt` | Startup logs of the workspace agent. |
| `agent/prometheus.txt` | The contents of the agent's Prometheus endpoint. |
| `cli_logs.txt` | Logs from running the `coder support bundle` command. |
| `deployment/buildinfo.json` | Coder version and build information. |
| `deployment/config.json` | Deployment [configuration](https://coder.com/docs/reference/api/general#get-deployment-config) , with secret values removed. |
| `deployment/experiments.json` | Any [experiments](https://coder.com/docs/reference/cli/server#--experiments) currently enabled for the deployment. |
| `deployment/health.json` | A snapshot of the [health status](https://coder.com/docs/admin/monitoring/health-check) of the deployment. |
| `logs.txt` | Logs from the `codersdk.Client` used to generate the bundle. |
| `network/connection_info.json` | Information used by workspace agents used to connect to Coder (DERP map etc.) |
| `network/coordinator_debug.html` | Peers currently connected to each Coder instance and the tunnels established between peers. |
| `network/netcheck.json` | Results of running `coder netcheck` locally. |
| `network/tailnet_debug.html` | Tailnet coordinators, their heartbeat ages, connected peers, and tunnels. |
| `workspace/build_logs.txt` | Build logs of the selected workspace. |
| `workspace/workspace.json` | Details of the selected workspace. |
| `workspace/parameters.json` | Build parameters of the selected workspace. |
| `workspace/template.json` | The template currently in use by the selected workspace. |
| `workspace/template_file.zip` | The source code of the template currently in use by the selected workspace. |
| `workspace/template_version.json` | The template version currently in use by the selected workspace. |
[](https://coder.com/docs/support/support-bundle#how-do-i-generate-a-support-bundle)
How do I generate a Support Bundle?
------------------------------------------------------------------------------------------------------------------------
1. Ensure your deployment is up and running. Generating a support bundle requires the Coder deployment to be available.
2. Ensure you have the Coder CLI installed on a local machine. See [installation](https://coder.com/docs/install)
for steps on how to do this.
Note
It is recommended to generate a support bundle from a location experiencing workspace connectivity issues.
3. Ensure you are [logged in](https://coder.com/docs/reference/cli/login#login)
to your Coder deployment as a user with the Owner privilege.
4. Run `coder support bundle [owner/workspace]`, and respond `yes` to the prompt. The support bundle will be generated in the current directory with the filename `coder-support-$TIMESTAMP.zip`.
Note
While support bundles can be generated without a running workspace, it is recommended to specify one to maximize troubleshooting information.
5. (Recommended) Extract the support bundle and review its contents, redacting any information you deem necessary.
6. Coder staff will provide you a link where you can upload the bundle along with any other necessary supporting files.
Note
It is helpful to leave an informative message regarding the nature of supporting files.
Coder support will then review the information you provided and respond to you with next steps.
##### On this page
---
# Support | Coder Docs
[Home](https://coder.com/docs "Home")
Support
If you have questions, encounter an issue or bug, or if you have a feature request, [open a GitHub issue](https://github.com/coder/coder/issues/new)
or [join our Discord](https://discord.gg/coder)
.
[##### Generate a Support Bundle\
\
Generate and upload a Support Bundle to Coder Support](https://coder.com/docs/support/support-bundle)
---
# Quickstart | Coder Docs
[Home](https://coder.com/docs "Home")
Quickstart
Follow the steps in this guide to get your first Coder development environment running in under 10 minutes. This guide covers the essential concepts and walks you through creating your first workspace and running VS Code from it. You can also get Claude Code up and running in the background!
[](https://coder.com/docs/tutorials/quickstart#what-youll-build)
What You'll Build
----------------------------------------------------------------------------------
In this quickstart, you'll:
* ✅ Install Coder server
* ✅ Create a **template** (blueprint for dev environments)
* ✅ Launch a **workspace** (your actual dev environment)
* ✅ Connect from your favorite IDE
* ✅ Optionally setup a **task** running Claude Code
[](https://coder.com/docs/tutorials/quickstart#understanding-coder-30-second-overview)
Understanding Coder: 30-Second Overview
------------------------------------------------------------------------------------------------------------------------------
Before diving in, here are the core concepts that power Coder explained through a cooking analogy:
| Component | What It Is | Real-World Analogy |
| --- | --- | --- |
| **You** | The engineer/developer/builder working | The head chef cooking the meal |
| **Templates** | A Terraform blueprint that defines your dev environment (OS, tools, resources) | Recipe for a meal |
| **Workspaces** | The actual running environment created from the template | The cooked meal |
| **Tasks** | AI-powered coding agents that run inside a workspace | Smart kitchen appliance that helps you cook |
| **Users** | A developer who launches the workspace from a template and does their work inside it | The people eating the meal |
**Putting it Together:** Coder separates who _defines_ environments from who _uses_ them. Admins create and manage Templates, the recipes, while developers use those Templates to launch Workspaces, the meals. Inside those Workspaces, developers can also run Tasks, the smart kitchen appliance, to help speed up day-to-day work.
[](https://coder.com/docs/tutorials/quickstart#prerequisites)
Prerequisites
---------------------------------------------------------------------------
* A machine with 2+ CPU cores and 4GB+ RAM
* 10 minutes of your time
[](https://coder.com/docs/tutorials/quickstart#step-1-install-docker-and-setup-permissions)
Step 1: Install Docker and Setup Permissions
----------------------------------------------------------------------------------------------------------------------------------------
[](https://coder.com/docs/tutorials/quickstart#linuxmacos)
Linux/macOS[](https://coder.com/docs/tutorials/quickstart#windows)
Windows
1. Install Docker:
`` `curl -sSL https://get.docker.com | sh` ``
For more details, visit:
* [Linux instructions](https://docs.docker.com/desktop/install/linux-install/)
* [Mac instructions](https://docs.docker.com/desktop/install/mac-install/)
2. Assign your user to the Docker group:
`` `sudo usermod -aG docker $USER` ``
3. Run `newgrp` to activate the groups changes:
`` `newgrp docker` ``
You might need to log out and back in or restart the machine for changes to take effect.
[](https://coder.com/docs/tutorials/quickstart#step-2-install--start-coder)
Step 2: Install & Start Coder
---------------------------------------------------------------------------------------------------------
Install the `coder` CLI to get started:
[](https://coder.com/docs/tutorials/quickstart#linuxmacos-1)
Linux/macOS[](https://coder.com/docs/tutorials/quickstart#windows-1)
Windows
1. Install Coder:
`` `curl -L https://coder.com/install.sh | sh` ``
* For standalone binaries, system packages, or other alternate installation methods, refer to the [latest release on GitHub](https://github.com/coder/coder/releases/latest)
.
2. Start Coder:
`` `coder server` ``
Coder will attempt to open the setup page in your browser. If it doesn't open automatically, go to [http://localhost:3000](http://localhost:3000/)
.
* If you get a browser warning similar to `Secure Site Not Available`, you can ignore the warning and continue to the setup page.
If your Coder server is on a network or cloud device, or you are having trouble viewing the page, locate the web UI URL in Coder logs in your terminal. It looks like `https://..try.coder.app`. It's one of the first lines of output, so you might have to scroll up to find it.
[](https://coder.com/docs/tutorials/quickstart#step-3-initial-setup)
Step 3: Initial Setup
------------------------------------------------------------------------------------------
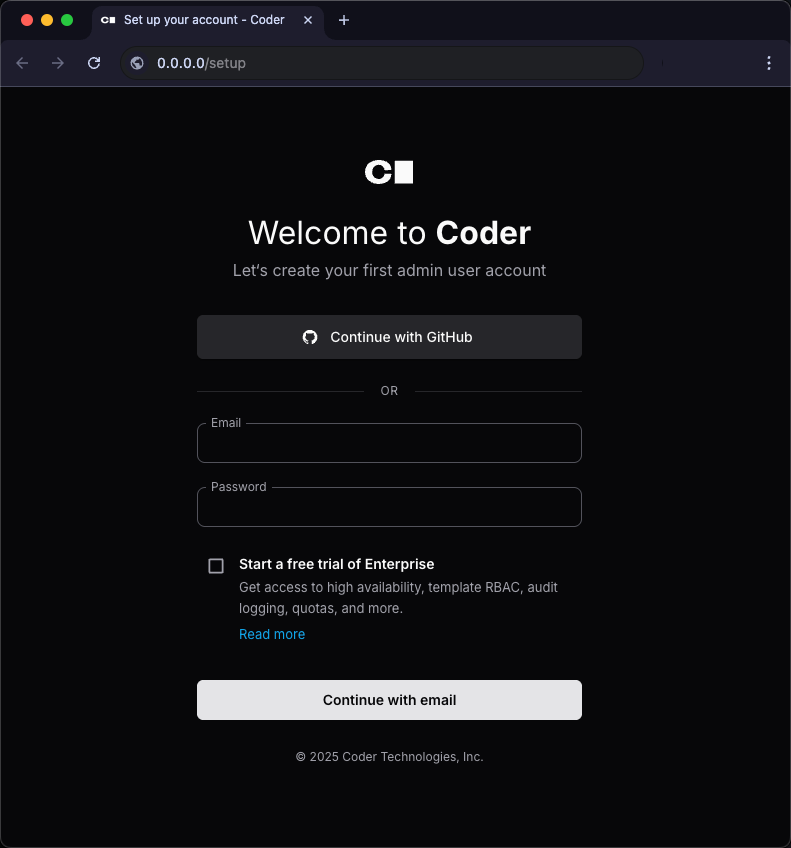
1. **Create your admin account:**
* Username: `yourname` (lowercase, no spaces)
* Email: `[[email protected]](https://coder.com/cdn-cgi/l/email-protection) `
* Password: Choose a strong password
You can also choose to **Continue with GitHub** instead of creating an admin account. The first user that signs in is automatically granted admin permissions.
[](https://coder.com/docs/tutorials/quickstart#step-4-create-your-first-template-and-workspace)
Step 4: Create your First Template and Workspace
------------------------------------------------------------------------------------------------------------------------------------------------
Templates define what's in your development environment. Let's start simple:
1. Click **"Templates"** → **"New Template"**
2. **Choose a starter template:**
| Starter | Best For | Includes |
| --- | --- | --- |
| **Docker Containers** (Recommended) | Getting started quickly, local development, prototyping | Ubuntu container with common dev tools, Docker runtime |
| **Kubernetes (Deployment)** | Cloud-native teams, scalable workspaces | Pod-based workspaces, Kubernetes orchestration |
| **AWS EC2 (Linux)** | Teams needing full VMs, AWS-native infrastructure | Full EC2 instances with AWS integration |
3. Click **"Use template"** on **Docker Containers**. Note: running this template requires Docker to be running in the background, so make sure Docker is running!
4. **Name your template:**
* Name: `quickstart`
* Display name: `quickstart doc template`
* Description: `Provision Docker containers as Coder workspaces`
5. Click **"Save"**

**What just happened?** You defined a template — a reusable blueprint for dev environments — in your Coder deployment. It's now stored in your organization's template list, where you and any teammates in the same org can create workspaces from it. Let's launch one.
[](https://coder.com/docs/tutorials/quickstart#step-5-launch-your-workspace)
Step 5: Launch your Workspace
----------------------------------------------------------------------------------------------------------
1. After the template is ready, select **Create Workspace**.
2. Give the workspace a name and select **Create Workspace**.
3. Coder starts your new workspace:

_Workspace is running_
[](https://coder.com/docs/tutorials/quickstart#step-6-connect-your-ide)
Step 6: Connect your IDE
------------------------------------------------------------------------------------------------
Select **VS Code Desktop** to install the Coder extension and connect to your Coder workspace.
After VS Code loads the remote environment, you can select **Open Folder** to explore directories in the Docker container or work on something new.
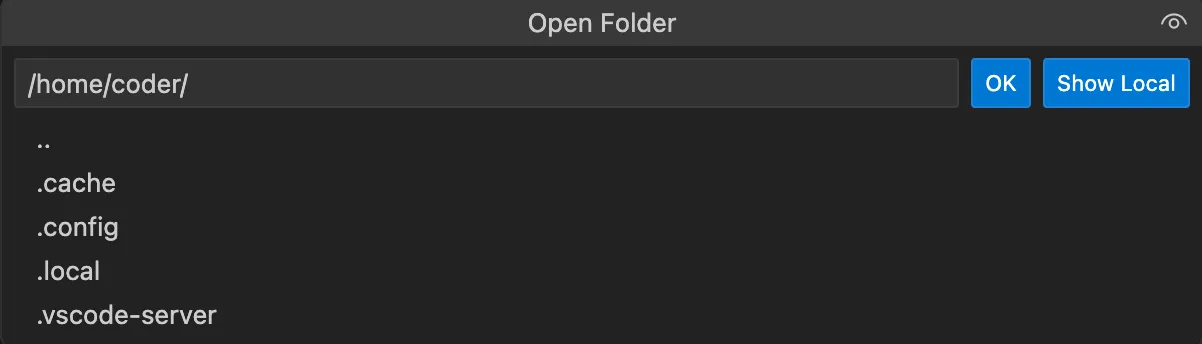
To clone an existing repository:
1. Select **Clone Repository** and enter the repository URL.
For example, to clone the Coder repo, enter `https://github.com/coder/coder.git`.
Learn more about how to find the repository URL in the [GitHub documentation](https://docs.github.com/en/repositories/creating-and-managing-repositories/cloning-a-repository)
.
2. Choose the folder to which VS Code should clone the repo. It will be in its own directory within this folder.
Note that you cannot create a new parent directory in this step.
3. After VS Code completes the clone, select **Open** to open the directory.
4. You are now using VS Code in your Coder environment!
[](https://coder.com/docs/tutorials/quickstart#success-youre-coding-in-coder)
Success! You're Coding in Coder
-------------------------------------------------------------------------------------------------------------
You now have:
* **Coder server** running locally
* **A template** defining your environment
* **A workspace** running that environment
* **IDE access** to code remotely
### [](https://coder.com/docs/tutorials/quickstart#whats-next)
What's Next?
Now that you have your own workspace running, you can start exploring more advanced capabilities that Coder offers.
* [Learn more about running Coder Tasks and our recommended Best Practices](https://coder.com/docs/ai-coder/best-practices)
* [Read about managing Workspaces for your team](https://coder.com/docs/user-guides/workspace-management)
* [Read about implementing monitoring tools for your Coder Deployment](https://coder.com/docs/admin/monitoring)
### [](https://coder.com/docs/tutorials/quickstart#get-coder-tasks-running)
Get Coder Tasks Running
Coder Tasks is an interface that allows you to run and manage coding agents like Claude Code within a given Workspace. Tasks become available when a Workspace Template has the `coder_ai_task` resource defined in its source code. In other words, any existing template can become a Task template by adding in that resource and parameter.
Coder maintains the [Tasks on Docker](https://registry.coder.com/templates/coder-labs/tasks-docker?_gl=1*19yewmn*_gcl_au*MTc0MzUwMTQ2NC4xNzU2MzA3MDkxLjk3NTM3MjgyNy4xNzU3Njg2NDY2LjE3NTc2ODc0Mzc.*_ga*NzUxMDI1NjIxLjE3NTYzMDcwOTE.*_ga_FTQQJCDWDM*czE3NTc3MDg4MDkkbzQ1JGcxJHQxNzU3NzA4ODE4JGo1MSRsMCRoMA..)
template which has Anthropic's Claude Code agent built in with a sample application. Let's try using this template by pulling it from Coder's Registry of public templates, and pushing it to your local server:
1. In the upper right hand corner, click **Use this template**
2. Open a terminal on your machine
3. Ensure your CLI is authenticated with your Coder deployment by [logging in](https://coder.com/docs/reference/cli/login)
4. Create an [API Key with Anthropic](https://console.anthropic.com/)
5. Head to the [Tasks on Docker](https://registry.coder.com/templates/coder-labs/tasks-docker?_gl=1*19yewmn*_gcl_au*MTc0MzUwMTQ2NC4xNzU2MzA3MDkxLjk3NTM3MjgyNy4xNzU3Njg2NDY2LjE3NTc2ODc0Mzc.*_ga*NzUxMDI1NjIxLjE3NTYzMDcwOTE.*_ga_FTQQJCDWDM*czE3NTc3MDg4MDkkbzQ1JGcxJHQxNzU3NzA4ODE4JGo1MSRsMCRoMA..)
template
6. Clone the Coder Registry repo to your local machine
`` `git clone https://github.com/coder/registry.git` ``
7. Switch to the template directory
`` `cd registry/registry/coder-labs/templates/tasks-docker` ``
8. Push the template to your Coder deployment. Note: this command differs from the registry since we're defining the Anthropic API Key as an environment variable
`` `coder template push tasks-docker -d . --variable anthropic_api_key="your-api-key"` ``
9. **Create a Task**
1. In your Coder deployment, click **Tasks** in the navigation
2. In the "Prompt your AI agent to start a task" box, enter a prompt like "Make the background yellow"
3. Select the **tasks-docker** template from the dropdown and click the submit button
10. **See Tasks in action**
1. Your task will appear in the table below. Click on it to open the task view where you can follow the initialization
2. Once active, you'll see Claude Code on the left panel and can preview the sample application or interact with the code in code-server on the right. You might need to wait for Claude Code to finish changing the background color of the application.
3. Try typing in a new request to Claude Code: "make the background red"
4. Click the back arrow to return to the task overview (you can also see all your tasks in the sidebar)
5. You can start a new task from the prompt box at the top of the page
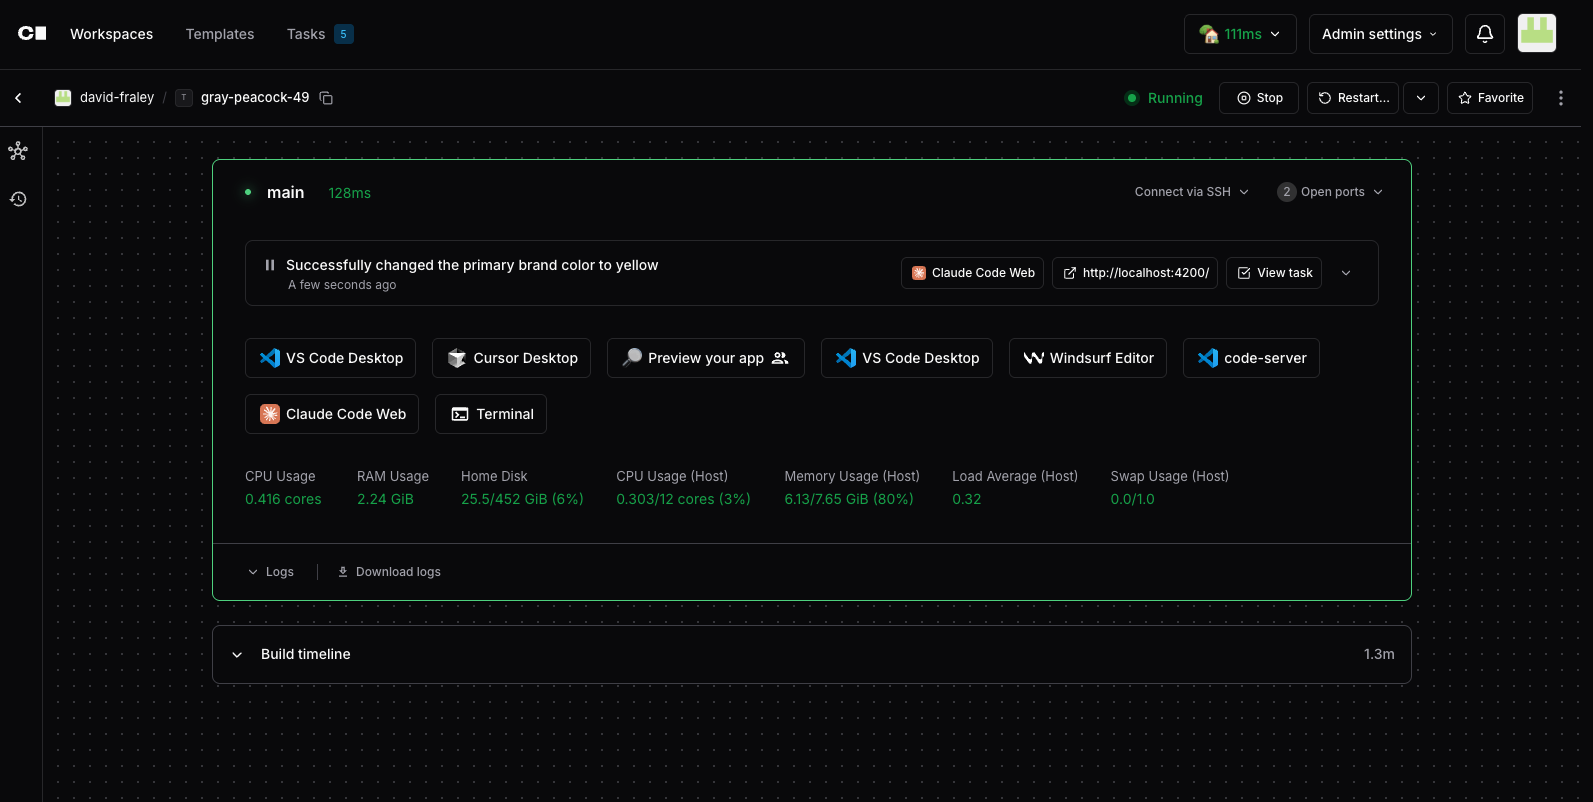
Congratulation! You now have a Coder Task running. This demo has shown you how to spin up a task, and prompt Claude Code to change parts of your application. Learn more specifics about Coder Tasks [here](https://coder.com/docs/ai-coder/tasks)
.
[](https://coder.com/docs/tutorials/quickstart#troubleshooting)
Troubleshooting
-------------------------------------------------------------------------------
### [](https://coder.com/docs/tutorials/quickstart#cannot-connect-to-the-docker-daemon)
Cannot connect to the Docker daemon
> Error: Error pinging Docker server: Cannot connect to the Docker daemon at unix:///var/run/docker.sock. Is the docker daemon running?
1. Install Docker for your system:
`` `curl -sSL https://get.docker.com | sh` ``
2. Set up the Docker daemon in rootless mode for your user to run Docker as a non-privileged user:
`` `dockerd-rootless-setuptool.sh install` ``
Depending on your system's dependencies, you might need to run other commands before you retry this step. Read the output of this command for further instructions.
3. Assign your user to the Docker group:
`` `sudo usermod -aG docker $USER` ``
4. Confirm that the user has been added:
`` `$ groups docker sudo users` ``
* Ubuntu users might not see the group membership update. In that case, run the following command or reboot the machine:
`` `newgrp docker` ``
### [](https://coder.com/docs/tutorials/quickstart#cant-start-coder-server-address-already-in-use)
Can't start Coder server: Address already in use
`` `Encountered an error running "coder server", see "coder server --help" for more information error: configure http(s): listen tcp 127.0.0.1:3000: bind: address already in use` ``
1. Stop the process:
`` `sudo systemctl stop coder` ``
2. Start Coder:
`` `coder server` ``
##### On this page
---
# Code of Conduct | Coder Docs
[Home](https://coder.com/docs "Home")
[Contributing](https://coder.com/docs/about/contributing/CONTRIBUTING "Contributing")
Code of Conduct
[](https://coder.com/docs/about/contributing/CODE_OF_CONDUCT#our-pledge)
Our Pledge
-----------------------------------------------------------------------------------
In the interest of fostering an open and welcoming environment, we as contributors and maintainers pledge to making participation in our project and our community a harassment-free experience for everyone, regardless of age, body size, disability, ethnicity, sex characteristics, gender identity and expression, level of experience, education, socio-economic status, nationality, personal appearance, race, religion, or sexual identity and orientation.
[](https://coder.com/docs/about/contributing/CODE_OF_CONDUCT#our-standards)
Our Standards
-----------------------------------------------------------------------------------------
Examples of behavior that contributes to creating a positive environment include:
* Using welcoming and inclusive language
* Being respectful of differing viewpoints and experiences
* Gracefully accepting constructive criticism
* Focusing on what is best for the community
* Showing empathy towards other community members
Examples of unacceptable behavior by participants include:
* The use of sexualized language or imagery and unwelcome sexual attention or advances
* Trolling, insulting/derogatory comments, and personal or political attacks
* Public or private harassment
* Publishing others' private information, such as a physical or electronic address, without explicit permission
* Other conduct which could reasonably be considered inappropriate in a professional setting
[](https://coder.com/docs/about/contributing/CODE_OF_CONDUCT#our-responsibilities)
Our Responsibilities
-------------------------------------------------------------------------------------------------------
Project maintainers are responsible for clarifying the standards of acceptable behavior and are expected to take appropriate and fair corrective action in response to any instances of unacceptable behavior.
Project maintainers have the right and responsibility to remove, edit, or reject comments, commits, code, wiki edits, issues, and other contributions that are not aligned to this Code of Conduct, or to ban temporarily or permanently any contributor for other behaviors that they deem inappropriate, threatening, offensive, or harmful.
[](https://coder.com/docs/about/contributing/CODE_OF_CONDUCT#scope)
Scope
-------------------------------------------------------------------------
This Code of Conduct applies both within project spaces and in public spaces when an individual is representing the project or its community. Examples of representing a project or community include using an official project e-mail address, posting via an official social media account, or acting as an appointed representative at an online or offline event. Representation of a project may be further defined and clarified by project maintainers.
[](https://coder.com/docs/about/contributing/CODE_OF_CONDUCT#enforcement)
Enforcement
-------------------------------------------------------------------------------------
Instances of abusive, harassing, or otherwise unacceptable behavior may be reported by contacting the project team at [\[email protected\]](https://coder.com/cdn-cgi/l/email-protection#a0cfd0c5ced3cfd5d2c3c5e0c3cfc4c5d28ec3cfcd)
. All complaints will be reviewed and investigated and will result in a response that is deemed necessary and appropriate to the circumstances. The project team is obligated to maintain confidentiality with regard to the reporter of an incident. Further details of specific enforcement policies may be posted separately.
Project maintainers who do not follow or enforce the Code of Conduct in good faith may face temporary or permanent repercussions as determined by other members of the project's leadership.
[](https://coder.com/docs/about/contributing/CODE_OF_CONDUCT#attribution)
Attribution
-------------------------------------------------------------------------------------
This Code of Conduct is adapted from the [Contributor Covenant](https://www.contributor-covenant.org/)
, version 1.4, available at [https://www.contributor-covenant.org/version/1/4/code-of-conduct.html](https://www.contributor-covenant.org/version/1/4/code-of-conduct.html)
For answers to common questions about this code of conduct, see [https://www.contributor-covenant.org/faq](https://www.contributor-covenant.org/faq)
##### On this page
---
# Documentation | Coder Docs
[Home](https://coder.com/docs "Home")
[Contributing](https://coder.com/docs/about/contributing/CONTRIBUTING "Contributing")
Documentation
This style guide is primarily for use with authoring documentation.
[](https://coder.com/docs/about/contributing/documentation#general-guidelines)
General guidelines
-------------------------------------------------------------------------------------------------
* Use sentence case, even in titles (do not punctuate the title, though)
* Use the second person
* Use the active voice
* Use plural nouns and pronouns (_they_, _their_, or _them_), especially when the specific number is uncertain (i.e., "Set up your environments" even though you don't know if the user will have one or many environments)
* When writing documentation titles, use the noun form, not the gerund form (e.g., "Environment Management" instead of "Managing Environments")
* Context matters when you decide whether to capitalize something or not. For example, ["A Job creates one or more Pods..."](https://kubernetes.io/docs/concepts/workloads/controllers/job/)
is correct when writing about Kubernetes. However, in other contexts, neither _job_ nor _pods_ would be capitalized. Please follow the conventions set forth by the relevant companies and open source communities.
[](https://coder.com/docs/about/contributing/documentation#third-party-references)
Third-party references
---------------------------------------------------------------------------------------------------------
If you have questions that aren't explicitly covered by this guide, consult the following third-party references:
| **Type of guidance** | **Third-party reference** |
| --- | --- |
| Spelling | [Merriam-Webster.com](https://www.merriam-webster.com/) |
| Style - nontechnical | [The Chicago Manual of Style](https://www.chicagomanualofstyle.org/home.html) |
| Style - technical | [Microsoft Writing Style Guide](https://docs.microsoft.com/en-us/style-guide/welcome/) |
[](https://coder.com/docs/about/contributing/documentation#tools)
Tools
-----------------------------------------------------------------------
The following are tools that you can use to edit your writing. However, take the suggestions provided with a grain of salt.
* [alex.js](https://alexjs.com/)
* [Grammarly](https://app.grammarly.com/)
* [Hemingway Editor](https://hemingwayapp.com/)
[](https://coder.com/docs/about/contributing/documentation#how-to-format-text)
How to format text
-------------------------------------------------------------------------------------------------
Below summarizes the text-formatting conventions you should follow.
### [](https://coder.com/docs/about/contributing/documentation#bold)
Bold
Use **bold** formatting when referring to UI elements.
### [](https://coder.com/docs/about/contributing/documentation#italics)
Italics
Use _italics_ for:
* Parameter names
* Mathematical and version variables
### [](https://coder.com/docs/about/contributing/documentation#code-font)
Code font
Use _code font_ for:
* User text input
* Command-line utility names
* DNS record types
* Environment variable names (e.g., `PATH`)
* Filenames, filename extensions, and paths
* Folders and directories
* HTTP verbs, status codes, and content-type values
* Placeholder variables
Use _code blocks_ for code samples and other blocks of code. Be sure to indicate the language your using to apply the proper syntax highlighting.
`` `This is a codeblock.` ``
For code that you want users to enter via a command-line interface, use `console`, not `bash`.
### [](https://coder.com/docs/about/contributing/documentation#punctuation)
Punctuation
Do not use the ampersand (&) as a shorthand for _and_ unless you're referring to a UI element or the name of something that uses _&_.
You can use the symbol `~` in place of the word _approximately_.
### [](https://coder.com/docs/about/contributing/documentation#ui-elements)
UI elements
When referring to UI elements, including the names for buttons, menus, dialogs, and anything that has a name visible to the user, use bold font.
**Example:** On the **Environment Overview** page, click **Configure SSH**.
Don't use code font for UI elements unless it is rendered based on previously entered text. For example, if you tell the user to provide the environment name as `myEnvironment`, then use both bold and cold font when referring to the name.
**Example**: Click **`myEnvironment`**.
When writing out instructions that involve UI elements, both of the following options are acceptable:
* Go to **Manage** > **Users**.
* In the **Manage** menu, click **Users**.
[](https://coder.com/docs/about/contributing/documentation#product-specific-references)
Product-specific references
-------------------------------------------------------------------------------------------------------------------
Below summarizes the guidelines regarding how Coder terms should be used.
### [](https://coder.com/docs/about/contributing/documentation#capitalized-terms)
Capitalized terms
The only Coder-specific terms that should be capitalized are the names of products (e.g., Coder).
The exception is **code-server**, which is always lowercase. If it appears at the beginning of the sentence, rewrite the sentence to avoid this usage.
### [](https://coder.com/docs/about/contributing/documentation#uncapitalized-terms)
Uncapitalized terms
In general, we do not capitalize the names of features (unless the situation calls for it, such as the word appearing at the beginning of a sentence):
* account dormancy
* audit logs
* autostart
* command-line interface
* dev URLs
* environment
* image
* metrics
* organizations
* progressive web app
* registries
* single sign-on
* telemetry
* workspace
* workspace providers
* workspaces as code
We also do not capitalize the names of user roles:
* auditor
* member
* site admin
* site manager
[](https://coder.com/docs/about/contributing/documentation#standardized-spellings)
Standardized spellings
---------------------------------------------------------------------------------------------------------
* WiFi
##### On this page
---
# Contributing | Coder Docs
[Home](https://coder.com/docs "Home")
Contributing
[](https://coder.com/docs/about/contributing/CONTRIBUTING#requirements)
Requirements
------------------------------------------------------------------------------------
[](https://coder.com/docs/about/contributing/CONTRIBUTING#nix)
Nix[](https://coder.com/docs/about/contributing/CONTRIBUTING#without-nix)
Without Nix
1. [Install Nix](https://nix.dev/install-nix#install-nix)
2. After you've installed Nix, instantiate the development with the `nix-shell` command:
`` `cd ~/code/coder # https://nix.dev/tutorials/declarative-and-reproducible-developer-environments nix-shell ... copying path '/nix/store/3ms6cs5210n8vfb5a7jkdvzrzdagqzbp-iana-etc-20210225' from 'https:// cache.nixos.org'... copying path '/nix/store/dxg5aijpyy36clz05wjsyk90gqcdzbam-iana-etc-20220520' from 'https:// cache.nixos.org'... copying path '/nix/store/v2gvj8whv241nj4lzha3flq8pnllcmvv-ignore-5.2.0.tgz' from 'https://cache. nixos.org'... ...` ``
3. Optional: If you have [direnv](https://direnv.net/)
installed with [hooks configured](https://direnv.net/docs/hook.html)
, you can add `use nix` to `.envrc` to automatically instantiate the development environment:
`` `cd ~/code/coder echo "use nix" >.envrc direnv allow` ``
Now, whenever you enter the project folder, [`direnv`](https://direnv.net/docs/hook.html)
will prepare the environment for you:
`` `cd ~/code/coder direnv: loading ~/code/coder/.envrc direnv: using nix direnv: export +AR +AS +CC +CONFIG_SHELL +CXX +HOST_PATH +IN_NIX_SHELL +LD +NIX_BINTOOLS +NIX_BINTOOLS_WRAPPER_TARGET_HOST_x86_64_unknown_linux_gnu +NIX_BUILD_CORES +NIX_BUILD_TOP +NIX_CC +NIX_CC_WRAPPER_TARGET_HOST_x86_64_unknown_linux_gnu +NIX_CFLAGS_COMPILE +NIX_ENFORCE_NO_NATIVE +NIX_HARDENING_ENABLE +NIX_INDENT_MAKE +NIX_LDFLAGS +NIX_STORE +NM +NODE_PATH +OBJCOPY +OBJDUMP +RANLIB +READELF +SIZE +SOURCE_DATE_EPOCH +STRINGS +STRIP +TEMP +TEMPDIR +TMP +TMPDIR +XDG_DATA_DIRS +buildInputs +buildPhase +builder +cmakeFlags +configureFlags +depsBuildBuild +depsBuildBuildPropagated +depsBuildTarget +depsBuildTargetPropagated +depsHostHost +depsHostHostPropagated +depsTargetTarget +depsTargetTargetPropagated +doCheck +doInstallCheck +mesonFlags +name +nativeBuildInputs +out +outputs +patches +phases +propagatedBuildInputs +propagatedNativeBuildInputs +shell +shellHook +stdenv +strictDeps +system ~PATH 🎉` ``
* If you encounter a `creating directory` error on macOS, check the [troubleshooting](https://coder.com/docs/about/contributing/CONTRIBUTING#troubleshooting)
section below.
[](https://coder.com/docs/about/contributing/CONTRIBUTING#development-workflow)
Development workflow
----------------------------------------------------------------------------------------------------
Use the following `make` commands and scripts in development:
* `./scripts/develop.sh` runs the frontend and backend development server
* `make build` compiles binaries and release packages
* `make install` installs binaries to `$GOPATH/bin`
* `make test`
### [](https://coder.com/docs/about/contributing/CONTRIBUTING#running-coder-on-development-mode)
Running Coder on development mode
1. Run the development script to spin up the local environment:
`` `./scripts/develop.sh` ``
This will start two processes:
* [http://localhost:3000](http://localhost:3000/)
— the backend API server. Primarily used for backend development and also serves the _static_ frontend build.
* [http://localhost:8080](http://localhost:8080/)
— the Node.js frontend development server. Supports _hot reloading_ and is useful if you're working on the frontend as well.
Additionally, it starts a local PostgreSQL instance, creates both an admin and a member user account, and installs a default Docker-based template.
2. Verify Your Session
Confirm that you're logged in by running:
`` `./scripts/coder-dev.sh list` ``
This should return an empty list of workspaces. If you encounter an error, review the output from the [develop.sh](https://github.com/coder/coder/blob/main/scripts/develop.sh)
script for issues.
Note
`coder-dev.sh` is a helper script that behaves like the regular coder CLI, but uses the binary built from your local source and shares the same configuration directory set up by `develop.sh`. This ensures your local changes are reflected when testing.
The default user is `[[email protected]](https://coder.com/cdn-cgi/l/email-protection) ` and the default password is `SomeSecurePassword!`
3. Create Your First Workspace
A template named `docker` is created automatically. To spin up a workspace quickly, use:
`` `./scripts/coder-dev.sh create my-workspace -t docker` ``
### [](https://coder.com/docs/about/contributing/CONTRIBUTING#deploying-a-pr)
Deploying a PR
You need to be a member or collaborator of the [coder](https://github.com/coder)
GitHub organization to be able to deploy a PR.
You can test your changes by creating a PR deployment. There are two ways to do this:
* Run `./scripts/deploy-pr.sh`
* Manually trigger the [`pr-deploy.yaml`](https://github.com/coder/coder/actions/workflows/pr-deploy.yaml)
GitHub Action workflow:

#### [](https://coder.com/docs/about/contributing/CONTRIBUTING#available-options)
Available options
* `-d` or `--deploy`, force deploys the PR by deleting the existing deployment.
* `-b` or `--build`, force builds the Docker image. (generally not needed as we are intelligently checking if the image needs to be built)
* `-e EXPERIMENT1,EXPERIMENT2` or `--experiments EXPERIMENT1,EXPERIMENT2`, will enable the specified experiments. (defaults to `*`)
* `-n` or `--dry-run` will display the context without deployment. e.g., branch name and PR number, etc.
* `-y` or `--yes`, will skip the CLI confirmation prompt.
Note
PR deployment will be re-deployed automatically when the PR is updated. It will use the last values automatically for redeployment.
Once the deployment is finished, a unique link and credentials will be posted in the [#pr-deployments](https://codercom.slack.com/archives/C05DNE982E8)
Slack channel.
[](https://coder.com/docs/about/contributing/CONTRIBUTING#styling)
Styling
--------------------------------------------------------------------------
* [Documentation style guide](https://coder.com/docs/about/contributing/documentation)
* [Frontend styling guide](https://coder.com/docs/about/contributing/frontend#styling)
[](https://coder.com/docs/about/contributing/CONTRIBUTING#pull-requests)
Pull Requests
--------------------------------------------------------------------------------------
We welcome pull requests (PRs) from community members including (but not limited to) open source users, enthusiasts, and enterprise customers.
We will ask that you sign a Contributor License Agreement before we accept any contributions into our repo.
Please keep PRs small and self-contained. This allows code reviewers (see below) to focus and fully understand the PR. A good rule of thumb is less than 1000 lines changed. (One exception is a mechanistic refactor, like renaming, that is conceptually trivial but might have a large line count.)
If your intended feature or refactor will be larger than this:
1. Open an issue explaining what you intend to build, how it will work, and that you are volunteering to do the development. Include `@coder/community-triage` in the body.
2. Give the maintainers a chance to respond. Changes to the visual, interaction, or software design are easier to adjust before you start laying down code.
3. Break your work up into a series of smaller PRs.
Stacking tools like [Graphite](https://www.graphite.dev/)
are useful for keeping a series of PRs that build on each other up to date as they are reviewed and merged.
Each PR:
* Must individually build and pass all tests, including formatting and linting.
* Must not introduce regressions or backward-compatibility issues, even if a subsequent PR in your series would resolve the issue.
* Should be a conceptually coherent change set.
In practice, many of these smaller PRs will be invisible to end users, and that is ok. For example, you might introduce a new Go package that implements the core business logic of a feature in one PR, but only later actually "wire it up" to a new API route in a later PR. Or, you might implement a new React component in one PR, and only in a later PR place it on a page.
[](https://coder.com/docs/about/contributing/CONTRIBUTING#reviews)
Reviews
--------------------------------------------------------------------------
The following information has been borrowed from [Go's review philosophy](https://go.dev/doc/contribute#reviews)
.
Coder values thorough reviews. For each review comment that you receive, please "close" it by implementing the suggestion or providing an explanation on why the suggestion isn't the best option. Be sure to do this for each comment; you can click **Done** to indicate that you've implemented the suggestion, or you can add a comment explaining why you aren't implementing the suggestion (or what you chose to implement instead).
It is perfectly normal for changes to go through several rounds of reviews, with one or more reviewers making new comments every time, then waiting for an updated change before reviewing again. All contributors, including those from maintainers, are subject to the same review cycle; this process is not meant to be applied selectively or to discourage anyone from contributing.
[](https://coder.com/docs/about/contributing/CONTRIBUTING#releases)
Releases
----------------------------------------------------------------------------
Coder releases are initiated via [`./scripts/release.sh`](https://github.com/coder/coder/blob/main/scripts/release.sh)
and automated via GitHub Actions. Specifically, the [`release.yaml`](https://github.com/coder/coder/blob/main/.github/workflows/release.yaml)
workflow. They are created based on the current [`main`](https://github.com/coder/coder/tree/main)
branch.
The release notes for a release are automatically generated from commit titles and metadata from PRs that are merged into `main`.
### [](https://coder.com/docs/about/contributing/CONTRIBUTING#creating-a-release)
Creating a release
The creation of a release is initiated via [`./scripts/release.sh`](https://github.com/coder/coder/blob/main/scripts/release.sh)
. This script will show a preview of the release that will be created, and if you choose to continue, create and push the tag which will trigger the creation of the release via GitHub Actions.
See `./scripts/release.sh --help` for more information.
### [](https://coder.com/docs/about/contributing/CONTRIBUTING#creating-a-release-via-workflow-dispatch)
Creating a release (via workflow dispatch)
Typically the workflow dispatch is only used to test (dry-run) a release, meaning no actual release will take place. The workflow can be dispatched manually from [Actions: Release](https://github.com/coder/coder/actions/workflows/release.yaml)
. Simply press "Run workflow" and choose dry-run.
If a release has failed after the tag has been created and pushed, it can be retried by again, pressing "Run workflow", changing "Use workflow from" from "Branch: main" to "Tag: vX.X.X" and not selecting dry-run.
### [](https://coder.com/docs/about/contributing/CONTRIBUTING#commit-messages)
Commit messages
Commit messages should follow the [Conventional Commits 1.0.0](https://www.conventionalcommits.org/en/v1.0.0/)
specification.
Allowed commit types (`feat`, `fix`, etc.) are listed in [conventional-commit-types](https://github.com/commitizen/conventional-commit-types/blob/c3a9be4c73e47f2e8197de775f41d981701407fb/index.json)
. Note that these types are also used to automatically sort and organize the release notes.
A good commit message title uses the imperative, present tense and is ~50 characters long (no more than 72).
Examples:
* Good: `feat(api): add feature X`
* Bad: `feat(api): added feature X` (past tense)
A good rule of thumb for writing good commit messages is to recite: [If applied, this commit will ...](https://reflectoring.io/meaningful-commit-messages/)
.
**Note:** We lint PR titles to ensure they follow the Conventional Commits specification, however, it's still possible to merge PRs on GitHub with a badly formatted title. Take care when merging single-commit PRs as GitHub may prefer to use the original commit title instead of the PR title.
### [](https://coder.com/docs/about/contributing/CONTRIBUTING#breaking-changes)
Breaking changes
Breaking changes can be triggered in two ways:
* Add `!` to the commit message title, e.g. `feat(api)!: remove deprecated endpoint /test`
* Add the [`release/breaking`](https://github.com/coder/coder/issues?q=sort%3Aupdated-desc+label%3Arelease%2Fbreaking)
label to a PR that has, or will be, merged into `main`.
### [](https://coder.com/docs/about/contributing/CONTRIBUTING#generative-ai)
Generative AI
Using AI to help with contributions is acceptable, but only if the [AI Contribution Guidelines](https://coder.com/docs/about/contributing/AI_CONTRIBUTING)
are followed. If most of your PR was generated by AI, please read and comply with these rules before submitting.
### [](https://coder.com/docs/about/contributing/CONTRIBUTING#security)
Security
Caution
If you find a vulnerability, **DO NOT FILE AN ISSUE**. Instead, send an email to [\[email protected\]](https://coder.com/cdn-cgi/l/email-protection#4231272137302b363b02212d2627306c212d2f)
.
The [`security`](https://github.com/coder/coder/issues?q=sort%3Aupdated-desc+label%3Asecurity)
label can be added to PRs that have, or will be, merged into `main`. Doing so will make sure the change stands out in the release notes.
### [](https://coder.com/docs/about/contributing/CONTRIBUTING#experimental)
Experimental
The [`release/experimental`](https://github.com/coder/coder/issues?q=sort%3Aupdated-desc+label%3Arelease%2Fexperimental)
label can be used to move the note to the bottom of the release notes under a separate title.
[](https://coder.com/docs/about/contributing/CONTRIBUTING#troubleshooting)
Troubleshooting
------------------------------------------------------------------------------------------
### [](https://coder.com/docs/about/contributing/CONTRIBUTING#nix-on-macos-error-creating-directory)
Nix on macOS: `error: creating directory`
On macOS, a [direnv bug](https://github.com/direnv/direnv/issues/1345)
can cause `nix-shell` to fail to build or run `coder`. If you encounter `error: creating directory` when you attempt to run, build, or test, add a `mkdir` line to your `.envrc`:
`` `use nix mkdir -p "$TMPDIR"` ``
##### On this page
---
# Getting Started: Installation & Setup | Coder Docs
[Home](https://coder.com/docs "Home")
Install
A single CLI (`coder`) is used for both the Coder server and the client.
We support two release channels: mainline and stable - read the [Releases](https://coder.com/docs/install/releases)
page to learn more about which best suits your team.
There are several ways to install Coder. Follow the steps on this page for a minimal installation of Coder, or for a step-by-step guide on how to install and configure your first Coder deployment, follow the [quickstart guide](https://coder.com/docs/tutorials/quickstart)
.
[](https://coder.com/docs/install#localindividual-installs)
Local/Individual Installs
-------------------------------------------------------------------------------------
This install guide is meant for **individual developers, small teams, and/or open source community members** setting up Coder locally or on a single server. It covers the light weight install for Linux, macOS, and Windows.
[](https://coder.com/docs/install#linuxmacos)
Linux/macOS[](https://coder.com/docs/install#windows)
Windows
Our install script is the fastest way to install Coder on Linux/macOS:
`` `curl -L https://coder.com/install.sh | sh` ``
Refer to [GitHub releases](https://github.com/coder/coder/releases)
for alternate installation methods (e.g. standalone binaries, system packages).
Warning
If you're using an Apple Silicon Mac with ARM64 architecture, so M1/M2/M3/M4, you'll need to use an external PostgreSQL Database using the following commands:
`` `# Install PostgreSQL brew install postgresql@16 # Start PostgreSQL brew services start postgresql@16 # Create database createdb coder # Run Coder with external database coder server --postgres-url="postgres://$(whoami)@localhost/coder?sslmode=disable"` ``
[](https://coder.com/docs/install#hostedenterprise-installs)
Hosted/Enterprise Installs
---------------------------------------------------------------------------------------
This install guide is meant for **IT Administrators, DevOps, and Platform Teams** deploying Coder for an organization. It covers production-grade, multi-user installs on Kubernetes and other hosted platforms.
[##### Coder CLI\
\
Install the standalone binary](https://coder.com/docs/install/cli)
[##### Docker\
\
Install Coder using Docker](https://coder.com/docs/install/docker)
[##### Kubernetes\
\
Install Coder on Kubernetes](https://coder.com/docs/install/kubernetes)
[##### Rancher\
\
Deploy Coder on Rancher](https://coder.com/docs/install/rancher)
[##### OpenShift\
\
Install Coder on OpenShift](https://coder.com/docs/install/openshift)
[##### Cloud Providers\
\
Install Coder on cloud providers](https://coder.com/docs/install/cloud)
[##### Air-gapped Deployments\
\
Run Coder in air-gapped / disconnected / offline environments](https://coder.com/docs/install/airgap)
[##### Unofficial Install Methods\
\
Other installation methods](https://coder.com/docs/install/other)
[##### Upgrading\
\
Learn how to upgrade Coder](https://coder.com/docs/install/upgrade)
[##### Uninstall\
\
Learn how to uninstall Coder](https://coder.com/docs/install/uninstall)
[##### Releases\
\
Learn about the Coder release channels and schedule](https://coder.com/docs/install/releases)
[](https://coder.com/docs/install#starting-the-coder-server)
Starting the Coder Server
--------------------------------------------------------------------------------------
To start the Coder server:
`` `coder server` ``

To log in to an existing Coder deployment:
`` `coder login https://coder.example.com` ``
##### On this page
---
# AI Contribution Guidelines | Coder Docs
[Home](https://coder.com/docs "Home")
[Contributing](https://coder.com/docs/about/contributing/CONTRIBUTING "Contributing")
AI Contribution Guidelines
This document defines rules for contributions where an AI system is the primary author of the code (i.e., most of the pull request was generated by AI). It applies to all Coder repositories and is a supplement to the [existing contributing guidelines](https://coder.com/docs/about/contributing/CONTRIBUTING)
, not a replacement.
For minor AI-assisted edits, suggestions, or completions where the human contributor is clearly the primary author, these rules do not apply — standard contributing guidelines are sufficient.
[](https://coder.com/docs/about/contributing/AI_CONTRIBUTING#disclosure)
Disclosure
-----------------------------------------------------------------------------------
Contributors must **disclose AI involvement** in the pull request description whenever these guidelines apply.
[](https://coder.com/docs/about/contributing/AI_CONTRIBUTING#human-ownership--attribution)
Human Ownership & Attribution
------------------------------------------------------------------------------------------------------------------------
* All pull requests must be opened under **user accounts linked to a human**, and not an application ("bot account").
* Contributors are personally accountable for the content of their PRs, regardless of how it was generated.
[](https://coder.com/docs/about/contributing/AI_CONTRIBUTING#verification--evidence)
Verification & Evidence
------------------------------------------------------------------------------------------------------------
All AI-assisted contributions require **manual verification**. Contributions without verification evidence will be rejected.
* Test your changes yourself. Don’t assume AI is correct.
* Provide screenshots showing that the change works as intended.
* For visual/UI changes: include before/after screenshots.
* For CLI or backend changes: include terminal or api output.
[](https://coder.com/docs/about/contributing/AI_CONTRIBUTING#why-these-rules-exist)
Why These Rules Exist
---------------------------------------------------------------------------------------------------------
Traditionally, maintainers assumed that producing a pull request required more effort than reviewing it. With AI-assisted tools, the balance has shifted: generating code is often faster than reviewing it.
Our guidelines exist to safeguard maintainers’ time, uphold contributor accountability, and preserve the overall quality of the project.
##### On this page
---
# Security | Coder Docs
[Home](https://coder.com/docs "Home")
[Contributing](https://coder.com/docs/about/contributing/CONTRIBUTING "Contributing")
Security
Coder welcomes feedback from security researchers and the general public to help improve our security. If you believe you have discovered a vulnerability, privacy issue, exposed data, or other security issues in any of our assets, we want to hear from you.
If you find a vulnerability, **DO NOT FILE AN ISSUE**. Instead, send an email to [\[email protected\]](https://coder.com/cdn-cgi/l/email-protection#7201171107001b060b32111d1617005c111d1f)
.
Refer to the [Security policy](https://coder.com/security/policy)
for more information.
---
# Modules | Coder Docs
[Home](https://coder.com/docs "Home")
[Contributing](https://coder.com/docs/about/contributing/CONTRIBUTING "Contributing")
Modules
Learn how to create and contribute Terraform modules to the Coder Registry. Modules provide reusable components that extend Coder workspaces with IDEs, development tools, login tools, and other features.
[](https://coder.com/docs/about/contributing/modules#what-are-coder-modules)
What are Coder modules
---------------------------------------------------------------------------------------------------
Coder modules are Terraform modules that integrate with Coder workspaces to provide specific functionality. They are published to the Coder Registry at [registry.coder.com](https://registry.coder.com/)
and can be consumed in any Coder template using standard Terraform module syntax.
Examples of modules include:
* **Desktop IDEs**: [`jetbrains-fleet`](https://registry.coder.com/modules/coder/jetbrains-fleet)
, [`cursor`](https://registry.coder.com/modules/coder/cursor)
, [`windsurf`](https://registry.coder.com/modules/coder/windsurf)
, [`zed`](https://registry.coder.com/modules/coder/zed)
* **Web IDEs**: [`code-server`](https://registry.coder.com/modules/coder/code-server)
, [`vscode-web`](https://registry.coder.com/modules/coder/vscode-web)
, [`jupyter-notebook`](https://registry.coder.com/modules/coder/jupyter-notebook)
, [`jupyter-lab`](https://registry.coder.com/modules/coder/jupyterlab)
* **Integrations**: [`devcontainers-cli`](https://registry.coder.com/modules/coder/devcontainers-cli)
, [`vault-github`](https://registry.coder.com/modules/coder/vault-github)
, [`jfrog-oauth`](https://registry.coder.com/modules/coder/jfrog-oauth)
, [`jfrog-token`](https://registry.coder.com/modules/coder/jfrog-token)
* **Workspace utilities**: [`git-clone`](https://registry.coder.com/modules/coder/git-clone)
, [`dotfiles`](https://registry.coder.com/modules/coder/dotfiles)
, [`filebrowser`](https://registry.coder.com/modules/coder/filebrowser)
, [`coder-login`](https://registry.coder.com/modules/coder/coder-login)
, [`personalize`](https://registry.coder.com/modules/coder/personalize)
[](https://coder.com/docs/about/contributing/modules#prerequisites)
Prerequisites
---------------------------------------------------------------------------------
Before contributing modules, ensure you have:
* Basic Terraform knowledge
* [Terraform installed](https://developer.hashicorp.com/terraform/install)
* [Docker installed](https://docs.docker.com/get-docker/)
(for running tests)
* [Bun installed](https://bun.sh/docs/installation)
(for running tests and tooling)
[](https://coder.com/docs/about/contributing/modules#setup-your-development-environment)
Setup your development environment
---------------------------------------------------------------------------------------------------------------------------
1. **Fork and clone the repository**:
`` `git clone https://github.com/your-username/registry.git cd registry` ``
2. **Install dependencies**:
`` `bun install` ``
3. **Understand the structure**:
`` `registry/[namespace]/ ├── modules/ # Your modules ├── .images/ # Namespace avatar and screenshots └── README.md # Namespace description` ``
[](https://coder.com/docs/about/contributing/modules#create-your-first-module)
Create your first module
-------------------------------------------------------------------------------------------------------
### [](https://coder.com/docs/about/contributing/modules#1-set-up-your-namespace)
1\. Set up your namespace
If you're a new contributor, create your namespace directory:
`` `mkdir -p registry/[your-username] mkdir -p registry/[your-username]/.images` ``
Add your namespace avatar by downloading your GitHub avatar and saving it as `avatar.png`:
`` `curl -o registry/[your-username]/.images/avatar.png https://github.com/[your-username].png` ``
Create your namespace README at `registry/[your-username]/README.md`:
`` `--- display_name: "Your Name" bio: "Brief description of what you do" github: "your-username" avatar: "./.images/avatar.png" linkedin: "https://www.linkedin.com/in/your-username" website: "https://your-website.com" support_email: "[[email protected]](https://coder.com/cdn-cgi/l/email-protection) " status: "community" --- # Your Name Brief description of who you are and what you do.` ``
Note
The `linkedin`, `website`, and `support_email` fields are optional and can be omitted or left empty if not applicable.
### [](https://coder.com/docs/about/contributing/modules#2-generate-module-scaffolding)
2\. Generate module scaffolding
Use the provided script to generate your module structure:
`` `./scripts/new_module.sh [your-username]/[module-name] cd registry/[your-username]/modules/[module-name]` ``
This creates:
* `main.tf` - Terraform configuration template
* `README.md` - Documentation template with frontmatter
* `run.sh` - Optional execution script
### [](https://coder.com/docs/about/contributing/modules#3-implement-your-module)
3\. Implement your module
Edit `main.tf` to build your module's features. Here's an example based on the `git-clone` module structure:
`` `terraform { required_providers { coder = { source = "coder/coder" } } } # Input variables variable "agent_id" { description = "The ID of a Coder agent" type = string } variable "url" { description = "Git repository URL to clone" type = string validation { condition = can(regex("^(https?://|git@)", var.url)) error_message = "URL must be a valid git repository URL." } } variable "base_dir" { description = "Directory to clone the repository into" type = string default = "~" } # Resources resource "coder_script" "clone_repo" { agent_id = var.agent_id display_name = "Clone Repository" script = <<-EOT #!/bin/bash set -e # Ensure git is installed if ! command -v git &> /dev/null; then echo "Installing git..." sudo apt-get update && sudo apt-get install -y git fi # Clone repository if it doesn't exist if [ ! -d "${var.base_dir}/$(basename ${var.url} .git)" ]; then echo "Cloning ${var.url}..." git clone ${var.url} ${var.base_dir}/$(basename ${var.url} .git) fi EOT run_on_start = true } # Outputs output "repo_dir" { description = "Path to the cloned repository" value = "${var.base_dir}/$(basename ${var.url} .git)" }` ``
### [](https://coder.com/docs/about/contributing/modules#4-write-complete-tests)
4\. Write complete tests
Create `main.test.ts` to test your module features:
`` `import { runTerraformApply, runTerraformInit, testRequiredVariables } from "~test" describe("git-clone", async () => { await testRequiredVariables("registry/[your-username]/modules/git-clone") it("should clone repository successfully", async () => { await runTerraformInit("registry/[your-username]/modules/git-clone") await runTerraformApply("registry/[your-username]/modules/git-clone", { agent_id: "test-agent-id", url: "https://github.com/coder/coder.git", base_dir: "/tmp" }) }) it("should work with SSH URLs", async () => { await runTerraformInit("registry/[your-username]/modules/git-clone") await runTerraformApply("registry/[your-username]/modules/git-clone", { agent_id: "test-agent-id", url: "[[email protected]](https://coder.com/cdn-cgi/l/email-protection) :coder/coder.git" }) }) })` ``
### [](https://coder.com/docs/about/contributing/modules#5-document-your-module)
5\. Document your module
Update `README.md` with complete documentation:
`` `--- display_name: "Git Clone" description: "Clone a Git repository into your Coder workspace" icon: "../../../../.icons/git.svg" verified: false tags: ["git", "development", "vcs"] --- # Git Clone This module clones a Git repository into your Coder workspace and ensures Git is installed. ## Usage ```tf module "git_clone" { source = "registry.coder.com/[your-username]/git-clone/coder" version = "~> 1.0" agent_id = coder_agent.main.id url = "https://github.com/coder/coder.git" base_dir = "/home/coder/projects" }` ``
[](https://coder.com/docs/about/contributing/modules#module-best-practices)
Module best practices
-------------------------------------------------------------------------------------------------
### [](https://coder.com/docs/about/contributing/modules#design-principles)
Design principles
* **Single responsibility**: Each module should have one clear purpose
* **Reusability**: Design for use across different workspace types
* **Flexibility**: Provide sensible defaults but allow customization
* **Safe to rerun**: Ensure modules can be applied multiple times safely
### [](https://coder.com/docs/about/contributing/modules#terraform-conventions)
Terraform conventions
* Use descriptive variable names and include descriptions
* Provide default values for optional variables
* Include helpful outputs for working with other modules
* Use proper resource dependencies
* Follow [Terraform style conventions](https://developer.hashicorp.com/terraform/language/syntax/style)
### [](https://coder.com/docs/about/contributing/modules#documentation-standards)
Documentation standards
Your module README should include:
* **Frontmatter**: Required metadata for the registry
* **Description**: Clear explanation of what the module does
* **Usage example**: Working Terraform code snippet
* **Additional context**: Setup requirements, known limitations, etc.
Note
Do not include variables tables in your README. The registry automatically generates variable documentation from your `main.tf` file.
[](https://coder.com/docs/about/contributing/modules#test-your-module)
Test your module
---------------------------------------------------------------------------------------
Run tests to ensure your module works correctly:
`` `# Test your specific module bun test -t 'git-clone' # Test all modules bun test # Format code bun fmt` ``
Important
Tests require Docker with `--network=host` support, which typically requires Linux. macOS users can use [Colima](https://github.com/abiosoft/colima)
or [OrbStack](https://orbstack.dev/)
instead of Docker Desktop.
[](https://coder.com/docs/about/contributing/modules#contribute-to-existing-modules)
Contribute to existing modules
-------------------------------------------------------------------------------------------------------------------
### [](https://coder.com/docs/about/contributing/modules#types-of-contributions)
Types of contributions
**Bug fixes**:
* Fix installation or configuration issues
* Resolve compatibility problems
* Correct documentation errors
**Feature additions**:
* Add new configuration options
* Support additional platforms or versions
* Add new features
**Maintenance**:
* Update dependencies
* Improve error handling
* Optimize performance
### [](https://coder.com/docs/about/contributing/modules#making-changes)
Making changes
1. **Identify the issue**: Reproduce the problem or identify the improvement needed
2. **Make focused changes**: Keep modifications minimal and targeted
3. **Maintain compatibility**: Ensure existing users aren't broken
4. **Add tests**: Test new features and edge cases
5. **Update documentation**: Reflect changes in the README
### [](https://coder.com/docs/about/contributing/modules#backward-compatibility)
Backward compatibility
When modifying existing modules:
* Add new variables with sensible defaults
* Don't remove existing variables without a migration path
* Don't change variable types or meanings
* Test that basic configurations still work
[](https://coder.com/docs/about/contributing/modules#versioning)
Versioning
---------------------------------------------------------------------------
When you modify a module, update its version following semantic versioning:
* **Patch** (1.0.0 → 1.0.1): Bug fixes, documentation updates
* **Minor** (1.0.0 → 1.1.0): New features, new variables
* **Major** (1.0.0 → 2.0.0): Breaking changes, removing variables
Use the version bump script to update versions:
`` `./.github/scripts/version-bump.sh patch|minor|major` ``
[](https://coder.com/docs/about/contributing/modules#submit-your-contribution)
Submit your contribution
-------------------------------------------------------------------------------------------------------
1. **Create a feature branch**:
`` `git checkout -b feat/modify-git-clone-module` ``
2. **Test thoroughly**:
`` `bun test -t 'git-clone' bun fmt` ``
3. **Commit with clear messages**:
`` `git add . git commit -m "feat(git-clone):add git-clone module"` ``
4. **Open a pull request**:
* Use a descriptive title
* Explain what the module does and why it's useful
* Reference any related issues
[](https://coder.com/docs/about/contributing/modules#common-issues-and-solutions)
Common issues and solutions
-------------------------------------------------------------------------------------------------------------
### [](https://coder.com/docs/about/contributing/modules#testing-problems)
Testing problems
**Issue**: Tests fail with network errors **Solution**: Ensure Docker is running with `--network=host` support
### [](https://coder.com/docs/about/contributing/modules#module-development)
Module development
**Issue**: Icon not displaying **Solution**: Verify icon path is correct and file exists in `.icons/` directory
### [](https://coder.com/docs/about/contributing/modules#documentation)
Documentation
**Issue**: Code blocks not syntax highlighted **Solution**: Use `tf` language identifier for Terraform code blocks
[](https://coder.com/docs/about/contributing/modules#get-help)
Get help
-----------------------------------------------------------------------
* **Examples**: Review existing modules like [`code-server`](https://registry.coder.com/modules/coder/code-server)
, [`git-clone`](https://registry.coder.com/modules/coder/git-clone)
, and [`jetbrains`](https://registry.coder.com/modules/coder/jetbrains)
* **Issues**: Open an issue at [github.com/coder/registry](https://github.com/coder/registry/issues)
* **Community**: Join the [Coder Discord](https://discord.gg/coder)
for questions
* **Documentation**: Check the [Coder docs](https://coder.com/docs)
for help on Coder.
[](https://coder.com/docs/about/contributing/modules#next-steps)
Next steps
---------------------------------------------------------------------------
After creating your first module:
1. **Share with the community**: Announce your module on Discord or social media
2. **Iterate based on feedback**: Improve based on user suggestions
3. **Create more modules**: Build a collection of related tools
4. **Contribute to existing modules**: Help maintain and improve the ecosystem
Happy contributing! 🚀
##### On this page
---
# Coder CLI | Coder Docs
[Home](https://coder.com/docs "Home")
[Install](https://coder.com/docs/install "Install")
Coder CLI
A single CLI (`coder`) is used for both the Coder server and the client.
We support two release channels: mainline and stable - read the [Releases](https://coder.com/docs/install/releases)
page to learn more about which best suits your team.
[](https://coder.com/docs/install/cli#download-the-latest-release-from-github)
Download the latest release from GitHub
----------------------------------------------------------------------------------------------------------------------
[](https://coder.com/docs/install/cli#linuxmacos)
Linux/macOS[](https://coder.com/docs/install/cli#windows)
Windows
Our install script is the fastest way to install Coder on Linux/macOS:
`` `curl -L https://coder.com/install.sh | sh` ``
Refer to [GitHub releases](https://github.com/coder/coder/releases)
for alternate installation methods (e.g. standalone binaries, system packages).
To start the Coder server:
`` `coder server` ``

To log in to an existing Coder deployment:
`` `coder login https://coder.example.com` ``
[](https://coder.com/docs/install/cli#download-the-cli-from-your-deployment)
Download the CLI from your deployment
------------------------------------------------------------------------------------------------------------------
Note
Available in Coder 2.19 and newer on macOS and Linux clients only.
Every Coder server hosts CLI binaries for all supported platforms. You can run a script to download the appropriate CLI for your machine from your Coder deployment.
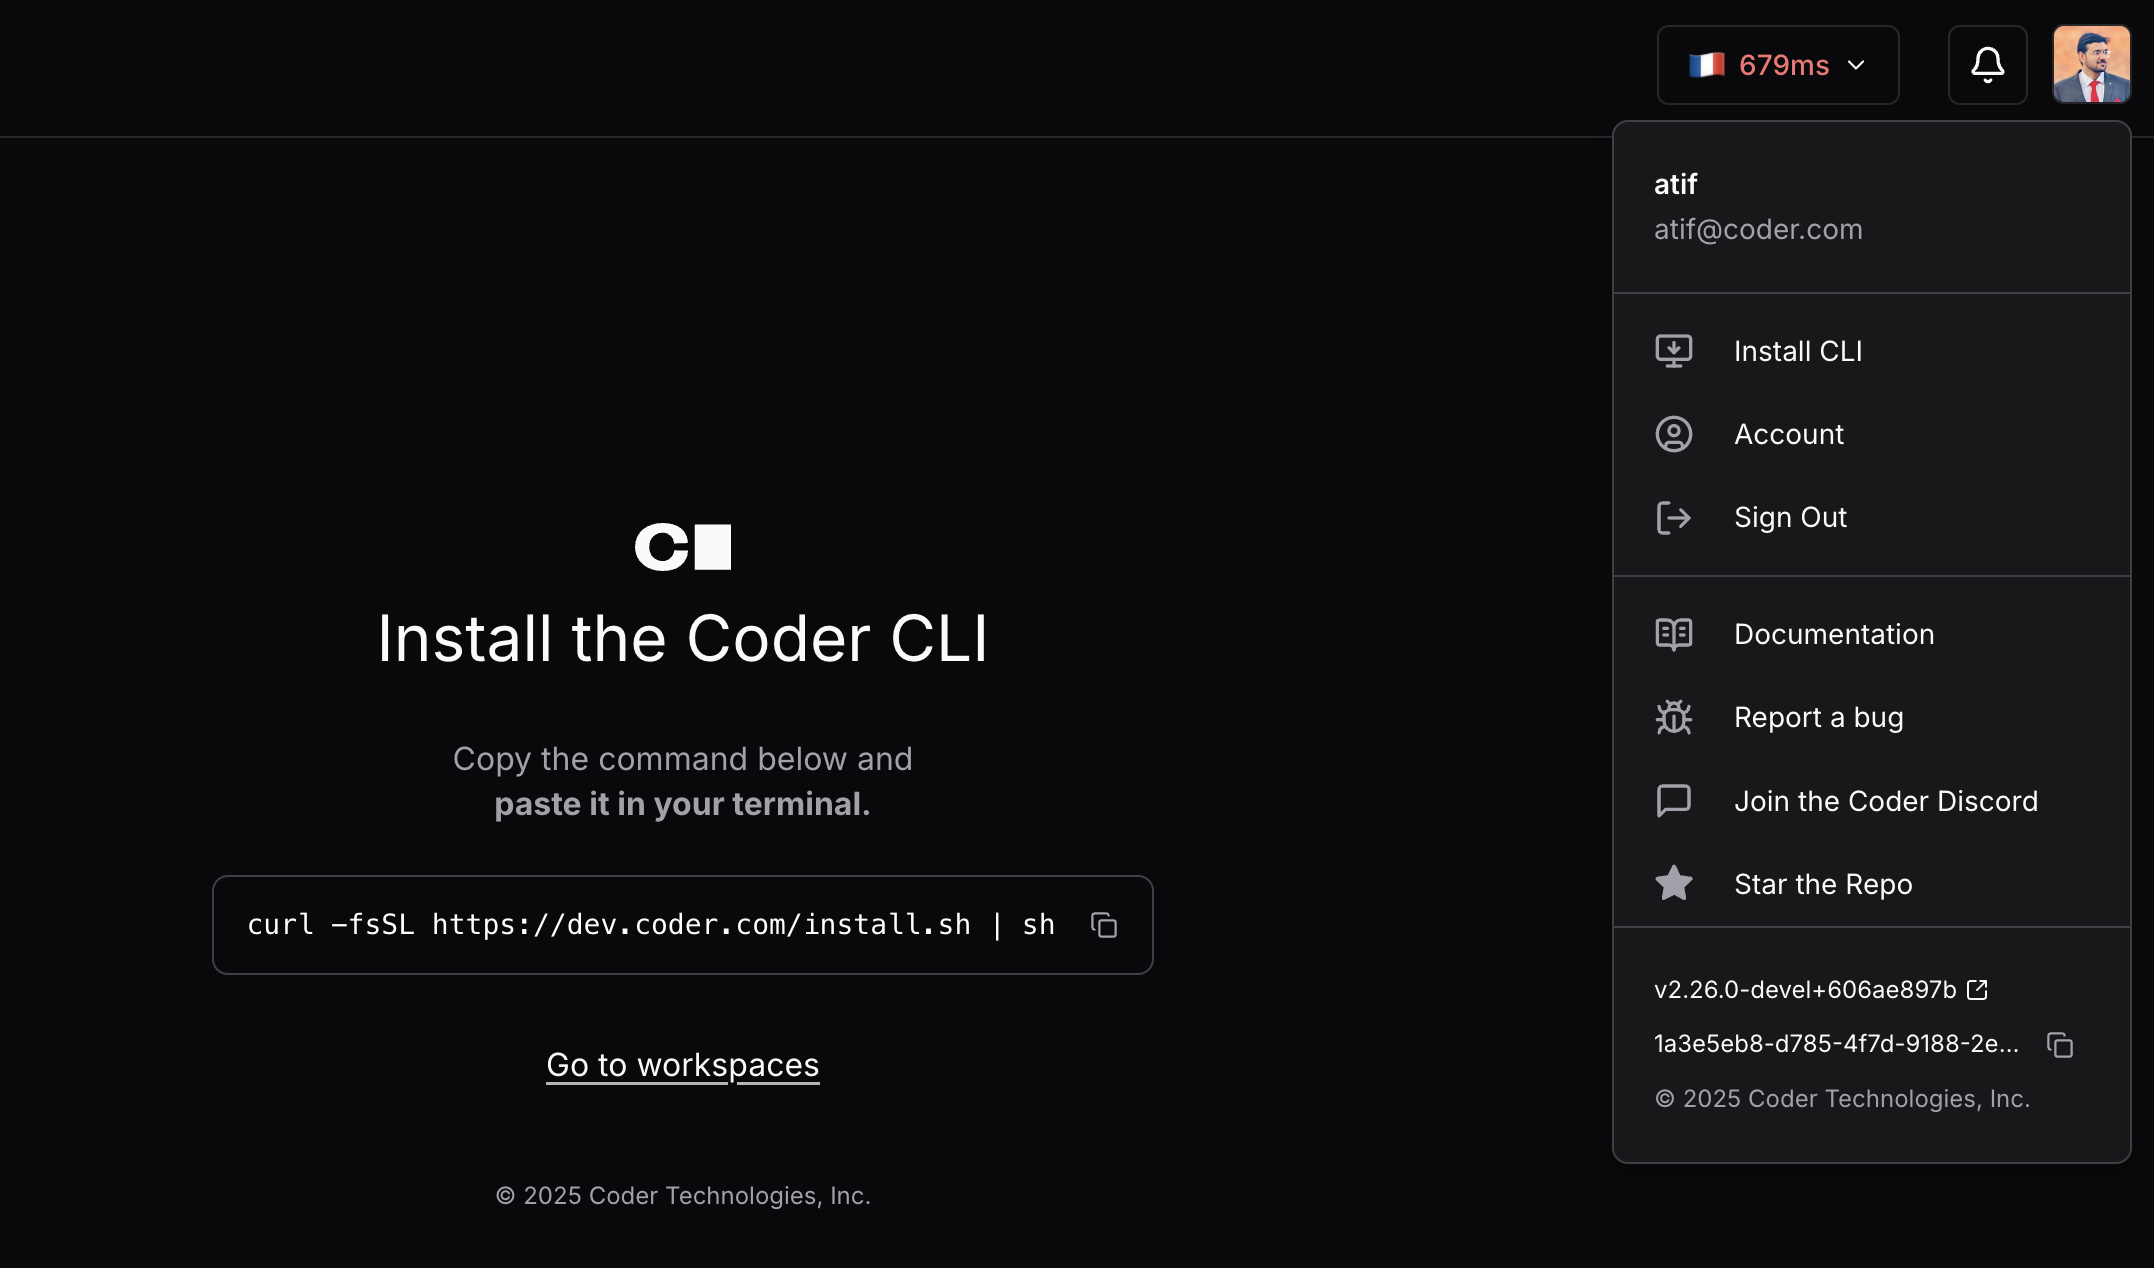
This script works within air-gapped deployments and ensures that the version of the CLI you have installed on your machine matches the version of the server.
This script can be useful when authoring a template for installing the CLI.
### [](https://coder.com/docs/install/cli#next-up)
Next up
* [Create your first template](https://coder.com/docs/tutorials/template-from-scratch)
* [Control plane configuration](https://coder.com/docs/admin/setup)
##### On this page
---
# Frontend | Coder Docs
[Home](https://coder.com/docs "Home")
[Contributing](https://coder.com/docs/about/contributing/CONTRIBUTING "Contributing")
Frontend
Welcome to the guide for contributing to the Coder frontend. Whether you’re part of the community or a Coder team member, this documentation will help you get started.
If you have any questions, feel free to reach out on our [Discord server](https://discord.com/invite/coder)
, and we’ll be happy to assist you.
[](https://coder.com/docs/about/contributing/frontend#running-the-ui)
Running the UI
------------------------------------------------------------------------------------
You can run the UI and access the Coder dashboard in two ways:
1. Build the UI pointing to an external Coder server: `CODER_HOST=https://mycoder.com pnpm dev` inside of the `site` folder. This is helpful when you are building something in the UI and already have the data on your deployed server.
2. Build the entire Coder server + UI locally: `./scripts/develop.sh` in the root folder. This is useful for contributing to features that are not deployed yet or that involve both the frontend and backend.
In both cases, you can access the dashboard on `http://localhost:8080`. If using `./scripts/develop.sh` you can log in with the default credentials.
Note
**Default Credentials:** `[[email protected]](https://coder.com/cdn-cgi/l/email-protection) ` and `SomeSecurePassword!`.
[](https://coder.com/docs/about/contributing/frontend#tech-stack-overview)
Tech Stack Overview
----------------------------------------------------------------------------------------------
All our dependencies are described in `site/package.json`, but the following are the most important.
* [React](https://reactjs.org/)
for the UI framework
* [Typescript](https://www.typescriptlang.org/)
to keep our sanity
* [Vite](https://vitejs.dev/)
to build the project
* [Material V5](https://mui.com/material-ui/getting-started/)
for UI components
* [react-router](https://reactrouter.com/en/main)
for routing
* [TanStack Query v4](https://tanstack.com/query/v4/docs/react/overview)
for fetching data
* [axios](https://github.com/axios/axios)
as fetching lib
* [Playwright](https://playwright.dev/)
for end-to-end (E2E) testing
* [Jest](https://jestjs.io/)
for integration testing
* [Storybook](https://storybook.js.org/)
and [Chromatic](https://www.chromatic.com/)
for visual testing
* [PNPM](https://pnpm.io/)
as the package manager
[](https://coder.com/docs/about/contributing/frontend#structure)
Structure
--------------------------------------------------------------------------
All UI-related code is in the `site` folder. Key directories include:
* **e2e** - End-to-end (E2E) tests
* **src** - Source code
* **mocks** - [Manual mocks](https://jestjs.io/docs/manual-mocks)
used by Jest
* **@types** - Custom types for dependencies that don't have defined types (largely code that has no server-side equivalent)
* **api** - API function calls and types
* **queries** - react-query queries and mutations
* **components** - Reusable UI components without Coder specific business logic
* **hooks** - Custom React hooks
* **modules** - Coder-specific UI components
* **pages** - Page-level components
* **testHelpers** - Helper functions for integration testing
* **theme** - theme configuration and color definitions
* **util** - Helper functions that can be used across the application
* **static** - Static assets like images, fonts, icons, etc
Do not use barrel files. Imports should be directly from the file that defines the value.
[](https://coder.com/docs/about/contributing/frontend#routing)
Routing
----------------------------------------------------------------------
We use [react-router](https://reactrouter.com/en/main)
as our routing engine.
* Authenticated routes - Place routes requiring authentication inside the `` route. The `RequireAuth` component handles all the authentication logic for the routes.
* Dashboard routes - routes that live in the dashboard should be placed under the `` route. The `DashboardLayout` adds a navbar and passes down common dashboard data.
[](https://coder.com/docs/about/contributing/frontend#pages)
Pages
------------------------------------------------------------------
Page components are the top-level components of the app and reside in the `src/pages` folder. Each page should have its own folder to group relevant views, tests, and utility functions. The page component fetches necessary data and passes to the view. We explain this decision a bit better in the next section which talks about where to fetch data.
If code within a page becomes reusable across other parts of the app, consider moving it to `src/utils`, `hooks`, `components`, or `modules`.
### [](https://coder.com/docs/about/contributing/frontend#handling-states)
Handling States
A page typically has three states: **loading**, **ready**/**success**, and **error**. Ensure you manage these states when developing pages. Use visual tests for these states with `*.stories.ts` files.
[](https://coder.com/docs/about/contributing/frontend#data-fetching)
Data Fetching
----------------------------------------------------------------------------------
We use [TanStack Query v4](https://tanstack.com/query/v4/docs/react/quick-start)
to fetch data from the API. Queries and mutation should be placed in the api/queries folder.
### [](https://coder.com/docs/about/contributing/frontend#where-to-fetch-data)
Where to fetch data
In the past, our approach involved creating separate components for page and view, where the page component served as a container responsible for fetching data and passing it down to the view.
For instance, when developing a page to display users, we would have a `UsersPage` component with a corresponding `UsersPageView`. The `UsersPage` would handle API calls, while the `UsersPageView` managed the presentational logic.
Over time, however, we encountered challenges with this approach, particularly in terms of excessive props drilling. To address this, we opted to fetch data in proximity to its usage. Taking the example of displaying users, in the past, if we were creating a header component for that page, we would have needed to fetch the data in the page component and pass it down through the hierarchy (`UsersPage -> UsersPageView -> UsersHeader`). Now, with libraries such as `react-query`, data fetching can be performed directly in the `UsersHeader` component, allowing UI elements to declare and consume their data-fetching dependencies directly, while preventing duplicate server requests ([more info](https://github.com/TanStack/query/discussions/608#discussioncomment-29735)
).
To simplify visual testing of scenarios where components are responsible for fetching data, you can easily set the queries' value using `parameters.queries` within the component's story.
`` `export const WithQuota: Story = { parameters: { queries: [ { key: getWorkspaceQuotaQueryKey(MockUserOwner.username), data: { credits_consumed: 2, budget: 40, }, }, ], }, };` ``
### [](https://coder.com/docs/about/contributing/frontend#api)
API
Our project uses [axios](https://github.com/axios/axios)
as the HTTP client for making API requests. The API functions are centralized in `site/src/api/api.ts`. Auto-generated TypeScript types derived from our Go server are located in `site/src/api/typesGenerated.ts`.
Typically, each API endpoint corresponds to its own `Request` and `Response` types. However, some endpoints require additional parameters for successful execution. Here's an illustrative example:"
``` ``export const getAgentListeningPorts = async ( agentID: string, ): Promise => { const response = await axiosInstance.get( `/api/v2/workspaceagents/${agentID}/listening-ports`, ); return response.data; };`` ```
Sometimes, a frontend operation can have multiple API calls which can be wrapped as a single function.
`` `export const updateWorkspaceVersion = async ( workspace: TypesGen.Workspace, ): Promise => { const template = await getTemplate(workspace.template_id); return startWorkspace(workspace.id, template.active_version_id); };` ``
[](https://coder.com/docs/about/contributing/frontend#components-and-modules)
Components and Modules
----------------------------------------------------------------------------------------------------
Components should be atomic, reusable and free of business logic. Modules are similar to components except that they can be more complex and can contain business logic specific to the product.
### [](https://coder.com/docs/about/contributing/frontend#mui)
MUI
The codebase is currently using MUI v5. Please see the [official documentation](https://mui.com/material-ui/getting-started/)
. In general, favor building a custom component via MUI instead of plain React/HTML, as MUI's suite of components is thoroughly battle-tested and accessible right out of the box.
### [](https://coder.com/docs/about/contributing/frontend#structure-1)
Structure
Each component and module gets its own folder. Module folders may group multiple files in a hierarchical structure. Storybook stories and component tests using Storybook interactions are required. By keeping these tidy, the codebase will remain easy to navigate, healthy and maintainable for all contributors.
### [](https://coder.com/docs/about/contributing/frontend#accessibility)
Accessibility
We strive to keep our UI accessible.
In general, colors should come from the app theme, but if there is a need to add a custom color, please ensure that the foreground and background have a minimum contrast ratio of 4.5:1 to meet WCAG level AA compliance. WebAIM has [a great tool for checking your colors directly](https://webaim.org/resources/contrastchecker/)
, but tools like [Dequeue's axe DevTools](https://chrome.google.com/webstore/detail/axe-devtools-web-accessib/lhdoppojpmngadmnindnejefpokejbdd)
can also do automated checks in certain situations.
When using any kind of input element, always make sure that there is a label associated with that element (the label can be made invisible for aesthetic reasons, but it should always be in the HTML markup). Labels are important for screen-readers; a placeholder text value is not enough for all users.
When possible, make sure that all image/graphic elements have accompanying text that describes the image. `` elements should have an `alt` text value. In other situations, it might make sense to place invisible, descriptive text inside the component itself using MUI's `visuallyHidden` utility function.
`` `import { visuallyHidden } from "@mui/utils"; ;` ``
### [](https://coder.com/docs/about/contributing/frontend#should-i-create-a-new-component-or-module)
Should I create a new component or module?
Components could technically be used in any codebase and still feel at home. A module would only make sense in the Coder codebase.
* Component
* Simple
* Atomic, used in multiple places
* Generic, would be useful as a component outside of the Coder product
* Good Examples: `Badge`, `Form`, `Timeline`
* Module
* Simple or Complex
* Used in multiple places
* Good Examples: `Provisioner`, `DashboardLayout`, `DeploymentBanner`
Our codebase has some legacy components that are being updated to follow these new conventions, but all new components should follow these guidelines.
[](https://coder.com/docs/about/contributing/frontend#styling)
Styling
----------------------------------------------------------------------
We use [Emotion](https://emotion.sh/)
to handle CSS styles.
[](https://coder.com/docs/about/contributing/frontend#forms)
Forms
------------------------------------------------------------------
We use [Formik](https://formik.org/docs)
for forms along with [Yup](https://github.com/jquense/yup)
for schema definition and validation.
[](https://coder.com/docs/about/contributing/frontend#testing)
Testing
----------------------------------------------------------------------
We use three types of testing in our app: **End-to-end (E2E)**, **Integration/Unit** and **Visual Testing**.
### [](https://coder.com/docs/about/contributing/frontend#end-to-end-e2e--playwright)
End-to-End (E2E) – Playwright
These are useful for testing complete flows like "Create a user", "Import template", etc. We use [Playwright](https://playwright.dev/)
. These tests run against a full Coder instance, backed by a database, and allows you to make sure that features work properly all the way through the stack. "End to end", so to speak.
For scenarios where you need to be authenticated as a certain user, you can use `login` helper. Passing it some user credentials will log out of any other user account, and will attempt to login using those credentials.
For ease of debugging, it's possible to run a Playwright test in headful mode running a Playwright server on your local machine, and executing the test inside your workspace.
You can either run `scripts/remote_playwright.sh` from `coder/coder` on your local machine, or execute the following command if you don't have the repo available:
`` `bash <(curl -sSL https://raw.githubusercontent.com/coder/coder/main/scripts/remote_playwright.sh) [workspace]` ``
The `scripts/remote_playwright.sh` script will start a Playwright server on your local machine and forward the necessary ports to your workspace. At the end of the script, you will land _inside_ your workspace with environment variables set so you can simply execute the test (`pnpm run playwright:test`).
### [](https://coder.com/docs/about/contributing/frontend#integrationunit--jest)
Integration/Unit – Jest
We use Jest mostly for testing code that does _not_ pertain to React. Functions and classes that contain notable app logic, and which are well abstracted from React should have accompanying tests. If the logic is tightly coupled to a React component, a Storybook test or an E2E test may be a better option depending on the scenario.
### [](https://coder.com/docs/about/contributing/frontend#visual-testing--storybook)
Visual Testing – Storybook
We use Storybook for testing all of our React code. For static components, you simply add a story that renders the components with the props that you would like to test, and Storybook will record snapshots of it to ensure that it isn't changed unintentionally. If you would like to test an interaction with the component, then you can add an interaction test by specifying a `play` function for the story. For stories with an interaction test, a snapshot will be recorded of the end state of the component. We use [Chromatic](https://www.chromatic.com/)
to manage and compare snapshots in CI.
To learn more about testing components that fetch API data, refer to the [**Where to fetch data**](https://coder.com/docs/about/contributing/frontend#where-to-fetch-data)
section.
### [](https://coder.com/docs/about/contributing/frontend#what-should-i-test)
What should I test?
Choosing what to test is not always easy since there are a lot of flows and a lot of things can happen but these are a few indicators that can help you with that:
* Things that can block the user
* Reported bugs
* Regression issues
### [](https://coder.com/docs/about/contributing/frontend#tests-getting-too-slow)
Tests getting too slow
You may have observed that certain tests in our suite can be notably time-consuming. Sometimes it is because the test itself is complex and sometimes it is because of how the test is querying elements.
#### [](https://coder.com/docs/about/contributing/frontend#using-byrole-queries)
Using `ByRole` queries
One thing we figured out that was slowing down our tests was the use of `ByRole` queries because of how it calculates the role attribute for every element on the `screen`. You can read more about it on the links below:
* [https://stackoverflow.com/questions/69711888/react-testing-library-getbyrole-is-performing-extremely-slowly](https://stackoverflow.com/questions/69711888/react-testing-library-getbyrole-is-performing-extremely-slowly)
* [https://github.com/testing-library/dom-testing-library/issues/552#issuecomment-625172052](https://github.com/testing-library/dom-testing-library/issues/552#issuecomment-625172052)
Even with `ByRole` having performance issues we still want to use it but for that, we have to scope the "querying" area by using the `within` command. So instead of using `screen.getByRole("button")` directly we could do `within(form).getByRole("button")`.
❌ Not ideal. If the screen has a hundred or thousand elements it can be VERY slow.
`` `user.click(screen.getByRole("button"));` ``
✅ Better. We can limit the number of elements we are querying.
`` `const form = screen.getByTestId("form"); user.click(within(form).getByRole("button"));` ``
❌ Does not work
`` `import { getUpdateCheck } from "api/api" createMachine({ ... }, { services: { getUpdateCheck, }, })` ``
✅ It works
`` `import { getUpdateCheck } from "api/api" createMachine({ ... }, { services: { getUpdateCheck: () => getUpdateCheck(), }, })` ``
##### On this page
---
# Templates | Coder Docs
[Home](https://coder.com/docs "Home")
[Contributing](https://coder.com/docs/about/contributing/CONTRIBUTING "Contributing")
Templates
Learn how to create and contribute complete Coder workspace templates to the Coder Registry. Templates provide ready-to-use workspace configurations that users can deploy directly to create development environments.
[](https://coder.com/docs/about/contributing/templates#what-are-coder-templates)
What are Coder templates
---------------------------------------------------------------------------------------------------------
Coder templates are complete Terraform configurations that define entire workspace environments. Unlike modules (which are reusable components), templates provide full infrastructure definitions that include:
* Infrastructure setup (containers, VMs, cloud resources)
* Coder agent configuration
* Development tools and IDE integrations
* Networking and security settings
* Complete startup automation
Templates appear on the Coder Registry and can be deployed directly by users.
[](https://coder.com/docs/about/contributing/templates#prerequisites)
Prerequisites
-----------------------------------------------------------------------------------
Before contributing templates, ensure you have:
* Strong Terraform knowledge
* [Terraform installed](https://developer.hashicorp.com/terraform/install)
* [Coder CLI installed](https://coder.com/docs/install)
* Access to your target infrastructure platform (Docker, AWS, GCP, etc.)
* [Bun installed](https://bun.sh/docs/installation)
(for tooling)
[](https://coder.com/docs/about/contributing/templates#setup-your-development-environment)
Setup your development environment
-----------------------------------------------------------------------------------------------------------------------------
1. **Fork and clone the repository**:
`` `git clone https://github.com/your-username/registry.git cd registry` ``
2. **Install dependencies**:
`` `bun install` ``
3. **Understand the structure**:
`` `registry/[namespace]/ ├── templates/ # Your templates ├── .images/ # Namespace avatar and screenshots └── README.md # Namespace description` ``
[](https://coder.com/docs/about/contributing/templates#create-your-first-template)
Create your first template
-------------------------------------------------------------------------------------------------------------
### [](https://coder.com/docs/about/contributing/templates#1-set-up-your-namespace)
1\. Set up your namespace
If you're a new contributor, create your namespace directory:
`` `mkdir -p registry/[your-username] mkdir -p registry/[your-username]/.images` ``
Add your namespace avatar by downloading your GitHub avatar and saving it as `avatar.png`:
`` `curl -o registry/[your-username]/.images/avatar.png https://github.com/[your-username].png` ``
Create your namespace README at `registry/[your-username]/README.md`:
`` `--- display_name: "Your Name" bio: "Brief description of what you do" github: "your-username" avatar: "./.images/avatar.png" linkedin: "https://www.linkedin.com/in/your-username" website: "https://your-website.com" support_email: "[[email protected]](https://coder.com/cdn-cgi/l/email-protection) " status: "community" --- # Your Name Brief description of who you are and what you do.` ``
Note
The `linkedin`, `website`, and `support_email` fields are optional and can be omitted or left empty if not applicable.
### [](https://coder.com/docs/about/contributing/templates#2-create-your-template-directory)
2\. Create your template directory
Create a directory for your template:
`` `mkdir -p registry/[your-username]/templates/[template-name] cd registry/[your-username]/templates/[template-name]` ``
### [](https://coder.com/docs/about/contributing/templates#3-build-your-template)
3\. Build your template
Create `main.tf` with your complete Terraform configuration:
`` `terraform { required_providers { coder = { source = "coder/coder" } docker = { source = "kreuzwerker/docker" } } } # Coder data sources data "coder_workspace" "me" {} data "coder_workspace_owner" "me" {} # Coder agent resource "coder_agent" "main" { arch = "amd64" os = "linux" startup_script_timeout = 180 startup_script = <<-EOT set -e # Install development tools sudo apt-get update sudo apt-get install -y curl wget git # Additional setup here EOT } # Registry modules for IDEs and tools module "code-server" { source = "registry.coder.com/coder/code-server/coder" version = "~> 1.0" agent_id = coder_agent.main.id } module "git-clone" { source = "registry.coder.com/coder/git-clone/coder" version = "~> 1.0" agent_id = coder_agent.main.id url = "https://github.com/example/repo.git" } # Infrastructure resources resource "docker_image" "main" { name = "codercom/enterprise-base:ubuntu" } resource "docker_container" "workspace" { count = data.coder_workspace.me.start_count image = docker_image.main.name name = "coder-${data.coder_workspace_owner.me.name}-${data.coder_workspace.me.name}" command = ["sh", "-c", coder_agent.main.init_script] env = ["CODER_AGENT_TOKEN=${coder_agent.main.token}"] host { host = "host.docker.internal" ip = "host-gateway" } } # Metadata resource "coder_metadata" "workspace_info" { count = data.coder_workspace.me.start_count resource_id = docker_container.workspace[0].id item { key = "memory" value = "4 GB" } item { key = "cpu" value = "2 cores" } }` ``
### [](https://coder.com/docs/about/contributing/templates#4-document-your-template)
4\. Document your template
Create `README.md` with comprehensive documentation:
``` ``--- display_name: "Ubuntu Development Environment" description: "Complete Ubuntu workspace with VS Code, Git, and development tools" icon: "../../../../.icons/ubuntu.svg" verified: false tags: ["ubuntu", "docker", "vscode", "git"] --- # Ubuntu Development Environment A complete Ubuntu-based development workspace with VS Code, Git, and essential development tools pre-installed. ## Features - **Ubuntu 24.04 LTS** base image - **VS Code** with code-server for browser-based development - **Git** with automatic repository cloning - **Node.js** and **npm** for JavaScript development - **Python 3** with pip - **Docker** for containerized development ## Requirements - Docker runtime - 4 GB RAM minimum - 2 CPU cores recommended ## Usage 1. Deploy this template in your Coder instance 2. Create a new workspace from the template 3. Access VS Code through the workspace dashboard 4. Start developing in your fully configured environment ## Customization You can customize this template by: - Modifying the base image in `docker_image.main` - Adding additional registry modules - Adjusting resource allocations - Including additional development tools ## Troubleshooting **Issue**: Workspace fails to start **Solution**: Ensure Docker is running and accessible **Issue**: VS Code not accessible **Solution**: Check agent logs and ensure code-server module is properly configured`` ```
[](https://coder.com/docs/about/contributing/templates#template-best-practices)
Template best practices
-------------------------------------------------------------------------------------------------------
### [](https://coder.com/docs/about/contributing/templates#design-principles)
Design principles
* **Complete environments**: Templates should provide everything needed for development
* **Platform-specific**: Focus on one platform or use case per template
* **Production-ready**: Include proper error handling and resource management
* **User-friendly**: Provide clear documentation and sensible defaults
### [](https://coder.com/docs/about/contributing/templates#infrastructure-setup)
Infrastructure setup
* **Resource efficiency**: Use appropriate resource allocations
* **Network configuration**: Ensure proper connectivity for development tools
* **Security**: Follow security best practices for your platform
* **Scalability**: Design for multiple concurrent users
### [](https://coder.com/docs/about/contributing/templates#module-integration)
Module integration
Use registry modules for common features:
`` `# VS Code in browser module "code-server" { count = data.coder_workspace.me.start_count source = "registry.coder.com/coder/code-server/coder" version = "1.3.0" agent_id = coder_agent.example.id } # JetBrains IDEs module "jetbrains" { count = data.coder_workspace.me.start_count source = "registry.coder.com/coder/jetbrains/coder" version = "1.0.0" agent_id = coder_agent.example.id folder = "/home/coder/project" } # Git repository cloning module "git-clone" { count = data.coder_workspace.me.start_count source = "registry.coder.com/coder/git-clone/coder" version = "1.1.0" agent_id = coder_agent.example.id url = "https://github.com/coder/coder" base_dir = "~/projects/coder" } # File browser interface module "filebrowser" { count = data.coder_workspace.me.start_count source = "registry.coder.com/coder/filebrowser/coder" version = "1.1.1" agent_id = coder_agent.example.id } # Dotfiles management module "dotfiles" { count = data.coder_workspace.me.start_count source = "registry.coder.com/coder/dotfiles/coder" version = "1.2.0" agent_id = coder_agent.example.id }` ``
### [](https://coder.com/docs/about/contributing/templates#variables)
Variables
Provide meaningful customization options:
`` `variable "git_repo_url" { description = "Git repository to clone" type = string default = "" } variable "instance_type" { description = "Instance type for the workspace" type = string default = "t3.medium" } variable "workspace_name" { description = "Name for the workspace" type = string default = "dev-workspace" }` ``
[](https://coder.com/docs/about/contributing/templates#test-your-template)
Test your template
---------------------------------------------------------------------------------------------
### [](https://coder.com/docs/about/contributing/templates#local-testing)
Local testing
Test your template locally with Coder:
`` `# Navigate to your template directory cd registry/[your-username]/templates/[template-name] # Push to Coder for testing coder templates push test-template -d . # Create a test workspace coder create test-workspace --template test-template` ``
### [](https://coder.com/docs/about/contributing/templates#validation-checklist)
Validation checklist
Before submitting your template, verify:
* [ ] Template provisions successfully
* [ ] Agent connects properly
* [ ] All registry modules work correctly
* [ ] VS Code/IDEs are accessible
* [ ] Networking functions properly
* [ ] Resource metadata is accurate
* [ ] Documentation is complete and accurate
[](https://coder.com/docs/about/contributing/templates#contribute-to-existing-templates)
Contribute to existing templates
-------------------------------------------------------------------------------------------------------------------------
### [](https://coder.com/docs/about/contributing/templates#types-of-improvements)
Types of improvements
**Bug fixes**:
* Fix setup issues
* Resolve agent connectivity problems
* Correct resource configurations
**Feature additions**:
* Add new registry modules
* Include additional development tools
* Improve startup automation
**Platform updates**:
* Update base images or AMIs
* Adapt to new platform features
* Improve security configurations
**Documentation improvements**:
* Clarify setup requirements
* Add troubleshooting guides
* Improve usage examples
### [](https://coder.com/docs/about/contributing/templates#making-changes)
Making changes
1. **Test thoroughly**: Always test template changes in a Coder instance
2. **Maintain compatibility**: Ensure existing workspaces continue to function
3. **Document changes**: Update the README with new features or requirements
4. **Follow versioning**: Update version numbers for significant changes
5. **Modernize**: Use latest provider versions, best practices, and current software versions
[](https://coder.com/docs/about/contributing/templates#submit-your-contribution)
Submit your contribution
---------------------------------------------------------------------------------------------------------
1. **Create a feature branch**:
`` `git checkout -b feat/add-python-template` ``
2. **Test thoroughly**:
`` `# Test with Coder coder templates push test-python-template -d . coder create test-workspace --template test-python-template # Format code bun fmt` ``
3. **Commit with clear messages**:
`` `git add . git commit -m "Add Python development template with FastAPI setup"` ``
4. **Open a pull request**:
* Use a descriptive title
* Explain what the template provides
* Include testing instructions
* Reference any related issues
[](https://coder.com/docs/about/contributing/templates#template-examples)
Template examples
-------------------------------------------------------------------------------------------
### [](https://coder.com/docs/about/contributing/templates#docker-based-template)
Docker-based template
`` `# Simple Docker template resource "docker_container" "workspace" { count = data.coder_workspace.me.start_count image = "ubuntu:24.04" name = "coder-${data.coder_workspace_owner.me.name}-${data.coder_workspace.me.name}" command = ["sh", "-c", coder_agent.main.init_script] env = ["CODER_AGENT_TOKEN=${coder_agent.main.token}"] }` ``
### [](https://coder.com/docs/about/contributing/templates#aws-ec2-template)
AWS EC2 template
`` `# AWS EC2 template resource "aws_instance" "workspace" { count = data.coder_workspace.me.start_count ami = data.aws_ami.ubuntu.id instance_type = var.instance_type user_data = coder_agent.main.init_script tags = { Name = "coder-${data.coder_workspace_owner.me.name}-${data.coder_workspace.me.name}" } }` ``
### [](https://coder.com/docs/about/contributing/templates#kubernetes-template)
Kubernetes template
`` `# Kubernetes template resource "kubernetes_pod" "workspace" { count = data.coder_workspace.me.start_count metadata { name = "coder-${data.coder_workspace_owner.me.name}-${data.coder_workspace.me.name}" } spec { container { name = "workspace" image = "ubuntu:24.04" command = ["sh", "-c", coder_agent.main.init_script] env { name = "CODER_AGENT_TOKEN" value = coder_agent.main.token } } } }` ``
[](https://coder.com/docs/about/contributing/templates#common-issues-and-solutions)
Common issues and solutions
---------------------------------------------------------------------------------------------------------------
### [](https://coder.com/docs/about/contributing/templates#template-development)
Template development
**Issue**: Template fails to create resources **Solution**: Check Terraform syntax and provider configuration
**Issue**: Agent doesn't connect **Solution**: Verify agent token and network connectivity
### [](https://coder.com/docs/about/contributing/templates#documentation)
Documentation
**Issue**: Icon not displaying **Solution**: Verify icon path and file existence
### [](https://coder.com/docs/about/contributing/templates#platform-specific)
Platform-specific
**Issue**: Docker containers not starting **Solution**: Verify Docker daemon is running and accessible
**Issue**: Cloud resources failing **Solution**: Check credentials and permissions
[](https://coder.com/docs/about/contributing/templates#get-help)
Get help
-------------------------------------------------------------------------
* **Examples**: Review real-world examples from the [official Coder templates](https://registry.coder.com/contributors/coder?tab=templates)
:
* [AWS EC2 (Devcontainer)](https://registry.coder.com/templates/aws-devcontainer)
- AWS EC2 VMs with Envbuilder
* [Docker (Devcontainer)](https://registry.coder.com/templates/docker-devcontainer)
- Docker-in-Docker with Dev Containers integration
* [Kubernetes (Devcontainer)](https://registry.coder.com/templates/kubernetes-devcontainer)
- Kubernetes pods with Envbuilder
* [Docker Containers](https://registry.coder.com/templates/docker)
- Basic Docker container workspaces
* [AWS EC2 (Linux)](https://registry.coder.com/templates/aws-linux)
- AWS EC2 VMs for Linux development
* [Google Compute Engine (Linux)](https://registry.coder.com/templates/gcp-vm-container)
- GCP VM instances
* [Scratch](https://registry.coder.com/templates/scratch)
- Minimal starter template
* **Modules**: Browse available modules at [registry.coder.com/modules](https://registry.coder.com/modules)
* **Issues**: Open an issue at [github.com/coder/registry](https://github.com/coder/registry/issues)
* **Community**: Join the [Coder Discord](https://discord.gg/coder)
for questions
* **Documentation**: Check the [Coder docs](https://coder.com/docs)
for template guidance
[](https://coder.com/docs/about/contributing/templates#next-steps)
Next steps
-----------------------------------------------------------------------------
After creating your first template:
1. **Share with the community**: Announce your template on Discord or social media
2. **Gather feedback**: Iterate based on user suggestions and issues
3. **Create variations**: Build templates for different use cases or platforms
4. **Contribute to existing templates**: Help maintain and improve the ecosystem
Your templates help developers get productive faster by providing ready-to-use development environments. Happy contributing! 🚀
##### On this page
---
# Install Coder with Docker: Step-by-Step Guide | Coder Docs
[Home](https://coder.com/docs "Home")
[Install](https://coder.com/docs/install "Install")
Docker
You can install and run Coder using the official Docker images published on [GitHub Container Registry](https://github.com/coder/coder/pkgs/container/coder)
.
[](https://coder.com/docs/install/docker#requirements)
Requirements
-------------------------------------------------------------------
* Docker. See the [official installation documentation](https://docs.docker.com/install/)
.
* A Linux machine. For macOS devices, start Coder using the [standalone binary](https://coder.com/docs/install/cli)
.
* 2 CPU cores and 4 GB memory free on your machine.
[](https://coder.com/docs/install/docker#install-coder-via-docker-compose)
Install Coder via `docker compose`[](https://coder.com/docs/install/docker#install-coder-via-docker-run)
Install Coder via `docker run`
Coder publishes a [docker compose example](https://github.com/coder/coder/blob/main/compose.yaml)
which includes a PostgreSQL container and volume.
1. Make sure you have [Docker Compose](https://docs.docker.com/compose/install/)
installed.
2. Download the [`docker-compose.yaml`](https://github.com/coder/coder/blob/main/compose.yaml)
file.
3. Update `group_add:` in `docker-compose.yaml` with the `gid` of `docker` group. You can get the `docker` group `gid` by running the below command:
`` `getent group docker | cut -d: -f3` ``
4. Start Coder with `docker compose up`
5. Visit the web UI via the configured url.
6. Follow the on-screen instructions log in and create your first template and workspace
Coder configuration is defined via environment variables. Learn more about Coder's [configuration options](https://coder.com/docs/admin/setup)
.
[](https://coder.com/docs/install/docker#install-the-preview-release)
Install the preview release
-------------------------------------------------------------------------------------------------
Tip
We do not recommend using preview releases in production environments.
You can install and test a [preview release of Coder](https://github.com/coder/coder/pkgs/container/coder-preview)
by using the `coder-preview:latest` image tag. This image is automatically updated with the latest changes from the `main` branch.
Replace `ghcr.io/coder/coder:latest` in the `docker run` command in the [steps above](https://coder.com/docs/install/docker#install-coder-via-docker-run)
with `ghcr.io/coder/coder-preview:latest`.
[](https://coder.com/docs/install/docker#troubleshooting)
Troubleshooting
-------------------------------------------------------------------------
### [](https://coder.com/docs/install/docker#docker-based-workspace-is-stuck-in-connecting)
Docker-based workspace is stuck in "Connecting..."
Ensure you have an externally-reachable `CODER_ACCESS_URL` set. See [troubleshooting templates](https://coder.com/docs/admin/templates/troubleshooting)
for more steps.
### [](https://coder.com/docs/install/docker#permission-denied-while-trying-to-connect-to-the-docker-daemon-socket)
Permission denied while trying to connect to the Docker daemon socket
See Docker's official documentation to [Manage Docker as a non-root user](https://docs.docker.com/engine/install/linux-postinstall/#manage-docker-as-a-non-root-user)
### [](https://coder.com/docs/install/docker#i-cannot-add-docker-templates)
I cannot add Docker templates
Coder runs as a non-root user, we use `--group-add` to ensure Coder has permissions to manage Docker via `docker.sock`. If the host systems `/var/run/docker.sock` is not group writeable or does not belong to the `docker` group, the above may not work as-is.
### [](https://coder.com/docs/install/docker#i-cannot-add-cloud-based-templates)
I cannot add cloud-based templates
In order to use cloud-based templates (e.g. Kubernetes, AWS), you must have an external URL that users and workspaces will use to connect to Coder. For proof-of-concept deployments, you can use [Coder's tunnel](https://coder.com/docs/admin/setup#tunnel)
. For production deployments, we recommend setting an [access URL](https://coder.com/docs/admin/setup#access-url)
[](https://coder.com/docs/install/docker#next-steps)
Next steps
---------------------------------------------------------------
[Write a Template from Scratch\
\
Learn how to author Coder templates](https://coder.com/docs/tutorials/template-from-scratch)
##### On this page
---
# Rancher | Coder Docs
[Home](https://coder.com/docs "Home")
[Install](https://coder.com/docs/install "Install")
Rancher
You can deploy Coder on Rancher as a [Workload](https://ranchermanager.docs.rancher.com/getting-started/quick-start-guides/deploy-workloads/workload-ingress)
.
[](https://coder.com/docs/install/rancher#requirements)
Requirements
--------------------------------------------------------------------
* [SUSE Rancher Manager](https://ranchermanager.docs.rancher.com/getting-started/installation-and-upgrade/install-upgrade-on-a-kubernetes-cluster)
running Kubernetes (K8s) 1.19+ with [SUSE Rancher Prime distribution](https://documentation.suse.com/cloudnative/rancher-manager/latest/en/integrations/kubernetes-distributions.html)
(Rancher Manager 2.10+)
* Helm 3.5+ installed
* Workload Kubernetes cluster for Coder
[](https://coder.com/docs/install/rancher#overview)
Overview
------------------------------------------------------------
Installing Coder on Rancher involves four key steps:
1. Create a namespace for Coder
2. Set up PostgreSQL
3. Create a database connection secret
4. Install the Coder application via Rancher UI
[](https://coder.com/docs/install/rancher#create-a-namespace)
Create a namespace
--------------------------------------------------------------------------------
Create a namespace for the Coder control plane. In this tutorial, we call it `coder`:
`` `kubectl create namespace coder` ``
[](https://coder.com/docs/install/rancher#set-up-postgresql)
Set up PostgreSQL
------------------------------------------------------------------------------
Coder requires a PostgreSQL database to store deployment data. We recommend that you use a managed PostgreSQL service, but you can use an in-cluster PostgreSQL service for non-production deployments:
[](https://coder.com/docs/install/rancher#managed-postgresql-recommended)
Managed PostgreSQL (Recommended)[](https://coder.com/docs/install/rancher#in-cluster-postgresql-developmentpoc)
In-Cluster PostgreSQL (Development/PoC)
For production deployments, we recommend using a managed PostgreSQL service:
* [Google Cloud SQL](https://cloud.google.com/sql/docs/postgres/)
* [AWS RDS for PostgreSQL](https://aws.amazon.com/rds/postgresql/)
* [Azure Database for PostgreSQL](https://docs.microsoft.com/en-us/azure/postgresql/)
* [DigitalOcean Managed PostgreSQL](https://www.digitalocean.com/products/managed-databases-postgresql)
Ensure that your PostgreSQL service:
* Is running and accessible from your cluster
* Is in the same network/project as your cluster
* Has proper credentials and a database created for Coder
[](https://coder.com/docs/install/rancher#create-the-database-connection-secret)
Create the database connection secret
----------------------------------------------------------------------------------------------------------------------
Create a Kubernetes secret with your PostgreSQL connection URL:
`` `kubectl create secret generic coder-db-url -n coder \ --from-literal=url="postgres://coder:[[email protected]](https://coder.com/cdn-cgi/l/email-protection) :5432/coder?sslmode=disable"` ``
Important
If you're using a managed PostgreSQL service, replace the connection URL with your specific database credentials.
[](https://coder.com/docs/install/rancher#install-coder-through-the-rancher-ui)
Install Coder through the Rancher UI
--------------------------------------------------------------------------------------------------------------------

1. In the Rancher Manager console, select your target Kubernetes cluster for Coder.
2. Navigate to **Apps** > **Charts**
3. From the dropdown menu, select **Partners** and search for `Coder`
4. Select **Coder**, then **Install**
5. Select the `coder` namespace you created earlier and check **Customize Helm options before install**.
Select **Next**
6. On the configuration screen, select **Edit YAML** and enter your Coder configuration settings:
Example values.yaml configuration
`` `coder: # Environment variables for Coder env: - name: CODER_PG_CONNECTION_URL valueFrom: secretKeyRef: name: coder-db-url key: url # For production, uncomment and set your access URL # - name: CODER_ACCESS_URL # value: "https://coder.example.com" # For TLS configuration (uncomment if needed) #tls: # secretNames: # - my-tls-secret-name` ``
For available configuration options, refer to the [Helm chart documentation](https://github.com/coder/coder/blob/main/helm#readme)
or [values.yaml file](https://github.com/coder/coder/blob/main/helm/coder/values.yaml)
.
7. Select a Coder version:
* **Mainline**: `2.29.1`
* **Stable**: `2.28.6`
Learn more about release channels in the [Releases documentation](https://coder.com/docs/install/releases)
.
8. Select **Next** when your configuration is complete.
9. On the **Supply additional deployment options** screen:
1. Accept the default settings
2. Select **Install**
10. A Helm install output shell will be displayed and indicates the installation status.
[](https://coder.com/docs/install/rancher#manage-your-rancher-coder-deployment)
Manage your Rancher Coder deployment
--------------------------------------------------------------------------------------------------------------------
To update or manage your Coder deployment later:
1. Navigate to **Apps** > **Installed Apps** in the Rancher UI.
2. Find and select Coder.
3. Use the options in the **⋮** menu for upgrade, rollback, or other operations.
[](https://coder.com/docs/install/rancher#next-steps)
Next steps
----------------------------------------------------------------
[Write a Template from Scratch\
\
Learn how to author Coder templates](https://coder.com/docs/tutorials/template-from-scratch)
##### On this page
---
# Backend | Coder Docs
[Home](https://coder.com/docs "Home")
[Contributing](https://coder.com/docs/about/contributing/CONTRIBUTING "Contributing")
Backend
This guide is designed to support both Coder engineers and community contributors in understanding our backend systems and getting started with development.
Coder’s backend powers the core infrastructure behind workspace provisioning, access control, and the overall developer experience. As the backbone of our platform, it plays a critical role in enabling reliable and scalable remote development environments.
The purpose of this guide is to help you:
* Understand how the various backend components fit together.
* Navigate the codebase with confidence and adhere to established best practices.
* Contribute meaningful changes - whether you're fixing bugs, implementing features, or reviewing code.
Need help or have questions? Join the conversation on our [Discord server](https://discord.com/invite/coder)
— we’re always happy to support contributors.
[](https://coder.com/docs/about/contributing/backend#platform-architecture)
Platform Architecture
-------------------------------------------------------------------------------------------------
To understand how the backend fits into the broader system, we recommend reviewing the following resources:
* [General Concepts](https://coder.com/docs/admin/infrastructure/validated-architectures#general-concepts)
: Essential concepts and language used to describe how Coder is structured and operated.
* [Architecture](https://coder.com/docs/admin/infrastructure/architecture)
: A high-level overview of the infrastructure layout, key services, and how components interact.
These sections provide the necessary context for navigating and contributing to the backend effectively.
[](https://coder.com/docs/about/contributing/backend#tech-stack)
Tech Stack
---------------------------------------------------------------------------
Coder's backend is built using a collection of robust, modern Go libraries and internal packages. Familiarity with these technologies will help you navigate the codebase and contribute effectively.
### [](https://coder.com/docs/about/contributing/backend#core-libraries--frameworks)
Core Libraries & Frameworks
* [go-chi/chi](https://github.com/go-chi/chi)
: lightweight HTTP router for building RESTful APIs in Go
* [golang-migrate/migrate](https://github.com/golang-migrate/migrate)
: manages database schema migrations across environments
* [coder/terraform-config-inspect](https://github.com/coder/terraform-config-inspect)
_(forked)_: used for parsing and analyzing Terraform configurations, forked to include [PR #74](https://github.com/hashicorp/terraform-config-inspect/pull/74)
* [coder/pq](https://github.com/coder/pq)
_(forked)_: PostgreSQL driver forked to support rotating authentication tokens via `driver.Connector`
* [coder/tailscale](https://github.com/coder/tailscale)
_(forked)_: enables secure, peer-to-peer connectivity, forked to apply internal patches pending upstreaming
* [coder/wireguard-go](https://github.com/coder/wireguard-go)
_(forked)_: WireGuard networking implementation, forked to fix a data race and adopt the latest gVisor changes
* [coder/ssh](https://github.com/coder/ssh)
_(forked)_: customized SSH server based on `gliderlabs/ssh`, forked to include Tailscale-specific patches and avoid complex subpath dependencies
* [coder/bubbletea](https://github.com/coder/bubbletea)
_(forked)_: terminal UI framework for CLI apps, forked to remove an `init()` function that interfered with web terminal output
### [](https://coder.com/docs/about/contributing/backend#coder-libraries)
Coder libraries
* [coder/terraform-provider-coder](https://github.com/coder/terraform-provider-coder)
: official Terraform provider for managing Coder resources via infrastructure-as-code
* [coder/websocket](https://github.com/coder/websocket)
: minimal WebSocket library for real-time communication
* [coder/serpent](https://github.com/coder/serpent)
: CLI framework built on `cobra`, used for large, complex CLIs
* [coder/guts](https://github.com/coder/guts)
: generates TypeScript types from Go for shared type definitions
* [coder/wgtunnel](https://github.com/coder/wgtunnel)
: WireGuard tunnel server for secure backend networking
[](https://coder.com/docs/about/contributing/backend#repository-structure)
Repository Structure
-----------------------------------------------------------------------------------------------
The Coder backend is organized into multiple packages and directories, each with a specific purpose. Here's a high-level overview of the most important ones:
* [agent](https://github.com/coder/coder/tree/main/agent)
: core logic of a workspace agent, supports DevContainers, remote SSH, startup/shutdown script execution. Protobuf definitions for DRPC communication with `coderd` are kept in [proto](https://github.com/coder/coder/tree/main/agent/proto)
.
* [cli](https://github.com/coder/coder/tree/main/cli)
: CLI interface for `coder` command built on [coder/serpent](https://github.com/coder/serpent)
. Input controls are defined in [cliui](https://github.com/coder/coder/tree/docs-backend-contrib-guide/cli/cliui)
, and [testdata](https://github.com/coder/coder/tree/docs-backend-contrib-guide/cli/testdata)
contains golden files for common CLI calls
* [cmd](https://github.com/coder/coder/tree/main/cmd)
: entry points for CLI and services, including `coderd`
* [coderd](https://github.com/coder/coder/tree/main/coderd)
: the main API server implementation with [chi](https://github.com/go-chi/chi)
endpoints
* [audit](https://github.com/coder/coder/tree/main/coderd/audit)
: audit log logic, defines target resources, actions and extra fields
* [autobuild](https://github.com/coder/coder/tree/main/coderd/autobuild)
: core logic of the workspace autobuild executor, periodically evaluates workspaces for next transition actions
* [httpmw](https://github.com/coder/coder/tree/main/coderd/httpmw)
: HTTP middlewares mainly used to extract parameters from HTTP requests (e.g. current user, template, workspace, OAuth2 account, etc.) and storing them in the request context
* [prebuilds](https://github.com/coder/coder/tree/main/coderd/prebuilds)
: common interfaces for prebuild workspaces, feature implementation is in [enterprise/prebuilds](https://github.com/coder/coder/tree/main/enterprise/coderd/prebuilds)
* [provisionerdserver](https://github.com/coder/coder/tree/main/coderd/provisionerdserver)
: DRPC server for [provisionerd](https://github.com/coder/coder/tree/main/provisionerd)
instances, used to validate and extract Terraform data and resources, and store them in the database.
* [rbac](https://github.com/coder/coder/tree/main/coderd/rbac)
: RBAC engine for `coderd`, including authz layer, role definitions and custom roles. Built on top of [Open Policy Agent](https://github.com/open-policy-agent/opa)
and Rego policies.
* [telemetry](https://github.com/coder/coder/tree/main/coderd/telemetry)
: records a snapshot with various workspace data for telemetry purposes. Once recorded the reporter sends it to the configured telemetry endpoint.
* [tracing](https://github.com/coder/coder/tree/main/coderd/tracing)
: extends telemetry with tracing data consistent with [OpenTelemetry specification](https://github.com/open-telemetry/opentelemetry-specification/blob/main/specification/protocol/exporter.md)
* [workspaceapps](https://github.com/coder/coder/tree/main/coderd/workspaceapps)
: core logic of a secure proxy to expose workspace apps deployed in a workspace
* [wsbuilder](https://github.com/coder/coder/tree/main/coderd/wsbuilder)
: wrapper for business logic of creating a workspace build. It encapsulates all database operations required to insert a build record in a transaction.
* [database](https://github.com/coder/coder/tree/main/coderd/database)
: schema migrations, query logic, in-memory database, etc.
* [db2sdk](https://github.com/coder/coder/tree/main/coderd/database/db2sdk)
: translation between database structures and [codersdk](https://github.com/coder/coder/tree/main/codersdk)
objects used by coderd API.
* [dbauthz](https://github.com/coder/coder/tree/main/coderd/database/dbauthz)
: AuthZ wrappers for database queries, ideally, every query should verify first if the accessor is eligible to see the query results.
* [dbfake](https://github.com/coder/coder/tree/main/coderd/database/dbfake)
: helper functions to quickly prepare the initial database state for testing purposes (e.g. create N healthy workspaces and templates), operates on higher level than [dbgen](https://github.com/coder/coder/tree/main/coderd/database/dbgen)
* [dbgen](https://github.com/coder/coder/tree/main/coderd/database/dbgen)
: helper functions to insert raw records to the database store, used for testing purposes
* [dbmock](https://github.com/coder/coder/tree/main/coderd/database/dbmock)
: a store wrapper for database queries, useful to verify if the function has been called, used for testing purposes
* [dbpurge](https://github.com/coder/coder/tree/main/coderd/database/dbpurge)
: simple wrapper for periodic database cleanup operations
* [migrations](https://github.com/coder/coder/tree/main/coderd/database/migrations)
: an ordered list of up/down database migrations, use `./create_migration.sh my_migration_name` to modify the database schema
* [pubsub](https://github.com/coder/coder/tree/main/coderd/database/pubsub)
: PubSub implementation using PostgreSQL and in-memory drop-in replacement
* [queries](https://github.com/coder/coder/tree/main/coderd/database/queries)
: contains SQL files with queries, `sqlc` compiles them to [Go functions](https://github.com/coder/coder/blob/docs-backend-contrib-guide/coderd/database/queries.sql.go)
* [sqlc.yaml](https://github.com/coder/coder/tree/main/coderd/database/sqlc.yaml)
: defines mappings between SQL types and custom Go structures
* [codersdk](https://github.com/coder/coder/tree/main/codersdk)
: user-facing API entities used by CLI and site to communicate with `coderd` endpoints
* [dogfood](https://github.com/coder/coder/tree/main/dogfood)
: Terraform definition of the dogfood cluster deployment
* [enterprise](https://github.com/coder/coder/tree/main/enterprise)
: enterprise-only features, notice similar file structure to repository root (`audit`, `cli`, `cmd`, `coderd`, etc.)
* [coderd](https://github.com/coder/coder/tree/main/enterprise/coderd)
* [prebuilds](https://github.com/coder/coder/tree/main/enterprise/coderd/prebuilds)
: core logic of prebuilt workspaces - reconciliation loop
* [provisioner](https://github.com/coder/coder/tree/main/provisioner)
: supported implementation of provisioners, Terraform and "echo" (for testing purposes)
* [provisionerd](https://github.com/coder/coder/tree/main/provisionerd)
: core logic of provisioner runner to interact provisionerd server, depending on a job acquired it calls template import, dry run or a workspace build
* [pty](https://github.com/coder/coder/tree/main/pty)
: terminal emulation for agent shell
* [support](https://github.com/coder/coder/tree/main/support)
: compile a support bundle with diagnostics
* [tailnet](https://github.com/coder/coder/tree/main/tailnet)
: core logic of Tailnet controller to maintain DERP maps, coordinate connections with agents and peers
* [vpn](https://github.com/coder/coder/tree/main/vpn)
: Coder Desktop (VPN) and tunneling components
[](https://coder.com/docs/about/contributing/backend#testing)
Testing
---------------------------------------------------------------------
The Coder backend includes a rich suite of unit and end-to-end tests. A variety of helper utilities are used throughout the codebase to make testing easier, more consistent, and closer to real behavior.
### [](https://coder.com/docs/about/contributing/backend#clitest)
[clitest](https://github.com/coder/coder/tree/main/cli/clitest)
* Spawns an in-memory `serpent.Command` instance for unit testing
* Configures an authorized `codersdk` client
* Once a `serpent.Invocation` is created, tests can execute commands as if invoked by a real user
### [](https://coder.com/docs/about/contributing/backend#ptytest)
[ptytest](https://github.com/coder/coder/tree/main/pty/ptytest)
* `ptytest` attaches to a `serpent.Invocation` and simulates TTY input/output
* `pty` provides matchers and "write" operations for interacting with pseudo-terminals
### [](https://coder.com/docs/about/contributing/backend#coderdtest)
[coderdtest](https://github.com/coder/coder/tree/main/coderd/coderdtest)
* Provides shortcuts to spin up an in-memory `coderd` instance
* Can start an embedded provisioner daemon
* Supports multi-user testing via `CreateFirstUser` and `CreateAnotherUser`
* Includes "busy wait" helpers like `AwaitTemplateVersionJobCompleted`
* [oidctest](https://github.com/coder/coder/tree/main/coderd/coderdtest/oidctest)
can start a fake OIDC provider
### [](https://coder.com/docs/about/contributing/backend#testutil)
[testutil](https://github.com/coder/coder/tree/main/testutil)
* General-purpose testing utilities, including:
* [chan.go](https://github.com/coder/coder/blob/main/testutil/chan.go)
: helpers for sending/receiving objects from channels (`TrySend`, `RequireReceive`, etc.)
* [duration.go](https://github.com/coder/coder/blob/main/testutil/duration.go)
: set timeouts for test execution
* [eventually.go](https://github.com/coder/coder/blob/main/testutil/eventually.go)
: repeatedly poll for a condition using a ticker
* [port.go](https://github.com/coder/coder/blob/main/testutil/port.go)
: select a free random port
* [prometheus.go](https://github.com/coder/coder/blob/main/testutil/prometheus.go)
: validate Prometheus metrics with expected values
* [pty.go](https://github.com/coder/coder/blob/main/testutil/pty.go)
: read output from a terminal until a condition is met
### [](https://coder.com/docs/about/contributing/backend#dbtestutil)
[dbtestutil](https://github.com/coder/coder/tree/main/coderd/database/dbtestutil)
* Allows choosing between real and in-memory database backends for tests
* `WillUsePostgres` is useful for skipping tests in CI environments that don't run Postgres
### [](https://coder.com/docs/about/contributing/backend#quartz)
[quartz](https://github.com/coder/quartz/tree/main)
* Provides a mockable clock or ticker interface
* Allows manual time advancement
* Useful for testing time-sensitive or timeout-related logic
[](https://coder.com/docs/about/contributing/backend#quiz)
Quiz
---------------------------------------------------------------
Try to find answers to these questions before jumping into implementation work — having a solid understanding of how Coder works will save you time and help you contribute effectively.
1. When you create a template, what does that do exactly?
2. When you create a workspace, what exactly happens?
3. How does the agent get the required information to run?
4. How are provisioner jobs run?
[](https://coder.com/docs/about/contributing/backend#recipes)
Recipes
---------------------------------------------------------------------
### [](https://coder.com/docs/about/contributing/backend#adding-database-migrations-and-fixtures)
Adding database migrations and fixtures
#### [](https://coder.com/docs/about/contributing/backend#database-migrations)
Database migrations
Database migrations are managed with [`migrate`](https://github.com/golang-migrate/migrate)
.
To add new migrations, use the following command:
`` `./coderd/database/migrations/create_migration.sh my name /home/coder/src/coder/coderd/database/migrations/000070_my_name.up.sql /home/coder/src/coder/coderd/database/migrations/000070_my_name.down.sql` ``
Then write queries into the generated `.up.sql` and `.down.sql` files and commit them into the repository. The down script should make a best-effort to retain as much data as possible.
Run `make gen` to generate models.
#### [](https://coder.com/docs/about/contributing/backend#database-fixtures-for-testing-migrations)
Database fixtures (for testing migrations)
There are two types of fixtures that are used to test that migrations don't break existing Coder deployments:
* Partial fixtures [`migrations/testdata/fixtures`](https://coder.com/docs/coderd/database/migrations/testdata/fixtures)
* Full database dumps [`migrations/testdata/full_dumps`](https://coder.com/docs/coderd/database/migrations/testdata/full_dumps)
Both types behave like database migrations (they also [`migrate`](https://github.com/golang-migrate/migrate)
). Their behavior mirrors Coder migrations such that when migration number `000022` is applied, fixture `000022` is applied afterwards.
Partial fixtures are used to conveniently add data to newly created tables so that we can ensure that this data is migrated without issue.
Full database dumps are for testing the migration of fully-fledged Coder deployments. These are usually done for a specific version of Coder and are often fixed in time. A full database dump may be necessary when testing the migration of multiple features or complex configurations.
To add a new partial fixture, run the following command:
`` `./coderd/database/migrations/create_fixture.sh my fixture /home/coder/src/coder/coderd/database/migrations/testdata/fixtures/000070_my_fixture.up.sql` ``
Then add some queries to insert data and commit the file to the repo. See [`000024_example.up.sql`](https://coder.com/docs/coderd/database/migrations/testdata/fixtures/000024_example.up.sql)
for an example.
To create a full dump, run a fully fledged Coder deployment and use it to generate data in the database. Then shut down the deployment and take a snapshot of the database.
`` `mkdir -p coderd/database/migrations/testdata/full_dumps/v0.12.2 && cd $_ pg_dump "postgres://coder@localhost:..." -a --inserts >000069_dump_v0.12.2.up.sql` ``
Make sure sensitive data in the dump is desensitized, for instance names, emails, OAuth tokens and other secrets. Then commit the dump to the project.
To find out what the latest migration for a version of Coder is, use the following command:
`` `git ls-files v0.12.2 -- coderd/database/migrations/*.up.sql` ``
This helps in naming the dump (e.g. `000069` above).
##### On this page
---
# Install Coder on Kubernetes with Helm | Coder Docs
[Home](https://coder.com/docs "Home")
[Install](https://coder.com/docs/install "Install")
Kubernetes
You can install Coder on Kubernetes (K8s) using Helm. We run on most Kubernetes distributions, including [OpenShift](https://coder.com/docs/install/openshift)
.
[](https://coder.com/docs/install/kubernetes#requirements)
Requirements
-----------------------------------------------------------------------
* Kubernetes cluster running K8s 1.19+
* [Helm](https://helm.sh/docs/intro/install/)
3.5+ installed on your local machine
[](https://coder.com/docs/install/kubernetes#1-create-a-namespace)
1\. Create a namespace
-----------------------------------------------------------------------------------------
Create a namespace for the Coder control plane. In this tutorial, we'll call it `coder`.
`` `kubectl create namespace coder` ``
[](https://coder.com/docs/install/kubernetes#2-create-a-postgresql-instance)
2\. Create a PostgreSQL instance
-------------------------------------------------------------------------------------------------------------
Coder does not manage a database server for you. This is required for storing data about your Coder deployment and resources.
### [](https://coder.com/docs/install/kubernetes#managed-postgresql-recommended)
Managed PostgreSQL (recommended)
If you're in a public cloud such as [Google Cloud](https://cloud.google.com/sql/docs/postgres/)
, [AWS](https://aws.amazon.com/rds/postgresql/)
, [Azure](https://docs.microsoft.com/en-us/azure/postgresql/)
, or [DigitalOcean](https://www.digitalocean.com/products/managed-databases-postgresql)
, you can use the managed PostgreSQL offerings they provide. Make sure that the PostgreSQL service is running and accessible from your cluster. It should be in the same network, same project, etc.
### [](https://coder.com/docs/install/kubernetes#in-cluster-postgresql-for-proof-of-concepts)
In-Cluster PostgreSQL (for proof of concepts)
You can install Postgres manually on your cluster using the [Bitnami PostgreSQL Helm chart](https://github.com/bitnami/charts/tree/master/bitnami/postgresql#readme)
. There are some [helpful guides](https://phoenixnap.com/kb/postgresql-kubernetes)
on the internet that explain sensible configurations for this chart. Example:
`` `# Install PostgreSQL helm repo add bitnami https://charts.bitnami.com/bitnami helm install postgresql bitnami/postgresql \ --namespace coder \ --set image.repository=bitnamilegacy/postgresql \ --set auth.username=coder \ --set auth.password=coder \ --set auth.database=coder \ --set primary.persistence.size=10Gi` ``
The cluster-internal DB URL for the above database is:
`` `postgres://coder:[[email protected]](https://coder.com/cdn-cgi/l/email-protection) :5432/coder?sslmode=disable` ``
You can optionally use the [Postgres operator](https://github.com/zalando/postgres-operator)
to manage PostgreSQL deployments on your Kubernetes cluster.
[](https://coder.com/docs/install/kubernetes#3-create-the-postgresql-secret)
3\. Create the PostgreSQL secret
-------------------------------------------------------------------------------------------------------------
Create a secret with the PostgreSQL database URL string. In the case of the self-managed PostgreSQL, the address will be:
`` `kubectl create secret generic coder-db-url -n coder \ --from-literal=url="postgres://coder:[[email protected]](https://coder.com/cdn-cgi/l/email-protection) :5432/coder?sslmode=disable"` ``
[](https://coder.com/docs/install/kubernetes#4-install-coder-with-helm)
4\. Install Coder with Helm
---------------------------------------------------------------------------------------------------
`` `helm repo add coder-v2 https://helm.coder.com/v2` ``
Create a `values.yaml` with the configuration settings you'd like for your deployment. For example:
``` ``coder: # You can specify any environment variables you'd like to pass to Coder # here. Coder consumes environment variables listed in # `coder server --help`, and these environment variables are also passed # to the workspace provisioner (so you can consume them in your Terraform # templates for auth keys etc.). # # Please keep in mind that you should not set `CODER_HTTP_ADDRESS`, # `CODER_TLS_ENABLE`, `CODER_TLS_CERT_FILE` or `CODER_TLS_KEY_FILE` as # they are already set by the Helm chart and will cause conflicts. env: - name: CODER_PG_CONNECTION_URL valueFrom: secretKeyRef: # You'll need to create a secret called coder-db-url with your # Postgres connection URL like: # postgres://coder:password@postgres:5432/coder?sslmode=disable name: coder-db-url key: url # For production deployments, we recommend configuring your own GitHub # OAuth2 provider and disabling the default one. - name: CODER_OAUTH2_GITHUB_DEFAULT_PROVIDER_ENABLE value: "false" # (Optional) For production deployments the access URL should be set. # If you're just trying Coder, access the dashboard via the service IP. # - name: CODER_ACCESS_URL # value: "https://coder.example.com" #tls: # secretNames: # - my-tls-secret-name`` ```
You can view our [Helm README](https://github.com/coder/coder/blob/main/helm/coder#readme)
for details on the values that are available, or you can view the [values.yaml](https://github.com/coder/coder/blob/main/helm/coder/values.yaml)
file directly.
We support two release channels: mainline and stable - read the [Releases](https://coder.com/docs/install/releases)
page to learn more about which best suits your team.
* **Mainline** Coder release:
* **Chart Registry**
`` `helm install coder coder-v2/coder \ --namespace coder \ --values values.yaml \ --version 2.29.1` ``
* **OCI Registry**
`` `helm install coder oci://ghcr.io/coder/chart/coder \ --namespace coder \ --values values.yaml \ --version 2.29.1` ``
* **Stable** Coder release:
* **Chart Registry**
`` `helm install coder coder-v2/coder \ --namespace coder \ --values values.yaml \ --version 2.28.6` ``
* **OCI Registry**
`` `helm install coder oci://ghcr.io/coder/chart/coder \ --namespace coder \ --values values.yaml \ --version 2.28.6` ``
You can watch Coder start up by running `kubectl get pods -n coder`. Once Coder has started, the `coder-*` pods should enter the `Running` state.
[](https://coder.com/docs/install/kubernetes#5-log-in-to-coder-)
5\. Log in to Coder 🎉
---------------------------------------------------------------------------------------
Use `kubectl get svc -n coder` to get the IP address of the LoadBalancer. Visit this in the browser to set up your first account.
If you do not have a domain, you should set `CODER_ACCESS_URL` to this URL in the Helm chart and upgrade Coder (see below). This allows workspaces to connect to the proper Coder URL.
[](https://coder.com/docs/install/kubernetes#upgrading-coder-via-helm)
Upgrading Coder via Helm
-----------------------------------------------------------------------------------------------
To upgrade Coder in the future or change values, you can run the following command:
`` `helm repo update helm upgrade coder coder-v2/coder \ --namespace coder \ -f values.yaml` ``
[](https://coder.com/docs/install/kubernetes#coder-observability-chart)
Coder Observability Chart
-------------------------------------------------------------------------------------------------
Use the [Observability Helm chart](https://github.com/coder/observability)
for a pre-built set of dashboards to monitor your control plane over time. It includes Grafana, Prometheus, Loki, and Alert Manager out-of-the-box, and can be deployed on your existing Grafana instance.
We recommend that all administrators deploying on Kubernetes set the observability bundle up with the control plane from the start. For installation instructions, visit the [observability repository](https://github.com/coder/observability?tab=readme-ov-file#installation)
.
[](https://coder.com/docs/install/kubernetes#kubernetes-security-reference)
Kubernetes Security Reference
---------------------------------------------------------------------------------------------------------
Below are common requirements we see from our enterprise customers when deploying an application in Kubernetes. This is intended to serve as a reference, and not all security requirements may apply to your business.
1. **All container images must be sourced from an internal container registry.**
* Control plane - To pull the control plane image from the appropriate registry, [update this Helm chart value](https://github.com/coder/coder/blob/f57ce97b5aadd825ddb9a9a129bb823a3725252b/helm/coder/values.yaml#L43-L50)
.
* Workspaces - To pull the workspace image from your registry, [update the Terraform template code here](https://github.com/coder/coder/blob/f57ce97b5aadd825ddb9a9a129bb823a3725252b/examples/templates/kubernetes/main.tf#L271)
. This assumes your cluster nodes are authenticated to pull from the internal registry.
2. **All containers must run as non-root user**
* Control plane - Our control plane pod [runs as non-root by default](https://github.com/coder/coder/blob/f57ce97b5aadd825ddb9a9a129bb823a3725252b/helm/coder/values.yaml#L124-L127)
.
* Workspaces - Workspace pod UID is [set in the Terraform template here](https://github.com/coder/coder/blob/f57ce97b5aadd825ddb9a9a129bb823a3725252b/examples/templates/kubernetes/main.tf#L274-L276)
, and are not required to run as `root`.
3. **Containers cannot run privileged**
* Coder's control plane does not run as privileged. [We disable](https://github.com/coder/coder/blob/f57ce97b5aadd825ddb9a9a129bb823a3725252b/helm/coder/values.yaml#L141)
`allowPrivilegeEscalation` [by default](https://github.com/coder/coder/blob/f57ce97b5aadd825ddb9a9a129bb823a3725252b/helm/coder/values.yaml#L141)
.
* Workspace pods do not require any elevated privileges, with the exception of our `envbox` workspace template (used for docker-in-docker workspaces, not required).
4. **Containers cannot mount host filesystems**
* Both the control plane and workspace containers do not require any host filesystem mounts.
5. **Containers cannot attach to host network**
* Both the control plane and workspaces use the Kubernetes networking layer by default, and do not require host network access.
6. **All Kubernetes objects must define resource requests/limits**
* Both the control plane and workspaces set resource request/limits by default.
7. **All Kubernetes objects must define liveness and readiness probes**
* Control plane - The control plane Deployment has liveness and readiness probes [configured by default here](https://github.com/coder/coder/blob/f57ce97b5aadd825ddb9a9a129bb823a3725252b/helm/coder/templates/_coder.tpl#L98-L107)
.
* Workspaces - the Kubernetes Deployment template does not configure liveness/readiness probes for the workspace, but this can be added to the Terraform template, and is supported.
[](https://coder.com/docs/install/kubernetes#load-balancing-considerations)
Load balancing considerations
---------------------------------------------------------------------------------------------------------
### [](https://coder.com/docs/install/kubernetes#aws)
AWS
If you are deploying Coder on AWS EKS and service is set to `LoadBalancer`, AWS will default to the Classic load balancer. The load balancer external IP will be stuck in a pending status unless sessionAffinity is set to None.
`` `coder: service: type: LoadBalancer sessionAffinity: None` ``
AWS recommends a Network load balancer in lieu of the Classic load balancer. Use the following `values.yaml` settings to request a Network load balancer:
`` `coder: service: externalTrafficPolicy: Local sessionAffinity: None annotations: { service.beta.kubernetes.io/aws-load-balancer-type: "nlb" }` ``
By default, Coder will set the `externalTrafficPolicy` to `Cluster` which will mask client IP addresses in the Audit log. To preserve the source IP, you can either set this value to `Local`, or pass through the client IP via the X-Forwarded-For header. To configure the latter, set the following environment variables:
`` `coder: env: - name: CODER_PROXY_TRUSTED_HEADERS value: X-Forwarded-For - name: CODER_PROXY_TRUSTED_ORIGINS value: 10.0.0.1/8 # this will be the CIDR range of your Load Balancer IP address` ``
### [](https://coder.com/docs/install/kubernetes#azure)
Azure
Certain enterprise environments require the [Azure Application Gateway](https://learn.microsoft.com/en-us/azure/application-gateway/ingress-controller-overview)
. The Application Gateway supports:
* Websocket traffic (required for workspace connections)
* TLS termination
Follow our doc on [how to deploy Coder on Azure with an Application Gateway](https://coder.com/docs/install/kubernetes/kubernetes-azure-app-gateway)
for an example.
[](https://coder.com/docs/install/kubernetes#troubleshooting)
Troubleshooting
-----------------------------------------------------------------------------
You can view Coder's logs by getting the pod name from `kubectl get pods` and then running `kubectl logs `. You can also view these logs in your Cloud's log management system if you are using managed Kubernetes.
### [](https://coder.com/docs/install/kubernetes#kubernetes-based-workspace-is-stuck-in-connecting)
Kubernetes-based workspace is stuck in "Connecting..."
Ensure you have an externally-reachable `CODER_ACCESS_URL` set in your helm chart. If you do not have a domain set up, this should be the IP address of Coder's LoadBalancer (`kubectl get svc -n coder`).
See [troubleshooting templates](https://coder.com/docs/admin/templates/troubleshooting)
for more steps.
[](https://coder.com/docs/install/kubernetes#next-steps)
Next steps
-------------------------------------------------------------------
[Write a Template from Scratch\
\
Learn how to author Coder templates](https://coder.com/docs/tutorials/template-from-scratch)
##### On this page
---
# User Guides | Coder Docs
[Home](https://coder.com/docs "Home")
User Guides
These guides contain information on workspace management, workspace access via IDEs, environment personalization, and workspace scheduling.
These are intended for end-user flows only. If you are an administrator, please refer to our docs on configuring [templates](https://coder.com/docs/admin)
or the [control plane](https://coder.com/docs/admin)
.
Check out [Dev Containers integration](https://coder.com/docs/user-guides/devcontainers)
for running containerized development environments in your Coder workspace.
[##### Access Workspaces\
\
Connect to your Coder workspaces](https://coder.com/docs/user-guides/workspace-access)
[##### Coder Desktop\
\
Transform remote workspaces into seamless local development environments with no port forwarding required](https://coder.com/docs/user-guides/desktop)
[##### Workspace Management\
\
Manage workspaces](https://coder.com/docs/user-guides/workspace-management)
[##### Workspace Sharing\
\
Sharing workspaces](https://coder.com/docs/user-guides/shared-workspaces)
[##### Workspace Scheduling\
\
Cost control with workspace schedules](https://coder.com/docs/user-guides/workspace-scheduling)
[##### Workspace Lifecycle\
\
A guide to the workspace lifecycle, from creation and status through stopping and deletion.](https://coder.com/docs/user-guides/workspace-lifecycle)
[##### Dev Containers\
\
Run containerized development environments in your Coder workspace using the dev containers specification.](https://coder.com/docs/user-guides/devcontainers)
[##### Dotfiles\
\
Personalize your environment with dotfiles](https://coder.com/docs/user-guides/workspace-dotfiles)
---
# Unofficial Install Methods | Coder Docs
[Home](https://coder.com/docs "Home")
[Install](https://coder.com/docs/install "Install")
Unofficial Install Methods
Coder has a number of alternate unofficial installation methods. Contributions are welcome!
| Platform Name | Status | Documentation |
| --- | --- | --- |
| Azure AKS | Unofficial | [GitHub: coder-aks](https://github.com/ericpaulsen/coder-aks) |
| Terraform (GKE, AKS, LKE, DOKS, IBMCloud K8s, OVHCloud K8s, Scaleway K8s Kapsule) | Unofficial | [GitHub: coder-oss-terraform](https://github.com/ElliotG/coder-oss-tf) |
| Fly.io | Unofficial | [Blog: Run Coder on Fly.io](https://coder.com/blog/remote-developer-environments-on-fly-io) |
| Garden.io | Unofficial | [GitHub: garden-coder-example](https://github.com/garden-io/garden-coder-example) |
| Railway.com | Unofficial | [Run Coder on Railway.com](https://railway.com/deploy/coder) |
| Heroku | Unofficial | [Docs: Deploy Coder on Heroku](https://github.com/coder/packages/blob/main/heroku/README.md) |
| Render | Unofficial | [Docs: Deploy Coder on Render](https://github.com/coder/packages/blob/main/render/README.md) |
| Snapcraft | Unofficial | [Get it from the Snap Store](https://snapcraft.io/coder) |
---
# Upgrading | Coder Docs
[Home](https://coder.com/docs "Home")
[Install](https://coder.com/docs/install "Install")
Upgrading
This article describes how to upgrade your Coder server.
Caution
Prior to upgrading a production Coder deployment, take a database snapshot since Coder does not support rollbacks.
[](https://coder.com/docs/install/upgrade#reinstall-coder-to-upgrade)
Reinstall Coder to upgrade
------------------------------------------------------------------------------------------------
To upgrade your Coder server, reinstall Coder using your original method of [install](https://coder.com/docs/install)
.
### [](https://coder.com/docs/install/upgrade#coder-install-script)
Coder install script
1. If you installed Coder using the `install.sh` script, re-run the below command on the host:
`` `curl -L https://coder.com/install.sh | sh` ``
2. If you're running Coder as a system service, you can restart it with `systemctl`:
`` `systemctl daemon-reload systemctl restart coder` ``
### [](https://coder.com/docs/install/upgrade#other-upgrade-methods)
Other upgrade methods
[](https://coder.com/docs/install/upgrade#docker-compose)
docker-compose[](https://coder.com/docs/install/upgrade#kubernetes)
Kubernetes[](https://coder.com/docs/install/upgrade#coder-ami-on-aws)
Coder AMI on AWS[](https://coder.com/docs/install/upgrade#windows)
Windows
If you installed using `docker-compose`, run the below command to upgrade the Coder container:
`` `docker-compose pull coder && docker-compose up -d coder` ``
---
# Deploy Coder on Azure with an Application Gateway | Coder Docs
[Home](https://coder.com/docs "Home")
[Install](https://coder.com/docs/install "Install")
[Kubernetes](https://coder.com/docs/install/kubernetes "Kubernetes")
Deploy Coder on Azure with an Application Gateway
In certain enterprise environments, the [Azure Application Gateway](https://learn.microsoft.com/en-us/azure/application-gateway/ingress-controller-overview)
is required.
These steps serve as a proof-of-concept example so that you can get Coder running with Kubernetes on Azure. Your deployment might require a separate Postgres server or signed certificates.
The Application Gateway supports:
* Websocket traffic (required for workspace connections)
* TLS termination
Refer to Microsoft's documentation on how to [enable application gateway ingress controller add-on for an existing AKS cluster with an existing application gateway](https://learn.microsoft.com/en-us/azure/application-gateway/tutorial-ingress-controller-add-on-existing)
. The steps here follow the Microsoft tutorial for a Coder deployment.
[](https://coder.com/docs/install/kubernetes/kubernetes-azure-app-gateway#deploy-coder-on-azure-with-an-application-gateway-1)
Deploy Coder on Azure with an Application Gateway
--------------------------------------------------------------------------------------------------------------------------------------------------------------------------------
1. Create Azure resource group:
`` `az group create --name myResourceGroup --location eastus` ``
2. Create AKS cluster:
`` `az aks create --name myCluster --resource-group myResourceGroup --network-plugin azure --enable-managed-identity --generate-ssh-keys` ``
3. Create public IP:
`` `az network public-ip create --name myPublicIp --resource-group myResourceGroup --allocation-method Static --sku Standard` ``
4. Create VNet and subnet:
`` `az network vnet create --name myVnet --resource-group myResourceGroup --address-prefix 10.0.0.0/16 --subnet-name mySubnet --subnet-prefix 10.0.0.0/24` ``
5. Create Azure application gateway, attach VNet, subnet and public IP:
`` `az network application-gateway create --name myApplicationGateway --resource-group myResourceGroup --sku Standard_v2 --public-ip-address myPublicIp --vnet-name myVnet --subnet mySubnet --priority 100` ``
6. Get app gateway ID:
`` `appgwId=$(az network application-gateway show --name myApplicationGateway --resource-group myResourceGroup -o tsv --query "id")` ``
7. Enable app gateway ingress to AKS cluster:
`` `az aks enable-addons --name myCluster --resource-group myResourceGroup --addon ingress-appgw --appgw-id $appgwId` ``
8. Get AKS node resource group:
`` `nodeResourceGroup=$(az aks show --name myCluster --resource-group myResourceGroup -o tsv --query "nodeResourceGroup")` ``
9. Get AKS VNet name:
`` `aksVnetName=$(az network vnet list --resource-group $nodeResourceGroup -o tsv --query "[0].name")` ``
10. Get AKS VNet ID:
`` `aksVnetId=$(az network vnet show --name $aksVnetName --resource-group $nodeResourceGroup -o tsv --query "id")` ``
11. Peer VNet to AKS VNet:
`` `az network vnet peering create --name AppGWtoAKSVnetPeering --resource-group myResourceGroup --vnet-name myVnet --remote-vnet $aksVnetId --allow-vnet-access` ``
12. Get app gateway VNet ID:
`` `appGWVnetId=$(az network vnet show --name myVnet --resource-group myResourceGroup -o tsv --query "id")` ``
13. Peer AKS VNet to app gateway VNet:
`` `az network vnet peering create --name AKStoAppGWVnetPeering --resource-group $nodeResourceGroup --vnet-name $aksVnetName --remote-vnet $appGWVnetId --allow-vnet-access` ``
14. Get AKS credentials:
`` `az aks get-credentials --name myCluster --resource-group myResourceGroup` ``
15. Create Coder namespace:
`` `kubectl create ns coder` ``
16. Deploy non-production PostgreSQL instance to AKS cluster:
`` `helm repo add bitnami https://charts.bitnami.com/bitnami helm install coder-db bitnami/postgresql \ --set image.repository=bitnamilegacy/postgresql \ --namespace coder \ --set auth.username=coder \ --set auth.password=coder \ --set auth.database=coder \ --set persistence.size=10Gi` ``
17. Create the PostgreSQL secret:
`` `kubectl create secret generic coder-db-url -n coder --from-literal=url="postgres://coder:[[email protected]](https://coder.com/cdn-cgi/l/email-protection) :5432/coder?sslmode=disable"` ``
18. Deploy Coder to AKS cluster:
`` `helm repo add coder-v2 https://helm.coder.com/v2 helm install coder coder-v2/coder \ --namespace coder \ --values values.yaml \ --version 2.25.2` ``
19. Clean up Azure resources:
`` `az group delete --name myResourceGroup az group delete --name MC_myResourceGroup_myCluster_eastus` ``
20. Deploy the gateway - this needs clarification
21. After you deploy the gateway, add the following entries to Helm's `values.yaml` file before you deploy Coder:
`` `service: enable: true type: ClusterIP sessionAffinity: None externalTrafficPolicy: Cluster loadBalancerIP: "" annotations: {} httpNodePort: "" httpsNodePort: "" ingress: enable: true className: "azure-application-gateway" host: "" wildcardHost: "" annotations: {} tls: enable: false secretName: "" wildcardSecretName: ""` ``
---
# Uninstall | Coder Docs
[Home](https://coder.com/docs "Home")
[Install](https://coder.com/docs/install "Install")
Uninstall
This article walks you through how to uninstall your Coder server.
To uninstall your Coder server, delete the following directories.
[](https://coder.com/docs/install/uninstall#the-coder-server-binary-and-cli)
The Coder server binary and CLI
------------------------------------------------------------------------------------------------------------
[](https://coder.com/docs/install/uninstall#linux)
Linux[](https://coder.com/docs/install/uninstall#macos)
macOS[](https://coder.com/docs/install/uninstall#windows)
Windows
[](https://coder.com/docs/install/uninstall#debian-ubuntu)
Debian, Ubuntu[](https://coder.com/docs/install/uninstall#fedora-centos-rhel-suse)
Fedora, CentOS, RHEL, SUSE[](https://coder.com/docs/install/uninstall#alpine)
Alpine
`` `sudo apt remove coder` ``
If you installed Coder manually or used the install script on an unsupported operating system, you can remove the binary directly:
`` `sudo rm /usr/local/bin/coder` ``
[](https://coder.com/docs/install/uninstall#coder-as-a-system-service-configuration)
Coder as a system service configuration
----------------------------------------------------------------------------------------------------------------------------
`` `sudo rm /etc/coder.d/coder.env` ``
[](https://coder.com/docs/install/uninstall#coder-settings-cache-and-the-optional-built-in-postgresql-database)
Coder settings, cache, and the optional built-in PostgreSQL database
------------------------------------------------------------------------------------------------------------------------------------------------------------------------------------
There is a `postgres` directory within the `coderv2` directory that has the database engine and database. If you want to reuse the database, consider not performing the following step or copying the directory to another location.
[](https://coder.com/docs/install/uninstall#linux-1)
Linux[](https://coder.com/docs/install/uninstall#macos-1)
macOS[](https://coder.com/docs/install/uninstall#windows-1)
Windows
`` `rm -rf ~/.config/coderv2 rm -rf ~/.cache/coder` ``
##### On this page
---
# Usage Data Reporting | Coder Docs
[Home](https://coder.com/docs "Home")
[Run AI Coding Agents in Coder](https://coder.com/docs/ai-coder "Run AI Coding Agents in Coder")
[AI Governance Add-On](https://coder.com/docs/ai-coder/ai-governance "AI Governance Add-On")
Usage Data Reporting
The [AI Governance Add-On](https://coder.com/docs/ai-coder/ai-governance)
requires reporting usage data to Tallyman, a Coder-managed server for billing and reporting purposes. Coder only captures and sends the following information, related to your deployment ID:
* number of agent workspace builds consumed
* number of AI governance seats consumed
No user-identifiable information or additional metrics are sent to Tallyman. This information is also shared with [Metronome](https://metronome.com/)
, a Stripe product and Coder partner for usage-based and reporting.
To send usage data, your Coder deployment must be able to make outbound HTTPS requests to `https://tallyman-prod.coder.com`. Usage data is sent approximately every 17 minutes and can be monitored via `coderd` logs.
Example of a successful request (requires debug logging enabled [`CODER_LOG_FILTER=.*`](https://coder.com/docs/reference/cli/server#-l---log-filter)
):
`` `[debu] published usage events to tallyman accepted=5 rejected=0` ``
Example of a request payload:
`` `POST /api/v1/events/ingest HTTP/1.1 Host: tallyman-prod.coder.com Content-Type: application/json Coder-License-Key: # your license JWT for verification Coder-Deployment-ID: 8a4e92f1-3b7c-4d5e-9f12-abc123def456 # your deployment ID { "events": [ { "id": "550e8400-e29b-41d4-a716-446655440000", # unique event ID generated by Coder "event_type": "dc_managed_agents_v1", # aka. agent workspace builds "event_data": { "count": 1 }, "created_at": "2025-01-15T14:30:00Z" } ] }` ``
Example of a failed request (e.g. Tallyman Server is blocked by your network):
`` `[warn] failed to send publish request to tallyman count=5 error="Post \"https://tallyman-prod.coder.com/api/v1/events/ingest\": dial tcp: lookup tallyman-prod.coder.com: no such host"` ``
Note
Air-gapped deployments and/or those with legal restrictions around usage reporting can [contact us](https://coder.com/contact)
to discuss alternative methods.
---
# Sunsetting Coder v1 and v2 Migration FAQ | Coder v1 Docs
[Home](https://coder.com/docs/v1 "Home")
[Guides](https://coder.com/docs/v1/guides "Guides")
Sunsetting Coder v1 and v2 Migration FAQ
[Coder v2](https://github.com/coder/coder)
is Coder's 2nd generation remote development platform launched in June 2022. This document lists frequently asked questions for customers planning to migrate from Coder v1 to v2.

When will Coder no longer support v1?
Coder v1 will have 3 sunset or end-of-life dates.
| Date | Support Sunset Parameters | Example |
| --- | --- | --- |
| 06/30/2023 | End of feature requests and enhancements | image tag decommissioning coming in `1.38.0` |
| 12/31/2023 | End of feature-related bug fixes | [organization sort order](https://coder.com/docs/v1/changelog/1.37.0) in `1.37.0` |
| 03/31/2024 | End of security vulnerability fixes | malicious [DevURL redirect link fix](https://coder.com/docs/v1/changelog/1.37.1) in `1.37.1` |
How will we continue to get v1 support?
Continue to either coordinate with your Coder account executive or leverage the [Slack](https://cdr.co/join-community)
channel.
Why did Coder build v2?
Coder v2 addresses compute and integration limitations of Coder v1. In particular, 100% control over a workspace's Kubernetes pod spec, flexibility to make workspace compute a Kubernetes pod, a VM, or a Docker container, and an open-source platform for the community to get the developer-centric benefits of remote development without a license fee. See the blog post [Lessons learned from v1](https://coder.com/blog/lessons-learned-from-v1-and-oss-to-enterprise-editions)
.
What Coder v2 features are open-source and paid?
Functionality for a developer to be productive are in the v2 OSS, while scalability, governance and control features for DevOps teams are in the v2 Enterprise paid version. [See this page for feature comparisons.](https://coder.com/pricing)
Will I pay the same for Coder v2?
[Contact Sales](https://coder.com/contact)
to learn how your v1 license fee converts to v2.
Is v2 a different code base?
Yes. Because we wanted to make v2 open-source and use Terraform as the workspace provisioning engine, it was easier to re-build Coder's remote development platform into a new code base. v2 also has a different Postgres database schema.
How are the v2 concepts different than v1 at a high-level?
In v1, workspaces are Kubernetes pods with an inner container based on [container images](https://coder.com/docs/v1/images)
with an optional configure script in the image that runs additional configurations as the non-root user after the workspace is built. Coder v1 has an optional workspace template yaml spec to define compute and additional bash scripting steps.
In Coder v2, workspaces are defined as [Terraform templates](https://coder.com/docs/coder-oss/latest/templates)
with Terraform resources to specify the infrastructure provider and compute type. e.g., Kubernetes pod, Docker container, or VM. Docker or alternatively VM images are specified in the template. The template includes an agent resource and `startup_script` configuration that can run the configure script in the image or additional steps like in v1 workspace templates. Coder v1 workspace applications are configured as `coder_app` resources in the Terraform template.
v1 [organizations](https://coder.com/docs/v1/admin/organizations)
are [groups](https://coder.com/docs/coder-oss/latest/admin/groups)
in v2.
Integration points remain the same like [OIDC](https://coder.com/docs/coder-oss/latest/admin/auth)
for single-sign-on and specifying image registries in v2 templates.
Out-of-the-box Git authentication in v1 is an OAuth app and SSH. In v2, [OAuth is used as well](https://coder.com/docs/coder-oss/latest/admin/git-providers)
but Coder intercepts git actions, forcing the user to authenticate to their git provider. Coder stores the user's OAuth token in the Coder database and using it for subsequent git actions. In v2, Coder issues an SSH key to each user if that is preferred.
Are there migration scripts from v1 to v2?
No. The database schema and architectural concepts are so different in v2, it is not reasonable to build migration scripts that meet all customer deployment scenarios. See [the migration strategy](https://coder.com/docs/v1/guides/moving-to-oss#migration-strategy)
and [recommendations on moving workspace contents](https://coder.com/docs/v1/guides/moving-to-oss#workspaces)
.
Is there a community to support v2?
Yes. In v1, Coder maintains a [Slack](https://cdr.co/join-community)
channel. In v2, customers can file [GitHub Issues](https://github.com/coder/coder/issues)
or use our [Discord](https://discord.gg/coder)
or [Slack](https://cdr.co/join-community)
channels to ask questions to the community.
> For more information on Coder v2 concepts, please review the [Moving to Coder v2](https://coder.com/docs/v1/guides/moving-to-oss)
> guide.
---
# Guides | Coder v1 Docs
[Home](https://coder.com/docs/v1 "Home")
Guides
[##### Admin\
\
Learn about admin tasks for Coder.](https://coder.com/docs/v1/guides/admin)
[##### Customization\
\
Learn about tasks related to customizing Coder.](https://coder.com/docs/v1/guides/customization)
[##### Deployment\
\
Learn about tasks related to deploying Coder.](https://coder.com/docs/v1/guides/deployments)
[##### TLS certificates\
\
Learn how to use cert-manager to set up TLS certificates.](https://coder.com/docs/v1/guides/tls-certificates)
[##### Mobile development\
\
Learn how to develop mobile apps with Coder.](https://coder.com/docs/v1/guides/mobile-development)
[##### Public API\
\
Learn more about Coder's API.](https://coder.com/docs/v1/guides/api)
[##### Troubleshooting\
\
Learn how to troubleshoot Coder-related errors.](https://coder.com/docs/v1/guides/troubleshooting)
[##### Workspace organization\
\
Learn how to organize your Coder workspaces.](https://coder.com/docs/v1/guides/workspaces)
[##### Moving to Coder v2\
\
What you need to know about Coder v2](https://coder.com/docs/v1/guides/moving-to-oss)
[##### Sunsetting Coder v1 and v2 Migration FAQ\
\
Frequently asked questions about sunsetting of Coder v1 and migrating to v2](https://coder.com/docs/v1/guides/v2-faq)
---
# Public API | Coder v1 Docs
[Home](https://coder.com/docs/v1 "Home")
[Guides](https://coder.com/docs/v1/guides "Guides")
Public API
To help you integrate Coder into your automated workflows, we've documented our API.
[](https://coder.com/docs/v1/guides/api#documentation)
Documentation
--------------------------------------------------------------------
Please note that the API is under active development; expect breaking changes as we finalize the endpoints.
[Swagger Docs](https://apidocs.coder.com/)
[](https://coder.com/docs/v1/guides/api#authentication)
Authentication
----------------------------------------------------------------------
Use of the API requires authentication with a session token. You can generate one using the [Coder CLI](https://coder.com/docs/v1/cli)
:
1. If you haven't already, [authenticate](https://coder.com/docs/v1/cli/installation#authenticate)
your CLI with your workspace.
2. Run `coder tokens create `
3. Save the token that's returned to use in your HTTP headers:
`` `curl \ -X GET "https://apidocs.coder.com/api/" \ -H "accept: application/json" \ -H "Session-Token: Bk...nt"` ``
[](https://coder.com/docs/v1/guides/api#examples)
Examples
----------------------------------------------------------
These are example Coder API calls for common tasks. Note that the site-manager role is required to be perform specific actions and without it, API results will be limited to a user's member role.
> Assign your Access URL, Session-Token and other resources like images and workspaces to variables for easier substitution in the curl commands.
`` `export ACCESS_URL "https://coder.acme.com" export API_KEY="MUdzI3UMvF-Qlwovt-----0CL0kTbADQl" export API_ROUTE="api/v0" export IMAGE_ID="622b3f6e-dd6fd08-----ba38c73c9639"` ``
### [](https://coder.com/docs/v1/guides/api#example-get-active-ssh-users-in-1-week-increments-in-august)
Example: get active SSH users in 1 week increments in August
> For a full list of categories and filters, see [Usage metrics](https://coder.com/docs/v1/admin/metrics)
> .
`` `# Currently in the private API API_ROUTE=api/private curl --request GET \ --url "$ACCESS_URL/$API_ROUTE/metrics/activity?\ start=2022-08-01T00:00:00.000000Z&end=2022-08-31T00:00:00.000000Z\ &category=tunnel\ &interval=1 week" \ --header "Session-Token: $API_KEY"` ``
### [](https://coder.com/docs/v1/guides/api#example-get-audit-logs-for-a-workspace-and-resource-type)
Example: get audit logs for a workspace and resource type
`` `curl --request GET \ --url "$ACCESS_URL/$API_ROUTE/audit?\ limit=10\ &resource_id=$WS_ID_PHP\ &resource_type=environment" \ --header "Session-Token: $API_KEY"` ``
### [](https://coder.com/docs/v1/guides/api#example-get-audit-logs-for-workspace-created-in-a-unix-seconds-period)
Example: get audit logs for workspace created in a Unix seconds period
`` `curl --request GET \ --url "$ACCESS_URL/$API_ROUTE/audit?\ range_start=1646092800\ &range_end=1646697600\ &resource_type=environment\ &action=create" \ --header "Session-Token: $API_KEY"` ``
### [](https://coder.com/docs/v1/guides/api#example-generate-a-session-token-for-a-user)
Example: generate a session token for a user
`` `curl --request POST \ --url $ACCESS_URL/$API_ROUTE/api-keys/613e75c4-faef2f87-----376e1f229b6 \ --header "Content-Type: application/json" \ --header "Session-Token: $API_KEY" \ --data '{ "name": "my-session-token" }'` ``
### [](https://coder.com/docs/v1/guides/api#example-get-the-workspaces-created-by-a-user)
Example: get the workspaces created by a user
`` `curl --request GET \ --url "$ACCESS_URL/$API_ROUTE/workspaces?users=$USER_ID" \ --header "Session-Token: $API_KEY"` ``
### [](https://coder.com/docs/v1/guides/api#example-get-the-workspaces-built-with-a-specific-image)
Example: get the workspaces built with a specific image
`` `curl --request GET \ --url "$ACCESS_URL/$API_ROUTE/images/$IMAGE_ID" \ --header "Session-Token: $API_KEY"` ``
### [](https://coder.com/docs/v1/guides/api#example-get-info-about-an-image-tag-and-workspaces-built-with-it)
Example: get info about an image tag and workspaces built with it
> Change `latest` to your tag name
`` `curl --request GET \ --url "$ACCESS_URL/$API_ROUTE/images/$IMAGE_ID/tags/latest" \ --header "Session-Token: $API_KEY"` ``
### [](https://coder.com/docs/v1/guides/api#example-get-the-workspaces-in-a-specific-organization)
Example: get the workspaces in a specific organization
`` `curl --request GET \ --url "$ACCESS_URL/$API_ROUTE/workspaces?orgs=$ORG_ID" \ --header "Session-Token: $API_KEY"` ``
### [](https://coder.com/docs/v1/guides/api#example-get-the-images-authorized-in-a-specific-organization)
Example: get the images authorized in a specific organization
`` `curl --request GET \ --url "$ACCESS_URL/$API_ROUTE/images/?org=$ORG_ID&workspaces=false" \ --header "Session-Token: $API_KEY"` ``
### [](https://coder.com/docs/v1/guides/api#example-update-image-tags-from-a-registry)
Example: update image tags from a registry
`` `curl --request POST \ --url "$ACCESS_URL/$API_ROUTE/images/$IMAGE_ID" \ --header "Session-Token: $API_KEY" \ --data "{}"` ``
### [](https://coder.com/docs/v1/guides/api#example-update-the-compute-resources-baseline-for-an-image)
Example: update the compute resources baseline for an image
`` `curl --request PATCH \ --url "$ACCESS_URL/$API_ROUTE/images/$IMAGE_ID" \ --header "Session-Token: $API_KEY" \ --data "{ \"default_memory_gb\": 8, \"description\": \"3/26/22 increased RAM from 4 to 8 GB\" }"` ``
### [](https://coder.com/docs/v1/guides/api#example-import-a-container-image)
Example: import a container image
`` `curl --request POST \ --url "$ACCESS_URL/$API_ROUTE/images" \ --header "Session-Token: $API_KEY" \ --header "Content-Type: application/json" \ --data "{ \"default_cpu_cores\": 4, \"default_disk_gb\": 4, \"default_memory_gb\": 10, \"description\": \"IntelliJ 2020.3.4\", \"org_id\": \"$ORG_ID\", \"registry_id\": \"$REG_ID\", \"repository\": \"marktmilligan/intellij-ultimate\", \"tag\": \"2020.3.4\" }"` ``
### [](https://coder.com/docs/v1/guides/api#example-deprecate-an-image-and-its-tags)
Example: deprecate an image (and its tags)
`` `curl --request PATCH \ --url "$ACCESS_URL/$API_ROUTE/images/$IMAGE_ID" \ --header "Session-Token: $API_KEY" \ --data "{ \"deprecated\": true }"` ``
### [](https://coder.com/docs/v1/guides/api#example-restartrebuild-a-workspace)
Example: Restart/rebuild a workspace
`` `curl --request PATCH \ --url $ACCESS_URL/$API_ROUTE/workspaces/$WS_ID \ --header "Content-Type: application/json" \ --header "Session-Token: $API_KEY" \ --data "{}"` ``
### [](https://coder.com/docs/v1/guides/api#example-how-to-create-a-user)
Example: How to create a user
`` `curl --request POST \ --url "$ACCESS_URL/$API_ROUTE/users" \ --header "Session-Token: $API_KEY" \ --header "Content-Type: application/json" \ --data "{ \"email\": \"[[email protected]](https://coder.com/cdn-cgi/l/email-protection) \", \"login_type\": \"built-in\", \"name\": \"Bob Barker\", \"password\": \"password\", \"temporary_password\": true, \"username\": \"bbarker\", \"organizations\": [\"default\",\"$ORG_ID\"] }"` ``
### [](https://coder.com/docs/v1/guides/api#example-get-a-users-public-ssh-key)
Example: Get a user's public SSH key
`` `curl --request GET \ --url "$ACCESS_URL/$API_ROUTE/users/$USER_ID/sshkey" \ --header "Session-Token: $API_KEY"` ``
### [](https://coder.com/docs/v1/guides/api#example-create-a-dev-url)
Example: Create a dev URL
`` `curl --request POST \ --url "$ACCESS_URL/$API_ROUTE/workspaces/$WS_ID_PHP/devurls" \ --header "Session-Token: $API_KEY" \ --header "Content-Type: application/json" \ --data "{ \"access\": \"PRIVATE\", \"name\": \"phpapp4\", \"port\": 1029, \"scheme\": \"http\" }"` ``
### [](https://coder.com/docs/v1/guides/api#example-update-a-dev-url-including-access-control-level)
Example: Update a dev URL including access control level
`` `curl --request PUT \ --url "$ACCESS_URL/$API_ROUTE/workspaces/$WS_ID_PHP/devurls/$DU_ID_PHP" \ --header "Session-Token: $API_KEY" \ --header "Content-Type: application/json" \ --data "{ \"access\": \"AUTHED\", \"name\": \"phpapp4\", \"port\": 1029, \"scheme\": \"http\" }"` ``
### [](https://coder.com/docs/v1/guides/api#example-list-dev-urls)
Example: List dev URLs
`` `curl --request GET \ --url "$ACCESS_URL/$API_ROUTE/workspaces/$WS_ID_PHP/devurls" \ --header "Session-Token: $API_KEY"` ``
### [](https://coder.com/docs/v1/guides/api#example-delete-a-dev-url)
Example: Delete a dev URL
`` `curl --request DELETE \ --url "$ACCESS_URL/$API_ROUTE/workspaces/$WS_ID_PHP/devurls/$DU_ID_PHP \ --header "Session-Token: $API_KEY" \ --header "Content-Type: application/json" \ --data "{ }"` ``
##### On this page
---
# Workspace organization | Coder v1 Docs
[Home](https://coder.com/docs/v1 "Home")
[Guides](https://coder.com/docs/v1/guides "Guides")
Workspace organization
This article describes considerations for deciding how to set up your Coder workspaces.
In general, the fewer workspaces per developer, the easier it is for the individual developer to manage. However, the complexity of the underlying images increases as the images need to support multiple projects, each potentially with its own language, set of tooling, and dependencies.
Nevertheless, for teams that do not have a complex development workflow, we recommend starting with one workspace per developer, since it is the fastest, most straightforward model to adopt.
[](https://coder.com/docs/v1/guides/workspaces#one-workspace-per-developer)
One workspace per developer
-------------------------------------------------------------------------------------------------------
With one workspace per developer, you can think of the Coder workspace the way you would a laptop: the workspace is where you have all of your languages, dependencies, and tooling installed, and it is the one place you'd go to work on your projects.
Benefits:
* Fewer workspaces to manage
* No need to switch between workspaces for different projects
Potential caveats:
* The size of the workspace can grow quite large
* The image supporting such a workspace can become complex
[](https://coder.com/docs/v1/guides/workspaces#one-workspace-per-architecture)
One workspace per architecture
-------------------------------------------------------------------------------------------------------------
In this situation, you would create one workspace for your JavaScript projects, one workspace for your Python projects, and so on.
Benefits:
* Smaller images, since they only contain one language and its dependencies
Potential caveats:
* Developers may have multiple workspaces, consuming more storage space overall
[](https://coder.com/docs/v1/guides/workspaces#one-workspace-per-project-per-developer)
One workspace per project per developer
-------------------------------------------------------------------------------------------------------------------------------
Each developer has multiple workspaces, with each workspace devoted to one project. If a developer is currently working on three projects, they'd have three workspaces.
Benefits:
* Streamlined images with only the languages and dependencies included
* Smaller, lighter workspaces
Potential caveats:
* As the number of workspaces per developer grows, the importance of well-defined dotfiles grow to ensure that developers do not spend too much time personalizing their workspaces
### [](https://coder.com/docs/v1/guides/workspaces#one-workspace-per-major-version-of-the-project)
One workspace per major version of the project
A subset of this category is one workspace per **major** version of a project (e.g., making major, breaking changes to something). Furthermore, Coder allows you to change the underlying image, so you can update the image (changing out the language and any dependencies) if needed.
The benefits and potential caveats of this option are similar to those involved with setting up one workspace per project per developer.
[](https://coder.com/docs/v1/guides/workspaces#one-workspace-per-featurebranch)
One workspace per feature/branch
----------------------------------------------------------------------------------------------------------------
Setting up one workspace per feature (or branch) allows your developers to focus only on that feature.
With dev URLs, allowing access to the work in progress, the workspace could also replace the need for any preview builds, while also providing access to some of the logs. Reviewers or other developers could push changes to the branch/pull request from their own workspaces without needing access to the primary developers' workspaces.
[](https://coder.com/docs/v1/guides/workspaces#one-workspace-per-commit)
One workspace per commit
-------------------------------------------------------------------------------------------------
We do not recommend creating workspaces on a per-commit basis due to the high cost of resources in these situations.
##### On this page
---
# Mobile development | Coder v1 Docs
[Home](https://coder.com/docs/v1 "Home")
[Guides](https://coder.com/docs/v1/guides "Guides")
Mobile development
Compiling mobile applications are resource-intensive, but Coder allows you to leverage cloud resources to save time compiling while still keeping your native emulator experience.
### [](https://coder.com/docs/v1/guides/mobile-development#android)
Android
You can use the Android emulator on your local machine to build and debug apps developed remotely on Coder.
1. [Install Android Studio](https://developer.android.com/studio)
onto your local machine.
2. Start Android Studio, and when prompted, install the SDK.
3. [Create and start](https://developer.android.com/studio/run/managing-avds)
a Virtual Device.
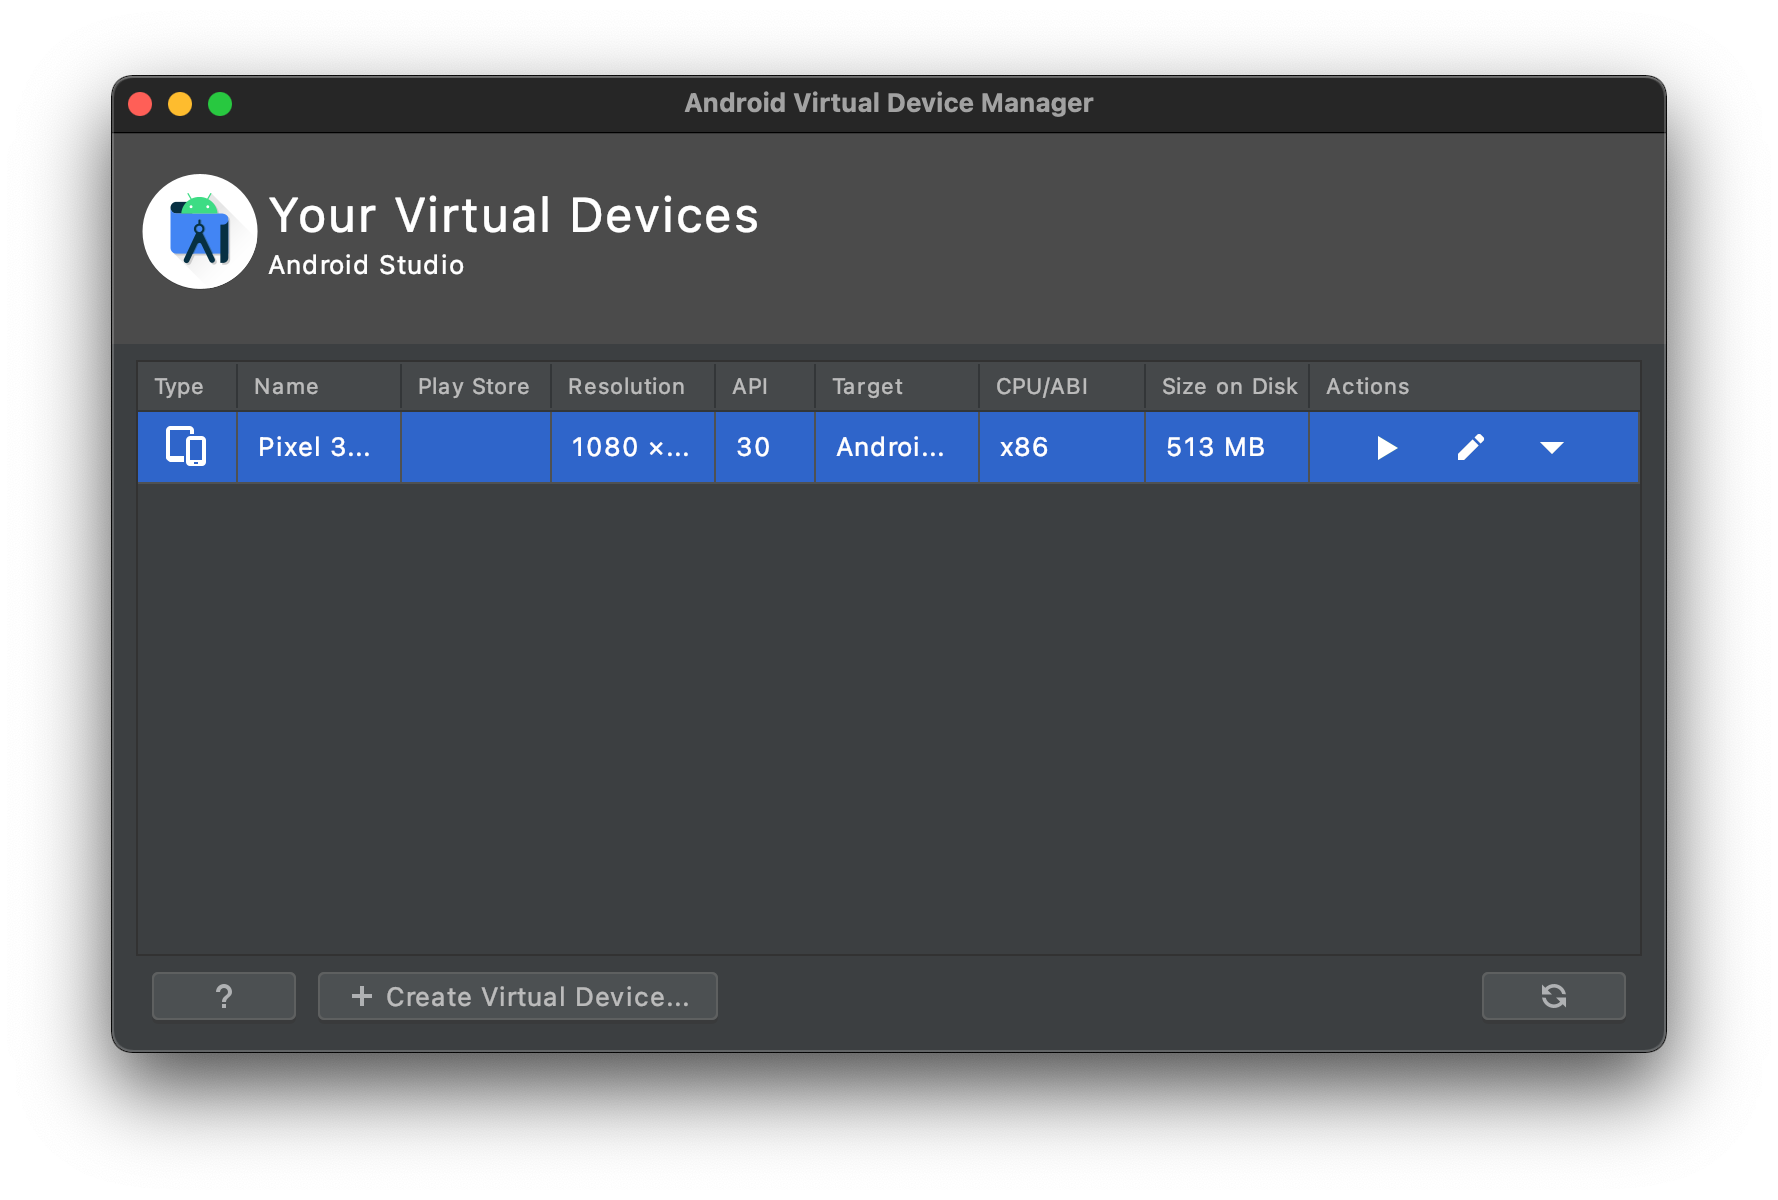
4. Create a workspace variable called `ANDROID_SDK_PATH` and set it to the installation path of your Android SDK (for example, it's typically `~/Library/Android/sdk` on macOS and `C:\Users\\AppData\Local\Android\sdk` on Windows).
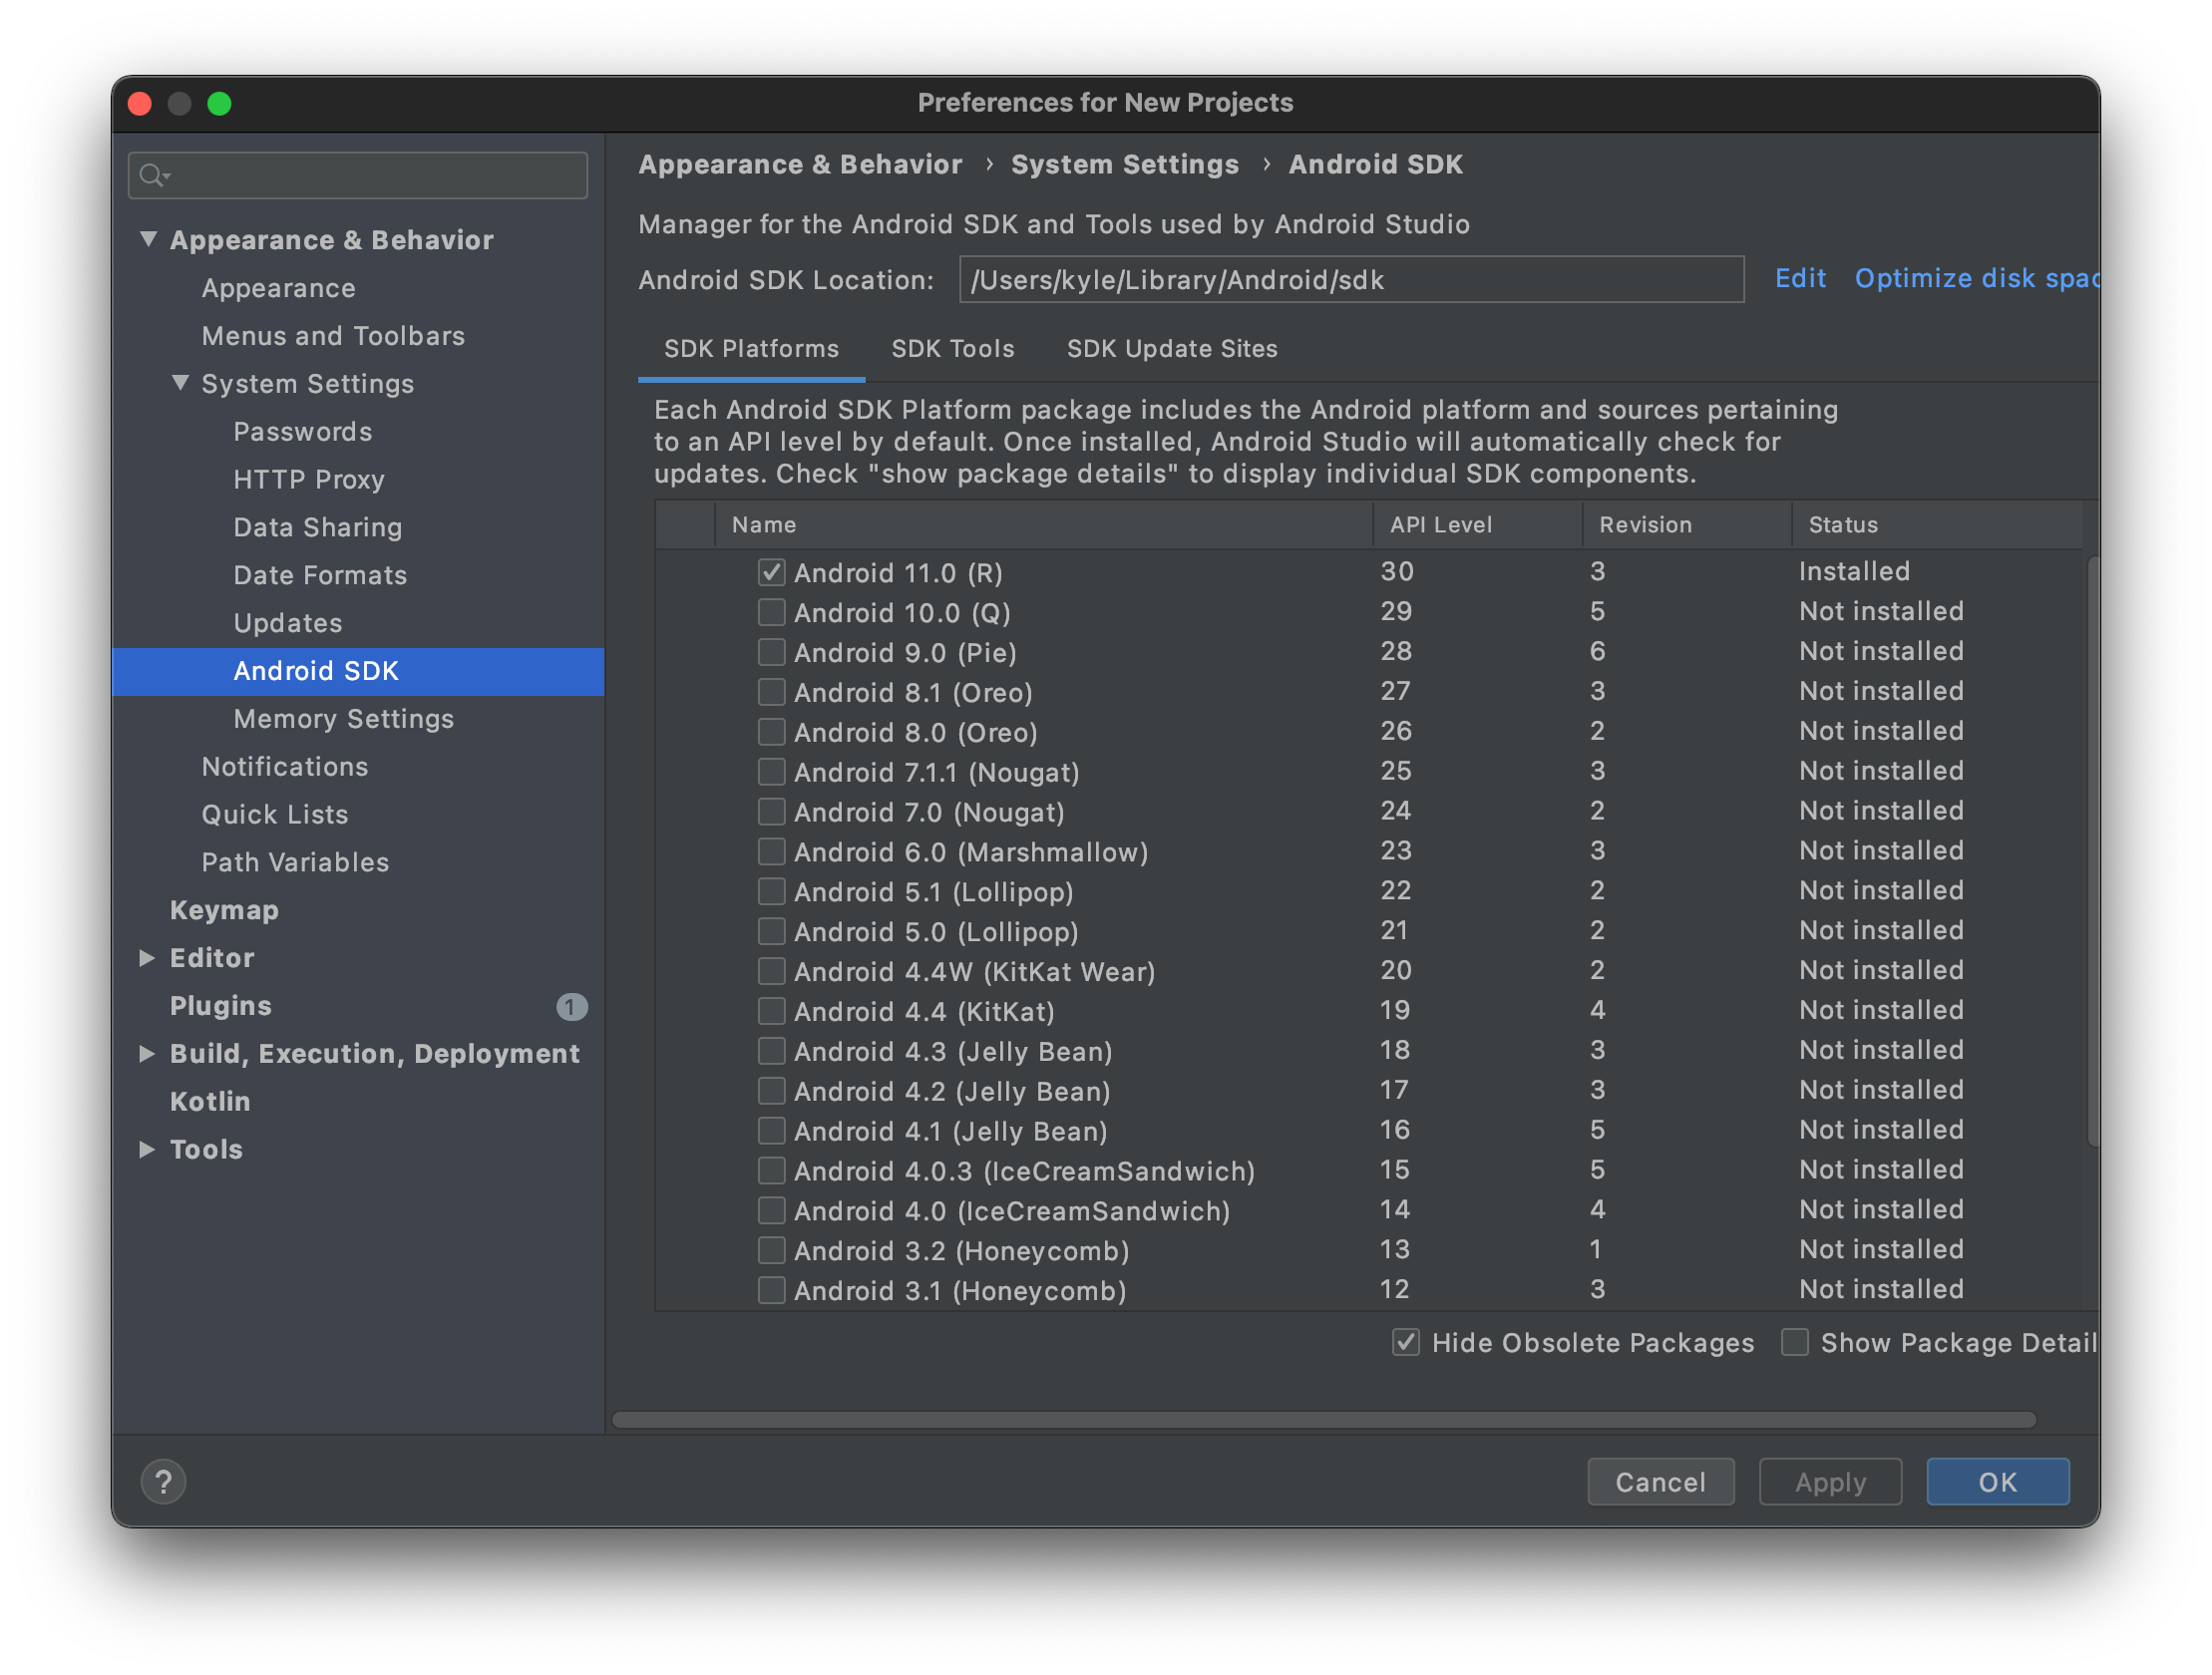
5. Start the Android Debug Server on port 5555:
`` `$ $ANDROID_SDK_PATH/platform-tools/adb tcpip 5555 restarting in TCP mode port: 5555` ``
6. Create a Coder workspace that includes the Android SDK; you can do this by including the following in your Dockerfile:
`` `FROM codercom/enterprise-android` ``
Alternatively, you can import or extend [Coder's image](https://github.com/coder/enterprise-images/blob/master/images/android/Dockerfile.ubuntu)
7. Forward your Android Debug Server to the remote workspace:
`` `# You must have the Coder CLI installed. $ coder config-ssh $ ssh -R 5555:127.0.0.1:5555 coder.` ``
8. Run `adb devices` to view the emulators forwarded from your local machine:
`` `$ adb devices List of devices attached emulator-5556` ``
9. Build and run your Android applications remotely:
`` `./gradlew android:installDebug` ``
---
# Command line | Coder v1 Docs
[Home](https://coder.com/docs/v1 "Home")
Command line
Coder provides a CLI that allows you to interact with your workspaces using your local machine.
> This document refers to the Coder v1 CLI. If you landed on this page by mistake or are looking for the Coder v2 CLI, view [the docs on how to install the Coder v2 CLI](https://coder.com/docs/v2/latest/templates#get-the-cli)
> . The Coder v1 CLI will not work with a Coder v2 deployment.
[##### Installation and setup\
\
Learn how to install and configure the Coder CLI.](https://coder.com/docs/v1/cli/installation)
[##### Remote terminal\
\
Learn how to use the Coder CLI to access your workspace.](https://coder.com/docs/v1/cli/remote-terminal)
[##### File sync\
\
Learn how to sync files between Coder and your local IDE.](https://coder.com/docs/v1/cli/file-sync)
[##### Workspace management\
\
See example usages of the CLI for personal workspace management.](https://coder.com/docs/v1/cli/managing-workspaces)
[##### Reference\
\
CLI reference](https://coder.com/docs/v1/cli/reference/coder)
[](https://coder.com/docs/v1/cli#full-cli-reference)
Full CLI reference
-----------------------------------------------------------------------
For a full list of the Coder CLI commands available, see the [reference pages](https://coder.com/docs/v1/cli/reference/coder)
.
---
# 1.37.1 | Coder v1 Docs
[Home](https://coder.com/docs/v1 "Home")
[Changelog](https://coder.com/docs/v1/changelog "Changelog")
[1.37.0](https://coder.com/docs/v1/changelog/1.37.0 "1.37.0")
1.37.1
### [](https://coder.com/docs/v1/changelog/1.37.1#breaking-changes-)
Breaking changes ❗
There are no breaking changes in 1.37.1.
### [](https://coder.com/docs/v1/changelog/1.37.1#features-)
Features ✨
There are no new features in 1.37.1.
### [](https://coder.com/docs/v1/changelog/1.37.1#bug-fixes-)
Bug fixes 🐛
* Fixed an issue where operations on API keys were not audit-logged.
### [](https://coder.com/docs/v1/changelog/1.37.1#security-updates-)
Security updates 🔐
* Fixed an issue where an attacker could craft a malicious DevURL redirect link to exfiltrate a token that allows accessing that user's devURLs.
---
# Getting started | Coder v1 Docs
[Home](https://coder.com/docs/v1 "Home")
Getting started
We’re excited for you to be part of the growing community of Coder users, and we wanted to provide this onboarding guide to help you get started.
If you've been tasked with deploying and configuring Coder, please see our [admin](https://coder.com/docs/v1/getting-started/admin)
guide for a high-level overview of what you need to do so that your developers can create their workspaces and begin working on their projects.
There are two primary ways of deploying Coder, and we offer developer-oriented guides for both [Kubernetes deployments](https://coder.com/docs/v1/getting-started/developers)
and [deployments using Coder for Docker](https://coder.com/docs/v1/getting-started/docker)
. Once developers have a Coder deployment available to them, these end-to-end guides will walk them through logging in and getting set up with a sample project they can use to experience Coder.
Additionally, we have a guide for those interested in leveraging Coder for [data science](https://coder.com/docs/v1/getting-started/data-scientists)
, specifically using Python with Jupyter notebooks. We also have a tutorial on getting started with [PyCharm](https://coder.com/docs/v1/getting-started/pycharm)
and [IntelliJ](https://coder.com/docs/v1/getting-started/intellij)
.
---
# 1.37.0 | Coder v1 Docs
[Home](https://coder.com/docs/v1 "Home")
[Changelog](https://coder.com/docs/v1/changelog "Changelog")
1.37.0
### [](https://coder.com/docs/v1/changelog/1.37.0#breaking-changes-)
Breaking changes ❗
* infra: Workspace statistics were previously stored in a table `environment_stats`. This table is removed in this release. Downgrading from this version to an older version may require manual steps.
* infra: The default CVM internal network was changed to `172.19.0.0/30`. If you experience issues connecting to workspaces after this change, you can override this setting on the [workspace provider](https://coder.com/docs/v1/admin/workspace-providers/management#edit-a-workspace-provider)
.
### [](https://coder.com/docs/v1/changelog/1.37.0#features-)
Features ✨
* infra: The database schema name used by Coder can now be changed by setting the `DB_SEARCH_STRING` environment variable.
* web: The list of organization workspaces is now paginated.
* infra: The internal bridge network used by CVMs can now be configured under the workspace provider settings page.
### [](https://coder.com/docs/v1/changelog/1.37.0#bug-fixes-)
Bug fixes 🐛
* infra: Fixed an issue where workspace builds would fail due to a missing `podSecurityContext`.
* infra: Fixed an issue where CVMs would not have the correct hostname set.
* web: Fixed an issue where organizations were not sorted alphabetically in the UI.
* web: Improved error messaging when importing an image fails.
* web: Fixed an issue where changing settings under **Admin** would not show up correctly in audit logs.
* infra: Fixed an issue where Coder services would incorrectly leave out client TLS credentials when communicating with GitLab.
* infra: Fixed a memory leak that occurs when attempting to update an image with invalid stored credentials.
* infra: Coder will now propagate its `http_proxy`, `https_proxy`, and `no_proxy` environment variables when building workspaces. This fixes issues when building CVM-enabled workspaces where the workspace image must be accessed through a HTTP proxy.
### [](https://coder.com/docs/v1/changelog/1.37.0#security-updates-)
Security updates 🔐
* infra: Updates `code-server` to `4.8.3` which includes Visual Studio Code version `1.72.1`. This mitigates `CVE-2022-36067`.
* infra: Fixed an issue where ordinary users could obtain admin-level credentials from the Coder API.
---
# Changelog | Coder v1 Docs
[Home](https://coder.com/docs/v1 "Home")
Changelog
[](https://coder.com/docs/v1/changelog#release-schedule)
Release schedule
-------------------------------------------------------------------------
[Coder release calendar (iCal file)](https://calendar.google.com/calendar/ical/c_sdmrh87t5voc4u5rrjvktcrpko%40group.calendar.google.com/public/basic.ics)
* We typically issue release _candidates_ on the **third Wednesday** of each month, though this is subject to change. Check the [release calendar](https://calendar.google.com/calendar/ical/c_sdmrh87t5voc4u5rrjvktcrpko%40group.calendar.google.com/public/basic.ics)
for up-to-date information (Coder may create multiple release candidates prior to the actual release)
* We do not provide documentation for release candidates, and you should not use them unless you've been instructed to do so by Coder. You can identify release candidates by the presence of `-rc` in the version number (e.g., `1.16.0-rc.1`).
* Releases are available a week after we issue a release candidate
* _Patch_ releases become available as needed
[](https://coder.com/docs/v1/changelog#changelogs)
Changelogs
-------------------------------------------------------------
[##### 1.44.0\
\
Released on 06/29/2023](https://coder.com/docs/v1/changelog/1.44.0)
[##### 1.43.0\
\
Released on 05/24/2023](https://coder.com/docs/v1/changelog/1.43.0)
[##### 1.42.0\
\
Released on 04/26/2023](https://coder.com/docs/v1/changelog/1.42.0)
[##### 1.41.0\
\
Released on 03/23/2023](https://coder.com/docs/v1/changelog/1.41.0)
[##### 1.40.0\
\
Released on 02/22/2023](https://coder.com/docs/v1/changelog/1.40.0)
[##### 1.39.0\
\
Released on 01/25/2023](https://coder.com/docs/v1/changelog/1.39.0)
[##### 1.38.0\
\
Released on 01/04/2023](https://coder.com/docs/v1/changelog/1.38.0)
[##### 1.37.0\
\
Released on 11/23/2022](https://coder.com/docs/v1/changelog/1.37.0)
[##### 1.36.0\
\
Released on 10/26/2022](https://coder.com/docs/v1/changelog/1.36.0)
[##### 1.35.0\
\
Released on 9/28/2022](https://coder.com/docs/v1/changelog/1.35.0)
[##### 1.34.0\
\
Released on 08/31/2022](https://coder.com/docs/v1/changelog/1.34.0)
[##### Archives](https://coder.com/docs/v1/changelog/archive)
##### On this page
---
# Images | Coder v1 Docs
[Home](https://coder.com/docs/v1 "Home")
Images
Coder creates development environments called [workspaces](https://coder.com/docs/v1/workspaces)
using container images as the blueprints.
For organizations, container images (sometimes referred to as images) are the foundation for achieving consistency and productivity across developers while eliminating configuration drift, downstream bugs, and risks related to outdated development environments.
Images contain the IDEs, CLIs, language versions, and dependencies users need to work on software development projects. Users can create workspaces with the image as the blueprint, then begin contributing immediately to the projects for which the image was defined.
Coder integrates with many common container registries (including Artifactory, Docker, AWS Elastic Container Registry, and Azure Container Registry). Container registries store the images that you can then import into Coder. Images are built using Dockerfiles.
You can nest images to reuse workspace configuration across development teams.
> [The Open Container Initiative (OCI) standard](https://opencontainers.org/)
> sets the standard for containers and images.
[](https://coder.com/docs/v1/images#in-this-section)
In this section
--------------------------------------------------------------------
[##### Configure script\
\
Learn how to configure Coder's workspace startup behavior.](https://coder.com/docs/v1/images/configure)
[##### Custom image creation\
\
Learn how to write custom images for use with Coder.](https://coder.com/docs/v1/images/writing)
[##### Deprecate and Decommission\
\
Learn how to deprecate an image and decommission a tag.](https://coder.com/docs/v1/images/deprecating)
[##### Embeddable button\
\
Learn how to embed an "Open in Coder" Button in Your Repo](https://coder.com/docs/v1/images/embed-button)
[##### Import\
\
Learn how to import images to use in Coder.](https://coder.com/docs/v1/images/importing)
[##### Structure\
\
Learn how to best structure image specifications for use inside your organization.](https://coder.com/docs/v1/images/structure)
[##### Tags\
\
Learn how to manage image versions inside Coder.](https://coder.com/docs/v1/images/tags)
[##### TLS certificates\
\
Learn how to add TLS certificates to Coder images](https://coder.com/docs/v1/images/tls-certificates)
---
# Customization | Coder v1 Docs
[Home](https://coder.com/docs/v1 "Home")
[Guides](https://coder.com/docs/v1/guides "Guides")
Customization
[##### Git configuration\
\
Learn how to configure Git in Coder.](https://coder.com/docs/v1/guides/customization/gitconfig)
[##### GPG forwarding\
\
Learn how to configure GPG agent forwarding Coder.](https://coder.com/docs/v1/guides/customization/gpg-forwarding)
[##### macOS keybindings\
\
Learn how to use macOS keybindings with JetBrains IDEs.](https://coder.com/docs/v1/guides/customization/macos-keybinding)
[##### Multiple JetBrains instances configuration\
\
Learn how to run multiple instances of JetBrains IDEs in Coder.](https://coder.com/docs/v1/guides/customization/multiple-jetbrains-ides)
[##### Node.js Projects\
\
Learn how to create custom images for Node.js projects.](https://coder.com/docs/v1/guides/customization/node)
[##### Tailscale\
\
Learn how to use Tailscale in your Coder workspace.](https://coder.com/docs/v1/guides/customization/tailscale)
[##### VNC\
\
Learn how to set up a VNC in Coder.](https://coder.com/docs/v1/guides/customization/vnc)
---
# TLS certificates | Coder v1 Docs
[Home](https://coder.com/docs/v1 "Home")
[Guides](https://coder.com/docs/v1/guides "Guides")
TLS certificates
[##### Azure DNS\
\
Learn how to use cert-manager to set up TLS certificates using Azure DNS for DNS01 challenges.](https://coder.com/docs/v1/guides/tls-certificates/azureDNS)
[##### Google Cloud DNS\
\
Learn how to use cert-manager to set up TLS certificates using Google Cloud DNS for DNS01 challenges.](https://coder.com/docs/v1/guides/tls-certificates/cloudDNS)
[##### Cloudflare\
\
Learn how to use cert-manager to set up TLS certificates using Cloudflare for DNS01 challenges.](https://coder.com/docs/v1/guides/tls-certificates/cloudflare)
[##### Route 53\
\
Learn how to use cert-manager to set up TLS certificates using Route 53 for DNS01 challenges.](https://coder.com/docs/v1/guides/tls-certificates/route53)
[##### Configure TLS on Coder for Docker\
\
Learn how to configure TLS on Coder for Docker](https://coder.com/docs/v1/guides/tls-certificates/docker-tls)
---
# Deployment | Coder v1 Docs
[Home](https://coder.com/docs/v1 "Home")
[Guides](https://coder.com/docs/v1/guides "Guides")
Deployment
[##### Coder installation from an archive\
\
Learn how to install Coder from an archive](https://coder.com/docs/v1/guides/deployments/archive-install)
[##### JFrog Artifactory\
\
Learn how to use Artifactory to host container images in Coder.](https://coder.com/docs/v1/guides/deployments/artifactory)
[##### Managed code-server Workspaces\
\
Learn how Coder can improve your code-server deployment on Kubernetes.](https://coder.com/docs/v1/guides/deployments/code-server)
[##### Podman\
\
Learn how to run Podman in Coder.](https://coder.com/docs/v1/guides/deployments/podman)
[##### PostgreSQL\
\
Learn how connect Coder to an external postgreSQL database.](https://coder.com/docs/v1/guides/deployments/postgres)
[##### Proxies\
\
Learn how to configure forward and reverse proxies for Coder.](https://coder.com/docs/v1/guides/deployments/proxy)
[##### SAML 2.0 identity brokering\
\
Learn how broker JumpCloud SAML 2.0 logins to Coder using Keycloak.](https://coder.com/docs/v1/guides/deployments/keycloak)
[##### Teardown\
\
Learn how to tear down Coder and the infrastructure on which it's deployed.](https://coder.com/docs/v1/guides/deployments/teardown)
[##### Terraform\
\
Learn how to deploy Coder using Terraform.](https://coder.com/docs/v1/guides/deployments/terraform)
---
# Setup | Coder v1 Docs
[Home](https://coder.com/docs/v1 "Home")
Setup
The articles in this section will walk you through setting up a cluster to which Coder deploys and then deploying Coder.
Coder is free to try, though you'll need a license to do so. You can [generate a license](https://coder.com/trial)
that allows you to try Coder free of charge for 60 days. You'll provide this license _after_ you've completed the deployment steps.
> If you're interested in a lightweight preview of Coder, check out our [Coder for Docker](https://coder.com/docs/v1/setup/coder-for-docker)
> option.
[](https://coder.com/docs/v1/setup#deploying-coder)
Deploying Coder
-------------------------------------------------------------------
1. Before you start, we recommend familiarizing yourself with Coder's [requirements](https://coder.com/docs/v1/setup/requirements)
.
2. To begin the deployment process, see our docs on creating a [Kubernetes cluster](https://coder.com/docs/v1/setup/kubernetes)
and [installing Coder](https://coder.com/docs/v1/setup/installation)
.
[](https://coder.com/docs/v1/setup#in-this-section)
In this section
-------------------------------------------------------------------
[##### Architecture\
\
Learn about the technical architecture of the Coder platform.](https://coder.com/docs/v1/setup/architecture)
[##### System Requirements\
\
Learn about the prerequisite infrastructure requirements.](https://coder.com/docs/v1/setup/requirements)
[##### Kubernetes\
\
Learn how to set up a Kubernetes cluster compatible with Coder.](https://coder.com/docs/v1/setup/kubernetes)
[##### Installation\
\
Learn how to install Coder onto your infrastructure.](https://coder.com/docs/v1/setup/installation)
[##### Configuration\
\
Learn how to configure a fresh Coder installation.](https://coder.com/docs/v1/setup/configuration)
[##### Scaling Coder\
\
Learn about best practices to properly scale Coder to meet developer and workspace needs.](https://coder.com/docs/v1/setup/scaling)
[##### Air-gapped deployment\
\
Learn how to set up an air-gapped Coder deployment.](https://coder.com/docs/v1/setup/air-gapped)
[##### Coder for Docker\
\
Learn how to run Coder with Docker.](https://coder.com/docs/v1/setup/coder-for-docker)
[##### Upgrade\
\
Learn how to upgrade your Coder deployment.](https://coder.com/docs/v1/setup/upgrade)
##### On this page
---
# Admin | Coder v1 Docs
[Home](https://coder.com/docs/v1 "Home")
Admin
[##### Access control\
\
Learn how to change how Coder users sign in.](https://coder.com/docs/v1/admin/access-control)
[##### Organizations\
\
Learn about Coder organizations.](https://coder.com/docs/v1/admin/organizations)
[##### Registries\
\
Learn how to hook into Docker Registries.](https://coder.com/docs/v1/admin/registries)
[##### Satellites\
\
Learn about satellite deployments to reduce global latency.](https://coder.com/docs/v1/admin/satellites)
[##### Workspace management\
\
Learn how to manage workspaces from an admin level.](https://coder.com/docs/v1/admin/workspace-management)
[##### Workspace providers\
\
Learn how workspace providers can improve the developer experience.](https://coder.com/docs/v1/admin/workspace-providers)
[##### Access URL\
\
Learn how to set the access URL.](https://coder.com/docs/v1/admin/access-url)
[##### Account dormancy\
\
Learn how to manage the lifecycle of dormant user accounts.](https://coder.com/docs/v1/admin/account-dormancy)
[##### Appearance\
\
Learn how to augment the dashboard appearance.](https://coder.com/docs/v1/admin/appearance)
[##### Audit\
\
Learn how Coder audits user and admin actions.](https://coder.com/docs/v1/admin/audit)
[##### Security\
\
Learn about Coder's security options.](https://coder.com/docs/v1/admin/security)
[##### Dev URLs\
\
Learn how to configure dev URL support for a Coder deployment.](https://coder.com/docs/v1/admin/devurls)
[##### Direct workspace connections\
\
Learn how to enable direct connections to workspaces.](https://coder.com/docs/v1/admin/stun)
[##### Fallback shell\
\
Learn how to enable fallback shell support for Kubernetes.](https://coder.com/docs/v1/admin/shell)
[##### Git integration\
\
Learn how to integrate with a Git provider to authenticate workspaces.](https://coder.com/docs/v1/admin/git)
[##### Prometheus integration\
\
Learn how to configure Prometheus with Coder.](https://coder.com/docs/v1/admin/prometheus)
[##### Licensing\
\
Learn how to manage the license for your Coder deployment.](https://coder.com/docs/v1/admin/licensing)
[##### Telemetry\
\
Learn what usage telemetry Coder collects.](https://coder.com/docs/v1/admin/telemetry)
[##### Templates\
\
Learn how to manage your workspace templates.](https://coder.com/docs/v1/admin/templates)
[##### Usage metrics\
\
Learn how to track usage of your Coder deployment.](https://coder.com/docs/v1/admin/metrics)
---
# Troubleshooting | Coder v1 Docs
[Home](https://coder.com/docs/v1 "Home")
[Guides](https://coder.com/docs/v1/guides "Guides")
Troubleshooting
[##### Activate JetBrains license in a browser\
\
Learn how to activate a license when running a JetBrains IDE in a browser.](https://coder.com/docs/v1/guides/troubleshooting/activate-jetbrains-licensing)
[##### Admin password reset\
\
Learn how to resolve issues with resetting your admin password.](https://coder.com/docs/v1/guides/troubleshooting/admin-pwd)
[##### Docker\
\
Learn how to solve Docker issues inside Coder workspaces.](https://coder.com/docs/v1/guides/troubleshooting/docker-problems)
[##### GitHub OAuth integration\
\
Learn how to fix a "Failed to link account" OAuth error.](https://coder.com/docs/v1/guides/troubleshooting/git-oauth)
[##### Image registry\
\
Learn how to resolve issues connecting to an image registry.](https://coder.com/docs/v1/guides/troubleshooting/registry)
[##### inotify watcher limit problems\
\
Learn how to resolve issues related to the inotify watcher limit.](https://coder.com/docs/v1/guides/troubleshooting/inotify-watch-limits)
[##### TypeError: Failed to fetch\
\
Learn how to resolve TypeError issues.](https://coder.com/docs/v1/guides/troubleshooting/502error)
[##### Vite and HMR\
\
Learn how to resolve issues with HMR when using Vite.](https://coder.com/docs/v1/guides/troubleshooting/vite-hmr)
[##### SSH no mutual signature supported\
\
Learn how to fix SSH error "no mutual signature supported"](https://coder.com/docs/v1/guides/troubleshooting/ssh-no-mutual-signature-supported)
---
# Moving to Coder v2 | Coder v1 Docs
[Home](https://coder.com/docs/v1 "Home")
[Guides](https://coder.com/docs/v1/guides "Guides")
Moving to Coder v2
Coder v2 is Coder's open core remote development platform first launched in June 2022. Coder v2 has an [open-source](https://github.com/coder/coder)
"OSS" and an [Enterprise paid edition](https://coder.com/docs/coder-oss/latest/enterprise)
. This document shares best practices for moving your workflows from Coder v1 to Coder v2.

> If you are current a Coder v1 customer and would like to try Coder v2, contact your account executive or [contact us](https://coder.com/contact)
> .
[](https://coder.com/docs/v1/guides/moving-to-oss#high-level-concepts)
High-level concepts
------------------------------------------------------------------------------------------
Coder v2 introduces a number of new paradigms. We recommend reading the comparison table before you proceed.
| | Coder v1 | Coder v2 |
| --- | --- | --- |
| **Workspace** | Each user creates and develops on remote workspaces | Same as Coder v1 |
| **Supported IDEs** | Web IDEs (code-server, Jupyter) + SSH-powered desktop IDEs (e.g. VS Code, JetBrains) | Same as Coder v1 |
| **Provisioner** | Provisions workspaces on Kubernetes with hardcoded spec (pod + home volume) | Provisions workspaces via [Terraform](https://terraform.io/) . Supports any resource (e.g. VM, Kubernetes, Docker) |
| **Template** | Optional YAML [configuration syntax](https://coder.com/docs/coder/latest/admin/templates) for workspaces. Managed by Coder admins or git/CI | [Terraform code](https://coder.com/docs/coder-oss/latest/templates) that defines workspace specs. Managed by Coder admins or git/CI |
| **Image** | Container image for workspace, contains dev tools and dependencies | Container and VM image included in [the template](https://coder.com/docs/coder-oss/latest/templates) with dev tools and dependencies |
| **Workspace options** | CPU, RAM, GPU, disk size, image name, CVM (on/off), dotfiles | Defined as variables in [the template](https://coder.com/docs/coder-oss/latest/templates) |
| **Deployment methods** | Kubernetes, Docker | Kubernetes, Docker, VM, or bare metal |
| **Architecture** | Control plane + PostgreSQL database + workspaces | Same as Coder v1 |
Keep reading for an in-depth feature comparison. Also see the [Coder v2 documentation](https://coder.com/docs/coder-oss/)
[](https://coder.com/docs/v1/guides/moving-to-oss#migration-strategy)
Migration Strategy
----------------------------------------------------------------------------------------
A separate control plane is necessary to run Coder v2. A direct upgrade via Helm is not possible since Coder v2 redefines some concepts (e.g. templates, provisioners) and other features are still being developed (e.g. audit log, organization support).
Short term, we recommend keeping your Coder v1 control plane and inviting a pilot group to your Coder v2 control plane to reproduce their workflows and try new features (e.g. Windows support, dynamic secrets, faster builds).
### [](https://coder.com/docs/v1/guides/moving-to-oss#feature-list-key)
Feature list key
Each of the following features have open issues on coder/coder - if they're a priority for your team, please chime in on the GitHub issue.
✅ = Complete
⌛ = WIP/planned [on a roadmap](https://github.com/coder/coder/discussions/categories/roadmap)
🤔 = Still considering
❌ = No current plans for feature
### [](https://coder.com/docs/v1/guides/moving-to-oss#infrastructure)
Infrastructure
For small "proof-of-concept" deployments, you can use Coder's [built-in database and tunnel](https://github.com/coder/coder#getting-started)
on a VM to avoid setting up a database, reverse proxy, and TLS.
For production use, we recommend running Coder with an external PostgresSQL database and a reverse proxy for TLS.
* [Installing Coder v2](https://coder.com/docs/coder-oss/latest/install)
| | Coder v1 | Coder v2 |
| --- | --- | --- |
| Kubernetes | ✅ Helm chart | ✅ |
| Kubernetes (HA/multiple replicas) | ✅ | ✅ |
| Docker control plane | ✅ | ✅ |
| VM control plane | ❌ | ✅ |
| Built-in PostgreSQL | ✅ | ✅ |
| External PostgreSQL support | ✅ | ✅ |
| External TLS documentation | ✅ | ✅ |
| **Multi region/cloud (control plane)** | ✅ Multi-region [satellites](https://coder.com/docs/coder/latest/admin/satellites) for faster IDE connections. | ✅ |
| **Multi region/cloud (workspaces)** | ✅ [Workspace providers](https://coder.com/docs/coder/latest/admin/workspace-providers) support additional clusters. | ✅ [Templates](https://coder.com/docs/coder/latest/admin/templates) can provision resources in any clouds, clusters, or region |
| **Multi region/cloud (tunnel/SSH)** | ✅ | ✅ |
### [](https://coder.com/docs/v1/guides/moving-to-oss#cli)
CLI
Coder v2 uses a separate [command line utility](https://coder.com/docs/coder-oss/latest/install)
. To use both CLIs on the same machine, you can install the Coder v2 CLI under a different name (e.g. `coderv2`):
`` `curl -sL https://coder.com/install.sh | sh -s -- --method=standalone --binary-name=coderv2 > /dev/null # Coder v1 CLI coder workspaces list # Coder v2 CLI coderv2 list` ``
### [](https://coder.com/docs/v1/guides/moving-to-oss#users)
Users
Like Coder v1, you can [enable SSO via OpenID Connect](https://coder.com/docs/coder-oss/latest/install/auth#step-2-configure-coder-with-the-openid-connect-credentials)
so that any user in your federation can log in. Coder v2 optionally supports [GitHub (Enterprise)](https://coder.com/docs/coder-oss/latest/install/auth#step-1-configure-the-oauth-application-in-github)
and [username/password](https://coder.com/docs/coder-oss/latest/users)
authentication.
> If you are interested in a bulk user and/or workspace migration utility, [we'd like to hear from you](https://coder.com/contact)
> .
| | Coder v1 | Coder v2 |
| --- | --- | --- |
| Dotfiles | ✅ | Per-workspace [(dotfiles docs)](https://coder.com/docs/coder-oss/latest/dotfiles) |
| Generated SSH key | ✅ | ✅ |
| Default shell | ✅ | Per-workspace [(with parameters)](https://coder.com/docs/coder-oss/latest/templates#parameters) |
| Auto-start times | ✅ | Per-workspace |
| Git OAuth | ✅ | ✅ |
User-wide settings (e.g. shell, autostart times, dotfiles URL) are not currently supported in Coder v2 [(#3506)](https://github.com/coder/coder/issues/3506)
.
### [](https://coder.com/docs/v1/guides/moving-to-oss#workspaces)
Workspaces
To migrate Coder v1 workspaces, you'll need at least one template in your Coder v2 deployment, specifically with the image(s) you support in Coder v1.
* Docs: [Adding templates](https://coder.com/docs/coder-oss/latest/templates)
We recommend manually creating a new workspace in Coder v2 and using a utility such as `scp` or `rsync` to copy the home directory from your v1 workspace.
Inside a v1 workspace, run the following commands to:
1. Download the Coder v2 CLI
2. Create a Coder v2 workspace
3. rsync your files to the new workspace
`` `# Download the Coder v2 CLI (alias "coderv2") curl -sL https://coder.com/install.sh | sh -s -- --method=standalone --binary-name=coderv2 > /dev/null # Log in to the Coder v2 deployment (e.g. coder-v2.example.com) coderv2 login https://coder-v2.example.com # Create a workspace coderv2 create # Gain SSH access to v2 workspaces coderv2 config-ssh -y # Copy your home directory into the new Coder v2 workspace rsync \ --recursive \ --itemize-changes \ --info=progress2 \ --links \ --exclude='.cache/' \ $HOME/. coder.$CODER_WORKSPACE_NAME:/home/coder/.` ``
Some workspace-level features are different in Coder v2. Refer to this comparison:
| | Coder v1 | Coder v2 |
| --- | --- | --- |
| **Kubernetes workspaces** | ✅ Hardcoded spec | ✅ Any spec via the [template](https://github.com/coder/coder/tree/main/examples/templates/kubernetes-multi-service) |
| **Docker workspaces** | ✅ Hardcoded spec | ✅ Any spec via the Terraform [template](https://coder.com/docs/coder-oss/latest/templates) |
| **VM workspaces** | ❌ | ✅ Any spec via the Terraform [template](https://coder.com/docs/coder-oss/latest/templates) |
| **Linux workspaces** | ✅ | ✅ |
| **Windows workspaces** | ✅ | ✅ |
| **macOS workspaces** | ❌ | ✅ |
| **ARM workspaces** | ❌ | ✅ |
| **Additional resources in workspace (volume mounts, API keys, etc)** | ❌ | ✅ Any [Terraform resource](https://registry.terraform.io/) |
| **Workspace options** | Limited options | ✅ Any options via [template parameters](https://coder.com/docs/coder-oss/latest/templates#parameters) |
| **Edit workspace** | ✅ | ✅ |
| **Resource provisoning rates** | ✅ Organization wide | ✅ Template wide [(needs docs)](https://github.com/coder/coder/issues/3519) |
| **Manage workspaces through UI and CLI** | ✅ | ✅ |
### [](https://coder.com/docs/v1/guides/moving-to-oss#developer-experience)
Developer experience
Some developer experience features are different, or still being worked on in Coder v2. Refer to this table:
| | Coder v1 | Coder v2 |
| --- | --- | --- |
| **Auto-start workspace (schedule)** | ✅ | ✅ |
| **Auto-start workspace (SSH or visit app)** | ❌ | See [#4973](https://github.com/coder/coder/issues/4973) |
| **Code via web terminal** | ✅ | ✅ |
| **Code via code-server (Code Web)** | ✅ Hardcoded version | ✅ Any version [via the template](https://coder.com/docs/coder-oss/latest/ides/web-ides#code-server) |
| **Code via JetBrains Projector (web)** | ✅ Hardcoded version | ✅ Any version [via the template](https://coder.com/docs/coder-oss/latest/ides/web-ides#jetbrains-projector) |
| **Code with local IDE via SSH (VS Code Remote, JetBrains Gateway)** | ✅ With [coder-cli](https://coder.com/docs/v1/cli) installed | ✅ With [coder](https://coder.com/docs/coder-oss/latest/install) installed |
| **Custom workspace applications** | ✅ | ✅ Defined in [templates](https://coder.com/docs/coder-oss/latest/templates#coder-apps) |
| **Access ports (SSH/tunnel)** | ✅ | ✅ |
| **Access ports (web UI)** | ✅ [Dev URLs](https://coder.com/docs/coder/latest/workspaces/devurls) | ✅ |
| **Share ports (web UI)** | ✅ [Dev URLs](https://coder.com/docs/coder/latest/workspaces/devurls) | ✅ |
| **Docker in workspaces (Kubernetes)** | ✅ [CVMs](https://coder.com/docs/coder/latest/workspaces/cvms) | ✅ |
| **Manage workspaces through UI and CLI** | ✅ | ✅ |
| **Open in Coder button** | ✅ | ✅ |
### [](https://coder.com/docs/v1/guides/moving-to-oss#enterprisemanagement)
Enterprise/management
Some enterprise features are different, or still being worked on in Coder v2. Refer to this table:
| | Coder v1 | Coder v2 |
| --- | --- | --- |
| **Auto-stop workspace** | ✅ Activity-based | ✅ Schedule-based & ✅ Activity-based ) |
| **Audit logging** | ✅ | ✅ |
| **Organizations** | ✅ | ✅ Groups & template permissions |
| **Workspace Proccess Logging** | ✅ | ⌛ [#5314](https://github.com/coder/coder/issues/5314) |
| **User metrics** | ✅ | Template-wide metrics [(needs docs)](https://github.com/coder/coder/issues/3980) |
| **Resource quotas** | ✅ | ✅ Max workspace limit |
| **SDK** | ❌ | ✅ [codersdk](https://github.com/coder/coder/tree/main/codersdk) |
| **REST API** | ✅ | ✅ |
> See the [v1 sunset frequently asked questions](https://coder.com/docs/v1/guides/v2-faq)
> for more information.
##### On this page
---
# Organizations | Coder v1 Docs
[Home](https://coder.com/docs/v1 "Home")
[Admin](https://coder.com/docs/v1/admin "Admin")
Organizations
Organizations are groups that tie together users, workspaces, and images. You must assign all of your images and workspaces to a specific organization. An end-user can only access images that are assigned to the same organization they are.
> Be sure to familiarize yourself with the [types of roles](https://coder.com/docs/v1/admin/access-control/organizations)
> you can assign users within an organization.
[](https://coder.com/docs/v1/admin/organizations#the-default-organization)
The default organization
---------------------------------------------------------------------------------------------------
Coder automatically creates a default organization for you during the deployment process. You can then assign users and their workspaces to that organization.
If you have multiple organizations, you can set one or more as the default. You can also change which organizations are defaults at any time.
[](https://coder.com/docs/v1/admin/organizations#namespaces)
Namespaces
-----------------------------------------------------------------------
> **Deprecation notice**: The `namespaceWhitelist` field has been deprecated in [Coder version 1.17](https://coder.com/docs/v1/changelog/archive/1.17.0)
> .
Coder's Helm chart previously included a `namespaceWhitelist` field that accepted a list of cluster namespaces and made them available to Coder. The [workspace provider feature](https://coder.com/docs/v1/admin/workspace-providers)
supersedes this field.
You will not be able to make any changes _unless_ you are removing namespaces that no longer contain workspaces with Coder deployments v1.17.0 or later (if you remove namespaces from the `namespaceWhitelist` field, the workspaces in the namespaces are no longer accessible).
For older Coder deployments, you can continue using existing workspaces in whitelisted namespaces, though you cannot create new workspaces in those namespaces.
If you want to separate Coder workspaces by namespaces in a Kubernetes cluster, you can do so by [deploying a new workspace provider](https://coder.com/docs/v1/admin/workspace-providers/deployment)
to each additional namespace in the cluster. The workspace provider provisions workspaces to the namespace it has been deployed to, and you can control access to each workspace provider via an organization allowlist to replace the previous organization namespace behaviors.
##### On this page
---
# Workspaces | Coder v1 Docs
[Home](https://coder.com/docs/v1 "Home")
Workspaces
Workspaces contain the dependencies, IDEs, and configuration information needed for your projects. Coder creates workspaces using a [shared container image](https://coder.com/docs/v1/images)
, which improves their reproducibility.
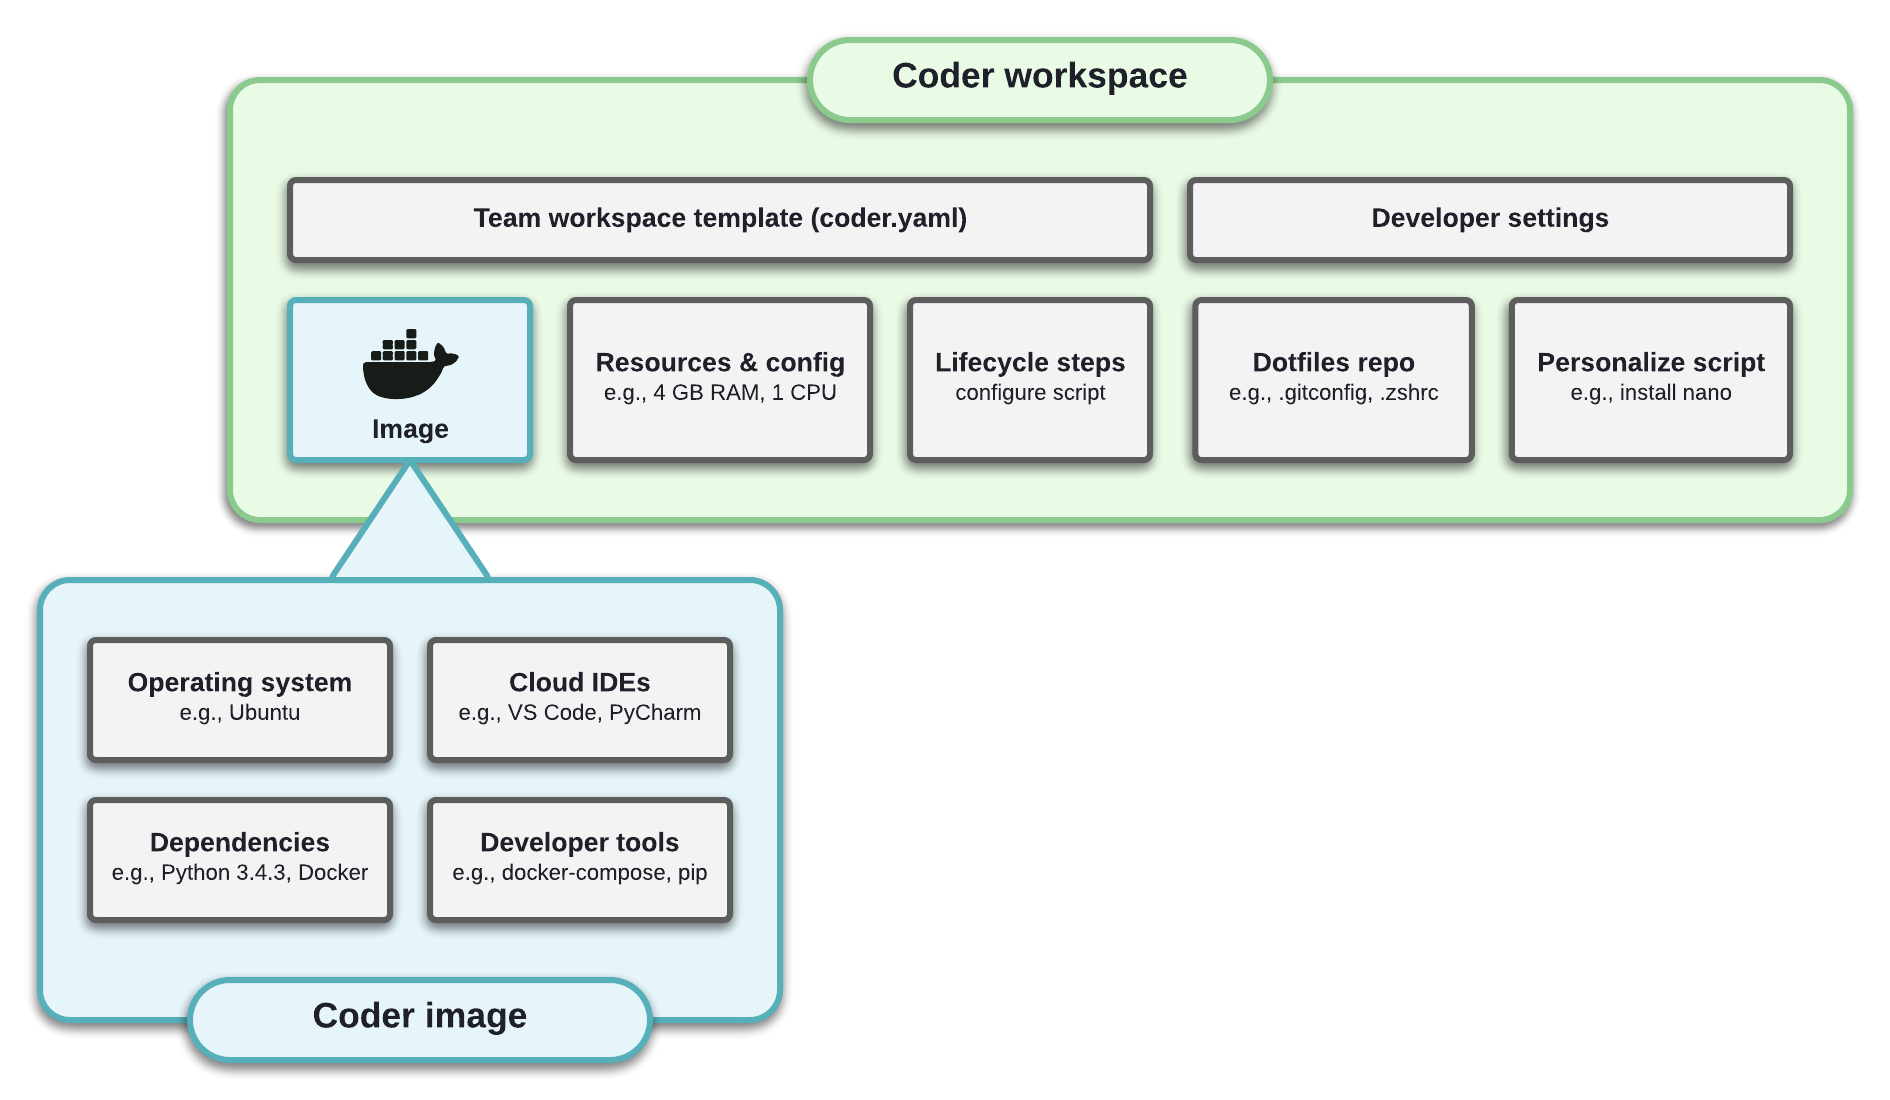
[](https://coder.com/docs/v1/workspaces#in-this-section)
In this section
------------------------------------------------------------------------
[##### Create a workspace\
\
Learn how to create and develop in a workspace.](https://coder.com/docs/v1/workspaces/create)
[##### Lifecycle\
\
Learn about the workspace lifecycle.](https://coder.com/docs/v1/workspaces/lifecycle)
[##### Auto-start\
\
Learn how to configure automated workspace rebuilds.](https://coder.com/docs/v1/workspaces/autostart)
[##### Dev URLs\
\
Learn how to access HTTP services running inside your workspace.](https://coder.com/docs/v1/workspaces/devurls)
[##### Docker in workspaces\
\
Learn how to run Docker securely inside your workspace.](https://coder.com/docs/v1/workspaces/cvms)
[##### Editors and IDEs\
\
Learn how to connect your favorite editors and IDEs to your remote workspace.](https://coder.com/docs/v1/workspaces/editors)
[##### Environment variables\
\
Learn how to work with CODER\_\* environment variables inside workspaces.](https://coder.com/docs/v1/workspaces/variables)
[##### Personalization\
\
Learn how to personalize your workspace to augment its base image.](https://coder.com/docs/v1/workspaces/personalization)
[##### Preferences\
\
Learn how to manage your Coder account preferences.](https://coder.com/docs/v1/workspaces/preferences)
[##### Progressive web apps\
\
Learn how to install the editor PWAs for a native IDE-like browser editing experience.](https://coder.com/docs/v1/workspaces/pwa)
[##### SSH access\
\
Learn how to configure SSH access to your workspaces.](https://coder.com/docs/v1/workspaces/ssh)
[##### VS Code extensions\
\
Learn how to add and use VS Code extensions with your workspace.](https://coder.com/docs/v1/workspaces/vs-code-extensions)
[##### Workspace applications\
\
Learn how to access web apps running in your workspace.](https://coder.com/docs/v1/workspaces/applications)
[##### Workspace parameters\
\
Learn about each parameter available during workspace creation.](https://coder.com/docs/v1/workspaces/workspace-params)
[##### Workspace templates\
\
Learn how to describe workspace configuration as code.](https://coder.com/docs/v1/workspaces/workspace-templates)
---
# Admin | Coder v1 Docs
[Home](https://coder.com/docs/v1 "Home")
[Guides](https://coder.com/docs/v1/guides "Guides")
Admin
[##### Compute resources\
\
Learn the unique compute resource management capabilities in Coder.](https://coder.com/docs/v1/guides/admin/resources)
[##### Database migration\
\
Learn how to migrate data from Coder's built-in database.](https://coder.com/docs/v1/guides/admin/timescale-migration)
[##### AWS RDS with IAM credentials\
\
Learn how to connect Coder to an RDS database using IAM.](https://coder.com/docs/v1/guides/admin/awsrds)
[##### File download disabling\
\
Learn how to disable file downloading in Coder.](https://coder.com/docs/v1/guides/admin/disable-downloads)
[##### Helm charts\
\
Learn how to modify configuration values in Helm charts.](https://coder.com/docs/v1/guides/admin/helm-charts)
[##### Image tag names\
\
Learn about image tag naming conventions and recommendations for use.](https://coder.com/docs/v1/guides/admin/image-tag-names)
[##### Logging\
\
Learn how to set up logging for your Coder deployment.](https://coder.com/docs/v1/guides/admin/logging)
[##### NFS file mounting\
\
Learn how to mount NFS file shares onto Coder workspaces.](https://coder.com/docs/v1/guides/admin/nfs)
[##### OpenID Connect with Azure AD\
\
Learn how to use Azure's Active Directory SSO with Coder.](https://coder.com/docs/v1/guides/admin/oidc-azuread)
[##### OpenID Connect with Active Directory Federation Services (ADFS)\
\
Learn how to use Azure's Active Directory Federation Services (ADFS) SSO with Coder.](https://coder.com/docs/v1/guides/admin/oidc-adfs)
[##### OpenID Connect with Google\
\
Learn how to use Google SSO with Coder.](https://coder.com/docs/v1/guides/admin/oidc-google)
[##### OpenID Connect with Okta\
\
Learn how to use Okta SSO with Coder.](https://coder.com/docs/v1/guides/admin/oidc-okta)
[##### Shared security responsibility\
\
Learn how Coder and its users carry security-related responsibilities.](https://coder.com/docs/v1/guides/admin/shared-security)
[##### Storage\
\
Learn about storage in workspaces.](https://coder.com/docs/v1/guides/admin/storage)
[##### Usage monitoring\
\
Learn how to monitor Coder's compute usage.](https://coder.com/docs/v1/guides/admin/usage-monitoring)
[##### Workspace provider provisioning via CLI\
\
Learn how to provision a workspace provider using the Coder CLI.](https://coder.com/docs/v1/guides/admin/wp-cli)
---
# Coder for Docker | Coder v1 Docs
[Home](https://coder.com/docs/v1 "Home")
[Getting started](https://coder.com/docs/v1/getting-started "Getting started")
Coder for Docker
This tutorial shows you how to create a Coder development workspace and getting set up to work on a web development project requiring Node.js and React.js. You'll learn how to:
* Connect Coder to your Git provider;
* Create a workspace;
* Add [Create React App](https://create-react-app.dev/)
to your workspace, which will allow you to create a sample single-page application that you can modify;
* Create a dev URL and preview changes to your project;
* Push your changes to a GitHub repo.
[](https://coder.com/docs/v1/getting-started/docker#prerequisites)
Prerequisites
--------------------------------------------------------------------------------
Please [install Coder for Docker](https://coder.com/docs/v1/setup/coder-for-docker)
before proceeding.
[](https://coder.com/docs/v1/getting-started/docker#step-1-log-in-and-connect-coder-to-your-git-provider)
Step 1: Log in and connect Coder to your Git provider
---------------------------------------------------------------------------------------------------------------------------------------------------------------
In this step, you'll log into Coder and connect and authenticate with your Git provider. This will allow you to do things like pull repositories and push changes.
1. Navigate to the Coder deployment using the URL provided to you during the Coder for Docker installation process, and log in.
2. Click on your avatar in the top-right, and select **Account**.
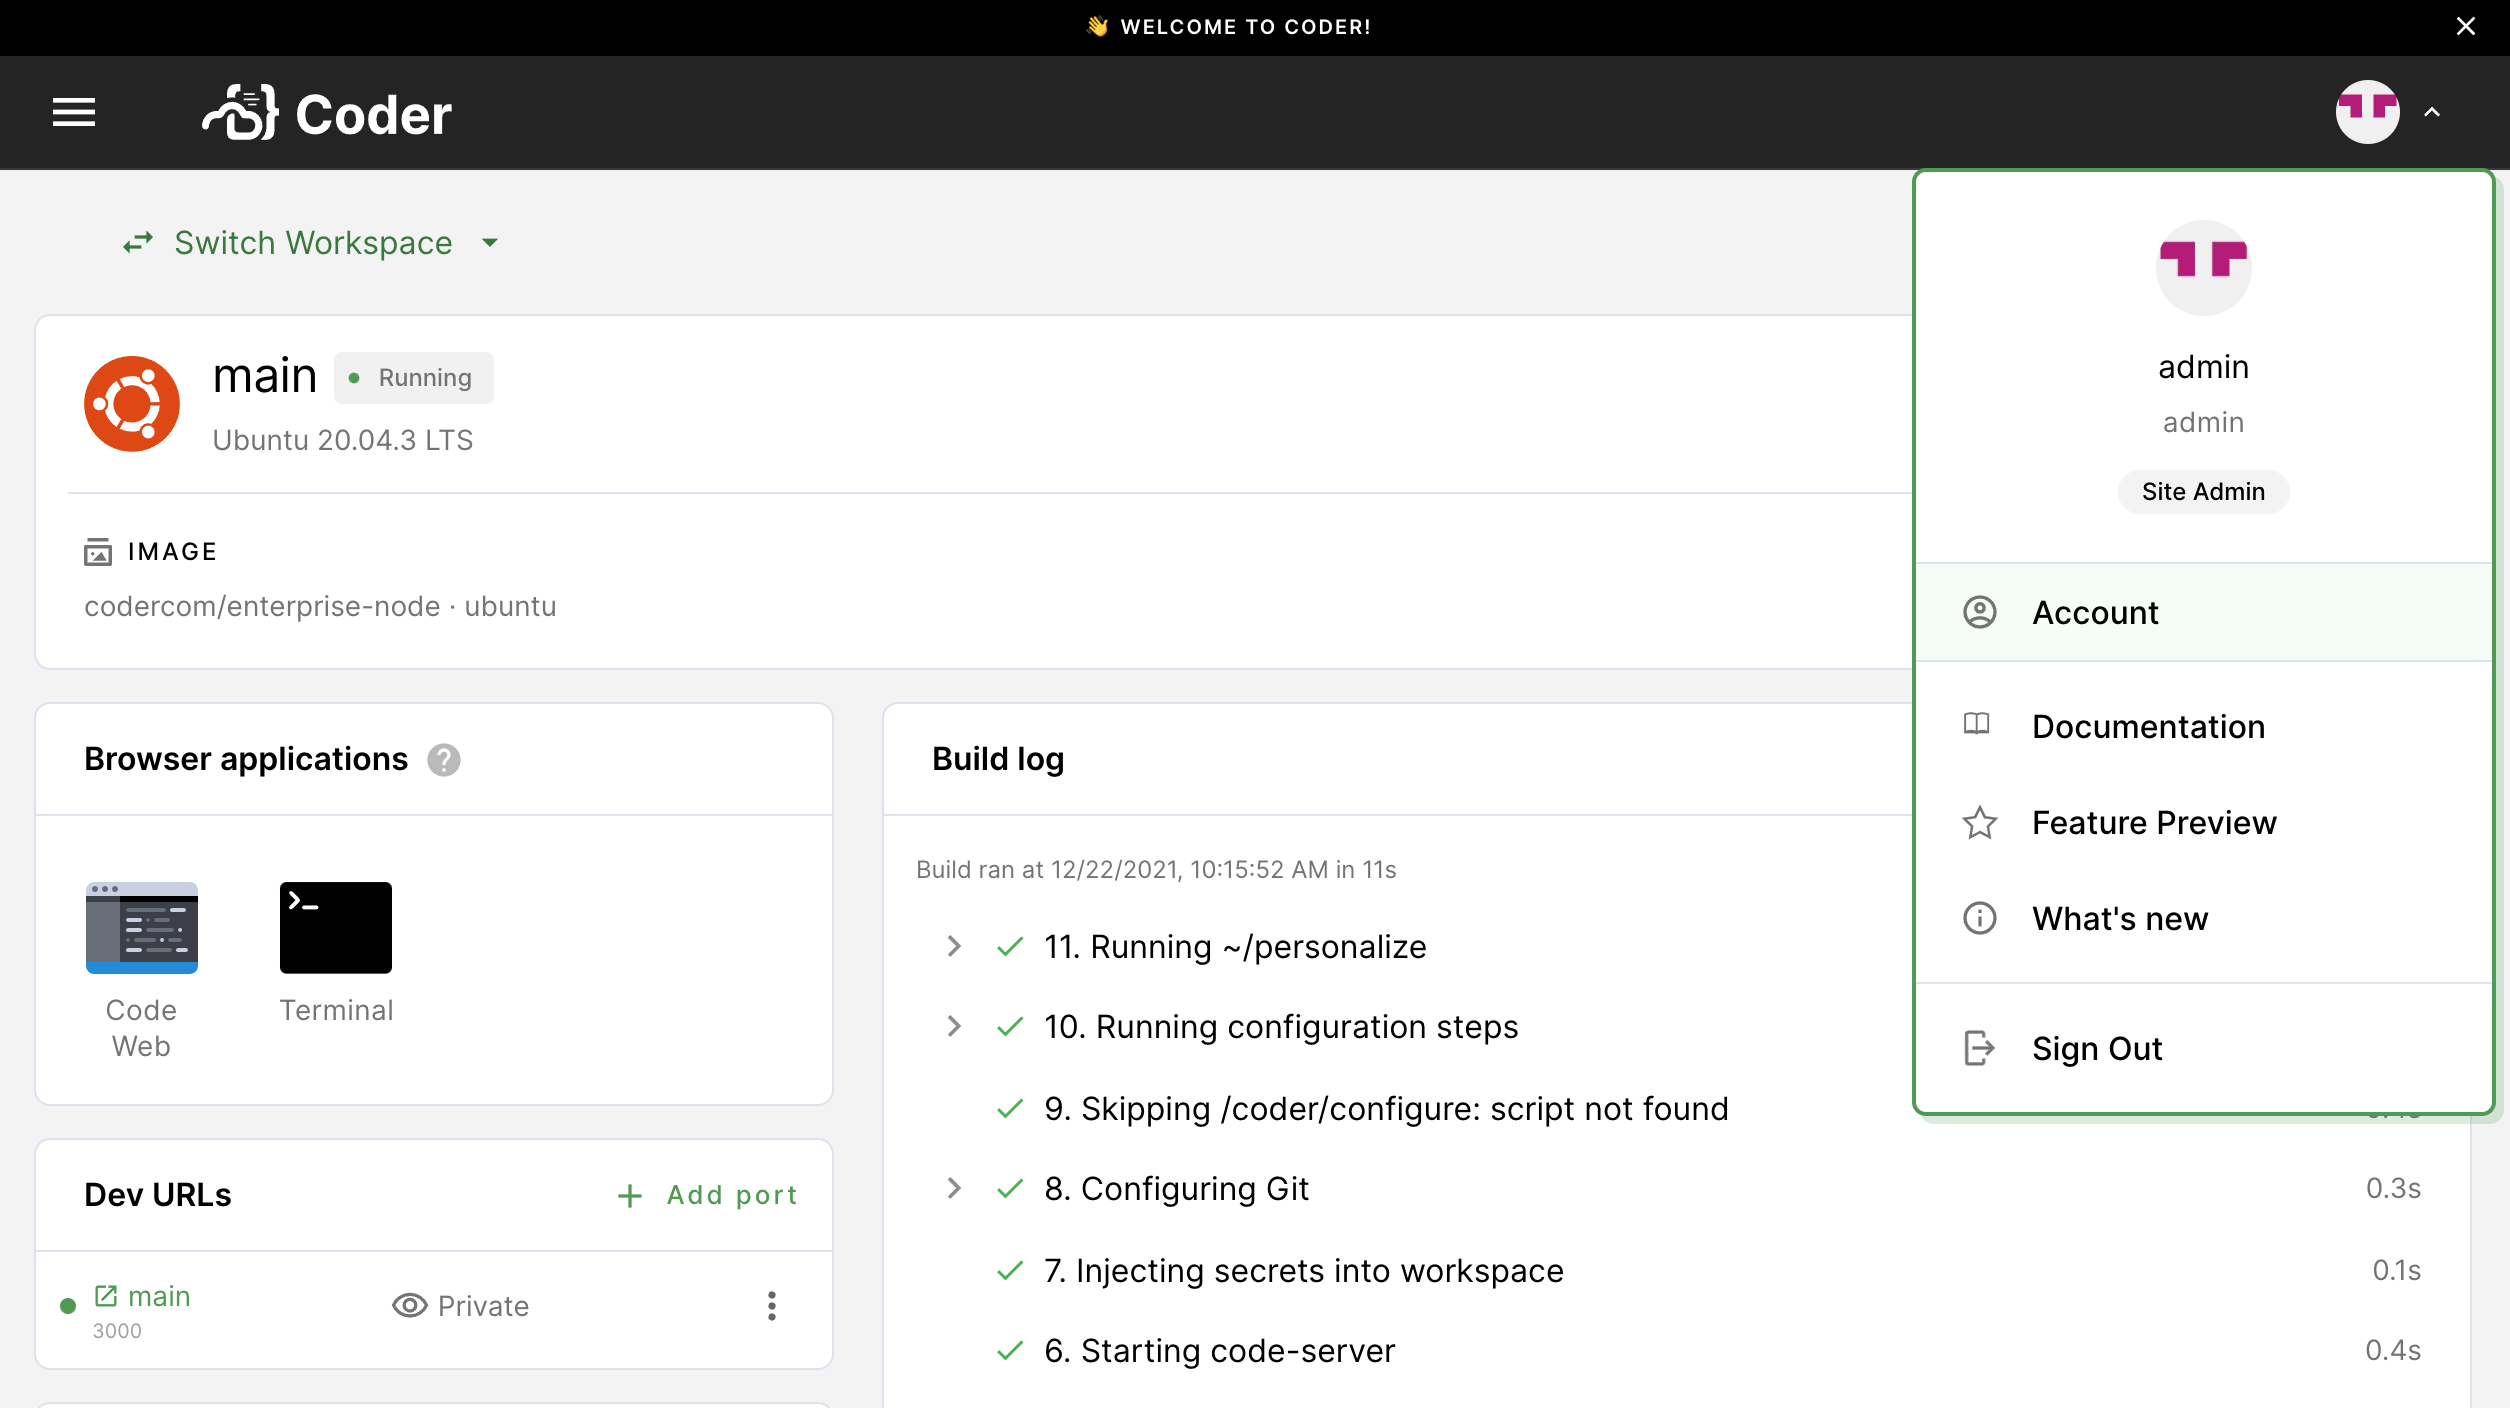
3. Provide Coder with your SSH key to connect and authenticate to GitHub.
Go to **SSH keys**. Copy your public SSH key and [provide it to GitHub](https://docs.github.com/en/authentication/connecting-to-github-with-ssh/adding-a-new-ssh-key-to-your-github-account)
.
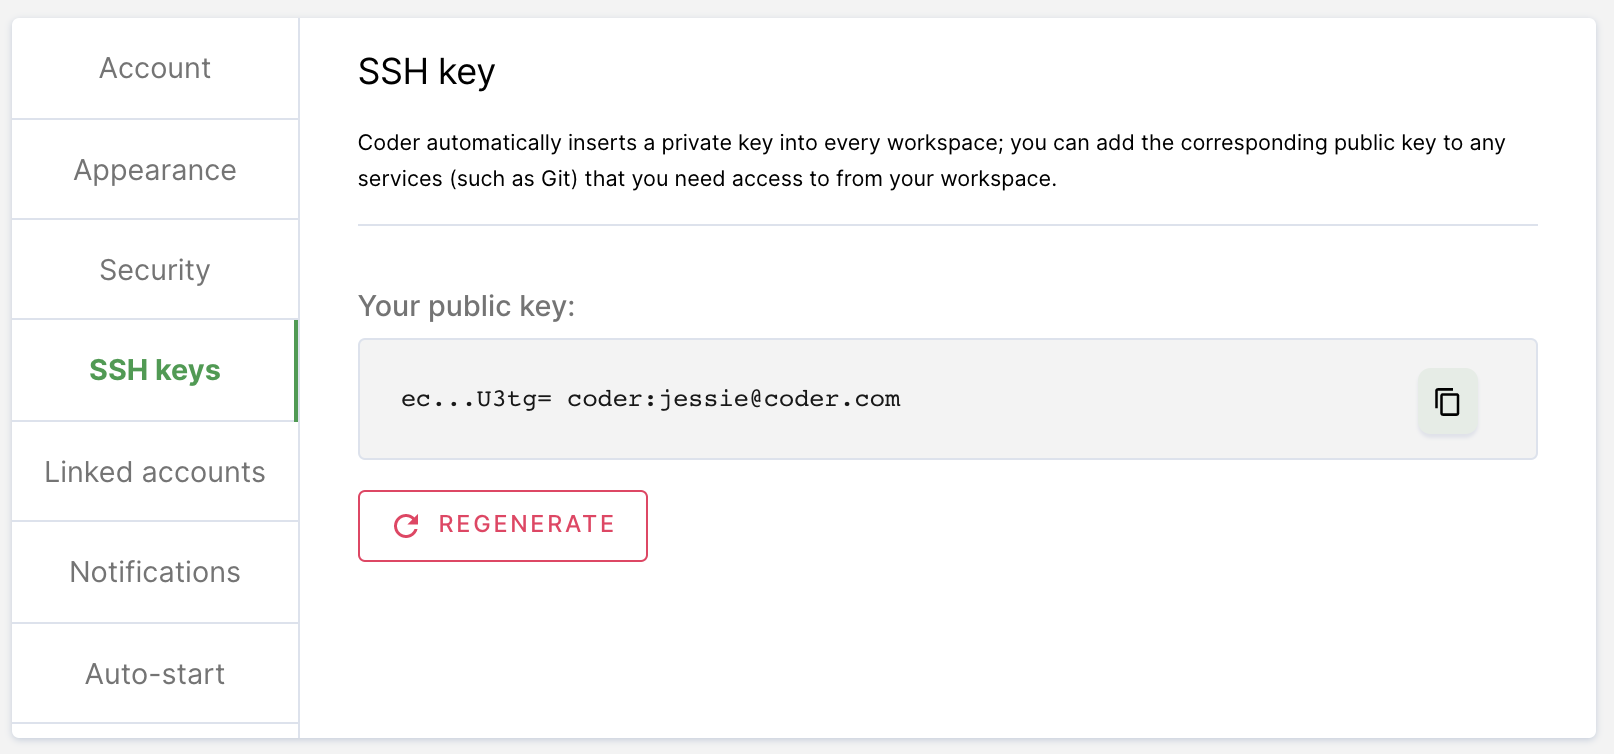
[](https://coder.com/docs/v1/getting-started/docker#step-2-create-your-workspace)
Step 2: Create your workspace
---------------------------------------------------------------------------------------------------------------
You will now create the workspace where you'll work on your development project.
1. Return to **Workspaces** using the top navigation bar.
2. Click **New workspace** to launch the workspace-creation dialog.
3. Provide a **Workspace Name**.
4. In the **Image** section, click **Packaged** (this tab contains Coder-provided images hosted in a Docker registry). Select **NodeJS**. This will populate the form in the **Import** tab.
5. Under **Workspace providers**, leave the default option (which is **Docker**) selected.
6. Scroll to the bottom, and click **Create workspace**. The dialog will close, allowing you to see the main workspace page. You can track the workspace build process using the **Build log** on the right-hand side.
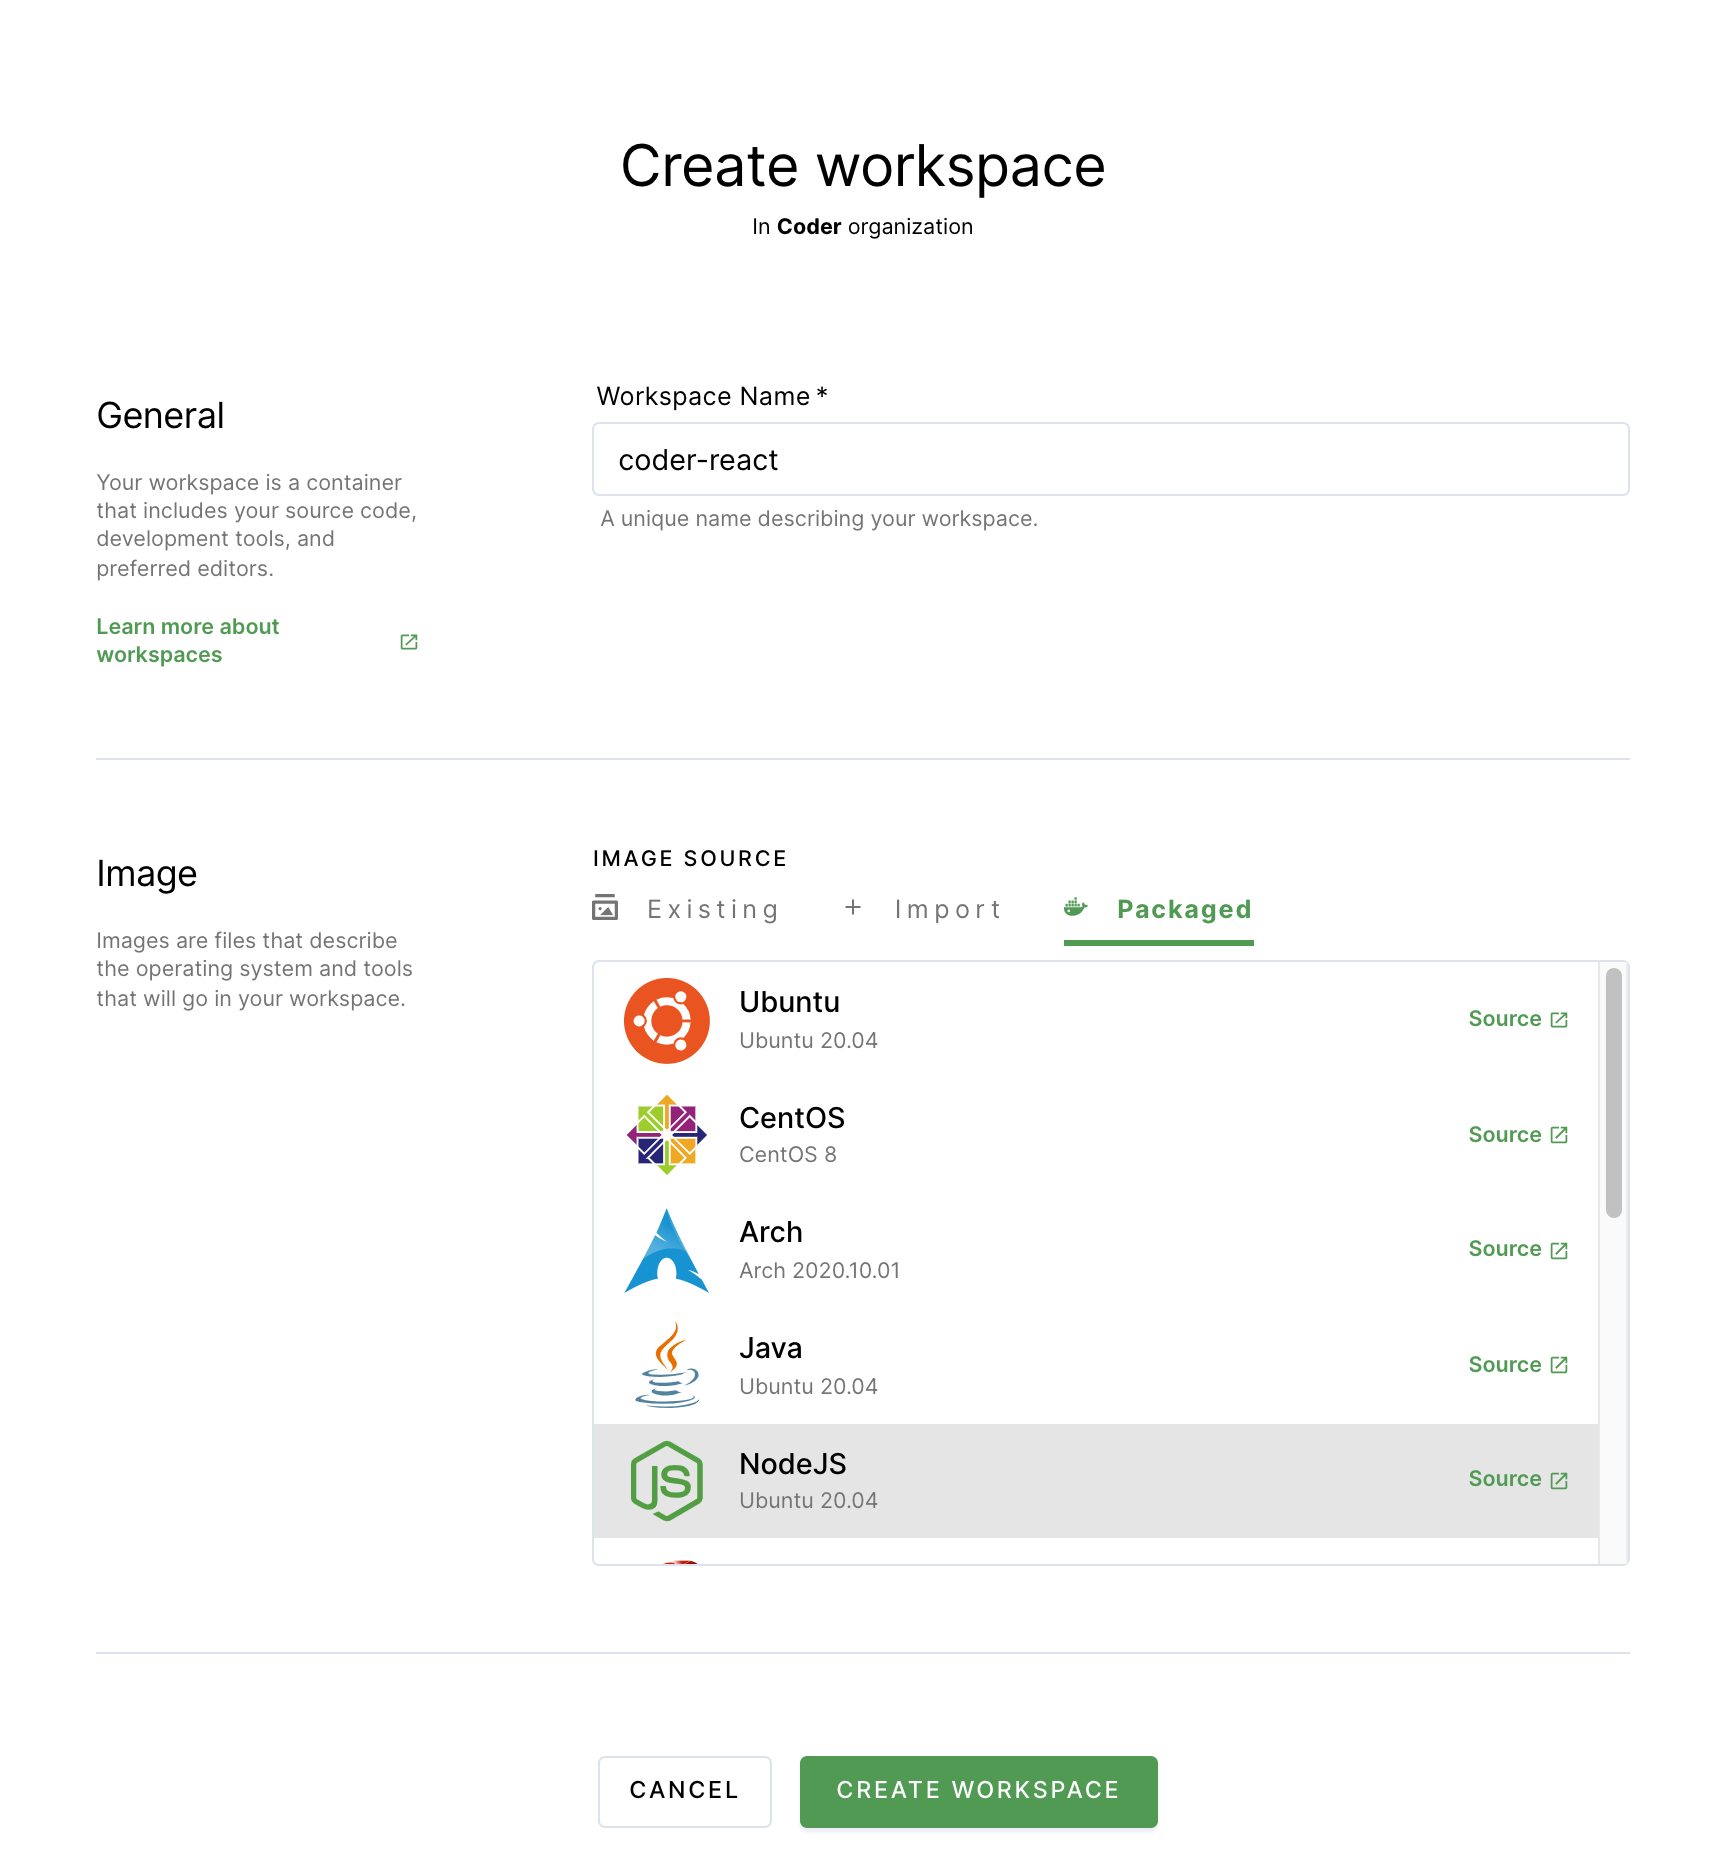
Once your workspace is ready for use, you'll see a chip that says **Running** next to the name of your workspace.
[](https://coder.com/docs/v1/getting-started/docker#step-3-add-a-sample-project-to-your-workspace)
Step 3: Add a sample project to your workspace
-------------------------------------------------------------------------------------------------------------------------------------------------
Once you've created your workspace, you can start using Coder after adding a sample project to your workspace.
1. Under **Browser applications**, click **Code Web** to open VS Code in your browser.
2. When VS Code launches in your browser, click **Open folder...**. In the prompt, you'll see `/home/coder`. This directory is where you'll clone a sample React app project Git repository. Click **OK** to proceed.
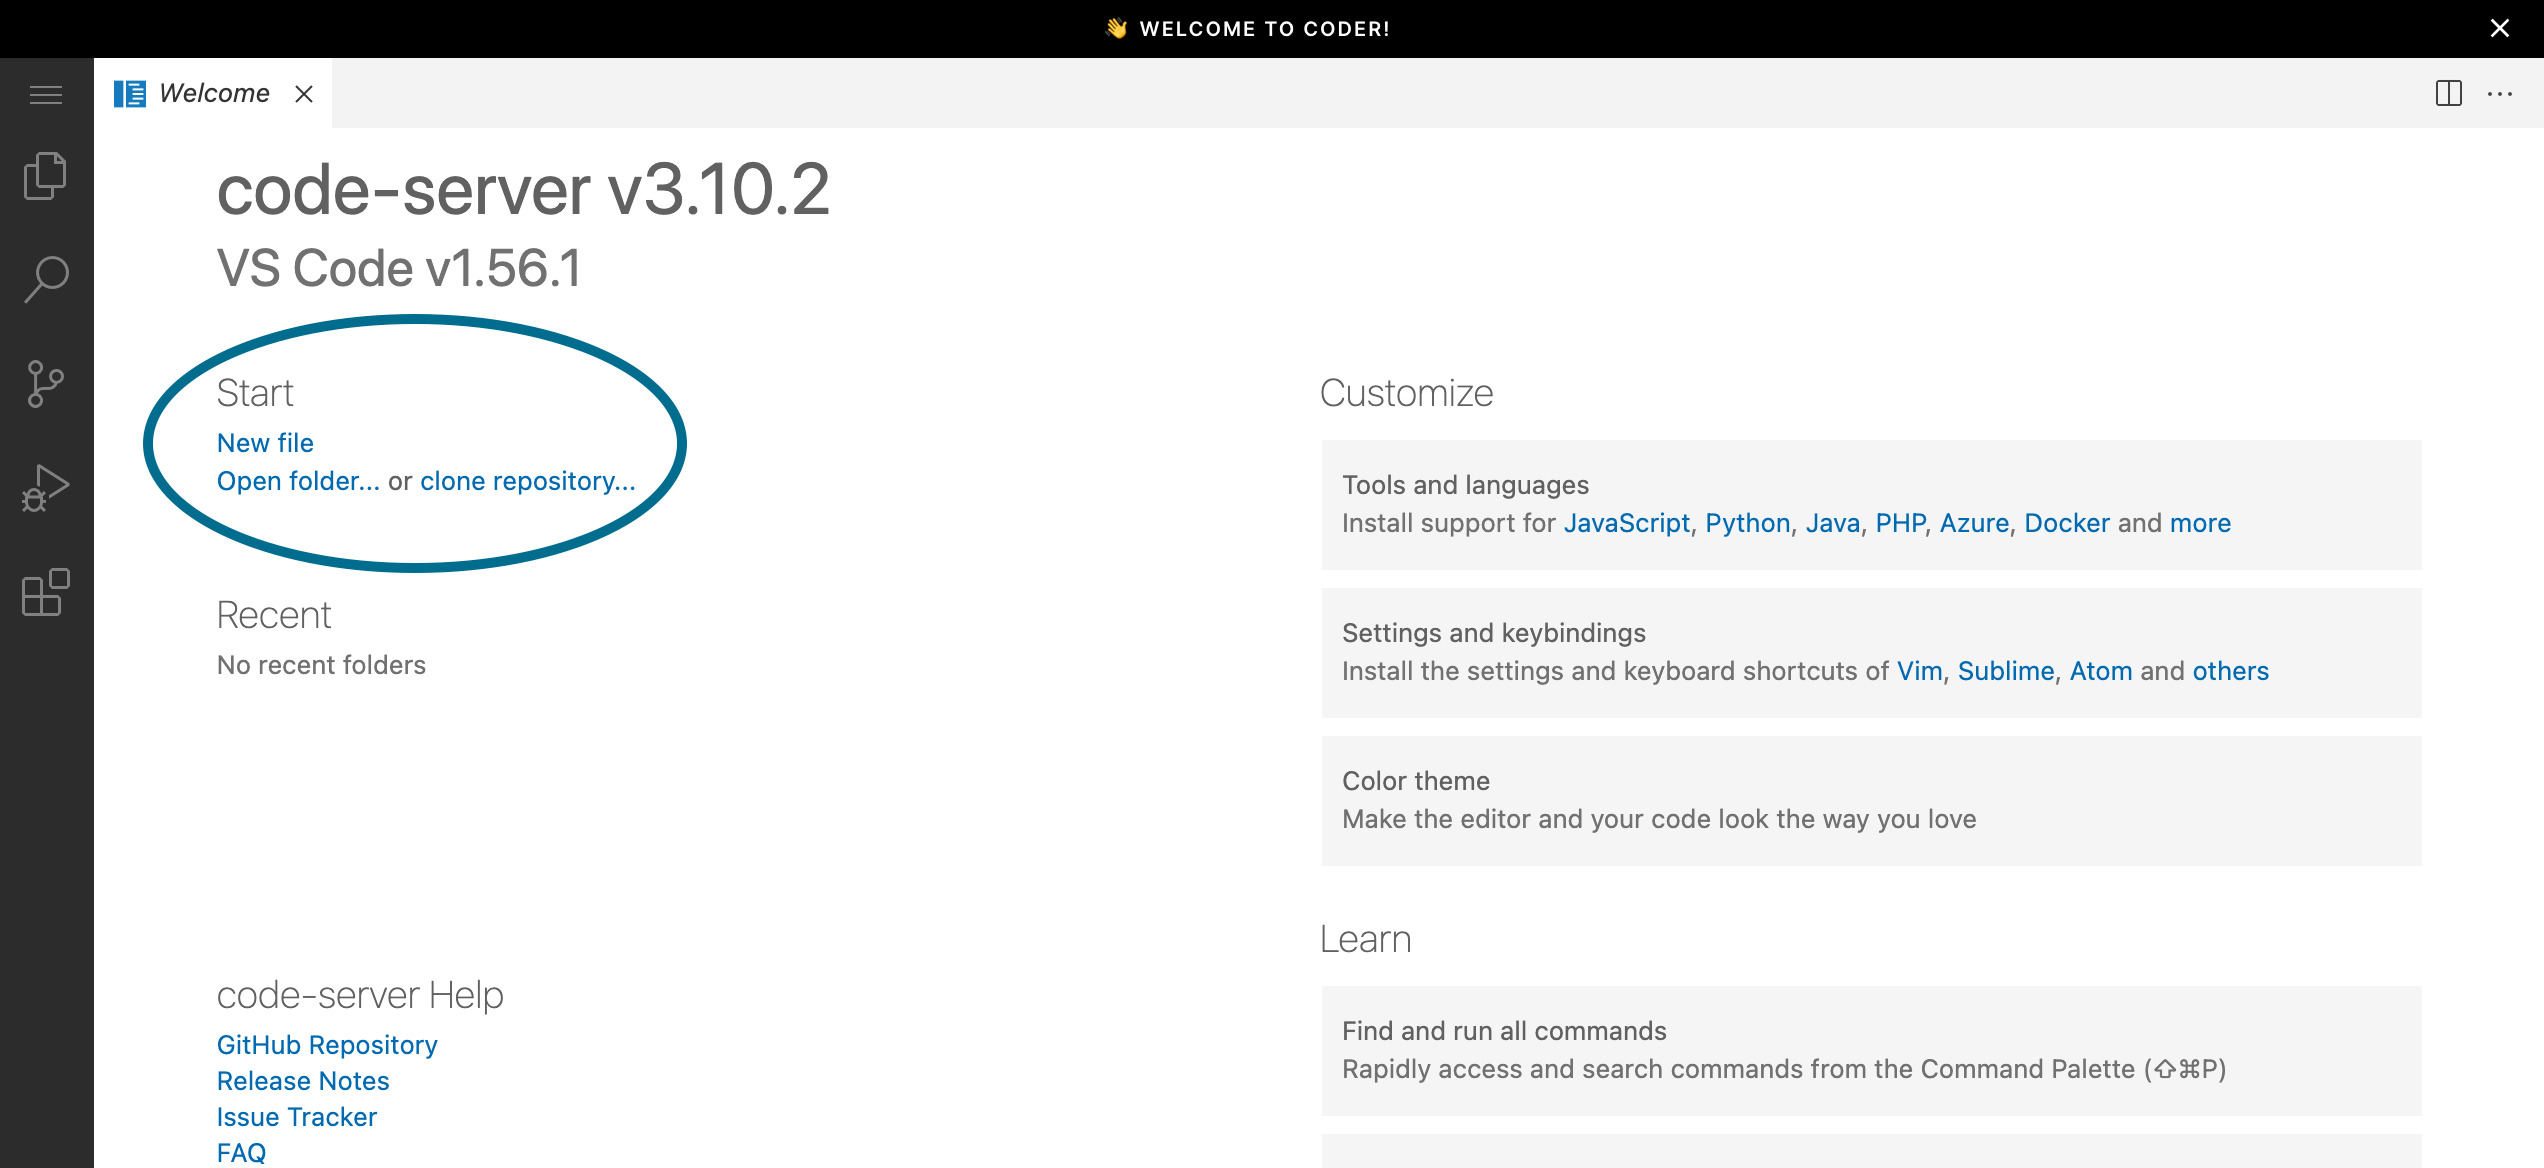
3. Click the hamburger icon in the top right, and select **Terminal** > **New Terminal** to open a new terminal.
4. You're now ready to create a demo app that you can modify:
`` `npx create-react-app my-app cd my-app` ``
Once done, you can expand the `my-app` folder in the left-have nav bar to see its contents:
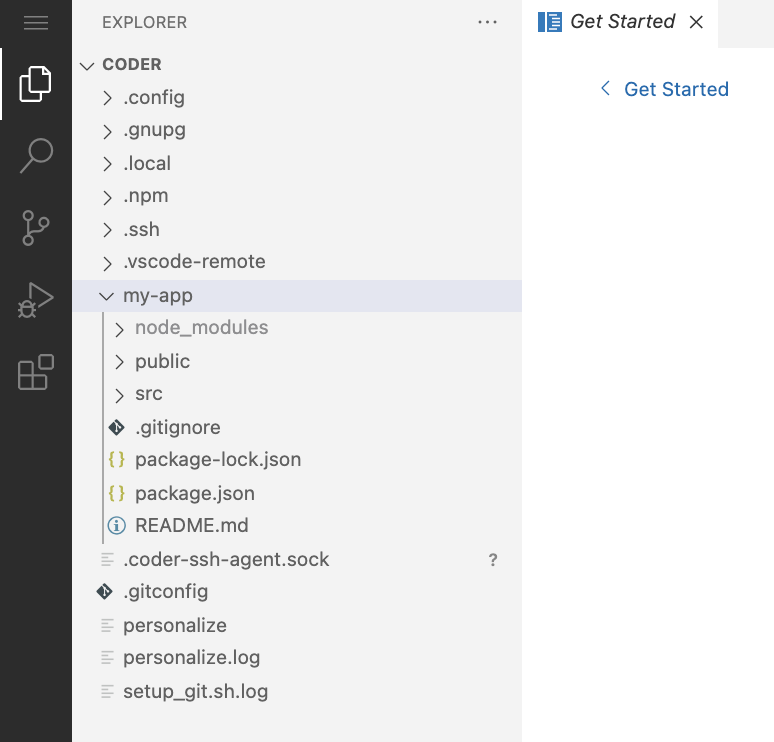
You're now ready to make changes to the application.
[](https://coder.com/docs/v1/getting-started/docker#step-4-preview-your-app-and-view-changes-live)
Step 4: Preview your app and view changes live
-------------------------------------------------------------------------------------------------------------------------------------------------
Dev URLs allow you to access the web services you're developing in your workspace. Once you've created a dev URL, Coder listens on the port you specified and renders a browser link you can use to view your application.
1. Return to your workspace overview page, and find the **Dev URLs** section.
2. Click **Add port**.
3. Provide a **Name** for your port, and leave the remaining fields as-is. Click **Save**.
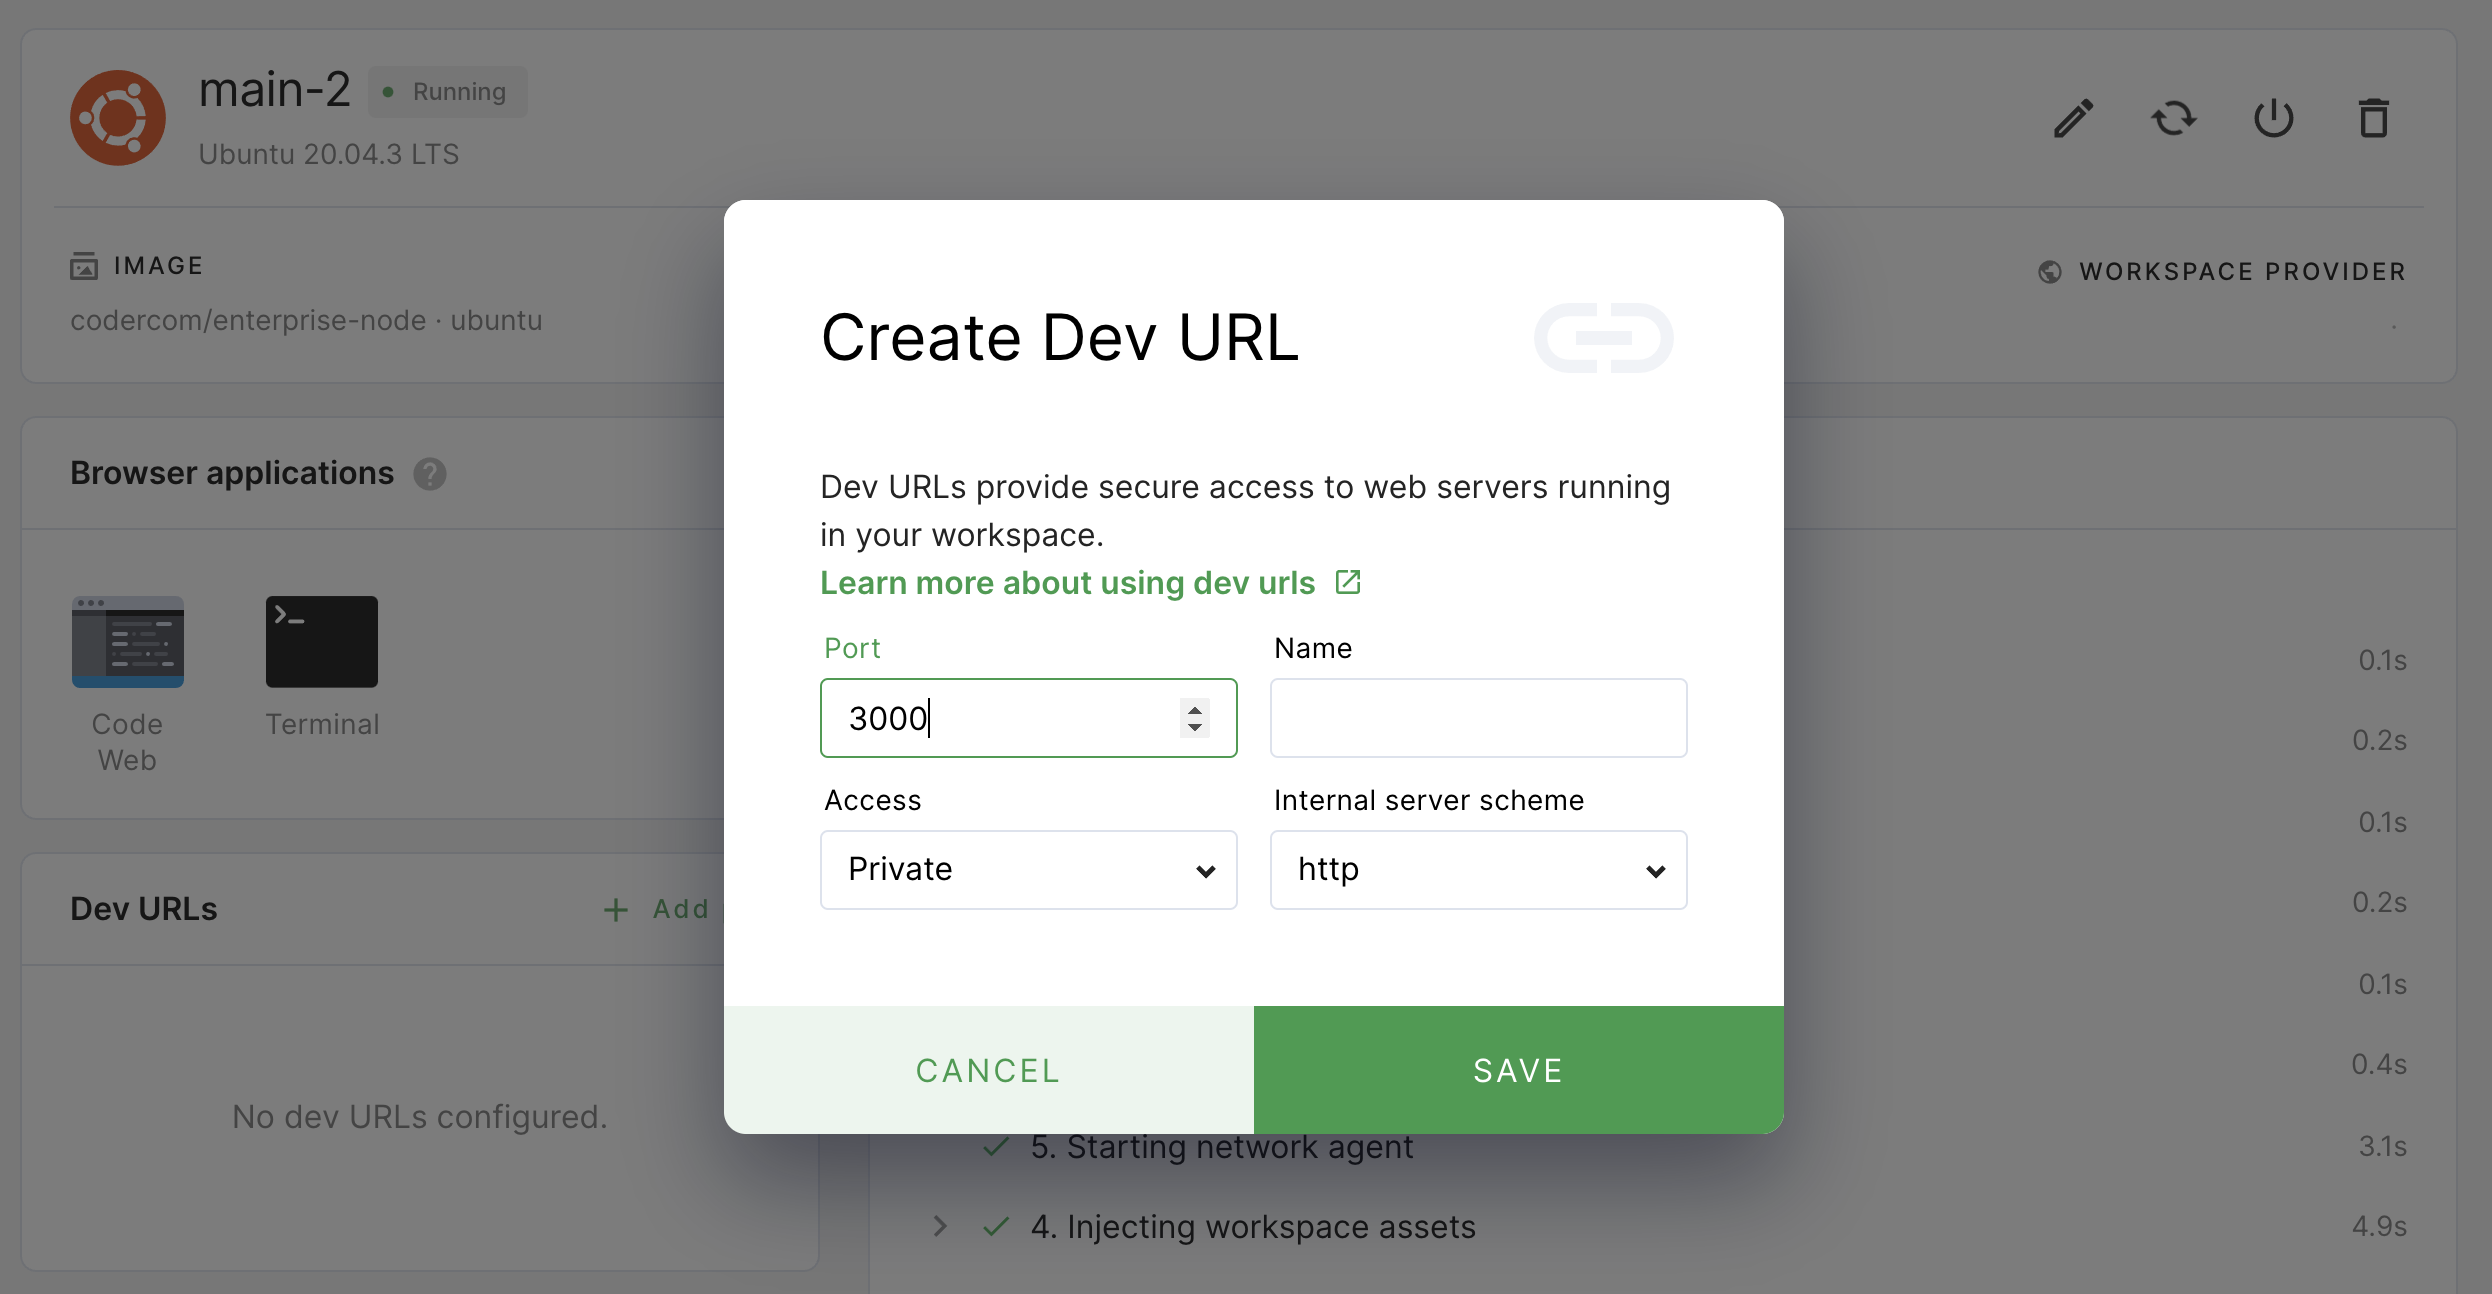
4. At this point, you can build and run the sample app by returning to your Code Web window and running the following in the terminal:
`` `npm start` ``
5. From the workspace overview, launch your dev URL by clicking its name; Coder will open a new browser window and point you to the appropriate URL.
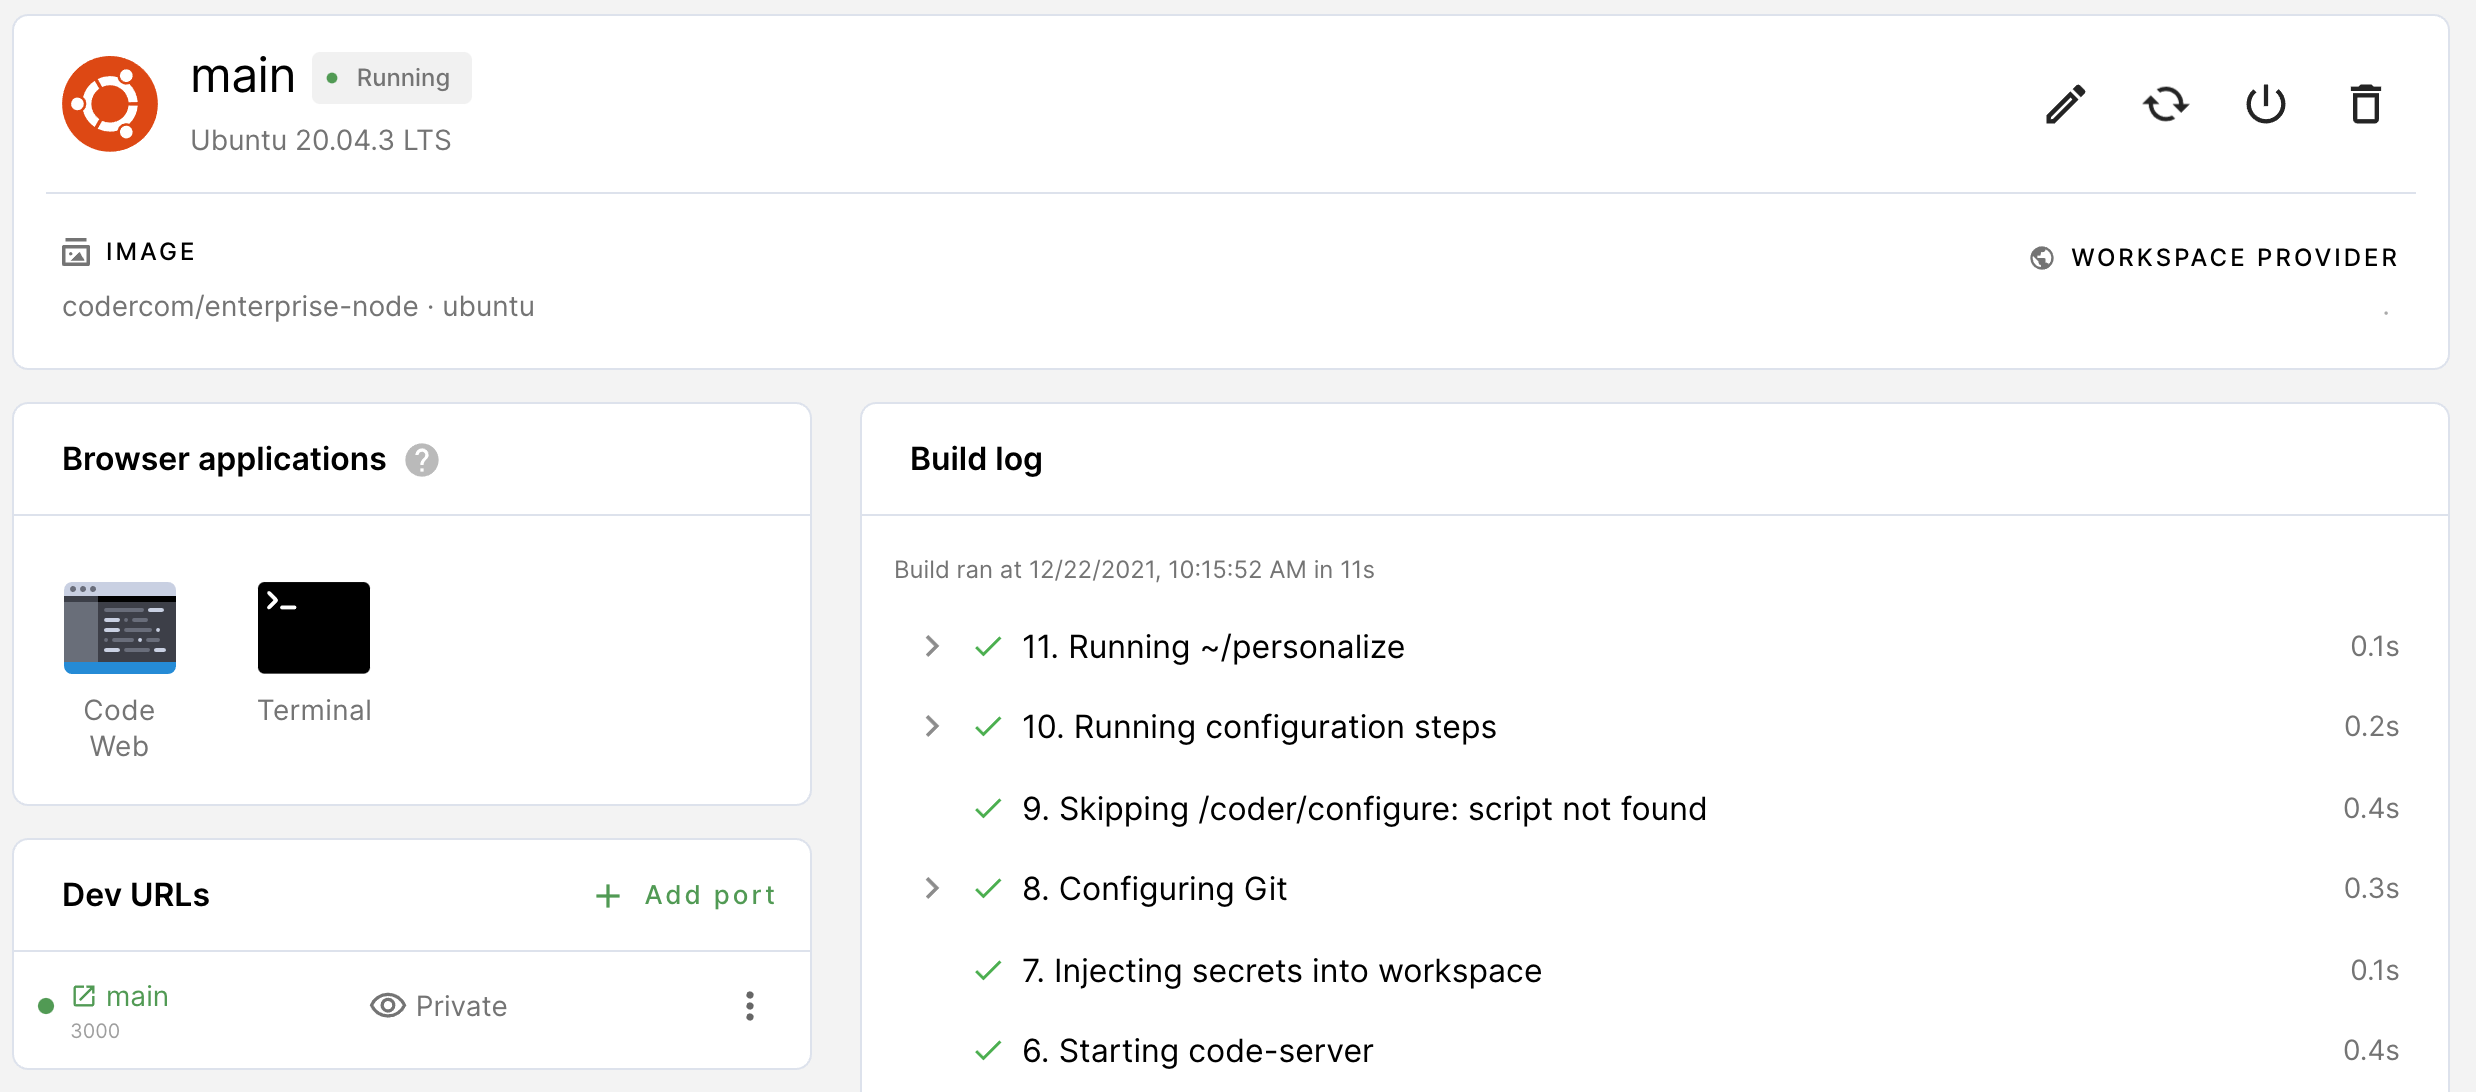
6. You can test preview by making changes to the `src/App.js` file; every time you save your changes to this file and refresh your browser window, your preview will update.
[](https://coder.com/docs/v1/getting-started/docker#step-5-push-your-repo-to-github)
Step 5: Push your repo to GitHub
---------------------------------------------------------------------------------------------------------------------
The follow steps show you how to push your app to a newly created GitHub repo.
1. Log in to GitHub and navigate to [Create a new repository](https://github.com/new)
.
2. Provide a **repository name** and click **Create repository**.
3. Return to your workspace, run the following in your terminal to add a remote to your GitHub repo, change the primary branch name to `main`, and push the contents to your newly created repo:
`` `git remote add origin https://github.com//.git git branch -M main git push origin main` ``
4. Next, Code Web will display an alert that says the GitHub extension wants to sign in; click **Allow** to proceed.
5. Within the IDE window (near the top), you'll be prompted to provide your GitHub Personal Access token
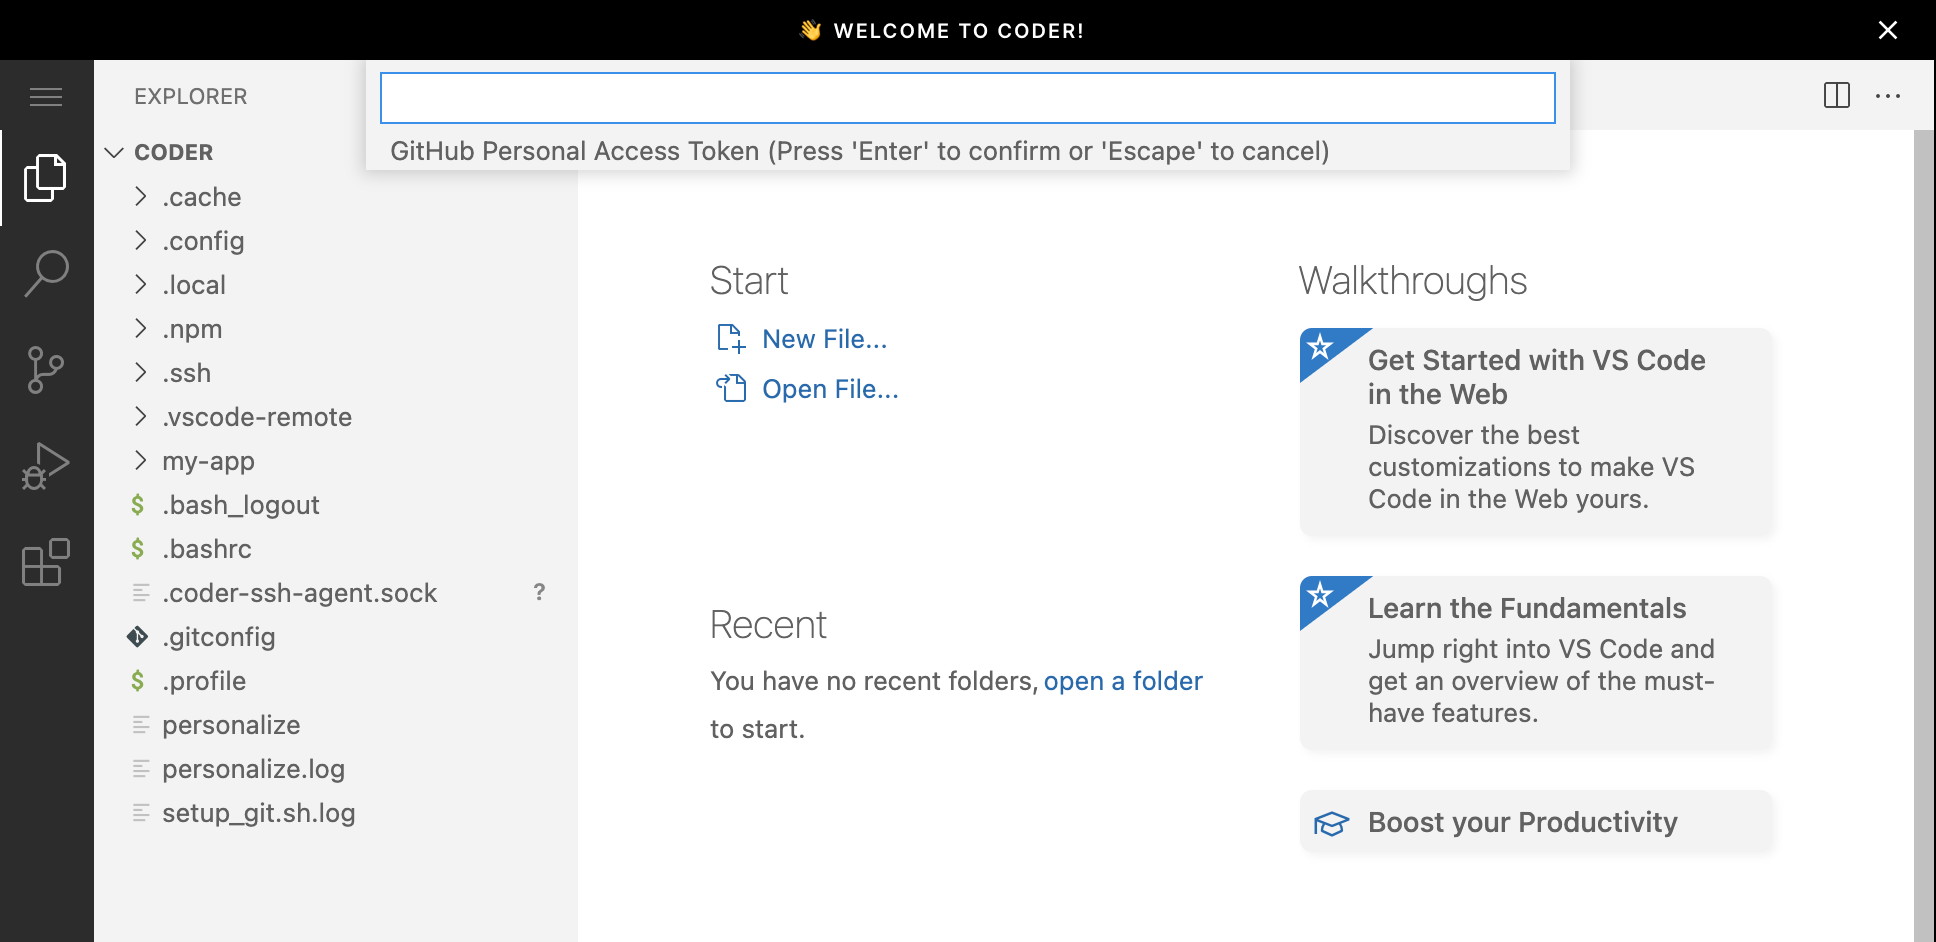
\]
At this point, the contents of your repo should be pushed to GitHub.
##### On this page
---
# Installation and setup | Coder v1 Docs
[Home](https://coder.com/docs/v1 "Home")
[Command line](https://coder.com/docs/v1/cli "Command line")
Installation and setup
[](https://coder.com/docs/v1/cli/installation#getting-started)
Getting started
------------------------------------------------------------------------------
The Coder CLI is automatically injected and authenticated inside of all Coder workspaces.
You can also use the CLI on your local machine. To do so, you'll need to download, install, and authenticate the CLI with Coder.
[](https://coder.com/docs/v1/cli/installation#installation)
Installation
------------------------------------------------------------------------
The version numbering for CLI releases mirrors the version numbering for Coder releases. Download the CLI release whose version number matches your Coder version number.
### [](https://coder.com/docs/v1/cli/installation#homebrew-mac-linux)
Homebrew (Mac, Linux)
`` `brew install cdr/coder/coder-cli` ``
### [](https://coder.com/docs/v1/cli/installation#download-linux-mac)
Download (Linux, Mac)
Download releases [from GitHub](https://github.com/coder/coder-v1-cli/releases)
:
1. Click a release and download the tar file for your operating system (ex: `coder-cli-linux-amd64.tar.gz`)
2. Extract the `coder` binary and copy it to a location you've added to your `PATH` environment variable
### [](https://coder.com/docs/v1/cli/installation#download-windows)
Download (Windows)
1. Click a release (e.g., `coder-cli-windows.zip`) and download the file
2. Unzip the file
3. Copy the file to a location of your choosing (e.g., `%USERPROFILE%\bin`).
4. On the command-line interface, execute `coder.exe login`
> Make sure that your user's `PATH` environment variable contains the location you chose in step 3.
[](https://coder.com/docs/v1/cli/installation#authenticate)
Authenticate
------------------------------------------------------------------------
Once you've installed the CLI, authenticate the client with your Coder account.
`` `coder login [https://coder.domain.com]` ``
If you're logged into Coder via your web browser, the process will open a new browser window that displays a session token. Copy the token, and paste it into the terminal prompt.
### [](https://coder.com/docs/v1/cli/installation#static-authentication)
Static authentication
To support cases where the browser-based authentication flow isn't appropriate, such as in CI/CD pipelines, the Coder CLI can also be authenticated with the `CODER_TOKEN` and `CODER_URL` environment variables.
Generate a static authentication token with the following command:
`` `coder tokens create my-token` ``
[](https://coder.com/docs/v1/cli/installation#update)
Update
------------------------------------------------------------
To update the CLI to the version corresponding to your current Coder deployment, run (you will be asked to confirm all changes before they're performed):
`` `coder update` ``
The `coder update` command accepts the following arguments:
* `--coder`: specify the Coder instance the CLI should use to query the version
* `--version`: specify the version that the CLI should download and upgrade to
* `--force`: omit prompts asking for change confirmations
**Note:** Coder CLI will not update if it is located under `/var/tmp/coder` or `C:\Windows`.
##### On this page
---
# Configure script | Coder v1 Docs
[Home](https://coder.com/docs/v1 "Home")
[Images](https://coder.com/docs/v1/images "Images")
Configure script
If you have configuration instructions that apply to everyone who uses a given image to create workspaces, you can define them using the **/coder/configure** file.
You can use the configure script to:
* Run scripts to install and configure dependencies for your workspace
* Install VS Code extensions
* Run [Coder CLI](https://coder.com/docs/v1/cli)
commands
* Check for and clone a GitHub repo if it isn't present
* Run scripts using [CODER\_\* environment variables](https://coder.com/docs/v1/workspaces/variables)
> We strongly recommend changing the `USER` to `coder` as the final step of your Dockerfile so that the configure script runs as the `coder` user. This change ensures that Coder stores all installation and configuration information in the persisted `/home/coder` folder (the only time this is _not_ the case is if a command is prefaced by `sudo`).
Coder will check the image for the presence of a **/coder/configure** file during the build process; if Coder finds one, it will execute the instructions contained. You copy the configure file into the image when creating the Dockerfile.
The following steps will show you how to create and use a config file.
[](https://coder.com/docs/v1/images/configure#step-1-create-the-configure-file)
Step 1: Create the configure file
-----------------------------------------------------------------------------------------------------------------
Using the text editor of your choice, create a file named `configure` and make it executable:
`` `touch configure chmod +x configure` ``
Next, add the instructions that you want included. For example, the following file shows how you can clone a repo at build time:
`` `#!/bin/bash if [ ! -d "/home/coder/workspace/project" ] then ssh-keyscan -t rsa >> ~/.ssh/known_hosts git clone git://company.com/project.git /home/coder/workspace/project else echo "Project has already been cloned." fi` ``
> Ensure that you change the `` placeholder in the `ssh-keyscan` command (e.g., `github.com`, `bitbucket.org`, `gitlab.com`).
Note that the instructions provided include `if-else` logic on whether the instructions should be re-run (and when) or if Coder should run the instructions only once. We strongly recommend including this logic at all times to minimize overhead.
> Any commands run with `sudo` will, by default, not include the environment variables of your user. If you'd like to preserve your existing env variables, [pass the `-E` flag to your `sudo` invocation](https://man7.org/linux/man-pages/man8/sudo.8.html)
> .
[](https://coder.com/docs/v1/images/configure#step-2-add-the-configure-file-to-the-image)
Step 2: Add the configure file to the image
-------------------------------------------------------------------------------------------------------------------------------------
Once you have a config file, update your image to use it by including the following in your Dockerfile:
`` `COPY [ "configure", "/coder/configure" ]` ``
As an example, take a look at the sample Dockerfile that follows; the final line includes instructions to Coder on copying the settings from the configure file:
`` `FROM ubuntu:latest RUN apt-get update && apt-get install -y curl COPY [ "configure", "/coder/configure" ] USER coder` ``
[](https://coder.com/docs/v1/images/configure#step-3-build-and-push-the-image-and-config-file)
Step 3: Build and push the image and config file
-----------------------------------------------------------------------------------------------------------------------------------------------
To make your image accessible to Coder, build the development image and push it to your container registry.
You can build your image by running the following command in the directory where your Dockerfile is located (be sure to replace the `user/repo:latest` placeholder value with your user, repository and tag names so that the image is pushed to the appropriate location):
`` `docker build user/repo:latest .` ``
Once you've built the image, push the image to the Docker registry:
`` `docker push user/repo:latest` ``
[](https://coder.com/docs/v1/images/configure#step-4-test-the-config-file)
Step 4: Test the config file
-------------------------------------------------------------------------------------------------------
You can test your setup by performing the following steps:
1. [Importing your image](https://coder.com/docs/v1/images/importing)
2. [Creating your workspace using the newly imported image](https://coder.com/docs/v1/workspaces/create)
Coder will run the configure file during the build process. You can verify this by:
* Reviewing the build log on the **Workspace Overview** page (Coder runs the configure file as the second-to-last step of the build process)
* Opening the terminal, ensuring that you're in the `/home/coder` folder, and running `cat configure.log`.
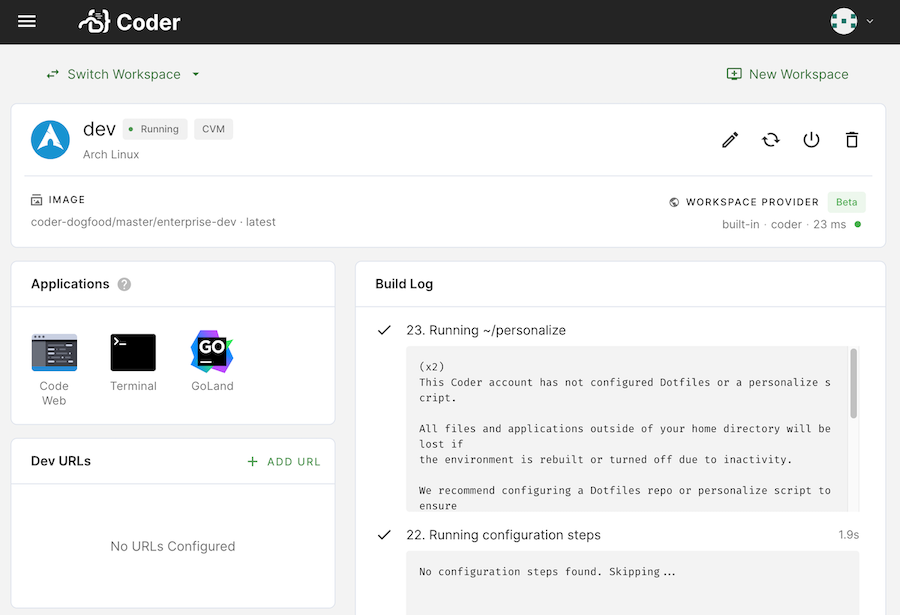
[](https://coder.com/docs/v1/images/configure#examples)
Examples
----------------------------------------------------------------
The following are examples of instructions you can include in your configure file.
### [](https://coder.com/docs/v1/images/configure#copying-coders-sample-config-file)
Copying Coder's sample config file
Coder's [base images](https://github.com/coder/enterprise-images)
include a basic configure script, which you can copy and modify:
`` `# Dockerfile FROM ... COPY configure /coder/configure USER coder` ``
#### [](https://coder.com/docs/v1/images/configure#extending-a-configure-script-in-a-base-image)
Extending a configure script in a base image
If you're extending a Coder image that has a configure file that you'd like to preserve, the following steps show you how to avoid writing over the original script.
1. Create the configure script
`` `touch configure chmod +x configure` ``
2. Modify the image's Dockerfile to move the original configure script (this results in Coder using the configure script that you created in the previous step while preserving the original script)
`` `# Dockerfile FROM codercom/enterprise-configure:ubuntu USER root RUN mv /coder/configure /coder/configure-first # Add the new configure script COPY configure /coder/configure USER coder` ``
3. Create your new script; in addition to any instructions that you add, this script will run the configure script that came with the base image
`` `# Configure # Run the initial configure script sh /coder/configure-first print "And some more commands..." ...` ``
### [](https://coder.com/docs/v1/images/configure#running-coder-cli-commands)
Running Coder CLI commands
The following shows how to run a [Coder CLI command](https://coder.com/docs/v1/cli)
in your configure script by demonstrating how you can create a Dev URL:
`` `# configure # Create a Dev URL (or update if it already exists) coder urls create $CODER_WORKSPACE_NAME 3000 --name webapp` ``
### [](https://coder.com/docs/v1/images/configure#modifying-vs-code-settings)
Modifying VS Code settings
1. Create a `settings.json` file:
`` `touch settings.json chmod +x settings.json` ``
2. Add settings info to your file:
`` `{ "git.enableSmartCommit": true, "git.confirmSync": false, "editor.formatOnSave": true }` ``
3. Update `configure` to use the settings file:
`` `# configure # Check if there are existing settings if [ -f "/home/coder/.local/share/code-server/User/settings.json" ] then echo "VS Code settings are already present. Remove with and run /coder/configure to revert to defaults" else cp settings.json /home/coder/.local/share/code-server/User/settings.json # Install extensions /var/tmp/coder/code-server/bin/code-server --install-extension esbenp.prettier-vscode fi` ``
> You can also modify VS Code settings using [dotfiles repos](https://coder.com/docs/v1/workspaces/personalization#dotfiles-repo)
> which are cloned and executed as the final workspace build step.
##### On this page
---
# Create a workspace | Coder v1 Docs
[Home](https://coder.com/docs/v1 "Home")
[Workspaces](https://coder.com/docs/v1/workspaces "Workspaces")
Create a workspace
This article walks you through creating a new workspace using a pre-defined image.
[](https://coder.com/docs/v1/workspaces/create#1-import-an-image)
1\. Import an image
-------------------------------------------------------------------------------------
Ensure you've [imported an image](https://coder.com/docs/v1/images/importing)
for your [workspace](https://coder.com/docs/v1/workspaces)
to use.
[](https://coder.com/docs/v1/workspaces/create#2-create-a-workspace)
2\. Create a workspace
-------------------------------------------------------------------------------------------
If this is your first time using Coder, you'll see a **New workspace** button in the middle of your screen; otherwise, you'll see a list of your existing workspaces. Click the **New workspace** button to proceed.
> To learn more about creating an environment from templates, see [Workspace templates](https://coder.com/docs/v1/workspaces/workspace-templates)
> .
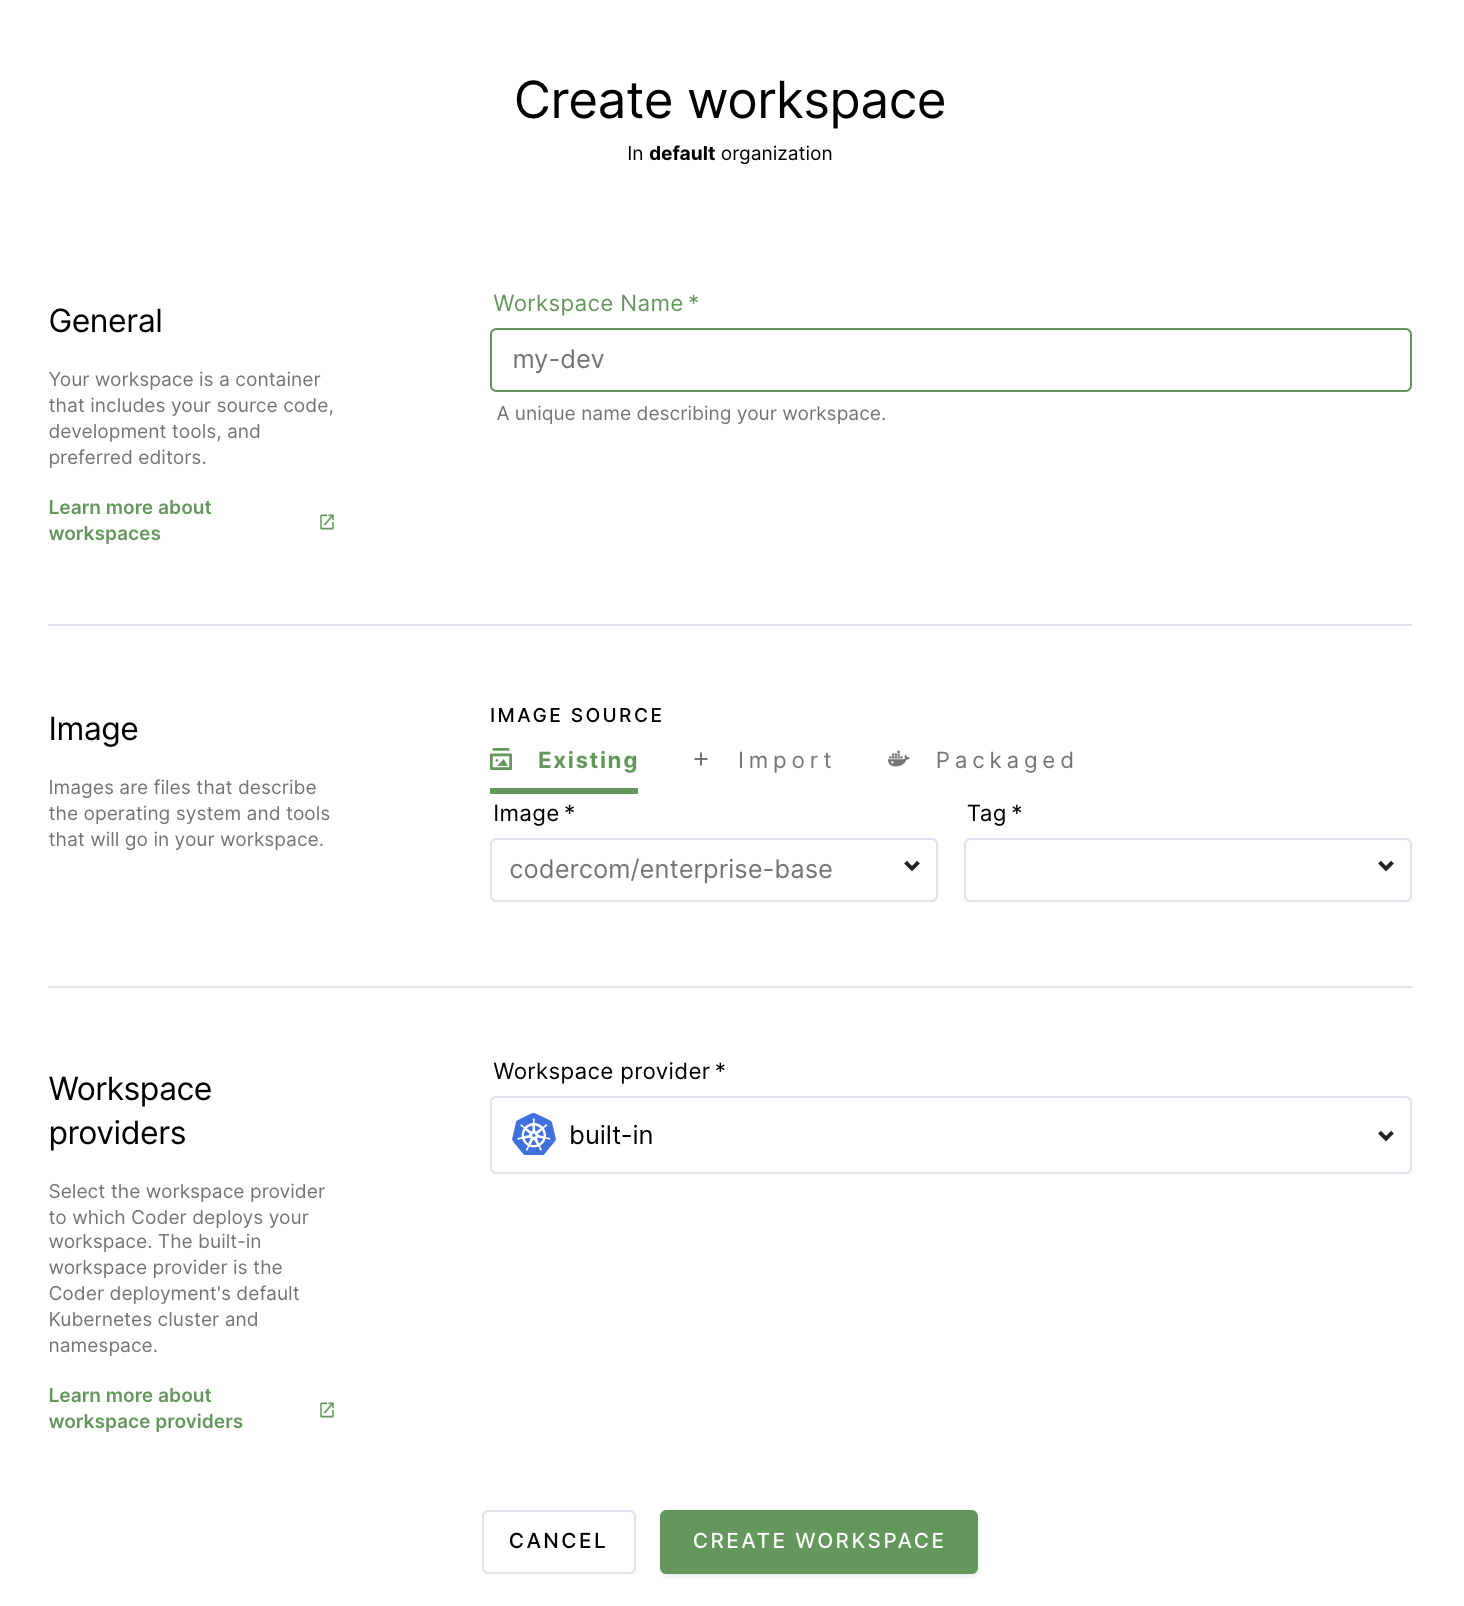
1. Enter a friendly name for your workspace, and choose an [image](https://coder.com/docs/v1/images)
to use.
2. Set the [parameters](https://coder.com/docs/v1/workspaces/workspace-params)
for your workspace.
3. Click **Create workspace** to proceed.
Coder redirects you to an overview page for your workspace during the build process. Learn more about the workspace [creation parameters](https://coder.com/docs/v1/workspaces/workspace-params)
.
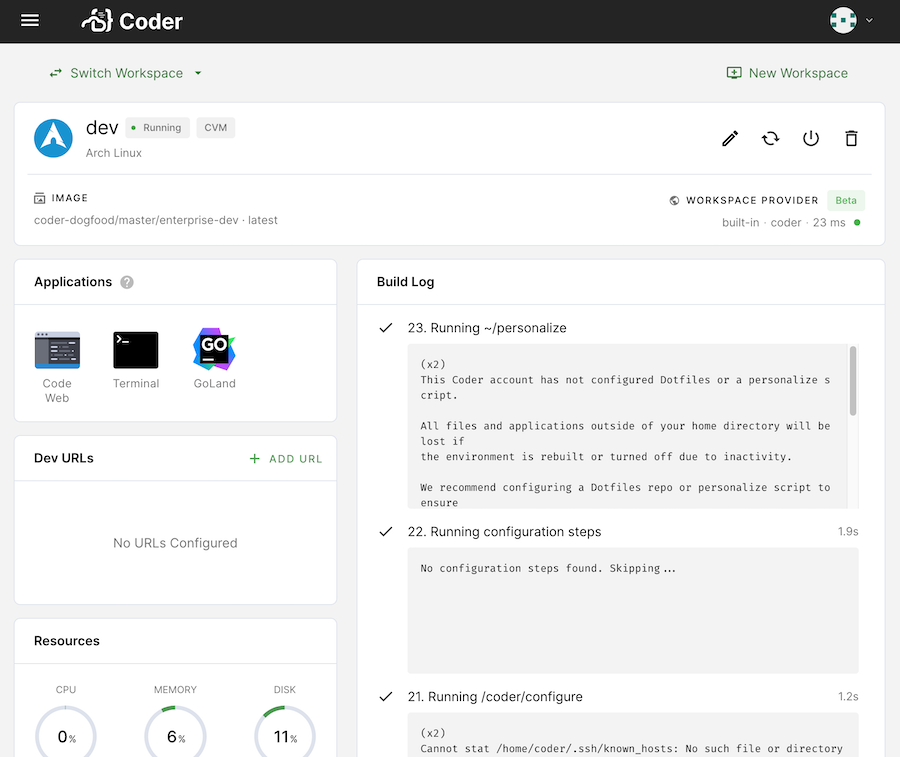
Your workspace persists in the home directory, updates itself to new versions of the image on which it is built, and runs custom configuration on startup. Learn about the [workspace lifecycle](https://coder.com/docs/v1/workspaces/lifecycle)
.
[](https://coder.com/docs/v1/workspaces/create#cancel-workspace-builds)
Cancel workspace builds
-----------------------------------------------------------------------------------------------
If Coder hasn't finished building or rebuilding your workspace, you have the option of cancelling this process. Cancelling the workspace will stop the workspace and release the resources needed for your workspace.
You can cancel the build process by clicking **Cancel** at the bottom-right of the workspace status bar.
### [](https://coder.com/docs/v1/workspaces/create#workspace-status)
Workspace status
The workspace overview page displays information regarding the status and performance of your workspace.
The following workspace statuses are available:
* **Running**: Your workspace is running
* **Off**: Your workspace has been shut off either manually or due to inactivity
* **Error**: An unknown error has occurred
* **Building**: Your workspace is building
* **Turning off**: Your workspace is turning off
* **Unknown**: Your workspace is in an unknown state
* **Initializing**: The container is initializing
* **Deleting**: Your workspace is being deleted, and compute resources are being released.
### [](https://coder.com/docs/v1/workspaces/create#advanced)
Advanced
Coder provides advanced settings that allow you to customize your workspace.
If your Coder deployment has [container-based virtual machines enabled](https://coder.com/docs/v1/admin/workspace-management/cvms)
, Coder creates your workspace as a [CVM](https://coder.com/docs/v1/workspaces/cvms)
by default (you can opt-out of this setting by unchecking the **Run as Container-based Virtual Machine** box).
You can also specify the resources Coder should allocate.
> By default, Coder allocates resources (CPU Cores, Memory, and Disk Space) based on the parent image.
>
> Coder displays a warning if you choose your resource settings and they're less than the image-recommended default, but you can still create the workspace.
[](https://coder.com/docs/v1/workspaces/create#3-start-coding)
3\. Start coding
-------------------------------------------------------------------------------
Once you've created a workspace, it's time to hop in. Read more about how to [connect your favorite editor or IDE](https://coder.com/docs/v1/workspaces/editors)
with your new workspace!
> [Integrate with Git](https://coder.com/docs/v1/workspaces/personalization#git-integration)
> to have your SSH key injected automatically into Workspaces.
[](https://coder.com/docs/v1/workspaces/create#workspace-limits)
Workspace limits
---------------------------------------------------------------------------------
Coder allows each user to create up to 50 workspaces.
##### On this page
---
# Administrators | Coder v1 Docs
[Home](https://coder.com/docs/v1 "Home")
[Getting started](https://coder.com/docs/v1/getting-started "Getting started")
Administrators
This article will walk you through the steps needed to set up, deploy, and configure Coder so that your developers are ready create their workspaces and begin working on their projects.
[](https://coder.com/docs/v1/getting-started/admin#set-up-and-deploy-coder)
Set up and deploy Coder
---------------------------------------------------------------------------------------------------
To get started with Coder, you will need to:
1. [Create a Kubernetes cluster](https://coder.com/docs/v1/setup/kubernetes)
2. [Install Coder via Helm](https://coder.com/docs/v1/setup/installation)
Alternatively, [Coder for Docker](https://coder.com/docs/v1/setup/coder-for-docker)
allows you to deploy Coder quickly to machines where you have Docker installed. We recommend this option for teams with 5-10 developers.
[](https://coder.com/docs/v1/getting-started/admin#configure-coder)
Configure Coder
-----------------------------------------------------------------------------------
Once you've deployed Coder, you'll need to log in and perform the following configuration steps:
1. [Upload your license file](https://coder.com/docs/v1/setup/configuration)
(you can get a trial license for free [here](https://coder.com/trial)
)
2. Set up [access controls](https://coder.com/docs/v1/admin/access-control)
with OpenID Connect (OIDC) if you'd like to allow users to register themselves
3. [Create organizations](https://coder.com/docs/v1/admin/organizations)
to manage your user groups
4. Create an OAuth app for your users to [connect to your Git provider](https://coder.com/docs/v1/admin/git)
5. [Add a container registry](https://coder.com/docs/v1/admin/registries)
for your development environments to pull from
6. [Import an image](https://coder.com/docs/v1/images/importing)
with the tools your developers need. You can [create custom images](https://coder.com/docs/v1/images/writing)
for your developer workspaces as well.
[](https://coder.com/docs/v1/getting-started/admin#provision-users)
Provision users
-----------------------------------------------------------------------------------
To allow developers to access your Coder deployment, you can manually create and invite users, or you can set up OpenID Connect (OIDC):
* [Azure AD](https://coder.com/docs/v1/guides/admin/oidc-azuread)
* [Okta](https://coder.com/docs/v1/guides/admin/oidc-okta)
If you are using another Identity Provider (IdP), the process should be very similar.
With OIDC configured, Coder will automatically create a user and add them to the [default organization](https://coder.com/docs/v1/admin/organizations)
when a developer logs in for the first time.
[](https://coder.com/docs/v1/getting-started/admin#automate)
Automate
---------------------------------------------------------------------
You can use the Coder [command-line (CLI) tool](https://coder.com/docs/v1/cli)
to interact with Coder, as well as the [public API](https://coder.com/docs/v1/guides/api)
to automate various tasks through code.
[](https://coder.com/docs/v1/getting-started/admin#maintain-and-upgrade)
Maintain and upgrade
---------------------------------------------------------------------------------------------
Coder releases [upgrades](https://coder.com/docs/v1/setup/upgrade)
on the third Wednesday of each month, with patch releases published and available as needed.
Coder maintains a public [changelog](https://coder.com/docs/v1/changelog)
and [release calendar](https://coder.com/release-calendar.ical)
to keep you updated on features, bug fixes, security updates, and breaking changes that are coming.
[](https://coder.com/docs/v1/getting-started/admin#interact-with-support)
Interact with Support
-----------------------------------------------------------------------------------------------
Coder’s standard support is included with your license. You can reach us at [\[email protected\]](https://coder.com/cdn-cgi/l/email-protection#3c4f494c4c534e487c5f5358594e125f5351)
, and one of our engineers will be able to assist. Please include any relevant logs, error messages, or screenshots.
Coder also has a [public community Slack](https://cdr.co/join-community)
you can join if you’d like.
Finally, Coder offers premium support through Coder Escalation Services, which provides a faster response Service-Level Agreement (SLA). Speak to your account executive if you’re interested in this option.
[](https://coder.com/docs/v1/getting-started/admin#additional-information)
Additional information
-------------------------------------------------------------------------------------------------
We encourage you to look through the various [Guides](https://coder.com/docs/v1/guides)
in our public documentation, as it contains more detailed information on specific use cases and topics.
##### On this page
---
# Deprecate and Decommission | Coder v1 Docs
[Home](https://coder.com/docs/v1 "Home")
[Images](https://coder.com/docs/v1/images "Images")
Deprecate and Decommission
At a certain point, you may wish to deprecate a specific workspace image in favor of a newer one. Coder provides two mechanisms to control workspace image lifecycles:
[](https://coder.com/docs/v1/images/deprecating#deprecate-an-image)
Deprecate an Image
--------------------------------------------------------------------------------------
Deprecation controls whether an entire image repository (and all tags) can be used to create new workspaces.
You can mark images as deprecated to prevent them from being used to create new workspaces. For example, if you have an existing workspace image based on an older OS release, and you create a new workspace image based on a newer OS release, you can **Deprecate** the old workspace image to ensure that new workspace images use the newer OS release.
To mark an image as **deprecated**:
1. Go to **Images** and find the image to mark as deprecated.
2. Click **Edit**.
3. Select the **Deprecate this image** checkbox.
4. Click **Update Image** to save your changes.
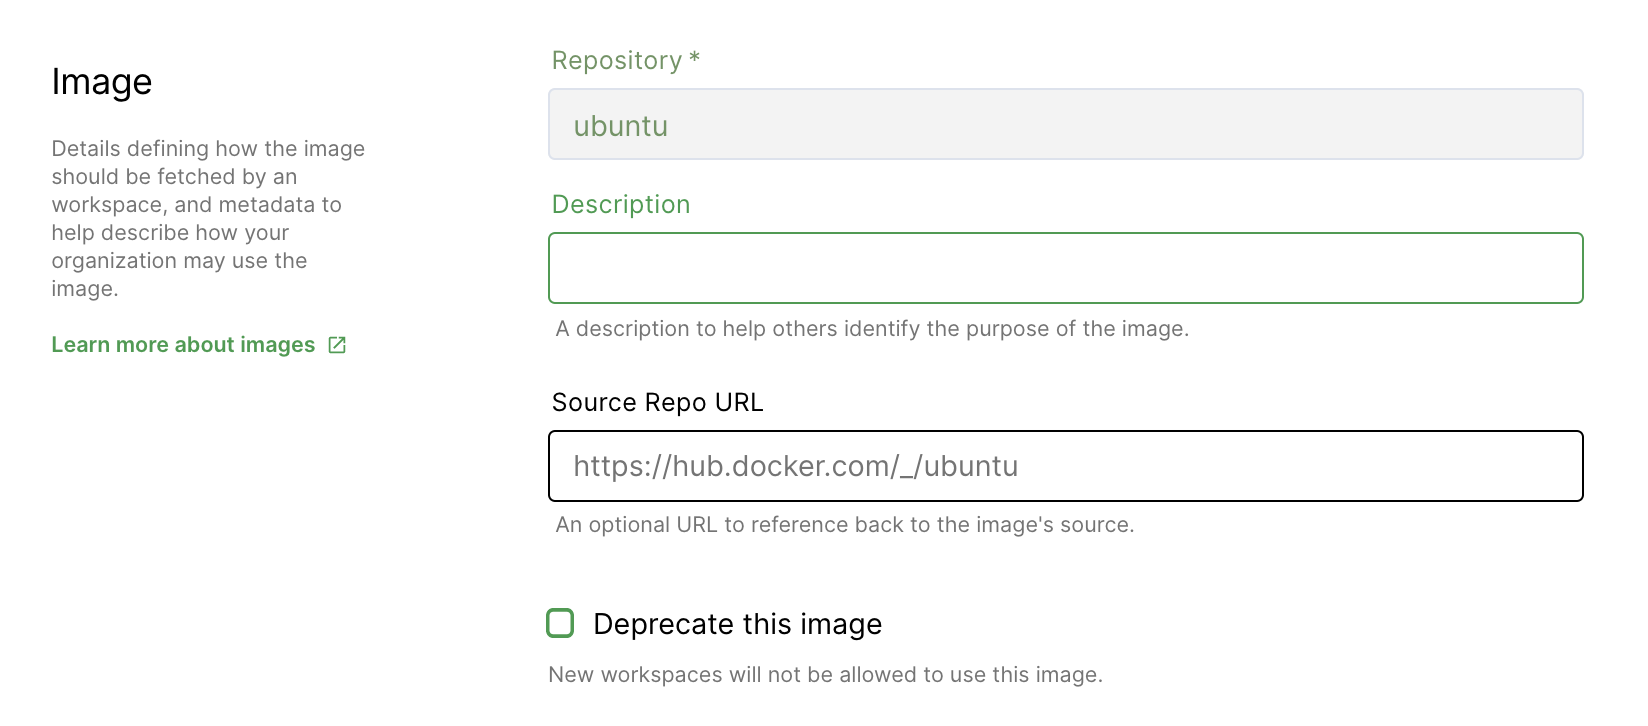
> Users cannot create new workspaces using deprecated images. However, they can continue to use _existing_ workspaces created with the now-deprecated images and edit the resources allocated to that workspace.
[](https://coder.com/docs/v1/images/deprecating#decommission-an-image-tag)
Decommission an Image Tag
----------------------------------------------------------------------------------------------------
Decommissioning controls whether an **individual** image tag can be used to create new workspaces. This may be useful in an environment where image tags are considered _immutable_.
You can **decommission** an existing image tag to prevent them from being used to create new workspaces. Additionally, existing workspaces using this tag will be updated to use the **default image tag** upon their next rebuild.
> ⚠️ You cannot decommission the default image tag. If you need to do so, update the default tag and then decommission the previous default tag.
To **decommission** an image tag:
1. Go to **Images** and find the image whose tag you wish to decommission.
2. Under **Available Tags**, find the tag you wish to decommission.
3. Click the three-dot menu to the right in the table, and select **Decommission**. A dialog will appear asking you to confirm your decision.
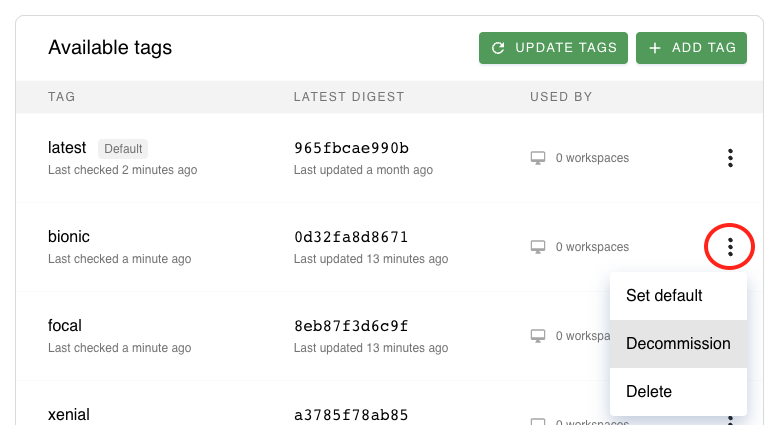
To reverse this process, repeat the above steps but select **Recommission** instead.
##### On this page
---
# File sync | Coder v1 Docs
[Home](https://coder.com/docs/v1 "Home")
[Command line](https://coder.com/docs/v1/cli "Command line")
File sync
If you're working in an IDE that's on your local machine, you can use Coder's live sync feature to sync changes from your local IDE with your Coder workspace. Live sync watches your IDE and pushes updates whenever it detects changes. This allows you to work locally while leveraging Coder for testing, compilation, and so on.
[](https://coder.com/docs/v1/cli/file-sync#one-way-file-sync)
One-way file sync
-------------------------------------------------------------------------------
1. Make sure that you've installed [rsync](https://rsync.samba.org/)
on both your local machine and Coder workspace.
2. To establish a one-way directory sync to a remote workspace:
`` `coder sync [local directory] [:]` ``
Include the `-i` or `--init` flag for initial transfer and exit.
### [](https://coder.com/docs/v1/cli/file-sync#example)
Example
To sync your local directory **~/Projects/coder/coder-cli** to **coder-cli** in the home directory of your workspace:
`` `$ coder sync ~/Projects/coder/coder-cli my-env:coder-cli 2020-05-19 17:57:40 INFO doing initial sync (~/Projects/coder/coder-cli -> coder-cli) 2020-05-19 17:57:41 SUCCESS finished initial sync (878ms) 2020-05-19 17:57:41 INFO watching ~/Projects/coder/coder-cli for changes` ``
[](https://coder.com/docs/v1/cli/file-sync#two-way-file-sync)
Two-way file sync
-------------------------------------------------------------------------------
Alternatively, you can set up two-way file sync, which allows you to simultaneously use local and remote development tools. Setting up two-way file sync can help ensure your project is in the same state no matter where you make changes.
1. Make sure that you've installed [Mutagen](https://mutagen.io/documentation/introduction/installation)
.
2. Log into Coder and configure your local SSH client:
`` `$ coder login https://coder.yourcompany.com 2020-10-20 11:16:29 SUCCESS Logged in. $ coder config-ssh An auto-generated ssh config was written to "/Users/yourName/.ssh/config" Your private ssh key was written to "/Users/yourName/.ssh/coder_enterprise" You should now be able to ssh into your workspace For example, try running $ ssh coder.yourName` ``
3. Identify your project directory and workspace name, then create the sync session. Note that the folder must exist on the remote server before you begin this step:
`` `$ cd ~/my-project $ coder envs ls Name ImageTag CPUCores MemoryGB DiskGB GPUs Updating Status yourName latest 4 4 30 0 false ON test latest 1 1 10 0 false OFF $ mutagen sync create ~/project coder.env-name:/target-dir Created session sync_dLg9zfqynqVa9aj2V36Fr4OCMz1AHzTKzNGFYYkqfAI` ``
> Do not include ~/ or /home in your target directory definition. Mutagen will look in the home directory by default.
1. Test your connection by running `mutagen sync monitor`. If you're successful, your project files should sync on all future changes.
### [](https://coder.com/docs/v1/cli/file-sync#pausing-or-terminating-your-session)
Pausing or terminating your session
You can pause your sync by running `mutagen sync pause`.
You can stop and delete your session by running `mutagen sync terminate`.
##### On this page
---
# 1.43.0 | Coder v1 Docs
[Home](https://coder.com/docs/v1 "Home")
[Changelog](https://coder.com/docs/v1/changelog "Changelog")
1.43.0
### [](https://coder.com/docs/v1/changelog/1.43.0#breaking-changes-)
Breaking changes ❗
* The Bitbucket Server integration for version 7.20 and above now requires the `REPO_ADMIN` permission. See [Git integration](https://coder.com/docs/v1/admin/git)
for more information. Users will need to re-link their Bitbucket Server account to Coder for this fix to take effect.
### [](https://coder.com/docs/v1/changelog/1.43.0#features-)
Features ✨
* web: Added the ability to modify the default role for new users in an organization. The default role can be updated in the "Edit Organization" page.
### [](https://coder.com/docs/v1/changelog/1.43.0#bug-fixes-)
Bug fixes 🐛
* web: Fixed an issue where the autostart time was getting misinterpreted due to a timezone conversion.
* web: Fixed some styling issues in the "Edit Organization" page.
* infra: Fixed an issue where attempting to access a public Dev URL could result in a 500.
* infra: Improved SSH PTY handling.
* infra: Added cgroup-v2 support for setting CPU quota and period in envbox.
* infra: Fixed an issue with the Bitbucket Server (v7.20+) integration where Coder would fail to fetch a workspace template with a 401 error.
### [](https://coder.com/docs/v1/changelog/1.43.0#security-updates-)
Security updates 🔐
* Updated code-server to 4.13.0 to fix some vulnerabilities in transitive dependencies (CVE-2023-30547, CVE-2023-29199, CVE-2023-29017).
---
# Access control | Coder v1 Docs
[Home](https://coder.com/docs/v1 "Home")
[Admin](https://coder.com/docs/v1/admin "Admin")
Access control
The **Authentication** tab allows you to choose how your users log in and gain access to Coder. Currently, you can choose between **Built-In Authentication** and **OpenID Connect**.
[](https://coder.com/docs/v1/admin/access-control#built-in-authentication)
Built-in authentication
--------------------------------------------------------------------------------------------------
Built-in authentication, which is the default method, allows you (or any admin) to manually create users who log in with their email address and temporary password. Coder will ask them to change their password after they log in the first time.
The default user session expiry time is one week for users logging in via built-in authentication. This is non-configurable.
[](https://coder.com/docs/v1/admin/access-control#oidc-authentication)
OIDC authentication
------------------------------------------------------------------------------------------
The OpenID Connect (OIDC) authentication option allows you to defer identity management to the OIDC provider of your choice (e.g., Google).
The default user session expiry time for OIDC logins is determined by the upstream identity provider.
[](https://coder.com/docs/v1/admin/access-control#managing-authentication-to-coder)
Managing authentication to Coder
--------------------------------------------------------------------------------------------------------------------
To manage the ways that users can login to Coder, see [Managing authentication](https://coder.com/docs/v1/admin/access-control/manage)
[](https://coder.com/docs/v1/admin/access-control#see-also)
See also
--------------------------------------------------------------------
* [User management in Coder](https://coder.com/docs/v1/admin/access-control/users)
* [User password reset](https://coder.com/docs/v1/admin/access-control/users/password-reset)
##### On this page
---
# Architecture | Coder v1 Docs
[Home](https://coder.com/docs/v1 "Home")
[Setup](https://coder.com/docs/v1/setup "Setup")
Architecture
Coder is deployed on Kubernetes and includes the following components:
* **coderd**: the central authority; provides authentication and supports the Dashboard and an API which you can use to create and interact with Workspaces
* **PostgreSQL**: data storage for session tokens, workspace information, etc.
* **coder agent**: a program running in each workspace that connects to `coderd` and handles tunnelled connections, collection of workspace statistics (such as processor and memory utilization), and manages programs, such as editors.
Each component runs in its own Kubernetes pod.
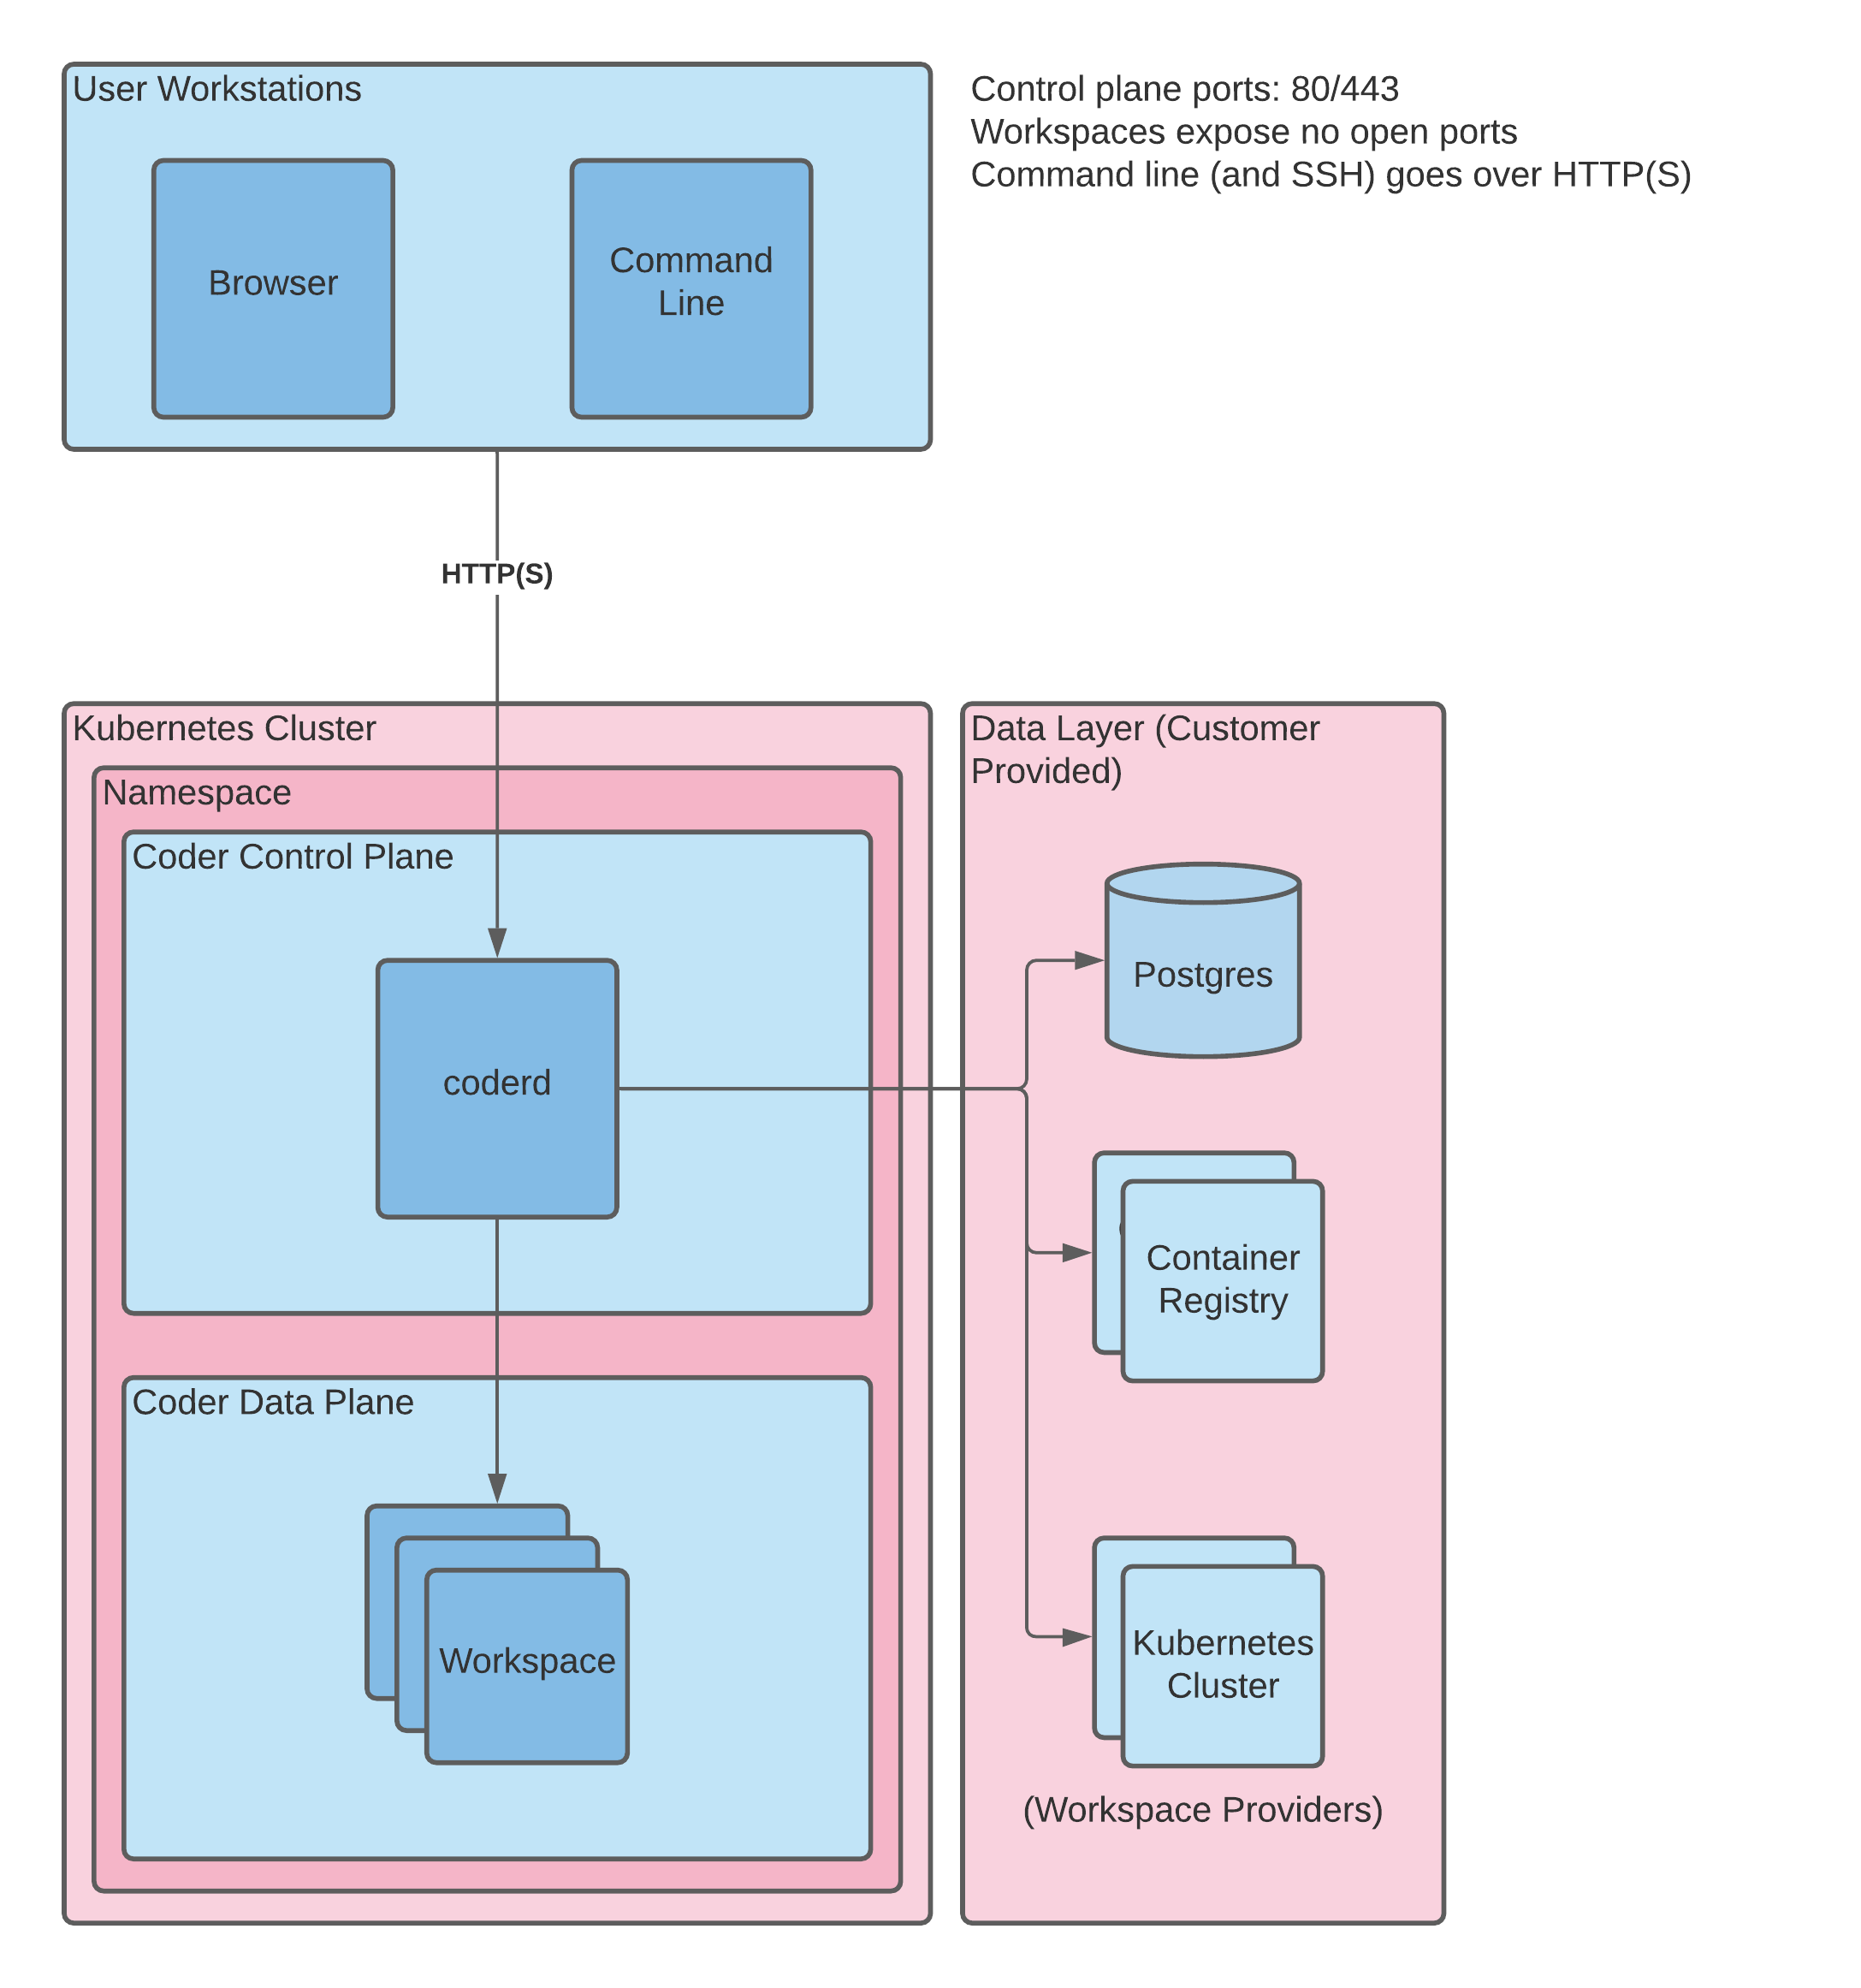
[](https://coder.com/docs/v1/setup/architecture#deployment-options)
Deployment options
--------------------------------------------------------------------------------------
There are two ways to deploy Coder:
1. The default installation, which is a non-air-gapped option, using the Kubernetes provider of your choice; you should be able to access Coder resources from this workspace freely
2. A secured, air-gapped option; you can choose to limit access and deploy Coder by first pulling in all of the required resources, or you can choose to whitelist the URLs/IP addresses needed to access Coder resources
> Coder's trial license does not work in an air-gapped environment. If your organization is interested in evaluating Coder air-gapped, please contact [\[email protected\]](https://coder.com/cdn-cgi/l/email-protection#5d2e3c31382e1d3e3239382f733e3230)
> to discuss license requirements.
---
# JFrog Artifactory | Coder v1 Docs
[Home](https://coder.com/docs/v1 "Home")
[Guides](https://coder.com/docs/v1/guides "Guides")
[Deployment](https://coder.com/docs/v1/guides/deployments "Deployment")
JFrog Artifactory
This article will walk you through setting up [Artifactory](https://jfrog.com/artifactory/)
as a Docker registry in Coder.
JFrog Artifactory serves as a central hub for housing and managing any kind of artifact you might be interested in securely managing across your entire organization, including container images. It can be self-hosted which may be particularly useful for hardened environments where external network access is undesirable.
We have based these instructions off Artifactory's documentation. Please see the following links for more information:
* [Docker Registry](https://www.jfrog.com/confluence/display/JFROG/Docker+Registry)
* [Getting Started with Artifactory as a Docker Registry](https://www.jfrog.com/confluence/display/JFROG/Getting+Started+with+Artifactory+as+a+Docker+Registry)
[](https://coder.com/docs/v1/guides/deployments/artifactory#step-1-create-an-artifactory-repository)
Step 1: Create an Artifactory repository
---------------------------------------------------------------------------------------------------------------------------------------------
1. If you do not already have an account you can [start up a free trial](https://jfrog.com/artifactory/)
or get yourself a free instance to play with.
2. Log in to your Artifactory dashboard.
3. Navigate to **Repositories** in the sidebar.
4. Click **\+ Add Repositories**.
5. Select **Docker**.
6. Name your repository.
7. Click **Create Local Repository**.
[](https://coder.com/docs/v1/guides/deployments/artifactory#step-2-add-images)
Step 2: Add images
-------------------------------------------------------------------------------------------------
You can push and pull images as you would with any other Docker registry once you log in.
`` `docker login $ARTIFACTORY_URL` ``
If you have trouble logging in click your user account icon in the upper right corner of the Artifactory dashboard, go to **Set Me Up**, then select **docker** to find exactly what username and password you can provide to get logged in.
At this stage you can add any images you want to use with Coder. For example with an image called `hello-world` and a repository called `images`:
`` `docker push $ARTIFACTORY_URL/images/hello-world` ``
[](https://coder.com/docs/v1/guides/deployments/artifactory#step-3-configure-coder)
Step 3: Configure Coder
-----------------------------------------------------------------------------------------------------------
To add the registry to Coder you can use the same credentials you used for `docker login` but in production you may want to create a new user with read-only permissions. This can be done by clicking the cog icon in the upper right corner of your Artifactory dashboard then clicking **User Management**.
Once you have the credentials you want to use grab your Artifactory URL and and the full path to an image then [add a new registry](https://coder.com/docs/v1/admin/registries)
to Coder.
For example here we add an image stored at `codercom/enterprise-intellij` in an Artifactory server called `test` and a repository called `images`:

[](https://coder.com/docs/v1/guides/deployments/artifactory#other-notes)
Other Notes
------------------------------------------------------------------------------------
We have an open-source version of Microsoft's extension marketplace for VS Code which is capable of using Artifactory for extension storage. If you use VS Code or code-server with Coder and are interested in further securing your supply chain with Artifactory check it out [here](https://github.com/coder/code-marketplace/)
.
##### On this page
---
# 1.42.0 | Coder v1 Docs
[Home](https://coder.com/docs/v1 "Home")
[Changelog](https://coder.com/docs/v1/changelog "Changelog")
1.42.0
### [](https://coder.com/docs/v1/changelog/1.42.0#breaking-changes-)
Breaking changes ❗
There are no breaking changes in 1.42.0.
### [](https://coder.com/docs/v1/changelog/1.42.0#features-)
Features ✨
* infra: Added support for Bitbucket version 7.21.4 and above.
* infra: Improved performance when accessing Dev URLs.
* infra: Updated code-server to 4.11.0.
* web: Added the ability to set a target role when creating a user.
* web: Added the ability to customize the number of audit logs shown per page.
* web: Organization admins can now select the days of the week on which workspaces may autostart.
* web: Users may choose their local timezone for configuring workspace autostart.
### [](https://coder.com/docs/v1/changelog/1.42.0#bug-fixes-)
Bug fixes 🐛
* infra: Fixed a goroutine leak.
* infra: Fixed an issue where failed proxy requests to Dev URLs were not logged.
* infra: Fixed an issue where Jetbrains Gateway fails to connect to a workspace.
* infra: Fixed an issue where workspaces autostarted at the incorrect time after a daylight savings change.
* web: Fixed an issue where errors connecting to a registry would not be shown correctly.
* web: Fixed an issue where logs from a failed workspace build would not show in the UI.
* web: Fixed an issue where organization managers would have no option to view organization members or organization workspaces.
* web: Updated the instructions shown when creating a Kubernetes workspace provider to work correctly with more recent versions of Kubernetes.
### [](https://coder.com/docs/v1/changelog/1.42.0#security-updates-)
Security updates 🔐
There are no security updates in 1.42.0.
---
# Developers | Coder v1 Docs
[Home](https://coder.com/docs/v1 "Home")
[Getting started](https://coder.com/docs/v1/getting-started "Getting started")
Developers
This article will walk you through the process of getting started with a Coder workspace and a web development project featuring Node.js and React.js. You'll learn how to:
* Connect Coder to your Git provider;
* Create a workspace;
* Add [Create React App](https://create-react-app.dev/)
to your workspace, which will allow you to create a sample single-page application that you can modify;
* Create a dev URL and preview changes to your project;
* Push your changes to a GitHub repo.
[](https://coder.com/docs/v1/getting-started/developers#prerequisites)
Prerequisites
------------------------------------------------------------------------------------
This guide assumes that you have a Coder deployment available to you and that you have the credentials needed to access the deployment.
[](https://coder.com/docs/v1/getting-started/developers#step-1-log-in-and-connect-coder-to-your-git-provider)
Step 1: Log in and connect Coder to your Git provider
-------------------------------------------------------------------------------------------------------------------------------------------------------------------
In this step, you'll log into Coder and connect and authenticate with your Git provider. This will allow you to do things like pull repositories and push changes.
1. Navigate to the Coder deployment using the URL provided to you by your site manager, and log in.
2. Click on your avatar in the top-right, and select **Account**.

3. Provide Coder with your SSH key to connect and authenticate to GitHub.
If your site manager has configured OAuth, go to **Linked Accounts** and follow the on-screen instructions to link your GitHub account.
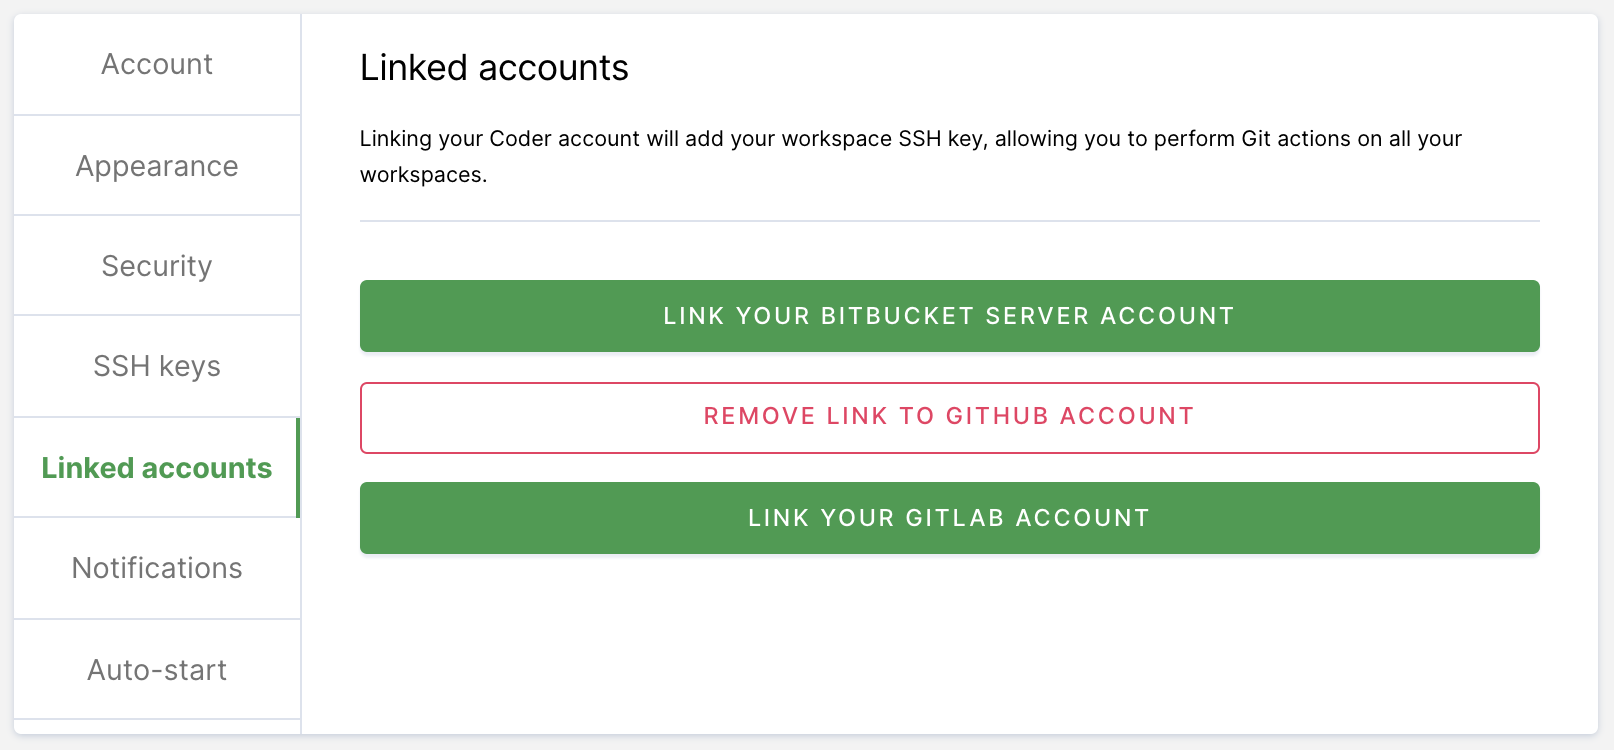
If your site manager has _not_ configured OAuth, go to **SSH keys**. Copy your public SSH key and [provide it to GitHub](https://docs.github.com/en/authentication/connecting-to-github-with-ssh/adding-a-new-ssh-key-to-your-github-account)
.

[](https://coder.com/docs/v1/getting-started/developers#step-2-create-your-workspace)
Step 2: Create your workspace
-------------------------------------------------------------------------------------------------------------------
You will now create the workspace where you'll work on your development project.
1. Return to **Workspaces** using the top navigation bar.
2. Click **New workspace** to launch the workspace-creation dialog.
3. Provide a **Workspace Name**.
4. In the **Image** section, click **Packaged** (this tab contains Coder-provided images hosted in a Docker registry). Select **NodeJS**. This will populate the form in the **Import** tab.
5. Under **Workspace providers**, leave the default option (which is **built-in**) selected.
6. Expand the **Advanced** section. If the **Run as a container-based virtual machine** option is selected, _unselect_ the box. Leave the **CPU**, **Memory**, **Disk**, and **GPU** allocations as-is.
7. Scroll to the bottom, and click **Create workspace**. The dialog will close, allowing you to see the main workspace page. You can track the workspace build process using the **Build log** on the right-hand side.

Once your workspace is ready for use, you'll see a chip that says **Running** next to the name of your workspace.
[](https://coder.com/docs/v1/getting-started/developers#step-3-add-a-sample-project-to-your-workspace)
Step 3: Add a sample project to your workspace
-----------------------------------------------------------------------------------------------------------------------------------------------------
Once you've created your workspace, you can start working in Coder. For this tutorial, we'll be leveraging the [Create React App](https://create-react-app.dev/)
to get you set up with a way to create single-page applications.
1. Under **Browser applications**, click **Code Web** to open VS Code in your browser.
2. When VS Code launches in your browser, click **Open folder...**. In the prompt, you'll see `/home/coder`. This directory is where you'll store your sample React app project. Click **OK** to proceed.

3. Click the hamburger icon in the top right, and select **Terminal** > **New Terminal** to open a new terminal.
4. You're now ready to create a demo app that you can modify:
`` `npx create-react-app my-app cd my-app` ``
Once done, you can expand the `my-app` folder in the left-have nav bar to see its contents:

You're now ready to make changes to the application.
[](https://coder.com/docs/v1/getting-started/developers#step-4-preview-your-app-and-view-changes-live)
Step 4: Preview your app and view changes live
-----------------------------------------------------------------------------------------------------------------------------------------------------
Dev URLs allow you to access the web services you're developing in your workspace. Once you've created a dev URL, Coder listens on the port you specified and renders a browser link you can use to view your application.
> Please note that your site manager must have enabled and configured dev URLs for your Coder deployment before you can use this feature.
1. Return to your workspace overview page, and find the **Dev URLs** section.
2. Click **Add port**.
3. Provide a **Name** for your port, and leave the remaining fields as-is. Click **Save**.

4. At this point, you can build and run the sample app by returning to your Code Web window and running the following in the terminal:
`` `npm start` ``
5. From the workspace overview, launch your dev URL by clicking its name; Coder will open a new browser window and point you to the appropriate URL.

6. You can test preview by making changes to the `src/App.js` file; every time you save your changes to this file, your preview will reload.

[](https://coder.com/docs/v1/getting-started/developers#step-5-push-your-repo-to-github)
Step 5: Push your repo to GitHub
-------------------------------------------------------------------------------------------------------------------------
The follow steps show you how to push your app to a newly created GitHub repo.
1. Log in to GitHub and navigate to [Create a new repository](https://github.com/new)
.
2. Provide a **repository name** and click **Create repository**.
3. Return to your workspace, run the following in your terminal to add a remote to your GitHub repo, change the primary branch name to `main`, and push the contents to your newly created repo:
`` `git remote add origin https://github.com//.git git branch -M main git push origin main` ``
4. Within the IDE window (near the top), you'll be prompted to log in to GitHub by providing your username and password/personal access token.
5. Next, Code Web will display an alert that says the GitHub extension wants to sign in; click **Allow** to proceed.
6. In the subsequent window, click **Continue** to authorize Visual Studio Code to access GitHub.
At this point, the contents of your repo should be pushed to GitHub.
##### On this page
---
# Embeddable button | Coder v1 Docs
[Home](https://coder.com/docs/v1 "Home")
[Images](https://coder.com/docs/v1/images "Images")
Embeddable button
You can embed an **Open in Coder** button into a repository's README file to provide developers with a one-click way to start contributing code. It eliminates much of the effort required to set up a development environment, allowing users to begin contributing faster.
When a user clicks on the **Open in Coder** button, they will be directed to the specified Coder deployment and prompted to login if they don't already have an active session. Coder then builds a workspace based on the image specified. Coder will also clone the repository into the workspace's `/home/coder` folder. At this point, the user can open the IDE and begin working.
[](https://coder.com/docs/v1/images/embed-button#requirements)
Requirements
---------------------------------------------------------------------------
* You must have Git and SSH installed on your image
* Coder must be [integrated with a supported Git provider](https://coder.com/docs/v1/admin/git)
* You must [link your Coder account](https://coder.com/docs/v1/workspaces/preferences#linked-accounts)
to the service of your choice. This step is required for anyone who wants to use the button to launch a project using the provided image and repo.
[](https://coder.com/docs/v1/images/embed-button#create-the-embedded-buttons-code)
Create the embedded button's code
--------------------------------------------------------------------------------------------------------------------
Coder can automatically generate the code you need to embed the Open in Coder button.
1. In the Coder UI, go to **Images**. Find the image you want to use and click to open.
2. Underneath the name of the image, click **Embed**.
3. Choose the **Image Tag** and **Git Service** you want to use, and provide your **Git Repository URI**.
4. Once you fill in the required fields, Coder generates the code you need in Markdown or HTML (you can change the button's display text by modifying the Markdown or HTML snippets). Copy the code and paste it into your repository's README.md file.
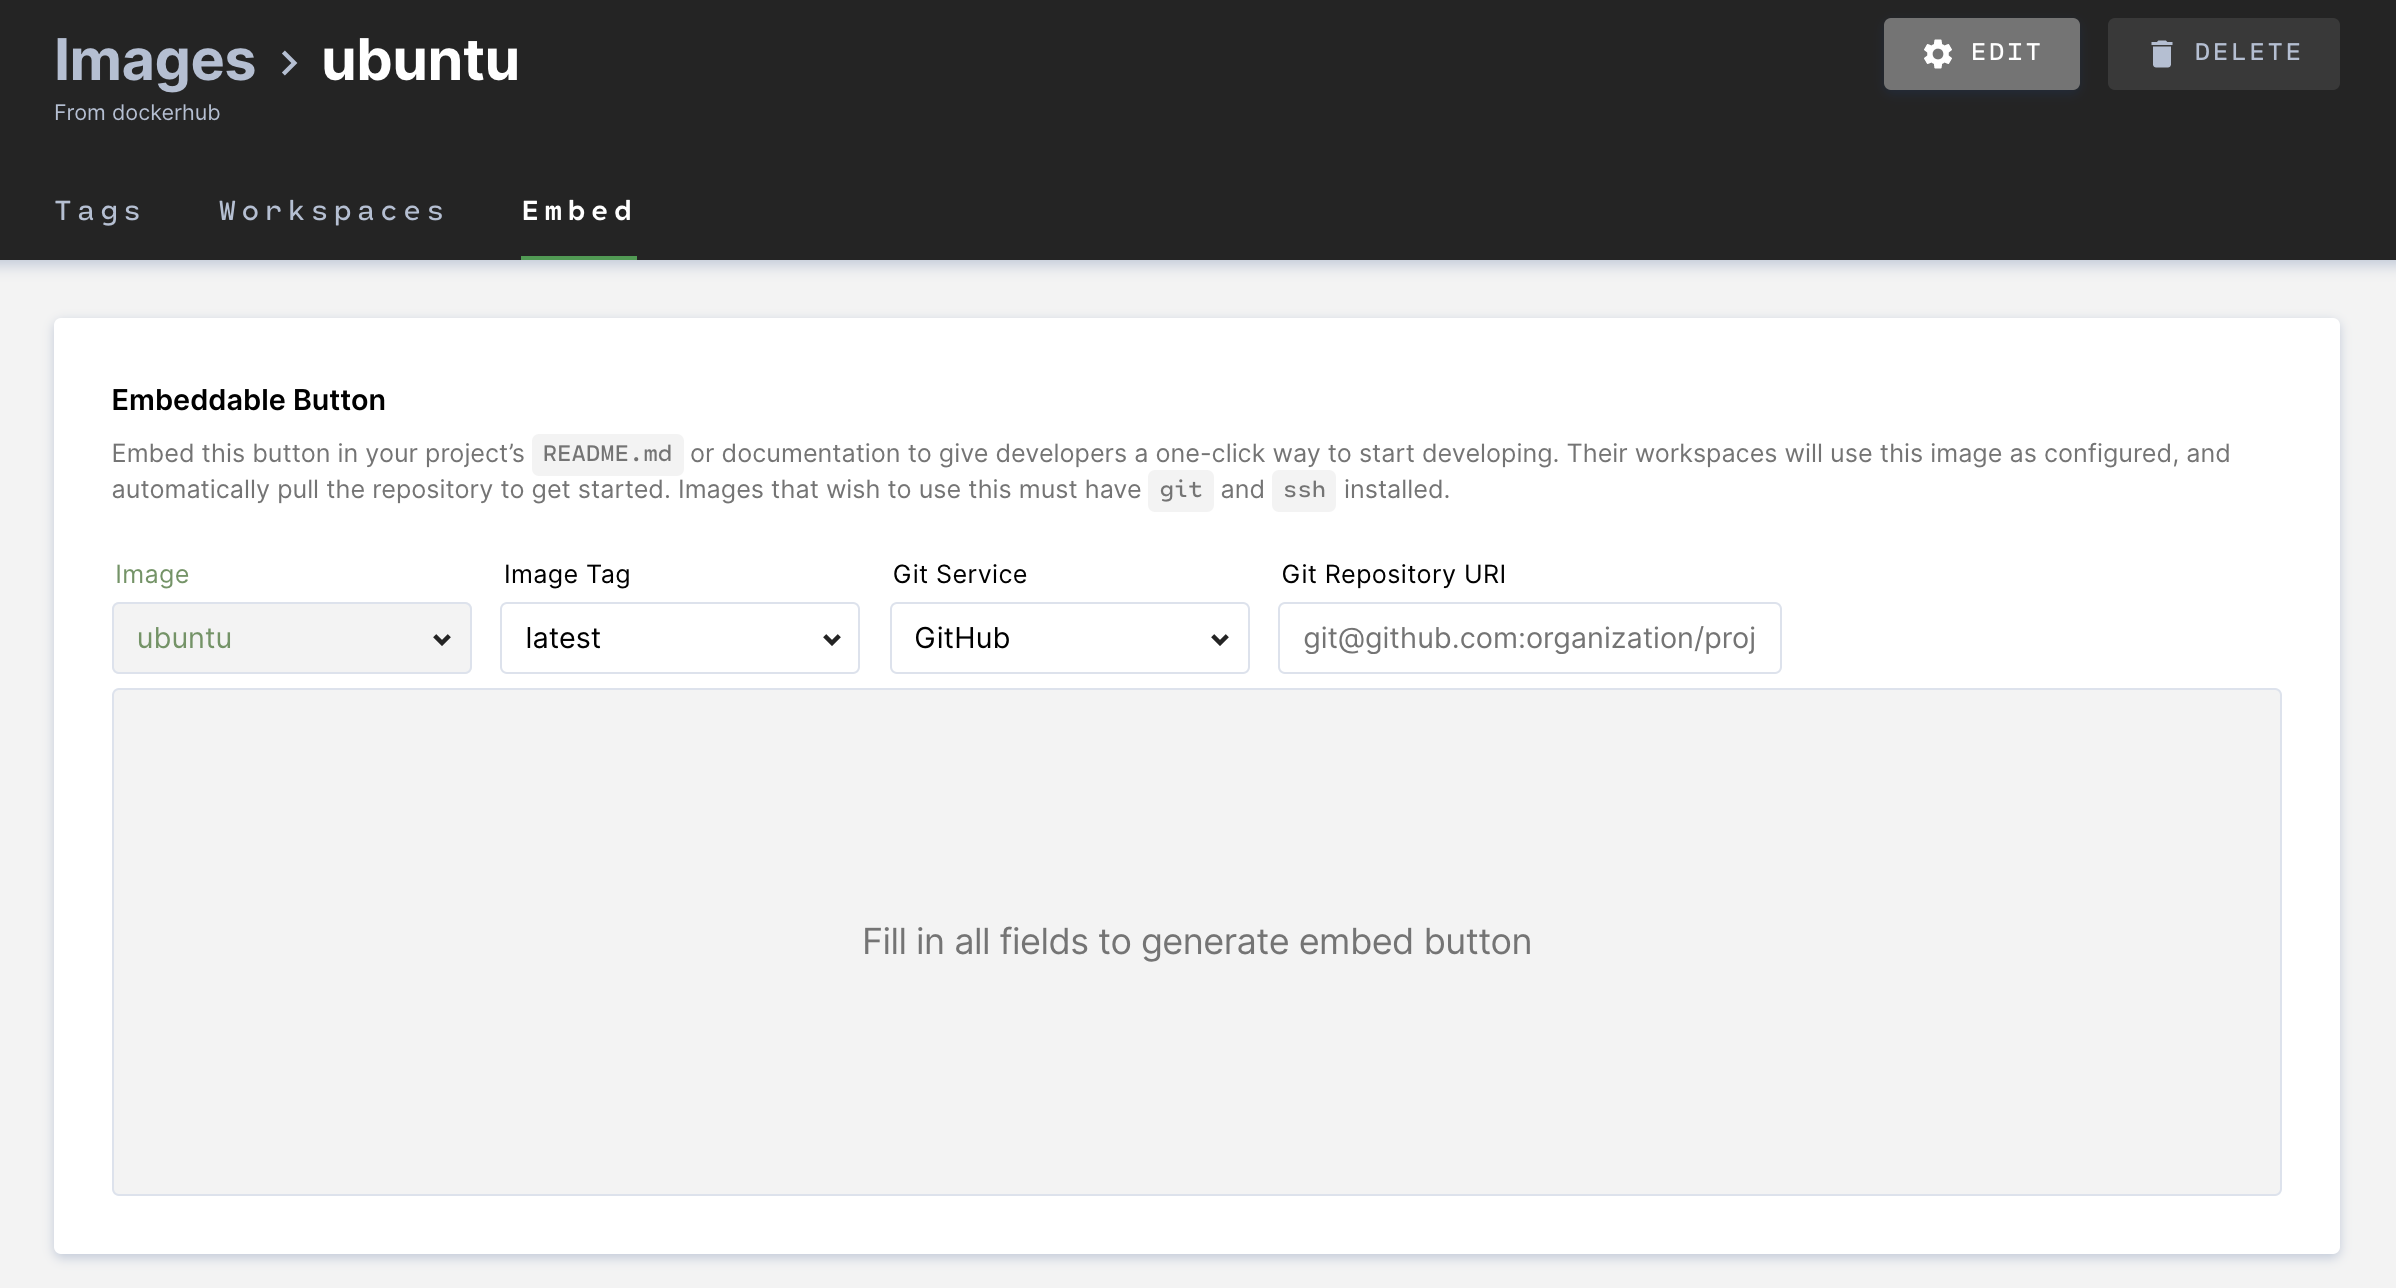
##### On this page
---
# GPG forwarding | Coder v1 Docs
[Home](https://coder.com/docs/v1 "Home")
[Guides](https://coder.com/docs/v1/guides "Guides")
[Customization](https://coder.com/docs/v1/guides/customization "Customization")
GPG forwarding
This guide will show you how to sign, encrypt, and decrypt content where GPG is in a Coder workspace while the private key is on your local machine.
[](https://coder.com/docs/v1/guides/customization/gpg-forwarding#step-1-configure-your-local-machine)
Step 1: Configure your local machine
------------------------------------------------------------------------------------------------------------------------------------------
We assume that you're already capable of using and signing GPG on your local machine.
The examples in this guide were created using macOS 11 (Big Sur); Windows and Linux users may need to modify the provided instructions.
First, make sure that you've:
* Installed GnuPG (GPG) using [Homebrew](https://formulae.brew.sh/formula/gnupg)
or [gpg-suite](https://gpgtools.org/)
* Verified that `pinentry` is installed (if not, install `pinentry`)
* Created or imported both your public and private GPG keys
You can verify your GnuPG installation and version number as follows:
`` `gpg --version gpg (GnuPG) 2.3.1` ``
### [](https://coder.com/docs/v1/guides/customization/gpg-forwarding#starting-gnupg)
Starting GnuPG
When running any `gpg` command, your system knows to start `gpg-agent`, which creates the sockets needed and performs the cryptographic activity. However, if you connect to a workspace via SSH using the `-R` flag to remote forward the sockets, your local `gpg-agent` won't start automatically since this process doesn't invoke the `gpg` binary.
To address this issue, add the gpg-agent to your local `.profile`, `.bashrc`, `.zshrc`, or configuration script that runs for each terminal session:
`` `gpgconf --launch gpg-agent` ``
Alternatively, you can run `gpg-agent --daemon` to prepare your local system.
If you don't perform either of the steps above, there won't be sockets for mounting and the remote `gpg` command won't work (instead, you'll end up starting an agent in the remote system that has no keys).
[](https://coder.com/docs/v1/guides/customization/gpg-forwarding#step-2-configure-coder)
Step 2: Configure Coder
----------------------------------------------------------------------------------------------------------------
> The following steps must be performed by a Coder user assigned the **site manager** role.
To use GPG agent forwarding, ensure that you've enabled:
* [SSH access to workspaces](https://coder.com/docs/v1/admin/workspace-management/ssh-access)
; you must use OpenSSH (the basic `libssh` server doesn't support forwarding)
* [Container-based virtual machines (CVMs)](https://coder.com/docs/v1/admin/workspace-management/cvms)
; CVMs are required to run `systemd`, which is required for OpenSSH to start
[](https://coder.com/docs/v1/guides/customization/gpg-forwarding#step-3-configure-a-coder-image-to-support-gpg-forwarding)
Step 3: Configure a Coder image to support GPG forwarding
------------------------------------------------------------------------------------------------------------------------------------------------------------------------------------
Update the image on which your workspace is based to include the following dependencies for GPG forwarding:
* `openssh-server` and `gnupg2` installed
* `StreamLocalBindUnlink yes` set in the `/etc/ssh/sshd_config` file
* Socket masking
* `OpenSSH` enabled (so that Coder doesn't inject its own ssh daemon)
Your updated Dockerfile would look something like:
`` `FROM ubuntu:20:04 RUN apt-get update && \ DEBIAN_FRONTEND="noninteractive" apt-get install --yes \ openssh-server \ gnupg2 \ systemd \ systemd-sysv RUN echo "StreamLocalBindUnlink yes" >> /etc/ssh/sshd_config && \ systemctl --global mask gpg-agent.service \ gpg-agent.socket gpg-agent-ssh.socket \ gpg-agent-extra.socket gpg-agent-browser.socket && \ systemctl enable ssh` ``
Alternatively, you can create a new image from scratch. If so, we recommend starting with Coder's [Enterprise Base](https://github.com/coder/enterprise-images/blob/main/images/base/Dockerfile.ubuntu)
image, which helps establish dependencies and conventions that improves the Coder user experience.
If you use the Enterprise Base image as your starting point:
1. run `apt-get install gnupg2 openssh-server`
2. Add the following to the Dockerfile:
`` `RUN echo "StreamLocalBindUnlink yes" >> /etc/ssh/sshd_config && \ systemctl --global mask gpg-agent.service \ gpg-agent.socket gpg-agent-ssh.socket \ gpg-agent-extra.socket gpg-agent-browser.socket && \ systemctl enable ssh` ``
[](https://coder.com/docs/v1/guides/customization/gpg-forwarding#step-4-createupdate-a-workspace-using-the-image)
Step 4: Create/update a workspace using the image
-------------------------------------------------------------------------------------------------------------------------------------------------------------------
Once you've created your image, you can [import it](https://coder.com/docs/v1/images/importing)
for use. When creating a workspace using that image, be sure to [create a CVM-enabled workspace](https://coder.com/docs/v1/workspaces/create)
.
[](https://coder.com/docs/v1/guides/customization/gpg-forwarding#step-5-define-the-workspace-startup-configurations-using-dotfiles)
Step 5: Define the workspace-startup configurations using dotfiles
------------------------------------------------------------------------------------------------------------------------------------------------------------------------------------------------------
The configuration detailed in this section must be be run _after_ you've created and started your workspace (the configurations must be run within the context of your user). We recommend defining your configuration using [Coder personalization scripts (otherwise known as dotfiles)](https://coder.com/docs/v1/workspaces/personalization#dotfiles-repo)
.
To use your local private key on the remote Coder workspace, you must provide the workspace a reference to the public key and the key must be trusted. You must also account for the fact that not all images will include GPG. To do both, add the following to an `install.sh` script, then add the file to your dotfiles repo:
`` `if hash gpg 2>/dev/null; then echo "gpg found, configuring public key" gpg --import ~/dotfiles/.gnupg/mterhar_coder.com-publickey.asc echo "16AD...B84AC:6:" | gpg --import-ownertrust git config --global user.signingkey F371232FA31B84AC echo "pinentry-mode loopback" > ~/.gnupg/gpg.conf echo "export GPG_TTY=\$(tty)" > ~/.profile echo "to enable commit signing, run" echo "git config --global commit.gpgsign true" else echo "gpg not found, no git signing" fi` ``
**Notes regarding the sample script:**
* Adding the public key export directly to the dotfiles repository (as shown in the example) allows it to be imported.
* The `gpg --import-ownertrust` command gets the fingerprint of the key that was just imported with a trust level of `6` (this indicates a trust level of **ultimate**).
* The `"pinentry-mode loopback" > ~/.gnupg/gpg.conf` allows the remote system to trigger `pinentry` inline so that you can type your passphrase into the same terminal where you're running the GPG command to unlock the mounted socket.
* Setting `GPG_TTY` allows `pinentry` time to send the request for a passphrase to the correct place. The use of a single `>` prevents that line from being added to `.profile` repeatedly, though anything you have in the file will be erased.
[](https://coder.com/docs/v1/guides/customization/gpg-forwarding#step-6-connect-to-coder)
Step 6: Connect to Coder
------------------------------------------------------------------------------------------------------------------
On your local machine, ensure that `gpg-agent` is running and that it works when you attempt to perform a GPG action (e.g., `echo "test" | gpg --clearsign`). Note that you'll be prompted to provide your pin; as such, the socket will be open for a bit unless you kill and restart the GPG agent.
To launch `gpg-agent` and connect to Coder:
`` `gpgconf --launch gpg-agent coder config-ssh ssh -R /run/user/1000/gnupg/S.gpg-agent:/Users/mterhar/.gnupg/S.gpg-agent coder.` ``
At this point, there is a connection from your local filesystem socket to the remote filesystem socket, so you can begin running GPG actions:
`` `$ echo "test " | gpg --clearsign -v gpg: using character set 'utf-8' gpg: using pgp trust model gpg: key F371232FA31B84AC: accepted as trusted key gpg: writing to stdout -----BEGIN PGP SIGNED MESSAGE----- Hash: SHA256 test gpg: EDDSA/SHA256 signature from: "F371232FA31B84AC Mike Terhar <[[email protected]](https://coder.com/cdn-cgi/l/email-protection) >" -----BEGIN PGP SIGNATURE----- iHUEARYIAB0WIQQWraRO2qW8c4RXhlTzcSMvoxuErAUCYPm2fwAKCRDzcSMvoxuE rHYNAQCrGPbF9Z89dDjemFMtgt0dfsPSUcAlgVj1PKGsg/K8lgEAj8MeTXi1RQhv dqbC8blPKTAzupH7OeQpe6EbweZHjAI= =tgC/ -----END PGP SIGNATURE-----` ``
If you decide to run a web terminal or use the terminal within code-server, you'll be prompted for to enter your pin and to use the SSH socket (this is true for terminals that are running from different devices as well).
### [](https://coder.com/docs/v1/guides/customization/gpg-forwarding#example-gpg-forwarding-action)
Example: GPG forwarding action
The following is an example of what a GPG forwarding action looks like:
`` `% gpgconf --launch gpg-agent % ssh -R /run/user/1000/gnupg/S.gpg-agent:/Users/mterhar/.gnupg/S.gpg-agent coder.gpg Welcome to Ubuntu 20.04.2 LTS (GNU/Linux 5.4.0-1039-gke x86_64) * Documentation: https://help.ubuntu.com * Management: https://landscape.canonical.com * Support: https://ubuntu.com/advantage This system has been minimized by removing packages and content that are not required on a system that users do not log into. To restore this content, you can run the 'unminimize' command. Last login: Thu Jul 22 18:17:57 2021 from 127.0.0.1 $ echo "test " | gpg --clearsign -v gpg: using character set 'utf-8' gpg: using pgp trust model gpg: key F371232FA31B84AC: accepted as trusted key gpg: writing to stdout -----BEGIN PGP SIGNED MESSAGE----- Hash: SHA256 test gpg: EDDSA/SHA256 signature from: "F371232FA31B84AC Mike Terhar <[[email protected]](https://coder.com/cdn-cgi/l/email-protection) >" -----BEGIN PGP SIGNATURE----- iHUEARYIAB0WIQQWraRO2qW8c4RXhlTzcSMvoxuErAUCYPm2fwAKCRDzcSMvoxuE rHYNAQCrGPbF9Z89dDjemFMtgt0dfsPSUcAlgVj1PKGsg/K8lgEAj8MeTXi1RQhv dqbC8blPKTAzupH7OeQpe6EbweZHjAI= =tgC/ -----END PGP SIGNATURE-----` ``
To sign Git commits via the command line:
`` `$ git commit -m "trigger signature" [gpg-test 2ece8ea] trigger signature 1 file changed, 2 insertions(+) $ git verify-commit 2ece8ea gpg: Signature made Thu Jul 22 19:15:50 2021 UTC gpg: using EDDSA key 16ADA44EDAA5BC7384578654F371232FA31B84AC gpg: Good signature from "Mike Terhar <[[email protected]](https://coder.com/cdn-cgi/l/email-protection) >" [ultimate]` ``
Now, when you push commits to GitHub/GitLab, you'll see that the commits are flagged as verified.
[](https://coder.com/docs/v1/guides/customization/gpg-forwarding#using-a-yubikey-or-other-smart-card)
Using a Yubikey or other smart card
-----------------------------------------------------------------------------------------------------------------------------------------
The Yubikey configurations required to make GPG work with the local machine are all that is necessary to use it as a smart card.
Once you've configured Yubikey, you can follow the steps detailed in this article to set up GPG forwarding; the only difference is that you should provide `pinentry` with your Yubikey PIN, not the private key passphrase.
As soon as the cryptographic action is complete, be sure remove the Yubikey from the USB port to prevent any additional cryptographic actions from occurring through the GPG forwarding socket.
[](https://coder.com/docs/v1/guides/customization/gpg-forwarding#limitations-for-code-server-users)
Limitations for code-server users
-------------------------------------------------------------------------------------------------------------------------------------
The Git functionality in code-server will sign the commit and obey the `.gitconfig` file. However, it lacks the ability to ask for a GPG pin, so the forwarding process only works if the socket is already open due to some other activity. For example, the following Git CLI command would typically prompt you to unlock the GPG key:
`` `git verify-commit ` ``
However, if the socket isn't already open, you'd get an error saying `Git: gpg failed to sign the data`, even if the configuration setting is enabled:
`` `"git.enableCommitSigning": true` ``
[](https://coder.com/docs/v1/guides/customization/gpg-forwarding#security-considerations)
Security considerations
-----------------------------------------------------------------------------------------------------------------
Any time you use a private key, you expose it to the systems that are granted access to the key.
Furthermore, actions such as typing the passphrase or using `gpg-preset-passphrase` to keep the socket open each have different risk profiles associated (e.g., the risk of someone looking over your shoulder and the risk of someone accessing the system with open socket from another terminal).
The following are steps you can take to minimize your risk:
1. Setting `default-cache-ttl 30`, which will prompt you for your PIN more frequently. While the signing activity only takes a short amount of time to complete, the GPG socket remains open longer.
2. Connect to the local `.extra` socket rather than the primary socket, which helps limit key exposure (if you do this, modify examples in this article to use the appropriate socket).
3. Create a separate sub-key for Coder to use to prevent the primary key from being compromised if a security incident occurs. You'll need to add the sub-keys to your Git provider, and if there's a security incident, the old commits signed using the affected keys may be considered unverified.
4. As of Coder v1.22.x, running `coder config-ssh` enables the `ControlMaster` mechanism, which caches connections even you exit the interactive shell. This means that GPG actions on the remote system can occur even if there's no apparent connection. To disable `ControlMaster` on your GPG-forwarded SSH connection, add the following options to your command: `-o ControlMaster=no -o ControlPath=none`.
[](https://coder.com/docs/v1/guides/customization/gpg-forwarding#troubleshooting)
Troubleshooting
-------------------------------------------------------------------------------------------------
The following sections explain how you can troubleshoot errors you may see when using up GPG forwarding.
### [](https://coder.com/docs/v1/guides/customization/gpg-forwarding#unable-to-connect-to-the-default-agent-port)
Unable to connect to the default agent port
`` `connect to /Users/mterhar/.gnupg/S.gpg-agent port -2 failed: No such file or directory gpg: no running gpg-agent - starting '/usr/bin/gpg-agent'` ``
If you see this error, the socket wasn't present on the local machine when you executed your `ssh` command. This is caused by a lack of `-R` or `ForwardRemote` in the `ssh` configuration, so update your configuration accordingly.
### [](https://coder.com/docs/v1/guides/customization/gpg-forwarding#no-secret-key)
No secret key
`` `gpg: key F371232FA31B84AC: accepted as trusted key gpg: no default secret key: No secret key gpg: [stdin]: clear-sign failed: No secret key` ``
This error can happen if there's a `gpg` agent running in the remote workspace that is intercepting the GPG commands _before_ they get to the remote socket.
You can fix this by:
1. Running `gpgconf --kill gpg-agent`
2. Using `ps ax | grep gpg-agent` to find and kill all of the pids.
Then, reconnect your `ssh` session to re-establish the socket forwarding.
### [](https://coder.com/docs/v1/guides/customization/gpg-forwarding#inappropriate-ioctl-for-the-device)
Inappropriate ioctl for the device
`` `$ echo "test " | gpg --clearsign -vvv gpg: using character set 'utf-8' gpg: using pgp trust model gpg: key F371232FA31B84AC: accepted as trusted key gpg: writing to stdout -----BEGIN PGP SIGNED MESSAGE----- Hash: SHA256 test gpg: pinentry launched (1744 curses 1.1.1 - xterm-256color - - 501/20 0) gpg: signing failed: Inappropriate ioctl for device gpg: [stdin]: clear-sign failed: Inappropriate ioctl for device` ``
If `gpg: pinentry launched (1744 curses 1.1.1 - xterm-256color - - 501/20 0)` does not include the `/dev/pts/1` after the version number, you may need to add the `GPG_TTY` environment variable to a process that runs before trying to use `gpg`.
If `GPG_TTY` is set to the same output as `tty`, be sure you have a `.gnupg/gpg.conf` file that contains `pinentry-mode loopback`.
### [](https://coder.com/docs/v1/guides/customization/gpg-forwarding#ssh-error-with-remote-port-forwarding)
SSH error with remote port forwarding
If you receive this error when connecting via SSH:
`` `Warning: remote port forwarding failed for listen path /run/user/1000/gnupg/S.gpg-agent` ``
The likely cause is that `openssh` isn't running. This could be a result of:
* The image you're using doesn't include `openssh`
* The `systemctl enable ssh` command didn't work
* The workspace doesn't have [CVMs](https://coder.com/docs/coder/v1.20/workspaces/cvms#container-based-virtual-machine-cvm)
enabled.
### [](https://coder.com/docs/v1/guides/customization/gpg-forwarding#unverified-commits-in-github-or-gitlab)
Unverified commits in GitHub or GitLab
Both GitHub and GitLab display verification statuses beside signed commits. If you see a commit that's unverified, it could be that the signing key hasn't been uploaded to the associated account.
To fix this issue, add the GPG key to your account:
* [GitHub: Adding a GPG key](https://docs.github.com/en/github/authenticating-to-github/managing-commit-signature-verification/adding-a-new-gpg-key-to-your-github-account)
* [GitLab: Adding a GPG key](https://docs.gitlab.com/ee/user/project/repository/gpg_signed_commits/#adding-a-gpg-key-to-your-account)
If this doesn't fix the issue, ensure that the email address in the author field matches the email associated with the username and signing key.
### [](https://coder.com/docs/v1/guides/customization/gpg-forwarding#the-signing-still-works-after-disconnecting-the-session)
The signing still works after disconnecting the session
Coder CLI's `coder config-ssh` command uses session caching:
`` `Host coder.[workspace name] [...] ControlMaster auto ControlPath ~/.ssh/.connection-%r@%h:%p ControlPersist 600` ``
Therefore, the connection persists for some time and the GPG socket forwarding remains open to make opening a new shell fast.
### [](https://coder.com/docs/v1/guides/customization/gpg-forwarding#verbose-logging)
Verbose logging
If you're having issues with GPG forwarding, getting verbose logs is helpful for pinpointing where the issue may be. One way to do so is to add `-v` to the SSH command you run.
You can also add `--verbose` to the `gpg` command. For example, if your sockets aren't where you expected them and you receive the following output, you'll need to get additional information via verbose logs:
`` `$ gpgconf --list-dirs sysconfdir:/etc/gnupg bindir:/usr/bin libexecdir:/usr/lib/gnupg libdir:/usr/lib/x86_64-linux-gnu/gnupg datadir:/usr/share/gnupg localedir:/usr/share/locale socketdir:/run/user/1000/gnupg dirmngr-socket:/run/user/1000/gnupg/S.dirmngr agent-ssh-socket:/run/user/1000/gnupg/S.gpg-agent.ssh agent-extra-socket:/run/user/1000/gnupg/S.gpg-agent.extra agent-browser-socket:/run/user/1000/gnupg/S.gpg-agent.browser agent-socket:/run/user/1000/gnupg/S.gpg-agent homedir:/home/coder/.gnupg` ``
##### On this page
---
# Lifecycle | Coder v1 Docs
[Home](https://coder.com/docs/v1 "Home")
[Workspaces](https://coder.com/docs/v1/workspaces "Workspaces")
Lifecycle
A Coder workspace is designed to shutdown (triggered by either scheduled workspace inactivity or manually by users and administrators) and be rebuilt.
The persistent volume claim (or `/home/`) mounted to the workspace ensures that the workspaces retain cloned code repositories and other personalization settings.
You can manage a Coder workspace's lifecycle at the organization-level to auto shutdown after a defined period of inactivity or when administrators want to force workspace rebuilds.
[](https://coder.com/docs/v1/workspaces/lifecycle#rebuilds)
Rebuilds
--------------------------------------------------------------------
Rebuilding a [workspace](https://coder.com/docs/v1/workspaces)
allows you to update to the latest image, edit resource requests, or restart your workspace after a shutdown.
Only the `/home/` directory persists between rebuilds. Rebuilds do not affect configurations and source code within the `/home/` subtree, even if the underlying [image](https://coder.com/docs/v1/images)
or its dependencies change.
**Note:** `username` is defined in the image. See [Docker's image documentation](https://docs.docker.com/engine/reference/builder/#user)
[](https://coder.com/docs/v1/workspaces/lifecycle#auto-start)
Auto-start
------------------------------------------------------------------------
Users can configure a workspace [auto-start](https://coder.com/docs/coder/latest/workspaces/autostart)
time, which sets the time when Coder will rebuild and start their workspaces. Users typically set this time to coincide with the start of their working day.
Organizations can also configure the days of week on which workspaces are permitted to start automatically. For example, if users tend to not start their workspaces on Saturday or Sunday, organization managers can exclude these days by [editing the organization](https://coder.com/docs/v1/admin/organizations/manage#editing-an-organization)
.
[](https://coder.com/docs/v1/workspaces/lifecycle#auto-off)
Auto-off
--------------------------------------------------------------------
Organizations can set an [auto-off inactivity threshold](https://coder.com/docs/v1/admin/workspace-management/shutdown)
. After a workspace hasn't been accessed for the specified threshold, it is shut down. A stopped workspace requires a [rebuild](https://coder.com/docs/v1/workspaces/lifecycle#rebuilds)
before you can access it again.
Optionally, you can allow users to modify or disable auto-off criteria for specific workspaces at the organization level.
[](https://coder.com/docs/v1/workspaces/lifecycle#hooks)
Hooks
--------------------------------------------------------------
Coder exposes a few hooks during the build process. Once a workspace is available and running on an underlying host, the following steps are taken:
1. **Injection of secrets into the workspace**: Coder injects authentication for the [Coder CLI](https://github.com/coder/coder-cli)
, allowing the CLI to perform authenticated CLI commands. If your Coder instance is configured with a Git provider, your SSH key pair is injected during this step as well, allowing it to perform authenticated `git` operations.
2. **Execution of `/coder/configure`**: Execution of this script, which is included in the workspace image, allows [images](https://coder.com/docs/v1/images)
to perform startup operations that are consistent across all of the workspaces that use the image. If you need your image to include modifications to `/home/`, include the instructions in this script.
In other words, the configure script is _not_ run as the root user but as the `/home/`, so configurations are stored in `/home/`. You may also run commands with `sudo`, but these changes will not persist in `/home/`.
3. **Execution of `~/personalize`**: Execution of this script allows you to customize your personal development workspace on each rebuild. Coder injects the personalize script into the workspace and includes cloning logic if a user has specified a dotfiles repo. Read more on personalization [here](https://coder.com/docs/v1/workspaces/personalization)
.
##### On this page
---
# Workspace management | Coder v1 Docs
[Home](https://coder.com/docs/v1 "Home")
[Command line](https://coder.com/docs/v1/cli "Command line")
Workspace management
[](https://coder.com/docs/v1/cli/managing-workspaces#list-all-of-your-workspaces)
List all of your workspaces
-------------------------------------------------------------------------------------------------------------
`` `$ coder workspaces ls Name ImageTag CPUCores MemoryGB DiskGB GPUs Updating Status cdev latest 8 12 96 0 false ON site ubuntu 1 1 10 0 false ON dev latest 8 16 64 0 false OFF denv latest 8 16 80 0 false OFF` ``
[](https://coder.com/docs/v1/cli/managing-workspaces#rebuild-a-workspace)
Rebuild a workspace
---------------------------------------------------------------------------------------------
`` `$ coder workspaces rebuild my-workspace --follow Rebuild workspace "my-workspace"? (will destroy any work outside of /home): y█ ✅ -- 2020-12-20T02:43:44Z Deleting old workspace ✅ -- 2020-12-20T02:43:44Z Deleting old network isolation policy ✅ -- 2020-12-20T02:43:44Z Deleting old service ...` ``
[](https://coder.com/docs/v1/cli/managing-workspaces#stop-all-of-your-workspaces)
Stop all of your workspaces
-------------------------------------------------------------------------------------------------------------
`` `$ coder workspaces ls -o json | jq -r .[].name | xargs coder workspaces stop success: successfully stopped workspace "site" ...` ``
##### On this page
---
# Compute resources | Coder v1 Docs
[Home](https://coder.com/docs/v1 "Home")
[Guides](https://coder.com/docs/v1/guides "Guides")
[Admin](https://coder.com/docs/v1/guides/admin "Admin")
Compute resources
The computing workloads of developers are unique in that they don't require consistent access to CPUs; instead, developers typically have short periods of peak usage during builds and compilation followed by long periods of low usage.
Build and compilation performance directly impacts the development experience of a project: faster builds mean faster iteration cycles, leading to greater development velocity. However, traditional approaches to providing developers with more hardware for computationally intensive compilations can lead to wasted resources.
[](https://coder.com/docs/v1/guides/admin/resources#individual-vs-shared-resources)
Individual vs. shared resources
-------------------------------------------------------------------------------------------------------------------
Consider a project whose compilation is parallelizable up to 16 CPU cores.
Because each developer would need hardware capable of supporting compilation, you could give everyone laptops with 16 CPU cores. During compilation and build, each machine would see 100% utilization of its resources. However, these processes are relatively quick, so the machine is underutilized the vast majority of the time.
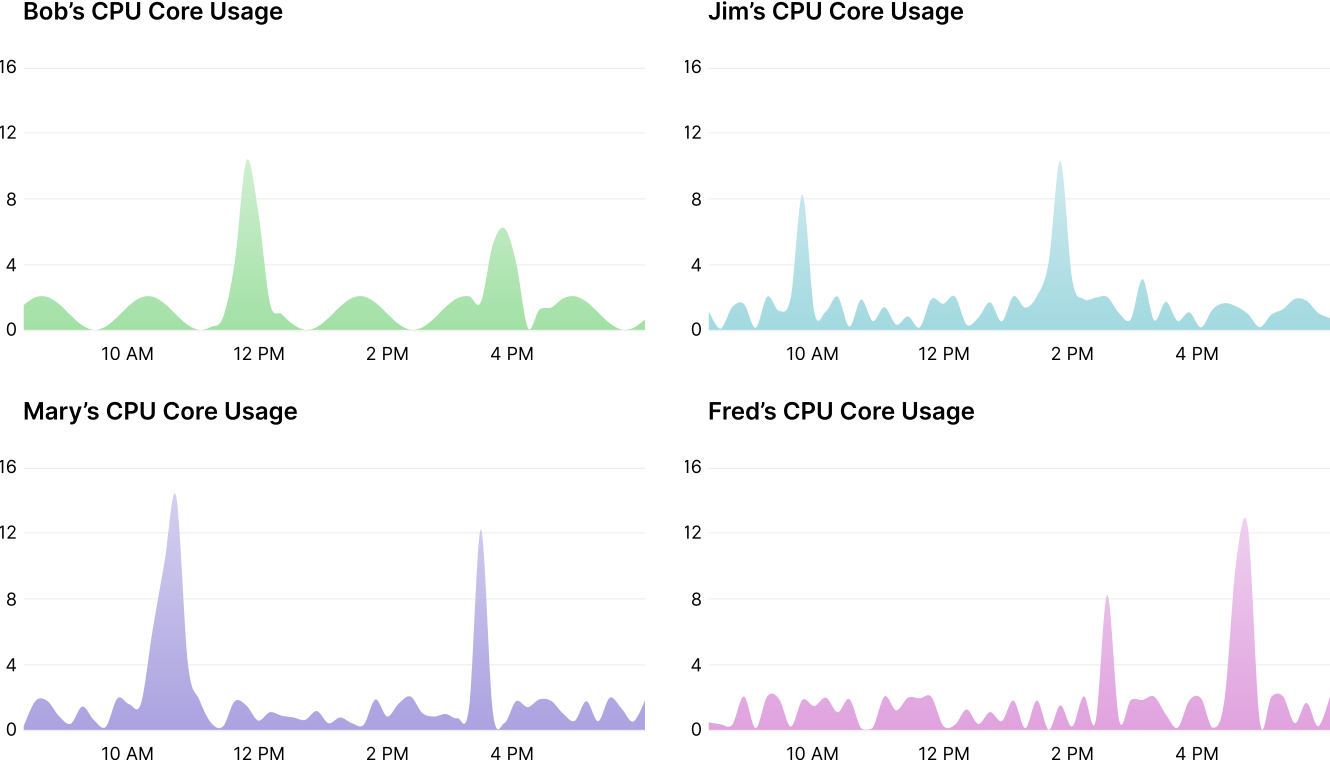
However, sharing resources can allow you to provide your developers with access to the computing resources while minimizing underutilization.
Coder places each developer into an isolated workspace and schedules each developer's workspace onto the same piece of hardware (in this example, the hardware is a machine with 16 CPU cores). Each developer has access to the resources they need during peak load (e.g., compilation, build); this offers them a performant experience when required. However, the shared resources minimize resource underutilization.
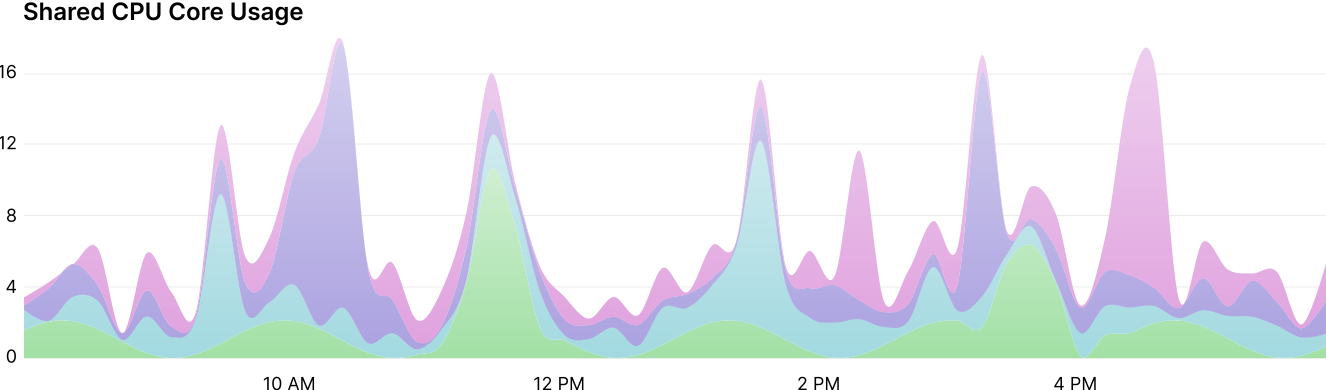
[](https://coder.com/docs/v1/guides/admin/resources#resource-contention)
Resource contention
--------------------------------------------------------------------------------------------
One possible issue with shared resources is resource contention.
If the resources on the underlying node become contended, the developers will share CPU cycles on a weighted basis relative to the resource request of the Coder workspace.
However, the nature of developer workflows makes resource contention fairly uncommon since this occurs when several users are performing resource-intensive tasks, such as compilation, simultaneously.
[](https://coder.com/docs/v1/guides/admin/resources#shared-resource-configuration-in-coder)
Shared resource configuration in Coder
----------------------------------------------------------------------------------------------------------------------------------
Five variables determine how resource allocation and usage affect developers and compute costs:
* The Kubernetes Node type (virtual CPU count and memory size)
* The Coder workspace's default CPU and memory limits
* The Coder organization's CPU and memory provision ratios
* The Coder organization's workspace inactivity shutdown threshold
* The magnitude and frequency of code compilation operations
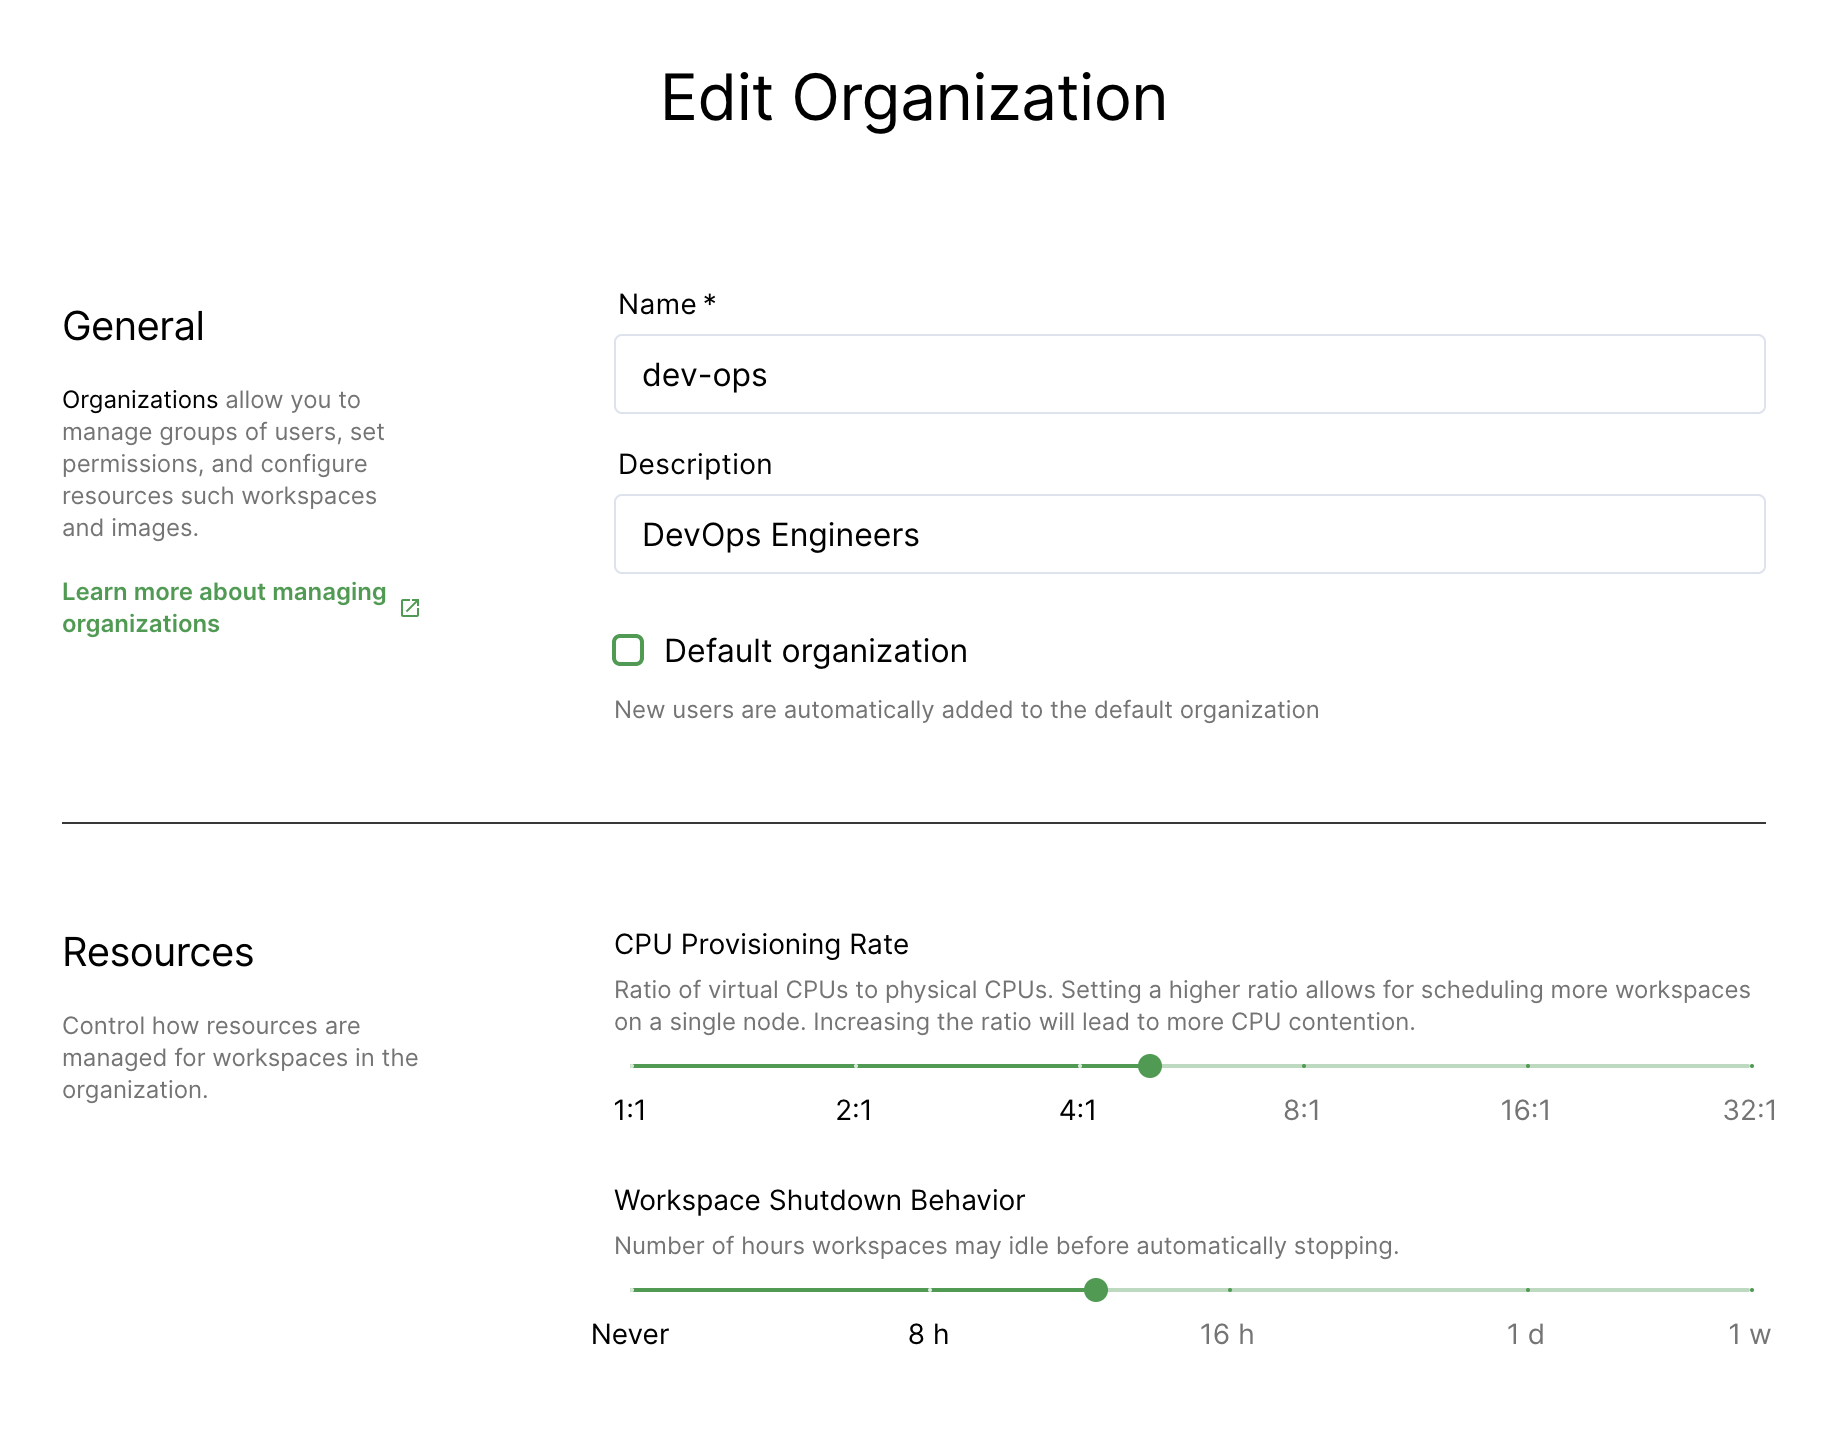
##### On this page
---
# Registries | Coder v1 Docs
[Home](https://coder.com/docs/v1 "Home")
[Admin](https://coder.com/docs/v1/admin "Admin")
Registries
Coder hooks into public and private Docker Registries to pull images and manage image metadata.
> You must be a **site manager** to add a registry or remove registries that aren't in use.
[](https://coder.com/docs/v1/admin/registries#adding-a-registry)
Adding a registry
----------------------------------------------------------------------------------
You can add registries during the process of [adding images](https://coder.com/docs/v1/images)
.
To import an image:
1. Go to **Images** > **Import Image** in the upper-right.
2. In the dialog that opens, you'll be prompted to pick a registry by default. However, to _add_ a registry, click **Add a new registry**, which is the option located immediately below the registry selector.
3. You'll be asked to provide a **registry name** and the **registry**.
4. **Optional:**
1. If your registry is a **private registry** or you want to avoid hitting [rate limits](https://www.docker.com/increase-rate-limits)
, provide the **username** and **password** combination required to access the registry.
2. If your registry is a private **Amazon ECR Registry**, follow the steps specific to [AWS ECR](https://coder.com/docs/v1/admin/registries/ecr)
.
3. If your registry is hosted on **Microsoft Azure Container Registry (ACR)** and you want to authenticate using **Azure Active Directory (AAD) Pod Identity**, follow the steps specific to [ACR](https://coder.com/docs/v1/admin/registries/acr)
.
5. Continue with the process of [adding your image](https://coder.com/docs/v1/images)
.
6. When done, click **Import**.
[](https://coder.com/docs/v1/admin/registries#deleting-a-registry)
Deleting a registry
--------------------------------------------------------------------------------------
> You cannot delete a registry if there are workspaces using images from that registry.
To delete a registry:
1. Go to the **Images** > **Registries** page.
2. Find the registry that you'd like to remove, click its **horizontal ellipsis** icon, and select **Delete**.
[](https://coder.com/docs/v1/admin/registries#unsupported-registries)
Unsupported registries
--------------------------------------------------------------------------------------------
Coder does not support the following registries at this time:
* GitHub Packages
##### On this page
---
# Usage metrics | Coder v1 Docs
[Home](https://coder.com/docs/v1 "Home")
[Admin](https://coder.com/docs/v1/admin "Admin")
Usage metrics
Metrics allow you to track the number of people using Coder on a day-to-day basis. Access the following view from **Manage > Metrics**.
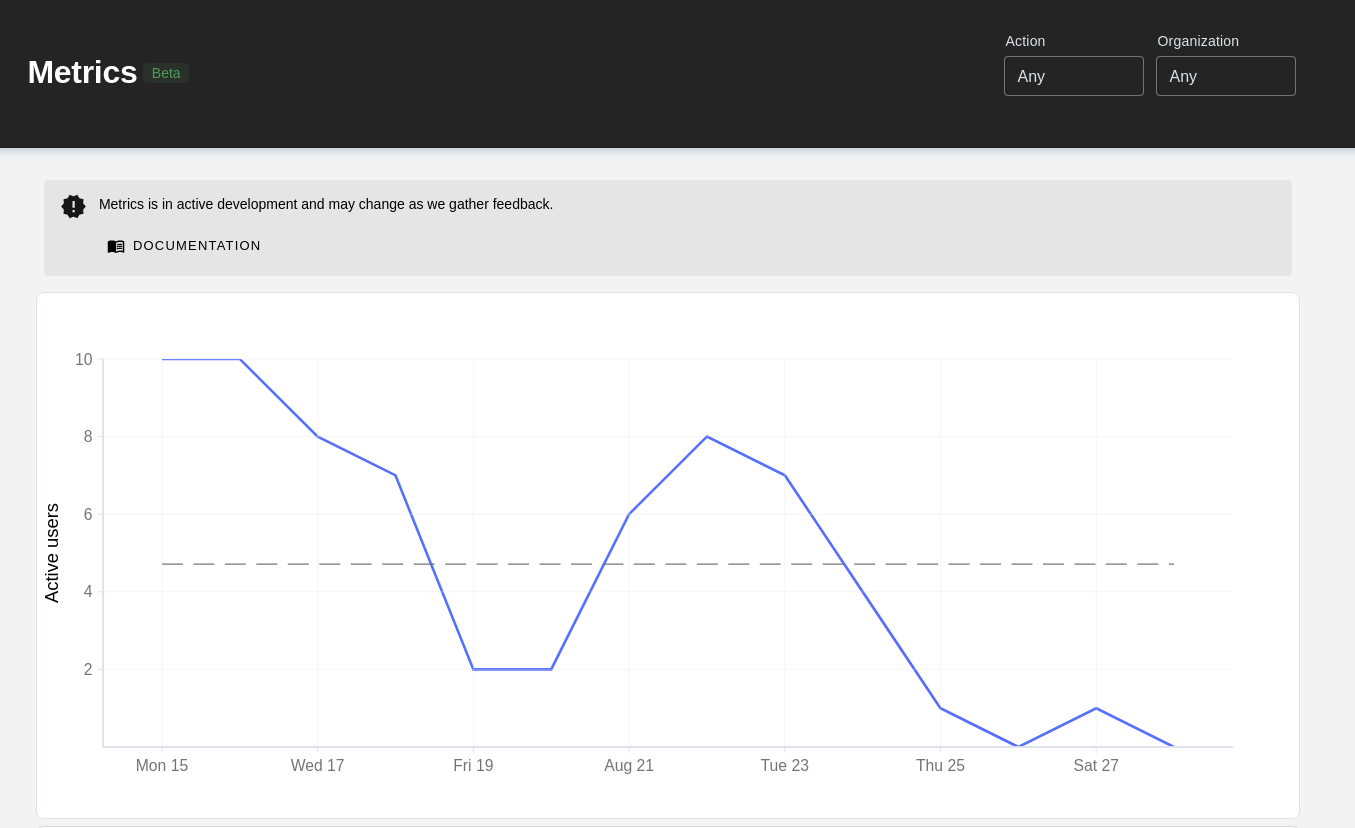
[](https://coder.com/docs/v1/admin/metrics#filters)
Filters
-----------------------------------------------------------
You can filter the report by the following properties:
* **Organization**: Only show user activity within a specific [organization](https://coder.com/docs/v1/admin/organizations)
* **Action**: Only show users who performed a specific action within the time period
* **Any**: Any of the below actions count towards activity
* **IDE**: Used a web IDE in a workspace (Code Web, JetBrains, PyCharm, Jupyter, RStudio)
* **Login**: Logged in to Coder
* **App**: Used a custom [workspace application](https://coder.com/docs/v1/workspaces/applications)
in a workspace (measures long-lived requests e.g. WebSockets)
* **Tunnel**: Connected to a workspace over SSH (VS Code Remote, JetBrains Gateway) or directly used `coder tunnel`
* **Web Terminal**: Used a web terminal in a workspace
[](https://coder.com/docs/v1/admin/metrics#activity-api)
Activity API
---------------------------------------------------------------------
You can use the REST API to generate reports for specific time periods and intervals. For example, "active IDE users in August, by week."
``` ``ACCESS_URL=https://coder.example.com API_ROUTE=api/private API_KEY=PLACEHOLDER # Use `coder tokens create` curl --request GET \ --url "$ACCESS_URL/$API_ROUTE/metrics/activity?\ start=2022-08-01T00:00:00.000000Z&end=2022-08-31T00:00:00.000000Z\ &category=ide\ &interval=1 week" \ --header "Session-Token: $API_KEY"`` ```
> Filter by organization with `org=id` Other intervals include 1 week, 1 year, 90 day
Coder will return a list of active users over the time period as well as how much time each user spent with the activity (in milliseconds)
`` `{ // 1 week intervals "activity": [ { "time": "2022-08-01T00:00:00Z", "duration": 604800000000000, "user_activity": [ { "user_id": "6004ad77-a7a69a24d779dd9f44357014", "duration": 72000000000000, // 20h (in nanoseconds) "count": 1200 }, { "user_id": "5f905429-ba6e4ac480eb4c0ead160b47", "duration": 30780000000000, // 8h 33m "count": 513 }, { "user_id": "627935e2-838713a0437b43f006b26244", "duration": 2760000000000, // 46m "count": 46 } ] }, // +3 weeks... ], // All active users from 2022-08-01 -> 2922-08-31 "users": { "6004ad77-a7a69a24d779dd9f44357014": { "id": "6004ad77-a7a69a24d779dd9f44357014", "name": "Joe", "username": "joe2", "roles": [ "site-member", "site-manager" ], "avatar_hash": "671b4b1db753a55396036354ff526c8df02e0a53bb4ce4990010a96ab8782ffd", "total_count": 4713, "total_duration": 282780000000000 // 78h 36m }, "needs-id": { "id": "627935e2-838713a0437b43f006b26244", "name": "Bob", "username": "bob12", "roles": [ "site-member" ], "avatar_hash": "51fb9f8ed9f17d919c62055a81db00015662af958edd91e52e14149f64aae434", "total_count": 3708, "total_duration": 360000000000 // 61h 48m } "5f905429-ba6e4ac480eb4c0ead160b47": { "id": "5f905429-ba6e4ac480eb4c0ead160b47", "name": "Alice", "username": "alice92", "roles": [ "site-member" ], "avatar_hash": "970ee9aa01c30411825a1f90208c2ce5cffffda643973260bf10fa35b4a188c4", "total_count": 3468, "total_duration": 2640000000000 // 57h 48m }, } }` ``
##### On this page
---
# IntelliJ | Coder v1 Docs
[Home](https://coder.com/docs/v1 "Home")
[Getting started](https://coder.com/docs/v1/getting-started "Getting started")
IntelliJ
This article will walk you through getting started with a Coder workspace and a project that leverages IntelliJ. You'll learn how to:
* Connect Coder to your Git provider;
* Create a workspace;
* Create an IntelliJ project;
* Push your changes to GitHub.
[](https://coder.com/docs/v1/getting-started/intellij#prerequisites)
Prerequisites
----------------------------------------------------------------------------------
This guide assumes that you have a Coder deployment available to you and that you have the credentials needed to access the deployment.
[](https://coder.com/docs/v1/getting-started/intellij#step-1-log-in-and-connect-coder-to-your-git-provider)
Step 1: Log in and connect Coder to your Git provider
-----------------------------------------------------------------------------------------------------------------------------------------------------------------
You'll log into Coder in this step and connect and authenticate with your Git provider. This will allow you to do things like pull repositories and push changes.
1. Navigate to the Coder deployment using the URL provided to you by your site manager, and log in.
2. Click on your avatar in the top-right, and select **Account**.

3. Provide Coder with your SSH key to connect and authenticate to GitHub.
If your site manager has configured OAuth, go to **Linked Accounts** and follow the on-screen instructions to link your GitHub account.

If your site manager has _not_ configured OAuth, go to **SSH keys**. Copy your public SSH key and [provide it to GitHub](https://docs.github.com/en/authentication/connecting-to-github-with-ssh/adding-a-new-ssh-key-to-your-github-account)
.

[](https://coder.com/docs/v1/getting-started/intellij#step-2-create-your-workspace)
Step 2: Create your workspace
-----------------------------------------------------------------------------------------------------------------
You will now create the workspace to work on your development project.
1. Return to **Workspaces** using the top navigation bar.
2. Click **New workspace** to launch the workspace-creation dialog.
3. Provide a **Workspace Name**.
4. In the **Image** section, click **Packaged** (this tab contains Coder-provided images hosted in a Docker registry). Select **IntelliJ**. This will populate the form in the **Import** tab.
5. Under **Workspace providers**, leave the default option (which is **built-in**) selected.
6. Expand the **Advanced** section. If the **Run as a container-based virtual machine** option is selected, _unselect_ the box. Leave the **CPU**, **Memory**, **Disk**, and **GPU** allocations as-is.
7. Scroll to the bottom and click **Create workspace**. The dialog will close, allowing you to see the main workspace page. You can track the workspace build process using the **Build log** on the right-hand side.
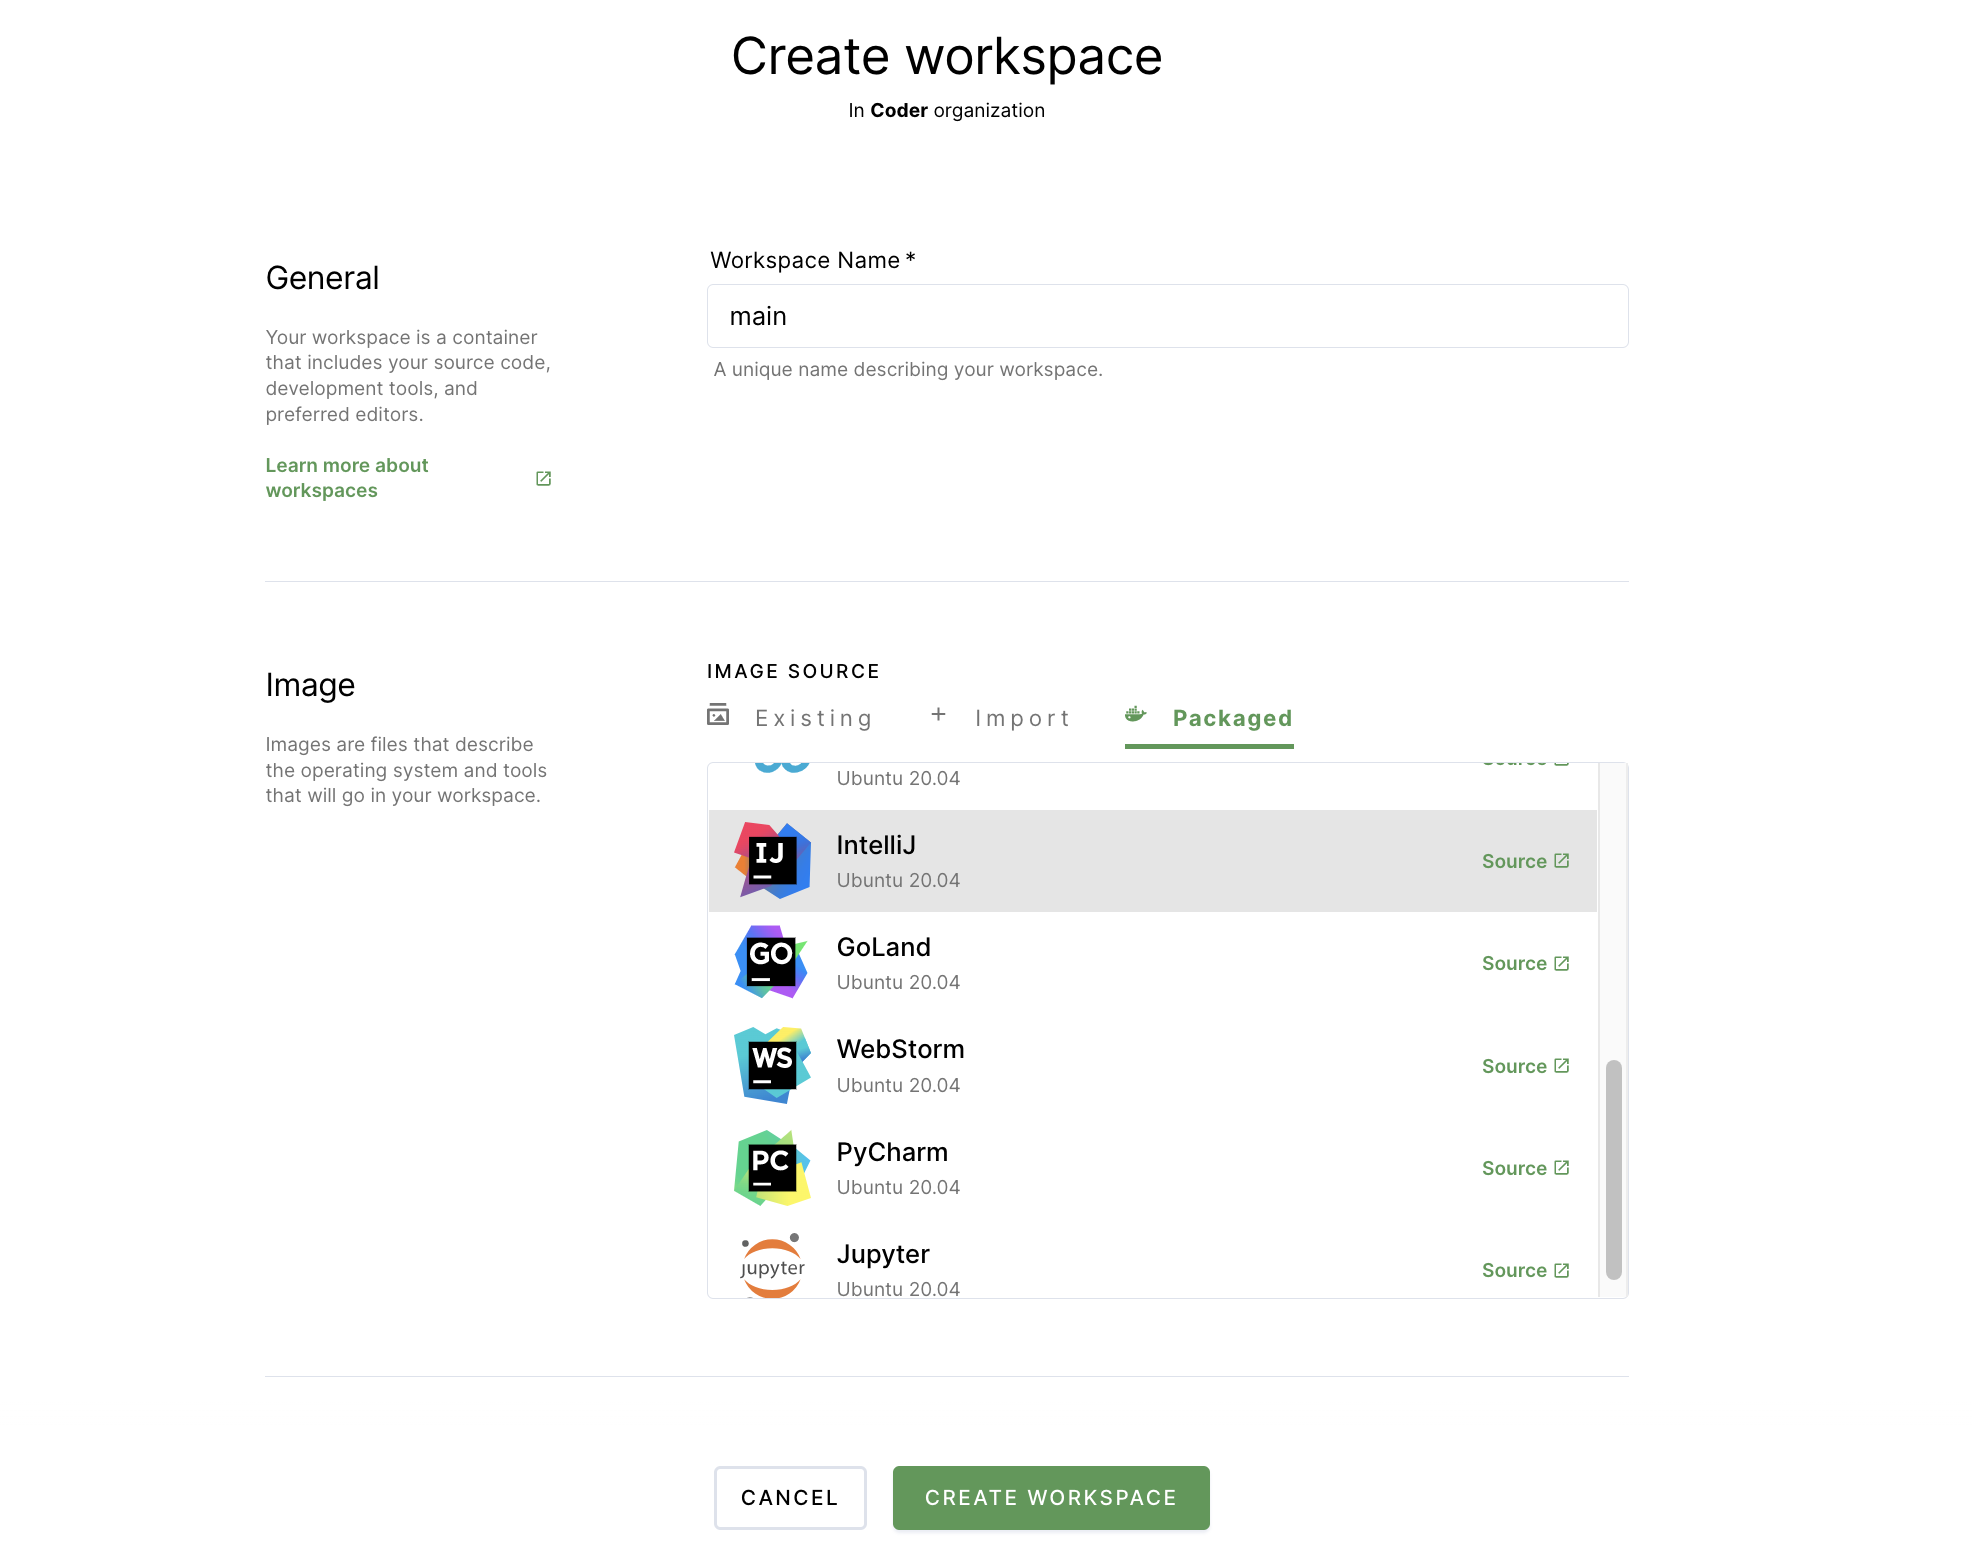
Once your workspace is ready for use, you'll see a chip that says **Running** next to the name of your workspace.
[](https://coder.com/docs/v1/getting-started/intellij#step-3-create-a-sample-project-file-in-your-workspace)
Step 3: Create a sample project file in your workspace
-------------------------------------------------------------------------------------------------------------------------------------------------------------------
Once you've created your workspace, you can start working in Coder. For the purposes of this article, we'll leverage JetBrains' tutorial on how to [Create and run your first Java project](https://www.jetbrains.com/help/idea/creating-and-running-your-first-java-application.html)
.
1. Under **Browser applications**, click **IntelliJ IDEA Community** to open the IDE in your browser. Follow the prompts to accept the license agreement and determine data sharing permissions.
2. If the welcome screen opens, click **New Project**. Otherwise, open the main menu, and select **File** > **New Project**.
3. Under Project SDK, select Download SDK, leave the pre-filled fields as-is, and click **Download**.
4. Click **Next**.
5. Click **Next** again since you will not be creating a project from a template
6. Name your project `HelloWorld`, and click **Finish**.
7. In the Project tool window, right-click the **src** folder, then select **New** > **Java Class**.
8. In the **Name** field, enter `com.example.helloworld.HelloWorld` and click **OK**. The IDE will create the `com.example.helloworld` package and the `HelloWorld` class.
9. Update your code so that it looks like the following:
`` `package com.example.helloworld; public class HelloWorld { public static void main(String[] args) { System.out.println("Hello, world!"); } }` ``
10. Click the **green triangle** to the left of your code. In the pop-up that appears, select **Run 'HelloWorld.main()'**. IntelliJ will begin compiling your code.
When IntelliJ is done compiling your code, it opens a new pane at the bottom that displays the result of running your code.
[](https://coder.com/docs/v1/getting-started/intellij#step-5-push-your-repo-to-github)
Step 5: Push your repo to GitHub
-----------------------------------------------------------------------------------------------------------------------
The following steps show you how to push your app to a newly created GitHub repo.
1. Log in to GitHub and navigate to [Create a new repository](https://github.com/new)
.
2. Provide a **repository name** and click **Create repository**.
3. Return to your workspace, and click **Terminal** at the bottom.
4. Run the following to turn your directory into a Git repository and commit your initial changes:
`` `cd .. git init cd git add -A git commit -am "Initial commit"` ``
5. Run the following in your terminal to add a remote to your GitHub repo, change the primary branch name to `main`, and push the contents to your newly created repo:
`` `git remote add origin [[email protected]](https://coder.com/cdn-cgi/l/email-protection) :/.git git branch -M main git push origin main` ``
At this point, the contents of your repo should be pushed to GitHub.
##### On this page
---
# 1.41.0 | Coder v1 Docs
[Home](https://coder.com/docs/v1 "Home")
[Changelog](https://coder.com/docs/v1/changelog "Changelog")
1.41.0
### [](https://coder.com/docs/v1/changelog/1.41.0#breaking-changes-)
Breaking changes ❗
* There are no breaking changes in 1.41.0.
### [](https://coder.com/docs/v1/changelog/1.41.0#features-)
Features ✨
* Updated code-server to 4.11.0.
* The `coder` CLI will return an error if it detects that a user is trying to connect to v2 server.
### [](https://coder.com/docs/v1/changelog/1.41.0#bug-fixes-)
Bug fixes 🐛
* Set User ID on audit log when proxying an IDE connection.
* Fixed a race condition where updates to Workspace Providers would not propagate to `coderd` replicas.
* Fixed some incorrect database transactions levels in various endpoints.
### [](https://coder.com/docs/v1/changelog/1.41.0#security-updates-)
Security updates 🔐
* There are no security updates in 1.41.0.
---
# System Requirements | Coder v1 Docs
[Home](https://coder.com/docs/v1 "Home")
[Setup](https://coder.com/docs/v1/setup "Setup")
System Requirements
Coder is deployed into a Kubernetes cluster namespace. We recommend the following resource minimums to ensure quality performance.
[](https://coder.com/docs/v1/setup/requirements#compute)
Compute
----------------------------------------------------------------
For the Coder control plane (which consists of the `coderd` pod and any additional replicas) allocate at least 2 CPU cores, 4 GB of RAM, and 20 GB of storage.
In addition to sizing the control plane node(s), you can configure the `coderd` pod's resource requests/limits and number of replicas in the [Helm chart](https://github.com/coder/enterprise-helm/blob/main/values.yaml)
. The current defaults for both CPU and memory are the following:
`` `coderd: resources: requests: cpu: "250m" memory: "512Mi" limits: cpu: "500m" memory: "512Mi"` ``
By default, Coder is a single-replica deployment. For larger evaluations and production systems, consider increasing the number of nodes and using at least two to three coderd replicas to provide failover and load balancing capabilities.
If you expect roughly ten or more concurrent users, we recommend increasing these figures to improve platform performance (we also recommend regular performance testing in a staging environment).
See [Scaling](https://coder.com/docs/v1/setup/scaling)
for more information.
For **each** active developer using Coder, allocate additional resources. The specific amount required per developer varies, though we recommend starting with 4 CPUs and 4 GB of RAM, especially when JetBrains IDEs are used and which are resource intensive. Developers are free to request the resource allocation that fits their usage:
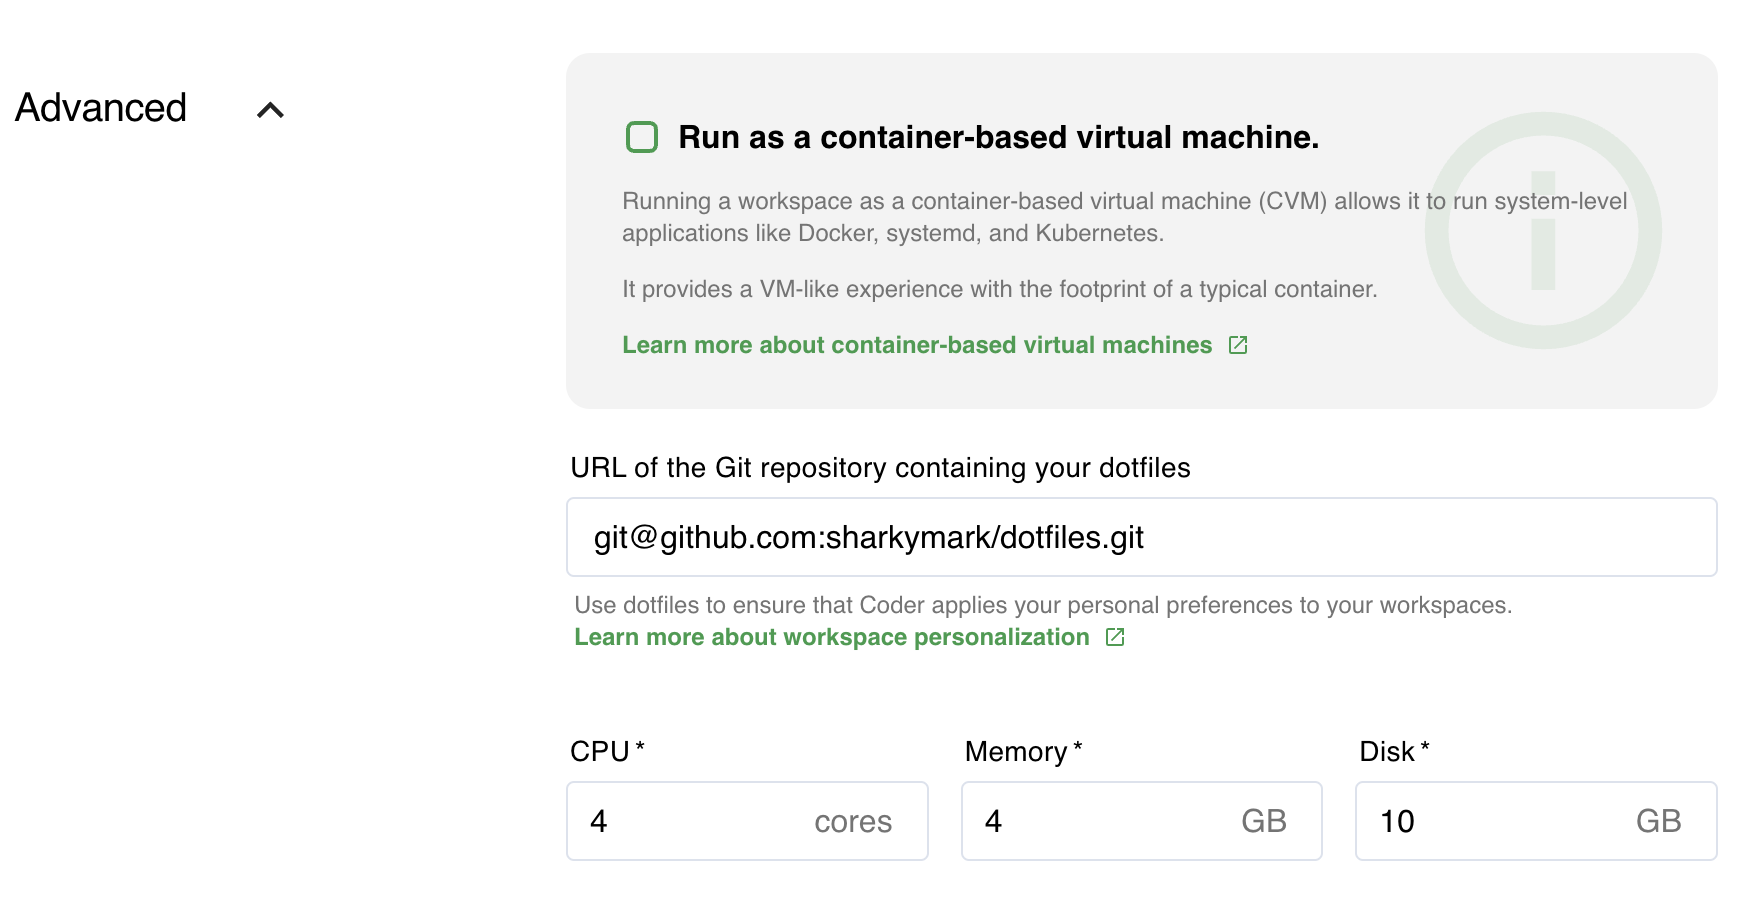
Administrators can put limits aka [Resource Quotas at the Organization-level](https://coder.com/docs/v1/admin/organizations/manage#create-a-new-organization)
to prevent developers from using excessive compute that is either cost prohibitive and/or destructive to the health of the Kubernetes cluster.
We also recommend [monitoring](https://coder.com/docs/v1/guides/admin/usage-monitoring)
your usage to determine whether you should change your resource allocation. Accepting a utilization of RAM of around 50% and CPU of around 70% is a good way to balance performance with cost.
[](https://coder.com/docs/v1/setup/requirements#throughput)
Throughput
----------------------------------------------------------------------
We recommend the following throughput:
* Read: 3000 IOPS at 50 MB/s
* Write: 3000 IOPS at 50 MB/s
[](https://coder.com/docs/v1/setup/requirements#enabled-extensions)
Enabled extensions
--------------------------------------------------------------------------------------
You must enable the following extensions on your K8 cluster (check whether you have these extensions enabled by running `kubectl get apiservices`):
* apps/v1
* rbac.authorization.k8s.io/v1
* metrics.k8s.io
* storage.k8s.io/v1
* networking.k8s.io/v1
* extensions/v1beta1
[](https://coder.com/docs/v1/setup/requirements#browsers)
Browsers
------------------------------------------------------------------
Use an up-to-date browser to ensure that you can use all of Coder's features. Coder runs on the following browsers:
* Apple Safari
* Google Chrome
* Mozilla Firefox
* Microsoft Edge
> We have noticed periodic user interface issues with Apple Safari so if you experience difficulties, please use another browser type.
If you're using [Remote IDEs](https://coder.com/docs/v1/workspaces/editors)
, allow pop-ups; Coder launches the Web Terminal and Remote IDE in pop-up windows.
[](https://coder.com/docs/v1/setup/requirements#storage)
Storage
----------------------------------------------------------------
Coder requires the use of a [persistent volume](https://kubernetes.io/docs/concepts/storage/persistent-volumes/)
in your Kubernetes cluster to store [workspaces](https://coder.com/docs/v1/workspaces)
data. More specifically, the persistent volume claim (PVC) requires the block storage type (the PVC is created when you create the workspace to mount the requested block storage).
Files stored in the `/home` directory of a workspace are persisted in the PVC. All files that live _outside_ of the `/home` directory are written to the node's disk storage (the node's disk storage is shared across all workspaces on that node). If there's insufficient node disk storage, Coder cannot create new workspaces (and, in some cases, workspaces may be evicted from the node). To avoid this, we recommend creating nodes with a disk size of at least 100 GiB.
Additionally, you must enable [dynamic volume provisioning](https://kubernetes.io/docs/concepts/storage/dynamic-provisioning/#enabling-dynamic-provisioning)
so that Coder can mount the PVC to the workspace (if you're using a custom `StorageClass`, be sure that it supports DVP. Otherwise, Coder cannot provision workspaces).
> If you are running a multi-zone deployment, ensure that you have at least one node in each zone to prevent volume node affinity conflicts.
[](https://coder.com/docs/v1/setup/requirements#database)
Database
------------------------------------------------------------------
Coder requires a [PostgreSQL](https://www.postgresql.org/)
database to store metadata related to your deployment.
By default, Coder deploys a TimescaleDB internal to your Kubernetes cluster. This is included for evaluation purposes _only_, and it is _not_ backed up. For production deployments, we recommend using a PostgreSQL database _external_ to your cluster. You can connect Coder to your external database by [modifying the Helm chart](https://coder.com/docs/v1/guides/admin/helm-charts)
with information regarding your PostgreSQL instance.
Coder requires, at minimum, PostgreSQL 11 with the `contrib` package installed.
[](https://coder.com/docs/v1/setup/requirements#network-policies)
Network Policies
----------------------------------------------------------------------------------
Coder uses [Kubernetes NetworkPolicies](https://kubernetes.io/docs/concepts/services-networking/network-policies/)
to enforce network segmentation and tenant isolation within your cluster.
Coder's network isolation policy blocks all ingress traffic to workspaces except traffic from the control plane (this ensures that you can audit all traffic). However, the control plane does not specify egress rules; by default, it allows outbound traffic. However, you can still enforce a more specific network policy.
[Container network interface (CNI)](https://github.com/containernetworking/cni#what-is-cni)
plugins implement network segmentation and tenant isolation in the Kubernetes cluster. They enforce network boundaries between pods, preventing users from accessing other workspaces.
If your container network interface (CNI) plugin does not support NetworkPolicy enforcement, traffic between workspaces, and other containerized workloads within the same cluster will be permitted to communicate without restriction. Consider testing your container networking _after_ installing Coder to ensure that the behavior is as expected.
> If you're not sure which CNI plugin to use, we suggest [Calico](https://docs.projectcalico.org/getting-started/kubernetes/quickstart)
> .
[](https://coder.com/docs/v1/setup/requirements#licenses)
Licenses
------------------------------------------------------------------
The use of Coder deployments requires a license that's emailed to you. Save as a JSON file and see [Setup](https://coder.com/docs/v1/setup/configuration#providing-your-license)
for how to add a license file into a Coder deployment.
### [](https://coder.com/docs/v1/setup/requirements#restrictions)
Restrictions
Deployments using the free trial of Coder:
* **Must** be able to reach and use an outbound internet connection (at minimum, your deployment must be able to access **licensor.coder.com**)
* Cannot be deployed in an air-gapped network
If you are an enterprise and require Coder to run in an air-gapped network, please contact [\[email protected\]](https://coder.com/cdn-cgi/l/email-protection#0774666b62744764686362752964686a)
to discuss your project.
##### On this page
---
# Auto-start | Coder v1 Docs
[Home](https://coder.com/docs/v1 "Home")
[Workspaces](https://coder.com/docs/v1/workspaces "Workspaces")
Auto-start
Coder [automatically turns off idle workspaces](https://coder.com/docs/v1/admin/workspace-management/shutdown)
to help manage resource expenditure. Typically, this means workspaces turn off overnight and remain offline until a rebuild is requested. With auto-start, you can request automated rebuilds at a time that suits your workflow. You can expect your workspaces to be ready for you at the start of each workday.
[](https://coder.com/docs/v1/workspaces/autostart#criteria-for-auto-start)
Criteria for auto-start
--------------------------------------------------------------------------------------------------
Your workspace must be:
* Active (_Active_ workspaces are those that have been opened in the last four days)
* Off (auto-start doesn't work when workspaces are _on_ to prevent the triggering of a rebuild while you're working)
* The current day of week must be allowed for auto-start by your organization.
Coder may trigger auto-start up to 5 minutes before your scheduled time to ensure all queued workspaces are ready on time.
[](https://coder.com/docs/v1/workspaces/autostart#enabling-auto-start)
Enabling auto-start
------------------------------------------------------------------------------------------
1. Click on your avatar in the top-right and select **Account** in the drop-down menu.
2. Select the **Auto-start** tab and set your desired auto-start time.
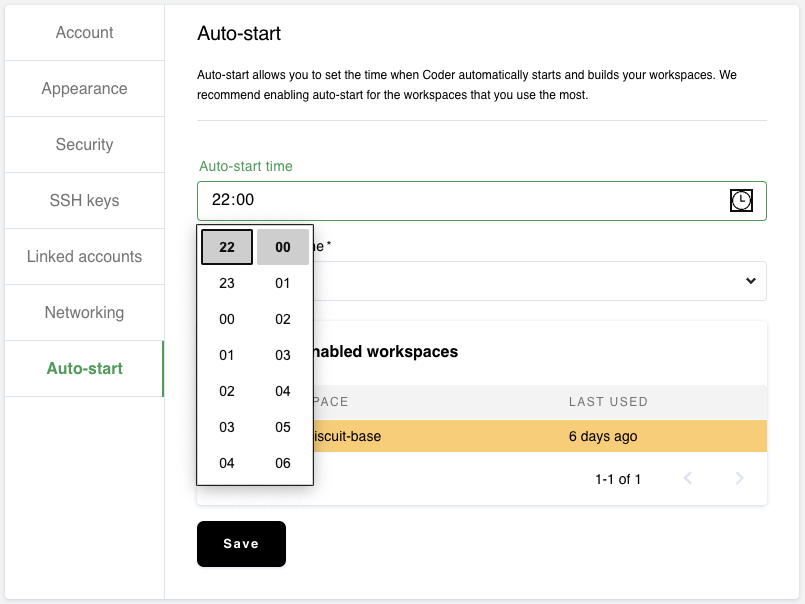
You can also set your local timezone. This ensures that your workspace will start at the correct time if you experience seasonal Daylight Savings Time (DST) changes.
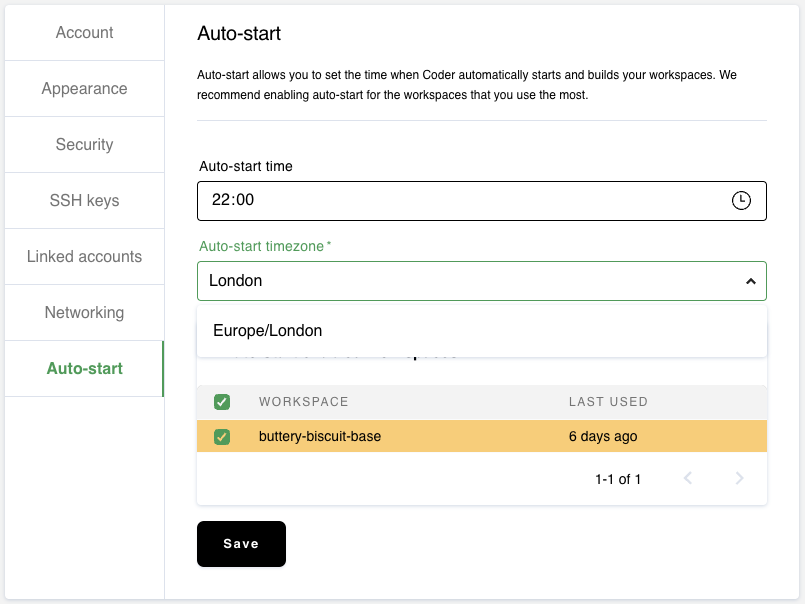
3. Select the workspaces for which you want to enable auto-start and save.
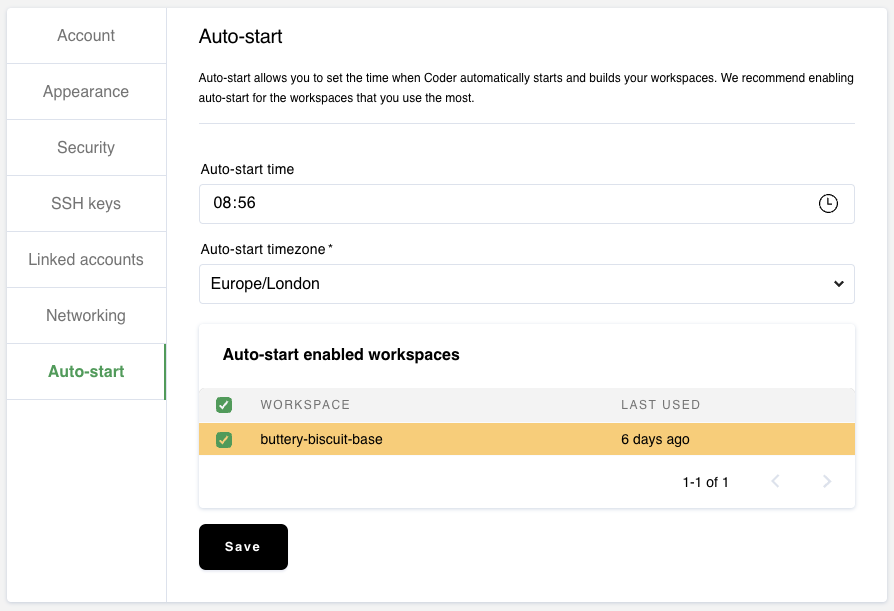
### [](https://coder.com/docs/v1/workspaces/autostart#enabling-auto-start-for-new-workspaces)
Enabling auto-start for new workspaces
When creating a new workspace, you may enable auto-start by checking the box labeled **Automatically turn this workspace on at (HH:MM)** (where HH:MM is your configured time).
##### On this page
---
# macOS keybindings | Coder v1 Docs
[Home](https://coder.com/docs/v1 "Home")
[Guides](https://coder.com/docs/v1/guides "Guides")
[Customization](https://coder.com/docs/v1/guides/customization "Customization")
macOS keybindings
You can switch from the default Windows/Linux keybinding to macOS keybindings when using any of the following JetBrains IDE within Coder.
To switch the keybindings:
1. From your workspace overview page, launch the JetBrains IDE of your choice
2. In the newly launched multi-editor window, go to **File** > **Settings** > **Plugins**
3. Find the **macOS Keymap** and click **Install**
4. Use the left-hand navigation bar to switch back to **Keymap**
5. Use the **Keymap** toggle at the top to switch to **macOS**
6. Click **OK** to save your changes and proceed
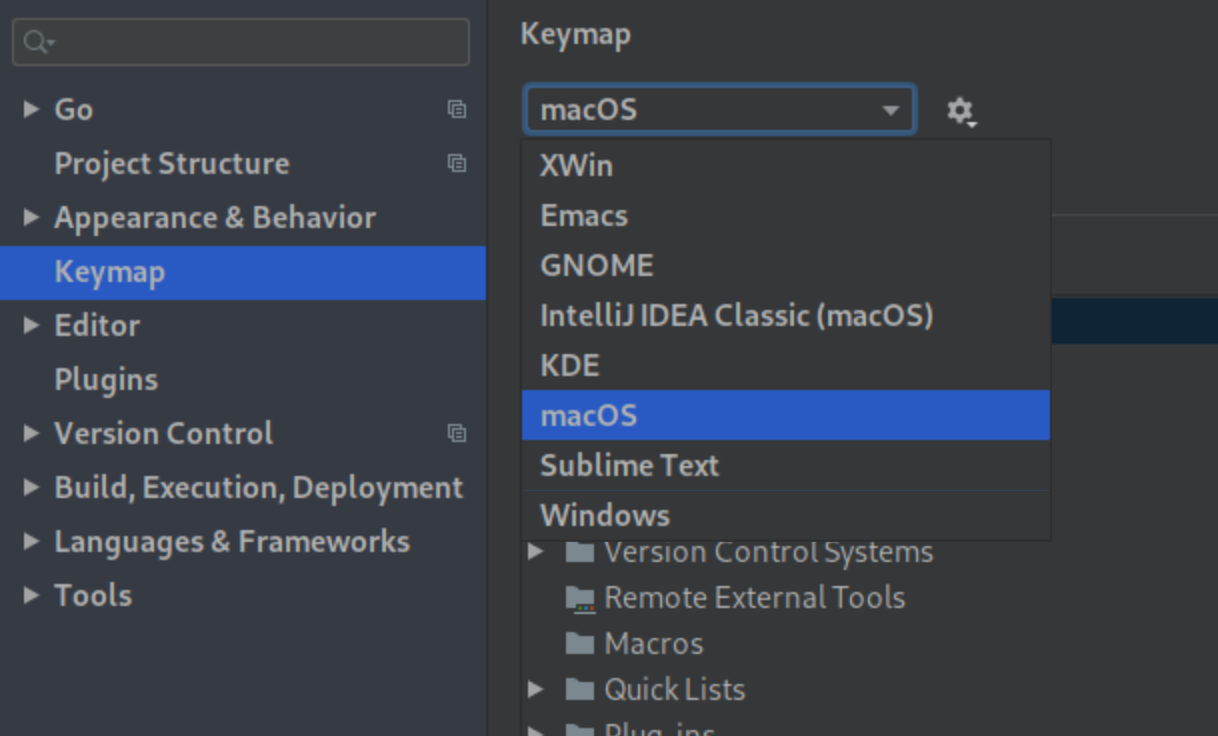
---
# Import | Coder v1 Docs
[Home](https://coder.com/docs/v1 "Home")
[Images](https://coder.com/docs/v1/images "Images")
Import
Coder imports images from [container registries](https://coder.com/docs/v1/admin/registries)
.
Images are associated with the same organization as the user who imported it. For example, if Jessie Lorem is a member of the ExampleCo organization, any images that they import will also be associated with the ExampleCo organization.
> Any user may import images, but only site managers can link the container registry that holds the images.
[](https://coder.com/docs/v1/images/importing#import-an-image)
Import an image
------------------------------------------------------------------------------
To import an image:
1. Log into Coder and navigate to **Images > Import Image**.
2. Select the **registry** that hosts your image.
3. Provide your image's **repository** name and **tag**. Optionally, you can provide a **description** of the image (this is shown to all users) and a **Source Repo URL** to point to the image's source.
4. Specify the minimum amount of resources (cores, memory, and disk space) the workspace should have when using this image.
5. Click **Import Image**.
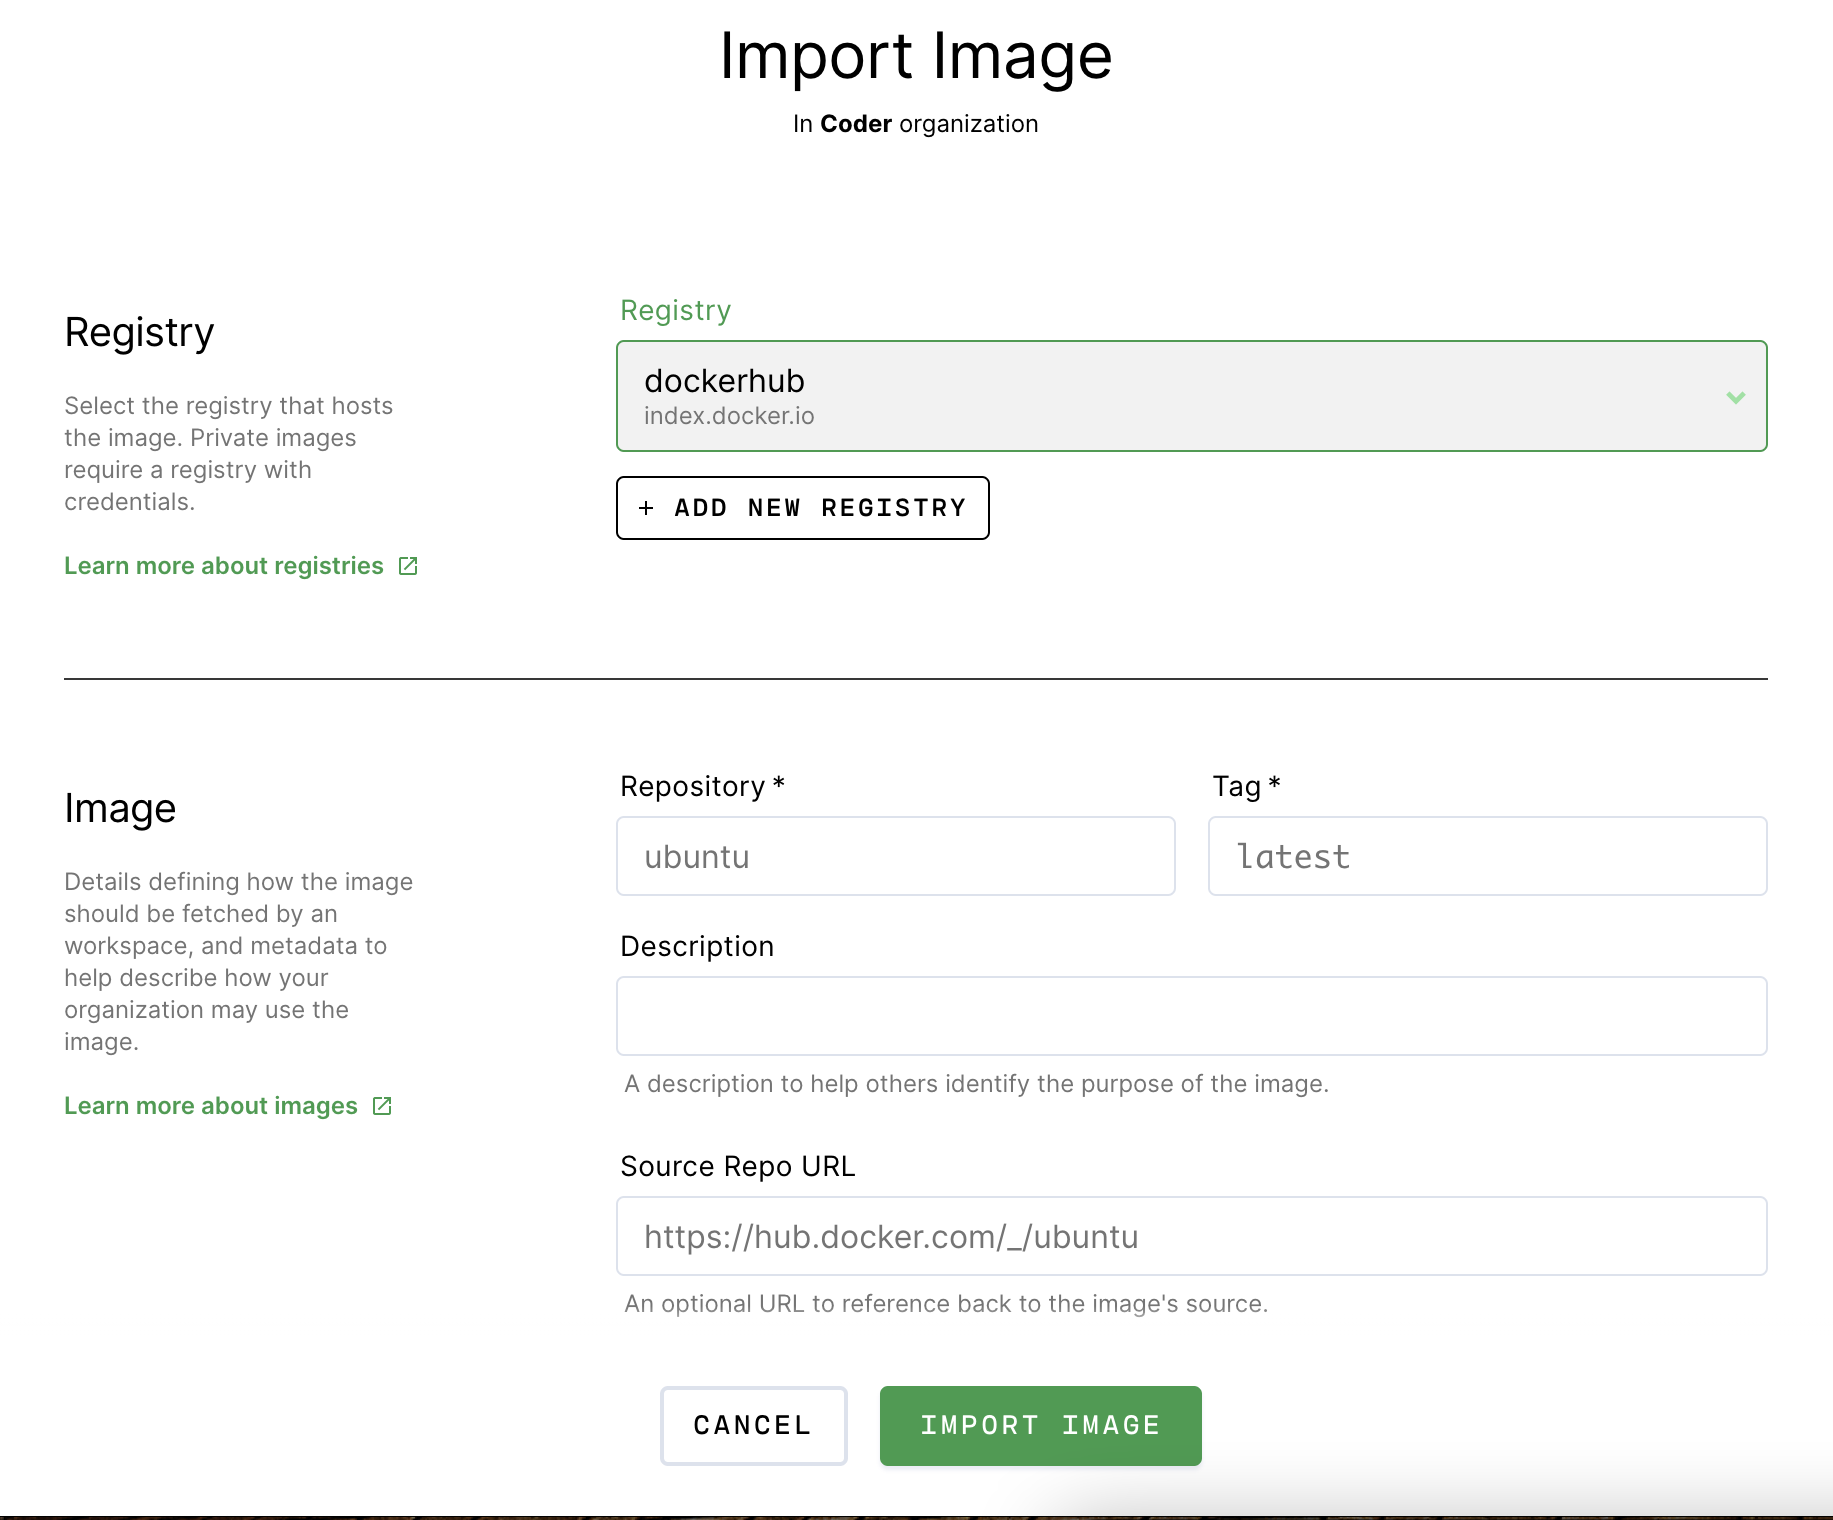
---
# 1.40.0 | Coder v1 Docs
[Home](https://coder.com/docs/v1 "Home")
[Changelog](https://coder.com/docs/v1/changelog "Changelog")
1.40.0
### [](https://coder.com/docs/v1/changelog/1.40.0#breaking-changes-)
Breaking changes ❗
* After upgrade to 1.40.0, workspaces must be rebuilt before they can be used.
### [](https://coder.com/docs/v1/changelog/1.40.0#features-)
Features ✨
* Added logout events to the audit log (previously, users would see deletion of APIKeys, but no explicit logout event).
* Added ability to disable OIDC account auto-creation.
* Organization memberships are shown on the Users page.
* CLI detects when it connects to a v2 Coder instance and warns the user to upgrade their CLI.
### [](https://coder.com/docs/v1/changelog/1.40.0#bug-fixes-)
Bug fixes 🐛
* Fixed an issue where satellite deployments would proxy Dev URL requests to the main deployment instead of their own configured Dev URL domain.
* Fixed an issue where initial setup would hang when attempting to change the password for admin.
* Fixed an issue where user filter was not being applied and/or incorrectly reporting "no users found" after creating a new user.
* Fixed an issue where coder would unnecessarily create an application token for a user when they authenticated to a DevURL.
* Fixed an issue where the Dashboard would render twice.
* Fixed an issue where deleted users would show up when using a filter in the user list.
* Fixed an issue where "create" audit logs would be emitted when existing users log in over OIDC.
* Fixed an issue where images and tags from a deleted organization would incorrectly be retained in the database.
* Fixed an issue where some audit log diffs showed `[object Object]` instead of the changes.
* Fixed an issue where Organization names were incorrectly required to be at least 3 characters.
* Fixed an issue where configuration changes to workspace providers were not being applied to all Coderd replicas.
### [](https://coder.com/docs/v1/changelog/1.40.0#security-updates-)
Security updates 🔐
* Resetting the admin password via 'coderd reset-admin-password' now deletes all existing admin API keys.
* Fixed an issue where cached CVMs would fail to find the correct rootfs for a workspace.
* Added the ability to serve IDEs and Workspace applications from a domain separate from the Coder server. This prevents IDEs and applications from making authenticated requests to the Coder API. This is an administrative setting and enabling it may break existing user bookmarks directly to IDEs and applications, requiring them to re-bookmark.
---
# Org management | Coder v1 Docs
[Home](https://coder.com/docs/v1 "Home")
[Admin](https://coder.com/docs/v1/admin "Admin")
[Organizations](https://coder.com/docs/v1/admin/organizations "Organizations")
Org management
This article shows how you can create, view, edit, or delete an organization.
[](https://coder.com/docs/v1/admin/organizations/manage#create-a-new-organization)
Create a new organization
------------------------------------------------------------------------------------------------------------
[Site admins and site managers](https://coder.com/docs/v1/admin/access-control/user-roles)
can create new organizations by going to **Manage** > **Organizations** > **New Organization**.
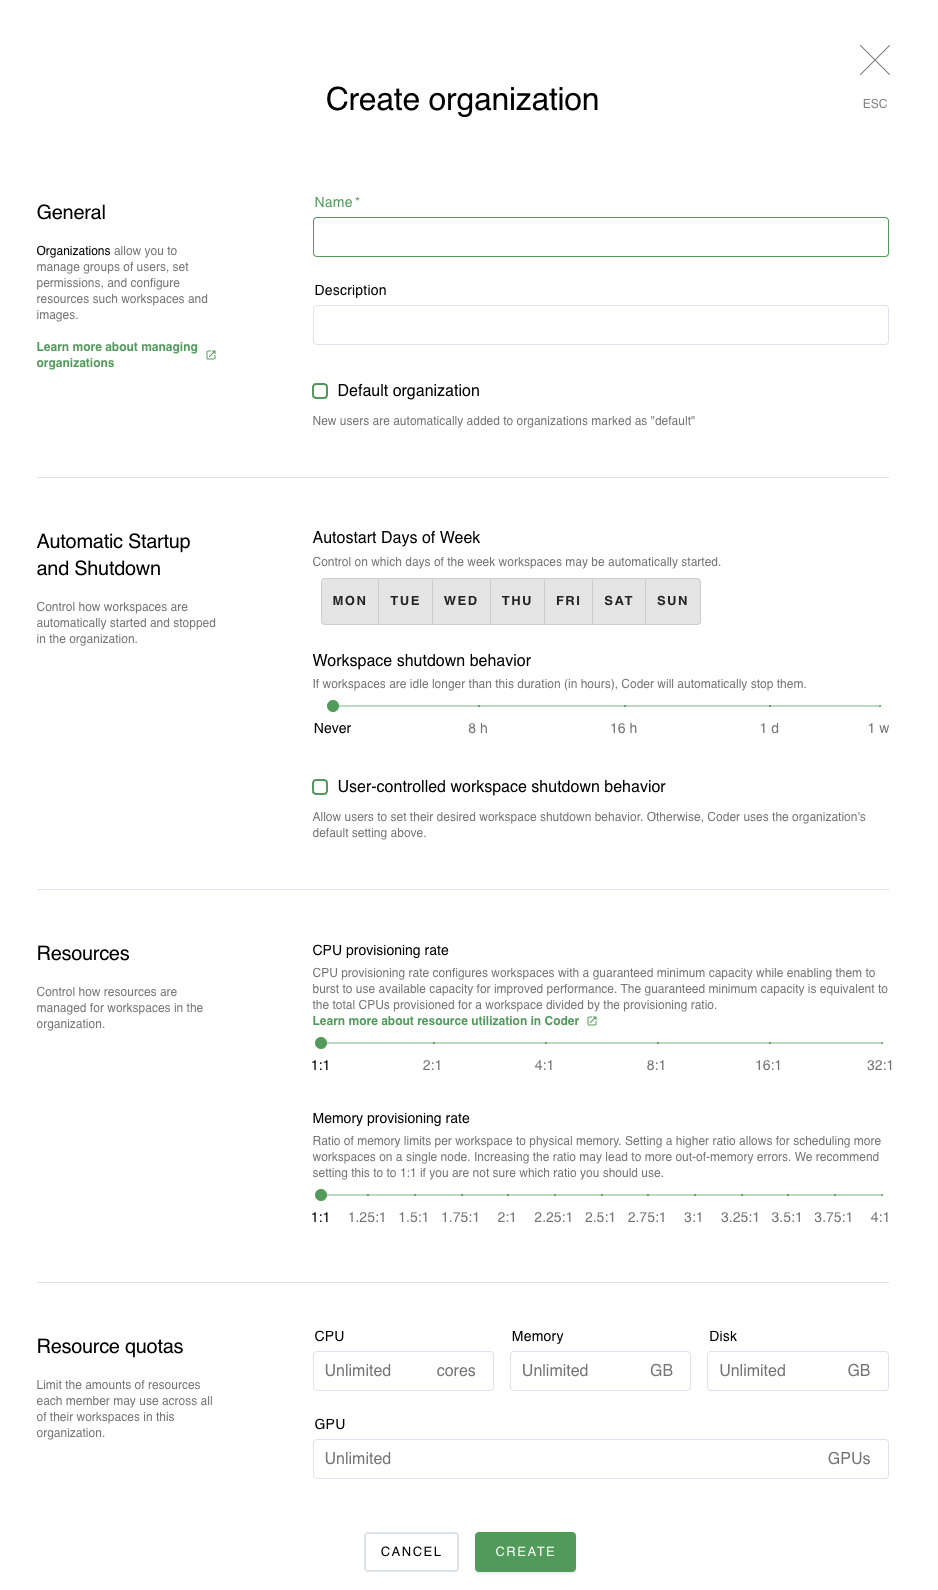
Provide a **name** and (optionally) a **description** for this organization. If you want this to become a **Default organization**, make sure to check the box for this.
You can control the [auto-start behaviour](https://coder.com/docs/v1/workspaces/lifecycle#auto-start)
for workspaces in this organization. You can configure:
* **Autostart Days of Week**: configures on which days of the week workspaces in the organization may automatically start. If you do not want workspaces to auto-start in the organization _at all_, you can simply deselect all weekdays here.
* **Workspace Shutdown Behavior**: The number of hours a workspace may be idle before Coder stops it automatically to help free up resources.
* **User-controlled workspace shutdown behavior**: Whether end-users can set the desired workspace shutdown behavior. If disabled, Coder uses the organization's default setting.
You can also control how Coder manages resources for workspaces in this organization. You can set the:
* **CPU Provisioning Rate**: sets the ratio of virtual CPUs to physical CPUs; if you set a higher ratio, you can schedule a larger number of workspaces per node, though it will also lead to greater CPU contention.
* **Memory Provisioning Rate**: sets the ratio of requested versus maximum RAM allocated to workspaces. If you set a higher ratio, you can schedule a larger number of workspaces per node, though it will lead to greater memory contention. See [memory overprovisioning](https://coder.com/docs/v1/admin/workspace-management/memory-overprovisioning)
for more information.
Finally, you can set **Resource Quotas**. These are limits on the number of **CPUs** and **GPUs**, as well as the amount of **memory** and **disk space** each developer can request concurrently for running workspaces in this organization. The limits for what you can set are as follows:
* **CPUs**: 128 CPU cores
* **Memory**: 256 GBs
* **Disk**: 8192 GB
* **GPUs**: 20 GPUs
When you've set your parameters, click **Create** to proceed.
[](https://coder.com/docs/v1/admin/organizations/manage#viewing-an-organization)
Viewing an organization
--------------------------------------------------------------------------------------------------------
You can view information about an organization at any time by going to **Manage** > **Organizations** and selecting the org of interest.
The **Members** tab displays users that belong to the org. The **Workspaces** tab displays the workspaces that belong to the org, as well as the resources they consume.
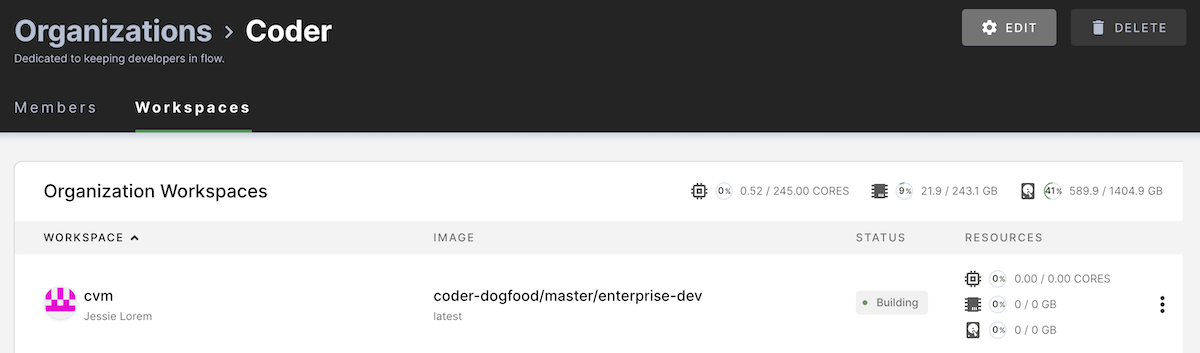
[](https://coder.com/docs/v1/admin/organizations/manage#editing-an-organization)
Editing an organization
--------------------------------------------------------------------------------------------------------
You can edit an organization at any time by going to **Manage** > **Organizations**.
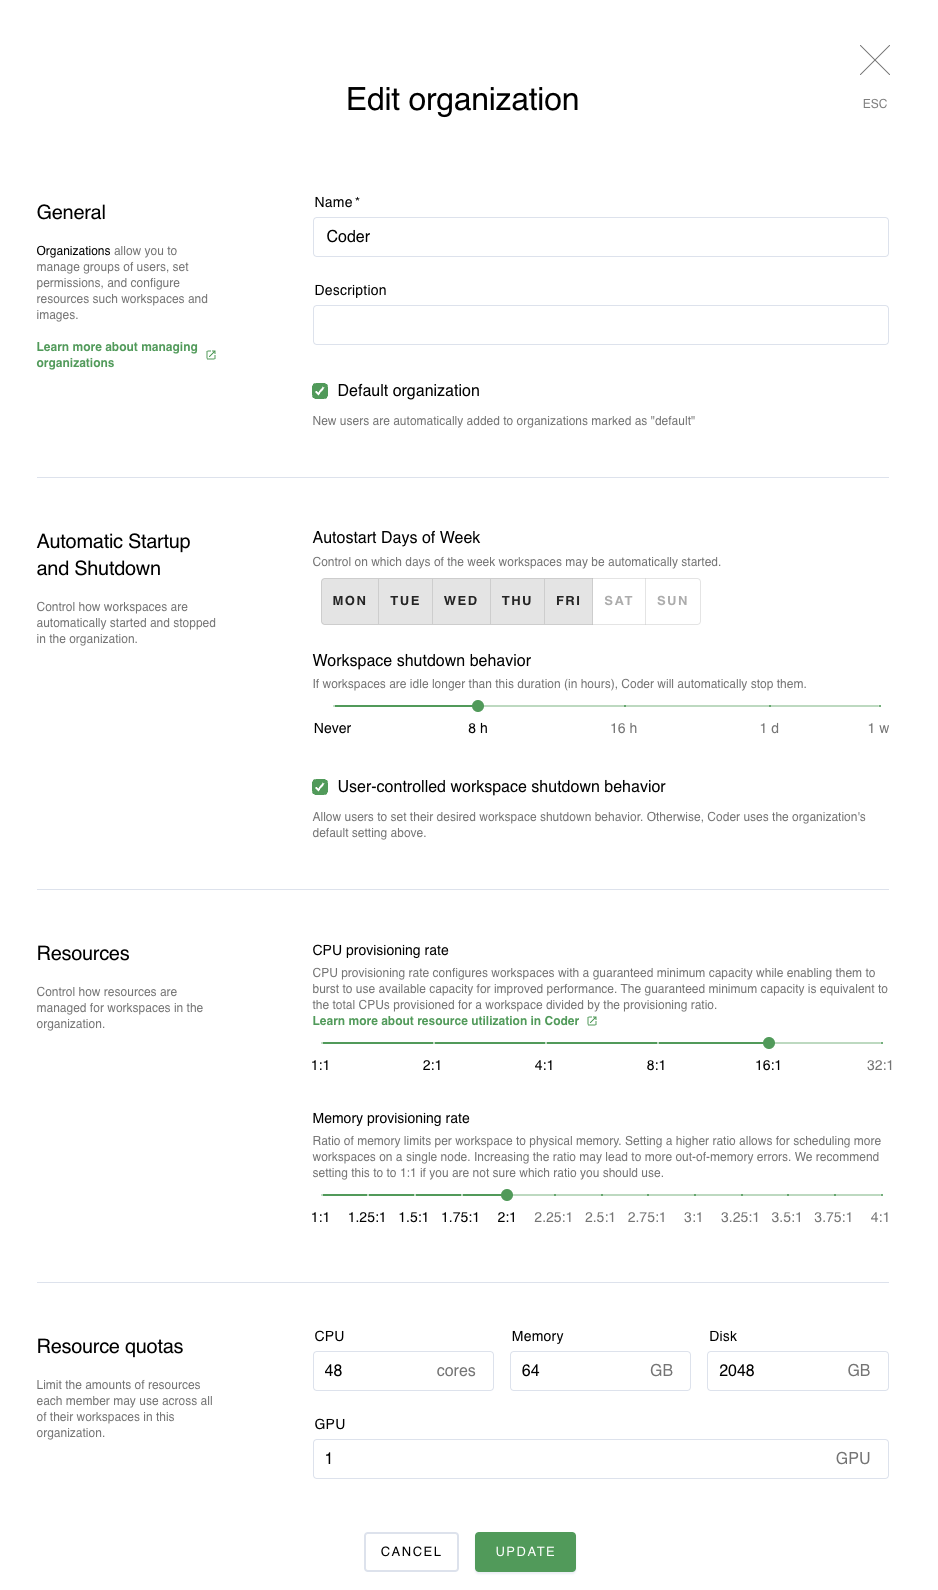
Find the organization you want to edit, and click to open. In the top-right, click **Edit** to launch the **Edit Organizations** dialog.
When you're finished making your changes, click **Update** to save.
[](https://coder.com/docs/v1/admin/organizations/manage#deleting-an-organization)
Deleting an organization
----------------------------------------------------------------------------------------------------------
You can edit an organization at any time by going to **Manage** > **Organizations**. Find the organization that you want to delete, and click to open. In the top right, click **Delete**. Confirm that you would like to delete the org.
> Deleting an organization does not delete users or workspaces. Coder reassigns existing users and workspaces to a default org.
##### On this page
---
# Activate JetBrains license in a browser | Coder v1 Docs
[Home](https://coder.com/docs/v1 "Home")
[Guides](https://coder.com/docs/v1/guides "Guides")
[Troubleshooting](https://coder.com/docs/v1/guides/troubleshooting "Troubleshooting")
Activate JetBrains license in a browser
JetBrains requires a valid license to evaluate or use a JetBrains IDE. When running a JetBrains IDE in a browser, you need to perform the following steps.
1. [Click the JetBrains IDE icon](https://coder.com/docs/v1/guides/troubleshooting/activate-jetbrains-licensing#launch-the-jetbrains-ide-in-a-browser)
in your Coder workspace
2. [Click the "Log In to JetBrains Account" button](https://coder.com/docs/v1/guides/troubleshooting/activate-jetbrains-licensing#log-into-your-jetbrains-account)
3. Since your IDE is in the web browser, click the ["Troubles" link](https://coder.com/docs/v1/guides/troubleshooting/activate-jetbrains-licensing#click-the-troubles-link)
to use an alternate login method
4. [Click the "copy" link](https://coder.com/docs/v1/guides/troubleshooting/activate-jetbrains-licensing#click-the-copy-link)
, open a new browser window and paste the link
5. [Log into JetBrains with your valid JetBrains credentials](https://coder.com/docs/v1/guides/troubleshooting/activate-jetbrains-licensing#login-with-your-jetbrains-account)
to get an IDE authentication token
6. [Click "Copy token"](https://coder.com/docs/v1/guides/troubleshooting/activate-jetbrains-licensing#click-copy-token)
to copy your IDE authentication token
7. [Paste the token](https://coder.com/docs/v1/guides/troubleshooting/activate-jetbrains-licensing#paste-the-ide-authentication-token)
back into your JetBrains IDE window
8. [Start using JetBrains](https://coder.com/docs/v1/guides/troubleshooting/activate-jetbrains-licensing#start-using-jetbrains)
[](https://coder.com/docs/v1/guides/troubleshooting/activate-jetbrains-licensing#launch-the-jetbrains-ide-in-a-browser)
Launch the JetBrains IDE in a browser
-------------------------------------------------------------------------------------------------------------------------------------------------------------
Launch the JetBrains IDE in the browser from the workspaces page by clicking the JetBrains IDE icon. This example uses the JetBrains PhpStorm IDE.
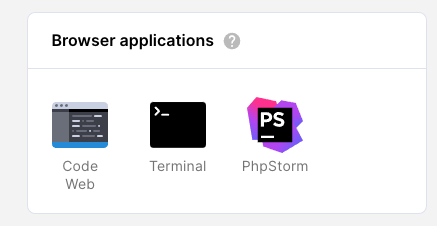
[](https://coder.com/docs/v1/guides/troubleshooting/activate-jetbrains-licensing#log-into-your-jetbrains-account)
Log into your JetBrains account
-------------------------------------------------------------------------------------------------------------------------------------------------
Click the Log In to JetBrains Account button. You need a valid JetBrains account to proceed for both a trial and a paid license.
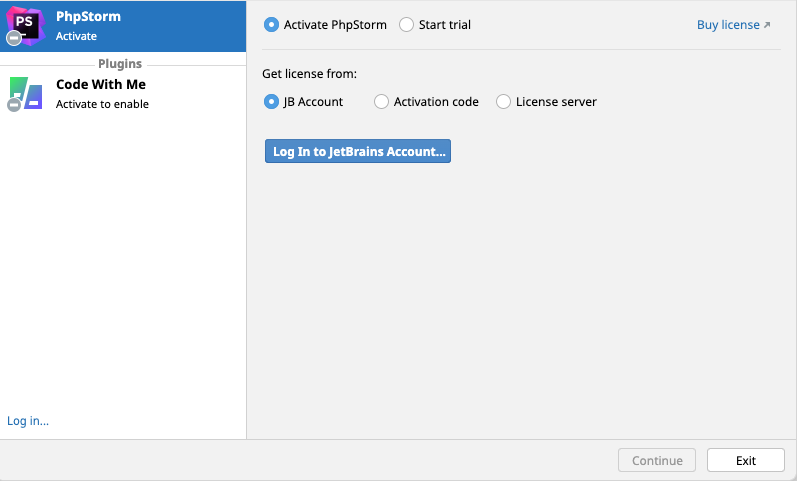
[](https://coder.com/docs/v1/guides/troubleshooting/activate-jetbrains-licensing#click-the-troubles-link)
Click the Troubles link
---------------------------------------------------------------------------------------------------------------------------------
Because you already are in a browser, a new browser window cannot open. Click the Troubles link to proceed.
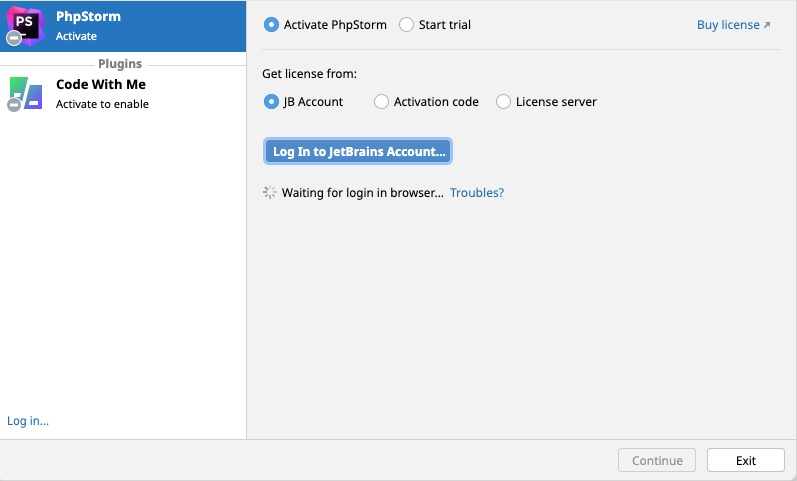
[](https://coder.com/docs/v1/guides/troubleshooting/activate-jetbrains-licensing#click-the-copy-link)
Click the copy link
-------------------------------------------------------------------------------------------------------------------------
Click the copy link, open a new browser window, and paste the copied link to go to the JetBrains website to log in.
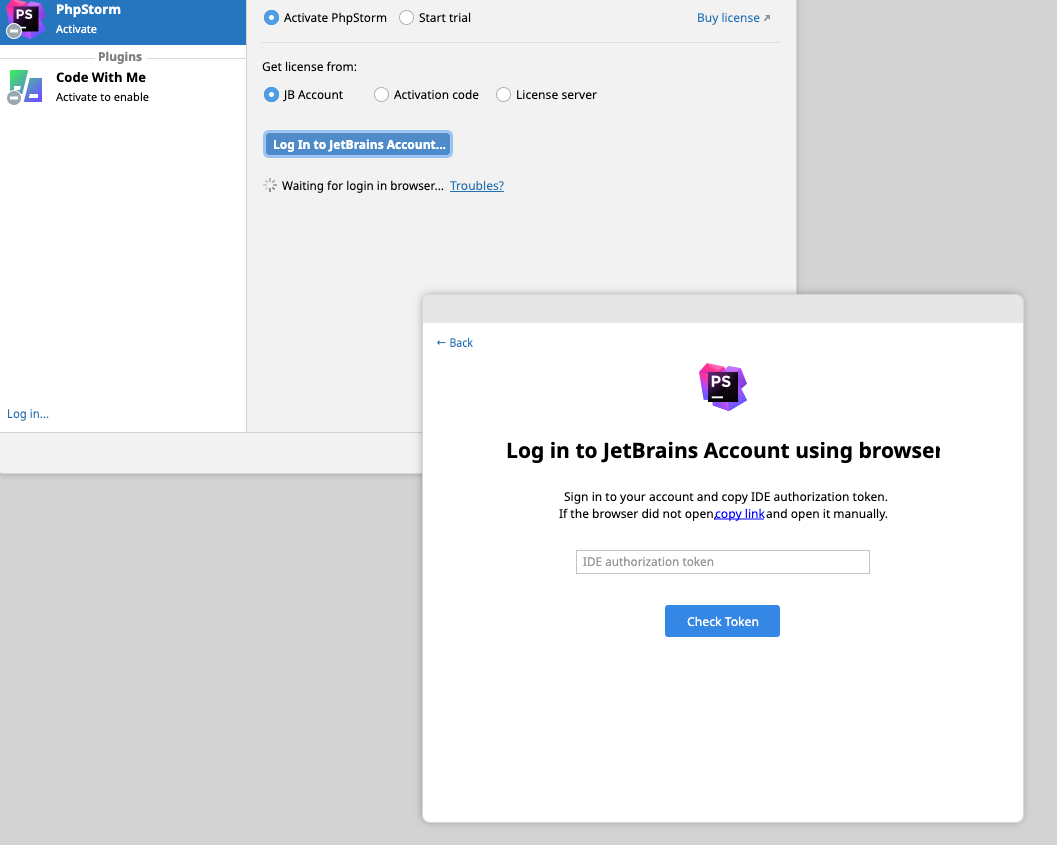
[](https://coder.com/docs/v1/guides/troubleshooting/activate-jetbrains-licensing#log-in-with-your-jetbrains-account)
Log in with your JetBrains account
-------------------------------------------------------------------------------------------------------------------------------------------------------
At the JetBrains website, log in with your valid JetBrains account to get the IDE authentication token.
[](https://coder.com/docs/v1/guides/troubleshooting/activate-jetbrains-licensing#click-copy-token)
Click Copy token
-------------------------------------------------------------------------------------------------------------------
Click the Copy token link to copy the IDE authentication token to your clipboard.
[](https://coder.com/docs/v1/guides/troubleshooting/activate-jetbrains-licensing#paste-the-ide-authentication-token)
Paste the IDE authentication token
-------------------------------------------------------------------------------------------------------------------------------------------------------
Paste the IDE authentication token back into your already opened JetBrains IDE window. Type **Command + v** (macOS) or **Control + v** (Linux/Windows) for the paste operation to work correctly.
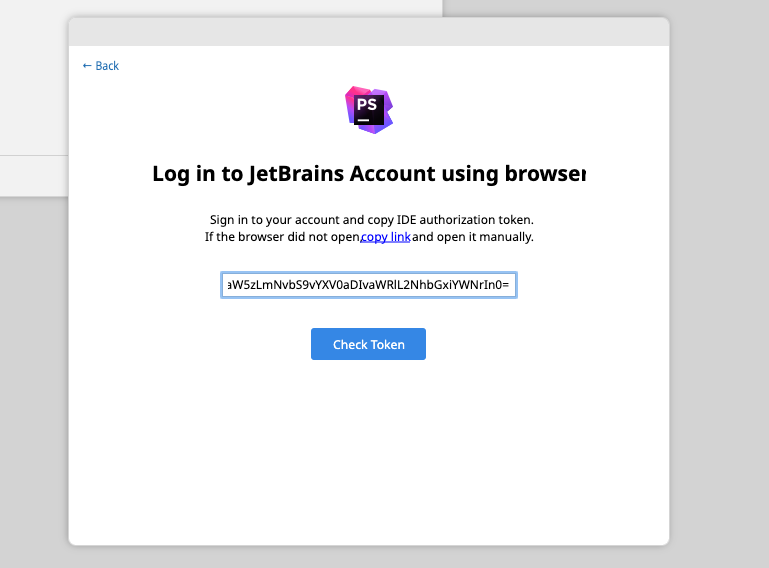
[](https://coder.com/docs/v1/guides/troubleshooting/activate-jetbrains-licensing#start-using-jetbrains)
Start using JetBrains
-----------------------------------------------------------------------------------------------------------------------------
You can now use the JetBrains IDE in a browser.
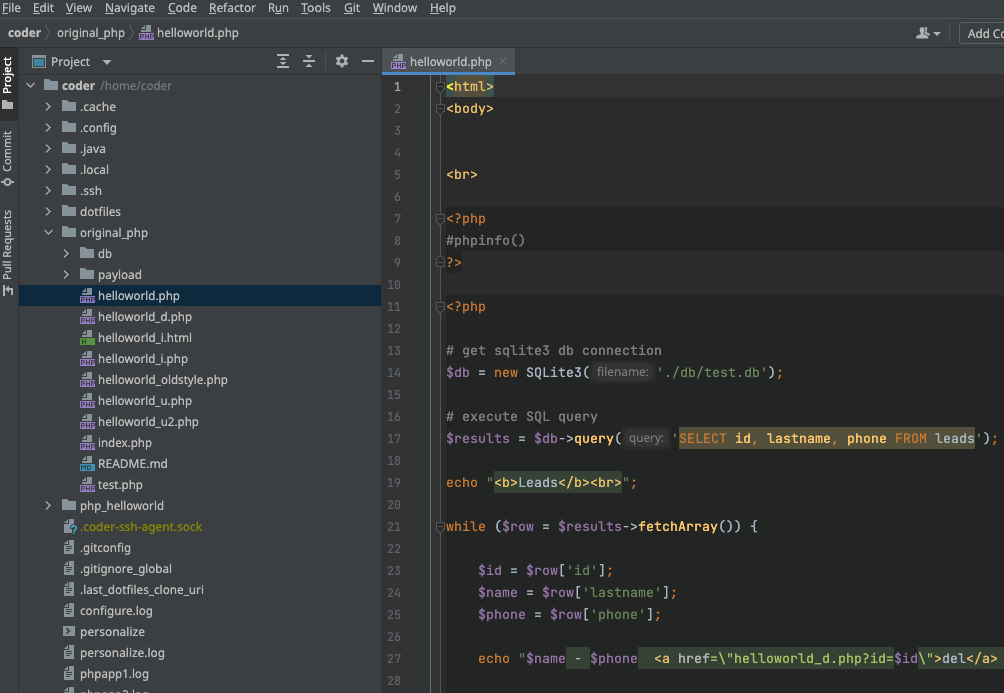
##### On this page
---
# 1.39.0 | Coder v1 Docs
[Home](https://coder.com/docs/v1 "Home")
[Changelog](https://coder.com/docs/v1/changelog "Changelog")
1.39.0
### [](https://coder.com/docs/v1/changelog/1.39.0#breaking-changes-)
Breaking changes ❗
There are no breaking changes in 1.39.0.
### [](https://coder.com/docs/v1/changelog/1.39.0#features-)
Features ✨
* Added the ability to set the maximum age for an API key in the Admin panel.
* Added a toggle to the OIDC provider in the Admin panel to disable automatic user creation. When toggled on, users will have to be manually created by an administrator with an email that matches the value provided by the 'email' field in the OIDC payload. The login type of the user must be set to OIDC in order to successfully login.
* Added a logout action to the audit log to track user logouts.
* Removed the hard limit on total number of images in a deployment.
### [](https://coder.com/docs/v1/changelog/1.39.0#bug-fixes-)
Bug fixes 🐛
* Fixed an issue where users couldn't install the code-server PWA (Progressive Web App).
* Fixed various paths where API Keys were not being audited.
* Fixed an issue where deleted users were not shown in the audit log.
* Fixed various UI inconsistencies around images and image tags.
* Fixed an issue that could cause the dashboard to unnecessarily re-render multiple times.
### [](https://coder.com/docs/v1/changelog/1.39.0#security-updates-)
Security updates 🔐
* Fixed an issue where exporting audit logs could be vulnerable to a CSV injection.
* Websocket clients are now rejected if they supply an invalid 'sec-websocket-key' header value.
---
# Tags | Coder v1 Docs
[Home](https://coder.com/docs/v1 "Home")
[Images](https://coder.com/docs/v1/images "Images")
Tags
[Image tags](https://docs.docker.com/engine/reference/commandline/tag/)
are variants of the original (or base) image. Users can publish new image tags containing updated dependencies and tooling useful for work on the project.
[](https://coder.com/docs/v1/images/tags#add-a-tag)
Add a tag
-------------------------------------------------------------
To add a tag to Coder:
1. Go to **Images** and find the original image.
2. Open the image, then click **Add Tag** in the top-right.
3. Provide the **tag name** when prompted.
When someone publishes a new version of a tag, Coder notifies users of that tag with active workspaces.
[](https://coder.com/docs/v1/images/tags#default-tag)
Default tag
-----------------------------------------------------------------
Each image has a default tag. The default tag appears at the top of the list and is indicated by an asterisk. Coder automatically selects the default tag when you create a workspace.
Additionally, if the current workspace image tag has been **decommissioned**, Coder will automatically update it to the default tag when it is next rebuilt.
> For information about how Coder handles image tags, see [Image Tag Names](https://coder.com/docs/v1/guides/admin/image-tag-names)
> .
### [](https://coder.com/docs/v1/images/tags#changing-the-default-tag)
Changing the default tag
> We encourage you to update an image's default tag whenever you publish new tags since Coder suggests the default tag whenever someone creates a new workspace. This change does not affect existing workspaces.
When adding a tag, check **Set tag as default** to make it the default tag for that image.
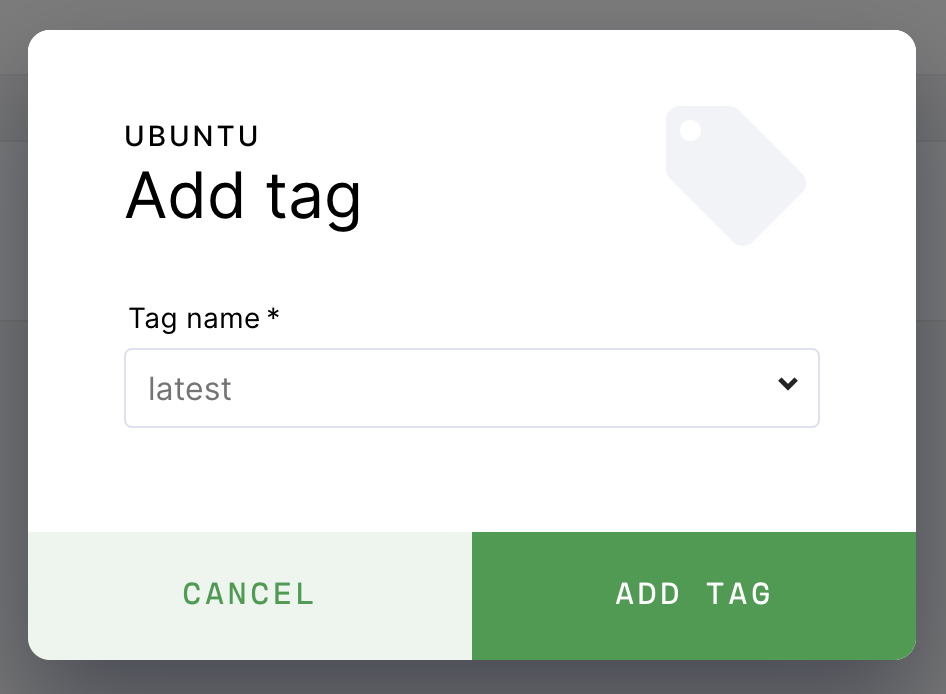
To use an existing tag as the default tag, click the **vertical ellipsis** for a tag and select **Make default**.
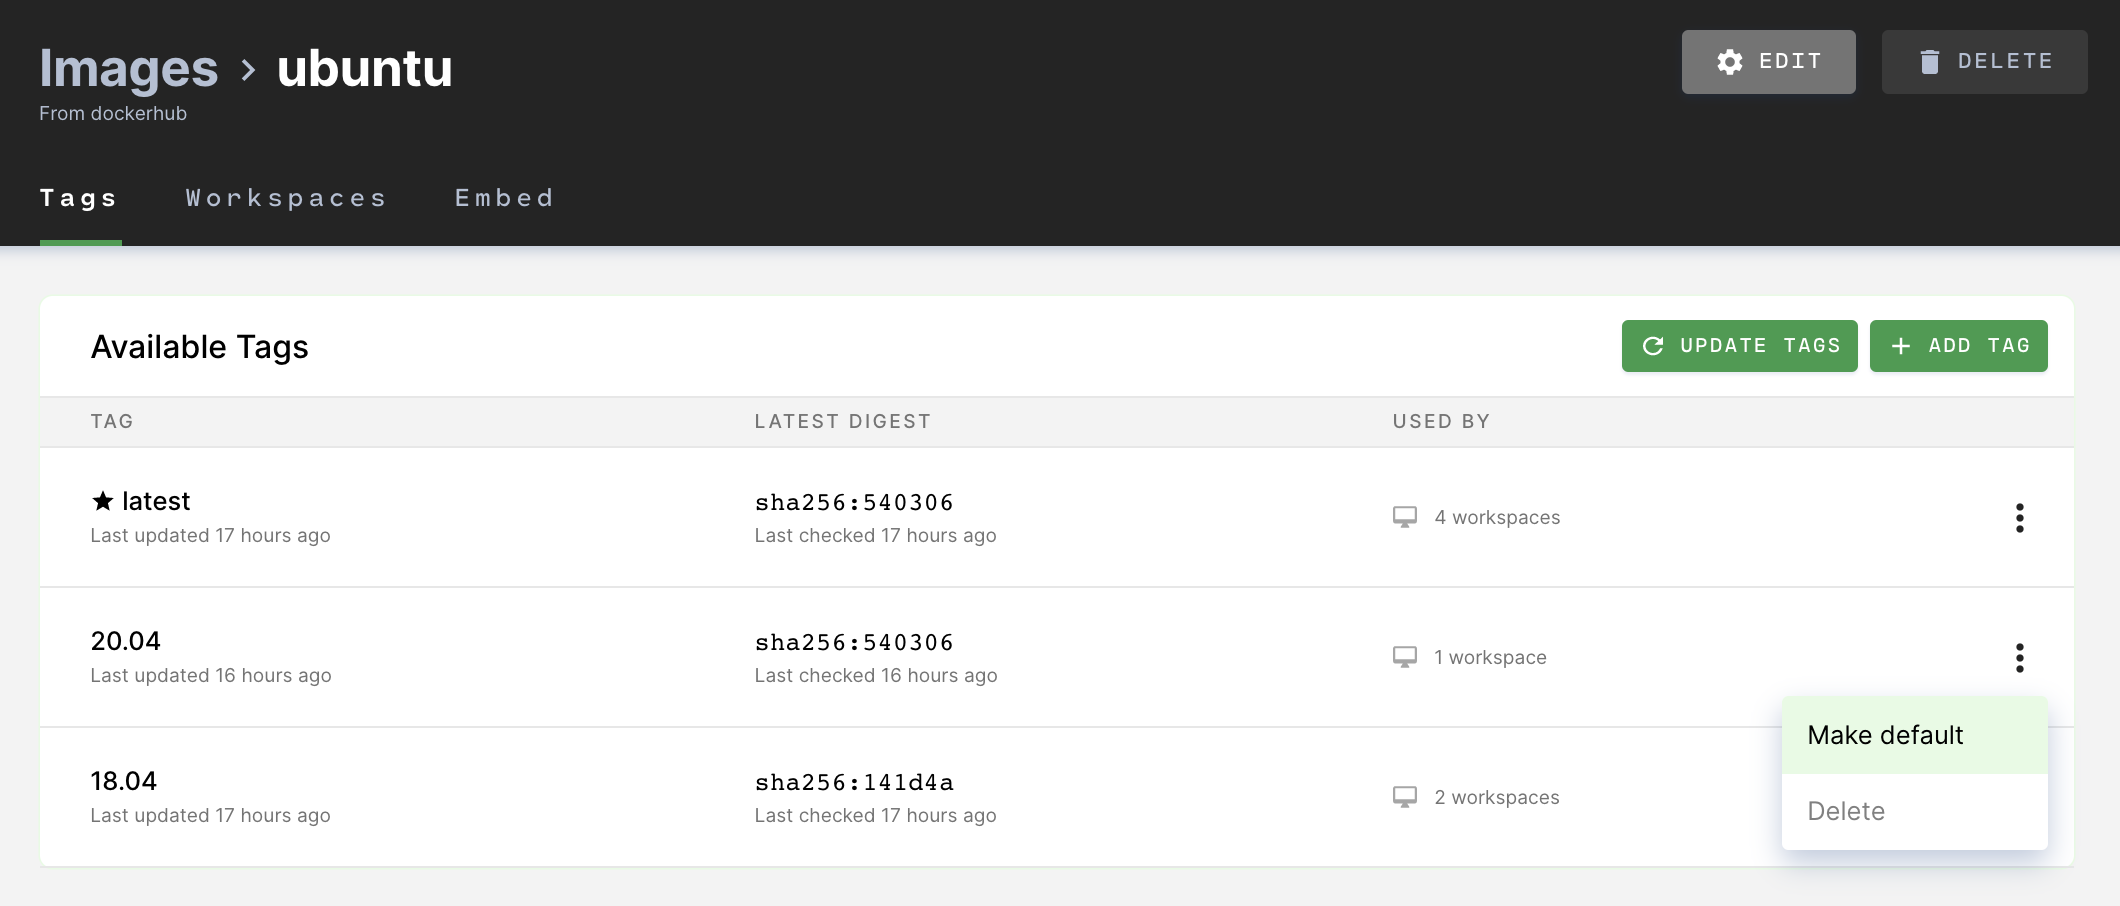
### [](https://coder.com/docs/v1/images/tags#decommission-a-tag)
Decommission a tag
A **decommissioned** image tag cannot be used to create new workspaces.
See [Deprecate and Decommission](https://coder.com/docs/v1/images/deprecating#decommission-an-image-tag)
##### On this page
---
# Installation | Coder v1 Docs
[Home](https://coder.com/docs/v1 "Home")
[Setup](https://coder.com/docs/v1/setup "Setup")
Installation
This article walks you through the process of installing Coder onto your [Kubernetes cluster](https://coder.com/docs/v1/setup/kubernetes)
.
[](https://coder.com/docs/v1/setup/installation#dependencies)
Dependencies
--------------------------------------------------------------------------
Install the following dependencies if you haven't already:
* [kubectl](https://kubernetes.io/docs/tasks/tools/install-kubectl/)
* [Helm](https://helm.sh/docs/intro/install/)
**For production deployments:** set up and use an external [PostgreSQL](https://www.postgresql.org/docs/12/admin.html)
instance to store data, including workspace information and session tokens.
> ⚠️ Coder requires a database in order to function. If Coder's database becomes unavailable, Coder will become unavailable. Ensure that your Coder database is monitored for common issues such as available connections, disk usage, and so on.
[](https://coder.com/docs/v1/setup/installation#for-public-sector-deployments)
For public sector deployments
------------------------------------------------------------------------------------------------------------
Users with public sector deployments may need to obtain Coder's installation resources from [Big Bang](https://repo1.dso.mil/platform-one/big-bang/apps/developer-tools/coder)
(Helm charts) and [Ironbank](https://repo1.dso.mil/dsop/coder-enterprise/coder-enterprise/coder-service)
(installation images).
> Both the Big Bang and Ironbank repositories are one release behind the latest version of Coder.
[](https://coder.com/docs/v1/setup/installation#install-coder)
Install Coder
----------------------------------------------------------------------------
1. Create the Coder [namespace](https://kubernetes.io/docs/concepts/overview/working-with-objects/namespaces/)
:
`` `kubectl create namespace coder` ``
2. Add the Coder Helm repo:
`` `helm repo add coder https://helm.coder.com` ``
3. Install the Helm chart onto your cluster (see the [changelog](https://coder.com/docs/v1/changelog)
for a list of Coder versions or run `helm search repo coder -l`)
> This step will install Coder with the default configuration. This does not set up dev URLs, TLS, ingress controllers, or an external database. To configure these recommended features, please see the following sections.
`` `helm install coder coder/coder --namespace coder --version=` ``
4. Once `coderd` is running, tail the logs to find the randomly generated password for the admin user:
`` `kubectl logs -n coder -l coder.deployment=coderd -c coderd \ --tail=-1 | grep -A1 -B2 Password` ``
When this step is done, you will see:
`` `---------------------- User: admin Password: kv...k3 ----------------------` ``
You will need these credentials to continue setup using Coder's web UI.
> If you lose your admin credentials, you can use the [admin password reset](https://coder.com/docs/v1/admin/access-control/users/password-reset#resetting-the-site-admin-password)
> process to regain access.
5. Create a `values.yaml` file to configure Coder:
`` `helm show values coder/coder --namespace coder --version= > values.yaml` ``
> View the [configuration options available in the `values.yaml` file.](https://github.com/coder/enterprise-helm#values)
[](https://coder.com/docs/v1/setup/installation#set-the-super-admin-password)
Set the super admin password
----------------------------------------------------------------------------------------------------------
**Optional**: change the admin user password by updating `values.yaml` as follows:
``` ``superAdmin: # Options for configuring the secret used to specify the password for the # built-in super admin account. passwordSecret: # coderd.superAdmin.passwordSecret.name -- Name of a secret that should # be used to determine the password for the super admin account. The # password should be contained in the field `password`, or the manually # specified one. name: "" # coderd.superAdmin.passwordSecret.key -- The key of the secret that # contains the super admin password. key: "password"`` ```
[](https://coder.com/docs/v1/setup/installation#connect-an-external-database)
Connect an external database
----------------------------------------------------------------------------------------------------------
**Optional**: To configure an externally hosted database, set the following in `values.yaml`:
> Ensure that you have superuser privileges to your PostgreSQL database.
`` `postgres: default: enable: false host: HOST_ADDRESS port: PORT_NUMBER user: YOUR_USER_NAME database: YOUR_DATABASE passwordSecret: secret-name sslMode: require` ``
a. To create the `passwordSecret`, run:
`` `kubectl create secret generic --from-literal="password=UserDefinedPassword"` ``
> Put a space before the command to prevent it from being saved in your shell history.
>
> Running this command could potentially expose your database password to other users on your system through `/proc`. If this is a concern, you can use `--from-file=password=/dev/stdin` instead of `--from-literal=...` to enter your password and press `Ctrl+D` when you're done to submit it.
>
> Ensure that there are no trailing white spaces in your password secret.
For more detailed configuration instructions, [see our PostgreSQL setup guide](https://coder.com/docs/v1/guides/deployments/postgres)
. Alternatively, see our [guide on connecting to AWS RDS via IAM credentials](https://coder.com/docs/v1/setup/guides/admin/awsrds)
.
[](https://coder.com/docs/v1/setup/installation#enable-dev-urls)
Enable dev URLs
--------------------------------------------------------------------------------
**Optional**: Enable dev URL usage. [You must provide a wildcard domain in the Helm chart](https://coder.com/docs/v1/admin/devurls)
.
`` `coderd: devurlsHost: "*.my-custom-domain.io"` ``
[](https://coder.com/docs/v1/setup/installation#enable-tls)
Enable TLS
----------------------------------------------------------------------
**Optional:** To set up TLS:
a. You will need to create a TLS secret. To do so, run the following with the `.pem` files provided by your certificate:
`` `kubectl create secret tls tls-secret --key key.pem --cert cert.pem` ``
> If your certificate provider does not provide `.pem` files, then you may need to attach the certificate to the LoadBalancer manually.
b. Attach the secret to the `coderd` service by setting the following values:
`` `coderd: tls: hostSecretName: devurlsHostSecretName: ` ``
[](https://coder.com/docs/v1/setup/installation#set-up-an-ingress-controller)
Set up an ingress controller
----------------------------------------------------------------------------------------------------------
**Optional:** If you cannot use a load balancer, you may need an ingress controller. To configure one with Coder, set the following in `values.yaml`:
> We assume that you already have an ingress controller installed in your cluster.
`` `coderd: devurlsHost: "*.devurls.coderhost.com" serviceSpec: # The Ingress will route traffic to the internal ClusterIP. type: ClusterIP externalTrafficPolicy: "" tls: hostSecretName: devurlsHostSecretName: ingress: enable: true # Hostname to use for routing decisions host: "coder.coderhost.com" # Custom annotations to apply to the resulting Ingress object # This is useful for configuring other controllers in the cluster # such as cert-manager or the ingress controller annotations: {}` ``
[](https://coder.com/docs/v1/setup/installation#configure-a-proxy)
Configure a proxy
------------------------------------------------------------------------------------
**Optional:** To have Coder initiate outbound connections via a proxy, set the following (applicable) values:
`` `coderd: proxy: http: "" https: "" exempt: "cluster.local"` ``
Once you've implemented all of the changes in `values.yaml`, upgrade Coder with the following command:
`` `helm upgrade coder coder/coder --namespace coder --version= -f values.yaml` ``
[](https://coder.com/docs/v1/setup/installation#logging)
Logging
----------------------------------------------------------------
At this time, we recommend reviewing Coder's default [logging](https://coder.com/docs/v1/guides/admin/logging)
settings. Logs help monitor the health of your cluster and troubleshooting, and Coder offers you several options for obtaining these.
[](https://coder.com/docs/v1/setup/installation#accessing-coder)
Accessing Coder
--------------------------------------------------------------------------------
1. To access Coder's web UI, you'll need to get its IP address by running the following in the terminal to list the Kubernetes services running:
`` `kubectl --namespace coder get services` ``
You'll see a row named **coderd** with an **EXTERNAL-IP** value; this is the IP address you need.
2. In your browser, navigate to the external IP.
3. Use the admin credentials you obtained in this installation guide's previous step to log in to the Coder platform. If this is the first time you've logged in, Coder will prompt you to change your password.
At this point, you're ready to proceed to [configuring Coder](https://coder.com/docs/v1/setup/configuration)
.
[](https://coder.com/docs/v1/setup/installation#eks-troubleshooting)
EKS troubleshooting
----------------------------------------------------------------------------------------
If you're unable to access your Coder deployment via the external IP generated by EKS, this is likely due to `coderd` being scheduled onto the incorrect node group, causing the load balancer health checks to fail. Below are two methods to resolve this:
1. Set the `externalTrafficPolicy` Helm value to `Cluster` by running the following command:
`` `helm upgrade --install coder coder/coder --set coderd.serviceSpec.externalTrafficPolicy=Cluster` ``
Note that setting `externalTrafficPolicy` to `Cluster` masks the source IP address of your Coder users. For more information on this value, [see the Kubernetes documentation](https://kubernetes.io/docs/tasks/access-application-cluster/create-external-load-balancer/#preserving-the-client-source-ip)
.
2. Set the `services.nodeSelector` Helm value to a label assigned to the `standard-workers` node group created by AWS. Common labels include:
`` `eks.amazonaws.com/nodegroup=standard-workers alpha.eksctl.io/nodegroup-name=standard-workers beta.kubernetes.io/instance-type=t3.small` ``
This option is recommended if you'd like to preserve the source IP. See the [Kubernetes documentation](https://kubernetes.io/docs/reference/labels-annotations-taints/)
for a full list of the standard node labels.
##### On this page
---
# Azure DNS | Coder v1 Docs
[Home](https://coder.com/docs/v1 "Home")
[Guides](https://coder.com/docs/v1/guides "Guides")
[TLS certificates](https://coder.com/docs/v1/guides/tls-certificates "TLS certificates")
Azure DNS
[cert-manager](https://cert-manager.io/)
allows you to enable HTTPS on your Coder installation, regardless of whether you're using [Let's Encrypt](https://letsencrypt.org/)
or you have your own certificate authority.
> This guide is for Coder v1.21.0 and later, which handle certificates differently from earlier versions of Coder. Ensure that you're reading the docs applicable to your Coder version.
This guide will show you how to install cert-manager and set up your cluster to issue Let's Encrypt certificates for your Coder installation so that you can enable HTTPS on your Coder deployment. It will also show you how to configure your Coder hostname and dev URLs.
There are three available methods to configuring the Azure DNS DNS01 Challenge via cert-manager:
* [Managed Identity Using AAD Pod Identities](https://coder.com/docs/v1/guides/tls-certificates/azureDNS#step-1-create-an-azure-dns-zone)
* [Managed Identity Using AKS Kubelet Identity](https://cert-manager.io/docs/configuration/acme/dns01/azuredns/#managed-identity-using-aks-kubelet-identity)
* [Service Principal](https://cert-manager.io/docs/configuration/acme/dns01/azuredns/#service-principal)
This guide will only walk through the **first** option, though the prerequisites are the same regardless of which option you choose.
> We recommend reviewing the official cert-manager [documentation](https://cert-manager.io/docs/)
> if you encounter any issues or if you want info on using a different certificate issuer.
[](https://coder.com/docs/v1/guides/tls-certificates/azureDNS#prerequisites)
Prerequisites
------------------------------------------------------------------------------------------
You must have:
* A Kubernetes cluster [of a supported version](https://coder.com/docs/v1/setup/kubernetes#supported-kubernetes-versions)
with internet connectivity
* Installed [kubectl](https://kubernetes.io/docs/tasks/tools/install-kubectl/)
* Installed [Azure CLI](https://docs.microsoft.com/en-us/cli/azure/?view=azure-cli-latest)
You should also:
* Be a cluster admin
* Have access to your DNS provider
* Have a paid Azure account that allows you to access [Azure DNS](https://azure.microsoft.com/en-us/services/dns/)
[](https://coder.com/docs/v1/guides/tls-certificates/azureDNS#step-1-create-an-azure-dns-zone)
Step 1: Create an Azure DNS Zone
-------------------------------------------------------------------------------------------------------------------------------
Log into the [Azure Portal](https://coder.com/docs/v1/guides/tls-certificates/portal.azure.com)
. Using the search bar, look for **DNS Zones** and navigate to this service.
If Azure DNS is the registrar for your domain, the zone will already exist so you can skip to Step 3.
Click **New** to create a new zone, and when prompted:
1. Select your **subscription** and the **resource group** where your Coder deployment is
2. Provide a **name** for your new zone
Click **Review + create**. Review the summary information, and if it's correct, click **Create** to proceed.
Once Azure has deployed your resource, click **Go to resource**. Make a note of the name server records (e.g., `ns1-09.azure-dns.com.`) presented to you, since you'll need to provide these four values to your domain provider.
[](https://coder.com/docs/v1/guides/tls-certificates/azureDNS#step-2-assign-azure-name-server-records-to-your-domain)
Step 2: Assign Azure name server records to your domain
-----------------------------------------------------------------------------------------------------------------------------------------------------------------------------
Navigate to your domain provider, and add the four Azure name server records to the domain you're using for your Coder deployment.
[](https://coder.com/docs/v1/guides/tls-certificates/azureDNS#step-3-add-cert-manager-to-your-kubernetes-cluster)
Step 3: Add cert-manager to your Kubernetes cluster
---------------------------------------------------------------------------------------------------------------------------------------------------------------------
1. [Install](https://cert-manager.io/docs/installation/kubernetes/#installing-with-regular-manifests)
cert-manager:
`` `kubectl apply -f https://github.com/cert-manager/cert-manager/releases/download/v1.8.0/cert-manager.yaml` ``
2. Check that cert-manager installs correctly by running
`` `kubectl get CustomResourceDefinition | grep cert-manager` ``
You should see certificates, certificate requests, challenges, cluster issuers, issuers, and orders.
3. Next, check that your services are running in the cert-manager namespace
`` `kubectl get all -n cert-manager NAME READY STATUS RESTARTS AGE cert-manager-7cd5cdf774-vb2pr 1/1 Running 0 84s cert-manager-cainjector-6546bf7765-ssxhf 1/1 Running 0 84s cert-manager-webhook-7f68b65458-zvzn9 1/1 Running 0 84s` ``
[](https://coder.com/docs/v1/guides/tls-certificates/azureDNS#step-4-set-up-a-managed-identity)
Step 4: Set up a managed identity
---------------------------------------------------------------------------------------------------------------------------------
[AAD Pod Identities](https://azure.github.io/aad-pod-identity/)
enables you to assign an Active Directory Managed Identity to a pod. This allows you to create the DNS records without having to add your credentials to the cluster.
To create the identity with access to the DNS Zone:
`` `# Choose a unique identity name and the resource group to create identity in IDENTITY=$(az identity create --name $IDENTITY_NAME --resource-group $IDENTITY_GROUP ) # Get principalId to use for role assignment PRINCIPAL_ID=$(echo $IDENTITY | jq -r '.principalId') # Identity binding CLIENT_ID=$(echo $IDENTITY | jq -r '.clientId') RESOURCE_ID=$(echo $IDENTITY | jq -r '.id') # Get existing DNS Zone ID ZONE_ID=$(az network dns zone show --name $ZONE_NAME --resource-group $ZONE_GROUP --query "id" -o tsv) # Create role assignment az role assignment create --role "DNS Zone Contributor" --assignee $PRINCIPAL_ID --scope $ZONE_ID` ``
[](https://coder.com/docs/v1/guides/tls-certificates/azureDNS#step-5-deploy-the-managed-identity)
Step 5: Deploy the managed identity
-------------------------------------------------------------------------------------------------------------------------------------
1. Export the following environment variables with your own values:
`` `export SUBSCRIPTION_ID="05e8b285-4ce1-46a3-b4c9-f51ba67d6acc" export RESOURCE_GROUP="workshop-202103" export CLUSTER_NAME="coder-workshop-202103"` ``
The **subscription ID** comes from your Azure subscription. The **resource group** should be set to the resource group that owns the cluster. The **cluster name** is the name Azure uses to refer to the required Kubernetes cluster.
2. Deploy the AAD Pod Identity components to an RBAC-enabled cluster:
`` `kubectl apply -f https://raw.githubusercontent.com/Azure/ aad-pod-identity/master/deploy/infra/deployment-rbac.yaml # For AKS clusters, deploy the MIC and AKS add-on exception by running the following kubectl apply -f https://raw.githubusercontent.com/Azure/ aad-pod-identity/master/deploy/infra/mic-exception.yaml` ``
> If you're using a non-RBAC cluster, remove the `-rbac` flag from the initial command
3. Deploy AzureIdentity and AzureIdentityBinding. To do so, create an `azureId.yaml` file using the template below to deploy the custom resources required to assign the identity:
`` `apiVersion: "aadpodidentity.k8s.io/v1" kind: AzureIdentity metadata: annotations: # We recommend using namespaced identities https://azure.github.io/ aad-pod-identity/docs/configure/match_pods_in_namespace/ aadpodidentity.k8s.io/Behavior: namespaced name: certman-identity namespace: cert-manager # Change to your preferred namespace spec: type: 0 # MSI resourceID: # Resource ID From Previous step clientID: # Client ID from previous step --- apiVersion: "aadpodidentity.k8s.io/v1" kind: AzureIdentityBinding metadata: name: certman-id-binding namespace: cert-manager # Change to your preferred namespace spec: azureIdentity: certman-identity selector: certman-label # The label that needs to be set on cert-manager pods` ``
4. Apply the `azureId.yaml` file:
`` `kubectl apply -f azureId.yaml` ``
5. Set the pod identity label on the cert-manager pod:
`` `spec: template: metadata: labels: aadpodidbinding: certman-label # must match selector in AzureIdentityBinding` ``
This label tells the cluster which pods are allowed to use the IAM role specified earlier. For our purposes, we want the cert-manager pod to be able to set the DNS records for dns01 challenges. The side effect is that any pod with that label will be able to change DNS settings in the authorized zone.
[](https://coder.com/docs/v1/guides/tls-certificates/azureDNS#step-6-create-the-acme-issuer)
Step 6: Create the ACME Issuer
---------------------------------------------------------------------------------------------------------------------------
1. Create a file called `letsencrypt.yaml` (you can name it whatever you'd like) to specify the `hostedZoneName`, `resourceGroupName` and `subscriptionID` fields for the DNS Zone:
`` `apiVersion: cert-manager.io/v1 kind: ClusterIssuer metadata: name: letsencrypt spec: acme: email: [[email protected]](https://coder.com/cdn-cgi/l/email-protection) server: https://acme-v02.api.letsencrypt.org/directory privateKeySecretRef: name: example-issuer-account-key solvers: - selector: dnsZones: - # Your Azure DNS Zone dns01: azureDNS: subscriptionID: SUBSCRIPTION_ID resourceGroupName: RESOURCE_GROUP hostedZoneName: ZONE_ID # Azure Cloud Environment, default to AzurePublicCloud environment: AzurePublicCloud` ``
More information on the values in the YAML file above can be found in [the dns01 solver configuration documentation](https://cert-manager.io/docs/configuration/acme/dns01/)
.
2. Apply your configuration changes:
`` `kubectl apply -f letsencrypt.yaml` ``
If successful, you'll see a response similar to:
`` `clusterissuer.cert-manager.io/letsencrypt created` ``
[](https://coder.com/docs/v1/guides/tls-certificates/azureDNS#step-7-create-a-certificate)
Step 7: Create a certificate
-----------------------------------------------------------------------------------------------------------------------
> Note: If you are providing an ingress, certificates can be automatically created with an ingress annotation. See the [cert-manager docs](https://cert-manager.io/docs/usage/ingress/)
> for details. If you are unsure whether you are using an ingress or not, continue with this step.
In a text editor, create a new file called **certificate.yaml** and paste the following:
`` `apiVersion: cert-manager.io/v1 kind: Certificate metadata: name: coder-certs namespace: coder # Your Coder deployment namespace spec: commonName: "*.coder.example.com" dnsNames: - "coder.example.com" - "*.coder.example.com" issuerRef: kind: ClusterIssuer name: letsencrypt secretName: coder-certs` ``
Be sure to change `coder.example.com` to the domain for your Coder deployment. While this example uses a single domain, a separate domain can be created for dev URLs or even omitted if you do not have [dev URLs enabled](https://coder.com/docs/v1/guides/admin/devurls)
.
Once you're done, deploy the certificates.
`` `kubectl apply -f certificate.yaml` ``
[](https://coder.com/docs/v1/guides/tls-certificates/azureDNS#step-8-installupgrade-coder)
Step 8: Install/upgrade Coder
------------------------------------------------------------------------------------------------------------------------
At this point, you're ready to [install](https://coder.com/docs/v1/setup/installation)
Coder. However, to use all of the functionality you set up in this tutorial, use the following command instead:
``` ``# be sure to update the `stringValue` placeholder with the # proper value for your devurlsHostSecretName and hostSecretName helm upgrade --install coder coder/coder --namespace coder \ --version= \ --set coderd.devurlsHost="*.coder.example.com" \ --set coderd.tls.devurlsHostSecretName="coder-certs-stringValue" \ --set coderd.tls.hostSecretName="coder-certs-stringValue" \ --wait`` ```
The `hostSecretName` and `devurlsHostSecretName` are arbitrary strings that you should set to some value that does not conflict with any other secrets in the Coder namespace.
There are also a few additional steps to make sure that your hostname and dev URLs work.
1. Check the contents of your namespace:
`` `kubectl get svc -n -o wide` ``
Find the **service/coderd** line, and copy the **external IP** value shown.
2. Return to Azure and go to **DNS zones**.
3. Create a new record for your hostname; provide `coder` as the record name, and paste the external IP as the `value`. Save.
4. Create another record for your dev URLs: set it to `*.dev.exampleCo` or similar and use the same external IP as the previous step for `value`. Save.
At this point, you can return to **step 6** of the [installation](https://coder.com/docs/v1/setup/installation)
guide to obtain the admin credentials you need to log in.
[](https://coder.com/docs/v1/guides/tls-certificates/azureDNS#troubleshooting)
Troubleshooting
----------------------------------------------------------------------------------------------
If you are not getting a valid certificate after redeploying, see [cert-manager's troubleshooting guide](https://cert-manager.io/docs/faq/acme/)
for additional assistance.
##### On this page
---
# Multiple JetBrains instances configuration | Coder v1 Docs
[Home](https://coder.com/docs/v1 "Home")
[Guides](https://coder.com/docs/v1/guides "Guides")
[Customization](https://coder.com/docs/v1/guides/customization "Customization")
Multiple JetBrains instances configuration
This article walks you through the process of configuring Coder to support the use of multiple instances of the same JetBrains IDE using the JetBrains Projector CLI.
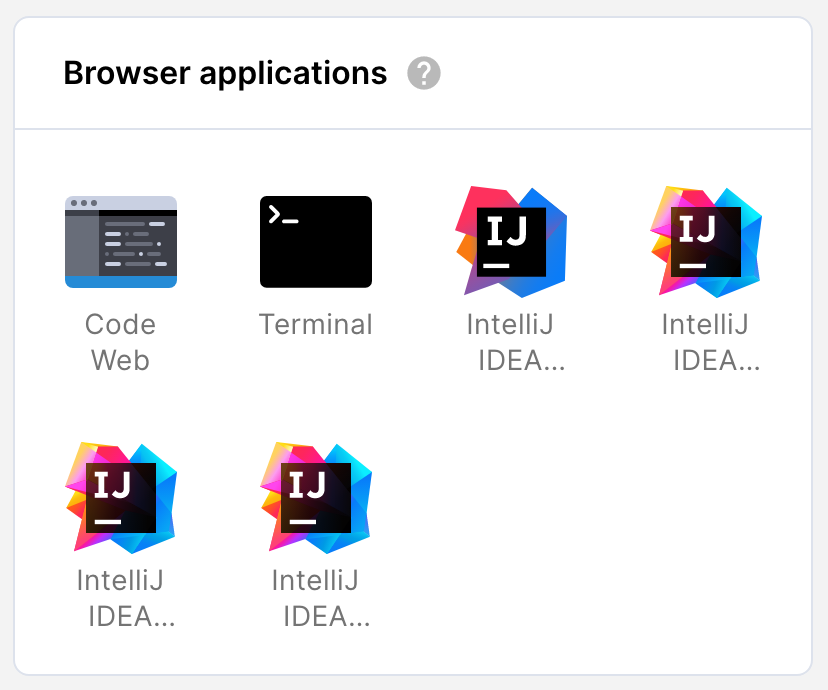
You will:
1. Create and build the custom image
2. Write the configure script
3. Write the `config.yaml` file needed to utilize Coder's \[workspace applications\] feature to surface additional JetBrains IDE instances in your browser
This article shows you how to configure multiple instances of IntelliJ IDEA Ultimate, but you can use this process for any JetBrains IDEs.
> Using additional JetBrains IDEs consumes extra workspace compute resources, so ensure that you've allocated enough resources to your workspace to support all of your IDE instances.
1. Build a custom image that installs the primary JetBrains IDE and copies the configure script, `.profile` script, and `config.yaml` file to the image:
`` `FROM codercom/enterprise-java:ubuntu USER root # Install IntelliJ IDEA Ultimate RUN mkdir -p /opt/idea RUN curl -L \ "https://download.jetbrains.com/product?code=IU&latest&distribution=linux" \ | tar -C /opt/idea --strip-components 1 -xzvf - # Create a symbolic link in PATH that points to the Intellij startup script. RUN ln -s /opt/idea/bin/idea.sh /usr/bin/intellij-idea-ultimate # Packages required for JetBrains-in-a-browser support RUN apt-get update && \ DEBIAN_FRONTEND="noninteractive" apt-get install -y \ libxtst6 \ libxrender1 \ libfontconfig1 \ libxi6 \ libgtk-3-0 # bash .profile so projector can be added to the path COPY [".profile", "/coder/.profile"] # configure script COPY ["configure", "/coder/configure"] RUN chmod +x /coder/configure # copy custom apps info (config.yaml) COPY ["./coder", "/coder"] # Set back to coder user USER coder` ``
2. Create the configure script that installs the Projector CLI into `/home/coder` and uses the CLI to create additional JetBrains IDE config folders. Each IDE configuration has a different directory in `/home/coder/.projector/configs`.
In this example, the configure script is in the directory that contains the image's Dockerfile:
> Each additional IDE requires a unique port number.
`` `# install projector into /home/coder/ pvc pip3 install projector-installer --user # autoinstall intellij version specifying config name and port $HOME/.local/bin/projector --accept-license PROJECTOR_CONFIG_PATH=$HOME/.projector/configs/IntelliJ_2 if [ -d $PROJECTOR_CONFIG_PATH ]; then echo 'projector has already been configured - skip step' else $HOME/.local/bin/projector ide autoinstall --config-name IntelliJ_2 \ --ide-name "IntelliJ IDEA Ultimate 2021.3.2" --port 8997 \ --use-separate-config $HOME/.local/bin/projector ide autoinstall --config-name IntelliJ_3 \ --ide-name "IntelliJ IDEA Ultimate 2021.3.2" --port 8998 \ --use-separate-config $HOME/.local/bin/projector ide autoinstall --config-name IntelliJ_4 \ --ide-name "IntelliJ IDEA Ultimate 2021.3.2" --port 8999 \ --use-separate-config fi` ``
3. Create the `config.yaml` file used by [workspace applications](https://coder.com/docs/v1/workspaces/applications)
to surface icons for each additional JetBrains IDE in the workspace. The configuration uses the JetBrains icon included with the initial JetBrains IDE installed.
In this example, `config.yaml` is located in a `coder/apps` directory within the directory that contains the image Dockerfile.
> Each workspace application name must be unique so that Projector can point to the correct config directory.
`` `# /coder/apps/config.yaml apps: # Name of application in launcher. Name may consist of alphanumeric # characters, dashes, underscores. Names must begin with an alphanumeric # character. Names must be unique per application. Required. - name: IntelliJ IDEA Ultimate 2 # Application scheme - must be http or https. Required. scheme: http # Application port. Required. port: 8997 # Host of the application to use when dialing. Defaults to localhost. # Optional. host: "localhost" # Working directory for the start command. Required. working-directory: /home/coder # File path to icon used in application launcher. Icons should be either # PNG, SVG, or JPG. Required. icon-path: /opt/idea/bin/idea.svg # Command to start the application. Required. command: /home/coder/.projector/configs/IntelliJ_2/run.sh # Array of arguments for command. Optional. args: [""] # Health checks to get running application status. Can use exec or http # health checks to localhost. Optional, but we recommend specifying a # health check. If you don't supply one, then an http request is sent to # the application root path "/". health-check: http: # Scheme must be "http" or "https". If not specified it inherits # the application scheme. Optional. scheme: "http" # The host to use when dialing the address. If not specified it # inherits the application host. Optional. host: "localhost" # Port to use when dialing the application. If not specified it # inherits the application port. Optional. port: 8997 - name: IntelliJ IDEA Ultimate 3 # Application scheme - must be http or https. Required. scheme: http # Application port. Required. port: 8998 # Host of the application to use when dialing. Defaults to localhost. # Optional. host: "localhost" # Working directory for the start command. Required. working-directory: /home/coder # File path to icon used in application launcher. Icons should be either # PNG, SVG, or JPG. Required. icon-path: /opt/idea/bin/idea.svg # Command to start the application. Required. command: /home/coder/.projector/configs/IntelliJ_3/run.sh # Array of arguments for command. Optional. args: [""] # Health checks to get running application status. Can use exec or http # health checks to localhost. Optional, but we recommend specifying a # health check. If you don't supply one, then an http request is sent to # the application root path "/". health-check: http: # Scheme must be "http" or "https". If not specified it inherits # the application scheme. Optional. scheme: "http" # The host to use when dialing the address. If not specified it # inherits the application host. Optional. host: "localhost" # Port to use when dialing the application. If not specified it # inherits the application port. Optional. port: 8998 - name: IntelliJ IDEA Ultimate 4 # Application scheme - must be http or https. Required. scheme: http # Application port. Required. port: 8999 # Host of the application to use when dialing. Defaults to localhost. # Optional. host: "localhost" # Working directory for the start command. Required. working-directory: /home/coder # File path to icon used in application launcher. Icons should be either # PNG, SVG, or JPG. Required. icon-path: /opt/idea/bin/idea.svg # Command to start the application. Required. command: /home/coder/.projector/configs/IntelliJ_4/run.sh # Array of arguments for command. Optional. args: [""] # Health checks to get running application status. Can use exec or http # health checks to localhost. Optional, but we recommend specifying a # health check. If you don't supply one, then an http request is sent to # the application root path "/". health-check: http: # Scheme must be "http" or "https". If not specified it inherits # the application scheme. Optional. scheme: "http" # The host to use when dialing the address. If not specified it # inherits the application host. Optional. host: "localhost" # Port to use when dialing the application. If not specified it # inherits the application port. Optional. port: 8999` ``
The configure script example above auto-installs the JetBrains IDE into the `/home/coder` folder. If you have an air-gapped deployment or want to use the existing Coder-installed JetBrains IDE, replace the auto-install command with Projector's configure command:
`` `INTELLIJ_PATH=$HOME/.projector/apps/idea if [ -d $INTELLIJ_PATH ]; then echo 'intellij IDE has already been copied - skip step' else echo 'copying Coder-installed JetBrains IntelliJ IDE into /home/coder' cp -R /opt/idea $HOME/.projector/apps fi PROJECTOR_CONFIG_PATH=$HOME/.projector/configs/IntelliJ_2 if [ -d $PROJECTOR_CONFIG_PATH ]; then echo 'projector has already been configured - skip step' else echo 'creating projector config folders to support running multiple IntelliJ IDEs' $HOME/.local/bin/projector config add IntelliJ_2 $HOME/.projector/apps/idea --port 8997 --hostname=localhost --use-separate-config $HOME/.local/bin/projector config add IntelliJ_3 $HOME/.projector/apps/idea --port 8998 --hostname=localhost --use-separate-config $HOME/.local/bin/projector config add IntelliJ_4 $HOME/.projector/apps/idea --port 8999 --hostname=localhost --use-separate-config fi` ``
If you do not want to use workspace applications (i.e., the icons and `config.yaml` file), you can create dev URLs for each additional IntelliJ IDE and launch the `run.sh` script in `.projector/configs/` on the appropriate port.
> See Projector's CLI documentation for additional information on [installation](https://github.com/JetBrains/projector-installer#Installation)
> and the [CLI commands](https://github.com/JetBrains/projector-installer/blob/master/COMMANDS.md)
> it accepts.
---
# Cloudflare | Coder v1 Docs
[Home](https://coder.com/docs/v1 "Home")
[Guides](https://coder.com/docs/v1/guides "Guides")
[TLS certificates](https://coder.com/docs/v1/guides/tls-certificates "TLS certificates")
Cloudflare
[cert-manager](https://cert-manager.io/)
allows you to enable HTTPS on your Coder installation, regardless of whether you're using [Let's Encrypt](https://letsencrypt.org/)
or you have your own certificate authority.
> This guide is for Coder v1.21.0 and later, which handle certificates differently from earlier versions of Coder. Ensure that you're reading the docs applicable to your Coder version.
This guide will show you how to install cert-manager and set up your cluster to issue Let's Encrypt certificates for your Coder installation so that you can enable HTTPS on your Coder deployment.
> We recommend reviewing the official cert-manager [documentation](https://cert-manager.io/docs/)
> if you encounter any issues or if you want info on using a different certificate issuer.
[](https://coder.com/docs/v1/guides/tls-certificates/cloudflare#prerequisites)
Prerequisites
--------------------------------------------------------------------------------------------
You must have:
* A Kubernetes cluster [of a supported version](https://coder.com/docs/v1/setup/kubernetes#supported-kubernetes-versions)
with internet connectivity
* Installed [kubectl](https://kubernetes.io/docs/tasks/tools/install-kubectl/)
[](https://coder.com/docs/v1/guides/tls-certificates/cloudflare#step-1-add-cert-manager-to-your-kubernetes-cluster)
Step 1: Add cert-manager to your Kubernetes cluster
-----------------------------------------------------------------------------------------------------------------------------------------------------------------------
`` `kubectl apply -f https://github.com/cert-manager/cert-manager/releases/download/v1.8.0/cert-manager.yaml` ``
More specifics can be found in the [cert-manager install documentation](https://cert-manager.io/docs/installation/kubernetes/#installing-with-regular-manifests)
.
Once you've started the installation process, you can verify that all the pods are running:
`` `$ kubectl get pods -n cert-manager NAME READY STATUS RESTARTS AGE cert-manager-7cd5cdf774-vb2pr 1/1 Running 0 84s cert-manager-cainjector-6546bf7765-ssxhf 1/1 Running 0 84s cert-manager-webhook-7f68b65458-zvzn9 1/1 Running 0 84s` ``
[](https://coder.com/docs/v1/guides/tls-certificates/cloudflare#step-2-create-an-acme-issuer)
Step 2: Create an ACME issuer
---------------------------------------------------------------------------------------------------------------------------
cert-manager supports HTTP01 and DNS01 challenges, as well as [many DNS providers](https://cert-manager.io/docs/configuration/acme/dns01/#supported-dns01-providers)
. This guide, however, shows you how to use Cloudflare for DNS01 challenges. This is necessary to issue wildcard certificates, which are required for Coder's [dev URLs](https://coder.com/docs/v1/admin/devurls)
feature.
First, get the Cloudflare API credentials for cert-manager to use; cert-manager needs permission to add a temporary TXT record and delete it after the challenge has been completed.
Open the Cloudflare dashboard and go to [My Profile > API Tokens](https://dash.cloudflare.com/profile/api-tokens)
. Click **Create Token**, then go to **Create Custom Token** and click **Get Started**.
Create a token with the following settings:
* Permissions:
* Zone: DNS = Edit
* Zone: Zone = Read
* Zone Resources:
* Include: Specific Zone = your-domain.com
You can also add more zones (or give the token access to all zones in your account), and set an expiry date.
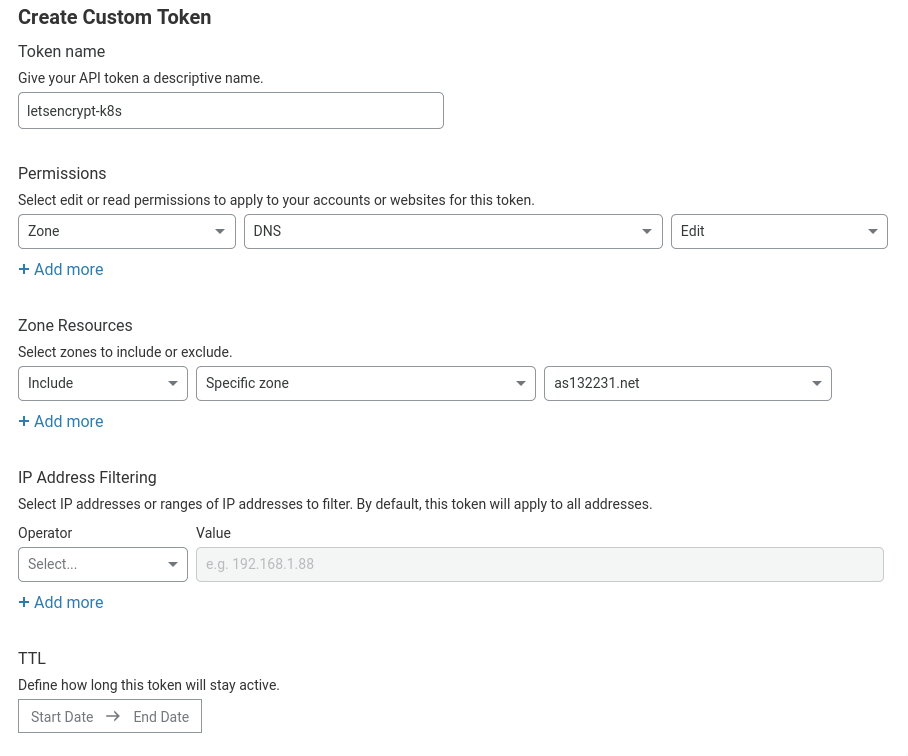
Click **Continue to summary**, then **Create Token**. Be sure to copy and save the token displayed because Cloudflare will not display it again.
Now that we have our Cloudflare API token, we need to configure cert-manager to use it. In a text editor, create a new file called **issuer.yaml** and paste the following:
`` `apiVersion: v1 kind: Secret metadata: name: cloudflare-api-token-secret namespace: coder # Your Coder deployment namespace type: Opaque stringData: api-token: "" # Your Cloudflare API token (from earlier) --- apiVersion: cert-manager.io/v1 kind: Issuer metadata: name: letsencrypt namespace: coder # Your Coder deployment namespace spec: acme: email: "" # Your email address (given to Let's Encrypt) server: "https://acme-v02.api.letsencrypt.org/directory" privateKeySecretRef: name: letsencrypt-account-key solvers: - dns01: cloudflare: email: "" # Your Cloudflare email address apiTokenSecretRef: name: cloudflare-api-token-secret key: api-token # This section denotes which domains to use this issuer for. If you didn't # limit which zones the API token had access to, you may wish to remove # this section. selector: dnsZones: # Only use this issuer for the domain example.com and its subdomains. - "example.com"` ``
More information on the values in the YAML file above can be found in [the dns01 solver configuration documentation](https://cert-manager.io/docs/configuration/acme/dns01/)
.
### [](https://coder.com/docs/v1/guides/tls-certificates/cloudflare#clusterissuers)
ClusterIssuers
cert-manager has a concept of **Issuer** (which are per-namespace) or **ClusterIssuer** (which are global to the entire cluster). If you plan on using cert-manager only for Coder, you may choose to use the **Issuer** configuration above. If you want to use a **ClusterIssuer** instead, you'll need to make the following changes:
* Change the namespace of the secret (and certificate object created in the next step) to **cert-manager**
* Change the kind of the **Issuer** to **ClusterIssuer**
* Remove the namespace of the **ClusterIssuer**
* Change the annotations to `cert-manager.io/cluster-issuer: "letsencrypt"`
For further information, see [Setting Up Issuers](https://docs.cert-manager.io/en/release-0.8/tasks/issuers/index.html)
.
Read the comments and fill out the blanks. Once you're done, you can go ahead and apply that to your cluster using:
`` `$ kubectl apply -f issuer.yaml secret/cloudflare-api-key-secret created issuer.cert-manager.io/letsencrypt created` ``
[](https://coder.com/docs/v1/guides/tls-certificates/cloudflare#step-3-create-a-certificate)
Step 3: Create a certificate
-------------------------------------------------------------------------------------------------------------------------
> Note: If you are providing an ingress, certificates can be automatically created with an ingress annotation. See the [cert-manager docs](https://cert-manager.io/docs/usage/ingress/)
> for details. If you are unsure whether you are using an ingress or not, continue with this step.
In a text editor, create a new file called **certificate.yaml** and paste the following:
`` `apiVersion: cert-manager.io/v1 kind: Certificate metadata: name: coder-certs namespace: coder # Your Coder deployment namespace spec: commonName: "*.coder.example.com" dnsNames: - "coder.example.com" - "*.coder.example.com" issuerRef: kind: Issuer name: letsencrypt secretName: coder-certs` ``
Be sure to change `coder.example.com` to the domain for your Coder deployment. While this example uses a single domain, a separate domain can be created for dev URLs or even omitted if you do not have [dev URLs enabled](https://coder.com/docs/v1/guides/admin/devurls)
.
Once you're done, deploy the certificates.
`` `kubectl apply -f certificate.yaml` ``
[](https://coder.com/docs/v1/guides/tls-certificates/cloudflare#step-4-configure-coder-to-issue-and-use-the-certificates)
Step 4: Configure Coder to issue and use the certificates
-----------------------------------------------------------------------------------------------------------------------------------------------------------------------------------
If you're using the default LoadBalancer to access Coder, you can use the following Helm values to use the certificate.
``` ``# be sure to update the `stringValue` placeholder with the # proper value for your devurlsHostSecretName and hostSecretName coderd: devurlsHost: "*.coder.example.com" tls: devurlsHostSecretName: "coder-certs-stringValue" hostSecretName: "coder-certs-stringValue"`` ```
Be sure to change `coder.example.com` to the domain for your Coder deployment. The `hostSecretName` and `devurlsHostSecretName` correspond to the secret specified by the certificate(s) created in step 2. The secret name(s) are arbitrary, but ensure they do not conflict with any other secrets in the Coder namespace.
Be sure to [redeploy Coder](https://coder.com/docs/v1/setup/upgrade)
after changing your Helm values. Then, log in to Coder and change your access URL in `Manage > Admin` to use HTTPS.
[](https://coder.com/docs/v1/guides/tls-certificates/cloudflare#troubleshooting)
Troubleshooting
------------------------------------------------------------------------------------------------
If, after redeploying, you're not getting a valid certificate, see [cert-manager's troubleshooting guide](https://cert-manager.io/docs/faq/acme/)
for additional assistance.
##### On this page
---
# TLS certificates | Coder v1 Docs
[Home](https://coder.com/docs/v1 "Home")
[Images](https://coder.com/docs/v1/images "Images")
TLS certificates
This article will show you how to correct issues regarding TLS certificates in Coder.
[](https://coder.com/docs/v1/images/tls-certificates#background)
Background
---------------------------------------------------------------------------
Coder may sometimes fail to download extensions for your IDE if the remote extension marketplace URL is untrusted. This might happen for one of the following reasons:
* The image doesn't come with any ca-certificates
* You're using an internal certificate authority
Coder workspaces may also fail to build if the TLS certificate used by Coder is not present in the image, or if there is some issue with the certificate.
[](https://coder.com/docs/v1/images/tls-certificates#adding-certificates-for-coder)
Adding certificates for Coder
-----------------------------------------------------------------------------------------------------------------
To add certificates to your image and have them recognized by Coder:
1. Add the certificate(s) to the image
2. Set the `NODE_EXTRA_CA_CERTS` environment variable to the file in the image that contains the certificates
3. Add the following to your Dockerfile to ensure that Coder finds and uses your newly added certificates when making requests:
`` `COPY my-certs.crt /etc/ssl/certs/my-certs.crt ENV NODE_EXTRA_CA_CERTS /etc/ssl/certs/my-certs.crt` ``
[](https://coder.com/docs/v1/images/tls-certificates#adding-certificates-at-the-system-level)
Adding certificates at the system level
-------------------------------------------------------------------------------------------------------------------------------------
You can add certificates at the system level so that any process that runs within the workspace will use the certificates when making requests.
The specific process to add system-level certificates depends on the Linux distribution that you're using, but it is typically done by adding your certificates to your system's trusted CA repository.
[](https://coder.com/docs/v1/images/tls-certificates#tls-certificate-requirements)
TLS Certificate Requirements
---------------------------------------------------------------------------------------------------------------
Since the publication of RFC 2818 in 2000, the `commonName` field has been [considered deprecated](https://groups.google.com/a/chromium.org/g/security-dev/c/IGT2fLJrAeo/m/csf_1Rh1AwAJ)
.
The Go programming language, which Coder uses, recently began enforcing this and ignoring the `commonName` field (source) in favor of the Subject Alternative Name (SAN) field.
This essentially means that SSL certificates are required to use `Subject Alternative Name` instead of `commonName`. If you attempt to use a certificate having `commonName` with Coder, you may see the following error:
`` `x509: certificate relies on legacy Common Name field, use SANs instead` ``
Certificates may specify both fields for interoperability with existing software that requires the `commonName` field.
If you see this error when building a workspace or performing other operations with Coder workspaces, you may be running into the aforementioned issue. To verify that this is the case, you can inspect the certificate of your Coder deployment with the following command:
`` `openssl s_client -connect coder.domain.tld:443 < /dev/null 2>/dev/null \| sed -ne '/-BEGIN CERTIFICATE-/,/-END CERTIFICATE-/p' \| openssl x509 -text -noout \| grep -A1 'Subject Alternative Name'` ``
If your certificate has SANs specified, the expected output for the above command would be similar to the following:
`` `X509v3 Subject Alternative Name: DNS:*.coder.domain.tld, DNS:coder.domain.tld, DNS:domain.tld` ``
Otherwise, a blank output is expected.
To fix the issue, a new TLS certificate is required that does not rely solely on the `commmonName` field. In the above example, this would equate to adding the following arguments to the `openssl` invocation to generate the certificate:
`` `-addext "subjectAltName = DNS:domain-name.com"` ``
##### On this page
---
# 1.36.0 | Coder v1 Docs
[Home](https://coder.com/docs/v1 "Home")
[Changelog](https://coder.com/docs/v1/changelog "Changelog")
1.36.0
### [](https://coder.com/docs/v1/changelog/1.36.0#breaking-changes-)
Breaking changes ❗
There are no breaking changes in 1.36.0
### [](https://coder.com/docs/v1/changelog/1.36.0#features-)
Features ✨
* infra: Allowed older verions of curl for self-contained builds.
* infra: Allowed workspace template builds even if user does not have permission to add webhooks on their git repo.
* infra: Broke out API request latency Prometheus metrics by route.
* infra: Added Prometheus metrics around background job execution.
* infra: Added support for cached CVMs with 5.15 and 5.16 kernel versions.
### [](https://coder.com/docs/v1/changelog/1.36.0#bug-fixes-)
Bug fixes 🐛
* web: Fixed the "back to site" button that appears when trying to access an IDE on a workspace that has shut off.
* infra: Fixed a goroutine leak.
* web: Fixed relative links on embedded docs.
* infra: Large numbers of concurrent workspace builds are distributed more evenly amongst multiple coderd replicas.
* web: Allow org managers to view activity metrics.
* infra: Fix SSH connections not being audit logged.
* infra: Fixed an issue where temporary pods created during build did not have templates applied.
* infra: Fixed an issue where the hostname was set to `workspace` for CVM workspaces irrespective of the workspace name.
* helm: Fixed an issue where the helm install was not respecting the `coderd.postgres.noPasswordEnv` variable
### [](https://coder.com/docs/v1/changelog/1.36.0#security-updates-)
Security updates 🔐
* infra: Fixed an issued where Coder services inside the workspace could be reached via the network from outside in some environments.
### [](https://coder.com/docs/v1/changelog/1.36.0#known-issues-%E2%84%B9%EF%B8%8F)
Known Issues ℹ️
* On AWS EKS, cached CVMs are known to not work with more recent versions of the `Ubuntu2004` AMI family that include kernel version `5.15-aws`. Workaround: roll back to a version that includes an earlier kernel version (for example, `ubuntu-eks/k8s_1.22/images/hvm-ssd/ubuntu-focal-20.04-amd64-server-20220706`) or build a custom AMI with the generic kernel.
---
# Docker in workspaces | Coder v1 Docs
[Home](https://coder.com/docs/v1 "Home")
[Workspaces](https://coder.com/docs/v1/workspaces "Workspaces")
Docker in workspaces
Standard Coder workspaces run as regular Docker containers. This carries limitations as to what applications you can run inside your workspace. Most notably, it's not possible to run Docker securely within regular Docker containers.
Coder offers an alternative workspace deployment option, called container-based virtual machines (CVMs), that leverages the [Sysbox container runtime](https://github.com/nestybox/sysbox)
. CVMs allow you to run Docker, Docker Compose, systemd, and other system-level applications securely within your development containers.
> Coder site managers should review [our admin docs](https://coder.com/docs/v1/admin/workspace-management/cvms)
> for information on enabling Docker in workspaces for your deployment.
[](https://coder.com/docs/v1/workspaces/cvms#container-based-virtual-machine-cvm)
Container-based Virtual Machine (CVM)
-----------------------------------------------------------------------------------------------------------------------
By choosing this option, your workspace behaves like a VM or raw host, yet retains the image, security, and performance properties of typical containers.
To create a workspace capable of securely running system-level applications like Docker, make sure that the `Run as Container-based Virtual Machine` box is checked when you create a new workspace. If your admin has enabled CVMs, this feature will be selected by default whenever you create a new workspace.
[](https://coder.com/docs/v1/workspaces/cvms#disk)
Disk
-------------------------------------------------------
Standard workspaces only persist the `/home` directory in your workspace disk. CVM workspaces have additional levels of persistence:
1. `/var/lib/docker` is stored in your workspace disk and is persisted between rebuilds. This prevents shutdowns and rebuilds from purging the Docker cache.
2. The workspace image is itself stored in your workspace disk. Note that this data is never directly accessible to you but will still consume data on your disk and count towards the size limit.
When setting default disk sizes for [images](https://coder.com/docs/v1/images)
, plan for these additional storage requirements. We recommend treating the workspace as a full machine, so disk sizes in the range of 50-100 GB are reasonable. This is especially true if users of the image are storing large Docker caches.
##### On this page
---
# Configuration | Coder v1 Docs
[Home](https://coder.com/docs/v1 "Home")
[Setup](https://coder.com/docs/v1/setup "Setup")
Configuration
After installation, you'll set up and configure Coder using its web UI.
[](https://coder.com/docs/v1/setup/configuration#before-you-start)
Before you start
-----------------------------------------------------------------------------------
You should have completed the [installation](https://coder.com/docs/v1/setup/installation)
process and successfully logged in to Coder.
Make sure you have the following information on hand:
* The **admin user credentials** for your Coder deployment (necessary if you're not already logged in).
* Your **Coder license**; you must provide your license key during setup and config. Your license should have been sent to you via email; if not, please reach out to your Coder sales representative.
> If you do not have a license, you can [generate one](https://coder.com/trial)
> that allows you to try Coder free of charge for 60 days.
### [](https://coder.com/docs/v1/setup/configuration#creating-your-license-file)
Creating your license file
Coder provides you with your licensing information, which looks like:
`` `{"owner":"yourName","issued_at":"2020-01-01T00:00:00Z","expires_at":"2020-01-02T00:00:00Z","max_usage":{"user_count":10},"paid":false,"nonce":"MjA...MDA=","version":1,"checksum":"VtG...uQ=="}` ``
Copy this information into the text editor of your choice, and save it as a `.txt` or a `.json` file. You'll need to upload this file at **two** points during the setup and configuration processes.
[](https://coder.com/docs/v1/setup/configuration#providing-your-license)
Providing your license
-----------------------------------------------------------------------------------------------
Immediately after logging into Coder for the first time, you'll be prompted to upload your license (you must provide a `.txt` or `.json` file).
Once done, you can proceed with the Coder configuration process.
[](https://coder.com/docs/v1/setup/configuration#configure-your-coder-deployment)
Configure your Coder deployment
-----------------------------------------------------------------------------------------------------------------
Immediately after logging in to Coder's Web UI, you'll be walked through a configuration dashboard. You can specify the authentication method used for logins, provide your license information, set up a Git OAuth integration so that your users can clone their repositories, and more.
When you complete this process, you'll be redirected to the main Coder dashboard, where you can create new users, images, and workspaces.
> As part of the configuration process, we recommend creating a **site manager** user that can be used to create additional users and resources. **We suggest using the site admin user only for initial configuration purposes.**
### [](https://coder.com/docs/v1/setup/configuration#best-practices)
Best practices
Coder's default values during the setup/configuration process are acceptable only by a deployment used for evaluation purposes.
[](https://coder.com/docs/v1/setup/configuration#next-steps)
Next steps
-----------------------------------------------------------------------
[Developers\
\
Get started with Coder as a developer.](https://coder.com/docs/v1/getting-started/developers)
##### On this page
---
# Scaling Coder | Coder v1 Docs
[Home](https://coder.com/docs/v1 "Home")
[Setup](https://coder.com/docs/v1/setup "Setup")
Scaling Coder
Coder's control plane (`coderd`) and workspaces are deployed in a Kubernetes namespace. This document outlines vertical and horizontal scaling techniques to ensure the `coderd` pods can accommodate user and workspace load on a Coder deployment.
> Vertical scaling is preferred over horizontal scaling!
[](https://coder.com/docs/v1/setup/scaling#vertical-scaling)
Vertical Scaling
-----------------------------------------------------------------------------
Vertical scaling or scaling up the Coder control plane (which consists of the `coderd` pod and any additional replicas) is done by adding additional computing resources to the `coderd` pods in the Helm chart's `values.yaml` file.
Download the values file for a deployed Coder release with the following command:
`` `helm get values coder > values.yaml -n coder` ``
Experiment with increasing CPU and memory requests and limits as the number of workspaces in your Coder deployment increase. Pay particular attention to whether users have their workspaces configured to auto-start at the same time each day, which produces spike loads on the `coderd` pods. To best prevent Out of Memory conditions aka OOM Kills, configure the memory requests and limits to be the same Gi values. e.g., 8Gi
> Increasing `coderd` CPU and memory resources requires sufficient Kubernetes node machine types to accomodate `coderd`, Coder workspaces and additional system and 3rd party pods on the same cluster namespace.
These are example `values.yaml` resources for `coderd`'s CPU and memory for a larger deployment with hundreds of workspaces autostarting at the same time each day:
`` `coderd: resources: requests: cpu: "4" memory: "8Gi" limits: cpu: "8" memory: "8Gi"` ``
Leading indicators of undersized `coderd` pods include users experiencing disconnects in the web terminal, a web IDE like code-server or slowness within the Coder UI dashboard. One condition that may be occuring is an OOM Kill where one or more `coderd` pod fails, restarts or fails to restart and enteres a CrashLoopBackOff status. If `coderd` restarts and there are active workspaces and user sessions, they will be reconnected to a new `coderd` pod causing a disconnect situation. As a Kubernetes administrator, you can also notice restarts by noticing frequently changing and low `AGE` column when getting the pods:
`` `kubectl get pods -n coder | grep coderd` ``
[](https://coder.com/docs/v1/setup/scaling#horizontal-scaling)
Horizontal Scaling
---------------------------------------------------------------------------------
Another way to distribute user and workspace load on a Coder deployment is to add additional `coderd` pods.
`` `coderd: replicas: 3` ``
Coder load balances user and workspace requests across the `coderd` replicas ensuring sufficient resources and response time.
> There is not a linear relationship between nodes and `coderd` replicas so experiment with incrementing replicas as you increase nodes. e.g., 8 nodes and 3 `coderd` replicas.
### [](https://coder.com/docs/v1/setup/scaling#horizontal-pod-autoscaling)
Horizontal Pod Autoscaling
We do not recommend using [Horizontal Pod Autoscaling](https://kubernetes.io/docs/tasks/run-application/horizontal-pod-autoscale/)
with Coder. In some environments, this will lead to errors with workspace builds.
##### On this page
---
# Access URL | Coder v1 Docs
[Home](https://coder.com/docs/v1 "Home")
[Admin](https://coder.com/docs/v1/admin "Admin")
Access URL
This article will show you how to change your **access URL**, which is a custom domain name that you can use to access your Coder deployment.
[](https://coder.com/docs/v1/admin/access-url#step-1-ensure-that-your-domain-name-resolves-to-coder)
Step 1: Ensure that your domain name resolves to Coder
-----------------------------------------------------------------------------------------------------------------------------------------------------------
The steps to do this vary based on the DNS provider you're using, but the general steps required are as follows:
1. Check the contents of your namespace to obtain your ingress controller's IP address:
`` `kubectl get all -n -o wide` ``
Find the **service/coderd** line, and copy the **external IP** value shown.
Point your DNS records from your custom domain to the external IP address you obtained in the previous step.
> If your custom domain uses the HTTPS protocol, make sure that you have [TLS certificates](https://coder.com/docs/v1/guides/tls-certificates)
> for use with your Coder deployment. Otherwise, you can skip this step.
[](https://coder.com/docs/v1/admin/access-url#step-2-update-the-helm-chart-and-redeploy-coder)
Step 2: Update the Helm chart and redeploy Coder
-----------------------------------------------------------------------------------------------------------------------------------------------
When changing your access URL, you'll need to [update your Helm chart](https://coder.com/docs/v1/guides/admin/helm-charts)
and [redeploy Coder](https://coder.com/docs/v1/setup/upgrade)
:
helm upgrade coder coder/coder
\--set devurlsHost="\*.example.com"
> See the [enterprise-helm repo](https://github.com/coder/enterprise-helm)
> for more information on Coder's Helm charts.
[](https://coder.com/docs/v1/admin/access-url#step-3-provide-the-access-url-in-the-coder-ui)
Step 3: Provide the access URL in the Coder UI
-------------------------------------------------------------------------------------------------------------------------------------------
1. Log into Coder as a site admin/site manager and go to **Manage** > **Admin** > **Infrastructure**.
2. Provide your custom domain in the **Access URL** field. The URL you provide must match the value you provided as `ingress.host` in the previous step.
##### On this page
---
# Docker | Coder v1 Docs
[Home](https://coder.com/docs/v1 "Home")
[Guides](https://coder.com/docs/v1/guides "Guides")
[Troubleshooting](https://coder.com/docs/v1/guides/troubleshooting "Troubleshooting")
Docker
When using Coder, you may encounter the following error:
`` `docker: Error response from daemon: OCI runtime create failed: container_linux.go:370: starting container process caused: process_linux.go:459: container init caused: join session keyring: create session key: disk quota exceeded: unknown.` ``
[](https://coder.com/docs/v1/guides/troubleshooting/docker-problems#why-this-happens)
Why this happens
------------------------------------------------------------------------------------------------------
The kernel allocates a system key for each container created. When lots of developers are sharing the same instance, you may run into limits on the number and size of keys each user can have.
[](https://coder.com/docs/v1/guides/troubleshooting/docker-problems#resolution)
Resolution
------------------------------------------------------------------------------------------
To fix this error, you can increase `maxkeys` and `maxbytes`. These are global settings that apply to _all_ users sharing the same system. You can modify this by adding the following to the `sysctl` configuration file:
`` `sudo sysctl -w kernel.keys.maxkeys=20000 sudo sysctl -w kernel.keys.maxbytes=400000` ``
Alternatively, you can use a DaemonSet with `kubectl apply` to make changes to `sysctl`:
`` `apiVersion: apps/v1 kind: DaemonSet metadata: name: increase-limits namespace: kube-system labels: app: increase-limits k8s-app: increase-limits spec: selector: matchLabels: k8s-app: increase-limits template: metadata: labels: name: increase-limits k8s-app: increase-limits annotations: seccomp.security.alpha.kubernetes.io/defaultProfileName: runtime/default apparmor.security.beta.kubernetes.io/defaultProfileName: runtime/default spec: nodeSelector: kubernetes.io/os: linux initContainers: - name: sysctl image: alpine:3 command: - sysctl - -w - kernel.keys.maxkeys=20000 - kernel.keys.maxbytes=400000 resources: requests: cpu: 10m memory: 1Mi limits: cpu: 100m memory: 5Mi securityContext: # We need to run as root in a privileged container to modify # /proc/sys on the host (for sysctl) runAsUser: 0 privileged: true readOnlyRootFilesystem: true capabilities: drop: - ALL containers: - name: pause image: k8s.gcr.io/pause:3.5 command: - /pause resources: requests: cpu: 10m memory: 1Mi limits: cpu: 100m memory: 5Mi securityContext: runAsNonRoot: true runAsUser: 65535 allowPrivilegeEscalation: false privileged: false readOnlyRootFilesystem: true capabilities: drop: - ALL terminationGracePeriodSeconds: 5` ``
At a later point, you can delete the DaemonSet by running:
`` `$ kubectl delete --namespace=kube-system daemonset increase-limits daemonset.apps "increase-limits" deleted` ``
However, note that the setting will persist until the node restarts or another program sets the `kernel.keys.maxkeys` and `kernel.keys.maxkeys` settings.
If this doesn't resolve the issue, please [contact us](https://coder.com/contact)
for further support.
##### On this page
---
# Database migration | Coder v1 Docs
[Home](https://coder.com/docs/v1 "Home")
[Guides](https://coder.com/docs/v1/guides "Guides")
[Admin](https://coder.com/docs/v1/guides/admin "Admin")
Database migration
By default, Coder deploys a built-in database in the installation's Kubernetes namespace. We recommend using this database _only_ for evaluation purposes.
At the end of your evaluation period, you may need to migrate the data from the built-in database to an out-of-cluster PostgreSQL database for production use. This article will walk you through the process of doing so.
[](https://coder.com/docs/v1/guides/admin/timescale-migration#requirements)
Requirements
----------------------------------------------------------------------------------------
* You must be a cluster admin for your Kubernetes cluster.
[](https://coder.com/docs/v1/guides/admin/timescale-migration#migration-steps)
Migration Steps
----------------------------------------------------------------------------------------------
1. Access the database pod and dump the database into a file:
`` `kubectl exec -it statefulset/timescale -n coder -- pg_dump -U coder -d coder > backup.sql` ``
2. **Optional**: If your database is large, you can truncate Coder's telemetry, metrics, and audit log data to reduce the file size:
`` `TRUNCATE metric_events; TRUNCATE environment_stats; TRUNCATE audit_logs;` ``
3. Access your PostgreSQL instance and create user `coder` and database `coder`
4. Import the data you exported in the first step into your external database:
`` `psql -U coder < backup.sql` ``
5. Connect your Coder instance to the database:
`` `helm upgrade --reuse-values -n coder coder coder/coder \ --set postgres.default.enable=false \ --set postgres.host= \ --set postgres.port= \ --set postgres.user= \ --set postgres.database= \ --set postgres.passwordSecret= \ --set postgres.sslMode=require` ``
6. **Optional**: If you'd like to delete the Timescale persistent volume, run:
`` `kubectl delete pvc timescale-data-timescale-0 -n coder` ``
At this point, you should be able to log in to your Coder deployment successfully.
##### On this page
---
# PostgreSQL | Coder v1 Docs
[Home](https://coder.com/docs/v1 "Home")
[Guides](https://coder.com/docs/v1/guides "Guides")
[Deployment](https://coder.com/docs/v1/guides/deployments "Deployment")
PostgreSQL
This guide walks you through deploying Coder with an external PostgreSQL database.
[](https://coder.com/docs/v1/guides/deployments/postgres#background)
Background
-------------------------------------------------------------------------------
For convenience and ease of installation, Coder's default Helm Chart settings will deploy a [PostgreSQL database](https://www.postgresql.org/)
within the installation's Kubernetes namespace. This is useful for evaluation purposes; however, we **recommend using an out-of-cluster database for production** to streamline maintenance operations, such as backups and upgrades. The database state is _not_ backed up and will be lost when deleting the Kubernetes namespace or cluster.
[](https://coder.com/docs/v1/guides/deployments/postgres#configuration-steps)
Configuration steps
-------------------------------------------------------------------------------------------------
> For optimal performance, it is important to ensure that the round-trip latency between the Coder control plane services and the database is low. We recommend ensuring that the database is within the same data center as the control plane, such as within the same cloud availability zone.
1. Set up a PostgreSQL database for use with Coder. If you do not already have an instance available, consider using the service from your cloud provider:
* [Amazon Relational Database Service (RDS)](https://aws.amazon.com/rds/)
* [Azure Database for PostgreSQL](https://azure.microsoft.com/en-us/services/postgresql/)
* [Google Cloud SQL](https://cloud.google.com/sql)
2. Configure a private IP address for use with your PostgreSQL instance. You will set this in the [Helm settings (values file)](https://coder.com/docs/v1/guides/admin/helm-charts)
).
3. If your PostgreSQL instance requires a password, you will need to create a Kubernetes Secret containing the password:
`` `kubectl create secret generic --from-file=password=/dev/stdin` ``
We recommend using the syntax provided above, which reads credentials from the console, to avoid inadvertently storing credentials in shell history files.
> Normally, we set the PostgreSQL password as an environment variable in the `coderd` deployment with a reference to the Kubernetes secret. If this is not desirable, you can instead mount the secret as a file which Coder will read at startup. To do this, set the Helm value `postgres.noPasswordEnv` to `true`. This will mount the secret under `/run/secrets/<.Values.postgres.passwordSecret>/password` and set the environment variable `DB_PASSWORD_PATH` for `coderd` to that value.
4. Get the port number for your PostgreSQL instance:
`` `SELECT * FROM pg_settings WHERE name = 'port';` ``
5. Get the user of the PostgreSQL instance:
`` `\du` ``
6. Get the name of the database _within_ your PostgreSQL instance in which you're currently working:
`` `SELECT current_database();` ``
7. Get the name of the secret you created for your PostgreSQL instance's password:
`` `kubectl get secrets --namespace=` ``
Set the database name, port number, user, and password secret created in the prior steps [in your Helm values file](https://coder.com/docs/v1/guides/admin/helm-charts)
. Coder will use these credentials to connect to your PostgreSQL instance:
`` `postgres: host: "" port: "" user: "" database: "" passwordSecret: ""` ``
> Ensure that there are no trailing white spaces in your password secret.
### [](https://coder.com/docs/v1/guides/deployments/postgres#mtls-connections)
mTLS connections
Coder supports mutual TLS (mTLS) connections to Postgres databases; if you'd like to enable this feature, [provide the necessary values in `postgres.ssl`](https://github.com/coder/enterprise-helm/blob/24a7a3efd3ccb8b8103e0ecaa888ba0de05de12e/values.yaml#L297)
.
### [](https://coder.com/docs/v1/guides/deployments/postgres#using-aws-iam-to-authenticate-with-an-rds-instance)
Using AWS IAM to authenticate with an RDS instance
You can set the Postgres connector option in the Helm chart. If you'd like to use the environment's AWS IAM account to authenticate with an RDS instance, [set `postgres.connector` accordingly](https://github.com/coder/enterprise-helm/blob/24a7a3efd3ccb8b8103e0ecaa888ba0de05de12e/values.yaml#L316)
.
### [](https://coder.com/docs/v1/guides/deployments/postgres#upgrade-coder)
Upgrade Coder
At this point, you can install/upgrade your Coder instance using the updated Helm chart.
To install Coder for the first time:
`` `helm install coder coder/coder --namespace= \ --version= --values=current-values.yml --wait` ``
To upgrade Coder:
`` `helm upgrade coder coder/coder --namespace= \ --version= --values=current-values.yml --wait` ``
If the upgrade fails for any reason, please run the `helm rollback` command and [contact our support team](https://coder.com/docs/v1/feedback)
for assistance.
Once you complete this process, you'll be able to access Coder using the external IP address of the ingress controller in your cluster.
### [](https://coder.com/docs/v1/guides/deployments/postgres#scaling-coder--postgresql)
Scaling Coder & PostgreSQL
Each Coder replica maintains a pool of connections to Postgres, capped at a maximum of 30 connections by default. This value strikes a balance between allowing multiple concurrent requests and using up connections on the Postgres database.
To reconfigure this value, set the environment variable `CODER_MAX_DB_CONNECTIONS` to your desired value in the `coderd.extraEnvs` section of the Helm chart.
> **Important**: You must ensure that Coder's maximum connections per replica times the number of Coder replicas is less than the maximum number of connections your Postgres instance allows, assuming Coder is the only application using the Postgres instance (less if other applications will also consume connections). For example, with 3 Coder replicas and the default max connections of 30, you must ensure Postgres is configured to allow 90 connections. If Postgres runs out of connections Coder may fail API requests or builds.
By default, Postgres allows a maximum of 100 open connections (less 3 reserved for superusers). Consult [Postgres documentation](https://www.postgresql.org/docs/12/runtime-config-connection.html)
, or your database administrator for information on how to change this value.
Consider monitoring the [`go_sql_open_connections`](https://coder.com/docs/v1/admin/prometheus)
metric to see how many connections Coder uses in different load scenarios.
##### On this page
---
# File download disabling | Coder v1 Docs
[Home](https://coder.com/docs/v1 "Home")
[Guides](https://coder.com/docs/v1/guides "Guides")
[Admin](https://coder.com/docs/v1/guides/admin "Admin")
File download disabling
For security and compliance purposes, Coder site managers may choose to disable the downloading of files from Coder's built-in IDEs:
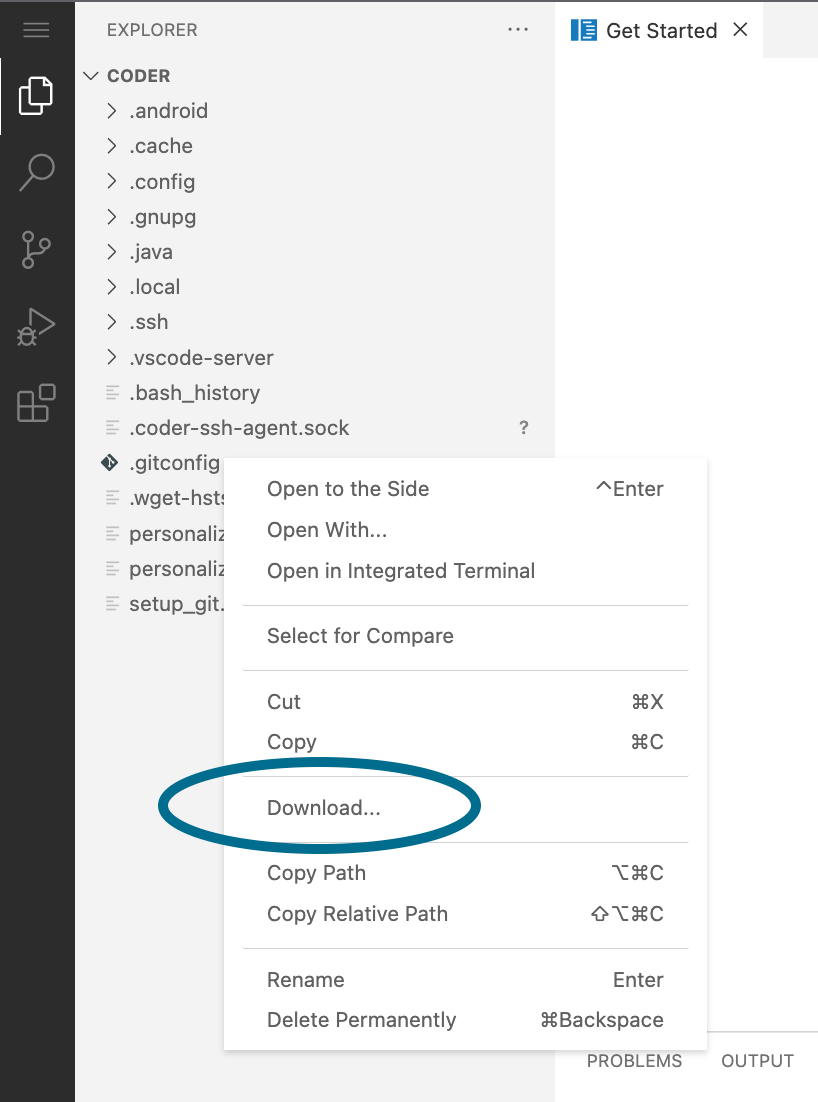
To do so, [update your deployment's workspace template policy](https://coder.com/docs/v1/admin/templates)
to include the following definition:
`` `kubernetes: env: policy: append value: - key: "CS_DISABLE_FILE_DOWNLOADS" # To enable, set to "true" or "1" value: "true"` ``
This change will take effect _after_ the user rebuilds their workspaces.
---
# Appearance | Coder v1 Docs
[Home](https://coder.com/docs/v1 "Home")
[Admin](https://coder.com/docs/v1/admin "Admin")
Appearance
Coder offers you appearance customization options for the following:
* System banner messages
* Service banner messages
* The terms of service display
The system and service banners accept plain text and Markdown formatting. The terms of service display accepts plaintext, HTML, and Markdown formatting.
[](https://coder.com/docs/v1/admin/appearance#system-banners)
System banners
----------------------------------------------------------------------------
To customize your system banner messages:
1. Go to **Manage** > **Admin** > **Appearance** in the Coder UI.
2. Toggle the **System Banner** switch to **On**.
3. Set your **Background Color**, and provide the text you want to be displayed in your **Header** and **Footer**.
4. Click **Save Preferences** to save your changes.
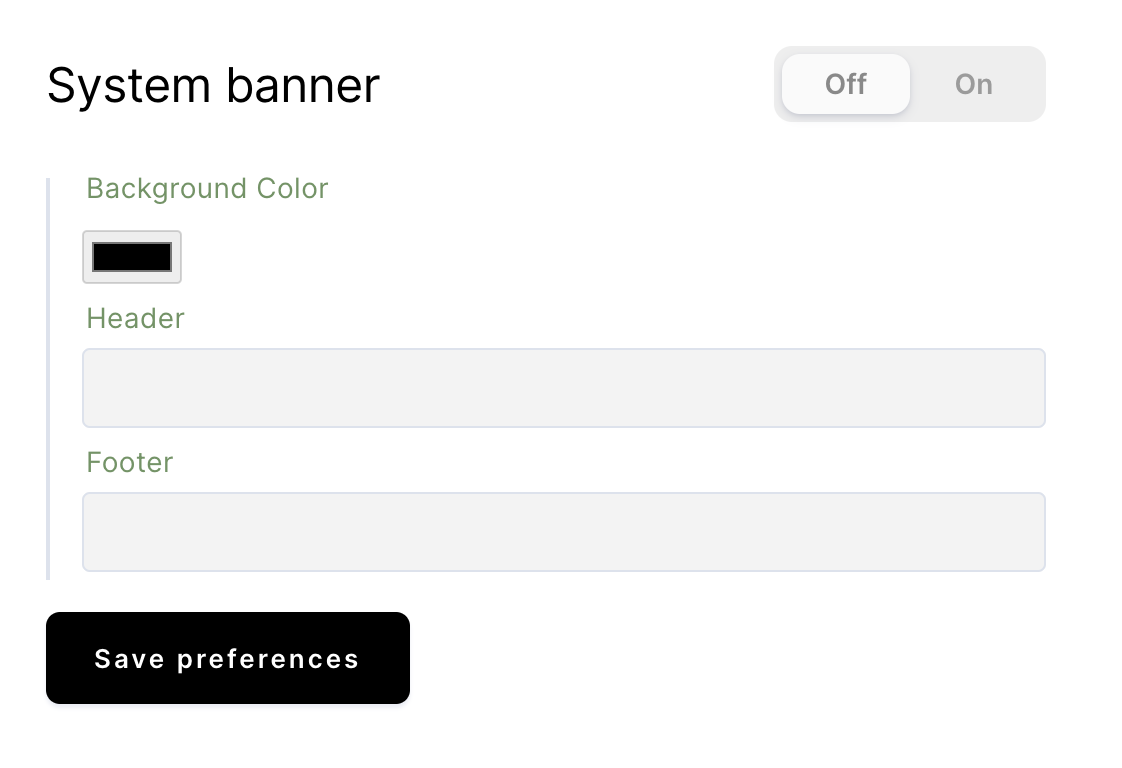
[](https://coder.com/docs/v1/admin/appearance#service-banners)
Service banners
------------------------------------------------------------------------------
The service banner allows you to display a message to all users of your Coder system. The user can dismiss the message at any time and Coder will not display a banner until you change the message (or disable and re-enable the current message).
1. Go to **Manage** > **Admin** > **Appearance** in the Coder UI.
2. Toggle the **Service Banner** switch to **On**.
3. Set the **Message**.
4. Click **Save Preferences**.
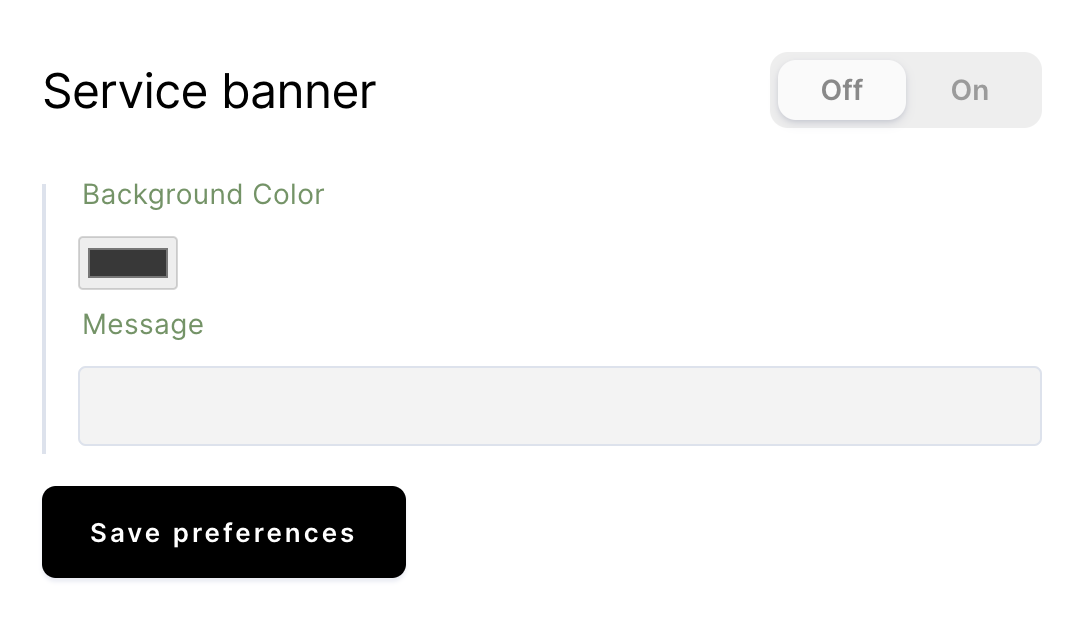
[](https://coder.com/docs/v1/admin/appearance#terms-of-service)
Terms of service
--------------------------------------------------------------------------------
To enable the display of terms of service and to edit the text displayed:
1. Go to **Manage** > **Admin** > **Appearance** in the Coder UI.
2. Toggle the switch to **On**.
3. Provide your Terms of Service in **Body**; this editor accepts HTML and Markdown formatting.
4. Click **Save Preferences** to save your changes.
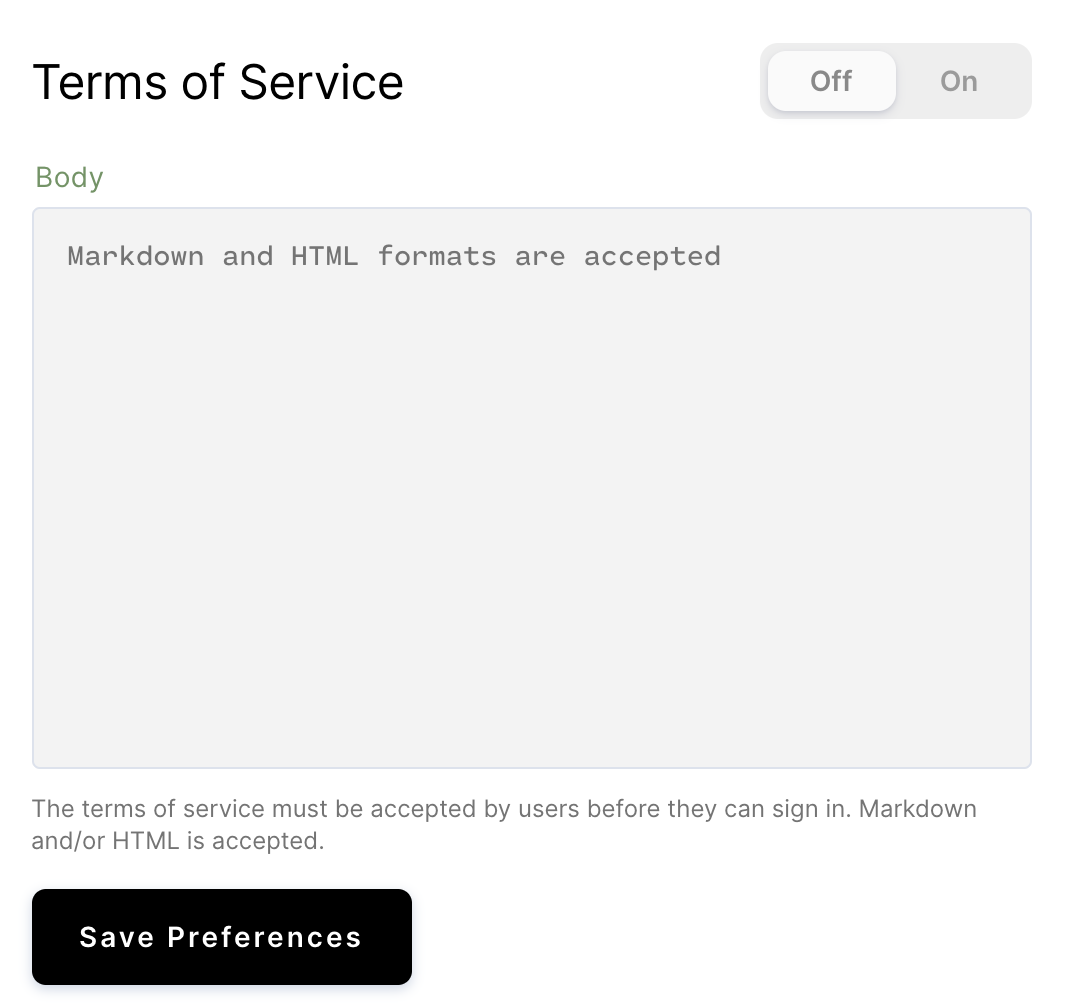
**Note**: If you enable the use of terms of service, users will not be able to log in to Coder without first accepting the terms of service.
##### On this page
---
# Tailscale | Coder v1 Docs
[Home](https://coder.com/docs/v1 "Home")
[Guides](https://coder.com/docs/v1/guides "Guides")
[Customization](https://coder.com/docs/v1/guides/customization "Customization")
Tailscale
This guide walks you through configuring [Tailscale networking](https://tailscale.com/)
for use inside [Coder workspaces](https://coder.com/docs/v1/workspaces)
. With Tailscale networking, you can access services running inside Coder and services running on your [tailnet (Tailscale private network)](https://tailscale.com/kb/1136/tailnet/)
.
[](https://coder.com/docs/v1/guides/customization/tailscale#creating-the-image)
Creating the image
--------------------------------------------------------------------------------------------------
As part of this tutorial, you'll create an image with the following that you'll use to create new Coder workspaces. The container image will include:
* The Tailscale daemon (`tailscaled`)
* A transparent proxy tool (`proxychains4`)
* Environment variables to control proxy behavior for outbound connections
* A [SOCKS5 proxy](https://en.wikipedia.org/wiki/SOCKS)
included in `tailscaled` to facilitate connections to the tailnet, listening on `localhost:1080`
* An [HTTP proxy](https://en.wikipedia.org/wiki/Proxy_server#Web_proxy_servers)
included in `tailscaled` to facilitate connections to the tailnet, listening on `localhost:3128`
[](https://coder.com/docs/v1/guides/customization/tailscale#limitations)
Limitations
------------------------------------------------------------------------------------
This guide describes how to install Tailscale in a Ubuntu base image using the package manager and running it in userspace networking mode. As such:
* The image (which you will create as part of this tutorial) requires [container-based virtual machine](https://coder.com/docs/v1/workspaces/cvms)
workspaces, so that `systemd` can start the Tailscale daemon (`tailscaled`)
* Users will require `sudo` access to configure the Tailscale tunnel
* Inbound connections from other devices on the tailnet to your workspace will appear to originate from `localhost`
* Outbound connections to other devices on the tailnet will require support for HTTP proxies; otherwise, you'll need to use a wrapper such as `proxychains4`
* The example in this article applies to Ubuntu 20.04 LTS (Focal Fossa), so you may need to adapt it for compatibility with your preferred base image
Tailscale does not require root access to operate in userspace networking mode, and the requirement to use [container-based virtual machine](https://coder.com/docs/v1/workspaces/cvms)
workspaces applies only to the instructions in this guide. [Contact our support team](https://coder.com/docs/v1/feedback)
if you are interested in using Tailscale in your Coder workspace without root access.
[](https://coder.com/docs/v1/guides/customization/tailscale#step-1-create-the-dockerfile)
Step 1: Create the Dockerfile
-----------------------------------------------------------------------------------------------------------------------
In Coder, developer workspaces are defined by a Dockerfile that contains the apps, tools, and dependencies that you need to work on the project.
> See our [custom image docs](https://coder.com/docs/v1/images/writing)
> and Docker’s [guide to writing Dockerfiles](https://docs.docker.com/develop/develop-images/dockerfile_best-practices/)
> for more information.
To simplify creating and maintaining the image, we recommend structuring your source code so that files added or modified in the image match the hierarchy of the target files, in a subdirectory called `files`:
`` `. ├── Dockerfile └── files ├── etc │ ├── apt │ │ ├── preferences.d │ │ │ └── tailscale │ │ └── sources.list.d │ │ └── tailscale.list │ └── systemd │ └── system │ └── tailscaled.service.d │ └── tailscale.conf └── usr └── share └── keyrings └── tailscale.gpg` ``
While it is possible to configure everything directly in a single Dockerfile, we recommend using a folder hierarchy, since this makes it easier to create a reproducible image and examine the change history for individual files.
Create the folder hierarchy:
`` `mkdir --parents \ files/etc/apt/preferences.d \ files/etc/apt/sources.list.d \ files/etc/systemd/system/tailscaled.service.d \ files/usr/share/keyrings` ``
Then, create the following files (we'll walk you through the contents of each in the following steps):
`` `touch files/etc/apt/preferences.d/tailscale \ files/etc/apt/sources.list.d/tailscale.list \ files/etc/systemd/system/tailscaled.service.d/tailscale.conf` ``
### [](https://coder.com/docs/v1/guides/customization/tailscale#step-1a-add-image-repository)
Step 1a: Add image repository
Add the Tailscale package repository to `tailscale.list` in the local path `files/etc/apt/sources.list.d`. This will appear in `/etc/apt/sources.list.d` in the resulting image, with the following contents:
`` `deb [signed-by=/usr/share/keyrings/tailscale.gpg] https://pkgs.tailscale.com/stable/ubuntu focal main` ``
This configures `apt` and `apt-get` to install packages from the Tailscale repository and verify package signatures with the specified public key.
### [](https://coder.com/docs/v1/guides/customization/tailscale#step-1b-optional-configure-package-pinning)
Step 1b: (Optional) Configure package pinning
For improved security, you can configure `apt` to deny package installation from a given repository by default and allow specific packages by name. To do this, create `files/etc/apt/preferences.d/tailscale` with the following contents:
`` `# Ignore all packages from this repository by default Package: * Pin: origin pkgs.tailscale.com Pin-Priority: 1 Package: tailscale Pin: origin pkgs.tailscale.com Pin-Priority: 500` ``
### [](https://coder.com/docs/v1/guides/customization/tailscale#step-1c-add-the-signing-key-for-tailscale-package-repository)
Step 1c: Add the signing key for Tailscale package repository
Retrieve the signing key from Tailscale, and store the binary (dearmored) key file in `files/usr/share/keyrings/tailscale.gpg`:
`` `curl --silent --show-error --location "https://pkgs.tailscale.com/stable/ubuntu/focal.gpg" | \ gpg --dearmor --yes --output=files/usr/share/keyrings/tailscale.gpg` ``
### [](https://coder.com/docs/v1/guides/customization/tailscale#step-1d-override-default-tailscaled-service-settings)
Step 1d: Override default `tailscaled` service settings
By default, `tailscaled` will store its internal state in a **state file** located at `/var/lib/tailscale/tailscaled.state` (this is is ephemeral in Coder). We will need to modify the service settings to:
* Store the state file in the persistent home volume (`/home/coder`)
* Enable userspace networking
* Enable the SOCKS5 proxy (optional)
* Enable the HTTP proxy (optional)
If you do not require outbound connections from the workspace to other services running in the tailnet, you may skip the steps where you configure the proxies.
Override the `ExecStart` setting for the `tailscaled` service by saving the following to `files/etc/systemd/system/tailscaled.service.d/tailscale.conf`:
`` `[Service] ExecStart= ExecStart=-/usr/sbin/tailscaled --state=/home/coder/.config/tailscaled.state --socket=/var/run/tailscale/tailscaled.sock --port $PORT --tun=userspace-networking --socks5-server=localhost:1080 --outbound-http-proxy-listen=localhost:3128 $FLAGS` ``
### [](https://coder.com/docs/v1/guides/customization/tailscale#step-1e-create-the-dockerfile)
Step 1e: Create the Dockerfile
Create a `Dockerfile`, build it, and push to an external repository, such as Docker Hub:
`` `FROM codercom/enterprise-base:ubuntu USER root # Copy configuration files to appropriate locations COPY files / ARG DEBIAN_FRONTEND="noninteractive" RUN apt-get update && \ apt-get install --no-install-recommends --yes --quiet \ netcat-openbsd \ proxychains4 \ python3 && \ apt-get install --no-install-recommends --yes --quiet \ tailscale && \ # Delete package cache to avoid consuming space in layer apt-get clean && \ rm -rf /var/lib/apt/lists/* USER coder ENV ALL_PROXY=socks5://localhost:1080 ENV http_proxy=http://localhost:3128` ``
[](https://coder.com/docs/v1/guides/customization/tailscale#step-2-authenticate-to-tailscale)
Step 2: Authenticate to Tailscale
-------------------------------------------------------------------------------------------------------------------------------
[Create a workspace](https://coder.com/docs/v1/workspaces/create)
using the container image. Initially, `tailscaled` should be running, but it will indicate that it requires authentication:
`` `systemctl status tailscaled` ``
Authenticate using `sudo tailscale up`, then verify that other network devices are visible:
`` `tailscale status` ``
> You may also use a [pre-authentication key](https://tailscale.com/kb/1085/auth-keys/)
> with `tailscale up --authkey` to avoid needing to sign in via a web browser.
`tailscale` should maintain connectivity across workspace rebuilds, since we chose to store the state file in a persistent volume.
[](https://coder.com/docs/v1/guides/customization/tailscale#step-3-optional-test-tailscale-services)
Step 3: (Optional) Test Tailscale services
-----------------------------------------------------------------------------------------------------------------------------------------------
By creating two workspaces from the same image, both authenticated to Tailscale, we can verify connectivity works as expected. In one workspace, run the Python web server:
`` `python3 -m http.server 3000` ``
In another workspace, verify that `tailscaled` is listening for connections on the configured proxy ports:
`` `ss -nltp` ``
Check that the `http_proxy` environment variable is set to the address of the local `tailscaled` proxy:
`` `env | grep -i proxy` ``
Run `curl` (which respects the `http_proxy` command) to connect to the webserver running in the other workspace. Since we proxy the connection through the local `tailscaled` instance, we can use the internal hostname:
`` `curl http://jawnsy-tailscale-1:3000` ``
For applications that do not respect the `http_proxy` or `ALL_PROXY` environment variables, consider using a tool like `proxychains4` to intercept the socket system calls and transparently route traffic through the proxy.
##### On this page
---
# Route 53 | Coder v1 Docs
[Home](https://coder.com/docs/v1 "Home")
[Guides](https://coder.com/docs/v1/guides "Guides")
[TLS certificates](https://coder.com/docs/v1/guides/tls-certificates "TLS certificates")
Route 53
[cert-manager](https://cert-manager.io/)
allows you to enable HTTPS on your Coder installation, regardless of whether you're using [Let's Encrypt](https://letsencrypt.org/)
or you have your own certificate authority.
> This guide is for Coder v1.21.0 and later, which handle certificates differently from earlier versions of Coder. Ensure that you're reading the docs applicable to your Coder version.
This guide will show you how to install cert-manager and set up your cluster to issue Let's Encrypt certificates for your Coder installation so that you can enable HTTPS on your Coder deployment. It will also show you how to configure your Coder hostname and dev URLs.
[](https://coder.com/docs/v1/guides/tls-certificates/route53#prerequisites)
Prerequisites
-----------------------------------------------------------------------------------------
You must have:
* A Kubernetes cluster [of a supported version](https://coder.com/docs/v1/setup/kubernetes#supported-kubernetes-versions)
with internet connectivity
* Installed [kubectl](https://kubernetes.io/docs/tasks/tools/install-kubectl/)
You should also:
* Be a cluster admin
* Have access to your DNS provider
* Have an AWS account so that you can access [Route 53](https://aws.amazon.com/route53/)
and [IAM](https://aws.amazon.com/iam/)
[](https://coder.com/docs/v1/guides/tls-certificates/route53#step-1-add-cert-manager-to-your-kubernetes-cluster)
Step 1: Add cert-manager to your Kubernetes cluster
--------------------------------------------------------------------------------------------------------------------------------------------------------------------
1. [Install](https://cert-manager.io/docs/installation/kubernetes/#installing-with-regular-manifests)
cert-manager:
`` `kubectl apply -f https://github.com/cert-manager/cert-manager/releases/download/v1.8.0/cert-manager.yaml` ``
2. Check that cert-manager installs correctly by running
`` `kubectl get CustomResourceDefinition | grep cert-manager` ``
You should see certificates, certificate requests, challenges, cluster issuers, issuers, and orders.
3. Next, check that your services are running in the cert-manager namespace
`` `kubectl get all -n cert-manager NAME READY STATUS RESTARTS AGE cert-manager-7cd5cdf774-vb2pr 1/1 Running 0 84s cert-manager-cainjector-6546bf7765-ssxhf 1/1 Running 0 84s cert-manager-webhook-7f68b65458-zvzn9 1/1 Running 0 84s` ``
[](https://coder.com/docs/v1/guides/tls-certificates/route53#step-2-delegate-your-domain-names-and-set-up-dns01-challenges)
Step 2: Delegate your domain names and set up DNS01 challenges
------------------------------------------------------------------------------------------------------------------------------------------------------------------------------------------
Because Coder dynamically generates domains (specifically the dev URLs), your certificates need to be approved and challenged. The following steps will show you how to use Route 53 for DNS01 challenges.
If your domain name is managed by Route 53, the hosted zone will already exist so skip to step 3.
1. Log in to AWS Route 53. On the Dashboard, click **Hosted Zone**.
2. Click **Create Hosted Zone**. In the configuration screen, provide the **Domain name** that you'll use for Coder (e.g., `coder.exampleCo.com`) and make sure that you've selected **Public hosted zone**. Click **Create hosted zone** to proceed.
When your list of hosted zones refreshes, you'll see that your new records includes multiple values under **Value/Route traffic to**.
3. Log in to your DNS provider so that you can edit your NS records.
4. Edit your NS record to delegate your zones to AWS by sending _each_ of the values under **Value/Route traffic to** to your domain name (i.e., delegate `ns-X.awsdns-32.net` to `coder.exampleCo.com`).
[](https://coder.com/docs/v1/guides/tls-certificates/route53#step-3-create-an-iam-role-for-clusterissuer)
Step 3: Create an IAM role for `clusterIssuer`
--------------------------------------------------------------------------------------------------------------------------------------------------------
To make sure that your `clusterIssuer` can change your DNS settings, [create the required IAM role](https://cert-manager.io/docs/configuration/acme/dns01/route53/#set-up-an-iam-role)
When you create the secret for cert-manager, referenced below as `route53-credentials`, be sure it is in the cert-manager namespace since it's used by the cert-manager pod to perform DNS configuration changes:
`` `kubectl --namespace cert-manager \ create secret generic route53-credentials \ --from-literal="secret-access-key="` ``
[](https://coder.com/docs/v1/guides/tls-certificates/route53#step-4-create-the-acme-issuer)
Step 4: Create the ACME Issuer
--------------------------------------------------------------------------------------------------------------------------
1. Using the text editor of your choice, create a new [configuration file](https://cert-manager.io/docs/configuration/acme/dns01/)
called `letsencrypt.yaml` (you can name it whatever you'd like) that includes your newly created IAM role:
`` `apiVersion: cert-manager.io/v1 kind: ClusterIssuer metadata: name: letsencrypt spec: acme: email: [[email protected]](https://coder.com/cdn-cgi/l/email-protection) preferredChain: "" privateKeySecretRef: name: example-issuer-account-key server: https://acme-v02.api.letsencrypt.org/directory solvers: - dns01: route53: accessKeyID: your-access-key-ID #secret with IAM Role region: your-region secretAccessKeySecretRef: key: secret-access-key name: route53-credentials selector: dnsZones: - yourDomain.com` ``
More information on the values in the YAML file above can be found in [the dns01 solver configuration documentation](https://cert-manager.io/docs/configuration/acme/dns01/)
.
2. Apply your configuration changes
`` `kubectl apply -f letsencrypt.yaml` ``
If successful, you'll see a response similar to
`` `clusterissuer.cert-manager.io/letsencrypt created` ``
[](https://coder.com/docs/v1/guides/tls-certificates/route53#step-5-create-a-certificate)
Step 5: Create a certificate
----------------------------------------------------------------------------------------------------------------------
> Note: If you are providing an ingress, certificates can be automatically created with an ingress annotation. See the [cert-manager docs](https://cert-manager.io/docs/usage/ingress/)
> for details. If you are unsure whether you are using an ingress or not, continue with this step.
In a text editor, create a new file called **certificate.yaml** and paste the following:
`` `apiVersion: cert-manager.io/v1 kind: Certificate metadata: name: coder-certs namespace: coder # Your Coder deployment namespace spec: commonName: "*.coder.example.com" dnsNames: - "coder.example.com" - "*.coder.example.com" issuerRef: kind: ClusterIssuer name: letsencrypt secretName: coder-certs` ``
Be sure to change `coder.example.com` to the domain for your Coder deployment. While this example uses a single domain, a separate domain can be created for dev URLs or even omitted if you do not have [dev URLs enabled](https://coder.com/docs/v1/guides/admin/devurls)
.
Once you're done, deploy the certificates.
`` `kubectl apply -f certificate.yaml` ``
[](https://coder.com/docs/v1/guides/tls-certificates/route53#step-5-installupgrade-coder)
Step 5: Install/upgrade Coder
-----------------------------------------------------------------------------------------------------------------------
At this point, you're ready to [install](https://coder.com/docs/v1/setup/installation)
Coder. However, to use all of the functionality you set up in this tutorial, use the following command instead:
``` ``# be sure to update the `stringValue` placeholder with the # proper value for your devurlsHostSecretName and hostSecretName helm upgrade --install coder coder/coder --namespace coder \ --version= \ --set coderd.devurlsHost="*.coder.example.com" \ --set coderd.tls.devurlsHostSecretName="coder-certs-stringValue" \ --set coderd.tls.hostSecretName="coder-certs-stringValue" \ --wait`` ```
The `hostSecretName` and `devurlsHostSecretName` are arbitrary strings that you should set to some value that does not conflict with any other secrets in the Coder namespace.
There are also a few additional steps to make sure that your hostname and dev URLs work.
1. Check the contents of your namespace:
`` `kubectl get all -n -o wide` ``
Find the **service/coderd** line, and copy the **external IP** value shown.
2. Return to Route53 and go to **Hosted Zone**.
3. Create a new record for your hostname; provide `coder` as the record name and paste the external IP as the `value`. Save.
4. Create another record for your dev URLs: set it to `*.dev.exampleCo` or similar and use the same external IP as the previous step for `value`. Save.
At this point, you can return to **step 6** of the [installation](https://coder.com/docs/v1/setup/installation)
guide to obtain the admin credentials you need to log in. If you are not getting a valid certificate after redeploying, see [cert-manager's troubleshooting guide](https://cert-manager.io/docs/faq/acme/)
for additional assistance.
[](https://coder.com/docs/v1/guides/tls-certificates/route53#troubleshooting)
Troubleshooting
---------------------------------------------------------------------------------------------
If you are not getting a valid certificate after redeploying, see [cert-manager's troubleshooting guide](https://cert-manager.io/docs/faq/acme/)
for additional assistance.
##### On this page
---
# Configure TLS on Coder for Docker | Coder v1 Docs
[Home](https://coder.com/docs/v1 "Home")
[Guides](https://coder.com/docs/v1/guides "Guides")
[TLS certificates](https://coder.com/docs/v1/guides/tls-certificates "TLS certificates")
Configure TLS on Coder for Docker
This guide walks you through configuring TLS on your Coder for Docker deployment using a reverse proxy.
[](https://coder.com/docs/v1/guides/tls-certificates/docker-tls#requirements)
Requirements
------------------------------------------------------------------------------------------
* A machine with [Docker Engine](https://docs.docker.com/engine/install/)
and [Docker Compose](https://docs.docker.com/compose/)
installed
* A domain name
* An SSL/TLS certificate
[](https://coder.com/docs/v1/guides/tls-certificates/docker-tls#optional-step-1-validate-the-letsencrypt-dns)
(Optional) Step 1: Validate the LetsEncrypt DNS
-------------------------------------------------------------------------------------------------------------------------------------------------------------
> If you already have an TLS certificate, you can skip this step.
This step shows you how to get a free TLS certificate for your domain. Your domain must be set up with a [supported DNS provider](https://certbot.eff.org/hosting_providers)
.
1. Create a `docker-compose.yaml` file with the code below (make sure that you replace the `URL`, `DNSPLUGIN`, and `EMAIL` variables with the appropriate values):
`` `version: "3" services: letsencrypt: image: linuxserver/letsencrypt container_name: letsencrypt environment: - PUID=1000 - PGID=1000 - URL= - SUBDOMAINS=wildcard - VALIDATION=dns - DNSPLUGIN="" - [[email protected]](https://coder.com/cdn-cgi/l/email-protection) - DHLEVEL=4096 volumes: - "~/letsencrypt:/config" restart: unless-stopped` ``
Leave the `volumes` section of the code snippet as-is. Docker will automatically create the `~/letsencrypt` folder and populate it with the contents of the container. In this case, the contents will be `.ini` files for your DNS provider.
1. Run `docker-compose up -d`, and navigate to `~/letsencrypt/dns-conf`.
2. Update your DNS provider's `.ini` file with the requested values.
3. Restart the container by running `docker-compose restart letsencrypt`.
You should now see your TLS certificate file in `~/letsencrypt/etc/letsencrypt/live/example.com`
[](https://coder.com/docs/v1/guides/tls-certificates/docker-tls#step-2-configure-the-nginx-reverse-proxy-and-the-coder-container)
Step 2: Configure the Nginx reverse proxy and the Coder container
---------------------------------------------------------------------------------------------------------------------------------------------------------------------------------------------------
To properly start the NGINX reverse proxy, you'll need an `nginx.conf` file present on the host machine.
1. Create a `docker-compose.yaml` file if you have not yet done so.
2. Create an `nginx` folder in the same directory as your `docker-compose.yaml` file.
3. Create an `nginx.conf` file inside of the `nginx` directory that includes the following code (make sure that you replace each `` string with your domain):
> If you skipped **Step 1**, replace the `ssl_certificate` & `ssl_certificate_key` paths with the path to your certificate files.
`` `worker_processes 1; events { worker_connections 1024; } http { default_type application/octet-stream; map $http_upgrade $connection_upgrade { default upgrade; '' close; } server { listen 80; listen [::]:80; server_name ; error_page 500 502 503 504 /50x.html; location = /50x.html { root /usr/share/nginx/html; } location / { proxy_pass http://coder:7080; proxy_http_version 1.1; proxy_set_header Upgrade $http_upgrade; proxy_set_header Connection "Upgrade"; proxy_set_header Host $host; proxy_set_header X-Real-IP $remote_addr; } } server { listen 443 ssl; server_name ; ssl_certificate /letsencrypt/etc/letsencrypt/live//cert.pem; ssl_certificate_key /letsencrypt/etc/letsencrypt/live//privkey.pem; ssl_session_cache shared:SSL:1m; ssl_session_timeout 5m; ssl_ciphers HIGH:!aNULL:!MD5; ssl_prefer_server_ciphers on; location / { proxy_pass http://coder:7080; proxy_http_version 1.1; proxy_set_header Upgrade $http_upgrade; proxy_set_header Connection "Upgrade"; proxy_set_header Host $host; proxy_set_header X-Real-IP $remote_addr; } } sendfile on; keepalive_timeout 65; proxy_connect_timeout 90; proxy_send_timeout 90; proxy_read_timeout 90; }` ``
1. Add the following code to your `docker-compose.yaml` file:
`` `nginx: container_name: nginx hostname: reverse image: nginx ports: - 80:80 - 443:443 volumes: - "nginx:/etc/nginx" - "~/letsencrypt:/letsencrypt/" coder: hostname: coder image: codercom/coder:1.27.0 container_name: coder volumes: - /var/run/docker.sock:/var/run/docker.sock - ~/.coder:/var/run/coder ports: - 7080:7080 environment: - DEVURL_HOST=*.` ``
> The `~/letsecnrypt:/letsencrypt/` volume definition is required only if you followed **Step 1**.
[](https://coder.com/docs/v1/guides/tls-certificates/docker-tls#step-3-configure-and-access-coder)
Step 3: Configure and access Coder
-------------------------------------------------------------------------------------------------------------------------------------
Now that NGINX and the Coder containers are configured, run your Docker Compose file:
`` `docker-compose up -d` ``
Finally, in the Coder UI, navigate to **Manage** > **Admin** > **Infrastructure**. and provide your domain name in the **Access URL** field.
You should now be able to access Coder via your secure domain.
##### On this page
---
# Account dormancy | Coder v1 Docs
[Home](https://coder.com/docs/v1 "Home")
[Admin](https://coder.com/docs/v1/admin "Admin")
Account dormancy
Coder's account dormancy feature allows you to free up license seats if you have users that aren't active on the platform for 90 days or more.
You can choose to delete a dormant account after a period of time automatically. For example, you can set Coder to delete accounts 30 days after they go dormant (this means that the user has been inactive for 120 days: 90 days to become dormant, plus an additional 30 days).
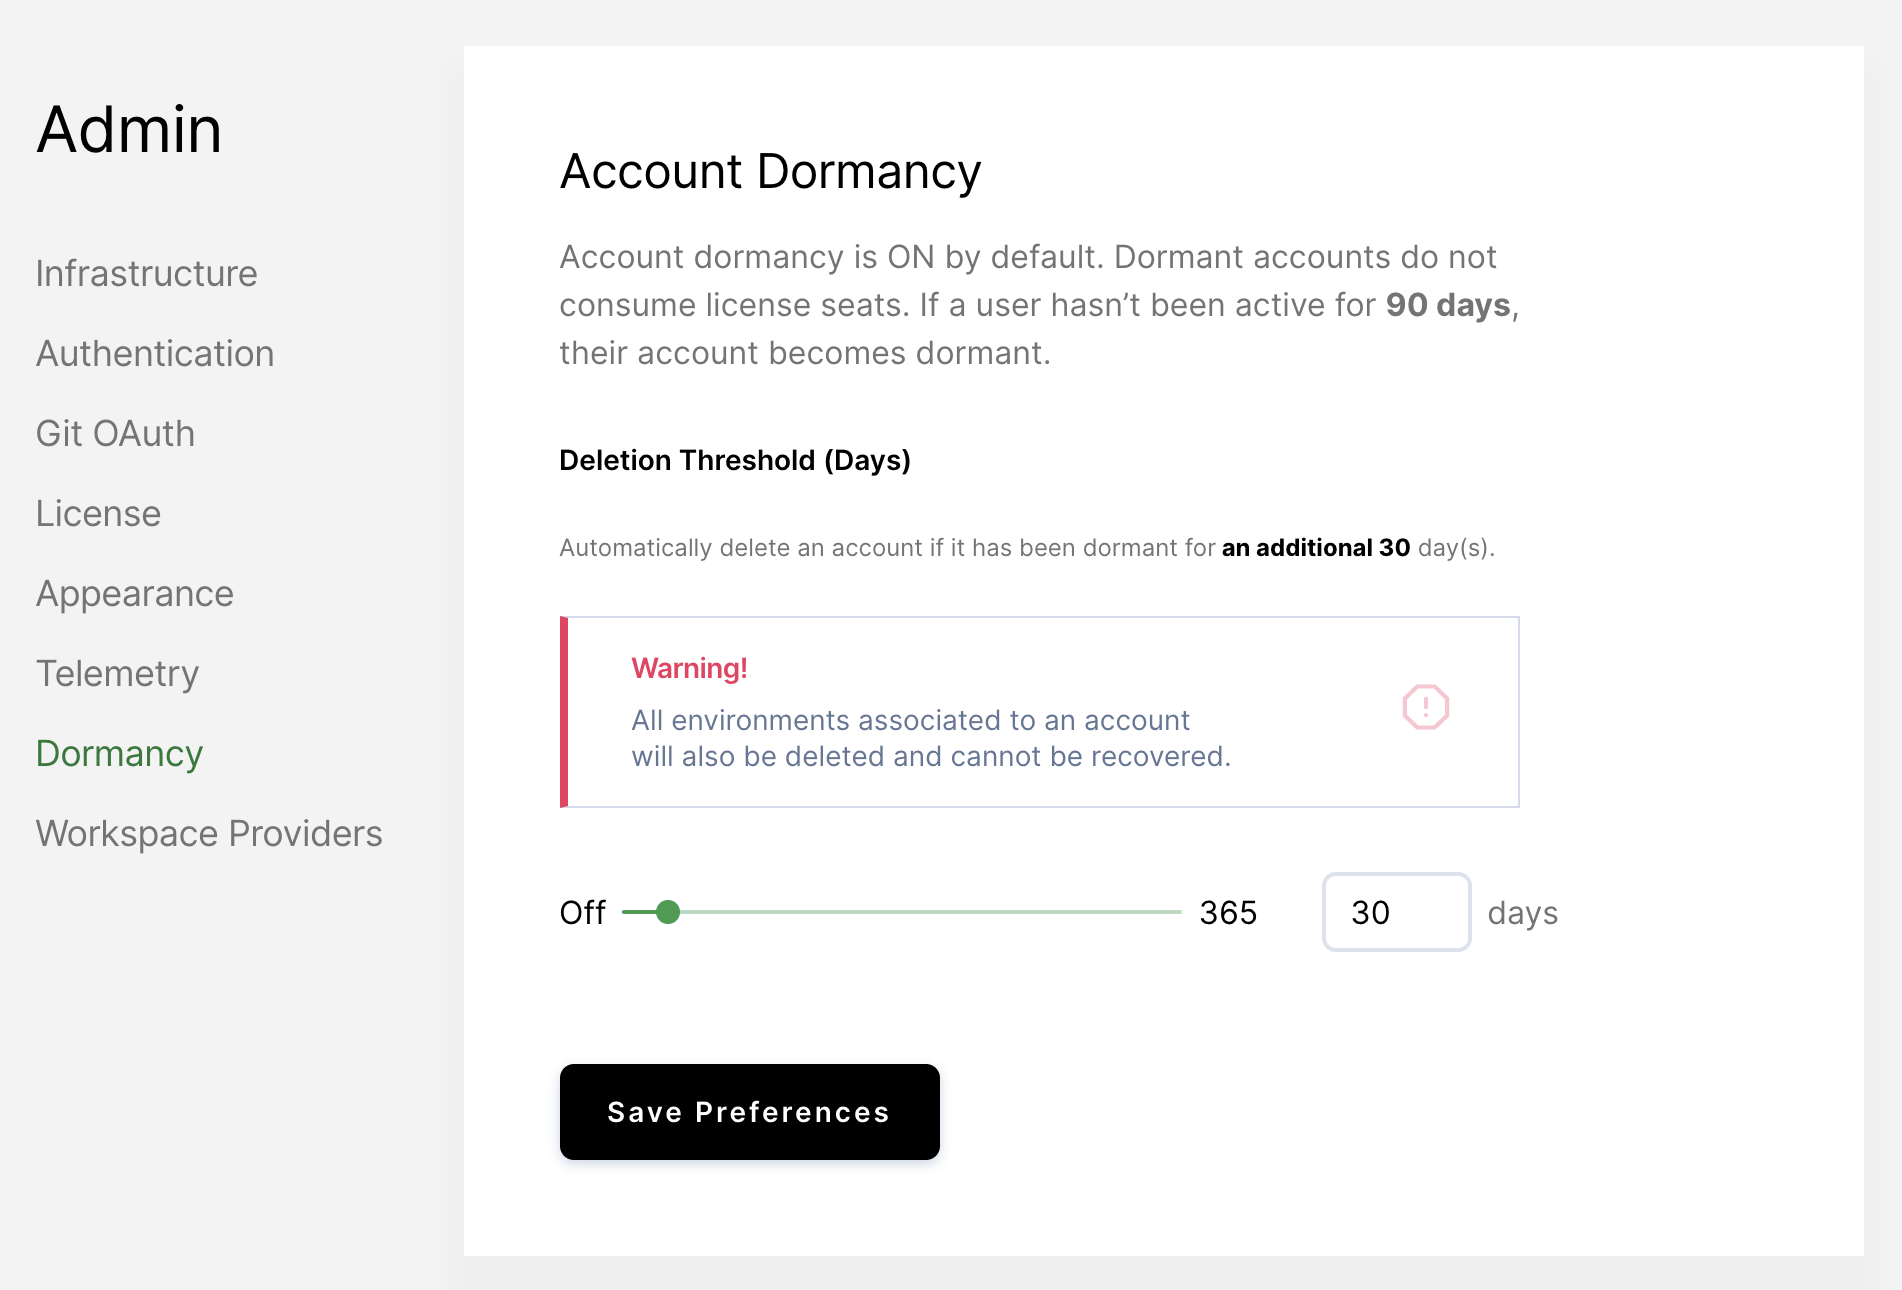
---
# GitHub OAuth integration | Coder v1 Docs
[Home](https://coder.com/docs/v1 "Home")
[Guides](https://coder.com/docs/v1/guides "Guides")
[Troubleshooting](https://coder.com/docs/v1/guides/troubleshooting "Troubleshooting")
GitHub OAuth integration
When configuring the OAuth integration between Coder and GitHub, you may encounter the following error:
[](https://coder.com/docs/v1/guides/troubleshooting/git-oauth#why-this-happens)
Why this happens
------------------------------------------------------------------------------------------------
This error occurs when your Coder public key has been uploaded to your GitHub profile; when you attempt to link Coder and GitHub, the OAuth integration attempts to add your public key again to GitHub.
[](https://coder.com/docs/v1/guides/troubleshooting/git-oauth#solution)
Solution
--------------------------------------------------------------------------------
1. [Remove your Coder public key](https://docs.github.com/en/github/authenticating-to-github/keeping-your-account-and-data-secure/reviewing-your-ssh-keys)
from your GitHub account.
2. In Coder, navigate to **Account** > **Linked Accounts** and click **Link Your GitHub Account**.
3. If successful, you will be re-directed back to the **Account** page. There will be a message in the bottom right corner that says:
`` `Successfully linked to GitHub account ` ``
If the steps above do not fix the problem, the error may be related to the GitHub configuration values set using Coder's **Admin** panel. Site managers can view and update these values at **Manage** > **Admin** > **Git OAuth**.
If this doesn't resolve the issue, please [contact us](https://coder.com/contact)
for further support.
##### On this page
---
# Remote terminal | Coder v1 Docs
[Home](https://coder.com/docs/v1 "Home")
[Command line](https://coder.com/docs/v1/cli "Command line")
Remote terminal
You can access the shell of your Coder workspace from your local computer using the `coder ssh` command.
[](https://coder.com/docs/v1/cli/remote-terminal#usage)
Usage
-------------------------------------------------------------
`` `coder ssh []` ``
This executes a remote command on the workspace; if no command is specified, the CLI opens up the workspace's default shell.
For example, you can print "Hello World" in your Coder workspace shell as follows:
`` `$ coder ssh my-workspace echo "hello world" hello world` ``
---
# 1.35.0 | Coder v1 Docs
[Home](https://coder.com/docs/v1 "Home")
[Changelog](https://coder.com/docs/v1/changelog "Changelog")
1.35.0
### [](https://coder.com/docs/v1/changelog/1.35.0#breaking-changes-)
Breaking changes ❗
There are no breaking changes in 1.35.0.
### [](https://coder.com/docs/v1/changelog/1.35.0#features-)
Features ✨
* infra: Coder now supports reading the database password from a file (specified by environment variable `DB_PASSWORD_PATH`) instead of directly from an environment variable. This is configurable via the Helm option `postgres.noPasswordEnv`.
* infra: Workspace templates now allow specifying seccomp profiles for workspace pods.
### [](https://coder.com/docs/v1/changelog/1.35.0#bug-fixes-)
Bug fixes 🐛
* web: Fixed an issue where non-Admin users were unable to create "Open in Coder" buttons.
* web: Fixed broken links in the offline docs.
* web: Added a workaround for an issue in Projector where the IDE would crash when running a unit test [(IDEA-300226](https://youtrack.jetbrains.com/issue/IDEA-300226)
).
* web: Fixed an issue where custom font glyphs were not being rendered correctly in the web terminal.
* web: `coderd` now automatically reloads TLS certificates without a restart.
* web: fixed an issue blocking the usage of Server-Sent Events (SSE).
* infra: Improved connection caching logic.
* infra: Fixed an issue where building multiple workspaces in parallel would result in excessive queuing.
* infra: Improved logging of workspace builds and websocket connection errors.
### [](https://coder.com/docs/v1/changelog/1.35.0#security-updates-)
Security updates 🔐
There are no security updates in 1.35.
### [](https://coder.com/docs/v1/changelog/1.35.0#notes-%E2%84%B9%EF%B8%8F)
Notes ℹ️
* Our bundled version of JetBrains Projector is now built with JDK 17 to match the version used by more recent Jetbrains IDEs.
---
# Personalization | Coder v1 Docs
[Home](https://coder.com/docs/v1 "Home")
[Workspaces](https://coder.com/docs/v1/workspaces "Workspaces")
Personalization
Your Coder development workspace strikes a balance between consistent team configuration and personal customization. The workspace's [image](https://coder.com/docs/v1/images)
standardizes the system dependencies for development, but there are several different mechanisms that Coder offers for customizing the workspace.
[](https://coder.com/docs/v1/workspaces/personalization#persistent-home)
Persistent home
----------------------------------------------------------------------------------------
The `/home/` volume is bound to your workspace, and its contents persist despite shutdowns and rebuilds. This ensures that personal configuration files like `~/.gitconfig` and `~/.zshrc`, source code, and project files, are not disrupted.
The workspace's [image](https://coder.com/docs/v1/images)
, however, provides all data outside `/home/` and is reset whenever your workspace [rebuilds](https://coder.com/docs/v1/workspaces/lifecycle)
.
[](https://coder.com/docs/v1/workspaces/personalization#personalize)
~/personalize
----------------------------------------------------------------------------------
If you want to configure your system files, Coder workspaces expose the [~/personalize rebuild hook](https://coder.com/docs/v1/workspaces/lifecycle#hooks)
. Coder executes the `~/personalize` script every time Coder rebuilds the workspace.
For example, if you want to use the `fish` shell as your default, but your workspace's image doesn't include it, you can have installation instructions in your `~/personalize` script. Whenever Coder rebuilds your workspace, it runs your `~/personalize` script, installs `fish`, and changes the default shell.
`` `#!/bin/bash echo "--Starting personalize" sudo apt-get update sudo apt-get install -y fish sudo chsh -s /usr/bin/fish $USER` ``
The following is a more extensive example of a `~/personalize` script:
`` `#!/bin/bash # # For use with a workspace build using an image that includes git. This # script configures git using Coder's personalize script. This script runs # each time the workspace is rebuilt. The script must be located at # ~/personalize. The initial workspace will not contain this script, so # it must be added after creation. # # Backup existing gitconfig if it exists if [ -f ~/.gitconfig ]; then echo "Backing up ~/.gitconfig" mv ~/.gitconfig ~/.gitconfig.bak fi # Set name and email in git echo "[user]\n\temail = [[email protected]](https://coder.com/cdn-cgi/l/email-protection) \n\tname = Your Name" > ~/.gitconfig` ``
### [](https://coder.com/docs/v1/workspaces/personalization#notes)
Notes
* \*The `-y` flag is required to continue through any prompts. Otherwise, the `~/personalize` script will abort.
* The personalize script must be executable; if you create your script, you may need to run `chmod +x ~/personalize` to give the script execute permissions.
* When you create a new personalize file or edit an existing file, your changes won't take effect until you either:
* Run ~/personalize using the Coder terminal
* Rebuild your workspace
The Workspaces page shows the log output of the `~/personalize` script in the build log whenever it runs:
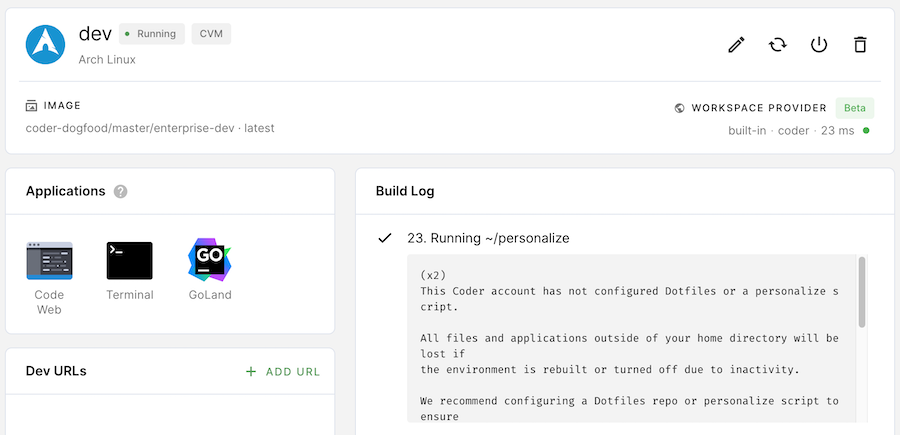
[](https://coder.com/docs/v1/workspaces/personalization#git-integration)
Git integration
----------------------------------------------------------------------------------------
Once your site manager has [set up a Git service](https://coder.com/docs/v1/admin/git)
, you can [link your Coder account](https://coder.com/docs/v1/workspaces/preferences#linked-accounts)
. This will authenticate all `git` operations performed in your workspace.
[](https://coder.com/docs/v1/workspaces/personalization#dotfiles-repo)
Dotfiles repo
------------------------------------------------------------------------------------
A **dotfiles repository** is a Git repository that contains your personal workspace preferences in the form of static files and setup scripts.
We recommend configuring a dotfiles repo (which Coder then clones to your home directory) to ensure that your preferences are applied whenever you create your workspace or turn it on.
At startup, Coder clones your dotfiles repository into `~/dotfiles`. If there's an executable `~/dotfiles/install.sh` present, Coder executes it. If not, all dot-prefixed files are symlinked to your home directory.
> You **must** mark `install.sh` as executable before committing it to your dotfiles repo.
Read more about dotfiles repos [here](http://dotfiles.github.io/)
.
### [](https://coder.com/docs/v1/workspaces/personalization#adding-your-dotfiles-repo-to-coder)
Adding your dotfiles repo to Coder
You can provide a link to your dotfiles repo that's hosted with the Git provider of your choice under [User preferences](https://coder.com/docs/v1/workspaces/preferences)
:
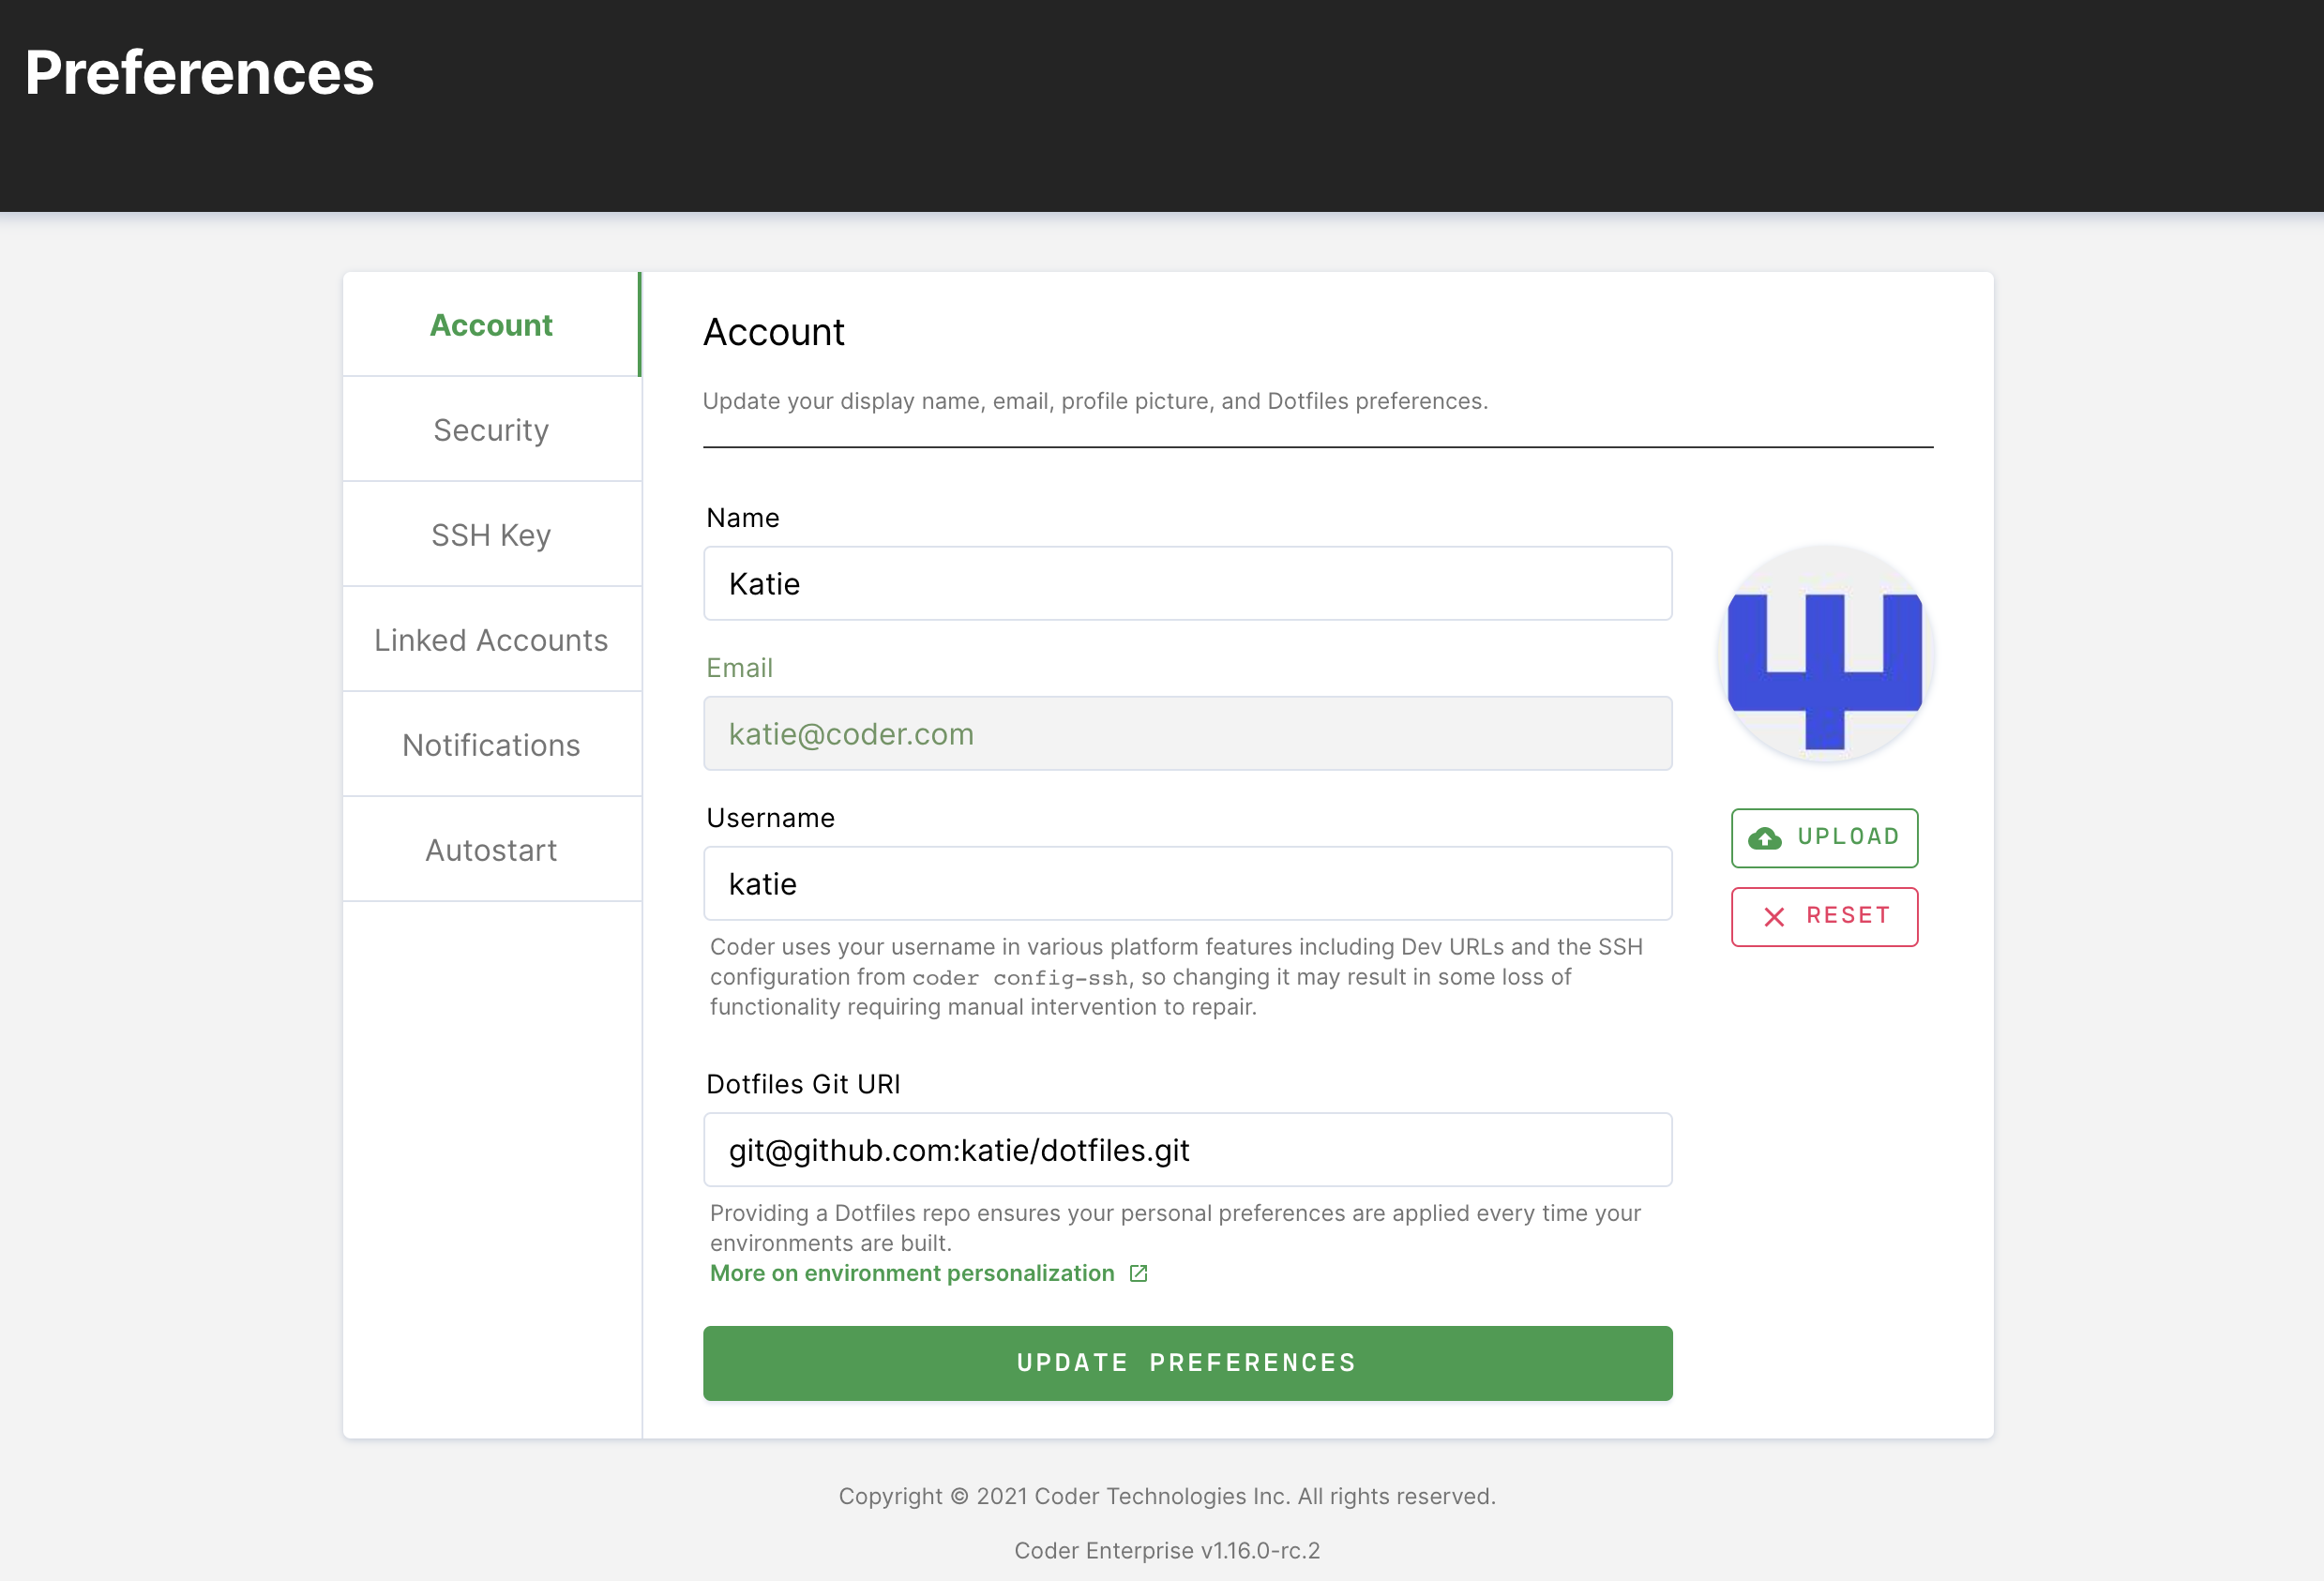
### [](https://coder.com/docs/v1/workspaces/personalization#setting-environment-variables)
Setting environment variables
If you'd like to set environment variables in your workspace so that they're available to Code Web (VS Code) running in your workspace and persist across workspace builds, you can do so by:
1. Setting the environment variables in `.profile`;
2. Including `.profile` in the dotfiles repo you're using with Coder.
Code Web will access the environment variables you set when you launch the IDE.
##### On this page
---
# Data scientists | Coder v1 Docs
[Home](https://coder.com/docs/v1 "Home")
[Getting started](https://coder.com/docs/v1/getting-started "Getting started")
Data scientists
This article will walk you through the process of getting started with a Coder workspace capable of supporting data science projects. You'll learn how to:
* Connect Coder to your Git provider (this example assumes that you're using GitHub, but Coder supports GitLab and Bitbucket as well));
* Create a workspace with Jupyter Notebook and other data science packages present;
* Add a sample project to your workspace, specifically [one as a Jupyter Notebook using IMDB movie data](https://github.com/khorne3/data-science-imdb-sample)
.
[](https://coder.com/docs/v1/getting-started/data-scientists#prerequisites)
Prerequisites
-----------------------------------------------------------------------------------------
This guide assumes that you have a Coder deployment available to you and that you have the credentials needed to access the deployment.
[](https://coder.com/docs/v1/getting-started/data-scientists#step-1-log-in-and-connect-coder-to-your-git-provider)
Step 1: Log in and connect Coder to your Git provider
------------------------------------------------------------------------------------------------------------------------------------------------------------------------
In this step, you'll log into Coder, then link your Coder account with your Git provider. This will allow you to do things like pull repositories and push changes.
1. Navigate to the Coder deployment using the URL provided to you by your site manager, and log in.
2. Click on your avatar in the top-right, and select **Account**.

3. Provide Coder with your SSH key to connect and authenticate to GitHub.
If your site manager has configured OAuth, go to **Linked Accounts** and follow the on-screen instructions to link your GitHub account.

If your site manager has _not_ configured OAuth or you are using a Git provider that Coder does not support, go to **SSH keys**. Copy your public SSH key and [provide it to GitHub](https://docs.github.com/en/authentication/connecting-to-github-with-ssh/adding-a-new-ssh-key-to-your-github-account)
.

[](https://coder.com/docs/v1/getting-started/data-scientists#step-2-import-an-image)
Step 2: Import an image
------------------------------------------------------------------------------------------------------------
At this point, you'll import your image, which you can think of as a template for your workspace. This template contains the language version, tooling, and dependencies you need to work on the project. In this case, the image also contains a `configure` script that will clone the data science project from GitHub to your workspace.
To import an image:
1. In the top navigation bar, click **Images**. Then, click on **Import Image**.
2. Leave the default registry (which is **dockerhub**) selected.
3. Under **repository**, provide **kmhcdr/python**. Provide **latest** as the **tag**. Optionally, you can provide a **description** of the image
4. Specify the minimum amount of resources (cores, memory, and disk space) the workspace should have when using this image. For this project, we recommend 4 cores, 8 GB memory, and 10 GB disk space as a starting point.
5. Click **Import Image**.
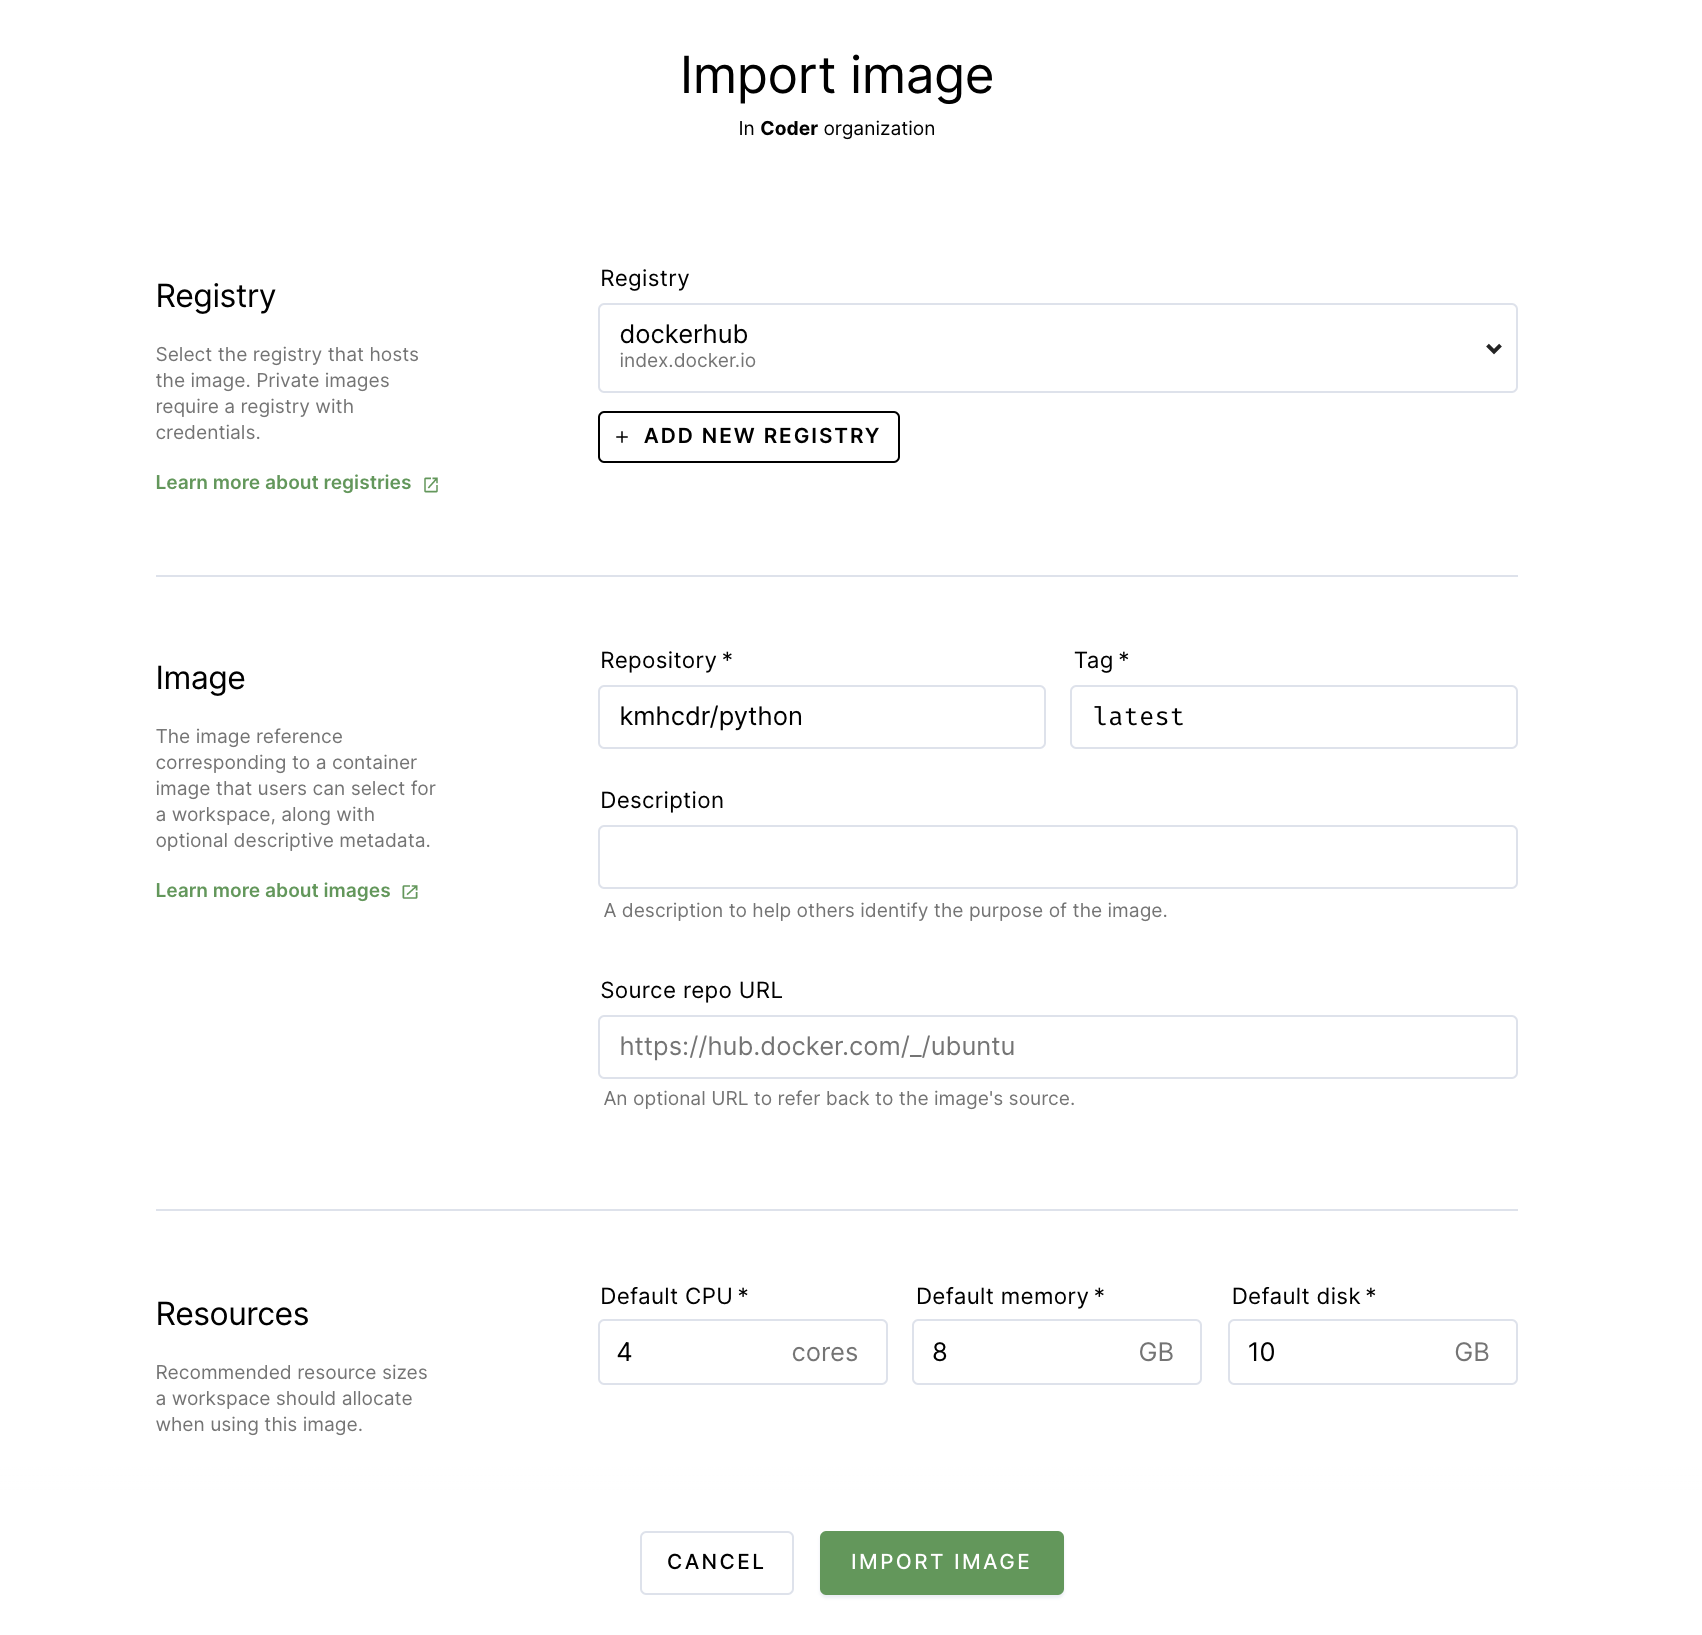
[](https://coder.com/docs/v1/getting-started/data-scientists#step-3-create-your-workspace)
Step 3: Create your workspace
------------------------------------------------------------------------------------------------------------------------
You will now create the workspace where you'll work on your development project.
1. Return to **Workspaces** using the top navigation bar.
2. Click **New workspace** to launch the workspace-creation dialog.
3. Provide a **Workspace Name**.
4. In the **Image** section, select the **kmhcdr/python** image you just imported.
5. Under **Workspace providers**, leave the default option (which is **built-in**) selected.
6. Expand the **Advanced** section. If the **Run as a container-based virtual machine** option is selected, _unselect_ the box. Leave the **CPU**, **Memory**, **Disk**, and **GPU** allocations as-is.
7. Scroll to the bottom, and click **Create workspace**. The dialog will close, allowing you to see the main workspace page. You can track the workspace build process using the **Build log** on the right-hand side.
Due to the number of packages present in the image, this might take few minutes.
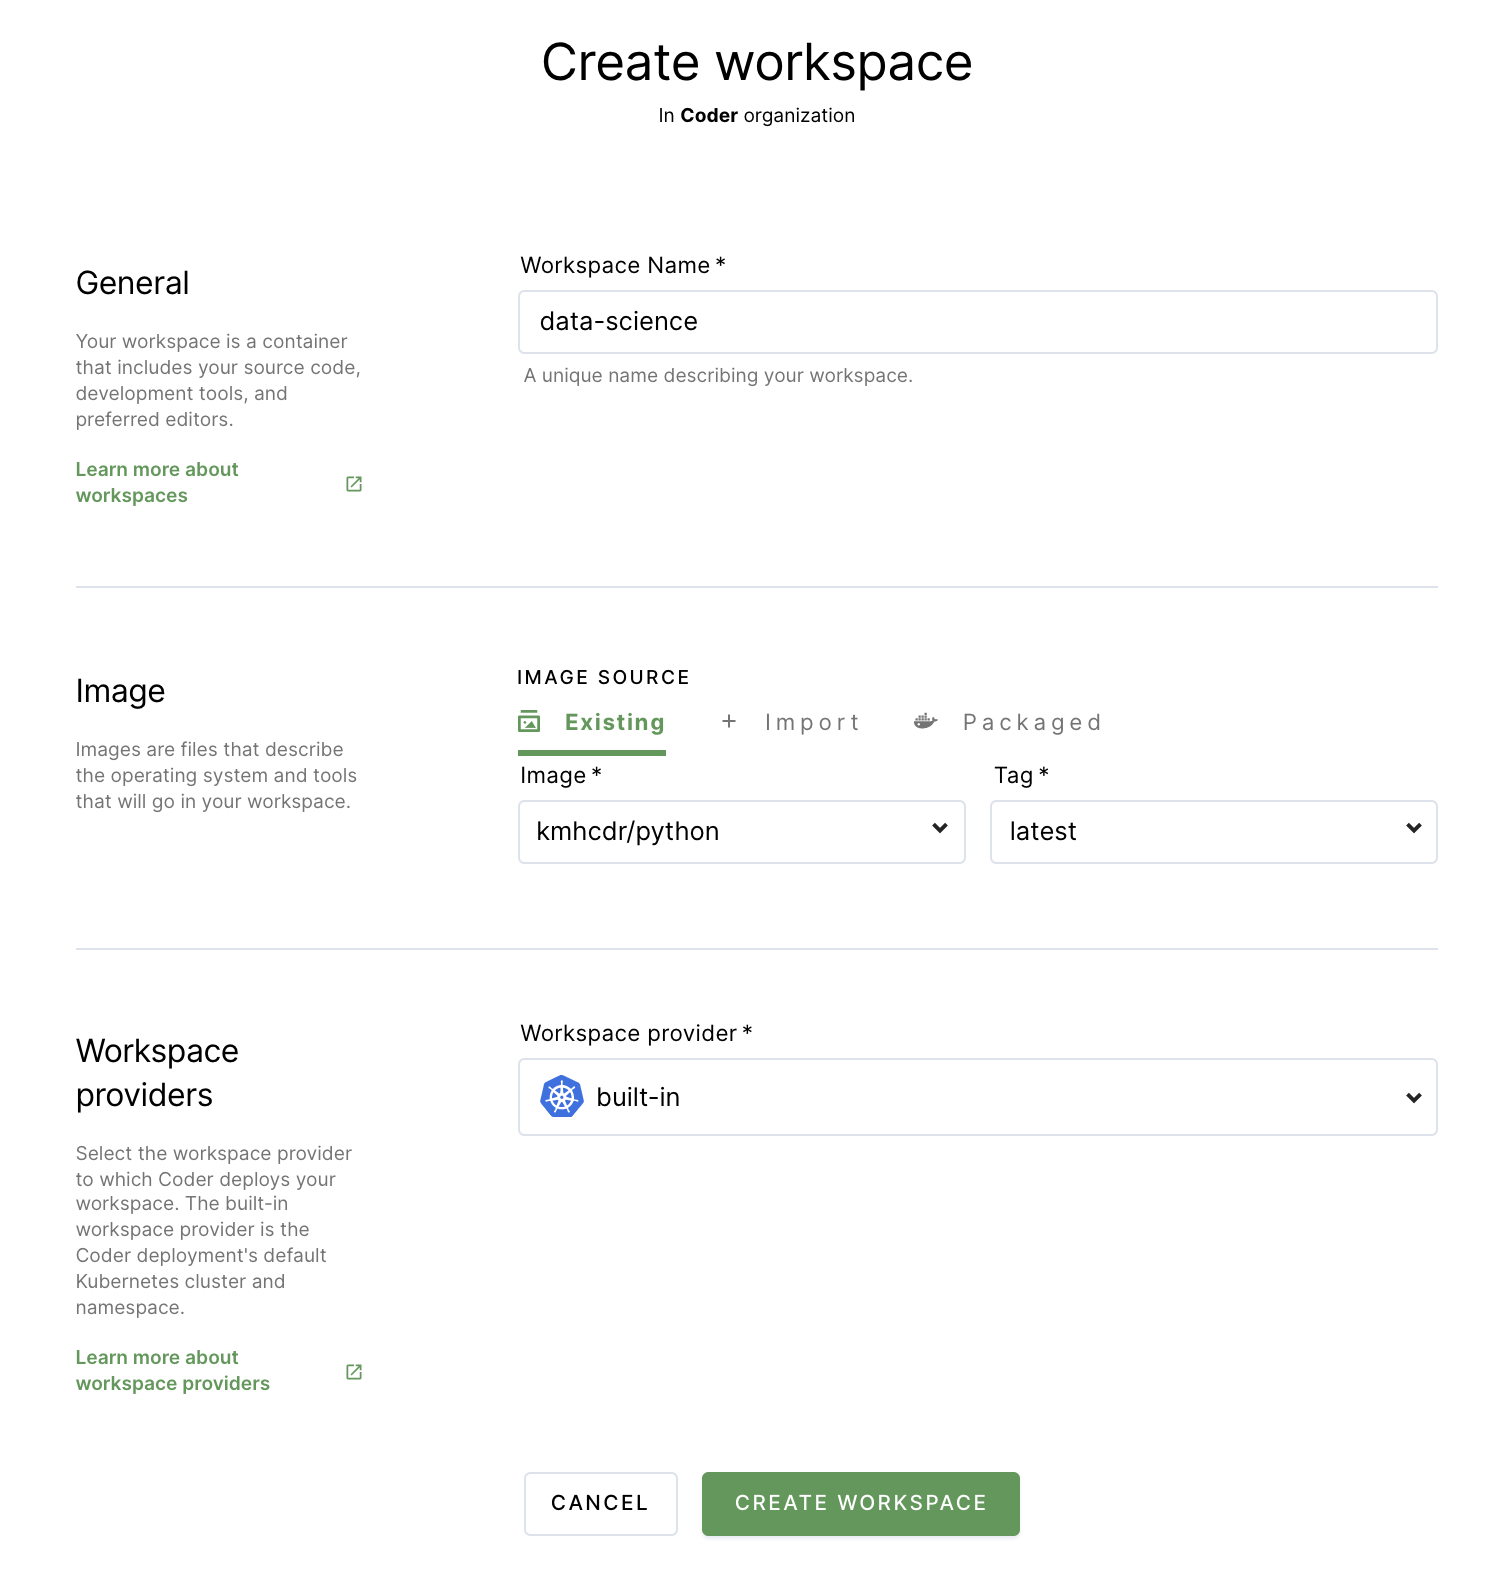
Once your workspace is ready for use, you'll see a chip that says **Running** next to the name of your workspace.
[](https://coder.com/docs/v1/getting-started/data-scientists#step-4-open-up-the-sample-project)
Step 4: Open up the sample project
----------------------------------------------------------------------------------------------------------------------------------
At this point, you're ready to open up Jupyter to access your notebook.
1. Under **Browser applications**, click **Jupyter** to open the IDE in a new browser tab.
2. Under **Files**, click to open the **data-science-imdb-sample** project.
3. Click **Data Science Workflow.ipynb** to launch the notebook.
You're now ready to proceed with work on the project.
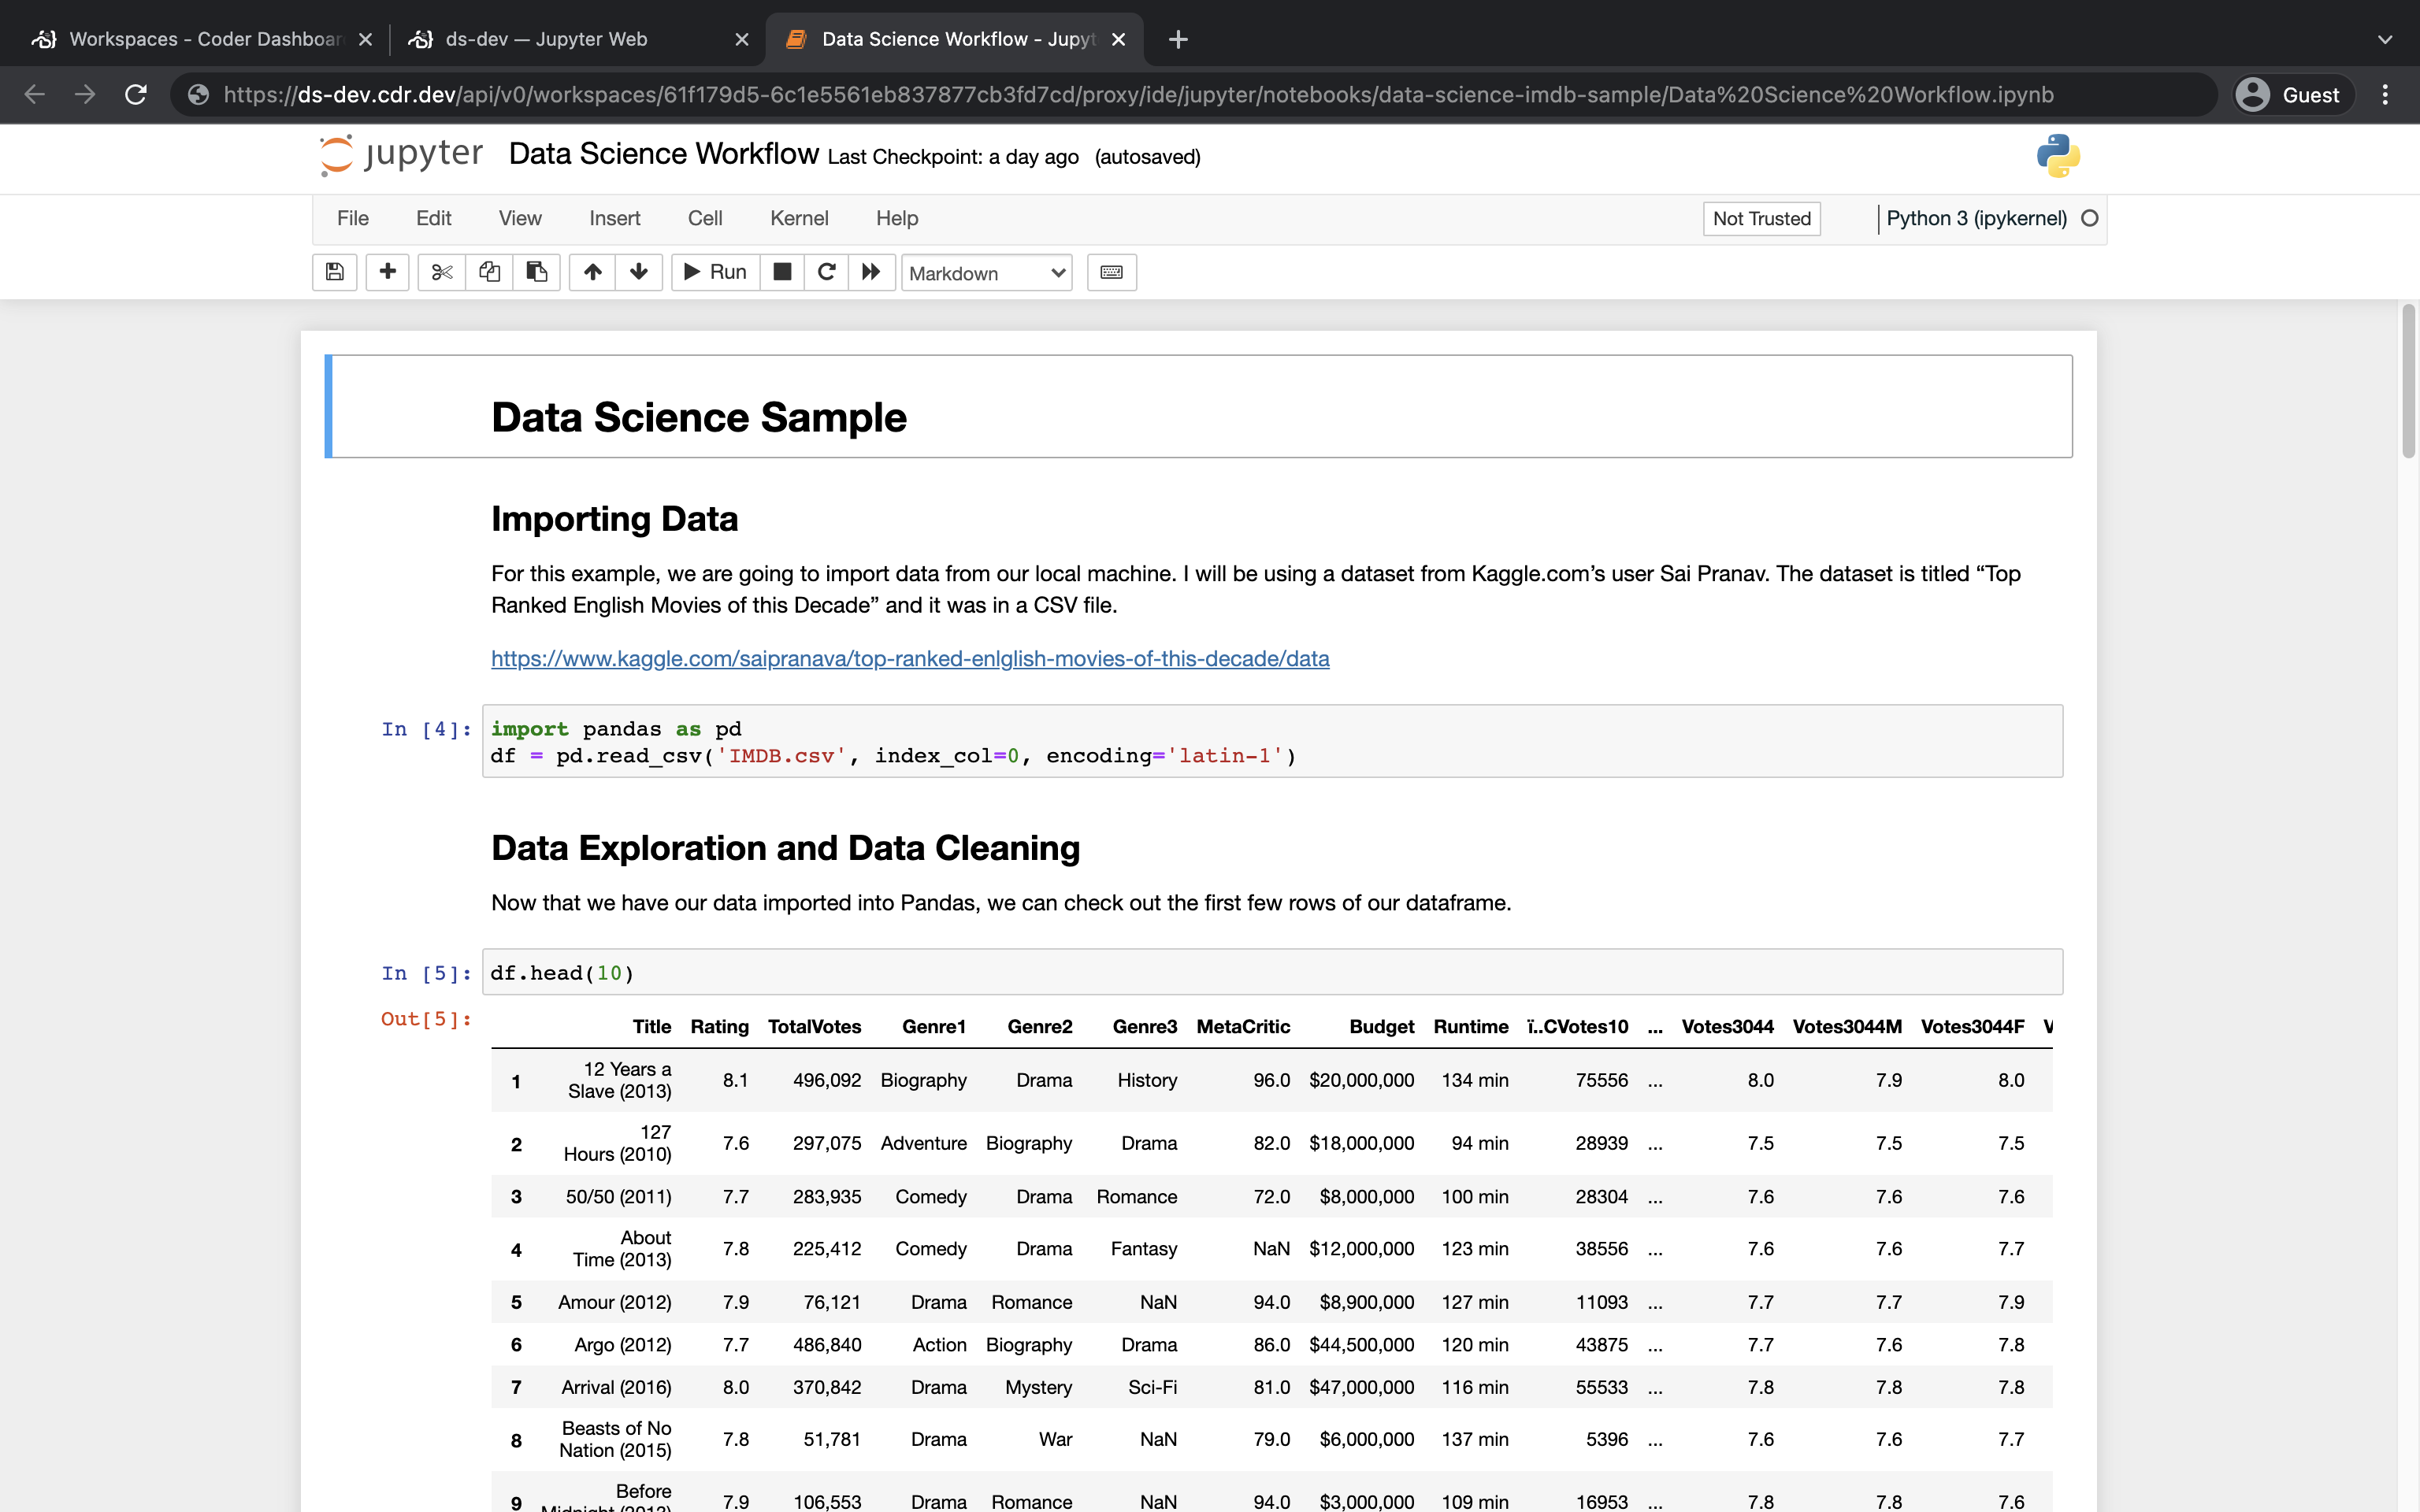
##### On this page
---
# Proxies | Coder v1 Docs
[Home](https://coder.com/docs/v1 "Home")
[Guides](https://coder.com/docs/v1/guides "Guides")
[Deployment](https://coder.com/docs/v1/guides/deployments "Deployment")
Proxies
This article walks you through configuring proxies for Coder.
If your Coder installation accesses the internet through a forward proxy, configure a [forward proxy](https://coder.com/docs/v1/guides/deployments/proxy#forward-proxies)
.
If you have a reverse proxy in front of Coder, such as an ingress controller internal to the cluster, then configure a [reverse proxy](https://coder.com/docs/v1/guides/deployments/proxy#reverse-proxies)
.
[](https://coder.com/docs/v1/guides/deployments/proxy#forward-proxies)
Forward proxies
--------------------------------------------------------------------------------------
Coder supports proxies for outbound HTTP and HTTPS connections once you've configured the `coderd.proxy.http` and `coderd.proxy.https` settings in the [Helm chart](https://coder.com/docs/v1/guides/admin/helm-charts)
. These settings correspond to the standard `http_proxy` and `https_proxy` environment variables, respectively.
If the proxy URL does not include a scheme, Coder treats it as an HTTP proxy by default. Coder also supports proxies using the HTTPS and SOCKS 5 protocols. As a special case, Coder will always establish connections to `localhost` directly, regardless of the `coderd.proxy.exempt` setting. For additional proxy setting information, see the [documentation for ProxyFromEnvironment](https://pkg.go.dev/net/http#ProxyFromEnvironment)
.
For an HTTP proxy with address `http://localhost:3128`, use the setting:
``` ``coderd: proxy: # If the scheme is omitted, Coder will default to `http` http: localhost:3128`` ```
For an HTTPS proxy with address `https://localhost`, include the scheme:
`` `coderd: proxy: # If the port is omitted, Coder will use the default port corresponding to # the selected scheme (443 for https) http: https://localhost` ``
For a [SOCKS 5 proxy](https://en.wikipedia.org/wiki/SOCKS)
on listening on port 1080, use the setting:
`` `coderd: proxy: http: socks5://10.10.10.10:1080` ``
If you specify a proxy for outbound HTTP connections, and you do not specify a proxy for outgoing HTTPS connections, then Coder will proxy requests to HTTPS endpoints using the HTTP proxy. The previous examples will proxy all requests through the defined proxy, regardless of protocol (HTTP or HTTPS).
To configure a different proxy for use with outbound HTTPS connections, you can specify the same proxy types (`http`, `https`, `socks5`) using the `coderd.proxy.https` key:
`` `coderd: proxy: # Use an HTTP proxy on port 3128 for outbound HTTP connections, and an # HTTP proxy on port 8080 for outbound HTTPS connections. http: http://localhost:3128 https: http://localhost:8080` ``
For hosts that must connect directly, rather than using the proxy, define the `coderd.proxy.exempt` setting with a comma-separated list of hosts and subdomains:
`` `coderd: proxy: # Coder will establish connections to cluster.local or example.com, or # their subdomains directly, rather than using the proxy settings. exempt: "cluster.local,example.com"` ``
[](https://coder.com/docs/v1/guides/deployments/proxy#reverse-proxies)
Reverse proxies
--------------------------------------------------------------------------------------
If you have a reverse proxy in front of Coder, which is the case if you're using an ingress controller, Coder receives connections originating from the proxy. For auditing, logging, and other features to correctly recognize the connecting user's IP address information, you will need to configure the `coderd.reverseProxy` setting.
> By default, Coder will ignore `X-Forwarded-For` and similar headers and remove them from proxied connections to [Dev URL services](https://coder.com/docs/v1/workspaces/devurls)
> . This prevents clients from spoofing their originating IP addresses.
Specify a list of trusted origin addresses (those of the reverse proxy) in CIDR format as follows:
`` `coderd: reverseProxy: # These settings will treat inbound connections originating from # localhost (127.0.0.1/8) and the RFC 1918 Class A network (10.0.0.0/8) # as trusted proxies, and will consider the configured headers. trustedOrigins: - 127.0.0.1/8 - 10.0.0.0/8 headers: - X-Forwarded-For` ``
##### On this page
---
# Security | Coder v1 Docs
[Home](https://coder.com/docs/v1 "Home")
[Admin](https://coder.com/docs/v1/admin "Admin")
Security
Coder offers security features that you can configure. These are available under **Manage** > **Admin** > **Security**.
[](https://coder.com/docs/v1/admin/security#http-strict-transport-security)
HTTP Strict Transport Security
----------------------------------------------------------------------------------------------------------
If you are serving Coder over HTTPS, we recommend enabling the **Strict-Transport-Security Header** option, which adds the [HTTP Strict Transport Security](https://developer.mozilla.org/en-US/docs/Web/HTTP/Headers/Strict-Transport-Security)
header to responses. This browser feature requires future requests to occur over HTTPS.
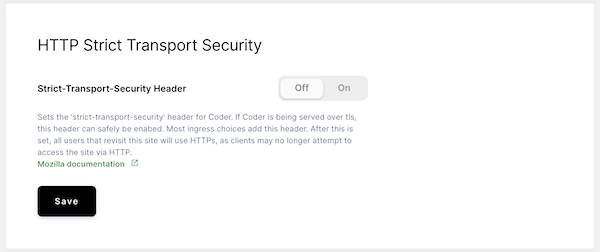
[](https://coder.com/docs/v1/admin/security#secure-cookie)
Secure Cookie
------------------------------------------------------------------------
The **Secure Cookie** option controls the [`secure` property of cookies](https://developer.mozilla.org/en-US/docs/Web/HTTP/Cookies)
that Coder issues. This prevents browsers from sending sensitive cookies, such as those containing credentials, over unencrypted (HTTP) connections. We recommend enabling this setting if you are serving Coder over HTTPS.
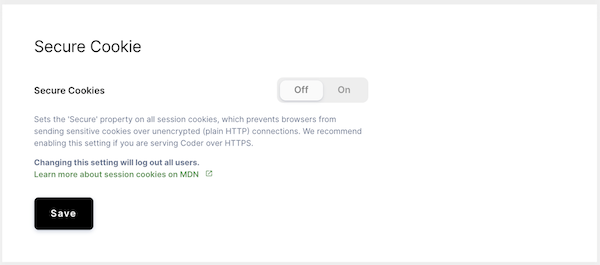
[](https://coder.com/docs/v1/admin/security#ssh)
SSH
----------------------------------------------------
You can choose the SSH keygen algorithm Coder uses when generating SSH keys for users.
Coder allows you to choose between **Ed25519**, **ECDSA**, and **RSA (4096 bits)**.
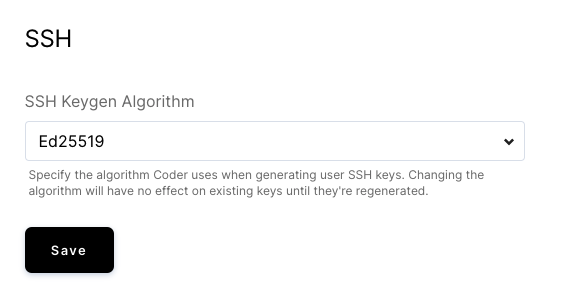
##### On this page
---
# SAML 2.0 identity brokering | Coder v1 Docs
[Home](https://coder.com/docs/v1 "Home")
[Guides](https://coder.com/docs/v1/guides "Guides")
[Deployment](https://coder.com/docs/v1/guides/deployments "Deployment")
SAML 2.0 identity brokering
This article will show you how to set up and use Keycloak to broker JumpCloud SAML 2.0 logins to Coder.
We've based this configuration on the method described in the Keycloak Server Administration Guide's [Identity Brokering](https://www.keycloak.org/docs/latest/server_admin/#_identity_broker)
section.
[](https://coder.com/docs/v1/guides/deployments/keycloak#step-1-create-a-new-realm-in-keycloak)
Step 1: Create a new Realm in Keycloak
--------------------------------------------------------------------------------------------------------------------------------------
The first part of configuring the identity broker is to add a new Realm. This Realm will be where we will add the `JumpCloud <-> Keycloak <-> Coder SAML 2.0 to OIDC Bridge`.
1. [Set up and install](https://www.keycloak.org/getting-started)
Keycloak.
2. [Create](https://www.keycloak.org/docs/latest/getting_started/#creating-a-realm)
a new Realm.
[](https://coder.com/docs/v1/guides/deployments/keycloak#step-2-configure-jumpcloud)
Step 2: Configure JumpCloud
----------------------------------------------------------------------------------------------------------------
1. Log into your JumpCloud account.
2. Go to the **SSO** page and click the **+** to add a new SSO Service Provider.
3. Click **Custom SAML App** to add a custom Keycloak configuration.
4. Add a **Display Label** (e.g., `Keycloak`).
5. Choose an **IdP Entity ID** value that is unique to your identity and Keycloak instance (e.g., `jumpcloud-keycloak`; this value must be the same for both).
6. Specify the **SP Entity ID** and the **ACS URL** for the JumpCloud SAML IdP that you want to connect with. These values be formatted similar to the following:
**SP Entity ID**: `https:///auth/realms/`
**ACS URL**: `https:///auth/realms//broker//endpoint`
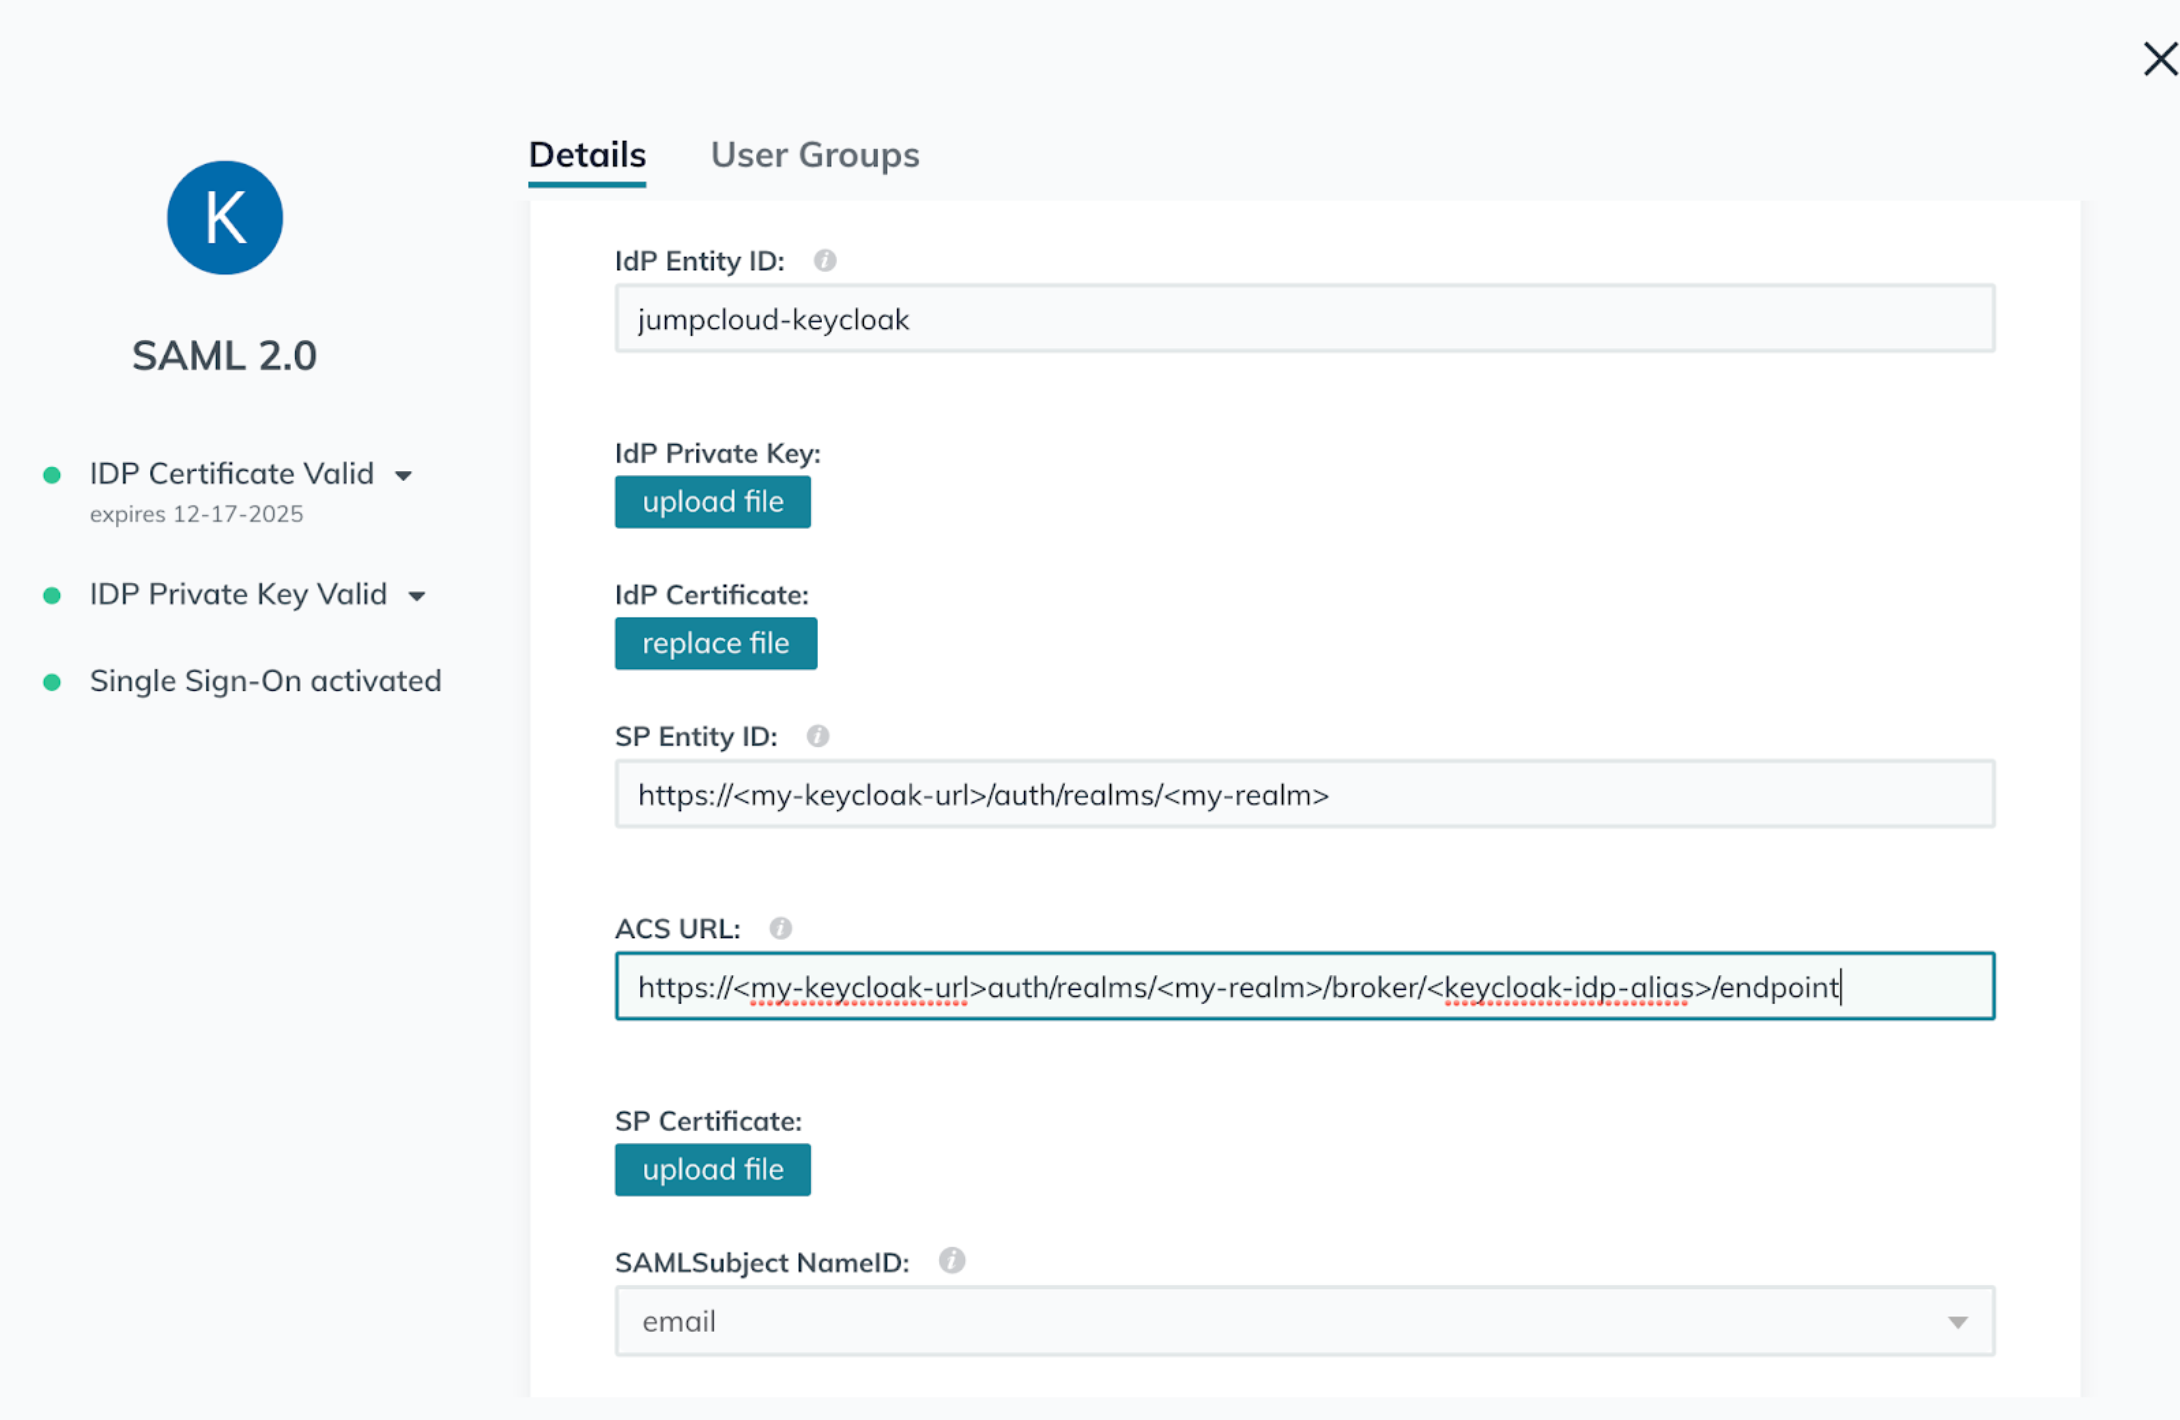
7. The remaining parameters can be left as is, so click **Save** to proceed.
8. At this point, you should be able to open the **Application Configuration** backup on JumpCloud and export the IdP metadata to use with Keycloak.
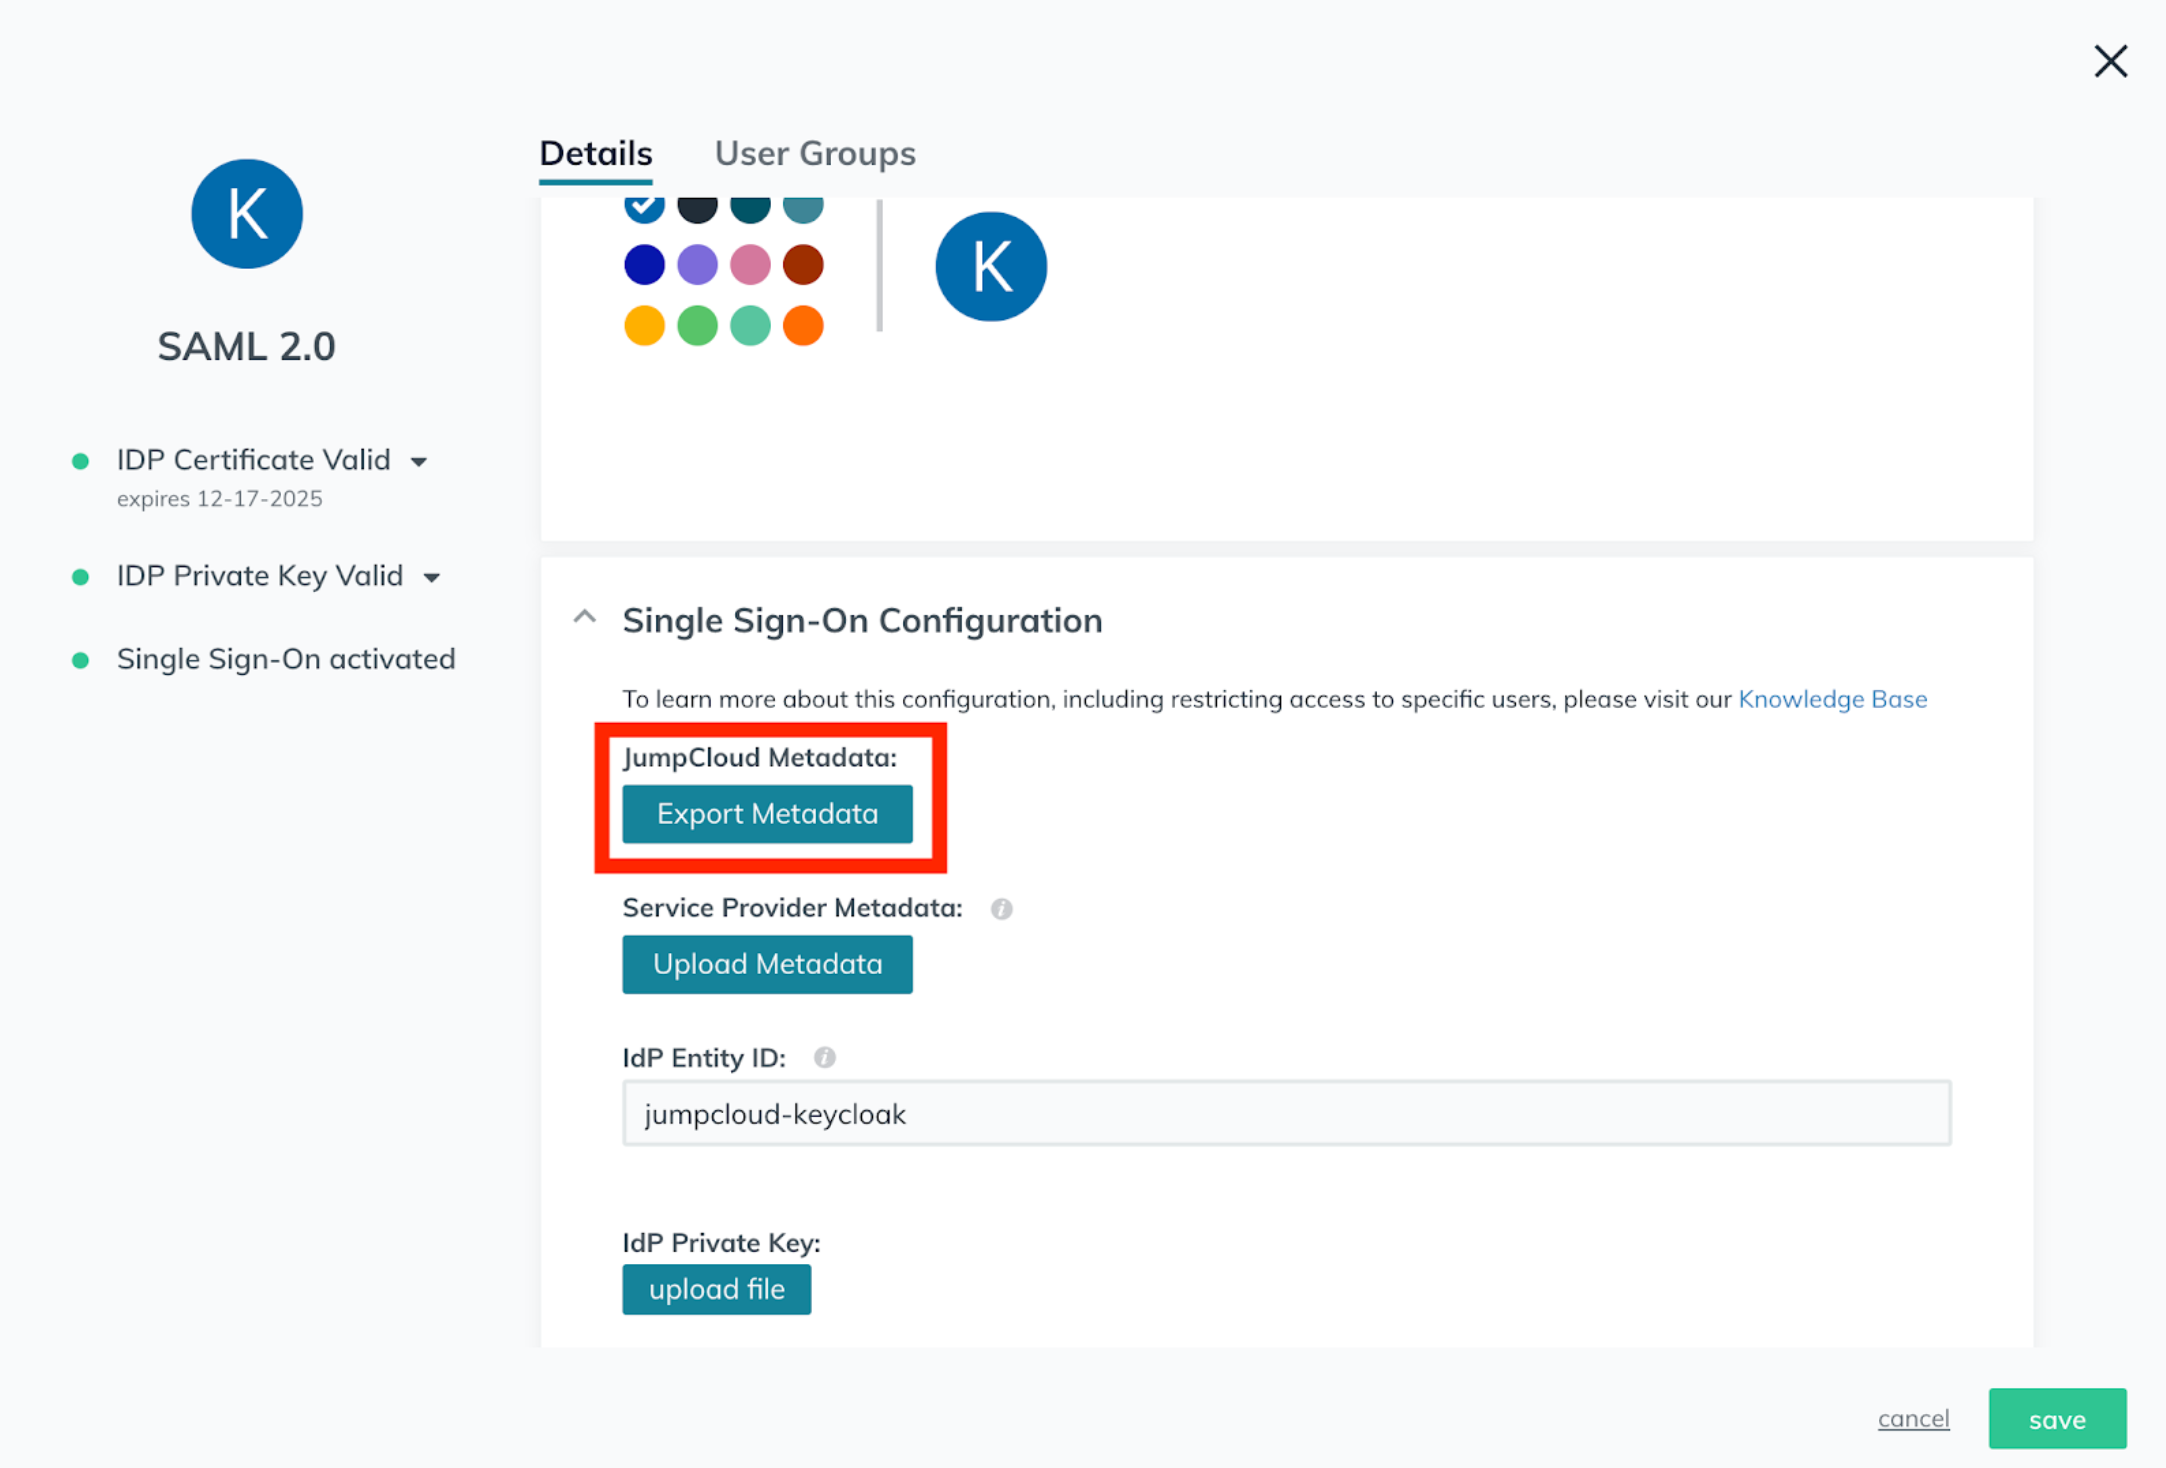
9. On the **User Groups** tab, add the JumpCloud User Group(s) that need access to Coder.
[](https://coder.com/docs/v1/guides/deployments/keycloak#step-3-configure-keycloak)
Step 3: Configure Keycloak
--------------------------------------------------------------------------------------------------------------
1. Log in to Keycloak as an admin, and navigate to the Realm you created at the beginning of this tutorial.
2. Go to the **Identity Providers** page for your Realm and click **SAML 2.0** to set up your identity provider ([this Keycloak document](https://www.keycloak.org/docs/latest/server_admin/#saml-v2-0-identity-providers)
provides additional information about adding a SAML 2.0 Identity Provider).
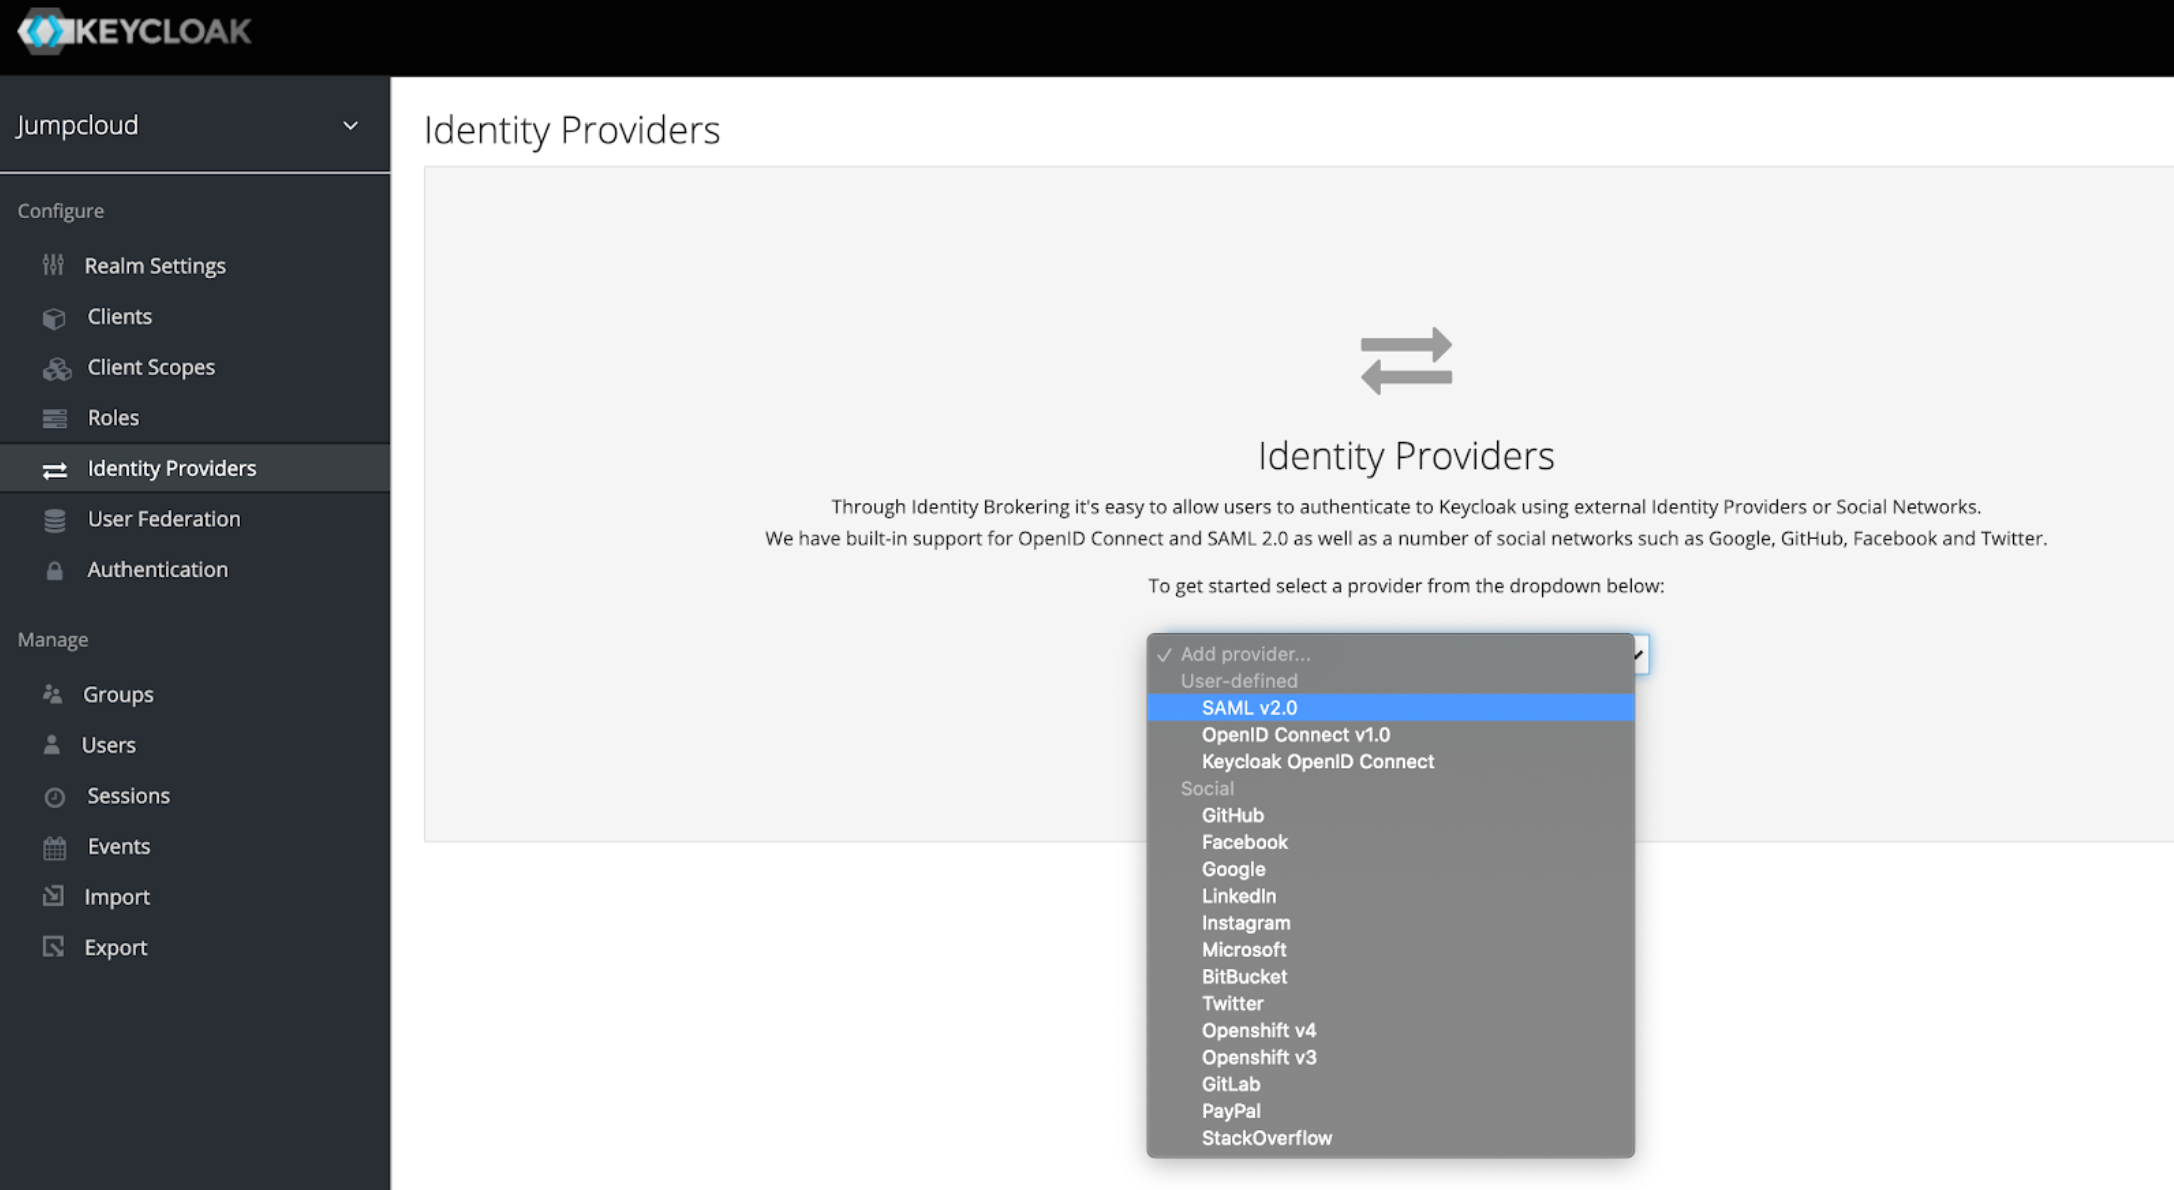
3. On the IdP configuration page, specify an **Alias** to use for your IdP provider.
4. Scroll to the bottom of the configuration page and upload the IdP metadata you exported from JumpCloud.
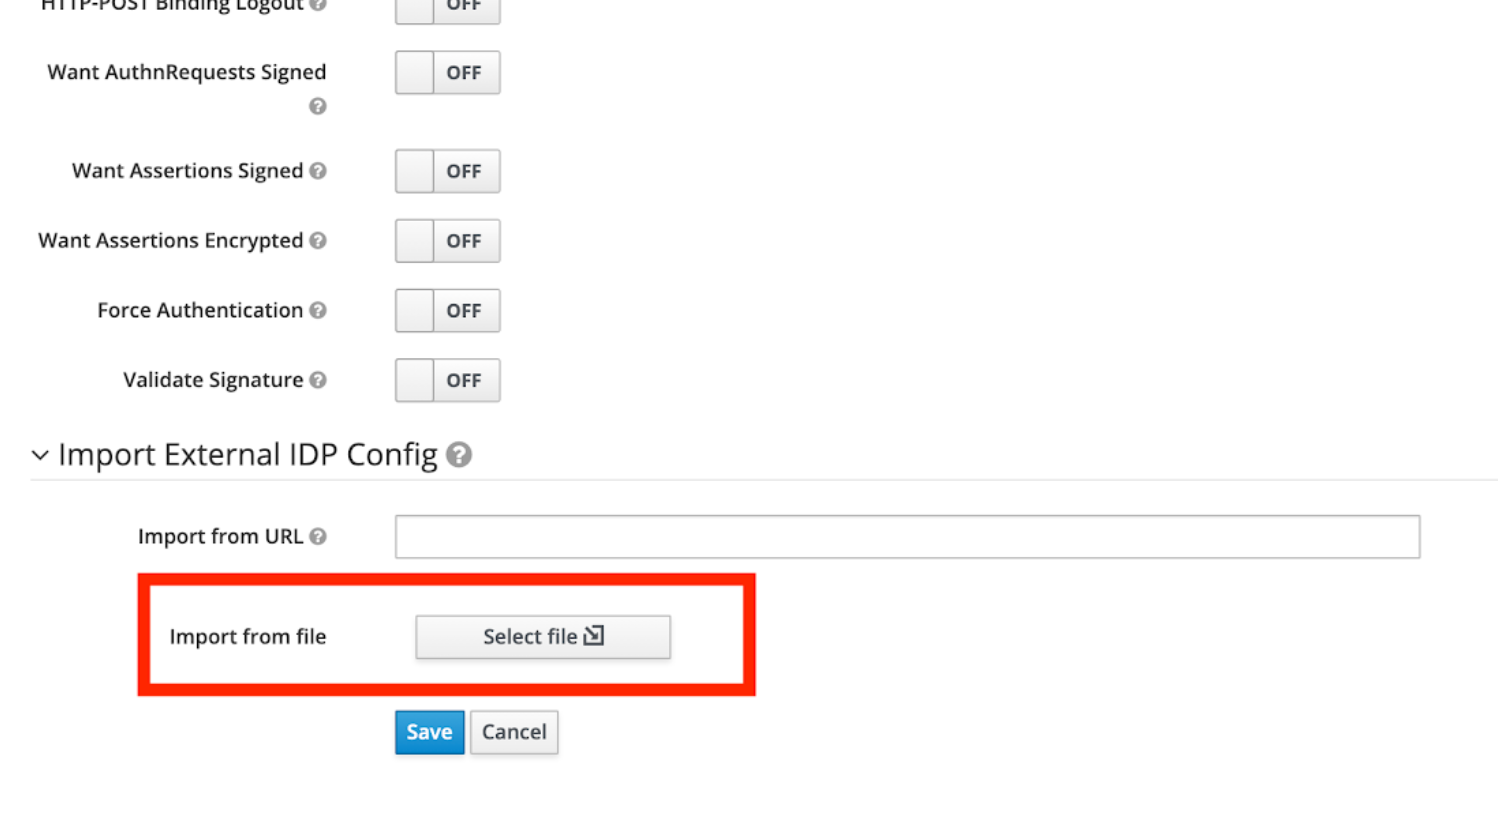
### [](https://coder.com/docs/v1/guides/deployments/keycloak#optional-specify-jumpcloud-as-the-default-idp)
Optional: Specify JumpCloud as the default IdP
1. Navigate to **Authentication**.
2. Select the **Browser** flow from the dropdown in the top-left.
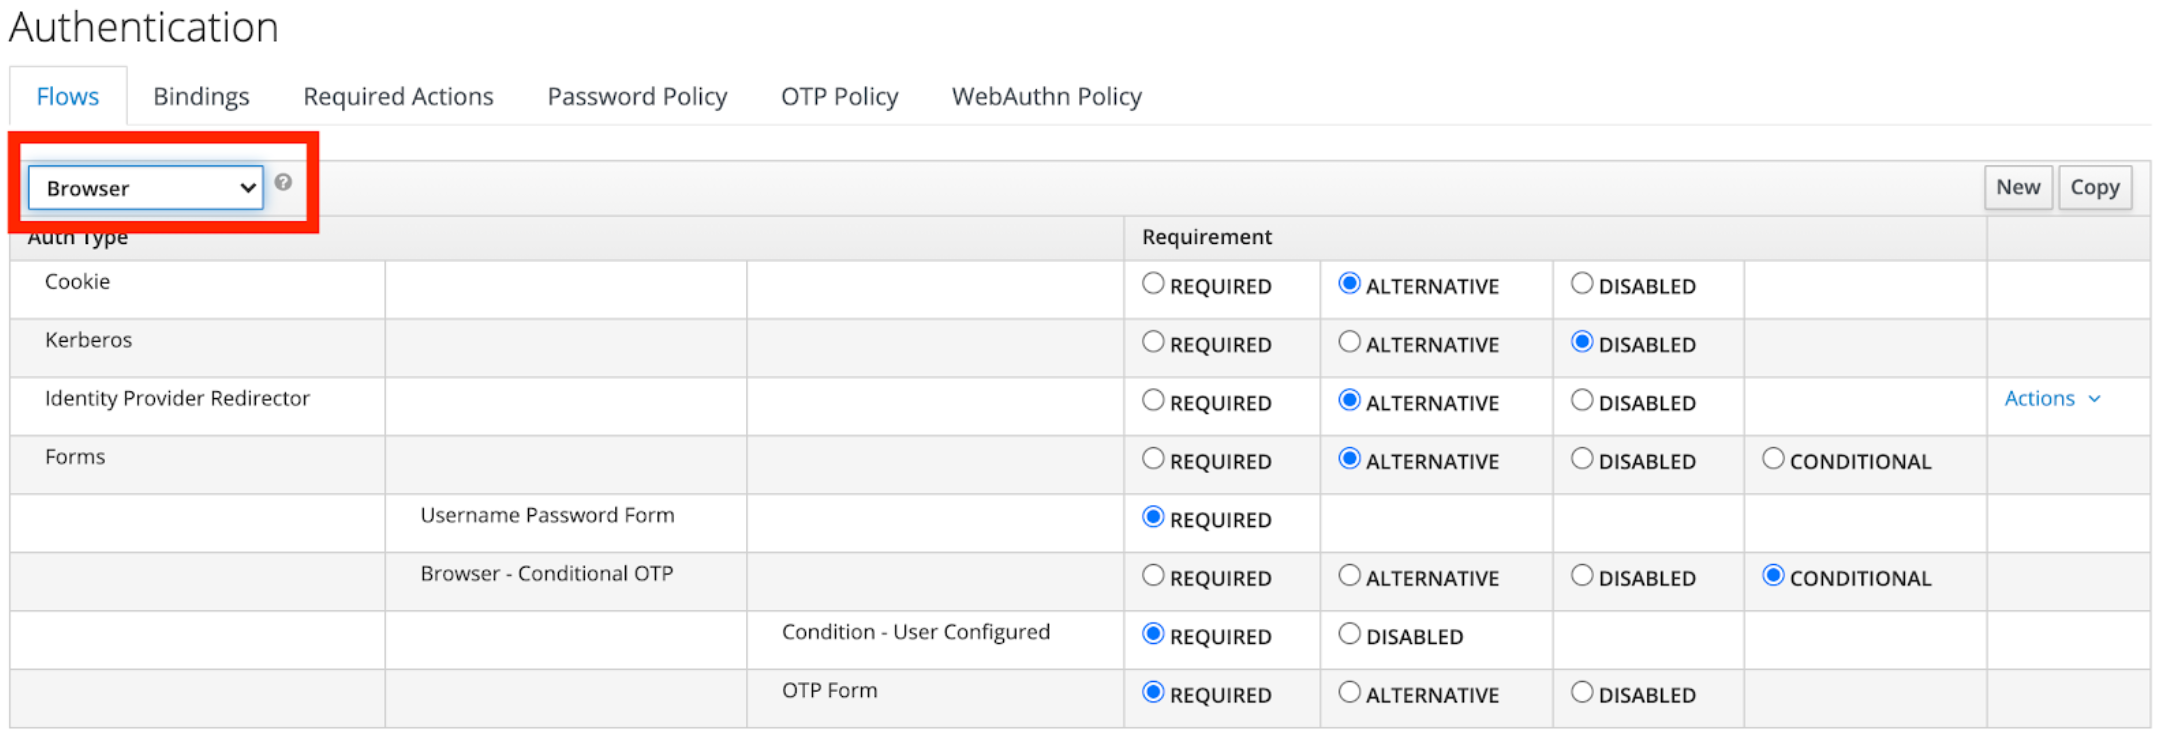
3. Find the **Identity Provider Redirector** row and click **Actions** > **Config**.
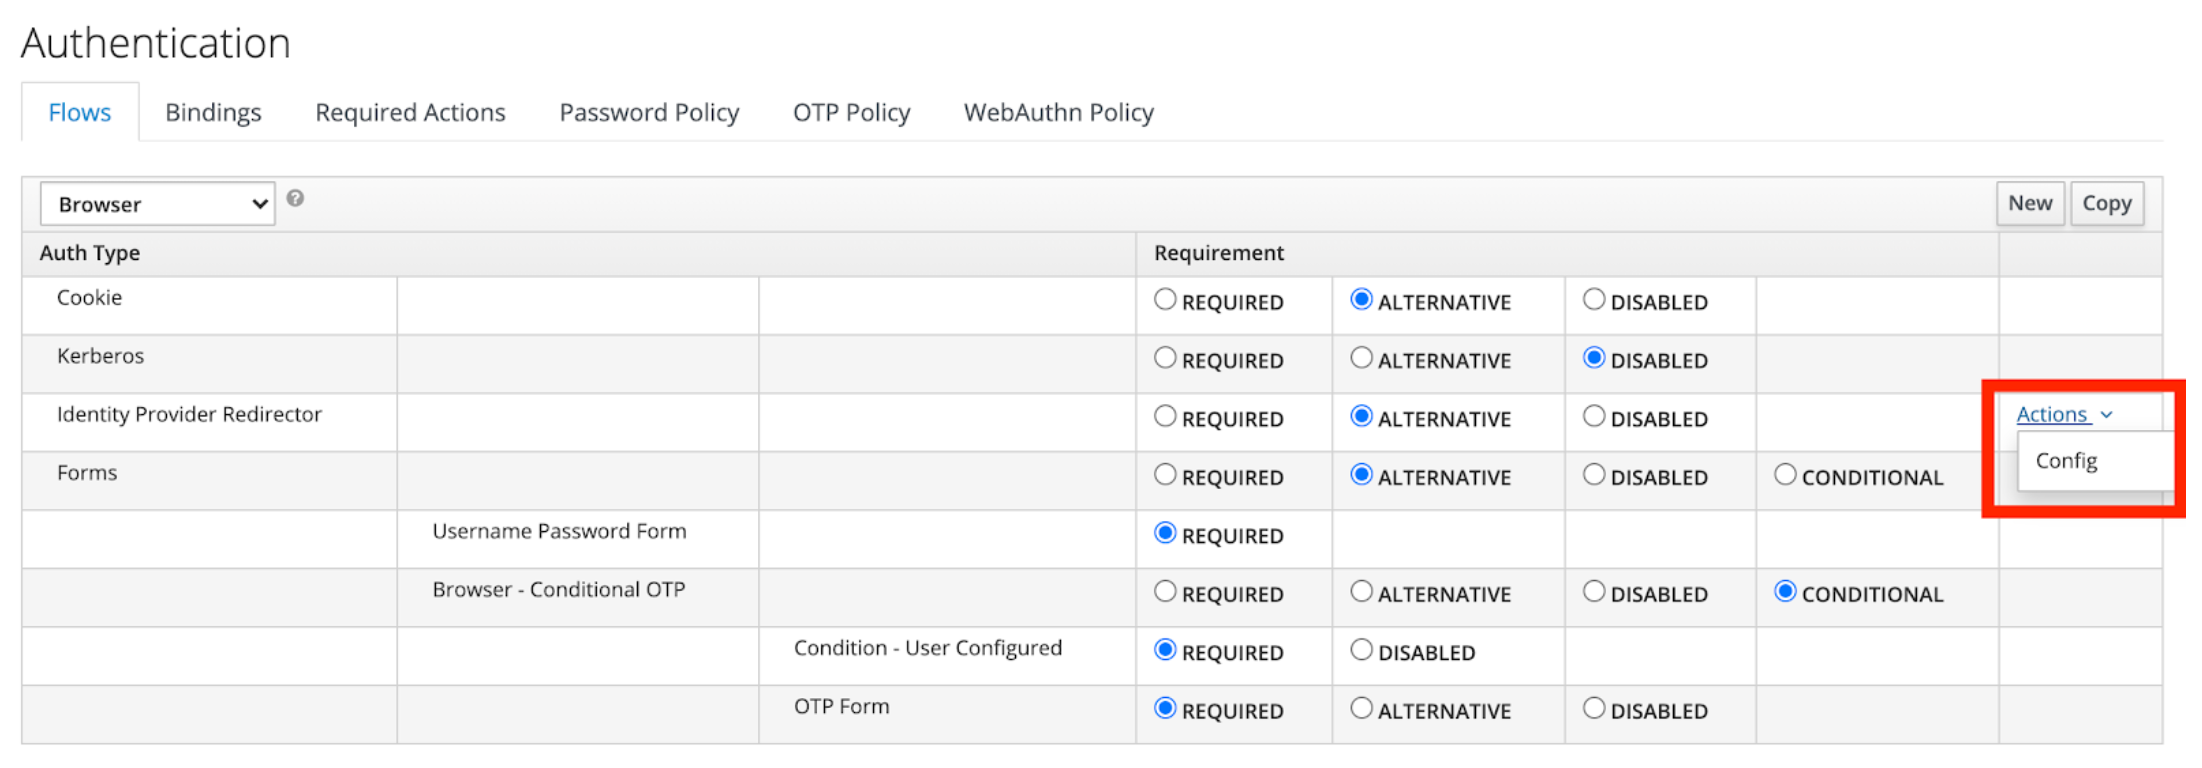
4. Set **Alias** and **Default Identity Provider** to the alias of the identity provider you created earlier.
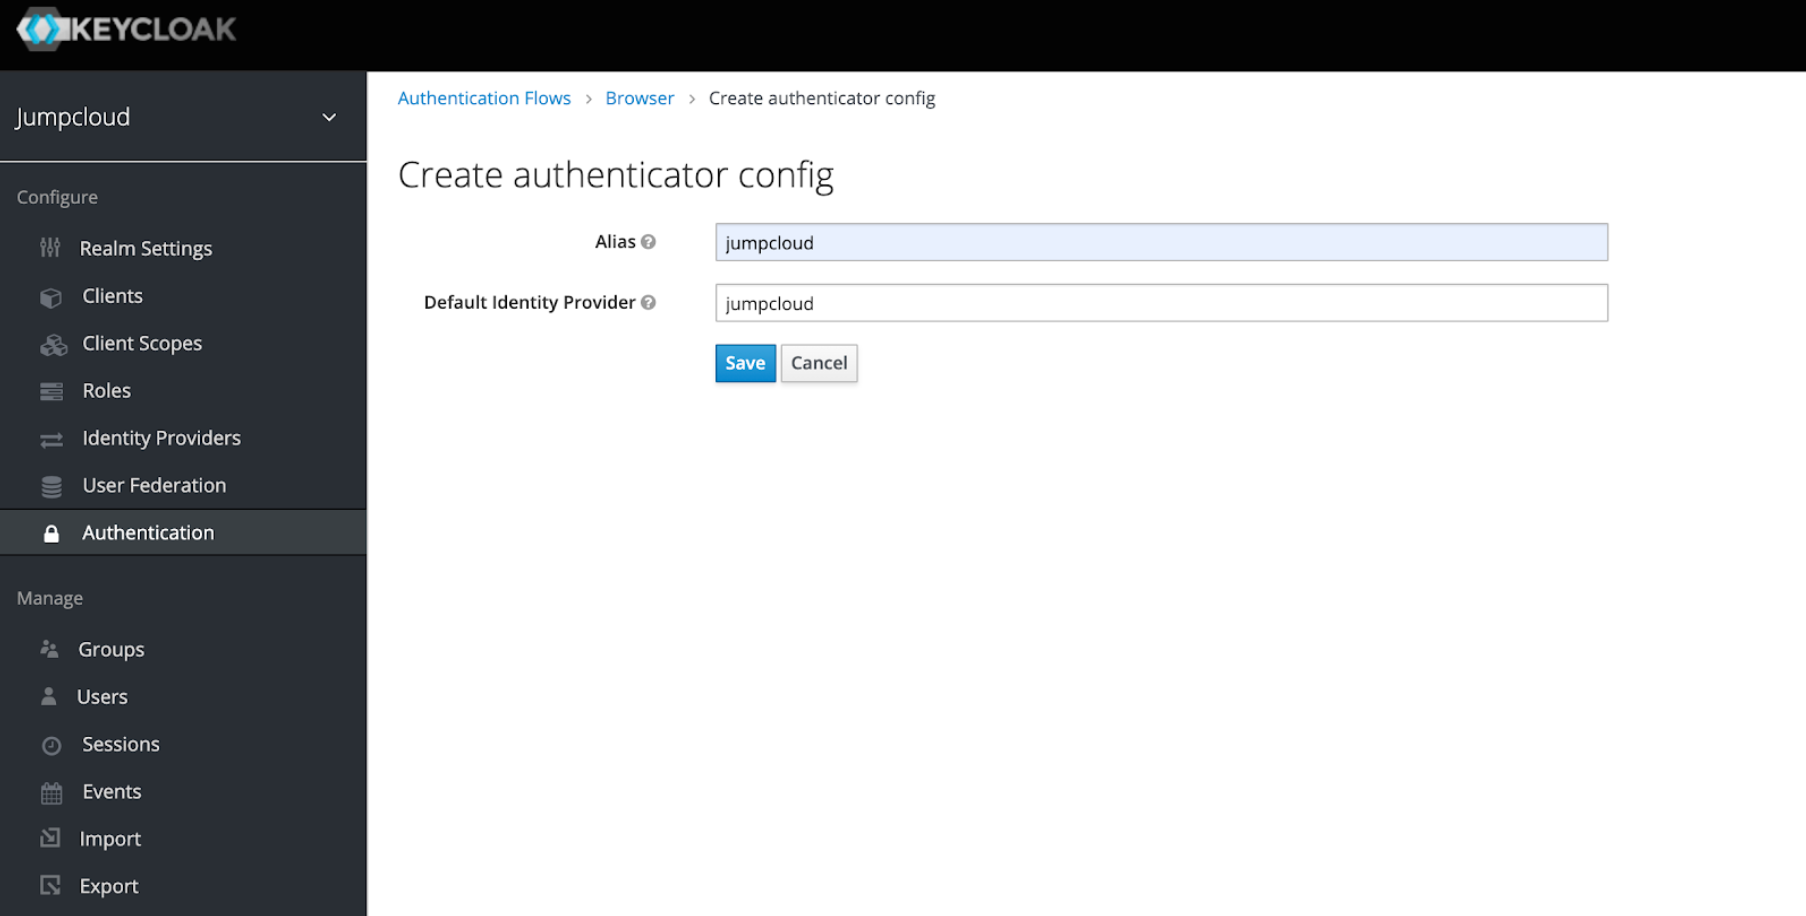
[](https://coder.com/docs/v1/guides/deployments/keycloak#step-4-configure-the-openid-connect-oidc-connector-in-keycloak)
Step 4: Configure the OpenID Connect (OIDC) Connector in Keycloak
------------------------------------------------------------------------------------------------------------------------------------------------------------------------------------------
1. Navigate to **Clients** and click **Create**.
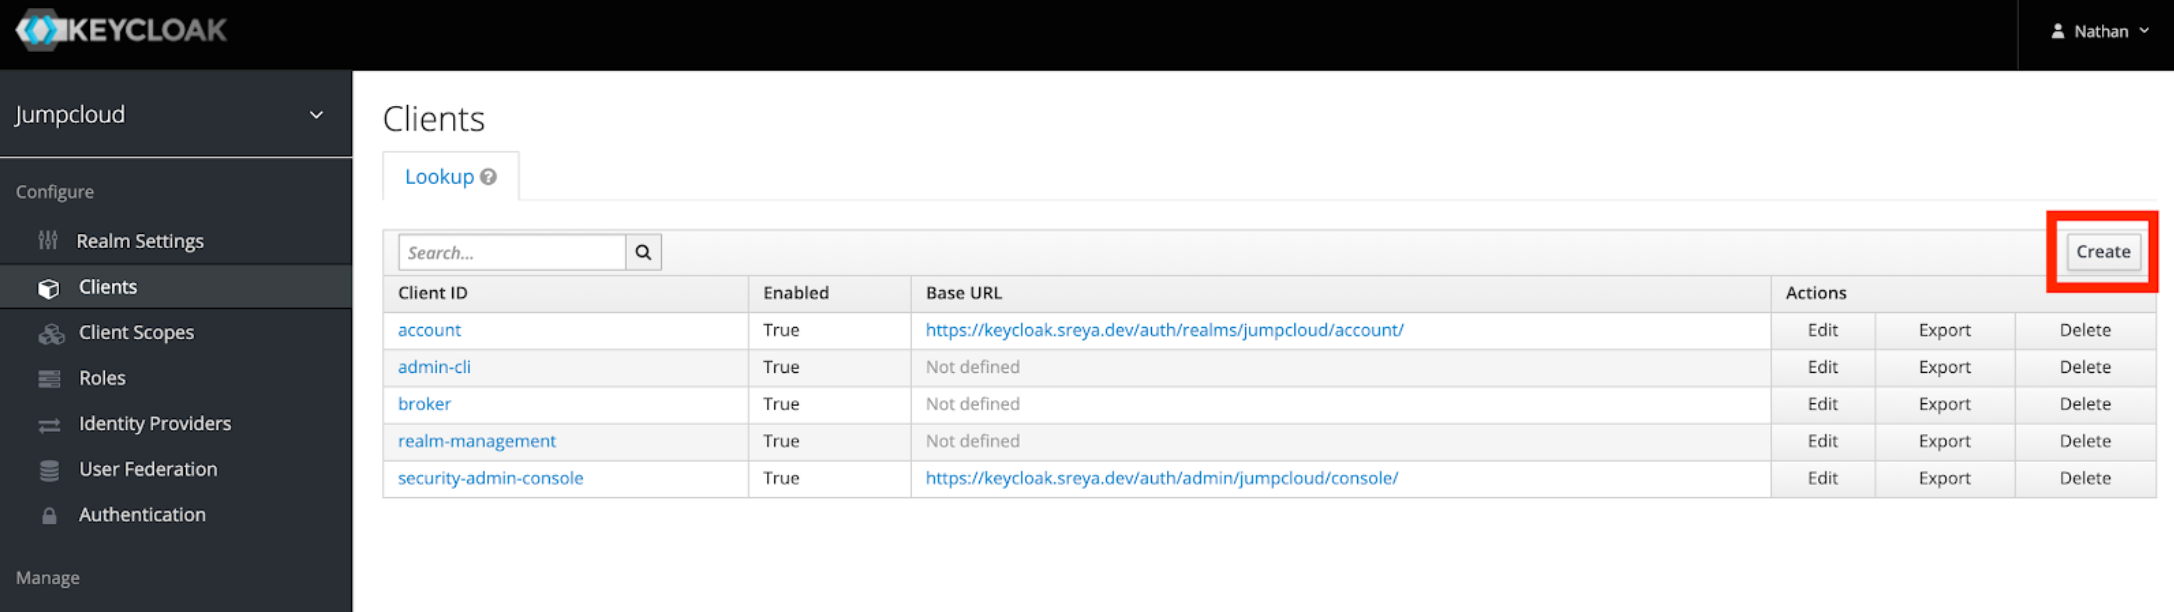
2. Add a new OIDC Client to point to your Coder deployment and click **Save**.
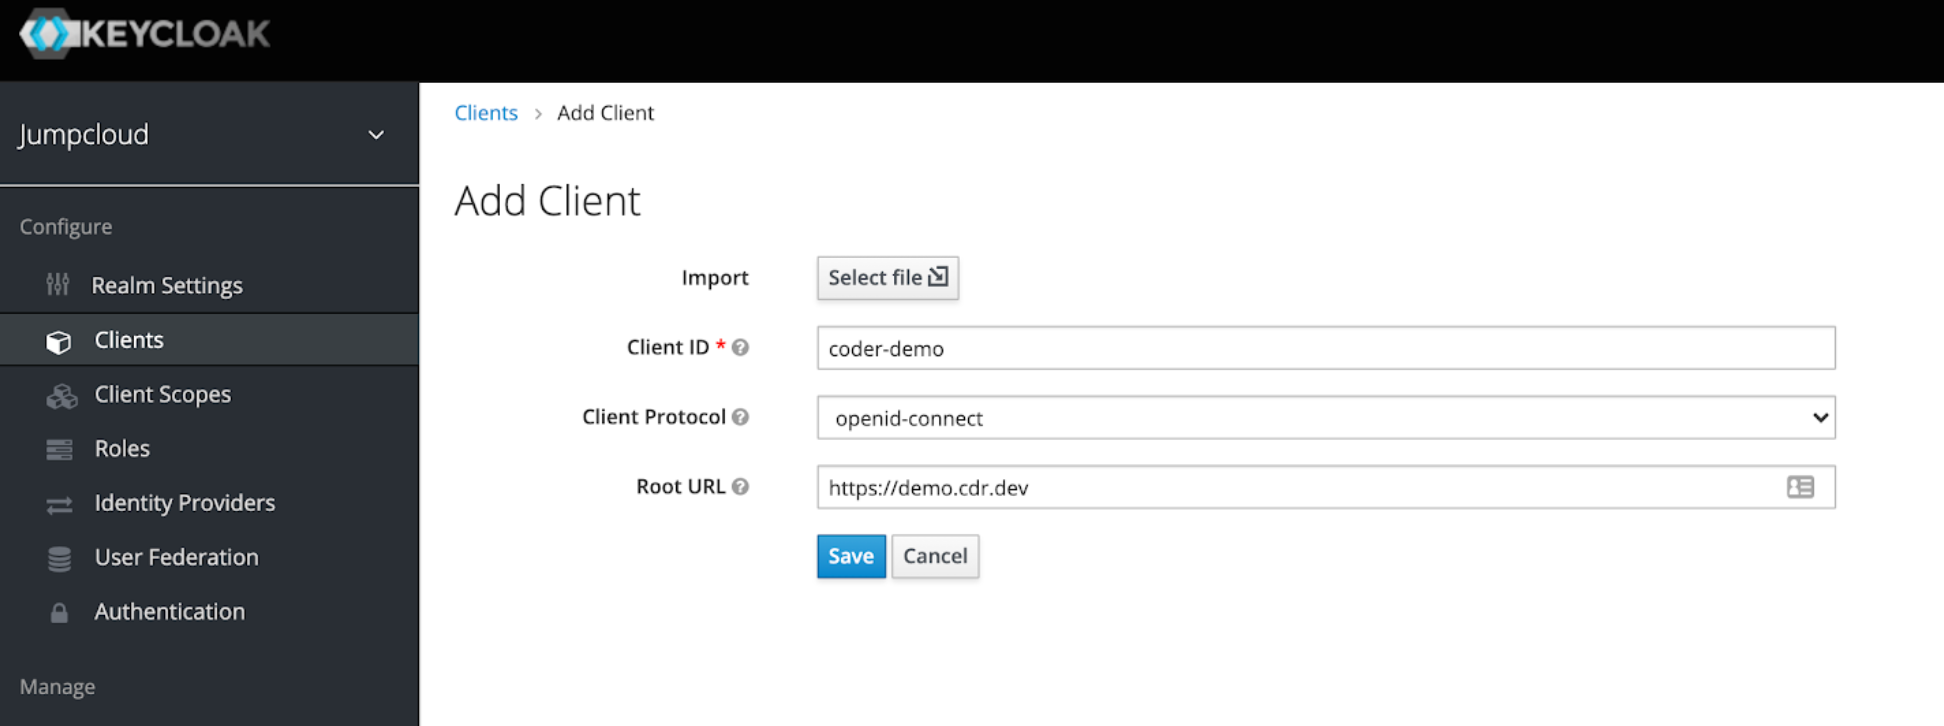
3. Once on the **Clients** configuration page, set the **Access Type** to **Confidential** and click **Save**.
4. Your client configuration should look something like the following (make sure that all of the values point to your Coder deployment):
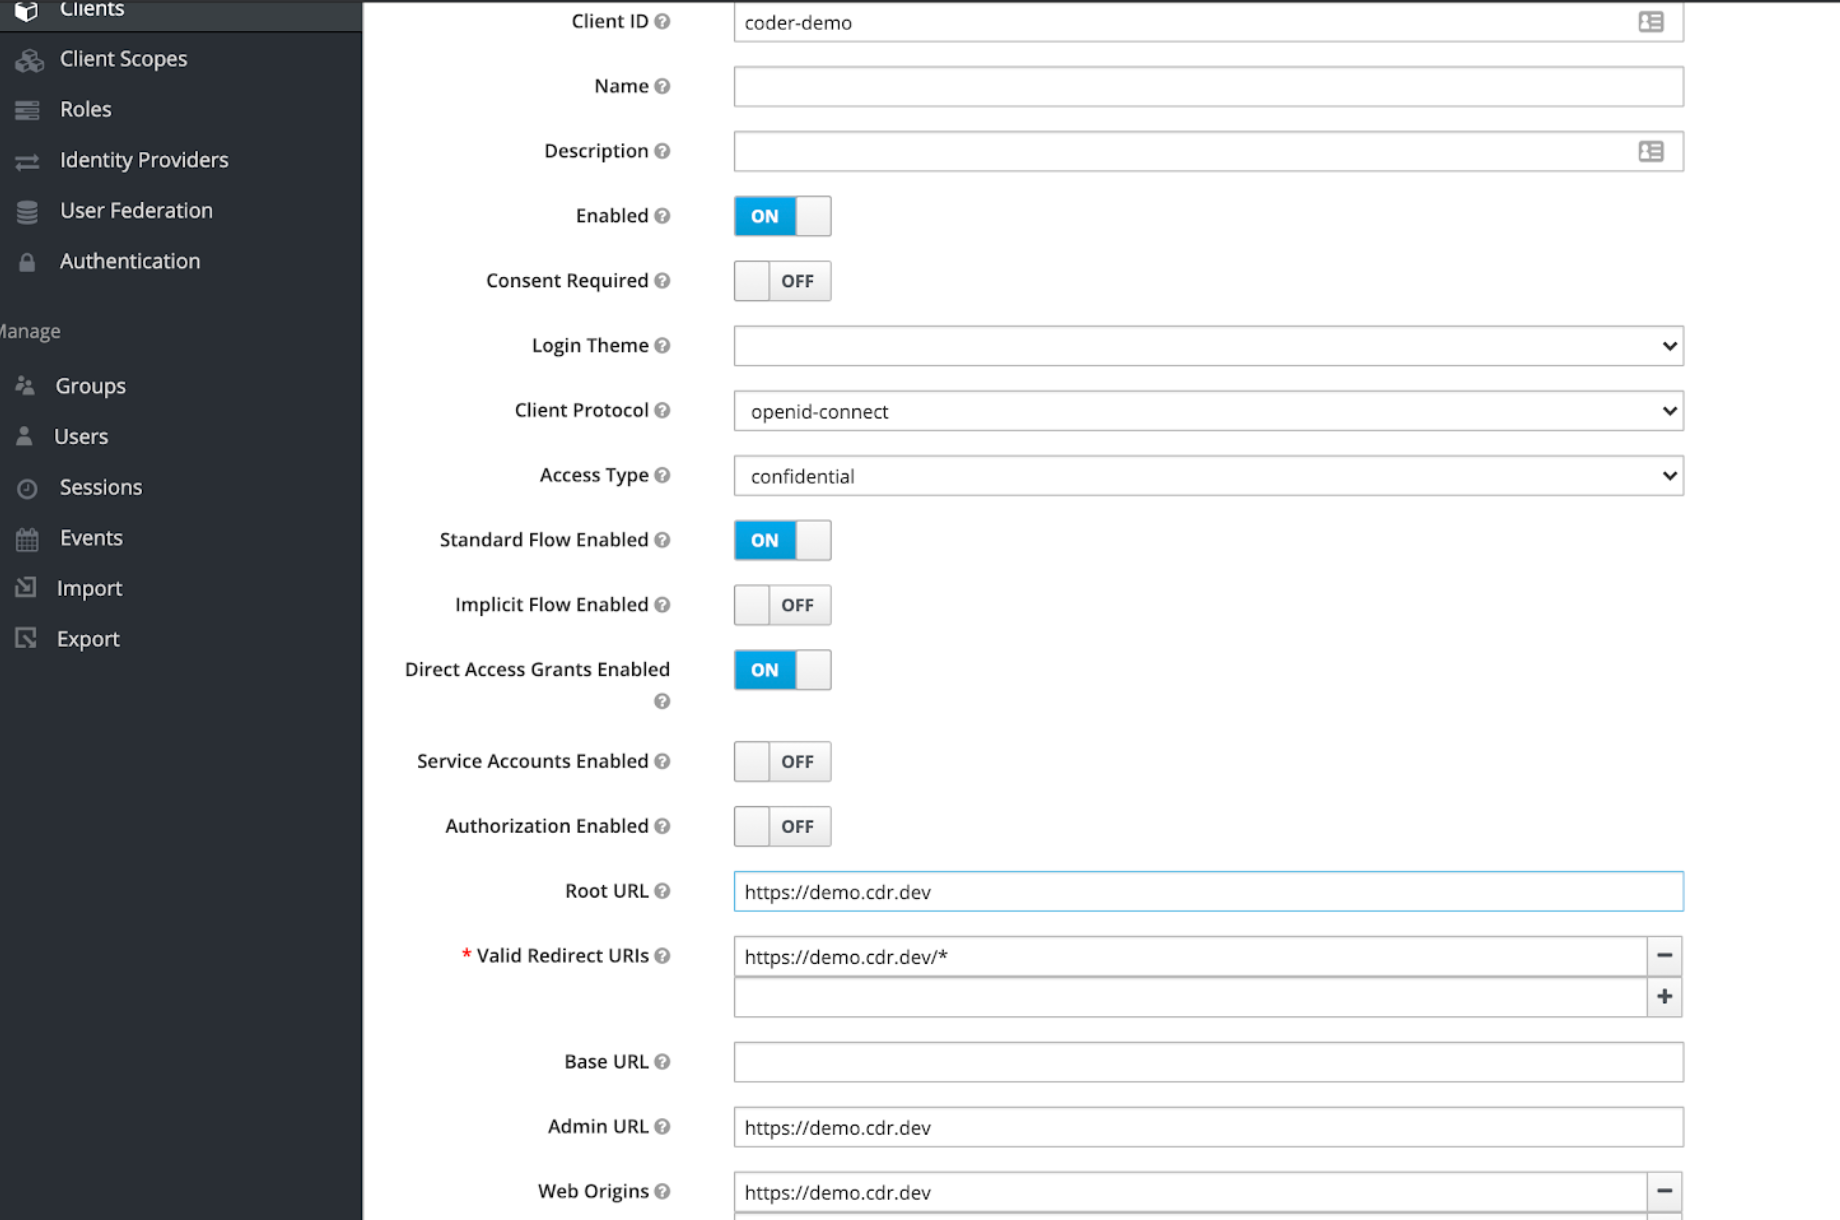
At this point, you can configure your Coder deployment to use the Keycloak OIDC Connector.
[](https://coder.com/docs/v1/guides/deployments/keycloak#step-5-configure-coder)
Step 5: Configure Coder
--------------------------------------------------------------------------------------------------------
1. Log in to Coder as an administrator and go to **Manage** > **Admin**.
2. Go to **Authentication** and select **OpenID Connect** from the dropdown.
3. Add the **Client ID** that you specified in Keycloak.
4. Add the **Secret** to the **Client Secret** field (you can get this value from the **Credentials** page in the Keycloak Clients Configuration).
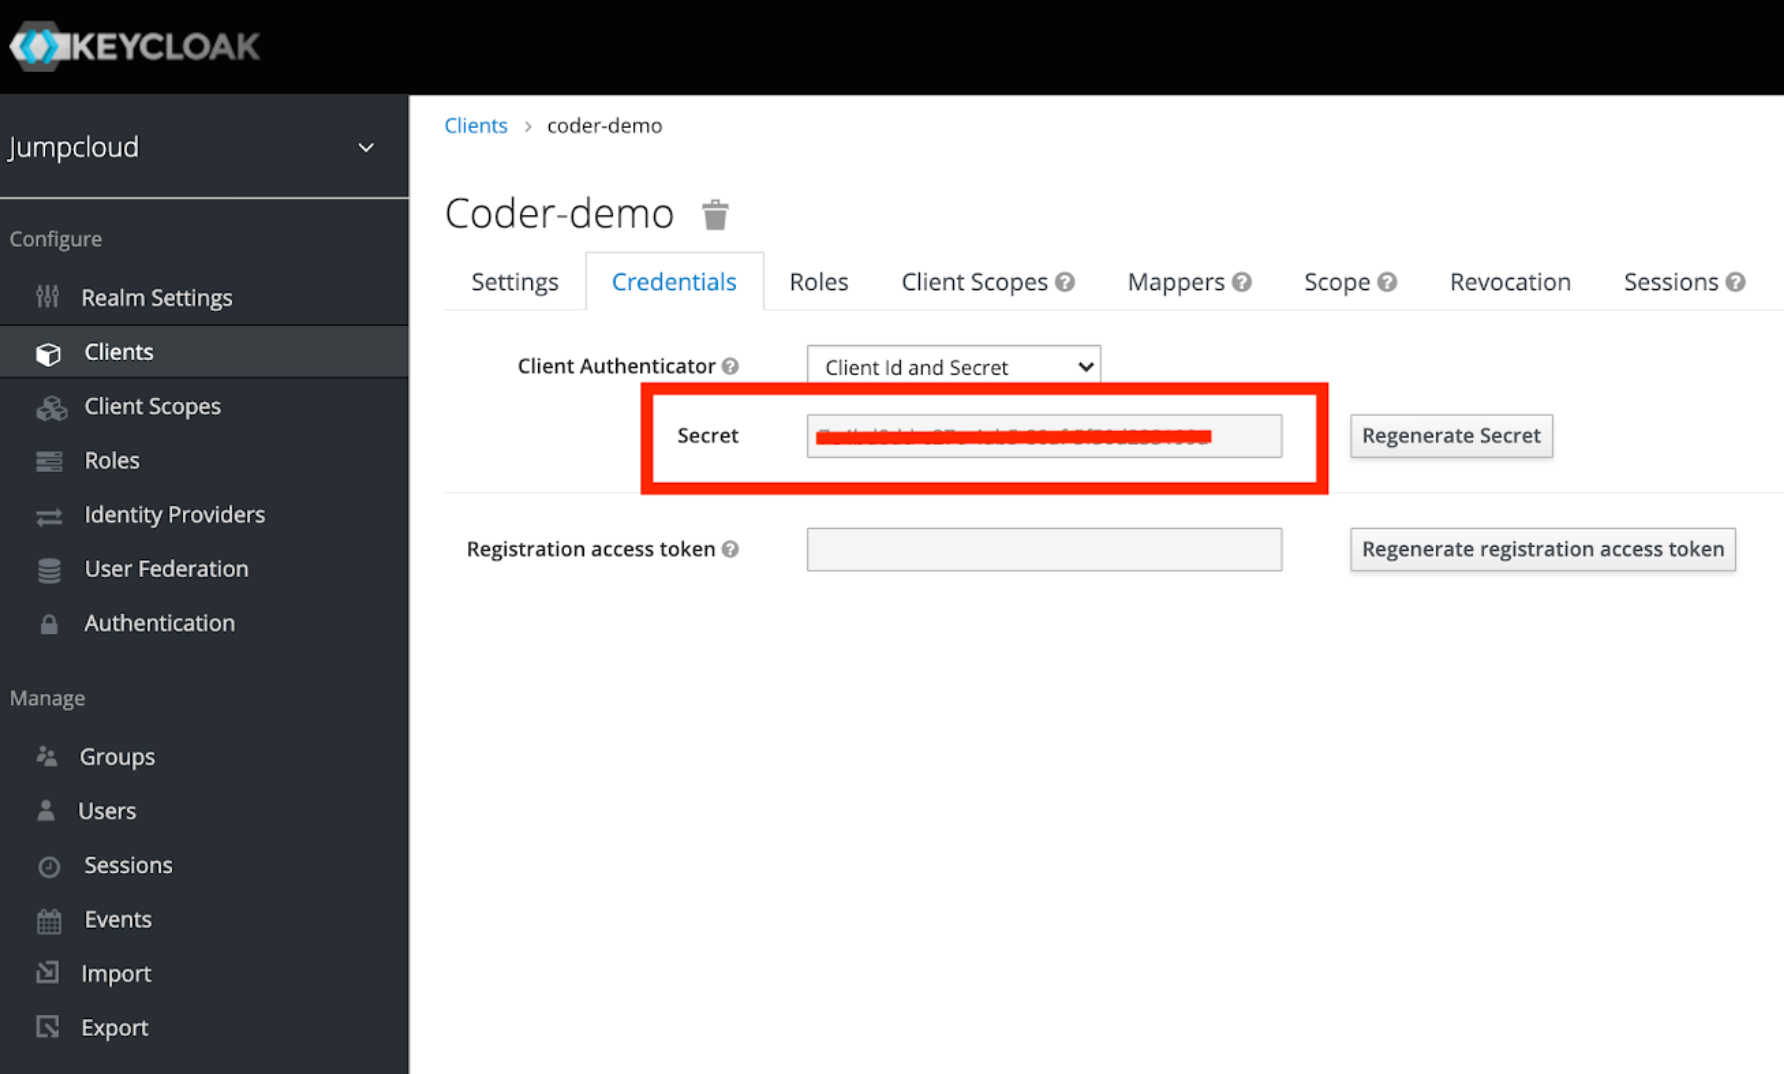
5. Add your Keycloak instance and Realm as the `Issuer`. This will be a URL formatted as follows: `https:///auth/realms/`
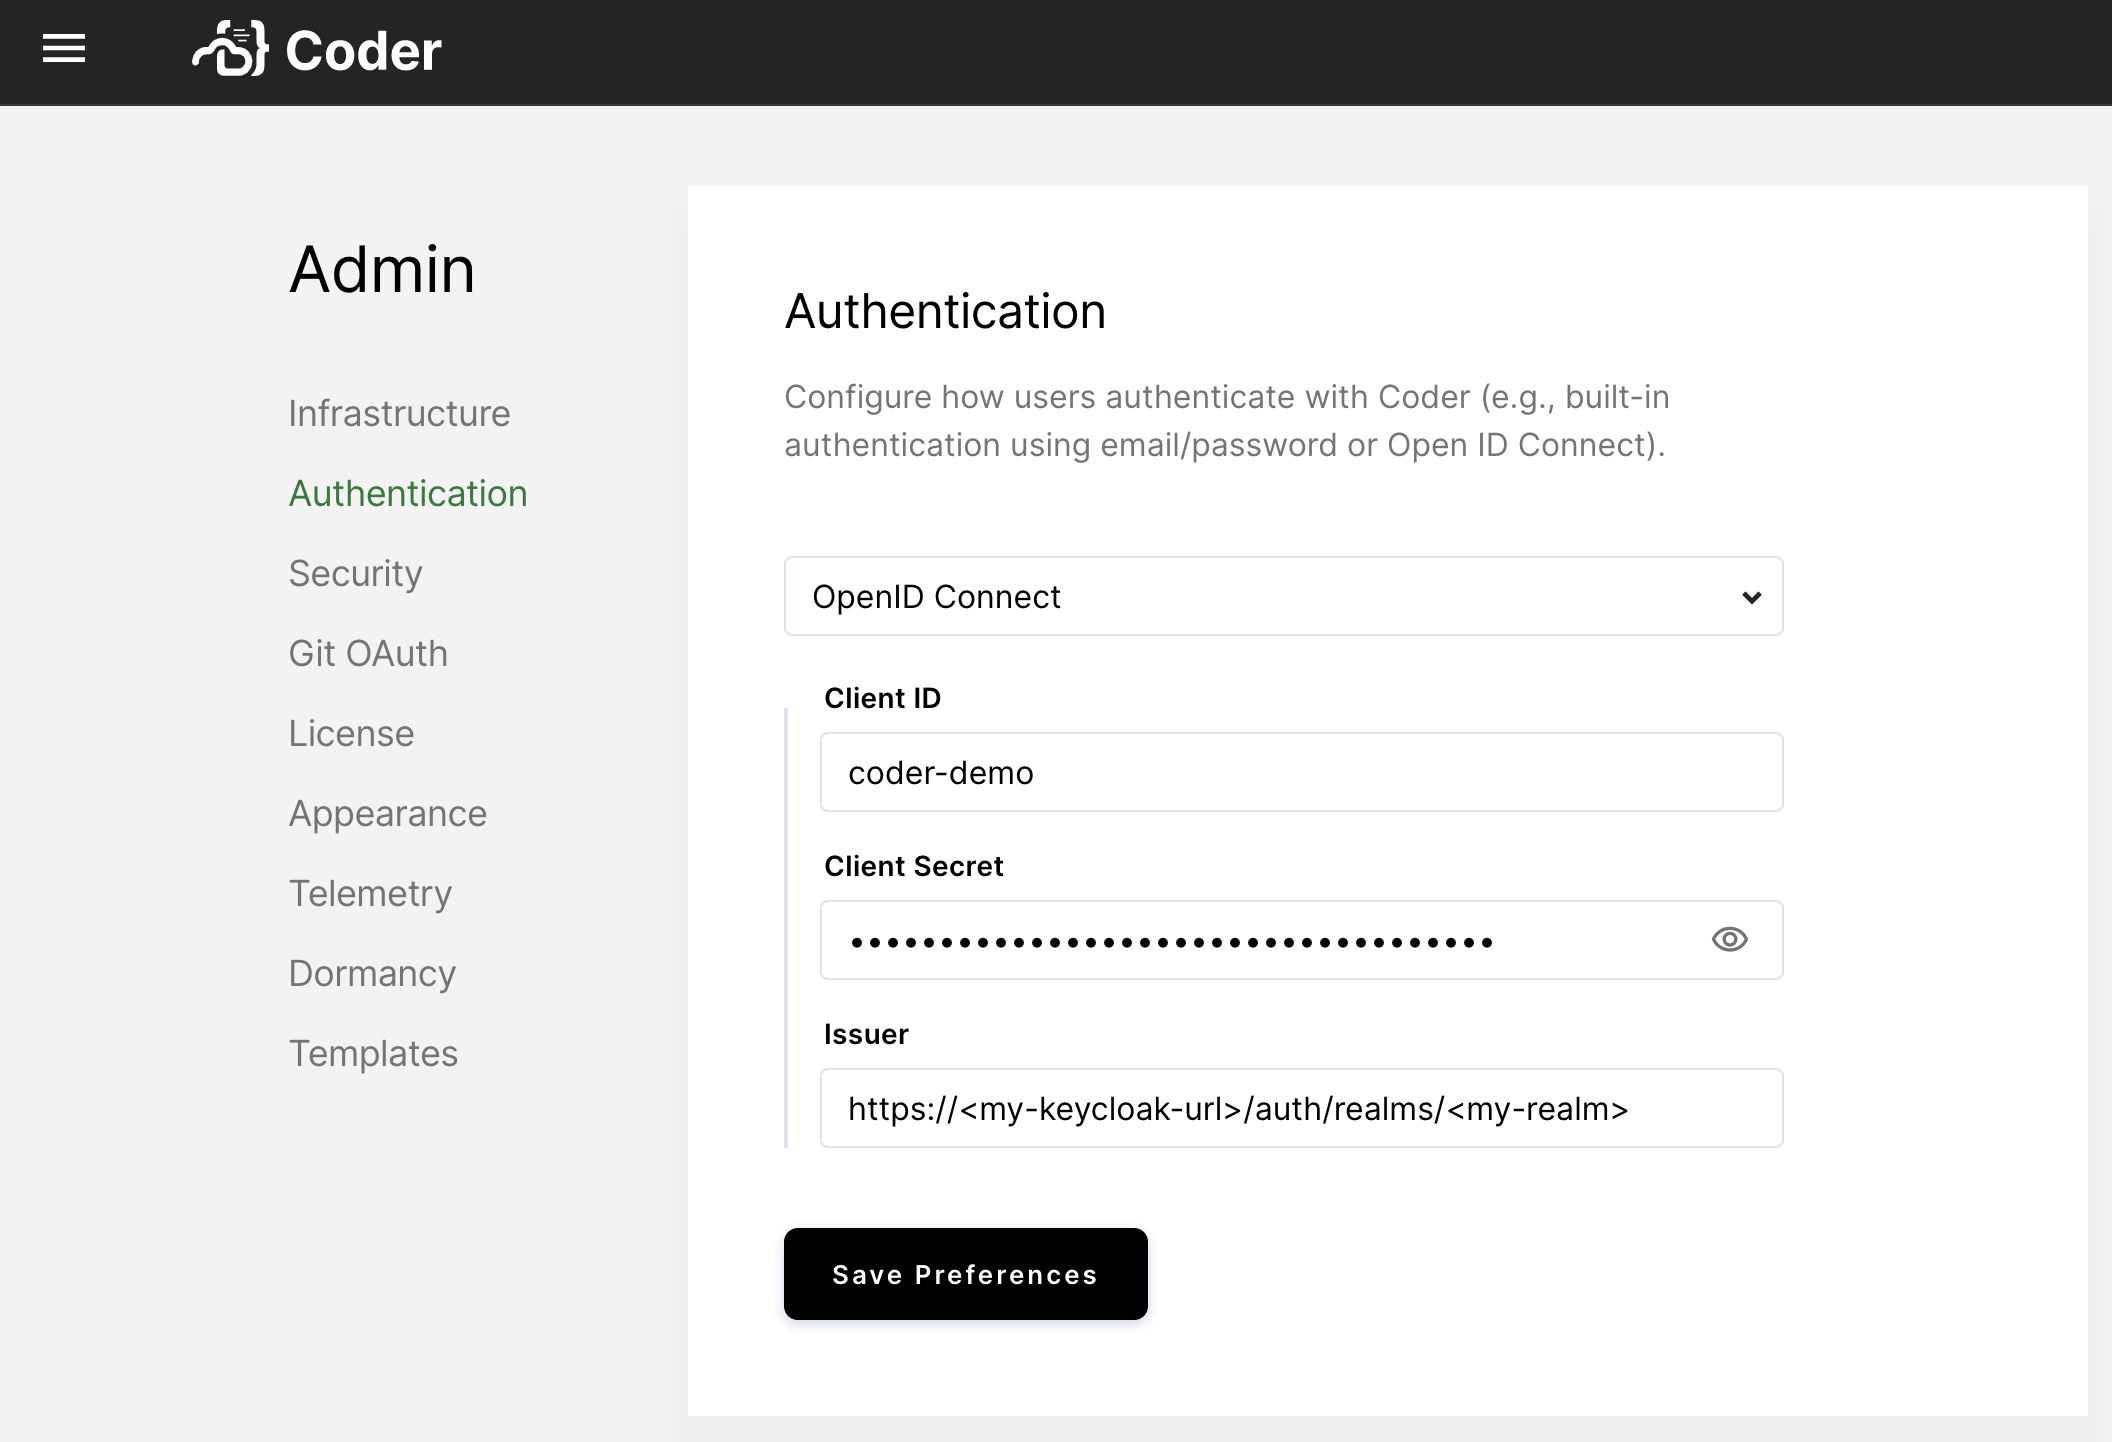
6. Click **Save Preferences**.
At this point, you should be able to log into Coder via OIDC.
> You may have to adjust your `Auth Type` on the `Users` page within your Coder deployment.
##### On this page
---
# PyCharm | Coder v1 Docs
[Home](https://coder.com/docs/v1 "Home")
[Getting started](https://coder.com/docs/v1/getting-started "Getting started")
PyCharm
This article will walk you through the process of getting started with a Coder workspace and a project that leverages PyCharm. You'll learn how to:
* Connect Coder to your Git provider;
* Create a workspace;
* Create your first Python project;
* Push your changes to GitHub.
[](https://coder.com/docs/v1/getting-started/pycharm#prerequisites)
Prerequisites
---------------------------------------------------------------------------------
This guide assumes that you have a Coder deployment available to you and that you have the credentials needed to access the deployment.
[](https://coder.com/docs/v1/getting-started/pycharm#step-1-log-in-and-connect-coder-to-your-git-provider)
Step 1: Log in and connect Coder to your Git provider
----------------------------------------------------------------------------------------------------------------------------------------------------------------
In this step, you'll log into Coder and connect and authenticate with your Git provider. This will allow you to do things like pull repositories and push changes.
1. Navigate to the Coder deployment using the URL provided to you by your site manager, and log in.
2. Click on your avatar in the top-right, and select **Account**.

3. Provide Coder with your SSH key to connect and authenticate to GitHub.
If your site manager has configured OAuth, go to **Linked Accounts** and follow the on-screen instructions to link your GitHub account.

If your site manager has _not_ configured OAuth, go to **SSH keys**. Copy your public SSH key and [provide it to GitHub](https://docs.github.com/en/authentication/connecting-to-github-with-ssh/adding-a-new-ssh-key-to-your-github-account)
.

[](https://coder.com/docs/v1/getting-started/pycharm#step-2-create-your-workspace)
Step 2: Create your workspace
----------------------------------------------------------------------------------------------------------------
You will now create the workspace to work on your development project.
1. Return to **Workspaces** using the top navigation bar.
2. Click **New workspace** to launch the workspace-creation dialog.
3. Provide a **Workspace Name**.
4. In the **Image** section, click **Packaged** (this tab contains Coder-provided images hosted in a Docker registry). Select **PyCharm**. This will populate the form in the **Import** tab.
5. Under **Workspace providers**, leave the default option (which is **built-in**) selected.
6. Expand the **Advanced** section. If the **Run as a container-based virtual machine** option is selected, _unselect_ the box. Leave the **CPU**, **Memory**, **Disk**, and **GPU** allocations as-is.
7. Scroll to the bottom and click **Create workspace**. The dialog will close, allowing you to see the main workspace page. On the right-hand side, you can track the workspace build process using the **Build log**.
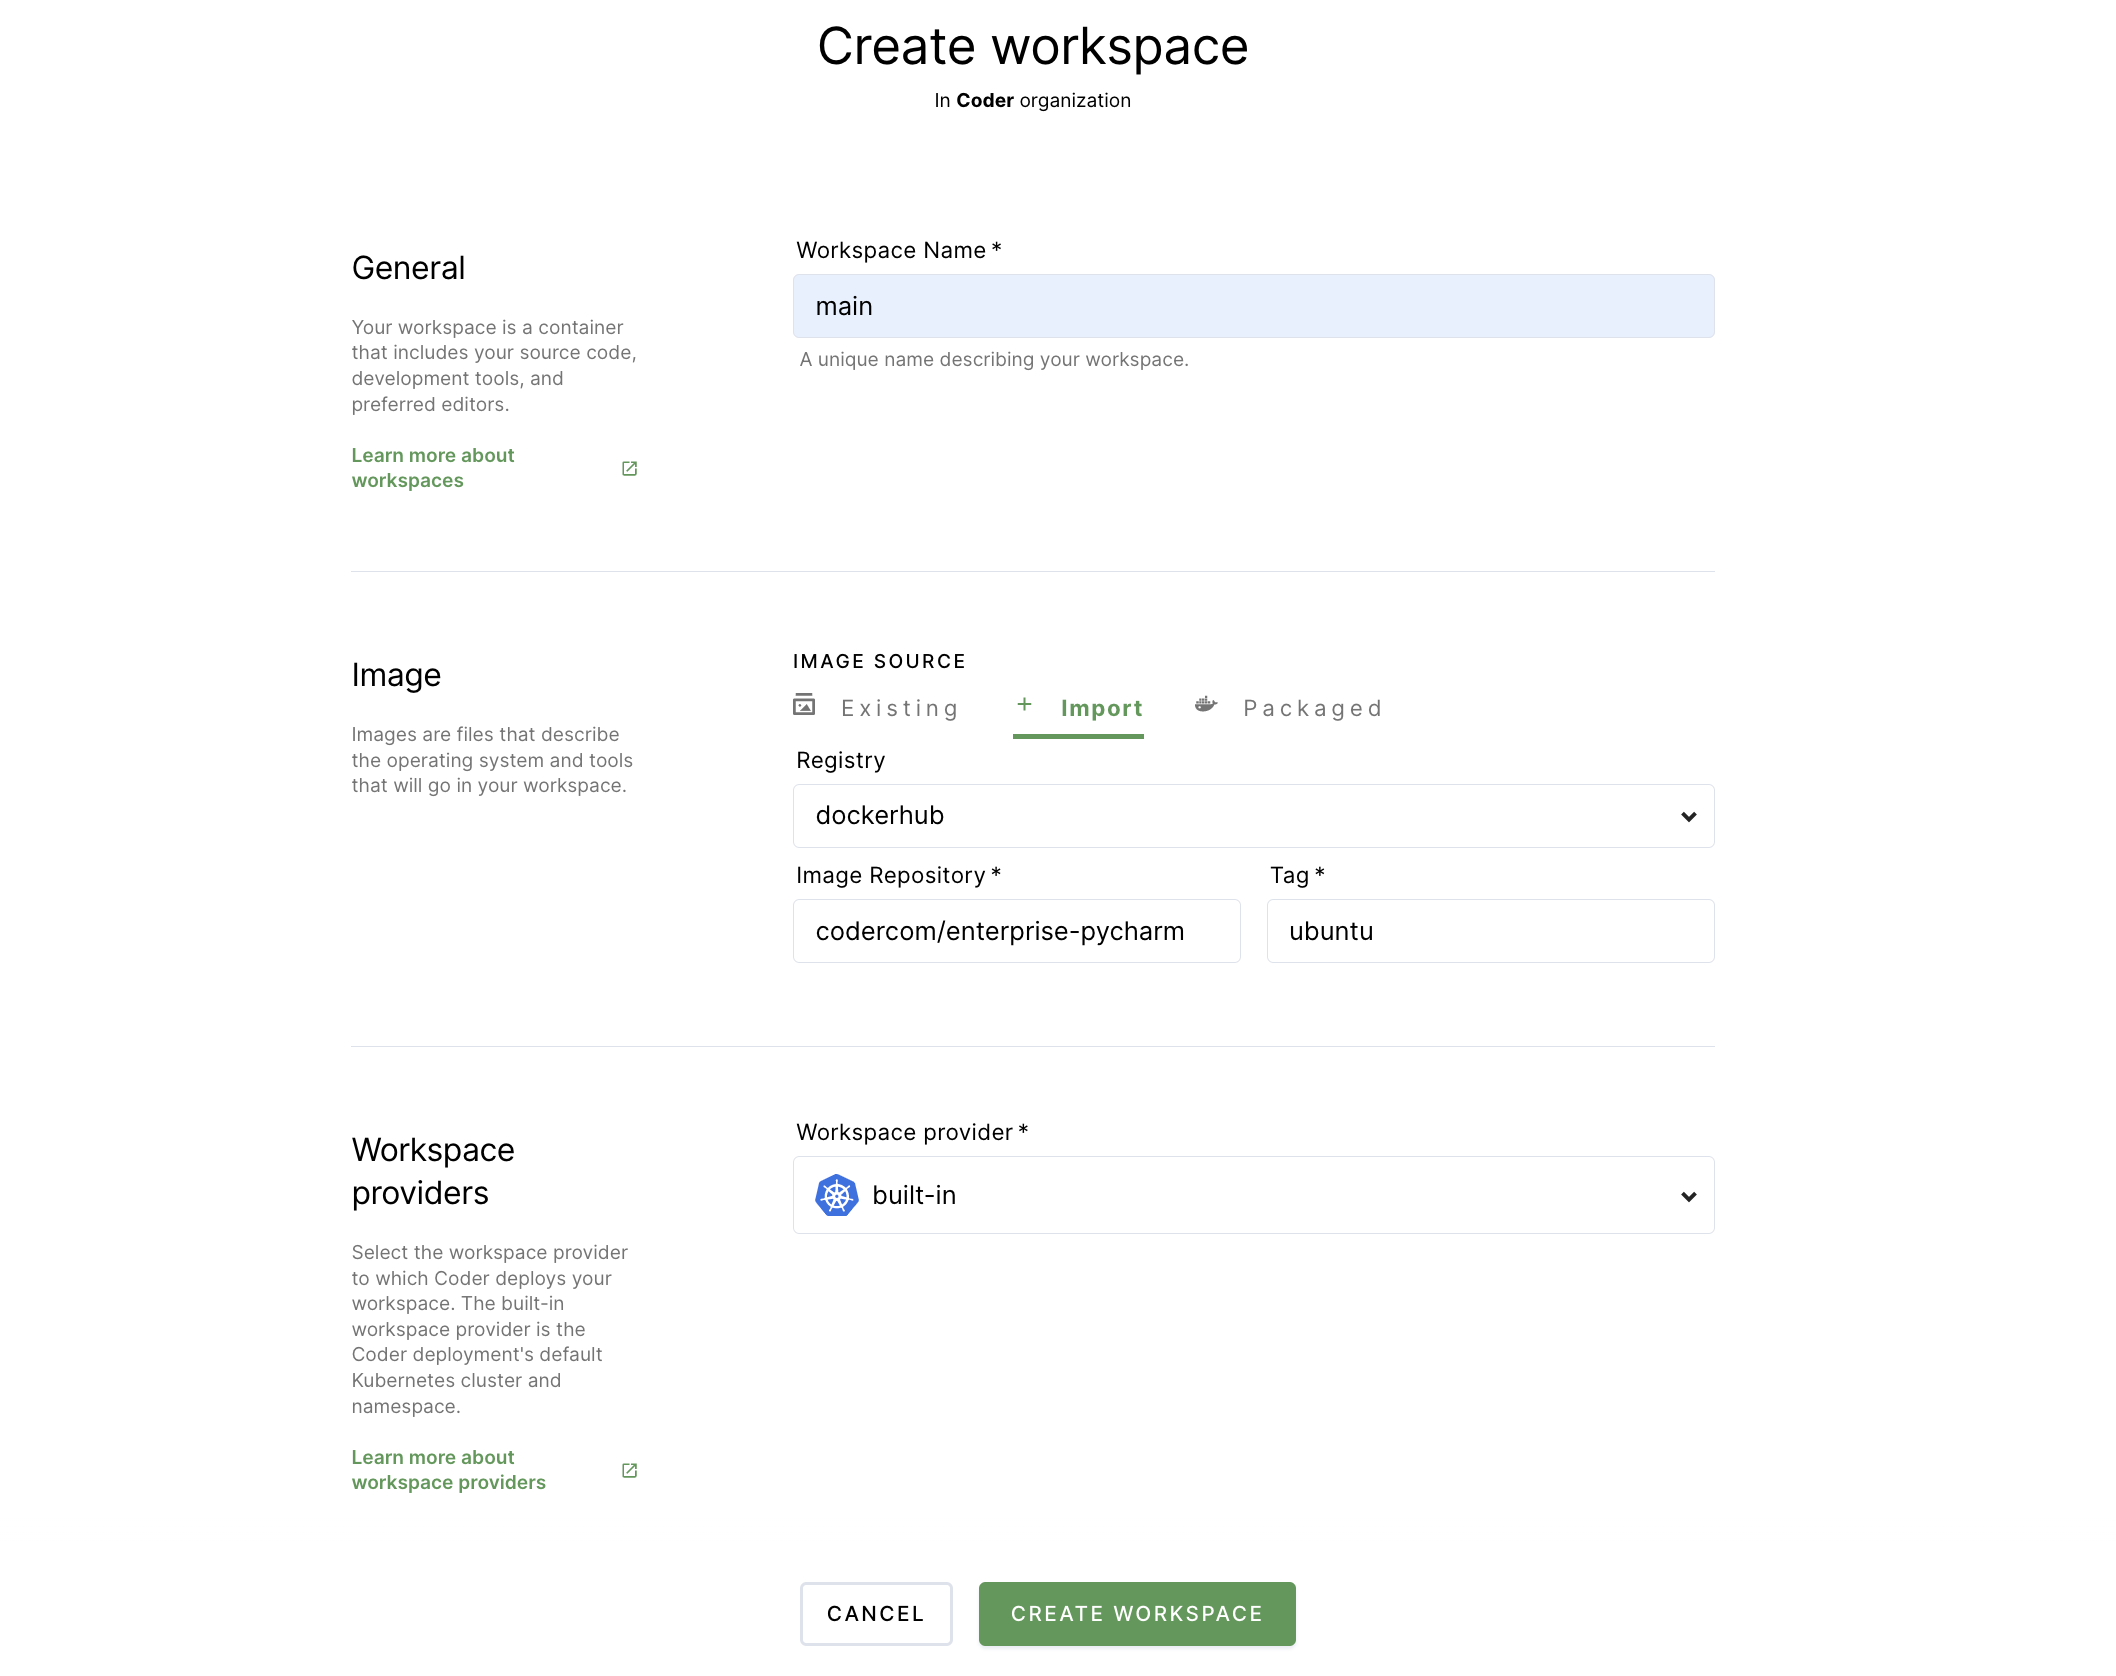
Once your workspace is ready for use, you'll see a chip that says **Running** next to the name of your workspace.
[](https://coder.com/docs/v1/getting-started/pycharm#step-3-create-a-sample-project-file-in-your-workspace)
Step 3: Create a sample project file in your workspace
------------------------------------------------------------------------------------------------------------------------------------------------------------------
Once you've created your workspace, you can start working in Coder. For the purposes of this article, we'll leverage JetBrains' tutorial on how to [Create and run your first Python project](https://www.jetbrains.com/help/pycharm/creating-and-running-your-first-python-project.html)
.
1. Under **Browser applications**, click **PyCharm Community** to open the IDE in your browser. Follow the prompts to accept the license agreement and determine data sharing permissions.
2. On the **Welcome to PyCharm** screen, click **New Project**.
3. In the window that pops up:
1. Provide the **Location** where PyCharm should save your files (for this example, we changed the highlighted portion to `task`, but you can name the folder whatever you'd like))
2. Ensure that **New environment using Virtualenv** is selected.
3. Make sure to **uncheck** the option to **Create a main.py welcome script**.
4. Click **Create** to proceed.
4. In the left-hand navigation bar, right-click on the **root** of your folder (for example, if you named the folder `task`, you would click where it says **task** in the navbar) and select **New** > **File**. When prompted, provide a name for your file (e.g., `car.py`).
5. The IDE automatically opens your new, empty file, allowing you to edit. Copy and paste the following [sample app from JetBrains](https://www.jetbrains.com/help/pycharm/creating-and-running-your-first-python-project.html#edit-file)
:
`` `class Car: def __init__(self, speed=0): self.speed = speed self.odometer = 0 self.time = 0 def say_state(self): print("I'm going {} kph!".format(self.speed)) def accelerate(self): self.speed += 5 def brake(self): if self.speed < 5: self.speed = 0 else: self.speed -= 5 def step(self): self.odometer += self.speed self.time += 1 def average_speed(self): if self.time != 0: return self.odometer / self.time else: pass if __name__ == '__main__': my_car = Car() print("I'm a car!") while True: action = input("What should I do? [A]ccelerate, [B]rake, " "show [O]dometer, or show average [S]peed? ").upper() if action not in "ABOS" or len(action) != 1: print("I don't know how to do that") continue if action == 'A': my_car.accelerate() elif action == 'B': my_car.brake() elif action == 'O': print("The car has driven {} kilometers".format(my_car.odometer)) elif action == 'S': print("The car's average speed was {} kph".format(my_car.average_speed())) my_car.step() my_car.say_state()` ``
6. At this point, you can run your application by right-clicking on the IDE editor window and selecting **Run** . Once the app starts, you can interact with it using the terminal at the bottom.
[](https://coder.com/docs/v1/getting-started/pycharm#step-5-push-your-repo-to-github)
Step 5: Push your repo to GitHub
----------------------------------------------------------------------------------------------------------------------
The following steps show you how to push your app to a newly created GitHub repo.
1. Log in to GitHub and navigate to [Create a new repository](https://github.com/new)
.
2. Provide a **repository name** and click **Create repository**.
3. Return to your workspace, and click **Terminal** at the bottom.
4. Run the following to turn your directory into a Git repository and commit your initial changes:
`` `cd .. git init cd git add -A git commit -am "Initial commit"` ``
5. Run the following in your terminal to add a remote to your GitHub repo, change the primary branch name to `main`, and push the contents to your newly created repo:
`` `git remote add origin [[email protected]](https://coder.com/cdn-cgi/l/email-protection) :/.git git branch -M main git push origin main` ``
6. Within the IDE window (near the top), you'll be prompted to log in to GitHub by providing your username and password/personal access token.
7. Next, Code Web will display an alert that says the GitHub extension wants to sign in; click **Allow** to proceed.
8. In the subsequent window, click **Continue** to authorize Visual Studio Code to access GitHub.
At this point, the contents of your repo should be pushed to GitHub.
##### On this page
---
# Satellites | Coder v1 Docs
[Home](https://coder.com/docs/v1 "Home")
[Admin](https://coder.com/docs/v1/admin "Admin")
Satellites
Workspace providers allow a single Coder deployment to provision and manage workspaces across multiple Kubernetes clusters and namespaces, including those located in other geographies, regions, or clouds.
Satellites are Coder deployments that are used as access points to workspaces provisioned in a multi-region pattern. Satellites reduce latency for developers by acting as local proxies to the workspaces, keeping traffic from the developer's machine to the workspaces within the same region instead of requiring the traffic to cross regions back to the primary Coder deployment.
Satellites act as a secure reverse proxy to both Coder workspaces and the primary Coder deployment. Traffic meant for workspaces, such as web and SSH connections, are sent directly to the workspaces, while all other traffic is routed to the primary Coder deployment.
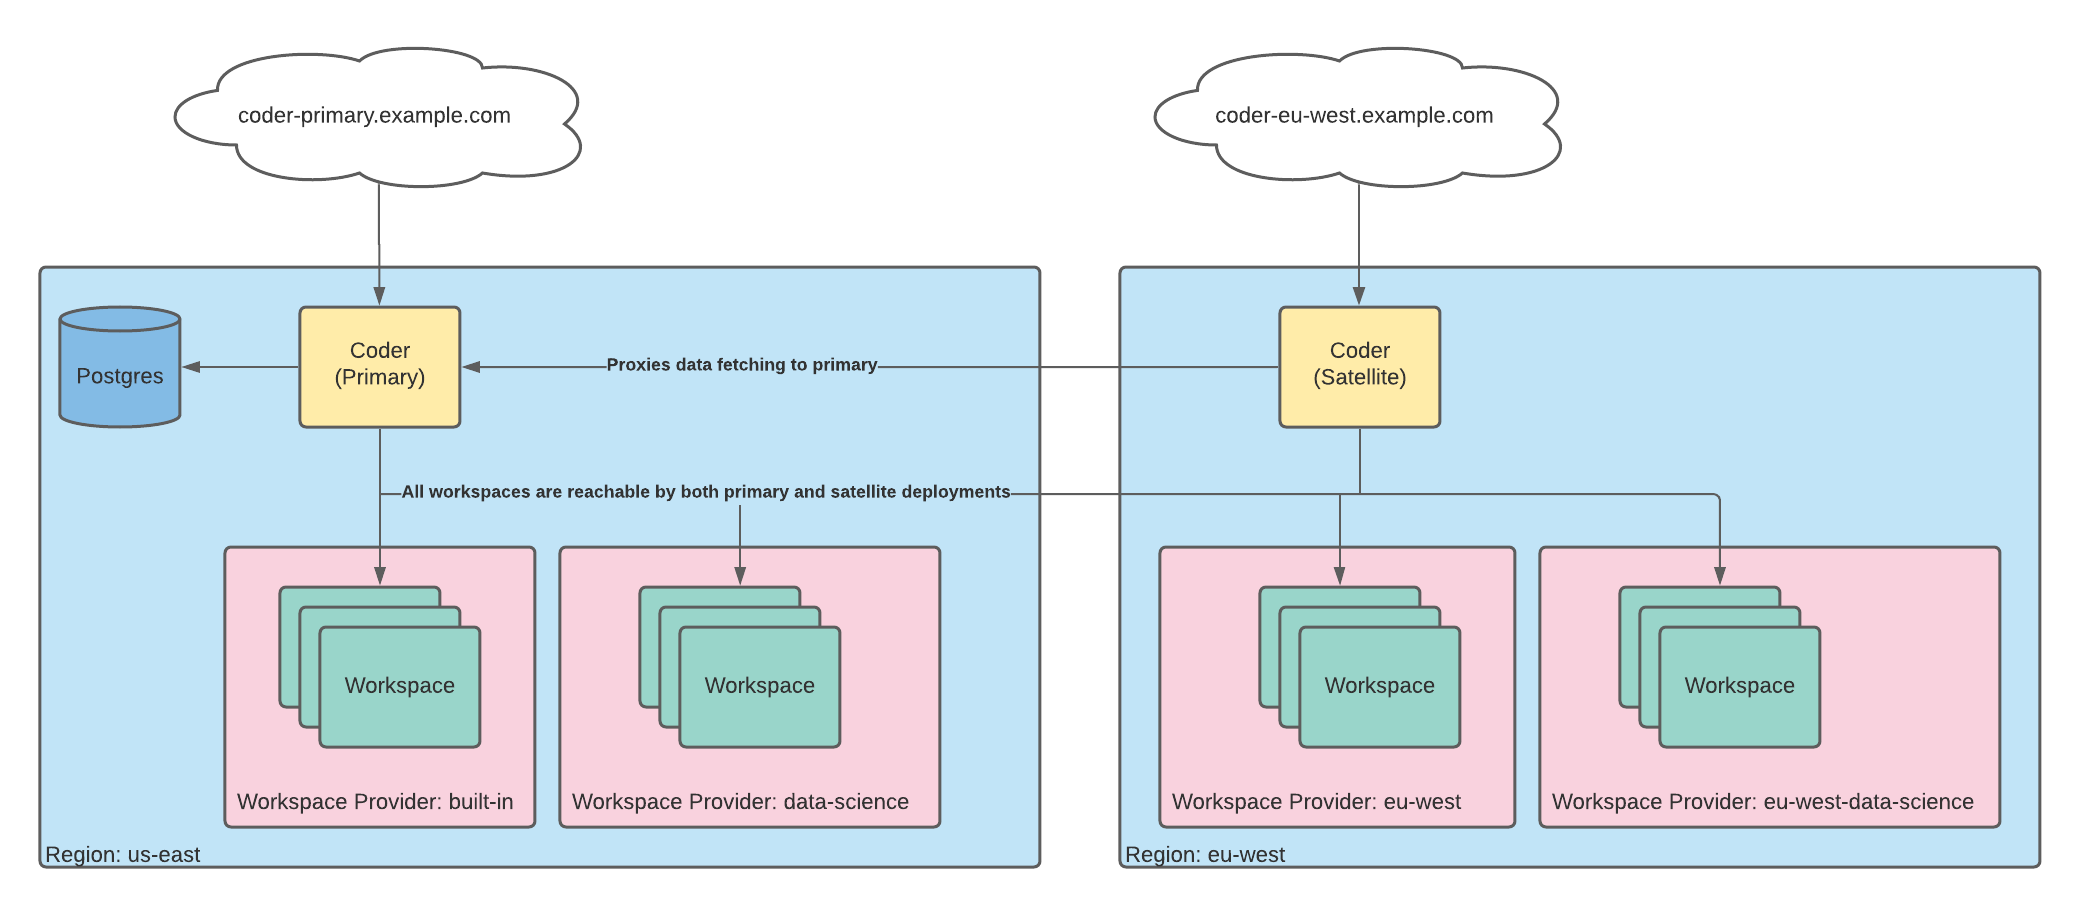
Coder users connect to the satellite deployment that's geographically closest to them instead of to the primary deployment, gaining the benefits of local proxying.
---
# Image registry | Coder v1 Docs
[Home](https://coder.com/docs/v1 "Home")
[Guides](https://coder.com/docs/v1/guides "Guides")
[Troubleshooting](https://coder.com/docs/v1/guides/troubleshooting "Troubleshooting")
Image registry
When configuring Coder to use a local image registry in an air-gapped network, you may encounter an error similar to the following:
`` `An error occurred while submitting unable to ping registry for 'new transport: Get "https://registry-url.org": x509: certificate signed by unknown authority` ``
[](https://coder.com/docs/v1/guides/troubleshooting/registry#why-this-happens)
Why this happens
-----------------------------------------------------------------------------------------------
The local registry you are configuring is expecting a valid certificate to authenticate the connection with Coder. You will receive this error if:
* You do not have a certificate configured
* There is an issue with the certificate itself
> Coder uses Docker's Registry 2.0 implementation, which supports self-signed certificates and assumes that the protocol you're using will be HTTPS.
[](https://coder.com/docs/v1/guides/troubleshooting/registry#troubleshooting-steps)
Troubleshooting steps
---------------------------------------------------------------------------------------------------------
* If you haven't created the local registry, and you haven't generated the self-signed certificate, [please see our documentation](https://coder.com/docs/v1/setup/air-gapped/infrastructure)
on setting these up.
* Check to see if your `registry.crt` file is stored in the correct location on each of your Kubernetes nodes. Depending upon your Linux distribution and container runtime, it may be in any of the following locations:
`` `/usr/local/share/ca-certificates/registry.crt /etc/docker/certs.d/${REGISTRY_DOMAIN_NAME}/ca.crt /etc/ssl/certs/registry.crt /etc/pki/tls/registry.crt` ``
* If your cluster uses `containerd`, ensure the following patch has been applied to the `/etc/containerd/config.toml` file:
`` `[plugins."io.containerd.grpc.v1.cri".registry.configs."$REGISTRY_DOMAIN_NAME".tls] insecure_skip_verify = true` ``
Ensure that you've created the self-signed certificate secret in your Kubernetes cluster:
`` `kubectl -n coder get secret local-registry-cert -o yaml` ``
If none of these steps resolve the issue, please [contact us](https://coder.com/contact)
for further support.
##### On this page
---
# Environment variables | Coder v1 Docs
[Home](https://coder.com/docs/v1 "Home")
[Workspaces](https://coder.com/docs/v1/workspaces "Workspaces")
Environment variables
Coder injects a standard set of environment variables that allow you to access contextual information about your workspace.
To obtain a list of environment variables and their values, launch the **Terminal** via the Coder Dashboard and run:
`` `env | grep CODER_` ``
[](https://coder.com/docs/v1/workspaces/variables#available-environment-variables)
Available environment variables
------------------------------------------------------------------------------------------------------------------
| Environment variable | Description |
| --- | --- |
| `CODER_ASSETS_ROOT` | The directory where coder adds Coder-specific assets during workspace creation, such as the `coder-cli` binary |
| `CODER_CPU_LIMIT` | The CPU core limit given to your workspace |
| `CODER_IMAGE_DIGEST` | The content-addressable identifier for your image |
| `CODER_IMAGE_TAG` | The image tag used to create your workspace |
| `CODER_IMAGE_URI` | The URI of the image used to build the workspace |
| `CODER_MEMORY_LIMIT` | The memory limit given to your workspace in GB |
| `CODER_ORGANIZATION_ID` | The ID of the organization to which the workspace belongs. |
| `CODER_RUNTIME` | The container runtime used to start the workspace (either `kubernetes/default` or `kubernetes/sysbox` if the workspace is a CVM |
| `CODER_URL` | The base URL of your Coder deployment |
| `CODER_USER_EMAIL` | Your email address |
| `CODER_USERNAME` | Your user name |
| `CODER_WORKSPACE_ID` | The unique ID of your workspace |
| `CODER_WORKSPACE_NAME` | The name of your workspace |
| `CODER_WP_NAME` | The name of the workspace provider hosting the workspace |
[](https://coder.com/docs/v1/workspaces/variables#other-variables)
Other variables
----------------------------------------------------------------------------------
Coder uses the following environment variables for its internal operation:
> **Important**: These variables may be modified or removed in future releases without prior notice and are not covered by Coder's backward compatibility policy. These are documented here for your information only.
| Environment variable | Description |
| --- | --- |
| `CODER_AGENT_TOKEN` | The token used by the [Coder Agent](https://coder.com/docs/v1/setup/architecture) to authenticate with `coderd`. The Coder Agent handles tunnelled connections, collects workspace statistics (such as processor and memory utilization), and manages programs, such as editors. |
| `CODER_AGENT_URL` | The URL that the `coder agent` process uses to connect to `coderd`. If this is not set, the agent will connect to `CODER_URL` instead, enabling the `coder agent` and `coder` command-line tool to connect to different installations. |
| `CODER_BOOTSTRAP_SCRIPT` | The script used to initiate the workspace startup sequence when the [self-contained workspace builds](https://coder.com/docs/v1/admin/workspace-management/self-contained-builds) feature is active; begins by downloading the "bootstrap agent" from the `coderd` process. |
##### On this page
---
# Audit | Coder v1 Docs
[Home](https://coder.com/docs/v1 "Home")
[Admin](https://coder.com/docs/v1/admin "Admin")
Audit
Coder maintains records of all user actions on system resources for auditing purposes.
Any user who is a **Site Manager** or an **Auditor** can log into Coder, go to **Manage** > **Audit**, and view the **Audit Logs**.
By default, this page displays a chronological list of all actions taken on the system.
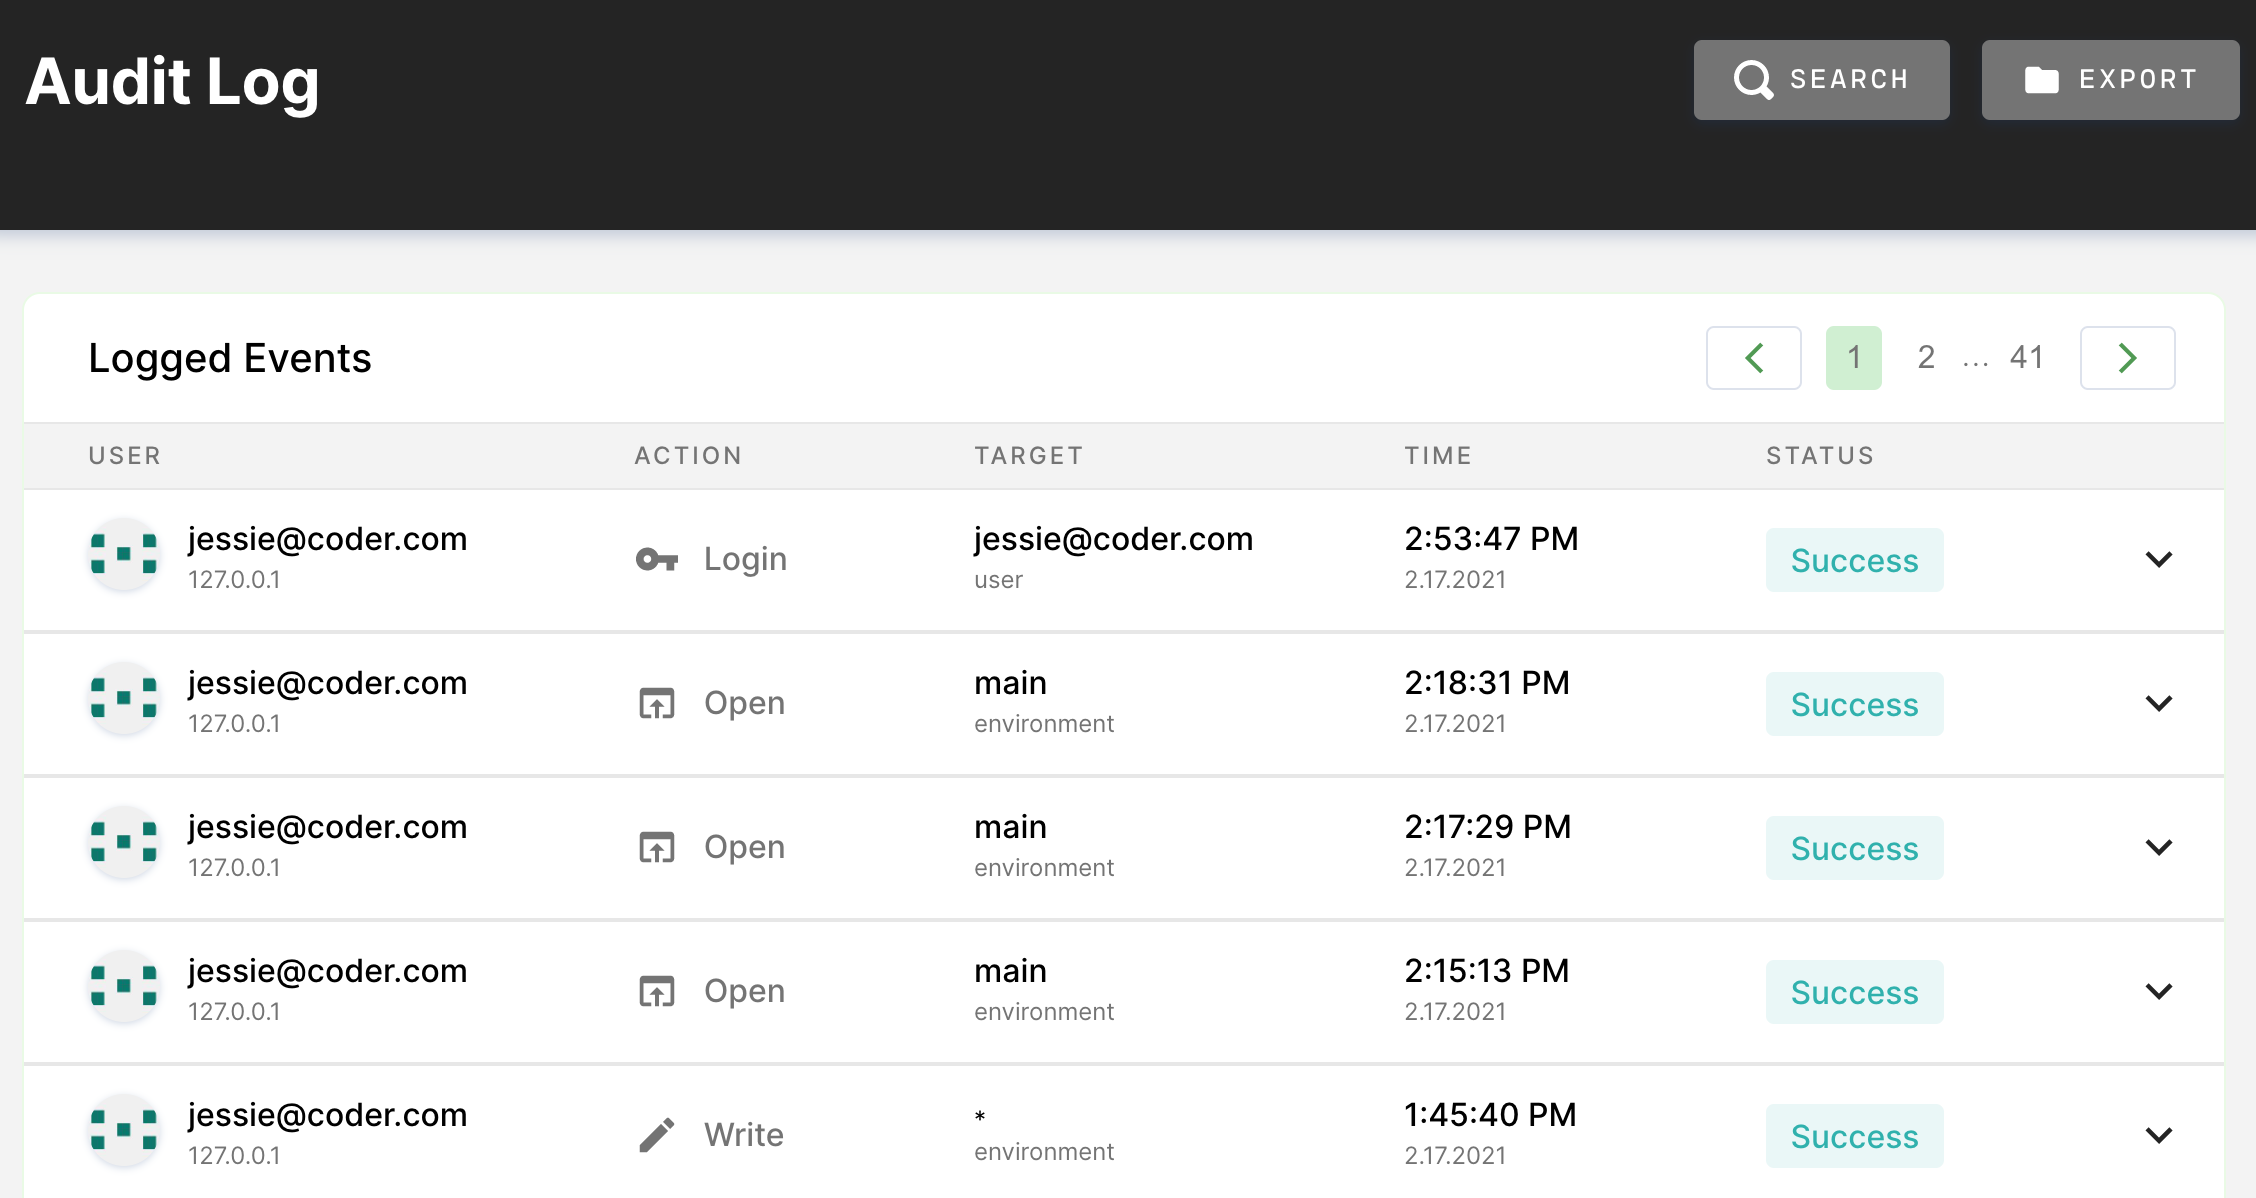
You can filter the logs displayed using the search filters available at the top:
* **Resource Type**: The resource on which the action is taken (e.g., image, workspace, user)
* **Action**: The action that the user took against a resource (e.g., read, write, create)
* **Resource Target**: The friendly name for the resource (e.g., the user with the email address **[\[email protected\]](https://coder.com/cdn-cgi/l/email-protection#94f0f1e2d4f7fbf0f1e6baf7fbf9)
**)
* **User**: The user who performs the action
[](https://coder.com/docs/v1/admin/audit#actions)
Actions
---------------------------------------------------------
The audit logs capture information about the following actions (those who [export Coder logs](https://coder.com/docs/v1/guides/admin/logging)
will see this information under `message.fields.audit_log.action`):
When reviewing Coder's audit logs, specifically, you will see the following actions included:
* `auto_off`: Coder automatically turned off a workspace due to inactivity
* `auto_start`: Coder automatically turned on a workspace at the time preset by its owner
* `connect`: a user connected to an existing workspace via a local VS Code instance, a JetBrains IDE via JetBrains Gateway, a local terminal `ssh` connection, or a local terminal connection via the Coder CLI's `coder ssh` command
* `cordon`: a workspace provider became unavailable for new workspace creation requests
* `create`: the user created a Coder entity (e.g., dev URL, image/image tag, workspace, etc.)
* `delete`: a user deleted a Coder entity (e.g., workspace or image)
* `enqueue`: a user added a new job to the queue (e.g., workspace build, user deletion, workspace deletion)
* `login`: a user logs in via basic authentication or OIDC, with Coder exchanging a token as a result
* `open`: a user opened a workspace using the Code Web IDE through the browser (please note that this action is not yet logged for JetBrains IDEs)
* `ssh`: a user opened a web terminal to access Coder
* `stop`: a user manually stopped a workspace
* `uncordon`: a workspace provider became available for new workspace creation requests
* `view`: the Coder CLI used a secret
* `write`: the user made a change to a Coder entity (e.g., workspace, user, resource pool, etc.)
[](https://coder.com/docs/v1/admin/audit#admin-logged-events)
Admin logged events
---------------------------------------------------------------------------------
With the exception of a few, logged events made by Admin panel changes will output the changed field(s) and the new, corresponding value. Below is the expected (example) output for each Admin panel change.
> The Admin fields not documented below currently do not output a field/diff.
### [](https://coder.com/docs/v1/admin/audit#infrastructure)
Infrastructure
| **Admin Setting** | **Action** | **Target** | **Field** | **Diff** |
| --- | --- | --- | --- | --- |
| Access URL | Write | infrastructure | access URL | `coder.com` |
| GPU Vendor | Write | infrastructure | gpu vendor | `amd/nvidia/none` |
| Enable container-based virtual machines | Write | infrastructure | enable container vms | `true/false` |
| Enable caching | Write | infrastructure | enabled cached container vms | `true/false` |
| Enable auto loading of `shiftfs` kernel module | Write | infrastructure | enable load shiftfs | `true/false` |
| Default to container-based virtual machines | Write | infrastructure | default container vms | `true/false` |
| Enable self-contained workspace builds | Write | features | coder agent pull assets | `enabled/disabled` |
| Enable workspace process logging | Write | features | exectrace | `enabled/disabled` |
| Enable TUN device | Write | features | fuse device | `enabled/disabled` |
| Enable FUSE device | Write | features | tun device | `enabled/disabled` |
| Enable default registry | Write | infrastructure | default registry enabled | `true/false` |
| Enable ECR IAM role authentication | Write | features | ecr auth irsa | `enabled/disabled` |
| Enable AAD authentication for ACR | Write | features | azure auth aad | `enabled/disabled` |
| Enable fallback shell support for K8s | Write | features | | |
| Extension marketplace type | Write | \* | ext marketplace type | `public/custom` |
| Dev URL access permissions | Write | devurl access | public/org/authed/ | `true/false` |
| Enable memory overprovisioning | Write | infrastructure | memory overprovisioning enabled | `true/false` |
### [](https://coder.com/docs/v1/admin/audit#git-oauth)
Git OAuth
| **Admin Setting** | **Action** | **Target** | **Field** | **Diff** |
| --- | --- | --- | --- | --- |
| Client ID | Write | oauth configs | client id | `0fb2...7a4a` |
| Client Secret | Write | oauth configs | client secret | `******` |
| Description | Write | oauth configs | description | `example` |
| Name | Write | oauth configs | name | `GitHub` |
| Provider | Write | oauth configs | service type | `github/gitlab` |
| URL | Write | oauth configs | URL host | `host.com` |
### [](https://coder.com/docs/v1/admin/audit#appearance)
Appearance
| **Admin Setting** | **Action** | **Target** | **Field** | **Diff** |
| --- | --- | --- | --- | --- |
| System Banner | Write | system banner | enabled | `true/false` |
| Background color | Write | system banner | color bg | `#9A4967` |
| Footer | Write | system banner | text footer | `UNCLASSIFIED` |
| Header | Write | system banner | text header | `UNCLASSIFIED` |
| Service Banner | Write | appearance | svc banner enabled | `true/false` |
| Background color | Write | appearance | svc banner color bg | `#18382D` |
| Message | Write | appearance | svc banner body | `Maintenance 9:01PM` |
| Terms of Service | Write | appearance | tos body | `Accept Terms & Conditions` |
| Text field | Write | appearance | tos enabled | `true/false` |
### [](https://coder.com/docs/v1/admin/audit#telemetry)
Telemetry
| **Admin Setting** | **Action** | **Target** | **Field** | **Diff** |
| --- | --- | --- | --- | --- |
| Send crash reports | Write | telemetry | crash reports enabled | `true/false` |
| Send usage telemetry | Write | telemetry | enhanced telemetry enabled | `true/false` |
| Send enhanced usage telemetry | Write | telemetry | telemetry enabled | `true/false` |
### [](https://coder.com/docs/v1/admin/audit#templates)
Templates
> The template policy dropdown will provide a unique `commit`/`hash` for the uploaded file. If file is uploaded from disk, then `file path`/`git ref` will be `local`.
| **Admin Setting** | **Action** | **Target** | **Field** | **Diff** |
| --- | --- | --- | --- | --- |
| Enable workspace templates | Write | infrastructure | enable workspaces as code | `true/false` |
| Template policy | Write | local | commit/file hash/filepath/git ref/From | `0000...0000`/`ed19...843b`/`local`/`local`/`User` |
##### On this page
---
# Progressive web apps | Coder v1 Docs
[Home](https://coder.com/docs/v1 "Home")
[Workspaces](https://coder.com/docs/v1/workspaces "Workspaces")
Progressive web apps
In addition to running Coder in a web browser, you can also run each application as a progressive web application (PWA). Using Coder as a PWA offers you an experience akin to a native application and improved performance.
[](https://coder.com/docs/v1/workspaces/pwa#requirements)
Requirements
----------------------------------------------------------------------
To use Coder as a PWA, you must connect to Coder over HTTPS and use either Google Chrome or Microsoft Edge.
[](https://coder.com/docs/v1/workspaces/pwa#installing-the-pwa)
Installing the PWA
----------------------------------------------------------------------------------
1. Log into Coder and select your workspace.
2. Under **Applications**, click on an application to launch it as a new window or tab.
3. Follow your browser's instructions for installing the application as a [Google Chrome](https://support.google.com/chrome/answer/9658361)
or a [Microsoft Edge](https://docs.microsoft.com/en-us/microsoft-edge/progressive-web-apps-chromium/ux#installing-a-pwa)
PWA.
Please note that applications are currently installed on a per-workspace basis.
##### On this page
---
# Upgrade | Coder v1 Docs
[Home](https://coder.com/docs/v1 "Home")
[Setup](https://coder.com/docs/v1/setup "Setup")
Upgrade
This guide will show you how to upgrade your Coder deployment.
> Before proceeding, review the [upgrade considerations](https://coder.com/docs/v1/setup/upgrade/considerations)
> article for information breaking charges, architecture changes, and so on.
[](https://coder.com/docs/v1/setup/upgrade#recommendations)
Recommendations
---------------------------------------------------------------------------
* As with any significant maintenance operation, we **strongly recommend** taking a snapshot of the database before upgrading. If there are upgrade issues, it is simpler and safer to roll back at the database level since it guarantees restoration of the system to a known working condition.
* We recommend updating no more than one major version at a time (e.g., we recommend moving from 1.28 to 1.29 only).
[](https://coder.com/docs/v1/setup/upgrade#prerequisites)
Prerequisites
-----------------------------------------------------------------------
* If you haven't already, install [Helm](https://helm.sh/docs/intro/install/)
.
* Before beginning the update process, ensure that you've added the Coder Helm repo to your cluster. You can verify that the Coder repo has been added to Helm using `helm repo list`:
`` `$ helm repo list NAME URL coder https://helm.coder.com` ``
If you don't have the Coder repo, you can add it:
`` `helm repo add coder https://helm.coder.com` ``
[](https://coder.com/docs/v1/setup/upgrade#for-public-sector-deployments)
For public sector deployments
-------------------------------------------------------------------------------------------------------
Users with public sector deployments may need to obtain Coder's installation resources from [Big Bang](https://repo1.dso.mil/platform-one/big-bang/apps/developer-tools/coder)
(Helm charts) and [Ironbank](https://repo1.dso.mil/dsop/coder-enterprise/coder-enterprise/coder-service)
(installation images).
> Both the Big Bang and Ironbank repositories are one release behind the latest version of Coder.
[](https://coder.com/docs/v1/setup/upgrade#upgrade-coder)
Upgrade Coder
-----------------------------------------------------------------------
1. Retrieve the latest repository information:
`` `helm repo update` ``
2. Export your current Helm chart values into a file:
`` `helm get values --namespace coder coder > current-values.yaml` ``
> Make sure that your values only contain the changes you want (e.g., if you see references to a prior version, you may need to remove these).
3. Upgrade Coder with your new Helm chart:
`` `helm upgrade coder coder/coder -n coder --version= --values current-values.yaml` ``
[](https://coder.com/docs/v1/setup/upgrade#downgrading)
Downgrading
-------------------------------------------------------------------
When attempting to troubleshoot Coder, you may want to roll back to an older version of Coder. Doing so requires you to make and use a database snapshot since the database schema will be out of date.
##### On this page
---
# Preferences | Coder v1 Docs
[Home](https://coder.com/docs/v1 "Home")
[Workspaces](https://coder.com/docs/v1/workspaces "Workspaces")
Preferences
The **User Preferences** area of the Coder UI allows you to manage your account.
To access **User Preferences**, click on your avatar in the top-right, then click on either **Account** or your avatar in the drop-down menu.
[](https://coder.com/docs/v1/workspaces/preferences#account)
Account
--------------------------------------------------------------------
The **Account** tab allows you to provide or change:
* Your avatar
* Your display name
* Email address
* Username (this is the value that Coder uses throughout the platform, including dev URLs and the CLI's SSH configuration)
* Shell (this is the command Coder runs when starting a terminal)
* Your dotfiles URI to personalize your workspaces
[](https://coder.com/docs/v1/workspaces/preferences#appearance)
Appearance
--------------------------------------------------------------------------
To use Coder's dark theme, enable it by selecting **Dark Theme**. Coder uses its light theme by default.
[](https://coder.com/docs/v1/workspaces/preferences#security)
Security
----------------------------------------------------------------------
The **Security** tab allows you to change your password if you log in using built-in authentication (that is, you log in by providing an email/password combination).
> You cannot change the passwords for accounts authenticated via Open ID Connect using the Coder platform. However, your password may be changeable within your organization's account management system. See your system administrator for more information.
[](https://coder.com/docs/v1/workspaces/preferences#ssh-keys)
SSH keys
----------------------------------------------------------------------
The **SSH Keys** page is where you'll find the public SSH key corresponding to the private key that Coder inserts automatically into your workspaces. The public key is useful for services, such as Git, Azure Repos, Bitbucket, GitHub, and GitLab, that you need to access from your workspace.
If necessary, you can regenerate your key. Be sure to provide your updated key to all of the services you use. Otherwise, they won't work.
[](https://coder.com/docs/v1/workspaces/preferences#linked-accounts)
Linked accounts
------------------------------------------------------------------------------------
The **Linked Accounts** tab allows you to automatically provide your Coder SSH public key to the Git service of your choice. You can then perform the Git actions in your Coder workspace and interact with the service (e.g., push changes). Your administrator must configure OAuth for this feature to work.
> During the linked account process, Coder sends requests directly from your local machine's web browser to your Git provider. If your organization requires additional authentication (e.g., VPN), you must start this process before linking your accounts.
>
> Note that linking your accounts is a one-time process, typically during onboarding. Future Git actions within Coder will operate within the Coder deployment's network, _not_ the local machine.
[](https://coder.com/docs/v1/workspaces/preferences#networking)
Networking
--------------------------------------------------------------------------
You can choose the WebRTC protocol used when connecting to your workspace from the Coder CLI:
* **Auto** (default): uses STUN and falls back to TURN if it's unable to establish a peer-to-peer connection
* **TURN**: establishes a connection using an intermediary relay server
* **STUN**: establishes a peer-to-peer connection
[](https://coder.com/docs/v1/workspaces/preferences#auto-start)
Auto-start
--------------------------------------------------------------------------
Auto-start allows you to set:
* The time when Coder automatically starts and builds your workspaces.
* Your preferred timezone.
See [auto-start](https://coder.com/docs/v1/workspaces/autostart)
for more information.
##### On this page
---
# Custom image creation | Coder v1 Docs
[Home](https://coder.com/docs/v1 "Home")
[Images](https://coder.com/docs/v1/images "Images")
Custom image creation
Custom images allow you to define workspaces that include the dependencies, scripts, and user preferences helpful for your project.
This guide assumes that you're familiar with:
* [Dockerfiles](https://docs.docker.com/engine/reference/builder/)
* [docker login](https://docs.docker.com/engine/reference/commandline/login/)
* [docker build](https://docs.docker.com/engine/reference/commandline/build/)
* [docker push](https://docs.docker.com/engine/reference/commandline/push/)
[](https://coder.com/docs/v1/images/writing#resources)
Resources
----------------------------------------------------------------
For ideas on what you can include in your images, see:
* [Sample Coder images](https://github.com/coder/enterprise-images)
* [Guide: Node.js image for Coder](https://coder.com/docs/v1/guides/customization/node)
[](https://coder.com/docs/v1/images/writing#creating-a-custom-image)
Creating a custom image
--------------------------------------------------------------------------------------------
Instead of starting from scratch, we recommend extending one of our [sample images](https://github.com/coder/enterprise-images)
:
`` `# Dockerfile FROM codercom/enterprise-base:ubuntu USER root # Add software, files, dev tools, and dependencies here RUN apt-get install -y ... COPY file ./ USER coder ...` ``
Please note:
* Coder workspaces mount a [home volume](https://coder.com/docs/v1/workspaces/personalization#persistent-home)
, which is a persistent volume that will replace any files in the image's home directory. If you have installation scripts (e.g., those for Rust), you must configure them to install software in another directory.
* If you're using a different base image, see our [image minimum requirements](https://github.com/coder/enterprise-images/#image-minimums)
to ensure that your image will work with all of Coder's features.
* You can leverage your Coder deployment and its compute resources to build images inside a [CVM-enabled workspace](https://coder.com/docs/v1/admin/workspace-management/cvms)
with Docker installed (see our [base image](https://github.com/coder/enterprise-images/tree/main/images/base)
for an example of how you can do this). This is a way to free up your local machine from the compute-heavy image building process.
* If you're using CVM-only features during an image's build time (e.g., you're [pre-loading images](https://github.com/nestybox/sysbox/blob/master/docs/quickstart/images.md#building-a-system-container-that-includes-inner-container-images--v012-)
in workspaces), you may need to install the [sysbox runtime](https://github.com/nestybox/sysbox)
onto your local machine and build your images locally. Note that this isn't usually necessary, even if your image installs and enables Docker.
* If you're installing additional IDEs (like JetBrains), you may need to include installation instructions for the language interpreter, development kit, build tool, and compiler in the image. Check the docs for your IDE to see what components it requires.
[](https://coder.com/docs/v1/images/writing#example-installing-a-jetbrains-ide)
Example: Installing a JetBrains IDE
-------------------------------------------------------------------------------------------------------------------
This snippet shows you how to install a JetBrains IDE onto your image so that you can use it in your Coder workspace:
`` `# Dockerfile FROM ... # Install IDEs as root USER root RUN mkdir -p /opt/[IDE] RUN curl -L \ "https://download.jetbrains.com/product?code=[CODE]&latest&distribution=linux" \ | tar -C /opt/[IDE] --strip-components 1 -xzvf - # Add a binary to the PATH that points to the IDE startup script. RUN ln -s /opt/[IDE]/bin/idea.sh /usr/bin/[IDE] # Set back to coder user USER coder` ``
Make sure that you replace `[IDE]` with the name of the IDE in lowercase and provide its [corresponding `[CODE]`](https://plugins.jetbrains.com/docs/marketplace/product-codes.html)
.
Here's how to install IntelliJ IDEA Ultimate onto your image:
`` `# Dockerfile FROM ... USER root # Install IntelliJ IDEA Ultimate RUN mkdir -p /opt/idea RUN curl -L "https://download.jetbrains.com/product?code=IU&latest&distribution=linux" \ | tar -C /opt/idea --strip-components 1 -xzvf - # Create a symbolic link in PATH that points to the Intellij startup script. RUN ln -s /opt/idea/bin/idea.sh /usr/bin/intellij-idea-ultimate # Set back to coder user USER coder` ``
Here's how to install PyCharm Professional onto your image:
`` `# Dockerfile FROM ... USER root # Install pycharm professional RUN mkdir -p /opt/pycharm RUN curl -L "https://download.jetbrains.com/product?code=PCP&latest&distribution=linux" | tar -C /opt/pycharm --strip-components 1 -xzvf - # Add a binary to the PATH that points to the pycharm startup script. RUN ln -s /opt/pycharm/bin/pycharm.sh /usr/bin/pycharm # Set back to coder user USER coder` ``
##### On this page
---
# Air-gapped deployment | Coder v1 Docs
[Home](https://coder.com/docs/v1 "Home")
[Setup](https://coder.com/docs/v1/setup "Setup")
Air-gapped deployment
If you need increased security for your Coder deployments, you can set up an air-gapped deployment.
To do so, you must:
* Pull all Coder deployment resources into your air-gapped environment
* Push the images to your Docker registry,
* Deploy Coder from within your air-gapped environment
> Coder's trial license does not work in an air-gapped environment. If your organization is interested in evaluating Coder air-gapped, please contact [\[email protected\]](https://coder.com/cdn-cgi/l/email-protection#c3b0a2afa6b083a0aca7a6b1eda0acae)
> to discuss license requirements.
[](https://coder.com/docs/v1/setup/air-gapped#dependencies)
Dependencies
------------------------------------------------------------------------
Before proceeding, please ensure that you've installed the following software dependencies:
* [kubectl](https://kubernetes.io/docs/tasks/tools/install-kubectl/)
* [helm](https://helm.sh/docs/intro/install/)
Next, configure the following items in the same network as the Kubernetes cluster that will run Coder (we've provided links to a suggested option for each item type, but you're welcome to use the alternatives of your choice):
* [Docker Registry](https://hub.docker.com/_/registry)
* A [DNS server](https://coredns.io/)
(or you can use [HostAliases](https://kubernetes.io/docs/concepts/services-networking/add-entries-to-pod-etc-hosts-with-host-aliases/)
)
* A [certificate authority](https://github.com/activecm/docker-ca/blob/master/Dockerfile)
or self-signed certificates
[](https://coder.com/docs/v1/setup/air-gapped#network-configuration)
Network configuration
------------------------------------------------------------------------------------------
Coder requires several preliminary steps to be performed on your network before you can deploy Coder. If you don't already have the following on your network, please see our [infrastructure setup guide](https://coder.com/docs/v1/setup/air-gapped/infrastructure)
:
* A certificate authority
* A domain name service
* A local Docker Registry
[](https://coder.com/docs/v1/setup/air-gapped#version-controlling-your-changes-to-the-coder-install-files)
Version controlling your changes to the Coder install files
----------------------------------------------------------------------------------------------------------------------------------------------------------------------
Throughout this article, we will suggest changes to the Helm chart that you'll obtain from the `.tgz` that's returned when you run `helm pull`. We recommend version controlling your files.
[](https://coder.com/docs/v1/setup/air-gapped#step-1-pull-all-coder-resources-into-your-air-gapped-environment)
Step 1: Pull all Coder resources into your air-gapped environment
---------------------------------------------------------------------------------------------------------------------------------------------------------------------------------
Coder is deployed through [helm](https://helm.sh/docs/intro/install/)
, and the platform images are hosted in Coder's Docker Hub repo.
1. Download the Coder Helm charts by running the following command _outside_ of the air-gapped environment:
`` `helm repo add coder https://helm.coder.com helm pull coder/coder` ``
These commands will add Coder's helm charts and pull the latest stable release into a tarball file whose name uses the following format: `coder-X.Y.Z.tgz` (X.Y.Z is the Coder release number).
2. Pull the images for the Coder platform from the following Docker Hub locations:
[coder-service](https://hub.docker.com/r/coderenvs/coder-service)
[envbox](https://hub.docker.com/r/coderenvs/envbox)
**Optional:** [timescale](https://hub.docker.com/r/coderenvs/timescale)
> Timescale is an internal database meant for evaluation deployments. It is not It is not recommended to run this service in production. Connect to an external Postgres database for production deployments.
You can pull each of these images from their `coderenvs/:` registry location using the image's name and Coder version:
`` `docker pull coderenvs/coder-service:` ``
The following images are optional, though you're welcome to take advantage of Coder's versions instead of building your own:
[Open VSX](https://github.com/orgs/eclipse/packages/container/package/openvsx-server)
[enterprise-node](https://hub.docker.com/r/codercom/enterprise-node)
[enterprise-intellij](https://hub.docker.com/r/codercom/enterprise-intellij)
[ubuntu](https://hub.docker.com/_/ubuntu)
When building images for your environments that rely on a custom certificate authority, be sure to follow the [docs for adding certificates](https://coder.com/docs/v1/images/tls-certificates#adding-certificates-for-coder)
to images.
3. Tag and push all of the images that you've downloaded in the previous step to your internal registry; this registry must be accessible from your air-gapped environment. For example, to push `coder-service`:
`` `docker tag coderenvs/coder-service: my-registry.com/coderenvs/coder-service: docker push my-registry.com/coderenvs/coder-service:` ``
4. If necessary, create an `offline.values.yaml` file that includes the image paths for each of the Coder containers and proxy configuration similar to the following:
`` `coderd: image: my-registry.com/coderenvs/coder-service: # Coder will use this proxy for all outbound HTTP/HTTPS connections # such as when checking for updated images in the image registry. # However, note that images are pulled from the Kubernetes container runtime, # and may require a different setting. proxy: http: http://proxy.internal:8888 exempt: cluster.local postgres: default: image: my-registry.com/coderenvs/timescale: envbox: image: my-registry.com/coderenvs/envbox:` ``
See [configuring forward and reverse proxies](https://coder.com/docs/v1/guides/deployments/proxy)
for additional information about Coder's support for network proxies.
5. Once all of the resources are in your air-gapped network, run the following to deploy Coder to your Kubernetes cluster:
`` `helm install coder . --create-namespace --namespace coder --values=offline.values.yaml` ``
If you'd like to run this command after navigating _into_ the `coder.tgz` directory, you can replace the `coder.tgz` path with a period:
`` `helm install --wait --atomic --debug --namespace coder coder . \ --set postgres.default.image=$REGISTRY_DOMAIN_NAME/coderenvs/coder-service: \ --set envbox.image=$REGISTRY_DOMAIN_NAME/coderenvs/envbox: \ --set timescale.image=$REGISTRY_DOMAIN_NAME/coderenvs/timescale: \ -f registry-cert-values.yml` ``
6. Next, follow the [Installation](https://coder.com/docs/v1/setup/installation)
guide beginning with **step 6** to get the access URL and the temporary admin password, which allows you to proceed with setting up and configuring Coder.
[](https://coder.com/docs/v1/setup/air-gapped#extensions-marketplace)
Extensions marketplace
--------------------------------------------------------------------------------------------
Coder users in an air-gapped environment cannot access the public VS Code marketplace. However, you can point Coder to an air-gapped instance of either [Coder's code-marketplace OSS](https://github.com/coder/code-marketplace)
or [Open VSX](https://github.com/eclipse/openvsx)
to serve VS Code extensions to users. For instructions on how to do either approach, see [Extensions](https://coder.com/docs/v1/admin/workspace-management/extensions)
.
##### On this page
---
# Dev URLs | Coder v1 Docs
[Home](https://coder.com/docs/v1 "Home")
[Admin](https://coder.com/docs/v1/admin "Admin")
Dev URLs
Developer (dev) URLs allow users to access the ports of running applications they develop within their workspace. Coder listens for the applications running on the specified ports and provides a browser link that can be used to access the application.
Before individual developers can set up dev URLs, an administrator must configure and enable dev URL usage.
[](https://coder.com/docs/v1/admin/devurls#before-you-proceed)
Before you proceed
---------------------------------------------------------------------------------
You must own a wildcard DNS record for your custom domain name to enable and use dev URLs with Coder.
[](https://coder.com/docs/v1/admin/devurls#enabling-the-use-of-dev-urls)
Enabling the use of dev URLs
-----------------------------------------------------------------------------------------------------
[Dev URLs](https://coder.com/docs/v1/workspaces/devurls)
is an opt-in feature. To enable dev URLs in your cluster, you'll need to modify your:
1. Helm chart
2. Wildcard DNS record
### [](https://coder.com/docs/v1/admin/devurls#step-1-modify-the-helm-chart)
Step 1: Modify the Helm chart
Set `coderd.devurlsHost` to a wildcard domain in your `values.yaml` file:
`` `coderd: devurlsHost: "*.my-custom-domain.io"` ``
Run the `helm upgrade` command:
`` `helm upgrade coder coder/coder -n coder --version= --values values.yaml"` ``
> Beginning with Coder version `1.26.0`, you can set a constant suffix for all dev URLs (e.g., `*-suffix.coder.io`). This feature helps organizations that may incur expenses and delays due to the need for multiple wildcard DNS records.
### [](https://coder.com/docs/v1/admin/devurls#step-2-modify-the-wildcard-dns-record)
Step 2: Modify the wildcard DNS record
The final step to enabling dev URLs is to update your wildcard DNS record. Get the **LoadBalancer IP address** using `kubectl --namespace coder get svc` and point your wildcard DNS record (e.g., \*.my-custom-domain.io) to the **external-IP** value found in the `ingress-nginx` or the `coderd` lines.
[](https://coder.com/docs/v1/admin/devurls#step-3-optional-add-a-tls-certificate)
Step 3 (Optional): Add a TLS certificate
--------------------------------------------------------------------------------------------------------------------------
For secure (HTTPS) dev URLs, you can add (or generate) a TLS certificate for the wildcard domain.
* See our [guide for creating a TLS certificate using LetsEncrypt](https://coder.com/docs/v1/guides/tls-certificates)
* To add a custom certificate, refer to our [Helm chart](https://github.com/coder/enterprise-helm)
[](https://coder.com/docs/v1/admin/devurls#setting-dev-url-access-permissions)
Setting dev URL access permissions
-----------------------------------------------------------------------------------------------------------------
Once you've enabled dev URLs for users, you can set the **maximum access level**. To do so, go to **Manage** > **Admin**. On the **Infrastructure** tab, scroll down to **Dev URL Access Permissions**.
| Maximum access level | Description |
| --- | --- |
| Public | Accessible by anyone with access to the network your cluster is on |
| Authenticated | Accessible by any authenticated Coder user |
| Organization | Accessible by anyone in the user's organization |
| Private | Accessible only by the user |

You can set the maximum access level, but developers may choose to restrict access further.
For example, if you set the maximum access level as **Authenticated**, then all dev URLs created for workspaces in your Coder deployment will be accessible to any authenticated Coder user.
The developer, however, can choose to set a stricter permission level (e.g., allowing only those in their organization to use the dev URL). Developers cannot choose a more permissive option.
[](https://coder.com/docs/v1/admin/devurls#authentication-with-apps-requiring-a-single-callback-url)
Authentication with apps requiring a single callback URL
-------------------------------------------------------------------------------------------------------------------------------------------------------------
If you're using GitHub credentials to sign in to an application, and your GitHub OAuth app has the authorization callback URL set to `localhost`, you will need to work around the fact that GitHub enforces a single callback URL (since each workspace gets a unique dev URL).
To do so, you can either:
* Use SSH tunneling to tunnel the web app to individual developers' `localhost` instead of dev URLs (this is also an out-of-the-box feature included with VS Code Remote)
* Use this workaround for [multiple callback sub-URLs](https://stackoverflow.com/questions/35942009/github-oauth-multiple-authorization-callback-url/38194107#38194107)
##### On this page
---
# Editors and IDEs | Coder v1 Docs
[Home](https://coder.com/docs/v1 "Home")
[Workspaces](https://coder.com/docs/v1/workspaces "Workspaces")
Editors and IDEs
There are several primary ways you can connect an IDE to your Coder workspace:
1. [VS Code remote SSH](https://coder.com/docs/v1/workspaces/editors#vs-code-remote-ssh)
with local VS Code
2. [VS Code in the browser](https://coder.com/docs/v1/workspaces/editors#vs-code-in-the-browser)
with code-server
3. [JetBrains Gateway and SSH](https://coder.com/docs/v1/workspaces/editors#jetbrains-gateway-with-ssh)
4. [Jupyter Notebook](https://coder.com/docs/v1/workspaces/editors#jupyter-notebook)
5. [JupyterLab](https://coder.com/docs/v1/workspaces/editors#jupyterlab)
6. [RStudio](https://coder.com/docs/v1/workspaces/editors#rstudio)
7. _Any_ local editor with [1-way file synchronization](https://coder.com/docs/v1/cli/file-sync#one-way-file-sync)
or [2-way file synchronization over SSH](https://coder.com/docs/v1/cli/file-sync#two-way-file-sync)
[](https://coder.com/docs/v1/workspaces/editors#vs-code-remote-ssh)
VS Code remote SSH
--------------------------------------------------------------------------------------
Once you've [set up SSH access to Coder](https://coder.com/docs/v1/workspaces/ssh)
, you can work on projects from your local VS Code, connected to your Coder workspace for compute, etc.
1. Open VS Code locally.
2. Make sure that you've installed [Remote - SSH](https://marketplace.visualstudio.com/items?itemName=ms-vscode-remote.remote-ssh)
extension
3. In VS Code's left-hand nav bar, click **Remote Explorer** and right-click on a workspace to connect
> If Coder is deployed air-gapped (no Internet), you need to configure your VS Code's [setting](https://code.visualstudio.com/docs/getstarted/settings)
> with `remote.SSH.allowLocalServerDownload` enabled so the extension will install the VS Code Server on the client first and then copy it over to the Coder workspace via SCP.
>
> For further troubleshooting steps, see [Troubleshooting hanging or failing connections](https://code.visualstudio.com/docs/remote/troubleshooting#_troubleshooting-hanging-or-failing-connections)
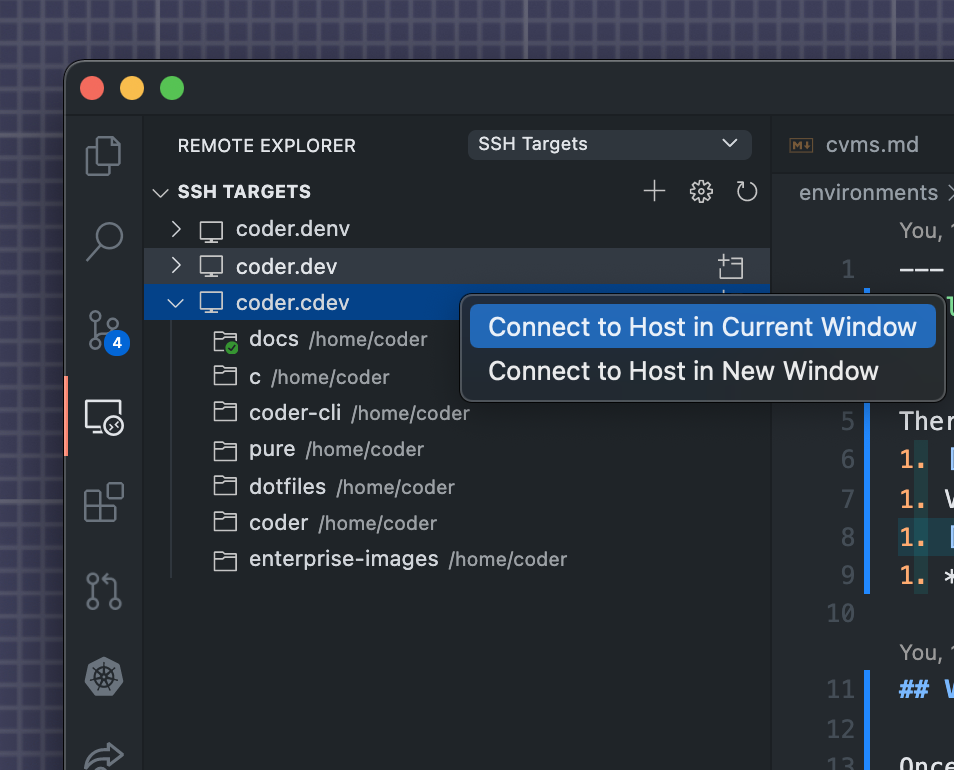
[](https://coder.com/docs/v1/workspaces/editors#vs-code-in-the-browser)
VS Code in the browser
----------------------------------------------------------------------------------------------
Launch VS Code in the browser from the workspaces page by clicking the _Code Web_ icon.
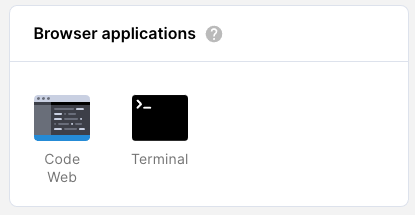
> Code Web is Coder's open-source project [code-server](https://coder.com/docs/code-server/latest)
> .
### [](https://coder.com/docs/v1/workspaces/editors#opening-files-via-the-terminal)
Opening files via the terminal
You can open files from your Coder workspace in VS Code via the terminal. We recommend creating an alias to the underlying code-server executable so that you can use the command `code` for this process:
`` `alias code="/var/tmp/coder/code-server/bin/code-server -r"` ``
Then, to open a file (e.g., `personalize.log`):
`` `code personalize.log` ``
Alternatively, if you would like to use just the code-server executable, add it to your `PATH`:
`` `export PATH=$PATH:/var/tmp/coder/code-server/bin` ``
Then, to open a file (e.g., `personalize.log`):
`` `code-server -r personalize.log` ``
> If you're using Coder's web terminal, make sure that you've opened a Code Web session. If, however, you're using the web IDE's terminal, the file contents will appear in the IDE.
[](https://coder.com/docs/v1/workspaces/editors#jetbrains-gateway-with-ssh)
JetBrains Gateway with SSH
------------------------------------------------------------------------------------------------------
[Gateway](https://www.jetbrains.com/remote-development/gateway/)
is JetBrains' remote development solution. [JetBrains has suspended](https://lp.jetbrains.com/projector/)
Projector (the browser-based option) therefore Coder no longer provides examples or support.
> By default, Gateway will download the IDE from jetbrains.com into the Coder workspace during the setup. If you are air-gapped or want to leverage a JetBrains IDE in your workspace for faster setup, you can point to an already-installed JetBrains IDE. See the configuration at the end of this Gateway section.
Requirements:
* SSH access to Coder must [already be configured](https://coder.com/docs/v1/workspaces/ssh)
* Your Coder workspace must be running. Gateway needs compute resources, so monitor your resource usage on the Coder dashboard and adjust accordingly.
* If you use a premium JetBrains IDE (e.g., GoLand, IntelliJ IDEA Ultimate), you will still need a license to use it remotely with Coder.
1. [Download and install JetBrains Toolbox](https://www.jetbrains.com/toolbox-app/)
. Locate JetBrains Gateway in the Toolbox list and click **Install**.
2. Open JetBrains Gateway and click **Connect via SSH** within the **Run the IDE Remotely** section.
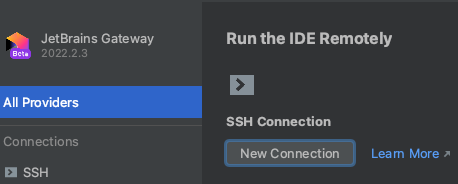
3. Click the small **gear icon** to the right of the **Connection** field, then the **+** button on the next screen to create a new configuration.
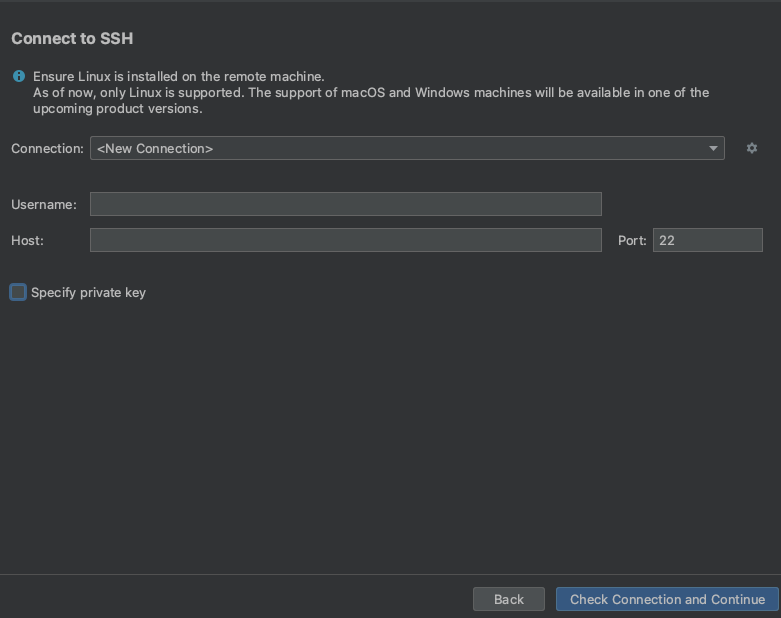
4. Enter your Coder workspace host name in **Host** (e.g., `coder.mark-intellij`), `22` in **Port**, `coder` in **User name**, and change **Authentication Type** to **OpenSSH config and authentication agent**. You can find the workspace host names in `~/.ssh/config`. Leave the local port field blank. Click **Test Connection**.
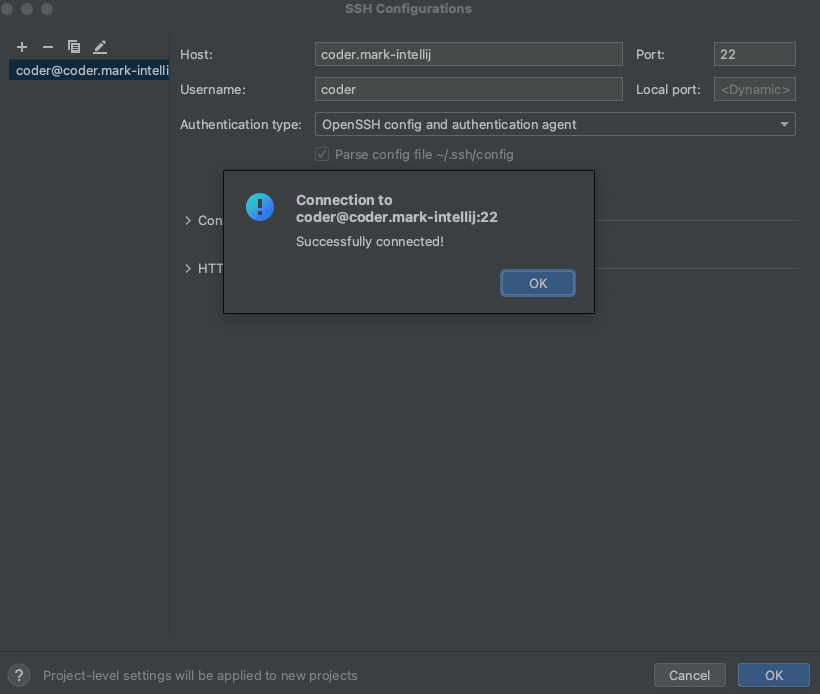
5. Choose your new connection from the drop-down and click Check Connection and Continue
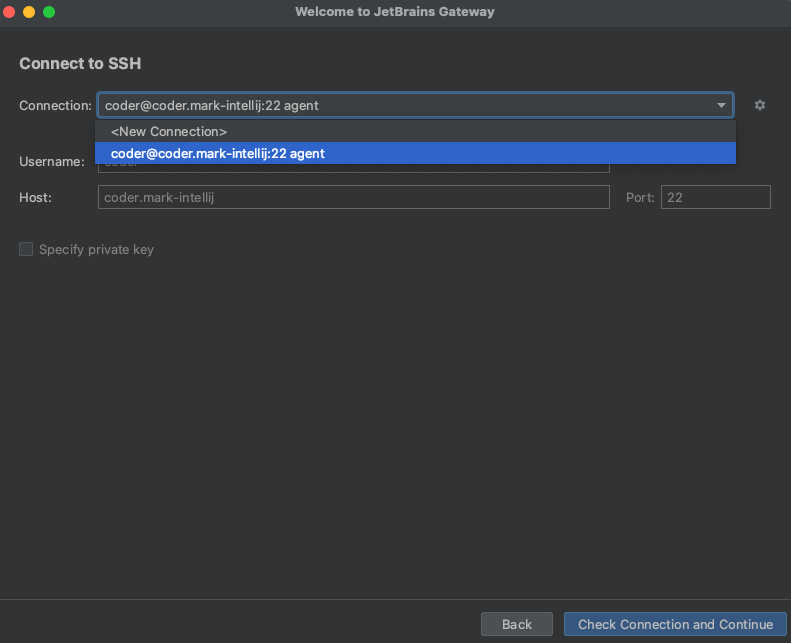
6. The default behavior is to select a JetBrains IDE from the IDE version drop-down and download it from jetbrain.com. Choose the IDE installed in your Coder workspace, and click the folder icon and select your `/home/coder` directory in your Coder workspace.
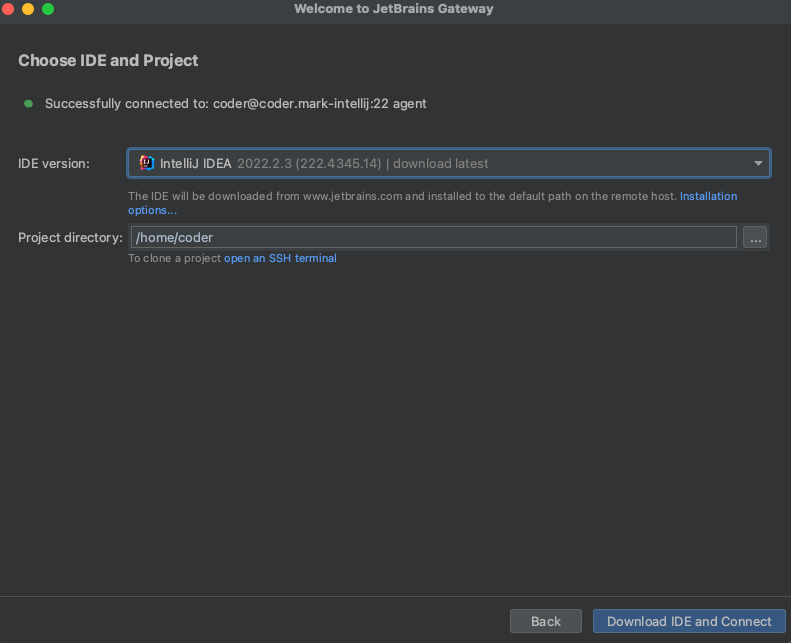
If you ran `remote-dev-server.sh` (see note below) before starting the config setup, JetBrains will detect your already installed IDE in the drop-down.
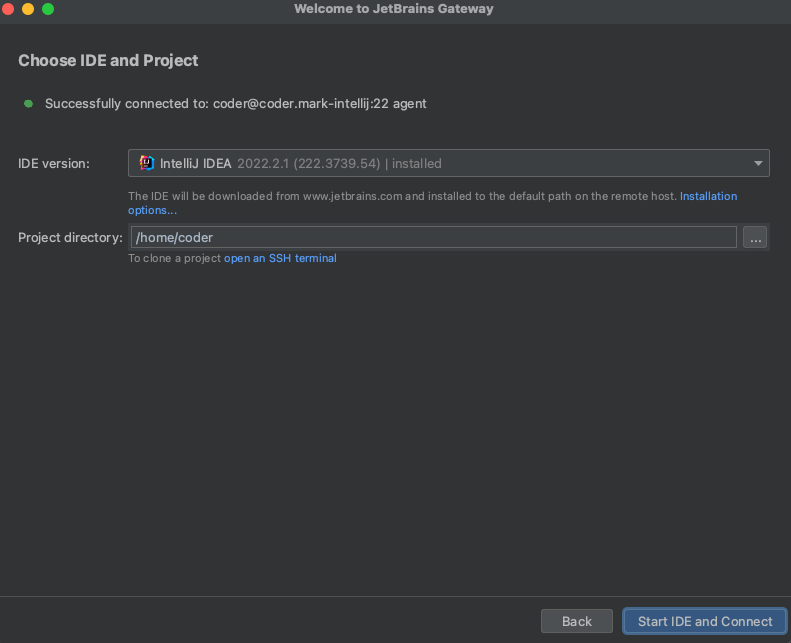
7. Gateway will open the JetBrains client connected to the remotely installed IDE.
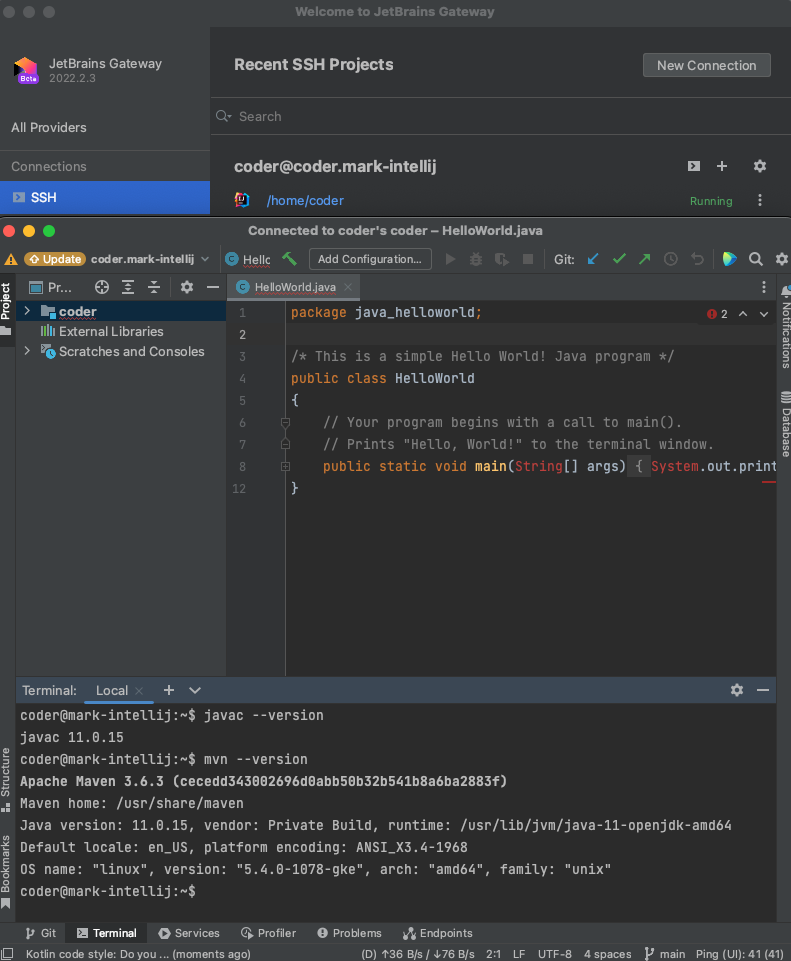
### [](https://coder.com/docs/v1/workspaces/editors#using-an-existing-jetbrains-installation-in-the-workspace)
Using an existing JetBrains installation in the workspace
If you would like to use an existing JetBrains IDE in a Coder workspace (or you are air-gapped, and cannot reach jetbrains.com), run the following script in the JetBrains IDE directory to point the default Gateway directory to the IDE directory. This step must be done before configuring Gateway.
`` `cd /opt/idea/bin ./remote-dev-server.sh registerBackendLocationForGateway` ``
[Here is the JetBrains article](https://www.jetbrains.com/help/idea/remote-development-troubleshooting.html#setup:~:text=Can%20I%20point%20Remote%20Development%20to%20an%20existing%20IDE%20on%20my%20remote%20server%3F%20Is%20it%20possible%20to%20install%20IDE%20manually%3F)
explaining this IDE specification.
### [](https://coder.com/docs/v1/workspaces/editors#alternative-ssh-key-algorithms-and-gateway)
Alternative SSH key algorithms and Gateway
If your Coder deployment is configured with ECDSA ssh key algorithm, change the Gateway authentication type to **Key pair** and create the Coder public ssh key in your local `~/.ssh` directory with `ssh-keygen -y -f`:
`` `~/.ssh/coder_enterprise | tee ~/.ssh/coder_enterprise.pub` ``
### [](https://coder.com/docs/v1/workspaces/editors#support--troubleshooting)
Support & troubleshooting
[This article](https://www.jetbrains.com/help/idea/remote-development-troubleshooting.html#setup)
outlines troubleshooting steps with Gateway. JetBrains product support including their Issue Trackers [are here.](https://www.jetbrains.com/support/)
[](https://coder.com/docs/v1/workspaces/editors#jupyter-notebook)
Jupyter Notebook
----------------------------------------------------------------------------------
Jupyter Notebook is the original web IDE for creating Notebooks used in data science, machine learning and analytics projects. By default, any Coder workspace with the Jupyter project installed (in `/usr/local/bin/jupyter`) will render the icon to launch Jupyter Notebook.
To use Jupyter Notebook in a Coder workspace, build a Dockerfile with Jupyter project installed as shown below:
`` `# Dockerfile to install Jupyter Notebook FROM codercom/enterprise-base:ubuntu USER root RUN pip3 install jupyter notebook USER coder` ``
[](https://coder.com/docs/v1/workspaces/editors#jupyterlab)
JupyterLab
----------------------------------------------------------------------
JupyterLab is the next-generation web-based IDE for data science and Python using documents called Notebooks.
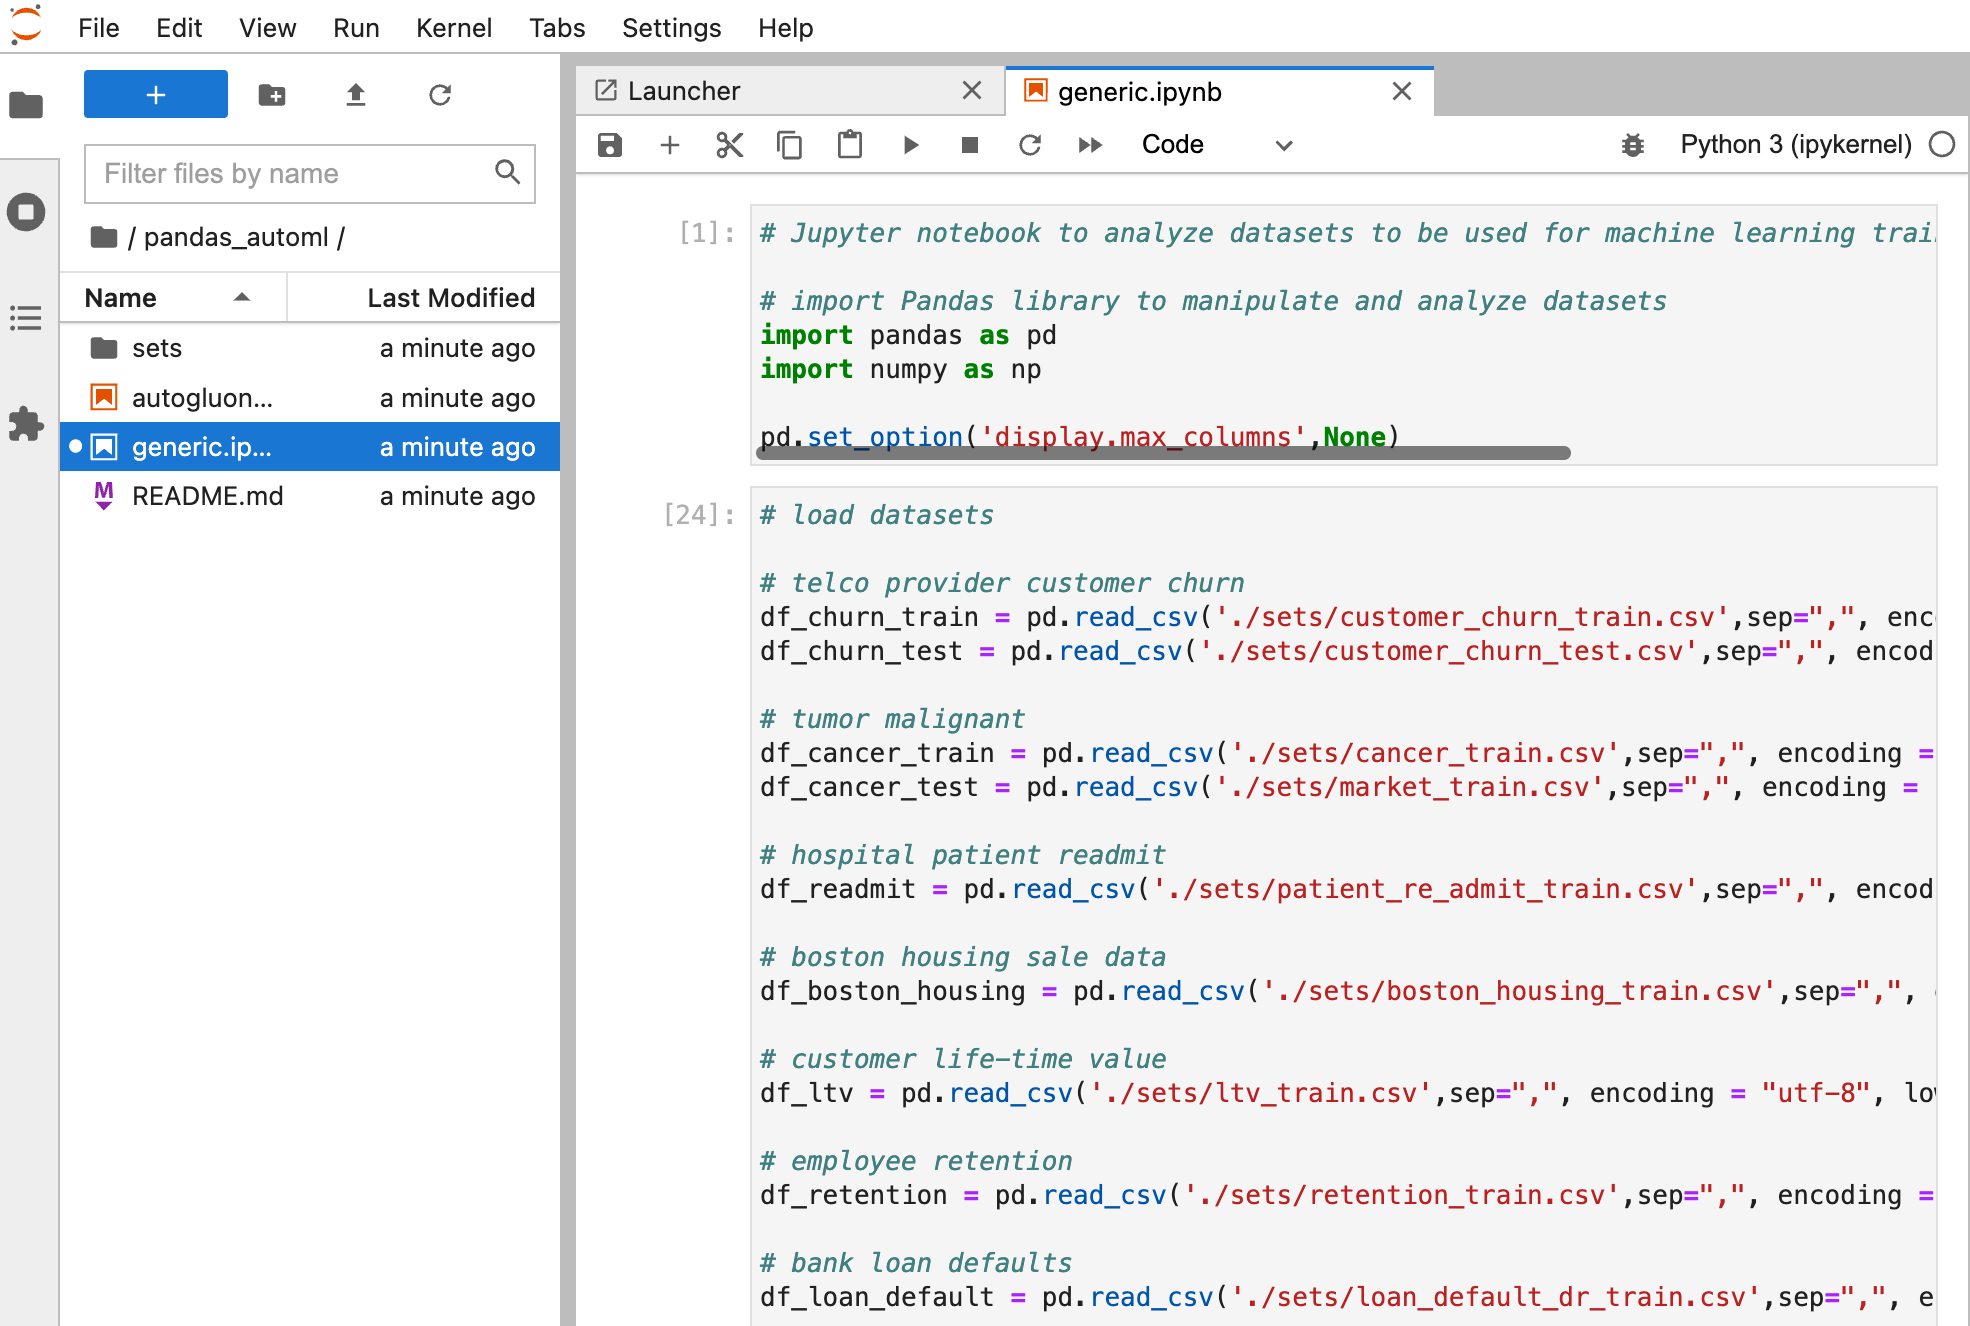
There are three methods to install and access JupyterLab in Coder. All require JupyterLab to be installed in the Dockerfile via `pip3 install jupyterlab`.
The first method renames the `jupyter` binary and copies a new `jupyter` that adjusts the arguments passed to the `jupyter` binary to tell Coder to launch JupyterLab instead of Notebook.
`` `FROM codercom/enterprise-base:ubuntu USER root RUN pip3 install jupyterlab RUN pip3 install jupyter notebook RUN mv /usr/local/bin/jupyter /usr/local/bin/jupyter.py COPY jupyter /usr/local/bin/jupyter RUN chmod +x jupyter USER coder` ``
Below is an example `jupyter` script with the lab arguments. This file must be located in the same directory as the Dockerfile to be copied during `docker build`
`` `#!/bin/bash # Replace all "NotebookApp" settings with ServerApp settings. args=${@//LabApp/"ServerApp"} # Replace 'notebook' with 'lab' to launch juypter lab args=${args/notebook/"lab"} jupyter.py ${args}` ``
The second method to run JupyterLab is with a dev URL and launching JupyterLab via `supervisord` in the `configure` script. The benefit of this approach is it is completely independent of Coder's IDE launching mechanism and relies only on a generic dev URL.
`` `FROM codercom/enterprise-base:ubuntu USER root RUN pip3 install jupyterlab RUN pip3 install jupyter notebook # configure script to create a dev URL and launch JupyterLab COPY ["configure", "/coder/configure"] RUN chmod +x /coder/configure # install supervisord RUN apt-get update && apt-get install -y supervisor RUN mkdir -p /var/log/supervisor COPY supervisord.conf /etc/supervisor/conf.d/supervisord.conf # change back to the coder user USER coder` ``
The `configure` script installs `supervisord`
`` `#!/bin/bash echo 'create dev URL for JupyterLab' coder urls create $CODER_WORKSPACE_NAME 8888 --name jupyterlab echo 'start supervisord and JupyterLab' sudo /usr/bin/supervisord` ``
The `supervisord.conf` launches JupyterLab. This file must be located in the same directory as the Dockerfile to be copied during `docker build`
`` `[supervisord] nodaemon=false environment=HOME=/home/coder [program:jupyterlab] command=/usr/local/bin/jupyter lab --ip='*' --NotebookApp.token='' --NotebookApp.password='' user=coder directory=/home/coder` ``
The third method to access JupyterLab is locally using the SSH port forward command: `ssh -L 8888:localhost:8888 coder.jupyterlab`. Alternatively, you can use the Coder CLI to port forward using: `coder tunnel jupyterlab 8888 8888`. Now, open a local browser and navigate to `https://localhost:8888`.
[](https://coder.com/docs/v1/workspaces/editors#rstudio)
RStudio
----------------------------------------------------------------
Coder supports [RStudio](https://coder.com/docs/v1/workspaces/rstudio.com)
. To create a workspace that lets you use RStudio:
1. Create a [custom image](https://coder.com/docs/v1/images/writing)
with RStudio installed, `rserver` in `PATH`.
To do this, you can refer to the sample Dockerfile below, which installs RStudio Server Open Source to log in with username `coder` and password `rstudio`.
> This Dockerfile approach works now with latest versions of RStudio including 2022-2-1.
`` `FROM codercom/enterprise-base:ubuntu USER root # Install dependencies RUN apt-get update && \ DEBIAN_FRONTEND="noninteractive" apt-get install --yes \ r-base \ gdebi-core # Install RStudio RUN wget https://download2.rstudio.org/server/bionic/amd64/rstudio-server-2022.02.1-461-amd64.deb && \ gdebi --non-interactive rstudio-server-2022.02.1-461-amd64.deb # Ensure rstudio files can be written to by the coder user. RUN chown -R coder:coder /var/lib/rstudio-server RUN echo "server-pid-file=/tmp/rstudio-server.pid" >> /etc/rstudio/rserver.conf RUN echo "server-data-dir=/tmp/rstudio" >> /etc/rstudio/rserver.conf RUN echo "www-frame-origin=same" >> /etc/rstudio/rserver.conf RUN echo "server-user=coder" >> /etc/rstudio/rserver.conf # Remove the following line if you do not run Coder on https RUN echo "server-add-header=X-Forwarded-Proto: https" >> /etc/rstudio/rserver.conf # Assign password "rstudio" to coder user. RUN echo 'coder:rstudio' | chpasswd # Assign locale RUN locale-gen en_US.UTF-8 # Run as coder user USER coder # Add RStudio to path ENV PATH /usr/lib/rstudio-server/bin:${PATH}` ``
2. [Create a workspace](https://coder.com/docs/v1/workspaces/getting-started#2-create-a-workspace)
using the image you created in the previous step.
3. At this point, you can go to **Applications** to launch RStudio.
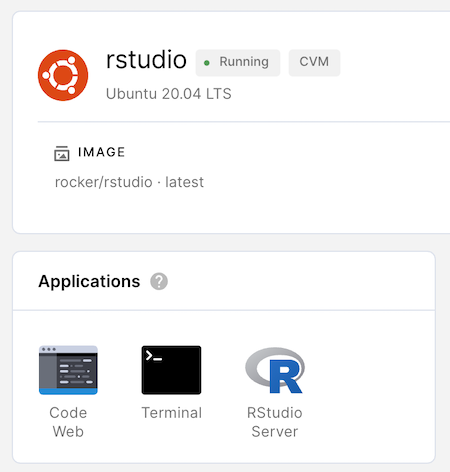
Coder auto-signs in using the Unix user (whose username and password you defined in your custom image above).
> RStudio may take a few additional seconds to start launch after the workspace is built.
>
> All RStudio data is stored in the home directory associated with the user you sign in as, since this ensures that your data is saved if Coder shuts down or rebuilds your environment.
[](https://coder.com/docs/v1/workspaces/editors#logging)
Logging
----------------------------------------------------------------
You can find your IDE logs in the following places:
* For code-server: `~/.local/share/code-server/logs/`
* For JetBrains IDEs: `.cache/JetBrains//log/.log`
##### On this page
---
# Direct workspace connections | Coder v1 Docs
[Home](https://coder.com/docs/v1 "Home")
[Admin](https://coder.com/docs/v1/admin "Admin")
Direct workspace connections
Coder supports the use of [WebRTC STUN](https://en.wikipedia.org/wiki/STUN)
, enabling point-to-point, direct connections to workspaces. Direct connections to workspaces help avoid the need to proxy traffic, reducing latency.
To connect to workspaces using WebRTC STUN:
1. In the Coder UI, go to **Manage** > **Admin** > **Infrastructure**.
2. Scroll down to **Direct workspace connections**, and provide the **STUN URI**.
> If you don't have a STUN server, you can use Google's publicly accessible option. The URL for Google's STUN server is `stun:stun.l.google.com:19302`.
---
# Helm charts | Coder v1 Docs
[Home](https://coder.com/docs/v1 "Home")
[Guides](https://coder.com/docs/v1/guides "Guides")
[Admin](https://coder.com/docs/v1/guides/admin "Admin")
Helm charts
This article will show you how to modify the default configuration values in Coder's Helm chart.
> You can [see the contents of Coder's Helm chart](https://github.com/coder/enterprise-helm/blob/master/values.yaml)
> on GitHub.
1. Get a copy of your existing Helm chart and save it as `current-values.yaml`
`` `helm show values coder/coder > current-values.yaml` ``
2. Open the `current-values.yaml` file using the text editor of your choice
3. Edit the `current-values.yaml` file as needed. **Be sure to remove the lines that you are _not_ modifying. Otherwise, the contents of `current-values.yaml` will override those in the default chart**
4. Save the `current-values.yaml` file
5. Update your Coder deployment with your new Helm chart values. Be sure to replace the placeholder value in the following command with your Coder version):
`` `helm upgrade coder coder/coder -n coder --version= --values current-values.yaml` ``
**Note:** You must complete this step every time you update the Helm chart values
---
# Teardown | Coder v1 Docs
[Home](https://coder.com/docs/v1 "Home")
[Guides](https://coder.com/docs/v1/guides "Guides")
[Deployment](https://coder.com/docs/v1/guides/deployments "Deployment")
Teardown
This guide shows you how to tear down Coder and the cluster on which it is deployed.
> These instructions help you remove infrastructure created when following our [Kubernetes setup tutorials](https://coder.com/docs/v1/setup/kubernetes)
> . They do not include teardown steps for any additional resources that you create. If you need to keep your cluster, you can run `helm uninstall coder`, which deletes all Coder services but retains workspaces and their associated disk space.
[](https://coder.com/docs/v1/guides/deployments/teardown#amazon-elastic-kubernetes-service-eks)
Amazon Elastic Kubernetes Service (EKS)
---------------------------------------------------------------------------------------------------------------------------------------
1. Make sure you're running `eksctl` version 0.37.0 or later:
`` `eksctl version` ``
2. List all of the services in your cluster:
`` `kubectl get svc --all-namespaces` ``
3. Delete any services that have an `EXTERNAL-IP` value in your namespace:
`` `kubectl delete svc ` ``
4. Delete the cluster and its underlying nodes:
`` `eksctl delete cluster --name ` ``
[](https://coder.com/docs/v1/guides/deployments/teardown#azure-kubernetes-service-aks)
Azure Kubernetes Service (AKS)
---------------------------------------------------------------------------------------------------------------------
1. Make sure that the workspace variable for `RESOURCE_GROUP` is set to the one you want to delete in Azure:
`` `echo $RESOURCE_GROUP` ``
If the variable is incorrect, fix it by setting it to the proper value:
`` `RESOURCE_GROUP=""` ``
2. Delete the cluster:
`` `az group delete --resource-group $RESOURCE_GROUP` ``
[](https://coder.com/docs/v1/guides/deployments/teardown#google-kubernetes-engine-gke)
Google Kubernetes Engine (GKE)
---------------------------------------------------------------------------------------------------------------------
1. Ensure that the environment variables for `PROJECT_ID` and `CLUSTER_NAME` are set to those for the cluster you want to delete:
`` `echo $PROJECT_ID echo $CLUSTER_NAME` ``
If these values are incorrect, you can fix this by providing the proper names:
`` `PROJECT_ID="" \ CLUSTER_NAME=""` ``
2. Delete the cluster:
`` `gcloud beta container --project $PROJECT_ID clusters delete \ $CLUSTER_NAME --zone ` ``
##### On this page
---
# 1.17.0 | Coder v1 Docs
[Home](https://coder.com/docs/v1 "Home")
[Changelog](https://coder.com/docs/v1/changelog "Changelog")
[Archives](https://coder.com/docs/v1/changelog/archive "Archives")
1.17.0
### [](https://coder.com/docs/v1/changelog/archive/1.17.0#breaking-changes-)
Breaking changes ❗
* helm: The `namespaceWhitelist` field on the Coder helm charts has been removed and the organization namespaces feature has been deprecated.
* Deployments that had this value set cannot add namespaces, and cannot remove namespaces unless there are no environments still using them
* Existing environments in whitelisted namespaces will continue to work
* Environments cannot be created in whitelisted namespaces any longer
* Organizations can't be removed from a workspace provider (see below) until all environments in that organization _and_ workspace provider are deleted. Users in an organization can create environments in the built-in workspace provider until _all_ environments in that provider are deleted and the organization is removed from the whitelist.
### [](https://coder.com/docs/v1/changelog/archive/1.17.0#features-)
Features ✨
* Workspace Providers: Workspace providers enable a single Coder deployment to provision and manage workspaces across multiple Kubernetes clusters and namespaces.
* web: New configuration page available via **Manage** > **Admin** > **Workspace Providers**
* web: New option to choose your workspace provider in the Create and Edit Environment modals
* infra: New support for the use of multiple Kubernetes clusters and namespaces
* Autostart: Autostart allows you to set the time when Coder automatically starts and builds your environments.
* web: New onboarding wizard available for setting a preferred Autostart time.
* web: New configuration page available via **Account Preferences** > **Autostart** that allows you to set a time and choose the environments that should be automatically started. We recommend enabling this feature for the environments you use the most.
* web: New checkbox for opting into Autostart is available on the **Create and Edit Environment** modals.
* web: Autostart action has been added to the Audit Log
* web: Environment stop actions have been added to the Audit Log
* web: UI shows most recent Build Log for offline environments
* cli: Improved sign-in flow to authenticate the CLI with Coder
* web: Improved error messages within the Build Log
* Improved messages when '/coder/configure' is not executable
* code-web: Upgraded to code-server version 3.9.0
* jetbrains: The Mac OS keymap plugin is now automatically installed
* web: Resources section on Environments page has been redesigned
* web: Applied consistent design theme across all Preferences pages
### [](https://coder.com/docs/v1/changelog/archive/1.17.0#bug-fixes-)
Bug fixes 🐛
* web: Fixed dormant accounts and accounts pending deletion not displaying correctly in the **Manage > Users** table
* web: Fixed DevURL error page links using incorrect URIs.
* infra: Fixed timeout when deleting users with many environments
* infra: Increased offline timeout in trial versions of Coder
* web: Fixed casing when referencing 'GitHub' and 'GitLab'
* infra: Fixed an issue whereby renaming an OAuth provider caused a duplicate to be created. Migrating to 1.17.0 will remove these duplicates. They are not visible in the UI.
* infra: Corrected environment statuses during build and shutdown states
* web: Fixed SiteAdmin users receiving a notification that their SSH keys are out of sync after creating an initial environment.
* Note: We do not recommend using the SiteAdmin user beyond the initial setup
### [](https://coder.com/docs/v1/changelog/archive/1.17.0#security-updates-)
Security updates 🔐
* When resetting the SiteAdmin password using the `cemanager reset-admin-password` tool, Coder requires a new password to be set upon next login (the initial password provided is marked as a temporary password).
---
# 1.34.0 | Coder v1 Docs
[Home](https://coder.com/docs/v1 "Home")
[Changelog](https://coder.com/docs/v1/changelog "Changelog")
1.34.0
### [](https://coder.com/docs/v1/changelog/1.34.0#breaking-changes-)
Breaking changes ❗
There are no breaking changes 1.34.0.
### [](https://coder.com/docs/v1/changelog/1.34.0#features-)
Features ✨
* web: added filtering capabilities to metrics page.
* web: added ability to disable editing of usernames for OIDC login.
* infra: allowed overriding Bitbucket OAuth consumer key using the CODERD\_BITBUCKET\_CONSUMER\_KEY environment variable.
* infra: added automatic user deprovisioning via SCIM.
* infra: updated sysbox to v0.5.2. Fixed an issue where CVMs would not work with latest Docker versions inside the user container.
* infra: added ability to toggle on/off the coderd `DEBUG` logs in the Helm chart.
* cli: added a warning to the CLI when attempting to access a workspace that requires a rebuild.
* cli: added --duration flag to coder tokens create to control token lifetime.
* cli: added prometheus stats to WebRTC connections.
### [](https://coder.com/docs/v1/changelog/1.34.0#bug-fixes-)
Bug fixes 🐛
* infra: fixed CVMs to properly report CPU and memory allocation.
* infra: reduced log spam in workspace agent logs.
* infra: fixed workspace builds being stuck on "enqueuing workspace build" step due to nil pointer panic. Workspaces that were getting stuck should now show a proper root cause error in the build log.
* infra: upgraded code-server to 4.6.0 to fix disconnects caused by reverse proxy idle timeouts.
* infra: fixed an issue where disconnecting from a pod log stream resulted in a failed build.
* infra: improved WebRTC connection logging.
* infra: improved WebRTC session handling.
* infra: fixed SSH from logging noisily by default.
### [](https://coder.com/docs/v1/changelog/1.34.0#security-updates-)
Security updates 🔐
* infra: added fix to prevent cross-origin websocket requests.
---
# VNC | Coder v1 Docs
[Home](https://coder.com/docs/v1 "Home")
[Guides](https://coder.com/docs/v1/guides "Guides")
[Customization](https://coder.com/docs/v1/guides/customization "Customization")
VNC
This guide will show you how to set up a VNC in Coder.
Coder does not have a specific set of VNC providers it supports. Coder will render the VNC, as long as it is installed on the image used to create the workspace.
[](https://coder.com/docs/v1/guides/customization/vnc#step-1-create-the-dockerfile)
Step 1: Create the Dockerfile
-----------------------------------------------------------------------------------------------------------------
To begin, create a Dockerfile that you'll use to build an [image](https://coder.com/docs/v1/images)
with a VNC provider installed.
Be sure to set the `HOME`, `USER`, and `PORT` environment variables in the Dockerfile:
`` `HOME=/home/coder USER coder PORT 1234` ``
**Note:** Set `PORT` to the appropriate port number for your VNC instance.
> To help you get started, see this [sample image](https://github.com/coder/enterprise-images/tree/main/images/vnc)
> that uses [noVNC](https://github.com/novnc/noVNC)
> as the client and [TurboVNC](https://turbovnc.org/)
> as the server.
[](https://coder.com/docs/v1/guides/customization/vnc#step-2-build-and-push-the-image-to-docker-hub)
Step 2: Build and push the image to Docker Hub
---------------------------------------------------------------------------------------------------------------------------------------------------
Once you've created your image, build and push it to Docker Hub:
`` `docker build . -t /vnc docker push /vnc` ``
[](https://coder.com/docs/v1/guides/customization/vnc#step-3-import-the-image-into-coder)
Step 3: Import the image into Coder
-----------------------------------------------------------------------------------------------------------------------------
Now that your image is available via Docker Hub, you can import it for use in Coder.
1. Log in to Coder and go to **Images** > **Import Image**
2. Import or select a [registry](https://coder.com/docs/v1/admin/registries)
.
3. Provide the **Repository** and **Tag** of the VNC image. Optionally, you can include a **Description** and the **Source Repo URL** that refers to the image's source.
4. Set the recommended resources (CPU cores, memory, disk space) for your VNC instance.
5. Click **Import Image**.
[](https://coder.com/docs/v1/guides/customization/vnc#step-4-create-a-workspace-with-the-image)
Step 4: Create a workspace with the image
-----------------------------------------------------------------------------------------------------------------------------------------
Once you've imported your image into Coder, you can use it to create an workspace.
1. In the Coder UI, go to the **workspace overview** page. Click **New Workspace** and choose **Custom Workspace**
2. Provide a **Workspace Name**, and indicate that your **Image Source** is **Existing**.
3. Select your **Image** and associated **Tag**.
4. Click **Create Workspace**
[](https://coder.com/docs/v1/guides/customization/vnc#connecting-to-coder)
Connecting to Coder
----------------------------------------------------------------------------------------------
There are two ways you can connect to your workspace:
* Connect via the web
* Connect using a local VNC client
### [](https://coder.com/docs/v1/guides/customization/vnc#option-1-connect-via-web)
Option 1: Connect via web
If your image includes [noVNC](https://github.com/novnc/noVNC)
, or another web-based client, you can use a [dev URL](https://coder.com/docs/v1/workspaces/devurls)
to access it securely.
1. From the **workspace overview** page, click **Add URL**
2. Provide the **Port** number that the VNC web client is running on (this information is defined in the image you used to build this workspace).
3. Provide a **name** for the dev URL.
4. Click **Save**.
You can now access the VNC in Coder by clicking the **Open in Browser** icon (this will launch a separate window).
### [](https://coder.com/docs/v1/guides/customization/vnc#option-2-connect-using-a-local-vnc-client)
Option 2: Connect using a local VNC client
If your Coder deployment has [ssh](https://coder.com/docs/admin/workspace-management/ssh-access)
enabled, you can also connect to Coder using a local client with SSH port forwarding.
You will need to install [coder-cli](https://coder.com/docs/v1/cli)
and a VNC client on your local machine.
Run the following commands on your local machine to connect to the VNC server. Replace `[vnc-port]` with the port on which the server is running and `[workspace-name]` with the workspace you created in **Step 4**.
`` `# Ensure the workspace you created is an SSH target coder config-ssh # Forward the remote VNC server to your local machine # Note that you will not see any output if this succeeds ssh -L -N [vnc-port]:localhost:localhost:[vnc-port] coder.[workspace-name] # At this point, you can connect your VNC client to localhost:[vnc-port]` ``
##### On this page
---
# inotify watcher limit problems | Coder v1 Docs
[Home](https://coder.com/docs/v1 "Home")
[Guides](https://coder.com/docs/v1/guides "Guides")
[Troubleshooting](https://coder.com/docs/v1/guides/troubleshooting "Troubleshooting")
inotify watcher limit problems
When using some applications and tools, including Webpack or [code-server](https://github.com/coder/code-server)
, you may encounter an error similar to the following:
> Watchpack Error (watcher): Error: ENOSPC: System limit for number of file watchers reached, watch '/some/path'
This article will show you how to diagnose and troubleshoot this error, which relates to a high number of inotify watchers in use.
[](https://coder.com/docs/v1/guides/troubleshooting/inotify-watch-limits#background)
Background
-----------------------------------------------------------------------------------------------
[`inotify`](https://en.wikipedia.org/wiki/Inotify)
allows programs to monitor files for changes, so that they receive an event whenever a user or program modifies a file. `inotify` requires kernel resources (memory and processor) for each file it tracks. As a result, the Linux kernel limits the number of file watchers that each user can register. The default settings vary according to the host system distribution; on Ubuntu 20.04 LTS, the default limit is 8,192 watches per instance.
On a 64-bit system, each `inotify` watch that programs register will consume ~1 kB of kernel memory, which cannot be swapped to disk and is not counted against the workspace memory limit setting.
[](https://coder.com/docs/v1/guides/troubleshooting/inotify-watch-limits#diagnosis)
Diagnosis
---------------------------------------------------------------------------------------------
If you encounter the error that's the focus of this article, the total number of watchers in use is approaching the `max_user_watches` setting. The following sections will show you how to verify if this is the case.
### [](https://coder.com/docs/v1/guides/troubleshooting/inotify-watch-limits#check-tunable-settings)
Check tunable settings
There are three kernel tuning options related to the `inotify` system:
* `fs.inotify.max_queued_events`: The upper bound on the number of file notification events pending delivery to programs
* `fs.inotify.max_user_instances`: The maximum number of `inotify` instances per user (programs using `inotify` will typically create a single _instance_, so this limit is unlikely to cause issues)
* `fs.inotify.max_user_watches`: The maximum number of files and folders that programs can monitor for changes
To see the values for these settings that are applicable to your workspace, run:
`` `sysctl fs.inotify.{max_queued_events,max_user_instances,max_user_watches}` ``
You should see output similar to the following:
`` `fs.inotify.max_queued_events = 16384 fs.inotify.max_user_instances = 128 fs.inotify.max_user_watches = 8192` ``
Because these settings are not namespace-aware, the values will be the same regardless of whether you run the commands on the host system or inside a container running on that host.
> See [inotify(7)](https://man7.org/linux/man-pages/man7/inotify.7.html)
> for additional details regarding the `inotify` system.
### [](https://coder.com/docs/v1/guides/troubleshooting/inotify-watch-limits#identify-inotify-consumers)
Identify inotify consumers
To identify the programs consuming `inotify` watches, you can use a script that summarizes the information available in the `/proc` filesystem, such as [`inotify-consumers`](https://github.com/fatso83/dotfiles/blob/master/utils/scripts/inotify-consumers)
.
Running `./inotify-consumers` will show the names of programs along with the number of `inotify` watches registered with the kernel, which will look like the following:
`` `$ ./inotify-consumers INOTIFY WATCHER COUNT PID USER COMMAND -------------------------------------- 269 254560 coder /var/tmp/coder/code-server/lib/node /var/tmp/coder/code-server/lib/vscode/out/bootstrap-fork --type=watcherService 5 1722 coder /var/tmp/coder/code-server/lib/node /var/tmp/coder/code-server/lib/vscode/out/vs/server/fork 2 254538 coder /var/tmp/coder/code-server/lib/node /var/tmp/coder/code-server/lib/vscode/out/bootstrap-fork --type=extensionHost 2 1507 coder gpg-agent --homedir /home/coder/.gnupg --use-standard-socket --daemon 278 WATCHERS TOTAL COUNT` ``
> Please note that this is a third-party script published by an individual who is not affiliated with Coder, and as such, we cannot provide a warranty or support for its usage.
To see the specific files that the tools track for changes, you can use `strace` to monitor invocations of the `inotify_add_watch` system call, for example:
`` `$ strace --follow-forks --trace='inotify_add_watch' inotifywait --quiet test inotify_add_watch(3, "test", IN_ACCESS|IN_MODIFY|IN_ATTRIB|IN_CLOSE_WRITE|IN_CLOSE_NOWRITE|IN_OPEN|IN_MOVED_FROM|IN_MOVED_TO|IN_CREATE|IN_DELETE|IN_DELETE_SELF|IN_MOVE_SELF) = 1` ``
This example shows that the `inotifywait` command is listening for notifications related to the `test` file.
[](https://coder.com/docs/v1/guides/troubleshooting/inotify-watch-limits#resolution)
Resolution
-----------------------------------------------------------------------------------------------
If you encounter the file watcher limit, you can do one of two things:
1. Reduce the number of file watcher registrations
2. Increase the maximum file watcher limit
We recommend attempting to reduce the file watcher registrations first, because increasing the number of file watches may result in high processor utilization.
### [](https://coder.com/docs/v1/guides/troubleshooting/inotify-watch-limits#reduce-watchers)
Reduce watchers
Many applications include files that change rarely (e.g., third-party dependencies stored in `node_modules`). Your tools may watch for changes to these files and folders, consuming `inotify` watchers. These tools typically provide configuration settings to exclude specific files, paths, and patterns from file watching.
For example, Visual Studio Code and `code-server` apply the following [user workspace setting](https://code.visualstudio.com/docs/getstarted/settings)
by default:
`` `"files.watcherExclude": { "**/.git/objects/**": true, "**/.git/subtree-cache/**": true, "**/node_modules/**": true, "**/.hg/store/**": true },` ``
Consider adding other infrequently-changed files to this list, which will cause Visual Studio Code to poll (or check periodically) for changes to those files.
For information on how to do this with other software tools, please see their documentation/user manuals.
### [](https://coder.com/docs/v1/guides/troubleshooting/inotify-watch-limits#increase-the-watch-limit)
Increase the watch limit
You can increase the kernel tunable option to increase the maximum number of `inotify` watches for each user. This is a global setting that applies to all users sharing the same system/Kubernetes node. To do this, modify the `sysctl` configuration file, or apply a DaemonSet to the Kubernetes cluster to apply that change to all nodes automatically.
> You must rebuild workspaces before your changes take effect.
For example, you can create a file called `/etc/sysctl.d/watches.conf` and include the following contents:
`` `fs.inotify.max_user_watches = 10485760` ``
Alternatively, you can use the following DaemonSet with `kubectl apply`:
`` `apiVersion: apps/v1 kind: DaemonSet metadata: name: more-fs-watchers namespace: kube-system labels: app: more-fs-watchers k8s-app: more-fs-watchers spec: selector: matchLabels: k8s-app: more-fs-watchers template: metadata: labels: name: more-fs-watchers k8s-app: more-fs-watchers annotations: seccomp.security.alpha.kubernetes.io/defaultProfileName: runtime/default apparmor.security.beta.kubernetes.io/defaultProfileName: runtime/default spec: nodeSelector: kubernetes.io/os: linux initContainers: - name: sysctl image: alpine:3 env: # Each inotify watch consumes kernel memory, and existing container memory # limits do not account for this. While you can set an arbitrary limit here, # note that permitting large numbers of watches may result in performance # degradation and out-of-memory errors. The required memory per watcher is # platform-dependent and defined as INOTIFY_WATCH_COST in fs/notify: # https://git.kernel.org/pub/scm/linux/kernel/git/torvalds/linux.git/tree/fs/notify/inotify/inotify_user.c # # The default in this file is 10 million watchers per user. - name: "USER_WATCHES_MAX" value: "10485760" command: - sysctl - -w - fs.inotify.max_user_watches=$(USER_WATCHES_MAX) resources: requests: cpu: 10m memory: 1Mi limits: cpu: 100m memory: 5Mi securityContext: # We need to run as root in a privileged container to modify # /proc/sys on the host (for sysctl) runAsUser: 0 privileged: true readOnlyRootFilesystem: true capabilities: drop: - ALL containers: - name: pause image: k8s.gcr.io/pause:3.5 command: - /pause resources: requests: cpu: 10m memory: 1Mi limits: cpu: 100m memory: 5Mi securityContext: runAsNonRoot: true runAsUser: 65535 allowPrivilegeEscalation: false privileged: false readOnlyRootFilesystem: true capabilities: drop: - ALL terminationGracePeriodSeconds: 5` ``
This DaemonSet will ensure that the corresponding pod runs on _every_ Linux node in the cluster. When new nodes join the cluster, such as during an autoscaling event, the DaemonSet will ensure that the pod runs on the new node as well.
You can delete the DaemonSet by running:
`` `$ kubectl delete --namespace=kube-system daemonset more-fs-watchers daemonset.apps "more-fs-watchers" deleted` ``
However, note that the setting will persist until the node restarts or another program sets the `fs.inotify.max_user_watches` setting.
[](https://coder.com/docs/v1/guides/troubleshooting/inotify-watch-limits#see-also)
See also
-------------------------------------------------------------------------------------------
* [INotify watch limit](https://blog.passcod.name/2017/jun/25/inotify-watch-limit.html)
provides additional context on this problem and its resolution
* [inotify(7)](https://man7.org/linux/man-pages/man7/inotify.7.html)
, the Linux manual page related to the `inotify` system call
* [Kernel Korner - Intro to inotify](https://www.linuxjournal.com/article/8478)
* [Filesystem notification, part 1: An overview of dnotify and inotify](https://lwn.net/Articles/604686/)
and [Filesystem notification, part 2: A deeper investigation of inotify](https://lwn.net/Articles/605128/)
examine the `inotify` mechanism and its predecessor, `dnotify`, in detail
* Microsoft's Language Server Protocol (LSP) specification [describes an approach for using file watch notifications](https://microsoft.github.io/language-server-protocol/specification#workspace_didChangeWatchedFiles)
(Visual Studio Code and code-server, along with many other editors, uses this protocol for programming language support, and the same constraints and limitations apply to those tools)
* Resources for Visual Studio Code and code-server:
* [User and workspace settings](https://code.visualstudio.com/docs/getstarted/settings)
, in particular, the setting called `files.watcherExclude`
* [VS Code Setting: files.watcherExclude](https://youtu.be/WMNua0ob6Aw)
(YouTube)
* [My ultimate VSCode configuration](https://dev.to/vaidhyanathan93/ulitmate-vscode-configuration-4i2o)
, a blog post describing a user's preferred settings, including file exclusions
If none of these steps resolve the issue, please [contact us](https://coder.com/contact)
for further support.
##### On this page
---
# SSH access | Coder v1 Docs
[Home](https://coder.com/docs/v1 "Home")
[Workspaces](https://coder.com/docs/v1/workspaces "Workspaces")
SSH access
Before accessing your workspace via SSH:
* Your site manager must [enable access to workspaces using SSH](https://coder.com/docs/v1/admin/workspace-management/ssh-access)
* You must install the [Coder CLI](https://coder.com/docs/v1/cli)
on your local machine
[](https://coder.com/docs/v1/workspaces/ssh#configuration)
Configuration
------------------------------------------------------------------------
To access your servers via SSH, run the following using the Coder CLI:
`` `coder config-ssh` ``
You should see the following returned:
`` `An auto-generated ssh config was written to "/Users/yourName/.ssh/config" Your private ssh key was written to "/Users/yourName/.ssh/coder_enterprise" You should now be able to ssh into your workspace For example, try running $ ssh coder.backend` ``
Your workspace is now accessible via `ssh coder.` (e.g., `ssh coder.myEnv` if your workspace is named `myEnv`).
### [](https://coder.com/docs/v1/workspaces/ssh#ssh-port-forwarding)
SSH port forwarding
To start an SSH port forwarding session:
`` `ssh -L [localport]:localhost:[remoteport] coder.[workspace]` ``
| Parameter | Description |
| --- | --- |
| `localport` | The port to use on your local machine (e.g., `localhost:3000`) |
| `remoteport` | The port of the server you want to access in the workspace |
> You can use either HTTP or HTTPS, though the latter may result in certificate-related errors.
At this point, you can access the server in the browser using the `localport` value.
[](https://coder.com/docs/v1/workspaces/ssh#reconfiguration)
Reconfiguration
----------------------------------------------------------------------------
You will need to rerun the `coder config-ssh` command if:
* You reconfigure or modify your keypair using the Coder dashboard
* You add additional workspaces (running this command will ensure that your **~/.ssh/config** file populates correctly with alias targets)
[](https://coder.com/docs/v1/workspaces/ssh#using-sftp)
Using SFTP
------------------------------------------------------------------
Coder supports the use of the SFTP protocol. To connect to a workspace using SFTP, run `sftp coder.`.
[](https://coder.com/docs/v1/workspaces/ssh#using-rsync)
Using rsync
--------------------------------------------------------------------
You can use `rsync` to transfer files to and from Coder.
To do so, use the flag `-e "coder ssh"` in your `rsync` transfer invocation. For example, the following shows how you can transfer your home directory to your workspace:
`` `rsync -e "coder ssh" -a --progress ~/project :~/project` ``
##### On this page
---
# Terraform | Coder v1 Docs
[Home](https://coder.com/docs/v1 "Home")
[Guides](https://coder.com/docs/v1/guides "Guides")
[Deployment](https://coder.com/docs/v1/guides/deployments "Deployment")
Terraform
Coder offers [Terraform modules](https://github.com/coder/enterprise-terraform)
that help you deploy Coder faster.
Currently, we offer a single-command deployment of Coder to Google Cloud Platform. We will add support for additional cloud providers in the future.
[](https://coder.com/docs/v1/guides/deployments/terraform#deploying-coder-to-google-cloud-platform)
Deploying Coder to Google Cloud Platform
--------------------------------------------------------------------------------------------------------------------------------------------
> Before proceeding, please make sure that you have both [Terraform](https://www.terraform.io/downloads.html)
> and [Terragrunt](https://terragrunt.gruntwork.io/docs/getting-started/quick-start/)
> installed.
1. [Copy the GKE example](https://github.com/coder/enterprise-terraform/tree/main/examples/gke/self-hosted)
to the location of your choice (we recommend version controlling the entire folder).
2. [Create a cloud DNS zone](https://cloud.google.com/dns/docs/quickstart)
containing your desired hostname. This must be in the same GCP project where you will deploy Coder.
3. Update the `terragrunt.hcl` file that's included in the root of your example folder. The `terragrunt.hcl` file contains notes that will guide you through customization options available. When done, you can view the changes you proposed running:
`` `terragrunt run-all plan` ``
If you run the above command and it fails, you may have misconfigured one or more of the variables required. The output will direct you to the problematic areas.
4. Deploy Coder by running:
`` `terragrunt run-all apply` ``
If the `apply` command succeeds, you will be able to access Coder at the hostname you provided. Log in with `admin` as the username and the password that you're provided.
[](https://coder.com/docs/v1/guides/deployments/terraform#tear-down)
Tear down
------------------------------------------------------------------------------
To tear down your Coder deployment, run:
`` `terragrunt run-all destroy` ``
##### On this page
---
# Coder for Docker | Coder v1 Docs
[Home](https://coder.com/docs/v1 "Home")
[Setup](https://coder.com/docs/v1/setup "Setup")
Coder for Docker
[##### Local deployment\
\
Learn how to run Coder with Docker locally.](https://coder.com/docs/v1/setup/coder-for-docker/local)
[##### External database setup\
\
Learn how to set up an external Postgres database for use with C4D.](https://coder.com/docs/v1/setup/coder-for-docker/postgres)
[##### Upgrade\
\
Learn how to upgrade your Coder for Docker deployment.](https://coder.com/docs/v1/setup/coder-for-docker/upgrade)
---
# TypeError: Failed to fetch | Coder v1 Docs
[Home](https://coder.com/docs/v1 "Home")
[Guides](https://coder.com/docs/v1/guides "Guides")
[Troubleshooting](https://coder.com/docs/v1/guides/troubleshooting "Troubleshooting")
TypeError: Failed to fetch
When using Coder, you may encounter this error when loading a workspace:
`` `Failed to fetch applications! TypeError: Failed to fetch` ``
[](https://coder.com/docs/v1/guides/troubleshooting/502error#why-this-happens)
Why this happens
-----------------------------------------------------------------------------------------------
This is a WebSocket error that occurs when network traffic attempts to access the applications endpoint.
[](https://coder.com/docs/v1/guides/troubleshooting/502error#troubleshooting-steps)
Troubleshooting Steps
---------------------------------------------------------------------------------------------------------
Ensure your Coder access URL is set to `https://your-coder-domain.com`.
You can verify your access URL by going to **Admin** > **Infrastructure** > **Access URL**.
If this doesn't resolve the issue, please [contact us](https://coder.com/contact)
for further support.
##### On this page
---
# Fallback shell | Coder v1 Docs
[Home](https://coder.com/docs/v1 "Home")
[Admin](https://coder.com/docs/v1/admin "Admin")
Fallback shell
You can enable fallback shell support so that Coder will automatically fall back to the [CMD specified in the Docker image](https://docs.docker.com/engine/reference/builder/#cmd)
if Coder detects that the user's shell is `/sbin/nologin`.
To enable fallback shell support for Kubernetes:
1. Log in to Coder as a site manager.
2. Go to Manage > Admin.
3. On the **Infrastructure** tab, find the **Fallback shell** section.
4. Toggle **Enable Fallback Shell support for Kubernetes** to **On**.
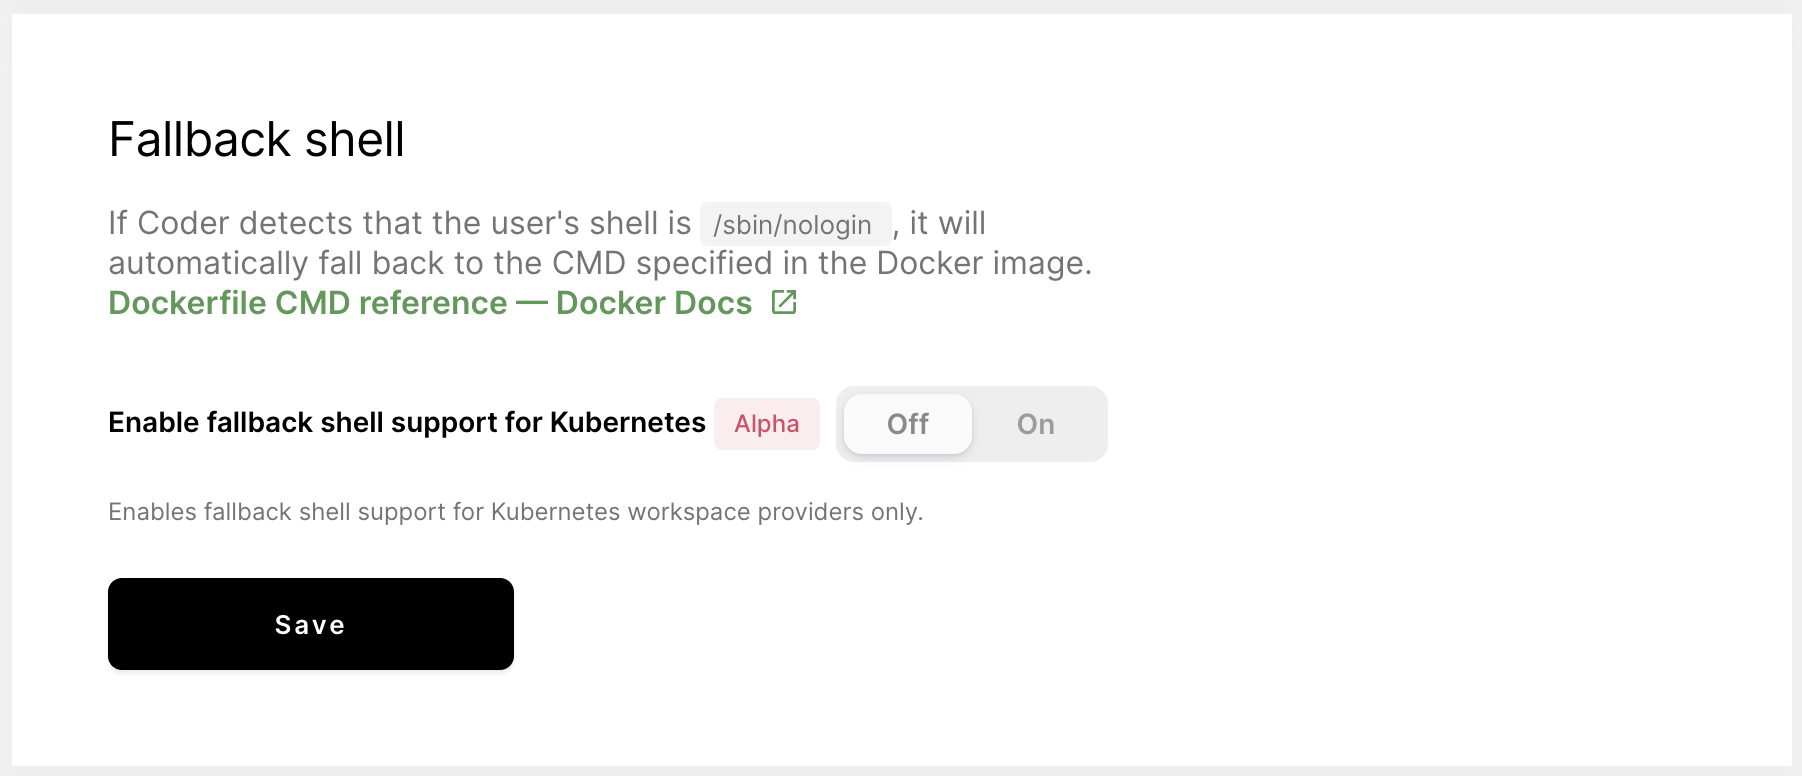
---
# Structure | Coder v1 Docs
[Home](https://coder.com/docs/v1 "Home")
[Images](https://coder.com/docs/v1/images "Images")
Structure
Coder allows your organization to structure your image hierarchy however you'd like. However, we've seen organizations do well by defining a set of organization-wide base images from which all projects are created.
These base images extend common open-source base images. They also contain security patches, org-wide utilities, and configuration settings/information that individual project images will get by default when you create additional images. For example:
``` ``FROM ubuntu:20.04 # Install baseline packages RUN apt-get update && DEBIAN_FRONTEND="noninteractive" apt-get install -y \ build-essential \ git \ bash \ curl \ wget \ unzip \ htop \ man \ vim \ sudo \ python3 \ python3-pip \ ca-certificates \ locales # Add a user `coder` so that you're not developing as the `root` user RUN adduser --gecos '' --disabled-password coder && \ echo "coder ALL=(ALL) NOPASSWD:ALL" >> /etc/sudoers.d/nopasswd USER coder`` ```
Your users can then create descendant images. These contain all of the original tooling and configuration installed onto the base image and the new customizations added by the users.
[](https://coder.com/docs/v1/images/structure#coder-assets)
Coder assets
------------------------------------------------------------------------
Coder inserts static assets into each workspace, including:
* code-server
* JetBrains Projector
* Coder CLI, which includes the [Coder Agent](https://coder.com/docs/v1/setup/architecture)
These assets are installed into the `/var/tmp/coder` directory of each workspace. You do not need to include these static assets in your custom images. However, the following software are **required** when you build custom images:
* [POSIX Utilities](https://pubs.opengroup.org/onlinepubs/9699919799/idx/utilities.html)
* [GNU libc](https://www.gnu.org/software/libc/libc.html)
* The minimum GNU libc version supported for the Coder-inserted assets is `2.1`
* Coder doesn't support Alpine, since it uses musl libc
* [GNU Core Utilities](https://www.gnu.org/software/coreutils/)
The following utilities are **optional**:
* [ssh-agent](https://www.ssh.com/academy/ssh/agent)
to automatically add the Coder user's public SSH key to the agent
* [systemd](https://systemd.io/)
for service supervision (this is only available with [CVMs](https://coder.com/docs/v1/workspaces/cvms)
* [OpenSSH](https://www.openssh.com/)
server
* You can run OpenSSH from either your `coder/configure` script or `systemd`
---
# Image tag names | Coder v1 Docs
[Home](https://coder.com/docs/v1 "Home")
[Guides](https://coder.com/docs/v1/guides "Guides")
[Admin](https://coder.com/docs/v1/guides/admin "Admin")
Image tag names
Coder uses image tags to determine the image variant to use when creating an workspace.
Image tags are expressed using the following notation:
`` `:` ``
Examples include:
`` `ubuntu:rolling ubuntu:latest ubuntu:20.04 mycorp/myproject:v1` ``
This article will walk you through how Coder handles image tags and what to consider when working with image tags.
[](https://coder.com/docs/v1/guides/admin/image-tag-names#rebuilds-use-the-same-tag-not-the-same-image)
Rebuilds use the same tag, not the same image
-----------------------------------------------------------------------------------------------------------------------------------------------------
When modifying an existing image, be sure to consider whether the changes you're making will break existing workspaces built using that image. You may want to consider taking a semantic versioning view of your image tags for more critical images.
[](https://coder.com/docs/v1/guides/admin/image-tag-names#tag-behavior)
Tag behavior
------------------------------------------------------------------------------------
The following examples show how different tagging schemes change how Coder uses the image tag.
* If you build your workspace using a `ubuntu:rolling` or `ubuntu:latest` tag, Coder prompts you to rebuild for patches, security updates, and major version releases. If you're supporting a SaaS product or working on mobile apps, you can opt for this to ensure that your tools stay up-to-date.
* If you build your workspace using a specific version tag (e.g., `ubuntu:20.04`), Coder will alert you regarding patches and security updates so that you rebuild your workspace (you won't get these fixes otherwise). Coder does not, however, alert you regarding minor releases (e.g., movement from `20.04` to `20.10`). This is a good option for those offering long-term support of software with lengthier version cycles or those supporting multiple versions where you expect to revert to a prior release to investigate and fix issues.
* If you build your workspace using `mycorp/myproject:v1`, the image is associated with a specific project's major version. You can apply the `:v1` tag to the most recent build for the image, while you can use `:v1.3` or `:v1.3.1` to pull a more specific tag version.
[](https://coder.com/docs/v1/guides/admin/image-tag-names#recommendations)
Recommendations
------------------------------------------------------------------------------------------
* Use image names and tags that follow a consistent format across the organization so that users will be comfortable selecting either a _versioned_ or a _rolling_ tag.
* To avoid pulling images from Docker Hub (or another external source), use internal registry names and tags or namespaces that are controlled by your organization.
[](https://coder.com/docs/v1/guides/admin/image-tag-names#sample-tagging-scheme)
Sample tagging scheme
------------------------------------------------------------------------------------------------------
Let's say that you have the following tag:
`` `registry:port/company/department/software:majorversion` ``
Here's the information that can be gleaned from the tag name:
* `registry:port`: By using an internal image registry name, there's no risk of pulling an outside image with unapproved content
* `company`: If you're using an internal registry, you can omit this parameter
* `department`: Helps set the scope for who owns the image and therefore can patch/modify the image
* `software`: Offers information about which software systems should be developed using the image
* `majorversion`: Can correlate to a software stock; helpful in determining which version of various dependencies and build tools are present in the image
The above recommendations are based on assumptions that may not apply to all organizations, and their applicability may change over time. There's no "right way" to tag your images, as long as your tags are meaningful to your teams and don't cause issues with your developers' workflows.
##### On this page
---
# Vite and HMR | Coder v1 Docs
[Home](https://coder.com/docs/v1 "Home")
[Guides](https://coder.com/docs/v1/guides "Guides")
[Troubleshooting](https://coder.com/docs/v1/guides/troubleshooting "Troubleshooting")
Vite and HMR
When using Vite and accessing your app via [dev URLs](https://coder.com/docs/v1/workspaces/devurls)
, you may encounter issues with hot module reloading (HMR) not working.
[](https://coder.com/docs/v1/guides/troubleshooting/vite-hmr#why-this-happens)
Why this happens
-----------------------------------------------------------------------------------------------
Vite runs a WebSocket for hot module reloading (HMR) and assumes the client will listen on a specific port. If this isn't the case, Vite HMR and the client never connect.
[](https://coder.com/docs/v1/guides/troubleshooting/vite-hmr#how-to-fix)
How to fix
-----------------------------------------------------------------------------------
Edit your `vite.config.js` file and add the following information to provide the appropriate port number:
`` `server: { hmr: { clientPort: 443 }, },` ``
If this doesn't resolve the issue, please [contact us](https://coder.com/contact)
for further support.
##### On this page
---
# 1.44.0 | Coder v1 Docs
[Home](https://coder.com/docs/v1 "Home")
[Changelog](https://coder.com/docs/v1/changelog "Changelog")
1.44.0
### [](https://coder.com/docs/v1/changelog/1.44.0#breaking-changes-)
Breaking changes ❗
* GitLab introduced a breaking change in version 14.3 where OAuth tokens without expiration are no longer supported. Users who have linked their Coder account to a GitLab instance version 14.3 or higher will need to un-link and re-link their account.
### [](https://coder.com/docs/v1/changelog/1.44.0#features-)
Features ✨
There are no new features in 1.44.0.
### [](https://coder.com/docs/v1/changelog/1.44.0#bug-fixes-)
Bug fixes 🐛
* infra: Fixes an issue where Coder would not update OAuth refresh tokens correctly (see Breaking Changes above).
* infra: Improve some error messages when Git OAuth credentials are expired.
### [](https://coder.com/docs/v1/changelog/1.44.0#security-updates-)
Security updates 🔐
* Updated Red Hat Universal Base Image to version 8.8 to address some vulnerabilities (CVE-2022-35252, CVE-2022-36227, CVE-2022-43552, CVE-2023-27535).
* Updated Go compiler to 1.20.5.
---
# VS Code extensions | Coder v1 Docs
[Home](https://coder.com/docs/v1 "Home")
[Workspaces](https://coder.com/docs/v1/workspaces "Workspaces")
VS Code extensions
This article will show you the ways to add VS Code extensions and use them with a Coder workspace:
1. Using the [public extensions marketplaces](https://coder.com/docs/v1/workspaces/vs-code-extensions#using-the-public-extensions-marketplaces)
with Code Web (code-server)
2. Adding [extensions to custom images](https://coder.com/docs/v1/workspaces/vs-code-extensions#adding-extensions-to-custom-images)
3. Installing extensions [using its `vsix` file at the command line](https://coder.com/docs/v1/workspaces/vs-code-extensions#installing-extensions-using-its-vsix-file-at-the-command-line)
4. Installing extensions [from a marketplace using the command line](https://coder.com/docs/v1/workspaces/vs-code-extensions#installing-from-a-marketplace-at-the-command-line)
5. Using a [local VS Code instance with SSH](https://coder.com/docs/v1/workspaces/vs-code-extensions#using-a-local-vs-code-instance-with-ssh)
[](https://coder.com/docs/v1/workspaces/vs-code-extensions#using-the-public-extensions-marketplaces)
Using the public extensions marketplaces
---------------------------------------------------------------------------------------------------------------------------------------------
You can manually add an extension while you're working in the Code Web IDE. The extensions can be from Eclipse Open VSX's public marketplace or the Eclipse Open VSX _local_ marketplace.
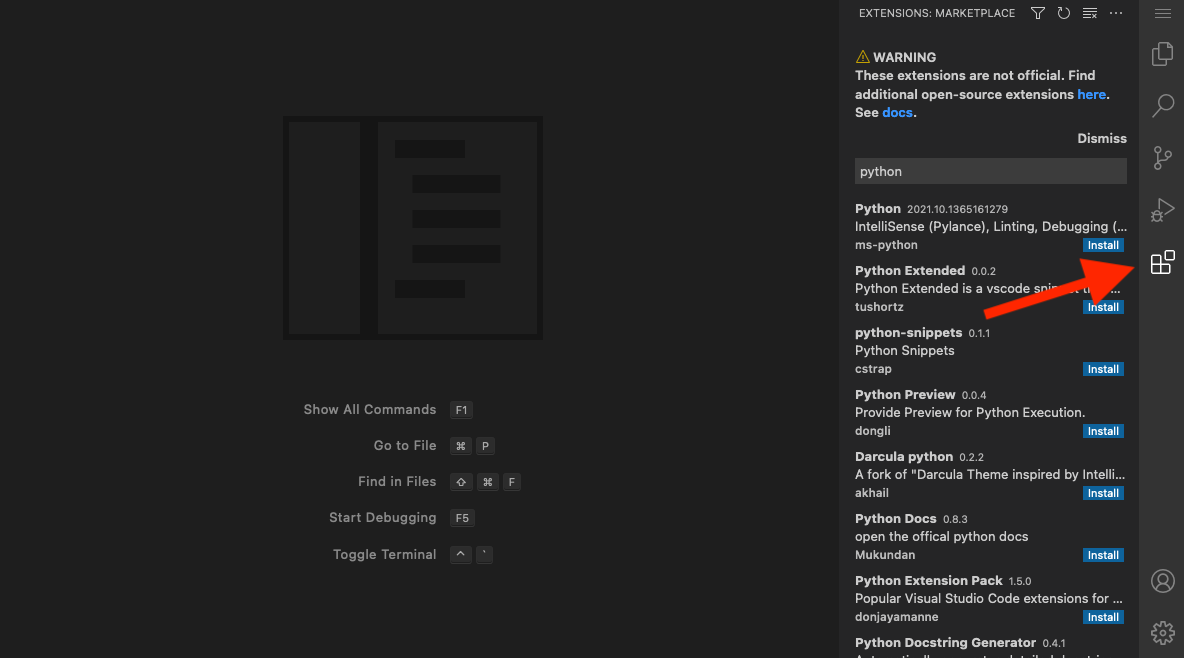
Site managers can [configure the specific marketplace to use](https://coder.com/docs/v1/admin/workspace-management/extensions#the-extension-marketplace)
.
> Code Web (code-server) cannot legally connect to Microsoft's public marketplace.
[](https://coder.com/docs/v1/workspaces/vs-code-extensions#adding-extensions-to-custom-images)
Adding extensions to custom images
---------------------------------------------------------------------------------------------------------------------------------
You can add extensions to a custom image and install them either through Code Web or using the workspace's terminal.
1. Download the extension(s) from the Microsoft public marketplace.
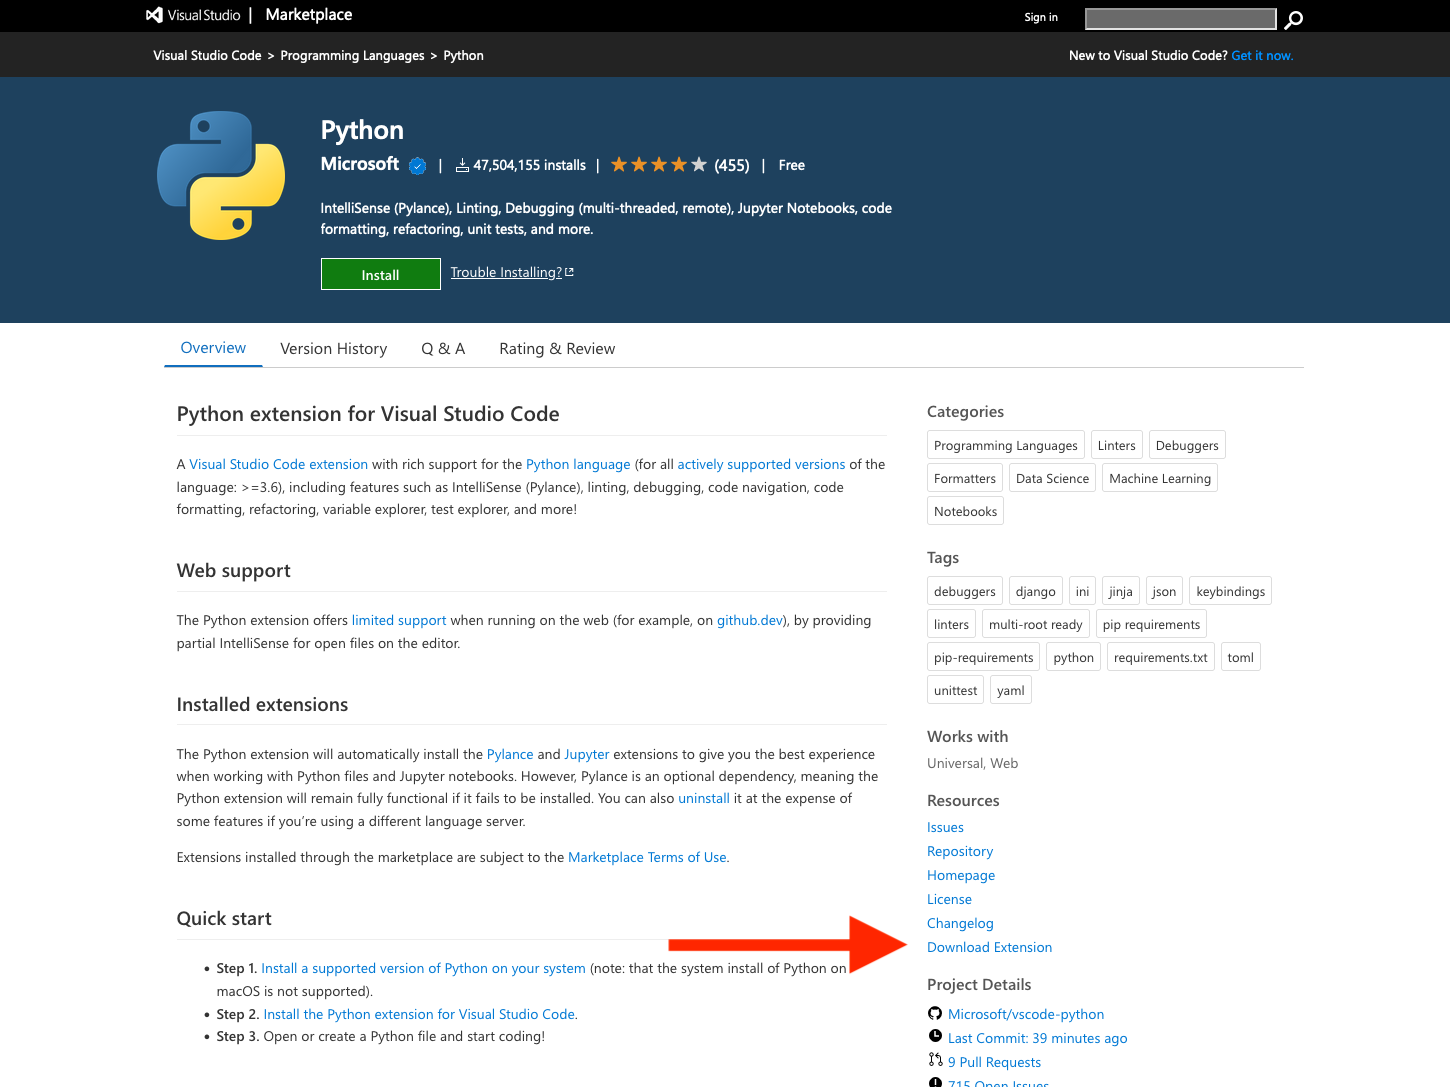
2. Add the `vsix` extension files to the same folder as your Dockerfile.

3. In the Dockerfile, add instructions to make a folder and to copy the `vsix` files into the newly created folder.
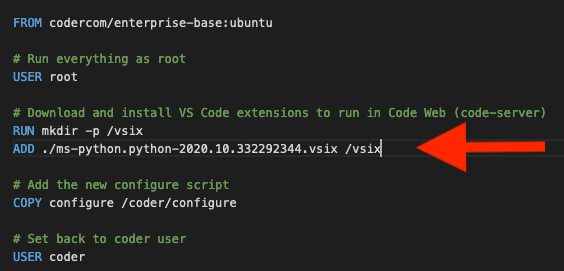
4. Add a `configure` script to the folder with your Dockerfile, and run code-server to install the extension (be sure to update the filename below):
`` `/var/tmp/coder/code-server/bin/code-server --install-extension /vsix/YOUR_EXTENSION.vsix` ``

5. Build the custom image, and upload to the Docker registry you've connected to Coder.
6. [Import the custom image](https://coder.com/docs/v1/images/importing)
into Coder.
7. Create a workspace using the custom image.
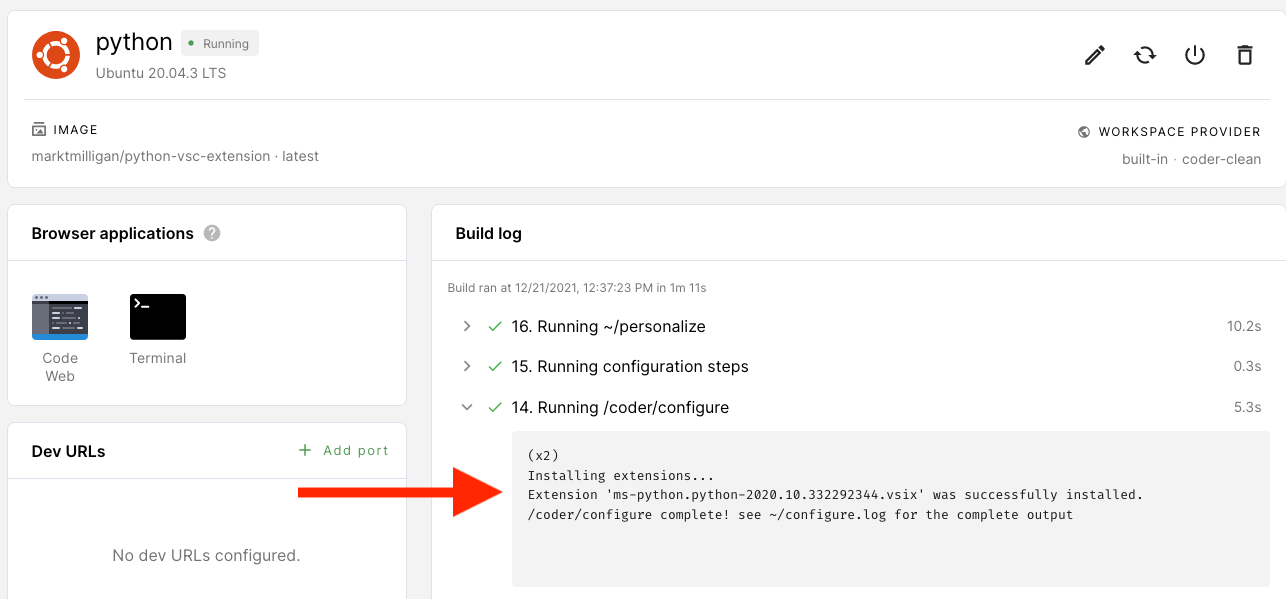
You will now have access to the extension in your workspace.
[](https://coder.com/docs/v1/workspaces/vs-code-extensions#installing-extensions-using-its-vsix-file-at-the-command-line)
Installing extensions using its `vsix` file at the command line
-----------------------------------------------------------------------------------------------------------------------------------------------------------------------------------------
Using the workspace's terminal or the terminal available inside Code Web (code server), you can install an extension whose files you've downloaded from a marketplace:
`` `/var/tmp/coder/code-server/bin/code-server --install-extension /vsix/ms-python.python-2020.10.332292344.vsix` ``
> You can also run these commands within a [template](https://coder.com/docs/v1/workspaces/workspace-templates/templates)
> , [configure script](https://coder.com/docs/v1/images/configure)
> or [personalize script](https://coder.com/docs/v1/workspaces/personalization#personalize)
> .
[](https://coder.com/docs/v1/workspaces/vs-code-extensions#installing-from-a-marketplace-at-the-command-line)
Installing from a marketplace at the command line
---------------------------------------------------------------------------------------------------------------------------------------------------------------
Using the workspace's terminal or the terminal available inside Code Web (code server), run the following to install an extension from the currently configured marketplace, which defaults to Open VSX's public marketplace (be sure to update the snippets with the name of the extension you want to install):
`` `/var/tmp/coder/code-server/bin/code-server --install-extension ms-python.python` ``
To install from a different marketplace you can set the `EXTENSIONS_GALLERY` environment variable, which corresponds to the `extensionsGallery` entry in Code Web's `product.json`:
`` `EXTENSIONS_GALLERY='{"serviceUrl": "https://my-extensions/api"}' /var/tmp/coder/code-server/bin/code-server --install-extension ms-python.python` ``
[](https://coder.com/docs/v1/workspaces/vs-code-extensions#using-a-local-vs-code-instance-with-ssh)
Using a local VS Code instance with SSH
-------------------------------------------------------------------------------------------------------------------------------------------
You use a local instance of the VS Code IDE and [configure with Coder via SSH](https://coder.com/docs/v1/workspaces/editors#vs-code-remote-ssh)
to add extensions from Microsoft's extension marketplace.
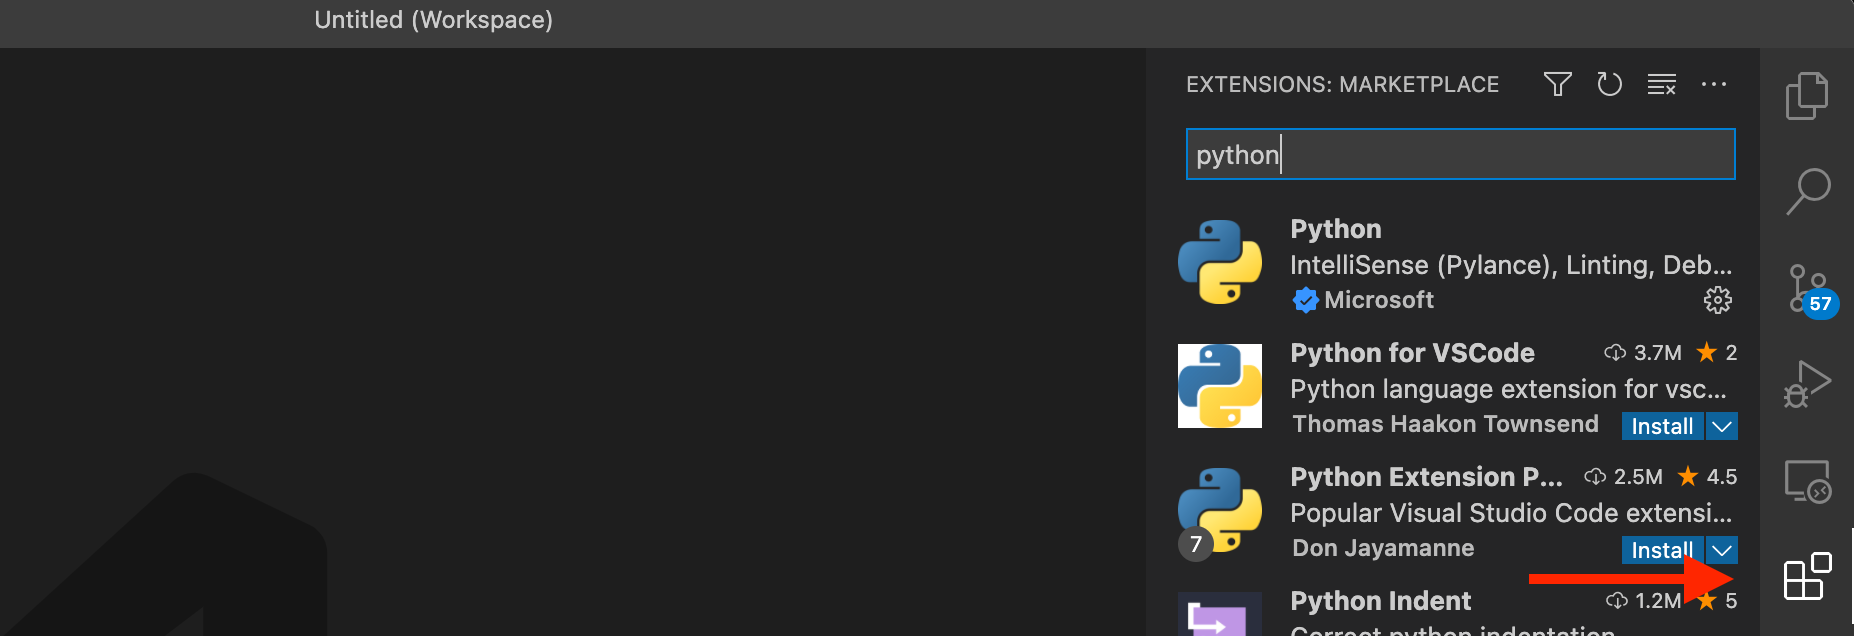
##### On this page
---
# Workspace applications | Coder v1 Docs
[Home](https://coder.com/docs/v1 "Home")
[Workspaces](https://coder.com/docs/v1/workspaces "Workspaces")
Workspace applications
You can connect to web applications installed on your workspace using an applications specification file located at `/coder/apps/config.yaml` of the workspace filesystem.
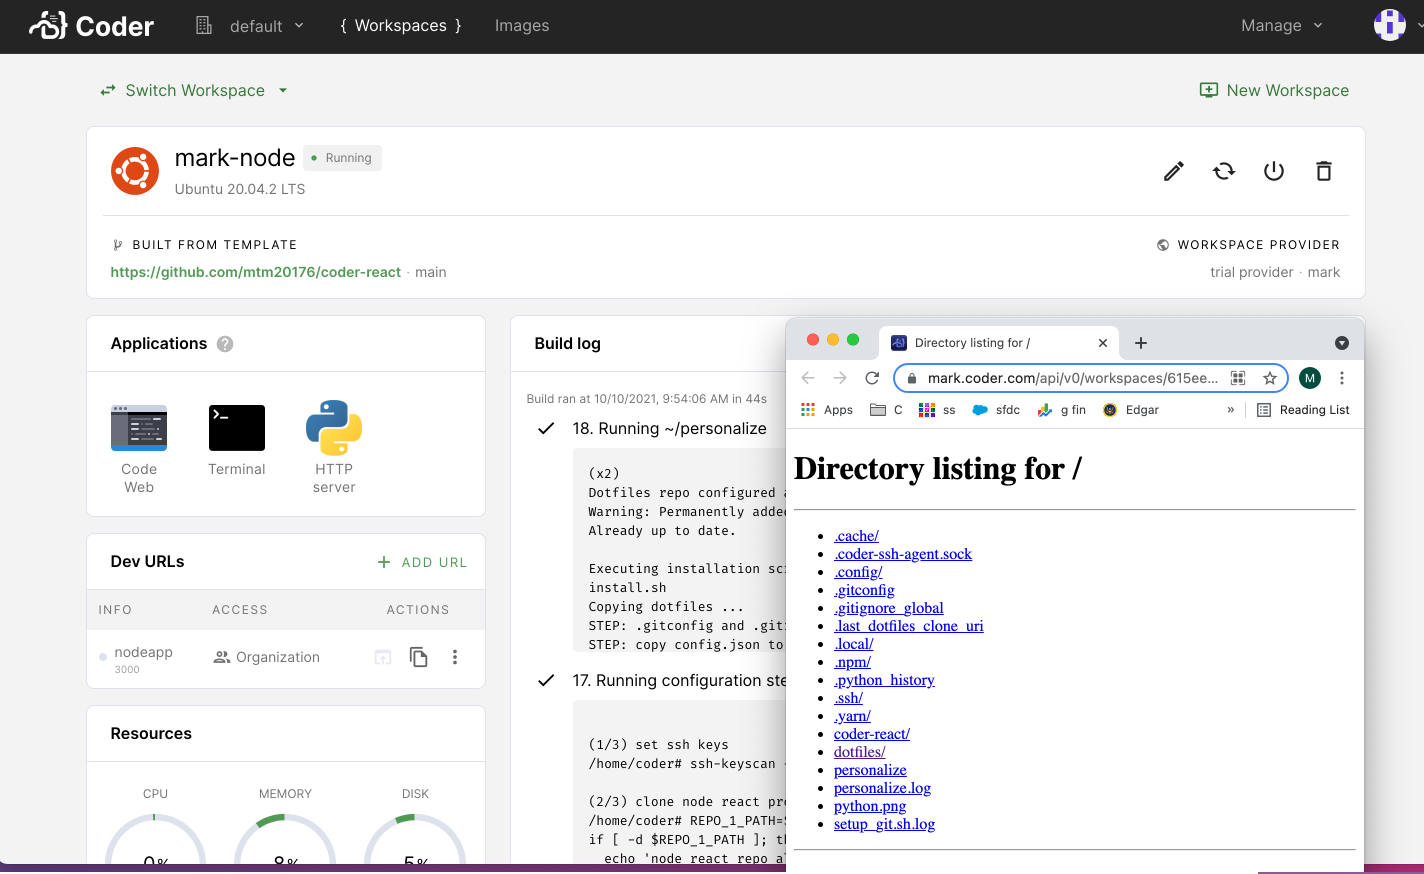
[](https://coder.com/docs/v1/workspaces/applications#enabling-workspace-applications)
Enabling workspace applications
---------------------------------------------------------------------------------------------------------------------
If you'd like to use workspace applications in Coder, you can enable this feature in the UI:
1. In the top-right, click on your avatar and select **Feature Preview**.
2. Click **Workspace applications** and select **Enable**.
[](https://coder.com/docs/v1/workspaces/applications#application-specification-file)
Application specification file
-------------------------------------------------------------------------------------------------------------------
To define workspace applications, add a configuration file at `/coder/apps/config.yaml` to your image.
The config file specifies the parameters Coder requires to launch the application. Here is a sample `config.yaml` for adding a Python HTTP server as a workspace application. Note that this requires the `python3` binary, which is included in Coder's base images.
`` `# /coder/apps/config.yaml apps: # Name of application in launcher. Name may consist of alphanumeric # characters, dashes, underscores. Names must begin with an alphanumeric # character. Names must be unique per application. Required. - name: HTTP server # Application scheme - must be http or https. Required. scheme: http # Application port. Required. port: 8000 # Host of the application to use when dialing. Defaults to localhost. # Optional. host: "localhost" # Working directory for the start command. Required. working-directory: /home/coder # File path to icon used in application launcher. Icons should be either # PNG, SVG, or JPG. Required. icon-path: /home/coder/python-logo.png # Command to start the application. Required. command: python3 # Array of arguments for command. Optional. args: ["-m", "http.server"] # Health checks to get running application status. Can use exec or http # health checks to localhost. Optional, but we recommend specifying a # health check. If you don't supply one, then an http request is sent to # the application root path "/". health-check: # Exec commands require an exit code of '0' to report healthy. exec: command: "pgrep" args: ["python3"] # http sends a GET request to the address specified via the parameters. # Expects the status codes to match; default is HTTP 200. http: # Scheme must be "http" or "https". If not specified it inherits # the application scheme. Optional. scheme: "http" # The host to use when dialing the address. If not specified it # inherits the application host. Optional. host: "localhost" # Port to use when dialing the application. If not specified it # inherits the application port. Optional. port: 8000 # Path to use for the health check. If not specified defaults to # "/". Optional. path: ""` ``
**Notes**:
* A health check _must_ report healthy for you to access the application.
* If you specify both the HTTP and Exec health checks, Coder prioritizes HTTP.
### [](https://coder.com/docs/v1/workspaces/applications#image-creation)
Image creation
When creating your image, be sure to:
1. In the folder where your Dockerfile is, add a `coder/apps` folder
2. Add the `config.yaml` you created to `coder/apps`.
3. Add the icon that you would like Coder to render for your app to the `coder/apps` folder
4. Add a step to your Dockerfile to copy the `coder` folder into the image:
`` `# copy custom apps info (config.yaml) COPY ["./coder", "/coder"]` ``
[](https://coder.com/docs/v1/workspaces/applications#sample-usage)
Sample usage
-------------------------------------------------------------------------------
Coder offers an [image](https://hub.docker.com/r/codercom/enterprise-vnc)
that helps you [set up a VNC](https://coder.com/docs/v1/guides/customization/vnc)
. With a VNC available, you can add an icon to your **Browser applications** via setting the [config file](https://github.com/coder/enterprise-images/blob/91ef8f521b2275783fed54b27052cc544153cd99/images/vnc/coder/apps/config.yaml)
.
You are welcome to try the [public Dockerfile repo that contains the example above](https://github.com/mtm20176/dockerfiles/tree/main/python/workspace-apps)
. The repo includes config files that set up Python and Node.js HTTP servers and the accompanying icons.
You can also see our [blog post](https://coder.com/blog/run-any-application-or-ide-in-coder)
for further samples on adding tools like Portainer, Insomnia, and various versions of code-server.
##### On this page
---
# SSH no mutual signature supported | Coder v1 Docs
[Home](https://coder.com/docs/v1 "Home")
[Guides](https://coder.com/docs/v1/guides "Guides")
[Troubleshooting](https://coder.com/docs/v1/guides/troubleshooting "Troubleshooting")
SSH no mutual signature supported
When using `coder ssh` to reach your workspace, you may encounter the following error:
`` `sign_and_send_pubkey: no mutual signature supported sign_and_send_pubkey: no mutual signature supported [[email protected]](https://coder.com/cdn-cgi/l/email-protection) : Permission denied (publickey).` ``
[](https://coder.com/docs/v1/guides/troubleshooting/ssh-no-mutual-signature-supported#why-this-happens)
Why this happens
------------------------------------------------------------------------------------------------------------------------
Some versions of ssh, including the version that is included in macOS Ventura (Version 13) fail to select a supported authentication algorithm when connecting to Coder with an RSA SSH key. The ssh client incorrectly determines that only the deprecated `ssh-rsa` algorithm is supported by the server.
[](https://coder.com/docs/v1/guides/troubleshooting/ssh-no-mutual-signature-supported#resolution)
Resolution
------------------------------------------------------------------------------------------------------------
### [](https://coder.com/docs/v1/guides/troubleshooting/ssh-no-mutual-signature-supported#option-1-use-elliptic-curve-ssh-keys)
Option 1: Use elliptic curve SSH keys
Elliptic curve key authentication does not appear to suffer the negotiation failure. A Coder administrator should configure either `Ed25519` or `ECDSA` SSH keys under **Manage** > **Admin** > **Security**.
After this configuration change, regenerate your SSH key by clicking your avatar in the top right, then select **Account** > **SSH keys**, and finally, click the **Regenerate** button.
Lastly, rebuild your workspace(s) to pick up the new keys.
### [](https://coder.com/docs/v1/guides/troubleshooting/ssh-no-mutual-signature-supported#option-2-configure-your-ssh-client)
Option 2: Configure your SSH client
If you cannot switch to elliptic curve SSH keys, as a workaround, you can configure your SSH client to use the `ssh-rsa` authentication algorithm.
**NOTE**: Although this algorithm is considered cryptographically insecure, using it does not alter the overall security properties of `coder ssh` because all SSH protocol traffic is sent via an authenticated and encrypted tunnel to your workspace.
Generate SSH configuration entries for your workspaces:
`` `$ coder config-ssh Your private ssh key was written to "/Users/user/.ssh/coder_enterprise" An auto-generated ssh config was written to "/Users/user/.ssh/config" You should now be able to ssh into your workspace For example, try running $ ssh coder.workspace` ``
Open your ssh configuration file in a text editor (this is usually at `~/.ssh/config` but check the output of the previous command if unsure).
For each workspace config block, add the line `PubkeyAcceptedAlgorithms +ssh-rsa`
For example:
`` `SSH Config Host coder.workspace HostName coder.workspace ProxyCommand "/opt/homebrew/bin/coder" tunnel --retry 0 workspace 12213 stdio StrictHostKeyChecking no ConnectTimeout=0 IdentitiesOnly yes IdentityFile="/Users/spike/.ssh/coder_enterprise" ControlMaster auto ControlPath ~/.ssh/.connection-coder.f6fd39b24f3a813ecc60e43f5063bbcf ControlPersist 600 PubkeyAcceptedAlgorithms +ssh-rsa` ``
You will need to repeat this process if you create new workspaces and re-run `coder config-ssh`
If this doesn't resolve the issue, please [contact us](https://coder.com/contact)
for further support.
##### On this page
---
# Workspace parameters | Coder v1 Docs
[Home](https://coder.com/docs/v1 "Home")
[Workspaces](https://coder.com/docs/v1/workspaces "Workspaces")
Workspace parameters
Whenever you log into Coder, you'll see the **Workspace** page.
If this is your first time using Coder, you'll see a **Create Workspace** button in the middle of your screen; otherwise, you'll see a list of your existing workspaces.
To create a workspace, launch the creation dialog by clicking **New Workspace** in the top-right. If you'd like to create a new workspace based on a [template](https://coder.com/docs/v1/workspaces/workspace-templates)
, click the drop-down arrow next to **New Workspace** and select **New workspace from template**.

When prompted, provide the following information:
| | |
| --- | --- |
| **Workspace name** | A friendly name for your workspace |
| **Image source** | The source of your image; leave as **Existing** in most cases. You can also **import** a new image if your site manager has imported a [registry](https://coder.com/docs/v1/admin/registries) or select a **[packaged](https://github.com/coder/enterprise-images) ** [image provided by Coder if your site manager has enabled the automatic importing of the](https://github.com/coder/enterprise-images) [Default Registry](https://coder.com/docs/v1/admin/registries/default-registry) . |
| **Image** | The Docker image you want to use as the base for your workspace |
| **Tag** | The version of the image you want to use |
| **Workspace provider** | The Kubernetes cluster to which your workspace will be deployed. Default: `built-in` |
Coder offers several **advanced** settings that allow you to customize your workspace. You can choose to run your workspace as a container-based virtual machine, provide a dotfiles URI for [personalization](https://coder.com/docs/v1/workspaces/personalization)
, and set your resource allocation.
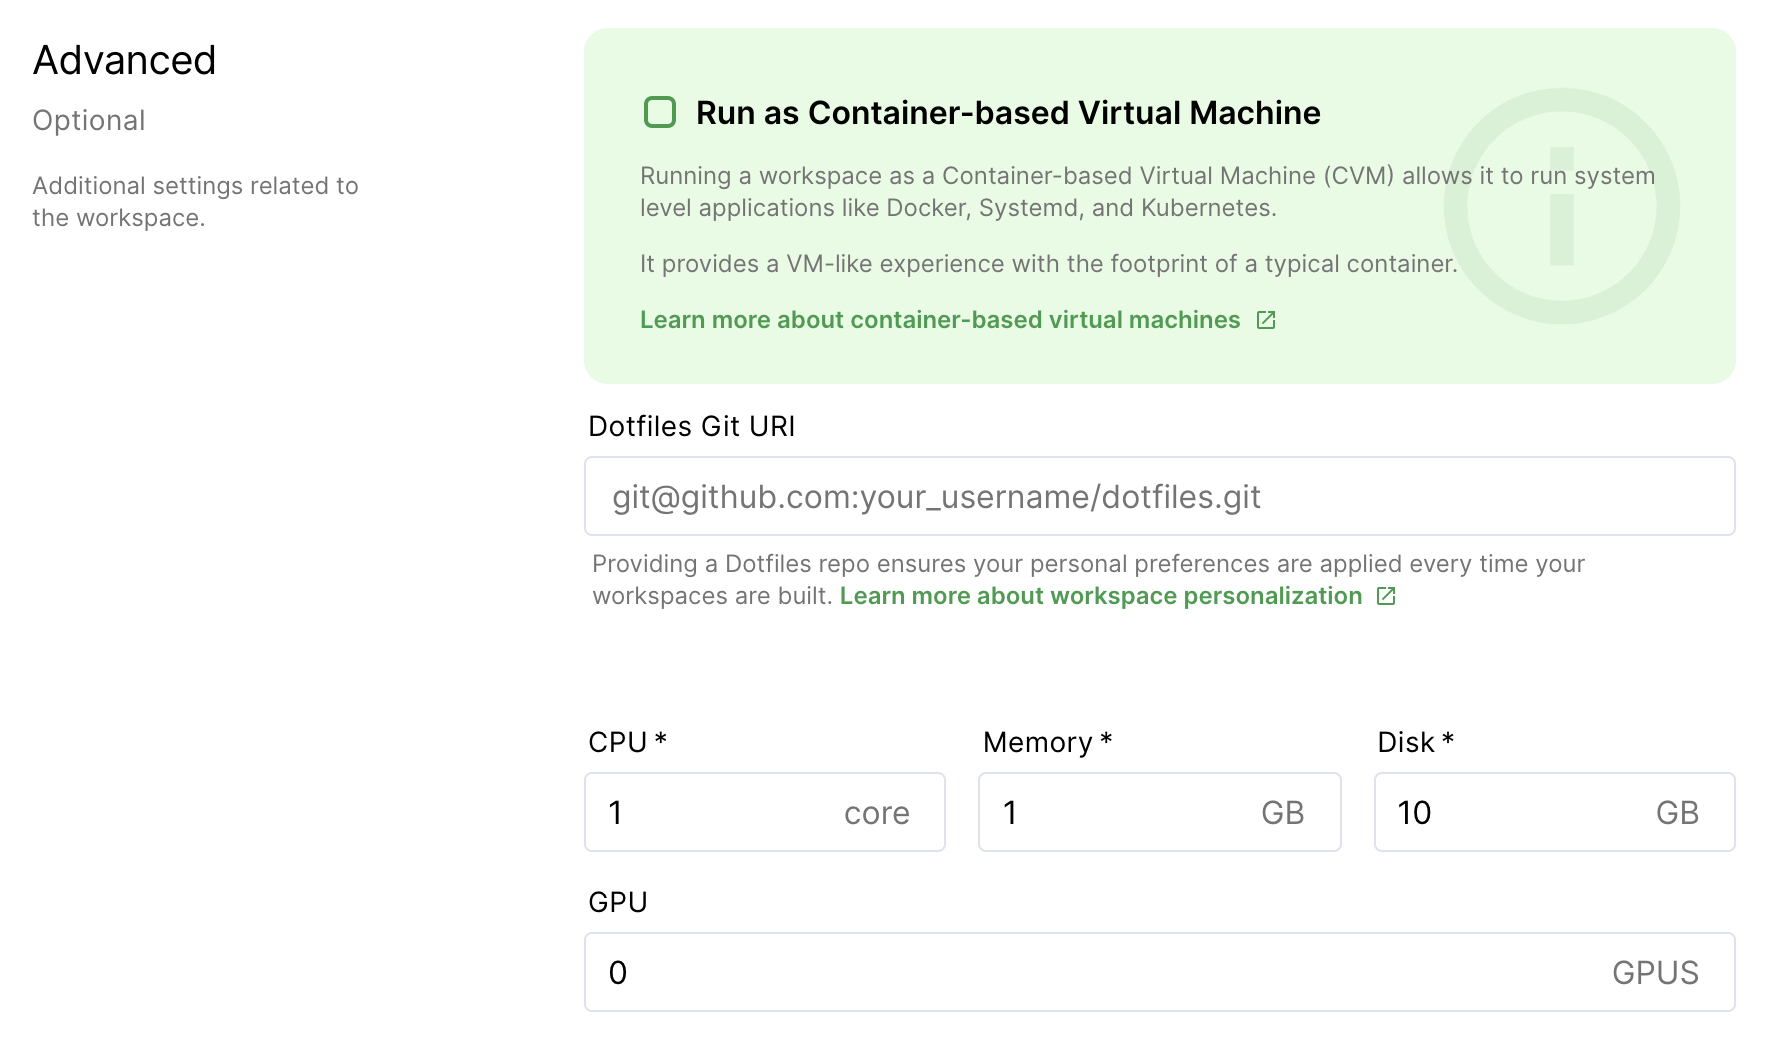
| | |
| --- | --- |
| **Run as container-based virtual machine** | Enable this to allow the running of system-level applications like Docker, Systemd, and Kubernetes; this provides a VM-like experience with the footprint of a container |
| **Dotfiles Git URI** | The link to your Dotfiles repo; Coder will apply the settings prescribed every time your workspace rebuilds |
| **CPU cores** | The number of CPU cores you'd like for your workspace |
| **Memory** | The amount of memory you'd like for your workspace |
| **Disk** | The amount of storage space you'd like for your workspace |
| **GPU** | The number of [GPUs](https://coder.com/docs/v1/admin/workspace-management/gpu-acceleration) you want allocated to your workspace |
| **Auto-start** | Whether you want your workspace to turn on automatically at a specific time (you can set the auto-start time in User Preferences. |
| **Auto-off** | The amount of time your workspace can be idle before Coder stops the workspace. Available only [if your site manager has allowed this setting to be changed at the user level](https://coder.com/docs/v1/admin/workspace-management/shutdown#configuring-workspace-shutdown-behavior) (otherwise the organization default applies). |
By default, Coder allocates resources (CPU cores, memory, and disk space) based on the parent image. You can modify these starting values, though the maximum number of CPU cores, amount of memory, and allocation of disk space you can request for your workspace are determined by the Coder [site manager on an organization level](https://coder.com/docs/v1/admin/organizations#create-a-new-organization)
.
Coder displays a warning if you choose your resource settings and they're less than the image-recommended default, but you can still create the workspace.
When you're done making changes, click **Create workspace** to proceed. Coder redirects you to an overview page for your workspace during the build process.
[](https://coder.com/docs/v1/workspaces/workspace-params#gitconfig-files)
.gitconfig files
------------------------------------------------------------------------------------------
If the image you're using to create your workspace doesn't include a .gitconfig file, Coder will generate one for you automatically using the details found in your Coder account.
You can modify the .gitconfig file, but we recommend using a [personalization](https://coder.com/docs/v1/workspaces/personalization)
file to customize your workspace.
---
# Telemetry | Coder v1 Docs
[Home](https://coder.com/docs/v1 "Home")
[Admin](https://coder.com/docs/v1/admin "Admin")
Telemetry
Coder allows you to control the behavior of its built-in telemetry and crash reporting features.
In the Coder UI, go to **Manage** > **Admin** > **Telemetry**.
Using the provided checkboxes, indicate whether you want Coder to **Send Crash Reports**, **Send Usage Telemetry**, or **Send Enhanced Usage Telemetry**.
Be sure to click **Save Preferences** after you make your changes.
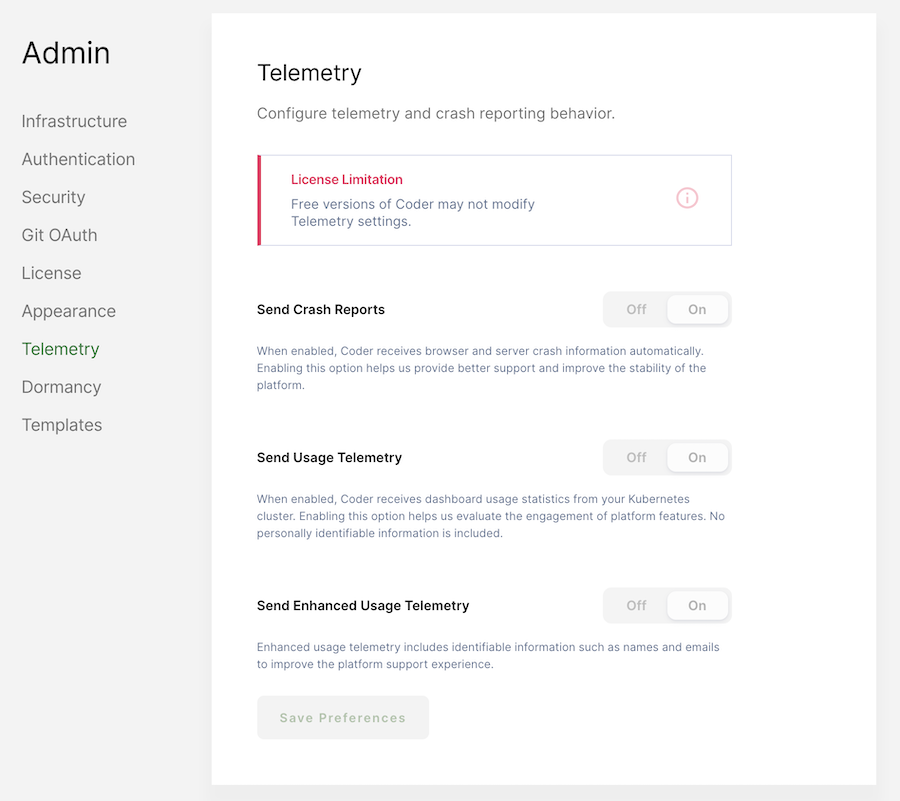
> You cannot modify the default telemetry settings during a [free trial](https://coder.com/trial)
> of Coder or by those with evaluation deployments.
---
# Licensing | Coder v1 Docs
[Home](https://coder.com/docs/v1 "Home")
[Admin](https://coder.com/docs/v1/admin "Admin")
Licensing
You can manage your Coder licenses using the Dashboard when logged in as a site manager.
To view your current license details, go to the **License** tab on the **Admin** page. This is also where you can upload a new license file if you'd like to replace the currently installed license.
The **License** tab displays the details for your current license, including:
* The number of users you've been allocated
* When the license was issued
* When the license expires
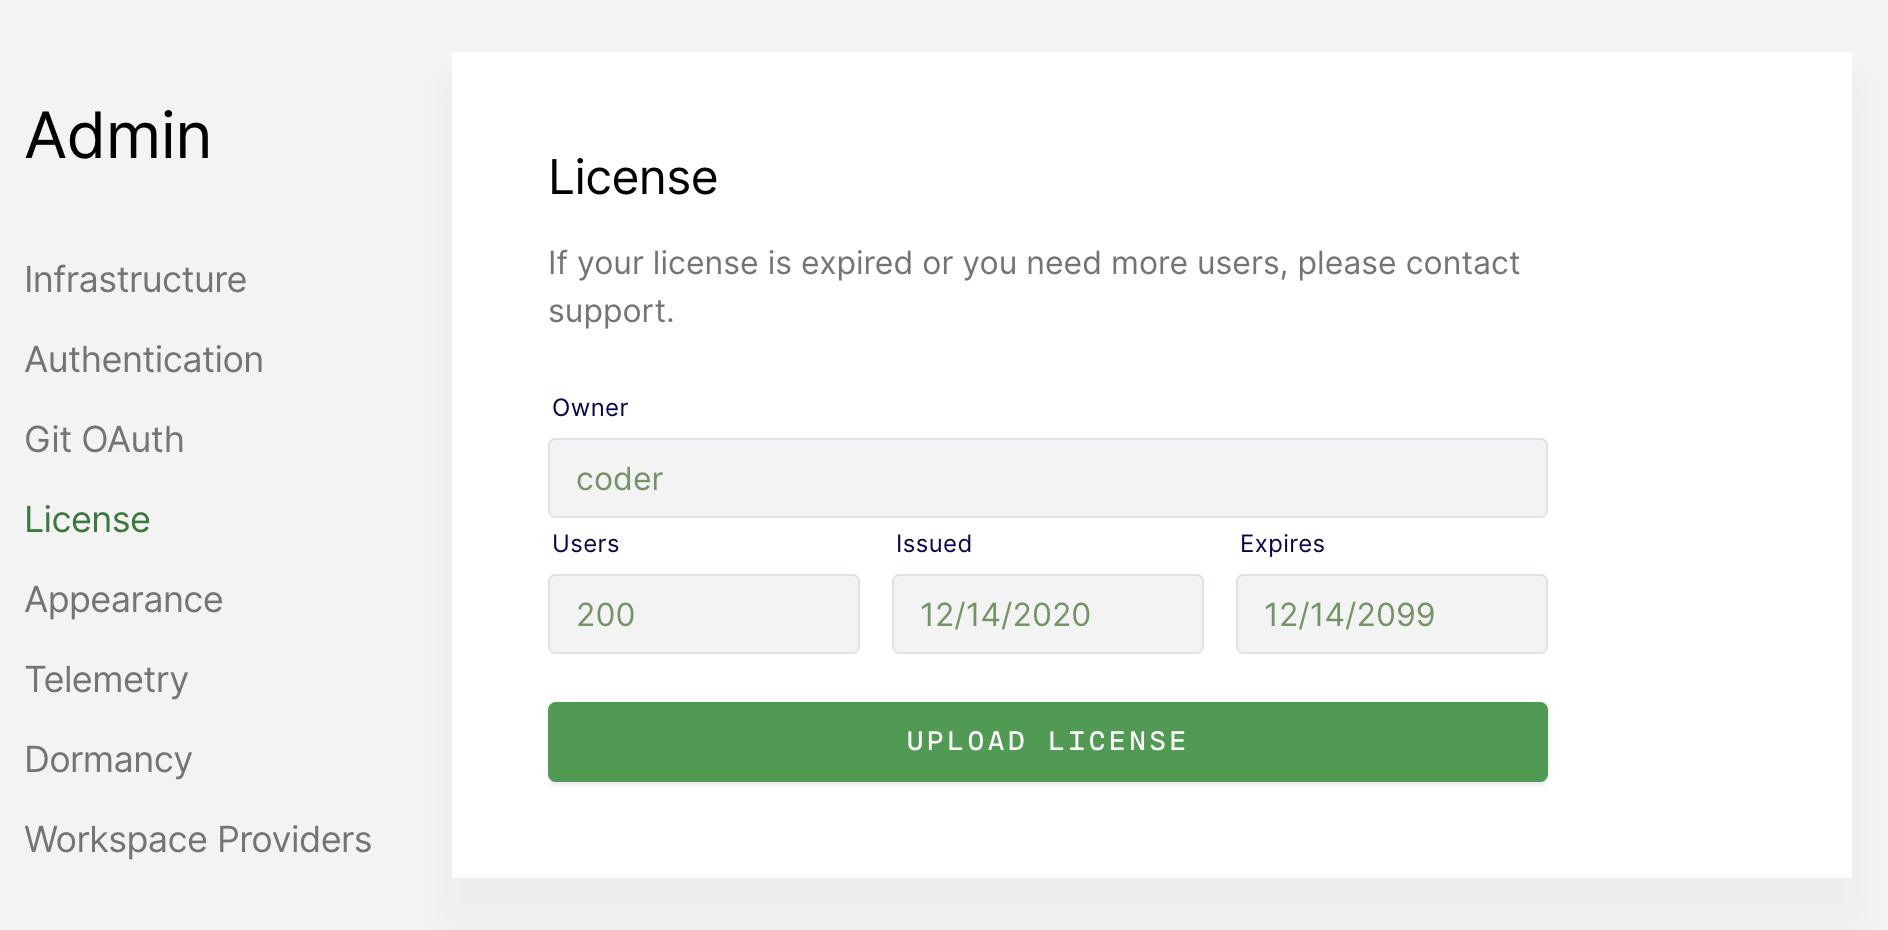
You can also upload a new license file by clicking **Upload License**.
> To request a license, [contact our technical sales team](https://coder.com/contact)
> .
---
# Dev URLs | Coder v1 Docs
[Home](https://coder.com/docs/v1 "Home")
[Workspaces](https://coder.com/docs/v1/workspaces "Workspaces")
Dev URLs
Developer (dev) URLs allow you to access the web services you're developing in your workspace. Once defined, Coder listens for an application running on the port specified in the dev URL and renders a browser link you can use to view the application.
> You must have [dev URLs enabled](https://coder.com/docs/v1/admin/devurls)
> in your installation.
[](https://coder.com/docs/v1/workspaces/devurls#creating-a-dev-url)
Creating a dev URL
--------------------------------------------------------------------------------------
You can create a dev URL from the workspace overview page.
In the **Dev URLs** section, click **Add Port**. First, provide the **port** number for your application and a friendly **name** for the dev URL (optional).
Next, indicate who should be able to **access** the dev URL and the **internal server scheme** (e.g., whether Coder should use HTTP or HTTPS when proxying requests to the internal server).

[](https://coder.com/docs/v1/workspaces/devurls#access-control)
Access control
------------------------------------------------------------------------------
You can set the access level for each dev URL:
* **Private** - Only the owner of the workspace can access the dev URL
* **Organization** - Anyone in the same Coder organization as the workspace can access the dev URL
* **Authorized Users** - Anyone logged in to your Coder instance can access the dev URL
* **Public** - Anyone outside the Coder deployment's network can access the dev URL (organization-defined firewall rules and VPNs can still restrict access)
[](https://coder.com/docs/v1/workspaces/devurls#using-dev-urls)
Using dev URLs
------------------------------------------------------------------------------
To access and manage a dev URL, you can click:
* The **Open in browser** icon to the left of the dev URL name to launch a new browser window
* The **Copy URL** action to copy the dev URL for sharing
* The **Edit URL** action to edit the dev URL
* The **Delete URL** action to delete the dev URL
> Coder's dev URL upload limit is **1 MB**.

### [](https://coder.com/docs/v1/workspaces/devurls#direct-access)
Direct access
There are two ways for you to construct dev URLs.
If you provided a name for the dev URL when you created it:
`` `devUrlName--username.domain # ex: main--jessieLorem.exampleCo.com` ``
If you didn't provide a name for the dev URL when you created it:
`` `portNumber--workspaceName-username.domain # ex: 8080--mainDev-jessieLorem.exampleCo.com` ``
For example, let's say that you've created a dev URL for port `8080`. Also:
* Username: `user`
* Domain: `acme.com`
* Workspace: `my-project`
If you didn't name your dev URL, then your URL is `8080--my-project-user.acme.com`.
If, however, you named the dev URL `reactproject`, then your URL is `reactproject--user.acme.com`.
If you access a dev URL that hasn't been created, Coder automatically adds it to your dev URL list on the dashboard and sets the access level to **Private**.
[](https://coder.com/docs/v1/workspaces/devurls#programmatically-accessing-dev-urls)
Programmatically accessing dev URLs
------------------------------------------------------------------------------------------------------------------------
If you need programmatic access to authenticated dev URLs (i.e., dev URLs with access levels set to **private**, **organization**, or **authorized users**), you can run the following in the terminal:
`` `# Generate an API token with the Coder CLI $ coder tokens create devurl # Send HTTP requests to the dev URL using the devurl_session cookie $ curl --cookie "devurl_session=" ` ``
[](https://coder.com/docs/v1/workspaces/devurls#access-via-ssh-port-forwarding)
Access via SSH port forwarding
--------------------------------------------------------------------------------------------------------------
You can also access your server via [SSH port forwarding](https://coder.com/docs/v1/workspaces/ssh#forwarding-dev-urls)
.
[](https://coder.com/docs/v1/workspaces/devurls#troubleshooting)
Troubleshooting
--------------------------------------------------------------------------------
If you're seeing issues with your dev URL, we recommend using something like Python's `http.server` module to gain additional information helpful for troubleshooting issues with DevURL configuration and external proxies:
`` `# update the following with the port you're troubleshooting python3 -m http.server 8080` ``
##### On this page
---
# Git integration | Coder v1 Docs
[Home](https://coder.com/docs/v1 "Home")
[Admin](https://coder.com/docs/v1/admin "Admin")
Git integration
The Git Integration allows your developers to connect their Coder accounts to their accounts with the Git repository service of choice.
[](https://coder.com/docs/v1/admin/git#support)
Support
-------------------------------------------------------
Coder integrates with the following service providers for authentication and [user key management](https://coder.com/docs/v1/workspaces/preferences#linked-accounts)
:
* GitHub (both GitHub.com and GitHub Enterprise)
* GitLab (both GitLab.com and self-hosted GitLab)
* Bitbucket Server and Data Center (_not_ Bitbucket Cloud; the Cloud API [doesn't support](https://jira.atlassian.com/browse/BCLOUD-17762)
managing SSH keys for users via OAuth)
> Coder supports integration with [Azure Repos (Azure DevOps) via SSH](https://docs.microsoft.com/en-us/azure/devops/repos/git/use-ssh-keys-to-authenticate?view=azure-devops#step-2--add-the-public-key-to-azure-devops-servicestfs)
> , though we do not currently support OAuth capabilities. Developers can find their public SSH keys under [preferences](https://coder.com/docs/v1/workspaces/preferences)
> .
Linking your Coder account with a git service provider is _not_ required. Instead, you can use Visual Studio Code with git, the command-line tool, and we expect this combination to work with most hosting software or services. However, Coder doesn't test these and cannot provide recommendations or support.
> Ensure that your Git provider supports the keygen algorithm that Coder uses; you can choose the algorithm in **Manage** > **Admin** > **Security** > **SSH**.
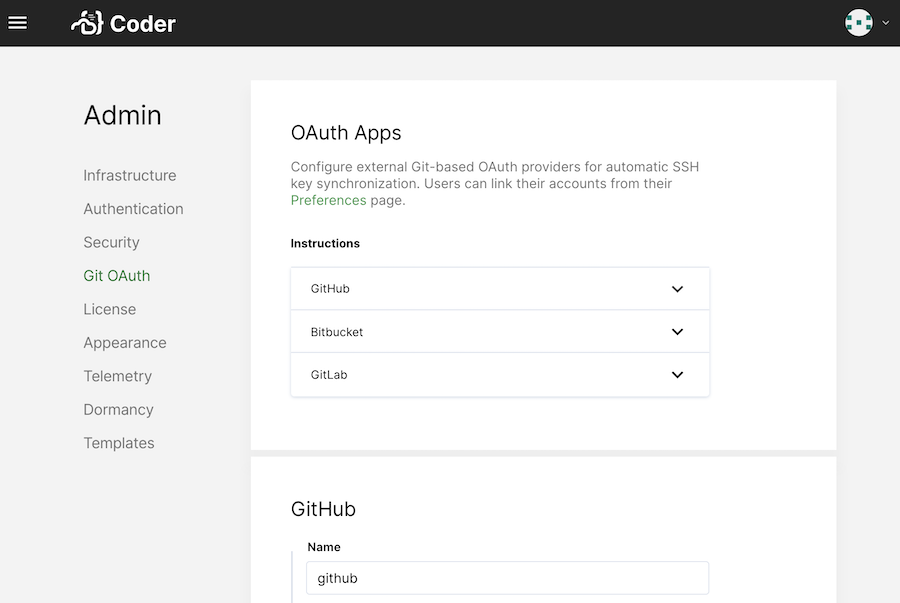
[](https://coder.com/docs/v1/admin/git#configuring-oauth)
Configuring OAuth
---------------------------------------------------------------------------
Before developers can link their accounts, you (or another site manager) must create an OAuth application with the appropriate providers. You can create as many OAuth applications as necessary.
1. Log into Coder as a site manager, and go to **Manage** > **Admin** > **Git OAuth**.
2. Click **Add provider**.
3. Select your **Provider** (e.g., GitHub, GitLab, or Bitbucket Server).
4. Create an OAuth application with your Git provider and provide Coder with the requested details (the parameters required vary based on your Git provider). See the following sections for additional guidance.
### [](https://coder.com/docs/v1/admin/git#github)
GitHub
When [creating an OAuth app](https://developer.github.com/apps/building-oauth-apps/creating-an-oauth-app/)
, GitHub will ask you for the following Coder parameters:
* **Homepage URL**: Set to `[your-coder-domain]` (e.g. `https://coder.domain.com`)
* **User Authorization Callback URL**: Set to `[your-coder-domain]/oauth/callback` (e.g. `https://coder.domain.com/oauth/callback`)
Then, in Coder, provide a **Name** for your app, your **URL**, **Client ID**, and **Client Secret** to Coder. You can also provide an optional **Description**.
When done, click **Save**.
### [](https://coder.com/docs/v1/admin/git#gitlab)
GitLab
When [setting up OAuth with GitLab](https://docs.gitlab.com/ee/integration/oauth_provider.html)
, you'll have to provide the following during setup:
* **Redirect URI**: Set to `[your-coder-domain]/oauth/callback` (e.g. `https://coder.domain.com/oauth/callback`)
You can modify the settings for your application afterward. Make sure you've enabled the following:
* **Confidential**: Check this option
* **API** (scope): Check this option
Then, in Coder, provide a **Name** for your app, your **URL**, **Application ID**, and **Client Secret** to Coder. You can also provide an optional **Description**.
When done, click **Save**.
### [](https://coder.com/docs/v1/admin/git#bitbucket-server-and-data-center)
Bitbucket Server and Data Center
Determine your Bitbucket version, by looking at the footer of the **Administration** page, then select the corresponding Provider in Coder.
#### [](https://coder.com/docs/v1/admin/git#version-720-or-later)
Version 7.20 or later
On your Bitbucket Server, go to **Administration** > **Applications** > **Application Links** and select _Create link_.
* Set **Application type** to _External application_
* Set **Direction** to _Incoming_
Click _Continue_.
* Enter a unique name for the link, e.g. "Coder"
* Set **Redirect URL** to `[your-coder-domain]/oauth/callback` (e.g. `https://coder.domain.com/oauth/callback`)
* In **Application permissions**, enable the following:
* **Account: Write** (required to add SSH keys)
* **Repositories: Admin** (required to clone repositories and create webhooks)
Click _Save_ and enter the generated **Client ID** and **Client Secret**.
#### [](https://coder.com/docs/v1/admin/git#version-719-or-earlier)
Version 7.19 or earlier
On your Bitbucket Server, go to **Administration** > **Application Links**.
Create a new **Application Link**, setting the **Application URL** as `[your-coder-domain]` (e.g. `https://coder.domain.com`). If you receive a **No response received** error, click **Continue** to ignore it.
* If you are asked for a **Shared secret**, enter _Coder_
* If you are asked for **Request Token URL**, **Access Token URL**, or **Authorize URL**, enter `[your-coder-domain]` (e.g. `https://coder.domain.com`)
(These values are for connections from Bitbucket to Coder and are unused in our integration).
If shown, check **Create incoming link** and click _Continue_.
For your newly created Application Link, provide the following values as your **Incoming Authentication** properties:
* **Consumer Key**: `Coder` (or the value of `CODERD_BITBUCKET_CONSUMER_KEY`)
* **Consumer Name**: `Coder`
* **Public Key**: Your public key (available from the Coder Admin Configuration page)
Then, in Coder, provide a **Name** for your app, your **URL**, and, optionally, a **Description**.
When done, click **Save**.
> 💡 By default, Coder sets the Bitbucket Consumer Key to `Coder`. This can cause issues when attempting to link multiple Coder instances to a single Bitbucket server. In this case, you can override the Bitbucket Consumer Key by setting the environment variable `CODERD_BITBUCKET_CONSUMER_KEY` to a unique value for each Coder deployment. Here's an example of how to set this in your Helm values:
>
> `` `coderd: [...] extraEnvs: [...] - name: CODERD_BITBUCKET_CONSUMER_KEY value: ""` ``
### [](https://coder.com/docs/v1/admin/git#built-in-github-integration-vs-code)
Built-in GitHub Integration (VS Code)
Alternatively, users can VS Code's [built-in GitHub integration](https://code.visualstudio.com/docs/sourcecontrol/github)
in order to clone repositories within VS Code Remote and code-server. This uses a GitHub token to authenticate instead of SSH keys.
To cache the token within the workspace, users can run the following command. This can also be added to a [configure script](https://coder.com/docs/v1/images/configure)
:
`` `git config --global credential.helper store` ``
##### On this page
---
# Templates | Coder v1 Docs
[Home](https://coder.com/docs/v1 "Home")
[Admin](https://coder.com/docs/v1/admin "Admin")
Templates
The **Templates** tab features options that control the behavior of [workspace templates](https://coder.com/docs/v1/workspaces/workspace-templates)
.
[](https://coder.com/docs/v1/admin/templates#enabling-workspace-templates)
Enabling workspace templates
-------------------------------------------------------------------------------------------------------
By default, workspace templates is an opt-in feature. The **Enable using Workspace Templates** toggle allows you to enable or disable the creation of [workspaces](https://coder.com/docs/v1/workspaces)
using predefined templates located in Git repositories.
To enable workspace templates, go to **Admin > Templates** and set **Enable using Workspace Templates** to **On**.

[](https://coder.com/docs/v1/admin/templates#template-policy)
Template policy
-----------------------------------------------------------------------------
> Template policies are currently an **alpha** feature.
If you enable the use of workspace templates, a **template policy** allows you to control which fields users can set and which values they can use when defining their workspaces.
Users can apply the following policies to fields:
* `read` - **Default.** Workspaces cannot modify the field
* `write` - Workspaces can overwrite the field
* `append` - Workspaces can append lists (e.g., configure.start steps) or mappings to the field
The default template policy is as follows:
`` `version: "0.2" workspace: configure: start: policy: write dev-urls: policy: write specs: kubernetes: container-based-vm: policy: write cpu: policy: write disk: policy: write env: policy: write gpu-count: policy: write image: policy: write labels: policy: read memory: policy: write node-selector: policy: read tolerations: policy: read` ``
Underneath the policy template preview, you can either upload your policy or drag-and-drop the file onto the UI. Click **Save** to persist your changes.
If, at any time, you want to remove your policy and use Coder's default policy, click **Reset to default**.
The template policy applies to all workspaces, including custom workspaces, created and managed in Coder. If a workspace's properties conflict with the template policy, Coder will ignore the workspace's values in favor of those defined by the template policy.
[](https://coder.com/docs/v1/admin/templates#embeddable-button)
Embeddable Button
---------------------------------------------------------------------------------
The **Embeddable Button** section features a form you can use for generating an embeddable button. This button makes it easy for developers to use your [workspace template](https://coder.com/docs/v1/workspaces/workspace-templates)
.
> Due to changes made to Coder v1.30.0+ to support the use of multiple Git providers, you must regenerate any embeddable buttons created using v1.29.x or earlier. Otherwise, the buttons will not work correctly.
To create your button:
1. Go to **Manage** > **Admin** > **Templates**.
2. Fill out the fields.
Once you've filled out the form, Coder generates a custom Markdown snippet, which you can then add to your repository's `README.md`.

##### On this page
---
# Prometheus integration | Coder v1 Docs
[Home](https://coder.com/docs/v1 "Home")
[Admin](https://coder.com/docs/v1/admin "Admin")
Prometheus integration
The Prometheus integration enables you to query and visualize Coder's platform metrics.
[](https://coder.com/docs/v1/admin/prometheus#requirements)
Requirements
------------------------------------------------------------------------
* A Coder deployment on Kubernetes
* [Prometheus Operator](https://github.com/prometheus-operator/prometheus-operator)
installed on your cluster
[](https://coder.com/docs/v1/admin/prometheus#configuration)
Configuration
--------------------------------------------------------------------------
Coder sends Prometheus-formatted metrics to port `2112` on the `coderd` container. Use the below PodMonitor resource to connect the Prometheus Operator to this endpoint:
`` `apiVersion: monitoring.coreos.com/v1 kind: PodMonitor metadata: name: master-monitor namespace: coder spec: selector: matchLabels: app.kubernetes.io/component: coderd podMetricsEndpoints: - port: prom-coderd` ``
[](https://coder.com/docs/v1/admin/prometheus#workspace-metrics)
Workspace Metrics
----------------------------------------------------------------------------------
Each coder workspace has an agent that connects to a single `coderd` instance. Each coderd instance will include all metrics from the workspaces it manages. The workspace metrics will all look like this:
`` `coderd_workspace_{user_id="",workspace_id=""}` ``
Due to the nature of workspace ids, this produces a [high cardinality of metric labels](https://prometheus.io/docs/practices/naming/#labels)
. This could be problematic for some configurations. If specific workspace metrics are not of interest, or are causing issues, you can configure your metric scraping service to drop these metrics.
Note that if a workspace connects to a new `coderd` (rebuild, network issue, coder update, etc), the metrics for that workspace will be moved to the new `coderd` metrics endpoint. The labels on the new metrics will likely have the new `coderd` pod name. So when tracking a singular workspace, you should track **only** by `workspace_id` throughout the lifetime of the workspace until it is deleted.
### [](https://coder.com/docs/v1/admin/prometheus#drop-workspace-metrics-config)
Drop workspace metrics config
[Prometheus Documentation](https://prometheus.io/docs/prometheus/latest/configuration/configuration/#metric_relabel_configs)
about relabelling metrics. In this case we will drop all metrics that contain the `workspace_id` label.
`` `metric_relabel_configs: - source_labels: ["workspace_id"] action: drop` ``
In Prometheus Operator we can pass this config addition to our `coderd` PodMonitor spec.
`` `apiVersion: monitoring.coreos.com/v1 kind: PodMonitor metadata: name: master-monitor namespace: coder spec: selector: matchLabels: app.kubernetes.io/component: coderd podMetricsEndpoints: - port: prom-coderd relabelings: - action: drop sourceLabels: - workspace_id` ``
[](https://coder.com/docs/v1/admin/prometheus#coderd-metrics)
Coderd Metrics
----------------------------------------------------------------------------
Below is a list of the various metrics emitted by Coder's Prometheus endpoint:
| Metric | Type | Description |
| --- | --- | --- |
| `coderd_agent_aggregator_agent_push_backlog` | `gauge` | Total number of agent metric bundles waiting to be processed. |
| `coderd_agent_aggregator_collect_backlog` | `gauge` | Total amount of gathers waiting to collect metrics. |
| `coderd_agent_aggregator_collect_nanoseconds` | `summary` | Time taken to collect all metrics. |
| `coderd_agent_aggregator_count_total` | `gauge` | Total number of agent metrics being reported by this coderd. |
| `coderd_agent_aggregator_delete_backlog` | `gauge` | Total number of agents waiting to be deleted in aggregator. |
| `coderd_agent_aggregator_workspace_count_total` | `gauge` | Total number of workspace agents pushing metrics to this coderd. |
| `coderd_api_concurrent_requests` | `gauge` | The total number of concurrent API requests |
| `coderd_api_concurrent_websockets` | `gauge` | The total number of concurrent API websockets |
| `coderd_api_request_latencies_ms` | `histogram` | Latency distribution of requests in milliseconds |
| `coderd_api_requests_processed_total` | `counter` | The total number of processed API requests |
| `coderd_api_websocket_durations_ms` | `histogram` | Websocket duration distribution of requests in milliseconds |
| `coderd_background_workspace_build_duration_s` | `histogram` | Duration distribution of workspace builds in seconds |
| `coderd_backgroundjob_completed_total` | `counter` | Total number of jobs completed since startup. |
| `coderd_backgroundjob_current_enqueued_jobs` | `gauge` | Current number of enqueued and not started background jobs. |
| `coderd_backgroundjob_enqueue_time_seconds` | `histogram` | Histogram of total time taken by job type to transition from Enqueue to Running. |
| `coderd_backgroundjob_enqueued_total` | `counter` | Total number of jobs enqueued. |
| `coderd_backgroundjob_execution_time_seconds` | `histogram` | Histogram of total time taken by job type to transition from Running to Completed. |
| `coderd_backgroundjob_started_total` | `counter` | Total number of jobs started. |
| `coderd_db_sql_queries_executed_total` | `counter` | The total number of executed SQL queries |
| `coderd_db_sql_query_latencies_ms` | `histogram` | Latency distribution of SQL queries in milliseconds |
| `coderd_license_expires_at_unix` | `gauge` | Unix timestamp of the license expiry date. |
| `coderd_license_issued_at_unix` | `gauge` | Unix timestamp of the license issue date. |
| `coderd_license_time_until_expires_days` | `gauge` | Number of days until the license expires. |
| `coderd_license_user_count` | `gauge` | Number of active (non-dormant) users. |
| `coderd_license_user_limit` | `gauge` | Number of users allowed by the license. |
| `coderd_rtc_agent_listeners_concurrent` | `gauge` | The total number of concurrent RTC agent listener websockets. |
| `coderd_rtc_client_connections_total` | `counter` | The total number of RTC client connections. |
| `coderd_rtc_turn_connections_concurrent` | `gauge` | The number of concurrent TURN connections. |
| `coderd_rtc_turn_connections_total` | `counter` | The total number of TURN connections opened. |
| `coderd_rtc_workspace_connections_current` | `gauge` | The number of concurrent wsnet workspace connections. |
| `coderd_rtc_workspace_connections_total` | `counter` | The total number of wsnet workspace connections opened. |
| `go_gc_cycles_automatic_gc_cycles_total` | `counter` | Count of completed GC cycles generated by the Go runtime. |
| `go_gc_cycles_forced_gc_cycles_total` | `counter` | Count of completed GC cycles forced by the application. |
| `go_gc_cycles_total_gc_cycles_total` | `counter` | Count of all completed GC cycles. |
| `go_gc_duration_seconds` | `summary` | A summary of the pause duration of garbage collection cycles. |
| `go_gc_heap_allocs_by_size_bytes` | `histogram` | Distribution of heap allocations by approximate size. Note that this does not include tiny objects as defined by /gc/heap/tiny/allocs:objects, only tiny blocks. |
| `go_gc_heap_allocs_bytes_total` | `counter` | Cumulative sum of memory allocated to the heap by the application. |
| `go_gc_heap_allocs_objects_total` | `counter` | Cumulative count of heap allocations triggered by the application. Note that this does not include tiny objects as defined by /gc/heap/tiny/allocs:objects, only tiny blocks. |
| `go_gc_heap_frees_by_size_bytes` | `histogram` | Distribution of freed heap allocations by approximate size. Note that this does not include tiny objects as defined by /gc/heap/tiny/allocs:objects, only tiny blocks. |
| `go_gc_heap_frees_bytes_total` | `counter` | Cumulative sum of heap memory freed by the garbage collector. |
| `go_gc_heap_frees_objects_total` | `counter` | Cumulative count of heap allocations whose storage was freed by the garbage collector. Note that this does not include tiny objects as defined by /gc/heap/tiny/allocs:objects, only tiny blocks. |
| `go_gc_heap_goal_bytes` | `gauge` | Heap size target for the end of the GC cycle. |
| `go_gc_heap_objects_objects` | `gauge` | Number of objects, live or unswept, occupying heap memory. |
| `go_gc_heap_tiny_allocs_objects_total` | `counter` | Count of small allocations that are packed together into blocks. These allocations are counted separately from other allocations because each individual allocation is not tracked by the runtime, only their block. Each block is already accounted for in allocs-by-size and frees-by-size. |
| `go_gc_pauses_seconds` | `histogram` | Distribution individual GC-related stop-the-world pause latencies. |
| `go_goroutines` | `gauge` | Number of goroutines that currently exist. |
| `go_info` | `gauge` | Information about the Go environment. |
| `go_memory_classes_heap_free_bytes` | `gauge` | Memory that is completely free and eligible to be returned to the underlying system, but has not been. This metric is the runtime's estimate of free address space that is backed by physical memory. |
| `go_memory_classes_heap_objects_bytes` | `gauge` | Memory occupied by live objects and dead objects that have not yet been marked free by the garbage collector. |
| `go_memory_classes_heap_released_bytes` | `gauge` | Memory that is completely free and has been returned to the underlying system. This metric is the runtime's estimate of free address space that is still mapped into the process, but is not backed by physical memory. |
| `go_memory_classes_heap_stacks_bytes` | `gauge` | Memory allocated from the heap that is reserved for stack space, whether or not it is currently in-use. |
| `go_memory_classes_heap_unused_bytes` | `gauge` | Memory that is reserved for heap objects but is not currently used to hold heap objects. |
| `go_memory_classes_metadata_mcache_free_bytes` | `gauge` | Memory that is reserved for runtime mcache structures, but not in-use. |
| `go_memory_classes_metadata_mcache_inuse_bytes` | `gauge` | Memory that is occupied by runtime mcache structures that are currently being used. |
| `go_memory_classes_metadata_mspan_free_bytes` | `gauge` | Memory that is reserved for runtime mspan structures, but not in-use. |
| `go_memory_classes_metadata_mspan_inuse_bytes` | `gauge` | Memory that is occupied by runtime mspan structures that are currently being used. |
| `go_memory_classes_metadata_other_bytes` | `gauge` | Memory that is reserved for or used to hold runtime metadata. |
| `go_memory_classes_os_stacks_bytes` | `gauge` | Stack memory allocated by the underlying operating system. |
| `go_memory_classes_other_bytes` | `gauge` | Memory used by execution trace buffers, structures for debugging the runtime, finalizer and profiler specials, and more. |
| `go_memory_classes_profiling_buckets_bytes` | `gauge` | Memory that is used by the stack trace hash map used for profiling. |
| `go_memory_classes_total_bytes` | `gauge` | All memory mapped by the Go runtime into the current process as read-write. Note that this does not include memory mapped by code called via cgo or via the syscall package. Sum of all metrics in /memory/classes. |
| `go_memstats_alloc_bytes` | `gauge` | Number of bytes allocated and still in use. |
| `go_memstats_alloc_bytes_total` | `counter` | Total number of bytes allocated, even if freed. |
| `go_memstats_buck_hash_sys_bytes` | `gauge` | Number of bytes used by the profiling bucket hash table. |
| `go_memstats_frees_total` | `counter` | Total number of frees. |
| `go_memstats_gc_sys_bytes` | `gauge` | Number of bytes used for garbage collection system metadata. |
| `go_memstats_heap_alloc_bytes` | `gauge` | Number of heap bytes allocated and still in use. |
| `go_memstats_heap_idle_bytes` | `gauge` | Number of heap bytes waiting to be used. |
| `go_memstats_heap_inuse_bytes` | `gauge` | Number of heap bytes that are in use. |
| `go_memstats_heap_objects` | `gauge` | Number of allocated objects. |
| `go_memstats_heap_released_bytes` | `gauge` | Number of heap bytes released to OS. |
| `go_memstats_heap_sys_bytes` | `gauge` | Number of heap bytes obtained from system. |
| `go_memstats_last_gc_time_seconds` | `gauge` | Number of seconds since 1970 of last garbage collection. |
| `go_memstats_lookups_total` | `counter` | Total number of pointer lookups. |
| `go_memstats_mallocs_total` | `counter` | Total number of mallocs. |
| `go_memstats_mcache_inuse_bytes` | `gauge` | Number of bytes in use by mcache structures. |
| `go_memstats_mcache_sys_bytes` | `gauge` | Number of bytes used for mcache structures obtained from system. |
| `go_memstats_mspan_inuse_bytes` | `gauge` | Number of bytes in use by mspan structures. |
| `go_memstats_mspan_sys_bytes` | `gauge` | Number of bytes used for mspan structures obtained from system. |
| `go_memstats_next_gc_bytes` | `gauge` | Number of heap bytes when next garbage collection will take place. |
| `go_memstats_other_sys_bytes` | `gauge` | Number of bytes used for other system allocations. |
| `go_memstats_stack_inuse_bytes` | `gauge` | Number of bytes in use by the stack allocator. |
| `go_memstats_stack_sys_bytes` | `gauge` | Number of bytes obtained from system for stack allocator. |
| `go_memstats_sys_bytes` | `gauge` | Number of bytes obtained from system. |
| `go_sched_goroutines_goroutines` | `gauge` | Count of live goroutines. |
| `go_sched_latencies_seconds` | `histogram` | Distribution of the time goroutines have spent in the scheduler in a runnable state before actually running. |
| `go_sql_idle_connections` | `gauge` | The number of idle connections. |
| `go_sql_in_use_connections` | `gauge` | The number of connections currently in use. |
| `go_sql_max_idle_closed_total` | `counter` | The total number of connections closed due to SetMaxIdleConns. |
| `go_sql_max_idle_time_closed_total` | `counter` | The total number of connections closed due to SetConnMaxIdleTime. |
| `go_sql_max_lifetime_closed_total` | `counter` | The total number of connections closed due to SetConnMaxLifetime. |
| `go_sql_max_open_connections` | `gauge` | Maximum number of open connections to the database. |
| `go_sql_open_connections` | `gauge` | The number of established connections both in use and idle. |
| `go_sql_wait_count_total` | `counter` | The total number of connections waited for. |
| `go_sql_wait_duration_seconds_total` | `counter` | The total time blocked waiting for a new connection. |
| `go_threads` | `gauge` | Number of OS threads created. |
| `process_cpu_seconds_total` | `counter` | Total user and system CPU time spent in seconds. |
| `process_max_fds` | `gauge` | Maximum number of open file descriptors. |
| `process_open_fds` | `gauge` | Number of open file descriptors. |
| `process_resident_memory_bytes` | `gauge` | Resident memory size in bytes. |
| `process_start_time_seconds` | `gauge` | Start time of the process since unix epoch in seconds. |
| `process_virtual_memory_bytes` | `gauge` | Virtual memory size in bytes. |
| `process_virtual_memory_max_bytes` | `gauge` | Maximum amount of virtual memory available in bytes. |
| `promhttp_metric_handler_requests_in_flight` | `gauge` | Current number of scrapes being served. |
| `promhttp_metric_handler_requests_total` | `counter` | Total number of scrapes by HTTP status code. |
##### On this page
---
# Git configuration | Coder v1 Docs
[Home](https://coder.com/docs/v1 "Home")
[Guides](https://coder.com/docs/v1/guides "Guides")
[Customization](https://coder.com/docs/v1/guides/customization "Customization")
Git configuration
This guide will show you how to manage your Git configuration in Coder.
[](https://coder.com/docs/v1/guides/customization/gitconfig#personal-git-configurations)
Personal git configurations
--------------------------------------------------------------------------------------------------------------------
Coder will create a global Git configuration file located at `~/.gitconfig` in all newly created workspaces. Coder will also set the user name and email address based on the user's Coder account information.
This step occurs before [coder/configure](https://coder.com/docs/v1/images/configure)
and [personalization](https://coder.com/docs/v1/workspaces/personalization)
. This means that you can use both files to override the default `.gitconfig` created by Coder.
> If there's already a `.gitconfig` file, Coder will not recreate a default version when you rebuild a workspace.
We recommend that each Coder user set and modify their personal `.gitconfig` file using the [~/personalize script](https://coder.com/docs/v1/workspaces/personalization)
. **Preferences defined using individual `.gitconfig` files take precedence over system-level settings.**
[](https://coder.com/docs/v1/guides/customization/gitconfig#system-and-global-git-configurations)
System and global Git configurations
--------------------------------------------------------------------------------------------------------------------------------------
If you have a set of instructions that apply to your organization as a whole, you can define and use a system-level Git configuration file. We suggest adding the system-level `.gitconfig` directly to the image's Dockerfile:
`` `# Add system-level gitconfig COPY ["gitconfig", "/etc/gitconfig"]` ``
System-level git configurations live under `/etc/gitconfig`. If this file is present, `git` applies the settings defined to each repository. However, any Coder user can override system-level settings using global or worktree git configurations.
For more information on Git configuration, refer to the [official documentation](https://git-scm.com/docs/git-config)
.
##### On this page
---
# Coder installation from an archive | Coder v1 Docs
[Home](https://coder.com/docs/v1 "Home")
[Guides](https://coder.com/docs/v1/guides "Guides")
[Deployment](https://coder.com/docs/v1/guides/deployments "Deployment")
Coder installation from an archive
You can install Coder from an archive instead of using Helm. To do so, replace **steps 1-2** of the [Installation guide](https://coder.com/docs/v1/setup/installation)
with the following three steps, then proceed with the remainder of the Installation guide as written:
1. Add the Coder Helm repo:
`` `helm repo add coder https://helm.coder.com` ``
2. Pull the `tar` file, which will be written to `./coder-.tgz`:
`` `helm pull coder/coder` ``
3. Install Coder from the archive:
`` `helm install coder coder-.tgz \ --namespace=coder --values=` ``
---
# Google Cloud DNS | Coder v1 Docs
[Home](https://coder.com/docs/v1 "Home")
[Guides](https://coder.com/docs/v1/guides "Guides")
[TLS certificates](https://coder.com/docs/v1/guides/tls-certificates "TLS certificates")
Google Cloud DNS
[cert-manager](https://cert-manager.io/)
allows you to enable HTTPS on your Coder installation, regardless of whether you're using [Let's Encrypt](https://letsencrypt.org/)
or you have your own certificate authority.
> This guide is for Coder v1.21.0 and later, which handle certificates differently from earlier versions of Coder. Ensure that you're reading the docs applicable to your Coder version.
This guide will show you how to install cert-manager and set up your cluster to issue Let's Encrypt certificates for your Coder installation so that you can enable HTTPS on your Coder deployment. It will also show you how to configure your Coder hostname and dev URLs.
> We recommend reviewing the official cert-manager [documentation](https://cert-manager.io/docs/)
> if you encounter any issues or if you want info on using a different certificate issuer.
You must have:
* A Kubernetes cluster [of a supported version](https://coder.com/docs/v1/setup/kubernetes#supported-kubernetes-versions)
with internet connectivity
* Installed [kubectl](https://kubernetes.io/docs/tasks/tools/install-kubectl/)
* A [Cloud DNS](https://cloud.google.com/dns)
account
* A [GCP Service Account](https://cloud.google.com/iam/docs/creating-managing-service-accounts)
with the `dns.admin` role
[](https://coder.com/docs/v1/guides/tls-certificates/cloudDNS#step-1-add-cert-manager-to-your-kubernetes-cluster)
Step 1: Add cert-manager to your Kubernetes cluster
---------------------------------------------------------------------------------------------------------------------------------------------------------------------
There are two ways to add cert-manager to your Kubernetes cluster.
[](https://coder.com/docs/v1/guides/tls-certificates/cloudDNS#option-1-kubectl-apply)
Option 1: `kubectl apply`
---------------------------------------------------------------------------------------------------------------
Add cert-manager to your cluster [using `kubectl apply`](https://cert-manager.io/docs/installation/kubectl/)
by running:
`` `kubectl apply -f https://github.com/cert-manager/cert-manager/releases/download/v1.8.0/cert-manager.yaml` ``
[](https://coder.com/docs/v1/guides/tls-certificates/cloudDNS#option-2-helm)
Option 2: Helm
-------------------------------------------------------------------------------------------
Add cert-manager to your cluster [using Helm](https://cert-manager.io/docs/installation/helm/)
.
First, add the Helm repo:
`` `helm repo add jetstack https://charts.jetstack.io` ``
Then, install cert-manager and create its namespace (check for the [latest cert-manager version](https://cert-manager.io/docs/installation/supported-releases/#installing-with-regular-manifests)
, since they may change)
`` `helm install \ cert-manager jetstack/cert-manager \ --namespace cert-manager \ --version v1.7.0 \ # update version if necessary --create-namespace \ --set installCRDs=true` ``
You can find additional information in [cert-manager's installation docs](https://cert-manager.io/docs/installation/kubernetes/#installing-with-regular-manifests)
.
Once you've started the installation process, verify that all the pods are running:
`` `$ kubectl get pods -n cert-manager NAME READY STATUS RESTARTS AGE cert-manager-7cd5cdf774-vb2pr 1/1 Running 0 84s cert-manager-cainjector-6546bf7765-ssxhf 1/1 Running 0 84s cert-manager-webhook-7f68b65458-zvzn9 1/1 Running 0 84s` ``
[](https://coder.com/docs/v1/guides/tls-certificates/cloudDNS#step-2-get-the-private-key-from-the-service-account)
Step 2: Get the private key from the service account
-----------------------------------------------------------------------------------------------------------------------------------------------------------------------
You can get the private key from the GCP Service Account using:
`` `gcloud iam service-accounts keys create key.json \ --iam-account @.iam.gserviceaccount.com` ``
The response should look similar to the following:
`` `created key [44...3d] of type [json] as [key.json] for [@.iam.gserviceaccount.com]` ``
[](https://coder.com/docs/v1/guides/tls-certificates/cloudDNS#step-3-configure-cluster-issuer-secret-and-add-it-to-cert-manager-namespace)
Step 3: Configure cluster issuer secret and add it to cert-manager namespace
-----------------------------------------------------------------------------------------------------------------------------------------------------------------------------------------------------------------------
Next, configure the cluster issuer secret, and add it to cert-manager's namespace:
`` `kubectl -n cert-manager create secret generic \ clouddns-dns01-solver-svc-acct --from-file=./key.json` ``
If successful, you'll see a response similar to:
`` `secret/clouddns-dns01-solver-svc-acct created` ``
[](https://coder.com/docs/v1/guides/tls-certificates/cloudDNS#step-4-create-a-cluster-issuer-resource-and-apply-it)
Step 4: Create a cluster issuer resource and apply it
-------------------------------------------------------------------------------------------------------------------------------------------------------------------------
1. Using the text editor of your choice, create a new [configuration file](https://cert-manager.io/docs/configuration/acme/dns01/)
called `letsencrypt.yaml` (you can name it whatever you'd like) that includes your newly created private key:
`` `apiVersion: cert-manager.io/v1 kind: ClusterIssuer metadata: name: letsencrypt spec: acme: privateKeySecretRef: name: gclouddnsissuersecret server: https://acme-v02.api.letsencrypt.org/directory solvers: - dns01: cloudDNS: # The ID of the GCP project project: # This is the secret used to access the service account serviceAccountSecretRef: name: clouddns-dns01-solver-svc-acct key: key.json` ``
More information on the values in the YAML file above can be found in [the dns01 solver configuration documentation](https://cert-manager.io/docs/configuration/acme/dns01/)
.
2. Apply your configuration changes:
`` `kubectl apply -f letsencrypt.yaml` ``
If successful, you'll see a response similar to:
`` `clusterissuer.cert-manager.io/letsencrypt created` ``
[](https://coder.com/docs/v1/guides/tls-certificates/cloudDNS#step-5-create-a-certificate)
Step 5: Create a certificate
-----------------------------------------------------------------------------------------------------------------------
> Note: If you are providing an ingress, certificates can be automatically created with an ingress annotation. See the [cert-manager docs](https://cert-manager.io/docs/usage/ingress/)
> for details. If you are unsure whether you are using an ingress or not, continue with this step.
In a text editor, create a new file called **certificate.yaml** and paste the following:
`` `apiVersion: cert-manager.io/v1 kind: Certificate metadata: name: coder-certs namespace: coder # Your Coder deployment namespace spec: commonName: "*.coder.example.com" dnsNames: - "coder.example.com" - "*.coder.example.com" issuerRef: kind: ClusterIssuer name: letsencrypt secretName: coder-certs` ``
Be sure to change `coder.example.com` to the domain for your Coder deployment. While this example uses a single domain, a separate domain can be created for dev URLs or even omitted if you do not have [dev URLs enabled](https://coder.com/docs/v1/guides/admin/devurls)
.
Once you're done, deploy the certificates.
`` `kubectl apply -f certificate.yaml` ``
[](https://coder.com/docs/v1/guides/tls-certificates/cloudDNS#step-6-installupgrade-coder)
Step 6: Install/upgrade Coder
------------------------------------------------------------------------------------------------------------------------
At this point, you're ready to [install](https://coder.com/docs/v1/setup/installation)
Coder. However, to use all of the functionality you set up in this tutorial, use the following command instead:
``` ``# be sure to update the `stringValue` placeholder with the # proper value for your devurlsHostSecretName and hostSecretName helm upgrade --install coder coder/coder --namespace coder \ --version= \ --set coderd.devurlsHost="*.coder.example.com" \ --set coderd.tls.devurlsHostSecretName="coder-certs-stringValue" \ --set coderd.tls.hostSecretName="coder-certs-stringValue" \ --wait`` ```
The cluster-issuer will create the certificates you need, using the values provided in the `helm install` command for the dev URL and host secret.
There are additional steps to make sure that your hostname and Dev URLs work.
[](https://coder.com/docs/v1/guides/tls-certificates/cloudDNS#step-6-configure-dns-resolution)
Step 6: Configure DNS resolution
-------------------------------------------------------------------------------------------------------------------------------
1. Check the contents of your namespace
`` `kubectl get svc -n -o wide` ``
Find the **service/coderd** line, and copy the **external IP** value shown.
2. Return to Google Cloud Platform, navigate to the [Cloud DNS](https://cloud.google.com/dns)
Console, and select the Zone that your cluster is in.
**Note:** You will need to create two A records, one for both the hostname and Dev URLs
3. Click **Add Record Set**
4. Provide your **DNS Name**
a. If you're configuring the hostname, this value will be a standard domain
b. If you're configuring your dev URLs, this will be a wildcard domain (e.g., `*.example.com`)
5. Set the **Resource Record Type** to **A**
6. Copy and paste the external IP address associated with the **service/coderd** line from your terminal to the `IPv4 Address` field.
7. Click **Create**
At this point, you can return to **step 6** of the [installation](https://coder.com/docs/v1/setup/installation)
guide to obtain the admin credentials you need to log in.
[](https://coder.com/docs/v1/guides/tls-certificates/cloudDNS#troubleshooting)
Troubleshooting
----------------------------------------------------------------------------------------------
If you are not getting a valid certificate after redeploying, see [cert-manager's troubleshooting guide](https://cert-manager.io/docs/faq/acme/)
for additional assistance.
##### On this page
---
# Logging | Coder v1 Docs
[Home](https://coder.com/docs/v1 "Home")
[Guides](https://coder.com/docs/v1/guides "Guides")
[Admin](https://coder.com/docs/v1/guides/admin "Admin")
Logging
Logging can help you understand what's happening under the hood of your Coder deployment and is useful for debugging and monitoring the health of your cluster.
[](https://coder.com/docs/v1/guides/admin/logging#accessing-logs)
Accessing logs
--------------------------------------------------------------------------------
You can access your logs at any time by running:
`` `kubectl -n coder logs ` ``
[](https://coder.com/docs/v1/guides/admin/logging#exporting-logs)
Exporting logs
--------------------------------------------------------------------------------
The following sections show how you can change your Helm chart values to export logs.
> See our guide to [updating your Helm chart](https://coder.com/docs/v1/guides/admin/helm-charts)
> if you're unfamiliar with updating a Helm chart.
Please note that:
* Setting either the `/dev/stdout` or `/dev/stderr` value to an empty string to disable.
* You can use `/dev/stdout` and `/dev/stderr` interchangeably, since both write to the pod's standard output and error directories.
* Coder supports writing logs to multiple output targets.
[](https://coder.com/docs/v1/guides/admin/logging#human-readable-logs)
Human-readable logs
------------------------------------------------------------------------------------------
This is the default value that's set in the Helm chart:
`` `logging: human: /dev/stderr` ``
When set, logs will be sent to the `/dev/stderr` file path and formatted for human readability.
[](https://coder.com/docs/v1/guides/admin/logging#json-formatted-logs)
JSON-formatted logs
------------------------------------------------------------------------------------------
You can get JSON-formatted logs by setting the `json` value:
`` `logging: json: /dev/stderr` ``
[](https://coder.com/docs/v1/guides/admin/logging#sending-logs-to-google-stackdriver)
Sending logs to Google Stackdriver
------------------------------------------------------------------------------------------------------------------------
If you deployed your Kubernetes cluster to Google Cloud, you can send logs to Stackdriver:
`` `logging: stackdriver: /dev/stderr` ``
[](https://coder.com/docs/v1/guides/admin/logging#sending-logs-to-splunk)
Sending logs to Splunk
------------------------------------------------------------------------------------------------
Coder can send logs directly to Splunk. Splunk uses the HTTP Event Collector (HEC) to receive data and application logs. See Splunk's docs for [information on configuring an HEC](https://docs.splunk.com/Documentation/Splunk/8.1.3/Data/UsetheHTTPEventCollector)
.
Once you've configured an HEC, you'll need to update your Helm chart with your HTTP (HEC) endpoint and your HEC collector token.
To provide your HTTP (HEC) endpoint:
`` `logging: splunk: url: ""` ``
To provide your HEC collector token:
`` `logging: splunk: token: ""` ``
Optionally, you can [specify the Splunk channel](https://docs.splunk.com/Documentation/Splunk/8.1.3/Data/AboutHECIDXAck#About_channels_and_sending_data)
that you'd like associated with your messages. Channels allow logs to be segmented by client, preventing Coder application logs from affecting other client logs in your Splunk deployment.
`` `logging: splunk: channel: ""` ``
##### On this page
---
# OpenID Connect with Azure AD | Coder v1 Docs
[Home](https://coder.com/docs/v1 "Home")
[Guides](https://coder.com/docs/v1/guides "Guides")
[Admin](https://coder.com/docs/v1/guides/admin "Admin")
OpenID Connect with Azure AD
This article walks you through setting up single sign-on to Coder using Azure's Active directory.
Configuring [Coder's OpenID Connect](https://coder.com/docs/v1/admin/access-control#openid-connect)
feature requires you to provide three pieces of information from Azure:
* Client ID
* Client Secret
* Issuer
This guide will show you how to set up Azure's Active Directory and obtain the information you need to provide to Coder.
[](https://coder.com/docs/v1/guides/admin/oidc-azuread#step-1-register-your-app-with-azure)
Step 1: Register your app with Azure
--------------------------------------------------------------------------------------------------------------------------------
1. Log in to [Azure](https://portal.azure.com/)
.
2. Using the search bar at the top, enter **App registrations** and click the matching search result.
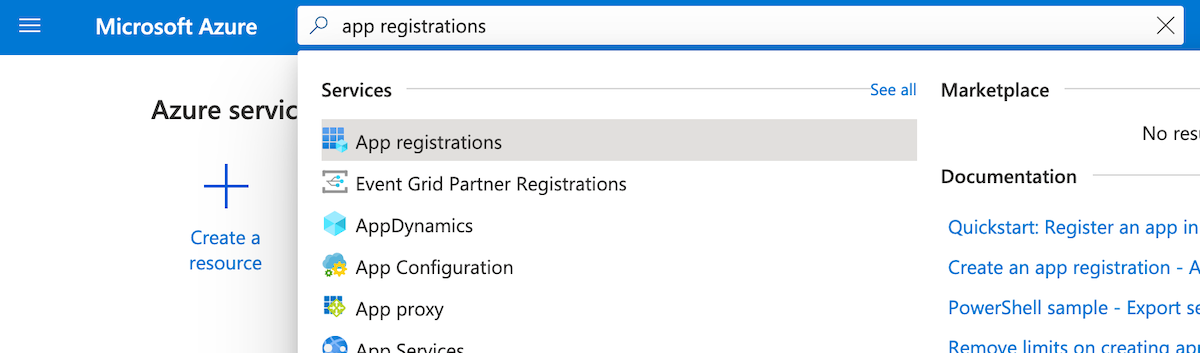
3. Click **New registration**.
4. Provide a **Name** for your application.
5. Select the access option that best fits your needs; use **Default Directory only - Single tenant** unless your AD requires multi-tenancy.
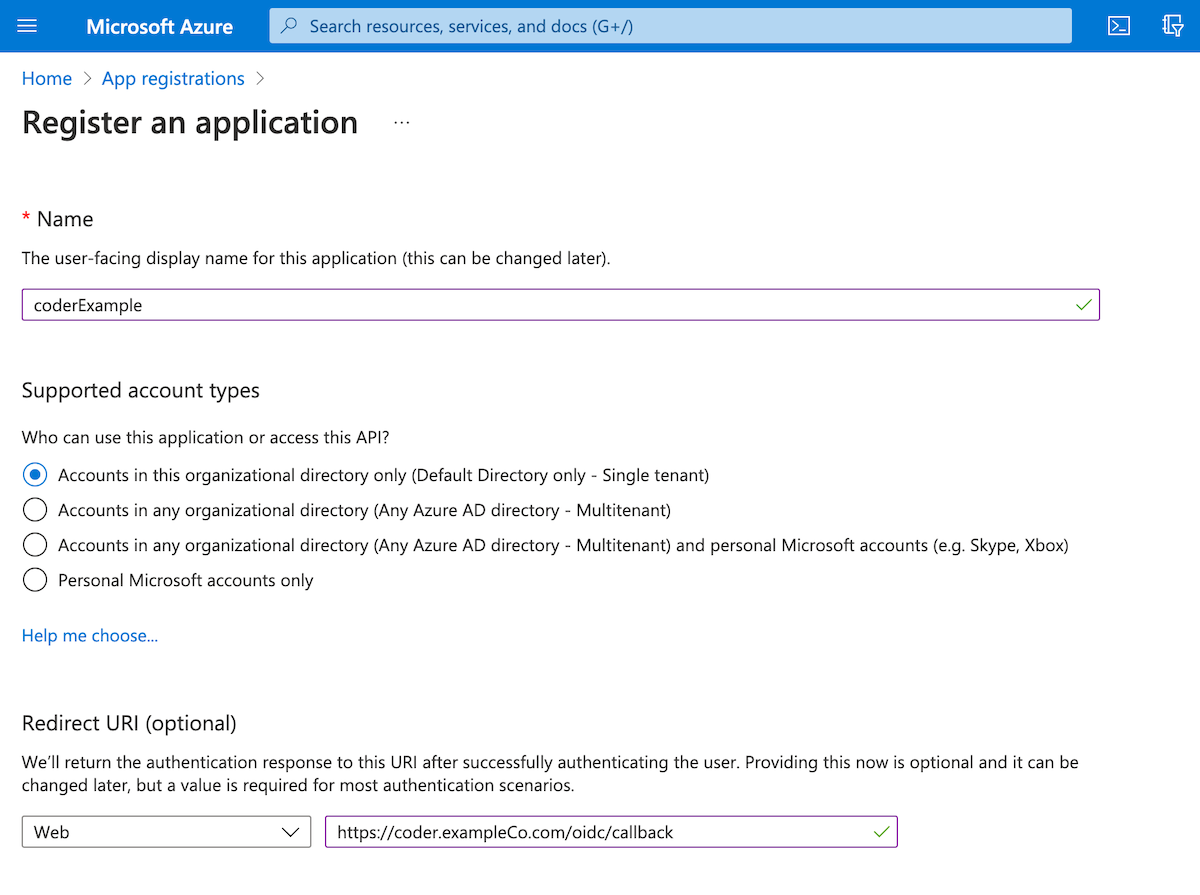
6. Provide your **Redirect URL** (it will be formatted similar to `https://coder.exampleCo.com/oidc/callback`).
7. Click **Register** to proceed.
When Azure has created your app, you'll be redirected to **Overview**, which displays the app information.
[](https://coder.com/docs/v1/guides/admin/oidc-azuread#step-2-gather-your-azure-app-information)
Step 2: Gather your Azure app information
------------------------------------------------------------------------------------------------------------------------------------------
Once you've registered your app, you can obtain your:
* Client ID
* Client Secret
* Issuer
### [](https://coder.com/docs/v1/guides/admin/oidc-azuread#client-id)
Client ID
On your application's **Overview**, look for the **Application (client) ID** under the **Essentials** section. This is the value Coder expects as the **Client ID**.
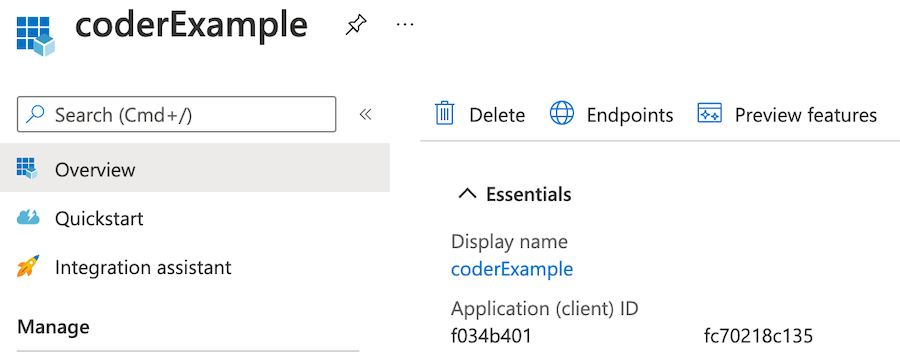
### [](https://coder.com/docs/v1/guides/admin/oidc-azuread#client-secret)
Client secret
You'll need to create the client secret. To do so:
1. Go to **Certificates & secrets**.
2. Click **New client secret**.
3. Provide a description for your secret and set an expiration date, and click **Add**. (We recommend creating a calendar notification to alert you shortly before your secret is set to expire.)
4. You'll be redirected back to the **Certificates & secrets** page; save the **Value** field string for use as your client secret.
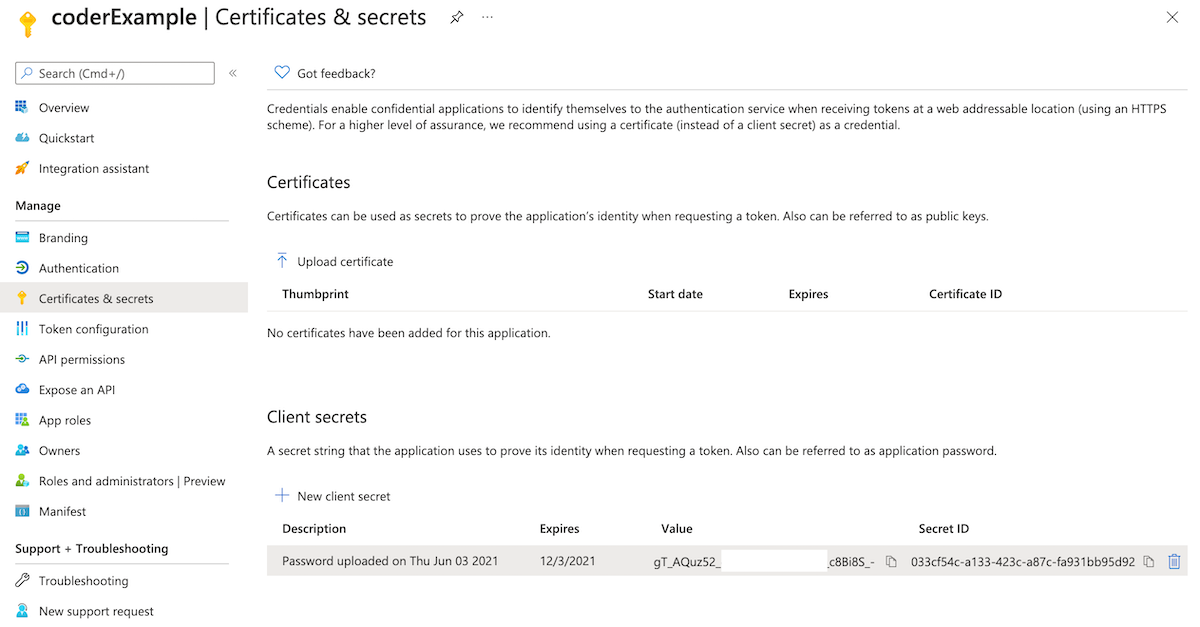
### [](https://coder.com/docs/v1/guides/admin/oidc-azuread#issuer)
Issuer
On your app's **Overview** page, click **Endpoints**. Find **OpenID Connect metadata document**, and copy the first 2/3s of this value.
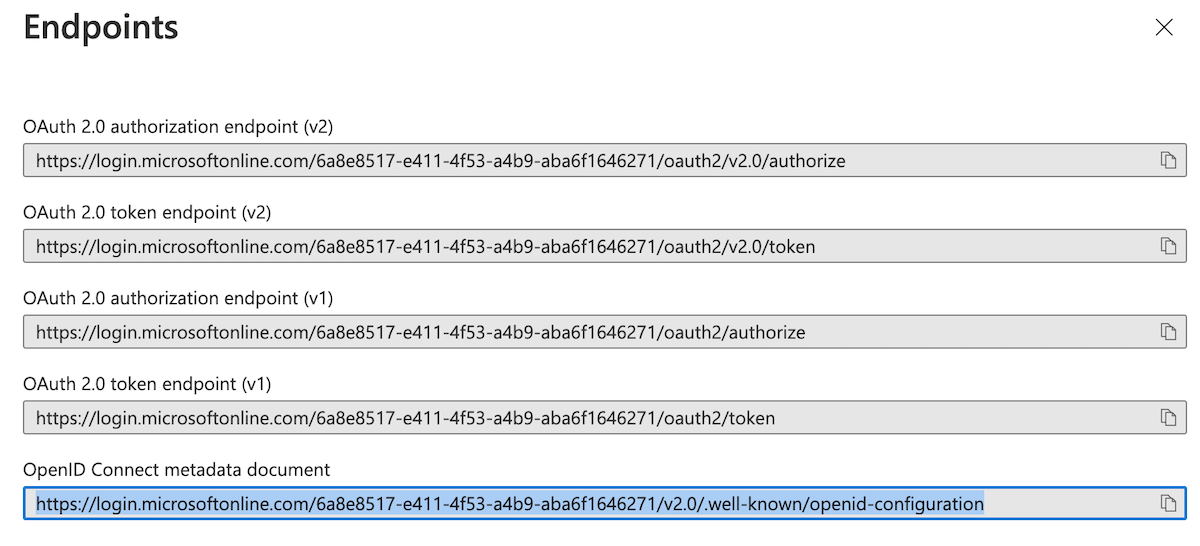
For example, if the full value is:
`` `https://login.microsoftonline.com/6a8e8517-e411-4f53-a4b9-aba6f1646271/v2.0/.well-known/openid-configuration` ``
Then remove `/.well-known/openid-configuration`, leaving the following as your issuer:
`` `https://login.microsoftonline.com/6a8e8...6271/v2.0` ``
Be sure to keep `v2.0`, though you must omit the `/` from the end.
> If there's an issue during the configuration process, the error message will tell you the value you provided and the value it expected; you can use this information to correct your configuration.
[](https://coder.com/docs/v1/guides/admin/oidc-azuread#step-3-configure-coder-authentication)
Step 3: Configure Coder authentication
------------------------------------------------------------------------------------------------------------------------------------
Once you've saved your Azure values, you can complete the remaining steps using the Coder UI.
1. Log in to Coder, and go to **Manage** > **Admin** > **Authentication**.
2. In the top-most drop-down box, select **OpenID Connect**.
3. Provide the requested values for **Client ID**, **Client Secret**, and **Issuer**. Optionally, you can specify **Additional Scopes**.
When done, click **Save Preferences**.
At this point, Coder validates your configuration before proceeding. If successful, you can expect Coder to send OIDC login attempts to Azure.
##### On this page
---
# NFS file mounting | Coder v1 Docs
[Home](https://coder.com/docs/v1 "Home")
[Guides](https://coder.com/docs/v1/guides "Guides")
[Admin](https://coder.com/docs/v1/guides/admin "Admin")
NFS file mounting
This guide will walk you through configuring and mounting an NFS file share to a Coder workspace. The NFS file share will be separate from the user's persistent volume (represented as `/home/` in the workspace).
[](https://coder.com/docs/v1/guides/admin/nfs#requirements)
Requirements
------------------------------------------------------------------------
To mount an NFS file share, you must use a container-based virtual machine (CVM) workspace with a FUSE device attached. You can enable both of these features in the admin panel by navigating to **Manage** > **Admin** > **Infrastructure** > **Workspace container runtime**.
> Please review [the CVM infrastructure requirements before enabling](https://coder.com/docs/coder/latest/admin/workspace-management/cvms)
> CVMs and FUSE devices.
The Coder workspace must have either `nfs-utils` or `nfs-common` installed.
The server must have either `nfs-utils` or `nfs-kernel-server` installed.
Ensure that no firewalls are blocking the client connections. By default, the NFS daemon is configured to run on a static port of `2049`.
[](https://coder.com/docs/v1/guides/admin/nfs#server-configuration-steps)
Server configuration steps
----------------------------------------------------------------------------------------------------
1. Create an NFS mount on the server for the clients to access:
`` `export NFS_MNT_PATH=/mnt/nfs_share # Create directory to shaare sudo mkdir -p $NFS_MNT_PATH # Assign UID & GIDs access sudo chown -R uid:gid $NFS_MNT_PATH sudo chmod 777 $NFS_MNT_PATH` ``
2. Grant access to the clients by updating the `/etc/exports` file, which controls the directories shared with remote clients. See [Red Hat's docs for more information about the configuration options](https://access.redhat.com/documentation/en-us/red_hat_enterprise_linux/5/html/deployment_guide/s1-nfs-server-config-exports)
.
`` `# Provides read/write access to clients accessing the NFS from any IP address. /mnt/nfs_share *(rw,sync,no_subtree_check)` ``
3. Export the NFS file share directory. You must do this every time you change `/etc/exports`.
`` `sudo exportfs -a sudo systemctl restart ` ``
[](https://coder.com/docs/v1/guides/admin/nfs#client-coder-workspace-configuration-steps)
Client (Coder workspace) configuration steps
--------------------------------------------------------------------------------------------------------------------------------------
1. Create a directory where the NFS mount will reside:
`` `sudo mkdir -p /mnt/nfs_clientshare` ``
2. Mount the NFS file share from the server into your workspace:
`` `sudo mount :/mnt/nfs_share /mnt/nfs_clientshare` ``
##### On this page
---
# Admin password reset | Coder v1 Docs
[Home](https://coder.com/docs/v1 "Home")
[Guides](https://coder.com/docs/v1/guides "Guides")
[Troubleshooting](https://coder.com/docs/v1/guides/troubleshooting "Troubleshooting")
Admin password reset
When [resetting your Coder admin password](https://coder.com/docs/v1/admin/access-control/users/password-reset#resetting-the-site-admin-password)
in the terminal, you may encounter the following error:
`` `error: unable to upgrade connection: error dialing backend: remote error: tls: handshake failure` ``
[](https://coder.com/docs/v1/guides/troubleshooting/admin-pwd#why-this-happens)
Why this happens
------------------------------------------------------------------------------------------------
This upgrade-related error occurs when a proxy is in front of `kube-apiserver`, blocking your attempt to reach the `coderd` pod and reset the admin password.
[](https://coder.com/docs/v1/guides/troubleshooting/admin-pwd#troubleshooting-steps)
Troubleshooting steps
----------------------------------------------------------------------------------------------------------
To access the `coderd` pod properly, you'll need to remove the proxy. If removing the proxy isn't possible, circumvent the proxy and make the call to `coderd` directly using `kubectl`.
If this doesn't resolve the issue, please [contact us](https://coder.com/contact)
for further support.
##### On this page
---
# Organization roles | Coder v1 Docs
[Home](https://coder.com/docs/v1 "Home")
[Admin](https://coder.com/docs/v1/admin "Admin")
[Access control](https://coder.com/docs/v1/admin/access-control "Access control")
Organization roles
You can assign members of an [organization](https://coder.com/docs/v1/admin/organizations)
roles, which function like [user roles](https://coder.com/docs/v1/admin/access-control/users/user-roles)
. There are five roles available:
| **Role** | **Description** |
| --- | --- |
| **Organization super manager** | Grants full administrative access to the organization and the ability to manage its **images** and **members**. Can view, modify, and delete **workspaces** belonging to members of the organization. |
| **Organization manager** | Grants create, view, modify, and delete to the organization's **images**, **image tags**, and **registries**. |
| **Organization image manager** | Grants create, view, modify, and delete to the organization's **images**, and **image tags**. |
| **Organization importer** | In addition to basic organization access, can create new **images** assigned to the organization. |
| **Organization member** | Grants basic organization access. Can use and view **images** belonging to the organization. Can only access **workspaces** within their organization. |
Please note that roles are defined per organization. Therefore, assigning someone as an organization manager does not change their role in another organization.
### [](https://coder.com/docs/v1/admin/access-control/organizations#organization-super-manager-permissions)
Organization super manager permissions
| | Create | Read (all) | Read (own) | List | Delete (all) | Delete (own) | Update (all) | Update (own) |
| --- | --- | --- | --- | --- | --- | --- | --- | --- |
| Dev URLs | | X | | | | | | |
| Workspaces | X | X | X | | X | X | X | X |
| Images | X | X | | | X | | X | |
| Image tags | X | X | | | X | | X | |
| Metrics | | X | X | | | | | |
| Org members | X | X | | X | X | | X | |
| Orgs | | X | | X | | | | |
| Registries | X | X | | | X | | X | |
| System banners | | X | | | | | | |
| Users | | X | X | | | | | |
### [](https://coder.com/docs/v1/admin/access-control/organizations#organization-manager-permissions)
Organization manager permissions
| | Create | Read (all) | Read (own) | List | Delete (all) | Delete (own) | Update (all) | Update (own) |
| --- | --- | --- | --- | --- | --- | --- | --- | --- |
| Dev URLs | | X | | | | | | |
| Workspaces | X | X | X | | | X | | X |
| Images | X | X | | | X | | X | |
| Image tags | X | X | | | X | | X | |
| Metrics | | X | X | | | | | |
| Org members | | | | X | | | | |
| Orgs | | X | | X | | | | |
| Registries | X | X | | | X | | X | |
| System banners | | X | | | | | | |
| Users | | X | X | | | | | |
### [](https://coder.com/docs/v1/admin/access-control/organizations#organization-image-manager-permissions)
Organization image manager permissions
| | Create | Read (all) | Read (own) | List | Delete (all) | Delete (own) | Update (all) | Update (own) |
| --- | --- | --- | --- | --- | --- | --- | --- | --- |
| Dev URLs | | X | | | | | | |
| Workspaces | X | | X | | | X | | X |
| Images | X | X | | | X | | X | |
| Image tags | X | X | | | X | | X | |
| Metrics | | | X | | | | | |
| Org members | | | | X | | | | |
| Orgs | | | | X | | | | |
| Registries | | X | | | | | | |
| System banners | | X | | | | | | |
| Users | | | X | | | | | |
### [](https://coder.com/docs/v1/admin/access-control/organizations#organization-importer-permissions)
Organization importer permissions
| | Create | Read (all) | Read (own) | List | Delete (all) | Delete (own) | Update (all) | Update (own) |
| --- | --- | --- | --- | --- | --- | --- | --- | --- |
| Dev URLs | | X | | | | | | |
| Workspaces | X | | X | | | X | | X |
| Images | X | X | | | | | | |
| Image tags | X | X | | | | | | |
| Metrics | | | X | | | | | |
| Org members | | | | X | | | | |
| Orgs | | | | X | | | | |
| Registries | | X | | | | | | |
| System banners | | X | | | | | | |
| Users | | | X | | | | | |
### [](https://coder.com/docs/v1/admin/access-control/organizations#organization-member-permissions)
Organization member permissions
| | Create | Read (all) | Read (own) | List | Delete (all) | Delete (own) | Update (all) | Update (own) |
| --- | --- | --- | --- | --- | --- | --- | --- | --- |
| Dev URLs | | X | | | | | | |
| Workspaces | X | | X | | | X | | X |
| Images | | X | | | | | | |
| Image tags | | X | | | | | | |
| Metrics | | | X | | | | | |
| Org members | | | | X | | | | |
| Orgs | | | | X | | | | |
| Registries | | X | | | | | | |
| System banners | | X | | | | | | |
| Users | | | X | | | | | |
---
# Podman | Coder v1 Docs
[Home](https://coder.com/docs/v1 "Home")
[Guides](https://coder.com/docs/v1/guides "Guides")
[Deployment](https://coder.com/docs/v1/guides/deployments "Deployment")
Podman
This article will walk you through setting up [Podman](https://docs.podman.io/en/latest/)
for use in Coder workspaces
Podman is a container engine (similar to Docker) that is compatible with the OCI containers specification. Podman is useful if you'd like an alternative to [CVM workspaces](https://coder.com/docs/v1/admin/workspace-management/cvms)
or if your Linux kernel doesn't support CVMs.
Prior to completing the steps below, please review the following Podman documentation:
* [Basic setup and use of Podman in a rootless environment](https://github.com/containers/podman/blob/main/docs/tutorials/rootless_tutorial.md)
* [Shortcomings of Rootless Podman](https://github.com/containers/podman/blob/main/rootless.md#shortcomings-of-rootless-podman)
If you are receiving `permission denied` errors when running Podman, please see the below article:
* [Container permission denied](https://www.redhat.com/sysadmin/container-permission-denied-errors)
1. Install `smarter-device-manager` and expose the FUSE device through it. To do so, create a file called `smarter-device-manager.yaml` with the following contents:
`` `apiVersion: v1 kind: Namespace metadata: name: smarter-device-manager labels: name: smarter-device-manager --- apiVersion: v1 kind: ResourceQuota metadata: name: smarter-device-manager namespace: smarter-device-manager spec: hard: pods: 50 scopeSelector: matchExpressions: - operator: In scopeName: PriorityClass values: - system-node-critical - system-cluster-critical --- apiVersion: v1 kind: ConfigMap metadata: name: smarter-device-manager namespace: smarter-device-manager data: conf.yaml: |+ - devicematch: ^fuse$ nummaxdevices: 50 --- apiVersion: apps/v1 kind: DaemonSet metadata: name: smarter-device-manager namespace: smarter-device-manager labels: name: smarter-device-manager role: agent spec: selector: matchLabels: name: smarter-device-manager updateStrategy: type: RollingUpdate template: metadata: labels: name: smarter-device-manager annotations: node.kubernetes.io/bootstrap-checkpoint: "true" spec: nodeSelector: smarter-device-manager: enabled priorityClassName: "system-node-critical" hostname: smarter-device-management hostNetwork: true dnsPolicy: ClusterFirstWithHostNet containers: - name: smarter-device-manager image: registry.gitlab.com/arm-research/smarter/smarter-device-manager:v1.20.7 imagePullPolicy: IfNotPresent securityContext: allowPrivilegeEscalation: false capabilities: drop: ["ALL"] resources: limits: cpu: 100m memory: 15Mi requests: cpu: 10m memory: 15Mi volumeMounts: - name: device-plugin mountPath: /var/lib/kubelet/device-plugins - name: dev-dir mountPath: /dev - name: sys-dir mountPath: /sys - name: config mountPath: /root/config volumes: - name: device-plugin hostPath: path: /var/lib/kubelet/device-plugins - name: dev-dir hostPath: path: /dev - name: sys-dir hostPath: path: /sys - name: config configMap: name: smarter-device-manager terminationGracePeriodSeconds: 30` ``
Next, apply the changes to your clusters by running:
`` `kubectl apply -f ./smarter-device-manager.yaml` ``
The example `DaemonSet` includes a `nodeSelector` that constrains the device plugin to nodes with the `smarter-device-manager` label set to `enabled`. Label the nodes that will include the FUSE device by using the following command, or remove the `nodeSelector` from the manifest:
`` `kubectl get nodes kubectl label nodes --all smarter-device-manager=enabled` ``
2. If you haven't already done so for your Coder deployment, enable workspace templates. To do so, go to **Manage** > **Admin** > **Templates**, and set the **Enable workspace templates** to **On**. Click **Save**.
3. Create a [workspace configuration file](https://coder.com/docs/v1/workspaces/workspace-templates/templates)
that includes instructions for resource requests and resource limits (the instructions ask the cluster to request the FUSE device for each workspace):
`` `version: "0.2" workspace: specs: kubernetes: resource-requests: policy: write value: smarter-devices/fuse: "1" resource-limits: policy: write value: smarter-devices/fuse: "1"` ``
A complete workspace template might look something like
`` `version: "0.2" workspace: configure: start: policy: write dev-urls: policy: write specs: aws-ec2-docker: container-image: policy: write disk-size: policy: write instance-type: policy: write docker: container-based-vm: policy: write image: policy: write kubernetes: annotations: policy: read container-based-vm: policy: write cpu: policy: write disk: policy: write env: policy: write gpu-count: policy: write image: policy: write labels: policy: read memory: policy: write node-selector: policy: read privileged: policy: read resource-requests: policy: write value: smarter-devices/fuse: "1" resource-limits: policy: write value: smarter-devices/fuse: "1" runtime-class-name: policy: read tolerations: policy: read` ``
4. In the Coder UI, navigate to **Manage** > **Admin** > **Templates** if you haven't already done so. Under **template policy**, upload the configuration file you created in the previous step. Click **Save**.
With the above template policy, all workspaces will acquire a FUSE device, which enables Podman to operate in rootless mode.
[](https://coder.com/docs/v1/guides/deployments/podman#for-systems-running-apparmor-and-selinux)
For systems running AppArmor and SELinux
-----------------------------------------------------------------------------------------------------------------------------------------
Running Podman in rootless mode requires a FUSE device to implement the overlay filesystem (fuse-overlayfs) in unprivileged mode. The following directions work by mounting the FUSE device from the host into workspace containers, which conflicts with the isolation provided by SELinux and AppArmor.
For systems running AppArmor (typically Debian- and Ubuntu-derived systems), please disable AppArmor before proceeding.
For systems running SELinux (typically Fedora-, CentOS-, and Red Hat-based systems), please disable SELinux or set it to `permissive` mode.
[](https://coder.com/docs/v1/guides/deployments/podman#testing)
Testing
-----------------------------------------------------------------------
At this point, you can create a workspace that leverages Podman. If you need a sample Podman image, you can obtain one [from RedHat](https://quay.io/repository/podman/stable?tag=latest&tab=tags)
. When using this image, switch to the unprivileged `podman` user before creating containers to ensure that `podman` runs in rootless mode.
##### On this page
---
# Workspace providers | Coder v1 Docs
[Home](https://coder.com/docs/v1 "Home")
[Admin](https://coder.com/docs/v1/admin "Admin")
Workspace providers
Workspace providers are logical groups of resources to which developers can deploy workspaces. They enable a single Coder deployment to provision and manage workspaces across multiple Kubernetes clusters and namespaces, including those located in other geographies, regions, or clouds.
Distributed teams can use this feature to allow users to manage workspaces in the nearest cluster. When combined with [satellites](https://coder.com/docs/v1/admin/satellites)
, developers will see an improved experience and reduced network latency.
You can also use workspace providers to support data sovereignty requirements or increase the isolation between workspaces running in the same region or cluster.
[](https://coder.com/docs/v1/admin/workspace-providers#built-in-workspace-provider)
Built-in workspace provider
---------------------------------------------------------------------------------------------------------------
By default, all Coder deployments will have a `built-in` workspace provider that specifies the Kubernetes cluster containing the Coder deployment. This allows users to create workspaces in the same cluster as the Coder deployment with no additional configuration.
[](https://coder.com/docs/v1/admin/workspace-providers#remote-workspace-providers)
Remote workspace providers
-------------------------------------------------------------------------------------------------------------
You can deploy a workspace provider to any existing Kubernetes cluster, enabling the cluster to become a selectable pool of resources in which developers can create workspaces.
Remote workspace providers can lower developers' latency by locating their workspaces closer to them geographically or can be used for workload isolation purposes. See [Deploying a workspace provider](https://coder.com/docs/v1/admin/workspace-providers/deployment)
to learn how to expand your Coder deployment to additional Kubernetes clusters.
### [](https://coder.com/docs/v1/admin/workspace-providers#organization-allowlists)
Organization allowlists
Site admins and site managers can manage which organizations have permissions to provision new workspaces in each workspace provider. When a new organization is created, it can provision workspaces into the **built-in** workspace provider by default.
##### On this page
---
# OpenID Connect with Google | Coder v1 Docs
[Home](https://coder.com/docs/v1 "Home")
[Guides](https://coder.com/docs/v1/guides "Guides")
[Admin](https://coder.com/docs/v1/guides/admin "Admin")
OpenID Connect with Google
This article walks you through setting up single sign-on to Coder using Google.
Configuring [Coder's OpenID Connect](https://coder.com/docs/v1/admin/access-control#openid-connect)
feature requires you to provide three pieces of information from Google:
* Client ID
* Client Secret
* Issuer
This guide will show you how to set up an app on Google and obtain the information you need to provide to Coder.
[](https://coder.com/docs/v1/guides/admin/oidc-google#prerequisites)
Prerequisites
----------------------------------------------------------------------------------
Before proceeding, please ensure that you've [enabled and configured the Identity Platform](https://cloud.google.com/identity-platform/docs/web/oidc)
for your Google Cloud account.
[](https://coder.com/docs/v1/guides/admin/oidc-google#step-1-create-the-oauth-consent-screen)
Step 1: Create the OAuth consent screen
-------------------------------------------------------------------------------------------------------------------------------------
1. Navigate to your [GCP console](https://console.cloud.google.com/)
.
2. Go to **APIs & Services** > **OAuth consent screen**. Create a new app or edit an existing app, setting the following fields:
* **App name**
* **User support email**
* App domains (at minimum, you must provide the **Application home page**)
* Authorized domains (e.g. `coder.your-domain.com`)
3. Click **Save and continue** to proceed.
[](https://coder.com/docs/v1/guides/admin/oidc-google#step-2-create-the-oauth-client)
Step 2: Create the OAuth Client
---------------------------------------------------------------------------------------------------------------------
1. Under **APIs & Services**, go to **Credentials**.
2. Click **Create Credentials** and select **OAuth Client ID**.
3. When prompted for your **Application type**, choose **Web Application**.
4. Provide a **Name** for your application.
5. Under **Authorized redirect URIs**, click **Add URI**, and provide your URI (e.g. `coder.your-domain.com/oidc/callback`).
6. Click **Create**. Google shows you both your **Client ID** and **Client Secret**; copy both values and save them, since you'll need to provide these Coder.
[](https://coder.com/docs/v1/guides/admin/oidc-google#step-3-provide-the-oidc-credentials-to-coder)
Step 3: Provide the OIDC credentials to Coder
-------------------------------------------------------------------------------------------------------------------------------------------------
Now that you've registered an app, you can provide the relevant **Client ID**, **Client Secret**, and **Issuer** to Coder.
1. Log into Coder, and go to **Manage** > **Admin** > **Authentication**.
2. Toggle the top-most field to **OpenID Connect**.
3. Provide the **Client ID** and **Client Secret** supplied by Google.
4. For the **Issuer**, provide `https://accounts.google.com`.
5. For **Additional Scopes**, you can leave this value blank.
6. Click **Save preferences**.
You can now use Google as an SSO provider with Coder.
[](https://coder.com/docs/v1/guides/admin/oidc-google#optional-enable-token-refresh-and-redirect-options)
Optional: Enable token refresh and redirect options
-------------------------------------------------------------------------------------------------------------------------------------------------------------
If you'd like to enable session token refresh and define redirect options, set the following values in Coder's [Helm chart and update your deployment](https://coder.com/docs/v1/guides/admin/helm-charts)
:
`` `oidc: enableRefresh: true redirectOptions: { access_type: offline, prompt: consent }` ``
##### On this page
---
# OpenID Connect with Active Directory Federation Services (ADFS) | Coder v1 Docs
[Home](https://coder.com/docs/v1 "Home")
[Guides](https://coder.com/docs/v1/guides "Guides")
[Admin](https://coder.com/docs/v1/guides/admin "Admin")
OpenID Connect with Active Directory Federation Services (ADFS)
This article walks you through setting up single sign-on to Coder using Azure's Active Directory Federation Services (ADFS).
Configuring [Coder's OpenID Connect](https://coder.com/docs/v1/admin/access-control#openid-connect)
feature requires you to provide three pieces of information from Azure:
* Client ID
* Client Secret
* Issuer
This guide will show you how to set up Azure's Active Directory Federation Services and obtain the information you need to provide to Coder.
[](https://coder.com/docs/v1/guides/admin/oidc-adfs#step-1-create-a-new-application-group-for-coder)
Step 1: Create a new application group for Coder
-----------------------------------------------------------------------------------------------------------------------------------------------------
1. On the server running ADFS, open Server Manager and go to **Tools** > **AD FS Management**.
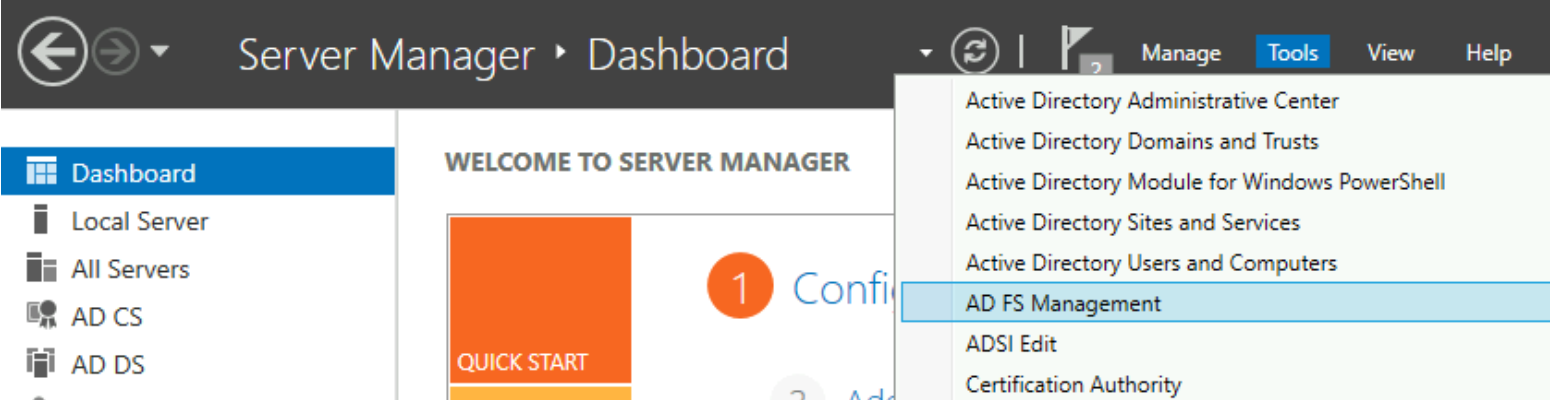
2. In the left-hand pane, right-click on **Application Groups** and select **Add Application Group...**.
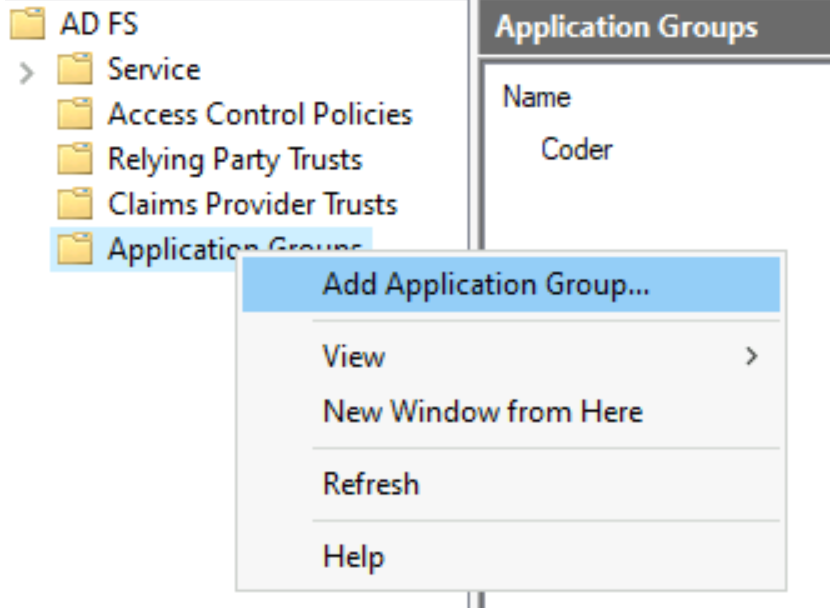
3. In the prompt window that appears, enter a **Name** and a **Description** (optional). Under **Template**, select **Server application accessing a web API**. Click **Next** to proceed.
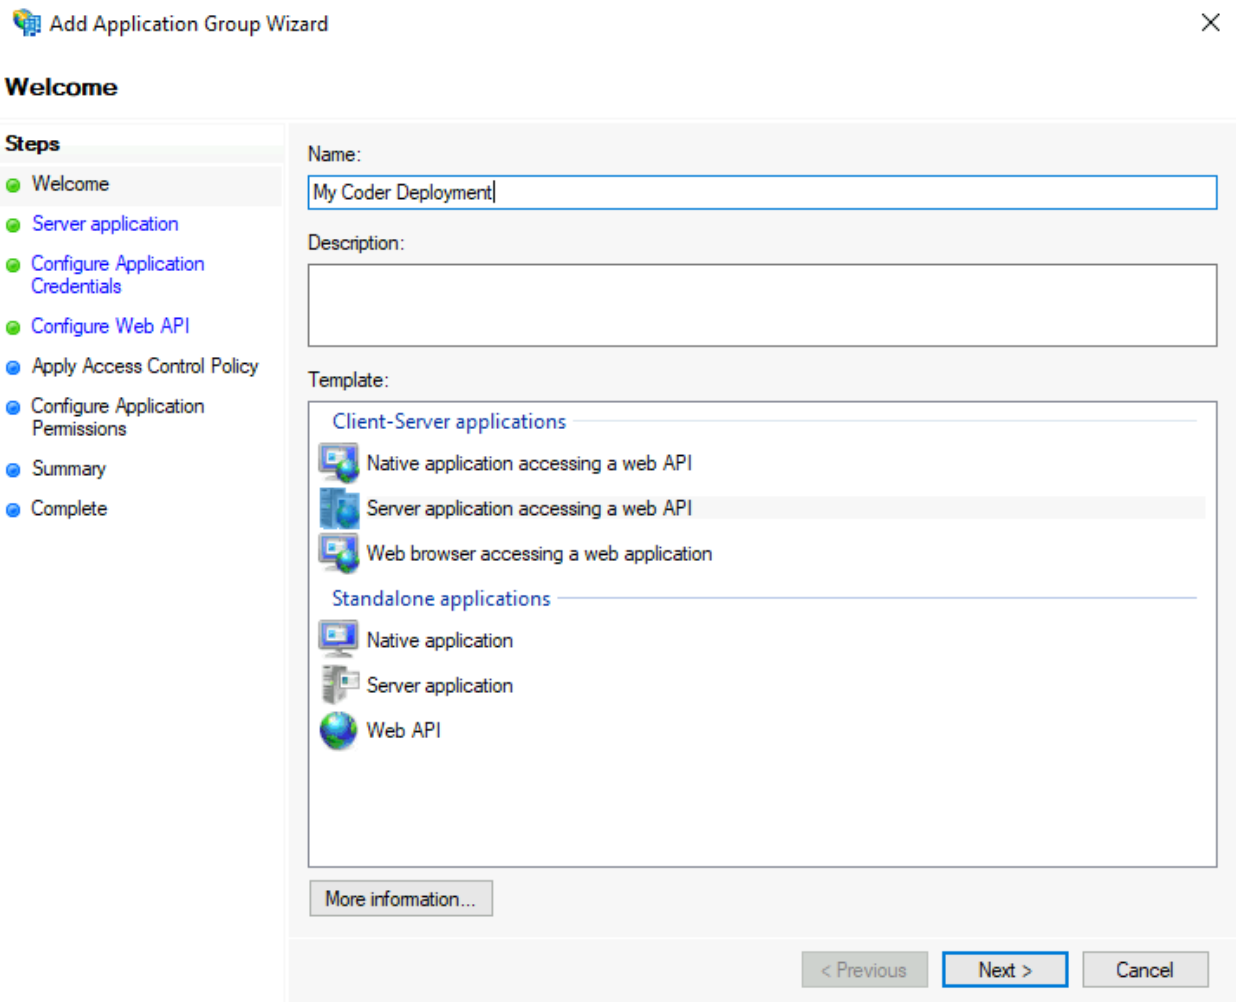
4. In the next prompt window, you'll see a **Client identifier**. Save this value, since you'll need to provide it at a later step. Next, provide a **Redirect URI** (this value should be `https://coder.your-domain.com/oidc/callback`) and click **Add**. Then, click **Next** to proceed.
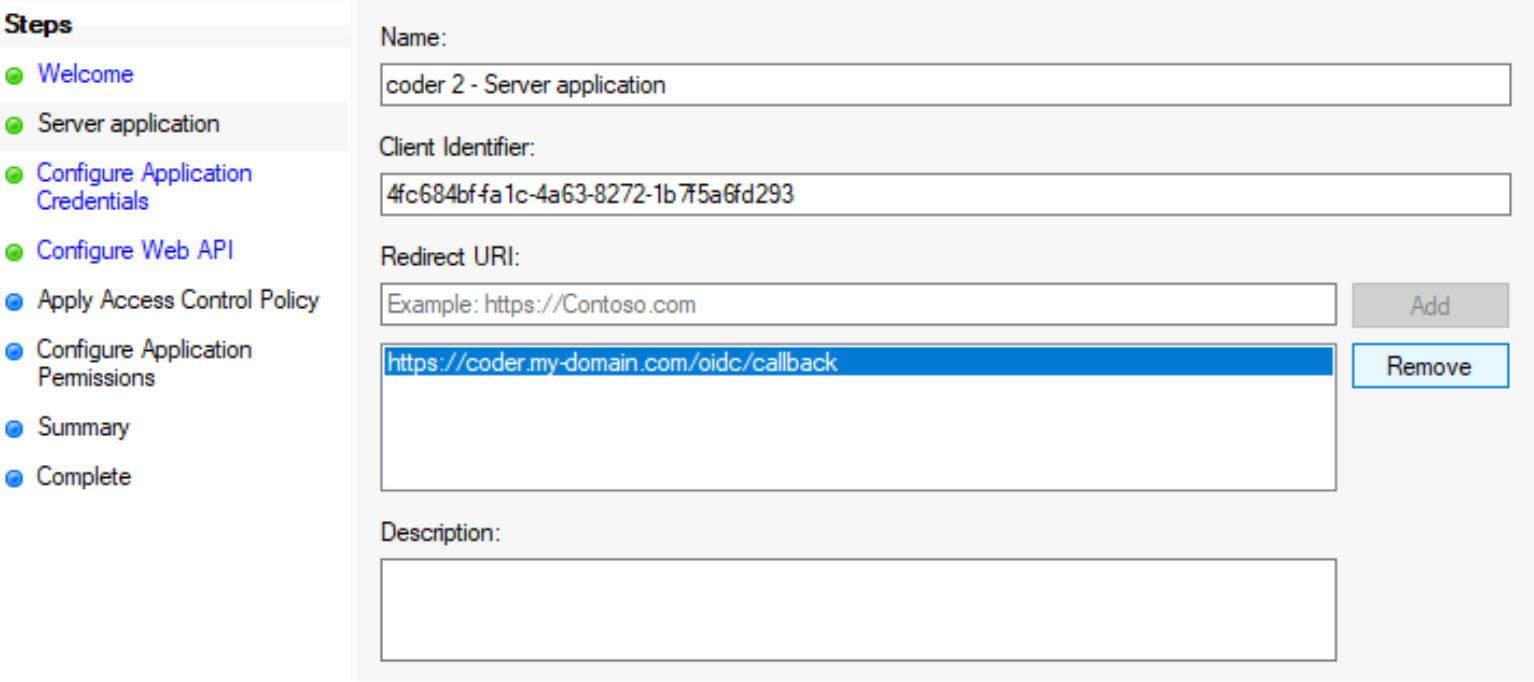
5. In the next screen, titled **Configure Application Credentials**, click the **Generate a shared secret** checkbox. Note the **Secret** value that appears, since you'll need to provide this to Coder at a later step. Click **Next** to proceed.
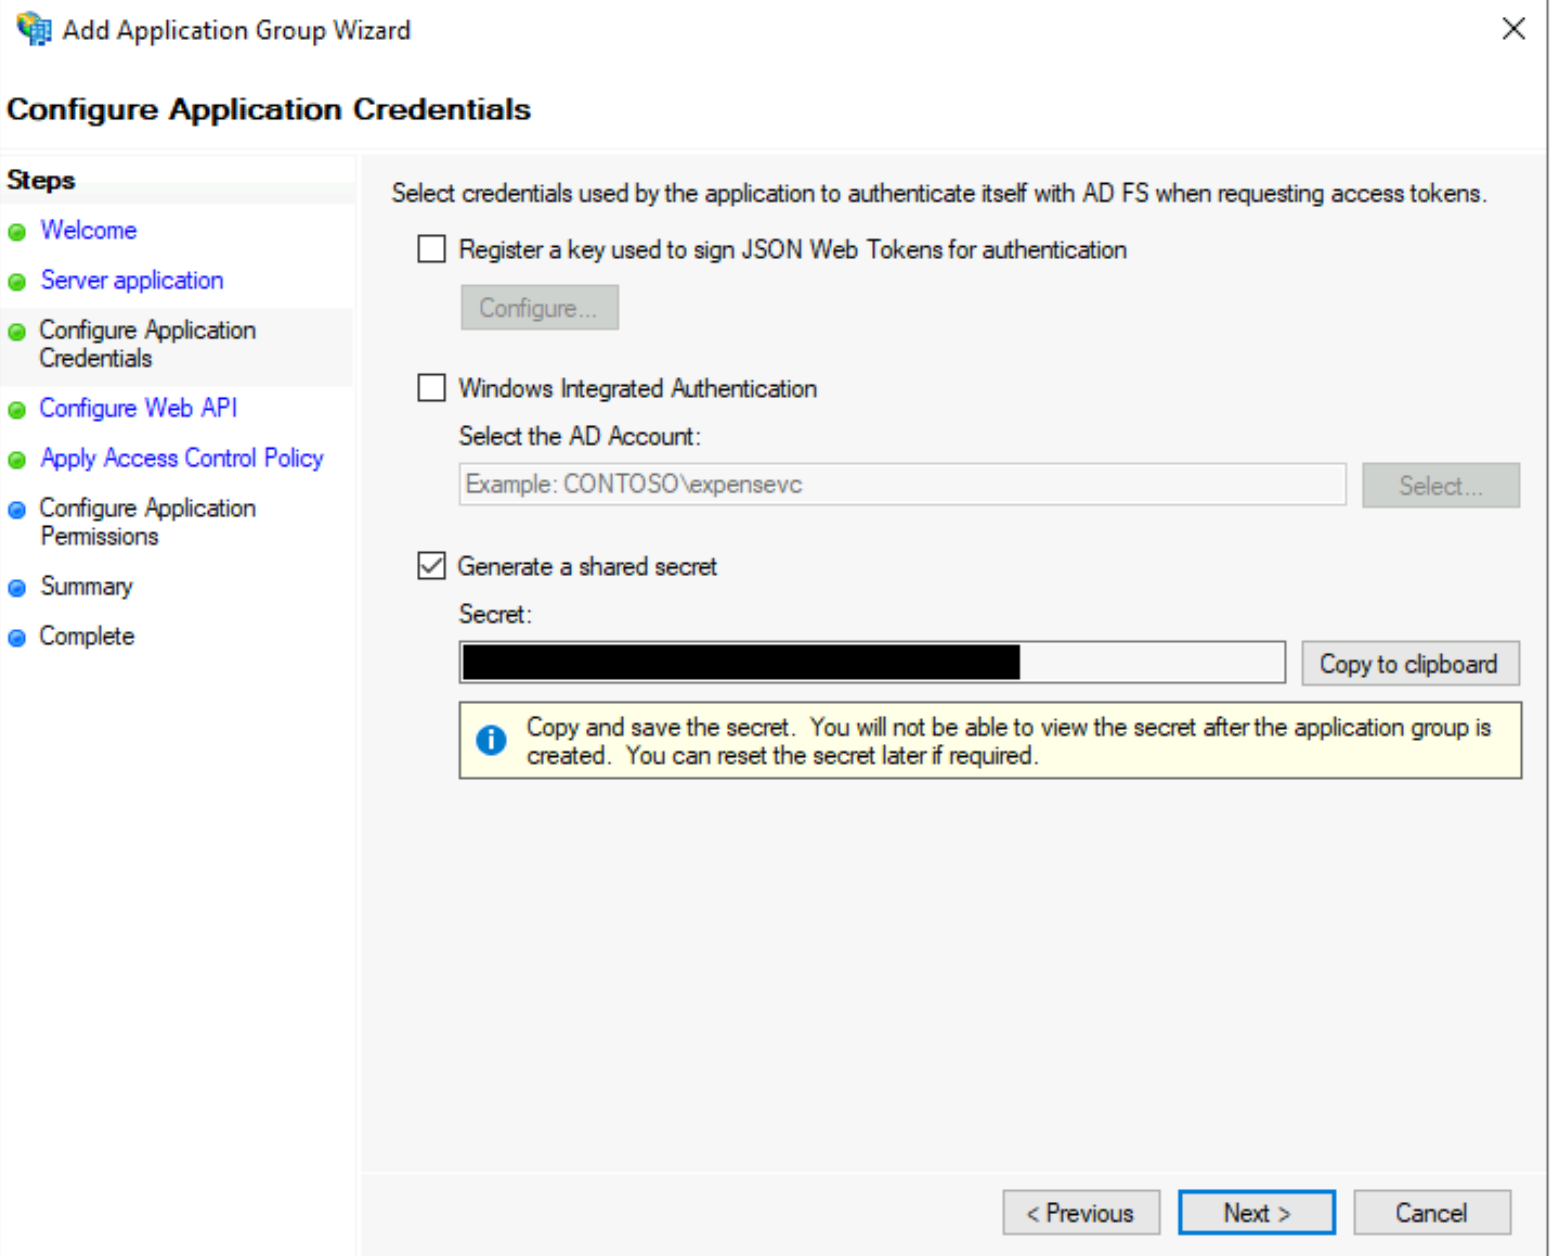
6. In the next step, **Configure Web API**, enter the **Client identifier** that you saved in step 4 in the field called **Identified** and click **Add**. Click **Next** to proceed.
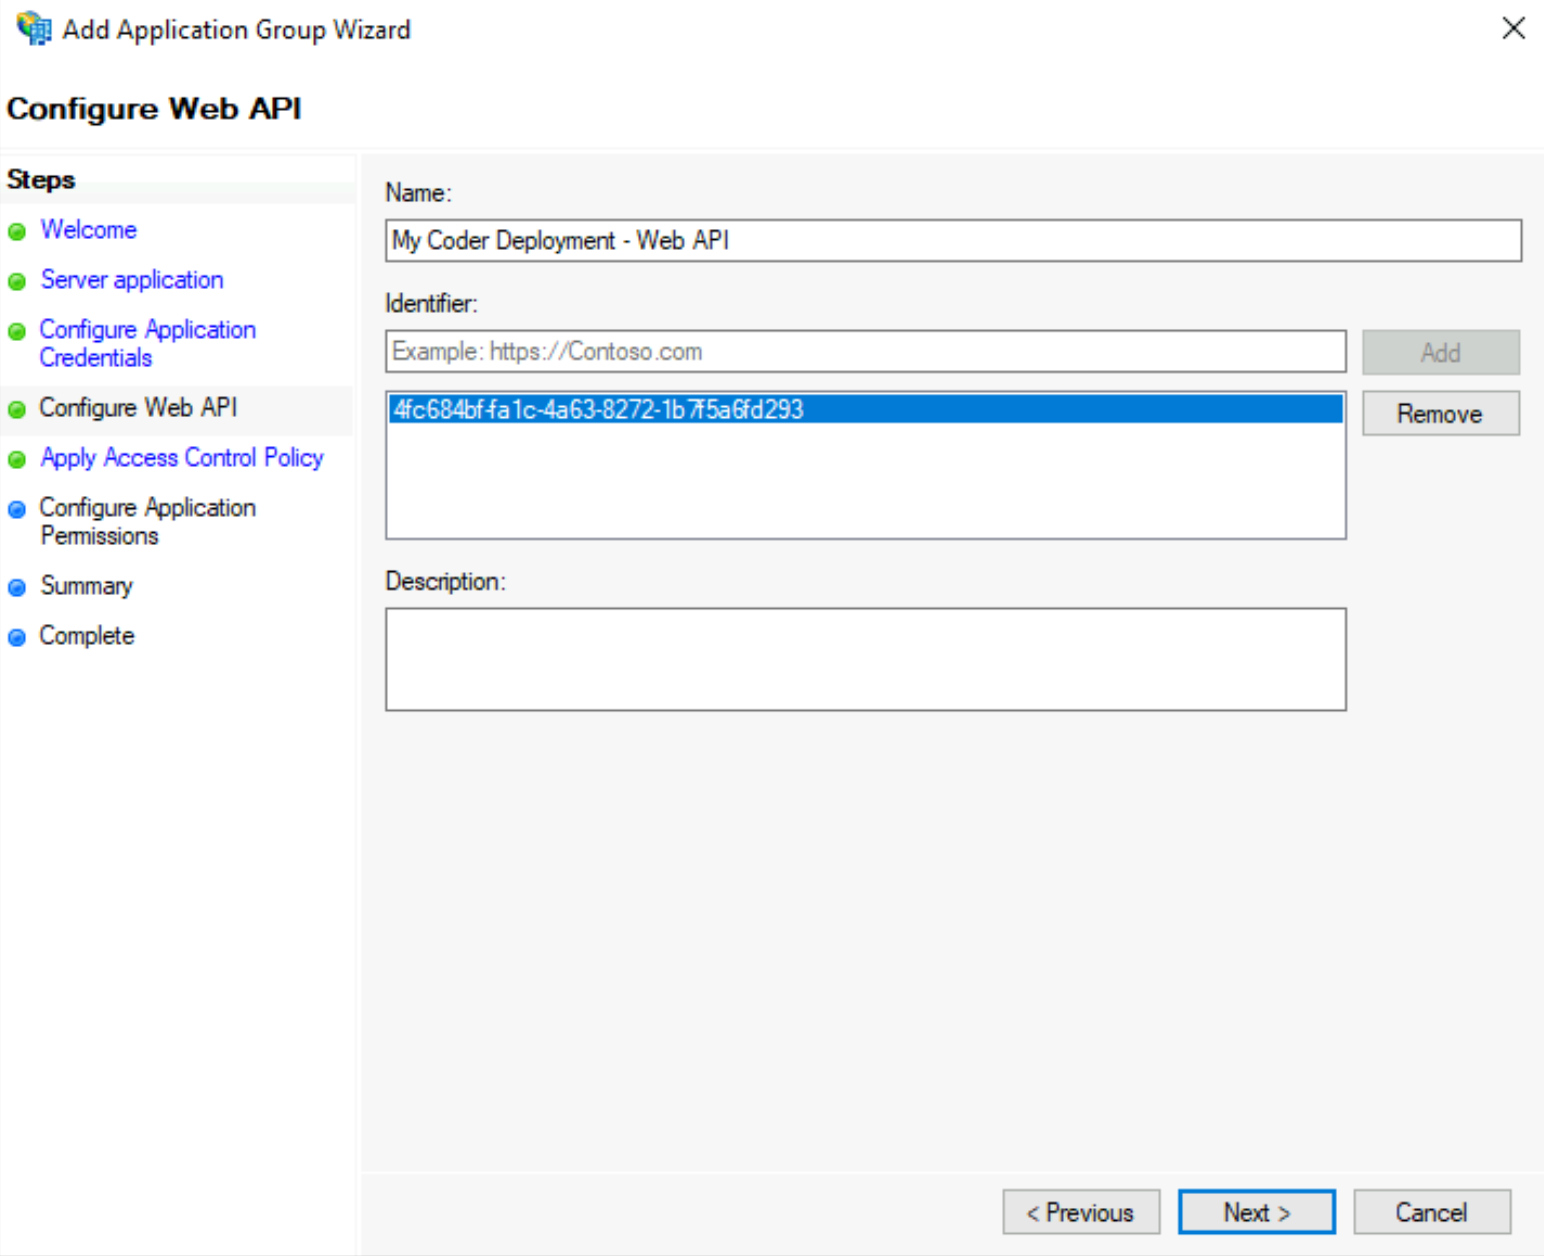
7. On the **Choose Access Control Policy** screen, choose your preferred access control policy, and click **Next** to proceed.
In the example below, we permit members of a specific group `coder-users` to access Coder.
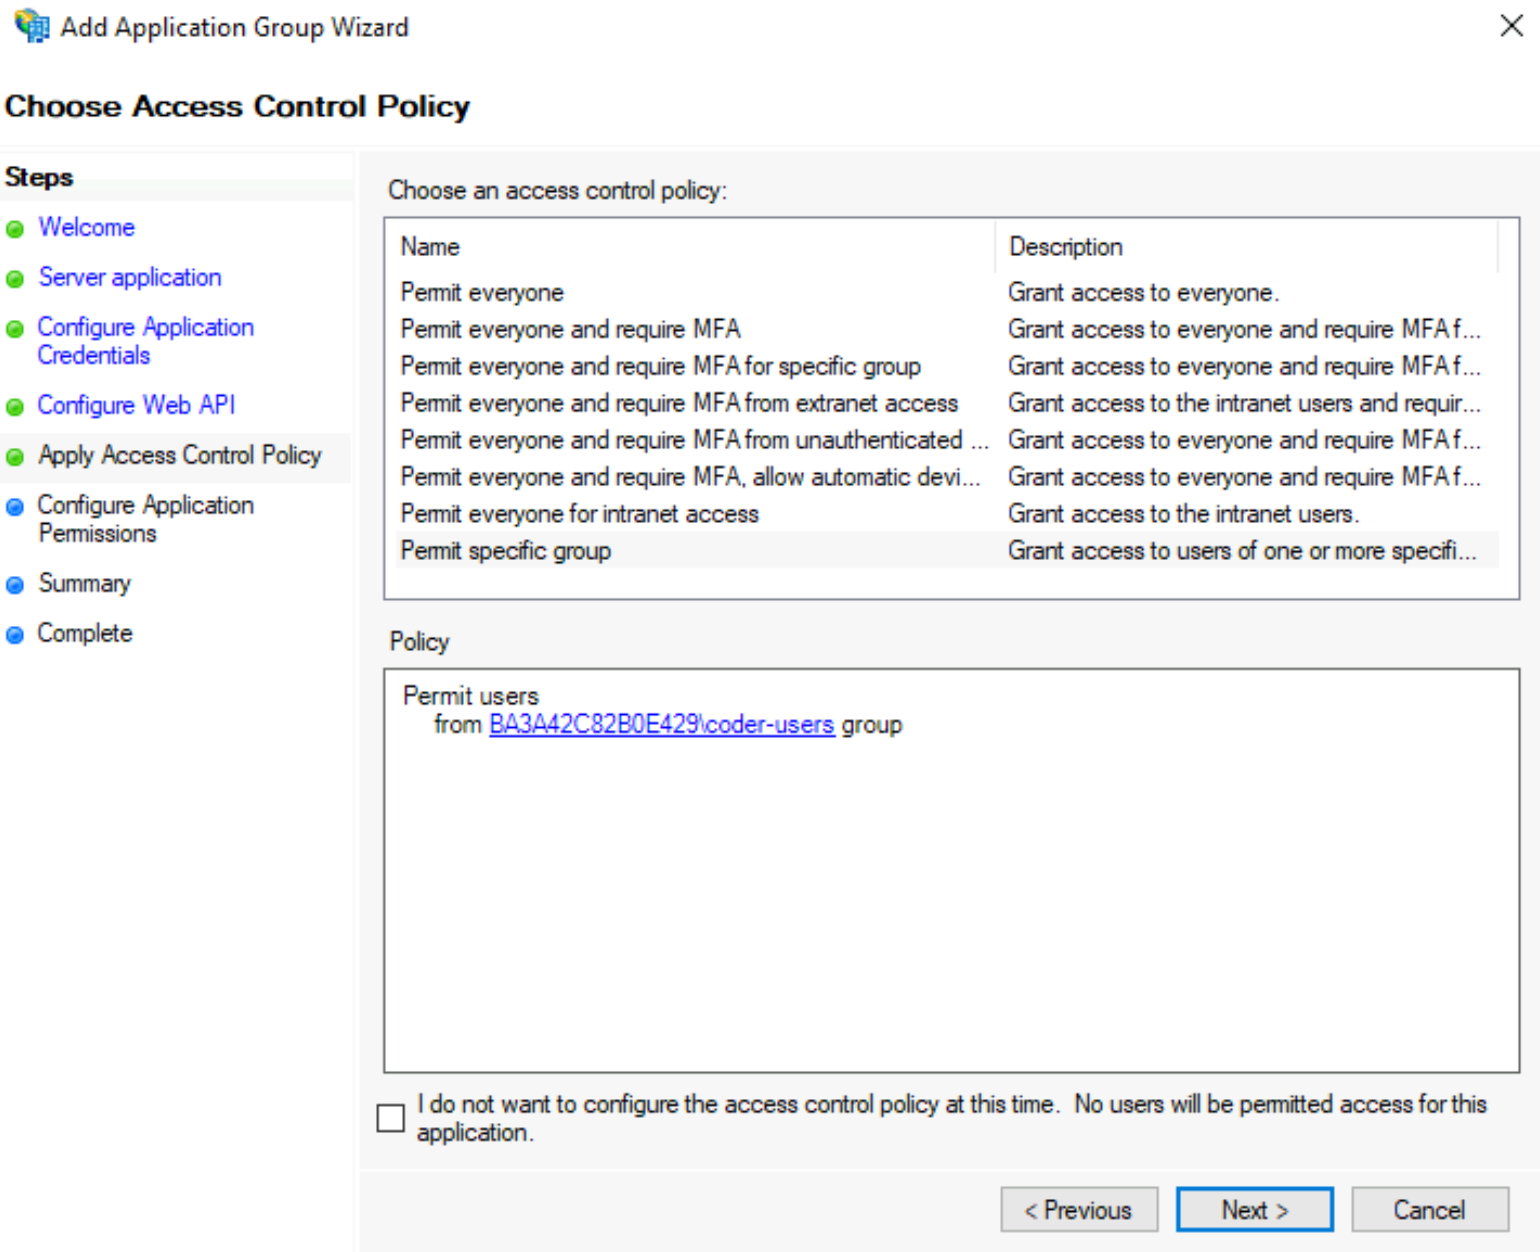
8. For the step **Configure Application Permissions**, select the following **Permitted scopes**:
* `allataclaims`
* `email`
* `openid`
* `profile`
Click **Next** to proceed.
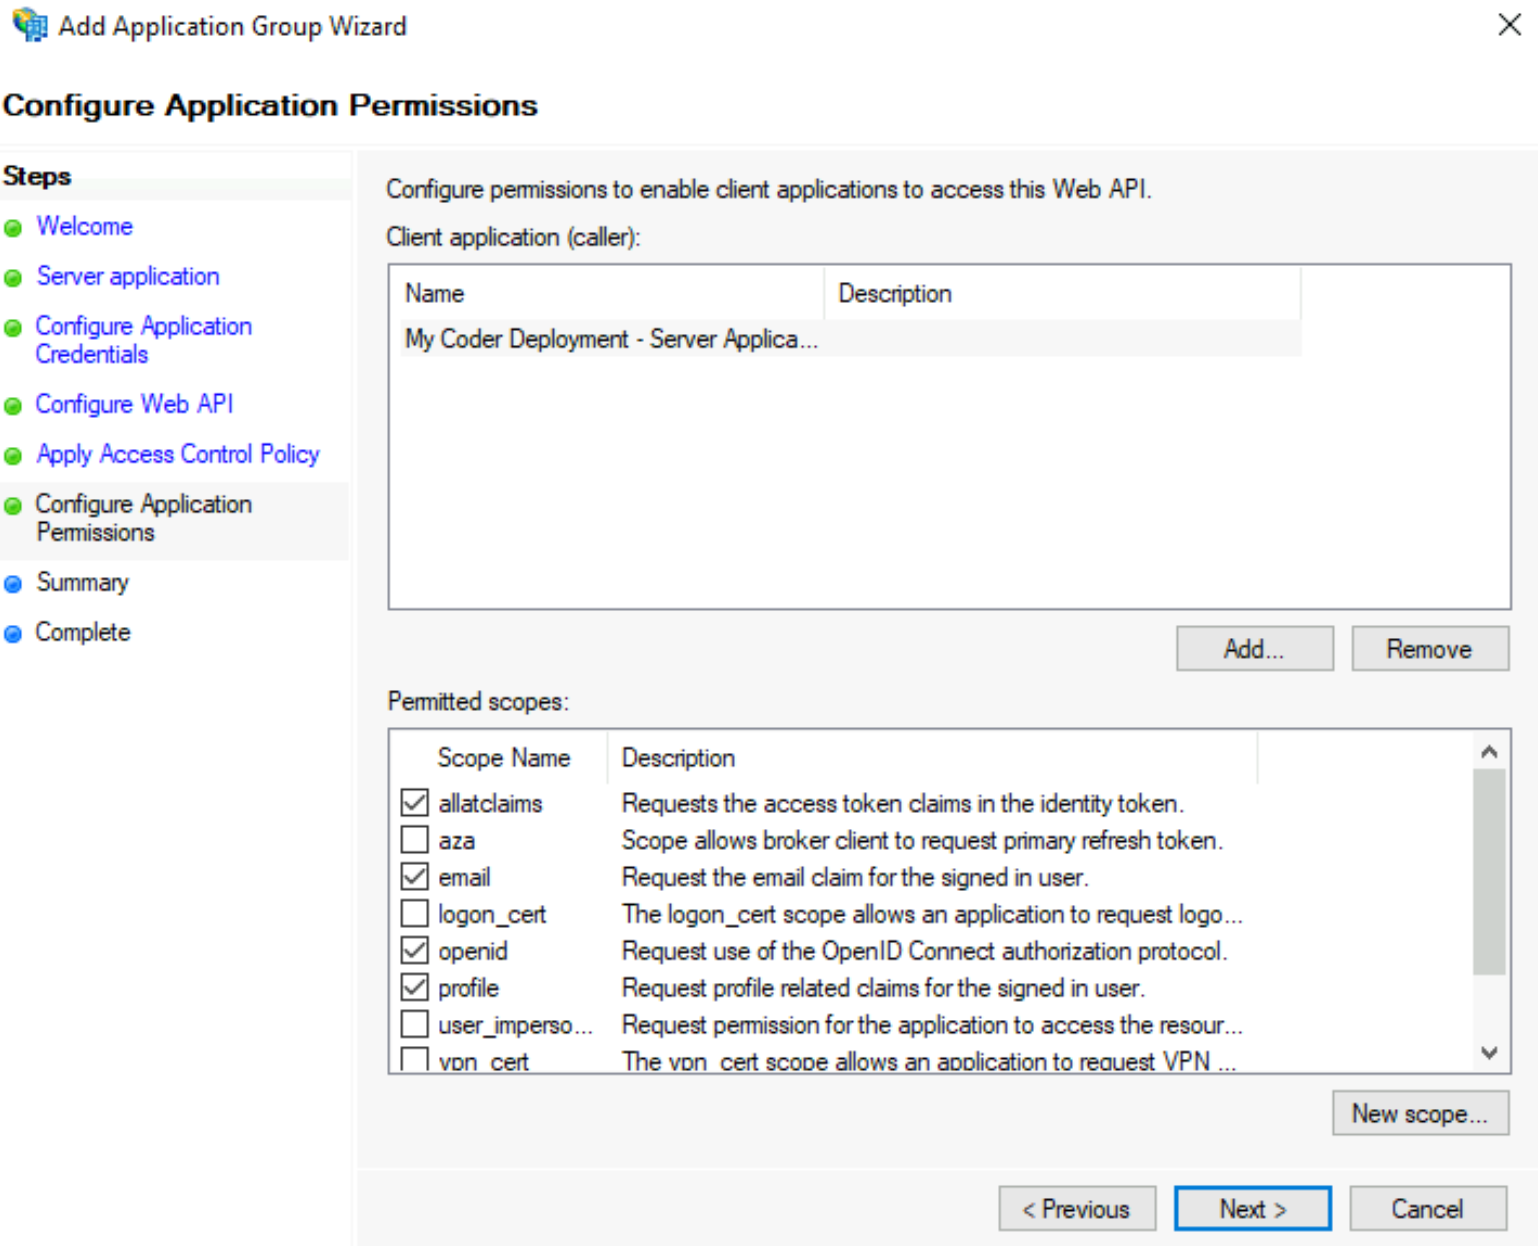
9. Finally, in the **Summary** window, review the information you've provided. Click **Next** when you're ready to proceed and close the setup wizard.
[](https://coder.com/docs/v1/guides/admin/oidc-adfs#step-2-modify-the-claim-rules)
Step 2: Modify the claim rules
-----------------------------------------------------------------------------------------------------------------
In this step, you'll ensure that the access tokens sent by ADFS include the following [OIDC standard claims](https://openid.net/specs/openid-connect-core-1_0.html#StandardClaims)
: `name` and `email`.
1. In Server Manager, double-click on your newly created application group.
2. Under **Applications**, select the **Web API** application and click **Edit**.
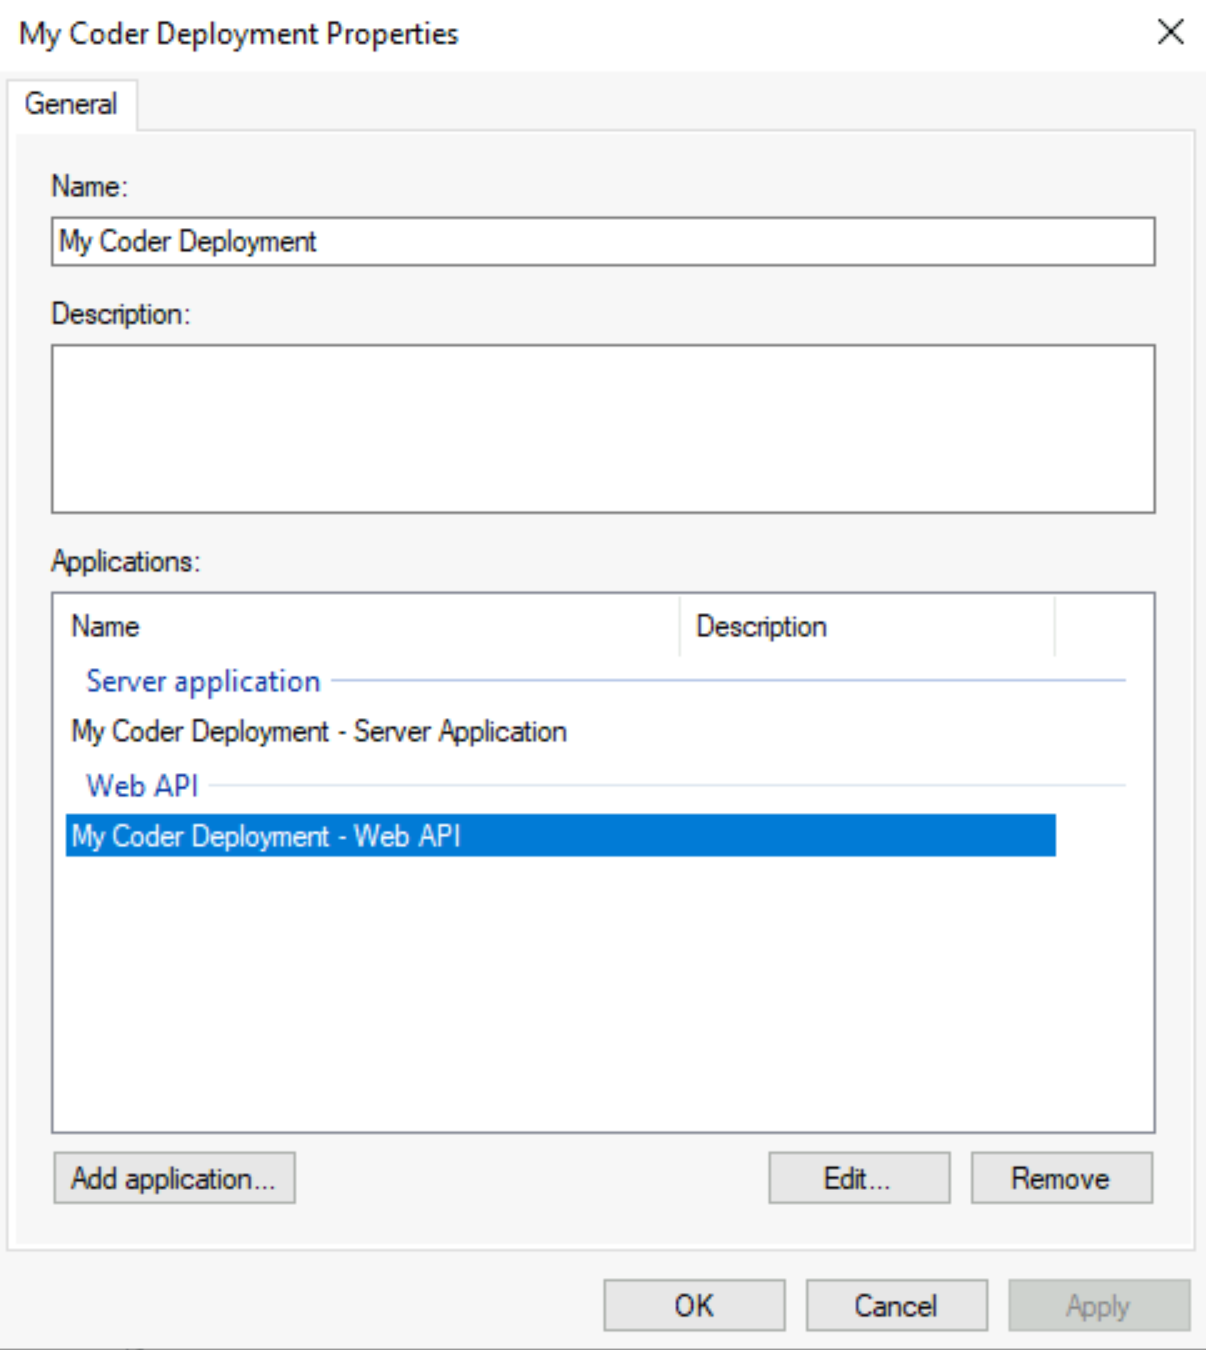
3. Select the tab **Issuance Transform Rules** and click **Add Rule...**. This will open the **Add Transform Claim Rule Wizard**.
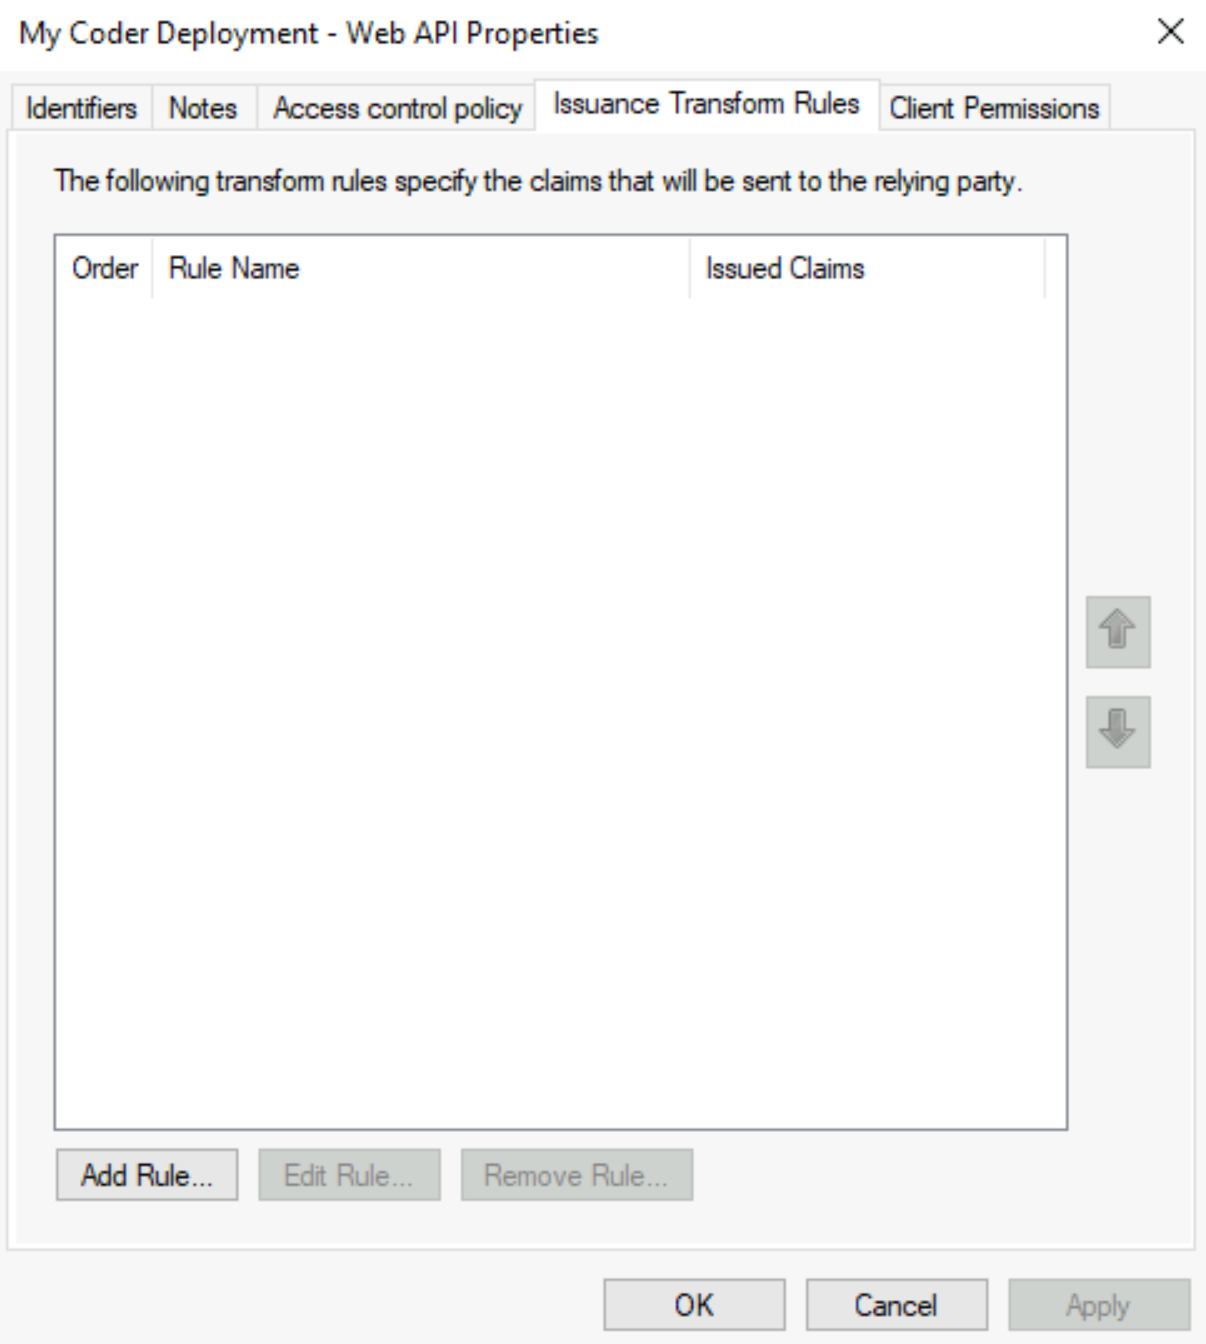
4. In the rule wizard, under **Claim rule template**, select the option to **Send Claims using a Custom Rule**, and click **Next**.
5. Enter a name for the claim rule.
6. In the **Custom Rule** field, enter a claim rule written in the [ADFS Claim Rule Language](https://docs.microsoft.com/en-us/windows-server/identity/ad-fs/technical-reference/the-role-of-the-claim-rule-language)
.
The following example claim rule maps the Active Directory attributes `userPrincipalName` and `displayName` as `email` and `name`, respectively:
`` `c:[Type == "http://schemas.microsoft.com/ws/2008/06/identity/claims/windowsaccountname", Issuer == "AD AUTHORITY"] => issue(store = "Active Directory", types = ("email", "name"), query = ";userPrincipalName,displayName;{0}", param = c.Value);` ``
> For more information, see [Create a Rule to Send Claims Using a Custom Rule](https://docs.microsoft.com/en-us/windows-server/identity/ad-fs/operations/create-a-rule-to-send-claims-using-a-custom-rule)
[](https://coder.com/docs/v1/guides/admin/oidc-adfs#step-3-gather-information-for-coder-authentication)
Step 3: Gather information for Coder authentication
-----------------------------------------------------------------------------------------------------------------------------------------------------------
Once you've created your application group, you'll have the **Client ID** and **Client Secret**. However, you still need the **issuer**, which you can get by running the `Get-ADFSProperties` Powershell cmdlet on the server running ADFS:
`` `Get-ADFSProperties | Select IdTokenIssuer` ``
You should see something similar for the output:
`` `PS C:\Users\coder> Get-ADFSProperties | Select IdTokenIssuer IdTokenIssuer - - - - - - - https://dc1.ba3...da221.westeurope.aksapp.io/adfs` ``
[](https://coder.com/docs/v1/guides/admin/oidc-adfs#step-4-configure-coder-authentication)
Step 4: Configure Coder authentication
---------------------------------------------------------------------------------------------------------------------------------
At this point, you can continue with configuring authentication in Coder.
1. Log into Coder and go to **Manage** > **Admin** > **Authentication**.
2. In the top-most drop-down box, select **OpenID Connect**.
3. Provide the requested values for **Client ID**, **Client Secret**, and **Issuer**.
When done, click **Save Preferences**. At this point, Coder validates your configuration before proceeding. If successful, you can expect Coder to send OIDC login attempts to your configured ADFS instance.
##### On this page
---
# Node.js Projects | Coder v1 Docs
[Home](https://coder.com/docs/v1 "Home")
[Guides](https://coder.com/docs/v1/guides "Guides")
[Customization](https://coder.com/docs/v1/guides/customization "Customization")
Node.js Projects
This guide will show you how to create a Coder image for a [sample blog project](https://github.com/gatsbyjs/gatsby-starter-blog)
that's written in Node.js.
The Coder [workspace](https://coder.com/docs/v1/workspaces)
that you'll create using this image and be using for your project includes:
* The source code for the project, which is automatically cloned from GitHub
* The Node.js version that's compatible with this project, as well as several global dependencies obtained via npm
* Environment variables containing the developer API keys
[](https://coder.com/docs/v1/guides/customization/node#requirements)
Requirements
---------------------------------------------------------------------------------
* A Coder deployment (you can request a [trial license](https://coder.com/trial)
; afterward, see our [installation guide](https://coder.com/docs/v1/setup/installation)
)
* Docker (you can have this installed locally or on an existing Coder workspace)
* A Docker Hub account or access to another Docker registry
* VS Coder or the text editor of your choice
[](https://coder.com/docs/v1/guides/customization/node#step-1-create-the-dockerfile)
Step 1: Create the Dockerfile
------------------------------------------------------------------------------------------------------------------
In Coder, developer workspaces are defined by a Dockerfile that contains the apps, tools, and dependencies that you need to work on the project.
> See Docker’s [guide to writing Dockerfiles](https://docs.docker.com/develop/develop-images/dockerfile_best-practices/)
> for more information.
To create your Dockerfile, as well as the [configure script](https://coder.com/docs/v1/images/configure)
that Coder runs automatically once it has started your workspace:
Create a folder for the image you're creating:
`` `mkdir node_apps` ``
We strongly recommend that you version control your Dockerfiles:
`` `cd node_apps git init` ``
Create a file named `configure` that runs when your workspace starts:
`` `touch node_apps/configure chmod +x node_apps/configure` ``
At this point, you can open your text editor and begin the Dockerfile for your image. Coder maintains base images that contain the recommended software for a Coder workspace. For this guide, we recommend that you use the Ubuntu one:
`` `# Dockerfile FROM codercom/enterprise-base:ubuntu # Copy the configure script to /coder/configure where Coder can find it COPY configure /coder/configure` ``
[](https://coder.com/docs/v1/guides/customization/node#2-install-nodejs-and-global-dependencies)
2\. Install Node.js and global dependencies
--------------------------------------------------------------------------------------------------------------------------------------------
There are two options when it comes to installing Node.js and the global dependencies that you'll need for this project.
### [](https://coder.com/docs/v1/guides/customization/node#option-1-install-nodejs-directly-from-nodesource)
Option 1: Install Node.js directly from NodeSource
To include instructions for installing Node.js directly from [NodeSource](https://github.com/nodesource/distributions#installation-instructions)
:
`` `# Dockerfile ... # Install Node.js 15 RUN curl -fsSL https://deb.nodesource.com/setup_15.x | sudo -E bash - RUN sudo apt-get install -y nodejs # Install global packages RUN npm install --global [[email protected]](https://coder.com/cdn-cgi/l/email-protection) ` ``
### [](https://coder.com/docs/v1/guides/customization/node#option-2-use-nvm)
Option 2: Use nvm
If you'd like to use nvm instead of supporting multiple versions of Node.js in a single workspace, you can do so using the `configure` script.
In the following example, you're _not_ installing `nvm` in the user's home directory. As such, the image is the deciding factor for the Node.js version that's installed and any global packages.
`` `# Dockerfile FROM codercom/enterprise-base:ubuntu USER root # Set NVM_DIR outside of the home directory so it doesn't persist across rebuilds ENV NVM_DIR=/usr/bin/nvm RUN mkdir -p $NVM_DIR RUN chown coder:coder $NVM_DIR # Install nvm as the "coder" user USER coder RUN curl -o- https://raw.githubusercontent.com/nvm-sh/nvm/v0.37.2/install.sh | bash \ && . $NVM_DIR/nvm.sh \ # Install any Node versions we need && nvm install 12.21.0 \ && nvm install 15.12.0 \ && nvm alias default 15.12.0 \ && nvm use default \ # Install global packages on the default version of node && npm install --global [[email protected]](https://coder.com/cdn-cgi/l/email-protection) # Copy configure script (we need this to add nvm to our path) COPY configure /coder/configure` ``
The `configure` script is as follows:
`` `# configure #!/bin/bash # if nvm command fails, try to add it to our profile and PATH if ! command -v nvm &> /dev/null then echo "nvm command not found... attempting to add to your profile via the install script" # Create a .bash_profile file if it doesn't exist if [ ! -f ~/.bash_profile ]; then touch ~/.bash_profile echo "#/bin/sh" > ~/.bash_profile echo "source ~/.bashrc" >> ~/.bash_profile fi # Create a .bashrc if it doesn't exist if [ ! -f ~/.bashrc ]; then touch ~/.bashrc echo "#/bin/sh" > ~/.bashrc fi # run the install script to add to profile $NVM_DIR/install.sh export NVM_DIR="/usr/bin/nvm" [ -s "$NVM_DIR/nvm.sh" ] && \. "$NVM_DIR/nvm.sh" # This loads nvm [ -s "$NVM_DIR/bash_completion" ] && \. "$NVM_DIR/bash_completion" # This loads nvm bash_completion fi` ``
> We have recently released **configure steps** in workspace templates. See [https://github.com/bpmct/company-blog](https://github.com/bpmct/company-blog)
> to see how you can implement this new functionality.
[](https://coder.com/docs/v1/guides/customization/node#step-3-clone-projects-automatically)
Step 3: Clone projects automatically
--------------------------------------------------------------------------------------------------------------------------------
In the `configure` script, you can set `git clone` to run on your behalf (assuming that you've [linked your Git account](https://coder.com/docs/workspaces/preferences#linked-accounts)
). We recommend using the SSH option.
In your `configure` script, include:
`` `# configure # 1. Ensure that you've added GitHub's host key to known_hosts if ! grep github.com ~/.ssh/known_hosts > /dev/null; then ssh-keyscan github.com >> ~/.ssh/known_hosts 2> /dev/null fi # 2. Clone your project GIT_REMOTE="[[email protected]](https://coder.com/cdn-cgi/l/email-protection) :bpmct/company-blog.git" CLONE_TO="$HOME/company-blog" if [ ! -d $CLONE_TO ]; then echo "$CLONE_TO is empty... Cloning" git clone $GIT_REMOTE $CLONE_TO/. else echo "$CLONE_TO exists ✅" fi` ``
If you have multiple repositories, you can clone each one by replicating and including the cloning instructions shown above.
[](https://coder.com/docs/v1/guides/customization/node#step-4-add-environment-variables)
Step 4: Add environment variables
--------------------------------------------------------------------------------------------------------------------------
There are two ways to add environment variables so that they're available to anyone who uses the image.
### [](https://coder.com/docs/v1/guides/customization/node#option-1-specify-environment-variables-in-the-dockerfile)
Option 1: Specify environment variables in the Dockerfile
> Note: If you have secret credentials, make sure you make the image private in the Docker Hub, or use a private registry!
`` `# Dockerfile ... ENV PORT=3000 ENV API_KEY=asdfjkl` ``
### [](https://coder.com/docs/v1/guides/customization/node#option-2-add-a-secrets-manager-to-the-coder-image)
Option 2: Add a secrets manager to the Coder image
You can install a secrets manager in Coder just as you would with a local machine. This approach is more secure than the option mentioned previously, since it doesn't require you to commit sensitive information. However, you'll still need to create an account with a secrets manager provider or host the service of your choice.
Some options that you can consider include:
* [Doppler](https://docs.doppler.com/docs/enclave-installation-docker#option-1-dockerfile)
* [SecretHub.io](https://secrethub.io/docs/reference/cli/install/#linux)
* [Hashicorp Vault](https://learn.hashicorp.com/tutorials/vault/getting-started-install#install-vault)
[](https://coder.com/docs/v1/guides/customization/node#step-5-build-and-push-your-image)
Step 5: Build and push your image
--------------------------------------------------------------------------------------------------------------------------
Once you've created your image, you can build and push it to your registry so that it can be accessed by Coder and used to build your workspace. For this guide, we'll show you how to do this with Docker Registry using the console, but you can use the registry of your choice:
Log in to Docker Hub:
`` `docker login` ``
Build the image (from the current directory) and tag it:
`` `docker build . -t [username]/gatsby-blog` ``
Push the image:
`` `# Note: if you want this image to be private, make sure that # you create the private image in hub.docker.com or use a # private registry docker push [username]/gatsby-blog` ``
> We recommend adding CI-related steps to your git repository so that you can build images automatically and source control images. You can do this with GitHub Actions, GitLab, CircleCI, or even Docker Hub.
[](https://coder.com/docs/v1/guides/customization/node#step-6-import-the-image-to-coder-and-create-the-workspace)
Step 6: Import the image to Coder and create the workspace
----------------------------------------------------------------------------------------------------------------------------------------------------------------------------
At this point, you can [import your image](https://coder.com/docs/v1/images/importing)
and use it to [create a new workspace](https://coder.com/docs/v1/workspaces/create)
. When you've completed these steps, you can launch your workspace, which contains all of the required tools and dependencies.
> See our [sample repo](https://github.com/bpmct/company-blog)
> for the example project and image configured for Coder.
##### On this page
---
# Storage | Coder v1 Docs
[Home](https://coder.com/docs/v1 "Home")
[Guides](https://coder.com/docs/v1/guides "Guides")
[Admin](https://coder.com/docs/v1/guides/admin "Admin")
Storage
Coder differentiates between system-installed files and user-installed files. System-installed files are stored in `/user/`, while user-installed files are located in the root directory `~`.
Conventionally, Coder places anything installed with `apt` or `yum` or similar with the system-installed files. This is considered ephemeral storage in Coder workspaces, and we recommend that you install these using `docker build` and have them in your image.
Conversely, things installed via `npm`, Java dependencies, Ruby bundles, or similar, belong in the project folder (which is the `~`) so that it persists in Coder workspaces.
[](https://coder.com/docs/v1/guides/admin/storage#storage-allocation-for-workspaces)
Storage allocation for workspaces
----------------------------------------------------------------------------------------------------------------------
Coder allows users to choose how much storage to allocate to their workspace.
Ephemeral storage (where system-installed files are located) is available to you, but we don't recommend that you use this too often. Kubernetes enforces some limits on using this storage, and exceeding certain bounds could potentially lead to eviction in some clusters.
Instead, we recommend installing everything a user needs in the image, including build steps, so that they can be shared across workspaces. For example, if you have multiple users start base images and install the same five things (e.g., Node.js, CLIs, etc.), these things get placed in ephemeral storage, and none of it is shared across workspaces.
However, if you share some of the items and install them during `docker build`, the image cache layers have the apps in them, and they can be shared across workspaces. This also has the benefit of speeding up the workspace build process.
The only things we recommend placing in your workspace storage are the contents of your Git repos and any generated artifacts.
If you're using Node.js or Go, you'll see that these install many items in your persistent user directory to make capabilities like `npx` persist (though these are project-specific items).
---
# OpenID Connect with Okta | Coder v1 Docs
[Home](https://coder.com/docs/v1 "Home")
[Guides](https://coder.com/docs/v1/guides "Guides")
[Admin](https://coder.com/docs/v1/guides/admin "Admin")
OpenID Connect with Okta
This article walks you through setting up single sign-on to Coder using Okta.
Configuring [Coder's OpenID Connect](https://coder.com/docs/v1/admin/access-control#openid-connect)
feature requires you to provide three pieces of information from Okta:
* Client ID
* Client Secret
* Issuer
This guide will show you how to set up an app on Okta and obtain the information you need to provide to Coder.
[](https://coder.com/docs/v1/guides/admin/oidc-okta#step-1-register-your-app-with-okta)
Step 1: Register your app with Okta
---------------------------------------------------------------------------------------------------------------------------
1. Log in to your Okta org (`.okta.com`) as an admin.
2. From the admin dashboard, go to **Applications** and select the **Applications** sub-menu.
3. Click **Add Application**.
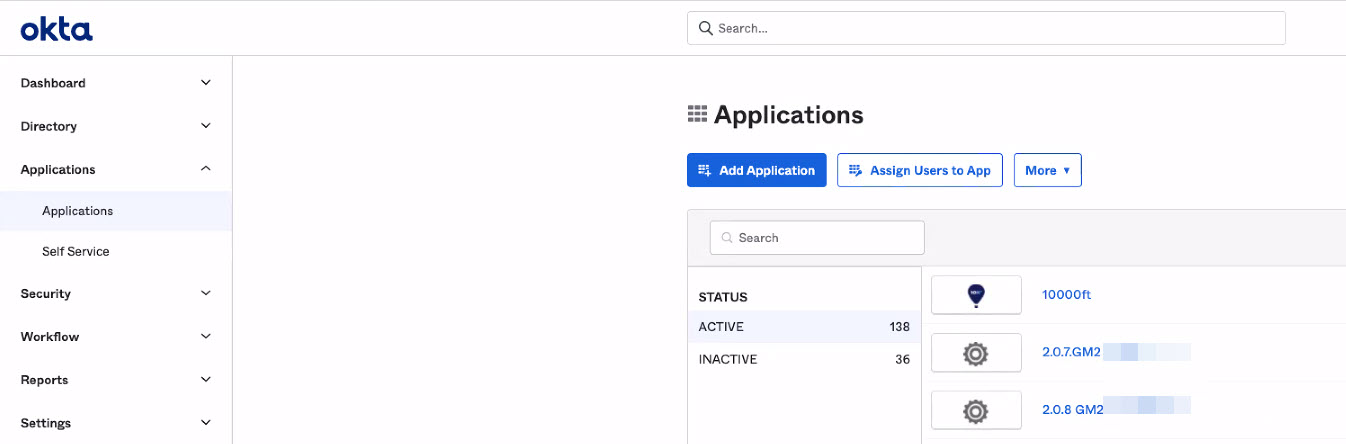
4. Click **Create New App**.
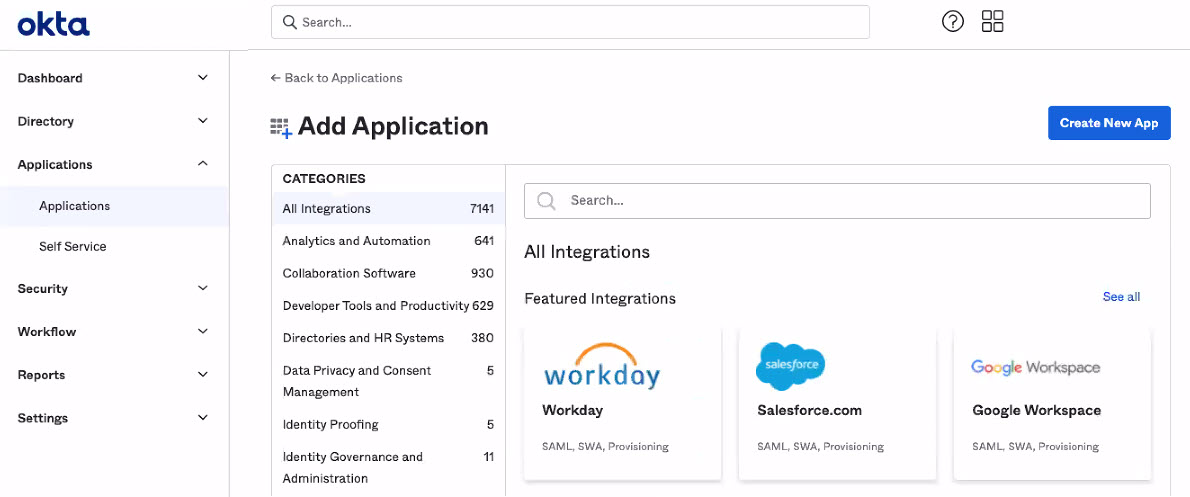
5. Select **OpenID Connect** and click **Create**
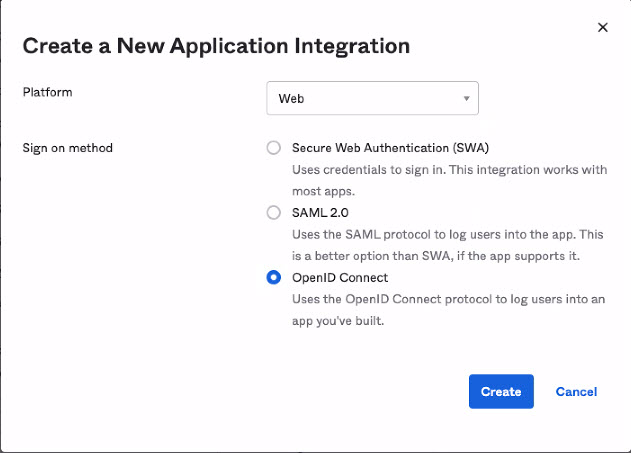
6. Provide an **Application name** (i.e., `Coder`), (optionally) add a logo, and add the **Login redirect URIs** for Coder (it will be formatted similarly to `https://coder.my-company.com/oidc/callback`).
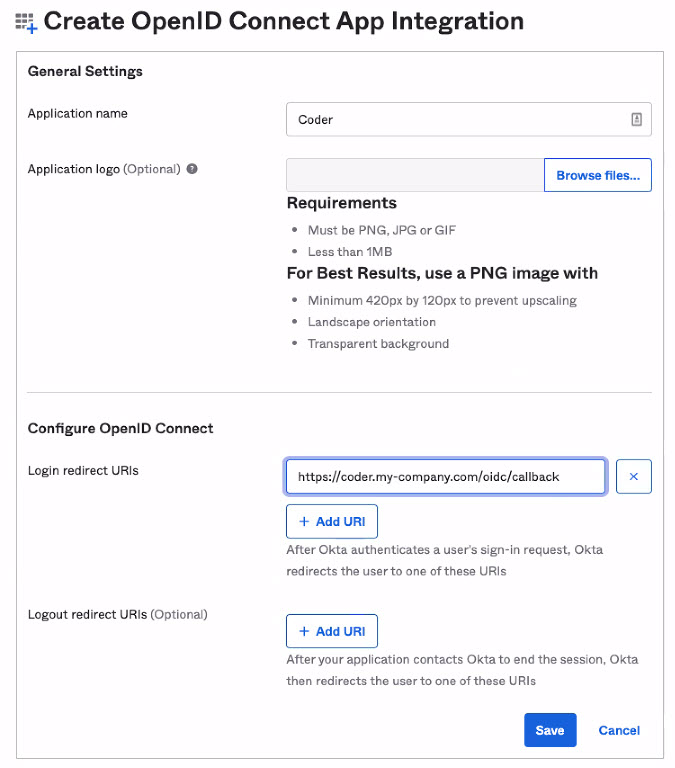
7. Click **Save** to proceed.
When Okta has created your app, you'll be redirected to the **General** tab, which displays your app information.
[](https://coder.com/docs/v1/guides/admin/oidc-okta#step-2-gather-your-okta-app-information)
Step 2: Gather your Okta app information
-------------------------------------------------------------------------------------------------------------------------------------
Once you've saved your app, you can obtain your:
* Client ID
* Client Secret
* Issuer
### [](https://coder.com/docs/v1/guides/admin/oidc-okta#client-id-and-client-secret)
Client ID and Client Secret
On your application's **General** tab, look for the **Client Credentials** section, which includes the **Client secret**.
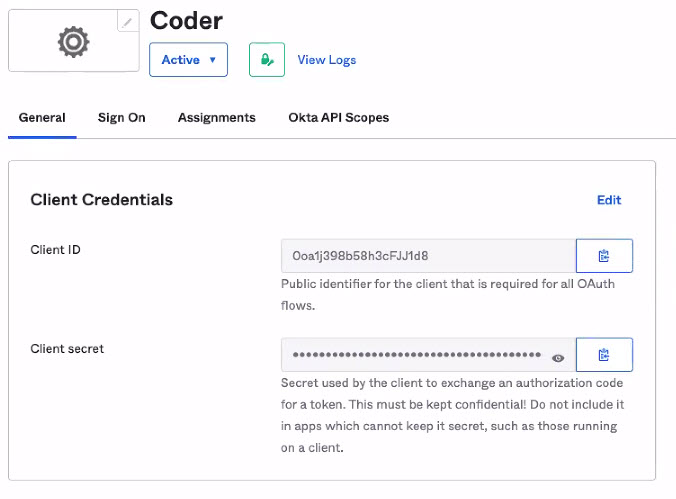
### [](https://coder.com/docs/v1/guides/admin/oidc-okta#issuer)
Issuer
On your app's **Overview** page, click the **Sign On** tab. Find the **OpenID Connect ID Token** section, and copy the **Issuer**.
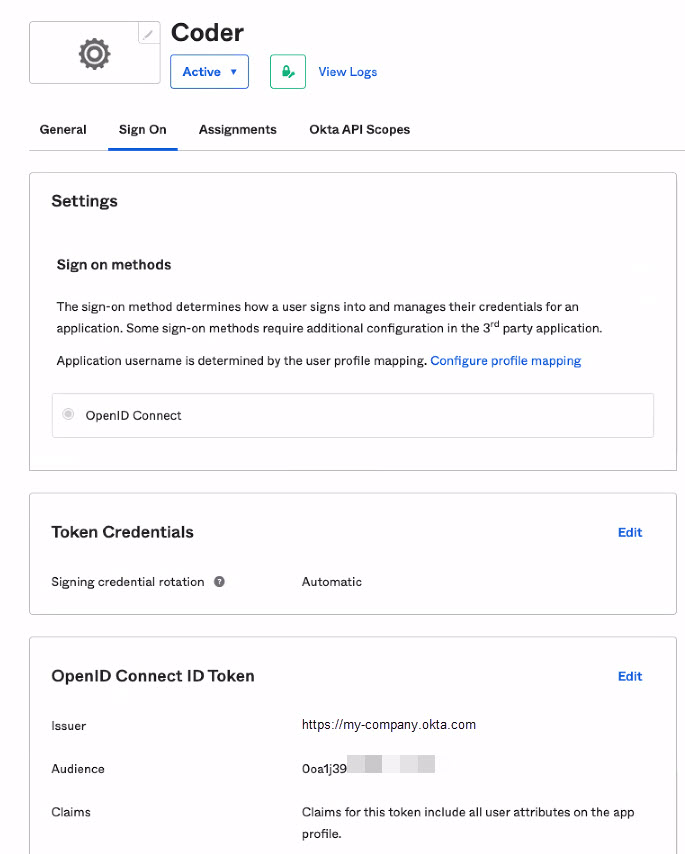
[](https://coder.com/docs/v1/guides/admin/oidc-okta#step-3-assign-people-and-groups-to-coder)
Step 3: Assign People and Groups to Coder
---------------------------------------------------------------------------------------------------------------------------------------
On your app's **Overview** page, click the **Assignments** tab. Under **Assign**, you can choose to **Assign to People** or **Assign to Group** to provide users and groups access to Coder.
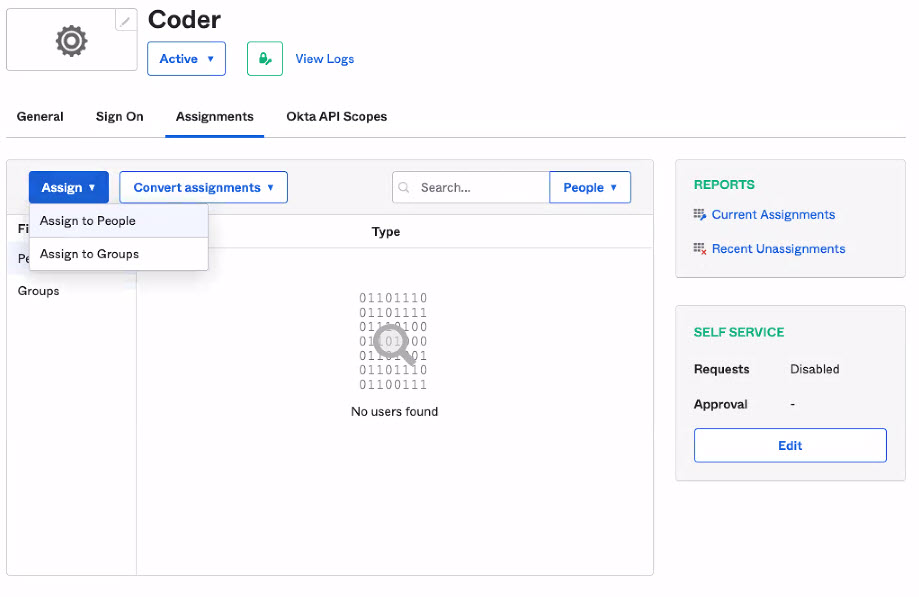
[](https://coder.com/docs/v1/guides/admin/oidc-okta#step-4-configure-coder-authentication)
Step 4: Configure Coder authentication
---------------------------------------------------------------------------------------------------------------------------------
Once you've saved your Okta values, you can complete the remaining steps using the Coder UI.
1. Log in to Coder, and go to **Manage** > **Admin** > **Authentication**.
2. In the top-most drop-down box, select **OpenID Connect**.
3. Provide the requested values for **Client ID**, **Client Secret**, and **Issuer**. Optionally, you can specify **Additional Scopes**.
When done, click **Save Preferences**.
At this point, Coder validates your configuration before proceeding. If successful, Coder will send OIDC login attempts to Okta.
##### On this page
---
# Workspace provider provisioning via CLI | Coder v1 Docs
[Home](https://coder.com/docs/v1 "Home")
[Guides](https://coder.com/docs/v1/guides "Guides")
[Admin](https://coder.com/docs/v1/guides/admin "Admin")
Workspace provider provisioning via CLI
1. Install and authenticate the Coder CLI.
2. Run the following to provision a new **Kubernetes** workspace provider (be sure to replace the placeholders as necessary):
`` `coder providers create kubernetes [name] --namespace=[namespace] --cluster-address=[clusterAddress]` ``
| **Parameter** | **Description** |
| --- | --- |
| `name` | The name for the workspace provider you'd like provisioned |
| `namespace` | The namespace in which to provision workspaces. |
| `cluster-address` | The address of the Kubernetes control plane; find using `kubectl cluster-info` |
Example usage:
``` `` coder providers create kubernetes my-provider --namespace=my-namespace --cluster-address=https://255.255.255.255` `` ```
To create a new **EC2** workspace provider:
`` `coder providers create ec2 [name] --access-key-id=[access-key-id] --secret-access-key=[secret-access-key]` ``
| **Parameter** | **Description** |
| --- | --- |
| `name` | The name for the workspace provider you'd like provisioned |
| `access-key-id` | The AWS access key associated with your account. |
| `secret-access-key` | The AWS region where the EC2 instances should be created. |
`` `coder providers create ec2 my-provider --access-key-id=AKIAIOSFODNN7EXAMPLE --secret-access-key=wJalrXUtnFEMI/K7MDENG/bPxRfiCYEXAMPLEKEY` ``
> Run `coder providers create --help` for a full list of options available.
3. Once you've provisioned the workspace provider, deploy it to your [Kubernetes](https://coder.com/docs/v1/admin/workspace-providers/deployment/kubernetes)
or [EC2](https://coder.com/docs/v1/admin/workspace-providers/deployment/ec2)
cluster.
---
# Shared security responsibility | Coder v1 Docs
[Home](https://coder.com/docs/v1 "Home")
[Guides](https://coder.com/docs/v1/guides "Guides")
[Admin](https://coder.com/docs/v1/guides/admin "Admin")
Shared security responsibility
To guarantee the security of the Coder workspace, which includes the entire ecosystem of components needed to support the developer's user experience, several parties must carry different responsibilities. While this is not an exhaustive list, this article lists the security responsibilities for both Coder and its users (specifically the site admin/site managers).
There are two categories of integration points for a Coder workspace:
1. Kubernetes and networking
2. External tie-ins (authentication, container registries, Git providers, etc.)
[](https://coder.com/docs/v1/guides/admin/shared-security#kubernetes-and-networking)
Kubernetes and networking
--------------------------------------------------------------------------------------------------------------
Like most software, Coder depends on the system on which it is installed to provide some security boundaries. Coder is installed onto Kubernetes clusters and includes expectations of how to cluster is configured. As such, changes to the following aspects of your cluster may impact Coder's security and performance:
* Storage
* Quotas
* Encryption
* Cloud access to volumes
* Depletion as denial of service
* PVC
* Ephemeral
* Networking
* Encryption (mTLS)
* Certificates
* TLS certificates presented by `coderd`
* TLS certificats presented by the applications with which Coder interacts
* Boundaries (e.g., network policies)
* External interactions (ingress and egress)
* IP address depletion as denial of service
* Each workspace gets an IP address in the `pod` subset
* Each dev URL gets an IP address in the `services` subnet
* Kubernetes roles
* Service accounts for Coder to create pods
* Cluster admins (use of cluster admins can pose a security risk)
* Cloud access to the control plane
* Node security
* Upgrades to keep up with Kubernetes
* Access to node user accounts
* Cloud access to nodes
### [](https://coder.com/docs/v1/guides/admin/shared-security#recommendations)
Recommendations
We recommend that you **deploy Coder to its own cluster**. With this option, the security boundary is around the cluster, so things like PVC access, password resets, and database access are clearly actions taken against Coder. Cluster admins can perform any necessary action, while all others are constrained by their Coder role.
Though you can deploy Coder to a shared cluster, the security boundary is threaded through the components mentioned in the section above due to the multiple applications present in the cluster.
[](https://coder.com/docs/v1/guides/admin/shared-security#external-tie-ins)
External tie-ins
--------------------------------------------------------------------------------------------
Coder makes assumptions about how the following tie-ins are configured when deploying security controls:
* Authentication provider
* Changing the authentication provider settings can render Coder insecure
* Site admins could convert a user authenticating via OIDC to built-in, allowing the admin to impersonate the user
* Container registry
* The registry account used to access images should be a specific Coder-only account so that Coder users can only pull approved images
* CVMs can only pull unauthenticated containers, which means that any user can reference any container within the registry
* Git provider
* OAuth linkage allows Coder admins to perform actions as the linked Git user
* SSH keys generated by Coder and added to workspaces can be used to circumvent 2FA to GitLab via Coder
* Git integration request both SSH and HTTPS access to function
* Access to all user repos must be added to a Coder workspace to clone private dotfiles repos
* Coder doesn't allow the linking of multiple Git providers of the same type
* Disabling the OAuth linking account may cause a denial of service
##### On this page
---
# Deployment | Coder v1 Docs
[Home](https://coder.com/docs/v1 "Home")
[Admin](https://coder.com/docs/v1/admin "Admin")
[Workspace providers](https://coder.com/docs/v1/admin/workspace-providers "Workspace providers")
Deployment
[##### Docker\
\
Learn how to deploy a workspace provider to a Docker instance.](https://coder.com/docs/v1/admin/workspace-providers/deployment/docker)
[##### EC2\
\
Learn how to deploy a workspace provider to an EC2 instance.](https://coder.com/docs/v1/admin/workspace-providers/deployment/ec2)
[##### Kubernetes\
\
Learn how to deploy a workspace provider to a Kubernetes cluster.](https://coder.com/docs/v1/admin/workspace-providers/deployment/kubernetes)
---
# Usage monitoring | Coder v1 Docs
[Home](https://coder.com/docs/v1 "Home")
[Guides](https://coder.com/docs/v1/guides "Guides")
[Admin](https://coder.com/docs/v1/guides/admin "Admin")
Usage monitoring
We recommend monitoring your Coder deployment to track compute cost, performance, uptime, and deployment stability. Because you deploy Coder onto Kubernetes clusters, you can monitor your developer workspaces as you would any other server workload.
[](https://coder.com/docs/v1/guides/admin/usage-monitoring#node-utilization-metrics)
Node utilization metrics
-------------------------------------------------------------------------------------------------------------
One of the most important metrics to track is the CPU and memory usage/utilization of the underlying Kubernetes node. Excessive node resource contention can result in the throttling of developer workspaces, while excessive underutilization suggests that you may be spending more on your cloud workspace than necessary.
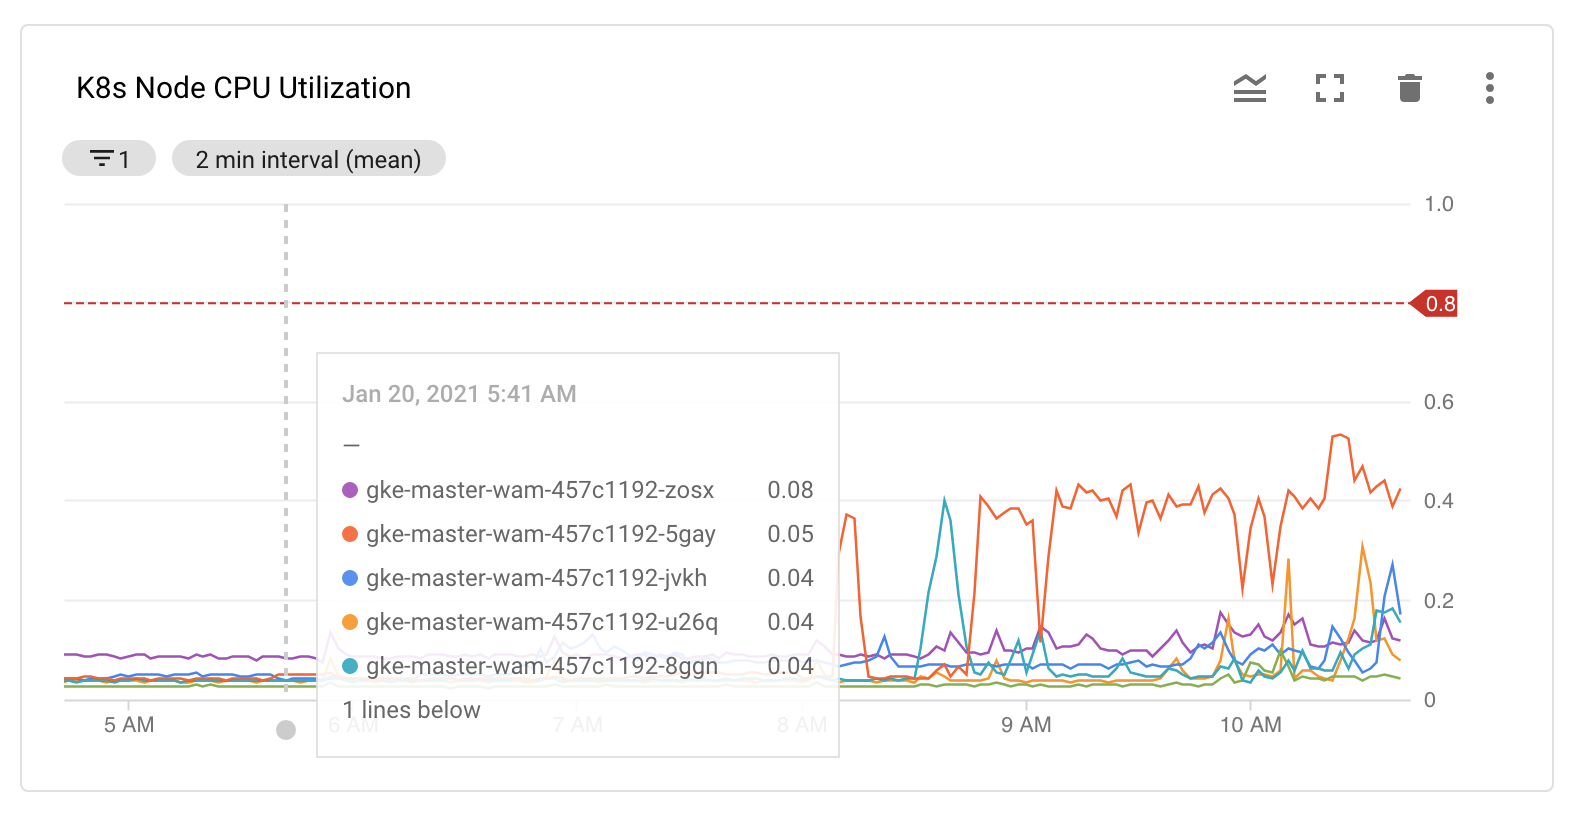
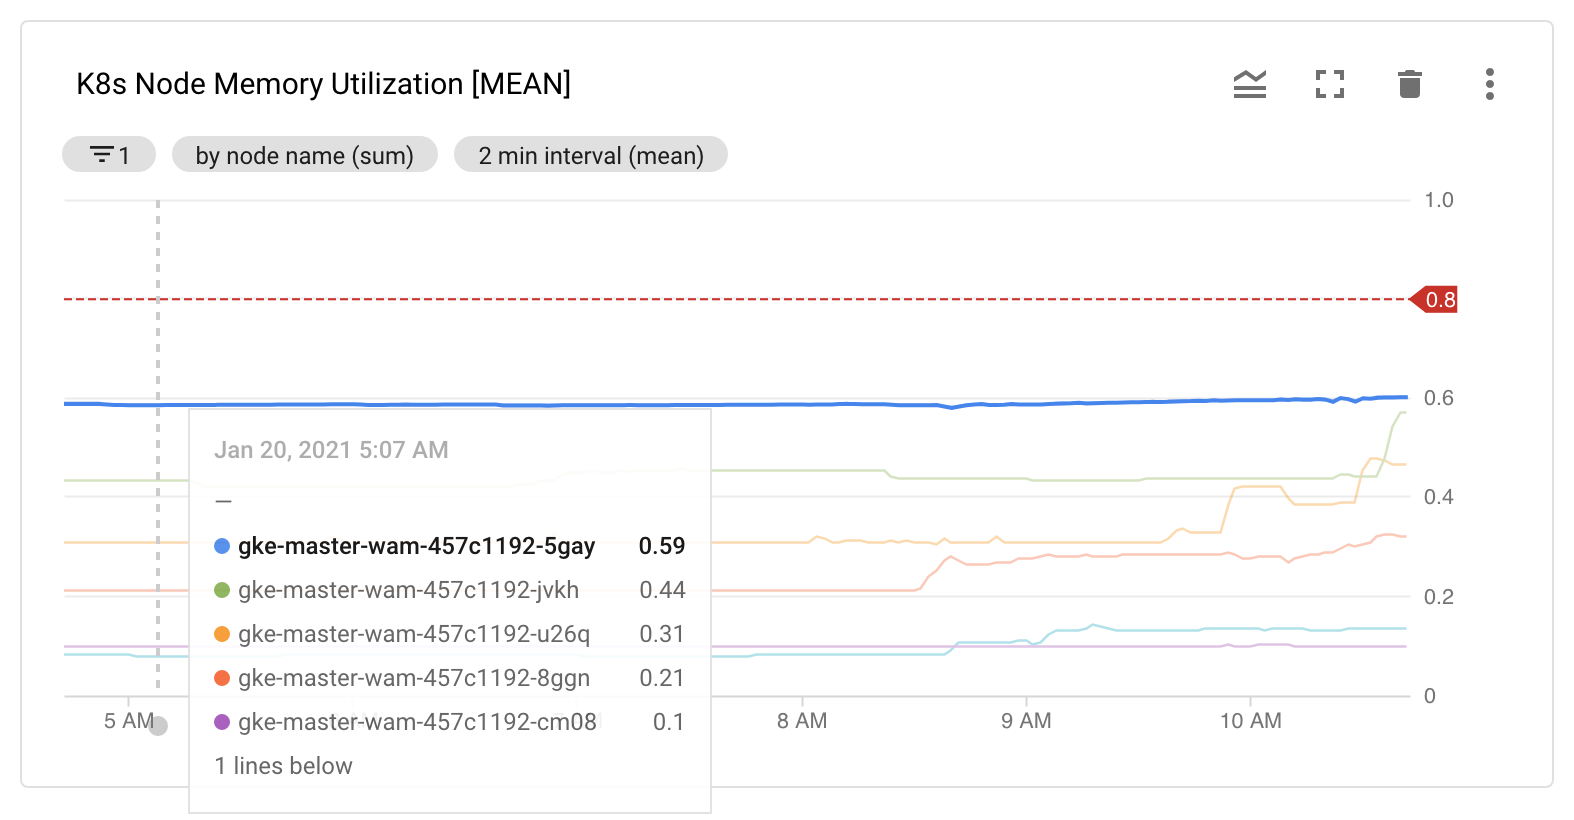
There are several tools available to you to balance the tradeoff between workspace performance and cloud cost. Read more about this on [compute resources](https://coder.com/docs/v1/guides/admin/resources)
.
[](https://coder.com/docs/v1/guides/admin/usage-monitoring#development-workspace-metrics)
Development workspace metrics
-----------------------------------------------------------------------------------------------------------------------
Coder comes with a set of Kubernetes labels that allow monitoring tools to map cluster resources to Coder's product-level resource identifiers. For example, the following chart tracks the CPU/Memory Limit Utilization of each workspace container and labels them with the username and workspace name identifiers:
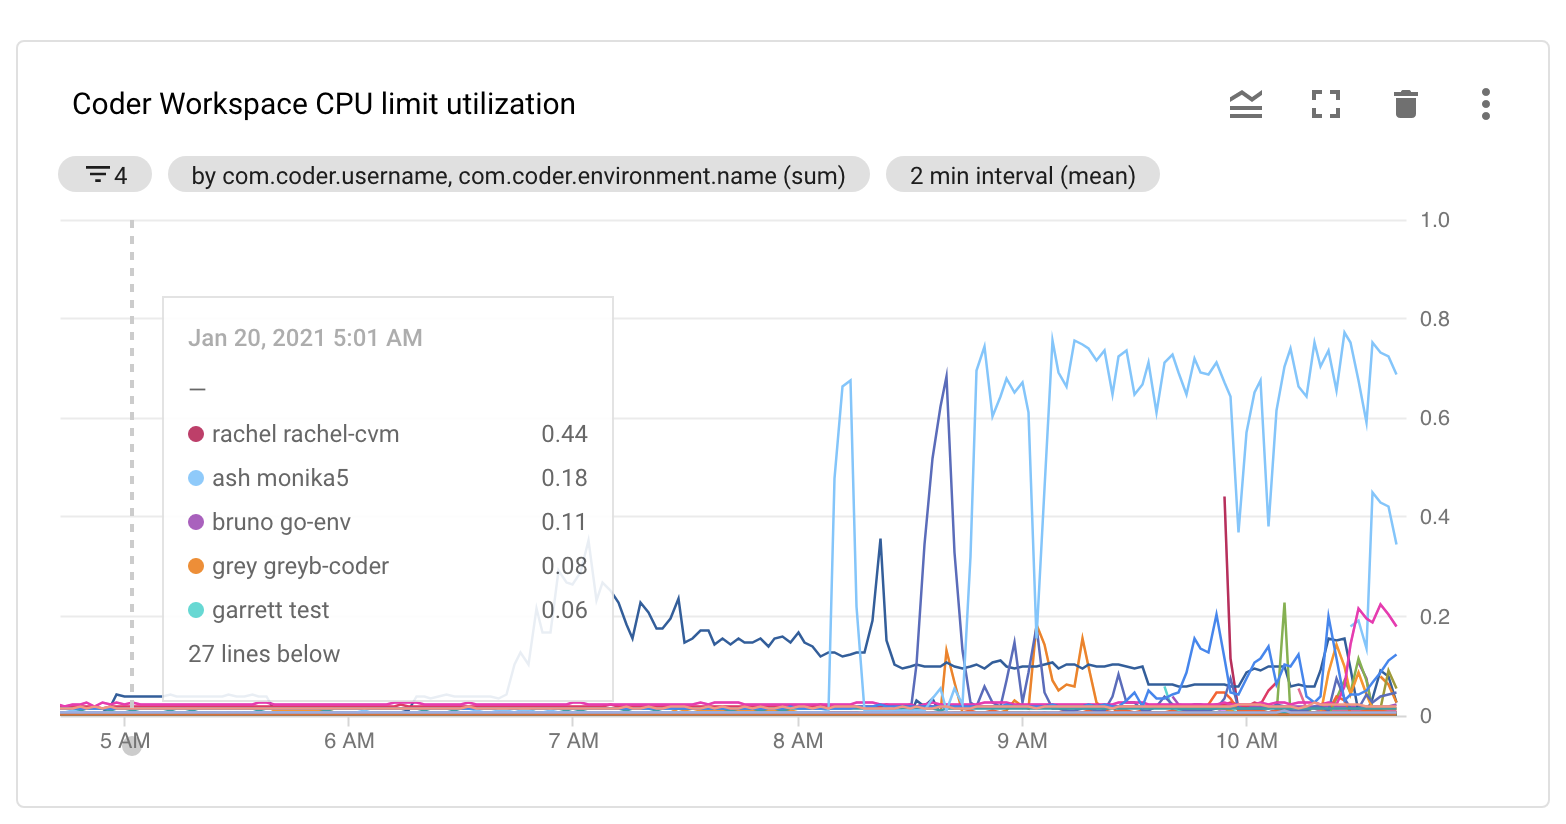
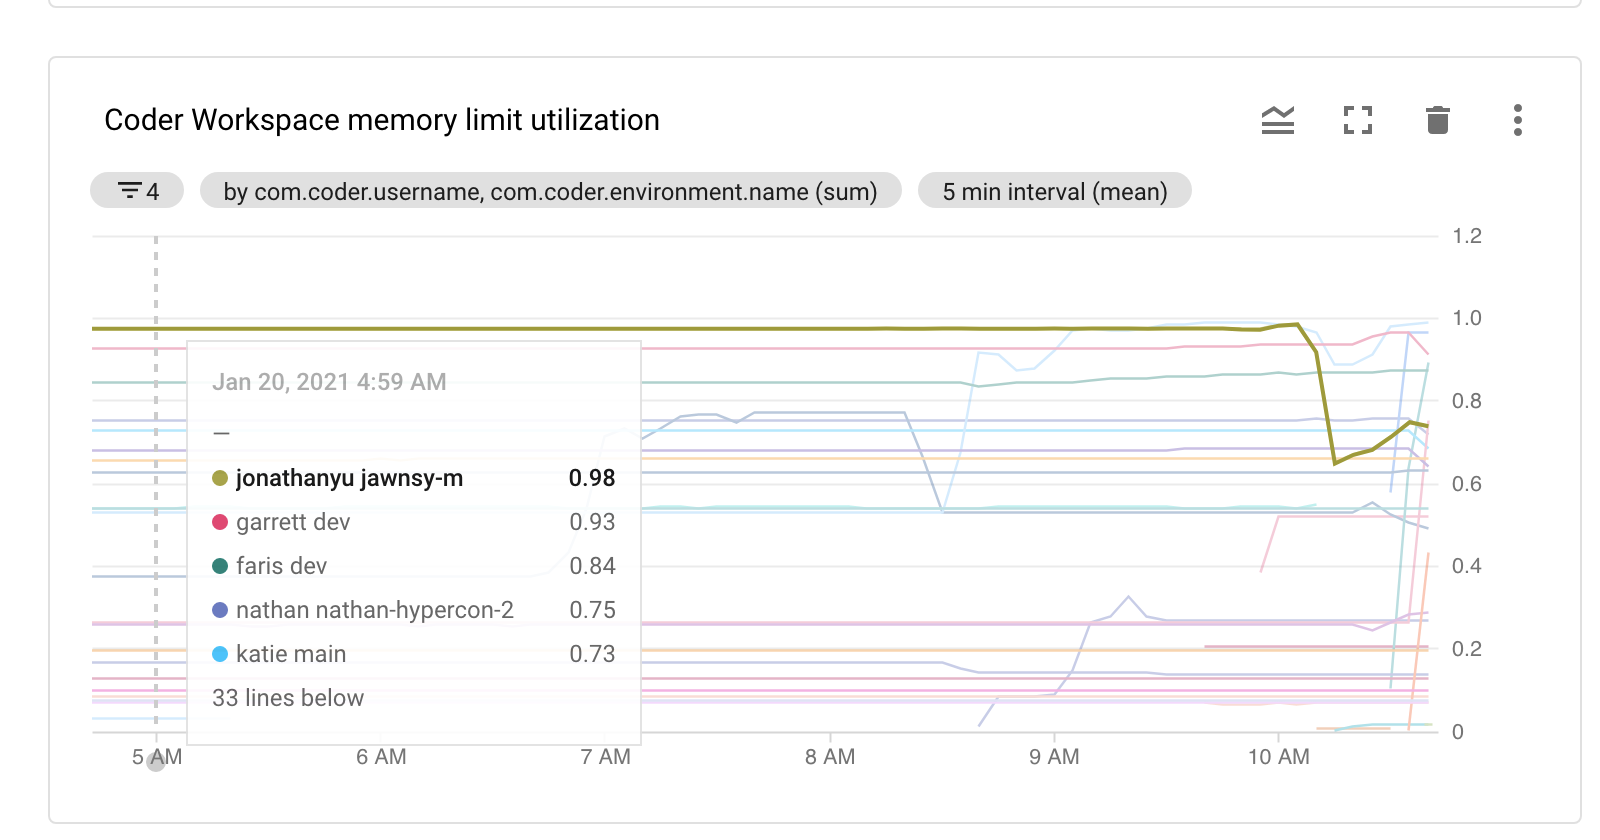
These views can help you track which users may require larger CPU allocations, enabling greater "burst-ability" under peak loads. However, remember that using a CPU/memory provision rate greater than 1:1 may result in users being throttled below their CPU limit if the underlying Kubernetes Node experiences CPU contention.
[](https://coder.com/docs/v1/guides/admin/usage-monitoring#control-plane-monitoring)
Control plane monitoring
-------------------------------------------------------------------------------------------------------------
Monitoring the Coder control plane can help you maintain high uptime. For example, the following charts provide high-level insight into the state of the Coder API server:
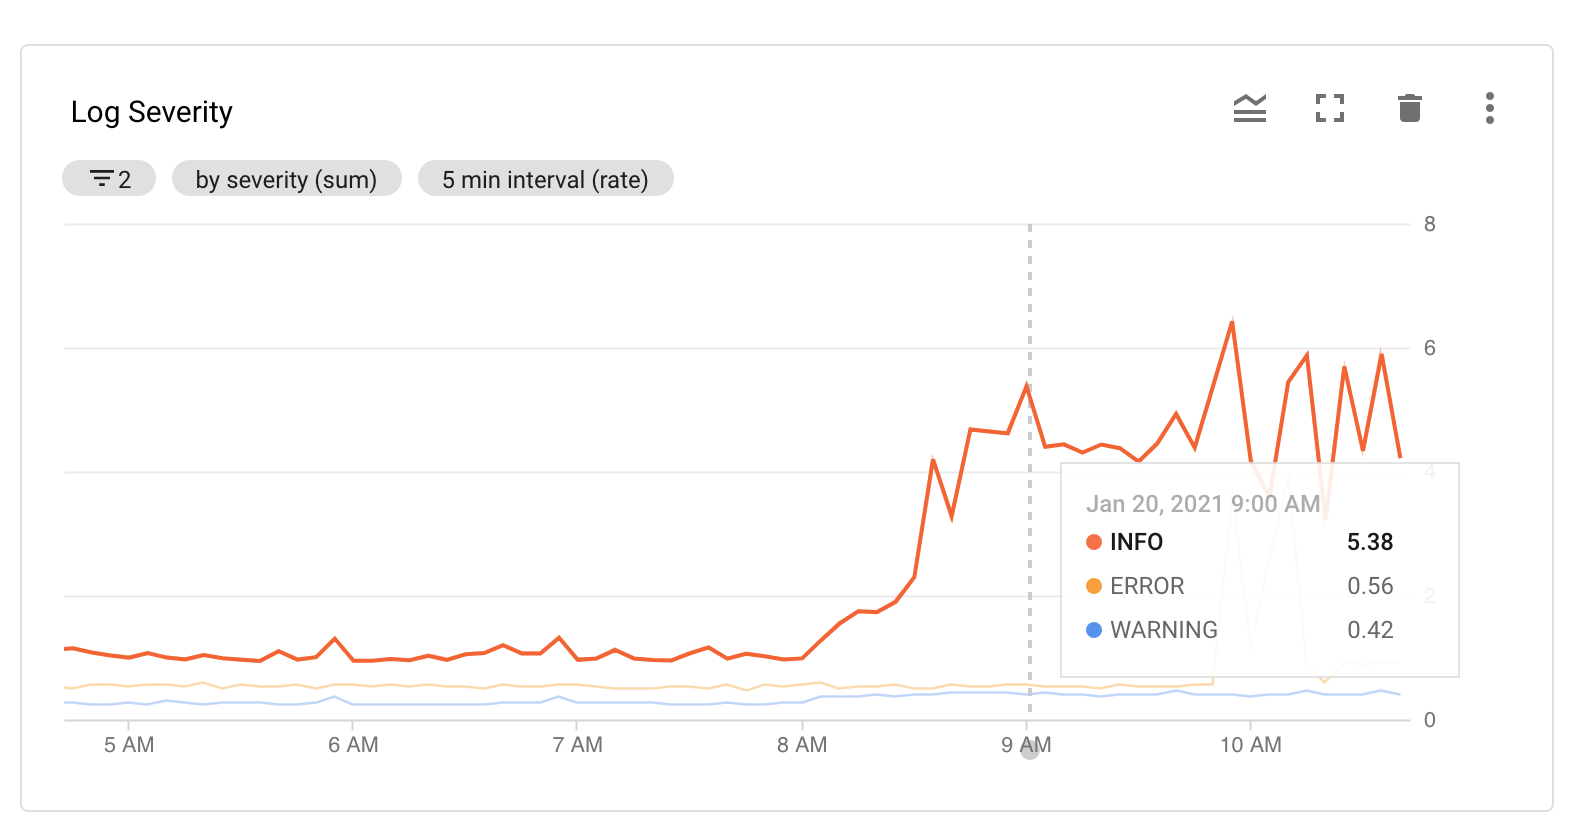
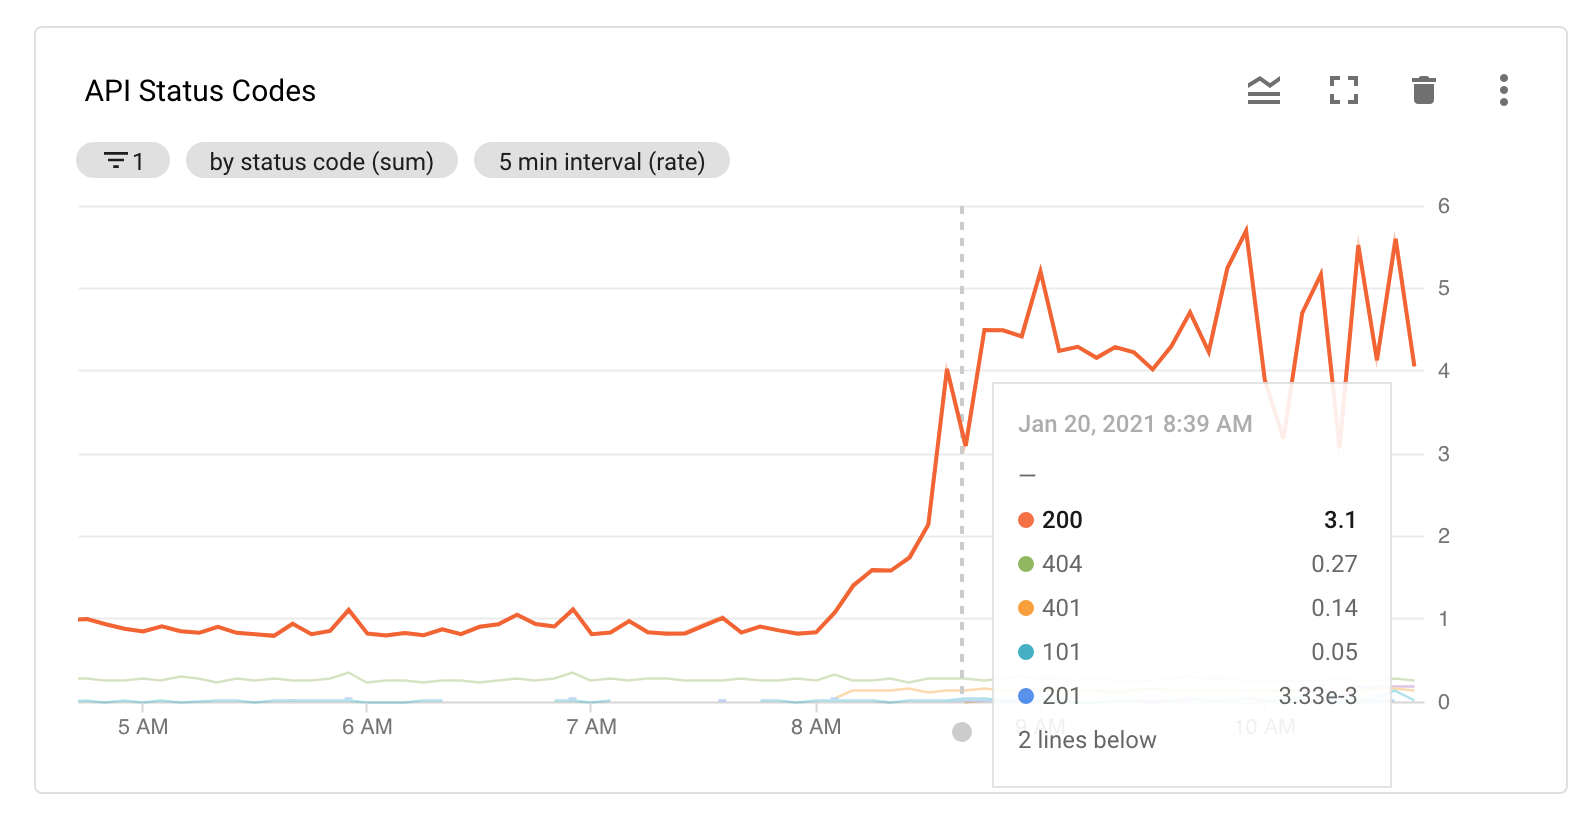
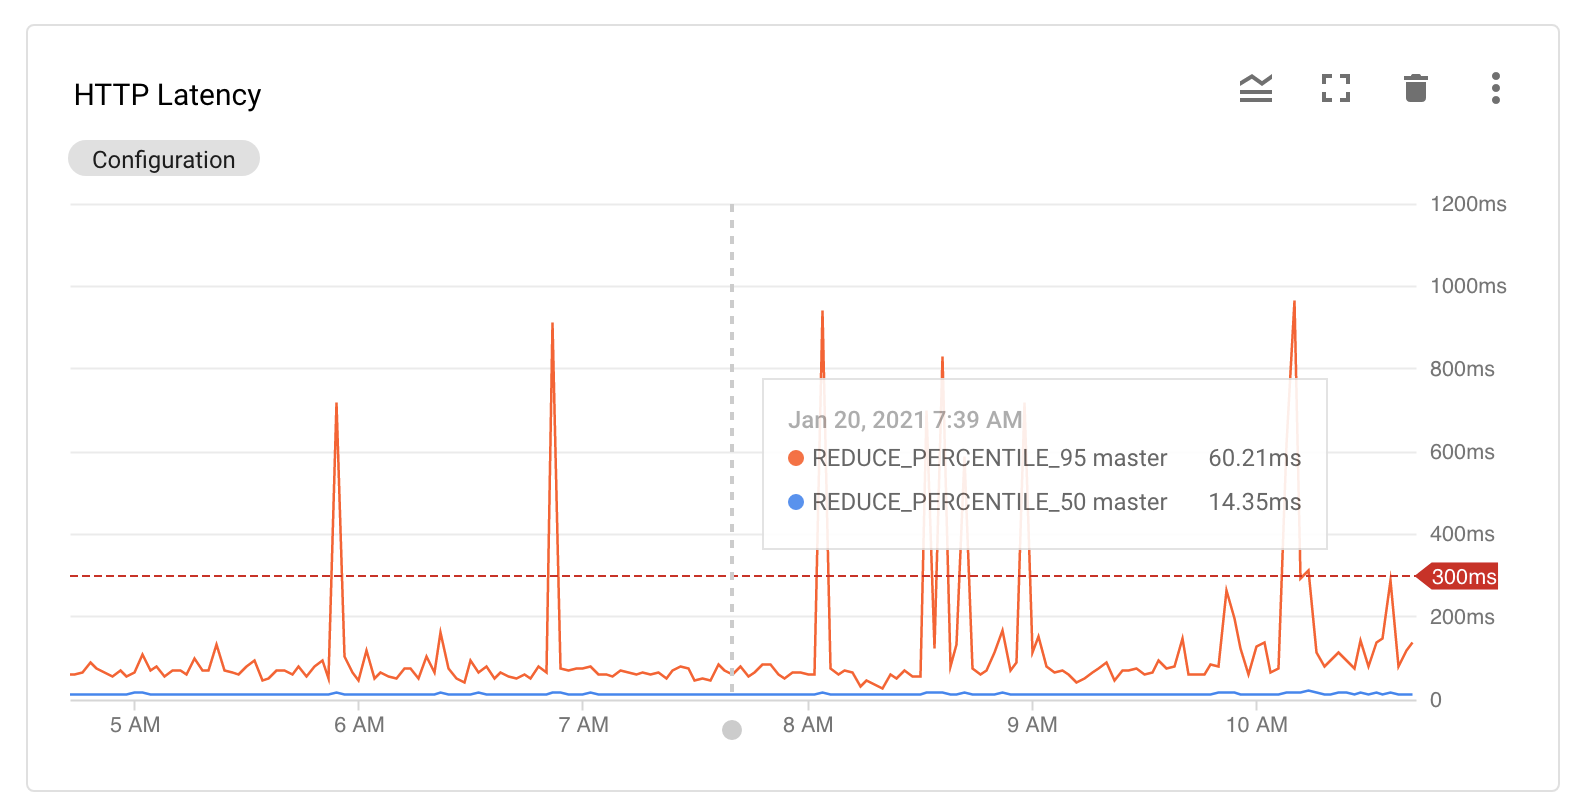
##### On this page
---
# 1.43.1 | Coder v1 Docs
[Home](https://coder.com/docs/v1 "Home")
[Changelog](https://coder.com/docs/v1/changelog "Changelog")
[1.43.0](https://coder.com/docs/v1/changelog/1.43.0 "1.43.0")
1.43.1
### [](https://coder.com/docs/v1/changelog/1.43.1#breaking-changes-)
Breaking changes ❗
* GitLab introduced a breaking change in version 14.3 where OAuth tokens without expiration are no longer supported. Users who have linked their Coder account to a GitLab instance version 14.3 or higher will need to un-link and re-link their account.
### [](https://coder.com/docs/v1/changelog/1.43.1#features-)
Features ✨
There are no new features in 1.43.1.
### [](https://coder.com/docs/v1/changelog/1.43.1#bug-fixes-)
Bug fixes 🐛
* infra: Fixes an issue where Coder would not update OAuth refresh tokens correctly (see Breaking Changes above).
### [](https://coder.com/docs/v1/changelog/1.43.1#security-updates-)
Security updates 🔐
* Updated Red Hat Universal Base Image to version 8.8 to address some vulnerabilities (CVE-2022-35252, CVE-2022-36227, CVE-2022-43552, CVE-2023-27535).
* Updated Go compiler to 1.20.5.
---
# 1.38.0 | Coder v1 Docs
[Home](https://coder.com/docs/v1 "Home")
[Changelog](https://coder.com/docs/v1/changelog "Changelog")
1.38.0
### [](https://coder.com/docs/v1/changelog/1.38.0#breaking-changes-)
Breaking changes ❗
There are no breaking changes in 1.38.0.
### [](https://coder.com/docs/v1/changelog/1.38.0#features-)
Features ✨
* Individual image tags can now be decommissioned. Existing workspaces using a decommissioned tag will be migrated to use the default tag upon rebuild. Adds new organization-level roles: Organization Super Manager, Organization Image Manager, and Organization Importer. These roles allow finer-grained access control around image and registry management. For more information, see [Organization Roles](https://coder.com/docs/coder/latest/admin/access-control/organizations)
.
> ℹ️ ️Migration: existing users with the Organization Manager role will be migrated to Organization Super Manager, and users with the Organization Member role will be migrated to Importer. Both of these changes will result in no effective permission changes for existing users.
* Improves web terminal reconnection by leveraging [GNU Screen](https://www.gnu.org/software/screen/)
if available inside the workspace. Workspaces without screen installed will no longer support reconnection.
### [](https://coder.com/docs/v1/changelog/1.38.0#bug-fixes-)
Bug fixes 🐛
* Fixed an issue where CVMs would fail to build when their home volume is completely full.
* Fixed an issue where users accessing a DevURL could encounter a redirect loop under certain circumstances.
* Fixed an issue where users accessing Coder through an HTTP proxy were unable to access workspaces or view build logs in some cases.
* Fixed an issue where satellites would need to be manually restarted to pick up changes in certificates.
* Fixed an issue where users were able to reduce the size of their home volume, which is not supported in Kubernetes.
* Fixed some rendering issues with the web terminal and SSH, for example when using Emacs or GNU Screen.
### [](https://coder.com/docs/v1/changelog/1.38.0#security-updates-)
Security updates 🔐
* Fixed an issue where an attacker could craft a malicious DevURL redirect link to exfiltrate a token that allows accessing that user's devURLs.
* Fixed an issue where organization members could read information about other users' workspaces.
* Fixed an issue where users could create DevURLs to ports reserved by the Coder agent.
* Fixed an issue where Content Security Policy violations were reported from Coder's own UI.
---
# AWS RDS with IAM credentials | Coder v1 Docs
[Home](https://coder.com/docs/v1 "Home")
[Guides](https://coder.com/docs/v1/guides "Guides")
[Admin](https://coder.com/docs/v1/guides/admin "Admin")
AWS RDS with IAM credentials
In addition to using [user/password](https://coder.com/docs/v1/setup/installation#connect-an-external-database)
for database authentication, Coder supports connecting to Amazon RDS databases using IAM credentials.
[](https://coder.com/docs/v1/guides/admin/awsrds#requirements)
Requirements
---------------------------------------------------------------------------
* An EKS cluster with an [IAM OIDC provider enabled](https://docs.aws.amazon.com/eks/latest/userguide/enable-iam-roles-for-service-accounts.html)
* An RDS instance with [IAM authentication enabled](https://docs.aws.amazon.com/AmazonRDS/latest/UserGuide/UsingWithRDS.IAMDBAuth.Enabling.html)
[](https://coder.com/docs/v1/guides/admin/awsrds#setup)
Setup
-------------------------------------------------------------
1. [Create an IAM role](https://docs.aws.amazon.com/IAM/latest/UserGuide/id_roles_create.html)
to use for database authentication.
2. Create an IAM policy for the role created in Step 1.
`` `{ "Version": "2012-10-17", "Statement": [ { "Effect": "Allow", "Action": ["rds-db:connect"], "Resource": [ "arn:aws:rds-db:us-east-2:1234567890:dbuser:db-ABCDEFGHIJKL01234/db_user" ] } ] }` ``
1. Add a Trust Relationship to the IAM role.
`` `{ "Version": "2012-10-17", "Statement": [ { "Effect": "Allow", "Principal": { "Federated": "arn:aws:iam::111122223333:oidc-provider/oidc.eks.region-code.amazonaws.com/id/EXAMPLED539D4633E53DE1B71EXAMPLE" }, "Action": "sts:AssumeRoleWithWebIdentity", "Condition": { "StringEquals": { "oidc.eks.region-code.amazonaws.com/id/EXAMPLED539D4633E53DE1B71EXAMPLE:sub": "system:serviceaccount::" } } } ] }` ``
1. Create a database user with the same name specified in the policy above, and grant them the `rds_iam` role.
`` `CREATE USER dbuser WITH LOGIN; GRANT rds_iam TO dbuser; GRANT CREATE ON DATABASE coder TO dbuser;` ``
1. Set the following values in your Helm chart and re-deploy Coder.
`` `coderd: builtinProviderServiceAccount: annotations: # this role is assumed by the coderd pods, it must have correct IAM policy to connect to RDS "eks.amazonaws.com/role-arn": "arn:aws:iam::1234567890:role/example" postgres: host: "example.us-east-1.rds.amazonaws.com" port: "5432" user: "dbuser" database: "coder" # notice the password field is not used connector: "awsiamrds" default: enable: false` ``
Documentation references:
* [IAM database authentication for MariaDB, MySQL, and PostgreSQL](https://docs.aws.amazon.com/AmazonRDS/latest/UserGuide/UsingWithRDS.IAMDBAuth.html)
* [Creating a database account using IAM authentication](https://docs.aws.amazon.com/AmazonRDS/latest/UserGuide/UsingWithRDS.IAMDBAuth.DBAccounts.html#UsingWithRDS.IAMDBAuth.DBAccounts.PostgreSQL)
##### On this page
---
# Workspace templates | Coder v1 Docs
[Home](https://coder.com/docs/v1 "Home")
[Workspaces](https://coder.com/docs/v1/workspaces "Workspaces")
Workspace templates
Workspace templates brings the _infrastructure as code_ paradigm to Coder workspaces. Templates allow you to define and create new workspaces using YAML.
[Workspace templates](https://coder.com/docs/v1/workspaces/workspace-templates/templates)
are declarative YAML files that describe how to configure workspaces and their supporting infrastructure. Coder supports files with either the `.yaml` or `.yml` extension.
[](https://coder.com/docs/v1/workspaces/workspace-templates#requirements)
Requirements
--------------------------------------------------------------------------------------
* You must configure a [Git OAuth service of your choice](https://coder.com/docs/v1/admin/git)
* The image you use in your template **must** have been [imported](https://coder.com/docs/v1/images/importing)
into Coder
* A `.coder/.yaml` file exists in your repository.
We strongly recommend allowing the Git provider to run a webhook capable of reaching the Coder server for immediate template updates. Otherwise, Coder will update your workspace templates daily.
[](https://coder.com/docs/v1/workspaces/workspace-templates#creating-a-workspace-template)
Creating a workspace template
------------------------------------------------------------------------------------------------------------------------
You can find a fully populated workspace template and descriptions of each field in our [syntax guide](https://coder.com/docs/v1/workspaces/workspace-templates/templates)
.
[](https://coder.com/docs/v1/workspaces/workspace-templates#creating-a-workspace-using-a-template)
Creating a workspace using a template
----------------------------------------------------------------------------------------------------------------------------------------
To create a new workspace using a template, go to **New Workspace** > **Create from Template**.
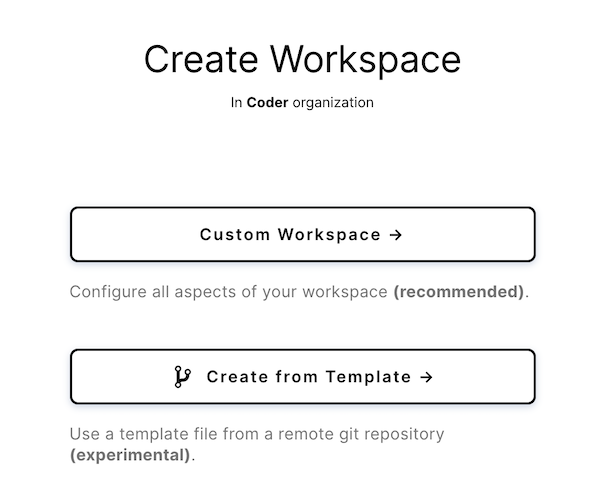
When prompted, provide:
* **Workspace Name**: A name for your workspace
* **Git Repository URL**: The git repository that contains your `coder.yaml` configuration file. See [Workspace templates](https://coder.com/docs/v1/workspaces/workspace-templates/templates)
for more information about these files
* **Branch**: The branch in your git repo to track
* **Path to template**: The path to your workspace template. By default, this will be `.coder/coder.yaml`, but if you choose a different path, provide it here
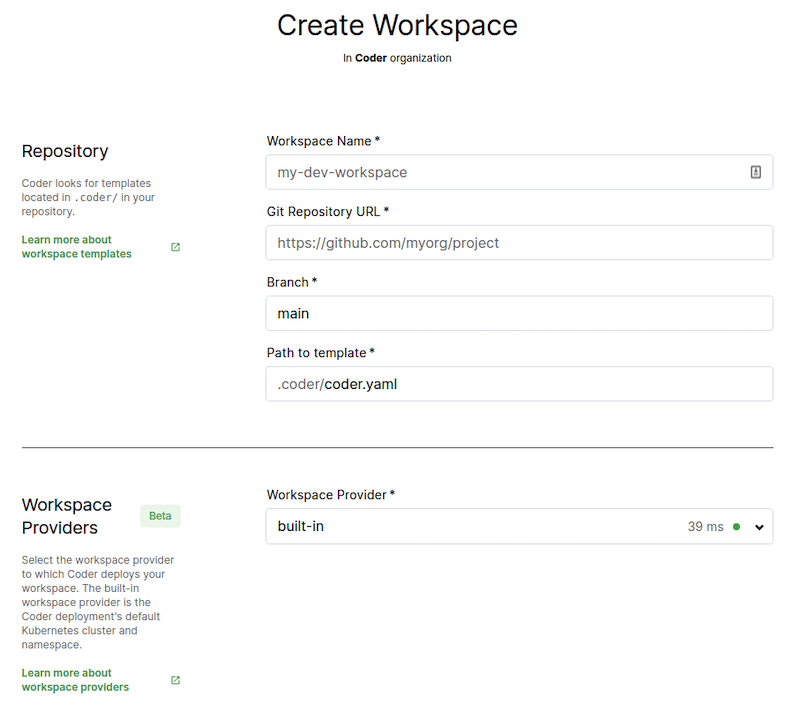
[](https://coder.com/docs/v1/workspaces/workspace-templates#adding-an-embeddable-button)
Adding an embeddable button
--------------------------------------------------------------------------------------------------------------------
To make it easy for your developers to use your template, you can generate an embeddable Markdown button for use in your repo. See the [admin guide](https://coder.com/docs/v1/admin/templates)
for details.
[](https://coder.com/docs/v1/workspaces/workspace-templates#using-templates-with-coder-for-docker)
Using templates with Coder for Docker
----------------------------------------------------------------------------------------------------------------------------------------
[Coder for Docker](https://coder.com/docs/v1/setup/coder-for-docker)
supports the use of workspace templates. However, the configuration has [some differences that are outlined in our setup doc](https://coder.com/docs/v1/setup/coder-for-docker/local)
##### On this page
---
# Managed code-server Workspaces | Coder v1 Docs
[Home](https://coder.com/docs/v1 "Home")
[Guides](https://coder.com/docs/v1/guides "Guides")
[Deployment](https://coder.com/docs/v1/guides/deployments "Deployment")
Managed code-server Workspaces
If you're deploying [code-server](https://github.com/coder/code-server)
on Kubernetes, you may want to consider Coder, our solution for developers and development teams. Coder runs on Kubernetes and offers the following features in addition to the base code-server functionality.
[](https://coder.com/docs/v1/guides/deployments/code-server#workspace-consistency)
Workspace consistency
--------------------------------------------------------------------------------------------------------
* [Manage and distribute workspace images](https://coder.com/docs/images)
* [Build custom workspaces that include your project's dependencies](https://coder.com/docs/images/structure)

[](https://coder.com/docs/v1/guides/deployments/code-server#developer-workflows)
Developer workflows
----------------------------------------------------------------------------------------------------
* [Connect to workspaces via web: (code-server, JetBrains)](https://coder.com/docs/workspaces/editors#jetbrains-ides-in-the-browser)
* [Connect to workspaces via SSH or VS Code Remote](https://coder.com/docs/workspaces/ssh)
* [Sync local files to workspaces](https://coder.com/docs/cli/file-sync)
* [Use Docker and docker-compose in workspaces](https://coder.com/docs/workspaces/cvms)
* [Access and share web services in workspaces](https://coder.com/docs/workspaces/devurls)
* [Manage workspaces with the Coder CLI](https://coder.com/docs/cli)
* [Personalize workspaces](https://coder.com/docs/workspaces/personalization)
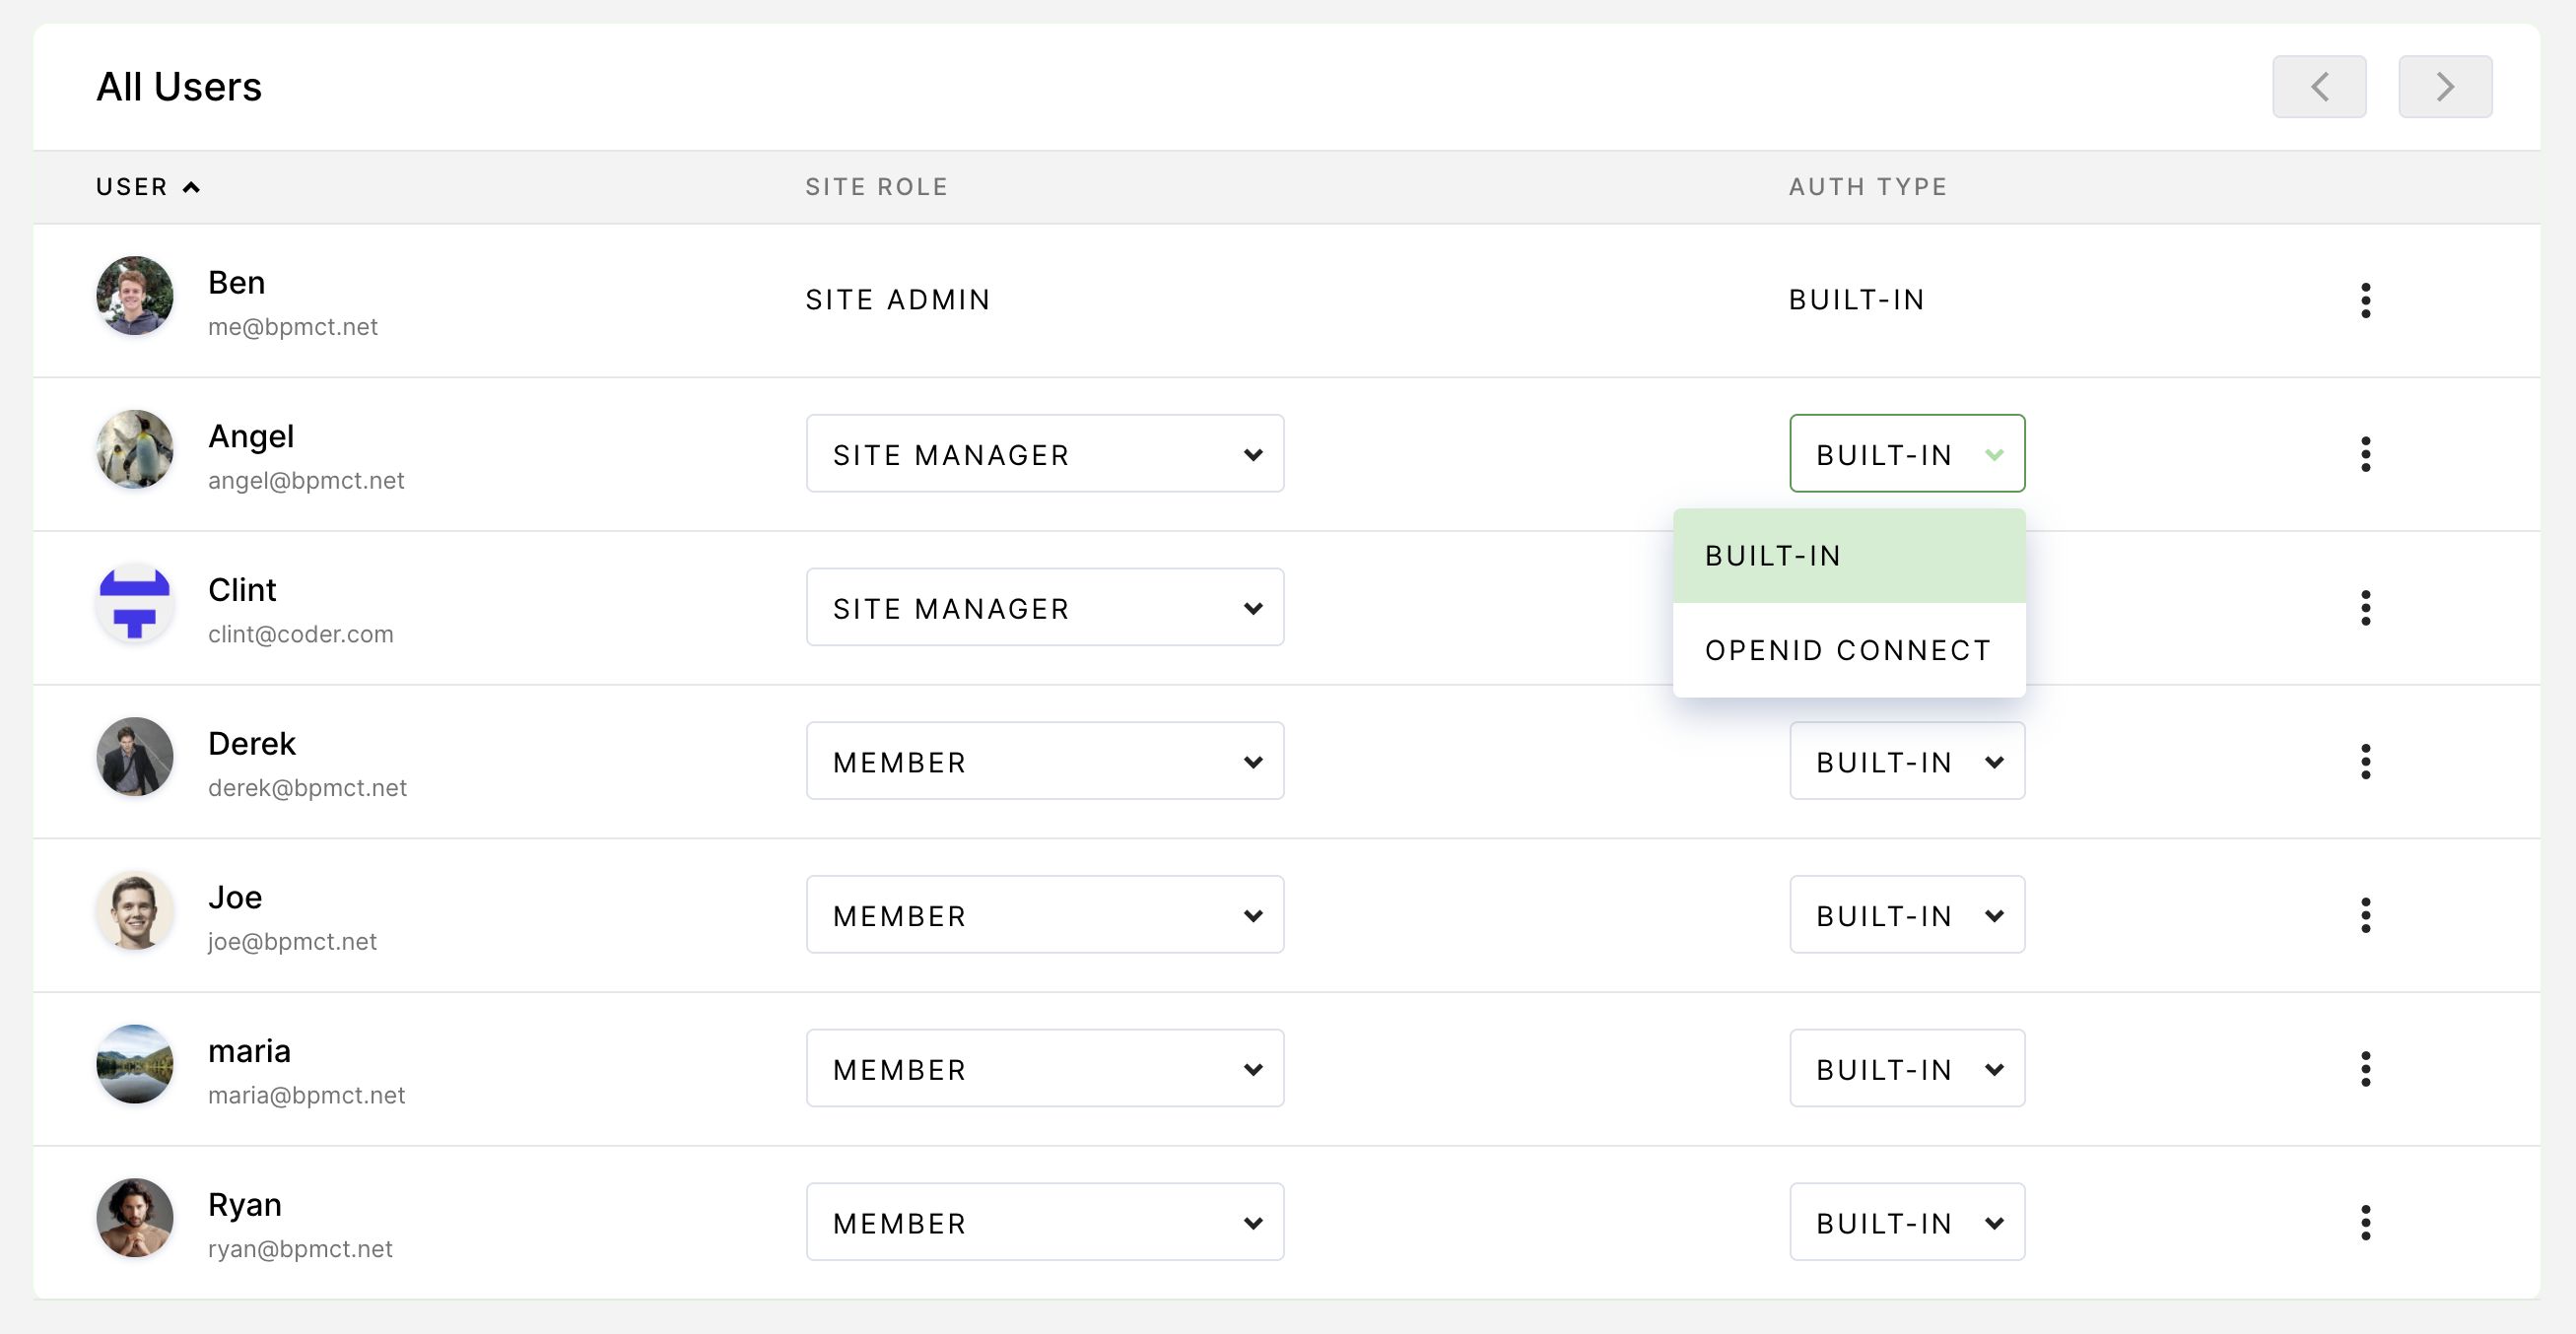
[](https://coder.com/docs/v1/guides/deployments/code-server#team-management)
Team management
--------------------------------------------------------------------------------------------
* [Implement single-sign-on](https://coder.com/docs/admin/access-control#openid-connect)
* [Assign user roles](https://coder.com/docs/admin/access-control/user-roles)
* [Manage organizations](https://coder.com/docs/admin/access-control/organizations)
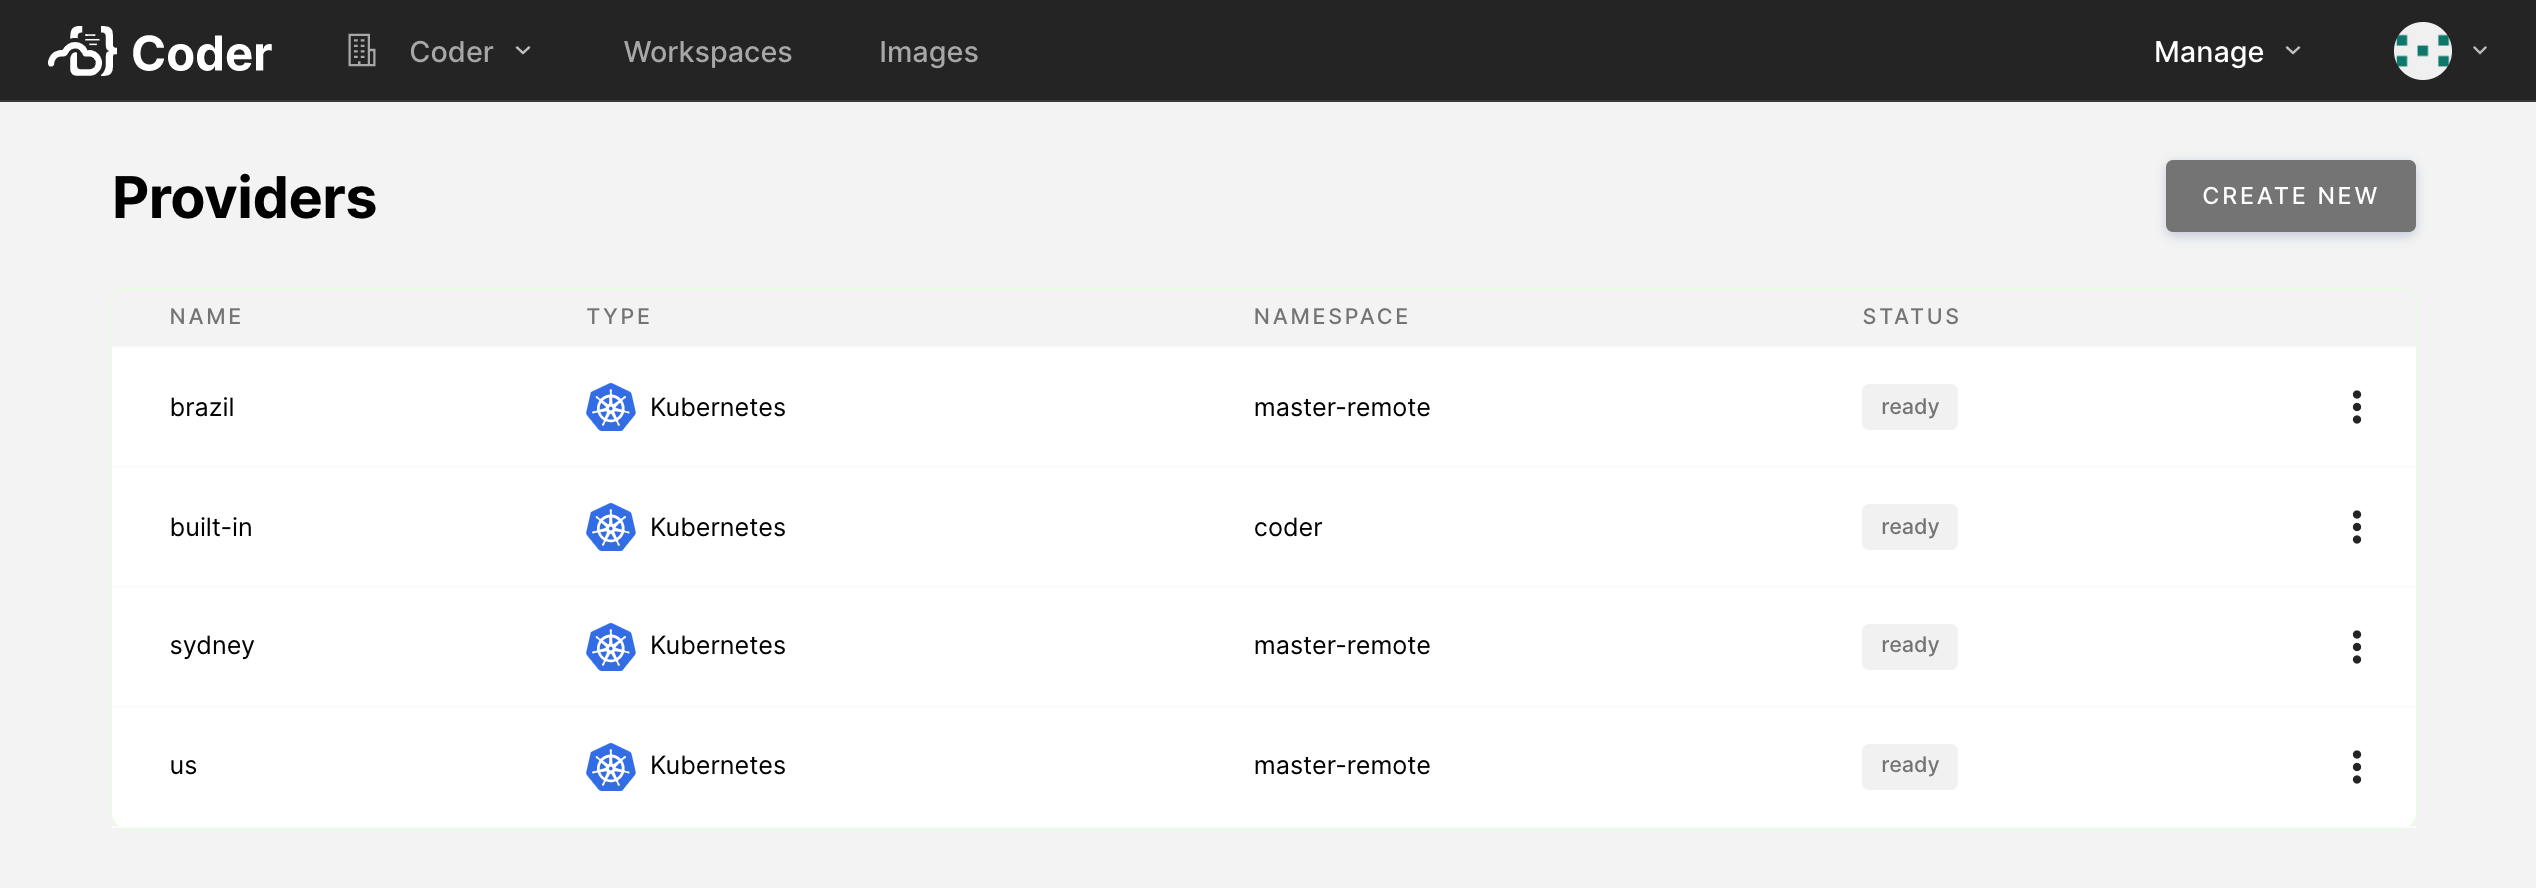
[](https://coder.com/docs/v1/guides/deployments/code-server#operations)
Operations
----------------------------------------------------------------------------------
* [Add a private image registry](https://coder.com/docs/admin/registries)
* [Manage workspaces in multiple regions or clusters](https://coder.com/docs/admin/workspace-management/workspace-providers)
* * *
[](https://coder.com/docs/v1/guides/deployments/code-server#getting-started)
Getting started
--------------------------------------------------------------------------------------------
Coder is free to try for 60 days. See our [install guide](https://coder.com/docs/setup)
for additional details.
##### On this page
---
# User management | Coder v1 Docs
[Home](https://coder.com/docs/v1 "Home")
[Admin](https://coder.com/docs/v1/admin "Admin")
[Access control](https://coder.com/docs/v1/admin/access-control "Access control")
User management
[Site managers](https://coder.com/docs/v1/admin/access-control/users/user-roles#site-manager-permissions)
can create and manage users from the **Users** page, which is accessible at **Manage** > **Users**.
[](https://coder.com/docs/v1/admin/access-control/users#creating-a-new-user)
Creating a new user
------------------------------------------------------------------------------------------------
To create a new user:
1. Go to **Manage** > **Users** > **New User**.
2. When prompted, provide the user's **name** and **email address** and select the **Auth Type** you want for the account. Select **Built-In** as your Auth Type if you want the user to access Coder with a username/password combination; select **OpenID Connect** as your Auth Type if you would like to use your organization's OpenID Connect Identity Provider.
3. Finally, choose the **Organization** to which the user belongs (this will affect the images to which the user has access). Click **Create**.
Coder will create the new user. If you opted for the **Built-In** auth type, Coder will display a temporary password. Provide this password to the user, which they can use with their email to access their new account. For increased security, Coder prompts the new user to change their password immediately after they log in.
[](https://coder.com/docs/v1/admin/access-control/users#changing-a-users-role)
Changing a user's role
-----------------------------------------------------------------------------------------------------
Coder comes with built-in [user roles](https://coder.com/docs/v1/admin/access-control/users/user-roles)
that define what actions a user can take in the deployment.
By default, all new users are assigned the **Member** role. These users can be upgraded to **Auditor** or **Site Manager** by another user with administrative privileges.
To change a user's role, go to **Manage** > **Users**. Find the user and use the **Site Role** drop-down to change the assigned role.
[](https://coder.com/docs/v1/admin/access-control/users#deleting-a-user)
Deleting a user
----------------------------------------------------------------------------------------
To delete a user:
1. Go to **Manage** > **Users**. Find the user you want to delete and click the **vertical ellipsis** associated with that user.
2. Click **Delete**.
3. You'll be prompted to confirm this action. Click **Delete** to proceed.
If you're using your organization's OpenID Connect identity provider to manage users, this process revokes the user's access to Coder; it does _not_ delete the user from your identity store.
##### On this page
---
# Authentication management | Coder v1 Docs
[Home](https://coder.com/docs/v1 "Home")
[Admin](https://coder.com/docs/v1/admin "Admin")
[Access control](https://coder.com/docs/v1/admin/access-control "Access control")
Authentication management
By default, Coder enables **built-in authentication**, though you can change this if desired.
To do so, go to **Manage** > **Users**. Find the user whose authentication type you want to change, and use the **Auth Type** to toggle between **Built-In** and **OpenID Connect**.
If you opt for **OpenID Connect**, you'll need to provide additional configuration steps, which are detailed in the subsequent sections of this article.
[](https://coder.com/docs/v1/admin/access-control/manage#coders-oidc-claims)
Coder's OIDC claims
------------------------------------------------------------------------------------------------
Coder will request the scopes `openid`, `email`, and `profile` from your OIDC provider.
Coder expects the following [OIDC claims](https://developer.okta.com/blog/2017/07/25/oidc-primer-part-1#whats-a-claim)
from your OIDC provider:
* `email` (required)
* `name` (full name/display name)
* `preferred_username` (username for dev URLs)
If the `name` or `email` claims are not present in the identity token returned from your OIDC provider, Coder will request these from the `user-info` endpoint of your OIDC provider. If hitting this endpoint is problematic, ensure that your OIDC provider returns these claims in the tokens it provides.
You may need to map these to your existing claims within your OIDC provider's admin console. If `name` and `preferred_username` are not provided, Coder will derive both claims from the email address.
[](https://coder.com/docs/v1/admin/access-control/manage#set-up-oidc-authentication)
Set up OIDC authentication
---------------------------------------------------------------------------------------------------------------
To set up OIDC authentication, you'll first need to register a Coder application with your OIDC provider. During this process, you'll be asked to provide a domain name for the OIDC token callback; use `https://coder.my-company.com/oidc/callback`.
Once you've registered a Coder application with your OIDC provider, you'll need to return to Coder and complete the setup process. Under **Admin** > **Manage** > **Authentication**, ensure that you've selected **OpenID Connect** as the authentication type. Then, provide the following parameters:
* **Client ID**: The client ID for the Coder application you registered with the OIDC provider
* **Client Secret**: The secret assigned to the Coder application you registered with the OIDC provider
* **Issuer** (e.g., `https://my-idp.com/realm/my-org`): The URL where Coder can find your OIDC provider's configuration document
> If you do not have values for any of these parameters, you can obtain them from your OIDC provider.
There are several additional configuration parameters that may be of interest to you:
* **Enable Access Tokens:** Toggle **On** if you'd like to allow users to fetch tokens from `https:///api/v0/users/me/oidc-access-token`
* **Additional Scopes:** Specify any scopes (beyond the default) that you would like Coder to request from the authentication provider. By default, Coder requests the scopes `openid`, `email`, and `profile`. Consult your authentication provider's documentation for information on which scopes they support.
* **Disable built-in authentication:** Choose whether Coder removes the ability to log in with an email/password option when you've enabled OIDC authentication
### [](https://coder.com/docs/v1/admin/access-control/manage#logging)
Logging
If you're having issues with your OIDC configuration, you can enable additional logging of OIDC tokens to aid in troubleshooting.
To do so, [update your Helm chart](https://coder.com/docs/v1/guides/admin/helm-charts)
and set the `OIDC_DEBUG` environment variable to `true`:
`` `coderd: extraEnvs: - name: "OIDC_DEBUG" value: "true"` ``
### [](https://coder.com/docs/v1/admin/access-control/manage#troubleshooting-oidc-failures)
Troubleshooting OIDC failures
If OIDC fails to configure, only an admin using the built-in authentication can go into the settings and resolve the issue. All users using OIDC to authenticate will be unable to login until it is fixed.
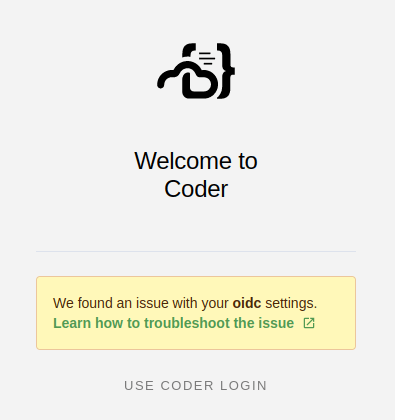
The admin must follow the [Set up OIDC authentication](https://coder.com/docs/v1/admin/access-control/manage#set-up-oidc-authentication)
steps again. Once the OIDC authentication is fixed, it is recommended to restart the coderd deployment.
### [](https://coder.com/docs/v1/admin/access-control/manage#disable-built-in-authentication)
Disable built-in authentication
You can disable built-in authentication as an option for accessing Coder if you have OIDC configured.
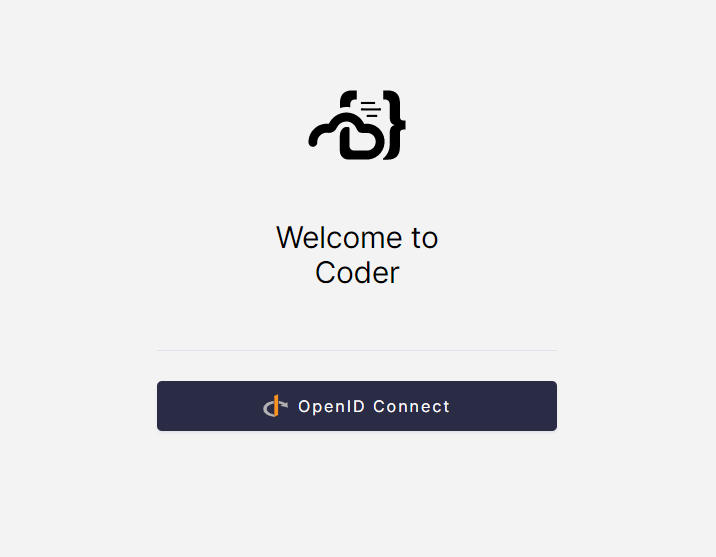
To do so, navigate to **Manage** > **Admin** > **Authentication**. Then, toggle **Disable built-in authentication** to **On** and click **Save preferences**.
[Site managers](https://coder.com/docs/v1/admin/access-control/users/user-roles#site-manager-permissions)
can still use built-in authentication. The **Admin Login** option will be visible on the login page if built-in authentication is disabled.
##### On this page
---
# Kubernetes | Coder v1 Docs
[Home](https://coder.com/docs/v1 "Home")
[Setup](https://coder.com/docs/v1/setup "Setup")
Kubernetes
This section contains guides for creating a compatible cluster on common cloud platforms, including Microsoft Azure, Google Cloud Platform, and Amazon Web Services. If you already have a Kubernetes cluster that meets Coder's [requirements](https://coder.com/docs/v1/setup/requirements)
, you can proceed to the [installation guide](https://coder.com/docs/v1/setup/installation)
.
[](https://coder.com/docs/v1/setup/kubernetes#supported-kubernetes-versions)
Supported Kubernetes versions
----------------------------------------------------------------------------------------------------------
You can deploy Coder to any [compatible Kubernetes cluster](https://coder.com/docs/v1/setup/requirements)
. Coder follows the [Kubernetes upstream version support policy](https://kubernetes.io/docs/setup/release/version-skew-policy/)
, and the latest stable release version of Coder supports the previous two minor releases as well as the current release of Kubernetes at time of publication.
During installation, Helm will check to ensure that Coder is compatible with your cluster version; if not, the installation process will fail, and you will receive an error message indicating the minimum cluster version required.
Coder continuously removes usage of deprecated Kubernetes API versions once the minimum baseline version of Kubernetes supports the necessary features in a stable version. We follow this policy to ensure that Coder stops using deprecated features before they are removed from new versions of Kubernetes.
> You can opt to use v1.19 or v1.20, you'll see warning messages during the installation process. Coder does not allow the use of v1.18 or earlier.
| | Kubernetes `1.24` | Kubernetes `1.23` | Kubernetes `1.22` | Kubernetes `1.21` | Kubernetes `1.20` | Kubernetes `1.19` | Kubernetes `1.18` |
| --- | --- | --- | --- | --- | --- | --- | --- |
| Coder `1.32` | ✅ | ✅ | ✅ | | | | |
| Coder `1.31` | ✅ | ✅ | ✅ | | | | |
| Coder `1.30` | | ✅ | ✅ | ✅ | | | |
| Coder `1.29` | | ✅ | ✅ | ✅ | | | |
| Coder `1.28` | | ✅ | ✅ | ✅ | | | |
| Coder `1.27` | | ✅ | ✅ | ✅ | | | |
| Coder `1.26` | | | ✅ | ✅ | ✅ | | |
[##### K3s\
\
Set up K3s on an Ubuntu machine to deploy Coder.](https://coder.com/docs/v1/setup/kubernetes/k3s)
[##### Amazon Elastic Kubernetes Service\
\
Learn how to set up an Amazon EKS cluster for your Coder deployment.](https://coder.com/docs/v1/setup/kubernetes/aws)
[##### Azure Kubernetes Service\
\
Learn how to set up an AKS cluster for your Coder deployment.](https://coder.com/docs/v1/setup/kubernetes/azure)
[##### Google Kubernetes Engine\
\
Learn how to set up a GKE cluster for your Coder deployment.](https://coder.com/docs/v1/setup/kubernetes/google)
[##### Red Hat OpenShift\
\
Learn about deploying Coder in OpenShift Container Platform](https://coder.com/docs/v1/setup/kubernetes/openshift)
[##### Rancher Kubernetes Engine\
\
Learn how to setup a Rancher cluster for your Coder deployment](https://coder.com/docs/v1/setup/kubernetes/rke)
[](https://coder.com/docs/v1/setup/kubernetes#incompatible-kubernetes-distributions)
Incompatible Kubernetes distributions
--------------------------------------------------------------------------------------------------------------------------
* [DigitalOcean Kubernetes](https://www.digitalocean.com/products/kubernetes/)
does not support Coder with [CVMs](https://coder.com/docs/v1/admin/workspace-management/cvms)
.
* The [OpenShift Container Platform](https://coder.com/docs/v1/setup/kubernetes/openshift)
does not support Coder with [CVMs](https://coder.com/docs/v1/admin/workspace-management/cvms)
.
##### On this page
---
# Reference | Coder v1 Docs
[Home](https://coder.com/docs/v1 "Home")
[Command line](https://coder.com/docs/v1/cli "Command line")
Reference
coder provides a CLI for working with an existing Coder installation
### [](https://coder.com/docs/v1/cli/reference/coder#options)
Options
`` `-h, --help help for coder -v, --verbose show verbose output` ``
### [](https://coder.com/docs/v1/cli/reference/coder#see-also)
SEE ALSO
* [coder completion](https://coder.com/docs/v1/cli/reference/coder_completion)
- Generate completion script
* [coder config-ssh](https://coder.com/docs/v1/cli/reference/coder_config-ssh)
- Configure SSH to access Coder workspaces
* [coder images](https://coder.com/docs/v1/cli/reference/coder_images)
- Manage Coder images
* [coder login](https://coder.com/docs/v1/cli/reference/coder_login)
- Authenticate this client for future operations
* [coder logout](https://coder.com/docs/v1/cli/reference/coder_logout)
- Remove local authentication credentials if any exist
* [coder satellites](https://coder.com/docs/v1/cli/reference/coder_satellites)
- Interact with Coder satellite deployments
* [coder ssh](https://coder.com/docs/v1/cli/reference/coder_ssh)
- Enter a shell of execute a command over SSH into a Coder workspace
* [coder sync](https://coder.com/docs/v1/cli/reference/coder_sync)
- Establish a one way directory sync to a Coder workspace
* [coder tokens](https://coder.com/docs/v1/cli/reference/coder_tokens)
- manage Coder API tokens for the active user
* [coder tunnel](https://coder.com/docs/v1/cli/reference/coder_tunnel)
- proxies a port on the workspace to localhost
* [coder update](https://coder.com/docs/v1/cli/reference/coder_update)
- Update coder binary
* [coder urls](https://coder.com/docs/v1/cli/reference/coder_urls)
- Interact with workspace DevURLs
* [coder users](https://coder.com/docs/v1/cli/reference/coder_users)
- Interact with Coder user accounts
* [coder workspaces](https://coder.com/docs/v1/cli/reference/coder_workspaces)
- Interact with Coder workspaces
---
# Workspace management | Coder v1 Docs
[Home](https://coder.com/docs/v1 "Home")
[Admin](https://coder.com/docs/v1/admin "Admin")
Workspace management
Administrative users can modify a variety of workspace-related behaviors.
* From the Coder UI's **Manage** > **Admin** > **Infrastructure** tab, you can enable and configure the following features:
* [Access URL](https://coder.com/docs/v1/admin/access-url)
* [GPU vendor](https://coder.com/docs/v1/admin/workspace-management/gpu-acceleration)
* [Workspace container runtime](https://coder.com/docs/v1/admin/workspace-management/cvms)
* [Default registries](https://coder.com/docs/v1/admin/registries/default-registry)
* [Extensions](https://coder.com/docs/v1/admin/workspace-management/extensions)
* [Dev URL access permissions](https://coder.com/docs/v1/admin/devurls#setting-dev-url-access-permissions)
* [Browser security](https://coder.com/docs/v1/admin/security)
* [Memory overprovisioning](https://coder.com/docs/v1/admin/workspace-management/memory-overprovisioning)
* You can modify the [workspace shutdown behavior](https://coder.com/docs/v1/admin/workspace-management/shutdown)
on a per-organization basis to optimize resource usage.
* You can configure the autostart days of week on a per-organization basis to minimize unnecessary resource consumption.
* You can [install multiple IDEs](https://coder.com/docs/v1/admin/workspace-management/installing-jetbrains)
onto your image so that users have alternatives to the default option (VS Code).
* You can [disable SSH access](https://coder.com/docs/v1/admin/workspace-management/ssh-access)
for users by editing the Helm values file (Coder enables SSH access to workspaces by default).
---
# Docker in workspaces | Coder v1 Docs
[Home](https://coder.com/docs/v1 "Home")
[Admin](https://coder.com/docs/v1/admin "Admin")
[Workspace management](https://coder.com/docs/v1/admin/workspace-management "Workspace management")
Docker in workspaces
[Container-based virtual machines (CVMs)](https://coder.com/docs/v1/workspaces/cvms)
allow users to run system-level programs, such as Docker and systemd, in their workspaces.
If you're a site admin or a site manager, you can enable CVMs as a workspace deployment option.
[](https://coder.com/docs/v1/admin/workspace-management/cvms#infrastructure-requirements)
Infrastructure requirements
---------------------------------------------------------------------------------------------------------------------
* Coder implements container-based virtual machines (CVMs) using the [Sysbox container runtime](https://github.com/nestybox/sysbox)
, which allows unprivileged users to run system-level applications, such as Docker and systemd, securely from their workspace containers. Sysbox requires a [compatible Linux distribution](https://github.com/nestybox/sysbox/blob/master/docs/distro-compat.md)
to implement these security features; for additional information, see the [Sysbox User Guide: Design Notes](https://github.com/nestybox/sysbox/blob/master/docs/user-guide/design.md)
.
[Nestybox](https://www.nestybox.com/)
maintains the Sysbox runtime and provides an [enterprise offering called Sysbox EE](https://www.nestybox.com/sysbox-ee)
that includes additional security features and capabilities.
* The cluster must allow privileged containers and `hostPath` mounts. See [Security](https://coder.com/docs/v1/admin/workspace-management/cvms#security)
for more information on why this is still secure.
> You can use any cloud provider that supports the above requirements, but we have instructions on how to set up supported clusters on [AWS](https://coder.com/docs/v1/setup/kubernetes/aws)
> and [Google](https://coder.com/docs/v1/setup/kubernetes/google)
> . Azure-hosted clusters will meet these requirements as long as you use Kubernetes version 1.18+.
### [](https://coder.com/docs/v1/admin/workspace-management/cvms#hostpath-mounts)
HostPath mounts
The host paths required for CVM functionality depend on whether you've enabled **Caching** and **Auto loading of the `shiftfs` kernel module**. You can find these settings under **Manage > Admin > Infrastructure**.
The following table documents the host paths that are mounted:
| Caching | Auto Load `shiftfs` | `/usr/src` | `/lib/modules` | `/var/run` | `/var/lib` |
| --- | --- | --- | --- | --- | --- |
| Off | N/A | Read-only | Read-only | | |
| On | Off | Read-only | Read-only | Read-only | Read-write |
| On | On | Read-write | Read-write | Read-only | Read-write |
[](https://coder.com/docs/v1/admin/workspace-management/cvms#security)
Security
-------------------------------------------------------------------------------
The container-based virtual machine deployment option leverages the Sysbox container runtime to offer a VM-like user experience while retaining the footprint of a typical container.
Coder first launches a supervising container with additional privileges. This container is standard and included with the Coder release package. During the workspace build process, the supervising container launches an inner container using the Sysbox container runtime. This inner container is the user’s [workspace](https://coder.com/docs/v1/workspaces)
.
The user cannot gain access to the supervising container at any point. The isolation between the user's workspace container and its outer, supervising container is what provides [strong isolation](https://github.com/nestybox/sysbox/blob/master/docs/user-guide/security.md)
.
> Sysbox is not yet supported on systems with SELinux enabled.
[](https://coder.com/docs/v1/admin/workspace-management/cvms#known-issues)
Known issues
---------------------------------------------------------------------------------------
* Do not add configuration files like bash scripts to `/tmp` in CVMs since they will not be available once the CVM workspace is built. Consider creating another directory like `/mycompanyname`
* Coder requires an older version of `containerd.io` because it contains a version of `runc` that works with Sysbox correctly. See our [enterprise-base Dockerfile](https://github.com/coder/enterprise-images/blob/main/images/base/Dockerfile.ubuntu)
for an example or install the following in your Dockerfile `containerd.io=1.5.11-1`. In a future release, Coder will update to the latest Sysbox version that supports the latest `runc`.
* NVIDIA GPUs can be added to CVMs on bare metal clusters only. This feature is not supported on Google Kubernetes Engine or other cloud providers at this time.
Support for NVIDIA [GPUs](https://coder.com/docs/v1/admin/workspace-management/gpu-acceleration)
is in **beta**. We do not support AMD GPUs at this time.
[](https://coder.com/docs/v1/admin/workspace-management/cvms#next-steps)
Next Steps
-----------------------------------------------------------------------------------
[Cluster setup\
\
Learn how to set up K8s clusters capable of supporting CVMs.](https://coder.com/docs/v1/admin/workspace-management/cvms/cluster-setup)
[Images\
\
Learn how to work with images for CVM-enabled workspaces.](https://coder.com/docs/v1/admin/workspace-management/cvms/images)
[Management\
\
Learn how to enable CVMs.](https://coder.com/docs/v1/admin/workspace-management/cvms/management)
[NFS file mounting\
\
Learn how to mount NFS file shares onto Coder workspaces.](https://coder.com/docs/v1/guides/admin/nfs)
##### On this page
---
# Archives | Coder v1 Docs
[Home](https://coder.com/docs/v1 "Home")
[Changelog](https://coder.com/docs/v1/changelog "Changelog")
Archives
[##### 1.33.6\
\
Released on 10/24/2022](https://coder.com/docs/v1/changelog/1.33.6)
[##### 1.33.5\
\
Released on 09/16/2022](https://coder.com/docs/v1/changelog/1.33.5)
[##### 1.33.4\
\
Released on 08/29/2022](https://coder.com/docs/v1/changelog/1.33.4)
[##### 1.33.3\
\
Released on 08/22/2022](https://coder.com/docs/v1/changelog/1.33.3)
[##### 1.33.2\
\
Released on 08/15/2022](https://coder.com/docs/v1/changelog/1.33.2)
[##### 1.33.1\
\
Released on 08/04/2022](https://coder.com/docs/v1/changelog/1.33.1)
[##### 1.33.0\
\
Released on 07/27/2022](https://coder.com/docs/v1/changelog/1.33.0)
[##### 1.32.5\
\
Released on 09/09/2022](https://coder.com/docs/v1/changelog/1.32.5)
[##### 1.32.4\
\
Released on 08/22/2022](https://coder.com/docs/v1/changelog/1.32.4)
[##### 1.32.3\
\
Released on 08/04/2022](https://coder.com/docs/v1/changelog/1.32.3)
[##### 1.32.2\
\
Released on 07/20/2022](https://coder.com/docs/v1/changelog/1.32.2)
[##### 1.32.1\
\
Released on 07/14/2022](https://coder.com/docs/v1/changelog/1.32.1)
[##### 1.31.3\
\
Released on 08/15/2022](https://coder.com/docs/v1/changelog/1.31.3)
[##### 1.31.2\
\
Released on 07/20/2022](https://coder.com/docs/v1/changelog/1.31.2)
[##### 1.31.1\
\
Released on 06/01/2022](https://coder.com/docs/v1/changelog/1.31.1)
[##### 1.30.5\
\
Released on 09/01/2022](https://coder.com/docs/v1/changelog/1.30.5)
[##### 1.30.4\
\
Released on 07/20/2022](https://coder.com/docs/v1/changelog/1.30.4)
[##### 1.30.3\
\
Released on 06/01/2022](https://coder.com/docs/v1/changelog/1.30.3)
[##### 1.30.2\
\
Released on 04/30/2022](https://coder.com/docs/v1/changelog/1.30.2)
[##### 1.30.1\
\
Released on 04/29/2022](https://coder.com/docs/v1/changelog/1.30.1)
[##### 1.29.6\
\
Released on 06/01/2022](https://coder.com/docs/v1/changelog/1.29.6)
[##### 1.29.5\
\
Released on 04/30/2022](https://coder.com/docs/v1/changelog/1.29.5)
[##### 1.29.4\
\
Released on 04/29/2022](https://coder.com/docs/v1/changelog/1.29.4)
[##### 1.29.3\
\
Released on 4/28/2022](https://coder.com/docs/v1/changelog/1.29.3)
[##### 1.29.2\
\
Released on 4/15/2022](https://coder.com/docs/v1/changelog/1.29.2)
[##### 1.29.1\
\
Released on 04/05/2022](https://coder.com/docs/v1/changelog/1.29.1)
[##### 1.29.0\
\
Released on 03/23/2022](https://coder.com/docs/v1/changelog/1.29.0)
[##### 1.28.7\
\
Released on 04/30/2022](https://coder.com/docs/v1/changelog/1.28.7)
[##### 1.28.6\
\
Released on 04/29/2022](https://coder.com/docs/v1/changelog/1.28.6)
[##### 1.28.5\
\
Released on 4/28/2022](https://coder.com/docs/v1/changelog/1.28.5)
[##### 1.28.4\
\
Released on 03/17/2022](https://coder.com/docs/v1/changelog/1.28.4)
[##### 1.28.3\
\
Released on 03/10/2022](https://coder.com/docs/v1/changelog/1.28.3)
[##### 1.28.2\
\
Released on 02/28/2022](https://coder.com/docs/v1/changelog/1.28.2)
[##### 1.28.1\
\
Released on 02/23/2022](https://coder.com/docs/v1/changelog/1.28.1)
[##### 1.28.0\
\
Released on 02/16/2022](https://coder.com/docs/v1/changelog/1.28.0)
[##### 1.27.4\
\
Released on 05/2/2022](https://coder.com/docs/v1/changelog/1.27.4)
[##### 1.27.3\
\
Released on 03/10/2022](https://coder.com/docs/v1/changelog/1.27.3)
[##### 1.27.2\
\
Released on 02/15/2022](https://coder.com/docs/v1/changelog/1.27.2)
[##### 1.27.1\
\
Released on 01/31/2022](https://coder.com/docs/v1/changelog/1.27.1)
[##### 1.27.0\
\
Released on 01/19/2022](https://coder.com/docs/v1/changelog/1.27.0)
[##### 1.26.4\
\
Released on 03/17/2022](https://coder.com/docs/v1/changelog/archive/1.26.4)
[##### 1.26.3\
\
Released on 03/11/2022](https://coder.com/docs/v1/changelog/archive/1.26.3)
[##### 1.26.2\
\
Released on 01/28/2022](https://coder.com/docs/v1/changelog/archive/1.26.2)
[##### 1.26.1\
\
Released on 01/06/2022](https://coder.com/docs/v1/changelog/archive/1.26.1)
[##### 1.26.0\
\
Released on 12/15/2021](https://coder.com/docs/v1/changelog/archive/1.26.0)
[##### 1.25.0\
\
Released on 11/17/2021](https://coder.com/docs/v1/changelog/archive/1.25.0)
[##### 1.24.0\
\
Released on 10/20/2021](https://coder.com/docs/v1/changelog/archive/1.24.0)
[##### 1.23.1\
\
Released on 10/11/2021](https://coder.com/docs/v1/changelog/archive/1.23.1)
[##### 1.23.0\
\
Released on 09/22/2021](https://coder.com/docs/v1/changelog/archive/1.23.0)
[##### 1.22.3\
\
Released on 09/29/2021](https://coder.com/docs/v1/changelog/archive/1.22.3)
[##### 1.22.2\
\
Released on 09/23/2021](https://coder.com/docs/v1/changelog/archive/1.22.2)
[##### 1.22.1\
\
Released on 09/13/2021](https://coder.com/docs/v1/changelog/archive/1.22.1)
[##### 1.22.0\
\
Released on 08/25/2021](https://coder.com/docs/v1/changelog/archive/1.22.0)
[##### 1.21.7\
\
Released on 01/05/2022](https://coder.com/docs/v1/changelog/archive/1.21.7)
[##### 1.21.6\
\
Released on 11/19/2021](https://coder.com/docs/v1/changelog/archive/1.21.6)
[##### 1.21.5\
\
Released on 09/29/2021](https://coder.com/docs/v1/changelog/archive/1.21.5)
[##### 1.21.4\
\
Released on 09/22/2021](https://coder.com/docs/v1/changelog/archive/1.21.4)
[##### 1.21.3\
\
Released on 09/13/2021](https://coder.com/docs/v1/changelog/archive/1.21.3)
[##### 1.21.2\
\
Released on 08/26/2021](https://coder.com/docs/v1/changelog/archive/1.21.2)
[##### 1.21.1\
\
Released on 08/05/2021](https://coder.com/docs/v1/changelog/archive/1.21.1)
[##### 1.21.0\
\
Released on 07/21/2021](https://coder.com/docs/v1/changelog/archive/1.21.0)
[##### 1.20.0\
\
Released on 06/16/2021](https://coder.com/docs/v1/changelog/archive/1.20.0)
[##### 1.19.1\
\
Released on 06/23/2021](https://coder.com/docs/v1/changelog/archive/1.19.1)
[##### 1.19.0\
\
Released on 05/19/2021](https://coder.com/docs/v1/changelog/archive/1.19.0)
[##### 1.18.1\
\
Released on 04/21/2021](https://coder.com/docs/v1/changelog/archive/1.18.1)
[##### 1.18.0\
\
Released on 04/21/2021](https://coder.com/docs/v1/changelog/archive/1.18.0)
[##### 1.17.4\
\
Released on 04/13/2021](https://coder.com/docs/v1/changelog/archive/1.17.4)
[##### 1.17.3\
\
Released on 04/09/2021](https://coder.com/docs/v1/changelog/archive/1.17.3)
[##### 1.17.2\
\
Released on 03/30/2021](https://coder.com/docs/v1/changelog/archive/1.17.2)
[##### 1.17.1\
\
Released on 03/25/2021](https://coder.com/docs/v1/changelog/archive/1.17.1)
[##### 1.17.0\
\
Released on 03/17/2021](https://coder.com/docs/v1/changelog/archive/1.17.0)
[##### 1.16.3\
\
Released on 03/25/21](https://coder.com/docs/v1/changelog/archive/1.16.3)
[##### 1.16.2\
\
Released on 03/09/2021](https://coder.com/docs/v1/changelog/archive/1.16.2)
[##### 1.16.1\
\
Released on 02/24/2021](https://coder.com/docs/v1/changelog/archive/1.16.1)
[##### 1.16.0\
\
Released on 02/22/2021](https://coder.com/docs/v1/changelog/archive/1.16.0)
[##### 1.15.2\
\
Released on 01/26/2021](https://coder.com/docs/v1/changelog/archive/1.15.2)
[##### 1.15.1\
\
Released on 01/25/2021](https://coder.com/docs/v1/changelog/archive/1.15.1)
[##### 1.15.0\
\
Released on 01/20/2021. Deprecated on 01/25/2021.](https://coder.com/docs/v1/changelog/archive/1.15.0)
[##### 1.14.4\
\
Released on 01/11/2021](https://coder.com/docs/v1/changelog/archive/1.14.4)
[##### 1.14.3\
\
Released on 01/08/2021](https://coder.com/docs/v1/changelog/archive/1.14.3)
[##### 1.14.2\
\
Released on 12/22/2020](https://coder.com/docs/v1/changelog/archive/1.14.2)
[##### 1.14.1\
\
Released on 12/18/2020](https://coder.com/docs/v1/changelog/archive/1.14.1)
[##### 1.14.0\
\
Released on 12/18/2020](https://coder.com/docs/v1/changelog/archive/1.14.0)
[##### 1.13.2\
\
Released on 11/23/2020](https://coder.com/docs/v1/changelog/archive/1.13.2)
---
# 1.42.1 | Coder v1 Docs
[Home](https://coder.com/docs/v1 "Home")
[Changelog](https://coder.com/docs/v1/changelog "Changelog")
[1.42.0](https://coder.com/docs/v1/changelog/1.42.0 "1.42.0")
1.42.1
### [](https://coder.com/docs/v1/changelog/1.42.1#breaking-changes-)
Breaking changes ❗
There are no breaking changes in 1.42.1.
### [](https://coder.com/docs/v1/changelog/1.42.1#features-)
Features ✨
There are no features in 1.42.1.
### [](https://coder.com/docs/v1/changelog/1.42.1#bug-fixes-)
Bug fixes 🐛
* infra: Fixed an issue where public Dev URLs resulted in an Internal Server Error.
### [](https://coder.com/docs/v1/changelog/1.42.1#security-updates-)
Security updates 🔐
There are no security updates in 1.42.1.
---
# Default registry | Coder v1 Docs
[Home](https://coder.com/docs/v1 "Home")
[Admin](https://coder.com/docs/v1/admin "Admin")
[Registries](https://coder.com/docs/v1/admin/registries "Registries")
Default registry
> This feature is unavailable for air-gapped deployments.
Coder is configured to automatically import the default [registry](https://coder.com/docs/v1/admin/registries)
, Docker Hub, to streamline your initial setup process.
This means that your users can create workspaces using Docker Hub images without further configuration on your part.
[](https://coder.com/docs/v1/admin/registries/default-registry#disable-the-importing-of-the-default-registry)
Disable the importing of the default registry
-----------------------------------------------------------------------------------------------------------------------------------------------------------
If you prefer a more granular experience, you can disable the importing of Docker Hub. You'll then have to manually configure registries on a per-organization basis before you can import images that can be used to create new workspaces.
To do so:
1. Launch the Coder dashboard.
2. Go to **Manage** > **Admin**.
3. On the **Infrastructure** tab, uncheck the **Import Default Registry** option.
4. Click **Save Registry**.
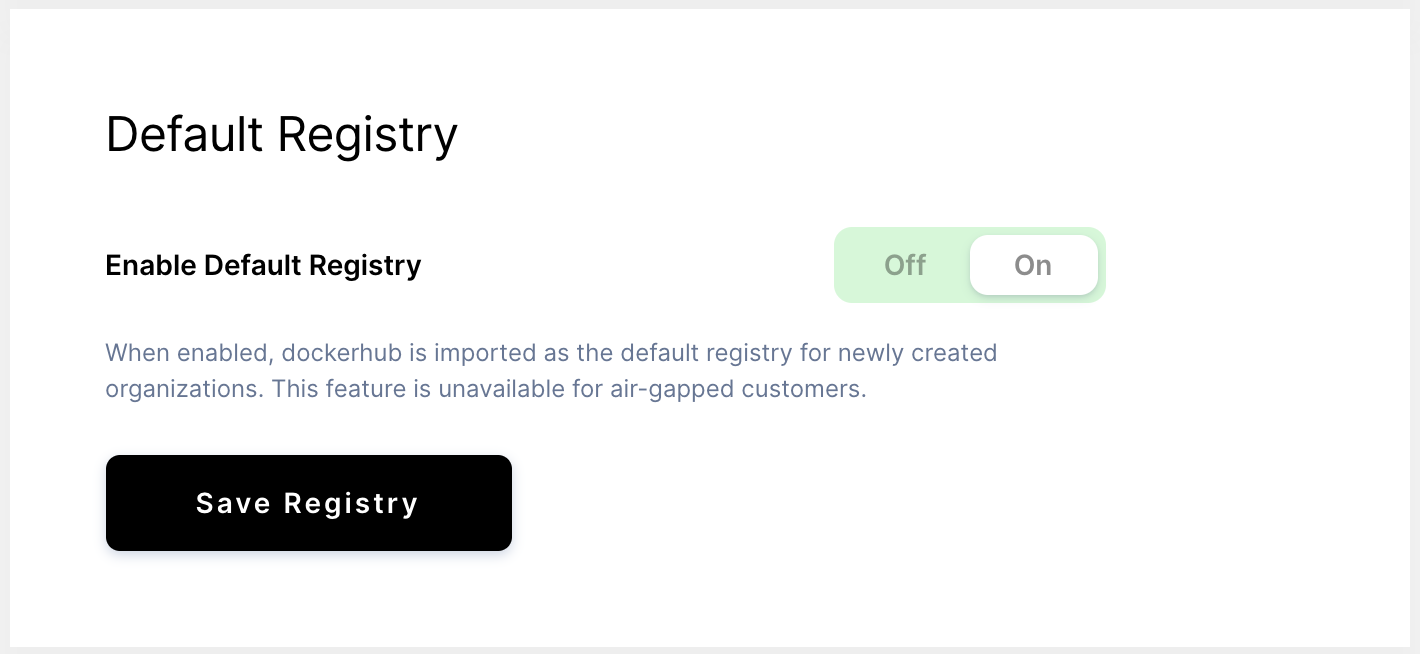
---
# Azure Container Registry | Coder v1 Docs
[Home](https://coder.com/docs/v1 "Home")
[Admin](https://coder.com/docs/v1/admin "Admin")
[Registries](https://coder.com/docs/v1/admin/registries "Registries")
Azure Container Registry
This article will show you how to add a private Azure Container Registry (ACR) instance to Coder.
[](https://coder.com/docs/v1/admin/registries/azure#step-1-set-up-authentication-for-coder)
Step 1: Set up authentication for Coder
-----------------------------------------------------------------------------------------------------------------------------------
Coder supports the [following methods](https://docs.microsoft.com/en-us/azure/container-registry/container-registry-authentication)
for authenticating with ACR:
* Static credentials that the `docker login` command can consume
* **Alpha:** Azure Active Directory (AAD) Pod Identity
### [](https://coder.com/docs/v1/admin/registries/azure#option-a-provision-static-credentials-for-coder)
Option A: Provision static credentials for Coder
ACR provides several options for using static credentials, including:
* Registry Administrator Account (not enabled by default)
* AAD Service Principal (SP)
* Individual AAD Identity
* Repository-scoped Access Token
Depending on your ACR SKU, some of the above features may not be available to you. Additionally, depending on the method you use, you may need to regenerate the static credentials used by Coder from time to time.
Please consult the [Azure Container Registry Documentation](https://docs.microsoft.com/en-us/azure/container-registry/container-registry-authentication)
for more details.
Once you've chosen the option for using static credentials, make a note of your username and password and proceed to **step 2** of this guide.
### [](https://coder.com/docs/v1/admin/registries/azure#option-b-use-an-azure-active-directory-aad-pod-identity)
Option B: Use an Azure Active Directory (AAD) Pod Identity
> This is currently an **alpha** feature. To use this feature, enable the feature flag under `Manage > Admin > Infrastructure > Azure Container Registry authentication`.
AAD Pod Identity allows you to assign an AAD identity to pods in your Azure Kubernetes (AKS) cluster. You can assign Coder an AAD identity with pull access to an ACR instance so that Coder can access the registry without needing to provide static credentials.
1. [Create your Azure role assignments and install AAD Pod Identity on your clusters.](https://azure.github.io/aad-pod-identity/docs/getting-started/)
Consult the [AAD Pod Identity Documentation](https://azure.github.io/aad-pod-identity/docs/)
for additional support on configuring this feature.
2. Once you have configured an Azure Identity Binding, ensure that you label the `coderd` deployment pods with the correct `aadpodidbinding` label.
For example, if you name the Azure Identity `coder-identity`, then the pods in your `coderd` deployment should all have the label `aadpodidbinding: coder-identity`.
3. Verify that the Azure Identity binding is set up correctly. First, run:
`` `kubectl run -it --rm --image=mcr.microsoft.com/azure-cli:latest --labels=aadpodidbinding=coder-identity aadpodidtest -- bash` ``
Then, run the following command, replacing the variables `$SUBSCRIPTION_ID`, `$RESOURCE_GROUP`, and `$IDENTITY_NAME` where appropriate:
`` `bash-5.1# az login --identity -u /subscriptions/$SUBSCRIPTION_ID/resourcegroups/$RESOURCE_GROUP/providers/Microsoft.ManagedIdentity/userAssignedIdentities/$IDENTITY_NAME # Expected output: [ { "environmentName": "AzureCloud", "homeTenantId": "xxxxxxxx-xxxx-xxxx-xxxx-xxxxxxxxxxxx", "id": "xxxxxxxx-xxxx-xxxx-xxxx-xxxxxxxxxxxx", "isDefault": true, "managedByTenants": [], "name": "Microsoft Azure Sponsorship", "state": "Enabled", "tenantId": "xxxxxxxx-xxxx-xxxx-xxxx-xxxxxxxxxxxx", "user": { "assignedIdentityInfo": "MSIResource-/subscriptions/$SUBSCRIPTION_ID/resourcegroups/$RESOURCE_GROUP/providers/Microsoft.ManagedIdentity/userAssignedIdentities/$IDENTITY_NAME", "name": "userAssignedIdentity", "type": "servicePrincipal" } } ]` ``
If you see output similar to the above, then you have successfully configured AAD Pod Identity!
#### [](https://coder.com/docs/v1/admin/registries/azure#troubleshooting)
Troubleshooting
You can manually check that Coder is able to acquire a token from the Azure Instance Metadata Service (IMDS) by running the following (be sure to replace the variable `$CLIENTID` with the ID of the user-assigned entity you are using):
`` `kubectl -n coder exec -it deployment/coderd -- curl 'http://169.254.169.254/metadata/identity/oauth2/token?api-version=2018-02-01&client_id=$CLIENTID&resource=https%3A%2F%2Fmanagement.azure.com' -H 'Metadata:true'` ``
If you receive an error similar to the following, try restarting `coderd` by running the command `kubectl rollout restart deployment coderd`: the `coderd` pod:
`` `{"error":"invalid_request","error_description":"Identity not found"}` ``
If you run into further issues, please check the [official troubleshooting documentation for AAD Pod Identity](https://azure.github.io/aad-pod-identity/docs/troubleshooting/)
.
1. Next, set the `aadpodidbinding` label in your [Helm `values.yaml`](https://coder.com/docs/v1/guides/admin/helm-charts)
:
`` `extraLabels: aadpodidbinding: coder-identity` ``
2. You will then need to upgrade the Helm deployment:
`` `helm upgrade coder coder/coder --values values.yaml` ``
3. Finally, enable the feature flag under `Manage > Admin > Infrastructure > Azure Registry Authentication` if you haven't already.
[](https://coder.com/docs/v1/admin/registries/azure#step-2-add-your-azure-container-registry-to-coder)
Step 2: Add your Azure Container Registry to Coder
---------------------------------------------------------------------------------------------------------------------------------------------------------
You can add your private ACR instance at the same time that you [add your images](https://coder.com/docs/v1/images)
. To import an image:
1. In Coder, go to **Images** and click on **Import Image** in the upper-right.
2. In the dialog that opens, you'll be prompted to pick a registry. However, to _add_ a registry, click **Add a new registry** located immediately below the registry selector.
3. Provide a **registry name** and the **registry**.
4. Depending on how you are authenticating:
1. If you are using **Static Credentials**, then set the **registry kind** to **Generic Registry** and provide the **username** and **password** as normal.
2. If you are using AAD Pod Identity, set **Registry Kind** to **Microsoft Azure Container Registry**. You do not have to provide a username or password if you are using AAD Pod Identity.
5. Continue with the process of [adding your image](https://coder.com/docs/v1/images)
.
6. When done, click **Import**.
##### On this page
---
# SSH configuration | Coder v1 Docs
[Home](https://coder.com/docs/v1 "Home")
[Admin](https://coder.com/docs/v1/admin "Admin")
[Workspace management](https://coder.com/docs/v1/admin/workspace-management "Workspace management")
SSH configuration
By default, Coder enables SSH access for all users. Coder assigns each user a private key that they can use to access their workspaces.
[](https://coder.com/docs/v1/admin/workspace-management/ssh-access#background)
Background
-----------------------------------------------------------------------------------------
Part of the standard Coder workspace asset bundle is a lightweight SSH server mounted onto the workspace agent; the lightweight SSH server is a backup used when Coder can't find a server available on port 22. This allows slimmer images to remain accessible via SSH without the need for additional image dependencies.
[](https://coder.com/docs/v1/admin/workspace-management/ssh-access#using-openssh)
Using OpenSSH
-----------------------------------------------------------------------------------------------
The built-in SSH server is limited and does not implement advanced functionality like X11 forwarding or `sshd_config` specifications. If SSH is the primary mode of access to Coder for your users, or if you would like to take advantage of a login shell, consider running an entire OpenSSH server with `systemd` inside your image instead.
To do so, add the following to your Dockerfile:
`` `FROM ubuntu:20.04 RUN apt-get update && apt-get install -y \ build-essential \ systemd \ openssh-server # Start OpenSSH with systemd RUN systemctl enable ssh # recommended: remove the system-wide environment override RUN rm /etc/environment # recommended: adjust OpenSSH config RUN echo "PermitUserEnvironment yes" >> /etc/ssh/sshd_config && \ echo "X11Forwarding yes" >> /etc/ssh/sshd_config && \ echo "X11UseLocalhost no" >> /etc/ssh/sshd_config` ``
Then, make sure that you're creating your workspaces with the [CVM option](https://coder.com/docs/v1/workspaces/cvms)
enabled.
> If Coder detects a running TCP server on port 22, it will forward incoming SSH traffic to this server. This means that workspaces should not run a TCP server on port 22 unless it can adequately handle incoming SSH traffic.
At startup, Coder injects the user's SSH key into `~/authorized_keys` inside your workspace to facilitate authentication with OpenSSH. For the best experience, add the following to your `/etc/ssh/sshd_config` file inside your image:
`` `PermitUserEnvironment yes X11Forwarding yes X11UseLocalhost no` ``
> X11 forwarding will fail with `X11 forwarding request failed on channel 0` if `xauth` is not installed.
### [](https://coder.com/docs/v1/admin/workspace-management/ssh-access#ssh-environment-variables)
SSH environment variables
OpenSSH handles environment variables differently than most container processes. Environment variable overrides for OpenSSH sessions are set by `~/.ssh/environment` and `/etc/environment`. Note that these values will override those specified in the Dockerfile `ENV` directives.
At workspace startup, Coder injects the image defined environment variables into `~/.ssh/environment`, as well as a set of Coder-defined defaults.
The following snippet shows an example of what this file may look like for a new workspace.
`` `# --------- START CODER ENVIRONMENT VARIABLES ---------- # The following has been auto-generated at workspace startup # You should not hand-edit this section unless you are deleting it. SHELL=/bin/bash [[email protected]](https://coder.com/cdn-cgi/l/email-protection) CODER_WORKSPACE_NAME=dev HOSTNAME=dev CODER_USERNAME=john SSH_AUTH_SOCK=/home/coder/.coder-ssh-agent.sock PWD=/home/coder CODER_ASSETS_ROOT=/var/tmp/coder HOME=/home/coder LANG=en_US.UTF-8 CODER_CPU_LIMIT=24.00 CODER_MEMORY_LIMIT=32.00 USER=coder ITEM_URL=https://coder.domain.com/extensions CODER_IMAGE_TAG=latest CODER_IMAGE_DIGEST=sha256:1586122346e7d9d64a0c49a28df7538de4c5da5bfe0df672b1552dd52932c9a7 CODER_IMAGE_URI=codercom/enterprise-base:ubuntu PATH=/usr/local/google-cloud-sdk/bin:/home/coder/go/bin:/home/linuxbrew/.linuxbrew/bin:/usr/local/sbin:/usr/local/bin:/usr/sbin:/usr/bin:/sbin:/bin:/var/tmp/coder/coder-cli BASE_PATH=/proxy/workspaces/60162f9e-78809dfc9a9e24b8f5e580ff/ide _=/var/tmp/coder/envagent # ----------------- END CODER -----------------------` ``
[](https://coder.com/docs/v1/admin/workspace-management/ssh-access#disable-ssh-access)
Disable SSH access
---------------------------------------------------------------------------------------------------------
If you would like to disable SSH access:
1. Log into the Coder UI with a site manager account, and go to **Manage** > **Providers**.
2. Select the workspace provider where you want to disable SSH. Click on the **vertical ellipses** to its right and select **edit**.
3. Scroll down to the **Features** section and toggle **External Connect** to **off**.
Repeat these steps for each workspace provider where you want to disable SSH connections.
##### On this page
---
# Amazon Elastic Container Registry | Coder v1 Docs
[Home](https://coder.com/docs/v1 "Home")
[Admin](https://coder.com/docs/v1/admin "Admin")
[Registries](https://coder.com/docs/v1/admin/registries "Registries")
Amazon Elastic Container Registry
This article will show you how to add your private ECR to Coder. If you're using a public ECR registry, you do not need to follow the steps below.
Amazon requires users to [request temporary login credentials](https://docs.aws.amazon.com/AmazonECR/latest/userguide/registry_auth.html)
to access a private Elastic Container Registry (ECR) registry. When interacting with ECR, Coder will request temporary credentials from the registry using the AWS credentials linked to the registry.
[](https://coder.com/docs/v1/admin/registries/ecr#step-1-setting-up-authentication-for-coder)
Step 1: Setting up authentication for Coder
-----------------------------------------------------------------------------------------------------------------------------------------
To access a private ECR registry, Coder needs to authenticate with AWS. Coder supports two methods of authentication with AWS ECR:
* Static credentials
* **Alpha:** IAM roles for service accounts
### [](https://coder.com/docs/v1/admin/registries/ecr#option-a-provision-static-credentials-for-coder)
Option A: Provision static credentials for Coder
You can use an **Access Key ID** and **Secret Access Key** tied to either your own AWS account _or_ credentials tied to a dedicated IAM user (we recommend the latter option).
> You are not limited to providing a single set of AWS credentials. For example, you can use a set of credentials with access to all of your ECR repositories, or you can use individual sets of credentials, each with access to a single repository.
To provision static credentials for Coder:
1. **Optional:** [Create an IAM user for Coder](https://docs.aws.amazon.com/IAM/latest/UserGuide/id_users_create.html)
to access ECR. You can either attach the AWS-managed policy `AmazonEC2ContainerRegistryReadOnly` to the user, or you can [create your own](https://docs.aws.amazon.com/AmazonECR/latest/userguide/repository-policy-examples.html)
.
2. [Create an access key](https://docs.aws.amazon.com/IAM/latest/UserGuide/id_credentials_access-keys.html)
for the IAM user to be used with Coder (if one does not already exist).
### [](https://coder.com/docs/v1/admin/registries/ecr#option-b-link-an-aws-iam-role-to-the-coder-kubernetes-service-account-irsa)
Option B: Link an AWS IAM role to the Coder Kubernetes service account (IRSA)
**Note:** This is currently an **alpha** feature.
Coder can use an [IAM role linked to Coder's Kubernetes service account](https://aws.amazon.com/blogs/opensource/introducing-fine-grained-iam-roles-service-accounts/)
, though this is only supported when Coder is running in AWS EKS. This is because the [EKS Pod Identity Webhook](https://github.com/aws/amazon-eks-pod-identity-webhook/)
is required to provision and inject the required token into the `coderd` pod.
> For more information on IAM Roles for Service Accounts (IRSA), please consult the [AWS Documentation](https://docs.aws.amazon.com/eks/latest/userguide/iam-roles-for-service-accounts.html)
> .
To link an IAM role to Coder's Kubernetes service account:
1. Enable the feature under Manage > Admin > Infrastructure > ECR IAM Role Authentication.
2. Create an IAM OIDC Provider for your EKS cluster (if it does not already exist).
3. [Create the IAM role](https://docs.aws.amazon.com/eks/latest/userguide/create-service-account-iam-policy-and-role.html#create-service-account-iam-role)
to be used by Coder, if it does not already exist.
**Note:** Ensure that you also create and attach a trust policy that permits the Coder service account the action `sts:AssumeRoleWithWebIdentity`. The trust policy will look similar to the following:
`` `{ "Version": "2012-10-17", "Statement": [ { "Effect": "Allow", "Principal": { "Federated": "arn:aws:iam::${ACCT_ID}:oidc-provider/${OIDC_PROVIDER}" }, "Action": "sts:AssumeRoleWithWebIdentity", "Condition": { "StringEquals": { "${OIDC_PROVIDER}:sub": "system:serviceaccount:${NAMESPACE}:${SERVICE_ACCOUNT}" } } } ] }` ``
4. Annotate the Coder service account with the role ARN:
a) Add the following to your `values.yaml` for your Coder helm deployment:
`` `coderd: ... builtinProviderServiceAccount: ... annotations: eks.amazonaws.com/role-arn: my-role-arn` ``
b) Update the Helm deployment:
`` `helm upgrade coder coder/coder --values values.yaml` ``
c) Verify that the Coder service account now has the correct annotation:
`` `kubectl get serviceaccount coder -o yaml | grep eks.amazonaws.com/role-arn eks.amazonaws.com/role-arn: my-role-arn` ``
5. Validate that pods created with the `coder` service account have permission to assume the role:
`` `kubectl run -it --rm awscli --image=amazon/aws-cli \ --overrides='{"spec":{"serviceAccount":"coder"}}' \ --command aws ecr describe-repositories` ``
[](https://coder.com/docs/v1/admin/registries/ecr#step-2-add-your-private-ecr-registry-to-coder)
Step 2: Add your private ECR registry to Coder
-----------------------------------------------------------------------------------------------------------------------------------------------
You can add your private ECR registry at the same time that you [add your images](https://coder.com/docs/v1/images)
. To import an image:
1. In Coder, go to **Images** and click on **Import Image** in the upper-right.
2. In the dialog that opens, you'll be prompted to pick a registry. However, to _add_ a registry, click **Add a new registry** located immediately below the registry selector.
3. Provide a **registry name** and the **registry**.
4. Set the **registry kind** to **ECR** and provide your **Access Key ID** and **Secret Access Key**, if required. If you want to use IRSA instead of static credentials, to authenticate with ECR, leave **Access Key ID** and **Secret Access Key** blank.
5. Continue with the process of [adding your image](https://coder.com/docs/v1/images)
.
6. When done, click **Import**.
##### On this page
---
# Shutdown | Coder v1 Docs
[Home](https://coder.com/docs/v1 "Home")
[Admin](https://coder.com/docs/v1/admin "Admin")
[Workspace management](https://coder.com/docs/v1/admin/workspace-management "Workspace management")
Shutdown
You can specify the duration of inactivity allowed before a workspace automatically shuts down. This helps you optimize your resource allocation since automatically shutting down idle workspaces can save resource availability and reduce costs.
A workspace that's stopped must be rebuilt before it can be used again. All data outside of **/home** is lost during rebuild. Please store any changes you would like persisted across rebuilds with the [Dotfiles](https://coder.com/docs/v1/workspaces/personalization)
feature.
> If Code Web (VS Code in a browser), the web terminal, or an SSH connection are open, Coder considers the workspace to be active and will not automatically shut down.
[](https://coder.com/docs/v1/admin/workspace-management/shutdown#configuring-workspace-shutdown-behavior)
Configuring workspace shutdown behavior
-------------------------------------------------------------------------------------------------------------------------------------------------
If you have administrative privileges, you can configure the workspace shutdown behavior. Configuring the workspace shutdown behavior is done at the organization level.
In the Coder dashboard, go to **Manage** > **Organizations** and choose the organization you'd like to modify.
Click **Edit** in the top-right. In the dialog that opens, use the slider underneath **Workspace Shutdown Behavior** to select the maximum allowed duration.
Select **User-controlled workspace shutdown behavior** if you'd like to allow users to set their desired shutdown behavior. This will override the org-level setting.
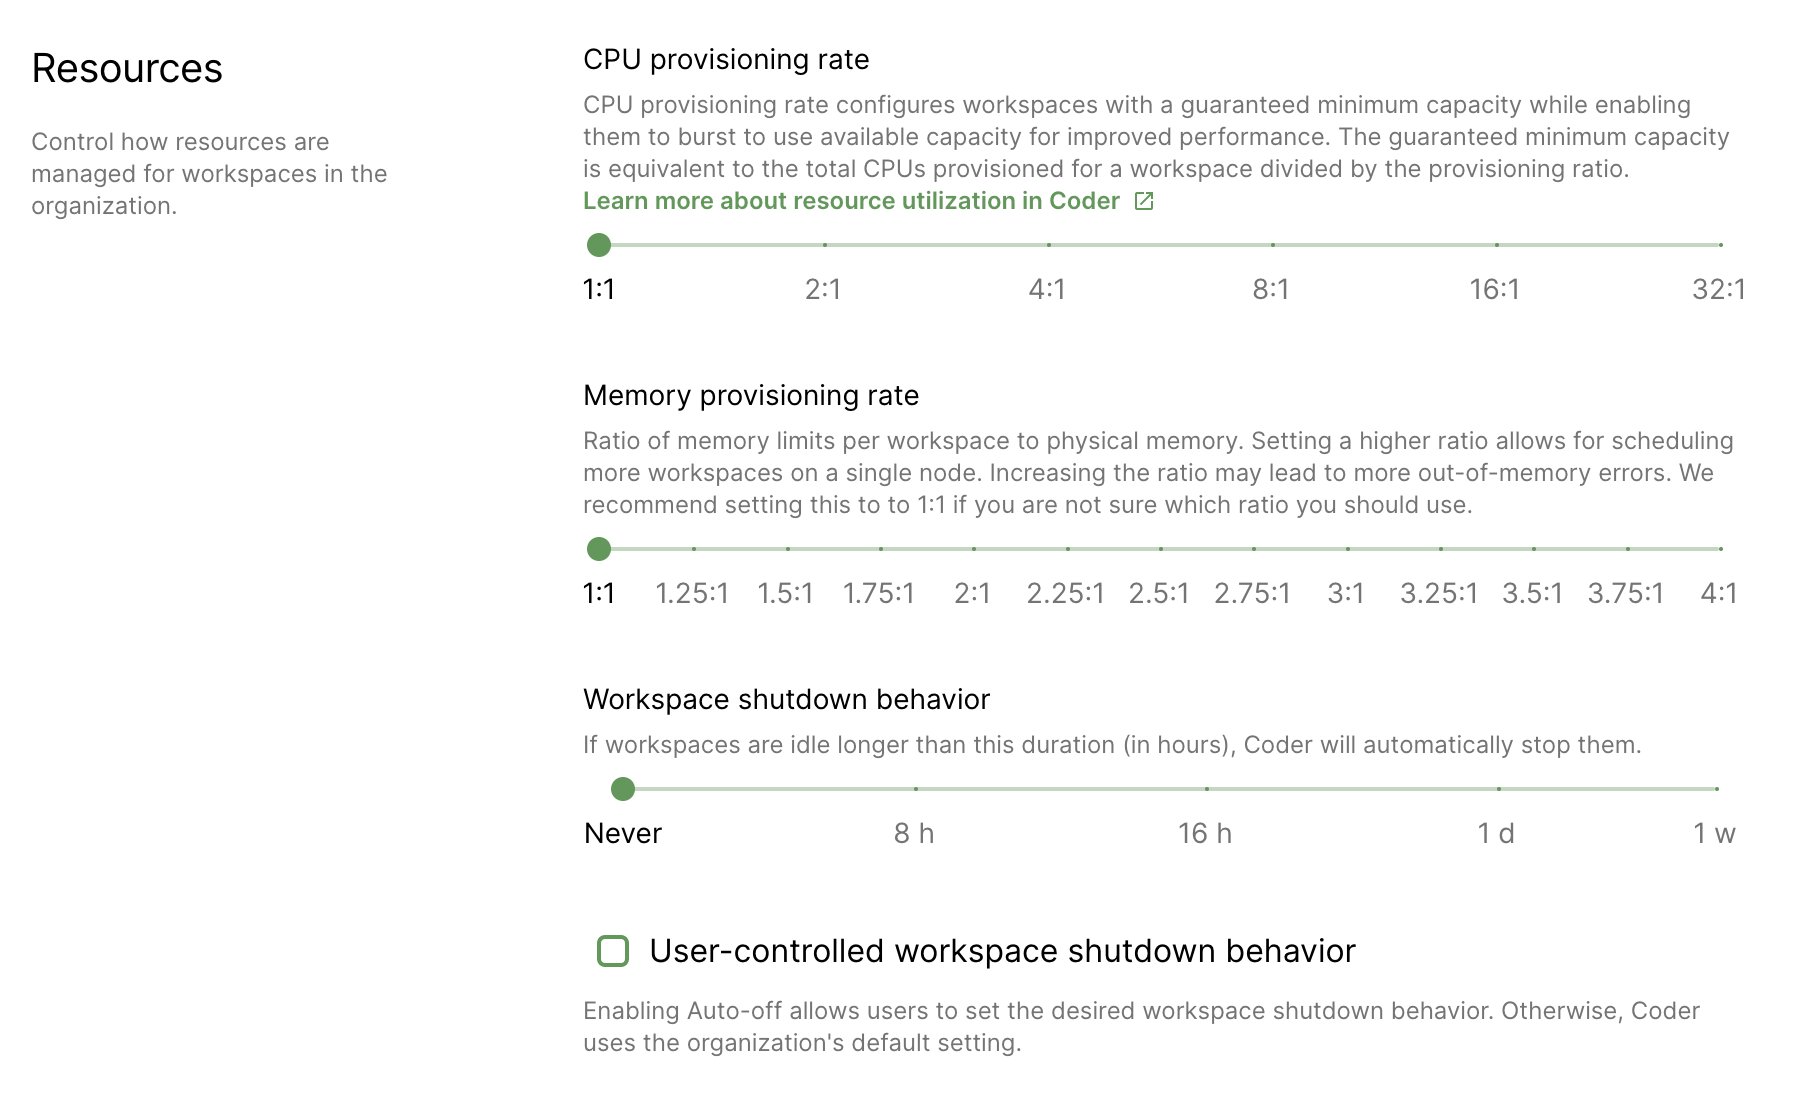
---
# Google Container Registry | Coder v1 Docs
[Home](https://coder.com/docs/v1 "Home")
[Admin](https://coder.com/docs/v1/admin "Admin")
[Registries](https://coder.com/docs/v1/admin/registries "Registries")
Google Container Registry
Google Container Registry (GCR) uses different authorization methods, unlike the generic `registry:2` image that requires a username and password. This article will show you how to add GCR to Coder using a `_json_key` file.
[](https://coder.com/docs/v1/admin/registries/gcr#adding-a-private-gcr-registry)
Adding a private GCR registry
--------------------------------------------------------------------------------------------------------------
Create a `_json_key` file with your authorization information:
1. In the [Google Cloud Console](https://console.cloud.google.com/)
, configure a service account for access to the GCR registry holding your images for use with Coder.
2. Create a [JSON key file](https://cloud.google.com/container-registry/docs/advanced-authentication#json-key)
.
Add your private GCR registry during the process of [adding images](https://coder.com/docs/v1/images)
. To import an image:
1. Go to **Images** > **Import Image** in the upper-right.
2. In the dialog that opens, you'll be prompted to pick a registry by default. However, to _add_ a registry, click **Add a new registry**, which is the option located immediately below the registry selector.
3. You'll be asked to provide a **registry name** and the **registry**. You can leave the **registry kind** as the default **Generic** value.
4. Since your registry is a **private registry**, provide the `_json_key` string for the **username** and the file's contents for **password**.
5. Continue with the process of [adding your image](https://coder.com/docs/v1/images)
.
6. When done, click **Import**.
---
# 1.41.1 | Coder v1 Docs
[Home](https://coder.com/docs/v1 "Home")
[Changelog](https://coder.com/docs/v1/changelog "Changelog")
[1.41.0](https://coder.com/docs/v1/changelog/1.41.0 "1.41.0")
1.41.1
### [](https://coder.com/docs/v1/changelog/1.41.1#breaking-changes-)
Breaking changes ❗
* There are no breaking changes in 1.41.1.
### [](https://coder.com/docs/v1/changelog/1.41.1#features-)
Features ✨
* There are no new features 1.41.1.
### [](https://coder.com/docs/v1/changelog/1.41.1#bug-fixes-)
Bug fixes 🐛
* Improved PTY session handling in embedded SSH connections.
* Fixed a goroutine leak.
### [](https://coder.com/docs/v1/changelog/1.41.1#security-updates-)
Security updates 🔐
* Fixed an issue where users could modify other users' workspaces autostart configuration.
---
# 1.39.2 | Coder v1 Docs
[Home](https://coder.com/docs/v1 "Home")
[Changelog](https://coder.com/docs/v1/changelog "Changelog")
[1.39.0](https://coder.com/docs/v1/changelog/1.39.0 "1.39.0")
1.39.2
### [](https://coder.com/docs/v1/changelog/1.39.2#breaking-changes-)
Breaking changes ❗
There are no breaking changes in 1.39.2.
### [](https://coder.com/docs/v1/changelog/1.39.2#features-)
Features ✨
There are no features in 1.39.2.
### [](https://coder.com/docs/v1/changelog/1.39.2#bug-fixes-)
Bug fixes 🐛
* Fixed an issue where updates to the 'CVM Internal Network' field in a workspace provider do not propagate to coderd replicas for workspace builds.
### [](https://coder.com/docs/v1/changelog/1.39.2#security-updates-)
Security updates 🔐
There are no security updates in 1.39.2.
---
# Memory provisioning | Coder v1 Docs
[Home](https://coder.com/docs/v1 "Home")
[Admin](https://coder.com/docs/v1/admin "Admin")
[Workspace management](https://coder.com/docs/v1/admin/workspace-management "Workspace management")
Memory provisioning
Coder allows you to set memory provisioning ratios for each of your organizations. By changing this ratio, you can change the number of workspaces that fit onto a single Kubernetes node.
> **Note:** This may cause the Linux Kernel to terminate user workloads if there is insufficient system memory available. You can read more about this topic [here](https://www.kernel.org/doc/gorman/html/understand/understand016.html)
> .
[](https://coder.com/docs/v1/admin/workspace-management/memory-overprovisioning#step-1-enabling-memory-provisioning)
Step 1: Enabling memory provisioning
---------------------------------------------------------------------------------------------------------------------------------------------------------
A site admin/manager must complete these steps:
1. In the Coder Dashboard's top navigation bar, go to **Manage** > **Admin**.
2. Under the **Infrastructure** tab, check the box next to **Enable Memory Overprovisioning**.
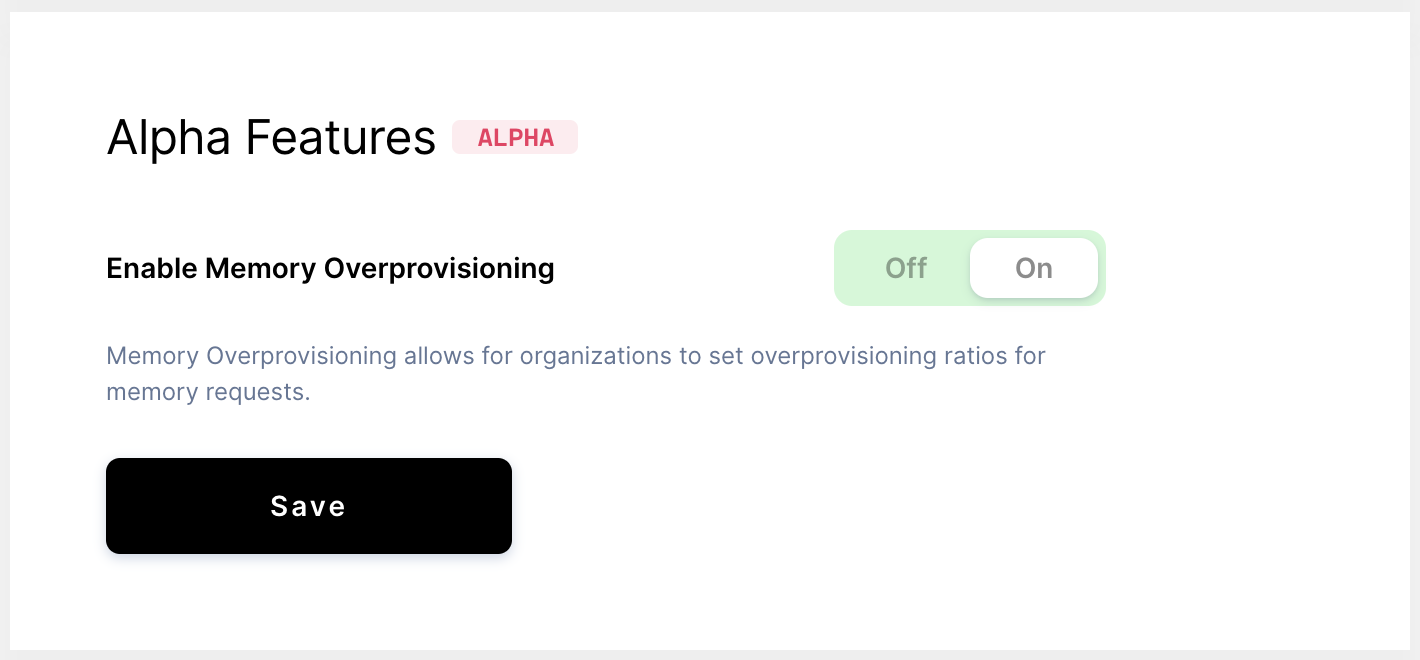
[](https://coder.com/docs/v1/admin/workspace-management/memory-overprovisioning#step-2-changing-the-memory-provisioning-rate)
Step 2: Changing the memory provisioning rate
---------------------------------------------------------------------------------------------------------------------------------------------------------------------------
1. Go to **Manage** > **Organizations** and select your organization.
2. At the top of your organization page, click **Actions** > **Edit**. Scroll down to **Memory Provisioning Rate** and set the maximum ratio
3. Click **Update**.
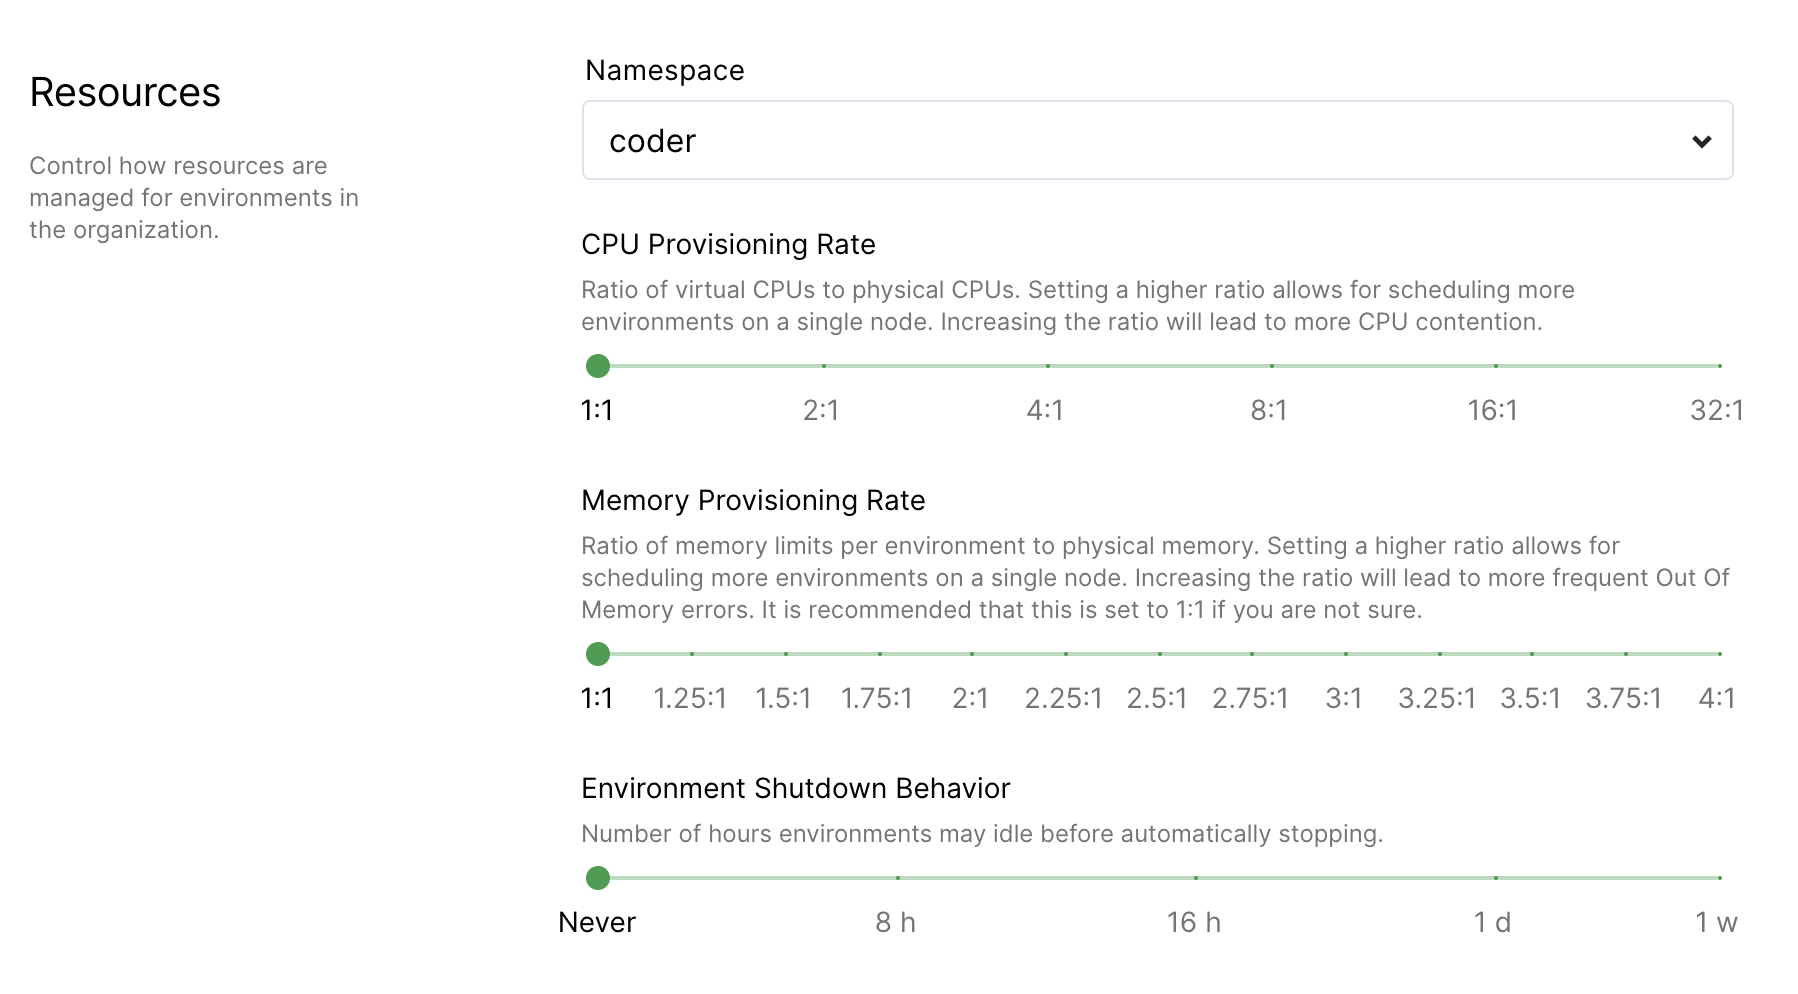
##### On this page
---
# 1.39.1 | Coder v1 Docs
[Home](https://coder.com/docs/v1 "Home")
[Changelog](https://coder.com/docs/v1/changelog "Changelog")
[1.39.0](https://coder.com/docs/v1/changelog/1.39.0 "1.39.0")
1.39.1
### [](https://coder.com/docs/v1/changelog/1.39.1#breaking-changes-)
Breaking changes ❗
There are no breaking changes in 1.39.1.
### [](https://coder.com/docs/v1/changelog/1.39.1#features-)
Features ✨
There are no features in 1.39.1.
### [](https://coder.com/docs/v1/changelog/1.39.1#bug-fixes-)
Bug fixes 🐛
* Fixed an issue where satellite deployments would proxy Dev URL requests to the main deployment instead of their own configured Dev URL domain.
* Fixed an issue where initial setup would hang when attempting to change the password for admin.
### [](https://coder.com/docs/v1/changelog/1.39.1#security-updates-)
Security updates 🔐
* Resetting the admin password via 'coderd reset-admin-password' now deletes all existing admin API keys.
* Fixed an issue where cached CVMs would fail to find the correct rootfs for a workspace.
---
# coder completion | Coder v1 Docs
[Home](https://coder.com/docs/v1 "Home")
[Command line](https://coder.com/docs/v1/cli "Command line")
[Reference](https://coder.com/docs/v1/cli/reference/coder "Reference")
coder completion
Generate completion script
### [](https://coder.com/docs/v1/cli/reference/coder_completion#synopsis)
Synopsis
To load completions:
Bash:
`` `source <(coder completion bash)` ``
To load completions for each session, execute once: Linux:
`` `coder completion bash > /etc/bash_completion.d/coder` ``
MacOS:
``` `` coder completion bash > /usr/local/etc/bash_completion.d/coder` `` ```
Zsh:
If shell completion is not already enabled in your workspace you will need to enable it. You can execute the following once:
`` `echo "autoload -U compinit; compinit" >> ~/.zshrc` ``
To load completions for each session, execute once:
`` `coder completion zsh > "${fpath[1]}/_coder"` ``
You will need to start a new shell for this setup to take effect.
Fish:
`` `coder completion fish | source` ``
To load completions for each session, execute once:
`` `coder completion fish > ~/.config/fish/completions/coder.fish` ``
`` `coder completion [bash|zsh|fish|powershell]` ``
### [](https://coder.com/docs/v1/cli/reference/coder_completion#options)
Options
`` `-h, --help help for completion` ``
### [](https://coder.com/docs/v1/cli/reference/coder_completion#options-inherited-from-parent-commands)
Options inherited from parent commands
`` `-v, --verbose show verbose output` ``
### [](https://coder.com/docs/v1/cli/reference/coder_completion#see-also)
SEE ALSO
* [coder](https://coder.com/docs/v1/cli/reference/coder)
- coder provides a CLI for working with an existing Coder installation
---
# Manage satellites | Coder v1 Docs
[Home](https://coder.com/docs/v1 "Home")
[Admin](https://coder.com/docs/v1/admin "Admin")
[Satellites](https://coder.com/docs/v1/admin/satellites "Satellites")
Manage satellites
This article will show you how to deploy a satellite to reduce latency. It also covers how to view a list of your satellites and how to remove satellites.
[](https://coder.com/docs/v1/admin/satellites/management#creating-a-satellite)
Creating a Satellite
---------------------------------------------------------------------------------------------------
To create a new satellite, you must update the Coder Helm chart to enable `satellite` mode, deploy Coder, and register the new deployment using the Coder CLI.
[](https://coder.com/docs/v1/admin/satellites/management#dependencies)
Dependencies
-----------------------------------------------------------------------------------
Install the following dependencies if you haven't already:
* [Coder CLI](https://coder.com/docs/v1/cli/installation)
* [Helm](https://helm.sh/docs/intro/install/)
* [kubectl](https://kubernetes.io/docs/tasks/tools/install-kubectl/)
[](https://coder.com/docs/v1/admin/satellites/management#requirements)
Requirements
-----------------------------------------------------------------------------------
1. You must be a Coder site manager and have [authenticated with the Coder CLI](https://coder.com/docs/v1/cli/installation#authenticate)
.
2. The satellite deployment must be able to communicate with the primary Coder deployment via HTTPS.
[](https://coder.com/docs/v1/admin/satellites/management#step-1-confirming-your-context)
Step 1: Confirming your context
------------------------------------------------------------------------------------------------------------------------
First, make sure that you're connected to the cluster to which you want to deploy the satellite. Ideally, this deployment should be in the same geographical region as the developers' and their workspaces.
To see your current context, run:
`` `kubectl config current-context` ``
Confirm that your current kubectl context is correct before continuing; otherwise, connect to the right context.
[](https://coder.com/docs/v1/admin/satellites/management#step-2-creating-the-new-deployment)
Step 2: Creating the new deployment
--------------------------------------------------------------------------------------------------------------------------------
The following steps are identical to those for [deploying the primary Coder installation](https://coder.com/docs/v1/setup/installation)
.
First, [update your Helm chart](https://coder.com/docs/v1/guides/admin/helm-charts)
to set the following required values:
* `coderd.satellite.enable` - set to `true`
* `coderd.satellite.primaryURL` - set with the primary Coder deployment access URL
* `coderd.satellite.accessURL` - set with the URL you want to use to access the satellite deployment
The following is a sample `values.yaml` for a deployment with satellites, TLS, and dev URLs enabled:
`` `coderd: satellite: enable: "true" primaryURL: "https://coder.example.com" accessURL: "https://coder-eu-west.example.com" devurlsHost: "*.coder-eu-west.example.com" tls: hostSecretName: "coder-satellite-cert" devurlsHostSecretName: "coder-satellite-cert"` ``
Once you've updated your Helm chart, install the satellite:
`` `helm repo add coder https://helm.coder.com helm repo update helm upgrade coder-satellite coder/coder \ --namespace= --version= \ --install \ -f values.yaml` ``
[](https://coder.com/docs/v1/admin/satellites/management#step-3-registering-the-satellite)
Step 3: Registering the satellite
----------------------------------------------------------------------------------------------------------------------------
Once you've deployed the satellite, you need to register it to the primary Coder deployment. This process ensures that the primary deployment can trust requests originating from the satellite deployment.
Using the Coder CLI, run:
`` `coder satellites create ` ``
This command will fetch the public key from satellite deployment and register it with Coder. If successful, the satellite deployment should be fully functional and reachable via the provided access URL.
[](https://coder.com/docs/v1/admin/satellites/management#viewing-satellites)
Viewing Satellites
-----------------------------------------------------------------------------------------------
You can list your satellite deployments using the Coder CLI:
`` `coder satellites ls` ``
[](https://coder.com/docs/v1/admin/satellites/management#removing-a-satellite)
Removing a Satellite
---------------------------------------------------------------------------------------------------
You can remove your satellite deployments using the Coder CLI:
`` `coder satellites rm ` ``
After removing a registered satellite deployment via the Coder CLI, you should remove the deployment via Helm as well:
`` `helm uninstall coder-satellite -n ` ``
##### On this page
---
# 1.36.2 | Coder v1 Docs
[Home](https://coder.com/docs/v1 "Home")
[Changelog](https://coder.com/docs/v1/changelog "Changelog")
[1.36.0](https://coder.com/docs/v1/changelog/1.36.0 "1.36.0")
1.36.2
### [](https://coder.com/docs/v1/changelog/1.36.2#breaking-changes-)
Breaking changes ❗
There are no breaking changes in 1.36.2.
### [](https://coder.com/docs/v1/changelog/1.36.2#features-)
Features ✨
There are no new features in 1.36.2.
### [](https://coder.com/docs/v1/changelog/1.36.2#bug-fixes-)
Bug fixes 🐛
* Fixed an issue where operations on API keys were not audit-logged.
### [](https://coder.com/docs/v1/changelog/1.36.2#security-updates-)
Security updates 🔐
* Fixed an issue where an attacker could craft a malicious DevURL redirect link to exfiltrate a token that allows accessing that user's devURLs.
---
# coder config-ssh | Coder v1 Docs
[Home](https://coder.com/docs/v1 "Home")
[Command line](https://coder.com/docs/v1/cli "Command line")
[Reference](https://coder.com/docs/v1/cli/reference/coder "Reference")
coder config-ssh
Configure SSH to access Coder workspaces
### [](https://coder.com/docs/v1/cli/reference/coder_config-ssh#synopsis)
Synopsis
Inject the proper OpenSSH configuration into your local SSH config file.
`` `coder config-ssh [flags]` ``
### [](https://coder.com/docs/v1/cli/reference/coder_config-ssh#options)
Options
`` `--filepath string override the default path of your ssh config file (default "~/.ssh/config") -h, --help help for config-ssh -o, --option strings additional options injected in the ssh config (ex. disable caching with "-o ControlPath=none") --remove remove the auto-generated Coder ssh config` ``
### [](https://coder.com/docs/v1/cli/reference/coder_config-ssh#options-inherited-from-parent-commands)
Options inherited from parent commands
`` `-v, --verbose show verbose output` ``
### [](https://coder.com/docs/v1/cli/reference/coder_config-ssh#see-also)
SEE ALSO
* [coder](https://coder.com/docs/v1/cli/reference/coder)
- coder provides a CLI for working with an existing Coder installation
---
# Migrate to satellite deployments | Coder v1 Docs
[Home](https://coder.com/docs/v1 "Home")
[Admin](https://coder.com/docs/v1/admin "Admin")
[Satellites](https://coder.com/docs/v1/admin/satellites "Satellites")
Migrate to satellite deployments
Coder v1.21 (and later) feature satellites, which work in tandem with Networking v2, to provide low latency experiences for geo-distributed teams.
This article outlines the steps required to migrate from an `envproxy`\-based workspace provider deployment (used in Coder v1.20.x and earlier) to one using the Networking v2 architecture present in Coder 1.21.x and later.
> For in-depth information on Coder's networking changes (which appear in v1.21.0), see [Rearchitecting Coder’s networking with WebRTC](https://coder.com/blog/rearchitecting-coder-networking-with-webrtc)
> .
[](https://coder.com/docs/v1/admin/satellites/migration#overview)
Overview
--------------------------------------------------------------------------
Each region that currently has an `envproxy`\-based workspace provider deployment must be replaced with a satellite deployment (the satellite deployment is tasked with the same proxy-related tasks for the workspaces located in that region).
> Satellites are only compatible with workspace providers with Networking v2 enabled.
### [](https://coder.com/docs/v1/admin/satellites/migration#using-satellite-access-urls)
Using satellite access URLs
Developers will always have the lowest latency possible by connecting to the Coder deployment closed to them geographically. Therefore, they should use the access URL for the satellite deployment (e.g., those in the `australia-southeast1` region would use `coder-sydney.example.com`) instead of the access URL for the primary Coder deployment (e.g., `coder.example.com`)
[](https://coder.com/docs/v1/admin/satellites/migration#dependencies)
Dependencies
----------------------------------------------------------------------------------
Install the following dependencies if you haven't already:
* [Coder CLI](https://coder.com/docs/v1/cli/installation)
* [Helm](https://helm.sh/docs/intro/install/)
* [kubectl](https://kubernetes.io/docs/tasks/tools/install-kubectl/)
[](https://coder.com/docs/v1/admin/satellites/migration#migration)
Migration
----------------------------------------------------------------------------
To migrate, you must:
1. Deploy satellites in each additional region
2. Enable Networking v2 for each workspace provider
Though we expect you to see no downtime, end-users may experience negative impact to latency during the migration process for their region.
### [](https://coder.com/docs/v1/admin/satellites/migration#step-1-deploy-satellites)
Step 1: Deploy satellites
The first step is to deploy new satellites into each region to which you're expanding. To do so, follow the steps outlined in [satellite management](https://coder.com/docs/v1/admin/satellites/management)
.
We recommend deploying the satellite into a namespace that's different from the one you're using for the existing workspace provider. Furthermore, because the satellite doesn't have any dependencies on the workspaces, you can deploy a satellite to any cluster and any namespace.
### [](https://coder.com/docs/v1/admin/satellites/migration#step-2-enable-networking-v2)
Step 2: Enable Networking v2
Log into Coder as a site manager, and go to **Manage** > **Workspace providers**. Select the workspace provider, click the **vertical ellipsis** to its right, and select **Edit**. Enable the **NetworkingV2 toggle** and click **Update Provider**.
At this point, rebuild a workspace to ensure connectivity between the workspace provider and the workspace. Note that latency to the workspace may be negatively impacted until users connect to the new satellite deployments.
Repeat this step for each of your workspace providers.
### [](https://coder.com/docs/v1/admin/satellites/migration#step-3-ensure-connectivity)
Step 3: Ensure connectivity
Developers should now be able to connect to their nearest region using the satellite's hostname (e.g., `coder-sydney.example.com`) and can expect low latency when using their workspaces.
> As of v1.21, Coder will no longer update the `coder/workspace-provider` Helm chart. However, this Helm chart must stay deployed to allow for rollback opportunities. Coder will issue instructions on how to remove this chart beginning with v1.22.
##### On this page
---
# 1.34.3 | Coder v1 Docs
[Home](https://coder.com/docs/v1 "Home")
[Changelog](https://coder.com/docs/v1/changelog "Changelog")
[1.34.0](https://coder.com/docs/v1/changelog/1.34.0 "1.34.0")
1.34.3
### [](https://coder.com/docs/v1/changelog/1.34.3#breaking-changes-)
Breaking changes ❗
There are no breaking changes in 1.34.3.
### [](https://coder.com/docs/v1/changelog/1.34.3#features-)
Features ✨
There are no new features in 1.34.3.
### [](https://coder.com/docs/v1/changelog/1.34.3#bug-fixes-)
Bug fixes 🐛
There are no new bug fixes in 1.34.3.
### [](https://coder.com/docs/v1/changelog/1.34.3#security-updates-)
Security updates 🔐
* infra: Fixed an issue where ordinary users could obtain admin-level credentials from the Coder API.
---
# 1.35.4 | Coder v1 Docs
[Home](https://coder.com/docs/v1 "Home")
[Changelog](https://coder.com/docs/v1/changelog "Changelog")
[1.35.0](https://coder.com/docs/v1/changelog/1.35.0 "1.35.0")
1.35.4
### [](https://coder.com/docs/v1/changelog/1.35.4#breaking-changes-)
Breaking changes ❗
There are no breaking changes in 1.35.4.
### [](https://coder.com/docs/v1/changelog/1.35.4#features-)
Features ✨
There are no new features in 1.35.4.
### [](https://coder.com/docs/v1/changelog/1.35.4#bug-fixes-)
Bug fixes 🐛
* Fixed an issue where operations on API keys were not audit-logged.
### [](https://coder.com/docs/v1/changelog/1.35.4#security-updates-)
Security updates 🔐
* Fixed an issue where an attacker could craft a malicious DevURL redirect link to exfiltrate a token that allows accessing that user's devURLs.
---
# Offline documentation | Coder v1 Docs
[Home](https://coder.com/docs/v1 "Home")
[Setup](https://coder.com/docs/v1/setup "Setup")
[Air-gapped deployment](https://coder.com/docs/v1/setup/air-gapped "Air-gapped deployment")
Offline documentation
While Coder's documentation is hosted at [https://coder.com/docs/coder](https://coder.com/docs/coder)
, you can also access it directly via the Coder deplopyment. This may come in handy if users are connecting via a network without access to `coder.com`.
By default, in-product documentation links will link to `coder.com`. To change the links to the offline documentation, you can [upgrade Coder](https://coder.com/docs/v1/setup/upgrade)
with the following Helm value:
`` `coderd: extraEnvs: - name: USE_OFFLINE_DOCS_LINKS value: "true"` ``
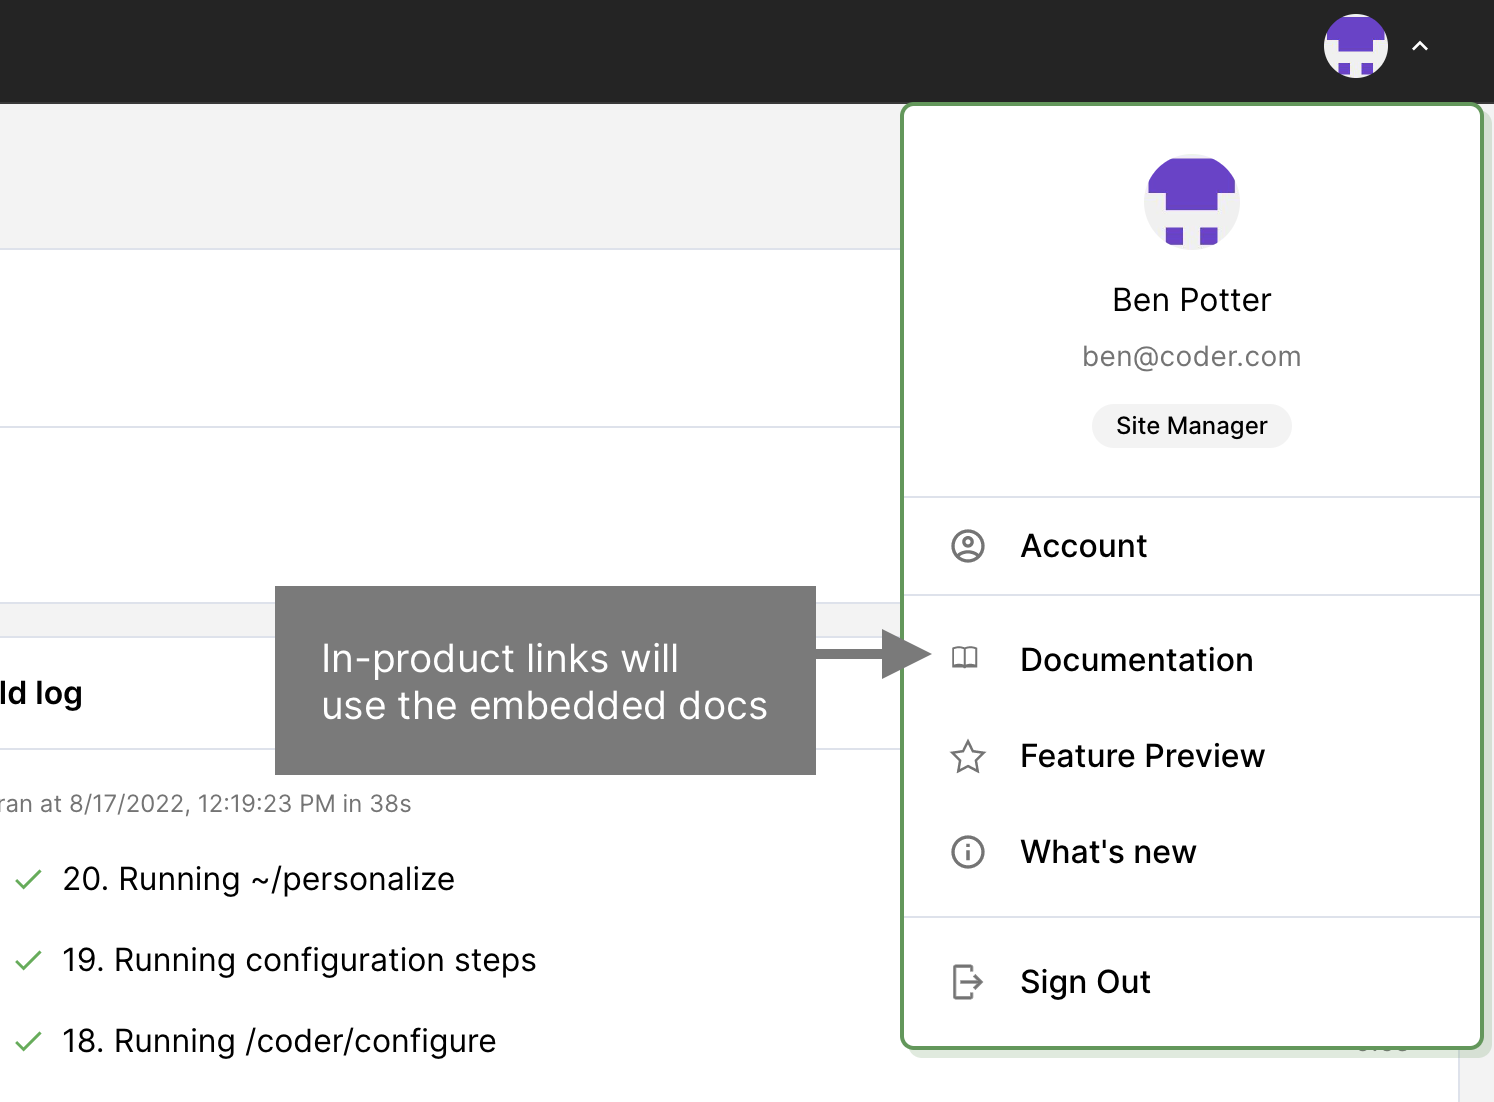
---
# 1.33.6 | Coder v1 Docs
[Home](https://coder.com/docs/v1 "Home")
[Changelog](https://coder.com/docs/v1/changelog "Changelog")
[Archives](https://coder.com/docs/v1/changelog/archive "Archives")
1.33.6
### [](https://coder.com/docs/v1/changelog/1.33.6#breaking-changes-)
Breaking changes ❗
There are no breaking changes in 1.33.6.
### [](https://coder.com/docs/v1/changelog/1.33.6#bug-fixes-)
Bug fixes 🐛
There are no bug fixes in 1.33.6.
### [](https://coder.com/docs/v1/changelog/1.33.6#security-updates-)
Security updates 🔐
* infra: Fixed an issue where Coder services inside the workspace could be reached via the network from outside in some environments.
---
# 1.38.3 | Coder v1 Docs
[Home](https://coder.com/docs/v1 "Home")
[Changelog](https://coder.com/docs/v1/changelog "Changelog")
[1.38.0](https://coder.com/docs/v1/changelog/1.38.0 "1.38.0")
1.38.3
### [](https://coder.com/docs/v1/changelog/1.38.3#breaking-changes-)
Breaking changes ❗
There are no breaking changes in 1.38.3.
### [](https://coder.com/docs/v1/changelog/1.38.3#features-)
Features ✨
There are no new features in 1.38.3.
### [](https://coder.com/docs/v1/changelog/1.38.3#bug-fixes-)
Bug fixes 🐛
* Fixed an issue where workspace provider updates would not propagate to replicas.
* Fixed some issues with offline docs.
### [](https://coder.com/docs/v1/changelog/1.38.3#security-updates-)
Security updates 🔐
There are no security updates for 1.38.3.
---
# Workspace template code completion | Coder v1 Docs
[Home](https://coder.com/docs/v1 "Home")
[Workspaces](https://coder.com/docs/v1/workspaces "Workspaces")
[Workspace templates](https://coder.com/docs/v1/workspaces/workspace-templates "Workspace templates")
Workspace template code completion
Coder provides a [JSON Schema](https://json-schema.org/)
for workspace templates that enables code completion and syntax checking.
[](https://coder.com/docs/v1/workspaces/workspace-templates/code-completion#requirements)
Requirements
------------------------------------------------------------------------------------------------------
You must have the [YAML extension by Red Hat](https://marketplace.visualstudio.com/items?itemName=redhat.vscode-yaml)
installed to use this feature.
[](https://coder.com/docs/v1/workspaces/workspace-templates/code-completion#how-to-use)
How to use
--------------------------------------------------------------------------------------------------
Create a file called `coder.yaml`, and add the following to the top (be sure to replace the `` placeholder with your Coder deployment URL):
`` `# yaml-language-server: $schema=https:///api/private/template/schemas/wac.schema.json # Write your YAML config here` ``
At this point, you can use the code completion and syntax checking features.
[](https://coder.com/docs/v1/workspaces/workspace-templates/code-completion#keyboard-shortcuts)
Keyboard shortcuts
------------------------------------------------------------------------------------------------------------------
Some keyboard shortcuts you may find helpful include:
* Document outlining (Ctrl + Shift + O)
* Auto completion (Ctrl + Space)
See the [YAML extension by Red Hat docs](https://marketplace.visualstudio.com/items?itemName=redhat.vscode-yaml)
for additional shortcuts.
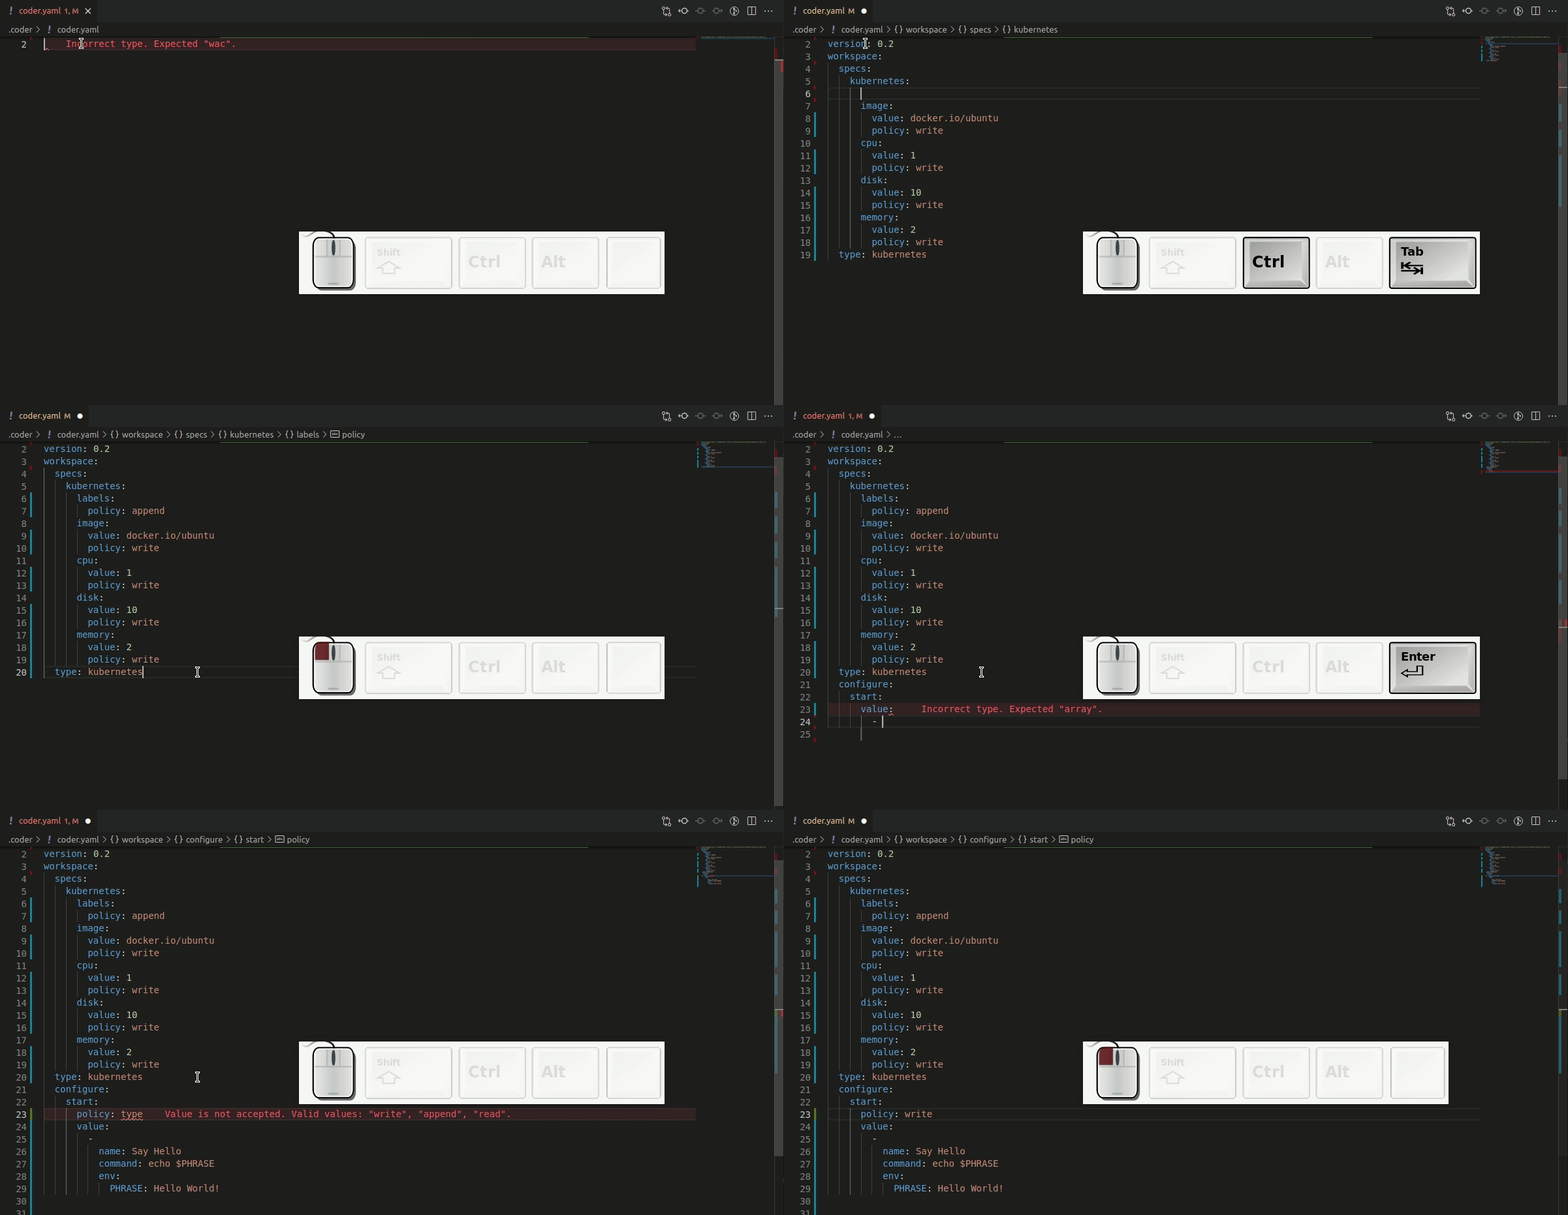
##### On this page
---
# 1.32.5 | Coder v1 Docs
[Home](https://coder.com/docs/v1 "Home")
[Changelog](https://coder.com/docs/v1/changelog "Changelog")
[Archives](https://coder.com/docs/v1/changelog/archive "Archives")
1.32.5
### [](https://coder.com/docs/v1/changelog/1.32.5#breaking-changes-)
Breaking changes ❗
There are no breaking changes in 1.32.5.
### [](https://coder.com/docs/v1/changelog/1.32.5#features-)
Features ✨
There are no new features in 1.32.5.
### [](https://coder.com/docs/v1/changelog/1.32.5#bug-fixes-)
Bug fixes 🐛
web: fixed an issue where regular users could not create embeddable "Open in Coder" buttons.
### [](https://coder.com/docs/v1/changelog/1.32.5#security-updates-)
Security updates 🔐
There are no security updates in 1.32.5.
---
# 1.31.3 | Coder v1 Docs
[Home](https://coder.com/docs/v1 "Home")
[Changelog](https://coder.com/docs/v1/changelog "Changelog")
[Archives](https://coder.com/docs/v1/changelog/archive "Archives")
1.31.3
### [](https://coder.com/docs/v1/changelog/1.31.3#breaking-changes-)
Breaking changes ❗
There are no breaking changes in 1.31.3.
### [](https://coder.com/docs/v1/changelog/1.31.3#features-)
Features ✨
* web: updated Projector client to `1.8.0`.
* infra: updated Projector server to `1.8.1`.
### [](https://coder.com/docs/v1/changelog/1.31.3#bug-fixes-)
Bug fixes 🐛
* infra: fixed an issue where idle connections would drop after 30 seconds.
### [](https://coder.com/docs/v1/changelog/1.31.3#security-updates-)
Security updates 🔐
There are no security updates in 1.31.3.
### [](https://coder.com/docs/v1/changelog/1.31.3#known-issues-)
Known issues 🔧
* [Development of JetBrains projector was suspended on July 11, 2022.](https://lp.jetbrains.com/projector/)
JetBrains IDE versions published after this date may exhibit strange behaviors or crash unexpectedly under Projector. For the best experience, JetBrains recommends migrating to Jetbrains Gateway.
---
# 1.32.4 | Coder v1 Docs
[Home](https://coder.com/docs/v1 "Home")
[Changelog](https://coder.com/docs/v1/changelog "Changelog")
[Archives](https://coder.com/docs/v1/changelog/archive "Archives")
1.32.4
### [](https://coder.com/docs/v1/changelog/1.32.4#breaking-changes-)
Breaking changes ❗
There are no breaking changes in 1.32.4.
### [](https://coder.com/docs/v1/changelog/1.32.4#features-)
Features ✨
* cli: add `--address` flag to the `coder tunnel` command.
### [](https://coder.com/docs/v1/changelog/1.32.4#bug-fixes-)
Bug fixes 🐛
* infra: fix workspace builds being stuck on "enqueuing workspace build" step due to nil pointer panic. Workspaces that were getting stuck should now show a proper root cause error in the build log.
### [](https://coder.com/docs/v1/changelog/1.32.4#security-updates-)
Security updates 🔐
There are no security updates in 1.32.4.
### [](https://coder.com/docs/v1/changelog/1.32.4#known-issues-)
Known issues 🔧
* [Development of JetBrains projector was suspended on July 11, 2022.](https://lp.jetbrains.com/projector/)
JetBrains IDE versions published after this date may exhibit strange behaviors or crash unexpectedly under Projector. For the best experience, JetBrains recommends migrating to Jetbrains Gateway.
---
# 1.31.1 | Coder v1 Docs
[Home](https://coder.com/docs/v1 "Home")
[Changelog](https://coder.com/docs/v1/changelog "Changelog")
[Archives](https://coder.com/docs/v1/changelog/archive "Archives")
1.31.1
### [](https://coder.com/docs/v1/changelog/1.31.1#breaking-changes-)
Breaking changes ❗
There are no breaking changes in 1.31.1.
### [](https://coder.com/docs/v1/changelog/1.31.1#features-)
Features ✨
* infra: doubled the UID and GID map size for cached CVMs from 65k to 131k.
### [](https://coder.com/docs/v1/changelog/1.31.1#bug-fixes-)
Bug fixes 🐛
* infra: fixed panic preventing cached CVMs from starting on some Kubernetes installations.
### [](https://coder.com/docs/v1/changelog/1.31.1#security-updates-)
Security updates 🔐
There are no security updates in 1.31.1.
### [](https://coder.com/docs/v1/changelog/1.31.1#known-issues-)
Known issues 🔧
* web: JetBrains IDEs versions 2022.2 or later are not compatible with the installed Projector version in this release.
---
# 1.38.1 | Coder v1 Docs
[Home](https://coder.com/docs/v1 "Home")
[Changelog](https://coder.com/docs/v1/changelog "Changelog")
[1.38.0](https://coder.com/docs/v1/changelog/1.38.0 "1.38.0")
1.38.1
### [](https://coder.com/docs/v1/changelog/1.38.1#breaking-changes-)
Breaking changes ❗
There are no breaking changes in 1.38.1.
### [](https://coder.com/docs/v1/changelog/1.38.1#features-)
Features ✨
There are no new features in 1.38.1.
### [](https://coder.com/docs/v1/changelog/1.38.1#bug-fixes-)
Bug fixes 🐛
* Fixed an issue where expired Dev URL tokens could result in an infinite authentication loop.
* Added documentation for image tag decommissioning.
### [](https://coder.com/docs/v1/changelog/1.38.1#security-updates-)
Security updates 🔐
There are no security updates for 1.38.1.
---
# 1.32.2 | Coder v1 Docs
[Home](https://coder.com/docs/v1 "Home")
[Changelog](https://coder.com/docs/v1/changelog "Changelog")
[Archives](https://coder.com/docs/v1/changelog/archive "Archives")
1.32.2
### [](https://coder.com/docs/v1/changelog/1.32.2#breaking-changes-)
Breaking changes ❗
* infra: the "Getting default user from image" build step now spawns a container that consumes 100m CPU and 250mb of memory. Previously these were unset, which can cause issues with some Kubernetes variants.
### [](https://coder.com/docs/v1/changelog/1.32.2#features-)
Features ✨
* infra: updated code-server to 4.5.1.
* cli: added usernames to the workspaces list command.
### [](https://coder.com/docs/v1/changelog/1.32.2#bug-fixes-)
Bug fixes 🐛
* infra: fixed an issue where P2P connections used the wrong access URL for some workspace providers.
* infra: fixed an issue where site admins lacked permissions to query user DevURLs.
* web: fixed an issue where users that never interacted with workspaces would not be counted as an active user.
* web: fixed an issue preventing the metrics UI from displaying the graph.
* infra: fixed a memory leak triggered by DevURL requests.
* infra: fixed an issue which made workspaces unable to be built in Rancher.
### [](https://coder.com/docs/v1/changelog/1.32.2#security-updates-)
Security updates 🔐
There are no security updates in 1.32.2.
### [](https://coder.com/docs/v1/changelog/1.32.2#known-issues-)
Known issues 🔧
* web: JetBrains IDEs versions 2022.2 or later are not compatible with the installed Projector version in this release.
---
# coder users | Coder v1 Docs
[Home](https://coder.com/docs/v1 "Home")
[Command line](https://coder.com/docs/v1/cli "Command line")
[Reference](https://coder.com/docs/v1/cli/reference/coder "Reference")
coder users
Interact with Coder user accounts
### [](https://coder.com/docs/v1/cli/reference/coder_users#options)
Options
`` `-h, --help help for users` ``
### [](https://coder.com/docs/v1/cli/reference/coder_users#options-inherited-from-parent-commands)
Options inherited from parent commands
`` `-v, --verbose show verbose output` ``
### [](https://coder.com/docs/v1/cli/reference/coder_users#see-also)
SEE ALSO
* [coder](https://coder.com/docs/v1/cli/reference/coder)
- coder provides a CLI for working with an existing Coder installation
* [coder users ls](https://coder.com/docs/v1/cli/reference/coder_users_ls)
- list all user accounts
---
# 1.30.5 | Coder v1 Docs
[Home](https://coder.com/docs/v1 "Home")
[Changelog](https://coder.com/docs/v1/changelog "Changelog")
[Archives](https://coder.com/docs/v1/changelog/archive "Archives")
1.30.5
### [](https://coder.com/docs/v1/changelog/1.30.5#breaking-changes-)
Breaking changes ❗
There are no breaking changes in 1.30.5.
### [](https://coder.com/docs/v1/changelog/1.30.5#features-)
Features ✨
* infra: updated Projector server to 1.8.1.
* web: updated Projector client to 1.8.0.
### [](https://coder.com/docs/v1/changelog/1.30.5#bug-fixes-)
Bug fixes 🐛
* infra: fixed an issue where idle connections would drop after 30 seconds.
### [](https://coder.com/docs/v1/changelog/1.30.5#security-updates-)
Security updates 🔐
There are no security updates in 1.30.5.
### [](https://coder.com/docs/v1/changelog/1.30.5#known-issues-)
Known issues 🔧
* [Development of JetBrains projector was suspended on July 11, 2022.](https://lp.jetbrains.com/projector/)
JetBrains IDE versions published after this date may exhibit strange behaviors or crash unexpectedly under Projector. For the best experience, JetBrains recommends migrating to Jetbrains Gateway.
---
# 1.32.3 | Coder v1 Docs
[Home](https://coder.com/docs/v1 "Home")
[Changelog](https://coder.com/docs/v1/changelog "Changelog")
[Archives](https://coder.com/docs/v1/changelog/archive "Archives")
1.32.3
### [](https://coder.com/docs/v1/changelog/1.32.3#breaking-changes-)
Breaking changes ❗
There are no breaking changes in 1.32.3.
### [](https://coder.com/docs/v1/changelog/1.32.3#features-)
Features ✨
* web: updated Projector client to `1.8.0`.
* infra: updated Projector server to `1.8.1`.
### [](https://coder.com/docs/v1/changelog/1.32.3#bug-fixes-)
Bug fixes 🐛
* infra: fixed dotfiles validation to allow extra formats.
* infra: fixed an issue where idle connections would drop after 30 seconds.
### [](https://coder.com/docs/v1/changelog/1.32.3#security-updates-)
Security updates 🔐
There are no security updates in 1.32.3.
### [](https://coder.com/docs/v1/changelog/1.32.3#known-issues-)
Known issues 🔧
* [Development of JetBrains projector was suspended on July 11, 2022.](https://lp.jetbrains.com/projector/)
JetBrains IDE versions published after this date may exhibit strange behaviors or crash unexpectedly under Projector. For the best experience, JetBrains recommends migrating to Jetbrains Gateway.
---
# 1.32.1 | Coder v1 Docs
[Home](https://coder.com/docs/v1 "Home")
[Changelog](https://coder.com/docs/v1/changelog "Changelog")
[Archives](https://coder.com/docs/v1/changelog/archive "Archives")
1.32.1
### [](https://coder.com/docs/v1/changelog/1.32.1#breaking-changes-)
Breaking changes ❗
There are no breaking changes in 1.32.1.
### [](https://coder.com/docs/v1/changelog/1.32.1#features-)
Features ✨
There are no features in 1.32.1.
### [](https://coder.com/docs/v1/changelog/1.32.1#bug-fixes-)
Bug fixes 🐛
* infra: fixed an issue which caused multiple audit log events to be created for a single auto-off event.
* web: fixed an issue with special characters causing dotfiles URLs to not save.
### [](https://coder.com/docs/v1/changelog/1.32.1#security-updates-)
Security updates 🔐
There are no security updates in 1.32.1.
### [](https://coder.com/docs/v1/changelog/1.32.1#known-issues-)
Known issues 🔧
* web: JetBrains IDEs versions 2022.2 or later are not compatible with the installed Projector version in this release.
---
# 1.30.1 | Coder v1 Docs
[Home](https://coder.com/docs/v1 "Home")
[Changelog](https://coder.com/docs/v1/changelog "Changelog")
[Archives](https://coder.com/docs/v1/changelog/archive "Archives")
1.30.1
### [](https://coder.com/docs/v1/changelog/1.30.1#breaking-changes-)
Breaking changes ❗
There are no breaking changes in 1.30.1.
### [](https://coder.com/docs/v1/changelog/1.30.1#features-)
Features ✨
* infra: Coder tunnel no longer exits after a single connection.
### [](https://coder.com/docs/v1/changelog/1.30.1#bug-fixes-)
Bug fixes 🐛
* infra: fixed issue where a lower MTU caused connections to break.
* infra: fixed issue where the default Helm `networkingress` policy did not allow inbound UDP connections.
### [](https://coder.com/docs/v1/changelog/1.30.1#security-updates-)
Security updates 🔐
There are no security updates in 1.30.1.
### [](https://coder.com/docs/v1/changelog/1.30.1#known-issues-)
Known issues 🔧
* web: JetBrains IDEs versions 2022.2 or later are not compatible with the installed Projector version in this release.
---
# coder tunnel | Coder v1 Docs
[Home](https://coder.com/docs/v1 "Home")
[Command line](https://coder.com/docs/v1/cli "Command line")
[Reference](https://coder.com/docs/v1/cli/reference/coder "Reference")
coder tunnel
proxies a port on the workspace to localhost
### [](https://coder.com/docs/v1/cli/reference/coder_tunnel#synopsis)
Synopsis
Start a tunnel between this computer and a remove workspace, using a localhost port.
### [](https://coder.com/docs/v1/cli/reference/coder_tunnel#options)
Options
`` `--address string local address to bind to (default "127.0.0.1") -h, --help help for tunnel --max-retry-duration duration maximum amount of time to sleep between retry attempts (default 1m0s) --retry int number of attempts to retry if the tunnel fails to establish or disconnect (-1 for infinite retries) --udp tunnel over UDP instead of TCP` ``
### [](https://coder.com/docs/v1/cli/reference/coder_tunnel#options-inherited-from-parent-commands)
Options inherited from parent commands
`` `--coder-token string API authentication token. --coder-url string access url of the Coder deployment. (default "https://stable.cdr.dev") -v, --verbose show verbose output` ``
### [](https://coder.com/docs/v1/cli/reference/coder_tunnel#see-also)
SEE ALSO
* [coder](https://coder.com/docs/v1/cli/reference/coder)
- coder provides a CLI for working with an existing Coder installation
---
# 1.31.2 | Coder v1 Docs
[Home](https://coder.com/docs/v1 "Home")
[Changelog](https://coder.com/docs/v1/changelog "Changelog")
[Archives](https://coder.com/docs/v1/changelog/archive "Archives")
1.31.2
### [](https://coder.com/docs/v1/changelog/1.31.2#breaking-changes-)
Breaking changes ❗
* infra: the "Getting default user from image" build step now spawns a container that consumes 100m CPU and 250mb of memory. Previously these were unset, which can cause issues with some Kubernetes variants.
### [](https://coder.com/docs/v1/changelog/1.31.2#features-)
Features ✨
There are no new features in 1.31.2.
### [](https://coder.com/docs/v1/changelog/1.31.2#bug-fixes-)
Bug fixes 🐛
* web: fixed an issue where users that never interacted with workspaces would not be counted as an active user.
* web: fixed an issue preventing the metrics UI from displaying the graph.
* infra: fixed a memory leak triggered by DevURL requests.
### [](https://coder.com/docs/v1/changelog/1.31.2#security-updates-)
Security updates 🔐
There are no security updates in 1.31.2.
### [](https://coder.com/docs/v1/changelog/1.31.2#known-issues-)
Known issues 🔧
* web: JetBrains IDEs versions 2022.2 or later are not compatible with the installed Projector version in this release.
---
# 1.29.6 | Coder v1 Docs
[Home](https://coder.com/docs/v1 "Home")
[Changelog](https://coder.com/docs/v1/changelog "Changelog")
[Archives](https://coder.com/docs/v1/changelog/archive "Archives")
1.29.6
### [](https://coder.com/docs/v1/changelog/1.29.6#breaking-changes-)
Breaking changes ❗
There are no breaking changes in 1.29.6.
### [](https://coder.com/docs/v1/changelog/1.29.6#features-)
Features ✨
* infra: added automatic reconnection if the web terminal disconnects.
* infra: doubled the UID and GID map size for cached CVMs from 65k to 131k.
### [](https://coder.com/docs/v1/changelog/1.29.6#bug-fixes-)
Bug fixes 🐛
* infra: fixed panic preventing cached CVMs from starting on some Kubernetes installations.
### [](https://coder.com/docs/v1/changelog/1.29.6#security-updates-)
Security updates 🔐
There are no security updates in 1.29.6.
---
# 1.30.2 | Coder v1 Docs
[Home](https://coder.com/docs/v1 "Home")
[Changelog](https://coder.com/docs/v1/changelog "Changelog")
[Archives](https://coder.com/docs/v1/changelog/archive "Archives")
1.30.2
### [](https://coder.com/docs/v1/changelog/1.30.2#breaking-changes-)
Breaking changes ❗
There are no breaking changes in 1.30.2.
### [](https://coder.com/docs/v1/changelog/1.30.2#features-)
Features ✨
There are no new features in 1.30.2.
### [](https://coder.com/docs/v1/changelog/1.30.2#bug-fixes-)
Bug fixes 🐛
* web: fixed issue with blank dotfiles URL causing inability to update user account details.
* infra: fixed issue with incorrect formatting of `coder tunnel` command.
### [](https://coder.com/docs/v1/changelog/1.30.2#security-updates-)
Security updates 🔐
There are no security updates in 1.30.2.
### [](https://coder.com/docs/v1/changelog/1.30.2#known-issues-)
Known issues 🔧
* web: JetBrains IDEs versions 2022.2 or later are not compatible with the installed Projector version in this release.
---
# 1.29.4 | Coder v1 Docs
[Home](https://coder.com/docs/v1 "Home")
[Changelog](https://coder.com/docs/v1/changelog "Changelog")
[Archives](https://coder.com/docs/v1/changelog/archive "Archives")
1.29.4
### [](https://coder.com/docs/v1/changelog/1.29.4#breaking-changes-)
Breaking changes ❗
There are no breaking changes in 1.29.4.
### [](https://coder.com/docs/v1/changelog/1.29.4#features-)
Features ✨
* infra: Coder tunnel no longer exits after a single connection.
### [](https://coder.com/docs/v1/changelog/1.29.4#bug-fixes-)
Bug fixes 🐛
* infra: fixed issue where a lower MTU caused connections to break.
* infra: fixed issue where the default Helm `networkingress` policy did not allow inbound UDP connections.
### [](https://coder.com/docs/v1/changelog/1.29.4#security-updates-)
Security updates 🔐
There are no security updates in 1.29.4.
---
# 1.29.5 | Coder v1 Docs
[Home](https://coder.com/docs/v1 "Home")
[Changelog](https://coder.com/docs/v1/changelog "Changelog")
[Archives](https://coder.com/docs/v1/changelog/archive "Archives")
1.29.5
### [](https://coder.com/docs/v1/changelog/1.29.5#breaking-changes-)
Breaking changes ❗
There are no breaking changes in 1.29.5.
### [](https://coder.com/docs/v1/changelog/1.29.5#features-)
Features ✨
There are no new features in 1.29.5.
### [](https://coder.com/docs/v1/changelog/1.29.5#bug-fixes-)
Bug fixes 🐛
* infra: fixed issue with incorrect formatting of `coder tunnel` command.
### [](https://coder.com/docs/v1/changelog/1.29.5#security-updates-)
Security updates 🔐
There are no security updates in 1.29.5.
---
# 1.30.3 | Coder v1 Docs
[Home](https://coder.com/docs/v1 "Home")
[Changelog](https://coder.com/docs/v1/changelog "Changelog")
[Archives](https://coder.com/docs/v1/changelog/archive "Archives")
1.30.3
### [](https://coder.com/docs/v1/changelog/1.30.3#breaking-changes-)
Breaking changes ❗
There are no breaking changes in 1.30.3.
### [](https://coder.com/docs/v1/changelog/1.30.3#features-)
Features ✨
* infra: added automatic reconnection if the web terminal disconnects.
* infra: doubled the UID and GID map size for cached CVMs from 65k to 131k.
### [](https://coder.com/docs/v1/changelog/1.30.3#bug-fixes-)
Bug fixes 🐛
* infra: fixed panic preventing cached CVMs from starting on some Kubernetes installations.
### [](https://coder.com/docs/v1/changelog/1.30.3#security-updates-)
Security updates 🔐
There are no security updates in 1.30.3.
### [](https://coder.com/docs/v1/changelog/1.30.3#known-issues-)
Known issues 🔧
* web: JetBrains IDEs versions 2022.2 or later are not compatible with the installed Projector version in this release.
---
# 1.30.4 | Coder v1 Docs
[Home](https://coder.com/docs/v1 "Home")
[Changelog](https://coder.com/docs/v1/changelog "Changelog")
[Archives](https://coder.com/docs/v1/changelog/archive "Archives")
1.30.4
### [](https://coder.com/docs/v1/changelog/1.30.4#breaking-changes-)
Breaking changes ❗
* infra: the "Getting default user from image" build step now spawns a container that consumes 100m CPU and 250mb of memory. Previously these were unset, which can cause issues with some Kubernetes variants.
### [](https://coder.com/docs/v1/changelog/1.30.4#features-)
Features ✨
There are no new features in 1.30.4.
### [](https://coder.com/docs/v1/changelog/1.30.4#bug-fixes-)
Bug fixes 🐛
* web: fixed an issue where users that never interacted with workspaces would not be counted as an active user.
* web: fixed an issue preventing the metrics UI from displaying the graph.
* infra: fixed a memory leak triggered by DevURL requests.
### [](https://coder.com/docs/v1/changelog/1.30.4#security-updates-)
Security updates 🔐
There are no security updates in 1.30.4.
### [](https://coder.com/docs/v1/changelog/1.30.4#known-issues-)
Known issues 🔧
* web: JetBrains IDEs versions 2022.2 or later are not compatible with the installed Projector version in this release.
---
# 1.28.3 | Coder v1 Docs
[Home](https://coder.com/docs/v1 "Home")
[Changelog](https://coder.com/docs/v1/changelog "Changelog")
[Archives](https://coder.com/docs/v1/changelog/archive "Archives")
1.28.3
### [](https://coder.com/docs/v1/changelog/1.28.3#breaking-changes-)
Breaking changes ❗
There are no breaking changes in 1.28.3.
### [](https://coder.com/docs/v1/changelog/1.28.3#features-)
Features ✨
* infra: added debug level logging for Docker in CVM outer container.
* infra: added check for code-server reachability during the workspace build process.
* infra: updated secrets injection process to be more resilient against short WebRTC connection failures.
### [](https://coder.com/docs/v1/changelog/1.28.3#bug-fixes-)
Bug fixes 🐛
* infra: fixed memory leak when a client connects to a workspace.
### [](https://coder.com/docs/v1/changelog/1.28.3#security-updates-)
Security updates 🔐
There are no security updates in 1.28.3.
---
# 1.29.3 | Coder v1 Docs
[Home](https://coder.com/docs/v1 "Home")
[Changelog](https://coder.com/docs/v1/changelog "Changelog")
[Archives](https://coder.com/docs/v1/changelog/archive "Archives")
1.29.3
### [](https://coder.com/docs/v1/changelog/1.29.3#breaking-changes-)
Breaking changes ❗
There are no breaking changes in 1.29.3.
### [](https://coder.com/docs/v1/changelog/1.29.3#features-)
Features ✨
There are no new features in 1.29.3.
### [](https://coder.com/docs/v1/changelog/1.29.3#bug-fixes-)
Bug fixes 🐛
* infra: fixed issue where the Coder front-end attempts to reconnect to a workspace even when it is offline.
### [](https://coder.com/docs/v1/changelog/1.29.3#security-updates-)
Security updates 🔐
There are no security updates in 1.29.3.
---
# 1.29.0 | Coder v1 Docs
[Home](https://coder.com/docs/v1 "Home")
[Changelog](https://coder.com/docs/v1/changelog "Changelog")
[Archives](https://coder.com/docs/v1/changelog/archive "Archives")
1.29.0
### [](https://coder.com/docs/v1/changelog/1.29.0#breaking-changes-)
Breaking changes ❗
There are no breaking changes in 1.29.0.
### [](https://coder.com/docs/v1/changelog/1.29.0#features-)
Features ✨
* web: added admin login form that appears when OIDC login is enabled and built-in authentication is disabled.
* web: upgraded JetBrains Projector to version 1.6.0.
* C4D: added support for SSH to Docker workspace providers.
* C4D: added support for access URLs other than `localhost`.
* cli: added ability to [create workspace providers via CLI](https://coder.com/docs/v1/guides/admin/wp-cli)
.
* infra: added support for AWS’ IAM Roles for Service Accounts (IRSA) to CVM-enabled workspaces.
* infra: added support for [FUSE devices in CVM-enabled workspaces](https://coder.com/docs/v1/admin/workspace-management/cvms/management#fuse-device)
.
* infra: updated code-server version to `4.1.0` (features VS Code `1.63.0`).
* infra: updated Kubernetes libraries to `1.21`.
* api: added ability for users to set preferred ICE protocol (e.g., `TURN` or `STUN`).
### [](https://coder.com/docs/v1/changelog/1.29.0#bug-fixes-)
Bug fixes 🐛
* web: fixed issue with RStudio login redirects.
* web: fixed issue where usernames in dev URLs were case-sensitive.
* web: fixed issue where resource quota changes were audit logged incorrectly.
* web: fixed issue where deleting a workspace caused a “Failed to fetch applications!” error.
* web: fixed issue where the Dashboard showed a “workspace available” notification even though the build failed.
* web: fixed issue with the Create/Edit a Workspace form not displaying errors if users provided non-unique workspace names.
* web: fixed issue with code copy buttons in the UI.
* web: fixed issue where users aren’t logged out correctly after changing the password.
* C4D: fixed issue with Docker workspace provider form throwing “Failed to create/update workspace provider!” errors.
* C4D: fixed “Resource Load Unknown” errors that occurred during the workspace build process.
* infra: fixed issue where the API call issued by Coder while loading the workspaces page returns the image and information on all workspaces using that image, leading to degraded performance.
* infra: fixed issue with workspace build jobs scheduled multiple times.
* infra: fixed memory leak when a client connects to a workspace.
* infra: fixed issue where dev URL access settings weren’t enforced after changes made by site managers.
* infra: fixed issue regarding mTLS not working with Git providers and Docker registries.
* infra: fixed issue with `coderd` intermittently crashing.
* infra: fixed issue with satellites unable to build workspaces when the self-contained workspace feature was enabled.
### [](https://coder.com/docs/v1/changelog/1.29.0#security-updates-)
Security updates 🔐
* infra: upgraded from Go boring 1.17.5b7 to 1.17.8b7 to fix CVEs.
### [](https://coder.com/docs/v1/changelog/1.29.0#known-issues-)
Known issues 🔧
* web: the service banner (if enabled) reappears for all users, even if they've previously dismissed it.
* web: using the web terminal in Coder can occasionally result in the connection being reset and needing to be restarted.
* web: the **Switch workspace** drop-down menu shows a workspace's status as **Building** even though the build process is completed.
* web: users installing v1.24 (or later) into an air-gapped environment cannot upload their license when prompted.
---
# 1.29.1 | Coder v1 Docs
[Home](https://coder.com/docs/v1 "Home")
[Changelog](https://coder.com/docs/v1/changelog "Changelog")
[Archives](https://coder.com/docs/v1/changelog/archive "Archives")
1.29.1
### [](https://coder.com/docs/v1/changelog/1.29.1#breaking-changes-)
Breaking changes ❗
There are no breaking changes in 1.29.1.
### [](https://coder.com/docs/v1/changelog/1.29.1#features-)
Features ✨
* infra: added `CODER_MAX_WORKSPACES_PER_USER` environment variable to `coderd` that controls the maximum number of workspaces allowed to each user.
* infra: improved Bitbucket server account linking errors to help debug integration issues.
* infra: updated the Helm chart to allow the setting of arbitrary environment variables for `coderd` via the `coderd.extraEnvs` value.
* infra: mounted additional NVIDIA GPU libraries (specifically the GL/GLX libraries) from the host into CVMs if users request GPUs.
### [](https://coder.com/docs/v1/changelog/1.29.1#bug-fixes-)
Bug fixes 🐛
* infra: remove embedded Coder v2 to fix migration problems on new deployments.
* infra: fixed scan error on metrics table caused by `float` being scanned as `int`.
* infra: fixed issue where air-gapped deployments were unable to update admin configuration settings.
* c4d: corrected IP tables patching for access URLs that aren't `localhost`.
### [](https://coder.com/docs/v1/changelog/1.29.1#security-updates-)
Security updates 🔐
There are no security updates in 1.29.1.
---
# 1.28.5 | Coder v1 Docs
[Home](https://coder.com/docs/v1 "Home")
[Changelog](https://coder.com/docs/v1/changelog "Changelog")
[Archives](https://coder.com/docs/v1/changelog/archive "Archives")
1.28.5
### [](https://coder.com/docs/v1/changelog/1.28.5#breaking-changes-)
Breaking changes ❗
There are no breaking changes in 1.28.5.
### [](https://coder.com/docs/v1/changelog/1.28.5#features-)
Features ✨
There are no new features in 1.28.5.
### [](https://coder.com/docs/v1/changelog/1.28.5#bug-fixes-)
Bug fixes 🐛
* infra: fixed issue where the Coder front-end attempts to reconnect to a workspace even when it is offline.
* web: fixed issue where the error message does not show when a user exceeds their resource quota when attempting to create a workspace.
### [](https://coder.com/docs/v1/changelog/1.28.5#security-updates-)
Security updates 🔐
There are no security updates in 1.28.5.
---
# 1.29.2 | Coder v1 Docs
[Home](https://coder.com/docs/v1 "Home")
[Changelog](https://coder.com/docs/v1/changelog "Changelog")
[Archives](https://coder.com/docs/v1/changelog/archive "Archives")
1.29.2
### [](https://coder.com/docs/v1/changelog/1.29.2#breaking-changes-)
Breaking changes ❗
There are no breaking changes in 1.29.2.
### [](https://coder.com/docs/v1/changelog/1.29.2#features-)
Features ✨
* infra: added ability to specify ingress className in the Helm chart.
* infra: added ability to customize liveness and readiness probes in the Helm chart.
### [](https://coder.com/docs/v1/changelog/1.29.2#bug-fixes-)
Bug fixes 🐛
* infra: fixed issue where filesystem corruption would stall builds on EC2 workspaces.
* helm: updated ingress template to use correct value names.
* web: fixed issue where JetBrains 2022.1 IDE versions would not open in Projector.
### [](https://coder.com/docs/v1/changelog/1.29.2#security-updates-)
Security updates 🔐
There are no security updates in 1.29.2.
---
# 1.28.4 | Coder v1 Docs
[Home](https://coder.com/docs/v1 "Home")
[Changelog](https://coder.com/docs/v1/changelog "Changelog")
[Archives](https://coder.com/docs/v1/changelog/archive "Archives")
1.28.4
### [](https://coder.com/docs/v1/changelog/1.28.4#breaking-changes-)
Breaking changes ❗
There are no breaking changes in 1.28.4.
### [](https://coder.com/docs/v1/changelog/1.28.4#features-)
Features ✨
* web: the **Open in Coder** SVG is now served from your Coder deployment, rather than Coder's CDN, so air-gapped customers can use this feature as well. We will continue to serve existing images from our CDN.
### [](https://coder.com/docs/v1/changelog/1.28.4#bug-fixes-)
Bug fixes 🐛
* web: fixed changelog URLs pointing to docs pages ending with `index.md`.
* infra: ensure CVM daemons aren't oom-killed.
### [](https://coder.com/docs/v1/changelog/1.28.4#security-updates-)
Security updates 🔐
* infra: upgraded from Go boring `1.17.5b7` to `1.17.8b7` to fix CVEs.
---
# 1.28.2 | Coder v1 Docs
[Home](https://coder.com/docs/v1 "Home")
[Changelog](https://coder.com/docs/v1/changelog "Changelog")
[Archives](https://coder.com/docs/v1/changelog/archive "Archives")
1.28.2
### [](https://coder.com/docs/v1/changelog/1.28.2#breaking-changes-)
Breaking changes ❗
There are no breaking changes in 1.28.2.
### [](https://coder.com/docs/v1/changelog/1.28.2#features-)
Features ✨
There are no new features in 1.28.2.
### [](https://coder.com/docs/v1/changelog/1.28.2#bug-fixes-)
Bug fixes 🐛
* C4D: fixed issue where workspaces running on Docker Desktop (for Windows or MacOS) would show a `Resource load unknown` warning message.
> This bug fix is only applicable to Coder for Docker users; those deploying to Kubernetes do not need to upgrade.
### [](https://coder.com/docs/v1/changelog/1.28.2#security-updates-)
Security updates 🔐
There are no security updates in 1.28.2.
---
# 1.27.2 | Coder v1 Docs
[Home](https://coder.com/docs/v1 "Home")
[Changelog](https://coder.com/docs/v1/changelog "Changelog")
[Archives](https://coder.com/docs/v1/changelog/archive "Archives")
1.27.2
### [](https://coder.com/docs/v1/changelog/1.27.2#breaking-changes-)
Breaking changes ❗
There are no breaking changes in 1.27.2.
### [](https://coder.com/docs/v1/changelog/1.27.2#features-)
Features ✨
There are no new features in 1.27.2.
### [](https://coder.com/docs/v1/changelog/1.27.2#bug-fixes-)
Bug fixes 🐛
* web: fixed issue where workspaces turned off during active use.
* infra: fixed `envbox` Docker permissions.
### [](https://coder.com/docs/v1/changelog/1.27.2#security-updates-)
Security updates 🔐
* web: added authentication requirement when auto-creating dev URLs.
---
# 1.28.7 | Coder v1 Docs
[Home](https://coder.com/docs/v1 "Home")
[Changelog](https://coder.com/docs/v1/changelog "Changelog")
[Archives](https://coder.com/docs/v1/changelog/archive "Archives")
1.28.7
### [](https://coder.com/docs/v1/changelog/1.28.7#breaking-changes-)
Breaking changes ❗
There are no breaking changes in 1.28.7.
### [](https://coder.com/docs/v1/changelog/1.28.7#features-)
Features ✨
There are no new features in 1.28.7.
### [](https://coder.com/docs/v1/changelog/1.28.7#bug-fixes-)
Bug fixes 🐛
* infra: fixed issue with incorrect formatting of `coder tunnel` command.
### [](https://coder.com/docs/v1/changelog/1.28.7#security-updates-)
Security updates 🔐
There are no security updates in 1.28.7.
---
# 1.28.6 | Coder v1 Docs
[Home](https://coder.com/docs/v1 "Home")
[Changelog](https://coder.com/docs/v1/changelog "Changelog")
[Archives](https://coder.com/docs/v1/changelog/archive "Archives")
1.28.6
### [](https://coder.com/docs/v1/changelog/1.28.6#breaking-changes-)
Breaking changes ❗
There are no breaking changes in 1.28.6.
### [](https://coder.com/docs/v1/changelog/1.28.6#features-)
Features ✨
* infra: Coder tunnel no longer exits after a single connection.
### [](https://coder.com/docs/v1/changelog/1.28.6#bug-fixes-)
Bug fixes 🐛
* infra: fixed issue where a lower MTU caused connections to break.
* infra: fixed issue where the default Helm `networkingress` policy did not allow inbound UDP connections.
### [](https://coder.com/docs/v1/changelog/1.28.6#security-updates-)
Security updates 🔐
There are no security updates in 1.28.6.
---
# 1.28.0 | Coder v1 Docs
[Home](https://coder.com/docs/v1 "Home")
[Changelog](https://coder.com/docs/v1/changelog "Changelog")
[Archives](https://coder.com/docs/v1/changelog/archive "Archives")
1.28.0
### [](https://coder.com/docs/v1/changelog/1.28.0#breaking-changes-)
Breaking changes ❗
* infra: Coder v1.28.x requires the use of Kubernetes v1.21 or later. See Coder's [version support policy](https://coder.com/docs/v1/setup/kubernetes#supported-kubernetes-versions)
for more information.
### [](https://coder.com/docs/v1/changelog/1.28.0#features-)
Features ✨
* web: added support for requesting additional scopes from the OIDC authentication provider.
* web: added prompt for new users to link their Git accounts when signing in for the first time.
* C4D: added ability to view Docker workspace providers in the dashboard and edit its name and organizations whitelist.
* C4D: added support for remote Postgres databases to Coder for Docker.
* cli: added ability for authenticated users to obtain their OIDC access token from the Coder CLI using `coder tokens get-oidc-access-token` once an admin has enabled access tokens.
* api: added `autostart_at` field to the information returned about users.
* infra: updated code-server to 4.0.2.
* infra: added [support for a single access URL](https://coder.com/docs/v1/admin/satellites/global-access-url)
to be used for both primary and satellite deployments using GeoDNS.
* infra: updated Coder to pass `X-Forwarded-For` headers to dev URL connections.
* infra: add client TLS support for Coder, which is used for connections to registries and Git providers.
* infra: added a `labels` field to all logged entries for AWS EKS.
* infra: added [support for TUN devices](https://coder.com/docs/v1/admin/workspace-management/tun-device)
to CVM-enabled workspaces.
### [](https://coder.com/docs/v1/changelog/1.28.0#bug-fixes-)
Bug fixes 🐛
* web: fixed issue with Coder not persisting custom resource allocation requests.
* web: fixed issue where existing OIDC users cannot log in when the license is at maximum usage.
* web: fixed issue with dormant user accounts not being redirected home properly after being reactivated.
* web: fixed issue with workspace provider tooltip interfering with the workspace start button.
* web: removed ability to use double-hyphens in workspaces, causing conflict with dev URLs.
* web: fix issue with custom apps not working with satellites.
* C4D: fixed issue with access URLs not being saved.
* C4D: fixed issue with inability to rebuild workspaces relying on templates.
* cli: fixed issue where the `coder-cli` location was not appended to the `PATH` in terminal sessions.
* infra: added functionality to clean up and remove image pull secrets during workspace clean-up.
* infra: fixed issues with `coderd` certificate injection.
### [](https://coder.com/docs/v1/changelog/1.28.0#security-updates-)
Security updates 🔐
* web: added requirement to authenticate when auto-creating dev URLs.
### [](https://coder.com/docs/v1/changelog/1.28.0#known-issues-)
Known issues 🔧
* web: the service banner (if enabled) reappears for all users, even if they've previously dismissed it.
* web: using the web terminal in Coder can occasionally result in the connection being reset and needing to be restarted.
* web: the **Switch workspace** drop-down menu shows a workspace's status as **Building** even though the build process is completed.
* web: users installing v1.24 (or later) into an air-gapped environment cannot upload their license when prompted.
---
# 1.26.2 | Coder v1 Docs
[Home](https://coder.com/docs/v1 "Home")
[Changelog](https://coder.com/docs/v1/changelog "Changelog")
[Archives](https://coder.com/docs/v1/changelog/archive "Archives")
1.26.2
### [](https://coder.com/docs/v1/changelog/archive/1.26.2#breaking-changes-)
Breaking changes ❗
There are no breaking changes in 1.26.2.
### [](https://coder.com/docs/v1/changelog/archive/1.26.2#features-)
Features ✨
There are no new features in 1.26.2.
### [](https://coder.com/docs/v1/changelog/archive/1.26.2#bug-fixes-)
Bug fixes 🐛
* web: fixed issue where users could not log in via OIDC after the license's user limit was exceeded.
* infra: fixed issue where CVM workspaces that were created or rebuilt on `1.26.0` were no longer able to use Docker.
* infra: fixed issue where the `coder-cli` was not in the workspace `PATH`.
### [](https://coder.com/docs/v1/changelog/archive/1.26.2#security-updates-)
Security updates 🔐
There are no security updates in 1.26.2.
---
# 1.28.1 | Coder v1 Docs
[Home](https://coder.com/docs/v1 "Home")
[Changelog](https://coder.com/docs/v1/changelog "Changelog")
[Archives](https://coder.com/docs/v1/changelog/archive "Archives")
1.28.1
### [](https://coder.com/docs/v1/changelog/1.28.1#breaking-changes-)
Breaking changes ❗
There are no breaking changes in 1.28.1.
### [](https://coder.com/docs/v1/changelog/1.28.1#features-)
Features ✨
* infra: relaxed the Kubernetes version requirement. Coder requires v1.21 or later and does not support earlier versions. If you opt to use v1.19 or v1.20, you'll see warning messages during the installation process. Coder does not allow the use of v1.18 or earlier.
### [](https://coder.com/docs/v1/changelog/1.28.1#bug-fixes-)
Bug fixes 🐛
* infra: fixed issue regarding mTLS not working with Git providers and Docker registries.
* infra: fixed issue with `coderd` intermittently crashing.
### [](https://coder.com/docs/v1/changelog/1.28.1#security-updates-)
Security updates 🔐
There are no security updates in 1.28.1.
---
# 1.27.3 | Coder v1 Docs
[Home](https://coder.com/docs/v1 "Home")
[Changelog](https://coder.com/docs/v1/changelog "Changelog")
[Archives](https://coder.com/docs/v1/changelog/archive "Archives")
1.27.3
### [](https://coder.com/docs/v1/changelog/1.27.3#breaking-changes-)
Breaking changes ❗
There are no breaking changes in 1.27.3.
### [](https://coder.com/docs/v1/changelog/1.27.3#features-)
Features ✨
* infra: relaxed the Kubernetes version requirement. Coder requires v1.21 or later and does not support earlier versions. If you opt to use v1.19 or v1.20, you'll see warning messages during the installation process. Coder does not allow the use of v1.18 or earlier.
* infra: added debug level logging for Docker in CVM outer container.
* infra: added check for code-server reachability during the workspace build process.
* infra: updated secrets injection process to be more resilient against short WebRTC connection failures.
### [](https://coder.com/docs/v1/changelog/1.27.3#bug-fixes-)
Bug fixes 🐛
* infra: fixed memory leak when a client connects to a workspace.
### [](https://coder.com/docs/v1/changelog/1.27.3#security-updates-)
Security updates 🔐
There are no security updates in 1.27.3.
---
# 1.27.4 | Coder v1 Docs
[Home](https://coder.com/docs/v1 "Home")
[Changelog](https://coder.com/docs/v1/changelog "Changelog")
[Archives](https://coder.com/docs/v1/changelog/archive "Archives")
1.27.4
### [](https://coder.com/docs/v1/changelog/1.27.4#breaking-changes-)
Breaking changes ❗
There are no breaking changes in 1.27.4.
### [](https://coder.com/docs/v1/changelog/1.27.4#features-)
Features ✨
There are no new features in 1.27.4.
### [](https://coder.com/docs/v1/changelog/1.27.4#bug-fixes-)
Bug fixes 🐛
* web: fixed issue where JetBrains 2022.1 IDE versions would not open in Projector.
### [](https://coder.com/docs/v1/changelog/1.27.4#security-updates-)
Security updates 🔐
There are no security updates in 1.27.4.
---
# 1.26.4 | Coder v1 Docs
[Home](https://coder.com/docs/v1 "Home")
[Changelog](https://coder.com/docs/v1/changelog "Changelog")
[Archives](https://coder.com/docs/v1/changelog/archive "Archives")
1.26.4
### [](https://coder.com/docs/v1/changelog/archive/1.26.4#breaking-changes-)
Breaking changes ❗
There are no breaking changes in 1.26.4.
### [](https://coder.com/docs/v1/changelog/archive/1.26.4#features-)
Features ✨
There are no security updates in 1.26.4.
### [](https://coder.com/docs/v1/changelog/archive/1.26.4#bug-fixes-)
Bug fixes 🐛
* infra: ensure CVM daemons aren't oom-killed.
### [](https://coder.com/docs/v1/changelog/archive/1.26.4#security-updates-)
Security updates 🔐
There are no security updates in 1.26.4.
---
# 1.26.3 | Coder v1 Docs
[Home](https://coder.com/docs/v1 "Home")
[Changelog](https://coder.com/docs/v1/changelog "Changelog")
[Archives](https://coder.com/docs/v1/changelog/archive "Archives")
1.26.3
### [](https://coder.com/docs/v1/changelog/archive/1.26.3#breaking-changes-)
Breaking changes ❗
There are no breaking changes in 1.26.3.
### [](https://coder.com/docs/v1/changelog/archive/1.26.3#features-)
Features ✨
* infra: added debug level logging for Docker in CVM outer container.
### [](https://coder.com/docs/v1/changelog/archive/1.26.3#bug-fixes-)
Bug fixes 🐛
* infra: fixed memory leak when a client connects to a workspace.
### [](https://coder.com/docs/v1/changelog/archive/1.26.3#security-updates-)
Security updates 🔐
There are no security updates in 1.26.3.
---
# 1.26.1 | Coder v1 Docs
[Home](https://coder.com/docs/v1 "Home")
[Changelog](https://coder.com/docs/v1/changelog "Changelog")
[Archives](https://coder.com/docs/v1/changelog/archive "Archives")
1.26.1
### [](https://coder.com/docs/v1/changelog/archive/1.26.1#breaking-changes-)
Breaking changes ❗
There are no breaking changes in 1.26.1.
### [](https://coder.com/docs/v1/changelog/archive/1.26.1#features-)
Features ✨
There are no new features in 1.26.1.
### [](https://coder.com/docs/v1/changelog/archive/1.26.1#bug-fixes-)
Bug fixes 🐛
* web: fixed issue where enabling a feature flag disables all other feature flags currently enabled.
* web: fixed issue with workspace templates on GitHub Enterprise.
* infra: fixed issue where workspaces created with CVM caching _enabled_ that are then rebuilt with CVM caching _disabled_ causes the Docker daemon to not start.
* infra: improve Kubernetes workspace provider logging and update error messages to be more informative.
* infra: fixed issue where using an identically named image in two different registries would prevent the creation of a workspace via template.
### [](https://coder.com/docs/v1/changelog/archive/1.26.1#security-updates-)
Security updates 🔐
There are no security updates in 1.26.1
---
# 1.27.1 | Coder v1 Docs
[Home](https://coder.com/docs/v1 "Home")
[Changelog](https://coder.com/docs/v1/changelog "Changelog")
[Archives](https://coder.com/docs/v1/changelog/archive "Archives")
1.27.1
### [](https://coder.com/docs/v1/changelog/1.27.1#breaking-changes-)
Breaking changes ❗
* Users upgrading deployments that predate the release of v1.21 should update their Helm values file to reflect Coder's [updated schema](https://github.com/coder/enterprise-helm/blob/1.27.0/values.yaml)
if they haven't already. More specifically, users must change the following values:
* `cemanager` --> `coderd`
* `cemanager.replicas` --> `coderd.replicas`
* `cemanager.image` --> `coderd.image`
* `cemanager.resources` --> `coderd.resources`
* `devurls.host` --> `coderd.devurlsHost`
* `ingress.loadBalancerIP` --> `coderd.serviceSpec.loadBalancerIP`
* `ingress.loadBalancerSourceRanges` --> `coderd.serviceSpec.loadBalancerSourceRanges`
* `ingress.service.externalTrafficPolicy` --> `coderd.serviceSpec.externalTrafficPolicy`
* `ingress.tls.hostSecretName` --> `coderd.tls.hostSecretName`
* `ingress.tls.devurlsHostSecretName` --> `coderd.tls.devurlsHostSecretName`
* `storageClassName` --> `postgres.default.storageClassName`
* `timescale.image` --> `postgres.default.image`
* `timescale.resources` --> `postgres.default.resources`
* `timescale.resources.requests.storage` --> `postgres.default.resources.requests.storage`
* `postgres.useDefault` --> `postgres.default.enable`
* `deploymentAnnotations` --> `services.annotations`
* `serviceTolerations` --> `services.tolerations`
* `clusterDomainSuffix` --> `services.clusterDomainSuffix`
* `serviceType` --> `services.type`
* `serviceAccount.annotations` --> `coderd.builtinProviderServiceAccount.annotations`
* `serviceAccount.labels` --> `coderd.builtinProviderServiceAccount.labels`
### [](https://coder.com/docs/v1/changelog/1.27.1#features-)
Features ✨
* infra: upgraded code-server to v4.0.2.
### [](https://coder.com/docs/v1/changelog/1.27.1#bug-fixes-)
Bug fixes 🐛
* infra: fixed issue where CVM workspaces that were created or rebuilt on `1.26.0` were no longer able to use Docker.
* web: fixed issue where users could not log in via OIDC after the license's user limit was exceeded.
* infra: downgraded Sysbox version to fix xattr permissions issues.
* infra: fixed issue where the `coder-cli` was not in the workspace `PATH`.
* infra: updated the Coder agent to print an extended "certificate injection required" error message.
* infra: added functionality to delete legacy cookies.
### [](https://coder.com/docs/v1/changelog/1.27.1#security-updates-)
Security updates 🔐
There are no security updates in 1.27.1.
---
# 1.26.0 | Coder v1 Docs
[Home](https://coder.com/docs/v1 "Home")
[Changelog](https://coder.com/docs/v1/changelog "Changelog")
[Archives](https://coder.com/docs/v1/changelog/archive "Archives")
1.26.0
### [](https://coder.com/docs/v1/changelog/archive/1.26.0#breaking-changes-)
Breaking changes ❗
* infra: Coder now requires the use of Kubernetes v1.20 or later. See Coder's [version support policy](https://coder.com/docs/v1/changelog/setup/kubernetes#supported-kubernetes-versions)
for more information.
### [](https://coder.com/docs/v1/changelog/archive/1.26.0#features-)
Features ✨
* web: **(alpha)** added support for Azure Container Registry authentication using Azure Active Directory Pod Identity.
* web: added ability to set access URLs for individual workspace providers.
* web: added ability to enable fallback shell support.
* web: added ability to use Markdown syntax when customizing system and service banners. Note that Coder will now render existing banners with Markdown content.
* web: improved error catching in build logs.
* web: updated **Images** > **Workspaces** to display the specific tag used.
* web: added functionality where Coder stores the `CMD` from the Docker image when imported/refreshing image tags so that users on OpenShift can use a default shell.
* web: added ability to set a constant suffix for all dev URLs (e.g., `*-suffix.coder.io`).
* web: updated `error` chips in the UI to display error messages in a tooltip.
* web: made the dark theme generally available under **Preferences** > **Appearance** (users who have enabled the beta version via feature flag will need to re-enable this; Coder won't auto-apply the theme).
* cli: CLI now displays connection status and protocol used, even outside of `debug` mode.
* cli: added support for UDP tunneling.
* jetbrains: fixed Projector so that new editor windows open and fill the browser window.
* jetbrains: updated Projector client and server to `1.5.0`.
* infra: updated `nice` values for OpenSSH connections to prevent disconnection during times of high CPU usage.
### [](https://coder.com/docs/v1/changelog/archive/1.26.0#bug-fixes-)
Bug fixes 🐛
* web: fixed issue with dev URLs and Open in Coder buttons not redirecting users appropriately based on their authentication status.
* web: fixed rendering issues present in the Coder UI when using the dark theme.
* web: fixed issue with build log hanging in Safari 15.1.
* web: added validation to prevent the use of dev URLs with subdomains with more than 63 characters.
* web: added username validation to the user-creation process.
* cli: fixed issue with auto-generated `ControlPath` values being too lengthy.
* infra: updated `coderd` to start HTTPS server even if no TLS certificates are specified.
* infra: fixed issue where `coderd` was unable to communicate with CVM-enabled workspaces.
* infra: fixed issue where `nodeSelector` annotation cannot be updated.
* infra: fixed cached CVMs to use the correct IP address for `/etc/hosts` in the pod's inner container, allowing the use of the container name as the application host.
* C4D: fixed issue with Coder for Docker workspaces not having the default personalize script.
* C4D: added ability for Coder for Docker workspaces to use workspace templates.
* C4D: fixed issues with SSH connections to/from the Coder CLI.
### [](https://coder.com/docs/v1/changelog/archive/1.26.0#security-updates-)
Security updates 🔐
* infra: removed CORS headers from `coderd`.
* infra: removed sensitive fields from admin-only workspace providers query endpoints.
### [](https://coder.com/docs/v1/changelog/archive/1.26.0#known-issues-)
Known issues 🔧
* web: the service banner (if enabled) reappears for all users, even if they've previously dismissed it.
* web: using the web terminal in Coder can occasionally result in the connection being reset and needing to be restarted.
* web: the **Switch workspace** drop-down menu shows a workspace's status as **Building** even though the build process is completed.
* web: users installing v1.24 (or later) into an air-gapped environment cannot upload their license when prompted.
---
# 1.22.2 | Coder v1 Docs
[Home](https://coder.com/docs/v1 "Home")
[Changelog](https://coder.com/docs/v1/changelog "Changelog")
[Archives](https://coder.com/docs/v1/changelog/archive "Archives")
1.22.2
### [](https://coder.com/docs/v1/changelog/archive/1.22.2#breaking-changes-)
Breaking changes ❗
There are no breaking changes in 1.22.2.
### [](https://coder.com/docs/v1/changelog/archive/1.22.2#features-)
Features ✨
There are no new features in 1.22.2.
### [](https://coder.com/docs/v1/changelog/archive/1.22.2#bug-fixes-)
Bug fixes 🐛
* web: fixed issue where users had to rebuild workspaces twice after regenerating SSH keys.
### [](https://coder.com/docs/v1/changelog/archive/1.22.2#security-updates-)
Security updates 🔐
There are no security updates in 1.22.2.
---
# 1.22.3 | Coder v1 Docs
[Home](https://coder.com/docs/v1 "Home")
[Changelog](https://coder.com/docs/v1/changelog "Changelog")
[Archives](https://coder.com/docs/v1/changelog/archive "Archives")
1.22.3
### [](https://coder.com/docs/v1/changelog/archive/1.22.3#breaking-changes-)
Breaking changes ❗
There are no breaking changes in 1.22.3.
### [](https://coder.com/docs/v1/changelog/archive/1.22.3#features-)
Features ✨
There are no new features in 1.22.3.
### [](https://coder.com/docs/v1/changelog/archive/1.22.3#bug-fixes-)
Bug fixes 🐛
* web: fixed the dev URL button not opening the correct hostname after editing the dev URL on a satellite
* infra: fixed panic in authenticated dev URLs served on satellites
* web: fixed issue where the ingress object included in Helm wasn't pointing to the correct service port
### [](https://coder.com/docs/v1/changelog/archive/1.22.3#security-updates-)
Security updates 🔐
There are no security updates in 1.22.3.
---
# 1.24.0 | Coder v1 Docs
[Home](https://coder.com/docs/v1 "Home")
[Changelog](https://coder.com/docs/v1/changelog "Changelog")
[Archives](https://coder.com/docs/v1/changelog/archive "Archives")
1.24.0
> Beginning with Coder v1.24.0, the Coder CLI is closed-source. The open-source `cdr/coder-cli` repo on GitHub will continue to exist, though we will not be making any further changes to it. We will be publishing a new Go SDK as a replacement in the near future.
### [](https://coder.com/docs/v1/changelog/archive/1.24.0#breaking-changes-)
Breaking changes ❗
There are no breaking changes in 1.24.0.
### [](https://coder.com/docs/v1/changelog/archive/1.24.0#features-)
Features ✨
* web: added ability to pull images from private Amazon ECR repositories.
* web: added alert to notify users when workspace disks are full.
* web: added information regarding applications used to the audit log.
* web: updated the in-product changelog to display information for multiple versions of Coder.
* web: added ability to set the background color for all in-product banners with a color picker.
* infra: added auto-injection of TLS certificates into workspaces to ensure secure communication with `coderd`.
* infra: added ability to [specify an affinity rule in the Helm chart](https://github.com/coder/enterprise-helm#values)
for the `coderd` deployment.
### [](https://coder.com/docs/v1/changelog/archive/1.24.0#bug-fixes-)
Bug fixes 🐛
* web: fixed rendering issues when using dark theme.
* web: fixed issue with inability to update a registry name or URL.
* web: fixed issue with Coder not displaying an error when there is an issue during OIDC login.
* web: fixed issue where large outputs would sometimes cause web terminals to disconnect.
* web: fixed issue with Intercom not loading for hosted beta users.
* web: fixed issue with RStudio not launching.
* web: fixed issue with password max length validation being too narrow for registries (password length limit for image registries has been updated to 32 KiB).
* web: fixed issue with incorrect dev URL status indicators
* web: fixed issue with dev URLs sometimes not opening.
* web: fixed issue with the **Save Preferences** button being permanently disabled.
* web: fixed issues with rendering icons in the user interface.
* web: fixed issue with workspace templates sometimes not updating.
* web: fixed issue with workspaces needing to be rebuilt twice after regenerating an SSH key.
* infra: fixed issue with inability to set `ulimit` inside cached CVMs.
* api: removed ability for site managers to create site admins through the API.
### [](https://coder.com/docs/v1/changelog/archive/1.24.0#security-updates-)
Security updates 🔐
* infra: removed dependency on vulnerable `jwt-go` package.
* infra: updated login functionality to always hash passwords on login, regardless of whether user exists or not, to mitigate timing attacks.
* infra: applied the `Content-Type-Options: nosniff` header to `envagent` and satellite responses.
* infra: added `referrer-policy: no-referrer` header to responses from Coder (including satellites) that include static content.
* infra: added expiration date to dev URL cookies.
### [](https://coder.com/docs/v1/changelog/archive/1.24.0#known-issues-)
Known issues 🔧
* web: the service banner (if enabled) reappears for all users, even if they've previously dismissed it.
* web: using the web terminal in Coder can occasionally result in the connection being reset and needing to be restarted.
* web: the **Switch workspace** drop-down menu shows a workspace's status as **Building** even though the build process is completed.
---
# 1.21.6 | Coder v1 Docs
[Home](https://coder.com/docs/v1 "Home")
[Changelog](https://coder.com/docs/v1/changelog "Changelog")
[Archives](https://coder.com/docs/v1/changelog/archive "Archives")
1.21.6
### [](https://coder.com/docs/v1/changelog/archive/1.21.6#breaking-changes-)
Breaking changes ❗
There are no breaking changes in 1.21.6.
### [](https://coder.com/docs/v1/changelog/archive/1.21.6#features-)
Features ✨
There are no new features in 1.21.6.
### [](https://coder.com/docs/v1/changelog/archive/1.21.6#bug-fixes-)
Bug fixes 🐛
* infra: make the networking agent startup more reliably
* infra: fix dev URLs returning 502 error on satellites
* infra: improve stability for Net V2 connections and update WebRTC dependencies
### [](https://coder.com/docs/v1/changelog/archive/1.21.6#security-updates-)
Security updates 🔐
There are no security updates in 1.21.6.
---
# 1.21.5 | Coder v1 Docs
[Home](https://coder.com/docs/v1 "Home")
[Changelog](https://coder.com/docs/v1/changelog "Changelog")
[Archives](https://coder.com/docs/v1/changelog/archive "Archives")
1.21.5
### [](https://coder.com/docs/v1/changelog/archive/1.21.5#breaking-changes-)
Breaking changes ❗
There are no breaking changes in 1.21.5.
### [](https://coder.com/docs/v1/changelog/archive/1.21.5#features-)
Features ✨
There are no new features in 1.21.5.
### [](https://coder.com/docs/v1/changelog/archive/1.21.5#bug-fixes-)
Bug fixes 🐛
* web: fixed the dev URL button not opening the correct hostname after editing the dev URL on a satellite
* infra: fixed panic in authenticated dev URLs served on satellites
### [](https://coder.com/docs/v1/changelog/archive/1.21.5#security-updates-)
Security updates 🔐
There are no security updates in 1.21.5.
---
# 1.23.1 | Coder v1 Docs
[Home](https://coder.com/docs/v1 "Home")
[Changelog](https://coder.com/docs/v1/changelog "Changelog")
[Archives](https://coder.com/docs/v1/changelog/archive "Archives")
1.23.1
### [](https://coder.com/docs/v1/changelog/archive/1.23.1#breaking-changes-)
Breaking changes ❗
There are no breaking changes in 1.23.1.
### [](https://coder.com/docs/v1/changelog/archive/1.23.1#features-)
Features ✨
There are no new features in 1.23.1.
### [](https://coder.com/docs/v1/changelog/archive/1.23.1#bug-fixes-)
Bug fixes 🐛
* web: fixed issue with Coder not displaying an error when there is an issue during OIDC login.
* web: fixed issue where large output would sometimes cause web terminals to disconnect.
* web: fixed issue with Intercom not loading for hosted beta users.
* web: fixed issue with RStudio not launching.
* web: fixed issue with password max length validation being too narrow for registries (password length limit for image registries has been updated to 32 KiB).
* web: fixed issue with inability to update a registry name or URL.
* infra: fixed issue with inability to set `ulimit` inside cached CVMs.
### [](https://coder.com/docs/v1/changelog/archive/1.23.1#security-updates-)
Security updates 🔐
* infra: removed dependency on `jwt-go` package.
---
# 1.21.4 | Coder v1 Docs
[Home](https://coder.com/docs/v1 "Home")
[Changelog](https://coder.com/docs/v1/changelog "Changelog")
[Archives](https://coder.com/docs/v1/changelog/archive "Archives")
1.21.4
### [](https://coder.com/docs/v1/changelog/archive/1.21.4#breaking-changes-)
Breaking changes ❗
There are no breaking changes in 1.21.4.
### [](https://coder.com/docs/v1/changelog/archive/1.21.4#features-)
Features ✨
* infra: updated Helm service account and RBAC objects to be kept when uninstalling Helm.
### [](https://coder.com/docs/v1/changelog/archive/1.21.4#bug-fixes-)
Bug fixes 🐛
* web: fixed issue where users had to rebuild workspaces twice after regenerating SSH keys.
* infra: fixed race condition seen during the "starting networking agent" build step leading to a "context deadline exceeded" error message.
### [](https://coder.com/docs/v1/changelog/archive/1.21.4#security-updates-)
Security updates 🔐
There are no security updates in 1.21.4.
---
# 1.21.7 | Coder v1 Docs
[Home](https://coder.com/docs/v1 "Home")
[Changelog](https://coder.com/docs/v1/changelog "Changelog")
[Archives](https://coder.com/docs/v1/changelog/archive "Archives")
1.21.7
### [](https://coder.com/docs/v1/changelog/archive/1.21.7#breaking-changes-)
Breaking changes ❗
There are no breaking changes in 1.21.7.
### [](https://coder.com/docs/v1/changelog/archive/1.21.7#features-)
Features ✨
There are no new features in 1.21.7.
### [](https://coder.com/docs/v1/changelog/archive/1.21.7#bug-fixes-)
Bug fixes 🐛
* web: fixed issue with workspace templates on GitHub Enterprise.
* infra: fixed issue where using an identically named image in two different registries would prevent the creation of a workspace via template.
### [](https://coder.com/docs/v1/changelog/archive/1.21.7#security-updates-)
Security updates 🔐
There are no security updates in 1.21.7.
---
# 1.27.0 | Coder v1 Docs
[Home](https://coder.com/docs/v1 "Home")
[Changelog](https://coder.com/docs/v1/changelog "Changelog")
[Archives](https://coder.com/docs/v1/changelog/archive "Archives")
1.27.0
### [](https://coder.com/docs/v1/changelog/1.27.0#breaking-changes-)
Breaking changes ❗
* Users upgrading deployments that predate the release of v1.21 should update their Helm values file to reflect Coder's [updated schema](https://github.com/coder/enterprise-helm/blob/1.27.0/values.yaml)
if they haven't already. More specifically, users must change the following values:
* `cemanager` --> `coderd`
* `cemanager.replicas` --> `coderd.replicas`
* `cemanager.image` --> `coderd.image`
* `cemanager.resources` --> `coderd.resources`
* `devurls.host` --> `coderd.devurlsHost`
* `ingress.loadBalancerIP` --> `coderd.serviceSpec.loadBalancerIP`
* `ingress.loadBalancerSourceRanges` --> `coderd.serviceSpec.loadBalancerSourceRanges`
* `ingress.service.externalTrafficPolicy` --> `coderd.serviceSpec.externalTrafficPolicy`
* `ingress.tls.hostSecretName` --> `coderd.tls.hostSecretName`
* `ingress.tls.devurlsHostSecretName` --> `coderd.tls.devurlsHostSecretName`
* `storageClassName` --> `postgres.default.storageClassName`
* `timescale.image` --> `postgres.default.image`
* `timescale.resources` --> `postgres.default.resources`
* `timescale.resources.requests.storage` --> `postgres.default.resources.requests.storage`
* `postgres.useDefault` --> `postgres.default.enable`
* `deploymentAnnotations` --> `services.annotations`
* `serviceTolerations` --> `services.tolerations`
* `clusterDomainSuffix` --> `services.clusterDomainSuffix`
* `serviceType` --> `services.type`
* `serviceAccount.annotations` --> `coderd.builtinProviderServiceAccount.annotations`
* `serviceAccount.labels` --> `coderd.builtinProviderServiceAccount.labels`
### [](https://coder.com/docs/v1/changelog/1.27.0#features-)
Features ✨
* infra: added functionality to [log all system-level processes executing in the workspace](https://coder.com/docs/v1/admin/workspace-management/process-logging)
.
* web: added ability to [disable built-in logins](https://coder.com/docs/v1/admin/access-control#disable-built-in-authentication)
to Coder once OIDC authentication has been configured.
* web: added tutorial on setting up Git OAuth connection to the onboarding steps displayed to administrators when launching a new Coder deployment.
* web: switched [default extensions marketplace](https://coder.com/docs/v1/admin/workspace-management/extensions)
to OpenVSX.
* web: added ability for admins to [specify RSA-4096 as the SSH key algorithm](https://coder.com/docs/v1/admin/security#ssh)
.
* web: added [auto-off settings](https://coder.com/docs/v1/workspaces/workspace-params)
to the **Create Workspace** and **Edit Workspace** forms’ **Advanced** section.
* web: added functionality to prune images and log image pull process for EC2 providers.
* cli: updated CLI so that it places updated binary to the current working directory if the existing binary is under a blocked prefix.
* infra: added [support for Podman](https://coder.com/docs/v1/guides/deployments/podman)
as an alternative to sysbox for CVM workspaces.
* infra: added ability to customize resource requests and limits in workspace templates.
* infra: added support for volume resizing on EC2 providers.
* infra: added [mutual TLS support](https://coder.com/docs/v1/guides/deployments/postgres#mtls-connections)
to Postgres database connections to/from Coder.
* infra: improved logging to help diagnose authentication issues.
* infra: added logging to and improved error handling for workspace providers.
* infra: update code-server to 4.0.1.
* infra: added support for [AWS IAM authentication to RDS instances](https://coder.com/docs/v1/guides/deployments/postgres#using-aws-iam-to-authenticate-with-an-rds-instance)
.
### [](https://coder.com/docs/v1/changelog/1.27.0#bug-fixes-)
Bug fixes 🐛
* web: fixed issue with exported audit logs showing incorrect IP addresses.
* web: fixed issue where enabling a feature flag disabled all other feature flags.
* web: fixed issue on OAuth setup page where client ID and client secret fields were incorrectly auto-filled.
* web: fixed issue with select toggle switches not working.
* web: fixed issue with Intercom button showing in applications, including IDEs.
* web: fixed workspace provider authorization issues that occasionally resulted in workspace builds hanging.
* infra: fixed issue with OIDC provisioning more users than allowed by the active license.
* infra: fixed issue with workspace template searching.
* infra: updated GitHub SDK to v41.0.0.
* infra: fixed embeddable buttons to support workspace templates that launch a Coder for Docker deployment.
### [](https://coder.com/docs/v1/changelog/1.27.0#security-updates-)
Security updates 🔐
There are no security updates in 1.27.0
### [](https://coder.com/docs/v1/changelog/1.27.0#known-issues-)
Known issues 🔧
* web: the service banner (if enabled) reappears for all users, even if they've previously dismissed it.
* web: using the web terminal in Coder can occasionally result in the connection being reset and needing to be restarted.
* web: the **Switch workspace** drop-down menu shows a workspace's status as **Building** even though the build process is completed.
* web: users installing v1.24 (or later) into an air-gapped environment cannot upload their license when prompted.
---
# 1.22.1 | Coder v1 Docs
[Home](https://coder.com/docs/v1 "Home")
[Changelog](https://coder.com/docs/v1/changelog "Changelog")
[Archives](https://coder.com/docs/v1/changelog/archive "Archives")
1.22.1
### [](https://coder.com/docs/v1/changelog/archive/1.22.1#breaking-changes-)
Breaking changes ❗
There are no breaking changes in 1.22.1.
### [](https://coder.com/docs/v1/changelog/archive/1.22.1#features-)
Features ✨
There are no new features in 1.22.1.
### [](https://coder.com/docs/v1/changelog/archive/1.22.1#bug-fixes-)
Bug fixes 🐛
* infra: Fixed goroutine/memory leaks.
* infra: Fixed issue where Kubernetes labels were parsed incorrectly.
### [](https://coder.com/docs/v1/changelog/archive/1.22.1#security-updates-)
Security updates 🔐
There are no security updates in 1.22.1.
---
# 1.21.3 | Coder v1 Docs
[Home](https://coder.com/docs/v1 "Home")
[Changelog](https://coder.com/docs/v1/changelog "Changelog")
[Archives](https://coder.com/docs/v1/changelog/archive "Archives")
1.21.3
### [](https://coder.com/docs/v1/changelog/archive/1.21.3#breaking-changes-)
Breaking changes ❗
There are no breaking changes in 1.21.3.
### [](https://coder.com/docs/v1/changelog/archive/1.21.3#features-)
Features ✨
There are no new features in 1.21.3.
### [](https://coder.com/docs/v1/changelog/archive/1.21.3#bug-fixes-)
Bug fixes 🐛
> Coder v1.21.3 includes bug fixes backported from v1.22.1.
* infra: Fixed goroutine/memory leaks.
### [](https://coder.com/docs/v1/changelog/archive/1.21.3#security-updates-)
Security updates 🔐
There are no security updates in 1.21.3.
---
# 1.22.0 | Coder v1 Docs
[Home](https://coder.com/docs/v1 "Home")
[Changelog](https://coder.com/docs/v1/changelog "Changelog")
[Archives](https://coder.com/docs/v1/changelog/archive "Archives")
1.22.0
### [](https://coder.com/docs/v1/changelog/archive/1.22.0#breaking-changes-)
Breaking changes ❗
* infra: the following features have been deprecated and require migration:
* The Coder Helm chart no longer includes `envproxy`.
* The workspace provider Helm chart has been removed; ensure that existing workspace providers have been [migrated to a satellite deployment](https://coder.com/docs/v1/changelog/admin/satellites/migration)
.
### [](https://coder.com/docs/v1/changelog/archive/1.22.0#features-)
Features ✨
* P2P connections: added ability to connect to workspaces using WebRTC STUN, which establishes a direct connection to workspaces.
* Cached CVMs: [cached container-based virtual machines (CVMs)](https://coder.com/docs/v1/changelog/admin/workspace-management/cvms#enabling-cached-cvms)
will improve the startup experience of CVM workspaces; previously, CVM workspaces suffered from slow startup times due to the `envbox` Docker daemon's inability to utilize the cache on the node. With the cache on the node accessible, Coder's also eliminated the need to run `dockerd` in `envbox`. To enable cached CVMs, go to **Manage** > **Admin** > **Infrastructure**. Scroll down to **Workspace Container Runtime**, and toggle **Enable Caching** to **On**.
* infra: added ability to [enable dynamic loading of `shiftfs`](https://coder.com/docs/v1/changelog/admin/workspace-management/cvms#enabling-cached-cvms)
.
* web: added progress details to the "injecting workspace assets" step in the workspace build log.
* web: added Android Studio support.
* web: added ability to see the active number of license seats in use. See **Manage** > **Admin** > **License**.
* infra: updated `envbox` to always use Docker 20.10.3 or later.
* infra: set Networking v2 as the default; the provider config option has been removed.
* web: added ability to use hyphens and underscores in dev URLs.
* web: added improved logging and error messages to the workspace creation process for image import failures.
* cli: added `coder ws ping ` command that returns information regarding workspace latency.
* cli: updated `coder sh` to use a WebRTC tunnel.
* web: added ability to modify suggested CPU and memory settings to the **Create Workspace** UI when creating a workspace based on a packaged image.
* infra: added client-side username validation to clarify acceptable input
* infra: during installation, the Helm package manager checks to ensure that Coder is compatible with the Kubernetes cluster version used; if not, the installation process fails, and Helm returns an error message indicating the minimum cluster version required.
### [](https://coder.com/docs/v1/changelog/archive/1.22.0#bug-fixes-)
Bug fixes 🐛
* web: fixed grammar errors and improved messaging in UI.
* web: fixed issue with the sign-in page so that it always displays OIDC login option when configured.
* web: fixed issue with linking to GitHub when the Coder SSH key has been added already to GitHub.
* web: fixed issue where required rebuild messages do not disappear until the page is refreshed.
* web: fixed rendering issues related to the workspace status bar.
* web: removed non-functioning toggle to disable system notifications.
* web: fixed issue with Coder moving back into setup mode if the authentication configuration process fails.
* web: fixed **Images** page sort; Coder now sorts the entire list instead of the current page based on the number of workspaces that use the image.
* cli: the Coder CLI now returns an error message if a user attempts to connect to an offline workspace via SSH.
* infra: fixed issue with `coderd` attempting to use the public access URL to connect to TURN; `coderd` now uses `localhost` instead to avoid hitting the load balancer.
* web: moved workspace build "last built at" time to the top of the build log.
* infra: fixed connection leak in Networking v2 when proxying browser traffic.
### [](https://coder.com/docs/v1/changelog/archive/1.22.0#security-updates-)
Security updates 🔐
* infra: updated `Content-Security-Policy` to be stricter.
* infra: updated `CORS` header to prevent cookies from being sent to Coder subdomains.
* infra: implemented dev URL-specific tokens that cannot be used for authentication.
---
# 1.23.0 | Coder v1 Docs
[Home](https://coder.com/docs/v1 "Home")
[Changelog](https://coder.com/docs/v1/changelog "Changelog")
[Archives](https://coder.com/docs/v1/changelog/archive "Archives")
1.23.0
### [](https://coder.com/docs/v1/changelog/archive/1.23.0#breaking-changes-)
Breaking changes ❗
There are no breaking changes in 1.23.0.
### [](https://coder.com/docs/v1/changelog/archive/1.23.0#features-)
Features ✨
* Doctor: [Doctor](https://github.com/coder/coder-doctor)
assesses a Kubernetes cluster to determine its readiness for Coder installation; if there are issues, Doctor provides information on why.
* Terraform: Coder has released the first of a series of [Terraform scripts](https://github.com/coder/enterprise-terraform)
to facilitate one-click Coder deployment.
* web: added support for [workspace applications](https://coder.com/docs/v1/changelog/workspaces/applications)
; users can provide images with custom applications, instead of only using applications that have been built into the container image `PATH`.
* web: added support for DataSpell.
* web: improved input validation for dev URLs.
* web: added ability to get access token returned by OIDC providers on login.
* web: added usage statistics for individual workspaces to the Organizations section of the UI.
* web: renamed "decommissioned" state to "deleting" when referring to the process of deleting a workspace and freeing up its resources.
* web: added integrated live chat user so that hosted beta users can reach the Coder support team.
* web: added in-product changelog.
* web: added dark mode for the Coder UI.
* web: added ability to provide a shell command to be run when starting a terminal in Coder.
* web: updated default workspace resource allocation from 1 core and 1 GB of memory to 4 cores and 4 GB of memory.
* web: updated audit log to include information about workspace stop actions.
* web: added ability to specify the Kubernetes service account name when editing a workspace provider.
* cli: added `run coder update` command; users can now update the Coder CLI directly.
* api: added ability to use the Coder API to create workspaces.
* infra: updated logging so that Coder will send an error to `stdout` if unable to write to the in-product audit log.
* infra: add support for containerd for cached CVMs.
* infra: updated Coder to use the latest stable version of JetBrains Projector.
* infra: updated Next.js `10` to `11`.
### [](https://coder.com/docs/v1/changelog/archive/1.23.0#bug-fixes-)
Bug fixes 🐛
* web: fixed inconsistent color scheming in UI.
* web: fixed issues related to the rendering of UI components.
* web: fixed issues in the UI with longer strings of text.
* web: updated build log to show elapsed time for the final step.
* web: fixed issue with Coder networking agent hanging when certificates are missing.
* web: fixed issue where STUN URI field in the admin panel could not be left empty.
* web: fixed issue with session cookies not persisting in Safari.
* web: fixed issue preventing users from signing out of Coder.
* web: fixed intermittent workspace build and build log errors when using cached CVMs.
* infra: fixed issue with SSH connections immediately closing when using cached CVMs.
* infra: fixed issue with cached CVMs not having internet connectivity when network policies are enabled on GKE.
* infra: fixed issue with cached CVMs not preserving environment variables passed from the image.
* infra: consolidated requests sent when to get dev URL status, lessening server load.
* infra: fixed issue with inability to delete workspace provider if its cluster has been deleted.
### [](https://coder.com/docs/v1/changelog/archive/1.23.0#security-updates-)
Security updates 🔐
* api: the admin-only authentication API no longer returns the OIDC client secret.
* infra: added `X-Content-Type-Options` to headers returned by Coder so that browsers avoid automatically detecting MIME types based on content.
* infra: added CSP `frame-ancestors` directive to prevent click-jacking.
* infra: reduced session cookie expiration time from seven days to twenty-four hours.
---
# 1.25.0 | Coder v1 Docs
[Home](https://coder.com/docs/v1 "Home")
[Changelog](https://coder.com/docs/v1/changelog "Changelog")
[Archives](https://coder.com/docs/v1/changelog/archive "Archives")
1.25.0
> The final patch release of Kubernetes 1.19 was published on 28 October 2021. As such, the _subsequent_ versions of Coder (v1.26 and later) will require the use of Kubernetes 1.20 or later. See Coder's [version support policy](https://coder.com/docs/v1/changelog/setup/kubernetes#supported-kubernetes-versions)
> for more information.
### [](https://coder.com/docs/v1/changelog/archive/1.25.0#breaking-changes-)
Breaking changes ❗
> See [Update considerations](https://coder.com/docs/v1/changelog/setup/upgrade/considerations)
> for additional information.
* web: updated dev URLs to use a double hyphen as the delimiter. Please update bookmarks accordingly.
### [](https://coder.com/docs/v1/changelog/archive/1.25.0#features-)
Features ✨
* EC2: **alpha**. added support for [workspace providers deployed on EC2 instances](https://coder.com/docs/v1/changelog/admin/workspace-providers/deployment/ec2)
.
* Coder for Docker: added ability for Linux and macOS [users with Docker Desktop to quickly deploy Coder](https://coder.com/docs/v1/changelog/setup/docker)
.
* web: **alpha**. added support for [IRSA authentication](https://aws.amazon.com/blogs/opensource/introducing-fine-grained-iam-roles-service-accounts/)
with AWS ECR. This can be enabled under **Manage > Admin > Infrastructure > ECR IAM Role Authentication**.
* web: removed the workspace create interstitial page for selecting custom or templated workspaces and replaced with a drop-down button.
* web: updated the **Create a Workspace** screen so that the **Advanced** section is collapsed by default.
* web: added support for hyphens in usernames.
* web: improved length validation on dev URL names to conform with hostname length limit.
* web: improved performance of the Coder UI.
* cli: added ability to set auto-off times on a per-workspace basis.
* infra: added the `CODER_ORGANIZATION_ID` environment variable.
* infra: added ability to pass custom headers to workspace applications.
* infra: added ability to check for non-200 status codes related to workspace applications.
* infra: added [permissions for service account creation](https://github.com/coder/enterprise-helm/blob/main/templates/rbac.yaml#L33)
to the RBAC Helm charts.
* infra: added functionality to create Kubernetes service accounts for workspaces when service account annotations are set for the workspace provider.
* infra: added functionality to edit theaffinity of workspaces for workspace providers.
* infra: **alpha**. added option to enable self-contained workspace builds, eliminating dependency on `kube exec`.
* infra: updated to Next.js 12.
* infra: updated JetBrains Projector to Agent v1.7 and Client v1.4.
* infra: added logging for workspace applications.
### [](https://coder.com/docs/v1/changelog/archive/1.25.0#bug-fixes-)
Bug fixes 🐛
* web: fixed audit log rendering issues.
* web: fixed feedback form loading and rendering errors.
* cli: fixed issue with user login overwriting configuration used by the Coder Agent.
* cli: fixed issue with the web terminal not loading information correctly when running `--help`.
* cli: added `tunnel` to the Coder CLI help listing.
* infra: fixed issue with CVMs due to `shiftfs` failing to compile on kernel v5.11+.
* infra: reverted Sysbox version due to memory corruption issues with Nix.
* infra: fixed memory leak.
* infra: fixed issue with `coder sync` not functioning properly.
* infra: fixed issue with TLS certificates not properly updating at runtime.
### [](https://coder.com/docs/v1/changelog/archive/1.25.0#security-updates-)
Security updates 🔐
* api: restricted ability to list all users and workspaces through the API to site managers and site admins.
* api: removed ability to return OIDC IdP client secret using admin authentication API.
* infra: implemented `update-crypto-policies` in images to ensure there's no use of insecure cryptography in images.
### [](https://coder.com/docs/v1/changelog/archive/1.25.0#known-issues-)
Known issues 🔧
* web: the service banner (if enabled) reappears for all users, even if they've previously dismissed it.
* web: using the web terminal in Coder can occasionally result in the connection being reset and needing to be restarted.
* web: the **Switch workspace** drop-down menu shows a workspace's status as **Building** even though the build process is completed.
---
# 1.33.0 | Coder v1 Docs
[Home](https://coder.com/docs/v1 "Home")
[Changelog](https://coder.com/docs/v1/changelog "Changelog")
[Archives](https://coder.com/docs/v1/changelog/archive "Archives")
1.33.0
### [](https://coder.com/docs/v1/changelog/1.33.0#breaking-changes-)
Breaking changes ❗
* infra: the "Getting default user from image" build step now spawns a container that consumes 100m CPU and 250mb of memory. Previously these were unset, which can cause issues with some Kubernetes variants.
### [](https://coder.com/docs/v1/changelog/1.33.0#features-)
Features ✨
* cli: allow local address specification in `coder tunnel`
* cli: added retry logic to `coder tunnel`. Default is 0 retries.
* infra: added the ability to set annotations on the `environments` service account in Helm.
* web: updated code-server to 4.5.1
### [](https://coder.com/docs/v1/changelog/1.33.0#bug-fixes-)
Bug fixes 🐛
* infra: increased terminal timeout to 15 minutes.
* infra: fixed dotfiles validation to allow extra formats.
* infra: fixed websocket issue in webkit-based browsers.
* infra: fixed memory/cpu limits not being set in inner container for CVMs.
* infra: fixed an issue where coderd would not launch due to an OIDC config error.
* infra: fixed some memory leaks in the workspace agent.
* infra: fixed the Workspace Provider access URL not being honored for connections.
* web: removed auto-off audit log spam.
* web: improved error message for enabling build-in auth.
* web: fixed support for multiple links to the same OAuth service type.
* web: fixed site-admins Dev URLs privileges.
* web: removed some telemetry-related log spam
* web: fixed some config endpoints not being audited.
### [](https://coder.com/docs/v1/changelog/1.33.0#security-updates-)
Security updates 🔐
There are no security updates in 1.33.0.
### [](https://coder.com/docs/v1/changelog/1.33.0#known-issues-)
Known issues 🔧
* web: JetBrains IDEs versions 2022.2 or later are not compatible with the installed Projector version in this release.
---
# 1.21.2 | Coder v1 Docs
[Home](https://coder.com/docs/v1 "Home")
[Changelog](https://coder.com/docs/v1/changelog "Changelog")
[Archives](https://coder.com/docs/v1/changelog/archive "Archives")
1.21.2
### [](https://coder.com/docs/v1/changelog/archive/1.21.2#breaking-changes-)
Breaking changes ❗
There are no breaking changes in 1.21.2.
### [](https://coder.com/docs/v1/changelog/archive/1.21.2#features-)
Features ✨
* infra: updated the Sysbox container runtime.
* infra: upgraded the Docker Engine version used for CVMs to `20.10.8`.
### [](https://coder.com/docs/v1/changelog/archive/1.21.2#bug-fixes-)
Bug fixes 🐛
> Coder v1.21.2 includes bug fixes backported from v1.22.0.
* infra: fixed connection leak in Networking v2 when proxying browser traffic.
* infra: re-enabled Go's `pprof` server on `localhost:6060` in the `coderd` pod.
* infra: fixed Kubernetes watcher leak.
### [](https://coder.com/docs/v1/changelog/archive/1.21.2#security-updates-)
Security updates 🔐
There are no security updates in 1.21.2.
---
# 1.21.1 | Coder v1 Docs
[Home](https://coder.com/docs/v1 "Home")
[Changelog](https://coder.com/docs/v1/changelog "Changelog")
[Archives](https://coder.com/docs/v1/changelog/archive "Archives")
1.21.1
### [](https://coder.com/docs/v1/changelog/archive/1.21.1#breaking-changes-)
Breaking changes ❗
There are no breaking changes in 1.21.1.
### [](https://coder.com/docs/v1/changelog/archive/1.21.1#features-)
Features ✨
* infra: Toggling Networking v2 on/off now triggers a workspace provider rebuild automatically.
* infra: Added labels to capture workspace image metadata.
### [](https://coder.com/docs/v1/changelog/archive/1.21.1#bug-fixes-)
Bug fixes 🐛
* web: Fixed issue so that CVM-enabled workspaces can be built with a minimum of 1 GB disk storage.
* web: Fixed issue where `nodeSelector` and `tolerations` weren't set properly in the UI. parse its version number.
* web: Fixed issue where UI indicated dev URLs were disabled even when enabled.
* infra: Fixed issue where JetBrains editors failed if Coder couldn't properly read product version manifests.
* infra: Fixed issue where process niceness was not being set properly in workspaces.
### [](https://coder.com/docs/v1/changelog/archive/1.21.1#security-updates-)
Security updates 🔐
There are no security updates in 1.21.1.
---
# 1.19.1 | Coder v1 Docs
[Home](https://coder.com/docs/v1 "Home")
[Changelog](https://coder.com/docs/v1/changelog "Changelog")
[Archives](https://coder.com/docs/v1/changelog/archive "Archives")
1.19.1
### [](https://coder.com/docs/v1/changelog/archive/1.19.1#breaking-changes-)
Breaking changes ❗
There are no breaking changes in 1.19.1.
### [](https://coder.com/docs/v1/changelog/archive/1.19.1#features-)
Features ✨
* infra: Added verbose logging around workspace provider startup process.
### [](https://coder.com/docs/v1/changelog/archive/1.19.1#bug-fixes-)
Bug fixes 🐛
* infra: Updated Sysbox container runtime version to ensure that containerd runs properly.
### [](https://coder.com/docs/v1/changelog/archive/1.19.1#security-updates-)
Security updates 🔐
There are no security updates in 1.19.1.
---
# Rancher Kubernetes Engine | Coder v1 Docs
[Home](https://coder.com/docs/v1 "Home")
[Setup](https://coder.com/docs/v1/setup "Setup")
[Kubernetes](https://coder.com/docs/v1/setup/kubernetes "Kubernetes")
Rancher Kubernetes Engine
This deployment guide shows you how to set up a bare-metal Rancher Kubernetes Engine (RKE) cluster on which Coder can deploy.
[](https://coder.com/docs/v1/setup/kubernetes/rke#prerequisites)
Prerequisites
------------------------------------------------------------------------------
See here for the full list of [Rancher requirements](https://rancher.com/docs/rke/latest/en/os/)
. You must have at least one Linux host (node) with the following utilities installed:
### [](https://coder.com/docs/v1/setup/kubernetes/rke#binaries)
Binaries
* [Docker](https://docs.docker.com/engine/install/)
* [Helm](https://helm.sh/docs/intro/install/)
* [kubectl](https://kubernetes.io/docs/tasks/tools/#kubectl)
* [rke](https://rancher.com/docs/rke/latest/en/installation/)
### [](https://coder.com/docs/v1/setup/kubernetes/rke#storage)
Storage
Since Coder requires dynamic storage provisioning, you'll need to install a [Rancher-supported storage provisioner](https://rancher.com/docs/rancher/v2.6/en/cluster-admin/volumes-and-storage/provisioning-new-storage/#prerequisites)
. We recommend using [Longhorn](https://longhorn.io/)
, since it is tightly integrated with Rancher.
### [](https://coder.com/docs/v1/setup/kubernetes/rke#networking)
Networking
To configure pod networking, you'll need to install a Container Network Interface (CNI) into the Rancher cluster. Here are [Rancher's recommended CNI providers](https://rancher.com/docs/rancher/v2.6/en/faq/networking/cni-providers/)
[](https://coder.com/docs/v1/setup/kubernetes/rke#setup)
Setup
--------------------------------------------------------------
1. Once you've installed the necessary dependencies, create a `cluster.yml` file to define the Rancher cluster configuration. Below is an example for a single-node cluster:
`` `nodes: - address: 10.206.0.2 user: ubuntu role: - controlplane - etcd - worker ssh_key_path: /home/ubuntu/.ssh/id_rsa ssh_agent_auth: true` ``
> Ensure the user is a member of the docker group.
For a multi-node, high availability cluster, [see the Rancher documentation](https://rancher.com/docs/rke/latest/en/example-yamls/)
for additional configuration values.
1. Deploy the cluster with the following command:
`` `rke up --config cluster.yml` ``
1. After the cluster is brought up, create your `kubeconfig` file and copy over the Rancher-generated configuration:
`` `mkdir -p $HOME/.kube/ && cp kube_config_cluster.yml $HOME/.kube/config` ``
Once complete, you can now [install Coder](https://coder.com/docs/v1/setup/installation)
on to your Rancher cluster.
##### On this page
---
# 1.20.0 | Coder v1 Docs
[Home](https://coder.com/docs/v1 "Home")
[Changelog](https://coder.com/docs/v1/changelog "Changelog")
[Archives](https://coder.com/docs/v1/changelog/archive "Archives")
1.20.0
### [](https://coder.com/docs/v1/changelog/archive/1.20.0#breaking-changes-)
Breaking changes ❗
There are no breaking changes in 1.20.0.
### [](https://coder.com/docs/v1/changelog/archive/1.20.0#features-)
Features ✨
* web: **Alpha**. Added the ability to set a site-wide workspace template policy at **Manage > Admin > Templates > Template Policy**. If not set, Coder uses the provided default.
* web: Added the `node-selector`, `tolerations`, and `annotations` fields to workspace templates.
* other: Added a new JSON schema for writing Coder workspace templates with code completion and syntax checking.
* web: Added a service banner that's displayed to all users of the system. The message can be used with existing messages. It can be dismissed by each user at any point and will not be shown again until there is a new message.
* web: Added text wrapping to system banners.
* infra: Added a `CODER_RUNTIME` environment variable that indicates whether a workspace is CVM-enabled or not.
* web: Updated UI to display decommissioned workspaces that are awaiting deletion.
* web: Added ability to filter the audit log by the _auto-off_ action.
### [](https://coder.com/docs/v1/changelog/archive/1.20.0#bug-fixes-)
Bug fixes 🐛
* web: Fixed bug causing duplicate fetch requests on page load.
* web: Fixed issue causing private dev URLs to load as blank pages for unauthorized users (users will now see an error page).
### [](https://coder.com/docs/v1/changelog/archive/1.20.0#security-updates-)
Security updates 🔐
* web: Require administrative permissions to view workspaces belonging to other users; previously, users could view others' workspace metadata
* web: Added content security policy (CSP) to help protect against cross-site scripting attacks.
* web: Added opt-in for HTTP Strict Transport Security. This setting can be managed at **Manage > Admin > Infrastructure > HTTP Strict Transport Security**.
* web: Added opt-in for secure cookies. This setting can be managed at **Manage > Admin > Infrastructure > Secure Cookie**.
* web: Use strong cryptographic APIs to generate client-side tokens.
* infra: Upgraded control plane containers from Red Hat UBI 8.3 to 8.4, and switch from ubi to ubi-minimal to reduce image contents.
* infra: Enable read-only root filesystem for control plane containers, by default. You can override this with the Helm `coderd.securityContext` setting.
* web: Resolved CVE-2021-23364 in browserslist.
* web: Resolved CVE-2021-23358 in underscore.
* web: Resolved CVE-2020-7753 in trim.
---
# 1.18.1 | Coder v1 Docs
[Home](https://coder.com/docs/v1 "Home")
[Changelog](https://coder.com/docs/v1/changelog "Changelog")
[Archives](https://coder.com/docs/v1/changelog/archive "Archives")
1.18.1
### [](https://coder.com/docs/v1/changelog/archive/1.18.1#breaking-changes-)
Breaking changes ❗
There are no breaking changes in 1.18.1.
### [](https://coder.com/docs/v1/changelog/archive/1.18.1#features-)
Features ✨
There are no new features in 1.18.1.
### [](https://coder.com/docs/v1/changelog/archive/1.18.1#bug-fixes-)
Bug fixes 🐛
infra: disabled experimental WebRTC feature by default.
### [](https://coder.com/docs/v1/changelog/archive/1.18.1#security-updates-)
Security updates 🔐
There are no security updates in 1.18.1.
---
# 1.21.0 | Coder v1 Docs
[Home](https://coder.com/docs/v1 "Home")
[Changelog](https://coder.com/docs/v1/changelog "Changelog")
[Archives](https://coder.com/docs/v1/changelog/archive "Archives")
1.21.0
### [](https://coder.com/docs/v1/changelog/archive/1.21.0#breaking-changes-)
Breaking changes ❗
There are no breaking changes in 1.21.0.
### [](https://coder.com/docs/v1/changelog/archive/1.21.0#features-)
Features ✨
* Satellites: Satellites are secondary Coder deployments provisioned to reduce latency for developers. They keep traffic between the developer's machine and the deployment in the same region, thereby reducing the need for traffic to cross regions to/from the primary Coder deployment.
* infra: Added WebRTC service (including ICE server routes)
* web: Added ability to cancel the workspace build process after it's been started.
* web: Updated workspace status bar to better display workspace status (e.g., "Creating workspace").
* web: Updated workspace providers management screen (**Manage** > **Providers**) to include edit and delete options, as well as an organizations selector.
* web: Added ability to specify Kubernetes `tolerations` and `nodeSelector` for workspaces. This can be done via **Manage** > **Providers**; select the provider of interest and click **Edit**.
* web: Added support for multiple SSH keys, allowing the addition of one SSH key per OAuth application (e.g., GitHub, GitLab). Previously, Coder only supported one SSH key across all deployments.
* infra: Renamed Kubernetes labels still referring to environments to workspaces.
* infra: Added ability to write audit logs to the container's stdout/stderr.
* infra: Added SSH agent forwarding support when not using OpenSSH.
* web: Updated footer to display license information to site admins and site managers.
* web: Updated system banners to remind site managers of license expiration when 3 days remain.
* web: New users authenticating via OIDC will see Coder using their preferred username instead of an auto-generated username based on their email.
* infra: Added additional logging to OAuth processes.
* web: Changed Coder's JWE query parameter so that `token` can be used as a query parameter in dev URLs.
* web: Updated minimum disk size requirement when creating a workspace to 1 GB and maximum disk size constraint to 8192 GB.
* web: Added ability to choose the SSH keygen algorithm Coder uses when generating SSH keys.
* infra: Added ability to opt-in to OIDC's new refresh feature, allowing Coder-issued API keys to inherit session timing limits and to use refresh tokens to ensure continued access.
* infra: Improved speed of metrics query to improve metrics page performance.
* infra: Added `coderd.trustProxyIP` to Helm chart to allow configuration of Real IP.
* web: Added **External Connect** toggle to enable/disable SSH access and external tunneling to workspaces (excludes dev URLs).
* web: Images tags now update asynchronously.
* web: The workspace provider ping functionality has been removed from the Coder UI.
### [](https://coder.com/docs/v1/changelog/archive/1.21.0#bug-fixes-)
Bug fixes 🐛
* web: Fixed issue where dev URL session cookies were not using the root path.
* cli: Fixed issue with white border appearing in terminal windows.
* web: Fixed issue where audit log showed when the workspace deletion was requested instead of when it was deleted.
* infra: Fixed API issue where routes returning daily active user metrics were incorrect.
* web: Fixed issue where user deletion took an extended period of time (users will now be deleted faster).
* web: Fixed issue where Safari users saw a blank screen during OIDC redirect.
* web: Fixed issue with failed user deletes; any failed deletes are retried, and the username and email are immediately available after the user is deleted.
### [](https://coder.com/docs/v1/changelog/archive/1.21.0#security-updates-)
Security updates 🔐
* infra: CSRF tokens are now added to all non-GET, HEAD, OPTIONS, or TRACE HTTP calls, while all POST, PATCH, DELETE calls required a CSRF token if using `cookie` for authentication.
* infra: New keys are generated using the Ed25519 digital signature algorithm instead of ECDSA.
* infra: Updated function to generate unbiased random strings for generating secret values, such as API keys, default site admin passwords, auto-generated passwords for password reset.
* infra: Added support for running Coder's control plane containers with OpenShift's restricted security context constraints (SCC).
* web: Added functionality to strip extraneous cookies from dev URLs.
* infra: Added functionality to disable browser features not needed by Coder, including accelerometer, autoplay, battery, camera, document domain, geolocation, gyroscope, magnetometer, microphone, midi, payment, USB, VR, screen wake/lock, and XR spatial tracking.
* web: Updated incorrect login message to be more generic.
---
# 1.17.1 | Coder v1 Docs
[Home](https://coder.com/docs/v1 "Home")
[Changelog](https://coder.com/docs/v1/changelog "Changelog")
[Archives](https://coder.com/docs/v1/changelog/archive "Archives")
1.17.1
### [](https://coder.com/docs/v1/changelog/archive/1.17.1#breaking-changes-)
Breaking changes ❗
There are no breaking changes in 1.17.1.
### [](https://coder.com/docs/v1/changelog/archive/1.17.1#features-)
Features ✨
There are no new features in 1.17.1.
### [](https://coder.com/docs/v1/changelog/archive/1.17.1#bug-fixes-)
Bug fixes 🐛
There are no bug fixes in 1.17.1.
### [](https://coder.com/docs/v1/changelog/archive/1.17.1#security-updates-)
Security updates 🔐
* infra: Updated environment network policies to remove egress restriction that prevented the specification of additional network policies pertaining to environments. In prior versions, additional egress policies were disregarded.
---
# 1.19.0 | Coder v1 Docs
[Home](https://coder.com/docs/v1 "Home")
[Changelog](https://coder.com/docs/v1/changelog "Changelog")
[Archives](https://coder.com/docs/v1/changelog/archive "Archives")
1.19.0
### [](https://coder.com/docs/v1/changelog/archive/1.19.0#breaking-changes-)
Breaking changes ❗
* infra: Workspace assets created by Coder that were previously located at `/opt/coder`, such as code-server and coder-cli, have been moved to `/var/tmp/coder`
* infra: Workspace templates have been updated from version _0.1_ to _0.2_. Existing workspaces using version _0.1_ templates can be rebuilt, but no new workspaces can be created using the old format.
* web: The workspace templates _Open in Coder_ embeddable button flow no longer includes a _clone_ step; buttons created from prior versions will still work, but Coder will not clone the project. To automate project cloning, use [`workspace.configure.start`](https://coder.com/docs/v1/changelog/workspaces/workspace-templates/templates#workspaceconfigurestart)
* web: The embedded form for workspace templates located at **Manage** > **Admin** > **Templates** no longer uses the following fields: **Project Repository URL** and **Project Git Service**
### [](https://coder.com/docs/v1/changelog/archive/1.19.0#features-)
Features ✨
* web: Introduced resource quotas to organizations. Resource quotas define the maximum resource utilization allowable for each member within an organization for which such quotas are enabled. Modify them at **Manage** > **Organizations** > **Edit Organization**
* web: Added a reactivation step for returning users that had been marked as dormant. The reactivation step requires the user to agree to use a license seat
* web: Added an admin setting controlling the maximum dev URL access level across all workspaces within the deployment. Modify the maximum dev URL access level at **Manage** > **Admin** > **Infrastructure** in the card titled **Dev URL Access Permissions**
* web: The CVM option will be selected by default when creating a custom environment (if CVMs are enabled at the site level)
* web: Improved display and support for errors returned by an Identity Provider (IdP) during sign-in
* infra: Changed permissions of `/home/coder/` and subdirectories to _755_ in control plane containers to support OpenShift `anyuid`
* infra: Workspace builds are now properly validated when setting policy templates
* code-server: Upgraded code-server to [3.10.1](https://github.com/coder/code-server/releases/tag/v3.10.1)
### [](https://coder.com/docs/v1/changelog/archive/1.19.0#bug-fixes-)
Bug fixes 🐛
* web: Fixed issue where the **Edit Workspace** dialog showed the resource selectors as disabled while still allowing modifications
* web: Fixed issue where the **Edit Workspace** dialog displayed resource allocation incorrectly if the workspace was initially built using a template
* web: Updated validation logic so that workspaces with invalid names can no longer be created
* web: Fixed issue causing web-based terminals to show two scrollbars and overflowing content when system banners are present
* infra: Fixed issue causing workspace autostart to stop or fail intermittently
* web: Fixed issue in the **Audit Logs** preventing users from clearing the filters
* web: Added a _.csv_ extension to exported audit logs
### [](https://coder.com/docs/v1/changelog/archive/1.19.0#security-updates-)
Security updates 🔐
* web: Upgraded version of `next` to 10.2.0.
* web: Upgraded and addressed CVE-2021-21306 in `marked`.
* web: Upgraded and addressed Fix CVE-2021-23368 in `postcss`.
* web: Client secret is now omitted from `GET` requests to OAuth configurations.
* web: When authenticating with the CLI, a new API key is always generated.
* web: Fixed authentication for the _watch-update_ workspace endpoint. This was previously open to any authenticated user
* web: Fixed issue where audit logs for **workspace auto-off** was always attributed to the site admin; the audit log has been corrected to display the user owning the workspace.
* infra: Increased the minimum requirement for inbound and outbound connections to TLS 1.2
* infra: Added debug logs to show TLS certificates
---
# 1.16.2 | Coder v1 Docs
[Home](https://coder.com/docs/v1 "Home")
[Changelog](https://coder.com/docs/v1/changelog "Changelog")
[Archives](https://coder.com/docs/v1/changelog/archive "Archives")
1.16.2
### [](https://coder.com/docs/v1/changelog/archive/1.16.2#breaking-changes-)
Breaking changes ❗
There are no breaking changes in 1.16.2.
### [](https://coder.com/docs/v1/changelog/archive/1.16.2#features-)
Features ✨
* feat: Add environments.nodeSelector to the Helm chart, which enables selecting specific nodes for environment pods to be scheduled on.
### [](https://coder.com/docs/v1/changelog/archive/1.16.2#bug-fixes-)
Bug fixes 🐛
There are no bug fixes in 1.16.2.
### [](https://coder.com/docs/v1/changelog/archive/1.16.2#security-updates-)
Security updates 🔐
There are no security updates in 1.16.2.
---
# 1.18.0 | Coder v1 Docs
[Home](https://coder.com/docs/v1 "Home")
[Changelog](https://coder.com/docs/v1/changelog "Changelog")
[Archives](https://coder.com/docs/v1/changelog/archive "Archives")
1.18.0
### [](https://coder.com/docs/v1/changelog/archive/1.18.0#breaking-changes-)
Breaking changes ❗
* web: Renamed _environments_ to _workspaces_. URLs containing _environment_ should redirect to use _workspace_. It is possible that some URLs will not link to the expected resource.
### [](https://coder.com/docs/v1/changelog/archive/1.18.0#features-)
Features ✨
* web: Added the ability to specify a workspace templates filepath other than the default _coder.yaml_
* web: Moved _built-in_ sign-in behind a toggle so that it does not display when OIDC is configured for authentication
* web: Updated color scheme on the sign-in page
* web: Added dev URL support in workspace templates
* web: Added admin toggle for workspace templates feature
* web: Added Bitbucket Server support for workspace templates
* infra: Added `CODER_WP_NAME` environment variable to workspaces
* cli: Added ability to cordon and uncordon workspace providers which will allow/disallow new workspaces from being provisioned on a specific provider
* cli: Added ability to rename workspace providers
* web: Improved error notifications with additional details and resolutions. Added _Tip_, _Error Type_, and enumerations for workspace templates errors.
* infra: Added a background job to update templates
* web: Added a workspace status indicator in the **Switch Workspace** selector
* web: Added a tooltip with an error message for workspace status indicators
* jetbrains: Enabled JetBrains IDE support by default and removed the feature flag
* web: Added an alpha feature flag for testing connections to Coder using WebRTC
### [](https://coder.com/docs/v1/changelog/archive/1.18.0#bug-fixes-)
Bug fixes 🐛
* web: Fixed bug causing re-authentication whenever an external link to Coder is used. Most notably, re-authentication will not be required when clicking **Open in Coder** buttons
* web: Fixed the inability to delete an empty organization while workspaces were awaiting deletion in the background
* web: Improved error messages regarding attempts to import a workspace template from a repository using an SSH URI
* infra: Fixed a bug that had allowed updates to be made to workspaces created from local template
### [](https://coder.com/docs/v1/changelog/archive/1.18.0#security-updates-)
Security updates 🔐
* web: Fixed CVE-2021-27290 by updating NextJS
* web: Improved audit logs generated in background processes. Previously, these logs appeared as the _site admin_ user and did not capture request details. They now capture and pass through details from the requestor.
---
# 1.17.2 | Coder v1 Docs
[Home](https://coder.com/docs/v1 "Home")
[Changelog](https://coder.com/docs/v1/changelog "Changelog")
[Archives](https://coder.com/docs/v1/changelog/archive "Archives")
1.17.2
### [](https://coder.com/docs/v1/changelog/archive/1.17.2#breaking-changes-)
Breaking changes ❗
There are no breaking changes in 1.17.2.
### [](https://coder.com/docs/v1/changelog/archive/1.17.2#features-)
Features ✨
* Workspace templates: Workspace templates brings the _infrastructure as code_ paradigm to Coder environments by allowing you to define and create new environments using YAML templates.
* web: New page available via **Admin** > **Templates** for creating an embeddable quickstart button.
* web: New options available when clicking **New Environment** from the **Environments** page.
* web: **Workspace template** information is now displayed on the **Environments** page for environments built from a template.
* web: Added _Cordon_ and _Uncordon_ actions to _Provider_ audit logs.
### [](https://coder.com/docs/v1/changelog/archive/1.17.2#bug-fixes-)
Bug fixes 🐛
* infra: Fixes an issue whereby using `coder/configure` to create dev URLs would fail.
* infra: Fixes an issue authenticating using OpenID Connect identity providers (IdPs) that omit name information, such as GitLab. In this case, Coder will use the email address as the user's name.
* infra: Improved validation for environment names. Previously, a long environment name may have caused build errors.
* web: The dev URLs card on the **Environments** page now refreshes after an environment finishes building.
* jetbrains: Fixed an issue whereby JetBrains IDE processes would start and always run. They now start on request when opening JetBrains IDEs.
* web: Improved reliability of the workspace provider ping indicator.
* web: Fixed incorrect timestamps in an image's **Available Tags** table.
### [](https://coder.com/docs/v1/changelog/archive/1.17.2#security-updates-)
Security updates 🔐
There are no security updates in 1.17.2.
---
# 1.15.2 | Coder v1 Docs
[Home](https://coder.com/docs/v1 "Home")
[Changelog](https://coder.com/docs/v1/changelog "Changelog")
[Archives](https://coder.com/docs/v1/changelog/archive "Archives")
1.15.2
### [](https://coder.com/docs/v1/changelog/archive/1.15.2#breaking-changes-)
Breaking changes ❗
There are no breaking changes in 1.15.2.
### [](https://coder.com/docs/v1/changelog/archive/1.15.2#features-)
Features ✨
There are no new features in 1.15.2.
### [](https://coder.com/docs/v1/changelog/archive/1.15.2#bug-fixes-)
Bug fixes 🐛
* infra: Add `coder.serviceTolerations` to the dashboard pod.
* jetbrains: Fix out-of-memory crash by limiting stdout/stderr buffer.
### [](https://coder.com/docs/v1/changelog/archive/1.15.2#security-updates-)
Security updates 🔐
There are no security updates in 1.15.2.
---
# 1.17.3 | Coder v1 Docs
[Home](https://coder.com/docs/v1 "Home")
[Changelog](https://coder.com/docs/v1/changelog "Changelog")
[Archives](https://coder.com/docs/v1/changelog/archive "Archives")
1.17.3
> Deprecation Notice: We strongly recommend using version 1.17.4 instead of 1.17.3 if at all possible. Version 1.17.3 includes only a partial fix for the malformed _envproxy\_access\_url_ on `built-in` workspace providers; 1.17.4 includes a complete fix for this issue.
### [](https://coder.com/docs/v1/changelog/archive/1.17.3#breaking-changes-)
Breaking changes ❗
* infra: Removed `tolerations` from workspace templates.
### [](https://coder.com/docs/v1/changelog/archive/1.17.3#features-)
Features ✨
* web: Added a toggle to enable/disable workspace templates on the **Manage > Admin > Templates** page. Disabling workspace templates has the following impact:
* New workspaces cannot be created from a template.
* Existing workspaces built from a template will continue to operate and may be rebuilt. These workspaces will still be notified of changes to remote templates.
* infra: Added beta support for NVIDIA GPUs in environments created as container-based virtual machines (CVMs).
* NVIDIA GPUs can be added to container-based virtual machines (CVMs) on bare metal clusters. GKE and other cloud providers are currently not supported at this time.
* web: Environments can now be created with multiple GPUs (maximum number of GPUs: 20).
### [](https://coder.com/docs/v1/changelog/archive/1.17.3#bug-fixes-)
Bug fixes 🐛
* web: Fixed **Application** icons appearing broken and the **workspace provider ping indicator** remaining in an error state. The underlying cause was a malformed _envproxy\_access\_url_ on `built-in` workspace providers.
* web: Fixed an issue causing workspace providers to incorrectly appear in an error state on the **Manage > Admin > Workspace Providers** page.
### [](https://coder.com/docs/v1/changelog/archive/1.17.3#security-updates-)
Security updates 🔐
There are no security updates in 1.17.3.
---
# 1.16.3 | Coder v1 Docs
[Home](https://coder.com/docs/v1 "Home")
[Changelog](https://coder.com/docs/v1/changelog "Changelog")
[Archives](https://coder.com/docs/v1/changelog/archive "Archives")
1.16.3
### [](https://coder.com/docs/v1/changelog/archive/1.16.3#breaking-changes-)
Breaking changes ❗
There are no breaking changes in 1.16.3.
### [](https://coder.com/docs/v1/changelog/archive/1.16.3#features-)
Features ✨
There are no new features in 1.16.3.
### [](https://coder.com/docs/v1/changelog/archive/1.16.3#bug-fixes-)
Bug fixes 🐛
There are no bug fixes in 1.16.3.
### [](https://coder.com/docs/v1/changelog/archive/1.16.3#security-updates-)
Security updates 🔐
* infra: Updated environment network policies to remove egress restriction that prevented the specification of additional network policies pertaining to environments. In prior versions, additional egress policies were disregarded.
---
# 1.15.1 | Coder v1 Docs
[Home](https://coder.com/docs/v1 "Home")
[Changelog](https://coder.com/docs/v1/changelog "Changelog")
[Archives](https://coder.com/docs/v1/changelog/archive "Archives")
1.15.1
### [](https://coder.com/docs/v1/changelog/archive/1.15.1#breaking-changes-)
Breaking changes ❗
There are no breaking changes in 1.15.1.
### [](https://coder.com/docs/v1/changelog/archive/1.15.1#features-)
Features ✨
There are no new features in 1.15.1.
### [](https://coder.com/docs/v1/changelog/archive/1.15.1#bug-fixes-)
Bug fixes 🐛
* infra: Fixes a faulty database migration introduced in [`1.15.0`](https://coder.com/docs/v1/changelog/archive/1.15.0)
### [](https://coder.com/docs/v1/changelog/archive/1.15.1#security-updates-)
Security updates 🔐
There are no security updates in 1.15.1.
---
# 1.17.4 | Coder v1 Docs
[Home](https://coder.com/docs/v1 "Home")
[Changelog](https://coder.com/docs/v1/changelog "Changelog")
[Archives](https://coder.com/docs/v1/changelog/archive "Archives")
1.17.4
### [](https://coder.com/docs/v1/changelog/archive/1.17.4#breaking-changes-)
Breaking changes ❗
There are no breaking changes in 1.17.4.
### [](https://coder.com/docs/v1/changelog/archive/1.17.4#features-)
Features ✨
There are no new features in 1.17.4.
### [](https://coder.com/docs/v1/changelog/archive/1.17.4#bug-fixes-)
Bug fixes 🐛
* helm: Fixed issue where the _ingress.host_ value was incorrectly suffixed with a `/proxy` path. This supersedes the fix to the issue regarding `coder.envproxy.accessURL` values in [1.17.3](https://coder.com/docs/v1/changelog/archive/1.17.3)
* infra: Fixed issue where workspace providers fail to update when cemanager is running more than a single replica
* infra: Fixed issue where environments were being connected to via HTTP despite the workspace provider URL specifying HTTPS
### [](https://coder.com/docs/v1/changelog/archive/1.17.4#security-updates-)
Security updates 🔐
There are no security updates in 1.17.4.
---
# 1.14.4 | Coder v1 Docs
[Home](https://coder.com/docs/v1 "Home")
[Changelog](https://coder.com/docs/v1/changelog "Changelog")
[Archives](https://coder.com/docs/v1/changelog/archive "Archives")
1.14.4
### [](https://coder.com/docs/v1/changelog/archive/1.14.4#breaking-changes-)
Breaking changes ❗
There are no breaking changes in 1.14.4.
### [](https://coder.com/docs/v1/changelog/archive/1.14.4#features-)
Features ✨
There are no new features in 1.14.4.
### [](https://coder.com/docs/v1/changelog/archive/1.14.4#bug-fixes-)
Bug fixes 🐛
* infra: Increase environment rebuild timeout to 30 minutes
* cli: Patch panic condition in `coder config-ssh`
### [](https://coder.com/docs/v1/changelog/archive/1.14.4#security-updates-)
Security updates 🔐
There are no security updates in 1.14.4.
---
# 1.16.1 | Coder v1 Docs
[Home](https://coder.com/docs/v1 "Home")
[Changelog](https://coder.com/docs/v1/changelog "Changelog")
[Archives](https://coder.com/docs/v1/changelog/archive "Archives")
1.16.1
### [](https://coder.com/docs/v1/changelog/archive/1.16.1#breaking-changes-)
Breaking changes ❗
There are no breaking changes in 1.16.1.
### [](https://coder.com/docs/v1/changelog/archive/1.16.1#features-)
Features ✨
There are no new features in 1.16.1.
### [](https://coder.com/docs/v1/changelog/archive/1.16.1#bug-fixes-)
Bug fixes 🐛
* infra: Fix GitHub OAuth account link failures when used with GitHub Enterprise.
### [](https://coder.com/docs/v1/changelog/archive/1.16.1#security-updates-)
Security updates 🔐
There are no security updates in 1.16.1.
---
# 1.14.3 | Coder v1 Docs
[Home](https://coder.com/docs/v1 "Home")
[Changelog](https://coder.com/docs/v1/changelog "Changelog")
[Archives](https://coder.com/docs/v1/changelog/archive "Archives")
1.14.3
### [](https://coder.com/docs/v1/changelog/archive/1.14.3#breaking-changes-)
Breaking changes ❗
There are no breaking changes in 1.14.3.
### [](https://coder.com/docs/v1/changelog/archive/1.14.3#features-)
Features ✨
There are no new features in 1.14.3.
### [](https://coder.com/docs/v1/changelog/archive/1.14.3#bug-fixes-)
Bug fixes 🐛
* infra: Remove environment variable override "DISPLAY=:0" in all environments
* infra: Fix race condition causing intermittent Container-based Virtual Machine startup failures
### [](https://coder.com/docs/v1/changelog/archive/1.14.3#security-updates-)
Security updates 🔐
There are no security updates in 1.14.3.
---
# 1.14.2 | Coder v1 Docs
[Home](https://coder.com/docs/v1 "Home")
[Changelog](https://coder.com/docs/v1/changelog "Changelog")
[Archives](https://coder.com/docs/v1/changelog/archive "Archives")
1.14.2
### [](https://coder.com/docs/v1/changelog/archive/1.14.2#breaking-changes-)
Breaking changes ❗
There are no breaking changes in 1.14.2.
### [](https://coder.com/docs/v1/changelog/archive/1.14.2#features-)
Features ✨
There are no new features in 1.14.2.
### [](https://coder.com/docs/v1/changelog/archive/1.14.2#bug-fixes-)
Bug fixes 🐛
* web: Fix audit log export
### [](https://coder.com/docs/v1/changelog/archive/1.14.2#security-updates-)
Security updates 🔐
There are no security updates in 1.14.2.
---
# 1.14.1 | Coder v1 Docs
[Home](https://coder.com/docs/v1 "Home")
[Changelog](https://coder.com/docs/v1/changelog "Changelog")
[Archives](https://coder.com/docs/v1/changelog/archive "Archives")
1.14.1
### [](https://coder.com/docs/v1/changelog/archive/1.14.1#breaking-changes-)
Breaking changes ❗
There are no breaking changes in 1.14.1.
### [](https://coder.com/docs/v1/changelog/archive/1.14.1#features-)
Features ✨
There are no new features in 1.14.1.
### [](https://coder.com/docs/v1/changelog/archive/1.14.1#bug-fixes-)
Bug fixes 🐛
* infra: Fix propagation of environment tolerations specified in the values.yaml
### [](https://coder.com/docs/v1/changelog/archive/1.14.1#security-updates-)
Security updates 🔐
There are no security updates in 1.14.1.
---
# 1.15.0 | Coder v1 Docs
[Home](https://coder.com/docs/v1 "Home")
[Changelog](https://coder.com/docs/v1/changelog "Changelog")
[Archives](https://coder.com/docs/v1/changelog/archive "Archives")
1.15.0
> **Deprecation Notice:** This version is no longer accessible. Please use version `1.15.1`. A bug in `1.15.0` caused migrations from existing instances with active environments to fail. Our release verification process did not adequately account for instances with active environments. We have since updated our release process to cover this case.
### [](https://coder.com/docs/v1/changelog/archive/1.15.0#breaking-changes-)
Breaking changes ❗
* web: The root dashboard PWA manifest has been removed; uninstall the Coder PWA. In lieu of this, Coder is moving forward with a PWA-per-application approach. To install the Code Server PWA:
1. Log into Coder and select your environment.
2. Under **Applications** click **code** to launch code-server.
3. Follow your browser's instructions for installing the PWA.
* web: Deprecated **Services** in favor of [CVMs](https://coder.com/docs/v1/changelog/workspaces/cvms)
### [](https://coder.com/docs/v1/changelog/archive/1.15.0#features-)
Features ✨
* web: Added 30-day notices to dormant accounts listed in the **Manage** > **Users** table; this warning indicates these accounts will be removed if not reactivated
* web: Added **Cluster Info** page to the Admin Panel. In the future, this page will contain the administration and configuration of multiple clusters.
* web: Redesigned Admin Panel
* Renamed the **General** page to **Infrastructure** and updated page with a new design
* Redesigned the **Authentication**, **Appearance**, **Telemetry** and **Dormancy** pages
* web: Changed how Progressive Web Apps function; the code-server application can now be installed as a PWA.
* web: Added tooltip with extended information that shows when hovering over the image info in the summary card on the `Environments` page
* web: Redesigned the Coder Dashboard to use NextJS and SSR. Page loads should be quicker ⚡.
### [](https://coder.com/docs/v1/changelog/archive/1.15.0#bug-fixes-)
Bug fixes 🐛
* infra: Fixed the removing of query strings from Dev URL authentication redirect
* infra: Changed the dotfiles install.sh script so that it is invoked as a child process instead of `exec`'d. This ensures the remainder of `~/personalize` executes after `install.sh`.
* jetbrains: Fixed the appearance of window title and close buttons
* jetbrains: Changed the behavior of links; opening URLs and/or clicking links opens a new tab
* jetbrains: Fixed access to the context menu from then Terminal toolbar
* web: Removed display containing environment resources information if the environment isn't running
* web: Updated the **Import an Image** dialog window to hide image tags that have already been imported
* web: Updated the **Create/Edit an Environment** dialog; images and tags are now sorted alphabetically and then chronologically by creation date
### [](https://coder.com/docs/v1/changelog/archive/1.15.0#security-updates-)
Security updates 🔐
There are no security updates in 1.15.0.
---
# 1.13.2 | Coder v1 Docs
[Home](https://coder.com/docs/v1 "Home")
[Changelog](https://coder.com/docs/v1/changelog "Changelog")
[Archives](https://coder.com/docs/v1/changelog/archive "Archives")
1.13.2
### [](https://coder.com/docs/v1/changelog/archive/1.13.2#breaking-changes-)
Breaking changes ❗
There are no breaking changes in 1.13.2.
### [](https://coder.com/docs/v1/changelog/archive/1.13.2#features-)
Features ✨
* infra: Adds support for `https` servers behind dev URLs
* **Notice:** Environments will need to be rebuilt before using this feature
### [](https://coder.com/docs/v1/changelog/archive/1.13.2#bug-fixes-)
Bug fixes 🐛
* infra: Fixes a regression where some database tables grew larger than intended
* infra: Query logging is now disabled for deployments using the internal Postgres pod
* web: Fixes code-server viewport when system banners are enabled
### [](https://coder.com/docs/v1/changelog/archive/1.13.2#security-updates-)
Security updates 🔐
There are no security updates in 1.13.2.
---
# 1.33.1 | Coder v1 Docs
[Home](https://coder.com/docs/v1 "Home")
[Changelog](https://coder.com/docs/v1/changelog "Changelog")
[Archives](https://coder.com/docs/v1/changelog/archive "Archives")
1.33.1
### [](https://coder.com/docs/v1/changelog/1.33.1#breaking-changes-)
Breaking changes ❗
There are no breaking changes in 1.33.1.
### [](https://coder.com/docs/v1/changelog/1.33.1#features-)
Features ✨
* web: updated Projector client to `1.8.0`.
* infra: updated Projector server to `1.8.1`.
### [](https://coder.com/docs/v1/changelog/1.33.1#bug-fixes-)
Bug fixes 🐛
* infra: fixed an issue where idle connections would drop after 30 seconds.
### [](https://coder.com/docs/v1/changelog/1.33.1#security-updates-)
Security updates 🔐
There are no security updates in 1.33.1.
### [](https://coder.com/docs/v1/changelog/1.33.1#known-issues-)
Known issues 🔧
* [Development of JetBrains projector was suspended on July 11, 2022.](https://lp.jetbrains.com/projector/)
JetBrains IDE versions published after this date may exhibit strange behaviors or crash unexpectedly under Projector. For the best experience, JetBrains recommends migrating to Jetbrains Gateway.
---
# 1.33.2 | Coder v1 Docs
[Home](https://coder.com/docs/v1 "Home")
[Changelog](https://coder.com/docs/v1/changelog "Changelog")
[Archives](https://coder.com/docs/v1/changelog/archive "Archives")
1.33.2
### [](https://coder.com/docs/v1/changelog/1.33.2#breaking-changes-)
Breaking changes ❗
There are no breaking changes in 1.33.2.
### [](https://coder.com/docs/v1/changelog/1.33.2#features-)
Features ✨
There are no new features in 1.33.2.
### [](https://coder.com/docs/v1/changelog/1.33.2#bug-fixes-)
Bug fixes 🐛
* web: fixed an issue where in-application documentation links were incorrect.
### [](https://coder.com/docs/v1/changelog/1.33.2#security-updates-)
Security updates 🔐
There are no security updates in 1.33.2.
### [](https://coder.com/docs/v1/changelog/1.33.2#known-issues-)
Known issues 🔧
* [Development of JetBrains projector was suspended on July 11, 2022.](https://lp.jetbrains.com/projector/)
JetBrains IDE versions published after this date may exhibit strange behaviors or crash unexpectedly under Projector. For the best experience, JetBrains recommends migrating to Jetbrains Gateway.
---
# 1.33.3 | Coder v1 Docs
[Home](https://coder.com/docs/v1 "Home")
[Changelog](https://coder.com/docs/v1/changelog "Changelog")
[Archives](https://coder.com/docs/v1/changelog/archive "Archives")
1.33.3
### [](https://coder.com/docs/v1/changelog/1.33.3#breaking-changes-)
Breaking changes ❗
There are no breaking changes in 1.33.3.
### [](https://coder.com/docs/v1/changelog/1.33.3#features-)
Features ✨
* infra: allow overriding Bitbucket OAuth consumer key using the `CODERD_BITBUCKET_CONSUMER_KEY` environment variable.
* cli: add `--duration` flag to `coder tokens create` to control token lifetime.
### [](https://coder.com/docs/v1/changelog/1.33.3#bug-fixes-)
Bug fixes 🐛
* infra: fix workspace builds being stuck on "enqueuing workspace build" step due to nil pointer panic. Workspaces that were getting stuck should now show a proper root cause error in the build log.
* infra: reduce log spam in coder agent log file in workspaces.
* infra: upgrades code-server to 4.6.0 to fix frequent disconnects caused by reverse proxy idle timeouts.
### [](https://coder.com/docs/v1/changelog/1.33.3#security-updates-)
Security updates 🔐
There are no security updates in 1.33.3.
### [](https://coder.com/docs/v1/changelog/1.33.3#known-issues-)
Known issues 🔧
* [Development of JetBrains projector was suspended on July 11, 2022.](https://lp.jetbrains.com/projector/)
JetBrains IDE versions published after this date may exhibit strange behaviors or crash unexpectedly under Projector. For the best experience, JetBrains recommends migrating to Jetbrains Gateway.
---
# 1.16.0 | Coder v1 Docs
[Home](https://coder.com/docs/v1 "Home")
[Changelog](https://coder.com/docs/v1/changelog "Changelog")
[Archives](https://coder.com/docs/v1/changelog/archive "Archives")
1.16.0
### [](https://coder.com/docs/v1/changelog/archive/1.16.0#breaking-changes-)
Breaking changes ❗
* The deprecated `Services` feature is now **removed**. All resources created for Services are preserved for data recovery purposes (volumes, database tables, etc.), but are not accessible through the Coder platform. Please reference [Docker in Environments](https://coder.com/docs/v1/changelog/workspaces/cvms)
for a guide on the new workflow for running containers within your environment.
* The built-in Internal Extension Marketplace is now **removed**. All resources created for this feature are preserved for data recovery purposes, but are not accessible through the Coder platform. For air-gapped deployments, the `Custom` Extension Marketplace configuration enables the use of [Open VSX](https://github.com/eclipse/openvsx)
as an alternative.
* The [Container-based Virtual Machine](https://coder.com/docs/v1/changelog/admin/workspace-management/cvms)
environment option is now considered generally available. The admin-level configuration is still required, but the `alpha` warning has been removed.
* Environment SSH routing has new behavior. If you have any processes listening on port 22 it will be used to provide SSH access to your environment instead of the bundled SSH implementation. This is a breaking change for users that had services listening on port 22 before this change. Please reference [this guide](https://coder.com/docs/v1/changelog/admin/workspace-management/ssh-access)
.
### [](https://coder.com/docs/v1/changelog/archive/1.16.0#features-)
Features ✨
* Public Rest API: [documentation](https://apidocs.coder.com/)
* Support for remote port forwarding over SSH
* ex: `ssh -R 8080:localhost:8080 coder.dev`
* Support for [running a full OpenSSH server](https://coder.com/docs/v1/changelog/admin/workspace-management/ssh-access)
inside your environment.
* The administrator configuration option "Privileged Environments" is now removed. All non-CVM environments are launched with `privileged: false`.
* web: PWA icons for JetBrains and code-server have been redesigned
* web: Input sliders have been redesigned
* web: A character counter was added to the organization description field
* web: Display warning when memory provision rate is high
* web: The dashboard has been redesigned with a new color scheme and navbar branding
### [](https://coder.com/docs/v1/changelog/archive/1.16.0#bug-fixes-)
Bug fixes 🐛
* infra: Extraneous environment variables were removed from non-CVM based environments
### [](https://coder.com/docs/v1/changelog/archive/1.16.0#security-updates-)
Security updates 🔐
There are no security updates in 1.16.0.
---
# Update considerations | Coder v1 Docs
[Home](https://coder.com/docs/v1 "Home")
[Setup](https://coder.com/docs/v1/setup "Setup")
[Upgrade](https://coder.com/docs/v1/setup/upgrade "Upgrade")
Update considerations
The upgrade page provides instructions on how to upgrade your Coder deployment. This article, however, includes information you should be aware of prior to upgrading, such as architecture updates and breaking changes.
[](https://coder.com/docs/v1/setup/upgrade/considerations#upgrading-to-v130)
Upgrading to v1.30
-----------------------------------------------------------------------------------------------
* Versions `1.30` and above include a database migration that changes string-based IDs to PostgreSQL UUIDs.
[](https://coder.com/docs/v1/setup/upgrade/considerations#upgrading-to-v129)
Upgrading to v1.29
-----------------------------------------------------------------------------------------------
Previously, Coder applied a `UNIQUE` constraint to usernames, but only the case-sensitive form (not the lowercase username). This release changes the constraint so that it also applies to the lowercase form of the username and ensures that all users have unique, lowercase usernames.
If there are multiple usernames where the only differences are the casing, the duplicates will be renamed as follows:
* Sort each group of usernames (e.g., username, Username, UserName) by its case-sensitive form
* The first username remains untouched; Coder appends a number to subsequent usernames (e.g., Username2, UserName3)
This means that any usernames that are already lowercase remain unchanged, since they will be first in the sort group.
[](https://coder.com/docs/v1/setup/upgrade/considerations#upgrading-from-v125-to-v126)
Upgrading from v1.25 to v1.26
--------------------------------------------------------------------------------------------------------------------
* Beginning with `1.26`, Coder requires the use of Kubernetes `1.20` or later. See Coder's [version support policy](https://coder.com/docs/v1/setup/kubernetes#supported-kubernetes-versions)
for more information.
* Coder supports the use of Markdown formatting in system and service banners. Coder now renders the Markdown content in existing banners, instead of displaying the raw Markdown syntax.
* Coder has made the dark theme generally available. Users who have enabled the beta version via feature flag will need to re-enable this; Coder won't auto-apply the theme.
[](https://coder.com/docs/v1/setup/upgrade/considerations#upgrading-from-v124-to-v125)
Upgrading from v1.24 to v1.25
--------------------------------------------------------------------------------------------------------------------
* In 1.25, dev URLs use double dashes `--` as delimiters, instead of single dashes `-`. Please update bookmarks accordingly.
* v1.25 updates the username format to allow the use of alphanumeric character and hyphens. The length of the username can be 1-39 characters, inclusive.
[](https://coder.com/docs/v1/setup/upgrade/considerations#upgrading-from-versions-prior-to-v121)
Upgrading from versions prior to v1.21
---------------------------------------------------------------------------------------------------------------------------------------
Users upgrading deployments that predate the release of v1.21 to v1.21 or later should update their Helm values file to reflect Coder's [updated schema](https://github.com/coder/enterprise-helm/blob/1.27.0/values.yaml)
. More specifically, users must change the following values:
* `cemanager` --> `coderd`
* `cemanager.replicas` --> `coderd.replicas`
* `cemanager.image` --> `coderd.image`
* `cemanager.resources` --> `coderd.resources`
* `devurls.host` --> `coderd.devurlsHost`
* `ingress.loadBalancerIP` --> `coderd.serviceSpec.loadBalancerIP`
* `ingress.loadBalancerSourceRanges` --> `coderd.serviceSpec.loadBalancerSourceRanges`
* `ingress.service.externalTrafficPolicy` --> `coderd.serviceSpec.externalTrafficPolicy`
* `ingress.tls.hostSecretName` --> `coderd.tls.hostSecretName`
* `ingress.tls.devurlsHostSecretName` --> `coderd.tls.devurlsHostSecretName`
* `storageClassName` --> `postgres.default.storageClassName`
* `timescale.image` --> `postgres.default.image`
* `timescale.resources` --> `postgres.default.resources`
* `timescale.resources.requests.storage` --> `postgres.default.resources.requests.storage`
* `postgres.useDefault` --> `postgres.default.enable`
* `deploymentAnnotations` --> `services.annotations`
* `serviceTolerations` --> `services.tolerations`
* `clusterDomainSuffix` --> `services.clusterDomainSuffix`
* `serviceType` --> `services.type`
* `serviceAccount.annotations` --> `coderd.builtinProviderServiceAccount.annotations`
* `serviceAccount.labels` --> `coderd.builtinProviderServiceAccount.labels`
> The Helm charts shipped with versions 1.21 through 1.26 are backward-compatible, while charts shipping with v1.27 and later are not.
##### On this page
---
# 1.44.1 | Coder v1 Docs
[Home](https://coder.com/docs/v1 "Home")
[Changelog](https://coder.com/docs/v1/changelog "Changelog")
[1.44.0](https://coder.com/docs/v1/changelog/1.44.0 "1.44.0")
1.44.1
### [](https://coder.com/docs/v1/changelog/1.44.1#breaking-changes-)
Breaking changes ❗
There are no breaking changes in 1.44.1.
### [](https://coder.com/docs/v1/changelog/1.44.1#features-)
Features ✨
* web: Updated code-server to 4.16.1
### [](https://coder.com/docs/v1/changelog/1.44.1#bug-fixes-)
Bug fixes 🐛
* infra: Fixed an issue where a workspace pod would be orphaned if it exited during the build process.
### [](https://coder.com/docs/v1/changelog/1.44.1#security-updates-)
Security updates 🔐
There are no security updates in 1.44.1.
---
# 1.33.5 | Coder v1 Docs
[Home](https://coder.com/docs/v1 "Home")
[Changelog](https://coder.com/docs/v1/changelog "Changelog")
[Archives](https://coder.com/docs/v1/changelog/archive "Archives")
1.33.5
### [](https://coder.com/docs/v1/changelog/1.33.5#breaking-changes-)
Breaking changes ❗
There are no breaking changes in 1.33.5.
### [](https://coder.com/docs/v1/changelog/1.33.5#bug-fixes-)
Bug fixes 🐛
web: fixed an issue where regular users could not create embeddable "Open in Coder" buttons.
### [](https://coder.com/docs/v1/changelog/1.33.5#security-updates-)
Security updates 🔐
There are no security updates in 1.33.5.
---
# 1.14.0 | Coder v1 Docs
[Home](https://coder.com/docs/v1 "Home")
[Changelog](https://coder.com/docs/v1/changelog "Changelog")
[Archives](https://coder.com/docs/v1/changelog/archive "Archives")
1.14.0
### [](https://coder.com/docs/v1/changelog/archive/1.14.0#breaking-changes-)
Breaking changes ❗
* cli: Previous [Coder CLI](https://github.com/coder/coder-cli/releases/latest)
versions are incompatible, v1.14.x is _required_
* web: Personal metrics have been removed
* infra: Environment assets previously located in `/tmp/coder` have been moved to `/opt/coder`
* **Notice:** Environments require a rebuild for this change to occur
### [](https://coder.com/docs/v1/changelog/archive/1.14.0#features-)
Features ✨
* infra: Container-based Virtual Machines (CVMs) alpha
* web: New account dormancy page in the admin panel
* infra: Coder environment variables [see guide](https://coder.com/docs/workspaces/variables)
* web: Admin panel pages have been redesigned
* web: SSH information has been added to the environments page
* web: Default Images have been promoted out of beta and are now active
* web: Metrics have undergone a revision. The chart has been simplified to daily active users.
* web: Environment rebuild icons have been redesigned
* infra: Add username label to env pod/deployment
* web/projector: Progressive web app (PWA) icons have been redesigned
* **Notice:** The Coder PWA may need to be reinstalled. An invalid cache state may occur that is fixed with a hard refresh.
* infra: Git configuration build step now occurs before configure and personalize
### [](https://coder.com/docs/v1/changelog/archive/1.14.0#bug-fixes-)
Bug fixes 🐛
* projector: Improved performance using native fonts
* projector: Fixed modals incorrectly resizing to full screen
* web: Dev URL creation is no longer enabled during environment builds
* web: Fixed image tag not populating correctly when creating an environment from an embeddable button
### [](https://coder.com/docs/v1/changelog/archive/1.14.0#security-updates-)
Security updates 🔐
* Enhanced security surrounding the use of API keys within environments
* Fixes upstream SSH server [DoS vulnerability](https://groups.google.com/g/golang-announce/c/CqSxrm7Mpr0/m/BGVPu5DJAgAJ)
---
# External database setup | Coder v1 Docs
[Home](https://coder.com/docs/v1 "Home")
[Setup](https://coder.com/docs/v1/setup "Setup")
[Coder for Docker](https://coder.com/docs/v1/setup/coder-for-docker "Coder for Docker")
External database setup
If you'd like to use an external database with your Coder for Docker deployment, you must:
1. Disable the embedded database by setting the `DB_EMBEDDED` environment variable (see the next code snippet for an example)
2. Provide the connection information to the external PostgreSQL database:
`` `docker run --rm -it -p 7080:7080 \ -v /var/run/docker.sock:/var/run/docker.sock \ -v ~/.coder:/var/run/coder \ # Disable using the embedded DB -e DB_EMBEDDED="" \ # Change these values to match those for your database -e DB_HOST=127.0.0.1 \ -e DB_PORT=5432 \ -e DB_USER=postgres \ -e DB_PASSWORD="" \ -e DB_NAME=postgres \ -e DB_SSL_MODE=disable \ codercom/coder:1.33.3` ``
Coder supports client TLS certificates using `DB_SSL_MODE=verify-full`. Ensure that you mount the certs into the container (and add the flag `-v :/certs`). Then, specify the certificate path using environment variables:
| **Flag/environment variable** | **Description** |
| --- | --- |
| `-e DB_CERT=/certs/client.crt` | The path to the client cert signed by the CA |
| `-e DB_KEY=/certs/client.key` | The path to the client secret |
| `-e DB_ROOT_CERT=/certs/myCA.crt` | The path to the trusted CA cert |
---
# 1.38.2 | Coder v1 Docs
[Home](https://coder.com/docs/v1 "Home")
[Changelog](https://coder.com/docs/v1/changelog "Changelog")
[1.38.0](https://coder.com/docs/v1/changelog/1.38.0 "1.38.0")
1.38.2
### [](https://coder.com/docs/v1/changelog/1.38.2#breaking-changes-)
Breaking changes ❗
There are no breaking changes in 1.38.2.
### [](https://coder.com/docs/v1/changelog/1.38.2#features-)
Features ✨
There are no new features in 1.38.2.
### [](https://coder.com/docs/v1/changelog/1.38.2#bug-fixes-)
Bug fixes 🐛
* Fixed an issue where workspace builds would fail due to an error collecting workspace metrics.
* Fixed an issue where workspace metrics would fail to show in the UI.
* Removed the limit of maximum 500 images across all organizations.
### [](https://coder.com/docs/v1/changelog/1.38.2#security-updates-)
Security updates 🔐
There are no security updates for 1.38.2.
---
# Upgrade | Coder v1 Docs
[Home](https://coder.com/docs/v1 "Home")
[Setup](https://coder.com/docs/v1/setup "Setup")
[Coder for Docker](https://coder.com/docs/v1/setup/coder-for-docker "Coder for Docker")
Upgrade
This guide will show you how to upgrade your Coder for Docker deployment.
To upgrade, run the following command to download the resources you need, including the latest images (ensure that you're providing the correct version number in the command, e.g., `1.33.3`):
`` `docker run --rm -it \ -p 7080:7080 \ -v /var/run/docker.sock:/var/run/docker.sock \ -v ~/.coder:/var/run/coder \ codercom/coder:` ``
[](https://coder.com/docs/v1/setup/coder-for-docker/upgrade#docker-compose)
Docker Compose
------------------------------------------------------------------------------------------
If you use Docker Compose to run Coder, here's how to upgrade your deployment:
1. Update the Coder the version in your `docker-compose-yml` file:
`` `# ... services: coder: image: docker.io/codercom/coder:1.33.3 # ...` ``
2. Recreate your image:
`` `docker-compose up --force-recreate --build -d` ``
3. Start the container:
`` `docker-compose up` ``
---
# coder update | Coder v1 Docs
[Home](https://coder.com/docs/v1 "Home")
[Command line](https://coder.com/docs/v1/cli "Command line")
[Reference](https://coder.com/docs/v1/cli/reference/coder "Reference")
coder update
Update coder binary
### [](https://coder.com/docs/v1/cli/reference/coder_update#synopsis)
Synopsis
Update coder to the version matching a given coder instance.
`` `coder update [flags]` ``
### [](https://coder.com/docs/v1/cli/reference/coder_update#options)
Options
`` `--coder string query this coder instance for the matching version --force do not prompt for confirmation -h, --help help for update --version string explicitly specify which version to fetch and install` ``
### [](https://coder.com/docs/v1/cli/reference/coder_update#options-inherited-from-parent-commands)
Options inherited from parent commands
`` `-v, --verbose show verbose output` ``
### [](https://coder.com/docs/v1/cli/reference/coder_update#see-also)
SEE ALSO
* [coder](https://coder.com/docs/v1/cli/reference/coder)
- coder provides a CLI for working with an existing Coder installation
---
# Red Hat OpenShift | Coder v1 Docs
[Home](https://coder.com/docs/v1 "Home")
[Setup](https://coder.com/docs/v1/setup "Setup")
[Kubernetes](https://coder.com/docs/v1/setup/kubernetes "Kubernetes")
Red Hat OpenShift
This deployment guide shows you how to customize your [OpenShift Container Platform](https://www.openshift.com/products/container-platform)
cluster to deploy Coder.
The OpenShift Container Platform includes security features, notably the restricted [Security Context Constraint](https://docs.openshift.com/container-platform/4.7/authentication/managing-security-context-constraints.html)
(SCC), that can interfere with Coder. This guide describes the customizations to the OpenShift cluster and Coder that ensure an optimal user experience.
> Please note that OpenShift doesn't support the use of [CVMs](https://coder.com/docs/v1/admin/workspace-management/cvms)
[](https://coder.com/docs/v1/setup/kubernetes/openshift#prerequisites)
Prerequisites
------------------------------------------------------------------------------------
* An OpenShift cluster with a project (Kubernetes namespace) for Coder
* OpenShift command-line tools (`oc` and `kubectl`) installed
[](https://coder.com/docs/v1/setup/kubernetes/openshift#step-1-modify-pod-and-container-security-contexts)
Step 1: Modify pod and container security contexts
-------------------------------------------------------------------------------------------------------------------------------------------------------------
OpenShift's SCC feature enforces the settings with which applications must run. The default SCC setting, `restricted`, requires applications to run as a user within a project-specific range (`MustRunAsRange`) and does not allow apps to define a seccomp profile.
You can view the restrictions using `oc describe scc restricted`:
`` `$ oc describe scc restricted Name: restricted Priority: Access: Users: Groups: system:authenticated Settings: Allow Privileged: false Allow Privilege Escalation: true Default Add Capabilities: Required Drop Capabilities: KILL,MKNOD,SETUID,SETGID Allowed Capabilities: Allowed Seccomp Profiles: Allowed Volume Types: configMap,downwardAPI,emptyDir,persistentVolumeClaim,projected,secret Allowed Flexvolumes: Allowed Unsafe Sysctls: Forbidden Sysctls: Allow Host Network: false Allow Host Ports: false Allow Host PID: false Allow Host IPC: false Read Only Root Filesystem: false Run As User Strategy: MustRunAsRange UID: UID Range Min: UID Range Max: SELinux Context Strategy: MustRunAs User: Role: Type: Level: FSGroup Strategy: MustRunAs Ranges: Supplemental Groups Strategy: RunAsAny Ranges: ` ``
You can override the default settings by defining the following in your [Helm chart](https://coder.com/docs/v1/guides/admin/helm-charts)
:
`` `coderd: podSecurityContext: runAsUser: null seccompProfile: null securityContext: seccompProfile: null` ``
At this point, you need to get your Coder workspaces running with the appropriate service account/user. There are two options available to you:
1. Adding the environment's service account to `anyuid` or `nonroot`
2. Building images compatible with OpenShift
[](https://coder.com/docs/v1/setup/kubernetes/openshift#option-1-add-the-environments-service-account-to-anyuid-or-nonroot)
Option 1: Add the environment's service account to anyuid or nonroot
------------------------------------------------------------------------------------------------------------------------------------------------------------------------------------------------
Coder's default base images for workspaces, such as `enterprise-base`, run as the `coder` user (UID 1000). However, OpenShift doesn't allow this, since service accounts are required by the `restricted` Security Context Constraint (SCC) to run with a project-specific UID.
To work around this, we we recommend adding this service account to the `anyuid` or `nonroot` SCC since Coder creates workspaces in pods with the service account `environments`:
`` `$ oc adm policy add-scc-to-user nonroot -z environments clusterrole.rbac.authorization.k8s.io/system:openshift:scc:nonroot added: "environments" $ oc adm policy who-can use scc nonroot resourceaccessreviewresponse.authorization.openshift.io/ Namespace: coder Verb: use Resource: securitycontextconstraints.security.openshift.io Users: system:admin system:serviceaccount:coder:environments` ``
> Note: Do not set any `service_account_annotations` values in Workspace Providers, as it will cause Coder to create a workspace-specific service account in place of the default `environments` service account.
[](https://coder.com/docs/v1/setup/kubernetes/openshift#option-2-build-images-compatible-with-openshift)
Option 2: Build images compatible with OpenShift
---------------------------------------------------------------------------------------------------------------------------------------------------------
To run Coder workspaces without modifying Security Context Constraints (SCC), you can modify the user and permissions in the base images. First, determine the UID range for the project using:
`` `$ oc describe project coderName: coder Created: 10 days ago Labels: Annotations: openshift.io/description= openshift.io/display-name= openshift.io/requester=kube:admin openshift.io/sa.scc.mcs=s0:c26,c10 openshift.io/sa.scc.supplemental-groups=1000670000/10000 openshift.io/sa.scc.uid-range=1000670000/10000 Display Name: Description: Status: Active Node Selector: Quota: Resource limits: ` ``
Next, create a `BuildConfig` that outputs an image with a UID in the given range (in this case, `sa.scc.uid-range` begins with `1000670000`):
`` `kind: BuildConfig apiVersion: build.openshift.io/v1 metadata: name: example namespace: coder spec: triggers: - type: ConfigChange runPolicy: Serial source: type: Dockerfile dockerfile: | FROM docker.io/codercom/enterprise-base:ubuntu # Switch to root USER root # As root: # 1) Remove the original coder user with UID 1000 # 2) Add a coder group with an allowed UID # 3) Add a coder user as a member of the above group # 4) Fix ownership on the user's home directory RUN userdel coder && \ groupadd coder -g 1000670000 && \ useradd -l -u 1000670000 coder -g 1000670000 && \ chown -R coder:coder /home/coder # Go back to the user 'coder' USER coder strategy: type: Docker dockerStrategy: imageOptimizationPolicy: SkipLayers output: to: kind: ImageStreamTag name: "enterprise-base:latest"` ``
This will automatically create a `Build` for the image. For the moment, it will remain in the "New" status.
Finally, create an `ImageStream` that references the `ImageStreamTag` from the `BuildConfig` above:
`` `oc create imagestream enterprise-base` ``
The `Build` created from the previous step should begin automatically.
When creating workspaces, [configure Coder to connect to the internal OpenShift registry](https://coder.com/docs/v1/admin/registries)
and use the base image you just created.
[](https://coder.com/docs/v1/setup/kubernetes/openshift#next-steps)
Next steps
------------------------------------------------------------------------------
[Installation\
\
Learn how to install Coder onto your infrastructure.](https://coder.com/docs/v1/setup/installation)
##### On this page
---
# 1.34.2 | Coder v1 Docs
[Home](https://coder.com/docs/v1 "Home")
[Changelog](https://coder.com/docs/v1/changelog "Changelog")
[1.34.0](https://coder.com/docs/v1/changelog/1.34.0 "1.34.0")
1.34.2
### [](https://coder.com/docs/v1/changelog/1.34.2#breaking-changes-)
Breaking changes ❗
There are no breaking changes in 1.34.2.
### [](https://coder.com/docs/v1/changelog/1.34.2#features-)
Features ✨
There are no new features in 1.34.2.
### [](https://coder.com/docs/v1/changelog/1.34.2#bug-fixes-)
Bug fixes 🐛
* web: fixed an issue where regular users could not create embeddable "Open in Coder" buttons.
### [](https://coder.com/docs/v1/changelog/1.34.2#security-updates-)
Security updates 🔐
* infra: Fixed an issue where Coder services inside the workspace could be reached via the network from outside in some environments.
---
# Google Kubernetes Engine | Coder v1 Docs
[Home](https://coder.com/docs/v1 "Home")
[Setup](https://coder.com/docs/v1/setup "Setup")
[Kubernetes](https://coder.com/docs/v1/setup/kubernetes "Kubernetes")
Google Kubernetes Engine
This guide shows you how to set up a Google Kubernetes Engine (GKE) cluster to which Coder can deploy.
[](https://coder.com/docs/v1/setup/kubernetes/google#prerequisites)
Prerequisites
---------------------------------------------------------------------------------
Before proceeding, make sure that the [gcloud CLI](https://cloud.google.com/sdk/docs/quickstarts)
is installed on your machine and configured to interact with your Google Cloud Platform account.
Alternatively, you can [create your cluster using the Google Cloud Console](https://cloud.google.com/kubernetes-engine/docs/how-to/creating-a-zonal-cluster#creating-a-cluster)
instead of the gcloud CLI. Please refer to the sample CLI commands below for assistance selecting the correct options for your cluster.
[](https://coder.com/docs/v1/setup/kubernetes/google#node-considerations)
Node Considerations
---------------------------------------------------------------------------------------------
The node type and size that you select impact how you use Coder. When choosing, be sure to account for the number of developers you expect to use Coder, as well as the resources they need to run their workspaces. See our guide on on [compute resources](https://coder.com/docs/v1/guides/admin/resources)
for additional information.
> In GKE version 1.24 and later, Docker-based [node image types](https://cloud.google.com/kubernetes-engine/docs/concepts/node-images)
> are not supported. The examples below use `ubuntu_containerd` and `cos_containerd` to meet this requirement. Docker-based node images will prevent GKE cluster creation.
If you expect to provision GPUs to your Coder workspaces, you **must** use a general-purpose [N1 machine type](https://cloud.google.com/compute/docs/machine-types#gpus)
in your GKE cluster and add GPUs to the nodes. We recommend doing this in a separate GPU-specific node pool.
> GPUs are not supported in workspaces deployed as [container-based virtual machines (CVMs)](https://coder.com/docs/v1/workspaces/cvms)
> unless you're running Coder in a bare-metal Kubernetes environment.
[](https://coder.com/docs/v1/setup/kubernetes/google#set-up-the-gke-cluster)
Set up the GKE cluster
---------------------------------------------------------------------------------------------------
The following two sections will show you how to spin up a Kubernetes cluster using the `gcloud` command. See [Google's docs](https://cloud.google.com/sdk/gcloud/reference/beta/container/clusters/create)
for more information on each parameter used.
Regardless of which option you choose, be sure to replace the following parameters to reflect the needs of your workspace: `PROJECT_ID`, `NEW_CLUSTER_NAME`, `ZONE`, and `REGION`. You can [choose the zone and region](https://cloud.google.com/compute/docs/regions-zones#choosing_a_region_and_zone)
that makes the most sense for your location.
> Both options include the use of the `enable-network-policy` flag, which [creates a Calico cluster](https://kubernetes.io/docs/tasks/administer-cluster/network-policy-provider/calico-network-policy/)
> . See See [Network Policies](https://coder.com/docs/v1/setup/requirements#network-policies)
> for more information.
The sample scripts below create an `e2-standard-4` instance with 2 nodes for evaluation purposes, with a configuration to auto-scale to 8 nodes as more developer workspace pods are created. Depending on your needs, you can choose other sizes. See [machine type comparisons](https://cloud.google.com/compute/docs/machine-types#machine_type_comparison)
in particular [general-purpose machine types like n1 and e2](https://cloud.google.com/compute/docs/general-purpose-machines)
. See [requirements](https://coder.com/docs/v1/setup/requirements)
for help estimating your cluster size.
### [](https://coder.com/docs/v1/setup/kubernetes/google#option-1-cluster-with-full-support-of-coder-features)
Option 1: Cluster with full support of Coder features
This option uses an Ubuntu node image to enable support of [Container-based Virtual Machines (CVMs)](https://coder.com/docs/v1/admin/workspace-management/cvms)
, allowing system-level functionalities such as Docker in Docker.
`` `gcloud beta container --project "$PROJECT_ID" \ clusters create "$NEW_CLUSTER_NAME" \ --zone "$ZONE" \ --no-enable-basic-auth \ --node-version "latest" \ --cluster-version "latest" \ --machine-type "e2-standard-4" \ --image-type "ubuntu_containerd" \ --disk-type "pd-standard" \ --disk-size "50" \ --metadata disable-legacy-endpoints=true \ --scopes "https://www.googleapis.com/auth/cloud-platform" \ --num-nodes "2" \ --logging=SYSTEM,WORKLOAD \ --monitoring=SYSTEM \ --enable-ip-alias \ --network "projects/$PROJECT_ID/global/networks/default" \ --subnetwork "projects/$PROJECT_ID/regions/$REGION/subnetworks/default" \ --default-max-pods-per-node "110" \ --addons HorizontalPodAutoscaling,HttpLoadBalancing \ --enable-autoupgrade \ --enable-autorepair \ --enable-network-policy \ --enable-autoscaling \ --min-nodes "1" \ --max-nodes "8"` ``
### [](https://coder.com/docs/v1/setup/kubernetes/google#option-2-cluster-with-minimum-requirements-for-coder)
Option 2: Cluster with minimum requirements for Coder
This option uses a Container-Optimized OS (COS) and meets Coder's minimum requirements. It does _not_ enable the use of [CVMs](https://coder.com/docs/v1/admin/workspace-management/cvms)
.
`` `gcloud beta container --project "$PROJECT_ID" \ clusters create "$NEW_CLUSTER_NAME" \ --zone "$ZONE" \ --no-enable-basic-auth \ --cluster-version "latest" \ --machine-type "e2-standard-4" \ --image-type "cos_containerd" \ --disk-type "pd-standard" \ --disk-size "50" \ --metadata disable-legacy-endpoints=true \ --scopes "https://www.googleapis.com/auth/cloud-platform" \ --num-nodes "2" \ --logging=SYSTEM,WORKLOAD \ --monitoring=SYSTEM \ --enable-ip-alias \ --network "projects/$PROJECT_ID/global/networks/default" \ --subnetwork "projects/$PROJECT_ID/regions/$REGION/subnetworks/default" \ --default-max-pods-per-node "110" \ --addons HorizontalPodAutoscaling,HttpLoadBalancing \ --enable-autoupgrade \ --enable-autorepair \ --enable-network-policy \ --enable-autoscaling \ --min-nodes "1" \ --max-nodes "8"` ``
This process may take ~15-30 minutes to complete.
[](https://coder.com/docs/v1/setup/kubernetes/google#access-control)
Access control
-----------------------------------------------------------------------------------
GKE allows you to integrate Identity Access and Management (IAM) with Kubernetes' native Role-Based Access Control (RBAC) mechanism to authorize user actions in the cluster. IAM configuration is primarily applied at the project level and to all clusters within that project. Kubernetes RBAC configuration applies to individual clusters, allowing you to implement fine-grained authorization right down to the namespace level.
For more information, see:
* [GKE interaction with IAM](https://cloud.google.com/kubernetes-engine/docs/how-to/role-based-access-control#iam-interaction)
* [Kubernetes RBAC authorization](https://kubernetes.io/docs/reference/access-authn-authz/rbac/)
[](https://coder.com/docs/v1/setup/kubernetes/google#next-steps)
Next steps
---------------------------------------------------------------------------
[Installation\
\
Learn how to install Coder onto your infrastructure.](https://coder.com/docs/v1/setup/installation)
##### On this page
---
# Amazon Elastic Kubernetes Service | Coder v1 Docs
[Home](https://coder.com/docs/v1 "Home")
[Setup](https://coder.com/docs/v1/setup "Setup")
[Kubernetes](https://coder.com/docs/v1/setup/kubernetes "Kubernetes")
Amazon Elastic Kubernetes Service
This deployment guide shows you how to set up an Amazon Elastic Kubernetes Engine (EKS) cluster on which Coder can deploy.
[](https://coder.com/docs/v1/setup/kubernetes/aws#prerequisites)
Prerequisites
------------------------------------------------------------------------------
Please make sure that you have the following utilities installed on your machine:
* [kubectl](https://kubernetes.io/docs/tasks/tools/install-kubectl/)
* [AWS command-line interface](https://docs.aws.amazon.com/cli/latest/userguide/install-cliv2.html)
(you'll also need to [configure](https://docs.aws.amazon.com/cli/latest/userguide/cli-chap-configure.html)
the command-line interface to interact with your AWS account; consider AWS' [CLI configuration quickstart](https://docs.aws.amazon.com/cli/latest/userguide/cli-configure-quickstart.html)
to fast-track this process
* [eksctl command-line utility](https://docs.aws.amazon.com/eks/latest/userguide/eksctl.html)
[](https://coder.com/docs/v1/setup/kubernetes/aws#step-1-create-an-eks-cluster)
Step 1: Create an EKS cluster
-------------------------------------------------------------------------------------------------------------
While flags can be passed to `eksctl create cluster`, the following example uses an [`eksctl` configuration file](https://eksctl.io/usage/schema/)
to define the EKS cluster.
> The cluster name, [region](https://docs.aws.amazon.com/AWSEC2/latest/UserGuide/using-regions-availability-zones%3E.html#concepts-regions)
> , and SSH key path will be specific to your installation.
`` `apiVersion: eksctl.io/v1alpha5 kind: ClusterConfig metadata: name: coder-trial-cluster region: us-east-1 managedNodeGroups: - name: managed-ng-1 instanceType: t2.medium amiFamily: Ubuntu2004 desiredCapacity: 1 minSize: 1 maxSize: 2 volumeSize: 100 ssh: allow: true publicKeyPath: ~/.ssh/id_rsa.pub` ``
This example uses `t2.medium` instance with 2 nodes which is meant for a small trial deployment. Depending on your needs, you can choose a [larger size](https://aws.amazon.com/ec2/instance-types/)
instead. See our documentation on [resources](https://coder.com/docs/v1/guides/admin/resources)
and [requirements](https://coder.com/docs/v1/setup/requirements)
for help estimating your cluster size.
> If your developers require Docker commands like `docker build`, `docker run`, and `docker-compose` as part of their development flow, then [container-based virtual machines (CVMs)](https://coder.com/docs/v1/workspaces/cvms)
> are required. In this case, we recommend using the `Ubuntu2004` AMI family, as the `AmazonLinux2` AMI family does not meet the requirements for [cached CVMs](https://coder.com/docs/v1/workspace-management/cvms/management#caching)
> .
Once the file is ready, run the following command to create the cluster:
`` `eksctl create cluster -f cluster.yaml` ``
This process may take ~15-30 minutes to complete since it is creating EC2 instance(s) aka node(s), node pool, a VPC, NAT Gateway, network interface, security group, elastic IP, EKS cluster, namespaces and pods.
> By default, EKS creates a `volumeBindingMode` of `WaitForFirstConsumer`. See the [Kubernetes docs](https://kubernetes.io/docs/concepts/storage/storage-classes/#volume-binding-mode)
> for more information on this mode. Coder accepts both `Immediate` and `WaitForFirstConsumer`.
When your cluster is ready, you should see the following message:
`` `EKS cluster "YOUR CLUSTER NAME" in "YOUR REGION" region is ready` ``
[](https://coder.com/docs/v1/setup/kubernetes/aws#step-2-optional-install-calico-onto-your-cluster)
Step 2: (Optional) Install Calico onto your cluster
-------------------------------------------------------------------------------------------------------------------------------------------------------
AWS uses [Calico](https://docs.amazonaws.cn/en_us/eks/latest/userguide/calico.html)
to implement network segmentation and tenant isolation. For production deployments, we recommend Calico to enforce workspace pod isolation; please see [Network Policies](https://coder.com/docs/v1/setup/requirements#network-policies)
for more information.
1. Apply the Calico manifest to your cluster:
`` `kubectl apply -f https://raw.githubusercontent.com/aws/amazon-vpc-cni-k8s/master/config/master/calico-operator.yaml kubectl apply -f https://raw.githubusercontent.com/aws/amazon-vpc-cni-k8s/master/config/master/calico-crs.yaml` ``
2. Watch the `calico-system` DaemonSets:
`` `kubectl get daemonset calico-node --namespace calico-system` ``
Wait for the `calico-node` DaemonSet to have the number of pods **desired** in the **ready** state; this indicates that Calico is working:
`` `NAME DESIRED CURRENT READY UP-TO-DATE ... calico-node 3 3 3 3 ...` ``
[](https://coder.com/docs/v1/setup/kubernetes/aws#cleanup--delete-eks-cluster)
Cleanup | Delete EKS cluster
-----------------------------------------------------------------------------------------------------------
To delete the EKS cluster including any installation of Coder, substitute your cluster name and zone in the following `eksctl` command. This will take several minutes and can be monitored in the CloudFormation stack.
`` `eksctl delete cluster --region=us-east-1 --name=trial-cluster` ``
[](https://coder.com/docs/v1/setup/kubernetes/aws#next-steps)
Next steps
------------------------------------------------------------------------
[Installation\
\
Learn how to install Coder onto your infrastructure.](https://coder.com/docs/v1/setup/installation)
##### On this page
---
# 1.35.1 | Coder v1 Docs
[Home](https://coder.com/docs/v1 "Home")
[Changelog](https://coder.com/docs/v1/changelog "Changelog")
[1.35.0](https://coder.com/docs/v1/changelog/1.35.0 "1.35.0")
1.35.1
### [](https://coder.com/docs/v1/changelog/1.35.1#breaking-changes-)
Breaking changes ❗
There are no breaking changes in 1.35.1.
### [](https://coder.com/docs/v1/changelog/1.35.1#features-)
Features ✨
* infra: Added the ability to set `runAsUser` and `runAsGroup` in workspace templates.
### [](https://coder.com/docs/v1/changelog/1.35.1#bug-fixes-)
Bug fixes 🐛
* web: Fixed an issue where `code-server` would show a frequent "Reconnecting" dialog.
* infra: Fixed an issue where database migrations would fail with an error `migrate v2: up: Dirty database version 1.`
### [](https://coder.com/docs/v1/changelog/1.35.1#security-updates-)
Security updates 🔐
There are no security updates in 1.35.1.
### [](https://coder.com/docs/v1/changelog/1.35.1#notes-%E2%84%B9%EF%B8%8F)
Notes ℹ️
* Our bundled version of JetBrains Projector is now built with JDK 17 to match the version used by more recent Jetbrains IDEs.
---
# 1.33.4 | Coder v1 Docs
[Home](https://coder.com/docs/v1 "Home")
[Changelog](https://coder.com/docs/v1/changelog "Changelog")
[Archives](https://coder.com/docs/v1/changelog/archive "Archives")
1.33.4
### [](https://coder.com/docs/v1/changelog/1.33.4#breaking-changes-)
Breaking changes ❗
There are no breaking changes in 1.33.4.
### [](https://coder.com/docs/v1/changelog/1.33.4#bug-fixes-)
Bug fixes 🐛
* infra: improved WebRTC connection logging.
* infra: improved WebRTC session handling.
* infra: prevent SSH from logging noisily by default.
### [](https://coder.com/docs/v1/changelog/1.33.4#security-updates-)
Security updates 🔐
There are no security updates in 1.33.4.
---
# Network setup | Coder v1 Docs
[Home](https://coder.com/docs/v1 "Home")
[Setup](https://coder.com/docs/v1/setup "Setup")
[Air-gapped deployment](https://coder.com/docs/v1/setup/air-gapped "Air-gapped deployment")
Network setup
This article walks you through setting up the supporting infrastructure for an air-gapped Coder deployment.
If the network that will run Coder already has the following, skip this tutorial and proceed with [the installation](https://coder.com/docs/v1/setup/air-gapped)
process:
* A certificate authority
* A domain name service
* A local Docker Registry
> The code snippets provided in this article are sourced from third-party software packages. While we attempt to keep this article up-to-date, we strongly recommend that you verify the snippets before using them.
[](https://coder.com/docs/v1/setup/air-gapped/infrastructure#creating-the-local-registry-and-generating-a-self-signed-certificate)
Creating the local registry and generating a self-signed certificate
-------------------------------------------------------------------------------------------------------------------------------------------------------------------------------------------------------
Coder needs an image registry to store your images. It uses Docker's Registry 2.0 implementation, which supports self-signed certificates and assumes that the protocol used will be HTTPS. The following steps will show you how to make sure the registry works.
Before starting the registry container, create a self-signed certificate:
`` `export REGISTRY_DOMAINNAME=registry.local mkdir /certs openssl req \ -newkey rsa:4096 -nodes -sha256 -keyout /certs/registry.key \ -x509 -days 365 -out /certs/registry.crt` ``
The console will prompt you for `Common Name [CN]:`; provide the value that matches exactly what you set with your DNS. For the volume mounted at `/var/lib/registry`, make sure that it has at least 10 GB for Coder images.
Start the registry container that you just created:
`` `docker run -d -p 443:5000 \ -e REGISTRY_HTTP_TLS_CERTIFICATE=/certs/registry.crt \ -e REGISTRY_HTTP_TLS_KEY=/certs/registry.key \ -v /certs:/certs \ -v /var/lib/docker/registry:/var/lib/registry \ registry:2` ``
> For the volume mounted at `/var/lib/registry` make sure it can store 10+ GB for just Coder images.
[](https://coder.com/docs/v1/setup/air-gapped/infrastructure#configuring-the-kubernetes-node)
Configuring the Kubernetes Node
-----------------------------------------------------------------------------------------------------------------------------
Before the Kubernetes node can accept local images, it needs to consider the new `registry.crt` file as trusted. The specific locations and methods to store and trust the certificate vary depending on the Linux distribution and the container runtime, but here is a partial list to help you get started:
`` `/usr/local/share/ca-certificates/registry.crt /etc/docker/certs.d/${REGISTRY_DOMAIN_NAME}/ca.crt /etc/ssl/certs/registry.crt /etc/pki/tls/registry.crt` ``
If the cluster uses containerd, apply the following to patch in certificates for images in the local registry domain:
`` `update-ca-certificates cat <> /etc/containerd/config.toml [plugins."io.containerd.grpc.v1.cri".registry.configs."$REGISTRY_DOMAIN_NAME".tls] insecure_skip_verify = true EOT systemctl restart containerd` ``
Because the steps described in this section must be run on all nodes that will be scheduling Coder images, either:
1. Include these steps in the image
2. Run an init script that includes these instructions whenever you add a new node to your cluster
[](https://coder.com/docs/v1/setup/air-gapped/infrastructure#adding-certificate-secrets-to-the-helm-chart)
Adding certificate secrets to the Helm chart
-------------------------------------------------------------------------------------------------------------------------------------------------------
Coder validates images and pulls tags using REST API calls to the registry. Other internal services (OIDC, Git providers, etc.) that use HTTPS APIs require the Coder container to trust the certificate. You can fix this by adding a root CA certificate to the Coder service images via the Coder helm chart.
To pass a self-signed certificate to Coder's images, you'll need to:
1. Create a secret
2. Reference the secret in your Coder Helm chart
To create a secret, run:
`` `kubectl -n coder create secret generic local-registry-cert --from-file=/certs` ``
When using the above command, `kubectl` creates the secret from a directory containing a single file. The directory name doesn't matter, but the filename becomes the secret **key**.
> If you changed the `-keyout` argument on the OpenSSL command used to generate the certificates, or if you moved the certificates, make sure that you adjust the path included with `--from-file=`.
To verify the new secret:
`` `kubectl -n coder get secret local-registry-cert -o yaml` ``
Refer to the new secret from the Helm chart by adding the following snippet into a YAML file named `registry-cert-values.yml`:
`` `certs: secret: name: "local-registry-cert" key: "registry.crt"` ``
Then, add the flag `-f registry-cert-values.yml` to the end of the `helm install` or `helm upgrade` command to include the new secrets file:
`` `helm install --wait --atomic --debug --namespace coder coder . \ --set coderd.image=$REGISTRY_DOMAIN_NAME/coderenvs/coder-service: \ --set envbox.image=$REGISTRY_DOMAIN_NAME/coderenvs/envbox: \ --set timescale.image=$REGISTRY_DOMAIN_NAME/coderenvs/timescale: \ -f registry-cert-values.yml` ``
### [](https://coder.com/docs/v1/setup/air-gapped/infrastructure#resolving-the-registry-using-the-clusters-dns-or-hostaliases)
Resolving the registry using the cluster's DNS or hostAliases
Nodes must be able to resolve the `$REGISTRY_DOMAIN` name of the local registry's static IP address. One way to do this without an external DNS server is to use the node's hosts file. For example, if the registry is on 10.0.0.2, then add this to the Node configuration script:
`` `echo "10.0.0.2 $REGISTRY_DOMAIN_NAME" >> /etc/hosts` ``
> This modification may not help the containers _within_ the cluster, since Kubernetes forwards some of its DNS services out of the cluster. If, at a later point, you discover that the hosts file on the node isn't being heeded by pods, you can work around this by extracting the Helm chart from `coder-X.Y.Z.tgz` and patching the `coderd` deployment (this goes at the same indentation level as `containers:`):
>
> `` `hostAliases: - hostnames: - $REGISTRY_DOMAIN_NAME ip: 10.0.0.2` ``
##### On this page
---
# 1.36.1 | Coder v1 Docs
[Home](https://coder.com/docs/v1 "Home")
[Changelog](https://coder.com/docs/v1/changelog "Changelog")
[1.36.0](https://coder.com/docs/v1/changelog/1.36.0 "1.36.0")
1.36.1
### [](https://coder.com/docs/v1/changelog/1.36.1#breaking-changes-)
Breaking changes ❗
There are no breaking changes in 1.36.1
### [](https://coder.com/docs/v1/changelog/1.36.1#features-)
Features ✨
There are no new features in 1.36.1
### [](https://coder.com/docs/v1/changelog/1.36.1#bug-fixes-)
Bug fixes 🐛
* infra: Fixed an issue where Coder services would incorrectly leave out client TLS credentials when communicating with GitLab
### [](https://coder.com/docs/v1/changelog/1.36.1#security-updates-)
Security updates 🔐
* infra: Fixed an issue where ordinary users could obtain admin-level credentials from the Coder API.
---
# Feedback | Coder v1 Docs
[Home](https://coder.com/docs/v1 "Home")
Feedback
Do you have a feature request or an idea for how we can improve our product? Is something not working as expected? **We want to hear from you!**
[](https://coder.com/docs/v1/feedback#making-a-suggestion)
Making a suggestion
------------------------------------------------------------------------------
If Coder is missing a feature that you would like, select **Submit Idea** and fill out the form with the details of your suggestion.
We collect your email so that you will be notified when the feature is updated.
[](https://coder.com/docs/v1/feedback#reporting-a-problem)
Reporting a problem
------------------------------------------------------------------------------
If you experience a problem or encounter unexpected behavior, send a detailed report using the guidelines below to **[\[email protected\]](https://coder.com/cdn-cgi/l/email-protection#bccfc9ccccd3cec8fcdfd3d8d9ce92dfd3d1)
**. If the application crashes, Coder generates a report for you. Copy the report and include it with your message.
### [](https://coder.com/docs/v1/feedback#writing-a-detailed-report)
Writing a detailed report
Writing a detailed report improves our ability to address any issues you see or concerns that you may have. We suggest including the following information when writing your report:
`` `**Steps to reproduce:** 1. Step 1 2. Step 2 3. Step 3 **Expected:** Describe what you expected to happen **Actual:** Describe what happened **System information:** - Operating System: - Browser: - Console logs:` ``
We welcome any additional information that you think may be helpful.
### [](https://coder.com/docs/v1/feedback#coder-version-information)
Coder version information
One critical piece of information you could provide is the version number of your deployment. This information is available at the bottom of most pages in the Coder UI.
##### On this page
---
# Azure Kubernetes Service | Coder v1 Docs
[Home](https://coder.com/docs/v1 "Home")
[Setup](https://coder.com/docs/v1/setup "Setup")
[Kubernetes](https://coder.com/docs/v1/setup/kubernetes "Kubernetes")
Azure Kubernetes Service
This deployment guide shows you how to set up an Azure Kubernetes Service (AKS) cluster on which Coder can deploy.
[](https://coder.com/docs/v1/setup/kubernetes/azure#prerequisites)
Prerequisites
--------------------------------------------------------------------------------
You must have an Azure account and paid subscription.
Please make sure that you have the [Azure CLI](https://docs.microsoft.com/en-us/cli/azure/?view=azure-cli-latest)
installed on your machine and that you've logged in (run `az login` and follow the prompts).
[](https://coder.com/docs/v1/setup/kubernetes/azure#node-considerations)
Node Considerations
--------------------------------------------------------------------------------------------
The node type and size that you select impact how you use Coder. When choosing, be sure to account for the number of developers you expect to use Coder, as well as the resources they need to run their workspaces. See our guide on on [compute resources](https://coder.com/docs/v1/guides/admin/resources)
for additional information.
If you expect to provision GPUs to your Coder workspaces, you **must** use an Azure Virtual Machine with support for GPUs. See the [Azure documentation](https://docs.microsoft.com/en-us/azure/virtual-machines/sizes-gpu)
for more information.
> GPUs are not supported in workspaces deployed as [container-based virtual machines (CVMs)](https://coder.com/docs/v1/workspaces/cvms)
> unless you're running Coder in a bare-metal Kubernetes environment.
[](https://coder.com/docs/v1/setup/kubernetes/azure#pod-ip-addresses)
Pod IP Addresses
--------------------------------------------------------------------------------------
By default, AKS clusters use [kubenet](https://docs.microsoft.com/en-us/azure/aks/concepts-network#kubenet-basic-networking)
, and a virtual network and subnet are created for you. With kubenet, nodes get an IP address from a virtual network subnet. Network address translation (NAT) is then configured on the nodes, and pods receive an IP address "hidden" behind the node IP. This approach reduces the number of IP addresses that you need to reserve in your network space for pods to use.
Alternatively with [Azure Container Networking Interface (CNI)](https://docs.microsoft.com/en-us/azure/aks/configure-azure-cni#plan-ip-addressing-for-your-cluster)
, every pod gets an IP address from the subnet and can be accessed directly.
[](https://coder.com/docs/v1/setup/kubernetes/azure#step-1-create-the-resource-group)
Step 1: Create the resource group
-----------------------------------------------------------------------------------------------------------------------
To make subsequent steps easier, start by creating environment variables for the [resource group](https://docs.microsoft.com/en-us/azure/azure-resource-manager/management/manage-resource-groups-portal#what-is-a-resource-group)
and [location](https://azure.microsoft.com/en-us/global-infrastructure/geographies/)
that will host your cluster:
`` `RESOURCE_GROUP="" LOCATION=""` ``
Create a resource group:
`` `az group create \ --resource-group "$RESOURCE_GROUP" \ --location "$LOCATION"` ``
If this is successful, Azure returns information about your resource group. Pay attention to the `id` field:
`` `"id": "/subscriptions/3afe...d2d/resourceGroups/coderdocs"` ``
You will need the hash provided (i.e., `3afe...d2d`) when creating your cluster.
[](https://coder.com/docs/v1/setup/kubernetes/azure#step-2-create-the-azure-kubernetes-service-cluster)
Step 2: Create the Azure Kubernetes Service cluster
-----------------------------------------------------------------------------------------------------------------------------------------------------------
Set two additional environment variables for your cluster name and subscription ID:
`` `CLUSTER_NAME="" SUBSCRIPTION=""` ``
At this point, you're ready to create your cluster. Please note that:
* You may have to run `az extension add --name aks-preview`
* You may need to create a service principal manually using `az ad sp create-for-rbac --skip-assignment`, then setting the `--service-principal` and `--client-secret` flags
* The sample script creates a `Standard_B8ms` instance; depending on your needs, you can choose a [larger size](https://docs.microsoft.com/en-us/azure/virtual-machines/sizes-b-series-burstable)
instead. See [requirements](https://coder.com/docs/v1/setup/requirements)
for help estimating your cluster size.
To create the Azure Kubernetes Service Cluster:
`` `az aks create \ --name "$CLUSTER_NAME" \ --resource-group "$RESOURCE_GROUP" \ --subscription "$SUBSCRIPTION" \ --generate-ssh-keys \ --enable-addons http_application_routing \ --enable-cluster-autoscaler \ --location "$LOCATION" \ --max-count 10 \ --min-count 2 \ --node-count 2 \ --node-vm-size Standard_B8ms \ --network-plugin "kubenet"` ``
> Both options include the [use of the `--network-policy "azure"` flag](https://docs.microsoft.com/en-us/azure/aks/use-network-policies)
> , which [creates a Calico cluster](https://kubernetes.io/docs/tasks/administer-cluster/network-policy-provider/calico-network-policy/)
> . See [Network Policies](https://coder.com/docs/v1/setup/requirements#network-policies)
> for more information.
This process might take some time (~5-20 minutes), but if you're successful, Azure returns a JSON object with your cluster information.
[](https://coder.com/docs/v1/setup/kubernetes/azure#step-3-configure-kubectl-to-point-to-the-cluster)
Step 3: Configure kubectl to point to the cluster
-------------------------------------------------------------------------------------------------------------------------------------------------------
After deploying your AKS cluster, configure kubectl to point to your cluster:
`` `az aks get-credentials --name "$CLUSTER_NAME" --resource-group "$RESOURCE_GROUP"` ``
You should get a message similar to the following if this is successful:
`` `Merged "" as current context in /Users//.kube/config` ``
[](https://coder.com/docs/v1/setup/kubernetes/azure#access-control)
Access control
----------------------------------------------------------------------------------
You can configure AKS to use both Azure Active Directory (AD) and Kubernetes Role-Based Access Control (RBAC) to limit access to cluster resources based on the user's identity or group membership. You can create groups and users in AD, then define roles to assign to users with role bindings via RBAC.
For more information, see:
* [Azure AD with Kubernetes RBAC](https://docs.microsoft.com/en-us/azure/aks/azure-ad-rbac)
* [Kubernetes RBAC authorization](https://kubernetes.io/docs/reference/access-authn-authz/rbac/)
[](https://coder.com/docs/v1/setup/kubernetes/azure#next-steps)
Next steps
--------------------------------------------------------------------------
[Installation\
\
Learn how to install Coder onto your infrastructure.](https://coder.com/docs/v1/setup/installation)
##### On this page
---
# K3s | Coder v1 Docs
[Home](https://coder.com/docs/v1 "Home")
[Setup](https://coder.com/docs/v1/setup "Setup")
[Kubernetes](https://coder.com/docs/v1/setup/kubernetes "Kubernetes")
K3s
This article will show you how to install K3s onto a new Ubuntu 20.04 LTS machine for use with Coder.
[K3s](https://k3s.io/)
is a lightweight Kubernetes distribution that works well for single-node or multi-node clusters. For single-user trial purposes, you may want to consider the options in [Coder for Docker](https://coder.com/docs/v1/setup/coder-for-docker)
.
> This installation method is not officially supported or tested by Coder. If you have questions or run into issues, feel free to reach out using our [community Slack channel](https://cdr.co/join-community)
> .
>
> **We do not recommend using K3s for production deployments of Coder.**
[](https://coder.com/docs/v1/setup/kubernetes/k3s#prerequisites)
Prerequisites
------------------------------------------------------------------------------
Before proceeding, please make sure that:
* You have an **Ubuntu 20.04 machine**: This can be a bare metal or a virtual machine.
Ensure that the machine's specs satisfy Coder's [resource requirements](https://coder.com/docs/v1/setup/requirements)
, since your experience with Coder is dependent on your system specs.
* You have the following software installed on your machine:
* [helm](https://helm.sh/docs/intro/install/)
* Your network policy or firewall accepts incoming traffic on:
* Port 80 (HTTP)
* Port 443 (HTTPS)
* **Optional**: Port 6443 (Kubernetes API)
[](https://coder.com/docs/v1/setup/kubernetes/k3s#step-1-install-k3s-with-calico)
Step 1: Install K3s with Calico
-----------------------------------------------------------------------------------------------------------------
The following steps are based on [Calico's quickstart guide](https://docs.projectcalico.org/getting-started/kubernetes/k3s/quickstart)
for setting up K3s. However, you will disable K3s' default network policies and Traefik in favor of Calico and nginx-ingress.
1. Create a single-node K3s cluster:
`` `curl -sfL https://get.k3s.io | K3S_KUBECONFIG_MODE="644" INSTALL_K3S_EXEC="--flannel-backend=none --cluster-cidr=192.168.0.0/16 --disable-network-policy --disable=traefik" sh -` ``
> Per the [Calico docs](https://docs.projectcalico.org/getting-started/kubernetes/k3s/quickstart)
> :
>
> If `192.168.0.0/16` is already in use within your network, you must select a different pod network CIDR by replacing `192.168.0.0/16` in the above command.
>
> K3s installer generates kubeconfig file in `/etc` with limited permissions; by using the `K3S_KUBECONFIG_MODE` environment, you are assigning the necessary permissions to the file and making it accessible for other users.
2. Install the Calico operator and CRDs (Calico implements Kubernetes pod networking and policy enforcement):
`` `kubectl create -f https://docs.projectcalico.org/manifests/tigera-operator.yaml kubectl create -f https://docs.projectcalico.org/manifests/custom-resources.yaml` ``
3. Confirm that all of the pods are running:
`` `watch kubectl get pods --all-namespaces` ``
[](https://coder.com/docs/v1/setup/kubernetes/k3s#step-2-allow-ip-forwarding)
Step 2: Allow IP Forwarding
---------------------------------------------------------------------------------------------------------
Modify Calico to enable IP forwarding, which is needed for container networking.
`` `vim /etc/cni/net.d/10-calico.conflist kubectl edit cm cni-config -n calico-system` ``
Under `container_settings`, set `allow_ip_forwarding` to `true`:
`` `"container_settings": { "allow_ip_forwarding": true }` ``
[](https://coder.com/docs/v1/setup/kubernetes/k3s#step-3-copy-over-the-kubeconfig)
Step 3: Copy over the kubeconfig
-------------------------------------------------------------------------------------------------------------------
Occasionally, Helm will not recognize the K3s cluster (see k3s-io/[k3s#1126](https://github.com/k3s-io/k3s/issues/1126)
for more information).
If this happens, but you want to interface with the cluster from your local machine, copy `/etc/rancher/k3s/k3s.yaml` to `~/.kube/config`.
After copying this file from the K3s node to your local workstation:
* Ensure that you replace `localhost` or `127.0.0.1` with the host's public IP address in the copied file
* Ensure that your firewall permits traffic through port `443`
`` `# on the host machine: cp /etc/rancher/k3s/k3s.yaml ~/.kube/config` ``
[](https://coder.com/docs/v1/setup/kubernetes/k3s#next-steps)
Next steps
------------------------------------------------------------------------
[Installation\
\
Learn how to install Coder onto your infrastructure.](https://coder.com/docs/v1/setup/installation)
##### On this page
---
# 1.34.1 | Coder v1 Docs
[Home](https://coder.com/docs/v1 "Home")
[Changelog](https://coder.com/docs/v1/changelog "Changelog")
[1.34.0](https://coder.com/docs/v1/changelog/1.34.0 "1.34.0")
1.34.1
### [](https://coder.com/docs/v1/changelog/1.34.1#breaking-changes-)
Breaking changes ❗
There are no breaking changes in 1.34.1.
### [](https://coder.com/docs/v1/changelog/1.34.1#features-)
Features ✨
There are no new features in 1.34.1.
### [](https://coder.com/docs/v1/changelog/1.34.1#bug-fixes-)
Bug fixes 🐛
* web: Fixed an issue where `code-server` would show a frequent "Reconnecting" dialog.
* infra: Fixed an issue where database migrations would fail with an error `migrate v2: up: Dirty database version 1.`
### [](https://coder.com/docs/v1/changelog/1.34.1#security-updates-)
Security updates 🔐
There are no security updates in 1.34.1.
---
# 1.35.3 | Coder v1 Docs
[Home](https://coder.com/docs/v1 "Home")
[Changelog](https://coder.com/docs/v1/changelog "Changelog")
[1.35.0](https://coder.com/docs/v1/changelog/1.35.0 "1.35.0")
1.35.3
### [](https://coder.com/docs/v1/changelog/1.35.3#breaking-changes-)
Breaking changes ❗
There are no breaking changes in 1.35.3.
### [](https://coder.com/docs/v1/changelog/1.35.3#features-)
Features ✨
There are no new features in 1.35.3
### [](https://coder.com/docs/v1/changelog/1.35.3#bug-fixes-)
Bug fixes 🐛
* infra: Fixed an issue where the hostname was set to `workspace` for CVM workspaces irrespective of the workspace name.
* helm: Fixed an issue where the helm install was not respecting the `coderd.postgres.noPasswordEnv` variable
### [](https://coder.com/docs/v1/changelog/1.35.3#security-updates-)
Security updates 🔐
* infra: Fixed an issue where ordinary users could obtain admin-level credentials from the Coder API.
---
# coder sync | Coder v1 Docs
[Home](https://coder.com/docs/v1 "Home")
[Command line](https://coder.com/docs/v1/cli "Command line")
[Reference](https://coder.com/docs/v1/cli/reference/coder "Reference")
coder sync
Establish a one way directory sync to a Coder workspace
`` `coder sync [local directory] [:] [flags]` ``
### [](https://coder.com/docs/v1/cli/reference/coder_sync#options)
Options
`` `-h, --help help for sync --init do initial transfer and exit` ``
### [](https://coder.com/docs/v1/cli/reference/coder_sync#options-inherited-from-parent-commands)
Options inherited from parent commands
`` `-v, --verbose show verbose output` ``
### [](https://coder.com/docs/v1/cli/reference/coder_sync#see-also)
SEE ALSO
* [coder](https://coder.com/docs/v1/cli/reference/coder)
- coder provides a CLI for working with an existing Coder installation
---
# 1.35.2 | Coder v1 Docs
[Home](https://coder.com/docs/v1 "Home")
[Changelog](https://coder.com/docs/v1/changelog "Changelog")
[1.35.0](https://coder.com/docs/v1/changelog/1.35.0 "1.35.0")
1.35.2
### [](https://coder.com/docs/v1/changelog/1.35.2#breaking-changes-)
Breaking changes ❗
There are no breaking changes in 1.35.2.
### [](https://coder.com/docs/v1/changelog/1.35.2#features-)
Features ✨
There are no new features in 1.35.2
### [](https://coder.com/docs/v1/changelog/1.35.2#bug-fixes-)
Bug fixes 🐛
* infra: Fixed a goroutine leak.
* infra: Fixed an issue where temporary pods created during build did not have templates applied
### [](https://coder.com/docs/v1/changelog/1.35.2#security-updates-)
Security updates 🔐
* infra: Fixed an issue where Coder services inside the workspace could be reached via the network from outside in some environments.
---
# Workspace limits | Coder v1 Docs
[Home](https://coder.com/docs/v1 "Home")
[Admin](https://coder.com/docs/v1/admin "Admin")
[Workspace management](https://coder.com/docs/v1/admin/workspace-management "Workspace management")
Workspace limits
You can set the maximum number of workspaces that each user can create. To do so, [update your Helm chart](https://coder.com/docs/v1/guides/admin/helm-charts)
and set the `CODER_MAX_WORKSPACES_PER_USER` parameter to the maximum allowable number:
`` `# Allow each user to create no more than 100 workspaces coderd: extraEnvs: - name: CODER_MAX_WORKSPACES_PER_USER value: "100"` ``
---
# coder ssh | Coder v1 Docs
[Home](https://coder.com/docs/v1 "Home")
[Command line](https://coder.com/docs/v1/cli "Command line")
[Reference](https://coder.com/docs/v1/cli/reference/coder "Reference")
coder ssh
Enter a shell of execute a command over SSH into a Coder workspace
`` `coder ssh [workspace_name] []` ``
### [](https://coder.com/docs/v1/cli/reference/coder_ssh#examples)
Examples
`` `coder ssh my-dev coder ssh my-dev pwd` ``
### [](https://coder.com/docs/v1/cli/reference/coder_ssh#options)
Options
`` `-h, --help help for ssh` ``
### [](https://coder.com/docs/v1/cli/reference/coder_ssh#options-inherited-from-parent-commands)
Options inherited from parent commands
`` `-v, --verbose show verbose output` ``
### [](https://coder.com/docs/v1/cli/reference/coder_ssh#see-also)
SEE ALSO
* [coder](https://coder.com/docs/v1/cli/reference/coder)
- coder provides a CLI for working with an existing Coder installation
---
# coder login | Coder v1 Docs
[Home](https://coder.com/docs/v1 "Home")
[Command line](https://coder.com/docs/v1/cli "Command line")
[Reference](https://coder.com/docs/v1/cli/reference/coder "Reference")
coder login
Authenticate this client for future operations
`` `coder login [Coder URL eg. https://my.coder.domain/] [flags]` ``
### [](https://coder.com/docs/v1/cli/reference/coder_login#options)
Options
`` `-h, --help help for login` ``
### [](https://coder.com/docs/v1/cli/reference/coder_login#options-inherited-from-parent-commands)
Options inherited from parent commands
`` `-v, --verbose show verbose output` ``
### [](https://coder.com/docs/v1/cli/reference/coder_login#see-also)
SEE ALSO
* [coder](https://coder.com/docs/v1/cli/reference/coder)
- coder provides a CLI for working with an existing Coder installation
---
# Workspace templates | Coder v1 Docs
[Home](https://coder.com/docs/v1 "Home")
[Workspaces](https://coder.com/docs/v1/workspaces "Workspaces")
[Workspace templates](https://coder.com/docs/v1/workspaces/workspace-templates "Workspace templates")
Workspace templates
> As of Coder version _1.19_, only workspace templates version _0.2_ is supported. To update your workspace, you **must** update your templates to version _0.2_.
Workspace templates allows you to define and create new workspaces using **workspace templates**.
Workspace templates are written in YAML and have a `.yaml` or `.yml` extension. For assistance with creating your Coder YAML file, you can use the [template intellisense](https://coder.com/docs/v1/workspaces/workspace-templates/code-completion)
feature.
Coder looks for your workspace template at the following path:
`` `/.coder/.yaml` ``

[](https://coder.com/docs/v1/workspaces/workspace-templates/templates#workspace-template-sample)
Workspace template sample
--------------------------------------------------------------------------------------------------------------------------
The following is a sample workspace template that makes use of all available fields. Depending on your use case, you may not need all of the options available.
> Note that the fields are **case-sensitive**.
For detailed information on the fields available, see the [subsequent sections](https://coder.com/docs/v1/workspaces/workspace-templates/templates#workspace-template-fields)
of this article.
``` ``version: 0.2 workspace: # Type indicates the provider type to use when building the workspace. # It corresponds to the `kubernetes` section under `specs`. type: kubernetes specs: kubernetes: image: value: index.docker.io/ubuntu:18.04 container-based-vm: value: true cpu: value: 4 memory: value: 16 disk: value: 128 gpu-count: value: 1 labels: value: com.coder.custom.hello: "hello" com.coder.custom.world: "world" annotations: value: - key: annotation-key value: annotation-value run-as-user: value: 1000 run-as-group: value: 1000 seccomp-profile-type: value: Localhost seccomp-profile-localhost-profile: value: profiles/custom-profile.json configure: start: value: - name: "install curl" command: | apt update apt install -y curl - name: "Create organization directory" command: "mkdir -p /home/coder/go/src/github.com/my-org" # Be careful with keyscans like this! - name: "Add GitHub to known hosts" command: "sudo ssh-keyscan -H github.com >> /home/coder/.ssh/known_hosts" - name: "Clone Git Project" command: "git clone [[email protected]](https://coder.com/cdn-cgi/l/email-protection) :my-org/my-project.git" continue-on-error: true directory: /home/coder/go/src/github.com/my-org - name: "install Go binary" command: "go install" directory: /home/coder/go/src/github.com/my-org/my-project shell: "bash" continue-on-error: true env: GOPATH: /home/coder/go dev-urls: value: - name: MyWebsite port: 3000 scheme: http access: private - name: PublicPort port: 443 scheme: https access: public - name: OrgWebsite port: 3001 scheme: http access: org - name: AuthedSite port: 8081 scheme: https access: authed`` ```
[](https://coder.com/docs/v1/workspaces/workspace-templates/templates#workspace-template-fields)
Workspace template fields
--------------------------------------------------------------------------------------------------------------------------
### [](https://coder.com/docs/v1/workspaces/workspace-templates/templates#version)
version
The version number of the config file being used. The currently supported version is `0.2`.
### [](https://coder.com/docs/v1/workspaces/workspace-templates/templates#workspace)
workspace
**Required**. The section containing all configuration information related to the workspace.
#### [](https://coder.com/docs/v1/workspaces/workspace-templates/templates#workspacetype)
workspace.type
**Required**. Determines the type of workspace to be created. Currently, the only accepted value is `kubernetes`.
#### [](https://coder.com/docs/v1/workspaces/workspace-templates/templates#workspacespecs)
workspace.specs
**Required**. This section contains configuration information specific to the `workspace.type`.
#### [](https://coder.com/docs/v1/workspaces/workspace-templates/templates#workspacespecskubernetes)
workspace.specs.kubernetes
This section contains all the properties related to a `kubernetes` workspace.
#### [](https://coder.com/docs/v1/workspaces/workspace-templates/templates#workspacespecskubernetesimagevalue)
workspace.specs.kubernetes.image.value
**Required**. The image to use for the workspace. The image should include the registry and (optionally) the tag, e.g., `docker.io/ubuntu:18.04`. If you omit the tag, Coder uses the default value of `latest`.
You must have [imported the image](https://coder.com/docs/v1/images/importing)
into Coder, otherwise, the workspace will fail to build.
#### [](https://coder.com/docs/v1/workspaces/workspace-templates/templates#workspacespecskuberneteslabelsvalue)
workspace.specs.kubernetes.labels.value
The [Kubernetes labels](https://kubernetes.io/docs/concepts/overview/working-with-objects/labels/)
to be added to the workspace pod.
`` `labels: value: com.coder.custom.hello: hello com.coder.custom.world: world` ``
`labels` is disabled by default and must be enabled by a site admin.
#### [](https://coder.com/docs/v1/workspaces/workspace-templates/templates#workspacespecskubernetesannotationsvalue)
workspace.specs.kubernetes.annotations.value
The [Kubernetes annotations](https://kubernetes.io/docs/concepts/overview/working-with-objects/annotations/)
to be added to the workspace pod.
`` `annotations: value: - key: annotation-key value: annotation-value` ``
#### [](https://coder.com/docs/v1/workspaces/workspace-templates/templates#workspacespecskubernetesgpu-countvalue)
workspace.specs.kubernetes.gpu-count.value
The number of GPUs to allocate to the workspace.
#### [](https://coder.com/docs/v1/workspaces/workspace-templates/templates#workspacespecskubernetescontainer-based-vmvalue)
workspace.specs.kubernetes.container-based-vm.value
Determines whether the workspace should be created as a [container-based virtual machine (CVM)](https://coder.com/docs/v1/workspaces/cvms)
. Default is `false`.
#### [](https://coder.com/docs/v1/workspaces/workspace-templates/templates#workspacespecskubernetescpuvalue)
workspace.specs.kubernetes.cpu.value
**Required**. The number of cores to allocate to the workspace.
#### [](https://coder.com/docs/v1/workspaces/workspace-templates/templates#workspacespecskubernetesenv)
workspace.specs.kubernetes.env
The environment variables to set in the workspaces.
#### [](https://coder.com/docs/v1/workspaces/workspace-templates/templates#workspacespecskubernetesmemoryvalue)
workspace.specs.kubernetes.memory.value
**Required**. The amount of memory (in GB) to allocate to the workspace.
#### [](https://coder.com/docs/v1/workspaces/workspace-templates/templates#workspacespecskubernetesdiskvalue)
workspace.specs.kubernetes.disk.value
**Required**. The amount of disk space (in GB) to allocate to the workspace.
#### [](https://coder.com/docs/v1/workspaces/workspace-templates/templates#workspacespecskubernetesprivileged)
workspace.specs.kubernetes.privileged
Whether the workspace should be run as privileged (running as privileged disables most container security isolation).
#### [](https://coder.com/docs/v1/workspaces/workspace-templates/templates#workspacespecskubernetesresource-requests)
workspace.specs.kubernetes.resource-requests
The custom resources that can be requested.
#### [](https://coder.com/docs/v1/workspaces/workspace-templates/templates#workspacespecskubernetesresource-limits)
workspace.specs.kubernetes.resource-limits
The limits to apply to the custom resources requested.
#### [](https://coder.com/docs/v1/workspaces/workspace-templates/templates#workspacespecskubernetesruntime-class-name)
workspace.specs.kubernetes.runtime-class-name
The name of a [Kubernetes RuntimeClass](https://kubernetes.io/docs/concepts/containers/runtime-class/)
to associate with the workspaces.
#### [](https://coder.com/docs/v1/workspaces/workspace-templates/templates#workspacespecskubernetestolerationsvalue)
workspace.specs.kubernetes.tolerations.value
Adds [Kubernetes tolerations](https://kubernetes.io/docs/concepts/scheduling-eviction/taint-and-toleration/)
to the workspace pod.
`` `tolerations: value: - key: example1 operator: Exists value: value-1 effect: NoSchedule tolerationSeconds: 200 - key: example-3 operator: Equal value: value-2 effect: PreferNoSchedule tolerationSeconds: 400 - key: example-3 value: value-3 effect: NoExecute` ``
`tolerations` is disabled by default and must be enabled by a site admin.
#### [](https://coder.com/docs/v1/workspaces/workspace-templates/templates#workspacespecskubernetesnode-selectorvalue)
workspace.specs.kubernetes.node-selector.value
Adds [Kubernetes NodeSelectors](https://kubernetes.io/docs/concepts/scheduling-eviction/assign-pod-node/#nodeselector)
to the workspace pod. The value is a sequence of key/value pairs.
For example, the following snippet would add two `nodeSelectors` for Kubernetes: `accelerator:nvidia` and `disktype:ssd`.
`` `node-selector: value: - key: accelerator value: nvidia - key: disktype value: ssd` ``
`node-selector` is disabled by default and must be enabled by a site admin.
#### [](https://coder.com/docs/v1/workspaces/workspace-templates/templates#workspacespecskubernetesrun-as-uservalue)
workspace.specs.kubernetes.run-as-user.value
Sets the `runAsUser` attribute on the workspace's PodSecurityContext, which controls the UID used within containers. The value must be a numeric UID.
If not specified, this defaults to the UID specified in the image metadata, as specified in the [Kubernetes documentation](https://kubernetes.io/docs/reference/kubernetes-api/workload-resources/pod-v1/)
.
#### [](https://coder.com/docs/v1/workspaces/workspace-templates/templates#workspacespecskubernetesrun-as-groupvalue)
workspace.specs.kubernetes.run-as-group.value
Sets the `runAsGroup` attribute on the workspace's PodSecurityContext, which controls the GID used within the workspace container. The value must be a numeric GID.
If not specified, this defaults to a GID specified by the container runtime, as specified in the [Kubernetes documentation](https://kubernetes.io/docs/reference/kubernetes-api/workload-resources/pod-v1/)
.
#### [](https://coder.com/docs/v1/workspaces/workspace-templates/templates#workspacespecskubernetesseccomp-profile-typevalue)
workspace.specs.kubernetes.seccomp-profile-type.value
Applies a [seccomp profile](https://kubernetes.io/docs/tutorials/security/seccomp/)
to the workspace pod. The value is a string, corresponding to the `type` subfield of the PodSecurityContext `seccompProfile` attribute.
For example, the following snippet would explicitly disable seccomp protection:
`` `seccomp-profile-type: value: Unconfined` ``
`seccomp-profile-type` is disabled by default and must be enabled by a site admin.
#### [](https://coder.com/docs/v1/workspaces/workspace-templates/templates#workspacespecskubernetesseccomp-profile-localhost-profilevalue)
workspace.specs.kubernetes.seccomp-profile-localhost-profile.value
Applies a custom [seccomp profile](https://kubernetes.io/docs/tutorials/security/seccomp/)
to the workspace pod. The value is a string, corresponding to the `localhostProfile` subfield of the PodSecurityContext `seccompProfile` attribute.
Per the [Kubernetes documentation](https://kubernetes.io/docs/reference/generated/kubernetes-api/v1.25/#seccompprofile-v1-core)
, this attribute is only valid if used in combination with the `Localhost` seccomp profile type. Its value must correspond to the path of a valid JSON profile that is already configured on the Kubernetes worker nodes.
The following snippet demonstrates setting a custom profile:
`` `seccomp-profile-type: value: Localhost seccomp-profile-localhost-profile: value: profiles/my-custom-profile.json` ``
`seccomp-profile-localhost-profile` is disabled by default and must be enabled by a site admin.
#### [](https://coder.com/docs/v1/workspaces/workspace-templates/templates#workspaceconfigure)
workspace.configure
This section lists the commands that run within the workspace after Coder builds the workspace. See [Configure](https://coder.com/docs/v1/images/configure)
for more information.
#### [](https://coder.com/docs/v1/workspaces/workspace-templates/templates#workspaceconfigurestartvalue)
workspace.configure.start.value
The list of commands to run when Coder _starts_ a workspace.
#### [](https://coder.com/docs/v1/workspaces/workspace-templates/templates#workspaceconfigurestartvaluecommand)
workspace.configure.start.value\[\*\].command
**Required**. Runs the provided command within the workspace (Coder supports the use of both single-line and multi-line commands).
* Single-line command:
`` `- name: Install curl command: apt install -y curl` ``
* Multi-line command:
`` `- name: Update and install curl command: | apt update apt install -y curl` ``
#### [](https://coder.com/docs/v1/workspaces/workspace-templates/templates#workspaceconfigurestartvaluename)
workspace.configure.start.value\[\*\].name
The name of the command being run.
#### [](https://coder.com/docs/v1/workspaces/workspace-templates/templates#workspaceconfigurestartvalueshell)
workspace.configure.start.value\[\*\].shell
The shell Coder should use to run the command.
`` `start: value: - name: First step shell: /bin/bash` ``
#### [](https://coder.com/docs/v1/workspaces/workspace-templates/templates#workspaceconfigurestartvaluedirectory)
workspace.configure.start.value\[\*\].directory
The working directory from which Coder should run the command.
`` `start: value: - name: First step directory: /home/coder` ``
#### [](https://coder.com/docs/v1/workspaces/workspace-templates/templates#workspaceconfigurestartvaluecontinue-on-error)
workspace.configure.start.value\[\*\].continue-on-error
Any step that returns a non-zero exit code will fail. By default, a failure prevents the subsequent steps from executing. If you would like to change this behavior, this field (which accepts a Boolean value) will allow a step to fail and _not_ halt subsequent steps.
#### [](https://coder.com/docs/v1/workspaces/workspace-templates/templates#workspaceconfigurestartvalueenv)
workspace.configure.start.value\[\*\].env
The map of environment variables to set for the command.
`` `start: value: - name: First step env: HOME: /home/coder GOPATH: /home/coder/go` ``
#### [](https://coder.com/docs/v1/workspaces/workspace-templates/templates#workspacedev-urlsvalue)
workspace.dev-urls.value
This list allows you to provision [dev URLs](https://coder.com/docs/v1/workspaces/devurls)
using the workspaces as code configuration file. The dev URLs will be provisioned _in addition to_ any dev URLs you create.
`` `dev-urls: value: - name: PublicPort port: 443 scheme: https access: public - name: PrivatePort port: 8000 scheme: https access: private` ``
#### [](https://coder.com/docs/v1/workspaces/workspace-templates/templates#workspacedev-urlsvaluename)
workspace.dev-urls.value\[\*\].name
The name of the dev URL to be created.
#### [](https://coder.com/docs/v1/workspaces/workspace-templates/templates#workspacedev-urlsvalueport)
workspace.dev-urls.value\[\*\].port
The workspace port that the dev URL exposes.
#### [](https://coder.com/docs/v1/workspaces/workspace-templates/templates#workspacedev-urlsvaluescheme)
workspace.dev-urls.value\[\*\].scheme
The URL scheme (protocol) to use (i.e., `http` or `https`).
#### [](https://coder.com/docs/v1/workspaces/workspace-templates/templates#workspacedev-urlsvalueaccess)
workspace.dev-urls.value\[\*\].access
The permission level of the dev URL:
* **private**: Can only be accessed by the owner of the workspace
* **org**: Can be accessed by all members of the organization to which the workspace belongs
* **authed**: Can be accessed by all users on the Coder deployment
* **public**: Can be accessed by anyone on the internet
##### On this page
---
# coder workspaces | Coder v1 Docs
[Home](https://coder.com/docs/v1 "Home")
[Command line](https://coder.com/docs/v1/cli "Command line")
[Reference](https://coder.com/docs/v1/cli/reference/coder "Reference")
coder workspaces
Interact with Coder workspaces
### [](https://coder.com/docs/v1/cli/reference/coder_workspaces#synopsis)
Synopsis
Perform operations on the Coder workspaces owned by the active user.
### [](https://coder.com/docs/v1/cli/reference/coder_workspaces#options)
Options
`` `-h, --help help for workspaces` ``
### [](https://coder.com/docs/v1/cli/reference/coder_workspaces#options-inherited-from-parent-commands)
Options inherited from parent commands
`` `-v, --verbose show verbose output` ``
### [](https://coder.com/docs/v1/cli/reference/coder_workspaces#see-also)
SEE ALSO
* [coder](https://coder.com/docs/v1/cli/reference/coder)
- coder provides a CLI for working with an existing Coder installation
* [coder workspaces create](https://coder.com/docs/v1/cli/reference/coder_workspaces_create)
- create a new workspace.
* [coder workspaces create-from-config](https://coder.com/docs/v1/cli/reference/coder_workspaces_create-from-config)
- create a new workspace from a template
* [coder workspaces edit](https://coder.com/docs/v1/cli/reference/coder_workspaces_edit)
- edit an existing workspace and initiate a rebuild.
* [coder workspaces edit-from-config](https://coder.com/docs/v1/cli/reference/coder_workspaces_edit-from-config)
- change the template a workspace is tracking
* [coder workspaces ls](https://coder.com/docs/v1/cli/reference/coder_workspaces_ls)
- list all workspaces owned by the active user
* [coder workspaces ping](https://coder.com/docs/v1/cli/reference/coder_workspaces_ping)
- ping Coder workspaces by name
* [coder workspaces policy-template](https://coder.com/docs/v1/cli/reference/coder_workspaces_policy-template)
- Set workspace policy template
* [coder workspaces rebuild](https://coder.com/docs/v1/cli/reference/coder_workspaces_rebuild)
- rebuild a Coder workspace
* [coder workspaces rm](https://coder.com/docs/v1/cli/reference/coder_workspaces_rm)
- remove Coder workspaces by name
* [coder workspaces stop](https://coder.com/docs/v1/cli/reference/coder_workspaces_stop)
- stop Coder workspaces by name
* [coder workspaces watch-build](https://coder.com/docs/v1/cli/reference/coder_workspaces_watch-build)
- trail the build log of a Coder workspace
---
# Workspace process logging | Coder v1 Docs
[Home](https://coder.com/docs/v1 "Home")
[Admin](https://coder.com/docs/v1/admin "Admin")
[Workspace management](https://coder.com/docs/v1/admin/workspace-management "Workspace management")
Workspace process logging
The workspace process logging feature allows you to log all system-level processes executing in the workspace.
Enabling workspace process logging adds a sidecar to your workspaces that will log all processes users start in the workspace (e.g., commands executed in the terminal or system processes created by background services in CVM workspaces). You can view the output from the sidecar or send it to a monitoring stack, such as CloudWatch, for further analysis.
Please note that these logs are not recorded or captured by the Coder organization in any way, shape, or form.
[](https://coder.com/docs/v1/admin/workspace-management/process-logging#how-this-works)
How this works
------------------------------------------------------------------------------------------------------
Coder uses [eBPF](https://ebpf.io/)
(which we chose for its speed) to perform in-kernel logging and filtering of all `exec` system calls to match events originating from the workspace.
The core of this feature is also open source and can be found in the [`exectrace` repo on GitHub](https://github.com/coder/exectrace)
repo.
[](https://coder.com/docs/v1/admin/workspace-management/process-logging#requirements)
Requirements
--------------------------------------------------------------------------------------------------
Use of the workspace process logging functionality requires a host Linux kernel >= 5.8 with the kernel config `CONFIG_DEBUG_INFO_BTF=y` enabled.
To validate this config is enabled, run either of the following commands on the nodes directly (_not_ from the terminal within a workspace):
`` `cat /proc/config.gz | gunzip | grep CONFIG_DEBUG_INFO_BTF` ``
`` `cat "/boot/config-$(uname -r)" | grep CONFIG_DEBUG_INFO_BTF` ``
[](https://coder.com/docs/v1/admin/workspace-management/process-logging#enable-workspace-process-logging)
Enable workspace process logging
------------------------------------------------------------------------------------------------------------------------------------------
To enable workspace process logging:
1. Log into Coder as a site manager.
2. Go to **Manage** > **Admin**.
3. On the **Infrastructure** page, scroll down to the **Workspace container runtime** section.
4. Toggle on **Enable workspace command execution recording**.
5. Click **Save workspaces**.
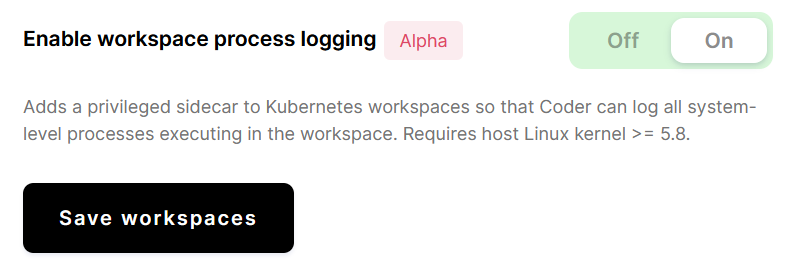
This setting will apply to all new workspaces; it will apply to existing workspaces only after they have been rebuilt.
[](https://coder.com/docs/v1/admin/workspace-management/process-logging#view-logs)
View logs
--------------------------------------------------------------------------------------------
To view the process logs from a specific user or workspace, you can use your cloud provider's log viewer, or you can use `kubectl` to print the logs:
`` `kubectl logs \ --selector="com.coder.username=jessie" \ # Filter by the user "jessie" --selector="com.coder.workspace.name=main" \ # Filter by the workspace "main" --container exectrace # Only show logs from the sidecar` ``
The raw logs will look something like this:
`` `{ "ts": "2022-02-28T20:29:38.038452202Z", "level": "INFO", "msg": "exec", "caller": "/go/src/coder.com/m/product/coder/cmd/envbox/exectrace.go:176", "func": "main.runExectrace", "fields": { "labels": { "organization_id": "default", "user_email": "[[email protected]](https://coder.com/cdn-cgi/l/email-protection) ", "user_id": "5e876e9a-121663f01ebd1522060d5270", "username": "jessie", "workspace_id": "621d2e52-a6987ef6c56210058ee2593c", "workspace_name": "main" }, "cmdline": "uname -a", "event": { "filename": "/usr/bin/uname", "argv": ["uname", "-a"], "truncated": false, "pid": 920684, "uid": 101000, "gid": 101000, "comm": "bash" } } }` ``
### [](https://coder.com/docs/v1/admin/workspace-management/process-logging#view-logs-in-aws-eks)
View logs in AWS EKS
If you're using AWS' Elastic Kubernetes Service, you can [configure your cluster](https://docs.aws.amazon.com/AmazonCloudWatch/latest/monitoring/Container-Insights-EKS-logs.html)
to send logs to CloudWatch. This allows you to view the logs for a specific user or workspace.
To view your logs, go to the CloudWatch dashboard (which is available on the **Log Insights** tab) and run a query similar to the following:
`` `fields @timestamp, log_processed.fields.cmdline | sort @timestamp asc | filter kubernetes.container_name="exectrace" | filter log_processed.fields.labels.username="zac" | filter log_processed.fields.labels.workspace_name="code"` ``
[](https://coder.com/docs/v1/admin/workspace-management/process-logging#usage-considerations)
Usage considerations
------------------------------------------------------------------------------------------------------------------
* This feature is only supported on Kubernetes workspaces. None of the other workspace types (such as those on [EC2](https://coder.com/docs/v1/admin/workspace-providers/deployment/ec2)
or using [Coder for Docker](https://coder.com/docs/v1/setup/coder-for-docker)
) currently include process logging capabilities.
* With this feature enabled, all of the nodes on which Coder schedules workspaces run Linux kernel >= 5.8. If not, workspaces scheduled on incompatible nodes will fail to start correctly for security reasons.
* **Google Kubernetes Engine users**: At this time, GKE's stable branch runs Linux kernel 5.4; as such, this feature doesn't work on GKE (you may be able to leverage this feature if you opt for the rapid branch instead).
* **AWS Elastic Kubernetes Service users**: EKS kernels on the Ubuntu 20.04 image family use the kernel version necessary for this feature (we have not tested other image families)
* The sidecar attached to each workspace is a [privileged](https://kubernetes.io/docs/concepts/policy/pod-security-policy/#privileged)
container (this is similar to the CVM container on CVM-enabled workspaces), so you may need to review your organization's security policies before enabling this feature. Enabling workspace process logging does _not_ grant extra privileges to the workspace container itself, however.
* Coder logs processes from nested Docker containers (including deeply nested containers) correctly, but Coder does not distinguish between processes started in the workspace and processes started in a child container in the logs.
* With CVM-enabled workspaces, this feature may detect and log startup processes begun in the outer container (including container initialization processes).
* Because this feature logs **all** processes in the workspace, high levels of usage (e.g., during a `make` run) will result in an abundance of output in the sidecar container. Depending on how your Kubernetes cluster is configured, you may incur extra charges from your cloud provider to store the additional logs.
##### On this page
---
# coder urls | Coder v1 Docs
[Home](https://coder.com/docs/v1 "Home")
[Command line](https://coder.com/docs/v1/cli "Command line")
[Reference](https://coder.com/docs/v1/cli/reference/coder "Reference")
coder urls
Interact with workspace DevURLs
### [](https://coder.com/docs/v1/cli/reference/coder_urls#options)
Options
`` `-h, --help help for urls` ``
### [](https://coder.com/docs/v1/cli/reference/coder_urls#options-inherited-from-parent-commands)
Options inherited from parent commands
`` `-v, --verbose show verbose output` ``
### [](https://coder.com/docs/v1/cli/reference/coder_urls#see-also)
SEE ALSO
* [coder](https://coder.com/docs/v1/cli/reference/coder)
- coder provides a CLI for working with an existing Coder installation
* [coder urls create](https://coder.com/docs/v1/cli/reference/coder_urls_create)
- Create a new dev URL for a workspace
* [coder urls ls](https://coder.com/docs/v1/cli/reference/coder_urls_ls)
- List all DevURLs for a workspace
* [coder urls rm](https://coder.com/docs/v1/cli/reference/coder_urls_rm)
- Remove a DevURL
---
# coder logout | Coder v1 Docs
[Home](https://coder.com/docs/v1 "Home")
[Command line](https://coder.com/docs/v1/cli "Command line")
[Reference](https://coder.com/docs/v1/cli/reference/coder "Reference")
coder logout
Remove local authentication credentials if any exist
`` `coder logout [flags]` ``
### [](https://coder.com/docs/v1/cli/reference/coder_logout#options)
Options
`` `-h, --help help for logout` ``
### [](https://coder.com/docs/v1/cli/reference/coder_logout#options-inherited-from-parent-commands)
Options inherited from parent commands
`` `-v, --verbose show verbose output` ``
### [](https://coder.com/docs/v1/cli/reference/coder_logout#see-also)
SEE ALSO
* [coder](https://coder.com/docs/v1/cli/reference/coder)
- coder provides a CLI for working with an existing Coder installation
---
# Workspace provider management | Coder v1 Docs
[Home](https://coder.com/docs/v1 "Home")
[Admin](https://coder.com/docs/v1/admin "Admin")
[Workspace providers](https://coder.com/docs/v1/admin/workspace-providers "Workspace providers")
Workspace provider management
This article walks you through the process of managing your workspace provider via the Coder UI.
[](https://coder.com/docs/v1/admin/workspace-providers/management#admin-ui)
Admin UI
------------------------------------------------------------------------------------
Site admins and site managers can view the workspace providers configuration page available via **Manage** > **Workspace Providers**.

The Admin panel shows an overview of all configured workspace providers and indicates their statuses and details.
[](https://coder.com/docs/v1/admin/workspace-providers/management#statuses)
Statuses
------------------------------------------------------------------------------------
A workspace provider can have one of the following statuses:
* **Pending**: The workspace provider has been registered but not deployed to the remote Kubernetes cluster.
* **Ready**: The workspace provider is online and available, and you can provision new workspaces to it.
* **Error**: The workspace provider encountered an issue on startup or cannot be reached by the Coder deployment. The workspace provider's details will include an error message.
[](https://coder.com/docs/v1/admin/workspace-providers/management#edit-a-workspace-provider)
Edit a workspace provider
----------------------------------------------------------------------------------------------------------------------
To edit a workspace provider, log in to Coder, and go to **Manage** > **Providers**.
In the **Providers** list, find the workspace provider you want to edit. Click the vertical ellipsis to its right, and select **Edit**.
At this point, you can:
* Change the **name of the provider**.
* Select the **organizations** that can use this provider; if you do not select at least one organization, no one will be able to provision workspaces using this provider.
> Organizations must not contain any workspaces in the workspace provider before you remove them from a workspace provider's allowlist.
* Change the features of the workspace provider. You can:
* Enable **end-to-end encryption** for this provider
* Enable **external SSH connections** to the provider's workspaces via the Coder CLI
* Specify an **Access URL** that will be used only by workspaces deployed to this provider instead of the site-wide access URL for the deployment
* Specify a **Kubernetes storage class** to use when Coder provisions workspaces (this is useful for improving disk performance)
* Specify the **Kubernetes service account** that Coder uses to provision workspaces
> If you enable **end-to-end encryption**, end-users using SSH need to rerun `coder config-ssh`.
* Specify the **CVM internal network**. CVMs use an internal bridge network to communicate with the outside world. The default network range used is `172.19.0.0/30`. If this overlaps with existing resources in your network, you can specify an alternative network range here in CIDR format. This setting applies to both cached and non-cached CVMs, but does not affect non-CVM workspaces.
> The CIDR must allow for 2 hosts at minimum, so a `/30` network is the smallest possible network. Larger networks are acceptable.
* Specify the Kubernetes `pod_tolerations`, `pod_node_selector`, `service_account_annotations`, and `affinity` for the workspaces deployed with this provider:
`` `{ "pod_tolerations": [ { "key": "com.coder.workspace", "operator": "Exists", "effect": "NoSchedule" } ], "pod_node_selector": {}, "service_account_annotations": {}, "affinity": {} }` ``
Configuring service account annotations allows you to create Kubernetes service accounts for each workspace and attach custom annotations to the service account. This is commonly used to integrate OIDC authentication into the workspace pods.
> To set service account annotations, the RBAC role for the Coder workspace provider must have the correct permissions for controlling the service accounts resource. See [Creating a Kubernetes Workspace Provider](https://coder.com/docs/v1/admin/workspace-providers/deployment/kubernetes)
> for information on role required.
The annotations can use `{{ .UserEmail }}` to render the workspace user's email:
`` `{ "service_account_annotations": { "eks.amazonaws.com/role-arn": "arn:aws:iam::123456789123:role/coder-role-{{.UserEmail}}" } }` ``
> Currently, any changes made to the workspace container via mutating webhooks will not propagate to CVM workspaces. As such, environment variables and files injected by authentication providers will be missing.
Once set, you will see a workspace build set where a service account is created and the user email is populated properly.
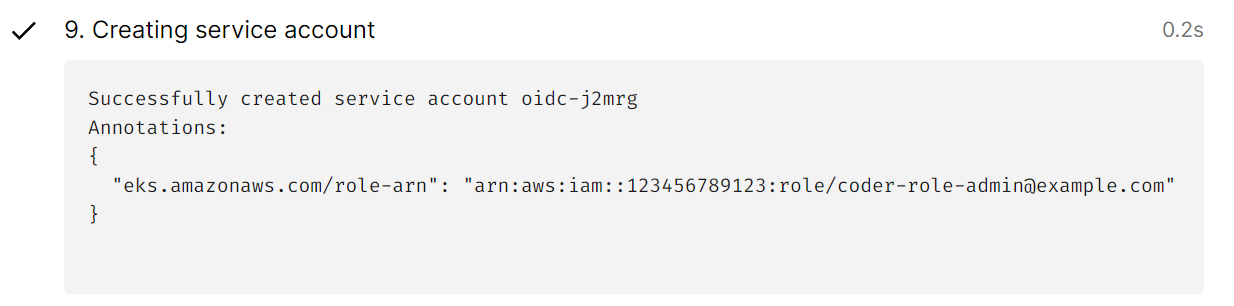
Configuring affinities allows you to control how workspaces are scheduled across nodes. By default, Coder sets a default pod affinity that favors scheduling pods on Nodes that have other workspaces running to optimize for cost savings. The default affinity is the following:
`` `"affinity": { "podAffinity": { "preferredDuringSchedulingIgnoredDuringExecution": [ { "weight": 1, "podAffinityTerm": { "labelSelector": { "matchLabels": { "com.coder.resource": "true" } }, "topologyKey": "kubernetes.io/hostname" } } ] } }` ``
For Kubernetes clusters with nodes spread across multiple availability zones, it may not be favorable to use Coder's default `affinity`. Because persistent disks are often zonal, this can cause pods to become saturated in a single zone and become unschedulable. You can unset this affinity by setting it to an empty object and allow the default behavior of the Kubernetes scheduler.
`` `"affinity": {}` ``
Once you've made your changes, click **Update Provider** to save and continue.
[](https://coder.com/docs/v1/admin/workspace-providers/management#delete-a-workspace-provider)
Delete a workspace provider
--------------------------------------------------------------------------------------------------------------------------
1. Log in to Coder, and go to **Manage** > **Workspace providers**.
2. In the **Providers** list, find the workspace provider you want to delete. Click the vertical ellipsis to its right. Select **Delete**.
3. Confirm that you want to delete the provider; once deleted, no user will be able to provision workspaces using that provider.
> You can only remove a workspace provider if it no longer contains any workspaces, so you must remove all workspaces before deleting the workspace provider.
##### On this page
---
# CPU provisioning | Coder v1 Docs
[Home](https://coder.com/docs/v1 "Home")
[Admin](https://coder.com/docs/v1/admin "Admin")
[Workspace management](https://coder.com/docs/v1/admin/workspace-management "Workspace management")
CPU provisioning
Coder allows you to set the CPU provisioning ratio for each of your organizations. The CPU provisioning ratio configures workspaces with a guaranteed minimum capacity, while enabling them to use available capacity for improved performance. The guaranteed minimum capacity is equivalent to the total CPUs provisioned for a workspace divided by the provisioning ratio.
For example, let's say that you set a CPU provisioning ratio of 8:1. If a user creates a workspace with 4 CPUs, then Coder will reserve 0.5 CPUs on the underlying node, with a maximum limit of 4 CPUs.
[Learn more about how resource utilization in Coder works.](https://coder.com/docs/v1/guides/admin/resources#individual-vs-shared-resources)
[](https://coder.com/docs/v1/admin/workspace-management/cpu-provisioning#changing-the-cpu-provisioning-ratio)
Changing the CPU provisioning ratio
-------------------------------------------------------------------------------------------------------------------------------------------------
1. Go to **Manage** > **Organizations** and select your organization.
2. At the top of your organization page, click **Actions** > **Edit**. Scroll down to **CPU Provisioning Rate** and set the maximum ratio.
3. Click **Update**.
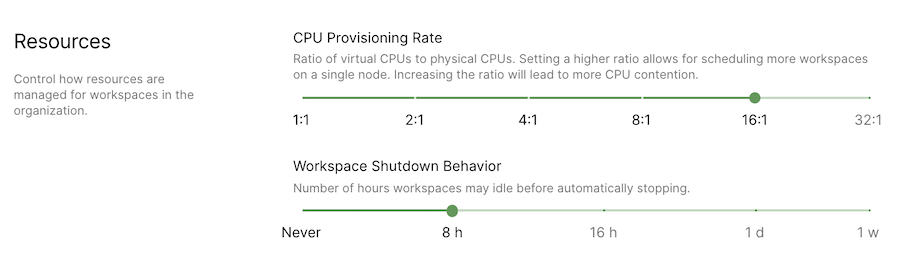
---
# IDE installation | Coder v1 Docs
[Home](https://coder.com/docs/v1 "Home")
[Admin](https://coder.com/docs/v1/admin "Admin")
[Workspace management](https://coder.com/docs/v1/admin/workspace-management "Workspace management")
IDE installation
> [Development of JetBrains projector was suspended on July 11, 2022.](https://lp.jetbrains.com/projector/)
> JetBrains IDE versions published after this date may exhibit strange behaviors or crash unexpectedly under Projector. For the best experience, JetBrains recommends migrating to Jetbrains Gateway.
The process of installing an IDE onto your [image](https://coder.com/docs/v1/images)
is similar to installing the IDE onto a local machine.
To see examples demonstrating how to install the various IDEs and configure your image to work with Coder's multi editor feature, see the [sample images](https://github.com/coder/enterprise-images)
available on GitHub.
[](https://coder.com/docs/v1/admin/workspace-management/installing-jetbrains#supported-ides)
Supported IDEs
-----------------------------------------------------------------------------------------------------------
Coder can find and start the following IDEs if their binaries exist in your PATH:
* Android Studio
* CLion
* DataGrip
* DataSpell
* GoLand
* IntelliJ IDEA Community Edition
* IntelliJ IDEA Ultimate
* Jupyter
* PhpStorm
* PyCharm
* Rider
* RStudio (see [rocker-versioned](https://github.com/rocker-org/rocker-versioned/tree/master/rstudio)
for sample images containing RStudio)
* RubyMine
* Code OSS (VS Code, installed by default)
* WebStorm
[](https://coder.com/docs/v1/admin/workspace-management/installing-jetbrains#required-packages)
Required packages
-----------------------------------------------------------------------------------------------------------------
The following packages are required in your image if you're using an IDE other than VS Code. They ensure that the IDE can communicate with Coder:
| Debian package | RPM package | Description |
| --- | --- | --- |
| openssl | openssl | Secure Sockets Layer Toolkit |
| libxtst6 | libXtst | X11 Testing Library |
| libxrender1 | libXrender | X Rendering Extension Client Library |
| libfontconfig1 | fontconfig | Generic Font Configuration Library |
| libxi6 | libXi | X11 Input Extension Library |
| libgtk-3-0 | gtk3 | GTK+ Graphical User Interface Library |
##### On this page
---
# coder images | Coder v1 Docs
[Home](https://coder.com/docs/v1 "Home")
[Command line](https://coder.com/docs/v1/cli "Command line")
[Reference](https://coder.com/docs/v1/cli/reference/coder "Reference")
coder images
Manage Coder images
### [](https://coder.com/docs/v1/cli/reference/coder_images#synopsis)
Synopsis
Manage existing images and/or import new ones.
### [](https://coder.com/docs/v1/cli/reference/coder_images#options)
Options
`` `-h, --help help for images --user string Specifies the user by email (default "me")` ``
### [](https://coder.com/docs/v1/cli/reference/coder_images#options-inherited-from-parent-commands)
Options inherited from parent commands
`` `-v, --verbose show verbose output` ``
### [](https://coder.com/docs/v1/cli/reference/coder_images#see-also)
SEE ALSO
* [coder](https://coder.com/docs/v1/cli/reference/coder)
- coder provides a CLI for working with an existing Coder installation
* [coder images ls](https://coder.com/docs/v1/cli/reference/coder_images_ls)
- list all images available to the active user
---
# Global access URL configuration | Coder v1 Docs
[Home](https://coder.com/docs/v1 "Home")
[Admin](https://coder.com/docs/v1/admin "Admin")
[Satellites](https://coder.com/docs/v1/admin/satellites "Satellites")
Global access URL configuration
By default, the primary deployment and satellite deployments have different access URLs. Using two access URLs can confuse engineering teams when it comes time to determine which one they should use for Coder.
To prevent confusion, Coder supports an optional unified hostname configuration where the primary deployment and all satellite deployments share a hostname. All users who access Coder use the same URL; meanwhile, your DNS server or anycast configuration ensures that users are still accessing a deployment that is near to them geographically, offering low latency when connecting to their workspaces.
GeoDNS (also known as _geographical split-horizon DNS_) is a DNS load balancing technique that helps users connect to their geographically nearest servers without relying on anycast IP routing. This guide will focus on GeoDNS setup, though it will still work with anycast routing.
[](https://coder.com/docs/v1/admin/satellites/global-access-url#requirements)
Requirements
------------------------------------------------------------------------------------------
You will need the following:
* A primary access URL (e.g. `https://primary.example.com`)
* One or more satellite access URLs (e.g. `https://sydney.example.com`, `https://london.example.com`)
* A "unified" access URL (e.g. `https://coder.example.com`). If you are using GeoDNS, you should set the default backend to the primary access URL. Set the backend for each region with a satellite to the corresponding satellite access URL or IP address
* A TLS certificate for the primary deployment that has both the primary hostname and the corresponding unified hostname
* A TLS certificate for _each_ satellite with the satellite's hostname and the corresponding unified hostname
> Please note that:
>
> * If you are using cert-manager, you can add hostnames to a certificate by including them in the `spec.dnsNames` section.
> * We recommend maintaining a separate "regional" hostname or IP address for each primary or satellite so you can access them explicitly to aid in debugging. This guide will walk you through preserving the existing regional access URL.
[](https://coder.com/docs/v1/admin/satellites/global-access-url#configure-a-unified-access-url-on-coder)
Configure a unified access URL on Coder
------------------------------------------------------------------------------------------------------------------------------------------------
1. Configure your geo DNS or anycast routing so the primary Coder deployment and all satellites share a single hostname, as well as their individual hostnames. (We have provided instructions on [how to create a GeoDNS load balancer on Cloudflare](https://coder.com/docs/v1/admin/satellites/global-access-url#create-a-geo-dns-load-balancer-on-cloudflare)
below.)
2. In the primary Helm values file, set `coderd.alternateHostnames` to your primary hostname and unified hostname:
`` `coderd: alternateHostnames: - "primary.example.com" - "coder.example.com"` ``
3. In _each_ of your satellite deployments' Helm values file:
1. Set `coderd.satellite.accessURL` to your unified access URL (this value will be used as the default URL).
2. Set `coderd.alternateHostnames` to your satellite's specific hostname and your unified hostname:
`` `coderd: alternateHostnames: - "satellite.example.com" - "coder.example.com"` ``
4. Redeploy your primary and satellite deployments with your new Helm values.
5. Once you've fully deployed your primary and satellite deployments, log into Coder on your original primary access URL and go to **Manage** > **Admin**.
6. On the **Infrastructure** tab, set the **Access URL** field to your unified access URL (e.g. `https://coder.example.com`).
7. If you've enabled logins via OIDC, log into your OIDC identity provider's admin page and update Coder's redirect URI to reflect your new access URL (e.g. `https://coder.example.com/oidc/callback`).
8. If you've enabled Git account linking, log into each Git provider and update Coder's redirect URI to reflect your new access URL.
At this point, all users should be able to access Coder via the unified access URL. Your DNS server will automatically route users to their nearest geographical primary or satellite deployment for low latency. OIDC logins should work as expected across all domain names, including the primary access URL.
[](https://coder.com/docs/v1/admin/satellites/global-access-url#create-a-geo-dns-load-balancer-on-cloudflare)
Create a geo DNS load balancer on Cloudflare
----------------------------------------------------------------------------------------------------------------------------------------------------------
To create a geo DNS load balancer on Cloudflare:
1. Log in to Cloudflare, and select the domain on which you want your geo DNS hostname to exist.
2. Expand the **Traffic** app on the sidebar and select **Load Balancing**.
3. Enable **Load Balancing** if you haven't already.
4. Ensure that your Cloudflare plan has enough origin servers for your deployments; you will need one origin server for the primary deployment and one for each satellite deployment.
5. Click **Create Load Balancer**.
6. Enter the unified hostname you wish to use (e.g. `coder.example.com`).
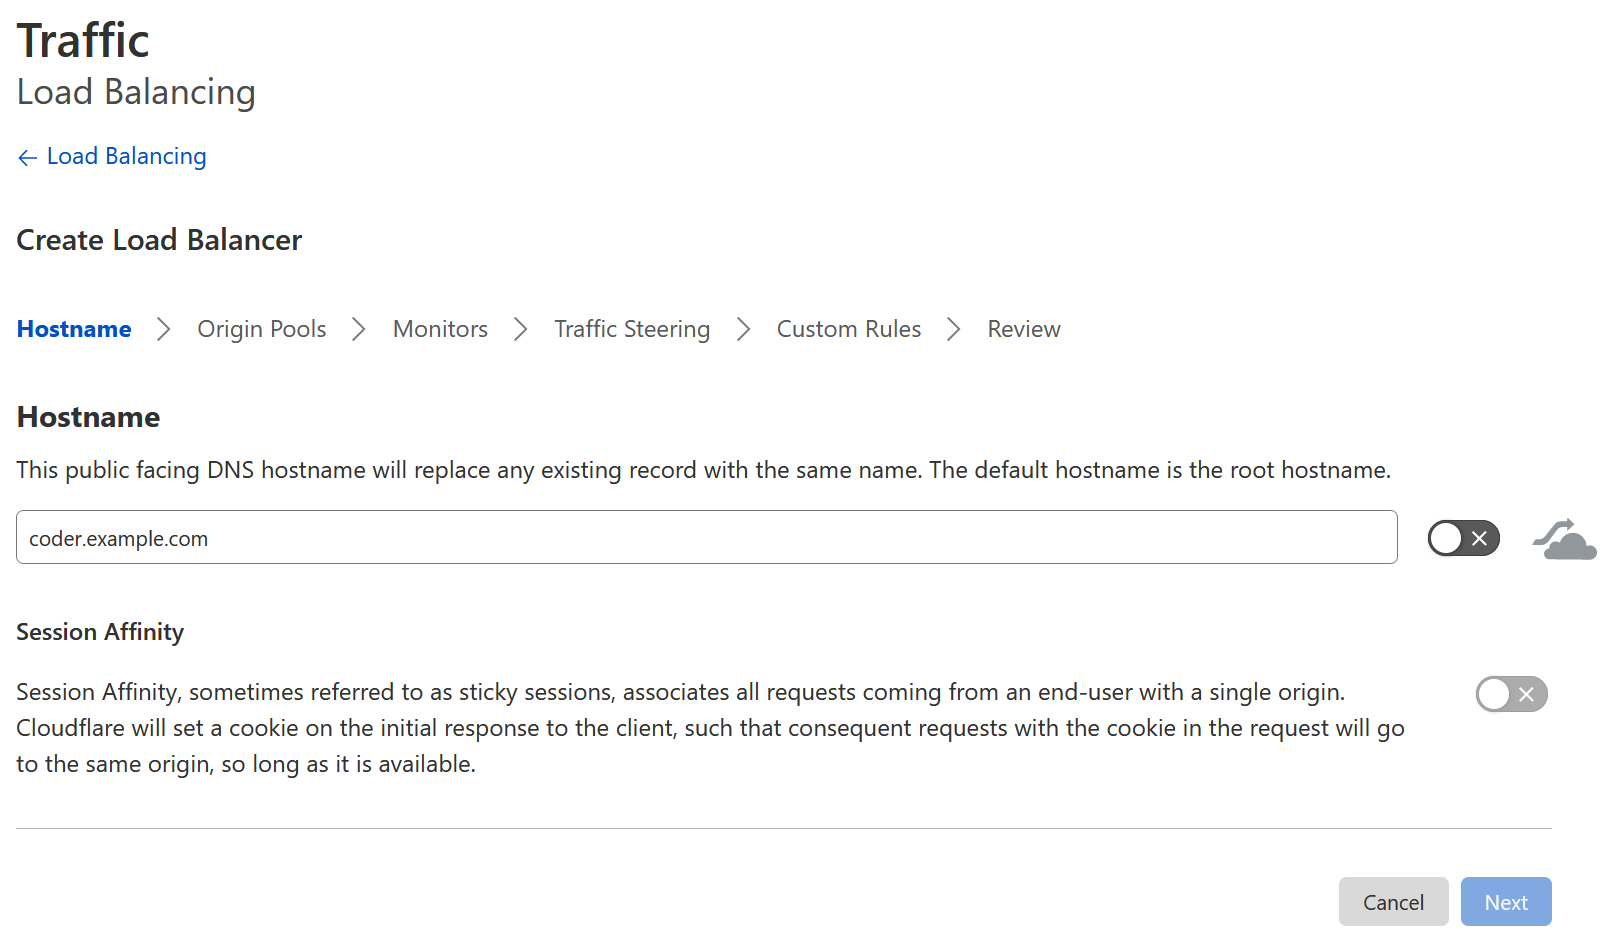
7. **Optional:** Disable Cloudflare proxying by **unchecking** the orange cloud. We recommend disabling Cloudflare proxying when using satellites, since proxying adds additional hops that will increase latency.
8. Click **Next** to proceed.
9. For the primary deployment and _each_ satellite deployment, do the following steps:
1. Click **\+ Create an Origin Pool**.
2. Set the **Pool Name** and **Pool Description**.
3. Specify a single origin with **Origin Address** set to the hostname or IP address of the deployment. Then, set the **Weight** to **1**.
4. Click **Configure co-ordinates for Proximity Steering** and drag the marker to roughly where the deployment is located geographically.
5. Click **Save**.
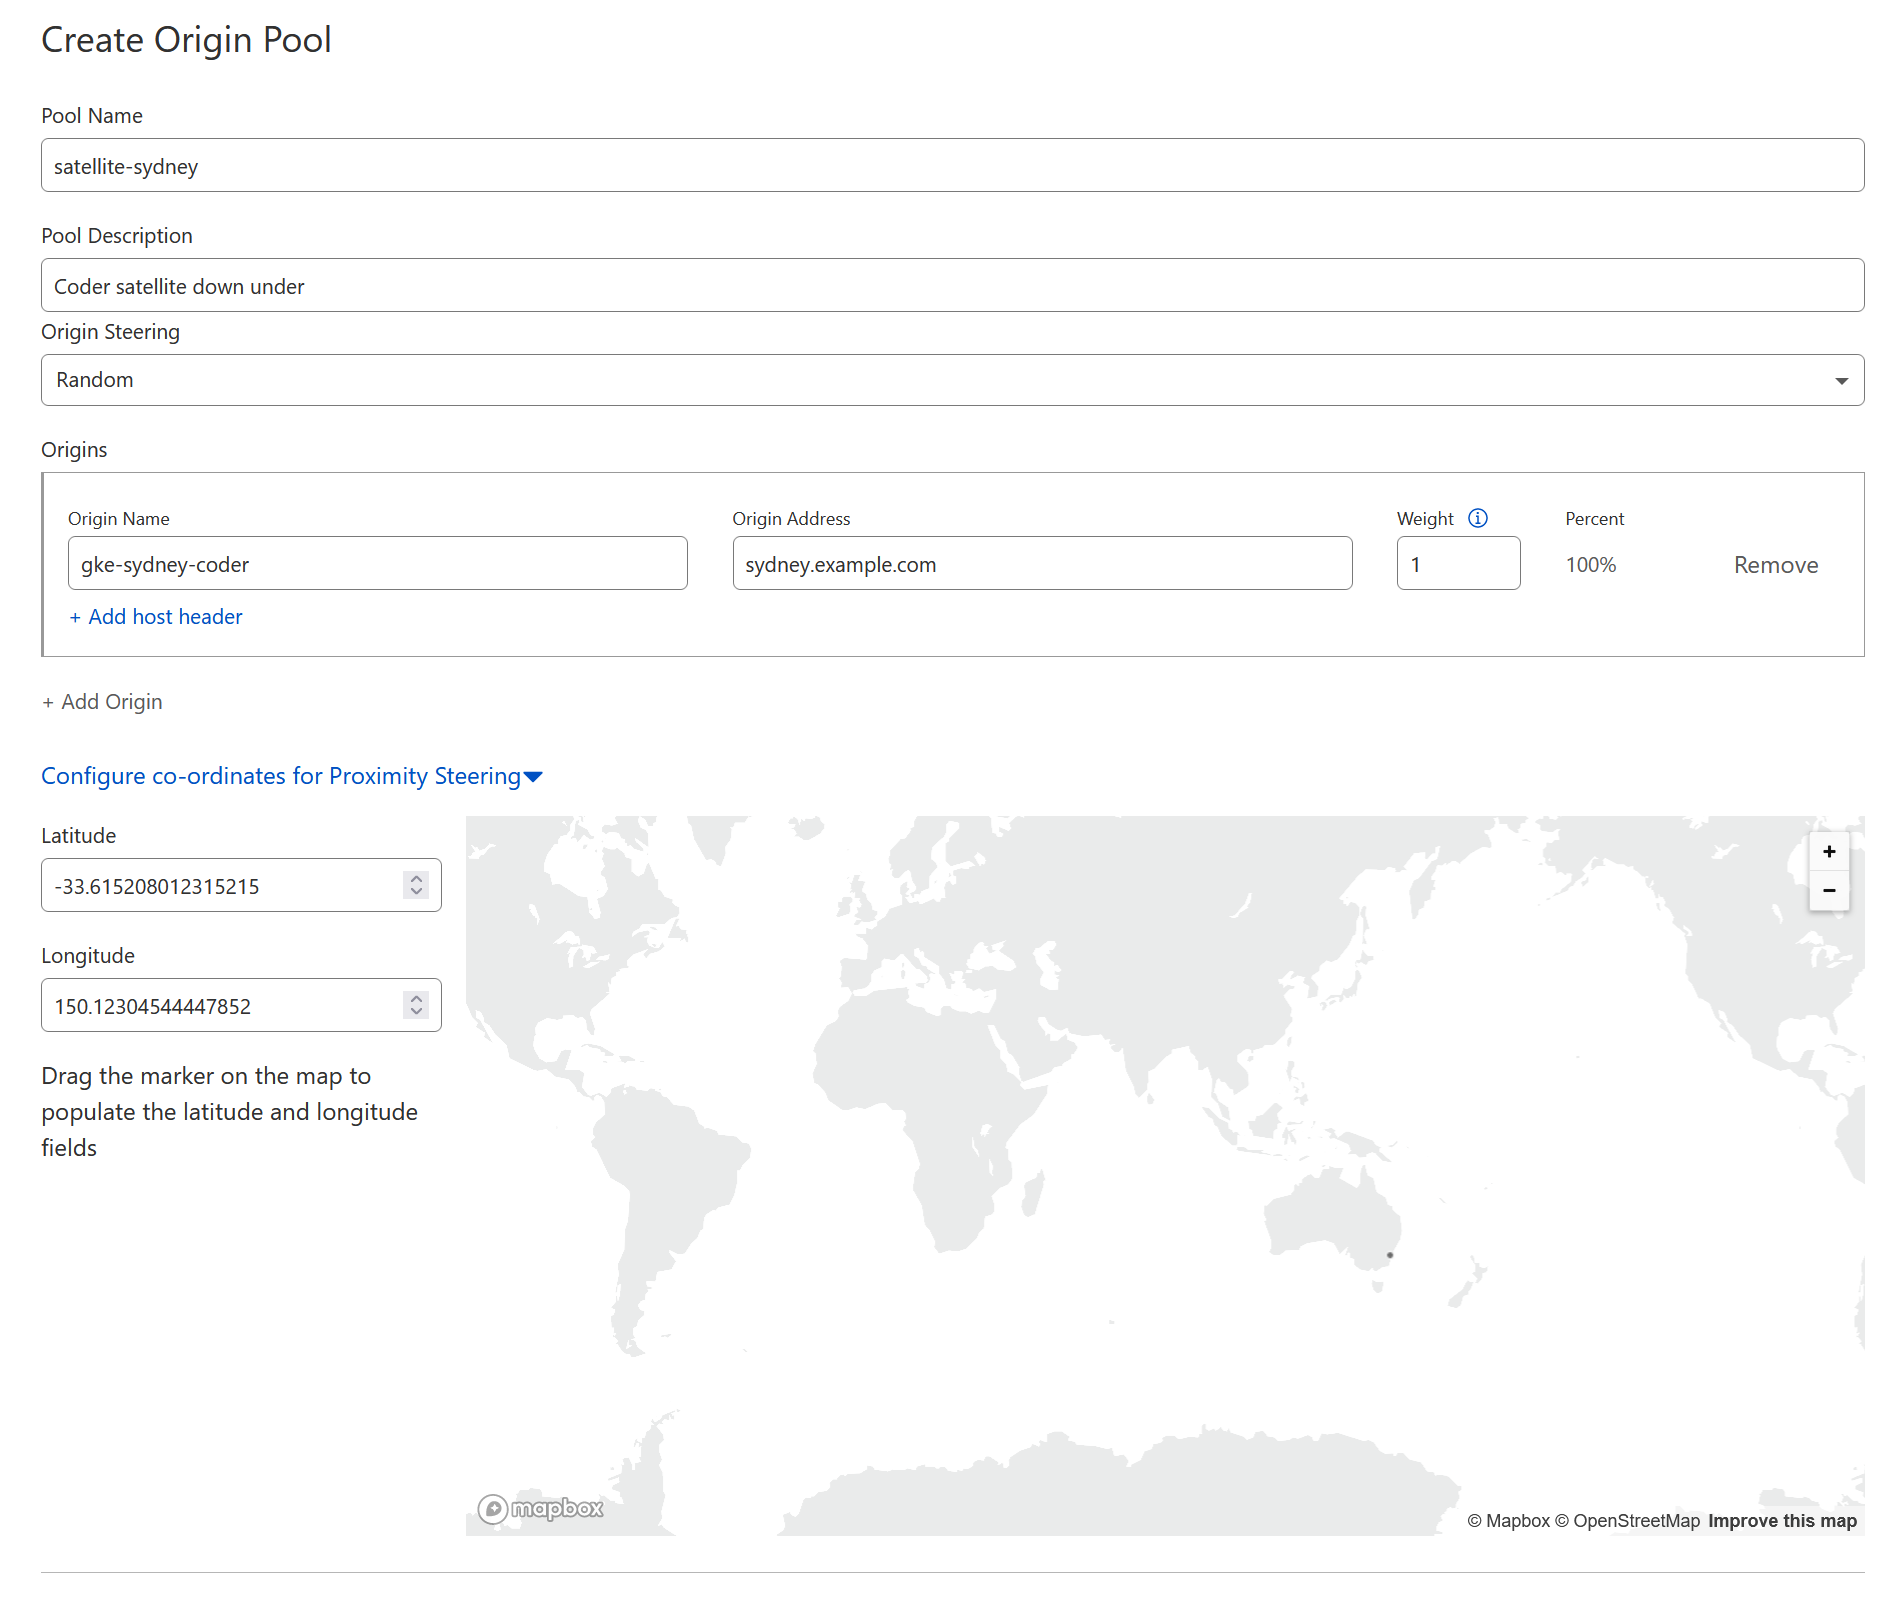
10. Once you have completed the above steps for the primary and each satellite deployment, ensure that all origin pools have been assigned to the load balancer.
11. Set the **Fallback Pool** to your primary deployment's origin pool.
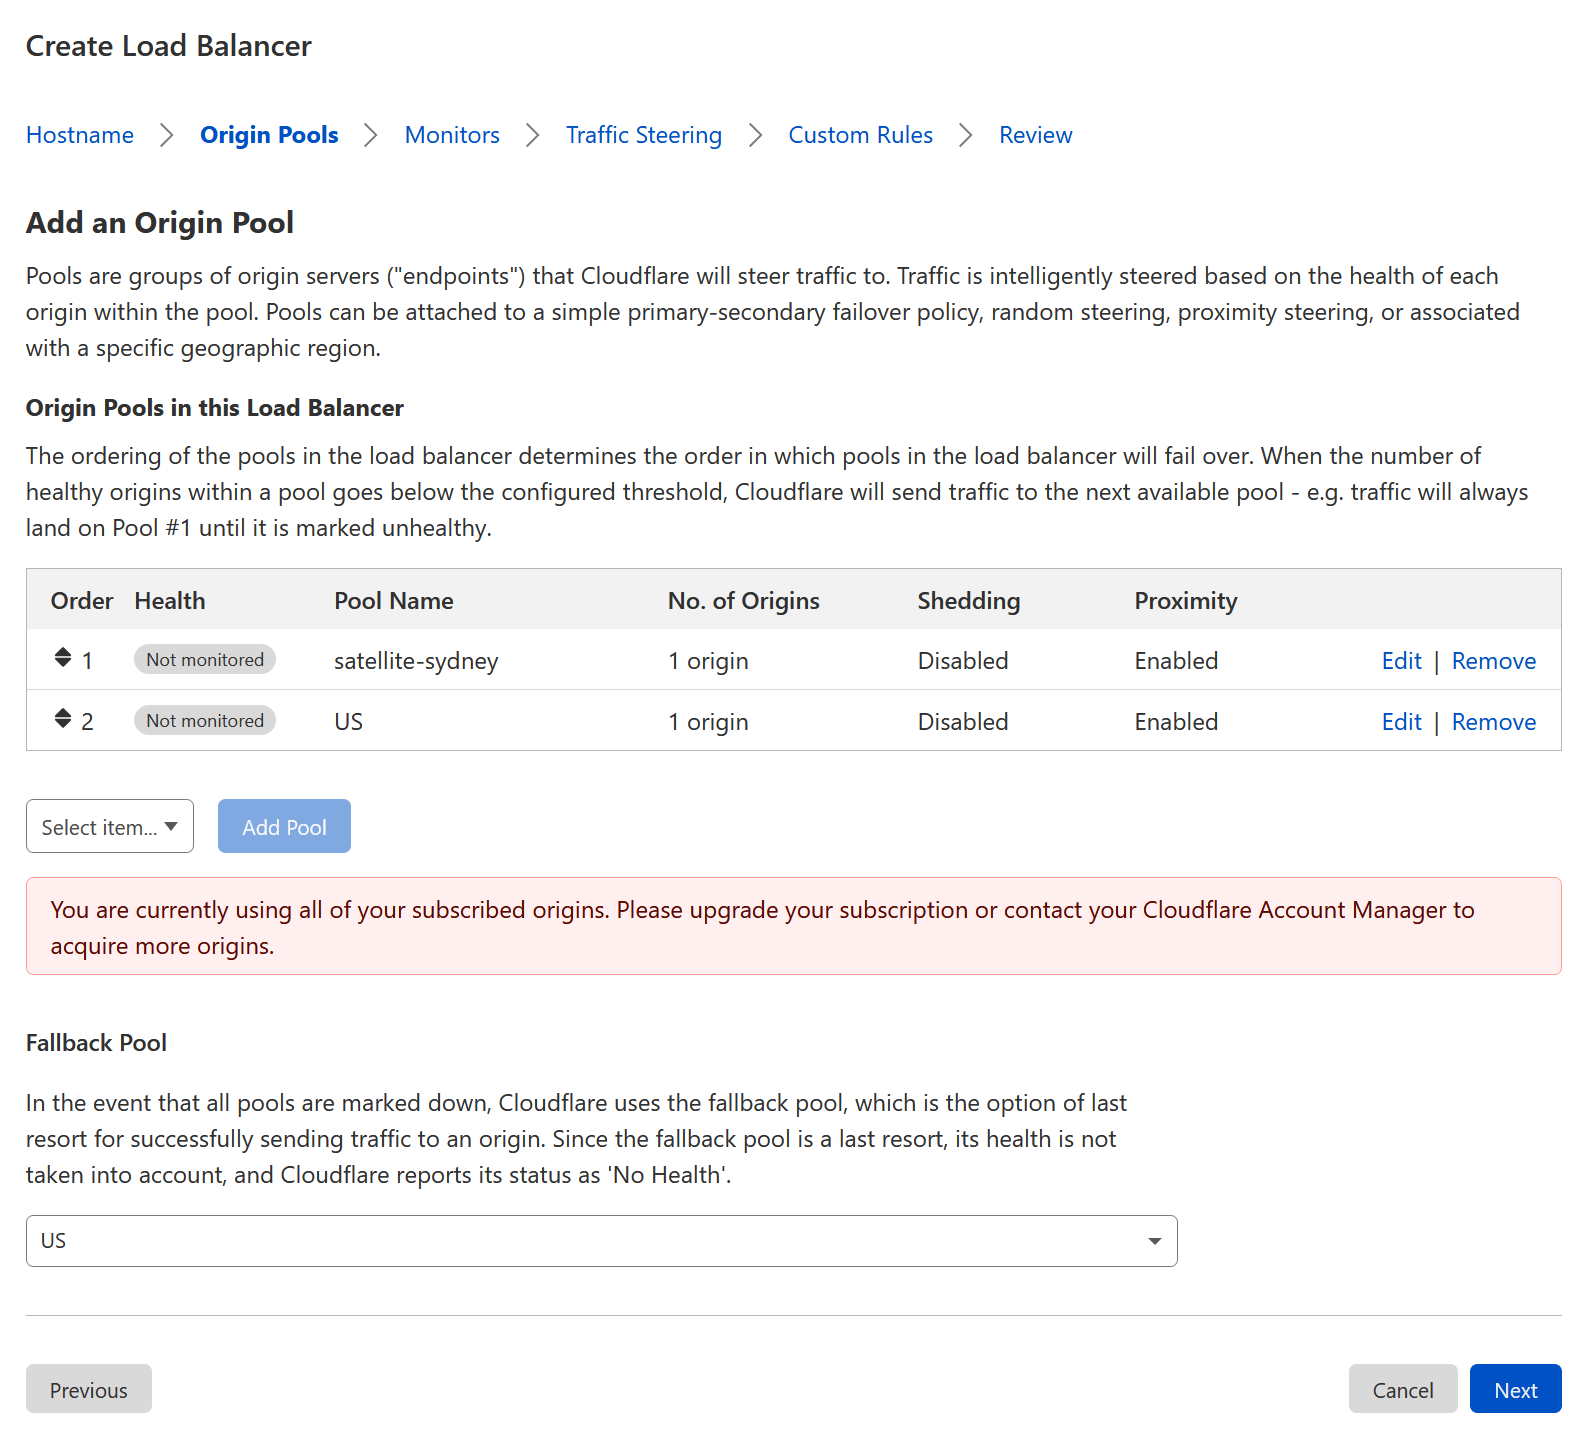
12. Click **Next** until you reach the **Traffic Steering** step.
13. Set the traffic steering policy to **Proximity steering**.
14. Click **Next** until you reach the **Review** step.
15. Review your changes; then, click **Save and Deploy**.
##### On this page
---
# GPU acceleration | Coder v1 Docs
[Home](https://coder.com/docs/v1 "Home")
[Admin](https://coder.com/docs/v1/admin "Admin")
[Workspace management](https://coder.com/docs/v1/admin/workspace-management "Workspace management")
GPU acceleration
Graphical processing units (GPUs) are useful with compute-intensive workloads, such as those involved with data science/machine learning projects.
You can allocate GPUs to workspaces once a site manager configures and enables this feature. Enabling GPU acceleration requires that you've configured your Kubernetes cluster and [scheduled GPUs](https://kubernetes.io/docs/tasks/manage-gpus/scheduling-gpus/)
. For instructions on how to schedule GPUs with your specific cloud vendor, see:
* [Amazon Elastic Container Service](https://docs.aws.amazon.com/AmazonECS/latest/developerguide/ecs-gpu.html)
* [Azure Kubernetes Service](https://docs.microsoft.com/en-us/azure/aks/gpu-cluster)
* [Google Kubernetes Engine](https://cloud.google.com/kubernetes-engine/docs/how-to/gpus)
Once your Kubernetes cluster has been configured, you can enable GPUs in Coder.
To do so, go to **Manage** > **Admin**. On the **Infrastructure** tab, find the **GPU Vendor** setting, and change it to the GPU vendor of choice (either **AMD** or **Nvidia**). Click **Save Vendor**.
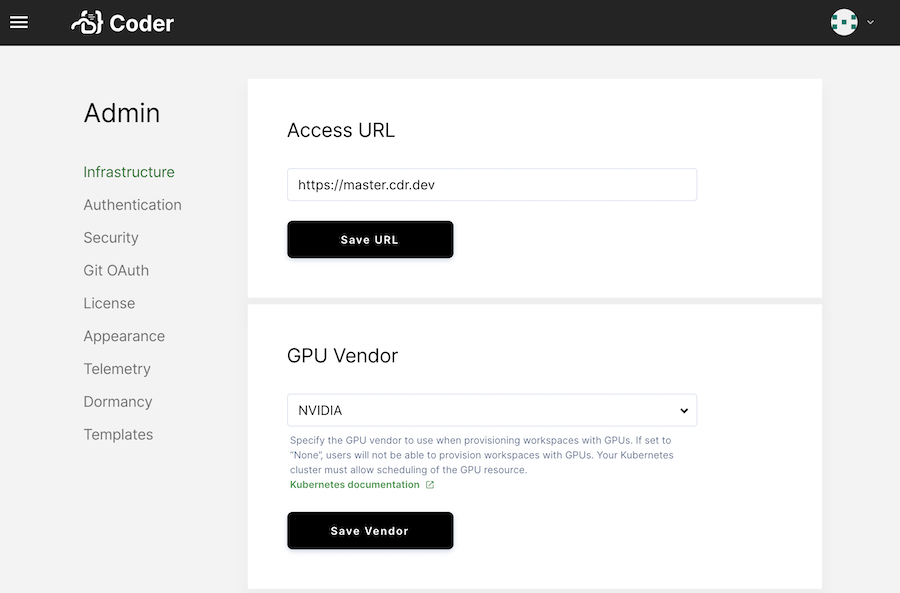
---
# Self-contained workspace builds | Coder v1 Docs
[Home](https://coder.com/docs/v1 "Home")
[Admin](https://coder.com/docs/v1/admin "Admin")
[Workspace management](https://coder.com/docs/v1/admin/workspace-management "Workspace management")
Self-contained workspace builds
Currently, there are two ways in which the workspace boot sequence can occur:
1. Remotely: Coder uploads assets (including the Coder agent, code-server, and JetBrains Projector) from `coderd` to a workspace.
2. Self-contained: workspaces control the boot sequence internally; the workspace downloads assets from `coderd`. This requires `curl` to be available in the image.
Beginning with v1.30.0, the default is **self-contained workspace builds**, though site managers can toggle this feature off and opt for remote builds instead.
To toggle self-contained workspace builds:
1. Log into Coder.
2. Go to Manage > Admin.
3. On the Infrastructure page, scroll down to **Workspace container runtime**.
4. Under **Enable self-contained workspace builds**, flip the toggle to **On** or **Off** as required.
5. Click **Save workspaces**.
> Build errors are typically more verbose for remote builds than with self-contained builds.
[](https://coder.com/docs/v1/admin/workspace-management/self-contained-builds#troubleshooting)
Troubleshooting
--------------------------------------------------------------------------------------------------------------
In certain cases, your workspace may not trust the `coderd` TLS certificate. This will result in the error below:
`` `stream logs from workspace: Failed to create Container-based Virtual Machine` ``
To resolve this, you will need to copy the `coderd` TLS certificate into your Docker image's certificate trust store. Below are examples for doing so, for the major distributions:
### [](https://coder.com/docs/v1/admin/workspace-management/self-contained-builds#debian-and-ubuntu-distributions)
Debian and Ubuntu distributions
`` `RUN apt-get install -y ca-certificates COPY my-cert.pem /usr/local/share/ca-certificates/my-cert.pem RUN update-ca-certificates` ``
### [](https://coder.com/docs/v1/admin/workspace-management/self-contained-builds#centos-fedora-redhat-distributions)
CentOS, Fedora, RedHat distributions
`` `RUN yum install ca-certificates && update-ca-trust force-enable COPY my-cert.pem /etc/pki/ca-trust/source/anchors/ RUN update-ca-trust extract` ``
---
# Extensions | Coder v1 Docs
[Home](https://coder.com/docs/v1 "Home")
[Admin](https://coder.com/docs/v1/admin "Admin")
[Workspace management](https://coder.com/docs/v1/admin/workspace-management "Workspace management")
Extensions
You can customize VS Code with extensions, which allow you to add new features and functionality (e.g., languages, debuggers, tools), themes, and more.
[](https://coder.com/docs/v1/admin/workspace-management/extensions#the-extension-marketplace)
The extension marketplace
-----------------------------------------------------------------------------------------------------------------------
You can find the extensions available to you in the extension marketplace. Coder enables access to the marketplace by default and requires no unique configuration on your part. You can, however, choose between two types of extensions marketplaces by going to **Manage** > **Admin** > **Infrastructure**, then scrolling down to **Extensions**:
* **Public**: the [Open VSX public extension marketplace](https://github.com/eclipse/openvsx/wiki/Using-Open-VSX-in-VS-Code)
, which Coder uses by default
* **Custom**: your organization's custom VS Code extension marketplace API, accessed via the URL you provide
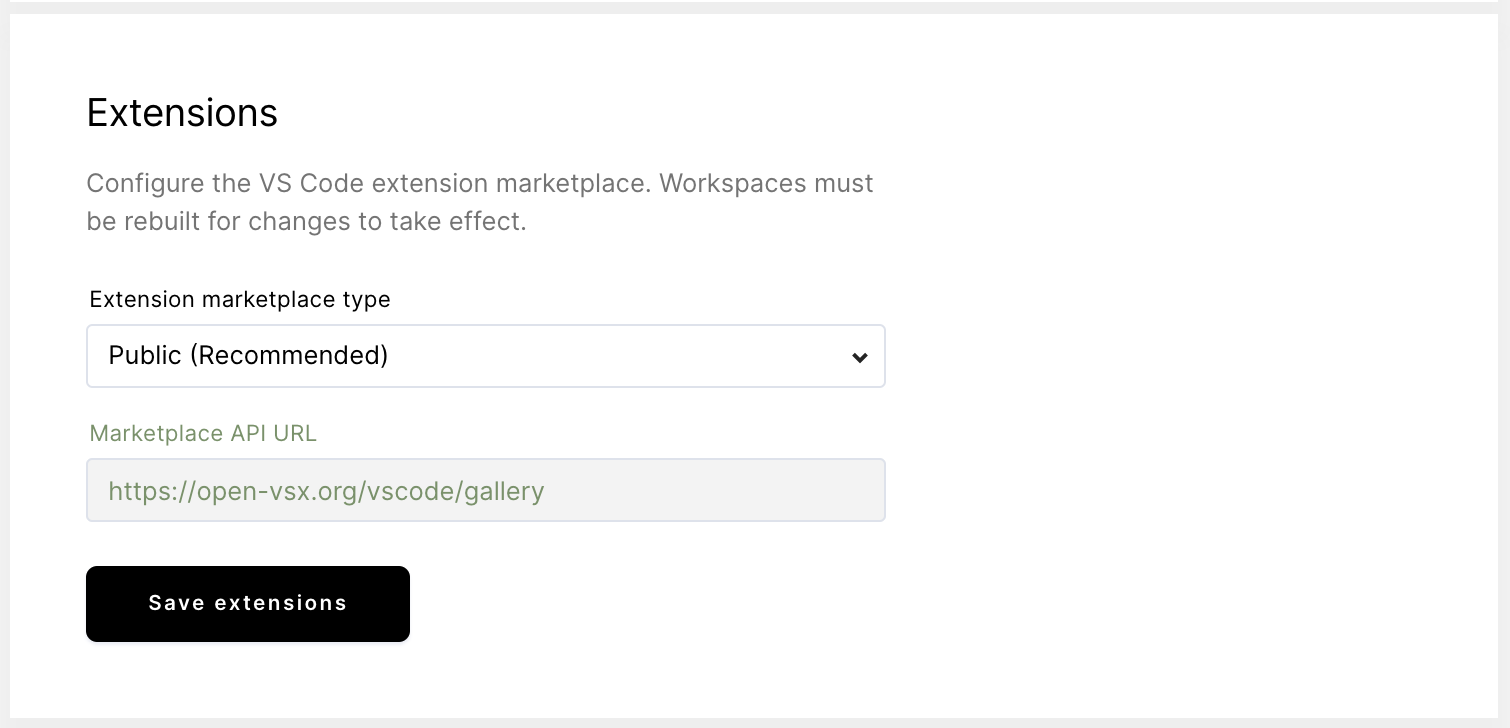
[](https://coder.com/docs/v1/admin/workspace-management/extensions#air-gapped-marketplaces)
Air-gapped marketplaces
-------------------------------------------------------------------------------------------------------------------
If you run Coder in an air-gapped workspace, the public VS Code marketplace is inaccessible to end-users. Using the **Custom** configuration option, you can point Coder to an air-gapped instance of a marketplace.
Coder offers an open-source project [code-marketplace](https://github.com/coder/code-marketplace)
to serve air-gapped VS Code extensions.
[OpenVSX](https://github.com/eclipse/openvsx)
is another open-source project to serve VS Code extensions.
##### On this page
---
# coder satellites | Coder v1 Docs
[Home](https://coder.com/docs/v1 "Home")
[Command line](https://coder.com/docs/v1/cli "Command line")
[Reference](https://coder.com/docs/v1/cli/reference/coder "Reference")
coder satellites
Interact with Coder satellite deployments
### [](https://coder.com/docs/v1/cli/reference/coder_satellites#synopsis)
Synopsis
Perform operations on the Coder satellites for the platform.
### [](https://coder.com/docs/v1/cli/reference/coder_satellites#options)
Options
`` `-h, --help help for satellites` ``
### [](https://coder.com/docs/v1/cli/reference/coder_satellites#options-inherited-from-parent-commands)
Options inherited from parent commands
`` `-v, --verbose show verbose output` ``
### [](https://coder.com/docs/v1/cli/reference/coder_satellites#see-also)
SEE ALSO
* [coder](https://coder.com/docs/v1/cli/reference/coder)
- coder provides a CLI for working with an existing Coder installation
* [coder satellites create](https://coder.com/docs/v1/cli/reference/coder_satellites_create)
- create a new satellite.
* [coder satellites ls](https://coder.com/docs/v1/cli/reference/coder_satellites_ls)
- list satellites.
* [coder satellites rm](https://coder.com/docs/v1/cli/reference/coder_satellites_rm)
- remove a satellite.
---
# Local deployment | Coder v1 Docs
[Home](https://coder.com/docs/v1 "Home")
[Setup](https://coder.com/docs/v1/setup "Setup")
[Coder for Docker](https://coder.com/docs/v1/setup/coder-for-docker "Coder for Docker")
Local deployment
Coder for Docker allows you to deploy Coder to any machine on which Docker runs quickly.
[](https://coder.com/docs/v1/setup/coder-for-docker/local#prerequisites)
Prerequisites
--------------------------------------------------------------------------------------
Coder for Docker works with the following platforms:
* macOS 10.10+ with [Docker Desktop 20.10](https://www.docker.com/products/docker-desktop)
**Note**: If your computer uses an [Apple silicon](https://en.wikipedia.org/wiki/Apple_silicon)
processor, you will need to install [Rosetta 2](https://support.apple.com/en-us/HT211861)
to emulate the x86\_64 instruction set. To install it, run the following command in a terminal window:
`` `softwareupdate --install-rosetta` ``
* Ubuntu Linux 20.04 (Focal Fossa) with Docker Community Edition 20.10
* Windows 11 with [Docker Desktop 20.10](https://www.docker.com/products/docker-desktop)
.
**Note**: Coder for Docker requires Windows Subsystem for Linux at this time.
> At this time, Coder publishes builds for the x86-64 architecture only and does _not_ support Arm-based processors, such Apple silicon or Amazon Graviton instances.
[](https://coder.com/docs/v1/setup/coder-for-docker/local#installing-coder-for-docker)
Installing Coder for Docker
------------------------------------------------------------------------------------------------------------------
1. Launch Docker Desktop.
2. If you've previously installed Coder, run `sudo rm -rf ~/.coder` in the terminal. **Note:** This command erases your Coder database and settings, so only run this if you'd like a clean install.
3. In the terminal, run the following to download the resources you need, including the images, and set up your Coder deployment (if you're using the terminal in Docker Desktop, omit the slashes and run as a single-line command):
`` `docker run --rm -it \ -p 7080:7080 \ -v /var/run/docker.sock:/var/run/docker.sock \ -v ~/.coder:/var/run/coder \ codercom/coder:1.35.0` ``
> Please check the [changelog for the latest Coder v1 release](https://coder.com/docs/coder/latest/changelog)
> to add to the `docker run` command.
When this process is complete, Coder will print the URL you can use to access your deployment, as well as the admin credentials you'll need to log in:
`` `> Welcome to Coder! 👋 > Head to http://localhost:7080 to get started! > 🙋 Username: admin > 🔑 Password: 5h...7n` ``
Make a note of these values, because you will need these in the subsequent step.
4. Launch a web browser and navigate to the URL provided by Coder (e.g., `http://localhost:7080`). Log in using the credentials Coder provided.
5. [Create a workspace](https://coder.com/docs/v1/setup/workspaces/create)
using one of the **Packaged** images by clicking on **New workspace** in the center of the UI.
At this point, you're ready to use your workspace. See our [getting started guide](https://coder.com/docs/v1/setup/getting-started/docker)
for detailed instructions on getting your first workspace up and running.
[](https://coder.com/docs/v1/setup/coder-for-docker/local#usage-notes)
Usage notes
----------------------------------------------------------------------------------
When running, Docker Desktop displays both your Coder deployment and your workspace.
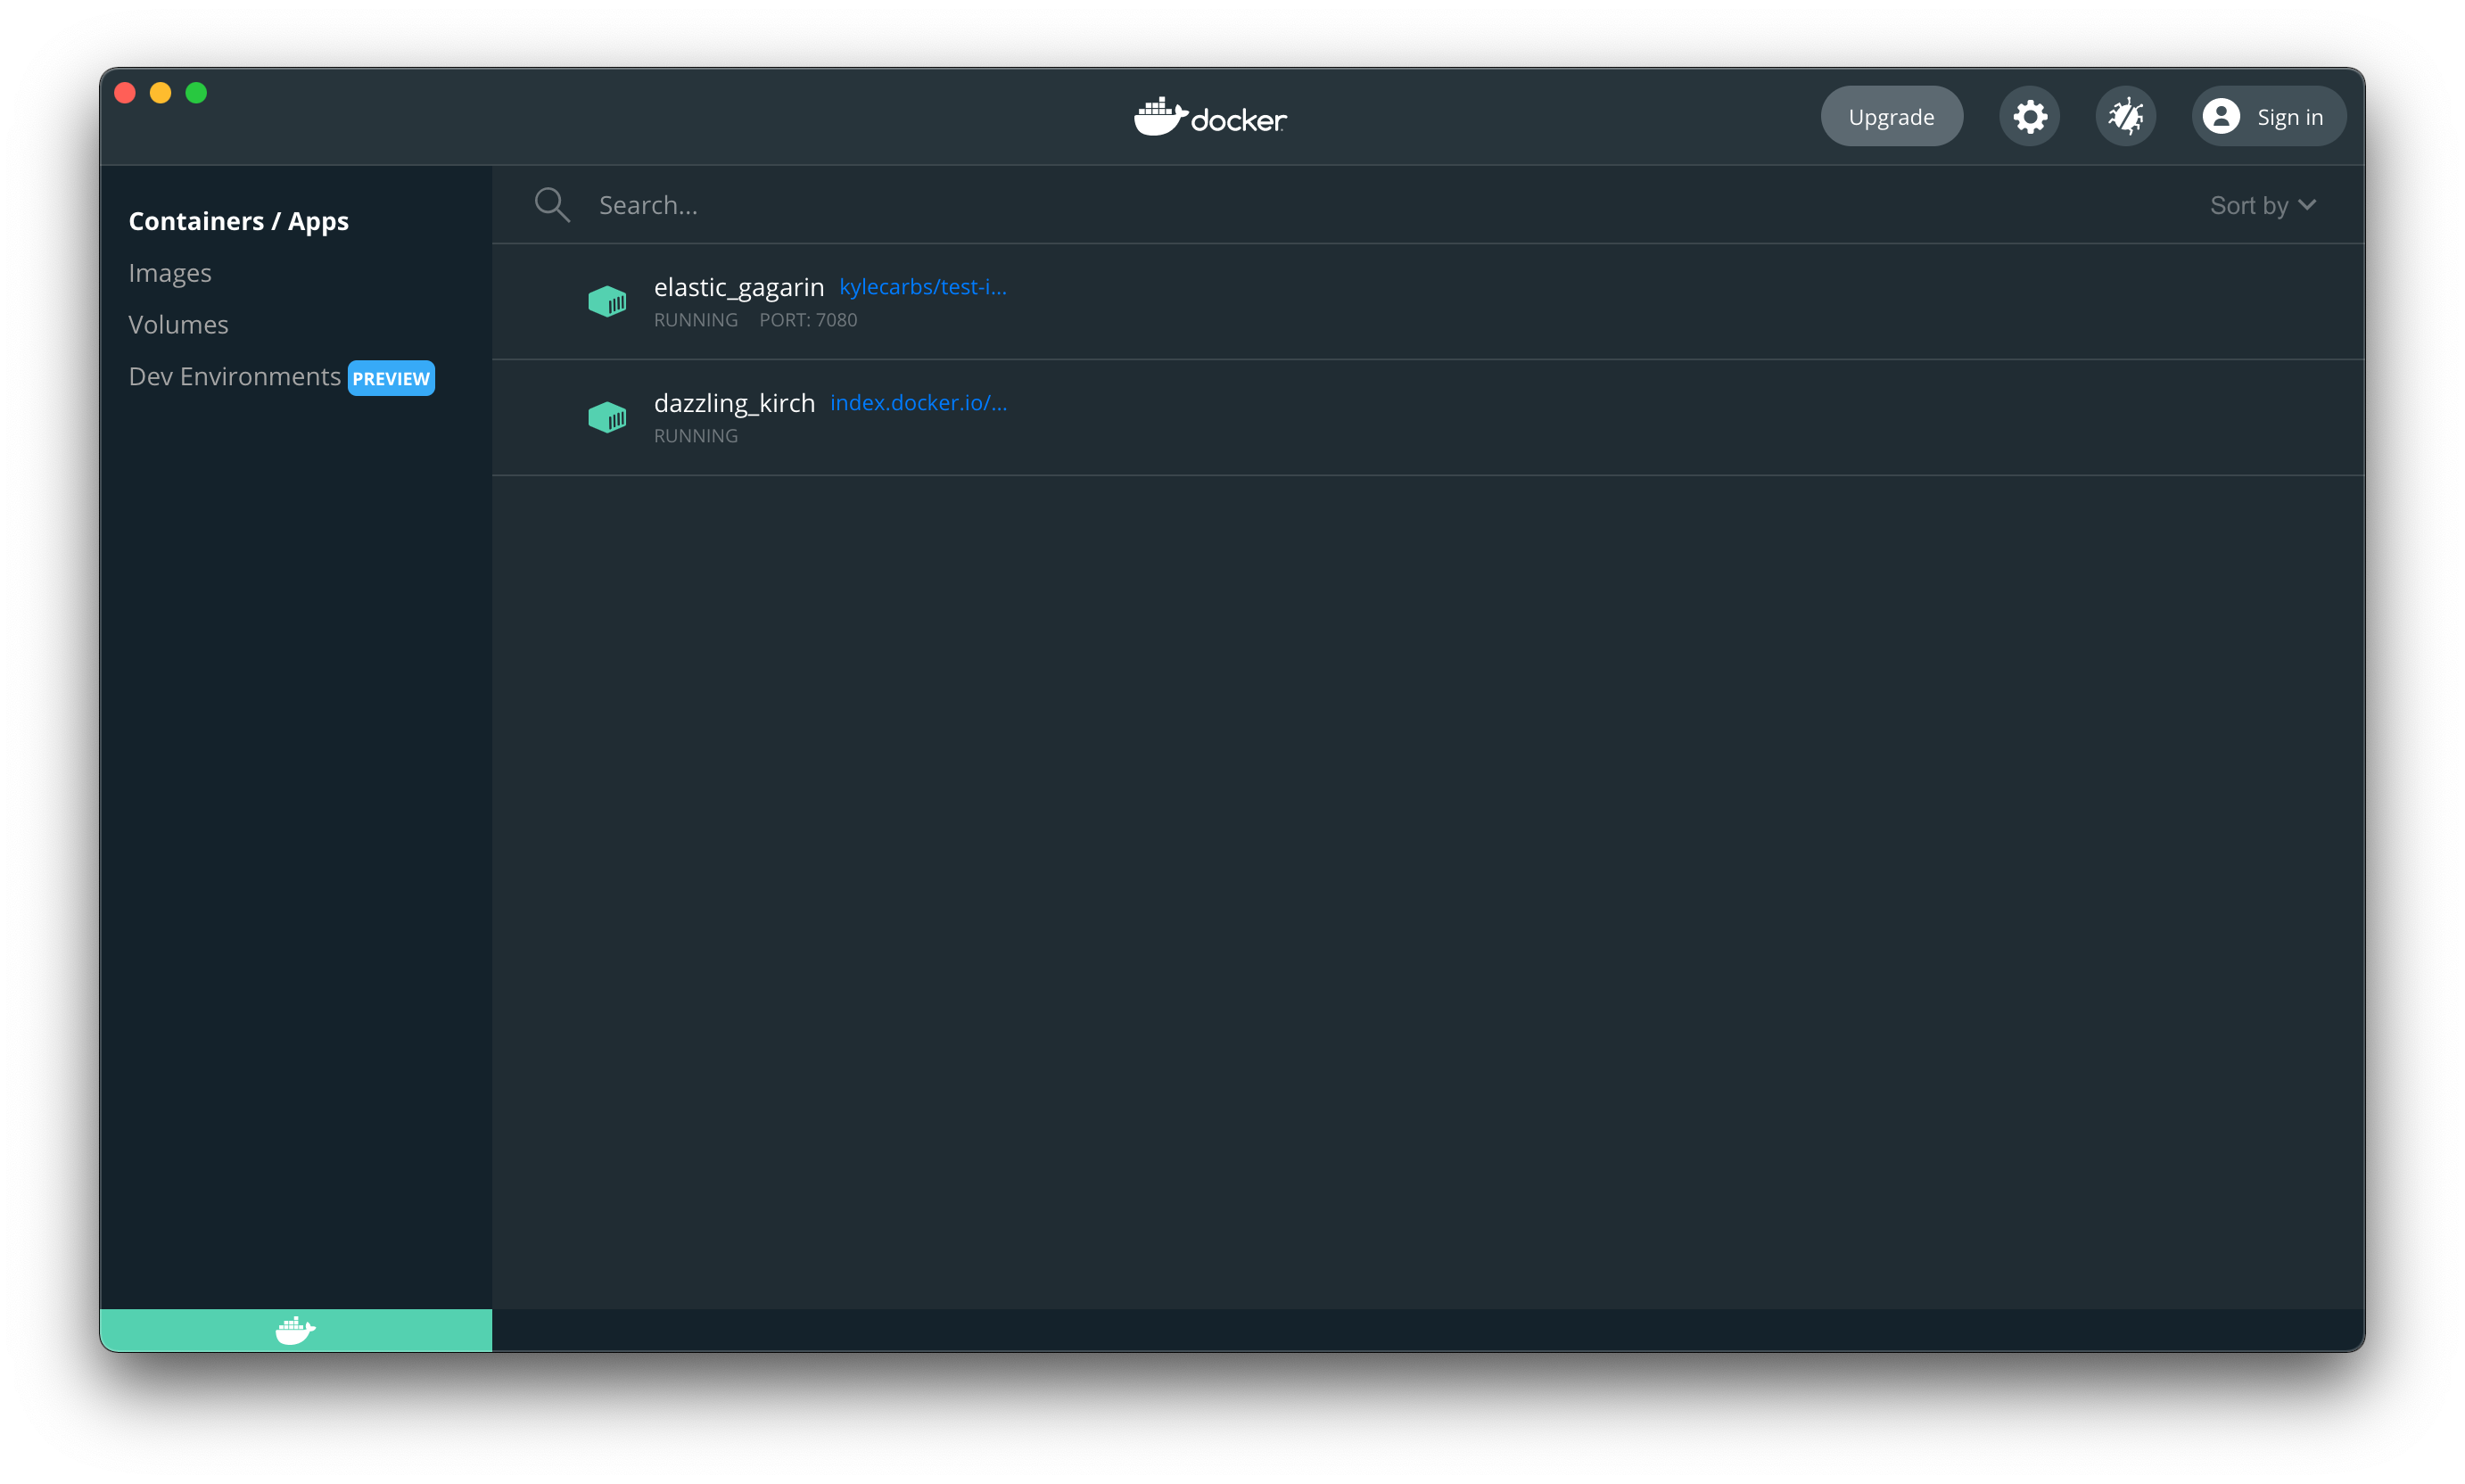
You can also view runtime information (i.e., API calls) in the console where you started your deployment:
[](https://coder.com/docs/v1/setup/coder-for-docker/local#dev-urls)
Dev URLs
----------------------------------------------------------------------------
To use a dev URL, set an environment variable when issuing the `docker run` command to start your deployment (be sure to replace the placeholder URL):
`` `DEVURL_HOST="*.mycompany.com"` ``
For example:
`` `docker run --rm -it -p 7080:7080 -v /var/run/docker.sock:/var/run/docker.sock -v ~/.coder:/var/run/coder -e DEVURL_HOST="*.mycompany.com" codercom/coder:1.33.3` ``
[](https://coder.com/docs/v1/setup/coder-for-docker/local#use-an-external-postgresql-database)
Use an external PostgreSQL database
----------------------------------------------------------------------------------------------------------------------------------
Coder for Docker comes with an embedded database, but you can [opt for an external database](https://coder.com/docs/v1/setup/coder-for-docker/postgres)
instead.
[](https://coder.com/docs/v1/setup/coder-for-docker/local#admin-password)
Admin password
----------------------------------------------------------------------------------------
If you want to set (or reset) your admin password, use the `-e SUPER_ADMIN_PASSWORD=` flag with the `docker run` command.
[](https://coder.com/docs/v1/setup/coder-for-docker/local#scaling)
Scaling
--------------------------------------------------------------------------
Coder for Docker is limited by the resources of the machine on which it runs. We recommend using Kubernetes or AWS EC2 providers if you would like automatic multi-machine scaling.
For organizations, we recommend one Docker host per team of 5-10 developers.
[](https://coder.com/docs/v1/setup/coder-for-docker/local#docker-compose)
Docker Compose
----------------------------------------------------------------------------------------
You can also use [Docker Compose](https://docs.docker.com/compose/)
to run Coder in Docker.
To do so:
1. Create a new directory (we recommend something like `c4d`, but you can name it whatever you'd like)
2. Within the newly created directory, create a file named `docker-compose.yml` that includes the following:
`` `version: "3.5" services: coder: image: docker.io/codercom/coder:1.33.3 container_name: coderd restart: unless-stopped ports: - 7080:7080/tcp volumes: - /var/run/docker.sock:/var/run/docker.sock - ${HOME}/.coder:/var/run/coder` ``
By default, Coder will create a postgres database. If you'd like to use postgres in a separate container, use the example below:
`` `version: "3.5" services: coder: image: docker.io/codercom/coder:1.33.3 container_name: coderd restart: unless-stopped ports: - 7080:7080/tcp networks: - coder volumes: - /var/run/docker.sock:/var/run/docker.sock - ${HOME}/.coder:/var/run/coder environment: DB_EMBEDDED: "" DB_HOST: "db" DB_PORT: 5432 DB_USER: postgres DB_PASSWORD: "password" DB_NAME: postgres DB_SSL_MODE: disable db: container_name: postgres image: postgres restart: unless-stopped ports: - 5432:5432/tcp networks: - coder environment: POSTGRES_PASSWORD: password volumes: - db-data:/var/lib/postgresql/data networks: coder: name: coder_network volumes: db-data: {}` ``
1. In the terminal, navigate into the folder you created and run:
`` `docker-compose up -d` ``
Coder will now run in the background.
For more detailed information on the Docker Compose file, please see [Docker's docs](https://docs.docker.com/compose/compose-file/compose-file-v3/)
.
[](https://coder.com/docs/v1/setup/coder-for-docker/local#coder-templates)
Coder templates
------------------------------------------------------------------------------------------
You can use [templates](https://coder.com/docs/coder/latest/workspaces/workspace-templates/templates#workspace-template-sample)
with Coder for Docker to define how Coder builds your workspaces.
To use a standard Coder workspace template for Docker:
1. Change the `workspace.type` and`workspace.specs` to `docker`
2. Remove any Kubernetes-specific `workspace.specs.kubernetes values` (e.g., `cpu`, `memory`, `gpu`)
Your configuration file will look something like the following:
`` `version: 0.2 workspace: type: docker specs: docker: image: value: index.docker.io/codercom/enterprise-intellij:ubuntu container-based-vm: value: false configure: start: ...` ``
[](https://coder.com/docs/v1/setup/coder-for-docker/local#ensure-that-user-ips-show-up-in-the-audit-logs)
Ensure that user IPs show up in the audit logs
--------------------------------------------------------------------------------------------------------------------------------------------------------
If you would like users' IP addresses to show up in the audit logs (i.e., identify the originating client IP address, regardless of whether they're connecting through a proxy, load balancer, or other such service), use the following flags with the `docker run` command:
`` `-e "PROXY_TRUSTED_HEADERS=X-Forwarded-For" -e PROXY_TRUSTED_ORIGINS=172.17.0.0/16` ``
[](https://coder.com/docs/v1/setup/coder-for-docker/local#workspace-providers)
Workspace providers
--------------------------------------------------------------------------------------------------
If you're interested in using Docker as a workspace provider, please see our [deployment instructions](https://coder.com/docs/v1/admin/workspace-providers/deployment/docker)
.
[](https://coder.com/docs/v1/setup/coder-for-docker/local#accessing-the-local-postgresql-database)
Accessing the local PostgreSQL database
------------------------------------------------------------------------------------------------------------------------------------------
To query the local PostgreSQL database using the `psql` [terminal-based front-end](https://www.postgresql.org/docs/13/app-psql.html)
, follow these steps.
1. Run `docker ps` to get the name of the Coder container.
2. Exec into the Coder container and connect to the database.
`` `docker exec -it psql --username=coder --host=0.0.0.0 --port=5433 --dbname=postgres` ``
[](https://coder.com/docs/v1/setup/coder-for-docker/local#known-issues)
Known issues
------------------------------------------------------------------------------------
Currently, Coder for Docker does not support:
* The use of your own TLS certificates. If you'd like to use TLS with Coder for Docker, you'll need to run Coder behind a reverse proxy (e.g., Caddy or NGINX) and terminate TLS at that point. See [our guide](https://coder.com/docs/v1/guides/tls-certificates/docker-tls)
for information.
* Air-gapped deployments/offline installs
##### On this page
---
# coder tokens | Coder v1 Docs
[Home](https://coder.com/docs/v1 "Home")
[Command line](https://coder.com/docs/v1/cli "Command line")
[Reference](https://coder.com/docs/v1/cli/reference/coder "Reference")
coder tokens
manage Coder API tokens for the active user
### [](https://coder.com/docs/v1/cli/reference/coder_tokens#synopsis)
Synopsis
Create and manage API Tokens for authenticating the CLI. Statically authenticate using the token value with the `CODER_TOKEN` and `CODER_URL` workspace variables.
### [](https://coder.com/docs/v1/cli/reference/coder_tokens#options)
Options
`` `-h, --help help for tokens` ``
### [](https://coder.com/docs/v1/cli/reference/coder_tokens#options-inherited-from-parent-commands)
Options inherited from parent commands
`` `-v, --verbose show verbose output` ``
### [](https://coder.com/docs/v1/cli/reference/coder_tokens#see-also)
SEE ALSO
* [coder](https://coder.com/docs/v1/cli/reference/coder)
- coder provides a CLI for working with an existing Coder installation
* [coder tokens create](https://coder.com/docs/v1/cli/reference/coder_tokens_create)
- create generates a new API token and prints it to stdout
* [coder tokens ls](https://coder.com/docs/v1/cli/reference/coder_tokens_ls)
- show the user's active API tokens
* [coder tokens regen](https://coder.com/docs/v1/cli/reference/coder_tokens_regen)
- regenerate an API token by its unique ID and print the new token to stdout
* [coder tokens rm](https://coder.com/docs/v1/cli/reference/coder_tokens_rm)
- remove an API token by its unique ID
---
# coder users ls | Coder v1 Docs
[Home](https://coder.com/docs/v1 "Home")
[Command line](https://coder.com/docs/v1/cli "Command line")
[Reference](https://coder.com/docs/v1/cli/reference/coder "Reference")
[coder users](https://coder.com/docs/v1/cli/reference/coder_users "coder users")
coder users ls
list all user accounts
`` `coder users ls [flags]` ``
### [](https://coder.com/docs/v1/cli/reference/coder_users_ls#examples)
Examples
`` `coder users ls -o json coder users ls -o json | jq .[] | jq -r .email` ``
### [](https://coder.com/docs/v1/cli/reference/coder_users_ls#options)
Options
`` `-h, --help help for ls -o, --output string human | json (default "human")` ``
### [](https://coder.com/docs/v1/cli/reference/coder_users_ls#options-inherited-from-parent-commands)
Options inherited from parent commands
`` `-v, --verbose show verbose output` ``
### [](https://coder.com/docs/v1/cli/reference/coder_users_ls#see-also)
SEE ALSO
* [coder users](https://coder.com/docs/v1/cli/reference/coder_users)
- Interact with Coder user accounts
---
# coder workspaces create-from-config | Coder v1 Docs
[Home](https://coder.com/docs/v1 "Home")
[Command line](https://coder.com/docs/v1/cli "Command line")
[Reference](https://coder.com/docs/v1/cli/reference/coder "Reference")
[coder workspaces](https://coder.com/docs/v1/cli/reference/coder_workspaces "coder workspaces")
coder workspaces create-from-config
create a new workspace from a template
### [](https://coder.com/docs/v1/cli/reference/coder_workspaces_create-from-config#synopsis)
Synopsis
Create a new Coder workspace using a workspace template.
`` `coder workspaces create-from-config [flags]` ``
### [](https://coder.com/docs/v1/cli/reference/coder_workspaces_create-from-config#examples)
Examples
`` `# create a new workspace from git repository coder workspaces create-from-config --name="dev-env" --repo-url https://github.com/cdr/m --ref my-branch coder workspaces create-from-config --name="dev-env" --filepath coder.yaml` ``
### [](https://coder.com/docs/v1/cli/reference/coder_workspaces_create-from-config#options)
Options
`` `-f, --filepath string path to local template file. --follow follow buildlog after initiating rebuild -h, --help help for create-from-config --name string name of the workspace to be created -o, --org string name of the organization the workspace should be created under. --provider string name of Workspace Provider with which to create the workspace --ref string git reference to pull template from. May be a branch, tag, or commit hash. (default "master") -r, --repo-url string URL of the git repository to pull the config from. Config file must live in '.coder/coder.yaml'.` ``
### [](https://coder.com/docs/v1/cli/reference/coder_workspaces_create-from-config#options-inherited-from-parent-commands)
Options inherited from parent commands
`` `-v, --verbose show verbose output` ``
### [](https://coder.com/docs/v1/cli/reference/coder_workspaces_create-from-config#see-also)
SEE ALSO
* [coder workspaces](https://coder.com/docs/v1/cli/reference/coder_workspaces)
- Interact with Coder workspaces
---
# coder workspaces create | Coder v1 Docs
[Home](https://coder.com/docs/v1 "Home")
[Command line](https://coder.com/docs/v1/cli "Command line")
[Reference](https://coder.com/docs/v1/cli/reference/coder "Reference")
[coder workspaces](https://coder.com/docs/v1/cli/reference/coder_workspaces "coder workspaces")
coder workspaces create
create a new workspace.
### [](https://coder.com/docs/v1/cli/reference/coder_workspaces_create#synopsis)
Synopsis
Create a new Coder workspace.
`` `coder workspaces create [workspace_name] [flags]` ``
### [](https://coder.com/docs/v1/cli/reference/coder_workspaces_create#examples)
Examples
`` `# create a new workspace using default resource amounts coder workspaces create my-new-workspace --image ubuntu coder workspaces create my-new-powerful-workspace --cpu 12 --disk 100 --memory 16 --image ubuntu` ``
### [](https://coder.com/docs/v1/cli/reference/coder_workspaces_create#options)
Options
`` `--container-based-vm deploy the workspace as a Container-based VM -c, --cpu float32 number of cpu cores the workspace should be provisioned with. -d, --disk int GB of disk storage a workspace should be provisioned with. --enable-autostart automatically start this workspace at your preferred time. --follow follow buildlog after initiating rebuild -g, --gpus int number GPUs a workspace should be provisioned with. -h, --help help for create -i, --image string name of the image to base the workspace off of. -m, --memory float32 GB of RAM a workspace should be provisioned with. -o, --org string name of the organization the workspace should be created under. --provider string name of Workspace Provider with which to create the workspace -t, --tag string tag of the image the workspace will be based off of. (default "latest") --user string Specify the user whose resources to target. This flag can only be used by admins and managers. Input an email or user id. (default "me")` ``
### [](https://coder.com/docs/v1/cli/reference/coder_workspaces_create#options-inherited-from-parent-commands)
Options inherited from parent commands
`` `-v, --verbose show verbose output` ``
### [](https://coder.com/docs/v1/cli/reference/coder_workspaces_create#see-also)
SEE ALSO
* [coder workspaces](https://coder.com/docs/v1/cli/reference/coder_workspaces)
- Interact with Coder workspaces
---
# coder workspaces edit-from-config | Coder v1 Docs
[Home](https://coder.com/docs/v1 "Home")
[Command line](https://coder.com/docs/v1/cli "Command line")
[Reference](https://coder.com/docs/v1/cli/reference/coder "Reference")
[coder workspaces](https://coder.com/docs/v1/cli/reference/coder_workspaces "coder workspaces")
coder workspaces edit-from-config
change the template a workspace is tracking
### [](https://coder.com/docs/v1/cli/reference/coder_workspaces_edit-from-config#synopsis)
Synopsis
Edit an existing Coder workspace using a workspace template.
`` `coder workspaces edit-from-config [flags]` ``
### [](https://coder.com/docs/v1/cli/reference/coder_workspaces_edit-from-config#examples)
Examples
`` `# edit a new workspace from git repository coder workspaces edit-from-config dev-env --repo-url https://github.com/cdr/m --ref my-branch coder workspaces edit-from-config dev-env --filepath coder.yaml` ``
### [](https://coder.com/docs/v1/cli/reference/coder_workspaces_edit-from-config#options)
Options
`` `-f, --filepath string path to local template file. --follow follow buildlog after initiating rebuild -h, --help help for edit-from-config` ``
### [](https://coder.com/docs/v1/cli/reference/coder_workspaces_edit-from-config#options-inherited-from-parent-commands)
Options inherited from parent commands
`` `-v, --verbose show verbose output` ``
### [](https://coder.com/docs/v1/cli/reference/coder_workspaces_edit-from-config#see-also)
SEE ALSO
* [coder workspaces](https://coder.com/docs/v1/cli/reference/coder_workspaces)
- Interact with Coder workspaces
---
# coder workspaces edit | Coder v1 Docs
[Home](https://coder.com/docs/v1 "Home")
[Command line](https://coder.com/docs/v1/cli "Command line")
[Reference](https://coder.com/docs/v1/cli/reference/coder "Reference")
[coder workspaces](https://coder.com/docs/v1/cli/reference/coder_workspaces "coder workspaces")
coder workspaces edit
edit an existing workspace and initiate a rebuild.
### [](https://coder.com/docs/v1/cli/reference/coder_workspaces_edit#synopsis)
Synopsis
Edit an existing workspace and initate a rebuild.
`` `coder workspaces edit [flags]` ``
### [](https://coder.com/docs/v1/cli/reference/coder_workspaces_edit#examples)
Examples
`` `coder workspaces edit back-end-workspace --cpu 4 coder workspaces edit back-end-workspace --disk 20` ``
### [](https://coder.com/docs/v1/cli/reference/coder_workspaces_edit#options)
Options
`` `-c, --cpu float32 The number of cpu cores the workspace should be provisioned with. -d, --disk int The amount of disk storage a workspace should be provisioned with. --follow follow buildlog after initiating rebuild --force force rebuild without showing a confirmation prompt -g, --gpu int The amount of disk storage to provision the workspace with. -h, --help help for edit -i, --image string name of the image you want the workspace to be based off of. -m, --memory float32 The amount of RAM a workspace should be provisioned with. -o, --org string name of the organization the workspace should be created under. -t, --tag string image tag of the image you want to base the workspace off of. (default "latest") --user string Specify the user whose resources to target (default "me")` ``
### [](https://coder.com/docs/v1/cli/reference/coder_workspaces_edit#options-inherited-from-parent-commands)
Options inherited from parent commands
`` `-v, --verbose show verbose output` ``
### [](https://coder.com/docs/v1/cli/reference/coder_workspaces_edit#see-also)
SEE ALSO
* [coder workspaces](https://coder.com/docs/v1/cli/reference/coder_workspaces)
- Interact with Coder workspaces
---
# coder workspaces ls | Coder v1 Docs
[Home](https://coder.com/docs/v1 "Home")
[Command line](https://coder.com/docs/v1/cli "Command line")
[Reference](https://coder.com/docs/v1/cli/reference/coder "Reference")
[coder workspaces](https://coder.com/docs/v1/cli/reference/coder_workspaces "coder workspaces")
coder workspaces ls
list all workspaces owned by the active user
### [](https://coder.com/docs/v1/cli/reference/coder_workspaces_ls#synopsis)
Synopsis
List all Coder workspaces owned by the active user.
`` `coder workspaces ls [flags]` ``
### [](https://coder.com/docs/v1/cli/reference/coder_workspaces_ls#options)
Options
`` `--all Get workspaces for all users (admin only) -h, --help help for ls -o, --output string human | json (default "human") -p, --provider string Filter workspaces by a particular workspace provider name. --user string Specify the user whose resources to target (default "me")` ``
### [](https://coder.com/docs/v1/cli/reference/coder_workspaces_ls#options-inherited-from-parent-commands)
Options inherited from parent commands
`` `-v, --verbose show verbose output` ``
### [](https://coder.com/docs/v1/cli/reference/coder_workspaces_ls#see-also)
SEE ALSO
* [coder workspaces](https://coder.com/docs/v1/cli/reference/coder_workspaces)
- Interact with Coder workspaces
---
# coder workspaces ping | Coder v1 Docs
[Home](https://coder.com/docs/v1 "Home")
[Command line](https://coder.com/docs/v1/cli "Command line")
[Reference](https://coder.com/docs/v1/cli/reference/coder "Reference")
[coder workspaces](https://coder.com/docs/v1/cli/reference/coder_workspaces "coder workspaces")
coder workspaces ping
ping Coder workspaces by name
### [](https://coder.com/docs/v1/cli/reference/coder_workspaces_ping#synopsis)
Synopsis
ping Coder workspaces by name
`` `coder workspaces ping [flags]` ``
### [](https://coder.com/docs/v1/cli/reference/coder_workspaces_ping#examples)
Examples
`` `coder workspaces ping front-end-workspace` ``
### [](https://coder.com/docs/v1/cli/reference/coder_workspaces_ping#options)
Options
`` `-c, --count int stop after replies -h, --help help for ping -s, --scheme strings customize schemes to filter ice servers (default [stun,stuns,turn,turns])` ``
### [](https://coder.com/docs/v1/cli/reference/coder_workspaces_ping#options-inherited-from-parent-commands)
Options inherited from parent commands
`` `-v, --verbose show verbose output` ``
### [](https://coder.com/docs/v1/cli/reference/coder_workspaces_ping#see-also)
SEE ALSO
* [coder workspaces](https://coder.com/docs/v1/cli/reference/coder_workspaces)
- Interact with Coder workspaces
---
# About | Coder v1 Docs
[Home](https://coder.com/docs/v1 "Home")
About
Coder is a self-hosted platform that allows organizations to securely provision developer workspaces for DevOps, infrastructure, and software engineering teams.
Coder's pre-configured workspaces allow project organization members to define what language version and tooling are required to provide consistency across the organization and enable new members to onboard and contribute. Developers focus on their projects and the end product, not on setup.
These pre-configured workspaces are the foundation of Coder's _Dev Workspaces as Code_ paradigm, allowing a project's language and tooling dependencies to be source controlled along with the code itself.
With Coder, engineers can continue using the development tools, CI/CD pipelines, source code management systems, and editors they know and love while leveraging the power of cloud and automation.
[](https://coder.com/docs/v1/about#our-mission)
Our mission
-----------------------------------------------------------
Developers should spend their time writing code, not getting their development workspace ready. Coder aims to empower organizations to harness the cloud's power to provide consistent, secure, and performant workspaces for their development teams.
Our software has been pulled over 19 million times from Docker, received over 45,000 stars on GitHub, and is used by some of the world's largest enterprises. We're also working with pilot organizations to shape the future of remote development through Coder.
[](https://coder.com/docs/v1/about#why-coder)
Why Coder
-------------------------------------------------------
Coder's _dev workspaces as code_ paradigm is new for software development. Its key benefits include:
**Automated setup and instant onboarding**: Your workspaces are created via pre-configured images, so there's little setup time for your developers. New developers can begin contributing right away instead of spending time setting up their workspace.
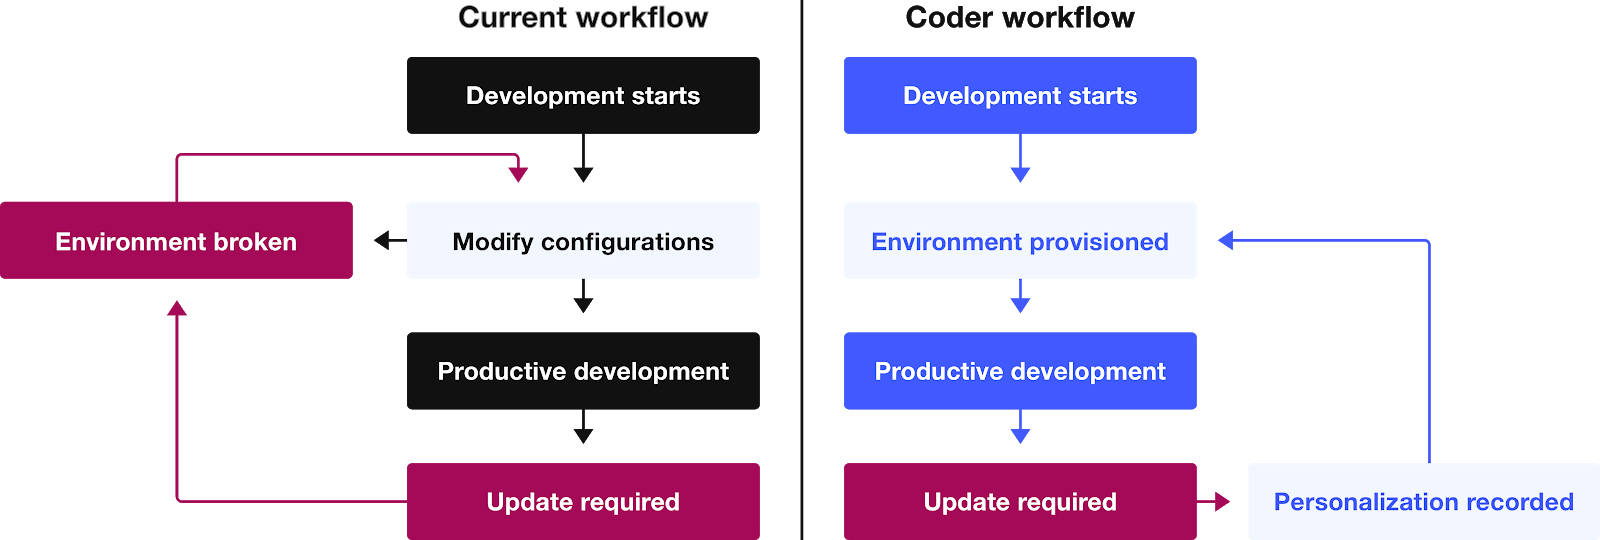
* **Workspace consistency**: Every component of your workspaces is predefined and preapproved, reducing configuration drift caused by variations in development workspaces. The images used to create workspaces can also be source-controlled the way that your code is.
* **Performant workspaces**: Coder empowers you to use servers over local hardware to perform resource-intensive development operations. Developers are, therefore, not limited to the computing power of the device on which they're working or the slow network uploads of large files. All processes are performed on the cluster, with only the commands sent over the network.
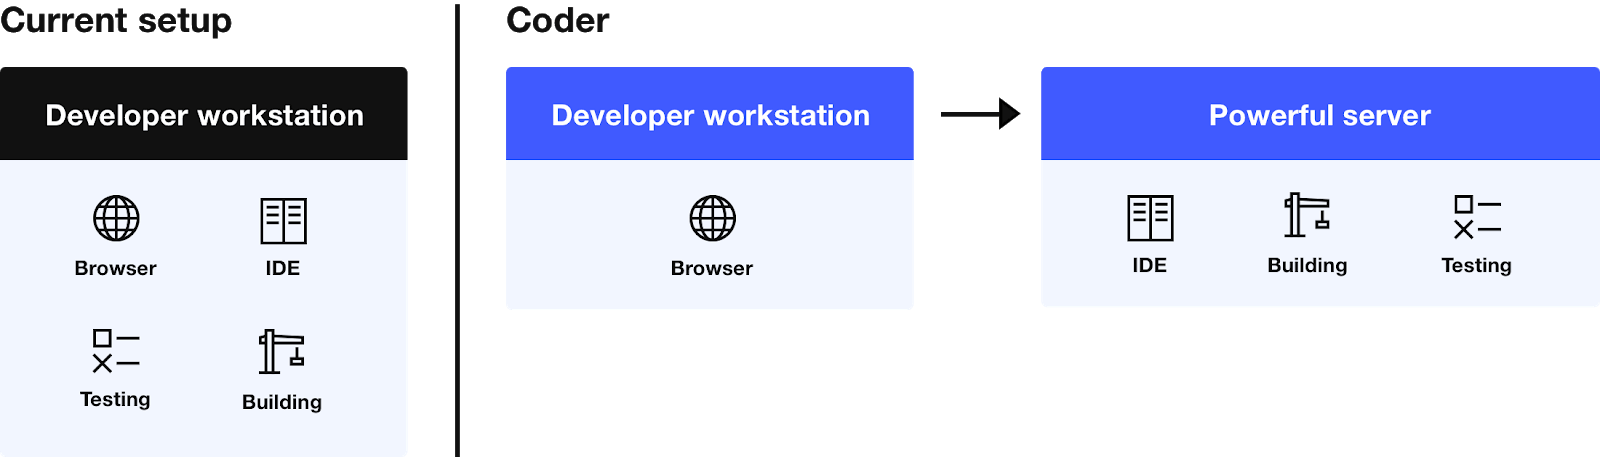
* **Zero overhead**: Coder performs all graphical rendering on the client, minimizing network traffic and resulting in zero overhead for most workspaces. This reduces things like typing lag -- Coder enables remote access with the performance of a local workspace.
* **Simple updates**: As soon as you push updates to your organization's base development image, developers receive notifications in the dashboard that there's an update available. Your developers can upgrade when convenient, and you can track which versions your developers are using, providing visibility into workspace consistency.
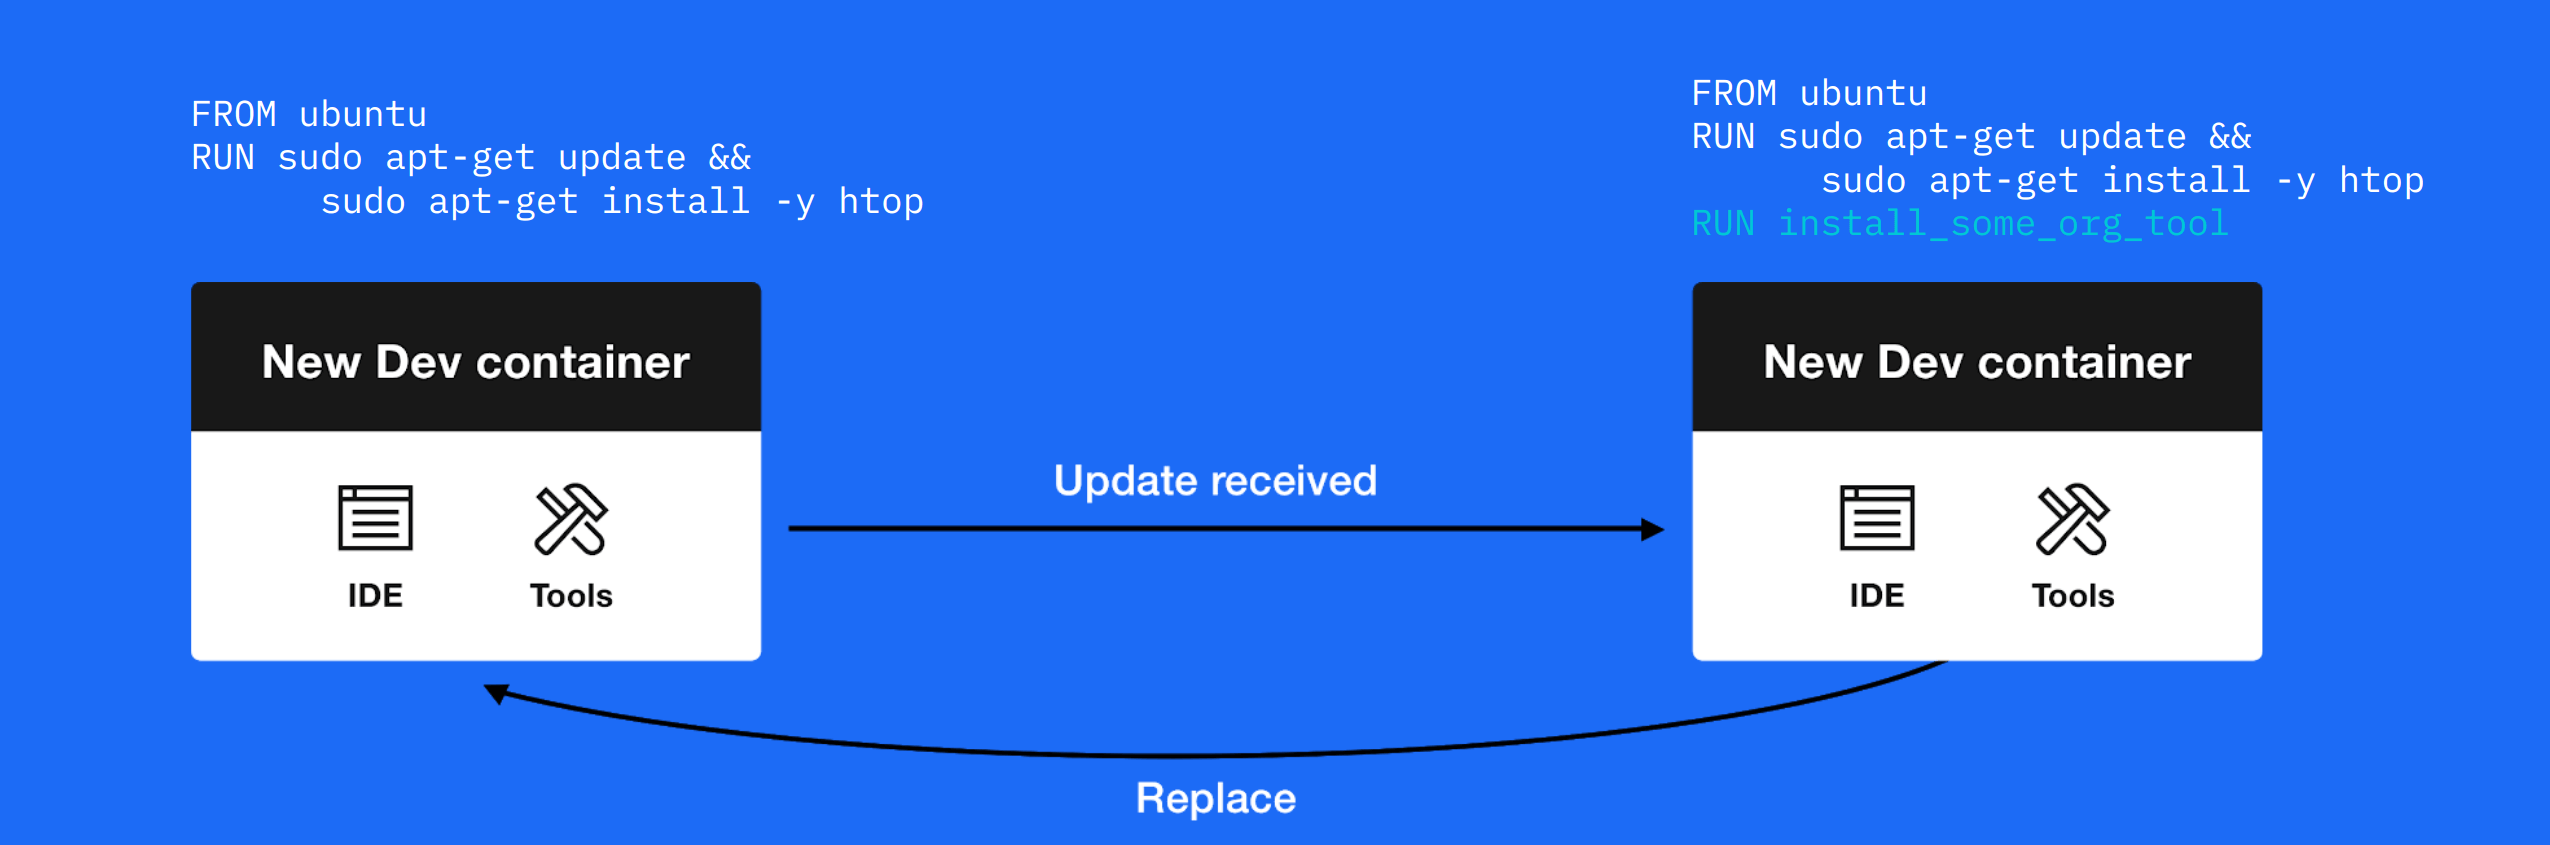
* **Centralized source code**: Keeping source code centralized on company servers mitigates the risk of loss or theft. Developers can work on their projects from anywhere while using any device with an internet browser.
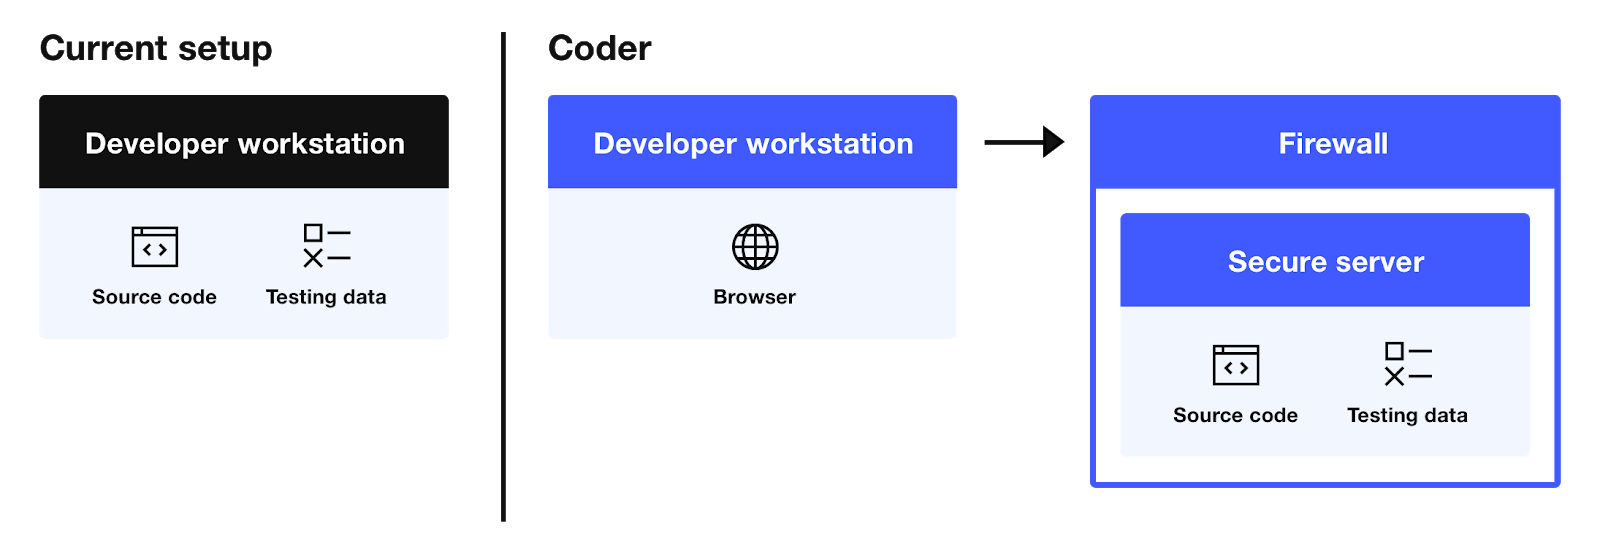
* **Improved security**: Development actions are centralized on your internal infrastructure, allowing insight into potential threats. Furthermore, deploying Coder into an air-gapped workspace will provide additional protection around your organization's intellectual property.
##### On this page
---
# coder workspaces policy-template | Coder v1 Docs
[Home](https://coder.com/docs/v1 "Home")
[Command line](https://coder.com/docs/v1/cli "Command line")
[Reference](https://coder.com/docs/v1/cli/reference/coder "Reference")
[coder workspaces](https://coder.com/docs/v1/cli/reference/coder_workspaces "coder workspaces")
coder workspaces policy-template
Set workspace policy template
### [](https://coder.com/docs/v1/cli/reference/coder_workspaces_policy-template#synopsis)
Synopsis
Set workspace policy template or restore to default configuration. This feature is for site admins only.
`` `coder workspaces policy-template [flags]` ``
### [](https://coder.com/docs/v1/cli/reference/coder_workspaces_policy-template#options)
Options
`` `--default Restore policy template to default configuration --dry-run skip setting policy template, but view errors/warnings about how this policy template would impact existing workspaces -f, --filepath string full path to local policy template file. -h, --help help for policy-template --scope string scope of impact for the policy template. Supported values: site (default "site")` ``
### [](https://coder.com/docs/v1/cli/reference/coder_workspaces_policy-template#options-inherited-from-parent-commands)
Options inherited from parent commands
`` `-v, --verbose show verbose output` ``
### [](https://coder.com/docs/v1/cli/reference/coder_workspaces_policy-template#see-also)
SEE ALSO
* [coder workspaces](https://coder.com/docs/v1/cli/reference/coder_workspaces)
- Interact with Coder workspaces
---
# coder tokens create | Coder v1 Docs
[Home](https://coder.com/docs/v1 "Home")
[Command line](https://coder.com/docs/v1/cli "Command line")
[Reference](https://coder.com/docs/v1/cli/reference/coder "Reference")
[coder tokens](https://coder.com/docs/v1/cli/reference/coder_tokens "coder tokens")
coder tokens create
create generates a new API token and prints it to stdout
`` `coder tokens create [token_name] [flags]` ``
### [](https://coder.com/docs/v1/cli/reference/coder_tokens_create#options)
Options
`` `-h, --help help for create` ``
### [](https://coder.com/docs/v1/cli/reference/coder_tokens_create#options-inherited-from-parent-commands)
Options inherited from parent commands
`` `-v, --verbose show verbose output` ``
### [](https://coder.com/docs/v1/cli/reference/coder_tokens_create#see-also)
SEE ALSO
* [coder tokens](https://coder.com/docs/v1/cli/reference/coder_tokens)
- manage Coder API tokens for the active user
---
# coder tokens regen | Coder v1 Docs
[Home](https://coder.com/docs/v1 "Home")
[Command line](https://coder.com/docs/v1/cli "Command line")
[Reference](https://coder.com/docs/v1/cli/reference/coder "Reference")
[coder tokens](https://coder.com/docs/v1/cli/reference/coder_tokens "coder tokens")
coder tokens regen
regenerate an API token by its unique ID and print the new token to stdout
`` `coder tokens regen [token_id] [flags]` ``
### [](https://coder.com/docs/v1/cli/reference/coder_tokens_regen#options)
Options
`` `-h, --help help for regen` ``
### [](https://coder.com/docs/v1/cli/reference/coder_tokens_regen#options-inherited-from-parent-commands)
Options inherited from parent commands
`` `-v, --verbose show verbose output` ``
### [](https://coder.com/docs/v1/cli/reference/coder_tokens_regen#see-also)
SEE ALSO
* [coder tokens](https://coder.com/docs/v1/cli/reference/coder_tokens)
- manage Coder API tokens for the active user
---
# coder tokens ls | Coder v1 Docs
[Home](https://coder.com/docs/v1 "Home")
[Command line](https://coder.com/docs/v1/cli "Command line")
[Reference](https://coder.com/docs/v1/cli/reference/coder "Reference")
[coder tokens](https://coder.com/docs/v1/cli/reference/coder_tokens "coder tokens")
coder tokens ls
show the user's active API tokens
`` `coder tokens ls [flags]` ``
### [](https://coder.com/docs/v1/cli/reference/coder_tokens_ls#options)
Options
`` `-h, --help help for ls -o, --output string human | json (default "human")` ``
### [](https://coder.com/docs/v1/cli/reference/coder_tokens_ls#options-inherited-from-parent-commands)
Options inherited from parent commands
`` `-v, --verbose show verbose output` ``
### [](https://coder.com/docs/v1/cli/reference/coder_tokens_ls#see-also)
SEE ALSO
* [coder tokens](https://coder.com/docs/v1/cli/reference/coder_tokens)
- manage Coder API tokens for the active user
---
# coder workspaces rebuild | Coder v1 Docs
[Home](https://coder.com/docs/v1 "Home")
[Command line](https://coder.com/docs/v1/cli "Command line")
[Reference](https://coder.com/docs/v1/cli/reference/coder "Reference")
[coder workspaces](https://coder.com/docs/v1/cli/reference/coder_workspaces "coder workspaces")
coder workspaces rebuild
rebuild a Coder workspace
`` `coder workspaces rebuild [workspace_name] [flags]` ``
### [](https://coder.com/docs/v1/cli/reference/coder_workspaces_rebuild#examples)
Examples
`` `coder workspaces rebuild front-end-workspace --follow coder workspaces rebuild backend-workspace --force` ``
### [](https://coder.com/docs/v1/cli/reference/coder_workspaces_rebuild#options)
Options
`` `--follow follow build log after initiating rebuild --force force rebuild without showing a confirmation prompt -h, --help help for rebuild --user string Specify the user whose resources to target (default "me")` ``
### [](https://coder.com/docs/v1/cli/reference/coder_workspaces_rebuild#options-inherited-from-parent-commands)
Options inherited from parent commands
`` `-v, --verbose show verbose output` ``
### [](https://coder.com/docs/v1/cli/reference/coder_workspaces_rebuild#see-also)
SEE ALSO
* [coder workspaces](https://coder.com/docs/v1/cli/reference/coder_workspaces)
- Interact with Coder workspaces
---
# coder workspaces rm | Coder v1 Docs
[Home](https://coder.com/docs/v1 "Home")
[Command line](https://coder.com/docs/v1/cli "Command line")
[Reference](https://coder.com/docs/v1/cli/reference/coder "Reference")
[coder workspaces](https://coder.com/docs/v1/cli/reference/coder_workspaces "coder workspaces")
coder workspaces rm
remove Coder workspaces by name
`` `coder workspaces rm [...workspace_names] [flags]` ``
### [](https://coder.com/docs/v1/cli/reference/coder_workspaces_rm#options)
Options
`` `-f, --force force remove the specified workspaces without prompting first -h, --help help for rm --user string Specify the user whose resources to target (default "me")` ``
### [](https://coder.com/docs/v1/cli/reference/coder_workspaces_rm#options-inherited-from-parent-commands)
Options inherited from parent commands
`` `-v, --verbose show verbose output` ``
### [](https://coder.com/docs/v1/cli/reference/coder_workspaces_rm#see-also)
SEE ALSO
* [coder workspaces](https://coder.com/docs/v1/cli/reference/coder_workspaces)
- Interact with Coder workspaces
---
# coder tokens rm | Coder v1 Docs
[Home](https://coder.com/docs/v1 "Home")
[Command line](https://coder.com/docs/v1/cli "Command line")
[Reference](https://coder.com/docs/v1/cli/reference/coder "Reference")
[coder tokens](https://coder.com/docs/v1/cli/reference/coder_tokens "coder tokens")
coder tokens rm
remove an API token by its unique ID
`` `coder tokens rm [token_id] [flags]` ``
### [](https://coder.com/docs/v1/cli/reference/coder_tokens_rm#options)
Options
`` `-h, --help help for rm` ``
### [](https://coder.com/docs/v1/cli/reference/coder_tokens_rm#options-inherited-from-parent-commands)
Options inherited from parent commands
`` `-v, --verbose show verbose output` ``
### [](https://coder.com/docs/v1/cli/reference/coder_tokens_rm#see-also)
SEE ALSO
* [coder tokens](https://coder.com/docs/v1/cli/reference/coder_tokens)
- manage Coder API tokens for the active user
---
# coder satellites create | Coder v1 Docs
[Home](https://coder.com/docs/v1 "Home")
[Command line](https://coder.com/docs/v1/cli "Command line")
[Reference](https://coder.com/docs/v1/cli/reference/coder "Reference")
[coder satellites](https://coder.com/docs/v1/cli/reference/coder_satellites "coder satellites")
coder satellites create
create a new satellite.
### [](https://coder.com/docs/v1/cli/reference/coder_satellites_create#synopsis)
Synopsis
Create a new Coder satellite.
`` `coder satellites create [name] [satellite_access_url] [flags]` ``
### [](https://coder.com/docs/v1/cli/reference/coder_satellites_create#examples)
Examples
`` `# create a new satellite coder satellites create eu-west https://eu-west.coder.com` ``
### [](https://coder.com/docs/v1/cli/reference/coder_satellites_create#options)
Options
`` `-h, --help help for create` ``
### [](https://coder.com/docs/v1/cli/reference/coder_satellites_create#options-inherited-from-parent-commands)
Options inherited from parent commands
`` `-v, --verbose show verbose output` ``
### [](https://coder.com/docs/v1/cli/reference/coder_satellites_create#see-also)
SEE ALSO
* [coder satellites](https://coder.com/docs/v1/cli/reference/coder_satellites)
- Interact with Coder satellite deployments
---
# Comparison | Coder v1 Docs
[Home](https://coder.com/docs/v1 "Home")
Comparison
Coder offers both enterprise and open-source (code-server) solutions to meet the remote development needs of organizations and individual developers. Both solutions enable cloud-based software development delivered through the browser. The key differences pertain to governance, development environment management, availability of enterprise integrations (e.g., Git OAuth, SSO), and multi-IDE support.
| | | |
| --- | --- | --- |
| | Coder | [code-server](https://github.com/coder/code-server) |
| Used by | Organizations & teams | Individuals |
| Self-hosted on | Kubernetes or Docker | Any machine |
| Cloud management | Resources automatically scale; each organization defines quotas and limits | None |
| Environment management | Project code, configuration, dependencies, and tooling as a container | Code-only |
| IDE support | VS Code, JetBrains (e.g., IntelliJ, PyCharm), Jupyter, RStudio | VS Code |
| Administration & security | Role-based permission system, audit logs, single sign-on | Self-administered |
| Enterprise integrations | Git (SSH key, OAuth), SSO via OIDC, public cloud identity | Self-administered |
| Delivery | Browser, progressive web app, local IDE with SSH | Browser, progressive web app |
| Maximum number of users | Variable | N/A - one connection allowed |
| Usage term length | Variable ([see Pricing](https://coder.com/pricing) ) | See [license](https://github.com/coder/code-server/blob/v3.5.0/LICENSE.txt) |
| Air-gapped deployment | Optional | Optional |
> To get a free trial of Coder, please visit [https://coder.com/trial](https://coder.com/trial)
> .
Coder's trial license does not work in an air-gapped environment. If your organization is interested in evaluating Coder air-gapped, please contact [\[email protected\]](https://coder.com/cdn-cgi/l/email-protection#becddfd2dbcdfeddd1dadbcc90ddd1d3)
to discuss license requirements.
---
# coder satellites rm | Coder v1 Docs
[Home](https://coder.com/docs/v1 "Home")
[Command line](https://coder.com/docs/v1/cli "Command line")
[Reference](https://coder.com/docs/v1/cli/reference/coder "Reference")
[coder satellites](https://coder.com/docs/v1/cli/reference/coder_satellites "coder satellites")
coder satellites rm
remove a satellite.
### [](https://coder.com/docs/v1/cli/reference/coder_satellites_rm#synopsis)
Synopsis
Remove an existing Coder satellite by name.
`` `coder satellites rm [satellite_name] [flags]` ``
### [](https://coder.com/docs/v1/cli/reference/coder_satellites_rm#examples)
Examples
`` `# remove an existing satellite by name coder satellites rm my-satellite` ``
### [](https://coder.com/docs/v1/cli/reference/coder_satellites_rm#options)
Options
`` `-h, --help help for rm` ``
### [](https://coder.com/docs/v1/cli/reference/coder_satellites_rm#options-inherited-from-parent-commands)
Options inherited from parent commands
`` `-v, --verbose show verbose output` ``
### [](https://coder.com/docs/v1/cli/reference/coder_satellites_rm#see-also)
SEE ALSO
* [coder satellites](https://coder.com/docs/v1/cli/reference/coder_satellites)
- Interact with Coder satellite deployments
---
# coder images ls | Coder v1 Docs
[Home](https://coder.com/docs/v1 "Home")
[Command line](https://coder.com/docs/v1/cli "Command line")
[Reference](https://coder.com/docs/v1/cli/reference/coder "Reference")
[coder images](https://coder.com/docs/v1/cli/reference/coder_images "coder images")
coder images ls
list all images available to the active user
### [](https://coder.com/docs/v1/cli/reference/coder_images_ls#synopsis)
Synopsis
List all Coder images available to the active user.
`` `coder images ls [flags]` ``
### [](https://coder.com/docs/v1/cli/reference/coder_images_ls#options)
Options
`` `-h, --help help for ls --org string organization name --output string human | json (default "human")` ``
### [](https://coder.com/docs/v1/cli/reference/coder_images_ls#options-inherited-from-parent-commands)
Options inherited from parent commands
`` `--user string Specifies the user by email (default "me") -v, --verbose show verbose output` ``
### [](https://coder.com/docs/v1/cli/reference/coder_images_ls#see-also)
SEE ALSO
* [coder images](https://coder.com/docs/v1/cli/reference/coder_images)
- Manage Coder images
---
# coder satellites ls | Coder v1 Docs
[Home](https://coder.com/docs/v1 "Home")
[Command line](https://coder.com/docs/v1/cli "Command line")
[Reference](https://coder.com/docs/v1/cli/reference/coder "Reference")
[coder satellites](https://coder.com/docs/v1/cli/reference/coder_satellites "coder satellites")
coder satellites ls
list satellites.
### [](https://coder.com/docs/v1/cli/reference/coder_satellites_ls#synopsis)
Synopsis
List all Coder workspace satellites.
`` `coder satellites ls [flags]` ``
### [](https://coder.com/docs/v1/cli/reference/coder_satellites_ls#examples)
Examples
`` `# list satellites coder satellites ls` ``
### [](https://coder.com/docs/v1/cli/reference/coder_satellites_ls#options)
Options
`` `-h, --help help for ls` ``
### [](https://coder.com/docs/v1/cli/reference/coder_satellites_ls#options-inherited-from-parent-commands)
Options inherited from parent commands
`` `-v, --verbose show verbose output` ``
### [](https://coder.com/docs/v1/cli/reference/coder_satellites_ls#see-also)
SEE ALSO
* [coder satellites](https://coder.com/docs/v1/cli/reference/coder_satellites)
- Interact with Coder satellite deployments
---
# coder urls rm | Coder v1 Docs
[Home](https://coder.com/docs/v1 "Home")
[Command line](https://coder.com/docs/v1/cli "Command line")
[Reference](https://coder.com/docs/v1/cli/reference/coder "Reference")
[coder urls](https://coder.com/docs/v1/cli/reference/coder_urls "coder urls")
coder urls rm
Remove a dev url
`` `coder urls rm [workspace_name] [port] [flags]` ``
### [](https://coder.com/docs/v1/cli/reference/coder_urls_rm#options)
Options
`` `-h, --help help for rm` ``
### [](https://coder.com/docs/v1/cli/reference/coder_urls_rm#options-inherited-from-parent-commands)
Options inherited from parent commands
`` `-v, --verbose show verbose output` ``
### [](https://coder.com/docs/v1/cli/reference/coder_urls_rm#see-also)
SEE ALSO
* [coder urls](https://coder.com/docs/v1/cli/reference/coder_urls)
- Interact with workspace DevURLs
---
# coder workspaces watch-build | Coder v1 Docs
[Home](https://coder.com/docs/v1 "Home")
[Command line](https://coder.com/docs/v1/cli "Command line")
[Reference](https://coder.com/docs/v1/cli/reference/coder "Reference")
[coder workspaces](https://coder.com/docs/v1/cli/reference/coder_workspaces "coder workspaces")
coder workspaces watch-build
trail the build log of a Coder workspace
`` `coder workspaces watch-build [workspace_name] [flags]` ``
### [](https://coder.com/docs/v1/cli/reference/coder_workspaces_watch-build#examples)
Examples
`` `coder workspaces watch-build front-end-workspace` ``
### [](https://coder.com/docs/v1/cli/reference/coder_workspaces_watch-build#options)
Options
`` `-h, --help help for watch-build --user string Specify the user whose resources to target (default "me")` ``
### [](https://coder.com/docs/v1/cli/reference/coder_workspaces_watch-build#options-inherited-from-parent-commands)
Options inherited from parent commands
`` `-v, --verbose show verbose output` ``
### [](https://coder.com/docs/v1/cli/reference/coder_workspaces_watch-build#see-also)
SEE ALSO
* [coder workspaces](https://coder.com/docs/v1/cli/reference/coder_workspaces)
- Interact with Coder workspaces
---
# coder urls ls | Coder v1 Docs
[Home](https://coder.com/docs/v1 "Home")
[Command line](https://coder.com/docs/v1/cli "Command line")
[Reference](https://coder.com/docs/v1/cli/reference/coder "Reference")
[coder urls](https://coder.com/docs/v1/cli/reference/coder_urls "coder urls")
coder urls ls
List all DevURLs for a workspace
`` `coder urls ls [workspace_name] [flags]` ``
### [](https://coder.com/docs/v1/cli/reference/coder_urls_ls#options)
Options
`` `-h, --help help for ls -o, --output string human|json (default "human")` ``
### [](https://coder.com/docs/v1/cli/reference/coder_urls_ls#options-inherited-from-parent-commands)
Options inherited from parent commands
`` `-v, --verbose show verbose output` ``
### [](https://coder.com/docs/v1/cli/reference/coder_urls_ls#see-also)
SEE ALSO
* [coder urls](https://coder.com/docs/v1/cli/reference/coder_urls)
- Interact with workspace DevURLs
---
# coder urls create | Coder v1 Docs
[Home](https://coder.com/docs/v1 "Home")
[Command line](https://coder.com/docs/v1/cli "Command line")
[Reference](https://coder.com/docs/v1/cli/reference/coder "Reference")
[coder urls](https://coder.com/docs/v1/cli/reference/coder_urls "coder urls")
coder urls create
Create a new dev URL for a workspace
`` `coder urls create [workspace_name] [port] [flags]` ``
### [](https://coder.com/docs/v1/cli/reference/coder_urls_create#examples)
Examples
`` `coder urls create my-workspace 8080 --name my-dev-url` ``
### [](https://coder.com/docs/v1/cli/reference/coder_urls_create#options)
Options
`` `--access string Set DevURL access to [private | org | authed | public] (default "private") -h, --help help for create --name string DevURL name --scheme string Server scheme (http|https) (default "http")` ``
### [](https://coder.com/docs/v1/cli/reference/coder_urls_create#options-inherited-from-parent-commands)
Options inherited from parent commands
`` `-v, --verbose show verbose output` ``
### [](https://coder.com/docs/v1/cli/reference/coder_urls_create#see-also)
SEE ALSO
* [coder urls](https://coder.com/docs/v1/cli/reference/coder_urls)
- Interact with workspace DevURLs
---
# coder workspaces stop | Coder v1 Docs
[Home](https://coder.com/docs/v1 "Home")
[Command line](https://coder.com/docs/v1/cli "Command line")
[Reference](https://coder.com/docs/v1/cli/reference/coder "Reference")
[coder workspaces](https://coder.com/docs/v1/cli/reference/coder_workspaces "coder workspaces")
coder workspaces stop
stop Coder workspaces by name
### [](https://coder.com/docs/v1/cli/reference/coder_workspaces_stop#synopsis)
Synopsis
Stop Coder workspaces by name
`` `coder workspaces stop [...workspace_names] [flags]` ``
### [](https://coder.com/docs/v1/cli/reference/coder_workspaces_stop#examples)
Examples
`` `coder workspaces stop front-end-workspace coder workspaces stop front-end-workspace backend-workspace # stop all of your workspaces coder workspaces ls -o json | jq -c '.[].name' | xargs coder workspaces stop # stop all workspaces for a given user coder workspaces --user [[email protected]](https://coder.com/cdn-cgi/l/email-protection) ls -o json \ | jq -c '.[].name' \ | xargs coder workspaces --user [[email protected]](https://coder.com/cdn-cgi/l/email-protection) stop` ``
### [](https://coder.com/docs/v1/cli/reference/coder_workspaces_stop#options)
Options
`` `-h, --help help for stop --user string Specify the user whose resources to target (default "me")` ``
### [](https://coder.com/docs/v1/cli/reference/coder_workspaces_stop#options-inherited-from-parent-commands)
Options inherited from parent commands
`` `-v, --verbose show verbose output` ``
### [](https://coder.com/docs/v1/cli/reference/coder_workspaces_stop#see-also)
SEE ALSO
* [coder workspaces](https://coder.com/docs/v1/cli/reference/coder_workspaces)
- Interact with Coder workspaces
---