# Table of Contents
- [Devolutions Documentation](#devolutions-documentation)
- [Devolutions knowledge base - Devolutions Documentation](#devolutions-knowledge-base-devolutions-documentation)
- [Profile - Devolutions Documentation](#profile-devolutions-documentation)
- [Devolutions Gateway - Devolutions Documentation](#devolutions-gateway-devolutions-documentation)
- [Devolutions Gateway configuration with Devolutions Hub Business - Devolutions Documentation](#devolutions-gateway-configuration-with-devolutions-hub-business-devolutions-documentation)
- [Devolutions Gateway configuration with Devolutions Server - Devolutions Documentation](#devolutions-gateway-configuration-with-devolutions-server-devolutions-documentation)
- [Devolutions Workspace - Devolutions Documentation](#devolutions-workspace-devolutions-documentation)
- [Installation - Devolutions Documentation](#installation-devolutions-documentation)
- [Installation - Devolutions Documentation](#installation-devolutions-documentation)
- [PAM with Remote Desktop Manager - Devolutions Documentation](#pam-with-remote-desktop-manager-devolutions-documentation)
- [Devolutions PAM - Devolutions Documentation](#devolutions-pam-devolutions-documentation)
- [PAM with Devolutions Server - Devolutions Documentation](#pam-with-devolutions-server-devolutions-documentation)
- [Get started with SSO in Devolutions Hub Business - Devolutions Documentation](#get-started-with-sso-in-devolutions-hub-business-devolutions-documentation)
- [Devolutions Hub - Devolutions Documentation](#devolutions-hub-devolutions-documentation)
- [Get started with Devolutions Hub Business - Devolutions Documentation](#get-started-with-devolutions-hub-business-devolutions-documentation)
- [Devolutions Launcher - Devolutions Documentation](#devolutions-launcher-devolutions-documentation)
- [Download and installation - Devolutions Documentation](#download-and-installation-devolutions-documentation)
- [Devolutions Server - Devolutions Documentation](#devolutions-server-devolutions-documentation)
- [Getting started - Devolutions Documentation](#getting-started-devolutions-documentation)
- [Installation - Devolutions Documentation](#installation-devolutions-documentation)
- [Remote Desktop Manager - Devolutions Documentation](#remote-desktop-manager-devolutions-documentation)
- [Getting started - Devolutions Documentation](#getting-started-devolutions-documentation)
- [Client - Devolutions Documentation](#client-devolutions-documentation)
- [Devolutions Portal - Devolutions Documentation](#devolutions-portal-devolutions-documentation)
- [Create your Devolutions Account - Devolutions Documentation](#create-your-devolutions-account-devolutions-documentation)
- [Devolutions Send Standalone - Devolutions Documentation](#devolutions-send-standalone-devolutions-documentation)
- [PAM with Devolutions Hub Business - Devolutions Documentation](#pam-with-devolutions-hub-business-devolutions-documentation)
- [Devolutions Send - Devolutions Documentation](#devolutions-send-devolutions-documentation)
- [Devolutions Send - Devolutions Documentation](#devolutions-send-devolutions-documentation)
- [Devolutions PowerShell - Devolutions Documentation](#devolutions-powershell-devolutions-documentation)
- [Devolutions Server PowerShell - Devolutions Documentation](#devolutions-server-powershell-devolutions-documentation)
- [Devolutions Hub PowerShell - Devolutions Documentation](#devolutions-hub-powershell-devolutions-documentation)
- [Devolutions Gateway PowerShell - Devolutions Documentation](#devolutions-gateway-powershell-devolutions-documentation)
- [Devolutions Send - Devolutions Documentation](#devolutions-send-devolutions-documentation)
- [Sign-In & Security - Devolutions Documentation](#sign-in-security-devolutions-documentation)
- [Licenses - Devolutions Documentation](#licenses-devolutions-documentation)
- [Devolutions ecosystem - Devolutions Documentation](#devolutions-ecosystem-devolutions-documentation)
- [Écosystème Devolutions - Documentation Devolutions](#-cosyst-me-devolutions-documentation-devolutions)
- [Devolutions Agent - Devolutions Documentation](#devolutions-agent-devolutions-documentation)
- [Devolutions ecosystem - Devolutions Documentation](#devolutions-ecosystem-devolutions-documentation)
- [Devolutions PowerShell - Devolutions Documentation](#devolutions-powershell-devolutions-documentation)
- [Devolutions PowerShell - Documentation Devolutions](#devolutions-powershell-documentation-devolutions)
- [Devolutions PowerShell - Devolutions Documentation](#devolutions-powershell-devolutions-documentation)
- [Fermes Devolutions Gateway - Devolutions Documentation](#fermes-devolutions-gateway-devolutions-documentation)
- [Devolutions Gateway farms configuration - Devolutions Documentation](#devolutions-gateway-farms-configuration-devolutions-documentation)
- [Devolutions Gateway farms - Devolutions Documentation](#devolutions-gateway-farms-devolutions-documentation)
- [Devolutions Gateway farms - Devolutions Documentation](#devolutions-gateway-farms-devolutions-documentation)
- [Configuration de Devolutions Gateway avec Devolutions Hub Business - Documentation Devolutions](#configuration-de-devolutions-gateway-avec-devolutions-hub-business-documentation-devolutions)
- [Configuration de l'ensemble de règles Gateway dans Devolutions Hub Business - Documentation Devolutions](#configuration-de-l-ensemble-de-r-gles-gateway-dans-devolutions-hub-business-documentation-devolutions)
- [Gateway ruleset configuration in Devolutions Hub Business - Devolutions Documentation](#gateway-ruleset-configuration-in-devolutions-hub-business-devolutions-documentation)
- [Gateway ruleset configuration in Devolutions Hub Business - Devolutions Documentation](#gateway-ruleset-configuration-in-devolutions-hub-business-devolutions-documentation)
- [Devolutions Gateway configuration with Devolutions Hub Business - Devolutions Documentation](#devolutions-gateway-configuration-with-devolutions-hub-business-devolutions-documentation)
- [Devolutions Hub Business - Devolutions Documentation](#devolutions-hub-business-devolutions-documentation)
- [Devolutions Hub Business - Documentation Devolutions](#devolutions-hub-business-documentation-devolutions)
- [Devolutions Hub Business - Devolutions Documentation](#devolutions-hub-business-devolutions-documentation)
- [Configuration de Devolutions Gateway dans Remote Desktop Manager - Documentation Devolutions](#configuration-de-devolutions-gateway-dans-remote-desktop-manager-documentation-devolutions)
- [Devolutions Gateway configuration in Remote Desktop Manager - Devolutions Documentation](#devolutions-gateway-configuration-in-remote-desktop-manager-devolutions-documentation)
- [Devolutions Gateway configuration in Remote Desktop Manager - Devolutions Documentation](#devolutions-gateway-configuration-in-remote-desktop-manager-devolutions-documentation)
- [Démarrage - Documentation Devolutions](#d-marrage-documentation-devolutions)
- [Getting started - Devolutions Documentation](#getting-started-devolutions-documentation)
- [Getting started - Devolutions Documentation](#getting-started-devolutions-documentation)
- [Configuration de Devolutions Gateway sur Linux - Documentation Devolutions](#configuration-de-devolutions-gateway-sur-linux-documentation-devolutions)
- [Gateway ruleset configuration in Devolutions Server - Devolutions Documentation](#gateway-ruleset-configuration-in-devolutions-server-devolutions-documentation)
- [Devolutions Gateway configuration on Linux - Devolutions Documentation](#devolutions-gateway-configuration-on-linux-devolutions-documentation)
- [Configuration de l'ensemble de règles Gateway dans Devolutions Server - Documentation Devolutions](#configuration-de-l-ensemble-de-r-gles-gateway-dans-devolutions-server-documentation-devolutions)
- [Gateway ruleset configuration in Devolutions Server - Devolutions Documentation](#gateway-ruleset-configuration-in-devolutions-server-devolutions-documentation)
- [Devolutions Gateway farms - Devolutions Documentation](#devolutions-gateway-farms-devolutions-documentation)
- [Fermes Devolutions Gateway - Documentation Devolutions](#fermes-devolutions-gateway-documentation-devolutions)
- [Devolutions Server - Documentation Devolutions](#devolutions-server-documentation-devolutions)
- [Devolutions Server - Devolutions Documentation](#devolutions-server-devolutions-documentation)
- [Devolutions Gateway configuration on Linux - Devolutions Documentation](#devolutions-gateway-configuration-on-linux-devolutions-documentation)
- [Devolutions Gateway farms - Devolutions Documentation](#devolutions-gateway-farms-devolutions-documentation)
- [Configuration de Devolutions Gateway dans Remote Desktop Manager - Documentation Devolutions](#configuration-de-devolutions-gateway-dans-remote-desktop-manager-documentation-devolutions)
- [Devolutions Server - Devolutions Documentation](#devolutions-server-devolutions-documentation)
- [Devolutions Gateway configuration in Remote Desktop Manager - Devolutions Documentation](#devolutions-gateway-configuration-in-remote-desktop-manager-devolutions-documentation)
- [Devolutions Gateway configuration in Remote Desktop Manager - Devolutions Documentation](#devolutions-gateway-configuration-in-remote-desktop-manager-devolutions-documentation)
- [Devolutions Gateway avec Devolutions Server - Documentation Devolutions](#devolutions-gateway-avec-devolutions-server-documentation-devolutions)
- [Devolutions Gateway with Devolutions Server - Devolutions Documentation](#devolutions-gateway-with-devolutions-server-devolutions-documentation)
- [Configuration de Devolutions Gateway avec Devolutions Server - Documentation Devolutions](#configuration-de-devolutions-gateway-avec-devolutions-server-documentation-devolutions)
- [Clear a browser's local storage - Devolutions Documentation](#clear-a-browser-s-local-storage-devolutions-documentation)
- [Effacer le stockage local d'un navigateur - Documentation Devolutions](#effacer-le-stockage-local-d-un-navigateur-documentation-devolutions)
- [Devolutions Gateway with Devolutions Server - Devolutions Documentation](#devolutions-gateway-with-devolutions-server-devolutions-documentation)
- [Devolutions Gateway farms configuration - Devolutions Documentation](#devolutions-gateway-farms-configuration-devolutions-documentation)
- [Récupération du compte Devolutions - Documentation Devolutions](#r-cup-ration-du-compte-devolutions-documentation-devolutions)
- [Devolutions Gateway configuration with Devolutions Server - Devolutions Documentation](#devolutions-gateway-configuration-with-devolutions-server-devolutions-documentation)
- [Devolutions Account recovery - Devolutions Documentation](#devolutions-account-recovery-devolutions-documentation)
- [La page de connexion Devolutions ne s'ouvre pas dans le navigateur - Documentation Devolutions](#la-page-de-connexion-devolutions-ne-s-ouvre-pas-dans-le-navigateur-documentation-devolutions)
- [Devolutions Account recovery - Devolutions Documentation](#devolutions-account-recovery-devolutions-documentation)
- [Clear a browser's local storage - Devolutions Documentation](#clear-a-browser-s-local-storage-devolutions-documentation)
- [Devolutions login page does not open in the browser - Devolutions Documentation](#devolutions-login-page-does-not-open-in-the-browser-devolutions-documentation)
- [Devolutions Send Standalone - Devolutions Documentation](#devolutions-send-standalone-devolutions-documentation)
- [Prévenir les problèmes en faisant correspondre les versions majeures et mineures - Documentation Devolutions](#pr-venir-les-probl-mes-en-faisant-correspondre-les-versions-majeures-et-mineures-documentation-devolutions)
- [Connaissance générale - Documentation Devolutions](#connaissance-g-n-rale-documentation-devolutions)
- [Devolutions Send Standalone - Documentation Devolutions](#devolutions-send-standalone-documentation-devolutions)
- [General knowledge - Devolutions Documentation](#general-knowledge-devolutions-documentation)
- [Prevent issues by matching major and minor versions - Devolutions Documentation](#prevent-issues-by-matching-major-and-minor-versions-devolutions-documentation)
- [Devolutions login page does not open in the browser - Devolutions Documentation](#devolutions-login-page-does-not-open-in-the-browser-devolutions-documentation)
- [Installer des certificats racines - Documentation Devolutions](#installer-des-certificats-racines-documentation-devolutions)
- [Licence - Documentation Devolutions](#licence-documentation-devolutions)
- [License - Devolutions Documentation](#license-devolutions-documentation)
- [General knowledge - Devolutions Documentation](#general-knowledge-devolutions-documentation)
- [Devolutions Send Standalone - Devolutions Documentation](#devolutions-send-standalone-devolutions-documentation)
- [Prevent issues by matching major and minor versions - Devolutions Documentation](#prevent-issues-by-matching-major-and-minor-versions-devolutions-documentation)
- [Install root certificates - Devolutions Documentation](#install-root-certificates-devolutions-documentation)
- [Politiques de cycle de vie - Documentation Devolutions](#politiques-de-cycle-de-vie-documentation-devolutions)
- [Install root certificates - Devolutions Documentation](#install-root-certificates-devolutions-documentation)
- [Life cycle policies - Devolutions Documentation](#life-cycle-policies-devolutions-documentation)
- [License - Devolutions Documentation](#license-devolutions-documentation)
- [Vault privacy for administrators and users - Devolutions Documentation](#vault-privacy-for-administrators-and-users-devolutions-documentation)
- [Life cycle policies - Devolutions Documentation](#life-cycle-policies-devolutions-documentation)
- [Confidentialité des coffres pour les administrateurs et les utilisateurs - Documentation Devolutions](#confidentialit-des-coffres-pour-les-administrateurs-et-les-utilisateurs-documentation-devolutions)
- [Remote Desktop Manager life cycle policies - Devolutions Documentation](#remote-desktop-manager-life-cycle-policies-devolutions-documentation)
- [How to renew your license - Devolutions Documentation](#how-to-renew-your-license-devolutions-documentation)
- [Générer des certificats serveur et client auto-signés avec OpenSSL - Documentation Devolutions](#g-n-rer-des-certificats-serveur-et-client-auto-sign-s-avec-openssl-documentation-devolutions)
- [Licensing issues - Devolutions Documentation](#licensing-issues-devolutions-documentation)
- [Generate a self-signed server and client certificates with OpenSSL - Devolutions Documentation](#generate-a-self-signed-server-and-client-certificates-with-openssl-devolutions-documentation)
- [Qu'est-ce que SHA-256 ? - Documentation Devolutions](#qu-est-ce-que-sha-256-documentation-devolutions)
- [Devolutions Workspace life cycle policies - Devolutions Documentation](#devolutions-workspace-life-cycle-policies-devolutions-documentation)
- [What is SHA-256? - Devolutions Documentation](#what-is-sha-256-devolutions-documentation)
- [Change Devolutions Gateway certificate - Devolutions Documentation](#change-devolutions-gateway-certificate-devolutions-documentation)
- [Changer le certificat Devolutions Gateway - Documentation Devolutions](#changer-le-certificat-devolutions-gateway-documentation-devolutions)
- [Vault privacy for administrators and users - Devolutions Documentation](#vault-privacy-for-administrators-and-users-devolutions-documentation)
- [Generate a self-signed server and client certificates with OpenSSL - Devolutions Documentation](#generate-a-self-signed-server-and-client-certificates-with-openssl-devolutions-documentation)
- [What is SHA-256? - Devolutions Documentation](#what-is-sha-256-devolutions-documentation)
- [Configurer l'injection des identifiants basée sur un proxy - Documentation Devolutions](#configurer-l-injection-des-identifiants-bas-e-sur-un-proxy-documentation-devolutions)
- [How-to articles - Devolutions Documentation](#how-to-articles-devolutions-documentation)
- [Articles pratiques - Documentation Devolutions](#articles-pratiques-documentation-devolutions)
- [Change Devolutions Gateway certificate - Devolutions Documentation](#change-devolutions-gateway-certificate-devolutions-documentation)
- [Configure proxy-based credential injection - Devolutions Documentation](#configure-proxy-based-credential-injection-devolutions-documentation)
- [Configure proxy-based credential injection - Devolutions Documentation](#configure-proxy-based-credential-injection-devolutions-documentation)
- [How-to articles - Devolutions Documentation](#how-to-articles-devolutions-documentation)
- [Déployer rapidement Devolutions Gateway - Documentation Devolutions](#d-ployer-rapidement-devolutions-gateway-documentation-devolutions)
- [Lancer une session SSH dans un client Web - Documentation Devolutions](#lancer-une-session-ssh-dans-un-client-web-documentation-devolutions)
- [Démarrer une session RDP dans un client web - Documentation Devolutions](#d-marrer-une-session-rdp-dans-un-client-web-documentation-devolutions)
- [Reverse proxying - Devolutions Documentation](#reverse-proxying-devolutions-documentation)
- [Reverse proxying - Documentation Devolutions](#reverse-proxying-documentation-devolutions)
- [Quickly deploy Devolutions Gateway - Devolutions Documentation](#quickly-deploy-devolutions-gateway-devolutions-documentation)
- [Quickly deploy Devolutions Gateway - Devolutions Documentation](#quickly-deploy-devolutions-gateway-devolutions-documentation)
- [Launch an SSH session in a web client - Devolutions Documentation](#launch-an-ssh-session-in-a-web-client-devolutions-documentation)
- [Launch an RDP session in a web client - Devolutions Documentation](#launch-an-rdp-session-in-a-web-client-devolutions-documentation)
- [Reverse proxying - Devolutions Documentation](#reverse-proxying-devolutions-documentation)
- [Use Devolutions Gateway with an external browser - Devolutions Documentation](#use-devolutions-gateway-with-an-external-browser-devolutions-documentation)
- [Utiliser Devolutions Gateway avec un navigateur externe - Documentation Devolutions](#utiliser-devolutions-gateway-avec-un-navigateur-externe-documentation-devolutions)
- [Launch an RDP session in a web client - Devolutions Documentation](#launch-an-rdp-session-in-a-web-client-devolutions-documentation)
- [Launch an SSH session in a web client - Devolutions Documentation](#launch-an-ssh-session-in-a-web-client-devolutions-documentation)
- [Base de connaissances - Documentation Devolutions](#base-de-connaissances-documentation-devolutions)
- [Cloudflare with Devolutions Gateway - Devolutions Documentation](#cloudflare-with-devolutions-gateway-devolutions-documentation)
- [Ngrok tunnel with Devolutions Gateway - Devolutions Documentation](#ngrok-tunnel-with-devolutions-gateway-devolutions-documentation)
- [Knowledge base - Devolutions Documentation](#knowledge-base-devolutions-documentation)
- [Use the Devolutions Gateway KDC proxy - Devolutions Documentation](#use-the-devolutions-gateway-kdc-proxy-devolutions-documentation)
- [Utiliser le mandataire KDC de Devolutions Gateway - Documentation Devolutions](#utiliser-le-mandataire-kdc-de-devolutions-gateway-documentation-devolutions)
- [Articles de la base de connaissances - Documentation Devolutions](#articles-de-la-base-de-connaissances-documentation-devolutions)
- [Use Devolutions Gateway with an external browser - Devolutions Documentation](#use-devolutions-gateway-with-an-external-browser-devolutions-documentation)
- [Knowledge base articles - Devolutions Documentation](#knowledge-base-articles-devolutions-documentation)
- [Devolutions Gateway recording path - Devolutions Documentation](#devolutions-gateway-recording-path-devolutions-documentation)
- [Utiliser le magasin de certificats Windows pour Devolutions Gateway - Documentation Devolutions](#utiliser-le-magasin-de-certificats-windows-pour-devolutions-gateway-documentation-devolutions)
- [Chemin d'enregistrement Devolutions Gateway - Documentation Devolutions](#chemin-d-enregistrement-devolutions-gateway-documentation-devolutions)
- [Use the Devolutions Gateway KDC proxy - Devolutions Documentation](#use-the-devolutions-gateway-kdc-proxy-devolutions-documentation)
- [Type de connexion de tunnel Devolutions Gateway - Documentation Devolutions](#type-de-connexion-de-tunnel-devolutions-gateway-documentation-devolutions)
- [Devolutions Gateway tunnel connection type - Devolutions Documentation](#devolutions-gateway-tunnel-connection-type-devolutions-documentation)
- [Use Windows certificate store for Devolutions Gateway - Devolutions Documentation](#use-windows-certificate-store-for-devolutions-gateway-devolutions-documentation)
- [Knowledge base - Devolutions Documentation](#knowledge-base-devolutions-documentation)
- [Articles de dépannage - Documentation Devolutions](#articles-de-d-pannage-documentation-devolutions)
- [Knowledge base articles - Devolutions Documentation](#knowledge-base-articles-devolutions-documentation)
- [Troubleshooting articles - Devolutions Documentation](#troubleshooting-articles-devolutions-documentation)
- [Devolutions Gateway side-by-side installation method not found - Devolutions Documentation](#devolutions-gateway-side-by-side-installation-method-not-found-devolutions-documentation)
- [Méthode d'installation côte à côte Devolutions Gateway non trouvée - Documentation Devolutions](#m-thode-d-installation-c-te-c-te-devolutions-gateway-non-trouv-e-documentation-devolutions)
- [Résolution des problèmes de Devolutions Gateway - Documentation Devolutions](#r-solution-des-probl-mes-de-devolutions-gateway-documentation-devolutions)
- [Devolutions Gateway tunnel connection type - Devolutions Documentation](#devolutions-gateway-tunnel-connection-type-devolutions-documentation)
- [Use Windows certificate store for Devolutions Gateway - Devolutions Documentation](#use-windows-certificate-store-for-devolutions-gateway-devolutions-documentation)
- [Devolutions Gateway troubleshooting - Devolutions Documentation](#devolutions-gateway-troubleshooting-devolutions-documentation)
- [Devolutions Gateway recording path - Devolutions Documentation](#devolutions-gateway-recording-path-devolutions-documentation)
- [Problèmes de certificat TLS invalide pour l'enregistrement de la session via Devolutions Gateway - Documentation Devolutions](#probl-mes-de-certificat-tls-invalide-pour-l-enregistrement-de-la-session-via-devolutions-gateway-documentation-devolutions)
- [Troubleshooting articles - Devolutions Documentation](#troubleshooting-articles-devolutions-documentation)
- [Invalid TLS certificate issues for session recording via Devolutions Gateway - Devolutions Documentation](#invalid-tls-certificate-issues-for-session-recording-via-devolutions-gateway-devolutions-documentation)
- [Aperçu - Documentation Devolutions](#aper-u-documentation-devolutions)
- [Devolutions Gateway side-by-side installation method not found - Devolutions Documentation](#devolutions-gateway-side-by-side-installation-method-not-found-devolutions-documentation)
- [Client web RDP ne s'affiche pas - Documentation Devolutions](#client-web-rdp-ne-s-affiche-pas-documentation-devolutions)
- [Overview - Devolutions Documentation](#overview-devolutions-documentation)
- [Devolutions Gateway troubleshooting - Devolutions Documentation](#devolutions-gateway-troubleshooting-devolutions-documentation)
- [Exigences système - Documentation Devolutions](#exigences-syst-me-documentation-devolutions)
- [System requirements - Devolutions Documentation](#system-requirements-devolutions-documentation)
- [RDP web client not showing - Devolutions Documentation](#rdp-web-client-not-showing-devolutions-documentation)
- [Devolutions Gateway - Documentation Devolutions](#devolutions-gateway-documentation-devolutions)
- [Invalid TLS certificate issues for session recording via Devolutions Gateway - Devolutions Documentation](#invalid-tls-certificate-issues-for-session-recording-via-devolutions-gateway-devolutions-documentation)
- [Exigences système pour Devolutions Server - Documentation Devolutions](#exigences-syst-me-pour-devolutions-server-documentation-devolutions)
- [Exigences système pour Devolutions Hub Business - Documentation Devolutions](#exigences-syst-me-pour-devolutions-hub-business-documentation-devolutions)
- [System requirements for Devolutions Server - Devolutions Documentation](#system-requirements-for-devolutions-server-devolutions-documentation)
- [Devolutions Gateway - Devolutions Documentation](#devolutions-gateway-devolutions-documentation)
- [System requirements for Devolutions Hub Business - Devolutions Documentation](#system-requirements-for-devolutions-hub-business-devolutions-documentation)
- [RDP web client not showing - Devolutions Documentation](#rdp-web-client-not-showing-devolutions-documentation)
- [Overview - Devolutions Documentation](#overview-devolutions-documentation)
- [Devolutions Force - Devolutions Documentation](#devolutions-force-devolutions-documentation)
- [Devolutions Force - Documentation de Devolutions](#devolutions-force-documentation-de-devolutions)
- [System requirements - Devolutions Documentation](#system-requirements-devolutions-documentation)
- [Devolutions Academy - Documentation de Devolutions](#devolutions-academy-documentation-de-devolutions)
- [Devolutions Academy - Devolutions Documentation](#devolutions-academy-devolutions-documentation)
- [Devolutions Forum - Devolutions Documentation](#devolutions-forum-devolutions-documentation)
- [Devolutions Forum - Documentation de Devolutions](#devolutions-forum-documentation-de-devolutions)
- [Versions d'essai gratuites - Documentation Devolutions](#versions-d-essai-gratuites-documentation-devolutions)
- [Free trials - Devolutions Documentation](#free-trials-devolutions-documentation)
- [Commencer avec les packages Devolutions - Documentation Devolutions](#commencer-avec-les-packages-devolutions-documentation-devolutions)
- [System requirements for Devolutions Hub Business - Devolutions Documentation](#system-requirements-for-devolutions-hub-business-devolutions-documentation)
- [Devolutions Force - Devolutions Documentation](#devolutions-force-devolutions-documentation)
- [System requirements for Devolutions Server - Devolutions Documentation](#system-requirements-for-devolutions-server-devolutions-documentation)
- [Devolutions Academy - Devolutions Documentation](#devolutions-academy-devolutions-documentation)
- [Devolutions Forum - Devolutions Documentation](#devolutions-forum-devolutions-documentation)
- [Free trials - Devolutions Documentation](#free-trials-devolutions-documentation)
- [Getting started with Devolutions packages - Devolutions Documentation](#getting-started-with-devolutions-packages-devolutions-documentation)
- [Getting started with Devolutions packages - Devolutions Documentation](#getting-started-with-devolutions-packages-devolutions-documentation)
- [Support and resources - Devolutions Documentation](#support-and-resources-devolutions-documentation)
- [Support et ressources - Documentation Devolutions](#support-et-ressources-documentation-devolutions)
- [Avis de sécurité - Documentation Devolutions](#avis-de-s-curit-documentation-devolutions)
- [Security advisories - Devolutions Documentation](#security-advisories-devolutions-documentation)
- [Securely send a file to our team - Devolutions Documentation](#securely-send-a-file-to-our-team-devolutions-documentation)
- [Paquet de gestion de l'accès à distance - Documentation Devolutions](#paquet-de-gestion-de-l-acc-s-distance-documentation-devolutions)
- [Envoyer un fichier à notre équipe de manière sécurisée - Documentation Devolutions](#envoyer-un-fichier-notre-quipe-de-mani-re-s-curis-e-documentation-devolutions)
- [Integration levels - Devolutions Documentation](#integration-levels-devolutions-documentation)
- [Remote access management package - Devolutions Documentation](#remote-access-management-package-devolutions-documentation)
- [Niveaux d'intégration - Documentation Devolutions](#niveaux-d-int-gration-documentation-devolutions)
- [Customer support - Devolutions Documentation](#customer-support-devolutions-documentation)
- [Système de billetterie - Documentation Devolutions](#syst-me-de-billetterie-documentation-devolutions)
- [Support client - Documentation Devolutions](#support-client-documentation-devolutions)
- [Ticketing system - Devolutions Documentation](#ticketing-system-devolutions-documentation)
- [Paquet de gestion des accès privilégiés - Documentation Devolutions](#paquet-de-gestion-des-acc-s-privil-gi-s-documentation-devolutions)
- [Gestion des bureaux à distance et opérations TI - Documentation Devolutions](#gestion-des-bureaux-distance-et-op-rations-ti-documentation-devolutions)
- [Package de gestion des mots de passe de la main-d'œuvre - Documentation Devolutions](#package-de-gestion-des-mots-de-passe-de-la-main-d-uvre-documentation-devolutions)
- [YouTube channel - Devolutions Documentation](#youtube-channel-devolutions-documentation)
- [Support and resources - Devolutions Documentation](#support-and-resources-devolutions-documentation)
- [Chaîne YouTube - Documentation Devolutions](#cha-ne-youtube-documentation-devolutions)
- [Privileged access management package - Devolutions Documentation](#privileged-access-management-package-devolutions-documentation)
- [Workforce password management package - Devolutions Documentation](#workforce-password-management-package-devolutions-documentation)
- [Forfait de Démarrage - Documentation Devolutions](#forfait-de-d-marrage-documentation-devolutions)
- [Remote desktop management and IT operations package - Devolutions Documentation](#remote-desktop-management-and-it-operations-package-devolutions-documentation)
- [Security advisories - Devolutions Documentation](#security-advisories-devolutions-documentation)
- [Remote access management package - Devolutions Documentation](#remote-access-management-package-devolutions-documentation)
- [Securely send a file to our team - Devolutions Documentation](#securely-send-a-file-to-our-team-devolutions-documentation)
- [Ticketing system - Devolutions Documentation](#ticketing-system-devolutions-documentation)
- [Privileged access management package - Devolutions Documentation](#privileged-access-management-package-devolutions-documentation)
- [Remote desktop management and IT operations package - Devolutions Documentation](#remote-desktop-management-and-it-operations-package-devolutions-documentation)
- [Starter Pack - Devolutions Documentation](#starter-pack-devolutions-documentation)
- [Customer support - Devolutions Documentation](#customer-support-devolutions-documentation)
- [Integration levels - Devolutions Documentation](#integration-levels-devolutions-documentation)
- [YouTube channel - Devolutions Documentation](#youtube-channel-devolutions-documentation)
- [Workforce password management package - Devolutions Documentation](#workforce-password-management-package-devolutions-documentation)
- [Starter Pack - Devolutions Documentation](#starter-pack-devolutions-documentation)
- [API - Documentation Devolutions](#api-documentation-devolutions)
- [API - Devolutions Documentation](#api-devolutions-documentation)
- [API - Devolutions Documentation](#api-devolutions-documentation)
- [Check-out approvals - Devolutions Documentation](#check-out-approvals-devolutions-documentation)
---
# Devolutions Documentation
What can we help you with?
Devolutions Documentation
=========================
Need help? Here is the complete coverage for all Devolutions products, add-ons, and companion tools.
Remote access and connection management
---------------------------------------
[Remote Desktop Manager](https://docs.devolutions.net/rdm/overview/what-is-rdm/)
* * *
* [What is Remote Desktop Manager?](https://docs.devolutions.net/rdm/overview/what-is-rdm/)
* [Getting started](https://docs.devolutions.net/rdm/getting-started/)
* [Installation](https://docs.devolutions.net/rdm/installation/client/)
[Devolutions Gateway](https://docs.devolutions.net/gateway/overview/what-is-gateway/)
* * *
* [What is Devolutions Gateway?](https://docs.devolutions.net/gateway/overview/what-is-gateway/)
* [Devolutions Server](https://docs.devolutions.net/gateway/getting-started/server/server-configuration/)
* [Devolutions Hub](https://docs.devolutions.net/gateway/getting-started/hub/hub-business-configuration/)
[Devolutions Launcher](https://docs.devolutions.net/server/devolutions-ecosystem/launcher/)
* * *
* [What is Devolutions Launcher?](https://docs.devolutions.net/server/devolutions-ecosystem/launcher/)
* [Download and installation](https://docs.devolutions.net/server/devolutions-ecosystem/launcher/installation/download-installation/)
[Devolutions Workspace](https://docs.devolutions.net/workspace/overview/what-is-workspace/)
* * *
* [What is Devolutions Workspace?](https://docs.devolutions.net/workspace/overview/what-is-workspace/)
* [Workspace app installation](https://docs.devolutions.net/workspace/workspace-app/installation/)
* [Browser extension installation](https://docs.devolutions.net/workspace/workspace-browser-extension/installation/)
Data sources
------------
[Devolutions Server](https://docs.devolutions.net/server/overview/what-is-server/)
* * *
* [What is Devolutions Server?](https://docs.devolutions.net/server/overview/what-is-server/)
* [Getting started](https://docs.devolutions.net/server/getting-started/)
* [Installation](https://docs.devolutions.net/server/getting-started/installation/)
[Devolutions Hub](https://docs.devolutions.net/hub/overview/what-is-hub/)
* * *
* [What is Devolutions Hub?](https://docs.devolutions.net/hub/overview/what-is-hub/)
* [Getting started](https://docs.devolutions.net/hub/getting-started/get-started-hub-business/)
* [Getting started with single sign-on (SSO)](https://docs.devolutions.net/hub/getting-started/get-started-sso-hub-business/)
* [Devolutions Account](https://docs.devolutions.net/portal/profile/)
Privileged access management
----------------------------
[Devolutions PAM](https://docs.devolutions.net/pam/overview/what-is-pam/)
* * *
* [What is Devolutions PAM?](https://docs.devolutions.net/pam/overview/what-is-pam/)
* [Remote Desktop Manager](https://docs.devolutions.net/pam/rdm/)
* [Devolutions Server](https://docs.devolutions.net/pam/server/)
* [Devolutions Hub Business](https://docs.devolutions.net/pam/hub/)
Scripting, automation, and tools
--------------------------------
[Devolutions PowerShell](https://docs.devolutions.net/powershell/overview/what-is-powershell/)
* * *
* [What is Devolutions PowerShell?](https://docs.devolutions.net/powershell/overview/what-is-powershell/)
* [Remote Desktop Manager](https://docs.devolutions.net/powershell/overview/what-is-powershell/)
* [Devolutions Server](https://docs.devolutions.net/powershell/dvls-powershell/)
* [Devolutions Hub](https://docs.devolutions.net/powershell/hub-powershell/)
* [Devolutions Gateway](https://docs.devolutions.net/powershell/gateway-powershell/)
Devolutions Send
* * *
* [Devolutions Send with Remote Desktop Manager](https://docs.devolutions.net/rdm/devolutions-ecosystem/send/)
* [Devolutions Send with Devolutions Server](https://docs.devolutions.net/server/devolutions-ecosystem/send/)
* [Devolutions Send with Devolutions Hub](https://docs.devolutions.net/hub/devolutions-ecosystem/send/)
* [Devolutions Send Standalone](https://docs.devolutions.net/workspace/kb/general-knowledge/devolutions-send-standalone/)
[Devolutions Portal](https://docs.devolutions.net/portal/overview/what-is-portal/)
* * *
* [What is Devolutions Portal?](https://docs.devolutions.net/portal/overview/what-is-portal/)
* [Profile](https://docs.devolutions.net/portal/profile/)
* [Create a Devolutions Account](https://docs.devolutions.net/portal/profile/create-devolutions-account/)
* [Sign-in & Security](https://docs.devolutions.net/portal/sign-in-security/)
* [Licenses](https://docs.devolutions.net/portal/licenses/)
[Devolutions Agent](https://docs.devolutions.net/rdm/devolutions-ecosystem/devolutions-agent/)
* * *
* [What is Devolutions Agent?](https://docs.devolutions.net/rdm/devolutions-ecosystem/devolutions-agent/)
Live chat:Agent Offline
---
# Devolutions knowledge base - Devolutions Documentation
What can we help you with?
Devolutions knowledge base
==========================
Dig deeper with expert articles on problem resolution, advanced usage, and step-by-step instructions to help you resolve issues and master Devolutions products.
Remote access and connection management
---------------------------------------
Remote Desktop Manager
* * *
* [General knowledge](https://docs.devolutions.net/rdm/kb/general-knowledge/)
* [How-to articles](https://docs.devolutions.net/rdm/kb/how-to-articles/)
* [Troubleshooting articles](https://docs.devolutions.net/rdm/kb/troubleshooting-articles/)
* [Knowledge base articles](https://docs.devolutions.net/rdm/kb/knowledge-base/)
Devolutions Gateway
* * *
* [General knowledge](https://docs.devolutions.net/gateway/kb/general-knowledge/)
* [How-to articles](https://docs.devolutions.net/gateway/kb/how-to-articles/)
* [Troubleshooting articles](https://docs.devolutions.net/gateway/kb/troubleshooting-articles/)
* [Knowledge base articles](https://docs.devolutions.net/gateway/kb/knowledge-base/)
Devolutions Workspace
* * *
* [General knowledge](https://docs.devolutions.net/workspace/kb/general-knowledge/)
* [Workspace app knowledge base](https://docs.devolutions.net/workspace/workspace-app/)
* [Workspace browser extension knowledge base](https://docs.devolutions.net/workspace/kb/workspace-browser-extension/)
Data sources
------------
Devolutions Server
* * *
* [General knowledge](https://docs.devolutions.net/server/kb/general-knowledge/)
* [How-to articles](https://docs.devolutions.net/server/kb/how-to-articles/)
* [Troubleshooting articles](https://docs.devolutions.net/server/kb/troubleshooting-articles/)
* [Knowledge base articles](https://docs.devolutions.net/server/kb/knowledge-base/)
Devolutions Hub
* * *
* [General knowledge](https://docs.devolutions.net/hub/kb/general-knowledge/)
* [How-to articles](https://docs.devolutions.net/hub/kb/how-to-articles/)
* [Troubleshooting articles](https://docs.devolutions.net/hub/kb/troubleshooting-articles/)
* [Knowledge base articles](https://docs.devolutions.net/hub/kb/knowledge-base/)
Privileged access management
----------------------------
Devolutions PAM
* * *
* [General knowledge](https://docs.devolutions.net/pam/kb/general-knowledge/)
* [How-to articles](https://docs.devolutions.net/pam/kb/how-to-articles/)
* [Troubleshooting articles](https://docs.devolutions.net/pam/kb/troubleshooting-articles/)
* [Knowledge base articles](https://docs.devolutions.net/pam/kb/knowledge-base/)
Scripting, automation, and tools
--------------------------------
Devolutions PowerShell
* * *
* [General knowledge](https://docs.devolutions.net/powershell/kb/general-knowledge/)
Devolutions Portal
* * *
* [General knowledge](https://docs.devolutions.net/portal/kb/general-knowledge/)
---
# Profile - Devolutions Documentation
Profile
=======
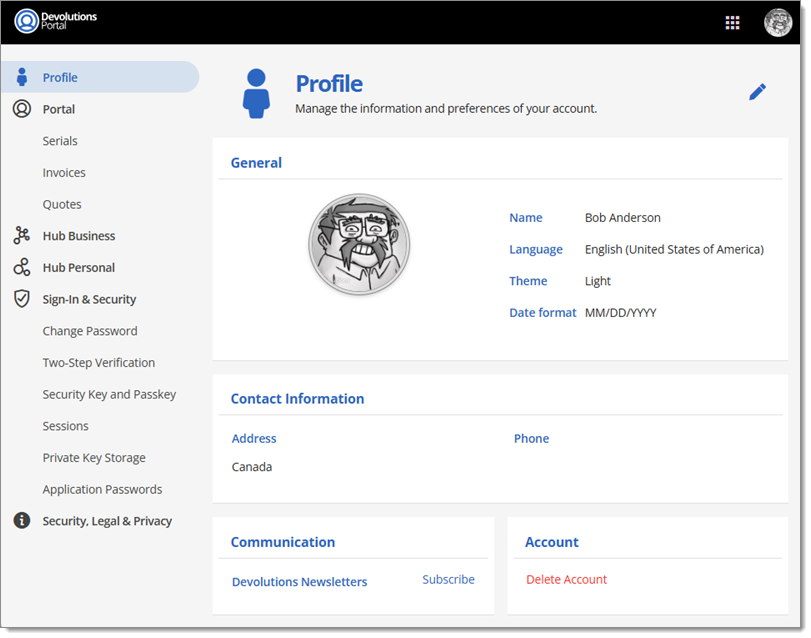
In the [_**Profile**_](https://portal.devolutions.com/profile)
section, you can manage the information and preferences of your Devolutions Account.
* _**General**_: Set your name, your display language, your display theme, and the date format. Manage your profile image using the [Gravatar](https://gravatar.com/)
system.
* _**Contact information**_: Link an address and a phone number to your Devolutions Account.
* _**Communication**_: Manage your Devolutions Newletters communication preferences.
You also have the option to permanently delete your Devolutions Account, but please note that **this action cannot be undone**. Once an account is deleted, it is irreversible. To understand the implications of this decision, we encourage you to read [How deleting Devolutions Accounts affects Hub](https://docs.devolutions.net/hub/kb/knowledge-base/deleting-devolutions-account-affect-hub/)
.
Profile
[ Share your feedback](https://forum.devolutions.net/forums/176/documentation--documentation-requests)
---
# Devolutions Gateway - Devolutions Documentation
Devolutions Gateway
===================
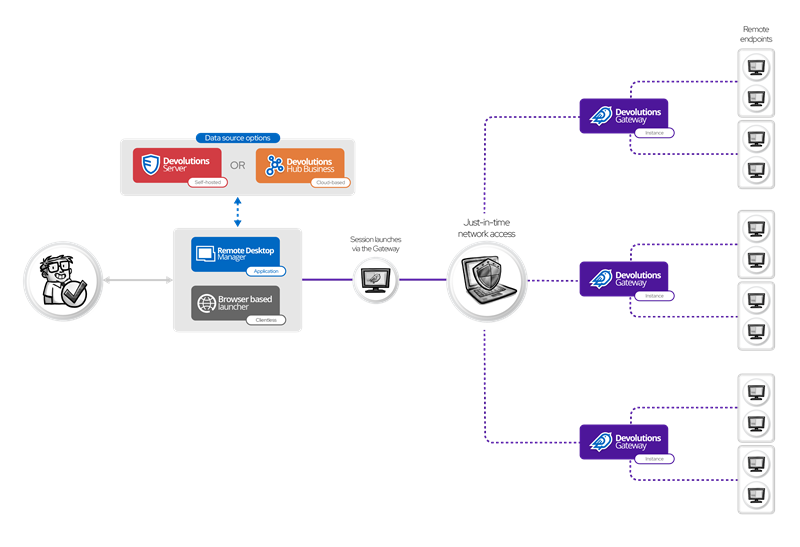
Devolutions Gateway provides authorized just-in-time access to resources in segmented networks.
Key benefits of Devolutions Gateway include:
* Reduced exposure to internal network resources with just-in-time RDP connections through the Devolutions Gateway.
* Replaced static VPN and firewall rules with dynamic access rules controlled by Devolutions Server.
* Enhanced security by giving remote access, or access to specific applications, in separate network segments on demand.
* Improved productivity by eliminating the need to update VPN or firewall rules for temporary access.
* Possible use of Devolutions Gateway with supported connection entry types (RDP, SSH, VNC, ARD, SCP, SFTP, PowerShell, Telnet, websites) in Remote Desktop Manager and supported data sources (Devolutions Server, Devolutions Hub Business).
* Increased scalability by eliminating the need to use multiple VPNs to access many environments simultaneously. Devolutions Gateway can handle over 75 concurrent sessions, depending on the infrastructure.
Learn more about [Devolutions Gateway](https://devolutions.net/gateway/)
.
### See also
[](https://docs.devolutions.net/gateway/overview/what-is-gateway/#see-also)
* [Devolutions Academy - Overview of Devolutions Gateway](https://academy.devolutions.net/student/path/2007290/activity/3070847 "Devolutions Academy - Overview of the Devolutions Gateway")
[ Share your feedback](https://forum.devolutions.net/forums/176/documentation--documentation-requests)
---
# Devolutions Gateway configuration with Devolutions Hub Business - Devolutions Documentation
Devolutions Gateway configuration with Devolutions Hub Business
===============================================================
On this page
* [Steps for installing manually](https://docs.devolutions.net/gateway/getting-started/hub/hub-business-configuration/#steps-for-installing-manually)
* [See also](https://docs.devolutions.net/gateway/getting-started/hub/hub-business-configuration/#see-also)
Devolutions Gateway allows for just-in-time connections at the session level, eliminating the need to change the system's global configuration. Devolutions Gateway provides a flexible and secure alternative to VPNs, offering easy access management and efficient use of network resources.
If your clients fail to connect with Devolutions Gateway, ensure the certificate contains the entire chain. This certificate chain includes any intermediate certificates. For example: Root Certificate Authority – Secure (Intermediate) Certificate Authority – Purchased XYZ Certificate
Additionally, to [Launch an RDP session](https://docs.devolutions.net/gateway/kb/how-to-articles/launch-rdp-session-web-client/)
with Devolutions Gateway only browsers that meet these minimal version requirements are compatible:
* Chrome: 102
* Firefox: 102
* Safari: 16.4
Steps for installing manually
-----------------------------
[](https://docs.devolutions.net/gateway/getting-started/hub/hub-business-configuration/#steps-for-installing-manually)
The following instructions explain how to manually install Devolutions Gateway through Devolutions Hub Business.
As the installer is an MSI file, this method only works on Windows.
1. Log in with an administrator Devolutions Hub Business account.
2. Create an [application identity](https://docs.devolutions.net/hub/web-interface/administration/management/application-users/manage-application-users/)
.
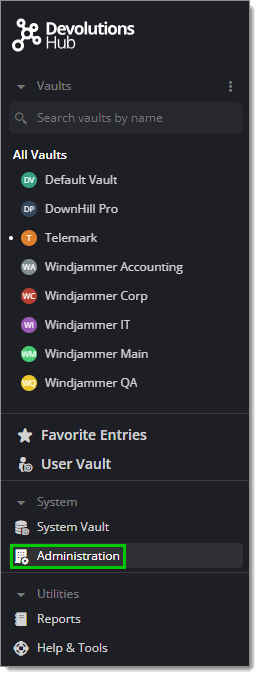
3. Once the application identity has been created, click on the _**Administration**_ tab.
Administration tab
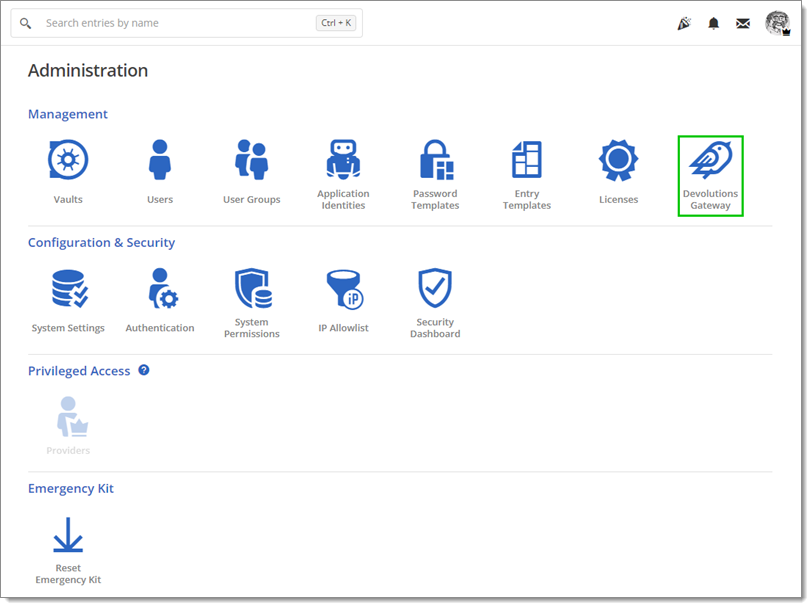
4. Click on Devolutions Gateway, which is under the _**Management**_ section.
5. Click on the _**More**_ button in the top right.
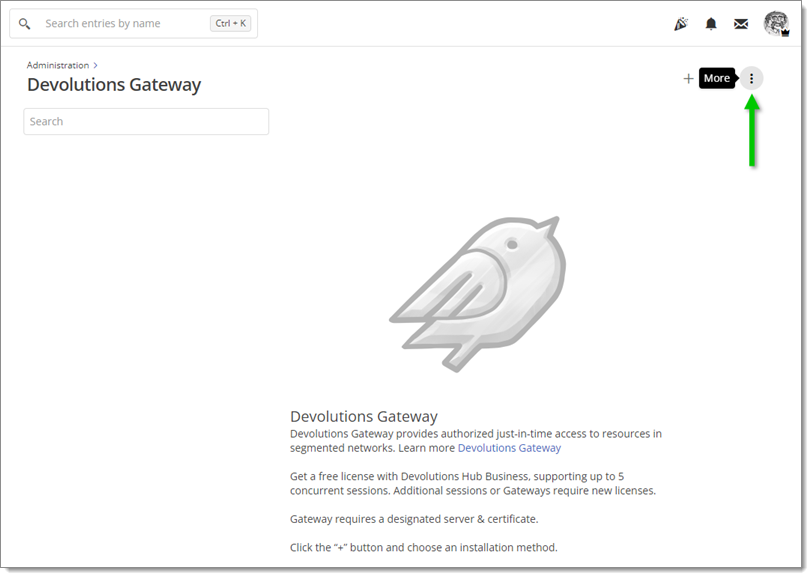
More button
6. Click on _**Download public key**_. This key is unique to the Devolutions Hub Business account. It is automatically renamed to _provisioner.pem_. Keep track of where you saved this key, as it will be needed later.
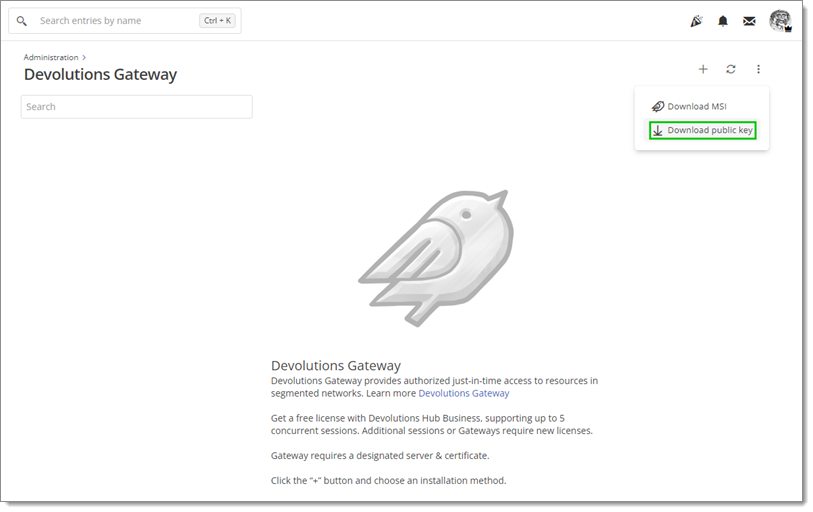
Gateway public key
7. Select _**Download MSI**_ from the dropdown.
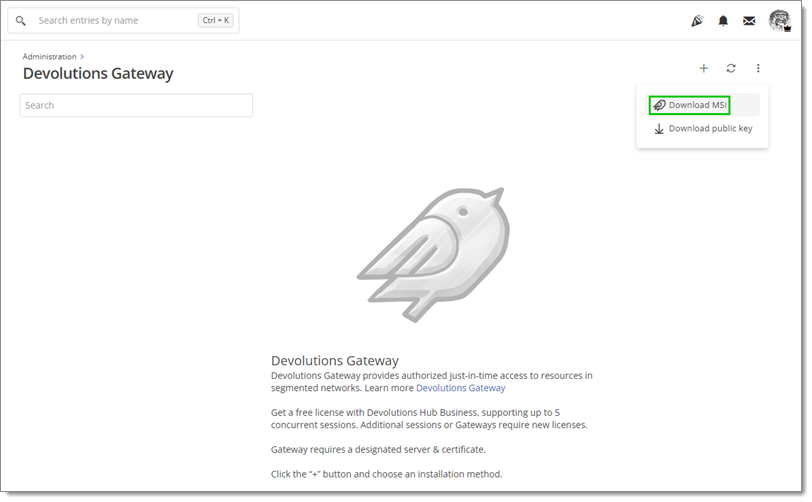
Download MSI
8. Execute the installer.
The installer should be run on the server hosting Devolutions Gateway.
9. Click _**Next**_.
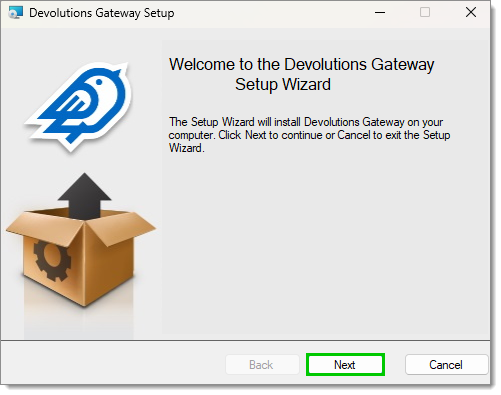
Setup Wizard
10. Once the desired installation path is selected, click _**Next**_.
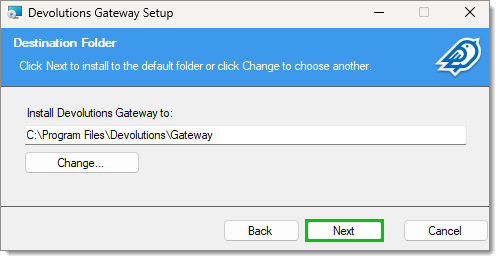
Destination Folder
11. Click _**Next**_.
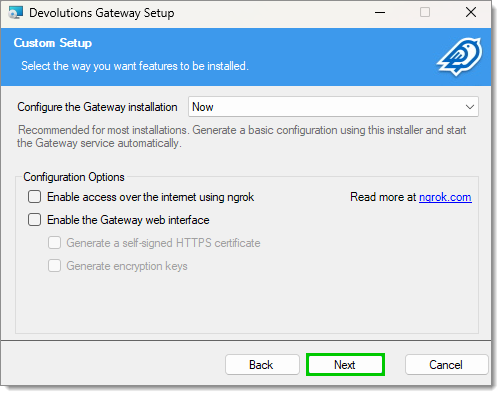
Configure the Gateway installation
12. Change the _**Ports**_ to the desired value and click _**Next**_.
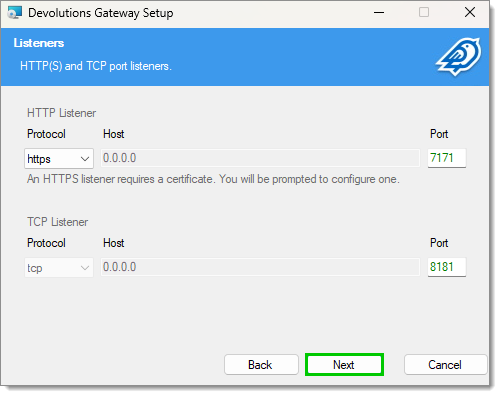
Listeners
HTTP(S) and TCP default ports are 7171 and 8181, respectively, but can be changed.
13. Input the Devolutions Gateway access URI and click _**Next**_.
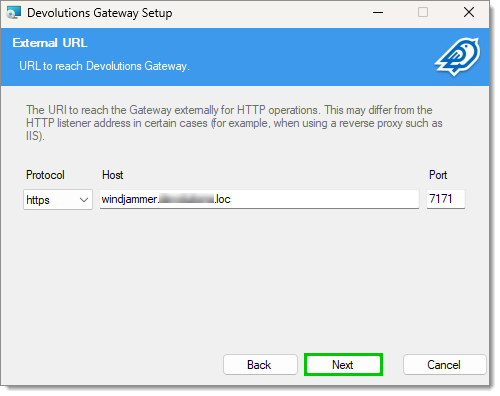
Access URI
14. After clicking the top ellipsis button, select either a PFX file or a Certificate file, then enter the corresponding password. (If the listener is _**HTTP**_ this step is automatically skipped)
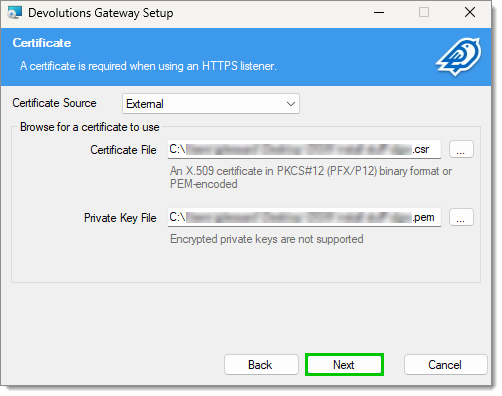
Certificate
15. Click on the ellipsis button and select the _**Provisioner Public Key**_ which was generated in Step 5.
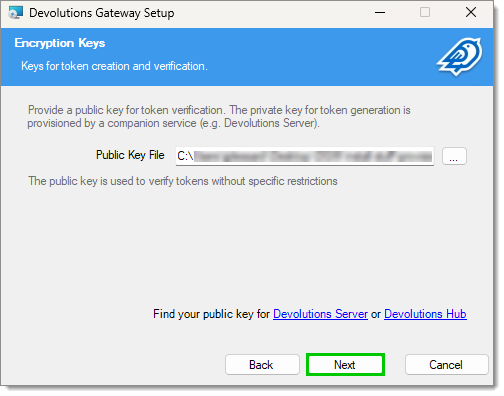
Public Key File
16. This screen shows a summary of the current paths/settings. It is possible to go _**Back**_ and modify them. If the settings are correct, click _**Next**_.
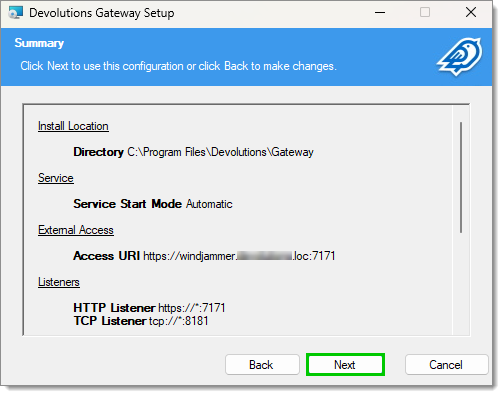
Gateway setup summary
17. Click _**Install**_.
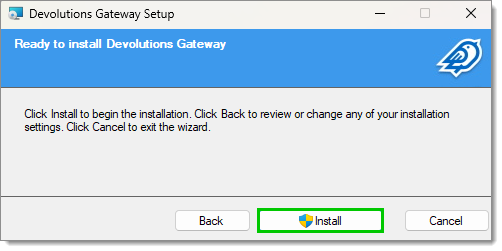
Install button
18. Click _**Finish**_ when the setup is complete.
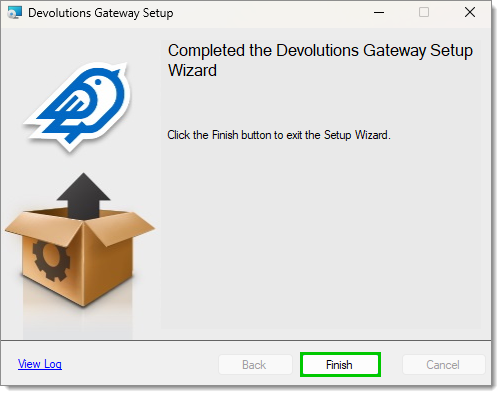
Finish button
19. Go back to the _**Administration**_ – _**Devolutions Gateway**_ page in Devolutions Hub Business.
20. Input the correct information.
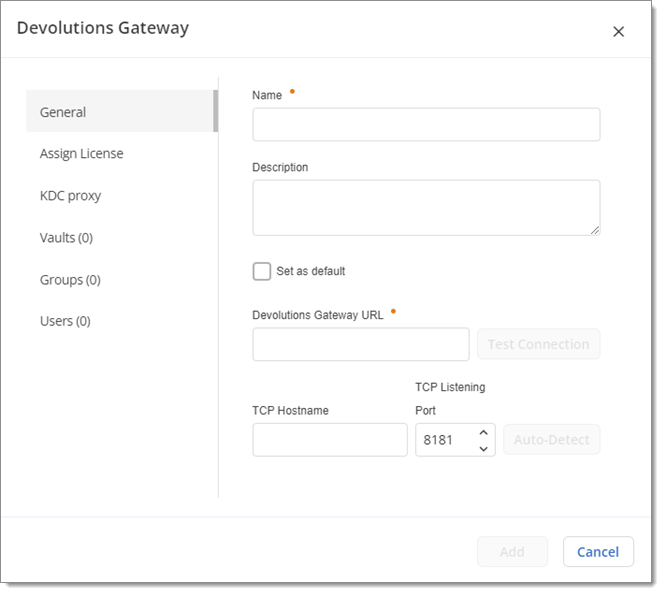
Information fields
Once the Devolutions Gateway URL is entered, click on **_Auto-detect_** next to the **_TCP hostname_** to fill in the value automatically.
21. By checking the _**Default**_ box, this Devolutions Gateway will be the one selected if none are specified or if _**Default**_ is chosen when connecting.
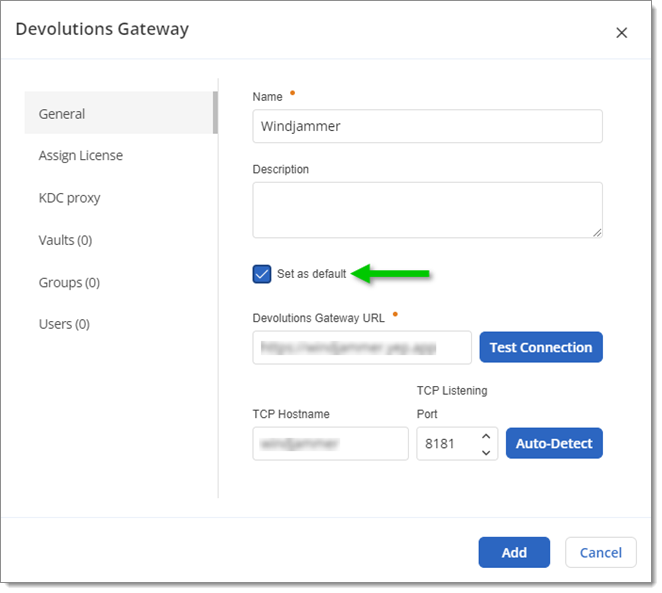
Default option
22. Make certain the gateway can be reached by clicking _**Test Connection**_.
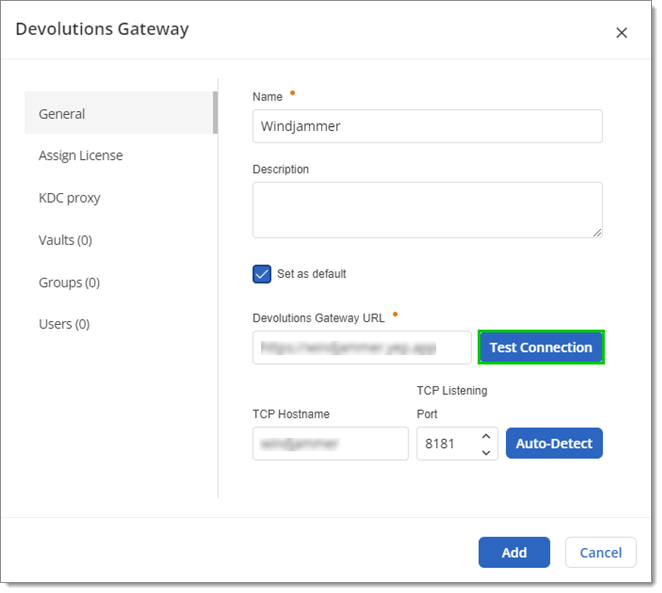
Test Connection button
23. Click the _**Add**_ button to link your Devolutions Gateway installation to your Devolutions Hub Business.
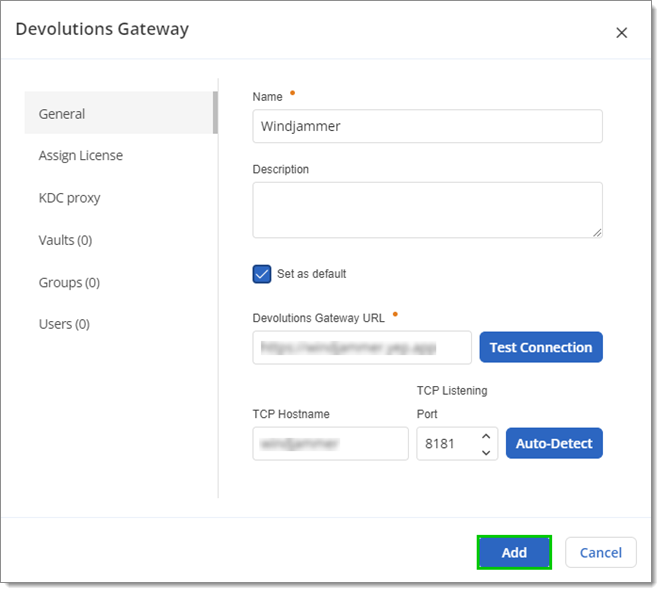
Add button
24. A rectangle will show the information for every Devolutions Gateway Hub link(s).
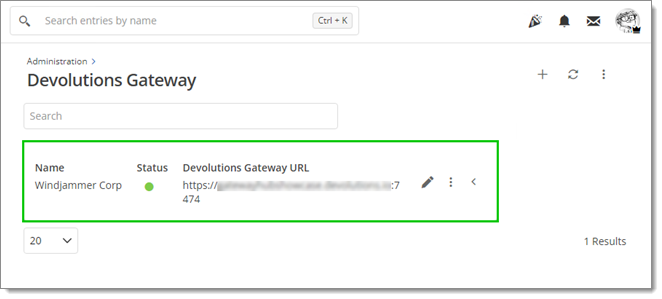
Successful link
25. Enable [session recording](https://docs.devolutions.net/pam/hub/session-recording/)
.
Visit [Remote Desktop Manager configuration](https://docs.devolutions.net/gateway/getting-started/hub/rdm-configuration/)
to learn more about linking Remote Desktop Manager and Devolutions Gateway.
### See also
[](https://docs.devolutions.net/gateway/getting-started/hub/hub-business-configuration/#see-also)
* [Devolutions Academy - Overview of Devolutions Gateway](https://academy.devolutions.net/student/path/2007290/activity/3070847 "Devolutions Academy - Overview of the Devolutions Gateway")
[ Share your feedback](https://forum.devolutions.net/forums/176/documentation--documentation-requests)
---
# Devolutions Gateway configuration with Devolutions Server - Devolutions Documentation
Devolutions Gateway configuration with Devolutions Server
=========================================================
On this page
* [Differences between Side-by-side and Standard (managed) installation](https://docs.devolutions.net/gateway/getting-started/server/server-configuration/#differences-between-side-by-side-and-standard-managed-installation)
* [Side-by-side installation](https://docs.devolutions.net/gateway/getting-started/server/server-configuration/#side-by-side-installation)
* [Standard (managed) installation](https://docs.devolutions.net/gateway/getting-started/server/server-configuration/#standard-installation)
* [Enable Gateway recording](https://docs.devolutions.net/gateway/getting-started/server/server-configuration/#enable-gateway-recording)
* [MSI installation](https://docs.devolutions.net/gateway/getting-started/server/server-configuration/#msi-installation)
* [Update Devolutions Gateway](https://docs.devolutions.net/gateway/getting-started/server/server-configuration/#update-devolutions-gateway)
This topic describes how to configure Devolutions Server to connect with Devolutions Gateway. There are three ways to install a Devolutions Gateway: the [_**Side-by-side installation**_](https://docs.devolutions.net/gateway/getting-started/server/server-configuration/#side-by-side-installation)
, the [_**Standard (managed) installation**_](https://docs.devolutions.net/gateway/getting-started/server/server-configuration/#standard-installation)
and the [_**MSI installation**_](https://docs.devolutions.net/gateway/getting-started/server/server-configuration/#msi-installation)
.
If your clients fail to connect with Devolutions Gateway, ensure the certificate contains the entire chain. This certificate chain includes any intermediate certificates. For example: Root Certificate Authority – Secure Certificate Authority – Purchased XYZ Certificate
Additionally, to [Launch an RDP session](https://docs.devolutions.net/gateway/kb/how-to-articles/launch-rdp-session-web-client/)
with Devolutions Gateway only browsers that meet these minimal version requirements are compatible:
* Chrome: 102
* Firefox: 102
* Safari: 16.4
Differences between Side-by-side and Standard (managed) installation
--------------------------------------------------------------------
[](https://docs.devolutions.net/gateway/getting-started/server/server-configuration/#differences-between-side-by-side-and-standard-managed-installation)
The _**Side-by-side installation**_ will be used if you need to install Devolutions Gateway on the same machine where Devolutions Server is hosted. It is a simplified installation process that will automatically configure the new Devolutions Gateway with information from the Devolutions Server instance (access URI and public key).
To install Devolutions Gateway on another machine than the one where Devolutions Server is hosted, you need to follow the _**Standard (managed) installation**_ process. The procedure is similar, but you will need to provide more information about your Devolutions Server instance to complete it.
Side-by-side installation
-------------------------
[](https://docs.devolutions.net/gateway/getting-started/server/server-configuration/#side-by-side-installation)
This installation process is the easier of the two and is the recommended method for simpler network layouts.
1. From the Devolutions Server Console, click on the _**Companions**_ tab.
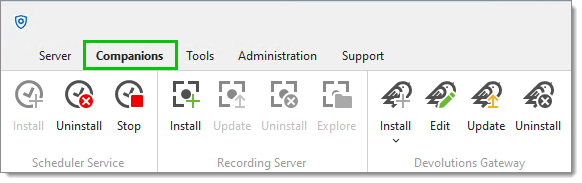
Companions tab
2. In the Devolutions Gateway section, click on _**Install**_.
3. Choose _**Side-by-side installation**_.
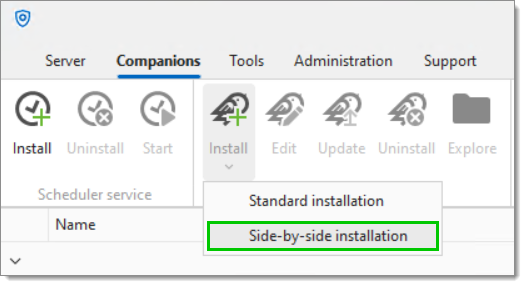
Side-by-side installation
It is possible to download an [.msi](https://devolutions.net/gateway/download/)
file to install Devolutions Gateway on an offline Devolutions Server.
4. If default values do not work for your environment, enter the desired settings.
* _**HTTP Listener**_: HTTP(s) port to reach the Gateway. (7171 is default)
* _**TCP Listener**_: port used for the RDP sessions. (8181 is default)
5. Click _**OK**_.
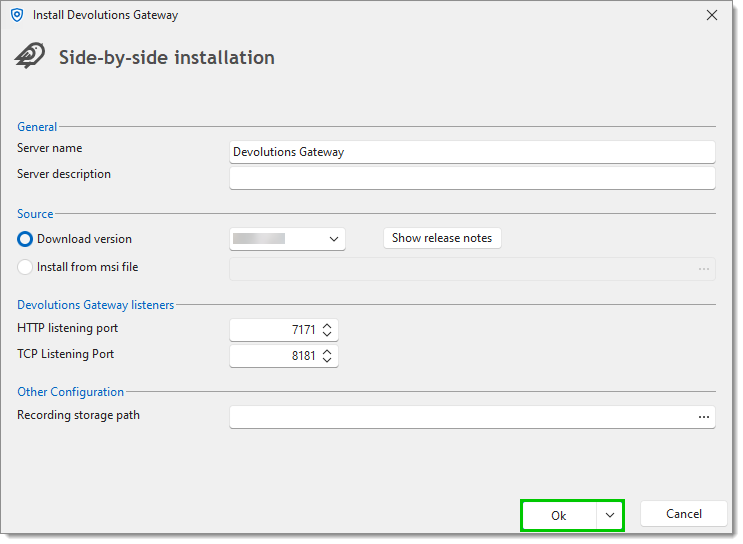
OK button
6. Go to the Devolutions Server web interface, connect with an administrator account.
7. Go to _**Administration**_ – _**Devolutions Gateway**_.
8. Click on the _**Ping**_ button for the desired gateway in the list to see if a connection can successfully be made. If the page was already open, refresh it first.
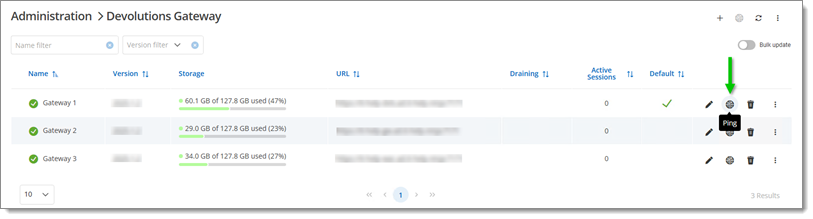
Ping button
Standard (managed) installation
-------------------------------
[](https://docs.devolutions.net/gateway/getting-started/server/server-configuration/#standard-installation)
The _**Standard (managed)**_ method allows Devolutions Gateway to be installed on a separate server than Devolutions Server. It could be for performance purposes or access networks that Devolutions Server cannot access.
1. From the Devolutions Server Console, click on the _**Companions**_ tab.
2. In the Devolutions Gateway section, click on _**Install**_.
3. Choose _**Standard installation**_.
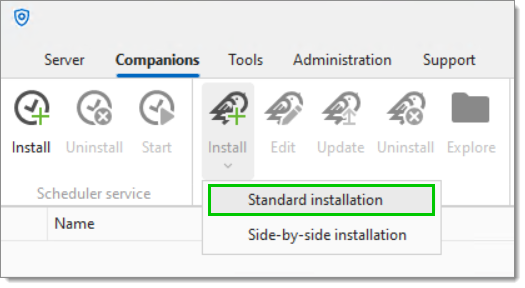
Standard installation
4. Choose between _**Download version**_ and _**Install from .msi file**_.
It is possible to download an [_**.msi**_](https://devolutions.net/gateway/download/)
file to install Devolutions Gateway on an offline Devolutions Server.
5. Click _**Next**_.
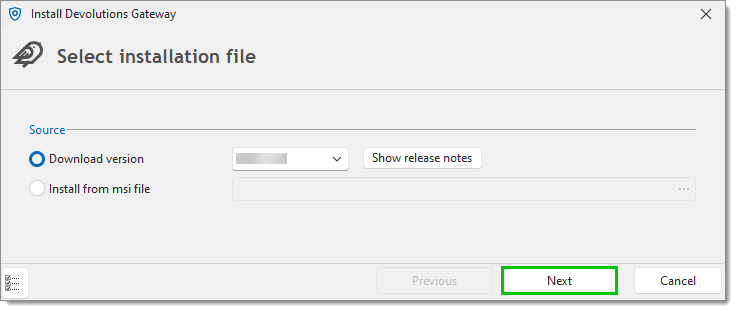
Download version or Install from .msi file
6. Enter the _**Access URI**_ information, for example https://gateway.example.com.
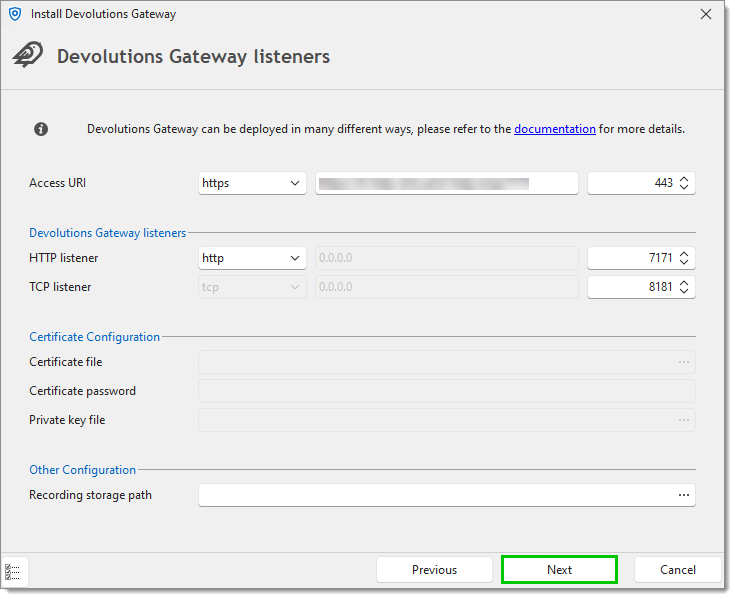
Listeners
7. Choose the Devolutions Gateway _**Listeners**_ ports (by default they are 7171 and 8181). Devolutions Server will use the Access URI port (usually 443 or 7171) for health checks and initial configuration. Remote Desktop Manager will use ports 7171 and 8181 to connect to the Gateway. For instance, a web session using the Gateway will connect on port 7171, as will any registration via Devolutions Gateway. Port 8181 is used by sessions such as RDP.
* If HTTPS is chosen instead of HTTP in the step above, the _**Certificate configuration**_ will be needed.
* _**Certificate file**_: Needs to be a full chain certificate (.pfx, .p12, .pem, .crt).
* _**Certificate password**_: Only needed if a .pfx or .p12 certificate was used.
* _**Private key file**_: Only needed if a .pem or .crt was used as a certificate.
Do not share the private key with other users, as it can be used to decrypt the communication between a user and Devolutions Gateway. Only the public key should be shared.
8. Click _**Next**_.
9. Choose between:
* _**Use public key from Devolutions Server instance 'Devolutions Server'**_: this option is used if the installed Devolutions Gateway is on the same server as the Devolutions Server;
* _**From file**_: If installing Devolutions Gateway on another computer, download the public key from the Devolutions Server you want to pair with that Devolutions Gateway. It is located under _**Administration – Devolutions Gateway**_.
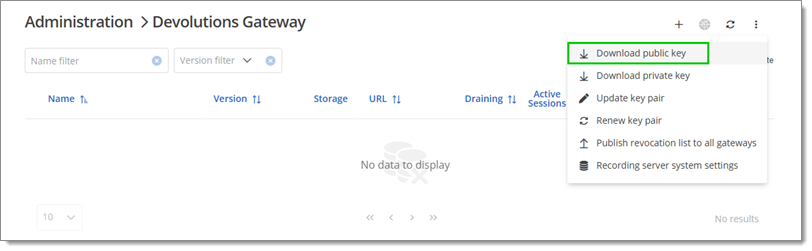
Download public key
10. Click _**Next**_.
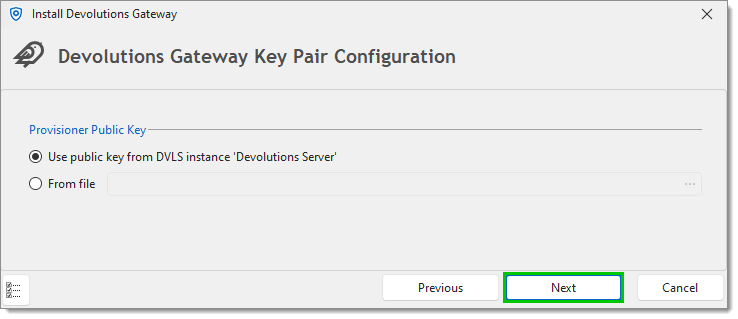
Key pair configuration
If Devolutions Server is not installed locally, then check the _**From file**_ option, and select Devolutions Gateway's `.json` configuration file .See [Configuring Windows certificate store via gateway.json](https://docs.devolutions.net/gateway/kb/how-to-articles/use-windows-certificate-store/#configuring-windows-certificate-store-via-gatewayjson)
for a typical configuration file.
[Devolutions' GitHub repository](https://github.com/Devolutions/devolutions-gateway/?tab=readme-ov-file#configuration)
also contains a list of the typical paths for the file, as well as all the stable options available to customize it.
11. Click _**Install**_.
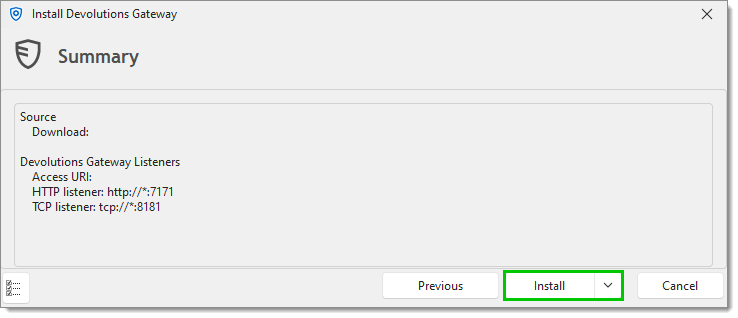
Summary
12. Click _**Close**_.
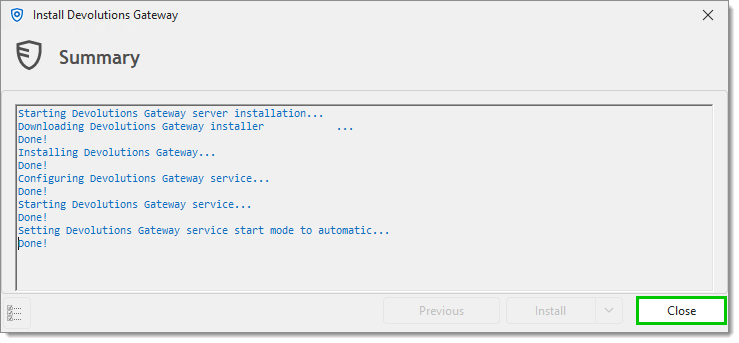
Installation Summary
13. On the Devolutions Server web interface, connect with an administrator account.
14. Go to _**Administration**_ – _**Devolutions Gateway**_.
15. Click on the _**Add**_ button on the top right corner.
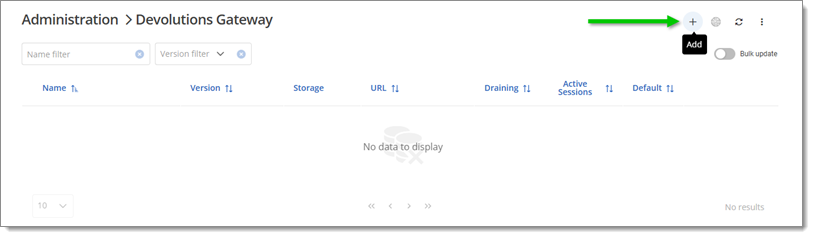
Add button
16. Enter the following information.
* _**Name**_: Name of the gateway that will be displayed in Remote Desktop Manager.
* _**Description**_: Description of the gateway.
* _**Set as default**_: If enabled, this gateway will be selected by default when configuring Remote Desktop Manager.
* _**Devolutions Gateway URL**_: The Devolutions Gateway URL and Port that Devolutions Server will connect to, for example: **https://gateway.example.com:7171**.
* _**TCP Listening Port**_: Set the port with the same TCP port value configured in the Devolutions Server Console.
* _**TCP hostname**_: It should be resolvable by the machine initiating the connection (Remote Desktop Manager).
17. Click _**Save**_.
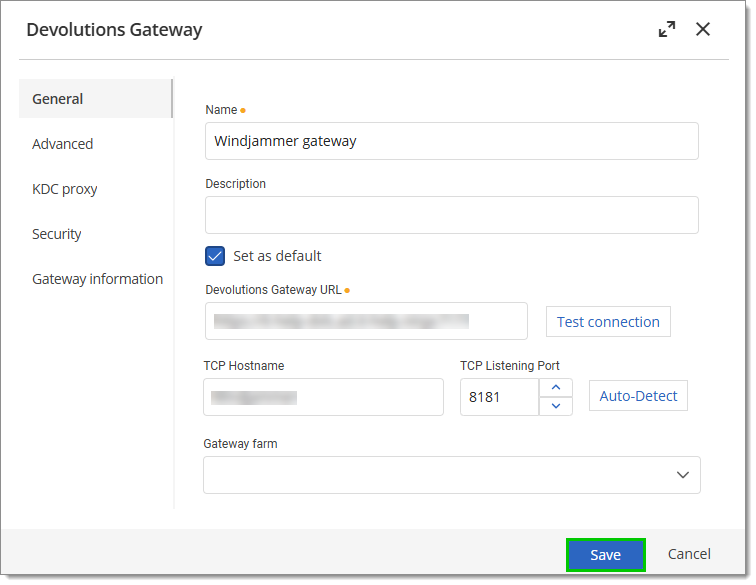
Gateway information
The gateway should now be visible in the list. It is possible to verify the status of the gateway with the _**Ping**_ button.

Ping
18. Publish the _**Devolutions Gateway configuration**_.
19. Publish the _**Revocation list**_. 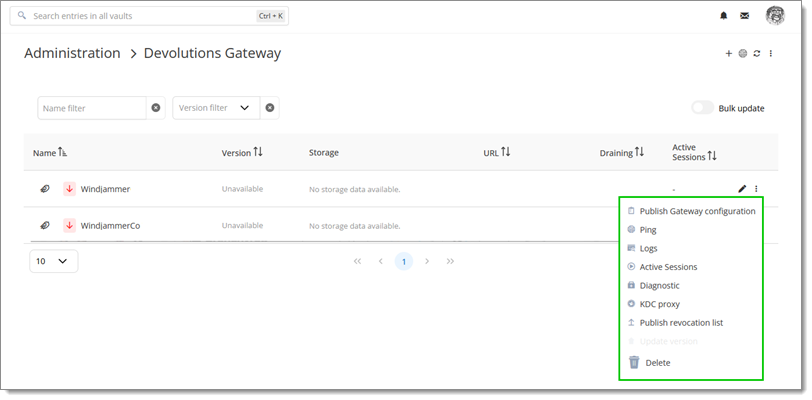
Enable Gateway recording
------------------------
[](https://docs.devolutions.net/gateway/getting-started/server/server-configuration/#enable-gateway-recording)
Click [here](https://docs.devolutions.net/server/kb/how-to-articles/configure-recording-server/)
to learn how to enable Devolutions Gateway recording in Devolutions Server.
MSI installation
----------------
[](https://docs.devolutions.net/gateway/getting-started/server/server-configuration/#msi-installation)
It is possible to do an automated silent installation which will install a gateway with the default configuration. This is the recommended way to configure it through the [Devolutions.PowerShell module](https://docs.devolutions.net/gateway/devolutions-ecosystem/powershell/)
. Use the following command:
msiexec.exe /i DevolutionsGateway-x86_64-VERSION.msi /quiet /norestart /log gateway_install.log
Update Devolutions Gateway
--------------------------
[](https://docs.devolutions.net/gateway/getting-started/server/server-configuration/#update-devolutions-gateway)
Devolutions Gateway can be updated in three different ways depending on your needs:
* Push updates via Devolutions Server web interface, in _**Administration**_ – _**Devolutions Gateway**_. Using this method, instances can be updated singly or in bulk. The latter can be done quickly by toggling the _**Bulk update**_ option, selecting the gateways, and clicking on _**Update**_. Note that [Devolutions Agent](https://devolutions.net/agent/)
is required to update from the Devolutions Server web interface.
* Update manually through the Devolutions Server Console. To do so, head over the _**Companions**_ tab, select the Devolutions Gateway to update, click the _**Update**_ button, and follow the instructions then provided.
* Run the [auto-updater PowerShell script](https://docs.devolutions.net/powershell/gateway-powershell/powershell-updater/)
. This can be registered as a scheduled task to periodically check for updates.
#### See also
[](https://docs.devolutions.net/gateway/getting-started/server/server-configuration/#see-also)
* [Devolutions Academy - Overview of Devolutions Gateway](https://academy.devolutions.net/student/path/2007290/activity/3070847 "Devolutions Academy - Overview of the Devolutions Gateway")
[ Share your feedback](https://forum.devolutions.net/forums/176/documentation--documentation-requests)
---
# Devolutions Workspace - Devolutions Documentation
Devolutions Workspace
=====================
On this page
* [Workspace apps](https://docs.devolutions.net/workspace/overview/what-is-workspace/#workspace-apps)
* [Workspace browser extension](https://docs.devolutions.net/workspace/overview/what-is-workspace/#workspace-browser-extension)
Workspace apps
--------------
[](https://docs.devolutions.net/workspace/overview/what-is-workspace/#workspace-apps)
The Workspace apps are both mobile and desktop applications that bring together Devolutions Hub Business and Devolutions Server into a single, centralized, cloud-based location. Workspace simplifies and streamlines access and management in our solutions. It is the perfect companion tool for those who use our solutions.
The Workspace apps are available for iOS and Android devices as well as for Windows and macOS.
Workspace browser extension
---------------------------
[](https://docs.devolutions.net/workspace/overview/what-is-workspace/#workspace-browser-extension)
The Workspace browser extension is a web browser password plugin used in conjunction with Remote Desktop Manager, Devolutions Server, and Devolutions Hub, which allows users to securely inject passwords into websites using credentials stored in their vaults.
It gives system administrators full control over the management of passwords, without affecting the user's productivity.
Advanced users, other browser extensions, or even JavaScript injection can all result in the password being read from the password edit control, even if it displays dots instead of the password. Any use of an external browser must be carefully weighed against your security requirements.
[ Share your feedback](https://forum.devolutions.net/forums/176/documentation--documentation-requests)
---
# Installation - Devolutions Documentation
Installation
============
The Workspace browser extension is a free companion tool. It requires at least one of our Devolutions products to function at this time.
Click on one of the browser links below to start the installation of the Workspace browser extension:
* [Chrome](https://docs.devolutions.net/workspace/workspace-browser-extension/installation/chrome/)
* [Firefox](https://docs.devolutions.net/workspace/workspace-browser-extension/installation/firefox/)
* [Edge](https://docs.devolutions.net/workspace/workspace-browser-extension/installation/edge/)
* [Opera](https://docs.devolutions.net/workspace/workspace-browser-extension/installation/opera/)
#### See also
[](https://docs.devolutions.net/workspace/workspace-browser-extension/installation/#see-also)
* [Devolutions Academy - Navigating Devolutions Workspace (Browser Extension)](https://academy.devolutions.net/student/page/2481291-navigating-devolutions-workspace-browser-extension?curriculum_activity_id=4001823&path_id=2481294&sid=f7ff6a9c-0aad-4a55-9ce5-f0b3f531371a&sid_i=2)
[ Share your feedback](https://forum.devolutions.net/forums/176/documentation--documentation-requests)
---
# Installation - Devolutions Documentation
Installation
============
On this page
* [Installing the Workspace desktop app](https://docs.devolutions.net/workspace/workspace-app/installation/#installing-the-workspace-desktop-app)
* [Setting up the Workspace desktop app](https://docs.devolutions.net/workspace/workspace-app/installation/#setting-up-the-workspace-desktop-app)
* [Installing the Workspace desktop app](https://docs.devolutions.net/workspace/workspace-app/installation/#installing-the-workspace-desktop-app-1)
* [Setting up the Workspace desktop app](https://docs.devolutions.net/workspace/workspace-app/installation/#setting-up-the-workspace-desktop-app-1)
* [Installing the Workspace mobile app](https://docs.devolutions.net/workspace/workspace-app/installation/#installing-the-workspace-mobile-app)
* [Setting up the Workspace mobile app](https://docs.devolutions.net/workspace/workspace-app/installation/#setting-up-the-workspace-mobile-app)
* [Installing the Workspace mobile app](https://docs.devolutions.net/workspace/workspace-app/installation/#installing-the-workspace-mobile-app-1)
* [Setting up the Workspace mobile app](https://docs.devolutions.net/workspace/workspace-app/installation/#setting-up-the-workspace-mobile-app-1)
* [Dependencies](https://docs.devolutions.net/workspace/workspace-app/installation/#dependencies)
* [Installing the Workspace desktop app](https://docs.devolutions.net/workspace/workspace-app/installation/#installing-the-workspace-desktop-app-2)
* [Setting up the Workspace desktop app](https://docs.devolutions.net/workspace/workspace-app/installation/#setting-up-the-workspace-desktop-app-2)
* [Custom installation](https://docs.devolutions.net/workspace/workspace-app/installation/#custom-installation)
Before using your application, you will have to complete a quick setup that involves selecting your Devolutions product(s), connecting to your account, and configuring security settings. The Workspace desktop app can be used with Devolutions Server and Devolutions Hub Business.
Installing the Workspace desktop app
------------------------------------
[](https://docs.devolutions.net/workspace/workspace-app/installation/#installing-the-workspace-desktop-app)
The following steps detail how to install Workspace desktop app:
1. [Download the Workspace desktop app](https://devolutions.net/workspace/)
for Windows.
2. Launch the installation wizard.
3. Click on _**Install**_.
Setting up the Workspace desktop app
------------------------------------
[](https://docs.devolutions.net/workspace/workspace-app/installation/#setting-up-the-workspace-desktop-app)
Follow the steps below to perform the initial configuration of your Workspace desktop app:
1. Once the installation is complete, in the _**Workspace apps setup**_ window, check the solution you wish to add, then click on _**Start setup**_.
2. Next, enter the URL of the solution.
3. Log in to your Devolutions Account.
Adding a Devolutions Hub Business space requires the additional step of choosing which Hub to connect to.
4. Choose a backup option (strongly recommended) and click on _**Next**_.
5. Enable the use of a biometric lock (Windows Hello, Touch ID, etc.) or a master password (strongly recommended). The [Biometric lock setting](https://docs.devolutions.net/workspace/workspace-app/workspace-settings/biometric-lock-setting/)
can be found later in _**File**_ – _**Settings**_ – _**Security and privacy**_.
* _**Use biometric lock**_: Your device will prompt you to authenticate using this method. It must first be configured on your device to work with Workspace.
* _**Use master password**_: Workspace will ask you to create a password of at least 8 characters.
6. Click on _**Done**_ to complete the initial setup of your first space.
Adding more spaces can be done by clicking on the _**Add space**_ (cross icon), located either in the sidebar or the _**Home**_ section of Workspace, and following the same steps described above.
Before using your application, you will have to complete a quick setup that involves selecting your Devolutions product(s), connecting to your account, and configuring security settings. The Workspace desktop app can be used with Devolutions Server and Devolutions Hub Business.
Installing the Workspace desktop app
------------------------------------
[](https://docs.devolutions.net/workspace/workspace-app/installation/#installing-the-workspace-desktop-app-1)
The following steps detail how to install Workspace desktop app:
1. [Download the Workspace desktop app](https://devolutions.net/workspace/)
for macOS.
2. Launch the installation wizard.
3. Click on _**Install**_.
Setting up the Workspace desktop app
------------------------------------
[](https://docs.devolutions.net/workspace/workspace-app/installation/#setting-up-the-workspace-desktop-app-1)
Follow the steps below to perform the initial configuration of your Workspace desktop app:
1. Once the installation is complete, in the _**Workspace apps setup**_ window, check the solution you wish to add, then click on _**Start setup**_.
2. Next, enter the URL of the solution.
3. Log in to your Devolutions Account.
Adding a Devolutions Hub Business space requires the additional step of choosing which Hub to connect to.
4. Choose a backup option (strongly recommended) and click on _**Next**_.
5. Enable the use of a biometric lock (Windows Hello, Touch ID, etc.) or a master password (strongly recommended). The [Biometric lock setting](https://docs.devolutions.net/workspace/workspace-app/workspace-settings/biometric-lock-setting/)
can be found later in _**File**_ – _**Settings**_ – _**Security and privacy**_.
* _**Use biometric lock**_: Your device will prompt you to authenticate using this method. It must first be configured on your device to work with Workspace.
* _**Use master password**_: Workspace will ask you to create a password of at least 8 characters.
6. Click on _**Done**_ to complete the initial setup of your first space.
Adding more spaces can be done by clicking on the _**Add space**_ (cross icon), located either in the sidebar or the _**Home**_ section of Workspace, and following the same steps described above.
Before using your application, you will have to complete a quick setup that involves selecting your Devolutions product(s), connecting to your account, and configuring security settings. The Workspace mobile app can be used with Devolutions Server and Devolutions Hub Business.
Installing the Workspace mobile app
-----------------------------------
[](https://docs.devolutions.net/workspace/workspace-app/installation/#installing-the-workspace-mobile-app)
The following steps detail how to install Workspace mobile app:
1. [Download the Workspace mobile app](https://devolutions.net/workspace/#mobile)
for Android.
2. Launch the application.
Setting up the Workspace mobile app
-----------------------------------
[](https://docs.devolutions.net/workspace/workspace-app/installation/#setting-up-the-workspace-mobile-app)
Follow the steps below to perform the initial configuration of your Workspace mobile app:
1. Once the installation is complete, in the _**Workspace mobile apps setup**_ window, check the solution you wish to add, then click on _**Start setup**_.
2. Next, enter the URL of the solution.
3. Log in to your Devolutions Account.
Adding a Devolutions Hub Business space requires the additional step of choosing which Hub to connect to.
4. Choose a backup option (strongly recommended) and click on _**Next**_.
5. It is strongly recommended to enable the use of a biometric lock (Windows Hello, Touch ID, etc.). The [Biometric lock setting](https://docs.devolutions.net/workspace/workspace-app/workspace-settings/biometric-lock-setting/)
can be found later in _**Menu**_ – _**Security and privacy**_.
* _**Use biometric lock**_: Your device will prompt you to authenticate using this method. It must first be configured on your device to work with Workspace.
6. Click on _**Done**_ to complete the initial setup of your first space.
Adding more spaces can be done by clicking on the _**Add space**_ (cross icon), located on the _**Home page**_ of Workspace, and following the same steps described above.
Before using your application, you will have to complete a quick setup that involves selecting your Devolutions product(s), connecting to your account, and configuring security settings. The Workspace mobile app can be used with Devolutions Server and Devolutions Hub Business.
Installing the Workspace mobile app
-----------------------------------
[](https://docs.devolutions.net/workspace/workspace-app/installation/#installing-the-workspace-mobile-app-1)
The following steps detail how to install Workspace mobile app:
1. [Download the Workspace mobile app](https://devolutions.net/workspace/#mobile)
for iOS.
2. Launch the application.
Setting up the Workspace mobile app
-----------------------------------
[](https://docs.devolutions.net/workspace/workspace-app/installation/#setting-up-the-workspace-mobile-app-1)
Follow the steps below to perform the initial configuration of your Workspace mobile app:
1. Once the installation is complete, in the _**Workspace mobile apps setup**_ window, check the solution you wish to add, then click on _**Start setup**_.
2. Next, enter the URL of the solution.
3. Log in to your Devolutions Account.
Adding a Devolutions Hub Business space requires the additional step of choosing which Hub to connect to.
4. Choose a backup option (strongly recommended) and click on _**Next**_.
5. It is strongly recommended to enable the use of a biometric lock (Windows Hello, Touch ID, etc.). The [Biometric lock setting](https://docs.devolutions.net/workspace/workspace-app/workspace-settings/biometric-lock-setting/)
can be found later in _**Menu**_ – _**Security and privacy**_.
* _**Use biometric lock**_: Your device will prompt you to authenticate using this method. It must first be configured on your device to work with Workspace.
6. Click on _**Done**_ to complete the initial setup of your first space.
Adding more spaces can be done by clicking on the _**Add space**_ (cross icon), located on the _**Home page**_ of Workspace, and following the same steps described above.
Before using your application, you will have to complete a quick setup that involves selecting your Devolutions product(s), connecting to your account, and configuring security settings. The Workspace desktop app can be used with Devolutions Server and Devolutions Hub Business.
Dependencies
------------
[](https://docs.devolutions.net/workspace/workspace-app/installation/#dependencies)
In order to work properly on Linux, the Workspace desktop app is dependent on a few packages that must be downloaded and installed beforehand:
* `libglib2.0-dev`
* `libkeybinder-3.0-0`
* `libwebkit2gtk-4.1-0`
* `libsqlite3-dev`
* `libcurl4t64`
* `libayatana-appindicator3-1`
* `libjpeg-turbo8`
The latest version of Workspace desktop app for Linux can be [downloaded from Cloudsmith](https://cloudsmith.io/~devolutions/repos/deb/packages/)
or from [Devolution’ website](https://devolutions.net/workspace/)
, and is available for Ubuntu 2024.04 and up. The installation process is then the same as for the other operating systems.
Installing the Workspace desktop app
------------------------------------
[](https://docs.devolutions.net/workspace/workspace-app/installation/#installing-the-workspace-desktop-app-2)
The following steps detail how to install Workspace desktop app:
1. [Download the Workspace desktop app](https://devolutions.net/workspace/)
for Linux.
2. Launch the installation wizard.
3. Click on _**Install**_.
Setting up the Workspace desktop app
------------------------------------
[](https://docs.devolutions.net/workspace/workspace-app/installation/#setting-up-the-workspace-desktop-app-2)
Follow the steps below to perform the initial configuration of your Workspace desktop app:
1. Once the installation is complete, in the _**Workspace apps setup**_ window, check the solution you wish to add, then click on _**Start setup**_.
2. Next, enter the URL of the solution.
3. Log in to your Devolutions Account.
Adding a Devolutions Hub Business space requires the additional step of choosing which Hub to connect to.
4. Choose a backup option (strongly recommended) and click on _**Next**_.
5. Enable the use of a biometric lock (Windows Hello, Touch ID, etc.) or a master password (strongly recommended). The [Biometric lock setting](https://docs.devolutions.net/workspace/workspace-app/workspace-settings/biometric-lock-setting/)
can be found later in _**File**_ – _**Settings**_ – _**Security and privacy**_.
* _**Use biometric lock**_: Your device will prompt you to authenticate using this method. It must first be configured on your device to work with Workspace.
* _**Use master password**_: Workspace will ask you to create a password of at least 8 characters.
6. Click on _**Done**_ to complete the initial setup of your first space.
Adding more spaces can be done by clicking on the _**Add space**_ (cross icon), located either in the sidebar or the _**Home**_ section of Workspace, and following the same steps described above.
Custom installation
-------------------
[](https://docs.devolutions.net/workspace/workspace-app/installation/#custom-installation)
Custom installations can be created to facilitate data source deployment on multiple machines with the same preconfigured settings, similar to the [custom installer service](https://docs.devolutions.net/rdm/installation/client/custom-installer-service/)
for Remote Desktop Manager. Follow the steps below to create a `.cfg` configuration file which can then be imported into your users' Workspace app:
1. In the Workspace desktop app, go to _**Help & Tools**_ – _**Custom installation**_.
2. Click the _**Create configuration file**_ tab, and select an _**Active data source**_.
3. Check the particular settings you wish to include in the custom installation, and toggle/define the options that best fit your needs.
4. Once the settings have been configured, click the _**Create**_ button and choose a destination folder for the `.cfg` file.
[ Share your feedback](https://forum.devolutions.net/forums/176/documentation--documentation-requests)
---
# PAM with Remote Desktop Manager - Devolutions Documentation
PAM with Remote Desktop Manager
===============================
[Devolutions Privileged Access Management](https://devolutions.net/privileged-access-management/)
provides all the following features. It is specifically designed to meet the needs of SMBs, providing enterprise-grade features to bring a level of protection usually only afforded to large organizations while at the same time being robust, easy to deploy, and affordable.
Here are some of its main features:
* Ease of deployment and management
* Secure password vault
* Logging and reporting
* Built-in multifactor authentication
* Access brokering
* Role-based access control
A license is required to enable the PAM module. Please contact our [sales department](mailto:sales@devolutions.net)
for more information about the license.
The PAM features you have access to in Remote Desktop Manager will depend on the data source you are using.
[ Share your feedback](https://forum.devolutions.net/forums/176/documentation--documentation-requests)
---
# Devolutions PAM - Devolutions Documentation
Devolutions PAM
===============
[Devolutions Privileged Access Management (PAM)](https://devolutions.net/privileged-access-management/)
provides all the following features. It is specifically designed to meet the needs of SMBs, providing enterprise-grade features to bring a level of protection usually only afforded to large organizations while at the same time being robust, easy to deploy, and affordable.
Here are some of its main features:
* Ease of deployment and management
* Secure password vault
* Logging and reporting
* Built-in multifactor authentication
* Access brokering
* Role-based access control
A license is now required to enable the PAM module. Please contact our [sales department](mailto:sales@devolutions.net)
for more information about the license. The PAM features you have access to in Remote Desktop Manager will depend on the data source you are using.
### See also
[](https://docs.devolutions.net/pam/overview/what-is-pam/#see-also)
* [Devolutions Academy – Devolutions PAM](https://academy.devolutions.net/student/path/2354099-devolutions-pam?sid=c6b6d631-3f41-42b0-a3c1-ce1e39eaa248&sid_i=0)
* [Devolutions Academy - Simplifying Privileged Access Management with Devolutions PAM](https://academy.devolutions.net/student/path/2007290/activity/3070848 "Devolutions Academy - Simplifying Privileged Access Management with Devolutions PAM")
* [Devolutions Blog - Decoding PAM: Core concepts and application](https://blog.devolutions.net/2024/08/decoding-pam-core-concepts-and-application/ "Devolutions Blog - Decoding PAM: Core concepts and application")
* [Devolutions Blog - Need Cybersecurity Insurance? Then You Probably Need PAM, Too](https://blog.devolutions.net/2023/10/need-cybersecurity-insurance-then-you-probably-need-pam-too/ "Devolutions Blog - Need Cybersecurity Insurance? Then You Probably Need PAM, Too")
[ Share your feedback](https://forum.devolutions.net/forums/176/documentation--documentation-requests)
---
# PAM with Devolutions Server - Devolutions Documentation
PAM with Devolutions Server
===========================
On this page
* [Privileged access](https://docs.devolutions.net/pam/server/#privileged-access)
[Devolutions Privileged Access Management](https://devolutions.net/privileged-access-management/)
provides all the following features. It is specifically designed to meet the needs of SMBs, providing enterprise-grade features to bring a level of protection usually only afforded to large organizations while at the same time being robust, easy to deploy, and affordable.
Here are some of its main features:
* Ease of deployment and management
* Secure password vault
* Logging and reporting
* Built-in multifactor authentication
* Access brokering
* Role-based access control
A license is required to enable the PAM module. Please contact our [sales department](mailto:sales@devolutions.net)
for more information about the license.
Privileged access
-----------------
[](https://docs.devolutions.net/pam/server/#privileged-access)
The _**Privileged session monitoring**_ page provides a quick overview of the current PAM vault accounts and current check-outs.
[ Share your feedback](https://forum.devolutions.net/forums/176/documentation--documentation-requests)
---
# Get started with SSO in Devolutions Hub Business - Devolutions Documentation
Get started with SSO in Devolutions Hub Business
================================================
You can configure your Devolutions Hub Business users to log in using Single Sign-on (SSO) with Microsoft Entra ID or Okta credentials instead of using our Devolutions Account authentication. Follow the steps below to create and configure this feature in Devolutions Hub Business:
1. Configure SSO authentication with:
* [Microsoft Azure](https://docs.devolutions.net/hub/getting-started/get-started-sso-hub-business/configure-sso-authentication-microsoft-azure/)
* [Okta](https://docs.devolutions.net/hub/getting-started/get-started-sso-hub-business/configure-sso-authentication-okta/)
2. [Invite users for SSO in Devolutions Hub Business](https://docs.devolutions.net/hub/getting-started/get-started-sso-hub-business/invite-users-sso-hub-business/)
### See also
[](https://docs.devolutions.net/hub/getting-started/get-started-sso-hub-business/#see-also)
* [Devolutions Academy - Overview of the Devolutions Hub Business](https://academy.devolutions.net/student/path/2007290/activity/3070846 "Devolutions Academy - Overview of the Devolutions Hub Business")
[ Share your feedback](https://forum.devolutions.net/forums/176/documentation--documentation-requests)
---
# Devolutions Hub - Devolutions Documentation
Devolutions Hub
===============
Devolutions Hub is a highly secure team-based password manager that is part of our cloud services. It has been designed for both IT administrators and end users to store and share information across the whole organization, no matter the size. You can access and manage sensitive information from anywhere and with any supported web browser.
Your information is stored in entries of different types which are organized into vaults. Entries are managed directly from the web interface and no client application is required.
Security is at the core of Devolutions Hub since it is hosted by [Microsoft Azure](https://docs.devolutions.net/hub/kb/knowledge-base/hosting-region-password-hub/)
, a highly trusted cloud services provider.
Devolutions Hub possesses powerful user management features, reports, and accessibility options. Users can be assigned roles and permissions and can also be members of user groups with predefined roles and permissions, streamlining the onboarding process.
Devolutions Hub can be used in combination with our Remote Desktop Manager as a data source as well as with other Devolutions products and companion tools, which you can find below.
### See also
[](https://docs.devolutions.net/hub/overview/what-is-hub/#see-also)
* [Devolutions Academy - Overview of Devolutions Hub Business](https://academy.devolutions.net/student/path/2007290/activity/3070846 "Devolutions Academy - Overview of the Devolutions Hub Business")
* [Devolutions Academy - Navigating Devolutions Hub](https://academy.devolutions.net/student/page/2633361-navigating-devolutions-hub?sid=4dd0e3d0-7c46-49cd-87a4-7785543da859&sid_i=0)
* [Devolutions Academy – Introduction to Devolutions Hub](https://academy.devolutions.net/student/page/2813652-introduction-to-devolutions-hub?curriculum_activity_id=4268343&path_id=2543918&sid=5fb582e2-01ea-48ad-aa4b-28df6e2784e2&sid_i=0)
[ Share your feedback](https://forum.devolutions.net/forums/176/documentation--documentation-requests)
---
# Get started with Devolutions Hub Business - Devolutions Documentation
Get started with Devolutions Hub Business
=========================================
On this page
* [Setting up user groups and vaults](https://docs.devolutions.net/hub/getting-started/get-started-hub-business/#setting-up-user-groups-and-vaults)
* [Inviting multiple users](https://docs.devolutions.net/hub/getting-started/get-started-hub-business/#inviting-multiple-users)
* [Filling vaults with content](https://docs.devolutions.net/hub/getting-started/get-started-hub-business/#filling-vaults-with-content)
* [Administration settings and reports](https://docs.devolutions.net/hub/getting-started/get-started-hub-business/#administration-settings-and-reports)
* [See also](https://docs.devolutions.net/hub/getting-started/get-started-hub-business/#see-also)
Here is a list of steps to help you get started with Devolutions Hub Business for your team environment.
Setting up _**user groups**_ and _**vaults**_
---------------------------------------------
[](https://docs.devolutions.net/hub/getting-started/get-started-hub-business/#setting-up-user-groups-and-vaults)
In this video, we will demonstrate the proper configuration for Devolutions Hub Business as well as best practices for inviting an _**administrator**_, creating _**user groups**_, as well as setting up _**shared vaults**_, and assigning them _**roles**_ and _**permissions**_.
Inviting multiple _**users**_
-----------------------------
[](https://docs.devolutions.net/hub/getting-started/get-started-hub-business/#inviting-multiple-users)
With this video, we will demonstrate how to add _**users**_ to your Devolutions Hub Business for both those who already have a Devolutions Account as well as those that do not.
Filling vaults with content
---------------------------
[](https://docs.devolutions.net/hub/getting-started/get-started-hub-business/#filling-vaults-with-content)
At this stage, we will show you four different ways to add and import _**entries**_ into your newly created Devolutions Hub Business. We will also cover the _**properties**_ and _**permissions**_ of _**entries**_. See also [9 secrets organizations should store in Devolutions Hub Business](https://blog.devolutions.net/2025/02/spotlight-on-9-secrets-organizations-should-store-in-devolutions-hub-business/)
.
_**Administration settings**_ and _**reports**_
-----------------------------------------------
[](https://docs.devolutions.net/hub/getting-started/get-started-hub-business/#administration-settings-and-reports)
In this final video, we will show you some of the administration _**management**_ settings, _**configuration**_, _**tools**_, and _**reports**_ that we think will benefit you as you finalize getting your Devolutions Hub Business all set up.
### See also
[](https://docs.devolutions.net/hub/getting-started/get-started-hub-business/#see-also)
* [Management](https://docs.devolutions.net/hub/web-interface/administration/)
* [Configuration & Security](https://docs.devolutions.net/hub/web-interface/administration/configuration-security/system-settings/)
* [Reports](https://docs.devolutions.net/hub/web-interface/reports/)
* [Tools](https://docs.devolutions.net/hub/web-interface/tools/)
* [Create entries manually](https://docs.devolutions.net/hub/web-interface/entries/create-entries-manually/)
* [Invite an administrator](https://docs.devolutions.net/hub/web-interface/administration/management/users/administrator-invite/)
* [Create user groups](https://docs.devolutions.net/hub/web-interface/administration/management/user-groups/create-manage-user-groups/)
* [Create vaults and assign permissions](https://docs.devolutions.net/hub/web-interface/administration/management/vaults/create-manage-vaults/)
* [Invite users](https://docs.devolutions.net/hub/web-interface/administration/management/users/create-invite-users/)
* [Devolutions Academy - Overview of Devolutions Hub Business](https://academy.devolutions.net/student/path/2007290/activity/3070846 "Devolutions Academy - Overview of the Devolutions Hub Business")
[ Share your feedback](https://forum.devolutions.net/forums/176/documentation--documentation-requests)
---
# Devolutions Launcher - Devolutions Documentation
Devolutions Launcher
====================
Devolutions Launcher is a companion tool for Devolutions Server. It can launch multiple remote sessions simultaneously, while giving system administrators full control. It is available on _**Windows only**_.
[ Share your feedback](https://forum.devolutions.net/forums/176/documentation--documentation-requests)
---
# Download and installation - Devolutions Documentation
Download and installation
=========================
Once a [package](https://docs.devolutions.net/server/support-resources/getting-started-packages/)
offering Devolutions Launcher has been purchased from the [Devolutions store](https://store.devolutions.net/package)
, you can follow these steps to download and install Devolutions Launcher:
1. Download [Devolutions Launcher](https://devolutions.net/launcher/download)
from our website and launch the executable file.
2. Click _**Next**_ on the welcome page.
3. Select a setup type:
* _**Typical**_: Installs the most common program features. Recommended for most users.
* _**Custom**_: Allows users to choose which program features will be installed and where they will be installed. Recommended for advanced users.
* _**Complete**_: All program features will be installed. (Requires most disk space) 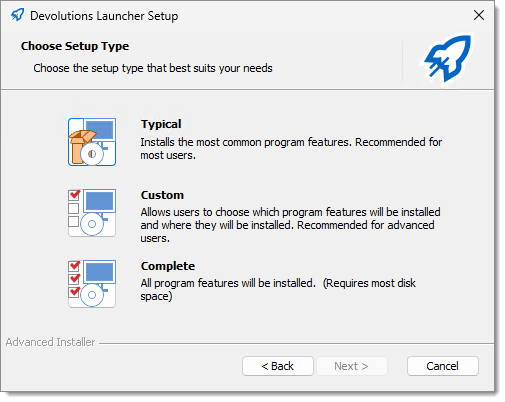
4. Choose where to create Devolutions Launcher application shortcuts. Click _**Next**_.
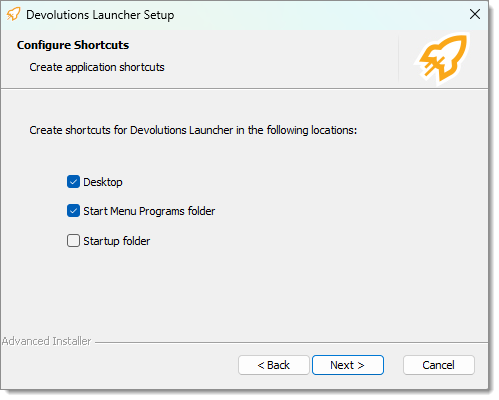
Configure shortcuts
5. Read and accept the terms in the license agreement then click _**Next**_.
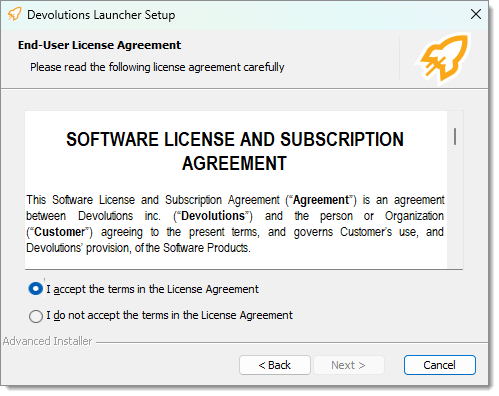
End-user license agreement
6. Click _**Install**_ to begin the installation.
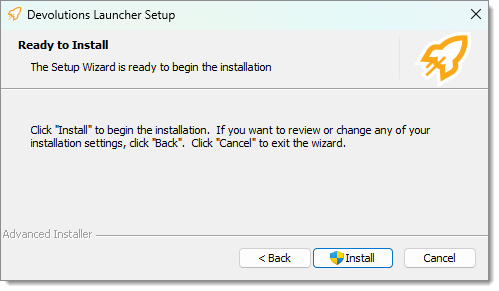
Ready to install
7. Once done, click _**Finish**_ to complete the installation and launch Devolutions Launcher.
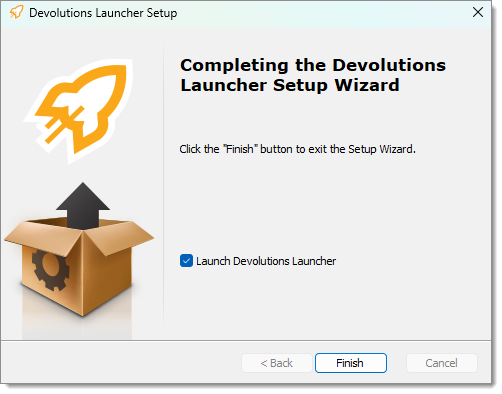
Completed installation
#### See also
[](https://docs.devolutions.net/server/devolutions-ecosystem/launcher/installation/download-installation/#see-also)
* [Licensing issues](https://docs.devolutions.net/rdm/kb/general-knowledge/license/licensing-issues/)
[ Share your feedback](https://forum.devolutions.net/forums/176/documentation--documentation-requests)
---
# Devolutions Server - Devolutions Documentation
Devolutions Server
==================
Devolutions Server is an self-hosted solution for storing and sharing information across your whole organization. Manage remote connections, credentials, and sensitive information with ease.
Use our _**user group-based access control**_ to grant permissions in a granular fashion. Advanced logging of all user activity is included to offer visibility in all aspects of the solution.
Because of its web architecture, you can offer Devolutions Server only from your intranet or publish it online.
### See also
[](https://docs.devolutions.net/server/overview/what-is-server/#see-also)
* [Devolutions Academy – Devolutions Server path](https://academy.devolutions.net/student/path/2942210-devolutions-server?sid_i=0)
* [Devolutions Academy - Overview of Devolutions Server](https://academy.devolutions.net/student/path/2942210/activity/4899951)
* [Devolutions Academy - Navigating Devolutions Server](https://academy.devolutions.net/student/page/2634255-navigating-devolutions-server?sid=e6228a6e-b1d0-46c2-ac20-70ede637d6aa&sid_i=0)
[ Share your feedback](https://forum.devolutions.net/forums/176/documentation--documentation-requests)
---
# Getting started - Devolutions Documentation
Getting started
===============
On this page
* [Domain requirements](https://docs.devolutions.net/server/getting-started/#domain-requirements)
* [Installation steps](https://docs.devolutions.net/server/getting-started/#installation-steps)
* [See also](https://docs.devolutions.net/server/getting-started/#see-also)
A Devolutions Server instance is in itself a web server application which acts as a backend for our client applications. You can think of it as a specialized database for your data. All instances can be installed on the same physical server or spread across many. Devolutions Server can be installed through different [topologies](https://docs.devolutions.net/server/overview/topologies/)
.
Domain requirements
-------------------
[](https://docs.devolutions.net/server/getting-started/#domain-requirements)
These requirements apply especially if you intend to use Automatic User Account Creation (see [Authentication](https://docs.devolutions.net/server/web-interface/administration/configuration/server-settings/general/authentication/)
) and/or User Groups to manage your instance.
1. Create Active Directory groups to manage your instance. Typical examples are: Remote Desktop Manager Admins, Remote Desktop Manager Operators, Remote Desktop Manager Users.
2. Add domain users to the Active Directory groups.
3. Create a VaultDBOwner account that will be the owner of the database. Performing upgrades with this account will ensure the proper rights are held.
4. Create a VaultDBRunner account that will be used as the identity of the website. This will allow you to harden the permissions to what is minimally required.
Installation steps
------------------
[](https://docs.devolutions.net/server/getting-started/#installation-steps)
1. Create a new instance of Devolutions Server (see [Create Devolutions Server instance](https://docs.devolutions.net/server/getting-started/installation/create-server-instance/)
).
2. Create a Devolutions Server administrator account in the [User management](https://docs.devolutions.net/server/web-interface/administration/security-management/users/)
.
3. Create [User groups](https://docs.devolutions.net/server/web-interface/administration/security-management/user-groups/)
.
4. Add domain users or built-in users (see [User management](https://docs.devolutions.net/server/web-interface/administration/security-management/users/)
).
### See also
[](https://docs.devolutions.net/server/getting-started/#see-also)
* [Devolutions Academy – Devolutions Server path](https://academy.devolutions.net/student/path/2942210-devolutions-server?sid_i=0)
[ Share your feedback](https://forum.devolutions.net/forums/176/documentation--documentation-requests)
---
# Installation - Devolutions Documentation
Installation
============
On this page
* [Topology](https://docs.devolutions.net/server/getting-started/installation/#topology)
* [Installation](https://docs.devolutions.net/server/getting-started/installation/#installation)
* [See also](https://docs.devolutions.net/server/getting-started/installation/#see-also)
Topology
--------
[](https://docs.devolutions.net/server/getting-started/installation/#topology)
A Devolutions Server instance is a web application, allowing its services to be accessible over the Internet or an Intranet.
The recommended [topology](https://docs.devolutions.net/server/overview/topologies/)
involves using two servers: one for the database and one for the web application. For smaller installations, a single server may be used; however, resources will be shared between both roles, which may impact performance.
Key points to consider:
* Ensure that .NET 10.0 is installed on your machine before beginning the installation.
* It is strongly recommended to enable SSL encryption to secure communication with the SQL Server instance. Follow Microsoft's guide: [Configure SQL Server Database Engine for encrypting connections](https://learn.microsoft.com/en-US/sql/database-engine/configure-windows/configure-sql-server-encryption)
. We advise completing this step after the initial setup.
* For full Active Directory integration, the application pool should use a domain identity, and both servers need to be joined to the domain.
Installation
------------
[](https://docs.devolutions.net/server/getting-started/installation/#installation)
* [Installing web server prerequisites](https://docs.devolutions.net/server/getting-started/installation/installing-web-server-prerequisites/)
After installing the prerequisites, test the IIS installation by navigating to `http://localhost`. If the IIS welcome screen does not appear, do not proceed. Any issues must be resolved before continuing.
* [Database instance](https://docs.devolutions.net/server/getting-started/installation/database-setup/database-instance/)
* [Create a Devolutions Server instance](https://docs.devolutions.net/server/getting-started/installation/create-server-instance/)
### See also
[](https://docs.devolutions.net/server/getting-started/installation/#see-also)
* [Devolutions Academy - Overview of Devolutions Server](https://academy.devolutions.net/student/path/2007290/activity/3070845 "Devolutions Academy - Overview of the Devolutions Server")
* [Devolutions Academy - Installing Devolutions Server](https://academy.devolutions.net/student/page/2942307-installing-devolutions-server?curriculum_activity_id=4493546&path_id=2942210&sid=1f0658ca-fdf5-4f74-a93f-a6a4b8853c09&sid_i=0)
[ Share your feedback](https://forum.devolutions.net/forums/176/documentation--documentation-requests)
---
# Remote Desktop Manager - Devolutions Documentation
Remote Desktop Manager
======================
On this page
* [The Remote Desktop Manager ecosystem](https://docs.devolutions.net/rdm/overview/what-is-rdm/#the-remote-desktop-manager-ecosystem)
* [See also](https://docs.devolutions.net/rdm/overview/what-is-rdm/#see-also)
Remote Desktop Manager is an application that integrates a comprehensive set of tools and managers to meet the needs of any IT team. It is designed to centralize remote connection technologies, credentials, and secure access to these resources. Most connections are established using either an external library or third-party software.
Remote Desktop Manager is compatible with over 200 relevant tools and technologies, including Apple Remote Desktop, Citrix, Dameware, FTP, Hyper-V, LogMeIn, Radmin, RDP (Microsoft Remote Desktop), Remote Desktop Services, SSH Port Forward, SSH Shell, TeamViewer, Telnet, VMware, VNC, SCP, X Windows, and more!
The Remote Desktop Manager ecosystem
------------------------------------
[](https://docs.devolutions.net/rdm/overview/what-is-rdm/#the-remote-desktop-manager-ecosystem)
Remote Desktop Manager is available on **Windows**, **macOS**, **Linux**, **iOS**, and **Android**.
The solution is offered in **two editions**, regardless of the operating system:
| | |
| --- | --- |
| **Free** | For individual users who don't need to share remote connections and privileged passwords with other IT professionals. |
| **Team** | For MSPs, IT professionals & helpdesk technicians who need to share remote connections and privileged passwords with other team members. Purchasing a Team license grants the right to use Remote Desktop Manager on all available platforms. |
A desktop application is required to create a Team data source, which explains why the mobile applications are free. While they provide basic functionality similar to the Free edition for individual use, they can only access a Team data source, not manage it.
See also
--------
[](https://docs.devolutions.net/rdm/overview/what-is-rdm/#see-also)
* [Remote Desktop Manager FAQ: Overview edition](https://blog.devolutions.net/2025/02/remote-desktop-manager-faq-overview-edition/)
[ Share your feedback](https://forum.devolutions.net/forums/176/documentation--documentation-requests)
---
# Getting started - Devolutions Documentation
Getting started
===============
Remote Desktop Manager offers great flexibility, making it suitable for both individuals and teams. Please refer to the checklist that best matches your environment:
* [Checklist for **Solo (free)** data sources](https://docs.devolutions.net/rdm/getting-started/checklist-individuals/)
: Ideal for single users who do not wish to implement advanced security features.
* [Checklist for **Native team** data sources](https://docs.devolutions.net/rdm/getting-started/checklist-enterprises/)
: Designed for teams using Devolutions Server or Devolutions Hub Business as their data source.
* [Checklist for **Third-party team** data sources](https://docs.devolutions.net/rdm/getting-started/checklist-small-teams/)
: For environments intended to leverage Microsoft SQL Server or Microsoft Azure SQL as their data source.
Remote Desktop Manager macOS offers great flexibility, making it suitable for both individuals and teams. Please refer to the checklist that best matches your environment:
* [Checklist for **Solo (free)** data sources](https://docs.devolutions.net/rdm/getting-started/checklist-individuals/?tab=macos)
: Ideal for single users who do not wish to implement advanced security features.
* [Checklist for **Native team** data sources](https://docs.devolutions.net/rdm/getting-started/checklist-enterprises/?tab=macos)
: Designed for teams using Devolutions Server or Devolutions Hub Business as their data source.
* [Checklist for **Third-party team** data sources](https://docs.devolutions.net/rdm/getting-started/checklist-small-teams/?tab=macos)
: For environments intended to leverage Microsoft SQL Server or Microsoft Azure SQL as their data source.
[ Share your feedback](https://forum.devolutions.net/forums/176/documentation--documentation-requests)
---
# Client - Devolutions Documentation
Client
======
On this page
* [Installation](https://docs.devolutions.net/rdm/installation/client/#installation)
* [License](https://docs.devolutions.net/rdm/installation/client/#license)
* [Data source](https://docs.devolutions.net/rdm/installation/client/#data-source)
* [External applications](https://docs.devolutions.net/rdm/installation/client/#external-applications)
* [Terminal Services / Remote Desktop Services](https://docs.devolutions.net/rdm/installation/client/#terminal-services-remote-desktop-services)
* [Installation](https://docs.devolutions.net/rdm/installation/client/#installation-1)
* [License](https://docs.devolutions.net/rdm/installation/client/#license-1)
* [Data source](https://docs.devolutions.net/rdm/installation/client/#data-source-1)
* [License](https://docs.devolutions.net/rdm/installation/client/#license-2)
* [Data source](https://docs.devolutions.net/rdm/installation/client/#data-source-2)
* [Installation](https://docs.devolutions.net/rdm/installation/client/#installation-2)
* [Repo method](https://docs.devolutions.net/rdm/installation/client/#repo-method)
* [Manual installation on unsupported systems](https://docs.devolutions.net/rdm/installation/client/#manual-installation-on-unsupported-systems)
Remote Desktop Manager can be downloaded as setup files or as a binary compressed file (ZIP) via our [Devolutions website](https://devolutions.net/remote-desktop-manager/home/download)
. It can also be downloaded from the [Microsoft Store](https://apps.microsoft.com/store/detail/devolutions-remote-desktop-manager/XPFCXHF337W98S)
.
Installation
------------
[](https://docs.devolutions.net/rdm/installation/client/#installation)
Depending on the downloaded media, either run the setup or extract the files from the archive in any folder and launch the executable.
If you wish to use a portable device or run multiple independent copies of the application, please consult [Portable (USB)](https://docs.devolutions.net/rdm/installation/client/portable-usb/)
.
| OPTIONS | DESCRIPTION |
| --- | --- |
| **Windows (.msi, x64)** | Download a Microsoft Software Installation package for 64-bit PCs (most desktops and laptops). |
| **Windows (.msi, arm64)** | Download a Microsoft Software Installation package for Windows devices using ARM. |
| **Windows (.msi, universal)** | Download a Microsoft Software Installation package containing binaries for both x64 and arm64 machines and devices. |
| **Windows (.exe, universal)** | Download a `.exe` package containing binaries for both x64 and arm64 machines and devices. |
| **Windows (.7z, x64)** | Download Remote Desktop Manager as a highly compressed, pre-optimized for x64, .7z file. Use [for better startup performance.](https://docs.devolutions.net/rdm/kb/troubleshooting-articles/startup-performance/) |
| **Windows (.7z, arm64)** | Download Remote Desktop Manager as a highly compressed, pre-optimized for armx64, .7z file. Use for [better startup performance](https://docs.devolutions.net/rdm/kb/troubleshooting-articles/startup-performance/)
. |
| **Windows (.zip, universal)** | Download Remote Desktop Manager as a compressed `.zip` file containing binaries for both x64 and arm 64 machines and devices. While `.7z` files are smaller, `.zip` files are more universally supported. |
License
-------
[](https://docs.devolutions.net/rdm/installation/client/#license)
It is possible to try Remote Desktop Manager with a [Free trial](https://docs.devolutions.net/rdm/support-resources/getting-started-packages/free-trials/)
. If you possess a purchased license, please follow the instructions [Registration](https://docs.devolutions.net/rdm/installation/client/registration/)
.
Data source
-----------
[](https://docs.devolutions.net/rdm/installation/client/#data-source)
By default, a local data source is created using the SQLite format. You can add as many data sources as needed. Please consult [Data sources](https://docs.devolutions.net/rdm/data-sources/)
for more information.
To use an SQL Server or Azure SQL data source, refer to [Configure SQL Server](https://docs.devolutions.net/rdm/data-sources/data-sources-types/advanced-data-sources/microsoft-sql-server/configure/)
or [Configure Azure SQL](https://docs.devolutions.net/rdm/data-sources/data-sources-types/advanced-data-sources/microsoft-azure-sql/configure/)
.
External applications
---------------------
[](https://docs.devolutions.net/rdm/installation/client/#external-applications)
Configure your installation path for all external applications you intend to use such as RealVNC, Putty, Filezilla, etc. Set the paths in _**File**_ – _**Settings**_ – _**Application**_ – _**Paths**_.
Terminal Services / Remote Desktop Services
-------------------------------------------
[](https://docs.devolutions.net/rdm/installation/client/#terminal-services-remote-desktop-services)
Please consult [Terminal Services / Remote Desktop Services](https://docs.devolutions.net/rdm/installation/client/terminal-services/)
.
Remote Desktop Manager macOS can be downloaded as a DMG file via our [Devolutions website](https://devolutions.net/remote-desktop-manager/home/download)
.
Installation
------------
[](https://docs.devolutions.net/rdm/installation/client/#installation-1)
Depending on the downloaded media, either run the setup or extract the files from the archive in any folder and launch the executable.
License
-------
[](https://docs.devolutions.net/rdm/installation/client/#license-1)
It is possible to try Remote Desktop Manager with a [Free trial](https://docs.devolutions.net/rdm/support-resources/getting-started-packages/free-trials/)
. If you possess a purchased license, please follow the instructions [Registration](https://docs.devolutions.net/rdm/installation/client/registration/)
.
Data source
-----------
[](https://docs.devolutions.net/rdm/installation/client/#data-source-1)
By default, a local data source is created using the SQLite format. You can add as many data sources as needed. Please consult [Data sources](https://docs.devolutions.net/rdm/data-sources/)
for more information.
To use an SQL Server or Azure SQL data source, refer to [Configure SQL Server](https://docs.devolutions.net/rdm/data-sources/data-sources-types/advanced-data-sources/microsoft-sql-server/configure/)
or [Configure Azure SQL](https://docs.devolutions.net/rdm/data-sources/data-sources-types/advanced-data-sources/microsoft-azure-sql/configure/)
.
Remote Desktop Manager can be downloaded as DEB or RPM files via the [Devolutions website](https://devolutions.net/remote-desktop-manager/download/)
.
License
-------
[](https://docs.devolutions.net/rdm/installation/client/#license-2)
It is possible to try Remote Desktop Manager with a [Free trial](https://docs.devolutions.net/rdm/support-resources/getting-started-packages/free-trials/)
. If you possess a purchased license, please follow the instructions [Registration](https://docs.devolutions.net/rdm/installation/client/registration/)
.
**Data source**
---------------
[](https://docs.devolutions.net/rdm/installation/client/#data-source-2)
By default, a local data source is created using the SQLite format. You can add as many data sources as needed. Please consult [Data sources](https://docs.devolutions.net/rdm/data-sources/)
for more information.
To use an SQL Server or Azure SQL data source, refer to [Configure SQL Server](https://docs.devolutions.net/rdm/data-sources/data-sources-types/advanced-data-sources/microsoft-sql-server/configure/)
or [Configure Azure SQL](https://docs.devolutions.net/rdm/data-sources/data-sources-types/advanced-data-sources/microsoft-azure-sql/configure/)
.
Installation
------------
[](https://docs.devolutions.net/rdm/installation/client/#installation-2)
Depending on the downloaded media, either run the setup or extract the files from the archive in any folder and launch the executable. If this method of installation does not meet your needs, follow the instructions below.
### Repo method
[](https://docs.devolutions.net/rdm/installation/client/#repo-method)
Devolutions offer RDM through Cloudsmith for Debian and RedHat-based distributions. For Arch-based distributions, the package is available through AUR, and finally, Devolutions offers a Flatpak package that should cover most other platforms.
#### Debian and other Debian-based distributions
[](https://docs.devolutions.net/rdm/installation/client/#debian-and-other-debian-based-distributions)
The repository must be set up before installing Remote Desktop Manager through Cloudsmith on any Debian-based distributions, including but not limited to Ubuntu, Pop!\_Os, and Kali Linux.
The following example showcases an Ubuntu system using APT as package manager.
1. To set up the repositary, run the bash script that most fit your needs from the choices below:
###### Cloudsmith's automatic setup:
[](https://docs.devolutions.net/rdm/installation/client/#cloudsmiths-automatic-setup)
curl -1sLf \
'https://dl.cloudsmith.io/public/devolutions/rdm/setup.deb.sh' \
| sudo -E bash
###### Forced specific distribution, release/version, architecture:
[](https://docs.devolutions.net/rdm/installation/client/#forced-specific-distribution-releaseversion-architecture)
curl -1sLf \
'https://dl.cloudsmith.io/public/devolutions/rdm/setup.deb.sh' \
| sudo -E distro=some-distro codename=some-codename arch=some-arch bash
###### Manual configuration:
[](https://docs.devolutions.net/rdm/installation/client/#manual-configuration)
apt-get install -y debian-keyring # debian only
apt-get install -y debian-archive-keyring # debian only
apt-get install -y apt-transport-https
# For Debian Stretch, Ubuntu 16.04 and later
keyring_location=/usr/share/keyrings/devolutions-rdm-archive-keyring.gpg
# For Debian Jessie, Ubuntu 15.10 and earlier
keyring_location=/etc/apt/trusted.gpg.d/devolutions-rdm.gpg
curl -1sLf 'https://dl.cloudsmith.io/public/devolutions/rdm/gpg.FE7407ECB26FD2FE.key' | gpg --dearmor >> ${keyring_location}
curl -1sLf 'https://dl.cloudsmith.io/public/devolutions/rdm/config.deb.txt?distro=ubuntu&codename=xenial' > /etc/apt/sources.list.d/devolutions-rdm.list
apt-get update
Be sure to replace **ubuntu** and **xenial** in the above with your actual operating system (distribution and distribution release/version).
2. Install the package through your chosen package manager (APT here) by running the following script:
sudo apt-get install remotedesktopmanager
#### RedHat and RedHat-based systems
[](https://docs.devolutions.net/rdm/installation/client/#redhat-and-redhat-based-systems)
The repository must be set up before installing Remote Desktop Manager through Cloudsmith on any RedHat-based distributions, including but not limited to RHEL, CentOS, SUSE, Fedora. For specific distribution based instructions please refer to [Cloudsmith’s guide](https://cloudsmith.io/~devolutions/repos/rdm/setup/#repository-setup-dnf)
.
The following example showcases a Fedora system using DNF as package manager.
1. To set up the repositary, run the bash script that most fit your needs from the choices below:
##### Cloudsmith's automatic setup
[](https://docs.devolutions.net/rdm/installation/client/#cloudsmiths-automatic-setup-1)
curl -1sLf \
'https://dl.cloudsmith.io/public/devolutions/rdm/setup.deb.sh' \
| sudo -E bash
##### Forced specific distribution, release/version, architecture
[](https://docs.devolutions.net/rdm/installation/client/#forced-specific-distribution-releaseversion-architecture-1)
curl -1sLf \
'https://dl.cloudsmith.io/public/devolutions/rdm/setup.deb.sh' \
| sudo -E distro=some-distro codename=some-codename arch=some-arch bash
##### Manual configuration
[](https://docs.devolutions.net/rdm/installation/client/#manual-configuration-1)
dnf install yum-utils pygpgme
rpm --import 'https://dl.cloudsmith.io/public/devolutions/rdm/gpg.FE7407ECB26FD2FE.key'
curl -1sLf 'https://dl.cloudsmith.io/public/devolutions/rdm/config.rpm.txt?distro=fedora&codename=29' > /tmp/devolutions-rdm.repo
dnf config-manager --add-repo '/tmp/devolutions-rdm.repo'
dnf -q makecache -y --disablerepo='*' --enablerepo='devolutions-rdm' --enablerepo='devolutions-rdm-source'
Be sure to replace **fedora** and **29** in the above with your actual operating system (distribution and distribution release/version).
2. Install the package through your chosen package manager (DNF here) by running the following script:
sudo dnf-get install remotedesktopmanager
#### Arch or Arch-based systems
[](https://docs.devolutions.net/rdm/installation/client/#arch-or-arch-based-systems)
For Arch-based distributions, including but not limited to Arch, Manjaro, EndeavourOS, Devolutions strongly recommends [Yay](https://github.com/Jguer/yay)
. The package can also be built from scratch.
##### Installing Remote Desktop Manager using Yay
[](https://docs.devolutions.net/rdm/installation/client/#installing-remote-desktop-manager-using-yay)
1. If Yay is not already installed on the machine, do so by using this script:
sudo pacman -Sy yay
2. Install the remote-desktop-manager package:
yay -Sy remote-desktop-manager
3. Run a full system synchronization (recommended):
yay -Syu
or only upgrade the remote-desktop-manager package (may cause dependency issues):
yay -Sy remote-desktop-manager
##### Building the package using Pacman
[](https://docs.devolutions.net/rdm/installation/client/#building-the-package-using-pacman)
1. Install base-devel with the following script:
sudo pacman -S base-devel
2. Clone the remote-desktop-manager repository in a particular location:
git clone https://aur.archlinux.org/remote-desktop-manager.git
3. Build and install the pack by running this script and replacing "path\_to\_the\_cloned\_repo":
cd path_to_the_cloned_repo/
makepkg -si
#### Flatpak-supported distributions
[](https://docs.devolutions.net/rdm/installation/client/#flatpak-supported-distributions)
To install Remote Desktop Manager on Flatpak-supported distributions, start by setting up Flatpak on the machine according to Flatpak's [Quick Setup page](https://flatpak.org/setup/)
. Then, install the package using flathub by running these scripts:
flatpak install flathub com.devolutions.remotedesktopmanager
flatpak run com.devolutions.remotedesktopmanager
### **Manual installation on unsupported systems**
[](https://docs.devolutions.net/rdm/installation/client/#manual-installation-on-unsupported-systems)
Here is a simple guide to help installing Remote Desktop Manager Linux on an unsupported distro.
Here are required dependencies:
* glibc 2.29
* libwebkit2gtk-4.0 or libwebkit2gtk-4.1
* ca-certificates
* libsecret-1-0
* gnome-keyring
* libvte-2.91
Devolutions also suggests the following libraries:
* libappindicator
* xdotool
* lsof
Install Remote Desktop Manager Linux using the following steps:
1. Download the [latest .deb version of Remote Desktop Manager](https://devolutions.net/remote-desktop-manager/download/)
.
2. Make a directory:
`mkdir ./extractedData/`
3. Move the DEB file to the newly created folder and open that same folder:
`mv ./RemoteDesktopManager_x.x.x.x_amd64.deb ./extractedData cd ./extractedData`
4. Extract the DEB file's content:
`ar -x RemoteDesktopManager_x.x.x.x_amd64.deb`
5. Extract data.tar.xz content:
`tar -xf data.tar.xz`
6. Copy the extracted data’s bin/remotedesktopmananger to /bin:
`cp -r /bin/remotedesktopmananger /bin`
7. Copy the extracted data’s usr/lib/devolutions/RemoteDesktopManager to /usr/lib/devolutions/RemoteDesktopManager:
`cp -r /usr/lib/devolutions/RemoteDesktopManager /usr/lib/devolutions/RemoteDesktopManager`
Remote Desktop Manager can then be launched using the remotedesktopmanager terminal command.
On the Apple Store, search for the Remote Desktop Manager application and install the application on your device.
When launching the application on your device, the _**Master password**_ window will appear, you can either decide to enter a password protecting Remote Desktop Manager, which will prompt you for your password every time you open the application or if you leave the field blank the application will open without prompting you for a password. You can also choose to use _**Touch ID**_ and _**Face ID**_. 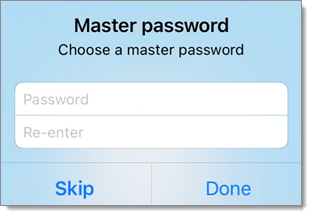
Remote Desktop Manager iOS automatically creates an _**XML data source**_ the first time it is launched if you choose to skip the _**Setup Wizard**_. 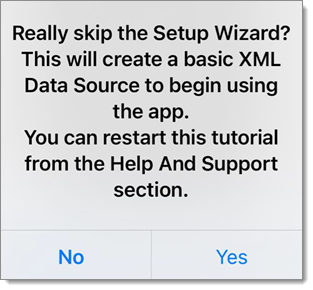
On the Google Play Store store, search for the Remote Desktop Manager application and install the application on your device.
When launching the application on your device, the _**Master Password**_ window will appear, you can either decide to enter a password protecting Remote Desktop Manager, which will prompt you for your password every time you open the application or if you leave the field blank the application will open without prompting your for a password.
Remote Desktop Manager Android will automatically create an XML data source upon first launch.
[ Share your feedback](https://forum.devolutions.net/forums/176/documentation--documentation-requests)
---
# Devolutions Portal - Devolutions Documentation
Devolutions Portal
==================
[Devolutions Portal](https://portal.devolutions.com/)
provides a centralized platform to manage:
* Your Devolutions Account details and communication preferences;
* Your Devolutions product and integration licenses, along with billing information;
* Your access to Devolutions Hub;
* Your authentication and security settings.
To access Devolutions Portal, [log in](https://login.devolutions.com/op/login)
to your Devolutions Account or [create](https://login.devolutions.com/op/register)
one for free. For help creating your account, check out [our guide](https://docs.devolutions.net/portal/profile/create-devolutions-account/)
.
You can also access Devolutions Portal and other Devolutions solutions through the menu icon on the [Devolutions website](https://devolutions.net/)
.
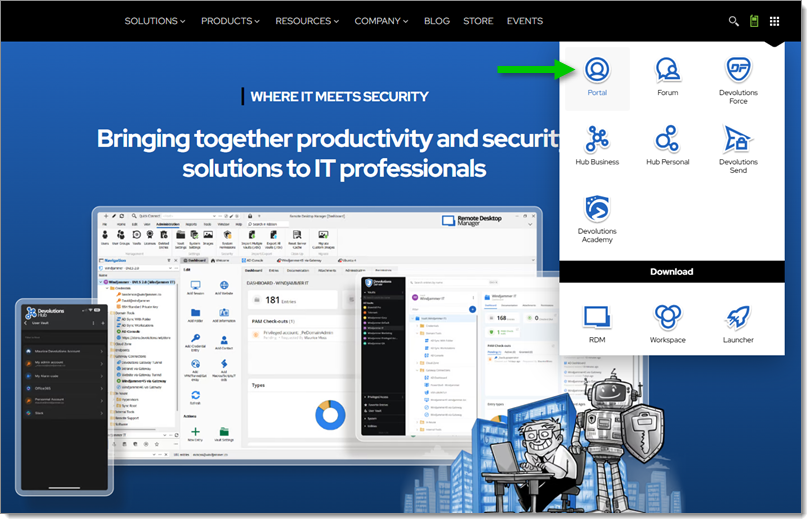
Access
#### See also
[](https://docs.devolutions.net/portal/overview/what-is-portal/#see-also)
* [Devolutions Academy – Creating a Devolutions account and navigate through the Devolutions portal](https://academy.devolutions.net/student/page/2751285-creating-a-devolutions-account-and-navigate-through-the-devolutions-portal?curriculum_activity_id=4211746&path_id=2628397&sid=75c8c4cf-7be2-4b4c-a179-6b4b7012c43c&sid_i=0)
[ Share your feedback](https://forum.devolutions.net/forums/176/documentation--documentation-requests)
---
# Create your Devolutions Account - Devolutions Documentation
Create your Devolutions Account
===============================
On this page
* [Devolutions Account creation](https://docs.devolutions.net/portal/profile/create-devolutions-account/#devolutions-account-creation)
* [Forgotten password](https://docs.devolutions.net/portal/profile/create-devolutions-account/#forgotten-password)
To get started, create your free Devolutions Account by following the steps below.
Devolutions Account creation
----------------------------
[](https://docs.devolutions.net/portal/profile/create-devolutions-account/#devolutions-account-creation)
1. Go to your [account login](https://portal.devolutions.com/)
.
2. Click on _**Create your account**_ to start the process.
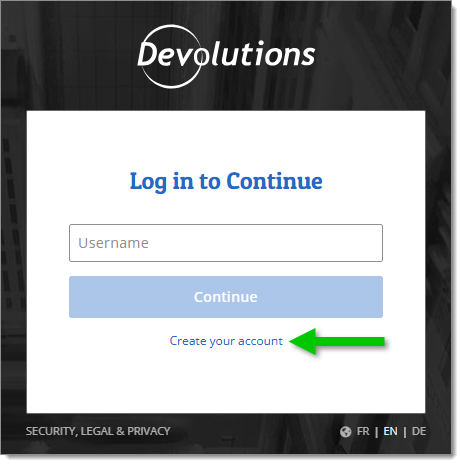
Create your account
3. Fill in the fields with your information, then click _**Create account**_.
By clicking on _**Create account**_ , you confirm that you have read and accepted our [Software License and Subscription Agreement](https://devolutions.net/legal/customer-agreements/)
and [Privacy Policy](https://devolutions.net/legal/privacy/)
.
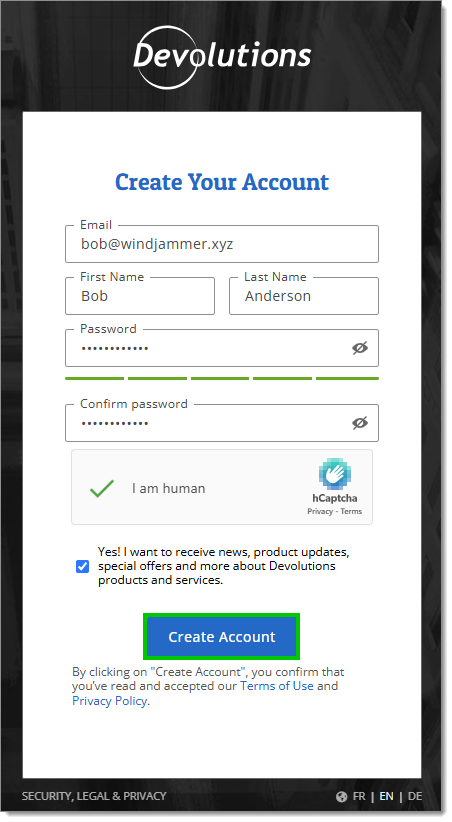
Account information
4. Go to your email inbox and open the activation email that was sent to you.
The activation link email might be in your spam/junk folder. For Gmail accounts, also check the _**Promotions**_ folder.
It may take some time to receive it. If you do not receive the email, follow the [Forgotten password](https://docs.devolutions.net/portal/profile/create-devolutions-account/#forgotten-password)
steps below.
5. Click _**Activate**_ in the email to verify your account creation.
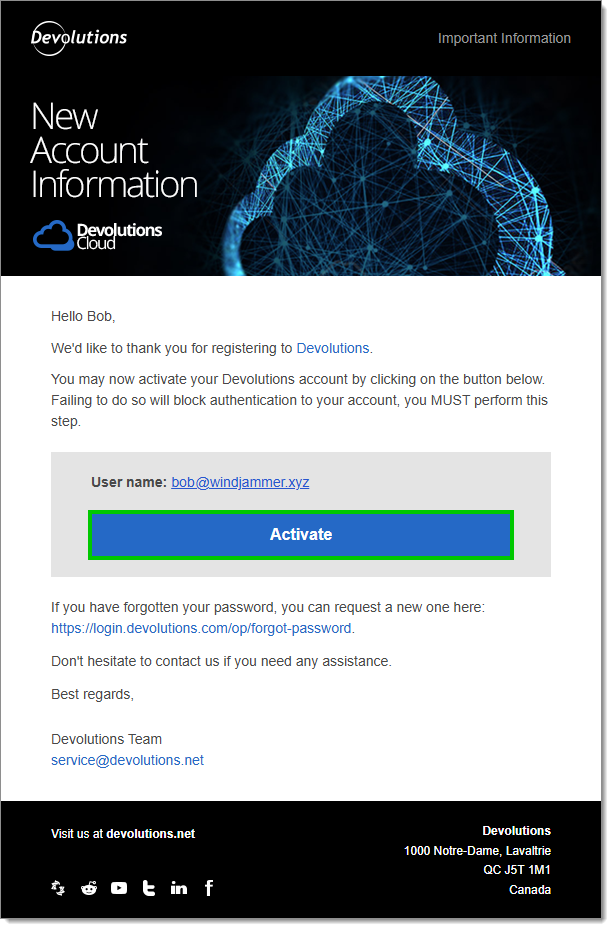
Activate your account
Your account has been created!
Forgotten password
------------------
[](https://docs.devolutions.net/portal/profile/create-devolutions-account/#forgotten-password)
If you did not receive the activation email or have forgotten your password, follow the steps below to resolve the issue:
1. Go to the [Devolutions Account login page](https://portal.devolutions.com/)
.
2. Enter your _**Username**_ (Devolutions Account email address), then click _**Continue**_.
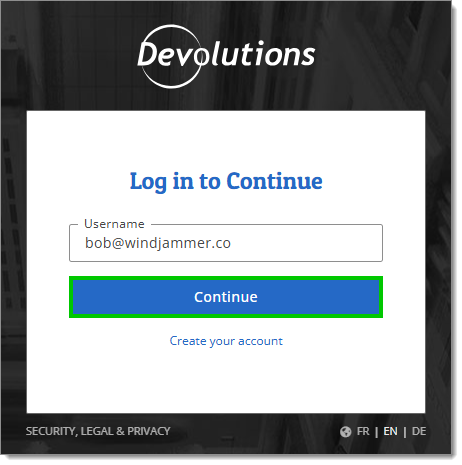
Username
3. Click _**Forgot your password?**_.
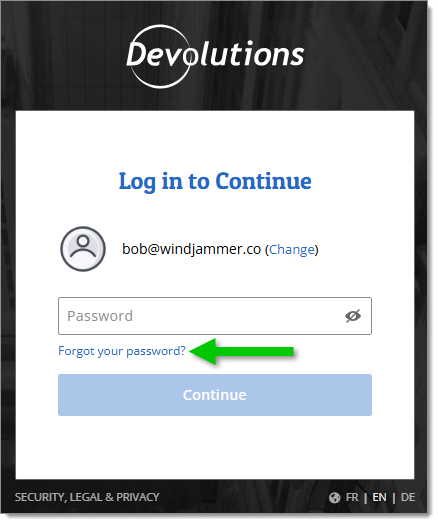
Forgot your password?
4. Enter your username again if required, then click _**Next**_.
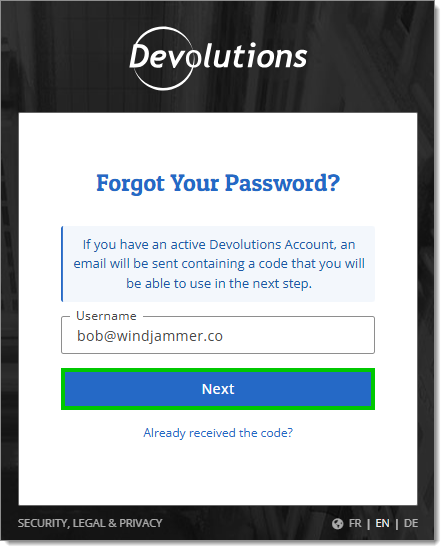
Username
5. Copy the code received in the email and paste it in the _**Code**_ field, then click _**Next**_.
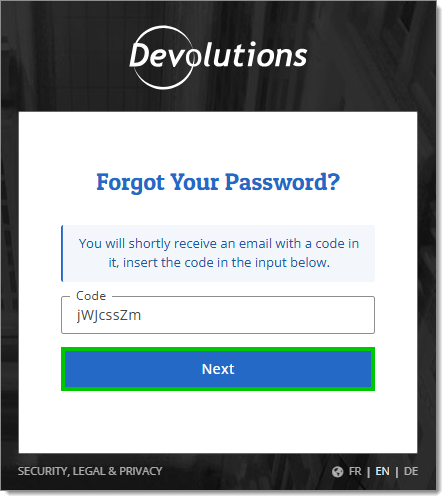
Email code
6. Enter a new password that follows the security guidelines, then click _**Update my password**_.
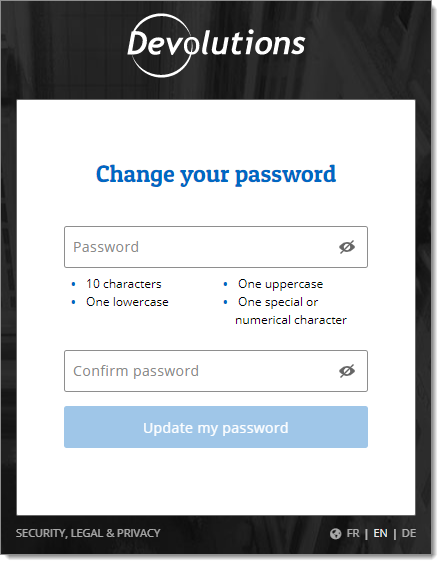
New password
[ Share your feedback](https://forum.devolutions.net/forums/176/documentation--documentation-requests)
---
# Devolutions Send Standalone - Devolutions Documentation
Devolutions Send Standalone
===========================
On this page
* [Features](https://docs.devolutions.net/workspace/kb/general-knowledge/devolutions-send-standalone/#features)
* [How to use Devolutions Send Standalone](https://docs.devolutions.net/workspace/kb/general-knowledge/devolutions-send-standalone/#how-to-use-devolutions-send-standalone)
* [How to receive a Devolutions Send Standalone secret](https://docs.devolutions.net/workspace/kb/general-knowledge/devolutions-send-standalone/#how-to-receive-a-devolutions-send-standalone-secret)
* [Technical details](https://docs.devolutions.net/workspace/kb/general-knowledge/devolutions-send-standalone/#technical-details)
* [See also](https://docs.devolutions.net/workspace/kb/general-knowledge/devolutions-send-standalone/#see-also)
[Devolutions Send Standalone](https://devolutions.net/devolutions-send/)
features a secure method to generate a link to share secrets instead of using insecure email to send sensitive data.
Features
--------
[](https://docs.devolutions.net/workspace/kb/general-knowledge/devolutions-send-standalone/#features)
The in-app version of Devolutions Send is currently under development and will be progressively deployed in Remote Desktop Manager, Devolutions Server, and Devolutions Hub. More information will come in the future.
Despite sharing the same underlying architecture, slight differences exist between the feature set of the standalone and in-app versions of Devolutions Send.
* Unique link encrypted on the client side.
* Valid for a customizable amount of time.
* Optional protection via a client-provided passphrase.
* Users may be non-Devolutions users (not linked to a Devolutions Account).
* Character limit of 10 kb.
* A sender email is required and stored with the GUID as part of the “payload” stored in the database.
How to use Devolutions Send Standalone
--------------------------------------
[](https://docs.devolutions.net/workspace/kb/general-knowledge/devolutions-send-standalone/#how-to-use-devolutions-send-standalone)
1. Go to the [Devolutions Send Standalone](https://send.devolutions.com/)
website.
2. Enter the _**Sender email**_, which is required and stored with the GUID as part of the “payload” stored in the database.
3. Enter your _**Secure message**_ to encrypt.
* A file of maximum 1 MB can be added to the secure message as well.
4. Add a _**Passphrase**_ for extra security (mandatory if the recipient does not have a Devolutions Account, optional otherwise).
* _**Additional security options**_:
* The _**Link duration**_ can be set to 1 hour, 24 hours, 3 days or 1 week.
* The _**View limit**_ can be set to Unlimited, Single view or Multiple views. The Multiple views option is useful for setting an exact amount of possible views.
* It is recommended to enable the _**Allow recipient to delete message**_ option.
5. Read and agree to our online services terms.
6. Click on _**Create secure link**_ to get the in-browser encrypted link. 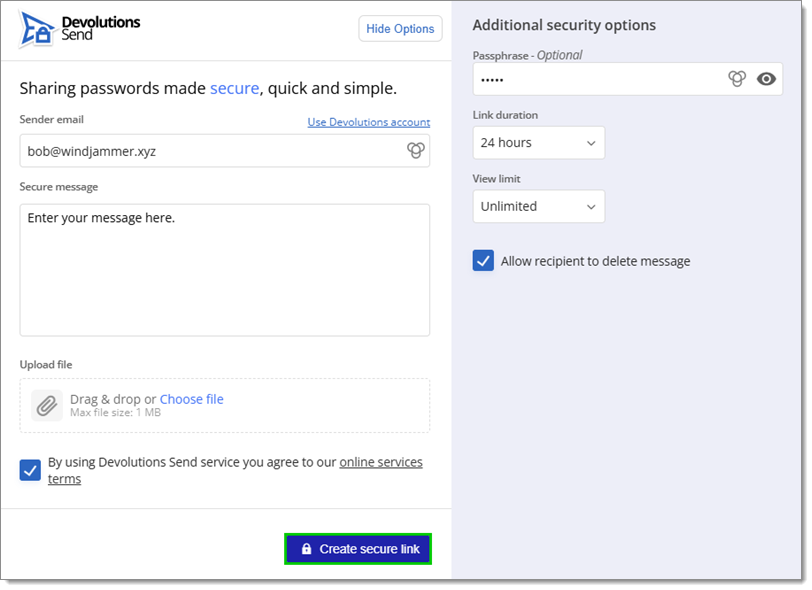
7. Click on _**Copy to clipboard**_ and send it to the recipient(s).
How to receive a Devolutions Send Standalone secret
---------------------------------------------------
[](https://docs.devolutions.net/workspace/kb/general-knowledge/devolutions-send-standalone/#how-to-receive-a-devolutions-send-standalone-secret)
1. Click on the received encrypted link.
A Devolutions Send Standalone secret will always start with https://send.devolutions.com/receive/.
2. Click on _**Unmask text**_.
Make certain to be in a private setting before reading this message if it contains sensitive information.
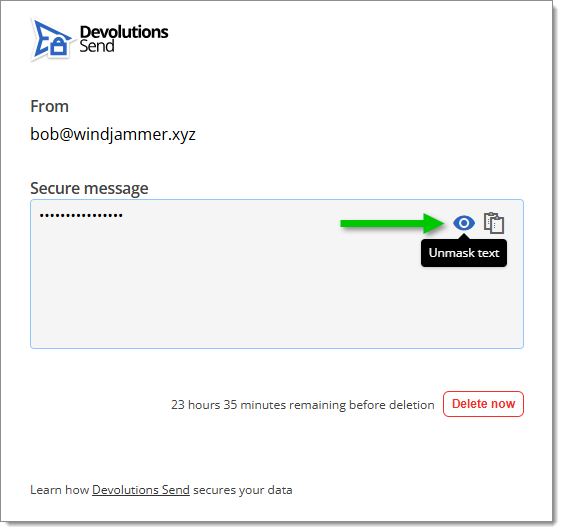
Unmask text
3. Enter the _**Passphrase**_ the sender provided (if necessary) and click on _**Decrypt**_. 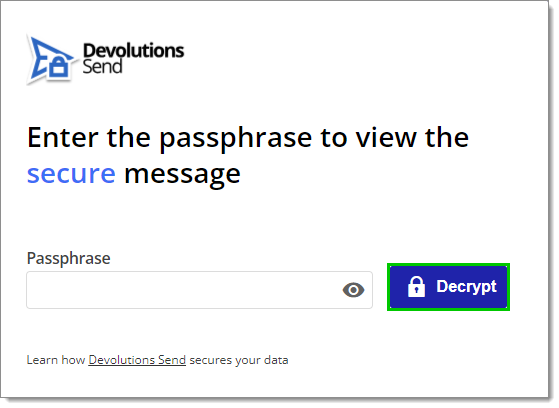
4. Once done, click on _**Delete Now**_.
5. Click _**Yes**_. 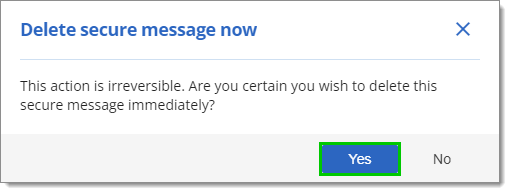 
Technical details
-----------------
[](https://docs.devolutions.net/workspace/kb/general-knowledge/devolutions-send-standalone/#technical-details)
The core tenant of Devolutions Send is that Devolutions itself cannot decrypt the user's secret. This is accomplished via client-side (browser) encryption through a Rust program compiled to WASM (WebAssembly) in-browser. Therefore, Devolutions does not hold the encryption key and cannot decrypt the data.
### See also
[](https://docs.devolutions.net/workspace/kb/general-knowledge/devolutions-send-standalone/#see-also)
* [Devolutions Blog - How organizations can safely share confidential information with Devolutions Send](https://blog.devolutions.net/2024/08/how-organizations-can-safely-share-confidential-information-with-devolutions-send/ "Devolutions Blog - How organizations can safely share confidential information with Devolutions Send")
[ Share your feedback](https://forum.devolutions.net/forums/176/documentation--documentation-requests)
---
# PAM with Devolutions Hub Business - Devolutions Documentation
PAM with Devolutions Hub Business
=================================
[Devolutions Privileged Access Management](https://devolutions.net/privileged-access-management/)
for Devolutions Hub Business takes care of Entra ID privileged accounts. It is specifically designed to meet the needs of SMBs, providing enterprise-grade features to bring a level of protection usually only afforded to large organizations while at the same time being robust, easy to deploy, and affordable.
Since Devolutions Hub Business is a cloud-based solution, you must download and install the [Devolutions Hub Services](https://docs.devolutions.net/pam/hub/pam-service/)
to establish communication between your Devolutions Hub Business and your internal resources.
Here are some of its main features:
* Secure PAM vault managing all your different privileged accounts
* Checkout request approval
* Automatic password reset
* Secure password injection
* Administration report
A license is required to enable the PAM module. Please contact our [sales department](mailto:sales@devolutions.net)
for more information about the license.
[ Share your feedback](https://forum.devolutions.net/forums/176/documentation--documentation-requests)
---
# Devolutions Send - Devolutions Documentation
Devolutions Send
================
On this page
* [Features](https://docs.devolutions.net/hub/devolutions-ecosystem/send/#features)
* [How to use Devolutions Send with Devolutions Hub Business](https://docs.devolutions.net/hub/devolutions-ecosystem/send/#how-to-use-devolutions-send-with-devolutions-hub-business)
* [Send in-app](https://docs.devolutions.net/hub/devolutions-ecosystem/send/#send-in-app)
* [Send by email](https://docs.devolutions.net/hub/devolutions-ecosystem/send/#send-by-email)
* [Create shareable link](https://docs.devolutions.net/hub/devolutions-ecosystem/send/#create-shareable-link)
* [Send copy of a password](https://docs.devolutions.net/hub/devolutions-ecosystem/send/#send-copy-of-a-password)
* [See also](https://docs.devolutions.net/hub/devolutions-ecosystem/send/#see-also)
Send a password through in-app secure messaging or email external contacts directly from an entry. Create a shareable link to send secrets outside your organization securely.
This feature needs the user to have _**Send messages with attachments**_ enabled. This option can be found under _**Administration**_ – _**Users**_. It is enabled by default for each user.
The _**External password sharing**_ option also needs to be enabled for this feature to work. The option can be found under _**Administration**_ – _**System settings**_ – _**Advanced**_. It is enabled by default.
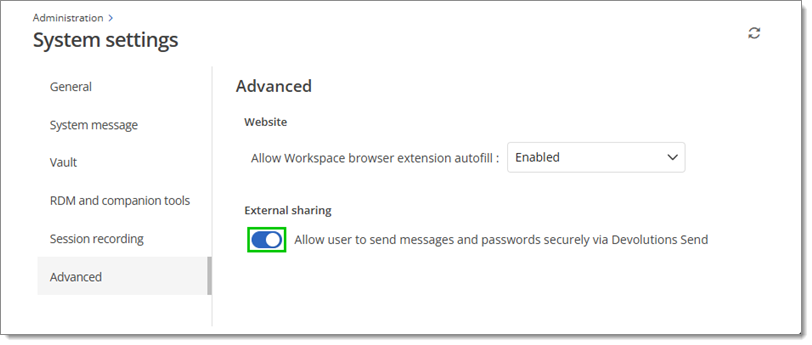
External sharing
Features
--------
[](https://docs.devolutions.net/hub/devolutions-ecosystem/send/#features)
[Devolutions Send Standalone](https://devolutions.net/devolutions-send/)
is an alternative for those who do not use our products.
Despite sharing the same underlying architecture, slight differences exist between the feature set of the standalone and in-app versions of Devolutions Send.
* Unique link encrypted on the client side.
* Valid for a customizable amount of time.
* Optional protection via a client-provided passphrase.
* Users may be non-Devolutions users (not linked to a Devolutions Account).
* Character limit of 10 kB.
* A sender email is required and stored with the GUID as part of the “payload” stored in the database.
How to use Devolutions Send with Devolutions Hub Business
---------------------------------------------------------
[](https://docs.devolutions.net/hub/devolutions-ecosystem/send/#how-to-use-devolutions-send-with-devolutions-hub-business)
1. Open the Devolutions Hub Business web page.
2. Click on _**Messages**_ next to the user's avatar.
Messages
3. Click _**New message**_.
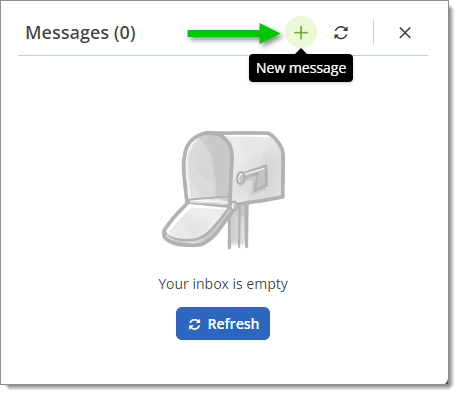
New message
4. Select one of the three available options:
* [Send in-app](https://docs.devolutions.net/hub/devolutions-ecosystem/send/#send-in-app)
* [Send by email](https://docs.devolutions.net/hub/devolutions-ecosystem/send/#send-by-email)
* [Create shareable link](https://docs.devolutions.net/hub/devolutions-ecosystem/send/#create-shareable-link)
### Send in-app
[](https://docs.devolutions.net/hub/devolutions-ecosystem/send/#send-in-app)
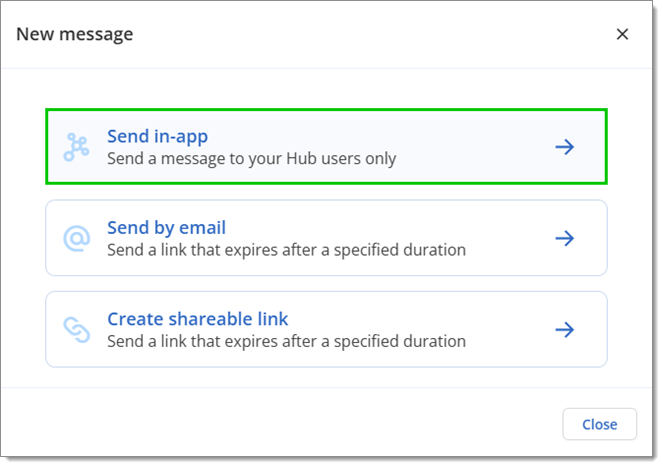
Send in-app
This feature is covered in [_**Secure messages**_](https://docs.devolutions.net/hub/web-interface/secure-messages/)
.
### Send by email
[](https://docs.devolutions.net/hub/devolutions-ecosystem/send/#send-by-email)
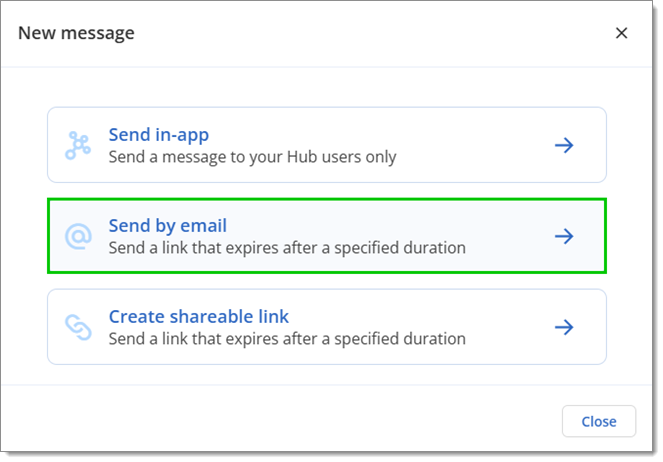
Send by email
1. Enter the _**Recipient(s) email**_.
2. Enter the information in the _**Secure message**_ field.
* Files can be securely shared by clicking _**Upload file**_.
* A _**Passphrase**_ may be added for additional security.
* The _**Duration**_ can be set to 1 hour, 24 hours, 3 days, 1 week, 2 weeks or 1 month.
* The _**View limit**_ can be set to _**Unlimited**, **Single view**_ or _**Multiple views**._ The latter is useful for setting an exact number of possible views.
3. Click _**Submit**_.
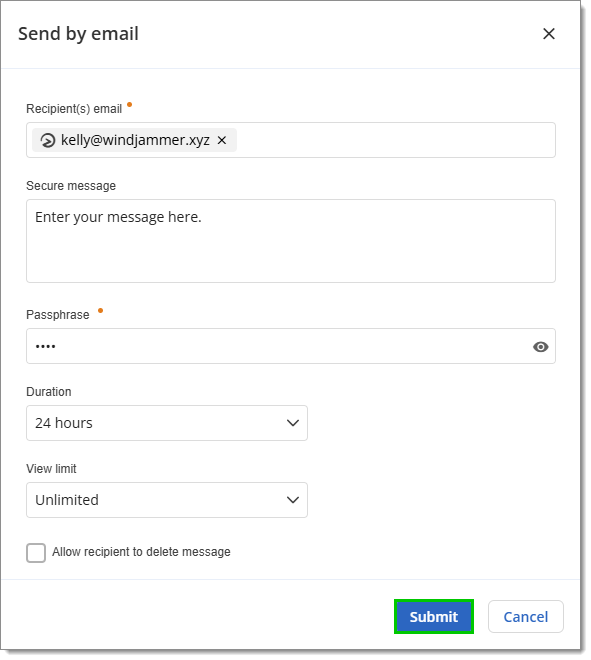
Submit
### Create shareable link
[](https://docs.devolutions.net/hub/devolutions-ecosystem/send/#create-shareable-link)
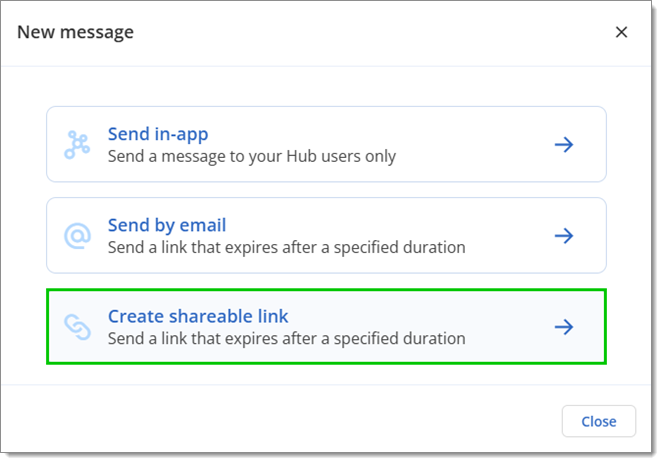
Create shareable link
1. Enter the information in the _**Secure Message**_ field.
* A _**Passphrase**_ may be added for additional security.
* The _**Duration**_ can be set to 1 hour, 24 hours, 3 days, 1 week, 2 weeks or 1 month.
* The _**View limit**_ can be set to Unlimited, Single view or Multiple views. The Multiple option is useful for setting an exact amount of possible views.
2. Click on _**Create link**_.
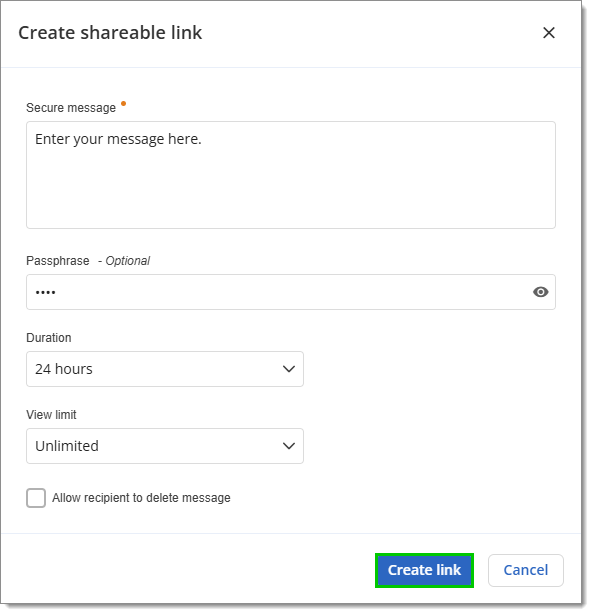
Create link
3. Copy the link and send it to the intended individual(s).
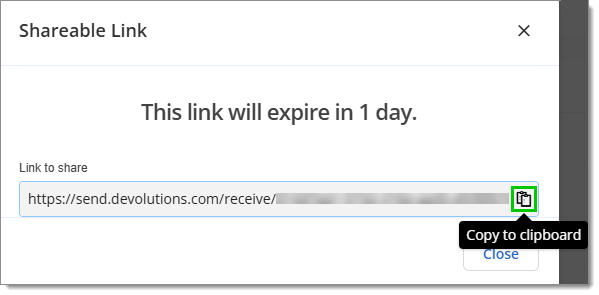
Copy to clipboard
Send copy of a password
-----------------------
[](https://docs.devolutions.net/hub/devolutions-ecosystem/send/#send-copy-of-a-password)
It is also possible to send a password directly to another user in-app or outside of Devolutions Hub Business by using Devolutions Send. The user needs to have [_**View**_ permission](https://docs.devolutions.net/hub/web-interface/administration/configuration-security/system-permissions/roles-permissions/)
on that entry to send it.
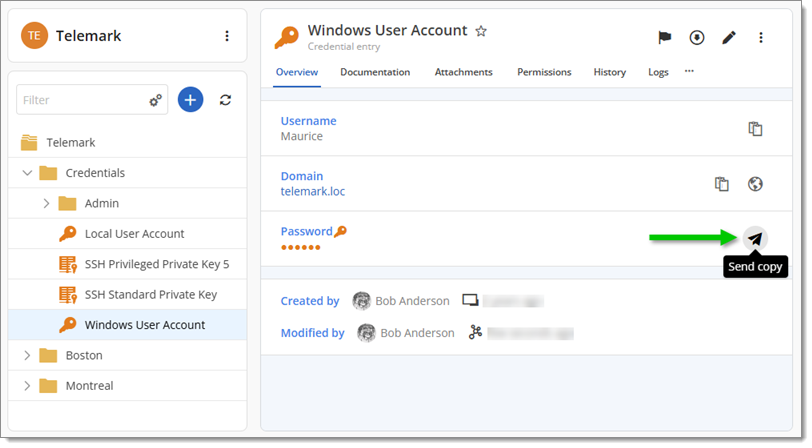
Send copy
The main difference with this option is that the password is automatically added and hidden as the message. The password can only be edited if the text is revealed (by clicking the eye icon).
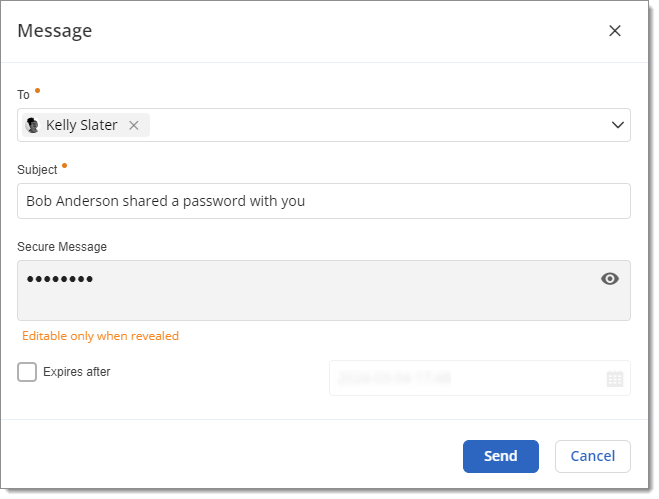
Editable only when revealed
To learn more about the _**Secure message**_ features, please refer to the above section on [How to use Devolutions Send with Devolutions Hub Business](https://docs.devolutions.net/hub/devolutions-ecosystem/send/#how-to-use-devolutions-send-with-devolutions-hub-business)
.
### See also
[](https://docs.devolutions.net/hub/devolutions-ecosystem/send/#see-also)
* [Devolutions Blog - How organizations can safely share confidential information with Devolutions Send](https://blog.devolutions.net/2024/08/how-organizations-can-safely-share-confidential-information-with-devolutions-send/ "Devolutions Blog - How organizations can safely share confidential information with Devolutions Send")
[ Share your feedback](https://forum.devolutions.net/forums/176/documentation--documentation-requests)
---
# Devolutions Send - Devolutions Documentation
Devolutions Send
================
On this page
* [Features](https://docs.devolutions.net/server/devolutions-ecosystem/send/#features)
* [How to use Devolutions Send with Devolutions Server](https://docs.devolutions.net/server/devolutions-ecosystem/send/#how-to-use-devolutions-send-with-devolutions-server)
* [Send in-app](https://docs.devolutions.net/server/devolutions-ecosystem/send/#send-in-app)
* [Send by email](https://docs.devolutions.net/server/devolutions-ecosystem/send/#send-by-email)
* [Create shareable link](https://docs.devolutions.net/server/devolutions-ecosystem/send/#create-shareable-link)
* [Send copy of a password](https://docs.devolutions.net/server/devolutions-ecosystem/send/#send-copy-of-a-password)
* [See also](https://docs.devolutions.net/server/devolutions-ecosystem/send/#see-also)
Send a password through in-app secure messaging or email external contacts directly from an entry. Create a shareable link to send secrets outside your organization securely.
This feature needs Devolutions Server to have _**SMTP**_ configured. This option can be found under _**Administration**_ – _**Server settings**_ – _**Email**_.
Additionally, _**Allow users to send password with Devolutions Send**_ needs to be enabled. This option can be found under _**Administration**_ – _**Server settings**_ – _**Features**_. It is enabled by default.
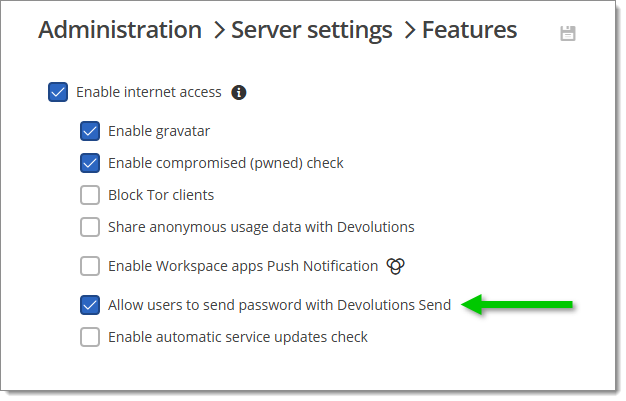
Allow users to send password with
Features
--------
[](https://docs.devolutions.net/server/devolutions-ecosystem/send/#features)
[Devolutions Send Standalone](https://devolutions.net/devolutions-send/)
is an alternative for those who do not use our products.
Despite sharing the same underlying architecture, slight differences exist between the feature set of the standalone and in-app versions of Devolutions Send.
* Unique link encrypted on the client side.
* Valid for a customizable amount of time.
* Optional protection via a client-provided passphrase.
* Users may be non-Devolutions users (not linked to a Devolutions Account).
* Character limit of 10 kB.
* A sender email is required and stored with the GUID as part of the “payload” stored in the database.
How to use Devolutions Send with Devolutions Server
---------------------------------------------------
[](https://docs.devolutions.net/server/devolutions-ecosystem/send/#how-to-use-devolutions-send-with-devolutions-server)
1. Open the Devolutions Server web page.
2. Click on _**Messages**_ next to the user's avatar. 
3. Click _**New message**_. 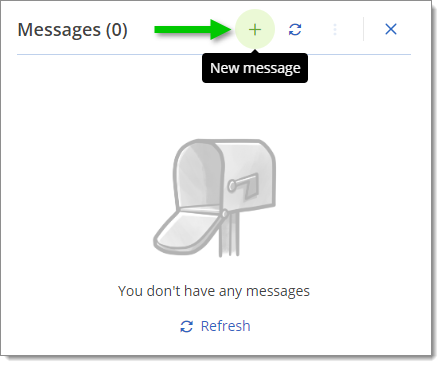
4. Select one of the three available options:
* [Send in-app](https://docs.devolutions.net/server/devolutions-ecosystem/send/#send-in-app)
* [Send by email](https://docs.devolutions.net/server/devolutions-ecosystem/send/#send-by-email)
* [Create shareable link](https://docs.devolutions.net/server/devolutions-ecosystem/send/#create-shareable-link)
### Send in-app
[](https://docs.devolutions.net/server/devolutions-ecosystem/send/#send-in-app)
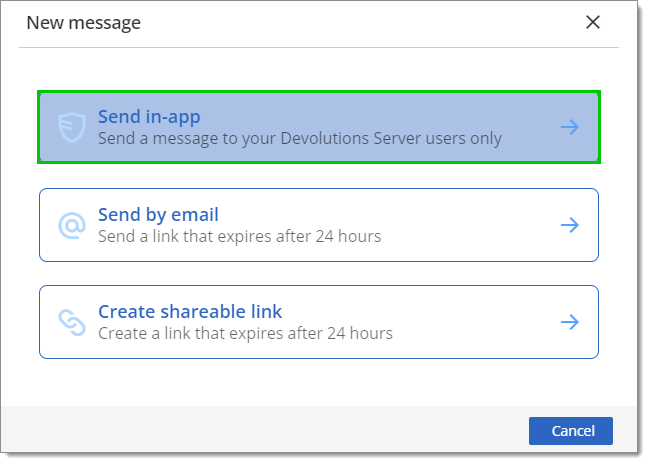 This feature is covered in [_**Secure messages**_](https://docs.devolutions.net/server/web-interface/messages/)
.
### Send by email
[](https://docs.devolutions.net/server/devolutions-ecosystem/send/#send-by-email)
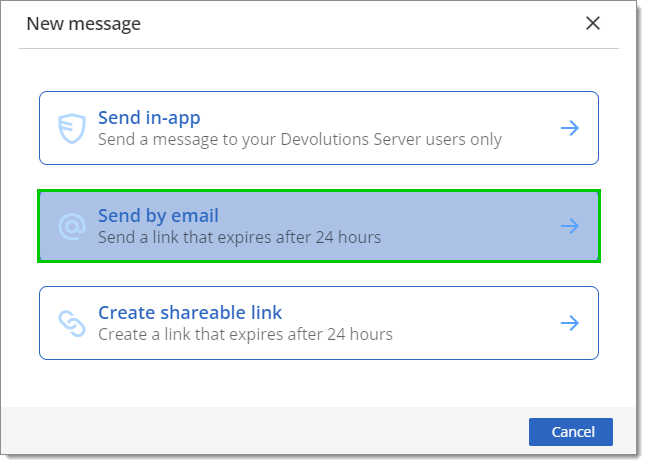
Send by email
1. Enter the recipient(s) email in the _**To**_ field.
2. Enter the information in the _**Secure message**_ field.
* A _**Passphrase**_ may be added for additional security.
* The _**Link duration**_ can be set to 1 hour, 24 hours, 3 days, 1 week, 2 weeks or 1 month.
* The _**View limit**_ can be set to Unlimited, Single view or Multiple views. The Multiple option is useful for setting an exact amount of possible views.
3. Click _**Send by email**_. 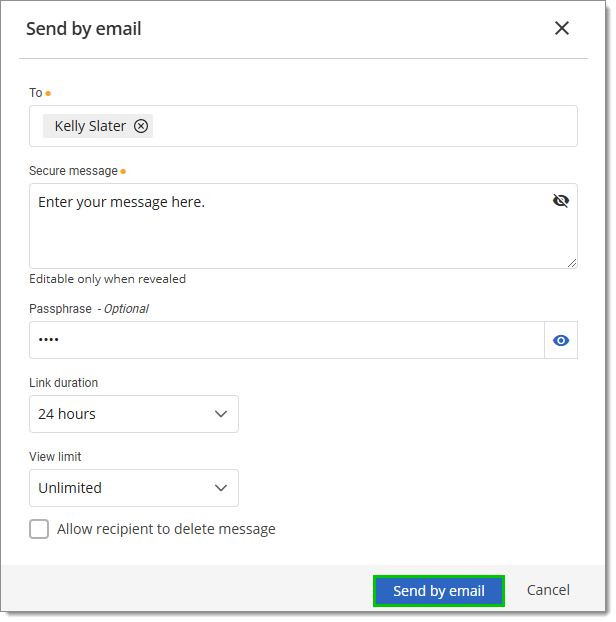
### Create shareable link
[](https://docs.devolutions.net/server/devolutions-ecosystem/send/#create-shareable-link)
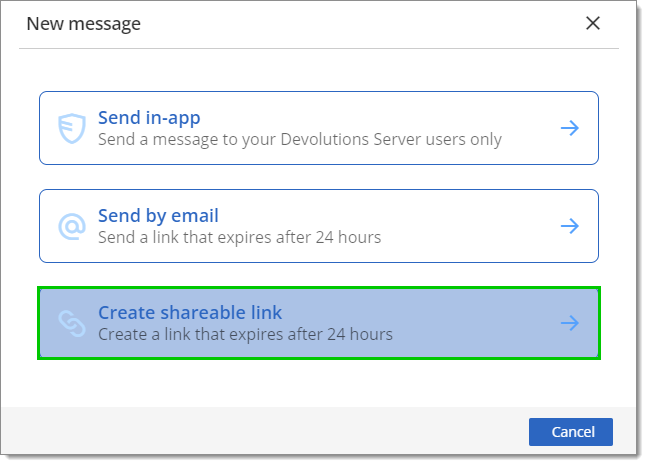
Create shareable link
1. Enter the information in the _**Secure message**_ field.
* Files can be securely shared by clicking _**Attachment**_.
* A _**Passphrase**_ may be added for additional security.
* The _**Link duration**_ can be set to 1 hour, 24 hours, 3 days, 1 week, 2 weeks or 1 month.
* The _**View limit**_ can be set to Unlimited, Single view or Multiple views. The Multiple option is useful for setting an exact amount of possible views.
2. Click on _**Create link**_. 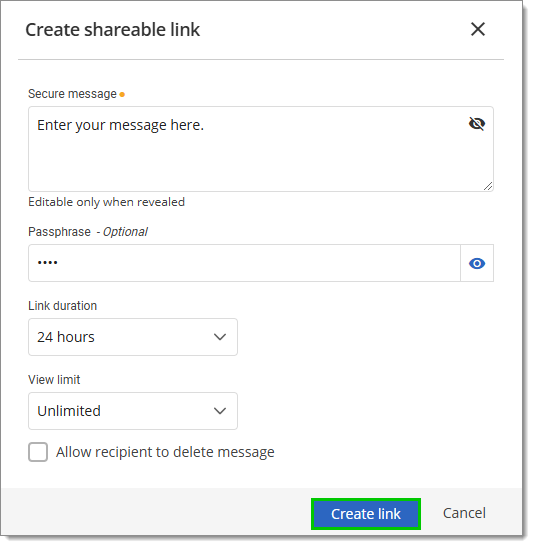
3. Copy the link and send it to the intended individual(s). 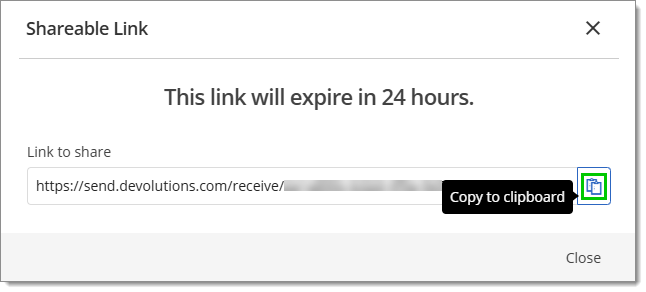
Send copy of a password
-----------------------
[](https://docs.devolutions.net/server/devolutions-ecosystem/send/#send-copy-of-a-password)
It is also possible to send a password directly to another user in-app or outside of Devolutions Server by using Devolutions Send. The user needs to have [view permission](https://docs.devolutions.net/server/web-interface/user-groups-based-security/permissions/)
on that entry to send it. 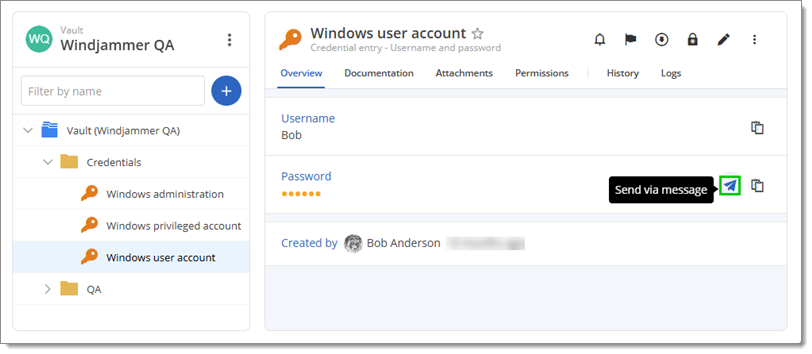
The main difference with this option is that the password is automatically added and hidden as the message in one of the three messaging option. The password can only be edited if the text is revealed (by clicking _**View**_).
To learn more about the _**Secure message**_ features, please refer to the above section on [How to use Devolutions Send with Devolutions Server](https://docs.devolutions.net/server/devolutions-ecosystem/send/#how-to-use-devolutions-send-with-devolutions-server)
.
### See also
[](https://docs.devolutions.net/server/devolutions-ecosystem/send/#see-also)
* [Devolutions Blog - How organizations can safely share confidential information with Devolutions Send](https://blog.devolutions.net/2024/08/how-organizations-can-safely-share-confidential-information-with-devolutions-send/ "Devolutions Blog - How organizations can safely share confidential information with Devolutions Send")
* [Devolutions Academy – Sending secure messages](https://academy.devolutions.net/student/path/2942210/activity/4493544)
[ Share your feedback](https://forum.devolutions.net/forums/176/documentation--documentation-requests)
---
# Devolutions PowerShell - Devolutions Documentation
Devolutions PowerShell
======================
On this page
* [Getting started with the Devolutions.PowerShell module](https://docs.devolutions.net/powershell/overview/what-is-powershell/#getting-started-with-the-devolutionspowershell-module)
* [PowerShell Gallery (recommended)](https://docs.devolutions.net/powershell/overview/what-is-powershell/#powershell-gallery-recommended)
* [Cloudsmith](https://docs.devolutions.net/powershell/overview/what-is-powershell/#cloudsmith)
* [Offline](https://docs.devolutions.net/powershell/overview/what-is-powershell/#offline)
* [Examples](https://docs.devolutions.net/powershell/overview/what-is-powershell/#examples)
* [Remote Desktop Manager](https://docs.devolutions.net/powershell/overview/what-is-powershell/#remote-desktop-manager)
* [Devolutions Server](https://docs.devolutions.net/powershell/overview/what-is-powershell/#devolutions-server)
* [Devolutions Hub](https://docs.devolutions.net/powershell/overview/what-is-powershell/#devolutions-hub)
* [Uninstalling the Devolutions.PowerShell module](https://docs.devolutions.net/powershell/overview/what-is-powershell/#uninstalling-the-devolutionspowershell-module)
Devolutions products fully integrate Microsoft PowerShell, offering powerful scripting and automation capabilities. You can control Devolutions products themselves and, through Remote Desktop Manager, run PowerShell scripts across your environment. With that in mind, here is how PowerShell is used across the Devolutions ecosystem.
| Integration | Purpose | Reference |
| --- | --- | --- |
| Devolutions.PowerShell module | This PowerShell module is used to interact directly with Devolutions products. | * [PowerShell Gallery](https://www.powershellgallery.com/packages/Devolutions.PowerShell/) |
| Remote Desktop Manager actions | You may define a PowerShell script to run as a batch action against one or more hosts. | * [Custom PowerShell commands](https://docs.devolutions.net/powershell/rdm-powershell/powershell-scripting/custom-powershell-commands/)
* [Batch edit with PowerShell](https://docs.devolutions.net/powershell/rdm-powershell/batch-edit-folders-custom-powershell-commands/)
* [Modifying a synchronizer source](https://docs.devolutions.net/powershell/rdm-powershell/powershell-scripting/custom-powershell-commands/change-synchronizer-source/) |
| Remote Desktop Manager reports | This entry type supports running a PowerShell script to generate a report. | * [Custom PowerShell report](https://docs.devolutions.net/powershell/rdm-powershell/create-custom-field-report/) |
| Remote Desktop Manager entry types | Both the PowerShell local and PowerShell remote entry types support running scripts. | |
| Privileged access management (PAM) providers and password propagation | Within Devolutions Server and Devolutions Hub, PowerShell powers custom PAM providers and password propagation scripts. | * [Devolutions Server custom PAM provider](https://docs.devolutions.net/pam/server/getting-started/anyidentity/create-anyidentity-pam-provider-dvls/)
* [Devolutions Server PAM password propagation scripts](https://docs.devolutions.net/pam/server/propagation-scripts/) |
Getting started with the Devolutions.PowerShell module
------------------------------------------------------
[](https://docs.devolutions.net/powershell/overview/what-is-powershell/#getting-started-with-the-devolutionspowershell-module)
The Devolutions.PowerShell module requires [PowerShell 7.4 or later](https://learn.microsoft.com/en-us/powershell/scripting/install/installing-powershell?view=powershell-7.4)
, and is supported on Windows, macOS, and Linux operating systems.
Windows PowerShell or earlier versions of PowerShell 7 are not supported because the PowerShell module is built from the same core as Remote Desktop Manager, and therefore requires a version of PowerShell using a compatible version of the .NET runtime (.NET 9).
### PowerShell Gallery (recommended)
[](https://docs.devolutions.net/powershell/overview/what-is-powershell/#powershell-gallery-recommended)
The Devolutions.PowerShell module is available in the [PowerShell Gallery](https://www.powershellgallery.com/packages/Devolutions.PowerShell)
and it is the recommended default installation method:
Install-Module Devolutions.PowerShell -Force
Since the PowerShell Gallery is usually a repository marked as untrusted (packages are not curated or reviewed), using `-Force` is required to avoid the confirmation prompt.
### Cloudsmith
[](https://docs.devolutions.net/powershell/overview/what-is-powershell/#cloudsmith)
As an alternative to the PowerShell Gallery, we offer a [Devolutions PowerShell repository](https://cloudsmith.io/~devolutions/repos/powershell/packages/)
hosted by [Cloudsmith](https://cloudsmith.com/)
.
1. Register the Devolutions PowerShell repository, which can be marked as trusted:
Register-PSRepository -Name 'Devolutions' -SourceLocation 'https://nuget.cloudsmith.io/devolutions/powershell/v2/' -InstallationPolicy Trusted
2. Uninstall previous versions of the Devolutions.PowerShell module installed from the PowerShell Gallery:
Uninstall-Module Devolutions.PowerShell -AllVersions
3. Install the Devolutions.PowerShell module explicitly from the "Devolutions" repository:
Install-Module Devolutions.PowerShell -Repository Devolutions
4. Confirm that the installation source repository for the Devolutions.PowerShell module is "Devolutions" and not "PSGallery":
Get-InstalledModule Devolutions.PowerShell | Select-Object -Property Name, Repository
Name Repository
---- ----------
Devolutions.PowerShell Devolutions
Since the Devolutions.PowerShell module is available in more than one registered repository, the `-Repository` parameter becomes mandatory. However, if you've marked the "Devolutions" repository as trusted, `-Force` is unnecessary to avoid the confirmation prompt.
### Offline
[](https://docs.devolutions.net/powershell/overview/what-is-powershell/#offline)
If you need to install the Devolutions.PowerShell module on a system with limited or no Internet access, you can do so by following these steps:
1. Create a new PowerShell repository called "local" in your chosen directory; the example below uses `C:\PSRepo`.
$RepoPath = "C:\PSRepo"
New-Item -Path $RepoPath -ItemType 'Directory' -Force | Out-Null
Register-PSRepository -Name 'local' -SourceLocation $RepoPath -PublishLocation $RepoPath -InstallationPolicy Trusted
2. Download the `.nupkg` file for the Devolutions.PowerShell module using the _**Download the raw nupkg file**_ button under _**Manual Download**_ in the [PowerShell Gallery](https://www.powershellgallery.com/packages/Devolutions.PowerShell)
. Copy the `.nupkg` file to the previously created, local PowerShell repository directory.
3. Uninstall previous versions of the Devolutions.PowerShell module installed from other sources.
Uninstall-Module Devolutions.PowerShell -AllVersions
4. Install the Devolutions.PowerShell module explicitly from the `local` repository.
Install-Module Devolutions.PowerShell -Repository local
5. Confirm that the installation source for the Devolutions.PowerShell module is `local`.
Get-InstalledModule Devolutions.PowerShell | Select-Object -Property Name, Repository
Name Repository
---- ----------
Devolutions.PowerShell local
Alternatively, a directory on a network share can be used instead of a local directory, making it easier to distribute the PowerShell module on a local network.
Examples
--------
[](https://docs.devolutions.net/powershell/overview/what-is-powershell/#examples)
To quickly get started with some common Devolutions.PowerShell examples, read on below.
### Remote Desktop Manager
[](https://docs.devolutions.net/powershell/overview/what-is-powershell/#remote-desktop-manager)
# [Import module]
Import-Module Devolutions.PowerShell
# [Load data source] Example for a local data source (SQLite) or SQL Server
$DatasourceLocal = Get-RDMDataSource -Name "Local data source"; Set-RDMCurrentDataSource $DatasourceLocal
$DatasourceSQL = Get-RDMDataSource -Name "SQL Server"; Set-RDMCurrentDataSource $DatasourceSQL
# [Create vault] Only the SQL Server data source supports vaults (as do Devolutions Server and Devolutions Hub)
$Vault = New-RDMRepository -Name 'MyVault' -Description 'My vault description' -SetRepository | Set-RDMCurrentRepository | Update-RDMUI
# [Retrieve vault]
Get-RDMRepository -Name 'MyVault'
# [Create entry] Example to create an RDP and Credential entry
$Entry = New-RDMSession -Host 'MyHost' -Type RDPConfigured -Name 'MyHost'; Set-RDMSession -Session $Entry -Refresh; Update-RDMUI
$Entry = New-RDMSession -Name 'MyCredential' -Type Credential; $Entry.Credentials.Username = 'Administrator'; Set-RDMSession $Entry -Refresh; Set-RDMSessionPassword -ID $Entry.ID -Password (ConvertTo-SecureString 'Test123$' -AsPlainText -Force)
# [Retrieve entries]
Get-RDMSession -GroupName 'MyFolder' -Name 'MyHost'
# [Update entry]
$Entry = Get-RDMSession -Name 'MyHost'; $Entry.Name = 'MyUpdatedHost'; Set-RDMSEssion $Entry | Update-RDMUI
# [Export entries]
$Entries = Get-RDMSession; $Entries | Select-Object * | Export-CSV 'C:\Export\FileName.csv' -NoTypeInformation
# [Remove entry]
Get-RDMSession -Name 'MyUpdatedHost' | Remove-RDMSession; Update-RDMUI
### Devolutions Server
[](https://docs.devolutions.net/powershell/overview/what-is-powershell/#devolutions-server)
# [Import module]
Import-Module Devolutions.PowerShell
# [Load data source]
New-DSSession -Credential (Get-Credential) -BaseURI 'https://MyServer/dvls/'
# [Create vault]
$Vault = New-DSVault -Name 'MyVault' -Description 'My vault description'
# [Retrieve vault]
Get-DSVault -All | Where-Object DisplayName -EQ 'MyVault'
# [Create entry]
New-DSRDPEntry -Name 'MyHost' -HostName 'MyHost' -Username 'Administrator' -Password 'Test123$' -Domain 'MyDomain' -VaultID 'VaultGUID'
New-DSCredentialEntry -Name 'MyCredential' -Username 'Administrator' -Password 'Test123$' -Domain 'MyDomain' -VaultID 'VaultGUID'
# [Retrieve entries]
Get-DSEntry -FilterBy 'Name' -FilterMatch 'StartsWith' -FilterValue 'MyHost' -SearchAllVaults
# [Update entry]
$Entry = Get-DSEntry -EntryId 'EntryGUID'; $Entry.Name = 'MyUpdatedHost'; Update-DSEntryBase -JsonBody (ConvertTo-JSON -InputObject $Entry -Depth 10)
# [Export entries]
$Entries = Get-DSEntry -SearchAllVaults; $Entries | Select-Object * | Export-CSV 'C:\Export\FileName.csv' -NoTypeInformation
# [Remove entry]
Remove-DSEntry -EntryID 'EntryGUID'
### Devolutions Hub
[](https://docs.devolutions.net/powershell/overview/what-is-powershell/#devolutions-hub)
# [Import module]
Import-Module Devolutions.PowerShell
# [Load data source]
Connect-HubAccount -Url 'https://myhub.devolutions.app' -ApplicationKey 'ApplicationKey' -ApplicationSecret 'ApplicationSecret'
# [Create vault]
$Vault = New-HubVault -VaultName 'MyVault' -VaultDescription 'My vault description'
# [Retrieve vault]
Get-HubVault
# [Create entry]
$Entry = [Devolutions.Hub.PowerShell.Entities.Hub.PSDecryptedEntry]@{
PsMetadata = [Devolutions.Hub.PowerShell.Entities.Hub.PSEntryMetadata]@{
Name = 'MyHost'
ConnectionType = [Devolutions.RemoteDesktopManager.ConnectionType]::Credential
}
Connection = [Devolutions.RemoteDesktopManager.Business.Connection]@{
Credentials = [Devolutions.RemoteDesktopManager.Business.CredentialsConnection]@{
CredentialType = [Devolutions.RemoteDesktopManager.CredentialResolverConnectionType]::Default
UserName = 'Administrator'
Password = 'Test123$'
}
}
}
New-HubEntry -VaultId 'VaultGUID' -PSDecryptedEntry $Entry
# [Retrieve entries]
Get-HubEntry -VaultId 'VaultGUID' | Where-Object { $PSItem.PSMetaData.Name -EQ 'MyHost' }
# [Update entry]
$Entry = Get-HubEntry -VaultId 'VaultGUID' -EntryId 'EntryGUID'; $Entry.PsMetadata.Name = 'MyUpdatedHost'; Set-HubEntry -VaultId 'VaultGUID' -EntryId $Entry.Entry.ID.Guid -PSDecryptedEntry $Entry
# [Export entries]
$Entries = Get-HubEntry -VaultId 'VaultGUID'; $Entries | Select-Object * | Export-CSV 'C:\Export\FileName.csv' -NoTypeInformation
# [Remove entry]
Remove-HubEntry -VaultId 'VaultGUID' -EntryId 'EntryGUID'
**Uninstalling** the Devolutions.PowerShell **module**
------------------------------------------------------
[](https://docs.devolutions.net/powershell/overview/what-is-powershell/#uninstalling-the-devolutionspowershell-module)
Uninstall all versions of the Devolutions.PowerShell module:
Uninstall-Module Devolutions.PowerShell -AllVersions
If the module is installed via Cloudsmith, you may unregister the "Devolutions" repository like so:
Unregister-PSRepository Devolutions
Finally, if you have installed the module offline, you may unregister the "local" file-based repository and delete the associated directory (your directory name may be different):
Unregister-PSRepository local
Remove-Item "C:\PSRepo" -Recurse -ErrorAction SilentlyContinue
[ Share your feedback](https://forum.devolutions.net/forums/176/documentation--documentation-requests)
---
# Devolutions Server PowerShell - Devolutions Documentation
Devolutions Server PowerShell
=============================
The [Devolutions.PowerShell module](https://www.powershellgallery.com/packages/Devolutions.PowerShell/)
provides administrators with a suite of of cmdlets for managing Devolutions Server through PowerShell. Explore this section to learn more about its integration and functionality within Devolutions Server.
[ Share your feedback](https://forum.devolutions.net/forums/176/documentation--documentation-requests)
---
# Devolutions Hub PowerShell - Devolutions Documentation
Devolutions Hub PowerShell
==========================
The [Devolutions.PowerShell module](https://www.powershellgallery.com/packages/Devolutions.PowerShell/)
provides administrators with a suite of of cmdlets for managing Devolutions Hub through PowerShell. Explore this section to learn more about its integration and functionality within Devolutions Hub Business.
[ Share your feedback](https://forum.devolutions.net/forums/176/documentation--documentation-requests)
---
# Devolutions Gateway PowerShell - Devolutions Documentation
Devolutions Gateway PowerShell
==============================
The [Devolutions.PowerShell module](https://www.powershellgallery.com/packages/DevolutionsGateway/2025.2.3)
provides administrators with a suite of of cmdlets for managing Devolutions Gateway through PowerShell. Explore this section to learn more about its integration and functionality within Devolutions Gateway.
[ Share your feedback](https://forum.devolutions.net/forums/176/documentation--documentation-requests)
---
# Devolutions Send - Devolutions Documentation
Devolutions Send
================
On this page
* [Features](https://docs.devolutions.net/rdm/devolutions-ecosystem/send/#features)
* [Using Devolutions Send with Remote Desktop Manager](https://docs.devolutions.net/rdm/devolutions-ecosystem/send/#using-devolutions-send-with-remote-desktop-manager)
* [Send in-app](https://docs.devolutions.net/rdm/devolutions-ecosystem/send/#send-in-app)
* [Send by email](https://docs.devolutions.net/rdm/devolutions-ecosystem/send/#send-by-email)
* [Create shareable link](https://docs.devolutions.net/rdm/devolutions-ecosystem/send/#create-shareable-link)
* [Send a password from a credential entry](https://docs.devolutions.net/rdm/devolutions-ecosystem/send/#send-a-password-from-a-credential-entry)
* [Disabling Devolutions Send in Remote Desktop Manager](https://docs.devolutions.net/rdm/devolutions-ecosystem/send/#disabling-devolutions-send-in-remote-desktop-manager)
* [See also](https://docs.devolutions.net/rdm/devolutions-ecosystem/send/#see-also)
Devolutions Send features a secure method to generate a link to share secrets instead of using insecure email to send sensitive data. Send a password through in-app secure messaging or create a shareable link to send secrets outside your organization securely.
Features
--------
[](https://docs.devolutions.net/rdm/devolutions-ecosystem/send/#features)
[Devolutions Send Standalone](https://devolutions.net/devolutions-send/)
is an alternative for those who do not use our products.
Despite sharing the same underlying architecture, slight differences exist between the feature sets of the standalone and in-app versions of Devolutions Send.
* Unique link encrypted on the client side.
* Valid for a customizable amount of time.
* Optional protection via a client-provided passphrase.
* Users may be non-Devolutions users (not linked to a Devolutions Account).
* Character limit of 10 kB.
* A sender email is required and stored with the GUID as part of the “payload” stored in the database.
Using Devolutions Send with Remote Desktop Manager
--------------------------------------------------
[](https://docs.devolutions.net/rdm/devolutions-ecosystem/send/#using-devolutions-send-with-remote-desktop-manager)
These steps are valid for Devolutions Server and Devolutions Hub Business data sources. Only the [Send a password from a credential entry](https://docs.devolutions.net/rdm/devolutions-ecosystem/send/#send-a-password-from-a-credential-entry)
is available for SQL datasources.
1. In the ribbon, navigate to the _**Window**_ tab.
2. Click _**Messages**_.

Messages button
3. Click _**Send message**_.
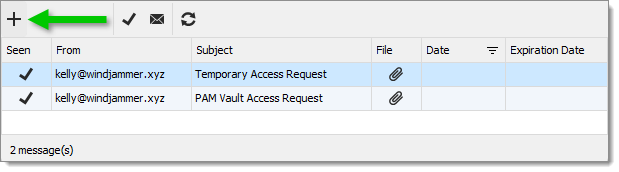
Send message
4. Select one of the three available options:
* [Send in-app](https://docs.devolutions.net/rdm/devolutions-ecosystem/send/#send-in-app)
* [Send by email](https://docs.devolutions.net/rdm/devolutions-ecosystem/send/#send-by-email)
* [Create shareable link](https://docs.devolutions.net/rdm/devolutions-ecosystem/send/#create-shareable-link)
### Send in-app
[](https://docs.devolutions.net/rdm/devolutions-ecosystem/send/#send-in-app)
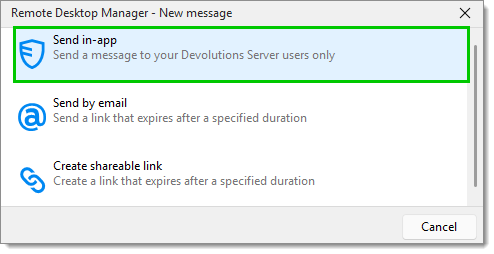
Send in-app
This feature is covered in [_**Secure messages**_](https://docs.devolutions.net/rdm/commands/window/secure-messages/)
.
### Send by email
[](https://docs.devolutions.net/rdm/devolutions-ecosystem/send/#send-by-email)
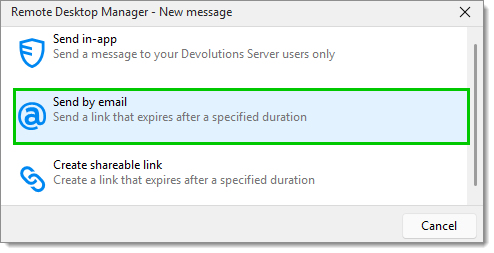
Send by email
1. Enter the recipient(s) email in the _**To**_ field.
2. Enter the information in the _**Secure message**_ field.
* _**Attachments**_ such as user entries and files can be added.
* A _**Passphrase**_ may be added for additional security.
* The _**Link duration**_ can be set to 1 hour, 24 hours, 3 days, 1 week, 2 weeks, 1 month or custom.
* The _**View**_ limit can be set to _**Unlimited**_, _**Single view**_ or _**Multiple views**_. The latter is useful for setting an exact number of possible views.
3. Click _**Send**_.
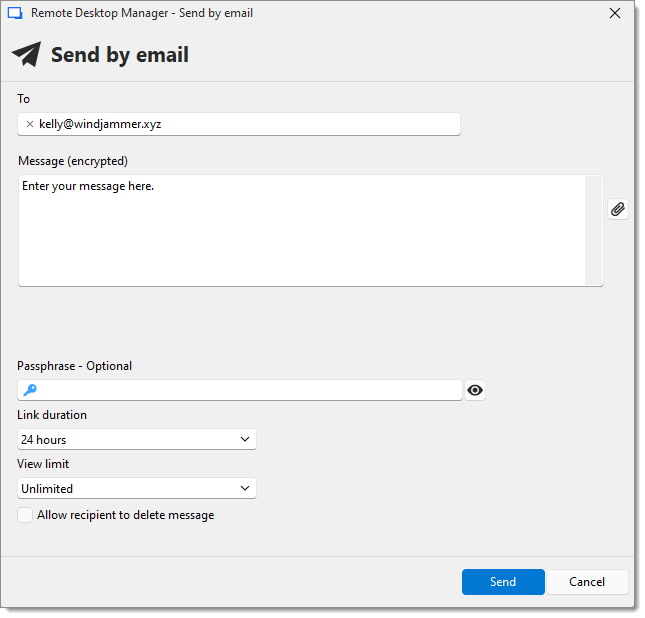
Send
### Create shareable link
[](https://docs.devolutions.net/rdm/devolutions-ecosystem/send/#create-shareable-link)
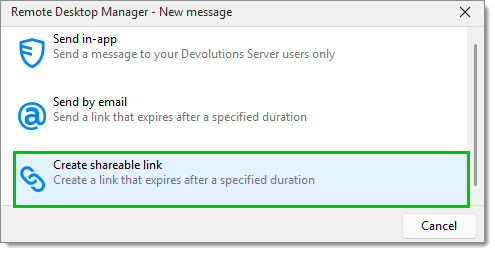
Create shareable link
1. Enter the information in the _**Message**_ field.
* A _**Passphrase**_ may be added for additional security.
* The _**Link duration**_ can be set to 1 hour, 24 hours, 3 days, 1 week, 2 weeks, 1 month or custom.
* The _**View limit**_ can be set to _**Unlimited**_, _**Single view**_ or _**Multiple views**_. The latter is useful for setting an exact number of possible views.
2. Click on _**Create link**_.
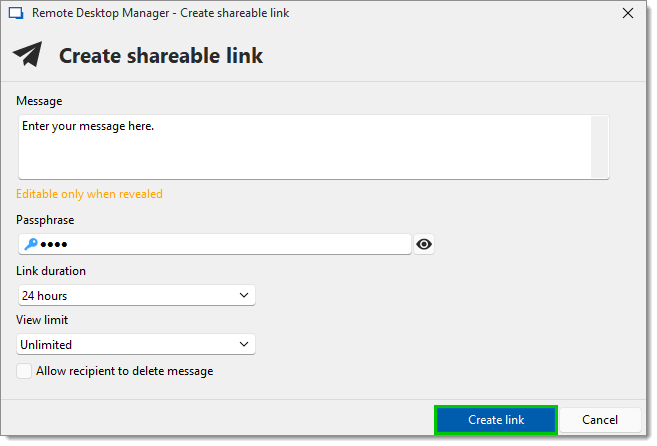
Create link
3. Copy the link and send it to the intended individual(s).
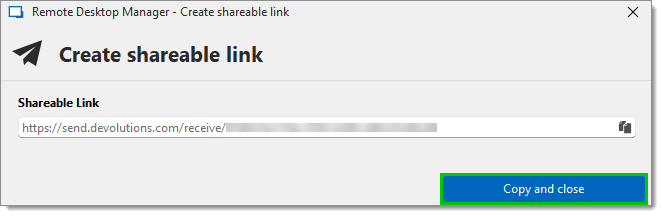
Copy and close
### Send a password from a credential entry
[](https://docs.devolutions.net/rdm/devolutions-ecosystem/send/#send-a-password-from-a-credential-entry)
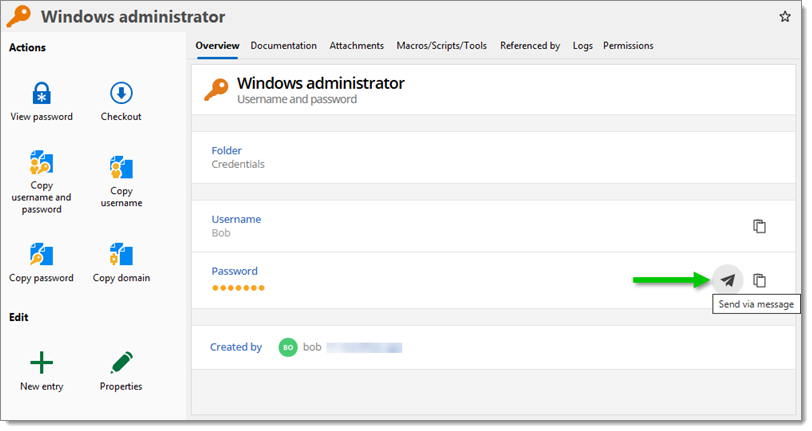
Send via message
Sending a password from a credential entry on a Devolutions Server or Devolutions Hub Business data source is possible with all three options showcased in the [Using Devolutions Send with Remote Desktop Manager](https://docs.devolutions.net/rdm/devolutions-ecosystem/send/#using-devolutions-send-with-remote-desktop-manager)
section.
### Disabling Devolutions Send in Remote Desktop Manager
[](https://docs.devolutions.net/rdm/devolutions-ecosystem/send/#disabling-devolutions-send-in-remote-desktop-manager)
1. In an SQL data source, go to the _**Administration**_ tab.
2. Click on _**System settings**_.

System settings
3. Under _**Application**_ – _**General**_ – _**General**_, enable _**Disable send message in dashboard**_.
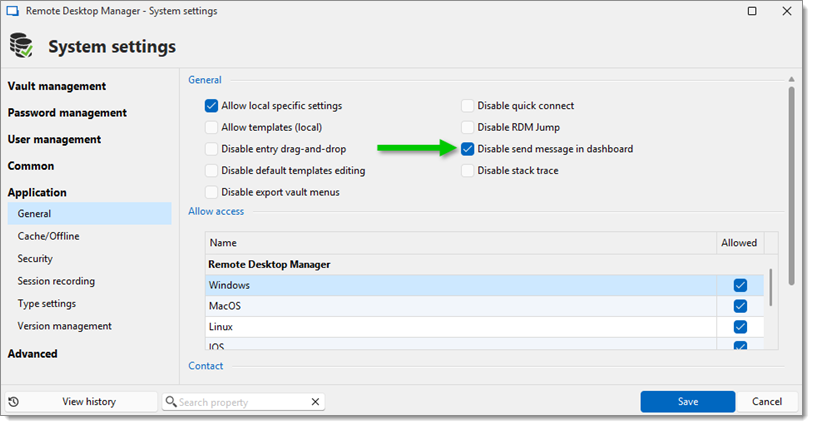
Disable send message in dashboard
4. Click _**Save**_.
### See also
[](https://docs.devolutions.net/rdm/devolutions-ecosystem/send/#see-also)
* [Devolutions Blog - How organizations can safely share confidential information with Devolutions Send](https://blog.devolutions.net/2024/08/how-organizations-can-safely-share-confidential-information-with-devolutions-send/ "Devolutions Blog - How organizations can safely share confidential information with Devolutions Send")
[ Share your feedback](https://forum.devolutions.net/forums/176/documentation--documentation-requests)
---
# Sign-In & Security - Devolutions Documentation
Sign-In & Security
==================
The _**Sign-In & Security**_ section is a summary page and provides shortcuts to manage all Devolutions Account security information.
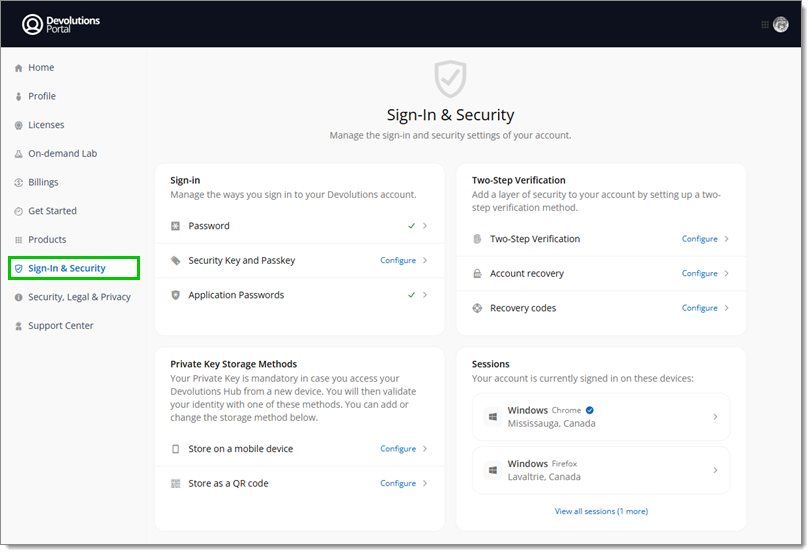
Sign-In & Security
[ Share your feedback](https://forum.devolutions.net/forums/176/documentation--documentation-requests)
---
# Licenses - Devolutions Documentation
Licenses
========
The _**Licenses**_ section of the Devolutions Portal lists all the licenses associated with its Devolutions Account. By default, only the main contact, i.e., the person who first communicated with our [sales team](mailto:sales@devolutions.net)
, has the right to see and interact with the licenses. The main contact can share licenses with other users by clicking on the _**Share**_ button.
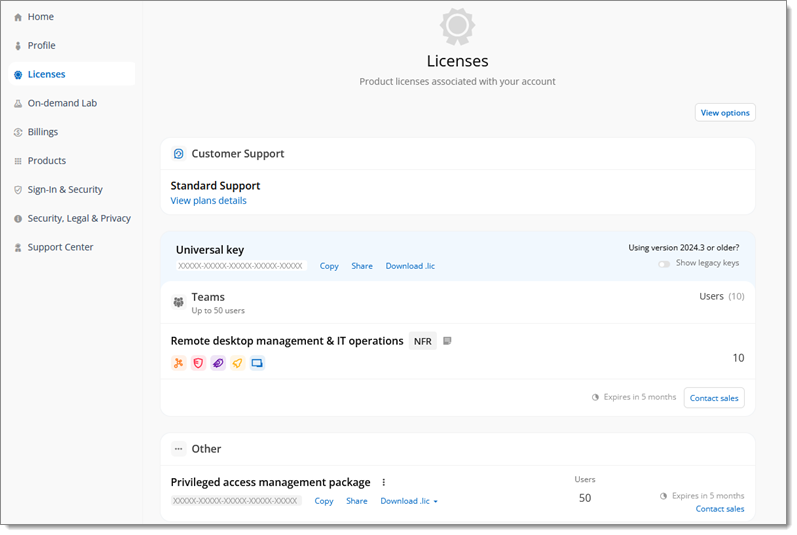
The Licenses section of the Devolutions Portal
Additionally, this is where you can download `.lic` files for the licenses you own. These can then be used to import licenses in many different scenarios, such as [Remote Desktop Manager Offline registration](https://docs.devolutions.net/rdm/commands/administration/licenses/#offline-registration)
.
The _**Licenses**_ section is a listing of your product licensing information only. You will be required to save the serial into the appropriate Devolutions application to register.
Communicate with Devolutions' [sales team](mailto:sales@devolutions.net)
for assistance if you are the main contact but cannot see your purchased licenses.
#### See also
[](https://docs.devolutions.net/portal/licenses/#see-also)
* [Devolutions store – Tailored packages for your IT needs](https://store.devolutions.net/package)
* [Getting started with Devolutions packages](https://docs.devolutions.net/portal/support-resources/getting-started-packages/)
* [Licensing issues](https://docs.devolutions.net/rdm/kb/general-knowledge/license/licensing-issues/)
[ Share your feedback](https://forum.devolutions.net/forums/176/documentation--documentation-requests)
---
# Devolutions ecosystem - Devolutions Documentation
Devolutions ecosystem
=====================
On this page
* [Remote access and connection management](https://docs.devolutions.net/gateway/devolutions-ecosystem/#remote-access-and-connection-management)
* [Data sources](https://docs.devolutions.net/gateway/devolutions-ecosystem/#data-sources)
* [Privileged access management](https://docs.devolutions.net/gateway/devolutions-ecosystem/#privileged-access-management)
* [Scripting, automation, and tools](https://docs.devolutions.net/gateway/devolutions-ecosystem/#scripting-automation-and-tools)
Our platform offers multiple products and companion tools to help manage all of the aspects of an IT infrastructure.
Remote access and connection management
---------------------------------------
[](https://docs.devolutions.net/gateway/devolutions-ecosystem/#remote-access-and-connection-management)
| PRODUCT | DESCRIPTION | INSTALLATION |
| --- | --- | --- |
| [**Remote Desktop Manager (RDM)**](https://docs.devolutions.net/rdm/overview/what-is-rdm/) | Remote Desktop Manager is an application used to manage and centralize remote access technologies, privileged passwords, documents and shared information. | Windows, macOS, Linux, iOS, Android |
| [**Devolutions Gateway**](https://docs.devolutions.net/gateway/overview/what-is-gateway/) | Devolutions Gateway provides authorized just-in-time access to resources in segmented networks. | Windows, Linux |
| [**Devolutions Launcher**](https://docs.devolutions.net/server/devolutions-ecosystem/launcher/) | Devolutions Launcher provides users with a simple method of launching remote sessions, while also giving system administrators full control of whether passwords and sensitive information are divulged or kept secret. All privileged account information is transmitted directly from the password vault into the remote session via Launcher's secure API, keeping with the latest security standards. | Windows |
| [**Workspace apps**](https://docs.devolutions.net/workspace/overview/what-is-workspace/) | The Workspace apps are both mobile and desktop applications that bring together Devolutions Hub Business and Devolutions Server into a single, centralized, cloud-based location. Workspace simplifies and streamlines access and management in our solutions. | Windows, macOS, Linux, iOS, Android |
| [**Workspace browser extension**](https://docs.devolutions.net/workspace/workspace-browser-extension/) | The Workspace browser extension is a free browser plugin used in conjunction with Remote Desktop Manager, Devolutions Server, and Devolutions Hub, which allows users to securely inject passwords into websites using credentials stored in their vaults. | Windows, macOS, Linux |
| [**Remote Desktop Manager Agent**](https://docs.devolutions.net/rdm/devolutions-ecosystem/rdm-agent/) | The Remote Desktop Manager Agent can run commands on remote hosts, but what is really useful is that it can send commands to multiple hosts at the same time. Since Remote Desktop Manager uses a secure RDP channel to communicate with the Remote Desktop Manager Agent, it can only operate against Windows-based hosts. | Windows |
| [**Remote Desktop Manager Jump**](https://docs.devolutions.net/rdm/devolutions-ecosystem/rdm-jump/) | Remote Desktop Manager Jump connects to a remote host, often called a Jump Box, Service Host, or a Bastion Server, which in turn connects to other hosts. Remote Desktop Manager Jump is actually an RDP in an RDP. | Windows |
Data sources
------------
[](https://docs.devolutions.net/gateway/devolutions-ecosystem/#data-sources)
| PRODUCT | DESCRIPTION | INSTALLATION |
| --- | --- | --- |
| [**Devolutions Server**](https://docs.devolutions.net/server/overview/what-is-server/) | Devolutions Server is a full-featured shared account and password management solution with add-on privileged access components. It deploys rapidly, implements easily, and delivers the core features of a comprehensive PAM solution. Devolutions Server is designed to meet the ever-expanding security requirements of SMBs, while remaining very affordable. | Windows, Linux |
| [**Devolutions Hub**](https://docs.devolutions.net/hub/overview/what-is-hub/) | Devolutions Hub Business is a secure and cloud-based password manager for teams. It empowers your organization to easily and securely vault and manage business-user passwords, along with other sensitive information, through a user-friendly web interface that can be quickly, easily and securely accessed via any browser. | Cloud |
Privileged access management
----------------------------
[](https://docs.devolutions.net/gateway/devolutions-ecosystem/#privileged-access-management)
| PRODUCT | DESCRIPTION | INSTALLATION |
| --- | --- | --- |
| [**Devolutions PAM**](https://docs.devolutions.net/pam/overview/what-is-pam/) | Devolutions PAM is a robust, easy-to-deploy, and affordable privileged access management solution that balances productivity and security. | Windows, macOS |
Scripting, automation, and tools
--------------------------------
[](https://docs.devolutions.net/gateway/devolutions-ecosystem/#scripting-automation-and-tools)
| PRODUCT | DESCRIPTION | INSTALLATION |
| --- | --- | --- |
| [**Devolutions PowerShell**](https://docs.devolutions.net/powershell/overview/what-is-powershell/) | The Devolutions PowerShell module provides administrators with a suite of cmdlets for managing Remote Desktop Manager, Devolutions Server, and Devolutions Hub Business through PowerShell. | Windows |
| [**Devolutions Send**](https://docs.devolutions.net/workspace/devolutions-ecosystem/send/) | Devolutions Send features a secure method to generate a link to share secrets instead of using insecure email to send sensitive data. Send a password through in-app secure messaging or create a shareable link to send secrets outside your organization securely. | Web-based |
| [**Devolutions Portal**](https://docs.devolutions.net/portal/overview/what-is-portal/) | Devolutions Portal provides a centralized platform to manage:
* Devolutions Account details and communication preferences.
* Devolutions product and integration licenses, along with billing information.
* access to Devolutions Hub.
* authentication and security settings. | Web-based |
[ Share your feedback](https://forum.devolutions.net/forums/176/documentation--documentation-requests)
---
# Écosystème Devolutions - Documentation Devolutions
Écosystème Devolutions
======================
Sur cette page
* [Gestion de l'accès à distance et des connexions](https://docs.devolutions.net/fr/gateway/devolutions-ecosystem/#remote-access-and-connection-management)
* [Sources de données](https://docs.devolutions.net/fr/gateway/devolutions-ecosystem/#data-sources)
* [Gestion des accès privilégiés](https://docs.devolutions.net/fr/gateway/devolutions-ecosystem/#privileged-access-management)
* [Script, automatisation, et outils](https://docs.devolutions.net/fr/gateway/devolutions-ecosystem/#scripting-automation-and-tools)
Notre plateforme offre plusieurs produits et outils connexes pour aider à gérer tous les aspects d'une infrastructure TI.
Gestion de l'accès à distance et des connexions
-----------------------------------------------
[](https://docs.devolutions.net/fr/gateway/devolutions-ecosystem/#remote-access-and-connection-management)
| PRODUIT | DESCRIPTION | INSTALLATION |
| --- | --- | --- |
| [**Remote Desktop Manager (RDM)**](https://docs.devolutions.net/fr/rdm/overview/what-is-rdm/) | Remote Desktop Manager est une application utilisée pour gérer et centraliser les technologies d'accès à distance, les mots de passe privilégiés, les documents et les informations partagées. | Windows, macOS, Linux, iOS, Android |
| [**Devolutions Gateway**](https://docs.devolutions.net/fr/gateway/overview/what-is-gateway/) | Devolutions Gateway fournit un accès juste-à-temps autorisé aux ressources dans des réseaux segmentés. | Windows, Linux |
| [**Devolutions Launcher**](https://docs.devolutions.net/fr/server/devolutions-ecosystem/launcher/) | Devolutions Launcher fournit aux utilisateurs une méthode simple pour lancer des sessions à distance, tout en donnant aux administrateurs système le contrôle total pour déterminer si les mots de passe et les informations sensibles sont divulguées ou gardées secrètes. Toutes les informations de comptes privilégiés sont transmises directement du coffre de mots de passe dans la session à distance via l'API sécurisée du Launcher, conformément aux dernières normes de sécurité. | Windows |
| [**Applications Workspace**](https://docs.devolutions.net/fr/workspace/overview/what-is-workspace/) | Les applications Workspace sont à la fois des applications mobiles et de bureau qui réunissent Devolutions Hub Business et Devolutions Server en un seul emplacement centralisé infonuagique. Workspace simplifie et rationalise l'accès et la gestion dans nos solutions. | Windows, macOS, Linux, iOS, Android |
| [**Extension de navigateur Workspace**](https://docs.devolutions.net/fr/workspace/workspace-browser-extension/) | L'extension de navigateur Workspace est un plugin de navigateur gratuit utilisé conjointement avec Remote Desktop Manager, Devolutions Server et Devolutions Hub, qui permet aux utilisateurs d'injecter de manière sécurisée des mots de passe dans des sites Web en utilisant les informations d'identification stockées dans leurs coffres. | Windows, macOS, Linux |
| [**Remote Desktop Manager Agent**](https://docs.devolutions.net/fr/rdm/devolutions-ecosystem/rdm-agent/) | Remote Desktop Manager Agent peut exécuter des commandes sur des hôtes distants, mais il est vraiment utile car il peut envoyer des commandes à plusieurs hôtes en même temps. Étant donné que Remote Desktop Manager utilise un canal RDP sécurisé pour communiquer avec Remote Desktop Manager Agent, il ne peut fonctionner que sur des hôtes sous Windows. | Windows |
| [**Remote Desktop Manager Jump**](https://docs.devolutions.net/fr/rdm/devolutions-ecosystem/rdm-jump/) | Remote Desktop Manager Jump se connecte à un hôte distant, souvent appelé serveur de rebond, hôte de service, ou serveur Bastion, qui à son tour se connecte à d'autres hôtes. Remote Desktop Manager Jump est en réalité un RDP dans un RDP. | Windows |
Sources de données
------------------
[](https://docs.devolutions.net/fr/gateway/devolutions-ecosystem/#data-sources)
| PRODUIT | DESCRIPTION | INSTALLATION |
| --- | --- | --- |
| [**Devolutions Server**](https://docs.devolutions.net/fr/server/overview/what-is-server/) | Devolutions Server est une solution de gestion d'identifiants et de mots de passe partagée à fonctionnalités complètes avec des composants d'accès privilégiés supplémentaires. Il se déploie rapidement, s'implante facilement et fournit les fonctionnalités de base d'une solution PAM complète. Devolutions Server est conçu pour répondre aux exigences croissantes de sécurité des PME, tout en restant très abordable. | Windows, Linux |
| [**Devolutions Hub**](https://docs.devolutions.net/fr/hub/overview/what-is-hub/) | Devolutions Hub Business est un gestionnaire de mots de passe sécurisé et basé sur le nuage pour les équipes. Il permet à votre organisation de gérer facilement et en toute sécurité les mots de passe d'utilisateur d'entreprise, ainsi que d'autres informations sensibles, grâce à une interface Web conviviale qui peut être rapidement, facilement et en toute sécurité accessible via n'importe quel navigateur. | Nuage |
Gestion des accès privilégiés
-----------------------------
[](https://docs.devolutions.net/fr/gateway/devolutions-ecosystem/#privileged-access-management)
| PRODUIT | DESCRIPTION | INSTALLATION |
| --- | --- | --- |
| [**Devolutions PAM**](https://docs.devolutions.net/fr/pam/overview/what-is-pam/) | Devolutions PAM est une solution de gestion des accès privilégiés robuste, facile à déployer et abordable qui équilibre productivité et sécurité. | Windows, macOS |
Script, automatisation, et outils
---------------------------------
[](https://docs.devolutions.net/fr/gateway/devolutions-ecosystem/#scripting-automation-and-tools)
| PRODUCT | DESCRIPTION | INSTALLATION |
| --- | --- | --- |
| [**Devolutions PowerShell**](https://docs.devolutions.net/fr/powershell/overview/what-is-powershell/) | The Devolutions PowerShell module provides administrators with a suite of cmdlets for managing Remote Desktop Manager, Devolutions Server, and Devolutions Hub Business through PowerShell. | Windows |
| [**Devolutions Send**](https://docs.devolutions.net/fr/workspace/devolutions-ecosystem/send/) | Devolutions Send features a secure method to generate a link to share secrets instead of using insecure email to send sensitive data. Send a password through in-app secure messaging or create a shareable link to send secrets outside your organization securely. | Basé sur le Web |
| [**Devolutions Portal**](https://docs.devolutions.net/fr/portal/overview/what-is-portal/) | Devolutions Portal fournit une plateforme centralisée pour gérer :
* Détails du compte Devolutions et préférences de communication.
* Licences de produits et d'intégration de Devolutions, ainsi que l'information de facturation.
* accès à Devolutions Hub.
* les paramètres d'authentification et de sécurité. | Basé sur le Web |
[ Partagez vos commentaires](https://forum.devolutions.net/forums/176/documentation--documentation-requests)
---
# Devolutions Agent - Devolutions Documentation
Devolutions Agent
=================
Devolutions Agent is a versatile background process used by many Devolutions products to perform various remote management tasks.
Devolutions Agent can only operate against Windows-based hosts.
### Installation
[](https://docs.devolutions.net/rdm/devolutions-ecosystem/devolutions-agent/#installation)
Download Devolutions Agent from [Devolutions’ website](https://devolutions.net/agent/)
, and install it on the remote computer. Devolutions Agent must be configured to automatically start when a Windows session is established. Consult the documentation of your operating system for details.
New users using this technology may wonder why a full installation of Remote Desktop Manager is required. There are three factors that make this a good solution:
* Remote Desktop Manager on the remote host does not require a data source, it’s an empty shell.
* The logging of the activity is brought back to your data source.
* Every technology supported by Remote Desktop Manager can be used remotely.
### Usage
[](https://docs.devolutions.net/rdm/devolutions-ecosystem/devolutions-agent/#usage)
#### Running commands on multiple remote hosts
[](https://docs.devolutions.net/rdm/devolutions-ecosystem/devolutions-agent/#running-commands-on-multiple-remote-hosts)
Devolutions Agent can be used to run scripts from another Remote Desktop Manager installation. Since it uses an RDP channel for communication, it saves you from remote management headaches such as opening various ports in your firewall.
#### Executing commands on remote hosts using RDM MCP server
[](https://docs.devolutions.net/rdm/devolutions-ecosystem/devolutions-agent/#executing-commands-on-remote-hosts-using-rdm-mcp-server)
Devolutions Agent allows users with access to RDM MCP server to run commands on remote hosts via text-based prompts. Read [MCP server (experimental)](https://docs.devolutions.net/rdm/commands/tools/more-tools/mcp-server/)
to learn about RDM MCP server.
#### Leveraging Remote Desktop Manager's PEDM module
[](https://docs.devolutions.net/rdm/devolutions-ecosystem/devolutions-agent/#leveraging-remote-desktop-managers-pedm-module)
With Devolutions Agent, users can obtain elevated privileges for specific actions as defined in Remote Desktop Manager's PEDM module. To use this method, someone with administrator privileges must first configure a PEDM profile and assign it to one or more users. From then on, they should be able to select the profile in Devolutions Agent, and use the _**Run elevated**_ option when attempting to access resources requiring admin rights (right-click context menu). See [Privileged elevation and delegation management](https://docs.devolutions.net/pam/concepts/privilege-elevation-delegation-management/)
for more details.
#### Updating remote Devolutions Gateways via Devolutions Agent
[](https://docs.devolutions.net/rdm/devolutions-ecosystem/devolutions-agent/#updating-remote-devolutions-gateways-via-devolutions-agent)
The [Devolutions Hub Services](https://docs.devolutions.net/pam/hub/pam-service/)
must be configured on the Devolutions Hub to enable Devolutions Gateway updates with the Devolutions Agent.
Devolutions Agent enables administrators on Devolutions Server to remotely update Devolutions Gateway instances and farms, provided the Agent is installed on the systems hosting them (with the _**Devolutions Gateway Updater**_ feature checked during installation).
The updating process can be initiated in a few clicks by toggling the _**Bulk update**_ option in _**Administration**_ – _**Devolutions Gateway**_, selecting the desired gateways and/or farms, and clicking on _**Update**_. The _**Update version**_ and _**Bulk update**_ windows allow for further customization of the process, including options to defer updates, specify versions, etc.
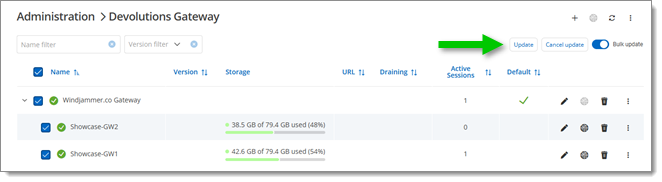
Updating a Gateway and its farms on Devolutions Server using the Devolutions Agent
[ Share your feedback](https://forum.devolutions.net/forums/176/documentation--documentation-requests)
---
# Devolutions ecosystem - Devolutions Documentation
Devolutions ecosystem
=====================
Auf dieser Seite
* [Remote access and connection management](https://docs.devolutions.net/de/gateway/devolutions-ecosystem/#remote-access-and-connection-management)
* [Data sources](https://docs.devolutions.net/de/gateway/devolutions-ecosystem/#data-sources)
* [Privileged access management](https://docs.devolutions.net/de/gateway/devolutions-ecosystem/#privileged-access-management)
* [Scripting, automation, and tools](https://docs.devolutions.net/de/gateway/devolutions-ecosystem/#scripting-automation-and-tools)
Our platform offers multiple products and companion tools to help manage all of the aspects of an IT infrastructure.
Remote access and connection management
---------------------------------------
[](https://docs.devolutions.net/de/gateway/devolutions-ecosystem/#remote-access-and-connection-management)
| PRODUCT | DESCRIPTION | INSTALLATION |
| --- | --- | --- |
| [**Remote Desktop Manager (RDM)**](https://docs.devolutions.net/rdm/overview/what-is-rdm/) | Remote Desktop Manager is an application used to manage and centralize remote access technologies, privileged passwords, documents and shared information. | Windows, macOS, Linux, iOS, Android |
| [**Devolutions Gateway**](https://docs.devolutions.net/gateway/overview/what-is-gateway/) | Devolutions Gateway provides authorized just-in-time access to resources in segmented networks. | Windows, Linux |
| [**Devolutions Launcher**](https://docs.devolutions.net/server/devolutions-ecosystem/launcher/) | Devolutions Launcher provides users with a simple method of launching remote sessions, while also giving system administrators full control of whether passwords and sensitive information are divulged or kept secret. All privileged account information is transmitted directly from the password vault into the remote session via Launcher's secure API, keeping with the latest security standards. | Windows |
| [**Workspace apps**](https://docs.devolutions.net/workspace/overview/what-is-workspace/) | The Workspace apps are both mobile and desktop applications that bring together Devolutions Hub Business and Devolutions Server into a single, centralized, cloud-based location. Workspace simplifies and streamlines access and management in our solutions. | Windows, macOS, Linux, iOS, Android |
| [**Workspace browser extension**](https://docs.devolutions.net/workspace/workspace-browser-extension/) | The Workspace browser extension is a free browser plugin used in conjunction with Remote Desktop Manager, Devolutions Server, and Devolutions Hub, which allows users to securely inject passwords into websites using credentials stored in their vaults. | Windows, macOS, Linux |
| [**Remote Desktop Manager Agent**](https://docs.devolutions.net/rdm/devolutions-ecosystem/rdm-agent/) | The Remote Desktop Manager Agent can run commands on remote hosts, but what is really useful is that it can send commands to multiple hosts at the same time. Since Remote Desktop Manager uses a secure RDP channel to communicate with the Remote Desktop Manager Agent, it can only operate against Windows-based hosts. | Windows |
| [**Remote Desktop Manager Jump**](https://docs.devolutions.net/rdm/devolutions-ecosystem/rdm-jump/) | Remote Desktop Manager Jump connects to a remote host, often called a Jump Box, Service Host, or a Bastion Server, which in turn connects to other hosts. Remote Desktop Manager Jump is actually an RDP in an RDP. | Windows |
Data sources
------------
[](https://docs.devolutions.net/de/gateway/devolutions-ecosystem/#data-sources)
| PRODUCT | DESCRIPTION | INSTALLATION |
| --- | --- | --- |
| [**Devolutions Server**](https://docs.devolutions.net/server/overview/what-is-server/) | Devolutions Server is a full-featured shared account and password management solution with add-on privileged access components. It deploys rapidly, implements easily, and delivers the core features of a comprehensive PAM solution. Devolutions Server is designed to meet the ever-expanding security requirements of SMBs, while remaining very affordable. | Windows, Linux |
| [**Devolutions Hub**](https://docs.devolutions.net/hub/overview/what-is-hub/) | Devolutions Hub Business is a secure and cloud-based password manager for teams. It empowers your organization to easily and securely vault and manage business-user passwords, along with other sensitive information, through a user-friendly web interface that can be quickly, easily and securely accessed via any browser. | Cloud |
Privileged access management
----------------------------
[](https://docs.devolutions.net/de/gateway/devolutions-ecosystem/#privileged-access-management)
| PRODUCT | DESCRIPTION | INSTALLATION |
| --- | --- | --- |
| [**Devolutions PAM**](https://docs.devolutions.net/pam/overview/what-is-pam/) | Devolutions PAM is a robust, easy-to-deploy, and affordable privileged access management solution that balances productivity and security. | Windows, macOS |
Scripting, automation, and tools
--------------------------------
[](https://docs.devolutions.net/de/gateway/devolutions-ecosystem/#scripting-automation-and-tools)
| PRODUCT | DESCRIPTION | INSTALLATION |
| --- | --- | --- |
| [**Devolutions PowerShell**](https://docs.devolutions.net/de/powershell/overview/what-is-powershell/) | The Devolutions PowerShell module provides administrators with a suite of cmdlets for managing Remote Desktop Manager, Devolutions Server, and Devolutions Hub Business through PowerShell. | Windows |
| [**Devolutions Send**](https://docs.devolutions.net/de/workspace/devolutions-ecosystem/send/) | Devolutions Send features a secure method to generate a link to share secrets instead of using insecure email to send sensitive data. Send a password through in-app secure messaging or create a shareable link to send secrets outside your organization securely. | Web-based |
| [**Devolutions Portal**](https://docs.devolutions.net/portal/overview/what-is-portal/) | Devolutions Portal provides a centralized platform to manage:
* Devolutions Account details and communication preferences.
* Devolutions product and integration licenses, along with billing information.
* access to Devolutions Hub.
* authentication and security settings. | Web-based |
[ Share your feedback](https://forum.devolutions.net/forums/176/documentation--documentation-requests)
---
# Devolutions PowerShell - Devolutions Documentation
Devolutions PowerShell
======================
The [Devolutions.PowerShell module](https://www.powershellgallery.com/packages/Devolutions.PowerShell/)
provides administrators with a suite of of cmdlets for managing Devolutions Gateway through PowerShell.
Learn more about [Devolutions PowerShell with Devolutions Gateway](https://docs.devolutions.net/powershell/gateway-powershell)
.
[ Share your feedback](https://forum.devolutions.net/forums/176/documentation--documentation-requests)
---
# Devolutions PowerShell - Documentation Devolutions
Devolutions PowerShell
======================
Le [module Devolutions.PowerShell](https://www.powershellgallery.com/packages/Devolutions.PowerShell/)
fournit aux administrateurs une suite d'applets de commande pour gérer Devolutions Gateway via PowerShell.
En savoir plus sur [Devolutions PowerShell avec Devolutions Gateway](https://docs.devolutions.net/fr/powershell/gateway-powershell)
.
[ Partagez vos commentaires](https://forum.devolutions.net/forums/176/documentation--documentation-requests)
---
# Devolutions PowerShell - Devolutions Documentation
Devolutions PowerShell
======================
The [Devolutions.PowerShell module](https://www.powershellgallery.com/packages/Devolutions.PowerShell/)
provides administrators with a suite of of cmdlets for managing Devolutions Gateway through PowerShell.
Learn more about [Devolutions PowerShell with Devolutions Gateway](https://docs.devolutions.net/powershell/gateway-powershell)
.
[ Share your feedback](https://forum.devolutions.net/forums/176/documentation--documentation-requests)
---
# Fermes Devolutions Gateway - Devolutions Documentation
Fermes Devolutions Gateway
==========================
Le but de la fonctionnalité des fermes Devolutions Gateway est de regrouper plusieurs passerelles sous une seule ferme pour équilibrer la charge des sessions passant par chaque passerelle. En utilisant cette fonctionnalité, les sessions seront réparties entre elles selon la configuration de la ferme :
* La distribution de la charge aide à éviter de surcharger une passerelle particulière. Auparavant, pour une entrée donnée, une passerelle pouvait être configurée, mais toutes les connexions pour cette session passeraient par elle, ce qui pourrait potentiellement conduire à une saturation. Avec les fermes, il est maintenant possible de distribuer cette charge pour éviter la surcharge du service et maintenir la performance.
* Haute disponibilité, ce qui signifie que la ferme aide à maintenir la disponibilité continue du service. Auparavant, si une passerelle devenait indisponible pour une raison quelconque, il n'était pas possible d'établir une session. Avec une ferme, si une passerelle est indisponible, la session sera automatiquement dirigée vers l'une des autres passerelles disponibles dans la ferme. Cela peut également être utile pour la maintenance ou les mises à jour, car une passerelle peut être temporairement mise hors ligne tandis qu'une autre active continue de fournir le service.
[ Partagez vos commentaires](https://forum.devolutions.net/forums/176/documentation--documentation-requests)
---
# Devolutions Gateway farms configuration - Devolutions Documentation
Devolutions Gateway farms configuration
=======================================
On this page
* [Configuration](https://docs.devolutions.net/gateway/getting-started/hub/farms/farm-configuration/#configuration)
* [Moving a gateway into a farm](https://docs.devolutions.net/gateway/getting-started/hub/farms/farm-configuration/#moving-a-gateway-into-a-farm)
* [Removing a farm/gateway](https://docs.devolutions.net/gateway/getting-started/hub/farms/farm-configuration/#removing-a-farmgateway)
* [Load balancing](https://docs.devolutions.net/gateway/getting-started/hub/farms/farm-configuration/#load-balancing)
* [Weight](https://docs.devolutions.net/gateway/getting-started/hub/farms/farm-configuration/#weight)
* [Drain](https://docs.devolutions.net/gateway/getting-started/hub/farms/farm-configuration/#drain)
* [After configuration](https://docs.devolutions.net/gateway/getting-started/hub/farms/farm-configuration/#after-configuration)
This topic will cover how to configure a Devolutions Gateway farm through the web interface for Devolutions Hub Business.
The [PAM service](https://docs.devolutions.net/pam/hub/pam-service/)
must be installed for Devolutions Gateway farms to work properly.
Configuration
-------------
[](https://docs.devolutions.net/gateway/getting-started/hub/farms/farm-configuration/#configuration)
1. In the web interface for Devolutions Hub Business, make sure you are connected to the right data source.
2. Go to _**Administration**_ – _**Devolutions Gateway**_.
3. Click _**Add**_ and click _**Gateway farm**_.
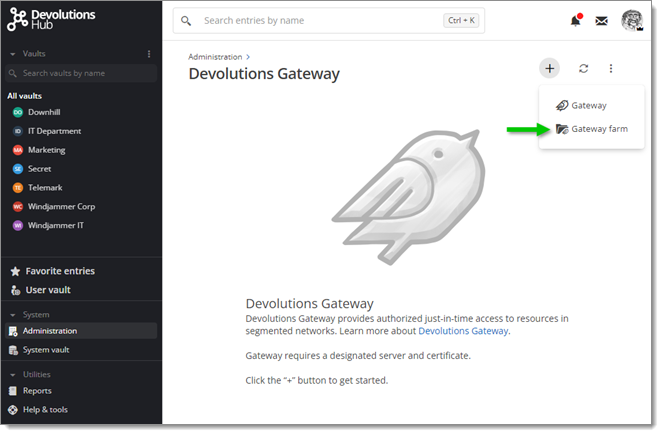
Gateway Farm
4. In the _**General**_ tab, provide a name and description for the farm. You can also choose to set this farm as the default.
Only one default setting is allowed at a time, whether it is a gateway or a farm. If a farm is created and set as default while another gateway is the default, the farm becomes the new default. The same applies if a default gateway is moved into a farm, the farm becomes the new default.
5. In the _**Members**_ tab, click _**Select Farm Members**_ to open a dialogue for selecting the gateways to include in the farm.
A gateway can belong to only one farm at a time. If it is included in a new farm, it will be moved from the current farm.
6. In the _**Vaults**_ tab, select the vaults that are going to be a part of the farm.
7. In the _**Groups**_ tab, select which groups to add to the farm.
8. In the _**Users**_ tab, select which users to add to the farm.
9. The _**Farm information**_ tab contains information about the farm ID.
10. Click _**Add**_ to save the farm.
### Moving a gateway into a farm
[](https://docs.devolutions.net/gateway/getting-started/hub/farms/farm-configuration/#moving-a-gateway-into-a-farm)
To move a gateway into a farm, there are two ways:
* Use the selection dialogue during the initial configuration; or
* Directly _**Edit**_ a gateway and choose the farm in the _**General**_ tab.
### Removing a farm/gateway
[](https://docs.devolutions.net/gateway/getting-started/hub/farms/farm-configuration/#removing-a-farmgateway)
To remove a farm, you can choose to delete the gateways within it or only delete the farm. If you delete only the farm, the gateways within it become independent gateways.
Load balancing
--------------
[](https://docs.devolutions.net/gateway/getting-started/hub/farms/farm-configuration/#load-balancing)
### Weight
[](https://docs.devolutions.net/gateway/getting-started/hub/farms/farm-configuration/#weight)
In the _**Members**_ tab of the farm's _**Edit**_ dialogue, gateways appear in a table with two editable values. The first value is their relative weight. This weight affects load distribution, higher weight increases the chances of a gateway receiving the next session. If all gateways within the farm have the same weight, they have an equal chance of receiving sessions.
#### Weight calculations example 1:
[](https://docs.devolutions.net/gateway/getting-started/hub/farms/farm-configuration/#weight-calculations-example-1)
Gateway1 weight = 100 Gateway2 weight = 200 Gateway3 weight = 300 Total weight = 600
Gateway1 probability = 100/600 = 16.66% Gateway2 probability = 200/600 = 33.33% Gateway3 probability = 300/600 = 50%
The actual weight values do not matter, only their ratios. So, 1-2-3 is equivalent to 1000-2000-3000.
#### Weight calculations example 2:
[](https://docs.devolutions.net/gateway/getting-started/hub/farms/farm-configuration/#weight-calculations-example-2)
Gateway1 weight = 1 Gateway2 weight = 2 (UNAVAILABLE) Gateway3 weight = 3 Total weight = 4
In this example, since Gateway2 is unavailable, it is not considered for session distribution.
Gateway1 probability = 25% Gateway3 probability = 75%
These are probabilities, not certainties. For example, with 4 sessions, Gateway1 might receive 2 or 3 sessions, despite the 25% probability. Over time, probabilities tend to balance out according to the law of large numbers.
### Drain
[](https://docs.devolutions.net/gateway/getting-started/hub/farms/farm-configuration/#drain)
The _**Drain**_ button is in the column with the same name. Clicking it makes a gateway unavailable for new sessions. Active sessions continue until completion. It is useful for planned maintenance or updates.
### After configuration
[](https://docs.devolutions.net/gateway/getting-started/hub/farms/farm-configuration/#after-configuration)
Selecting a farm for a session is similar to choosing a regular gateway (under _**Properties**_ – _**VPN/SSH/Gateway**_ in the Devolutions Hub Business web interface). Farms are listed along with individual gateways. A gateway within a farm cannot be selected outside the farm.
The _**Check Health**_ button is available for farms. A positive response means at least one gateway in the farm is available. A negative response means no gateways in the farm are available.
Go to _**Reports**_ – _**Activity logs**_ – _**Log entry**_ – _**Details**_ to see exactly which _**Gateway**_ and _**Gateway farm**_ were used for the session.
[ Share your feedback](https://forum.devolutions.net/forums/176/documentation--documentation-requests)
---
# Devolutions Gateway farms - Devolutions Documentation
Devolutions Gateway farms
=========================
The purpose of the Devolutions Gateway farms feature is to group multiple gateways under a single farm to balance the load of sessions passing through each gateway. By using this feature, sessions will be distributed among them according to the farm's configuration:
* Load distribution helps to avoid overloading a particular gateway. Previously, for a given entry, a gateway could be configured, but all connections for that session would pass through it, potentially leading to saturation. With farms, it is now possible to distribute this load to prevent service overload and maintain performance.
* High availability, meaning that the farm helps maintain continuous service availability. Previously, if a gateway became unavailable for any reason, it was not possible to establish a session. With a farm, if one gateway is unavailable, the session will automatically be directed to one of the other available gateways in the farm. This can also be useful for maintenance or updates, as a gateway can be temporarily taken offline while an active one continues to provide service.
[ Share your feedback](https://forum.devolutions.net/forums/176/documentation--documentation-requests)
---
# Devolutions Gateway farms - Devolutions Documentation
Devolutions Gateway farms
=========================
The purpose of the Devolutions Gateway farms feature is to group multiple gateways under a single farm to balance the load of sessions passing through each gateway. By using this feature, sessions will be distributed among them according to the farm's configuration:
* Load distribution helps to avoid overloading a particular gateway. Previously, for a given entry, a gateway could be configured, but all connections for that session would pass through it, potentially leading to saturation. With farms, it is now possible to distribute this load to prevent service overload and maintain performance.
* High availability, meaning that the farm helps maintain continuous service availability. Previously, if a gateway became unavailable for any reason, it was not possible to establish a session. With a farm, if one gateway is unavailable, the session will automatically be directed to one of the other available gateways in the farm. This can also be useful for maintenance or updates, as a gateway can be temporarily taken offline while an active one continues to provide service.
[ Share your feedback](https://forum.devolutions.net/forums/176/documentation--documentation-requests)
---
# Configuration de Devolutions Gateway avec Devolutions Hub Business - Documentation Devolutions
Configuration de Devolutions Gateway avec Devolutions Hub Business
==================================================================
Sur cette page
* [Étapes pour installer manuellement](https://docs.devolutions.net/fr/gateway/getting-started/hub/hub-business-configuration/#steps-for-installing-manually)
* [Voir aussi](https://docs.devolutions.net/fr/gateway/getting-started/hub/hub-business-configuration/#see-also)
Devolutions Gateway permettre connexions juste-à-temps au niveau de la session, éliminant le besoin de changer la configuration globale du système. Devolutions Gateway fournir une alternative flexible et sécurisée aux VPN, offrant une gestion de l'accès facile et une utilisation efficace des ressources du réseau.
Si vos clients ne parviennent pas à se connecter avec Devolutions Gateway, assurez-vous que le certificat contient toute la chaîne. Cette chaîne de certificats inclut tous les certificats intermédiaires. Par exemple : Autorité de Certification Racine – Autorité de Certification (Intermédiaire) Sécurisée – Certificat XYZ Acheté
De plus, pour [lancer une session RDP](https://docs.devolutions.net/fr/gateway/kb/how-to-articles/launch-rdp-session-web-client/)
avec Devolutions Gateway, seuls les navigateurs répondant à ces exigences minimales de version sont compatibles :
* Chrome : 102
* Firefox : 102
* Safari : 16.4
Étapes pour installer manuellement
----------------------------------
[](https://docs.devolutions.net/fr/gateway/getting-started/hub/hub-business-configuration/#steps-for-installing-manually)
Les instructions suivantes expliquent comment installer manuellement Devolutions Gateway via Devolutions Hub Business.
Étant donné que l'installateur est un fichier MSI, cette méthode ne fonctionne que sous Windows.
1. Se connecter avec un compte Devolutions Hub Business administrateur.
2. Créer une [identité d'application](https://docs.devolutions.net/fr/hub/web-interface/administration/management/application-users/manage-application-users/)
.
3. Une fois l'identité de l'application créée, cliquer sur l'onglet _**Administration**_.

Administration tab
4. Cliquer sur Devolutions Gateway, qui se trouve sous la section _**Gestion**_.

5. Cliquer sur le bouton _**Plus**_ en haut à droite.

More button
6. Cliquer sur _**Télécharger la clé publique**_. Cette clé est unique au compte Devolutions Hub Business. Elle est automatiquement renommée en _provisioner.pem_. Garder une trace de l'endroit où vous avez sauvegardé cette clé, car elle sera nécessaire plus tard.

Gateway public key
7. Sélectionner _**Télécharger MSI**_ dans la liste déroulante.

Download MSI
8. Exécuter l'installateur.
L'installateur doit être exécuté sur le serveur hébergeant Devolutions Gateway.
9. Cliquer sur _**Suivant**_.

Setup Wizard
10. Une fois le chemin d'installation souhaité sélectionné, cliquer sur _**Suivant**_.

Destination Folder
11. Cliquer sur _**Suivant**_.

Configure the Gateway installation
12. Changer les _**Ports**_ à la valeur désirée et cliquer sur _**Suivant**_.

Listeners
Les ports par défaut pour HTTP(S) et TCP sont respectivement 7171 et 8181, mais peuvent être changés.
13. Saisir l'URI d'accès de Devolutions Gateway et cliquer sur _**Suivant**_.

Access URI
14. Après avoir cliqué sur le bouton supérieur des points de suspension, sélectionner soit un fichier PFX soit un fichier de certificat, puis saisir le mot de passe correspondant. (Si l'écouteur est _**HTTP**_ cette étape est automatiquement sautée)

Certificate
15. Cliquer sur le bouton des points de suspension et sélectionner la _**Clé publique du provisionneur**_ qui a été générée à l'Étape 5.

Public Key File
16. Cet écran montre un résumé des chemins/paramètres actuels. Il est possible de revenir en arrière et de les modifier. Si les paramètres sont corrects, cliquer sur _**Suivant**_.

Gateway setup summary
17. Cliquer sur _**Installer**_.

Install button
18. Cliquer sur _**Terminer**_ une fois que l'installation est terminée.

Finish button
19. Retourner à la page _**Administration**_ – _**Devolutions Gateway**_ dans Devolutions Hub Business.
20. Entrer les informations correctes.

Information fields
Une fois l'URL Devolutions Gateway saisie, cliquer sur **_Détection automatique_** à côté de **_nom d'hôte TCP_** pour remplir la valeur automatiquement.
21. En cochant la case _**Par défaut**_, ce Devolutions Gateway sera celui sélectionné si aucun n'est spécifié ou si _**Par défaut**_ est choisi lors de la connexion.

Default option
22. Assurez-vous que le gateway est accessible en cliquant sur _**Tester la connexion**_.

Test Connection button
23. Cliquer sur le bouton _**Ajouter**_ pour lier votre installation Devolutions Gateway à votre Devolutions Hub Business.

Add button
24. Un rectangle affichera les informations pour chaque lien(s) Devolutions Gateway Hub.

Successful link
25. Activer [l'enregistrement de la session](https://docs.devolutions.net/fr/pam/hub/session-recording/)
.
Visiter [configuration du Remote Desktop Manager](https://docs.devolutions.net/fr/gateway/getting-started/hub/rdm-configuration/)
pour en savoir plus sur le lien entre Remote Desktop Manager et Devolutions Gateway.
### Voir aussi
[](https://docs.devolutions.net/fr/gateway/getting-started/hub/hub-business-configuration/#see-also)
* [Devolutions Academy - Aperçu de Devolutions Gateway](https://academy.devolutions.net/student/path/2007290/activity/3070847 "Devolutions Academy - Aperçu de Devolutions Gateway")
[ Partagez vos commentaires](https://forum.devolutions.net/forums/176/documentation--documentation-requests)
---
# Configuration de l'ensemble de règles Gateway dans Devolutions Hub Business - Documentation Devolutions
Configuration de l'ensemble de règles Gateway dans Devolutions Hub Business
===========================================================================
Restreindre l'accès au réseau et segmenter le trafic sans créer une nouvelle instance de Gateway sur une autre machine à l'aide des règles du Gateway. Configurer les règles pour autoriser ou refuser les connexions par IPs, sous-réseaux, plages IP ou domaines. De plus, appliquer des règles de sécurité pour autoriser ou refuser l'accès à des utilisateurs ou groupes d'utilisateurs spécifiques ou au niveau du coffre. Suivre les étapes ci-dessous pour configurer rapidement un ensemble de règles Gateway dans Devolutions Hub Business :
1. Naviguer vers _**Administration**_ – _**Devolutions Gateway**_,
2. Cliquer sur _**Ajouter**_ (_**+**_) et sélectionner _**Ensemble de règles Gateway**_.
3. Sélectionner un _**Gateway physique**_ depuis la liste des Gateways dans votre Devolutions Hub Business.
4. Saisir un _**Nom**_ pour l'ensemble de règles Gateway.
5. Cliquer sur _**Sauvegarder**_.
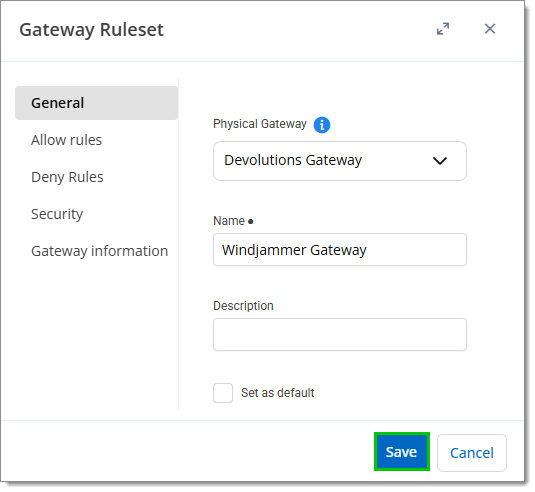
Configure a new Gateway ruleset
[ Partagez vos commentaires](https://forum.devolutions.net/forums/176/documentation--documentation-requests)
---
# Gateway ruleset configuration in Devolutions Hub Business - Devolutions Documentation
Gateway ruleset configuration in Devolutions Hub Business
=========================================================
Restrict network access and segment traffic without creating a new Gateway instance on a different machine with the help of Gateway rulesets. Rules can be configured to allow or deny connections by IPs, subnets, IP ranges, or domains. What's more, security rules can be enforced to allow or deny access to specific users or user groups or at vault level. Follow the steps below to quickly set up a Gateway ruleset in Devolutions Hub Business:
1. Navigate to _**Administration**_ – _**Devolutions Gateway**_,
2. Click on _**Add**_ (_**+**_ ) and select _**Gateway ruleset**_.
3. Select a _**Physical Gateway**_ from the list of Gateway in your Devolutions Hub Business.
4. Enter a _**Name**_ for the Gateway ruleset.
5. Cick on _**Save**_.

Configure a new Gateway ruleset
[ Share your feedback](https://forum.devolutions.net/forums/176/documentation--documentation-requests)
---
# Gateway ruleset configuration in Devolutions Hub Business - Devolutions Documentation
Gateway ruleset configuration in Devolutions Hub Business
=========================================================
Restrict network access and segment traffic without creating a new Gateway instance on a different machine with the help of Gateway rulesets. Rules can be configured to allow or deny connections by IPs, subnets, IP ranges, or domains. What's more, security rules can be enforced to allow or deny access to specific users or user groups or at vault level. Follow the steps below to quickly set up a Gateway ruleset in Devolutions Hub Business:
1. Navigate to _**Administration**_ – _**Devolutions Gateway**_,
2. Click on _**Add**_ (_**+**_ ) and select _**Gateway ruleset**_.
3. Select a _**Physical Gateway**_ from the list of Gateway in your Devolutions Hub Business.
4. Enter a _**Name**_ for the Gateway ruleset.
5. Cick on _**Save**_.

Configure a new Gateway ruleset
[ Share your feedback](https://forum.devolutions.net/forums/176/documentation--documentation-requests)
---
# Devolutions Gateway configuration with Devolutions Hub Business - Devolutions Documentation
Devolutions Gateway configuration with Devolutions Hub Business
===============================================================
Auf dieser Seite
* [Steps for installing manually](https://docs.devolutions.net/de/gateway/getting-started/hub/hub-business-configuration/#steps-for-installing-manually)
* [See also](https://docs.devolutions.net/de/gateway/getting-started/hub/hub-business-configuration/#see-also)
Devolutions Gateway allows for just-in-time connections at the session level, eliminating the need to change the system's global configuration. Devolutions Gateway provides a flexible and secure alternative to VPNs, offering easy access management and efficient use of network resources.
If your clients fail to connect with Devolutions Gateway, ensure the certificate contains the entire chain. This certificate chain includes any intermediate certificates. For example: Root Certificate Authority – Secure (Intermediate) Certificate Authority – Purchased XYZ Certificate
Additionally, to [Launch an RDP session](https://docs.devolutions.net/gateway/kb/how-to-articles/launch-rdp-session-web-client/)
with Devolutions Gateway only browsers that meet these minimal version requirements are compatible:
* Chrome: 102
* Firefox: 102
* Safari: 16.4
Steps for installing manually
-----------------------------
[](https://docs.devolutions.net/de/gateway/getting-started/hub/hub-business-configuration/#steps-for-installing-manually)
The following instructions explain how to manually install Devolutions Gateway through Devolutions Hub Business.
As the installer is an MSI file, this method only works on Windows.
1. Log in with an administrator Devolutions Hub Business account.
2. Create an [application identity](https://docs.devolutions.net/hub/web-interface/administration/management/application-users/manage-application-users/)
.
3. Once the application identity has been created, click on the _**Administration**_ tab.

Administration tab
4. Click on Devolutions Gateway, which is under the _**Management**_ section.

5. Click on the _**More**_ button in the top right.

More button
6. Click on _**Download public key**_. This key is unique to the Devolutions Hub Business account. It is automatically renamed to _provisioner.pem_. Keep track of where you saved this key, as it will be needed later.

Gateway public key
7. Select _**Download MSI**_ from the dropdown.

Download MSI
8. Execute the installer.
The installer should be run on the server hosting Devolutions Gateway.
9. Click _**Next**_.

Setup Wizard
10. Once the desired installation path is selected, click _**Next**_.

Destination Folder
11. Click _**Next**_.

Configure the Gateway installation
12. Change the _**Ports**_ to the desired value and click _**Next**_.

Listeners
HTTP(S) and TCP default ports are 7171 and 8181, respectively, but can be changed.
13. Input the Devolutions Gateway access URI and click _**Next**_.

Access URI
14. After clicking the top ellipsis button, select either a PFX file or a Certificate file, then enter the corresponding password. (If the listener is _**HTTP**_ this step is automatically skipped)

Certificate
15. Click on the ellipsis button and select the _**Provisioner Public Key**_ which was generated in Step 5.

Public Key File
16. This screen shows a summary of the current paths/settings. It is possible to go _**Back**_ and modify them. If the settings are correct, click _**Next**_.

Gateway setup summary
17. Click _**Install**_.

Install button
18. Click _**Finish**_ when the setup is complete.

Finish button
19. Go back to the _**Administration**_ – _**Devolutions Gateway**_ page in Devolutions Hub Business.
20. Input the correct information.

Information fields
Once the Devolutions Gateway URL is entered, click on **_Auto-detect_** next to the **_TCP hostname_** to fill in the value automatically.
21. By checking the _**Default**_ box, this Devolutions Gateway will be the one selected if none are specified or if _**Default**_ is chosen when connecting.

Default option
22. Make certain the gateway can be reached by clicking _**Test Connection**_.

Test Connection button
23. Click the _**Add**_ button to link your Devolutions Gateway installation to your Devolutions Hub Business.

Add button
24. A rectangle will show the information for every Devolutions Gateway Hub link(s).

Successful link
25. Enable [session recording](https://docs.devolutions.net/pam/hub/session-recording/)
.
Visit [Remote Desktop Manager configuration](https://docs.devolutions.net/gateway/getting-started/hub/rdm-configuration/)
to learn more about linking Remote Desktop Manager and Devolutions Gateway.
### See also
[](https://docs.devolutions.net/de/gateway/getting-started/hub/hub-business-configuration/#see-also)
* [Devolutions Academy - Overview of Devolutions Gateway](https://academy.devolutions.net/student/path/2007290/activity/3070847 "Devolutions Academy - Overview of the Devolutions Gateway")
[ Share your feedback](https://forum.devolutions.net/forums/176/documentation--documentation-requests)
---
# Devolutions Hub Business - Devolutions Documentation
Devolutions Hub Business
========================
[ Share your feedback](https://forum.devolutions.net/forums/176/documentation--documentation-requests)
---
# Devolutions Hub Business - Documentation Devolutions
Devolutions Hub Business
========================
[ Partagez vos commentaires](https://forum.devolutions.net/forums/176/documentation--documentation-requests)
---
# Devolutions Hub Business - Devolutions Documentation
Devolutions Hub Business
========================
[ Share your feedback](https://forum.devolutions.net/forums/176/documentation--documentation-requests)
---
# Configuration de Devolutions Gateway dans Remote Desktop Manager - Documentation Devolutions
Configuration de Devolutions Gateway dans Remote Desktop Manager
================================================================
Sur cette page
* [Étapes](https://docs.devolutions.net/fr/gateway/getting-started/hub/rdm-configuration/#steps)
Les instructions suivantes expliquent comment utiliser Devolutions Gateway dans une session RDP.
Étapes
------
[](https://docs.devolutions.net/fr/gateway/getting-started/hub/rdm-configuration/#steps)
1. Sélectionner une session RDP et ouvrir son dialogue _**Propriétés**_.
2. Aller à _**Connexion**_ – _**VPN/SSH/Gateway**_ – _**VPN/SSH/Gateway**_ – _**Général**_.
3. Dans la section _**Général**_, définir l'option _**Type**_ sur Devolutions Gateway.
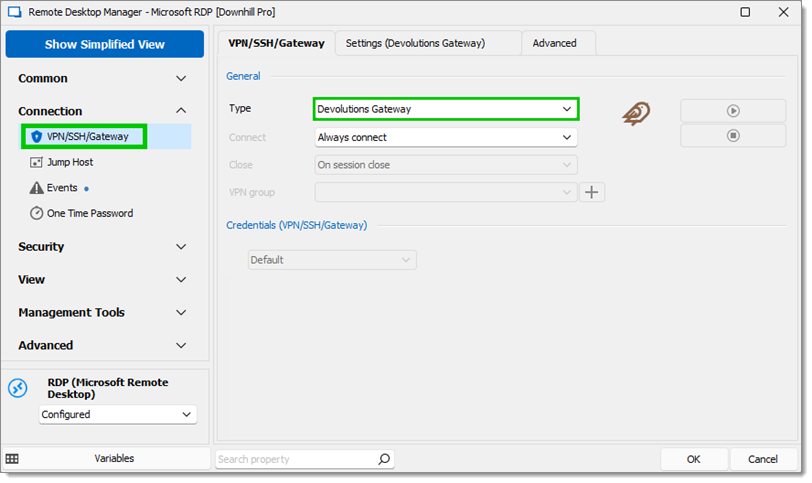
4. Dans la même section, définir l'option _**Connecter**_ sur _**Toujours connecter**_.
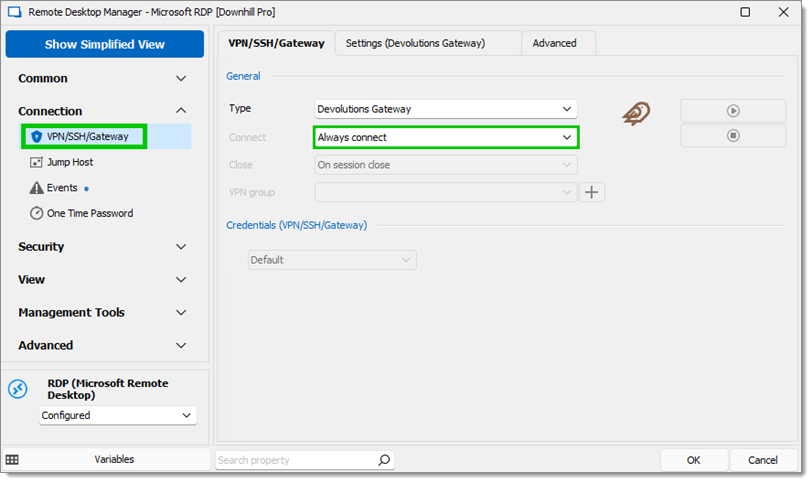
Always Connect
5. Dans l'onglet _**Paramètres (Devolutions Gateway)**_ sélectionner le gateway configuré dans [configuration de Devolutions Hub Business.](https://docs.devolutions.net/fr/gateway/getting-started/hub/hub-business-configuration/)
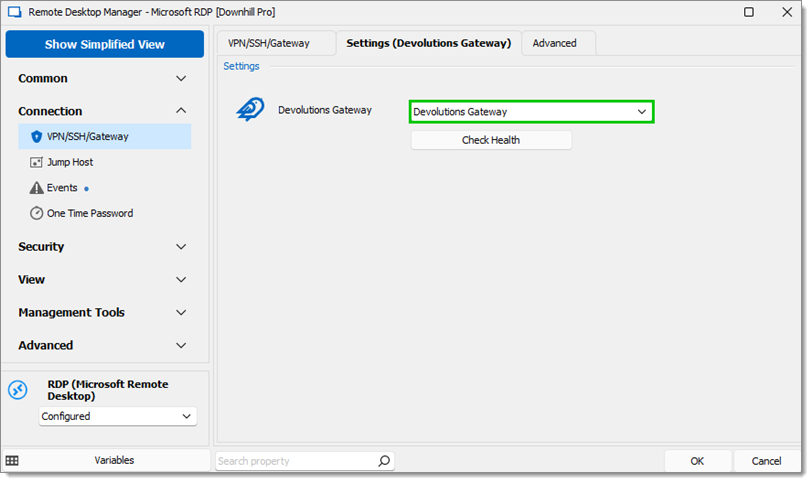
Settings
Pour supprimer le délai de cinq secondes lors de l'ouverture d'une connexion, définir la valeur **_Délai_** sur 0 dans l'onglet **_Avancé_**.
6. Une fois la session RDP connectée, l’entrée du journal suivante devrait être dans _**Rapports**_ – _**Sessions Gateway**_, qui se trouvent dans l'interface web de Devolutions Hub.
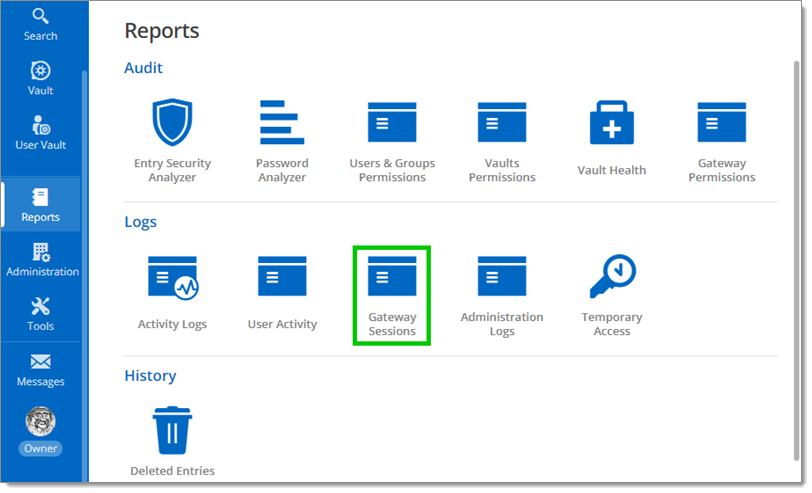
Reports – Gateway Sessions
7. Toutes vos sessions, journaux et configurations peuvent être gérés depuis le ruban de Remote Desktop Manager en allant dans _**Administration**_ _**Devolutions Gateway**_.

Administration – Devolutions Gateway
[ Partagez vos commentaires](https://forum.devolutions.net/forums/176/documentation--documentation-requests)
---
# Devolutions Gateway configuration in Remote Desktop Manager - Devolutions Documentation
Devolutions Gateway configuration in Remote Desktop Manager
===========================================================
Auf dieser Seite
* [Steps](https://docs.devolutions.net/de/gateway/getting-started/hub/rdm-configuration/#steps)
The following instructions explain how to use Devolutions Gateway in an RDP session.
Steps
-----
[](https://docs.devolutions.net/de/gateway/getting-started/hub/rdm-configuration/#steps)
1. Select an RDP session and open its _**Properties**_ dialog.
2. Go to _**Connection**_ – _**VPN/SSH/Gateway**_ – _**VPN/SSH/Gateway**_ – _**General**_.
3. In the _**General**_ section, set the _**Type**_ option to Devolutions Gateway.

4. In the same section, set the _**Connect**_ option to _**Always connect**_.

Always Connect
5. In the _**Settings (Devolutions Gateway)**_ tab select the gateway configured in [Devolutions Hub Business configuration.](https://docs.devolutions.net/gateway/getting-started/hub/hub-business-configuration/)

Settings
To remove the five-second delay when opening a connection, set the **_Delay_** value to 0 in the **_Advanced_** tab.
6. Once the RDP session is connected, the following log entry should be in _**Reports**_ – _**Gateway Sessions**_, which are located in the Devolutions Hub web interface.

Reports – Gateway Sessions
7. All of your sessions, logs, and configurations can be managed from the Remote Desktop Manager ribbon by going to _**Administration**_ _**Devolutions Gateway**_.

Administration – Devolutions Gateway
[ Share your feedback](https://forum.devolutions.net/forums/176/documentation--documentation-requests)
---
# Devolutions Gateway configuration in Remote Desktop Manager - Devolutions Documentation
Devolutions Gateway configuration in Remote Desktop Manager
===========================================================
On this page
* [Steps](https://docs.devolutions.net/gateway/getting-started/hub/rdm-configuration/#steps)
The following instructions explain how to use Devolutions Gateway in an RDP session.
Steps
-----
[](https://docs.devolutions.net/gateway/getting-started/hub/rdm-configuration/#steps)
1. Select an RDP session and open its _**Properties**_ dialog.
2. Go to _**Connection**_ – _**VPN/SSH/Gateway**_ – _**VPN/SSH/Gateway**_ – _**General**_.
3. In the _**General**_ section, set the _**Type**_ option to Devolutions Gateway.

4. In the same section, set the _**Connect**_ option to _**Always connect**_.

Always Connect
5. In the _**Settings (Devolutions Gateway)**_ tab select the gateway configured in [Devolutions Hub Business configuration.](https://docs.devolutions.net/gateway/getting-started/hub/hub-business-configuration/)

Settings
To remove the five-second delay when opening a connection, set the **_Delay_** value to 0 in the **_Advanced_** tab.
6. Once the RDP session is connected, the following log entry should be in _**Reports**_ – _**Gateway Sessions**_, which are located in the Devolutions Hub web interface.

Reports – Gateway Sessions
7. All of your sessions, logs, and configurations can be managed from the Remote Desktop Manager ribbon by going to _**Administration**_ _**Devolutions Gateway**_.

Administration – Devolutions Gateway
[ Share your feedback](https://forum.devolutions.net/forums/176/documentation--documentation-requests)
---
# Démarrage - Documentation Devolutions
Démarrage
=========
[ Partagez vos commentaires](https://forum.devolutions.net/forums/176/documentation--documentation-requests)
---
# Getting started - Devolutions Documentation
Getting started
===============
[ Share your feedback](https://forum.devolutions.net/forums/176/documentation--documentation-requests)
---
# Getting started - Devolutions Documentation
Getting started
===============
[ Share your feedback](https://forum.devolutions.net/forums/176/documentation--documentation-requests)
---
# Configuration de Devolutions Gateway sur Linux - Documentation Devolutions
Configuration de Devolutions Gateway sur Linux
==============================================
Sur cette page
* [Installer Devolutions Gateway](https://docs.devolutions.net/fr/gateway/getting-started/linux-configuration/#install-devolutions-gateway)
* [Mettre à jour Devolutions Gateway](https://docs.devolutions.net/fr/gateway/getting-started/linux-configuration/#update-devolutions-gateway)
* [Installer le module gateway PowerShell](https://docs.devolutions.net/fr/gateway/getting-started/linux-configuration/#install-the-powershell-gateway-module)
* [Configurer les certificats](https://docs.devolutions.net/fr/gateway/getting-started/linux-configuration/#configure-certificates)
* [Générer un certificat LetsEncrypt sur Ubuntu 22.04 LTS via Certbot.](https://docs.devolutions.net/fr/gateway/getting-started/linux-configuration/#generate-a-letsencrypt-certificate-on-ubuntu-2204-lts-via-certbot)
* [Générer un certificat auto-signé sur Ubuntu 22.04 LTS via OpenSSL](https://docs.devolutions.net/fr/gateway/getting-started/linux-configuration/#generate-a-self-signed-certificate-on-ubuntu-2204-lts-via-openssl)
* [Faire confiance au certificat auto-signé sur Ubuntu](https://docs.devolutions.net/fr/gateway/getting-started/linux-configuration/#trust-the-self-signed-certificate-on-ubuntu)
* [Faire confiance au certificat auto-signé sous Windows](https://docs.devolutions.net/fr/gateway/getting-started/linux-configuration/#trust-the-self-signed-certificate-on-windows)
* [Ouvrir les ports du pare-feu Ubuntu](https://docs.devolutions.net/fr/gateway/getting-started/linux-configuration/#open-ubuntu-firewall-ports)
* [Modifier la configuration de Devolutions Gateway](https://docs.devolutions.net/fr/gateway/getting-started/linux-configuration/#modify-the-devolutions-gateway-configuration)
* [Redémarrer Devolutions Gateway](https://docs.devolutions.net/fr/gateway/getting-started/linux-configuration/#restart-devolutions-gateway)
* [Connecter Devolutions Gateway à Devolutions Server](https://docs.devolutions.net/fr/gateway/getting-started/linux-configuration/#connect-devolutions-gateway-to-devolutions-server)
* [Copier la clé publique de Devolutions Server vers Devolutions Gateway Linux](https://docs.devolutions.net/fr/gateway/getting-started/linux-configuration/#copy-the-public-key-from-devolutions-server-to-devolutions-gateway-linux)
* [Configurer Devolutions Gateway dans Devolutions Server](https://docs.devolutions.net/fr/gateway/getting-started/linux-configuration/#configure-devolutions-gateway-in-devolutions-server)
* [Résoudre les hôtes dans Ubuntu](https://docs.devolutions.net/fr/gateway/getting-started/linux-configuration/#resolve-hosts-in-ubuntu)
* [Ouvrir une session RDP basée sur le Web](https://docs.devolutions.net/fr/gateway/getting-started/linux-configuration/#open-a-web-based-rdp-session)
* [Ouvrir une session RDP dans Remote Desktop Manager](https://docs.devolutions.net/fr/gateway/getting-started/linux-configuration/#open-a-remote-desktop-manager-rdp-session)
Installer et exécuter Devolutions Gateway sur Linux est rapide et facile, à condition que plusieurs prérequis soient remplis. Ubuntu 22.04 LTS a été utilisé pour démontrer l'installation et la configuration.
Devolutions Server ou Devolutions Hub Business est nécessaire pour la configuration ainsi qu'une licence de Devolutions Gateway.
Installer Devolutions Gateway
-----------------------------
[](https://docs.devolutions.net/fr/gateway/getting-started/linux-configuration/#install-devolutions-gateway)
1. Naviguer vers la page de [release Devolutions Gateway sur GitHub](https://github.com/Devolutions/devolutions-gateway/releases/ "https://github.com/Devolutions/devolutions-gateway/releases/")
et télécharger le fichier **.deb** de la dernière version.
2. Saisir ce qui suit en ligne de commande : `wget https://github.com/Devolutions/devolutions-gateway/releases/download/v2024.3.2/devolutions-gateway_2024.3.2.0_amd64.deb`
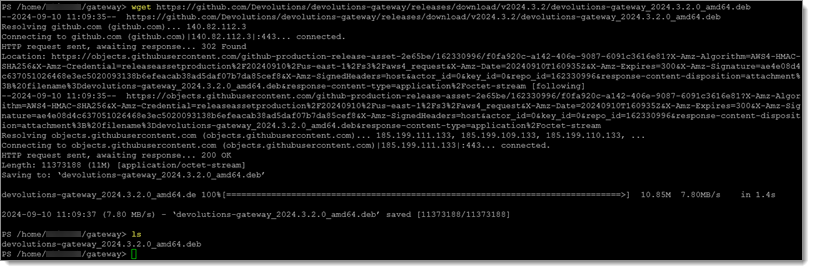
Command-line wget
3. Installer le paquet en utilisant l'utilitaire `dpkg` : `sudo dpkg -i devolutions-gateway_2024.3.2.0_amd64.deb`

Command-line dpkg
Les paquets de configuration et binaires se trouvent aux emplacements suivants :
* **Configuration** : `/etc/devolutions-gateway`
* **Binaire** : `/usr/bin/devolutions-gateway`
### Mettre à jour Devolutions Gateway
[](https://docs.devolutions.net/fr/gateway/getting-started/linux-configuration/#update-devolutions-gateway)
Pour mettre à jour Devolutions Gateway sur Linux, télécharger le dernier paquet comme expliqué dans la section précédente et exécuter la commande d'installation. Le paquet s'installe par-dessus l'installation existante et préserve les configurations.
Installer le module gateway PowerShell
--------------------------------------
[](https://docs.devolutions.net/fr/gateway/getting-started/linux-configuration/#install-the-powershell-gateway-module)
Il est recommandé d'utiliser le module PowerShell gateway pour configurer et gérer l'instance de Devolutions Gateway sur Linux.
1. Installer PowerShell avec cette commande :
source /etc/os-release
wget -q https://packages.microsoft.com/config/ubuntu/$VERSION_ID/packages-microsoft-prod.deb
sudo dpkg -i packages-microsoft-prod.deb
rm packages-microsoft-prod.deb
sudo apt-get update
sudo apt-get install -y powershell
2. Installer le module Devolutions Gateway PowerShell :
Install-Module -Name DevolutionsGateway
Import-Module -Name DevolutionsGateway
Une fois installé, la configuration de Devolutions Gateway peut être démarrée, arrêtée, visualisée ou modifiée.
Configurer les certificats
--------------------------
[](https://docs.devolutions.net/fr/gateway/getting-started/linux-configuration/#configure-certificates)
Une bonne confiance des certificats entre les systèmes est essentielle pour faire fonctionner Devolutions Gateway. Les fonctionnalités telles que les WebSockets utilisées dans les vues de tableau de bord web de RDP, SSH, etc., nécessitent un certificat correctement approuvé. Un certificat d'une autorité officielle telle que Let's Encrypt serait idéal pour la plupart des systèmes de production. Les certificats auto-signés, comme l'exemple montré ci-dessous, peuvent être générés mais nécessitent une configuration supplémentaire pour être approuvés. Vous pouvez générer des certificats sur n'importe quel système et les utiliser dans Devolutions Gateway s'ils respectent les exigences du certificat.
### Générer un certificat LetsEncrypt sur Ubuntu 22.04 LTS via Certbot.
[](https://docs.devolutions.net/fr/gateway/getting-started/linux-configuration/#generate-a-letsencrypt-certificate-on-ubuntu-2204-lts-via-certbot)
Une option consiste à générer un certificat LetsEncrypt avec l'utilitaire Certbot. Pour installer la dernière version, il est possible d'utiliser le gestionnaire de paquets snap. Selon la distribution Ubuntu, les dépôts APT par défaut peuvent ne pas contenir la dernière version du logiciel. Dans cet exemple, la vérification du domaine est utilisée avec Cloudflare comme fournisseur DNS.
1. L'exemple ci-dessous démontre l'exécution de Certbot installé et exécuté en tant qu'utilisateur root, mais Devolutions Gateway en tant qu'utilisateur différent.
sudo snap install certbot --classic
sudo snap set certbot trust-plugin-with-root=ok
sudo snap install certbot-dns-cloudflare
2. Lors de l'utilisation de Cloudflare, générer soit un jeton API limité à l'utilisateur ou à l'identifiant, en utilisant le modèle **Edit zone DNS**. Une fois que le jeton API est obtenu, créer le dossier contenant ainsi que le fichier correspondant `.ini` pour contenir le jeton API.
sudo install -d -m 0700 /root/.secrets
sudo nano /root/.secrets/cloudflare.ini
sudo chmod 0600 /root/.secrets/cloudflare.ini
3. Demander un certificat pour votre domaine Devolutions Gateway en utilisant le plugin Cloudflare DNS. Remplacer la valeur `gateway.mydomain.com` ci-dessous par votre propre domaine.
certbot certonly --dns-cloudflare --dns-cloudflare-credentials /root/.secrets/cloudflare.ini -d gateway.mydomain.com --cert-name gateway
4. Modifier votre fichier de configuration `gateway.json` pour ajouter les lignes suivantes et utiliser le certificat nouvellement généré, en utilisant le module Devolutions Gateway PowerShell. Les commandes ci-dessous modifient les variables de configuration `TlsCertificateFile`, `TlsPrivateKeyFile`, et `Listeners`.
Import-Module DevolutionsGateway
Set-DGatewayConfig -TlsCertificateFile "/etc/letsencrypt/live/gateway/fullchain.pem" -TlsPrivateKeyFile "/etc/letsencrypt/live/gateway/privkey.pem" -Listeners @(
@{
"InternalUrl" = "tcp://*:8181"
"ExternalUrl" = "tcp://*:8181"
}
@{
"InternalUrl" = "https://*:7171"
"ExternalUrl" = "https://*:7171"
}
)
5. Avant de pouvoir redémarrer Devolutions Gateway pour utiliser le nouveau certificat, donner à l'utilisateur exécutant Devolutions Gateway l'autorisation de lire les fichiers de certificat. Cela suppose que l'utilisateur s'appelle **devolutions** et que le certificat s'appelle **gateway**. Vous accordez les droits de traversée aux répertoires et les droits de lecture aux fichiers de certificat eux-mêmes.
sudo setfacl -R -m u:devolutions:x /etc/letsencrypt/live
sudo setfacl -R -m u:devolutions:x /etc/letsencrypt/live/gateway
sudo setfacl -R -m u:devolutions:x /etc/letsencrypt/archive
sudo setfacl -R -m u:devolutions:x /etc/letsencrypt/archive/gateway
sudo setfacl -m u:devolutions:r /etc/letsencrypt/live/gateway/fullchain.pem
sudo setfacl -m u:devolutions:r /etc/letsencrypt/live/gateway/privkey.pem
sudo setfacl -m u:devolutions:r /etc/letsencrypt/archive/gateway/fullchain*.pem
sudo setfacl -m u:devolutions:r /etc/letsencrypt/archive/gateway/privkey*.pem
# Reconfigure to add a deploy hook
sudo certbot reconfigure --cert-name gateway --deploy-hook "sudo setfacl -m u:devolutions:r /etc/letsencrypt/archive/gateway/fullchain*.pem; sudo setfacl -m u:devolutions:r /etc/letsencrypt/archive/gateway/privkey*.pem; systemctl restart devolutions-gateway.service"
6. Redémarrer Devolutions Gateway en utilisant soit la commande `systemctl`, soit le module Devolutions Gateway PowerShell.
# Restart Gateway using systemctl
systemctl restart devolutions-gateway.service
# Restart Gateway using the Devolutions Gateway PowerShell module, assuming it is run in a pwsh shell.
Import-Module DevolutionsGateway; Restart-DGateway
#### Renouveler le certificat LetsEncrypt.
[](https://docs.devolutions.net/fr/gateway/getting-started/linux-configuration/#renew-letsencrypt-certificate)
Par défaut, avec la méthode d'installation Snap, un minuteur systemd est utilisé (au lieu d'une tâche cron), qui s'exécute deux fois par jour (mais ne renouvelle un certificat que dans les 30 jours précédant son expiration). Pour forcer un renouvellement, utiliser la commande ci-dessous.
sudo certbot renew
# To perform a renewal dry run and force a restart of the service, you can use the following command:
# sudo certbot renew --dry-run --run-deploy-hooks
### Générer un certificat auto-signé sur Ubuntu 22.04 LTS via OpenSSL
[](https://docs.devolutions.net/fr/gateway/getting-started/linux-configuration/#generate-a-self-signed-certificate-on-ubuntu-2204-lts-via-openssl)
Utiliser l'utilitaire OpenSSL pour générer un certificat directement depuis la ligne de commande. Le certificat doit ensuite être placé directement dans le répertoire de configuration **/etc/devolutions-gateway**.

Command-line openssl
sudo openssl req -x509 -subj "/C=CA/ST=Quebec/L=Lavaltrie/O=Devolutions/CN=ubuntu-2204" -addext "subjectAltName = IP:10.10.0.20" -addext "extendedKeyUsage = serverAuth" -nodes -days 365 -newkey rsa:2048 -keyout /etc/devolutions-gateway/server.key -out /etc/devolutions-gateway/server.crt
La demande de certificat sera différente pour chaque configuration.
Noter que le certificat **doit** inclure une extension **Subject Alternative Name (SAN)** avec soit un **nom DNS** ou une **adresse IP**, et il doit aussi contenir l'extension **Extended Key Usage (EKU)** avec pour but **Server Authentication** (`serverAuth`). Cela est requis car les systèmes d'exploitation et navigateurs modernes, y compris **Google Chrome** et **macOS,** rejetteront les certificats qui manquent d'un SAN ou d'un EKU approprié, même si le Nom Commun (CN) est défini. Il est possible d'assouplir cette obligation en définissant l'option `TlsVerifyStrict` sur `false` si nécessaire, mais cela n'est pas recommandé.
| Options de personnalisation | Explication |
| --- | --- |
| `req` | Créer et traiter les demandes de certificat, y compris les certificats auto-signés au format PKCS#10. |
| `-x509` | Produire un certificat auto-signé. |
| `-subj` | Définir le sujet du certificat en ligne de commande. Il ne doit y avoir aucun espace entre les sections
* `/C` - Pays en code à 2 chiffres tel que "CA" pour le Canada ou "US" pour les États-Unis.
* `/ST` - État ou Province, tel que Québec ou Californie.
* `/L` - Localité, comme Lavaltrie ou Sacramento.
* `/O` - Organisation, telle que Devolutions ou Microsoft.
* `/CN` \- Nom commun, ici `ubuntu-2204` (tel qu'affiché via la commande `hostname`). |
| `-addext` | Pour ajouter un Nom Alternatif de Sujet (SAN), vous pouvez utiliser ce paramètre pour définir soit une entrée IP ou DNS.
* `"subjectAltName = IP:10.10.0.20"`
* `"subjectAltName = DNS:ubuntu-2204"` |
| `-nodes` | Ne pas chiffrer la clé privée créée. |
| `-days` | Le nombre de jours pendant lesquels le certificat est valide. |
| `-newkey` | Définir l'algorithme et la taille des bits, ici `rsa:2048` est utilisé. |
| `-keyout` | L'emplacement pour créer le fichier de clé privée. |
| `-out` | L'emplacement pour créer le fichier de clé publique. |
### Faire confiance au certificat auto-signé sur Ubuntu
[](https://docs.devolutions.net/fr/gateway/getting-started/linux-configuration/#trust-the-self-signed-certificate-on-ubuntu)
Le certificat TLS a deux objectifs :
1. Sécuriser l'API de gestion ;
2. Sécuriser tout tunnel client-à-passerelle dans lequel la passerelle peut inspecter ou filtrer le trafic (sites Web, Gateway Tunnel, SCP/SFTP, etc.).
Pour les protocoles opaques tels que RDP ou SSH, Devolutions Gateway réachemine simplement les octets déjà chiffrés, mais le certificat est toujours requis pour les vérifications de santé de la passerelle et les fonctionnalités futures.
Une fois que le certificat auto-signé est créé, le certificat dans le système Ubuntu devra être approuvé. Pour approuver à l'échelle du système, utiliser la série de commandes suivante :
cd /etc/devolutions-gateway
sudo apt-get install -y ca-certificates
sudo cp server.crt /usr/local/share/ca-certificates
sudo update-ca-certificates
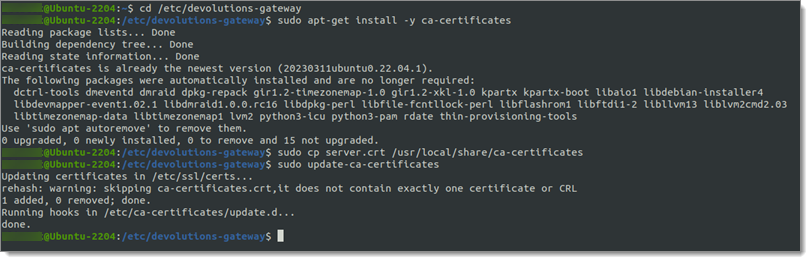
Command-line update-ca-certificates
Le `ca-certificates` peut déjà être installé. En exécutant la commande `update-ca-certificates`, un lien symbolique sera créé dans `/etc/ssl/certs` vers le fichier de certificat copié dans **/usr/local/share/ca-certificates**.

Creating a symlink
Si cela est fait dans Firefox, plusieurs erreurs de confiance apparaîtront car le navigateur n'utilise pas le magasin de certificats à l'échelle du système. Leur [documentation](https://support.mozilla.org/en-US/kb/setting-certificate-authorities-firefox "https://support.mozilla.org/en-US/kb/setting-certificate-authorities-firefox")
offre quelques solutions à cela.
### Faire confiance au certificat auto-signé sous Windows
[](https://docs.devolutions.net/fr/gateway/getting-started/linux-configuration/#trust-the-self-signed-certificate-on-windows)
Après que le certificat auto-signé est créé, il devra être approuvé sur Devolutions Server. Les fichiers **server.crt** et **server.key** devront être transférés sur le système Windows ; ou copier-coller le contenu dans les fichiers (c'est-à-dire **sudo cat server.crt** dans Ubuntu et copier cela dans un fichier texte sur Windows).
Passer cette section si Devolutions Server n'est pas exécuté sur Windows.
1. Copier la clé publique vers Windows (dans l'exemple, **C:\\Gateway** est un emplacement temporaire) :
`sudo cat server.crt`
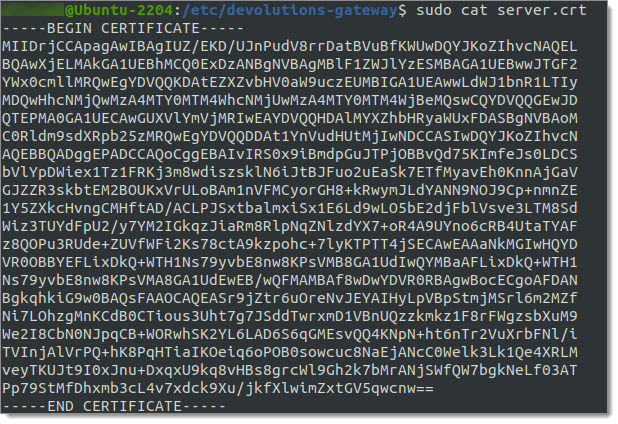
Command-line sudo cat server
2. Copier le contenu dans un fichier **server.crt**.
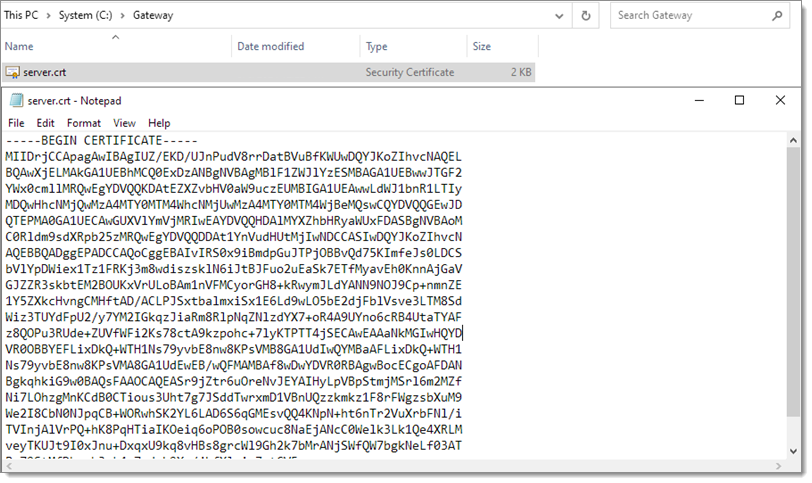
Server.crt file
3. Copier la clé privée vers Windows :
`sudo cat server.key`
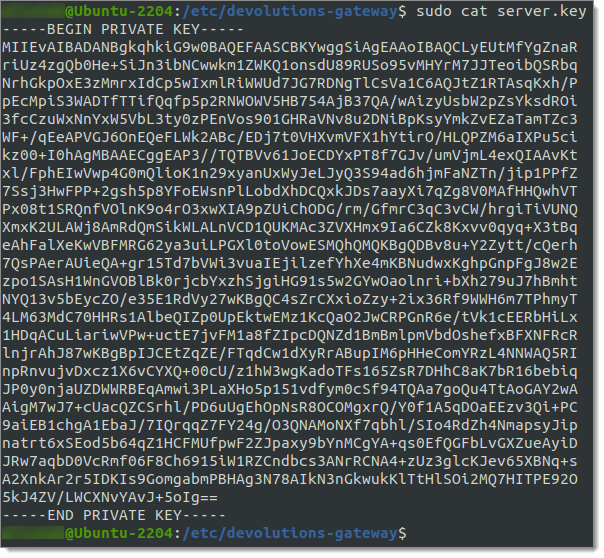
Copying the key to Windows
4. Copier le contenu dans un fichier **server.key**.
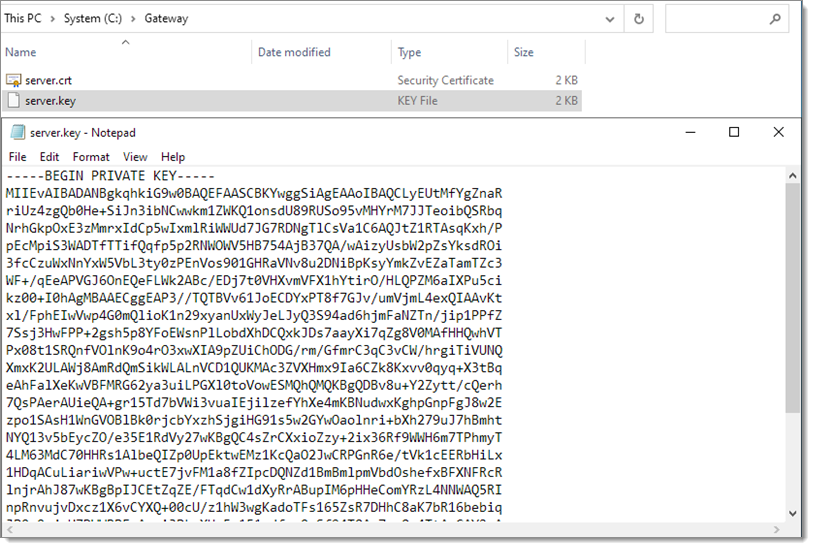
Server.key file
5. Créer un fichier PFX en utilisant l'outil en ligne de commande certutil de Windows. Pour que cela fonctionne, le fichier de clé doit avoir le même nom que le fichier **crt**, seule l'extension diffère :
`certutil -mergepfx server.crt server.pfx`
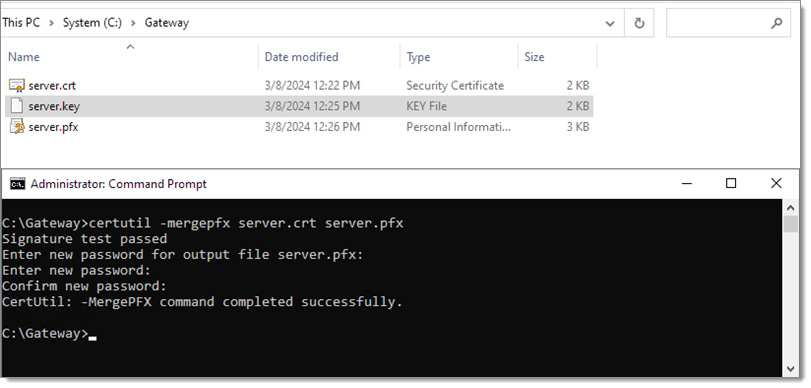
Create a PFX file
6. Importer le fichier PFX dans le [magasin de certificats des autorités de certification racines de confiance](https://learn.microsoft.com/en-us/windows-hardware/drivers/install/trusted-root-certification-authorities-certificate-store)
.
1. Double-cliquer sur le fichier **server.pfx** pour démarrer l'assistant d'importation et choisir _**Ordinateur local**_.
2. Cliquer sur _**Suivant**_ et accepter l'invite.
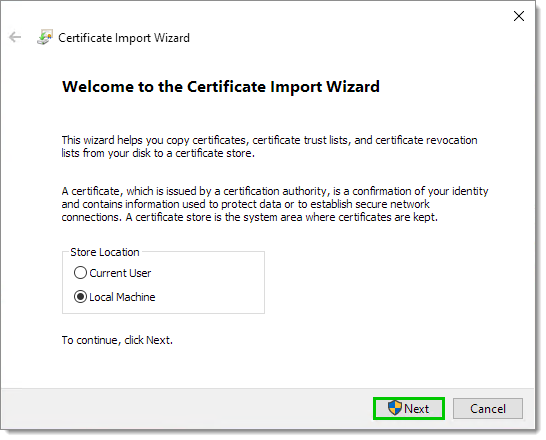
Click Next
3. Cliquer sur _**Suivant**_.
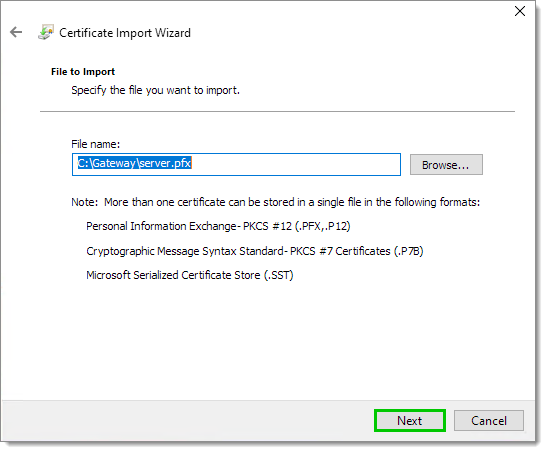
Click Next
4. Entrer le mot de passe que vous avez entré avec la commande `certutil`.
* Optionnellement : choisir de _**marquer cette clé comme exportable**_.
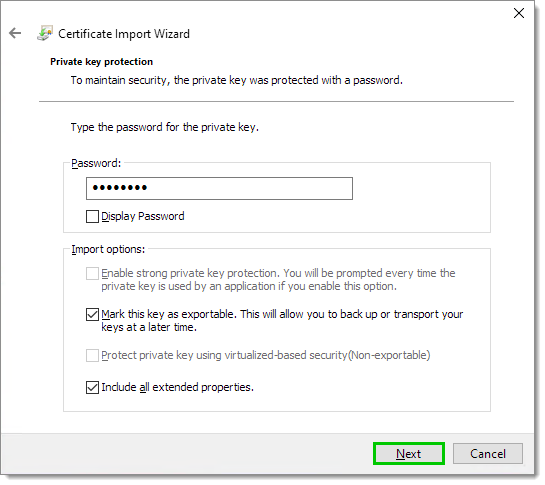
Enter the password
5. Choisir l'option _**Placer tous les certificats dans le magasin suivant**_.
6. Sélectionner _**Autorités de certification racines approuvées**_ avec le bouton _**Parcourir...**_.
7. Cliquer sur _**Suivant**_.
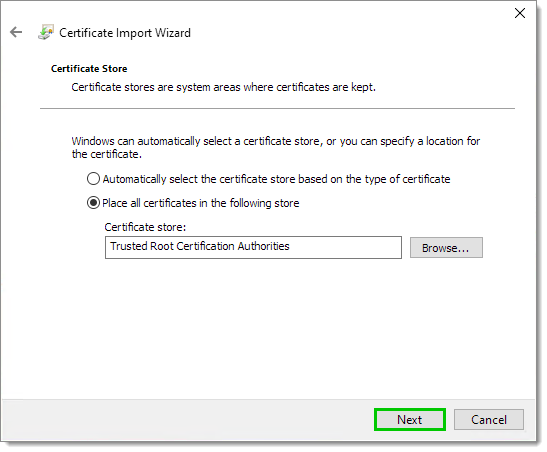
Click Next
8. Cliquer sur _**Terminer**_ pour compléter l'importation.
Ouvrir les ports du pare-feu Ubuntu
-----------------------------------
[](https://docs.devolutions.net/fr/gateway/getting-started/linux-configuration/#open-ubuntu-firewall-ports)
Si le système Linux utilise UFW (Uncomplicated Firewall) pour gérer le pare-feu basé sur iptable, exécuter les commandes suivantes pour ouvrir les ports nécessaires :
sudo ufw status
sudo ufw allow 7171
sudo ufw allow 8181
sudo ufw status
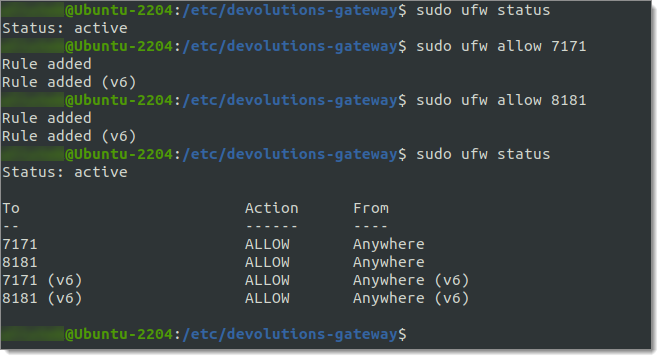
Opening Ubuntu firewall ports
Modifier la configuration de Devolutions Gateway
------------------------------------------------
[](https://docs.devolutions.net/fr/gateway/getting-started/linux-configuration/#modify-the-devolutions-gateway-configuration)
La configuration par défaut d'une passerelle contenue dans le fichier **/etc/devolutions-gateway/gateway.json** nécessite l'ajout de directives de certificat (l'`InternalUrl` devra utiliser HTTPS) :
{
"Id": "YOUR-UNIQUE-GUID",
"ProvisionerPublicKeyFile": "provisioner.pem",
"ProvisionerPrivateKeyFile": null,
"Listeners": [\
{\
"InternalUrl": "tcp://:8181",\
"ExternalUrl": "tcp://:8181"\
},\
{\
"InternalUrl": "http://:7171",\
"ExternalUrl": "https://:7171"\
}\
]
}
Modifier le fichier ci-dessus pour refléter ce qui suit, en supposant que **server.crt** et **server.key** sont dans le même répertoire que **gateway.json** (il est recommandé d'utiliser l'éditeur de fichiers intégré Nano):
{
"Id": "YOUR-UNIQUE-GUID",
"ProvisionerPublicKeyFile": "provisioner.pem",
"ProvisionerPrivateKeyFile": null,
"TlsCertificateFile": "server.crt",
"TlsPrivateKeyFile": "server.key",
"Listeners": [\
{\
"InternalUrl": "tcp://:8181",\
"ExternalUrl": "tcp://:8181"\
},\
{\
"InternalUrl": "https://:7171",\
"ExternalUrl": "https://:7171"\
}\
]
}
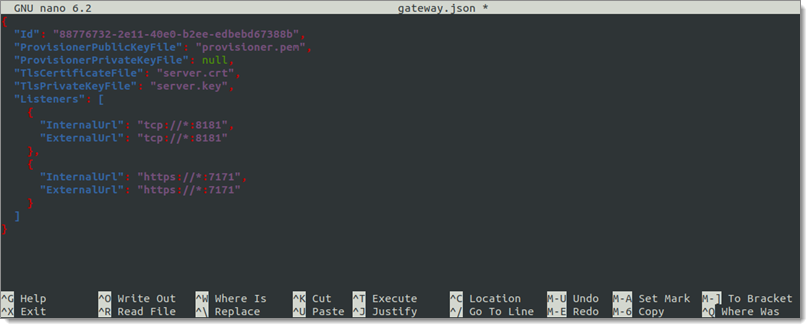
Modifying the configuration
### Redémarrer Devolutions Gateway
[](https://docs.devolutions.net/fr/gateway/getting-started/linux-configuration/#restart-devolutions-gateway)
Avec la nouvelle configuration en place, redémarrer Devolutions Gateway. Cela peut être fait avec la commande `systemctl` :
sudo systemctl restart devolutions-gateway.service
sudo systemctl status devolutions-gateway.service
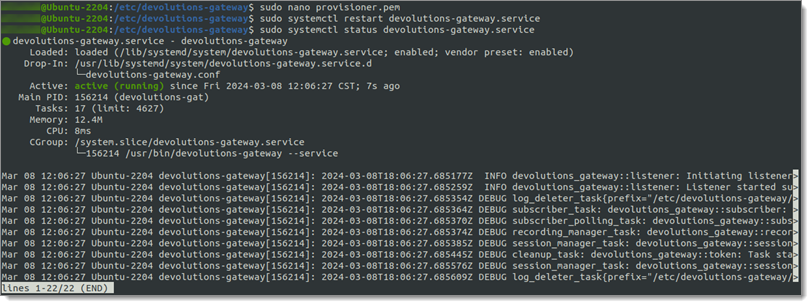
Restart the gateway
Alternativement, les commandes PowerShell `Stop-DGateway` et `Start-DGateway` peuvent aussi être utilisées.
Connecter Devolutions Gateway à Devolutions Server
--------------------------------------------------
[](https://docs.devolutions.net/fr/gateway/getting-started/linux-configuration/#connect-devolutions-gateway-to-devolutions-server)
### Copier la clé publique de Devolutions Server vers Devolutions Gateway Linux
[](https://docs.devolutions.net/fr/gateway/getting-started/linux-configuration/#copy-the-public-key-from-devolutions-server-to-devolutions-gateway-linux)
1. Se connecter à la console Web de Devolutions Server et naviguer vers _**Administration**_ – _**Devolutions Gateway**_.
2. Cliquer sur le bouton _**Plus**_ et choisir l'option _**Télécharger la clé publique**_.
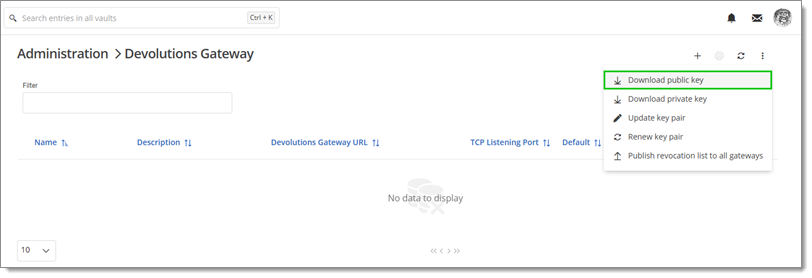
Download public key
3. Copier le contenu du fichier **gateway\_public\_key.pem** téléchargé sous Windows.
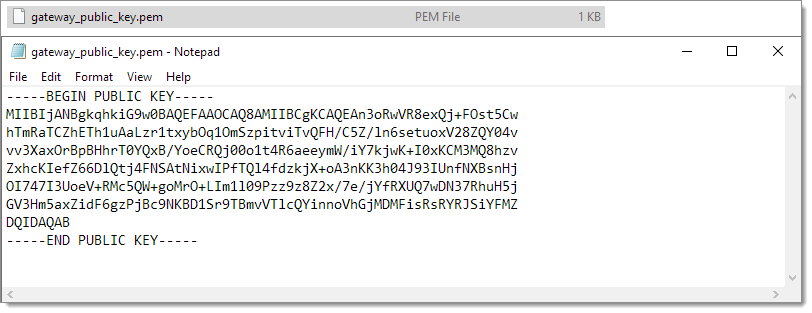
Copy the contents
4. Remplacer le contenu du fichier **/etc/devolutions-gateway/provisioner.pem** (l'utilitaire Nano est recommandé) par le contenu copié depuis Windows.
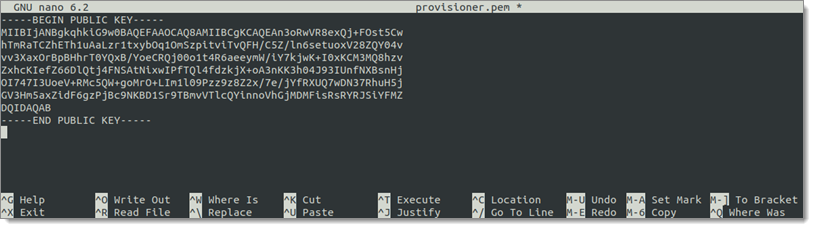
Replace the contents
5. Redémarrer Devolutions Gateway avec la commande `sudo systemctl restart devolutions-gateway.service`.

Restart Devolutions Gateway
### Configurer Devolutions Gateway dans Devolutions Server
[](https://docs.devolutions.net/fr/gateway/getting-started/linux-configuration/#configure-devolutions-gateway-in-devolutions-server)
Aller à l'interface web de Devolutions Server où la nouvelle Devolutions Gateway Linux configurée sera ajoutée.
Passer cette section si vous installez Devolutions Gateway avec Devolutions Hub Business.
1. Se connecter à la console Web de Devolutions Server et naviguer vers _**Administration**_ – _**Devolutions Gateway**_.
2. Cliquer sur le bouton _**Ajouter**_ (_**+**_).
3. Sélectionner _**Passerelle**_.
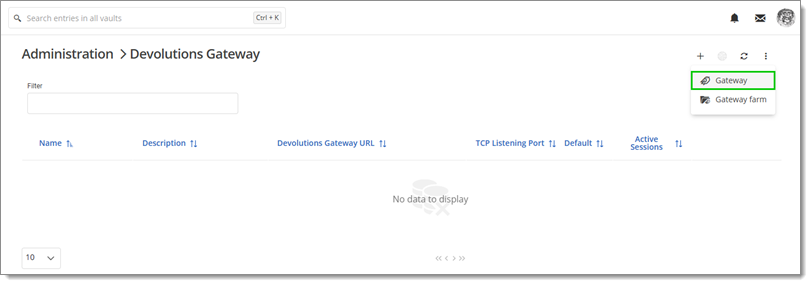
Select Gateway
4. Entrer ce qui suit (cela changera en fonction de la configuration).
1. _**Nom**_ : Passerelle Linux
2. _**URL de Devolutions Gateway :**_ `https://10.10.0.20:7171`
3. _**Nom d'hôte TCP :**_ `Ubuntu-2204`
5. Cliquer sur _**Enregistrer**_.
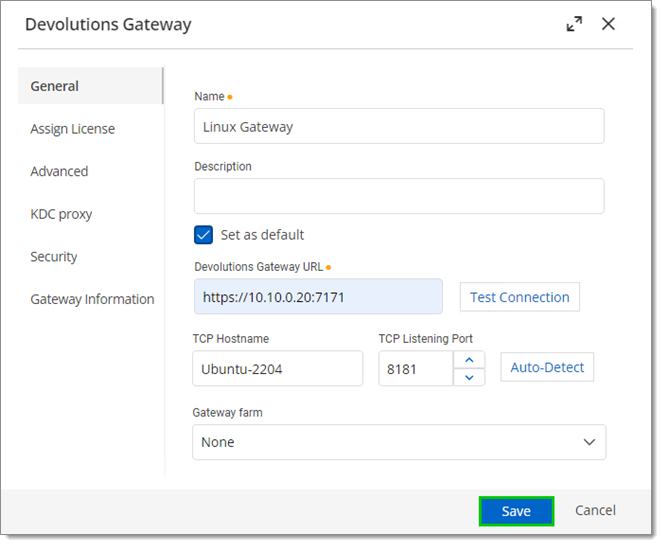
Click Save
Cliquer sur le menu _**Plus**_ d'options pour le gateway et choisir l'option _**Publier la liste de révocation**_ si la liste de révocation est obsolète.

Revocation list is not in sync
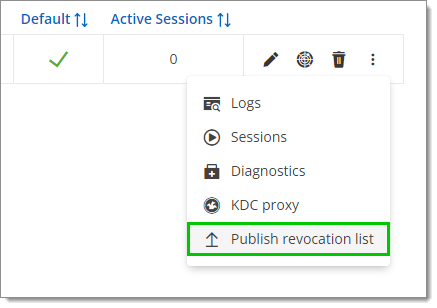
Publish revocation list
Résoudre les hôtes dans Ubuntu
------------------------------
[](https://docs.devolutions.net/fr/gateway/getting-started/linux-configuration/#resolve-hosts-in-ubuntu)
Le système Devolutions Gateway hébergé sous Linux doit être capable de résoudre les adresses demandées par Devolutions Server. La méthode la plus simple pour tester cela est de modifier le fichier hosts.
Se connecter au système suivant :
* **Nom d'hôte** : `it-help-dc`
* **Nom de domaine entièrement qualifié (FQDN)** : `it-help-dc.ad.it-help.ninja`
* **Adresse IP** : `10.10.0.3`
Ouvrir le fichier hosts pour édition `sudo nano /etc/hosts` pour ajouter l'hôte dans Ubuntu.
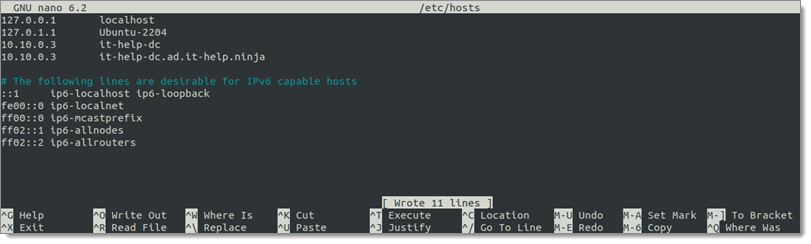
Add the host in Ubuntu
Ouvrir une session RDP basée sur le Web
---------------------------------------
[](https://docs.devolutions.net/fr/gateway/getting-started/linux-configuration/#open-a-web-based-rdp-session)
La passerelle peut désormais se connecter aux hôtes. Puisque l'hôte `it-help-dc` a été ajouté comme résolvable sur Ubuntu, il peut être utilisé pour se connecter dans une session basée sur le Web.
Les sessions basées sur le Web nécessitent une passerelle active configurée pour l'entrée et l'utilisateur lançant nécessitera une licence Remote Desktop Manager Team edition ou une licence Devolutions Launcher.
De plus, si des changements ont été apportés aux attributions de licences, il peut être nécessaire de se déconnecter et de se reconnecter pour voir l'option de lancer la connexion basée sur le Web.
1. Dans l'interface Web de Devolutions Server, cliquer sur _**Ajouter**_. Sélectionner une entrée de session _**RDP**_.
2. Cliquer sur _**Continuer**_.
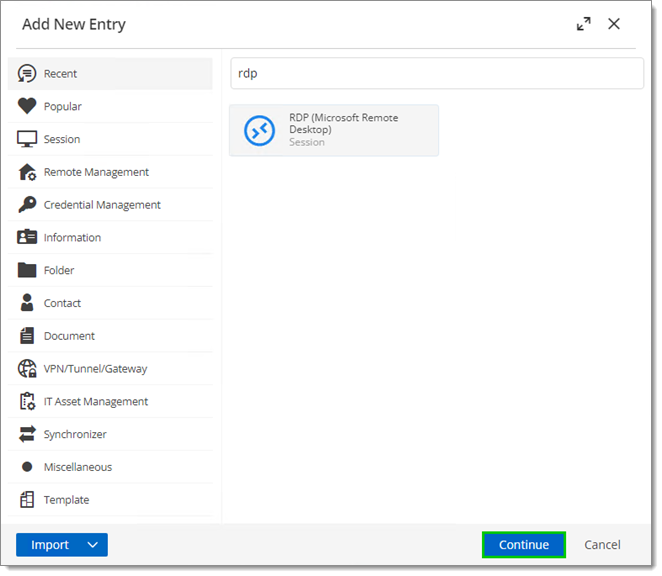
Click Continue
3. Saisir un _**Nom**_ et un _**Hôte**_ qui doivent être résolvables par l'installation de Devolutions Gateway sur Linux.
4. Cliquer sur _**Ajouter**_.
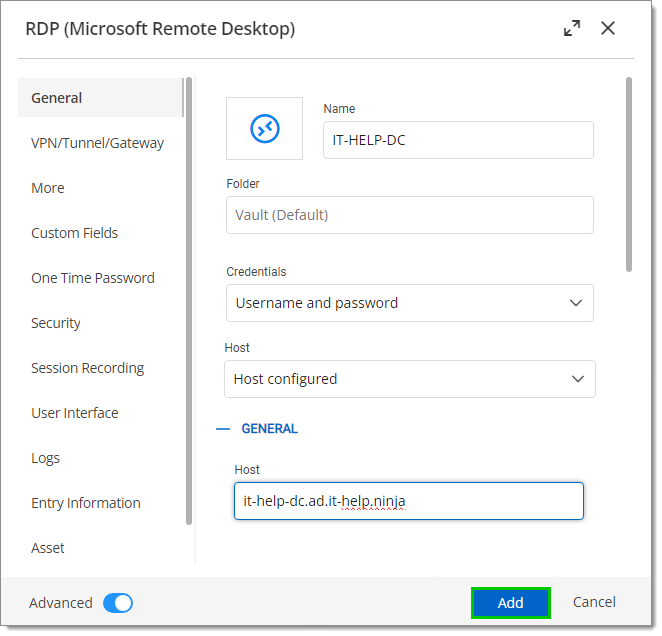
Click Add
5. Entrer ou lier tout identifiant nécessaire à la session RDP et cliquer sur _**Ajouter**_.
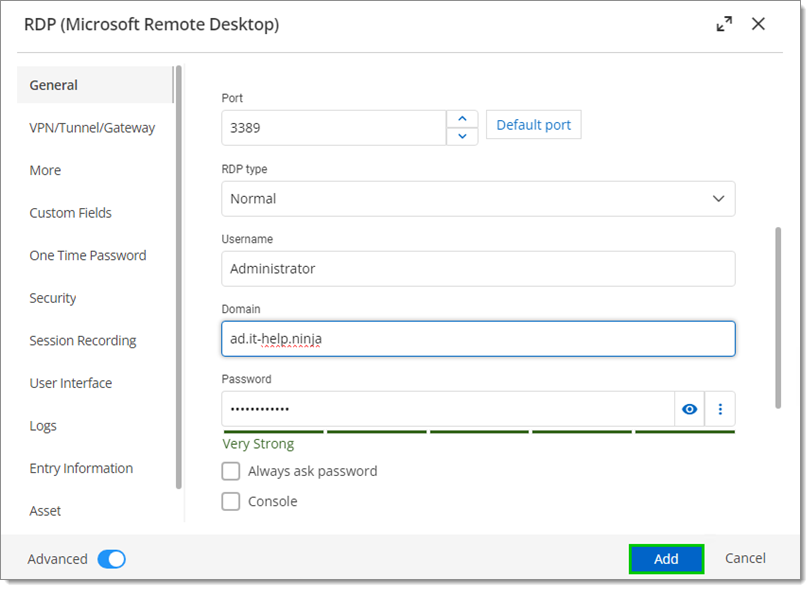
Enter or link credentials
6. Sous l'onglet _**VPN/Tunnel/Gateway**_, choisir Devolutions Gateway comme type de VPN.
7. Définir l'option _**Connecter**_ sur _**Toujours connecter**_.
8. Choisir la passerelle correcte.
9. Cliquer sur _**Ajouter**_.
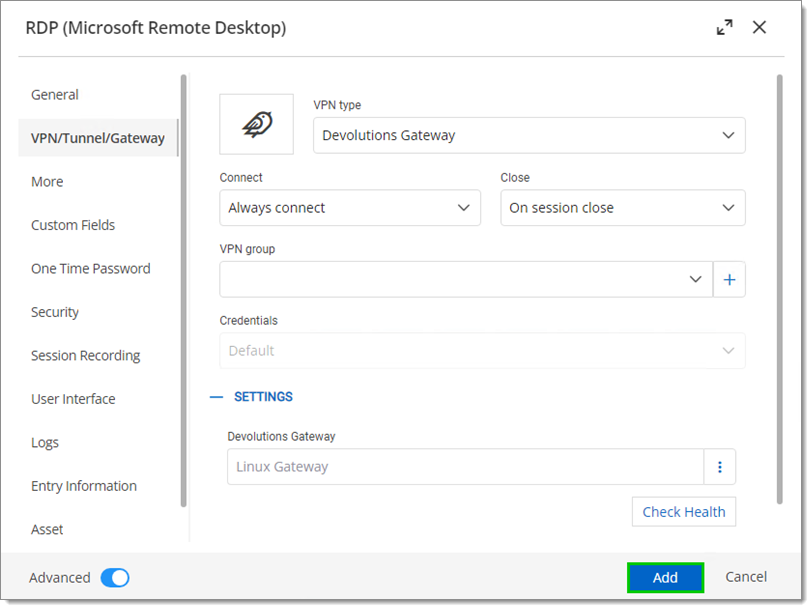
Choose the correct gateway
10. Cliquer sur _**Ouvrir dans le client Web**_.
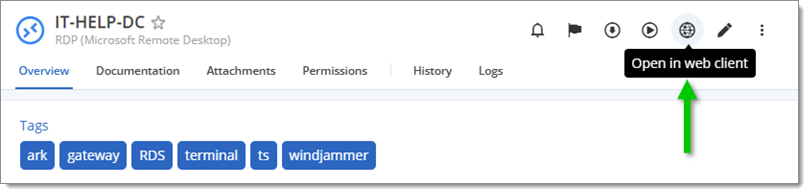
Open in web client
Ouvrir une session RDP dans Remote Desktop Manager
--------------------------------------------------
[](https://docs.devolutions.net/fr/gateway/getting-started/linux-configuration/#open-a-remote-desktop-manager-rdp-session)
Si l'entrée est déjà configurée depuis l'interface web de Devolutions Server, elle peut être lancée depuis Remote Desktop Manager lorsqu'elle est connectée à la source de données Devolutions Server.
Passer cette section si vous installez Devolutions Gateway avec Devolutions Hub Business.
Lors de la création d'une nouvelle entrée depuis Remote Desktop Manager, le processus est similaire à celui de Devolutions Server.
1. Dans Remote Desktop Manager, cliquer sur _**Nouvelle entrée**_. Sélectionner une entrée de session RDP.
2. Cliquer sur _**Sélectionner**_.
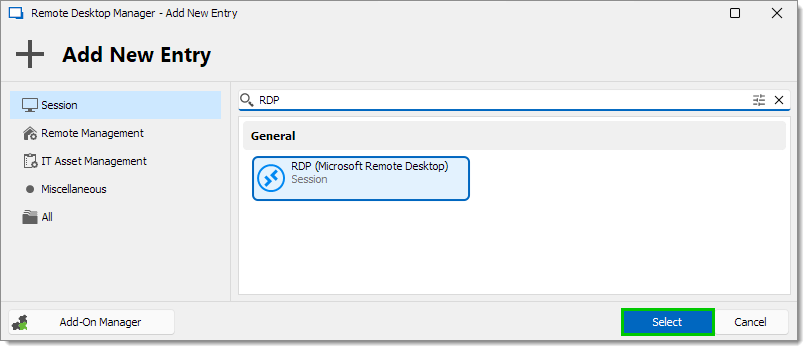
Click on Select
3. Saisir un _**Nom**_ et un _**Hôte**_ qui doivent être résolvables par l'installation de Devolutions Gateway sur Linux.
4. Saisir ou lier les informations d'identification nécessaires à la session RDP.
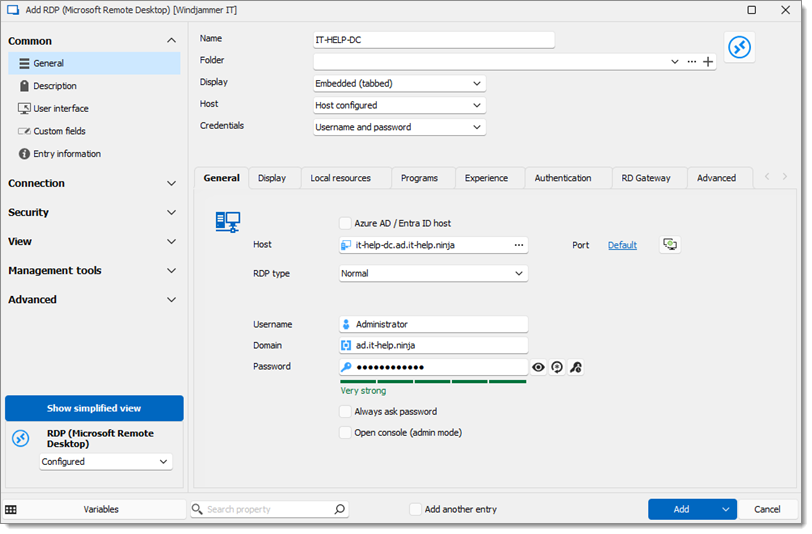
Fill in the necessary fields
5. Définir l'option _**Connecter**_ sur _**Toujours connecter**_.
6. Sous l'onglet _**VPN/Tunnel/Gateway**_, choisir Devolutions Gateway comme type de VPN.
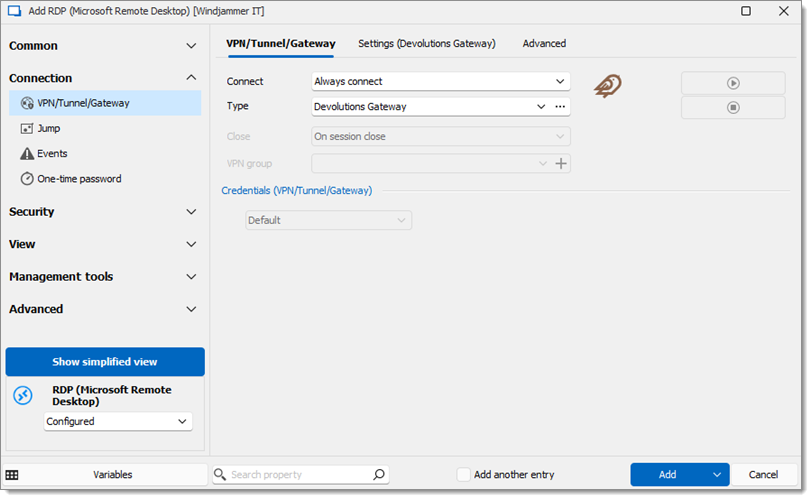
Adjust the General settings
7. Aller à l'_**onglet Paramètres (Devolutions Gateway)**_.
8. Choisir le Devolutions Gateway désiré.
9. Cliquer sur _**Ajouter**_.
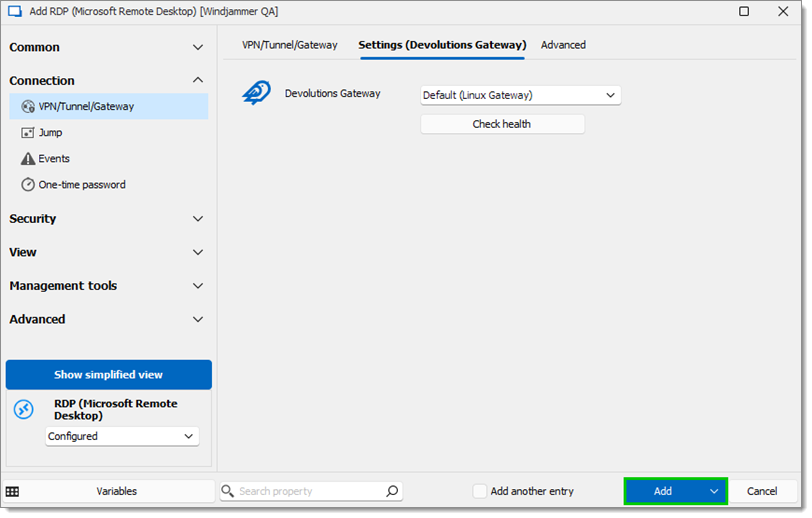
Click Add
10. Cliquer sur le bouton _**Ouvrir la session**_.
En survolant la barre de titre, une info-bulle apparaîtra et montrera que le RDP est connecté via Devolutions Gateway.
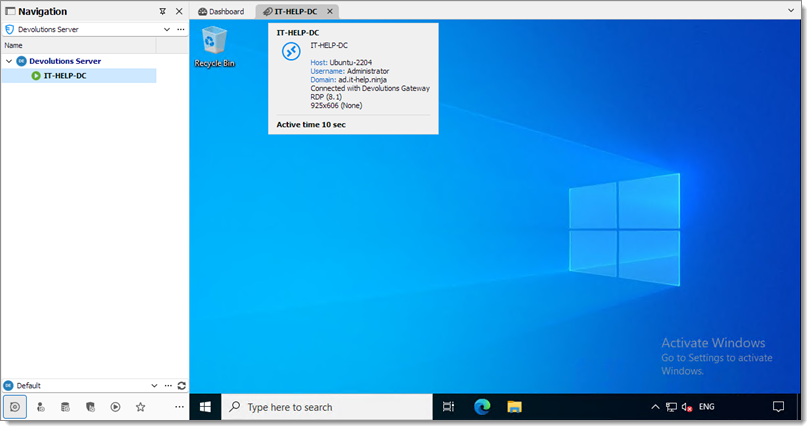
Tooltip
[ Partagez vos commentaires](https://forum.devolutions.net/forums/176/documentation--documentation-requests)
---
# Gateway ruleset configuration in Devolutions Server - Devolutions Documentation
Gateway ruleset configuration in Devolutions Server
===================================================
Restrict network access and segment traffic without creating a new Gateway instance on a different machine with the help of Gateway rulesets. Rules can be configured to allow or deny connections by IPs, subnets, IP ranges, or domains. What's more, security rules can be enforced to allow or deny access to specific users or user groups or at vault level. Follow the steps below to quickly set up a Gateway ruleset in Devolutions Server:
1. Navigate to _**Administration**_ – _**Devolutions Gateway**_.
2. Click on _**Add**_ (_**+**_) and select _**Gateway ruleset**_.
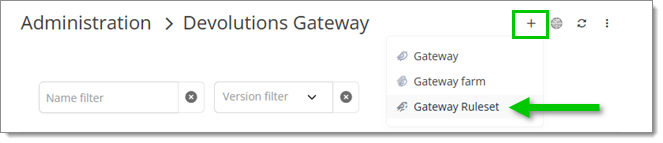
Administration – Devolutions Gateway – Add Gateway ruleset
3. Select a _**Physical Gateway**_ from the list of Gateway in your Devolutions Server.
4. Enter a _**Name**_ for the Gateway ruleset.
5. Cick on _**Save**_.

Configure a new Gateway ruleset
[ Share your feedback](https://forum.devolutions.net/forums/176/documentation--documentation-requests)
---
# Devolutions Gateway configuration on Linux - Devolutions Documentation
Devolutions Gateway configuration on Linux
==========================================
On this page
* [Install Devolutions Gateway](https://docs.devolutions.net/gateway/getting-started/linux-configuration/#install-devolutions-gateway)
* [Update Devolutions Gateway](https://docs.devolutions.net/gateway/getting-started/linux-configuration/#update-devolutions-gateway)
* [Install the PowerShell gateway module](https://docs.devolutions.net/gateway/getting-started/linux-configuration/#install-the-powershell-gateway-module)
* [Configure certificates](https://docs.devolutions.net/gateway/getting-started/linux-configuration/#configure-certificates)
* [Generate a LetsEncrypt certificate on Ubuntu 22.04 LTS via Certbot](https://docs.devolutions.net/gateway/getting-started/linux-configuration/#generate-a-letsencrypt-certificate-on-ubuntu-2204-lts-via-certbot)
* [Generate a self-signed certificate on Ubuntu 22.04 LTS via OpenSSL](https://docs.devolutions.net/gateway/getting-started/linux-configuration/#generate-a-self-signed-certificate-on-ubuntu-2204-lts-via-openssl)
* [Trust the self-signed certificate on Ubuntu](https://docs.devolutions.net/gateway/getting-started/linux-configuration/#trust-the-self-signed-certificate-on-ubuntu)
* [Trust the self-signed certificate on Windows](https://docs.devolutions.net/gateway/getting-started/linux-configuration/#trust-the-self-signed-certificate-on-windows)
* [Open Ubuntu firewall ports](https://docs.devolutions.net/gateway/getting-started/linux-configuration/#open-ubuntu-firewall-ports)
* [Modify the Devolutions Gateway configuration](https://docs.devolutions.net/gateway/getting-started/linux-configuration/#modify-the-devolutions-gateway-configuration)
* [Restart Devolutions Gateway](https://docs.devolutions.net/gateway/getting-started/linux-configuration/#restart-devolutions-gateway)
* [Connect Devolutions Gateway to Devolutions Server](https://docs.devolutions.net/gateway/getting-started/linux-configuration/#connect-devolutions-gateway-to-devolutions-server)
* [Copy the Public Key from Devolutions Server to Devolutions Gateway Linux](https://docs.devolutions.net/gateway/getting-started/linux-configuration/#copy-the-public-key-from-devolutions-server-to-devolutions-gateway-linux)
* [Configure Devolutions Gateway in Devolutions Server](https://docs.devolutions.net/gateway/getting-started/linux-configuration/#configure-devolutions-gateway-in-devolutions-server)
* [Resolve hosts in Ubuntu](https://docs.devolutions.net/gateway/getting-started/linux-configuration/#resolve-hosts-in-ubuntu)
* [Open a web-based RDP session](https://docs.devolutions.net/gateway/getting-started/linux-configuration/#open-a-web-based-rdp-session)
* [Open a Remote Desktop Manager RDP session](https://docs.devolutions.net/gateway/getting-started/linux-configuration/#open-a-remote-desktop-manager-rdp-session)
Installing and running Devolutions Gateway on Linux is quick and easy, provided that several prerequisites are met. Ubuntu 22.04 LTS was used to demonstrate the installation and configuration.
Devolutions Server or Devolutions Hub Business is needed for the configuration as well as a Devolutions Gateway license.
Install Devolutions Gateway
---------------------------
[](https://docs.devolutions.net/gateway/getting-started/linux-configuration/#install-devolutions-gateway)
1. Navigate to the [Devolutions Gateway GitHub Release](https://github.com/Devolutions/devolutions-gateway/releases/ "https://github.com/Devolutions/devolutions-gateway/releases/")
page and download the **.deb** file of the latest release.
2. Input the following using the command-line: `wget https://github.com/Devolutions/devolutions-gateway/releases/download/v2024.3.2/devolutions-gateway_2024.3.2.0_amd64.deb`

Command-line wget
3. Install the package using the `dpkg` utility: `sudo dpkg -i devolutions-gateway_2024.3.2.0_amd64.deb`

Command-line dpkg
The configuration and binary packages are in the following locations:
* **Configuration**: `/etc/devolutions-gateway`
* **Binary**: `/usr/bin/devolutions-gateway`
### Update Devolutions Gateway
[](https://docs.devolutions.net/gateway/getting-started/linux-configuration/#update-devolutions-gateway)
To update Devolutions Gateway on Linux download the latest package as explained in the previous section and run the installation command. The package will install over the existing installation and preserve configurations.
Install the PowerShell gateway module
-------------------------------------
[](https://docs.devolutions.net/gateway/getting-started/linux-configuration/#install-the-powershell-gateway-module)
It is recommended to use the PowerShell gateway module to configure and manage the Devolutions Gateway instance on Linux.
1. Install PowerShell with this command:
source /etc/os-release
wget -q https://packages.microsoft.com/config/ubuntu/$VERSION_ID/packages-microsoft-prod.deb
sudo dpkg -i packages-microsoft-prod.deb
rm packages-microsoft-prod.deb
sudo apt-get update
sudo apt-get install -y powershell
2. Install the Devolutions Gateway PowerShell module:
Install-Module -Name DevolutionsGateway
Import-Module -Name DevolutionsGateway
Once installed the Devolutions Gateway configuration can be started, stopped, viewed or modified.
Configure certificates
----------------------
[](https://docs.devolutions.net/gateway/getting-started/linux-configuration/#configure-certificates)
Proper trust of certificates between systems is key to making Devolutions Gateway work. Functionalities such as WebSockets used in web dashboard views of RDP, SSH, etc., require a properly trusted certificate. A certificate from an official authority such as Let's Encrypt would be ideal for most production systems. Self-signed certificates, such as the example shown below, may be generated but require additional configuration for trust. You may generate certificates on any system and use them within Devolutions Gateway if it adheres to the certificate requirements.
### Generate a LetsEncrypt certificate on Ubuntu 22.04 LTS via Certbot
[](https://docs.devolutions.net/gateway/getting-started/linux-configuration/#generate-a-letsencrypt-certificate-on-ubuntu-2204-lts-via-certbot)
One option is to generate a LetsEncrypt certificate with the Certbot utility. To install the latest version, you may use the snap package manager. Depending on the Ubuntu distribution, the default APT repositories may not contain the latest version of the software. In this example, the domain verification is used with Cloudflare as the DNS provider.
1. The example below demonstrates running Certbot installed and running as the root user, but Devolutions Gateway as a different user.
sudo snap install certbot --classic
sudo snap set certbot trust-plugin-with-root=ok
sudo snap install certbot-dns-cloudflare
2. When using Cloudflare, generate either a user or account-scoped API token, using the **Edit zone DNS** template. Once you have the API token, create the containing folder and corresponding `.ini` file to contain the API token.
sudo install -d -m 0700 /root/.secrets
sudo nano /root/.secrets/cloudflare.ini
sudo chmod 0600 /root/.secrets/cloudflare.ini
3. Request a certificate for your Devolutions Gateway domain using the Cloudflare DNS plugin. Replace the `gateway.mydomain.com` value below with your own domain.
certbot certonly --dns-cloudflare --dns-cloudflare-credentials /root/.secrets/cloudflare.ini -d gateway.mydomain.com --cert-name gateway
4. Modify your `gateway.json` configuration file to add the following lines and use the newly generated certificate, using the Devolutions Gateway PowerShell module. The commands below modify the `TlsCertificateFile`, `TlsPrivateKeyFile`, and `Listeners` configuration variables.
Import-Module DevolutionsGateway
Set-DGatewayConfig -TlsCertificateFile "/etc/letsencrypt/live/gateway/fullchain.pem" -TlsPrivateKeyFile "/etc/letsencrypt/live/gateway/privkey.pem" -Listeners @(
@{
"InternalUrl" = "tcp://*:8181"
"ExternalUrl" = "tcp://*:8181"
}
@{
"InternalUrl" = "https://*:7171"
"ExternalUrl" = "https://*:7171"
}
)
5. Before you can restart Devolutions Gateway to use the new certificate, you must allow the user running Devolutions Gateway to read the certificate files. This assumes your user is named **devolutions** and that the certificate is named **gateway**. You are giving traversal rights to the directories and read rights to the certificate files themselves.
sudo setfacl -R -m u:devolutions:x /etc/letsencrypt/live
sudo setfacl -R -m u:devolutions:x /etc/letsencrypt/live/gateway
sudo setfacl -R -m u:devolutions:x /etc/letsencrypt/archive
sudo setfacl -R -m u:devolutions:x /etc/letsencrypt/archive/gateway
sudo setfacl -m u:devolutions:r /etc/letsencrypt/live/gateway/fullchain.pem
sudo setfacl -m u:devolutions:r /etc/letsencrypt/live/gateway/privkey.pem
sudo setfacl -m u:devolutions:r /etc/letsencrypt/archive/gateway/fullchain*.pem
sudo setfacl -m u:devolutions:r /etc/letsencrypt/archive/gateway/privkey*.pem
# Reconfigure to add a deploy hook
sudo certbot reconfigure --cert-name gateway --deploy-hook "sudo setfacl -m u:devolutions:r /etc/letsencrypt/archive/gateway/fullchain*.pem; sudo setfacl -m u:devolutions:r /etc/letsencrypt/archive/gateway/privkey*.pem; systemctl restart devolutions-gateway.service"
6. Restart Devolutions Gateway using either the `systemctl` command or the Devolutions Gateway PowerShell module.
# Restart Gateway using systemctl
systemctl restart devolutions-gateway.service
# Restart Gateway using the Devolutions Gateway PowerShell module, assuming it is run in a pwsh shell.
Import-Module DevolutionsGateway; Restart-DGateway
#### Renew LetsEncrypt certificate
[](https://docs.devolutions.net/gateway/getting-started/linux-configuration/#renew-letsencrypt-certificate)
By default, with the Snap installation method, a systemd timer is used (instead of a cron job), which runs twice a day (though only renews a certificate within 30 days of its expiration). To force a renewal, you can use the command below.
sudo certbot renew
# To perform a renewal dry run and force a restart of the service, you can use the following command:
# sudo certbot renew --dry-run --run-deploy-hooks
### Generate a self-signed certificate on Ubuntu 22.04 LTS via OpenSSL
[](https://docs.devolutions.net/gateway/getting-started/linux-configuration/#generate-a-self-signed-certificate-on-ubuntu-2204-lts-via-openssl)
Using the OpenSSL utility, generate a certificate directly from the command line. The certificate then needs to be placed directly into the configuration directory **/etc/devolutions-gateway**.

Command-line openssl
sudo openssl req -x509 -subj "/C=CA/ST=Quebec/L=Lavaltrie/O=Devolutions/CN=ubuntu-2204" -addext "subjectAltName = IP:10.10.0.20" -addext "extendedKeyUsage = serverAuth" -nodes -days 365 -newkey rsa:2048 -keyout /etc/devolutions-gateway/server.key -out /etc/devolutions-gateway/server.crt
The certificate request will look different for every configuration.
Note that the certificate **must** include a **Subject Alternative Name (SAN)** extension with either a **DNS name** or an **IP address**, and it should also contain the **Extended Key Usage (EKU)** extension with the **Server Authentication** purpose (`serverAuth`). This is required because modern operating systems and browsers, including **Google Chrome** and **macOS,** will reject certificates that are missing a SAN or the appropriate EKU, even if the Common Name (CN) is set. It’s possible to relax this requirement by setting the `TlsVerifyStrict` option to `false` if necessary, but this is not recommended.
| Customization options | Explanation |
| --- | --- |
| `req` | Create and process certificate requests including self-signed certificates in PKCS#10 format. |
| `-x509` | Output a self-signed certificate. |
| `-subj` | Define the certificate subject on the command-line. There must be no spaces between sections
* `/C` - Country in 2-digit code such as “CA” for Canada or “US” for United States.
* `/ST` - State or Province, such as Quebec or California.
* `/L` - Locality, such as Lavaltrie or Sacramento.
* `/O` - Organization, such as Devolutions or Microsoft.
* `/CN` \- Common name, here `ubuntu-2204` (as shown via the `hostname` command). |
| `-addext` | To add a Subject Alternate Name (SAN), you can use this parameter to define either an IP or DNS entry.
* `"subjectAltName = IP:10.10.0.20"`
* `"subjectAltName = DNS:ubuntu-2204"` |
| `-nodes` | Do not encrypt the created private key. |
| `-days` | The number of days the certificate is valid. |
| `-newkey` | Define the algorithm and bit size, here `rsa:2048` is used. |
| `-keyout` | The location to create the private key file. |
| `-out` | The location to create the public key file. |
### Trust the self-signed certificate on Ubuntu
[](https://docs.devolutions.net/gateway/getting-started/linux-configuration/#trust-the-self-signed-certificate-on-ubuntu)
The TLS certificate has two purposes:
1. Secures the management API;
2. Secures any client-to-Gateway tunnel in which gateway can inspect or filter traffic (websites, Gateway Tunnel, SCP/SFTP, etc.).
For opaque protocols such as RDP or SSH, Devolutions Gateway simply forwards already-encrypted bytes, but the certificate is still required for gateway health checks and future features.
Once the self-signed certificate is created the certificate within the Ubuntu system will need to be trusted. To trust system-wide use the following set of commands:
cd /etc/devolutions-gateway
sudo apt-get install -y ca-certificates
sudo cp server.crt /usr/local/share/ca-certificates
sudo update-ca-certificates

Command-line update-ca-certificates
The `ca-certificates` may already be installed. By running the `update-ca-certificates` command a symlink will be created in `/etc/ssl/certs` to the copied certificate file in **/usr/local/share/ca-certificates**.

Creating a symlink
If this is done in Firefox multiple trust errors will appear as the browser does not use the system-wide certificate store. Their [documentation](https://support.mozilla.org/en-US/kb/setting-certificate-authorities-firefox "https://support.mozilla.org/en-US/kb/setting-certificate-authorities-firefox")
offers a few solutions to this.
### Trust the self-signed certificate on Windows
[](https://docs.devolutions.net/gateway/getting-started/linux-configuration/#trust-the-self-signed-certificate-on-windows)
After the self-signed certificate is created it will need to be trusted on Devolutions Server. The **server.crt** and **server.key** files will need to be transferred to the Windows system; or copy and paste the contents into files (i.e. **sudo cat server.crt** in Ubuntu and copy that into a text file on Windows).
Skip this section if Devolutions Server is not running on Windows.
1. Copy the public key to Windows (in the example, **C:\\Gateway** is a temporary location):
`sudo cat server.crt`

Command-line sudo cat server
2. Copy the content into a **server.crt** file.

Server.crt file
3. Copy private key to Windows:
`sudo cat server.key`

Copying the key to Windows
4. Copy the content into a **server.key** file.

Server.key file
5. Create a PFX file using the Windows certutil command-line tool. For this to work, the key file must be named the same as the **crt** file, only differing in extension:
`certutil -mergepfx server.crt server.pfx`

Create a PFX file
6. Import the PFX file into the [Trusted Root Certification Authorities Certificate Store](https://learn.microsoft.com/en-us/windows-hardware/drivers/install/trusted-root-certification-authorities-certificate-store)
.
1. Double-click the **server.pfx** file to start the import wizard and choose _**Local Machine**_.
2. Click _**Next**_ and accept the prompt.

Click Next
3. Click _**Next**_.

Click Next
4. Enter the password that you entered with the `certutil` command.
* Optionally: choose to _**Mark this key as exportable**_.

Enter the password
5. Choose the option _**Place all certificates in the following store**_.
6. Select _**Trusted Root Certification Authorities**_ with the _**Browse...**_ button.
7. Click _**Next**_.

Click Next
8. Click _**Finish**_ to complete the import.
Open Ubuntu firewall ports
--------------------------
[](https://docs.devolutions.net/gateway/getting-started/linux-configuration/#open-ubuntu-firewall-ports)
If the Linux system uses UFW (Uncomplicated Firewall) to manage iptable-based firewall, perform the following commands to open the necessary ports:
sudo ufw status
sudo ufw allow 7171
sudo ufw allow 8181
sudo ufw status

Opening Ubuntu firewall ports
Modify the Devolutions Gateway configuration
--------------------------------------------
[](https://docs.devolutions.net/gateway/getting-started/linux-configuration/#modify-the-devolutions-gateway-configuration)
The default configuration of a gateway contained in the **/etc/devolutions-gateway/gateway.json** file needs the certificate directives added (the `InternalUrl` will need to use HTTPS):
{
"Id": "YOUR-UNIQUE-GUID",
"ProvisionerPublicKeyFile": "provisioner.pem",
"ProvisionerPrivateKeyFile": null,
"Listeners": [\
{\
"InternalUrl": "tcp://:8181",\
"ExternalUrl": "tcp://:8181"\
},\
{\
"InternalUrl": "http://:7171",\
"ExternalUrl": "https://:7171"\
}\
]
}
Modify the above file to reflect the following, assuming that both **server.crt** and **server.key** are in the same directory as **gateway.json** (using the built-in file editor Nano is recommended):
{
"Id": "YOUR-UNIQUE-GUID",
"ProvisionerPublicKeyFile": "provisioner.pem",
"ProvisionerPrivateKeyFile": null,
"TlsCertificateFile": "server.crt",
"TlsPrivateKeyFile": "server.key",
"Listeners": [\
{\
"InternalUrl": "tcp://:8181",\
"ExternalUrl": "tcp://:8181"\
},\
{\
"InternalUrl": "https://:7171",\
"ExternalUrl": "https://:7171"\
}\
]
}

Modifying the configuration
### Restart Devolutions Gateway
[](https://docs.devolutions.net/gateway/getting-started/linux-configuration/#restart-devolutions-gateway)
With the new configuration in place restart Devolutions Gateway. This can be done with the `systemctl` command:
sudo systemctl restart devolutions-gateway.service
sudo systemctl status devolutions-gateway.service

Restart the gateway
Alternatively the `Stop-DGateway` and `Start-DGateway` PowerShell commands can also be used.
Connect Devolutions Gateway to Devolutions Server
-------------------------------------------------
[](https://docs.devolutions.net/gateway/getting-started/linux-configuration/#connect-devolutions-gateway-to-devolutions-server)
### Copy the Public Key from Devolutions Server to Devolutions Gateway Linux
[](https://docs.devolutions.net/gateway/getting-started/linux-configuration/#copy-the-public-key-from-devolutions-server-to-devolutions-gateway-linux)
1. Log into the Devolutions Server web console and navigate to _**Administration**_ – _**Devolutions Gateway**_.
2. Click the _**More**_ button and choose the _**Download public key**_ option.

Download public key
3. Copy the contents of the downloaded **gateway\_public\_key.pem** file on Windows.

Copy the contents
4. Replace the contents of the **/etc/devolutions-gateway/provisioner.pem** (the Nano utility is recommended) file with the copied contents from Windows.

Replace the contents
5. Restart Devolutions Gateway with the command `sudo systemctl restart devolutions-gateway.service`.

Restart Devolutions Gateway
### Configure Devolutions Gateway in Devolutions Server
[](https://docs.devolutions.net/gateway/getting-started/linux-configuration/#configure-devolutions-gateway-in-devolutions-server)
Go to the Devolutions Server web interface where the newly configured Linux Devolutions Gateway will be added.
Skip this section if you are installing Devolutions Gateway with Devolutions Hub Business.
1. Log into the Devolutions Server web console and navigate to _**Administration**_ – _**Devolutions Gateway**_.
2. Click the _**Add**_ (_**+**_) button.
3. Select _**Gateway**_.

Select Gateway
4. Enter the following (this will change depending on the configuration).
1. _**Name**_: Linux Gateway
2. _**Devolutions Gateway URL:**_ `https://10.10.0.20:7171`
3. _**TCP Hostname:**_ `Ubuntu-2204`
5. Click _**Save**_.

Click Save
Click the _**More**_ options menu for the gateway and choose the _**Publish revocation list**_ option if the revocation list is out of date.

Revocation list is not in sync

Publish revocation list
Resolve hosts in Ubuntu
-----------------------
[](https://docs.devolutions.net/gateway/getting-started/linux-configuration/#resolve-hosts-in-ubuntu)
The Linux-hosted Devolutions Gateway system must be able to resolve the addresses that are requested by Devolutions Server. The simplest method for testing is to modify the hosts file.
Connect to the following system:
* **Hostname**: `it-help-dc`
* **Fully-Qualified Domain Name (FQDN)**: `it-help-dc.ad.it-help.ninja`
* **IP Address**: `10.10.0.3`
Open the hosts file for editing `sudo nano /etc/hosts` to add the host in Ubuntu.

Add the host in Ubuntu
Open a web-based RDP session
----------------------------
[](https://docs.devolutions.net/gateway/getting-started/linux-configuration/#open-a-web-based-rdp-session)
The gateway can now to connect to hosts. Since the `it-help-dc` host was added as resolvable to Ubuntu, it can be used to connect in a web-based session.
Web-based sessions require an active gateway configured for the entry and the user launching will require an assigned Remote Desktop Manager Team edition license or Devolutions Launcher license.
Additionally, if changes have been made to license assignments, logging out and back in may be needed to see the option to launch the web-based connection.
1. In the Devolutions Server web UI click on _**Add**_. Select an _**RDP**_ session entry.
2. Click _**Continue**_.

Click Continue
3. Enter a _**Name**_ and _**Host**_ which must be resolvable by the Linux Devolutions Gateway install.
4. Click _**Add**_.

Click Add
5. Enter or link any necessary credentials to the RDP session and click _**Add**_.

Enter or link credentials
6. Under the _**VPN/Tunnel/Gateway**_ tab choose Devolutions Gateway as the VPN type.
7. Set the _**Connect**_ option to _**Always connect**_.
8. Choose the correct gateway.
9. Click _**Add**_.

Choose the correct gateway
10. Click _**Open in web client**_.

Open in web client
Open a Remote Desktop Manager RDP session
-----------------------------------------
[](https://docs.devolutions.net/gateway/getting-started/linux-configuration/#open-a-remote-desktop-manager-rdp-session)
If the entry is already configured from within the Devolutions Server web interface it can be launched from Remote Desktop Manager when connected to the Devolutions Server data source.
Skip this section if you are installing Devolutions Gateway with Devolutions Hub Business.
When creating a new entry from Remote Desktop Manager the process is similar to that of Devolutions Server.
1. In Remote Desktop Manager click on _**New entry**_. Select an RDP session entry.
2. Click on _**Select**_.

Click on Select
3. Enter a _**Name**_ and _**Host**_ which must be resolvable by the Linux Devolutions Gateway install.
4. Enter or link any necessary credentials to the RDP session.

Fill in the necessary fields
5. Set the _**Connect**_ option to _**Always connect**_.
6. Under the _**VPN/Tunnel/Gateway**_ tab choose Devolutions Gateway as the VPN type.

Adjust the General settings
7. Go to the _**Settings (Devolutions Gateway)**_ sub-tab.
8. Choose the desired Devolutions Gateway.
9. Click _**Add**_.

Click Add
10. Click on the _**Open session**_ button.
By hovering over the title bar a tooltip will appear and show that the RDP is connected via Devolutions Gateway.

Tooltip
[ Share your feedback](https://forum.devolutions.net/forums/176/documentation--documentation-requests)
---
# Configuration de l'ensemble de règles Gateway dans Devolutions Server - Documentation Devolutions
Configuration de l'ensemble de règles Gateway dans Devolutions Server
=====================================================================
Restreindre l'accès au réseau et segmenter le trafic sans créer une nouvelle instance de Gateway sur une autre machine à l'aide des règles du Gateway. Configurer les règles pour autoriser ou refuser les connexions par IPs, sous-réseaux, plages IP ou domaines. De plus, appliquer des règles de sécurité pour autoriser ou refuser l'accès à des utilisateurs ou groupes d'utilisateurs spécifiques ou au niveau du coffre. Suivre les étapes ci-dessous pour configurer rapidement un ensemble de règles Gateway dans Devolutions Server :
1. Naviguer vers _**Administration**_ – _**Devolutions Gateway**_.
2. Cliquer sur _**Ajouter**_ (_**+**_) et sélectionner _**Ensemble de règles Gateway**_.

Administration – Devolutions Gateway – Add Gateway ruleset
3. Sélectionner un _**Gateway physique**_ depuis la liste des Gateways dans votre Devolutions Server.
4. Saisir un _**Nom**_ pour l'ensemble de règles Gateway.
5. Cliquer sur _**Sauvegarder**_.

Configure a new Gateway ruleset
[ Partagez vos commentaires](https://forum.devolutions.net/forums/176/documentation--documentation-requests)
---
# Gateway ruleset configuration in Devolutions Server - Devolutions Documentation
Gateway ruleset configuration in Devolutions Server
===================================================
Restrict network access and segment traffic without creating a new Gateway instance on a different machine with the help of Gateway rulesets. Rules can be configured to allow or deny connections by IPs, subnets, IP ranges, or domains. What's more, security rules can be enforced to allow or deny access to specific users or user groups or at vault level. Follow the steps below to quickly set up a Gateway ruleset in Devolutions Server:
1. Navigate to _**Administration**_ – _**Devolutions Gateway**_.
2. Click on _**Add**_ (_**+**_) and select _**Gateway ruleset**_.

Administration – Devolutions Gateway – Add Gateway ruleset
3. Select a _**Physical Gateway**_ from the list of Gateway in your Devolutions Server.
4. Enter a _**Name**_ for the Gateway ruleset.
5. Cick on _**Save**_.

Configure a new Gateway ruleset
[ Share your feedback](https://forum.devolutions.net/forums/176/documentation--documentation-requests)
---
# Devolutions Gateway farms - Devolutions Documentation
Devolutions Gateway farms
=========================
The purpose of the Devolutions Gateway farms feature is to group multiple gateways under a single farm to balance the load of sessions passing through each gateway. By using this feature, sessions will be distributed among them according to the farm's configuration:
* Load distribution helps to avoid overloading a particular gateway. Previously, for a given entry, a gateway could be configured, but all connections for that session would pass through it, potentially leading to saturation. With farms, it is now possible to distribute this load to prevent service overload and maintain performance.
* High availability, meaning that the farm helps maintain continuous service availability. Previously, if a gateway became unavailable for any reason, it was not possible to establish a session. With a farm, if one gateway is unavailable, the session will automatically be directed to one of the other available gateways in the farm. This can also be useful for maintenance or updates, as a gateway can be temporarily taken offline while an active one continues to provide service.
[ Share your feedback](https://forum.devolutions.net/forums/176/documentation--documentation-requests)
---
# Fermes Devolutions Gateway - Documentation Devolutions
Fermes Devolutions Gateway
==========================
Le but de la fonctionnalité de fermes Devolutions Gateway est de regrouper plusieurs passerelles sous une seule ferme pour équilibrer la charge des sessions passant par chaque passerelle. En utilisant cette fonctionnalité, les sessions seront distribuées parmi elles selon la configuration de la ferme :
* La distribution de la charge aide à éviter la surcharge d'une passerelle particulière. Auparavant, pour une entrée donnée, une passerelle pouvait être configurée, mais toutes les connexions pour cette session passeraient par elle, ce qui pourrait conduire à une saturation. Avec les fermes, il est maintenant possible de distribuer cette charge pour prévenir la surcharge du service et maintenir la performance.
* Haute disponibilité, signifiant que la ferme aide à maintenir la disponibilité continue du service. Auparavant, si une passerelle devenait indisponible pour une raison quelconque, il n'était pas possible d'établir une session. Avec une ferme, si une passerelle est indisponible, la session sera automatiquement dirigée vers l'une des autres passerelles disponibles dans la ferme. Cela peut également être utile pour la maintenance ou les mises à jour, car une passerelle peut être temporairement mise hors ligne tandis qu'une autre active continue de fournir le service.
[ Partagez vos commentaires](https://forum.devolutions.net/forums/176/documentation--documentation-requests)
---
# Devolutions Server - Documentation Devolutions
Devolutions Server
==================
[ Partagez vos commentaires](https://forum.devolutions.net/forums/176/documentation--documentation-requests)
---
# Devolutions Server - Devolutions Documentation
Devolutions Server
==================
[ Share your feedback](https://forum.devolutions.net/forums/176/documentation--documentation-requests)
---
# Devolutions Gateway configuration on Linux - Devolutions Documentation
Devolutions Gateway configuration on Linux
==========================================
Auf dieser Seite
* [Install Devolutions Gateway](https://docs.devolutions.net/de/gateway/getting-started/linux-configuration/#install-devolutions-gateway)
* [Update Devolutions Gateway](https://docs.devolutions.net/de/gateway/getting-started/linux-configuration/#update-devolutions-gateway)
* [Install the PowerShell gateway module](https://docs.devolutions.net/de/gateway/getting-started/linux-configuration/#install-the-powershell-gateway-module)
* [Configure certificates](https://docs.devolutions.net/de/gateway/getting-started/linux-configuration/#configure-certificates)
* [Generate a LetsEncrypt certificate on Ubuntu 22.04 LTS via Certbot](https://docs.devolutions.net/de/gateway/getting-started/linux-configuration/#generate-a-letsencrypt-certificate-on-ubuntu-2204-lts-via-certbot)
* [Generate a self-signed certificate on Ubuntu 22.04 LTS via OpenSSL](https://docs.devolutions.net/de/gateway/getting-started/linux-configuration/#generate-a-self-signed-certificate-on-ubuntu-2204-lts-via-openssl)
* [Trust the self-signed certificate on Ubuntu](https://docs.devolutions.net/de/gateway/getting-started/linux-configuration/#trust-the-self-signed-certificate-on-ubuntu)
* [Trust the self-signed certificate on Windows](https://docs.devolutions.net/de/gateway/getting-started/linux-configuration/#trust-the-self-signed-certificate-on-windows)
* [Open Ubuntu firewall ports](https://docs.devolutions.net/de/gateway/getting-started/linux-configuration/#open-ubuntu-firewall-ports)
* [Modify the Devolutions Gateway configuration](https://docs.devolutions.net/de/gateway/getting-started/linux-configuration/#modify-the-devolutions-gateway-configuration)
* [Restart Devolutions Gateway](https://docs.devolutions.net/de/gateway/getting-started/linux-configuration/#restart-devolutions-gateway)
* [Connect Devolutions Gateway to Devolutions Server](https://docs.devolutions.net/de/gateway/getting-started/linux-configuration/#connect-devolutions-gateway-to-devolutions-server)
* [Copy the Public Key from Devolutions Server to Devolutions Gateway Linux](https://docs.devolutions.net/de/gateway/getting-started/linux-configuration/#copy-the-public-key-from-devolutions-server-to-devolutions-gateway-linux)
* [Configure Devolutions Gateway in Devolutions Server](https://docs.devolutions.net/de/gateway/getting-started/linux-configuration/#configure-devolutions-gateway-in-devolutions-server)
* [Resolve hosts in Ubuntu](https://docs.devolutions.net/de/gateway/getting-started/linux-configuration/#resolve-hosts-in-ubuntu)
* [Open a web-based RDP session](https://docs.devolutions.net/de/gateway/getting-started/linux-configuration/#open-a-web-based-rdp-session)
* [Open a Remote Desktop Manager RDP session](https://docs.devolutions.net/de/gateway/getting-started/linux-configuration/#open-a-remote-desktop-manager-rdp-session)
Installing and running Devolutions Gateway on Linux is quick and easy, provided that several prerequisites are met. Ubuntu 22.04 LTS was used to demonstrate the installation and configuration.
Devolutions Server or Devolutions Hub Business is needed for the configuration as well as a Devolutions Gateway license.
Install Devolutions Gateway
---------------------------
[](https://docs.devolutions.net/de/gateway/getting-started/linux-configuration/#install-devolutions-gateway)
1. Navigate to the [Devolutions Gateway GitHub Release](https://github.com/Devolutions/devolutions-gateway/releases/ "https://github.com/Devolutions/devolutions-gateway/releases/")
page and download the **.deb** file of the latest release.
2. Input the following using the command-line: `wget https://github.com/Devolutions/devolutions-gateway/releases/download/v2024.3.2/devolutions-gateway_2024.3.2.0_amd64.deb`

Command-line wget
3. Install the package using the `dpkg` utility: `sudo dpkg -i devolutions-gateway_2024.3.2.0_amd64.deb`

Command-line dpkg
The configuration and binary packages are in the following locations:
* **Configuration**: `/etc/devolutions-gateway`
* **Binary**: `/usr/bin/devolutions-gateway`
### Update Devolutions Gateway
[](https://docs.devolutions.net/de/gateway/getting-started/linux-configuration/#update-devolutions-gateway)
To update Devolutions Gateway on Linux download the latest package as explained in the previous section and run the installation command. The package will install over the existing installation and preserve configurations.
Install the PowerShell gateway module
-------------------------------------
[](https://docs.devolutions.net/de/gateway/getting-started/linux-configuration/#install-the-powershell-gateway-module)
It is recommended to use the PowerShell gateway module to configure and manage the Devolutions Gateway instance on Linux.
1. Install PowerShell with this command:
source /etc/os-release
wget -q https://packages.microsoft.com/config/ubuntu/$VERSION_ID/packages-microsoft-prod.deb
sudo dpkg -i packages-microsoft-prod.deb
rm packages-microsoft-prod.deb
sudo apt-get update
sudo apt-get install -y powershell
2. Install the Devolutions Gateway PowerShell module:
Install-Module -Name DevolutionsGateway
Import-Module -Name DevolutionsGateway
Once installed the Devolutions Gateway configuration can be started, stopped, viewed or modified.
Configure certificates
----------------------
[](https://docs.devolutions.net/de/gateway/getting-started/linux-configuration/#configure-certificates)
Proper trust of certificates between systems is key to making Devolutions Gateway work. Functionalities such as WebSockets used in web dashboard views of RDP, SSH, etc., require a properly trusted certificate. A certificate from an official authority such as Let's Encrypt would be ideal for most production systems. Self-signed certificates, such as the example shown below, may be generated but require additional configuration for trust. You may generate certificates on any system and use them within Devolutions Gateway if it adheres to the certificate requirements.
### Generate a LetsEncrypt certificate on Ubuntu 22.04 LTS via Certbot
[](https://docs.devolutions.net/de/gateway/getting-started/linux-configuration/#generate-a-letsencrypt-certificate-on-ubuntu-2204-lts-via-certbot)
One option is to generate a LetsEncrypt certificate with the Certbot utility. To install the latest version, you may use the snap package manager. Depending on the Ubuntu distribution, the default APT repositories may not contain the latest version of the software. In this example, the domain verification is used with Cloudflare as the DNS provider.
1. The example below demonstrates running Certbot installed and running as the root user, but Devolutions Gateway as a different user.
sudo snap install certbot --classic
sudo snap set certbot trust-plugin-with-root=ok
sudo snap install certbot-dns-cloudflare
2. When using Cloudflare, generate either a user or account-scoped API token, using the **Edit zone DNS** template. Once you have the API token, create the containing folder and corresponding `.ini` file to contain the API token.
sudo install -d -m 0700 /root/.secrets
sudo nano /root/.secrets/cloudflare.ini
sudo chmod 0600 /root/.secrets/cloudflare.ini
3. Request a certificate for your Devolutions Gateway domain using the Cloudflare DNS plugin. Replace the `gateway.mydomain.com` value below with your own domain.
certbot certonly --dns-cloudflare --dns-cloudflare-credentials /root/.secrets/cloudflare.ini -d gateway.mydomain.com --cert-name gateway
4. Modify your `gateway.json` configuration file to add the following lines and use the newly generated certificate, using the Devolutions Gateway PowerShell module. The commands below modify the `TlsCertificateFile`, `TlsPrivateKeyFile`, and `Listeners` configuration variables.
Import-Module DevolutionsGateway
Set-DGatewayConfig -TlsCertificateFile "/etc/letsencrypt/live/gateway/fullchain.pem" -TlsPrivateKeyFile "/etc/letsencrypt/live/gateway/privkey.pem" -Listeners @(
@{
"InternalUrl" = "tcp://*:8181"
"ExternalUrl" = "tcp://*:8181"
}
@{
"InternalUrl" = "https://*:7171"
"ExternalUrl" = "https://*:7171"
}
)
5. Before you can restart Devolutions Gateway to use the new certificate, you must allow the user running Devolutions Gateway to read the certificate files. This assumes your user is named **devolutions** and that the certificate is named **gateway**. You are giving traversal rights to the directories and read rights to the certificate files themselves.
sudo setfacl -R -m u:devolutions:x /etc/letsencrypt/live
sudo setfacl -R -m u:devolutions:x /etc/letsencrypt/live/gateway
sudo setfacl -R -m u:devolutions:x /etc/letsencrypt/archive
sudo setfacl -R -m u:devolutions:x /etc/letsencrypt/archive/gateway
sudo setfacl -m u:devolutions:r /etc/letsencrypt/live/gateway/fullchain.pem
sudo setfacl -m u:devolutions:r /etc/letsencrypt/live/gateway/privkey.pem
sudo setfacl -m u:devolutions:r /etc/letsencrypt/archive/gateway/fullchain*.pem
sudo setfacl -m u:devolutions:r /etc/letsencrypt/archive/gateway/privkey*.pem
# Reconfigure to add a deploy hook
sudo certbot reconfigure --cert-name gateway --deploy-hook "sudo setfacl -m u:devolutions:r /etc/letsencrypt/archive/gateway/fullchain*.pem; sudo setfacl -m u:devolutions:r /etc/letsencrypt/archive/gateway/privkey*.pem; systemctl restart devolutions-gateway.service"
6. Restart Devolutions Gateway using either the `systemctl` command or the Devolutions Gateway PowerShell module.
# Restart Gateway using systemctl
systemctl restart devolutions-gateway.service
# Restart Gateway using the Devolutions Gateway PowerShell module, assuming it is run in a pwsh shell.
Import-Module DevolutionsGateway; Restart-DGateway
#### Renew LetsEncrypt certificate
[](https://docs.devolutions.net/de/gateway/getting-started/linux-configuration/#renew-letsencrypt-certificate)
By default, with the Snap installation method, a systemd timer is used (instead of a cron job), which runs twice a day (though only renews a certificate within 30 days of its expiration). To force a renewal, you can use the command below.
sudo certbot renew
# To perform a renewal dry run and force a restart of the service, you can use the following command:
# sudo certbot renew --dry-run --run-deploy-hooks
### Generate a self-signed certificate on Ubuntu 22.04 LTS via OpenSSL
[](https://docs.devolutions.net/de/gateway/getting-started/linux-configuration/#generate-a-self-signed-certificate-on-ubuntu-2204-lts-via-openssl)
Using the OpenSSL utility, generate a certificate directly from the command line. The certificate then needs to be placed directly into the configuration directory **/etc/devolutions-gateway**.

Command-line openssl
sudo openssl req -x509 -subj "/C=CA/ST=Quebec/L=Lavaltrie/O=Devolutions/CN=ubuntu-2204" -addext "subjectAltName = IP:10.10.0.20" -addext "extendedKeyUsage = serverAuth" -nodes -days 365 -newkey rsa:2048 -keyout /etc/devolutions-gateway/server.key -out /etc/devolutions-gateway/server.crt
The certificate request will look different for every configuration.
Note that the certificate **must** include a **Subject Alternative Name (SAN)** extension with either a **DNS name** or an **IP address**, and it should also contain the **Extended Key Usage (EKU)** extension with the **Server Authentication** purpose (`serverAuth`). This is required because modern operating systems and browsers, including **Google Chrome** and **macOS,** will reject certificates that are missing a SAN or the appropriate EKU, even if the Common Name (CN) is set. It’s possible to relax this requirement by setting the `TlsVerifyStrict` option to `false` if necessary, but this is not recommended.
| Customization options | Explanation |
| --- | --- |
| `req` | Create and process certificate requests including self-signed certificates in PKCS#10 format. |
| `-x509` | Output a self-signed certificate. |
| `-subj` | Define the certificate subject on the command-line. There must be no spaces between sections
* `/C` - Country in 2-digit code such as “CA” for Canada or “US” for United States.
* `/ST` - State or Province, such as Quebec or California.
* `/L` - Locality, such as Lavaltrie or Sacramento.
* `/O` - Organization, such as Devolutions or Microsoft.
* `/CN` \- Common name, here `ubuntu-2204` (as shown via the `hostname` command). |
| `-addext` | To add a Subject Alternate Name (SAN), you can use this parameter to define either an IP or DNS entry.
* `"subjectAltName = IP:10.10.0.20"`
* `"subjectAltName = DNS:ubuntu-2204"` |
| `-nodes` | Do not encrypt the created private key. |
| `-days` | The number of days the certificate is valid. |
| `-newkey` | Define the algorithm and bit size, here `rsa:2048` is used. |
| `-keyout` | The location to create the private key file. |
| `-out` | The location to create the public key file. |
### Trust the self-signed certificate on Ubuntu
[](https://docs.devolutions.net/de/gateway/getting-started/linux-configuration/#trust-the-self-signed-certificate-on-ubuntu)
The TLS certificate has two purposes:
1. Secures the management API;
2. Secures any client-to-Gateway tunnel in which gateway can inspect or filter traffic (websites, Gateway Tunnel, SCP/SFTP, etc.).
For opaque protocols such as RDP or SSH, Devolutions Gateway simply forwards already-encrypted bytes, but the certificate is still required for gateway health checks and future features.
Once the self-signed certificate is created the certificate within the Ubuntu system will need to be trusted. To trust system-wide use the following set of commands:
cd /etc/devolutions-gateway
sudo apt-get install -y ca-certificates
sudo cp server.crt /usr/local/share/ca-certificates
sudo update-ca-certificates

Command-line update-ca-certificates
The `ca-certificates` may already be installed. By running the `update-ca-certificates` command a symlink will be created in `/etc/ssl/certs` to the copied certificate file in **/usr/local/share/ca-certificates**.

Creating a symlink
If this is done in Firefox multiple trust errors will appear as the browser does not use the system-wide certificate store. Their [documentation](https://support.mozilla.org/en-US/kb/setting-certificate-authorities-firefox "https://support.mozilla.org/en-US/kb/setting-certificate-authorities-firefox")
offers a few solutions to this.
### Trust the self-signed certificate on Windows
[](https://docs.devolutions.net/de/gateway/getting-started/linux-configuration/#trust-the-self-signed-certificate-on-windows)
After the self-signed certificate is created it will need to be trusted on Devolutions Server. The **server.crt** and **server.key** files will need to be transferred to the Windows system; or copy and paste the contents into files (i.e. **sudo cat server.crt** in Ubuntu and copy that into a text file on Windows).
Skip this section if Devolutions Server is not running on Windows.
1. Copy the public key to Windows (in the example, **C:\\Gateway** is a temporary location):
`sudo cat server.crt`

Command-line sudo cat server
2. Copy the content into a **server.crt** file.

Server.crt file
3. Copy private key to Windows:
`sudo cat server.key`

Copying the key to Windows
4. Copy the content into a **server.key** file.

Server.key file
5. Create a PFX file using the Windows certutil command-line tool. For this to work, the key file must be named the same as the **crt** file, only differing in extension:
`certutil -mergepfx server.crt server.pfx`

Create a PFX file
6. Import the PFX file into the [Trusted Root Certification Authorities Certificate Store](https://learn.microsoft.com/en-us/windows-hardware/drivers/install/trusted-root-certification-authorities-certificate-store)
.
1. Double-click the **server.pfx** file to start the import wizard and choose _**Local Machine**_.
2. Click _**Next**_ and accept the prompt.

Click Next
3. Click _**Next**_.

Click Next
4. Enter the password that you entered with the `certutil` command.
* Optionally: choose to _**Mark this key as exportable**_.

Enter the password
5. Choose the option _**Place all certificates in the following store**_.
6. Select _**Trusted Root Certification Authorities**_ with the _**Browse...**_ button.
7. Click _**Next**_.

Click Next
8. Click _**Finish**_ to complete the import.
Open Ubuntu firewall ports
--------------------------
[](https://docs.devolutions.net/de/gateway/getting-started/linux-configuration/#open-ubuntu-firewall-ports)
If the Linux system uses UFW (Uncomplicated Firewall) to manage iptable-based firewall, perform the following commands to open the necessary ports:
sudo ufw status
sudo ufw allow 7171
sudo ufw allow 8181
sudo ufw status

Opening Ubuntu firewall ports
Modify the Devolutions Gateway configuration
--------------------------------------------
[](https://docs.devolutions.net/de/gateway/getting-started/linux-configuration/#modify-the-devolutions-gateway-configuration)
The default configuration of a gateway contained in the **/etc/devolutions-gateway/gateway.json** file needs the certificate directives added (the `InternalUrl` will need to use HTTPS):
{
"Id": "YOUR-UNIQUE-GUID",
"ProvisionerPublicKeyFile": "provisioner.pem",
"ProvisionerPrivateKeyFile": null,
"Listeners": [\
{\
"InternalUrl": "tcp://:8181",\
"ExternalUrl": "tcp://:8181"\
},\
{\
"InternalUrl": "http://:7171",\
"ExternalUrl": "https://:7171"\
}\
]
}
Modify the above file to reflect the following, assuming that both **server.crt** and **server.key** are in the same directory as **gateway.json** (using the built-in file editor Nano is recommended):
{
"Id": "YOUR-UNIQUE-GUID",
"ProvisionerPublicKeyFile": "provisioner.pem",
"ProvisionerPrivateKeyFile": null,
"TlsCertificateFile": "server.crt",
"TlsPrivateKeyFile": "server.key",
"Listeners": [\
{\
"InternalUrl": "tcp://:8181",\
"ExternalUrl": "tcp://:8181"\
},\
{\
"InternalUrl": "https://:7171",\
"ExternalUrl": "https://:7171"\
}\
]
}

Modifying the configuration
### Restart Devolutions Gateway
[](https://docs.devolutions.net/de/gateway/getting-started/linux-configuration/#restart-devolutions-gateway)
With the new configuration in place restart Devolutions Gateway. This can be done with the `systemctl` command:
sudo systemctl restart devolutions-gateway.service
sudo systemctl status devolutions-gateway.service

Restart the gateway
Alternatively the `Stop-DGateway` and `Start-DGateway` PowerShell commands can also be used.
Connect Devolutions Gateway to Devolutions Server
-------------------------------------------------
[](https://docs.devolutions.net/de/gateway/getting-started/linux-configuration/#connect-devolutions-gateway-to-devolutions-server)
### Copy the Public Key from Devolutions Server to Devolutions Gateway Linux
[](https://docs.devolutions.net/de/gateway/getting-started/linux-configuration/#copy-the-public-key-from-devolutions-server-to-devolutions-gateway-linux)
1. Log into the Devolutions Server web console and navigate to _**Administration**_ – _**Devolutions Gateway**_.
2. Click the _**More**_ button and choose the _**Download public key**_ option.

Download public key
3. Copy the contents of the downloaded **gateway\_public\_key.pem** file on Windows.

Copy the contents
4. Replace the contents of the **/etc/devolutions-gateway/provisioner.pem** (the Nano utility is recommended) file with the copied contents from Windows.

Replace the contents
5. Restart Devolutions Gateway with the command `sudo systemctl restart devolutions-gateway.service`.

Restart Devolutions Gateway
### Configure Devolutions Gateway in Devolutions Server
[](https://docs.devolutions.net/de/gateway/getting-started/linux-configuration/#configure-devolutions-gateway-in-devolutions-server)
Go to the Devolutions Server web interface where the newly configured Linux Devolutions Gateway will be added.
Skip this section if you are installing Devolutions Gateway with Devolutions Hub Business.
1. Log into the Devolutions Server web console and navigate to _**Administration**_ – _**Devolutions Gateway**_.
2. Click the _**Add**_ (_**+**_) button.
3. Select _**Gateway**_.

Select Gateway
4. Enter the following (this will change depending on the configuration).
1. _**Name**_: Linux Gateway
2. _**Devolutions Gateway URL:**_ `https://10.10.0.20:7171`
3. _**TCP Hostname:**_ `Ubuntu-2204`
5. Click _**Save**_.

Click Save
Click the _**More**_ options menu for the gateway and choose the _**Publish revocation list**_ option if the revocation list is out of date.

Revocation list is not in sync

Publish revocation list
Resolve hosts in Ubuntu
-----------------------
[](https://docs.devolutions.net/de/gateway/getting-started/linux-configuration/#resolve-hosts-in-ubuntu)
The Linux-hosted Devolutions Gateway system must be able to resolve the addresses that are requested by Devolutions Server. The simplest method for testing is to modify the hosts file.
Connect to the following system:
* **Hostname**: `it-help-dc`
* **Fully-Qualified Domain Name (FQDN)**: `it-help-dc.ad.it-help.ninja`
* **IP Address**: `10.10.0.3`
Open the hosts file for editing `sudo nano /etc/hosts` to add the host in Ubuntu.

Add the host in Ubuntu
Open a web-based RDP session
----------------------------
[](https://docs.devolutions.net/de/gateway/getting-started/linux-configuration/#open-a-web-based-rdp-session)
The gateway can now to connect to hosts. Since the `it-help-dc` host was added as resolvable to Ubuntu, it can be used to connect in a web-based session.
Web-based sessions require an active gateway configured for the entry and the user launching will require an assigned Remote Desktop Manager Team edition license or Devolutions Launcher license.
Additionally, if changes have been made to license assignments, logging out and back in may be needed to see the option to launch the web-based connection.
1. In the Devolutions Server web UI click on _**Add**_. Select an _**RDP**_ session entry.
2. Click _**Continue**_.

Click Continue
3. Enter a _**Name**_ and _**Host**_ which must be resolvable by the Linux Devolutions Gateway install.
4. Click _**Add**_.

Click Add
5. Enter or link any necessary credentials to the RDP session and click _**Add**_.

Enter or link credentials
6. Under the _**VPN/Tunnel/Gateway**_ tab choose Devolutions Gateway as the VPN type.
7. Set the _**Connect**_ option to _**Always connect**_.
8. Choose the correct gateway.
9. Click _**Add**_.

Choose the correct gateway
10. Click _**Open in web client**_.

Open in web client
Open a Remote Desktop Manager RDP session
-----------------------------------------
[](https://docs.devolutions.net/de/gateway/getting-started/linux-configuration/#open-a-remote-desktop-manager-rdp-session)
If the entry is already configured from within the Devolutions Server web interface it can be launched from Remote Desktop Manager when connected to the Devolutions Server data source.
Skip this section if you are installing Devolutions Gateway with Devolutions Hub Business.
When creating a new entry from Remote Desktop Manager the process is similar to that of Devolutions Server.
1. In Remote Desktop Manager click on _**New entry**_. Select an RDP session entry.
2. Click on _**Select**_.

Click on Select
3. Enter a _**Name**_ and _**Host**_ which must be resolvable by the Linux Devolutions Gateway install.
4. Enter or link any necessary credentials to the RDP session.

Fill in the necessary fields
5. Set the _**Connect**_ option to _**Always connect**_.
6. Under the _**VPN/Tunnel/Gateway**_ tab choose Devolutions Gateway as the VPN type.

Adjust the General settings
7. Go to the _**Settings (Devolutions Gateway)**_ sub-tab.
8. Choose the desired Devolutions Gateway.
9. Click _**Add**_.

Click Add
10. Click on the _**Open session**_ button.
By hovering over the title bar a tooltip will appear and show that the RDP is connected via Devolutions Gateway.

Tooltip
[ Share your feedback](https://forum.devolutions.net/forums/176/documentation--documentation-requests)
---
# Devolutions Gateway farms - Devolutions Documentation
Devolutions Gateway farms
=========================
The purpose of the Devolutions Gateway farms feature is to group multiple gateways under a single farm to balance the load of sessions passing through each gateway. By using this feature, sessions will be distributed among them according to the farm's configuration:
* Load distribution helps to avoid overloading a particular gateway. Previously, for a given entry, a gateway could be configured, but all connections for that session would pass through it, potentially leading to saturation. With farms, it is now possible to distribute this load to prevent service overload and maintain performance.
* High availability, meaning that the farm helps maintain continuous service availability. Previously, if a gateway became unavailable for any reason, it was not possible to establish a session. With a farm, if one gateway is unavailable, the session will automatically be directed to one of the other available gateways in the farm. This can also be useful for maintenance or updates, as a gateway can be temporarily taken offline while an active one continues to provide service.
[ Share your feedback](https://forum.devolutions.net/forums/176/documentation--documentation-requests)
---
# Configuration de Devolutions Gateway dans Remote Desktop Manager - Documentation Devolutions
Configuration de Devolutions Gateway dans Remote Desktop Manager
================================================================
Les instructions suivantes expliquent comment utiliser Devolutions Gateway dans une session RDP.
1. Sélectionner une session RDP et ouvrir son dialogue des _**Propriétés**_.
2. Aller à _**Connexion**_ – _**VPN/SSH/Gateway**_.
3. Définir l'option _**Connecter**_ sur _**Toujours connecter**_.
4. Définir l'option _**Type**_ sur Devolutions Gateway.
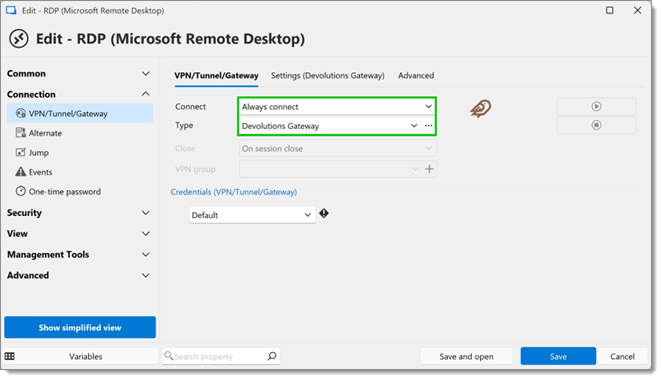
5. Dans l'onglet _**Paramètres (Devolutions Gateway)**_, sélectionner la passerelle configurée dans [configuration de Devolutions Server](https://docs.devolutions.net/fr/gateway/getting-started/server/server-configuration/)
.
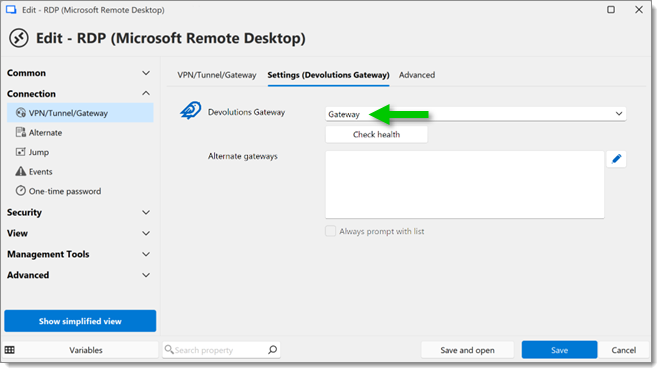
Select the gateway configured
Pour supprimer le délai de cinq secondes lors de l'ouverture d'une connexion, définir la valeur de **_Délai_** à 0 dans l'onglet **_Avancé_**.
6. Une fois la session RDP connectée, l'entrée de journal suivante devrait se trouver dans _**Rapports**_ – _**Journaux de la source de données**_, qui se trouvent dans l'interface web de Devolutions Server.
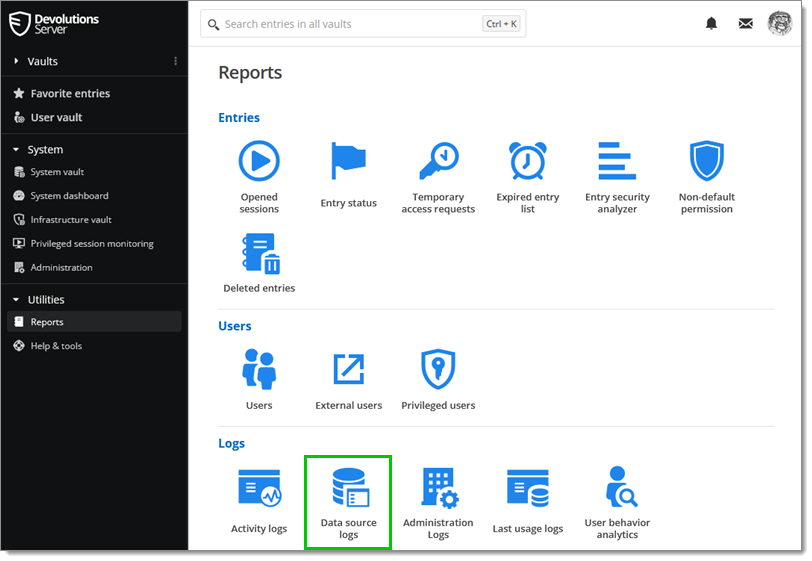
Reports – Data Source Logs
7. Toutes vos sessions, journaux et configurations peuvent être gérées à partir du ruban Remote Desktop Manager en allant à _**Administration**_ – _**Devolutions Gateway**_.

Administration -
### Enregistrement de session
[](https://docs.devolutions.net/fr/gateway/getting-started/server/rdm-configuration/#session-recording)
Un [enregistrement de session](https://docs.devolutions.net/fr/rdm/kb/how-to-articles/session-recording/)
fournit un enregistrement de ce qu'un utilisateur a fait lors d'une connexion à distance ouverte dans Remote Desktop Manager.
1. Ouvrir les propriétés de votre entrée RDP.
2. Aller à _**Enregistrement de session**_.
3. Dans le menu déroulant _**Mode**_, sélectionner votre réglage préféré.
4. Dans le menu déroulant _**Enregistrement**_, choisir _**Distant**_.
5. Cliquer sur _**Sauvegarder**_.
[ Partagez vos commentaires](https://forum.devolutions.net/forums/176/documentation--documentation-requests)
---
# Devolutions Server - Devolutions Documentation
Devolutions Server
==================
[ Share your feedback](https://forum.devolutions.net/forums/176/documentation--documentation-requests)
---
# Devolutions Gateway configuration in Remote Desktop Manager - Devolutions Documentation
Devolutions Gateway configuration in Remote Desktop Manager
===========================================================
The following instructions explain how to use Devolutions Gateway in an RDP session.
1. Select an RDP session and open its _**Properties**_ dialog.
2. Go to _**Connection**_ – _**VPN/SSH/Gateway**_.
3. Set the _**Connect**_ option to _**Always connect**_.
4. Set the _**Type**_ option to Devolutions Gateway.

5. In the _**Settings (Devolutions Gateway)**_ tab select the gateway configured in [Devolutions Server configuration](https://docs.devolutions.net/gateway/getting-started/server/server-configuration/)
.

Select the gateway configured
To remove the five-second delay when opening a connection, set the **_Delay_** value to 0 in the **_Advanced_** tab.
6. Once the RDP session is connected, the following log entry should be in _**Reports**_ – _**Data Source Logs**_, which are located in the Devolutions Server web interface.

Reports – Data Source Logs
7. All of your sessions, logs, and configurations can be managed from the Remote Desktop Manager ribbon by going to _**Administration**_ – _**Devolutions Gateway**_.

Administration -
### Session recording
[](https://docs.devolutions.net/gateway/getting-started/server/rdm-configuration/#session-recording)
A [session recording](https://docs.devolutions.net/rdm/kb/how-to-articles/session-recording/)
provides a record of what a user did while a remote connection was opened in Remote Desktop Manager.
1. Open the properties of your RDP entry.
2. Go to _**Session recording**_.
3. From the _**Mode**_ dropdown menu, select your preferred setting.
4. In the _**Recording**_ dropdown menu, choose _**Remote**_.
5. Click _**Save**_.
[ Share your feedback](https://forum.devolutions.net/forums/176/documentation--documentation-requests)
---
# Devolutions Gateway configuration in Remote Desktop Manager - Devolutions Documentation
Devolutions Gateway configuration in Remote Desktop Manager
===========================================================
The following instructions explain how to use Devolutions Gateway in an RDP session.
1. Select an RDP session and open its _**Properties**_ dialog.
2. Go to _**Connection**_ – _**VPN/SSH/Gateway**_.
3. Set the _**Connect**_ option to _**Always connect**_.
4. Set the _**Type**_ option to Devolutions Gateway.

5. In the _**Settings (Devolutions Gateway)**_ tab select the gateway configured in [Devolutions Server configuration](https://docs.devolutions.net/gateway/getting-started/server/server-configuration/)
.

Select the gateway configured
To remove the five-second delay when opening a connection, set the **_Delay_** value to 0 in the **_Advanced_** tab.
6. Once the RDP session is connected, the following log entry should be in _**Reports**_ – _**Data Source Logs**_, which are located in the Devolutions Server web interface.

Reports – Data Source Logs
7. All of your sessions, logs, and configurations can be managed from the Remote Desktop Manager ribbon by going to _**Administration**_ – _**Devolutions Gateway**_.

Administration -
### Session recording
[](https://docs.devolutions.net/de/gateway/getting-started/server/rdm-configuration/#session-recording)
A [session recording](https://docs.devolutions.net/rdm/kb/how-to-articles/session-recording/)
provides a record of what a user did while a remote connection was opened in Remote Desktop Manager.
1. Open the properties of your RDP entry.
2. Go to _**Session recording**_.
3. From the _**Mode**_ dropdown menu, select your preferred setting.
4. In the _**Recording**_ dropdown menu, choose _**Remote**_.
5. Click _**Save**_.
[ Share your feedback](https://forum.devolutions.net/forums/176/documentation--documentation-requests)
---
# Devolutions Gateway avec Devolutions Server - Documentation Devolutions
Devolutions Gateway avec Devolutions Server
===========================================
[ Partagez vos commentaires](https://forum.devolutions.net/forums/176/documentation--documentation-requests)
---
# Devolutions Gateway with Devolutions Server - Devolutions Documentation
Devolutions Gateway with Devolutions Server
===========================================
[ Share your feedback](https://forum.devolutions.net/forums/176/documentation--documentation-requests)
---
# Configuration de Devolutions Gateway avec Devolutions Server - Documentation Devolutions
Configuration de Devolutions Gateway avec Devolutions Server
============================================================
Sur cette page
* [Différences entre l'installation côte à côte et l'installation standard (gérée)](https://docs.devolutions.net/fr/gateway/getting-started/server/server-configuration/#differences-between-side-by-side-and-standard-managed-installation)
* [Installation côte à côte](https://docs.devolutions.net/fr/gateway/getting-started/server/server-configuration/#side-by-side-installation)
* [Installation standard (gérée)](https://docs.devolutions.net/fr/gateway/getting-started/server/server-configuration/#standard-installation)
* [Activer l'enregistrement Gateway](https://docs.devolutions.net/fr/gateway/getting-started/server/server-configuration/#enable-gateway-recording)
* [Installation MSI](https://docs.devolutions.net/fr/gateway/getting-started/server/server-configuration/#msi-installation)
* [Mettre à jour Devolutions Gateway](https://docs.devolutions.net/fr/gateway/getting-started/server/server-configuration/#update-devolutions-gateway)
Cette rubrique décrit comment configurer Devolutions Server pour se connecter avec Devolutions Gateway. Il existe trois manières d'installer un Devolutions Gateway : [_**Installation côte à côte**_](https://docs.devolutions.net/fr/gateway/getting-started/server/server-configuration/#side-by-side-installation)
, [_**Installation standard (gérée)**_](https://docs.devolutions.net/fr/gateway/getting-started/server/server-configuration/#standard-installation)
et [_**Installation MSI**_](https://docs.devolutions.net/fr/gateway/getting-started/server/server-configuration/#msi-installation)
.
Si vos clients ne parviennent pas à se connecter avec Devolutions Gateway, veiller à ce que le certificat contienne toute la chaîne. Cette chaîne de certificat comprend tous les certificats intermédiaires. Par exemple : Autorité de Certification Racine – Autorité de Certification Sécurisée – Certificat XYZ Acheté
Pour [Lancer une session RDP](https://docs.devolutions.net/fr/gateway/kb/how-to-articles/launch-rdp-session-web-client/)
avec Devolutions Gateway uniquement les navigateurs qui répondent à ces exigences de version minimale sont compatibles:
* Chrome : 102
* Firefox : 102
* Safari : 16.4
Différences entre l'installation côte à côte et l'installation standard (gérée)
-------------------------------------------------------------------------------
[](https://docs.devolutions.net/fr/gateway/getting-started/server/server-configuration/#differences-between-side-by-side-and-standard-managed-installation)
L'installation _**Côte à côte**_ sera utilisée si vous devez installer Devolutions Gateway sur la même machine où Devolutions Server est hébergé. Il s'agit d'un processus d'installation simplifié qui configurera automatiquement le nouveau Devolutions Gateway avec les informations de l'instance Devolutions Server (URI d'accès et clé publique).
Pour installer Devolutions Gateway sur une autre machine que celle où Devolutions Server est hébergé, suivre le processus _**Installation standard (gérée)**_. La procédure est similaire, mais il faudra fournir plus d'informations sur votre instance Devolutions Server pour la compléter.
Installation côte à côte
------------------------
[](https://docs.devolutions.net/fr/gateway/getting-started/server/server-configuration/#side-by-side-installation)
Ce processus d'installation est le plus facile des deux et est la méthode recommandée pour les configurations réseau plus simples.
1. Depuis la console Devolutions Server, cliquer sur l'onglet _**Compagnons**_.

Companions tab
2. Dans la section Devolutions Gateway, cliquer sur _**Installer**_.
3. Choisir _**Installation côte à côte**_.

Side-by-side installation
Il est possible de télécharger un fichier [.msi](https://devolutions.net/gateway/download/)
pour installer Devolutions Gateway sur un Devolutions Server hors ligne.
4. Si les valeurs par défaut ne fonctionnent pas pour votre environnement, entrer les paramètres souhaités.
* _**Écouteur HTTP**_ : Port HTTP(s) pour atteindre la Gateway. (7171 par défaut)
* _**Écouteur TCP**_: port utilisé pour les sessions RDP. (8181 par défaut)
5. Cliquer sur _**OK**_.

OK button
6. Aller à l'interface web de Devolutions Server, se connecter avec un compte administrateur.
7. Aller dans _**Administration**_ – _**Devolutions Gateway**_.
8. Cliquer sur le bouton _**Ping**_ pour la passerelle désirée dans la liste pour voir si une connexion peut être établie avec succès. Si la page était déjà ouverte, l'actualiser d'abord.

Ping button
Installation standard (gérée)
-----------------------------
[](https://docs.devolutions.net/fr/gateway/getting-started/server/server-configuration/#standard-installation)
La méthode _**Standard (gérée)**_ permet à Devolutions Gateway d'être installé sur un serveur différent de Devolutions Server. Cela peut être pour des raisons de performance ou pour accéder aux réseaux que Devolutions Server ne peut pas atteindre.
1. Depuis la console Devolutions Server, cliquer sur l'onglet _**Compagnons**_.
2. Dans la section Devolutions Gateway, cliquer sur _**Installer**_.
3. Choisir _**Installation standard**_.

Standard installation
4. Choisir entre _**Télécharger la version**_ et _**Installer depuis un fichier .msi**_.
Il est possible de télécharger un fichier [_**.msi**_](https://devolutions.net/gateway/download/)
pour installer Devolutions Gateway sur un Devolutions Server hors ligne.
5. Cliquer sur _**Suivant**_.

Download version or Install from .msi file
6. Entrer les informations de l'_**URI d'accès**_, par exemple https://gateway.example.com.

Listeners
7. Choisir les ports _**d'Écouteurs**_ de Devolutions Gateway (par défaut ils sont 7171 et 8181). Devolutions Server utilisera le port URI d'accès (généralement 443 ou 7171) pour les vérifications et la configuration initiale. Remote Desktop Manager utilisera les ports 7171 et 8181 pour se connecter à la Gateway. Par exemple, une session Web utilisant la Gateway se connectera sur le port 7171, tout comme toute inscription via Devolutions Gateway. Le port 8181 est utilisé par des sessions telles que RDP.
* Si HTTPS est choisi au lieu de HTTP à l'étape précédente, la _**Configuration du certificat**_ sera nécessaire.
* _**Fichier de certificat**_ : Doit être un certificat de chaîne complète (.pfx, .p12, .pem, .crt).
* _**Mot de passe du certificat**_: Nécessaire uniquement si un certificat .pfx ou .p12 a été utilisé.
* _**Fichier de clé privée**_ : Nécessaire seulement si un .pem ou .crt a été utilisé comme certificat.
Ne pas partager la clé privée avec d'autres utilisateurs, car elle peut être utilisée pour déchiffrer la communication entre un utilisateur et Devolutions Gateway. Seule la clé publique doit être partagée.
8. Cliquer sur _**Suivant**_.
9. Choisir entre :
* _**Utiliser la clé publique de l'instance Devolutions Server 'Devolutions Server'**_ : cette option est utilisée si Devolutions Gateway est installé sur le même serveur que le Devolutions Server ;
* _**Depuis un fichier**_ : Si l'installation de Devolutions Gateway est sur un autre ordinateur, télécharger la clé publique depuis le Devolutions Server avec lequel vouloir jumeler cette Devolutions Gateway. Elle se trouve sous _**Administration – Devolutions Gateway**_.

Download public key
10. Cliquer sur _**Suivant**_.

Key pair configuration
Si Devolutions Server n'est pas installé localement, alors cocher l'option _**Depuis le fichier**_ et sélectionner le fichier de configuration `.json` de Devolutions Gateway. Voir [Configuration du magasin de certificats Windows via gateway.json](https://docs.devolutions.net/fr/gateway/kb/how-to-articles/use-windows-certificate-store/#configuring-windows-certificate-store-via-gatewayjson)
pour un fichier de configuration typique.
[Le dépôt GitHub de Devolutions](https://github.com/Devolutions/devolutions-gateway/?tab=readme-ov-file#configuration)
contient également une liste des chemins typiques pour le fichier, ainsi que toutes les options stables disponibles pour le personnaliser.
11. Cliquer sur _**Installer**_.

Summary
12. Cliquer sur _**Fermer**_.

Installation Summary
13. Sur l'interface web de Devolutions Server, se connecter avec un compte administrateur.
14. Aller dans _**Administration**_ – _**Devolutions Gateway**_.
15. Cliquer sur le bouton _**Ajouter**_ en haut à droite.

Add button
16. Entrer les informations suivantes.
* _**Nom**_: Nom de la passerelle qui sera affiché dans Remote Desktop Manager.
* _**Description**_: Description de la passerelle.
* _**Définir par défaut**_ : Si activé, cette passerelle sera sélectionnée par défaut lors de la configuration de Remote Desktop Manager.
* _**URL Devolutions Gateway**_: L'URL et le Port du Devolutions Gateway auxquels Devolutions Server se connectera, par exemple : **https://gateway.example.com:7171**.
* _**Port d'écoute TCP**_: Définir le port avec le même numéro de port TCP configuré dans la console Devolutions Server.
* _**Nom d'hôte TCP**_: Il doit être résoluble par la machine initiant la connexion (Remote Desktop Manager).
17. Cliquer sur _**Sauvegarder**_.

Gateway information
La passerelle devrait maintenant être visible dans la liste. Il est possible de vérifier l'état de la passerelle avec le bouton _**Ping**_.

Ping
18. Publier _**la configuration Devolutions Gateway**_.
19. Publier _**la liste de révocation**_. 
Activer l'enregistrement Gateway
--------------------------------
[](https://docs.devolutions.net/fr/gateway/getting-started/server/server-configuration/#enable-gateway-recording)
Cliquer [ici](https://docs.devolutions.net/fr/server/kb/how-to-articles/configure-recording-server/)
pour savoir comment activer l'enregistrement Devolutions Gateway dans Devolutions Server.
Installation MSI
----------------
[](https://docs.devolutions.net/fr/gateway/getting-started/server/server-configuration/#msi-installation)
Il est possible de faire une installation silencieuse automatisée qui installera une passerelle avec la configuration par défaut. C'est la manière recommandée de la configurer à travers le [module Devolutions.PowerShell](https://docs.devolutions.net/fr/gateway/devolutions-ecosystem/powershell/)
. Utiliser la commande suivante:
msiexec.exe /i DevolutionsGateway-x86_64-VERSION.msi /quiet /norestart /log gateway_install.log
Mettre à jour Devolutions Gateway
---------------------------------
[](https://docs.devolutions.net/fr/gateway/getting-started/server/server-configuration/#update-devolutions-gateway)
Devolutions Gateway peut être mis à jour de trois manières différentes selon vos besoins:
* Transmettre les mises à jour via l'interface web de Devolutions Server, dans _**Administration**_ – _**Devolutions Gateway**_. En utilisant cette méthode, les instances peuvent être mises à jour individuellement ou en masse. Cette dernière peut être effectuée rapidement en activant l'option _**Mise à jour en masse**_, en sélectionnant les passerelles, et en cliquant sur _**Mettre à jour**_. Noter que [Devolutions Agent](https://devolutions.net/agent/)
est requis pour mettre à jour depuis l'interface web de Devolutions Server.
* Mettre à jour manuellement via la console Devolutions Server. Pour le faire, aller sur l'onglet _**Compagnons**_, sélectionner Devolutions Gateway à mettre à jour, cliquer sur le bouton _**Mettre à jour**_, et suivre les instructions alors fournies.
* Exécuter le [script PowerShell de mise à jour automatique](https://docs.devolutions.net/fr/powershell/gateway-powershell/powershell-updater/)
. Cela peut être enregistré comme une tâche planifiée pour vérifier périodiquement les mises à jour.
#### Voir aussi
[](https://docs.devolutions.net/fr/gateway/getting-started/server/server-configuration/#see-also)
* [Devolutions Academy - Overview of Devolutions Gateway](https://academy.devolutions.net/student/path/2007290/activity/3070847 "Devolutions Academy - Overview of the Devolutions Gateway")
[ Partagez vos commentaires](https://forum.devolutions.net/forums/176/documentation--documentation-requests)
---
# Clear a browser's local storage - Devolutions Documentation
Clear a browser's local storage
===============================
Follow the steps to clear your browser's local storage.
1. Open a Google Chrome browser page.
2. Use your keyboard's F12 key to open the Google Chrome Developer Tools Console.
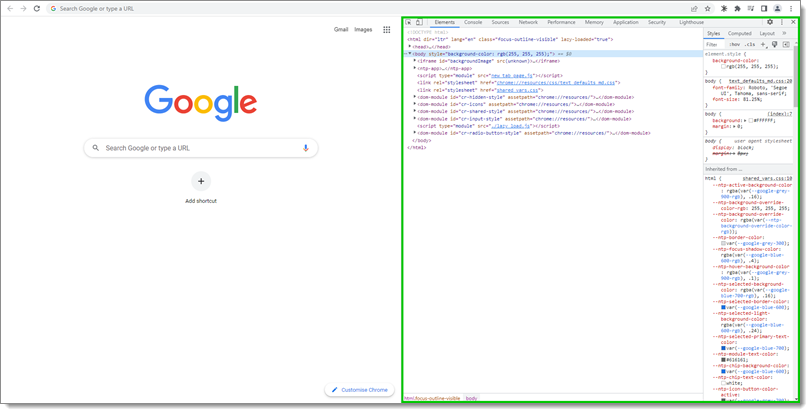
Google Chrome Developer Tools Console
3. Click _**Application**_ in the console's top menu.
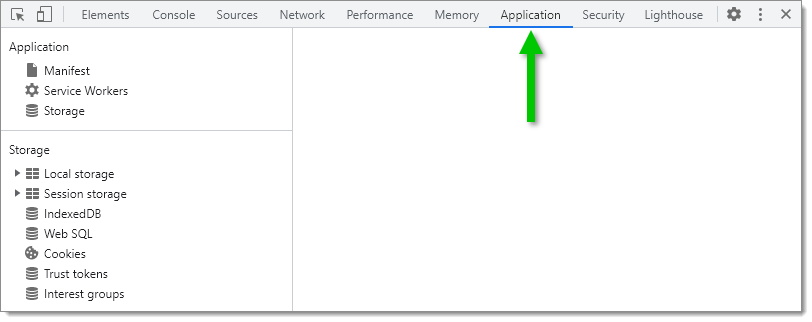
Console – Application
4. Expand the _**Local storage**_ list located under the _**Storage**_ section in the console's left menu.
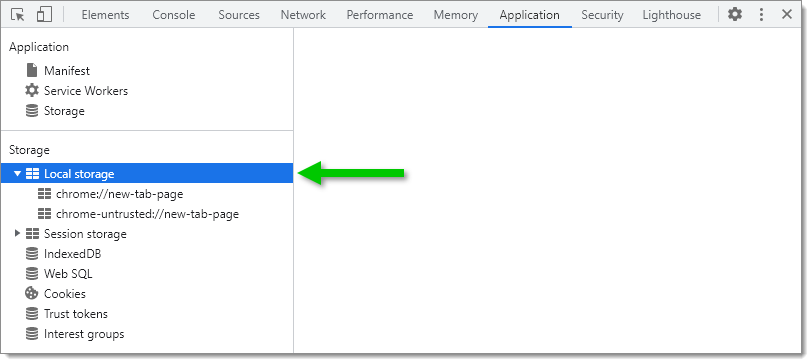
Console – Application – Local storage
5. Right-click your site(s) and click _**Clear**_ to delete the local storage.
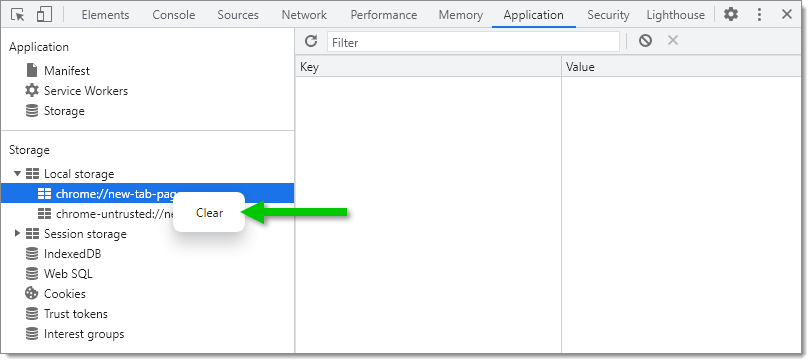
Local storage – Clear
1. Open a Microsoft Edge browser page.
2. Use your keyboard's F12 key to open the Microsoft Edge Developer Tools Console.
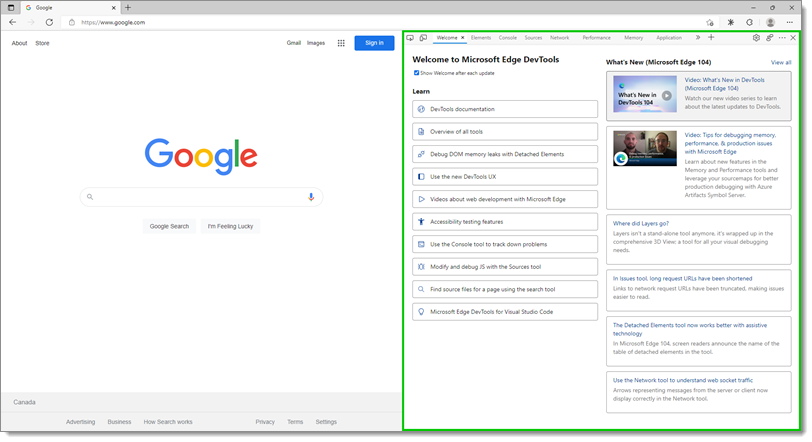
Microsoft Edge Developer Tools Console
3. Click _**Application**_ in the console's top menu.
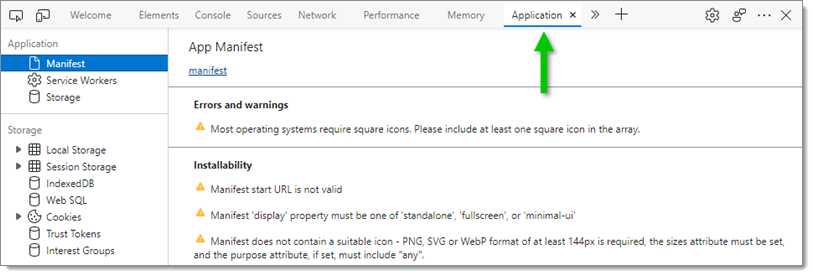
Console – Application
4. Expand the _**Local Storage**_ list located in the _**Storage**_ section of the console's left menu.
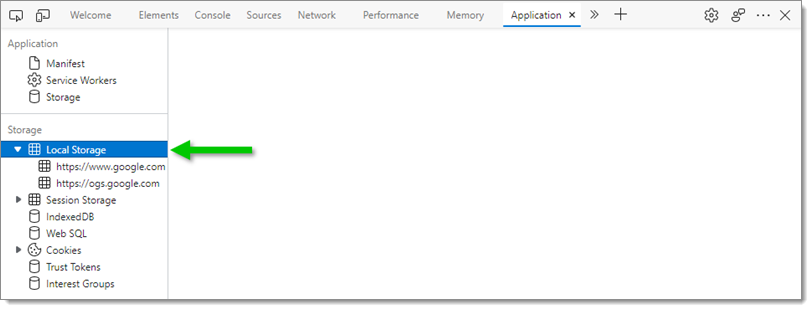
Console – Application – Local storage
5. Right-click your site(s) and click _**Clear**_ to delete the local storage.
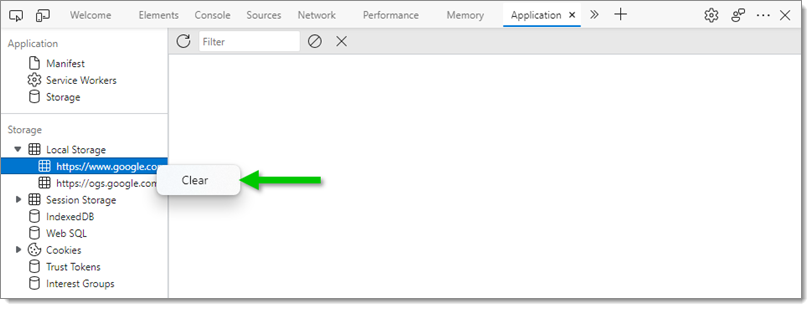
Local storage – Clear
1. Open a Firefox browser page.
2. Use your keyboard's F12 key to open the Firefox Developer Tools Console.
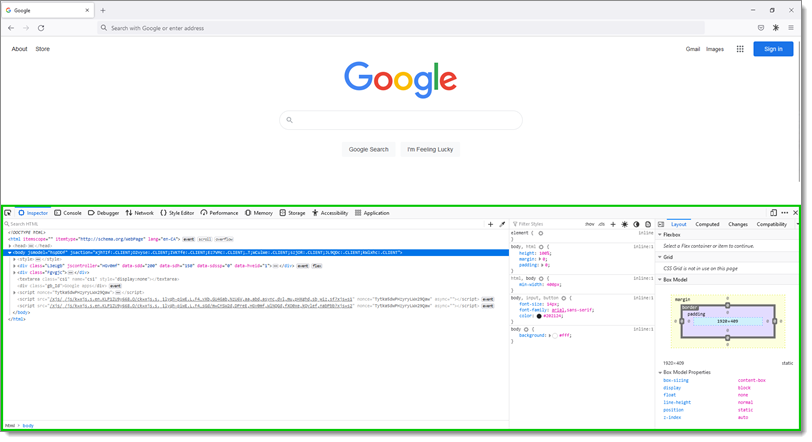
Firefox Developer Tools Console
3. Click _**Storage**_ in the console's top menu.

Console – Storage
4. Expand the _**Local Storage**_ list located in the console's left menu.

Console – Storage – Local Storage
5. Right-click your site(s) and click _**Delete All**_ to delete the local storage.

Local Storage – Delete All
1. Open an Opera browser page.
2. Use your keyboard Ctrl+Shift+I keys to open the Opera Developer Tools Console.
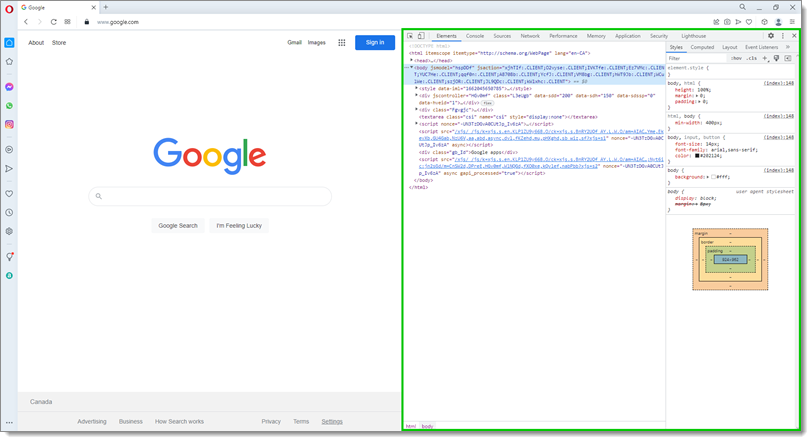
Opera Developer Tools Console
3. Click _**Application**_ in the console's top menu.
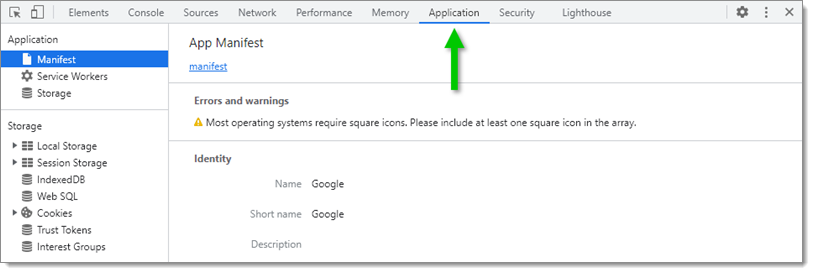
Console – Application
4. Expand the _**Local Storage**_ list located in the _**Storage**_ section of the console's left menu.
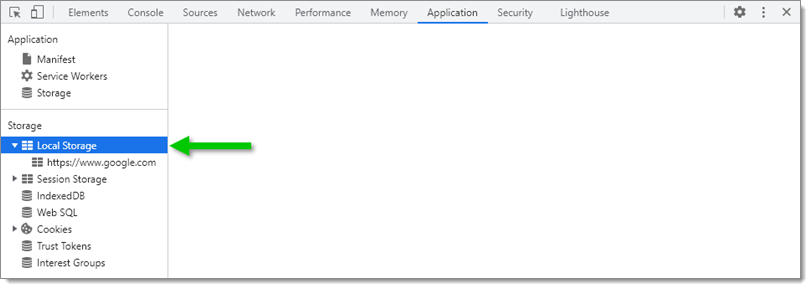
Console – Application – Local Storage
5. Right-click your site(s) and click _**Clear**_ to delete the local storage.
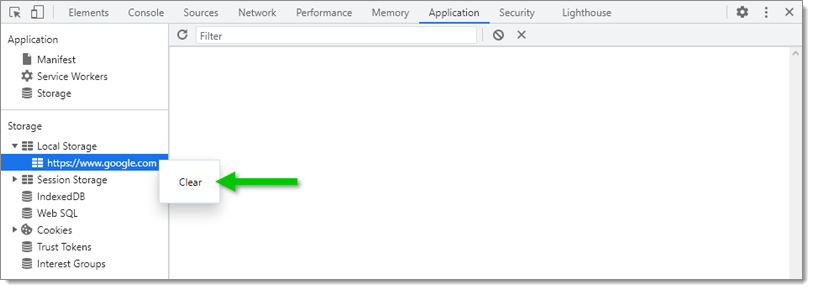
Local Storage – Clear
1. Open a Safari browser page.
2. Use your keyboard Alt+Cmd+C keys to open the Safari Javascript Console.
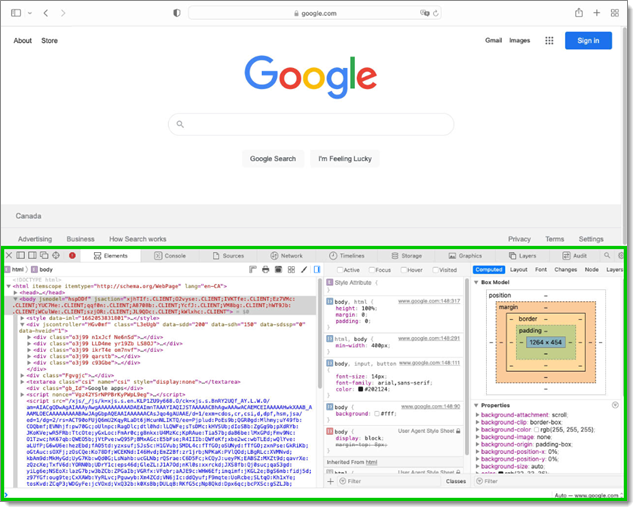
Safari Javascript Console
3. Click _**Storage**_ in the console's top menu.
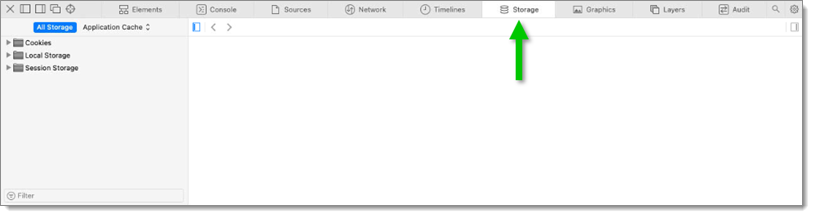
Console – Storage
4. Expand the _**Local Storage**_ list in the console's left menu.
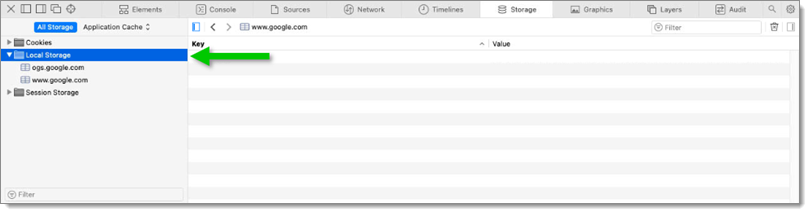
Console – Storage – Local Storage
5. Select your site and click _**Clear Local Storage**_ to delete the local storage.
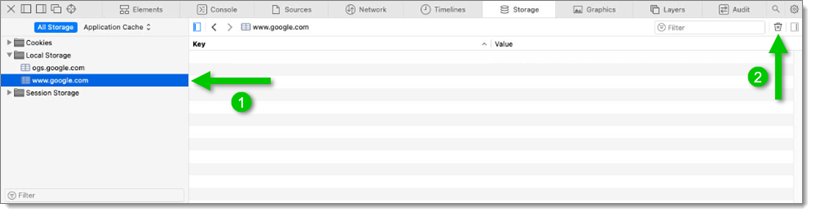
Local Storage – Clear Local Storage
[ Share your feedback](https://forum.devolutions.net/forums/176/documentation--documentation-requests)
---
# Effacer le stockage local d'un navigateur - Documentation Devolutions
Effacer le stockage local d'un navigateur
=========================================
Suivre les étapes pour effacer le stockage local de votre navigateur.
1. Ouvrir une page du navigateur Google Chrome.
2. Utiliser la touche F12 pour ouvrir la console des outils de développement de Google Chrome.

Google Chrome Developer Tools Console
3. Cliquer sur _**Application**_ dans le menu supérieur de la console.

Console – Application
4. Développer la liste _**Local storage**_ située sous la section _**Storage**_ dans le menu de gauche de la console.

Console – Application – Local storage
5. Faire un clic droit sur votre (vos) site(s) et cliquer sur _**Effacer**_ pour supprimer le stockage local.

Local storage – Clear
1. Ouvrir une page du navigateur Microsoft Edge.
2. Utiliser la touche F12 pour ouvrir la console des outils de développement de Microsoft Edge.

Microsoft Edge Developer Tools Console
3. Cliquer sur _**Application**_ dans le menu supérieur de la console.

Console – Application
4. Développer la liste _**Local Storage**_ située dans la section _**Storage**_ du menu de gauche de la console.

Console – Application – Local storage
5. Faire un clic droit sur votre (vos) site(s) et cliquer sur _**Effacer**_ pour supprimer le stockage local.

Local storage – Clear
1. Ouvrir une page du navigateur Firefox.
2. Utiliser la touche F12 pour ouvrir la console des outils de développement de Firefox.

Firefox Developer Tools Console
3. Cliquer sur _**Storage**_ dans le menu supérieur de la console.

Console – Storage
4. Développer la liste _**Local Storage**_ située dans le menu de gauche de la console.

Console – Storage – Local Storage
5. Faire un clic droit sur votre (vos) site(s) et cliquer sur _**Tout supprimer**_ pour supprimer le stockage local.

Local Storage – Delete All
1. Ouvrir une page du navigateur Opera.
2. Utiliser les touches Ctrl+Shift+I pour ouvrir la console des outils de développement d'Opera.

Opera Developer Tools Console
3. Cliquer sur _**Application**_ dans le menu supérieur de la console.

Console – Application
4. Développer la liste _**Local Storage**_ située dans la section _**Storage**_ du menu de gauche de la console.

Console – Application – Local Storage
5. Faire un clic droit sur votre (vos) site(s) et cliquer sur _**Effacer**_ pour supprimer le stockage local.

Local Storage – Clear
1. Ouvrir une page du navigateur Safari.
2. Utiliser les touches Alt+Cmd+C pour ouvrir la console JavaScript de Safari.

Safari Javascript Console
3. Cliquer sur _**Storage**_ dans le menu supérieur de la console.

Console – Storage
4. Développer la liste _**Local Storage**_ dans le menu de gauche de la console.

Console – Storage – Local Storage
5. Sélectionner votre site et cliquer sur _**Effacer le stockage local**_ pour supprimer le stockage local.

Local Storage – Clear Local Storage
[ Partagez vos commentaires](https://forum.devolutions.net/forums/176/documentation--documentation-requests)
---
# Devolutions Gateway with Devolutions Server - Devolutions Documentation
Devolutions Gateway with Devolutions Server
===========================================
[ Share your feedback](https://forum.devolutions.net/forums/176/documentation--documentation-requests)
---
# Devolutions Gateway farms configuration - Devolutions Documentation
Devolutions Gateway farms configuration
=======================================
On this page
* [Configuration](https://docs.devolutions.net/gateway/getting-started/server/farm/farm-configuration/#configuration)
* [Moving a gateway into a farm](https://docs.devolutions.net/gateway/getting-started/server/farm/farm-configuration/#moving-a-gateway-into-a-farm)
* [Removing a farm/gateway](https://docs.devolutions.net/gateway/getting-started/server/farm/farm-configuration/#removing-a-farmgateway)
* [Load balancing](https://docs.devolutions.net/gateway/getting-started/server/farm/farm-configuration/#load-balancing)
* [Weight](https://docs.devolutions.net/gateway/getting-started/server/farm/farm-configuration/#weight)
* [Drain](https://docs.devolutions.net/gateway/getting-started/server/farm/farm-configuration/#drain)
* [After configuration](https://docs.devolutions.net/gateway/getting-started/server/farm/farm-configuration/#after-configuration)
This topic will cover how to configure a Devolutions Gateway farm through the web interface for Devolutions Server.
Configuration
-------------
[](https://docs.devolutions.net/gateway/getting-started/server/farm/farm-configuration/#configuration)
1. In the web interface for Devolutions Server, make sure you are connected to the right data source.
2. Go to _**Administration**_ – _**Modules**_ – _**Devolutions Gateway**_.
3. Click _**Add**_ and click _**Gateway Farm**_.
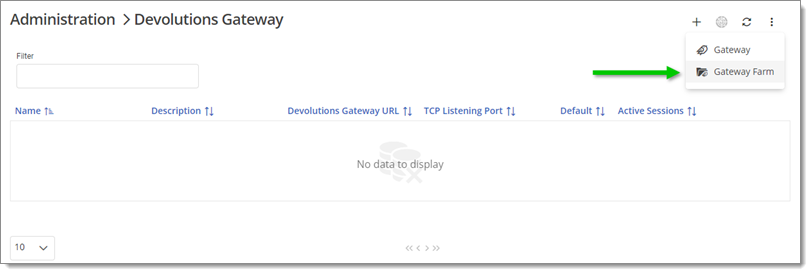
Gateway Farm
4. In the _**General**_ tab, provide a name and description for the farm. You can also choose to set this farm as the default.
Only one default setting is allowed at a time, whether it is a gateway or a farm. If a farm is created and set as default while another gateway is the default, the farm becomes the new default. The same applies if a default gateway is moved into a farm, the farm becomes the new default.
5. In the _**Members**_ tab, click _**Select Farm Members**_ to open a dialogue for selecting the gateways to include in the farm.
A gateway can belong to only one farm at a time. If it is included in a new farm, it will be moved from the current farm.
6. In the _**Security**_ tab, configure who can use the farm and in which vault it can be used. Permissions and rights are the same as those for a regular gateway.
If gateways within the farm have specific restrictions or permissions, they will be overridden by the farm's settings. A warning message in the **_Security_** tab of a gateway within a farm informs the user that modifying restrictions/permissions here will not have an impact as long as it remains in the farm.
### Moving a gateway into a farm
[](https://docs.devolutions.net/gateway/getting-started/server/farm/farm-configuration/#moving-a-gateway-into-a-farm)
To move a gateway into a farm, there are two ways:
* Use the selection dialogue during the initial configuration; or
* Directly _**Edit**_ a gateway and choose the farm in the _**General**_ tab.
### Removing a farm/gateway
[](https://docs.devolutions.net/gateway/getting-started/server/farm/farm-configuration/#removing-a-farmgateway)
To remove a farm, you can choose to delete the gateways within it or only delete the farm. If you delete only the farm, the gateways within it become independent gateways.
Load balancing
--------------
[](https://docs.devolutions.net/gateway/getting-started/server/farm/farm-configuration/#load-balancing)
### Weight
[](https://docs.devolutions.net/gateway/getting-started/server/farm/farm-configuration/#weight)
In the _**Members**_ tab of the farm's _**Edit**_ dialogue, gateways appear in a table with two editable values. The first value is their relative weight. This weight affects load distribution, higher weight increases the chances of a gateway receiving the next session. If all gateways within the farm have the same weight, they have an equal chance of receiving sessions.
#### Weight calculations example 1:
[](https://docs.devolutions.net/gateway/getting-started/server/farm/farm-configuration/#weight-calculations-example-1)
Gateway1 weight = 100 Gateway2 weight = 200 Gateway3 weight = 300 Total weight = 600
Gateway1 probability = 100/600 = 16.66% Gateway2 probability = 200/600 = 33.33% Gateway3 probability = 300/600 = 50%
The actual weight values do not matter, only their ratios. So, 1-2-3 is equivalent to 1000-2000-3000.
#### Weight calculations example 2:
[](https://docs.devolutions.net/gateway/getting-started/server/farm/farm-configuration/#weight-calculations-example-2)
Gateway1 weight = 1 Gateway2 weight = 2 (UNAVAILABLE) Gateway3 weight = 3 Total weight = 4
In this example, since Gateway2 is unavailable, it is not considered for session distribution.
Gateway1 probability = 25% Gateway3 probability = 75%
These are probabilities, not certainties. For example, with 4 sessions, Gateway1 might receive 2 or 3 sessions, despite the 25% probability. Over time, probabilities tend to balance out according to the law of large numbers.
### Drain
[](https://docs.devolutions.net/gateway/getting-started/server/farm/farm-configuration/#drain)
The _**Drain**_ button is in the column with the same name. Clicking it makes a gateway unavailable for new sessions. Active sessions continue until completion. It is useful for planned maintenance or updates.
### After configuration
[](https://docs.devolutions.net/gateway/getting-started/server/farm/farm-configuration/#after-configuration)
Selecting a farm for a session is similar to choosing a regular gateway (under _**Properties**_ – _**VPN/SSH/Gateway**_ in the Devolutions Server web interface). Farms are listed along with individual gateways. A gateway within a farm cannot be selected outside the farm.
The _**Check Health**_ button is available for farms. A positive response means at least one gateway in the farm is available. A negative response means no gateways in the farm are available.
Go to _**Reports**_ – _**Activity Logs**_ – _**Log Entry**_ – _**Details**_ to see exactly which _**Gateway**_ and _**Gateway Farm**_ were used for the session.
[ Share your feedback](https://forum.devolutions.net/forums/176/documentation--documentation-requests)
---
# Récupération du compte Devolutions - Documentation Devolutions
Récupération du compte Devolutions
==================================
Les utilisateurs qui ont perdu l'accès à leur compte Devolutions peuvent les récupérer rapidement en suivant la procédure de récupération décrite ci-dessous :
1. Ouvrir un navigateur Web et se diriger vers le [site Web Devolutions Portal](https://portal.devolutions.com/)
.
2. Entrer votre _**Nom d'utilisateur**_ et cliquer sur l'option _**Mot de passe oublié**_ pour réinitialiser votre mot de passe. Cela envoie automatiquement un code de vérification à votre adresse courriel.
3. De retour sur l'écran de connexion du Devolutions Portal, entrer le code qui vous a été fourni et choisir une méthode pour récupérer votre clé privée. Si vous n'en avez configuré aucune, cliquer sur _**Je n'ai aucun de ceux-ci**_.
S'assurer d’avoir votre [kit de récupération](https://docs.devolutions.net/fr/hub/kb/how-to-articles/emergency-kit-business/#emergency-kit-reset)
à portée de main si vous êtes le propriétaire des sources de données Devolutions Hub Business. Le kit de récupération est généré lors de la création du hub. Sans lui, perdre l’accès indéfiniment.
4. Choisir un nouveau _**Mot de passe**_ pour votre compte Devolutions. Une fois le mot de passe modifié, se connecter au Devolutions Portal et se rendre à la section _**Connexion & Sécurité**_.
5. Configurer un nouvel ensemble de clés de récupération. L'authentification à deux facteurs est fortement recommandée comme méthode pour récupérer les clés privées (_**Authentification à deux facteurs**_, _**Récupération de compte**_, et _**Codes de récupération**)._
6. Si cette récupération concernait un utilisateur du Devolutions Hub, il peut être réinvité dans le hub et son coffre utilisateur restauré.
#### Voir aussi
[](https://docs.devolutions.net/fr/gateway/kb/general-knowledge/devolutions-account-recovery/#see-also)
* [Academie Devolutions – Récupérer votre compte Devolutions](https://academy.devolutions.net/student/activity/2930847-recover-your-devolutions-account)
[ Partagez vos commentaires](https://forum.devolutions.net/forums/176/documentation--documentation-requests)
---
# Devolutions Gateway configuration with Devolutions Server - Devolutions Documentation
Devolutions Gateway configuration with Devolutions Server
=========================================================
Auf dieser Seite
* [Differences between Side-by-side and Standard (managed) installation](https://docs.devolutions.net/de/gateway/getting-started/server/server-configuration/#differences-between-side-by-side-and-standard-managed-installation)
* [Side-by-side installation](https://docs.devolutions.net/de/gateway/getting-started/server/server-configuration/#side-by-side-installation)
* [Standard (managed) installation](https://docs.devolutions.net/de/gateway/getting-started/server/server-configuration/#standard-installation)
* [Enable Gateway recording](https://docs.devolutions.net/de/gateway/getting-started/server/server-configuration/#enable-gateway-recording)
* [MSI installation](https://docs.devolutions.net/de/gateway/getting-started/server/server-configuration/#msi-installation)
* [Update Devolutions Gateway](https://docs.devolutions.net/de/gateway/getting-started/server/server-configuration/#update-devolutions-gateway)
This topic describes how to configure Devolutions Server to connect with Devolutions Gateway. There are three ways to install a Devolutions Gateway: the [_**Side-by-side installation**_](https://docs.devolutions.net/de/gateway/getting-started/server/server-configuration/#side-by-side-installation)
, the [_**Standard (managed) installation**_](https://docs.devolutions.net/de/gateway/getting-started/server/server-configuration/#standard-installation)
and the [_**MSI installation**_](https://docs.devolutions.net/de/gateway/getting-started/server/server-configuration/#msi-installation)
.
If your clients fail to connect with Devolutions Gateway, ensure the certificate contains the entire chain. This certificate chain includes any intermediate certificates. For example: Root Certificate Authority – Secure Certificate Authority – Purchased XYZ Certificate
Additionally, to [Launch an RDP session](https://docs.devolutions.net/gateway/kb/how-to-articles/launch-rdp-session-web-client/)
with Devolutions Gateway only browsers that meet these minimal version requirements are compatible:
* Chrome: 102
* Firefox: 102
* Safari: 16.4
Differences between Side-by-side and Standard (managed) installation
--------------------------------------------------------------------
[](https://docs.devolutions.net/de/gateway/getting-started/server/server-configuration/#differences-between-side-by-side-and-standard-managed-installation)
The _**Side-by-side installation**_ will be used if you need to install Devolutions Gateway on the same machine where Devolutions Server is hosted. It is a simplified installation process that will automatically configure the new Devolutions Gateway with information from the Devolutions Server instance (access URI and public key).
To install Devolutions Gateway on another machine than the one where Devolutions Server is hosted, you need to follow the _**Standard (managed) installation**_ process. The procedure is similar, but you will need to provide more information about your Devolutions Server instance to complete it.
Side-by-side installation
-------------------------
[](https://docs.devolutions.net/de/gateway/getting-started/server/server-configuration/#side-by-side-installation)
This installation process is the easier of the two and is the recommended method for simpler network layouts.
1. From the Devolutions Server Console, click on the _**Companions**_ tab.

Companions tab
2. In the Devolutions Gateway section, click on _**Install**_.
3. Choose _**Side-by-side installation**_.

Side-by-side installation
It is possible to download an [.msi](https://devolutions.net/gateway/download/)
file to install Devolutions Gateway on an offline Devolutions Server.
4. If default values do not work for your environment, enter the desired settings.
* _**HTTP Listener**_: HTTP(s) port to reach the Gateway. (7171 is default)
* _**TCP Listener**_: port used for the RDP sessions. (8181 is default)
5. Click _**OK**_.

OK button
6. Go to the Devolutions Server web interface, connect with an administrator account.
7. Go to _**Administration**_ – _**Devolutions Gateway**_.
8. Click on the _**Ping**_ button for the desired gateway in the list to see if a connection can successfully be made. If the page was already open, refresh it first.

Ping button
Standard (managed) installation
-------------------------------
[](https://docs.devolutions.net/de/gateway/getting-started/server/server-configuration/#standard-installation)
The _**Standard (managed)**_ method allows Devolutions Gateway to be installed on a separate server than Devolutions Server. It could be for performance purposes or access networks that Devolutions Server cannot access.
1. From the Devolutions Server Console, click on the _**Companions**_ tab.
2. In the Devolutions Gateway section, click on _**Install**_.
3. Choose _**Standard installation**_.

Standard installation
4. Choose between _**Download version**_ and _**Install from .msi file**_.
It is possible to download an [_**.msi**_](https://devolutions.net/gateway/download/)
file to install Devolutions Gateway on an offline Devolutions Server.
5. Click _**Next**_.

Download version or Install from .msi file
6. Enter the _**Access URI**_ information, for example https://gateway.example.com.

Listeners
7. Choose the Devolutions Gateway _**Listeners**_ ports (by default they are 7171 and 8181). Devolutions Server will use the Access URI port (usually 443 or 7171) for health checks and initial configuration. Remote Desktop Manager will use ports 7171 and 8181 to connect to the Gateway. For instance, a web session using the Gateway will connect on port 7171, as will any registration via Devolutions Gateway. Port 8181 is used by sessions such as RDP.
* If HTTPS is chosen instead of HTTP in the step above, the _**Certificate configuration**_ will be needed.
* _**Certificate file**_: Needs to be a full chain certificate (.pfx, .p12, .pem, .crt).
* _**Certificate password**_: Only needed if a .pfx or .p12 certificate was used.
* _**Private key file**_: Only needed if a .pem or .crt was used as a certificate.
Do not share the private key with other users, as it can be used to decrypt the communication between a user and Devolutions Gateway. Only the public key should be shared.
8. Click _**Next**_.
9. Choose between:
* _**Use public key from Devolutions Server instance 'Devolutions Server'**_: this option is used if the installed Devolutions Gateway is on the same server as the Devolutions Server;
* _**From file**_: If installing Devolutions Gateway on another computer, download the public key from the Devolutions Server you want to pair with that Devolutions Gateway. It is located under _**Administration – Devolutions Gateway**_.

Download public key
10. Click _**Next**_.

Key pair configuration
If Devolutions Server is not installed locally, then check the _**From file**_ option, and select Devolutions Gateway's `.json` configuration file .See [Configuring Windows certificate store via gateway.json](https://docs.devolutions.net/gateway/kb/how-to-articles/use-windows-certificate-store/#configuring-windows-certificate-store-via-gatewayjson)
for a typical configuration file.
[Devolutions' GitHub repository](https://github.com/Devolutions/devolutions-gateway/?tab=readme-ov-file#configuration)
also contains a list of the typical paths for the file, as well as all the stable options available to customize it.
11. Click _**Install**_.

Summary
12. Click _**Close**_.

Installation Summary
13. On the Devolutions Server web interface, connect with an administrator account.
14. Go to _**Administration**_ – _**Devolutions Gateway**_.
15. Click on the _**Add**_ button on the top right corner.

Add button
16. Enter the following information.
* _**Name**_: Name of the gateway that will be displayed in Remote Desktop Manager.
* _**Description**_: Description of the gateway.
* _**Set as default**_: If enabled, this gateway will be selected by default when configuring Remote Desktop Manager.
* _**Devolutions Gateway URL**_: The Devolutions Gateway URL and Port that Devolutions Server will connect to, for example: **https://gateway.example.com:7171**.
* _**TCP Listening Port**_: Set the port with the same TCP port value configured in the Devolutions Server Console.
* _**TCP hostname**_: It should be resolvable by the machine initiating the connection (Remote Desktop Manager).
17. Click _**Save**_.

Gateway information
The gateway should now be visible in the list. It is possible to verify the status of the gateway with the _**Ping**_ button.

Ping
18. Publish the _**Devolutions Gateway configuration**_.
19. Publish the _**Revocation list**_. 
Enable Gateway recording
------------------------
[](https://docs.devolutions.net/de/gateway/getting-started/server/server-configuration/#enable-gateway-recording)
Click [here](https://docs.devolutions.net/server/kb/how-to-articles/configure-recording-server/)
to learn how to enable Devolutions Gateway recording in Devolutions Server.
MSI installation
----------------
[](https://docs.devolutions.net/de/gateway/getting-started/server/server-configuration/#msi-installation)
It is possible to do an automated silent installation which will install a gateway with the default configuration. This is the recommended way to configure it through the [Devolutions.PowerShell module](https://docs.devolutions.net/gateway/devolutions-ecosystem/powershell/)
. Use the following command:
msiexec.exe /i DevolutionsGateway-x86_64-VERSION.msi /quiet /norestart /log gateway_install.log
Update Devolutions Gateway
--------------------------
[](https://docs.devolutions.net/de/gateway/getting-started/server/server-configuration/#update-devolutions-gateway)
Devolutions Gateway can be updated in three different ways depending on your needs:
* Push updates via Devolutions Server web interface, in _**Administration**_ – _**Devolutions Gateway**_. Using this method, instances can be updated singly or in bulk. The latter can be done quickly by toggling the _**Bulk update**_ option, selecting the gateways, and clicking on _**Update**_. Note that [Devolutions Agent](https://devolutions.net/agent/)
is required to update from the Devolutions Server web interface.
* Update manually through the Devolutions Server Console. To do so, head over the _**Companions**_ tab, select the Devolutions Gateway to update, click the _**Update**_ button, and follow the instructions then provided.
* Run the [auto-updater PowerShell script](https://docs.devolutions.net/powershell/gateway-powershell/powershell-updater/)
. This can be registered as a scheduled task to periodically check for updates.
#### See also
[](https://docs.devolutions.net/de/gateway/getting-started/server/server-configuration/#see-also)
* [Devolutions Academy - Overview of Devolutions Gateway](https://academy.devolutions.net/student/path/2007290/activity/3070847 "Devolutions Academy - Overview of the Devolutions Gateway")
[ Share your feedback](https://forum.devolutions.net/forums/176/documentation--documentation-requests)
---
# Devolutions Account recovery - Devolutions Documentation
Devolutions Account recovery
============================
Users who have lost access to their Devolutions Account can recover them quickly by following the recovery procedure described below:
1. Open a web browser and navigate to the [Devolutions Portal website](https://portal.devolutions.com/)
.
2. Enter your _**Username**_ and click on the _**Forgot my password**_ option to reset your password. This automatically sends a verification code to your email address.
3. Back on the Devolutions Portal login screen, enter the code provided to you and select a method to retrieve your private key. If you have not configured any, click on _**I have none of these**_.
Make sure you have your [recovery kit](https://docs.devolutions.net/hub/kb/how-to-articles/emergency-kit-business/#emergency-kit-reset)
on hand if you are the owner of Devolutions Hub Business data sources. The recovery kit is generated during the hub's creation. Without it, you will lose access indefinitely.
4. Choose a new _**Password**_ for your Devolutions Account. Once the password has been changed, log in to Devolutions Portal and head over to the _**Sign-In & Security**_ section.
5. Configure a new set of recovery keys. Two-step verification is highly recommended as a method of recovering private keys (_**Two-step verification**_, _**Account recovery**_, and _**Recovery codes**)._
6. If this recovery was for a Devolutions Hub user, he can safely be reinvited to the hub and his user vault restored.
#### See also
[](https://docs.devolutions.net/de/gateway/kb/general-knowledge/devolutions-account-recovery/#see-also)
* [Devolutions Academy – Recover your Devolutions Account](https://academy.devolutions.net/student/activity/2930847-recover-your-devolutions-account)
[ Share your feedback](https://forum.devolutions.net/forums/176/documentation--documentation-requests)
---
# La page de connexion Devolutions ne s'ouvre pas dans le navigateur - Documentation Devolutions
La page de connexion Devolutions ne s'ouvre pas dans le navigateur
==================================================================
Lors de la tentative de connexion à un produit Devolutions tel que Devolutions Hub ou Devolutions Server, une page de connexion devrait s'ouvrir dans votre navigateur pour vous permettre d'entrer vos informations d'identification. Cette fenêtre peut parfois être bloquée par votre navigateur ou une extension installée dessus. Dans ce cas, aucun message d'erreur n'est affiché dans le produit Devolutions puisque le problème provient du navigateur.
### Solution
[](https://docs.devolutions.net/fr/gateway/kb/general-knowledge/devolutions-login-page-does-not-open-browser/#solution)
D'abord, modifier les paramètres de votre navigateur ou de l'extension de navigateur pour supprimer ou désactiver le paramètre qui a bloqué la fenêtre d'invite d'identification. Essayer de se connecter à nouveau.
Si cela ne fonctionne pas, désactiver ou supprimer l'extension qui cause le problème ou changer de navigateur. Essayer de se connecter à nouveau.
Si vous rencontrez toujours des problèmes, [contactez notre équipe de support client](mailto:service@devolutions.net)
.
[ Partagez vos commentaires](https://forum.devolutions.net/forums/176/documentation--documentation-requests)
---
# Devolutions Account recovery - Devolutions Documentation
Devolutions Account recovery
============================
Users who have lost access to their Devolutions Account can recover them quickly by following the recovery procedure described below:
1. Open a web browser and navigate to the [Devolutions Portal website](https://portal.devolutions.com/)
.
2. Enter your _**Username**_ and click on the _**Forgot my password**_ option to reset your password. This automatically sends a verification code to your email address.
3. Back on the Devolutions Portal login screen, enter the code provided to you and select a method to retrieve your private key. If you have not configured any, click on _**I have none of these**_.
Make sure you have your [recovery kit](https://docs.devolutions.net/hub/kb/how-to-articles/emergency-kit-business/#emergency-kit-reset)
on hand if you are the owner of Devolutions Hub Business data sources. The recovery kit is generated during the hub's creation. Without it, you will lose access indefinitely.
4. Choose a new _**Password**_ for your Devolutions Account. Once the password has been changed, log in to Devolutions Portal and head over to the _**Sign-In & Security**_ section.
5. Configure a new set of recovery keys. Two-step verification is highly recommended as a method of recovering private keys (_**Two-step verification**_, _**Account recovery**_, and _**Recovery codes**)._
6. If this recovery was for a Devolutions Hub user, he can safely be reinvited to the hub and his user vault restored.
#### See also
[](https://docs.devolutions.net/gateway/kb/general-knowledge/devolutions-account-recovery/#see-also)
* [Devolutions Academy – Recover your Devolutions Account](https://academy.devolutions.net/student/activity/2930847-recover-your-devolutions-account)
[ Share your feedback](https://forum.devolutions.net/forums/176/documentation--documentation-requests)
---
# Clear a browser's local storage - Devolutions Documentation
Clear a browser's local storage
===============================
Follow the steps to clear your browser's local storage.
1. Open a Google Chrome browser page.
2. Use your keyboard's F12 key to open the Google Chrome Developer Tools Console.

Google Chrome Developer Tools Console
3. Click _**Application**_ in the console's top menu.

Console – Application
4. Expand the _**Local storage**_ list located under the _**Storage**_ section in the console's left menu.

Console – Application – Local storage
5. Right-click your site(s) and click _**Clear**_ to delete the local storage.

Local storage – Clear
1. Open a Microsoft Edge browser page.
2. Use your keyboard's F12 key to open the Microsoft Edge Developer Tools Console.

Microsoft Edge Developer Tools Console
3. Click _**Application**_ in the console's top menu.

Console – Application
4. Expand the _**Local Storage**_ list located in the _**Storage**_ section of the console's left menu.

Console – Application – Local storage
5. Right-click your site(s) and click _**Clear**_ to delete the local storage.

Local storage – Clear
1. Open a Firefox browser page.
2. Use your keyboard's F12 key to open the Firefox Developer Tools Console.

Firefox Developer Tools Console
3. Click _**Storage**_ in the console's top menu.

Console – Storage
4. Expand the _**Local Storage**_ list located in the console's left menu.

Console – Storage – Local Storage
5. Right-click your site(s) and click _**Delete All**_ to delete the local storage.

Local Storage – Delete All
1. Open an Opera browser page.
2. Use your keyboard Ctrl+Shift+I keys to open the Opera Developer Tools Console.

Opera Developer Tools Console
3. Click _**Application**_ in the console's top menu.

Console – Application
4. Expand the _**Local Storage**_ list located in the _**Storage**_ section of the console's left menu.

Console – Application – Local Storage
5. Right-click your site(s) and click _**Clear**_ to delete the local storage.

Local Storage – Clear
1. Open a Safari browser page.
2. Use your keyboard Alt+Cmd+C keys to open the Safari Javascript Console.

Safari Javascript Console
3. Click _**Storage**_ in the console's top menu.

Console – Storage
4. Expand the _**Local Storage**_ list in the console's left menu.

Console – Storage – Local Storage
5. Select your site and click _**Clear Local Storage**_ to delete the local storage.

Local Storage – Clear Local Storage
[ Share your feedback](https://forum.devolutions.net/forums/176/documentation--documentation-requests)
---
# Devolutions login page does not open in the browser - Devolutions Documentation
Devolutions login page does not open in the browser
===================================================
When trying to connect to a Devolutions product such as Devolutions Hub or Devolutions Server, a connection page should open in your browser to allow you to enter your credentials. This window can sometimes be blocked by your browser or an extension installed on it. In this case, no error message is shown in the Devolutions product since the issue comes from the browser.
### Solution
[](https://docs.devolutions.net/de/gateway/kb/general-knowledge/devolutions-login-page-does-not-open-browser/#solution)
First, change your browser or browser extension settings to remove or disable the setting that blocked the credentials prompt window. Try connecting again.
If that does not work, disable or delete the extension that causes the issue or change browser. Try connecting again.
If you still encouter issues, please [contact our customer support team](mailto:service@devolutions.net)
.
[ Share your feedback](https://forum.devolutions.net/forums/176/documentation--documentation-requests)
---
# Devolutions Send Standalone - Devolutions Documentation
Devolutions Send Standalone
===========================
Auf dieser Seite
* [Features](https://docs.devolutions.net/de/gateway/kb/general-knowledge/devolutions-send-standalone/#features)
* [How to use Devolutions Send Standalone](https://docs.devolutions.net/de/gateway/kb/general-knowledge/devolutions-send-standalone/#how-to-use-devolutions-send-standalone)
* [How to receive a Devolutions Send Standalone secret](https://docs.devolutions.net/de/gateway/kb/general-knowledge/devolutions-send-standalone/#how-to-receive-a-devolutions-send-standalone-secret)
* [Technical details](https://docs.devolutions.net/de/gateway/kb/general-knowledge/devolutions-send-standalone/#technical-details)
* [See also](https://docs.devolutions.net/de/gateway/kb/general-knowledge/devolutions-send-standalone/#see-also)
[Devolutions Send Standalone](https://devolutions.net/devolutions-send/)
features a secure method to generate a link to share secrets instead of using insecure email to send sensitive data.
Features
--------
[](https://docs.devolutions.net/de/gateway/kb/general-knowledge/devolutions-send-standalone/#features)
The in-app version of Devolutions Send is currently under development and will be progressively deployed in Remote Desktop Manager, Devolutions Server, and Devolutions Hub. More information will come in the future.
Despite sharing the same underlying architecture, slight differences exist between the feature set of the standalone and in-app versions of Devolutions Send.
* Unique link encrypted on the client side.
* Valid for a customizable amount of time.
* Optional protection via a client-provided passphrase.
* Users may be non-Devolutions users (not linked to a Devolutions Account).
* Character limit of 10 kb.
* A sender email is required and stored with the GUID as part of the “payload” stored in the database.
How to use Devolutions Send Standalone
--------------------------------------
[](https://docs.devolutions.net/de/gateway/kb/general-knowledge/devolutions-send-standalone/#how-to-use-devolutions-send-standalone)
1. Go to the [Devolutions Send Standalone](https://send.devolutions.com/)
website.
2. Enter the _**Sender email**_, which is required and stored with the GUID as part of the “payload” stored in the database.
3. Enter your _**Secure message**_ to encrypt.
* A file of maximum 1 MB can be added to the secure message as well.
4. Add a _**Passphrase**_ for extra security (mandatory if the recipient does not have a Devolutions Account, optional otherwise).
* _**Additional security options**_:
* The _**Link duration**_ can be set to 1 hour, 24 hours, 3 days or 1 week.
* The _**View limit**_ can be set to Unlimited, Single view or Multiple views. The Multiple views option is useful for setting an exact amount of possible views.
* It is recommended to enable the _**Allow recipient to delete message**_ option.
5. Read and agree to our online services terms.
6. Click on _**Create secure link**_ to get the in-browser encrypted link. 
7. Click on _**Copy to clipboard**_ and send it to the recipient(s).
How to receive a Devolutions Send Standalone secret
---------------------------------------------------
[](https://docs.devolutions.net/de/gateway/kb/general-knowledge/devolutions-send-standalone/#how-to-receive-a-devolutions-send-standalone-secret)
1. Click on the received encrypted link.
A Devolutions Send Standalone secret will always start with https://send.devolutions.com/receive/.
2. Click on _**Unmask text**_.
Make certain to be in a private setting before reading this message if it contains sensitive information.

Unmask text
3. Enter the _**Passphrase**_ the sender provided (if necessary) and click on _**Decrypt**_. 
4. Once done, click on _**Delete Now**_.
5. Click _**Yes**_.  
Technical details
-----------------
[](https://docs.devolutions.net/de/gateway/kb/general-knowledge/devolutions-send-standalone/#technical-details)
The core tenant of Devolutions Send is that Devolutions itself cannot decrypt the user's secret. This is accomplished via client-side (browser) encryption through a Rust program compiled to WASM (WebAssembly) in-browser. Therefore, Devolutions does not hold the encryption key and cannot decrypt the data.
### See also
[](https://docs.devolutions.net/de/gateway/kb/general-knowledge/devolutions-send-standalone/#see-also)
* [Devolutions Blog - How organizations can safely share confidential information with Devolutions Send](https://blog.devolutions.net/2024/08/how-organizations-can-safely-share-confidential-information-with-devolutions-send/ "Devolutions Blog - How organizations can safely share confidential information with Devolutions Send")
[ Share your feedback](https://forum.devolutions.net/forums/176/documentation--documentation-requests)
---
# Prévenir les problèmes en faisant correspondre les versions majeures et mineures - Documentation Devolutions
Prévenir les problèmes en faisant correspondre les versions majeures et mineures
================================================================================
Sur cette page
* [Version majeure](https://docs.devolutions.net/fr/gateway/kb/general-knowledge/difference-major-minor-versions/#major-version)
* [Version mineure](https://docs.devolutions.net/fr/gateway/kb/general-knowledge/difference-major-minor-versions/#minor-version)
* [Maintenance prolongée et dernières versions (Devolutions Server)](https://docs.devolutions.net/fr/gateway/kb/general-knowledge/difference-major-minor-versions/#extended-maintenance-and-latest-versions-devolutions-server)
* [Gestion des versions](https://docs.devolutions.net/fr/gateway/kb/general-knowledge/difference-major-minor-versions/#version-management)
Toujours correspondre les versions majeures et mineures à travers les produits Devolutions (par exemple, 2025.1 avec 2025.1) pour éviter les erreurs et les problèmes de compatibilité.
Version majeure
---------------
[](https://docs.devolutions.net/fr/gateway/kb/general-knowledge/difference-major-minor-versions/#major-version)
Une version majeure fait référence à une publication qui introduit des changements significatifs, de nouvelles fonctionnalités ou des améliorations majeures. La version majeure est identifiée par le premier chiffre après l'année. Par exemple, dans _**2024.3.27.0**_, la version majeure est _**3**_.
Version mineure
---------------
[](https://docs.devolutions.net/fr/gateway/kb/general-knowledge/difference-major-minor-versions/#minor-version)
Une version mineure consiste en des mises à jour incrémentielles au sein d'une version majeure. Ces mises à jour incluent souvent des corrections de bogues, des correctifs de sécurité et des améliorations mineures mais n'introduisent pas de nouvelles fonctionnalités majeures ou de changements qui altèrent significativement la fonctionnalité. Par exemple, dans _**2024.3.27.0**_, la version mineure est _**27**_.
Maintenance prolongée et dernières versions (Devolutions Server)
----------------------------------------------------------------
[](https://docs.devolutions.net/fr/gateway/kb/general-knowledge/difference-major-minor-versions/#extended-maintenance-and-latest-versions-devolutions-server)
En plus de comprendre les versions majeures et mineures, il est important de distinguer entre maintenance prolongée et dernières versions. Cette distinction s'applique uniquement à Devolutions Server.
* **Maintenance prolongée** : Se réfère à la dernière version mineure de la version majeure précédente (par ex., 2023.3.16).
* **Dernier**: Fait référence à la version la plus récente disponible, qui comprend toutes les dernières fonctionnalités, améliorations, [correctifs de sécurité](https://devolutions.net/security/advisories/)
et corrections de bogues (par exemple, 2024.1.11).
Chaque fois qu'une nouvelle version majeure est publiée (par ex., 2024.2.x), la dernière version (2024.1.x) devient la nouvelle version de maintenance prolongée. Aucune mise à jour de sécurité ou correctif n'est fourni pour les versions de maintenance prolongée précédentes (par ex., 2023.3.x ou antérieures). Ce cycle se répète pour chaque nouvelle version majeure.
Gestion des versions
--------------------
[](https://docs.devolutions.net/fr/gateway/kb/general-knowledge/difference-major-minor-versions/#version-management)
La _**Gestion de version**_ permet aux administrateurs de gérer la disponibilité de la source de données dans d'autres versions de Remote Desktop Manager pour Windows, Mac et Linux.
* [Remote Desktop Manager](https://docs.devolutions.net/fr/rdm/commands/administration/system-settings/application-specific/version-management/)
* [Devolutions Server](https://docs.devolutions.net/fr/server/web-interface/administration/configuration/system-settings/#vault-management)
[ Partagez vos commentaires](https://forum.devolutions.net/forums/176/documentation--documentation-requests)
---
# Connaissance générale - Documentation Devolutions
Connaissances générales
=======================
[ Partagez vos commentaires](https://forum.devolutions.net/forums/176/documentation--documentation-requests)
---
# Devolutions Send Standalone - Documentation Devolutions
Devolutions Send Standalone
===========================
Sur cette page
* [Fonctionnalités](https://docs.devolutions.net/fr/gateway/kb/general-knowledge/devolutions-send-standalone/#features)
* [Comment utiliser Devolutions Send Standalone](https://docs.devolutions.net/fr/gateway/kb/general-knowledge/devolutions-send-standalone/#how-to-use-devolutions-send-standalone)
* [Comment recevoir un secret Devolutions Send Standalone](https://docs.devolutions.net/fr/gateway/kb/general-knowledge/devolutions-send-standalone/#how-to-receive-a-devolutions-send-standalone-secret)
* [Détails techniques](https://docs.devolutions.net/fr/gateway/kb/general-knowledge/devolutions-send-standalone/#technical-details)
* [Voir aussi](https://docs.devolutions.net/fr/gateway/kb/general-knowledge/devolutions-send-standalone/#see-also)
[Devolutions Send Standalone](https://devolutions.net/devolutions-send/)
propose une méthode sécurisée pour générer un lien afin de partager des secrets au lieu d'utiliser des courriels non sécurisés pour envoyer des données sensibles.
Fonctionnalités
---------------
[](https://docs.devolutions.net/fr/gateway/kb/general-knowledge/devolutions-send-standalone/#features)
La version in-app de Devolutions Send est actuellement en cours de développement et sera progressivement déployée dans Remote Desktop Manager, Devolutions Server et Devolutions Hub. Plus d'informations à venir dans le futur.
Bien qu'ils partagent la même architecture sous-jacente, de légères différences existent entre l'ensemble des fonctionnalités des versions autonome et in-app de Devolutions Send.
* Lien unique chiffré côté client.
* Valable pour une durée personnalisable.
* Protection optionnelle via une phrase secrète fournie par le client.
* Les utilisateurs peuvent être des utilisateurs non-Devolutions (non liés à un compte Devolutions).
* Limite de caractères de 10 Ko.
* Un courriel de l'expéditeur est requis et stocké avec le GUID dans le cadre de la « charge utile » stockée dans la base de données.
Comment utiliser Devolutions Send Standalone
--------------------------------------------
[](https://docs.devolutions.net/fr/gateway/kb/general-knowledge/devolutions-send-standalone/#how-to-use-devolutions-send-standalone)
1. Aller sur le site [Devolutions Send Standalone](https://send.devolutions.com/)
.
2. Saisir le _**courriel de l'expéditeur**_, qui est requis et stocké avec le GUID comme partie de la “charge utile” stockée dans la base de données.
3. Entrer votre _**Message sécurisé**_ à chiffrer.
* Un fichier d'une taille maximale de 1 Mo peut aussi être ajouté au message sécurisé.
4. Ajouter une _**Phrase secrète**_ pour une sécurité supplémentaire (obligatoire si le destinataire n'a pas de compte Devolutions, facultatif sinon).
* _**Options de sécurité supplémentaires**_:
* La _**Durée du lien**_ peut être fixée à 1 heure, 24 heures, 3 jours ou 1 semaine.
* La _**Limite de vues**_ peut être réglée sur Illimité, Vue unique ou Vues multiples. L'option Vues multiples est utile pour définir un nombre exact de vues possibles.
* Il est recommandé d'activer l'option _**Autoriser le destinataire à supprimer le message**_.
5. Lire et accepter nos conditions de service en ligne.
6. Cliquer sur _**Créer un lien sécurisé**_ pour obtenir le lien chiffré dans le navigateur. 
7. Cliquer sur _**Copier dans le presse-papiers**_ et l'envoyer au(x) destinataire(s).
Comment recevoir un secret Devolutions Send Standalone
------------------------------------------------------
[](https://docs.devolutions.net/fr/gateway/kb/general-knowledge/devolutions-send-standalone/#how-to-receive-a-devolutions-send-standalone-secret)
1. Cliquer sur le lien chiffré reçu.
Un secret Devolutions Send Standalone commencera toujours par https://send.devolutions.com/receive/.
2. Cliquer sur _**Faire apparaître le texte**_.
S'assurer d'être dans un environnement privé avant de lire ce message s'il contient des informations sensibles.

Unmask text
3. Entrer la _**Phrase secrète**_ fournie par l'expéditeur (si nécessaire) et cliquer sur _**Déchiffrer**_. 
4. Une fois terminé, cliquer sur _**Supprimer maintenant**_.
5. Cliquer sur _**Oui**_.  
Détails techniques
------------------
[](https://docs.devolutions.net/fr/gateway/kb/general-knowledge/devolutions-send-standalone/#technical-details)
Le principe fondamental de Devolutions Send est que Devolutions elle-même ne peut pas déchiffrer le secret de l'utilisateur. Cela est accompli via un chiffrement côté client (navigateur) grâce à un programme Rust compilé en WASM (WebAssembly) dans le navigateur. Par conséquent, Devolutions ne détient pas la clé de chiffrement et ne peut pas déchiffrer les données.
### Voir aussi
[](https://docs.devolutions.net/fr/gateway/kb/general-knowledge/devolutions-send-standalone/#see-also)
* [Blog Devolutions - Comment les organisations peuvent partager en toute sécurité des informations confidentielles avec Devolutions Send](https://blog.devolutions.net/2024/08/how-organizations-can-safely-share-confidential-information-with-devolutions-send/ "Devolutions Blog - How organizations can safely share confidential information with Devolutions Send")
[ Partagez vos commentaires](https://forum.devolutions.net/forums/176/documentation--documentation-requests)
---
# General knowledge - Devolutions Documentation
General knowledge
=================
[ Share your feedback](https://forum.devolutions.net/forums/176/documentation--documentation-requests)
---
# Prevent issues by matching major and minor versions - Devolutions Documentation
Prevent issues by matching major and minor versions
===================================================
Auf dieser Seite
* [Major version](https://docs.devolutions.net/de/gateway/kb/general-knowledge/difference-major-minor-versions/#major-version)
* [Minor version](https://docs.devolutions.net/de/gateway/kb/general-knowledge/difference-major-minor-versions/#minor-version)
* [Extended maintenance and latest versions (Devolutions Server)](https://docs.devolutions.net/de/gateway/kb/general-knowledge/difference-major-minor-versions/#extended-maintenance-and-latest-versions-devolutions-server)
* [Version management](https://docs.devolutions.net/de/gateway/kb/general-knowledge/difference-major-minor-versions/#version-management)
Always match major and minor versions across Devolutions products (e.g., 2025.1 with 2025.1) to avoid errors and compatibility issues.
Major version
-------------
[](https://docs.devolutions.net/de/gateway/kb/general-knowledge/difference-major-minor-versions/#major-version)
A major version refers to a release that introduces significant changes, new features, or major enhancements. The major version is identified by the first number after the year. For example, in _**2024.3.27.0**_, the major version is _**3**_.
Minor version
-------------
[](https://docs.devolutions.net/de/gateway/kb/general-knowledge/difference-major-minor-versions/#minor-version)
A minor version consists of incremental updates within a major version. These updates often include bug fixes, security patches, and minor enhancements but do not introduce major new features or changes that significantly alter functionality. For example, in _**2024.3.27.0**_, the minor version is _**27**_.
Extended maintenance and latest versions (Devolutions Server)
-------------------------------------------------------------
[](https://docs.devolutions.net/de/gateway/kb/general-knowledge/difference-major-minor-versions/#extended-maintenance-and-latest-versions-devolutions-server)
In addition to understanding major and minor versions, it is important to distinguish between extended maintenance and latest versions. This distinction applies only to Devolutions Server.
* **Extended maintenance**: Refers to the latest minor version of the previous major release (e.g., 2023.3.16).
* **Latest**: Refers to the most recent version available, which includes all the latest features, improvements, [security patches](https://devolutions.net/security/advisories/)
, and bug fixes (e.g., 2024.1.11).
Each time a new major version is released (e.g., 2024.2.x), the latest version (2024.1.x) becomes the new extended maintenance version. No security updates or patches are provided for previous extended maintenance versions (e.g., 2023.3.x or earlier). This lifecycle is repeated for each new major release.
Version management
------------------
[](https://docs.devolutions.net/de/gateway/kb/general-knowledge/difference-major-minor-versions/#version-management)
The _**Version management**_ allows administrators to manage the data source availability in other versions of Remote Desktop Manager for Windows, Mac, and Linux.
* [Remote Desktop Manager](https://docs.devolutions.net/rdm/commands/administration/system-settings/application-specific/version-management/)
* [Devolutions Server](https://docs.devolutions.net/server/web-interface/administration/configuration/system-settings/#vault-management)
[ Share your feedback](https://forum.devolutions.net/forums/176/documentation--documentation-requests)
---
# Devolutions login page does not open in the browser - Devolutions Documentation
Devolutions login page does not open in the browser
===================================================
When trying to connect to a Devolutions product such as Devolutions Hub or Devolutions Server, a connection page should open in your browser to allow you to enter your credentials. This window can sometimes be blocked by your browser or an extension installed on it. In this case, no error message is shown in the Devolutions product since the issue comes from the browser.
### Solution
[](https://docs.devolutions.net/gateway/kb/general-knowledge/devolutions-login-page-does-not-open-browser/#solution)
First, change your browser or browser extension settings to remove or disable the setting that blocked the credentials prompt window. Try connecting again.
If that does not work, disable or delete the extension that causes the issue or change browser. Try connecting again.
If you still encouter issues, please [contact our customer support team](mailto:service@devolutions.net)
.
[ Share your feedback](https://forum.devolutions.net/forums/176/documentation--documentation-requests)
---
# Installer des certificats racines - Documentation Devolutions
Installer des certificats racines
=================================
Voici la procédure pour installer des certificats racines sur Windows.
Firefox ne fait pas confiance aux mêmes certificats que Windows et un réglage doit être appliqué pour l'activer.
Veuillez consulter [l'article de la base de connaissances de Mozilla](https://support.mozilla.org/en-US/kb/setting-certificate-authorities-firefox)
.
1. Ouvrir la console de gestion Microsoft en recherchant _**MMC**_ dans le menu _**Démarrer**_. Une autre façon est d'appuyer sur les touches Windows+R sur votre clavier et, dans la fenêtre _**Exécuter**_, rechercher _**MMC**_.
2. Sélectionner _**Fichier – Ajouter/Supprimer un module complémentaire**_.
3. Dans la boîte _**Modules complémentaires disponibles**_, sélectionner _**Certificats**_.
4. Cliquer sur le bouton _**Ajouter**_.
5. Dans l'assistant, sélectionner _**Compte de l'ordinateur**_, puis cliquer sur _**Suivant**_.
6. Sélectionner _**Ordinateur local**_, puis cliquer sur _**Terminer**_ pour terminer l'assistant.
7. Cliquer sur _**OK**_ pour enregistrer vos modifications. Cette action fermera également le _**Ajouter ou supprimer un module complémentaire**_ dialogue.
8. Dans la console, sélectionner _**Certificats (Ordinateur Local)**_.
9. Dans la boîte _**Nom du magasin logique**_, faire un clic droit sur _**Autorités de certification racines de confiance**_ et sélectionner _**Toutes les tâches – Importer**_.
10. Suivre les instructions dans l'_**Assistant d'importation de certificats**_ et fournir le fichier de certificat que vous avez.
Voici la procédure pour installer des certificats racines sous Linux (Ubuntu et Debian).
Firefox ne fait pas confiance aux mêmes certificats que Windows et un réglage doit être appliqué pour l'activer.
Veuillez consulter [l'article de la base de connaissances de Mozilla](https://support.mozilla.org/en-US/kb/setting-certificate-authorities-firefox)
.
1. sudo mkdir /usr/local/share/ca-certificates/extra
2. sudo cp ca.crt /usr/local/share/ca-certificates/extra/ca.crt
3. sudo update-ca-certificates
Guetter un "1" ajouté dans les messages de sortie.
[ Partagez vos commentaires](https://forum.devolutions.net/forums/176/documentation--documentation-requests)
---
# Licence - Documentation Devolutions
Licence
=======
[ Partagez vos commentaires](https://forum.devolutions.net/forums/176/documentation--documentation-requests)
---
# License - Devolutions Documentation
License
=======
[ Share your feedback](https://forum.devolutions.net/forums/176/documentation--documentation-requests)
---
# General knowledge - Devolutions Documentation
General knowledge
=================
[ Share your feedback](https://forum.devolutions.net/forums/176/documentation--documentation-requests)
---
# Devolutions Send Standalone - Devolutions Documentation
Devolutions Send Standalone
===========================
On this page
* [Features](https://docs.devolutions.net/gateway/kb/general-knowledge/devolutions-send-standalone/#features)
* [How to use Devolutions Send Standalone](https://docs.devolutions.net/gateway/kb/general-knowledge/devolutions-send-standalone/#how-to-use-devolutions-send-standalone)
* [How to receive a Devolutions Send Standalone secret](https://docs.devolutions.net/gateway/kb/general-knowledge/devolutions-send-standalone/#how-to-receive-a-devolutions-send-standalone-secret)
* [Technical details](https://docs.devolutions.net/gateway/kb/general-knowledge/devolutions-send-standalone/#technical-details)
* [See also](https://docs.devolutions.net/gateway/kb/general-knowledge/devolutions-send-standalone/#see-also)
[Devolutions Send Standalone](https://devolutions.net/devolutions-send/)
features a secure method to generate a link to share secrets instead of using insecure email to send sensitive data.
Features
--------
[](https://docs.devolutions.net/gateway/kb/general-knowledge/devolutions-send-standalone/#features)
The in-app version of Devolutions Send is currently under development and will be progressively deployed in Remote Desktop Manager, Devolutions Server, and Devolutions Hub. More information will come in the future.
Despite sharing the same underlying architecture, slight differences exist between the feature set of the standalone and in-app versions of Devolutions Send.
* Unique link encrypted on the client side.
* Valid for a customizable amount of time.
* Optional protection via a client-provided passphrase.
* Users may be non-Devolutions users (not linked to a Devolutions Account).
* Character limit of 10 kb.
* A sender email is required and stored with the GUID as part of the “payload” stored in the database.
How to use Devolutions Send Standalone
--------------------------------------
[](https://docs.devolutions.net/gateway/kb/general-knowledge/devolutions-send-standalone/#how-to-use-devolutions-send-standalone)
1. Go to the [Devolutions Send Standalone](https://send.devolutions.com/)
website.
2. Enter the _**Sender email**_, which is required and stored with the GUID as part of the “payload” stored in the database.
3. Enter your _**Secure message**_ to encrypt.
* A file of maximum 1 MB can be added to the secure message as well.
4. Add a _**Passphrase**_ for extra security (mandatory if the recipient does not have a Devolutions Account, optional otherwise).
* _**Additional security options**_:
* The _**Link duration**_ can be set to 1 hour, 24 hours, 3 days or 1 week.
* The _**View limit**_ can be set to Unlimited, Single view or Multiple views. The Multiple views option is useful for setting an exact amount of possible views.
* It is recommended to enable the _**Allow recipient to delete message**_ option.
5. Read and agree to our online services terms.
6. Click on _**Create secure link**_ to get the in-browser encrypted link. 
7. Click on _**Copy to clipboard**_ and send it to the recipient(s).
How to receive a Devolutions Send Standalone secret
---------------------------------------------------
[](https://docs.devolutions.net/gateway/kb/general-knowledge/devolutions-send-standalone/#how-to-receive-a-devolutions-send-standalone-secret)
1. Click on the received encrypted link.
A Devolutions Send Standalone secret will always start with https://send.devolutions.com/receive/.
2. Click on _**Unmask text**_.
Make certain to be in a private setting before reading this message if it contains sensitive information.

Unmask text
3. Enter the _**Passphrase**_ the sender provided (if necessary) and click on _**Decrypt**_. 
4. Once done, click on _**Delete Now**_.
5. Click _**Yes**_.  
Technical details
-----------------
[](https://docs.devolutions.net/gateway/kb/general-knowledge/devolutions-send-standalone/#technical-details)
The core tenant of Devolutions Send is that Devolutions itself cannot decrypt the user's secret. This is accomplished via client-side (browser) encryption through a Rust program compiled to WASM (WebAssembly) in-browser. Therefore, Devolutions does not hold the encryption key and cannot decrypt the data.
### See also
[](https://docs.devolutions.net/gateway/kb/general-knowledge/devolutions-send-standalone/#see-also)
* [Devolutions Blog - How organizations can safely share confidential information with Devolutions Send](https://blog.devolutions.net/2024/08/how-organizations-can-safely-share-confidential-information-with-devolutions-send/ "Devolutions Blog - How organizations can safely share confidential information with Devolutions Send")
[ Share your feedback](https://forum.devolutions.net/forums/176/documentation--documentation-requests)
---
# Prevent issues by matching major and minor versions - Devolutions Documentation
Prevent issues by matching major and minor versions
===================================================
On this page
* [Major version](https://docs.devolutions.net/gateway/kb/general-knowledge/difference-major-minor-versions/#major-version)
* [Minor version](https://docs.devolutions.net/gateway/kb/general-knowledge/difference-major-minor-versions/#minor-version)
* [Extended maintenance and latest versions (Devolutions Server)](https://docs.devolutions.net/gateway/kb/general-knowledge/difference-major-minor-versions/#extended-maintenance-and-latest-versions-devolutions-server)
* [Version management](https://docs.devolutions.net/gateway/kb/general-knowledge/difference-major-minor-versions/#version-management)
Always match major and minor versions across Devolutions products (e.g., 2025.1 with 2025.1) to avoid errors and compatibility issues.
Major version
-------------
[](https://docs.devolutions.net/gateway/kb/general-knowledge/difference-major-minor-versions/#major-version)
A major version refers to a release that introduces significant changes, new features, or major enhancements. The major version is identified by the first number after the year. For example, in _**2024.3.27.0**_, the major version is _**3**_.
Minor version
-------------
[](https://docs.devolutions.net/gateway/kb/general-knowledge/difference-major-minor-versions/#minor-version)
A minor version consists of incremental updates within a major version. These updates often include bug fixes, security patches, and minor enhancements but do not introduce major new features or changes that significantly alter functionality. For example, in _**2024.3.27.0**_, the minor version is _**27**_.
Extended maintenance and latest versions (Devolutions Server)
-------------------------------------------------------------
[](https://docs.devolutions.net/gateway/kb/general-knowledge/difference-major-minor-versions/#extended-maintenance-and-latest-versions-devolutions-server)
In addition to understanding major and minor versions, it is important to distinguish between extended maintenance and latest versions. This distinction applies only to Devolutions Server.
* **Extended maintenance**: Refers to the latest minor version of the previous major release (e.g., 2023.3.16).
* **Latest**: Refers to the most recent version available, which includes all the latest features, improvements, [security patches](https://devolutions.net/security/advisories/)
, and bug fixes (e.g., 2024.1.11).
Each time a new major version is released (e.g., 2024.2.x), the latest version (2024.1.x) becomes the new extended maintenance version. No security updates or patches are provided for previous extended maintenance versions (e.g., 2023.3.x or earlier). This lifecycle is repeated for each new major release.
Version management
------------------
[](https://docs.devolutions.net/gateway/kb/general-knowledge/difference-major-minor-versions/#version-management)
The _**Version management**_ allows administrators to manage the data source availability in other versions of Remote Desktop Manager for Windows, Mac, and Linux.
* [Remote Desktop Manager](https://docs.devolutions.net/rdm/commands/administration/system-settings/application-specific/version-management/)
* [Devolutions Server](https://docs.devolutions.net/server/web-interface/administration/configuration/system-settings/#vault-management)
[ Share your feedback](https://forum.devolutions.net/forums/176/documentation--documentation-requests)
---
# Install root certificates - Devolutions Documentation
Install root certificates
=========================
Here is the procedure to install root certificates on Windows.
Firefox does not trust the same certificates as Windows and a setting must be applied to enable this.
Please consult [Mozilla's knowledge base article](https://support.mozilla.org/en-US/kb/setting-certificate-authorities-firefox)
.
1. Open the Microsoft Management Console by searching for _**MMC**_ in the _**Start**_ menu. Another way is to press the Windows+R keys on your keyboard and, in the _**Run**_ window, search for _**MMC**_.
2. Select _**File – Add/Remove Snap-in**_.
3. In the _**Available snap-ins**_ box, select _**Certificates**_.
4. Click the _**Add**_ button.
5. In the wizard, select _**Computer Account**_, then click _**Next**_.
6. Select _**Local computer**_, then click _**Finish**_ to end the wizard.
7. Click _**OK**_ to save your changes. This action will also close the _**Add or Remove Snap-ins**_ dialog.
8. In the console, select _**Certificates (Local Computer)**_.
9. In the _**Logical Store Name**_ box, right-click _**Trusted Root Certification Authorities**_ and select _**All Tasks – Import**_.
10. Follow the instructions in the _**Certificate Import Wizard**_ and provide the certificate file you have.
Here is the procedure to install root certificates on Linux (Ubuntu and Debian).
Firefox does not trust the same certificates as Windows and a setting must be applied to enable this.
Please consult [Mozilla's knowledge base article](https://support.mozilla.org/en-US/kb/setting-certificate-authorities-firefox)
.
1. sudo mkdir /usr/local/share/ca-certificates/extra
2. sudo cp ca.crt /usr/local/share/ca-certificates/extra/ca.crt
3. sudo update-ca-certificates
Watch for a "1" added in the output messages.
[ Share your feedback](https://forum.devolutions.net/forums/176/documentation--documentation-requests)
---
# Politiques de cycle de vie - Documentation Devolutions
Politiques de cycle de vie
==========================
Sur cette page
* [Politiques de cycle de vie de Remote Desktop Manager](https://docs.devolutions.net/fr/gateway/kb/general-knowledge/life-cycle-policies/#remote-desktop-manager-life-cycle-policies)
* [Politiques de cycle de vie de Devolutions Workspace](https://docs.devolutions.net/fr/gateway/kb/general-knowledge/life-cycle-policies/#devolutions-workspace-life-cycle-policies)
Consulter nos politiques de cycle de vie pour les produits Devolutions suivants:
Politiques de cycle de vie de Remote Desktop Manager
----------------------------------------------------
[](https://docs.devolutions.net/fr/gateway/kb/general-knowledge/life-cycle-policies/#remote-desktop-manager-life-cycle-policies)
* [Remote Desktop Manager Windows](https://docs.devolutions.net/fr/gateway/kb/general-knowledge/life-cycle-policies/remote-desktop-manager/rdm-windows-life-cycle-policy/)
* [Remote Desktop Manager macOS](https://docs.devolutions.net/fr/gateway/kb/general-knowledge/life-cycle-policies/remote-desktop-manager/rdm-macos-life-cycle-policy/)
* [Remote Desktop Manager Linux](https://docs.devolutions.net/fr/gateway/kb/general-knowledge/life-cycle-policies/remote-desktop-manager/rdm-linux-life-cycle-policy/)
* [Remote Desktop Manager iOS](https://docs.devolutions.net/fr/gateway/kb/general-knowledge/life-cycle-policies/remote-desktop-manager/rdm-ios-life-cycle-policy/)
* [Remote Desktop Manager Android](https://docs.devolutions.net/fr/gateway/kb/general-knowledge/life-cycle-policies/remote-desktop-manager/rdm-android-life-cycle-policy/)
Politiques de cycle de vie de Devolutions Workspace
---------------------------------------------------
[](https://docs.devolutions.net/fr/gateway/kb/general-knowledge/life-cycle-policies/#devolutions-workspace-life-cycle-policies)
* [Application Windows pour Workspace](https://docs.devolutions.net/fr/gateway/kb/general-knowledge/life-cycle-policies/workspace/workspace-windows-life-cycle-policy/)
* [Application macOS pour Workspace](https://docs.devolutions.net/fr/gateway/kb/general-knowledge/life-cycle-policies/workspace/workspace-macos-life-cycle-policy/)
* [Application iOS Workspace](https://docs.devolutions.net/fr/gateway/kb/general-knowledge/life-cycle-policies/workspace/workspace-ios-life-cycle-policy/)
* [Application Android Workspace](https://docs.devolutions.net/fr/gateway/kb/general-knowledge/life-cycle-policies/workspace/workspace-android-life-cycle-policy/)
[ Partagez vos commentaires](https://forum.devolutions.net/forums/176/documentation--documentation-requests)
---
# Install root certificates - Devolutions Documentation
Install root certificates
=========================
Here is the procedure to install root certificates on Windows.
Firefox does not trust the same certificates as Windows and a setting must be applied to enable this.
Please consult [Mozilla's knowledge base article](https://support.mozilla.org/en-US/kb/setting-certificate-authorities-firefox)
.
1. Open the Microsoft Management Console by searching for _**MMC**_ in the _**Start**_ menu. Another way is to press the Windows+R keys on your keyboard and, in the _**Run**_ window, search for _**MMC**_.
2. Select _**File – Add/Remove Snap-in**_.
3. In the _**Available snap-ins**_ box, select _**Certificates**_.
4. Click the _**Add**_ button.
5. In the wizard, select _**Computer Account**_, then click _**Next**_.
6. Select _**Local computer**_, then click _**Finish**_ to end the wizard.
7. Click _**OK**_ to save your changes. This action will also close the _**Add or Remove Snap-ins**_ dialog.
8. In the console, select _**Certificates (Local Computer)**_.
9. In the _**Logical Store Name**_ box, right-click _**Trusted Root Certification Authorities**_ and select _**All Tasks – Import**_.
10. Follow the instructions in the _**Certificate Import Wizard**_ and provide the certificate file you have.
Here is the procedure to install root certificates on Linux (Ubuntu and Debian).
Firefox does not trust the same certificates as Windows and a setting must be applied to enable this.
Please consult [Mozilla's knowledge base article](https://support.mozilla.org/en-US/kb/setting-certificate-authorities-firefox)
.
1. sudo mkdir /usr/local/share/ca-certificates/extra
2. sudo cp ca.crt /usr/local/share/ca-certificates/extra/ca.crt
3. sudo update-ca-certificates
Watch for a "1" added in the output messages.
[ Share your feedback](https://forum.devolutions.net/forums/176/documentation--documentation-requests)
---
# Life cycle policies - Devolutions Documentation
Life cycle policies
===================
Auf dieser Seite
* [Remote Desktop Manager life cycle policies](https://docs.devolutions.net/de/gateway/kb/general-knowledge/life-cycle-policies/#remote-desktop-manager-life-cycle-policies)
* [Devolutions Workspace life cycle policies](https://docs.devolutions.net/de/gateway/kb/general-knowledge/life-cycle-policies/#devolutions-workspace-life-cycle-policies)
Consult our life cycle policies for the following Devolutions products:
Remote Desktop Manager life cycle policies
------------------------------------------
[](https://docs.devolutions.net/de/gateway/kb/general-knowledge/life-cycle-policies/#remote-desktop-manager-life-cycle-policies)
* [Remote Desktop Manager Windows](https://docs.devolutions.net/gateway/kb/general-knowledge/life-cycle-policies/remote-desktop-manager/rdm-windows-life-cycle-policy/)
* [Remote Desktop Manager macOS](https://docs.devolutions.net/gateway/kb/general-knowledge/life-cycle-policies/remote-desktop-manager/rdm-macos-life-cycle-policy/)
* [Remote Desktop Manager Linux](https://docs.devolutions.net/gateway/kb/general-knowledge/life-cycle-policies/remote-desktop-manager/rdm-linux-life-cycle-policy/)
* [Remote Desktop Manager iOS](https://docs.devolutions.net/gateway/kb/general-knowledge/life-cycle-policies/remote-desktop-manager/rdm-ios-life-cycle-policy/)
* [Remote Desktop Manager Android](https://docs.devolutions.net/gateway/kb/general-knowledge/life-cycle-policies/remote-desktop-manager/rdm-android-life-cycle-policy/)
Devolutions Workspace life cycle policies
-----------------------------------------
[](https://docs.devolutions.net/de/gateway/kb/general-knowledge/life-cycle-policies/#devolutions-workspace-life-cycle-policies)
* [Workspace Windows app](https://docs.devolutions.net/gateway/kb/general-knowledge/life-cycle-policies/workspace/workspace-windows-life-cycle-policy/)
* [Workspace macOS app](https://docs.devolutions.net/gateway/kb/general-knowledge/life-cycle-policies/workspace/workspace-macos-life-cycle-policy/)
* [Workspace iOS app](https://docs.devolutions.net/gateway/kb/general-knowledge/life-cycle-policies/workspace/workspace-ios-life-cycle-policy/)
* [Workspace Android app](https://docs.devolutions.net/gateway/kb/general-knowledge/life-cycle-policies/workspace/workspace-android-life-cycle-policy/)
[ Share your feedback](https://forum.devolutions.net/forums/176/documentation--documentation-requests)
---
# License - Devolutions Documentation
License
=======
[ Share your feedback](https://forum.devolutions.net/forums/176/documentation--documentation-requests)
---
# Vault privacy for administrators and users - Devolutions Documentation
Vault privacy for administrators and users
==========================================
The connection and password management solutions provided by Devolutions (Remote Desktop Manager, Devolutions Server, and Devolutions Hub Business) offer a robust system that empowers administrators with complete and secure control over user vault management. However, it is natural for some customers to have concerns regarding the potential access to their "private" vaults by a malicious administrator. It is crucial to clarify the intended purpose of these "private" or "user" vaults, as they are primarily designed for personal corporate usage rather than personal private usage.
The distinction lies in the fact that these vaults are created within the context of a corporate environment, where administrators need to ensure continuous access to critical information stored within them. This necessity arises from various scenarios such as managing incidents, addressing employee terminations, and other operational requirements. By maintaining administrative access to these vaults, organizations can effectively safeguard against potential disruptions and ensure the smooth functioning of their operations.
While administrators do possess the ability to access these vaults, it is important to emphasize that this access is granted within the framework of their administrative responsibilities, and they are logged normally for visibility and traceability. Devolutions recognize the importance of privacy and understand that users may require an additional layer of security for their personal information. To address this concern and provide users with absolute privacy, Devolutions offers a free solution called Devolutions Hub Business Free.
Devolutions Hub Business Free is specifically designed to cater to the individual needs of users who seek heightened privacy and control over their personal data. This solution ensures that personal information remains entirely private, without any administrative access or intervention. Users can securely store and manage their sensitive data within their personal vaults, maintaining complete ownership and exclusive control over their information.
By recommending Devolutions Hub Business Free for users seeking absolute privacy, Devolutions acknowledge the importance of differentiating between the corporate and personal usage of their connection and password management solution. This approach provides a comprehensive suite of options, catering to both the administrative requirements of organizations and the individual privacy needs of users, thereby offering a well-rounded and versatile solution for diverse user scenarios.
[ Share your feedback](https://forum.devolutions.net/forums/176/documentation--documentation-requests)
---
# Life cycle policies - Devolutions Documentation
Life cycle policies
===================
On this page
* [Remote Desktop Manager life cycle policies](https://docs.devolutions.net/gateway/kb/general-knowledge/life-cycle-policies/#remote-desktop-manager-life-cycle-policies)
* [Devolutions Workspace life cycle policies](https://docs.devolutions.net/gateway/kb/general-knowledge/life-cycle-policies/#devolutions-workspace-life-cycle-policies)
Consult our life cycle policies for the following Devolutions products:
Remote Desktop Manager life cycle policies
------------------------------------------
[](https://docs.devolutions.net/gateway/kb/general-knowledge/life-cycle-policies/#remote-desktop-manager-life-cycle-policies)
* [Remote Desktop Manager Windows](https://docs.devolutions.net/gateway/kb/general-knowledge/life-cycle-policies/remote-desktop-manager/rdm-windows-life-cycle-policy/)
* [Remote Desktop Manager macOS](https://docs.devolutions.net/gateway/kb/general-knowledge/life-cycle-policies/remote-desktop-manager/rdm-macos-life-cycle-policy/)
* [Remote Desktop Manager Linux](https://docs.devolutions.net/gateway/kb/general-knowledge/life-cycle-policies/remote-desktop-manager/rdm-linux-life-cycle-policy/)
* [Remote Desktop Manager iOS](https://docs.devolutions.net/gateway/kb/general-knowledge/life-cycle-policies/remote-desktop-manager/rdm-ios-life-cycle-policy/)
* [Remote Desktop Manager Android](https://docs.devolutions.net/gateway/kb/general-knowledge/life-cycle-policies/remote-desktop-manager/rdm-android-life-cycle-policy/)
Devolutions Workspace life cycle policies
-----------------------------------------
[](https://docs.devolutions.net/gateway/kb/general-knowledge/life-cycle-policies/#devolutions-workspace-life-cycle-policies)
* [Workspace Windows app](https://docs.devolutions.net/gateway/kb/general-knowledge/life-cycle-policies/workspace/workspace-windows-life-cycle-policy/)
* [Workspace macOS app](https://docs.devolutions.net/gateway/kb/general-knowledge/life-cycle-policies/workspace/workspace-macos-life-cycle-policy/)
* [Workspace iOS app](https://docs.devolutions.net/gateway/kb/general-knowledge/life-cycle-policies/workspace/workspace-ios-life-cycle-policy/)
* [Workspace Android app](https://docs.devolutions.net/gateway/kb/general-knowledge/life-cycle-policies/workspace/workspace-android-life-cycle-policy/)
[ Share your feedback](https://forum.devolutions.net/forums/176/documentation--documentation-requests)
---
# Confidentialité des coffres pour les administrateurs et les utilisateurs - Documentation Devolutions
Confidentialité des coffres pour les administrateurs et les utilisateurs
========================================================================
Les solutions de gestion des connexions et des mots de passe proposées par Devolutions (Remote Desktop Manager, Devolutions Server et Devolutions Hub Business) offrent un système robuste permettant aux administrateurs de disposer d’un contrôle complet et sécurisé sur la gestion du coffre des utilisateurs. Cependant, il est naturel que certains clients aient des préoccupations concernant l'accès éventuel à leur coffre « privé » par un administrateur malveillant. Il est essentiel de clarifier l’objectif prévu de ces coffres « privés » ou « utilisateur », car ils sont principalement conçus pour un usage professionnel personnel et non pour un usage privé personnel.
La distinction réside dans le fait que ces coffres sont créés dans le cadre d'un environnement corporatif, où les administrateurs doivent assurer un accès continu aux informations critiques qui y sont stockées. Cette nécessité découle de divers scénarios tels que la gestion des incidents, la gestion des départs d'employés et d'autres exigences opérationnelles. En maintenant un accès administratif à ces coffres, les organisations peuvent efficacement se protéger contre les perturbations potentielles et assurer le bon fonctionnement de leurs opérations.
Même si les administrateurs possèdent la capacité d’accéder à ces coffres, il est important de souligner que cet accès est accordé dans le cadre de leurs responsabilités administratives, et tout accès est consigné normalement pour assurer la visibilité et la traçabilité. Devolutions reconnaît l’importance de la confidentialité et comprend que les utilisateurs peuvent exiger une couche supplémentaire de sécurité pour leurs informations personnelles. Pour répondre à cette préoccupation et offrir aux utilisateurs une confidentialité absolue, Devolutions propose une solution gratuite dénommée Devolutions Hub Business Free.
Devolutions Hub Business Free est spécialement conçu pour répondre aux besoins individuels des utilisateurs recherchant une plus grande confidentialité et un meilleur contrôle sur leurs données personnelles. Cette solution garantit que les informations personnelles restent entièrement privées, sans aucun accès ni intervention administrative. Les utilisateurs peuvent stocker et gérer de façon sécurisée leurs données sensibles dans leurs coffres personnels, en conservant la pleine propriété et le contrôle exclusif de leurs informations.
En recommandant Devolutions Hub Business Free aux utilisateurs cherchant une confidentialité absolue, Devolutions reconnaît l’importance de différencier l’utilisation professionnelle et personnelle de leur solution de gestion des connexions et des mots de passe. Cette approche offre une suite complète d’options, répondant à la fois aux exigences administratives des organisations et aux besoins de confidentialité individuelle des utilisateurs, offrant ainsi une solution polyvalente et complète pour divers scénarios d’utilisation.
[ Partagez vos commentaires](https://forum.devolutions.net/forums/176/documentation--documentation-requests)
---
# Remote Desktop Manager life cycle policies - Devolutions Documentation
Remote Desktop Manager life cycle policies
==========================================
Consult our Remote Desktop Manager life cycle policies:
* [Remote Desktop Manager Windows](https://docs.devolutions.net/gateway/kb/general-knowledge/life-cycle-policies/remote-desktop-manager/rdm-windows-life-cycle-policy/)
* [Remote Desktop Manager macOS](https://docs.devolutions.net/gateway/kb/general-knowledge/life-cycle-policies/remote-desktop-manager/rdm-macos-life-cycle-policy/)
* [Remote Desktop Manager Linux](https://docs.devolutions.net/gateway/kb/general-knowledge/life-cycle-policies/remote-desktop-manager/rdm-linux-life-cycle-policy/)
* [Remote Desktop Manager iOS](https://docs.devolutions.net/gateway/kb/general-knowledge/life-cycle-policies/remote-desktop-manager/rdm-ios-life-cycle-policy/)
* [Remote Desktop Manager Android](https://docs.devolutions.net/gateway/kb/general-knowledge/life-cycle-policies/remote-desktop-manager/rdm-android-life-cycle-policy/)
[ Share your feedback](https://forum.devolutions.net/forums/176/documentation--documentation-requests)
---
# How to renew your license - Devolutions Documentation
How to renew your license
=========================
Licenses can be renewed directly through the [Devolutions Portal](https://portal.devolutions.com/)
, provided the renewal is for the same product(s) and number of users. To switch products or modify the number of users, please contact our [sales team](mailto:service@devolutions.net)
for further assistance.
1. Log in to the Devolutions Portal using the account that purchased the previous license.
2. Once logged in, go to the _**Licenses**_ section. You will see a list of your active and expired licenses.
3. Find the license you wish to renew and click the _**Renew now**_ button.
4. You will be able to adjust the **license term** (e.g., 1 year, 3 years). No other modifications can be made at this stage.
5. Click on _**Pay now**_ to confirm your renewal.
6. Complete the payment.
[ Share your feedback](https://forum.devolutions.net/forums/176/documentation--documentation-requests)
---
# Générer des certificats serveur et client auto-signés avec OpenSSL - Documentation Devolutions
Générer des certificats serveur et client auto-signés avec OpenSSL
==================================================================
Sur cette page
* [Procédure](https://docs.devolutions.net/fr/gateway/kb/general-knowledge/secure-self-signed-certificates/#procedure)
* [Autorité de certification racine (AC)](https://docs.devolutions.net/fr/gateway/kb/general-knowledge/secure-self-signed-certificates/#root-certification-authority-ca)
* [Certificat serveur](https://docs.devolutions.net/fr/gateway/kb/general-knowledge/secure-self-signed-certificates/#server-certificate)
* [Certificat client](https://docs.devolutions.net/fr/gateway/kb/general-knowledge/secure-self-signed-certificates/#client-certificate)
* [Traiter une demande de signature de certificat (CSR) sur l'autorité de certification racine (AC)](https://docs.devolutions.net/fr/gateway/kb/general-knowledge/secure-self-signed-certificates/#process-a-certificate-signing-request-csr-on-the-root-certificate-authority-ca)
Ceci est le guide définitif pour créer des certificats sécurisés, à la fois pour les serveurs et les clients, en utilisant OpenSSL.
Procédure
---------
[](https://docs.devolutions.net/fr/gateway/kb/general-knowledge/secure-self-signed-certificates/#procedure)
Sur Windows, il est recommandé d'utiliser Chocolatey pour installer OpenSSL et ses dépendances. La ligne de commande est simplement \`choco install openssl\`.
* [Créer l'AC racine](https://docs.devolutions.net/fr/gateway/kb/general-knowledge/secure-self-signed-certificates/#root-certification-authority-ca)
* [Générer une demande de signature de certificat (CSR) – Serveur](https://docs.devolutions.net/fr/gateway/kb/general-knowledge/secure-self-signed-certificates/#server-certificate)
* [Générer une demande de signature de certificat (CSR) – Client](https://docs.devolutions.net/fr/gateway/kb/general-knowledge/secure-self-signed-certificates/#client-certificate)
* [Traiter une demande de signature de certificat (CSR) sur l'autorité de certification (CA) racine](https://docs.devolutions.net/fr/gateway/kb/general-knowledge/secure-self-signed-certificates/#process-a-certificate-signing-request-csr-on-the-root-certificate-authority-ca)
### Autorité de certification racine (AC)
[](https://docs.devolutions.net/fr/gateway/kb/general-knowledge/secure-self-signed-certificates/#root-certification-authority-ca)
1. Générer la _**clé privée de l'AC racine**_ en utilisant la ligne de commande suivante :`openssl ecparam -name prime256v1 -genkey -noout -out ca.key`. Chaque certificat doit avoir une clé privée correspondante.
2. Générer le _**Certificat AC racine**_ (Autorité de Certification) en utilisant la ligne de commande suivante: `openssl req -new -x509 -sha256 -key ca.key -out ca.crt`.
3. Entrer les informations sur l'AC (le certificat sera généré dans le fichier ca.crt):
Country Name (2 letter code) [AU]:US
State or Province Name (full name) [Some-State]:CA
Locality Name (eg, city) []:Toontown
Organization Name (eg, company) [Internet Widgits Pty Ltd]:Acme inc.
Organizational Unit Name (eg, section) []:Security
Common Name (e.g. server FQDN or your name) []:acme.com
Email Address []:security@acme.com
4. [Installer le certificat](https://docs.devolutions.net/fr/gateway/kb/general-knowledge/install-root-certificates/)
.
Noter que le certificat doit être installé sur le serveur et sur tous les clients pour valider la légitimité des certificats émis. Certains navigateurs ont également des particularités qui sont décrites dans la rubrique.
### Certificat serveur
[](https://docs.devolutions.net/fr/gateway/kb/general-knowledge/secure-self-signed-certificates/#server-certificate)
Ces étapes sont généralement effectuées sur chaque serveur ou appareil pour lequel vous avez l'intention de demander un certificat. Installer OpenSSL s'il n'est pas présent. L'alternative est de déployer en toute sécurité la clé privée sur le serveur de destination en même temps que le certificat. Il est recommandé d'utiliser cette dernière approche uniquement si vous devez adhérer à des déploiements scriptés pour suivre les pratiques CloudOps/DevOps.
1. Générer la _**clé privée du certificat serveur**_ en utilisant la ligne de commande suivante : `openssl ecparam -name prime256v1 -genkey -noout -out server.key` (clé privée de 256 bits dans le fichier server.key). Chaque certificat doit avoir une clé privée correspondante.
2. Générer la _**demande de signature de certificat**_ (CSR) du serveur en utilisant la ligne de commande suivante : `openssl req -new -sha256 -key server.key -out server.csr`. Cette demande sera ensuite traitée sur le serveur de l'AC racine.
3. Entrer les informations sur le certificat du serveur (le FQDN exact utilisé par le serveur doit être spécifié). Par exemple:
Country Name (2 letter code) [AU]:US
State or Province Name (full name) [Some-State]:CA
Locality Name (eg, city) []:Toontown
Organization Name (eg, company) [Internet Widgits Pty Ltd]:Acme inc.
Organizational Unit Name (eg, section) []:Security
Common Name (e.g. server FQDN or your name) []:vault.acme.com
Email Address []:security@acme.com
4. Entrer un mot de passe dans l'invite, utiliser un gestionnaire de mots de passe ainsi qu'un générateur de mots de passe fort est essentiel.
5. Transférer le fichier server.csr à l'AC racine.
6. Traiter la demande en suivant les instructions [ci-dessous](https://docs.devolutions.net/fr/gateway/kb/general-knowledge/secure-self-signed-certificates/#process-a-certificate-signing-request-csr-on-the-root-certificate-authority-ca)
.
7. Déployer le certificat.
### Certificat client
[](https://docs.devolutions.net/fr/gateway/kb/general-knowledge/secure-self-signed-certificates/#client-certificate)
Suivre la même procédure que pour le [certificat serveur](https://docs.devolutions.net/fr/gateway/kb/general-knowledge/secure-self-signed-certificates/#server-certificate)
, mais vous devez adapter deux attributs des informations que vous entrez à vos besoins, à savoir le _**Nom commun**_ et l'_**Adresse courriel**_.
Common Name (e.g. server FQDN or your name) []:John Doe
Email Address []:JohnDoe@acme.com
### Traiter une demande de signature de certificat (CSR) sur l'autorité de certification racine (AC)
[](https://docs.devolutions.net/fr/gateway/kb/general-knowledge/secure-self-signed-certificates/#process-a-certificate-signing-request-csr-on-the-root-certificate-authority-ca)
Traiter la CSR en générant un certificat.
Générer en utilisant la ligne de commande suivante, où le server.csr a été généré sur le serveur: `openssl x509 -req -in server.csr -CA ca.crt -CAkey ca.key -CAcreateserial -out server.crt -days 1000 -sha256`
Cela se traduit par le certificat généré dans le fichier server.crt. Vous devez le déployer sur le serveur où vous avez généré le CSR.
[ Partagez vos commentaires](https://forum.devolutions.net/forums/176/documentation--documentation-requests)
---
# Licensing issues - Devolutions Documentation
Licensing issues
================
On this page
* [Invalid license (Product: RDM)](https://docs.devolutions.net/gateway/kb/general-knowledge/license/licensing-issues/#invalid-license-product-rdm)
* [Invalid license – Not found](https://docs.devolutions.net/gateway/kb/general-knowledge/license/licensing-issues/#invalid-license-not-found)
* [Invalid serial number - Not found](https://docs.devolutions.net/gateway/kb/general-knowledge/license/licensing-issues/#invalid-serial-number-not-found)
* [DVLS – License invalid](https://docs.devolutions.net/gateway/kb/general-knowledge/license/licensing-issues/#dvls-license-invalid)
* [Unable to save – License is invalid](https://docs.devolutions.net/gateway/kb/general-knowledge/license/licensing-issues/#unable-to-save-license-is-invalid)
* [License not supported or not valid](https://docs.devolutions.net/gateway/kb/general-knowledge/license/licensing-issues/#license-not-supported-or-not-valid)
* [No Enterprise license found](https://docs.devolutions.net/gateway/kb/general-knowledge/license/licensing-issues/#no-enterprise-license-found)
* [This account does not have an assigned license or the license is expired. Ask your administrator to assign you a license](https://docs.devolutions.net/gateway/kb/general-knowledge/license/licensing-issues/#this-account-does-not-have-an-assigned-license-or-the-license-is-expired-ask-your-administrator-to-assign-you-a-license)
* [Importing license key (.lic)](https://docs.devolutions.net/gateway/kb/general-knowledge/license/licensing-issues/#importing-license-key-lic)
* [License already exists](https://docs.devolutions.net/gateway/kb/general-knowledge/license/licensing-issues/#license-already-exists)
* [About the .lic file](https://docs.devolutions.net/gateway/kb/general-knowledge/license/licensing-issues/#lic-file)
This article provides solutions to licensing issues encountered across Devolutions products. If none of the solutions resolve the issue, please contact our customer support team at [service@devolutions.net](mailto:service@devolutions.net)
.
Licenses cannot be manually added in the [Devolutions Portal](https://portal.devolutions.com/serials)
. For any issues or irregularities related to license display, please contact our sales team at [sales@devolutions.net](mailto:sales@devolutions.net)
.
Removing expired licenses is a recommended best practice that can help resolve current issues and prevent future ones.
Invalid license (Product: RDM)
------------------------------
[](https://docs.devolutions.net/gateway/kb/general-knowledge/license/licensing-issues/#invalid-license-product-rdm)
Licenses for Remote Desktop Manager, Devolutions Launcher, and integration module are not assigned in Devolutions Server and Devolutions Hub.
#### Solutions
[](https://docs.devolutions.net/gateway/kb/general-knowledge/license/licensing-issues/#solutions)
* Confirm that old licenses have been removed.
* Verify that the new license has been added.
* Check that the license is properly assigned to the user(s).
* * *
Invalid license – Not found
---------------------------
[](https://docs.devolutions.net/gateway/kb/general-knowledge/license/licensing-issues/#invalid-license-not-found)
OSC key is used in a version older than 2025.2.
#### Solutions
[](https://docs.devolutions.net/gateway/kb/general-knowledge/license/licensing-issues/#solutions-1)
* Confirm that old licenses have been removed.
* Verify that the new license has been added.
* Check that the license is properly assigned to the user(s).
If the above solutions do not resolve the issue, contact our [sales team](mailto:sales@devolutions.net)
to get a licorice key type.
* * *
Invalid serial number - Not found
---------------------------------
[](https://docs.devolutions.net/gateway/kb/general-knowledge/license/licensing-issues/#invalid-serial-number-not-found)
This error occurs in version 2024.x when using an OSC key.
#### Solutions
[](https://docs.devolutions.net/gateway/kb/general-knowledge/license/licensing-issues/#solutions-2)
* Confirm that old licenses have been removed.
* Verify that the new license has been added.
* Check that the license is properly assigned to the user(s).
If the above solutions do not resolve the issue, contact our [sales team](mailto:sales@devolutions.net)
to get a licorice key type.
* * *
DVLS – License invalid
----------------------
[](https://docs.devolutions.net/gateway/kb/general-knowledge/license/licensing-issues/#dvls-license-invalid)
Devolutions Server version is older than 2025.1 and the license does not meet the required criteria.
#### Solutions
[](https://docs.devolutions.net/gateway/kb/general-knowledge/license/licensing-issues/#solutions-3)
* Confirm that old licenses have been removed.
* Verify that the new license has been added.
* Check that the license is properly assigned to the user(s).
If the above solutions do not resolve the issue, contact our [sales team](mailto:sales@devolutions.net)
to get a licorice key type.
* * *
Unable to save – License is invalid
-----------------------------------
[](https://docs.devolutions.net/gateway/kb/general-knowledge/license/licensing-issues/#unable-to-save-license-is-invalid)
#### Solutions
[](https://docs.devolutions.net/gateway/kb/general-knowledge/license/licensing-issues/#solutions-4)
* Confirm that old licenses have been removed.
* Verify that the new license has been added.
* Check that the license is properly assigned to the user(s).
* * *
License not supported or not valid
----------------------------------
[](https://docs.devolutions.net/gateway/kb/general-knowledge/license/licensing-issues/#license-not-supported-or-not-valid)
#### Solutions
[](https://docs.devolutions.net/gateway/kb/general-knowledge/license/licensing-issues/#solutions-5)
* Confirm that old licenses have been removed.
* Verify that the new license has been added.
* Check that the license is properly assigned to the user(s).
If the above solutions do not resolve the issue, contact our [sales team](mailto:sales@devolutions.net)
to get a licorice key type.
* * *
No Enterprise license found
---------------------------
[](https://docs.devolutions.net/gateway/kb/general-knowledge/license/licensing-issues/#no-enterprise-license-found)
System fails to detect an Enterprise license for Remote Desktop Manager, Devolutions Server, and Devolutions Hub.
#### Solutions
[](https://docs.devolutions.net/gateway/kb/general-knowledge/license/licensing-issues/#solutions-6)
* Confirm that old licenses have been removed.
* Add the new license via the [`.lic` file](https://docs.devolutions.net/gateway/kb/general-knowledge/license/licensing-issues/#lic-file)
.
* Verify that the new license has been added.
* Refresh cache using CTRL + F5.
* * *
This account does not have an assigned license or the license is expired. Ask your administrator to assign you a license
------------------------------------------------------------------------------------------------------------------------
[](https://docs.devolutions.net/gateway/kb/general-knowledge/license/licensing-issues/#this-account-does-not-have-an-assigned-license-or-the-license-is-expired-ask-your-administrator-to-assign-you-a-license)
#### Solutions
[](https://docs.devolutions.net/gateway/kb/general-knowledge/license/licensing-issues/#solutions-7)
Confirm that a license has been assigned to the user.
* * *
Importing license key (.lic)
----------------------------
[](https://docs.devolutions.net/gateway/kb/general-knowledge/license/licensing-issues/#importing-license-key-lic)
The `.lic` file cannot be found.
#### Solutions
[](https://docs.devolutions.net/gateway/kb/general-knowledge/license/licensing-issues/#solutions-8)
* Confirm that old licenses have been removed.
* Add the new license via the [`.lic` file](https://docs.devolutions.net/gateway/kb/general-knowledge/license/licensing-issues/#lic-file)
.
* Check that the license is properly assigned to the user(s).
If the above solutions do not resolve the issue, contact our [sales team](mailto:sales@devolutions.net)
so they can provide you with the `.lic` file.
* * *
License already exists
----------------------
[](https://docs.devolutions.net/gateway/kb/general-knowledge/license/licensing-issues/#license-already-exists)
A key was provided as part of an older package purchase, but it is no longer compatible and cannot be added.
#### Solution
[](https://docs.devolutions.net/gateway/kb/general-knowledge/license/licensing-issues/#solution)
The key is no longer necessary.
* * *
About the .lic file
-------------------
[](https://docs.devolutions.net/gateway/kb/general-knowledge/license/licensing-issues/#lic-file)
The person who communicated with our [sales team](mailto:sales@devolutions.net)
(main contact) is the one who received the `.lic` file via email. This file contains a JSON Web Token (JWT). You can import and register the license while offline using the `.lic` file.
#### **See also**
[](https://docs.devolutions.net/gateway/kb/general-knowledge/license/licensing-issues/#see-also)
* [Getting started with Devolutions packages](https://docs.devolutions.net/portal/support-resources/getting-started-packages/)
* [Devolutions store – Tailored packages for your IT needs](https://store.devolutions.net/package)
[ Share your feedback](https://forum.devolutions.net/forums/176/documentation--documentation-requests)
---
# Generate a self-signed server and client certificates with OpenSSL - Devolutions Documentation
Generate a self-signed server and client certificates with OpenSSL
==================================================================
Auf dieser Seite
* [Procedure](https://docs.devolutions.net/de/gateway/kb/general-knowledge/secure-self-signed-certificates/#procedure)
* [Root Certification authority (CA)](https://docs.devolutions.net/de/gateway/kb/general-knowledge/secure-self-signed-certificates/#root-certification-authority-ca)
* [Server certificate](https://docs.devolutions.net/de/gateway/kb/general-knowledge/secure-self-signed-certificates/#server-certificate)
* [Client certificate](https://docs.devolutions.net/de/gateway/kb/general-knowledge/secure-self-signed-certificates/#client-certificate)
* [Process a Certificate Signing Request (CSR) on the Root Certificate Authority (CA)](https://docs.devolutions.net/de/gateway/kb/general-knowledge/secure-self-signed-certificates/#process-a-certificate-signing-request-csr-on-the-root-certificate-authority-ca)
This is the definitive guide to create secure certificates, for both servers and clients, using OpenSSL.
Procedure
---------
[](https://docs.devolutions.net/de/gateway/kb/general-knowledge/secure-self-signed-certificates/#procedure)
On Windows, it is recommended to use Chocolatey to install OpenSSL and its dependencies. The command line is simply \`choco install openssl\`.
* [Create the Root Certification Authority (CA)](https://docs.devolutions.net/de/gateway/kb/general-knowledge/secure-self-signed-certificates/#root-certification-authority-ca)
* [Generate a Certificate Signing Request (CSR) – Server](https://docs.devolutions.net/de/gateway/kb/general-knowledge/secure-self-signed-certificates/#server-certificate)
* [Generate a Certificate Signing Request (CSR) – Client](https://docs.devolutions.net/de/gateway/kb/general-knowledge/secure-self-signed-certificates/#client-certificate)
* [Process a Certificate Signing Request (CSR) on the Root Certificate Authority (CA)](https://docs.devolutions.net/de/gateway/kb/general-knowledge/secure-self-signed-certificates/#process-a-certificate-signing-request-csr-on-the-root-certificate-authority-ca)
### Root Certification authority (CA)
[](https://docs.devolutions.net/de/gateway/kb/general-knowledge/secure-self-signed-certificates/#root-certification-authority-ca)
1. Generate the _**Root CA Private Key**_ using the following command line:`openssl ecparam -name prime256v1 -genkey -noout -out ca.key`. Every certificate must have a corresponding private key.
2. Generate the _**Root CA Certificate**_ (Certificate Authority) using the following command line: `openssl req -new -x509 -sha256 -key ca.key -out ca.crt`.
3. Enter the information about the CA (the certificate will be generated in the ca.crt file):
Country Name (2 letter code) [AU]:US
State or Province Name (full name) [Some-State]:CA
Locality Name (eg, city) []:Toontown
Organization Name (eg, company) [Internet Widgits Pty Ltd]:Acme inc.
Organizational Unit Name (eg, section) []:Security
Common Name (e.g. server FQDN or your name) []:acme.com
Email Address []:security@acme.com
4. [Install the certificate](https://docs.devolutions.net/gateway/kb/general-knowledge/install-root-certificates/)
.
Note that the certificate must be installed on the server and on all of the clients to validate the legitimacy of issued certificates. Some browsers also have particularities which are described in the topic.
### Server certificate
[](https://docs.devolutions.net/de/gateway/kb/general-knowledge/secure-self-signed-certificates/#server-certificate)
These steps are usually performed on each server or device for which you intend to request a certificate. Install OpenSSL if it is not present. The alternative is to securely deploy the private key to the destination server at the same time as the certificate. It is recommended to use this last approach only if you must adhere to scripted deployments to follow CloudOps/DevOps practices.
1. Generate the _**Server Certificate Private Key**_ using the following command line: `openssl ecparam -name prime256v1 -genkey -noout -out server.key` (256bit private key in the server.key file). Every certificate must have a corresponding private key.
2. Generate the server _**Certificate Signing Request**_ (CSR) using the following command line: `openssl req -new -sha256 -key server.key -out server.csr`. This request will later be processed on the Root CA server.
3. Enter the information about the server certificate (the exact FQDN that is used by the server must be specified). For Example:
Country Name (2 letter code) [AU]:US
State or Province Name (full name) [Some-State]:CA
Locality Name (eg, city) []:Toontown
Organization Name (eg, company) [Internet Widgits Pty Ltd]:Acme inc.
Organizational Unit Name (eg, section) []:Security
Common Name (e.g. server FQDN or your name) []:vault.acme.com
Email Address []:security@acme.com
4. Enter a password into the prompt, using a password manager as well as a strong password generator is essential.
5. Transfer the server.csr file to the Root CA.
6. Process the request by following the instructions [below](https://docs.devolutions.net/de/gateway/kb/general-knowledge/secure-self-signed-certificates/#process-a-certificate-signing-request-csr-on-the-root-certificate-authority-ca)
.
7. Deploy the certificate.
### Client certificate
[](https://docs.devolutions.net/de/gateway/kb/general-knowledge/secure-self-signed-certificates/#client-certificate)
Follow the same procedure as for the [Server certificate](https://docs.devolutions.net/de/gateway/kb/general-knowledge/secure-self-signed-certificates/#server-certificate)
, but you must adapt two attributes of the information you enter to your needs, namely the _**Common Name**_ and the _**Email Address**_.
Common Name (e.g. server FQDN or your name) []:John Doe
Email Address []:JohnDoe@acme.com
### Process a Certificate Signing Request (CSR) on the Root Certificate Authority (CA)
[](https://docs.devolutions.net/de/gateway/kb/general-knowledge/secure-self-signed-certificates/#process-a-certificate-signing-request-csr-on-the-root-certificate-authority-ca)
Process the CSR by generating a certificate.
Generate it using the following command line, where the server.csr has been generated on the server: `openssl x509 -req -in server.csr -CA ca.crt -CAkey ca.key -CAcreateserial -out server.crt -days 1000 -sha256`
This results in the certificate being generated in the server.crt file. You must deploy it to the server where you generated the CSR.
[ Share your feedback](https://forum.devolutions.net/forums/176/documentation--documentation-requests)
---
# Qu'est-ce que SHA-256 ? - Documentation Devolutions
Qu'est-ce que SHA-256 ?
=======================
La famille des Algorithmes de Hachage Sécurisés (SHA) englobe plusieurs fonctions de hachage cryptographique, avec SHA-256 étant une variante largement utilisée. Les hachages cryptographiques agissent comme des signatures numériques pour les données, permettant la comparaison de grands ensembles de données par leurs valeurs de hachage plutôt que par leur contenu intégral. Cette méthode est similaire à l'utilisation des empreintes digitales pour l'identification—chaque ensemble de données a un hachage unique, et même une modification mineure des données change la valeur du hachage.
SHA-256 génère un hachage distinctif et de taille fixe de 256 bits (32 octets), fonctionnant comme un processus à sens unique qui le rend excellent pour les vérifications de l'intégrité des données, les défis d'authentification, les mesures anti-falsification, les signatures numériques et les applications blockchain.
Par exemple, lors du téléchargement d'applications telles que celles de Devolutions, SHA-256 aide à vérifier que les données reçues correspondent à l'original, garantissant qu'elles n'ont pas été altérées en raison d'erreurs réseau ou d'attaques de maliciels. Pour vérifier le hachage d'un fichier, cliquez simplement sur l'icône SHA-256 sur la page de téléchargement du site Web de Devolutions.
Pour des instructions supplémentaires sur la manière d'obtenir le hachage SHA-256 d'un fichier, consultez la documentation de Microsoft sur la [commande Get-FileHash](https://docs.microsoft.com/en-us/powershell/module/microsoft.powershell.utility/get-filehash?view=powershell-7.2)
. Voici comment l'utiliser :
Get-FileHash C:\Users\user1\Downloads\Setup.RemoteDesktopManager.exe -Algorithm SHA256 | Format-List.
Cette commande fournit une sortie structurée de la valeur du hachage, facilitant ainsi la vérification de l'intégrité de votre fichier.
[ Partagez vos commentaires](https://forum.devolutions.net/forums/176/documentation--documentation-requests)
---
# Devolutions Workspace life cycle policies - Devolutions Documentation
Devolutions Workspace life cycle policies
=========================================
Consult our Devolutions Workspace life cycle policies:
* [Workspace Windows app](https://docs.devolutions.net/gateway/kb/general-knowledge/life-cycle-policies/workspace/workspace-windows-life-cycle-policy/)
* [Workspace macOS app](https://docs.devolutions.net/gateway/kb/general-knowledge/life-cycle-policies/workspace/workspace-macos-life-cycle-policy/)
* [Workspace iOS app](https://docs.devolutions.net/gateway/kb/general-knowledge/life-cycle-policies/workspace/workspace-ios-life-cycle-policy/)
* [Workspace Android app](https://docs.devolutions.net/gateway/kb/general-knowledge/life-cycle-policies/workspace/workspace-android-life-cycle-policy/)
[ Share your feedback](https://forum.devolutions.net/forums/176/documentation--documentation-requests)
---
# What is SHA-256? - Devolutions Documentation
What is SHA-256?
================
The Secure Hash Algorithm (SHA) family encompasses several cryptographic hash functions, with SHA-256 being a widely-used variant. Cryptographic hashes act as digital signatures for data, enabling the comparison of large data sets by their hash values rather than their full content. This method is similar to using fingerprints for identification—each data set has a unique hash, and even a minor alteration to the data changes the hash value.
SHA-256 generates a distinctive, fixed-size 256-bit (32-byte) hash, functioning as a one-way process that makes it excellent for data integrity checks, authentication challenges, anti-tampering measures, digital signatures, and blockchain applications.
For instance, when downloading applications like those from Devolutions, SHA-256 helps verify that the data received matches the original, ensuring it has not been altered due to network errors or malware attacks. To check a file's hash, simply click on the SHA-256 icon on the download page of the Devolutions website.
For additional guidance on how to obtain the SHA-256 hash of a file, refer to Microsoft's documentation on the [Get-FileHash](https://docs.microsoft.com/en-us/powershell/module/microsoft.powershell.utility/get-filehash?view=powershell-7.2)
command. Here is how you can use it:
Get-FileHash C:\Users\user1\Downloads\Setup.RemoteDesktopManager.exe -Algorithm SHA256 | Format-List.
This command provides a structured output of the hash value, aiding in easy verification of your file's integrity.
[ Share your feedback](https://forum.devolutions.net/forums/176/documentation--documentation-requests)
---
# Change Devolutions Gateway certificate - Devolutions Documentation
Change Devolutions Gateway certificate
======================================
Devolutions Gateway certificates can be changed quickly and easily in the Devolutions Server Console. Follow the instructions below:
1. Open the Devolutions Server Console, and click on the _**Edit**_ button located in the _**Devolutions Gateway**_ section of the _**Companions**_ tab.
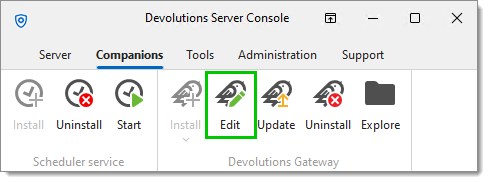
Edit the Devolutions Gateway
2. Then, change the _**HTTP listener**_ to _**https**_, and click on the ellipsis button (_**…**_) in the _**Certificate file**_ field under the _**Certificate configuration**_ heading.
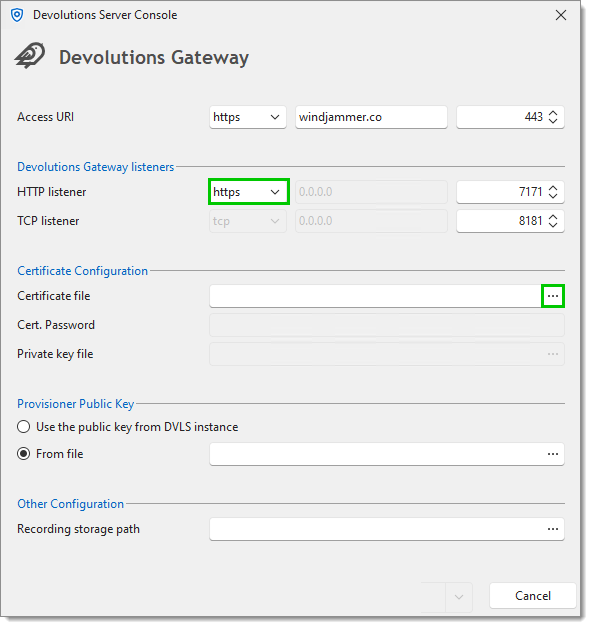
Choose a different certificate
3. Choose the certificate `.pfx` file to switch to, and click _**Ok**_ to save the changes.
4. Wait until the service restarts or do it manually in the Windows Services console.
5. Finally, verify the health of the Devolutions Gateway as described in [Troubleshooting Devolutions Gateway](https://docs.devolutions.net/gateway/kb/troubleshooting-articles/gateway-troubleshooting/#verify-a-gateways-health)
.
[ Share your feedback](https://forum.devolutions.net/forums/176/documentation--documentation-requests)
---
# Changer le certificat Devolutions Gateway - Documentation Devolutions
Changer le certificat Devolutions Gateway
=========================================
Les certificats Devolutions Gateway peuvent être changés rapidement et facilement dans la console Devolutions Server. Suivre les instructions ci-dessous :
1. Ouvrir la console Devolutions Server, et cliquer sur le bouton _**Modifier**_ situé dans la section _**Devolutions Gateway**_ de l'onglet _**Compagnons**_.

Edit the Devolutions Gateway
2. Ensuite, changer le _**HTTP listener**_ à _**https**_, et cliquer sur le bouton des points de suspension (_**…**_) dans le champ_**fichier de certificat**_ sous le titre _**configuration du certificat**_.

Choose a different certificate
3. Choisir le fichier de certificat `.pfx` à utiliser, et cliquer sur _**Ok**_ pour enregistrer les modifications.
4. Attendre que le service redémarre ou le faire manuellement dans la console des Services Windows.
5. Enfin, vérifier la santé du Devolutions Gateway comme décrit dans [Dépannage Devolutions Gateway](https://docs.devolutions.net/fr/gateway/kb/troubleshooting-articles/gateway-troubleshooting/#verify-a-gateways-health)
.
[ Partagez vos commentaires](https://forum.devolutions.net/forums/176/documentation--documentation-requests)
---
# Vault privacy for administrators and users - Devolutions Documentation
Vault privacy for administrators and users
==========================================
The connection and password management solutions provided by Devolutions (Remote Desktop Manager, Devolutions Server, and Devolutions Hub Business) offer a robust system that empowers administrators with complete and secure control over user vault management. However, it is natural for some customers to have concerns regarding the potential access to their "private" vaults by a malicious administrator. It is crucial to clarify the intended purpose of these "private" or "user" vaults, as they are primarily designed for personal corporate usage rather than personal private usage.
The distinction lies in the fact that these vaults are created within the context of a corporate environment, where administrators need to ensure continuous access to critical information stored within them. This necessity arises from various scenarios such as managing incidents, addressing employee terminations, and other operational requirements. By maintaining administrative access to these vaults, organizations can effectively safeguard against potential disruptions and ensure the smooth functioning of their operations.
While administrators do possess the ability to access these vaults, it is important to emphasize that this access is granted within the framework of their administrative responsibilities, and they are logged normally for visibility and traceability. Devolutions recognize the importance of privacy and understand that users may require an additional layer of security for their personal information. To address this concern and provide users with absolute privacy, Devolutions offers a free solution called Devolutions Hub Business Free.
Devolutions Hub Business Free is specifically designed to cater to the individual needs of users who seek heightened privacy and control over their personal data. This solution ensures that personal information remains entirely private, without any administrative access or intervention. Users can securely store and manage their sensitive data within their personal vaults, maintaining complete ownership and exclusive control over their information.
By recommending Devolutions Hub Business Free for users seeking absolute privacy, Devolutions acknowledge the importance of differentiating between the corporate and personal usage of their connection and password management solution. This approach provides a comprehensive suite of options, catering to both the administrative requirements of organizations and the individual privacy needs of users, thereby offering a well-rounded and versatile solution for diverse user scenarios.
[ Share your feedback](https://forum.devolutions.net/forums/176/documentation--documentation-requests)
---
# Generate a self-signed server and client certificates with OpenSSL - Devolutions Documentation
Generate a self-signed server and client certificates with OpenSSL
==================================================================
On this page
* [Procedure](https://docs.devolutions.net/gateway/kb/general-knowledge/secure-self-signed-certificates/#procedure)
* [Root Certification authority (CA)](https://docs.devolutions.net/gateway/kb/general-knowledge/secure-self-signed-certificates/#root-certification-authority-ca)
* [Server certificate](https://docs.devolutions.net/gateway/kb/general-knowledge/secure-self-signed-certificates/#server-certificate)
* [Client certificate](https://docs.devolutions.net/gateway/kb/general-knowledge/secure-self-signed-certificates/#client-certificate)
* [Process a Certificate Signing Request (CSR) on the Root Certificate Authority (CA)](https://docs.devolutions.net/gateway/kb/general-knowledge/secure-self-signed-certificates/#process-a-certificate-signing-request-csr-on-the-root-certificate-authority-ca)
This is the definitive guide to create secure certificates, for both servers and clients, using OpenSSL.
Procedure
---------
[](https://docs.devolutions.net/gateway/kb/general-knowledge/secure-self-signed-certificates/#procedure)
On Windows, it is recommended to use Chocolatey to install OpenSSL and its dependencies. The command line is simply \`choco install openssl\`.
* [Create the Root Certification Authority (CA)](https://docs.devolutions.net/gateway/kb/general-knowledge/secure-self-signed-certificates/#root-certification-authority-ca)
* [Generate a Certificate Signing Request (CSR) – Server](https://docs.devolutions.net/gateway/kb/general-knowledge/secure-self-signed-certificates/#server-certificate)
* [Generate a Certificate Signing Request (CSR) – Client](https://docs.devolutions.net/gateway/kb/general-knowledge/secure-self-signed-certificates/#client-certificate)
* [Process a Certificate Signing Request (CSR) on the Root Certificate Authority (CA)](https://docs.devolutions.net/gateway/kb/general-knowledge/secure-self-signed-certificates/#process-a-certificate-signing-request-csr-on-the-root-certificate-authority-ca)
### Root Certification authority (CA)
[](https://docs.devolutions.net/gateway/kb/general-knowledge/secure-self-signed-certificates/#root-certification-authority-ca)
1. Generate the _**Root CA Private Key**_ using the following command line:`openssl ecparam -name prime256v1 -genkey -noout -out ca.key`. Every certificate must have a corresponding private key.
2. Generate the _**Root CA Certificate**_ (Certificate Authority) using the following command line: `openssl req -new -x509 -sha256 -key ca.key -out ca.crt`.
3. Enter the information about the CA (the certificate will be generated in the ca.crt file):
Country Name (2 letter code) [AU]:US
State or Province Name (full name) [Some-State]:CA
Locality Name (eg, city) []:Toontown
Organization Name (eg, company) [Internet Widgits Pty Ltd]:Acme inc.
Organizational Unit Name (eg, section) []:Security
Common Name (e.g. server FQDN or your name) []:acme.com
Email Address []:security@acme.com
4. [Install the certificate](https://docs.devolutions.net/gateway/kb/general-knowledge/install-root-certificates/)
.
Note that the certificate must be installed on the server and on all of the clients to validate the legitimacy of issued certificates. Some browsers also have particularities which are described in the topic.
### Server certificate
[](https://docs.devolutions.net/gateway/kb/general-knowledge/secure-self-signed-certificates/#server-certificate)
These steps are usually performed on each server or device for which you intend to request a certificate. Install OpenSSL if it is not present. The alternative is to securely deploy the private key to the destination server at the same time as the certificate. It is recommended to use this last approach only if you must adhere to scripted deployments to follow CloudOps/DevOps practices.
1. Generate the _**Server Certificate Private Key**_ using the following command line: `openssl ecparam -name prime256v1 -genkey -noout -out server.key` (256bit private key in the server.key file). Every certificate must have a corresponding private key.
2. Generate the server _**Certificate Signing Request**_ (CSR) using the following command line: `openssl req -new -sha256 -key server.key -out server.csr`. This request will later be processed on the Root CA server.
3. Enter the information about the server certificate (the exact FQDN that is used by the server must be specified). For Example:
Country Name (2 letter code) [AU]:US
State or Province Name (full name) [Some-State]:CA
Locality Name (eg, city) []:Toontown
Organization Name (eg, company) [Internet Widgits Pty Ltd]:Acme inc.
Organizational Unit Name (eg, section) []:Security
Common Name (e.g. server FQDN or your name) []:vault.acme.com
Email Address []:security@acme.com
4. Enter a password into the prompt, using a password manager as well as a strong password generator is essential.
5. Transfer the server.csr file to the Root CA.
6. Process the request by following the instructions [below](https://docs.devolutions.net/gateway/kb/general-knowledge/secure-self-signed-certificates/#process-a-certificate-signing-request-csr-on-the-root-certificate-authority-ca)
.
7. Deploy the certificate.
### Client certificate
[](https://docs.devolutions.net/gateway/kb/general-knowledge/secure-self-signed-certificates/#client-certificate)
Follow the same procedure as for the [Server certificate](https://docs.devolutions.net/gateway/kb/general-knowledge/secure-self-signed-certificates/#server-certificate)
, but you must adapt two attributes of the information you enter to your needs, namely the _**Common Name**_ and the _**Email Address**_.
Common Name (e.g. server FQDN or your name) []:John Doe
Email Address []:JohnDoe@acme.com
### Process a Certificate Signing Request (CSR) on the Root Certificate Authority (CA)
[](https://docs.devolutions.net/gateway/kb/general-knowledge/secure-self-signed-certificates/#process-a-certificate-signing-request-csr-on-the-root-certificate-authority-ca)
Process the CSR by generating a certificate.
Generate it using the following command line, where the server.csr has been generated on the server: `openssl x509 -req -in server.csr -CA ca.crt -CAkey ca.key -CAcreateserial -out server.crt -days 1000 -sha256`
This results in the certificate being generated in the server.crt file. You must deploy it to the server where you generated the CSR.
[ Share your feedback](https://forum.devolutions.net/forums/176/documentation--documentation-requests)
---
# What is SHA-256? - Devolutions Documentation
What is SHA-256?
================
The Secure Hash Algorithm (SHA) family encompasses several cryptographic hash functions, with SHA-256 being a widely-used variant. Cryptographic hashes act as digital signatures for data, enabling the comparison of large data sets by their hash values rather than their full content. This method is similar to using fingerprints for identification—each data set has a unique hash, and even a minor alteration to the data changes the hash value.
SHA-256 generates a distinctive, fixed-size 256-bit (32-byte) hash, functioning as a one-way process that makes it excellent for data integrity checks, authentication challenges, anti-tampering measures, digital signatures, and blockchain applications.
For instance, when downloading applications like those from Devolutions, SHA-256 helps verify that the data received matches the original, ensuring it has not been altered due to network errors or malware attacks. To check a file's hash, simply click on the SHA-256 icon on the download page of the Devolutions website.
For additional guidance on how to obtain the SHA-256 hash of a file, refer to Microsoft's documentation on the [Get-FileHash](https://docs.microsoft.com/en-us/powershell/module/microsoft.powershell.utility/get-filehash?view=powershell-7.2)
command. Here is how you can use it:
Get-FileHash C:\Users\user1\Downloads\Setup.RemoteDesktopManager.exe -Algorithm SHA256 | Format-List.
This command provides a structured output of the hash value, aiding in easy verification of your file's integrity.
[ Share your feedback](https://forum.devolutions.net/forums/176/documentation--documentation-requests)
---
# Configurer l'injection des identifiants basée sur un proxy - Documentation Devolutions
Configurer l'injection des identifiants basée sur un proxy
==========================================================
Devolutions Gateway offre une fonctionnalité pour l'injection des identifiants via un proxy, permettant aux utilisateurs de se connecter à des sessions distantes sans jamais avoir accès à ses identifiants sur leur machine. Suivre les étapes ci-dessous pour configurer l'injection d'identifiants basée sur un proxy sur une entrée :
1. Configurer Devolutions Gateway dans [Devolutions Server](https://docs.devolutions.net/fr/gateway/getting-started/server/server-configuration/)
ou [Devolutions Hub Business](https://docs.devolutions.net/fr/gateway/getting-started/hub/hub-business-configuration/)
.
2. Modifier une entrée RDP et [la lier à un ensemble de règles Gateway](https://docs.devolutions.net/fr/gateway/kb/how-to-articles/configure-proxy-based-credential-injection/)
(ces étapes sont identiques quel que soit la source de données).
3. Se rendre sur l’interface Web de la source de données choisie, accéder à _**Administration**_ – _**Devolutions Gateway**_, puis cliquer sur le bouton _**Modifier**_ de l’ensemble de règles Gateway lié.
4. Puis, cocher l'option _**Activer l’injection d’identifiants basée sur un proxy**_ sous _**Sécurité**_.
Dès lors, lancer la session sans exposer ses identifiants sur la machine de l'utilisateur.
Pour une sécurité maximale lors de la gestion des utilisateurs externes, créer un [_**utilisateur Contractor**_](https://docs.devolutions.net/server/web-interface/user-groups-based-security/#contractors)
avec la permission _**Exécuter**_ mais PAS la permission _**Afficher mot de passe**_.
[ Partagez vos commentaires](https://forum.devolutions.net/forums/176/documentation--documentation-requests)
---
# How-to articles - Devolutions Documentation
How-to articles
===============
[ Share your feedback](https://forum.devolutions.net/forums/176/documentation--documentation-requests)
---
# Articles pratiques - Documentation Devolutions
Articles pratiques
==================
[ Partagez vos commentaires](https://forum.devolutions.net/forums/176/documentation--documentation-requests)
---
# Change Devolutions Gateway certificate - Devolutions Documentation
Change Devolutions Gateway certificate
======================================
Devolutions Gateway certificates can be changed quickly and easily in the Devolutions Server Console. Follow the instructions below:
1. Open the Devolutions Server Console, and click on the _**Edit**_ button located in the _**Devolutions Gateway**_ section of the _**Companions**_ tab.

Edit the Devolutions Gateway
2. Then, change the _**HTTP listener**_ to _**https**_, and click on the ellipsis button (_**…**_) in the _**Certificate file**_ field under the _**Certificate configuration**_ heading.

Choose a different certificate
3. Choose the certificate `.pfx` file to switch to, and click _**Ok**_ to save the changes.
4. Wait until the service restarts or do it manually in the Windows Services console.
5. Finally, verify the health of the Devolutions Gateway as described in [Troubleshooting Devolutions Gateway](https://docs.devolutions.net/gateway/kb/troubleshooting-articles/gateway-troubleshooting/#verify-a-gateways-health)
.
[ Share your feedback](https://forum.devolutions.net/forums/176/documentation--documentation-requests)
---
# Configure proxy-based credential injection - Devolutions Documentation
Configure proxy-based credential injection
==========================================
Devolutions Gateway offers a feature for the injection of credentials through a proxy, allowing users to connect to remote sessions without ever having access to its credentials on their machine. Follow the steps below to configure proxy-based credential injection on an entry:
1. Configure Devolutions Gateway in [Devolutions Server](https://docs.devolutions.net/gateway/getting-started/server/server-configuration/)
or [Devolutions Hub Business](https://docs.devolutions.net/gateway/getting-started/hub/hub-business-configuration/)
.
2. Edit an RDP entry, and [link it to a Gateway ruleset](https://docs.devolutions.net/gateway/kb/how-to-articles/configure-proxy-based-credential-injection/)
(these steps are the same regardless of the data source).
3. Head over to your chosen data source's web interface, go to _**Administration**_ – _**Devolutions Gateway**_, and click to _**Edit**_ button on the linked Gateway ruleset.
4. Then, check the _**Enable proxy-based credential injection**_ option under _**Security**_.
From then on, launching the session will not expose its credentials on the user's machine.
For maximum security when dealing with external users, create a [_**Contractor**_ user](https://docs.devolutions.net/server/web-interface/user-groups-based-security/#contractors)
with the _**Execute**_ permission but NOT the _**View password**_ permission.
[ Share your feedback](https://forum.devolutions.net/forums/176/documentation--documentation-requests)
---
# Configure proxy-based credential injection - Devolutions Documentation
Configure proxy-based credential injection
==========================================
Devolutions Gateway offers a feature for the injection of credentials through a proxy, allowing users to connect to remote sessions without ever having access to its credentials on their machine. Follow the steps below to configure proxy-based credential injection on an entry:
1. Configure Devolutions Gateway in [Devolutions Server](https://docs.devolutions.net/gateway/getting-started/server/server-configuration/)
or [Devolutions Hub Business](https://docs.devolutions.net/gateway/getting-started/hub/hub-business-configuration/)
.
2. Edit an RDP entry, and [link it to a Gateway ruleset](https://docs.devolutions.net/gateway/kb/how-to-articles/configure-proxy-based-credential-injection/)
(these steps are the same regardless of the data source).
3. Head over to your chosen data source's web interface, go to _**Administration**_ – _**Devolutions Gateway**_, and click to _**Edit**_ button on the linked Gateway ruleset.
4. Then, check the _**Enable proxy-based credential injection**_ option under _**Security**_.
From then on, launching the session will not expose its credentials on the user's machine.
For maximum security when dealing with external users, create a [_**Contractor**_ user](https://docs.devolutions.net/server/web-interface/user-groups-based-security/#contractors)
with the _**Execute**_ permission but NOT the _**View password**_ permission.
[ Share your feedback](https://forum.devolutions.net/forums/176/documentation--documentation-requests)
---
# How-to articles - Devolutions Documentation
How-to articles
===============
[ Share your feedback](https://forum.devolutions.net/forums/176/documentation--documentation-requests)
---
# Déployer rapidement Devolutions Gateway - Documentation Devolutions
Déployer rapidement Devolutions Gateway
=======================================
Apprendre comment déployer rapidement Devolutions Gateway dans les environnements suivants :
* [Configuration Devolutions Gateway avec Devolutions Server](https://docs.devolutions.net/fr/gateway/getting-started/server/server-configuration/)
* [Configuration Devolutions Gateway avec Devolutions Hub Business](https://docs.devolutions.net/fr/gateway/getting-started/hub/hub-business-configuration/)
* [Configuration de Devolutions Gateway dans Remote Desktop Manager](https://docs.devolutions.net/fr/gateway/getting-started/server/rdm-configuration/)
[ Partagez vos commentaires](https://forum.devolutions.net/forums/176/documentation--documentation-requests)
---
# Lancer une session SSH dans un client Web - Documentation Devolutions
Lancer une session SSH dans un client Web
=========================================
Sur cette page
* [Exigences](https://docs.devolutions.net/fr/gateway/kb/how-to-articles/launch-ssh-session-web-client/#requirements)
* [Entrées de session prises en charge](https://docs.devolutions.net/fr/gateway/kb/how-to-articles/launch-ssh-session-web-client/#supported-session-entries)
* [Configuration de la session terminal SSH](https://docs.devolutions.net/fr/gateway/kb/how-to-articles/launch-ssh-session-web-client/#ssh-terminal-session-configuration)
* [Voir également](https://docs.devolutions.net/fr/gateway/kb/how-to-articles/launch-ssh-session-web-client/#see-also)
Lancer la session SSH directement depuis votre navigateur web préféré via l'interface web Devolutions Server ou Devolutions Hub.
Exigences
---------
[](https://docs.devolutions.net/fr/gateway/kb/how-to-articles/launch-ssh-session-web-client/#requirements)
Pour utiliser cette fonctionnalité, certaines exigences doivent être respectées, à savoir :
* Windows 10 ou 11.
* [Devolutions Gateway](https://docs.devolutions.net/fr/gateway/getting-started/server/server-configuration/)
version 2023.1 ou ultérieure.
* [Devolutions Server](https://docs.devolutions.net/fr/server/getting-started/installation/upgrade-server/)
version 2023.1 ou ultérieure.
* Une entrée de [session de terminal SSH](https://docs.devolutions.net/fr/rdm/kb/knowledge-base/entry-settings/ssh-session-entry/)
avec un type de VPN Devolutions Gateway configuré doit être créée.
* Une licence Remote Desktop Manager ou Devolutions Launcher doit être assignée à l'utilisateur lançant la session.
Entrées de session prises en charge
-----------------------------------
[](https://docs.devolutions.net/fr/gateway/kb/how-to-articles/launch-ssh-session-web-client/#supported-session-entries)
D'autres types de sessions peuvent être lancés via l'interface web Devolutions Server :
* Active Directory
* Apple Remote Desktop (ARD)
* PowerShell (à distance)
* [RDP (Microsoft Remote Desktop)](https://docs.devolutions.net/fr/gateway/kb/how-to-articles/launch-rdp-session-web-client/)
* Terminal SSH
* Telnet
* VNC
Configuration de la session terminal SSH
----------------------------------------
[](https://docs.devolutions.net/fr/gateway/kb/how-to-articles/launch-ssh-session-web-client/#ssh-terminal-session-configuration)
Suivre les étapes ci-dessous pour configurer correctement votre session de terminal SSH afin de la lancer dans un navigateur :
Les étapes ci-dessous supposent que vous avez déjà une entrée de session terminal SSH. Si vous ne l'avez pas encore créée et souhaitez savoir comment, voir [Créer des entrées manuellement](https://docs.devolutions.net/fr/server/web-interface/vault/entries/create-entries-manually/)
.
1. Dans l'interface web du Devolutions Server, aller aux _**Propriétés...**_ de votre entrée de session terminal SSH.
2. Dans la section _**VPN/Tunnel/Gateway**_, sélectionner _**Devolutions Gateway**_ dans la liste déroulante _**Type de VPN**_.
!\[Définir Devolutions Gateway comme le type de VPN pour votre connexion\](https://cdnweb.devolutions.net/docs/DVLS4191\_2025\_1.png "Définir Devolutions Gateway comme le type de VPN pour votre connexion")
3. Dans le menu déroulant _**Connecter**_, sélectionner _**Toujours connecter**_.
!\[Mode de connexion Devolutions Gateway\](https://cdnweb.devolutions.net/docs/DVLS4192\_2025\_1.png "Mode de connexion Devolutions Gateway")
4. Sous _**Paramètres**_, sélectionner le Devolutions Gateway à utiliser pour cette connexion, puis cliquer sur _**Vérifier la santé**_ pour s'assurer que le Gateway est fonctionnel. Sa version doit être 2023.1 ou ultérieure pour que cela fonctionne. Cliquer sur _**Mettre à jour**_ pour enregistrer vos modifications.
!\[Sélectionner la bonne instance Devolutions Gateway et tester si la connexion fonctionne correctement\](https://cdnweb.devolutions.net/docs/DVLS4193\_2025\_1.png "Sélectionner la bonne instance Devolutions Gateway et tester si la connexion fonctionne correctement")
5. Une fois toutes les conditions remplies, vous pouvez appuyer sur le bouton _**Ouvrir dans le client Web**_.
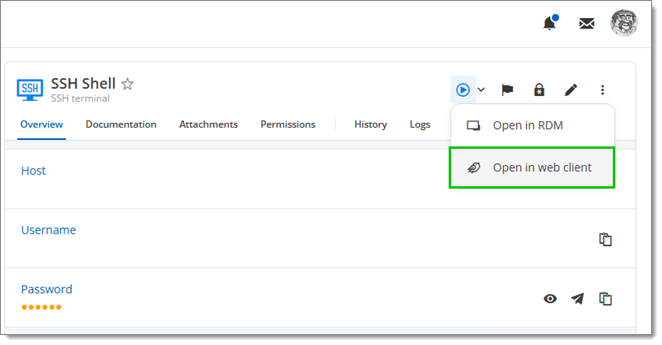
Launch the SSH terminal connection
Voir également
--------------
[](https://docs.devolutions.net/fr/gateway/kb/how-to-articles/launch-ssh-session-web-client/#see-also)
* [Démarrer une session RDP dans un client web](https://docs.devolutions.net/fr/gateway/kb/how-to-articles/launch-rdp-session-web-client/)
* [Options d'entrée du terminal SSH](https://docs.devolutions.net/fr/rdm/kb/knowledge-base/entry-settings/ssh-session-entry/)
[ Partagez vos commentaires](https://forum.devolutions.net/forums/176/documentation--documentation-requests)
---
# Démarrer une session RDP dans un client web - Documentation Devolutions
Démarrer une session RDP dans un client web
===========================================
Sur cette page
* [Exigences](https://docs.devolutions.net/fr/gateway/kb/how-to-articles/launch-rdp-session-web-client/#requirements)
* [Entrées de session prises en charge](https://docs.devolutions.net/fr/gateway/kb/how-to-articles/launch-rdp-session-web-client/#supported-session-entries)
* [Configuration de la session RDP](https://docs.devolutions.net/fr/gateway/kb/how-to-articles/launch-rdp-session-web-client/#rdp-session-configuration)
* [Lancement de la connexion](https://docs.devolutions.net/fr/gateway/kb/how-to-articles/launch-rdp-session-web-client/#launching-the-connection)
* [Fonctionnalités prises en charge](https://docs.devolutions.net/fr/gateway/kb/how-to-articles/launch-rdp-session-web-client/#supported-features)
* [Espionnage de session](https://docs.devolutions.net/fr/gateway/kb/how-to-articles/launch-rdp-session-web-client/#session-shadowing)
* [Voir aussi](https://docs.devolutions.net/fr/gateway/kb/how-to-articles/launch-rdp-session-web-client/#see-also)
Lancer les connexions RDP et d'autres types de sessions directement depuis le navigateur via l'interface web de Devolutions Server.
Basé sur [IronRDP](https://github.com/Devolutions/IronRDP)
(implémentation Rust du protocole RDP) et son composant web assembly, le client web, passant par un Devolutions Gateway, garantit une communication sécurisée en utilisant directement le protocole. Contrairement à Apache Guacamole, aucun protocole intermédiaire n'est utilisé et contrairement à RD Web Access, il n'y a pas de couche TLS supplémentaire redondante. Cela garantit de bonnes performances.
Exigences
---------
[](https://docs.devolutions.net/fr/gateway/kb/how-to-articles/launch-rdp-session-web-client/#requirements)
Pour utiliser cette fonctionnalité, certaines exigences doivent être remplies, à savoir :
* Le navigateur doit répondre à ces exigences minimales de version :
* Chrome : 102
* Firefox: 102
* Safari : 16.4
* Windows 10 ou 11.
* Windows Server 2016 et versions ultérieures.
* Avoir une version [Devolutions Gateway](https://docs.devolutions.net/fr/gateway/getting-started/server/server-configuration/)
2023.1 ou ultérieure.
* Avoir une version [Devolutions Server](https://docs.devolutions.net/fr/server/getting-started/installation/upgrade-server/)
2023.1.3 ou ultérieure.
* Avoir une [connexion de type RDP](https://docs.devolutions.net/fr/gateway/kb/how-to-articles/launch-rdp-session-web-client/#rdp-session-configuration)
avec un type de _VPN_ passerelle configuré.
* Avoir l'autorisation _**Voir le mot de passe**_ si vous êtes celui qui utilise la session.
* Lors de l'utilisation d'IronRDP, un appel est généré vers l'outil, et le mot de passe peut être vu lorsque les outils de développement sont activés.
* Avoir une licence Remote Desktop Manager ou Devolutions Launcher assignée à l'utilisateur qui lancera la session.
Si HTTPS est utilisé pour les communications de Devolutions Gateway, il est fortement recommandé d'utiliser le Subject Alternative Name (SAN). Dans la plupart des cas, un Common Name (CN) est uniquement utilisé comme solution de secours et généralement ignoré lorsque SAN est défini. Toutefois, pour des raisons de meilleures pratiques de sécurité et de compatibilité, il est préférable que le CN corresponde à l'une des entrées SAN.
Entrées de session prises en charge
-----------------------------------
[](https://docs.devolutions.net/fr/gateway/kb/how-to-articles/launch-rdp-session-web-client/#supported-session-entries)
D'autres types d'entrées de session peuvent être lancées via l'interface web de Devolutions Server:
* Active Directory
* Apple Remote Desktop (ARD)
* PowerShell (à distance)
* RDP (Microsoft Remote Desktop)
* Terminal SSH
* Telnet
* VNC
Configuration de la session RDP
-------------------------------
[](https://docs.devolutions.net/fr/gateway/kb/how-to-articles/launch-rdp-session-web-client/#rdp-session-configuration)
Suivre les étapes ci-dessous pour configurer correctement votre session RDP pour la lancer dans un navigateur :
Les étapes ci-dessous supposent que vous avez déjà une entrée de session RDP. Si vous ne l'avez pas encore créée et souhaitez savoir comment procéder, voir [Créer des entrées manuellement](https://docs.devolutions.net/fr/server/web-interface/vault/entries/create-entries-manually/)
.
1. Dans l'interface web de Devolutions Server, aller aux _**Propriétés**_ de votre _entrée RDP_.
2. Dans la section _**VPN/Tunnel/Gateway**_, sélectionner _**Devolutions Gateway**_ dans la _**liste déroulante**_ de type de VPN.
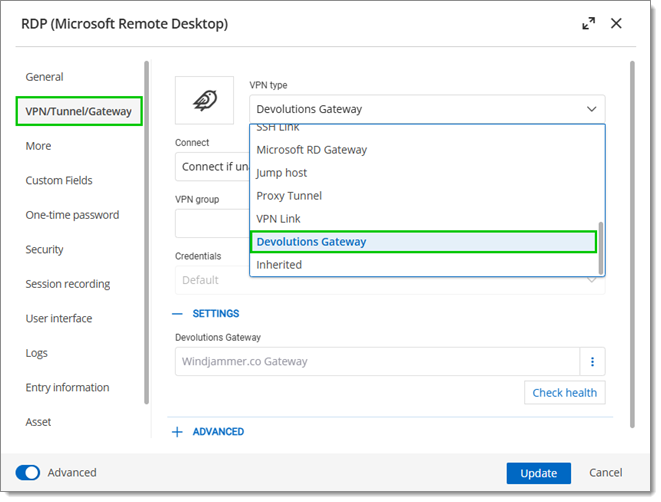
VPN/Tunnel/Gateway – VPN type
3. Dans la _**liste déroulante**_ Connexion, sélectionner _**Connecter si incapacité à ping/sanner des ports**_.
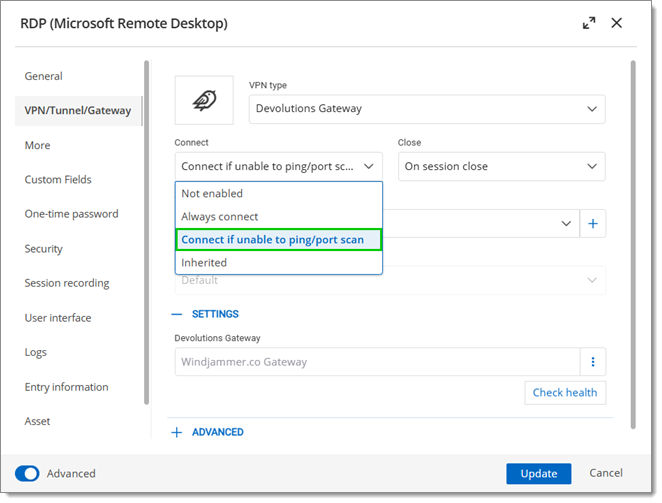
VPN/Tunnel/Gateway – Connect – Connect if unable to ping/port scan
4. Sous _**Paramètres**_, sélectionner le _**Devolutions Gateway**_ à utiliser pour cette connexion, puis cliquer sur _**Vérifier la santé**_ pour s'assurer que le Gateway est fonctionnel. Sa version doit être 2023.1 ou ultérieure.
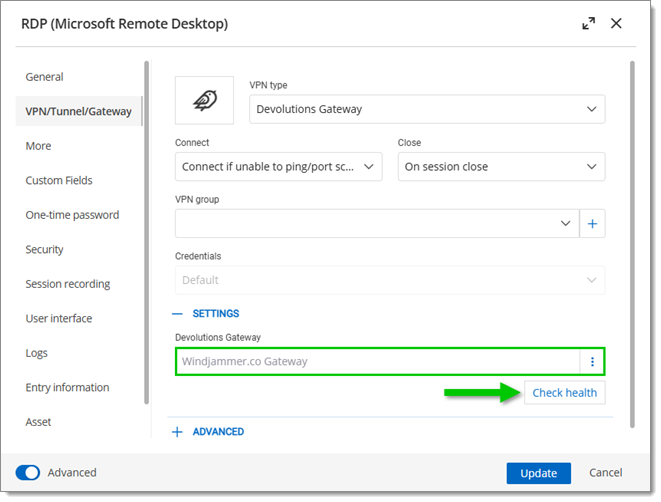
VPN/Tunnel/Gateway – Settings – Check health
5. Dans la section _**Enregistrement de session**_, définir le _**Mode**_ d'enregistrement.
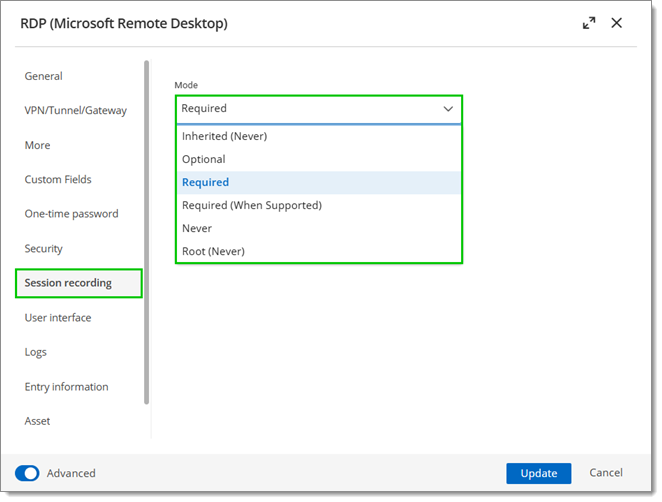
Session recording – Mode
6. Cliquer sur _**Mettre à jour**_ pour enregistrer vos modifications.
Lancement de la connexion
-------------------------
[](https://docs.devolutions.net/fr/gateway/kb/how-to-articles/launch-rdp-session-web-client/#launching-the-connection)
Une fois toutes les conditions remplies, vous pouvez appuyer sur le bouton _**Ouvrir dans le client web**_ pour lancer la connexion depuis le client web.

Open in web client
Si le mode d'enregistrement de la session a été défini sur _**Optionnel**_ dans les propriétés de l'entrée, il vous sera demandé si vous souhaitez enregistrer cette session.
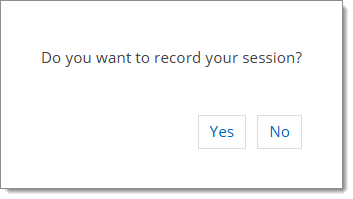
Do you want to record your session?
Un nouvel onglet de navigateur devrait s'ouvrir et votre session devrait commencer.
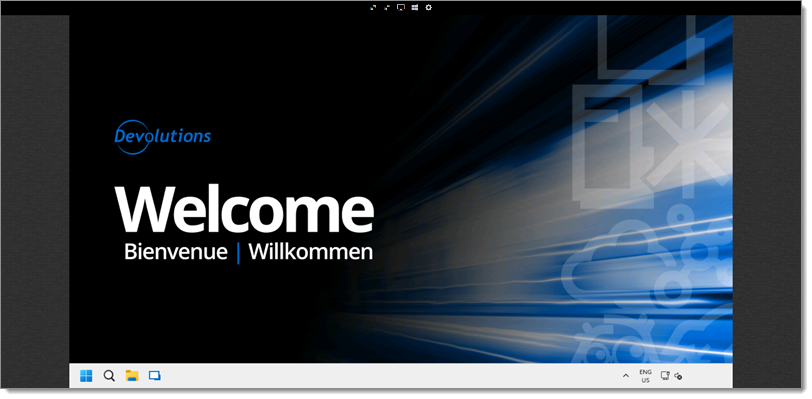
RDP session opened in a web client
Si la connexion ne fonctionne pas, vérifier à nouveau les [exigences](https://docs.devolutions.net/fr/gateway/kb/how-to-articles/launch-rdp-session-web-client/#requirements)
ou visiter [RDP Web client not showing](https://docs.devolutions.net/fr/gateway/kb/troubleshooting-articles/rdp-web-client-not-showing/ "RDP web client not showing")
.
### Fonctionnalités prises en charge
[](https://docs.devolutions.net/fr/gateway/kb/how-to-articles/launch-rdp-session-web-client/#supported-features)
Le menu des outils dans l'interface web RDP contient ce qui est actuellement pris en charge. Notez que la fonctionnalité de copier-coller (y compris le presse-papiers) est également prise en charge.
Supported features
| Icône | Option | Description |
| --- | --- | --- |
|  | Plein écran | Afficher le contenu de la session en s'assurant d'occuper toujours l'espace maximum de l'écran. |
|  | Adapter à l'écran (par défaut) | Adapter la taille pour s'ajuster au mieux à l'espace disponible afin que toute la session soit toujours visible. |
|  | Taille réelle | Se conformer à la résolution de l'hôte cible. |
|  | Touche Windows | Envoyer le signal de la touche Windows (cependant, la touche doit également fonctionner). |
|  | Ctrl + Alt + Del | Envoie la commande au système hôte. |
### Espionnage de session
[](https://docs.devolutions.net/fr/gateway/kb/how-to-articles/launch-rdp-session-web-client/#session-shadowing)
Avec le support de suivi de session Devolutions Gateway, il est possible de regarder un enregistrement de session en cours pour assister ou auditer le travail en cours. Accédez à l'onglet d'enregistrement d'une entrée pour voir une icône clignotante indiquant un enregistrement en cours, puis cliquez pour regarder en temps réel.
1. Lancer une session RDP basée sur le Web dans l'interface web de Devolutions Server.
2. Le Gateway commence automatiquement à enregistrer la session en arrière-plan.
3. Exécuter un script de chronométrage pour montrer le temps écoulé.
4. Retourner à l'interface web de Devolutions Server.
5. Sélectionner l' _entrée RDP_.
6. Ouvrir l'onglet d'enregistrement de l'entrée RDP pour voir la session en temps réel.
### Voir aussi
[](https://docs.devolutions.net/fr/gateway/kb/how-to-articles/launch-rdp-session-web-client/#see-also)
* [Devolutions Blog - Spotlight on: Web-based RDP, ARD, SSH in Devolutions Server & Hub](https://blog.devolutions.net/2024/08/spotlight-on-web-based-rdp-ard-ssh-in-devolutions-server-and-hub/ "Devolutions Blog - Spotlight on: Web-based RDP, ARD, SSH in Devolutions Server & Hub")
[ Partagez vos commentaires](https://forum.devolutions.net/forums/176/documentation--documentation-requests)
---
# Reverse proxying - Devolutions Documentation
Reverse proxying
================
[ Share your feedback](https://forum.devolutions.net/forums/176/documentation--documentation-requests)
---
# Reverse proxying - Documentation Devolutions
Proxy inverse
=============
[ Partagez vos commentaires](https://forum.devolutions.net/forums/176/documentation--documentation-requests)
---
# Quickly deploy Devolutions Gateway - Devolutions Documentation
Quickly deploy Devolutions Gateway
==================================
Learn how to quickly deploy Devolutions Gateway in the following environments:
* [Devolutions Gateway configuration with Devolutions Server](https://docs.devolutions.net/gateway/getting-started/server/server-configuration/)
* [Devolutions Gateway configuration with Devolutions Hub Business](https://docs.devolutions.net/gateway/getting-started/hub/hub-business-configuration/)
* [Devolutions Gateway configuration in Remote Desktop Manager](https://docs.devolutions.net/gateway/getting-started/server/rdm-configuration/)
[ Share your feedback](https://forum.devolutions.net/forums/176/documentation--documentation-requests)
---
# Quickly deploy Devolutions Gateway - Devolutions Documentation
Quickly deploy Devolutions Gateway
==================================
Learn how to quickly deploy Devolutions Gateway in the following environments:
* [Devolutions Gateway configuration with Devolutions Server](https://docs.devolutions.net/gateway/getting-started/server/server-configuration/)
* [Devolutions Gateway configuration with Devolutions Hub Business](https://docs.devolutions.net/gateway/getting-started/hub/hub-business-configuration/)
* [Devolutions Gateway configuration in Remote Desktop Manager](https://docs.devolutions.net/gateway/getting-started/server/rdm-configuration/)
[ Share your feedback](https://forum.devolutions.net/forums/176/documentation--documentation-requests)
---
# Launch an SSH session in a web client - Devolutions Documentation
Launch an SSH session in a web client
=====================================
Auf dieser Seite
* [Requirements](https://docs.devolutions.net/de/gateway/kb/how-to-articles/launch-ssh-session-web-client/#requirements)
* [Supported session entries](https://docs.devolutions.net/de/gateway/kb/how-to-articles/launch-ssh-session-web-client/#supported-session-entries)
* [SSH terminal session configuration](https://docs.devolutions.net/de/gateway/kb/how-to-articles/launch-ssh-session-web-client/#ssh-terminal-session-configuration)
* [See also](https://docs.devolutions.net/de/gateway/kb/how-to-articles/launch-ssh-session-web-client/#see-also)
Launch SSH session directly from your favorite web browser via the Devolutions Server or Devolutions Hub web interface.
Requirements
------------
[](https://docs.devolutions.net/de/gateway/kb/how-to-articles/launch-ssh-session-web-client/#requirements)
To use this feature, certain requirements must be met, namely:
* Windows 10 or 11.
* [Devolutions Gateway](https://docs.devolutions.net/gateway/getting-started/server/server-configuration/)
version 2023.1 or later.
* [Devolutions Server](https://docs.devolutions.net/server/getting-started/installation/upgrade-server/)
version 2023.1 or later.
* An [SSH terminal session](https://docs.devolutions.net/rdm/kb/knowledge-base/entry-settings/ssh-session-entry/)
entry with a Devolutions Gateway VPN type configured must be created.
* A Remote Desktop Manager or Devolutions Launcher license must be assigned to the user launching the session.
Supported session entries
-------------------------
[](https://docs.devolutions.net/de/gateway/kb/how-to-articles/launch-ssh-session-web-client/#supported-session-entries)
Other session types can be launched via the Devolutions Server web interface:
* Active Directory
* Apple Remote Desktop (ARD)
* PowerShell (remote)
* [RDP (Microsoft Remote Desktop)](https://docs.devolutions.net/gateway/kb/how-to-articles/launch-rdp-session-web-client/)
* SSH terminal
* Telnet
* VNC
SSH terminal session configuration
----------------------------------
[](https://docs.devolutions.net/de/gateway/kb/how-to-articles/launch-ssh-session-web-client/#ssh-terminal-session-configuration)
Follow the steps below to properly configure your SSH terminal session to launch it in a browser:
The steps below assume that you already have an SSH terminal session entry. If you have not yet created it and want to learn how, see [Create entries manually](https://docs.devolutions.net/server/web-interface/vault/entries/create-entries-manually/)
.
1. In the Devolutions Server web interface, go to the _**Properties...**_ of your SSH terminal entry.
2. In the _**VPN/Tunnel/Gateway**_ section, select _**Devolutions Gateway**_ in the _**VPN type**_ drop-down list.
!\[Set Devolutions Gateway as the VPN type for your connection\](https://cdnweb.devolutions.net/docs/DVLS4191\_2025\_1.png "Set Devolutions Gateway as the VPN type for your connection")
3. In the _**Connect**_ drop-down menu, select _**Always connect**_.
!\[Devolutions Gateway connect mode\](https://cdnweb.devolutions.net/docs/DVLS4192\_2025\_1.png "Devolutions Gateway connect mode")
4. Under _**Settings**_, select the Devolutions Gateway to use for this connection, then click on _**Check health**_ to make sure the Gateway is functional. Its version must be 2023.1 or later for this to work. Click on _**Update**_ to save your changes.
!\[Select the correct Devolutions Gateway instance and test if the connection functions properly\](https://cdnweb.devolutions.net/docs/DVLS4193\_2025\_1.png "Select the correct Devolutions Gateway instance and test if the connection functions properly")
5. Once all the conditions are met, you can press the _**Open in web client**_ button.

Launch the SSH terminal connection
See also
--------
[](https://docs.devolutions.net/de/gateway/kb/how-to-articles/launch-ssh-session-web-client/#see-also)
* [Launch an RDP session in a web client](https://docs.devolutions.net/gateway/kb/how-to-articles/launch-rdp-session-web-client/)
* [SSH terminal entry options](https://docs.devolutions.net/rdm/kb/knowledge-base/entry-settings/ssh-session-entry/)
[ Share your feedback](https://forum.devolutions.net/forums/176/documentation--documentation-requests)
---
# Launch an RDP session in a web client - Devolutions Documentation
Launch an RDP session in a web client
=====================================
Auf dieser Seite
* [Requirements](https://docs.devolutions.net/de/gateway/kb/how-to-articles/launch-rdp-session-web-client/#requirements)
* [Supported session entries](https://docs.devolutions.net/de/gateway/kb/how-to-articles/launch-rdp-session-web-client/#supported-session-entries)
* [RDP session configuration](https://docs.devolutions.net/de/gateway/kb/how-to-articles/launch-rdp-session-web-client/#rdp-session-configuration)
* [Launching the connection](https://docs.devolutions.net/de/gateway/kb/how-to-articles/launch-rdp-session-web-client/#launching-the-connection)
* [Supported features](https://docs.devolutions.net/de/gateway/kb/how-to-articles/launch-rdp-session-web-client/#supported-features)
* [Session shadowing](https://docs.devolutions.net/de/gateway/kb/how-to-articles/launch-rdp-session-web-client/#session-shadowing)
* [See also](https://docs.devolutions.net/de/gateway/kb/how-to-articles/launch-rdp-session-web-client/#see-also)
Launch RDP connections and other session types directly from the browser via the Devolutions Server web interface.
Based on [IronRDP](https://github.com/Devolutions/IronRDP)
(Rust implementation of the RDP protocol) and its web assembly component, the web client, passing through a Devolutions Gateway, ensures a secure communication using the protocol directly. Unlike Apache Guacamole, no intermediate protocol is used and unlike RD Web Access, there is no redundant extra TLS layer. This ensures good performance.
Requirements
------------
[](https://docs.devolutions.net/de/gateway/kb/how-to-articles/launch-rdp-session-web-client/#requirements)
To use this feature, certain requirements must be met, namely:
* The browser must meet these minimal version requirements:
* Chrome: 102
* Firefox: 102
* Safari: 16.4
* Windows 10 or 11.
* Windows Server 2016 and later.
* Have a [Devolutions Gateway](https://docs.devolutions.net/gateway/getting-started/server/server-configuration/)
version 2023.1 or later.
* Have a [Devolutions Server](https://docs.devolutions.net/server/getting-started/installation/upgrade-server/)
version 2023.1.3 or later.
* Have an [RDP type connection](https://docs.devolutions.net/de/gateway/kb/how-to-articles/launch-rdp-session-web-client/#rdp-session-configuration)
with a gateway type VPN configured.
* Have the _**View password**_ permission if you are the one to use the session.
* When using IronRDP, a call is generated to the tool, and the password can be seen when the developer tools are enabled.
* Have a Remote Desktop Manager or Devolutions Launcher license assigned to the user who will launch the session.
If HTTPS is used for Devolutions Gateway communications, it is highly recommended to use Subject Alternative Name (SAN). In most cases, a Common Name (CN) is only used as fallback and typically ignored when SAN is set. It is best security and compatibility practice, however, to make the CN match one of the SAN entries.
Supported session entries
-------------------------
[](https://docs.devolutions.net/de/gateway/kb/how-to-articles/launch-rdp-session-web-client/#supported-session-entries)
Other session entry types can be launched via the Devolutions Server web interface:
* Active Directory
* Apple Remote Desktop (ARD)
* PowerShell (remote)
* RDP (Microsoft Remote Desktop)
* SSH terminal
* Telnet
* VNC
RDP session configuration
-------------------------
[](https://docs.devolutions.net/de/gateway/kb/how-to-articles/launch-rdp-session-web-client/#rdp-session-configuration)
Follow the steps below to properly configure your RDP session to launch it in a browser:
The steps below assume that you already have an RDP session entry. If you have not yet created it and want to learn how, see [Create entries manually](https://docs.devolutions.net/server/web-interface/vault/entries/create-entries-manually/)
.
1. In the Devolutions Server web interface, go to the _**Properties**_ of your RDP entry.
2. In the _**VPN/Tunnel/Gateway**_ section, select _**Devolutions Gateway**_ in the _**VPN type**_ drop-down list.

VPN/Tunnel/Gateway – VPN type
3. In the _**Connect**_ drop-down list, select _**Connect if unable to ping/port scan**_.

VPN/Tunnel/Gateway – Connect – Connect if unable to ping/port scan
4. Under _**Settings**_, select the _**Devolutions Gateway**_ to use for this connection, then click on _**Check health**_ to make sure the Gateway is functional. Its version must be 2023.1 or later.

VPN/Tunnel/Gateway – Settings – Check health
5. In the _**Session recording**_ section, set the recording _**Mode**_.

Session recording – Mode
6. Click _**Update**_ to save your changes.
Launching the connection
------------------------
[](https://docs.devolutions.net/de/gateway/kb/how-to-articles/launch-rdp-session-web-client/#launching-the-connection)
Once all the conditions are met, you can press the _**Open in web client**_ button to launch the connection from the web client.

Open in web client
If the session recording mode was set to _**Optional**_ in the entry properties, you will be asked if you want to record this session.

Do you want to record your session?
A new browser tab should open and your session should start.

RDP session opened in a web client
If the connection does not work, check the [Requirements](https://docs.devolutions.net/de/gateway/kb/how-to-articles/launch-rdp-session-web-client/#requirements)
again or visit [RDP Web client not showing](https://docs.devolutions.net/gateway/kb/troubleshooting-articles/rdp-web-client-not-showing/ "RDP web client not showing")
.
### Supported features
[](https://docs.devolutions.net/de/gateway/kb/how-to-articles/launch-rdp-session-web-client/#supported-features)
The tools menu in the RDP web interface contains what is currently supported. Note that the copy/paste feature (including the clipboard) is also supported.

Supported features
| Icon | Option | Description |
| --- | --- | --- |
|  | Full screen | Displays the content of the session, making sure to always occupy the maximum space on the screen. |
|  | Fit to screen (default) | Adapts the size to best fit the available space so that the entire session is always visible. |
|  | Real size | Conforms to the resolution of the target host. |
|  | Windows key | Sends the signal of the Windows key (however, the key must also work). |
|  | Ctrl + Alt + Del | Sends the command to the host system. |
### Session shadowing
[](https://docs.devolutions.net/de/gateway/kb/how-to-articles/launch-rdp-session-web-client/#session-shadowing)
With Devolutions Gateway session shadowing support, it is possible to watch an in-progress session recording to assist or audit in-process work. Navigate to the recording tab of an entry to see a pulsing icon indicating an in-progress recording, then click to watch in real-time.
1. Launch a web-based RDP session in the Devolutions Server web interface.
2. The Gateway automatically starts recording the session in the background.
3. Run a stopwatch script to show the elapsed time.
4. Go back to the Devolutions Server web interface.
5. Select the RDP entry.
6. Open the RDP entry's recording tab to view the session in real time.
### See also
[](https://docs.devolutions.net/de/gateway/kb/how-to-articles/launch-rdp-session-web-client/#see-also)
* [Devolutions Blog - Spotlight on: Web-based RDP, ARD, SSH in Devolutions Server & Hub](https://blog.devolutions.net/2024/08/spotlight-on-web-based-rdp-ard-ssh-in-devolutions-server-and-hub/ "Devolutions Blog - Spotlight on: Web-based RDP, ARD, SSH in Devolutions Server & Hub")
[ Share your feedback](https://forum.devolutions.net/forums/176/documentation--documentation-requests)
---
# Reverse proxying - Devolutions Documentation
Reverse proxying
================
[ Share your feedback](https://forum.devolutions.net/forums/176/documentation--documentation-requests)
---
# Use Devolutions Gateway with an external browser - Devolutions Documentation
Use Devolutions Gateway with an external browser
================================================
Auf dieser Seite
* [Workaround to set up without having to close Chrome](https://docs.devolutions.net/de/gateway/kb/how-to-articles/use-dgw-external-browser/#workaround-to-set-up-without-having-to-close-chrome)
* [PowerShell](https://docs.devolutions.net/de/gateway/kb/how-to-articles/use-dgw-external-browser/#powershell)
* [Batch edit using PowerShell](https://docs.devolutions.net/de/gateway/kb/how-to-articles/use-dgw-external-browser/#batch-edit-using-powershell)
* [Temporary edit with Before Open](https://docs.devolutions.net/de/gateway/kb/how-to-articles/use-dgw-external-browser/#temporary-edit-with-before-open)
* [Deleting the folder](https://docs.devolutions.net/de/gateway/kb/how-to-articles/use-dgw-external-browser/#deleting-the-folder)
It is possible to use Devolutions Gateway with an external browser, but at the moment there are a few limitations to be aware of because of the browser design:
* It only works with Google Chrome.
* Google Chrome must be closed when opening a website from Remote Desktop Manager. A solution to this can be found in the [workaround](https://docs.devolutions.net/de/gateway/kb/how-to-articles/use-dgw-external-browser/#workaround-to-set-up-without-having-to-close-chrome)
.
* In case there are other proxy settings with Chrome (by GPO, command line, settings, etc.), they might conflict with each other and Devolutions Gateway will not work.
* In case Google Chrome is closed and does not have any other proxy settings, set up the entry to open externally like any other entries in Remote Desktop Manager. No additional installations/addons are needed for this to work.
Workaround to set up without having to close Chrome
---------------------------------------------------
[](https://docs.devolutions.net/de/gateway/kb/how-to-articles/use-dgw-external-browser/#workaround-to-set-up-without-having-to-close-chrome)
1. Right-click to go into the _**Properties**_ of the _**Web Browser**_ entry that has the Devolutions Gateway set.
2. In the _**General**_ section, set the _**Display**_ to _**External**_.
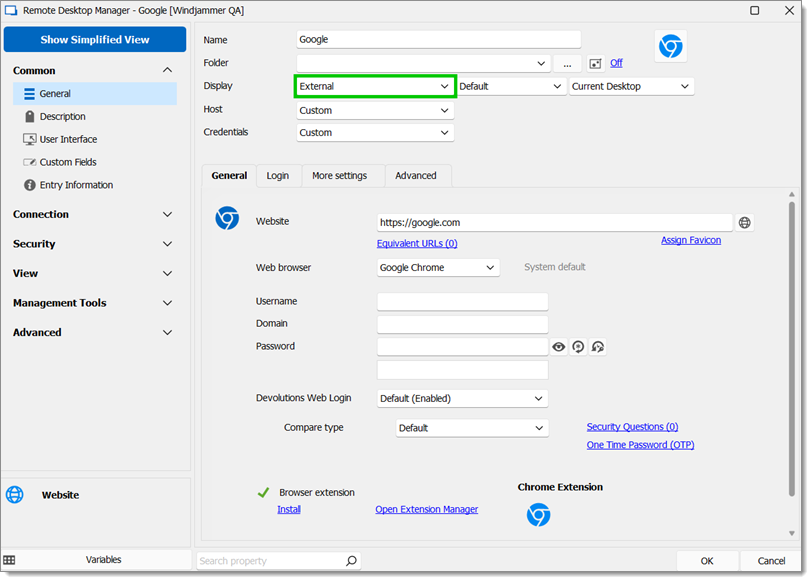
Common – General – Display – External
3. Go to the _**Advanced**_ tab.
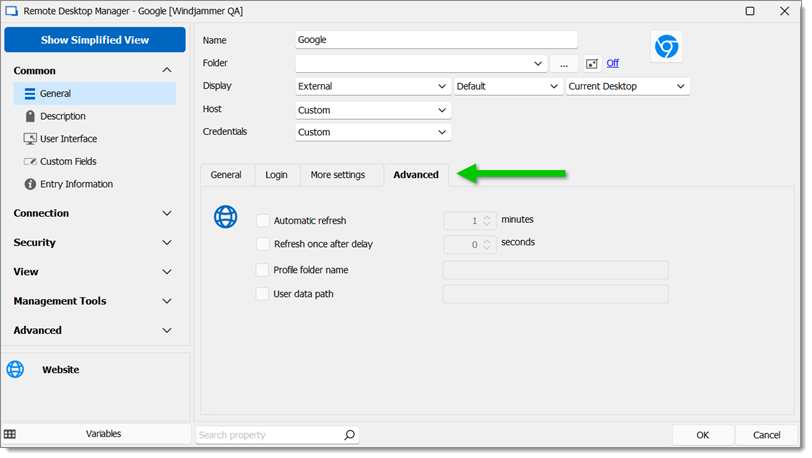
Advanced Tab
4. Check _**User Data Path**_.
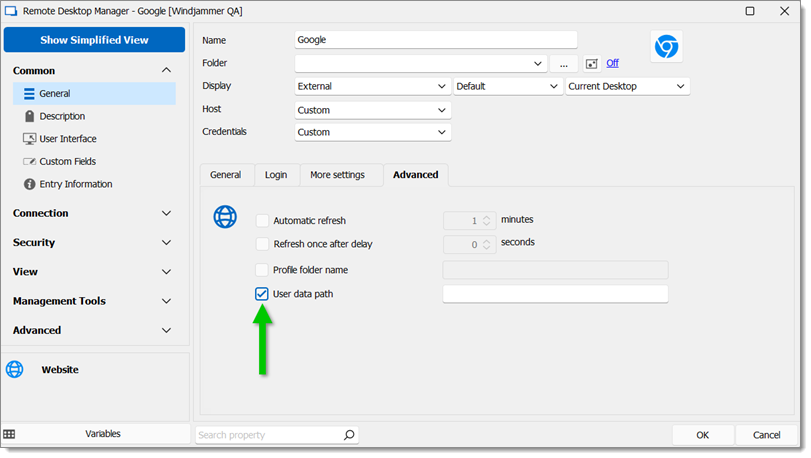
User Data Path Option
5. Enter a path for a new Chrome user data to be stored.
6. Click _**Ok**_ to save the changes.
PowerShell
----------
[](https://docs.devolutions.net/de/gateway/kb/how-to-articles/use-dgw-external-browser/#powershell)
This section will showcase multiple solutions by using PowerShell.
### Batch edit using PowerShell
[](https://docs.devolutions.net/de/gateway/kb/how-to-articles/use-dgw-external-browser/#batch-edit-using-powershell)
It is possible to [batch edit](https://docs.devolutions.net/rdm/commands/edit/batch-edit/)
the entries with a custom PowerShell command to make all of them use a different path (can be the temp or any place users are allowed to use it):
$connection.Web.UseUserDataPath = $true;
$connection.Web.UserDataPath = "C:\MyPath\" + $connection.ID;
$RDM.Save();
### Temporary edit with Before Open
[](https://docs.devolutions.net/de/gateway/kb/how-to-articles/use-dgw-external-browser/#temporary-edit-with-before-open)
It is also possible to [temporarily use the properties](https://docs.devolutions.net/rdm/kb/how-to-articles/execute-powershell-connection)
'Web.UseUserDataPath' set to true and 'Web.UserDataPath' set the path to the temp or any place users are allowed to use it that can be dynamic with a Before Open Event (using PowerShell Script).
$RDM.Connection.Web.UseUserDataPath = $true
$RDM.Connection.Web.UserDataPath = "C:\MyPath\" + $RDM.Connection.ID
### Deleting the folder
[](https://docs.devolutions.net/de/gateway/kb/how-to-articles/use-dgw-external-browser/#deleting-the-folder)
This code is used to delete the folder on the onClose Event:
$connectionID = $RDM.Connection.ID
Remove-Item -Path "C:\MyPath\$connectionID" -Recurse -Force
It is not possible to open a website using the Devolutions Gateway that is already running without the workarounds because of the way Google Chrome is designed. An already opened Chrome cannot change the proxy settings dynamically.
[ Share your feedback](https://forum.devolutions.net/forums/176/documentation--documentation-requests)
---
# Utiliser Devolutions Gateway avec un navigateur externe - Documentation Devolutions
Utiliser Devolutions Gateway avec un navigateur externe
=======================================================
Sur cette page
* [Solution de contournement pour configurer sans avoir à fermer Chrome](https://docs.devolutions.net/fr/gateway/kb/how-to-articles/use-dgw-external-browser/#workaround-to-set-up-without-having-to-close-chrome)
* [PowerShell](https://docs.devolutions.net/fr/gateway/kb/how-to-articles/use-dgw-external-browser/#powershell)
* [Modifier en lot en utilisant PowerShell](https://docs.devolutions.net/fr/gateway/kb/how-to-articles/use-dgw-external-browser/#batch-edit-using-powershell)
* [Édition temporaire avec Avant d'Ouvrir](https://docs.devolutions.net/fr/gateway/kb/how-to-articles/use-dgw-external-browser/#temporary-edit-with-before-open)
* [Supprimer le dossier](https://docs.devolutions.net/fr/gateway/kb/how-to-articles/use-dgw-external-browser/#deleting-the-folder)
Il est possible d'utiliser Devolutions Gateway avec un navigateur externe, mais pour le moment il y a quelques limitations à prendre en compte en raison de la conception du navigateur :
* Cela fonctionne uniquement avec Google Chrome.
* Google Chrome doit être fermé lors de l'ouverture d'un site Web depuis Remote Desktop Manager. Une solution à cela peut être trouvée dans la [solution de contournement](https://docs.devolutions.net/fr/gateway/kb/how-to-articles/use-dgw-external-browser/#workaround-to-set-up-without-having-to-close-chrome)
.
* Au cas où il y aurait d'autres paramètres de proxy avec Chrome (par objet stratégie de groupe, ligne de commande, paramètres, etc.), ils pourraient entrer en conflit les uns avec les autres et Devolutions Gateway ne fonctionnera pas.
* Au cas où Google Chrome est fermé et n'a pas d'autres paramètres de proxy, configurer l'entrée pour ouvrir de manière externe comme toute autre entrée dans Remote Desktop Manager. Aucune installation ou addon supplémentaire n'est nécessaire pour cela.
Solution de contournement pour configurer sans avoir à fermer Chrome
--------------------------------------------------------------------
[](https://docs.devolutions.net/fr/gateway/kb/how-to-articles/use-dgw-external-browser/#workaround-to-set-up-without-having-to-close-chrome)
1. Faire un clic droit pour accéder aux _**Propriétés**_ de l'entrée de _**navigateur Web**_ qui a le Devolutions Gateway défini.
2. Dans la section _**Général**_, définir l'_**Affichage**_ sur _**Externe**_.

Common – General – Display – External
3. Aller à l'onglet _**Avancé**_.

Advanced Tab
4. Vérifier le chemin de _**données utilisateur**_.

User Data Path Option
5. Entrer un chemin pour le stockage des nouvelles données utilisateur de Chrome.
6. Cliquer sur _**Ok**_ pour enregistrer les modifications.
PowerShell
----------
[](https://docs.devolutions.net/fr/gateway/kb/how-to-articles/use-dgw-external-browser/#powershell)
Cette section présentera plusieurs solutions en utilisant PowerShell.
### Modifier en lot en utilisant PowerShell
[](https://docs.devolutions.net/fr/gateway/kb/how-to-articles/use-dgw-external-browser/#batch-edit-using-powershell)
Il est possible de [modifier en lot](https://docs.devolutions.net/fr/rdm/commands/edit/batch-edit/)
les entrées avec une commande PowerShell personnalisée pour toutes les faire utiliser un chemin différent (peut être le temporaire ou tout endroit où les utilisateurs sont autorisés à l'utiliser) :
$connection.Web.UseUserDataPath = $true;
$connection.Web.UserDataPath = "C:\MyPath\" + $connection.ID;
$RDM.Save();
### Édition temporaire avec Avant d'Ouvrir
[](https://docs.devolutions.net/fr/gateway/kb/how-to-articles/use-dgw-external-browser/#temporary-edit-with-before-open)
Il est également possible d'[utiliser temporairement les propriétés](https://docs.devolutions.net/fr/rdm/kb/how-to-articles/execute-powershell-connection)
'Web.UseUserDataPath' réglé sur true et 'Web.UserDataPath' définir le chemin vers le temporaire ou tout endroit où les utilisateurs sont autorisés à l'utiliser, ce qui peut être dynamique avec un événement Before Open (en utilisant un script PowerShell).
$RDM.Connection.Web.UseUserDataPath = $true
$RDM.Connection.Web.UserDataPath = "C:\MyPath\" + $RDM.Connection.ID
### Supprimer le dossier
[](https://docs.devolutions.net/fr/gateway/kb/how-to-articles/use-dgw-external-browser/#deleting-the-folder)
Ce code est utilisé pour supprimer le dossier lors de l'événement onClose :
$connectionID = $RDM.Connection.ID
Remove-Item -Path "C:\MyPath\$connectionID" -Recurse -Force
Il n'est pas possible d'ouvrir un site Web utilisant le Devolutions Gateway déjà en cours d'exécution sans les solutions de contournement à cause de la façon dont Google Chrome est conçu. Un Chrome déjà ouvert ne peut pas changer les paramètres du proxy de manière dynamique.
[ Partagez vos commentaires](https://forum.devolutions.net/forums/176/documentation--documentation-requests)
---
# Launch an RDP session in a web client - Devolutions Documentation
Launch an RDP session in a web client
=====================================
On this page
* [Requirements](https://docs.devolutions.net/gateway/kb/how-to-articles/launch-rdp-session-web-client/#requirements)
* [Supported session entries](https://docs.devolutions.net/gateway/kb/how-to-articles/launch-rdp-session-web-client/#supported-session-entries)
* [RDP session configuration](https://docs.devolutions.net/gateway/kb/how-to-articles/launch-rdp-session-web-client/#rdp-session-configuration)
* [Launching the connection](https://docs.devolutions.net/gateway/kb/how-to-articles/launch-rdp-session-web-client/#launching-the-connection)
* [Supported features](https://docs.devolutions.net/gateway/kb/how-to-articles/launch-rdp-session-web-client/#supported-features)
* [Session shadowing](https://docs.devolutions.net/gateway/kb/how-to-articles/launch-rdp-session-web-client/#session-shadowing)
* [See also](https://docs.devolutions.net/gateway/kb/how-to-articles/launch-rdp-session-web-client/#see-also)
Launch RDP connections and other session types directly from the browser via the Devolutions Server web interface.
Based on [IronRDP](https://github.com/Devolutions/IronRDP)
(Rust implementation of the RDP protocol) and its web assembly component, the web client, passing through a Devolutions Gateway, ensures a secure communication using the protocol directly. Unlike Apache Guacamole, no intermediate protocol is used and unlike RD Web Access, there is no redundant extra TLS layer. This ensures good performance.
Requirements
------------
[](https://docs.devolutions.net/gateway/kb/how-to-articles/launch-rdp-session-web-client/#requirements)
To use this feature, certain requirements must be met, namely:
* The browser must meet these minimal version requirements:
* Chrome: 102
* Firefox: 102
* Safari: 16.4
* Windows 10 or 11.
* Windows Server 2016 and later.
* Have a [Devolutions Gateway](https://docs.devolutions.net/gateway/getting-started/server/server-configuration/)
version 2023.1 or later.
* Have a [Devolutions Server](https://docs.devolutions.net/server/getting-started/installation/upgrade-server/)
version 2023.1.3 or later.
* Have an [RDP type connection](https://docs.devolutions.net/gateway/kb/how-to-articles/launch-rdp-session-web-client/#rdp-session-configuration)
with a gateway type VPN configured.
* Have the _**View password**_ permission if you are the one to use the session.
* When using IronRDP, a call is generated to the tool, and the password can be seen when the developer tools are enabled.
* Have a Remote Desktop Manager or Devolutions Launcher license assigned to the user who will launch the session.
If HTTPS is used for Devolutions Gateway communications, it is highly recommended to use Subject Alternative Name (SAN). In most cases, a Common Name (CN) is only used as fallback and typically ignored when SAN is set. It is best security and compatibility practice, however, to make the CN match one of the SAN entries.
Supported session entries
-------------------------
[](https://docs.devolutions.net/gateway/kb/how-to-articles/launch-rdp-session-web-client/#supported-session-entries)
Other session entry types can be launched via the Devolutions Server web interface:
* Active Directory
* Apple Remote Desktop (ARD)
* PowerShell (remote)
* RDP (Microsoft Remote Desktop)
* SSH terminal
* Telnet
* VNC
RDP session configuration
-------------------------
[](https://docs.devolutions.net/gateway/kb/how-to-articles/launch-rdp-session-web-client/#rdp-session-configuration)
Follow the steps below to properly configure your RDP session to launch it in a browser:
The steps below assume that you already have an RDP session entry. If you have not yet created it and want to learn how, see [Create entries manually](https://docs.devolutions.net/server/web-interface/vault/entries/create-entries-manually/)
.
1. In the Devolutions Server web interface, go to the _**Properties**_ of your RDP entry.
2. In the _**VPN/Tunnel/Gateway**_ section, select _**Devolutions Gateway**_ in the _**VPN type**_ drop-down list.

VPN/Tunnel/Gateway – VPN type
3. In the _**Connect**_ drop-down list, select _**Connect if unable to ping/port scan**_.

VPN/Tunnel/Gateway – Connect – Connect if unable to ping/port scan
4. Under _**Settings**_, select the _**Devolutions Gateway**_ to use for this connection, then click on _**Check health**_ to make sure the Gateway is functional. Its version must be 2023.1 or later.

VPN/Tunnel/Gateway – Settings – Check health
5. In the _**Session recording**_ section, set the recording _**Mode**_.

Session recording – Mode
6. Click _**Update**_ to save your changes.
Launching the connection
------------------------
[](https://docs.devolutions.net/gateway/kb/how-to-articles/launch-rdp-session-web-client/#launching-the-connection)
Once all the conditions are met, you can press the _**Open in web client**_ button to launch the connection from the web client.

Open in web client
If the session recording mode was set to _**Optional**_ in the entry properties, you will be asked if you want to record this session.

Do you want to record your session?
A new browser tab should open and your session should start.

RDP session opened in a web client
If the connection does not work, check the [Requirements](https://docs.devolutions.net/gateway/kb/how-to-articles/launch-rdp-session-web-client/#requirements)
again or visit [RDP Web client not showing](https://docs.devolutions.net/gateway/kb/troubleshooting-articles/rdp-web-client-not-showing/ "RDP web client not showing")
.
### Supported features
[](https://docs.devolutions.net/gateway/kb/how-to-articles/launch-rdp-session-web-client/#supported-features)
The tools menu in the RDP web interface contains what is currently supported. Note that the copy/paste feature (including the clipboard) is also supported.

Supported features
| Icon | Option | Description |
| --- | --- | --- |
|  | Full screen | Displays the content of the session, making sure to always occupy the maximum space on the screen. |
|  | Fit to screen (default) | Adapts the size to best fit the available space so that the entire session is always visible. |
|  | Real size | Conforms to the resolution of the target host. |
|  | Windows key | Sends the signal of the Windows key (however, the key must also work). |
|  | Ctrl + Alt + Del | Sends the command to the host system. |
### Session shadowing
[](https://docs.devolutions.net/gateway/kb/how-to-articles/launch-rdp-session-web-client/#session-shadowing)
With Devolutions Gateway session shadowing support, it is possible to watch an in-progress session recording to assist or audit in-process work. Navigate to the recording tab of an entry to see a pulsing icon indicating an in-progress recording, then click to watch in real-time.
1. Launch a web-based RDP session in the Devolutions Server web interface.
2. The Gateway automatically starts recording the session in the background.
3. Run a stopwatch script to show the elapsed time.
4. Go back to the Devolutions Server web interface.
5. Select the RDP entry.
6. Open the RDP entry's recording tab to view the session in real time.
### See also
[](https://docs.devolutions.net/gateway/kb/how-to-articles/launch-rdp-session-web-client/#see-also)
* [Devolutions Blog - Spotlight on: Web-based RDP, ARD, SSH in Devolutions Server & Hub](https://blog.devolutions.net/2024/08/spotlight-on-web-based-rdp-ard-ssh-in-devolutions-server-and-hub/ "Devolutions Blog - Spotlight on: Web-based RDP, ARD, SSH in Devolutions Server & Hub")
[ Share your feedback](https://forum.devolutions.net/forums/176/documentation--documentation-requests)
---
# Launch an SSH session in a web client - Devolutions Documentation
Launch an SSH session in a web client
=====================================
On this page
* [Requirements](https://docs.devolutions.net/gateway/kb/how-to-articles/launch-ssh-session-web-client/#requirements)
* [Supported session entries](https://docs.devolutions.net/gateway/kb/how-to-articles/launch-ssh-session-web-client/#supported-session-entries)
* [SSH terminal session configuration](https://docs.devolutions.net/gateway/kb/how-to-articles/launch-ssh-session-web-client/#ssh-terminal-session-configuration)
* [See also](https://docs.devolutions.net/gateway/kb/how-to-articles/launch-ssh-session-web-client/#see-also)
Launch SSH session directly from your favorite web browser via the Devolutions Server or Devolutions Hub web interface.
Requirements
------------
[](https://docs.devolutions.net/gateway/kb/how-to-articles/launch-ssh-session-web-client/#requirements)
To use this feature, certain requirements must be met, namely:
* Windows 10 or 11.
* [Devolutions Gateway](https://docs.devolutions.net/gateway/getting-started/server/server-configuration/)
version 2023.1 or later.
* [Devolutions Server](https://docs.devolutions.net/server/getting-started/installation/upgrade-server/)
version 2023.1 or later.
* An [SSH terminal session](https://docs.devolutions.net/rdm/kb/knowledge-base/entry-settings/ssh-session-entry/)
entry with a Devolutions Gateway VPN type configured must be created.
* A Remote Desktop Manager or Devolutions Launcher license must be assigned to the user launching the session.
Supported session entries
-------------------------
[](https://docs.devolutions.net/gateway/kb/how-to-articles/launch-ssh-session-web-client/#supported-session-entries)
Other session types can be launched via the Devolutions Server web interface:
* Active Directory
* Apple Remote Desktop (ARD)
* PowerShell (remote)
* [RDP (Microsoft Remote Desktop)](https://docs.devolutions.net/gateway/kb/how-to-articles/launch-rdp-session-web-client/)
* SSH terminal
* Telnet
* VNC
SSH terminal session configuration
----------------------------------
[](https://docs.devolutions.net/gateway/kb/how-to-articles/launch-ssh-session-web-client/#ssh-terminal-session-configuration)
Follow the steps below to properly configure your SSH terminal session to launch it in a browser:
The steps below assume that you already have an SSH terminal session entry. If you have not yet created it and want to learn how, see [Create entries manually](https://docs.devolutions.net/server/web-interface/vault/entries/create-entries-manually/)
.
1. In the Devolutions Server web interface, go to the _**Properties...**_ of your SSH terminal entry.
2. In the _**VPN/Tunnel/Gateway**_ section, select _**Devolutions Gateway**_ in the _**VPN type**_ drop-down list.
!\[Set Devolutions Gateway as the VPN type for your connection\](https://cdnweb.devolutions.net/docs/DVLS4191\_2025\_1.png "Set Devolutions Gateway as the VPN type for your connection")
3. In the _**Connect**_ drop-down menu, select _**Always connect**_.
!\[Devolutions Gateway connect mode\](https://cdnweb.devolutions.net/docs/DVLS4192\_2025\_1.png "Devolutions Gateway connect mode")
4. Under _**Settings**_, select the Devolutions Gateway to use for this connection, then click on _**Check health**_ to make sure the Gateway is functional. Its version must be 2023.1 or later for this to work. Click on _**Update**_ to save your changes.
!\[Select the correct Devolutions Gateway instance and test if the connection functions properly\](https://cdnweb.devolutions.net/docs/DVLS4193\_2025\_1.png "Select the correct Devolutions Gateway instance and test if the connection functions properly")
5. Once all the conditions are met, you can press the _**Open in web client**_ button.

Launch the SSH terminal connection
See also
--------
[](https://docs.devolutions.net/gateway/kb/how-to-articles/launch-ssh-session-web-client/#see-also)
* [Launch an RDP session in a web client](https://docs.devolutions.net/gateway/kb/how-to-articles/launch-rdp-session-web-client/)
* [SSH terminal entry options](https://docs.devolutions.net/rdm/kb/knowledge-base/entry-settings/ssh-session-entry/)
[ Share your feedback](https://forum.devolutions.net/forums/176/documentation--documentation-requests)
---
# Base de connaissances - Documentation Devolutions
Base de connaissances
=====================
Consulter divers sujets plus en profondeur sur Devolutions Gateway dans cette section.
[ Partagez vos commentaires](https://forum.devolutions.net/forums/176/documentation--documentation-requests)
---
# Cloudflare with Devolutions Gateway - Devolutions Documentation
Cloudflare with Devolutions Gateway
===================================
On this page
* [Configure Cloudflare tunnel](https://docs.devolutions.net/gateway/kb/how-to-articles/reverse-proxying/cloudflare-tunnel-gateway/#configure-cloudflare-tunnel)
* [Retrieve the Devolutions Server or Devolutions Hub Business provisioning key](https://docs.devolutions.net/gateway/kb/how-to-articles/reverse-proxying/cloudflare-tunnel-gateway/#retrieve-the-devolutions-server-or-devolutions-hub-business-provisioning-key)
* [Install Devolutions Gateway with Cloudflare](https://docs.devolutions.net/gateway/kb/how-to-articles/reverse-proxying/cloudflare-tunnel-gateway/#install-devolutions-gateway-with-cloudflare)
* [Launch the Cloudflared client on the Remote Desktop Manager host](https://docs.devolutions.net/gateway/kb/how-to-articles/reverse-proxying/cloudflare-tunnel-gateway/#launch-the-cloudflared-client-on-the-remote-desktop-manager-host)
* [Configure Devolutions Server or Devolutions Hub Business](https://docs.devolutions.net/gateway/kb/how-to-articles/reverse-proxying/cloudflare-tunnel-gateway/#configure-devolutions-server-or-devolutions-hub-business)
* [Devolutions Server](https://docs.devolutions.net/gateway/kb/how-to-articles/reverse-proxying/cloudflare-tunnel-gateway/#devolutions-server)
* [Devolutions Hub Business](https://docs.devolutions.net/gateway/kb/how-to-articles/reverse-proxying/cloudflare-tunnel-gateway/#devolutions-hub-business)
Devolutions Gateway can operate behind a Cloudflare Tunnel to add an additional layer of protection to an internal Devolutions Gateway installation or to allow an outbound tunnel when changing a firewall configuration is unavailable. Using Devolutions Gateway behind Cloudflare Tunnel is available for both Devolutions Server and Devolutions Hub Business.
Configure Cloudflare tunnel
---------------------------
[](https://docs.devolutions.net/gateway/kb/how-to-articles/reverse-proxying/cloudflare-tunnel-gateway/#configure-cloudflare-tunnel)
1. Log into the Cloudflare dashboard.
A Cloudflare free plan can be used to install and run Cloudflare tunnels.
2. Go to the _**Zero Trust**_ section which is under _**Cloudflare Dashboard**_.
3. Go to _**Networks**_ – _**Tunnels**_ and click _**Create a tunnel**_.
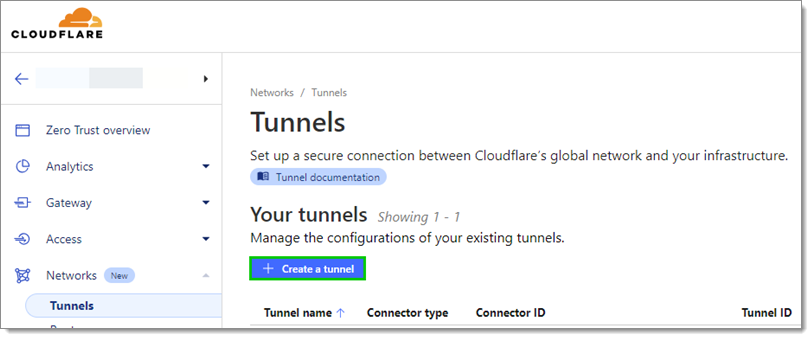
Create a tunnel
4. Select _**Cloudflared**_ and click _**Next**_.
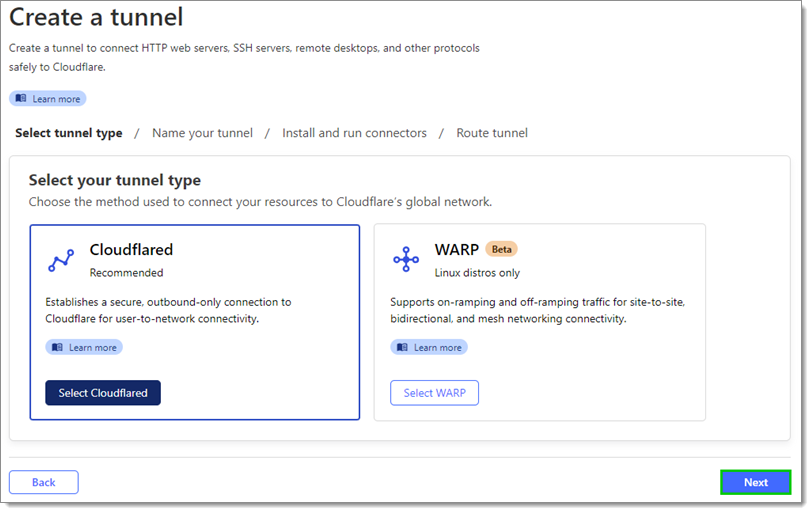
Cloudflared
5. Input a name and click _**Save tunnel**_.
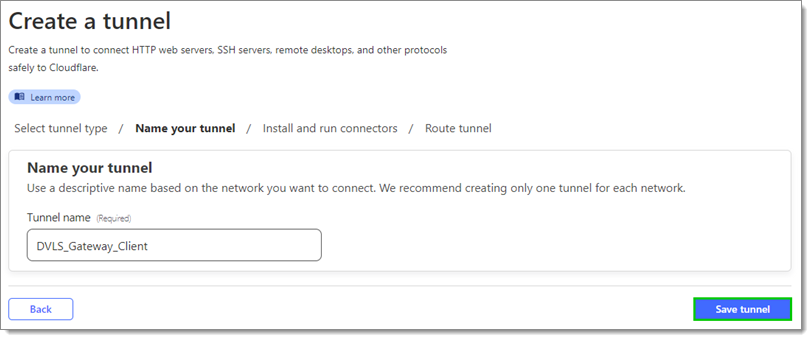
Save tunnel
6. Choose the appropriate operating system and architecture.
7. Download the installer via the given link.
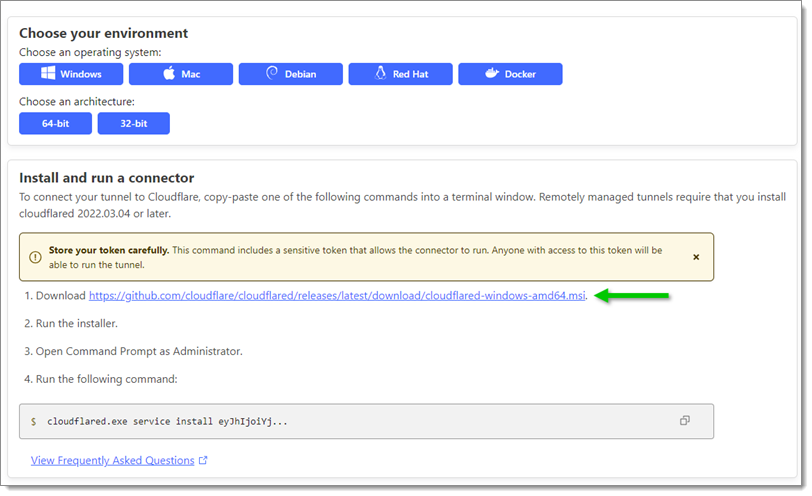
Download the installer
8. _**Copy**_ the configuration string.
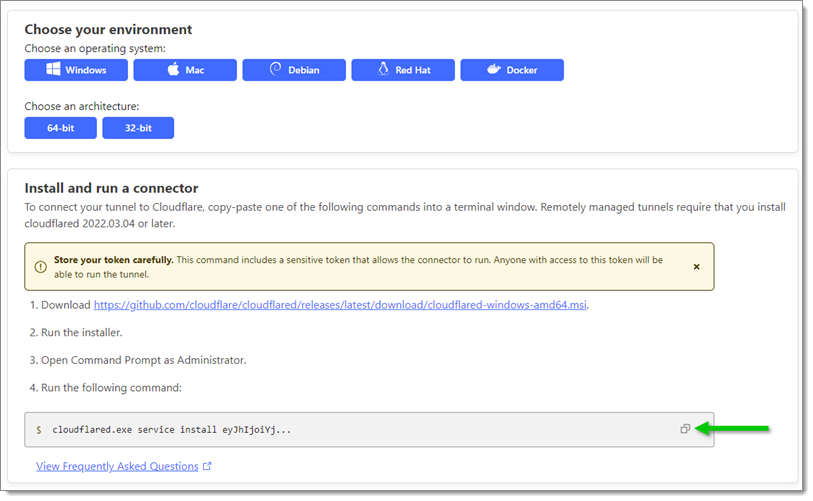
Copy the configuration string
9. Run the Cloudflare installer.
10. In the _**Install and run a connector**_ section of the Cloudflare installation window copy the command.
11. Open the server with the installed Cloudflare tunnel daemon and open _**Command Prompt**_ as an administrator.
12. Paste the copied configuration string from step 8 and press enter.
It is advised to verify that the _**Status**_ is showing as _**Connected**_.

Copied configuration string
13. Click _**Next**_.
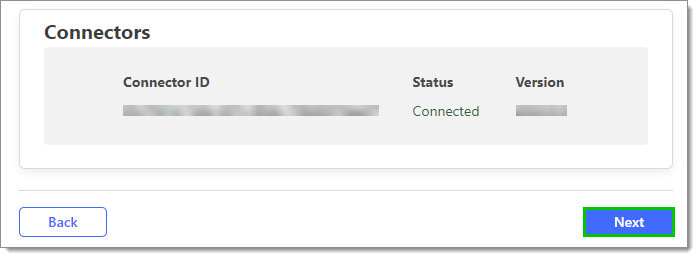
Connectors
14. Input a unique subdomain.
15. Choose _**HTTPS**_ as _**Type**_.
1. Enable the _**No TLS Verify**_ option under _**Additional application settings**_ – _**TLS**_ when using a self-signed certificate for a gateway.
Use localhost:7171 as the URL if the default gateway configuration was used.
16. Click _**Save tunnel**_.
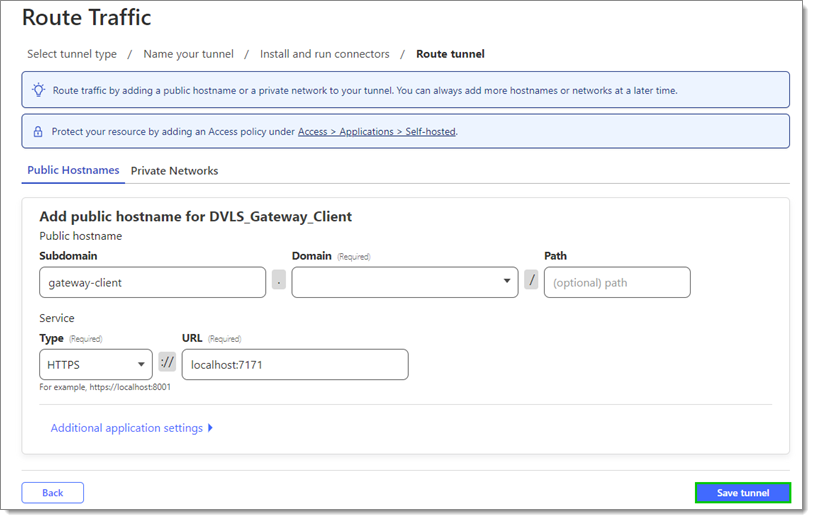
Save tunnel
17. Click on the newly created _**Tunnel name**_.
18. Click _**Edit**_.
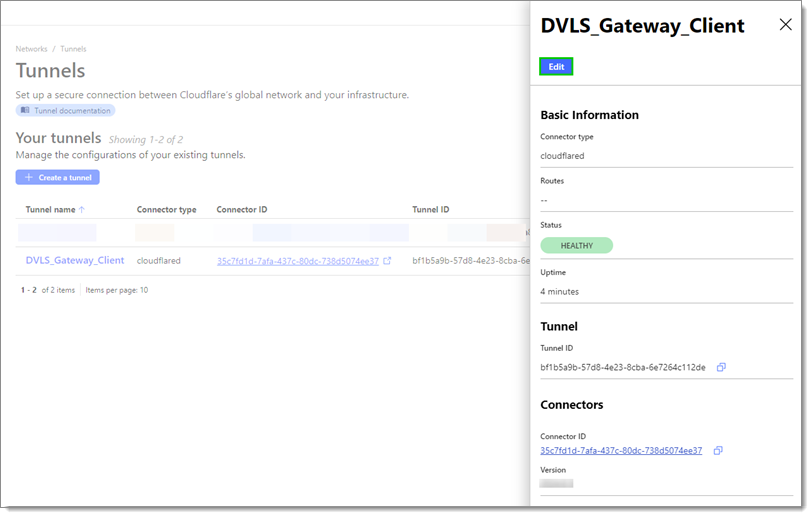
Edit
19. Go to the _**Public Hostname**_ tab and click _**Add a public hostname**_.
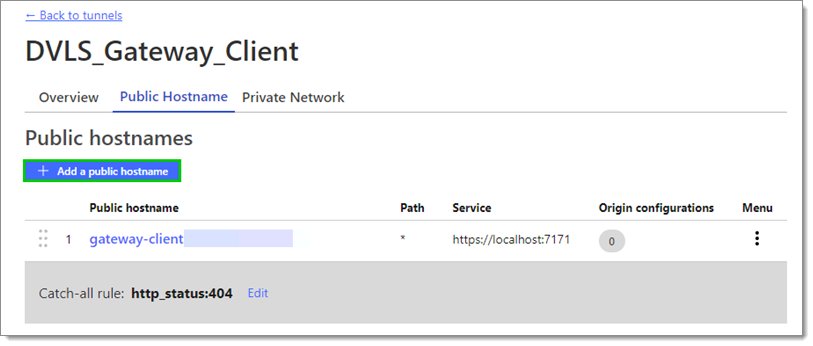
Add a public hostname
20. Input a unique subdomain (different from step 14).
21. Choose _**TCP**_ as _**Type**_.
Use localhost:8181 as the URL if the default gateway configuration was used.
22. Click _**Save hostname**_.
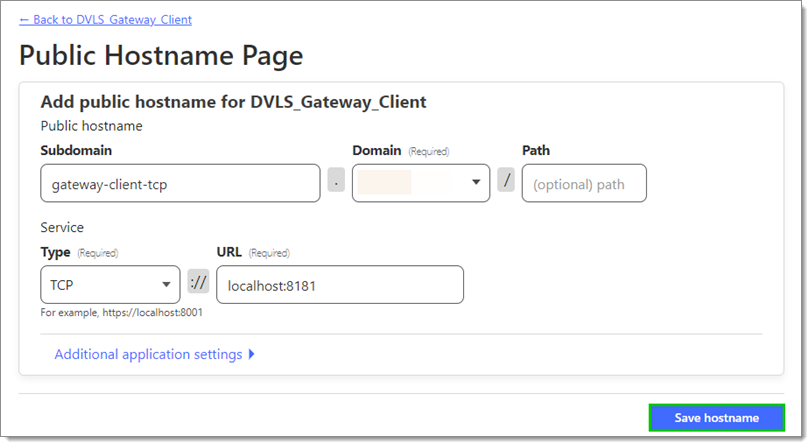
Save hostname
When done there should be two public hostnames.
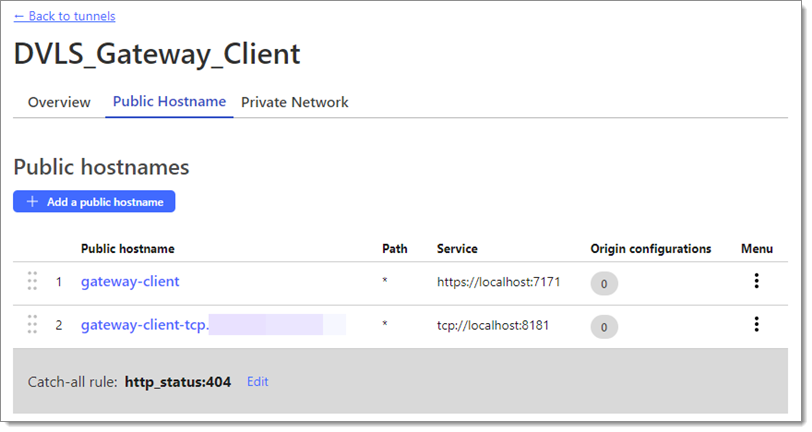
Two unique public hostnames
Retrieve the Devolutions Server or Devolutions Hub Business provisioning key
----------------------------------------------------------------------------
[](https://docs.devolutions.net/gateway/kb/how-to-articles/reverse-proxying/cloudflare-tunnel-gateway/#retrieve-the-devolutions-server-or-devolutions-hub-business-provisioning-key)
1. Log into the Devolutions Server or Devolutions Hub Business instance as a user with access to the Devolutions Gateway configuration.
2. Go to _**Administration**_ — _**Devolutions Gateway**_.
3. Click the _**More**_ button and select _**Download public key**_.
This file needs to be accessible to the server hosting Devolutions Gateway behind the Cloudflare tunnel.
Install Devolutions Gateway with Cloudflare
-------------------------------------------
[](https://docs.devolutions.net/gateway/kb/how-to-articles/reverse-proxying/cloudflare-tunnel-gateway/#install-devolutions-gateway-with-cloudflare)
1. Open a connection to the server hosting Devolutions Gateway and download the [installer](https://devolutions.net/gateway/)
.
2. Run the installer.
3. Click _**Next**_.
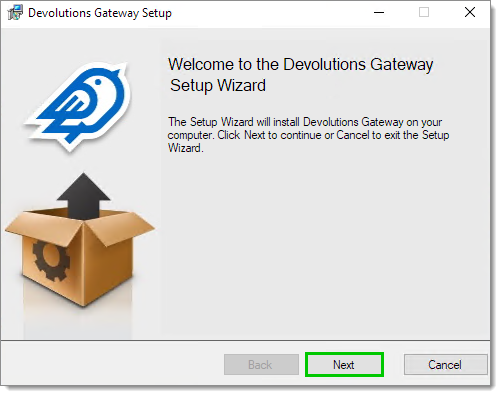
Next
4. Once the desired installation path is selected, click the _**Next**_ button.
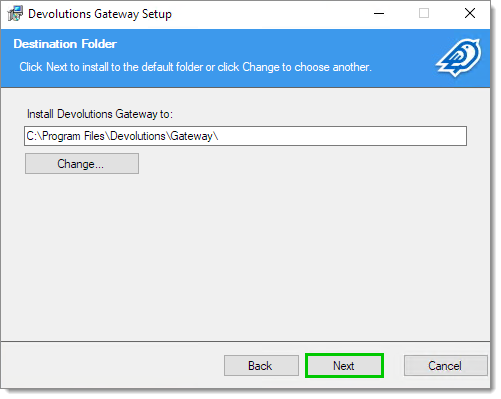
Installation path
5. Click _**Next**_.
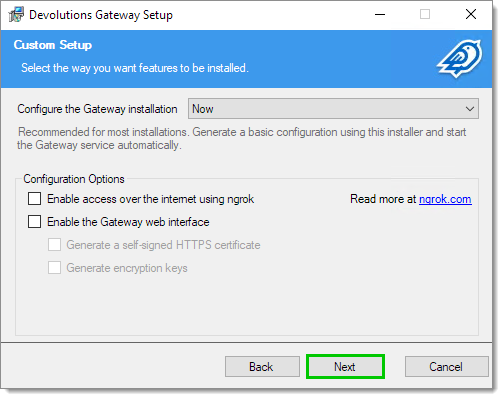
Leave the defaults
6. Click _**Next**_ in the _**Listeners**_ window.
It is advised to leave the default listeners as they will likely correspond to the Cloudflare tunnel configuration.
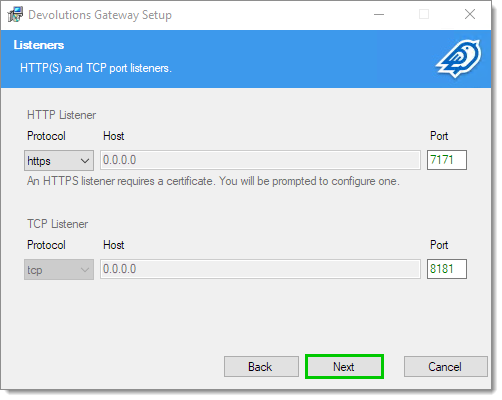
Listeners
7. Enter the external URI by which the gateway will be reachable.
8. Click _**Next**_.
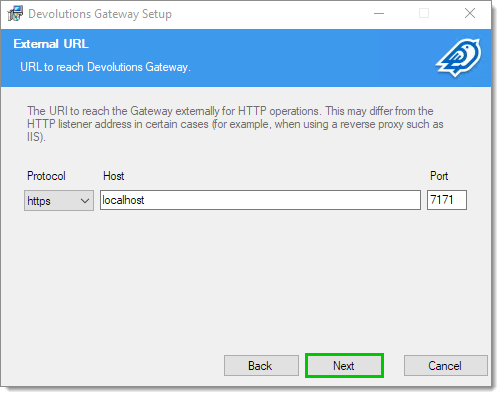
External URL
9. Specify the path to the TLS certificates or to the system certificate store location.
10. Click _**Next**_.
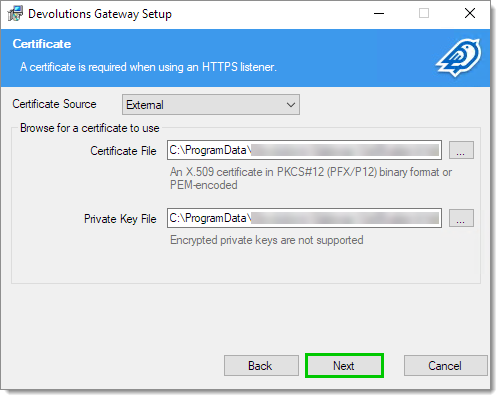
Certificates
11. Specify the path to the previously retrieved public key from Devolutions Server or Devolutions Hub Business.
This key file must be accessible to the **NetworkService** account, which Devolutions Gateway runs as.
12. Click _**Next**_.
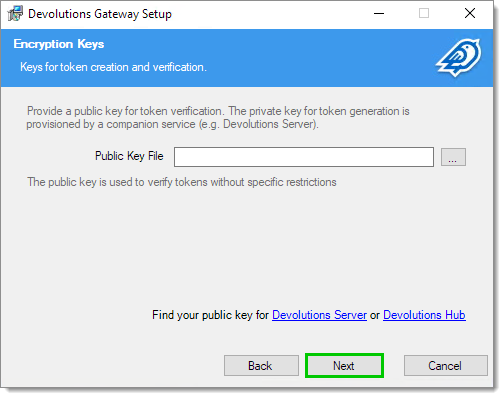
Public Key
13. Click _**Install**_.
Launch the Cloudflared client on the Remote Desktop Manager host
----------------------------------------------------------------
[](https://docs.devolutions.net/gateway/kb/how-to-articles/reverse-proxying/cloudflare-tunnel-gateway/#launch-the-cloudflared-client-on-the-remote-desktop-manager-host)
The Cloudflared client needs to be [downloaded](https://github.com/cloudflare/cloudflared/releases)
and launched to properly tunnel the connection. This client will create an outbound Cloudflare tunnel connection from the local Remote Desktop Manager client to the Cloudflare tunnel connecting to Devolutions Gateway.
The following code needs to be run in a terminal window as long the tunnel needs to be open and each time a gateway will be accessed behind a Cloudflare tunnel:
cloudflared-windows-amd64.exe access tcp --hostname gateway-client-tcp.mydomain.com --url localhost:8181
To avoid running the code every time, create a service:
1. Launch an elevated PowerShell session.
2. Input this code to create a new PowerShell service:
New-Service -Name "Cloudflared Egress" -BinaryPath "C:\Tools\cloudflared-windows-amd64.exe access tcp --hostname gateway-client-tcp.mydomain.com --url localhost:8181"
Start-Service -Name 'Cloudflared Egress'
3. Start the service.
The tunnel is now running permanently client-side.
Configure Devolutions Server or Devolutions Hub Business
--------------------------------------------------------
[](https://docs.devolutions.net/gateway/kb/how-to-articles/reverse-proxying/cloudflare-tunnel-gateway/#configure-devolutions-server-or-devolutions-hub-business)
### Devolutions Server
[](https://docs.devolutions.net/gateway/kb/how-to-articles/reverse-proxying/cloudflare-tunnel-gateway/#devolutions-server)
1. Log into a Devolutions Server instance as a user with access to the Devolutions Gateway configuration.
2. Go to _**Administration**_ — _**Devolutions Gateway**_.
3. Click the _**Add**_ (_**+**_) button and choose _**Gateway**_.
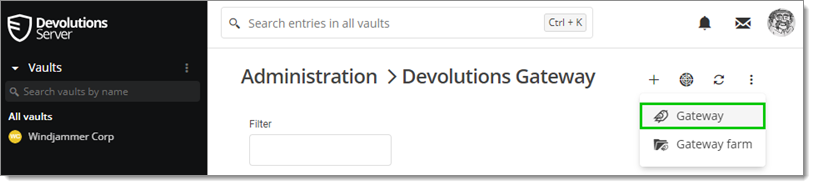
Gateway
4. Enter the previously retrieved details from Cloudflare used to configure Devolutions Gateway.
It may be needed to preface the Cloudflare tunnel domain with https://. _**Auto-Detect**_ will only work if the hostname was configured to be the same as the TCP hostname in Cloudflare. _**Test connection**_ if the tunnel domain is accessible.
5. Click _**Save**_.
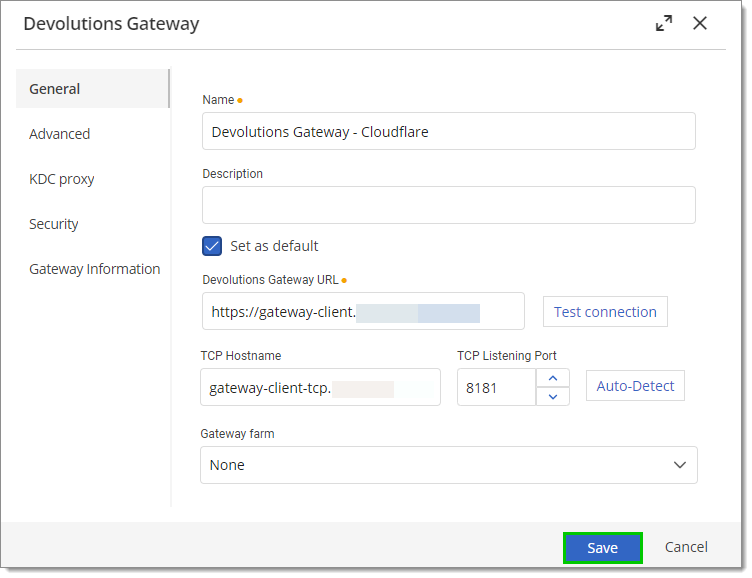
Cloudflare configuration
6. Click the ellipsis (_**More**_) button next to the newly configured gateway and select _**Publish revocation list**_.
1. If the _**Publish Gateway configuration**_ option is available, it should be done before _**Publish revocation list**_.
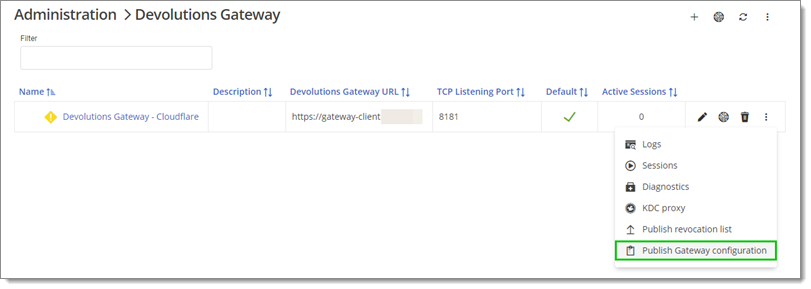
Publish Gateway configuration
### Devolutions Hub Business
[](https://docs.devolutions.net/gateway/kb/how-to-articles/reverse-proxying/cloudflare-tunnel-gateway/#devolutions-hub-business)
1. Log into a Devolutions Hub Business instance as a user with access to the Devolutions Gateway configuration.
2. Go to _**Administration**_ — _**Devolutions Gateway**_.
3. Click the _**Add**_ (_**+**_) button.
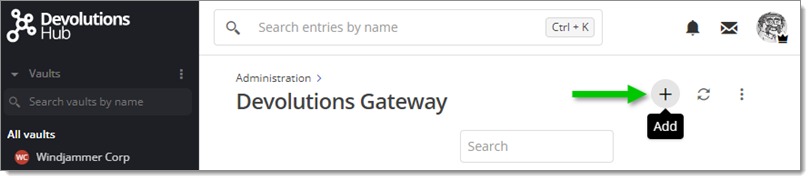
Add
4. Enter the previously retrieved details from Cloudflare used to configure Devolutions Gateway.
It may be needed to preface the Cloudflare tunnel domain with https://. _**Auto-Detect**_ will only work if the hostname was configured to be the same as the TCP hostname in Cloudflare. _**Test connection**_ if the tunnel domain is accessible.
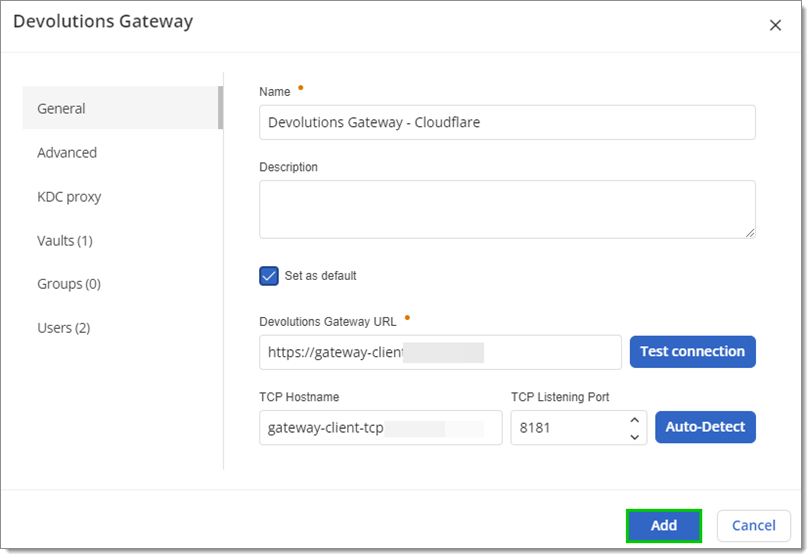
Cloudflare configuration
5. Go through any combination of _**Vaults**_, _**Groups**_ or _**Users**_ tabs to decide how the licenses will be distributed.
6. Click _**Add**_.
7. Click the ellipsis (_**More**_) button next to the newly configured gateway and select _**Publish Gateway configuration**_.
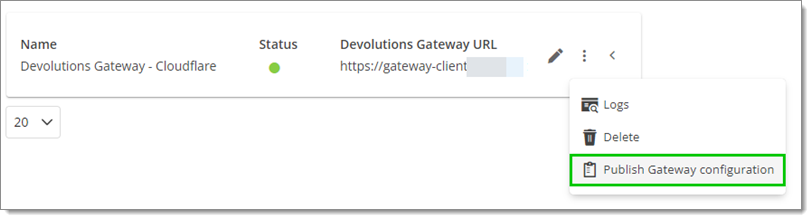
Publish Gateway configuration
[ Share your feedback](https://forum.devolutions.net/forums/176/documentation--documentation-requests)
---
# Ngrok tunnel with Devolutions Gateway - Devolutions Documentation
Ngrok tunnel with Devolutions Gateway
=====================================
On this page
* [Configure Ngrok](https://docs.devolutions.net/gateway/kb/how-to-articles/reverse-proxying/ngrok-tunnel-gateway/#configure-ngrok)
* [Retrieve the Devolutions Server or Devolutions Hub Business provisioning key](https://docs.devolutions.net/gateway/kb/how-to-articles/reverse-proxying/ngrok-tunnel-gateway/#retrieve-the-devolutions-server-or-devolutions-hub-business-provisioning-key)
* [Install Devolutions Gateway with Ngrok](https://docs.devolutions.net/gateway/kb/how-to-articles/reverse-proxying/ngrok-tunnel-gateway/#install-devolutions-gateway-with-ngrok)
* [Configure Devolutions Server or Devolutions Hub Business](https://docs.devolutions.net/gateway/kb/how-to-articles/reverse-proxying/ngrok-tunnel-gateway/#configure-devolutions-server-or-devolutions-hub-business)
* [Devolutions Server](https://docs.devolutions.net/gateway/kb/how-to-articles/reverse-proxying/ngrok-tunnel-gateway/#devolutions-server)
* [Devolutions Hub Business](https://docs.devolutions.net/gateway/kb/how-to-articles/reverse-proxying/ngrok-tunnel-gateway/#devolutions-hub-business)
Devolutions Gateway can operate behind Ngrok to add an additional layer of protection to an internal Devolutions Gateway installation or to allow an outbound tunnel when changing a firewall configuration is unavailable. Using Devolutions Gateway behind Ngrok is available for both Devolutions Server and Devolutions Hub Business. The Ngrok tunnel can be added to an already existing gateway by changing some settings in the **gateway.json** file.
Configure Ngrok
---------------
[](https://docs.devolutions.net/gateway/kb/how-to-articles/reverse-proxying/ngrok-tunnel-gateway/#configure-ngrok)
A paid subscription to Ngrok is required as the gateway needs to serve TCP traffic. The subscription also includes the use of custom domain names.
1. Log into the Ngrok dashboard.
2. Go to the _**Domains**_ section which is under _**Cloud Edge**_.
3. Click _**New Domain**_.
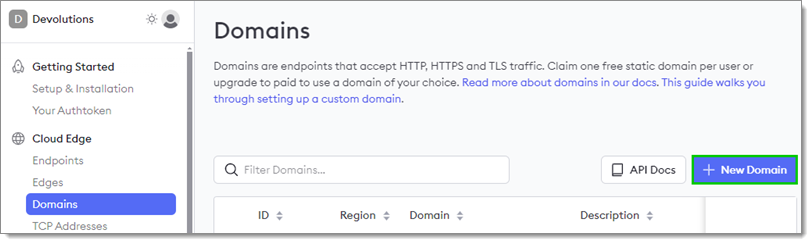
New Domain
4. Input the domain details and click _**Continue**_.
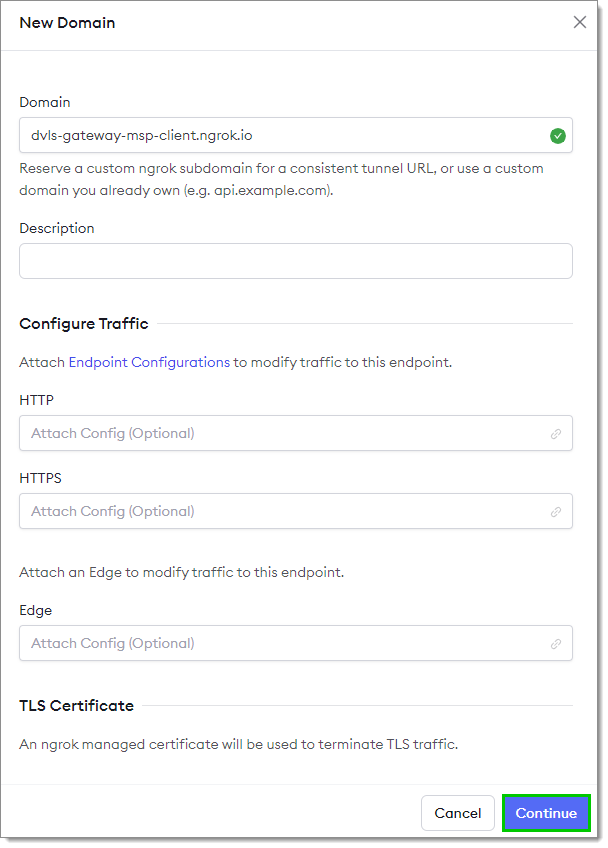
Continue
5. Under _**Cloud Edge**_, select the _**TCP Addresses**_ section and then click the _**New TCP Address**_ button.
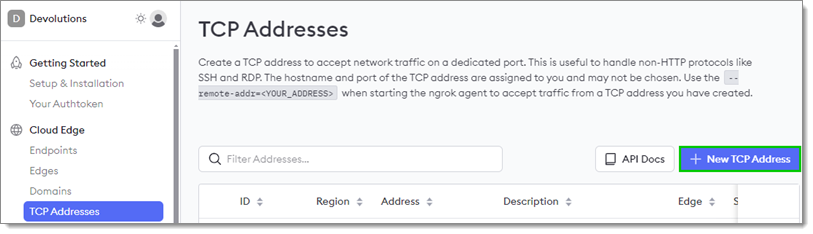
New TCP Address
6. Modify the information if needed and click _**Continue**_.
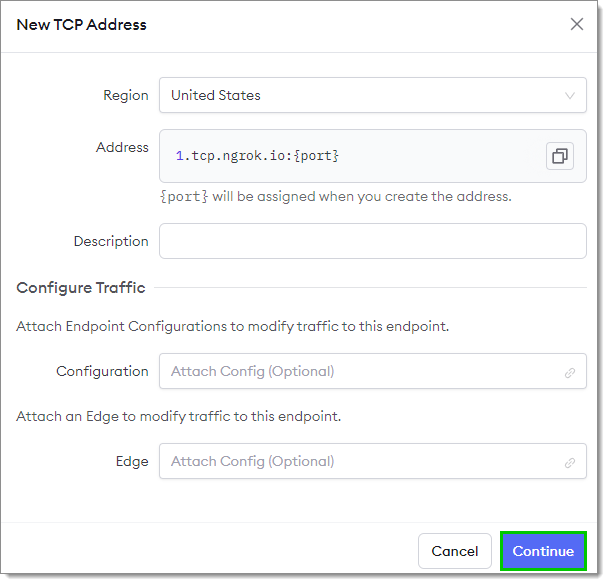
Continue
It is advised to take note of the _**Domain**_, _**TCP Address**_, assigned TCP port as well as the Ngrok _**Authtoken**_.
7. Go to _**Getting Started**_ — _**Your Authtoken**_ and click the _**Copy**_ button.
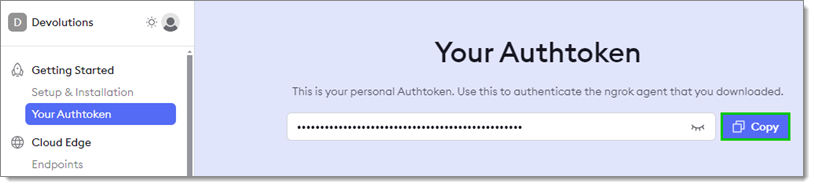
Copy
Retrieve the Devolutions Server or Devolutions Hub Business provisioning key
----------------------------------------------------------------------------
[](https://docs.devolutions.net/gateway/kb/how-to-articles/reverse-proxying/ngrok-tunnel-gateway/#retrieve-the-devolutions-server-or-devolutions-hub-business-provisioning-key)
1. Log into the Devolutions Server or Devolutions Hub Business instance as a user with access to the Devolutions Gateway configuration.
2. Go to _**Administration**_ — _**Devolutions Gateway**_.
3. Click the _**More**_ button and select _**Download public key**_.

Devolutions Server
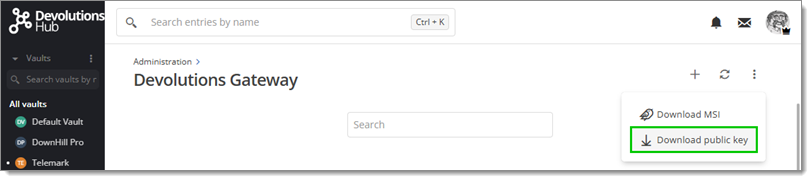
Devolutions Hub
This file needs to be accessible to the server hosting Devolutions Gateway behind Ngrok.
Install Devolutions Gateway with Ngrok
--------------------------------------
[](https://docs.devolutions.net/gateway/kb/how-to-articles/reverse-proxying/ngrok-tunnel-gateway/#install-devolutions-gateway-with-ngrok)
1. Open a connection to the server hosting Devolutions Gateway and download the [installer](https://devolutions.net/gateway/)
.
2. Run the installer.
3. Click _**Next**_.

Run the installer
4. Once the desired installation path is selected, click the _**Next**_ button.

Next
5. Check the _**Enable access over the internet using Ngrok**_ option and click _**Next**_.
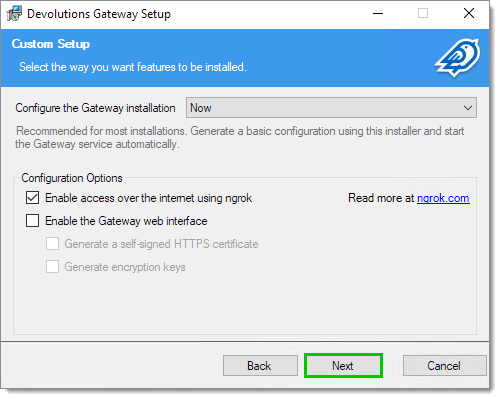
Enable access over the internet using ngrok
6. Enter the Ngrok settings and click _**Next**_.
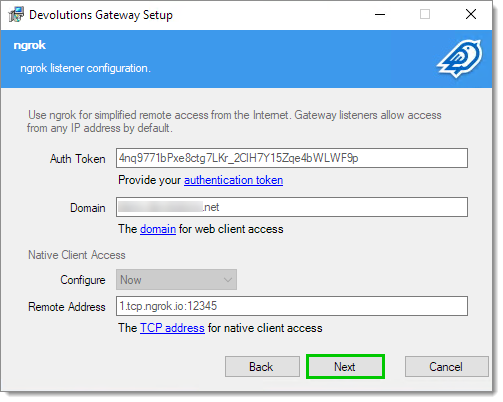
Next
7. Specify the path to the previously retrieved public key from Devolutions Server or Devolutions Hub Business and click _**Next**_.

Public Key File
This key file must be accessible to the NetworkService account, which Devolutions Gateway runs as.
8. Click _**Next**_ and then click _**Install**_.
Install
Configure Devolutions Server or Devolutions Hub Business
--------------------------------------------------------
[](https://docs.devolutions.net/gateway/kb/how-to-articles/reverse-proxying/ngrok-tunnel-gateway/#configure-devolutions-server-or-devolutions-hub-business)
### Devolutions Server
[](https://docs.devolutions.net/gateway/kb/how-to-articles/reverse-proxying/ngrok-tunnel-gateway/#devolutions-server)
1. Log into a Devolutions Server instance as a user with access to the Devolutions Gateway configuration.
2. Go to _**Administration**_ — _**Devolutions Gateway**_.
3. Click the _**Add**_ (_**+**_) button and choose _**Gateway**_.

Gateway
4. Enter the previously retrieved details from Ngrok used to configure Devolutions Gateway.
It may be needed to preface the Ngrok domain with `https://`. _**Auto-Detect**_ will not work but _**Test connection**_ will indicate if the Ngrok Domain is accessible.
5. Click _**Save**_.
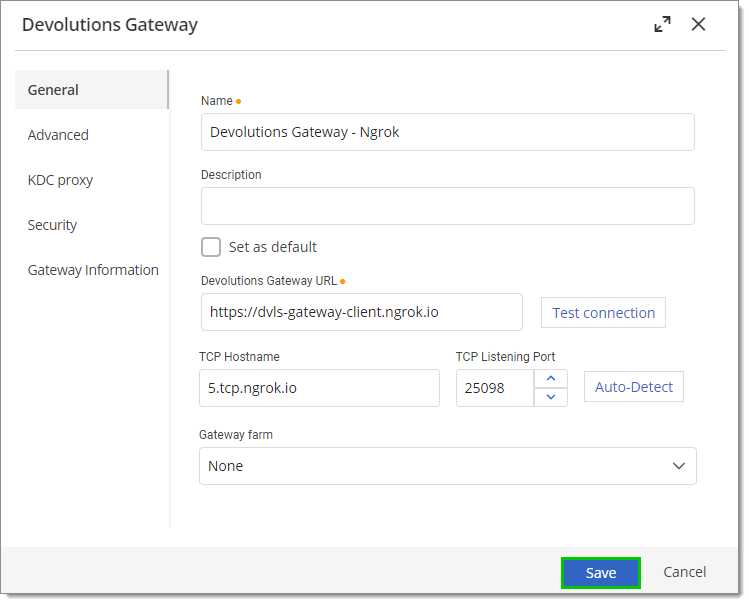
Save
6. Click the ellipsis (_**More**_) button next to the newly configured gateway and select _**Publish revocation list**_.
1. If the _**Publish Gateway configuration**_ option is available, it should be done before _**Publish revocation list**_.
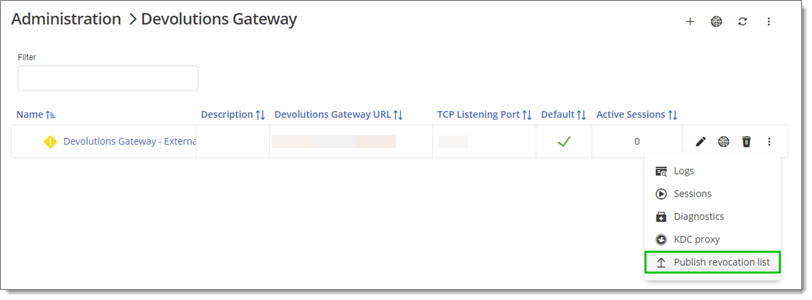
Publish revocation list
### Devolutions Hub Business
[](https://docs.devolutions.net/gateway/kb/how-to-articles/reverse-proxying/ngrok-tunnel-gateway/#devolutions-hub-business)
1. Log into a Devolutions Hub Business instance as a user with access to the Devolutions Gateway configuration.
2. Go to _**Administration**_ — _**Devolutions Gateway**_.
3. Click the _**Add**_ (_**+**_) button.

Add
4. Enter the previously retrieved details from Ngrok used to configure Devolutions Gateway.
It may be needed to preface the Ngrok domain with `https://`. _**Auto-Detect**_ will not work but _**Test connection**_ will indicate if the Ngrok Domain is accessible.
5. Go through any combination of _**Vaults**_, _**Groups**_ or _**Users**_ tabs to decide how the licenses will be distributed.
6. Click _**Add**_.
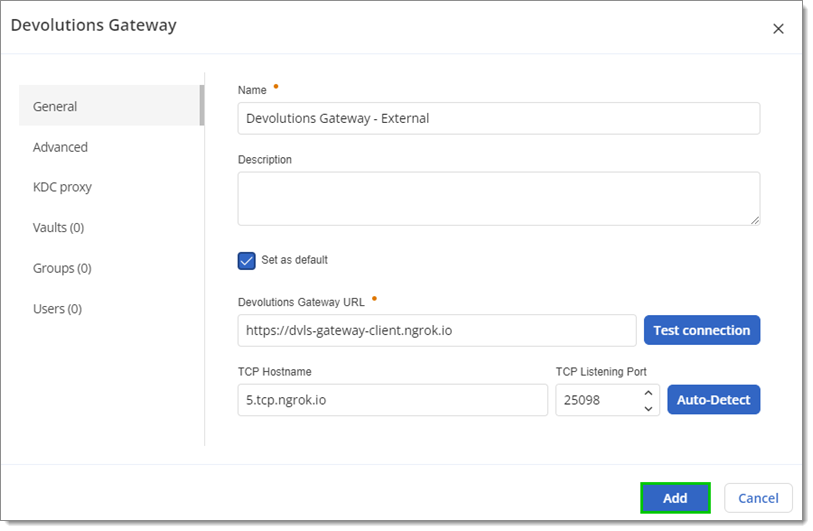
Add
7. Click the ellipsis (_**More**_) button next to the newly configured gateway and select _**Publish Gateway configuration**_.
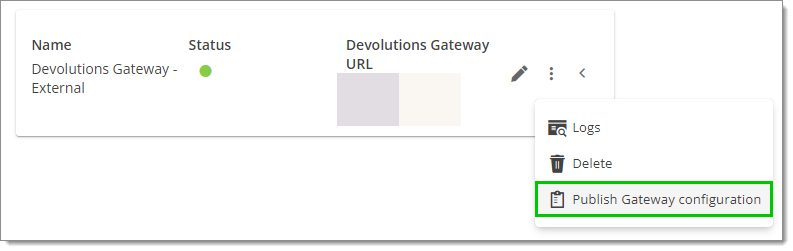
Publish Gateway configuration
[ Share your feedback](https://forum.devolutions.net/forums/176/documentation--documentation-requests)
---
# Knowledge base - Devolutions Documentation
Knowledge base
==============
You can consult various more in-depth topics about Devolutions Gateway in this section.
[ Share your feedback](https://forum.devolutions.net/forums/176/documentation--documentation-requests)
---
# Use the Devolutions Gateway KDC proxy - Devolutions Documentation
Use the Devolutions Gateway KDC proxy
=====================================
Auf dieser Seite
* [Enable API hooking for RDP](https://docs.devolutions.net/de/gateway/kb/how-to-articles/use-nla-rdp-connection/#api-hooking)
* [Configure KDC proxy with short-lived tokens](https://docs.devolutions.net/de/gateway/kb/how-to-articles/use-nla-rdp-connection/#short-lived-tokens)
* [Configure KDC proxy with long-lived tokens](https://docs.devolutions.net/de/gateway/kb/how-to-articles/use-nla-rdp-connection/#long-lived-tokens)
* [Registry entries for KDC proxy](https://docs.devolutions.net/de/gateway/kb/how-to-articles/use-nla-rdp-connection/#registry-entries-for-kdc-proxy)
* [Active Directory Protected Users Group](https://docs.devolutions.net/de/gateway/kb/how-to-articles/use-nla-rdp-connection/#active-directory-protected-users-group)
Remote connection to systems using Kerberos tokens is a challenge without direct line of sight. A [Kerberos KDC (Key Distribution Controller) proxy](https://learn.microsoft.com/en-us/openspecs/windows_protocols/ms-kkdcp/d688ea3a-04b0-45ea-8226-82a74cb6289e "https://learn.microsoft.com/en-us/openspecs/windows_protocols/ms-kkdcp/d688ea3a-04b0-45ea-8226-82a74cb6289e")
offers a method for a client to communicate with an intermediate server, Devolutions Gateway in this example, that proxies the token request to another KDC, which lives on the domain controller.
As Devolutions Gateway is a secure just-in-time lightweight VPN replacement, it is a great option to act as a KDC proxy for remote RDP connections. Devolutions Gateway offers two options: [short-lived](https://docs.devolutions.net/de/gateway/kb/how-to-articles/use-nla-rdp-connection/#short-lived-tokens)
and [long-lived tokens](https://docs.devolutions.net/de/gateway/kb/how-to-articles/use-nla-rdp-connection/#long-lived-tokens)
.
Enable API hooking for RDP
--------------------------
[](https://docs.devolutions.net/de/gateway/kb/how-to-articles/use-nla-rdp-connection/#api-hooking)
[Microsoft RDP API hooking should be enabled](https://docs.devolutions.net/rdm/kb/knowledge-base/microsoft-rdp-api-hooking/?tab=windows "/rdm/kb/knowledge-base/microsoft-rdp-api-hooking/?tab=windows")
in Remote Desktop Manager (enabled by default) for Devolutions Gateway connections. This allows continued use when an NTLM downgrade occurs.
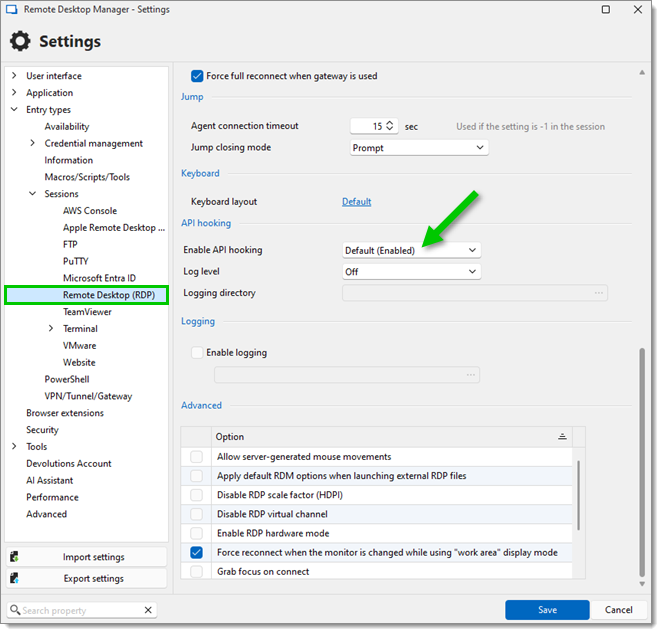
Make sure RDP API hooking is enabled in File – Settings – Entry types – Sessions – Remote Desktop (RDP)
Configure KDC proxy with short-lived tokens
-------------------------------------------
[](https://docs.devolutions.net/de/gateway/kb/how-to-articles/use-nla-rdp-connection/#short-lived-tokens)
When using a KDC proxy, the recommended default is short-lived tokens dynamically injected by the Devolutions Gateway. These tokens are used in RDP via NLA (Network Layer Authentication) and by the Devolutions web-based sessions, such as WinRM, LDAP, and LAPS. Typical Kerberos tokens are limited to 10 hours by default.
1. In Devolutions Server, head to _**Administration**_ – _**Modules**_ – _**Devolutions Gateway**_. Then, click the _**Edit**_ button (pen-shaped icon) on the desired Devolutions Gateway instance.
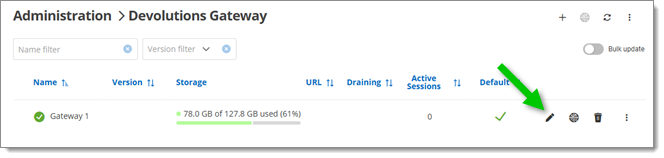
In Devolutions server, edit the desired Devolutions Gateway instance
2. In the _**KDC proxy**_ section, click the _**Add**_ button (cross-shaped icon). Multiple KDC servers can be added,
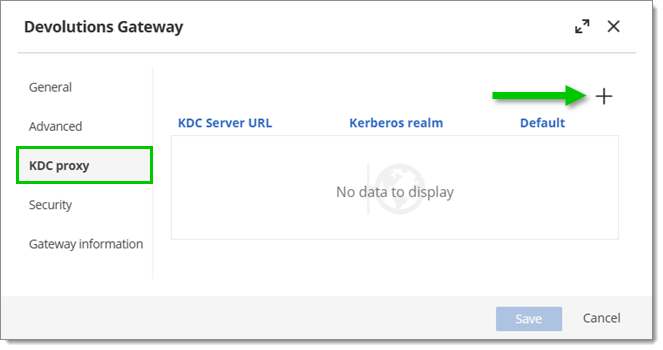
Add a new KDC proxy
The connection is matched based on the suffix, e.g., with two server realms named, respectively, `ad.it-help.ninja` and `ad.contoso.com`, `machine.ad.it-help.ninja` will automatically use the former suffix, while `machine.ad.contoso.com` will use the latter.
3. Fill out the _**KDC server URL**_ and _**Kerberos realm**_ fields. Check _**Set as default**_ to make all connections use the KDC server URL. Otherwise, only matched realms will be used. Click on _**Save**_.
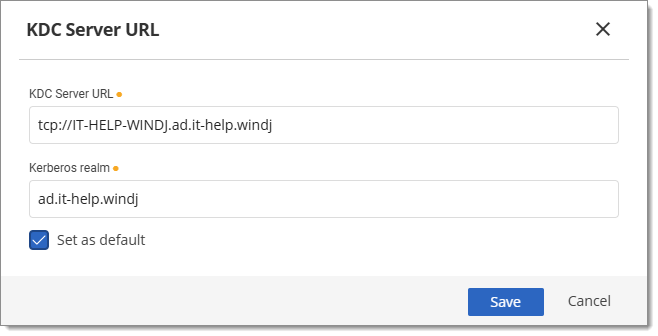
Fill out the KDC server URL fields
4. Back in the Devolutions Gateway edit window, go to the _**Advanced**_ section and make sure that the _**Force using IP address for RDP connections**_ option is unchecked. Click _**Save**_ to complete the configuration.
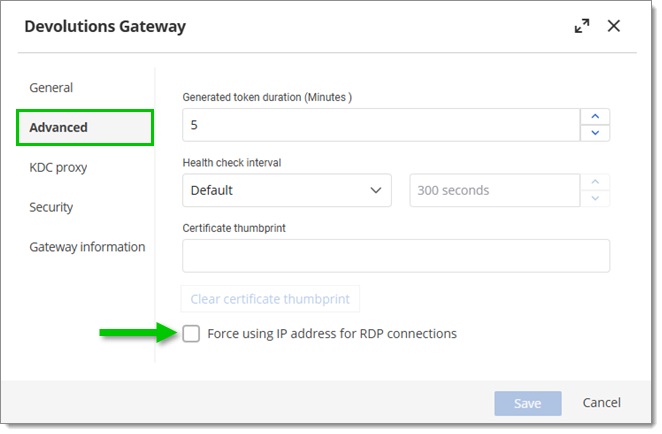
Uncheck the Force using IP address for RDP connections option
Configure KDC proxy with long-lived tokens
------------------------------------------
[](https://docs.devolutions.net/de/gateway/kb/how-to-articles/use-nla-rdp-connection/#long-lived-tokens)
Specific tokens can be created to live for 1, 3, and 6 months or a full year. Typically, these long-lived tokens would only be created to then be installed system-wide and used for edge cases where the Devolutions Gateway cannot dynamically inject a short-lived token.
1. In Devolutions Server, head to _**Administration**_ – _**Modules**_ – _**Devolutions Gateway**_, and click the _**More**_ button (vertical ellipsis-shaped icon). Select _**KDC proxy**_.
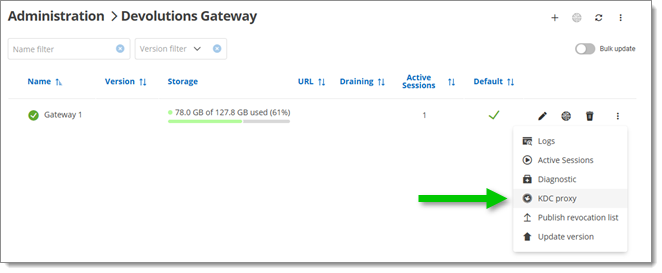
Open the KDC proxy tokens configuration window
2. Click the _**Add**_ button (cross-shaped icon).
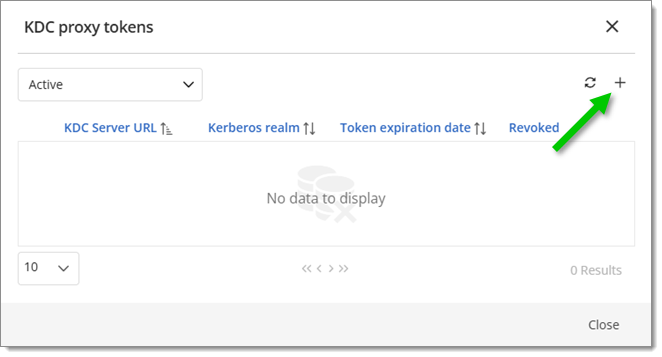
Add a new KDC proxy long-lived token
3. Fill out the _**KDC server URL**_ and _**Kerberos realm**_ fields, and determine how long the token will live. Click on _**Add**_.
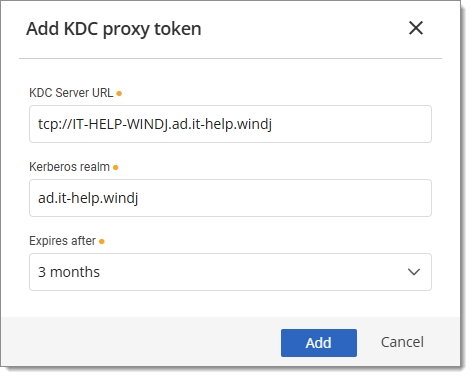
Fill out the KDC proxy token fields
4. Once added, download either a PowerShell script or registry file to add the token to the target machine’s registry. Both the registry file and PowerShell file do the same thing, but the PowerShell file also allows running with the `-Uninstall` parameter to uninstall, if needed.
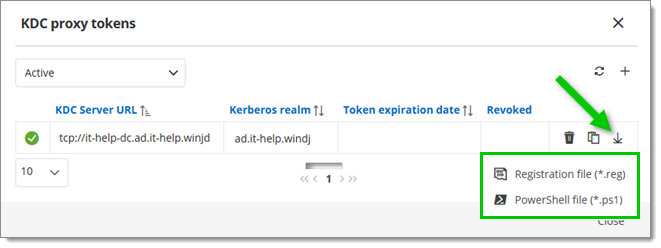
Download PowerShell scrit or registry file
### Registry entries for KDC proxy
[](https://docs.devolutions.net/de/gateway/kb/how-to-articles/use-nla-rdp-connection/#registry-entries-for-kdc-proxy)
Both scripts configure several registry keys and values:
* `HKLM:\SOFTWARE\Microsoft\Windows\CurrentVersion\Policies\System\Kerberos`
* `HKLM:\SOFTWARE\Microsoft\Windows\CurrentVersion\Policies\System\Kerberos\Parameters`
* `HKLM:\SOFTWARE\Microsoft\Windows\CurrentVersion\Policies\System\Kerberos\KdcProxy\ProxyServers`
Within here, the token that was generated will be put with the keys of:
* `HKLM:\SOFTWARE\Microsoft\Windows\CurrentVersion\Policies\System\Kerberos\KdcProxyServer_Enabled` = `1`
* `HKLM:\SOFTWARE\Microsoft\Windows\CurrentVersion\Policies\System\Kerberos\KdcProxy\ProxyServers\{realm name}` = Token Value
To remove the KDC configuration from the registry, carefully modify the Windows _**Registry Editor**_ or launch the previously used PowerShell script using the `-Uninstall` parameter.
**Active Directory Protected Users Group**
------------------------------------------
[](https://docs.devolutions.net/de/gateway/kb/how-to-articles/use-nla-rdp-connection/#active-directory-protected-users-group)
Adding users to the [Protected Users group in Active Directory](https://learn.microsoft.com/en-us/windows-server/security/credentials-protection-and-management/protected-users-security-group "https://learn.microsoft.com/en-us/windows-server/security/credentials-protection-and-management/protected-users-security-group")
disables NTLM, often breaking RDP for remote sessions. Devolutions Gateway fixes this by acting as a KDC proxy, enabling Kerberos authentication even without direct domain controller access. In Remote Desktop Manager Windows, [RDP API hooking must be enabled](https://docs.devolutions.net/de/gateway/kb/how-to-articles/use-nla-rdp-connection/#api-hooking)
to support short-lived Kerberos tokens and restore RDP functionality securely.
#### See also
[](https://docs.devolutions.net/de/gateway/kb/how-to-articles/use-nla-rdp-connection/#see-also)
* [Microsoft RDP API hooking](https://docs.devolutions.net/rdm/kb/knowledge-base/microsoft-rdp-api-hooking/)
[ Share your feedback](https://forum.devolutions.net/forums/176/documentation--documentation-requests)
---
# Utiliser le mandataire KDC de Devolutions Gateway - Documentation Devolutions
Utiliser le mandataire KDC de Devolutions Gateway
=================================================
Sur cette page
* [Activer l'accrochage d'API pour RDP](https://docs.devolutions.net/fr/gateway/kb/how-to-articles/use-nla-rdp-connection/#api-hooking)
* [Configurer le proxy KDC avec des jetons à courte durée de vie](https://docs.devolutions.net/fr/gateway/kb/how-to-articles/use-nla-rdp-connection/#short-lived-tokens)
* [Configurer le mandataire KDC avec des jetons de longue durée](https://docs.devolutions.net/fr/gateway/kb/how-to-articles/use-nla-rdp-connection/#long-lived-tokens)
* [Entrées de registre pour le mandataire KDC](https://docs.devolutions.net/fr/gateway/kb/how-to-articles/use-nla-rdp-connection/#registry-entries-for-kdc-proxy)
* [Groupe des utilisateurs protégés Active Directory](https://docs.devolutions.net/fr/gateway/kb/how-to-articles/use-nla-rdp-connection/#active-directory-protected-users-group)
La connexion à distance aux systèmes utilisant des jetons Kerberos est un défi sans ligne de vue directe. Un [mandataire Kerberos KDC (Key Distribution Controller)](https://learn.microsoft.com/en-us/openspecs/windows_protocols/ms-kkdcp/d688ea3a-04b0-45ea-8226-82a74cb6289e "https://learn.microsoft.com/en-us/openspecs/windows_protocols/ms-kkdcp/d688ea3a-04b0-45ea-8226-82a74cb6289e")
offre une méthode pour qu'un client communique avec un serveur intermédiaire, Devolutions Gateway dans cet exemple, qui envoie la demande de jeton à un autre KDC, qui se trouve sur le contrôleur de domaine.
Comme Devolutions Gateway est un remplaçant sécurisé et léger de VPN juste-à-temps, c'est une excellente option pour agir en tant que mandataire KDC pour les connexions RDP à distance. Devolutions Gateway offre deux options : [jetons de courte durée](https://docs.devolutions.net/fr/gateway/kb/how-to-articles/use-nla-rdp-connection/#short-lived-tokens)
et [jetons de longue durée](https://docs.devolutions.net/fr/gateway/kb/how-to-articles/use-nla-rdp-connection/#long-lived-tokens)
.
Activer l'accrochage d'API pour RDP
-----------------------------------
[](https://docs.devolutions.net/fr/gateway/kb/how-to-articles/use-nla-rdp-connection/#api-hooking)
[L'accrochage d'API Microsoft RDP doit être activé](https://docs.devolutions.net/fr/rdm/kb/knowledge-base/microsoft-rdp-api-hooking/?tab=windows "/rdm/kb/knowledge-base/microsoft-rdp-api-hooking/?tab=windows")
dans Remote Desktop Manager (activé par défaut) pour les connexions Devolutions Gateway. Cela permet une utilisation continue en cas de rétrogradation NTLM.

Make sure RDP API hooking is enabled in File – Settings – Entry types – Sessions – Remote Desktop (RDP)
Configurer le proxy KDC avec des jetons à courte durée de vie
-------------------------------------------------------------
[](https://docs.devolutions.net/fr/gateway/kb/how-to-articles/use-nla-rdp-connection/#short-lived-tokens)
Lors de l'utilisation d'un proxy KDC, le paramètre par défaut recommandé est des jetons à durée de vie courte injectés dynamiquement par le Devolutions Gateway. Ces jetons sont utilisés dans RDP via NLA (authentification de la couche réseau) et par les sessions basées sur le web Devolutions, telles que WinRM, LDAP et LAPS. Les jetons Kerberos typiques sont limités à 10 heures par défaut.
1. Dans Devolutions Server, aller à _**Administration**_ – _**Modules**_ – _**Devolutions Gateway**_. Puis, cliquer sur le bouton _**Éditer**_ (icône en forme de crayon) sur l'instance Devolutions Gateway souhaitée.

In Devolutions server, edit the desired Devolutions Gateway instance
2. Dans la section _**proxy KDC**_, cliquer sur le bouton _**Ajouter**_ (icône en forme de croix). Plusieurs serveurs KDC peuvent être ajoutés,

Add a new KDC proxy
La connexion est associée en fonction du suffixe, par exemple, avec deux domaines de serveur nommés, respectivement, `ad.it-help.ninja` et `ad.contoso.com`, `machine.ad.it-help.ninja` utilisera automatiquement le premier suffixe, tandis que `machine.ad.contoso.com` utilisera le dernier.
3. Remplir les champs _**URL serveur KDC**_ et _**réel Kerberos**_. Cocher _**Définir par défaut**_ pour que toutes les connexions utilisent l'URL du serveur KDC. Sinon, seuls les domaines correspondants seront utilisés. Cliquer sur _**Enregistrer**_.

Fill out the KDC server URL fields
4. De retour dans la fenêtre d'édition Devolutions Gateway, aller dans la section _**Avancé**_ et s'assurer que l'option _**Forcer l'utilisation de l'adresse IP pour les connexions RDP**_ est décochée. Cliquer sur _**Enregistrer**_ pour compléter la configuration.

Uncheck the Force using IP address for RDP connections option
Configurer le mandataire KDC avec des jetons de longue durée
------------------------------------------------------------
[](https://docs.devolutions.net/fr/gateway/kb/how-to-articles/use-nla-rdp-connection/#long-lived-tokens)
Des jetons spécifiques peuvent être créés pour vivre pendant 1, 3, 6 mois ou une année complète. Typiquement, ces jetons à longue durée de vie seraient seulement créés pour ensuite être installés à l'échelle du système et utilisés pour des cas particuliers où le Devolutions Gateway ne peut pas injecter dynamiquement un jeton à courte durée de vie.
1. Dans Devolutions Server, aller à _**Administration**_ – _**Modules**_ – _**Devolutions Gateway**_, et cliquer sur le bouton _**More**_ (icône en forme d'ellipse verticale). Sélectionner _**KDC proxy**_.

Open the KDC proxy tokens configuration window
2. Cliquer sur le bouton _**Ajouter**_ (icône en forme de croix).

Add a new KDC proxy long-lived token
3. Remplir les champs _**URL serveur KDC**_ et _**réel Kerberos**_, et déterminer combien de temps le jeton vivra. Cliquer sur _**Ajouter**_.

Fill out the KDC proxy token fields
4. Une fois ajoutés, télécharger soit un script PowerShell soit un fichier de registre pour ajouter le jeton au registre de la machine cible. Le fichier de registre et le fichier PowerShell font la même chose, mais le fichier PowerShell permet également de fonctionner avec le paramètre `-Uninstall` pour désinstaller, si nécessaire.

Download PowerShell scrit or registry file
### Entrées de registre pour le mandataire KDC
[](https://docs.devolutions.net/fr/gateway/kb/how-to-articles/use-nla-rdp-connection/#registry-entries-for-kdc-proxy)
Les deux scripts configurent plusieurs clés et valeurs de registre :
* `HKLM:\SOFTWARE\Microsoft\Windows\CurrentVersion\Policies\System\Kerberos`
* `HKLM:\SOFTWARE\Microsoft\Windows\CurrentVersion\Policies\System\Kerberos\Parameters`
* `HKLM:\SOFTWARE\Microsoft\Windows\CurrentVersion\Policies\System\Kerberos\KdcProxy\ProxyServers`
Ici, le jeton qui a été généré sera mis avec les clés de :
* `HKLM:\SOFTWARE\Microsoft\Windows\CurrentVersion\Policies\System\Kerberos\KdcProxyServer_Enabled` = `1`
* `HKLM:\SOFTWARE\Microsoft\Windows\CurrentVersion\Policies\System\Kerberos\KdcProxy\ProxyServers\{nom du domaine}` = Valeur du Jeton
Pour supprimer la configuration KDC du registre, modifier soigneusement l'_**Éditeur du Registre**_ de Windows ou lancer le script PowerShell précédemment utilisé avec le paramètre `-Uninstall`.
Groupe des utilisateurs protégés Active Directory
-------------------------------------------------
[](https://docs.devolutions.net/fr/gateway/kb/how-to-articles/use-nla-rdp-connection/#active-directory-protected-users-group)
Ajouter des utilisateurs au [groupe d'utilisateurs protégés dans Active Directory](https://learn.microsoft.com/en-us/windows-server/security/credentials-protection-and-management/protected-users-security-group "https://learn.microsoft.com/en-us/windows-server/security/credentials-protection-and-management/protected-users-security-group")
désactive NTLM, ce qui casse souvent RDP pour les sessions à distance. Devolutions Gateway corrige ceci en agissant en tant que mandataire KDC, permettant l'authentification Kerberos même sans accès direct au contrôleur de domaine. Dans Remote Desktop Manager Windows, [accrochage d'API RDP doit être activé](https://docs.devolutions.net/fr/gateway/kb/how-to-articles/use-nla-rdp-connection/#api-hooking)
pour prendre en charge les jetons Kerberos de courte durée et restaurer la fonctionnalité RDP en toute sécurité.
#### Voir aussi
[](https://docs.devolutions.net/fr/gateway/kb/how-to-articles/use-nla-rdp-connection/#see-also)
* [Accrochage d'API Microsoft RDP](https://docs.devolutions.net/fr/rdm/kb/knowledge-base/microsoft-rdp-api-hooking/)
[ Partagez vos commentaires](https://forum.devolutions.net/forums/176/documentation--documentation-requests)
---
# Articles de la base de connaissances - Documentation Devolutions
Articles de la base de connaissances
====================================
[ Partagez vos commentaires](https://forum.devolutions.net/forums/176/documentation--documentation-requests)
---
# Use Devolutions Gateway with an external browser - Devolutions Documentation
Use Devolutions Gateway with an external browser
================================================
On this page
* [Workaround to set up without having to close Chrome](https://docs.devolutions.net/gateway/kb/how-to-articles/use-dgw-external-browser/#workaround-to-set-up-without-having-to-close-chrome)
* [PowerShell](https://docs.devolutions.net/gateway/kb/how-to-articles/use-dgw-external-browser/#powershell)
* [Batch edit using PowerShell](https://docs.devolutions.net/gateway/kb/how-to-articles/use-dgw-external-browser/#batch-edit-using-powershell)
* [Temporary edit with Before Open](https://docs.devolutions.net/gateway/kb/how-to-articles/use-dgw-external-browser/#temporary-edit-with-before-open)
* [Deleting the folder](https://docs.devolutions.net/gateway/kb/how-to-articles/use-dgw-external-browser/#deleting-the-folder)
It is possible to use Devolutions Gateway with an external browser, but at the moment there are a few limitations to be aware of because of the browser design:
* It only works with Google Chrome.
* Google Chrome must be closed when opening a website from Remote Desktop Manager. A solution to this can be found in the [workaround](https://docs.devolutions.net/gateway/kb/how-to-articles/use-dgw-external-browser/#workaround-to-set-up-without-having-to-close-chrome)
.
* In case there are other proxy settings with Chrome (by GPO, command line, settings, etc.), they might conflict with each other and Devolutions Gateway will not work.
* In case Google Chrome is closed and does not have any other proxy settings, set up the entry to open externally like any other entries in Remote Desktop Manager. No additional installations/addons are needed for this to work.
Workaround to set up without having to close Chrome
---------------------------------------------------
[](https://docs.devolutions.net/gateway/kb/how-to-articles/use-dgw-external-browser/#workaround-to-set-up-without-having-to-close-chrome)
1. Right-click to go into the _**Properties**_ of the _**Web Browser**_ entry that has the Devolutions Gateway set.
2. In the _**General**_ section, set the _**Display**_ to _**External**_.

Common – General – Display – External
3. Go to the _**Advanced**_ tab.

Advanced Tab
4. Check _**User Data Path**_.

User Data Path Option
5. Enter a path for a new Chrome user data to be stored.
6. Click _**Ok**_ to save the changes.
PowerShell
----------
[](https://docs.devolutions.net/gateway/kb/how-to-articles/use-dgw-external-browser/#powershell)
This section will showcase multiple solutions by using PowerShell.
### Batch edit using PowerShell
[](https://docs.devolutions.net/gateway/kb/how-to-articles/use-dgw-external-browser/#batch-edit-using-powershell)
It is possible to [batch edit](https://docs.devolutions.net/rdm/commands/edit/batch-edit/)
the entries with a custom PowerShell command to make all of them use a different path (can be the temp or any place users are allowed to use it):
$connection.Web.UseUserDataPath = $true;
$connection.Web.UserDataPath = "C:\MyPath\" + $connection.ID;
$RDM.Save();
### Temporary edit with Before Open
[](https://docs.devolutions.net/gateway/kb/how-to-articles/use-dgw-external-browser/#temporary-edit-with-before-open)
It is also possible to [temporarily use the properties](https://docs.devolutions.net/rdm/kb/how-to-articles/execute-powershell-connection)
'Web.UseUserDataPath' set to true and 'Web.UserDataPath' set the path to the temp or any place users are allowed to use it that can be dynamic with a Before Open Event (using PowerShell Script).
$RDM.Connection.Web.UseUserDataPath = $true
$RDM.Connection.Web.UserDataPath = "C:\MyPath\" + $RDM.Connection.ID
### Deleting the folder
[](https://docs.devolutions.net/gateway/kb/how-to-articles/use-dgw-external-browser/#deleting-the-folder)
This code is used to delete the folder on the onClose Event:
$connectionID = $RDM.Connection.ID
Remove-Item -Path "C:\MyPath\$connectionID" -Recurse -Force
It is not possible to open a website using the Devolutions Gateway that is already running without the workarounds because of the way Google Chrome is designed. An already opened Chrome cannot change the proxy settings dynamically.
[ Share your feedback](https://forum.devolutions.net/forums/176/documentation--documentation-requests)
---
# Knowledge base articles - Devolutions Documentation
Knowledge base articles
=======================
[ Share your feedback](https://forum.devolutions.net/forums/176/documentation--documentation-requests)
---
# Devolutions Gateway recording path - Devolutions Documentation
Devolutions Gateway recording path
==================================
This topic serves as a reference for general information on Devolutions Gateway recording.
The recording format is WebM and the file size is around 15 kb/s, depending on compression.
The recording path can be set in the Devolutions Server Console only.
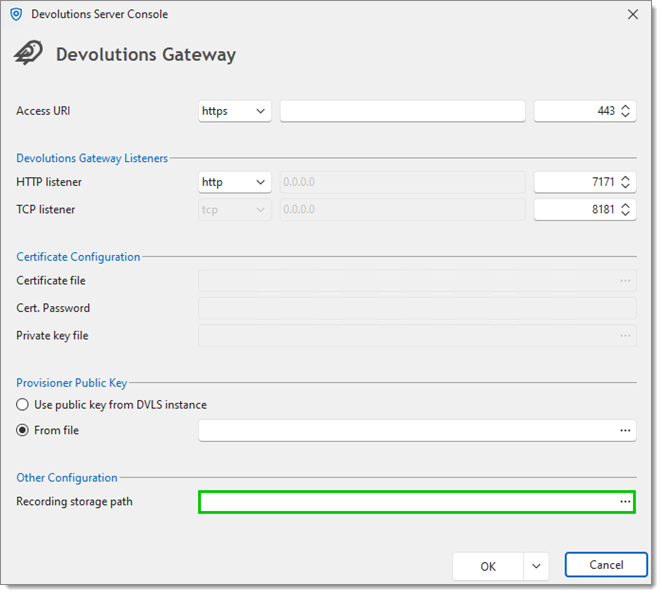
Recording path in the Devolutions Server Console
Here are some important considerations:
* If the new path is set to a network location, like a shared folder or a UNC path, be aware that this may impact network traffic, both incoming and outgoing.
* Confirm that the account operating the gateway service has the necessary permissions to access both the gateway files and the file share.
[ Share your feedback](https://forum.devolutions.net/forums/176/documentation--documentation-requests)
---
# Utiliser le magasin de certificats Windows pour Devolutions Gateway - Documentation Devolutions
Utiliser le magasin de certificats Windows pour Devolutions Gateway
===================================================================
Sur cette page
* [Importer le certificat dans le magasin de certificats Windows](https://docs.devolutions.net/fr/gateway/kb/how-to-articles/use-windows-certificate-store/#importing-the-certificate-into-the-windows-certificate-store)
* [Convertir un certificat X.509](https://docs.devolutions.net/fr/gateway/kb/how-to-articles/use-windows-certificate-store/#converting-an-x509-certificate)
* [Importer le certificat](https://docs.devolutions.net/fr/gateway/kb/how-to-articles/use-windows-certificate-store/#importing-the-certificate)
* [Donner à Devolutions Gateway l'autorisation de lecture sur la clé privée du certificat](https://docs.devolutions.net/fr/gateway/kb/how-to-articles/use-windows-certificate-store/#giving-the-devolutions-gateway-service-read-permission-on-the-certificate-private-key)
* [Configurer le magasin de certificats Windows via gateway.json](https://docs.devolutions.net/fr/gateway/kb/how-to-articles/use-windows-certificate-store/#configuring-windows-certificate-store-via-gatewayjson)
* [Configurer le magasin de certificats Windows via PowerShell](https://docs.devolutions.net/fr/gateway/kb/how-to-articles/use-windows-certificate-store/#configuring-windows-certificate-store-via-powershell)
Si vos clients échouent à se connecter avec Devolutions Gateway, vérifier que le certificat contient l'ensemble de la chaîne. Cette chaîne de certificats inclut tous les certificats intermédiaires. Par exemple : Autorité de Certification Racine – Autorité de Certification Sécurisée – Certificat XYZ Acheté.
Il est possible d'utiliser le magasin de certificats Windows comme source de certificat TLS. Au lieu d'utiliser un fichier, stocker et gérer vos certificats avec Windows. Au moment de la rédaction, cette fonctionnalité n'est pas exposée dans la console de configuration de Devolutions Gateway. Pour configurer, vous devez soit modifier directement le fichier gateway.json, soit utiliser le module Devolutions.PowerShell.
Avec la nouvelle fonctionnalité, [quelques paramètres supplémentaires](https://github.com/Devolutions/devolutions-gateway#configuration)
sont disponibles pour configurer la source du certificat.
Si vous avez précédemment défini une configuration \`TlsCertificateFile\` et/ou \`TlsPrivateKeyFile\`, leur suppression n'est pas nécessaire car \`TlsCertificateSource\` indique à Devolutions Gateway où chercher le certificat.
* **TlsCertificateSource** (string): Source du certificat TLS, valeurs possibles indiquées ci-dessous.
* **Externe** (défaut): Récupérer un certificat stocké sur le système de fichiers. Voir les options `TlsCertificateFile`, `TlsPrivateKeyFile`, et `TlsPrivateKeyPassword`.
* **Système**: Récupérer le certificat géré par le magasin de certificats système. Voir les options `TlsCertificateSubjectName`, `TlsCertificateStoreName`, et `TlsCertificateStoreLocation`.
* **TlsCertificateSubjectName** (string): Nom du sujet du certificat pour TLS lors de l'utilisation de la source Système.
* **TlsCertificateStoreName** (chaîne de caractères): Nom du magasin de certificats système à utiliser pour TLS (par défaut est Mon).
* **TlsCertificateStoreLocation** (chaîne de caractères): Emplacement du magasin de certificats système à utiliser pour TLS, valeurs possibles montrées ci-dessous.
* **CurrentUser** (défaut)
* **CurrentService**
* **LocalMachine**
Importer le certificat dans le magasin de certificats Windows
-------------------------------------------------------------
[](https://docs.devolutions.net/fr/gateway/kb/how-to-articles/use-windows-certificate-store/#importing-the-certificate-into-the-windows-certificate-store)
Tout d'abord, importer votre certificat dans le magasin de certificats Windows. Windows prend en charge les formats de certificat suivants :
* Certificat X.509 - \*.cer, \*.crt
* Échange d'informations personnelles - \*.pfx, \*.p12
* Microsoft Serialized certificate Store - \*.sst
* PKCS #7 Certificates - \*.spc, \*.p7b
Si l'on utilise la méthode \`Externe\` via \`TlsCertificateSource\`, alors Devolutions Gateway ne prend en charge que l'assemblage de la clé publique et privée dans un fichier PFX (PKCS#12). Sinon, il faudra également définir le paramètre \`TlsPrivateKeyFile\`.
### Convertir un certificat X.509
[](https://docs.devolutions.net/fr/gateway/kb/how-to-articles/use-windows-certificate-store/#converting-an-x509-certificate)
Devolutions Gateway requiert une clé privée avec le certificat TLS; par conséquent, il pourrait être nécessaire de combiner la clé publique avec sa clé privée. Voici deux méthodes : [Remote Desktop Manager](https://docs.devolutions.net/fr/gateway/kb/how-to-articles/use-windows-certificate-store/#using-remote-desktop-manager)
et l'utilitaire Windows intégré [`certutil`](https://docs.devolutions.net/fr/gateway/kb/how-to-articles/use-windows-certificate-store/#using-the-windows-certutil-utility)
.
#### Utiliser Remote Desktop Manager
[](https://docs.devolutions.net/fr/gateway/kb/how-to-articles/use-windows-certificate-store/#using-remote-desktop-manager)
L'entrée _**Certificat X.509**_ peut être utilisée pour importer ledit certificat et l'exporter dans plusieurs formats différents, y compris PFX.
1. Dans Remote Desktop Manager cliquer sur _**Nouvelle Entrée**_ – _**Gestion des Identifiants**_ – _**Général**_ – _**Certificat X.509**_.
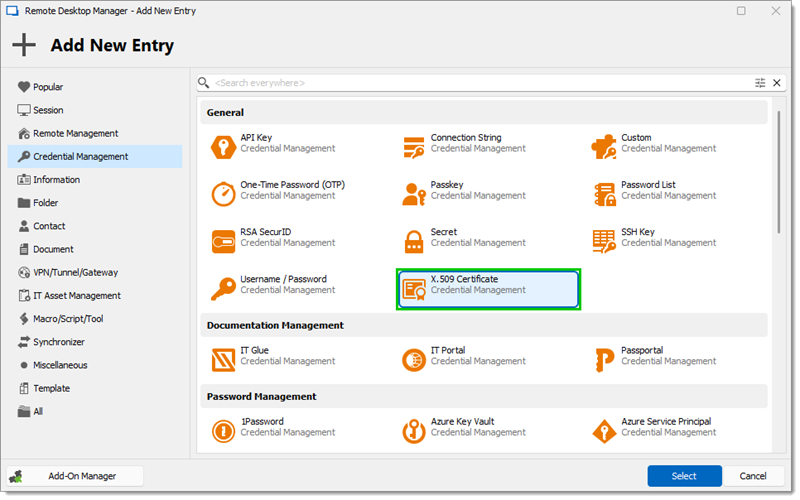
X.509 Certificate
2. Sélectionner le certificat et cliquer sur _**Ouvrir**_.
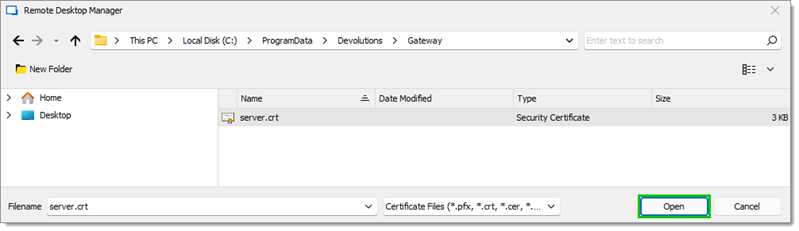
Open
3. Cliquer sur _**Suivant**_.
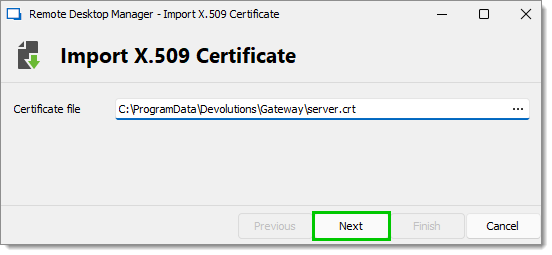
Next
4. Cliquer sur les points de suspension et sélectionner la _**Clé privée**_.
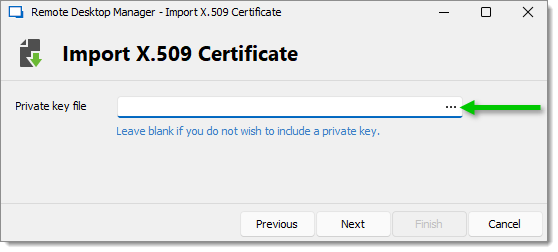
Ellipsis button
5. Cliquer sur _**Ouvrir**_.
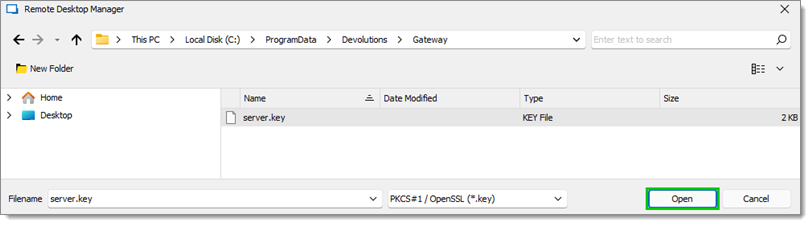
KEY file
La **_clé privée_** doit être dans l'extension \`.key\`.
6. Cliquer sur _**Terminer**_.
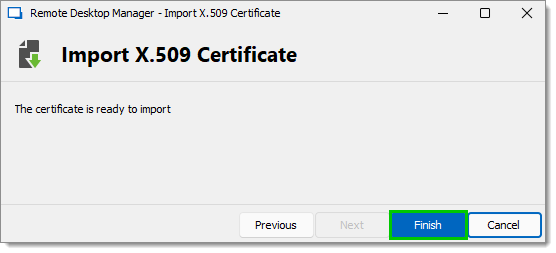
Finish
7. Remplir les informations, puis cliquer sur _**Ajouter**_.
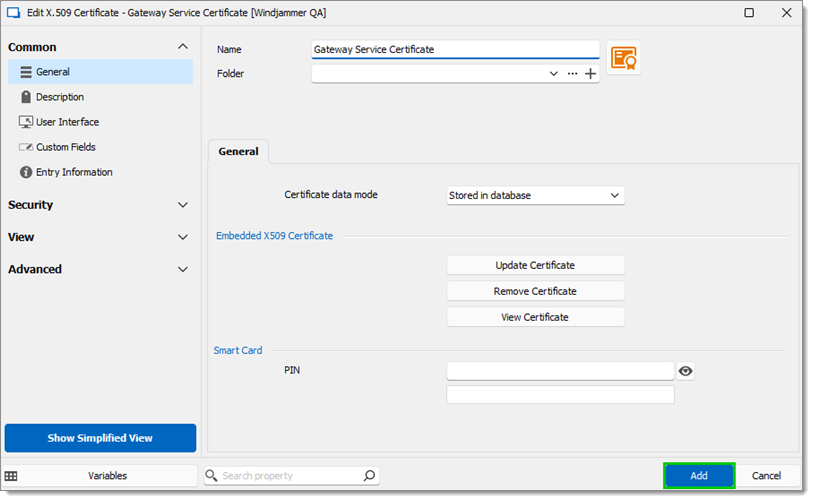
Information fields
8. Sélectionner l'entrée et cliquer sur _**Enregistrer le certificat sous**_ (également disponible dans le menu contextuel clic droit).
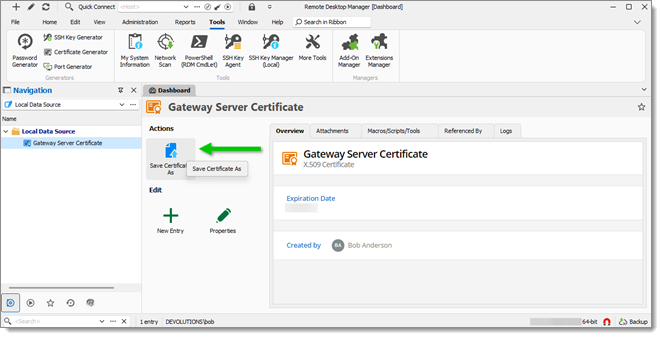
Save Certificate As
9. Dans le champ _**Format d'exportation**_, choisir _**Échange d'informations personnelles (pfx)**_.
10. Choisir où le fichier sera enregistré en cliquant sur les points de suspension.
11. Entrer un mot de passe fort, puis cliquer sur _**Exporter**_.
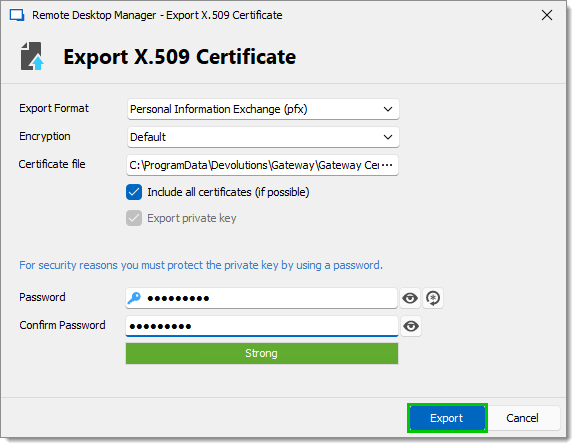
Export X.509 Certificate
#### Utiliser l'utilitaire certutil de Windows
[](https://docs.devolutions.net/fr/gateway/kb/how-to-articles/use-windows-certificate-store/#using-the-windows-certutil-utility)
Utiliser l'utilitaire Windows intégré `certutil` pour combiner un fichier de certificat (`.crt` ou `.cer`) et sa clé privée (`.key`). Les deux fichiers doivent avoir le même nom. `certutil -MergePFX file.crt file.pfx`
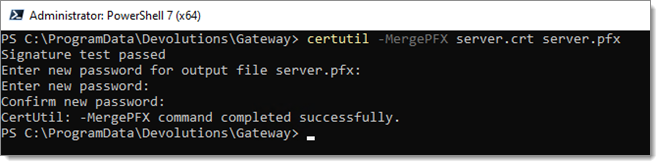
certutil
### Importer le certificat
[](https://docs.devolutions.net/fr/gateway/kb/how-to-articles/use-windows-certificate-store/#importing-the-certificate)
Après avoir acquis le certificat et le fichier de clé privée du certificat, l'importer dans Windows.
1. Installer le certificat :
* Si Windows détecte automatiquement le certificat, double-cliquer dessus et choisir _**Installer le certificat...**_; ou
* Ouvrir `certmgr.msc` à l'emplacement du magasin souhaité (`LocalMachine` ou `CurrentUser`), faire un clic droit sur l'emplacement voulu (ex : _**Personnel/Certificats**_) et choisir _**Toutes les tâches**_ – _**Importer**_.
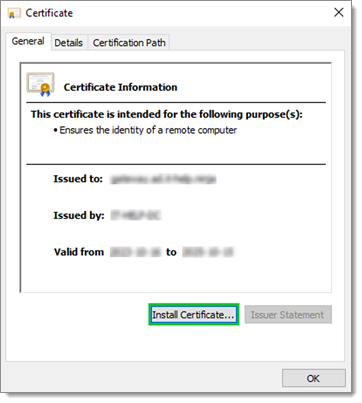
Install Certificate...
2. Choisir une des options suivantes et cliquer sur _**Suivant**_ :
* _**Sélectionner automatiquement le magasin de certificats en fonction du type de certificat**_; ou
* _**Placer tous les certificats dans le magasin suivant**_ et cliquer sur _**Parcourir...**_ pour choisir un dossier.
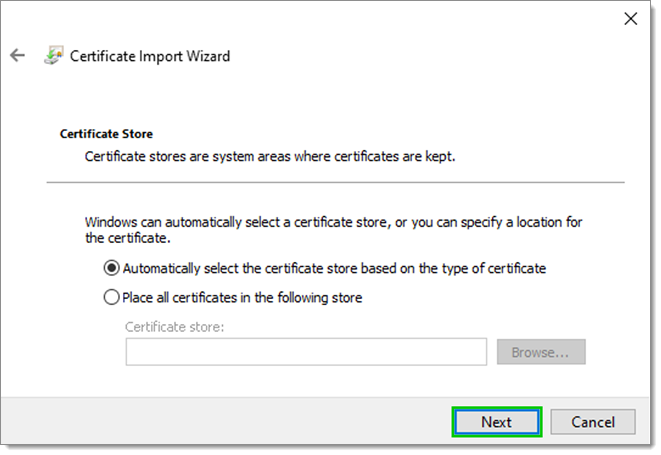
X.509 Certificate
3. Compléter l'importation en cliquant sur _**Terminer**_.
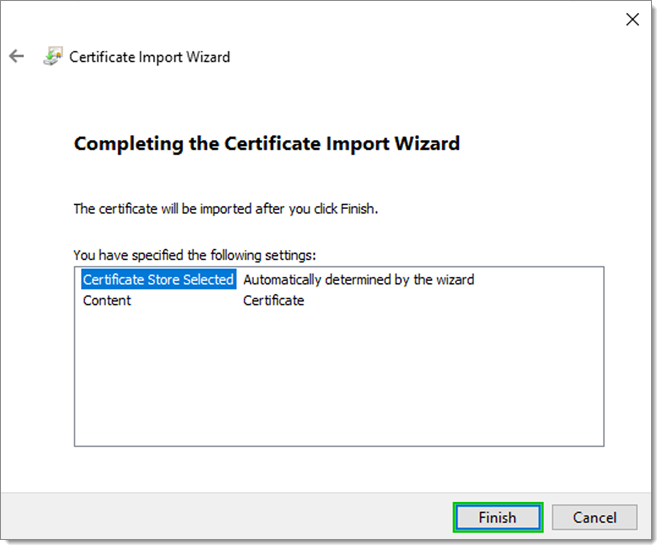
Certificate Import Wizard
Donner à Devolutions Gateway l'autorisation de lecture sur la clé privée du certificat
--------------------------------------------------------------------------------------
[](https://docs.devolutions.net/fr/gateway/kb/how-to-articles/use-windows-certificate-store/#giving-the-devolutions-gateway-service-read-permission-on-the-certificate-private-key)
Par défaut, Devolutions Gateway exécute son service avec le compte Service Réseau. Pour utiliser un certificat du magasin de certificats local, s'assurer que le service Réseau a les autorisations de lecture sur la clé privée du certificat.
1. Ouvrir le magasin de certificats local et naviguer vers le certificat.
2. Faire un clic droit sur le certificat et sélectionner _**Toutes les tâches**_ – _**Gérer les clés privées**_.
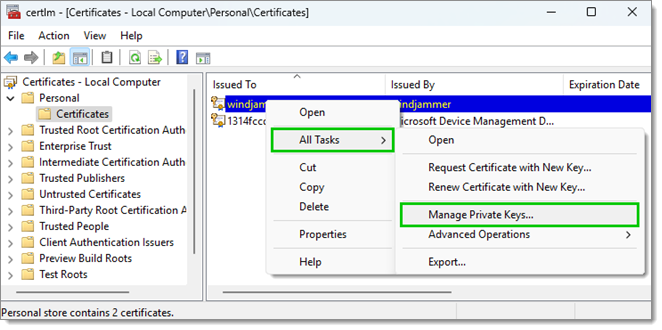
All Tasks – Manage Private Keys
3. Cliquer pour ajouter un nom d'utilisateur.
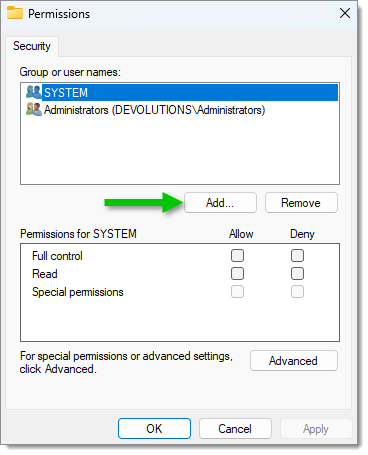
Add a user name
4. Écrire "NETWORK SERVICE" dans le champ des noms d'objet puis cliquer sur _**OK**_.
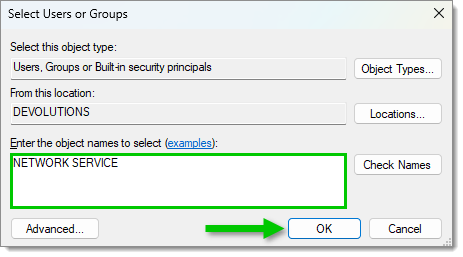
Add the "NETWORK SERVICE" user name
5. Sélectionner le nouveau nom d'utilisateur _**NETWORK SERVICE**_ et autoriser la permission de _**Lecture**_ sur celui-ci.
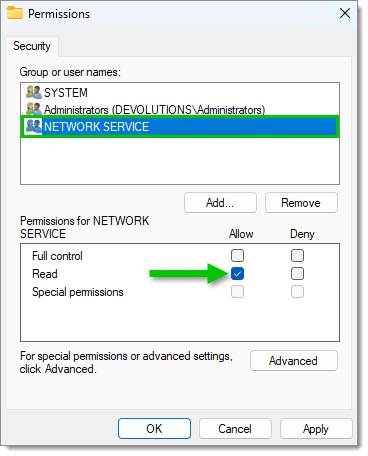
Allow the "Read" permission
6. Cliquer sur _**Appliquer**_, puis cliquer _**OK**_.
Configurer le magasin de certificats Windows via gateway.json
-------------------------------------------------------------
[](https://docs.devolutions.net/fr/gateway/kb/how-to-articles/use-windows-certificate-store/#configuring-windows-certificate-store-via-gatewayjson)
L'emplacement par défaut du fichier `gateway.json` est dans le répertoire **%ProgramData%\\Devolutions\\Gateway**.
S'assurer que le fichier est un `.json` valide en le testant avec :
$Config = ("{0}\Devolutions\Gateway\gateway.json" -F $Env:ProgramData)
Try {
Get-Content -Path $Config | ConvertFrom-JSON -ErrorAction 'Stop'
} Catch {
$PSItem[0].Exception.Message
}
Cela fonctionne avec PowerShell 5.1 et les versions ultérieures (la version recommandée est PowerShell 7.x).
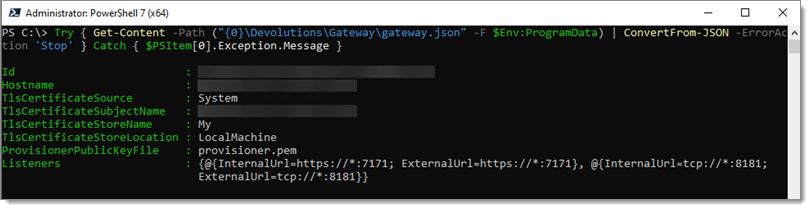
Get-Content
Une configuration typique est montrée ci-dessous. Vos valeurs peuvent différer, notamment le _**Nom du sujet**_, car il reflétera le nom de domaine auquel Devolutions Gateway répond. Les valeurs importantes à changer sont:
* `TlsCertificateSource` - `System`
* `TlsCertificateSubjectName` - `gateway.ad.it-help.ninja`
* `TlsCertificateStoreName` - `My`
* `TlsCertificateStoreLocation` - `LocalMachine`
Un exemple de fichier de configuration complet :
{
"Id": "c912b379-8c34-449d-8ff3-3aa20a9cc3e4",
"Hostname": "gateway.ad.it-help.ninja",
"TlsCertificateFile": "server.crt",
"TlsPrivateKeyFile": "server.key",
"TlsCertificateSource": "System",
"TlsCertificateSubjectName": "gateway.ad.it-help.ninja",
"TlsCertificateStoreName": "My",
"TlsCertificateStoreLocation": "LocalMachine",
"ProvisionerPublicKeyFile": "provisioner.pem",
"Listeners": [\
{\
"InternalUrl": "https://*:7171",\
"ExternalUrl": "https://*:7171"\
},\
{\
"InternalUrl": "tcp://*:8181",\
"ExternalUrl": "tcp://*:8181"\
}\
]
}
1. Exécuter le script ci-dessus.
2. Ouvrir `services.msc`.
3. Faire un clic droit sur _**Devolutions Gateway Service**_ et sélectionner _**Redémarrer**_.
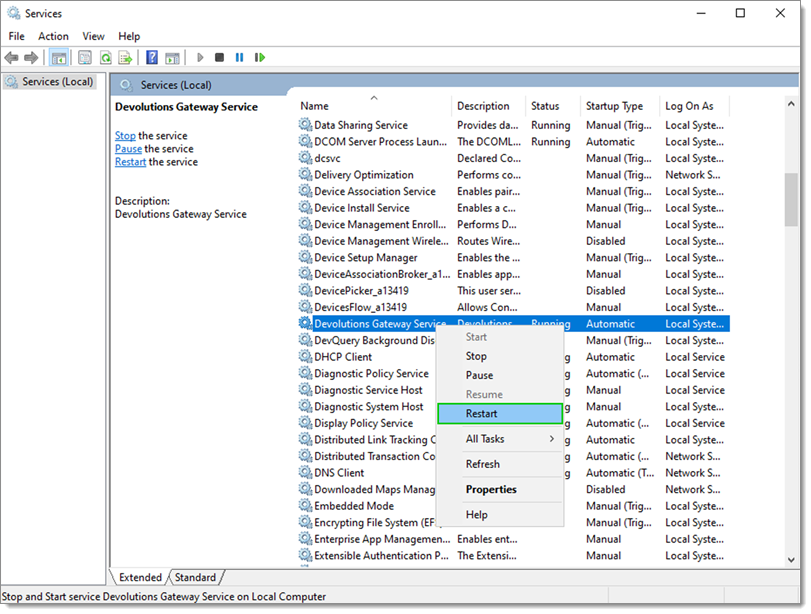
Restart
4. Vérifier si Devolutions Gateway fonctionne correctement en naviguant à `https://{FQDN}:7171/jet/health` (en remplaçant `{FQDN}` par votre adresse DNS Gateway) avec un navigateur web.
Configurer le magasin de certificats Windows via PowerShell
-----------------------------------------------------------
[](https://docs.devolutions.net/fr/gateway/kb/how-to-articles/use-windows-certificate-store/#configuring-windows-certificate-store-via-powershell)
Devolutions Gateway peut également être configuré via des commandes PowerShell. Le [Devolutions Gateway PowerShell module](https://www.powershellgallery.com/packages/DevolutionsGateway/)
expose de nombreuses commandes pour le configurer. Par défaut, l'installation de Devolutions Gateway inclut le module dans le répertoire d'installation. Importer le module via :
# Import the Module
Import-Module -Name "C:\Program Files\Devolutions\Gateway\PowerShell\Modules\DevolutionsGateway"
# View the imported Modules
Get-Module
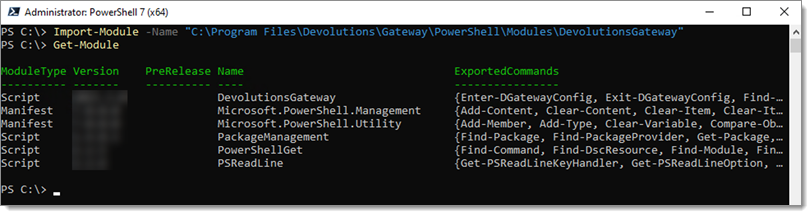
Import-Module
Une autre méthode pour rendre le module facilement accessible est de l'installer via ce qui suit :
# Install the DevolutionsGateway module
Install-Module -Name 'DevolutionsGateway'
# Update the module if installed via the above method (will not update the bundled version installed with Gateway)
Update-Module -Name 'DevolutionsGateway'
# Import the Module
Import-Module -Name 'DevolutionsGateway'
# View the imported modules to verify the DevolutionsGateway module is available
Get-Module
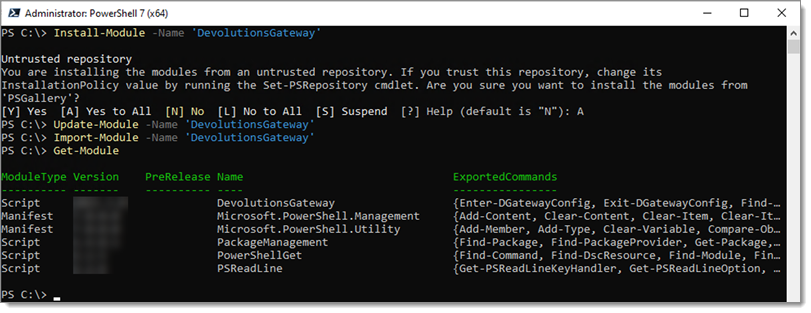
Install-Module
Une fois importé, voir la configuration actuelle via la commande suivante :
Get-DGatewayConfig
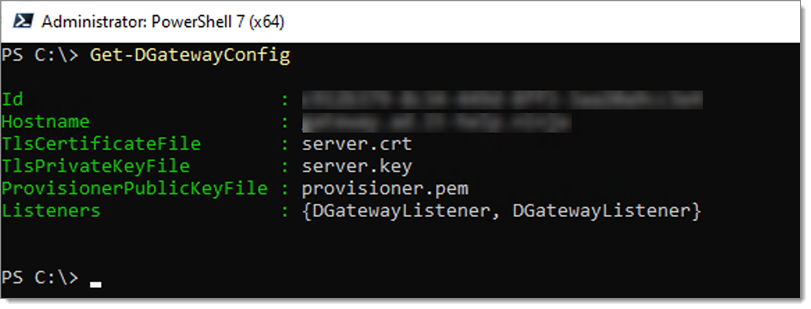
Get-DGatewayConfig
Pour indiquer à Devolutions Gateway d'utiliser le magasin Windows, utiliser la commande suivante :
# Update the configuration; this will not remove any existing parameters, only configure those defined.
# Replace the '{FQDN}` example with the fully-qualified DNS name of the Gateway address
Set-DGatewayConfig -TlsCertificateSource "System" -TlsCertificateSubjectName "{FQDN}" -TlsCertificateStoreLocation "LocalMachine" -TlsCertificateStoreName "My"
# Display the updated configuration
Get-DGatewayConfig
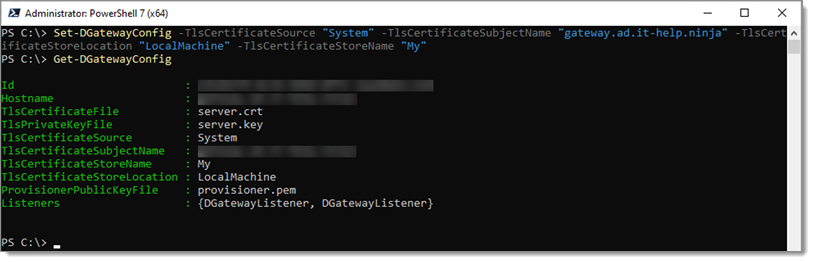
Set-DGatewayConfig
Redémarrer le service pour que la configuration prenne effet.
Restart-Service -Name 'DevolutionsGateway'
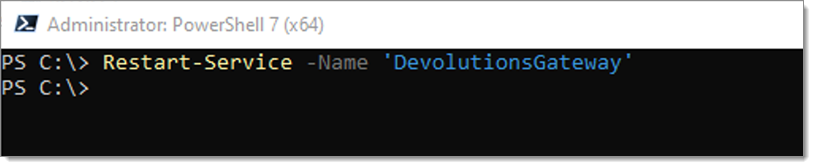
Restart-Service -Name 'DevolutionsGateway'
Vérifier si Devolutions Gateway fonctionne correctement en naviguant vers `https://{FQDN}:7171/jet/health` avec un navigateur Web.
[ Partagez vos commentaires](https://forum.devolutions.net/forums/176/documentation--documentation-requests)
---
# Chemin d'enregistrement Devolutions Gateway - Documentation Devolutions
Chemin d'enregistrement Devolutions Gateway
===========================================
Cette rubrique sert de référence pour des informations générales sur l'enregistrement Devolutions Gateway.
Le format d'enregistrement est WebM et la taille du fichier est d'environ 15 kb/s, selon la compression.
Le chemin d'enregistrement ne peut être défini que dans la Console Devolutions Server.

Recording path in the Devolutions Server Console
Voici quelques considérations importantes :
* Si le nouveau chemin est défini vers un emplacement réseau, comme un dossier partagé ou un chemin UNC, soyez conscient que cela peut impacter le trafic de réseau, entrant et sortant.
* Confirmer que le compte opérant le service de passerelle a les permissions nécessaires pour accéder à la fois aux fichiers de la passerelle et au partage de fichiers.
[ Partagez vos commentaires](https://forum.devolutions.net/forums/176/documentation--documentation-requests)
---
# Use the Devolutions Gateway KDC proxy - Devolutions Documentation
Use the Devolutions Gateway KDC proxy
=====================================
On this page
* [Enable API hooking for RDP](https://docs.devolutions.net/gateway/kb/how-to-articles/use-nla-rdp-connection/#api-hooking)
* [Configure KDC proxy with short-lived tokens](https://docs.devolutions.net/gateway/kb/how-to-articles/use-nla-rdp-connection/#short-lived-tokens)
* [Configure KDC proxy with long-lived tokens](https://docs.devolutions.net/gateway/kb/how-to-articles/use-nla-rdp-connection/#long-lived-tokens)
* [Registry entries for KDC proxy](https://docs.devolutions.net/gateway/kb/how-to-articles/use-nla-rdp-connection/#registry-entries-for-kdc-proxy)
* [Active Directory Protected Users Group](https://docs.devolutions.net/gateway/kb/how-to-articles/use-nla-rdp-connection/#active-directory-protected-users-group)
Remote connection to systems using Kerberos tokens is a challenge without direct line of sight. A [Kerberos KDC (Key Distribution Controller) proxy](https://learn.microsoft.com/en-us/openspecs/windows_protocols/ms-kkdcp/d688ea3a-04b0-45ea-8226-82a74cb6289e "https://learn.microsoft.com/en-us/openspecs/windows_protocols/ms-kkdcp/d688ea3a-04b0-45ea-8226-82a74cb6289e")
offers a method for a client to communicate with an intermediate server, Devolutions Gateway in this example, that proxies the token request to another KDC, which lives on the domain controller.
As Devolutions Gateway is a secure just-in-time lightweight VPN replacement, it is a great option to act as a KDC proxy for remote RDP connections. Devolutions Gateway offers two options: [short-lived](https://docs.devolutions.net/gateway/kb/how-to-articles/use-nla-rdp-connection/#short-lived-tokens)
and [long-lived tokens](https://docs.devolutions.net/gateway/kb/how-to-articles/use-nla-rdp-connection/#long-lived-tokens)
.
Enable API hooking for RDP
--------------------------
[](https://docs.devolutions.net/gateway/kb/how-to-articles/use-nla-rdp-connection/#api-hooking)
[Microsoft RDP API hooking should be enabled](https://docs.devolutions.net/rdm/kb/knowledge-base/microsoft-rdp-api-hooking/?tab=windows "/rdm/kb/knowledge-base/microsoft-rdp-api-hooking/?tab=windows")
in Remote Desktop Manager (enabled by default) for Devolutions Gateway connections. This allows continued use when an NTLM downgrade occurs.

Make sure RDP API hooking is enabled in File – Settings – Entry types – Sessions – Remote Desktop (RDP)
Configure KDC proxy with short-lived tokens
-------------------------------------------
[](https://docs.devolutions.net/gateway/kb/how-to-articles/use-nla-rdp-connection/#short-lived-tokens)
When using a KDC proxy, the recommended default is short-lived tokens dynamically injected by the Devolutions Gateway. These tokens are used in RDP via NLA (Network Layer Authentication) and by the Devolutions web-based sessions, such as WinRM, LDAP, and LAPS. Typical Kerberos tokens are limited to 10 hours by default.
1. In Devolutions Server, head to _**Administration**_ – _**Modules**_ – _**Devolutions Gateway**_. Then, click the _**Edit**_ button (pen-shaped icon) on the desired Devolutions Gateway instance.

In Devolutions server, edit the desired Devolutions Gateway instance
2. In the _**KDC proxy**_ section, click the _**Add**_ button (cross-shaped icon). Multiple KDC servers can be added,

Add a new KDC proxy
The connection is matched based on the suffix, e.g., with two server realms named, respectively, `ad.it-help.ninja` and `ad.contoso.com`, `machine.ad.it-help.ninja` will automatically use the former suffix, while `machine.ad.contoso.com` will use the latter.
3. Fill out the _**KDC server URL**_ and _**Kerberos realm**_ fields. Check _**Set as default**_ to make all connections use the KDC server URL. Otherwise, only matched realms will be used. Click on _**Save**_.

Fill out the KDC server URL fields
4. Back in the Devolutions Gateway edit window, go to the _**Advanced**_ section and make sure that the _**Force using IP address for RDP connections**_ option is unchecked. Click _**Save**_ to complete the configuration.

Uncheck the Force using IP address for RDP connections option
Configure KDC proxy with long-lived tokens
------------------------------------------
[](https://docs.devolutions.net/gateway/kb/how-to-articles/use-nla-rdp-connection/#long-lived-tokens)
Specific tokens can be created to live for 1, 3, and 6 months or a full year. Typically, these long-lived tokens would only be created to then be installed system-wide and used for edge cases where the Devolutions Gateway cannot dynamically inject a short-lived token.
1. In Devolutions Server, head to _**Administration**_ – _**Modules**_ – _**Devolutions Gateway**_, and click the _**More**_ button (vertical ellipsis-shaped icon). Select _**KDC proxy**_.

Open the KDC proxy tokens configuration window
2. Click the _**Add**_ button (cross-shaped icon).

Add a new KDC proxy long-lived token
3. Fill out the _**KDC server URL**_ and _**Kerberos realm**_ fields, and determine how long the token will live. Click on _**Add**_.

Fill out the KDC proxy token fields
4. Once added, download either a PowerShell script or registry file to add the token to the target machine’s registry. Both the registry file and PowerShell file do the same thing, but the PowerShell file also allows running with the `-Uninstall` parameter to uninstall, if needed.

Download PowerShell scrit or registry file
### Registry entries for KDC proxy
[](https://docs.devolutions.net/gateway/kb/how-to-articles/use-nla-rdp-connection/#registry-entries-for-kdc-proxy)
Both scripts configure several registry keys and values:
* `HKLM:\SOFTWARE\Microsoft\Windows\CurrentVersion\Policies\System\Kerberos`
* `HKLM:\SOFTWARE\Microsoft\Windows\CurrentVersion\Policies\System\Kerberos\Parameters`
* `HKLM:\SOFTWARE\Microsoft\Windows\CurrentVersion\Policies\System\Kerberos\KdcProxy\ProxyServers`
Within here, the token that was generated will be put with the keys of:
* `HKLM:\SOFTWARE\Microsoft\Windows\CurrentVersion\Policies\System\Kerberos\KdcProxyServer_Enabled` = `1`
* `HKLM:\SOFTWARE\Microsoft\Windows\CurrentVersion\Policies\System\Kerberos\KdcProxy\ProxyServers\{realm name}` = Token Value
To remove the KDC configuration from the registry, carefully modify the Windows _**Registry Editor**_ or launch the previously used PowerShell script using the `-Uninstall` parameter.
**Active Directory Protected Users Group**
------------------------------------------
[](https://docs.devolutions.net/gateway/kb/how-to-articles/use-nla-rdp-connection/#active-directory-protected-users-group)
Adding users to the [Protected Users group in Active Directory](https://learn.microsoft.com/en-us/windows-server/security/credentials-protection-and-management/protected-users-security-group "https://learn.microsoft.com/en-us/windows-server/security/credentials-protection-and-management/protected-users-security-group")
disables NTLM, often breaking RDP for remote sessions. Devolutions Gateway fixes this by acting as a KDC proxy, enabling Kerberos authentication even without direct domain controller access. In Remote Desktop Manager Windows, [RDP API hooking must be enabled](https://docs.devolutions.net/gateway/kb/how-to-articles/use-nla-rdp-connection/#api-hooking)
to support short-lived Kerberos tokens and restore RDP functionality securely.
#### See also
[](https://docs.devolutions.net/gateway/kb/how-to-articles/use-nla-rdp-connection/#see-also)
* [Microsoft RDP API hooking](https://docs.devolutions.net/rdm/kb/knowledge-base/microsoft-rdp-api-hooking/)
[ Share your feedback](https://forum.devolutions.net/forums/176/documentation--documentation-requests)
---
# Type de connexion de tunnel Devolutions Gateway - Documentation Devolutions
Type de connexion de tunnel Devolutions Gateway
===============================================
Sur cette page
* [Écouteurs](https://docs.devolutions.net/fr/gateway/kb/knowledge-base/gateway-tunnel/#listeners)
* [Règles d'autorisation](https://docs.devolutions.net/fr/gateway/kb/knowledge-base/gateway-tunnel/#allow-rules)
* [Utiliser le Devolutions Gateway Tunnel en dehors de Remote Desktop Manager](https://docs.devolutions.net/fr/gateway/kb/knowledge-base/gateway-tunnel/#using-the-devolutions-gateway-tunnel-oustide-of-remote-desktop-manager)
Le _**Devolutions Gateway tunnel**_ peut répondre à des besoins similaires au transfert de port SSH/Tunnel SSH, mais il ne nécessite rien d'autre que Devolutions Gateway lui-même. Il est utile lors de l'utilisation de connexions qui n'ont pas de support intégré dans Remote Desktop Manager via le Devolutions Gateway. L'entrée se trouve sous _**Nouvelle entrée**_ – _**Session**_ – _**Connexions à distance**_.
Devolutions Gateway doit être configuré dans la source de données de Remote Desktop Manager, puis configuré via [héritage](https://docs.devolutions.net/fr/rdm/kb/knowledge-base/inheritance/)
ou sur la connexion elle-même. L'option est sous **_Propriétés_** – **_Connexion_** – **_VPN/SSH/Gateway_** – **_VPN/SSH/Gateway_** – **_Général_**.
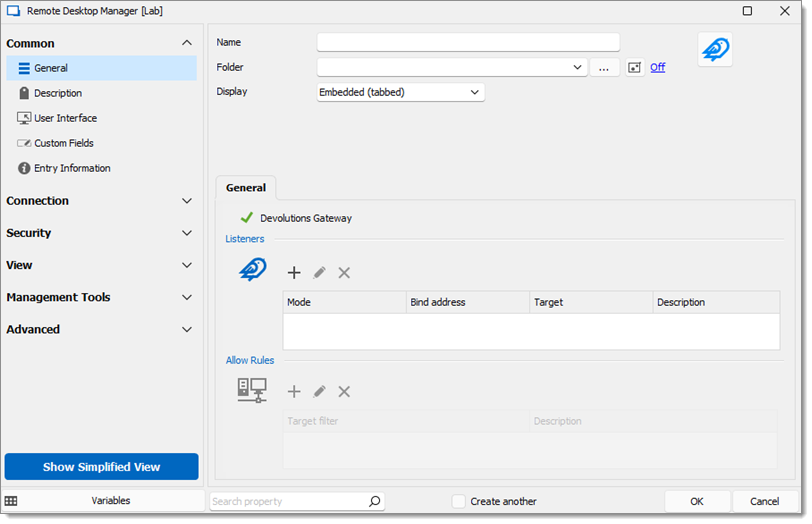
Tunnel
Écouteurs
---------
[](https://docs.devolutions.net/fr/gateway/kb/knowledge-base/gateway-tunnel/#listeners)
Si le **_Écouteur_** est réglé sur 0.0.0.0, il acceptera les connexions de toute source au sein du réseau. En raison de la difficulté de suivre la responsabilité, il est recommandé de **_NE PAS_** faire cela pour plusieurs raisons de sécurité.
* Dans presque tous les scénarios, l'écouteur (adresse de liaison) doit être réglé sur l'adresse de retour (127.0.0.1) de la machine locale.
* _**TCP Forward**_ : C'est l'équivalent du transfert de port.
* _**HTTP**_ et _**SOCKS5**_ proxies : Ces écouteurs sont configurés comme des proxy ce qui rend possible l'utilisation d'un navigateur autre que Google Chrome. Cela signifie également qu'ils utilisent une destination dynamique.
Dynamic ports can be used with all three listener types. If the value is 0, it will automatically find an available port.
### Règles d'autorisation
[](https://docs.devolutions.net/fr/gateway/kb/knowledge-base/gateway-tunnel/#allow-rules)
Les écouteurs _**HTTP**_ et _**SOCKS5**_ utiliseront également les _**Règles d'autorisation**_ pour spécifier les destinations autorisées, tout ce qui n'est pas sur la liste blanche sera refusé.
Les _**Filtres de cible**_ peuvent être spécifiés en utilisant des adresses IP ou des noms d'hôtes. Les deux peuvent contenir des caractères génériques. Chaque _**Filtre de cible**_ doit spécifier explicitement un port de destination. Laisser le port par défaut à '0' entraînera une erreur lors de la tentative de sauvegarde du filtre.
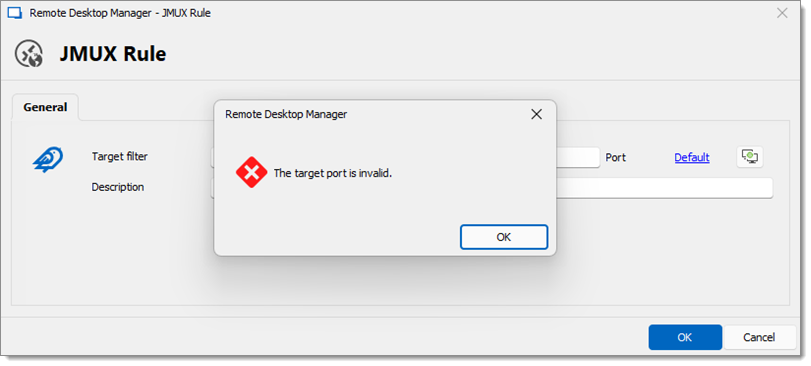
Default
#### Exemples de filtres de cible valides
[](https://docs.devolutions.net/fr/gateway/kb/knowledge-base/gateway-tunnel/#examples-of-valid-target-filters)
| Filtre de cible | Description |
| --- | --- |
| `windjammer.net:80` | Permettre le trafic HTTP vers le nom d'hôte windjammer.net. |
| `*.windjammer.net:443` | Permettre le trafic HTTPS vers tout sous-domaine de windjammer.net mais pas vers windjammer.net directement. |
| `192.168.0.*:22` | Permettre le trafic SSH vers toute adresse IP entre 192.168.0.0 et 192.168.0.255. |
| `*:3389` | Permettre le trafic RDP vers tout point de terminaison accessible par le Devolutions Gateway. |
Il est possible d'ajouter plusieurs _**Filtres de cible**_ à votre entrée adaptée à l'utilisation souhaitée du tunnel. Par exemple, il se peut que vous ajoutiez le même nom d'hôte plusieurs fois mais avec des ports différents, comme 80 et 443, pour permettre le trafic HTTP et HTTPS.
### Utiliser le Devolutions Gateway Tunnel en dehors de Remote Desktop Manager
[](https://docs.devolutions.net/fr/gateway/kb/knowledge-base/gateway-tunnel/#using-the-devolutions-gateway-tunnel-oustide-of-remote-desktop-manager)
Une fois ouvert, il est possible d'utiliser un _**Devolutions Gateway Tunnel**_ à partir d'une application externe à Remote Desktop Manager. Vous pourriez, par exemple, l'utiliser avec un navigateur web ou toute autre application qui supporte le type de proxying (TCP, HTTP, ou SOCKS5) que vous avez spécifié dans la connexion.
#### Exemple : Utiliser le tunnel avec l'outil en ligne de commande cURL
[](https://docs.devolutions.net/fr/gateway/kb/knowledge-base/gateway-tunnel/#example-using-the-tunnel-with-the-curl-command-line-tool)
Il est possible d'ajouter votre point de terminaison de proxy ainsi que le port spécifié ou celui qui a été généré par l'entrée _**Devolutions Gateway tunnel**_ avec l'argument -x.
curl -x socks5h://127.0.0.1:65535 windjammer.net
Si vous avez défini vos filtres cibles à l'aide des noms d'hôtes, il est important de s'assurer que votre application ne résout pas le nom d'hôte avant de l'envoyer au tunnel ; sinon, le trafic sera refusé. Les applications ont généralement des paramètres pour activer ou désactiver ce comportement. Par exemple, dans le navigateur Web Firefox, il faut activer l'option **_Proxy DNS lors de l'utilisation de SOCKS v5_** dans le panneau de configuration du proxy pour que ce scénario fonctionne correctement.
[ Partagez vos commentaires](https://forum.devolutions.net/forums/176/documentation--documentation-requests)
---
# Devolutions Gateway tunnel connection type - Devolutions Documentation
Devolutions Gateway tunnel connection type
==========================================
Auf dieser Seite
* [Listeners](https://docs.devolutions.net/de/gateway/kb/knowledge-base/gateway-tunnel/#listeners)
* [Allow Rules](https://docs.devolutions.net/de/gateway/kb/knowledge-base/gateway-tunnel/#allow-rules)
* [Using the Devolutions Gateway Tunnel oustide of Remote Desktop Manager](https://docs.devolutions.net/de/gateway/kb/knowledge-base/gateway-tunnel/#using-the-devolutions-gateway-tunnel-oustide-of-remote-desktop-manager)
The _**Devolutions Gateway tunnel**_ can fulfill similar needs to SSH port forwarding/SSH tunneling, but it requires nothing other than Devolutions Gateway itself. It is useful when using connections that do not have built-in support in Remote Desktop Manager through the Devolutions Gateway. The entry can be found under _**New Entry**_ – _**Session**_ – _**Remote Connections**_.
Devolutions Gateway needs to be set up in the Remote Desktop Manager data source and then configured through [inheritance](https://docs.devolutions.net/rdm/kb/knowledge-base/inheritance/)
or on the connection itself. The option is under **_Properties_** – **_Connection_** – **_VPN/SSH/Gateway_** – **_VPN/SSH/Gateway_** – **_General_**.

Tunnel
Listeners
---------
[](https://docs.devolutions.net/de/gateway/kb/knowledge-base/gateway-tunnel/#listeners)
If the **_Listener_** is set to 0.0.0.0, it will accept connections from any source within the network. Due to the difficulty in tracking accountability, it is recommended **_NOT_** to do this for multiple security reasons.
* In almost every scenario, the listener (bind address) should be set to the loopback address (127.0.0.1) from the local machine.
* _**TCP Forward**_: It is the equivalent to port forwarding.
* _**HTTP**_ and _**SOCKS5**_ proxies: These listeners are set up as proxies which makes it possible to use a browser other than Google Chrome. This also means they use a dynamic destination.
Dynamic ports can be used with all three listener types. If the value is 0, it will automatically find an available port.
### Allow Rules
[](https://docs.devolutions.net/de/gateway/kb/knowledge-base/gateway-tunnel/#allow-rules)
The _**HTTP**_ and _**SOCKS5**_ listeners will also make use of the _**Allow Rules**_ to specify authorized destinations, anything not on the allow list will be denied.
_**Target filters**_ can be specified using IP addresses or hostnames. Both can contain wildcards. Each _**Target filter**_ must explicitly specify a destination port. Leaving the default port as '0' will result in an error when attempting to save the filter.

Default
#### Examples of valid target filters
[](https://docs.devolutions.net/de/gateway/kb/knowledge-base/gateway-tunnel/#examples-of-valid-target-filters)
| Target filter | Description |
| --- | --- |
| `windjammer.net:80` | Allows HTTP traffic to the hostname windjammer.net. |
| `*.windjammer.net:443` | Allows HTTPS traffic to any subdomain of windjammer.net but not to windjammer.net directly. |
| `192.168.0.*:22` | Allows SSH traffic to any IP address between 192.168.0.0 to 192.168.0.255. |
| `*:3389` | Allows RDP traffic to any endpoint reachable by the Devolutions Gateway. |
You can add multiple _**Target filters**_ to your entry tailored to your intended use of the tunnel. For example, you might add the same hostname several times but with different ports, like 80 and 443, to permit both HTTP and HTTPS traffic.
### Using the Devolutions Gateway Tunnel oustide of Remote Desktop Manager
[](https://docs.devolutions.net/de/gateway/kb/knowledge-base/gateway-tunnel/#using-the-devolutions-gateway-tunnel-oustide-of-remote-desktop-manager)
Once opened, it is possible to use a _**Devolutions Gateway Tunnel**_ from an applicaton that is external to Remote Desktop Manager. You could, for instance, use it with a web browser or any other application that supports the type of proxying (TCP, HTTP, or SOCKS5) that you specified in the connection.
#### Example: Using the tunnel with the cURL command-line tool
[](https://docs.devolutions.net/de/gateway/kb/knowledge-base/gateway-tunnel/#example-using-the-tunnel-with-the-curl-command-line-tool)
You can add your proxy endpoint along with the port specified or the one that was generated by the _**Devolutions Gateway tunnel**_ entry with the -x argument.
curl -x socks5h://127.0.0.1:65535 windjammer.net
If you have set your target filters using hostnames, it is important to ensure that your application does not resolve the hostname before sending it to the tunnel; otherwise, the traffic will be denied. Applications typically have settings to enable or disable this behavior. For example, in the web browser Firefox, you need to enable the **_Proxy DNS when using SOCKS v5_** option in the proxy configuration panel for this scenario to function correctly.
[ Share your feedback](https://forum.devolutions.net/forums/176/documentation--documentation-requests)
---
# Use Windows certificate store for Devolutions Gateway - Devolutions Documentation
Use Windows certificate store for Devolutions Gateway
=====================================================
Auf dieser Seite
* [Importing the certificate into the Windows certificate store](https://docs.devolutions.net/de/gateway/kb/how-to-articles/use-windows-certificate-store/#importing-the-certificate-into-the-windows-certificate-store)
* [Converting an X.509 certificate](https://docs.devolutions.net/de/gateway/kb/how-to-articles/use-windows-certificate-store/#converting-an-x509-certificate)
* [Importing the certificate](https://docs.devolutions.net/de/gateway/kb/how-to-articles/use-windows-certificate-store/#importing-the-certificate)
* [Giving the Devolutions Gateway service read permission on the certificate private key](https://docs.devolutions.net/de/gateway/kb/how-to-articles/use-windows-certificate-store/#giving-the-devolutions-gateway-service-read-permission-on-the-certificate-private-key)
* [Configuring Windows certificate store via gateway.json](https://docs.devolutions.net/de/gateway/kb/how-to-articles/use-windows-certificate-store/#configuring-windows-certificate-store-via-gatewayjson)
* [Configuring Windows certificate store via PowerShell](https://docs.devolutions.net/de/gateway/kb/how-to-articles/use-windows-certificate-store/#configuring-windows-certificate-store-via-powershell)
If your clients fail to connect with Devolutions Gateway, ensure the certificate contains the entire chain. This certificate chain includes any intermediate certificates. For example: Root Certificate Authority – Secure Certificate Authority – Purchased XYZ Certificate.
It is possible to use the Windows certificate store as a TLS certificate source. Instead of using a file, store and manage your certificates with Windows. As of the time of writing, this functionality is not exposed in the Devolutions Gateway configuration console GUI. To configure, you must either directly modify the gateway.json file or use the Devolutions.PowerShell module.
With the new functionality, a [few additional parameters](https://github.com/Devolutions/devolutions-gateway#configuration)
are available to configure the source of the certificate.
If you have a previously defined \`TlsCertificateFile\` and/or \`TlsPrivateKeyFile\` configuration, removal is unnecessary as \`TlsCertificateSource\` tells Devolutions Gateway where to search for the certificate.
* **TlsCertificateSource** (string): Source for the TLS certificate, possible values shown below.
* **External** (default): Retrieve a certificate stored on the file system. See the options `TlsCertificateFile`, `TlsPrivateKeyFile`, and `TlsPrivateKeyPassword`.
* **System**: Retrieve the certificate managed by the system certificate store. See the options `TlsCertificateSubjectName`, `TlsCertificateStoreName`, and `TlsCertificateStoreLocation`.
* **TlsCertificateSubjectName** (string): Subject name of the certificate for TLS when using System source.
* **TlsCertificateStoreName** (string): Name of the System Certificate Store to use for TLS (default is My).
* **TlsCertificateStoreLocation** (string): Location of the System Certificate Store to use for TLS, possible values shown below.
* **CurrentUser** (default)
* **CurrentService**
* **LocalMachine**
Importing the certificate into the Windows certificate store
------------------------------------------------------------
[](https://docs.devolutions.net/de/gateway/kb/how-to-articles/use-windows-certificate-store/#importing-the-certificate-into-the-windows-certificate-store)
First, import your certificate into the Windows certificate store. Windows supports the following certificate formats:
* X.509 certificate - \*.cer, \*.crt
* Personal Information Exchange - \*.pfx, \*.p12
* Microsoft Serialized certificate Store - \*.sst
* PKCS #7 Certificates - \*.spc, \*.p7b
If using the \`External\` method via \`TlsCertificateSource\`, then Devolutions Gateway only supports bundling the public and private key in a PFX (PKCS#12) file. Otherwise, you will need to define the \`TlsPrivateKeyFile\` parameter as well.
### Converting an X.509 certificate
[](https://docs.devolutions.net/de/gateway/kb/how-to-articles/use-windows-certificate-store/#converting-an-x509-certificate)
Devolutions Gateway requires a private key with the TLS certificate; therefore, you may need to combine the public key with its private key. Here are two methods: [Remote Desktop Manager](https://docs.devolutions.net/de/gateway/kb/how-to-articles/use-windows-certificate-store/#using-remote-desktop-manager)
and the built-in [Windows utility `certutil`](https://docs.devolutions.net/de/gateway/kb/how-to-articles/use-windows-certificate-store/#using-the-windows-certutil-utility)
.
#### Using Remote Desktop Manager
[](https://docs.devolutions.net/de/gateway/kb/how-to-articles/use-windows-certificate-store/#using-remote-desktop-manager)
The _**X.509 Certificate**_ entry can be used to import said certificate and export it in several different formats, including PFX.
1. In Remote Desktop Manager click on _**New Entry**_ – _**Credential Management**_ – _**General**_ – _**X.509 Certificate**_.

X.509 Certificate
2. Select the certificate and click _**Open**_.

Open
3. Click _**Next**_.

Next
4. Click on the ellipsis and select the _**Private key**_.

Ellipsis button
5. Click on _**Open**_.

KEY file
The **_Private key_** must be in the \`.key\` extension.
6. Click _**Finish**_.

Finish
7. Fill in the information, then click _**Add**_.

Information fields
8. Select the entry and click _**Save Certificate As**_ (also available in the right-click context menu).

Save Certificate As
9. In the _**Export Format**_ field choose _**Personal Information Exchange (pfx)**_.
10. Choose where the file will be saved by clicking on the ellipsis.
11. Enter a strong password, then click _**Export**_.

Export X.509 Certificate
#### Using the Windows certutil utility
[](https://docs.devolutions.net/de/gateway/kb/how-to-articles/use-windows-certificate-store/#using-the-windows-certutil-utility)
Use the built-in Windows `certutil` utility to combine a certificate (`.crt` or `.cer`) file and its private key (`.key`). Both files need to have the same name. `certutil -MergePFX file.crt file.pfx`

certutil
### Importing the certificate
[](https://docs.devolutions.net/de/gateway/kb/how-to-articles/use-windows-certificate-store/#importing-the-certificate)
After acquiring the certificate and certificate private key file, import it into Windows.
1. Install the certificate:
* If Windows auto-detects the certificate, double-click it and choose _**Install Certificate...**_; or
* Open `certmgr.msc` to the intended store location (`LocalMachine` or `CurrentUser`), right-click on the wanted location (ex: _**Personal/Certificates**_) and choose _**All Tasks**_ – _**Import**_.

Install Certificate...
2. Pick one of the following options and click _**Next**_:
* _**Automatically select the certificate store based on the type of certificate**_; or
* _**Place all certificates in the following store**_ and click _**Browse...**_ to pick a folder.

X.509 Certificate
3. Complete the import by clicking on _**Finish**_.

Certificate Import Wizard
Giving the Devolutions Gateway service read permission on the certificate private key
-------------------------------------------------------------------------------------
[](https://docs.devolutions.net/de/gateway/kb/how-to-articles/use-windows-certificate-store/#giving-the-devolutions-gateway-service-read-permission-on-the-certificate-private-key)
By default, Devolutions Gateway runs its service using the Network Service account. To use a certificate from the local certificate store, ensure the Network Service account has read permissions on the certificate's private key.
1. Open the local certificate store and navigate to the certificate.
2. Right-click on the certificate and select _**All Tasks**_ – _**Manage Private Keys**_.

All Tasks – Manage Private Keys
3. Click to add a user name.

Add a user name
4. Write "NETWORK SERVICE" in the object names field then click _**OK**_.

Add the "NETWORK SERVICE" user name
5. Select the new _**NETWORK SERVICE**_ user name and allow the _**Read**_ permission on it.

Allow the "Read" permission
6. Click _**Apply**_, the click _**OK**_.
Configuring Windows certificate store via gateway.json
------------------------------------------------------
[](https://docs.devolutions.net/de/gateway/kb/how-to-articles/use-windows-certificate-store/#configuring-windows-certificate-store-via-gatewayjson)
The default location of the `gateway.json` file is in the **%ProgramData%\\Devolutions\\Gateway** directory.
Make sure the file is a valid `.json` by testing it with:
$Config = ("{0}\Devolutions\Gateway\gateway.json" -F $Env:ProgramData)
Try {
Get-Content -Path $Config | ConvertFrom-JSON -ErrorAction 'Stop'
} Catch {
$PSItem[0].Exception.Message
}
This works with PowerShell 5.1 and later versions (the recommended version to use is PowerShell 7.x).

Get-Content
A typical configuration is shown below. Your values may differ, especially the _**Subject Name**_, as that will reflect the domain name Devolutions Gateway responds to. The important values to change are:
* `TlsCertificateSource` - `System`
* `TlsCertificateSubjectName` - `gateway.ad.it-help.ninja`
* `TlsCertificateStoreName` - `My`
* `TlsCertificateStoreLocation` - `LocalMachine`
An example of the entire configuration file:
{
"Id": "c912b379-8c34-449d-8ff3-3aa20a9cc3e4",
"Hostname": "gateway.ad.it-help.ninja",
"TlsCertificateFile": "server.crt",
"TlsPrivateKeyFile": "server.key",
"TlsCertificateSource": "System",
"TlsCertificateSubjectName": "gateway.ad.it-help.ninja",
"TlsCertificateStoreName": "My",
"TlsCertificateStoreLocation": "LocalMachine",
"ProvisionerPublicKeyFile": "provisioner.pem",
"Listeners": [\
{\
"InternalUrl": "https://*:7171",\
"ExternalUrl": "https://*:7171"\
},\
{\
"InternalUrl": "tcp://*:8181",\
"ExternalUrl": "tcp://*:8181"\
}\
]
}
1. Run the above script.
2. Open `services.msc`.
3. Right-click on _**Devolutions Gateway Service**_ and select _**Restart**_.

Restart
4. Verify if Devolutions Gateway is running correctly by navigating to `https://{FQDN}:7171/jet/health` (replacing `{FQDN}` with your Gateway DNS address) with a web browser.
Configuring Windows certificate store via PowerShell
----------------------------------------------------
[](https://docs.devolutions.net/de/gateway/kb/how-to-articles/use-windows-certificate-store/#configuring-windows-certificate-store-via-powershell)
The Devolutions Gateway can also be configured through PowerShell commands. The [Devolutions Gateway PowerShell module](https://www.powershellgallery.com/packages/DevolutionsGateway/)
exposes many commands to configure it. By default, an install of Devolutions Gateway includes the module in the installation directory. Import the module via the following:
# Import the Module
Import-Module -Name "C:\Program Files\Devolutions\Gateway\PowerShell\Modules\DevolutionsGateway"
# View the imported Modules
Get-Module

Import-Module
Another method to make the module easily accessible is to install it via the following:
# Install the DevolutionsGateway module
Install-Module -Name 'DevolutionsGateway'
# Update the module if installed via the above method (will not update the bundled version installed with Gateway)
Update-Module -Name 'DevolutionsGateway'
# Import the Module
Import-Module -Name 'DevolutionsGateway'
# View the imported modules to verify the DevolutionsGateway module is available
Get-Module

Install-Module
Once imported, you can see the current configuration via the following command:
Get-DGatewayConfig

Get-DGatewayConfig
To tell Devolutions Gateway to use the Windows Store, use the following command:
# Update the configuration; this will not remove any existing parameters, only configure those defined.
# Replace the '{FQDN}` example with the fully-qualified DNS name of the Gateway address
Set-DGatewayConfig -TlsCertificateSource "System" -TlsCertificateSubjectName "{FQDN}" -TlsCertificateStoreLocation "LocalMachine" -TlsCertificateStoreName "My"
# Display the updated configuration
Get-DGatewayConfig

Set-DGatewayConfig
Restart the service for the configuration to take effect.
Restart-Service -Name 'DevolutionsGateway'

Restart-Service -Name 'DevolutionsGateway'
Verify if Devolutions Gateway is running correctly by navigating to `https://{FQDN}:7171/jet/health` with a web browser.
[ Share your feedback](https://forum.devolutions.net/forums/176/documentation--documentation-requests)
---
# Knowledge base - Devolutions Documentation
Knowledge base
==============
You can consult various more in-depth topics about Devolutions Gateway in this section.
[ Share your feedback](https://forum.devolutions.net/forums/176/documentation--documentation-requests)
---
# Articles de dépannage - Documentation Devolutions
Articles de dépannage
=====================
[ Partagez vos commentaires](https://forum.devolutions.net/forums/176/documentation--documentation-requests)
---
# Knowledge base articles - Devolutions Documentation
Knowledge base articles
=======================
[ Share your feedback](https://forum.devolutions.net/forums/176/documentation--documentation-requests)
---
# Troubleshooting articles - Devolutions Documentation
Troubleshooting articles
========================
[ Share your feedback](https://forum.devolutions.net/forums/176/documentation--documentation-requests)
---
# Devolutions Gateway side-by-side installation method not found - Devolutions Documentation
Devolutions Gateway side-by-side installation method not found
==============================================================
Auf dieser Seite
* [Solution](https://docs.devolutions.net/de/gateway/kb/troubleshooting-articles/install-dgw-method-not-found/#solution)
When installing Devolutions Gateway on the same machine as Devolutions Server (side by side installation), this error can trigger in the installation logs.
Method not found:'Void System.Management.Automation.Runspaces.InitialSessionState.set\_ExecutionPolicy(Microsoft.PowerShell.ExecutionPolicy)'.
Solution
--------
[](https://docs.devolutions.net/de/gateway/kb/troubleshooting-articles/install-dgw-method-not-found/#solution)
As Devolutions Gateway requires at least PowerShell version 5.1, please update PowerShell to that version to fix the issue. Then start over the Devolutions Gateway installation.
[ Share your feedback](https://forum.devolutions.net/forums/176/documentation--documentation-requests)
---
# Méthode d'installation côte à côte Devolutions Gateway non trouvée - Documentation Devolutions
Méthode d'installation côte à côte Devolutions Gateway non trouvée
==================================================================
Sur cette page
* [Solution](https://docs.devolutions.net/fr/gateway/kb/troubleshooting-articles/install-dgw-method-not-found/#solution)
Lors de l'installation de Devolutions Gateway sur la même machine que Devolutions Server (installation côte à côte), cette erreur peut se déclencher dans les journaux d'installation.
Method not found:'Void System.Management.Automation.Runspaces.InitialSessionState.set\_ExecutionPolicy(Microsoft.PowerShell.ExecutionPolicy)'.
Solution
--------
[](https://docs.devolutions.net/fr/gateway/kb/troubleshooting-articles/install-dgw-method-not-found/#solution)
Comme Devolutions Gateway nécessite au moins la version 5.1 de PowerShell, merci de mettre à jour PowerShell vers cette version pour résoudre le problème. Puis recommencer l'installation de Devolutions Gateway.
[ Partagez vos commentaires](https://forum.devolutions.net/forums/176/documentation--documentation-requests)
---
# Résolution des problèmes de Devolutions Gateway - Documentation Devolutions
Résolution des problèmes de Devolutions Gateway
===============================================
Sur cette page
* [Vérifier l'état de santé d'un Devolutions Gateway](https://docs.devolutions.net/fr/gateway/kb/troubleshooting-articles/gateway-troubleshooting/#verify-the-health-of-a-gateway)
* [Journal et diagnostics Devolutions Gateway](https://docs.devolutions.net/fr/gateway/kb/troubleshooting-articles/gateway-troubleshooting/#devolutions-gateway-logs-and-diagnostics)
* [Journaux de Devolutions Gateway](https://docs.devolutions.net/fr/gateway/kb/troubleshooting-articles/gateway-troubleshooting/#devolutions-gateway-logs)
* [Diagnostics Devolutions Gateway](https://docs.devolutions.net/fr/gateway/kb/troubleshooting-articles/gateway-troubleshooting/#devolutions-gateway-diagnostics)
* [Le service échoue à démarrer](https://docs.devolutions.net/fr/gateway/kb/troubleshooting-articles/gateway-troubleshooting/#service-fails-to-start)
* [Compatibilité du certificat](https://docs.devolutions.net/fr/gateway/kb/troubleshooting-articles/gateway-troubleshooting/#certificate-compatibility)
* [Connexion au serveur perdue](https://docs.devolutions.net/fr/gateway/kb/troubleshooting-articles/gateway-troubleshooting/#connection-to-the-server-lost)
* [Problèmes de proxy](https://docs.devolutions.net/fr/gateway/kb/troubleshooting-articles/gateway-troubleshooting/#proxy-issues)
Cette rubrique couvre des conseils sur la résolution de problèmes de Devolutions Gateway à travers plusieurs produits.
Si vous êtes incapable de télécharger les journaux via le web, vous pouvez aussi les trouver dans le dossier d'installation : `C:\ProgramData\Devolutions\Gateway`.
Vérifier l'état de santé d'un Devolutions Gateway
-------------------------------------------------
[](https://docs.devolutions.net/fr/gateway/kb/troubleshooting-articles/gateway-troubleshooting/#verify-the-health-of-a-gateway)
Il est possible de vérifier si une passerelle particulière est active et en bonne santé.
1. Ouvrir un navigateur web.
2. Dans la barre d'adresse, taper `https://:/jet/health`. Selon la configuration, cela pourrait aussi être `` `http` ``.
3. Appuyer sur Entrée.

Health check
Journal et diagnostics Devolutions Gateway
------------------------------------------
[](https://docs.devolutions.net/fr/gateway/kb/troubleshooting-articles/gateway-troubleshooting/#devolutions-gateway-logs-and-diagnostics)
Si vous avez des difficultés avec une passerelle, ces solutions peuvent faciliter la détection d'erreurs plus apparentes.
1. Dans l'interface Web de Devolutions Server, accéder à _**Administration**_ – _**Devolutions Gateway**_.
2. Cliquer sur _**Plus**_ sur le portail désiré.
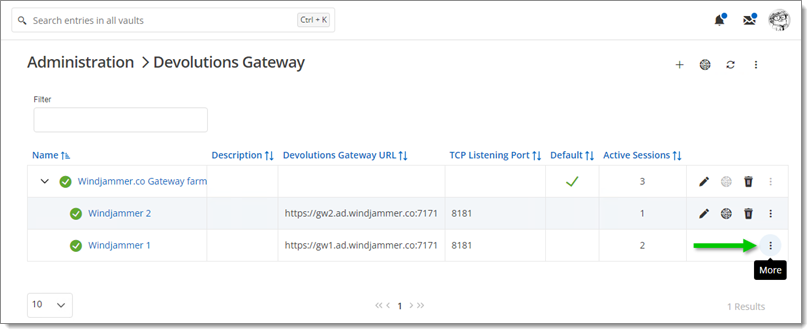
More button
3. Choisir entre [_**Journaux**_](https://docs.devolutions.net/fr/gateway/kb/troubleshooting-articles/gateway-troubleshooting/#devolutions-gateway-logs)
ou [_**Diagnostics**_](https://docs.devolutions.net/fr/gateway/kb/troubleshooting-articles/gateway-troubleshooting/#devolutions-gateway-diagnostics)
.
### Journaux de Devolutions Gateway
[](https://docs.devolutions.net/fr/gateway/kb/troubleshooting-articles/gateway-troubleshooting/#devolutions-gateway-logs)
1. Cliquer sur _**Journaux**_.
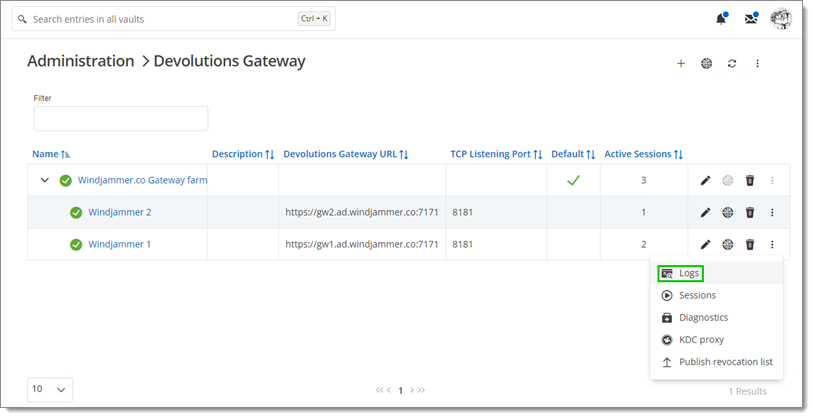
Logs
2. Observer les journaux.
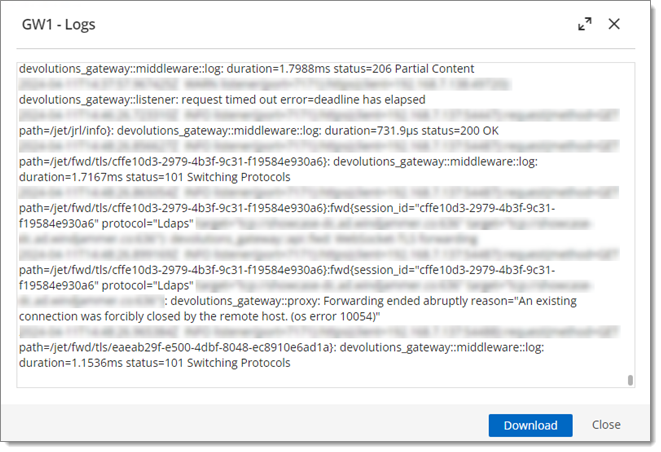
Logs window
### Diagnostics Devolutions Gateway
[](https://docs.devolutions.net/fr/gateway/kb/troubleshooting-articles/gateway-troubleshooting/#devolutions-gateway-diagnostics)
1. Cliquer sur _**Diagnostics**_.
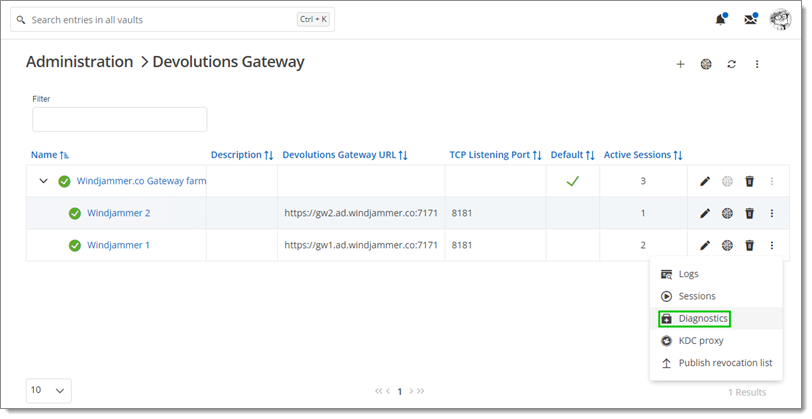
Diagnostics
2. Observer les statuts.
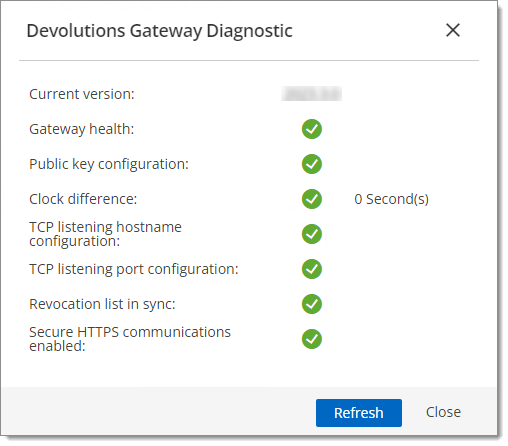
Gateway status
Le service échoue à démarrer
----------------------------
[](https://docs.devolutions.net/fr/gateway/kb/troubleshooting-articles/gateway-troubleshooting/#service-fails-to-start)
Si le service ne démarre pas du tout, vérifier si un fichier nommé `boot.stacktrace` existe dans le même répertoire que le fichier de configuration `gateway.json`. Ce fichier peut contenir des informations de diagnostic pertinentes. Contacter notre [équipe d'assistance](mailto:service@devolutions.net)
si vous n'êtes pas en mesure d'identifier la cause de l'échec.
Compatibilité du certificat
---------------------------
[](https://docs.devolutions.net/fr/gateway/kb/troubleshooting-articles/gateway-troubleshooting/#certificate-compatibility)
Les problèmes liés aux certificats auto-signés manquant un SAN ou un EKU peuvent être résolus en mettant à jour vers la dernière version de Devolutions Gateway.
Il est recommandé de définir l'option `TlsVerifyStrict` sur `true` dans la mesure du possible. Configurer également cette option si vous rencontrez des problèmes de certificat sur macOS et Chrome.
Connexion au serveur perdue
---------------------------
[](https://docs.devolutions.net/fr/gateway/kb/troubleshooting-articles/gateway-troubleshooting/#connection-to-the-server-lost)
Si ce message d'erreur est reçu, s'assurer que le compte de service configuré sur le service Devolutions Gateway peut atteindre le dossier de destination de l'enregistrement et qu'il dispose des permissions requises pour créer les dossiers et fichiers d'enregistrement.
Problèmes de proxy
------------------
[](https://docs.devolutions.net/fr/gateway/kb/troubleshooting-articles/gateway-troubleshooting/#proxy-issues)
Si vous rencontrez des problèmes lors du chargement ou de l'utilisation des entrées Web dans Remote Desktop Manager lorsque Devolutions Gateway est configuré comme un proxy, vérifier les fichiers journaux pour plus de détails:
* Chemin Windows: `C:\Users\\AppData\Roaming\jetsocat`
* Chemin macOS: `/Users//Library/Application Support/jetsocat`
Si le problème persiste, veuillez contacter notre équipe d'assistance client pour obtenir de l'aide à [service@devolutions.net](mailto:service@devolutions.net)
et fournir les fichiers journaux pertinents.
[ Partagez vos commentaires](https://forum.devolutions.net/forums/176/documentation--documentation-requests)
---
# Devolutions Gateway tunnel connection type - Devolutions Documentation
Devolutions Gateway tunnel connection type
==========================================
On this page
* [Listeners](https://docs.devolutions.net/gateway/kb/knowledge-base/gateway-tunnel/#listeners)
* [Allow Rules](https://docs.devolutions.net/gateway/kb/knowledge-base/gateway-tunnel/#allow-rules)
* [Using the Devolutions Gateway Tunnel oustide of Remote Desktop Manager](https://docs.devolutions.net/gateway/kb/knowledge-base/gateway-tunnel/#using-the-devolutions-gateway-tunnel-oustide-of-remote-desktop-manager)
The _**Devolutions Gateway tunnel**_ can fulfill similar needs to SSH port forwarding/SSH tunneling, but it requires nothing other than Devolutions Gateway itself. It is useful when using connections that do not have built-in support in Remote Desktop Manager through the Devolutions Gateway. The entry can be found under _**New Entry**_ – _**Session**_ – _**Remote Connections**_.
Devolutions Gateway needs to be set up in the Remote Desktop Manager data source and then configured through [inheritance](https://docs.devolutions.net/rdm/kb/knowledge-base/inheritance/)
or on the connection itself. The option is under **_Properties_** – **_Connection_** – **_VPN/SSH/Gateway_** – **_VPN/SSH/Gateway_** – **_General_**.

Tunnel
Listeners
---------
[](https://docs.devolutions.net/gateway/kb/knowledge-base/gateway-tunnel/#listeners)
If the **_Listener_** is set to 0.0.0.0, it will accept connections from any source within the network. Due to the difficulty in tracking accountability, it is recommended **_NOT_** to do this for multiple security reasons.
* In almost every scenario, the listener (bind address) should be set to the loopback address (127.0.0.1) from the local machine.
* _**TCP Forward**_: It is the equivalent to port forwarding.
* _**HTTP**_ and _**SOCKS5**_ proxies: These listeners are set up as proxies which makes it possible to use a browser other than Google Chrome. This also means they use a dynamic destination.
Dynamic ports can be used with all three listener types. If the value is 0, it will automatically find an available port.
### Allow Rules
[](https://docs.devolutions.net/gateway/kb/knowledge-base/gateway-tunnel/#allow-rules)
The _**HTTP**_ and _**SOCKS5**_ listeners will also make use of the _**Allow Rules**_ to specify authorized destinations, anything not on the allow list will be denied.
_**Target filters**_ can be specified using IP addresses or hostnames. Both can contain wildcards. Each _**Target filter**_ must explicitly specify a destination port. Leaving the default port as '0' will result in an error when attempting to save the filter.

Default
#### Examples of valid target filters
[](https://docs.devolutions.net/gateway/kb/knowledge-base/gateway-tunnel/#examples-of-valid-target-filters)
| Target filter | Description |
| --- | --- |
| `windjammer.net:80` | Allows HTTP traffic to the hostname windjammer.net. |
| `*.windjammer.net:443` | Allows HTTPS traffic to any subdomain of windjammer.net but not to windjammer.net directly. |
| `192.168.0.*:22` | Allows SSH traffic to any IP address between 192.168.0.0 to 192.168.0.255. |
| `*:3389` | Allows RDP traffic to any endpoint reachable by the Devolutions Gateway. |
You can add multiple _**Target filters**_ to your entry tailored to your intended use of the tunnel. For example, you might add the same hostname several times but with different ports, like 80 and 443, to permit both HTTP and HTTPS traffic.
### Using the Devolutions Gateway Tunnel oustide of Remote Desktop Manager
[](https://docs.devolutions.net/gateway/kb/knowledge-base/gateway-tunnel/#using-the-devolutions-gateway-tunnel-oustide-of-remote-desktop-manager)
Once opened, it is possible to use a _**Devolutions Gateway Tunnel**_ from an applicaton that is external to Remote Desktop Manager. You could, for instance, use it with a web browser or any other application that supports the type of proxying (TCP, HTTP, or SOCKS5) that you specified in the connection.
#### Example: Using the tunnel with the cURL command-line tool
[](https://docs.devolutions.net/gateway/kb/knowledge-base/gateway-tunnel/#example-using-the-tunnel-with-the-curl-command-line-tool)
You can add your proxy endpoint along with the port specified or the one that was generated by the _**Devolutions Gateway tunnel**_ entry with the -x argument.
curl -x socks5h://127.0.0.1:65535 windjammer.net
If you have set your target filters using hostnames, it is important to ensure that your application does not resolve the hostname before sending it to the tunnel; otherwise, the traffic will be denied. Applications typically have settings to enable or disable this behavior. For example, in the web browser Firefox, you need to enable the **_Proxy DNS when using SOCKS v5_** option in the proxy configuration panel for this scenario to function correctly.
[ Share your feedback](https://forum.devolutions.net/forums/176/documentation--documentation-requests)
---
# Use Windows certificate store for Devolutions Gateway - Devolutions Documentation
Use Windows certificate store for Devolutions Gateway
=====================================================
On this page
* [Importing the certificate into the Windows certificate store](https://docs.devolutions.net/gateway/kb/how-to-articles/use-windows-certificate-store/#importing-the-certificate-into-the-windows-certificate-store)
* [Converting an X.509 certificate](https://docs.devolutions.net/gateway/kb/how-to-articles/use-windows-certificate-store/#converting-an-x509-certificate)
* [Importing the certificate](https://docs.devolutions.net/gateway/kb/how-to-articles/use-windows-certificate-store/#importing-the-certificate)
* [Giving the Devolutions Gateway service read permission on the certificate private key](https://docs.devolutions.net/gateway/kb/how-to-articles/use-windows-certificate-store/#giving-the-devolutions-gateway-service-read-permission-on-the-certificate-private-key)
* [Configuring Windows certificate store via gateway.json](https://docs.devolutions.net/gateway/kb/how-to-articles/use-windows-certificate-store/#configuring-windows-certificate-store-via-gatewayjson)
* [Configuring Windows certificate store via PowerShell](https://docs.devolutions.net/gateway/kb/how-to-articles/use-windows-certificate-store/#configuring-windows-certificate-store-via-powershell)
If your clients fail to connect with Devolutions Gateway, ensure the certificate contains the entire chain. This certificate chain includes any intermediate certificates. For example: Root Certificate Authority – Secure Certificate Authority – Purchased XYZ Certificate.
It is possible to use the Windows certificate store as a TLS certificate source. Instead of using a file, store and manage your certificates with Windows. As of the time of writing, this functionality is not exposed in the Devolutions Gateway configuration console GUI. To configure, you must either directly modify the gateway.json file or use the Devolutions.PowerShell module.
With the new functionality, a [few additional parameters](https://github.com/Devolutions/devolutions-gateway#configuration)
are available to configure the source of the certificate.
If you have a previously defined \`TlsCertificateFile\` and/or \`TlsPrivateKeyFile\` configuration, removal is unnecessary as \`TlsCertificateSource\` tells Devolutions Gateway where to search for the certificate.
* **TlsCertificateSource** (string): Source for the TLS certificate, possible values shown below.
* **External** (default): Retrieve a certificate stored on the file system. See the options `TlsCertificateFile`, `TlsPrivateKeyFile`, and `TlsPrivateKeyPassword`.
* **System**: Retrieve the certificate managed by the system certificate store. See the options `TlsCertificateSubjectName`, `TlsCertificateStoreName`, and `TlsCertificateStoreLocation`.
* **TlsCertificateSubjectName** (string): Subject name of the certificate for TLS when using System source.
* **TlsCertificateStoreName** (string): Name of the System Certificate Store to use for TLS (default is My).
* **TlsCertificateStoreLocation** (string): Location of the System Certificate Store to use for TLS, possible values shown below.
* **CurrentUser** (default)
* **CurrentService**
* **LocalMachine**
Importing the certificate into the Windows certificate store
------------------------------------------------------------
[](https://docs.devolutions.net/gateway/kb/how-to-articles/use-windows-certificate-store/#importing-the-certificate-into-the-windows-certificate-store)
First, import your certificate into the Windows certificate store. Windows supports the following certificate formats:
* X.509 certificate - \*.cer, \*.crt
* Personal Information Exchange - \*.pfx, \*.p12
* Microsoft Serialized certificate Store - \*.sst
* PKCS #7 Certificates - \*.spc, \*.p7b
If using the \`External\` method via \`TlsCertificateSource\`, then Devolutions Gateway only supports bundling the public and private key in a PFX (PKCS#12) file. Otherwise, you will need to define the \`TlsPrivateKeyFile\` parameter as well.
### Converting an X.509 certificate
[](https://docs.devolutions.net/gateway/kb/how-to-articles/use-windows-certificate-store/#converting-an-x509-certificate)
Devolutions Gateway requires a private key with the TLS certificate; therefore, you may need to combine the public key with its private key. Here are two methods: [Remote Desktop Manager](https://docs.devolutions.net/gateway/kb/how-to-articles/use-windows-certificate-store/#using-remote-desktop-manager)
and the built-in [Windows utility `certutil`](https://docs.devolutions.net/gateway/kb/how-to-articles/use-windows-certificate-store/#using-the-windows-certutil-utility)
.
#### Using Remote Desktop Manager
[](https://docs.devolutions.net/gateway/kb/how-to-articles/use-windows-certificate-store/#using-remote-desktop-manager)
The _**X.509 Certificate**_ entry can be used to import said certificate and export it in several different formats, including PFX.
1. In Remote Desktop Manager click on _**New Entry**_ – _**Credential Management**_ – _**General**_ – _**X.509 Certificate**_.

X.509 Certificate
2. Select the certificate and click _**Open**_.

Open
3. Click _**Next**_.

Next
4. Click on the ellipsis and select the _**Private key**_.

Ellipsis button
5. Click on _**Open**_.

KEY file
The **_Private key_** must be in the \`.key\` extension.
6. Click _**Finish**_.

Finish
7. Fill in the information, then click _**Add**_.

Information fields
8. Select the entry and click _**Save Certificate As**_ (also available in the right-click context menu).

Save Certificate As
9. In the _**Export Format**_ field choose _**Personal Information Exchange (pfx)**_.
10. Choose where the file will be saved by clicking on the ellipsis.
11. Enter a strong password, then click _**Export**_.

Export X.509 Certificate
#### Using the Windows certutil utility
[](https://docs.devolutions.net/gateway/kb/how-to-articles/use-windows-certificate-store/#using-the-windows-certutil-utility)
Use the built-in Windows `certutil` utility to combine a certificate (`.crt` or `.cer`) file and its private key (`.key`). Both files need to have the same name. `certutil -MergePFX file.crt file.pfx`

certutil
### Importing the certificate
[](https://docs.devolutions.net/gateway/kb/how-to-articles/use-windows-certificate-store/#importing-the-certificate)
After acquiring the certificate and certificate private key file, import it into Windows.
1. Install the certificate:
* If Windows auto-detects the certificate, double-click it and choose _**Install Certificate...**_; or
* Open `certmgr.msc` to the intended store location (`LocalMachine` or `CurrentUser`), right-click on the wanted location (ex: _**Personal/Certificates**_) and choose _**All Tasks**_ – _**Import**_.

Install Certificate...
2. Pick one of the following options and click _**Next**_:
* _**Automatically select the certificate store based on the type of certificate**_; or
* _**Place all certificates in the following store**_ and click _**Browse...**_ to pick a folder.

X.509 Certificate
3. Complete the import by clicking on _**Finish**_.

Certificate Import Wizard
Giving the Devolutions Gateway service read permission on the certificate private key
-------------------------------------------------------------------------------------
[](https://docs.devolutions.net/gateway/kb/how-to-articles/use-windows-certificate-store/#giving-the-devolutions-gateway-service-read-permission-on-the-certificate-private-key)
By default, Devolutions Gateway runs its service using the Network Service account. To use a certificate from the local certificate store, ensure the Network Service account has read permissions on the certificate's private key.
1. Open the local certificate store and navigate to the certificate.
2. Right-click on the certificate and select _**All Tasks**_ – _**Manage Private Keys**_.

All Tasks – Manage Private Keys
3. Click to add a user name.

Add a user name
4. Write "NETWORK SERVICE" in the object names field then click _**OK**_.

Add the "NETWORK SERVICE" user name
5. Select the new _**NETWORK SERVICE**_ user name and allow the _**Read**_ permission on it.

Allow the "Read" permission
6. Click _**Apply**_, the click _**OK**_.
Configuring Windows certificate store via gateway.json
------------------------------------------------------
[](https://docs.devolutions.net/gateway/kb/how-to-articles/use-windows-certificate-store/#configuring-windows-certificate-store-via-gatewayjson)
The default location of the `gateway.json` file is in the **%ProgramData%\\Devolutions\\Gateway** directory.
Make sure the file is a valid `.json` by testing it with:
$Config = ("{0}\Devolutions\Gateway\gateway.json" -F $Env:ProgramData)
Try {
Get-Content -Path $Config | ConvertFrom-JSON -ErrorAction 'Stop'
} Catch {
$PSItem[0].Exception.Message
}
This works with PowerShell 5.1 and later versions (the recommended version to use is PowerShell 7.x).

Get-Content
A typical configuration is shown below. Your values may differ, especially the _**Subject Name**_, as that will reflect the domain name Devolutions Gateway responds to. The important values to change are:
* `TlsCertificateSource` - `System`
* `TlsCertificateSubjectName` - `gateway.ad.it-help.ninja`
* `TlsCertificateStoreName` - `My`
* `TlsCertificateStoreLocation` - `LocalMachine`
An example of the entire configuration file:
{
"Id": "c912b379-8c34-449d-8ff3-3aa20a9cc3e4",
"Hostname": "gateway.ad.it-help.ninja",
"TlsCertificateFile": "server.crt",
"TlsPrivateKeyFile": "server.key",
"TlsCertificateSource": "System",
"TlsCertificateSubjectName": "gateway.ad.it-help.ninja",
"TlsCertificateStoreName": "My",
"TlsCertificateStoreLocation": "LocalMachine",
"ProvisionerPublicKeyFile": "provisioner.pem",
"Listeners": [\
{\
"InternalUrl": "https://*:7171",\
"ExternalUrl": "https://*:7171"\
},\
{\
"InternalUrl": "tcp://*:8181",\
"ExternalUrl": "tcp://*:8181"\
}\
]
}
1. Run the above script.
2. Open `services.msc`.
3. Right-click on _**Devolutions Gateway Service**_ and select _**Restart**_.

Restart
4. Verify if Devolutions Gateway is running correctly by navigating to `https://{FQDN}:7171/jet/health` (replacing `{FQDN}` with your Gateway DNS address) with a web browser.
Configuring Windows certificate store via PowerShell
----------------------------------------------------
[](https://docs.devolutions.net/gateway/kb/how-to-articles/use-windows-certificate-store/#configuring-windows-certificate-store-via-powershell)
The Devolutions Gateway can also be configured through PowerShell commands. The [Devolutions Gateway PowerShell module](https://www.powershellgallery.com/packages/DevolutionsGateway/)
exposes many commands to configure it. By default, an install of Devolutions Gateway includes the module in the installation directory. Import the module via the following:
# Import the Module
Import-Module -Name "C:\Program Files\Devolutions\Gateway\PowerShell\Modules\DevolutionsGateway"
# View the imported Modules
Get-Module

Import-Module
Another method to make the module easily accessible is to install it via the following:
# Install the DevolutionsGateway module
Install-Module -Name 'DevolutionsGateway'
# Update the module if installed via the above method (will not update the bundled version installed with Gateway)
Update-Module -Name 'DevolutionsGateway'
# Import the Module
Import-Module -Name 'DevolutionsGateway'
# View the imported modules to verify the DevolutionsGateway module is available
Get-Module

Install-Module
Once imported, you can see the current configuration via the following command:
Get-DGatewayConfig

Get-DGatewayConfig
To tell Devolutions Gateway to use the Windows Store, use the following command:
# Update the configuration; this will not remove any existing parameters, only configure those defined.
# Replace the '{FQDN}` example with the fully-qualified DNS name of the Gateway address
Set-DGatewayConfig -TlsCertificateSource "System" -TlsCertificateSubjectName "{FQDN}" -TlsCertificateStoreLocation "LocalMachine" -TlsCertificateStoreName "My"
# Display the updated configuration
Get-DGatewayConfig

Set-DGatewayConfig
Restart the service for the configuration to take effect.
Restart-Service -Name 'DevolutionsGateway'

Restart-Service -Name 'DevolutionsGateway'
Verify if Devolutions Gateway is running correctly by navigating to `https://{FQDN}:7171/jet/health` with a web browser.
[ Share your feedback](https://forum.devolutions.net/forums/176/documentation--documentation-requests)
---
# Devolutions Gateway troubleshooting - Devolutions Documentation
Devolutions Gateway troubleshooting
===================================
Auf dieser Seite
* [Verify the health of a gateway](https://docs.devolutions.net/de/gateway/kb/troubleshooting-articles/gateway-troubleshooting/#verify-the-health-of-a-gateway)
* [Devolutions Gateway Logs and diagnostics](https://docs.devolutions.net/de/gateway/kb/troubleshooting-articles/gateway-troubleshooting/#devolutions-gateway-logs-and-diagnostics)
* [Devolutions Gateway Logs](https://docs.devolutions.net/de/gateway/kb/troubleshooting-articles/gateway-troubleshooting/#devolutions-gateway-logs)
* [Devolutions Gateway Diagnostics](https://docs.devolutions.net/de/gateway/kb/troubleshooting-articles/gateway-troubleshooting/#devolutions-gateway-diagnostics)
* [Service fails to start](https://docs.devolutions.net/de/gateway/kb/troubleshooting-articles/gateway-troubleshooting/#service-fails-to-start)
* [Certificate compatibility](https://docs.devolutions.net/de/gateway/kb/troubleshooting-articles/gateway-troubleshooting/#certificate-compatibility)
* [Connection to the server lost](https://docs.devolutions.net/de/gateway/kb/troubleshooting-articles/gateway-troubleshooting/#connection-to-the-server-lost)
* [Proxy issues](https://docs.devolutions.net/de/gateway/kb/troubleshooting-articles/gateway-troubleshooting/#proxy-issues)
This topic covers tips about troubleshooting Devolutions Gateway across multiple products.
If you are unable to download the logs from the web, you can also find them in the installation folder: `C:\ProgramData\Devolutions\Gateway`.
Verify the health of a gateway
------------------------------
[](https://docs.devolutions.net/de/gateway/kb/troubleshooting-articles/gateway-troubleshooting/#verify-the-health-of-a-gateway)
It is possible to check if a particular gateway is alive and healthy.
1. Open a web browser.
2. In the address bar type `https://<gateway.url>:<external port>/jet/health`. Depending on the setup, it could also be `` `http` ``.
3. Press Enter.

Health check
Devolutions Gateway Logs and diagnostics
----------------------------------------
[](https://docs.devolutions.net/de/gateway/kb/troubleshooting-articles/gateway-troubleshooting/#devolutions-gateway-logs-and-diagnostics)
If you are having trouble with a gateway, these solutions can make it easier to find more apparent errors.
1. In the Devolutions Server web UI, go to _**Administration**_ – _**Devolutions Gateway**_.
2. Click _**More**_ on the desired gateway.

More button
3. Choose between [_**Logs**_](https://docs.devolutions.net/de/gateway/kb/troubleshooting-articles/gateway-troubleshooting/#devolutions-gateway-logs)
or [_**Diagnostics**_](https://docs.devolutions.net/de/gateway/kb/troubleshooting-articles/gateway-troubleshooting/#devolutions-gateway-diagnostics)
.
### Devolutions Gateway Logs
[](https://docs.devolutions.net/de/gateway/kb/troubleshooting-articles/gateway-troubleshooting/#devolutions-gateway-logs)
1. Click on _**Logs**_.

Logs
2. Observe the logs.

Logs window
### Devolutions Gateway Diagnostics
[](https://docs.devolutions.net/de/gateway/kb/troubleshooting-articles/gateway-troubleshooting/#devolutions-gateway-diagnostics)
1. Click on _**Diagnostics**_.

Diagnostics
2. Observe the statuses.

Gateway status
Service fails to start
----------------------
[](https://docs.devolutions.net/de/gateway/kb/troubleshooting-articles/gateway-troubleshooting/#service-fails-to-start)
If the service does not start at all, verify whether a file named `boot.stacktrace` exists in the same directory as the `gateway.json` configuration file. This file may contain relevant diagnostic information. Contact our [support team](mailto:service@devolutions.net)
if you are not able to identify the cause of the failure.
Certificate compatibility
-------------------------
[](https://docs.devolutions.net/de/gateway/kb/troubleshooting-articles/gateway-troubleshooting/#certificate-compatibility)
Issues related to self-signed certificates missing a SAN or an EKU can be resolved by updating to the latest version of Devolutions Gateway.
It is recommended to set the `TlsVerifyStrict` option as `true` whenever possible. You should also configure this option if you encounter certificate issues on macOS and Chrome.
Connection to the server lost
-----------------------------
[](https://docs.devolutions.net/de/gateway/kb/troubleshooting-articles/gateway-troubleshooting/#connection-to-the-server-lost)
If you receive this error message, make sure that the service account configured on the Devolutions Gateway service can reach the recording destination folder and has the required permissions to create the recording folders and files.
Proxy issues
------------
[](https://docs.devolutions.net/de/gateway/kb/troubleshooting-articles/gateway-troubleshooting/#proxy-issues)
If you experience problems loading or using web entries in Remote Desktop Manager when Devolutions Gateway is configured as a proxy, check the log files for additional details:
* Windows path: `C:\Users\<user>\AppData\Roaming\jetsocat`
* macOS path: `/Users/<user>/Library/Application Support/jetsocat`
If the issue persists, please contact our customer support team for assistance at [service@devolutions.net](mailto:service@devolutions.net)
and provide the relevant log files.
[ Share your feedback](https://forum.devolutions.net/forums/176/documentation--documentation-requests)
---
# Devolutions Gateway recording path - Devolutions Documentation
Devolutions Gateway recording path
==================================
This topic serves as a reference for general information on Devolutions Gateway recording.
The recording format is WebM and the file size is around 15 kb/s, depending on compression.
The recording path can be set in the Devolutions Server Console only.

Recording path in the Devolutions Server Console
Here are some important considerations:
* If the new path is set to a network location, like a shared folder or a UNC path, be aware that this may impact network traffic, both incoming and outgoing.
* Confirm that the account operating the gateway service has the necessary permissions to access both the gateway files and the file share.
[ Share your feedback](https://forum.devolutions.net/forums/176/documentation--documentation-requests)
---
# Problèmes de certificat TLS invalide pour l'enregistrement de la session via Devolutions Gateway - Documentation Devolutions
Problèmes de certificat TLS invalide pour l'enregistrement de la session via Devolutions Gateway
================================================================================================
Si vous rencontrez des problèmes avec l'enregistrement de session via Devolutions Gateway, cela peut être dû à un certificat TLS invalide. Voici plusieurs raisons pour lesquelles un certificat TLS peut être considéré comme invalide. Voici les causes les plus courantes :
* **Certificat mal configuré** : Configuration incorrecte ou installation du certificat TLS.
* **Inadéquation du domaine** : Le certificat est délivré pour un domaine différent (par exemple, certificat délivré pour _exemple.loc_ mais l'adresse de destination de l'hôte est _pas-exemple.loc_).
* **Rupture dans la chaîne de confiance** : L'identité de l'émetteur du certificat ne peut pas être vérifiée.
* **Date/heure incorrecte sur la machine cliente** : Si la date/heure locale sur la machine cliente est incorrecte, le certificat peut être considéré comme expiré s'il dépasse la date d'expiration du certificat.
* **Structure de certificat brisée** : Le certificat a une signature numérique invalide ou d'autres problèmes structurels.
* **Algorithme de hachage obsolète** : Le certificat utilise uniquement l'algorithme de hachage SHA-1, qui est obsolète et n'est plus considéré comme sûr.
* **Certificat révoqué** : Le certificat a été révoqué par l'autorité de délivrance.
* **Certificat auto-signé et Sophos** : Lors de l'utilisation d'un certificat auto-signé, si le client utilise Sophos, le certificat peut être remplacé par un certificat non approuvé, contournant l'option d'autoriser les certificats auto-signés par Remote Desktop Manager.
[ Partagez vos commentaires](https://forum.devolutions.net/forums/176/documentation--documentation-requests)
---
# Troubleshooting articles - Devolutions Documentation
Troubleshooting articles
========================
[ Share your feedback](https://forum.devolutions.net/forums/176/documentation--documentation-requests)
---
# Invalid TLS certificate issues for session recording via Devolutions Gateway - Devolutions Documentation
Invalid TLS certificate issues for session recording via Devolutions Gateway
============================================================================
If you encounter issues with session recording via Devolutions Gateway, it may be due to an invalid TLS certificate. There are several reasons why a TLS certificate could be considered invalid. Here are the most common causes:
* **Misconfigured certificate**: Incorrect setup or installation of the TLS certificate.
* **Domain mismatch**: The certificate is issued for a different domain (e.g., certificate issued for _example.loc_ but the host destination address is _not-example.loc_).
* **Break in the chain of trust**: The certificate issuer's identity cannot be verified.
* **Incorrect date/time on client machine**: If the local date/time on the client machine is incorrect, the certificate may be considered expired if it falls past the certificate's expiration date.
* **Broken certificate structure**: The certificate has an invalid digital signature or other structural issues.
* **Outdated hashing algorithm**: The certificate uses only the SHA-1 hash algorithm, which is outdated and no longer considered secure.
* **Revoked certificate**: The certificate has been revoked by the issuing authority.
* **Self-signed certificate and Sophos**: When using a self-signed certificate, if the client is using Sophos, the certificate may be replaced by an untrusted one, bypassing the option to allow self-signed certificates by Remote Desktop Manager.
[ Share your feedback](https://forum.devolutions.net/forums/176/documentation--documentation-requests)
---
# Aperçu - Documentation Devolutions
Aperçu
======
[ Partagez vos commentaires](https://forum.devolutions.net/forums/176/documentation--documentation-requests)
---
# Devolutions Gateway side-by-side installation method not found - Devolutions Documentation
Devolutions Gateway side-by-side installation method not found
==============================================================
On this page
* [Solution](https://docs.devolutions.net/gateway/kb/troubleshooting-articles/install-dgw-method-not-found/#solution)
When installing Devolutions Gateway on the same machine as Devolutions Server (side by side installation), this error can trigger in the installation logs.
Method not found:'Void System.Management.Automation.Runspaces.InitialSessionState.set\_ExecutionPolicy(Microsoft.PowerShell.ExecutionPolicy)'.
Solution
--------
[](https://docs.devolutions.net/gateway/kb/troubleshooting-articles/install-dgw-method-not-found/#solution)
As Devolutions Gateway requires at least PowerShell version 5.1, please update PowerShell to that version to fix the issue. Then start over the Devolutions Gateway installation.
[ Share your feedback](https://forum.devolutions.net/forums/176/documentation--documentation-requests)
---
# Client web RDP ne s'affiche pas - Documentation Devolutions
Client web RDP ne s'affiche pas
===============================
Sur cette page
* [Solutions](https://docs.devolutions.net/fr/gateway/kb/troubleshooting-articles/rdp-web-client-not-showing/#solutions)
* [Licences](https://docs.devolutions.net/fr/gateway/kb/troubleshooting-articles/rdp-web-client-not-showing/#licenses)
* [Devolutions Gateway](https://docs.devolutions.net/fr/gateway/kb/troubleshooting-articles/rdp-web-client-not-showing/#devolutions-gateway)
* [Autorisations de voir le mot de passe](https://docs.devolutions.net/fr/gateway/kb/troubleshooting-articles/rdp-web-client-not-showing/#view-password-permission)
Si vous ne parvenez pas à lancer le client web RDP dans l'interface web de Devolutions Server, vérifier si vous avez les exigences nécessaires en utilisant les solutions ci-dessous.
Solutions
---------
[](https://docs.devolutions.net/fr/gateway/kb/troubleshooting-articles/rdp-web-client-not-showing/#solutions)
### Licences
[](https://docs.devolutions.net/fr/gateway/kb/troubleshooting-articles/rdp-web-client-not-showing/#licenses)
Une clé de licence qui inclut Devolutions Gateway doit être attribuée à l'utilisateur. Si vous n'avez pas cette clé, le bouton _**Ouvrir dans le navigateur**_, qui vous permet d'ouvrir l'entrée RDP dans un client web, n'apparaîtra pas.
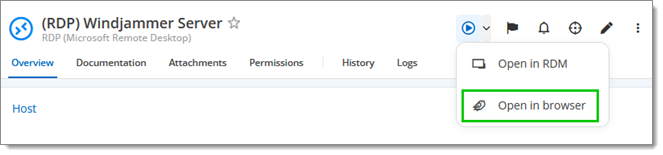
Open in browser
### Devolutions Gateway
[](https://docs.devolutions.net/fr/gateway/kb/troubleshooting-articles/rdp-web-client-not-showing/#devolutions-gateway)
Devolutions Gateway est requis pour ouvrir une session RDP dans le client web de Devolutions Server. Si vous avez bien une Gateway installée, vérifier sa [configuration](https://docs.devolutions.net/fr/gateway/getting-started/server/server-configuration/)
.
### Autorisations de voir le mot de passe
[](https://docs.devolutions.net/fr/gateway/kb/troubleshooting-articles/rdp-web-client-not-showing/#view-password-permission)
Avoir l'_**autorisation de voir le mot de passe**_ pour lancer la session RDP.
Pour vérifier si ce droit vous a été octroyé, sélectionner votre entrée dans l'interface web de Devolutions Server, puis cliquer sur l'onglet _**Permissions**_. Si vous voyez _**Autorisée**_ sous la permission _**Voir mot de passe**_, vous avez les permissions appropriées. Si vous voyez _**Non autorisée**_, vous n'avez pas ce droit. Si vous pensez que vous devriez l'avoir, contacter votre administrateur.
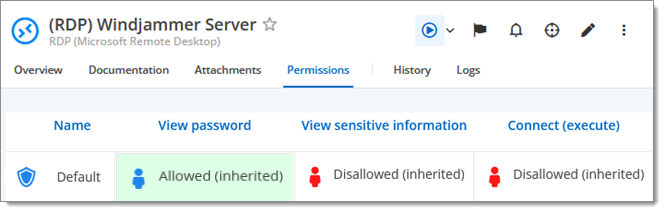
View password permission
[ Partagez vos commentaires](https://forum.devolutions.net/forums/176/documentation--documentation-requests)
---
# Overview - Devolutions Documentation
Overview
========
[ Share your feedback](https://forum.devolutions.net/forums/176/documentation--documentation-requests)
---
# Devolutions Gateway troubleshooting - Devolutions Documentation
Devolutions Gateway troubleshooting
===================================
On this page
* [Verify the health of a gateway](https://docs.devolutions.net/gateway/kb/troubleshooting-articles/gateway-troubleshooting/#verify-the-health-of-a-gateway)
* [Devolutions Gateway Logs and diagnostics](https://docs.devolutions.net/gateway/kb/troubleshooting-articles/gateway-troubleshooting/#devolutions-gateway-logs-and-diagnostics)
* [Devolutions Gateway Logs](https://docs.devolutions.net/gateway/kb/troubleshooting-articles/gateway-troubleshooting/#devolutions-gateway-logs)
* [Devolutions Gateway Diagnostics](https://docs.devolutions.net/gateway/kb/troubleshooting-articles/gateway-troubleshooting/#devolutions-gateway-diagnostics)
* [Service fails to start](https://docs.devolutions.net/gateway/kb/troubleshooting-articles/gateway-troubleshooting/#service-fails-to-start)
* [Certificate compatibility](https://docs.devolutions.net/gateway/kb/troubleshooting-articles/gateway-troubleshooting/#certificate-compatibility)
* [Connection to the server lost](https://docs.devolutions.net/gateway/kb/troubleshooting-articles/gateway-troubleshooting/#connection-to-the-server-lost)
* [Proxy issues](https://docs.devolutions.net/gateway/kb/troubleshooting-articles/gateway-troubleshooting/#proxy-issues)
This topic covers tips about troubleshooting Devolutions Gateway across multiple products.
If you are unable to download the logs from the web, you can also find them in the installation folder: `C:\ProgramData\Devolutions\Gateway`.
Verify the health of a gateway
------------------------------
[](https://docs.devolutions.net/gateway/kb/troubleshooting-articles/gateway-troubleshooting/#verify-the-health-of-a-gateway)
It is possible to check if a particular gateway is alive and healthy.
1. Open a web browser.
2. In the address bar type `https://:/jet/health`. Depending on the setup, it could also be `` `http` ``.
3. Press Enter.

Health check
Devolutions Gateway Logs and diagnostics
----------------------------------------
[](https://docs.devolutions.net/gateway/kb/troubleshooting-articles/gateway-troubleshooting/#devolutions-gateway-logs-and-diagnostics)
If you are having trouble with a gateway, these solutions can make it easier to find more apparent errors.
1. In the Devolutions Server web UI, go to _**Administration**_ – _**Devolutions Gateway**_.
2. Click _**More**_ on the desired gateway.

More button
3. Choose between [_**Logs**_](https://docs.devolutions.net/gateway/kb/troubleshooting-articles/gateway-troubleshooting/#devolutions-gateway-logs)
or [_**Diagnostics**_](https://docs.devolutions.net/gateway/kb/troubleshooting-articles/gateway-troubleshooting/#devolutions-gateway-diagnostics)
.
### Devolutions Gateway Logs
[](https://docs.devolutions.net/gateway/kb/troubleshooting-articles/gateway-troubleshooting/#devolutions-gateway-logs)
1. Click on _**Logs**_.

Logs
2. Observe the logs.

Logs window
### Devolutions Gateway Diagnostics
[](https://docs.devolutions.net/gateway/kb/troubleshooting-articles/gateway-troubleshooting/#devolutions-gateway-diagnostics)
1. Click on _**Diagnostics**_.

Diagnostics
2. Observe the statuses.

Gateway status
Service fails to start
----------------------
[](https://docs.devolutions.net/gateway/kb/troubleshooting-articles/gateway-troubleshooting/#service-fails-to-start)
If the service does not start at all, verify whether a file named `boot.stacktrace` exists in the same directory as the `gateway.json` configuration file. This file may contain relevant diagnostic information. Contact our [support team](mailto:service@devolutions.net)
if you are not able to identify the cause of the failure.
Certificate compatibility
-------------------------
[](https://docs.devolutions.net/gateway/kb/troubleshooting-articles/gateway-troubleshooting/#certificate-compatibility)
Issues related to self-signed certificates missing a SAN or an EKU can be resolved by updating to the latest version of Devolutions Gateway.
It is recommended to set the `TlsVerifyStrict` option as `true` whenever possible. You should also configure this option if you encounter certificate issues on macOS and Chrome.
Connection to the server lost
-----------------------------
[](https://docs.devolutions.net/gateway/kb/troubleshooting-articles/gateway-troubleshooting/#connection-to-the-server-lost)
If you receive this error message, make sure that the service account configured on the Devolutions Gateway service can reach the recording destination folder and has the required permissions to create the recording folders and files.
Proxy issues
------------
[](https://docs.devolutions.net/gateway/kb/troubleshooting-articles/gateway-troubleshooting/#proxy-issues)
If you experience problems loading or using web entries in Remote Desktop Manager when Devolutions Gateway is configured as a proxy, check the log files for additional details:
* Windows path: `C:\Users\\AppData\Roaming\jetsocat`
* macOS path: `/Users//Library/Application Support/jetsocat`
If the issue persists, please contact our customer support team for assistance at [service@devolutions.net](mailto:service@devolutions.net)
and provide the relevant log files.
[ Share your feedback](https://forum.devolutions.net/forums/176/documentation--documentation-requests)
---
# Exigences système - Documentation Devolutions
Exigences système
=================
[ Partagez vos commentaires](https://forum.devolutions.net/forums/176/documentation--documentation-requests)
---
# System requirements - Devolutions Documentation
System requirements
===================
[ Share your feedback](https://forum.devolutions.net/forums/176/documentation--documentation-requests)
---
# RDP web client not showing - Devolutions Documentation
RDP web client not showing
==========================
Auf dieser Seite
* [Solutions](https://docs.devolutions.net/de/gateway/kb/troubleshooting-articles/rdp-web-client-not-showing/#solutions)
* [Licenses](https://docs.devolutions.net/de/gateway/kb/troubleshooting-articles/rdp-web-client-not-showing/#licenses)
* [Devolutions Gateway](https://docs.devolutions.net/de/gateway/kb/troubleshooting-articles/rdp-web-client-not-showing/#devolutions-gateway)
* [View Password permission](https://docs.devolutions.net/de/gateway/kb/troubleshooting-articles/rdp-web-client-not-showing/#view-password-permission)
If you are unable to launch the RDP web client in the Devolutions Server web interface, check to see if you have the necessary requirements using the solutions below.
Solutions
---------
[](https://docs.devolutions.net/de/gateway/kb/troubleshooting-articles/rdp-web-client-not-showing/#solutions)
### Licenses
[](https://docs.devolutions.net/de/gateway/kb/troubleshooting-articles/rdp-web-client-not-showing/#licenses)
A package license that includes Devolutions Gateway must be assigned to the user. If you do not have this license, the _**Open in browser**_ button, which allows you to open the RDP entry in a web client, will not appear.

Open in browser
### Devolutions Gateway
[](https://docs.devolutions.net/de/gateway/kb/troubleshooting-articles/rdp-web-client-not-showing/#devolutions-gateway)
Devolutions Gateway is required to open a RDP session in the web client of Devolutions Server. If you do have a Gateway installed, check its [configuration](https://docs.devolutions.net/gateway/getting-started/server/server-configuration/)
.
### View Password permission
[](https://docs.devolutions.net/de/gateway/kb/troubleshooting-articles/rdp-web-client-not-showing/#view-password-permission)
You need to have the _**View password**_ permission to launch the RDP session.
To check if you have been granted this permission, select your entry in the Devolutions Server web interface, then click on the _**Permissions**_ tab. If you see _**Allowed**_ under _**View password**_ permission, you have the proper permissions. If you see _**Disallowed**_, you do not have this permission. If you think you should have it, contact your administrator.

View password permission
[ Share your feedback](https://forum.devolutions.net/forums/176/documentation--documentation-requests)
---
# Devolutions Gateway - Documentation Devolutions
Devolutions Gateway
===================
Devolutions Gateway offre un accès juste-à-temps autorisé aux ressources dans des réseaux segmentés.
Les avantages clés de Devolutions Gateway incluent :
* Réduire l'exposition aux ressources réseau internes avec des connexions RDP juste-à-temps via le Devolutions Gateway.
* Remplacer les règles VPN statiques et de pare-feu par des règles d'accès dynamiques contrôlées par Devolutions Server.
* Renforcer la sécurité en fournissant un accès à distance ou un accès à des applications spécifiques dans des segments réseau séparés à la demande.
* Améliorer la productivité en éliminant la nécessité de mettre à jour les règles VPN ou de pare-feu pour l'accès temporaire.
* Utilisation possible de Devolutions Gateway avec les types d'entrée de connexion pris en charge (RDP, SSH, VNC, ARD, SCP, SFTP, PowerShell, Telnet, sites Web) dans Remote Desktop Manager et les sources de données prises en charge (Devolutions Server, Devolutions Hub Business).
* Augmenter l'évolutivité en éliminant la nécessité d'utiliser plusieurs VPN pour accéder à de nombreux environnements simultanément. Devolutions Gateway peut gérer plus de 75 sessions simultanées, selon l'infrastructure.

En savoir plus sur [Devolutions Gateway](https://devolutions.net/gateway/)
.
### Voir aussi
[](https://docs.devolutions.net/fr/gateway/overview/what-is-gateway/#see-also)
* [Devolutions Academy - Aperçu de Devolutions Gateway](https://academy.devolutions.net/student/path/2007290/activity/3070847 "Devolutions Academy - Overview of Devolutions Gateway")
[ Partagez vos commentaires](https://forum.devolutions.net/forums/176/documentation--documentation-requests)
---
# Invalid TLS certificate issues for session recording via Devolutions Gateway - Devolutions Documentation
Invalid TLS certificate issues for session recording via Devolutions Gateway
============================================================================
If you encounter issues with session recording via Devolutions Gateway, it may be due to an invalid TLS certificate. There are several reasons why a TLS certificate could be considered invalid. Here are the most common causes:
* **Misconfigured certificate**: Incorrect setup or installation of the TLS certificate.
* **Domain mismatch**: The certificate is issued for a different domain (e.g., certificate issued for _example.loc_ but the host destination address is _not-example.loc_).
* **Break in the chain of trust**: The certificate issuer's identity cannot be verified.
* **Incorrect date/time on client machine**: If the local date/time on the client machine is incorrect, the certificate may be considered expired if it falls past the certificate's expiration date.
* **Broken certificate structure**: The certificate has an invalid digital signature or other structural issues.
* **Outdated hashing algorithm**: The certificate uses only the SHA-1 hash algorithm, which is outdated and no longer considered secure.
* **Revoked certificate**: The certificate has been revoked by the issuing authority.
* **Self-signed certificate and Sophos**: When using a self-signed certificate, if the client is using Sophos, the certificate may be replaced by an untrusted one, bypassing the option to allow self-signed certificates by Remote Desktop Manager.
[ Share your feedback](https://forum.devolutions.net/forums/176/documentation--documentation-requests)
---
# Exigences système pour Devolutions Server - Documentation Devolutions
Exigences système pour Devolutions Server
=========================================
Sur cette page
* [Prérequis](https://docs.devolutions.net/fr/gateway/overview/system-requirements/system-requirements-dvls/#prerequisites)
* [Exigences matérielles](https://docs.devolutions.net/fr/gateway/overview/system-requirements/system-requirements-dvls/#hardware-requirements)
* [Exigences logicielles](https://docs.devolutions.net/fr/gateway/overview/system-requirements/system-requirements-dvls/#software-requirements)
* [Exigences des certificats](https://docs.devolutions.net/fr/gateway/overview/system-requirements/system-requirements-dvls/#certificate-requirements)
* [Infrastructure de base](https://docs.devolutions.net/fr/gateway/overview/system-requirements/system-requirements-dvls/#basic-infrastructure)
Pour utiliser Devolutions Gateway, votre système doit répondre aux exigences suivantes.
Prérequis
---------
[](https://docs.devolutions.net/fr/gateway/overview/system-requirements/system-requirements-dvls/#prerequisites)
* Une instance Devolutions Server.
* Pour les fournisseurs de services gérés, un Devolutions Gateway peut être déployé par site client. Il vous suffit de garder les serveurs Devolutions Gateway accessibles à la fois par Devolutions Server et Remote Desktop Manager. Devolutions Gateway n'a besoin d'accepter que les connexions entrantes provenant d'eux. Aucune connexion sortante vers Devolutions Server et Remote Desktop Manager n'est requise.
Exigences matérielles
---------------------
[](https://docs.devolutions.net/fr/gateway/overview/system-requirements/system-requirements-dvls/#hardware-requirements)
| Implantation minimale
(1 à 5 sessions concurrentes) | Petite implantation
(5 à 15 sessions concurrentes) | Implantation moyenne
(15 à 75 sessions concurrentes) | Grande implantation
(Plus de 75 sessions simultanées) |
| --- | --- | --- | --- |
| 2 vCPUs
4 Go RAM | 4 vCPUs
8 Go RAM | 8 vCPUs
16 Go RAM | Déployer plusieurs instances Devolutions Gateway. |
Un contrôleur Ethernet Gigabit est recommandé pour des performances optimales.
Exigences logicielles
---------------------
[](https://docs.devolutions.net/fr/gateway/overview/system-requirements/system-requirements-dvls/#software-requirements)
* Windows 10 (version 20H2, 21H1 et 21H2), ou Windows 11 (version 21H2)
* Windows Server 2016, 2019, 2022 ou 2025 avec .NET Framework 4.8
* Ubuntu Linux 18.04, 20.4, 22.4 et supérieur
* Red Hat Enterprise Linux (RHEL) 8
* Rocky Linux 8
* PowerShell 7 (nécessaire uniquement pour utiliser le [module Devolutions Gateway PowerShell](https://www.powershellgallery.com/packages/DevolutionsGateway/2025.1.0)
sur Linux)
Exigences des certificats
-------------------------
[](https://docs.devolutions.net/fr/gateway/overview/system-requirements/system-requirements-dvls/#certificate-requirements)
Devolutions Gateway prend en charge TLS 1.2 et TLS 1.3 ainsi que les suites de chiffrements suivantes :
* AES\_256\_GCM\_SHA384
* AES\_128\_GCM\_SHA256
* CHACHA20\_POLY1305\_SHA256
* ECDHE\_ECDSA\_AES\_256\_GCM\_SHA384
* ECDHE\_ECDSA\_AES\_128\_GCM\_SHA256
* ECDHE\_ECDSA\_CHACHA20\_POLY1305\_SHA256
* ECDHE\_RSA\_AES\_256\_GCM\_SHA384
* ECDHE\_RSA\_AES\_128\_GCM\_SHA256
* ECDHE\_RSA\_CHACHA20\_POLY1305\_SHA256
Infrastructure de base
----------------------
[](https://docs.devolutions.net/fr/gateway/overview/system-requirements/system-requirements-dvls/#basic-infrastructure)
Lors de l'installation de Devolutions Gateway, il est essentiel de considérer l'emplacement des ressources que vous devez accéder et l'emplacement des utilisateurs nécessitant l'accès à ces ressources. Comme illustré dans les diagrammes réseau ci-dessous, la passerelle peut être installée soit sur un réseau interne (local) soit sur un réseau distant, selon la proximité des ressources et des utilisateurs.
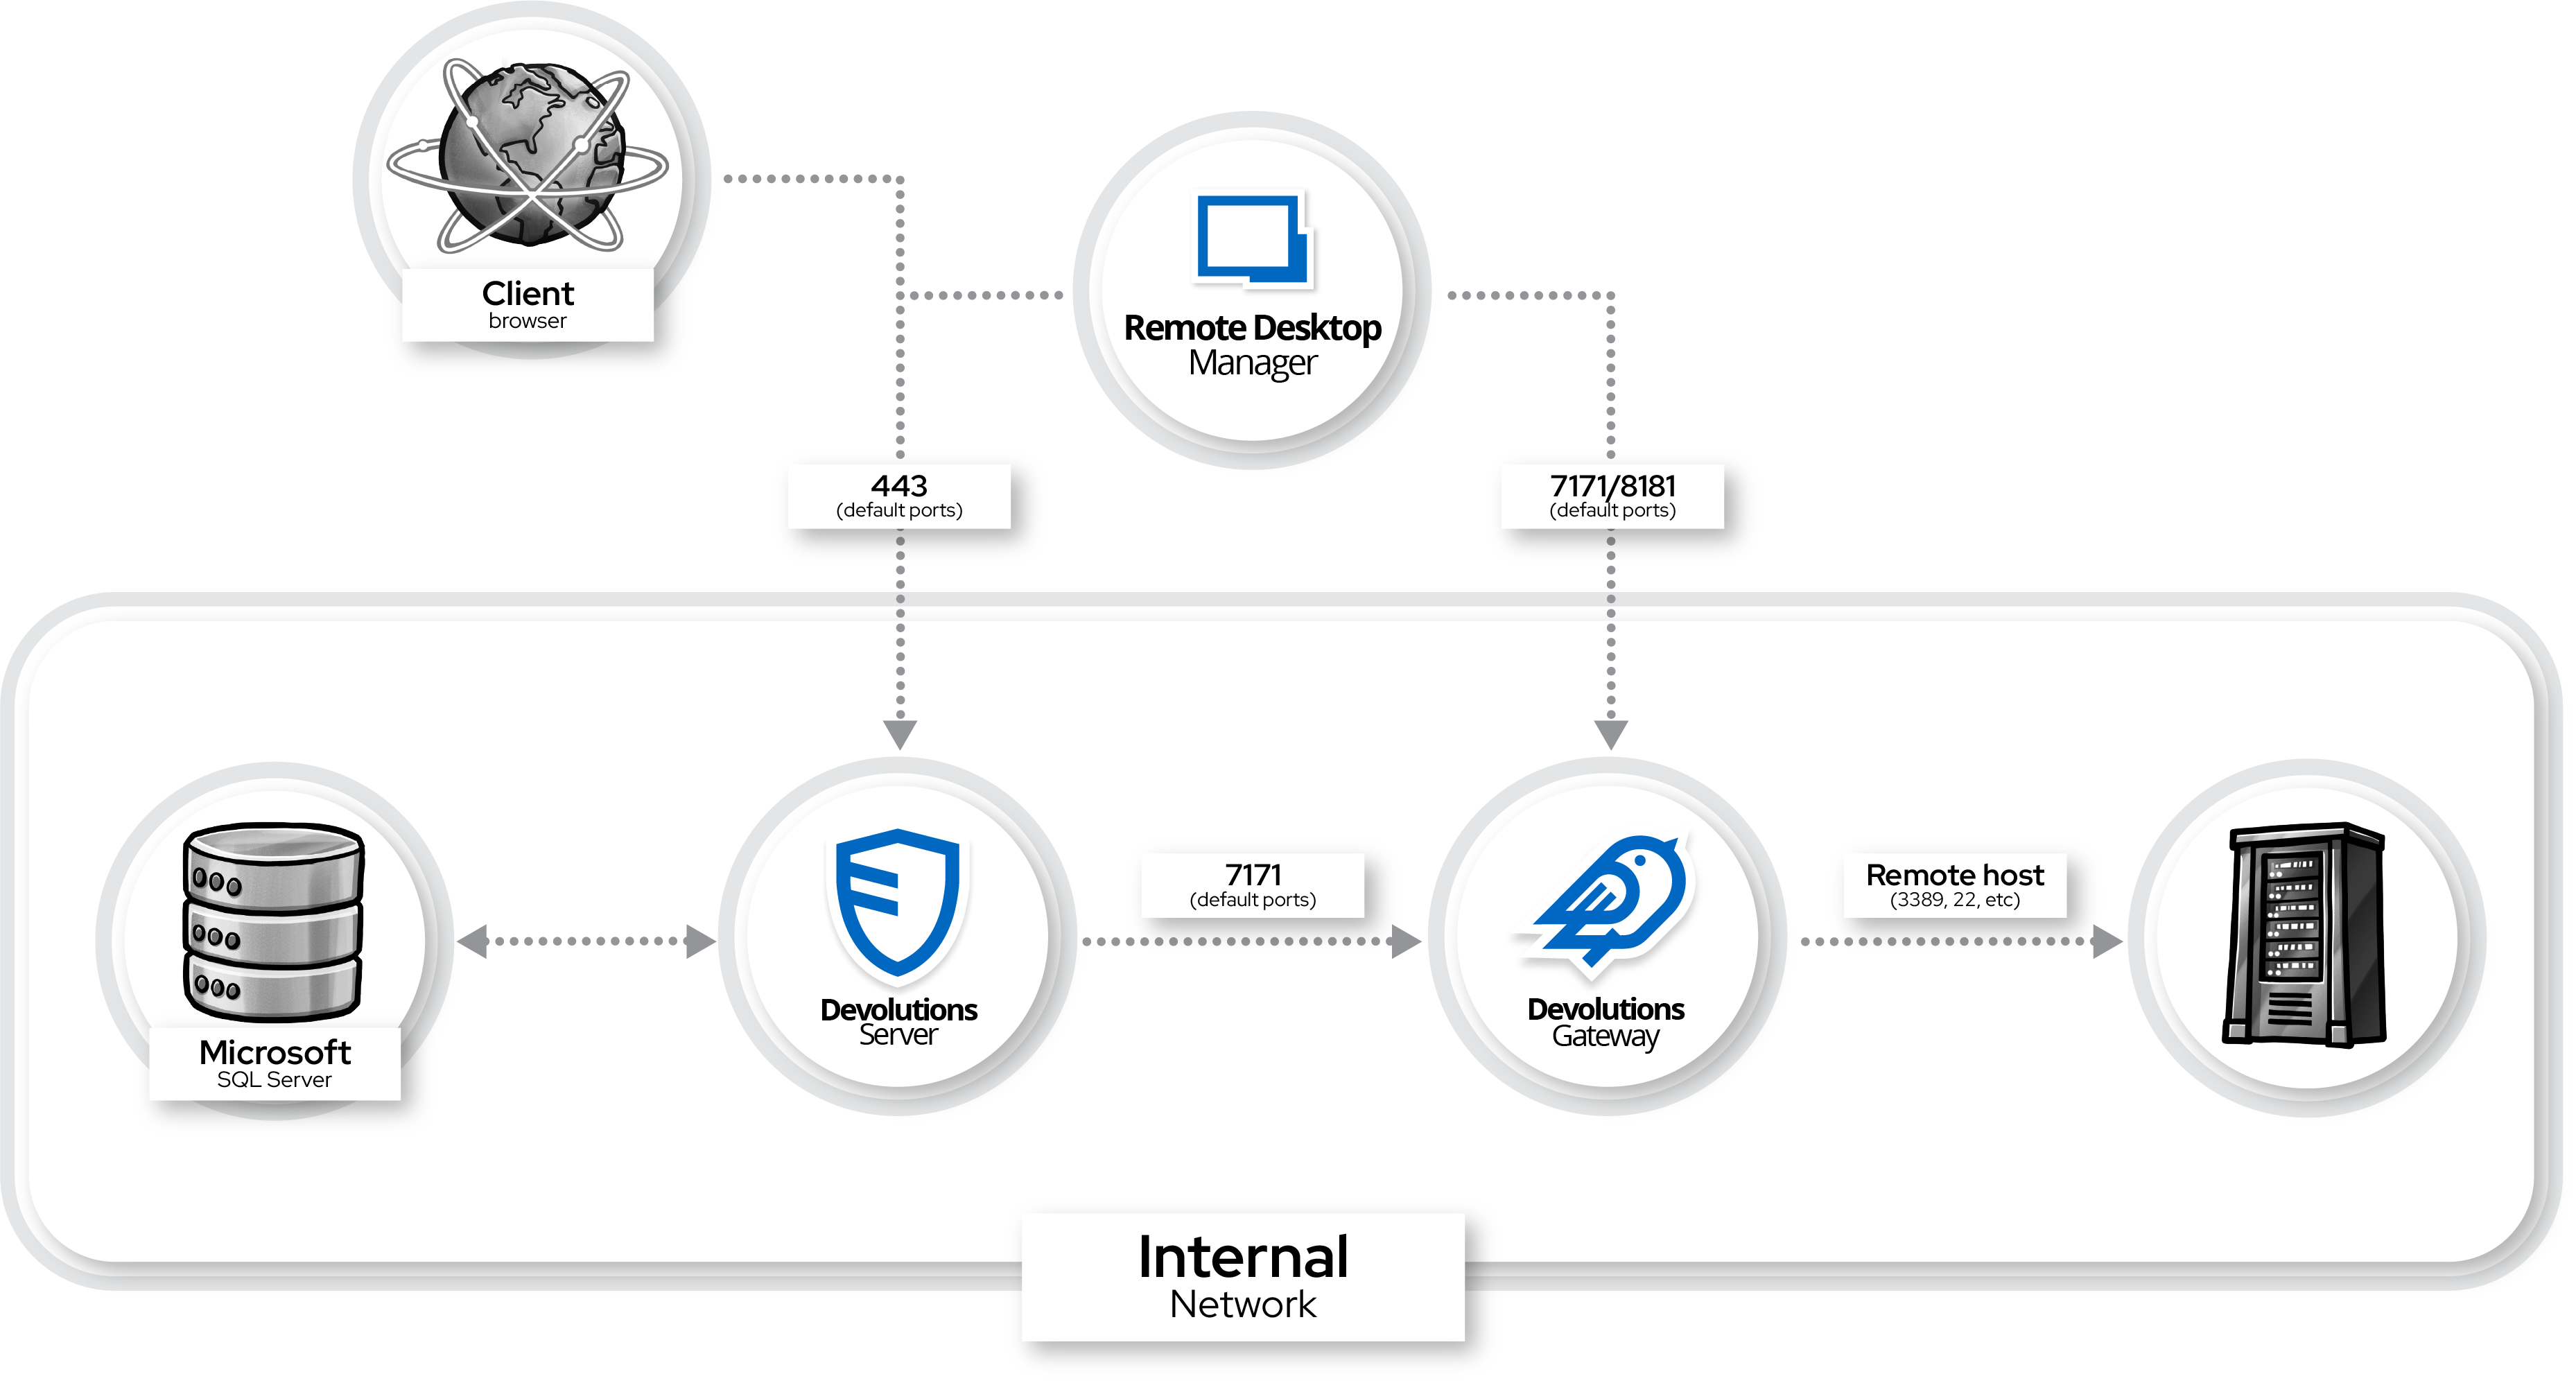
Internal (local) network installation
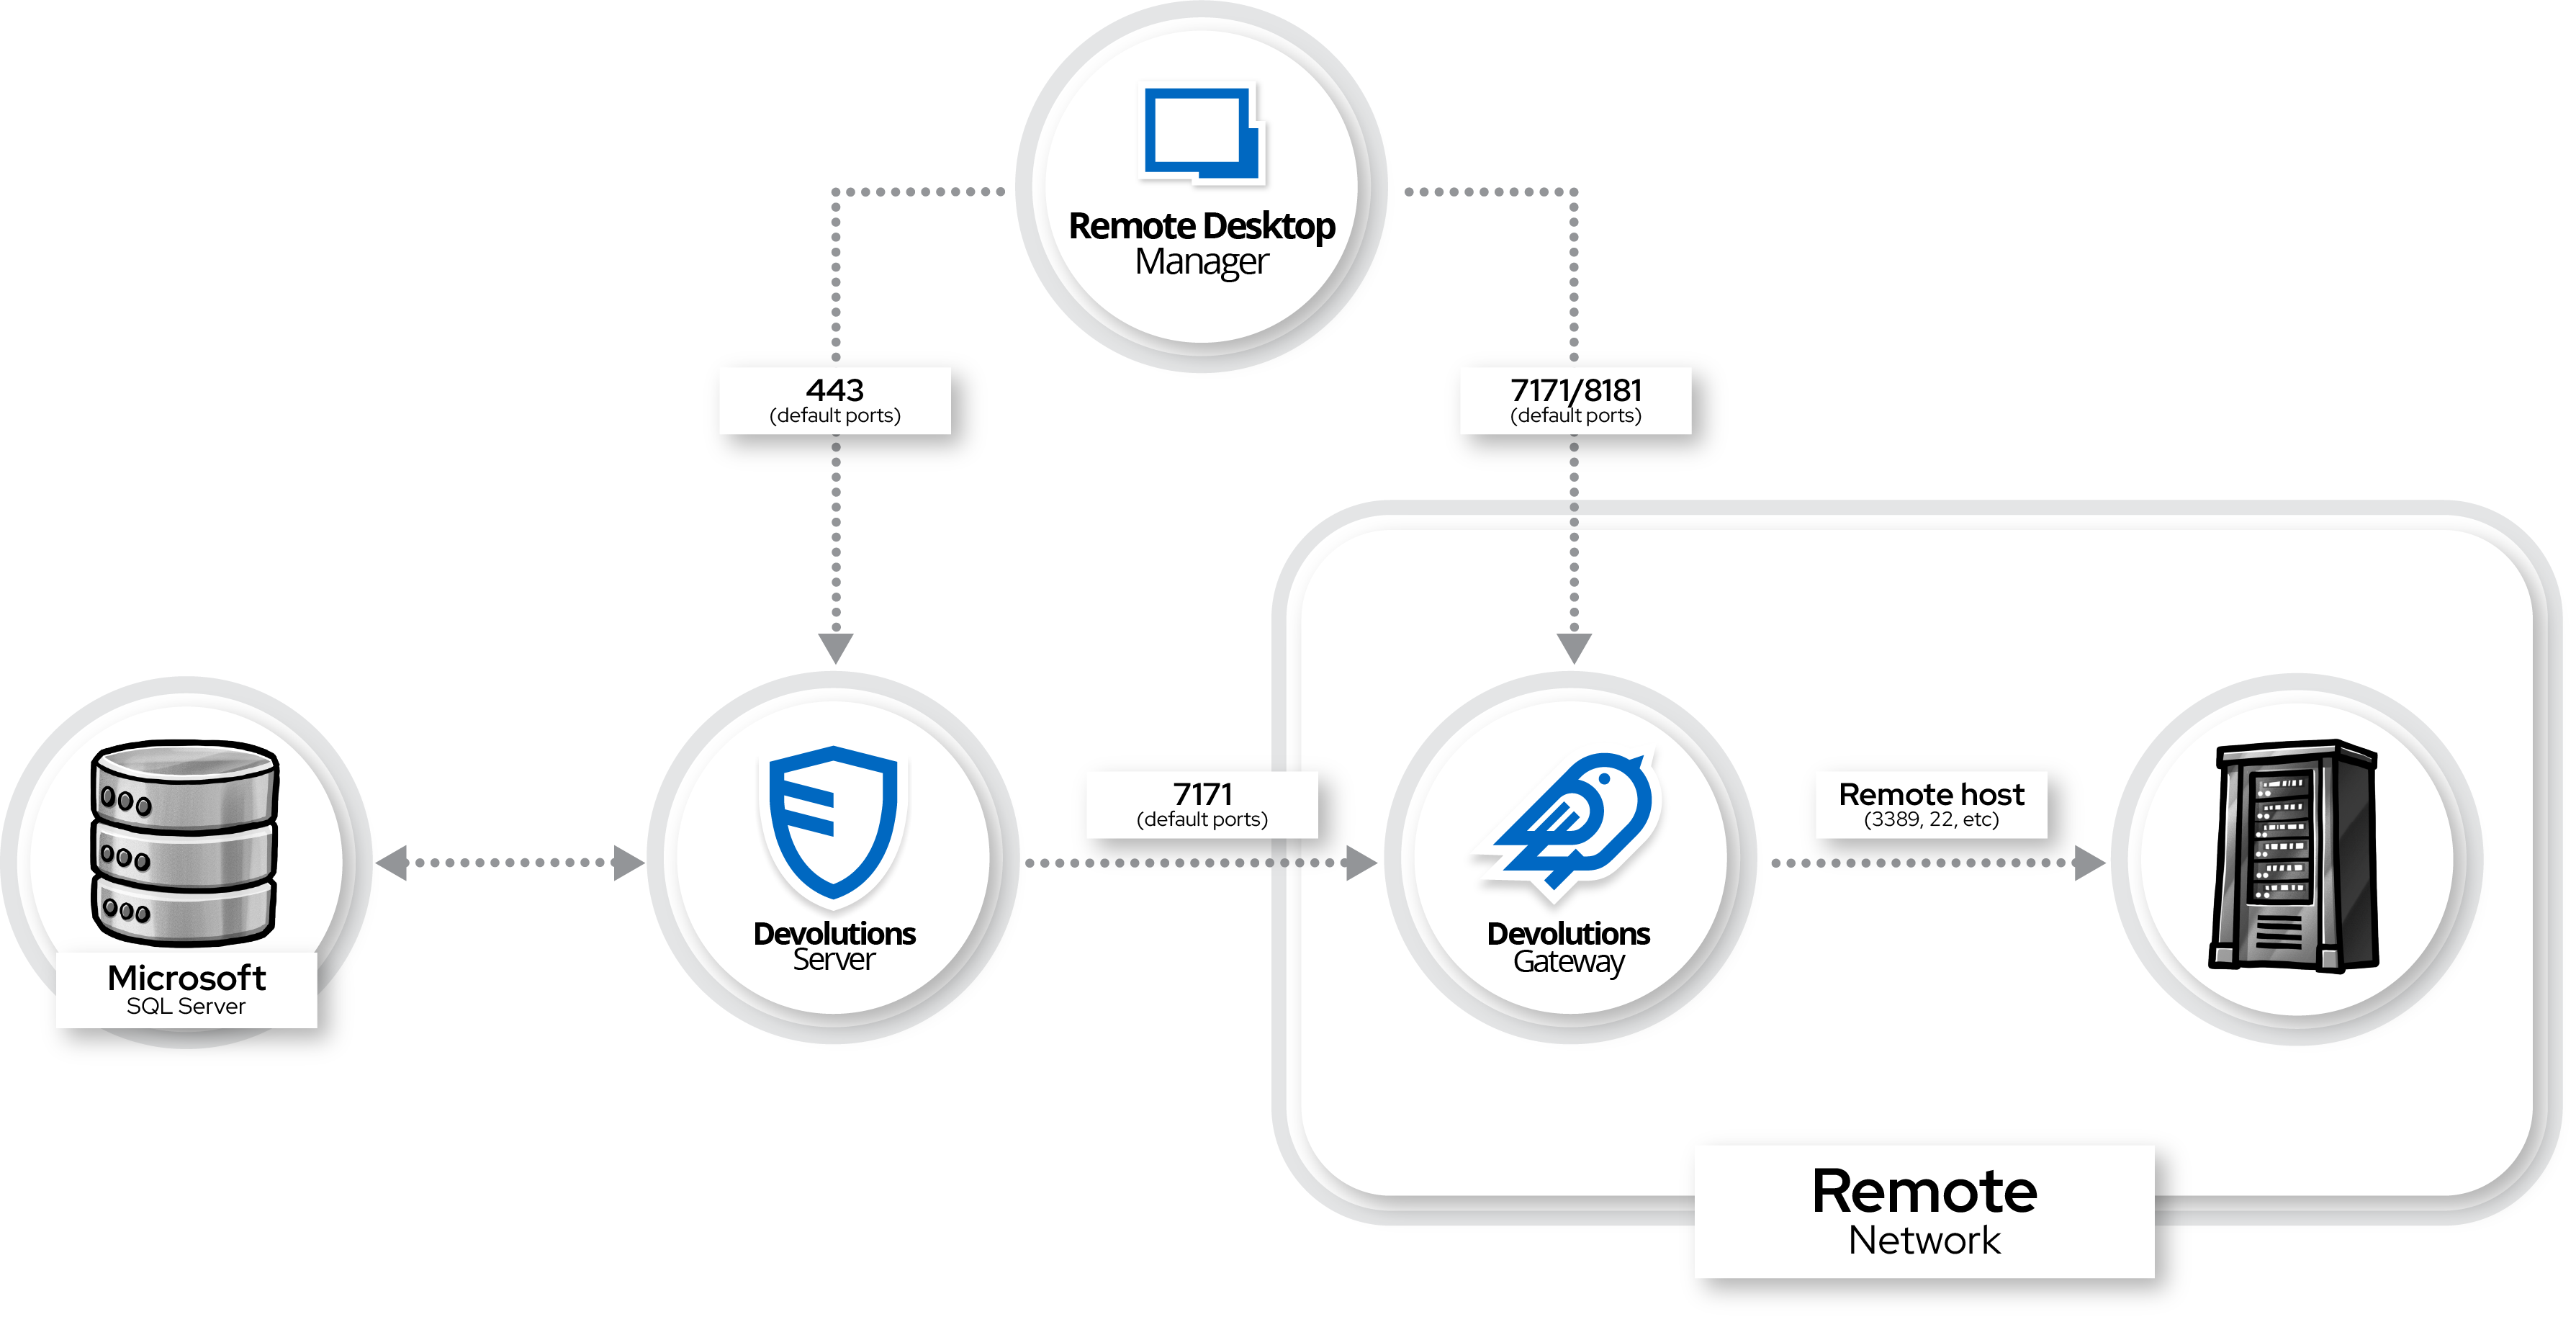
Remote network installation
La communication entre Remote Desktop Manager / Devolutions Server et la Gateway est chiffrée pour garantir un transfert de données sécurisé. Cependant, entre la Gateway et l'hôte cible, la connexion utilisera le protocole par défaut associé au type de connexion, tel que RDP ou SSH. Il est important de s'assurer que ces protocoles sont correctement sécurisés. Le port par défaut pour la communication HTTP(s) avec la Gateway est **7171**, tandis que le port par défaut pour la communication TCP est **8181**. Ces ports doivent être ouverts et non bloqués par les pare-feux pour permettre une communication appropriée.
L'interaction entre Remote Desktop Manager et Devolutions Gateway est directe et ne transite pas par Devolutions Server. La sécurité est maintenue par l'utilisation d'un jeton d'utilisateur, qui est chiffré et authentifié en utilisant un fichier PEM pour vérifier que le jeton a été généré par Devolutions Server. Cela assure l'intégrité de la connexion et protège contre l'accès non autorisé.
Pour des performances optimales, il faut installer la passerelle le plus proche possible des ressources auxquelles elle accède. De plus, les administrateurs doivent surveiller et mettre à jour régulièrement les règles du pare-feu pour permettre les ports requis (7171 et 8181) et garantir des configurations sécurisées pour les protocoles utilisés. Assurer une bonne gestion du fichier PEM est crucial pour maintenir une configuration sécurisée.
[ Partagez vos commentaires](https://forum.devolutions.net/forums/176/documentation--documentation-requests)
---
# Exigences système pour Devolutions Hub Business - Documentation Devolutions
Exigences système pour Devolutions Hub Business
===============================================
Sur cette page
* [Exigences matérielles](https://docs.devolutions.net/fr/gateway/overview/system-requirements/system-requirements-hub/#hardware-requirements)
* [Exigences logicielles](https://docs.devolutions.net/fr/gateway/overview/system-requirements/system-requirements-hub/#software-requirements)
* [Exigences de certificat](https://docs.devolutions.net/fr/gateway/overview/system-requirements/system-requirements-hub/#certificate-requirements)
Pour utiliser Devolutions Gateway, votre système doit répondre aux exigences suivantes.
Exigences matérielles
---------------------
[](https://docs.devolutions.net/fr/gateway/overview/system-requirements/system-requirements-hub/#hardware-requirements)
| Implantation minimale
(1 à 5 sessions concurrentes) | Petite implantation
(5 à 15 sessions concurrentes) | Implantation moyenne
(15 à 75 sessions concurrentes) | Grande implantation
(Plus de 75 sessions concurrentes) |
| --- | --- | --- | --- |
| 2 vCPUs
4 Go de RAM | 4 vCPUs
8 Go de RAM | 8 vCPUs
16 Go de RAM | Déployer plusieurs instances de Devolutions Gateway. |
Un contrôleur Ethernet Gigabit est recommandé pour une performance optimale.
Exigences logicielles
---------------------
[](https://docs.devolutions.net/fr/gateway/overview/system-requirements/system-requirements-hub/#software-requirements)
* Windows 10 (version 20H2, 21H1 et 21H2) ou Windows 11 (version 21H2)
* Windows Server 2016, 2019, 2022, ou 2025 avec .NET Framework 4.8
* Ubuntu Linux 18.04
* Red Hat Enterprise Linux (RHEL) 8
* Rocky Linux 8
* PowerShell 7 (nécessaire uniquement pour utiliser le [Devolutions Gateway PowerShell module](https://www.powershellgallery.com/packages/DevolutionsGateway/2025.1.0)
sur Linux)
* Le Devolutions Gateway doit être capable d'atteindre Devolutions Hub au niveau du réseau.
Exigences de certificat
-----------------------
[](https://docs.devolutions.net/fr/gateway/overview/system-requirements/system-requirements-hub/#certificate-requirements)
Devolutions Gateway prend en charge TLS 1.2 et TLS 1.3 ainsi que les suites de chiffrement suivantes :
* AES\_256\_GCM\_SHA384
* AES\_128\_GCM\_SHA256
* CHACHA20\_POLY1305\_SHA256
* ECDHE\_ECDSA\_AES\_256\_GCM\_SHA384
* ECDHE\_ECDSA\_AES\_128\_GCM\_SHA256
* ECDHE\_ECDSA\_CHACHA20\_POLY1305\_SHA256
* ECDHE\_RSA\_AES\_256\_GCM\_SHA384
* ECDHE\_RSA\_AES\_128\_GCM\_SHA256
* ECDHE\_RSA\_CHACHA20\_POLY1305\_SHA256
[ Partagez vos commentaires](https://forum.devolutions.net/forums/176/documentation--documentation-requests)
---
# System requirements for Devolutions Server - Devolutions Documentation
System requirements for Devolutions Server
==========================================
Auf dieser Seite
* [Prerequisites](https://docs.devolutions.net/de/gateway/overview/system-requirements/system-requirements-dvls/#prerequisites)
* [Hardware requirements](https://docs.devolutions.net/de/gateway/overview/system-requirements/system-requirements-dvls/#hardware-requirements)
* [Software requirements](https://docs.devolutions.net/de/gateway/overview/system-requirements/system-requirements-dvls/#software-requirements)
* [Certificate requirements](https://docs.devolutions.net/de/gateway/overview/system-requirements/system-requirements-dvls/#certificate-requirements)
* [Basic infrastructure](https://docs.devolutions.net/de/gateway/overview/system-requirements/system-requirements-dvls/#basic-infrastructure)
To use Devolutions Gateway, your system must meet the following requirements.
Prerequisites
-------------
[](https://docs.devolutions.net/de/gateway/overview/system-requirements/system-requirements-dvls/#prerequisites)
* A Devolutions Server instance.
* For MSPs, one Devolutions Gateway can be deployed per customer site. All you need is to keep the Devolutions Gateway servers reachable by both Devolutions Server and Remote Desktop Manager. Devolutions Gateway only needs to accept inbound connections coming from them. No outbound connections to Devolutions Server and Remote Desktop Manager are required.
Hardware requirements
---------------------
[](https://docs.devolutions.net/de/gateway/overview/system-requirements/system-requirements-dvls/#hardware-requirements)
| Minimal implementation
(1 to 5 concurrent sessions) | Small implementation
(5 to 15 concurrent sessions) | Medium implementation
(15 to 75 concurrent sessions) | Large implementation
(More than 75 concurrent sessions) |
| --- | --- | --- | --- |
| 2 vCPUs
4 GB RAM | 4 vCPUs
8 GB RAM | 8 vCPUs
16 GB RAM | Deploy multiple Devolutions Gateway instances. |
A Gigabit Ethernet controller is recommended for optimal performance.
Software requirements
---------------------
[](https://docs.devolutions.net/de/gateway/overview/system-requirements/system-requirements-dvls/#software-requirements)
* Windows 10 (version 20H2, 21H1, and 21H2), or Windows 11 (version 21H2)
* Windows Server 2016, 2019, 2022, or 2025 with .NET Framework 4.8
* Ubuntu Linux 18.04, 20.4, 22.4, and higher
* Red Hat Enterprise Linux (RHEL) 8
* Rocky Linux 8
* PowerShell 7 (required only for using the [Devolutions Gateway PowerShell module](https://www.powershellgallery.com/packages/DevolutionsGateway/2025.1.0)
on Linux)
Certificate requirements
------------------------
[](https://docs.devolutions.net/de/gateway/overview/system-requirements/system-requirements-dvls/#certificate-requirements)
Devolutions Gateway supports TLS 1.2 and TLS 1.3 as well as the following cipher suites:
* AES\_256\_GCM\_SHA384
* AES\_128\_GCM\_SHA256
* CHACHA20\_POLY1305\_SHA256
* ECDHE\_ECDSA\_AES\_256\_GCM\_SHA384
* ECDHE\_ECDSA\_AES\_128\_GCM\_SHA256
* ECDHE\_ECDSA\_CHACHA20\_POLY1305\_SHA256
* ECDHE\_RSA\_AES\_256\_GCM\_SHA384
* ECDHE\_RSA\_AES\_128\_GCM\_SHA256
* ECDHE\_RSA\_CHACHA20\_POLY1305\_SHA256
Basic infrastructure
--------------------
[](https://docs.devolutions.net/de/gateway/overview/system-requirements/system-requirements-dvls/#basic-infrastructure)
When installing Devolutions Gateway, it is essential to consider the location of the resources you need to access and the location of the users requiring access to those resources. As seen in the network diagrams below, the gateway can be installed in either an internal (local) network or a remote network, depending on the proximity to the resources and the users.

Internal (local) network installation

Remote network installation
The communication between Remote Desktop Manager / Devolutions Server and the gateway is encrypted to ensure secure data transfer. However, between the gateway and the target host, the connection will use the default protocol associated with the connection type, such as RDP or SSH. It is important to ensure that these protocols are properly secured. The default port for HTTP(s) communication with the gateway is **7171**, while the default port for TCP communication is **8181**. These ports should be open and not blocked by firewalls to allow proper communication.
The interaction between Remote Desktop Manager and Devolutions Gateway is direct and does not pass through Devolutions Server. Security is maintained through the use of a user token, which is encrypted and authenticated using a PEM file to verify that the token was generated by Devolutions Server. This ensures the integrity of the connection and protects against unauthorized access.
For optimal performance, the gateway should be installed as close as possible to the resources it accesses. Additionally, administrators should regularly monitor and update firewall rules to allow the required ports (7171 and 8181) and ensure secure configurations for the protocols in use. Proper handling of the PEM file is critical to maintaining a secure setup.
[ Share your feedback](https://forum.devolutions.net/forums/176/documentation--documentation-requests)
---
# Devolutions Gateway - Devolutions Documentation
Devolutions Gateway
===================
Devolutions Gateway provides authorized just-in-time access to resources in segmented networks.
Key benefits of Devolutions Gateway include:
* Reduced exposure to internal network resources with just-in-time RDP connections through the Devolutions Gateway.
* Replaced static VPN and firewall rules with dynamic access rules controlled by Devolutions Server.
* Enhanced security by giving remote access, or access to specific applications, in separate network segments on demand.
* Improved productivity by eliminating the need to update VPN or firewall rules for temporary access.
* Possible use of Devolutions Gateway with supported connection entry types (RDP, SSH, VNC, ARD, SCP, SFTP, PowerShell, Telnet, websites) in Remote Desktop Manager and supported data sources (Devolutions Server, Devolutions Hub Business).
* Increased scalability by eliminating the need to use multiple VPNs to access many environments simultaneously. Devolutions Gateway can handle over 75 concurrent sessions, depending on the infrastructure.

Learn more about [Devolutions Gateway](https://devolutions.net/gateway/)
.
### See also
[](https://docs.devolutions.net/de/gateway/overview/what-is-gateway/#see-also)
* [Devolutions Academy - Overview of Devolutions Gateway](https://academy.devolutions.net/student/path/2007290/activity/3070847 "Devolutions Academy - Overview of the Devolutions Gateway")
[ Share your feedback](https://forum.devolutions.net/forums/176/documentation--documentation-requests)
---
# System requirements for Devolutions Hub Business - Devolutions Documentation
System requirements for Devolutions Hub Business
================================================
Auf dieser Seite
* [Hardware requirements](https://docs.devolutions.net/de/gateway/overview/system-requirements/system-requirements-hub/#hardware-requirements)
* [Software requirements](https://docs.devolutions.net/de/gateway/overview/system-requirements/system-requirements-hub/#software-requirements)
* [Certificate requirements](https://docs.devolutions.net/de/gateway/overview/system-requirements/system-requirements-hub/#certificate-requirements)
To use Devolutions Gateway, your system must meet the following requirements.
Hardware requirements
---------------------
[](https://docs.devolutions.net/de/gateway/overview/system-requirements/system-requirements-hub/#hardware-requirements)
| Minimal implementation
(1 to 5 concurrent sessions) | Small implementation
(5 to 15 concurrent sessions) | Medium implementation
(15 to 75 concurrent sessions) | Large implementation
(More than 75 concurrent sessions) |
| --- | --- | --- | --- |
| 2 vCPUs
4 GB RAM | 4 vCPUs
8 GB RAM | 8 vCPUs
16 GB RAM | Deploy multiple Devolutions Gateway instances. |
A Gigabit Ethernet controller is recommended for optimal performance.
Software requirements
---------------------
[](https://docs.devolutions.net/de/gateway/overview/system-requirements/system-requirements-hub/#software-requirements)
* Windows 10 (version 20H2, 21H1, and 21H2), or Windows 11 (version 21H2)
* Windows Server 2016, 2019, 2022, or 2025 with .NET Framework 4.8
* Ubuntu Linux 18.04
* Red Hat Enterprise Linux (RHEL) 8
* Rocky Linux 8
* PowerShell 7 (required only for using the [Devolutions Gateway PowerShell module](https://www.powershellgallery.com/packages/DevolutionsGateway/2025.1.0)
on Linux)
* The Devolutions Gateway must be able to reach Devolutions Hub at the network-level.
Certificate requirements
------------------------
[](https://docs.devolutions.net/de/gateway/overview/system-requirements/system-requirements-hub/#certificate-requirements)
Devolutions Gateway supports TLS 1.2 and TLS 1.3 as well as the following cipher suites:
* AES\_256\_GCM\_SHA384
* AES\_128\_GCM\_SHA256
* CHACHA20\_POLY1305\_SHA256
* ECDHE\_ECDSA\_AES\_256\_GCM\_SHA384
* ECDHE\_ECDSA\_AES\_128\_GCM\_SHA256
* ECDHE\_ECDSA\_CHACHA20\_POLY1305\_SHA256
* ECDHE\_RSA\_AES\_256\_GCM\_SHA384
* ECDHE\_RSA\_AES\_128\_GCM\_SHA256
* ECDHE\_RSA\_CHACHA20\_POLY1305\_SHA256
[ Share your feedback](https://forum.devolutions.net/forums/176/documentation--documentation-requests)
---
# RDP web client not showing - Devolutions Documentation
RDP web client not showing
==========================
On this page
* [Solutions](https://docs.devolutions.net/gateway/kb/troubleshooting-articles/rdp-web-client-not-showing/#solutions)
* [Licenses](https://docs.devolutions.net/gateway/kb/troubleshooting-articles/rdp-web-client-not-showing/#licenses)
* [Devolutions Gateway](https://docs.devolutions.net/gateway/kb/troubleshooting-articles/rdp-web-client-not-showing/#devolutions-gateway)
* [View Password permission](https://docs.devolutions.net/gateway/kb/troubleshooting-articles/rdp-web-client-not-showing/#view-password-permission)
If you are unable to launch the RDP web client in the Devolutions Server web interface, check to see if you have the necessary requirements using the solutions below.
Solutions
---------
[](https://docs.devolutions.net/gateway/kb/troubleshooting-articles/rdp-web-client-not-showing/#solutions)
### Licenses
[](https://docs.devolutions.net/gateway/kb/troubleshooting-articles/rdp-web-client-not-showing/#licenses)
A package license that includes Devolutions Gateway must be assigned to the user. If you do not have this license, the _**Open in browser**_ button, which allows you to open the RDP entry in a web client, will not appear.

Open in browser
### Devolutions Gateway
[](https://docs.devolutions.net/gateway/kb/troubleshooting-articles/rdp-web-client-not-showing/#devolutions-gateway)
Devolutions Gateway is required to open a RDP session in the web client of Devolutions Server. If you do have a Gateway installed, check its [configuration](https://docs.devolutions.net/gateway/getting-started/server/server-configuration/)
.
### View Password permission
[](https://docs.devolutions.net/gateway/kb/troubleshooting-articles/rdp-web-client-not-showing/#view-password-permission)
You need to have the _**View password**_ permission to launch the RDP session.
To check if you have been granted this permission, select your entry in the Devolutions Server web interface, then click on the _**Permissions**_ tab. If you see _**Allowed**_ under _**View password**_ permission, you have the proper permissions. If you see _**Disallowed**_, you do not have this permission. If you think you should have it, contact your administrator.

View password permission
[ Share your feedback](https://forum.devolutions.net/forums/176/documentation--documentation-requests)
---
# Overview - Devolutions Documentation
Overview
========
[ Share your feedback](https://forum.devolutions.net/forums/176/documentation--documentation-requests)
---
# Devolutions Force - Devolutions Documentation
Devolutions Force
=================
The _**Devolutions Force**_ is a private channel that lets you connect and network with IT professionals worldwide. There is no obligation or cost and it lets you earn rewards, gives you advanced access to promotions, news and events.
Are you ready to feel the [Force](https://devolutionsforce-external.customershome.com/user-request)
?

[ Share your feedback](https://forum.devolutions.net/forums/176/documentation--documentation-requests)
---
# Devolutions Force - Documentation de Devolutions
Devolutions Force
=================
La _**Devolutions Force**_ est un canal privé qui vous permet de vous connecter et de créer un réseau avec des professionnels de l'informatique du monde entier. Il n'y a aucune obligation ou coût et cela vous permet de gagner des récompenses, vous donne un accès anticipé aux promotions, nouvelles et événements.
Êtes-vous prêt à sentir la [Force](https://devolutionsforce-external.customershome.com/user-request)
?

[ Partagez vos commentaires](https://forum.devolutions.net/forums/176/documentation--documentation-requests)
---
# System requirements - Devolutions Documentation
System requirements
===================
[ Share your feedback](https://forum.devolutions.net/forums/176/documentation--documentation-requests)
---
# Devolutions Academy - Documentation de Devolutions
Devolutions Academy
===================
Sur cette page
* [L'expérience Devolutions Academy](https://docs.devolutions.net/fr/gateway/support-resources/devolutions-academy/#the-devolutions-academy-experience)
* [forum Devolutions Academy](https://docs.devolutions.net/fr/gateway/support-resources/devolutions-academy/#devolutions-academy-forum)
Maîtriser la suite de produits et services de Devolutions avec [Devolutions Academy](https://devolutions.net/academy)
! Notre académie vous équipe des compétences et connaissances nécessaires pour optimiser la gestion informatique, améliorer les pratiques de sécurité et tirer le meilleur parti des logiciels Devolutions.
L'expérience Devolutions Academy
--------------------------------
[](https://docs.devolutions.net/fr/gateway/support-resources/devolutions-academy/#the-devolutions-academy-experience)
S'immerger dans une variété de cours approfondis adaptés à différents niveaux de compétence, des débutants aux utilisateurs avancés, et apprendre des professionnels du secteur ayant des années d'expérience et une connaissance approfondie des produits Devolutions et des meilleures pratiques.
Que vous soyez un professionnel de l'informatique cherchant à améliorer vos compétences ou un chef d'équipe visant à améliorer l'efficacité de votre département, nos parcours d'apprentissage sur mesure garantissent que vous obtenez la formation la plus pertinente. Notre plateforme en ligne vous permet d'apprendre à votre propre rythme et selon votre emploi du temps.
Un [compte Devolutions](https://docs.devolutions.net/fr/portal/profile/create-devolutions-account/)
gratuit est requis pour se connecter et interagir sur Devolutions Academy.
forum Devolutions Academy
-------------------------
[](https://docs.devolutions.net/fr/gateway/support-resources/devolutions-academy/#devolutions-academy-forum)
Visiter le [forum Devolutions Academy](https://forum.devolutions.net/resource/devolutions-academy)
:
* Rester à jour avec les dernières nouvelles, mises à jour, et informations importantes sur Devolutions Academy.
* Soumettre, suivre et gérer les demandes de formation.
* Obtenir de l'aide, poser des questions, et trouver des solutions à vos problèmes liés à la formation.
[ Partagez vos commentaires](https://forum.devolutions.net/forums/176/documentation--documentation-requests)
---
# Devolutions Academy - Devolutions Documentation
Devolutions Academy
===================
Auf dieser Seite
* [The Devolutions Academy experience](https://docs.devolutions.net/de/gateway/support-resources/devolutions-academy/#the-devolutions-academy-experience)
* [Devolutions Academy forum](https://docs.devolutions.net/de/gateway/support-resources/devolutions-academy/#devolutions-academy-forum)
Master Devolutions’ suite of products and services with [Devolutions Academy](https://devolutions.net/academy)
! Our academy equips you with the skills and knowledge needed to optimize IT management, enhance security practices, and make the most of Devolutions software.
The Devolutions Academy experience
----------------------------------
[](https://docs.devolutions.net/de/gateway/support-resources/devolutions-academy/#the-devolutions-academy-experience)
Dive into a variety of in-depth courses tailored to different skill levels, from beginners to advanced users, and learn from industry professionals with years of experience and deep knowledge of Devolutions products and best practices.
Whether you're an IT professional looking to enhance your skills or a team leader aiming to improve your department's efficiency, our tailored learning paths ensure you get the most relevant training. Our online platform allows you to learn at your own pace, on your schedule.
A free [Devolutions Account](https://docs.devolutions.net/portal/profile/create-devolutions-account/)
is required to log in and interact on Devolutions Academy.
Devolutions Academy forum
-------------------------
[](https://docs.devolutions.net/de/gateway/support-resources/devolutions-academy/#devolutions-academy-forum)
Visit the [Devolutions Academy forum](https://forum.devolutions.net/resource/devolutions-academy)
:
* Stay updated with the lastest news, updates, and important information about Devolutions Academy.
* Submit, track, and manage training requests.
* Get help, ask questions, and find solutions to your training-related issues.
[ Share your feedback](https://forum.devolutions.net/forums/176/documentation--documentation-requests)
---
# Devolutions Forum - Devolutions Documentation
Devolutions Forum
=================
The [Devolutions Forum](https://forum.devolutions.net/)
is an efficient way to get answers to your questions, either from our development team, or from our global community of IT pros.
Visit the different sections and help contribute to our community knowledge.
A free [Devolutions Account](https://docs.devolutions.net/portal/profile/create-devolutions-account/)
is required to log in and interact on the Devolutions Forum.
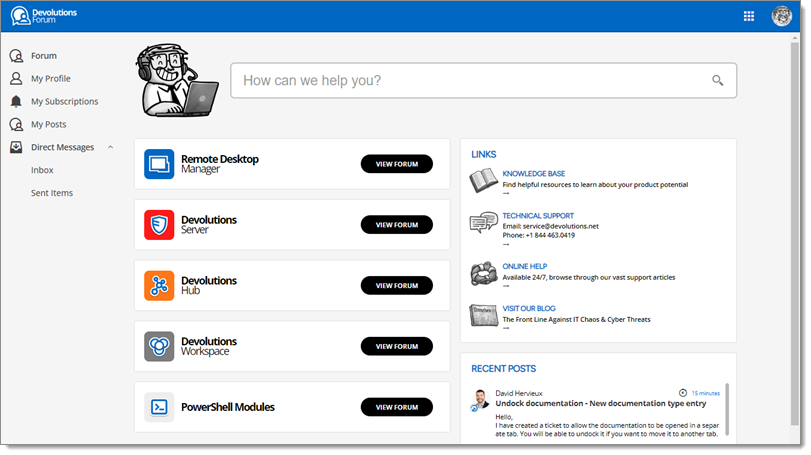
Devolutions Forum
[ Share your feedback](https://forum.devolutions.net/forums/176/documentation--documentation-requests)
---
# Devolutions Forum - Documentation de Devolutions
Devolutions Forum
=================
Le [forum Devolutions](https://forum.devolutions.net/)
est un moyen efficace pour obtenir des réponses à vos questions, soit de notre équipe de développement, soit de notre communauté mondiale de professionnels de l'informatique.
Visiter les différentes sections et contribuer à notre connaissance communautaire.
Un [compte Devolutions](https://docs.devolutions.net/fr/portal/profile/create-devolutions-account/)
gratuit est requis pour se connecter et interagir sur le forum Devolutions.

Devolutions Forum
[ Partagez vos commentaires](https://forum.devolutions.net/forums/176/documentation--documentation-requests)
---
# Versions d'essai gratuites - Documentation Devolutions
Versions d'essai gratuites
==========================
Devolutions propose des essais gratuits de 30 jours pour toutes ses solutions, vous permettant d'explorer nos outils avant de vous engager. Que vous évaluiez un produit unique ou la suite complète, nos essais vous aideront à découvrir la puissance de l'écosystème Devolutions.
* [Remote Desktop Manager Free](https://devolutions.net/products/remote-desktop-manager-free/)
– inclut une licence par défaut, vous pouvez demander des licences supplémentaires en contactant notre [équipe des ventes](mailto:sales@devolutions.net)
* [Pack de démarrage](https://devolutions.net/solutions/starter-pack/trial/)
– 5 utilisateurs
* [Forfait de gestion des mots de passe de l'effectif](https://devolutions.net/solutions/password-management/trial/)
– utilisateurs illimités
* [Forfait de gestion de l'accès à distance](https://devolutions.net/solutions/remote-access-management/trial/)
– utilisateurs illimités
* [Gestion des bureaux à distance et opérations TI](https://devolutions.net/solutions/remote-connection-management/trial/)
- utilisateurs illimités
* [Forfait de gestion des accès privilégiés](https://devolutions.net/solutions/privileged-access-management/trial/)
– utilisateurs illimités
Que vous décidiez ou non de vous inscrire à la fin de l'essai, vos données ne seront pas altérées ni effacées. Vous y aurez plein accès une fois que vous aurez fourni une clé de licence valide.
[ Partagez vos commentaires](https://forum.devolutions.net/forums/176/documentation--documentation-requests)
---
# Free trials - Devolutions Documentation
Free trials
===========
Devolutions offers 30-day free trials for all of its solutions, allowing you to explore our tools before making a commitment. Whether you are evaluating a single product or the full suite, our trials will help you experience the power of the Devolutions ecosystem.
* [Remote Desktop Manager Free](https://devolutions.net/products/remote-desktop-manager-free/)
– includes one license by default, you can request additional licenses by contacting our [sales team](mailto:sales@devolutions.net)
* [Starter Pack](https://devolutions.net/solutions/starter-pack/trial/)
– 5 users
* [Workforce password management package](https://devolutions.net/solutions/password-management/trial/)
– unlimited users
* [Remote access management package](https://devolutions.net/solutions/remote-access-management/trial/)
– unlimited users
* [Remote desktop management and IT operations package](https://devolutions.net/solutions/remote-connection-management/trial/)
– unlimited users
* [Privileged access management package](https://devolutions.net/solutions/privileged-access-management/trial/)
– unlimited users
Whether or not you decide to register by the end of the trial, your data will not be altered or erased. You will have full access to it once you provide a valid license key.
[ Share your feedback](https://forum.devolutions.net/forums/176/documentation--documentation-requests)
---
# Commencer avec les packages Devolutions - Documentation Devolutions
Commencer avec les packages Devolutions
=======================================
Les packages des solutions de Devolutions sont conçus pour répondre à des cas d'utilisation spécifiques en regroupant les bons produits.
Suivre ces guides d'installation pour commencer avec nos packages de solutions :
* [Pack de démarrage](https://docs.devolutions.net/fr/gateway/support-resources/getting-started-packages/starter-pack/)
* [Package de gestion des mots de passe de la main-d'œuvre](https://docs.devolutions.net/fr/gateway/support-resources/getting-started-packages/workforce-password-management-package/)
* [Package de gestion de l'accès à distance](https://docs.devolutions.net/fr/gateway/support-resources/getting-started-packages/remote-access-management-package/)
* [Gestion des bureaux à distance et opérations TI](https://docs.devolutions.net/fr/gateway/support-resources/getting-started-packages/remote-connection-and-it-management-package/)
* [Package de gestion des accès privilégiés](https://docs.devolutions.net/fr/gateway/support-resources/getting-started-packages/privileged-access-management-package/)
#### Voir aussi
[](https://docs.devolutions.net/fr/gateway/support-resources/getting-started-packages/#see-also)
* [Aperçu du pack de démarrage Devolutions : un package tout compris pour les petites équipes allant jusqu'à cinq utilisateurs](https://www.youtube.com/watch?v=4i5IUiXl_iM)
* [Commencer avec le pack de démarrage Devolutions : à quoi s'attendre et comment commencer](https://www.youtube.com/watch?v=PAEerLuCm6k)
[ Partagez vos commentaires](https://forum.devolutions.net/forums/176/documentation--documentation-requests)
---
# System requirements for Devolutions Hub Business - Devolutions Documentation
System requirements for Devolutions Hub Business
================================================
On this page
* [Hardware requirements](https://docs.devolutions.net/gateway/overview/system-requirements/system-requirements-hub/#hardware-requirements)
* [Software requirements](https://docs.devolutions.net/gateway/overview/system-requirements/system-requirements-hub/#software-requirements)
* [Certificate requirements](https://docs.devolutions.net/gateway/overview/system-requirements/system-requirements-hub/#certificate-requirements)
To use Devolutions Gateway, your system must meet the following requirements.
Hardware requirements
---------------------
[](https://docs.devolutions.net/gateway/overview/system-requirements/system-requirements-hub/#hardware-requirements)
| Minimal implementation
(1 to 5 concurrent sessions) | Small implementation
(5 to 15 concurrent sessions) | Medium implementation
(15 to 75 concurrent sessions) | Large implementation
(More than 75 concurrent sessions) |
| --- | --- | --- | --- |
| 2 vCPUs
4 GB RAM | 4 vCPUs
8 GB RAM | 8 vCPUs
16 GB RAM | Deploy multiple Devolutions Gateway instances. |
A Gigabit Ethernet controller is recommended for optimal performance.
Software requirements
---------------------
[](https://docs.devolutions.net/gateway/overview/system-requirements/system-requirements-hub/#software-requirements)
* Windows 10 (version 20H2, 21H1, and 21H2), or Windows 11 (version 21H2)
* Windows Server 2016, 2019, 2022, or 2025 with .NET Framework 4.8
* Ubuntu Linux 18.04
* Red Hat Enterprise Linux (RHEL) 8
* Rocky Linux 8
* PowerShell 7 (required only for using the [Devolutions Gateway PowerShell module](https://www.powershellgallery.com/packages/DevolutionsGateway/2025.1.0)
on Linux)
* The Devolutions Gateway must be able to reach Devolutions Hub at the network-level.
Certificate requirements
------------------------
[](https://docs.devolutions.net/gateway/overview/system-requirements/system-requirements-hub/#certificate-requirements)
Devolutions Gateway supports TLS 1.2 and TLS 1.3 as well as the following cipher suites:
* AES\_256\_GCM\_SHA384
* AES\_128\_GCM\_SHA256
* CHACHA20\_POLY1305\_SHA256
* ECDHE\_ECDSA\_AES\_256\_GCM\_SHA384
* ECDHE\_ECDSA\_AES\_128\_GCM\_SHA256
* ECDHE\_ECDSA\_CHACHA20\_POLY1305\_SHA256
* ECDHE\_RSA\_AES\_256\_GCM\_SHA384
* ECDHE\_RSA\_AES\_128\_GCM\_SHA256
* ECDHE\_RSA\_CHACHA20\_POLY1305\_SHA256
[ Share your feedback](https://forum.devolutions.net/forums/176/documentation--documentation-requests)
---
# Devolutions Force - Devolutions Documentation
Devolutions Force
=================
The _**Devolutions Force**_ is a private channel that lets you connect and network with IT professionals worldwide. There is no obligation or cost and it lets you earn rewards, gives you advanced access to promotions, news and events.
Are you ready to feel the [Force](https://devolutionsforce-external.customershome.com/user-request)
?

[ Share your feedback](https://forum.devolutions.net/forums/176/documentation--documentation-requests)
---
# System requirements for Devolutions Server - Devolutions Documentation
System requirements for Devolutions Server
==========================================
On this page
* [Prerequisites](https://docs.devolutions.net/gateway/overview/system-requirements/system-requirements-dvls/#prerequisites)
* [Hardware requirements](https://docs.devolutions.net/gateway/overview/system-requirements/system-requirements-dvls/#hardware-requirements)
* [Software requirements](https://docs.devolutions.net/gateway/overview/system-requirements/system-requirements-dvls/#software-requirements)
* [Certificate requirements](https://docs.devolutions.net/gateway/overview/system-requirements/system-requirements-dvls/#certificate-requirements)
* [Basic infrastructure](https://docs.devolutions.net/gateway/overview/system-requirements/system-requirements-dvls/#basic-infrastructure)
To use Devolutions Gateway, your system must meet the following requirements.
Prerequisites
-------------
[](https://docs.devolutions.net/gateway/overview/system-requirements/system-requirements-dvls/#prerequisites)
* A Devolutions Server instance.
* For MSPs, one Devolutions Gateway can be deployed per customer site. All you need is to keep the Devolutions Gateway servers reachable by both Devolutions Server and Remote Desktop Manager. Devolutions Gateway only needs to accept inbound connections coming from them. No outbound connections to Devolutions Server and Remote Desktop Manager are required.
Hardware requirements
---------------------
[](https://docs.devolutions.net/gateway/overview/system-requirements/system-requirements-dvls/#hardware-requirements)
| Minimal implementation
(1 to 5 concurrent sessions) | Small implementation
(5 to 15 concurrent sessions) | Medium implementation
(15 to 75 concurrent sessions) | Large implementation
(More than 75 concurrent sessions) |
| --- | --- | --- | --- |
| 2 vCPUs
4 GB RAM | 4 vCPUs
8 GB RAM | 8 vCPUs
16 GB RAM | Deploy multiple Devolutions Gateway instances. |
A Gigabit Ethernet controller is recommended for optimal performance.
Software requirements
---------------------
[](https://docs.devolutions.net/gateway/overview/system-requirements/system-requirements-dvls/#software-requirements)
* Windows 10 (version 20H2, 21H1, and 21H2), or Windows 11 (version 21H2)
* Windows Server 2016, 2019, 2022, or 2025 with .NET Framework 4.8
* Ubuntu Linux 18.04, 20.4, 22.4, and higher
* Red Hat Enterprise Linux (RHEL) 8
* Rocky Linux 8
* PowerShell 7 (required only for using the [Devolutions Gateway PowerShell module](https://www.powershellgallery.com/packages/DevolutionsGateway/2025.1.0)
on Linux)
Certificate requirements
------------------------
[](https://docs.devolutions.net/gateway/overview/system-requirements/system-requirements-dvls/#certificate-requirements)
Devolutions Gateway supports TLS 1.2 and TLS 1.3 as well as the following cipher suites:
* AES\_256\_GCM\_SHA384
* AES\_128\_GCM\_SHA256
* CHACHA20\_POLY1305\_SHA256
* ECDHE\_ECDSA\_AES\_256\_GCM\_SHA384
* ECDHE\_ECDSA\_AES\_128\_GCM\_SHA256
* ECDHE\_ECDSA\_CHACHA20\_POLY1305\_SHA256
* ECDHE\_RSA\_AES\_256\_GCM\_SHA384
* ECDHE\_RSA\_AES\_128\_GCM\_SHA256
* ECDHE\_RSA\_CHACHA20\_POLY1305\_SHA256
Basic infrastructure
--------------------
[](https://docs.devolutions.net/gateway/overview/system-requirements/system-requirements-dvls/#basic-infrastructure)
When installing Devolutions Gateway, it is essential to consider the location of the resources you need to access and the location of the users requiring access to those resources. As seen in the network diagrams below, the gateway can be installed in either an internal (local) network or a remote network, depending on the proximity to the resources and the users.

Internal (local) network installation

Remote network installation
The communication between Remote Desktop Manager / Devolutions Server and the gateway is encrypted to ensure secure data transfer. However, between the gateway and the target host, the connection will use the default protocol associated with the connection type, such as RDP or SSH. It is important to ensure that these protocols are properly secured. The default port for HTTP(s) communication with the gateway is **7171**, while the default port for TCP communication is **8181**. These ports should be open and not blocked by firewalls to allow proper communication.
The interaction between Remote Desktop Manager and Devolutions Gateway is direct and does not pass through Devolutions Server. Security is maintained through the use of a user token, which is encrypted and authenticated using a PEM file to verify that the token was generated by Devolutions Server. This ensures the integrity of the connection and protects against unauthorized access.
For optimal performance, the gateway should be installed as close as possible to the resources it accesses. Additionally, administrators should regularly monitor and update firewall rules to allow the required ports (7171 and 8181) and ensure secure configurations for the protocols in use. Proper handling of the PEM file is critical to maintaining a secure setup.
[ Share your feedback](https://forum.devolutions.net/forums/176/documentation--documentation-requests)
---
# Devolutions Academy - Devolutions Documentation
Devolutions Academy
===================
On this page
* [The Devolutions Academy experience](https://docs.devolutions.net/gateway/support-resources/devolutions-academy/#the-devolutions-academy-experience)
* [Devolutions Academy forum](https://docs.devolutions.net/gateway/support-resources/devolutions-academy/#devolutions-academy-forum)
Master Devolutions’ suite of products and services with [Devolutions Academy](https://devolutions.net/academy)
! Our academy equips you with the skills and knowledge needed to optimize IT management, enhance security practices, and make the most of Devolutions software.
The Devolutions Academy experience
----------------------------------
[](https://docs.devolutions.net/gateway/support-resources/devolutions-academy/#the-devolutions-academy-experience)
Dive into a variety of in-depth courses tailored to different skill levels, from beginners to advanced users, and learn from industry professionals with years of experience and deep knowledge of Devolutions products and best practices.
Whether you're an IT professional looking to enhance your skills or a team leader aiming to improve your department's efficiency, our tailored learning paths ensure you get the most relevant training. Our online platform allows you to learn at your own pace, on your schedule.
A free [Devolutions Account](https://docs.devolutions.net/portal/profile/create-devolutions-account/)
is required to log in and interact on Devolutions Academy.
Devolutions Academy forum
-------------------------
[](https://docs.devolutions.net/gateway/support-resources/devolutions-academy/#devolutions-academy-forum)
Visit the [Devolutions Academy forum](https://forum.devolutions.net/resource/devolutions-academy)
:
* Stay updated with the lastest news, updates, and important information about Devolutions Academy.
* Submit, track, and manage training requests.
* Get help, ask questions, and find solutions to your training-related issues.
[ Share your feedback](https://forum.devolutions.net/forums/176/documentation--documentation-requests)
---
# Devolutions Forum - Devolutions Documentation
Devolutions Forum
=================
The [Devolutions Forum](https://forum.devolutions.net/)
is an efficient way to get answers to your questions, either from our development team, or from our global community of IT pros.
Visit the different sections and help contribute to our community knowledge.
A free [Devolutions Account](https://docs.devolutions.net/portal/profile/create-devolutions-account/)
is required to log in and interact on the Devolutions Forum.

Devolutions Forum
[ Share your feedback](https://forum.devolutions.net/forums/176/documentation--documentation-requests)
---
# Free trials - Devolutions Documentation
Free trials
===========
Devolutions offers 30-day free trials for all of its solutions, allowing you to explore our tools before making a commitment. Whether you are evaluating a single product or the full suite, our trials will help you experience the power of the Devolutions ecosystem.
* [Remote Desktop Manager Free](https://devolutions.net/products/remote-desktop-manager-free/)
– includes one license by default, you can request additional licenses by contacting our [sales team](mailto:sales@devolutions.net)
* [Starter Pack](https://devolutions.net/solutions/starter-pack/trial/)
– 5 users
* [Workforce password management package](https://devolutions.net/solutions/password-management/trial/)
– unlimited users
* [Remote access management package](https://devolutions.net/solutions/remote-access-management/trial/)
– unlimited users
* [Remote desktop management and IT operations package](https://devolutions.net/solutions/remote-connection-management/trial/)
– unlimited users
* [Privileged access management package](https://devolutions.net/solutions/privileged-access-management/trial/)
– unlimited users
Whether or not you decide to register by the end of the trial, your data will not be altered or erased. You will have full access to it once you provide a valid license key.
[ Share your feedback](https://forum.devolutions.net/forums/176/documentation--documentation-requests)
---
# Getting started with Devolutions packages - Devolutions Documentation
Getting started with Devolutions packages
=========================================
Devolutions' solution packages are designed to address specific use cases by bundling together the right products.
Follow these installation guides to get started with our solution packages:
* [Starter Pack](https://docs.devolutions.net/gateway/support-resources/getting-started-packages/starter-pack/)
* [Workforce password management package](https://docs.devolutions.net/gateway/support-resources/getting-started-packages/workforce-password-management-package/)
* [Remote access management package](https://docs.devolutions.net/gateway/support-resources/getting-started-packages/remote-access-management-package/)
* [Remote desktop management and IT operations package](https://docs.devolutions.net/gateway/support-resources/getting-started-packages/remote-connection-and-it-management-package/)
* [Privileged access management package](https://docs.devolutions.net/gateway/support-resources/getting-started-packages/privileged-access-management-package/)
#### See also
[](https://docs.devolutions.net/de/gateway/support-resources/getting-started-packages/#see-also)
* [Devolutions Starter Pack overview: An all-inclusive bundle for small teams of up to five users](https://www.youtube.com/watch?v=4i5IUiXl_iM)
* [Getting started with the Devolutions Starter Pack: What to expect and how to start](https://www.youtube.com/watch?v=PAEerLuCm6k)
[ Share your feedback](https://forum.devolutions.net/forums/176/documentation--documentation-requests)
---
# Getting started with Devolutions packages - Devolutions Documentation
Getting started with Devolutions packages
=========================================
Devolutions' solution packages are designed to address specific use cases by bundling together the right products.
Follow these installation guides to get started with our solution packages:
* [Starter Pack](https://docs.devolutions.net/gateway/support-resources/getting-started-packages/starter-pack/)
* [Workforce password management package](https://docs.devolutions.net/gateway/support-resources/getting-started-packages/workforce-password-management-package/)
* [Remote access management package](https://docs.devolutions.net/gateway/support-resources/getting-started-packages/remote-access-management-package/)
* [Remote desktop management and IT operations package](https://docs.devolutions.net/gateway/support-resources/getting-started-packages/remote-connection-and-it-management-package/)
* [Privileged access management package](https://docs.devolutions.net/gateway/support-resources/getting-started-packages/privileged-access-management-package/)
#### See also
[](https://docs.devolutions.net/gateway/support-resources/getting-started-packages/#see-also)
* [Devolutions Starter Pack overview: An all-inclusive bundle for small teams of up to five users](https://www.youtube.com/watch?v=4i5IUiXl_iM)
* [Getting started with the Devolutions Starter Pack: What to expect and how to start](https://www.youtube.com/watch?v=PAEerLuCm6k)
[ Share your feedback](https://forum.devolutions.net/forums/176/documentation--documentation-requests)
---
# Support and resources - Devolutions Documentation
Support and resources
=====================
[ Share your feedback](https://forum.devolutions.net/forums/176/documentation--documentation-requests)
---
# Support et ressources - Documentation Devolutions
Support et ressources
=====================
[ Partagez vos commentaires](https://forum.devolutions.net/forums/176/documentation--documentation-requests)
---
# Avis de sécurité - Documentation Devolutions
Avis de sécurité
================
Sur cette page
* [CVSS](https://docs.devolutions.net/fr/gateway/support-resources/security-advisories/#cvss)
* [CVE](https://docs.devolutions.net/fr/gateway/support-resources/security-advisories/#cve)
_**Avis de sécurité**_ pour tous nos produits sont disponibles pour consultation sur notre [site web Devolutions](https://devolutions.net/security/advisories)
Il s'agit d'une liste pour informer nos utilisateurs qu'une vulnérabilité de sécurité dans nos produits a été trouvée. Elle comprendra des mesures correctives et de contournement, le score de niveau de gravité du [système de notation commune des vulnérabilités](https://www.first.org/cvss/)
(CVSS), et le numéro [d'exposition et de vulnérabilités communes](https://cve.mitre.org/index.html)
(CVE). [Abonnez-vous](https://devolutions.net/security/advisories)
pour recevoir nos derniers avis de sécurité par courriel.
CVSS
----
[](https://docs.devolutions.net/fr/gateway/support-resources/security-advisories/#cvss)

Le CVSS fournit un moyen de capturer les caractéristiques principales d'une vulnérabilité et de produire un score numérique reflétant sa gravité. Ce score numérique peut ensuite être traduit en une représentation qualitative (telle que faible, moyen, élevé et critique) pour aider les organisations à évaluer et à prioriser correctement leurs processus de gestion des vulnérabilités.
Pour plus de détails et une description des différents composants de l'équation, veuillez visiter le site web [CVSS](https://www.first.org/cvss/)
.
CVE
---
[](https://docs.devolutions.net/fr/gateway/support-resources/security-advisories/#cve)

Le programme de mission CVE consiste à identifier, définir et cataloguer les vulnérabilités de cybersécurité divulguées publiquement. Il y a un enregistrement CVE pour chaque vulnérabilité dans le catalogue. Les vulnérabilités sont découvertes puis attribuées et publiées par des organisations du monde entier ayant collaboré avec le programme CVE. Les partenaires publient les enregistrements CVE pour communiquer des descriptions cohérentes des vulnérabilités. Les professionnels de la technologie de l'information et de la cybersécurité utilisent les enregistrements CVE pour s'assurer qu'ils discutent du même problème et pour coordonner leurs efforts afin de prioriser et de traiter les vulnérabilités. Il s'agit d'une liste de failles de sécurité informatique divulguées publiquement. Lorsqu'on se réfère à un CVE, il s'agit d'une faille de sécurité à laquelle un numéro d'ID CVE a été attribué.
Pour plus de détails, veuillez visiter le site web [CVE](https://cve.mitre.org/)
.
[ Partagez vos commentaires](https://forum.devolutions.net/forums/176/documentation--documentation-requests)
---
# Security advisories - Devolutions Documentation
Security advisories
===================
Auf dieser Seite
* [CVSS](https://docs.devolutions.net/de/gateway/support-resources/security-advisories/#cvss)
* [CVE](https://docs.devolutions.net/de/gateway/support-resources/security-advisories/#cve)
_**Security Advisories**_ for all our products are available for consultation on our [Devolutions website](https://devolutions.net/security/advisories)
It is a list to inform our users that a security vulnerability in our products was found. It will include remediation and workarounds, the severity level score from the [Common Vulnerability Scoring System](https://www.first.org/cvss/)
(CVSS), and the [Common Vulnerabilities and Exposures](https://cve.mitre.org/index.html)
(CVE) number. [Subscribe](https://devolutions.net/security/advisories)
to receive our latest security advisories by email.
CVSS
----
[](https://docs.devolutions.net/de/gateway/support-resources/security-advisories/#cvss)

The CVSS provides a way to capture the principal characteristics of a vulnerability and produce a numerical score reflecting its severity. The numerical score can then be translated into a qualitative representation (such as low, medium, high, and critical) to help organizations properly assess and prioritize their vulnerability management processes.
For more details and a description of the various equation components, please visit the [CVSS](https://www.first.org/cvss/)
website.
CVE
---
[](https://docs.devolutions.net/de/gateway/support-resources/security-advisories/#cve)

The CVE mission program is to identify, define, and catalog publicly disclosed cybersecurity vulnerabilities. There is one CVE Record for each vulnerability in the catalog. The vulnerabilities are discovered then assigned and published by organizations from around the world that have partnered with the CVE Program. Partners publish CVE Records to communicate consistent descriptions of vulnerabilities. Information technology and cybersecurity professionals use CVE Records to ensure they are discussing the same issue and to coordinate their efforts to prioritize and address the vulnerabilities. It is a list of publicly disclosed computer security flaws. When someone refers to a CVE, it is a security flaw that has been assigned a CVE ID number.
For more details, please visit the [CVE](https://cve.mitre.org/)
website.
[ Share your feedback](https://forum.devolutions.net/forums/176/documentation--documentation-requests)
---
# Securely send a file to our team - Devolutions Documentation
Securely send a file to our team
================================
To protect your information, we are using a third-party provider of a secure file exchange service, namely Sharefile.
To send us a file, visit [Sharefile](https://devolutions.sharefile.com/filedrop)
, fill in your basic information, and you will be able to upload file(s). These files are not accessible to all Devolutions employees, only to our customer support team.
[ Share your feedback](https://forum.devolutions.net/forums/176/documentation--documentation-requests)
---
# Paquet de gestion de l'accès à distance - Documentation Devolutions
Paquet de gestion de l'accès à distance
=======================================
Le [**paquet de gestion de l'accès à distance**](https://devolutions.net/solutions/#remote-access-management)
offre un moyen sécurisé d'octroyer des accès just-in-time (JAT) aux utilisateurs externes, aux fournisseurs, et aux professionnels de l'informatique tiers. Cela permet aux organisations de remplacer les VPN traditionnels par une alternative plus contrôlée, d'appliquer des mesures d'authentification telles que l'AMF, et de surveiller les connexions à distance sans exposer leurs réseaux.
Suivre la liste de contrôle ci-dessous pour démarrer :
| LISTE DE CONTRÔLE | DESCRIPTION |
| --- | --- |
| **Étape 1 – Démarrer avec une source de données**
* Basé sur le nuage : [Créer un Devolutions Hub](https://docs.devolutions.net/fr/hub/getting-started/create-hub/)
* Auto-hébergé : [Créer une instance Devolutions Server](https://docs.devolutions.net/fr/server/getting-started/installation/create-server-instance/) | Créer et configurer une source de données. Les sources de données sont au cœur de l'écosystème de Devolutions.
Découvrez les principales différences entre l'auto-hébergement et l'hébergement sur le nuage dans cet article de blog : [Décoder l'auto-hébergement vs. l'hébergement sur le nuage](https://blog.devolutions.net/2025/03/decoding-self-hosting-vs-cloud-hosting)
. |
| **Étape 2 – Enregistrer une licence**
* [Dans Devolutions Server](https://docs.devolutions.net/fr/server/web-interface/administration/security-management/licenses/)
* [Dans Devolutions Hub](https://docs.devolutions.net/fr/hub/web-interface/administration/management/licenses/) | Gérer les licences en stockant leurs clés de licence soit dans Devolutions Server soit dans Devolutions Hub. |
| **Étape 3 – Installer Devolutions Gateway**
* [Installation et configuration de Devolutions Gateway](https://docs.devolutions.net/fr/gateway/getting-started/) | [Devolutions Gateway](https://docs.devolutions.net/fr/gateway/overview/what-is-gateway/)
fournit un accès juste-à-temps (JAT) autorisé aux ressources dans les réseaux segmentés, ce qui augmente la sécurité. |
| **Étape 4 – Démarrer avec Devolutions Launcher**
* [Avec Devolutions Server](https://docs.devolutions.net/fr/server/devolutions-ecosystem/launcher/)
* [Avec Devolutions Hub](https://docs.devolutions.net/fr/hub/devolutions-ecosystem/launcher/) | Devolutions Launcher est un outil connexe pour Devolutions Server et Devolutions Hub. Il peut lancer plusieurs sessions à distance simultanément tout en donnant aux administrateurs système un contrôle total. Devolutions Launcher est uniquement disponible pour Windows. |
### Outils connexes
[](https://docs.devolutions.net/fr/gateway/support-resources/getting-started-packages/remote-access-management-package/#companion-tools)
[Outils connexes](https://docs.devolutions.net/fr/rdm/devolutions-ecosystem/#companion-tools)
apportent des fonctionnalités supplémentaires aux solutions principales de Devolutions, telles que l'injection des identifiants, le support PowerShell, la messagerie sécurisée, et bien plus encore.
#### Démarrer avec Devolutions Workspace
[](https://docs.devolutions.net/fr/gateway/support-resources/getting-started-packages/remote-access-management-package/#get-started-with-devolutions-workspace)
Les [applications Workspace](https://docs.devolutions.net/fr/workspace/workspace-app/installation/)
réunissent Devolutions Hub Business et Devolutions Server en un seul emplacement centralisé infonuagique. En ce qui concerne [l’extension de navigateur Workspace](https://docs.devolutions.net/fr/workspace/workspace-browser-extension/installation/)
, il s’agit d’un module gratuit à utiliser en conjonction avec Remote Desktop Manager, Devolutions Server et Devolutions Hub pour injecter de façon sécurisée des mots de passe dans des sites Web.
* [Application Workspace](https://docs.devolutions.net/fr/workspace/workspace-app/installation/)
* [Extension de navigateur Workspace](https://docs.devolutions.net/fr/workspace/workspace-browser-extension/installation/)
#### Voir aussi
[](https://docs.devolutions.net/fr/gateway/support-resources/getting-started-packages/remote-access-management-package/#see-also)
* [Devolutions Academy – Gestion de l'accès à distance](https://academy.devolutions.net/student/path/2481294-workforce-password-management)
* [Vue d'ensemble du pack de démarrage Devolutions : Un forfait tout compris pour les petites équipes jusqu'à cinq utilisateurs](https://www.youtube.com/watch?v=4i5IUiXl_iM)
* [Démarrer avec le pack de démarrage Devolutions : À quoi s'attendre et comment commencer](https://www.youtube.com/watch?v=PAEerLuCm6k)
[ Partagez vos commentaires](https://forum.devolutions.net/forums/176/documentation--documentation-requests)
---
# Envoyer un fichier à notre équipe de manière sécurisée - Documentation Devolutions
Envoyer un fichier à notre équipe de manière sécurisée
======================================================
Pour protéger vos informations, nous utilisons un fournisseur tiers de service d'échange de fichiers sécurisé, à savoir Sharefile.
Pour nous envoyer un fichier, visitez [Sharefile](https://devolutions.sharefile.com/filedrop)
, remplissez vos informations de base, et vous pourrez télécharger le(s) fichier(s). Ces fichiers ne sont pas accessibles à tous les employés de Devolutions, uniquement à notre équipe de soutien client.
[ Partagez vos commentaires](https://forum.devolutions.net/forums/176/documentation--documentation-requests)
---
# Integration levels - Devolutions Documentation
Integration levels
==================
Auf dieser Seite
* [Integration level](https://docs.devolutions.net/de/gateway/support-resources/integration-levels/#integration-level)
* [Integration level 1 - High support](https://docs.devolutions.net/de/gateway/support-resources/integration-levels/#integration-level-1-high-support)
* [Integration level 2 - Moderate support](https://docs.devolutions.net/de/gateway/support-resources/integration-levels/#integration-level-2-moderate-support)
* [Integration level 3 - Limited support](https://docs.devolutions.net/de/gateway/support-resources/integration-levels/#integration-level-3-limited-support)
* [Data sources](https://docs.devolutions.net/de/gateway/support-resources/integration-levels/#data-sources)
* [Sessions](https://docs.devolutions.net/de/gateway/support-resources/integration-levels/#sessions)
* [Credential management](https://docs.devolutions.net/de/gateway/support-resources/integration-levels/#credential-management)
Devolutions integrates a wide array of technologies and third-party software. Some session types such as RDP and SSH, are core features of Remote Desktop Manager and are used by hundreds of thousands of our users. We also integrate other types that are much less popular; those are typically added at the request of users on our forum and are maintained on a best effort basis.
The purpose of this document is to describe the level of maintenance and support you can expect from Devolutions for the sessions we integrate. The classification is based on a number of factors such as:
* The amount of control we have on the integration
* Whether the integration is a preview, an addon or is deprecated
* The popularity of the types in our user base
**By default, session types that are not explicitly listed fall in Integration level 2.**
Integration level
-----------------
[](https://docs.devolutions.net/de/gateway/support-resources/integration-levels/#integration-level)
### **Integration level 1 - High support**
[](https://docs.devolutions.net/de/gateway/support-resources/integration-levels/#integration-level-1-high-support)
This tier reflects our highest ability and commitment to resolve problems. This tier includes sessions based on popular and standardized protocols, as well as services developed by Devolutions directly. The session types most popular with our users are typically placed in this category.
### Integration level 2 - Moderate support
[](https://docs.devolutions.net/de/gateway/support-resources/integration-levels/#integration-level-2-moderate-support)
This tier includes integrations where we have a moderate level of control. This typically includes integration based on an API or an SDK.
### Integration level 3 - Limited support
[](https://docs.devolutions.net/de/gateway/support-resources/integration-levels/#integration-level-3-limited-support)
Sessions in this tier are supported on a best effort basis. The following sessions fall under this tier:
* Addons
* Deprecated entries
Sessions that are integrated by launching an external program from the command line fall in this tier, as options with this type integrations are the most limited. Types with very low usage levels may also be placed in this category.
The following tables lists the tiers for data sources, sessions, and credential management types.
### Data sources
[](https://docs.devolutions.net/de/gateway/support-resources/integration-levels/#data-sources)
| Integration level | Data sources |
| --- | --- |
| **Integration level 1** | Devolutions Server, Devolutions Hub Business, SQL Server, Azure SQL, SQLite |
| **Integration level 2** | CyberArk, XML |
| **Integration level 3** | _**Deprecated data sources**_
Google Drive, Dropbox |
### Sessions
[](https://docs.devolutions.net/de/gateway/support-resources/integration-levels/#sessions)
| Integration level | Session types |
| --- | --- |
| **Integration level 1** | RDP, SSH (SSH Tunnel, SCP, SFTP, SSH port forward), Telnet, Web browser, VNC (FreeVNC, IronVNC), FTP, Active Directory dashboard, Apple Remote Desktop, Microsoft Entra ID dashboard, Powershell, Devolutions Gateway |
| **Integration level 2** | Apple Remote Management, AWS dashboard, BeyondTrust, CyberArk (SIA, PSM), Citrix, DameWare Mini Remote Control, Dell iDRAC, DeskRoll, Google Workspace, HP iLO, IBM 5250, LogMeIn, Microtik Winbox, Microsoft Hyper-V dashboard, OpenVPN, Proxmox dashboard, Proxy Tunnel, RD Gateway console, Serial port, Supremo, TN3270, VMware dashboard, VMware remote console (VMRC), Windows Admin Center |
| **Integration level 3** | AnyDesk, ISL Light, MobaXterm, Nice DCV, Oracle Virtualbox, Radmin, RustDesk, Teamviewer, VMWare (Player, Workstation, vSphere), VNC (UltraVNC), XWindow
_**Addons**_
2XClient, Ammyy Admin, Anyplace Control, AWRC Pro, Axel Viewer, Barracuda NG Firewall, BeyondTrust Representative Console, Bitvise SSH Client, Check Point Smart Console, Cisco ASDM, Citrix NetScaler, Database .Net, Db Visualizer, DBeaver, Ericom Blaze Client, FastViewer, FlashFXP, FortiClient VPN, GateProtect Firewall Administration Client, HeidiSQL, HP Integrated Lights Out (iLO Application), IBM i Access, IBM Personal Communications, Impero Guest, Iperius Remote, Java Web Start, MS Telnet, MySQL GUI Tools, MySQLWorkbench, Navicat Premium, NetSupport Manager, NoMachine, NX Client, PenguiNet SSH client, PgAdmin 4, PowerTerm Pro, Proxy Networks - Proxy Master, RemoteAssistant365, Royal TS, RVTools, Sandboxie, SAP Frontend Server (SAP GUI), SAP Hana Studio, SAP MaxDB Database Studio, SAP NetWeaver, SCCM 2012 Remote Control, SecureCRT, SecureFX, SimpleHelp, SmartFTP, Splashtop, Splunk, SQL Server Management Studio, SuperMicro IPMI Utilities, Tera Term Pro, Teradici PCoIP Client, TOAD, Veeam, VMware Horizon View Client, X2Go Client, XMail Manager, XManager , Xshell, ZOC
_**Deprecated sessions**_
Box, Chrome Remote Desktop, Google Drive, GoToAssist, Intel AMT (KVM), Microsoft Azure Storage Explorer, Microsoft RD Gateway, Rebex (FTP, SSH, SCP), PuTTY, Spiceworks, XenServer |
### Credential management
[](https://docs.devolutions.net/de/gateway/support-resources/integration-levels/#credential-management)
| Integration level | Credential management types |
| --- | --- |
| **Integration level 1** | SSH key, Devolutions Server privileged account, Devolutions Hub privileged account, RSA SecurID, X.509 certificate
_**Generic entries**_
username and password, password list, OTP, API key, access code, connection string |
| **Integration level 2** | 1Password, Bitwarden, Cerby, Dashlane, CyberArk, Delinea Secret Server, Dropbox Passwords, Hashicorp Vault, Hudu, IT Glue, IT Portal, Keepass, Keeper, LAPS, LastPass, Netwrix Password Secure, One Identity Safeguard, Passwordstate, Password Depot, Passbolt, Passwordstate, Pleasant Password Server, Proton Pass, Psono, Roboform, Sticky Password, TeamPass, Topicus KeyHub, True Key, Windows Credential Manager, Zoho Vault |
| **Integration level 3** | _**Addons**_
_**Deprecated credential management types**_ |
[ Share your feedback](https://forum.devolutions.net/forums/176/documentation--documentation-requests)
---
# Remote access management package - Devolutions Documentation
Remote access management package
================================
The [**Remote access management**](https://devolutions.net/solutions/#remote-access-management)
package provides a secure way to grant just-in-time (JIT) access to external users, vendors, and third-party IT professionals. It allows organizations to replace traditional VPNs with a more controlled alternative, enforce authentication measures such as MFA, and monitor remote connections without exposing their networks.
Follow the checklist below to get started:
| CHECKLIST | DESCRIPTION |
| --- | --- |
| **Step 1 – Get started with a data source**
* Cloud-based: [Create a Devolutions Hub](https://docs.devolutions.net/hub/getting-started/create-hub/)
* Self-hosted: [Create a Devolutions Server instance](https://docs.devolutions.net/server/getting-started/installation/create-server-instance/) | Create and configure a data source. Data sources are at the heart of Devolutions' ecosystem.
Discover the key differences between self-hosting and cloud-hosting in this blog article: [Decoding self-hosting vs. cloud-hosting](https://blog.devolutions.net/2025/03/decoding-self-hosting-vs-cloud-hosting)
. |
| **Step 2 – Register a license**
* [In Devolutions Server](https://docs.devolutions.net/server/web-interface/administration/security-management/licenses/)
* [In Devolutions Hub](https://docs.devolutions.net/hub/web-interface/administration/management/licenses/) | Manage licenses by storing their serials in either Devolutions Server or Devolutions Hub. |
| **Step 3 – Install Devolutions Gateway**
* [Devolutions Gateway installation and configuration](https://docs.devolutions.net/gateway/getting-started/) | [Devolutions Gateway](https://docs.devolutions.net/gateway/overview/what-is-gateway/)
provides authorized just-in-time (JIT) access to resources in segmented networks, thus increasing security. |
| **Step 4 – Get started with Devolutions Launcher**
* [With Devolutions Server](https://docs.devolutions.net/server/devolutions-ecosystem/launcher/)
* [With Devolutions Hub](https://docs.devolutions.net/hub/devolutions-ecosystem/launcher/) | Devolutions Launcher is a companion tool for Devolutions Server and Devolutions Hub. It can launch multiple remote sessions simultaneously while giving system administrators full control. Devolutions Launcher is only available for Windows. |
### Companion tools
[](https://docs.devolutions.net/de/gateway/support-resources/getting-started-packages/remote-access-management-package/#companion-tools)
[Companion tools](https://docs.devolutions.net/rdm/devolutions-ecosystem/#companion-tools)
bring additional features to Devolutions’ main solutions, such as credential brokering, PowerShell support, secure messaging, and much more.
#### Get started with Devolutions Workspace
[](https://docs.devolutions.net/de/gateway/support-resources/getting-started-packages/remote-access-management-package/#get-started-with-devolutions-workspace)
The [Workspace apps](https://docs.devolutions.net/workspace/workspace-app/installation/)
bring together Devolutions Hub Business and Devolutions Server into a single, centralized, cloud-based location. As for [Workspace browser extension](https://docs.devolutions.net/workspace/workspace-browser-extension/installation/)
, it is a free browser plugin to be used in conjunction with Remote Desktop Manager, Devolutions Server, and Devolutions Hub for secure password injection into websites.
* [Workspace app](https://docs.devolutions.net/workspace/workspace-app/installation/)
* [Workspace browser extension](https://docs.devolutions.net/workspace/workspace-browser-extension/installation/)
#### See also
[](https://docs.devolutions.net/de/gateway/support-resources/getting-started-packages/remote-access-management-package/#see-also)
* [Devolutions Academy – Remote Access Management](https://academy.devolutions.net/student/path/2481294-workforce-password-management)
* [Devolutions Starter Pack overview: An all-inclusive bundle for small teams of up to five users](https://www.youtube.com/watch?v=4i5IUiXl_iM)
* [Getting started with the Devolutions Starter Pack: What to expect and how to start](https://www.youtube.com/watch?v=PAEerLuCm6k)
[ Share your feedback](https://forum.devolutions.net/forums/176/documentation--documentation-requests)
---
# Niveaux d'intégration - Documentation Devolutions
Niveaux d'intégration
=====================
Sur cette page
* [Niveau d'intégration](https://docs.devolutions.net/fr/gateway/support-resources/integration-levels/#integration-level)
* [Niveau d'intégration 1 - Support élevé](https://docs.devolutions.net/fr/gateway/support-resources/integration-levels/#integration-level-1-high-support)
* [Niveau d'intégration 2 - Support modéré](https://docs.devolutions.net/fr/gateway/support-resources/integration-levels/#integration-level-2-moderate-support)
* [Niveau d'intégration 3 - Support limité](https://docs.devolutions.net/fr/gateway/support-resources/integration-levels/#integration-level-3-limited-support)
* [Sources de données](https://docs.devolutions.net/fr/gateway/support-resources/integration-levels/#data-sources)
* [Sessions](https://docs.devolutions.net/fr/gateway/support-resources/integration-levels/#sessions)
* [Gestion des identifiants](https://docs.devolutions.net/fr/gateway/support-resources/integration-levels/#credential-management)
Devolutions intègre un large éventail de technologies et de logiciels tiers. Certains types de sessions, tels que RDP et SSH, sont des fonctionnalités de base de Remote Desktop Manager et sont utilisés par des centaines de milliers de nos utilisateurs. Nous intégrons également d'autres types qui sont beaucoup moins populaires ; ceux-ci sont généralement ajoutés à la demande des utilisateurs sur notre forum et sont maintenus sur une base de meilleur effort.
Le but de ce document est de décrire le niveau de maintenance et de support auquel vous pouvez vous attendre de la part de Devolutions pour les sessions que nous intégrons. La classification est basée sur un certain nombre de facteurs tels que :
* La quantité de contrôle que nous avons sur l'intégration
* Que l'intégration soit une prévisualisation, un addon ou soit obsolète
* La popularité des types dans notre base d'utilisateurs
**Par défaut, les types de sessions qui ne sont pas explicitement listés tombent dans le niveau d'intégration 2.**
Niveau d'intégration
--------------------
[](https://docs.devolutions.net/fr/gateway/support-resources/integration-levels/#integration-level)
### Niveau d'intégration 1 - Support élevé
[](https://docs.devolutions.net/fr/gateway/support-resources/integration-levels/#integration-level-1-high-support)
Ce niveau reflète notre plus grande capacité et engagement à résoudre les problèmes. Ce niveau inclut les sessions basées sur des protocoles populaires et standardisés, ainsi que des services développés directement par Devolutions. Les types de sessions les plus populaires auprès de nos utilisateurs sont généralement placés dans cette catégorie.
### Niveau d'intégration 2 - Support modéré
[](https://docs.devolutions.net/fr/gateway/support-resources/integration-levels/#integration-level-2-moderate-support)
Ce niveau inclut les intégrations où nous avons un niveau de contrôle modéré. Cela inclut généralement une intégration basée sur une API ou un SDK.
### Niveau d'intégration 3 - Support limité
[](https://docs.devolutions.net/fr/gateway/support-resources/integration-levels/#integration-level-3-limited-support)
Les sessions dans ce niveau sont soutenues sur la base du meilleur effort. Les sessions suivantes relèvent de ce niveau :
* Addons
* Entrées obsolètes
Les sessions qui sont intégrées en lançant un programme externe depuis la ligne de commande tombent dans ce niveau, car les options avec ce type d'intégration sont les plus limitées. Les types avec des niveaux d'utilisation très faibles peuvent également être placés dans cette catégorie.
Les tableaux suivants listent les niveaux pour les sources de données, les sessions et les types de gestion des identifiants.
### Sources de données
[](https://docs.devolutions.net/fr/gateway/support-resources/integration-levels/#data-sources)
| Niveau d'intégration | Sources de données |
| --- | --- |
| **Niveau d'intégration 1** | Devolutions Server, Devolutions Hub Business, SQL Server, Azure SQL, SQLite |
| **Niveau d'intégration 2** | CyberArk, XML |
| **Niveau d'intégration 3** | _**Sources de données obsolètes**_
Google Drive, Dropbox |
### Sessions
[](https://docs.devolutions.net/fr/gateway/support-resources/integration-levels/#sessions)
| Niveau d'intégration | Types de sessions |
| --- | --- |
| **Niveau d'intégration 1** | RDP, SSH (Tunnel SSH, SCP, SFTP, redirection de port SSH), Telnet, navigateur Web, VNC (FreeVNC, IronVNC), FTP, Active Directory tableau de bord, Apple Remote Desktop, Microsoft Entra ID tableau de bord, Powershell, Devolutions Gateway |
| **Niveau d'intégration 2** | Apple Remote Management, tableau de bord AWS, BeyondTrust, CyberArk (SIA, PSM), Citrix, DameWare Mini Remote Control, Dell iDRAC, DeskRoll, Google Workspace, HP iLO, IBM 5250, LogMeIn, Microtik Winbox, tableau de bord Microsoft Hyper-V, OpenVPN, tableau de bord Proxmox, Proxy Tunnel, console RD Gateway, port série, Supremo, TN3270, tableau de bord VMware, console distante VMware (VMRC), Windows Admin Center |
| **Niveau d'intégration 3** | AnyDesk, ISL Light, MobaXterm, Nice DCV, Oracle Virtualbox, Radmin, RustDesk, Teamviewer, VMWare (Player, Workstation, vSphere), VNC (UltraVNC), XWindow
_**Extensions**_
2XClient, Ammyy Admin, Anyplace Control, AWRC Pro, Axel Viewer, Barracuda NG Firewall, BeyondTrust Representative Console, Bitvise SSH Client, Check Point Smart Console, Cisco ASDM, Citrix NetScaler, Database .Net, Db Visualizer, DBeaver, Ericom Blaze Client, FastViewer, FlashFXP, FortiClient VPN, Clé d'administration de GateProtect Firewall, HeidiSQL, HP Integrated Lights Out (iLO Application), IBM i Access, IBM Personal Communications, Impero Guest, Iperius Remote, Java Web Start, MS Telnet, MySQL GUI Tools, MySQLWorkbench, Navicat Premium, NetSupport Manager, NoMachine, NX Client, PenguiNet SSH client, PgAdmin 4, PowerTerm Pro, Proxy Networks - Proxy Master, RemoteAssistant365, Royal TS, RVTools, Sandboxie, SAP Frontend Server (SAP GUI), SAP Hana Studio, SAP MaxDB Database Studio, SAP NetWeaver, SCCM 2012 Remote Control, SecureCRT, SecureFX, SimpleHelp, SmartFTP, Splashtop, Splunk, SQL Server Management Studio, SuperMicro IPMI Utilities, Tera Term Pro, Teradici PCoIP Client, TOAD, Veeam, VMware Horizon View Client, X2Go Client, XMail Manager, XManager, Xshell, ZOC
_**Sessions obsolètes**_
Box, Chrome Remote Desktop, Google Drive, GoToAssist, Intel AMT (KVM), Microsoft Azure Storage Explorer, Microsoft RD Gateway, Rebex (FTP, SSH, SCP), PuTTY, Spiceworks, XenServer |
### Gestion des identifiants
[](https://docs.devolutions.net/fr/gateway/support-resources/integration-levels/#credential-management)
| Niveau d'intégration | Types de gestion des identifiants |
| --- | --- |
| **Niveau d'intégration 1** | clé SSH, compte privilégié Devolutions Server, compte privilégié Devolutions Hub, RSA SecurID, certificat X.509
_**Entrées génériques**_
nom d'utilisateur et mot de passe, liste de mots de passe, mot de passe à usage unique, clé API, code d'accès, chaîne de connexion |
| **Niveau d'intégration 2** | 1Password, Bitwarden, Cerby, Dashlane, CyberArk, Delinea Secret Server, Dropbox Passwords, Hashicorp Vault, Hudu, IT Glue, IT Portal, Keepass, Keeper, LAPS, LastPass, Netwrix Password Secure, One Identity Safeguard, Passwordstate, Password Depot, Passbolt, Passwordstate, Pleasant Password Server, Proton Pass, Psono, Roboform, Sticky Password, TeamPass, Topicus KeyHub, True Key, Gestionnaire d'informations d'identification Windows, Zoho Vault |
| **Niveau d'intégration 3** | _**Addons**_
_**Types de gestion des identifiants obsolètes**_ |
[ Partagez vos commentaires](https://forum.devolutions.net/forums/176/documentation--documentation-requests)
---
# Customer support - Devolutions Documentation
Customer support
================
Phone and chat hours: Monday to Friday 7:30 a.m. to 6:00 p.m. EDT
Languages: English, Français, Deutsch
Email: [service@devolutions.net](mailto:service@devolutions.net)
Forum: [https://forum.devolutions.net](https://forum.devolutions.net/)
Phone: +1 844 463.0419
### Support plans
[](https://docs.devolutions.net/de/gateway/support-resources/technical-support/#support-plans)
Subscribers of a paid support plan receive an email address and a plan ID. You should send your support requests to the appropriate email address and provide your plan ID in the subject line.
The level of support provided, as well as the priority assigned to customer’s support requests, will depend on the specific support plan selected or purchased, and on the severity level of the issue reported.
The table below outlines the various support plans offered by Devolutions, each plan defining a distinct scope of customer support and technical assistance:
| | Standard plan | Extended plan | Premium plan |
| --- | --- | --- | --- |
| **Support level priority** | Normal | High | Highest |
| **24/7 access to our community forum, documentation, and** **Devolutions Academy** | X | X | X |
| **Online community forum support** | X | X | X |
| **Email support** | X | X | X |
| **Live chat support** | X | X | X |
| **Phone support** | | X | X |
| **24/7 online community forum and email support** | | | X |
| **Dedicated customer success manager** | | | X |
| **Consulting, security guidance, and training (6 hours per year)** | | | X |
For more information, consult our full [Support Services Addendum](https://devolutions.net/legal/customer-agreements/)
.
[ Share your feedback](https://forum.devolutions.net/forums/176/documentation--documentation-requests)
---
# Système de billetterie - Documentation Devolutions
Système de billetterie
======================
Devolutions utilise actuellement Salesforce Service Cloud pour gérer ses besoins en système de billetterie. Utilisez l'adresse courriel [service@devolutions.net](mailto:service@devolutions.net)
pour ouvrir un cas avec nous.
Les abonnés de notre plan de soutien Premium ont également accès à un portail de soutien. Veuillez ouvrir un billet pour obtenir l'accès.
[ Partagez vos commentaires](https://forum.devolutions.net/forums/176/documentation--documentation-requests)
---
# Support client - Documentation Devolutions
Support client
==============
Heures de téléphone et chat : lundi au vendredi de 7h30 à 18h00 HAE
Langues : anglais, français, allemand
Courriel: [service@devolutions.net](mailto:service@devolutions.net)
Forum : [https://forum.devolutions.net](https://forum.devolutions.net/)
Téléphone : +1 844 463.0419
### Plans de support
[](https://docs.devolutions.net/fr/gateway/support-resources/technical-support/#support-plans)
Les abonnés à un plan de support payant reçoivent une adresse courriel et un ID de plan. Envoyer vos demandes de support à l'adresse courriel appropriée et indiquer votre ID de plan dans l'objet du message.
Le niveau de support fourni, ainsi que la priorité accordée aux demandes de support des clients, dépendent du forfait de support spécifique sélectionné ou acheté, et du niveau de gravité du problème signalé.
Le tableau ci-dessous présente les différents forfaits de support offerts par Devolutions, chaque forfait définissant un périmètre distinct de support client et d'assistance technique :
| | Forfait standard | Forfait étendu | Forfait premium |
| --- | --- | --- | --- |
| **Priorité du niveau de support** | Normal | Élevé | Le plus élevé |
| **Accès 24/7 à notre forum communautaire, documentation, et** **Devolutions Academy** | X | X | X |
| **Support du forum communautaire en ligne** | X | X | X |
| **Support par courriel** | X | X | X |
| **Support par chat en direct** | X | X | X |
| **Support téléphonique** | | X | X |
| **Support par courriel et forum communautaire en ligne 24/7** | | | X |
| **Responsable dédié du succès client** | | | X |
| **Consultation, conseils en sécurité, et formation (6 heures par an)** | | | X |
Pour plus d'informations, consultez notre [avenant de services de support](https://devolutions.net/legal/customer-agreements/)
complet.
[ Partagez vos commentaires](https://forum.devolutions.net/forums/176/documentation--documentation-requests)
---
# Ticketing system - Devolutions Documentation
Ticketing system
================
Devolutions currently uses Salesforce Service Cloud to handle its ticketing needs. Use the email address [service@devolutions.net](mailto:service@devolutions.net)
to open a case with us.
Subscribers of our Premium support plan also have access to a support portal. Please open a ticket to get access.
[ Share your feedback](https://forum.devolutions.net/forums/176/documentation--documentation-requests)
---
# Paquet de gestion des accès privilégiés - Documentation Devolutions
Paquet de gestion des accès privilégiés
=======================================
Le [**paquet de gestion des accès privilégiés**](https://devolutions.net/solutions/#privileged-access-management)
aide à sécuriser et gérer les informations d'identification d'administration en appliquant des contrôles d'accès et en appliquant le principe de moindre privilège. Il permet aux organisations de restreindre l'accès aux ressources critiques, d'automatiser la rotation des mots de passe, et d'octroyer une élévation de privilèges temporaire si nécessaire.
La liste de contrôle ci-dessous contient toutes les étapes pour configurer correctement vos solutions :
| LISTE DE CONTRÔLE | DESCRIPTION |
| --- | --- |
| **Étape 1 – Commencer avec une source de données**
* Basé sur le nuage : [Créer un Devolutions Hub](https://docs.devolutions.net/fr/hub/getting-started/create-hub/)
* Auto-hébergé : [Créer une instance Devolutions Server](https://docs.devolutions.net/fr/server/getting-started/installation/create-server-instance/) | Créer et configurer une source de données. Les sources de données sont au cœur de l'écosystème Devolutions.
Découvrir les principales différences entre l'hébergement sur site et l'hébergement dans le nuage dans cet article de blog : [Décoder l'hébergement sur site vs. l'hébergement dans le nuage](https://blog.devolutions.net/2025/03/decoding-self-hosting-vs-cloud-hosting)
. |
| **Étape 2 – Enregistrer une clé de licence**
* [Dans Devolutions Server](https://docs.devolutions.net/fr/server/web-interface/administration/security-management/licenses/)
* [Dans Devolutions Hub](https://docs.devolutions.net/fr/hub/web-interface/administration/management/licenses/) | Gérer les licences en stockant leurs clés de licence soit dans Devolutions Server, soit dans Devolutions Hub. |
| **Étape 3 – Installer Devolutions Gateway**
* [Installation et configuration de Devolutions Gateway](https://docs.devolutions.net/fr/gateway/getting-started/) | [Devolutions Gateway](https://docs.devolutions.net/fr/gateway/overview/what-is-gateway/)
fournit un accès juste-à-temps (JAT) autorisé aux ressources dans les réseaux segmentés, augmentant ainsi la sécurité. |
| **Étape 4 – Commencer avec Remote Desktop Manager**
* [Liste de contrôle de Remote Desktop Manager pour entreprises](https://docs.devolutions.net/fr/rdm/getting-started/checklist-enterprises/) | L'application Remote Desktop Manager est utilisée pour gérer et centraliser les technologies d'accès à distance, les mots de passe privilégiés, les documents, et les informations partagées. |
| **Étape 5 – Commencer avec Devolutions PAM**
* [Pour Devolutions Server](https://docs.devolutions.net/fr/pam/server/getting-started/)
* [Pour Devolutions Hub](https://docs.devolutions.net/fr/pam/hub/pam-service/) | Devolutions PAM est une solution de gestion des accès privilégiés robuste, facile à déployer et abordable qui équilibre productivité et sécurité. |
### Outils connexes
[](https://docs.devolutions.net/fr/gateway/support-resources/getting-started-packages/privileged-access-management-package/#companion-tools)
Les [outils connexes](https://docs.devolutions.net/fr/rdm/devolutions-ecosystem/#companion-tools)
ajoutent des fonctionnalités supplémentaires aux solutions principales de Devolutions, comme l'injection des identifiants, le support PowerShell, la messagerie sécurisée, et bien plus.
#### Commencer avec Devolutions Workspace
[](https://docs.devolutions.net/fr/gateway/support-resources/getting-started-packages/privileged-access-management-package/#get-started-with-devolutions-workspace)
Les applications Workspace sont des [applications](https://docs.devolutions.net/fr/workspace/workspace-app/installation/)
qui réunissent Devolutions Hub Business et Devolutions Server en un seul emplacement centralisé infonuagique. En ce qui concerne [l’extension de navigateur Workspace](https://docs.devolutions.net/fr/workspace/workspace-browser-extension/installation/)
, il s’agit d’un module gratuit à utiliser en conjonction avec Remote Desktop Manager, Devolutions Server et Devolutions Hub pour injecter de façon sécurisée des mots de passe dans des sites Web.
* [Application Workspace](https://docs.devolutions.net/fr/workspace/workspace-app/installation/)
* [Extension de navigateur Workspace](https://docs.devolutions.net/fr/workspace/workspace-browser-extension/installation/)
#### Commencer avec Devolutions Launcher
[](https://docs.devolutions.net/fr/gateway/support-resources/getting-started-packages/privileged-access-management-package/#get-started-with-devolutions-launcher)
Devolutions Launcher est un outil connexe pour Devolutions Server et Devolutions Hub. Il peut lancer plusieurs sessions à distance simultanément tout en donnant aux administrateurs système un contrôle total. Devolutions Launcher est disponible uniquement pour Windows.
* [Avec Devolutions Server](https://docs.devolutions.net/fr/server/devolutions-ecosystem/launcher/)
* [Avec Devolutions Hub](https://docs.devolutions.net/fr/hub/devolutions-ecosystem/launcher/)
#### Voir aussi
[](https://docs.devolutions.net/fr/gateway/support-resources/getting-started-packages/privileged-access-management-package/#see-also)
* [Devolutions Academy – Devolutions PAM](https://academy.devolutions.net/student/path/2354099-devolutions-pam?sid=64790ac4-3a63-4953-93af-27ba5f05a3f1&sid_i=0)
* [Aperçu du Pack de démarrage Devolutions : Un ensemble tout compris pour les petites équipes jusqu'à cinq utilisateurs](https://www.youtube.com/watch?v=4i5IUiXl_iM)
* [Commencer avec le Devolutions Starter Pack : À quoi s'attendre et comment commencer](https://www.youtube.com/watch?v=PAEerLuCm6k)
[ Partagez vos commentaires](https://forum.devolutions.net/forums/176/documentation--documentation-requests)
---
# Gestion des bureaux à distance et opérations TI - Documentation Devolutions
Gestion des bureaux à distance et opérations TI
===============================================
Le paquet [**Gestion des bureaux à distance et opérations TI**](https://devolutions.net/solutions/#remote-connection-management)
fournit aux professionnels de l'informatique, administrateurs système, et techniciens du service d'assistance une plateforme centralisée pour gérer les connexions à distance et l'infrastructure TI. Il permet aux organisations de gérer l'accès à distance, appliquer des politiques de sécurité, et standardiser les flux de travail à travers différents environnements.
Suivez cette liste de contrôle pour configurer vos solutions :
| LISTE DE CONTRÔLE | DESCRIPTION |
| --- | --- |
| **Étape 1 – Commencer avec une source de données**
* Basé sur le nuage : [Créer un Devolutions Hub](https://docs.devolutions.net/fr/hub/getting-started/create-hub/)
* Auto-hébergé : [Créer une instance Devolutions Server](https://docs.devolutions.net/fr/server/getting-started/installation/create-server-instance/) | Créer et configurer une source de données. Les sources de données sont au cœur de l'écosystème de Devolutions.
Découvrir les principales différences entre l'hébergement auto-hébergé et l'hébergement sur le nuage dans cet article de blogue : [Décodage de l'auto-hébergement vs. hébergement sur le nuage](https://blog.devolutions.net/2025/03/decoding-self-hosting-vs-cloud-hosting)
. |
| **Étape 2 – Enregistrer une licence**
* [Dans Devolutions Server](https://docs.devolutions.net/fr/server/web-interface/administration/security-management/licenses/)
* [Dans Devolutions Hub](https://docs.devolutions.net/fr/hub/web-interface/administration/management/licenses/) | Gérer les licences en stockant leurs clés dans Devolutions Server ou Devolutions Hub. |
| **Étape 3 – Installer Devolutions Gateway**
* [Installation et configuration de Devolutions Gateway](https://docs.devolutions.net/fr/gateway/getting-started/) | [Devolutions Gateway](https://docs.devolutions.net/fr/gateway/overview/what-is-gateway/)
fournit un accès autorisé juste-à-temps (JAT) aux ressources dans les réseaux segmentés, augmentant ainsi la sécurité. |
| **Étape 4 – Commencez avec Remote Desktop Manager**
* [Liste de contrôle pour les entreprises de Remote Desktop Manager](https://docs.devolutions.net/fr/rdm/getting-started/checklist-enterprises/) | L'application Remote Desktop Manager est utilisée pour gérer et centraliser les technologies d'accès à distance, les mots de passe privilégiés, les documents et les informations partagées. |
### Outils connexes
[](https://docs.devolutions.net/fr/gateway/support-resources/getting-started-packages/remote-connection-and-it-management-package/#companion-tools)
[Outils connexes](https://docs.devolutions.net/fr/rdm/devolutions-ecosystem/#companion-tools)
qui apportent des fonctionnalités supplémentaires aux solutions principales de Devolutions, telles que l'injection des identifiants, la prise en charge de PowerShell, la messagerie sécurisée, et bien plus encore.
#### Commencez avec Devolutions Workspace
[](https://docs.devolutions.net/fr/gateway/support-resources/getting-started-packages/remote-connection-and-it-management-package/#get-started-with-devolutions-workspace)
Les applications Workspace sont des [applications](https://docs.devolutions.net/fr/workspace/workspace-app/installation/)
qui réunissent Devolutions Hub Business et Devolutions Server en un seul emplacement centralisé infonuagique. En ce qui concerne [l’extension de navigateur Workspace](https://docs.devolutions.net/fr/workspace/workspace-browser-extension/installation/)
, il s’agit d’un module gratuit à utiliser en conjonction avec Remote Desktop Manager, Devolutions Server et Devolutions Hub pour injecter de façon sécurisée des mots de passe dans des sites Web.
* [Application Workspace](https://docs.devolutions.net/fr/workspace/workspace-app/installation/)
* [Extension de navigateur Workspace](https://docs.devolutions.net/fr/workspace/workspace-browser-extension/installation/)
#### Commencez avec Devolutions Launcher
[](https://docs.devolutions.net/fr/gateway/support-resources/getting-started-packages/remote-connection-and-it-management-package/#get-started-with-devolutions-launcher)
Devolutions Launcher est un outil connexe pour Devolutions Server et Devolutions Hub. Il peut lancer plusieurs sessions à distance simultanément tout en donnant aux administrateurs système un contrôle total. Devolutions Launcher est uniquement disponible pour Windows.
* [Avec Devolutions Server](https://docs.devolutions.net/fr/server/devolutions-ecosystem/launcher/)
* [Avec Devolutions Hub](https://docs.devolutions.net/fr/hub/devolutions-ecosystem/launcher/)
#### Voir aussi
[](https://docs.devolutions.net/fr/gateway/support-resources/getting-started-packages/remote-connection-and-it-management-package/#see-also)
* [Devolutions Academy – Gestion des connexions à distance](https://academy.devolutions.net/student/path/2523246-remote-connection-management)
* [Aperçu du Devolutions Starter Pack : Un ensemble tout inclus pour les petites équipes allant jusqu'à cinq utilisateurs](https://www.youtube.com/watch?v=4i5IUiXl_iM)
* [Commencer avec le Devolutions Starter Pack : Ce à quoi s'attendre et comment démarrer](https://www.youtube.com/watch?v=PAEerLuCm6k)
[ Partagez vos commentaires](https://forum.devolutions.net/forums/176/documentation--documentation-requests)
---
# Package de gestion des mots de passe de la main-d'œuvre - Documentation Devolutions
Package de gestion des mots de passe de la main-d'œuvre
=======================================================
Le [**package de gestion des mots de passe de la main-d'œuvre**](https://devolutions.net/solutions/#workforce-password-management)
simplifie la gestion des identifiants à travers les équipes et les appareils. Conçu pour les utilisateurs d'affaires et le personnel non technique, il fournit un stockage sécurisé des mots de passe, un partage contrôlé, et une application des politiques d'authentification tout en s'intégrant avec l'authentification unique et plusieurs plateformes. Suivre cette liste de vérification pour configurer vos solutions de manière sécurisée et efficace :
| LISTE DE VÉRIFICATION | DESCRIPTION |
| --- | --- |
| **Étape 1 - Commencer avec une source de données**
* Basé sur le nuage : [Créer un Hub Devolutions](https://docs.devolutions.net/fr/hub/getting-started/create-hub/)
* Auto-hébergé : [Créer une instance de Serveur Devolutions](https://docs.devolutions.net/fr/server/getting-started/installation/create-server-instance/) | Créer et configurer une source de données. Les sources de données sont au cœur de l'écosystème de Devolutions.
Découvrir les différences clés entre l'auto-hébergement et l'hébergement sur le nuage dans cet article de blog : [Décoder l'auto-hébergement vs. l'hébergement sur le nuage](https://blog.devolutions.net/2025/03/decoding-self-hosting-vs-cloud-hosting)
. |
| **Étape 2 - Enregistrer une licence**
* [Dans Devolutions Server](https://docs.devolutions.net/fr/server/web-interface/administration/security-management/licenses/)
* [Dans Devolutions Hub](https://docs.devolutions.net/fr/hub/web-interface/administration/management/licenses/) | Gérer les licences en stockant leurs clés de licence soit dans Devolutions Server ou Devolutions Hub. |
### Outils connexes
[](https://docs.devolutions.net/fr/gateway/support-resources/getting-started-packages/workforce-password-management-package/#companion-tools)
[Outils connexes](https://docs.devolutions.net/fr/rdm/devolutions-ecosystem/#companion-tools)
apportent des fonctionnalités supplémentaires aux solutions principales de Devolutions, telles que l'injection des identifiants, le support de PowerShell, la messagerie sécurisée, et bien plus encore.
#### Commencer avec Devolutions Workspace
[](https://docs.devolutions.net/fr/gateway/support-resources/getting-started-packages/workforce-password-management-package/#get-started-with-devolutions-workspace)
Les applications Workspace sont des [applications](https://docs.devolutions.net/fr/workspace/workspace-app/installation/)
qui réunissent Devolutions Hub Business et Devolutions Server en un seul emplacement centralisé infonuagique. En ce qui concerne [l’extension de navigateur Workspace](https://docs.devolutions.net/fr/workspace/workspace-browser-extension/installation/)
, il s’agit d’un module gratuit à utiliser en conjonction avec Remote Desktop Manager, Devolutions Server et Devolutions Hub pour injecter de façon sécurisée des mots de passe dans des sites Web.
* [Application Workspace](https://docs.devolutions.net/fr/workspace/workspace-app/installation/)
* [Extension de navigateur Workspace](https://docs.devolutions.net/fr/workspace/workspace-browser-extension/installation/)
#### Voir aussi
[](https://docs.devolutions.net/fr/gateway/support-resources/getting-started-packages/workforce-password-management-package/#see-also)
* [Devolutions Academy – Gestion des mots de passe de la main-d'œuvre](https://academy.devolutions.net/student/path/2472110-workforce-password-management)
* [Aperçu du Forfait de Démarrage Devolutions : un ensemble tout-inclus pour les petites équipes allant jusqu'à cinq utilisateurs](https://www.youtube.com/watch?v=4i5IUiXl_iM)
* [Commencer avec le Forfait de Démarrage Devolutions : À quoi s'attendre et comment démarrer](https://www.youtube.com/watch?v=PAEerLuCm6k)
[ Partagez vos commentaires](https://forum.devolutions.net/forums/176/documentation--documentation-requests)
---
# YouTube channel - Devolutions Documentation
YouTube channel
===============
Visit the [Devolutions YouTube channel](https://www.youtube.com/@Devolutions)
, where you will find a host of recorded webinars, instructional & informational videos on the best use of our solutions, pro tips, video podcasts, and more!
[ Share your feedback](https://forum.devolutions.net/forums/176/documentation--documentation-requests)
---
# Support and resources - Devolutions Documentation
Support and resources
=====================
[ Share your feedback](https://forum.devolutions.net/forums/176/documentation--documentation-requests)
---
# Chaîne YouTube - Documentation Devolutions
Chaîne YouTube
==============
Visiter la [chaîne YouTube de Devolutions](https://www.youtube.com/@Devolutions)
où se trouvent de nombreux webinaires enregistrés, des vidéos d'instructions et d'informations sur la meilleure utilisation de nos solutions, des conseils pro, des podcasts vidéo, et plus encore !
[ Partagez vos commentaires](https://forum.devolutions.net/forums/176/documentation--documentation-requests)
---
# Privileged access management package - Devolutions Documentation
Privileged access management package
====================================
The [**Privileged access management**](https://devolutions.net/solutions/#privileged-access-management)
package helps secure and manage administrative credentials by enforcing access controls and applying the principle of least privilege. It allows organizations to restrict access to critical resources, automate password rotation, and grant temporary privilege elevation when needed.
The checklist below contains all the steps to set up your solutions properly:
| CHECKLIST | DESCRIPTION |
| --- | --- |
| **Step 1 – Get started with a data source**
* Cloud-based: [Create a Devolutions Hub](https://docs.devolutions.net/hub/getting-started/create-hub/)
* Self-hosted: [Create a Devolutions Server instance](https://docs.devolutions.net/server/getting-started/installation/create-server-instance/) | Create and configure a data source. Data sources are at the heart of Devolutions' ecosystem.
Discover the key differences between self-hosting and cloud-hosting in this blog article: [Decoding self-hosting vs. cloud-hosting](https://blog.devolutions.net/2025/03/decoding-self-hosting-vs-cloud-hosting)
. |
| **Step 2 – Register a license**
* [In Devolutions Server](https://docs.devolutions.net/server/web-interface/administration/security-management/licenses/)
* [In Devolutions Hub](https://docs.devolutions.net/hub/web-interface/administration/management/licenses/) | Manage licenses by storing their serials in either Devolutions Server or Devolutions Hub. |
| **Step 3 – Install Devolutions Gateway**
* [Devolutions Gateway installation and configuration](https://docs.devolutions.net/gateway/getting-started/) | [Devolutions Gateway](https://docs.devolutions.net/gateway/overview/what-is-gateway/)
provides authorized just-in-time (JIT) access to resources in segmented networks, thus increasing security. |
| **Step 4 – Get started with Remote Desktop Manager**
* [Remote Desktop Manager checklist for enterprises](https://docs.devolutions.net/rdm/getting-started/checklist-enterprises/) | The Remote Desktop Manager application is used to manage and centralize remote access technologies, privileged passwords, documents, and shared information. |
| **Step 5 – Get started with Devolutions PAM**
* [For Devolutions Server](https://docs.devolutions.net/pam/server/getting-started/)
* [For Devolutions Hub](https://docs.devolutions.net/pam/hub/pam-service/) | Devolutions PAM is a robust, easy-to-deploy, and affordable privileged access management solution that balances productivity and security. |
### Companion tools
[](https://docs.devolutions.net/de/gateway/support-resources/getting-started-packages/privileged-access-management-package/#companion-tools)
[Companion tools](https://docs.devolutions.net/rdm/devolutions-ecosystem/#companion-tools)
bring additional features to Devolutions’ main solutions, such as credential brokering, PowerShell support, secure messaging, and much more.
#### Get started with Devolutions Workspace
[](https://docs.devolutions.net/de/gateway/support-resources/getting-started-packages/privileged-access-management-package/#get-started-with-devolutions-workspace)
The Workspace app are [applications](https://docs.devolutions.net/workspace/workspace-app/installation/)
that bring together Devolutions Hub Business and Devolutions Server into a single, centralized, cloud-based location. As for [Workspace browser extension](https://docs.devolutions.net/workspace/workspace-browser-extension/installation/)
, it is a free browser plugin to be used in conjunction with Remote Desktop Manager, Devolutions Server, and Devolutions Hub for secure password injection into websites.
* [Workspace app](https://docs.devolutions.net/workspace/workspace-app/installation/)
* [Workspace browser extension](https://docs.devolutions.net/workspace/workspace-browser-extension/installation/)
#### Get started with Devolutions Launcher
[](https://docs.devolutions.net/de/gateway/support-resources/getting-started-packages/privileged-access-management-package/#get-started-with-devolutions-launcher)
Devolutions Launcher is a companion tool for Devolutions Server and Devolutions Hub. It can launch multiple remote sessions simultaneously while giving system administrators full control. Devolutions Launcher is only available for Windows.
* [With Devolutions Server](https://docs.devolutions.net/server/devolutions-ecosystem/launcher/)
* [With Devolutions Hub](https://docs.devolutions.net/hub/devolutions-ecosystem/launcher/)
#### See also
[](https://docs.devolutions.net/de/gateway/support-resources/getting-started-packages/privileged-access-management-package/#see-also)
* [Devolutions Academy – Devolutions PAM](https://academy.devolutions.net/student/path/2354099-devolutions-pam?sid=64790ac4-3a63-4953-93af-27ba5f05a3f1&sid_i=0)
* [Devolutions Starter Pack overview: An all-inclusive bundle for small teams of up to five users](https://www.youtube.com/watch?v=4i5IUiXl_iM)
* [Getting started with the Devolutions Starter Pack: What to expect and how to start](https://www.youtube.com/watch?v=PAEerLuCm6k)
[ Share your feedback](https://forum.devolutions.net/forums/176/documentation--documentation-requests)
---
# Workforce password management package - Devolutions Documentation
Workforce password management package
=====================================
The [**Workforce password management**](https://devolutions.net/solutions/#workforce-password-management)
package simplifies credential management across teams and devices. Designed for business users and non-technical staff, it provides secure password storage, controlled sharing, and authentication policy enforcement while integrating with single sign-on and multiple platforms. Follow this checklist to set up your solutions securely and efficiently:
| CHECKLIST | DESCRIPTION |
| --- | --- |
| **Step 1 – Get started with a data source**
* Cloud-based: [Create a Devolutions Hub](https://docs.devolutions.net/hub/getting-started/create-hub/)
* Self-hosted: [Create a Devolutions Server instance](https://docs.devolutions.net/server/getting-started/installation/create-server-instance/) | Create and configure a data source. Data sources are at the heart of Devolutions' ecosystem.
Discover the key differences between self-hosting and cloud-hosting in this blog article: [Decoding self-hosting vs. cloud-hosting](https://blog.devolutions.net/2025/03/decoding-self-hosting-vs-cloud-hosting)
. |
| **Step 2 – Register a license**
* [In Devolutions Server](https://docs.devolutions.net/server/web-interface/administration/security-management/licenses/)
* [In Devolutions Hub](https://docs.devolutions.net/hub/web-interface/administration/management/licenses/) | Manage licenses by storing their serials in either Devolutions Server or Devolutions Hub. |
### Companion tools
[](https://docs.devolutions.net/de/gateway/support-resources/getting-started-packages/workforce-password-management-package/#companion-tools)
[Companion tools](https://docs.devolutions.net/rdm/devolutions-ecosystem/#companion-tools)
bring additional features to Devolutions’ main solutions, such as credential brokering, PowerShell support, secure messaging, and much more.
#### Get started with Devolutions Workspace
[](https://docs.devolutions.net/de/gateway/support-resources/getting-started-packages/workforce-password-management-package/#get-started-with-devolutions-workspace)
The Workspace app are [applications](https://docs.devolutions.net/workspace/workspace-app/installation/)
that bring together Devolutions Hub Business and Devolutions Server into a single, centralized, cloud-based location. As for [Workspace browser extension](https://docs.devolutions.net/workspace/workspace-browser-extension/installation/)
, it is a free browser plugin to be used in conjunction with Remote Desktop Manager, Devolutions Server, and Devolutions Hub for secure password injection into websites.
* [Workspace app](https://docs.devolutions.net/workspace/workspace-app/installation/)
* [Workspace browser extension](https://docs.devolutions.net/workspace/workspace-browser-extension/installation/)
#### See also
[](https://docs.devolutions.net/de/gateway/support-resources/getting-started-packages/workforce-password-management-package/#see-also)
* [Devolutions Academy – Workforce Password Management](https://academy.devolutions.net/student/path/2472110-workforce-password-management)
* [Devolutions Starter Pack overview: An all-inclusive bundle for small teams of up to five users](https://www.youtube.com/watch?v=4i5IUiXl_iM)
* [Getting started with the Devolutions Starter Pack: What to expect and how to start](https://www.youtube.com/watch?v=PAEerLuCm6k)
[ Share your feedback](https://forum.devolutions.net/forums/176/documentation--documentation-requests)
---
# Forfait de Démarrage - Documentation Devolutions
Forfait de Démarrage
====================
Le **Forfait de Démarrage** octroie des fonctionnalités de mots de passe, accès à distance, connexion à distance, et gestion des accès privilégiés pour des équipes allant jusqu'à 5 utilisateurs. Profiter de toutes les solutions et outils de Devolutions—sans restrictions de fonctionnalités ou mises à niveau cachées.
[Contacter notre département des ventes](mailto:sales@devolutions.net)
si vous souhaitez dépasser la limite de 5 utilisateurs.
La liste de contrôle ci-dessous contient toutes les étapes pour configurer correctement vos solutions :
| LISTE DE CONTRÔLE | DESCRIPTION |
| --- | --- |
| **Étape 1 – Commencer avec une source de données**
* Basé sur le nuage : [Créer un Devolutions Hub](https://docs.devolutions.net/fr/hub/getting-started/create-hub/)
* Auto-hébergé : [Créer une instance de Devolutions Server](https://docs.devolutions.net/fr/server/getting-started/installation/create-server-instance/) | Créer et configurer une source de données. Les sources de données sont au cœur de l'écosystème Devolutions.
Découvrir les principales différences entre l'hébergement local et l'hébergement sur le nuage dans cet article de blog : [Décoder l'auto-hébergement vs l'hébergement sur le nuage](https://blog.devolutions.net/2025/03/decoding-self-hosting-vs-cloud-hosting)
. |
| **Étape 2 – Enregistrer une licence**
* [Dans Devolutions Server](https://docs.devolutions.net/fr/server/web-interface/administration/security-management/licenses/)
* [Dans Devolutions Hub](https://docs.devolutions.net/fr/hub/web-interface/administration/management/licenses/) | Gérez les licences en stockant leurs clés dans soit Devolutions Server, soit Devolutions Hub. |
| **Étape 3 – Installer Devolutions Gateway**
* [Installation et configuration de Devolutions Gateway](https://docs.devolutions.net/fr/gateway/getting-started/) | [Devolutions Gateway](https://docs.devolutions.net/fr/gateway/overview/what-is-gateway/)
fournit un accès juste-à-temps (connexion JAT) autorisé aux ressources dans des réseaux segmentés, augmentant ainsi la sécurité. |
| **Étape 4 – Commencer avec Remote Desktop Manager**
* [Liste de contrôle Remote Desktop Manager pour les entreprises](https://docs.devolutions.net/fr/rdm/getting-started/checklist-enterprises/) | L'application Remote Desktop Manager est utilisée pour gérer et centraliser les technologies d'accès à distance, les mots de passe privilégiés, les documents et les informations partagées. |
| **Étape 5 – Commencer avec Devolutions PAM**
* [Pour Devolutions Server](https://docs.devolutions.net/fr/pam/server/getting-started/)
* [Pour Devolutions Hub](https://docs.devolutions.net/fr/pam/hub/pam-service/) | Devolutions PAM est une solution de gestion des accès privilégiés robuste, facile à déployer et abordable qui équilibre productivité et sécurité. |
### Outils connexes
[](https://docs.devolutions.net/fr/gateway/support-resources/getting-started-packages/starter-pack/#companion-tools)
[Outils connexes](https://docs.devolutions.net/fr/rdm/devolutions-ecosystem/#companion-tools)
apportent des fonctionnalités supplémentaires aux solutions principales de Devolutions, telles que l'injection des identifiants, la prise en charge de PowerShell, la messagerie sécurisée, et bien plus encore.
#### Commencer avec Devolutions Workspace
[](https://docs.devolutions.net/fr/gateway/support-resources/getting-started-packages/starter-pack/#get-started-with-devolutions-workspace)
Les applications Workspace sont des [applications](https://docs.devolutions.net/fr/workspace/workspace-app/installation/)
qui réunissent Devolutions Hub Business et Devolutions Server en un seul emplacement centralisé infonuagique. En ce qui concerne [l’extension de navigateur Workspace](https://docs.devolutions.net/fr/workspace/workspace-browser-extension/installation/)
, il s’agit d’un module gratuit à utiliser en conjonction avec Remote Desktop Manager, Devolutions Server et Devolutions Hub pour injecter de façon sécurisée des mots de passe dans des sites Web.
* [Application Workspace](https://docs.devolutions.net/fr/workspace/workspace-app/installation/)
* [Extension de navigateur Workspace](https://docs.devolutions.net/fr/workspace/workspace-browser-extension/installation/)
#### Commencer avec Devolutions Launcher
[](https://docs.devolutions.net/fr/gateway/support-resources/getting-started-packages/starter-pack/#get-started-with-devolutions-launcher)
Devolutions Launcher est un outil connexe pour Devolutions Server et Devolutions Hub. Il peut lancer plusieurs sessions à distance simultanément tout en donnant aux administrateurs système un contrôle total. Devolutions Launcher est uniquement disponible pour Windows.
* [Avec Devolutions Server](https://docs.devolutions.net/fr/server/devolutions-ecosystem/launcher/)
* [Avec Devolutions Hub](https://docs.devolutions.net/fr/hub/devolutions-ecosystem/launcher/)
#### Voir aussi
[](https://docs.devolutions.net/fr/gateway/support-resources/getting-started-packages/starter-pack/#see-also)
* [Vue d'ensemble du Devolutions Starter Pack : un ensemble tout compris pour les petites équipes allant jusqu'à cinq utilisateurs](https://www.youtube.com/watch?v=4i5IUiXl_iM)
* [Commencer avec le Devolutions Starter Pack : ce à quoi s'attendre et comment commencer](https://www.youtube.com/watch?v=PAEerLuCm6k)
[ Partagez vos commentaires](https://forum.devolutions.net/forums/176/documentation--documentation-requests)
---
# Remote desktop management and IT operations package - Devolutions Documentation
Remote desktop management and IT operations package
===================================================
The [**Remote desktop management and IT operations**](https://devolutions.net/solutions/#remote-connection-management)
package provides IT professionals, system administrators, and helpdesk technicians with a centralized platform for managing remote connections and IT infrastructure. It allows organizations to manage remote access, apply security policies, and standardize workflows across different environments.
Follow this checklist to set up your solutions:
| CHECKLIST | DESCRIPTION |
| --- | --- |
| **Step 1 – Get started with a data source**
* Cloud-based: [Create a Devolutions Hub](https://docs.devolutions.net/hub/getting-started/create-hub/)
* Self-hosted: [Create a Devolutions Server instance](https://docs.devolutions.net/server/getting-started/installation/create-server-instance/) | Create and configure a data source. Data sources are at the heart of Devolutions' ecosystem.
Discover the key differences between self-hosting and cloud-hosting in this blog article: [Decoding self-hosting vs. cloud-hosting](https://blog.devolutions.net/2025/03/decoding-self-hosting-vs-cloud-hosting)
. |
| **Step 2 – Register a license**
* [In Devolutions Server](https://docs.devolutions.net/server/web-interface/administration/security-management/licenses/)
* [In Devolutions Hub](https://docs.devolutions.net/hub/web-interface/administration/management/licenses/) | Manage licenses by storing their serials in either Devolutions Server or Devolutions Hub. |
| **Step 3 – Install Devolutions Gateway**
* [Devolutions Gateway installation and configuration](https://docs.devolutions.net/gateway/getting-started/) | [Devolutions Gateway](https://docs.devolutions.net/gateway/overview/what-is-gateway/)
provides authorized just-in-time (JIT) access to resources in segmented networks, thus increasing security. |
| **Step 4 – Get started with Remote Desktop Manager**
* [Remote Desktop Manager checklist for enterprises](https://docs.devolutions.net/rdm/getting-started/checklist-enterprises/) | The Remote Desktop Manager application is used to manage and centralize remote access technologies, privileged passwords, documents, and shared information. |
### Companion tools
[](https://docs.devolutions.net/de/gateway/support-resources/getting-started-packages/remote-connection-and-it-management-package/#companion-tools)
[Companion tools](https://docs.devolutions.net/rdm/devolutions-ecosystem/#companion-tools)
bring additional features to Devolutions’ main solutions, such as credential brokering, PowerShell support, secure messaging, and much more.
#### Get started with Devolutions Workspace
[](https://docs.devolutions.net/de/gateway/support-resources/getting-started-packages/remote-connection-and-it-management-package/#get-started-with-devolutions-workspace)
The Workspace app are [applications](https://docs.devolutions.net/workspace/workspace-app/installation/)
that bring together Devolutions Hub Business and Devolutions Server into a single, centralized, cloud-based location. As for [Workspace browser extension](https://docs.devolutions.net/workspace/workspace-browser-extension/installation/)
, it is a free browser plugin to be used in conjunction with Remote Desktop Manager, Devolutions Server, and Devolutions Hub for secure password injection into websites.
* [Workspace app](https://docs.devolutions.net/workspace/workspace-app/installation/)
* [Workspace browser extension](https://docs.devolutions.net/workspace/workspace-browser-extension/installation/)
#### Get started with Devolutions Launcher
[](https://docs.devolutions.net/de/gateway/support-resources/getting-started-packages/remote-connection-and-it-management-package/#get-started-with-devolutions-launcher)
Devolutions Launcher is a companion tool for Devolutions Server and Devolutions Hub. It can launch multiple remote sessions simultaneously while giving system administrators full control. Devolutions Launcher is only available for Windows.
* [With Devolutions Server](https://docs.devolutions.net/server/devolutions-ecosystem/launcher/)
* [With Devolutions Hub](https://docs.devolutions.net/hub/devolutions-ecosystem/launcher/)
#### See also
[](https://docs.devolutions.net/de/gateway/support-resources/getting-started-packages/remote-connection-and-it-management-package/#see-also)
* [Devolutions Academy – Remote Connection Management](https://academy.devolutions.net/student/path/2523246-remote-connection-management)
* [Devolutions Starter Pack overview: An all-inclusive bundle for small teams of up to five users](https://www.youtube.com/watch?v=4i5IUiXl_iM)
* [Getting started with the Devolutions Starter Pack: What to expect and how to start](https://www.youtube.com/watch?v=PAEerLuCm6k)
[ Share your feedback](https://forum.devolutions.net/forums/176/documentation--documentation-requests)
---
# Security advisories - Devolutions Documentation
Security advisories
===================
On this page
* [CVSS](https://docs.devolutions.net/gateway/support-resources/security-advisories/#cvss)
* [CVE](https://docs.devolutions.net/gateway/support-resources/security-advisories/#cve)
_**Security Advisories**_ for all our products are available for consultation on our [Devolutions website](https://devolutions.net/security/advisories)
It is a list to inform our users that a security vulnerability in our products was found. It will include remediation and workarounds, the severity level score from the [Common Vulnerability Scoring System](https://www.first.org/cvss/)
(CVSS), and the [Common Vulnerabilities and Exposures](https://cve.mitre.org/index.html)
(CVE) number. [Subscribe](https://devolutions.net/security/advisories)
to receive our latest security advisories by email.
CVSS
----
[](https://docs.devolutions.net/gateway/support-resources/security-advisories/#cvss)

The CVSS provides a way to capture the principal characteristics of a vulnerability and produce a numerical score reflecting its severity. The numerical score can then be translated into a qualitative representation (such as low, medium, high, and critical) to help organizations properly assess and prioritize their vulnerability management processes.
For more details and a description of the various equation components, please visit the [CVSS](https://www.first.org/cvss/)
website.
CVE
---
[](https://docs.devolutions.net/gateway/support-resources/security-advisories/#cve)

The CVE mission program is to identify, define, and catalog publicly disclosed cybersecurity vulnerabilities. There is one CVE Record for each vulnerability in the catalog. The vulnerabilities are discovered then assigned and published by organizations from around the world that have partnered with the CVE Program. Partners publish CVE Records to communicate consistent descriptions of vulnerabilities. Information technology and cybersecurity professionals use CVE Records to ensure they are discussing the same issue and to coordinate their efforts to prioritize and address the vulnerabilities. It is a list of publicly disclosed computer security flaws. When someone refers to a CVE, it is a security flaw that has been assigned a CVE ID number.
For more details, please visit the [CVE](https://cve.mitre.org/)
website.
[ Share your feedback](https://forum.devolutions.net/forums/176/documentation--documentation-requests)
---
# Remote access management package - Devolutions Documentation
Remote access management package
================================
The [**Remote access management**](https://devolutions.net/solutions/#remote-access-management)
package provides a secure way to grant just-in-time (JIT) access to external users, vendors, and third-party IT professionals. It allows organizations to replace traditional VPNs with a more controlled alternative, enforce authentication measures such as MFA, and monitor remote connections without exposing their networks.
Follow the checklist below to get started:
| CHECKLIST | DESCRIPTION |
| --- | --- |
| **Step 1 – Get started with a data source**
* Cloud-based: [Create a Devolutions Hub](https://docs.devolutions.net/hub/getting-started/create-hub/)
* Self-hosted: [Create a Devolutions Server instance](https://docs.devolutions.net/server/getting-started/installation/create-server-instance/) | Create and configure a data source. Data sources are at the heart of Devolutions' ecosystem.
Discover the key differences between self-hosting and cloud-hosting in this blog article: [Decoding self-hosting vs. cloud-hosting](https://blog.devolutions.net/2025/03/decoding-self-hosting-vs-cloud-hosting)
. |
| **Step 2 – Register a license**
* [In Devolutions Server](https://docs.devolutions.net/server/web-interface/administration/security-management/licenses/)
* [In Devolutions Hub](https://docs.devolutions.net/hub/web-interface/administration/management/licenses/) | Manage licenses by storing their serials in either Devolutions Server or Devolutions Hub. |
| **Step 3 – Install Devolutions Gateway**
* [Devolutions Gateway installation and configuration](https://docs.devolutions.net/gateway/getting-started/) | [Devolutions Gateway](https://docs.devolutions.net/gateway/overview/what-is-gateway/)
provides authorized just-in-time (JIT) access to resources in segmented networks, thus increasing security. |
| **Step 4 – Get started with Devolutions Launcher**
* [With Devolutions Server](https://docs.devolutions.net/server/devolutions-ecosystem/launcher/)
* [With Devolutions Hub](https://docs.devolutions.net/hub/devolutions-ecosystem/launcher/) | Devolutions Launcher is a companion tool for Devolutions Server and Devolutions Hub. It can launch multiple remote sessions simultaneously while giving system administrators full control. Devolutions Launcher is only available for Windows. |
### Companion tools
[](https://docs.devolutions.net/gateway/support-resources/getting-started-packages/remote-access-management-package/#companion-tools)
[Companion tools](https://docs.devolutions.net/rdm/devolutions-ecosystem/#companion-tools)
bring additional features to Devolutions’ main solutions, such as credential brokering, PowerShell support, secure messaging, and much more.
#### Get started with Devolutions Workspace
[](https://docs.devolutions.net/gateway/support-resources/getting-started-packages/remote-access-management-package/#get-started-with-devolutions-workspace)
The [Workspace apps](https://docs.devolutions.net/workspace/workspace-app/installation/)
bring together Devolutions Hub Business and Devolutions Server into a single, centralized, cloud-based location. As for [Workspace browser extension](https://docs.devolutions.net/workspace/workspace-browser-extension/installation/)
, it is a free browser plugin to be used in conjunction with Remote Desktop Manager, Devolutions Server, and Devolutions Hub for secure password injection into websites.
* [Workspace app](https://docs.devolutions.net/workspace/workspace-app/installation/)
* [Workspace browser extension](https://docs.devolutions.net/workspace/workspace-browser-extension/installation/)
#### See also
[](https://docs.devolutions.net/gateway/support-resources/getting-started-packages/remote-access-management-package/#see-also)
* [Devolutions Academy – Remote Access Management](https://academy.devolutions.net/student/path/2481294-workforce-password-management)
* [Devolutions Starter Pack overview: An all-inclusive bundle for small teams of up to five users](https://www.youtube.com/watch?v=4i5IUiXl_iM)
* [Getting started with the Devolutions Starter Pack: What to expect and how to start](https://www.youtube.com/watch?v=PAEerLuCm6k)
[ Share your feedback](https://forum.devolutions.net/forums/176/documentation--documentation-requests)
---
# Securely send a file to our team - Devolutions Documentation
Securely send a file to our team
================================
To protect your information, we are using a third-party provider of a secure file exchange service, namely Sharefile.
To send us a file, visit [Sharefile](https://devolutions.sharefile.com/filedrop)
, fill in your basic information, and you will be able to upload file(s). These files are not accessible to all Devolutions employees, only to our customer support team.
[ Share your feedback](https://forum.devolutions.net/forums/176/documentation--documentation-requests)
---
# Ticketing system - Devolutions Documentation
Ticketing system
================
Devolutions currently uses Salesforce Service Cloud to handle its ticketing needs. Use the email address [service@devolutions.net](mailto:service@devolutions.net)
to open a case with us.
Subscribers of our Premium support plan also have access to a support portal. Please open a ticket to get access.
[ Share your feedback](https://forum.devolutions.net/forums/176/documentation--documentation-requests)
---
# Privileged access management package - Devolutions Documentation
Privileged access management package
====================================
The [**Privileged access management**](https://devolutions.net/solutions/#privileged-access-management)
package helps secure and manage administrative credentials by enforcing access controls and applying the principle of least privilege. It allows organizations to restrict access to critical resources, automate password rotation, and grant temporary privilege elevation when needed.
The checklist below contains all the steps to set up your solutions properly:
| CHECKLIST | DESCRIPTION |
| --- | --- |
| **Step 1 – Get started with a data source**
* Cloud-based: [Create a Devolutions Hub](https://docs.devolutions.net/hub/getting-started/create-hub/)
* Self-hosted: [Create a Devolutions Server instance](https://docs.devolutions.net/server/getting-started/installation/create-server-instance/) | Create and configure a data source. Data sources are at the heart of Devolutions' ecosystem.
Discover the key differences between self-hosting and cloud-hosting in this blog article: [Decoding self-hosting vs. cloud-hosting](https://blog.devolutions.net/2025/03/decoding-self-hosting-vs-cloud-hosting)
. |
| **Step 2 – Register a license**
* [In Devolutions Server](https://docs.devolutions.net/server/web-interface/administration/security-management/licenses/)
* [In Devolutions Hub](https://docs.devolutions.net/hub/web-interface/administration/management/licenses/) | Manage licenses by storing their serials in either Devolutions Server or Devolutions Hub. |
| **Step 3 – Install Devolutions Gateway**
* [Devolutions Gateway installation and configuration](https://docs.devolutions.net/gateway/getting-started/) | [Devolutions Gateway](https://docs.devolutions.net/gateway/overview/what-is-gateway/)
provides authorized just-in-time (JIT) access to resources in segmented networks, thus increasing security. |
| **Step 4 – Get started with Remote Desktop Manager**
* [Remote Desktop Manager checklist for enterprises](https://docs.devolutions.net/rdm/getting-started/checklist-enterprises/) | The Remote Desktop Manager application is used to manage and centralize remote access technologies, privileged passwords, documents, and shared information. |
| **Step 5 – Get started with Devolutions PAM**
* [For Devolutions Server](https://docs.devolutions.net/pam/server/getting-started/)
* [For Devolutions Hub](https://docs.devolutions.net/pam/hub/pam-service/) | Devolutions PAM is a robust, easy-to-deploy, and affordable privileged access management solution that balances productivity and security. |
### Companion tools
[](https://docs.devolutions.net/gateway/support-resources/getting-started-packages/privileged-access-management-package/#companion-tools)
[Companion tools](https://docs.devolutions.net/rdm/devolutions-ecosystem/#companion-tools)
bring additional features to Devolutions’ main solutions, such as credential brokering, PowerShell support, secure messaging, and much more.
#### Get started with Devolutions Workspace
[](https://docs.devolutions.net/gateway/support-resources/getting-started-packages/privileged-access-management-package/#get-started-with-devolutions-workspace)
The Workspace app are [applications](https://docs.devolutions.net/workspace/workspace-app/installation/)
that bring together Devolutions Hub Business and Devolutions Server into a single, centralized, cloud-based location. As for [Workspace browser extension](https://docs.devolutions.net/workspace/workspace-browser-extension/installation/)
, it is a free browser plugin to be used in conjunction with Remote Desktop Manager, Devolutions Server, and Devolutions Hub for secure password injection into websites.
* [Workspace app](https://docs.devolutions.net/workspace/workspace-app/installation/)
* [Workspace browser extension](https://docs.devolutions.net/workspace/workspace-browser-extension/installation/)
#### Get started with Devolutions Launcher
[](https://docs.devolutions.net/gateway/support-resources/getting-started-packages/privileged-access-management-package/#get-started-with-devolutions-launcher)
Devolutions Launcher is a companion tool for Devolutions Server and Devolutions Hub. It can launch multiple remote sessions simultaneously while giving system administrators full control. Devolutions Launcher is only available for Windows.
* [With Devolutions Server](https://docs.devolutions.net/server/devolutions-ecosystem/launcher/)
* [With Devolutions Hub](https://docs.devolutions.net/hub/devolutions-ecosystem/launcher/)
#### See also
[](https://docs.devolutions.net/gateway/support-resources/getting-started-packages/privileged-access-management-package/#see-also)
* [Devolutions Academy – Devolutions PAM](https://academy.devolutions.net/student/path/2354099-devolutions-pam?sid=64790ac4-3a63-4953-93af-27ba5f05a3f1&sid_i=0)
* [Devolutions Starter Pack overview: An all-inclusive bundle for small teams of up to five users](https://www.youtube.com/watch?v=4i5IUiXl_iM)
* [Getting started with the Devolutions Starter Pack: What to expect and how to start](https://www.youtube.com/watch?v=PAEerLuCm6k)
[ Share your feedback](https://forum.devolutions.net/forums/176/documentation--documentation-requests)
---
# Remote desktop management and IT operations package - Devolutions Documentation
Remote desktop management and IT operations package
===================================================
The [**Remote desktop management and IT operations**](https://devolutions.net/solutions/#remote-connection-management)
package provides IT professionals, system administrators, and helpdesk technicians with a centralized platform for managing remote connections and IT infrastructure. It allows organizations to manage remote access, apply security policies, and standardize workflows across different environments.
Follow this checklist to set up your solutions:
| CHECKLIST | DESCRIPTION |
| --- | --- |
| **Step 1 – Get started with a data source**
* Cloud-based: [Create a Devolutions Hub](https://docs.devolutions.net/hub/getting-started/create-hub/)
* Self-hosted: [Create a Devolutions Server instance](https://docs.devolutions.net/server/getting-started/installation/create-server-instance/) | Create and configure a data source. Data sources are at the heart of Devolutions' ecosystem.
Discover the key differences between self-hosting and cloud-hosting in this blog article: [Decoding self-hosting vs. cloud-hosting](https://blog.devolutions.net/2025/03/decoding-self-hosting-vs-cloud-hosting)
. |
| **Step 2 – Register a license**
* [In Devolutions Server](https://docs.devolutions.net/server/web-interface/administration/security-management/licenses/)
* [In Devolutions Hub](https://docs.devolutions.net/hub/web-interface/administration/management/licenses/) | Manage licenses by storing their serials in either Devolutions Server or Devolutions Hub. |
| **Step 3 – Install Devolutions Gateway**
* [Devolutions Gateway installation and configuration](https://docs.devolutions.net/gateway/getting-started/) | [Devolutions Gateway](https://docs.devolutions.net/gateway/overview/what-is-gateway/)
provides authorized just-in-time (JIT) access to resources in segmented networks, thus increasing security. |
| **Step 4 – Get started with Remote Desktop Manager**
* [Remote Desktop Manager checklist for enterprises](https://docs.devolutions.net/rdm/getting-started/checklist-enterprises/) | The Remote Desktop Manager application is used to manage and centralize remote access technologies, privileged passwords, documents, and shared information. |
### Companion tools
[](https://docs.devolutions.net/gateway/support-resources/getting-started-packages/remote-connection-and-it-management-package/#companion-tools)
[Companion tools](https://docs.devolutions.net/rdm/devolutions-ecosystem/#companion-tools)
bring additional features to Devolutions’ main solutions, such as credential brokering, PowerShell support, secure messaging, and much more.
#### Get started with Devolutions Workspace
[](https://docs.devolutions.net/gateway/support-resources/getting-started-packages/remote-connection-and-it-management-package/#get-started-with-devolutions-workspace)
The Workspace app are [applications](https://docs.devolutions.net/workspace/workspace-app/installation/)
that bring together Devolutions Hub Business and Devolutions Server into a single, centralized, cloud-based location. As for [Workspace browser extension](https://docs.devolutions.net/workspace/workspace-browser-extension/installation/)
, it is a free browser plugin to be used in conjunction with Remote Desktop Manager, Devolutions Server, and Devolutions Hub for secure password injection into websites.
* [Workspace app](https://docs.devolutions.net/workspace/workspace-app/installation/)
* [Workspace browser extension](https://docs.devolutions.net/workspace/workspace-browser-extension/installation/)
#### Get started with Devolutions Launcher
[](https://docs.devolutions.net/gateway/support-resources/getting-started-packages/remote-connection-and-it-management-package/#get-started-with-devolutions-launcher)
Devolutions Launcher is a companion tool for Devolutions Server and Devolutions Hub. It can launch multiple remote sessions simultaneously while giving system administrators full control. Devolutions Launcher is only available for Windows.
* [With Devolutions Server](https://docs.devolutions.net/server/devolutions-ecosystem/launcher/)
* [With Devolutions Hub](https://docs.devolutions.net/hub/devolutions-ecosystem/launcher/)
#### See also
[](https://docs.devolutions.net/gateway/support-resources/getting-started-packages/remote-connection-and-it-management-package/#see-also)
* [Devolutions Academy – Remote Connection Management](https://academy.devolutions.net/student/path/2523246-remote-connection-management)
* [Devolutions Starter Pack overview: An all-inclusive bundle for small teams of up to five users](https://www.youtube.com/watch?v=4i5IUiXl_iM)
* [Getting started with the Devolutions Starter Pack: What to expect and how to start](https://www.youtube.com/watch?v=PAEerLuCm6k)
[ Share your feedback](https://forum.devolutions.net/forums/176/documentation--documentation-requests)
---
# Starter Pack - Devolutions Documentation
Starter Pack
============
The **Starter Pack** grants password, remote access, remote connection, and privileged access management features for teams of up to 5 users. Leverage all of Devolutions’ solutions and tools—no feature restrictions or hidden upgrades.
[Contact our sales department](mailto:sales@devolutions.net)
if you wish to go over the limit of 5 users.
The checklist below contains all the steps to set up your solutions properly:
| CHECKLIST | DESCRIPTION |
| --- | --- |
| **Step 1 – Get started with a data source**
* Cloud-based: [Create a Devolutions Hub](https://docs.devolutions.net/hub/getting-started/create-hub/)
* Self-hosted: [Create a Devolutions Server instance](https://docs.devolutions.net/server/getting-started/installation/create-server-instance/) | Create and configure a data source. Data sources are at the heart of Devolutions' ecosystem.
Discover the key differences between self-hosting and cloud-hosting in this blog article: [Decoding self-hosting vs. cloud-hosting](https://blog.devolutions.net/2025/03/decoding-self-hosting-vs-cloud-hosting)
. |
| **Step 2 – Register a license**
* [In Devolutions Server](https://docs.devolutions.net/server/web-interface/administration/security-management/licenses/)
* [In Devolutions Hub](https://docs.devolutions.net/hub/web-interface/administration/management/licenses/) | Manage licenses by storing their serials in either Devolutions Server or Devolutions Hub. |
| **Step 3 – Install Devolutions Gateway**
* [Devolutions Gateway installation and configuration](https://docs.devolutions.net/gateway/getting-started/) | [Devolutions Gateway](https://docs.devolutions.net/gateway/overview/what-is-gateway/)
provides authorized just-in-time (JIT) access to resources in segmented networks, thus increasing security. |
| **Step 4 – Get started with Remote Desktop Manager**
* [Remote Desktop Manager checklist for enterprises](https://docs.devolutions.net/rdm/getting-started/checklist-enterprises/) | The Remote Desktop Manager application is used to manage and centralize remote access technologies, privileged passwords, documents, and shared information. |
| **Step 5 – Get started with Devolutions PAM**
* [For Devolutions Server](https://docs.devolutions.net/pam/server/getting-started/)
* [For Devolutions Hub](https://docs.devolutions.net/pam/hub/pam-service/) | Devolutions PAM is a robust, easy-to-deploy, and affordable privileged access management solution that balances productivity and security. |
### Companion tools
[](https://docs.devolutions.net/de/gateway/support-resources/getting-started-packages/starter-pack/#companion-tools)
[Companion tools](https://docs.devolutions.net/rdm/devolutions-ecosystem/#companion-tools)
bring additional features to Devolutions’ main solutions, such as credential brokering, PowerShell support, secure messaging, and much more.
#### Get started with Devolutions Workspace
[](https://docs.devolutions.net/de/gateway/support-resources/getting-started-packages/starter-pack/#get-started-with-devolutions-workspace)
The Workspace app are [applications](https://docs.devolutions.net/workspace/workspace-app/installation/)
that bring together Devolutions Hub Business and Devolutions Server into a single, centralized, cloud-based location. As for [Workspace browser extension](https://docs.devolutions.net/workspace/workspace-browser-extension/installation/)
, it is a free browser plugin to be used in conjunction with Remote Desktop Manager, Devolutions Server, and Devolutions Hub for secure password injection into websites.
* [Workspace app](https://docs.devolutions.net/workspace/workspace-app/installation/)
* [Workspace browser extension](https://docs.devolutions.net/workspace/workspace-browser-extension/installation/)
#### Get started with Devolutions Launcher
[](https://docs.devolutions.net/de/gateway/support-resources/getting-started-packages/starter-pack/#get-started-with-devolutions-launcher)
Devolutions Launcher is a companion tool for Devolutions Server and Devolutions Hub. It can launch multiple remote sessions simultaneously while giving system administrators full control. Devolutions Launcher is only available for Windows.
* [With Devolutions Server](https://docs.devolutions.net/server/devolutions-ecosystem/launcher/)
* [With Devolutions Hub](https://docs.devolutions.net/hub/devolutions-ecosystem/launcher/)
#### See also
[](https://docs.devolutions.net/de/gateway/support-resources/getting-started-packages/starter-pack/#see-also)
* [Devolutions Starter Pack overview: An all-inclusive bundle for small teams of up to five users](https://www.youtube.com/watch?v=4i5IUiXl_iM)
* [Getting started with the Devolutions Starter Pack: What to expect and how to start](https://www.youtube.com/watch?v=PAEerLuCm6k)
[ Share your feedback](https://forum.devolutions.net/forums/176/documentation--documentation-requests)
---
# Customer support - Devolutions Documentation
Customer support
================
Phone and chat hours: Monday to Friday 7:30 a.m. to 6:00 p.m. EDT
Languages: English, Français, Deutsch
Email: [service@devolutions.net](mailto:service@devolutions.net)
Forum: [https://forum.devolutions.net](https://forum.devolutions.net/)
Phone: +1 844 463.0419
### Support plans
[](https://docs.devolutions.net/gateway/support-resources/technical-support/#support-plans)
Subscribers of a paid support plan receive an email address and a plan ID. You should send your support requests to the appropriate email address and provide your plan ID in the subject line.
The level of support provided, as well as the priority assigned to customer’s support requests, will depend on the specific support plan selected or purchased, and on the severity level of the issue reported.
The table below outlines the various support plans offered by Devolutions, each plan defining a distinct scope of customer support and technical assistance:
| | Standard plan | Extended plan | Premium plan |
| --- | --- | --- | --- |
| **Support level priority** | Normal | High | Highest |
| **24/7 access to our community forum, documentation, and** **Devolutions Academy** | X | X | X |
| **Online community forum support** | X | X | X |
| **Email support** | X | X | X |
| **Live chat support** | X | X | X |
| **Phone support** | | X | X |
| **24/7 online community forum and email support** | | | X |
| **Dedicated customer success manager** | | | X |
| **Consulting, security guidance, and training (6 hours per year)** | | | X |
For more information, consult our full [Support Services Addendum](https://devolutions.net/legal/customer-agreements/)
.
[ Share your feedback](https://forum.devolutions.net/forums/176/documentation--documentation-requests)
---
# Integration levels - Devolutions Documentation
Integration levels
==================
On this page
* [Integration level](https://docs.devolutions.net/gateway/support-resources/integration-levels/#integration-level)
* [Integration level 1 - High support](https://docs.devolutions.net/gateway/support-resources/integration-levels/#integration-level-1-high-support)
* [Integration level 2 - Moderate support](https://docs.devolutions.net/gateway/support-resources/integration-levels/#integration-level-2-moderate-support)
* [Integration level 3 - Limited support](https://docs.devolutions.net/gateway/support-resources/integration-levels/#integration-level-3-limited-support)
* [Data sources](https://docs.devolutions.net/gateway/support-resources/integration-levels/#data-sources)
* [Sessions](https://docs.devolutions.net/gateway/support-resources/integration-levels/#sessions)
* [Credential management](https://docs.devolutions.net/gateway/support-resources/integration-levels/#credential-management)
Devolutions integrates a wide array of technologies and third-party software. Some session types such as RDP and SSH, are core features of Remote Desktop Manager and are used by hundreds of thousands of our users. We also integrate other types that are much less popular; those are typically added at the request of users on our forum and are maintained on a best effort basis.
The purpose of this document is to describe the level of maintenance and support you can expect from Devolutions for the sessions we integrate. The classification is based on a number of factors such as:
* The amount of control we have on the integration
* Whether the integration is a preview, an addon or is deprecated
* The popularity of the types in our user base
**By default, session types that are not explicitly listed fall in Integration level 2.**
Integration level
-----------------
[](https://docs.devolutions.net/gateway/support-resources/integration-levels/#integration-level)
### **Integration level 1 - High support**
[](https://docs.devolutions.net/gateway/support-resources/integration-levels/#integration-level-1-high-support)
This tier reflects our highest ability and commitment to resolve problems. This tier includes sessions based on popular and standardized protocols, as well as services developed by Devolutions directly. The session types most popular with our users are typically placed in this category.
### Integration level 2 - Moderate support
[](https://docs.devolutions.net/gateway/support-resources/integration-levels/#integration-level-2-moderate-support)
This tier includes integrations where we have a moderate level of control. This typically includes integration based on an API or an SDK.
### Integration level 3 - Limited support
[](https://docs.devolutions.net/gateway/support-resources/integration-levels/#integration-level-3-limited-support)
Sessions in this tier are supported on a best effort basis. The following sessions fall under this tier:
* Addons
* Deprecated entries
Sessions that are integrated by launching an external program from the command line fall in this tier, as options with this type integrations are the most limited. Types with very low usage levels may also be placed in this category.
The following tables lists the tiers for data sources, sessions, and credential management types.
### Data sources
[](https://docs.devolutions.net/gateway/support-resources/integration-levels/#data-sources)
| Integration level | Data sources |
| --- | --- |
| **Integration level 1** | Devolutions Server, Devolutions Hub Business, SQL Server, Azure SQL, SQLite |
| **Integration level 2** | CyberArk, XML |
| **Integration level 3** | _**Deprecated data sources**_
Google Drive, Dropbox |
### Sessions
[](https://docs.devolutions.net/gateway/support-resources/integration-levels/#sessions)
| Integration level | Session types |
| --- | --- |
| **Integration level 1** | RDP, SSH (SSH Tunnel, SCP, SFTP, SSH port forward), Telnet, Web browser, VNC (FreeVNC, IronVNC), FTP, Active Directory dashboard, Apple Remote Desktop, Microsoft Entra ID dashboard, Powershell, Devolutions Gateway |
| **Integration level 2** | Apple Remote Management, AWS dashboard, BeyondTrust, CyberArk (SIA, PSM), Citrix, DameWare Mini Remote Control, Dell iDRAC, DeskRoll, Google Workspace, HP iLO, IBM 5250, LogMeIn, Microtik Winbox, Microsoft Hyper-V dashboard, OpenVPN, Proxmox dashboard, Proxy Tunnel, RD Gateway console, Serial port, Supremo, TN3270, VMware dashboard, VMware remote console (VMRC), Windows Admin Center |
| **Integration level 3** | AnyDesk, ISL Light, MobaXterm, Nice DCV, Oracle Virtualbox, Radmin, RustDesk, Teamviewer, VMWare (Player, Workstation, vSphere), VNC (UltraVNC), XWindow
_**Addons**_
2XClient, Ammyy Admin, Anyplace Control, AWRC Pro, Axel Viewer, Barracuda NG Firewall, BeyondTrust Representative Console, Bitvise SSH Client, Check Point Smart Console, Cisco ASDM, Citrix NetScaler, Database .Net, Db Visualizer, DBeaver, Ericom Blaze Client, FastViewer, FlashFXP, FortiClient VPN, GateProtect Firewall Administration Client, HeidiSQL, HP Integrated Lights Out (iLO Application), IBM i Access, IBM Personal Communications, Impero Guest, Iperius Remote, Java Web Start, MS Telnet, MySQL GUI Tools, MySQLWorkbench, Navicat Premium, NetSupport Manager, NoMachine, NX Client, PenguiNet SSH client, PgAdmin 4, PowerTerm Pro, Proxy Networks - Proxy Master, RemoteAssistant365, Royal TS, RVTools, Sandboxie, SAP Frontend Server (SAP GUI), SAP Hana Studio, SAP MaxDB Database Studio, SAP NetWeaver, SCCM 2012 Remote Control, SecureCRT, SecureFX, SimpleHelp, SmartFTP, Splashtop, Splunk, SQL Server Management Studio, SuperMicro IPMI Utilities, Tera Term Pro, Teradici PCoIP Client, TOAD, Veeam, VMware Horizon View Client, X2Go Client, XMail Manager, XManager , Xshell, ZOC
_**Deprecated sessions**_
Box, Chrome Remote Desktop, Google Drive, GoToAssist, Intel AMT (KVM), Microsoft Azure Storage Explorer, Microsoft RD Gateway, Rebex (FTP, SSH, SCP), PuTTY, Spiceworks, XenServer |
### Credential management
[](https://docs.devolutions.net/gateway/support-resources/integration-levels/#credential-management)
| Integration level | Credential management types |
| --- | --- |
| **Integration level 1** | SSH key, Devolutions Server privileged account, Devolutions Hub privileged account, RSA SecurID, X.509 certificate
_**Generic entries**_
username and password, password list, OTP, API key, access code, connection string |
| **Integration level 2** | 1Password, Bitwarden, Cerby, Dashlane, CyberArk, Delinea Secret Server, Dropbox Passwords, Hashicorp Vault, Hudu, IT Glue, IT Portal, Keepass, Keeper, LAPS, LastPass, Netwrix Password Secure, One Identity Safeguard, Passwordstate, Password Depot, Passbolt, Passwordstate, Pleasant Password Server, Proton Pass, Psono, Roboform, Sticky Password, TeamPass, Topicus KeyHub, True Key, Windows Credential Manager, Zoho Vault |
| **Integration level 3** | _**Addons**_
_**Deprecated credential management types**_ |
[ Share your feedback](https://forum.devolutions.net/forums/176/documentation--documentation-requests)
---
# YouTube channel - Devolutions Documentation
YouTube channel
===============
Visit the [Devolutions YouTube channel](https://www.youtube.com/@Devolutions)
, where you will find a host of recorded webinars, instructional & informational videos on the best use of our solutions, pro tips, video podcasts, and more!
[ Share your feedback](https://forum.devolutions.net/forums/176/documentation--documentation-requests)
---
# Workforce password management package - Devolutions Documentation
Workforce password management package
=====================================
The [**Workforce password management**](https://devolutions.net/solutions/#workforce-password-management)
package simplifies credential management across teams and devices. Designed for business users and non-technical staff, it provides secure password storage, controlled sharing, and authentication policy enforcement while integrating with single sign-on and multiple platforms. Follow this checklist to set up your solutions securely and efficiently:
| CHECKLIST | DESCRIPTION |
| --- | --- |
| **Step 1 – Get started with a data source**
* Cloud-based: [Create a Devolutions Hub](https://docs.devolutions.net/hub/getting-started/create-hub/)
* Self-hosted: [Create a Devolutions Server instance](https://docs.devolutions.net/server/getting-started/installation/create-server-instance/) | Create and configure a data source. Data sources are at the heart of Devolutions' ecosystem.
Discover the key differences between self-hosting and cloud-hosting in this blog article: [Decoding self-hosting vs. cloud-hosting](https://blog.devolutions.net/2025/03/decoding-self-hosting-vs-cloud-hosting)
. |
| **Step 2 – Register a license**
* [In Devolutions Server](https://docs.devolutions.net/server/web-interface/administration/security-management/licenses/)
* [In Devolutions Hub](https://docs.devolutions.net/hub/web-interface/administration/management/licenses/) | Manage licenses by storing their serials in either Devolutions Server or Devolutions Hub. |
### Companion tools
[](https://docs.devolutions.net/gateway/support-resources/getting-started-packages/workforce-password-management-package/#companion-tools)
[Companion tools](https://docs.devolutions.net/rdm/devolutions-ecosystem/#companion-tools)
bring additional features to Devolutions’ main solutions, such as credential brokering, PowerShell support, secure messaging, and much more.
#### Get started with Devolutions Workspace
[](https://docs.devolutions.net/gateway/support-resources/getting-started-packages/workforce-password-management-package/#get-started-with-devolutions-workspace)
The Workspace app are [applications](https://docs.devolutions.net/workspace/workspace-app/installation/)
that bring together Devolutions Hub Business and Devolutions Server into a single, centralized, cloud-based location. As for [Workspace browser extension](https://docs.devolutions.net/workspace/workspace-browser-extension/installation/)
, it is a free browser plugin to be used in conjunction with Remote Desktop Manager, Devolutions Server, and Devolutions Hub for secure password injection into websites.
* [Workspace app](https://docs.devolutions.net/workspace/workspace-app/installation/)
* [Workspace browser extension](https://docs.devolutions.net/workspace/workspace-browser-extension/installation/)
#### See also
[](https://docs.devolutions.net/gateway/support-resources/getting-started-packages/workforce-password-management-package/#see-also)
* [Devolutions Academy – Workforce Password Management](https://academy.devolutions.net/student/path/2472110-workforce-password-management)
* [Devolutions Starter Pack overview: An all-inclusive bundle for small teams of up to five users](https://www.youtube.com/watch?v=4i5IUiXl_iM)
* [Getting started with the Devolutions Starter Pack: What to expect and how to start](https://www.youtube.com/watch?v=PAEerLuCm6k)
[ Share your feedback](https://forum.devolutions.net/forums/176/documentation--documentation-requests)
---
# Starter Pack - Devolutions Documentation
Starter Pack
============
The **Starter Pack** grants password, remote access, remote connection, and privileged access management features for teams of up to 5 users. Leverage all of Devolutions’ solutions and tools—no feature restrictions or hidden upgrades.
[Contact our sales department](mailto:sales@devolutions.net)
if you wish to go over the limit of 5 users.
The checklist below contains all the steps to set up your solutions properly:
| CHECKLIST | DESCRIPTION |
| --- | --- |
| **Step 1 – Get started with a data source**
* Cloud-based: [Create a Devolutions Hub](https://docs.devolutions.net/hub/getting-started/create-hub/)
* Self-hosted: [Create a Devolutions Server instance](https://docs.devolutions.net/server/getting-started/installation/create-server-instance/) | Create and configure a data source. Data sources are at the heart of Devolutions' ecosystem.
Discover the key differences between self-hosting and cloud-hosting in this blog article: [Decoding self-hosting vs. cloud-hosting](https://blog.devolutions.net/2025/03/decoding-self-hosting-vs-cloud-hosting)
. |
| **Step 2 – Register a license**
* [In Devolutions Server](https://docs.devolutions.net/server/web-interface/administration/security-management/licenses/)
* [In Devolutions Hub](https://docs.devolutions.net/hub/web-interface/administration/management/licenses/) | Manage licenses by storing their serials in either Devolutions Server or Devolutions Hub. |
| **Step 3 – Install Devolutions Gateway**
* [Devolutions Gateway installation and configuration](https://docs.devolutions.net/gateway/getting-started/) | [Devolutions Gateway](https://docs.devolutions.net/gateway/overview/what-is-gateway/)
provides authorized just-in-time (JIT) access to resources in segmented networks, thus increasing security. |
| **Step 4 – Get started with Remote Desktop Manager**
* [Remote Desktop Manager checklist for enterprises](https://docs.devolutions.net/rdm/getting-started/checklist-enterprises/) | The Remote Desktop Manager application is used to manage and centralize remote access technologies, privileged passwords, documents, and shared information. |
| **Step 5 – Get started with Devolutions PAM**
* [For Devolutions Server](https://docs.devolutions.net/pam/server/getting-started/)
* [For Devolutions Hub](https://docs.devolutions.net/pam/hub/pam-service/) | Devolutions PAM is a robust, easy-to-deploy, and affordable privileged access management solution that balances productivity and security. |
### Companion tools
[](https://docs.devolutions.net/gateway/support-resources/getting-started-packages/starter-pack/#companion-tools)
[Companion tools](https://docs.devolutions.net/rdm/devolutions-ecosystem/#companion-tools)
bring additional features to Devolutions’ main solutions, such as credential brokering, PowerShell support, secure messaging, and much more.
#### Get started with Devolutions Workspace
[](https://docs.devolutions.net/gateway/support-resources/getting-started-packages/starter-pack/#get-started-with-devolutions-workspace)
The Workspace app are [applications](https://docs.devolutions.net/workspace/workspace-app/installation/)
that bring together Devolutions Hub Business and Devolutions Server into a single, centralized, cloud-based location. As for [Workspace browser extension](https://docs.devolutions.net/workspace/workspace-browser-extension/installation/)
, it is a free browser plugin to be used in conjunction with Remote Desktop Manager, Devolutions Server, and Devolutions Hub for secure password injection into websites.
* [Workspace app](https://docs.devolutions.net/workspace/workspace-app/installation/)
* [Workspace browser extension](https://docs.devolutions.net/workspace/workspace-browser-extension/installation/)
#### Get started with Devolutions Launcher
[](https://docs.devolutions.net/gateway/support-resources/getting-started-packages/starter-pack/#get-started-with-devolutions-launcher)
Devolutions Launcher is a companion tool for Devolutions Server and Devolutions Hub. It can launch multiple remote sessions simultaneously while giving system administrators full control. Devolutions Launcher is only available for Windows.
* [With Devolutions Server](https://docs.devolutions.net/server/devolutions-ecosystem/launcher/)
* [With Devolutions Hub](https://docs.devolutions.net/hub/devolutions-ecosystem/launcher/)
#### See also
[](https://docs.devolutions.net/gateway/support-resources/getting-started-packages/starter-pack/#see-also)
* [Devolutions Starter Pack overview: An all-inclusive bundle for small teams of up to five users](https://www.youtube.com/watch?v=4i5IUiXl_iM)
* [Getting started with the Devolutions Starter Pack: What to expect and how to start](https://www.youtube.com/watch?v=PAEerLuCm6k)
[ Share your feedback](https://forum.devolutions.net/forums/176/documentation--documentation-requests)
---
# API - Documentation Devolutions
API
===
Les administrateurs accèdent à l'API de Devolutions Hub Business principalement via le module Devolutions PowerShell, qui expose des applets de commande pour gérer les données du Hub depuis PowerShell. Utilisant des objets PSHubContext, les scripts authentifient avec un utilisateur d'application et un secret, puis appellent des commandes pour créer, mettre à jour ou supprimer des entrées, des coffres et des utilisateurs de manière automatisée.
Dans les opérations quotidiennes, cette surface d'API est utilisée pour intégrer le Hub avec des pipelines de déploiement, des CMDBs ou des systèmes de rapport. Par exemple, vous pouvez utiliser le type d'exportation de script PowerShell pour générer des données JSON ou CSV et les alimenter dans des analyses externes, ou provisionner automatiquement de nouveaux coffres de projet et attribuer des groupes en fonction d'un script standardisé.
### Sujets connexes
[](https://docs.devolutions.net/fr/hub/concepts/advanced-concepts/api/#related-topics)
* [Devolutions Hub PowerShell](https://docs.devolutions.net/powershell/hub-powershell/)
* [Module PowerShell](https://docs.devolutions.net/powershell/hub-powershell/powershell-module/)
* [Type d'exportation de script PowerShell](https://docs.devolutions.net/hub/web-interface/tools/export/powershell-script-export-type/)
[ Partagez vos commentaires](https://forum.devolutions.net/forums/176/documentation--documentation-requests)
---
# API - Devolutions Documentation
API
===
Administrators access the Devolutions Hub Business API primarily through the Devolutions PowerShell module, which exposes cmdlets for managing Hub data from PowerShell. Using PSHubContext objects, scripts authenticate with an application user and secret, then call commands to create, update, or remove entries, vaults, and users in an automated way.
In daily operations, this API surface is used to integrate Hub with deployment pipelines, CMDBs, or reporting systems. For example, you can use the PowerShell script export type to generate JSON or CSV data and feed it into external analytics, or automatically provision new project vaults and assign groups based on a standardized script.
### Related topics
[](https://docs.devolutions.net/de/hub/concepts/advanced-concepts/api/#related-topics)
* [Devolutions Hub PowerShell](https://docs.devolutions.net/powershell/hub-powershell/)
* [PowerShell module](https://docs.devolutions.net/powershell/hub-powershell/powershell-module/)
* [PowerShell script export type](https://docs.devolutions.net/hub/web-interface/tools/export/powershell-script-export-type/)
[ Share your feedback](https://forum.devolutions.net/forums/176/documentation--documentation-requests)
---
# API - Devolutions Documentation
API
===
Administrators access the Devolutions Hub Business API primarily through the Devolutions PowerShell module, which exposes cmdlets for managing Hub data from PowerShell. Using PSHubContext objects, scripts authenticate with an application user and secret, then call commands to create, update, or remove entries, vaults, and users in an automated way.
In daily operations, this API surface is used to integrate Hub with deployment pipelines, CMDBs, or reporting systems. For example, you can use the PowerShell script export type to generate JSON or CSV data and feed it into external analytics, or automatically provision new project vaults and assign groups based on a standardized script.
### Related topics
[](https://docs.devolutions.net/hub/concepts/advanced-concepts/api/#related-topics)
* [Devolutions Hub PowerShell](https://docs.devolutions.net/powershell/hub-powershell/)
* [PowerShell module](https://docs.devolutions.net/powershell/hub-powershell/powershell-module/)
* [PowerShell script export type](https://docs.devolutions.net/hub/web-interface/tools/export/powershell-script-export-type/)
[ Share your feedback](https://forum.devolutions.net/forums/176/documentation--documentation-requests)
---
# Check-out approvals - Devolutions Documentation
Check-out approvals
===================
Check-out approvals add an authorization step before a privileged account or sensitive entry can be checked out and used. In Devolutions PAM, this means a designated approver must validate the business need and duration before credentials are released, strengthening oversight and enforcing least privilege.
When Devolutions PAM is enabled with Devolutions Hub Business, users request access to privileged accounts, approvers handle these requests, and resulting activity appears in Privileged access reports, including dedicated check-out requests views. A typical use case is requiring team leads to approve temporary access to domain admin accounts during maintenance windows.
### Related topics
[](https://docs.devolutions.net/hub/concepts/advanced-concepts/check-out-approvals/#related-topics)
* [Check-out approvals](https://docs.devolutions.net/pam/concepts/checkout-approvals/)
* [Approve access to a privileged account](https://docs.devolutions.net/pam/hub/privileged-accounts/approve-access-privileged-account/)
* [Privileged access](https://docs.devolutions.net/hub/web-interface/reports/privileged-access/)
[ Share your feedback](https://forum.devolutions.net/forums/176/documentation--documentation-requests)
---