# Table of Contents
- [Expo Documentation](#expo-documentation)
- [Core concepts - Expo Documentation](#core-concepts-expo-documentation)
- [Documentation for LLMs - Expo Documentation](#documentation-for-llms-expo-documentation)
- [Create a project - Expo Documentation](#create-a-project-expo-documentation)
- [Introduction - Expo Documentation](#introduction-expo-documentation)
- [Next steps - Expo Documentation](#next-steps-expo-documentation)
- [Start developing - Expo Documentation](#start-developing-expo-documentation)
- [Navigation in Expo and React Native apps - Expo Documentation](#navigation-in-expo-and-react-native-apps-expo-documentation)
- [FAQ - Expo Documentation](#faq-expo-documentation)
- [Set up your environment - Expo Documentation](#set-up-your-environment-expo-documentation)
- [Authentication in Expo and React Native apps - Expo Documentation](#authentication-in-expo-and-react-native-apps-expo-documentation)
- [Create a development build on EAS - Expo Documentation](#create-a-development-build-on-eas-expo-documentation)
- [Tools for development - Expo Documentation](#tools-for-development-expo-documentation)
- [Animation - Expo Documentation](#animation-expo-documentation)
- [Next steps - Expo Documentation](#next-steps-expo-documentation)
- [Share a development build with your team - Expo Documentation](#share-a-development-build-with-your-team-expo-documentation)
- [Switch from Expo Go to a development build - Expo Documentation](#switch-from-expo-go-to-a-development-build-expo-documentation)
- [Use a development build - Expo Documentation](#use-a-development-build-expo-documentation)
- [Next steps - Expo Documentation](#next-steps-expo-documentation)
- [Color themes - Expo Documentation](#color-themes-expo-documentation)
- [Store data - Expo Documentation](#store-data-expo-documentation)
- [System bars - Expo Documentation](#system-bars-expo-documentation)
- [Tools, workflows and extensions - Expo Documentation](#tools-workflows-and-extensions-expo-documentation)
- [Safe areas - Expo Documentation](#safe-areas-expo-documentation)
- [Assets - Expo Documentation](#assets-expo-documentation)
- [Errors and warnings - Expo Documentation](#errors-and-warnings-expo-documentation)
- [Using a dangerous mod - Expo Documentation](#using-a-dangerous-mod-expo-documentation)
- [Unit testing with Jest - Expo Documentation](#unit-testing-with-jest-expo-documentation)
- [How to launch an update using Expo Orbit - Expo Documentation](#how-to-launch-an-update-using-expo-orbit-expo-documentation)
- [Introduction to config plugins - Expo Documentation](#introduction-to-config-plugins-expo-documentation)
- [App stores metadata - Expo Documentation](#app-stores-metadata-expo-documentation)
- [Introduction to development builds - Expo Documentation](#introduction-to-development-builds-expo-documentation)
- [Send over-the-air updates - Expo Documentation](#send-over-the-air-updates-expo-documentation)
- [Publish your web app - Expo Documentation](#publish-your-web-app-expo-documentation)
- [Create a dev tools plugin - Expo Documentation](#create-a-dev-tools-plugin-expo-documentation)
- [Share previews with your team - Expo Documentation](#share-previews-with-your-team-expo-documentation)
- [DateTimePicker - Expo Documentation](#datetimepicker-expo-documentation)
- [MailComposer - Expo Documentation](#mailcomposer-expo-documentation)
- [FlashList - Expo Documentation](#flashlist-expo-documentation)
- [React Native Maps - Expo Documentation](#react-native-maps-expo-documentation)
- [captureRef - Expo Documentation](#captureref-expo-documentation)
- [Manifests - Expo Documentation](#manifests-expo-documentation)
- [MaskedView - Expo Documentation](#maskedview-expo-documentation)
---
# Expo Documentation
Hide navigation
Search
[Home](https://docs.expo.dev/)
[Guides](https://docs.expo.dev/guides/overview)
[EAS](https://docs.expo.dev/eas)
[Reference](https://docs.expo.dev/versions/latest)
[Learn](https://docs.expo.dev/tutorial/overview)
[Archive](https://docs.expo.dev/archive)
[Expo Snack](https://snack.expo.dev/)
[Discord and Forums](https://chat.expo.dev/)
[Newsletter](https://expo.dev/mailing-list/signup)
State of React Native 2025
Have a few minutes and want to shape the future of React Native?
[Fill out the Survey Now!](https://survey.stateofreactnative.com/)
Create amazing apps that run everywhere
=======================================
Build one JavaScript/TypeScript project that runs natively on all your users' devices.
Quick Start
-----------
Terminal
Copy
`-` `npx create-expo-app@latest`
Then continue [setting up your environment](https://docs.expo.dev/get-started/set-up-your-environment)
.
Create a universal Android, iOS, and web app
--------------------------------------------
[Start Tutorial](https://docs.expo.dev/tutorial/introduction)
Launch to app stores
----------------------
Ship apps with zero config or no prior experience. Launch easily guides you through the technical stuff, directly from GitHub. No config or prior knowledge needed.
[Try Launch](https://launch.expo.dev/)
### Deploy from CLI
Deploy your apps using command-line tools for iOS and web platforms.
Deploy to TestFlight
--------------------
Terminal
Copy
`-` `npx testflight`
This is an iOS-only command that will upload your app to TestFlight.
Deploy your web app
-------------------
Terminal
Copy
`-` `npx eas-cli deploy`
For prerequisites and complete instructions, see [our guide](https://docs.expo.dev/deploy/web#export-your-web-project/)
.
### Discover more
Try out Expo in minutes and learn how to get the most out of Expo.
Speed up your development with Expo Application Services
--------------------------------------------------------
[Start EAS Tutorial](https://docs.expo.dev/tutorial/eas/introduction)
Discover the benefits of file-based routing with Expo Router
------------------------------------------------------------
[Learn More](https://docs.expo.dev/router/introduction)
### Try Expo in your browser
Expo's Snack lets you try Expo with zero local setup.
[Create a Snack](https://snack.expo.dev/)
### Chat with the community
Join over 60,000 other developers
on the Expo Community Discord.
[Go to Discord](https://chat.expo.dev/)
### Explore APIs
Expo supplies a vast array of SDK modules. You can also create your own.
[Image](https://docs.expo.dev/versions/latest/sdk/image)
[Camera](https://docs.expo.dev/versions/latest/sdk/camera)
[Notifications](https://docs.expo.dev/versions/latest/sdk/notifications)
[View all APIs](https://docs.expo.dev/versions/latest)
### Explore examples
Explore a variety of example projects showcasing how to use Expo and seamlessly integrate it with popular services.
[StickerSmash](https://github.com/expo/examples/tree/master/stickersmash)
[Router + menus](https://github.com/expo/examples/tree/master/with-router-menus)
[API Routes + Open AI](https://github.com/expo/examples/tree/master/with-openai)
[View all examples](https://github.com/expo/examples)
### Watch our latest talks
Explore our team's presentations. Stay informed and gain expertise.
[See More Talks](https://docs.expo.dev/additional-resources#talks)
[Keynote: streamline React Native development\
\
Charlie Cheever, Jon Samp\
\
App.js Conf 2025](https://www.youtube.com/watch?v=lnxanzsP1rM)
[Deploy Everywhere with Expo Router\
\
Evan Bacon\
\
App.js Conf 2025](https://www.youtube.com/watch?v=GKQ_0VfYweg)
[Embracing Native Code and Capabilities\
\
Keith Kurak\
\
App.js Conf 2025](https://www.youtube.com/watch?v=TLoHua8bzPg)
[Launching Desktop Apps to Orbit with React Native\
\
Gabriel Donadel\
\
App.js Conf 2024](https://www.youtube.com/watch?v=K7yC3JKfWYU)
### Join the community
See the source code, connect with others, and get connected.
[Discord and Forums\
\
Join our Discord to chat, ask questions or attend events.](https://chat.expo.dev/)
[GitHub\
\
View SDK and docs code, submit a PR, or report an issue.](https://github.com/expo/expo)
[YouTube\
\
Follow our channel to explore tutorials and other content.](https://www.youtube.com/channel/UCx_YiR733cfqVPRsQ1n8Fag)
[LinkedIn\
\
Follow Expo on LinkedIn for news and updates.](https://www.linkedin.com/company/expo-dev/)
[Bluesky\
\
Follow Expo on Bluesky for news and updates.](https://bsky.app/profile/expo.dev)
[X\
\
Follow Expo on X for news and updates.](https://x.com/expo)
[Reddit\
\
Get the latest on r/expo.](https://www.reddit.com/r/expo)
[Canny\
\
Give us a feedback or request a feature.](https://expo.canny.io/)
---
# Core concepts - Expo Documentation
Hide navigation
Search
[Home](https://docs.expo.dev/)
[Guides](https://docs.expo.dev/guides/overview)
[EAS](https://docs.expo.dev/eas)
[Reference](https://docs.expo.dev/versions/latest)
[Learn](https://docs.expo.dev/tutorial/overview)
[Archive](https://docs.expo.dev/archive)
[Expo Snack](https://snack.expo.dev/)
[Discord and Forums](https://chat.expo.dev/)
[Newsletter](https://expo.dev/mailing-list/signup)
Core concepts
=============
[Edit page](https://github.com/expo/expo/edit/main/docs/pages/core-concepts.mdx)
Copy page
An overview of Expo tools, features and services.
[Edit page](https://github.com/expo/expo/edit/main/docs/pages/core-concepts.mdx)
Copy page
* * *
Expo is an [open-source framework](https://github.com/expo/expo/)
for apps that run natively on Android, iOS, and the web. Expo brings together the best of mobile and the web and enables many important features for building and scaling an app.
The `expo` npm package enables a suite of incredible features for React Native apps. The `expo` package can be installed in nearly any React Native project.
Tools and features[](https://docs.expo.dev/core-concepts/#tools-and-features)
------------------------------------------------------------------------------
[Expo SDK\
\
Comprehensive suite of well-tested React Native modules that run on Android, iOS, and web.](https://docs.expo.dev/versions/latest)
[Develop an app with Expo\
\
An overview of the development process of building an Expo app to help build a mental model of the core development loop.](https://docs.expo.dev/workflow/overview)
[Expo Modules API\
\
Write highly performant native code with modern Swift and Kotlin API.](https://docs.expo.dev/modules/overview)
[Prebuild\
\
Separate React from Native to develop from any computer, upgrade easily, white label apps, and maintain larger projects.](https://docs.expo.dev/workflow/prebuild)
[Expo CLI\
\
Manage dependencies, compile native apps, develop for the web, and connect to any device with a powerful dev server.](https://docs.expo.dev/more/expo-cli)
[Expo Go\
\
Learn React by trying it on your simulator or device.](https://docs.expo.dev/get-started/set-up-your-environment)
> All features are free, optional, and can be used independently of each other. Unused features add no additional bloat to your app.
| Feature | With `expo` | Without `expo` (bare React Native) |
| --- | --- | --- |
| Develop complex apps entirely in JavaScript. | | |
| Write JSI native modules with Swift and Kotlin. | | |
| Develop apps without Xcode or Android Studio. | | |
| Create and share example apps in the browser with [Snack](https://snack.expo.dev/) . | | |
| Major upgrades without native changes. | | |
| First-class TypeScript support. | | |
| Install natively compatible libraries from the command line. | | |
| Develop performant websites with the same codebase. | | |
| [Tunnel](https://docs.expo.dev/more/expo-cli#tunneling) your dev server to any device. | | |
Services[](https://docs.expo.dev/core-concepts/#services)
----------------------------------------------------------
The team behind Expo also provides Expo Application Services (EAS), deeply integrated cloud services for building, submitting, and updating your React Native app. EAS can be used with any React Native app, regardless of whether it uses `expo` or not.
[Expo Application Services\
\
The easiest way to build, deploy, and update native apps.](https://docs.expo.dev/eas)
---
# Documentation for LLMs - Expo Documentation
Hide navigation
Search
[Home](https://docs.expo.dev/)
[Guides](https://docs.expo.dev/guides/overview)
[EAS](https://docs.expo.dev/eas)
[Reference](https://docs.expo.dev/versions/latest)
[Learn](https://docs.expo.dev/tutorial/overview)
[Archive](https://docs.expo.dev/archive)
[Expo Snack](https://snack.expo.dev/)
[Discord and Forums](https://chat.expo.dev/)
[Newsletter](https://expo.dev/mailing-list/signup)
Documentation for LLMs
======================
[Edit page](https://github.com/expo/expo/edit/main/docs/pages/llms.mdx)
A list of Expo and EAS documentation files available for large language models (LLMs) and apps that use them.
[Edit page](https://github.com/expo/expo/edit/main/docs/pages/llms.mdx)
* * *
At Expo, we support the [llms.txt](https://llmstxt.org/)
initiative to provide documentation for large language models (LLMs) and apps that use them. Below is a list of documentation files available:
* [/llms.txt](https://docs.expo.dev/llms.txt)
: A list of all available documentation files
* [/llms-full.txt](https://docs.expo.dev/llms-full.txt)
: Complete documentation for Expo, including Expo Router, Expo Modules API, development process, and more
* [/llms-eas.txt](https://docs.expo.dev/llms-eas.txt)
: Complete documentation for the Expo Application Services (EAS)
* [/llms-sdk.txt](https://docs.expo.dev/llms-sdk.txt)
: Complete documentation for the latest Expo SDK
Looking for deprecated Expo SDK versions?[](https://docs.expo.dev/llms/#looking-for-deprecated-expo-sdk-versions)
* [/llms-sdk-v53.0.0.txt](https://docs.expo.dev/llms-sdk-v53.0.0.txt)
: Documentation for the Expo SDK v53.0.0
* [/llms-sdk-v52.0.0.txt](https://docs.expo.dev/llms-sdk-v52.0.0.txt)
: Documentation for the Expo SDK v52.0.0
* [/llms-sdk-v51.0.0.txt](https://docs.expo.dev/llms-sdk-v51.0.0.txt)
: Documentation for the Expo SDK v51.0.0
---
# Create a project - Expo Documentation
Hide navigation
Search
[Home](https://docs.expo.dev/)
[Guides](https://docs.expo.dev/guides/overview)
[EAS](https://docs.expo.dev/eas)
[Reference](https://docs.expo.dev/versions/latest)
[Learn](https://docs.expo.dev/tutorial/overview)
[Archive](https://docs.expo.dev/archive)
[Expo Snack](https://snack.expo.dev/)
[Discord and Forums](https://chat.expo.dev/)
[Newsletter](https://expo.dev/mailing-list/signup)
Create a project
================
[Edit page](https://github.com/expo/expo/edit/main/docs/pages/get-started/create-a-project.mdx)
Copy page
Learn how to create a new Expo project.
[Edit page](https://github.com/expo/expo/edit/main/docs/pages/get-started/create-a-project.mdx)
Copy page
* * *
System requirements:
* [Node.js (LTS)](https://nodejs.org/en/)
.
* macOS, Windows (Powershell and [WSL 2](https://expo.fyi/wsl)
), and Linux are supported.
We recommend starting with the default project created by `create-expo-app`. The default project includes example code to help you get started.
To create a new project, run the following command:
Terminal
Copy
`-` `npx create-expo-app@latest`
> You can choose a different template by adding the [`--template` option](https://docs.expo.dev/more/create-expo#--template)
> .
Next step[](https://docs.expo.dev/get-started/create-a-project/#next-step)
---------------------------------------------------------------------------
You have a project. Now it's time to set up your development environment so that you can start developing.
---
# Introduction - Expo Documentation
Hide navigation
Search
[Home](https://docs.expo.dev/)
[Guides](https://docs.expo.dev/guides/overview)
[EAS](https://docs.expo.dev/eas)
[Reference](https://docs.expo.dev/versions/latest)
[Learn](https://docs.expo.dev/tutorial/overview)
[Archive](https://docs.expo.dev/archive)
[Expo Snack](https://snack.expo.dev/)
[Discord and Forums](https://chat.expo.dev/)
[Newsletter](https://expo.dev/mailing-list/signup)
Introduction
============
[Edit page](https://github.com/expo/expo/edit/main/docs/pages/get-started/introduction.mdx)
Copy page
Get started creating apps with Expo.
[Edit page](https://github.com/expo/expo/edit/main/docs/pages/get-started/introduction.mdx)
Copy page
* * *
Expo is a framework that makes developing Android and iOS apps easier. Our framework provides file-based routing, a standard library of native modules, and much more. Expo is open source with an active community on [GitHub](https://github.com/expo/expo)
and [Discord](https://chat.expo.dev/)
.
We also make [Expo Application Services (EAS)](https://expo.dev/eas)
, a set of services that complement the Expo framework in each step of the development process.
To get started visit:
[Quick start docs\
\
Create a project, set up your development environment, and start developing.](https://docs.expo.dev/get-started/create-a-project)
---
# Next steps - Expo Documentation
Hide navigation
Search
[Home](https://docs.expo.dev/)
[Guides](https://docs.expo.dev/guides/overview)
[EAS](https://docs.expo.dev/eas)
[Reference](https://docs.expo.dev/versions/latest)
[Learn](https://docs.expo.dev/tutorial/overview)
[Archive](https://docs.expo.dev/archive)
[Expo Snack](https://snack.expo.dev/)
[Discord and Forums](https://chat.expo.dev/)
[Newsletter](https://expo.dev/mailing-list/signup)
Next steps
==========
[Edit page](https://github.com/expo/expo/edit/main/docs/pages/get-started/next-steps.mdx)
Copy page
Develop, review, and submit your project.
[Edit page](https://github.com/expo/expo/edit/main/docs/pages/get-started/next-steps.mdx)
Copy page
* * *
Here are next steps to continue building your app:
### Reset your project[](https://docs.expo.dev/get-started/next-steps/#reset-your-project)
You can remove the boilerplate code and start fresh with a new project. Run the following command to reset your project:
Terminal
Copy
`-` `npm run reset-project`
This command will move the existing files in app to app-example, then create a new app directory with a new index.tsx file.
### Develop, review, and deploy[](https://docs.expo.dev/get-started/next-steps/#develop-review-and-deploy)
Learn how to develop by reading the docs in the Develop section. You'll learn how to create [UI elements](https://docs.expo.dev/develop/user-interface/splash-screen-and-app-icon)
, add [unit tests](https://docs.expo.dev/develop/unit-testing)
, include [native modules](https://docs.expo.dev/config-plugins/introduction)
, and more.
Once you've developed your app, you can share it with your teammates for [review](https://docs.expo.dev/review/overview)
.
Finally, you can [build](https://docs.expo.dev/deploy/build-project)
and [submit](https://docs.expo.dev/deploy/submit-to-app-stores)
your project to the app stores.
### Step-by-step guide[](https://docs.expo.dev/get-started/next-steps/#step-by-step-guide)
For a guided, step-by-step walkthrough of building an app with Expo from start to finish, check out the [tutorial](https://docs.expo.dev/tutorial/introduction)
.
---
# Start developing - Expo Documentation
Hide navigation
Search
[Home](https://docs.expo.dev/)
[Guides](https://docs.expo.dev/guides/overview)
[EAS](https://docs.expo.dev/eas)
[Reference](https://docs.expo.dev/versions/latest)
[Learn](https://docs.expo.dev/tutorial/overview)
[Archive](https://docs.expo.dev/archive)
[Expo Snack](https://snack.expo.dev/)
[Discord and Forums](https://chat.expo.dev/)
[Newsletter](https://expo.dev/mailing-list/signup)
Start developing
================
[Edit page](https://github.com/expo/expo/edit/main/docs/pages/get-started/start-developing.mdx)
Copy page
Make your first change to an Expo project and see it live on your device.
[Edit page](https://github.com/expo/expo/edit/main/docs/pages/get-started/start-developing.mdx)
Copy page
* * *
1
Start a development server[](https://docs.expo.dev/get-started/start-developing/#start-a-development-server)
-------------------------------------------------------------------------------------------------------------
To start the development server, run the following command:
Terminal
Copy
`-` `npx expo start`
2
Open the app on your device[](https://docs.expo.dev/get-started/start-developing/#open-the-app-on-your-device)
---------------------------------------------------------------------------------------------------------------
After running the command above, you will see a QR code in your terminal. Scan this QR code to open the app on your device.
If you're using an Android Emulator or iOS Simulator, you can press a or i respectively to open the app.
Having problems?[](https://docs.expo.dev/get-started/start-developing/#having-problems)
Make sure you are on the same Wi-Fi network on your computer and your device.
If it still doesn't work, it may be due to the router configuration — this is common for public networks. You can work around this by choosing the Tunnel connection type when starting the development server, then scanning the QR code again.
Terminal
Copy
`-` `npx expo start --tunnel`
> Using the Tunnel connection type will make the app reloads considerably slower than on LAN or Local, so it's best to avoid tunnel when possible. You may want to install and use an emulator or simulator to speed up development if Tunnel is required to access your machine from another device on your network.
3
Make your first change[](https://docs.expo.dev/get-started/start-developing/#make-your-first-change)
-----------------------------------------------------------------------------------------------------
Open the app/(tabs)/index.tsx file in your code editor and make a change.
app/(tabs)/index.tsx
| | | |
| --- | --- | --- |
| 17 | 17 | } |
| 18 | 18 | \> |
| 19 | 19 | |
| 20 | | Welcome! |
| | 20 | Hello World! |
| 21 | 21 | |
| 22 | 22 | |
| 23 | 23 | |
Changes not showing up on your device?[](https://docs.expo.dev/get-started/start-developing/#changes-not-showing-up-on-your-device)
Expo Go is configured by default to automatically reload the app whenever a file is changed, but let's make sure to go over the steps to enable it in case somehow things aren't working.
* Make sure you have the [development mode enabled in Expo CLI](https://docs.expo.dev/workflow/development-mode#development-mode)
.
* Close the Expo app and reopen it.
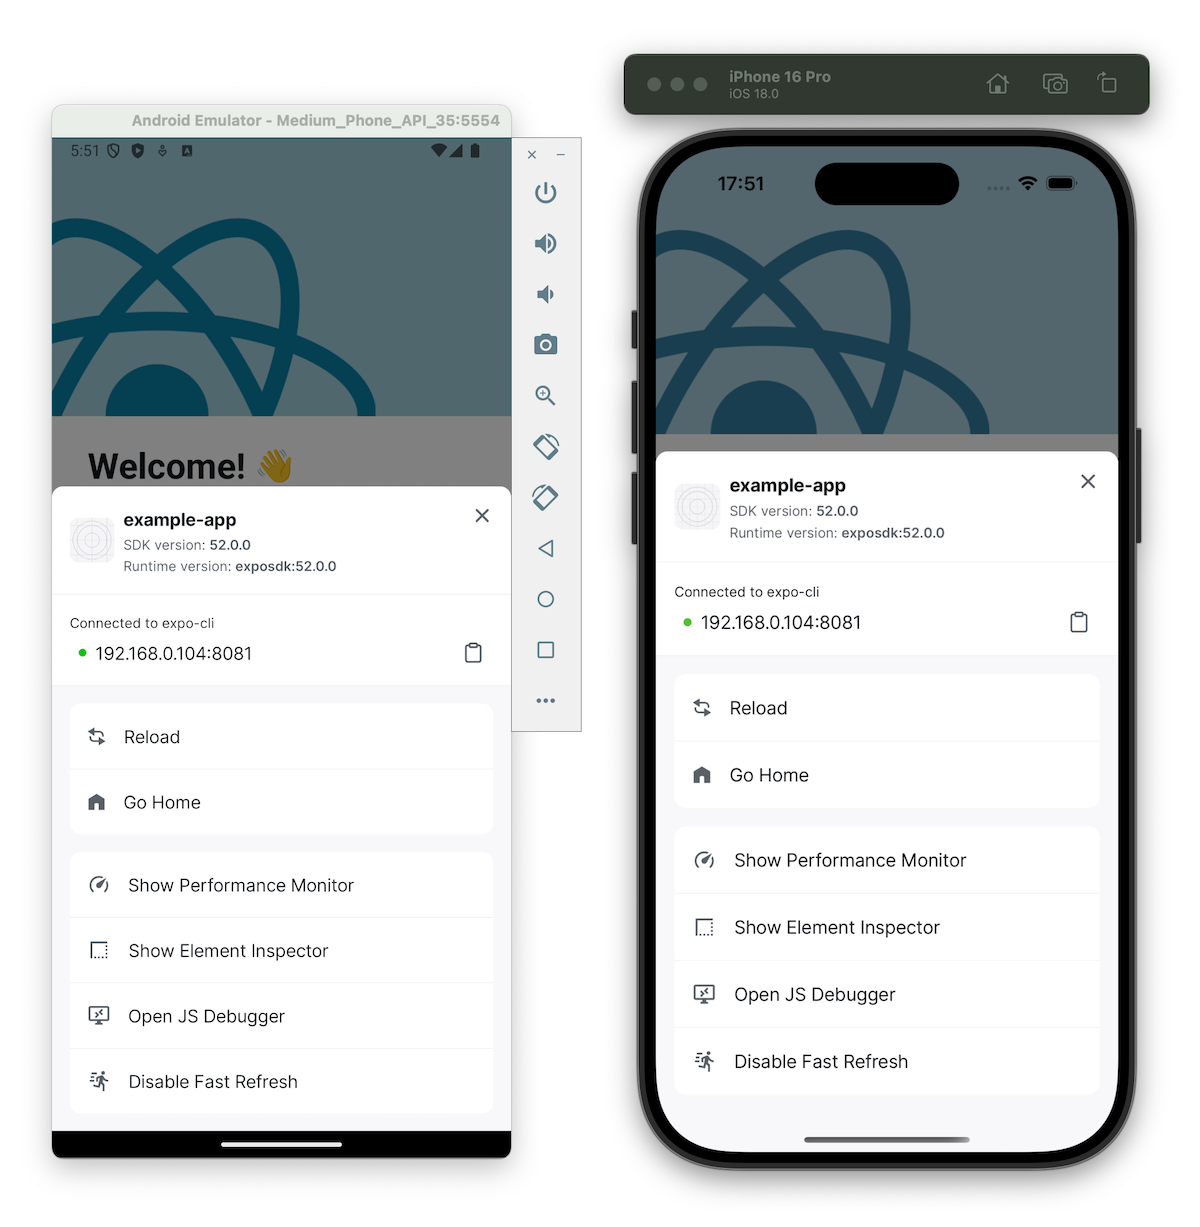
* Once the app is open again, shake your device to reveal the developer menu. If you are using an emulator, press Ctrl + M for Android or Cmd ⌘ + D for iOS.
* If you see Enable Fast Refresh, press it. If you see Disable Fast Refresh, dismiss the developer menu. Now try making another change.
* * *
File structure[](https://docs.expo.dev/get-started/start-developing/#file-structure)
-------------------------------------------------------------------------------------
Below, you can get familiar with the default project's file structure:
Files
app
assets
components
constants
hooks
scripts
app.json
package.json
tsconfig.json
### app
Contains the app's navigation, which is file-based. The file structure of the app directory determines the app's navigation.
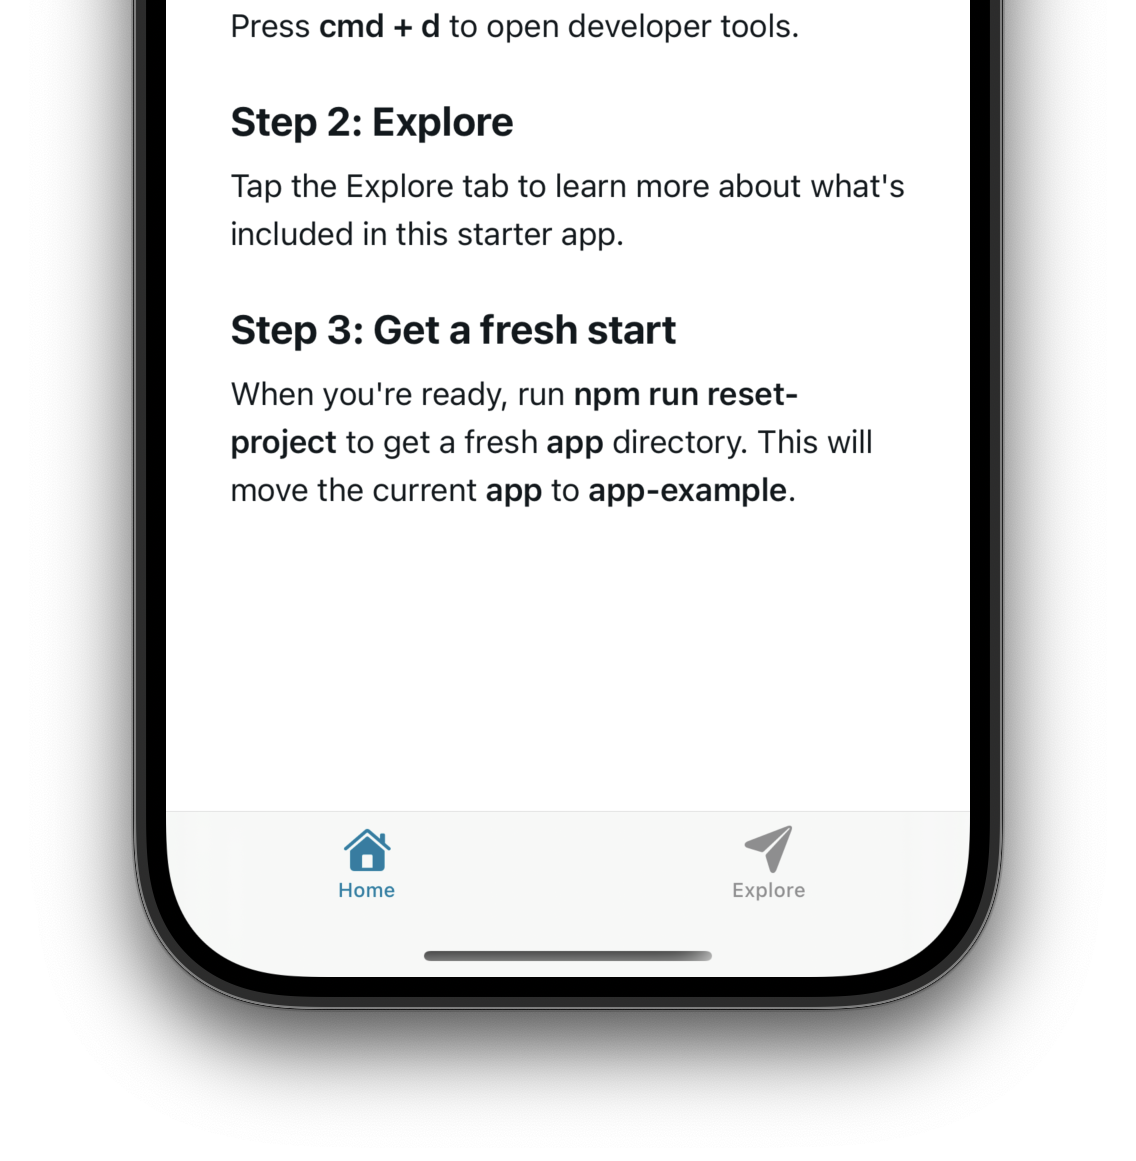
The app has two routes defined by two files: app/(tabs)/index.tsx and app/(tabs)/explore.tsx. The layout file in app/(tabs)/\_layout.tsx sets up the tab navigator.
Features[](https://docs.expo.dev/get-started/start-developing/#features)
-------------------------------------------------------------------------
The default project template has the following features:
Default project
File-based routing
Android, iOS, and web support
Images
Light and dark modes
Animations
### File-based routing
The app has two screens: app/(tabs)/index.tsx and app/(tabs)/explore.tsx. The layout file in app/(tabs)/\_layout.tsx sets up the tab navigator.
[Learn More](https://docs.expo.dev/router/introduction)
---
# Navigation in Expo and React Native apps - Expo Documentation
Hide navigation
Search
[Home](https://docs.expo.dev/)
[Guides](https://docs.expo.dev/guides/overview)
[EAS](https://docs.expo.dev/eas)
[Reference](https://docs.expo.dev/versions/latest)
[Learn](https://docs.expo.dev/tutorial/overview)
[Archive](https://docs.expo.dev/archive)
[Expo Snack](https://snack.expo.dev/)
[Discord and Forums](https://chat.expo.dev/)
[Newsletter](https://expo.dev/mailing-list/signup)
Navigation in Expo and React Native apps
========================================
[Edit page](https://github.com/expo/expo/edit/main/docs/pages/develop/app-navigation.mdx)
Copy page
Learn about the recommended approach for integrating navigation in an Expo and React Native project.
[Edit page](https://github.com/expo/expo/edit/main/docs/pages/develop/app-navigation.mdx)
Copy page
* * *
The core React Native library does not include a built-in navigation solution, so you can choose a navigation library that best fits your needs. For Expo and React Native apps, it is generally a choice between [React Navigation](https://reactnavigation.org/)
or [Expo Router](https://docs.expo.dev/router/introduction)
.
Why React Native apps needs a navigation library[](https://docs.expo.dev/develop/app-navigation/#why-react-native-apps-needs-a-navigation-library)
---------------------------------------------------------------------------------------------------------------------------------------------------
React Native core includes basic UI components, touch handling, device APIs and networking, but excludes, among other things, storage, camera, maps, most device sensors, and navigation! These are intended to be covered by community libraries.
React Navigation[](https://docs.expo.dev/develop/app-navigation/#react-navigation)
-----------------------------------------------------------------------------------
React Navigation is a component-based navigation library widely used across the React Native ecosystem. It lets you compose stack, tab, and drawer navigators entirely in code so you can implement complex flows, custom transitions, and app-specific UX patterns.
The library offers platform-specific look-and-feel with smooth animations and gestures, unified mobile and web routing, automatic deep links, type routes with static configuration, and is highly customizable.
[React Navigation: Getting started\
\
Learn how to get started with React Navigation.](https://reactnavigation.org/docs/getting-started)
Expo Router (recommended for Expo projects)[](https://docs.expo.dev/develop/app-navigation/#expo-router-recommended-for-expo-projects)
---------------------------------------------------------------------------------------------------------------------------------------
Expo Router is a file-based routing library for Expo and React Native projects and is a built on top of React Navigation. By following the app directory convention, it turns files into routes and is integrated with Expo for [Expo CLI](https://docs.expo.dev/more/expo-cli)
and bundling without additional setup. The library also adds features such as typed routes, dynamic routes, lazy bundling in development, static rendering for the web, and automatic deep linking.
New Expo projects created with `npx create-expo-app@latest` include Expo Router by default so you can ship cross-platform navigation quickly while still being able to reach for React Navigation APIs when needed.
[Introduction to Expo Router\
\
Expo Router is an open-source routing library for Universal React Native applications built with Expo.](https://docs.expo.dev/router/introduction)
[Installation\
\
Learn how to quickly get started by creating a new project with Expo Router or adding the library to an existing project.](https://docs.expo.dev/router/installation)
[Core concepts\
\
Learn about the core concepts of file-based routing in Expo.](https://docs.expo.dev/router/basics/core-concepts)
---
# FAQ - Expo Documentation
Hide navigation
Search
[Home](https://docs.expo.dev/)
[Guides](https://docs.expo.dev/guides/overview)
[EAS](https://docs.expo.dev/eas)
[Reference](https://docs.expo.dev/versions/latest)
[Learn](https://docs.expo.dev/tutorial/overview)
[Archive](https://docs.expo.dev/archive)
[Expo Snack](https://snack.expo.dev/)
[Discord and Forums](https://chat.expo.dev/)
[Newsletter](https://expo.dev/mailing-list/signup)
FAQ
===
[Edit page](https://github.com/expo/expo/edit/main/docs/pages/faq.mdx)
Copy page
A list of common questions and limitations about Expo and related services.
[Edit page](https://github.com/expo/expo/edit/main/docs/pages/faq.mdx)
Copy page
* * *
This page lists some of the common questions and answers about Expo and related services. If you have a question that is not answered here, see [Forums](https://chat.expo.dev/)
for more common questions.
What is Expo used for?[](https://docs.expo.dev/faq/#what-is-expo-used-for)
---------------------------------------------------------------------------
Expo is an [open-source framework](https://github.com/expo/expo)
for apps that run natively on Android, iOS, and the web. Expo brings together the best of mobile and the web and enables many important features for building and scaling an app such as live updates, instantly sharing your app, and web support. The `expo` npm package enables a suite of incredible features for React Native apps. The `expo` package can be installed in nearly any React Native project. See [what Expo offers](https://docs.expo.dev/core-concepts)
for more information.
Do companies use Expo?[](https://docs.expo.dev/faq/#do-companies-use-expo)
---------------------------------------------------------------------------
Yes, Expo is used by top companies worldwide, serving hundreds of millions of end users. See our [showcase](https://expo.dev/customers)
.
Why does Expo have its own SDK?[](https://docs.expo.dev/faq/#why-does-expo-have-its-own-sdk)
---------------------------------------------------------------------------------------------
When Expo was first created, React Native had yet to be publicly released. This means there were no third-party packages. To make React Native's developer experience reasonable, we created [several libraries to achieve common functionalities](https://docs.expo.dev/versions/latest)
. Many of these libraries have since been forked and modified to meet various needs. We welcome users to mix and match whichever [custom native code](https://docs.expo.dev/workflow/customizing)
they need to make their app great.
The Expo SDK is well-tested, written in TypeScript, documented, and built for Android, iOS, and the web. Every module in the Expo SDK works together to ensure versioning always matches. This creates a nice upgrading experience.
The Expo SDK is also written with the [Expo Modules API](https://docs.expo.dev/modules)
to make contributing, maintaining, and understanding easier.
What is the difference between Expo and React Native?[](https://docs.expo.dev/faq/#what-is-the-difference-between-expo-and-react-native)
-----------------------------------------------------------------------------------------------------------------------------------------
The `expo` package provides a suite of features that make it easier to develop, and scale complex React Native applications. You can install `expo` in nearly any React Native app. The `expo` package is not required to use [Expo Application Services (EAS)](https://docs.expo.dev/eas)
or React Native, however, it is highly recommended. See [what Expo offers](https://docs.expo.dev/core-concepts)
for more information.
Do I need to switch from React Native to use Expo?[](https://docs.expo.dev/faq/#do-i-need-to-switch-from-react-native-to-use-expo)
-----------------------------------------------------------------------------------------------------------------------------------
No, the `expo` npm package and CLI work with any React Native app. [Expo Application Services (EAS)](https://docs.expo.dev/eas)
also works with all React Native apps with first-class support for builds, updates, app store submissions, and more.
How much does Expo cost?[](https://docs.expo.dev/faq/#how-much-does-expo-cost)
-------------------------------------------------------------------------------
The Expo platform is [free and open source](https://blog.expo.dev/exponent-is-free-as-in-and-as-in-1d6d948a60dc)
. This includes the libraries that make up the [Expo SDK](https://docs.expo.dev/versions/latest)
and the [Expo CLI](https://docs.expo.dev/more/expo-cli)
used for development. The Expo Go app, the easiest way to get started, is also free from the app stores.
[Expo Application Services (EAS)](https://docs.expo.dev/eas)
is an optional suite of cloud services for React Native apps, from the Expo team. EAS makes it easier to build your app, submit it to the stores, keep it updated, send push notifications, and more. You can use EAS for free if the [Free plan](https://expo.dev/pricing)
quotas are sufficient for your app. More information is available on the [pricing page](https://expo.dev/pricing)
.
How do I add custom native code to my Expo project?[](https://docs.expo.dev/faq/#how-do-i-add-custom-native-code-to-my-expo-project)
-------------------------------------------------------------------------------------------------------------------------------------
Expo supports adding custom native code and customizing that native code (Android/Xcode projects). To use any custom native code, you can create a [development build](https://docs.expo.dev/develop/development-builds/introduction)
and [config plugins](https://docs.expo.dev/config-plugins/introduction)
. We do recommend using the modules in the [Expo SDK](https://docs.expo.dev/versions/latest)
when possible for easier upgrades and improved developer experience.
Can I use Expo in the app that is created with React Native CLI?[](https://docs.expo.dev/faq/#can-i-use-expo-in-the-app-that-is-created-with-react-native-cli)
---------------------------------------------------------------------------------------------------------------------------------------------------------------
Yes! All Expo tools and services work great in any React Native app. For example, you can use any part of the [Expo SDK](https://docs.expo.dev/versions/latest)
, [`expo-dev-client`](https://docs.expo.dev/develop/development-builds/installation)
and EAS Build, Submit, and Update — they work great! Learn more about [installing `expo` in your project](https://docs.expo.dev/bare/installing-expo-modules)
, [adopting prebuild](https://docs.expo.dev/guides/adopting-prebuild)
, and [setting up EAS Build](https://docs.expo.dev/build/introduction)
.
How do I share my Expo project? Can I submit it to the app stores?[](https://docs.expo.dev/faq/#how-do-i-share-my-expo-project-can-i-submit-it-to-the-app-stores)
------------------------------------------------------------------------------------------------------------------------------------------------------------------
The fastest way to share your project is to publish with [EAS Update](https://docs.expo.dev/eas-update/introduction)
and launch in a [development build](https://docs.expo.dev/develop/development-builds/introduction)
. This gives your app a URL; you can share this URL with anybody who has the [development build](https://docs.expo.dev/develop/development-builds/introduction)
for Android or iOS. URLs can also be opened in Expo Go for Android.
When ready, you can create a production build (.aab and .ipa) to submit to the app stores. You can build your app in a single command with [EAS Build](https://docs.expo.dev/build/introduction)
and submit it to the stores with [EAS Submit](https://docs.expo.dev/submit/introduction)
.
You can also use [internal distribution](https://docs.expo.dev/build/internal-distribution)
to share your app with an APK on Android and ad-hoc or enterprise provisioning on iOS.
Can I develop iOS apps on a Windows computer?[](https://docs.expo.dev/faq/#can-i-develop-ios-apps-on-a-windows-computer)
-------------------------------------------------------------------------------------------------------------------------
Traditionally you needed a macOS to develop iOS apps, however, you can use [EAS Build](https://docs.expo.dev/build/introduction)
to build your app in the cloud. You can also use [EAS Submit](https://docs.expo.dev/submit/introduction)
to submit your app to the stores. Testing can be done on a physical iOS device using [Expo Go](https://expo.dev/go)
or a [development build](https://docs.expo.dev/develop/development-builds/introduction)
.
What versions of Android and iOS are supported by the Expo SDK?[](https://docs.expo.dev/faq/#what-versions-of-android-and-ios-are-supported-by-the-expo-sdk)
-------------------------------------------------------------------------------------------------------------------------------------------------------------
Currently, Expo SDK supports Android 7+ and iOS 15.1+. For more information, see [Support for Android and iOS versions](https://docs.expo.dev/versions/latest#support-for-android-and-ios-versions)
.
What is the minimal size of a "hello world" expo app?[](https://docs.expo.dev/faq/#what-is-the-minimal-size-of-a-hello-world-expo-app)
---------------------------------------------------------------------------------------------------------------------------------------
A bare minimum production app created using pure Expo is less than 3 MB. For iOS, Expo targets a newer minimum iOS version which enables app store optimizations.
If the `expo` package is included in your app, it only adds 1 MB one time to the final size of apps on app stores. The `expo` package has a marginal size cost (for example, 150 Kib on Android). The rest of the size comes from the language runtime (such as Kotlin on Android).
Can I use Expo with my native library?[](https://docs.expo.dev/faq/#can-i-use-expo-with-my-native-library)
-----------------------------------------------------------------------------------------------------------
You can use native Android and iOS libraries with Expo by creating a [custom native module](https://docs.expo.dev/modules)
with Swift and Kotlin. Many popular libraries already have custom native modules. Check out our [React Native directory](https://reactnative.directory/)
to find popular libraries for your use case.
Can I use Expo with this web library?[](https://docs.expo.dev/faq/#can-i-use-expo-with-this-web-library)
---------------------------------------------------------------------------------------------------------
Many popular web packages such as three.js work with Expo and React Native. See [Expo examples](https://github.com/expo/examples)
for more information.
Is Expo similar to React for web development?[](https://docs.expo.dev/faq/#is-expo-similar-to-react-for-web-development)
-------------------------------------------------------------------------------------------------------------------------
Expo is an [open-source framework](https://github.com/expo/expo)
for apps that run natively on Android, iOS, and the web. React Native is similar to `react-dom` from web development, enabling you to run React on a particular platform, however, it has a few key differences:
* React Native does not support HTML or CSS.
* Instead of using the DOM, React Native uses native components. For example, `` instead of ``. Native components are more performant than the DOM and provide a much nicer user experience.
* Unlike React.js which has access to browser APIs, React Native uses custom native APIs. For example, instead of `navigator.geolocation`, you use `expo-location` to access the user's location. Custom native APIs are similar to browser APIs except you have full control over them. This means you can access new features before they are available in the browser.
In the same way React.js frameworks help users create larger websites with ease, Expo helps users create larger apps with ease. Expo provides a suite of well-tested React Native modules that run on Android, iOS, and the web. Expo also provides a [suite of tools](https://docs.expo.dev/eas)
for building, deploying, and updating your app.
What are the store policies regarding interpreted code?[](https://docs.expo.dev/faq/#what-are-the-store-policies-regarding-interpreted-code)
---------------------------------------------------------------------------------------------------------------------------------------------
React Native uses a JavaScript interpreter (JSC, V8, or Hermes) to run your application code. Refer to the [Google Play Policy Center](https://play.google/developer-content-policy/)
and [Apple Developer Program License Agreement](https://developer.apple.com/support/terms/apple-developer-program-license-agreement)
directly for the most up-to-date policy information.
_The following are excerpts of related policies, as of April 25, 2024._
### Google Play Store[](https://docs.expo.dev/faq/#google-play-store)
`...an app may not download executable code (such as dex, JAR, .so files) from a source other than Google Play. This restriction does not apply to code that runs in a virtual machine or an interpreter where either provides indirect access to Android APIs (such as JavaScript in a webview or browser). Apps or third-party code, like SDKs, with interpreted languages (JavaScript, Python, Lua, etc.) loaded at run time (for example, not packaged with the app) must not allow potential violations of Google Play policies.`
Source: [Google Play Policy Center](https://support.google.com/googleplay/android-developer/answer/9888379?hl=en)
.
### Apple App Store[](https://docs.expo.dev/faq/#apple-app-store)
`...Interpreted code may be downloaded to an Application but only so long as such code: (a) does not change the primary purpose of the Application by providing features or functionality that are inconsistent with the intended and advertised purpose of the Application as submitted to the App Store, (b) does not create a store or storefront for other code or applications, and (c) does not bypass signing, sandbox, or other security features of the OS.`
Source: [3.3.1 APIs and Functionality - B. Executable Code](https://developer.apple.com/support/terms/apple-developer-program-license-agreement#b331)
.
Should I use Expo CLI or React Native Community CLI?[](https://docs.expo.dev/faq/#should-i-use-expo-cli-or-react-native-community-cli)
---------------------------------------------------------------------------------------------------------------------------------------
Expo CLI offers the same core functionality as React Native Community CLI (also known as "React Native CLI") with additional features such as automatic [TypeScript setup](https://docs.expo.dev/guides/typescript)
, [web support](https://docs.expo.dev/workflow/web)
, [auto installing compatible libraries](https://docs.expo.dev/more/expo-cli#install)
, [improved native build commands](https://docs.expo.dev/more/expo-cli#compiling)
, [tunneling](https://docs.expo.dev/more/expo-cli#tunneling)
, [Prebuild](https://docs.expo.dev/workflow/prebuild)
, and [more](https://docs.expo.dev/more/expo-cli)
.
It can be used simultaneously with React Native Community. Regardless of which CLI you use, you can use any part of the [Expo SDK](https://docs.expo.dev/versions/latest)
and [Expo Application Services](https://docs.expo.dev/eas)
with your project. For more information, see:
* Learn how you can migrate to use Expo CLI in an [existing React Native project](https://docs.expo.dev/bare/using-expo-cli)
.
* Learn about the benefits of [using a framework to build React Native apps](https://reactnative.dev/blog/2024/06/25/use-a-framework-to-build-react-native-apps)
.
* Learn about the benefits of migrating to Expo CLI such as improved app performance, expedites release, and fostering stronger collaboration across you team in [this blog post](https://expo.dev/blog/from-rnc-cli-to-expo)
.
> Note: EAS Build is compatible with existing React Native projects (where native directories are checked into version control). When these directories are present, EAS Build does not run the prebuild step, as that could overwrite any manual customizations you have made to the native project files. You'll have to configure the native directories on your own with native tools such as Android Studio or Xcode.
Is Expo Go open source?[](https://docs.expo.dev/faq/#is-expo-go-open-source)
-----------------------------------------------------------------------------
Yes, the source for Expo Go can be found in the [expo/expo GitHub repository](https://github.com/expo/expo)
in the apps/expo-go directory. The Expo Go app is also built with Expo and React Native.
What can I do or cannot do with Expo Go?[](https://docs.expo.dev/faq/#what-can-i-do-or-cannot-do-with-expo-go)
---------------------------------------------------------------------------------------------------------------
[Expo Go](https://docs.expo.dev/get-started/set-up-your-environment?redirected=#how-would-you-like-to-develop)
is a sandbox that can help you get started quickly with React Native development in order to learn, prototype, or experiment. It allows you to use libraries included in the Expo SDK and libraries that don't require custom native code.
Expo Go cannot use third-party libraries that require custom native code and you cannot edit native code directly in Expo Go. It cannot be used for production apps.
We strongly recommend any projects that require additional libraries with native code to migrate to [development builds](https://docs.expo.dev/develop/development-builds/introduction)
. It's like creating a version of Expo Go that is specifically customized to your app's needs.
Is ejecting deprecated?[](https://docs.expo.dev/faq/#is-ejecting-deprecated)
-----------------------------------------------------------------------------
Yes, eject is a deprecated term and is no longer necessary. When Expo was first released, apps had larger native binary sizes and didn't support custom native code without "ejecting". This changed in December 2020 with the release of [EAS Build](https://docs.expo.dev/build/introduction)
which supports any React Native app. The concept of "ejecting" was replaced by the [`npx expo prebuild`](https://docs.expo.dev/workflow/prebuild)
command in SDK 41 (April 2021), which continuously generates native projects based on the libraries in your project and the app config (app.json). The `expo eject` command was fully deprecated in SDK 46 (August 2022).
Unlike the previous eject workflow, authors can configure their libraries to work with Expo Prebuild by creating a [config plugin](https://docs.expo.dev/config-plugins/introduction)
. This means you can use any library with Expo Prebuild. You can also use any custom native code with Expo Prebuild by creating a [development build](https://docs.expo.dev/develop/development-builds/introduction)
. Learn more in the [Expo Prebuild documentation](https://docs.expo.dev/workflow/prebuild)
.
---
# Set up your environment - Expo Documentation
Hide navigation
Search
[Home](https://docs.expo.dev/)
[Guides](https://docs.expo.dev/guides/overview)
[EAS](https://docs.expo.dev/eas)
[Reference](https://docs.expo.dev/versions/latest)
[Learn](https://docs.expo.dev/tutorial/overview)
[Archive](https://docs.expo.dev/archive)
[Expo Snack](https://snack.expo.dev/)
[Discord and Forums](https://chat.expo.dev/)
[Newsletter](https://expo.dev/mailing-list/signup)
Set up your environment
=======================
[Edit page](https://github.com/expo/expo/edit/main/docs/pages/get-started/set-up-your-environment.mdx)
Copy page
Learn how to set up your development environment to start building with Expo.
[Edit page](https://github.com/expo/expo/edit/main/docs/pages/get-started/set-up-your-environment.mdx)
Copy page
* * *
Let's set up a local development environment for running your project on Android and iOS.
Where would you like to develop?[](https://docs.expo.dev/get-started/set-up-your-environment/#where-would-you-like-to-develop)
-------------------------------------------------------------------------------------------------------------------------------
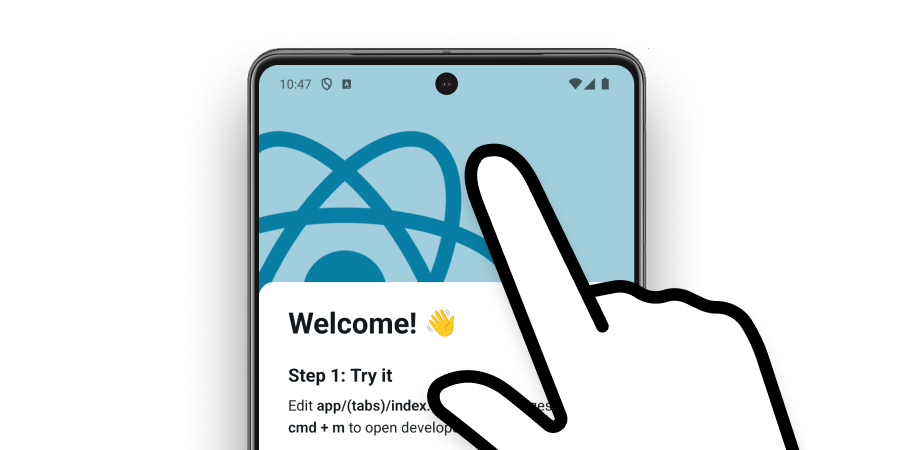
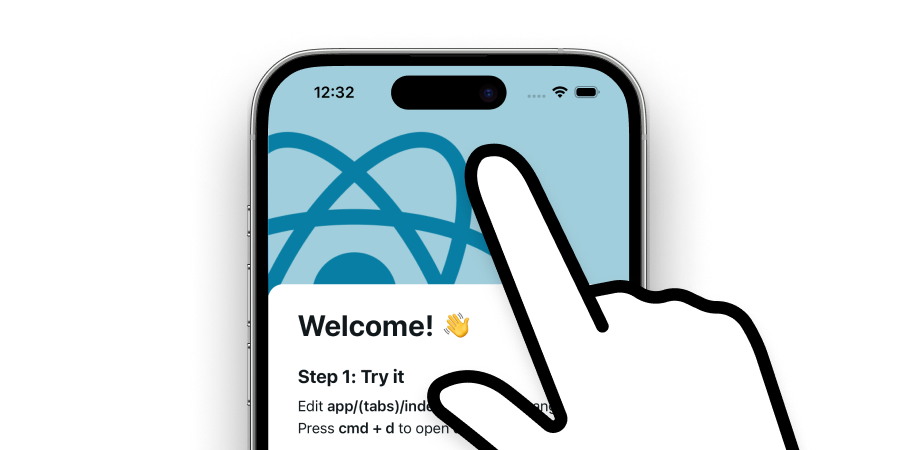
We recommend using a real device to develop, since you'll get to see exactly what your users will see.
Android device
iOS device
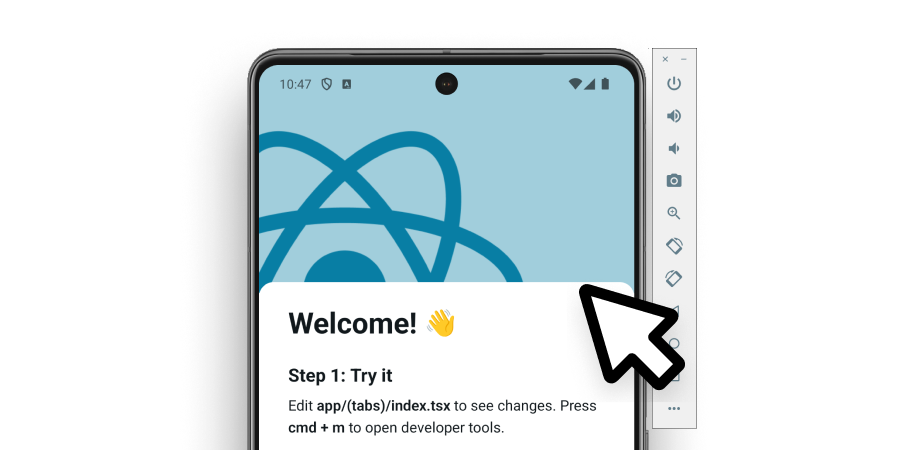
Android Emulator
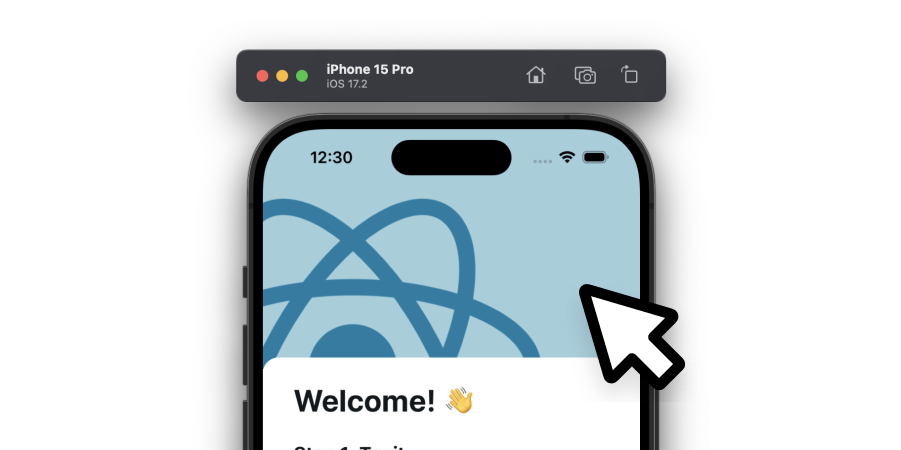
iOS Simulator
How would you like to develop?[](https://docs.expo.dev/get-started/set-up-your-environment/#how-would-you-like-to-develop)
---------------------------------------------------------------------------------------------------------------------------
Expo Go is a sandbox for trying out Expo quickly. A development build is a build of your own app that includes Expo's developer tools.
Expo Go
Try out app development in a limited sandbox without custom native modules. Great for testing out Expo quickly. Not intended for long-term projects.
Development build
Make a build of your own app with developer tools. Supports custom native modules. Intended for production projects.
* * *
Set up an Android device with Expo Go[](https://docs.expo.dev/get-started/set-up-your-environment/#set-up-an-android-device-with-expo-go)
------------------------------------------------------------------------------------------------------------------------------------------
Scan the QR code to download the app from the Google Play Store, or visit the Expo Go page on the [Google Play Store](https://play.google.com/store/apps/details?id=host.exp.exponent&referrer=docs)
.
Next step[](https://docs.expo.dev/get-started/set-up-your-environment/#next-step)
----------------------------------------------------------------------------------
You have a project and a development environment. Now it's time to start developing.
---
# Authentication in Expo and React Native apps - Expo Documentation
Hide navigation
Search
[Home](https://docs.expo.dev/)
[Guides](https://docs.expo.dev/guides/overview)
[EAS](https://docs.expo.dev/eas)
[Reference](https://docs.expo.dev/versions/latest)
[Learn](https://docs.expo.dev/tutorial/overview)
[Archive](https://docs.expo.dev/archive)
[Expo Snack](https://snack.expo.dev/)
[Discord and Forums](https://chat.expo.dev/)
[Newsletter](https://expo.dev/mailing-list/signup)
Authentication in Expo and React Native apps
============================================
[Edit page](https://github.com/expo/expo/edit/main/docs/pages/develop/authentication.mdx)
Copy page
Learn about setting up authentication in your Expo project.
[Edit page](https://github.com/expo/expo/edit/main/docs/pages/develop/authentication.mdx)
Copy page
* * *
Authentication is a critical part of 90 to 95 percent of modern apps. This guide explains common methods, patterns, and solutions to help you implement authentication in your Expo app.
> TL;DR: Auth is hard. If you want to skip the complexity, jump to the [Auth solutions](https://docs.expo.dev/develop/authentication#auth-solutions)
> section for ready-made solutions. Otherwise, keep reading.
Implementing authentication involves more than writing client-side code. You'll need to manage server requests, password flows, third-party providers like Google or Apple, email handling, and OAuth standards. It can get complex quickly.
There are several types of authentication methods. Some are simple and effective, while others offer a better user experience but require more work. Let's look at the most common approaches and how you can implement them.
Navigation auth flow[](https://docs.expo.dev/develop/authentication/#navigation-auth-flow)
-------------------------------------------------------------------------------------------
Let's start with the basics: any authentication system needs to separate public screens (such as login or signup) from protected screens (such as home or profile). At the navigation level, it comes down to a simple check: is the user authenticated?
To begin, you can simulate this using a hardcoded boolean value, like `isAuthenticated = true`, and build your navigation logic around it. Once everything is working, you can plug in your real authentication flow.
Using Expo Router[](https://docs.expo.dev/develop/authentication/#using-expo-router)
Expo Router v5 introduced [protected routes](https://docs.expo.dev/router/advanced/protected)
, which prevent users from accessing certain screens unless they are authenticated. This feature works well for client-side navigation and simplifies your setup.
If you're using an older version of Expo Router, you can use [redirects](https://docs.expo.dev/router/advanced/authentication-rewrites)
instead. Redirects provide the same result but require a bit more manual configuration. They are still supported in Expo Router v5 for backward compatibility.
[\
\
Expo Router Protected Routes\
\
Learn how to implement an authentication flow with Expo Router](https://www.youtube.com/watch?v=zHZjJDTTHJg)
Using React Navigation[](https://docs.expo.dev/develop/authentication/#using-react-navigation)
If you're using React Navigation, they offer a helpful [authentication flow guide](https://reactnavigation.org/docs/auth-flow/)
that explains how to structure your navigation logic. It includes examples for both [static](https://reactnavigation.org/docs/auth-flow/?config=static#how-it-will-work)
and [dynamic](https://reactnavigation.org/docs/auth-flow/?config=dynamic#how-it-will-work)
approaches based on the user's authentication state.
Both Expo Router and React Navigation give you flexible tools to implement protected navigation based on whether the user is logged in.
Email and password[](https://docs.expo.dev/develop/authentication/#email-and-password)
---------------------------------------------------------------------------------------
Email and password is a popular option when adding authentication to your app.
To make this flow user-friendly, you also need to implement forgot password and reset password functionality so users who lose access to their accounts can recover them.
If you want a quicker solution, several services offer built-in email and password authentication, including [Clerk](https://docs.expo.dev/develop/authentication#clerk)
, [Supabase](https://docs.expo.dev/develop/authentication#supabase)
, [Cognito](https://docs.expo.dev/develop/authentication#cognito)
, [Firebase](https://docs.expo.dev/develop/authentication#firebase-auth)
, and [Better Auth](https://docs.expo.dev/develop/authentication#better-auth)
. Most of these have generous free tiers, but it is a good idea to evaluate pricing if your app grows quickly.
The biggest advantage of these services is their ease of integration. They usually offer clear documentation, starter kits, and prebuilt components that save you time.
Security checklist (OWASP) and store-review gotchas[](https://docs.expo.dev/develop/authentication/#security-checklist-owasp-and-store-review-gotchas)
If you're building this flow yourself, be sure to review the [Authentication Cheat Sheet](https://cheatsheetseries.owasp.org/cheatsheets/Authentication_Cheat_Sheet.html#authentication-cheat-sheet)
by OWASP. It outlines best practices for password length, encryption, recovery, secure storage, and more.
> Adding email and password authentication is usually enough to pass App Store and Play Store review. You can submit your app with this method first. If you include "Sign in with Google," Apple may reject your app unless you also support "Sign in with Apple." The same rule applies in reverse on Google Play.
[Better Auth Example\
\
An example demonstrating email and password authentication with Better Auth.](https://github.com/expo/examples/tree/master/with-better-auth)
Passwordless login[](https://docs.expo.dev/develop/authentication/#passwordless-login)
---------------------------------------------------------------------------------------
Passwordless login removes the need for users to create or remember a password. Instead, they provide their email address or phone number during registration. Your app then sends a [magic link](https://auth0.com/docs/authenticate/passwordless/authentication-methods/email-magic-link#classic-login-flow-with-magic-links)
or [one-time passcode (OTP)](https://en.wikipedia.org/wiki/One-time_password)
to their inbox or device. This is a smoother experience for most users and reduces friction during onboarding.
Magic Links[](https://docs.expo.dev/develop/authentication/#magic-links)
With magic links, the user receives an email containing a link that redirects them back into your app. If everything works correctly, the session is verified and established.
A key detail here is [deep linking](https://docs.expo.dev/linking/into-your-app)
. Since users leave the app to check their email, the link must open your app and route them to the correct screen. If deep linking fails, the session cannot be validated, and the login flow breaks.
If you're using Expo Router deep linking is handled automatically (for most cases). You usually don't need to configure anything extra to make magic links work properly, which makes this approach even easier to adopt. See [Linking into your app](https://docs.expo.dev/linking/into-your-app)
to learn more.
[React Navigation](https://reactnavigation.org/)
also supports deep linking, but you will need to configure it manually. See its [Deep Linking guide](https://reactnavigation.org/docs/deep-linking/)
for more details.
One-Time Passcodes (OTP)[](https://docs.expo.dev/develop/authentication/#one-time-passcodes-otp)
An alternative to magic links is sending a one-time passcode by email or SMS. Instead of clicking a link, the user copies the code and manually returns to the app to enter it. This must happen within a specific time window before the code expires.
There's no deep linking involved here. The user stays in control of the flow and must return to the app themselves.
Fortunately, newer versions of Android and iOS automatically detect passcodes in incoming messages. This enables autofill suggestions above the keyboard, allowing users to enter the code with a single tap. When this works, the experience is seamless.
> Magic links and passcodes are both valid authentication methods for Google Play Store and Apple App Store reviews. You can submit your app with either of these methods as the only option and get approved, even before adding social or OAuth login options.
OAuth 2.0[](https://docs.expo.dev/develop/authentication/#oauth-20)
--------------------------------------------------------------------
To let your users log in using their existing accounts from services like Google, Apple, GitHub, and more, you can use OAuth 2.0.
[OAuth 2.0](https://oauth.net/2)
is a widely used, secure protocol that allows your app to access user information from another service, without needing to handle passwords. It allows your users to log in with a single tap, which saves time, builds trust, and removes the need to manage passwords.
> OAuth flows can be complex. If you're looking for a simple integration, most providers offer SDKs and services that handle everything for you. You can learn more about these in the [Auth solutions](https://docs.expo.dev/develop/authentication#auth-solutions)
> section.
If you are looking for full control or want to understand how OAuth works under the hood, the following sections show how to implement a complete OAuth flow yourself using Expo.
### How OAuth works[](https://docs.expo.dev/develop/authentication/#how-oauth-works)
OAuth works by introducing an authorization server that acts as a secure middleman. Instead of giving your app their password, users log in through this server and approve access to specific data (like their name or email). The server then issues a temporary code, which your app can exchange for a secure access token.
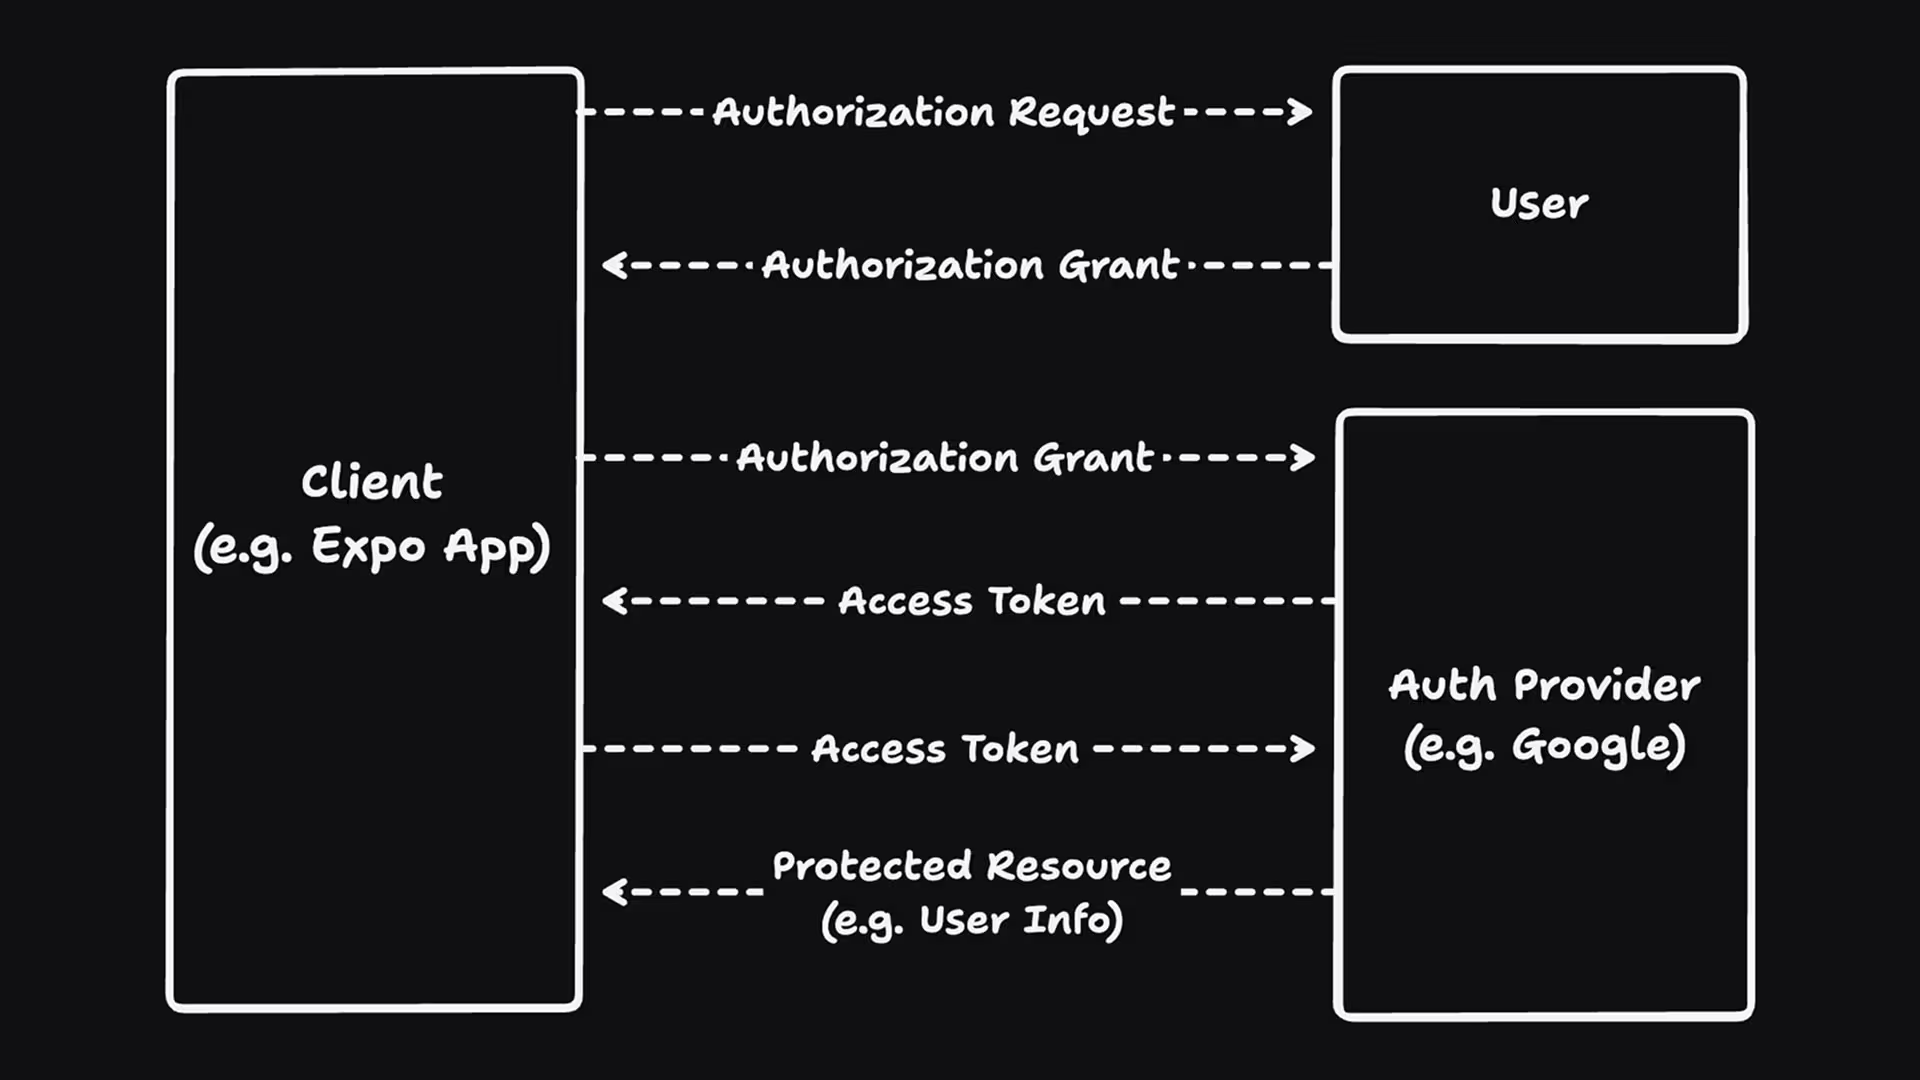
In this diagram, 'client' simply refers to the application and does not imply any specific implementation details, such as whether it runs on a server, desktop, mobile device, or other platform.
Once you understand this pattern, you can apply it to any provider. The setup for Google, Apple, or GitHub will follow the same general steps.
### Custom OAuth with Expo API Routes[](https://docs.expo.dev/develop/authentication/#custom-oauth-with-expo-api-routes)
The previous diagram shows a high-level overview of the OAuth flow. However, the preferred method for a client to obtain an authorization grant from the user is to use an authorization server as an intermediary, which is exactly what you can build using Expo API Routes.
The following diagram illustrates this flow in more detail:
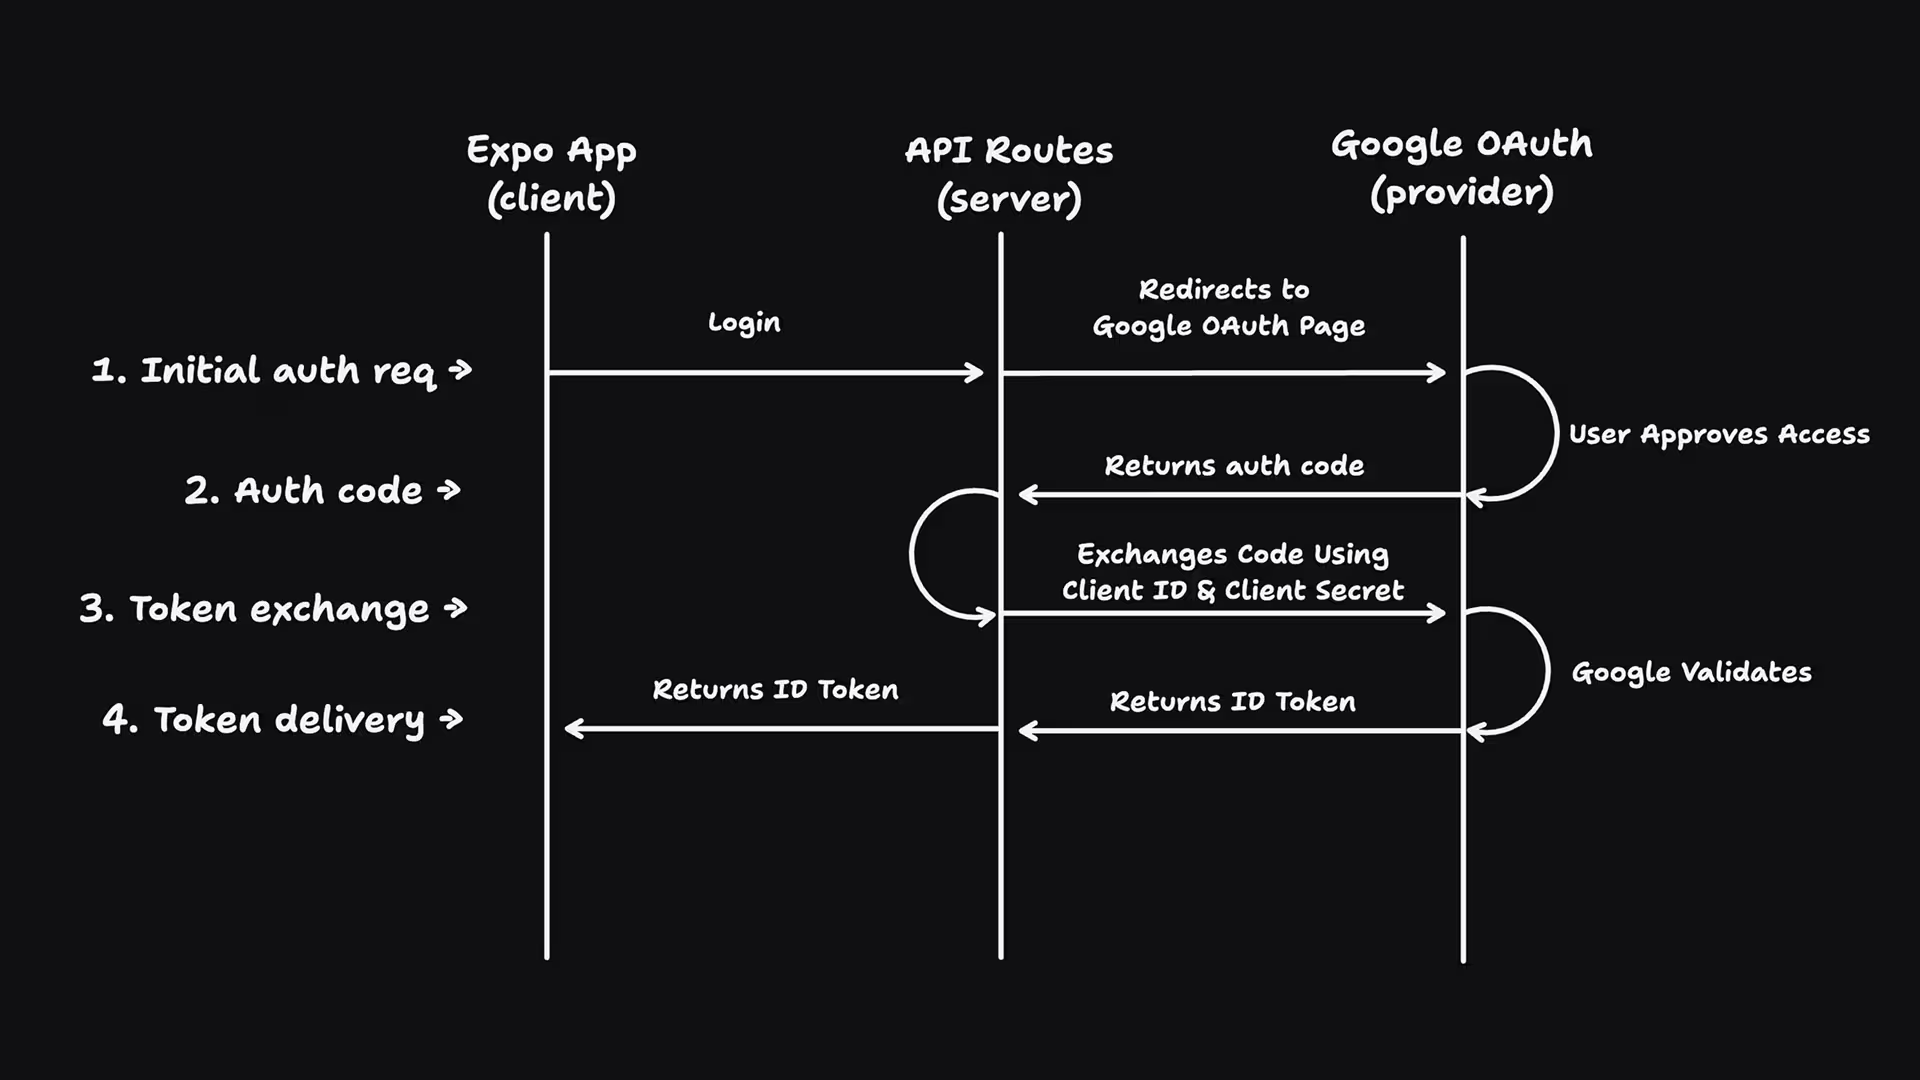
Expo lets you implement the entire OAuth flow directly in your app using:
[Expo Router](https://docs.expo.dev/router/introduction)
[Expo Router API Routes](https://docs.expo.dev/router/web/api-routes)
[Expo AuthSession](https://docs.expo.dev/versions/latest/sdk/auth-session)
Some providers offer native APIs to handle the sign-in flow directly within the app. Google offers a native Sign in with Google experience on Android. If you're looking for a native implementation, see the [Google authentication guide](https://docs.expo.dev/guides/google-authentication)
. Apple provides Sign in with Apple, which uses a native bottom sheet and Face ID on iOS. See [`expo-apple-authentication`](https://docs.expo.dev/versions/latest/sdk/apple-authentication)
reference.
The following setup gives you full control over the login experience across Android, iOS, and web.
What are Expo API Routes?[](https://docs.expo.dev/develop/authentication/#what-are-expo-api-routes)
[Expo Router API Routes](https://docs.expo.dev/router/web/api-routes)
allow you to write server-side logic directly inside your Expo app. You can define functions that handle requests just like an Express or Next.js backend, no need for an external server.
This makes it easy to securely handle sensitive parts of the auth flow, like the [authorization code exchange](https://www.oauth.com/oauth2-servers/pkce/authorization-code-exchange)
, directly within your app. Since these routes run on the server, you can safely manage secrets, issue JWTs, and validate tokens.
> You're essentially building a lightweight custom auth server scoped to your own application, all using your Expo project.
What is Expo AuthSession?[](https://docs.expo.dev/develop/authentication/#what-is-expo-authsession)
[Expo AuthSession](https://docs.expo.dev/versions/latest/sdk/auth-session)
is a client-side package that helps you open a web browser or native modal to start the OAuth login flow. It handles redirection, parses the authorization response, and brings the user back into your app.
It's the tool that kicks off the flow and talks to your API Route after the user authorizes access. See [Authentication with OAuth or OpenID providers](https://docs.expo.dev/guides/authentication)
for more information.
This setup lets you:
* Start the login flow using AuthSession
* Receive the auth code in your API Route
* Exchange the code for a token securely
* Generate a custom JWT with your own logic
* Return that token to the client
* Store sessions using cookies (Web) or JWTs (Native)
* Deploy instantly using EAS Hosting (free to start)
The following tutorials cover implementing OAuth on Android, iOS, and web, including how to create and verify custom JWTs, manage sessions, and protect API routes. If you're new to this flow, we recommend starting with the Google tutorial.
[\
\
Google Sign-In with Expo OAuth\
\
Learn how to implement Google Sign-In with Expo Router API Routes](https://www.youtube.com/watch?v=V2YdhR1hVNw)
[\
\
Sign in with Apple using Expo\
\
Learn how to implement Sign in with Apple](https://www.youtube.com/watch?v=tqxTijhYhp8)
Managing sessions after OAuth[](https://docs.expo.dev/develop/authentication/#managing-sessions-after-oauth)
Handling the OAuth flow securely is just the beginning. Once the user is authenticated, you need to think about how to store, restore, and validate their session.
This includes:
* Storing the session securely on the client
* Restoring it when the app restarts
* Protecting your API routes so only authenticated users can access them
Traditionally, [cookies](https://developer.mozilla.org/en-US/docs/Web/HTTP/Guides/Cookies#what_cookies_are_used_for)
are used to store sessions on the web, while [JSON Web Tokens (JWTs)](https://en.wikipedia.org/wiki/JSON_Web_Token)
are common in native applications.
The above tutorials demonstrate exactly how to handle this. After receiving the ID token from a provider like Google or Apple, you generate a custom JWT on the server using Expo API Routes.
This gives you full control over the session, including:
* Structuring the payload using consistent fields across providers
* Customizing expiration times
* Signing the token with a secret key so your server can verify it later
Once the token is created:
* For Android and iOS apps, you can store it securely using [`expo-secure-store`](https://docs.expo.dev/versions/latest/sdk/securestore)
* For web apps, you can set it as a secure cookie to maintain the session
On every request, the token is sent back to your server, where you verify the signature and check the expiration. If everything checks out, you continue processing the request.
This session model keeps your backend stateless, scalable, and secure, and works consistently across platforms.
All of this is covered in the video tutorials linked above, including:
* Generating and verifying custom JWTs
* Handling session storage with Secure Store and cookies
* Protecting API routes with authentication logic
Auth solutions[](https://docs.expo.dev/develop/authentication/#auth-solutions)
-------------------------------------------------------------------------------
If you prefer not to build a full authentication system from scratch, several services offer built-in solutions with first-class support for Expo. Here are some of the most popular options:
Better Auth[](https://docs.expo.dev/develop/authentication/#better-auth)
[BetterAuth](https://www.better-auth.com/docs/integrations/expo)
is a modern, open-source authentication provider built for developers. It integrates smoothly with Expo, and they offer a guide that shows how to use it with [Expo API Routes](https://www.better-auth.com/docs/integrations/expo)
for full control. It works well with any provider and deploys easily with EAS Hosting.
Clerk[](https://docs.expo.dev/develop/authentication/#clerk)
[Clerk](https://clerk.com/expo-authentication)
is a powerful, full-featured authentication service with excellent Expo support. It includes email/password, passcodes, magic links, OAuth providers, and even passkeys. They also offer a native Expo module that handles much of the integration for you.
Supabase[](https://docs.expo.dev/develop/authentication/#supabase)
[Supabase](https://supabase.com/docs/guides/getting-started/tutorials/with-expo-react-native)
provides a full backend platform, including a built-in authentication service that works with any OAuth provider. It integrates well with Expo apps and also includes support for email, magic links, and more.
Cognito[](https://docs.expo.dev/develop/authentication/#cognito)
[AWS Cognito](https://medium.com/@juliuscecilia33/aws-cognito-and-react-native-bf23ef7fea23)
is Amazon's solution for managing user pools and identity. It connects seamlessly with other AWS services and can be integrated into Expo apps using AWS Amplify. It does require more configuration, but it's robust and scalable.
Firebase Auth[](https://docs.expo.dev/develop/authentication/#firebase-auth)
[Firebase Authentication](https://rnfirebase.io/auth/usage)
is Google's auth platform and supports email, magic links, and OAuth providers. It works with React Native through [`react-native-firebase`](https://github.com/invertase/react-native-firebase)
, which is compatible with Expo development builds.
Modern methods[](https://docs.expo.dev/develop/authentication/#modern-methods)
-------------------------------------------------------------------------------
Once you have a working authentication system in place, you can improve the user experience by adding optional but powerful enhancements like biometrics and passkeys. These features add convenience, trust, and speed to your login flows.
Biometrics[](https://docs.expo.dev/develop/authentication/#biometrics)
Biometrics like Face ID and Touch ID can be used to unlock the app or confirm identity after a valid session is established. These are not authentication methods on their own, but act as a local gate that makes re-authentication faster and more secure.
React Native provides access to biometric APIs through libraries like [`expo-local-authentication`](https://docs.expo.dev/versions/latest/sdk/local-authentication)
or [`react-native-biometrics`](https://github.com/SelfLender/react-native-biometrics)
.
Passkeys[](https://docs.expo.dev/develop/authentication/#passkeys)
[Passkeys](https://safety.google/authentication/passkey)
are a new, passwordless way to log in to apps and websites. Backed by Apple, Google, and Microsoft, they use platform-level cryptography and biometrics to authenticate users without passwords.
Passkeys offer a seamless and secure experience, but they require a user to already be authenticated before registering one. They also require extra configuration if you're not using a provider that handles them for you.
* React Native passkey support: [`react-native-passkeys`](https://github.com/peterferguson/react-native-passkeys)
* Native passkey support with Clerk: [Clerk Passkeys for Expo](https://clerk.com/docs/references/expo/passkeys)
Recommendations[](https://docs.expo.dev/develop/authentication/#recommendations)
---------------------------------------------------------------------------------
This guide covers a lot of ground, from basic email and password flows to fully custom OAuth implementations, session management, and modern methods like biometrics and passkeys. Not all of these need to be implemented at once.
In many cases, starting simple is the best approach. Shipping your app with something like email authentication using a magic link or one-time passcode is often more than enough to get through the App Store review process and start collecting feedback from real users.
That said, if you're building an app where you expect high traffic from day one or need to support sign-in across platforms with minimal friction, investing in a more complete authentication flow early on can make a big difference. It can help improve user onboarding, trust, and retention right from the start.
Modern solutions like OAuth, biometrics, and passkeys are not required, but they can be excellent additions once your core system is in place.
The key is to build authentication that fits your current needs, while staying flexible enough to grow with your product.
---
# Create a development build on EAS - Expo Documentation
Hide navigation
Search
[Home](https://docs.expo.dev/)
[Guides](https://docs.expo.dev/guides/overview)
[EAS](https://docs.expo.dev/eas)
[Reference](https://docs.expo.dev/versions/latest)
[Learn](https://docs.expo.dev/tutorial/overview)
[Archive](https://docs.expo.dev/archive)
[Expo Snack](https://snack.expo.dev/)
[Discord and Forums](https://chat.expo.dev/)
[Newsletter](https://expo.dev/mailing-list/signup)
Create a development build on EAS
=================================
[Edit page](https://github.com/expo/expo/edit/main/docs/pages/develop/development-builds/create-a-build.mdx)
Copy page
Learn how to create development builds for a project.
[Edit page](https://github.com/expo/expo/edit/main/docs/pages/develop/development-builds/create-a-build.mdx)
Copy page
* * *
When you create a new Expo app with `npx create-expo-app`, you start off with a project where you update the JavaScript code on your local machine and view the changes in the Expo Go app. A development build is essentially your own version of Expo Go where you are free to use any native libraries and change any native config. In this guide, you will learn how to convert your project that runs on Expo Go into a development build, which will make the native side of your app fully customizable.
[\
\
How to create a development build](https://www.youtube.com/watch?v=uQCE9zl3dXU)
Prerequisites[](https://docs.expo.dev/develop/development-builds/create-a-build/#prerequisites)
------------------------------------------------------------------------------------------------
The instructions assume you already have an existing Expo project that runs on Expo Go.
The requirements for building the native app depend on which platform you are using, which platform you are building for, and whether you want to build on EAS or on your local machine.
Build on EAS[](https://docs.expo.dev/develop/development-builds/create-a-build/#build-on-eas)
This is the easiest way to build your native app, as it requires no native build tools on your side. The builds happen on the EAS servers, which makes it possible to trigger iOS builds from non-macOS platforms.
| | Android | iOS Simulator | iPhone device |
| --- | --- | --- | --- |
| macOS | | | (\*) |
| Windows | | | (\*) |
| Linux | | | (\*) |
(\*) All builds that run on an iPhone device require a paid [Apple Developer](https://developer.apple.com/)
account for build signing.
Build locally using the EAS CLI[](https://docs.expo.dev/develop/development-builds/create-a-build/#build-locally-using-the-eas-cli)
Any EAS CLI command can be built on your local machine with the `--local` flag. This requires your local [development environment](https://reactnative.dev/docs/set-up-your-environment?os=macos&platform=ios)
to be set up with native build tools. Read more about [local app development](https://docs.expo.dev/build-reference/local-builds)
.
| | Android | iOS Simulator | iPhone device |
| --- | --- | --- | --- |
| macOS | | | (\*) |
| Windows | (\*\*) | | |
| Linux | | | |
(\*) All builds that run on an iPhone device require a paid [Apple Developer](https://developer.apple.com/)
account for build signing.
(\*\*) No first-class support, but possible with [WSL](http://expo.fyi/wsl.md)
.
Build locally without EAS[](https://docs.expo.dev/develop/development-builds/create-a-build/#build-locally-without-eas)
To build locally without EAS requires your local [development environment](https://reactnative.dev/docs/set-up-your-environment?os=macos&platform=ios)
to be set up with native build tools. This is the only way to test your iOS build on an iPhone device without a paid Apple Developer Account (only possible on macOS). Read more about [local app compilation](https://docs.expo.dev/guides/local-app-development#local-app-compilation)
and see the [Expo Go to Development Build](https://docs.expo.dev/develop/development-builds/expo-go-to-dev-build)
guide.
| | Android | iOS Simulator | iPhone device |
| --- | --- | --- | --- |
| macOS | | | |
| Windows | | | |
| Linux | | | |
Get started[](https://docs.expo.dev/develop/development-builds/create-a-build/#get-started)
--------------------------------------------------------------------------------------------
For detailed, step-by-step instructions, see our [EAS Tutorial](https://docs.expo.dev/tutorial/eas/introduction)
. Available also as a [tutorial series](https://www.youtube.com/playlist?list=PLsXDmrmFV_AS14tZCBin6m9NIS_VCUKe2)
on YouTube.
1
### Install expo-dev-client[](https://docs.expo.dev/develop/development-builds/create-a-build/#install-expo-dev-client)
Terminal
Copy
`-` `npx expo install expo-dev-client`
Are you using this library in a existing (bare) React Native apps?[](https://docs.expo.dev/develop/development-builds/create-a-build/#are-you-using-this-library-in-a)
Apps that don't use [Continuous Native Generation](https://docs.expo.dev/workflow/continuous-native-generation)
or are created with `npx react-native`, require further configuration after installing this library. See steps 1 and 2 from [Install `expo-dev-client` in an existing React Native app](https://docs.expo.dev/bare/install-dev-builds-in-bare)
.
2
### Build the native app (Android)[](https://docs.expo.dev/develop/development-builds/create-a-build/#build-the-native-app-android)
Prerequisites
[](https://docs.expo.dev/develop/development-builds/create-a-build/#prerequisites)
3 requirements
1.
Expo account
Sign up for an [Expo](https://expo.dev/signup)
account, if you haven't already.
2.
EAS CLI
The [EAS CLI](https://docs.expo.dev/build/setup#install-the-latest-eas-cli)
installed and logged in.
Terminal
Copy
`-` `npm install -g eas-cli && eas login`
3.
An Android Emulator (optional)
An [Android Emulator](https://docs.expo.dev/workflow/android-studio-emulator)
is optional if you want to test your app on an emulator.
Terminal
Copy
`-` `eas build --platform android --profile development`
Read more about [Android builds on EAS](https://docs.expo.dev/tutorial/eas/android-development-build)
.
2
### Build the native app (iOS Simulator)[](https://docs.expo.dev/develop/development-builds/create-a-build/#build-the-native-app-ios-simulator)
Prerequisites
[](https://docs.expo.dev/develop/development-builds/create-a-build/#prerequisites-1)
3 requirements
1.
Expo account
Sign up for an [Expo](https://expo.dev/signup)
account, if you haven't already.
2.
EAS CLI
The [EAS CLI](https://docs.expo.dev/build/setup#install-the-latest-eas-cli)
installed and logged in.
Terminal
Copy
`-` `npm install -g eas-cli && eas login`
3.
macOS with iOS Simulator installed
iOS Simulators are available only on macOS. Make sure you have the [iOS Simulator](https://docs.expo.dev/workflow/ios-simulator)
installed.
Edit `development` profile in eas.json and set the [`simulator`](https://docs.expo.dev/eas/json#simulator)
option to `true` (you have to create a separate profile for simulator builds if you also want to create iOS device builds for this project).
eas.json
Copy
`{ "build": { "development": { "ios": { "simulator": true } } } }`
Terminal
Copy
`-` `eas build --platform ios --profile development`
iOS Simulator builds can only be installed on simulators and not on real devices.
Read more about [iOS Simulator builds on EAS](https://docs.expo.dev/tutorial/eas/ios-development-build-for-simulators)
.
2
### Build the native app (iOS device)[](https://docs.expo.dev/develop/development-builds/create-a-build/#build-the-native-app-ios-device)
Prerequisites
[](https://docs.expo.dev/develop/development-builds/create-a-build/#prerequisites-2)
3 requirements
1.
Expo account
Sign up for an [Expo](https://expo.dev/signup)
account, if you haven't already.
2.
EAS CLI
The [EAS CLI](https://docs.expo.dev/build/setup#install-the-latest-eas-cli)
installed and logged in.
Terminal
Copy
`-` `npm install -g eas-cli && eas login`
3.
Apple Developer account
A paid [Apple Developer](https://developer.apple.com/)
account for creating [signing credentials](https://docs.expo.dev/app-signing/managed-credentials#generating-app-signing-credentials)
so the app could be installed on an iOS device.
Terminal
Copy
`-` `eas build --platform ios --profile development`
iOS device builds can only be installed on iPhone devices and not on iOS Simulators.
Read more about [iOS device builds on EAS](https://docs.expo.dev/tutorial/eas/ios-development-build-for-devices)
.
3
### Install the app[](https://docs.expo.dev/develop/development-builds/create-a-build/#install-the-app)
You'll need to install the native app on your device, emulator, or simulator.
#### When building on EAS[](https://docs.expo.dev/develop/development-builds/create-a-build/#when-building-on-eas)
If you create your development build on EAS, the CLI will prompt you to install the app after the build is finished. You can also install previous builds from the [expo.dev](https://expo.dev/)
dashboard or using [Expo Orbit](https://expo.dev/orbit)
.
#### When building locally using EAS CLI[](https://docs.expo.dev/develop/development-builds/create-a-build/#when-building-locally-using-eas-cli)
When building locally the output of the build will be an archive. You may drag and drop this on your Android Emulator/iOS Simulator to install it, or use [Expo Orbit](https://expo.dev/orbit)
to install a build from your local machine.
4
### Start the bundler[](https://docs.expo.dev/develop/development-builds/create-a-build/#start-the-bundler)
The development client built in step 2 is the native side of your app (basically your own version of Expo Go). To continue developing, you'll also want to start the JavaScript bundler.
Depending on how you built the app, this may already be running, but if you close the process for any reason, there is no need to rebuild your development client. Simply restart the JavaScript bundler with:
Terminal
Copy
`-` `npx expo start`
This is the same command you would have used with Expo Go. It detects whether your project has `expo-dev-client` installed, in which case it will default to targeting your development build instead of Expo Go.
Video walkthroughs[](https://docs.expo.dev/develop/development-builds/create-a-build/#video-walkthroughs)
----------------------------------------------------------------------------------------------------------
["EAS Tutorial Series"\
\
A course on YouTube: learn how to speed up your development with Expo Application Services.](https://www.youtube.com/playlist?list=PLsXDmrmFV_AS14tZCBin6m9NIS_VCUKe2)
["Async Office Hours: How to make a development build with EAS Build"\
\
Learn how to make a development build with EAS Build in this video tutorial hosted by Developer Success Engineer: Keith Kurak.](https://www.youtube.com/watch?v=LUFHXsBcW6w)
---
# Tools for development - Expo Documentation
Hide navigation
Search
[Home](https://docs.expo.dev/)
[Guides](https://docs.expo.dev/guides/overview)
[EAS](https://docs.expo.dev/eas)
[Reference](https://docs.expo.dev/versions/latest)
[Learn](https://docs.expo.dev/tutorial/overview)
[Archive](https://docs.expo.dev/archive)
[Expo Snack](https://snack.expo.dev/)
[Discord and Forums](https://chat.expo.dev/)
[Newsletter](https://expo.dev/mailing-list/signup)
Tools for development
=====================
[Edit page](https://github.com/expo/expo/edit/main/docs/pages/develop/tools.mdx)
Copy page
An overview of Expo tools and websites that will help you during various aspects of your project-building journey.
[Edit page](https://github.com/expo/expo/edit/main/docs/pages/develop/tools.mdx)
Copy page
* * *
When you create a new project with Expo, learning about the following essential tools and websites can help you during your app development journey. This page provides an overview of a list of recommended tools.
Expo CLI[](https://docs.expo.dev/develop/tools/#expo-cli)
----------------------------------------------------------
Expo CLI is a development tool and is installed automatically with `expo` package when you create a new project. You can use it by leveraging `npx` (a Node.js package runner).
It is designed to help you move faster during the app development phase. For example, your first interaction with Expo CLI is starting the development server by running the command: `npx expo start`.
The following is a list of common commands that you will use with Expo CLI while developing your app:
| Command | Description |
| --- | --- |
| `npx expo start` | Starts the development server (whether you are using a development build or Expo Go). |
| `npx expo prebuild` | Generates native Android and iOS directories using [Prebuild](https://docs.expo.dev/workflow/prebuild) . |
| `npx expo run:android` | Compiles native Android app locally. |
| `npx expo run:ios` | Compiles native iOS app locally. |
| `npx expo install package-name` | Used to install a new library or validate and update specific libraries in your project by adding `--fix` option to this command. |
| `npx expo lint` | [Setup and configures](https://docs.expo.dev/guides/using-eslint) ESLint. If ESLint is already configured, this command will [lint your project files](https://docs.expo.dev/guides/using-eslint#usage) . |
In a nutshell, Expo CLI allows you to develop, compile, start your app, and more. See [Expo CLI reference](https://docs.expo.dev/more/expo-cli)
for more available options and actions you can perform with the CLI.
EAS CLI[](https://docs.expo.dev/develop/tools/#eas-cli)
--------------------------------------------------------
EAS CLI is used to log in to your Expo account and compile your app using different EAS services such as Build, Update, or Submit. You can also use this tool to:
* Publish your app to the app stores
* Create a development, preview, or production build of your app
* Create over-the-air (OTA) updates
* Manage your app credentials
* Create an ad hoc provisioning profile for an iOS device
To use EAS CLI, you need to install it globally on your local machine by running the command:
Terminal
Copy
`-` `npm install -g eas-cli`
You can use `eas --help` in your terminal window to learn more about the available commands. For a complete reference, see [`eas-cli` npm page](https://www.npmjs.com/package/eas-cli)
.
Expo Doctor[](https://docs.expo.dev/develop/tools/#expo-doctor)
----------------------------------------------------------------
Expo Doctor is a command line tool used to diagnose issues in your Expo project. To use it, run the following command in your project's root directory:
Terminal
Copy
`-` `npx expo-doctor`
This command performs checks and analyzes your project's codebase for common issues in [app config](https://docs.expo.dev/workflow/configuration)
and package.json files, dependency compatibility, configuration files, and the overall health of the project. Once the check is complete, Expo Doctor outputs the results.
If Expo Doctor finds an issue, it provides a description of the problem along with advice on how to fix it or where to find help.
By default, Expo Doctor validates your project's packages against the [React Native directory](https://reactnative.directory/)
and checks if app config properties are properly synced when native directories exist. You can configure these checks in your project's package.json file. See [`reactNativeDirectoryCheck`](https://docs.expo.dev/versions/latest/config/package-json#reactnativedirectorycheck)
and [`appConfigFieldsNotSyncedCheck`](https://docs.expo.dev/versions/latest/config/package-json#appconfigfieldsnotsynced)
for more details.
You can also use `npx expo-doctor --help` to display usage information.
Orbit[](https://docs.expo.dev/develop/tools/#orbit)
----------------------------------------------------
Orbit is a macOS and Windows app that enables:
* Install and launch builds from EAS on physical devices and emulators.
* Install and launch updates from EAS on Android Emulators or iOS Simulators.
* Launch snack projects on Android Emulators or iOS Simulators.
* Use local files to install and launch apps. Orbit supports any Android .apk, iOS Simulator compatible .app, or ad hoc signed apps.
* See a list of pinned projects from your EAS dashboard.
### Installation[](https://docs.expo.dev/develop/tools/#installation)
macOS
Windows
You can download Orbit with Homebrew for macOS, or directly from the [GitHub releases](https://github.com/expo/orbit/releases)
.
Terminal
Copy
`-` `brew install expo-orbit`
If you want Orbit to start when you log in automatically, click on the Orbit icon in the menu bar, then Settings and select the Launch on Login option.
> Orbit for Windows is in preview and is only compatible with x64 and x86 machines. Compatibility for other architectures will be added in the future.
You can download Orbit for Windows directly from the [GitHub releases](https://github.com/expo/orbit/releases)
.
> Orbit relies on the Android SDK on both macOS and Windows and `xcrun` for device management only on macOS, which requires setting up both [Android Studio](https://docs.expo.dev/workflow/android-studio-emulator)
> and [Xcode](https://docs.expo.dev/workflow/ios-simulator)
> .
Expo Tools for VS Code[](https://docs.expo.dev/develop/tools/#expo-tools-for-vs-code)
--------------------------------------------------------------------------------------
Expo Tools is a VS Code extension to improve your development experience when working with app config files. It provides features such as autocomplete and intellisense for files such as app config, EAS config, store config and Expo Module config files.
[Install Expo Tools VS Code extension\
\
Use this link to install the extension or search Expo Tools directly in your VS Code editor.](https://marketplace.visualstudio.com/items?itemName=expo.vscode-expo-tools)
You can also use it to debug your app using VS Code's built-in debugger to set breakpoints, inspect variables, execute code through the debug console, and more. See [Debugging with VS Code](https://docs.expo.dev/debugging/tools#debugging-with-vs-code)
for how to use this extension for debugging.
Test prototypes with Snack and Expo Go[](https://docs.expo.dev/develop/tools/#test-prototypes-with-snack-and-expo-go)
----------------------------------------------------------------------------------------------------------------------
### Snack[](https://docs.expo.dev/develop/tools/#snack)
Snack is an in-browser development environment that works similarly to Expo Go. It's a great way to share code snippets and experiment with React Native without downloading any tools on your computer.
To use it, go to [snack.expo.dev](https://snack.expo.dev/)
, edit the `` component in App.js, choose a platform (Android, iOS, or web) in the right panel and see the changes live.
### Expo Go[](https://docs.expo.dev/develop/tools/#expo-go)
[Expo Go](https://expo.dev/go)
is a free open-source, sandbox for learning and experimenting with React Native. It works with Android and iOS.
For more information on how to use it:
* Click [this link](https://docs.expo.dev/get-started/set-up-your-environment?mode=expo-go)
to go to Set up your environment guide
* Select a platform to develop under Where would you like to develop?
* Select Expo Go under How would you like to develop?
* Follow the instructions described in that guide
> Note: Not recommended for building and distributing production apps to the app stores. Instead, use [development builds](https://docs.expo.dev/get-started/set-up-your-environment?mode=development-build)
> .
What if I open a project with an unsupported SDK version?[](https://docs.expo.dev/develop/tools/#what-if-i-open-a-project-with)
When running a project that was created for an unsupported SDK version in Expo Go, you'll see the following error:
`"Project is incompatible with this version of Expo Go"`
To fix this, upgrading your project to a [supported SDK version](https://docs.expo.dev/versions/latest#each-expo-sdk-version-depends-on-a-react-native-version)
is recommended. If you want to learn how to do it, see [Upgrade the project to a new SDK Version](https://docs.expo.dev/develop/tools#how-do-i-upgrade-my-project-from)
.
How do I upgrade my project from an unsupported SDK version?[](https://docs.expo.dev/develop/tools/#how-do-i-upgrade-my-project-from)
See [Upgrading Expo SDK guide](https://docs.expo.dev/workflow/upgrading-expo-sdk-walkthrough)
for instructions for upgrading to a specific SDK version.
React Native directory[](https://docs.expo.dev/develop/tools/#react-native-directory)
--------------------------------------------------------------------------------------
Any library that is compatible with React Native works in an Expo project when you use a development build to create your project.
[reactnative.directory](https://reactnative.directory/)
is a searchable database for React Native libraries. If a library you are looking for is not included in Expo SDK, use the directory to find a compatible library for your project.
[Use libraries\
\
See this guide to learn more about the difference between React Native core libraries, Expo SDK libraries, and third-party libraries. It also explains how to determine third-party library compatibility.](https://docs.expo.dev/workflow/using-libraries)
---
# Animation - Expo Documentation
Hide navigation
Search
[Home](https://docs.expo.dev/)
[Guides](https://docs.expo.dev/guides/overview)
[EAS](https://docs.expo.dev/eas)
[Reference](https://docs.expo.dev/versions/latest)
[Learn](https://docs.expo.dev/tutorial/overview)
[Archive](https://docs.expo.dev/archive)
[Expo Snack](https://snack.expo.dev/)
[Discord and Forums](https://chat.expo.dev/)
[Newsletter](https://expo.dev/mailing-list/signup)
Animation
=========
[Edit page](https://github.com/expo/expo/edit/main/docs/pages/develop/user-interface/animation.mdx)
Copy page
Learn how to integrate React Native animations and use it in your Expo project.
[Edit page](https://github.com/expo/expo/edit/main/docs/pages/develop/user-interface/animation.mdx)
Copy page
* * *
Animations are a great way to enhance and provide a better user experience. In your Expo projects, you can use the [Animated API](https://reactnative.dev/docs/next/animations)
from React Native. However, if you want to use more advanced animations with better performance, you can use the [`react-native-reanimated`](https://docs.swmansion.com/react-native-reanimated/)
library. It provides an API that simplifies the process of creating smooth, powerful, and maintainable animations.
Installation[](https://docs.expo.dev/develop/user-interface/animation/#installation)
-------------------------------------------------------------------------------------
You can skip installing `react-native-reanimated` if you have created a project using [the default template](https://docs.expo.dev/get-started/create-a-project)
. This library is already installed. Otherwise, install it by running the following command:
Terminal
Copy
`-` `npx expo install react-native-reanimated`
Usage[](https://docs.expo.dev/develop/user-interface/animation/#usage)
-----------------------------------------------------------------------
### Minimal example[](https://docs.expo.dev/develop/user-interface/animation/#minimal-example)
The following example shows how to use the `react-native-reanimated` library to create a simple animation. For more information on the API and advanced usage, see [`react-native-reanimated` documentation](https://docs.swmansion.com/react-native-reanimated/docs/fundamentals/your-first-animation)
.
Using react-native-reanimated
Copy
Open in Snack
`import Animated, { useSharedValue, withTiming, useAnimatedStyle, Easing, } from 'react-native-reanimated'; import { View, Button, StyleSheet } from 'react-native'; export default function AnimatedStyleUpdateExample() { const randomWidth = useSharedValue(10); const config = { duration: 500, easing: Easing.bezier(0.5, 0.01, 0, 1), }; const style = useAnimatedStyle(() => { return { width: withTiming(randomWidth.value, config), }; }); return ( ); } const styles = StyleSheet.create({ container: { flex: 1, alignItems: 'center', justifyContent: 'center', }, box: { width: 100, height: 80, backgroundColor: 'black', margin: 30, }, });`
Other animation libraries[](https://docs.expo.dev/develop/user-interface/animation/#other-animation-libraries)
---------------------------------------------------------------------------------------------------------------
You can use other animation packages such as [Moti](https://moti.fyi/)
in your Expo project. It works on Android, iOS, and web.
---
# Next steps - Expo Documentation
Hide navigation
Search
[Home](https://docs.expo.dev/)
[Guides](https://docs.expo.dev/guides/overview)
[EAS](https://docs.expo.dev/eas)
[Reference](https://docs.expo.dev/versions/latest)
[Learn](https://docs.expo.dev/tutorial/overview)
[Archive](https://docs.expo.dev/archive)
[Expo Snack](https://snack.expo.dev/)
[Discord and Forums](https://chat.expo.dev/)
[Newsletter](https://expo.dev/mailing-list/signup)
Next steps
==========
[Edit page](https://github.com/expo/expo/edit/main/docs/pages/develop/development-builds/next-steps.mdx)
Copy page
A list of useful resources to learn more about development builds and EAS Build.
[Edit page](https://github.com/expo/expo/edit/main/docs/pages/develop/development-builds/next-steps.mdx)
Copy page
* * *
[Configuring EAS Build with eas.json\
\
Learn how a project using EAS services is configured with eas.json.](https://docs.expo.dev/build/eas-json)
[Environment variables\
\
Learn about different ways to use environment variables in an Expo project.](https://docs.expo.dev/guides/environment-variables)
[Android build process\
\
Learn how an Android project is built on EAS Build.](https://docs.expo.dev/build-reference/android-builds)
[iOS build process\
\
Learn how an iOS project is built on EAS Build.](https://docs.expo.dev/build-reference/ios-builds)
[Set up EAS Build with a monorepo\
\
Learn how to set up EAS Build with a monorepo.](https://docs.expo.dev/build-reference/build-with-monorepos)
---
# Share a development build with your team - Expo Documentation
Hide navigation
Search
[Home](https://docs.expo.dev/)
[Guides](https://docs.expo.dev/guides/overview)
[EAS](https://docs.expo.dev/eas)
[Reference](https://docs.expo.dev/versions/latest)
[Learn](https://docs.expo.dev/tutorial/overview)
[Archive](https://docs.expo.dev/archive)
[Expo Snack](https://snack.expo.dev/)
[Discord and Forums](https://chat.expo.dev/)
[Newsletter](https://expo.dev/mailing-list/signup)
Share a development build with your team
========================================
[Edit page](https://github.com/expo/expo/edit/main/docs/pages/develop/development-builds/share-with-your-team.mdx)
Copy page
Learn how to install and share the development with your team or run it on multiple devices.
[Edit page](https://github.com/expo/expo/edit/main/docs/pages/develop/development-builds/share-with-your-team.mdx)
Copy page
* * *
Android and iOS both offer ways to install a build of your application directly on devices. This gives you full control of putting specific builds on devices, allowing you to iterate quickly and have multiple builds of your application available for review at the same time. You can also share it with your team or run it on multiple test devices.
Share the URL[](https://docs.expo.dev/develop/development-builds/share-with-your-team/#share-the-url)
------------------------------------------------------------------------------------------------------
When a development build is ready, a shareable URL is generated for your build with instructions on how to get it up and running. You can use this URL with a teammate or send it to your test device to install the build. The URL generated is unique to the build for your project.
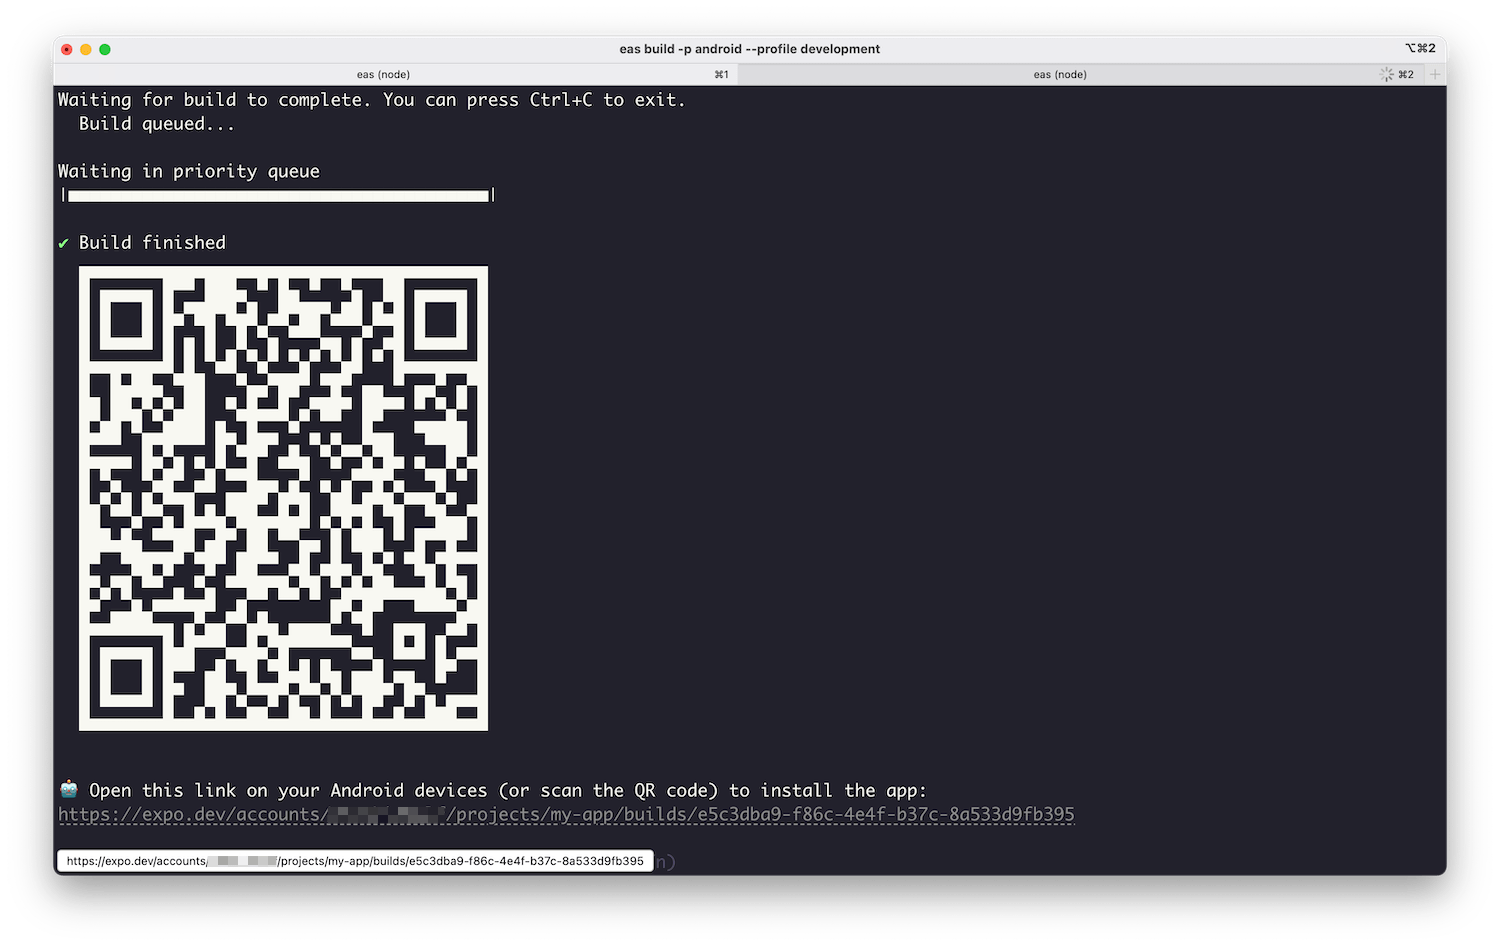
> If you register any new iOS devices after creating a development build, you'll need to create a new development build to install it on those devices. For more information, see [internal distribution](https://docs.expo.dev/build/internal-distribution)
> .
### Use the EAS dashboard[](https://docs.expo.dev/develop/development-builds/share-with-your-team/#use-the-eas-dashboard)
You can also direct your teammate to the build page in the EAS dashboard. From there, they can download the build artifact directly on their device.
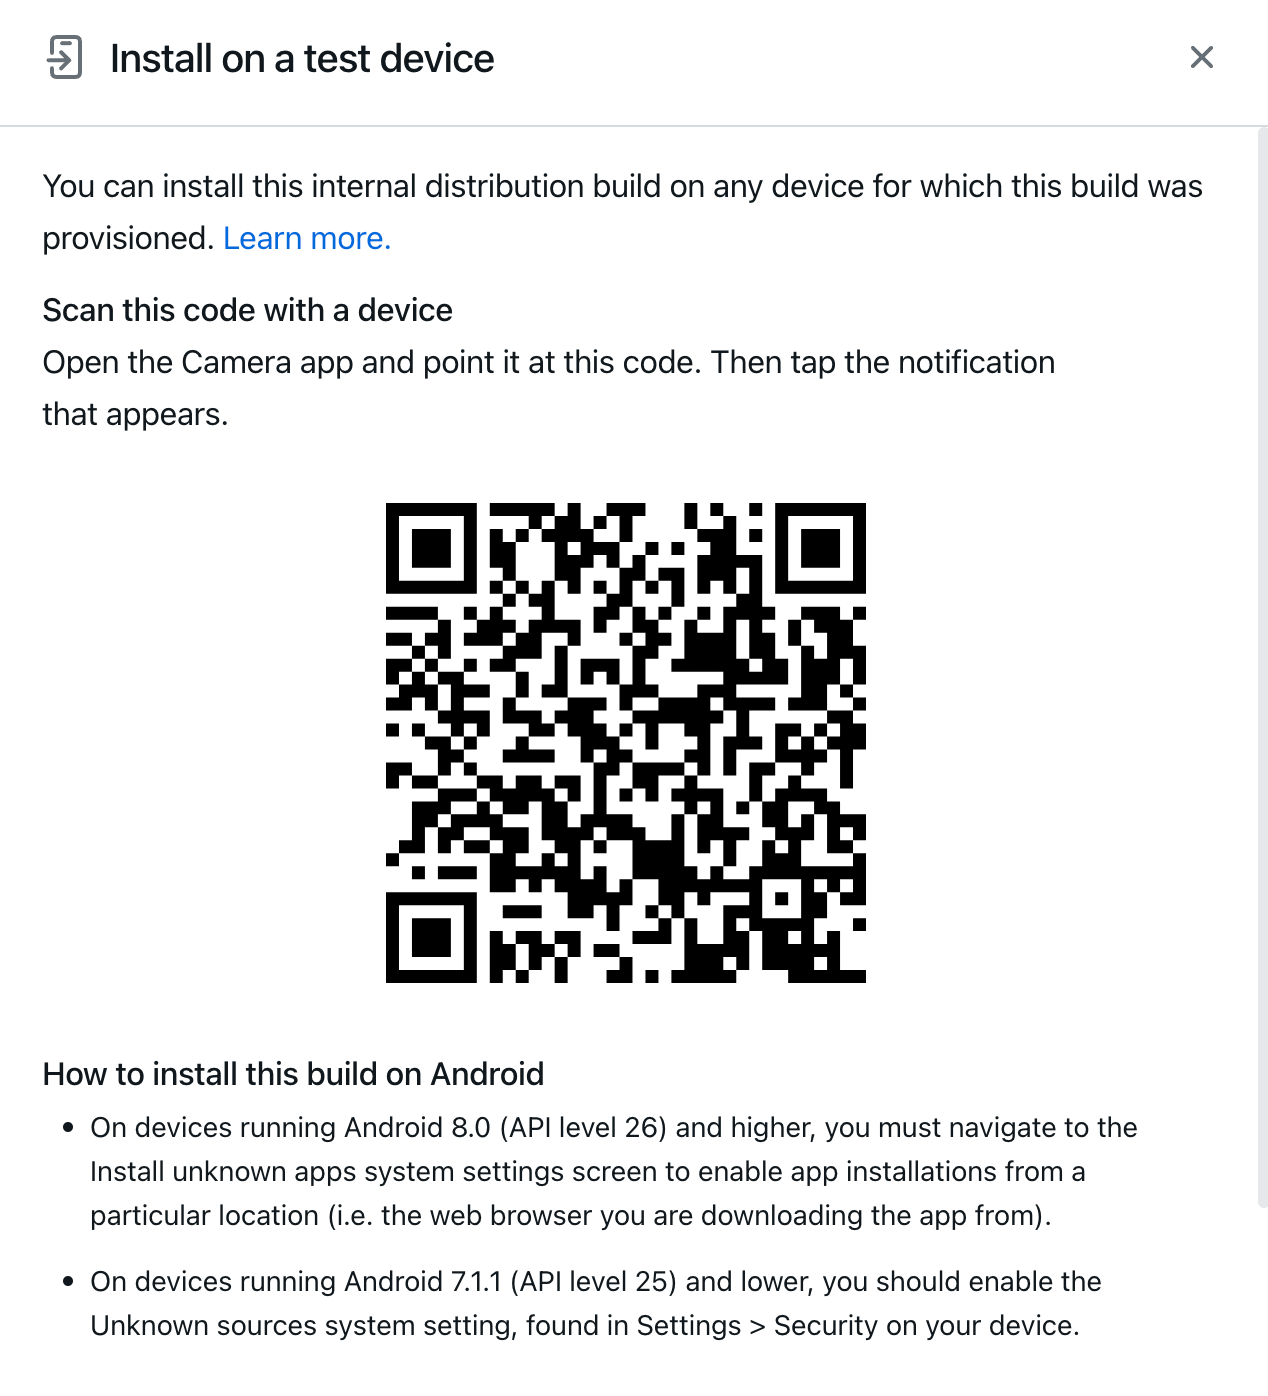
### Use EAS CLI[](https://docs.expo.dev/develop/development-builds/share-with-your-team/#use-eas-cli)
Your teammate can also download and install the development build using EAS CLI. They have to make sure that they are signed from the Expo account associated with the development build and then can run the following command:
Terminal
Copy
`-` `eas build:run --profile development`
If the profile name for the development build is different from `development`, use it instead with `--profile`.
### iOS-only instructions[](https://docs.expo.dev/develop/development-builds/share-with-your-team/#ios-only-instructions)
> If you're running iOS 16 or above and haven't yet turned on Developer Mode, you'll need to [enable it](https://docs.expo.dev/guides/ios-developer-mode)
> before you can run your build. (This doesn't apply if you're using enterprise provisioning.)
You can use `eas build:resign` to codesign an existing .ipa for iOS to a new ad hoc provisioning profile. This helps reduce time when distributing with your team. For example, if you want to add a new test device to an existing build, you can use this command to update the provisioning profile to include the device without rebuilding the entire app from scratch. For more information, see [Re-signing new credentials](https://docs.expo.dev/app-signing/app-credentials#re-signing-new-credentials)
.
Next steps[](https://docs.expo.dev/develop/development-builds/share-with-your-team/#next-steps)
------------------------------------------------------------------------------------------------
[Install multiple app variants on the same device\
\
Learn how to install multiple variants (development, preview, production) of an app on the same device side by side by converting `app.json` to `app.config.js` and additional configuration that is required to start the development server for each variant.](https://docs.expo.dev/build-reference/variants)
[Sharing pre-release versions of your app\
\
Learn more about sharing pre-release versions of your app.](https://docs.expo.dev/guides/sharing-preview-releases)
---
# Switch from Expo Go to a development build - Expo Documentation
Hide navigation
Search
[Home](https://docs.expo.dev/)
[Guides](https://docs.expo.dev/guides/overview)
[EAS](https://docs.expo.dev/eas)
[Reference](https://docs.expo.dev/versions/latest)
[Learn](https://docs.expo.dev/tutorial/overview)
[Archive](https://docs.expo.dev/archive)
[Expo Snack](https://snack.expo.dev/)
[Discord and Forums](https://chat.expo.dev/)
[Newsletter](https://expo.dev/mailing-list/signup)
Switch from Expo Go to a development build
==========================================
[Edit page](https://github.com/expo/expo/edit/main/docs/pages/develop/development-builds/expo-go-to-dev-build.mdx)
Copy page
How to switch from your Expo Go project to use development builds.
[Edit page](https://github.com/expo/expo/edit/main/docs/pages/develop/development-builds/expo-go-to-dev-build.mdx)
Copy page
* * *
To switch from Expo Go to a development build, you'll need to follow the steps below:
1
Install the `expo-dev-client`[](https://docs.expo.dev/develop/development-builds/expo-go-to-dev-build/#install-the-expo-dev-client)
------------------------------------------------------------------------------------------------------------------------------------
The Expo Dev Client library includes the launcher UI (shown in the screenshots below), dev menu, extensions to test over-the-air updates, and more. The Expo Go app has the dev menu built in, and that's why you need to install it separately for a development build.
Terminal
Copy
`-` `npx expo install expo-dev-client`
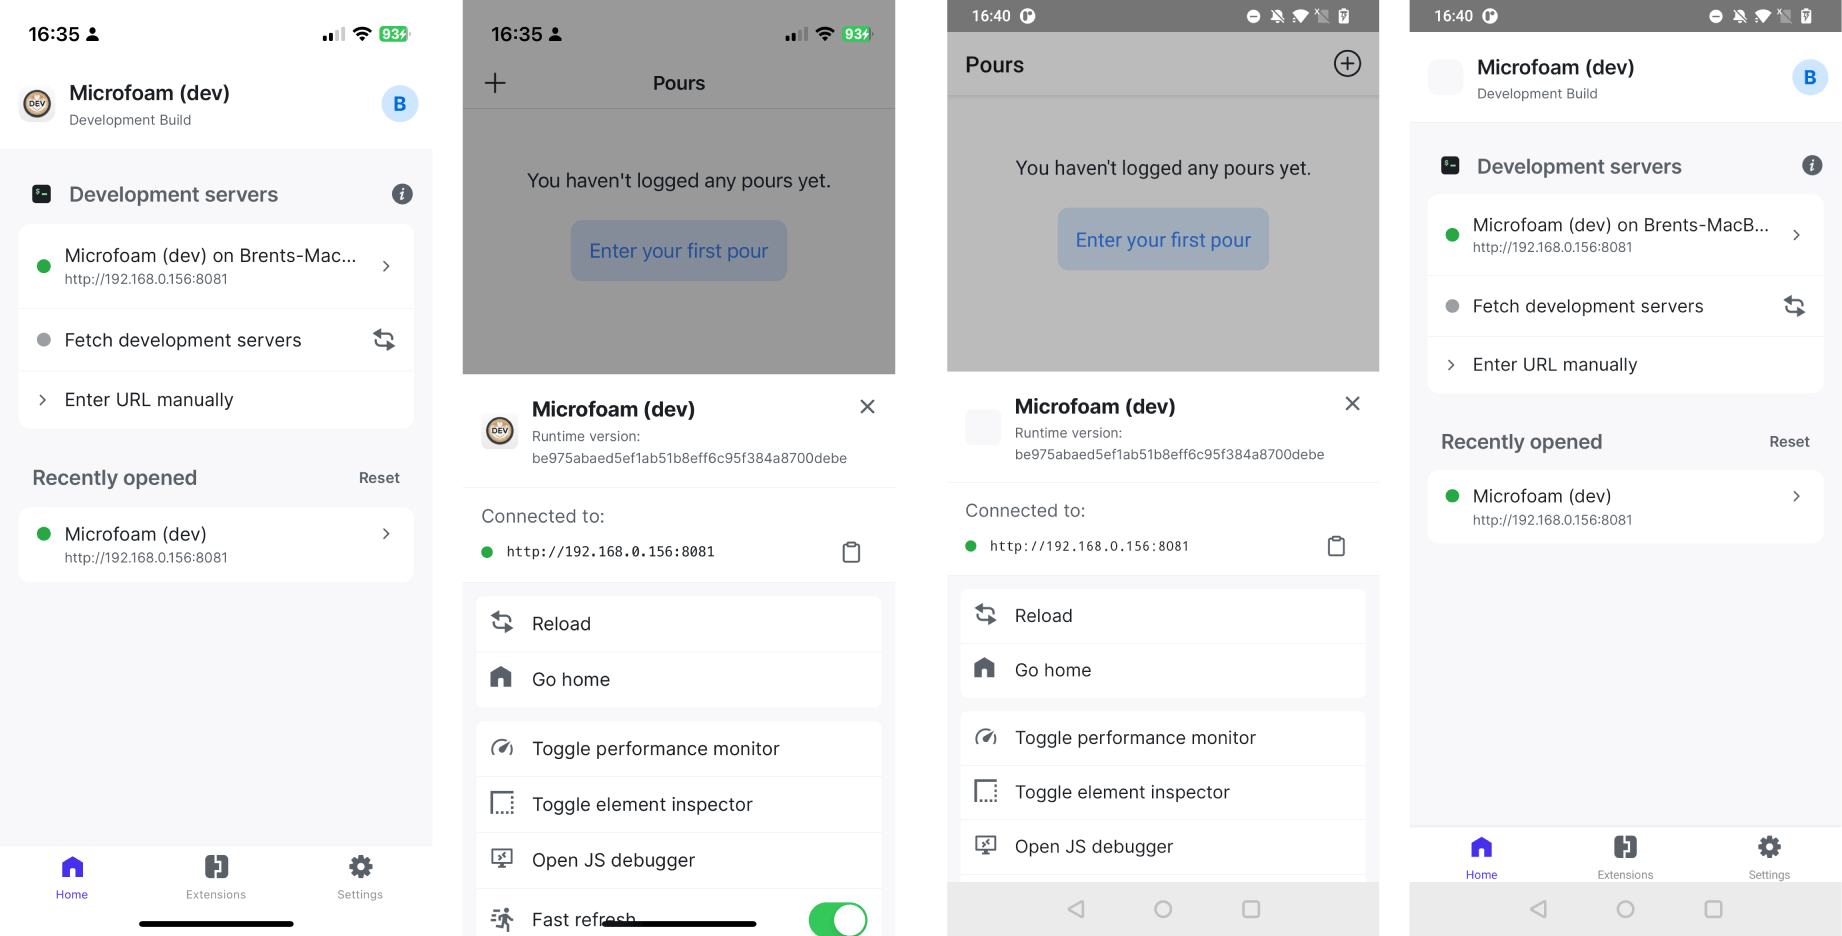
When you run a development build it will look like this, only with your app name and icon included rather than "Microfoam". The launcher UI is pictured in iOS on the left and Android on the right. In between, you can see an app running inside of the development build, with the customizable developer menu open.
> We recommend using the `expo-dev-client` for the best development experience, but it is possible to use development builds without installing this library. If not using the dev client, in [Step 3](https://docs.expo.dev/develop/development-builds/expo-go-to-dev-build#start-the-dev-client)
> , start the bundler with `--dev-client`. Otherwise, it will default to opening in Expo Go.
2
Build your native app[](https://docs.expo.dev/develop/development-builds/expo-go-to-dev-build/#build-your-native-app)
----------------------------------------------------------------------------------------------------------------------
With Expo Go, you only needed to build the JavaScript bundle, but with development builds you also need to compile the native app. With Expo, there are two parts to building your native app:
1. Generate the native android and/or ios directories ([read more](https://docs.expo.dev/develop/development-builds/expo-go-to-dev-build#cng-and-prebuild)
on when and how you'll need to do this)
2. Use native build tools to compile the native app(s)
Once you've built your native app, you won't need to build it again unless you add or update a library with native code, or change any native code or configuration, such as the app name.
> The android and ios directories are automatically added to .gitignore when you create a new project, so they won't be checked into Git. This ensures you can always regenerate the code locally or on CI with [CNG](https://docs.expo.dev/workflow/continuous-native-generation)
> when needed and never have to edit native code manually.
### Option 1: Build on your local machine[](https://docs.expo.dev/develop/development-builds/expo-go-to-dev-build/#option-1-build-on-your-local-machine)
To build a native app on your local machine, follow the setup your environment guides for [Android](https://docs.expo.dev/workflow/android-studio-emulator)
and [iOS](https://docs.expo.dev/workflow/ios-simulator)
platforms. This involves setting up and configuring native build tools like Android Studio for Android and Xcode for iOS.
Once you have everything set up, run the following command:
Build for Android
Build for iOS
Terminal
Copy
`-` `npx expo run:android`
Terminal
Copy
`-` `npx expo run:ios`
By default, this will build and install the app on an Android Emulator/iOS Simulator. If you need to run the build on your phone, plug it into your computer (on Android, select trust device and allow USB debugging if prompted, and on iOS, enable [developer mode](https://docs.expo.dev/get-started/set-up-your-environment?mode=development-build&buildEnv=local&platform=ios&device=physical#plug-in-your-device-via-usb-and-enable-developer-mode)
) and run the above commands with the `--device` flag.
### Option 2: Build on EAS[](https://docs.expo.dev/develop/development-builds/expo-go-to-dev-build/#option-2-build-on-eas)
Building on EAS servers is useful when:
* You can't or don't want to set up your local development environment
* You want to build an iOS app but don't own a Mac
* You want to share the development builds with your team
[Build on EAS\
\
How to create your Development Build on EAS](https://docs.expo.dev/develop/development-builds/create-a-build)
3
Start the bundler[](https://docs.expo.dev/develop/development-builds/expo-go-to-dev-build/#start-the-bundler)
--------------------------------------------------------------------------------------------------------------
After building locally, `npx expo run:android|ios` will start the bundler automatically. But if you closed the bundler or are working on a dev client you built earlier, (re)start the Metro bundler with:
Terminal
Copy
`-` `npx expo start`
When your project has `expo-dev-client` installed, the bundler will print out Using development build, and the QR code it shows will link into the development build you created instead of Expo Go.
Prebuild[](https://docs.expo.dev/develop/development-builds/expo-go-to-dev-build/#prebuild)
--------------------------------------------------------------------------------------------
[Prebuild](https://docs.expo.dev/workflow/continuous-native-generation#prebuild)
is a concept unique to Expo projects. It refers to the process of generating the android and ios directories based on your local configuration and properties.
### When should you run prebuild[](https://docs.expo.dev/develop/development-builds/expo-go-to-dev-build/#when-should-you-run-prebuild)
You will need to run prebuild locally if you are building via `npx expo run:android|ios`, and change any native dependencies or configuration, such as:
* Installing or updating a library containing native code
* Changing [app config](https://docs.expo.dev/workflow/configuration)
(`app.json`)
* Upgrading your Expo SDK version
In these cases, you'll want to rebuild the native directories with:
Terminal
Copy
`-` `npx expo prebuild --clean`
Then, rebuild your app with the updated native code, with:
Build for Android
Build for iOS
Terminal
Copy
`-` `npx expo run:android`
Terminal
Copy
`-` `npx expo run:ios`
### When you don't need to run prebuild[](https://docs.expo.dev/develop/development-builds/expo-go-to-dev-build/#when-you-dont-need-to-run-prebuild)
All Expo build tools (`npx expo run:android|ios` and `eas build`) will prebuild automatically if no existing native folders are found. This means that there is no need to run prebuild manually when you're running `npx expo run:android|ios` for the first time or `eas build`.
[Continuous Native Generation (CNG)\
\
Learn about the philosophy and benefits of Continuous Native Generation (CNG) and Prebuild](https://docs.expo.dev/workflow/continuous-native-generation)
---
# Use a development build - Expo Documentation
Hide navigation
Search
[Home](https://docs.expo.dev/)
[Guides](https://docs.expo.dev/guides/overview)
[EAS](https://docs.expo.dev/eas)
[Reference](https://docs.expo.dev/versions/latest)
[Learn](https://docs.expo.dev/tutorial/overview)
[Archive](https://docs.expo.dev/archive)
[Expo Snack](https://snack.expo.dev/)
[Discord and Forums](https://chat.expo.dev/)
[Newsletter](https://expo.dev/mailing-list/signup)
Use a development build
=======================
[Edit page](https://github.com/expo/expo/edit/main/docs/pages/develop/development-builds/use-development-builds.mdx)
Copy page
Learn how to use development builds for a project.
[Edit page](https://github.com/expo/expo/edit/main/docs/pages/develop/development-builds/use-development-builds.mdx)
Copy page
* * *
Usually, creating a new native build from scratch takes long enough that you'll be tempted to switch tasks and lose your focus. However, with the development build installed on your device or an emulator/simulator, you won't have to wait for the native build process until you [change the underlying native code](https://docs.expo.dev/develop/development-builds/use-development-builds#rebuild-a-development-build)
that powers your app.
Start the development server[](https://docs.expo.dev/develop/development-builds/use-development-builds/#start-the-development-server)
--------------------------------------------------------------------------------------------------------------------------------------
To start developing, run the following command to start the development server:
Terminal
Copy
`-` `npx expo start`
To open the project inside your development client:
* Press a or i keys to open your project on an Android Emulator or an iOS Simulator.
* On a physical device, scan the QR code from your system's camera or a QR code reader to open the project on your device.
The launcher screen[](https://docs.expo.dev/develop/development-builds/use-development-builds/#the-launcher-screen)
--------------------------------------------------------------------------------------------------------------------
If you launch the development build from your device's Home screen, you will see your launcher screen, which looks similar to the following:
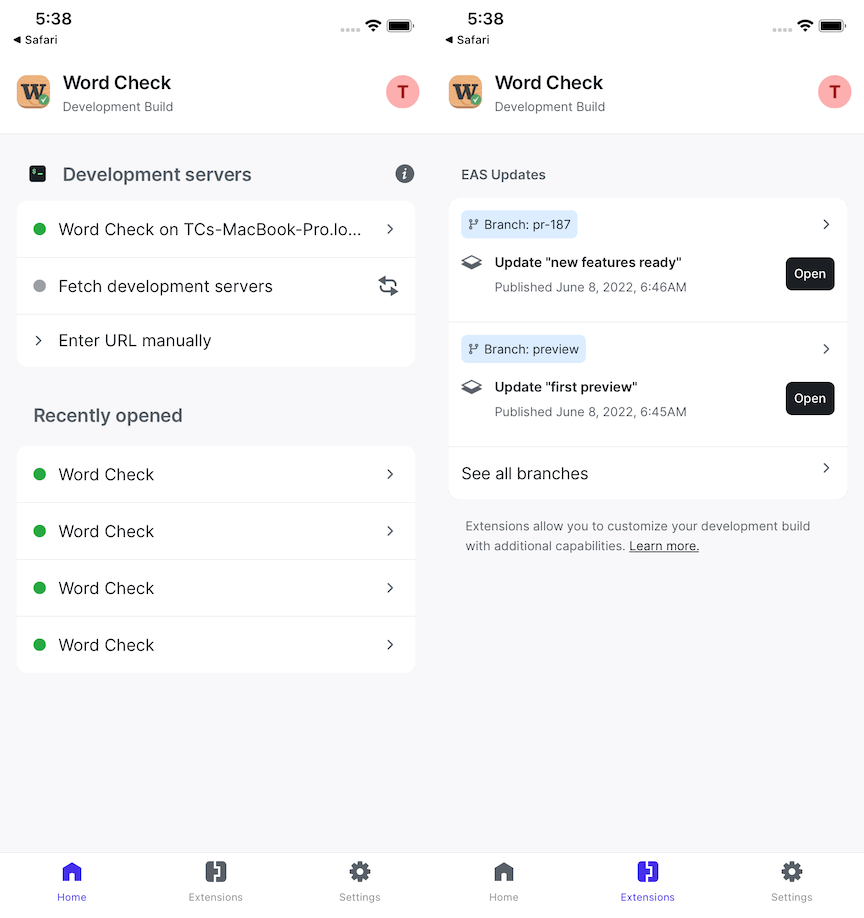
If a bundler is detected on your local network, or if you have signed in to an Expo account in both Expo CLI and your development build, you can connect to it directly from this screen. Otherwise, you can connect by scanning the QR code displayed by the Expo CLI.
Rebuild a development build[](https://docs.expo.dev/develop/development-builds/use-development-builds/#rebuild-a-development-build)
------------------------------------------------------------------------------------------------------------------------------------
If you add a library to your project that contains native code APIs, for example, [`expo-secure-store`](https://docs.expo.dev/versions/latest/sdk/securestore)
, you will have to rebuild the development client. This is because the native code of the library is not included in the development client automatically when installing the library as a dependency on your project.
Debug a development build[](https://docs.expo.dev/develop/development-builds/use-development-builds/#debug-a-development-build)
--------------------------------------------------------------------------------------------------------------------------------
When you need to, you can access the menu by pressing Cmd ⌘ + d or Ctrl + d in Expo CLI or by shaking your phone or tablet. Here you'll be able to access all of the functions of your development build, any debugging functionality you need, or switch to a different version of your app.
See [Debugging](https://docs.expo.dev/debugging/runtime-issues)
guide for more information.
---
# Next steps - Expo Documentation
Hide navigation
Search
[Home](https://docs.expo.dev/)
[Guides](https://docs.expo.dev/guides/overview)
[EAS](https://docs.expo.dev/eas)
[Reference](https://docs.expo.dev/versions/latest)
[Learn](https://docs.expo.dev/tutorial/overview)
[Archive](https://docs.expo.dev/archive)
[Expo Snack](https://snack.expo.dev/)
[Discord and Forums](https://chat.expo.dev/)
[Newsletter](https://expo.dev/mailing-list/signup)
Next steps
==========
[Edit page](https://github.com/expo/expo/edit/main/docs/pages/develop/user-interface/next-steps.mdx)
Copy page
A list of useful resources to learn more about implementing navigation and UI in your app.
[Edit page](https://github.com/expo/expo/edit/main/docs/pages/develop/user-interface/next-steps.mdx)
Copy page
* * *
[Use TypeScript\
\
An in-depth guide on configuring an Expo project with TypeScript or migrating an existing JavaScript project.](https://docs.expo.dev/guides/typescript)
[Icons\
\
Learn how to use various types of icons in your Expo app, including vector icons, custom icon fonts, icon images, and icon buttons.](https://docs.expo.dev/guides/icons)
[ESLint and Prettier\
\
A guide on configuring ESLint and Prettier to format Expo projects.](https://docs.expo.dev/guides/using-eslint)
---
# Color themes - Expo Documentation
Hide navigation
Search
[Home](https://docs.expo.dev/)
[Guides](https://docs.expo.dev/guides/overview)
[EAS](https://docs.expo.dev/eas)
[Reference](https://docs.expo.dev/versions/latest)
[Learn](https://docs.expo.dev/tutorial/overview)
[Archive](https://docs.expo.dev/archive)
[Expo Snack](https://snack.expo.dev/)
[Discord and Forums](https://chat.expo.dev/)
[Newsletter](https://expo.dev/mailing-list/signup)
Color themes
============
[Edit page](https://github.com/expo/expo/edit/main/docs/pages/develop/user-interface/color-themes.mdx)
Copy page
Learn how to support light and dark modes in your app.
[Edit page](https://github.com/expo/expo/edit/main/docs/pages/develop/user-interface/color-themes.mdx)
Copy page
* * *
It's common for apps to support light and dark color schemes. Here is an example of how supporting both modes looks in an Expo project:
Configuration[](https://docs.expo.dev/develop/user-interface/color-themes/#configuration)
------------------------------------------------------------------------------------------
> For Android and iOS projects, additional configuration is required to support switching between light and dark mode. For web, no additional configuration is required.
To configure supported appearance styles, you can use the [`userInterfaceStyle`](https://docs.expo.dev/versions/latest/config/app#userinterfacestyle)
property in your project's [app config](https://docs.expo.dev/versions/latest/config/app)
. By default, this property is set to `automatic` when you create a new project with the [default template](https://docs.expo.dev/get-started/create-a-project)
.
Here is an example configuration:
app.json
Copy
`{ "expo": { "userInterfaceStyle": "automatic" } }`
You can also configure `userInterfaceStyle` property for a specific platforms by setting either [`android.userInterfaceStyle`](https://docs.expo.dev/versions/latest/config/app#userinterfacestyle-2)
or [`ios.userInterfaceStyle`](https://docs.expo.dev/versions/latest/config/app#userinterfacestyle-1)
to the preferred value.
> The app will default to the `light` style if this property is absent.
When you are creating a development build, you have to install [`expo-system-ui`](https://docs.expo.dev/versions/latest/sdk/system-ui#installation)
to support the appearance styles for Android. Otherwise, the `userInterfaceStyle` property is ignored.
Terminal
Copy
`-` `npx expo install expo-system-ui`
If the project is misconfigured and doesn't have `expo-system-ui` installed, the following warning will be shown in the terminal:
Terminal
Copy
`» android: userInterfaceStyle: Install expo-system-ui in your project to enable this feature.`
You can also use the following command to check if the project is misconfigured:
Terminal
Copy
`-` `npx expo config --type introspect`
Using bare React Native app?[](https://docs.expo.dev/develop/user-interface/color-themes/#using-bare-react-native-app)
#### Android[](https://docs.expo.dev/develop/user-interface/color-themes/#android)
Ensure that the `uiMode` flag is present on your `MainActivity` (and any other activities where this behavior is desired) in AndroidManifest.xml:
``
Implement the `onConfigurationChanged` method in MainActivity.java:
`import android.content.Intent; import android.content.res.Configuration; public class MainActivity extends ReactActivity { %%placeholder-start%%... %%placeholder-end%% @Override public void onConfigurationChanged(Configuration newConfig) { super.onConfigurationChanged(newConfig); Intent intent = new Intent("onConfigurationChanged"); intent.putExtra("newConfig", newConfig); sendBroadcast(intent); } %%placeholder-start%%... %%placeholder-end%% }`
#### iOS[](https://docs.expo.dev/develop/user-interface/color-themes/#ios)
You can configure supported styles with the [`UIUserInterfaceStyle`](https://developer.apple.com/documentation/bundleresources/information_property_list/uiuserinterfacestyle)
key in your app Info.plist. Use `Automatic` to support both light and dark modes.
### Supported appearance styles[](https://docs.expo.dev/develop/user-interface/color-themes/#supported-appearance-styles)
The `userInterfaceStyle` property supports the following values:
* `automatic`: Follow system appearance settings and notify about any change the user makes.
* `light`: Restrict the app to support light theme only.
* `dark`: Restrict the app to support dark theme only.
Detect the color scheme[](https://docs.expo.dev/develop/user-interface/color-themes/#detect-the-color-scheme)
--------------------------------------------------------------------------------------------------------------
To detect the color scheme in your project, use `Appearance` or `useColorScheme` from `react-native`:
app/index.tsx
Copy
`import { Appearance, useColorScheme } from 'react-native';`
Then, you can use `useColorScheme()` hook as shown below:
app/index.tsx
Copy
`function MyComponent() { let colorScheme = useColorScheme(); if (colorScheme === 'dark') { // render some dark thing } else { // render some light thing } }`
In some cases, you will find it helpful to get the current color scheme imperatively with [`Appearance.getColorScheme()` or listen to changes with `Appearance.addChangeListener()`](https://reactnative.dev/docs/appearance)
.
Additional information[](https://docs.expo.dev/develop/user-interface/color-themes/#additional-information)
------------------------------------------------------------------------------------------------------------
### Minimal example[](https://docs.expo.dev/develop/user-interface/color-themes/#minimal-example)
useColorScheme example
Copy
Open in Snack
`import { Text, StyleSheet, View, useColorScheme } from 'react-native'; import { StatusBar } from 'expo-status-bar'; export default function App() { const colorScheme = useColorScheme(); const themeTextStyle = colorScheme === 'light' ? styles.lightThemeText : styles.darkThemeText; const themeContainerStyle = colorScheme === 'light' ? styles.lightContainer : styles.darkContainer; return ( Color scheme: {colorScheme} ); } const styles = StyleSheet.create({ container: { flex: 1, alignItems: 'center', justifyContent: 'center', }, text: { fontSize: 20, }, lightContainer: { backgroundColor: '#d0d0c0', }, darkContainer: { backgroundColor: '#242c40', }, lightThemeText: { color: '#242c40', }, darkThemeText: { color: '#d0d0c0', }, });`
### Tips[](https://docs.expo.dev/develop/user-interface/color-themes/#tips)
While you are developing your project, you can change your simulator's or device's appearance by using the following shortcuts:
* If using an Android Emulator, you can run `adb shell "cmd uimode night yes"` to enable dark mode, and `adb shell "cmd uimode night no"` to disable dark mode.
* If using a physical Android device or an Android Emulator, you can toggle the system dark mode setting in the device's settings.
* If working with an iOS emulator locally, you can use the Cmd ⌘ + Shift + a shortcut to toggle between light and dark modes.
---
# Store data - Expo Documentation
Hide navigation
Search
[Home](https://docs.expo.dev/)
[Guides](https://docs.expo.dev/guides/overview)
[EAS](https://docs.expo.dev/eas)
[Reference](https://docs.expo.dev/versions/latest)
[Learn](https://docs.expo.dev/tutorial/overview)
[Archive](https://docs.expo.dev/archive)
[Expo Snack](https://snack.expo.dev/)
[Discord and Forums](https://chat.expo.dev/)
[Newsletter](https://expo.dev/mailing-list/signup)
Store data
==========
[Edit page](https://github.com/expo/expo/edit/main/docs/pages/develop/user-interface/store-data.mdx)
Copy page
Learn about different libraries available to store data in your Expo project.
[Edit page](https://github.com/expo/expo/edit/main/docs/pages/develop/user-interface/store-data.mdx)
Copy page
* * *
Storing data can be essential to the features implemented in your mobile app. There are different ways to save data in your Expo project depending on the type of data you want to store and the security requirements of your app. This page lists a variety of libraries to help you decide which solution is best for your project.
Expo SecureStore[](https://docs.expo.dev/develop/user-interface/store-data/#expo-securestore)
----------------------------------------------------------------------------------------------
`expo-secure-store` provides a way to encrypt and securely store key-value pairs locally on the device.
[\
\
Expo SecureStore API reference\
\
For more information on how to install and use expo-secure-store, see its API documentation.](https://docs.expo.dev/versions/latest/sdk/securestore)
Expo FileSystem[](https://docs.expo.dev/develop/user-interface/store-data/#expo-filesystem)
--------------------------------------------------------------------------------------------
`expo-file-system` provides access to a file system stored locally on the device. Within Expo Go, each project has a separate file system and no access to other Expo projects' files. However, it can save content shared by other projects to the local filesystem and share local files with other projects. It is also capable of uploading and downloading files from network URLs.
[\
\
Expo FileSystem API reference\
\
For more information on how to install and use expo-file-system, see its API documentation.](https://docs.expo.dev/versions/latest/sdk/filesystem)
Expo SQLite[](https://docs.expo.dev/develop/user-interface/store-data/#expo-sqlite)
------------------------------------------------------------------------------------
`expo-sqlite` package gives your app access to a database that can be queried through a WebSQL-like API. The database is persisted across restarts of your app. You can use it for importing an existing database, opening databases, creating tables, inserting items, querying and displaying results, and using prepared statements.
[\
\
Expo SQLite API reference\
\
For more information on how to install and use expo-sqlite, see its API documentation.](https://docs.expo.dev/versions/latest/sdk/sqlite)
Async Storage[](https://docs.expo.dev/develop/user-interface/store-data/#async-storage)
----------------------------------------------------------------------------------------
[Async Storage](https://react-native-async-storage.github.io/async-storage/)
is an asynchronous, unencrypted, persistent key-value storage for React Native apps. It has a simple API and is a good choice for storing small amounts of data. It is also a good choice for storing data that does not need encryption, such as user preferences or app state.
[\
\
Async Storage documentation\
\
For more information on how to install and use Async Storage, see its documentation.](https://react-native-async-storage.github.io/async-storage/docs/usage)
Other libraries[](https://docs.expo.dev/develop/user-interface/store-data/#other-libraries)
--------------------------------------------------------------------------------------------
There are other libraries available for storing data for different purposes. For example, you might not need encryption in your project or are looking for a faster solution similar to Async Storage.
We recommend checking out [React Native for a list of libraries](https://reactnative.directory/?search=storage)
to help you store your project's data.
---
# System bars - Expo Documentation
Hide navigation
Search
[Home](https://docs.expo.dev/)
[Guides](https://docs.expo.dev/guides/overview)
[EAS](https://docs.expo.dev/eas)
[Reference](https://docs.expo.dev/versions/latest)
[Learn](https://docs.expo.dev/tutorial/overview)
[Archive](https://docs.expo.dev/archive)
[Expo Snack](https://snack.expo.dev/)
[Discord and Forums](https://chat.expo.dev/)
[Newsletter](https://expo.dev/mailing-list/signup)
System bars
===========
[Edit page](https://github.com/expo/expo/edit/main/docs/pages/develop/user-interface/system-bars.mdx)
Copy page
Learn how to handle and customize system bars for safe areas and edge-to-edge layout in your Expo project.
[Edit page](https://github.com/expo/expo/edit/main/docs/pages/develop/user-interface/system-bars.mdx)
Copy page
* * *
System bars are the UI elements at the edges of the screen that provide essential device information and navigation controls. Depending on the mobile OS, they include the status bar ([Android](https://developer.android.com/design/ui/mobile/guides/foundations/system-bars)
and [iOS](https://developer.apple.com/design/human-interface-guidelines/status-bars)
), caption bar ([Android](https://medium.com/androiddevelopers/insets-handling-tips-for-android-15s-edge-to-edge-enforcement-872774e8839b#:~:text=or%20SHORT_EDGES.-,Caption%20bars,-When%20your%20app)
only), navigation bar ([Android](https://developer.android.com/design/ui/mobile/guides/foundations/system-bars#navigation-bar)
and [iOS](https://developer.apple.com/design/human-interface-guidelines/navigation-bars)
), and home indicator (iOS only).
These components are used to display device information such as battery level, time, notification alerts, and provide direct interaction with the device from anywhere in the device's interface. For example, an app user can pull down the status bar to access quick settings and notifications regardless of which app they're currently using.
System bars are fundamental to the mobile experience, and understanding how to work with them properly is important for creating your app.
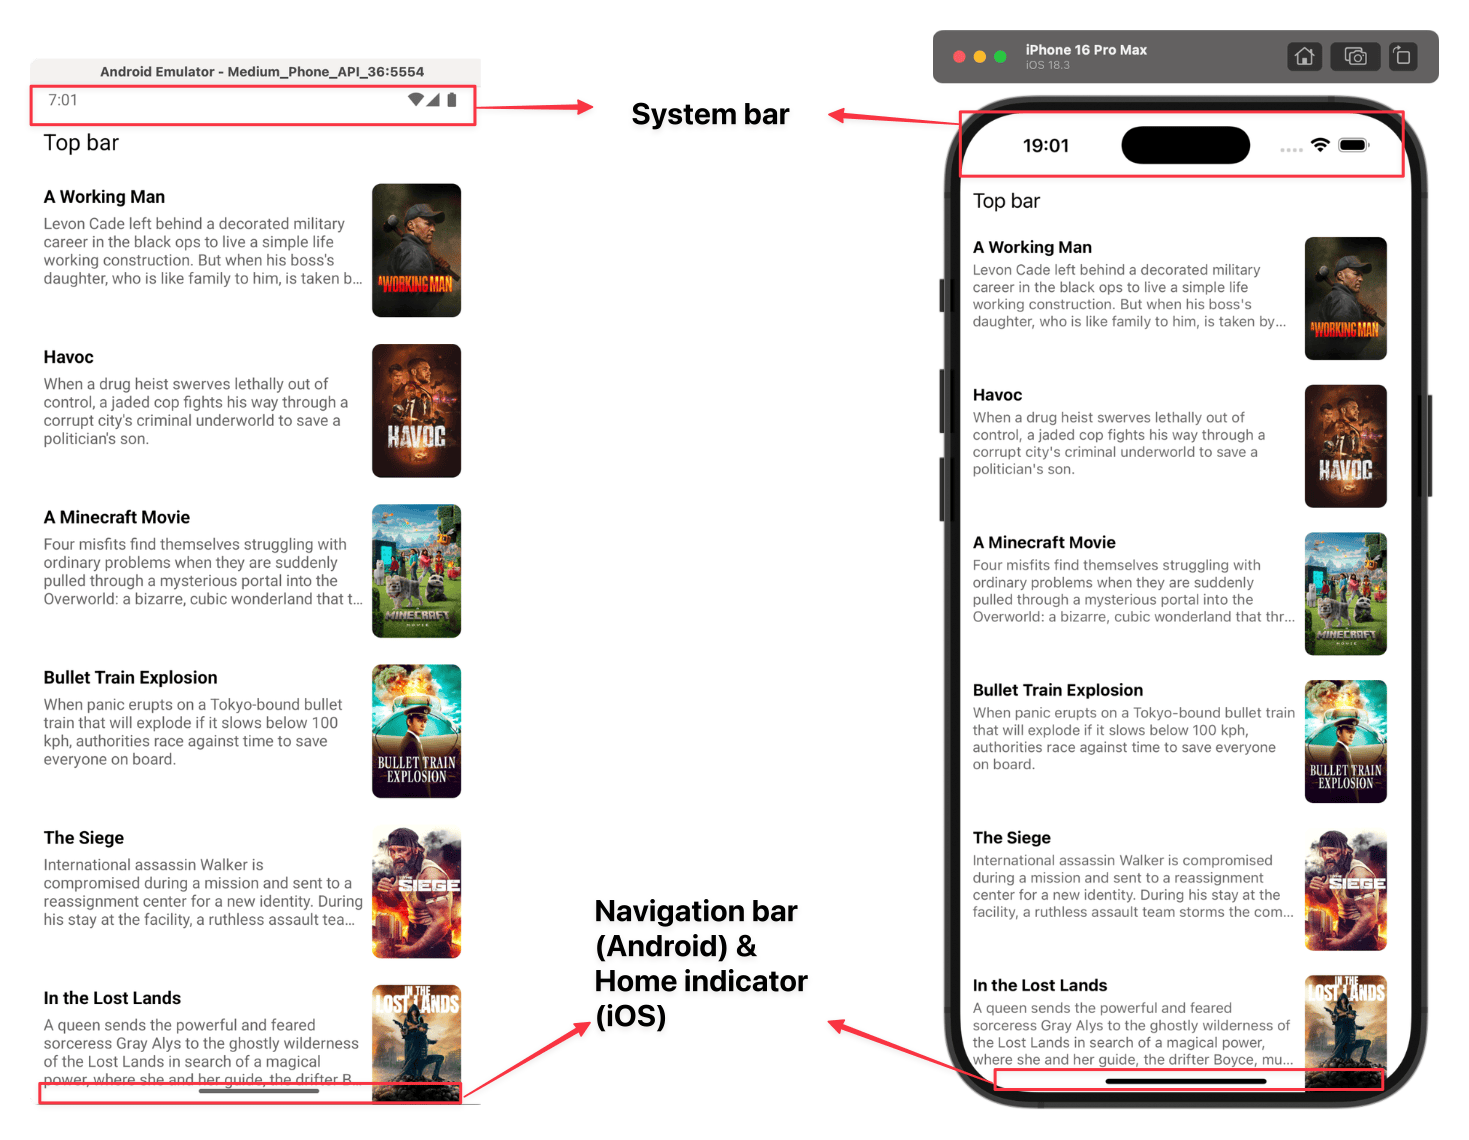
Handling overlaps using safe areas[](https://docs.expo.dev/develop/user-interface/system-bars/#handling-overlaps-using-safe-areas)
-----------------------------------------------------------------------------------------------------------------------------------
Some of your app's content may draw behind the system bars. To handle this, you need to position your app's content correctly by avoiding the overlap and ensuring that the controls from the system bars are present.
The following guide walks you through how to use `SafeAreaView` or a hook to apply insets directly for each edge of the screen.
[Safe areas\
\
Learn how to add safe areas for screen components inside your Expo project.](https://docs.expo.dev/develop/user-interface/safe-areas)
### Safe areas and edge-to-edge layout on Android[](https://docs.expo.dev/develop/user-interface/system-bars/#safe-areas-and-edge-to-edge-layout-on-android)
Before [edge-to-edge on Android](https://expo.dev/blog/edge-to-edge-display-now-streamlined-for-android)
, it was common to have a translucent status bar and navigation bar. With this approach, the content drawn behind these bars was already underneath them, and it was typically not necessary to factor in safe areas.
Now, [with edge-to-edge on Android](https://expo.dev/blog/edge-to-edge-display-now-streamlined-for-android)
, you will need to use safe areas to ensure that content does not overlap with system bars.
Customizing system bars[](https://docs.expo.dev/develop/user-interface/system-bars/#customizing-system-bars)
-------------------------------------------------------------------------------------------------------------
System bars can be customized to match your app's design and provide better visibility in different scenarios. When using Expo, there are two libraries available for this: `expo-status-bar` and `expo-navigation-bar` (Android only).
### Status bar configuration[](https://docs.expo.dev/develop/user-interface/system-bars/#status-bar-configuration)
The status bar appears at the top of the screen on both Android and iOS. You can customize it using [`expo-status-bar`](https://docs.expo.dev/versions/latest/sdk/status-bar)
. It provides a `StatusBar` component that you can use to control the appearance of the status bar while your app is running using the [`style`](https://docs.expo.dev/versions/latest/sdk/status-bar#style)
property or the [`setStatusBarStyle`](https://docs.expo.dev/versions/latest/sdk/status-bar#statusbarsetstatusbarstylestyle-animated)
method:
app/\_layout.tsx
Copy
`import { StatusBar } from 'expo-status-bar'; export default function RootLayout() { <> {/* Use light text instead of dark text in the status bar to provide more contrast with a dark background. */} ; }`
> Note: In Expo default template, the `style` property is set to `auto`. It automatically picks the appropriate style depending on the color scheme (light or dark mode) currently used by your app.
To control the `StatusBar` visibility, you can set the [`hidden`](https://docs.expo.dev/versions/latest/sdk/status-bar#hidden)
property to `true` or use the [`setStatusBarHidden`](https://docs.expo.dev/versions/latest/sdk/status-bar#statusbarsetstatusbarhiddenhidden-animation)
method.
With edge-to-edge enabled on Android, features from `expo-status-bar` that depend on an opaque status bar [are unavailable](https://developer.android.com/about/versions/15/behavior-changes-15#edge-to-edge)
. It's only possible to customize the style and visibility. Other properties will no-op and warn.
### Navigation bar configuration (Android only)[](https://docs.expo.dev/develop/user-interface/system-bars/#navigation-bar-configuration-android-only)
On Android devices, the Navigation Bar appears at the bottom of the screen. You can customize it using the [`expo-navigation-bar`](https://docs.expo.dev/versions/latest/sdk/navigation-bar)
library. It provides a `NavigationBar` component that you can use to set the style of the navigation bar using the [`setStyle`](https://docs.expo.dev/versions/latest/sdk/navigation-bar#navigationbarsetstylestyle)
method:
app/\_layout.tsx
Copy
`import { Platform } from 'react-native'; import * as NavigationBar from 'expo-navigation-bar'; import { useEffect } from 'react'; useEffect(() => { if (Platform.OS === 'android') { // Set the navigation bar style NavigationBar.setStyle('dark'); } }, []);`
To control the `NavigationBar` visibility, you can use the [`setVisibilityAsync`](https://docs.expo.dev/versions/latest/sdk/navigation-bar#navigationbarsetvisibilityasyncvisibility)
method.
With edge-to-edge enabled on Android, features from `expo-navigation-bar` that depend on an opaque navigation bar [are unavailable](https://developer.android.com/about/versions/15/behavior-changes-15#edge-to-edge)
. It's only possible to customize the style and visibility. Other properties will no-op and warn.
---
# Tools, workflows and extensions - Expo Documentation
Hide navigation
Search
[Home](https://docs.expo.dev/)
[Guides](https://docs.expo.dev/guides/overview)
[EAS](https://docs.expo.dev/eas)
[Reference](https://docs.expo.dev/versions/latest)
[Learn](https://docs.expo.dev/tutorial/overview)
[Archive](https://docs.expo.dev/archive)
[Expo Snack](https://snack.expo.dev/)
[Discord and Forums](https://chat.expo.dev/)
[Newsletter](https://expo.dev/mailing-list/signup)
Tools, workflows and extensions
===============================
[Edit page](https://github.com/expo/expo/edit/main/docs/pages/develop/development-builds/development-workflows.mdx)
Copy page
Learn more about different tools, workflows and extensions available when working with development builds.
[Edit page](https://github.com/expo/expo/edit/main/docs/pages/develop/development-builds/development-workflows.mdx)
Copy page
* * *
Development builds allow you to iterate quickly. However, you can extend the capabilities of your development build to provide a better developer experience when working in teams or customize the build to suit your needs.
Tools[](https://docs.expo.dev/develop/development-builds/development-workflows/#tools)
---------------------------------------------------------------------------------------
### Tunnel URLs[](https://docs.expo.dev/develop/development-builds/development-workflows/#tunnel-urls)
Sometimes, restrictive network conditions make it difficult to connect to the development server. The `npx expo start` command exposes your development server on a publicly available URL that is accessible through firewalls from around the globe. This option is helpful if you are not able to connect to your development server with the default LAN option or if you want to get feedback on your implementation while you are developing.
To get a tunneled URL, pass the [`--tunnel` flag](https://docs.expo.dev/more/expo-cli#tunneling)
to `npx expo start` from the command line.
### Published updates[](https://docs.expo.dev/develop/development-builds/development-workflows/#published-updates)
EAS CLI's `eas update` command bundles the current state of your JavaScript and asset files into an optimized "update". This update is stored on a hosting service by Expo. A development build of your app can load published updates without needing to check out a particular commit or leave a development machine running.
### Manually entering an update's URL[](https://docs.expo.dev/develop/development-builds/development-workflows/#manually-entering-an-updates-url)
When a development build launches, it will expose UI to load a development server, or to "Enter URL manually". You can provide a URL manually that will launch a specific branch. The URL follows this pattern:
`https://u.expo.dev/[your-project-id]?channel-name=[channel-name] # Example https://u.expo.dev/F767ADF57-B487-4D8F-9522-85549C39F43F?channel-name=main`
To get your project's ID, use the URL in the [app config's `expo.updates.url`](https://docs.expo.dev/versions/latest/config/app#url)
field. To see a list of channels, run `eas channel:list`.
### Deep linking to an update's URL[](https://docs.expo.dev/develop/development-builds/development-workflows/#deep-linking-to-an-updates-url)
You can load your app on a device that has a compatible build of your custom client by opening a URL of the form `{scheme}://expo-development-client/?url={manifestUrl}`. You'll need to pass the following parameters:
| parameter | value |
| --- | --- |
| `scheme` | URL scheme of your client (defaults to `exp+{slug}` where [`slug`](https://docs.expo.dev/versions/latest/config/app#slug) is the value set in the app config) |
| `manifestUrl` | URL-encoded URL of an update manifest to load. The URL will be `https://u.expo.dev/[your-project-id]?channel-name=[channel-name]` |
Example:
`exp+app-slug://expo-development-client/?url=https%3A%2F%2Fu.expo.dev%2F767ADF57-B487-4D8F-9522-85549C39F43F%2F%3Fchannel-name%3Dmain`
In the example above, the `scheme` is `exp+app-slug`, and the `manifestUrl` is a project with an ID of `F767ADF57-B487-4D8F-9522-85549C39F43F` and a channel of `main`.
#### Using updates deep links in automation scenarios[](https://docs.expo.dev/develop/development-builds/development-workflows/#using-updates-deep-links-in-automation-scenarios)
When launching an update URL in a development build on an emulator or simulator using automation, such as in a CI/CD workflow, you can add the `disableOnboarding=1` query parameter to the URL to skip the onboarding screen that appears on the first launch of a development build after installation.
#### App-specific deep links[](https://docs.expo.dev/develop/development-builds/development-workflows/#app-specific-deep-links)
When testing deep links in your development build, such as when navigating to a specific screen in an Expo Router app or testing redirecting back to your app during an Oauth login flow, construct the URL exactly as you would if you were deep-linking into a standalone build of your app (for example, `myscheme://path/to/screen`).
Your project must be already open in the development build for an app-specific deep link to work. Cold-launching a development build with an app-specific deep link is not currently supported. Avoid using `expo-development-client` in your app-specific deep links in the path, as it is a reserved path used for launching an updated URL.
### QR codes[](https://docs.expo.dev/develop/development-builds/development-workflows/#qr-codes)
You can use our endpoint to generate a QR code that can be easily loaded by a development build.
Requests send to `https://qr.expo.dev/development-client` when supplied the query parameters such as `appScheme` and `url` will receive a response with an SVG image containing a QR code that can be easily scanned to load a version of your project in your development build.
| parameter | value |
| --- | --- |
| `appScheme` | URL-encoded deeplinking scheme of your development build (defaults to `exp+{slug}` where [`slug`](https://docs.expo.dev/versions/latest/config/app#slug) is the value set in the app config) |
| `url` | URL-encoded URL of an update manifest to load. The URL will be `https://u.expo.dev/[your-project-id]?channel-name=[channel-name]` |
Example:
`https://qr.expo.dev/development-client?appScheme=exp%2Bapps-slug&url=https%3A%2F%2Fu.expo.dev%2FF767ADF57-B487-4D8F-9522-85549C39F43F0%3Fchannel-name%3Dmain`
In the example above, the `scheme` is `exp+app-slug`, and the `url` is a project with an ID of `F767ADF57-B487-4D8F-9522-85549C39F43F` and a channel of `main`.
Example workflows[](https://docs.expo.dev/develop/development-builds/development-workflows/#example-workflows)
---------------------------------------------------------------------------------------------------------------
These are a few examples of workflows to help your team get the most out of your development build. If you come up with others that would be useful for other teams, [submit a PR](https://github.com/expo/expo/tree/main/CONTRIBUTING.md#-updating-documentation)
to share your knowledge!
### PR previews[](https://docs.expo.dev/develop/development-builds/development-workflows/#pr-previews)
You can set up your CI process to publish an EAS Update whenever a pull request is updated and add a QR code that is used to view the change in a compatible development build.
See [instructions for publishing app previews on pull requests](https://docs.expo.dev/eas-update/github-actions#publish-previews-on-pull-requests)
to implement this workflow in your project using GitHub Actions or serve as a template in your CI of choice.
Extensions[](https://docs.expo.dev/develop/development-builds/development-workflows/#extensions)
-------------------------------------------------------------------------------------------------
Extensions allow you to extend your development client with additional capabilities.
### Extending the dev menu[](https://docs.expo.dev/develop/development-builds/development-workflows/#extending-the-dev-menu)
The dev menu can be extended to include extra buttons by using the `registerDevMenuItems` API:
`import { registerDevMenuItems } from 'expo-dev-menu'; const devMenuItems = [ { name: 'My Custom Button', callback: () => console.log('Hello world!'), }, ]; registerDevMenuItems(devMenuItems);`
This will create a new section in the dev menu that includes the buttons you have registered:
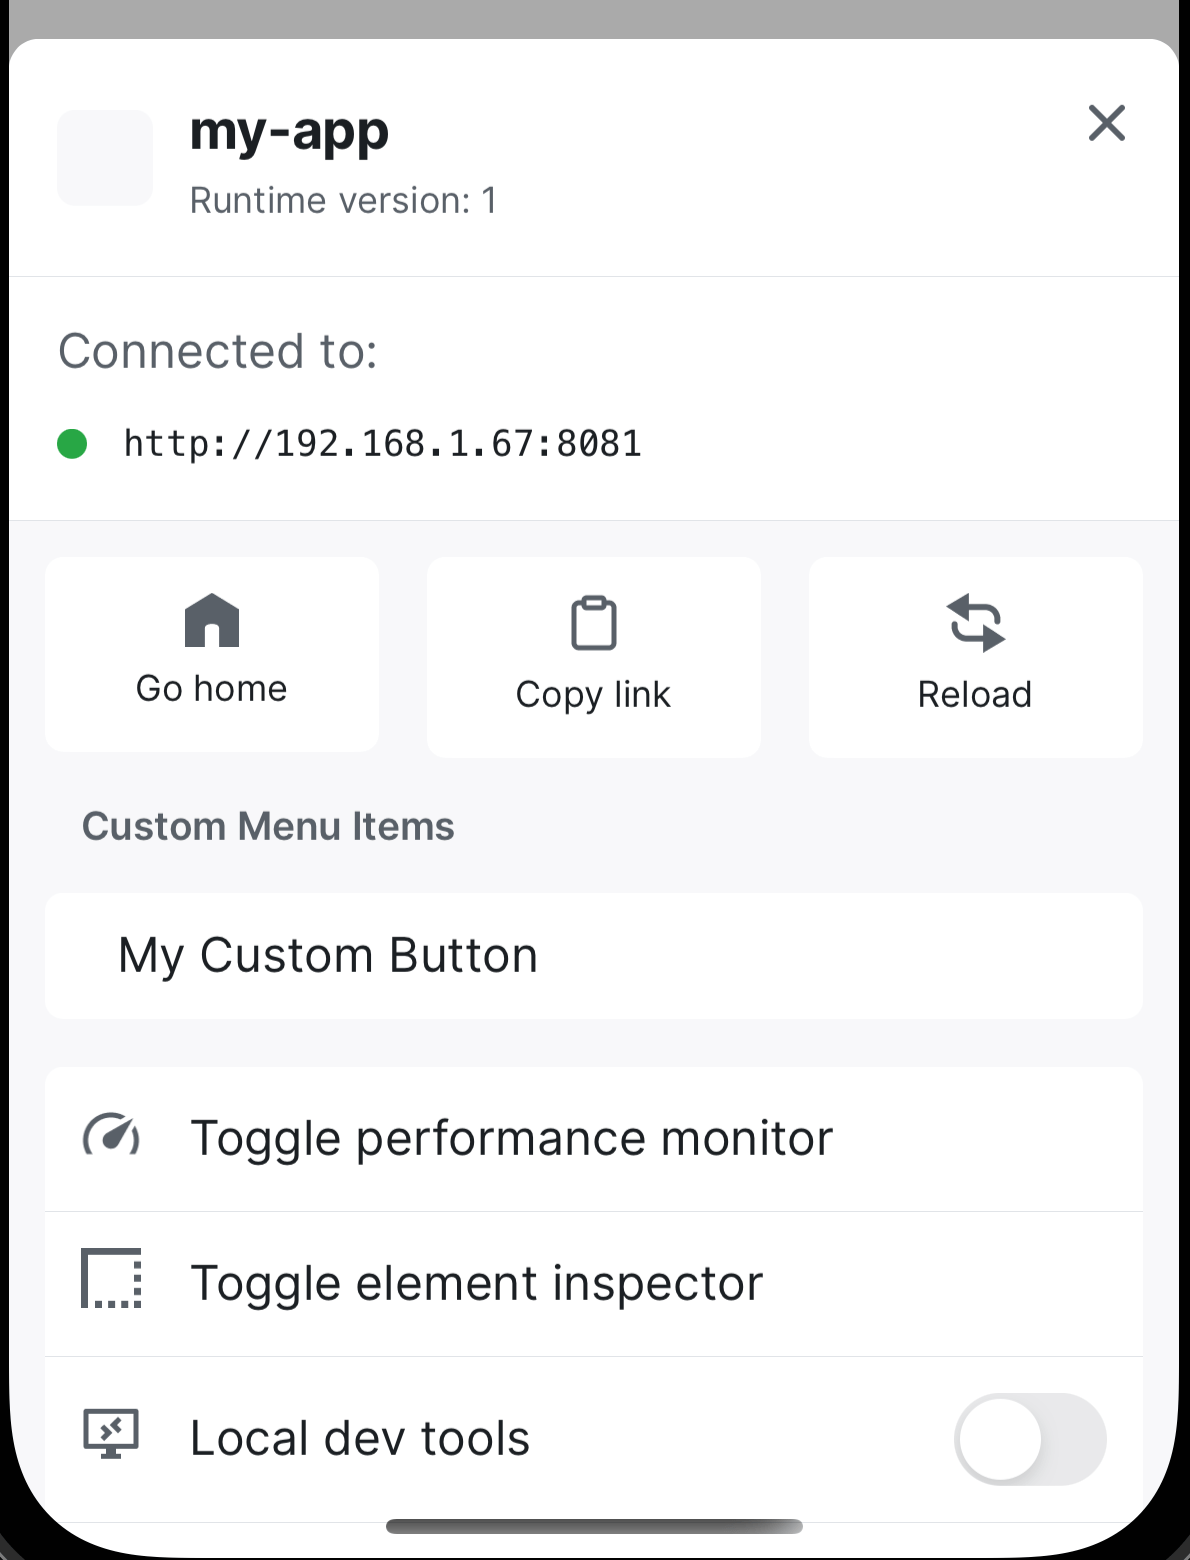
> Subsequent calls of `registerDevMenuItems` will override all previous entries.
### EAS Update[](https://docs.expo.dev/develop/development-builds/development-workflows/#eas-update)
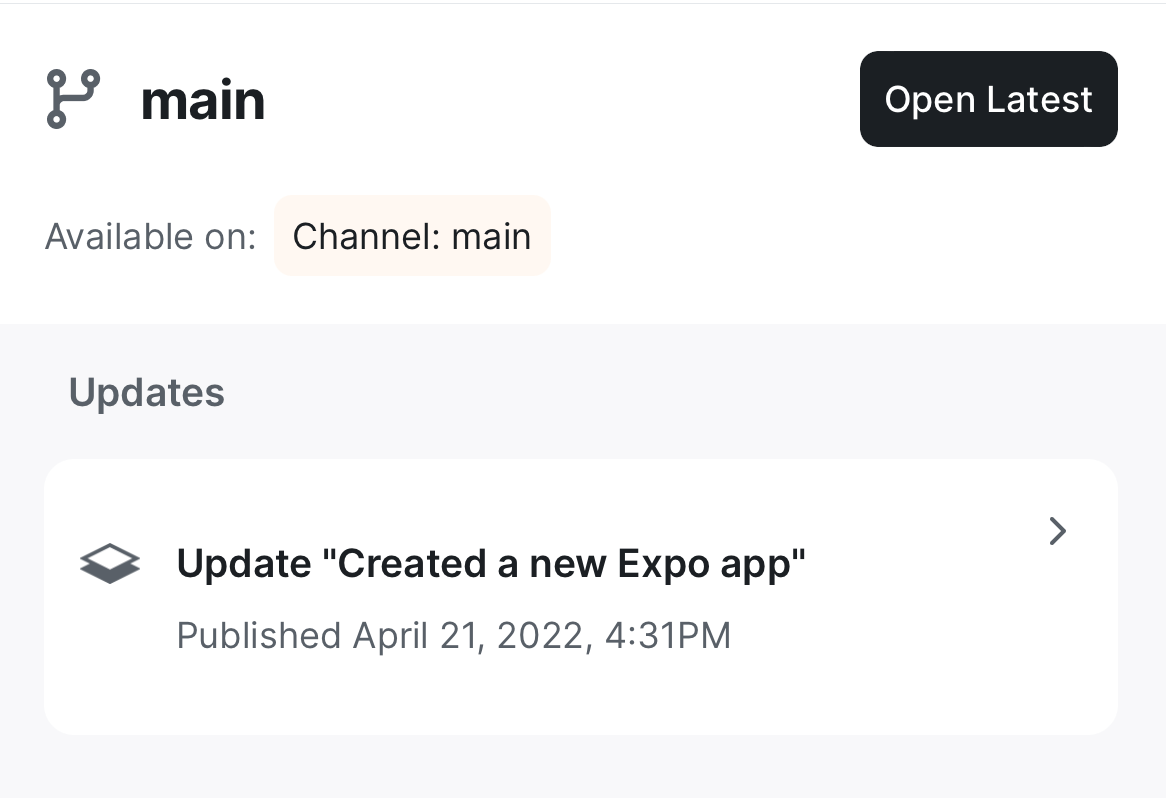
The EAS Update extension provides the ability to view and load published updates in your development client.
It's available for all development clients `v0.9.0` and above. To install it, you'll need the most recent publish of `expo-updates`:
Terminal
Copy
`-` `npx expo install expo-dev-client expo-updates`
#### Configure EAS Update[](https://docs.expo.dev/develop/development-builds/development-workflows/#configure-eas-update)
If you have not yet configured EAS Updates in your project, you can find [additional instructions on how to do so here.](https://docs.expo.dev/eas-update/getting-started)
You can now view and load EAS Updates in your development build via the `Extensions` panel.
Set runtimeVersion in app config[](https://docs.expo.dev/develop/development-builds/development-workflows/#set-runtimeversion-in-app-config)
---------------------------------------------------------------------------------------------------------------------------------------------
When you create a development build of your project, you'll get a stable environment to load any changes to your app that are defined in JavaScript or other asset-related changes. Other changes to your app, whether defined directly in android and ios directories or by packages or SDKs you choose to install, will require you to create a new build of your development build.
To enforce an API contract between the JavaScript and native layers of your app, you should set the [`runtimeVersion`](https://docs.expo.dev/eas-update/runtime-versions)
value in the app config. Each build you make will have this value embedded and will only load bundles with the same `runtimeVersion`, in both development and production.
---
# Safe areas - Expo Documentation
Hide navigation
Search
[Home](https://docs.expo.dev/)
[Guides](https://docs.expo.dev/guides/overview)
[EAS](https://docs.expo.dev/eas)
[Reference](https://docs.expo.dev/versions/latest)
[Learn](https://docs.expo.dev/tutorial/overview)
[Archive](https://docs.expo.dev/archive)
[Expo Snack](https://snack.expo.dev/)
[Discord and Forums](https://chat.expo.dev/)
[Newsletter](https://expo.dev/mailing-list/signup)
Safe areas
==========
[Edit page](https://github.com/expo/expo/edit/main/docs/pages/develop/user-interface/safe-areas.mdx)
Copy page
Learn how to add safe areas for screen components inside your Expo project.
[Edit page](https://github.com/expo/expo/edit/main/docs/pages/develop/user-interface/safe-areas.mdx)
Copy page
* * *
Creating a safe area ensures your app screen's content is positioned correctly. This means it doesn't get overlapped by notches, status bars, home indicators, and other interface elements that are part of the device's physical hardware or are controlled by the operating system. When the content gets overlapped, it gets concealed by these interface elements.
Here's an example of an app screen's content getting concealed by the status bar on Android. On iOS, the same content is concealed by rounded corners, notch, and the status bar.
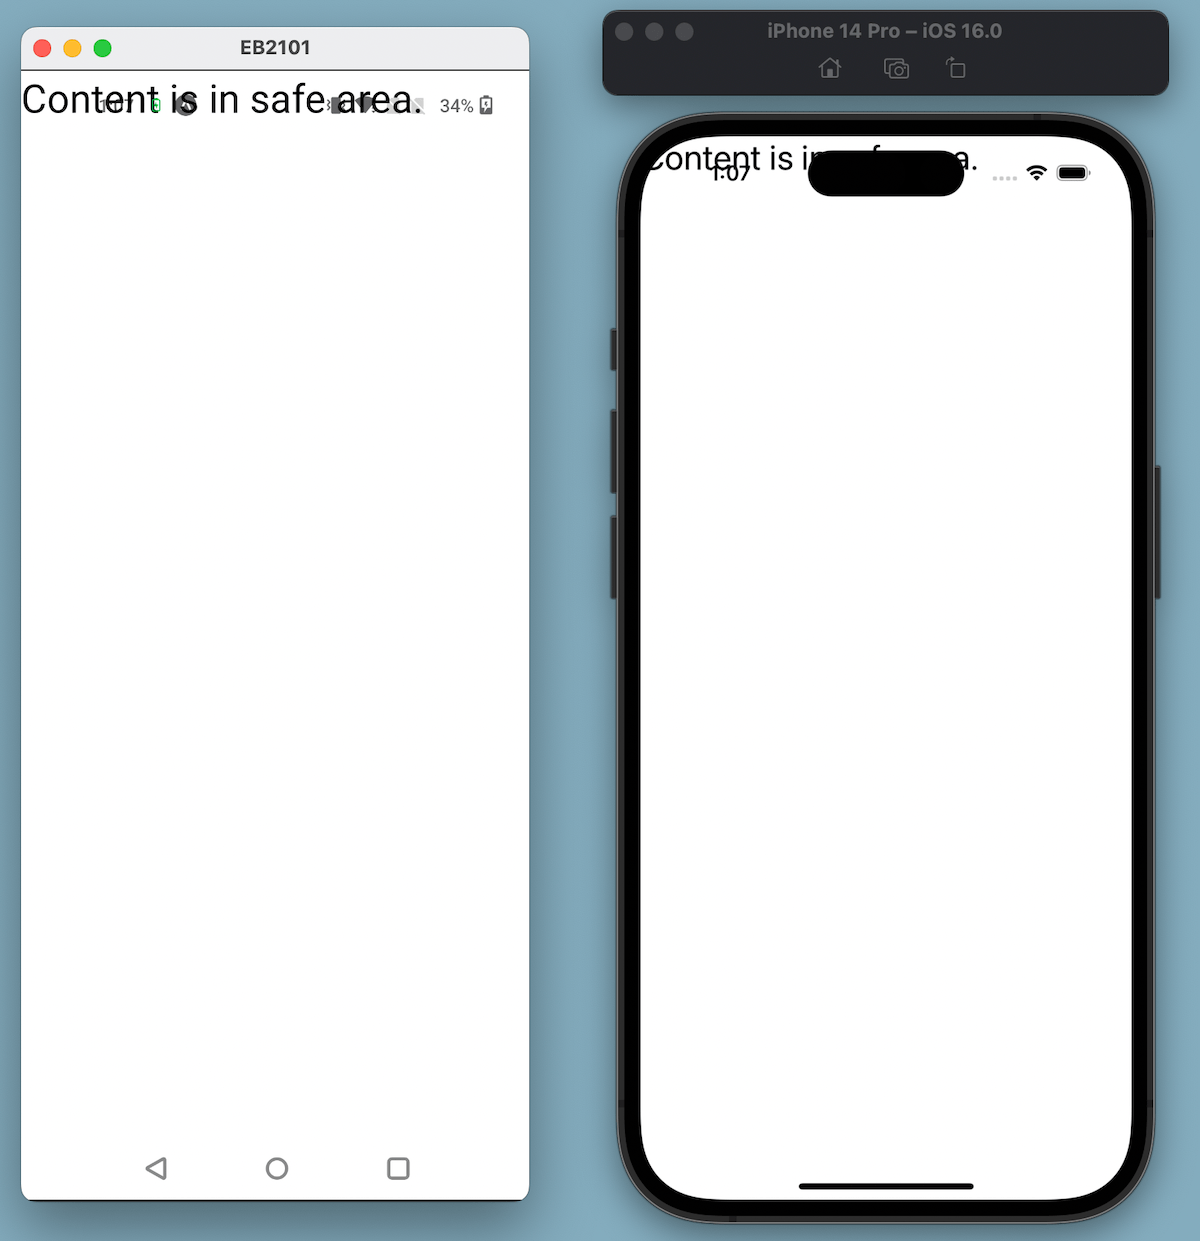
Use `react-native-safe-area-context` library[](https://docs.expo.dev/develop/user-interface/safe-areas/#use-react-native-safe-area-context-library)
----------------------------------------------------------------------------------------------------------------------------------------------------
[`react-native-safe-area-context`](https://github.com/AppAndFlow/react-native-safe-area-context)
provides a flexible API for handling Android and iOS device's safe area insets. It also provides a `SafeAreaView` component that you can use instead of a [``](https://reactnative.dev/docs/view)
to account for safe areas automatically in your screen components.
Using the library, the result of the previous example changes as it displays the content inside a safe area, as shown below:
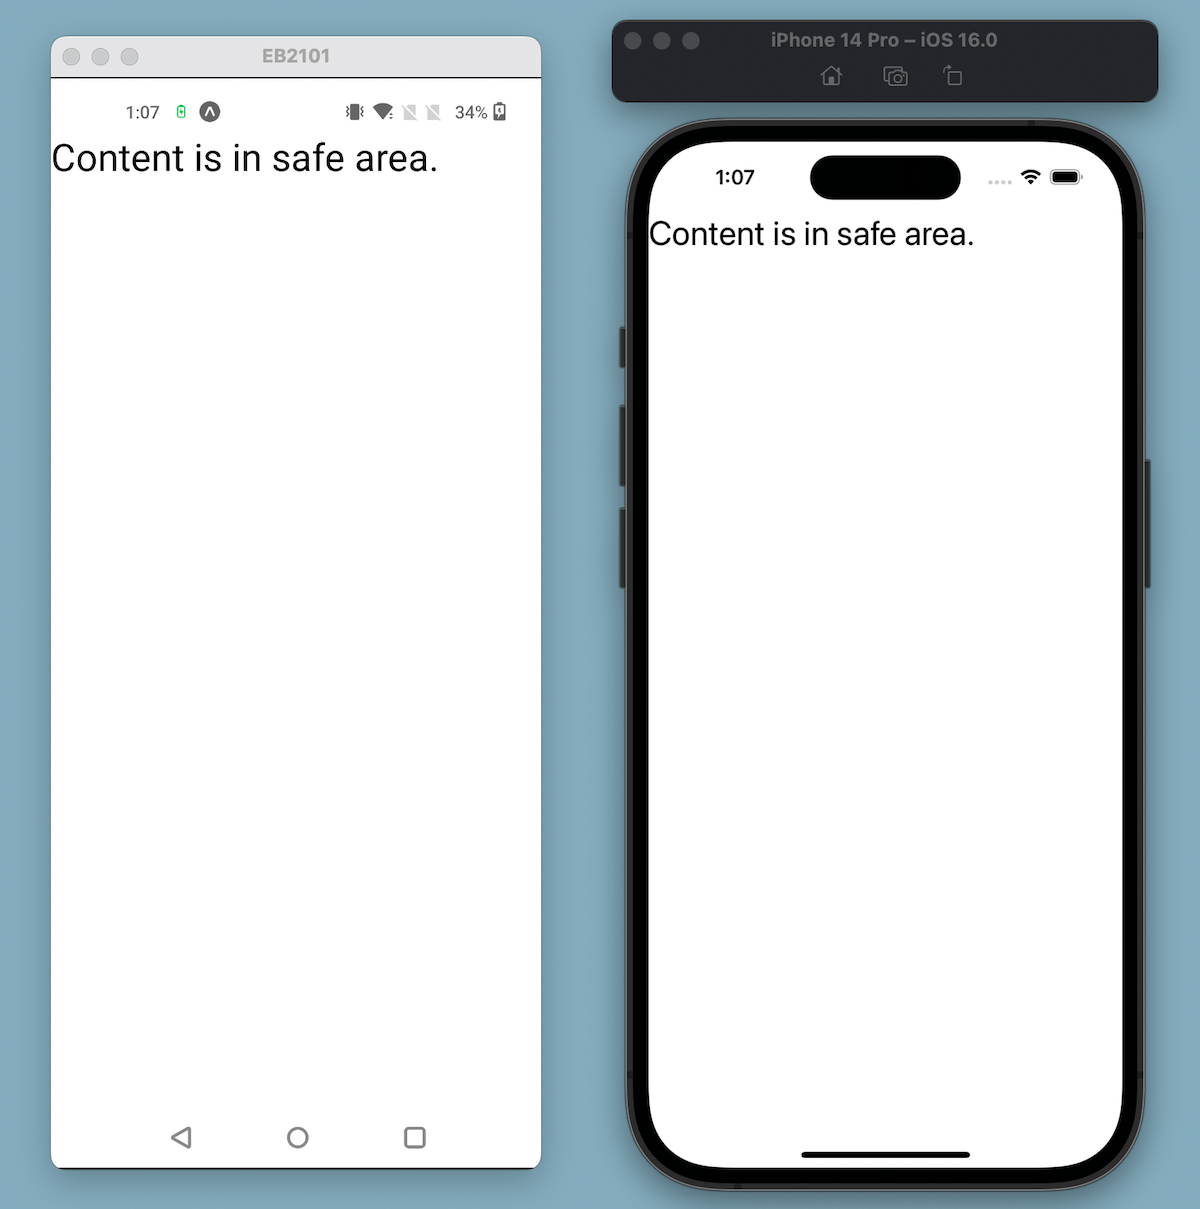
### Installation[](https://docs.expo.dev/develop/user-interface/safe-areas/#installation)
You can skip installing `react-native-safe-area-context` if you have created a project using [the default template](https://docs.expo.dev/get-started/create-a-project)
. This library is installed as peer dependency for Expo Router library. Otherwise, install it by running the following command:
Terminal
Copy
`-` `npx expo install react-native-safe-area-context`
### Usage[](https://docs.expo.dev/develop/user-interface/safe-areas/#usage)
You can directly use [`SafeAreaView`](https://appandflow.github.io/react-native-safe-area-context/api/safe-area-view)
to wrap the content of your screen's component. It is a regular `` with the safe area insets applied as extra padding or margin.
app/index.tsx
Copy
`import { Text } from 'react-native'; import { SafeAreaView } from 'react-native-safe-area-context'; export default function HomeScreen() { return ( Content is in safe area. ); }`
Using a different Expo template and don't have Expo Router installed?[](https://docs.expo.dev/develop/user-interface/safe-areas/#using-a-different-expo-template-and-dont)
Import and add [`SafeAreaProvider`](https://appandflow.github.io/react-native-safe-area-context/api/safe-area-provider)
to the root component file (such as App.tsx) before using `SafeAreaView` in your screen component.
App.tsx
Copy
`import { SafeAreaProvider } from 'react-native-safe-area-context'; export default function App() { return ( return ...; ); }`
Alternate: `useSafeAreaInsets` hook[](https://docs.expo.dev/develop/user-interface/safe-areas/#alternate-usesafeareainsets-hook)
---------------------------------------------------------------------------------------------------------------------------------
Alternate to `SafeAreaView`, you can use [`useSafeAreaInsets`](https://appandflow.github.io/react-native-safe-area-context/api/use-safe-area-insets)
hook in your screen component. It provides direct access to the safe area insets, allowing you to apply padding for each edge of the `` using an inset from this hook.
The example below uses the `useSafeAreaInsets` hook. It applies top padding to a `` using `insets.top`.
app/index.tsx
Copy
`import { Text, View } from 'react-native'; import { useSafeAreaInsets } from 'react-native-safe-area-context'; export default function HomeScreen() { const insets = useSafeAreaInsets(); return ( Content is in safe area. ); }`
The hook provides the insets in the following object:
`{ top: number, right: number, bottom: number, left: number }`
Additional information[](https://docs.expo.dev/develop/user-interface/safe-areas/#additional-information)
----------------------------------------------------------------------------------------------------------
### Minimal example[](https://docs.expo.dev/develop/user-interface/safe-areas/#minimal-example)
Below is a minimal working example that uses the `useSafeAreaInsets` hook to apply top padding to a view.
Using react-native-safe-area-context
Copy
Open in Snack
`import { Text, View } from 'react-native'; import { SafeAreaProvider, useSafeAreaInsets } from 'react-native-safe-area-context'; function HomeScreen() { const insets = useSafeAreaInsets(); return ( Content is in safe area. ); } export default function App() { return ( ); }`
### Usage with React Navigation[](https://docs.expo.dev/develop/user-interface/safe-areas/#usage-with-react-navigation)
By default, React Navigation supports safe areas and uses `react-native-safe-area-context` as a peer dependency. For more information, see the [React Navigation documentation](https://reactnavigation.org/docs/handling-safe-area/)
.
### Usage with web[](https://docs.expo.dev/develop/user-interface/safe-areas/#usage-with-web)
If you are targeting the web, set up `SafeAreaProvider` as described in the [usage section](https://docs.expo.dev/develop/user-interface/safe-areas#usage)
. If you are doing server-side rendering (SSR), see the [Web SSR section](https://appandflow.github.io/react-native-safe-area-context/optimizations#web-ssr)
in the library's documentation.
---
# Assets - Expo Documentation
Hide navigation
Search
[Home](https://docs.expo.dev/)
[Guides](https://docs.expo.dev/guides/overview)
[EAS](https://docs.expo.dev/eas)
[Reference](https://docs.expo.dev/versions/latest)
[Learn](https://docs.expo.dev/tutorial/overview)
[Archive](https://docs.expo.dev/archive)
[Expo Snack](https://snack.expo.dev/)
[Discord and Forums](https://chat.expo.dev/)
[Newsletter](https://expo.dev/mailing-list/signup)
Assets
======
[Edit page](https://github.com/expo/expo/edit/main/docs/pages/develop/user-interface/assets.mdx)
Copy page
Learn about using static assets in your project, including images, videos, sounds, database files, and fonts.
[Edit page](https://github.com/expo/expo/edit/main/docs/pages/develop/user-interface/assets.mdx)
Copy page
* * *
A static asset is a file that is bundled with your app's binary (native binary). This file type is not part of your app's JavaScript bundle which contain your app's code. Common types of static assets include images, videos, sounds, database files for SQLite, and fonts. These assets can be served locally from your project or remotely over the network.
This guide covers different ways you can load and use static assets in your project and also provides additional information on how to optimize and minify assets.
Serve an asset locally[](https://docs.expo.dev/develop/user-interface/assets/#serve-an-asset-locally)
------------------------------------------------------------------------------------------------------
When an asset is stored in your project's file system, it can be embedded in your app binary at build time or loaded at runtime. You can import it like a JavaScript module using `require` or `import` statements.
For example, to render an image called example.png in App.js, you can use `require` to import the image from the project's assets/images directory and pass it to the `` component:
app/index.tsx
Copy
``
In the above example, the bundler reads the imported image's metadata and automatically provides the width and height. For more information, see [Static Image Resources](https://reactnative.dev/docs/images#static-image-resources)
.
Libraries such as `expo-image` and `expo-file-system` work similarly to the `` component with local assets.
### How are assets served locally[](https://docs.expo.dev/develop/user-interface/assets/#how-are-assets-served-locally)
Locally stored assets are served over HTTP in development. They are automatically bundled into your app binary at the build time for production apps and served from disk on a device.
### Load an asset at build time with `expo-asset` config plugin[](https://docs.expo.dev/develop/user-interface/assets/#load-an-asset-at-build-time-with-expo-asset-config-plugin)
To load an asset at build time, you can use the [config plugin](https://docs.expo.dev/versions/latest/sdk/asset#example-appjson-with-config-plugin)
from the `expo-asset` library. This plugin will embed the asset file in your native project.
1
Install the `expo-asset` library.
Terminal
Copy
`-` `npx expo install expo-asset`
2
Add the config plugin to your project's [app config](https://docs.expo.dev/versions/latest/config/app#plugins)
file. The configuration must contain the path to the asset file using [`assets`](https://docs.expo.dev/versions/latest/sdk/asset#configurable-properties)
property which takes an array of one or more files or directories to link to the native project.
The path to each asset file must be relative to your project's root since the app config file is located in the project's root directory.
app.json
Copy
`{ "expo": { "plugins": [ [ "expo-asset", { "assets": ["./assets/images/example.png"] } ] ] } }`
3
After embedding the asset with the config plugin, [create a new development build](https://docs.expo.dev/develop/development-builds/create-a-build)
. Now, you can import and use the asset in your project without using a `require` or an `import` statement.
For example, the example.png is linked by the above config plugin. You can directly import it into your component and use its resource name as the URI. Note that when rendering assets without using `require`, you need to explicitly provide a width / height.
app/index.tsx
Copy
`import { Image } from 'expo-image'; %%placeholder-start%%... %%placeholder-end%% export default function HomeScreen() { return ; }`
> Different file formats are supported with the `expo-asset` config plugin. For more information on these formats, see [Assets API reference](https://docs.expo.dev/versions/latest/sdk/asset#configurable-properties)
> . If you don't see a file format supported by the config plugin, you can use the [`useAssets`](https://docs.expo.dev/develop/user-interface/assets#load-an-asset-at-runtime-with-useassets-hook)
> hook to load the asset at runtime.
### Load an asset at runtime with `useAssets` hook[](https://docs.expo.dev/develop/user-interface/assets/#load-an-asset-at-runtime-with-useassets-hook)
The `useAssets` hook from `expo-asset` library allows loading assets asynchronously. This hook downloads and stores an asset locally and after the asset is loaded, it returns a list of that asset's instances.
1
Install the `expo-asset` library.
Terminal
Copy
`-` `npx expo install expo-asset`
2
Import the [`useAssets`](https://docs.expo.dev/versions/latest/sdk/asset#useassetsmoduleids)
hook from the `expo-asset` library in your screen component:
app/index.tsx
Copy
`import { useAssets } from 'expo-asset'; export default function HomeScreen() { const [assets, error] = useAssets([ require('path/to/example-1.jpg'), require('path/to/example-2.png'), ]); return assets ? : null; }`
Serve an asset remotely[](https://docs.expo.dev/develop/user-interface/assets/#serve-an-asset-remotely)
--------------------------------------------------------------------------------------------------------
When an asset is served remotely, it is not bundled into the app binary at build time. You can use the URL of the asset resource in your project if it is hosted remotely. For example, pass the URL to the `` component to render a remote image:
App.js
Copy
`import { Image } from 'expo-image'; %%placeholder-start%%... %%placeholder-end%% function App() { return ( ); }`
There is no guarantee about the availability of images served remotely using a web URL because an internet connection may not be available, or the asset might be removed.
Additionally, loading assets remotely also requires you to provide an asset's metadata. In the above example, since the bundler cannot retrieve the image's width and height, those values are passed explicitly to the `` component. If you don't, the image will default to 0px by 0px.
Additional information[](https://docs.expo.dev/develop/user-interface/assets/#additional-information)
------------------------------------------------------------------------------------------------------
### Manual optimization methods[](https://docs.expo.dev/develop/user-interface/assets/#manual-optimization-methods)
#### Images[](https://docs.expo.dev/develop/user-interface/assets/#images)
You can compress images using the following:
* [`guetzli`](https://github.com/google/guetzli)
* [`pngcrush`](https://pmt.sourceforge.io/pngcrush/)
* [`optipng`](http://optipng.sourceforge.net/)
Some image optimizers are lossless. They re-encode your image to be smaller without any change or loss in the pixels displayed. When you need each pixel to be untouched from the original image, a lossless optimizer and a lossless image format like PNG are a good choice.
Other image optimizers are lossy. The optimized image differs from the original image. Often, lossy optimizers are more efficient because they discard visual information that reduces file size while making the image look nearly identical to humans. Tools like `imagemagick` can use comparison algorithms like [SSIM](https://en.wikipedia.org/wiki/Structural_similarity)
to show how similar two images look. It's quite common for an optimized image that is over 95% similar to the original image to be far less than 95% of the original file size.
#### Other assets[](https://docs.expo.dev/develop/user-interface/assets/#other-assets)
For assets like GIFs or videos, or non-code and non-image assets, it's up to you to optimize and minify those assets.
> Note: GIFs are a very inefficient format. Modern video codecs can produce significantly smaller file sizes with better quality.
### Fonts[](https://docs.expo.dev/develop/user-interface/assets/#fonts)
See [Add a custom font](https://docs.expo.dev/develop/user-interface/fonts#add-a-custom-font)
for more information on how to add a custom font to your app.
---
# Errors and warnings - Expo Documentation
Hide navigation
Search
[Home](https://docs.expo.dev/)
[Guides](https://docs.expo.dev/guides/overview)
[EAS](https://docs.expo.dev/eas)
[Reference](https://docs.expo.dev/versions/latest)
[Learn](https://docs.expo.dev/tutorial/overview)
[Archive](https://docs.expo.dev/archive)
[Expo Snack](https://snack.expo.dev/)
[Discord and Forums](https://chat.expo.dev/)
[Newsletter](https://expo.dev/mailing-list/signup)
Errors and warnings
===================
[Edit page](https://github.com/expo/expo/edit/main/docs/pages/debugging/errors-and-warnings.mdx)
Copy page
Learn about Redbox errors and stack traces in your Expo project.
[Edit page](https://github.com/expo/expo/edit/main/docs/pages/debugging/errors-and-warnings.mdx)
Copy page
* * *
When developing an application using Expo, you'll encounter a Redbox error or Yellowbox warning. These logging experiences are provided by [LogBox in React Native](https://reactnative.dev/blog/2020/07/06/version-0.63)
.
Redbox error and Yellowbox warning[](https://docs.expo.dev/debugging/errors-and-warnings/#redbox-error-and-yellowbox-warning)
------------------------------------------------------------------------------------------------------------------------------
A Redbox error is displayed when a fatal error prevents your app from running. A Yellowbox warning is displayed to inform you that there is a possible issue and you should probably resolve it before shipping your app.
You can also create warnings and errors on your own with `console.warn("Warning message")` and `console.error("Error message")`. Another way to trigger the redbox is to throw an error and not catch it: `throw Error("Error message")`.
> This is a brief introduction to debugging a React Native app with Expo CLI. For in-depth information, see [Debugging](https://docs.expo.dev/debugging/runtime-issues)
> .
Stack traces[](https://docs.expo.dev/debugging/errors-and-warnings/#stack-traces)
----------------------------------------------------------------------------------
When you encounter an error during development, you'll see the error message and a stack trace, which is a report of the recent calls your application made when it crashed. This stack trace is shown both in your terminal and the Expo Go app or if you have created a development build.
This stack trace is extremely valuable since it gives you the location of the error's occurrence. For example, in the following image, the error comes from the file HomeScreen.js and is caused on line 7 in that file.
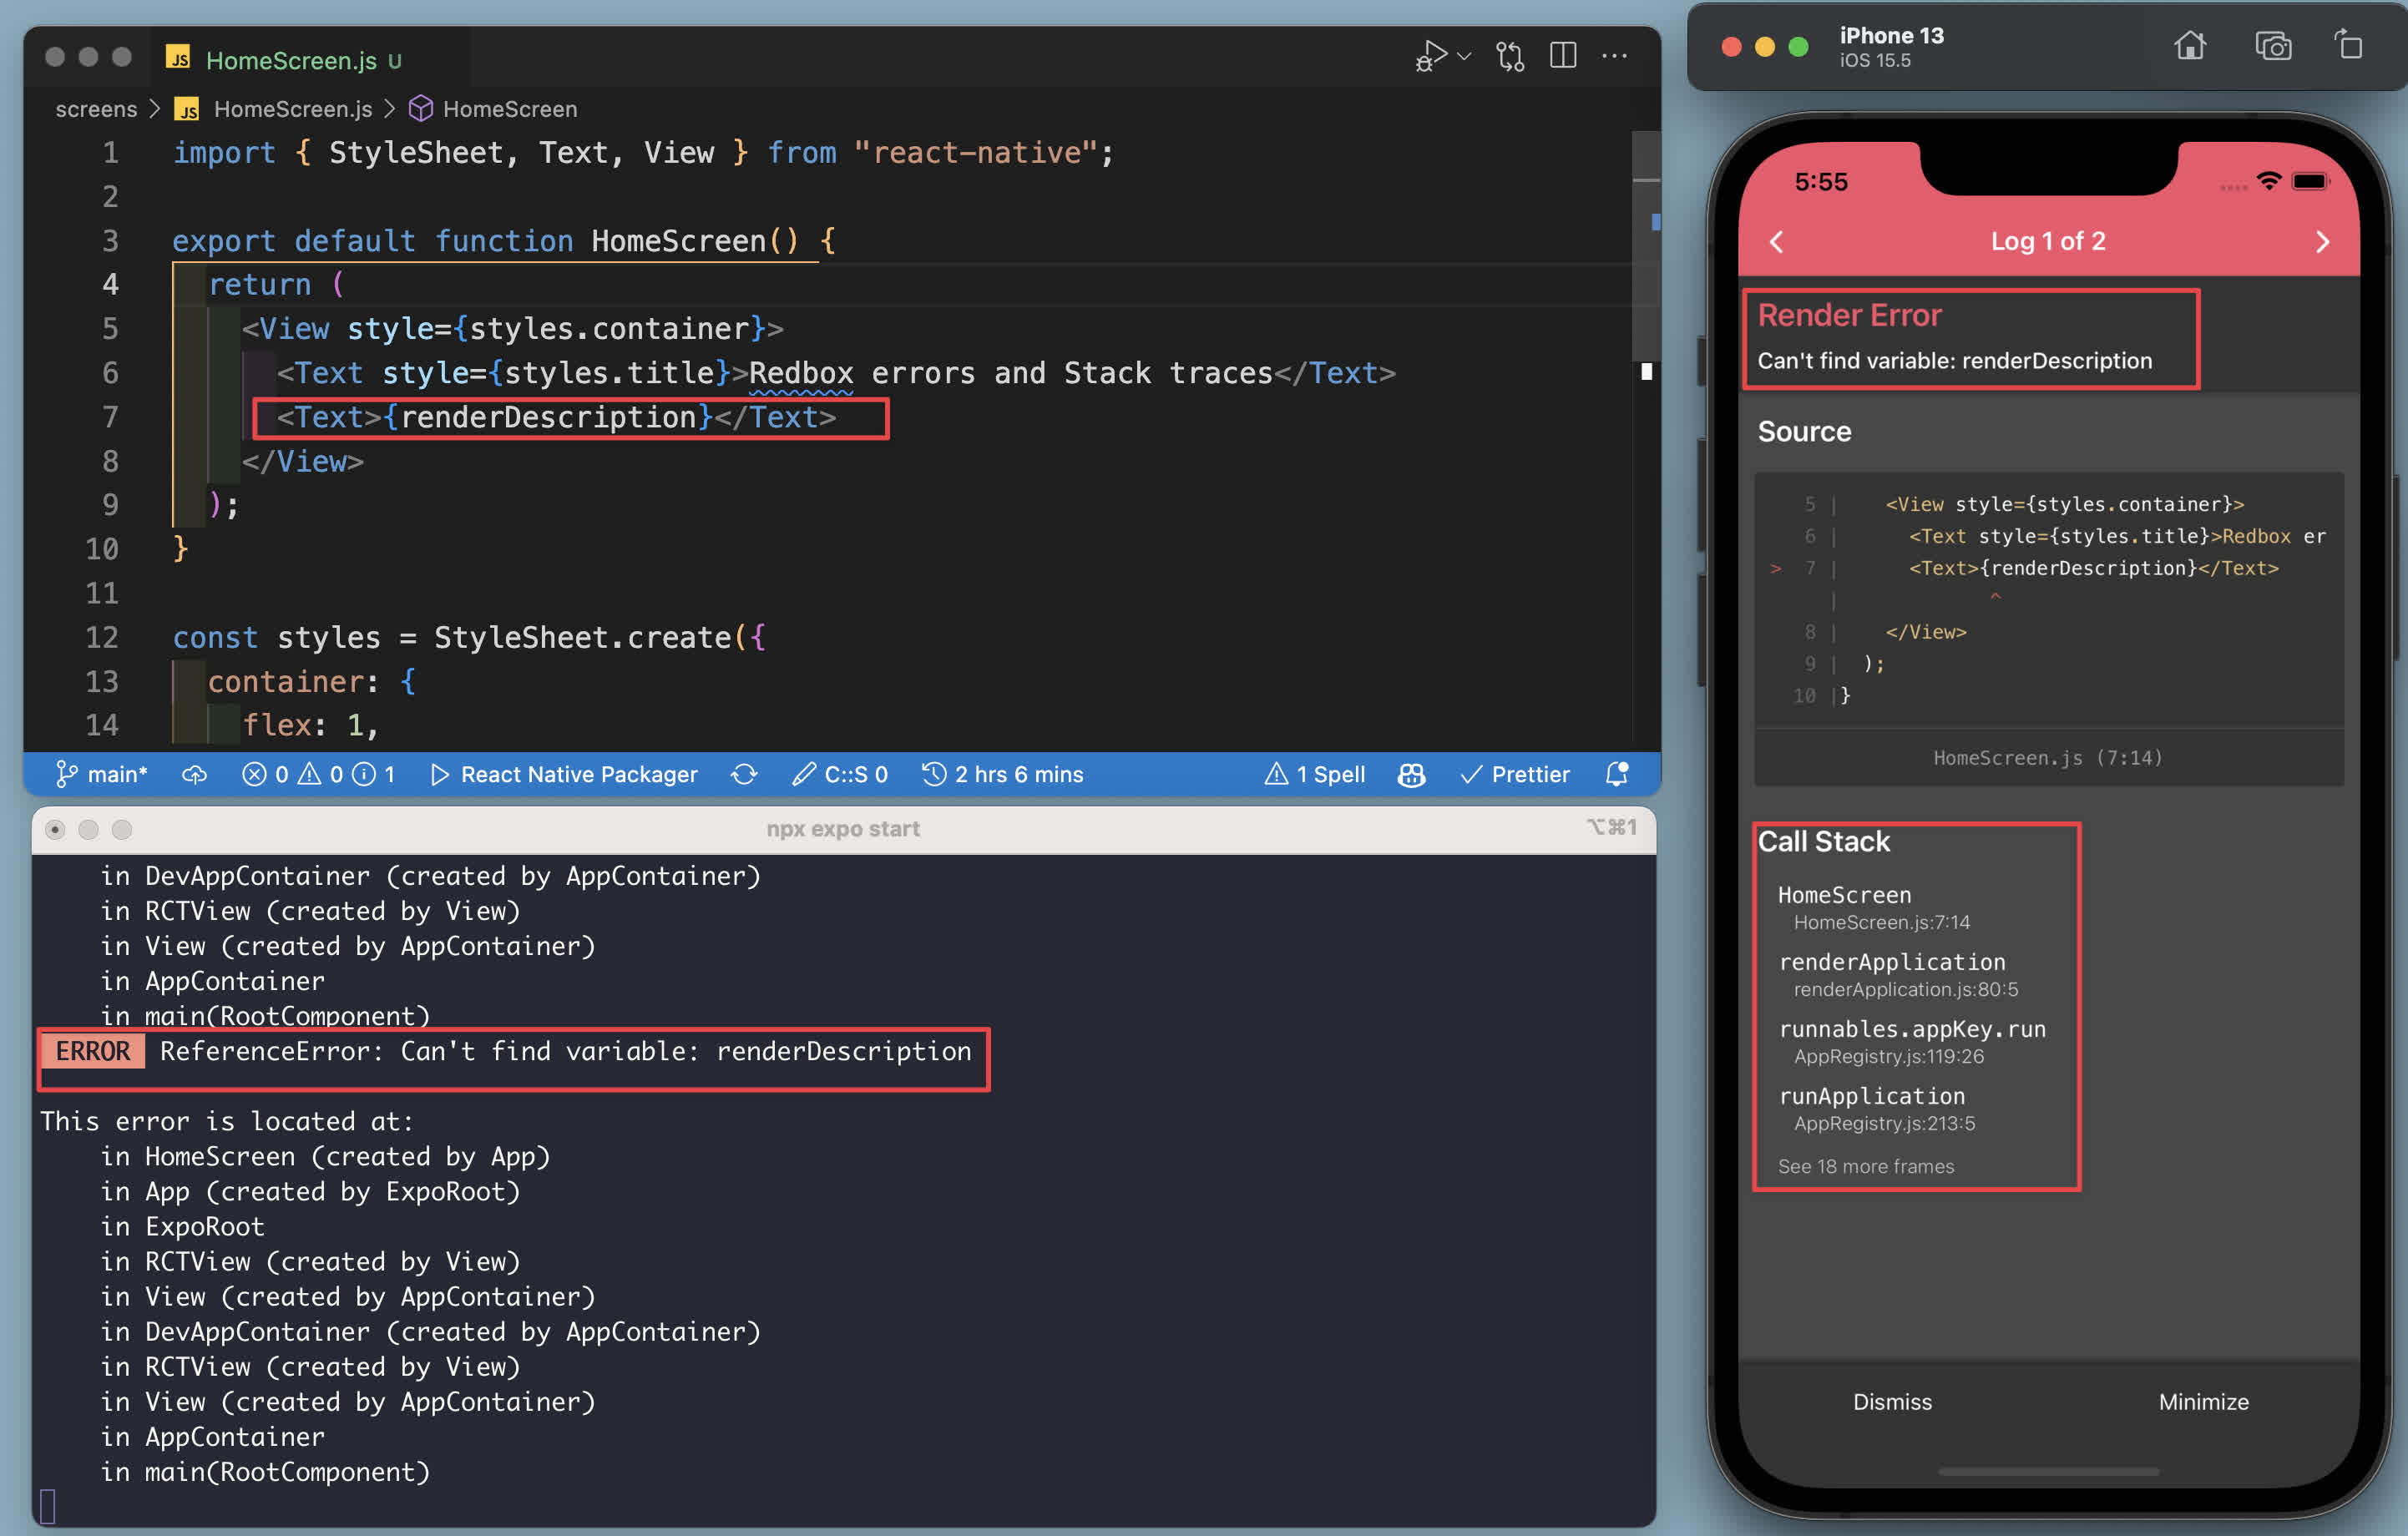
When you look at that file, on line 7, you will see that a variable called `renderDescription` is referenced. The error message describes that the variable is not found because the variable is not declared in HomeScreen.js. This is a typical example of how helpful error messages and stack traces can be if you take the time to decipher them.
Debugging errors is one of the most frustrating but satisfying parts of development. Remember that you're never alone. The Expo community and the React and React Native communities are great resources for help when you get stuck. There's a good chance someone else has run into your exact error. Make sure to read the documentation, search the [forums](https://chat.expo.dev/)
, [GitHub issues](https://github.com/expo/expo/issues/)
, and [Stack Overflow](https://stackoverflow.com/)
.
---
# Using a dangerous mod - Expo Documentation
Hide navigation
Search
[Home](https://docs.expo.dev/)
[Guides](https://docs.expo.dev/guides/overview)
[EAS](https://docs.expo.dev/eas)
[Reference](https://docs.expo.dev/versions/latest)
[Learn](https://docs.expo.dev/tutorial/overview)
[Archive](https://docs.expo.dev/archive)
[Expo Snack](https://snack.expo.dev/)
[Discord and Forums](https://chat.expo.dev/)
[Newsletter](https://expo.dev/mailing-list/signup)
Using a dangerous mod
=====================
[Edit page](https://github.com/expo/expo/edit/main/docs/pages/config-plugins/dangerous-mods.mdx)
Copy page
Learn about dangerous mods and how to use them when creating a config plugin.
[Edit page](https://github.com/expo/expo/edit/main/docs/pages/config-plugins/dangerous-mods.mdx)
Copy page
* * *
Dangerous mods in Expo provide direct access to native project files through string manipulation and regular expressions. While [existing mod plugins](https://docs.expo.dev/config-plugins/mods)
are the recommended approach, dangerous mods serve as an escape hatch for modifications that cannot be achieved through existing mod plugins.
Why are they considered dangerous?[](https://docs.expo.dev/config-plugins/dangerous-mods/#why-are-they-considered-dangerous)
Automated direct source code manipulation does not typically compose well. For example, if a dangerous mod replaces text in a source file, and a subsequent dangerous mod expects the original text to be there (perhaps it uses the original text as an anchor for a regular expression) then it is unlikely produce the desired result — depending on how it is written, it may either throw an error or log. Other types of mods are less prone to this type of problem, although it can happen with mods that manipulate source files directly like `withAndroidManifest` and `withPodfile`.
Unlike standard mods, which can run multiple times safely, dangerous mods are rarely guaranteed to be idempotent. Running the same dangerous mod multiple times may produce different results, cause duplicate modifications, or break the target file entirely.
When to use a dangerous mod[](https://docs.expo.dev/config-plugins/dangerous-mods/#when-to-use-a-dangerous-mod)
----------------------------------------------------------------------------------------------------------------
Consider using a dangerous mod when:
* Can't make the modification with a standard mod: The modification you need isn't supported by existing mod plugins like [`withAndroidManifest`](https://docs.expo.dev/config-plugins/mods#android)
, [`withPodfile`](https://docs.expo.dev/config-plugins/mods#ios)
, and so on, or if a library requires specific native modifications that aren't covered by standard plugins.
* Legacy Expo SDK compatibility: You are targeting an older Expo SDK version that doesn't include the mod plugin you need.
* Need to modify text with regexes or replace functions: You need to perform intricate text manipulations that existing mod plugins do not support. Expo uses dangerous mods internally for large file system refactoring, for example, when a library's name changes.
How to use a dangerous mod[](https://docs.expo.dev/config-plugins/dangerous-mods/#how-to-use-a-dangerous-mod)
--------------------------------------------------------------------------------------------------------------
In a real-world scenario, you can use the example config plugin described in this section directly in your project by following the standard config plugin usage pattern from the [Creating a config plugin section](https://docs.expo.dev/config-plugins/plugins#creating-a-config-plugin)
. However, with the existing mod plugin called [`withPodfile`](https://docs.expo.dev/config-plugins/mods#ios)
, you don't have to use the dangerous mod. The example below is just for demonstration of how a dangerous mod can be created and used.
Let's take a look at an example config plugin to modify a file inside a native directory (ios). This is useful when you are using Continuous Native Generation in your Expo project. With the help of this config plugin, the native file (ios/Podfile) will update anytime the `npx expo prebuild` command runs, whether you run it manually or using EAS Build). This example is an ideal use case when an existing mod plugin cannot edit and update a file inside a native directory.
Following the directory structure and steps to create a config plugin (steps 3, 4, and 5) from [Creating a config plugin section](https://docs.expo.dev/config-plugins/plugins#creating-a-config-plugin)
, let's assume this config plugin is created inside the plugins directory of your Expo project:
withCustomPodfile.ts
Copy
``import { ConfigPlugin, IOSConfig, withDangerousMod } from 'expo/config-plugins'; import fs from 'fs/promises'; import path from 'path'; const withCustomPodfile: ConfigPlugin = config => { return withDangerousMod(config, [ 'ios', async config => { const podfilePath = path.join(config.modRequest.platformProjectRoot, 'Podfile'); try { let contents = await fs.readFile(podfilePath, 'utf8'); const projectName = IOSConfig.XcodeUtils.getProjectName(config.modRequest.projectRoot); contents = addCustomPod(contents, projectName); await fs.writeFile(podfilePath, contents); console.log('✅ Successfully added custom pod to Podfile'); } catch (error) { console.warn('⚠️ Podfile not found, skipping modification'); } return config; }, ]); }; function addCustomPod(contents: string, projectName: string): string { if (contents.includes("pod 'Alamofire'")) { console.log('Alamofire pod already exists, skipping'); return contents; } const targetRegex = new RegExp( `(target ['"]${projectName}['"] do[\\s\\S]*?use_expo_modules!)`, 'm' ); return contents.replace(targetRegex, `$1\n pod 'Alamofire', '~> 5.6'`); } export default withCustomPodfile;``
In the example above, the plugin withCustomPodfile will add a CocoaPod dependency automatically to your project's native ios/Podfile during the prebuild process. It uses `withDangerousMod` to provide access to the native file system directly and run after the native project is generated, but before any CocoaPod dependency is installed.
The Podfile requires direct text manipulation, which is done using a regex pattern inside `addCustomMod` function. This process also requires that the CocoaPod dependency is inserted into the Podfile at a specific location, which is after the `use_expo_modules!` statement.
`withDangerousMod` syntax and requirements[](https://docs.expo.dev/config-plugins/dangerous-mods/#withdangerousmod-syntax-and-requirements)
--------------------------------------------------------------------------------------------------------------------------------------------
Using `withDangerousMod` requires certain parameters:
1. A native platform (android or ios)
2. An asynchronous function that receives `config` object with file system access
3. Relative file name/path to access inside the native directory
4. Reading the existing file, modifying its contents, and writing back to the file
5. (Optional) Log custom messages for success and failure state when a plugin executes during the prebuild process
The code snippet below provides a skeleton of the required field and how the config plugin can be structured when using `withDangerousMod`:
`import { ConfigPlugin, withDangerousMod } from 'expo/config-plugins'; import fs from 'fs/promises'; import path from 'path'; const myPlugin: ConfigPlugin = config => { return withDangerousMod(config, [ 'platform', // 1. "ios" | "android" async config => { // 2. Async modification function // 3. Build file paths const filePath = path.join( config.modRequest.platformProjectRoot, // Native project root 'path/to/file' // Relative path to target file ); try { // 4. Read existing file, modify its contents, and write back to the file let contents = await fs.readFile(filePath, 'utf8'); contents = modifyContents(contents); await fs.writeFile(filePath, contents); // 5. Log success and failure states console.log('✅ Successfully modified file'); } catch (error) { console.warn('⚠️ File modification failed:', error); } return config; }, ]); }; // Helper functions to use regex to modify the contents of the file`
### Available paths in config plugins[](https://docs.expo.dev/config-plugins/dangerous-mods/#available-paths-in-config-plugins)
Different path properties available in config plugins:
| Path | Type | Description |
| --- | --- | --- |
| `config.modRequest.projectRoot` | `string` | Universal app project root directory where package.json is located. Used for resolving assets, reading package.json, and cross-platform operations. Always verify the directory exists and contains package.json. |
| `config.modRequest.platformProjectRoot` | `string` | Platform-specific project root (projectRoot/android or projectRoot/ios). Used for platform-specific file operations like modifying native configuration files. Ensure the platform directory exists relative to main `projectRoot`. |
| `config.modRequest.projectName` | `string` | \[iOS only\] Project name component for constructing iOS file paths (for example, projectRoot/ios/\[projectName\]/). Used for iOS-specific file path construction. Only available on iOS platform and should match the actual Xcode project structure. |
| `config.modRequest.introspect` | `boolean` | Whether running in introspection mode where no filesystem changes should be made. When `true`, mods should only read and analyze files without writing. Used during config analysis and validation. |
| `config.modRequest.ignoreExistingNativeFiles` | `boolean` | Whether to ignore existing native files. Used in template-based operations, particularly affects entitlements and other native configs to ensure alignment with prebuild expectations. |
Considerations when using a dangerous mod[](https://docs.expo.dev/config-plugins/dangerous-mods/#considerations-when-using-a-dangerous-mod)
--------------------------------------------------------------------------------------------------------------------------------------------
When using a dangerous mod, consider the following:
* Limited idempotency guarantees. Unlike standard mods, which are generally idempotent and can work without the clean flag, dangerous mods are rarely guaranteed to be idempotent. This means running the same dangerous mod multiple times may produce different results or cause issues.
* Experimental and prone to breakage. Be careful using `withDangerousMod` as it is subject to change in the future. Test your dangerous mods thoroughly with each SDK release, as they are especially prone to breakage when native template changes occur.
* Use standard mod plugins. Both Android and iOS offer mod plugins like `withAndroidManifest`, `withPodfile`, `withPodfileProperties`, and so on, to perform common native file modifications. Only use a dangerous mod when there are no [existing mod plugins available](https://docs.expo.dev/config-plugins/mods#available-mod-plugins)
to handle your use case.
* Don't assume a file exists. Always check the native directory and the relative path to the file before reading/writing to it. If you use CNG, you can always run `npx expo prebuild` to create native android and ios directories and manually verify a file's existence.
* Dangerous mods run first. The order in which dangerous mods execute might be unreliable since dangerous mods run before other modifiers. This can affect the predictability of your build process and may cause conflicts with other modifications.
---
# Unit testing with Jest - Expo Documentation
Hide navigation
Search
[Home](https://docs.expo.dev/)
[Guides](https://docs.expo.dev/guides/overview)
[EAS](https://docs.expo.dev/eas)
[Reference](https://docs.expo.dev/versions/latest)
[Learn](https://docs.expo.dev/tutorial/overview)
[Archive](https://docs.expo.dev/archive)
[Expo Snack](https://snack.expo.dev/)
[Discord and Forums](https://chat.expo.dev/)
[Newsletter](https://expo.dev/mailing-list/signup)
Unit testing with Jest
======================
[Edit page](https://github.com/expo/expo/edit/main/docs/pages/develop/unit-testing.mdx)
Copy page
Learn how to set up and configure the jest-expo library to write unit and snapshot tests for a project with Jest.
[Edit page](https://github.com/expo/expo/edit/main/docs/pages/develop/unit-testing.mdx)
Copy page
* * *
[Jest](https://jestjs.io/)
is the most widely used unit and snapshot JavaScript testing framework. In this guide, you will learn how to set up Jest in your project, write a unit test, write a snapshot test, and best practices for structuring your tests when using Jest with React Native.
You will also use the [`jest-expo`](https://github.com/expo/expo/tree/main/packages/jest-expo)
library, which is a Jest preset that mocks the native part of the Expo SDK and handles most of the configuration required for your Expo project.
Installation and configuration[](https://docs.expo.dev/develop/unit-testing/#installation-and-configuration)
-------------------------------------------------------------------------------------------------------------
After creating your Expo project, follow the instructions below to install and configure `jest-expo` in your project:
1
Install `jest-expo` and other required dev dependencies in your project. Run the following command from your project's root directory:
macOS/Linux
Windows
Terminal
Copy
`-` `npx expo install jest-expo jest @types/jest --dev`
Terminal
Copy
`-` `npx expo install jest-expo jest @types/jest "--" --dev`
> Note: If your project is not using TypeScript, you can skip installing `@types/jest`.
2
Open package.json, add a script for running tests, and add the preset for using the base configuration from `jest-expo`:
package.json
Copy
`{ "scripts": { "test": "jest --watchAll" %%placeholder-start%%... %%placeholder-end%%}, "jest": { "preset": "jest-expo" } }`
3
In package.json, add `jest-expo` as a preset so that a base for Jest's configuration is set up:
package.json
Copy
`{ "jest": { "preset": "jest-expo" } }`
Additional configuration for using `transformIgnorePatterns`[](https://docs.expo.dev/develop/unit-testing/#additional-configuration-for-using-transformignorepatterns)
You can transpile node modules your project uses by configuring [`transformIgnorePatterns`](https://jestjs.io/docs/configuration#transformignorepatterns-arraystring)
in your package.json. This property takes a regex pattern as its value:
npm/Yarn
pnpm
package.json
Copy
`"jest": { "preset": "jest-expo", "transformIgnorePatterns": [ "node_modules/(?!((jest-)?react-native|@react-native(-community)?)|expo(nent)?|@expo(nent)?/.*|@expo-google-fonts/.*|react-navigation|@react-navigation/.*|@sentry/react-native|native-base|react-native-svg)" ] }`
package.json
Copy
`"jest": { "preset": "jest-expo", "transformIgnorePatterns": [ "node_modules/(?!(?:.pnpm/)?((jest-)?react-native|@react-native(-community)?|expo(nent)?|@expo(nent)?/.*|@expo-google-fonts/.*|react-navigation|@react-navigation/.*|@sentry/react-native|native-base|react-native-svg))" ] }`
Jest has many configuration options, but the above configuration should cover most of your needs. However, you can always add to this pattern list. For more details, see [Configuring Jest](https://jestjs.io/docs/configuration)
.
Install React Native Testing Library[](https://docs.expo.dev/develop/unit-testing/#install-react-native-testing-library)
-------------------------------------------------------------------------------------------------------------------------
The [React Native Testing Library (`@testing-library/react-native`)](https://callstack.github.io/react-native-testing-library/)
is a lightweight solution for testing React Native components. It provides utility functions and works with Jest.
To install it, run the following command:
macOS/Linux
Windows
Terminal
Copy
`-` `npx expo install @testing-library/react-native --dev`
Terminal
Copy
`-` `npx expo install @testing-library/react-native "--" --dev`
> Deprecated: `@testing-library/react-native` replaces the deprecated `react-test-renderer` because `react-test-renderer` does not support React 19 and above. Remove the deprecated library from your project if you are currently using it. See [React's documentation for more information](https://react.dev/warnings/react-test-renderer)
> .
Unit test[](https://docs.expo.dev/develop/unit-testing/#unit-test)
-------------------------------------------------------------------
A unit test checks the smallest unit of code, usually a function. To write your first unit test, take a look at the following example:
1
Inside the app directory of your project, create a new file called index.tsx, and the following code to render a simple component:
index.tsx
Copy
`import { PropsWithChildren } from 'react'; import { StyleSheet, Text, View } from 'react-native'; export const CustomText = ({ children }: PropsWithChildren) => {children}; export default function HomeScreen() { return ( Welcome! ); } const styles = StyleSheet.create({ container: { flex: 1, backgroundColor: '#fff', alignItems: 'center', justifyContent: 'center', }, });`
2
Create a \_\_tests\_\_ directory at the root of your project's directory. If this directory already exists in your project, use that. Then, create a new file called HomeScreen-test.tsx. The `jest-expo` preset customizes the Jest configuration to also identify files with \-test.ts|tsx extensions as tests.
Add the following example code in HomeScreen-test.tsx:
HomeScreen-test.tsx
Copy
`import { render } from '@testing-library/react-native'; import HomeScreen, { CustomText } from '@/app/index'; describe('', () => { test('Text renders correctly on HomeScreen', () => { const { getByText } = render(); getByText('Welcome!'); }); });`
In the above example, the `getByText` query helps your tests find relevant element in your app's user interface and make assertion whether or not the certain element exists. The React Native Testing Library provides this query, and each [query variant](https://callstack.github.io/react-native-testing-library/docs/api/queries#query-variant)
differs in its return type. For more examples and detailed API information, see the React Native Testing Library's [Queries API reference](https://callstack.github.io/react-native-testing-library/docs/api/queries)
.
3
Run the following command in a terminal window to execute the test:
Terminal
Copy
`-` `npm run test`
You will see one test being passed.
Structure your tests[](https://docs.expo.dev/develop/unit-testing/#structure-your-tests)
-----------------------------------------------------------------------------------------
Organizing your test files is important to make them easier to maintain. A common pattern is creating a \_\_tests\_\_ directory and putting all your tests inside.
An example structure of tests next to the components directory is shown below:
`__tests__`
`ThemedText-test.tsx`
`components`
`ThemedText.tsx`
`ThemedView.tsx`
Alternatively, you can have multiple \_\_tests\_\_ sub-directories for different areas of your project. For example, create a separate test directory for components, and so on:
`components`
`ThemedText.tsx`
`__tests__`
`ThemedText-test.tsx`
`utils`
`index.tsx`
`__tests__`
`index-test.tsx`
It's all about preferences, and it is up to you to decide how you want to organize your project directory.
Snapshot test[](https://docs.expo.dev/develop/unit-testing/#snapshot-test)
---------------------------------------------------------------------------
> Note: For UI testing, we recommend end-to-end tests instead of snapshot unit tests. See the [E2E tests with Maestro](https://docs.expo.dev/eas/workflows/examples/e2e-tests)
> guide.
A [snapshot test](https://jestjs.io/docs/en/snapshot-testing)
is used to make sure that UI stays consistent, especially when a project is working with global styles that are potentially shared across components.
To add a snapshot test for ``, add the following code snippet in the `describe()` in HomeScreen-test.tsx:
HomeScreen-test.tsx
Copy
`describe('', () => { %%placeholder-start%%... %%placeholder-end%% test('CustomText renders correctly', () => { const tree = render(Some text).toJSON(); expect(tree).toMatchSnapshot(); }); });`
Run `npm run test` command, and you will see a snapshot created inside \_\_tests\_\_\\\_\_snapshots\_\_ directory, and two tests passed.
Code coverage reports[](https://docs.expo.dev/develop/unit-testing/#code-coverage-reports)
-------------------------------------------------------------------------------------------
Code coverage reports can help you understand how much of your code is tested. To see the code coverage report in your project using the HTML format, in package.json, under `jest`, set the `collectCoverage` to true and use `collectCoverageFrom` to specify a list of files to ignore when collecting the coverage.
package.json
Copy
`"jest": { ... "collectCoverage": true, "collectCoverageFrom": [ "**/*.{ts,tsx,js,jsx}", "!**/coverage/**", "!**/node_modules/**", "!**/babel.config.js", "!**/expo-env.d.ts", "!**/.expo/**" ] }`
Run `npm run test`. You will see a coverage directory created in your project. Find the lcov-report/index.html and open it in a browser to see the coverage report.
> Usually, we don't recommend uploading index.html file to git. Add `coverage/**/*` in the .gitignore file to prevent it from being tracked.
Jest flows (optional)[](https://docs.expo.dev/develop/unit-testing/#jest-flows-optional)
-----------------------------------------------------------------------------------------
You can also use different flows to run your tests. Below are a few example scripts that you can try:
package.json
Copy
`"scripts": { "test": "jest --watch --coverage=false --changedSince=origin/main", "testDebug": "jest -o --watch --coverage=false", "testFinal": "jest", "updateSnapshots": "jest -u --coverage=false" %%placeholder-start%%... %%placeholder-end%% }`
For more information, see [CLI Options](https://jestjs.io/docs/en/cli)
in Jest documentation.
Additional information[](https://docs.expo.dev/develop/unit-testing/#additional-information)
---------------------------------------------------------------------------------------------
[React Native Testing library documentation\
\
See React Native Testing Library documentation, which provides testing utilities and encourages good testing practices and work with Jest.](https://callstack.github.io/react-native-testing-library/docs/start/quick-start)
[Testing configuration for Expo Router\
\
Learn how to create integration tests for your app when using Expo Router.](https://docs.expo.dev/router/reference/testing)
[E2E tests with EAS Workflows\
\
Learn how to set up and run E2E tests on EAS Workflows with Maestro.](https://docs.expo.dev/eas/workflows/examples/e2e-tests)
---
# How to launch an update using Expo Orbit - Expo Documentation
Hide navigation
Search
[Home](https://docs.expo.dev/)
[Guides](https://docs.expo.dev/guides/overview)
[EAS](https://docs.expo.dev/eas)
[Reference](https://docs.expo.dev/versions/latest)
[Learn](https://docs.expo.dev/tutorial/overview)
[Archive](https://docs.expo.dev/archive)
[Expo Snack](https://snack.expo.dev/)
[Discord and Forums](https://chat.expo.dev/)
[Newsletter](https://expo.dev/mailing-list/signup)
How to launch an update using Expo Orbit
========================================
[Edit page](https://github.com/expo/expo/edit/main/docs/pages/review/with-orbit.mdx)
Copy page
Learn how to open updates with Expo Orbit as part of a review workflow.
[Edit page](https://github.com/expo/expo/edit/main/docs/pages/review/with-orbit.mdx)
Copy page
* * *
[Expo Orbit](https://expo.dev/orbit)
is a macOS and Windows app designed to speed up installing and running builds from EAS. It makes running your builds and updates as easy as pressing Open in Orbit.
How does automatic installation and launching of updates work?[](https://docs.expo.dev/review/with-orbit/#how-does-automatic-installation-and-launching-of)
When you launch an update, Orbit will look for the latest development build that matches the runtime version and target platform of the update. If a compatible build is found, the update will install automatically on the target device and launch with a deep link that points to the update.
If you don't have any development builds available, either because they have all expired, you haven't created one, you don't use EAS Build, or you are [building your app locally](https://docs.expo.dev/guides/local-app-development)
, then Orbit will prompt you on how to proceed. Click Launch with deep link in the prompt to open the update if you already have a compatible development build installed on your target device.
Prerequisites[](https://docs.expo.dev/review/with-orbit/#prerequisites)
------------------------------------------------------------------------
* Install the Orbit app before following the steps in this guide. You can download it directly from [GitHub releases](https://github.com/expo/orbit/releases)
or see the [alternative method](https://docs.expo.dev/build/orbit#installation)
to install it.
* After installing the app, sign in to your Expo account from Settings.
Preview an update with Expo Orbit[](https://docs.expo.dev/review/with-orbit/#preview-an-update-with-expo-orbit)
----------------------------------------------------------------------------------------------------------------
Expo Orbit launching an update directly from EAS dashboard to an iOS Simulator.
Previewing with Expo Orbit requires you to have an update published. If you haven't published an update, see [Publish an update](https://docs.expo.dev/eas-update/getting-started#publish-an-update)
before following the steps in the next section.
### Install and launch the update[](https://docs.expo.dev/review/with-orbit/#install-and-launch-the-update)
> Note: Launching updates using Expo Orbit is not supported on physical iOS devices. It is supported on Android devices/emulators or iOS Simulators.
After the update is published, follow these steps to open it on an Android Emulator or iOS Simulator:
* Navigate your project's Updates tab.
* Select the update you want to preview.
* Click Preview. This will open the Preview dialog.
* Under Open with Orbit, select a platform to launch the update.
* Orbit will install and launch the update on the selected Android Emulator or iOS Simulator.
You can now seamlessly launch and review updates using Expo Orbit.
---
# Introduction to config plugins - Expo Documentation
Hide navigation
Search
[Home](https://docs.expo.dev/)
[Guides](https://docs.expo.dev/guides/overview)
[EAS](https://docs.expo.dev/eas)
[Reference](https://docs.expo.dev/versions/latest)
[Learn](https://docs.expo.dev/tutorial/overview)
[Archive](https://docs.expo.dev/archive)
[Expo Snack](https://snack.expo.dev/)
[Discord and Forums](https://chat.expo.dev/)
[Newsletter](https://expo.dev/mailing-list/signup)
Introduction to config plugins
==============================
[Edit page](https://github.com/expo/expo/edit/main/docs/pages/config-plugins/introduction.mdx)
Copy page
An introduction to Expo config plugins.
[Edit page](https://github.com/expo/expo/edit/main/docs/pages/config-plugins/introduction.mdx)
Copy page
* * *
When using [Continuous Native Generation (CNG)](https://docs.expo.dev/workflow/continuous-native-generation)
in a project, native project (android and ios directories) changes are implemented without directly interacting with the native project files. Instead, you can use a config plugin to automatically configure your native project beyond what can be configured using the default app config props.
What is a config plugin[](https://docs.expo.dev/config-plugins/introduction/#what-is-a-config-plugin)
------------------------------------------------------------------------------------------------------
A config plugin is a top-level custom configuration point that is not built into the [app config](https://docs.expo.dev/workflow/configuration)
. Using a config plugin, you can modify native projects created during the [prebuild](https://docs.expo.dev/workflow/continuous-native-generation#usage)
process in CNG projects.
A config plugin is referenced in the `plugins` property of the [app config](https://docs.expo.dev/workflow/configuration)
file and is made up of one or more plugin functions. These plugin functions are written in JavaScript and are executed during the prebuild process.
Glossary[](https://docs.expo.dev/config-plugins/introduction/#glossary)
------------------------------------------------------------------------
A typical config plugin is made up of one or more plugin functions that work together. The following diagram shows how the different parts of a config plugin interact with each other:
withMyPlugin
"myPlugin"
Config Plugin
withAndroidPlugin
withIosPlugin
Plugin Function
withAndroidManifest
withInfoPlist
Mod Plugin Function
mods.android.manifest
mods.ios.infoplist
Mod
Press enter or space to select a node. You can then use the arrow keys to move the node around. Press delete to remove it and escape to cancel.
Press enter or space to select an edge. You can then press delete to remove it or escape to cancel.
In the following guides, we will use the above diagram to highlight specific terminology explained below:
### Plugin[](https://docs.expo.dev/config-plugins/introduction/#plugin)
The top-level config plugin which is referenced in your app config's `plugins` array. This is the entry point for your plugin. Conventionally, it is named `with`. For example, `withMyPlugin`. It is made of one or more [plugin functions](https://docs.expo.dev/config-plugins/introduction#plugin-function)
.
### Plugin function[](https://docs.expo.dev/config-plugins/introduction/#plugin-function)
One or more functions inside a config plugin that are called _plugin functions_. They wrap the underlying logic of performing platform-specific modifications. Technically, plugin functions look just like the function for the top-level plugin itself, and could be used as a plugin independently. Breaking plugins into smaller functions is often helpful for testing and debugging.
### Mod plugin function[](https://docs.expo.dev/config-plugins/introduction/#mod-plugin-function)
Wrapper functions from `expo/config-plugins` library that provide a safe way to modify native files using `mods`. As a developer, you will use these functions in your config plugin instead of underlying `mods`.
### Mod[](https://docs.expo.dev/config-plugins/introduction/#mod)
The underlying platform-specific modifiers (like `mods.android.manifest` and `mods.ios.infoplist`) that directly modify native project files during prebuild.
Why use a config plugin[](https://docs.expo.dev/config-plugins/introduction/#why-use-a-config-plugin)
------------------------------------------------------------------------------------------------------
Config plugins can add native configuration to your project that isn't included by default. They can be used to generate app icons, set the app name, configure AndroidManifest.xml and Info.plist, and so on.
In CNG projects, it is best to avoid modifying these native projects manually, because you cannot regenerate them safely without potentially overwriting manual modifications. Config plugins allow you to modify these native projects in a _predictable way_ by consolidating your native project changes into a configuration file and applying them when you run `npx expo prebuild` (either manually or automatically during a CI/CD process). For example, when you change the name of your app in app config and run `npx expo prebuild`, the name will change in your native projects automatically without the need to manually update AndroidManifest.xml and Info.plist files.
Characteristics of a config plugin[](https://docs.expo.dev/config-plugins/introduction/#characteristics-of-a-config-plugin)
----------------------------------------------------------------------------------------------------------------------------
Config plugins have the following characteristics:
* Plugins are synchronous functions that accept an [ExpoConfig](https://docs.expo.dev/workflow/configuration)
and return a modified `ExpoConfig`. In rare cases, plugins can also be asynchronous if available methods to communicate with native projects are asynchronous, but they won't be performant.
* Plugins should be named using the following convention: `with`, for example, `withFacebook`
* Plugins should be synchronous and their return value should be serializable, except for adding any [`mods`](https://docs.expo.dev/config-plugins/introduction#mods)
* Plugins are always evaluated during the app config evaluation phase.
* Optionally, a second argument can be passed to the plugin to configure it
* Mods are only evaluated during the syncing phase of `npx expo prebuild` (prebuild process) and modify native files during code generation. Because of that, any modifications made to app config in a config plugin should be outside of a mod to ensure that they are executed in non-prebuild configuration scenarios.
Get started[](https://docs.expo.dev/config-plugins/introduction/#get-started)
------------------------------------------------------------------------------
[Create a config plugin\
\
Comprehensive guide on how to create and use config plugins in your Expo project.](https://docs.expo.dev/config-plugins/plugins)
[Mods\
\
Comprehensive guide on how mods work, how to create them, and their best practices.](https://docs.expo.dev/config-plugins/mods)
[Best practices for development and debugging\
\
Learn about best practices for development and debugging config plugins.](https://docs.expo.dev/config-plugins/development-and-debugging)
---
# App stores metadata - Expo Documentation
Hide navigation
Search
[Home](https://docs.expo.dev/)
[Guides](https://docs.expo.dev/guides/overview)
[EAS](https://docs.expo.dev/eas)
[Reference](https://docs.expo.dev/versions/latest)
[Learn](https://docs.expo.dev/tutorial/overview)
[Archive](https://docs.expo.dev/archive)
[Expo Snack](https://snack.expo.dev/)
[Discord and Forums](https://chat.expo.dev/)
[Newsletter](https://expo.dev/mailing-list/signup)
App stores metadata
===================
[Edit page](https://github.com/expo/expo/edit/main/docs/pages/deploy/app-stores-metadata.mdx)
Copy page
A brief overview of how to use EAS Metadata to automate and maintain your app store presence.
[Edit page](https://github.com/expo/expo/edit/main/docs/pages/deploy/app-stores-metadata.mdx)
Copy page
* * *
> EAS Metadata is in preview and subject to breaking changes.
When submitting your app to app stores, you need to provide metadata. This process is lengthy and is often about complex topics that don't apply to your app. After the information you provide gets reviewed and if there is any issue with it, you need to restart this process.
[EAS Metadata](https://docs.expo.dev/eas/metadata)
enables you to automate and maintain this information from the command line instead of going through multiple forms in the app store dashboards. It can also instantly identify well-known app store restrictions that could trigger a rejection after a lengthy review queue. This guide shows how to use EAS Metadata to automate and maintain your app store presence.
Prerequisites[](https://docs.expo.dev/deploy/app-stores-metadata/#prerequisites)
---------------------------------------------------------------------------------
EAS Metadata currently only supports the Apple App Store.
> Using VS Code? Install the [Expo Tools extension](https://github.com/expo/vscode-expo#readme)
> for auto-complete, suggestions, and warnings in your store.config.json files.
Create a store config[](https://docs.expo.dev/deploy/app-stores-metadata/#create-a-store-config)
-------------------------------------------------------------------------------------------------
EAS Metadata uses [store.config.json](https://docs.expo.dev/eas/metadata/config)
file to hold all the information you want to upload to the app stores. This file is located at the root of your Expo project.
Create a new store.config.json file at the root of your project directory as shown in the example below:
store.config.json
Copy
`{ "configVersion": 0, "apple": { "info": { "en-US": { "title": "Awesome App", "subtitle": "Your self-made awesome app", "description": "The most awesome app you have ever seen", "keywords": ["awesome", "app"], "marketingUrl": "https://example.com/en/promo", "supportUrl": "https://example.com/en/support", "privacyPolicyUrl": "https://example.com/en/privacy" } } } }`
The above example file contains JSON schema. Replace the example values with your own. It is usually contains your app's `title`, `subtitle` , `description`, `keywords`, and `marketingUrl` and so on.
An important thing to remember from the above example is the `configVersion` property. It helps with versioning changes that are not backward compatible.
> For more information on properties that can be defined in store.config.json, see [Schema for EAS Metadata](https://docs.expo.dev/eas/metadata/schema#config-schema)
> .
Upload the store config[](https://docs.expo.dev/deploy/app-stores-metadata/#upload-the-store-config)
-----------------------------------------------------------------------------------------------------
> Before pushing the store.config.json to the app stores, you must upload a new binary of your app. See [App Store submissions](https://docs.expo.dev/deploy/submit-to-app-stores)
> for more information. After the binary is submitted and processed, you can continue with the step below.
After you have created the store.config.json file and added the necessary information related to your app, you can push the store config to the app stores by running the command:
Terminal
Copy
`-` `eas metadata:push`
If EAS Metadata runs into any issues with your store config, it will warn you when running this command. When there are no errors, or you confirm to push it with possible issues, it will try to upload as much as possible.
You can also re-use this command when you modify the store.config.json file and want to push the latest changes to the app stores.
Next steps[](https://docs.expo.dev/deploy/app-stores-metadata/#next-steps)
---------------------------------------------------------------------------
[EAS Metadata schema\
\
A reference of store config in EAS Metadata.](https://docs.expo.dev/eas/metadata/schema)
[Static and dynamic configurations with EAS Metadata\
\
Learn about different ways to configure EAS Metadata.](https://docs.expo.dev/eas/metadata/config)
---
# Introduction to development builds - Expo Documentation
Hide navigation
Search
[Home](https://docs.expo.dev/)
[Guides](https://docs.expo.dev/guides/overview)
[EAS](https://docs.expo.dev/eas)
[Reference](https://docs.expo.dev/versions/latest)
[Learn](https://docs.expo.dev/tutorial/overview)
[Archive](https://docs.expo.dev/archive)
[Expo Snack](https://snack.expo.dev/)
[Discord and Forums](https://chat.expo.dev/)
[Newsletter](https://expo.dev/mailing-list/signup)
Introduction to development builds
==================================
[Edit page](https://github.com/expo/expo/edit/main/docs/pages/develop/development-builds/introduction.mdx)
Copy page
Why use development builds and how to get started.
[Edit page](https://github.com/expo/expo/edit/main/docs/pages/develop/development-builds/introduction.mdx)
Copy page
* * *
Development build is the term that we use for a "Debug" build of an app that includes the [`expo-dev-client`](https://docs.expo.dev/versions/latest/sdk/dev-client)
library. This library augments the built-in React Native development tooling with additional capabilities, such as support for inspecting network requests and a "launcher" UI that lets you switch between different development servers (such as between a server running on your machine or a teammate's machine) and deployments of your app (such as published updates with EAS Update).
Difference between Expo Go and development builds[](https://docs.expo.dev/develop/development-builds/introduction/#difference-between-expo-go-and-development-builds)
When you create your first React Native project with `npx create-expo-app` and ran it with `npx expo start`, you most likely start off using the [Expo Go](https://expo.dev/go)
app for development. Expo Go is a native app that the Expo team built and submitted to the [Google Play Store](https://play.google.com/store/apps/details?id=host.exp.exponent)
and [Apple App Store](https://apps.apple.com/us/app/expo-go/id982107779)
so you can get coding quickly. It is a sandbox app with a number of native libraries included within (see the [dependencies list](https://github.com/expo/expo/blob/main/apps/expo-go/package.json#L23)
). This means that developers may update their app's JavaScript code on their local machine and see the changes on Expo Go.
A React Native app consists of two parts: the native app (Expo Go) and the JavaScript bundle (`npx expo start`). It is immutable and when you're using the Expo Go app for development, you can only rely on the native code and tools that exist in Expo Go. The only way to get around it is to build your native app yourself instead of using Expo's pre-packaged sandbox. This is exactly what a Development Build is, your own version of Expo Go, where you are free to use any native libraries and change any native config.
Native app and JavaScript bundle[](https://docs.expo.dev/develop/development-builds/introduction/#native-app-and-javascript-bundle)
The native app (Expo Go) is immutable once installed. Native build tools are required to create this bundle, and it needs to be signed to be installable on real devices. To add a new library with native code or change metadata that is shipped with the app (for example app name, icon, splash screen) the app needs to be rebuilt and re-installed on the device.
The JavaScript bundle (`npx expo start`) is where your app's UI code and business logic are. In production apps, there is one main.js bundle that is shipped with the app itself. In development, this JS bundle is live reloaded from your local machine. The main role of React Native is to provide a way for the JavaScript code to access the native APIs (Image, Camera, Notifications, and more). However, only APIs and libraries that were bundled in the native app can be used.
[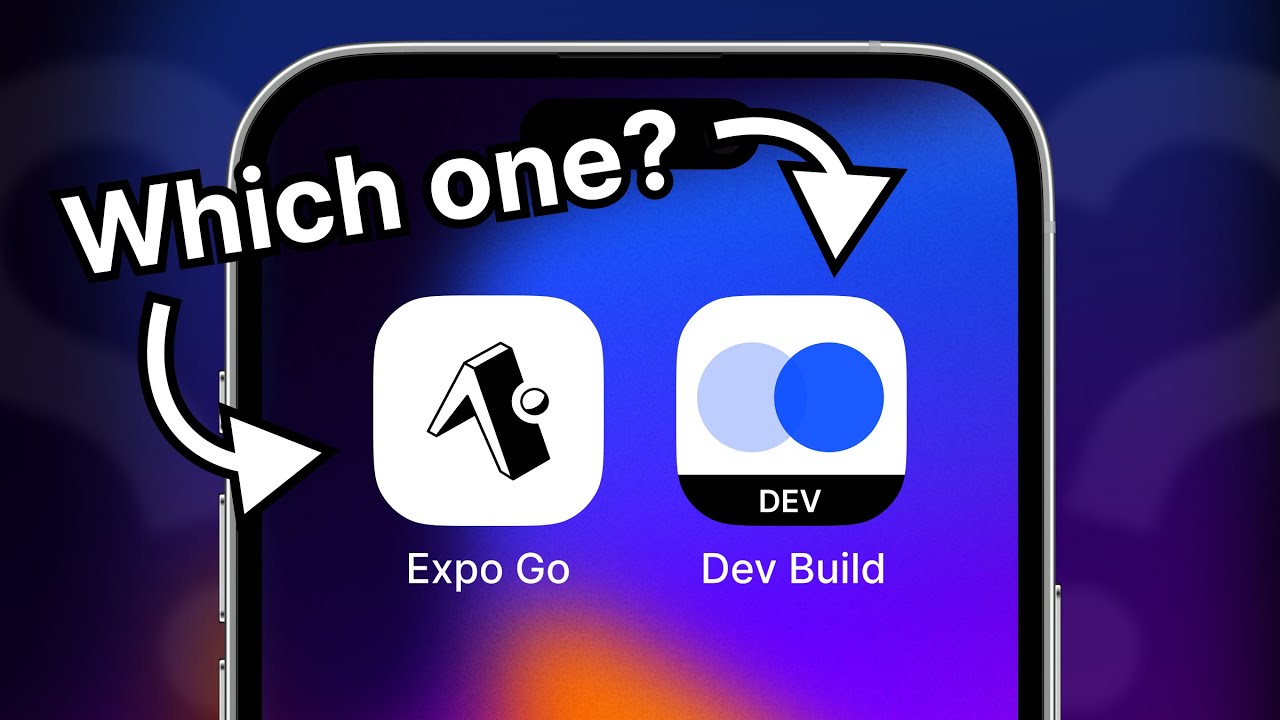\
\
Expo Go & Development Builds: which should you use?\
\
In this tutorial video Beto explains what each of them is, and when to choose a development build.](https://www.youtube.com/watch?v=FdjczjkwQKE)
Why use a development build (a.k.a what _can't_ you do in Expo Go and why)[](https://docs.expo.dev/develop/development-builds/introduction/#why-use-a-development-build-aka-what-cant-you-do-in-expo-go-and-why)
-----------------------------------------------------------------------------------------------------------------------------------------------------------------------------------------------------------------
Expo Go is the perfect tool for learning, prototyping, and experimenting, but most production apps will convert to using development builds sooner rather than later. It helps to know exactly what is _impossible_ in Expo Go and _why_, so you can make an informed decision on when and why to make this move.
Use libraries with native code that aren't in Expo Go[](https://docs.expo.dev/develop/development-builds/introduction/#use-libraries-with-native-code-that-arent)
Consider [`react-native-webview`](https://docs.expo.dev/versions/latest/sdk/webview)
as an example, a library that contains native code, but [is included in Expo Go](https://github.com/expo/expo/blob/main/apps/expo-go/package.json#L23)
. When you run `npx expo install react-native-webview` command in your project, it will install the library in your node\_modules directory, which includes both the JS code and the native code. But the JS bundle you are building _only_ uses the JS code. Then, your JS bundle gets uploaded to Expo Go, and it interacts with the native code that was already bundled with the app.
Instead, when you try to use a library that is not included, for example, [`react-native-firebase`](https://docs.expo.dev/guides/using-firebase#using-react-native-firebase)
, then you can use the JS code and hot reload the new bundle into Expo Go but it will immediately error because the JS code tries to call the native code from the React Native Firebase package that does not exist in Expo Go. There is no way to get the native code into the Expo Go app unless it was already included in the bundle that was uploaded to the app stores.
Test changes in app icon, name, splash screen[](https://docs.expo.dev/develop/development-builds/introduction/#test-changes-in-app-icon-name-splash)
If you're developing your app in Expo Go only, you can build a store version that will use your provided values and images; it just won't be possible to test it in Expo Go.
These native assets are shipped with the native bundle and are immutable once the app is installed. The Expo Go app does show a splash screen, which is your app icon on a solid color background. This is a dev-only emulation to view how the splash screen will probably look. However, it is limited, for example, you cannot test `SplashScreen.setOptions` to animate the splash screen.
Remote push notifications[](https://docs.expo.dev/develop/development-builds/introduction/#remote-push-notifications)
While [in-app notifications](https://docs.expo.dev/versions/latest/sdk/notifications)
are available in Expo Go, remote push notifications (that is, sending a push notification from a server to the app) are not. This is because a push notification service should be tied to your own push notification certificates, and while it is possible to make it work in Expo Go, it often causes confusion for production builds. It is recommended to test remote push notifications in development builds so you can ensure parity in behavior between development and production.
Implementing App/Universal links[](https://docs.expo.dev/develop/development-builds/introduction/#implementing-appuniversal-links)
Both [Android App Links](https://docs.expo.dev/linking/android-app-links)
and [iOS Universal Links](https://docs.expo.dev/linking/ios-universal-links)
require a two-way association between the native app and the website. In particular, it requires the native app to include the linked website's URL. This is impossible with Expo Go due to the aforementioned native code immutability.
Open projects using older SDKs (iOS device only)[](https://docs.expo.dev/develop/development-builds/introduction/#open-projects-using-older-sdks-ios-device)
Expo Go can only support one SDK version at a time. When a new SDK version is released, Expo Go is updated to support the newer version, and this will be the only version of Expo Go available to install from the stores.
If you're developing on an Android Device, Android Emulator, or iOS Simulator, a compatible version of Expo Go can be [downloaded and installed](https://expo.dev/go)
. The only platform where this is impossible is iPhone devices because Apple does not support side-loading older versions of apps.
[Expo Go to development build\
\
Learn how to migrate an existing Expo Go project to using development builds](https://docs.expo.dev/develop/development-builds/expo-go-to-dev-build)
[Local app development\
\
How to build a development client on your local machine](https://docs.expo.dev/guides/local-app-development)
[Development builds on EAS\
\
How to build a development client on EAS](https://docs.expo.dev/develop/development-builds/create-a-build)
---
# Send over-the-air updates - Expo Documentation
Hide navigation
Search
[Home](https://docs.expo.dev/)
[Guides](https://docs.expo.dev/guides/overview)
[EAS](https://docs.expo.dev/eas)
[Reference](https://docs.expo.dev/versions/latest)
[Learn](https://docs.expo.dev/tutorial/overview)
[Archive](https://docs.expo.dev/archive)
[Expo Snack](https://snack.expo.dev/)
[Discord and Forums](https://chat.expo.dev/)
[Newsletter](https://expo.dev/mailing-list/signup)
Send over-the-air updates
=========================
[Edit page](https://github.com/expo/expo/edit/main/docs/pages/deploy/send-over-the-air-updates.mdx)
Copy page
Learn how to send over-the-air updates to push critical bug fixes and improvements to your users.
[Edit page](https://github.com/expo/expo/edit/main/docs/pages/deploy/send-over-the-air-updates.mdx)
Copy page
* * *
You can send over-the-air updates containing critical bug fixes and improvements to your users.
Get started[](https://docs.expo.dev/deploy/send-over-the-air-updates/#get-started)
-----------------------------------------------------------------------------------
> If you've published [previews](https://docs.expo.dev/review/share-previews-with-your-team)
> or created a [build](https://docs.expo.dev/deploy/build-project)
> before, you may have already set up updates and can skip this section.
To set up updates, run the following [EAS CLI](https://docs.expo.dev/develop/tools#eas-cli)
command:
Terminal
Copy
`-` `eas update:configure`
After the command completes, you'll need to make new builds before continuing to the next section.
Send an update[](https://docs.expo.dev/deploy/send-over-the-air-updates/#send-an-update)
-----------------------------------------------------------------------------------------
To send an update, run the following [EAS CLI](https://docs.expo.dev/develop/tools#eas-cli)
command:
Terminal
Copy
`-` `eas update --channel production`
This command will create an update and make it available to builds of your app that are configured to receive updates on the `production` channel. This channel is defined in [eas.json](https://docs.expo.dev/eas/json#channel)
.
You can verify the update works by force closing the app and reopening it two times. The update should be applied on the second launch.
Send updates automatically[](https://docs.expo.dev/deploy/send-over-the-air-updates/#send-updates-automatically)
-----------------------------------------------------------------------------------------------------------------
You can automatically send updates with [EAS Workflows](https://docs.expo.dev/eas/workflows/get-started)
. First, you'll need to [configure your project](https://docs.expo.dev/eas/workflows/get-started#configure-your-project)
, add a file named .eas/workflows/send-updates.yml at the root of your project, then add the following workflow configuration:
.eas/workflows/send-updates.yml
Copy
`name: Send updates on: push: branches: ['main'] jobs: send_updates: name: Send updates type: update params: channel: production`
The workflow above will send an over-the-air update for the `production` update channel on every commit to your project's `main` branch. You can also run this workflow manually with the following EAS CLI command:
Terminal
Copy
`-` `eas workflow:run send-updates.yml`
Learn more about common patterns with the [workflows examples guide](https://docs.expo.dev/eas/workflows/examples)
.
Learn more[](https://docs.expo.dev/deploy/send-over-the-air-updates/#learn-more)
---------------------------------------------------------------------------------
You can learn how to [rollout an update](https://docs.expo.dev/eas-update/rollouts)
, [optimize assets](https://docs.expo.dev/eas-update/optimize-assets)
, and more with our [update guides](https://docs.expo.dev/eas-update/introduction)
.
---
# Publish your web app - Expo Documentation
Hide navigation
Search
[Home](https://docs.expo.dev/)
[Guides](https://docs.expo.dev/guides/overview)
[EAS](https://docs.expo.dev/eas)
[Reference](https://docs.expo.dev/versions/latest)
[Learn](https://docs.expo.dev/tutorial/overview)
[Archive](https://docs.expo.dev/archive)
[Expo Snack](https://snack.expo.dev/)
[Discord and Forums](https://chat.expo.dev/)
[Newsletter](https://expo.dev/mailing-list/signup)
Publish your web app
====================
[Edit page](https://github.com/expo/expo/edit/main/docs/pages/deploy/web.mdx)
Copy page
Learn how to deploy your web app using EAS Hosting.
[Edit page](https://github.com/expo/expo/edit/main/docs/pages/deploy/web.mdx)
Copy page
* * *
> EAS Hosting is in preview and subject to changes.
If you are building a universal app, you can quickly deploy your web app using [EAS Hosting](https://docs.expo.dev/eas/hosting/introduction)
. It is a service for deploying web apps built with Expo Router and React.
Prerequisites[](https://docs.expo.dev/deploy/web/#prerequisites)
-----------------------------------------------------------------
Before you begin, in your project's app.json file, ensure that the [`expo.web.output`](https://docs.expo.dev/versions/latest/config/app#output)
property is either `static` or `server`.
Export your web project[](https://docs.expo.dev/deploy/web/#export-your-web-project)
-------------------------------------------------------------------------------------
To deploy your web app, you need to create a static build of your web project. Export your web project into a dist directory by running the following command:
Terminal
Copy
`-` `npx expo export --platform web`
> Remember to re-run this command every time before deploying when you make changes to your web app.
Initial deployment[](https://docs.expo.dev/deploy/web/#initial-deployment)
---------------------------------------------------------------------------
To publish your web app, run the following [EAS CLI](https://docs.expo.dev/develop/tools#eas-cli)
command:
Terminal
Copy
`-` `eas deploy`
After running this command for the first time, you'll be prompted to select a preview subdomain for your project. This subdomain is a prefix used to create a preview URL and is used for production deployments. For example, in `https://test-app--1234.expo.app`, `test-app` is the preview subdomain.
Once your deployment is complete, the EAS CLI will output a preview URL to access your deployed app.
Production deployment[](https://docs.expo.dev/deploy/web/#production-deployment)
---------------------------------------------------------------------------------
To create a production deployment, run the following [EAS CLI](https://docs.expo.dev/develop/tools#eas-cli)
command:
Terminal
Copy
`-` `eas deploy --prod`
Once your deployment is complete, the EAS CLI will output a production URL to access your deployed app.
Deploy automatically[](https://docs.expo.dev/deploy/web/#deploy-automatically)
-------------------------------------------------------------------------------
You can automatically deploy your app to the web with [EAS Workflows](https://docs.expo.dev/eas/workflows/get-started)
. First, you'll need to [configure your project](https://docs.expo.dev/eas/workflows/get-started#configure-your-project)
, add a file named .eas/workflows/deploy-web.yml at the root of your project, then add the following workflow configuration:
.eas/workflows/deploy-web.yml
Copy
`name: Deploy web on: push: branches: ['main'] jobs: deploy_web: name: Deploy web type: deploy params: prod: true`
The workflow above will create a web deployment on every commit to your project's `main` branch. You can also run this workflow manually with the following EAS CLI command:
Terminal
Copy
`-` `eas workflow:run deploy-web.yml`
Learn more about common patterns with the [workflows examples guide](https://docs.expo.dev/eas/workflows/examples)
.
Learn more[](https://docs.expo.dev/deploy/web/#learn-more)
-----------------------------------------------------------
You can learn more about setting up [deployment aliases](https://docs.expo.dev/eas/hosting/deployments-and-aliases)
, using a [custom domain](https://docs.expo.dev/eas/hosting/custom-domain)
, or [deploying an API Route](https://docs.expo.dev/router/web/api-routes#deployment)
.
---
# Create a dev tools plugin - Expo Documentation
Hide navigation
Search
[Home](https://docs.expo.dev/)
[Guides](https://docs.expo.dev/guides/overview)
[EAS](https://docs.expo.dev/eas)
[Reference](https://docs.expo.dev/versions/latest)
[Learn](https://docs.expo.dev/tutorial/overview)
[Archive](https://docs.expo.dev/archive)
[Expo Snack](https://snack.expo.dev/)
[Discord and Forums](https://chat.expo.dev/)
[Newsletter](https://expo.dev/mailing-list/signup)
Create a dev tools plugin
=========================
[Edit page](https://github.com/expo/expo/edit/main/docs/pages/debugging/create-devtools-plugins.mdx)
Copy page
Learn how to create a dev tools plugin to enhance your development experience.
[Edit page](https://github.com/expo/expo/edit/main/docs/pages/debugging/create-devtools-plugins.mdx)
Copy page
* * *
> Tip: Check out the [Expo DevTools Plugins](https://github.com/expo/dev-plugins)
> for complete examples.
You can create a dev tools plugin, whether that's for inspecting aspects of a common framework or library or something specific to your custom code. This guide will walk you through creating a dev tools plugin.
What is a dev tools plugin?[](https://docs.expo.dev/debugging/create-devtools-plugins/#what-is-a-dev-tools-plugin)
-------------------------------------------------------------------------------------------------------------------
A dev tools plugin runs in your web browser in your local development environment and connects to your Expo app.
A plugin consists of three key elements:
* An Expo app to display the dev tools web user interface.
* An expo-module.config.json for Expo CLI recognition.
* Calls to `expo/devtools` API for the app to communicate back and forth with the dev tool's web interface.
Plugins can be distributed on npm or included inside your app's monorepo. They typically export a single hook that can be used in your app's root component to initiate two-way communication with the web interface when your app is running in debug mode.
1
Create a plugin[](https://docs.expo.dev/debugging/create-devtools-plugins/#create-a-plugin)
--------------------------------------------------------------------------------------------
### Create a new plugin project[](https://docs.expo.dev/debugging/create-devtools-plugins/#create-a-new-plugin-project)
`create-dev-plugin` will set up a new plugin project for you. Run the following command to create a new plugin project:
Terminal
Copy
`-` `npx create-dev-plugin@latest`
`create-dev-plugin` will prompt you for the name of your plugin, a description, and the name of the hook that will be used by consumers of your plugin.
The plugin project will contain the following directories:
* src - this exports the hook that will be used inside the consuming app to connect it to the plugin.
* webui - this contains the web user interface for the plugin.
### Customize a plugin's functionality[](https://docs.expo.dev/debugging/create-devtools-plugins/#customize-a-plugins-functionality)
The template includes a simple example of sending and receiving messages between the plugin and the app. `useDevToolsPluginClient`, imported from `expo/devtools`, provides functionality for sending and receiving messages between the plugin and the app.
The client object returned by `useDevToolsPluginClient` includes:
### `addMessageListener`[](https://docs.expo.dev/debugging/create-devtools-plugins/#addmessagelistener)
Listens for a message matching the typed string and invokes the callback with the message data.
``const client = useDevToolsPluginClient('my-devtools-plugin'); client.addMessageListener('ping', data => { alert(`Received ping from ${data.from}`); });``
### `sendMessage`[](https://docs.expo.dev/debugging/create-devtools-plugins/#sendmessage)
Listens for a message matching the typed string and invokes the callback with the message data.
`const client = useDevToolsPluginClient('my-devtools-plugin'); client?.sendMessage('ping', { from: 'web' });`
Edit the Expo app inside the webui directory to customize the user interface that displays diagnostic information from your app or triggers test scenarios:
webui/App.tsx
Copy
``import { useDevToolsPluginClient, type EventSubscription } from 'expo/devtools'; import { useEffect } from 'react'; export default function App() { const client = useDevToolsPluginClient('my-devtools-plugin'); useEffect(() => { const subscriptions: EventSubscription[] = []; subscriptions.push( client?.addMessageListener('ping', data => { alert(`Received ping from ${data.from}`); }) ); return () => { for (const subscription of subscriptions) { subscription?.remove(); } }; }, [client]); }``
Edit the hook in the src directory to customize what diagnostic information is sent to the plugin or how the app should respond to any messages from the web user interface:
src/useMyDevToolsPlugin.ts
Copy
`import { useDevToolsPluginClient } from 'expo/devtools'; export function useMyDevToolsPlugin() { const client = useDevToolsPluginClient('my-devtools-plugin'); const sendPing = () => { client?.sendMessage('ping', { from: 'app' }); }; return { sendPing, }; }`
If you update the hook to return functions that will be called by the app, you will also need to update src/index.ts so it exports no-op functions when the app is not running in debug mode:
src/index.ts
Copy
`if (process.env.NODE_ENV !== 'production') { useMyDevToolsPlugin = require('./useMyDevToolsPlugin').useMyDevToolsPlugin; } else { useMyDevToolsPlugin = () => ({ + sendPing: () => {}, }); }`
2
Test a plugin[](https://docs.expo.dev/debugging/create-devtools-plugins/#test-a-plugin)
----------------------------------------------------------------------------------------
Since the plugin web UI is an Expo app, you can test it just like you would any other Expo app, with `npx expo start`, except that you will run it in the browser only. The template includes a convenience command to run the plugin in local development mode:
Terminal
Copy
`-` `npm run web:dev`
3
Build a plugin for distribution[](https://docs.expo.dev/debugging/create-devtools-plugins/#build-a-plugin-for-distribution)
----------------------------------------------------------------------------------------------------------------------------
To prepare your plugin for distribution or use within your monorepo, you will need to build the plugin with the following command:
Terminal
Copy
`-` `npm run build:all`
This command will build the hook code into the build directory, and the web user interface into the dist directory.
4
Use the plugin[](https://docs.expo.dev/debugging/create-devtools-plugins/#use-the-plugin)
------------------------------------------------------------------------------------------
Import the plugin's hook into your app's root component and call it to connect your app to the plugin:
App.js
Copy
`import { useMyDevToolsPlugin } from 'my-devtools-plugin'; import { Button } from 'react-native'; export default function App() { const { sendPing } = useMyDevToolsPlugin(); return ( ); }`
---
# Share previews with your team - Expo Documentation
Hide navigation
Search
[Home](https://docs.expo.dev/)
[Guides](https://docs.expo.dev/guides/overview)
[EAS](https://docs.expo.dev/eas)
[Reference](https://docs.expo.dev/versions/latest)
[Learn](https://docs.expo.dev/tutorial/overview)
[Archive](https://docs.expo.dev/archive)
[Expo Snack](https://snack.expo.dev/)
[Discord and Forums](https://chat.expo.dev/)
[Newsletter](https://expo.dev/mailing-list/signup)
Share previews with your team
=============================
[Edit page](https://github.com/expo/expo/edit/main/docs/pages/review/share-previews-with-your-team.mdx)
Copy page
Share previews of your app with your team by publishing updates on branches.
[Edit page](https://github.com/expo/expo/edit/main/docs/pages/review/share-previews-with-your-team.mdx)
Copy page
* * *
Once you've made changes on a branch, you can share them with your team by publishing an update. This allows you to get feedback on your changes during review.
The following steps will outline a basic flow for publishing a preview of your changes, and then sharing it with your team. For a more comprehensive resource, see the [Preview updates](https://docs.expo.dev/eas-update/preview)
guide.
Publish a preview of your changes[](https://docs.expo.dev/review/share-previews-with-your-team/#publish-a-preview-of-your-changes)
-----------------------------------------------------------------------------------------------------------------------------------
You can publish a preview of your current changes by running the following [EAS CLI](https://docs.expo.dev/develop/tools#eas-cli)
command:
Terminal
Copy
`-` `eas update --auto`
This command will publish an update under the current branch name.
Share with your team[](https://docs.expo.dev/review/share-previews-with-your-team/#share-with-your-team)
---------------------------------------------------------------------------------------------------------
Once the preview is published, you'll see output like this in the terminal window:
Terminal
`✔ Published!`
`...``EAS Dashboard https://expo.dev/accounts/your-account/projects/your-project/updates/708b05d8-9bcf-4212-a052-ce40583b04fd`
Share the EAS dashboard link with a reviewer. After opening the link, they can click on the Preview button. They will see a QR code that they can scan to open the preview on their device.
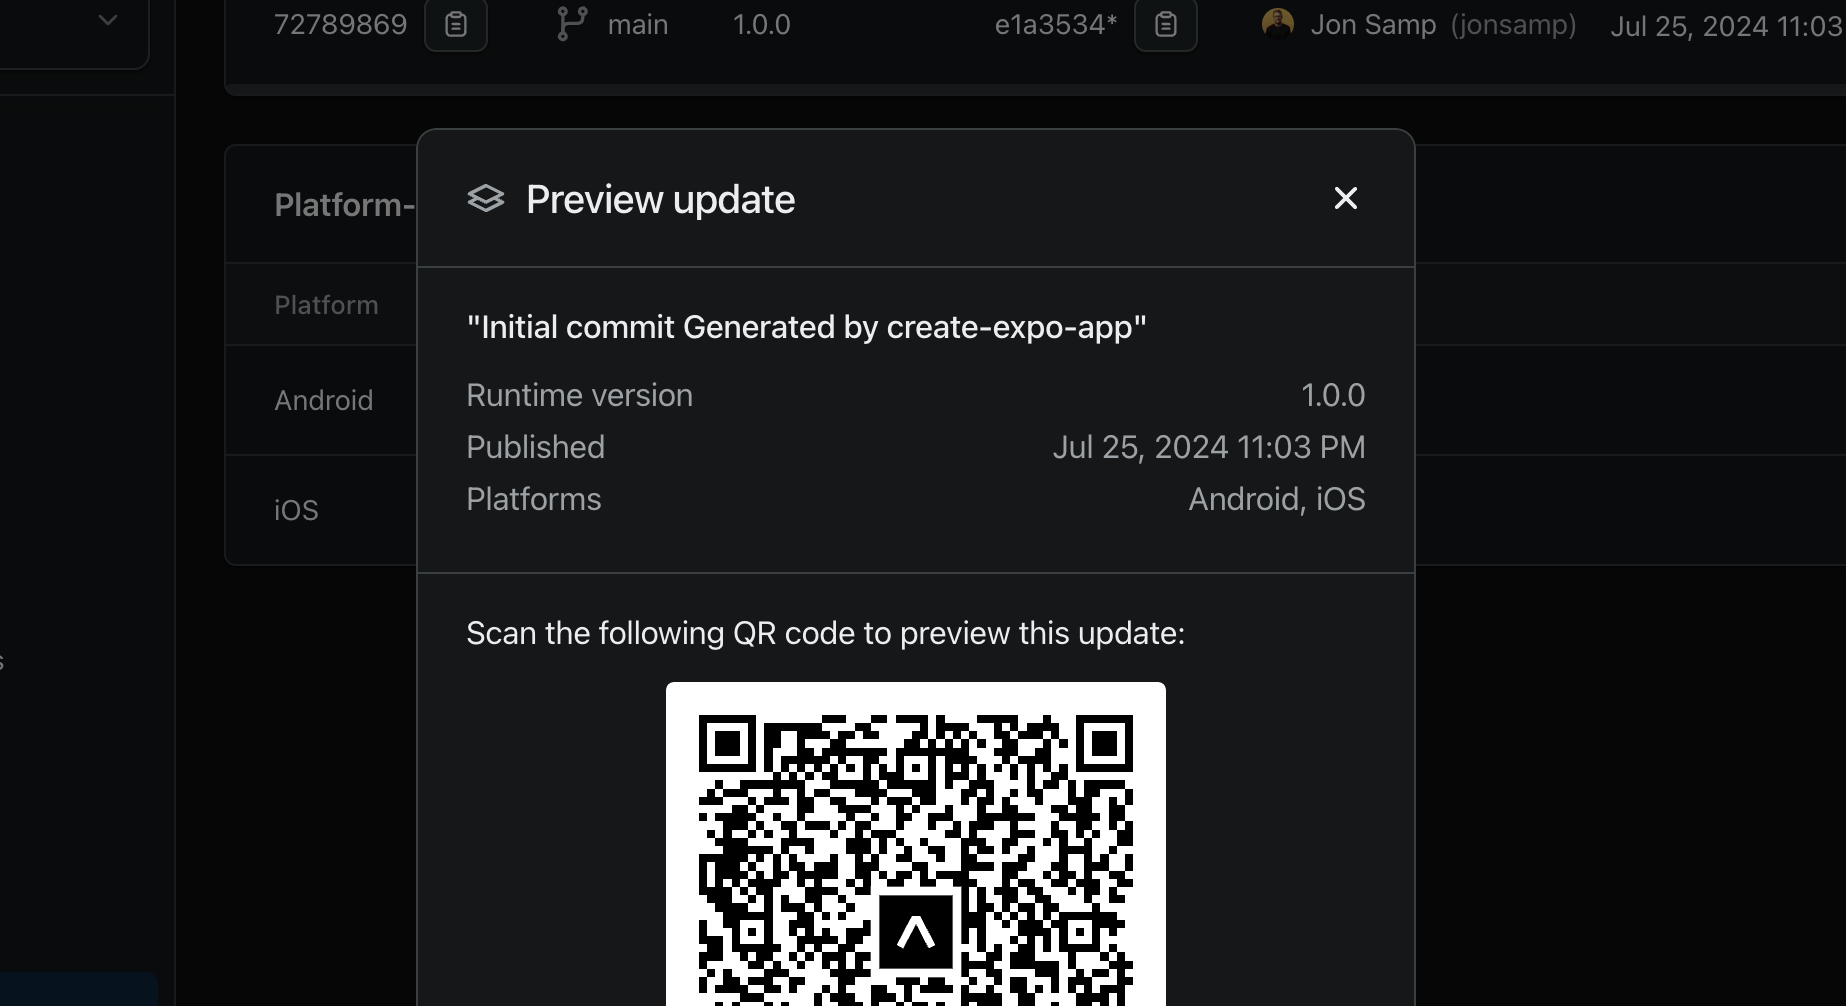
Create previews automatically[](https://docs.expo.dev/review/share-previews-with-your-team/#create-previews-automatically)
---------------------------------------------------------------------------------------------------------------------------
You can automatically create previews on every commit with [EAS Workflows](https://docs.expo.dev/eas/workflows/get-started)
. First, you'll need to [configure your project](https://docs.expo.dev/eas/workflows/get-started#configure-your-project)
, add a file named .eas/workflows/publish-preview-update.yml at the root of your project, then add the following workflow configuration:
.eas/workflows/publish-preview-update.yml
Copy
`name: Publish preview update on: push: branches: ['*'] jobs: publish_preview_update: name: Publish preview update type: update params: branch: ${{ github.ref_name || 'test' }}`
The workflow above will publish an update on every commit to every branch. You can also run this workflow manually with the following EAS CLI command:
Terminal
Copy
`-` `eas workflow:run publish-preview-update.yml`
Learn more about common patterns with the [workflows examples guide](https://docs.expo.dev/eas/workflows/examples)
.
Learn more[](https://docs.expo.dev/review/share-previews-with-your-team/#learn-more)
-------------------------------------------------------------------------------------
[Preview updates\
\
Learn how to preview updates in development, preview, and production builds.](https://docs.expo.dev/eas-update/preview)
---
# DateTimePicker - Expo Documentation
Hide navigation
Search
[Home](https://docs.expo.dev/)
[Guides](https://docs.expo.dev/guides/overview)
[EAS](https://docs.expo.dev/eas)
[Reference](https://docs.expo.dev/versions/latest)
[Learn](https://docs.expo.dev/tutorial/overview)
Reference version
[](https://docs.expo.dev/versions/unversioned)
[](https://docs.expo.dev/versions/latest)
[](https://docs.expo.dev/versions/v54.0.0)
[](https://docs.expo.dev/versions/v53.0.0)
[](https://docs.expo.dev/versions/v52.0.0)
[Archive](https://docs.expo.dev/archive)
[Expo Snack](https://snack.expo.dev/)
[Discord and Forums](https://chat.expo.dev/)
[Newsletter](https://expo.dev/mailing-list/signup)
DateTimePicker
==============
A component that provides access to the system UI for date and time selection.
Android
iOS
[GitHub](https://github.com/react-native-community/react-native-datetimepicker)
[npm](https://www.npmjs.com/package/@react-native-community/datetimepicker)
Bundled version:
8.2.0
Copy page
* * *
A component that provides access to the system UI for date and time selection.
Installation[](https://docs.expo.dev/versions/v52.0.0/sdk/date-time-picker/#installation)
------------------------------------------------------------------------------------------
Terminal
Copy
`-` `npx expo install @react-native-community/datetimepicker`
If you are installing this in an [existing React Native app](https://docs.expo.dev/bare/overview)
, make sure to [install `expo`](https://docs.expo.dev/bare/installing-expo-modules)
in your project. Then, follow the [installation instructions](https://github.com/react-native-datetimepicker/datetimepicker#getting-started)
provided in the library's README or documentation.
Usage[](https://docs.expo.dev/versions/v52.0.0/sdk/date-time-picker/#usage)
----------------------------------------------------------------------------
See full documentation at [`react-native-community/react-native-datetimepicker`](https://github.com/react-native-community/react-native-datetimepicker)
.
---
# MailComposer - Expo Documentation
Hide navigation
Search
Ctrl K
[Home](https://docs.expo.dev/)
[Guides](https://docs.expo.dev/guides/overview)
[EAS](https://docs.expo.dev/eas)
[Reference](https://docs.expo.dev/versions/latest)
[Learn](https://docs.expo.dev/tutorial/overview)
Reference version
SDK 52
[](https://docs.expo.dev/versions/unversioned)
[](https://docs.expo.dev/versions/latest)
[](https://docs.expo.dev/versions/v54.0.0)
[](https://docs.expo.dev/versions/v53.0.0)
[](https://docs.expo.dev/versions/v52.0.0)
[Archive](https://docs.expo.dev/archive)
[Expo Snack](https://snack.expo.dev/)
[Discord and Forums](https://chat.expo.dev/)
[Newsletter](https://expo.dev/mailing-list/signup)
Expo MailComposer
===============================================================================================================
A library that provides functionality to compose and send emails with the system's specific UI.
Android
iOS (device only)
Web
[GitHub](https://github.com/expo/expo/tree/sdk-52/packages/expo-mail-composer)
[npm](https://www.npmjs.com/package/expo-mail-composer)
[Changelog](https://github.com/expo/expo/tree/sdk-52/packages/expo-mail-composer/CHANGELOG.md)
Bundled version:
~14.0.2
Copy page
* * *
`expo-mail-composer` allows you to compose and send emails quickly and easily using the OS UI. This module can't be used on iOS Simulators since you can't sign into a mail account on them.
Installation[](https://docs.expo.dev/versions/v52.0.0/sdk/mail-composer/#installation)
---------------------------------------------------------------------------------------
Terminal
Copy
`-` `npx expo install expo-mail-composer`
If you are installing this in an [existing React Native app](https://docs.expo.dev/bare/overview)
, make sure to [install `expo`](https://docs.expo.dev/bare/installing-expo-modules)
in your project.
API[](https://docs.expo.dev/versions/v52.0.0/sdk/mail-composer/#api)
---------------------------------------------------------------------
`import * as MailComposer from 'expo-mail-composer';`
Methods[](https://docs.expo.dev/versions/v52.0.0/sdk/mail-composer/#methods)
-----------------------------------------------------------------------------
### `MailComposer.composeAsync(options)`[](https://docs.expo.dev/versions/v52.0.0/sdk/mail-composer/#mailcomposercomposeasyncoptions)
Android
iOS
Web
| Parameter | Type |
| --- | --- |
| options | `[MailComposerOptions](https://docs.expo.dev/versions/v52.0.0/sdk/mail-composer/#mailcomposeroptions) ` |
Opens a mail modal for iOS and a mail app intent for Android and fills the fields with provided data. On iOS you will need to be signed into the Mail app.
Returns:
`[Promise](https://developer.mozilla.org/en-US/docs/Web/JavaScript/Reference/Global_Objects/Promise) <[MailComposerResult](https://docs.expo.dev/versions/v52.0.0/sdk/mail-composer/#mailcomposerresult) >`
A promise fulfilled with an object containing a `status` field that specifies whether an email was sent, saved, or cancelled. Android does not provide this info, so the status is always set as if the email were sent.
### `MailComposer.isAvailableAsync()`[](https://docs.expo.dev/versions/v52.0.0/sdk/mail-composer/#mailcomposerisavailableasync)
Android
iOS
Web
Determine if the `MailComposer` API can be used in this app.
Returns:
`[Promise](https://developer.mozilla.org/en-US/docs/Web/JavaScript/Reference/Global_Objects/Promise) `
A promise resolves to `true` if the API can be used, and `false` otherwise.
* Returns `true` on iOS when the device has a default email setup for sending mail.
* Can return `false` on iOS if an MDM profile is setup to block outgoing mail. If this is the case, you may want to use the Linking API instead.
* Always returns `true` in the browser and on Android.
Types[](https://docs.expo.dev/versions/v52.0.0/sdk/mail-composer/#types)
-------------------------------------------------------------------------
### `MailComposerOptions`[](https://docs.expo.dev/versions/v52.0.0/sdk/mail-composer/#mailcomposeroptions)
Android
iOS
Web
A map defining the data to fill the mail.
| Property | Type | Description |
| --- | --- | --- |
| attachments(optional) | `string[]` | An array of app's internal file URIs to attach. |
| bccRecipients(optional) | `string[]` | An array of e-mail addresses of the BCC recipients. |
| body(optional) | `string` | Body of the e-mail. |
| ccRecipients(optional) | `string[]` | An array of e-mail addresses of the CC recipients. |
| isHtml(optional) | `boolean` | Whether the body contains HTML tags so it could be formatted properly. Not working perfectly on Android. |
| recipients(optional) | `string[]` | An array of e-mail addresses of the recipients. |
| subject(optional) | `string` | Subject of the e-mail. |
### `MailComposerResult`[](https://docs.expo.dev/versions/v52.0.0/sdk/mail-composer/#mailcomposerresult)
Android
iOS
Web
| Property | Type | Description |
| --- | --- | --- |
| status | `[MailComposerStatus](https://docs.expo.dev/versions/v52.0.0/sdk/mail-composer/#mailcomposerstatus) ` | \- |
Enums[](https://docs.expo.dev/versions/v52.0.0/sdk/mail-composer/#enums)
-------------------------------------------------------------------------
### `MailComposerStatus`[](https://docs.expo.dev/versions/v52.0.0/sdk/mail-composer/#mailcomposerstatus)
Android
iOS
Web
#### `CANCELLED`[](https://docs.expo.dev/versions/v52.0.0/sdk/mail-composer/#cancelled)
`MailComposerStatus.CANCELLED = "cancelled"`
#### `SAVED`[](https://docs.expo.dev/versions/v52.0.0/sdk/mail-composer/#saved)
`MailComposerStatus.SAVED = "saved"`
#### `SENT`[](https://docs.expo.dev/versions/v52.0.0/sdk/mail-composer/#sent)
`MailComposerStatus.SENT = "sent"`
#### `UNDETERMINED`[](https://docs.expo.dev/versions/v52.0.0/sdk/mail-composer/#undetermined)
`MailComposerStatus.UNDETERMINED = "undetermined"`
---
# FlashList - Expo Documentation
Hide navigation
Search
[Home](https://docs.expo.dev/)
[Guides](https://docs.expo.dev/guides/overview)
[EAS](https://docs.expo.dev/eas)
[Reference](https://docs.expo.dev/versions/latest)
[Learn](https://docs.expo.dev/tutorial/overview)
Reference version
[](https://docs.expo.dev/versions/unversioned)
[](https://docs.expo.dev/versions/latest)
[](https://docs.expo.dev/versions/v54.0.0)
[](https://docs.expo.dev/versions/v53.0.0)
[](https://docs.expo.dev/versions/v52.0.0)
[Archive](https://docs.expo.dev/archive)
[Expo Snack](https://snack.expo.dev/)
[Discord and Forums](https://chat.expo.dev/)
[Newsletter](https://expo.dev/mailing-list/signup)
FlashList
=========
A React Native component that provides a fast and performant way to render lists.
Android
iOS
tvOS
Web
[GitHub](https://github.com/shopify/flash-list)
[npm](https://www.npmjs.com/package/@shopify/flash-list)
Bundled version:
1.7.3
Copy page
* * *
> This library is listed in the Expo SDK reference because it is included in [Expo Go](https://docs.expo.dev/get-started/set-up-your-environment)
> . You may use any library of your choice with [development builds](https://docs.expo.dev/develop/development-builds/introduction)
> .
`@shopify/flash-list` is a "Fast and performant React Native list" component that is a drop-in replacement for React Native's `` component. It "recycles components under the hood to maximize performance."
Installation[](https://docs.expo.dev/versions/v52.0.0/sdk/flash-list/#installation)
------------------------------------------------------------------------------------
Terminal
Copy
`-` `npx expo install @shopify/flash-list`
If you are installing this in an [existing React Native app](https://docs.expo.dev/bare/overview)
, make sure to [install `expo`](https://docs.expo.dev/bare/installing-expo-modules)
in your project. Then, follow the [installation instructions](https://shopify.github.io/flash-list/docs/)
provided in the library's README or documentation.
Usage[](https://docs.expo.dev/versions/v52.0.0/sdk/flash-list/#usage)
----------------------------------------------------------------------
See full documentation at [https://shopify.github.io/flash-list/](https://shopify.github.io/flash-list/)
.
---
# React Native Maps - Expo Documentation
Hide navigation
Search
Ctrl K
[Home](https://docs.expo.dev/)
[Guides](https://docs.expo.dev/guides/overview)
[EAS](https://docs.expo.dev/eas)
[Reference](https://docs.expo.dev/versions/latest)
[Learn](https://docs.expo.dev/tutorial/overview)
Reference version
SDK 52
[](https://docs.expo.dev/versions/unversioned)
[](https://docs.expo.dev/versions/latest)
[](https://docs.expo.dev/versions/v54.0.0)
[](https://docs.expo.dev/versions/v53.0.0)
[](https://docs.expo.dev/versions/v52.0.0)
[Archive](https://docs.expo.dev/archive)
[Expo Snack](https://snack.expo.dev/)
[Discord and Forums](https://chat.expo.dev/)
[Newsletter](https://expo.dev/mailing-list/signup)
React Native Maps
=================
A library that provides a Map component that uses Google Maps on Android and Apple Maps or Google Maps on iOS.
Android
iOS
[GitHub](https://github.com/react-native-maps/react-native-maps)
[npm](https://www.npmjs.com/package/react-native-maps)
Bundled version:
1.18.0
Copy page
* * *
> This library is listed in the Expo SDK reference because it is included in [Expo Go](https://expo.dev/go)
> . You may use any library of your choice with [development builds](https://docs.expo.dev/develop/development-builds/introduction)
> .
`react-native-maps` provides a Map component that uses Google Maps on Android and Apple Maps or Google Maps on iOS.
No additional setup is required when testing your project using Expo Go. However, to deploy the app binary on app stores additional steps are required for Google Maps. For more information, see the [instructions below](https://docs.expo.dev/versions/v52.0.0/sdk/map-view#deploy-app-with-google-maps)
.
Installation[](https://docs.expo.dev/versions/v52.0.0/sdk/map-view/#installation)
----------------------------------------------------------------------------------
Terminal
Copy
`-` `npx expo install react-native-maps`
If you are installing this in an [existing React Native app](https://docs.expo.dev/bare/overview)
, make sure to [install `expo`](https://docs.expo.dev/bare/installing-expo-modules)
in your project. Then, follow the [installation instructions](https://github.com/react-native-maps/react-native-maps/blob/master/docs/installation.md)
provided in the library's README or documentation.
Usage[](https://docs.expo.dev/versions/v52.0.0/sdk/map-view/#usage)
--------------------------------------------------------------------
See full documentation at [`react-native-maps/react-native-maps`](https://github.com/react-native-maps/react-native-maps)
.
MapView
Copy
Open in Snack
`import React from 'react'; import MapView from 'react-native-maps'; import { StyleSheet, View } from 'react-native'; export default function App() { return ( ); } const styles = StyleSheet.create({ container: { flex: 1, }, map: { width: '100%', height: '100%', }, });`
Show More
Deploy app with Google Maps[](https://docs.expo.dev/versions/v52.0.0/sdk/map-view/#deploy-app-with-google-maps)
----------------------------------------------------------------------------------------------------------------
### Android[](https://docs.expo.dev/versions/v52.0.0/sdk/map-view/#android)
> If you have already registered a project for another Google service on Android, such as Google Sign In, you enable the Maps SDK for Android on your project and jump to step 4.
1
#### Register a Google Cloud API project and enable the Maps SDK for Android[](https://docs.expo.dev/versions/v52.0.0/sdk/map-view/#register-a-google-cloud-api-project-and-enable-the-maps-sdk-for-android)
* Open your browser to the [Google API Manager](https://console.developers.google.com/apis)
and create a project.
* Once it's created, go to the project and enable the Maps SDK for Android.
2
#### Copy your app's SHA-1 certificate fingerprint[](https://docs.expo.dev/versions/v52.0.0/sdk/map-view/#copy-your-apps-sha-1-certificate-fingerprint)
For Google Play Store
For development builds
* If you are deploying your app to the Google Play Store, you'll need to [upload your app binary to Google Play console](https://docs.expo.dev/submit/android)
at least once. This is required for Google to generate your app signing credentials.
* Go to the [Google Play Console](https://play.google.com/console)
> (your app) > Release > Setup > App integrity > App Signing.
* Copy the value of SHA-1 certificate fingerprint.
* If you have already created a [development build](https://docs.expo.dev/develop/development-builds/introduction)
, your project will be signed using a debug keystore.
* After the build is complete, go to your [project's dashboard](https://expo.dev/accounts/%5Busername%5D/projects/%5Bproject-name%5D)
, then, under Configure > click Credentials.
* Under Application Identifiers, click your project's package name and under Android Keystore copy the value of SHA-1 Certificate Fingerprint.
3
#### Create an API key[](https://docs.expo.dev/versions/v52.0.0/sdk/map-view/#create-an-api-key)
* Go to [Google Cloud Credential manager](https://console.cloud.google.com/apis/credentials)
and click Create Credentials, then API Key.
* In the modal, click Edit API key.
* Under Key restrictions > Application restrictions, choose Android apps.
* Under Restrict usage to your Android apps, click Add an item.
* Add your `android.package` from app.json (for example: `com.company.myapp`) to the package name field.
* Then, add the SHA-1 certificate fingerprint's value from step 2.
* Click Done and then click Save.
4
#### Add the API key to your project[](https://docs.expo.dev/versions/v52.0.0/sdk/map-view/#add-the-api-key-to-your-project)
* Copy your API Key into your project to either a .env file and then add it to your app.json under the `android.config.googleMaps.apiKey` field like or copy it:
`{ "android": { "config": { "googleMaps": { "apiKey": "process.env.GOOGLE_MAPS_API_KEY" } } } }`
* In your code, import `{ PROVIDER_GOOGLE }` from `react-native-maps` and add the property `provider={PROVIDER_GOOGLE}` to your ``. This property works on both Android and iOS.
* Rebuild the app binary (or re-submit to the Google Play Store in case your app is already uploaded). An easy way to test if the configuration was successful is to do an [emulator build](https://docs.expo.dev/develop/development-builds/create-a-build#create-a-development-build-for-emulatorsimulator)
.
### iOS[](https://docs.expo.dev/versions/v52.0.0/sdk/map-view/#ios)
> If you have already registered a project for another Google service on iOS, such as Google Sign In, you enable the Maps SDK for iOS on your project and jump to step 3.
1
#### Register a Google Cloud API project and enable the Maps SDK for iOS[](https://docs.expo.dev/versions/v52.0.0/sdk/map-view/#register-a-google-cloud-api-project-and-enable-the-maps-sdk-for-ios)
* Open your browser to the [Google API Manager](https://console.developers.google.com/apis)
and create a project.
* Then, go to the project, click Enable APIs and Services and enable the Maps SDK for iOS.
2
#### Create an API key[](https://docs.expo.dev/versions/v52.0.0/sdk/map-view/#create-an-api-key-1)
* Go to [Google Cloud Credential manager](https://console.cloud.google.com/apis/credentials)
and click Create Credentials, then API Key.
* In the modal, click Edit API key.
* Under Key restrictions > Application restrictions, choose iOS apps.
* Under Accept requests from an iOS application with one of these bundle identifiers, click the Add an item button.
* Add your `ios.bundleIdentifier` from app.json (for example: `com.company.myapp`) to the bundle ID field.
* Click Done and then click Save.
3
#### Add the API key to your project[](https://docs.expo.dev/versions/v52.0.0/sdk/map-view/#add-the-api-key-to-your-project-1)
* Copy your API Key into your project to either a .env file and then add it to your app.json under the `ios.config.googleMapsApiKey` field like or copy it:
`{ "ios": { "config": { "googleMapsApiKey": "process.env.GOOGLE_MAPS_API_KEY" } } }`
* In your code, import `{ PROVIDER_GOOGLE }` from `react-native-maps` and add the property `provider={PROVIDER_GOOGLE}` to your ``. This property works on both Android and iOS.
* Rebuild the app binary. An easy way to test if the configuration was successful is to do a [simulator build](https://docs.expo.dev/develop/development-builds/create-a-build#create-a-development-build-for-emulatorsimulator)
.
---
# captureRef - Expo Documentation
Hide navigation
Search
[Home](https://docs.expo.dev/)
[Guides](https://docs.expo.dev/guides/overview)
[EAS](https://docs.expo.dev/eas)
[Reference](https://docs.expo.dev/versions/latest)
[Learn](https://docs.expo.dev/tutorial/overview)
Reference version
[](https://docs.expo.dev/versions/unversioned)
[](https://docs.expo.dev/versions/latest)
[](https://docs.expo.dev/versions/v54.0.0)
[](https://docs.expo.dev/versions/v53.0.0)
[](https://docs.expo.dev/versions/v52.0.0)
[Archive](https://docs.expo.dev/archive)
[Expo Snack](https://snack.expo.dev/)
[Discord and Forums](https://chat.expo.dev/)
[Newsletter](https://expo.dev/mailing-list/signup)
captureRef
==========
A library that allows you to capture a React Native view and save it as an image.
Android
iOS
[GitHub](https://github.com/gre/react-native-view-shot)
[npm](https://www.npmjs.com/package/react-native-view-shot)
Bundled version:
~4.0.3
Copy page
* * *
> This library is listed in the Expo SDK reference because it is included in [Expo Go](https://docs.expo.dev/get-started/set-up-your-environment)
> . You may use any library of your choice with [development builds](https://docs.expo.dev/develop/development-builds/introduction)
> .
Given a view, `captureRef` will essentially screenshot that view and return an image for you. This is very useful for things like signature pads, where the user draws something, and then you want to save an image from it.
If you're interested in taking snapshots from the GLView, we recommend you use [GLView's takeSnapshotAsync](https://docs.expo.dev/versions/v52.0.0/sdk/gl-view#takesnapshotasyncoptions)
instead.
Installation[](https://docs.expo.dev/versions/v52.0.0/sdk/captureRef/#installation)
------------------------------------------------------------------------------------
Terminal
Copy
`-` `npx expo install react-native-view-shot`
If you are installing this in an [existing React Native app](https://docs.expo.dev/bare/overview)
, make sure to [install `expo`](https://docs.expo.dev/bare/installing-expo-modules)
in your project. Then, follow the [installation instructions](https://github.com/gre/react-native-view-shot)
provided in the library's README or documentation.
API[](https://docs.expo.dev/versions/v52.0.0/sdk/captureRef/#api)
------------------------------------------------------------------
`import { captureRef } from 'react-native-view-shot';`
### `captureRef(view, options)`[](https://docs.expo.dev/versions/v52.0.0/sdk/captureRef/#capturerefview-options)
Snapshots the given view.
#### Arguments[](https://docs.expo.dev/versions/v52.0.0/sdk/captureRef/#arguments)
* view (_number|ReactElement_) -- The `ref` or `reactTag` (also known as node handle) for the view to snapshot.
* options (_object_) --
An optional map of optional options
* format (_string_) -- `"png" | "jpg" | "webm"`, defaults to `"png"`, `"webm"` supported only on Android.
* quality (_number_) -- Number between 0 and 1 where 0 is worst quality and 1 is best, defaults to `1`
* result (_string_) -- The type for the resulting image. - `'tmpfile'` -- (default) Return a temporary file uri. - `'base64'` -- base64 encoded image. - `'data-uri'` -- base64 encoded image with data-uri prefix.
* height (_number_) -- Height of result in pixels
* width (_number_) -- Width of result in pixels
* snapshotContentContainer (_bool_) -- if true and when view is a ScrollView, the "content container" height will be evaluated instead of the container height
#### Returns[](https://docs.expo.dev/versions/v52.0.0/sdk/captureRef/#returns)
An image of the format specified in the options parameter.
Note on pixel values[](https://docs.expo.dev/versions/v52.0.0/sdk/captureRef/#note-on-pixel-values)
----------------------------------------------------------------------------------------------------
Remember to take the device `PixelRatio` into account. When you work with pixel values in a UI, most of the time those units are "logical pixels" or "device-independent pixels". With images like PNG files, you often work with "physical pixels". You can get the `PixelRatio` of the device using the React Native API: `PixelRatio.get()`
For example, to save a 'FullHD' picture of `1080x1080`, you would do something like this:
`const targetPixelCount = 1080; // If you want full HD pictures const pixelRatio = PixelRatio.get(); // The pixel ratio of the device // pixels * pixelRatio = targetPixelCount, so pixels = targetPixelCount / pixelRatio const pixels = targetPixelCount / pixelRatio; const result = await captureRef(this.imageContainer, { result: 'tmpfile', height: pixels, width: pixels, quality: 1, format: 'png', });`
---
# Manifests - Expo Documentation
Hide navigation
Search
[Home](https://docs.expo.dev/)
[Guides](https://docs.expo.dev/guides/overview)
[EAS](https://docs.expo.dev/eas)
[Reference](https://docs.expo.dev/versions/latest)
[Learn](https://docs.expo.dev/tutorial/overview)
Reference version
[](https://docs.expo.dev/versions/unversioned)
[](https://docs.expo.dev/versions/latest)
[](https://docs.expo.dev/versions/v54.0.0)
[](https://docs.expo.dev/versions/v53.0.0)
[](https://docs.expo.dev/versions/v52.0.0)
[Archive](https://docs.expo.dev/archive)
[Expo Snack](https://snack.expo.dev/)
[Discord and Forums](https://chat.expo.dev/)
[Newsletter](https://expo.dev/mailing-list/signup)
Expo Manifests
==============
A library that provides types for Expo Manifests.
Android
iOS
tvOS
[GitHub](https://github.com/expo/expo/tree/sdk-52/packages/expo-manifests)
[npm](https://www.npmjs.com/package/expo-manifests)
[Changelog](https://github.com/expo/expo/tree/sdk-52/packages/expo-manifests/CHANGELOG.md)
Copy page
* * *
Installation[](https://docs.expo.dev/versions/v52.0.0/sdk/manifests/#installation)
-----------------------------------------------------------------------------------
Terminal
Copy
`-` `npx expo install expo-manifests`
If you are installing this in an [existing React Native app](https://docs.expo.dev/bare/overview)
, make sure to [install `expo`](https://docs.expo.dev/bare/installing-expo-modules)
in your project.
API[](https://docs.expo.dev/versions/v52.0.0/sdk/manifests/#api)
-----------------------------------------------------------------
`import * as Manifests from 'expo-manifests';`
Types[](https://docs.expo.dev/versions/v52.0.0/sdk/manifests/#types)
---------------------------------------------------------------------
> Deprecated Renamed to `EmbeddedManifest`, will be removed in a few versions.
### `BareManifest`[](https://docs.expo.dev/versions/v52.0.0/sdk/manifests/#baremanifest)
Android
iOS
tvOS
Type: `[EmbeddedManifest](https://docs.expo.dev/versions/v52.0.0/sdk/manifests#embeddedmanifest) `
### `ClientScopingConfig`[](https://docs.expo.dev/versions/v52.0.0/sdk/manifests/#clientscopingconfig)
Android
iOS
tvOS
| Property | Type | Description |
| --- | --- | --- |
| scopeKey(optional) | `string` | An opaque unique string for scoping client-side data to this project. This value will not change when a project is transferred between accounts or renamed. |
### `EASConfig`[](https://docs.expo.dev/versions/v52.0.0/sdk/manifests/#easconfig)
Android
iOS
tvOS
| Property | Type | Description |
| --- | --- | --- |
| projectId(optional) | `string` | The ID for this project if it's using EAS. UUID. This value will not change when a project is transferred between accounts or renamed. |
### `EmbeddedManifest`[](https://docs.expo.dev/versions/v52.0.0/sdk/manifests/#embeddedmanifest)
Android
iOS
tvOS
An embedded manifest.
Generated during build in createManifest.js build step script.
| Property | Type | Description |
| --- | --- | --- |
| assets | `any[]` | \- |
| commitTime | `number` | \- |
| id | `string` | \- |
### `ExpoClientConfig`[](https://docs.expo.dev/versions/v52.0.0/sdk/manifests/#expoclientconfig)
Android
iOS
tvOS
Type: `[ExpoConfig](https://github.com/expo/expo/blob/main/packages/%40expo/config-types/src/ExpoConfig.ts) ` extended by:
| Property | Type | Description |
| --- | --- | --- |
| hostUri(optional) | `string` | Only present during development using `@expo/cli`. |
### `ExpoGoConfig`[](https://docs.expo.dev/versions/v52.0.0/sdk/manifests/#expogoconfig)
Android
iOS
tvOS
| Property | Type | Description |
| --- | --- | --- |
| debuggerHost(optional) | `string` | \- |
| developer(optional) | `Record & { tool: string }` | \- |
| mainModuleName(optional) | `string` | \- |
| packagerOpts(optional) | `[ExpoGoPackagerOpts](https://docs.expo.dev/versions/v52.0.0/sdk/manifests#expogopackageropts) ` | \- |
### `ExpoGoPackagerOpts`[](https://docs.expo.dev/versions/v52.0.0/sdk/manifests/#expogopackageropts)
Android
iOS
tvOS
Type: `Record` extended by:
| Property | Type | Description |
| --- | --- | --- |
| dev(optional) | `boolean` | \- |
| hostType(optional) | `string` | \- |
| lanType(optional) | `string` | \- |
| minify(optional) | `boolean` | \- |
| strict(optional) | `boolean` | \- |
| urlRandomness(optional) | `string` | \- |
| urlType(optional) | `string` | \- |
### `ExpoUpdatesManifest`[](https://docs.expo.dev/versions/v52.0.0/sdk/manifests/#expoupdatesmanifest)
Android
iOS
tvOS
A `expo-updates` manifest.
| Property | Type | Description |
| --- | --- | --- |
| assets | `[ManifestAsset[]](https://docs.expo.dev/versions/v52.0.0/sdk/manifests/#manifestasset) ` | \- |
| createdAt | `string` | \- |
| extra(optional) | `[ManifestExtra](https://docs.expo.dev/versions/v52.0.0/sdk/manifests#manifestextra) ` | \- |
| id | `string` | \- |
| launchAsset | `[ManifestAsset](https://docs.expo.dev/versions/v52.0.0/sdk/manifests#manifestasset) ` | \- |
| metadata | `object` | \- |
| runtimeVersion | `string` | \- |
### `ManifestAsset`[](https://docs.expo.dev/versions/v52.0.0/sdk/manifests/#manifestasset)
Android
iOS
tvOS
| Property | Type | Description |
| --- | --- | --- |
| url | `string` | \- |
### `ManifestExtra`[](https://docs.expo.dev/versions/v52.0.0/sdk/manifests/#manifestextra)
Android
iOS
tvOS
Type: `[ClientScopingConfig](https://docs.expo.dev/versions/v52.0.0/sdk/manifests#clientscopingconfig) ` extended by:
| Property | Type | Description |
| --- | --- | --- |
| eas(optional) | `[EASConfig](https://docs.expo.dev/versions/v52.0.0/sdk/manifests#easconfig) ` | \- |
| expoClient(optional) | `[ExpoClientConfig](https://docs.expo.dev/versions/v52.0.0/sdk/manifests#expoclientconfig) ` | \- |
| expoGo(optional) | `[ExpoGoConfig](https://docs.expo.dev/versions/v52.0.0/sdk/manifests#expogoconfig) ` | \- |
> Deprecated renamed to `ExpoUpdatesManifest`, will be removed in a few versions.
### `NewManifest`[](https://docs.expo.dev/versions/v52.0.0/sdk/manifests/#newmanifest)
Android
iOS
tvOS
Type: `[ExpoUpdatesManifest](https://docs.expo.dev/versions/v52.0.0/sdk/manifests#expoupdatesmanifest) `
---
# MaskedView - Expo Documentation
Hide navigation
Search
[Home](https://docs.expo.dev/)
[Guides](https://docs.expo.dev/guides/overview)
[EAS](https://docs.expo.dev/eas)
[Reference](https://docs.expo.dev/versions/latest)
[Learn](https://docs.expo.dev/tutorial/overview)
Reference version
[](https://docs.expo.dev/versions/unversioned)
[](https://docs.expo.dev/versions/latest)
[](https://docs.expo.dev/versions/v54.0.0)
[](https://docs.expo.dev/versions/v53.0.0)
[](https://docs.expo.dev/versions/v52.0.0)
[Archive](https://docs.expo.dev/archive)
[Expo Snack](https://snack.expo.dev/)
[Discord and Forums](https://chat.expo.dev/)
[Newsletter](https://expo.dev/mailing-list/signup)
MaskedView
==========
A library that provides a masked view.
Android
iOS
tvOS
[GitHub](https://github.com/react-native-masked-view/masked-view)
[npm](https://www.npmjs.com/package/@react-native-masked-view/masked-view)
Bundled version:
0.3.2
Copy page
* * *
`@react-native-masked-view/masked-view` provides a masked view that only displays the pixels that overlap with the view rendered in its mask element.
> You can only have one of either `@react-native-community/masked-view` (deprecated) or `@react-native-masked-view/masked-view` installed in your project at any given time. React Navigation v6 and above requires `@react-native-masked-view/masked-view`, so you should use that package instead if you are using the latest version of React Navigation.
> Android support for this library is experimental and you may encounter inconsistencies in behavior across platforms. Report issues you encounter to [`react-native-masked-view` GitHub repository](https://github.com/react-native-masked-view/masked-view)
> .
Installation[](https://docs.expo.dev/versions/v52.0.0/sdk/masked-view/#installation)
-------------------------------------------------------------------------------------
Terminal
Copy
`-` `npx expo install @react-native-masked-view/masked-view`
If you are installing this in an [existing React Native app](https://docs.expo.dev/bare/overview)
, make sure to [install `expo`](https://docs.expo.dev/bare/installing-expo-modules)
in your project. Then, follow the [installation instructions](https://github.com/react-native-masked-view/masked-view#getting-started)
provided in the library's README or documentation.
Usage[](https://docs.expo.dev/versions/v52.0.0/sdk/masked-view/#usage)
-----------------------------------------------------------------------
See full documentation at [`react-native-masked-view/masked-view`](https://github.com/react-native-masked-view/masked-view)
.
---