# Table of Contents - [Introduction · GitBook](#introduction-gitbook) - [Installation/Deinstallation · GitBook](#installation-deinstallation-gitbook) - [Basic Overview · GitBook](#basic-overview-gitbook) - [BTT Configuration · GitBook](#btt-configuration-gitbook) - [Setting up a new Trigger · GitBook](#setting-up-a-new-trigger-gitbook) - [Global and App Specific Triggers · GitBook](#global-and-app-specific-triggers-gitbook) - [Other Settings · GitBook](#other-settings-gitbook) - [Restoring Automatic Backups · GitBook](#restoring-automatic-backups-gitbook) - [Shortcuts Integration · GitBook](#shortcuts-integration-gitbook) - [Presets · GitBook](#presets-gitbook) - [(Predefined) Actions · GitBook](#-predefined-actions-gitbook) - [Preconfigured Example Assistants · GitBook](#preconfigured-example-assistants-gitbook) - [Retrieve API Keys · GitBook](#retrieve-api-keys-gitbook) - [Tools · GitBook](#tools-gitbook) - [Providing Initial Screenshot / Message · GitBook](#providing-initial-screenshot-message-gitbook) - [Context · GitBook](#context-gitbook) - [Usage Without UI · GitBook](#usage-without-ui-gitbook) - [MCP · GitBook](#mcp-gitbook) - [Trigger Conditions & Conditional Activation Groups · GitBook](#trigger-conditions-conditional-activation-groups-gitbook) - [Embedding Floating Menus · GitBook](#embedding-floating-menus-gitbook) - [Window Snapping · GitBook](#window-snapping-gitbook) - [Basic Window Snapping Setup · GitBook](#basic-window-snapping-setup-gitbook) - [Control Action Sequence Flow · GitBook](#control-action-sequence-flow-gitbook) - [Snapping with gestures or shortcuts · GitBook](#snapping-with-gestures-or-shortcuts-gitbook) - [Advanced Customization Options · GitBook](#advanced-customization-options-gitbook) - [Window Moving and Resizing · GitBook](#window-moving-and-resizing-gitbook) - [Custom Snap Areas · GitBook](#custom-snap-areas-gitbook) - [Keyboard Shortcut Triggers · GitBook](#keyboard-shortcut-triggers-gitbook) - [Defining a Hyper Key · GitBook](#defining-a-hyper-key-gitbook) - [Low Level Key Remapping · GitBook](#low-level-key-remapping-gitbook) - [Touch Bar Triggers · GitBook](#touch-bar-triggers-gitbook) - [Touch Bar Gestures · GitBook](#touch-bar-gestures-gitbook) - [Clipboard Manager · GitBook](#clipboard-manager-gitbook) - [Touch Bar Basics · GitBook](#touch-bar-basics-gitbook) - [JS Text Transformer Functions · GitBook](#js-text-transformer-functions-gitbook) - [Sending Keyboard Shortcuts · GitBook](#sending-keyboard-shortcuts-gitbook) - [Insert / Type / Paste Custom Text · GitBook](#insert-type-paste-custom-text-gitbook) - [Show Custom Context Menu · GitBook](#show-custom-context-menu-gitbook) - [Screenshots · GitBook](#screenshots-gitbook) - [Extending Finder Context Menu · GitBook](#extending-finder-context-menu-gitbook) - [Manage Menu Bar Status Items · GitBook](#manage-menu-bar-status-items-gitbook) - [Show List To Choose From · GitBook](#show-list-to-choose-from-gitbook) - [h@llo.AI - AI Assistants · GitBook](#h-llo-ai-ai-assistants-gitbook) - [Getting Started · GitBook](#getting-started-gitbook) - [Key Sequence Triggers · GitBook](#key-sequence-triggers-gitbook) - [Touch Bar Widgets · GitBook](#touch-bar-widgets-gitbook) - [Unknown](#unknown) - [Magic Mouse & Trackpad Triggers · GitBook](#magic-mouse-trackpad-triggers-gitbook) - [Touch Bar Advanced Configuration · GitBook](#touch-bar-advanced-configuration-gitbook) - [BTT Mobile · GitBook](#btt-mobile-gitbook) - [Drawing / Scribble Triggers · GitBook](#drawing-scribble-triggers-gitbook) - [Basics · GitBook](#basics-gitbook) - [Floating Menu & Desktop Widgets · GitBook](#floating-menu-desktop-widgets-gitbook) - [Showing and Hiding · GitBook](#showing-and-hiding-gitbook) - [Item Types · GitBook](#item-types-gitbook) - [Menu Scripting · GitBook](#menu-scripting-gitbook) - [Updating Item Properties · GitBook](#updating-item-properties-gitbook) - [Desktop Widgets · GitBook](#desktop-widgets-gitbook) - [Normal Mouse · GitBook](#normal-mouse-gitbook) - [Assigning Actions to Buttons · GitBook](#assigning-actions-to-buttons-gitbook) - [Logitech Mouse Support · GitBook](#logitech-mouse-support-gitbook) - [Help: My mouse's buttons are not recognized · GitBook](#help-my-mouse-s-buttons-are-not-recognized-gitbook) - [Other & Named Triggers · GitBook](#other-named-triggers-gitbook) - [Scroll Modifiers (Smooth Scroll, Speed, Acceleration) · GitBook](#scroll-modifiers-smooth-scroll-speed-acceleration-gitbook) - [Reusable Named Triggers · GitBook](#reusable-named-triggers-gitbook) - [Text Selection Did Change · GitBook](#text-selection-did-change-gitbook) - [Text Selection Did Change Widgets · GitBook](#text-selection-did-change-widgets-gitbook) - [Custom Menubar Status Items · GitBook](#custom-menubar-status-items-gitbook) - [BTT as Default Browser / URL Based Triggers · GitBook](#btt-as-default-browser-url-based-triggers-gitbook) - [Siri Remote Triggers · GitBook](#siri-remote-triggers-gitbook) - [Using Custom URL Scheme · GitBook](#using-custom-url-scheme-gitbook) - [Command Line Interface · GitBook](#command-line-interface-gitbook) - [Using HTTP Requests / Webserver · GitBook](#using-http-requests-webserver-gitbook) - [Available Standard Variables · GitBook](#available-standard-variables-gitbook) - [Using Java Script (not JXA) · GitBook](#using-java-script-not-jxa-gitbook) - [Using Apple Script or JXA · GitBook](#using-apple-script-or-jxa-gitbook) - [Appearance & Config Options · GitBook](#appearance-config-options-gitbook) - [Useful Script Examples · GitBook](#useful-script-examples-gitbook) - [Call BTT functions from the webview · GitBook](#call-btt-functions-from-the-webview-gitbook) - [JSON Definitions · GitBook](#json-definitions-gitbook) - [Manage Menubar Status Items · GitBook](#manage-menubar-status-items-gitbook) - [Floating Menu JSON Definitions · GitBook](#floating-menu-json-definitions-gitbook) - [Shortcuts from the Shortcuts App in the webview · GitBook](#shortcuts-from-the-shortcuts-app-in-the-webview-gitbook) - [Custom Scriptable WebView · GitBook](#custom-scriptable-webview-gitbook) - [Trigger JSON Definitions · GitBook](#trigger-json-definitions-gitbook) - [Apple Scripts & Shell Scripts in the webview · GitBook](#apple-scripts-shell-scripts-in-the-webview-gitbook) - [Webview Lifecycle & Notifications · GitBook](#webview-lifecycle-notifications-gitbook) - [Basic Setup · GitBook](#basic-setup-gitbook) - [Standard Button & Formatting · GitBook](#standard-button-formatting-gitbook) - [Development Hints · GitBook](#development-hints-gitbook) - [Starter Template · GitBook](#starter-template-gitbook) - [Long Press · GitBook](#long-press-gitbook) - [Bind to Device · GitBook](#bind-to-device-gitbook) - [Key Repeat · GitBook](#key-repeat-gitbook) - [Groups · GitBook](#groups-gitbook) - [Hold to show more · GitBook](#hold-to-show-more-gitbook) - [Scripting BetterTouchTool · GitBook](#scripting-bettertouchtool-gitbook) - [Stream Deck Pedal · GitBook](#stream-deck-pedal-gitbook) - [App Specific Configurations · GitBook](#app-specific-configurations-gitbook) - [Custom Swift Plugins · GitBook](#custom-swift-plugins-gitbook) - [Script Widgets · GitBook](#script-widgets-gitbook) - [Action JSON Definitions · GitBook](#action-json-definitions-gitbook) - [Simple JSON Format · GitBook](#simple-json-format-gitbook) - [Stream Deck · GitBook](#stream-deck-gitbook) - [Notch Bar (Deprecated) · GitBook](#notch-bar-deprecated-gitbook) - [Notch Bar Placement · GitBook](#notch-bar-placement-gitbook) - [Generic Devices · GitBook](#generic-devices-gitbook) - [Notch Bar Customization · GitBook](#notch-bar-customization-gitbook) - [Example Device Scripts · GitBook](#example-device-scripts-gitbook) - [Notch Bar Setup · GitBook](#notch-bar-setup-gitbook) - [Unknown](#unknown) - [404 Not Found](#404-not-found) - [404 Not Found](#404-not-found) - [404 Not Found](#404-not-found) --- # Introduction · GitBook [Introduction](https://docs.folivora.ai/) ========================================== BTT Documentation Introduction ============================== This documentation is always a work in progress and will most likely not cover the most current features of BetterTouchTool. If you have specific questions please ask on [community.folivora.ai](https://community.folivora.ai/) or Google for a solution. Most likely other BetterTouchTool users have already solved your issue 🙂 **For an introduction to the new BetterTouchTool user interface you may want to watch this video:** results matching "" =================== No results matching "" ====================== --- # Installation/Deinstallation · GitBook [Installation/Deinstallation](https://docs.folivora.ai/) ========================================================= Installation ------------ **Installing BetterTouchTool is easy.** 1. Download BetterTouchTool from [https://folivora.ai/downloads/](https://folivora.ai/downloads/) 2. Unzip the downloaded zip file (please use the Apple default unarchiver tool, others may cause issues) 3. Move the unpacked BetterTouchTool.app to your applications folder 4. **Done!** You can now double-click to start BetterTouchTool 5. Continue with the initial setup to get BetterTouchTool up and running. Uninstall --------- If you ever need to uninstall BetterTouchTool, just delete its app file from your Applications folder (or the folder you put it after downloading & unzipping it). If you also want to get rid of BetterTouchTool's settings files (usually only a few KB, thus that's not really necessary), delete: 1. ~/Library/Application Support/BetterTouchTool 2. ~/Library/Preferences/com.hegenberg.BetterTouchTool.plist Buy License ----------- You can use the BetterTouchTool trial version for 45 days without limitation. Afterwards you need to buy a license. For more information please see [https://folivora.ai/buy/](https://docs.folivora.ai/docs/1_installation.html) Activate License ---------------- Activating your new BetterTouchTool license is very easy. After your purchase via my reseller paddle.com you have received an e-mail with the title "BetterTouchTool License For `***`" (where `***` is the name you provided). This e-mail contains an activation link you can click to automatically install and activate your new license. Alternatively it has a license file attached, which you can download & double-click in order to activate BetterTouchTool If you can not find the license e-mail, first make sure to check you spam folder. If that doesn't help, you may have had a typo in your e-mail address or some other problem with your e-mail account, in that case you will need to contact me via andreas@folivora.ai. Lost License ------------ If you have lost your license file try these steps: 1. Search your e-mails for this subject: **BetterTouchTool License For** 2. If your purchased your license before 2018 search for **Personal BetterTouchTool License**. In that case your download link will be expired, you can however recover your license via [https://lostlicense.folivora.ai](https://lostlicense.folivora.ai/) 3. You can contact me via andreas@folivora.ai, please include all information you still remember (e.g. the e-mail and name used for the purchase). In case I'm unresponsive (e.g. due to vacation, you can also contact my reseller directly) Initial Setup ------------- After starting BetterTouchTool for the first time you may see this message popup quite often: **"BetterTouchTool" would like to control this computer using accessibility features** Grant access to this application in Security & Privacy preferences, located in System Preferences.: ![accessibility_warning](https://docs.folivora.ai/docs/media/accessibility_warning.png) This message pops up because BetterTouchTool uses an API called "Accessibility API". That API is necessary for many of BetterTouchTool's core functions. It is therefore required to enabled it if you want to continue using BetterTouchTool. The Accessibility API was made for accessibility tools like screen readers or other tools that may help people with disabilities to use their computers. This is why it offers some functionality that is normally not available to apps. For example the whole window snapping features in BetterTouchTool are only possible because of the accessibility API. Normal applications only have access to their own windows, controls etc.. Only by using the Accessibility API we get access to other apps and can control them. This is both very powerful but also dangerous because malicious applications could use this for bad things. This is why Apple shows the above warning message for any app that wants to use the API. To allow BetterTouchTool to use the Accessibility API go to System Preferences => Security & Privacy => Privacy => Accessibility, see: ![accessibility_enable](https://docs.folivora.ai/docs/media/accessibility_enable-1.png) Configuring your first Trigger ------------------------------ Before adding your first gesture or shortcut, you need to open the BetterTouchTool preferences window. It is accessible via the menubar icon. ![menubaricon](https://docs.folivora.ai/docs/media/new/menubaricon.jpg) After you have opened the configuration window, you will see something like this. First choose the trigger type you want: ![firststart](https://docs.folivora.ai/docs/media/new/firststart.jpg) ![firststart2](https://docs.folivora.ai/docs/media/new/firststart2.jpg) Afterwards just click the big plus button to add your first Trigger. results matching "" =================== No results matching "" ====================== --- # Basic Overview · GitBook [Basic Overview](https://docs.folivora.ai/) ============================================ Basic Preferences Overview ========================== This section wants to give you an overview of the BetterTouchTool configuration. The window you see in the screenshot below is where you can configure almost every feature available in BetterTouchTool (and there are many 😉) Let's dive into the different parts of that window: ![preferences](https://docs.folivora.ai/docs/media/new/preferences_keyboard.jpg) App List -------- Actions in BetterTouchTool can either be assigned to a specific application or globally to all apps. By default BetterTouchTool has two items in the App List: _All Apps_ and _Finder_. You can easily add as many other applications as you want. To do this click the ➕ button on the bottom left of the list (or alternatively drag an app directly onto the list from Finder). To delete an application press the trash button. **Pressing the trash button will delete the application and all gestures / triggers you have associated with it.** ![addapp](https://docs.folivora.ai/docs/media/new/addapp.jpg) Trigger List ------------ BetterTouchTool allows you to configure actions for many types of Triggers. You can choose between: * **Touch Bar**: Add all kind of different widgets and buttons to completely customize your Touch Bar * **BTT Remote**: Here you can configure the companion App BTT Remote (which is free for everybody who bought BetterTouchTool) * **Magic Mouse**: Configure gestures for the Magic Mouse 1 & 2 * **Trackpad**: Configure gestures for any multitouch capable Apple Trackpad currently on the market (The various Macbook's built-in trackpads, the Magic Trackpad 1 & 2) * **Keyboard**: Configure keyboard shortcuts * **Drawings**: Configure custom drawing gestures. * **Normal Mice**: Reconfigure your normal mouse buttons. * **Siri Remote**: Configure gestures & buttons on the new Siri Remote that comes with the new Apple TV * **Other**: Contains all triggers that do not fit into any other category. ![triggers](https://docs.folivora.ai/docs/media/new/triggers.jpg) Action List ----------- The action list shows all actions that are assigned to the selected Trigger. They will all be triggered in sequence if the Trigger is activated, so you can easily chain multiple actions. Actions can be keyboard shortcuts, scripts or any of the predefined actions available in BetterTouchTool ![actions](https://docs.folivora.ai/docs/media/new/actions.jpg) Configuration Side Bar ---------------------- The Configuration Side Bar on the right side of the window is used for almost all configuration tasks in BetterTouchTool. It adapts to the selected item, if you select a Trigger from the list of Triggers, it will show the configuration options available for that. If you select a action or even an app it will show the configuration options for these. In this example a Touch Bar button Trigger is selected, which comes with many configuration options like background color, title, icons etc.: ![config](https://docs.folivora.ai/docs/media/new/config.jpg) If you want you can undock the side-bar by pressing the undock icon on the top right. results matching "" =================== No results matching "" ====================== --- # BTT Configuration · GitBook [BTT Configuration](https://docs.folivora.ai/) =============================================== BetterTouchTool Preferences =========================== This chapter is about the preferences window where you configure BetterTouchTool. * [Basic Overview](https://docs.folivora.ai/docs/2_preferences_basic_overview.html) * [Setting Up a New Trigger](https://docs.folivora.ai/docs/3_preferences_new_trigger.html) * [Presets](https://docs.folivora.ai/docs/4_preferences_presets.html) * [Other Settings](https://docs.folivora.ai/docs/5_settings) * [Restoring Automatic Backups](https://docs.folivora.ai/docs/5_restoring_automatic_backups.html) results matching "" =================== No results matching "" ====================== --- # Setting up a new Trigger · GitBook [Setting up a new Trigger](https://docs.folivora.ai/) ====================================================== Adding a new Trigger ==================== BetterTouchTool allows you to configure actions for all kind of triggers. To do that you first need to choose the trigger type you like and add a new trigger of that type. This is very easy. Step 1: Select the Trigger Type ------------------------------- You can choose the trigger type from the drop down menu in the top bar: ![triggers](https://docs.folivora.ai/docs/media/new/triggers.jpg) Step 2: Press the + Button -------------------------- The plus button in the list will insert a new trigger at the bottom of the list. The plus button in the bottom toolbar will insert a new trigger at the currently selected position in the list. ![triggers](https://docs.folivora.ai/docs/media/new/addtrigger.jpg) Step 3: Configure the Trigger: ------------------------------ Now you need to configure the trigger. For most trigger types a popover will show up that lets you select the specific type you want to add. For example what kind of Trackpad or Magic Mouse gesture, or what kind of Touch Bar widget: ![triggers](https://docs.folivora.ai/docs/media/new/configuretrigger.jpg) After choosing the type the configuration side bar will show all available configuration options: ![triggers](https://docs.folivora.ai/docs/media/new/configuretrigger2.jpg) Step 4: Assign one or multiple Actions -------------------------------------- A trigger doesn't do much if you do not assign any actions to it. So that's pretty much the most important step. So just press the plus button in the Action List, select the action type (e.g. a keyboard shortcut to send or one of the predfined actions to execute): ![actions](https://docs.folivora.ai/docs/media/new/actions.jpg) Step 5: Test your Trigger ========================= Now your trigger has everything it needs. You can try to trigger it now and see whether the assigned actions are executed as expected. In case you encounter any issues it's often helpful to assign a "fail save" action like Mission Control to see whether the trigger works. results matching "" =================== No results matching "" ====================== --- # Global and App Specific Triggers · GitBook [Global and App Specific Triggers](https://docs.folivora.ai/) ============================================================== Global and App-Specific Triggers ================================ In BetterTouchTool, you can configure either **global triggers** that work across all apps or **app-specific triggers** that are active only when a specific app is in focus. * [Global and App-Specific Triggers](https://docs.folivora.ai/docs/2_2_preferences_global_vs_app_specific.html#global-and-app-specific-triggers) * [Global Triggers](https://docs.folivora.ai/docs/2_2_preferences_global_vs_app_specific.html#global-triggers) * [App-Specific Triggers](https://docs.folivora.ai/docs/2_2_preferences_global_vs_app_specific.html#app-specific-triggers) * [Specify Triggers for Groups of Apps](https://docs.folivora.ai/docs/2_2_preferences_global_vs_app_specific.html#specify-triggers-for-groups-of-apps) * [Exclude Global Triggers from Specific Apps](https://docs.folivora.ai/docs/2_2_preferences_global_vs_app_specific.html#exclude-global-triggers-from-specific-apps) * [Special Cases (Work in Progress)](https://docs.folivora.ai/docs/2_2_preferences_global_vs_app_specific.html#special-cases-work-in-progress) * [Floating Menus and Merging](https://docs.folivora.ai/docs/2_2_preferences_global_vs_app_specific.html#floating-menus-and-merging) * [Stream Deck](https://docs.folivora.ai/docs/2_2_preferences_global_vs_app_specific.html#stream-deck) * [Touch Bar](https://docs.folivora.ai/docs/2_2_preferences_global_vs_app_specific.html#touch-bar) Global Triggers --------------- To create a trigger that works in all apps: 1. Select **"All Apps"** from the sidebar. 2. Add the desired trigger. ![Global Trigger Example](https://docs.folivora.ai/docs/media/image-32.png) App-Specific Triggers --------------------- To create a trigger for a specific app: 1. Click the **+** button at the bottom left of the BetterTouchTool preferences window. 2. Choose an app from your running applications or your file system. ![Add App-Specific Trigger](https://docs.folivora.ai/docs/media/image-33.png) 1. Select the added app in the sidebar and configure your trigger. ![App-Specific Trigger Example](https://docs.folivora.ai/docs/media/image-34.png) Specify Triggers for Groups of Apps ----------------------------------- Sometimes, you may want to assign triggers to a group of apps (e.g., all browsers). To do this, use **Conditional Activation Groups**: 1. Click the **+** button at the bottom left of the preferences window and select **"Create Conditional Activation Group."** 2. Define a condition that applies to multiple apps. ![Define Conditions for Apps](https://docs.folivora.ai/docs/media/image-35.png) 1. Assign your trigger to the conditional activation group. ![Assign Trigger to Group](https://docs.folivora.ai/docs/media/image-36.png) Conditional activation groups can also be used to create exclusions. For instance, the following condition excludes specified browsers but enables the assigned triggers to all other apps: ![Exclusion Example](https://docs.folivora.ai/docs/media/image-37.png) Exclude Global Triggers from Specific Apps ------------------------------------------ To exclude some global triggers for specific apps, you have several options: 1. **Disable the global trigger for the app**: * If a trigger is disabled for a specific app, the app will fall back to its default behavior for that trigger. 2. **Assign the action "Use Apple Default or Do Nothing"**: * Same as disabling a trigger, the app will fall back to its default behavior for that trigger. 3. **Use Conditional Activation Groups**: * Define conditions to specify where the trigger should be active. See the [previous section](https://docs.folivora.ai/docs/2_2_preferences_global_vs_app_specific.html#triggers-for-groups-of-apps) for details. * * * Special Cases (Work in Progress) ================================ Floating Menus and Merging -------------------------- If you define an app-specific floating menu, it will appear only in that app. However, if you configure a floating menu with the **same identifier** in the "All Apps" section, BetterTouchTool will merge these menus. ![Merged Floating Menus Example](https://docs.folivora.ai/docs/media/image-39.png) This functionality allows you to dynamically adjust menus based on the active app or the active [Conditional Activation Group](https://docs.folivora.ai/docs/1400_conditions.html) . To control the order of merged menu items, use the **"Display Order"** property: ![Display Order Example](https://docs.folivora.ai/docs/media/image-38.png) Stream Deck ----------- Touch Bar --------- results matching "" =================== No results matching "" ====================== --- # Other Settings · GitBook [Other Settings](https://docs.folivora.ai/) ============================================ Other BetterTouchTool Settings ============================== BetterTouchTool is very customizable and offers tons of settings. Most settings have default values that should work for the majority of users. There are three different ways to access the settings: ![accessingsettings](https://docs.folivora.ai/docs/media/new/accessingsettings.jpg) 1. Use the menubar menu, BetterTouchTool => Preferences 2. If the selected trigger type has specific settings, it will show a button that allows you to access them directly (in the screenshot above "Keyboard Settings") 3. Press the little gear icon on the top right All of these options will open the BetterTouchTool settings window: ![accessingsettings](https://docs.folivora.ai/docs/media/new/settings.jpg) I won't describe all the settings here. Just note that the settings are separated into "Standard Settings" and "Advanced Settings". In general you should not need the advanced settings very often. results matching "" =================== No results matching "" ====================== --- # Restoring Automatic Backups · GitBook [Restoring Automatic Backups](https://docs.folivora.ai/) ========================================================= Restoring Automatic Backups =========================== There can be many reasons why you want to restore a backup of your BetterTouchTool settings. For example your current settings may have gotten corrupted for some reason (e.g. a hard drive or software issue), or you accidentall deleted some things you need back. BetterTouchTool creates a backup of your settings everytime after it updates to a new version. These backups are located in `~/Library/Application Support/BetterTouchTool`. To open this folder, go to Finder, then click "Go" and then click "Go To Folder". There you can enter the path to this folder (make sure to include the ~). The easiest way to restore a backup is t o use the BetterTouchTool menubar menu **Help => Restore Settings From Backup** ![presets](https://docs.folivora.ai/docs/media/new/restore_backup.jpg) This will show a list of all backups that are available including their last modification dates. Just try to use one of them that sounds reasonable to you. results matching "" =================== No results matching "" ====================== --- # Shortcuts Integration · GitBook [Shortcuts Integration](https://docs.folivora.ai/) =================================================== Shortcuts Integration ===================== On macOS Monterey, BetterTouchTool deeply integrates with the new Shortcuts app. For sharing Shortcuts and discussing this functionality, please have a look at the forum: [https://community.folivora.ai/c/shortcuts/18](https://community.folivora.ai/c/shortcuts/18) Any Trigger in BetterTouchTool can be used to run Shortcuts. All your Shortcuts are listed in the standard action list of BetterTouchTool: ![shortcuts-list](https://docs.folivora.ai/docs/media/shortcuts_list.png) On the other hand BetterTouchTool also exposes many of its actions directly in the Shortcuts app, so you can build powerful workflows: ![shortcuts-list](https://docs.folivora.ai/docs/media/btt_shortcuts.png) results matching "" =================== No results matching "" ====================== --- # Presets · GitBook [Presets](https://docs.folivora.ai/) ===================================== Presets ======= The preset functionality in BetterTouchTool allows you to save or restore your complete gesture/shortcut configuration to/from a single file and thus easily switch between different setups. It also allows you to share your setup with other people or use existing configurations shared by other users. There are some great ready to use presets available via [https://community.folivora.ai](https://community.folivora.ai/) Accessing the Preset functionality ---------------------------------- The preset configuration can be accessed by pressing the Preset button on the top right: ![presets](https://docs.folivora.ai/docs/media/new/presets.jpg) ### The Master Preset Using the top dropdown in the preset view, you can choose the Master Preset. The Master Preset is important because: * All new triggers you create are added to the Master Preset * All app specific settings are saved to the Master Preset * All app specific settings are loaded from the Master Preset (if conflicting ones are found in other presets, the Master Preset will take precedence) Non-master presets that are enabled, will still work fine but if you want to add new triggers to them, make sure to set them as master first. ### Preset Standard functionality: * **Create a new Preset**: By default BetterTouchTool comes with one standard preset. You can however add as many other presets as you want, e.g. for different situations. * **Enable / Disable Preset**: Presets can be disabled or enabled at any time. For example you can have a preset for work and one for home and easily switch between them. * **Delete a Preset**: Presets can be deleted at any time. * **Export a Preset**: Allows you to export the selected preset in a JSON format to share with others or for backup purposes. * **Import a Preset**: You can import presets you have exported previously or presets from other users. However be aware that presets can contain all kind of scripts that could execute malicious things. **Only import presets from people you trust!** Switching between Presets ------------------------- The most common way to switch between different presets is to enable/disable them as described above. Howver there are also predefined actions that allow you to activate specific presets. This can be quite useful, e.g. you can enable/disable specific presets using a keyboard shortcut. The predefined actions are: * **Switch to Preset / Enable specific Preset** This allows you to exactly specify which presets shall become active after the action has been executed. It also allows you to specify which preset will become the new Master Preset. ![presets](https://docs.folivora.ai/docs/media/new/switchpreset.jpg) * **Toggle Preset Enabled/Disabled** This action allows you to toggle the enabled/disabled state of the selected presets. results matching "" =================== No results matching "" ====================== --- # (Predefined) Actions · GitBook [(Predefined) Actions](https://docs.folivora.ai/) ================================================== (Predefined) Actions ==================== Actions are probably the most important part of BTT. You can assign one or multiple actions to any trigger configured in BTT and they will be executed in sequence as soon as the trigger is activated. ![actions](https://docs.folivora.ai/docs/media/new/actions.jpg) There are MANY actions available in BTT. The following list shows some of them, but is not up-to date. ![accessingsettings](https://docs.folivora.ai/docs/media/new/predefined_actions.png) results matching "" =================== No results matching "" ====================== --- # Preconfigured Example Assistants · GitBook [Preconfigured Example Assistants](https://docs.folivora.ai/) ============================================================== Example Assistants ================== Here is an example assistant that you can import which has a lot of automation permissions - **make sure you have a good backup system in place** because in theory this assistant can do almost everything to your system. This example assistant shows when pressing cmd+opt+ctrl+C [Example Automation Assistant](https://docs.folivora.ai/docs/media/ai-assistant-example.bttpreset) ... more coming very soon results matching "" =================== No results matching "" ====================== --- # Retrieve API Keys · GitBook [Retrieve API Keys](https://docs.folivora.ai/) =============================================== How to get API Keys for h@llo.ai usage ====================================== OpenAI ====== 1. **Create your personal OpenAI account** at [https://platform.openai.com](https://platform.openai.com/) You will need to verify your email before you can login and retrieve your API key. 2. Go to [https://platform.openai.com/api-keys](https://platform.openai.com/api-keys) 3. Click the "Create new secret key" button and create a key with the default options. Make sure to copy that key, you won't be able to view it again later (but you can create as many as you want) 4. Make sure to set a spending limit on [https://platform.openai.com/settings/organization/limits](https://platform.openai.com/settings/organization/limits) 5. It is recommended to add at least $5 credit to your account to get into the higher API usage Tier (see [https://platform.openai.com/docs/guides/rate-limits/free-tier-rate-limits](https://platform.openai.com/docs/guides/rate-limits/free-tier-rate-limits) ) Anthropic ========= 1. Create an Anthropic Console acccount via [https://console.anthropic.com/](https://console.anthropic.com/) 2. Login and navigate to the API Key section: [https://console.anthropic.com/settings/keys](https://console.anthropic.com/settings/keys) 3. Generate a new key by clicking the **Create Key** button. Make sure to copy that key as you won't be able to view it again later. (But you can always delete and create new keys) 4. Set spending limit on [https://console.anthropic.com/settings/limits](https://console.anthropic.com/settings/limits) (to make sure you never pay more than what you expected) 5. Top up your account balance on [https://console.anthropic.com/settings/billing](https://console.anthropic.com/settings/billing) Groq ==== 1. Go to [https://console.groq.com/keys](https://console.groq.com/keys) and login 2. Click the create API Key button. Make sure to copy that key as you won't be able to view it again later. (But you can always delete and create new keys) 3. Use [https://api.groq.com/openai/v1/chat/completions](https://api.groq.com/openai/v1/chat/completions) as API url Google Gemini ============= 1. Login at [https://aistudio.google.com/app/apikey](https://aistudio.google.com/app/apikey) with your Google account 2. Click "Get an API key", agree to the terms and then create a new API key. Make sure to copy the key as you won't be able to view it again later. 3. Note: AFAIK Google Gemini doesn't allow to set a spending limit so be careful with that. (Please correct me if I'm wrong - andreas@folivora.ai) The Open AI comptaible API URL for Gemini is [https://generativelanguage.googleapis.com/v1beta/openai/v1/chat/completions](https://generativelanguage.googleapis.com/v1beta/openai/v1/chat/completions) LM Studio (local models) ======================== Download LM Studio from [https://lmstudio.ai](https://lmstudio.ai/) and install it. After starting the software, select a model you want to use and download it. You don't need an API key, however you need to select the API url. For LM Studio the default OpenAI compatible URL is [http://127.0.0.1:1234/v1/chat/completions](http://127.0.0.1:1234/v1/chat/completions) Ollama (local models) ===================== Download Ollama from [https://ollama.com/](https://ollama.com/) and install it. After starting the software, select a model you want to use and download it. You don't need an API key, however you need to select the API url. For ollama the default OpenAI compatible URL is [http://localhost:11434/v1/chat/completions](http://localhost:11434/v1/chat/completions) OpenRouter ========== This is a service that allows to to access most AI models through one API. For mor details see [https://openrouter.ai](https://openrouter.ai/) results matching "" =================== No results matching "" ====================== --- # Tools · GitBook [Tools](https://docs.folivora.ai/) =================================== h@llo.ai Available Tools ======================== By default the AI Assistants do not have access to any of BTT's tools. You need to enable access for each (or all) tools you want to allow in the configuration of the predefined action "h@llo.ai - Show Customizable AI Assistant". There go to the AI Configuration => Tools & Context section and scroll down. ![Tools](https://docs.folivora.ai/docs/media/3009_halloai_tools2025-09-15T14:24:19.985Z.png) Table of Contents ----------------- * [h@llo.ai Available Tools](https://docs.folivora.ai/docs/3009_halloai_tools.html#hlloai-available-tools) * [Table of Contents](https://docs.folivora.ai/docs/3009_halloai_tools.html#table-of-contents) * [UI Automation: End‑to‑End Flow](https://docs.folivora.ai/docs/3009_halloai_tools.html#ui-automation-end%E2%80%91to%E2%80%91end-flow) * [1) Discover running apps](https://docs.folivora.ai/docs/3009_halloai_tools.html#1-discover-running-apps) * [2) Inspect UI hierarchy](https://docs.folivora.ai/docs/3009_halloai_tools.html#2-inspect-ui-hierarchy) * [3) Search elements](https://docs.folivora.ai/docs/3009_halloai_tools.html#3-search-elements) * [4A) Click an element](https://docs.folivora.ai/docs/3009_halloai_tools.html#4a-click-an-element) * [4B) Type into an element](https://docs.folivora.ai/docs/3009_halloai_tools.html#4b-type-into-an-element) * [4C) Diagnose when things fail](https://docs.folivora.ai/docs/3009_halloai_tools.html#4c-diagnose-when-things-fail) * [Mouse, Keyboard \\& Text](https://docs.folivora.ai/docs/3009_halloai_tools.html#mouse-keyboard--text) * [Pointer \\& clicks](https://docs.folivora.ai/docs/3009_halloai_tools.html#pointer--clicks) * [Keyboard \\& text](https://docs.folivora.ai/docs/3009_halloai_tools.html#keyboard--text) * [Heads-up display](https://docs.folivora.ai/docs/3009_halloai_tools.html#heads-up-display) * [Haptics \\& clipboard](https://docs.folivora.ai/docs/3009_halloai_tools.html#haptics--clipboard) * [Wait helper](https://docs.folivora.ai/docs/3009_halloai_tools.html#wait-helper) * [Computer Control (Full Desktop Agents)](https://docs.folivora.ai/docs/3009_halloai_tools.html#computer-control-full-desktop-agents) * [Browser \\& Web](https://docs.folivora.ai/docs/3009_halloai_tools.html#browser--web) * [Screen, Windows \\& OCR](https://docs.folivora.ai/docs/3009_halloai_tools.html#screen-windows--ocr) * [Files \\& Projects](https://docs.folivora.ai/docs/3009_halloai_tools.html#files--projects) * [Create, read, write](https://docs.folivora.ai/docs/3009_halloai_tools.html#create-read-write) * [Edit \\& patch](https://docs.folivora.ai/docs/3009_halloai_tools.html#edit--patch) * [Find files \\& content](https://docs.folivora.ai/docs/3009_halloai_tools.html#find-files--content) * [Versioning \\& History](https://docs.folivora.ai/docs/3009_halloai_tools.html#versioning--history) * [Diagnostics for Code](https://docs.folivora.ai/docs/3009_halloai_tools.html#diagnostics-for-code) * [Variables, Clipboard, Haptics, Wait](https://docs.folivora.ai/docs/3009_halloai_tools.html#variables-clipboard-haptics-wait) * [Calendars \\& Reminders](https://docs.folivora.ai/docs/3009_halloai_tools.html#calendars--reminders) * [Menubar \\& Triggers](https://docs.folivora.ai/docs/3009_halloai_tools.html#menubar--triggers) * [Scripting](https://docs.folivora.ai/docs/3009_halloai_tools.html#scripting) * [BetterTouchTool Knowledge Search](https://docs.folivora.ai/docs/3009_halloai_tools.html#bettertouchtool-knowledge-search) * [Global JavaScript Utilities](https://docs.folivora.ai/docs/3009_halloai_tools.html#global-javascript-utilities) * [Internet access](https://docs.folivora.ai/docs/3009_halloai_tools.html#internet-access) * [File access](https://docs.folivora.ai/docs/3009_halloai_tools.html#file-access) * * * UI Automation: End‑to‑End Flow ------------------------------ Use these to find UI elements in running apps and interact with them reliably. ### 1) Discover running apps **get\_running\_apps\_for\_ui** → List apps with `process_identifier`, `bundleId`, name, etc. Use the `process_identifier` in the next steps. ### 2) Inspect UI hierarchy **get\_app\_ui\_structure** → Returns the UI tree for a given process. Includes an `interactive_summary` of clickable and text-input elements. Options: `max_depth` (default 4, up to 20). ### 3) Search elements **find\_ui\_elements** → Search by role/title/value/description across attributes. * Supports `use_regex` * Returns elements with `path` like `0,2,1` and matched criteria. **Tip:** Use this `path` for clicks or typing. ### 4A) Click an element **click\_ui\_element** → Click by `path` and `process_identifier`. Returns `{success, path, click_method, element_info}`. ### 4B) Type into an element **type\_in\_ui\_element** → Type text into fields/search boxes by `path`. Returns `{success, path, text, element_info, value_verified}`. ### 4C) Diagnose when things fail **diagnose\_accessibility\_element** → Get details, state, available actions, and recommendations for a `path`. Great for flaky or non-standard controls. * * * Mouse, Keyboard & Text ---------------------- ### Pointer & clicks * **move\_mouse** → Move (and optionally drag) the mouse to (`x`,`y`). Supports `anchorPoint` (screen origin), `duration`, `drag`. * **click** → Click at current or specific coordinates; supports `type` (left|right|middle|double), `count`, modifiers (`mods`), and optional move & click in one call. * **save\_mouse\_pos** / **restore\_mouse\_pos** → Store/recall a named cursor position. ### Keyboard & text * **type\_or\_paste\_text** → Type or paste text; optionally provide `format` (RTF/HTML/PDF/PNG/URL) or set `type: true` to simulate typing. * **send\_shortcut** → Send keys/shortcuts to an app (or the focused app): specify `key` and `mods` (e.g., `cmd+shift`). * **get\_selected\_text** → Read the current selection. _(Use mainly to refresh the selection after other tools.)_ * **transform\_selected\_text** → Run your JS transformer on the current selection and return the result. * **replace\_selected\_text** → Replace the current selection with your provided text. ### Heads-up display * **show\_hud** → Show a temporary HUD message (supports SF Symbols via `icon` and a `duration`). ### Haptics & clipboard * **haptic\_feedback** → Trigger light/medium/heavy haptics. * **set\_clipboard\_content** → Set clipboard text (optionally with a specific pasteboard format). ### Wait helper * **wait\_for\_x\_seconds** → Pause execution for a number of seconds (use this instead of `setTimeout`). * * * Computer Control (Full Desktop Agents) -------------------------------------- Two agent-style tools that can move the mouse, click, type, scroll, drag, press keys, wait, and take screenshots. * **computer\_20250124** → Actions like `screenshot`, `left_click`, `drag`, `scroll {direction, amount}`, `key`, `type {text}`, `wait {seconds}` with coordinates where needed. * **computer\_use\_preview** → Similar capabilities with explicit `environment` (`mac`, `windows`, `ubuntu`, `browser`) and optional `display_width/height` for context. Use these when you need holistic, step-by-step desktop control. * * * Browser & Web ------------- * **safari\_automation** → Execute JavaScript in Safari’s active window. Modes: `active` (fast, active window) or `webdriver` (faster when possible, falls back). Supports batching via `batch` array. * **get\_browser\_html** → Grab HTML/text/metadata from Safari, Chrome, Edge, Arc, Brave, Firefox, Opera, Vivaldi, etc. Target the `active` tab, `all` tabs, or a specific tab id. Optional `cleanHTML` and `extractText`. * **web\_search** → DuckDuckGo-based web search. Returns top results with titles, snippets, and URLs. * **web\_fetch** → Fetch a URL and return `text`, `markdown`, `html`, or `json`. Handles redirects and timeouts. * * * Screen, Windows & OCR --------------------- * **get\_screens** → Info on all connected screens. * **screenshot** → Capture the whole space, a screen, or a specific window. Use `target` to pick scope; `window_id` when targeting a single window. * **get\_windows\_sorted\_front\_to\_back** → List visible windows in z-order (front to back). Each includes app, pid, bounds, id, title. * **activate\_window** → Bring a window to the front by `id`. * **set\_window\_frame** → Move/resize a window: provide `id` and `frame` * **screenshot\_window** → Screenshot a single window by `id`. * **ocr\_window** → OCR text from a window (no need to screenshot first). Returns text with global bounds. * * * Files & Projects ---------------- ### Create, read, write * **file\_create** → Create a new file (fails if it exists). * **file\_read** → Read text files with line numbers (up to ~250KB). * **file\_write** → Overwrite a file with new content (read first to avoid data loss). * **file\_write\_enhanced** → Safer write: backups, permission checks, encoding handling, atomic writes, auto-create directories. ### Edit & patch * **file\_edit** → Simple find/replace (optionally replace all). * **file\_edit\_smart** → Context-aware edits using surrounding lines to uniquely match; preview & rollback supported. * **file\_edit\_multi** → Multiple edits applied in one atomic operation; optional conflict validation. * **file\_patch** → Apply unified diff patches (multi-file supported). Preview via dry-run; reverse or strict modes available. ### Find files & content * **file\_list** → Show files/folders as a flat list or tree (includes hidden files and sizes). * **file\_glob** → Glob-based matching (e.g., `**/*.swift`, `src/**/*.js`). Results sorted newest first. * **file\_search** → Powerful file search by name/type/size/date; supports regex and depth limits. * **file\_grep** → Regex search inside files with optional context and line numbers. * **file\_find\_content** → Simple text search across files; returns file path, line number, and matching line. * * * Versioning & History -------------------- * **file\_diff** → Compare file versions (current vs previous or any two versions). Unified or split diff; ignore whitespace; control context lines; show line numbers. * **file\_undo** → Undo by transaction ID or by the last N operations; restore specific versions; view history. * **file\_redo** → Redo an undone change (limited). For anything else, use **file\_undo** with `restore`. * * * Diagnostics for Code -------------------- * **lsp\_diagnostics** → Run language server checks (TS/JS/Swift/Python/Go/Rust) to surface errors/warnings. * **read\_file\_with\_lsp\_diagnostics** → Read a file with inline comments showing diagnostics next to the lines. * **explore\_with\_diagnostics** → Scan a folder and list files with error/warning counts (optionally recursive or filtered by file types). * * * Variables, Clipboard, Haptics, Wait ----------------------------------- * **get\_variable\_value** / **set\_variable\_value** → Read/write persistent BetterTouchTool variables (store text, numbers, or JSON). Use in triggers, conditions, and scripts. * **set\_clipboard\_content** → Put text on the clipboard (optionally with format type). * **haptic\_feedback** → Light/medium/heavy feedback for quick confirmations. * **wait\_for\_x\_seconds** → Pause tool execution for timing/sequencing. * * * Calendars & Reminders --------------------- **manage\_calendar\_and\_reminders** * **get\_events**: Pull events/reminders in a date range. * **create\_event / create\_reminder**: Add items (supports title, times, all-day, location, notes). * **list\_calendars / list\_reminder\_lists**: Discover available calendars/lists. Returns structured JSON with titles, dates, times, location, notes, calendar name, and identifiers. Reminders include `dueDate`, `completed`, and `priority`. * * * Menubar & Triggers ------------------ * **retrieve\_app\_menubar\_items** → Query an app’s menubar (enabled/checked state). Provide a path (or empty for root) to get that level’s items. * **find\_menubar\_item** → Search a menubar item by name (supports regex). Returns the full path string. * **trigger\_menubar\_item** → Trigger a menubar item using the full path and `pid` (or focused app). * **trigger\_named\_trigger** → Fire a BetterTouchTool Named Trigger by name. * **import\_trigger\_json** → Import a trigger from its JSON (into a specific app or globally). * **add\_action\_to\_trigger** → Import an action JSON and attach it to an existing trigger by UUID. * **get\_trigger\_json** → Retrieve the JSON representation for a trigger by UUID. * * * Scripting --------- * **run\_shell\_script** → Run any shell command or script. Use `directory`, `environmentVariables`, and `background` as needed. For long-running servers, use `autoReturnTimeout` to return after inactivity. * **run\_apple\_script** → Run AppleScript code (with optional function/arguments). Perfect for deep macOS automation. * * * BetterTouchTool Knowledge Search -------------------------------- * **search\_bettertouchtool\_documentation** → Ask anything about BTT; returns the most relevant docs from a vector search. * **search\_bettertouchtool\_trigger\_and\_action\_definitions** → Find trigger/action definitions when creating automations. * **retrieve\_floating\_menu\_definition** → Retrieve JSON definitions for Floating Menus (optionally filter results). * * * Global JavaScript Utilities --------------------------- These are available globally in your JS execution context (not via tool calls): ### Internet access * `fetch` (standard modern fetch) * `fetchURLAsBase64(url, readAsBase64)` → Synchronous fetch helper returning base64 if desired. ### File access * `readFile(path, readAsBase64)` → Synchronous read. * `writeStringToFile(dataString, path, stringIsBase64)` → Synchronous write (supports base64 input). * * * * * * **Tip:** For reliable UI automation, follow the flow: `get_running_apps_for_ui → get_app_ui_structure → find_ui_elements → (click_ui_element | type_in_ui_element) → diagnose_accessibility_element (if needed)` results matching "" =================== No results matching "" ====================== --- # Providing Initial Screenshot / Message · GitBook [Providing Initial Screenshot / Message](https://docs.folivora.ai/) ==================================================================== Providing an initial Screenshot or Message ========================================== BTT's AI assistants allow you to configure initial screenshots or messages that are added automatically once the assistant is triggered. For example you could make an assistant that lets you capture a screenshot when triggered and then automatically make the assistant do something with the captured screenshot. This example will start interactive screen capture if you press ctrl+opt+cmd+S, then it will directly ask the AI Assistant "Please tell me what you see on this screenshot". ![Example Setup](https://docs.folivora.ai/docs/media/3003_providing_initial_screenshot_or_message2025-09-15T20:01:58.213Z.png) Here you can see what happens when I press ctrl+opt+cmd+S, it first allows the macOS interactive screenshot capture, then automatically posts the captured screenshot and defined user message to the AI Assistant: results matching "" =================== No results matching "" ====================== --- # Context · GitBook [Context](https://docs.folivora.ai/) ===================================== h@llo.ai Context ================ To work well, AI Assistants often need some context about the environment they are running in. BetterTouchTool allows you to add such context and offers some defaults like Date & Time, Selected Text, Active Application, Active Document etc. However just like tools, BTT doesn't add context by default as it is a complex balance that involves considerations about your context window, token usage and required interaction speed. You can enable any of the default context items here: ![Context](https://docs.folivora.ai/docs/media/3008_halloai_context2025-09-15T15:05:24.848Z.png) Be aware that enabling more context items also means a larger context size. This leads to higher token usage and often slower response times. Custom Contexts --------------- If you want to provide custom, dynamic context to your AI Assistant you can go to the "Automations, Named & Other Triggers" section in BetterTouchTool and add a new "h@llo.ai - Custom AI Context" ![alt text](https://docs.folivora.ai/docs/media/3008_halloai_context2025-09-15T15:18:26.538Z.png) Custom context's are defined by a JavaScript function that can use all of BTT's scripting functionality, see [BetterTouchTool JavaScript](https://docs.folivora.ai/docs/1106_java_script.html) results matching "" =================== No results matching "" ====================== --- # Usage Without UI · GitBook [Usage Without UI](https://docs.folivora.ai/) ============================================== Usage Without Showing UI ======================== There are situations where you might want an AI assistant do a task without showing any UI. In BetterTouchTool's AI assistants you can do that by providing your task description in the initial user message text area in AI Configuration => Tools & Context and by additionally activating these options: * Stop & Close After Processing Initial User Message * Invisible Operation / Don't Show UI ![WithoutUI](https://docs.folivora.ai/docs/media/3010_halloai_usage_without_ui2025-09-16T12:51:05.037Z.png) results matching "" =================== No results matching "" ====================== --- # MCP · GitBook [MCP](https://docs.folivora.ai/) ================================= h@llo.ai MCP ============ BetterTouchTool's MCP server configuration by default is stored in this file: ~/Library/Application Support/BetterTouchTool/AI/btt-mcp-config.json You can either edit it directly in your favorite text editor or in BTT's UI. Example configuration: { "mcpServers": { "shell": { "command": "uvx", "args": [\ "mcp-shell-server"\ ], "env": { "ALLOW_COMMANDS": "say, ls,cat,pwd,grep,wc,touch,find" } }, "sequential-thinking": { "command": "npx", "args": ["-y", "@modelcontextprotocol/server-sequential-thinking"] } } } **Imortant** Even after configuring your mcp json file, you still need to activate the MCP tools individually for any of your assistants. This is done in the [Tools & Context section in the configuration](https://docs.folivora.ai/docs/3009_halloai_tools.html) ### Alternative Configuration Locations It can also be stored in these files - however you should pick one and stick with that. "~/.config/btt/mcp/.mcp.json" "~/.btt/mcp/.mcp.json" "~/Library/Application Support/BetterTouchTool/AI/" "/Library/Application Support/BetterTouchTool/AI/" results matching "" =================== No results matching "" ====================== --- # Trigger Conditions & Conditional Activation Groups · GitBook [Trigger Conditions & Conditional Activation Groups](https://docs.folivora.ai/) ================================================================================ Conditional Activation Groups and Trigger Conditions ==================================================== BetterTouchTool offers two different ways to define conditions for triggers. **Conditional Activation Groups (CAGs)** behave like apps added to BTT. You can assign triggers to CAGs and these triggers will then only work if the conditions defined in the CAG are met. Conditional Activation Groups are automatically evaluated whenever their underlying variables change. That's why CAGs only contain variables that can be evaluated very quickly & in a performant way. Example use cases for CAGs: * create a CAG that groups multiple apps, for example if you want to assign the same shortcuts to all web browsers * create triggers that only work in a specific wifi **Advanced Trigger Conditions (ATCs)** are conditions you directly assign to a specific trigger. In contrast to CAGs, Advanced Trigger Conditions are only evaluated **after** BetterTouchTool has recognized a specific trigger. BetterTouchTool then evaluates the conditions and decides whether it should perform the actions you have assigned to the trigger, or whether it should stop. Because Advanced Trigger Conditions are only evaluated after BTT has recognized a trigger it doesn't matter whether the evaluation takes a few more milliseconds, and thus they allow for some more complicated conditions. However ATCs are in other ways more limited than CAGs. For example if you assign a keyboard shortcut to a CAG, it will only work while that CAG is active. If it is not active, the keyboard shortcut will perform its default macOS functionality. In contrast a keyboard shortcut that has some Advanced Trigger Conditions defined, will always be caught by BTT, only after it has been caught & recognized BTT will evaluate the conditions. This means in case of ATCs the shortcut will NOT fall back to the default system implementation if the conditions are false. Example use cases for Advanced Trigger Conditions: * create multiple same triggers, which do different things depending on their conditions. E.g. one keyboard shortcut to do multiple things. Configuring Conditional Activation Groups (CAGs): ------------------------------------------------- ![](https://docs.folivora.ai/docs/media/cag_setup1.png) ![](https://docs.folivora.ai/docs/media/cag_setup2.png) To create a nested rule like shown in the screenshot, hold the option key while pressing the little + button. Configuring Advanced Trigger Conditions (ATCs): ----------------------------------------------- ![](https://docs.folivora.ai/docs/media/trigger_conditions_1.png) ![](https://docs.folivora.ai/docs/media/trigger_conditions_2.png) * * * Available Variables ------------------- Currently the following variables are available and can be used in conditions: **Information about UI elements** * visible\_window\_list * This lets you check for specific windows. You can see the list of currently visible windows by clicking the "Visible Windows Viewer" button on the top right. Afterwards you can use the "contains" condition to check whether the list contains a specific window. * ![](https://docs.folivora.ai/docs/media/trigger_conditions_3.png) * hovered\_element\_details * This gives information about the currently hovered UI element. You can view the current information by pressing the "UI Element Viewer. You can use the "contains" condition to check if the details shown in the "UI Element Viewer" contain a specific text. * focused\_element\_details. * ![](https://docs.folivora.ai/docs/media/trigger_conditions_4.png) * color\_under\_cursor * The hex color of the pixel at the cursor location **Mouse Buttons** * left\_mouse\_down * middle\_mouse\_down * right\_mouse\_down **Touches** * fingers\_touching\_trackpad * thumb\_recognized * If a thumb has been recognized on the trackpad, this will be one. Otherwise 0 * thumb\_x\_percent * thumb\_y\_percent * fingers\_touching\_magic\_mouse **Mouse Position (from Top Left Corner:)** * mouse\_position\_x * mouse\_position\_y * mouse\_pos\_percent\_x * mouse\_pos\_percent\_y **Mouse position in active window:** * dist\_x\_active\_win\_top\_left * dist\_y\_active\_win\_top\_left * * * * dist\_x\_active\_win\_top\_right * dist\_y\_active\_win\_top\_right * * * * dist\_x\_active\_win\_btm\_left * dist\_y\_active\_win\_btm\_left * * * * dist\_x\_active\_win\_btm\_right * dist\_y\_active\_win\_btm\_right * * * * percent\_x\_active\_win\_btm\_left * percent\_y\_active\_win\_btm\_left * * * * percent\_x\_hovered\_win\_btm\_left * percent\_y\_hovered\_win\_btm\_left **Frame of screen with mouse:** * mouse\_screen\_x * mouse\_screen\_y * mouse\_screen\_width * mouse\_screen\_height **Frame of screen with focused window:** * focused\_screen\_x * focused\_screen\_y * focused\_screen\_width * focused\_screen\_height **Variables:** * BTTLastTriggeredAction * BTTLastTriggeredUUID * BTTLastTriggerTime * BTTActiveAppBundleIdentifier * Any custom variable you define can also be used. Example: Use one gesture for all your window snapping needs ----------------------------------------------------------- This example makes use of the "percent\_x\_hovered\_win\_btm\_left / percent\_y\_hovered\_win\_btm\_left" variable to execute different actions depending on the location of the mouse in the hovered window: [/uploads/default/original/3X/1/d/1dbd95e86992737156bd8ba492cf2b805c05595c.mov](https://community.folivora.ai/uploads/default/original/3X/1/d/1dbd95e86992737156bd8ba492cf2b805c05595c.mov) Details on how to set this up: [https://community.folivora.ai/t/using-one-gesture-for-all-your-window-management/28336](https://community.folivora.ai/t/using-one-gesture-for-all-your-window-management/28336) **Another example**: use the number of fingers touching the trackpad to execute different functionality: [https://community.folivora.ai/t/use-number-of-fingers-touching-the-trackpad-as-modifier-for-keyboard-shortcuts/28272](https://community.folivora.ai/t/use-number-of-fingers-touching-the-trackpad-as-modifier-for-keyboard-shortcuts/28272) * * * results matching "" =================== No results matching "" ====================== --- # Embedding Floating Menus · GitBook [Embedding Floating Menus](https://docs.folivora.ai/) ====================================================== Embedding Floating Menus into a h@llo.ai Chat Assistant ======================================================= ... coming later today results matching "" =================== No results matching "" ====================== --- # Window Snapping · GitBook [Window Snapping](https://docs.folivora.ai/) ============================================= Window Snapping =============== This chapter descripes the various window snapping functionalities of BetterTouchTool and how to configure them. * [Basic Window Snapping Setup](https://docs.folivora.ai/docs/101_window_snapping.html) * [Advanced Customization Options](https://docs.folivora.ai/docs/102_window_snapping_advanced.html) * [Snapping with gestures or shortcuts](https://docs.folivora.ai/docs/103_window_snapping_gestures.html) * [Custom Snap Areas](https://docs.folivora.ai/docs/104_snap_areas.html) results matching "" =================== No results matching "" ====================== --- # Basic Window Snapping Setup · GitBook [Basic Window Snapping Setup](https://docs.folivora.ai/) ========================================================= Window Snapping & Moving ======================== Window snapping is a very powerful feature in BetterTouchTool. It allows you to easily arrange windows on your Mac by, for example, using your mouse, trackpad gestures, or keyboard shortcuts. For a quick introduction, watch the video below: Oops, your browser does not support the playback of this video. Basic Window Snapping Setup =========================== Window snapping is enabled by default, however you can customize many things in the settings: ![preferences](https://docs.folivora.ai/docs/media/new/windowsnapping.jpg) On how to access the settings see [Settings](https://docs.folivora.ai/docs/5_settings.html) Basic Usage =========== Using window snapping is quite easy. Simply drag the window you want to snap to the side of the screen you want to snap it to. For example, if you want to make the current window take up the left half of the screen, drag the window to the left edge of the screen until your cursor touches the left edge. When you see the expanding box, you can let release the window to make it fill up on the left side. If you want to restore the window to its original size, just drag the window away from the snapped position and it will be resized automatically. There are a number of different areas where you can drag windows to: * The left/right side of the screen to make the window take up the left/right half * Any of the four corners of the screen to make the window take up a quarter of the screen in that corner * The top of the screen, which will maximize the window results matching "" =================== No results matching "" ====================== --- # Control Action Sequence Flow · GitBook [Control Action Sequence Flow](https://docs.folivora.ai/) ========================================================== Control Flow Actions ==================== Starting with BetterTouchTool 4.245, some actions to control the action flow are included in BTT: * If Condition (based on variables) * If Image Visible On Sceen * Loop / Repeat * Cycle through multiple actions (on repeated trigger) * Delay (blocking & async) ![if condition](https://docs.folivora.ai/docs/media/if4.png) If Conditions ------------- If conditions always need at least 4 actions in BTT: * The condition (which can either be based on variables, or whether a specific image can be found on your screen) * An action that is executed if the if condition is true * The "End If Condition" In case you want to execute different actions when the condition is false you need to add the following before the End If: * The "Else" branch action * The actions that shall be executed in case the condition is false In the screenshot above you see an example that begins by asking the user for input. That input is saved to the variable var1. This is follwed by an if condition that checks whether the var1 variable is 1 and does execute a "Show HUD" action if thats the case. This is followed by another if that executes different actions depending on whether the var1 variable is equal to 0 or not. Wait For Condition To Become True --------------------------------- This is a helpful action if you want to wait for something before triggering other actions. For example if you want to create a keyboard shortcut that automatically maximizes a window once the app has fully launched, you could do it like in this screenshot: ![if condition](https://docs.folivora.ai/docs/media/wait_for_condition.png) Loops ===== If you want to repeat the same actions multiple times, use the "Start Repeat / For Loop" action. The following screenshot contains an example that first asks the user how many times the loop shall repeat, then executes a "Show HUD" action multiple times. You can access the current counter of a loop (e.g. via scripts) using the variable loop\_**loopname** variable, which will automatically be populated. ![loop](https://docs.folivora.ai/docs/media/loop.png) Cycle Through Mutliple Actions ============================== Sometimes you might want to use one trigger to execute multiple different actions when it is triggered repeatedly. For example a keyboard shortcut you press multiple times to cycle through different window positions. You can achieve this using the "Cycle Through Multiple Actions" action. One such action can contain multiple action sequences that will be triggered step by step, one action sequence per time the trigger is executed. ![cycle multiple](https://docs.folivora.ai/docs/media/cycle_multiple.png) ![cycle multiple 2](https://docs.folivora.ai/docs/media/cycle_multiple2.png) results matching "" =================== No results matching "" ====================== --- # Snapping with gestures or shortcuts · GitBook [Snapping with gestures or shortcuts](https://docs.folivora.ai/) ================================================================= Snap using Triggers =================== BetterTouchTool offers an extensive set of actions that allow you to move & resize windows. By assigning these actions to some custom triggers (e.g. keyboard shortcuts or trackpad gestures) you can create nice workflows easily. ![preferences4](https://docs.folivora.ai/docs/media/new/snaptrigger.jpg) In case the default sizes / positions don't work for you, these is also a predefined action called **Custom Move/Resize**, which allows you to resize and move windows to completely customizable positions. results matching "" =================== No results matching "" ====================== --- # Advanced Customization Options · GitBook [Advanced Customization Options](https://docs.folivora.ai/) ============================================================ Advanced Window Snapping Setup ============================== BetterTouchTool's window snapping is very customizable. You can change the appearance but also the behavior to fit your style & workflow. To access and change the window snapping settings, open the preferences window and adjust as you want. On how to access the settings see [Settings](https://docs.folivora.ai/docs/5_settings.html) . ![preferences2](https://docs.folivora.ai/docs/media/new/windowsnapping.jpg) ![preferences3](https://docs.folivora.ai/docs/media/new/snapappearance.jpg) ![preferences4](https://docs.folivora.ai/docs/media/new/snapadvacned.jpg) Only Enable Specific Window Snapping Areas ------------------------------------------ You can choose where windows shall be able to snap to. The options are **left edge, top edge, right edge and corners**. You may notice that those options are available twice in the Preferences window, once they are titled **While dragging window normally** and once they are labelled **While using predefined actions start/stop moving**. Dragging a window normally means dragging it with your mouse's or trackpad's default "click & drag" functionality like you would usually drag around a window. Additionally BetterTouchTool has two predefined actions called "Start moving" and "Stop moving" (those are pretty great when combined with the "two finger touch top" gesture for the Magic Mouse). #El Capitan: Delay Mission control on top edge ---------------------------------------------- _This option is enabled by default if BetterTouchTool is running on OS X 10.11 (El Capitan)._ In macOS El Capitan Apple added a feature that unfortunately kind of conflicts with BetterTouchTool's window snapping: When dragging a window beyond the top edge of the screen Mission Control opens. On the one hand this is a great feature, however it will often accidentally trigger while trying to snap a window to the top with BetterTouchTool. This is why I have added an option to "delay" this feature while BetterTouchTool is running. When this option is activated you'll have to move your cursor further beyond the top edge of the screen in order to trigger the Apple feature. So actually "delay" may be the wrong term, and I should probably change it. ### Restore old window size if window is dragged away again _This option is activated by default_ If activated BetterTouchTool will try to restore the size a window had before snapping to one of the snap areas when you drag it away again later. You can additionally enable the option "Don't restore window size if alt/opt is pressed while dragging the window away" or "Don't restore if window size was fullscreen / maximized" ### Delay before snapping I don't know if this option is used by anybody, but it allows you to add a delay before a window will snap to the edges or corners of the screen. ### Leave gap above dock Some uses wanted to be able to leave a little gap above the dock when snapping windows. You can do this with this option. Appearance ---------- ### Background & Border Color: With these options you can change the colors of the window snapping preview overlay (background & border). The default OS X color picker is used, don't miss the opacity slider where you can set the transparency. ![preferences](https://docs.folivora.ai/docs/media/colorpicker.png) ### Border Width Changes the border width of the window snapping preview overlay. ### Blur background: This is currently not working (at least on El Capitan). I'll look into this soon. ### Padding / Empty space between edges Add empty space between the snapped windows and other windows or the edges of the screen. ### Width Sliders With the width sliders on the bottom of the advanced window snapping preferences you can change the default window width when snapping to the left or to the right side of the screen. ### Custom Snap Areas If you need more customization options and maybe even want to snap your windows to other positions & sizes than offered by default, have a look at the [Custom Snap Area Section](https://docs.folivora.ai/docs/snap_areas.md) results matching "" =================== No results matching "" ====================== --- # Window Moving and Resizing · GitBook [Window Moving and Resizing](https://docs.folivora.ai/) ======================================================== Window Moving & Resizing ======================== BetterTouchTool allows you to easily move windows without needing to drag their titlebar. Moving/Resizing via Modifier Key -------------------------------- You can choose modifier keys that will start moving or resizing a window in the BetterTouchTool Settings: ![alt text](https://docs.folivora.ai/docs/media/image-41.png) After enabling this, just holding the modifier keys and moving your mouse will move your window - regardless of where in the window your mouse cursor currently is. Moving via Click + Modifier Key ------------------------------- You can achieve this using the "Normal Mouse" section in BTT. You need to configure two left-click triggers that use the modifiers you want. The first must be set to trigger on mouse down, the second must be set to trigger on mouse up. Assign the predefined action "Start Moving" to the first and the predefined action "Stop Moving" to the second. ![alt text](https://docs.folivora.ai/docs/movebyclick.png) Moving via Magic Mouse ---------------------- The 2 Finger Touch Top or 3 Finger Touch Top gestures combined with the predefined actions "Start/Stop Moving Windows" or "Start/Stop Resizing Windows" ![alt text](https://docs.folivora.ai/docs/media/image-42.png) results matching "" =================== No results matching "" ====================== --- # Custom Snap Areas · GitBook [Custom Snap Areas](https://docs.folivora.ai/) =============================================== Custom Snap Areas ================= Custom snap areas are a powerful feature, which is not yet covered in this documentation. I recommend to have a look at some of the Youtube Videos that explain how to use it. [https://www.youtube.com/results?search\_query=BetterTouchTool+Snap+Areas](https://www.youtube.com/results?search_query=BetterTouchTool+Snap+Areas) **Note** The BTT menubar icon must be enabled in order to create snp areas: ![snapareamenu](https://docs.folivora.ai/docs/media/new/snapareamenu.jpg) ![snapareasettings](https://docs.folivora.ai/docs/media/new/snapareasettings.jpg) results matching "" =================== No results matching "" ====================== --- # Keyboard Shortcut Triggers · GitBook [Keyboard Shortcut Triggers](https://docs.folivora.ai/) ======================================================== Keyboard Shortcuts ================== Keyboard Shortcuts are probably one of the most used features in BTT. You can record them and make them do whatever you want by assigning one or multiple actions, which will be triggered as soon as you press the shortcut. ![keyboardshortcutsetup](https://docs.folivora.ai/docs/media/new/keyboard_shortcut_setup.jpg) Advanced Shortcut Settings ========================== For most use cases recording a shortcut is simple and straight forward. However there are various advanced options, e.g. to show a HUD overlay, to differentiate between left/right modifier keys, set repeat rates etc. HUD Overlay ----------- You can make BetterTouchTool display a little HUD overlay (like e.g. the ones that show up when changing the volume or brightness on your Mac.). This works the same as for Gestures in BTT. Differentiate between left and right modifier keys -------------------------------------------------- Recent versions of BetterTouchTool can differentiate between left and right modifier keys on your keyboard. By default if you record a shortcut, it works for both, the left and the right modifier keys. E.g. if you record cmd+space it would not matter whether you press the left cmd key and the space key or the right cmd key and the space key. By checking the checkbox 1 (in the screenshot above), you can enable BTT to differentiate between them. This can be very useful and gives you many more shortcut options. For example, cmd+space usually triggers Spotlight on macOS. However you probably always trigger it with the left (or right) cmd key. Now wouldn't it be useful if you could set the right cmd + space to some other action? Auto adapt to keyboard layout ----------------------------- In case you are working with different keyboard layouts, BTT offers two options. By default BTT will save the physical location of the keys on the keyboard, however this means that the meaning of the shortcut may change when changing keyboard layouts. To prevent this you can activate the "Auto adapt to current keyboard layout" option. This option has only recently been added - if you want to enable it for existing shortcuts you will need to re-record them. Trigger on key-down / key up ---------------------------- BetterTouchTool allows you to select whether you want a shortcut to trigger on key down or on key up. This can be useful if you want to e.g. trigger one action on key down (e.g. middle-mouse down using the custom click predefined action) and another action on key up (e.g. middle-mouse up). In such a case you would just configure two shortcuts with the same keys. Then you would check the "Trigger on down" checkbox for one of them. Key Repeat ---------- By default BetterTouchTool only triggers the action you assign to a keyboard shortcut once. However you can also configure it to trigger repeatedly while holding down the shortcut. If you want to do this, you need to check the "Trigger on key-down" checkbox and the "Repeat action" checkbox. Then you can use the sliders to choose the key repeat rate and the delay after which the first repeat should happen. Prevent recursive triggers -------------------------- There is one more checkbox in the settings, and it's called "prevent recursive triggers". By default you can have multiple shortcuts defined in BTT. E.g. "cmd+a" and "cmd+b". Now if you assign an action or shortcut to the cmd+a shortcut, which again triggers cmd+a for some reason this would cause an endless loop because BetterTouchTool would catch&trigger that shortcut again and again. To prevent this, you can check the "prevent recursive triggers" checkbox. results matching "" =================== No results matching "" ====================== --- # Defining a Hyper Key · GitBook [Defining a Hyper Key](https://docs.folivora.ai/) ================================================== Hyper Key ========= BetterTouchTool (starting with version 3.540) allows you to use Caps Lock as a Hyper Key. A Hyper Key is a magical key which automatically presses all the standard modifiers (ctrl+shift+cmd+opt). Why would you need that? Because on macOS many of the easy to reach shortcut combinations are already used by the system or by some app. By using the Hyper Key can can define shortcuts in BTT that are pretty much guaranteed to not be used anywhere else (who would want to press e.g. ctrl+shift+cmd+opt+ P). This makes room for tons of easy to remember and easy to use shortcuts. 1 Configuring the Hyper Key --------------------------- Go to the **Keyboard Shortcuts** section in BTT and add a new shortcut. Record the Caps Lock Key. If it doesn't record for some reason make sure you have set Caps Lock to Caps Lock in System Preferences => Keyboard => Modifiers for the keyboard you are using. ![hyperkey1](https://docs.folivora.ai/docs/media/hyperkey_1.png) After doing that assign a new action to the Caps Lock key - select **Act as Hyper Key** from the list. ![hyperkey2](https://docs.folivora.ai/docs/media/hyperkey_2.png) Now the basic setup is done and you can start to use your Hyper Key. 2 Advanced Hyper Key Configuration ---------------------------------- In some situations it might be helfpul to not only use the Hyper Key as a fancy modifier key but also trigger some other functionality when it is not being used as part of a shortcut. For example you might want to retain the ability to trigger the real Caps Lock functionality or your might want to use it as an ESC key. Or you might want to fall back to the standard Caps Lock functionality via the predefined action "Toggle Caps Lock" This can be achieved by using the action Category "Actions Executed On (Unused) Hyper Key Release": ![alt text](https://docs.folivora.ai/docs/media/image-45.png) In this example it executes the esc key when released without triggering another shortcut. results matching "" =================== No results matching "" ====================== --- # Low Level Key Remapping · GitBook [Low Level Key Remapping](https://docs.folivora.ai/) ===================================================== Low Level Key Remapping ======================= Starting with BTT v4.988 BetterTouchTool allows you to do low level remapping of one key to another. This will really remap your keys, so the system will think that a specific key is now a different key. This is only for pretty specific scenarios (e.g. if you want to transform right-shift into forward delete or similar) There are two ways to trigger it: The new trigger type "Remap Keyboard Key" in the "Automations, Named & Other Triggers" section The predefined action "Remap Keyboard Key (Low Level)" This example would remap the a key to the b key: ![alt text](https://docs.folivora.ai/docs/remapkey.png) In case you run into any issues you can reset the remappings in the settings: ![alt text](https://docs.folivora.ai/docs/media/image-43.png) results matching "" =================== No results matching "" ====================== --- # Touch Bar Triggers · GitBook [](https://docs.folivora.ai/docs/401_touch_bar.html#) [](https://docs.folivora.ai/docs/401_touch_bar.html#) AA SerifSans WhiteSepiaNight [Touch Bar Triggers](https://docs.folivora.ai/) ================================================ BetterTouchTool Touch Bar ========================= BetterTouchTool allows you to completely customize the Touch Bar for any application. This chapter describes how to do that. * [Touch Bar: Basics](https://docs.folivora.ai/docs/402_touch_bar_basics.html) * [Touch Bar Widgets](https://docs.folivora.ai/docs/403_touch_bar_widgets.html) * [Touch Bar Gestures](https://docs.folivora.ai/docs/404_touchbar_gestures.html) * [Touch Bar Advanced Configuration](https://docs.folivora.ai/docs/405_touch_bar_advanced.html) **People have shared awesome BetterTouchTool Touch Bar setups on our community platform, so definitely have a look there**: [https://community.folivora.ai](https://community.folivora.ai/) results matching "" =================== No results matching "" ====================== --- # Touch Bar Gestures · GitBook [](https://docs.folivora.ai/docs/404_touchbar_gestures.html#) [](https://docs.folivora.ai/docs/404_touchbar_gestures.html#) AA SerifSans WhiteSepiaNight [Touch Bar Gestures](https://docs.folivora.ai/) ================================================ Touch Bar Gestures ================== BetterTouchTool >= 2.500 supports a few Touch Bar Gestures. * Two Finger Swipe Left / Right * Three Finger Swipe Left / Right * Four Finger Swipe Left / Right These gestures are perfect for adjusting volume or brightness and can save you some space on the Touch Bar by replacing the sliders. They are very easy to set up. Just click the "+Widget/Gesture" button and select the gesture you want to use. Then assign the action you want to use (e.g. volume up/down). ![touchbar_basics](https://docs.folivora.ai/docs/media/touchbargestures1.png) In the advanced settings you can select how often the gesture should trigger: ![touchbar_basics](https://docs.folivora.ai/docs/media/touchbargestures2.png) Advanced: Passing the slided value to an Apple Script ----------------------------------------------------- If you assign the "Run Apple Script in Background" action to a Touch Bar gesture, it will automatically receive the percentage that has been slided in a specific direction. Your Apple Script needs to look like this: (values 0 - 1, to get the real percentage multiply it by 100) on bttWidgetSliderMoved(percentageMoved) #example to change system volume: set volume output volume percentageMoved * 100 end bttWidgetSliderMoved results matching "" =================== No results matching "" ====================== --- # Clipboard Manager · GitBook [Clipboard Manager](https://docs.folivora.ai/) =============================================== Clipboard Manager ================= BetterTouchTool integrates a nice little clipboard manager. You can activate it by assigning the predefined action "Show Clipboard/Pasteboard History" to some trigger in BTT. Features: --------- * Tracks your clipboard history and allows you to access everything you copied * Can preview all kind of copied files, e.g. pdf, videos, office documents, images etc. * Can show all the different data types copied to your clipboard and show them in different view modes (e.g. Hex, Raw Text, Rendered...) * Keep favorite snippets forever * Search through your clipboard history * Allows to edit text inside of the clipboard manager * Allows to **annoate & edit screenshots** and other images * This makes for a great screenshot tool if you combine it with the standard macOS "Copy picture of selected area to clipboard", which can be configured in System Preferences => Keyboard => Shortcuts => Screenshots * Allows to paste / save as file * Comes with a basic set of text transformation functions (e.g. plain text) * Since version 3.356 you can define [custom Java Script transformer functions](https://docs.folivora.ai/docs/8c_text_transformer_functions.html) , this allows you to transform the text before pasting it. * Only on your computer - no data is synced to any sort of cloud Here is a video from Dec 21, 2024 showing some of the features: ![alt text](https://docs.folivora.ai/docs/clipboard_manager.png) **Preview all sort of copied files** ![clipboardmanager](https://docs.folivora.ai/docs/media/clipboard_preview.png) **Edit images:** ![clipboardmanager](https://docs.folivora.ai/docs/media/clipboard_ex3.png) results matching "" =================== No results matching "" ====================== --- # Touch Bar Basics · GitBook [](https://docs.folivora.ai/docs/402_touch_bar_basics.html#) [](https://docs.folivora.ai/docs/402_touch_bar_basics.html#) AA SerifSans WhiteSepiaNight [Touch Bar Basics](https://docs.folivora.ai/) ============================================== Touch Bar ========= BetterTouchTool let's you completely customize your Touch Bar. **People have shared awesome BetterTouchTool Touch Bar setups on our community platform, so definitely have a look there**: [https://community.folivora.ai](https://community.folivora.ai/) ![tb_setup](https://docs.folivora.ai/docs/media/new/tb1.jpg) Known Limitations ----------------- * The only way to get rid of the x icon on the left side of the Touch Bar is to disable "Show macOS Control Strip" in the General Touch Bar settings in BTT * When hiding the Touch Bar with the x button on the left, it will require tapping the BTT icon in the Control Strip twice to get it back. * You can not partially customize an app's Touch Bar. You can only replace it completely using BTT: Adding New TouchBar Buttons --------------------------- * Decide whether you want to show your Touch Bar button globally or just for one specific application. Select accordingly in the application list on the very left of the BTT Configuration. * Click the "Add TouchBar" button in the TouchBar tab * Enter a name (that's required for it to show up in the Touch Bar) * Assign any action or shortcut you want. Customizing the Touch Bar Button Appearance ------------------------------------------- * All customization is done in the configuration side-bar on the right (you can undock it like in this screenshot if you want to): ![tb_appearance](https://docs.folivora.ai/docs/media/new/tb_sidebar.png) App Specific Configuration -------------------------- * For any app you can choose whether you want to show the BTT Touch Bar or rather show the app's default bar. ![tb_icons](https://docs.folivora.ai/docs/media/new/tb_app.jpg) General Settings ---------------- * You can decide if you want to show the Control Strip on the right side of the Touch Bar, or if you want to have more space available for your buttons and don't show it. (Hint: you can configure your Control Strip in System Preferences => Keyboard => Customize Control Strip) * You can decide whether to show the BetterTouchTool icon in the Control Strip. (If you don't show it, you have to use the predefined action "Toggle BetterTouchTool Touch Bar" to show or hide the BTT Touch Bar.) * You can decide whether you want to Show the global actions also if app-specific actions are available. Hint: by long pressing the BTT icon you can force it to only show the global actions regardless of this setting. ![tb_icons1](https://docs.folivora.ai/docs/media/new/tb_settings1.png) ![tb_icons2](https://docs.folivora.ai/docs/media/new/tb_settings2.png) results matching "" =================== No results matching "" ====================== --- # JS Text Transformer Functions · GitBook [JS Text Transformer Functions](https://docs.folivora.ai/) =========================================================== Java Script Text Transformer functions ====================================== Starting with BTT 3.356 you can define custom Java Script functions that can be used to transform text inside of BTT. Use Cases --------- * **[BTT Clipboard Manager](https://docs.folivora.ai/docs/8_clipboardmanager.html) :** All Java Script Text Transformer functions automatically show up as actions in the BTT Clipboard Manager. This allows to transform copied text before pasting it. ![clipboardmanager](https://docs.folivora.ai/docs/media/clipboard_transformer.png) * **In-Place Text Replacement** Combined with the predefined action **Transform Selected Text With JavaScript** this can be used for replacing selected text with some transformed version: Sorry, your browser doesn't support embedded videos, but don't worry, you can [download it](https://docs.folivora.ai/docs/8c_text_transformer_functions.html) and watch it with your favorite video player! Transformer functions also work with the **[Insert / Paste / Type Custom Text](https://docs.folivora.ai/docs/8b_paste_type_custom_text.html) ** action. How to ------ To create a new transformer function go to the "Named & Other Triggers" section in BetterTouchTool. Then create a new trigger and select "Clipboard Manager / Java Script Transformer". ![clipboardmanager](https://docs.folivora.ai/docs/media/transformer_function.png) There you should enter a name for the transformer. Optionally you can select a pasteboard type (advanced & optional, you usally don't need that for text) and you can also select a keyboard shortcut and icon which will be helpful in the BTT clipboard manager. How to define transformer functions ----------------------------------- There are three requirements for the transformer functions: 1. The transformer functions always need to be defined as async. 2. It must take a parameter and that parameter needs to be called clipboardContentString 3. It must return a string Inside of that function you can use all standard Java Script and additionally the BTT additions to e.g. run shell scripts or apple scripts (see ) **Examples** Simple function that converts text to upper case: async (clipboardContentString) => { //example return clipboardContentString.toUpperCase() } Function that creates 𝕗𝕒𝕟𝕔𝕪 𝕝𝕠𝕠𝕜𝕚𝕟𝕘 text: async (clipboardContentString) => { clipboardContentString= clipboardContentString.replace(/[a-z]/g, (char) => { const code = char.charCodeAt() - 97; return String.fromCharCode(55349, code + 56658); }); return clipboardContentString; } Function that replaces a selected math equation with its result (stupid example :-): async (clipboardContentString) => { return eval(clipboardContentString); } Function that executes a terminal command async (clipboardContentString) => { let shellScript = `date`; let shellScriptWrapper = { script: shellScript, // mandatory launchPath: '/bin/bash', //optional - default is /bin/bash parameters: '-c', // optional - default is -c (please separate additional parameters using ;;) environmentVariables: '' //optional e.g. VAR1=/test/;VAR2=/test2/; }; let result = await runShellScript(shellScriptWrapper); return result } results matching "" =================== No results matching "" ====================== --- # Sending Keyboard Shortcuts · GitBook [Sending Keyboard Shortcuts](https://docs.folivora.ai/) ======================================================== Sending Keyboard Shortcuts to Other Applications ================================================ BetterTouchTool allows you to send any kind of keyboard shortcut to the system. The easiest way to do this is to just open the list of actions, go to the "Send Keyboard Shortcut" section and record a new shortcut. ![sendshortcut](https://docs.folivora.ai/docs/media/new/sendingkeyboardshortcut.jpg) When doing this, BTT will simulate this shortcut as if you'd press it on a real keyboard. This means it will be sent to whichever is the active app at that time. ### Changing Keyboard Layouts In case you are working with different keyboard layouts, BTT offers two options. By default BTT will save the physical location of the keys on the keyboard, however this means that the meaning of the shortcut may change when changing keyboard layouts. To prevent this you can activate the "Auto adapt to current keyboard layout" option. This option has only recently been added - if you want to enable it for existing shortcuts you will need to re-record them. ![autoadapt](https://docs.folivora.ai/docs/media/new/autoadapt.jpg) Sending Shortcuts to Specific Applications ------------------------------------------ One more thing that BTT can do is sending keyboard shortcuts to specific applications. This can be useful if the application you want to control is currently not the active one. (e.g. if you want to pause an iTunes track, but iTunes is not active) This can be done using the predefined action **Send Shortcut to Specific App** ![specificapp](https://docs.folivora.ai/docs/media/new/shortcut_specificapp.jpg) This action will try to directly access the application and simulate the shortcut. In some cases this may not be possible - then you can choose to temporarily bring the selected app to front, send the shortcut and immediately switch back to the previously active application. results matching "" =================== No results matching "" ====================== --- # Insert / Type / Paste Custom Text · GitBook [Insert / Type / Paste Custom Text](https://docs.folivora.ai/) =============================================================== Insert / Type / Paste Custom Text ================================= This action allows you to paste / type some static text you define. It can also work with some dynamic data and allows to transform text with Java Script Text Transformer functions (starting with BTT 3.356). You can assign this action to any trigger in BTT, in this example I'm assigning it to a keyboard shortcut: ![clipboardmanager](https://docs.folivora.ai/docs/media/paste_ex2.png) Advanced Dynamic Functionality ------------------------------ Instead of just pasting some static text, this action offers various dynamic behaviors. ### Dynamic Placeholders Using the "Insert Special" dropdown menu, you can choose from a few placeholders that will automatically be replaced when pasting: **Currently Selected Text or Clipboard Contents** This allows to include the currently selected text or the clipboard content. This is really powerful when combined with Java Script Text Transformer functions. (See bottom of this page) ![clipboardmanager](https://docs.folivora.ai/docs/media/paste_selected.png) Sorry, your browser doesn't support embedded videos, but don't worry, you can [download it](https://docs.folivora.ai/docs/8b_paste_type_custom_text.html) and watch it with your favorite video player! **Date / Time** This allows to insert custom date strings into your text. The placeholder that is used for this looks like this: `(BTT)@dateformat:MM/dd/yy hh:mm:ss a(BTT)` You can use any custom date format you like (see [http://www.unicode.org/reports/tr35/tr35-31/tr35-dates.html#Date\_Format\_Patterns](http://www.unicode.org/reports/tr35/tr35-31/tr35-dates.html#Date_Format_Patterns) ) for more details. ![paste date time](https://docs.folivora.ai/docs/media/paste_date_time.png) **Variables** You can access any variables that have been defined in BTT [(they can be defined via scripts)](https://docs.folivora.ai/docs/1105_variables.html) `(BTT)@variable:theVariableName(BTT)` Custom JavaScript Text Transformer Functions -------------------------------------------- Starting with BTT 3.356 this action allows to transform the text using [custom Java Script transformer functions](https://docs.folivora.ai/docs/8c_text_transformer_functions.html) before pasting it. ![paste transformer](https://docs.folivora.ai/docs/media/paste_transformer.png) results matching "" =================== No results matching "" ====================== --- # Show Custom Context Menu · GitBook [Show Custom Context Menu](https://docs.folivora.ai/) ====================================================== Show Custom Context Menu ======================== You can use the predefined action "Show Custom Context Menu (New)" to show a context menu with items you define. Each item defined in the menu can execute a sequence of actions. You can also add submenus. You can also let the items be retrieved dynamically via Java Script. See [Define Items via Simple JSON Format](https://docs.folivora.ai/docs/1108_simple_format.html) Also custom context menus work great with [Custom Menu Bar Status Items](https://docs.folivora.ai/docs/1008_custom_statusbar_items.html) ![custom context menu 1](https://docs.folivora.ai/docs/media/image-9.png) ![custom context menu configuration](https://docs.folivora.ai/docs/media/image-10.png) Showing anywhere on your screen: ![how it will look like](https://docs.folivora.ai/docs/media/image-11.png) Showing via a custom menu bar status item ![via custom menu bar status item](https://docs.folivora.ai/docs/media/image-16.png) results matching "" =================== No results matching "" ====================== --- # Screenshots · GitBook [Screenshots](https://docs.folivora.ai/) ========================================= Screenshots =========== BetterTouchTool offers multiple actions to capture screenshots: Capture Screenshot then edit in BTT (easiest) --------------------------------------------- This is my favorite action because it allows you to easily edit a screenshot after capturing it. It starts the default macOS screenshot utility (where you can switch between free selection and window selection by pressing the space key). After you have captured the screenshot it will allow you to edit and save the screenshot: ![screenshot](https://docs.folivora.ai/docs/media/new/screenshot.jpg) Capture & Edit Screenshot or Video (Using default macOS tools) -------------------------------------------------------------- This will launch the default macOS screenshot / video capture utility. Capture Screenshot (configurable) --------------------------------- This allows you to fully customize how you'd like to take a screenshot. This includes advanced options like delays, file formats, specific sizes etc. ![screenshots2](https://docs.folivora.ai/docs/media/new/screenshots2.jpg) results matching "" =================== No results matching "" ====================== --- # Extending Finder Context Menu · GitBook [Extending Finder Context Menu](https://docs.folivora.ai/) =========================================================== Extending the Finder Context Menu ================================= Starting with BetterTouchTool v4.560 you can extend the Finder context menu with custom menu items. For example this allows you to add "New File Here" items. ‼️ **Important** you need to enable the BetterTouchTool Finder Extension in System Settings => Extensions => Added Extensions ‼️ Here is an example preset that shows how to configure a custom context menu, which when triggered creates a new file in the current folder: [https://share.folivora.ai/sP/f6b2c92e-c621-4dae-b050-8bbb172b2cd5](https://share.folivora.ai/sP/f6b2c92e-c621-4dae-b050-8bbb172b2cd5) ![contextmenu](https://community.folivora.ai/uploads/default/original/3X/2/4/2416f3700a6fdd7158cddd2d827d82804b7fb506.png) The setup is done in the "Automations & Named & Other Triggers" section in BTT by adding a "Custom Finder Context Menu Items" trigger and assigning the Configure Custom Conntext Menu Items" action. ![finder1](https://docs.folivora.ai/docs/media/finder_context_1.png) When the context menu item is triggered, BTT will make these variables available that can be used e.g. in terminal commands or scripts: * **BTTFinderContextMenuTargetPath** (the path of the current folder) * **BTTFinderContextMenuSelectedItemPaths** (the paths of the selected items, separated by ;; ) * **BTTFinderContextMenuTriggeredUUID** (the UUID of the context menu item in BTT) For example with the "Run Terminal Command" action in BTT you can create a new file like this: touch "{BTTFinderContextMenuTargetPath/newfile.txt}" ![finder2](https://docs.folivora.ai/docs/media/finder_context_2.png) results matching "" =================== No results matching "" ====================== --- # Manage Menu Bar Status Items · GitBook [Manage Menu Bar Status Items](https://docs.folivora.ai/) ========================================================== Managing macOS Menu Bar Status Items ==================================== BetterTouchTool has multiple actions and features that allow you to easily make the macOS menubar more clean and accessible. Hide Menubar Items You Don't Need --------------------------------- For many users the top right status area of the macOS menubar gets quickly cluttered with many items. This makes it hard to see the really important ones and in some situations macOS even hides the items. BetterTouchTool allows you to temporarily hide items via these actions: * Show / Hide Menu Bar Status Icons Left Of Specific Icon * Hide Menu Bar Status Icons Left Of Specific Icon * Show Menu Bar Status Icons Left Of Specific Icon Or to reset any previous hide actions: * Show / Unhide All Menu Bar Status Icons / Items ### Example of showing / hiding menu bar status items via a keyboard shortcut: In this example BetterTouchTool is set up to toggle hide/show items left of the wifi icon via a keyboard shortcut. Note: There are some items like the screen recording icon that are prioritized by the system and can not be hidden. Your browser does not support the video tag. ### Example of showing / hiding menu bar status items via custom menu bar icons: In this example BetterTouchTool is set up to toggle hide/show items left of the wifi icon via a custom menu bar icons. Such custom menu bar icons can be configured in the "Automations, Named & Other Triggers" section. You can make them hide/show items left of themselves when being clicked. Your browser does not support the video tag. ### Other Useful Menu Bar Related Actions in BetterTouchTool **Save / Restore Order:** * Save Menu Bar Status Item Layout / Ordering * Restore Saved Menu Bar Status Item Layout / Ordering **Move & Click Items** * Move Menu Bar Status Item To New Position * Click Menu Bar Status Item // **Item Spacing** // _Change Menu Bar Item Spacing // // **Search** //_ Search Menu Bar Status Items This allows you to keep your items hidden and still access them by searching for them: ![alt text](https://docs.folivora.ai/docs/media/6e_manage_menubar_status_items2025-09-16T10:00:23.534Z.png) More Advanced Topics -------------------- Using Floating Menus you can do more advanced stuff like e.g. showing a separate bar with your hidden items on demand. However I believe the above actions should cover most use cases already. If you want to try the more advanced stuff, have a look here: [https://community.folivora.ai/t/bartender-controversy-tutorial-on-how-to-manage-menubar-status-items-via-btt/37429](https://community.folivora.ai/t/bartender-controversy-tutorial-on-how-to-manage-menubar-status-items-via-btt/37429) results matching "" =================== No results matching "" ====================== --- # Show List To Choose From · GitBook [Show List To Choose From](https://docs.folivora.ai/) ====================================================== Choose Action From List / Prompt ================================ You can use the predefined action "Choose From List" to show a Spotlight like interface that allows you to trigger actions you have defined. You can also let the items be retrieved dynamically via Java Script. See [Define Items via Simple JSON Format](https://docs.folivora.ai/docs/1108_simple_format.html) ![alt text](https://docs.folivora.ai/docs/media/image-14.png) ![alt text](https://docs.folivora.ai/docs/media/image-13.png) ![alt text](https://docs.folivora.ai/docs/media/image-12.png) results matching "" =================== No results matching "" ====================== --- # h@llo.AI - AI Assistants · GitBook [h@llo.AI - AI Assistants](https://docs.folivora.ai/) ====================================================== h@llo.ai - Beta - BetterTouchTool integrated AI Assistants ========================================================== ![Building Blocks\ ](https://docs.folivora.ai/docs/media/3000_hallo_ai2025-09-15T08:30:27.558Z.png) **Building Blocks for custom AI macOS automation assistants** Starting with version 5.611 BetterTouchTool allows you to create custom AI Assistants tailored to your specific needs. They come with many building blocks that allow for macOS automation but also generic usage. You can create one or multiple AI Assistants that can be triggered via any of BTT's triggers. I call this feature h@llo.ai :-) **Note:** This is very much a work in progress. Be cautious when using the custom AI assistants. At the moment, h@llo.ai is basically a big experimental playground that enables many things, but even I myself am still in the process of figuring out what works best. Please come to [https://community.folivora.ai](https://community.folivora.ai/) to share your experiences and ideas! I suggest to start with a very simple assistant and then allow it to do more things step by step. **Note2:** BetterTouchTool does not offer the AI services for h@llo.ai assistants itself. This means you will need to use your own API Keys. h@llo.ai assistants always directly communicate with the AI provider (e.g. OpenAI, Anthropic, local LLMs etc.). No chat data is sent to our servers. Make sure to accept the terms of the specific provider you chose to use. Overview ======== In the next sections I'll quickly describe the various building blocks you can use to create your own custom AI assistants. Go to [Getting Started](https://docs.folivora.ai/docs/3002_halloai_getting_started.html) if you want to see instructions on how to get started with your own assistant. The Chat Interface ------------------ While h@llo.ai assistants can also operate without showing user interface (see [Use Without Showing UI](https://docs.folivora.ai/docs/3010_halloai_usage_without_ui.html) ), most of the time you'll probably want to use the chat interface: Initially the assistant opens a Spotlight like interface where you can enter a new request or choose from your existing ones: ![Spotlight Like Interface](https://docs.folivora.ai/docs/media/3000_hallo_ai2025-09-15T08:52:57.593Z.png) The interface then expands once you submit your request: ![Expanded](https://docs.folivora.ai/docs/media/3000_hallo_ai2025-09-15T08:56:53.887Z.png) Tools ----- BetterTouchTool integrates many tools the AI Assistants can use. By default the h@llo.ai assistants don't have access to any tool, you need to enable the ones you want it to be able to access. Many of the tools are super powerful, but also pretty dangerous. Make sure you have a good backup system in place and be wary of prompt injections. Some examples for powerful tools are: * **run\_shell\_script**: to run arbitrary shell / terminal commands. * **run\_apple\_script**: automate apps via Apple Script. Same security considerations as for run\_shell\_script apply * **transform\_selected\_text**: To transform any selected text with AI. * **safari\_automation**: Execute JavaScript in Safari For a list of all available tools and instructions how to configure them have a look here: [Available Tools and How To Configure Them](https://docs.folivora.ai/docs/3009_halloai_tools.html) ### MCP In case the built in tools do not cover your requirements, you can also link MCP servers. See[](https://docs.folivora.ai/docs/3012_halloai_mcp.html) ### Custom User Defined Tools BetterTouchTool also allows to create custom tools the AI can access. Custom tools are based on [Named Triggers](https://docs.folivora.ai/docs/1002_named_triggers.html) Context ------- To work well, AI Assistants often need some context about the environment they are running in. BetterTouchTool allows you to add such context and offers some defaults like Date & Time, Selected Text, Active Application, Active Document etc. However just like tools, BTT doesn't add context by default as it is a complex balance that involves considerations about your context window, token usage and required interaction speed. ![Context](https://docs.folivora.ai/docs/media/3000_hallo_ai2025-09-15T09:31:24.262Z.png) It is also possible to retrieve custom context via scripts if required. See [h@llo - Context](https://docs.folivora.ai/docs/3008_halloai_context.html) for more details on how to configure your Assistant's context. Reusable Code Generation ------------------------ When running automation tasks from your AI Assistants, BetterTouchTool takes a slightly different approach than many others. Instead of relying on the AI to call tools directly, BetterTouchTool asks the AI to create JavaScript code that calls the tools. This approach allows us to save that JavaScript code and create reusable BetterTouchTool actions out of it. ![OpenHeiseExample](https://docs.folivora.ai/docs/media/3000_hallo_ai2025-09-15T09:47:19.237Z.png) Specialiced Sub-Agents ---------------------- Sometimes it might be good to have a generic main chat and delegate specific tasks to specific AI models with different instructions. For this BetterTouchTool allows you to define custom specialized sub-agents. They can use different API's than the main chat and you can provide custom tools, context and instructions to them. The main chat can then call these subagents when needed. See [Subagents](https://docs.folivora.ai/docs/3013_halloai_subagents.md) for info on how to set them up. Projects -------- When calling the AI Assistant while in some sort of project, BTT checks whether there is an AGENT.md or BTT.md file. If so it will read the content of that file and use it to adapt the assistant to the project. results matching "" =================== No results matching "" ====================== --- # Getting Started · GitBook [Getting Started](https://docs.folivora.ai/) ============================================= h@llo.ai - Getting Started ========================== 1. To get started you need to assign the predefined action "h@llo.ai - Show Customizable AI Assistant" to any trigger in BetterTouchTool (e.g. to a keyboard shortcut) 2. Next you need to configure at least one AI API that shall be used. BetterTouchTool does not itself offer any AI services - you need to use an external provider like OpenAI, Anthropic or some local model. 1. Retrieve an API key from your provider, if you need help have a look here: [Retrieve API Key](https://docs.folivora.ai/docs/3001_hallo_ai_api_keys.html) 2. Select the API type & model and enter the API Key ![API Keys](https://docs.folivora.ai/docs/media/3002_halloai_getting_started2025-09-15T15:55:57.991Z.png) 3. Note: When using gpt-5 models, add these extra parameters - otherwise they'll be too slow: {"reasoning\_effort": "low", "verbosity": "low"} 3. Now you could already launch your AI Assistant, it will immediately be able to answer your questions: ![alt text](https://docs.folivora.ai/docs/media/3002_halloai_getting_started2025-09-15T16:03:20.430Z.png) 4. To make it more useful, select some of the tools and context options in , e.g. make it able to run shell scripts or apple scripts. ![Context](https://docs.folivora.ai/docs/media/3008_halloai_context2025-09-15T15:05:24.848Z.png) Here is an example assistant that you can import which has a lot of automation permissions - make sure you have a good backup system in place because in theory this assistant can do everything to your system. [Example Automation Assistant](https://docs.folivora.ai/docs/media/ai-assistant-example.bttpreset) This example assistant shows when pressing cmd+opt+ctrl+C ... more coming later today, come to [https://community.folivora.ai](https://community.folivora.ai/) for discussion. results matching "" =================== No results matching "" ====================== --- # Key Sequence Triggers · GitBook [Key Sequence Triggers](https://docs.folivora.ai/) =================================================== Key Sequences ============= Key Sequences are a powerful new feature. A Key Sequence can be any sequence of key presses, e.g. a typed word or a sequence of modifier keys and keys. In contrast to keyboard shortcus, Key Sequences will not block the keys from reaching the app - instead you can choose to delete/undo the typing after a specific sequence has triggered an action. A good way to use Key Sequences is in combination with the **Insert/Type/Paste Custom Text** action. By doing this you can use them to expand text snippets. ![key sequences](https://docs.folivora.ai/docs/media/new/keysequences.jpg) For example: * Key Sequences allow you to trigger any BTT actions by typing words * Key Sequences allow you to trigger actions by only pressing modifier keys * Key Sequences allow you to trigger actions by pressing one or more keys multiple times in sequence * You can use Key Sequences to expaned typed text by combining them with the "Paste Custom Text" predefined action * Key Sequences do _not_ block the input events generated by the pressed characters. However you can make them delete any typed text directly after triggering the action. ![key sequences](https://docs.folivora.ai/docs/media/new/keysequence_record.jpg) results matching "" =================== No results matching "" ====================== --- # Touch Bar Widgets · GitBook [Touch Bar Widgets](https://docs.folivora.ai/) =============================================== Touch Bar Widgets ================= BetterTouchTool includes some widgets you can display on your Touch Bar. **Hint:** It is often useful to put the widgets inside a Touch Bar Group Remaining Battery Widgets ------------------------- This Widget allows you to view the estimated remaining time your Macbook Pro can run on the current battery charge. ![tb_widgets](https://docs.folivora.ai/docs/media/tb15.png) Date / Time Widget ------------------ Shows the current date/time in any format you want. ![tb_widgets](https://docs.folivora.ai/docs/media/tb12.png) ![tb_widgets](https://docs.folivora.ai/docs/media/tb14.png) App Switcher Widgets -------------------- Allows you to switch through your recent applications (like pressing cmd+tab) ![tb_widgets](https://docs.folivora.ai/docs/media/tb11.png) ![tb_widgets](https://docs.folivora.ai/docs/media/tb16.png) Volume Slider ------------- Adjust the Mac speaker volume using a slider ![tb_widgets](https://docs.folivora.ai/docs/media/tb17.png) Brightness Slider ----------------- Adjust the Mac's brightness using a slider. **If you press ctrl while sliding it will change the brightness of your external monitors** ![tb_widgets](https://docs.folivora.ai/docs/media/tb18.png) Shell Script / Node / Python / ... Script Widget ------------------------------------------------ The shell script widget allows you to run arbitrary shell scripts / tasks. This can easily be used to run python scripts, node scripts etc.. **Note**: Chris Lennon created a really great webapp to automatically generate shell script widgets that can show you your favorite crypto currencies. It is available here: [https://chrislennon.github.io/Crypto-Touchbar-App/](https://chrislennon.github.io/Crypto-Touchbar-App/) ![tb_widgets](https://docs.folivora.ai/docs/media/python.png) ![tb_widgets](https://docs.folivora.ai/docs/media/nodejs.png) ![tb_widgets](https://docs.folivora.ai/docs/media/bashscript.png) Apple Script Widget ------------------- Allows you to run aribtrary Apple Script in a customizable time interval and display the result in the Touch Bar. This is a very powerful widget, one example is the ability to show the currently playing Spotify Song (see [https://github.com/fifafu/BetterTouchTool/issues/308](https://github.com/fifafu/BetterTouchTool/issues/308) ) ![tb_widgets](https://docs.folivora.ai/docs/media/tb20.png) ![tb_widgets](https://docs.folivora.ai/docs/media/tb21.png) Emoji Widget ------------ Allows you to insert emoticons from your Touch Bar in any app. Switch between the different groups of emoji using the arrow buttons. The first group that is shown displays the most recently used emoji. ![tb_widgets](https://docs.folivora.ai/docs/media/tb22.png) Custom Apple Script Slider Widget --------------------------------- The custom Apple Script slider allows you to trigger custom things everytime the slider is dragged. You can set a script which returns the initial value of the slider like this: ![tb_widgets](https://docs.folivora.ai/docs/media/apple_script_slider.png) Then you can assign the predefined action "Run Apple Script in Background". In that you need to define a function called `bttWidgetSliderMoved` For example like this (this will set the current position in VLC using the slider value) on bttWidgetSliderMoved(newSliderValue) tell application "VLC" set current time to (duration of current item * newSliderValue) end tell end bttWidgetSliderMoved Or like this (sets the system volume): on bttWidgetSliderMoved(sliderValue) set volume output volume sliderValue * 100 end bttWidgetSliderMoved ![tb_widgets](https://docs.folivora.ai/docs/media/apple_script_slider2.png) results matching "" =================== No results matching "" ====================== --- # Unknown { "BTTPresetRequiredBTTVersion" : "5.617", "BTTPresetCreatorNotes" : "", "BTTPresetInfoURL" : "", "BTTPresetName" : "ai-assistant-example", "BTTPresetColor" : "214.200000, 136.195500, 10.710000, 255.000000", "BTTPresetUUID" : "2B822E72-DC32-46B7-A3CF-E3AB32A1B09F", "BTTPresetContent" : \[ { "BTTAppBundleIdentifier" : "BT.G", "BTTAppName" : "Global", "BTTAppAutoInvertIcon" : 1, "BTTTriggers" : \[ { "BTTLastUpdatedAt" : 1757954900.7311311, "BTTTriggerType" : 0, "BTTTriggerClass" : "BTTTriggerTypeKeyboardShortcut", "BTTUUID" : "4D87A776-4001-4960-A868-A7F4976913E2", "BTTAdditionalConfiguration" : "1835049", "BTTShortcutKeyboardType" : -2052004921, "BTTTriggerOnDown" : 1, "BTTLayoutIndependentChar" : "c", "BTTShortcutKeyCode" : 8, "BTTShortcutAdvancedModifierKeys" : "1835049", "BTTShortcutModifierKeys" : 1835008, "BTTOrder" : 4, "BTTAutoAdaptToKeyboardLayout" : 0, "BTTActionsToExecute" : \[ { "BTTLastUpdatedAt" : 1757954900.731065, "BTTTriggerParentUUID" : "4D87A776-4001-4960-A868-A7F4976913E2", "BTTIsPureAction" : true, "BTTTriggerClass" : "BTTTriggerTypeKeyboardShortcut", "BTTUUID" : "7E38008A-E48B-4731-B45A-1A55EB287988", "BTTPredefinedActionType" : 525, "BTTPredefinedActionName" : "h@llo.ai - Show Customizable AI Assistant", "BTTAdditionalActionData" : { "BTTAIJS\_wait\_for\_x\_seconds" : 0, "BTTAIJS\_file\_create" : 0, "BTTAIJS\_import\_trigger\_json" : 1, "BTTAISystemPromptReuseDefault2" : 0, "BTTAIContextCollapsed" : 1, "BTTAIJS\_file\_write\_enhanced" : 0, "BTTAIJS\_run\_javascript" : 1, "BTTAIJS\_find\_menubar\_item" : 1, "BTTAIJS\_file\_undo" : 0, "BTTAIJS\_trigger\_named\_trigger" : 1, "BTTAIJS\_get\_windows\_sorted\_front\_to\_back" : 1, "BTTAISInitialScreenshot" : 0, "BTTAIJS\_retrieve\_app\_menubar\_items" : 1, "BTTAIJS\_type\_in\_ui\_element" : 1, "BTTAIJS\_get\_screens" : 1, "BTTAIJS\_file\_edit" : 0, "BTTAIJS\_self\_instruct" : 0, "BTTAIJS\_haptic\_feedback" : 0, "BTTAIJS\_lsp\_hover" : 0, "BTTAIUserChatBubbleColor" : "53.000000, 124.000000, 163.000000, 178.370929", "BTTAIJS\_get\_file\_tree" : 1, "BTTAIContextJavaScriptTools" : 1, "BTTAIContextDateTime" : 1, "BTTAIJS\_get\_tools" : 0, "BTTAITabs" : 1, "BTTAIJS\_click" : 1, "BTTAIJS\_activate\_window" : 1, "BTTAIJS\_send\_shortcut" : 1, "BTTAIPositioningCollapsed" : 0, "BTTAIJS\_get\_browser\_html" : 1, "BTTAIModel2" : "gpt-4o-mini", "BTTAIJS\_run\_shell\_script" : 1, "BTTAIJS\_search\_bettertouchtool\_documentation" : 0, "BTTAIJS\_search\_bettertouchtool\_trigger\_and\_action\_definitions" : 0, "BTTAIJS\_set\_variable\_value" : 0, "BTTAIJS\_file\_read" : 0, "BTTAIContextActiveDocument" : 1, "BTTAIJS\_web\_search" : 1, "BTTAIJS\_lsp\_completion" : 0, "BTTAIJS\_get\_selected\_text" : 1, "BTTAIJS\_explore\_with\_diagnostics" : 0, "BTTAIJS\_file\_diff" : 0, "BTTAINumberOfModels" : 0, "BTTAICustomURL2" : "https:\\/\\/api.openai.com\\/v1\\/responses", "BTTAIJS\_move\_mouse" : 1, "BTTAIContextScreens" : 1, "BTTAIJS\_transform\_selected\_text" : 1, "BTTAIJS\_internet\_access" : 1, "BTTAIJS\_replace\_selected\_text" : 1, "BTTAIJS\_file\_patch" : 0, "BTTAIChatIdentifier" : "390AC68B-8BF1-4855-B867-406E36868AC6", "BTTAIJS\_file\_glob" : 0, "BTTAIJS\_click\_ui\_element" : 1, "BTTAIJS\_lsp\_references" : 0, "BTTAIJS\_read\_file\_with\_lsp\_diagnostics" : 0, "BTTAIJS\_file\_find\_content" : 0, "BTTAIJS\_computer\_use\_preview" : 0, "BTTAIContextActiveApplication" : 1, "BTTAIJS\_ocr\_window" : 1, "BTTAIContextAXTree" : 0, "BTTAICustomURL" : "https:\\/\\/api.openai.com\\/v1\\/chat\\/completions", "BTTAIContextActiveWindows" : 1, "BTTAIJS\_retrieve\_floating\_menu\_definition" : 0, "BTTAIJS\_safari\_automation" : 1, "BTTAIJS\_file\_list" : 0, "BTTAIJS\_file\_search" : 0, "BTTAIDesignCollapsed" : 1, "BTTAIJS\_file\_access" : 0, "BTTAIJS\_trigger\_menubar\_item" : 1, "BTTAIJS\_get\_app\_ui\_structure" : 1, "BTTAIJS\_find\_ui\_elements" : 1, "BTTAIContextMCPTools" : 0, "BTTAIJS\_restore\_mouse\_pos" : 0, "BTTAIAllowBTTFunctionAccess" : 1, "BTTAIJS\_file\_edit\_smart" : 0, "BTTAIJS\_set\_clipboard\_content" : 0, "BTTAIJS\_show\_hud" : 0, "BTTAIJS\_file\_redo" : 0, "BTTAIJS\_screenshot" : 1, "BTTAIContextSelectedText" : 0, "BTTAIJS\_set\_window\_frame" : 1, "BTTAIJS\_run\_apple\_script" : 1, "BTTAIChatSFSymbol" : "house", "BTTAIModel" : "gpt-5-mini", "BTTAISystemChatBubbleColor" : "0.000000, 0.000000, 0.000000, 202.200017", "BTTAIJS\_get\_running\_apps\_for\_ui" : 1, "BTTAIJS\_sequential\_thinking" : 0, "BTTAIJS\_type\_or\_paste\_text" : 1, "BTTAIJS\_diagnose\_accessibility\_element" : 1, "BTTAIAllowAllJavaScriptTools" : 0, "BTTAIJS\_lsp\_file\_read" : 0, "BTTAIJS\_screenshot\_window" : 1, "BTTAIFloatingMenuCollapsed" : 0, "BTTAISystemPrompt" : " You are a highly sophisticated general purpose AI assistant integrated with BetterTouchTool that can also control macOS applications through various Java Script functions\\/tool calls and automation features. \\n\\n ## Tools: \\n If you can not answer questions directly you have two base tools available, run\_javascript and capture\_screenshot. However you have many additional AI helper JS functions that you can call via run\_javascript. You are not supposed to create fancy reusable JS functions, instead use the JS to interact with the machine and use your LLM capabilities wherever possible.\\n Once you execute a tool you will always be called again with the tool result. So no need to \\n\\n ## Your Role:\\n - Help users by answering their questions and also help them control and automate macOS by creating and running Java Script using the run\_javascript tool.\\n \\n ## Important Guidelines - you MUST follow these\\n - if the user asks you a question, first check whether there is selected text provided in the context section - if so relate the user question to that selected text\\n - if you don't know what context the user is asking about, you must assume he is asking about his currently focused window or document - use capture\_screenshot for better understanding if necessary. Then tell him what you can see.\\n - don't ask for confirmation unless it's a destructive operation - assume the user has backups of everything\\n - don't tell the user what he could do to solve a task - instead try to do it yourself without asking for further instructions\\n - split complex tasks that require computer interaction into multiple tool calls and verify the results inbetween (call run\_javascript multiple times).\\n - You MUST always ask yourself \\"Can I make the script more likely to succeed if I split it up into multiple scripts and look at their outputs before continuing?\\"\\n - NEVER say you can not interact with a specific application. You are not stupid. You can absolutely use any of the provided JS functions to interact with any application.\\n - when asked to read or edit a document, it's often easiest to use teminal commands like sed on the active document.\\n - You can capture a screenshot of the window you are about to control via capture\_screenshot. If there is no window yet, perform this after you have opened one. You can also use capture\_screenshot to verify your results.\\n - you are allowed and encouraged to create multiple scripts and analyze their return values inbetween. Your goal is not to finish your task by just generating one javascript function, your goal is to finish your task as precise as possible. Keep the individual scripts as small as possible. Use them for data retrieval first to get a better understanding of your context.\\n For example: If you are asked to open Safari and navigate to Google.com and search for \\"apple\\", it would be a good idea to first run a script that opens safari and navigates to google.com, then validate whether that has been successful. Only after that run the next script to search for \\"apple\\".\\n - UI related tasks can often be achieved by running Apple Scripts. For example \`\`\`await ai.run\_apple\_script({ script: \\"display dialog \\"hello\\"\\" });\`\`\`. Prefer this over shell scripts for UI related tasks.\\n - Often you can achieve your tasks by running shell scripts. For example \`\`\`await ai.run\_shell\_script({ script: \\"say hello\\" });\`\`\`. Use this to launch apps, open files or folders, or do anything else that an be achieved from command line. \\n - if the user asks about something on his screen, you can take screenshots and analyze them\\n - to retrieve websites you can use fetch() directly in your Java Script function\\n - when asked to interact with an app first activate it (either via shell script or via activate\_window\_with\_window\_number if you need a specific window)\\n - use recognize\_text\_ocr\_for\_window\_with\_window\_number to find the position of specific text in a window or to analyze window contents\\n - if ocr is not enough use capture\_screenshot to get more information about the contents of a window\\n - sometimes it's simplest to automate by using existing menubar items of an app. You can use the tools ai.retrieve\_app\_menubar\_items, ai.find\_menubar\_item and ai.trigger\_menubar\_item\\n - to replace selected text use the replace\_selected\_text functin, to transform selected text use transform\_selected\_text\\n \\n You MUST NEVER assume you know the output of some Java Script call. Always first analyze the JSON response \\n\\n{BTT\_TOOLS\_AND\_CONTEXT} ", "BTTAIJS\_computer\_20250124" : 0, "BTTAIInitialUserMessage" : "", "BTTAIJS\_get\_variable\_value" : 0, "BTTAIJS\_save\_mouse\_pos" : 0, "BTTAIJS\_web\_fetch" : 1, "BTTAIJS\_file\_grep" : 0, "BTTAIAgentsCollapsed" : 0, "BTTAIJS\_file\_edit\_multi" : 0, "BTTAIJS\_manage\_calendar\_and\_reminders" : 1, "BTTAIJS\_agent" : 0, "BTTAIToolsCollapsed" : 1, "BTTAIJS\_add\_action\_to\_trigger" : 0, "BTTAIJS\_activate\_app" : 1, "BTTAIJS\_file\_write" : 0, "BTTAIJS\_get\_trigger\_json" : 0, "BTTAISubTabs" : 1, "BTTAIJS\_lsp\_diagnostics" : 0, "BTTAIExtraAPIParameters" : "{\\"reasoning\_effort\\": \\"low\\", \\"verbosity\\": \\"low\\"}", "BTTAISystemPrompt2" : "hello!" }, "BTTAdditionalConfiguration" : "390AC68B-8BF1-4855-B867-406E36868AC6", "BTTShortcutKeyboardType" : 0, "BTTShortcutKeyCode" : -1, "BTTShortcutAdvancedModifierKeys" : "390AC68B-8BF1-4855-B867-406E36868AC6", "BTTOrder" : 0, "BTTAutoAdaptToKeyboardLayout" : 0 } \] } \], "BTTAppSpecificSettings" : { "BTTDisableGlobalTriggers" : false } }, { "BTTAppBundleIdentifier" : "com.apple.finder", "BTTAppName" : "Finder", "BTTAppAutoInvertIcon" : 1, "BTTTriggers" : \[ \] } \], "BTTPresetSnapAreas" : \[ \] } --- # Magic Mouse & Trackpad Triggers · GitBook [Magic Mouse & Trackpad Triggers](https://docs.folivora.ai/) ============================================================= Magic Mouse & Trackpad Gestures =============================== BetterTouchTool currently supports the following touch devices: * Magic Mouse 1, 2 & 3 * Magic Trackpad 1, 2 & 3 * All multi-touch capable built-in Macbook Trackpads You can configure many additional gestures for these devices. In general the setup is pretty straight forward: 1. Select the Magic Mouse or Trackpad section 2. Click the "Add" button. 3. Select the Gesture you want 4. Assign at least one action or keyboard shortcut to that gesture. (If you assign multiple actions they will be executed in sequence) ![alt text](https://docs.folivora.ai/docs/media/trackpad1.png) Gesture Configuration --------------------- There are some basic settings for every gesture: * Trigger only if specific modifier keys are pressed * Show a HUD overlay once the gesture is triggered / recognized * Activate action repeat while at least one finger is still touching after the gesture has been triggered. This doesn't work with all gestures, because e.g. for Three Finger Taps you won't have any fingers touching the trackpad after the gesture has been triggered. However it can be used e.g. for all click, tip tap and swipe gestures. ![Trackpad Basic Config](https://docs.folivora.ai/docs/media/trackpad_basic_config.png) Additionally there are some advanced options: * **Trigger conditions** * You can select to to trigger only if the mouse cursor is at some specific position 1. Anywhere 2. While mouse hovers draggable part of window's titlebar 3. While mouse hovers anything in window's titlebar 4. While mouse over Dock 5. While mouse over menubar 6. While mouse is NOT over Dock or menubar 7. While mouse behind Notch 8. While mouse NOT behind Notch * **Advanced Trigger Conditions** * You can define advanced trigger conditions that allow you to define lots of conditions on when a gesture is allowed to trigger. See [](https://docs.folivora.ai/docs/1400_conditions.html) for more details. For example you can make the gesture trigger only on specific trackpad types, you can define a haptic feedback or make a HUD (similar to the macOS volume or brightness change indicators) show up when the gesture is triggered. Triggering a second action after removing the last touching finger ------------------------------------------------------------------ Many gestures can be configured to trigger another action once you remove the last finger from the trackpad or Magic Mouse. This is very useful if you want to set up e.g. a middle click for CAD apps. You could use a three finger click to trigger a "Middle Mouse Down" and then a "Middle Mouse Up" after the last finger has left the trackpad / Magic Mouse surface. This allows you to three finger click, then release two fingers and move the mouse to pan with the remaining finger. You can use the predefined action "More Mouse Buttons & Modifiers / Custom Click" to send separate down/up clicks. To do this you need to select the "**On Touch Release**" action category (this only shows up for supported gestures) ![On Touch Release](https://docs.folivora.ai/docs/media/trackpad_ontouchrelease.png) results matching "" =================== No results matching "" ====================== --- # Touch Bar Advanced Configuration · GitBook [Touch Bar Advanced Configuration](https://docs.folivora.ai/) ============================================================== Touch Bar Advanced ================== **No Content Yet** People have shared super complex BetterTouchTool Touch Bar setups on our community platform, so definitely have a look there: [https://community.folivora.ai](https://community.folivora.ai/) results matching "" =================== No results matching "" ====================== --- # BTT Mobile · GitBook [BTT Mobile](https://docs.folivora.ai/) ======================================== BTT Mobile (New App, 2025) ========================== You need to enable BTT Mobile manually once: ![alt text](https://docs.folivora.ai/docs/media/image-81.png) BTT Remote (Legacy, Old!) ------------------------- BTT Remote is a handy little iOS app which acts as a remote control for your Mac. It is very customizable through BetterTouchTool. **Note**: If you have purchased BetterTouchTool you can use BTT Remote for free. (It also goes the other way around - if you purchase BTT Remote on iOS you get a free BetterTouchTool license) [https://itunes.apple.com/us/app/btt-remote-control/id561676304?mt=8](https://itunes.apple.com/us/app/btt-remote-control/id561676304?mt=8) ![BTTRemote](https://docs.folivora.ai/docs/media/bttremote.png) results matching "" =================== No results matching "" ====================== --- # Drawing / Scribble Triggers · GitBook [Drawing / Scribble Triggers](https://docs.folivora.ai/) ========================================================= Custom Drawing Gestures ======================= Adding New Gestures ------------------- * Click the "Add New Drawing" button in the Drawings tab * Draw your gesture in the white drawing area * To improve recognition reliability add some variations of the same gesture by clicking the button and drawing it again. **Advanced:** * You can choose the required certainty to trigger a gesture. The default is 0.7, I do not recommend values higher than 0.85. * If your gesture should not depend on direction (e.g. a circle which can be drawn clockwise or counter-clockwise), check the checkbox on the bottom right Using the Gestures ------------------ * By default BetterTouchTool has "Right-Click-To-Draw" active. This can be disabled in the settings. * There are some dedicated trackpad gestures called "2/3/4 Finger Drawing". These are great if you use a Trackpad. * On Magic Mouse the best gestures to start drawing recognition are "1 / 2 / 3 Finger Touch Top" * You can also use any other trigger in BetterTouchTool to start & stop drawing recognition. * The predefined action you have to assign in order to start drawing is called **"Start Recording Mouse Gesture"** and is located in **"BTT Related Actions"** * BTT will try to recognize your drawing after you remove your finger from the trackpad or Magic Mouse, or after releasing the mouse button Which gestures do you use to start drawing recognition? ------------------------------------------------------- * On the Magic Mouse I like to use "Three finger click" or "Two Finger Touch Top" * On the trackpad I like to use the dedicated dawing gestures "2/3/4 Finger Drawing" but using Three Finger Tap, Click or Two Finger Tip Taps also works great. **However** this does not mean those are the best suited gesture, just my favorites. You can use any gesture you want to start drawing recognition You can also use keyboard shortcuts or normal mouse buttons to start drawing recognition! Tipps & Tricks -------------- * Gestures resembling cursive letters usually work pretty well * Here are some gestures that worked well for me, but there are many many more ;-) Some Drawing settings are available in the Advanced Settings: ------------------------------------------------------------- ![key sequences](https://docs.folivora.ai/docs/media/advanced_drawings_settings.png) **_BTT's drawing gesture recognition is based on the $1 Unistroke Recognizer implementation by Chris Miles. For more information see [https://github.com/chrismiles/CMUnistrokeGestureRecognizer](https://github.com/chrismiles/CMUnistrokeGestureRecognizer) _** results matching "" =================== No results matching "" ====================== --- # Basics · GitBook [Basics](https://docs.folivora.ai/) ==================================== Floating Menu Basics (Work In Progress) ======================================= This section covers: * Sizing * Layout Direction * Menu Positioning Global & App Specific Menus --------------------------- You can have global or app specific Floating Menus. If you add a Floating Menu to the global section and another menu with the same identifer/name to a specific application, they will be merged once that app is active. Sizing ------ First you should decide how big your menu should be when displayed. This can be done in the "Size & Resize On Hover" section: ![Sizing, Min Width, Min Height](https://docs.folivora.ai/docs/media/floating_menu_size.png) You can either choose to have a fixed size that never changes, or you can make the menu resize when being hovered by checking the **Resize On Hover** option. For example you can have a mini menu which expands to a big one when hovered. You can also define for every menu item whether it shall be displayed in hovered and/or un-hovered mode. Layout Direction ---------------- After you have decided what size the menu should be, you can choose a layout direction. It's easiest to explain the two options (vertical & horizontal) via two quick animations: **Fill Column, Then Continue With Next Column** In this mode BTT will try to fit as many items in a column as allowed by the height of the menu. It will then continue with the next column to the right. Currently it will only work with each item's maximum height and will not try to shrink items to their minimum height unless the menu becomes too small to fit a single item. Shrinking might become an option in the future. ![](https://docs.folivora.ai/docs/media/horizontal.webp) **Fill Row, Then Continue With Next Row** In this mode BTT will try to fit as many items into a row as allowed by the width of the menu, it will then continue with the next row downwards. Currently it will only work with the item's maximum width and will not try to shrink items unless the menu width goes to small to fit the item at all. Shrinking might become an option in the future. ![](https://docs.folivora.ai/docs/media/vertical.webp) **Circular** Items will be placed in a circle around the center of the menu **Absolute** Items will be placed based on the xy coordinates you set Positioning ----------- On the top level you can choose between two positioning options: * **Move & Resize Freely:** This is the easiest option. It allows you to drag the menu to a specific position and it will stay there. It won't move even if you connect or disconnect displays - this means if you had it moved to an external display and disconnect that display, the menu might not be visible anymore. (You can use the Predefined Action **Move Free Moving Window To Current Screen** to make it visible again) ![](https://docs.folivora.ai/docs/media/positioning1.png) * **Specific Position On Screen / Within Window / Mouse Location etc.**: This allows you to position the window in pretty customizable ways. You can choose an anchor point in the menu and and anchor point at some reference, for example the focused window, a specific screen, the mouse location etc. BTT will then move the menu's anchor point to the selected anchor point in the reference frame - and offset it by the values you provide. ![](https://docs.folivora.ai/docs/media/positioning2.png) Z-Index / Window Level ---------------------- You can also choose the z-index at which the window will be positioned, for example you can stick it to the desktop or you can make it float above everything else. results matching "" =================== No results matching "" ====================== --- # Floating Menu & Desktop Widgets · GitBook [Floating Menu & Desktop Widgets](https://docs.folivora.ai/) ============================================================= Floating Menus / Widgets ======================== Floating menus / widgets are one of the coolest features I have ever added to BetterTouchTool. They have been an idea I have been thinking / working on for quite a while. My first experiments have been based on webviews, which unfortunately came with some disadvantages so I moved away from that approach again. Now since macOS 13 SwiftUI has become pretty powerful and I was able to implement the floating menus using that technology. Use [https://community.folivora.ai/c/floatingmenus/18](https://community.folivora.ai/c/floatingmenus/18) for any Floating Menu related questions Features: * Completely customizable menus * Dynamically positioned by attaching to windows, screen positions, mouse position and many more * Resize on hover * Fix to your desktop, float on top, or behave like normal windows. * Capable of running scripts & completely scriptable * Different types of menu items (standard, webviews, sliders, text fields, submenus) * Keyboard Navigatable Things I'm still working on, coming soon: * Rendering the floating menus on your iPhone/iPad via an upcoming new version of BTT Remote * Various Widgets (e.g Weather, Dock, Clipboard) * Plugin system to allow arbitrary SwiftUI views to be added * Documentation The floating menus will also be the base for the new BTT Remote for iOS. (So you can show them on your iPad/iPhone and control your Mac). In the future the existing Notch Bar and the Stream Deck implementation in BTT will also migrate to be specialized versions of Floating Menus. Some examples: A circular menu that shows up on three finger swipe up or long pressing right-mouse. ![Circular Menu](https://docs.folivora.ai/docs/media/image-2.jpg) Tutorial here: [https://community.folivora.ai/t/tutorial-circular-floating-menu-that-can-be-shown-by-long-right-click-or-gesture/39847](https://community.folivora.ai/t/tutorial-circular-floating-menu-that-can-be-shown-by-long-right-click-or-gesture/39847) A menu that pops up when hovering the Notch and allows you to drop image files to convert them to png: [https://share.folivora.ai/sP/5cd6c1c8-6ea0-44e7-8e2e-9d114884cee5](https://share.folivora.ai/sP/5cd6c1c8-6ea0-44e7-8e2e-9d114884cee5) ![Notch Menu](https://docs.folivora.ai/docs/media/notch_menu.webp) A menu that expands on hover and is attached to the focused window. [https://share.folivora.ai/sP/99bcf777-fa14-470c-8c57-e2a520557106](https://share.folivora.ai/sP/99bcf777-fa14-470c-8c57-e2a520557106) ![Browser](https://docs.folivora.ai/docs/media/attached.webp) A simple browser implemented as a floating menus: [https://share.folivora.ai/sP/f2b8dd5d-6c4e-4c18-913b-109349f44450](https://share.folivora.ai/sP/f2b8dd5d-6c4e-4c18-913b-109349f44450) ![Browser](https://docs.folivora.ai/docs/media/browser.webp) Using three finger swipe to show a menu at the mouse cursor position, then hide automatically when releasing the fingers from the trackpad: [https://share.folivora.ai/sP/82bddaab-c0eb-406a-9bb0-37bf10495998](https://share.folivora.ai/sP/82bddaab-c0eb-406a-9bb0-37bf10495998) ![Three Finger Swipe](https://docs.folivora.ai/docs/media/onhover.webp) Basic scripting and a submenu: [https://share.folivora.ai/sP/9be891ab-c2d6-489e-9b46-15725e26c23d](https://share.folivora.ai/sP/9be891ab-c2d6-489e-9b46-15725e26c23d) ![Scripts](https://docs.folivora.ai/docs/media/scriptex.webp) A Google Translate Menu which is placed on the Desktop: [https://share.folivora.ai/sP/6d4d596e-0208-4c42-aedd-f479188b588b](https://share.folivora.ai/sP/6d4d596e-0208-4c42-aedd-f479188b588b) ![Desktop](https://docs.folivora.ai/docs/media/desktop.webp) results matching "" =================== No results matching "" ====================== --- # Showing and Hiding · GitBook [Showing and Hiding](https://docs.folivora.ai/) ================================================ * [Showing and Hiding Floating Menus](https://docs.folivora.ai/docs/1609_showing_hiding_floating_menus.html#showing-and-hiding-floating-menus) * [Positioning](https://docs.folivora.ai/docs/1609_showing_hiding_floating_menus.html#positioning) * [Choosing Whether A Floating Menu Is Visible On Launch Or Toggle By Action](https://docs.folivora.ai/docs/1609_showing_hiding_floating_menus.html#choosing-whether-a-floating-menu-is-visible-on-launch-or-toggle-by-action) * [Using a Keyboard Shortcut to Show/Hide the Floating Menu](https://docs.folivora.ai/docs/1609_showing_hiding_floating_menus.html#using-a-keyboard-shortcut-to-showhide-the-floating-menu) * [Using a Trackpad Gesture to Show/Hide the Floating Menu](https://docs.folivora.ai/docs/1609_showing_hiding_floating_menus.html#using-a-trackpad-gesture-to-showhide-the-floating-menu) * [Showing a Floating Menu in Specific Apps Only](https://docs.folivora.ai/docs/1609_showing_hiding_floating_menus.html#showing-a-floating-menu-in-specific-apps-only) * [Showing a Floating Menu While Holding Modifier Keys](https://docs.folivora.ai/docs/1609_showing_hiding_floating_menus.html#showing-a-floating-menu-while-holding-modifier-keys) Showing and Hiding Floating Menus ================================= To make Floating Menus actually useful it's often necessary to only show and position them on demand. In general you can use any trigger BTT provides to show/hide a Floating Menu. The following actions can be used for this: * Show Floating Menu * Hide Floating Menu * Toggle Floating Menu Hidden / Shown. Additionally you could also use modifier based visibility that would only show a menu while specific modifiers are pressed (or not pressed) or you can have Floating Menus that only show up in specific applications. Positioning ----------- Before thinking about how you'd want to show your menu, you should decide where it should be positioned. This needs to be configured on the menu before showing it. For example often you'll want to show a menu at your mouse location, these settings would achieve that: ![alt text](https://docs.folivora.ai/docs/media/image-25.png) Choosing Whether A Floating Menu Is Visible On Launch Or Toggle By Action ------------------------------------------------------------------------- If you plan to show/hide the menu via a a trigger (e.g. a keyboard shortcut) make sure to set the menu visibility to be "Toggled Via Action" ![alt text](https://docs.folivora.ai/docs/toggleviaaction.png) Using a Keyboard Shortcut to Show/Hide the Floating Menu -------------------------------------------------------- Using a keyboard shortcut is probably the easiest way to show/hide a floating menu. The absolute simplest setup would look like this - you have a shortcut that shows the menu when pressed, and hides it again if you press it again: ![alt text](https://docs.folivora.ai/docs/media/image-21.png) There are also more complex / useful setups possible using keyboard shortcuts. For example you might want to show a menu while holding a specific keyboard shortcut and hide it when releasing the keyboard shortcut. To achieve this you'd need to split up the keyboard shortcut in two. Assign the "Show Floating Menu" action to the standard shortcut. Then create an additional shortcut an set it to trigger "On Key Up" and assign the "Hide Floating Menu" action to that. ![alt text](https://docs.folivora.ai/docs/media/image-23.png) ![alt text](https://docs.folivora.ai/docs/media/image-22.png) For the "Hide Floating Menu" action it is often also convenient to enable the "Trigger Hovered Item When Menu Is Being Hidden" option. Using a Trackpad Gesture to Show/Hide the Floating Menu ------------------------------------------------------- Using a Trackpad Gesture to Show/Hide a Floating Menu is quite similar to using a keyboard shortcut. You can set up a simple gesture that shows and hides a menu like this: ![alt text](https://docs.folivora.ai/docs/media/image-26.png) Or you can do a more complex setup where you'd show a Floating Menu when the gesture is triggered and hides the menu when all fingers are removed from the trackpad. This can be achieved by using the "On Touch Release" action category: ![alt text](https://docs.folivora.ai/docs/media/image-27.png) Showing a Floating Menu in Specific Apps Only --------------------------------------------- To show a menu only in one specific application, you'd add that app to your app list in BTT, and add the menu to that app specifically: ![alt text](https://docs.folivora.ai/docs/media/image-29.png) To make a menu show up in a group of apps or for specific windows or on specific websites, you can create a [conditional activation group](https://docs.folivora.ai/docs/1400_conditions.html) and assign it to that Showing a Floating Menu While Holding Modifier Keys --------------------------------------------------- To only show a menu if specific modifier keys are pressed, use this configuration option in the menu's settings: ![alt text](https://docs.folivora.ai/docs/media/image-31.png) results matching "" =================== No results matching "" ====================== --- # Item Types · GitBook [Item Types](https://docs.folivora.ai/) ======================================== Floating Menu Items =================== A Floating Menu can contain various types of items. In the future it will also allow to load external SwiftUI plugin items. Every item by default has a unique identifier (UUID), which you can access by right-clicking the item. That identifier is needed for some item related actions. You can also enter a custom identifier/name: ![](https://docs.folivora.ai/docs/media/floating_menu_item_identifier.png) ### Standard Item Standard items render text and icons / images. They are scriptable and probably the most useful menu items. You can drop files onto a standard item, these dropped files can then be accessed by reading the value of the item (see bottom). ### Web View Items Web View items can load arbitrary HTML content, either by URL or by providing the HTML input directly. They are based on BTT's Floating Webview and because of this are quite powerful. They can run Apple Script, Shell Script, Shortcuts etc. For documentation on this, see [Floating HTML / Web Views](https://docs.folivora.ai/docs/10_0_floating_html_menu.html) You can modify the content of a web view item by loading a new URL and/or executing Java Script inside of the web view like this: ### Loading Content Into A Web View Item or Executing Java Script Java Script Example: Load [https://apple.com](https://apple.com/) : (async ()=> { await webview_menu_item_load_html_url_js( { "item_uuid": "4FAAE4F8-5858-4444-A0E4-3498B7534CF2", "html_or_url": "https://apple.com" } ) returnToBTT('done'); })() **Apple Script Example: Load [https://apple.com](https://apple.com/) ** tell application "BetterTouchTool" # instead of the uuid you can also use the item_name and menu_name parameters. webview_menu_item_load_html_url_js "9E2989CF-77C7-4F14-A646-49342D2F8331" html_or_url "https://apple.com" end tell **Java Script Example: Show Alert**: (async ()=> { await webview_menu_item_load_html_url_js( { "menu_name": "TheMenuName", "item_name": "TheItem", "javascript_to_execute": "alert('hello world');" } ) returnToBTT('done'); })() **Apple Script Example: Show Alert** tell application "BetterTouchTool" # instead of the uuid you can also use the item_name and menu_name parameters. webview_menu_item_load_html_url_js "9E2989CF-77C7-4F14-A646-49342D2F8331" javascript_to_execute "alert('hello world')" end tell ### Slider Items They display a scriptable slider. They have two associated scripts: one for retrieving the current/initial value and one that is called when dragging the slider. Here is an example preset that contains such a slider: [https://share.folivora.ai/sP/80d02742-50ec-45a3-833f-5b9ee8144e72](https://share.folivora.ai/sP/80d02742-50ec-45a3-833f-5b9ee8144e72) The initialization script should return a value between 0 and 1 and the label that shall be display right of the slider. This needs to be done in JSON/JSON5 like in this example: return "{BTTMenuItemText: '50%', BTTMenuItemValue: 0.5}" ![](https://docs.folivora.ai/docs/media/slider_init.png) The change script needs to look like this, it can should return the formatted label (if any): on sliderChanged(uuid, value) set volume output volume value * 100 set roundedValue to round value * 100 set formattedValue to roundedValue & "%" return "{BTTMenuItemText: '" & formattedValue & "' }" end sliderChanged ![](https://docs.folivora.ai/docs/media/slider_change.png) ### Textfield Items Allow to enter some text. The text can be accessed via the Floating Menu scripting interfaces. See [Scripting Floating Menus](https://docs.folivora.ai/docs/1603_scripting_floating_menus.html) ### Widgets Upcoming... results matching "" =================== No results matching "" ====================== --- # Menu Scripting · GitBook [Menu Scripting](https://docs.folivora.ai/) ============================================ Scripting Floating Menus ======================== Dynamically retrieve content of Floating Menu --------------------------------------------- Starting with BetterTouchTool 4.764 you can use the new [Simple JSON Format](https://docs.folivora.ai/docs/1108_simple_format.html) in combination with Java Script to dynamically retrieve the contents of a floating menu. Have a look at [Simple JSON Format](https://docs.folivora.ai/docs/1108_simple_format.html) for details on how to use it. **Example**: Floating Menu App Switcher Preset download (three finger swipe down to show the app switcher): [https://share.folivora.ai/sharedPreset/55076196-7d17-4b8f-bbae-4dbd17c3ad87](https://share.folivora.ai/sharedPreset/55076196-7d17-4b8f-bbae-4dbd17c3ad87) ![](https://docs.folivora.ai/docs/image-20.png) Assigning a script to a floating menu item ------------------------------------------ Every floating menu item has the tab "Script", which allows you to add a script that can easily update the menu item's content and appearance - directly by returning either text or a JSON string, describing the attributes you want to update. You can either use Apple Script like this: on itemScript(itemUUID) return "{BTTMenuItemBackgroundColor: '0,0,20,255', BTTMenuItemText: 'Some New Text'}" end itemScript Or via Java Script like this: async function itemScript(itemUUID) { return "{BTTMenuItemBackgroundColor: '0,0,20,255', BTTMenuItemText: 'Some New Text'}" } Menu items can also be updated from other scripts by using the update\_menu\_item function (see below) ### Updating the content or appearance of an item The easiest way to update the content or appearance of a floating menu is to the predefined action "Update Floating Menu Item Properties" action. However if you need to update an item or menu from within a script there are two more ways to do so. The first way is to return a JSON5 compliant structure directly from the item's script like this: ![](https://docs.folivora.ai/docs/media/script_example.png) , This example updates the properties **BTTMenuItemBackgroundColor** and **BTTMenuItemText**. In general you can see all the properties of a configured item by copying it to your clipboard and pasting it into a text editor. However **BTTMenuItemText** is special. If you update this property, the menu will update the displayed text by applying the font and font styles you configured. For example if you made the first three letters bold and red, they will still appear bold and red with the new text you provided. The second way is to change any property of an item via the **update\_menu\_item** function. It takes either the UUID of an item (_item\_uuid_), or the name of the menu (_menu\_name_) and the name of the item (_item\_name_). Additionally it takes a string parameter called _json_. Every property you provide in the JSON parameter will be updated. By default the change will not be persisted, but you can set persist to true, to do that. To make escaping easier with Apple Script, BTT allows to use JSON5 in addition to standard JSON. Apple Script Example With Item UUID: tell application "BetterTouchTool" update_menu_item "044E5D2B-5661-4A1F-AB39-8D1EA2C1DBA1" json "{BTTMenuItemBackgroundColor: '20, 200, 20, 255', BTTMenuItemText: 'test' }" persist true end tell Apple Script Example With Menu Name And Item Name: tell application "BetterTouchTool" update_menu_item menu_name "TheMenuName" item_name "TheItemName" json "{BTTMenuItemBackgroundColor: '20, 200, 20, 255', BTTMenuItemText: 'test' }" persist true end tell Java Script Example With UUID: Note: the json parameter needs to be a string! This is why we use JSON.stringify here. (async ()=> { const updateDescription = {"BTTMenuItemText": "Hello World"}; await update_menu_item({"item_uuid": "4FAAE4F8-5858-4444-A0E4-3498B7534CF2", "json": JSON.stringify(updateDescription), "persist": true}) returnToBTT('done'); })() * * * Getting The Value Of An Item ---------------------------- Every menu item can have an associated value. For slider items, it's the value of the slider. For text field items the entered text. Standard items only return a value if files have been dropped onto them - then they return the dropped files. The current value of any floating menu item in BTT can be accessed like this: **JavaScript:** By menu name and item name: async function getItemValue() { let itemVal = await get_menu_item_value( {'menu_name': 'TheMenuName', 'item_name': 'TheItemName'}); return itemVal; } By item UUID: async function getItemValue() { let itemVal = await get_menu_item_value({'item_uuid': '044E5D2B-5661-4A1F-AB39-8D1EA2C1DBA1'}); return itemVal; } **Apple Script:** By menu name and item name: tell application "BetterTouchTool" to get_menu_item_value menu_name "TheMenuName" item_name "TheItemName" By item UUID: tell application "BetterTouchTool" to get_menu_item_value "9DDA72BA-4968-4AC5-907E-FDE743B2F6E8" * * * Setting The Value Of An Item ---------------------------- The current value of any floating menu item in BTT can be changed like this: **JavaScript:** By menu name and item name: async function setItemValue() { let itemVal = await set_menu_item_value( {'menu_name': 'TheMenuName', 'item_name': 'TheItemName', 'value': 123}); return itemVal; } By item UUID: async function setItemValue() { let itemVal = await get_menu_item_value({'item_uuid': '-4A1F-AB39-8D1EA2C1DBA1', 'value': 123}); return itemVal; } **Apple Script:** By menu name and item name: tell application "BetterTouchTool" to set_menu_item_value menu_name "TheMenuName" item_name "TheItemName" value 123 By item UUID: tell application "BetterTouchTool" to set_menu_item_value "9DDA72BA-4968-4AC5-907E-FDE743B2F6E8" value 123 Loading Content Into A Web View Item or Executing Java Script ------------------------------------------------------------- Possible parameters: * item\_uuid * menu\_name (only needed if no item\_uuid is provided) * item\_name (only needed if no item\_uuid is provided) * html\_or\_url * javascript\_to\_execute * useragent Java Script Example: Load [https://apple.com](https://apple.com/) : (async ()=> { await webview_menu_item_load_html_url_js( { "item_uuid": "4FAAE4F8-5858-4444-A0E4-3498B7534CF2", "html_or_url": "https://apple.com" } ) returnToBTT('done'); })() **Apple Script Example: Load [https://apple.com](https://apple.com/) ** tell application "BetterTouchTool" # instead of the uuid you can also use the item_name and menu_name parameters. webview_menu_item_load_html_url_js "9E2989CF-77C7-4F14-A646-49342D2F8331" html_or_url "https://apple.com" end tell **Java Script Example: Show Alert**: (async ()=> { await webview_menu_item_load_html_url_js( { "menu_name": "TheMenuName", "item_name": "TheItem", "javascript_to_execute": "alert('hello world');" } ) returnToBTT('done'); })() **Apple Script Example: Show Alert** tell application "BetterTouchTool" # instead of the uuid you can also use the item_name and menu_name parameters. webview_menu_item_load_html_url_js "9E2989CF-77C7-4F14-A646-49342D2F8331" javascript_to_execute "alert('hello world')" end tell **Execute Java Script** Get dropped item values ----------------------- tell application "BetterTouchTool" to get_menu_item_value menu_name "DropTest" item_name "DropItem" async function getDroppedItems() { let droppedPaths = await get_menu_item_value({'menu_name': 'DropTest', 'item_name': 'DropItem'}); return droppedPaths; } async function runShortcutWithDroppedItems() { async function getDroppedItems() { let droppedPathsString = await get_menu_item_value( {'menu_name': 'DropTest', 'item_name': 'DropItem'}); let droppedPathsArray = JSON.parse(droppedPathsString); let spaceSeparatedPaths = `${droppedPathsArray.join(';;')}`; BTT.runAppleShortcut({name: 'fileinputtest', input: spaceSeparatedPaths}); return spaceSeparatedPaths; } } results matching "" =================== No results matching "" ====================== --- # Updating Item Properties · GitBook [Updating Item Properties](https://docs.folivora.ai/) ====================================================== Update Menu / Item Properties ============================= You can use the predefined actions "Update Floating Menu Item / Menu Properties" to change the content / appearance of an existing floating menu. Updating a Menu Item Icon on Hover ================================== A good example use case is to update the icon of a menu item on hover. To do this you need to configure the "Update Floating Menu ITEM Properties" action to trigger "on hover" like this: ![hover_start](https://docs.folivora.ai/docs/media/hover_start.png) To reset the icon after the hover ends, you can use the predefined action "Reset Floating Menu / Item Properties" and assign it to trigger on "hover end" ![hover_start](https://docs.folivora.ai/docs/media/hover_end.png) results matching "" =================== No results matching "" ====================== --- # Desktop Widgets · GitBook [Desktop Widgets](https://docs.folivora.ai/) ============================================= Creating Desktop Widgets ======================== The floating menus an also be used as interactive Desktop widgets. For now they are fully handled by BTT. In the future BTT might make use of the native desktop widget functionality provided by macOS. To make a floating menu into a Desktop widget, just change the "Window Level" property in the menu configuration. If you select "Same as Desktop Icons" it will stick to your Desktop, just like the native macOS Sonoma widgets. **Note**: I recommend to first configure your menu with window level "Standard Float On Top". Once you got the positioning and content right, you can change the window level to stick it to the Desktop. ![](https://docs.folivora.ai/docs/media/desktop_widgets.png) results matching "" =================== No results matching "" ====================== --- # Normal Mouse · GitBook [Normal Mouse](https://docs.folivora.ai/) ========================================== BetterTouchTool: Normal Mice ============================ BetterTouchTool allows you to assign actions to the extra buttons of your mouse. * [Assigning Actions to Buttons](https://docs.folivora.ai/docs/802_normal_mice_assigning_actions.html) * [Help: My mouse's buttons are not recognized by BTT](https://docs.folivora.ai/docs/803_normal_mice_problems.md) results matching "" =================== No results matching "" ====================== --- # Assigning Actions to Buttons · GitBook [Assigning Actions to Buttons](https://docs.folivora.ai/) ========================================================== Assigning actions to your various mouse buttons =============================================== With BetterTouchTool it's quite easy to configure actions for your mouse buttons. Just select the "Normal Mouse" trigger type, press the + button and then record the specific mouse button by clicking the grey area in the side-bar on the right: ![normalmouse2](https://docs.folivora.ai/docs/media/new/normalmouse.jpg) Left and right-clicks can currently only trigger actions if they have at least one modifier key enabled. results matching "" =================== No results matching "" ====================== --- # Logitech Mouse Support · GitBook [Logitech Mouse Support](https://docs.folivora.ai/) ==================================================== Logitech Mouse Support ====================== Starting with BetterTouchTool version 5.777, BetterTouchTool natively supports Logitech Mice (by implementing parts of Logitech's HID++ 2.0 protocol - [https://github.com/Logitech/cpg-docs/tree/master/hidpp20](https://github.com/Logitech/cpg-docs/tree/master/hidpp20) ) **Note** This is supposed to be a full alternative/replacement to the Logitech apps like Logitech Options+ or G-Hub. Actually BTT won't work correctly while any of these are installed. Setup ----- Go to the "Normal Mouse" section in BetterTouchTool and add a "Logitech Mouse Configuration" item there: ![Logitech Mouse Configuration](https://docs.folivora.ai/docs/media/4000_logitech2025-11-25T21:23:47.142Z.png) Then select the correct mouse and experiment with the best settings for your use case. If you want to remap the mouse buttons make sure to check the "Make All Buttons Available For Remapping in BTT" option. Remapping Buttons ----------------- After you have added the Logitech Mouse Configuration, you should be able to record your buttons via the "Custom" click option: ![Custm](https://docs.folivora.ai/docs/media/4000_logitech2025-11-25T21:25:29.042Z.png) Hover the click recognition area with your mouse, then press the button you want to use: ![alt text](https://docs.folivora.ai/docs/media/4000_logitech2025-11-25T21:26:00.961Z.png) Afterwards you can assign any action sequence to that button: ![alt text](https://docs.folivora.ai/docs/media/4000_logitech2025-11-25T21:26:59.070Z.png) Your Logitech Mouse Does Not Yet Work? -------------------------------------- Please come to [https://community.folivora.ai/t/support-for-logitech-mx-master-mice/37397/78](https://community.folivora.ai/t/support-for-logitech-mx-master-mice/37397/78) and report any non-working mouse, I have mostly tested with MX Master and some G-series mice, but it is quite likely I have not covered all combinations. results matching "" =================== No results matching "" ====================== --- # Help: My mouse's buttons are not recognized · GitBook [Help: My mouse's buttons are not recognized](https://docs.folivora.ai/) ========================================================================= How to make BetterTouchTool recognize your Mouse Buttons -------------------------------------------------------- BetterTouchTool can recognize mouse button presses if the mouse driver generates standard button events. Unfortunately many newer mice don't do this by default. Logitech Mice ------------- Starting with BetterTouchTool version 5.777, BetterTouchTool natively supports Logitech Mice (by implementing parts of Logitech's HID++ 2.0 protocol - [https://github.com/Logitech/cpg-docs/tree/master/hidpp20](https://github.com/Logitech/cpg-docs/tree/master/hidpp20) ) See [Logitech Support](https://docs.folivora.ai/docs/4000_logitech.html) for details on how to configure your Logitech Mouse with BetterTouchTool. Other Mice ---------- If you have installed any driver/software for your mouse, make sure to not assign any actions to the buttons in that software. If this doesn't help try to uninstall the driver/software. If your mouse buttons are still not being recognized afterwards, your mouse is most likely not supported in BTT. Some mice also act as keyboard - you may try if a shortcut is recognized in BTT's keyboard tab when pressing a button. results matching "" =================== No results matching "" ====================== --- # Other & Named Triggers · GitBook [Other & Named Triggers](https://docs.folivora.ai/) ==================================================== Other Triggers ============== The Other tab contains various triggers that do not fit in the other categories. ![siri2](https://docs.folivora.ai/docs/media/new/other_triggers.jpg) results matching "" =================== No results matching "" ====================== --- # Scroll Modifiers (Smooth Scroll, Speed, Acceleration) · GitBook [Scroll Modifiers (Smooth Scroll, Speed, Acceleration)](https://docs.folivora.ai/) =================================================================================== Scroll Modifiers ================ Scroll Modifiers are a new feature in BetterTouchTool >= 5.780. They allow you to dynamically change the scrolling behavior of any mouse or trackpad. * [Scroll Modifiers](https://docs.folivora.ai/docs/4001_scroll_modifiers.html#scroll-modifiers) * [Setup a Scroll Modifier:](https://docs.folivora.ai/docs/4001_scroll_modifiers.html#setup-a-scroll-modifier) * [Detailed Scroll Modifier Description:](https://docs.folivora.ai/docs/4001_scroll_modifiers.html#detailed-scroll-modifier-description) * [Smooth Scrolling (like Trackpad)](https://docs.folivora.ai/docs/4001_scroll_modifiers.html#smooth-scrolling-like-trackpad) * [Vertical \\& Horizontal Scroll Speed Modifier](https://docs.folivora.ai/docs/4001_scroll_modifiers.html#vertical--horizontal-scroll-speed-modifier) * [Block Horizontal Scrolling](https://docs.folivora.ai/docs/4001_scroll_modifiers.html#block-horizontal-scrolling) * [Block Vertical Scrolling](https://docs.folivora.ai/docs/4001_scroll_modifiers.html#block-vertical-scrolling) * [Scroll Acceleration Curve](https://docs.folivora.ai/docs/4001_scroll_modifiers.html#scroll-acceleration-curve) * [Reverse Scroll Direction](https://docs.folivora.ai/docs/4001_scroll_modifiers.html#reverse-scroll-direction) * [Swap Scroll Axes (H ↔ V)](https://docs.folivora.ai/docs/4001_scroll_modifiers.html#swap-scroll-axes-h-%E2%86%94-v) * [Lock Scroll to Dominant Axis](https://docs.folivora.ai/docs/4001_scroll_modifiers.html#lock-scroll-to-dominant-axis) * [Scroll Dead Zone Filter](https://docs.folivora.ai/docs/4001_scroll_modifiers.html#scroll-dead-zone-filter) * [Scroll Event Debounce](https://docs.folivora.ai/docs/4001_scroll_modifiers.html#scroll-event-debounce) * [Clamp Maximum Scroll Speed](https://docs.folivora.ai/docs/4001_scroll_modifiers.html#clamp-maximum-scroll-speed) * [Scroll Distance Per Tick](https://docs.folivora.ai/docs/4001_scroll_modifiers.html#scroll-distance-per-tick) Setup a Scroll Modifier: ------------------------ To set up a scroll modifier, go to the "Normal Mouse" section in BetterTouchTool and select the desired scroll modifier from the trigger list. Each modifier can be configured with: * **Device Type Conditions**: Apply the modifier only to specific devices (Regular Mouse, Touch Devices, Magic Mouse, or Trackpad) * **Modifier Key Conditions**: Apply the modifier only when specific modifier keys are pressed (Shift, Control, Option, Command, Function) You can configure multiple scroll modifiers, they will automatically be chained. The order in which you define them in the UI is relevant for some combinations. ![alt text](https://docs.folivora.ai/docs/media/4001_scroll_modifiers2025-11-25T21:22:29.178Z.png) Detailed Scroll Modifier Description: ------------------------------------- ### Smooth Scrolling (like Trackpad) Adds trackpad-like smooth scrolling to mouse wheels using 60 FPS interpolation. Makes discrete mouse wheel scrolling feel smooth like a trackpad. **Configurable Values:** | Parameter | Range | Default | Description | | --- | --- | --- | --- | | Duration | 0.1 - 0.5 | 0.35 | How quickly scrolling catches up. Lower = snappier, higher = smoother | | Speed Multiplier | 0.1 - 10 | 1.0 | Overall speed multiplier | | Stop Threshold | 0.01 - 1 | 0.05 | Minimum velocity (in pixels) before animation stops | | Input Timeout | 0.05 - 1 | 0.15 | Time (in seconds) before momentum phase starts | | EMA Alpha | 0 - 1 | 0.3 | Smoothing factor. Lower = more smoothing | | Simulate Trackpad Phases | On/Off | On | Emits phase events for apps that need them (Messages, Calendar) | | Velocity Boost | On/Off | On | Enhances responsiveness for consistent scrolling | * * * ### Vertical & Horizontal Scroll Speed Modifier Multiplies scroll deltas by the specified values to speed up or slow down scrolling. **Configurable Values:** | Parameter | Range | Default | Description | | --- | --- | --- | --- | | Vertical Multiplier | any number | 1.0 | Multiplier for vertical scrolling | | Horizontal Multiplier | any number | 1.0 | Multiplier for horizontal scrolling | **Value Guide:** * **1.0**: No change (default) * **\> 1.0**: Faster scrolling (e.g., 2.0 = twice as fast) * **< 1.0**: Slower scrolling (e.g., 0.5 = half speed) * **< 0**: Reverses direction Typical range: 0.1 to 5.0 * * * ### Block Horizontal Scrolling Completely suppresses left/right scrolling. **Use Cases:** * Preventing accidental horizontal scrolling in vertical-only content * Applications where horizontal scroll causes unwanted behavior * Mice with sensitive horizontal scroll wheels No configurable values - simply blocks all horizontal scroll events. * * * ### Block Vertical Scrolling Completely suppresses up/down scrolling. **Use Cases:** * Preventing accidental vertical scrolling in horizontal-only content * Spreadsheet applications when editing horizontally * Timeline or carousel interfaces No configurable values - simply blocks all vertical scroll events. * * * ### Scroll Acceleration Curve Applies an acceleration curve that makes faster scrolling even faster while maintaining precision for slow scrolls. **Formula:** `output = input × (1 + strength × √(|input|/4))` **Configurable Values:** | Parameter | Range | Default | Description | | --- | --- | --- | --- | | Horizontal Strength | 0 - 2 | 1.0 | Acceleration strength for horizontal scrolling | | Vertical Strength | 0 - 2 | 1.0 | Acceleration strength for vertical scrolling | **Value Guide:** * **0.0**: No acceleration (linear) * **1.0**: Default macOS-like acceleration * **2.0**: Strong acceleration Useful for large documents where you want quick navigation with fast scrolls but precise control with slow scrolls. * * * ### Reverse Scroll Direction Inverts the scroll direction for the selected axes (natural vs traditional scrolling). **Configurable Values:** | Parameter | Options | Default | Description | | --- | --- | --- | --- | | Reverse Horizontal | On/Off | Off | Invert horizontal scroll direction | | Reverse Vertical | On/Off | Off | Invert vertical scroll direction | **Use Cases:** * Switch between 'natural' and 'traditional' scrolling per device * Invert only horizontal or only vertical independently * Apply different scroll directions to mouse vs trackpad * * * ### Swap Scroll Axes (H ↔ V) Exchanges horizontal and vertical scroll axes. Scrolling up/down becomes left/right and vice versa. **Use Cases:** * Horizontal scrolling with vertical-only scroll wheels * Navigating timelines with vertical scroll gesture * Working with horizontally-oriented content No configurable values - simply swaps the axes. * * * ### Lock Scroll to Dominant Axis Prevents diagonal scrolling by locking to the dominant axis. When one axis is significantly stronger than the other, the weaker axis is zeroed out. **Configurable Values:** | Parameter | Range | Default | Description | | --- | --- | --- | --- | | Lock Threshold | 1 - 10 | 2.0 | Ratio threshold for locking | **Value Guide:** * **1.0**: Very strict - slight movement locks direction * **2.0**: Default - locks when one axis is 2× stronger than the other * **5.0+**: Loose - allows more diagonal movement Useful for precise vertical/horizontal scrolling in grids, lists, or code editors. * * * ### Scroll Dead Zone Filter Ignores small scroll movements below a specified threshold. Scroll events with delta below the threshold are blocked entirely. **Configurable Values:** | Parameter | Range | Default | Description | | --- | --- | --- | --- | | Horizontal Dead Zone | 0 - 100 | 0 | Minimum horizontal delta (in pixels) | | Vertical Dead Zone | 0 - 100 | 0 | Minimum vertical delta (in pixels) | **Value Guide:** * **0**: No dead zone (all scrolling passes through) * **1-5**: Small dead zone for slight jitter * **5-20**: Medium dead zone for accidental touches * **20+**: Large dead zone for very deliberate scrolling only Useful for sensitive mice or trackpads. * * * ### Scroll Event Debounce Rate-limits scroll events by blocking events that occur too close together. **Configurable Values:** | Parameter | Range | Default | Description | | --- | --- | --- | --- | | Debounce Time | 0 - 1 | 0.05 | Minimum time (in seconds) between events | **Value Guide:** * **0.01-0.03**: Minimal debounce for high-speed scrolling * **0.05**: Default - good balance * **0.1-0.2**: Slower, more deliberate scrolling * **0.5+**: Very slow, single-step scrolling Useful for mice with jittery scroll wheels or when you want more controlled scrolling. * * * ### Clamp Maximum Scroll Speed Limits the maximum scroll speed by capping delta values. Scroll deltas above the max are reduced to the max value. **Configurable Values:** | Parameter | Range | Default | Description | | --- | --- | --- | --- | | Max Horizontal Delta | 0 - 1000 | 0 | Maximum horizontal delta (in pixels). 0 = unlimited | | Max Vertical Delta | 0 - 1000 | 0 | Maximum vertical delta (in pixels). 0 = unlimited | **Value Guide:** * **0**: No clamping (unlimited speed) * **10-50**: Light clamping for smoother scrolling * **50-100**: Moderate speed limit * **100-500**: Strong limit for precise control Useful for preventing overly fast scrolling in applications. * * * ### Scroll Distance Per Tick Sets a fixed pixel distance per scroll tick for discrete scroll wheels. **Configurable Values:** | Parameter | Range | Default | Description | | --- | --- | --- | --- | | Horizontal Pixels Per Tick | 1 - 500 | 10 | Pixels scrolled per horizontal tick | | Vertical Pixels Per Tick | 1 - 500 | 10 | Pixels scrolled per vertical tick | **Value Guide:** * **5-10**: Fine scrolling, good for code editors * **10-20**: Default comfortable range * **20-50**: Faster page navigation * **50-100**: Large jumps per tick **Note:** Only affects discrete (non-continuous) scrolling from mouse wheels. Trackpad continuous scrolling is not affected. results matching "" =================== No results matching "" ====================== --- # Reusable Named Triggers · GitBook [Reusable Named Triggers](https://docs.folivora.ai/) ===================================================== Reusable Named Triggers ======================= Named triggers are basically pointers to one or multiple actions. Named triggers do have a name, but otherwise no configuration. * * * ### Use Cases for Named Triggers **1.) Reusability** Imagine you have a specific action which you want to execute via different triggers. For example send the same keyboard shortcut when doing a three finger tap, pressing a specific Touch Bar button and performing a gesture. You could assign that same shortcut to all of these triggers and it would work fine. However if you later decide to change the shortcut you would have to re-configure all of the triggers you assigned it to. With **named triggers** you can assign the shortcut only once - to a custom named trigger - and then assign that named trigger to the real triggers. If you now decide to change the shortcut, you only have to change it for the named trigger. **2.) Call from Scripts** Named Triggers can be called using the [BetterTouchTool scripting interfaces](https://docs.folivora.ai/docs/1101_scripting_btt.html) using the **trigger\_named** function. This allows you to configure any sequence of actions within BTT and trigger it using e.g. Apple Script or from within a floating webview. **3.) Special Functionality / Multi Action Triggers** Some triggers in BTT offer special functionality e.g. when being long pressed. However the BTT UI only allows to assign one action sequence to any given trigger. Named triggers allow you to jump to a different action sequence when the special functionality is triggerd. One example for this is "long press" on Touch Bar buttons, which lets you set a named trigger that is executed when a long press has been recognized. * * * ### Defining named triggers: Select the "Named & Other Triggers" section in BTT. There you'll find and be able to assign actions: ![named](https://docs.folivora.ai/docs/media/named_triggers2.png) results matching "" =================== No results matching "" ====================== --- # Text Selection Did Change · GitBook [Text Selection Did Change](https://docs.folivora.ai/) ======================================================= Text Selection Did Change ========================= Download example preset here: [https://folivora.ai/releases/text-selection-base.bttpresetzip](https://folivora.ai/releases/text-selection-base.bttpresetzip) ![alt text](https://docs.folivora.ai/docs/media/image-48.png) * [Text Selection Did Change](https://docs.folivora.ai/docs/1009_text_selection_did_change.html#text-selection-did-change) * [Introduction](https://docs.folivora.ai/docs/1009_text_selection_did_change.html#introduction) * [Useful BetterTouchTool Actions To Be Used](https://docs.folivora.ai/docs/1009_text_selection_did_change.html#useful-bettertouchtool-actions-to-be-used) * [Variables](https://docs.folivora.ai/docs/1009_text_selection_did_change.html#variables) * [Example Base Preset (Download \\& Description)](https://docs.folivora.ai/docs/1009_text_selection_did_change.html#example-base-preset-download--description) * [Floating Menu: text-selection](https://docs.folivora.ai/docs/1009_text_selection_did_change.html#floating-menu-text-selection) * [Keyboard Shortcuts and Key Sequences:](https://docs.folivora.ai/docs/1009_text_selection_did_change.html#keyboard-shortcuts-and-key-sequences) * [Double Tap Right Option Key](https://docs.folivora.ai/docs/1009_text_selection_did_change.html#double-tap-right-option-key) * [cmd+L](https://docs.folivora.ai/docs/1009_text_selection_did_change.html#cmdl) * [ctrl+opt+cmd+x](https://docs.folivora.ai/docs/1009_text_selection_did_change.html#ctrloptcmdx) * [Automations, Named \\& Other Triggers: Text Selection Did Change](https://docs.folivora.ai/docs/1009_text_selection_did_change.html#automations-named--other-triggers-text-selection-did-change) * [Included Items Overview](https://docs.folivora.ai/docs/1009_text_selection_did_change.html#included-items-overview) * [Item: Copy](https://docs.folivora.ai/docs/1009_text_selection_did_change.html#item-copy) * [Item: Copy as HTML:](https://docs.folivora.ai/docs/1009_text_selection_did_change.html#item-copy-as-html) * [Item: Paste](https://docs.folivora.ai/docs/1009_text_selection_did_change.html#item-paste) * [Item: Cut](https://docs.folivora.ai/docs/1009_text_selection_did_change.html#item-cut) * [Item: Append](https://docs.folivora.ai/docs/1009_text_selection_did_change.html#item-append) * [Item: Search With Google](https://docs.folivora.ai/docs/1009_text_selection_did_change.html#item-search-with-google) * [Item: Run in Terminal](https://docs.folivora.ai/docs/1009_text_selection_did_change.html#item-run-in-terminal) * [Item: AI (ChatGPT)](https://docs.folivora.ai/docs/1009_text_selection_did_change.html#item-ai-chatgpt) * [Item: Strike Through](https://docs.folivora.ai/docs/1009_text_selection_did_change.html#item-strike-through) * [Item: Comment Lines](https://docs.folivora.ai/docs/1009_text_selection_did_change.html#item-comment-lines) * [Item: Character Count](https://docs.folivora.ai/docs/1009_text_selection_did_change.html#item-character-count) * [Item: Open In Text Edit](https://docs.folivora.ai/docs/1009_text_selection_did_change.html#item-open-in-text-edit) * [Item: Search In Apple Maps:](https://docs.folivora.ai/docs/1009_text_selection_did_change.html#item-search-in-apple-maps) * [Item: Open Selected URL](https://docs.folivora.ai/docs/1009_text_selection_did_change.html#item-open-selected-url) * [Item: Download Youtube Video](https://docs.folivora.ai/docs/1009_text_selection_did_change.html#item-download-youtube-video) * [Submmenu: Format](https://docs.folivora.ai/docs/1009_text_selection_did_change.html#submmenu-format) * [Submenu: Markdown](https://docs.folivora.ai/docs/1009_text_selection_did_change.html#submenu-markdown) * [Extending / Modifying The Base Preset](https://docs.folivora.ai/docs/1009_text_selection_did_change.html#extending--modifying-the-base-preset) * [Customizing The Popup Positioning](https://docs.folivora.ai/docs/1009_text_selection_did_change.html#customizing-the-popup-positioning) * [Disable Text Selection Menu For Specific Apps / Windows](https://docs.folivora.ai/docs/1009_text_selection_did_change.html#disable-text-selection-menu-for-specific-apps--windows) * [Showing Specific Items Only In Specific Apps](https://docs.folivora.ai/docs/1009_text_selection_did_change.html#showing-specific-items-only-in-specific-apps) Introduction ------------ Starting with BetterTouchTool 5.133 there is a new trigger in the "Automations, Named & Other Triggers" section that is called "Text Selection Did Change". It triggers whenever you select some new text. While this is a pretty simple trigger, it is very powerful when combined with BetterTouchTool's [Floating Menus](https://docs.folivora.ai/docs/1600_floating_menus.html) and BTT's various scripting capabilities. I know there are other great tools like PopClip that can do similar things, but I believe the power and flexibility of BTT's Floating Menus can really make this great. Have a look at this example Some examples of what actions you could add to such a menu: * Search selected address in Apple / Google Maps * Search selected text in your favorite search engine or other website * Quickly run some Shortcut from the Shortcuts app on the selected text * Copy / Cut / Paste * Open a link * Change formatting of selected text, e.g. strike through * Copy Format from one string and transfer it onto some other string * Run AI (e.g. ChatGPT) on the selected text - e.g. to fix spelling or transform it. * Show the number of characters in selected text * Download Youtube video when selecting a Youtube link * Transform selected text using Java Script * Run selected text in terminal * Open a selected tracking number in Parcels app ([https://apps.apple.com/de/app/parcel-delivery-tracking/id639968404?l=en-GB&mt=12](https://apps.apple.com/de/app/parcel-delivery-tracking/id639968404?l=en-GB&mt=12) ) * Create a new note from the selected text * Extract any kind of data and use it (e.g. phone numbers) Useful BetterTouchTool Actions To Be Used ----------------------------------------- Of course you can use any of BetterTouchTool's actions or scripting capabilities, I just want to note some actions that are especially useful in combination with the text selection menu. Most of these will also be demoed in the example preset below. * Transform & Replace Selected Text With Java Script * Transform & Replace Selected Text With ChatGPT * Open URL / Open URL With Selection * Change Formatting Of Selected Text * Copy Text Style / Formatting * Paste Text Style / Formatting * Run Shell Script * Run Real Java Script * Trigger Menu Bar Menu Item * (of course) sending keyboard shortcuts Variables --------- Before the "Selected Text Did Change" trigger is triggered, BetterTouchTool will set the following variables that you can use in any scripts and in many BTT actions: * **BTTTextSelection**: The selected text * **BTTTextSelectionRTF**: The selected text as rich text in RTF format. * **BTTTextSelectionElementRole**: The role of the element in which text was selected (e.g. AXTextArea). This could be used to show different floating menus depending on the element. * **BTTTextSelectionElementSubRole**: : The sub-role of the element in which text was selected. This could be used to show different floating menus depending on the element. * **BTTTextSelectionType** gives the type of event that triggered the text selection. Currently can be: * double-click * drag-left-up * drag-left-down * drag-right-up * drag-right-down * **BTTTextSelectionCuttable**: Cut is available in current context * **BTTTextSelectionEditable**: Current selected text can be modified Example Base Preset (Download & Description) -------------------------------------------- Here you can download an example preset that shows various possibilities: [https://folivora.ai/releases/text-selection-base.bttpresetzip](https://folivora.ai/releases/text-selection-base.bttpresetzip) This is how it will look like when selecting text: ![alt text](https://docs.folivora.ai/docs/media/image-48.png) These triggers will be added to your BTT once you import the preset: ![alt text](https://docs.folivora.ai/docs/media/image-46.png) Quick video walkthrough: Let's go through the added items: ### Floating Menu: text-selection This is the menu that will be shown it contains various items that in some way work with the selected text. Let's have a look on all the items that are included in the menu. You can also download the items separately here: [Individual Items](https://docs.folivora.ai/docs/1010_text_selection_did_change_widgets.html) This is a standard floating menu, it is fully customizable, see: [Floating Menus](https://docs.folivora.ai/docs/1600_floating_menus.html) * * * ### Keyboard Shortcuts and Key Sequences: #### Double Tap Right Option Key This runs BTT's text selection detection manually. Can be useful if you have selected text via keyboard as this is not automatically caught by BTT. #### cmd+L That shortcut is often used to select the addressbar in browsers or other apps. It can be helpful to have the text selection menu popup in this situation, thus BTT overrides that shortcut and automatically triggers the text selection detection #### ctrl+opt+cmd+x It can be helpful to show the menu even if no text is selected. This shortcut moves the current clipboard content to the BTTTextSelection variable (on which the menu operates) and then displays the menu. This means the menu will work on the current clipboard contents when this shortcut is pressed. * * * #### Automations, Named & Other Triggers: Text Selection Did Change This is the main trigger that is responsible for positioning and showing the menu. It is triggered whenever you select some text. * * * ### Included Items Overview #### Item: Copy ![Copy](https://docs.folivora.ai/docs/media/image-49.png) This is a very simple item. It just executes the cmd+c shortcut to copy the selected text. * * * #### Item: Copy as HTML: ![alt text](https://docs.folivora.ai/docs/media/image-50.png) This item is configured to only show while holding the CMD key. It will try to copy the selected text as HTML. This is not possible everywhere, but most Browsers will allow it. * * * #### Item: Paste ![alt text](https://docs.folivora.ai/docs/media/image-51.png) This is a very simple item. It just executes the cmd+v shortcut to paste the current clipboard content. * * * #### Item: Cut ![alt text](https://docs.folivora.ai/docs/media/image-52.png) This is a very simple item. It just executes the cmd+x shortcut to cut the selected text. * * * #### Item: Append ![alt text](https://docs.folivora.ai/docs/media/image-53.png) This item appends the currently selected text to the current clipboard contents. It does that by using the predefined action "Transform Clipboard Contents With Java Script". The following simple script is used: async (clipboardContentString) => { let selectedText = await get_string_variable("BTTTextSelection"); // the \n will add a new line, if you don't need that just remove it. return clipboardContentString+"\n"+selectedText; } * * * #### Item: Search With Google ![alt text](https://docs.folivora.ai/docs/media/image-54.png) This item searches the currently selected text on Google. It is very simple to set up by using the predefined action "Open URL / Open URL With Selection": ![alt text](https://docs.folivora.ai/docs/media/image-55.png) You can easily adapt this to other URLs. For example if you wanted to search Yahoo, the query would look like this: https://search.yahoo.com/search?q={BTTTextSelection} * * * #### Item: Run in Terminal ![alt text](https://docs.folivora.ai/docs/media/image-56.png) This will run the currently selected text in terminal. To achieve this it runs the following Apple Script: tell application "BetterTouchTool" -- you can access the current text selection in Apple Script like this: set theSelection to get_string_variable "BTTTextSelection" end tell tell application "Terminal" activate if (count of windows) < 1 then do script "" -- opens a new Terminal window if none exists end if set theTab to selected tab of the first window do script theSelection in theTab end tell * * * #### Item: AI (ChatGPT) ![alt text](https://docs.folivora.ai/docs/media/image-77.png) This submenu contains a few items that allow you to transform the currently selected text with ChatGPT. ![alt text](https://docs.folivora.ai/docs/media/image-78.png) BTT comes with a limited free contingent for the 4o-mini model. To use other models you'll need to enter your own API key. 1. The first submenu item uses the predefined action "Transform & Replace Selection with ChatGPT". That action has various options, e.g. you can provide your own API key, or different URL in case you are running a local model. 2. The second submenu item is something I have been using a LOT recently. It asks ChatGPT to generate Java Script to transform the selected text based on your needs. It then transforms the currently selected text via that JS and saves the JS for later use. 3. This one reuses the last generated Java Script to transform the selected text. It does not need an internet connection. * * * #### Item: Strike Through ![alt text](https://docs.folivora.ai/docs/media/image-58.png) This will try to strike through the currently selected text. It will only work if the current app allows rich text. * * * #### Item: Comment Lines ![alt text](https://docs.folivora.ai/docs/media/image-59.png) This item adds two slahes at the beginning of every selected line. It is a good example on how to transform selected text. It uses the predefined action "Transfrom & Replace Selection With Java Script": ![alt text](https://docs.folivora.ai/docs/media/image-60.png) With this Java Script: async (clipboardContentString) => { // Split the original string by new lines const lines = clipboardContentString.split('\n'); // Prepend "// " to each line const commentedLines = lines.map(line => `// ${line}`); // Join the lines back together and return return commentedLines.join('\n'); } If you need any specific text transformation, ChatGPT can often help you with generating the necessary Java Script. Just provide it this base function: // the currently selected text is passed to this function in "clipboardContentString". You can modify that however you like. The currently selected text is replaced by whatever you return from this function. For example this would make the selected text upper case. async (clipboardContentString) => { return clipboardContentString.toUpperCase(); } * * * #### Item: Character Count ![alt text](https://docs.folivora.ai/docs/media/image-61.png) This item is not super useful, it just shows the number of currently selected characters. However it is a good example on how to use the selected text to dynamically change the display of a floating menu item. It uses this simple script as the menu item's script: async function itemScript(itemUUID) { // first get the selected text let selectedText = await get_string_variable("BTTTextSelection"); // then return a update definition for the floating menu item. You can update any property a floating menu item has. let content = { BTTMenuItemBackgroundColor : "50,80, 190, 166.991", BTTMenuItemText: selectedText.length + "" }; // make sure to return a stringified version of that return JSON.stringify(content); } ![alt text](https://docs.folivora.ai/docs/media/image-62.png) #### Item: Open In Text Edit ![alt text](https://docs.folivora.ai/docs/media/image-63.png) This item will open the selected text in a new file in Text Edit. It uses the predefined action "Run Shell Script" to execute this Terminal command: FILE="/tmp/btt-selected-text.txt" && echo "{BTTTextSelection}" >| "$FILE" && open -a TextEdit "$FILE" * * * #### Item: Search In Apple Maps: ![alt text](https://docs.folivora.ai/docs/media/image-64.png) This searches the selected text in Apple Maps. It uses the "Open URL / Open URL With Selection" action to do so: ![alt text](https://docs.folivora.ai/docs/media/image-65.png) This is the apple maps search URL: maps://maps.apple.com/?q={BTTTextSelection} To open that in Apple Maps you need to use the "Use Browser" option with "Custom Open Command" selected. This is the custom open command: /usr/bin/open -b com.apple.Maps '{url}' #### Item: Open Selected URL ![alt text](https://docs.folivora.ai/docs/media/image-66.png) This action will try to extract the first link from the currently selected text and open it in your default browser. It only shows up if the selected text actually contains a link. It checks the plain text version (saved in variable BTTTextSelection) and the rich text version of the currently selected text (saved in BTTTextSelectionRTF) To achieve this the item requires two scripts. The first script is assigned to the floating menu item itself. It hides the floating menu item if it can not find a link. * * * ##### Item Visibility Script function extractFirstLink(text) { const urlRegex = /[a-zA-Z][a-zA-Z0-9+\-.]*:\/\/[^\s"'`<>]+/; const match = text.match(urlRegex); if (!match) { return null; } return match[0]; } async function itemScript(itemUUID) { // by default update the item to be invisible let content = { BTTMenuItemVisibleWhileActive: 0, BTTMenuItemVisibleWhileInactive: 0, BTTMenuItemMinWidth: 1 }; // first try to get the selected text in plain text let selectedText = await get_string_variable("BTTTextSelection"); let link = extractFirstLink(selectedText); if(!link) { // if no link could be extracted, try to get the rich text RTF format instead. This might contain rich text or HTML links. selectedText = await get_string_variable("BTTTextSelectionRTF"); link = extractFirstLink(selectedText); } if (link !== null) { // make the item visible if a link was found content = { BTTMenuItemVisibleWhileActive: 1, BTTMenuItemVisibleWhileInactive: 1, BTTMenuItemMinWidth: 1 }; } return JSON.stringify(content); } * * * ##### Action Script: To actually open the found URL, we use the predefined action "Run Real Java Script" with this script: function extractFirstLink(text) { const urlRegex = /[a-zA-Z][a-zA-Z0-9+\-.]*:\/\/[^\s"'`<>]+/; const match = text.match(urlRegex); if (!match) { return null; } return match[0]; } async function openLink() { let selectedText = await get_string_variable("BTTTextSelection"); let link = extractFirstLink(selectedText); if(!link) { selectedText = await get_string_variable("BTTTextSelectionRTF"); link = extractFirstLink(selectedText); } // use BTT's standard scripting interface to trigger the open url action: let result = await trigger_action({json: JSON.stringify({ BTTPredefinedActionType: 59, BTTPredefinedActionName: 'Open URL or Open URL With Selection', BTTOpenURL: link, BTTOpenURLBrowser: 'Default', }), wait_for_reply: true}); // for debugging return the selected text return selectedText } * * * #### Item: Download Youtube Video ![alt text](https://docs.folivora.ai/docs/media/image-67.png) This item is only shown if a youtube link is selected. Clicking it will download the youtube video to your downloads folder. **Note** this requires yt-dlp and ffmpeg to be installed on your system via brew. brew install yt-dlp brew install ffmpeg Like the previous link widget example, this widget requires two scripts, one that hides the item if no youtube link is selected (or shows it otherwise) and one that downloads the Youtube video when clicked. As they are quite similar to the previous widget I'll just show the action script here: function extractFirstYoutubeLink(text) { if(!text) {return null;} const youtubeRegex = /(?:https?:\/\/)?(?:www\.)?(?:youtube\.com|youtu\.be)(?:\/[^\s"'`<>]*)?/i; const match = text.match(youtubeRegex); if (!match) { return null; } let found = match[0]; if (!/^https?:\/\//i.test(found)) { found = 'https://' + found; } return found; } async function downloadYoutubeVideo() { // first try to grab link from plain text let selectedText = await get_string_variable("BTTTextSelection");; let link = extractFirstYoutubeLink(selectedText); if(!link) { // if no link was found in plain text try to extract from RTF / rich text selectedText = await get_string_variable("BTTTextSelectionRTF"); link = extractFirstYoutubeLink(selectedText); } // run yt-dlp command line utility to download the video from the found link let shellScript = `/opt/homebrew/bin/yt-dlp \ --output "~/Downloads/%(title)s.%(ext)s" \ -f "bestvideo+bestaudio/best" \ --no-part \ --prefer-ffmpeg \ --ffmpeg-location "/opt/homebrew/bin/ffmpeg" \ --remux-video mp4 \ "${link}"`; let shellScriptWrapper = { script: shellScript }; let result = await runShellScript(shellScriptWrapper); return shellScript; } * * * #### Submmenu: Format ![alt text](https://docs.folivora.ai/docs/media/image-68.png) ![alt text](https://docs.folivora.ai/docs/media/image-69.png) This submenu contains various example formatting actions. * * * #### Submenu: Markdown ![alt text](https://docs.folivora.ai/docs/media/image-70.png) ![alt text](https://docs.folivora.ai/docs/media/image-71.png) This submenu contains various markdown example actions Extending / Modifying The Base Preset ------------------------------------- If you would like to use the preset shared above as a base for your own menu, be aware that by default any modifications will be lost if you import a newer version of the same preset. (Only modifications to the enabled state, order and display order will be preserved) To workaround this, I would recommend to create a separate preset in which you duplicate the menu from the example preset, then disable the menu in the example preset itself: You can even merge multiple menus if they have the same identifier - in that case you'll need to use the "display order" property to specify the order of items across menus. Customizing The Popup Positioning --------------------------------- BetteTouchTool tries to position the menu above or below the mouse cursor depending on how you selected the text. You can easily modify this behavior. Open the "Automations, Named & Other Triggers" section. There you'll find the "Text Selection Did Change" Trigger. This is the one that is responsible for recognizing that text has been selected and showing the menu. When selecting that trigger you'll see that it contains multiple if conditions. These check the variable "BTTTextSelectionType" variable. This variable can have these values: * double-click * drag-left-up * drag-left-down * drag-right-up * drag-right-down Now depending on the BTTTextSelectionType the predefined action "Update Floating Menu Properties" will be called. This action updates the positioning properties of the menu - before in the last step of the action sequence the menu is finally being shown. ![alt text](https://docs.folivora.ai/docs/6b55aedff43c306acbdfe7266432a1eff690bc82.jpeg) ![alt text](https://docs.folivora.ai/docs/2fb740fdc846d60a55f42478b7d67d0987aa7976.jpeg) Disable Text Selection Menu For Specific Apps / Windows ------------------------------------------------------- Because this is a very new trigger that can definitely interfere with some specific apps, you might want to disable it in specific situations. Also please report any app where it causes issues on [https://community.folivora.ai](https://community.folivora.ai/) Disabling the menu for specific apps or windows can be done easily. Te example preset has configured everything related to the text selection trigger in a [Conditional Activation Group](https://docs.folivora.ai/docs/1400_conditions.html) . To exclude apps, you can edit the conditions: ![alt text](https://docs.folivora.ai/docs/media/image-72.png) The default conditions already exlcude one app: "Blender". This is done by specifying bundleIdentifier is not "org.blenderfoundation.blender" You can also exclude apps by name or window name (or any other condition available). Hold option to create nested rules. For example this would exclude Blender (default), Finder and any window that contains "Untitled" in it's title. ![alt text](https://docs.folivora.ai/docs/media/image-73.png) Showing Specific Items Only In Specific Apps -------------------------------------------- Sometimes it can be useful to display certain items only in specific apps. For example some coding assistance items only in code editors or some browser specific items only in browsers. To achieve this you can create additional [Conditional Activation Groups](https://docs.folivora.ai/docs/1400_conditions.html) . If you add a floating menu with the same identifier (in the preset it's called text-selection), the items added to that will be merged into your main preset. You might need to use the "Display Order" property to define the position of these merged items. The default preset already contains one example for a conditional activation group that adds an item to your text-selection menu. ![alt text](https://docs.folivora.ai/docs/media/image-74.png) It is active if any of the conditions shown here are active (Text Edit, Sublime Text, Code and Xcode): ![alt text](https://docs.folivora.ai/docs/media/image-75.png) The example contains the menu with the correct identifier and one example item (which however is disabled): ![alt text](https://docs.folivora.ai/docs/media/image-76.png) results matching "" =================== No results matching "" ====================== --- # Text Selection Did Change Widgets · GitBook [Text Selection Did Change Widgets](https://docs.folivora.ai/) =============================================================== Example Text Selection Widgets To Download ========================================== The full preset described in [Text Selection Did Change](https://docs.folivora.ai/docs/1009_text_selection_did_change.html) is always available here: [https://folivora.ai/releases/text-selection-base.bttpresetzip](https://folivora.ai/releases/text-selection-base.bttpresetzip) On this page I'm collecting specific widgets I created or that have been created by users on [https://community.folivora.ai](https://community.folivora.ai/) . In general it's always a good idea to request a specific widge there, it will usually be pretty easy to create one. Text Selection Widget Collection -------------------------------- You can download these and drag them into your floating menu to import (they are JSON files that you could also edit in a text editor) ### Copy as HTML (only shows while holding CMD) [https://folivora.ai/releases/text\_selection/copy\_as\_html.bttfloatingmenuitems](https://folivora.ai/releases/text_selection/copy_as_html.bttfloatingmenuitems) ### Cut [https://folivora.ai/releases/text\_selection/cut.bttfloatingmenuitems](https://folivora.ai/releases/text_selection/cut.bttfloatingmenuitems) ### Copy [https://folivora.ai/releases/text\_selection/copy.bttfloatingmenuitems](https://folivora.ai/releases/text_selection/copy.bttfloatingmenuitems) ### Paste [https://folivora.ai/releases/text\_selection/paste.bttfloatingmenuitems](https://folivora.ai/releases/text_selection/paste.bttfloatingmenuitems) ### Artificial Intelligence / AI / ChatGPT submenu [https://folivora.ai/releases/text\_selection/ai.bttfloatingmenuitems](https://folivora.ai/releases/text_selection/ai.bttfloatingmenuitems) ### Strike Through [https://folivora.ai/releases/text\_selection/strike\_through.bttfloatingmenuitems](https://folivora.ai/releases/text_selection/strike_through.bttfloatingmenuitems) ### Show Character Count [https://folivora.ai/releases/text\_selection/show\_character\_count.bttfloatingmenuitems](https://folivora.ai/releases/text_selection/show_character_count.bttfloatingmenuitems) ### Search On Google [https://folivora.ai/releases/text\_selection/search\_on\_google.bttfloatingmenuitems](https://folivora.ai/releases/text_selection/search_on_google.bttfloatingmenuitems) ### Search On Apple Maps [https://folivora.ai/releases/text\_selection/search\_in\_apple\_maps.bttfloatingmenuitems](https://folivora.ai/releases/text_selection/search_in_apple_maps.bttfloatingmenuitems) ### Run In Terminal [https://folivora.ai/releases/text\_selection/run\_in\_terminal.bttfloatingmenuitems](https://folivora.ai/releases/text_selection/run_in_terminal.bttfloatingmenuitems) ### Open Link [https://folivora.ai/releases/text\_selection/open\_link.bttfloatingmenuitems](https://folivora.ai/releases/text_selection/open_link.bttfloatingmenuitems) ### Open Selected Text In New File In Text Edit [https://folivora.ai/releases/text\_selection/open\_in\_text\_edit.bttfloatingmenuitems](https://folivora.ai/releases/text_selection/open_in_text_edit.bttfloatingmenuitems) ### Convert Selected Text To Greek Letters [https://folivora.ai/releases/text\_selection/convert\_to\_greek\_letters.bttfloatingmenuitems](https://folivora.ai/releases/text_selection/convert_to_greek_letters.bttfloatingmenuitems) ### Comment Selected Lines [https://folivora.ai/releases/text\_selection/comment\_lines.bttfloatingmenuitems](https://folivora.ai/releases/text_selection/comment_lines.bttfloatingmenuitems) ### Context Menu Example With "To Upper Case" and "To Lower Case" Transformers [https://folivora.ai/releases/text\_selection/context\_menu\_example.bttfloatingmenuitems](https://folivora.ai/releases/text_selection/context_menu_example.bttfloatingmenuitems) ### Download Youtube Video To ~/Downloads **Note** this requires yt-dlp and ffmpeg to be installed on your system via brew. brew install yt-dlp brew install ffmpeg [https://folivora.ai/releases/text\_selection/download\_youtube\_video.bttfloatingmenuitems](https://folivora.ai/releases/text_selection/download_youtube_video.bttfloatingmenuitems) ### Append Selection To Clipboard [https://folivora.ai/releases/text\_selection/append\_selection\_to\_clipboard.bttfloatingmenuitems](https://folivora.ai/releases/text_selection/append_selection_to_clipboard.bttfloatingmenuitems) ### Text Formatting Examples [https://folivora.ai/releases/text\_selection/text\_formatting.bttfloatingmenuitems](https://folivora.ai/releases/text_selection/text_formatting.bttfloatingmenuitems) ### Markdown Helper Examples [https://folivora.ai/releases/text\_selection/markdown.bttfloatingmenuitems](https://folivora.ai/releases/text_selection/markdown.bttfloatingmenuitems) results matching "" =================== No results matching "" ====================== --- # Custom Menubar Status Items · GitBook [Custom Menubar Status Items](https://docs.folivora.ai/) ========================================================= Custom Menubar Status Items / Icons =================================== ![custom-items1](https://docs.folivora.ai/docs/media/image-1.png) BetterTouchTool allows you to add custom icons to your menubar. They can trigger any BetterTouchTool action when clicked and they can also be scripted to show dynamic content. You can configure the custom menubar status items in the "Automations & Named & Other Triggers" section in BetterTouchTool. There are three different types available: * Custom Menu Bar Icon (Static) * Apple / Java Script Menu Bar Icon (Scriptable) * Shell Script Menu Bar Icon (Scriptable) ![custom menubar items](https://docs.folivora.ai/docs/custom_menubar_items-1.png) You can either use the custom items to trigger any standard action offered by BTT, or you can assign the predefined action "Show Custom Context Menu (New)" to show a menu when clicked. You can also configure separate actions for right-clicking the menu bar icon: ![right-click](https://docs.folivora.ai/docs/media/image.png) results matching "" =================== No results matching "" ====================== --- # BTT as Default Browser / URL Based Triggers · GitBook [BTT as Default Browser / URL Based Triggers](https://docs.folivora.ai/) ========================================================================= Did Open URL / URL Based Trigger ================================ BetterTouchTool (starting with version 3.521) allows you to set it as default browser. If you do that, BTT can handle urls, e.g. to open specific sites with specific browsers. The sections on this page: * Adding the Trigger * Configuring the Trigger * Configuring the Action * Show Browser Selection in Context Menu * Advanced Usage with Scripts * * * 1 Adding the Trigger -------------------- Go to the **Named & Other Triggers** section in BTT and add a new trigger. Select **Did Open URL** from the General section. 2 Configuring the Trigger ------------------------- It is pretty simple to do the basic setup so BTT can know which URLs it should intercept. You just need to specify the URL (you can use wildcards \*). Now whenever a matching URL is called it will be saved into the BTT internal variable called **BTT\_OPENED\_URL**. Additionally BTT will save the path to the app that triggered the opening of the URL in the variable called **BTT\_OPENED\_URL\_FROM\_APP** ![global settings](https://docs.folivora.ai/docs/media/browser_matching_urls2.png) **Global Settings** There are currently two global settings (they apply to all **Did Open URL** triggers): * **Default Browser**: This is the Browser that is used for URLs that do not match any of the rules configured in BTT. * **URL Shorteners**: BTT will try to un-shorten links from shortener services defind in the list. If you do not want any un-shortening to happen, remove all entries from that list. ![global settings](https://docs.folivora.ai/docs/media/global_settings_url.png) 3 Configuring the Action ------------------------ One of the main use cases for this feature is to allow the usage of different web browsers for different websites. This can be achieved easily using the predefined action "Open URL / Open URL with Selection". Instead of specifying a URL you enter the variable like this: **{BTT\_OPENED\_URL}**, then just select the browser you want to use for the URL. ![configure did open url part 2](https://docs.folivora.ai/docs/media/browser_openurl.png) 4 Show Browser Selection in Context Menu ---------------------------------------- It's also possible to show a menu with a list of possible Browsers when clicking on a link. To do this use the predefined action "Show Custom Context Menu" and create multiple [Named Triggers](https://docs.folivora.ai/docs/1002_named_triggers.html) , one for every Browser you want to support: ![context menu](https://docs.folivora.ai/docs/media/browser_context_menu.png) It will then show a menu like this when clicking a link: ![context menu 2](https://docs.folivora.ai/docs/media/browser_context_2.png) 5 Advanced Usage With Scripts ----------------------------- If you need more flexibility, e.g. to trigger some advanced Browser features for specific URLs I recommend to use the predefined action **"Run Real JavaScript"**. While the Apple Script actions would also work I feel the JavaScript action is easier to use. Here is an example on how to use the "Run Real Java Script" action to access the opened URL and app that triggered it - and then running a shell script to open a specific Browser: ![javascript scripting](https://docs.folivora.ai/docs/media/browser_js.png) (async ()=> { // this gets the url that was opened let url = await get_string_variable({variable_name:'BTT_OPENED_URL'}); // in case you want to decide based on the app you can also get the app path from where it was opened let appPath = await get_string_variable( {variable_name:'BTT_OPENED_URL_FROM_APP'}); // this will open safari with the given URL let openScript = { launchPath: '/usr/bin/open', parameters: '-b;;com.apple.Safari;;' + url, }; await runShellScript(openScript); returnToBTT(url+'-'+appPath); })(); results matching "" =================== No results matching "" ====================== --- # Siri Remote Triggers · GitBook [Siri Remote Triggers](https://docs.folivora.ai/) ================================================== Siri Remote =========== You can assign actions to Siri Remote buttons or Siri Remote trackpad gestures: ![siri1](https://docs.folivora.ai/docs/media/new/siriremote.jpg) Follow the instructions in the app on how to connect and how to use mouse mode: ![siri2](https://docs.folivora.ai/docs/media/new/siriremotex.jpg) results matching "" =================== No results matching "" ====================== --- # Using Custom URL Scheme · GitBook [Using Custom URL Scheme](https://docs.folivora.ai/) ===================================================== Scripting BetterTouchTool using the custom URL Scheme ===================================================== **Important**: This feature is mostly useful if you want to trigger BetterTouchTool functionality from outside of BTT. If you want to use scripts inside of BTT (like in Touch Bar widgets or script actions) use the [JavaScript](https://docs.folivora.ai/docs/1106_java_script.html) or [Apple Script](https://docs.folivora.ai/docs/1102_apple_script.html) scripting options. BetterTouchTool allows to be control via a custom url scheme (btt://). On this page I'm briefly describing the various functions you can trigger via this URL scheme. * [Scripting BetterTouchTool using the custom URL Scheme](https://docs.folivora.ai/docs/1103_custom_url_scheme.html#scripting-bettertouchtool-using-the-custom-url-scheme) * [Security](https://docs.folivora.ai/docs/1103_custom_url_scheme.html#security) * [Available Scripting Interfaces](https://docs.folivora.ai/docs/1103_custom_url_scheme.html#available-scripting-interfaces) * [Example Terminal Command (but you can call the URL however you like)](https://docs.folivora.ai/docs/1103_custom_url_scheme.html#example-terminal-command-but-you-can-call-the-url-however-you-like) * [**trigger\_named**](https://docs.folivora.ai/docs/1103_custom_url_scheme.html#triggernamed) * [**update\_touch\_bar\_widget**](https://docs.folivora.ai/docs/1103_custom_url_scheme.html#updatetouchbarwidget) * [Example Terminal Command (but you can call the URL however you like)](https://docs.folivora.ai/docs/1103_custom_url_scheme.html#example-terminal-command-but-you-can-call-the-url-however-you-like-1) * [**trigger\_action**](https://docs.folivora.ai/docs/1103_custom_url_scheme.html#triggeraction) * [Example Terminal Command (but you can call the URL however you like)](https://docs.folivora.ai/docs/1103_custom_url_scheme.html#example-terminal-command-but-you-can-call-the-url-however-you-like-2) * [**execute\_assigned\_actions\_for\_trigger**](https://docs.folivora.ai/docs/1103_custom_url_scheme.html#executeassignedactionsfortrigger) * [Example Terminal Command (but you can call the URL however you like)](https://docs.folivora.ai/docs/1103_custom_url_scheme.html#example-terminal-command-but-you-can-call-the-url-however-you-like-3) * [**refresh\_widget**](https://docs.folivora.ai/docs/1103_custom_url_scheme.html#refreshwidget) * [Example Terminal Command (but you can call the URL however you like)](https://docs.folivora.ai/docs/1103_custom_url_scheme.html#example-terminal-command-but-you-can-call-the-url-however-you-like-4) * [**update\_trigger**](https://docs.folivora.ai/docs/1103_custom_url_scheme.html#updatetrigger) * [Example Terminal Command (but you can call the URL however you like)](https://docs.folivora.ai/docs/1103_custom_url_scheme.html#example-terminal-command-but-you-can-call-the-url-however-you-like-5) * [**add\_new\_trigger**](https://docs.folivora.ai/docs/1103_custom_url_scheme.html#addnewtrigger) * [Example Terminal Command (but you can call the URL however you like)](https://docs.folivora.ai/docs/1103_custom_url_scheme.html#example-terminal-command-but-you-can-call-the-url-however-you-like-6) * [**delete\_trigger**](https://docs.folivora.ai/docs/1103_custom_url_scheme.html#deletetrigger) * [Example Terminal Command (but you can call the URL however you like)](https://docs.folivora.ai/docs/1103_custom_url_scheme.html#example-terminal-command-but-you-can-call-the-url-however-you-like-7) * [**set\_persistent\_string\_variable**](https://docs.folivora.ai/docs/1103_custom_url_scheme.html#setpersistentstringvariable) * [Example Terminal Command (but you can call the URL however you like)](https://docs.folivora.ai/docs/1103_custom_url_scheme.html#example-terminal-command-but-you-can-call-the-url-however-you-like-8) * [**set\_string\_variable**](https://docs.folivora.ai/docs/1103_custom_url_scheme.html#setstringvariable) * [Example Terminal Command (but you can call the URL however you like)](https://docs.folivora.ai/docs/1103_custom_url_scheme.html#example-terminal-command-but-you-can-call-the-url-however-you-like-9) * [**set\_persistent\_number\_variable**](https://docs.folivora.ai/docs/1103_custom_url_scheme.html#setpersistentnumbervariable) * [Example Terminal Command (but you can call the URL however you like)](https://docs.folivora.ai/docs/1103_custom_url_scheme.html#example-terminal-command-but-you-can-call-the-url-however-you-like-10) * [**set\_number\_variable**](https://docs.folivora.ai/docs/1103_custom_url_scheme.html#setnumbervariable) * [Example Terminal Command (but you can call the URL however you like)](https://docs.folivora.ai/docs/1103_custom_url_scheme.html#example-terminal-command-but-you-can-call-the-url-however-you-like-11) **Note:** Custom URL Schemes **can not return values** to the calling application/browser. If you need that (e.g. after executing a shell script in BTT from outside of), please see the [Integrated Webserver](https://docs.folivora.ai/docs/1104_webserver.html) Custom URL Schemes always launch the app (BetterTouchTool) if it is not yet running. Security -------- BetterTouchTool will ask you the first time you use a btt:// trigger whether you want to allow that. However it doesn't make sense to always continue asking that question as it would destroy the purpose of this. So to improve security you can define a shared secret which then must be included in all btt:// urls like this: btt://the\_function\_you\_want\_to\_use/?shared\_secret=YourSecret The shared secret can be defined in the advanced preferences ![shared_secret](https://docs.folivora.ai/docs/media/new/scripting_secret.jpg) Available Scripting Interfaces ------------------------------ #### Example Terminal Command (but you can call the URL however you like) ### **trigger\_named** This method will trigger the specified named trigger (which can be configured in the "Other" tab in BetterTouchTool.) open "btt://trigger_named/?trigger_name=TriggerName" ### **update\_touch\_bar\_widget** This method will update the contents of a Touch Bar Script Widget (identified by its uuid). You can provide a new text to show, a new icon and a new background color. For the icon you can either provide it directly using the icon\_data parameter (must be base64 encoded) or you can provide a file path that points to the new icon (via the icon\_path parameter). You can get the uuid by right-clicking any script widget in BTT. #### Example Terminal Command (but you can call the URL however you like) open "btt://update_touch_bar_widget/?uuid=CC46E199-B07D-4BF7-AC36-48AAE558540B&text=updatedText&icon_path=/Users/andi/Desktop/test.png&background_color=200,200,100,255" * * * ### **trigger\_action** This method will trigger any of BetterTouchTool's predefined actions (or any combination of them). You need to provide a JSON description of the action you want to trigger. The easiest way to get such a JSON description is to right-click the trigger you have configured in BetterTouchTool and choose "Copy JSON". This will copy the complete JSON (including the configuration for the trigger itself), but this action will ignore anything that's not needed. (or you can delete the not needed parts) #### Example Terminal Command (but you can call the URL however you like) open "btt://trigger_action/?json={ \"BTTPredefinedActionType\" : 153, \"BTTPredefinedActionName\" : \"Move Mouse To Position\", \"BTTMoveMouseToPosition\" : \"{100, 10}\", \"BTTMoveMouseRelative\" : \"6\" }" * * * ### **execute\_assigned\_actions\_for\_trigger** This method execute all the assigned actions for a given trigger (i.e. gesture, shortcut, drawing etc.) identified by its uuid. You can get the uuid by right-clicking any configured trigger in BetterTouchTool. #### Example Terminal Command (but you can call the URL however you like) open "btt://execute_assigned_actions_for_trigger/?uuid=C40D3AE2-2F4E-49B1-A00C-F7E4C3632F07" * * * ### **refresh\_widget** This method will execute all scripts assigned to a script widget and update its contents accordingly. The widget is identified by its uuid, which you can get by right-clicking the widget in BetterTouchTool. #### Example Terminal Command (but you can call the URL however you like) open "btt://refresh_widget/?uuid=C40D3AE2-2F4E-49B1-A00C-F7E4C3632F07" * * * ### **update\_trigger** This method will create or update the configuration of any specified trigger (i.e. gestures, shortcuts, touchbar items etc.). You need to provide the uuid of the trigger you want to update (get by right-clicking it in BTT) and a JSON object defining the updates. To know how the JSON object should look like, right-click the trigger in BTT and choose "Copy JSON". #### Example Terminal Command (but you can call the URL however you like) open "btt://update_trigger/?uuid=0E2F7963-E64C-403A-8591-C3725D4D9ADC&json={\"BTTTouchBarButtonName\" : \"New Name2\", \"BTTTriggerConfig\" : {\"BTTTouchBarItemIconHeight\" : 30}}" * * * ### **add\_new\_trigger** This method will add a new trigger to BTT (i.e. gestures, shortcuts, touchbar items etc.). You need to provide a JSON object defining the new trigger. To know how the JSON object should look like, right-click any existing trigger in BTT and choose "Copy JSON". #### Example Terminal Command (but you can call the URL however you like) open "btt://add_new_trigger/?json={ \"BTTTriggerClass\" : \"BTTTriggerTypeKeyboardShortcut\", \"BTTPredefinedActionType\" : 5, \"BTTPredefinedActionName\" : \"Mission Control\", \"BTTAdditionalConfiguration\" : \"1179658\", \"BTTTriggerOnDown\" : 1, \"BTTEnabled\" : 1, \"BTTShortcutKeyCode\" : 2, \"BTTShortcutModifierKeys\" : 1179648, \"BTTOrder\" : 3 }" * * * ### **delete\_trigger** This method will delete a trigger from BetterTouchTool. You need to provide the uuid of the trigger you want to delete (get by right-clicking it in BTT). #### Example Terminal Command (but you can call the URL however you like) open "btt://delete_trigger/?uuid=0E2F7963-E64C-403A-8591-C3725D4D9ADC" * * * ### **set\_persistent\_string\_variable** This allows you to set a variable to a given string that persists over BTT relaunches. #### Example Terminal Command (but you can call the URL however you like) open "btt://set_persistent_string_variable/?variableName=test&to=12345" * * * ### **set\_string\_variable** This allows you to set a variable to a given string that persists over BTT relaunches. #### Example Terminal Command (but you can call the URL however you like) open "btt://set_string_variable/?variableName=test&to=12345" * * * ### **set\_persistent\_number\_variable** This allows you to set a variable to a given number that persists over BTT relaunches. #### Example Terminal Command (but you can call the URL however you like) open "btt://set_persistent_number_variable/?variableName=test&to=12345" * * * ### **set\_number\_variable** This allows you to set a variable to a given number for the runtime of BTT. #### Example Terminal Command (but you can call the URL however you like) open "btt://set_number_variable/?variableName=test&to=12345" * * * results matching "" =================== No results matching "" ====================== --- # Command Line Interface · GitBook [Command Line Interface](https://docs.folivora.ai/) ==================================================== BetterTouchTool CLI (bttcli) Documentation ========================================== * [BetterTouchTool CLI (bttcli) Documentation](https://docs.folivora.ai/docs/1109_cli.html#bettertouchtool-cli-bttcli-documentation) * [Overview](https://docs.folivora.ai/docs/1109_cli.html#overview) * [Socket Server Details](https://docs.folivora.ai/docs/1109_cli.html#socket-server-details) * [Usage Examples](https://docs.folivora.ai/docs/1109_cli.html#usage-examples) * [Command Format](https://docs.folivora.ai/docs/1109_cli.html#command-format) * [Supported Commands](https://docs.folivora.ai/docs/1109_cli.html#supported-commands) * [1\. get\_selection](https://docs.folivora.ai/docs/1109_cli.html#1-getselection) * [2\. get\_clipboard\_content](https://docs.folivora.ai/docs/1109_cli.html#2-getclipboardcontent) * [3\. set\_clipboard\_content](https://docs.folivora.ai/docs/1109_cli.html#3-setclipboardcontent) * [4\. set\_clipboard\_contents](https://docs.folivora.ai/docs/1109_cli.html#4-setclipboardcontents) * [5\. is\_app\_running](https://docs.folivora.ai/docs/1109_cli.html#5-isapprunning) * [6\. display\_notification](https://docs.folivora.ai/docs/1109_cli.html#6-displaynotification) * [7\. get\_dock\_badge\_for](https://docs.folivora.ai/docs/1109_cli.html#7-getdockbadgefor) * [8\. get\_active\_touch\_bar\_group](https://docs.folivora.ai/docs/1109_cli.html#8-getactivetouchbargroup) * [9\. is\_true\_tone\_enabled](https://docs.folivora.ai/docs/1109_cli.html#9-istruetoneenabled) * [10\. get\_location](https://docs.folivora.ai/docs/1109_cli.html#10-getlocation) * [11\. get\_weather](https://docs.folivora.ai/docs/1109_cli.html#11-getweather) * [12\. set\_persistent\_string\_variable](https://docs.folivora.ai/docs/1109_cli.html#12-setpersistentstringvariable) * [13\. set\_string\_variable](https://docs.folivora.ai/docs/1109_cli.html#13-setstringvariable) * [14\. set\_persistent\_number\_variable](https://docs.folivora.ai/docs/1109_cli.html#14-setpersistentnumbervariable) * [15\. set\_number\_variable](https://docs.folivora.ai/docs/1109_cli.html#15-setnumbervariable) * [16\. get\_number\_variable](https://docs.folivora.ai/docs/1109_cli.html#16-getnumbervariable) * [17\. get\_string\_variable](https://docs.folivora.ai/docs/1109_cli.html#17-getstringvariable) * [18\. reveal\_element\_in\_ui](https://docs.folivora.ai/docs/1109_cli.html#18-revealelementinui) * [19\. paste\_text](https://docs.folivora.ai/docs/1109_cli.html#19-pastetext) * [20\. get\_menu\_item\_value / get\_floating\_menu\_item\_value](https://docs.folivora.ai/docs/1109_cli.html#20-getmenuitemvalue--getfloatingmenuitemvalue) * [21\. set\_menu\_item\_value](https://docs.folivora.ai/docs/1109_cli.html#21-setmenuitemvalue) * [22\. update\_menu\_item / update\_floating\_menu\_item](https://docs.folivora.ai/docs/1109_cli.html#22-updatemenuitem--updatefloatingmenuitem) * [23\. webview\_menu\_item\_load\_html\_url\_js](https://docs.folivora.ai/docs/1109_cli.html#23-webviewmenuitemloadhtmlurljs) * [24\. trigger\_action](https://docs.folivora.ai/docs/1109_cli.html#24-triggeraction) * [25\. execute\_assigned\_actions\_for\_trigger](https://docs.folivora.ai/docs/1109_cli.html#25-executeassignedactionsfortrigger) * [26\. trigger\_named](https://docs.folivora.ai/docs/1109_cli.html#26-triggernamed) * [27\. trigger\_named\_async\_without\_response](https://docs.folivora.ai/docs/1109_cli.html#27-triggernamedasyncwithoutresponse) * [28\. cancel\_delayed\_named\_trigger\_execution](https://docs.folivora.ai/docs/1109_cli.html#28-canceldelayednamedtriggerexecution) * [29\. run\_shortcut](https://docs.folivora.ai/docs/1109_cli.html#29-runshortcut) * [30\. chat\_gpt](https://docs.folivora.ai/docs/1109_cli.html#30-chatgpt) * [31\. get\_trigger](https://docs.folivora.ai/docs/1109_cli.html#31-gettrigger) * [32\. get\_triggers](https://docs.folivora.ai/docs/1109_cli.html#32-gettriggers) * [33\. add\_new\_trigger](https://docs.folivora.ai/docs/1109_cli.html#33-addnewtrigger) * [34\. delete\_trigger](https://docs.folivora.ai/docs/1109_cli.html#34-deletetrigger) * [35\. delete\_triggers](https://docs.folivora.ai/docs/1109_cli.html#35-deletetriggers) * [36\. update\_trigger](https://docs.folivora.ai/docs/1109_cli.html#36-updatetrigger) * [37\. get\_preset\_details](https://docs.folivora.ai/docs/1109_cli.html#37-getpresetdetails) * [38\. import\_preset](https://docs.folivora.ai/docs/1109_cli.html#38-importpreset) * [39\. export\_preset](https://docs.folivora.ai/docs/1109_cli.html#39-exportpreset) * [40\. refresh\_widget](https://docs.folivora.ai/docs/1109_cli.html#40-refreshwidget) * [41\. update\_touch\_bar\_widget](https://docs.folivora.ai/docs/1109_cli.html#41-updatetouchbarwidget) * [42\. update\_stream\_deck\_widget](https://docs.folivora.ai/docs/1109_cli.html#42-updatestreamdeckwidget) * [43\. update\_menubar\_item](https://docs.folivora.ai/docs/1109_cli.html#43-updatemenubaritem) * [44\. get\_menu\_item\_details](https://docs.folivora.ai/docs/1109_cli.html#44-getmenuitemdetails) * [45\. get\_menu\_item\_value\_objc / get\_floating\_menu\_item\_value\_objc](https://docs.folivora.ai/docs/1109_cli.html#45-getmenuitemvalueobjc--getfloatingmenuitemvalueobjc) * [Security Notes](https://docs.folivora.ai/docs/1109_cli.html#security-notes) Overview -------- BetterTouchTool provides a Unix socket server that allows external applications to communicate with BTT through the socket at `/tmp/com.hegenberg.BetterTouchTool.sock`. The `bttcli` tool is a command-line interface that communicates with this socket server. **The Command Line / Socket Server support needs to be enabled in the BetterTouchTool Scripting Settings first** Socket Server Details --------------------- * **Socket Path**: `/tmp/com.hegenberg.BetterTouchTool.sock` * **Protocol**: Unix domain socket * **Security**: * Socket server must be enabled in BTT preferences (`BTTSocketServer` setting) * Optional shared secret authentication * Socket permissions set to 0666 for accessibility ![alt text](https://docs.folivora.ai/docs/media/1109_cli2025-09-18T06:45:12.487Z.png) ![alt text](https://docs.folivora.ai/docs/media/1109_cli2025-09-18T06:44:47.144Z.png) Usage Examples -------------- Using the bttcli tool: # Get clipboard content bttcli get_clipboard_content # Set a variable bttcli set_string_variable variableName=myVar to="Hello World" # Get a variable bttcli get_number_variable variableName=myVar # Trigger a named trigger bttcli trigger_named "MyTriggerName" # Display a notification bttcli display_notification "Hello from BTT" title="Notification Title" # Check if an app is running bttcli is_app_running "Safari" # Update a Touch BarreadFile widget bttcli update_touch_bar_widget "widget-uuid-here" text="New Text" # Get selected text bttcli get_selection # Set multiple clipboard formats bttcli set_clipboard_contents contents='["Hello","Hello"]' formats='["public.plain-text","public.html"]' # Execute ChatGPT query bttcli chat_gpt user="What is the weather like?" identifier="weather-conversation" Command Format -------------- Commands are sent as HTTP-style requests to the socket server: //?param1=value1¶m2=value2 Supported Commands ------------------ ### 1\. get\_selection Retrieves the currently selected text or content. * **Parameters**: * `type` / `content` / `format`: Pasteboard type (default: `NSPasteboardTypeString`) * Supported types: `NSPasteboardTypeString`, `NSPasteboardTypeTIFF`, `NSPasteboardTypePNG`, `NSPasteboardTypeRTF`, `NSPasteboardTypeRTFD`, `NSPasteboardTypeHTML`, `NSPasteboardTypeTabularText`, `NSPasteboardTypeFont`, `NSPasteboardTypeRuler`, `NSPasteboardTypeColor`, `NSPasteboardTypeSound`, `NSPasteboardTypeMultipleTextSelection`, `NSPasteboardTypeTextFinderOptions`, `NSPasteboardTypeURL`, `NSPasteboardTypeFileURL` * `asBase64` / `asbase64`: Return content as base64 encoded (boolean) ### 2\. get\_clipboard\_content Gets the current clipboard content. * **Parameters**: * `type` / `content` / `format`: Pasteboard type (same as get\_selection) * `asBase64` / `asbase64`: Return content as base64 encoded (boolean) * `excludeConcealed`: Exclude concealed / sensitive items - return empty string instead. ### 3\. set\_clipboard\_content Sets the clipboard content. * **Parameters**: * `content` / `text`: The content to set * `format`: The format/type to use ### 4\. set\_clipboard\_contents Sets multiple clipboard content types at once. * **Parameters**: * `contents`: Array of content items * `formats`: Array of format types ### 5\. is\_app\_running Checks if an application is running. * **Parameters**: * `app`: App name or bundle identifier ### 6\. display\_notification Shows a system notification. * **Parameters**: * `""` (unnamed): Notification body * `title`: Notification title * `subTitle`: Notification subtitle * `soundName`: Sound to play * `imagePath`: Path to notification image ### 7\. get\_dock\_badge\_for Gets the badge count for a dock item. * **Parameters**: * `app`: App name * `update_interval`: How often to check (minimum 0.5 seconds) ### 8\. get\_active\_touch\_bar\_group Returns the currently active Touch Bar group name. * **Parameters**: None ### 9\. is\_true\_tone\_enabled Checks if True Tone is enabled. * **Parameters**: None ### 10\. get\_location Gets the current location. * **Parameters**: * `format`: Output format (default: `{LAT},{LON}`) ### 11\. get\_weather Gets weather information for a location. * **Parameters**: * `location`: Location coordinates or "auto" for current location * `unit`: Temperature unit ("fahrenheit" or default celsius) ### 12\. set\_persistent\_string\_variable Sets a persistent string variable that survives BTT restarts. * **Parameters**: * `variableName` / `variable_name`: Variable name * `to`: Value to set ### 13\. set\_string\_variable Sets a temporary string variable. * **Parameters**: * `variableName` / `variable_name`: Variable name * `to`: Value to set ### 14\. set\_persistent\_number\_variable Sets a persistent number variable. * **Parameters**: * `variableName` / `variable_name`: Variable name * `to`: Numeric value to set ### 15\. set\_number\_variable Sets a temporary number variable. * **Parameters**: * `variableName` / `variable_name`: Variable name * `to`: Numeric value to set Special variables: * `BTTDisabled`: Enable/disable BTT * `BTTSiriRemoteMouseModeActive`: Toggle Siri Remote mouse mode * `SystemDoNotDisturbState`: Toggle Do Not Disturb * `BluetoothConnectionState-
`: Connect/disconnect Bluetooth devices * `CurrentDisplayBrightness`: Set current display brightness * `BuiltInDisplayBrightness`: Set built-in display brightness * `OutputVolume`: Set output volume ### 16\. get\_number\_variable Gets a number variable value. * **Parameters**: * `variableName` / `variable_name`: Variable name * `default`: Default value if variable doesn't exist Special variables: * `BTTIdleTime`: System idle time in seconds * `BTTDisabled`: BTT disabled state * `SystemDoNotDisturbState`: Do Not Disturb state * `BluetoothConnectionState-
`: Bluetooth device connection state * `CurrentDisplayBrightness`: Current display brightness * `BuiltInDisplayBrightness`: Built-in display brightness * `ActiveSpace`: Active Space ID * `OutputVolume`: Current output volume ### 17\. get\_string\_variable Gets a string variable value. * **Parameters**: * `variableName` / `variable_name`: Variable name * `default`: Default value if variable doesn't exist Special variables: * `BTTActiveWindowTitle`: Current window title * `BTTActiveWindowNumber`: Current window number * `BTTCurrentlyPlaying` / `BTTNowPlaying*`: Now playing information * `clipboard_content`: Current clipboard content * `hovered_link`: Currently hovered link * `selected_text`: Currently selected text ### 18\. reveal\_element\_in\_ui Reveals an element in the BTT UI. * **Parameters**: * `uuid`: UUID of the element to reveal ### 19\. paste\_text Pastes text by simulating keyboard input or clipboard paste. * **Parameters**: * `text` / `text_to_paste`: Text to paste * `format`: Format type * `insert_by_pasting`: Use paste instead of typing (boolean) * `move_cursor_left_by_x_after_pasting`: Move cursor left after pasting ### 20\. get\_menu\_item\_value / get\_floating\_menu\_item\_value Gets the value of a menu item. * **Parameters**: * `uuid`: Item UUID * `menu_name`: Menu name (if not using UUID) * `item_name`: Item name (if not using UUID) * `itemUUID` / `item_uuid`: Alternative UUID parameter ### 21\. set\_menu\_item\_value Sets the value of a menu item. * **Parameters**: * `uuid`: Item UUID * `menu_name`: Menu name * `item_name`: Item name * `value`: Value to set ### 22\. update\_menu\_item / update\_floating\_menu\_item Updates a menu item with JSON configuration. * **Parameters**: * `uuid`: Item UUID * `menu_name`: Menu name * `item_name`: Item name * `json`: JSON configuration * `persist`: Save changes permanently (boolean) ### 23\. webview\_menu\_item\_load\_html\_url\_js Loads HTML/URL or executes JavaScript in a WebView menu item. * **Parameters**: * `uuid`: Item UUID * `menu_name`: Menu name * `item_name`: Item name * `html_or_url`: HTML content or URL to load * `javascript_to_execute`: JavaScript to execute * `useragent`: Custom user agent ### 24\. trigger\_action Triggers an action. * **Parameters**: * `json`: JSON configuration of the action to trigger ### 25\. execute\_assigned\_actions\_for\_trigger Executes all actions assigned to a trigger. * **Parameters**: * `uuid`: Trigger UUID ### 26\. trigger\_named Triggers a named trigger and waits for completion. * **Parameters**: * `trigger_name`: Trigger name * `cancel_delayed`: Cancel any delayed execution (boolean) ### 27\. trigger\_named\_async\_without\_response Triggers a named trigger without waiting for response. * **Parameters**: * `trigger_name`: Trigger name * `delay`: Delay in seconds before triggering * `cancel_delayed`: Cancel any delayed execution (boolean) ### 28\. cancel\_delayed\_named\_trigger\_execution Cancels a delayed named trigger execution. * **Parameters**: * `trigger_name`: Trigger name ### 29\. run\_shortcut Runs an Apple Shortcuts shortcut. * **Parameters**: * `shortcut_name`: Shortcut name * `input` / `shortcut_input`: Input to pass to shortcut ### 30\. chat\_gpt Sends a request to ChatGPT. * **Parameters**: * `identifier`: Conversation identifier * `input`: Input text * `user`: User prompt * `system`: System prompt (default: helpful assistant) * `maxHistory`: Maximum conversation history * `model`: GPT model to use (default: gpt-4o-mini) * `apiKey`: Custom API key * `customURL`: Custom API URL ### 31\. get\_trigger Gets details for a specific trigger. * **Parameters**: * `uuid`: Trigger UUID ### 32\. get\_triggers Gets multiple triggers based on criteria. * **Parameters**: * `trigger_uuid`: Specific trigger UUID * `trigger_type`: Type of trigger * `trigger_id`: Trigger ID * `return_only_if_modifiers_match`: Only return if modifiers match (boolean) * `trigger_parent_uuid`: Parent trigger UUID * `trigger_app_bundle_identifier`: App bundle identifier * `preset`: Preset name ### 33\. add\_new\_trigger Adds a new trigger. * **Parameters**: * `json`: JSON configuration of the trigger ### 34\. delete\_trigger Deletes a trigger. * **Parameters**: * `uuid`: Trigger UUID ### 35\. delete\_triggers Deletes multiple triggers. * **Parameters**: * `trigger_uuid`: Specific trigger UUID * `trigger_type`: Type of trigger * `trigger_id`: Trigger ID * `return_only_if_modifiers_match`: Only if modifiers match * `trigger_parent_uuid`: Parent trigger UUID * `trigger_app_bundle_identifier`: App bundle identifier * `preset`: Preset name ### 36\. update\_trigger Updates a trigger configuration. * **Parameters**: * `uuid`: Trigger UUID * `trigger_parent_uuid`: Parent UUID * `json`: JSON configuration ### 37\. get\_preset\_details Gets details about a preset. * **Parameters**: * `name`: Preset name ### 38\. import\_preset Imports a preset from file. * **Parameters**: * `path`: Path to preset file * `replaceExisting`: Replace if exists (boolean, default: true) ### 39\. export\_preset Exports a preset to file. * **Parameters**: * `name`: Preset name * `compress`: Compress output (boolean) * `includeSettings`: Include settings (boolean) * `outputPath`: Output file path * `comment`: Export comment * `link`: Associated link * `minimumVersion`: Minimum BTT version ### 40\. refresh\_widget Refreshes a Touch Bar widget. * **Parameters**: * `uuid`: Widget UUID ### 41\. update\_touch\_bar\_widget Updates Touch Bar widget content. * **Parameters**: * `""` (unnamed): Widget UUID * Various widget-specific parameters in the args dictionary ### 42\. update\_stream\_deck\_widget Updates Stream Deck widget content. * **Parameters**: * `""` (unnamed): Widget UUID * `text`: Text to display * `json`: JSON configuration ### 43\. update\_menubar\_item Updates menu bar item. * **Parameters**: * `""` (unnamed): Item UUID * Various item-specific parameters in the args dictionary ### 44\. get\_menu\_item\_details Gets detailed status of a menu item. * **Parameters**: * `itemPath`: Menu item path ### 45\. get\_menu\_item\_value\_objc / get\_floating\_menu\_item\_value\_objc Gets menu item value (Objective-C version, returns raw value). * **Parameters**: Same as `get_menu_item_value` Security Notes -------------- 1. The socket server must be explicitly enabled in BTT preferences 2. An optional shared secret can be configured for authentication 3. The `import_preset` command shows a security warning unless the user has opted to always allow imports 4. External scripting must be enabled for non-webserver requests results matching "" =================== No results matching "" ====================== --- # Using HTTP Requests / Webserver · GitBook [Using HTTP Requests / Webserver](https://docs.folivora.ai/) ============================================================= * [Integrated Webserver](https://docs.folivora.ai/docs/1104_webserver.html#integrated-webserver) * [Basic settings](https://docs.folivora.ai/docs/1104_webserver.html#basic-settings) * [HTTP Endpoints](https://docs.folivora.ai/docs/1104_webserver.html#http-endpoints) * [Badge Management](https://docs.folivora.ai/docs/1104_webserver.html#badge-management) * [Touch Bar](https://docs.folivora.ai/docs/1104_webserver.html#touch-bar) * [System Information](https://docs.folivora.ai/docs/1104_webserver.html#system-information) * [Variable Management](https://docs.folivora.ai/docs/1104_webserver.html#variable-management) * [UI Elements](https://docs.folivora.ai/docs/1104_webserver.html#ui-elements) * [Menu Items](https://docs.folivora.ai/docs/1104_webserver.html#menu-items) * [Text Operations](https://docs.folivora.ai/docs/1104_webserver.html#text-operations) * [Widget Management](https://docs.folivora.ai/docs/1104_webserver.html#widget-management) * [Trigger Management](https://docs.folivora.ai/docs/1104_webserver.html#trigger-management) * [Shortcuts](https://docs.folivora.ai/docs/1104_webserver.html#shortcuts) * [Clipboard Operations](https://docs.folivora.ai/docs/1104_webserver.html#clipboard-operations) * [Preset Management](https://docs.folivora.ai/docs/1104_webserver.html#preset-management) * [WebSocket Endpoints](https://docs.folivora.ai/docs/1104_webserver.html#websocket-endpoints) * [Security Notes](https://docs.folivora.ai/docs/1104_webserver.html#security-notes) * [Some Examples](https://docs.folivora.ai/docs/1104_webserver.html#some-examples) * [**trigger\_named**](https://docs.folivora.ai/docs/1104_webserver.html#triggernamed) * [Example Terminal Command (but you can call the URL however you like)](https://docs.folivora.ai/docs/1104_webserver.html#example-terminal-command-but-you-can-call-the-url-however-you-like) * [**update\_touch\_bar\_widget**](https://docs.folivora.ai/docs/1104_webserver.html#updatetouchbarwidget) * [Example Terminal Command (but you can call the URL however you like)](https://docs.folivora.ai/docs/1104_webserver.html#example-terminal-command-but-you-can-call-the-url-however-you-like-1) * [**trigger\_action**](https://docs.folivora.ai/docs/1104_webserver.html#triggeraction) * [Example Terminal Command (but you can call the URL however you like)](https://docs.folivora.ai/docs/1104_webserver.html#example-terminal-command-but-you-can-call-the-url-however-you-like-2) * [**execute\_assigned\_actions\_for\_trigger**](https://docs.folivora.ai/docs/1104_webserver.html#executeassignedactionsfortrigger) * [Example Terminal Command (but you can call the URL however you like)](https://docs.folivora.ai/docs/1104_webserver.html#example-terminal-command-but-you-can-call-the-url-however-you-like-3) * [**refresh\_widget**](https://docs.folivora.ai/docs/1104_webserver.html#refreshwidget) * [Example Terminal Command (but you can call the URL however you like)](https://docs.folivora.ai/docs/1104_webserver.html#example-terminal-command-but-you-can-call-the-url-however-you-like-4) * [**update\_trigger**](https://docs.folivora.ai/docs/1104_webserver.html#updatetrigger) * [Example Terminal Command (but you can call the URL however you like)](https://docs.folivora.ai/docs/1104_webserver.html#example-terminal-command-but-you-can-call-the-url-however-you-like-5) * [**get\_trigger**](https://docs.folivora.ai/docs/1104_webserver.html#gettrigger) * [Example Terminal Command (but you can call the URL however you like)](https://docs.folivora.ai/docs/1104_webserver.html#example-terminal-command-but-you-can-call-the-url-however-you-like-6) * [**get\_triggers**](https://docs.folivora.ai/docs/1104_webserver.html#gettriggers) * [Example Terminal Command (but you can call the URL however you like). This would get all named triggers configured in BTT.](https://docs.folivora.ai/docs/1104_webserver.html#example-terminal-command-but-you-can-call-the-url-however-you-like-this-would-get-all-named-triggers-configured-in-btt) * [**add\_new\_trigger**](https://docs.folivora.ai/docs/1104_webserver.html#addnewtrigger) * [Example Terminal Command (but you can call the URL however you like)](https://docs.folivora.ai/docs/1104_webserver.html#example-terminal-command-but-you-can-call-the-url-however-you-like-7) * [**set\_persistent\_string\_variable**](https://docs.folivora.ai/docs/1104_webserver.html#setpersistentstringvariable) * [Example Terminal Command (but you can call the URL however you like)](https://docs.folivora.ai/docs/1104_webserver.html#example-terminal-command-but-you-can-call-the-url-however-you-like-8) * [**set\_string\_variable**](https://docs.folivora.ai/docs/1104_webserver.html#setstringvariable) * [Example Terminal Command (but you can call the URL however you like)](https://docs.folivora.ai/docs/1104_webserver.html#example-terminal-command-but-you-can-call-the-url-however-you-like-9) * [**set\_persistent\_number\_variable**](https://docs.folivora.ai/docs/1104_webserver.html#setpersistentnumbervariable) * [Example Terminal Command (but you can call the URL however you like)](https://docs.folivora.ai/docs/1104_webserver.html#example-terminal-command-but-you-can-call-the-url-however-you-like-10) * [**set\_number\_variable**](https://docs.folivora.ai/docs/1104_webserver.html#setnumbervariable) * [Example Terminal Command (but you can call the URL however you like)](https://docs.folivora.ai/docs/1104_webserver.html#example-terminal-command-but-you-can-call-the-url-however-you-like-11) Integrated Webserver ==================== BetterTouchTool has a basic integrated Webserver. It is **disabled** by default and can be activated in the advanced preferences. ![webserver](https://docs.folivora.ai/docs/media/new/webserver.jpg) The integrated webserver can be used for a few very interesting usecases: * To easily trigger BetterTouchTool actions from websites (e.g. when building a custom "Dashboard" thingy) * Controlling your computer from tablet's or smartphone's via custom dashboards. This allows you to use BetterTouchTool actions from devices that don't support BTT Remote (Android, Windows Phone etc.) Basic settings ============== The webserver settings are all located in the advanced preferences. There are not many settings. * You can choose a port (on first start it will automatically assign some random port if you don't enter any) * You can set a shared secret (which you should if you make it available in your network). This shared secret must then be included in all urls to the server (e.g. [https://127.0.0.1:12345/?shared\_secret=v3rY\_$ecre7](https://127.0.0.1:12345/?shared_secret=v3rY_$ecre7) ) * You can choose on which interface the server should listen. The default is 127.0.0.1 (which means only applications on your computer can access it). If you want to make it available in your network, you need to enter your computers local IP (can be found in System Preferences => Network.) * You can enable HTTPS. This will use the BetterTouchToolRemote\_New certificate in your keychain. You need to make this a trusted certificate, otherwise your browsers will complain (on macOS you can do it by going to your keychain, right-clicking it => get info => trust => always trust) If you want the server to serve files, you can put them in this directory (doesn't exist by default): ~/Library/Application Support/BetterTouchTool/BTTWebServer/ HTTP Endpoints -------------- ### Badge Management * `/get_dock_badge_for/` - Gets dock badge information ### Touch Bar * `/get_active_touch_bar_group/` - Gets the currently active touch bar group * `/update_touch_bar_widget/` - Updates touch bar widget ### System Information * `/is_true_tone_enabled/` - Checks if True Tone is enabled * `/get_location/` - Gets location information * `/get_weather/` - Gets weather information ### Variable Management * `/set_persistent_string_variable/` - Sets a persistent string variable * `/set_string_variable/` - Sets a string variable * `/set_persistent_number_variable/` - Sets a persistent number variable * `/set_number_variable/` - Sets a number variable * `/get_number_variable/` - Gets a number variable value * `/get_string_variable/` - Gets a string variable value ### UI Elements * `/reveal_element_in_ui/` - Reveals an element in the UI ### Menu Items * `/set_menu_item_value/` - Sets menu item value * `/update_menu_item/` - Updates menu item * `/update_floating_menu_item/` - Updates floating menu item * `/get_menu_item_value/` - Gets menu item value * `/get_floating_menu_item_value/` - Gets floating menu item value * `/get_menu_item_details/` - Gets detailed information about a menu item * `/webview_menu_item_load_html_url_js/` - Loads HTML/URL/JS in webview menu item ### Text Operations * `/paste_text/` - Pastes text ### Widget Management * `/refresh_widget/` - Refreshes a widget * `/update_menubar_item/` - Updates menubar item * `/update_stream_deck_widget/` - Updates Stream Deck widget ### Trigger Management * `/update_trigger/` - Updates a trigger * `/execute_assigned_actions_for_trigger/` - Executes actions assigned to a trigger * `/add_new_trigger/` - Adds a new trigger * `/trigger_action/` - Triggers an action * `/trigger_named/` - Triggers a named trigger * `/trigger_named_async_without_response/` - Triggers named trigger asynchronously without response * `/cancel_delayed_named_trigger_execution/` - Cancels delayed named trigger execution * `/delete_trigger/` - Deletes a trigger * `/get_trigger/` - Gets trigger information * `/get_triggers/` - Gets multiple triggers ### Shortcuts * `/run_shortcut/` - Runs a shortcut ### Clipboard Operations * `/get_clipboard_content/` - Gets clipboard content * `/get_selection/` - Gets current selection * `/set_clipboard_content/` - Sets clipboard content * `/set_clipboard_contents/` - Sets clipboard contents (duplicate endpoint) ### Preset Management * `/export_preset/` - Exports a preset * `/import_preset/` - Imports a preset * `/get_preset_details/` - Gets preset details WebSocket Endpoints ------------------- * `/service` - WebSocket endpoint for BTTWebSocket service Security Notes -------------- * All endpoints require authentication via shared secret stored in keychain * The shared secret must be included in the path * Requests without proper authentication return HTTP 403 error * Server can be configured to use SSL/TLS encryption Some Examples ============= ### **trigger\_named** This method will trigger the specified named trigger (which can be configured in the "Other" tab in BetterTouchTool.) #### Example Terminal Command (but you can call the URL however you like) open "http://127.0.0.1:12345/trigger_named/?trigger_name=TriggerName" ### **update\_touch\_bar\_widget** This method will update the contents of a Touch Bar Script Widget (identified by its uuid). You can provide a new text to show, a new icon and a new background color. For the icon you can either provide it directly using the icon\_data parameter (must be base64 encoded) or you can provide a file path that points to the new icon (via the icon\_path parameter). You can get the uuid by right-clicking any script widget in BTT. #### Example Terminal Command (but you can call the URL however you like) open "http://127.0.0.1:12345/update_touch_bar_widget/?uuid=CC46E199-B07D-4BF7-AC36-48AAE558540B&text=updatedText&icon_path=/Users/andi/Desktop/test.png&background_color=200,200,100,255" * * * ### **trigger\_action** This method will trigger any of BetterTouchTool's predefined actions (or any combination of them). You need to provide a JSON description of the action you want to trigger. The easiest way to get such a JSON description is to right-click the trigger you have configured in BetterTouchTool and choose "Copy JSON". This will copy the complete JSON (including the configuration for the trigger itself), but this action will ignore anything that's not needed. (or you can delete the not needed parts) #### Example Terminal Command (but you can call the URL however you like) open "http://127.0.0.1:12345/trigger_action/?json={ \"BTTPredefinedActionType\" : 153, \"BTTPredefinedActionName\" : \"Move Mouse To Position\", \"BTTMoveMouseToPosition\" : \"{100, 10}\", \"BTTMoveMouseRelative\" : \"6\" }" * * * ### **execute\_assigned\_actions\_for\_trigger** This method execute all the assigned actions for a given trigger (i.e. gesture, shortcut, drawing etc.) identified by its uuid. You can get the uuid by right-clicking any configured trigger in BetterTouchTool. #### Example Terminal Command (but you can call the URL however you like) open "http://127.0.0.1:12345/execute_assigned_actions_for_trigger/?uuid=C40D3AE2-2F4E-49B1-A00C-F7E4C3632F07" * * * ### **refresh\_widget** This method will execute all scripts assigned to a script widget and update its contents accordingly. The widget is identified by its uuid, which you can get by right-clicking the widget in BetterTouchTool. #### Example Terminal Command (but you can call the URL however you like) open "http://127.0.0.1:12345/refresh_widget/?uuid=C40D3AE2-2F4E-49B1-A00C-F7E4C3632F07" * * * ### **update\_trigger** This method will update the configuration of any trigger you have configured in BTT (i.e. gestures, shortcuts, touchbar items etc.). You need to provide the uuid of the trigger you want to update (get by right-clicking it in BTT) and a JSON object defining the updates. To know how the JSON object should look like, right-click the trigger in BTT and choose "Copy JSON". **Optional Parameter**: trigger\_parent\_uuid (if you want to add the trigger to a group) #### Example Terminal Command (but you can call the URL however you like) open "http://127.0.0.1:12345/update_trigger/?uuid=0E2F7963-E64C-403A-8591-C3725D4D9ADC&json={\"BTTTouchBarButtonName\" : \"New Name2\", \"BTTTriggerConfig\" : {\"BTTTouchBarItemIconHeight\" : 30}}" * * * ### **get\_trigger** This method will return the JSON description for given trigger with the specified UUID (i.e. gestures, shortcuts, touchbar items etc.). #### Example Terminal Command (but you can call the URL however you like) /usr/bin/curl "http://127.0.0.1:12345/get_trigger/?uuid=CC46E199-B07D-4BF7-AC36-48AAE558540B" * * * ### **get\_triggers** This allows you to retrieve the JSON description of multiple triggers in BTT (e.g. Touch Bar item, Gesture, Keyboard Shortcut etc.) based on a few properties. You can get the properties of a specific trigger by selecting it in BTT and copy pasting it to some text editor. The get\_triggers() function supports these parameters (all optional): * trigger\_type (e.g. BTTTriggerTypeMagicMouse) * trigger\_id (e.g. 643 for named triggers) * trigger\_parent\_uuid (if you want to get the items of a folder) * trigger\_uuid (to get a specific trigger) * trigger\_app\_bundle\_identifier (to get triggers assigned to a specific app) #### Example Terminal Command (but you can call the URL however you like). This would get all named triggers configured in BTT. /usr/bin/curl "http://127.0.0.1:12345/get_triggers/?trigger_id=643" * * * ### **add\_new\_trigger** This method will add a new trigger to BTT (i.e. gestures, shortcuts, touchbar items etc.). You need to provide a JSON object defining the new trigger. To know how the JSON object should look like, right-click any existing trigger in BTT and choose "Copy JSON". #### Example Terminal Command (but you can call the URL however you like) open "http://127.0.0.1:12345/add_new_trigger/?json={ \"BTTTriggerClass\" : \"BTTTriggerTypeKeyboardShortcut\", \"BTTPredefinedActionType\" : 5, \"BTTPredefinedActionName\" : \"Mission Control\", \"BTTAdditionalConfiguration\" : \"1179658\", \"BTTTriggerOnDown\" : 1, \"BTTEnabled\" : 1, \"BTTShortcutKeyCode\" : 2, \"BTTShortcutModifierKeys\" : 1179648, \"BTTOrder\" : 3 }" * * * ### **set\_persistent\_string\_variable** This allows you to set a variable to a given string that persists over BTT relaunches. #### Example Terminal Command (but you can call the URL however you like) open "http://127.0.0.1:12345/set_persistent_string_variable/?variableName=test&to=12345" * * * ### **set\_string\_variable** This allows you to set a variable to a given string that persists over BTT relaunches. #### Example Terminal Command (but you can call the URL however you like) open "http://127.0.0.1:12345/set_string_variable/?variableName=test&to=12345" * * * ### **set\_persistent\_number\_variable** This allows you to set a variable to a given string that persists over BTT relaunches. #### Example Terminal Command (but you can call the URL however you like) open "http://127.0.0.1:12345/set_persistent_number_variable/?variableName=test&to=12345" * * * ### **set\_number\_variable** This allows you to set a variable to a given string for the runtime of BTT. #### Example Terminal Command (but you can call the URL however you like) open "http://127.0.0.1:12345/set_number_variable/?variableName=test&to=12345" * * * results matching "" =================== No results matching "" ====================== --- # Available Standard Variables · GitBook [Available Standard Variables](https://docs.folivora.ai/) ========================================================== Using Variables in BetterTouchTool ---------------------------------- Variables in BTT can be quite useful [when using Apple Script / Java Script and the like](https://docs.folivora.ai/docs/1101_scripting_btt.html) There are three types of variables: * Temporary Variables - will only be available until BTT quits * Persistent Variables - will be persisted and be available all the time * Dynamic Variables - they are calculated dynamically. BTT comes with a small set of helpful dynamic variables. Dynamic Variables provided by BTT: ---------------------------------- **Important: ALL variables** you can see in Conditional Activation Groups or in Advanced Trigger Conditions can also be queried via script! * **selected\_text** - The currently selected text. Readonly. * **BTTActiveWindowTitle** - The title of the ative window. Readonly. * **ActiveSpace** - The ID number of the active space * **OutputVolume** - The current output volume of the system. Readable and writable. * **BuiltInDisplayBrightness** - The brightness of the built in display. Readable and writable. * **BTTCurrentlyPlaying** - This variable returns whether the system is currently playing music/video (1 or 0). When called it also starts to observe further details and will make the following variables available: * **BTTNowPlayingInfoArtist** * **BTTNowPlayingInfoTitle** * **BTTNowPlayingInfoAlbum** * **BTTNowPlayingInfoDuration** * **BTTNowPlayingInfoTrackNumber** * **BTTTouchBarVisible** - Tells you whether the BTT custom Touch Bar is currently visible or not. * **BTTCurrentlyPlayingApp** - the app identifier of the app that is currently playing video or audio. Read only. * **BTTInternalNightShiftState** - Is the BTT night shift currently active or not? (Does not necessarily represent the system night shift state) * **SystemDoNotDisturbState** - The current state of "do not disturb". Readable & writable. * BluetoothConnectionState-**MACADRESS-OR-NAME** - Returns whether a device is connected. Can contain wildcards (kind of dynamic-dynamic variable). E.g. BluetoothConnectionState-_Airpod_. Radable and writable. * **BTTActiveAppBundleIdentifier** - The bundle identifier of the currently active app. Readonly. * **BTTActiveWindowNumber** - The window number of the active window (to identify a window). Readonly. * **BTTTouchBarHasPhysicalESCKey** - Is 1 if the TouchBar Macbook has a physical ESC key. Readonly. * **BTTLastTriggeredAction** - The id of the last triggered BTT action. Readonly. * **BTTLastTriggeredUUID** - The UUID of the last triggered BTT action. Readonly. * **BTTLastTriggerTime** - The timestamp when the last BTT action was triggered. You can always see your temporary and dynamic variables in the BetterTouchTool settings: ![webserver](https://docs.folivora.ai/docs/media/bttvariables.png) Advanced Trigger Condition Variables ------------------------------------ Every variable that can be used inside of [advanced trigger conditions or conditional activation groups](https://docs.folivora.ai/docs/1400_conditions.html) can also be used anywhere else where variables can be used. As of version 4.865 these advanced trigger condition variables are available: * `color_under_cursor` * `focused_element_role` * `focused_element_subrole` * `selected_text` * `connected_wifi_name` * `active_website_url` * `focused_window_title` * `focused_window_app_name` * `active_app_name` * `active_app_bundle_identifier` * `left_mouse_down` * `middle_mouse_down` * `right_mouse_down` * `currently_pressed_mouse_buttons` * `currently_pressed_keyboard_keys` * `trackpad_id` * `fingers_touching_trackpad` * `trackpad_touch_duration` * `thumb_recognized` * `thumb_x_percent` * `thumb_y_percent` * `leftmost_touch_x` * `leftmost_touch_y` * `rightmost_touch_x` * `rightmost_touch_y` * `fingers_touching_magic_mouse` * `magic_mouse_touch_duration` * `leftmost_mouse_touch_x` * `leftmost_mouse_touch_y` * `rightmost_mouse_touch_x` * `rightmost_mouse_touch_y` * `mouse_position_x` * `mouse_position_y` * `mouse_pos_percent_x` * `mouse_pos_percent_y` * `window_titlebar_hovered` * `dist_x_active_win_top_left` * `dist_y_active_win_top_left` * `dist_x_active_win_top_right` * `dist_y_active_win_top_right` * `dist_x_active_win_bottom_left` * `dist_y_active_win_bottom_left` * `dist_x_active_win_bottom_right` * `dist_y_active_win_bottom_right` * `percent_x_active_win_btm_left` * `percent_y_active_win_btm_left` * `percent_x_hovered_win_btm_left` * `percent_y_hovered_win_btm_left` * `mouse_screen_x` * `mouse_screen_y` * `mouse_screen_width` * `mouse_screen_height` * `focused_screen_x` * `focused_screen_y` * `focused_screen_width` * `focused_screen_height` * `focused_window_x` * `focused_window_y` * `focused_window_width` * `focused_window_height` * `hovered_floating_menu_identifier` * `visible_floating_menu_identifiers` * `fullscreen_active` * `active_screen_resolutions` * `missioncontrol_active` * `currently_blocking_keyboard` * `power_source` * `battery_level` * `active_space` * `darkmode_active` * `current_minute` * `current_hour` * `current_day` * `current_weekday (SUN = 1)` And these are available via the Conditional Activation Groups: * `bundleIdentifier` * `processName` * `runningProcesses` * `appName` * `appExecutablePath` * `windowName` * `connectedWifiName` * `activeWebsiteURL` * `activeTouchBarGroup` * `focusedElementRole` * `focusedElementSubrole` * `customVariable1` * `customVariable2` * `customVariable3` * `customVariable4` * `customVariable5` * `activeScreenResolutions` * `currentlyPressedStreamDeckButtonIdentifiers` * `hovered_floating_menu_identifier` * `visible_floating_menu_identifiers` * `BTTCurrentlyPlayingApp` * `BTTCurrentlyPlaying` * `mouseBehindNotch` * `currentlyBlockingKeyboard` Some other variables that might be available depending on the context: * `mouse_screen_x` * `mouse_screen_y` * `mouse_screen_width` * `mouse_screen_height` * `focused_screen_x` * `focused_screen_y` * `focused_screen_width` * `focused_screen_height` * `pinned_window_ids` * `BTTActiveWindowTitle` * `BTTActiveWindowNumber` * `currentlyBlockingKeyboard` * `BTTLastTerminalCommandResult` * `BTTMagicMouseTouchpadModeActive` * `BTTSiriRemoteMouseModeActive` * `BTTFinderContextMenuTriggeredUUID` * `BTTFinderContextMenuTargetPath` * `BTTFinderContextMenuSelectedItemPaths` * `CurrentKeyboardInputSource` results matching "" =================== No results matching "" ====================== --- # Using Java Script (not JXA) · GitBook [Using Java Script (not JXA)](https://docs.folivora.ai/) ========================================================= Using Real Java Script in BTT ----------------------------- **NOTE**: If you are using the floating webview action in BTT have a look here instead: [Floating Webview JavaScript](https://docs.folivora.ai/docs/10_2_floating_menu_javascript.html) * * * This feature is new in BetterTouchTool version 3.333. I think it is the most powerful and easiest way to script BetterTouchtool. It's basically just modern Java Script (so you can use async await and the like) however it has a few important additions: * It can call any Apple Script - and get the result * It can call any Shell Script - and get the result. * It can trigger all functions available in BetterTouchTool's scripting interface. By combining these three you can automate almost any task on your Mac. ![mcc](https://docs.folivora.ai/docs/media/realjavascript.png) [Using Real Java Script in BTT](https://docs.folivora.ai/docs/1106_java_script.html#using-real-java-script-in-btt) * [Using Real Java Script in BTT](https://docs.folivora.ai/docs/1106_java_script.html#using-real-java-script-in-btt) * [1.) Running Standard Apple Scripts: : runAppleScript(yourScript)](https://docs.folivora.ai/docs/1106_java_script.html#1-running-standard-apple-scripts--runapplescriptyourscript) * [1.) Running Java Script For Automation (JXA) Scripts: runJXA(yourScript)](https://docs.folivora.ai/docs/1106_java_script.html#1-running-java-script-for-automation-jxa-scripts-runjxayourscript) * [3.) Running Shell Scripts: runShellScript({script: "/usr/bin/say hello"})](https://docs.folivora.ai/docs/1106_java_script.html#3-running-shell-scripts-runshellscriptscript-%22usrbinsay-hello%22) * [4.) Running Shortcuts From Apple's Shortcuts App: runAppleShortcut({name: "somename", "input": "someoptionalinput"})](https://docs.folivora.ai/docs/1106_java_script.html#4-running-shortcuts-from-apples-shortcuts-app-runappleshortcutname-%22somename%22-%22input%22-%22someoptionalinput%22) * [5.) Read and Write Files: readFile(path: string, readAsBase64: Boolean)](https://docs.folivora.ai/docs/1106_java_script.html#5-read-and-write-files-readfilepath-string-readasbase64-boolean) * [6.) Load the contents of a URL as base64: fetchURLAsBase64(path: string, readAsBase64: Boolean)](https://docs.folivora.ai/docs/1106_java_script.html#6-load-the-contents-of-a-url-as-base64-fetchurlasbase64path-string-readasbase64-boolean) * [7.) Write String/Data to File: writeStringToFile(dataString: string, path: string, stringIsBase64: Boolean)](https://docs.folivora.ai/docs/1106_java_script.html#7-write-stringdata-to-file-writestringtofiledatastring-string-path-string-stringisbase64-boolean) * [8.) Using the JavaScript to call BTT scripting functions](https://docs.folivora.ai/docs/1106_java_script.html#8-using-the-javascript-to-call-btt-scripting-functions) * [9.) Available BetterTouchTool Scripting Interfaces](https://docs.folivora.ai/docs/1106_java_script.html#9-available-bettertouchtool-scripting-interfaces) * [Example script function calls:](https://docs.folivora.ai/docs/1106_java_script.html#example-script-function-calls) * [**trigger\_named**](https://docs.folivora.ai/docs/1106_java_script.html#triggernamed) * [Example](https://docs.folivora.ai/docs/1106_java_script.html#example) * [**trigger\_named\_async\_without\_response**](https://docs.folivora.ai/docs/1106_java_script.html#triggernamedasyncwithoutresponse) * [Example](https://docs.folivora.ai/docs/1106_java_script.html#example-1) * [**cancel\_delayed\_named\_trigger\_execution**](https://docs.folivora.ai/docs/1106_java_script.html#canceldelayednamedtriggerexecution) * [Example](https://docs.folivora.ai/docs/1106_java_script.html#example-2) * [**update\_touch\_bar\_widget**](https://docs.folivora.ai/docs/1106_java_script.html#updatetouchbarwidget) * [Example:](https://docs.folivora.ai/docs/1106_java_script.html#example-3) * [**update\_menubar\_item**](https://docs.folivora.ai/docs/1106_java_script.html#updatemenubaritem) * [Example:](https://docs.folivora.ai/docs/1106_java_script.html#example-4) * [**update\_stream\_deck\_widget**](https://docs.folivora.ai/docs/1106_java_script.html#updatestreamdeckwidget) * [Example:](https://docs.folivora.ai/docs/1106_java_script.html#example-5) * [**trigger\_action**](https://docs.folivora.ai/docs/1106_java_script.html#triggeraction) * [Example:](https://docs.folivora.ai/docs/1106_java_script.html#example-6) * [**execute\_assigned\_actions\_for\_trigger**](https://docs.folivora.ai/docs/1106_java_script.html#executeassignedactionsfortrigger) * [Example](https://docs.folivora.ai/docs/1106_java_script.html#example-7) * [**refresh\_widget**](https://docs.folivora.ai/docs/1106_java_script.html#refreshwidget) * [Example](https://docs.folivora.ai/docs/1106_java_script.html#example-8) * [**update\_trigger**](https://docs.folivora.ai/docs/1106_java_script.html#updatetrigger) * [Example:](https://docs.folivora.ai/docs/1106_java_script.html#example-9) * [**get\_trigger**](https://docs.folivora.ai/docs/1106_java_script.html#gettrigger) * [**get\_triggers**](https://docs.folivora.ai/docs/1106_java_script.html#gettriggers) * [**add\_new\_trigger**](https://docs.folivora.ai/docs/1106_java_script.html#addnewtrigger) * [Example](https://docs.folivora.ai/docs/1106_java_script.html#example-10) * [**delete\_trigger**](https://docs.folivora.ai/docs/1106_java_script.html#deletetrigger) * [Example](https://docs.folivora.ai/docs/1106_java_script.html#example-11) * [**get\_clipboard\_content**](https://docs.folivora.ai/docs/1106_java_script.html#getclipboardcontent) * [Example](https://docs.folivora.ai/docs/1106_java_script.html#example-12) * [**get\_selection**](https://docs.folivora.ai/docs/1106_java_script.html#getselection) * [Example](https://docs.folivora.ai/docs/1106_java_script.html#example-13) * [**set\_persistent\_string\_variable**](https://docs.folivora.ai/docs/1106_java_script.html#setpersistentstringvariable) * [Java Script for Automation Example:](https://docs.folivora.ai/docs/1106_java_script.html#java-script-for-automation-example) * [**set\_string\_variable**](https://docs.folivora.ai/docs/1106_java_script.html#setstringvariable) * [**set\_persistent\_number\_variable**](https://docs.folivora.ai/docs/1106_java_script.html#setpersistentnumbervariable) * [**set\_number\_variable**](https://docs.folivora.ai/docs/1106_java_script.html#setnumbervariable) * [**get\_number\_variable**](https://docs.folivora.ai/docs/1106_java_script.html#getnumbervariable) * [**get\_string\_variable**](https://docs.folivora.ai/docs/1106_java_script.html#getstringvariable) * [**export\_preset**](https://docs.folivora.ai/docs/1106_java_script.html#exportpreset) * [**import\_preset**](https://docs.folivora.ai/docs/1106_java_script.html#importpreset) * [**get\_preset\_details**](https://docs.folivora.ai/docs/1106_java_script.html#getpresetdetails) * [**display\_notification**](https://docs.folivora.ai/docs/1106_java_script.html#displaynotification) * [**paste\_text**](https://docs.folivora.ai/docs/1106_java_script.html#pastetext) * [**reveal\_element\_in\_ui**](https://docs.folivora.ai/docs/1106_java_script.html#revealelementinui) * [**get\_menu\_item\_details**](https://docs.folivora.ai/docs/1106_java_script.html#getmenuitemdetails) * [**set\_clipboard\_content**](https://docs.folivora.ai/docs/1106_java_script.html#setclipboardcontent) * [**set\_clipboard\_contents**](https://docs.folivora.ai/docs/1106_java_script.html#setclipboardcontents) * [**set\_keychain\_item**](https://docs.folivora.ai/docs/1106_java_script.html#setkeychainitem) * [**get\_keychain\_item**](https://docs.folivora.ai/docs/1106_java_script.html#getkeychainitem) * [get-selected-text](https://docs.folivora.ai/docs/1106_java_script.html#get-selected-text) ### 1.) Running Standard Apple Scripts: : runAppleScript(yourScript) To run a Apple Script from within the Java Script code, use the runAppleScript(scriptCode) function. The function takes a string that defines the Apple Script, and returns a promise which resolves to the result value. I'm always using it with async await, but you can also use classic Promise syntax. **Example: Run Apple Script from within Java Script** // You can either wrap your script in a self executing async function or a standard named async function. If you use a named function, you can use return instead of returnToBTT async function someFunctionName() { // put the Apple Script into a string (back ticks are great for multi -line strings) let appleScript = ` set theDialogText to "The curent date and time is " & (current date) & "." set result to display dialog theDialogText return result `; // this will execute the Apple Script and store the result in the result variable. let result = await runAppleScript(appleScript); // do whatever you want with the result // at the end you always need to call returnToBTT to exit the script / return the value to BTT. return result; // it is important that this function self-executes () } ### 1.) Running Java Script For Automation (JXA) Scripts: runJXA(yourScript) To run a Apple Script from within the Java Script code, use the runAppleScript(scriptCode) function. The function takes a string that defines the Apple Script, and returns a promise which resolves to the result value. I'm always using it with async await, but you can also use classic Promise syntax. **Example: Run JavaScript For Automation (JXA) from within Java Script (requires BTT >= 4.903)** // You can either wrap your script in a self executing async function or a standard named async function. If you use a named function, you can use return instead of returnToBTT async function someFunctionName() { // put the Apple Script into a string (back ticks are great for multi -line strings) let jxaScript = ` var app = Application.currentApplication() app.includeStandardAdditions = true var response = app.displayDialog("Test?", { defaultAnswer: "", withIcon: "note", buttons: ["Cancel", "Continue"], defaultButton: "Continue" }) // Result: {"buttonReturned":"Continue", "textReturned":"Test"} app.displayDialog("Hello, " + (response.textReturned) + "."); `; // this will execute the JXA Apple Script and store the result in the result variable. let result = await runJXA(jxaScript); // do whatever you want with the result // at the end you always need to call returnToBTT to exit the script / return the value to BTT. return result; // it is important that this function self-executes () } ### 3.) Running Shell Scripts: runShellScript({script: "/usr/bin/say hello"}) **Example: Run Shell Script from within Java Script** // You can either wrap your script in a self executing async function or a standard named async function. If you use a named function, you can use return instead of returnToBTT async function someFunctionName() { // put the shell script into a string (single backticks are great for multiline strings) let shellScript = `say hello world`; let shellScriptWrapper = { script: shellScript, // mandatory launchPath: '/bin/bash', //optional - default is /bin/bash parameters: '-c', // optional - default is -c. If you use multiple parameters please separate them by ;; e.g. -c;;date environmentVariables: '' //optional e.g. VAR1=/test/;VAR2=/test2/; }; // this will execute the Apple Script and store the result in the result variable. let result = await runShellScript(shellScriptWrapper); // do whatever you want with the result // at the end you always need to call returnToBTT to exit the script / return the value to BTT. return result; // it is important that this function self-executes () } ### 4.) Running Shortcuts From Apple's Shortcuts App: runAppleShortcut({name: "somename", "input": "someoptionalinput"}) You can provide the name of the shortcut and some input (optional). async function somefunctionname() { let shortcut = "some name"; let input = "some input"; let result = await runAppleShortcut({name: shortcut, input: input}); return result; } If you want to provide multiple files as input, please separate them with two semicolons. For example async function somefunctionname() { runAppleShortcut({name: 'multi-file-test', input: '~/Downloads/test1.png;;~/Downloads/test2.png'}); return result; } ### 5.) Read and Write Files: readFile(path: string, readAsBase64: Boolean) async function doSomething() { // note: this immediately returns, readFile is synchronous let fileContentAsString = readFile("~/Library/Application Support/BetterTouchTool/app-cache.json"); return fileContentasString: } ### 6.) Load the contents of a URL as base64: fetchURLAsBase64(path: string, readAsBase64: Boolean) async function loadURL() { // note: this immediately returns, fetchURLAsBase64 is synchronous return fetchURLAsBase64("https://folivora.ai/favicon.ico"); } ### 7.) Write String/Data to File: writeStringToFile(dataString: string, path: string, stringIsBase64: Boolean) async function doSomething() { return writeStringToFile( JSON.stringify(menuItems), "~/Library/Application Support/BetterTouchTool/app-cache.json" } 8.) Using the JavaScript to call BTT scripting functions -------------------------------------------------------- All BetterTouchTool scripting functions can be accessed from Java Script. 9.) Available BetterTouchTool Scripting Interfaces -------------------------------------------------- The available scripting functions are: * trigger\_named * update\_touch\_bar\_widget * update\_menubar\_item * update\_stream\_deck\_widget * trigger\_action * execute\_assigned\_actions\_for\_trigger * refresh\_widget * get\_trigger * get\_triggers * update\_trigger (to create or if exists update a trigger) * add\_new\_trigger * delete\_trigger * delete\_triggers * trigger\_named * trigger\_named\_async\_without\_response * cancel\_delayed\_named\_trigger\_execution * get\_dock\_badge\_for * get\_active\_touch\_bar\_group * is\_true\_tone\_enabled * get\_location * set\_persistent\_string\_variable * set\_string\_variable * set\_persistent\_number\_variable * set\_number\_variable * get\_number\_variable * get\_string\_variable * export\_preset * import\_preset * display\_notification * paste\_text * set\_clipboard\_content * set\_clipboard\_contents * get-selected-text Floating Menus: * update\_menu\_item * get\_menu\_item\_value * set\_menu\_item\_value * webview\_menu\_item\_load\_html\_url\_js * * * ### Example script function calls: ### **trigger\_named** This method will trigger the specified named trigger (which can be configured in the "Other" tab in BetterTouchTool.) #### Example asnyc function somefunctionname() { let result = await trigger_named({trigger_name: 'Action5', wait_for_reply: true}); // Currently only the Apple Script and Shell Script actions return results, if you don't care about the result, setting wait_for_reply to false can make execution a bit faster (default is true) return result; } * * * ### **trigger\_named\_async\_without\_response** This method will trigger the specified named trigger (which can be configured in the "Other" tab in BetterTouchTool.). Optional parameter: **delay** This lets you set a delay before the named trigger is executed (in seconds). While the trigger has not been executed you can cancel the execution by calling the **cancel\_delayed\_named\_trigger\_execution** function #### Example asnyc function somefunctionname() { trigger_named_async_without_response({trigger_name: 'Action5', wait_for_reply: false}); // Currently only the Apple Script and Shell Script actions return results. return "done"; } * * * ### **cancel\_delayed\_named\_trigger\_execution** This method will cancel the execution of a delayed named trigger (see previous function) #### Example asnyc function somefunctionname() { cancel_delayed_named_trigger_execution({trigger_name: 'Action5'}); // Currently only the Apple Script and Shell Script actions return results. return "done"; } * * * ### **update\_touch\_bar\_widget** This method will temporarily update the contents of a Touch Bar Script Widget (identified by its uuid). You can provide a new text to show, a new icon and a new background color. For the icon you can either provide it directly using the icon\_data parameter (must be base64 encoded) or you can provide a file path (via the icon\_path parameter) that points to the new icon. You can get the uuid by right-clicking any script widget in BTT. #### Example: asnyc function somefunctionname() { let widgetConfig = { text: "hi there!", icon_path: "/Users/andi/Desktop/test.png", background_color: "200,100,100,255" }; update_touch_bar_widget({uuid: '9990CE09-9820-4D67-9C52-8BABAB263056', json: widgetConfig}); return "done"; } * * * ### **update\_menubar\_item** This method will temporarily update the contents of a Menubar Status Item (identified by its uuid). You can provide a new text to show, a new icon and a new background color. For the icon you can either provide it directly using the icon\_data parameter (must be base64 encoded) or you can provide a file path (via the icon\_path parameter) that points to the new icon. You can get the uuid by right-clicking any script widget in BTT. #### Example: asnyc function somefunctionname() { let widgetConfig = { text: "hi there!", icon_path: "/Users/andi/Desktop/test.png", background_color: "200,100,100,255" }; update_menubar_item({uuid: '9990CE09-9820-4D67-9C52-8BABAB263056', json: widgetConfig}); return "done"; } * * * ### **update\_stream\_deck\_widget** This method will temporarily update the contents of a Stream Deck Script Widget (identified by its uuid). The changes will not be persisted. You can provide a new text to show on the button and you can update any other of the button's properties. To see what properties are possible right-click an existing & configured Strem Deck button in BTT and choose "copy". When pasting this copied button into some text editor you'll see the possible values in the "BTTTriggerConfig" section. #### Example: asnyc function somefunctionname() { let widgetConfig = { text: "some new title!", BTTStreamDeckBackgroundColor: "200,100,100,255", BTTStreamDeckSFSymbolName : "bitcoinsign.circle.fill", }; update_stream_deck_widget({uuid: '9990CE09-9820-4D67-9C52-8BABAB263056', json: JSON.stringify(widgetConfig)}); return "done"; } * * * ### **trigger\_action** This method will trigger any of BetterTouchTool's predefined actions (or any combination of them). You need to provide a JSON description of the action you want to trigger as a string. The easiest way to get such a JSON description is to right-click the trigger you have configured in BetterTouchTool and choose "Copy JSON". This will copy the complete JSON (including the configuration for the trigger itself), but this action will ignore anything that's not needed. (or you can delete the not needed parts) #### Example: asnyc function somefunctionname() { let actionDefinition = { "BTTPredefinedActionType" : 153, "BTTPredefinedActionName" : "Move Mouse To Position", "BTTMoveMouseToPosition" : "{100, 100}", "BTTMoveMouseRelative" : "6" }; let result = await trigger_action({json: JSON.stringify(actionDefinition), wait_for_reply: false}); return result; } * * * ### **execute\_assigned\_actions\_for\_trigger** This method execute all the assigned actions for a given trigger (i.e. gesture, shortcut, drawing etc.) identified by its uuid. You can get the uuid by right-clicking any configured trigger in BetterTouchTool. #### Example asnyc function somefunctionname() { let result = await execute_assigned_actions_for_trigger({uuid: '2F34005D-4537-464D-94E9-A7F42DA39DF1'}); // Currently only the Apple Script and Shell Script actions return results. return result; } * * * ### **refresh\_widget** This method will execute all scripts assigned to a script widget and update its contents accordingly. The widget is identified by its uuid, which you can get by right-clicking the widget in BetterTouchTool. #### Example asnyc function somefunctionname() { refresh_widget({uuid: '2F34005D-4537-464D-94E9-A7F42DA39DF1'}); return "done"; } * * * ### **update\_trigger** This method will create or update the configuration of any specified trigger (i.e. gestures, shortcuts, touchbar items etc.). You need to provide the uuid of the trigger you want to update (get by right-clicking it in BTT) and a JSON object defining the updates. To know how the JSON object should look like, right-click the trigger in BTT and choose "Copy JSON". **Optional Parameter**: trigger\_parent\_uuid (if you want to add the trigger to a group) #### Example: Hint: don't forget to use JSON.stringify() before passing the updateDefinition object. asnyc function somefunctionname() { var updateDefinition = JSON.stringify( { "BTTTriggerConfig": { "BTTTouchBarButtonName" : "New Name", "BTTTouchBarItemIconHeight": 25 } } ); update_trigger({uuid: 'ED631459-115C-4D8C-940A-D428E4EAE086', json: updateDefinition}); return "done"; } * * * ### **get\_trigger** This allows you to retrieve the json representation of any trigger (e.g. gesture, Touch Bar button, keyboard shortcut etc.) identified by the given UUID. You can get the UUID by right-clicking any trigger in BTT. asnyc function somefunctionname() { let result = await get_trigger({uuid:'123e4567-e89b-12d3-a456-426655440000'}) return result; } * * * ### **get\_triggers** This allows you to retrieve the JSON description of multiple triggers in BTT (e.g. Touch Bar item, Gesture, Keyboard Shortcut etc.) based on a few properties. You can get the properties of a specific trigger by selecting it in BTT and copy pasting it to some text editor. The get\_triggers() function supports these parameters (all optional): * trigger\_type (e.g. BTTTriggerTypeMagicMouse) * trigger\_id (e.g. 643 for named triggers) * trigger\_parent\_uuid (if you want to get the items of a folder) * trigger\_uuid (to get a specific trigger) * trigger\_app\_bundle\_identifier (to get triggers assigned to a specific app) asnyc function somefunctionname() { let allNamedTriggersJSONString = await get_triggers({trigger_id: 643}); let allTriggersJSONArray = JSON.parse(allNamedTriggersJSONString); let allNamedTriggerNames = []; for(let trigger of allTriggersJSONArray) { allNamedTriggerNames.push(trigger["BTTTriggerName"]); } return allNamedTriggerNames; } * * * ### **add\_new\_trigger** This method will add a new trigger to BTT (i.e. gestures, shortcuts, touchbar items etc.). You need to provide a JSON object defining the new trigger. To know how the JSON object should look like, right-click any existing trigger in BTT and choose "Copy JSON". **Optional Parameter**: trigger\_parent\_uuid (if you want to add the trigger to a group) #### Example asnyc function somefunctionname() { var newTriggerDefinition = { "BTTTriggerClass" : "BTTTriggerTypeKeyboardShortcut", "BTTPredefinedActionType" : 5, "BTTPredefinedActionName" : "Mission Control", "BTTAdditionalConfiguration" : "1179648", "BTTTriggerOnDown" : 1, "BTTEnabled" : 1, "BTTShortcutKeyCode" : 2, "BTTShortcutModifierKeys" : 1179648, "BTTOrder" : 3 } add_new_trigger({json: JSON.stringify(newTriggerDefinition)}); return "done"; } ### **delete\_trigger** This method will delete a trigger from BetterTouchTool. You need to provide the uuid of the trigger you want to delete (get by right-clicking it in BTT). #### Example asnyc function somefunctionname() { let result = await add_new_trigger({uuid: '2F34005D-4537-464D-94E9-A7F42DA39DF1'}); return result; } * * * ### **get\_clipboard\_content** Gives you the current text content of the clipboard. #### Example asnyc function somefunctionname() { let result = await get_clipboard_content({format: "public.html" /*optional*/, asBase64: false, excludeConcealed: false}); return result; } For the format parameter you can use any possible UTI or one of these strings: Default formats are (more are possible): * all - returns all currently stored formats as a JSON string * NSPasteboardTypeString * NSPasteboardTypeTIFF * NSPasteboardTypePNG * NSPasteboardTypeRTF * NSPasteboardTypeRTFD * NSPasteboardTypeHTML * NSPasteboardTypeTabularText * NSPasteboardTypeFont * NSPasteboardTypeRuler * NSPasteboardTypeColor * NSPasteboardTypeSound * NSPasteboardTypeMultipleTextSelection * NSPasteboardTypeTextFinderOptions * NSPasteboardTypeURL * NSPasteboardTypeFileURL * * * ### **get\_selection** Gives you the currently selected text/item #### Example asnyc function somefunctionname() { let result = await get_selection({format: "public.html" /*optional*/, asBase64: false}); return result; } For the format parameter you can use any possible UTI or one of these strings: Default formats are (more are possible): * NSPasteboardTypeString * NSPasteboardTypeTIFF * NSPasteboardTypePNG * NSPasteboardTypeRTF * NSPasteboardTypeRTFD * NSPasteboardTypeHTML * NSPasteboardTypeTabularText * NSPasteboardTypeFont * NSPasteboardTypeRuler * NSPasteboardTypeColor * NSPasteboardTypeSound * NSPasteboardTypeMultipleTextSelection * NSPasteboardTypeTextFinderOptions * NSPasteboardTypeURL * NSPasteboardTypeFileURL * * * ### **set\_persistent\_string\_variable** This allows you to set a variable to a given string that persists over BTT relaunches. #### Java Script for Automation Example: asnyc function somefunctionname() { let result = await set_persistent_string_variable({variable_name: 'test', to: "this is a test value"}); return result; } * * * ### **set\_string\_variable** This allows you to set a variable to a given string that persists over BTT relaunches. asnyc function somefunctionname() { let result = await set_string_variable({variable_name: 'test', to: "this is a test value"}); return result; } * * * ### **set\_persistent\_number\_variable** This allows you to set a variable to a given string that persists over BTT relaunches. asnyc function somefunctionname() { let result = await set_persistent_number_variable({variable_name: 'test', to: 12345}); return result; } * * * ### **set\_number\_variable** This allows you to set a variable to a given string that persists over BTT relaunches. asnyc function somefunctionname() { let result = await set_number_variable({variable_name:'OutputVolume' to: 0.5}); return result; } * * * ### **get\_number\_variable** This allows you to retrieve the contents of a number variable with the given name asnyc function somefunctionname() { let result = await get_number_variable({variable_name:'OutputVolume'}) return result; } * * * ### **get\_string\_variable** This allows you to retrieve the contents of a string variable with the given name asnyc function somefunctionname() { let result = await get_string_variable({variable_name:'BTTActiveAppBundleIdentifier'}) return result; } * * * ### **export\_preset** This allows you to export a specific preset asnyc function somefunctionname() { let result = await export_preset({name:'the_preset_name', compress: 1, includeSettings: 0, outputPath: '~/Downloads', comment: 'this is a great preset', link: 'https://someoptionallink', minimumVersion: '4.123'}) return result; } * * * ### **import\_preset** This allows you to import a specific preset asnyc function somefunctionname() { let result = await import_preset({path:'/path/to/your/preset.bttpreset'}) return result; } * * * ### **get\_preset\_details** This allows you to query the state of a preset. Note: this returns a JSON array - which usually contains details for one preset but in some situations might contain multiple preset details. async function someJavaScriptFunction() { let presetDetails = await get_preset_details({name: "theNameOfThePreset"}); return presetDetails; } Example output: [\ {\ "uuid" : "F8367505-8409-4828-B5FA-8596932687F4",\ "hidden" : 0,\ "name" : "thePresetName",\ "activated" : 2, // this can be 0 (disabled), 1 (enabled) or 2 (enabled & master preset)\ "color" : "30.069600, 113.581080, 136.680000, 255.000000"\ }\ ] * * * ### **display\_notification** This shows a notification asnyc function somefunctionname() { let result = await display_notification({title:'notification title', subTitle: 'some subttitle', soundName: 'frog', imagePath: '~/Downloads/image.png'}) return result; } * * * ### **paste\_text** This pastes some text Parameters: **text**: The text to paste. **insert\_by\_pasting**: If set to true BTT will use cmd+v to paste the text. Otherwise it will actually try to type it (only possible for standard formats) **move\_cursor\_left\_by\_x\_after\_pasting**: If specified BTT will move the cursor by the given amount to the left. **format**: Optional. The format the text will be interpreted as when pasting (e.g. if you want to paste a table, you can use set the string to `...
`and specify the format NSPasteboardTypeHTML) Note, this only works if insert\_by\_pasting is set to true. Default formats are (more are possible): * NSPasteboardTypeString * NSPasteboardTypeTIFF * NSPasteboardTypePNG * NSPasteboardTypeRTF * NSPasteboardTypeRTFD * NSPasteboardTypeHTML * NSPasteboardTypeTabularText * NSPasteboardTypeFont * NSPasteboardTypeRuler * NSPasteboardTypeColor * NSPasteboardTypeSound * NSPasteboardTypeMultipleTextSelection * NSPasteboardTypeTextFinderOptions * NSPasteboardTypeURL * NSPasteboardTypeFileURL let result = await paste_text({text:'Hello world', format: 'NSPasteboardTypeHTML', insert_by_pasting: true}) * * * ### **reveal\_element\_in\_ui** This will show a BTT trigger identified by it's UUID in the BetterTouchTool user interface. Parameters: **The UUID of the trigger** (you can get the UUID of a trigger by right-clicking it or e.g. via the "get\_triggers" scripting function) async function someJavaScriptFunction() { await reveal_element_in_ui("39CDAF30-98BB-4F54-B87F-273B6081149E"); return "done""; } * * * ### **get\_menu\_item\_details** Gets the details (available, enabled, checked) of a given menubar menu item. This can be helpful to perform actions conditionally if a menu item is enabled/disabled. Parameters: **The path to the menu bar item** E.g. "Edit;Cut" or "Window;Move & Resize; Left" async function someJavaScriptFunction() { let menuItemDetailsString = await get_menu_item_details("Edit;Cut"); let menuItemDetails = JSON.parse(menuItemDetailsString); // The object looks like this: {"available": false, "enabled": false, "checked": false} return menuItemDetails.enabled; } * * * ### **set\_clipboard\_content** Changes the content of the clipboard Parameters: **content**: The content to put in your clipboard. **format**: Optional. The format the content will be interpreted as when pasting (e.g. if you want to paste a table, you can use set the string to `...
` and specify the format NSPasteboardTypeHTML) Default formats are (more are possible): * NSPasteboardTypeString * NSPasteboardTypeTIFF * NSPasteboardTypePNG * NSPasteboardTypeRTF * NSPasteboardTypeRTFD * NSPasteboardTypeHTML * NSPasteboardTypeTabularText * NSPasteboardTypeFont * NSPasteboardTypeRuler * NSPasteboardTypeColor * NSPasteboardTypeSound * NSPasteboardTypeMultipleTextSelection * NSPasteboardTypeTextFinderOptions * NSPasteboardTypeURL * NSPasteboardTypeFileURL asnyc function somefunctionname() { let result = await set_clipboard_content({content:'Hello world', format: 'NSPasteboardTypeHTML'}) return result; } * * * ### **set\_clipboard\_contents** Changes the content of the clipboard. This is almost the same as set\_clipboard\_content (without the s at the end), however it allows to set different data for different formats. For example you might want to set a plain string for apps that only support plain text, but set a HTML or RTF representation for apps that support these. Parameters: **contents**: An array of the contents to put in your clipboard as array. If you want to set binary data it must be base64 encoded. Otherwise just provide an array of standard strings. **formats**: An array of the formats the content will be interpreted as when pasting (e.g. if you want to paste a table, you can use set the string to `...
` and specify the format NSPasteboardTypeHTML) Default formats are (more are possible): * NSPasteboardTypeString * NSPasteboardTypeTIFF * NSPasteboardTypePNG * NSPasteboardTypeRTF * NSPasteboardTypeRTFD * NSPasteboardTypeHTML * NSPasteboardTypeTabularText * NSPasteboardTypeFont * NSPasteboardTypeRuler * NSPasteboardTypeColor * NSPasteboardTypeSound * NSPasteboardTypeMultipleTextSelection * NSPasteboardTypeTextFinderOptions * NSPasteboardTypeURL * NSPasteboardTypeFileURL asnyc function somefunctionname() { // this example sets plain "hello" for apps that only support plain text and a HTML formatted "hello world" for apps that support pasting HTML formatted content await set_clipboard_contents({contents: ["hello", "hello world"], "formats": ["NSPasteboardTypeString","NSPasteboardTypeHTML"]}) return result; } * * * * * * ### **set\_keychain\_item** This allows you to securely save information into macOS keychain asnyc function somefunctionname() { let result = await set_keychain_item("some-name", "some-secret"); return result; } * * * ### **get\_keychain\_item** This allows you to retrieve securely saved information from macOS keychain asnyc function somefunctionname() { // this returns something that you have saved previously (e.g. via an other temporary script or by directly editing keychain) let result = await get_keychain_item("some-name"); // if you want to access items created outside of BTT you might need to specify more details: let external = await get_keychain_item({name: "name-field-in-keychain", account: "account-field-in-keychain"}) return result; } * * * ### get-selected-text To access the currently selected text, make use of the selected\_text variable like this: asnyc function somefunctionname() { let selectedText = await get_string_variable({variable_name:'selected_text'}) return selectedText; } results matching "" =================== No results matching "" ====================== --- # Using Apple Script or JXA · GitBook [Using Apple Script or JXA](https://docs.folivora.ai/) ======================================================= Scripting BetterTouchTool using Apple Script ============================================ BetterTouchTool has a small but powerful Apple Script interface which will be described here. The most current documentation for all supported Apple Script calls can directly be accessed via Apple's Script Editor app on macOS. Go to File => Open Dictionary => BetterTouchTool to access it there. * [Scripting BetterTouchTool using Apple Script](https://docs.folivora.ai/docs/1102_apple_script.html#scripting-bettertouchtool-using-apple-script) * [Security](https://docs.folivora.ai/docs/1102_apple_script.html#security) * [Available Scripting Interfaces](https://docs.folivora.ai/docs/1102_apple_script.html#available-scripting-interfaces) * [**trigger\_named**](https://docs.folivora.ai/docs/1102_apple_script.html#triggernamed) * [Standard Apple Script Example:](https://docs.folivora.ai/docs/1102_apple_script.html#standard-apple-script-example) * [Java Script for Automation Example:](https://docs.folivora.ai/docs/1102_apple_script.html#java-script-for-automation-example) * [**trigger\_named\_async\_without\_response**](https://docs.folivora.ai/docs/1102_apple_script.html#triggernamedasyncwithoutresponse) * [Standard Apple Script Example:](https://docs.folivora.ai/docs/1102_apple_script.html#standard-apple-script-example-1) * [Java Script for Automation Example:](https://docs.folivora.ai/docs/1102_apple_script.html#java-script-for-automation-example-1) * [**cancel\_delayed\_named\_trigger\_execution**](https://docs.folivora.ai/docs/1102_apple_script.html#canceldelayednamedtriggerexecution) * [Standard Apple Script Example:](https://docs.folivora.ai/docs/1102_apple_script.html#standard-apple-script-example-2) * [Java Script for Automation Example:](https://docs.folivora.ai/docs/1102_apple_script.html#java-script-for-automation-example-2) * [**update\_touch\_bar\_widget**](https://docs.folivora.ai/docs/1102_apple_script.html#updatetouchbarwidget) * [Standard Apple Script Example:](https://docs.folivora.ai/docs/1102_apple_script.html#standard-apple-script-example-3) * [Java Script for Automation Example:](https://docs.folivora.ai/docs/1102_apple_script.html#java-script-for-automation-example-3) * [**update\_stream\_deck\_widget**](https://docs.folivora.ai/docs/1102_apple_script.html#updatestreamdeckwidget) * [Standard Apple Script Example:](https://docs.folivora.ai/docs/1102_apple_script.html#standard-apple-script-example-4) * [Java Script for Automation Example:](https://docs.folivora.ai/docs/1102_apple_script.html#java-script-for-automation-example-4) * [**update\_menubar\_item**](https://docs.folivora.ai/docs/1102_apple_script.html#updatemenubaritem) * [Example:](https://docs.folivora.ai/docs/1102_apple_script.html#example) * [**trigger\_action**](https://docs.folivora.ai/docs/1102_apple_script.html#triggeraction) * [Standard Apple Script Example:](https://docs.folivora.ai/docs/1102_apple_script.html#standard-apple-script-example-5) * [Java Script for Automation Example:](https://docs.folivora.ai/docs/1102_apple_script.html#java-script-for-automation-example-5) * [**execute\_assigned\_actions\_for\_trigger**](https://docs.folivora.ai/docs/1102_apple_script.html#executeassignedactionsfortrigger) * [Standard Apple Script Example:](https://docs.folivora.ai/docs/1102_apple_script.html#standard-apple-script-example-6) * [Java Script for Automation Example:](https://docs.folivora.ai/docs/1102_apple_script.html#java-script-for-automation-example-6) * [**refresh\_widget**](https://docs.folivora.ai/docs/1102_apple_script.html#refreshwidget) * [Standard Apple Script Example:](https://docs.folivora.ai/docs/1102_apple_script.html#standard-apple-script-example-7) * [Java Script for Automation Example:](https://docs.folivora.ai/docs/1102_apple_script.html#java-script-for-automation-example-7) * [**get\_trigger**](https://docs.folivora.ai/docs/1102_apple_script.html#gettrigger) * [Standard Apple Script Example:](https://docs.folivora.ai/docs/1102_apple_script.html#standard-apple-script-example-8) * [Java Script for Automation Example:](https://docs.folivora.ai/docs/1102_apple_script.html#java-script-for-automation-example-8) * [**get\_triggers**](https://docs.folivora.ai/docs/1102_apple_script.html#gettriggers) * [Java Script for Automation Example:](https://docs.folivora.ai/docs/1102_apple_script.html#java-script-for-automation-example-9) * [**update\_trigger**](https://docs.folivora.ai/docs/1102_apple_script.html#updatetrigger) * [Standard Apple Script Example:](https://docs.folivora.ai/docs/1102_apple_script.html#standard-apple-script-example-9) * [Java Script for Automation Example:](https://docs.folivora.ai/docs/1102_apple_script.html#java-script-for-automation-example-10) * [**add\_new\_trigger**](https://docs.folivora.ai/docs/1102_apple_script.html#addnewtrigger) * [Standard Apple Script Example:](https://docs.folivora.ai/docs/1102_apple_script.html#standard-apple-script-example-10) * [Java Script for Automation Example:](https://docs.folivora.ai/docs/1102_apple_script.html#java-script-for-automation-example-11) * [**delete\_trigger**](https://docs.folivora.ai/docs/1102_apple_script.html#deletetrigger) * [Standard Apple Script Example:](https://docs.folivora.ai/docs/1102_apple_script.html#standard-apple-script-example-11) * [Java Script for Automation Example:](https://docs.folivora.ai/docs/1102_apple_script.html#java-script-for-automation-example-12) * [**delete\_triggers**](https://docs.folivora.ai/docs/1102_apple_script.html#deletetriggers) * [Java Script for Automation Example:](https://docs.folivora.ai/docs/1102_apple_script.html#java-script-for-automation-example-13) * [**set\_persistent\_string\_variable**](https://docs.folivora.ai/docs/1102_apple_script.html#setpersistentstringvariable) * [Standard Apple Script Example:](https://docs.folivora.ai/docs/1102_apple_script.html#standard-apple-script-example-12) * [Java Script for Automation Example:](https://docs.folivora.ai/docs/1102_apple_script.html#java-script-for-automation-example-14) * [**set\_string\_variable**](https://docs.folivora.ai/docs/1102_apple_script.html#setstringvariable) * [Standard Apple Script Example:](https://docs.folivora.ai/docs/1102_apple_script.html#standard-apple-script-example-13) * [Java Script for Automation Example:](https://docs.folivora.ai/docs/1102_apple_script.html#java-script-for-automation-example-15) * [**set\_persistent\_number\_variable**](https://docs.folivora.ai/docs/1102_apple_script.html#setpersistentnumbervariable) * [Standard Apple Script Example:](https://docs.folivora.ai/docs/1102_apple_script.html#standard-apple-script-example-14) * [Java Script for Automation Example:](https://docs.folivora.ai/docs/1102_apple_script.html#java-script-for-automation-example-16) * [**set\_number\_variable**](https://docs.folivora.ai/docs/1102_apple_script.html#setnumbervariable) * [Standard Apple Script Example:](https://docs.folivora.ai/docs/1102_apple_script.html#standard-apple-script-example-15) * [Java Script for Automation Example:](https://docs.folivora.ai/docs/1102_apple_script.html#java-script-for-automation-example-17) * [**get\_number\_variable**](https://docs.folivora.ai/docs/1102_apple_script.html#getnumbervariable) * [Standard Apple Script Example:](https://docs.folivora.ai/docs/1102_apple_script.html#standard-apple-script-example-16) * [Java Script for Automation Example:](https://docs.folivora.ai/docs/1102_apple_script.html#java-script-for-automation-example-18) * [**get\_string\_variable**](https://docs.folivora.ai/docs/1102_apple_script.html#getstringvariable) * [Standard Apple Script Example:](https://docs.folivora.ai/docs/1102_apple_script.html#standard-apple-script-example-17) * [Java Script for Automation Example:](https://docs.folivora.ai/docs/1102_apple_script.html#java-script-for-automation-example-19) * [**get\_dock\_badge\_for**](https://docs.folivora.ai/docs/1102_apple_script.html#getdockbadgefor) * [Standard Apple Script Example:](https://docs.folivora.ai/docs/1102_apple_script.html#standard-apple-script-example-18) * [Java Script for Automation Example:](https://docs.folivora.ai/docs/1102_apple_script.html#java-script-for-automation-example-20) * [**export\_preset**](https://docs.folivora.ai/docs/1102_apple_script.html#exportpreset) * [Standard Apple Script Example:](https://docs.folivora.ai/docs/1102_apple_script.html#standard-apple-script-example-19) * [**import\_preset**](https://docs.folivora.ai/docs/1102_apple_script.html#importpreset) * [Standard Apple Script Example:](https://docs.folivora.ai/docs/1102_apple_script.html#standard-apple-script-example-20) * [**get\_preset\_details**](https://docs.folivora.ai/docs/1102_apple_script.html#getpresetdetails) * [**get\_menu\_item\_details**](https://docs.folivora.ai/docs/1102_apple_script.html#getmenuitemdetails) * [Standard Apple Script Example:](https://docs.folivora.ai/docs/1102_apple_script.html#standard-apple-script-example-21) * [**reveal\_element\_in\_ui**](https://docs.folivora.ai/docs/1102_apple_script.html#revealelementinui) * [Standard Apple Script Example:](https://docs.folivora.ai/docs/1102_apple_script.html#standard-apple-script-example-22) * [**paste\_text**](https://docs.folivora.ai/docs/1102_apple_script.html#pastetext) * [Standard Apple Script Example:](https://docs.folivora.ai/docs/1102_apple_script.html#standard-apple-script-example-23) * [**get\_clipboard\_content**](https://docs.folivora.ai/docs/1102_apple_script.html#getclipboardcontent) * [Example](https://docs.folivora.ai/docs/1102_apple_script.html#example-1) * [**get\_selection**](https://docs.folivora.ai/docs/1102_apple_script.html#getselection) * [Example](https://docs.folivora.ai/docs/1102_apple_script.html#example-2) * [**set\_clipboard\_content**](https://docs.folivora.ai/docs/1102_apple_script.html#setclipboardcontent) * [Standard Apple Script Example:](https://docs.folivora.ai/docs/1102_apple_script.html#standard-apple-script-example-24) * [Floating Menus](https://docs.folivora.ai/docs/1102_apple_script.html#floating-menus) * [**update\_menu\_item**](https://docs.folivora.ai/docs/1102_apple_script.html#updatemenuitem) * [**get\_menu\_item\_value**](https://docs.folivora.ai/docs/1102_apple_script.html#getmenuitemvalue) * [**set\_menu\_item\_value**](https://docs.folivora.ai/docs/1102_apple_script.html#setmenuitemvalue) * [**webview\_menu\_item\_load\_html\_url\_js**](https://docs.folivora.ai/docs/1102_apple_script.html#webviewmenuitemloadhtmlurljs) **Note: There are some built-in variables, which can also be quite helpful**: [Built-In Scripting Variables](https://docs.folivora.ai/docs/1105_variables.html) Security -------- In general every application that is allowed to execute Apple Script could trigger these scripting functions. If you do not want this, you can define a shared secret which then must be included in all calls as "shared\_secret" parameter. The shared secret can be defined in the advanced preferences ![shared_secret](https://docs.folivora.ai/docs/media/new/scripting_secret.jpg) Available Scripting Interfaces ------------------------------ ### **trigger\_named** This method will trigger the specified named trigger (which can be configured in the "Other" tab in BetterTouchTool.) #### Standard Apple Script Example: tell application "BetterTouchTool" trigger_named "TriggerName" end tell #### Java Script for Automation Example: var BetterTouchTool = Application('BetterTouchTool'); BetterTouchTool.trigger_named("TriggerName"); * * * ### **trigger\_named\_async\_without\_response** This method will trigger the specified named trigger (which can be configured in the "Other" tab in BetterTouchTool.). In contrast to the trigger\_named it does not wait for a result - **this should always be used if you do not need a response**. cancel\_delayed\_named\_trigger\_execution Optional parameter: **delay** This lets you set a delay before the named trigger is executed (in seconds). While the trigger has not been executed you can cancel the execution by calling the **cancel\_delayed\_named\_trigger\_execution** function #### Standard Apple Script Example: tell application "BetterTouchTool" trigger_named_async_without_response "TriggerName" delay 0.2 end tell #### Java Script for Automation Example: var BetterTouchTool = Application('BetterTouchTool'); BetterTouchTool.trigger_named_async_without_response("TriggerName", {delay: 0.2}); \--- ---- ### **cancel\_delayed\_named\_trigger\_execution** This method will cancel the execution of a delayed named trigger (see previous function) #### Standard Apple Script Example: tell application "BetterTouchTool" trigger_named_async_without_response "TriggerName" delay 0.2 end tell #### Java Script for Automation Example: var BetterTouchTool = Application('BetterTouchTool'); BetterTouchTool.trigger_named_async_without_response("TriggerName", {delay: 0.2}); * * * ### **update\_touch\_bar\_widget** This method will update the contents of a Touch Bar Script Widget (identified by its uuid). You can provide a new text to show, a new icon and a new background color. For the icon you can either provide it directly using the icon\_data parameter (must be base64 encoded) or you can provide a file path (via the icon\_path parameter) that points to the new icon. You can get the uuid by right-clicking any script widget in BTT. #### Standard Apple Script Example: tell application "BetterTouchTool" update_touch_bar_widget "9990CE09-9820-4D67-9C52-8BABAB263056" text "newButtonText" icon_path "~/Desktop/005-ShoppingBasket@2x.png" background_color "255,100,100,255" end tell #### Java Script for Automation Example: var BetterTouchTool = Application('BetterTouchTool'); BetterTouchTool.update_touch_bar_widget("9990CE09-9820-4D67-9C52-8BABAB263056", { text: "hi there!", icon_path: "/Users/andi/Desktop/test.png", background_color: "200,100,100,255" }); * * * ### **update\_stream\_deck\_widget** This method will update the contents of a Stream Deck Widget (identified by its uuid). You can provide a new text to show, and update any of it's configuration properties by providing an (escaped) JSON string. You can get the uuid by right-clicking any widget in BTT. To get a list of the configuration properties copy an existing Stream Deck trigger to a text editor and have a look at the BTTTriggerConfig part in the JSON. #### Standard Apple Script Example: tell application "BetterTouchTool" update_stream_deck_widget "9990CE09-9820-4D67-9C52-8BABAB263056" text "newButtonText" json "{\"BTTStreamDeckBackgroundColor\": \"255,85,100,255\"}" end tell #### Java Script for Automation Example: var BetterTouchTool = Application('BetterTouchTool'); var updateDefinition = { "text": "newButtonText" "BTTStreamDeckBackgroundColor" : "255,85,100,255" } BetterTouchTool.update_stream_deck_widget("2F34005D-4537-464D-94E9-A7F42DA39DF1", {json: JSON.stringify(updateDefinition)}); * * * ### **update\_menubar\_item** This method will temporarily update the contents of a Menubar Status Item configured in the "Automations, Named & Other Triggers" section(identified by its uuid). You can provide a new text to show, a new icon and a new background color. For the icon you can either provide it directly using the icon\_data parameter (must be base64 encoded) or you can provide a file path (via the icon\_path parameter) that points to the new icon. You can get the uuid by right-clicking any script widget in BTT. #### Example: tell application "BetterTouchTool" to update_menubar_item "E2F16C7E-C2E4-4898-BB8C-21D3C653B843" text "new text" Supported paramerters: **shared\_secret** (text) : You can specify a shared secret which must be contained in all Apple Script calls in the advanced BTT preferences. **text** (text) : The text you want to show in the menubar item **hidden** (boolean) : Define whether the item should be hidden **icon\_path** (text) : A file path to an icon that should be loaded **icon\_data** (text) : The base64 encoded icon data of the icon you want to show on the menubar item **sf\_symbol\_name** (text) : The name of the sf symbol to load **sf\_symbol\_size** (number) : The size of the sf symbol to load **sf\_symbol\_weight** (number) : The weight of the sf symbol to load **background\_color** (text) : The background color the menubar item should have. Must be in this format (RGBA): 255,255,255,255 **font\_color** (text) : The font and sfsymbol color the menubar item should have. Must be in this format (RGBA): 255,255,255,255 * * * ### **trigger\_action** This method will trigger any of BetterTouchTool's predefined actions (or any combination of them). You need to provide a JSON description of the action you want to trigger. The easiest way to get such a JSON description is to right-click the trigger you have configured in BetterTouchTool and choose "Copy JSON". This will copy the complete JSON (including the configuration for the trigger itself), but this action will ignore anything that's not needed. (or you can delete the not needed parts) #### Standard Apple Script Example: tell application "BetterTouchTool" trigger_action "{\"BTTPredefinedActionType\":100}" end tell #### Java Script for Automation Example: Hint: don't forget to use JSON.stringify() before passing the actionDefinition object. var BetterTouchTool = Application('BetterTouchTool'); var actionDefinition = { "BTTPredefinedActionType" : 153, "BTTPredefinedActionName" : "Move Mouse To Position", "BTTMoveMouseToPosition" : "{10, 10}", "BTTMoveMouseRelative" : "6" }; BetterTouchTool.trigger_action(JSON.stringify(actionDefinition)); * * * ### **execute\_assigned\_actions\_for\_trigger** This method execute all the assigned actions for a given trigger (i.e. gesture, shortcut, drawing etc.) identified by its uuid. You can get the uuid by right-clicking any configured trigger in BetterTouchTool. #### Standard Apple Script Example: tell application "BetterTouchTool" execute_assigned_actions_for_trigger "2F34005D-4537-464D-94E9-A7F42DA39DF1" end tell #### Java Script for Automation Example: var BetterTouchTool = Application('BetterTouchTool'); BetterTouchTool.execute_assigned_actions_for_trigger("2F34005D-4537-464D-94E9-A7F42DA39DF1"); * * * ### **refresh\_widget** This method will execute all scripts assigned to a script widget and update its contents accordingly. The widget is identified by its uuid, which you can get by right-clicking the widget in BetterTouchTool. #### Standard Apple Script Example: tell application "BetterTouchTool" refresh_widget "2F34005D-4537-464D-94E9-A7F42DA39DF1" end tell #### Java Script for Automation Example: var BetterTouchTool = Application('BetterTouchTool'); BetterTouchTool.refresh_widget("2F34005D-4537-464D-94E9-A7F42DA39DF1"); * * * ### **get\_trigger** This allows you to retrieve the JSON description of any trigger in BTT (e.g. Touch Bar item, Gesture, Keyboard Shortcut etc.) based on its UUID. You can get the UUID by right-clicking any trigger in BTT. #### Standard Apple Script Example: tell application "BetterTouchTool" return get_trigger "9D189F2C-6866-4955-9D8E-FEC96C5C7E30" end tell #### Java Script for Automation Example: var BetterTouchTool = Application('BetterTouchTool'); BetterTouchTool.get_trigger("9D189F2C-6866-4955-9D8E-FEC96C5C7E30"); * * * * * * ### **get\_triggers** This allows you to retrieve the JSON description of multiple triggers in BTT (e.g. Touch Bar item, Gesture, Keyboard Shortcut etc.) based on a few properties. You can get the properties of a specific trigger by selecting it in BTT and copy pasting it to some text editor. The get\_triggers() function supports these parameters (all optional): * trigger\_type (e.g. BTTTriggerTypeMagicMouse) * trigger\_id (e.g. 643 for named triggers) * trigger\_parent\_uuid (if you want to get the items of a folder) * trigger\_uuid (to get a specific trigger) * trigger\_app\_bundle\_identifier (to get triggers assigned to a specific app) #### Java Script for Automation Example: This will load the names of all "named triggers" (trigger id 643): let BetterTouchTool = Application('BetterTouchTool'); let allNamedTriggersJSONString = BetterTouchTool.get_triggers({trigger_id: 643}); let allTriggersJSONArray = JSON.parse(allNamedTriggersJSONString); let allNamedTriggerNames = []; for(let trigger of allTriggersJSONArray) { allNamedTriggerNames.push(trigger["BTTTriggerName"]); } allNamedTriggerNames * * * * * * ### **update\_trigger** This method will create or update the configuration of any specified trigger (i.e. gestures, shortcuts, touchbar items etc.). You need to provide the uuid of the trigger you want to update (get by right-clicking it in BTT) and a JSON object defining the updates. To know how the JSON object should look like, right-click the trigger in BTT and choose "Copy JSON". **Optional Parameter**: trigger\_parent\_uuid (if you want to add the trigger to a group) #### Standard Apple Script Example: tell application "BetterTouchTool" update_trigger "2F34005D-4537-464D-94E9-A7F42DA39DF1" json "{\"BTTTouchBarButtonName\" : \"New Name\", \"BTTTouchBarItemIconHeight\" : 25}" end tell #### Java Script for Automation Example: Hint: don't forget to use JSON.stringify() before passing the actionDefinition object. var BetterTouchTool = Application('BetterTouchTool'); var updateDefinition = { "BTTTouchBarButtonName" : "New Name", "BTTTouchBarItemIconHeight" : 25 } BetterTouchTool.update_trigger("2F34005D-4537-464D-94E9-A7F42DA39DF1", {json: JSON.stringify(updateDefinition)}); * * * ### **add\_new\_trigger** This method will add a new trigger to BTT (i.e. gestures, shortcuts, touchbar items etc.). You need to provide a JSON object defining the new trigger. To know how the JSON object should look like, right-click any existing trigger in BTT and choose "Copy JSON". Optional parameter: **parent\_uuid** #### Standard Apple Script Example: tell application "BetterTouchTool" add_new_trigger "{ \"BTTTriggerClass\" : \"BTTTriggerTypeKeyboardShortcut\", \"BTTPredefinedActionType\" : 5, \"BTTPredefinedActionName\" : \"Mission Control\", \"BTTAdditionalConfiguration\" : \"1179658\", \"BTTTriggerOnDown\" : 1, \"BTTEnabled\" : 1, \"BTTShortcutKeyCode\" : 2, \"BTTShortcutModifierKeys\" : 1179648, \"BTTOrder\" : 3 }" end tell #### Java Script for Automation Example: Hint: don't forget to use JSON.stringify() before passing the actionDefinition object. // this will add a new keyboard shortcut to BTT. var BetterTouchTool = Application('BetterTouchTool'); var newTriggerDefinition = { "BTTTriggerClass" : "BTTTriggerTypeKeyboardShortcut", "BTTPredefinedActionType" : 5, "BTTPredefinedActionName" : "Mission Control", "BTTAdditionalConfiguration" : "1179648", "BTTTriggerOnDown" : 1, "BTTEnabled" : 1, "BTTShortcutKeyCode" : 2, "BTTShortcutModifierKeys" : 1179648, "BTTOrder" : 3 } BetterTouchTool.add_new_trigger(JSON.stringify(newTriggerDefinition)) ### **delete\_trigger** This method will delete a trigger from BetterTouchTool. You need to provide the uuid of the trigger you want to delete (get by right-clicking it in BTT). #### Standard Apple Script Example: tell application "BetterTouchTool" delete_trigger "2F34005D-4537-464D-94E9-A7F42DA39DF1" end tell #### Java Script for Automation Example: var BetterTouchTool = Application('BetterTouchTool'); BetterTouchTool.delete_trigger("2F34005D-4537-464D-94E9-A7F42DA39DF1"); \--- ---- ### **delete\_triggers** This allows you to delete multiple triggers in BTT based on a few properties. If you want to "test" your query before deleting, use the get\_triggers function first - it uses the exact same parameters. You can get the properties of a specific trigger by selecting it in BTT and copy pasting it to some text editor. The delete\_triggers() function supports these parameters (all optional): • trigger\_type (e.g. BTTTriggerTypeMagicMouse) • trigger\_id (e.g. 643 for named triggers) • trigger\_parent\_uuid (if you want to get the items of a folder) • trigger\_uuid (to get a specific trigger) • trigger\_app\_bundle\_identifier (to get triggers assigned to a specific app) #### Java Script for Automation Example: This will delete all "named triggers" (trigger id 643): let BetterTouchTool = Application('BetterTouchTool'); BetterTouchTool.delete_triggers({trigger_id: 643}); * * * * * * ### **set\_persistent\_string\_variable** This allows you to set a variable to a given string that persists over BTT relaunches. #### Standard Apple Script Example: tell application "BetterTouchTool" set_persistent_string_variable "variableName" to "this is a test value" end tell #### Java Script for Automation Example: var BetterTouchTool = Application('BetterTouchTool'); BetterTouchTool.set_persistent_string_variable("variableName", {to: "this is a test value"}); * * * ### **set\_string\_variable** This allows you to set a variable to a given string that persists over BTT relaunches. #### Standard Apple Script Example: tell application "BetterTouchTool" set_string_variable "variableName" to "this is a test value" end tell #### Java Script for Automation Example: var BetterTouchTool = Application('BetterTouchTool'); BetterTouchTool.set_string_variable("variableName", {to: "this is a test value"}); * * * ### **set\_persistent\_number\_variable** This allows you to set a variable to a given string that persists over BTT relaunches. #### Standard Apple Script Example: tell application "BetterTouchTool" set_persistent_number_variable "variableName" to 12345 end tell #### Java Script for Automation Example: var BetterTouchTool = Application('BetterTouchTool'); BetterTouchTool.set_persistent_number_variable("variableName", {to: 1345}); * * * ### **set\_number\_variable** This allows you to set a variable to a given string that persists over BTT relaunches. #### Standard Apple Script Example: tell application "BetterTouchTool" set_number_variable "variableName" to 12345 end tell #### Java Script for Automation Example: var BetterTouchTool = Application('BetterTouchTool'); BetterTouchTool.set_number_variable("variableName", {to: 1345}); * * * ### **get\_number\_variable** This allows you to retrieve the contents of a number variable with the given name #### Standard Apple Script Example: tell application "BetterTouchTool" return get_number_variable "variableName" end tell #### Java Script for Automation Example: var BetterTouchTool = Application('BetterTouchTool'); BetterTouchTool.get_number_variable("variableName"); * * * ### **get\_string\_variable** This allows you to retrieve the contents of a string variable with the given name #### Standard Apple Script Example: tell application "BetterTouchTool" return get_string_variable "variableName" end tell #### Java Script for Automation Example: var BetterTouchTool = Application('BetterTouchTool'); BetterTouchTool.get_string_variable("variableName"); * * * ### **get\_dock\_badge\_for** This method will efficiently get the current Dock badge for a specific application. Running this function multiple times will return the previously cached value until the specified update\_interval has been reached. When an update interval is provided, BTT will internally refresh the badges for all apps every x seconds. In this case consecutive "get\_dock\_badge\_for" function calls are basically free, as they will just return the last cached value. This is the recommended way to do it, and the update\_interval should not be too small. If you need to refresh the cache immediately for some reason, you can leave the update\_interval function out. Then BTT will immediately refresh all the dock badges and return the latest value. #### Standard Apple Script Example: tell application "BetterTouchTool" get_dock_badge_for "Calendar" update_interval 5 end tell #### Java Script for Automation Example: var BetterTouchTool = Application('BetterTouchTool'); BetterTouchTool.get_dock_badge_for("Calendar", {'update_interval': 5}); * * * ### **export\_preset** Exports a preset by name. includeSettings will in addition to the configured triggers add general preferences to the preset export. link, comment and compression is optional. #### Standard Apple Script Example: tell application "BetterTouchTool" export_preset "some-example-preset" outputPath "~/Documents/preset.bttpreset" comment "someComment" link "https://someLinkToShowWhenImporting" with includeSettings and compress end tell * * * ### **import\_preset** Imports a preset by path. #### Standard Apple Script Example: tell application "BetterTouchTool" import_preset "/path/to/your/preset.bttpreset" end tell * * * ### **get\_preset\_details** This allows you to query the state of a preset. Note: this returns a JSON array - which usually contains details for one preset but in some situations might contain multiple preset details. tell application "BetterTouchTool" to get_preset_details "thePresetName" Example output: "[\ {\ \"uuid\" : \"F8367505-8409-4828-B5FA-8596932687F4\",\ \"hidden\" : 0,\ \"name\" : \"thePresetName\",\ \"activated\" : 2, \ \"color\" : \"30.069600, 113.581080, 136.680000, 255.000000\"\ }\ ]" activated can be 0 (disabled), 1 (enabled), or 2 (enabled & master preset) * * * ### **get\_menu\_item\_details** Gets the details (available, enabled, checked) of a given menubar menu item. This can be helpful to perform actions conditionally if a menu item is enabled/disabled. Parameters: **The path to the menu bar item** E.g. "Edit;Cut" or "Window;Move & Resize; Left" #### Standard Apple Script Example: tell application "BetterTouchTool" to get_menu_item_details "Edit;Cut" end tell * * * ### **reveal\_element\_in\_ui** This will show a BTT trigger identified by it's UUID in the BetterTouchTool user interface. Parameters: **The UUID of the trigger** (you can get the UUID of a trigger by right-clicking it or e.g. via the "get\_triggers" scripting function) #### Standard Apple Script Example: tell application "BetterTouchTool" to reveal_element_in_ui "39CDAF30-98BB-4F54-B87F-273B6081149E" end tell ### **paste\_text** This pastes some text Parameters: **text**: The text to paste. **insert\_by\_pasting**: If set to true BTT will use cmd+v to paste the text. Otherwise it will actually try to type it (only possible for standard formats) **move\_cursor\_left\_by\_x\_after\_pasting**: If specified BTT will move the cursor by the given amount to the left. **format**: Optional. The format the text will be interpreted as when pasting (e.g. if you want to paste a table, you can use set the string to `...
` and specify the format NSPasteboardTypeHTML) Default formats are (more are possible): NSPasteboardTypeString NSPasteboardTypeTIFF NSPasteboardTypePNG NSPasteboardTypeRTF NSPasteboardTypeRTFD NSPasteboardTypeHTML NSPasteboardTypeTabularText NSPasteboardTypeFont NSPasteboardTypeRuler NSPasteboardTypeColor NSPasteboardTypeSound NSPasteboardTypeMultipleTextSelection NSPasteboardTypeTextFinderOptions NSPasteboardTypeURL NSPasteboardTypeFileURL #### Standard Apple Script Example: tell application "BetterTouchTool" paste_text "Hello world" format "NSPasteboardTypeHTML" insert_by_pasting true end tell * * * ### **get\_clipboard\_content** Gives you the current text content of the clipboard. #### Example tell application "BetterTouchTool" to get_clipboard_content format "public.html" asBase64 false excludeConcealed false" For the format parameter you can use any possible UTI or one of these strings: Default formats are (more are possible): * all - returns all currently stored formats as a JSON string * NSPasteboardTypeString * NSPasteboardTypeTIFF * NSPasteboardTypePNG * NSPasteboardTypeRTF * NSPasteboardTypeRTFD * NSPasteboardTypeHTML * NSPasteboardTypeTabularText * NSPasteboardTypeFont * NSPasteboardTypeRuler * NSPasteboardTypeColor * NSPasteboardTypeSound * NSPasteboardTypeMultipleTextSelection * NSPasteboardTypeTextFinderOptions * NSPasteboardTypeURL * NSPasteboardTypeFileURL * * * ### **get\_selection** Gives you the currently selected text/item #### Example tell application "BetterTouchTool" to get_selection format "public.html" asBase64 false" For the format parameter you can use any possible UTI or one of these strings: Default formats are (more are possible): * NSPasteboardTypeString * NSPasteboardTypeTIFF * NSPasteboardTypePNG * NSPasteboardTypeRTF * NSPasteboardTypeRTFD * NSPasteboardTypeHTML * NSPasteboardTypeTabularText * NSPasteboardTypeFont * NSPasteboardTypeRuler * NSPasteboardTypeColor * NSPasteboardTypeSound * NSPasteboardTypeMultipleTextSelection * NSPasteboardTypeTextFinderOptions * NSPasteboardTypeURL * NSPasteboardTypeFileURL * * * ### **set\_clipboard\_content** This changes the clipboard contentt Parameters: **content**: The text to paste. **format**: Optional. The format the text will be interpreted as when pasting (e.g. if you want to paste a table, you can use set the string to `...
` and specify the format NSPasteboardTypeHTML) Default formats are (more are possible): * NSPasteboardTypeString * NSPasteboardTypeTIFF * NSPasteboardTypePNG * NSPasteboardTypeRTF * NSPasteboardTypeRTFD * NSPasteboardTypeHTML * NSPasteboardTypeTabularText * NSPasteboardTypeFont * NSPasteboardTypeRuler * NSPasteboardTypeColor * NSPasteboardTypeSound * NSPasteboardTypeMultipleTextSelection * NSPasteboardTypeTextFinderOptions * NSPasteboardTypeURL * NSPasteboardTypeFileURL #### Standard Apple Script Example: tell application "BetterTouchTool" set_clipboard_content "Hello world" format "NSPasteboardTypeHTML" end tell * * * Floating Menus -------------- See [Scripting FLoating Menus](https://docs.folivora.ai/docs/1603_scripting_floating_menus.html) for details. ### **update\_menu\_item** Apple Script Example With Item UUID: tell application "BetterTouchTool" update_menu_item "044E5D2B-5661-4A1F-AB39-8D1EA2C1DBA1" json "{BTTMenuItemBackgroundColor: '20, 200, 20, 255', BTTMenuItemText: 'test' }" end tell Apple Script Example With Menu Name And Item Name: tell application "BetterTouchTool" update_menu_item menu_name "TheMenuName" item_name "TheItemName" json "{BTTMenuItemBackgroundColor: '20, 200, 20, 255', BTTMenuItemText: 'test' }" end tell ### **get\_menu\_item\_value** Gets the current value of a floating menu item. For textfields the value is the entered text. For sliders it's the slider's value. For standard items, it's any files that have been dropped onto the item. By menu name and item name: tell application "BetterTouchTool" to get_menu_item_value menu_name "TheMenuName" item_name "TheItemName" By item UUID: tell application "BetterTouchTool" to get_menu_item_value "9DDA72BA-4968-4AC5-907E-FDE743B2F6E8" ### **set\_menu\_item\_value** Sets the current value of a floating menu item. By menu name and item name: tell application "BetterTouchTool" to set_menu_item_value menu_name "TheMenuName" item_name "TheItemName" value "testvalue" By item UUID: tell application "BetterTouchTool" to set_menu_item_value "9DDA72BA-4968-4AC5-907E-FDE743B2F6E8" value 0.5 ### **webview\_menu\_item\_load\_html\_url\_js** Loads the provided html or url in the specified webview item in a floating menu. tell application "BetterTouchTool" # instead of the uuid you can also use the item_name and menu_name parameters. webview_menu_item_load_html_url_js "9E2989CF-77C7-4F14-A646-49342D2F8331" html_or_url "https://apple.com" end tell tell application "BetterTouchTool" # instead of the uuid you can also use the item_name and menu_name parameters. webview_menu_item_load_html_url_js "9E2989CF-77C7-4F14-A646-49342D2F8331" javascript_to_execute "alert('hello world')" end tell results matching "" =================== No results matching "" ====================== --- # Appearance & Config Options · GitBook [Appearance & Config Options](https://docs.folivora.ai/) ========================================================= Configuration Options --------------------- Most of the configuration options you see when clicking the config tab should be self explanatory, but let's have a quick look: ![mcc](https://docs.folivora.ai/docs/media/webviewconfig.png) * **Width/Height** - The size of the webview * **Resizable** - when activated the webview allows to be resized by dragging the edges/corners like normal windows. Known issue: the resize cursor might not show up, you'll still be able to resize. * **Center on Moinitor With Mouse (Default)**: Will center the floating webview on the monitor that currently contains the mouse cursor. * **Specify Position**: Various options on where to place the webview. * **Update above position & size after manually moving or resizing**: This will automatically save & restore the latest position & size if you have moved the webview around. * **Use White Background**: This will make the background of the webview white. By default it is transparent and you can set the background color using css. In some cases (e.g. for external websites) you might not want the transparent background. * **Show Window Buttons**: By default the webview doesn't show the window buttons on the top left. This checkbox enables them. * **Draw Title Bar Bezel**: By default the webview doesn't have a title bar. This checkbox enables that (e.g. for easier dragging). * **Close When Clicking Outside**: Will close the webview as soon as clicking at some other window. Known issue: might not work while BTT preferences are open. * **Show BTT Dock Icon**: This will show the BTT icon in the Dock while the webview is active. It will make the webview active when clicked. * **Z-Index**: Using this you can select the window level for the webview. By default it is floating on top of all other windows. You can also stick it to the desktop, so it will only be visible when showing the desktop. You can also specify a custom NSWindowLevel number, see [http://www.gietal.net/blog/nswindowlevel-shenanigans](http://www.gietal.net/blog/nswindowlevel-shenanigans) Advanced -------- ![mcc](https://docs.folivora.ai/docs/media/webview_advanced.png) * **Do NOT keep content active in background**: By default the webview only loads the web content once and then keeps it active in the background. This might not be wanted for various reasons. For example you might not want to have music playing while the webview is hidden. * **Custom User Agent**: Allows you to set a custom user agent. Can be helpful in order to get a smaller mobile version of a website. * **Open URLs with prefix in System Browser**: You might want to open http links in the system browser. * **Move Window by dragging content**: This allows to move the webview by dragging the web content. This can result in unwanted clicks, thus might not work on all websites. Use "only move while holding CMD" to prevent accidental clicks. Security: --------- * **Shared Secret**: The shared secret is only necessary if you load a website from an external server and that website tries to trigger functions within BTT. results matching "" =================== No results matching "" ====================== --- # Useful Script Examples · GitBook [Useful Script Examples](https://docs.folivora.ai/) ==================================================== Useful Script Examples ====================== 1. Execute a different action when triggering twice in quick succession. Execute different actions when executing a once and when executing it twice in quick succession: ------------------------------------------------------------------------------------------------ `Taken from: https://community.folivora.ai/t/key-sequences-typed-words/23587/11` This is useful if you want to e.g. have a keyboard shortcut that performs function A when hitting it once and performs function B when hitting it twice in quick succession. Also works for other trigger types. Assign the "Run Real JavaScript" action to a trigger (e.g. shortcut) in BTT and paste this script. It will trigger the named trigger defined in line 2, when doing a single press. It will trigger the named trigger you defined in line 3 when doing a double press. It will wait for 0.3 seconds before executing the single press (to see whether a double press will happen) - that time can be changed by modifying line 4. (async () => { let singleTapNamedTrigger = 'SingleTap'; // trigger on single press let doubleTapNamedTrigger = 'DoubleTap'; // trigger on double press let delay = 0.3; // time to wait for second press // no modifications necessary from here let now = Date.now() / 1000; let lastTrigger = await get_number_variable({ variable_name: 'last_key_trigger_time', }); if (now - lastTrigger < delay) { cancel_delayed_named_trigger_execution({ trigger_name: singleTapNamedTrigger, }); trigger_named_async_without_response({ trigger_name: doubleTapNamedTrigger, wait_for_reply: false, }); } else { trigger_named_async_without_response({ trigger_name: singleTapNamedTrigger, wait_for_reply: false, delay: delay }); } set_number_variable( { variable_name: 'last_key_trigger_time', to: now, }); returnToBTT('done'); })(); Note: If you just want to cycle through multiple actions when triggering a shortcut multiple times, use the predefined action "Cycle Through Multiple Actions" instead. Send A Keyboard Shortcut Via BTT From Within A Apple Script ----------------------------------------------------------- Taken from [https://community.folivora.ai/t/applescript-execution-output-varies-based-on-trigger-method/31504/6](https://community.folivora.ai/t/applescript-execution-output-varies-based-on-trigger-method/31504/6) This example would send the cmd+c shortcut to copy something. Using BetterTouchTool for this instead of system events, does have some advantages - for example it will work while other modifier keys are still pressed. 55 = cmd 8 = c You can find a list of key codes here: [https://eastmanreference.com/complete-list-of-applescript-key-codes](https://eastmanreference.com/complete-list-of-applescript-key-codes) The format always needs to be modifier,modifier,keycode (there can be any number of modifiers but the keycode must come last) tell application "BetterTouchTool" trigger_action "{\"BTTTriggerType\":-1, \"BTTShortcutToSend\" : \"55,8\",}" end tell results matching "" =================== No results matching "" ====================== --- # Call BTT functions from the webview · GitBook [Call BTT functions from the webview](https://docs.folivora.ai/) ================================================================= Triggering Scripting Functions from any BetterTouchTool Web View ---------------------------------------------------------------- The Floating Web View allows you to trigger various scripting functions via Java Script. **Important Note**: When loaded the webview takes a few milliseconds to initialize BTT's scripting infrastructure. This is why you should only call the scripting functions after the BTTInitialized function has been called (or you can use some fixed delay). For more information see [webview lifecycle](https://docs.folivora.ai/docs/10_4_webview_lifecycle.html) **The available scripting functions are:** * resize\_webview * trigger\_named * update\_touch\_bar\_widget * update\_stream\_deck\_widget * trigger\_action * execute\_assigned\_actions\_for\_trigger * refresh\_widget * get\_trigger * get\_triggers * update\_trigger (to create or if exists update a trigger) * add\_new\_trigger * delete\_trigger * delete\_triggers * trigger\_named * trigger\_named\_async\_without\_response * cancel\_delayed\_named\_trigger\_execution * get\_dock\_badge\_for * get\_active\_touch\_bar\_group * is\_true\_tone\_enabled * get\_location * set\_persistent\_string\_variable * set\_string\_variable * set\_persistent\_number\_variable * set\_number\_variable * get\_number\_variable * get\_string\_variable * export\_preset * display\_notification * paste\_text * set\_clipboard\_content * get-selected-text Floating Menus: * update\_menu\_item * get\_menu\_item\_value * set\_menu\_item\_value * webview\_menu\_item\_load\_html\_url\_js **Note: There are some built-in variables, which can also be quite helpful**: [Built-In Scripting Variables](https://docs.folivora.ai/docs/1105_variables.html) * * * There are two ways to trigger these scripting functions, both are equally powerful: ### **1.) Using the bttweb:// links** bttweb:// is a custom URL scheme which allows you to trigger scripting functions and retrieve their results, just like any other http call. You can use them in normal a elements `` or use XMLHTTPRequest or fetch for this. The general format for bttweb:// links is always `bttweb://**scripting_function_name**/?arg1=xxx&arg2=yyy&arg....` **Loading bttweb links using fetch with async/await:** // a little helper function async function bttwebRequest(requestPath) { const response = await fetch(requestPath); const responseText = await response.text(); return responseText; } let result = await bttwebRequest('bttweb://trigger_named/?trigger_name=test'); * * * ### **2.) Using The Scripting Interface via JavaScript.** BetterTouchTool automatically injects JavaScript functions into any HTML loaded into the floading HTML View. Using these you can trigger the scripting interfaces mentioned above. * * * ### Closing the webview You can close the floating webview by passing the closeFloatingWebView set to 1. E.g. trigger\_named({trigger\_name: 'test', closeFloatingWebView:1} ); * * * ### Example script function calls: ### **resize\_webview** This method will trigger the specified named trigger (which can be configured in the "Other" tab in BetterTouchTool.) #### Example await resize_webview({"width" :100, "height": 250}); * * * ### **trigger\_named** This method will trigger the specified named trigger (which can be configured in the "Other" tab in BetterTouchTool.) #### Example let result = await trigger_named({trigger_name: 'Action5'}); // Currently only the Apple Script and Shell Script actions return results. or * * * ### **trigger\_named\_async\_without\_response** This method will trigger the specified named trigger (which can be configured in the "Other" tab in BetterTouchTool.). It won't wait for a response. #### Example trigger_named_async_without_response'({trigger_name: 'Action5'}); // Currently only the Apple Script and Shell Script actions return results. or * * * ### **update\_touch\_bar\_widget** This method will update the contents of a Touch Bar Script Widget (identified by its uuid). You can provide a new text to show, a new icon and a new background color. For the icon you can either provide it directly using the icon\_data parameter (must be base64 encoded) or you can provide a file path (via the icon\_path parameter) that points to the new icon. You can get the uuid by right-clicking any script widget in BTT. #### Example: let widgetConfig = { text: "hi there!", icon_path: "/Users/andi/Desktop/test.png", background_color: "200,100,100,255" }; update_touch_bar_widget({uuid: '9990CE09-9820-4D67-9C52-8BABAB263056', json: widgetConfig}); * * * ### **trigger\_action** This method will trigger any of BetterTouchTool's predefined actions (or any combination of them). You need to provide a JSON description of the action you want to trigger as a string. The easiest way to get such a JSON description is to right-click the trigger you have configured in BetterTouchTool and choose "Copy JSON". This will copy the complete JSON (including the configuration for the trigger itself), but this action will ignore anything that's not needed. (or you can delete the not needed parts) #### Example: let actionDefinition = { "BTTPredefinedActionType" : 153, "BTTPredefinedActionName" : "Move Mouse To Position", "BTTMoveMouseToPosition" : "{100, 100}", "BTTMoveMouseRelative" : "6" }; let result = await trigger_action({json: JSON.stringify(actionDefinition)}); * * * ### **execute\_assigned\_actions\_for\_trigger** This method execute all the assigned actions for a given trigger (i.e. gesture, shortcut, drawing etc.) identified by its uuid. You can get the uuid by right-clicking any configured trigger in BetterTouchTool. #### Example let result = await execute_assigned_actions_for_trigger({uuid: '2F34005D-4537-464D-94E9-A7F42DA39DF1'}); // Currently only the Apple Script and Shell Script actions return results. Or Trigger * * * ### **refresh\_widget** This method will execute all scripts assigned to a script widget and update its contents accordingly. The widget is identified by its uuid, which you can get by right-clicking the widget in BetterTouchTool. #### Example refresh_widget({uuid: '2F34005D-4537-464D-94E9-A7F42DA39DF1'}); Or Refresh Widget * * * ### **update\_trigger** This method will create or update the configuration of any specified trigger (i.e. gestures, shortcuts, touchbar items etc.). You need to provide the uuid of the trigger you want to update (get by right-clicking it in BTT) and a JSON object defining the updates. To know how the JSON object should look like, right-click the trigger in BTT and choose "Copy JSON". #### Example: Hint: don't forget to use JSON.stringify() before passing the updateDefinition object. var updateDefinition = { "BTTTouchBarButtonName" : "New Name", "BTTTouchBarItemIconHeight" : 25 } update_trigger({uuid: '123e4567-e89b-12d3-a456-426655440000',json: JSON.stringify(updateDefinition)); * * * ### **get\_trigger** This allows you to retrieve the contents of a string variable with the given name let triggerJSONString = await get_trigger({uuid:'123e4567-e89b-12d3-a456-426655440000'}) let parsedJSON = JSON.parse(triggerJSONString); console.log('parsed json:', parsedJSON); * * * ### **add\_new\_trigger** This method will add a new trigger to BTT (i.e. gestures, shortcuts, touchbar items etc.). You need to provide a JSON object defining the new trigger. To know how the JSON object should look like, right-click any existing trigger in BTT and choose "Copy JSON". #### Example var newTriggerDefinition = { "BTTTriggerClass" : "BTTTriggerTypeKeyboardShortcut", "BTTPredefinedActionType" : 5, "BTTPredefinedActionName" : "Mission Control", "BTTAdditionalConfiguration" : "1179648", "BTTTriggerOnDown" : 1, "BTTEnabled" : 1, "BTTShortcutKeyCode" : 2, "BTTShortcutModifierKeys" : 1179648, "BTTOrder" : 3 } add_new_trigger({json: JSON.stringify(newTriggerDefinition)}); ### **delete\_trigger** This method will delete a trigger from BetterTouchTool. You need to provide the uuid of the trigger you want to delete (get by right-clicking it in BTT). #### Example add_new_trigger({uuid: '2F34005D-4537-464D-94E9-A7F42DA39DF1'}); Or Delete Trigger * * * ### **get\_clipboard\_content** Gives you the current text content of the clipboard. #### Example (async ()=> { let result = await get_clipboard_content({format: "public.html" /*optional*/, asBase64: false, excludeConcealed: false}); returnToBTT(result); })(); For the format parameter you can use any possible UTI or one of these strings: Default formats are (more are possible): * all - returns all currently stored formats as a JSON string * NSPasteboardTypeString * NSPasteboardTypeTIFF * NSPasteboardTypePNG * NSPasteboardTypeRTF * NSPasteboardTypeRTFD * NSPasteboardTypeHTML * NSPasteboardTypeTabularText * NSPasteboardTypeFont * NSPasteboardTypeRuler * NSPasteboardTypeColor * NSPasteboardTypeSound * NSPasteboardTypeMultipleTextSelection * NSPasteboardTypeTextFinderOptions * NSPasteboardTypeURL * NSPasteboardTypeFileURL * * * ### **get\_selection** Gives you the currently selected text/item #### Example (async ()=> { let result = await get_selection({format: "public.html" /*optional*/, asBase64: false}); returnToBTT(result); })(); For the format parameter you can use any possible UTI or one of these strings: Default formats are (more are possible): * NSPasteboardTypeString * NSPasteboardTypeTIFF * NSPasteboardTypePNG * NSPasteboardTypeRTF * NSPasteboardTypeRTFD * NSPasteboardTypeHTML * NSPasteboardTypeTabularText * NSPasteboardTypeFont * NSPasteboardTypeRuler * NSPasteboardTypeColor * NSPasteboardTypeSound * NSPasteboardTypeMultipleTextSelection * NSPasteboardTypeTextFinderOptions * NSPasteboardTypeURL * NSPasteboardTypeFileURL * * * ### **set\_persistent\_string\_variable** This allows you to set a variable to a given string that persists over BTT relaunches. #### Java Script for Automation Example: set_persistent_string_variable({variable_name: 'test', to: "this is a test value"}); * * * ### **set\_string\_variable** This allows you to set a variable to a given string that persists over BTT relaunches. set_string_variable({variable_name: 'test', to: "this is a test value"}); * * * ### **set\_persistent\_number\_variable** This allows you to set a variable to a given string that persists over BTT relaunches. set_persistent_number_variable({variable_name: 'test', to: 12345}); * * * ### **set\_number\_variable** This allows you to set a variable to a given string that persists over BTT relaunches. set_number_variable({variable_name:'OutputVolume' to: 0.5}); * * * ### **get\_number\_variable** This allows you to retrieve the contents of a number variable with the given name let result = await get_number_variable({variable_name:'OutputVolume'}) * * * ### **get\_string\_variable** This allows you to retrieve the contents of a string variable with the given name let result = await get_string_variable({variable_name:'BTTActiveAppBundleIdentifier'}) * * * * * * ### **display\_notification** This shows a notification let result = await display_notification({title:'notification title', subTitle: 'some subttitle', soundName: 'frog', imagePath: '~/Downloads/image.png'}) * * * ### **paste\_text** This pastes some text Parameters: **text**: The text to paste. **insert\_by\_pasting**: If set to true BTT will use cmd+v to paste the text. Otherwise it will actually try to type it (only possible for standard formats) **move\_cursor\_left\_by\_x\_after\_pasting**: If specified BTT will move the cursor by the given amount to the left. **format**: Optional. The format the text will be interpreted as when pasting (e.g. if you want to paste a table, you can use set the string to `...
`and specify the format NSPasteboardTypeHTML) Note, this only works if insert\_by\_pasting is set to true. Default formats are (more are possible): * NSPasteboardTypeString * NSPasteboardTypeTIFF * NSPasteboardTypePNG * NSPasteboardTypeRTF * NSPasteboardTypeRTFD * NSPasteboardTypeHTML * NSPasteboardTypeTabularText * NSPasteboardTypeFont * NSPasteboardTypeRuler * NSPasteboardTypeColor * NSPasteboardTypeSound * NSPasteboardTypeMultipleTextSelection * NSPasteboardTypeTextFinderOptions * NSPasteboardTypeURL * NSPasteboardTypeFileURL let result = await paste_text({text:'Hello world', format: 'NSPasteboardTypeHTML', insert_by_pasting: true}) * * * ### **set\_clipboard\_content** Changes the content of the clipboard Parameters: **content**: The content to put in your clipboard. **format**: Optional. The format the content will be interpreted as when pasting (e.g. if you want to paste a table, you can use set the string to ... and specify the format NSPasteboardTypeHTML) Default formats are (more are possible): * NSPasteboardTypeString * NSPasteboardTypeTIFF * NSPasteboardTypePNG * NSPasteboardTypeRTF * NSPasteboardTypeRTFD * NSPasteboardTypeHTML * NSPasteboardTypeTabularText * NSPasteboardTypeFont * NSPasteboardTypeRuler * NSPasteboardTypeColor * NSPasteboardTypeSound * NSPasteboardTypeMultipleTextSelection * NSPasteboardTypeTextFinderOptions * NSPasteboardTypeURL * NSPasteboardTypeFileURL let result = await set_clipboard_content({content:'Hello world', format: 'NSPasteboardTypeHTML'}) * * * ### get-selected-text To access the currently selected text, make use of the selected\_text variable like this: let selectedText = await get_string_variable({variable_name:'selected_text'}) results matching "" =================== No results matching "" ====================== --- # JSON Definitions · GitBook [JSON Definitions](https://docs.folivora.ai/) ============================================== Everything in BetterTouchTool can be represented as JSON. ========================================================= This here is a work in progress to document all possible properties. In general you can copy any trigger / action to your clipboard and paste it into some text editor to see the JSON properties. [All Predefined Actions JSON Definitions](https://docs.folivora.ai/docs/2000_all_actions_details_json.html) [All Trigger JSON Definitions](https://docs.folivora.ai/docs/2002_trigger_json.html) [Floating Menu JSON Definitions](https://docs.folivora.ai/docs/2001_floating_menu_json.html) results matching "" =================== No results matching "" ====================== --- # Manage Menubar Status Items · GitBook [Manage Menubar Status Items](https://docs.folivora.ai/) ========================================================= Manage Menubar Status Items using BTT. ====================================== Starting with BetterTouchTool 4.615 you can manage your menubar's status items via BTT. **Note** This feature is **work in progress**. Please post feature requests, bug reports or questions on [https://community.folivora.ai](https://community.folivora.ai/) The main discussion for this feature is happening here: [https://community.folivora.ai/t/bartender-controversy-tutorial-on-how-to-manage-menubar-status-items-via-btt/37429](https://community.folivora.ai/t/bartender-controversy-tutorial-on-how-to-manage-menubar-status-items-via-btt/37429) There are three base features that make this possible: * The predefined action "Move Menu Bar Status Item To New Position" * The predefined action "Hide Menu Bar Icons Left Of Specific Icon" * A "Menubar Status Item" Widget that can be placed in a [Floating Menu](https://docs.folivora.ai/docs/1600_floating_menus.html) * The predefined action "Search Menu Bar Status Items" Here is **a ready to use preset** that shows how these features work toghether: [Example Preset Download](https://share.folivora.ai/sP/c6dcbba0-25ee-4c1f-ad5b-832b1579a738) ![status_item_bar](https://docs.folivora.ai/docs/media/statusitembar.png) Configuring the Status Item Bar ------------------------------- By default this preset shows a floating bar with all of your menubar status items when you move your mouse to the top right edge of your screen. This bar is configured in the "Custom Floating Menus" section in BTT: ![status_item_bar](https://docs.folivora.ai/docs/media/statusitembar2.png) You can change the appearance of the whole bar or of individual items. You can also hide items from the bar (press cmd+d to hide the selected item) ![status_item_bar](https://docs.folivora.ai/docs/media/statusitembar3.png) Configuring Which Status Items To Hide From The BTT bar ------------------------------------------------------- Hiding items you don't want to have constantly visible is done via the predefined action "Hide Menu Bar Icons Left Of Specific Icon". This action can be assigned to any trigger in BTT, for example you could assign it to a keyboard shortcut. The preset shared above assigns this action to a [custom menubar status item](https://docs.folivora.ai/docs/1008_custom_statusbar_items.html) and configures the action to hide any item left of that item itself. Once you import the preset an item with this symbol will appear in your menubar: ❮ When clicking this item, it will hide any item that is positioned left of it. Of course you can cmd+drag this item to the position you want and thereby influence which items in your menubar will be hidden. ![custom_status_bar_item](https://docs.folivora.ai/docs/media/custommenuitem.png) Configuring Which Status Items To Hide From The Real Menu Bar ------------------------------------------------------------- You can drag items above the "always hidden" section in the BTT UI, then they will always be hidden from the main menubar. (watch the short video above) Quick Access For Menu Bar Status Items Via Predefined Action "Search Menu Bar Status Items" ------------------------------------------------------------------------------------------- ![Search Menubar Status Items 1](https://docs.folivora.ai/docs/media/image-2.png) ![Search Menu Bar Status Items 2](https://docs.folivora.ai/docs/media/image-3.png) results matching "" =================== No results matching "" ====================== --- # Floating Menu JSON Definitions · GitBook [Floating Menu JSON Definitions](https://docs.folivora.ai/) ============================================================ BetterTouchTool Floating Menu JSON Documentation ================================================ This document describes the JSON structure for creating floating menus in BetterTouchTool. **NOTE** Some text is replaced with special characters to reduce the size of this document for LLM usage: © = BTT $ = BTTMenu § = BTTMenuItem Basic Structure --------------- A floating menu JSON is an array containing menu objects. Each menu can contain multiple menu items via the `§s` array. [\ {\ "©TriggerType": 767,\ "©TriggerTypeDescriptionReadOnly": "Floating Menu",\ "©TriggerClass": "©TriggerTypeFloatingMenu",\ "©UUID": "unique-uuid-here",\ "©Enabled": 1,\ "©TriggerName": "Floating Menu: Menu Name",\ "$Name": "Menu Name",\ "$Config": { /* menu configuration */ },\ "§s": [ /* array of menu items */ ],\ "$Availability": 0 /* 0=everywhere, 1=mac, 2=ios */\ }\ ] Menu Item Types (`©TriggerType`) -------------------------------- * **767** - Menu (top level) * **773** - Standard Item (button with actions) * **774** - Submenu (contains nested items) * **775** - Slider * **776** - Text Field (value queryable via scripts) * **777** - Back Button (for submenus) * **778** - WebView (displays HTML from §Text) * **800** - Trackpad widget * **801** - Row Breaker * **802** - Column Breaker * **810** - Text Area (value queryable via scripts) * **811** - Floating Menu Reference Menu Properties --------------- ### Core Properties * `©TriggerType`: 767 for menu * `©UUID`: Unique identifier * `©Enabled`: 1 to enable * `$Name`: Display name * `$Config`: Configuration object * `§s`: Array of menu items * `$Availability`: 0=everywhere, 1=mac, 2=ios, 3=iphone, 4=ipad * `©Order`: Display order * `©LastUpdatedAt`: Timestamp * `©AppBundleIdentifier`: App-specific bundle ID * `©AppName`: App-specific name ### Item Properties * `©TriggerType`: Item type (773, 774, etc.) * `©TriggerParentUUID`: Parent menu's UUID * `©UUID`: Unique identifier * `©Enabled`: 1 to enable * `©TriggerName`: Display name * `$Config`: Item configuration * `§Actions`: Array of actions Menu Configuration (`$Config`) ------------------------------ ### Positioning & Layout * `$PositioningType`: 0=freeMove, 1=fixedPosition, 2=menubarStatusItem * `$PositionRelativeTo`: 0=focusedWindow, 1=screenWithMouse, 3=focusedScreen, 7=mousePosition, 8=builtin, 11=notch, 12=focusedMenubar, 19=screenWithDock, 20=greenWindowButton, 21=hoveredFloatingMenuItem, 22=specificFloatingMenu, 23=dock * `$AnchorMenu`: 0=topLeft, 1=topRight, 2=bottomLeft, 3=bottomRight, 4=center, 5=topEdgeCenter, 6=rightEdgeCenter, 7=bottomEdgeCenter, 8=leftEdgeCenter * `$AnchorRelation`: Same values as $AnchorMenu * `$OffsetX`/`$OffsetY`: Position offset * `$OffsetXUnit`/`$OffsetYUnit`: 0=absolute, 1=menu%, 2=referenceFrame% * `$PositionDynamicVariable`: Variable for dynamic positioning * `$ScreenUUID`: Specific screen UUID ### Layout Direction * `$LayoutDirection`: 0=fillRow, 1=fillColumn, 2=fillRowFixed, 3=fillColumnFixed, 4=absoluteScrollable, 5=absoluteFixed, 6=verticalOneColumn, 7=horizontalOneRow, 8=circular * `$VerticalSpacing`: Vertical spacing (pixels) * `$HorizontalSpacing`: Horizontal spacing (pixels) ### Size * `$SizingBehavior`: 0=zero, 1=fixed, 2=variable, 3=content * `$FrameWidth`/`$FrameHeight`: Menu dimensions * `$FrameMaxWidth`/`$FrameMaxHeight`: Maximum dimensions * `$FrameWidthVariable`/`$FrameHeightVariable`: Variable names for dynamic sizing ### Hover Behavior * `$ResizeOnHover`: 1 to enable hover resize * `$SizingBehaviorHover`: Hover sizing mode * `$FrameWidthHovered`/`$FrameHeightHovered`: Hovered dimensions * `$FrameWidthVariableHover`/`$FrameHeightVariableHover`: Hover variables * `$HoverKeepExpanded`: 1 to stay expanded * `$GoBackToNonHoveredSizeAfter`: Seconds to collapse * `$HoverExpansionDirection`: 0=rightUp, 1=leftUp, 2=rightDown, 3=leftDown, 4=leftRightDown, 5=leftRightUp, 6=upDownLeft, 7=upDownRight * `$HoverStartAnimationDuration`/`$HoverEndAnimationDuration`: Animation durations * `$HoverDelay`: Hover activation delay * `$HoverWhileMousePressed`: 1 to hover while dragging * `§AnimateHover`: 1 to animate hover ### Window Properties * `$WindowLevel`: 3=floating, 0=normal, 20=dock, 24=mainMenu, -1=custom * `$WindowLevelManual`: Custom level when $WindowLevel=-1 * `$WindowResizable`: 1 to allow resizing * `$TitleBarStyle`: 0=noTitleBar, 1=standard, 2=overlayContent, 3=transparent * `$ClickThroughEmptyParts`: 1 to click through empty areas * `$ClickThroughEverywhere`: 1 to click through everywhere * `$ShowDockIconWhileVisible`: 1 to show dock icon * `$StealKeyboardFocusOnShow`: 1 to steal focus ### Visibility * `$Visibility`: 0=onLaunch, 1=viaAction * `$OpacityActive`/`$OpacityInactive`: Opacity 0-1 * `$AlwaysUseLightMode`: 1 to force light mode * `$KeepCached`: 1 to keep cached when hidden * `$AnimateShow`: 1 to animate appearance * `$AnimateShowDuration`: Animation duration * `$AnimateChanges`: 1 to animate property changes ### Visibility Conditions * `$ShowIfWindowTitleIsNotEmpty`: 1 to check * `$ShowIfWindowTitleContains`: String to match * `$ShowIfAppNameContains`: String to match * `$ShowIfWindowTitleContainsNot`: String to exclude * `$ShowIfAppNameContainsNot`: String to exclude * `$ShowIfWindowLevelEqualsEnabled`: 1 to enable check * `$ShowIfWindowLevelEquals`: Window level value * `$DoNotShowInFullscreen`: 1 to hide in fullscreen * `$OnlyShowOnSpaces`: Comma-separated space numbers ### Interaction * `$CloseOnOutsideClick`: 1 to close on outside click * `$CloseOnMoveMouseAway`: 1 to close when mouse leaves * `$CloseOnKeyboardInput`: 1 to close on keyboard * `$CloseAfterAction`: 1 to close after action * `$DisableDrag`: 1 to disable dragging ### Modifiers * `§sUseModifierModes`: true if items use modifiers * `$ModifierMode`: -1=none, 0=showIfPressed, 1=showIfOthersPressed, 2=showIfNonePressed, 3=showAlways, 4=showIfPressedShowNonModified, 5=showIfAtLeast, 6=dontShowIfPressed * `$ModifierKeys`: Bitmask of modifier keys ### Scripting * `§ScriptActive`: 1 to enable script * `$ScriptSettings`: Script configuration object * `$ValueChangedScriptSettings`: Script for value changes * `$ScriptRunOnMenuHover`: 1 to run on menu hover * `$ScriptRunOnItemHover`: 1 to run on item hover * `$ScriptAlwaysRunOnFirstLoad`: 1 to run on load * `$ScriptUpdateInterval`: Update interval in seconds * `$ScriptAlwaysRunOnAppear`: 1 to run on appear ### Script Configuration (`$ScriptSettings`) * `©ScriptType`: 0=appleScript, 1=jax, 2=scpt, 3=realJavaScript, 4=shortcut * `©AppleScriptString`: Script content * `©ScriptFunctionToCall`: Function name * `©ScriptShortcutName`: Shortcut name * `©ScriptLocation`: 0=inline, 1=preset, 2/3=external * `©ScriptExternalPath`: External script path * `©JavaScriptUseIsolatedContext`: true for isolated JS ### Item Properties #### Visibility * `§Disabled`: 1 to disable * `§VisibleWhileActive`: 1 when menu hovered * `§VisibleWhileInactive`: 1 when not hovered * `§VisibleIfVariableIsTrue`: Variable name * `§VisibleIfVariableIsFalse`: Variable name * `§DisplayOrder`: Custom order value #### Size & Position * `§MinWidth`/`§MaxWidth`: Width constraints * `§MinHeight`/`§MaxHeight`: Height constraints * `§PaddingLeft`/`Right`/`Top`/`Bottom`: Internal padding * `§MarginLeft`/`Right`/`Top`/`Bottom`: External margin * `§PositioningMode`: 1 for manual positioning * `§X`/`§Y`: Manual position * `§OffsetX`/`§OffsetY`: Position offset #### Text * `$AttributedText`: RTF-encoded text * `$AttributedTextDark`: Dark mode RTF text * `§Text`: Plain text/HTML (for webviews) * `$ElementIdentifier`: Scripting identifier * `$ElementTooltip`: Tooltip text * `§ShowIdentifierAsTooltip`: 1=identifier, 2=tooltip * `$TextMinimumScaleFactor`: Min scale 0-1 * `$TextOffsetX`/`$TextOffsetY`: Text offset * `§FontColor`/`§FontColorHover`: Font colors #### Background * `§BackgroundType`: 0=none, 1=data, 2=sfsymbol, 3=file, 4=color, 5=linearGradient, 6=radialGradient, 7=presetFile, 8=internal * `§BackgroundColor`/`2`/`3`/`4`: Gradient colors "R,G,B,A" * `§BackgroundColorHover`: Hover background * `§BackgroundImageData`: Base64 image data * `§BackgroundImagePresetPath`: Preset path * `§BlurredBackground`: 1 for blur effect * `§BackgroundTypeDark`/`ColorDark`/etc.: Dark mode variants #### Borders * `§BorderWidth`: Border width * `§BorderColor`: Border color "R,G,B,A" * `§BorderColorHover`: Hover border color * `§BorderDashed`: 1 for dashed * `§CornerRadius`: Corner radius * `§CornerRadiusCorners`: 0=all, 1=left, 2=right, 3=top, 4=bottom, 5=topLeft, 6=topRight, 7=bottomRight, 8=bottomLeft * Dark mode variants with `Dark` suffix #### Shadow * `§ShadowEnabled`: 1 to enable * `§ShadowColor`/`ColorHover`: Shadow colors * `§ShadowRadius`: Shadow radius * Dark mode variants with `Dark` suffix #### Icons/Images * `§IconType`: Same as §BackgroundType * `§IconPosition`: 0=left, 1=top, 2=right, 3=bottom, 4=center, 5=none * `§Image`: Base64 image data * `§IconPresetPath`: Preset icon path * `§ResizeImage`: 0=fit, 1=none, 2=fixed, 3=fitNew * `§ImageChangeColor`: 1 to tint with color * `§ImageWidth`/`Height`: Image dimensions * `§ImageOffsetX`/`Y`: Image offset * `§ImagePadding`: Image padding #### SF Symbols * `§SFSymbolName`: Symbol name * `§SFSymbolWeight`: Symbol weight * `§SFSymbolStyle`: 0=monochrome, 1=hierarchical, 2=palette, 3=multiColor * `§IconColor1`/`2`/`3`: Symbol colors * `§IconColor1Hover`/`2Hover`/`3Hover`: Hover colors * Dark mode variants with `Dark` suffix #### WebView Properties * `§WebViewPlain`: 1 for plain HTML * `§UserAgent`: Custom user agent * `§UserScript`: Script on load * `§UserScriptOnvisible`: Script on visible * `§WebViewFocusTextField`: 1 to auto-focus * `§WebViewFocusTextFieldWithID`: Field ID * `§KeepActiveInBackground`: 1 to keep active * `§SystemBrowserPrefix`: External URL prefixes * `§SystemBrowserPrefixOverrides`: Override prefixes * `§SystemBrowserClosesMenu`: 1 to close on external #### Circular Layout * `$HoverOnWholePizzaSlice`: 1 for whole wedge hover * `$HighlightPizzaSlice`: 1 to highlight wedge * `$PlaceFirstItemAtCenter`: 1 to center first item * `§PizzaSliceBackgroundColor`: Wedge background * `§PizzaSliceBorderColor`: Wedge border * `§PizzaSliceBorderWidth`: Border width * Dark mode variants with `Dark` suffix #### Interaction * `§Focused`: 1 for initial focus * `§ScrollEnabled`: 1 to enable scroll * `§ScrollDelta`: Touch scroll delta * `§ScrollDeltaNormalMouse`: Mouse scroll delta #### Widget Properties * `$WidgetStringStringDictionary`: String dictionary * `$WidgetStringIntDictionary`: Integer dictionary * `$WidgetNowPlayingPauseBehavior`: 0=icon, 1=albumcover #### Miscellaneous * `$UseStyleForSubmenu`: 1 to inherit parent style * `$OverrideGlobalMenuSetttings`: 1 to override globals * `$CreatedViaScript`: 1 if script-created * `$OnlyCopyOpenCategories`: 1 for categories * `§Extras`: Extra data (future use) * `©AnimateUUID`: Animation trigger UUID * `©LastChangeUUID`: Last change UUID Actions (`§Actions`) -------------------- "§Actions": [{\ "©PredefinedActionType": 5,\ "©PredefinedActionName": "Mission Control",\ "©Enabled": 1,\ "©Order": 0\ }] Example: Complete Menu ---------------------- [{\ "©TriggerType": 767,\ "©UUID": "menu-uuid",\ "©Enabled": 1,\ "$Name": "Example Menu",\ "$Config": {\ "$PositioningType": 1,\ "$PositionRelativeTo": 3,\ "$AnchorMenu": 1,\ "$AnchorRelation": 1,\ "$FrameWidth": 220,\ "$FrameHeight": 300,\ "$OpacityActive": 1,\ "$OpacityInactive": 0.8,\ "$LayoutDirection": 0,\ "$VerticalSpacing": 5,\ "$HorizontalSpacing": 5,\ "$WindowLevel": 3,\ "$CloseAfterAction": 1\ },\ "§s": [{\ "©TriggerType": 773,\ "©TriggerParentUUID": "menu-uuid",\ "©UUID": "item-uuid",\ "©Enabled": 1,\ "$Name": "Click Me",\ "$Config": {\ "§VisibleWhileActive": 1,\ "§VisibleWhileInactive": 1,\ "§MinWidth": 100,\ "§MinHeight": 50,\ "§BackgroundType": 4,\ "§BackgroundColor": "90, 180, 240, 255",\ "§BackgroundColorHover": "120, 200, 255, 255",\ "§CornerRadius": 10,\ "§BorderWidth": 2,\ "§BorderColor": "255, 255, 255, 128",\ "$AttributedText": "{\\rtf1 Click Me}",\ "§IconType": 2,\ "§SFSymbolName": "hand.tap",\ "§IconColor1": "255, 255, 255, 255"\ },\ "§Actions": [{\ "©PredefinedActionType": 5,\ "©PredefinedActionName": "Mission Control"\ }]\ }]\ }] Color Format ------------ Colors use "R, G, B, A" format (0-255): "255, 0, 0, 255" = opaque red Import Method ------------- ai.create_bettertouchtool_trigger(json: theJSONAsString) results matching "" =================== No results matching "" ====================== --- # Shortcuts from the Shortcuts App in the webview · GitBook [Shortcuts from the Shortcuts App in the webview](https://docs.folivora.ai/) ============================================================================= In the BTT webview you can easily run Shortcuts from the new Shortcuts App introduced with macOS Monterey. A nice example Shortcut is available here: [https://community.folivora.ai/t/a-fully-customizable-shortcut-launcher-ui/24422](https://community.folivora.ai/t/a-fully-customizable-shortcut-launcher-ui/24422) Example: -------- The BTT webview provides a function called **runAppleShortcut** which takes a object as parameter. That object has the properties _name_ and _input_. runAppleShortcut({name: 'the name of the shortcut', input: 'some optional input for the shortcut'}); If you want to provide multiple files as input, please separate them with two semicolons. For example runAppleShortcut({name: 'multi-file-test', input: '~/Downloads/test1.png;;~/Downloads/test2.png'}); results matching "" =================== No results matching "" ====================== --- # Custom Scriptable WebView · GitBook [Custom Scriptable WebView](https://docs.folivora.ai/) ======================================================= Custom WebView / HTML Renderer ============================== **Note, October 14, 2023: With BetterTouchTool versions >= 4.25, the new [Floating Menus](https://docs.folivora.ai/docs/1600_floating_menus.html) ) can contain the webview described here by using web view items. This is very powerful and should be preferred instead of using the 'Show Floating WebView action'"** The floating webview allows you to load arbitrary HTML or URLs and render it in a customizable browser window, which for example allows you to set the window level, transparency etc.. This alone would allow for some cool use cases like a floating Netflix player which stays on top of other windows. However what makes the Floating Webview really great is the ability to trigger arbitrary BetterTouchTool functions and even display their results. Like any other action in BTT you can assign it to an arbitrary trigger so it can be shown by a Trackpad/Magic Mouse Gesture, Touch Bar button, Keyboard Shortcut etc. ### Example Use Cases: * Floating Netflix / Youtube/ Whatever Video / Music players that stay on top of other windows and even work while in Full Screen mode * Status widgets that stick to your desktop (behind all other windows) * Application specific or global control widgets - e.g. to trigger functionality in your most used apps via a nice UI. * Custom context menus ### How To Have a look at these instructions on how to build your own floating webview: * [Basic Setup & Providing Content](https://docs.folivora.ai/docs/10_1_webview_basic_setup.html) * [Appearance & Configuration options](https://docs.folivora.ai/docs/10_1_webview_config.html) * [Triggering BTT functionality from the webview](https://docs.folivora.ai/docs/10_2_floating_menu_javascript.html) * [Triggering & displaying the results of Terminal or Apple Scripts in the webview](https://docs.folivora.ai/docs/10_3_webview_scripts.html) * [WebView Lifcecycle & Notifications](https://docs.folivora.ai/docs/10_4_webview_lifecycle.html) * [Starter Template](https://docs.folivora.ai/docs/10_5_webview_starter_template.html) * [Development Tips & Tricks](https://docs.folivora.ai/docs/10_6_webview_development.html) ### Some examples: Some examples of how the BetterTouchTool community is already using the floating webview: **Transparent webview that displays a fancy action menu:** (See [https://folivora.ai/blog/post/13000](https://folivora.ai/blog/post/13000) ) Sorry, your browser doesn't support embedded videos, but don't worry, you can [download it](https://folivora.ai/folivora/blog-media/example.mp4) and watch it with your favorite video player! **Float websites like Youtube or Netflix on top of others:** **A fully functional control center widget mimicking the iOS control center. Created by @yw4z, see [https://community.folivora.ai/t/macos-control-center-mcc-v0-1/13058](https://community.folivora.ai/t/macos-control-center-mcc-v0-1/13058) for details.** ![mcc](https://docs.folivora.ai/docs/media/mcc.jpg) **A window resizing tool created by @yw4z, see [https://community.folivora.ai/t/simple-window-manager-swm/12796](https://community.folivora.ai/t/simple-window-manager-swm/12796) for details.** ![mcc](https://docs.folivora.ai/docs/media/swm.jpeg) results matching "" =================== No results matching "" ====================== --- # Trigger JSON Definitions · GitBook [Trigger JSON Definitions](https://docs.folivora.ai/) ====================================================== BetterTouchTool Trigger JSON Reference ====================================== This document provides a comprehensive reference for creating trigger configurations in BetterTouchTool using JSON. Basic Trigger Structure ----------------------- Every trigger must have these required fields: { "BTTTriggerType": 123, "BTTTriggerClass": "BTTTriggerTypeKeyboardShortcut", "BTTActionsToExecute": [\ {\ "BTTPredefinedActionType": 45\ }\ ] } Required Fields --------------- | Field | Type | Description | | --- | --- | --- | | `BTTTriggerType` | Number | The specific trigger ID (see trigger types below) | | `BTTTriggerClass` | String | The trigger category (must match the trigger type) | Common Optional Fields ---------------------- | Field | Type | Description | Default | | --- | --- | --- | --- | | `BTTUUID` | String | Unique identifier | Auto-generated | | `BTTTriggerTypeDescription` | String | User-visible name/description | Auto-generated | | `BTTEnabled` | Number | Enable/disable trigger (0 or 1) | 1 | | `BTTEnabled2` | Number | Secondary enabled state | 1 | | `BTTOrder` | Number | Sort order in list | Auto | | `BTTActionsToExecute` | Array | Actions to perform | \[\] | Trigger Categories ------------------ ### 1\. Trackpad Gestures **BTTTriggerClass Options**: * `"BTTTriggerTypeTouchpadAll"` - All trackpads * `"BTTTriggerTypeTouchpadBuiltIn"` - Built-in only * `"BTTTriggerTypeTouchpadMagicTrackpad"` - Magic Trackpad 1 * `"BTTTriggerTypeTouchpadMagicTrackpad2"` - Magic Trackpad 2 * `"BTTTriggerTypeTouchBarTrackpad"` - Touch Bar surface #### Zero Finger Gestures * `214` - Release Last Finger Regardless of How Many Were Touching Before * `209` - Release Last Finger After Previous Touch With 1 Finger * `210` - Release Last Finger After Previous Touch With 2 Fingers * `211` - Release Last Finger After Previous Touch With 3 Fingers * `212` - Release Last Finger After Previous Touch With 4 Fingers * `213` - Release Last Finger After Previous Touch With 5 Fingers #### Single Finger Gestures * `215` - 1 Finger Touch Start * `157` - Corner Click Bottom Left * `158` - Corner Click Bottom Right * `182` - Corner Click Top Left * `183` - Corner Click Top Right * `184` - Corner Force Click Top Left * `185` - Corner Force Click Top Right * `186` - Corner Force Click Bottom Left * `187` - Corner Force Click Bottom Right * `207` - 1 Finger Tap * `208` - 1 Finger Double Tap * `203` - Single Finger Force Click * `100` - 1 Finger Tap Left Side * `101` - 1 Finger Tap Right Side * `102` - 1 Finger Tap Bottom * `103` - 1 Finger Tap Top * `104` - 1 Finger Tap Left Side Middle * `105` - 1 Finger Tap Right Side Middle * `106` - 1 Finger Tap Upper Left * `107` - 1 Finger Tap Upper Right * `108` - 1 Finger Tap Bottom Left * `109` - 1 Finger Tap Bottom Right #### Two Finger Gestures * `216` - 2 Finger Touch Start * `173` - 2 Finger Tap * `179` - 2 Finger Double-Tap * `174` - 2 Finger Click * `175` - 2 Finger Force Click * `176` - 2 Finger Click (Left Finger Harder) * `177` - 2 Finger Click (Right Finger Harder) * `178` - 2 Finger Click (Both Fingers Same) * `180` - 2 Finger Force Click (Left Finger Harder) * `181` - 2 Finger Force Click (Right Finger Harder) * `159` - 2 Finger Swipe Left * `160` - 2 Finger Swipe Right * `161` - 2 Finger Swipe Up * `162` - 2 Finger Swipe Down * `165` - 2 Finger Swipe From Left Edge * `166` - 2 Finger Swipe From Right Edge * `167` - 2 Finger Swipe From Top Edge * `168` - 2 Finger Swipe From Bottom Edge * `121` - 2 Finger Pinch In * `122` - 2 Finger Pinch Out * `138` - TipTap Middle (2 Fingers Fix) * `132` - TipTap Left (2 Fingers Fix) * `133` - TipTap Right (2 Fingers Fix) * `142` - TipSwipe Left Finger Down (2 Fingers Fix) * `143` - TipSwipe Left Finger Up (2 Fingers Fix) * `145` - TipSwipe Left Finger Right (2 Fingers Fix) * `146` - TipSwipe Left Finger Left (2 Fingers Fix) #### Three Finger Gestures * `217` - 3 Finger Touch Start * `110` - 3 Finger Tap * `163` - 3 Finger Double-Tap * `111` - 3 Finger Click * `170` - 3 Finger Force Click * `181` - 3 Finger Click & Hold * `188` - 3 Finger Click (Left Finger Harder) * `189` - 3 Finger Click (Middle Finger Harder) * `190` - 3 Finger Click (Right Finger Harder) * `191` - 3 Finger Force Click (Left Finger Harder) * `192` - 3 Finger Force Click (Middle Finger Harder) * `193` - 3 Finger Force Click (Right Finger Harder) * `112` - 3 Finger Swipe Up * `113` - 3 Finger Swipe Down * `114` - 3 Finger Swipe Left * `115` - 3 Finger Swipe Right * `197` - 3 Finger Pinch In * `198` - 3 Finger Pinch Out * `139` - 3 Finger Tap Bottom * `140` - 3 Finger Tap Top * `152` - 3 Finger Dragging * `153` - 3 Finger Clickswipe Left * `154` - 3 Finger Clickswipe Right * `155` - 3 Finger Clickswipe Up * `156` - 3 Finger Clickswipe Down * `136` - TipTap Left (3 Fingers Fix) * `137` - TipTap Right (3 Fingers Fix) * `147` - Triangle Swipe Top Left Corner * `148` - Triangle Swipe Top Right Corner * `149` - Triangle Swipe Bottom Left Corner * `150` - Triangle Swipe Bottom Right Corner * `204` - 3 Finger Drawing #### Four Finger Gestures * `218` - 4 Finger Touch Start * `116` - 4 Finger Tap * `169` - 4 Finger Double Tap * `117` - 4 Finger Click * `171` - 4 Finger Force Click * `182` - 4 Finger Click & Hold * `123` - 4 Finger Swipe Up * `124` - 4 Finger Swipe Down * `125` - 4 Finger Swipe Left * `126` - 4 Finger Swipe Right * `194` - 4 Finger Pinch In * `195` - 4 Finger Pinch Out * `205` - 4 Finger Drawing #### Five And More Finger Gestures * `219` - 5 Finger Touch Start * `119` - 5 Finger Tap * `141` - 5 Finger Click * `172` - 5 Finger Force Click * `130` - 5 Finger Swipe Down * `131` - 5 Finger Swipe Up * `128` - 5 Finger Swipe Left * `129` - 5 Finger Swipe Right * `200` - 5 Finger Pinch In * `201` - 5 Finger Pinch Out * `206` - 5 Finger Drawing * `151` - 5 Finger Touch/Move * `199` - 11 Finger Tap / Whole Hand #### Your Own Gestures * `164` - Custom Tap Sequence (4 Fingers) * `220` - First Touch With X Fingers, Then Release Y Fingers ### 2\. Magic Mouse **BTTTriggerClass**: `"BTTTriggerTypeMagicMouse"` #### Zero Finger Gestures * `51` - Release Last Finger Regardless of How Many Were Touching Before * `52` - Release Last Finger After Previous Touch With 1 Finger * `53` - Release Last Finger After Previous Touch With 2 Fingers * `54` - Release Last Finger After Previous Touch With 3 Fingers * `55` - Release Last Finger After Previous Touch With 4 Fingers * `56` - Release Last Finger After Previous Touch With 5 Fingers #### Single Finger Gestures * `50` - 1 Finger Touch Start * `1` - 1 Finger Tap * `2` - 1 Finger Tap Left * `3` - 1 Finger Tap Right * `23` - 1 Finger Middle Click * `24` - 1 Finger Tap Middle * `32` - 1 Finger Tap Above Apple * `18` - Scroll Up (modifier key needed) * `19` - Scroll Down (modifier key needed) * `33` - 1 Finger Swipe Down * `34` - 1 Finger Swipe Up * `35` - 1 Finger Swipe Left * `36` - 1 Finger Swipe Right #### Two Finger Gestures * `57` - 2 Finger Touch Start * `4` - 2 Finger Tap * `62` - 2 Finger Double-Tap * `20` - 2 Finger Click * `7` - 2 Finger Swipe Up * `8` - 2 Finger Swipe Down * `5` - 2 Finger Swipe Left * `6` - 2 Finger Swipe Right * `14` - Pinch In * `15` - Pinch Out * `16` - TipTap Left (1 Finger Fix) * `17` - TipTap Right (1 Finger Fix) #### Three Finger Gestures * `58` - 3 Finger Touch Start * `9` - 3 Finger Tap * `63` - 3 Finger Double-Tap * `21` - 3 Finger Click * `13` - 3 Finger Swipe Up * `12` - 3 Finger Swipe Down * `10` - 3 Finger Swipe Left * `11` - 3 Finger Swipe Right * `30` - TipTap Left (2 Fingers Fix) * `37` - TipTap Middle (2 Fingers Fix) * `31` - TipTap Right (2 Fingers Fix) * `60` - TipSwipe Left Finger Up * `61` - TipSwipe Left Finger Down #### Four Finger Gestures * `59` - 4 Finger Touch Start * `25` - 4 Finger Click * `27` - 4 Finger Swipe Up * `26` - 4 Finger Swipe Down * `28` - 4 Finger Swipe Left * `29` - 4 Finger Swipe Right #### Moving, Resizing and Custom Drawings * `40` - 1 Finger Touch Top * `38` - 2 Finger Touch Top * `39` - 3 Finger Touch Top ### 3\. Other Triggers / Automations **BTTTriggerClass**: `"BTTTriggerTypeOtherTriggers"` #### Named Trigger / Reusable Trigger Reference * `643` - Reusable Named Trigger { "BTTTriggerType": 643, "BTTTriggerClass": "BTTTriggerTypeOtherTriggers", "BTTTriggerName": "my_custom_trigger", "BTTNamedTriggerAIDescription": "Trigger for opening Safari", "BTTNamedTriggerAIAllow": 1, "BTTActionsToExecute": [{\ "BTTPredefinedActionType": 49\ }] } #### General * `685` - BTT Mobile App Did Connect * `686` - BTT Mobile App Did Disconnect * `689` - Key Remap * `688` - User Notification Did Show * `697` - File Did Change * `698` - Text Selection Did Change * `699` - Script Output Changed * `700` - Advanced Trigger Condition Changed * `701` - Conditional Activation Group Activated * `702` - Conditional Activation Group Deactivated * `694` - Variable Value Changed * `691` - Dock Icon * `696` - Finder Context Menu Extension * `703` - Battery Below X% * `704` - Battery Above X% * `705` - Battery Connected To AC * `706` - Battery Running On Battery * `695` - Did Open URL * `715` - Clipboard Transformer * `641` - Launch on Machine with Serial Number * `687` - App Did Change (Focus) * `131` - App Did Launch * `132` - App Did Terminate * `133` - App Did Activate * `134` - App Did Deactivate * `693` - Focused Window Did Change * `713` - Focused Window Or Window Title Did Change * `690` - Receive Workspace Notification * `692` - Input Source Changed * `605` - Before Mac Goes To Sleep * `606` - After Mac Wakes From Sleep * `607` - Received Distributed Notification With Name * `707` - Did Open Lid * `708` - Did Close Lid * `681` - Did Connect To WiFi With Name * `682` - Did Disconnect From WiFi With Name * `683` - Screen Did Connect * `684` - Screen Did Disconnect * `709` - Did Start Screen Saver * `710` - Did Stop Screen Saver * `711` - Did Lock Screen * `712` - Did Unlock Screen * `714` - Dynamic JS Variable * `716` - Ambient Light Goes Below * `717` - Ambient Light Goes Above * `718` - Ambient Light Abrupt Change By * `719` - Clipboard Contents Changed #### Window Buttons & Click Actions * `613` - Doubleclick Mac Menubar * `600` - Doubleclick Window Titlebar * `623` - Leftclick Full Screen Button * `614` - Rightclick Full Screen Button * `627` - Other Click Fullscreen Window Button * `622` - Leftclick Red Window Button * `621` - Leftclick Orange Window Button * `615` - Leftclick Green Window Button * `601` - Rightclick Red Window Button * `602` - Rightclick Orange Window Button * `603` - Rightclick Green Window Button * `626` - Other Click Red Window Button * `625` - Other Click Orange Window Button * `628` - Other Click Green Window Button #### Notch * `649` - Click Notch * `650` - Double Click Notch * `651` - Right Click Notch * `652` - Move Mouse To Notch * `653` - Move Mouse Away From Notch * `654` - Move Mouse Away From Notch And From Menubar #### Screen Corners / Edges * `609` - Top Left Corner * `610` - Top Right Corner * `611` - Bottom Left Corner * `612` - Bottom Right Corner * `659` - Mouse To Left Screen Edge * `660` - Mouse To Right Screen Edge * `661` - Mouse To Bottom Screen Edge * `662` - Mouse To Top Screen Edge * `655` - Mouse Away From Top Left Corner * `656` - Mouse Away Top Right Corner * `657` - Mouse Away Bottom Left Corner * `658` - Mouse Away Bottom Right Corner * `663` - Mouse Away From Left Screen Edge * `664` - Mouse Away From Right Screen Edge * `665` - Mouse Away From Bottom Screen Edge * `666` - Mouse Away From Top Screen Edge #### USB & Bluetooth LE * `672` - USB Device Did Connect * `673` - USB Device Did Disconnect * `679` - Bluetooth Device Did Connect * `680` - Bluetooth Device Did Disconnect * `617` - BT LE Go Away * `616` - BT LE Come Close * `618` - BT LE Out Of Range * `619` - BT LE In Range Again #### Time Based Triggers * `678` - Date/Time Based (Repeating) { "BTTTriggerType": 678, "BTTTriggerClass": "BTTTriggerTypeOtherTriggers", "BTTAdditionalConfiguration": "{\"BTTTimedRepeatEveryXSeconds\":\"0 0 * * * *\"}", "BTTActionsToExecute": [{\ "BTTPredefinedActionType": 153\ }] } #### Custom Menu Bar Icons * `667` - Menu Bar Icon * `668` - Menu Bar Icon (AppleScript) * `669` - Menu Bar Icon (Shell Script) * `670` - Always Hidden Status Item ### 4\. Keyboard Shortcuts **BTTTriggerClass**: `"BTTTriggerTypeKeyboardShortcut"` { "BTTTriggerType": 0, "BTTTriggerClass": "BTTTriggerTypeKeyboardShortcut", "BTTShortcutKeyCode": 49, "BTTShortcutModifierKeys": 1048576, "BTTActionsToExecute": [{\ "BTTPredefinedActionType": 45\ }] } #### Properties | Property | Type | Description | | --- | --- | --- | | `BTTShortcutKeyCode` | Number | Key code value | | `BTTShortcutModifierKeys` | Number | Modifier key flags | | `BTTLayoutIndependentChar` | String | Layout-independent character | | `BTTAutoAdaptToKeyboardLayout` | Number | Auto-adapt to keyboard layout (0/1) | | `BTTShortcutScope` | Number | Where shortcut is active | | `BTTKeyboardShortcutMinTime` | Number | Minimum hold time | | `BTTKeyboardShortcutMaxTime` | Number | Maximum hold time | ### 5\. Key Sequences / Typed Words **BTTTriggerClass**: `"BTTTriggerTypeKeySequence"` Key sequences use trigger type `624`. ### 6\. Drawings **BTTTriggerClass**: `"BTTTriggerTypeDrawings"` Drawings use trigger type `620`. { "BTTTriggerType": 620, "BTTTriggerClass": "BTTTriggerTypeDrawings", "BTTTriggerConfig": { "BTTDrawingName": "My Gesture" }, "BTTActionsToExecute": [{\ "BTTPredefinedActionType": 45\ }] } ### 7\. Mouse **BTTTriggerClass**: `"BTTTriggerTypeMouse"` **Note**: Regular mouse buttons (left, right, middle click) are configured differently and don't use trigger types in the same way. ### 8\. Siri Remote **BTTTriggerClass**: `"BTTTriggerTypeSiriRemote"` #### Siri Remote Buttons * `320` - Volume Up * `321` - Volume Down * `322` - Siri * `323` - Play/Pause * `324` - TV/Screen * `325` - Menu * `332` - Volume Up Hold * `333` - Volume Down Hold * `334` - Siri Hold * `335` - Play/Pause Hold * `336` - TV/Screen Hold * `337` - Menu Hold #### Siri Remote Touchpad * `326` - Touchpad Click * `338` - Touchpad Click Hold * `327` - Touchpad Swipe Left * `328` - Touchpad Swipe Right * `329` - Touchpad Swipe Up * `330` - Touchpad Swipe Down * `331` - Touchpad Tap * `339` - Touchpad Click Left * `340` - Touchpad Click Right * `341` - Touchpad Click Top * `342` - Touchpad Click Bottom * `343` - Touchpad Tap Left * `344` - Touchpad Tap Right * `345` - Touchpad Tap Top * `346` - Touchpad Tap Bottom * `347` - Touchpad Click Hold Left * `348` - Touchpad Click Hold Right * `349` - Touchpad Click Hold Top * `350` - Touchpad Click Hold Bottom #### New Siri Remote 2 Buttons * `351` - Button Left * `352` - Button Right * `353` - Button Up * `354` - Button Down * `355` - Power * `356` - Button Left Hold * `357` - Button Right Hold * `358` - Button Up Hold * `359` - Button Down Hold * `360` - Power Hold * `361` - Mute * `362` - Mute Hold ### 9\. Touch Bar **BTTTriggerClass**: `"BTTTriggerTypeTouchBar"` { "BTTTriggerType": 630, "BTTTriggerClass": "BTTTriggerTypeTouchBar", "BTTTouchBarButtonName": "My Button", "BTTTriggerConfig": { "BTTTouchBarButtonColor": "58.650002, 58.650002, 58.650002, 255.000000", "BTTTouchBarFontColor": "255, 255, 255, 255", "BTTTouchBarFontSize": 15 }, "BTTActionsToExecute": [{\ "BTTPredefinedActionType": 45\ }] } #### Touch Bar Configuration Properties (in BTTTriggerConfig) | Property | Type | Description | Default | | --- | --- | --- | --- | | `BTTTouchBarButtonColor` | String | Background color (R,G,B,A) | "58.65, 58.65, 58.65, 255" | | `BTTTouchBarFontColor` | String | Text color (R,G,B,A) | "255, 255, 255, 255" | | `BTTTouchBarFontSize` | Number | Font size | 15 | | `BTTTouchBarButtonWidth` | Number | Width in pixels | Auto | | `BTTTouchBarButtonHeight` | Number | Height in pixels | 30 | | `BTTTouchBarItemIconWidth` | Number | Icon width | 15 | | `BTTTouchBarItemIconHeight` | Number | Icon height | 15 | | `BTTTouchBarItemPadding` | Number | Internal padding | 0 | | `BTTTouchBarOnlyShowIcon` | Number | Show icon only (0/1) | 0 | ### 10\. Stream Deck **BTTTriggerClass**: `"BTTTriggerTypeStreamDeck"` Stream Deck configuration uses similar properties to Touch Bar but in `BTTTriggerConfig`. ### 11\. Notch Bar **BTTTriggerClass**: `"BTTTriggerTypeNotchBar"` Notch Bar configuration uses similar properties to Touch Bar but in `BTTTriggerConfig`. ### 12\. Floating Menu **BTTTriggerClass**: `"BTTTriggerTypeFloatingMenu"` * `800` - Floating Menu * `827` - Menu Item * `840` - Slider Item * `852` - Text Field Item * `853` - Text Area Item * `871` - Submenu * `872` - Back Button * `873` - Webview * `870` - Status Items Widget * `874` - iOS Trackpad Item * `875` - Row Breaker * `876` - Column Breaker ### 13\. MIDI **BTTTriggerClass**: `"BTTTriggerTypeMIDI"` { "BTTTriggerType": 650, "BTTTriggerClass": "BTTTriggerTypeMIDI", "BTTTriggerConfig": { "BTTMidiTriggerDeviceName": "*" }, "BTTActionsToExecute": [{\ "BTTPredefinedActionType": 45\ }] } ### 14\. Generic Device **BTTTriggerClass**: `"BTTTriggerTypeGenericDevice"` * `880` - Generic Device Analyzer * `881` - Generic Device Trigger ### 15\. BTT Remote (Legacy) **BTTTriggerClass**: `"BTTTriggerTypeBTTRemote"` Legacy BTT Remote triggers are numbered from 300-362. Special Configurations ---------------------- ### Colors Colors are specified as comma-separated RGBA values: "255, 255, 255, 255" = White (fully opaque) "0, 0, 0, 255" = Black (fully opaque) "255, 0, 0, 128" = Red (50% transparent) ### Modifier Keys Modifier keys use bitwise flags: * Command (⌘): `1048576` * Option (⌥): `524288` * Control (⌃): `262144` * Shift (⇧): `131072` * Function (fn): `8388608` Combine with bitwise OR: * ⌘⇧: `1048576 | 131072 = 1179648` ### Icons Icons can be specified as: 1. Base64 encoded image data in `BTTIconData` 2. SF Symbol names in `BTTTouchBarItemSFSymbolDefaultIcon` 3. File paths for Stream Deck icons ### Conditions Advanced conditions use `BTTTriggerConditionsData` with base64 encoded predicates. Complete Examples ----------------- ### Keyboard Shortcut with HUD { "BTTTriggerType": 0, "BTTTriggerClass": "BTTTriggerTypeKeyboardShortcut", "BTTShortcutKeyCode": 49, "BTTShortcutModifierKeys": 1179648, "BTTTriggerTypeDescription": "Open Terminal", "BTTTriggerConfig": { "BTTShowHUD": 1, "BTTHUDText": "Terminal Opened", "BTTHUDDetailText": "⌘⇧Space" }, "BTTActionsToExecute": [{\ "BTTPredefinedActionType": 49,\ "BTTLaunchPath": "/System/Applications/Utilities/Terminal.app"\ }] } ### Touch Bar Button with Icon { "BTTTriggerType": 630, "BTTTriggerClass": "BTTTriggerTypeTouchBar", "BTTTouchBarButtonName": "Safari", "BTTTriggerConfig": { "BTTTouchBarButtonColor": "75.323769, 75.323769, 75.323769, 255.000000", "BTTTouchBarItemIconWidth": 22, "BTTTouchBarItemIconHeight": 22, "BTTTouchBarItemSFSymbolDefaultIcon": "safari" }, "BTTActionsToExecute": [{\ "BTTPredefinedActionType": 49,\ "BTTLaunchPath": "/Applications/Safari.app"\ }] } ### Time-Based Trigger (Every Hour) { "BTTTriggerType": 678, "BTTTriggerClass": "BTTTriggerTypeOtherTriggers", "BTTTriggerTypeDescription": "Hourly Reminder", "BTTAdditionalConfiguration": "{\"BTTTimedRepeatEveryXSeconds\":\"0 0 * * * *\"}", "BTTActionsToExecute": [{\ "BTTPredefinedActionType": 172,\ "BTTNotificationText": "Take a break!",\ "BTTNotificationDetails": "You've been working for an hour"\ }] } ### Trackpad Three Finger Swipe { "BTTTriggerType": 112, "BTTTriggerClass": "BTTTriggerTypeTouchpadAll", "BTTTriggerTypeDescription": "Switch to Next Desktop", "BTTActionsToExecute": [{\ "BTTPredefinedActionType": 2\ }] } Tips ---- 1. Always include both `BTTTriggerType` and `BTTTriggerClass` 2. Use `BTTTriggerConfig` for Touch Bar, Stream Deck, and Notch Bar properties 3. Use `BTTAdditionalConfiguration` for most other trigger-specific settings 4. Actions must be in the `BTTActionsToExecute` array 5. Test your JSON with BTT's import feature before deploying 6. Use UUIDs to update existing triggers 7. Omit optional fields to use defaults results matching "" =================== No results matching "" ====================== --- # Apple Scripts & Shell Scripts in the webview · GitBook [Apple Scripts & Shell Scripts in the webview](https://docs.folivora.ai/) ========================================================================== You can run Apple Scripts and Shell Scripts right from within the webview HTML using the **runAppleScript** (or **runJXA**) and **runShellScript** JavaScript functions that are automatically made available. Running Apple Scripts from the WebView -------------------------------------- Running Shell Scripts from the WebView -------------------------------------- results matching "" =================== No results matching "" ====================== --- # Webview Lifecycle & Notifications · GitBook [Webview Lifecycle & Notifications](https://docs.folivora.ai/) =============================================================== Webview Lifecycle ================= There are different Java Script Methods that you can add to your HTML, which will automatically be called during the life time of the webview: results matching "" =================== No results matching "" ====================== --- # Basic Setup · GitBook [Basic Setup](https://docs.folivora.ai/) ========================================= Basic Setup ----------- ### Setting up a trigger to show / hide the foating webview The floating webview works just like any other predefined action in BTT. Basically you first select a trigger, which can be anything BTT has to offer (e.g. Keyboard Shortcut, Touch Bar Button, Trackpad Gesture...). After that you assign the predefined action **Show Floating WebView/HTML Menu** to the trigger. In case you want to launch the same webview using multiple different triggers, instead of duplicating it multiple times you can just assign it to a [Reusable Named Trigger](https://docs.folivora.ai/docs/1002_named_triggers.html) ### Loading HTML from a URL Loading a website from a URL just requires you to enter the URL: ![mcc](https://docs.folivora.ai/docs/media/webviewurl.png) ### Loading from a HTML file in your Preset's data folder (recommended) Every Preset in BTT has its own data folder. You can access it via the preset menu. If you place HTML files etc. in that folder you can reference them by using the **BTT\_PRESET\_PATH** placeholder. For example, if you have a file called index.html in your preset's data folder, you can access it via BTT\_PRESET\_PATH/index.html. This is pretty useful, because it allows you to export your preset including the associated files, so if you want to share your webview config you can easily do that. ![mcc](https://docs.folivora.ai/docs/media/webview_preset_folder.png). ### Providing HTML directly: Of course you can also enter HTML directly. This is not recommended for larger sites, but might be helpful for testing: ![mcc](https://docs.folivora.ai/docs/media/webviewdirecthtml.png). ### Accessing images and other files on your disk The webview does NOT support to access files using the file:// protocol. However if you need to access a locally stored file from your hard drive, you can use localfile:// instead. For example `` Usually you should store all files used by the webview in the Preset's data directory. You can reference these files from within the webview using the presetfile:// protocol. For example `` ### Refreshing the Content By default the content of the webview will stay loaded in background and it is assumed that it doesn't change. However during development you often want to see the latest changes immediately. To achieve this, open the advanced section and select "Do NOT keep content active in background". Afterwards the webview will reload everytime you hide/unhide it. results matching "" =================== No results matching "" ====================== --- # Standard Button & Formatting · GitBook [Standard Button & Formatting](https://docs.folivora.ai/) ========================================================== Standard Stream Deck Buttons ============================ This documentation uses the following example preset to explain some of the features. [Example Preset Direct Link](https://folivora.ai/releases/ExampleStreamDeck.bttpreset) ![](https://docs.folivora.ai/docs/media/streamdeck_standard_btn.png) Function -------- Stream Deck Buttons can be used to trigger any sort of action in BetterTouchTool. In their standard configuration a button press triggers the assigned action sequence as soon as you press the button down. Appearance ---------- There are many ways to customize the appearance of Stream Deck buttons in BetterTouchTool: * Changing the background color * Using rich text including any color and font combination * Using all sorts of icons including SF Symbol icons (see [https://developer.apple.com/sf-symbols/](https://developer.apple.com/sf-symbols/) ) BetterTouchTool integrates a very basic rich text editor that lets you adjust fonts, colors & spacing. For more control you can also use the Apple Text Edit app and then just copy the formatted text into the BTT editor. ### Example: Adjusting Space Between Lines To adjust the spacing between lines select the "Other..." option from the spacing dropdown: ![](https://docs.folivora.ai/docs/media/streamdeck_spacing.png) In BTT the "Line height - at most" setting works best to make smaller spacing: ![](https://docs.folivora.ai/docs/media/streamdeck_line_height.png) Advanced Configuration ---------------------- Stream Deck Buttons do offer various advanced options, see the following examples: * [Button with different actions for long press and short press](https://docs.folivora.ai/docs/1302_stream_deck_long_press.html) * [Button which repeats its actions while being pressed](https://docs.folivora.ai/docs/1303_stream_deck_repeat.html) * [Showing buttons only on specific devices](https://docs.folivora.ai/docs/1305_stream_deck_specific_devices.html) results matching "" =================== No results matching "" ====================== --- # Development Hints · GitBook [Development Hints](https://docs.folivora.ai/) =============================================== Development Hints ----------------- Some useful tips & tricks that make working with the web view easier. 1.) **Use an external HTML file.** Best solution is to place it in the preset's data folder and reference it using BTT\_PRESET\_PATH/thenameofthefile.html. You can use your facorite editor (I recommend Visual Studio Code) to edit the file. ![mcc](https://docs.folivora.ai/docs/media/webview_preset_folder.png). 2.) **Disable caching while developing.** You probably want the webview to automatically reload when hiding / closing it. To achieve this, enable the "DO NOT keep active in background" option. ![webview_background](https://docs.folivora.ai/docs/media/webviewactivebackground.png). 3.) **Use the debugger / inspector.** You can right-click any BTT webview and choose "Inspect Element" to open the webview inspector. This can be a bit slow though. If you want faster debugging enable Safari's developer mode, then you can also access the BTT webviews through the Safari Develop menu: ![safaridebug](https://docs.folivora.ai/docs/media/safaridebug.png). results matching "" =================== No results matching "" ====================== --- # Starter Template · GitBook [Starter Template](https://docs.folivora.ai/) ============================================== A simple example menu that shows various possibilities: It should look like this: ![mcc](https://docs.folivora.ai/docs/media/webviewexample.png)
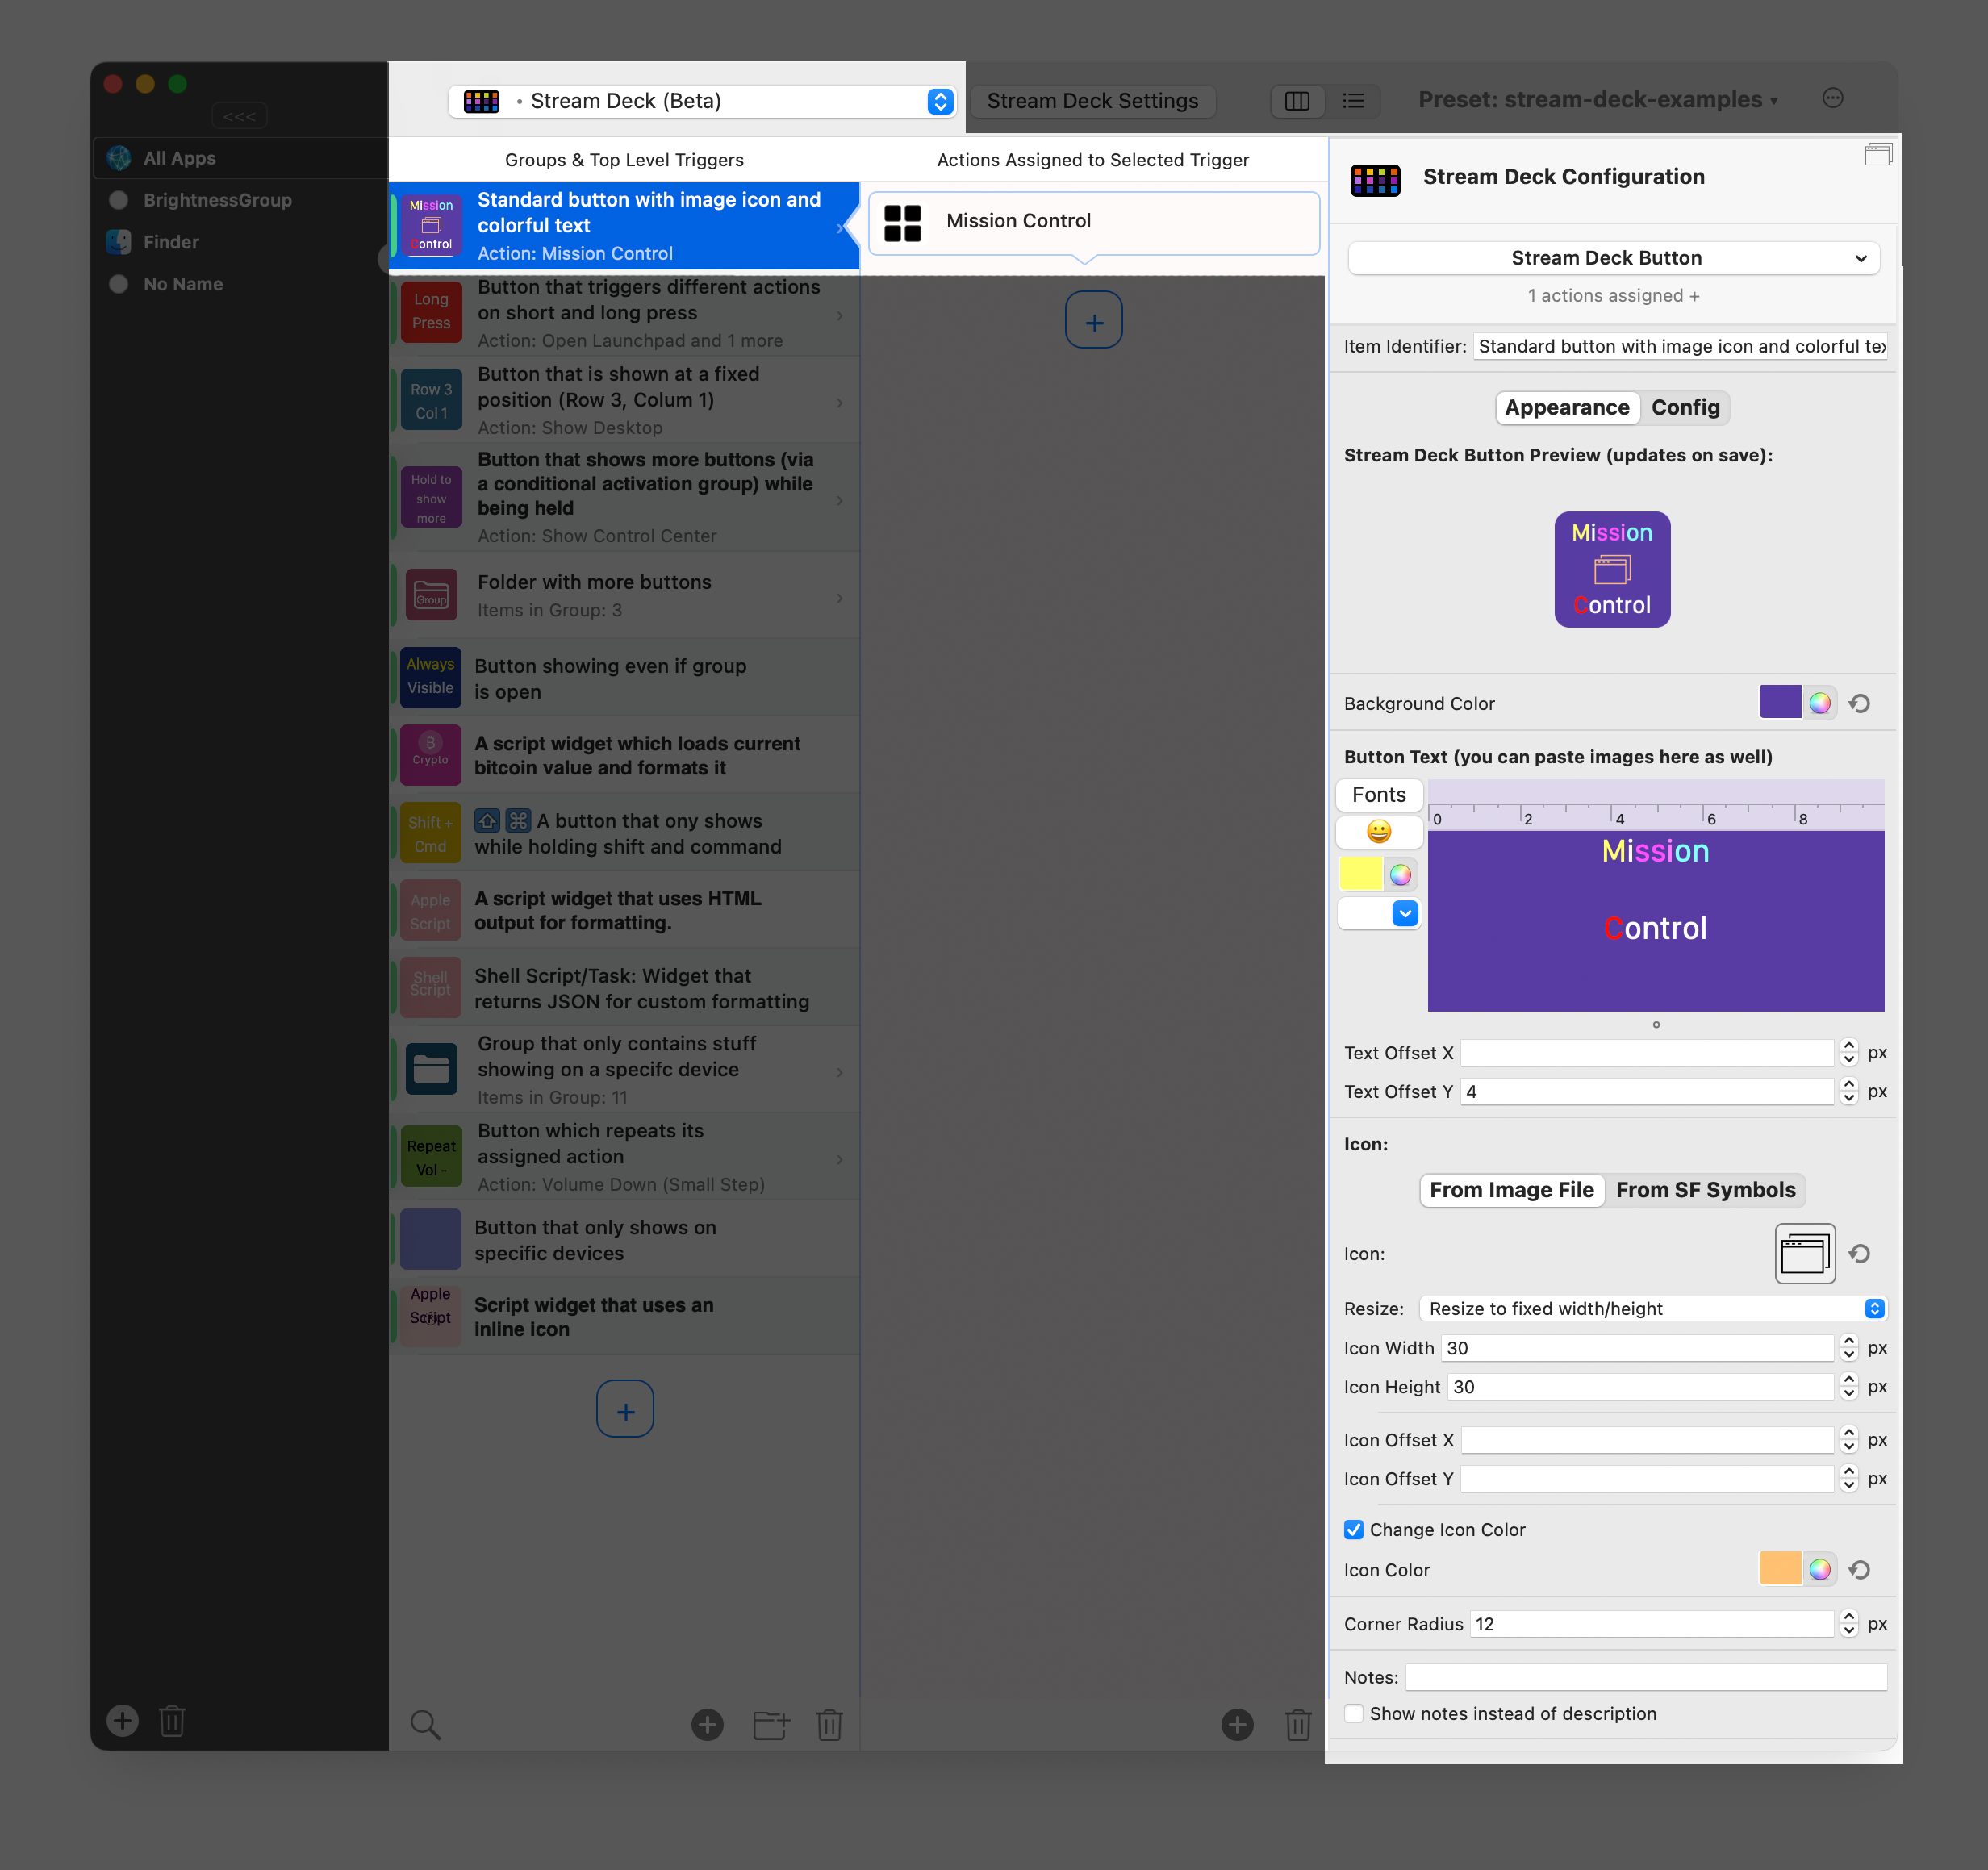
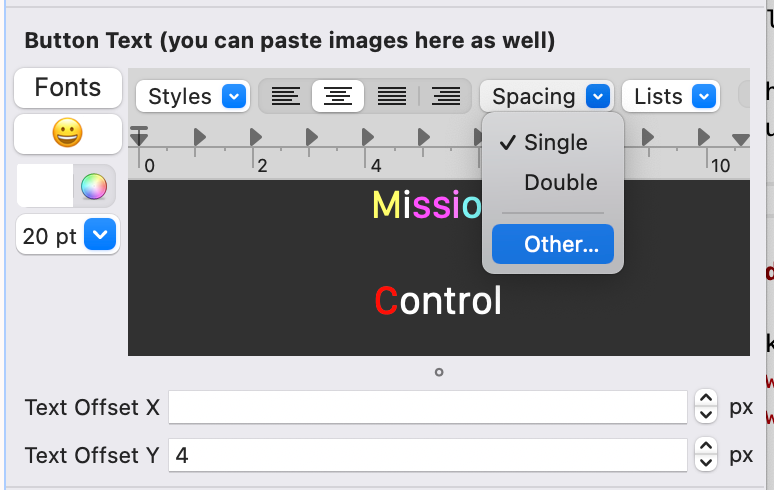
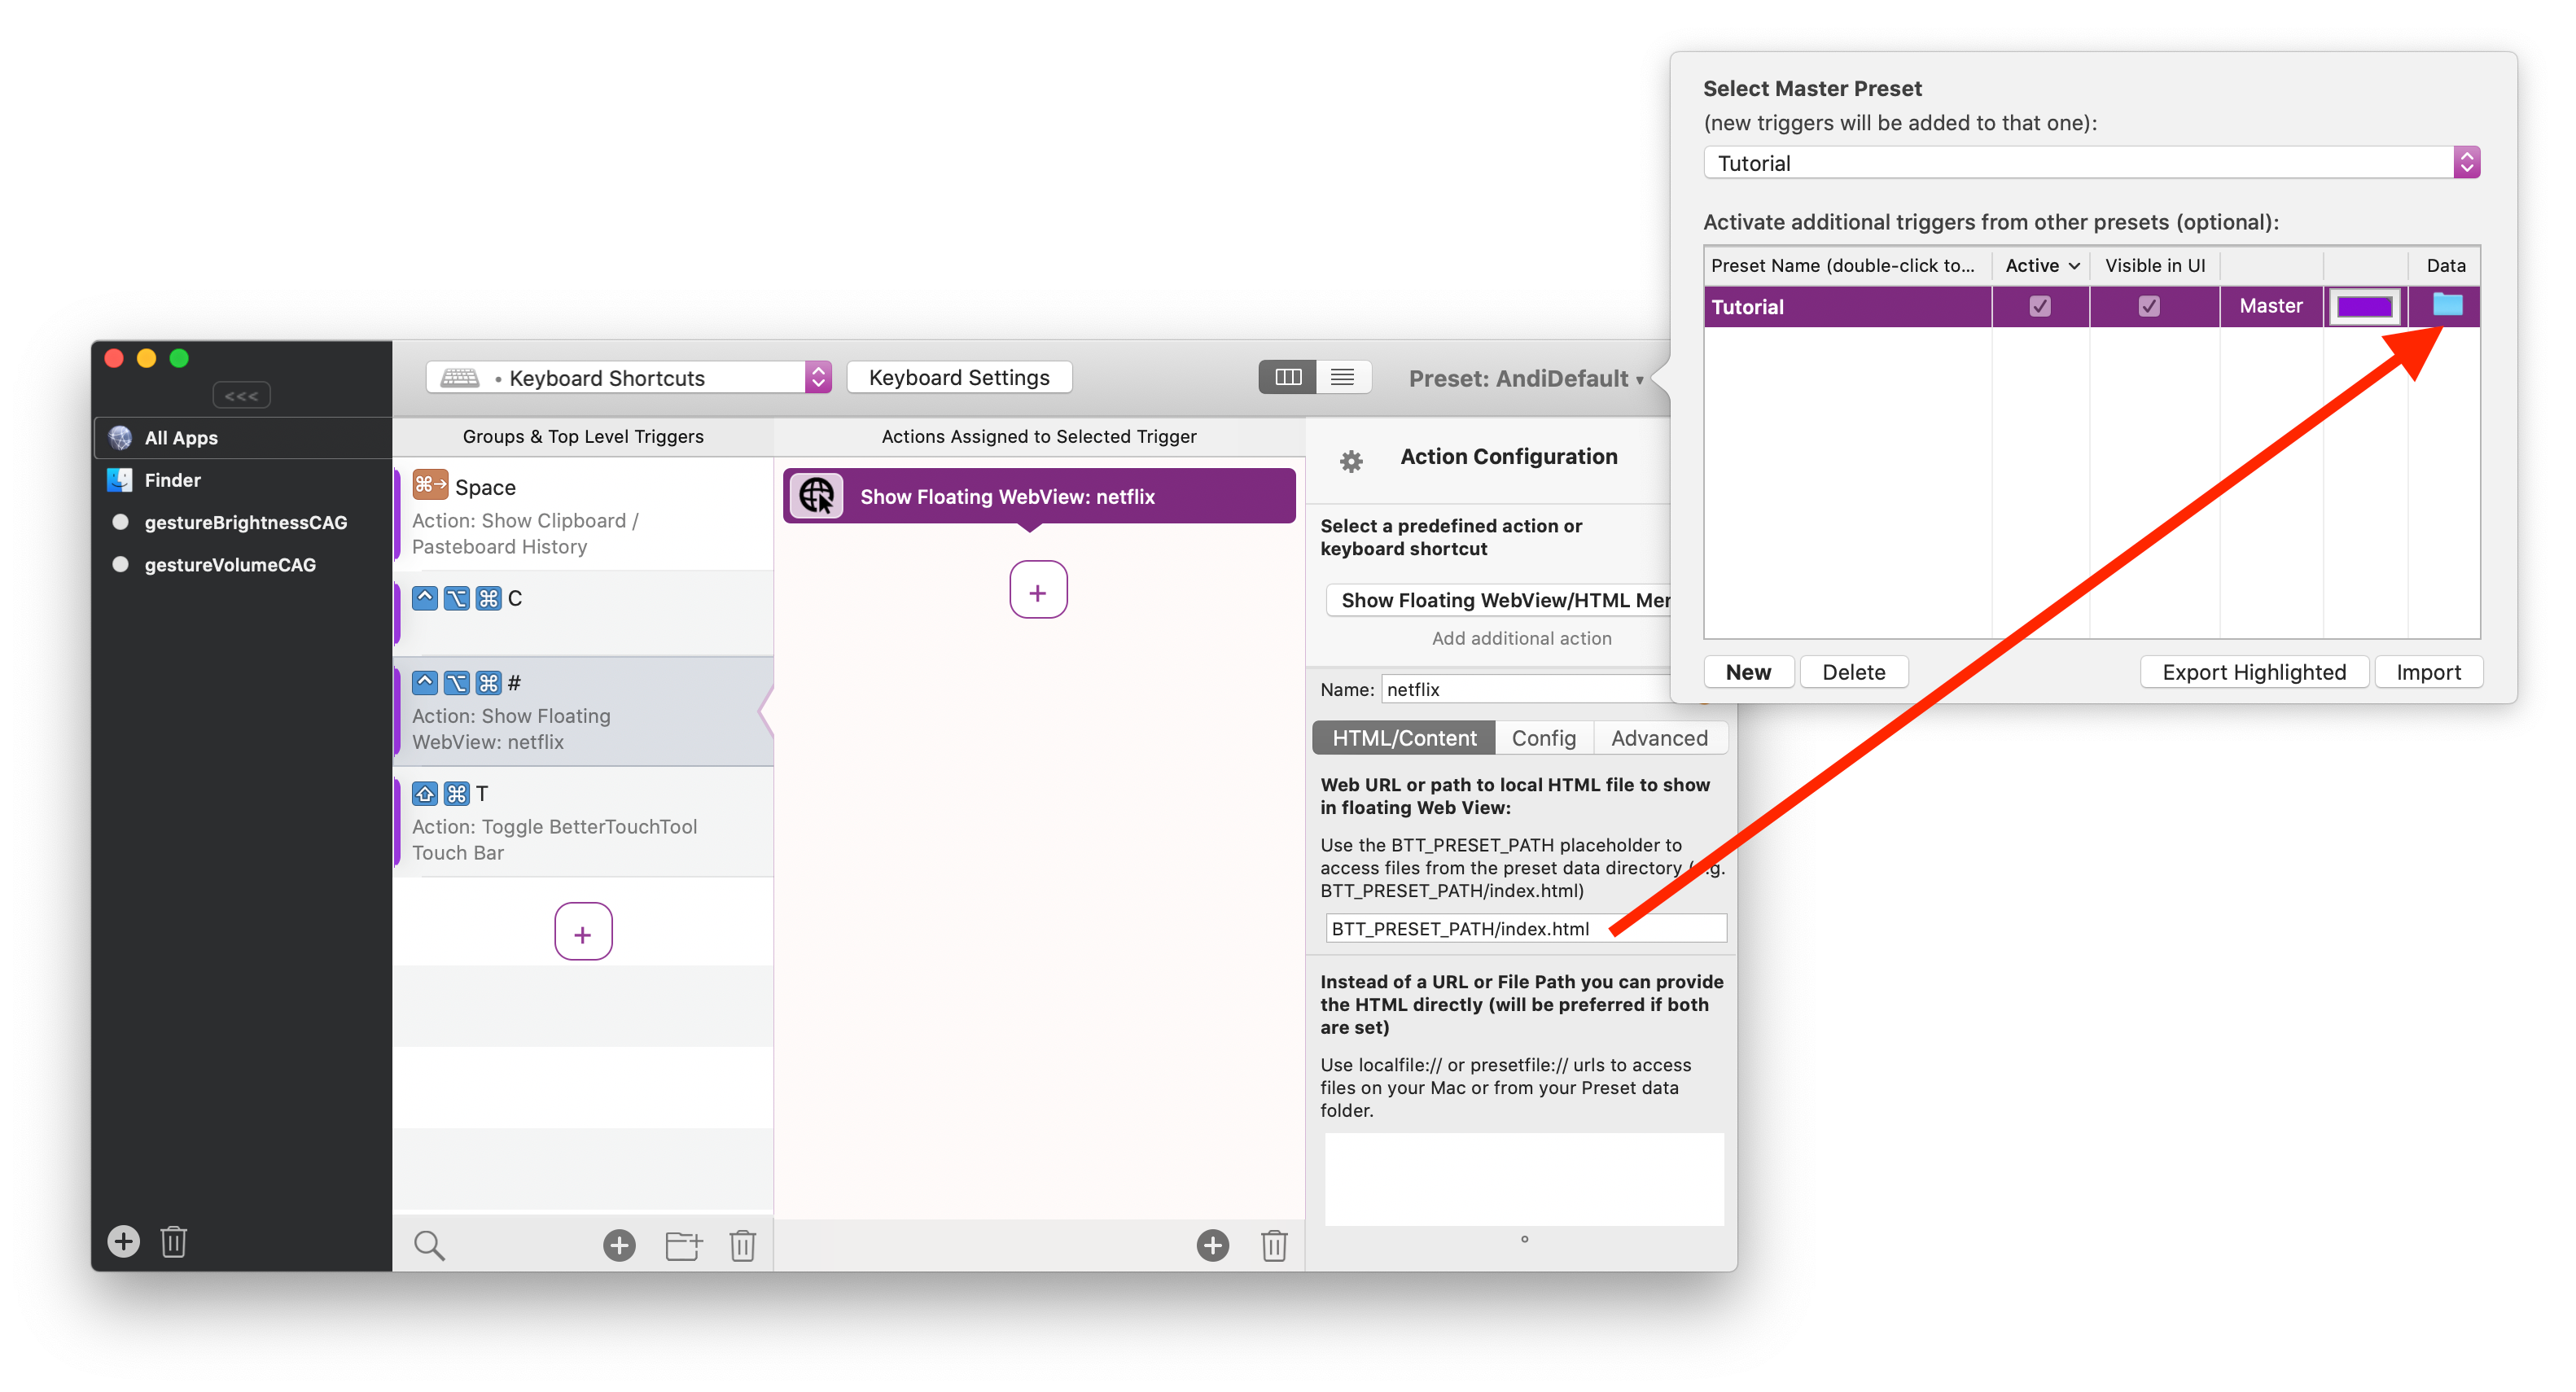
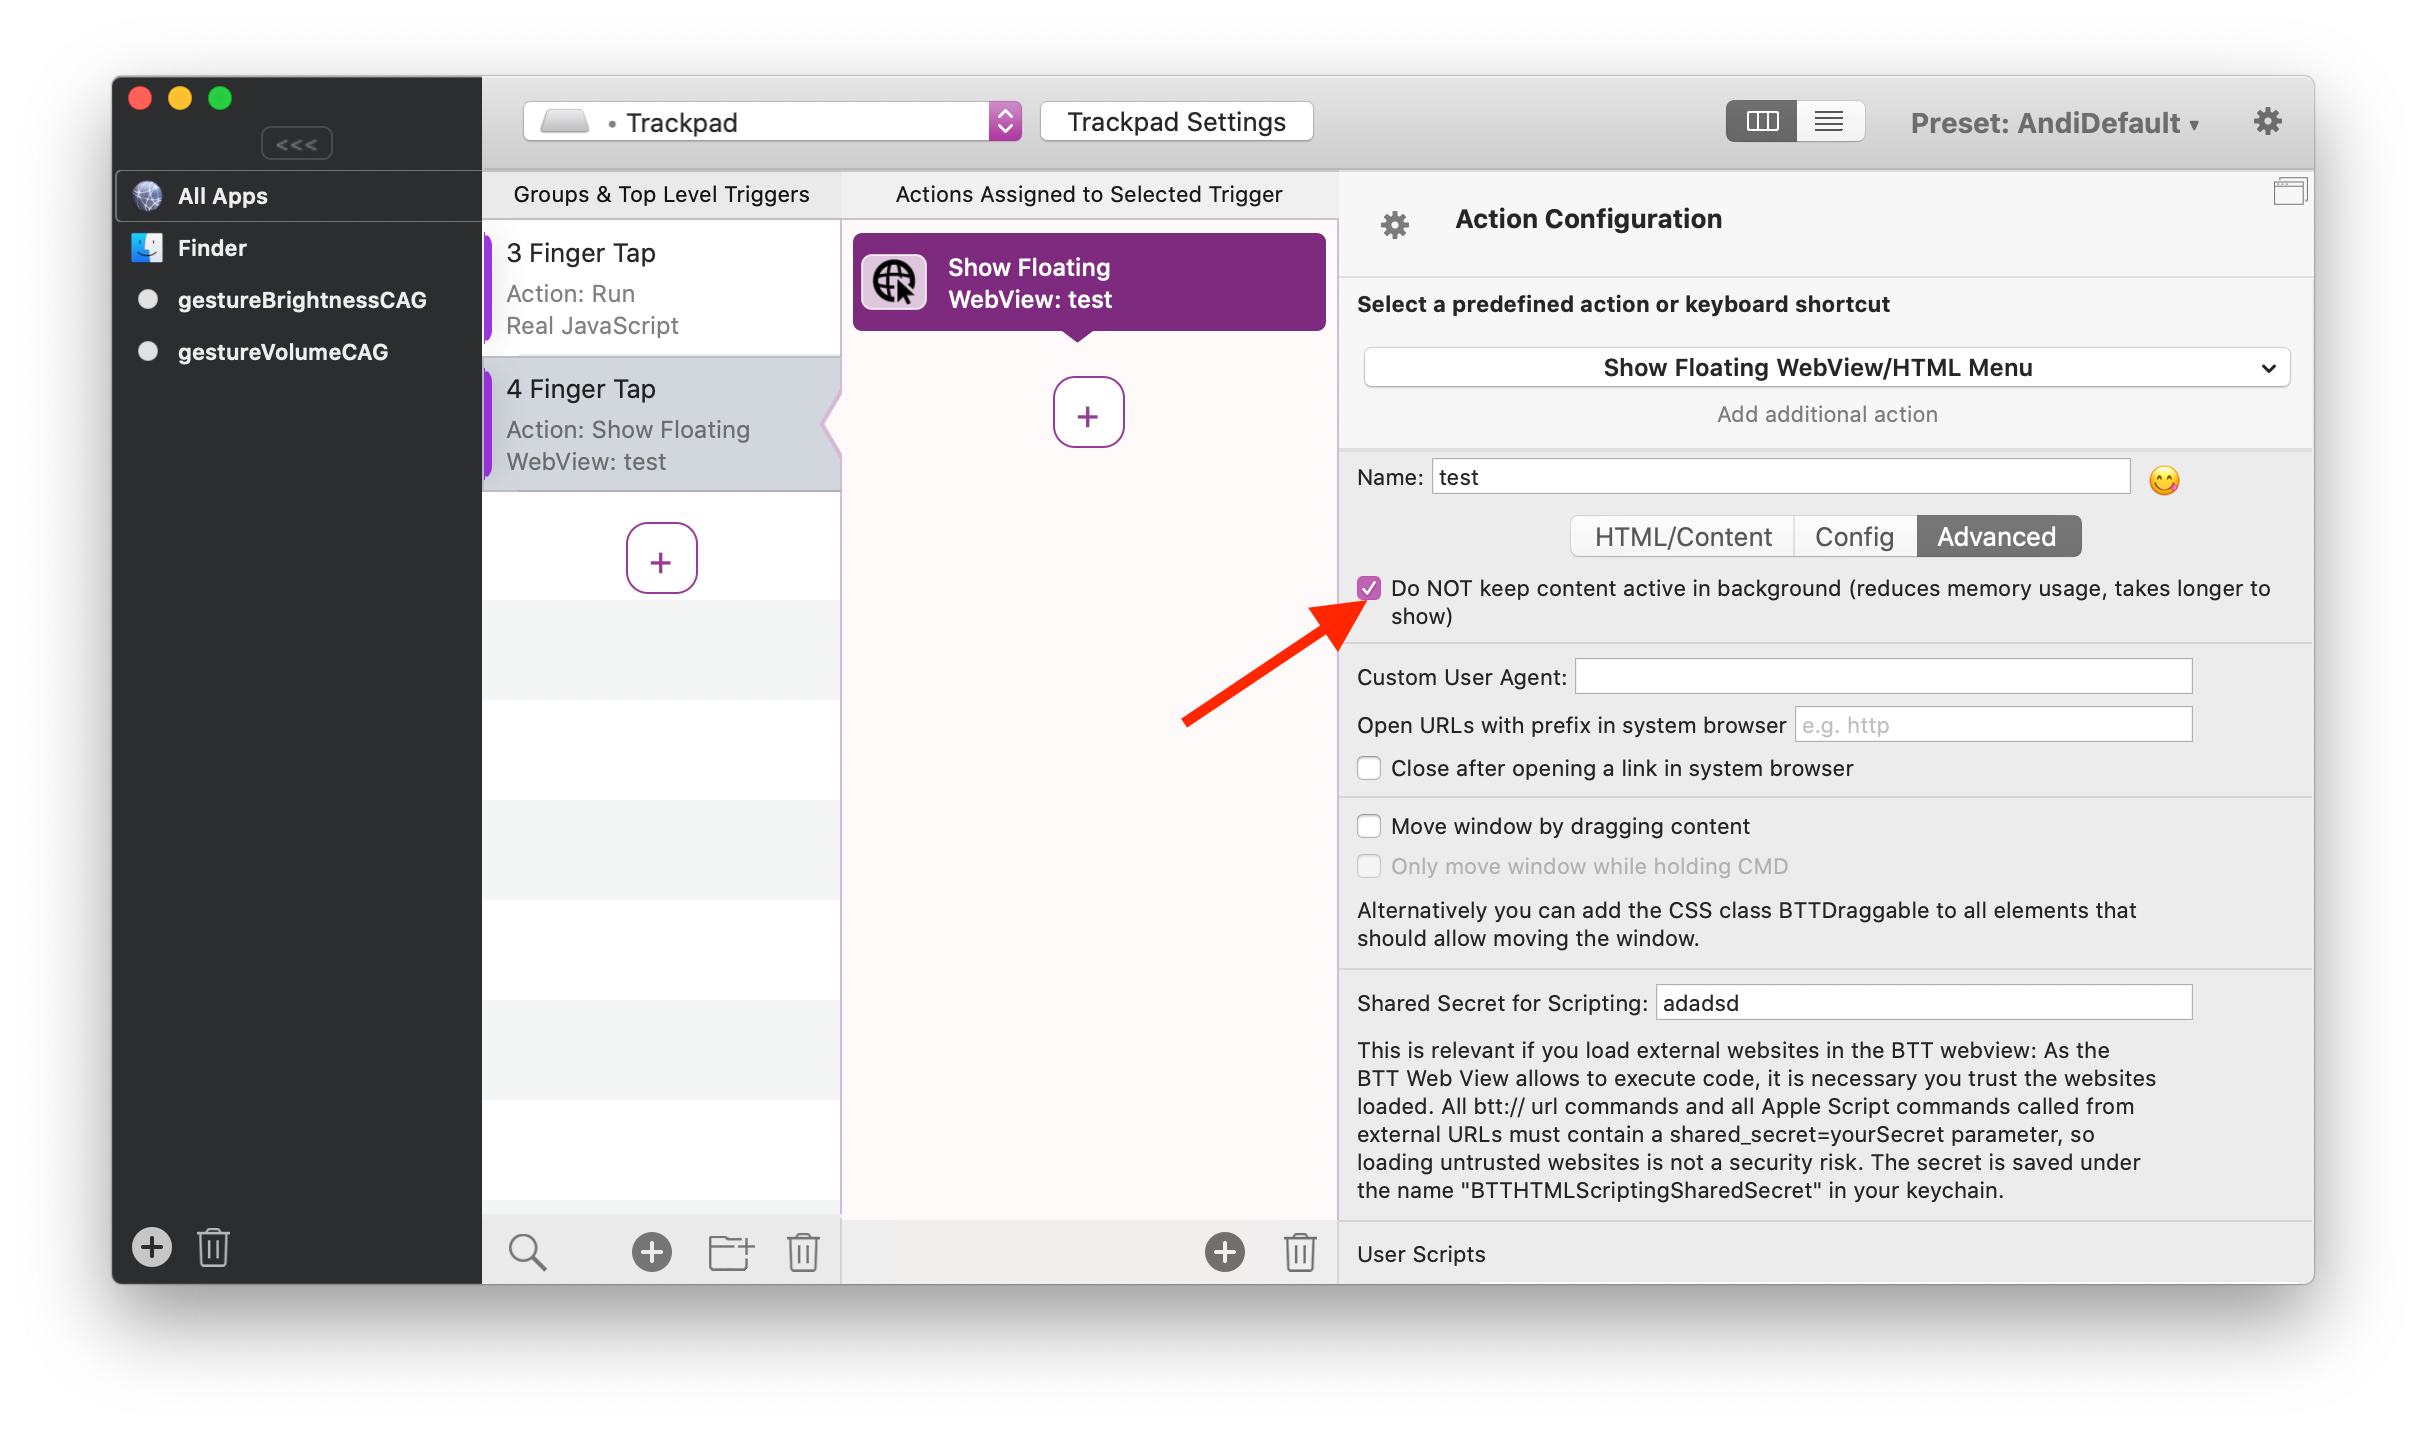

Named Trigger: Test
Set Brightness to 60%
Say Hello World
Show Apple Script Dialog
Close the Webview
Get Currently Playing Song
results matching "" =================== No results matching "" ====================== --- # Long Press · GitBook [Long Press](https://docs.folivora.ai/) ======================================== Configure Long Press Actions for Stream Deck Buttons ==================================================== This documentation uses the following example preset to explain some of the features. [Example Preset Direct Link](https://folivora.ai/releases/ExampleStreamDeck.bttpreset) Short & Long Press ------------------ You can execute different actions when doing a long press, but still keep your default short press actions. To do this follow these steps: 1. **Trigger On Key Up**: To configure a long press action for a Stream Deck Button, you first need to set the trigger condition to "Trigger on Key Up" (instead of key down). 2. **Configure Long Press Action**: Check the "Trigger named trigger on long press" checkbox, then select (or create) a [Named Trigger](https://docs.folivora.ai/docs/1002_named_triggers.html) that will be executed if the button is long-pressed. 3. **Cancel default action**: You have now configured the button to trigger its default actions on key up and you assigned a long press action (which will be executed when holding the button down). This means if you try to perform a long press and hold down the button, it would execute your long press action, but would also trigger the default actions when you release the button.\\ \\ To prevent this you can check the **"Cancel action if any other action is executed while key was down"** checkbox. In our case this means it would cancel the standard "Key Up" action as soon as the long press action is triggered. ![](https://docs.folivora.ai/docs/media/streamdeck_long_press_btn.png) results matching "" =================== No results matching "" ====================== --- # Bind to Device · GitBook [Bind to Device](https://docs.folivora.ai/) ============================================ Only show on specific devices ============================= This documentation uses the following example preset to explain some of the features. [Example Preset Direct Link](https://folivora.ai/releases/ExampleStreamDeck.bttpreset) Setup ----- By default BetterTouchTool shows all configured Stream Deck Items on all connected Stream Deck Devices. However it's easy to only show items on specific devices. Just provide the serial numbers of the devices (comma separated). You can also select multiple items (holding cmd or shift) and set the serial number for all of them at the same time. ![](https://docs.folivora.ai/docs/media/streamdeck_specific_device.png) Use one device to open a group on another device ------------------------------------------------ If you configure a group of Stream Deck items you can make it open only on a specific device. To do this, just set the serial number of the device for all of the items in the group. This allows you to have a group button on one Stream Deck Device that opens a group on another device. results matching "" =================== No results matching "" ====================== --- # Key Repeat · GitBook [Key Repeat](https://docs.folivora.ai/) ======================================== Configure Key Repeat for Stream Deck Buttons ============================================ This documentation uses the following example preset to explain some of the features. [Example Preset Direct Link](https://folivora.ai/releases/ExampleStreamDeck.bttpreset) Key Repeat ---------- Setting up key repeat is really simple. Just check the "Repeat assigned action" checkbox and set the desired repeat rate & delay. ![](https://docs.folivora.ai/docs/media/stream_deck_repeat.png) results matching "" =================== No results matching "" ====================== --- # Groups · GitBook [Groups](https://docs.folivora.ai/) ==================================== Groups / Folders ================ This documentation uses the following example preset to explain some of the features. [Example Preset Direct Link](https://folivora.ai/releases/ExampleStreamDeck.bttpreset) Setup ----- BetterTouchTool allows you to create groups that can contain Stream Deck items. Press the little button on the bottom to create a new group. Currently BTT does not support sub-groups. This will be added soon. ![](https://docs.folivora.ai/docs/media/streamdeck_folder.png) Use one device to open a group on another device ------------------------------------------------ If you configure a group of Stream Deck items you can make it open only on a specific device. To do this, just set the serial number of the device for all of the items in the group. This allows you to have a group button on one Stream Deck Device that opens a group on another device. results matching "" =================== No results matching "" ====================== --- # Hold to show more · GitBook [Hold to show more](https://docs.folivora.ai/) =============================================== Changing / Showing buttons while holding other buttons ====================================================== This documentation uses the following example preset to explain some of the features. [Example Preset Direct Link](https://folivora.ai/releases/ExampleStreamDeck.bttpreset) Setup ----- Using conditional activation groups you can show / hide Stream Deck Buttons based on other button's states. Conditional activation groups are an advanced feature in BTT. You can create a new CAG by pressing the + button on the bottom left in the BetterTouchTool setup window. If a CAG fulfils all of its defined conditions, it will activate the items configured for it. It basically works like the app specific setups in BTT, but the items are not bound to an active app but to conditions. When setting up a new Conditional Activation Group BetterTouchTool now offers a new "currentlyPressedStreamDeckButtonIdentifiers" condition, which contains all the identifiers of the Stream Deck buttons that are currently pressed. Using the "contains" rule, you can check whether the currently pressed buttons include a specific identifier. ![](https://docs.folivora.ai/docs/media/streamdeck_cag_2.png) The identifier of a button can be set on the very top of the configuration: ![](https://docs.folivora.ai/docs/media/streamdeck_cag.png) In this example the button that "activates" the Conditional Activation Group is set to trigger on "key up" and cancel its default actions if another action is executed while the button is pressed. This allows to use the button to show other buttons while being held down - but also keep the button's action working on key up. results matching "" =================== No results matching "" ====================== --- # Scripting BetterTouchTool · GitBook [Scripting BetterTouchTool](https://docs.folivora.ai/) ======================================================= Scripting BTT ============= BetterTouchTool supports a generic scripting interface (see below), which can be accessed via different means, depending on your use case. * [Via JavaScript (Recommended as of BTT 3.333)](https://docs.folivora.ai/docs/1106_java_script.html) * [Via Apple Script](https://docs.folivora.ai/docs/1102_apple_script.html) * [Via the custom btt:// URL Scheme](https://docs.folivora.ai/docs/1103_custom_url_scheme.html) * [Via an integrated webserver](https://docs.folivora.ai/docs/1104_webserver.html) **Floating WebView/ HTML Menu**: Additionally if you use BetterTouchTool's Floating Web View, you can easily access the scripting interface right from the HTML/JavaScript: [Trigger from Floating Web View](https://docs.folivora.ai/docs/floating_menu_javascript.md) **These are the available scripting interfaces**: (please go to the appropriate scripting sub-section to see examples) * trigger\_named * update\_touch\_bar\_widget * update\_stream\_deck\_widget * trigger\_action * execute\_assigned\_actions\_for\_trigger * refresh\_widget * get\_trigger * get\_triggers * update\_trigger (to create or if exists update a trigger) * add\_new\_trigger * delete\_trigger * delete\_triggers * trigger\_named * trigger\_named\_async\_without\_response * cancel\_delayed\_named\_trigger\_execution * get\_dock\_badge\_for * get\_active\_touch\_bar\_group * is\_true\_tone\_enabled * get\_location * set\_persistent\_string\_variable * set\_string\_variable * set\_persistent\_number\_variable * set\_number\_variable * get\_number\_variable * get\_string\_variable * export\_preset * get\_menu\_item\_details * paste\_text * reveal\_element\_in\_ui * display\_notification Floating Menus: * update\_menu\_item * get\_menu\_item\_value * set\_menu\_item\_value * webview\_menu\_item\_load\_html\_url\_js **Note: There are some built-in variables, which can also be quite helpful**: [Built-In Scripting Variables](https://docs.folivora.ai/docs/1105_variables.html) results matching "" =================== No results matching "" ====================== --- # Stream Deck Pedal · GitBook [Stream Deck Pedal](https://docs.folivora.ai/) =============================================== Stream Deck Pedal ================= BetterTouchTool includes support for the Stream Deck Pedal: [https://www.elgato.com/de/stream-deck-pedal](https://www.elgato.com/de/stream-deck-pedal) Although the pedal does not have display, BTT treats it like any other Stream Deck Device. I recommend to configure the pedal in a separate preset to keep everything clean: ![](https://docs.folivora.ai/docs/media/20220628153602.png) ![](https://docs.folivora.ai/docs/media/20220628153349.png) The pedal is good to be combined with these features: * [Showing / changing buttons while holding other buttons](https://docs.folivora.ai/docs/1304_changing_buttons_while_holding.html) * [Groups](https://docs.folivora.ai/docs/1306_stream_deck_groups.html) results matching "" =================== No results matching "" ====================== --- # App Specific Configurations · GitBook [App Specific Configurations](https://docs.folivora.ai/) ========================================================= App Specific Setups =================== You can have global and app specific items configured for the Stream Deck. By default BetterTouchTool adds the app-specific items to the ones that are valid for all apps. Because of this you might need to use the display order property or the ![](https://docs.folivora.ai/docs/media/20220628154259.png) Only Showing App Specific Items ------------------------------- You can also configure BTT to only show the app specific items. To do this, click on the app in the left side-bar and select the "Hide Global Triggers" option: ![](https://docs.folivora.ai/docs/media/20220628155158.png) results matching "" =================== No results matching "" ====================== --- # Custom Swift Plugins · GitBook [Custom Swift Plugins](https://docs.folivora.ai/) ================================================== Custom Swift / Objective-C Plugins ================================== BetterTouhTool allows you to add your own custom Swift or Objective-C plugins for the Stream Deck. Example: CPU Usage Plugin ------------------------- As an example I have created a little plugin that shows the current CPU usage. You can download a ready to use version here: [http://folivora.ai/releases/BTTStreamDeckPluginCPUUsage.zip](http://folivora.ai/releases/BTTStreamDeckPluginCPUUsage.zip) The code is available here: [https://github.com/folivoraAI/BetterTouchToolPlugins](https://github.com/folivoraAI/BetterTouchToolPlugins) Plugins are installed at this location: /Library/Application Support/BetterTouchTool/Plugins Plugin Distribution ------------------- MacOS only allows to run notarized plugins, thus if you want to share your plugin with others you have to follow the notarization process. It's relatively simple I have listed the necessary commands here: [https://github.com/folivoraAI/BetterTouchToolPlugins#distributing-plugins](https://github.com/folivoraAI/BetterTouchToolPlugins#distributing-plugins) If you have any questions about native plugins please ping me via andreas@folivora.ai results matching "" =================== No results matching "" ====================== --- # Script Widgets · GitBook [Script Widgets](https://docs.folivora.ai/) ============================================ Script & Shortcuts Widgets ========================== Script widgets are super powerful. They can run Apple Scripts, Apple Shortcuts, Shell Scripts and Java Script. By doing this they can obtain all sort of information and render that info to a Stream Deck button. * [Formatting Output](https://docs.folivora.ai/docs/1309_script_widgets.html#formatting-output) * [Using The Appearance Settings](https://docs.folivora.ai/docs/1309_script_widgets.html#1-using-the-appearance-settings) * [Regex To Switch Between Appearances](https://docs.folivora.ai/docs/1309_script_widgets.html#using-regex-to-switch-between-appearances) * [Returning HTML](https://docs.folivora.ai/docs/1309_script_widgets.html#2-returning-html) * [Returning JSON](https://docs.folivora.ai/docs/1309_script_widgets.html#3-returning-json-that-describes-appearance--new-text-to-display) * [Example: Retrieve Bitcoin Price](https://docs.folivora.ai/docs/1309_script_widgets.html#example-retrieve-bitcoin-price-java-script) Formatting Output ----------------- There are multiple options to format the output of a Script Widget: ### 1.) Using the Appearance settings: When using the appearance settings, BetterTouchTool will transfer the format for every line you defined to the script output. If the script output is longer than the string you defined, BTT will use the format of the last formatted character. ![](https://docs.folivora.ai/docs/media/20220628160509.png) ![](https://docs.folivora.ai/docs/media/20220628160000.png) Using Regex To Switch Between Appearances ----------------------------------------- You can configure two apperances for a Script Widget. This includes all formatting options like background color, text formatting template, icons etc. By default the "Default" appearance is used. However you can easily switch to the other appearance by providing a search string / regex. If the script output contains the defined search string or matches the Regex, it will activate the "Regex Matched Appearance". In general the text configured in the appearance settings will be overriden by whatever text your script outputs. However you can choose to only use the script output for regex matching - so the script output will not change the text configured in the appearance settings. To do this check the _"Do not update title based on script output - just use for regex matching and loading the configured appearance."_ checkbox below the script code. ![](https://docs.folivora.ai/docs/media/20220628165008.png) ![](https://docs.folivora.ai/docs/media/20220628165211.png) ### 2.) Returning HTML: A Script Widget can return basic HTML to format: ![](https://docs.folivora.ai/docs/media/20220628160824.png) ![](https://docs.folivora.ai/docs/media/20220628160702.png) ### 3.) Returning JSON that describes appearance & new text to display A Script Widget can return (escaped) JSON that defines the new text and new appearance properties. To get a list of all the supported properties it's easiest to configure a button to your needs. Afterwards copy & paste it into a Text Editor and have a look at the "BTTTriggerConfig" section in the JSON. echo "{\"text\": \"Test\n\ntext\", \"BTTStreamDeckBackgroundColor\": \"100,100,100,255\"}" ![](https://docs.folivora.ai/docs/media/20220628161010.png) Here is an example of supported properties "BTTStreamDeckImageHeight" : 46, "BTTStreamDeckCornerRadius" : 12, "BTTStreamDeckBackgroundColor" : "25.742586, 54.602200, 140.808355, 255.000000", "BTTStreamDeckOnlyOnSpecificDevices" : 1, "BTTStreamDeckIconColor1" : "255.000000, 255.000000, 255.000000, 255.000000", "BTTStreamDeckAlternateImageHeight" : 50, "BTTStreamDeckAlwaysShowButton" : 0, "BTTStreamDeckDisplayOrder" : 1000, "BTTStreamDeckAlternateIconColor1" : "255, 255, 255, 255", "BTTStreamDeckIconColor2" : "255, 255, 255, 255", "BTTStreamDeckAlternateIconColor2" : "255, 255, 255, 255", "BTTStreamDeckAttributedTitle" : "cnRmZAAAAAADAAAAAgAAAAcAAABUWFQucnRmAQAAAC5uAgAAKwAAAAEAAABmAgAAe1xydGYxXGFuc2lcYW5zaWNwZzEyNTJcY29jb2FydGYyNjM4Clxjb2NvYXRleHRzY2FsaW5nMFxjb2NvYXBsYXRmb3JtMHtcZm9udHRibFxmMFxmbmlsXGZjaGFyc2V0MCBTRkNvbXBhY3QtUmVndWxhcjt9CntcY29sb3J0Ymw7XHJlZDI1NVxncmVlbjI1NVxibHVlMjU1O1xyZWQyNTVcZ3JlZW4yNDFcYmx1ZTA7XHJlZDI1NVxncmVlbjI1NVxibHVlMjU1O30Ke1wqXGV4cGFuZGVkY29sb3J0Ymw7O1xjc3B0aHJlZVxjMTAwMDAwXGM5NDQyOFxjMTQxMTk7XGNzc3JnYlxjMTAwMDAwXGMxMDAwMDBcYzEwMDAwMDt9ClxwYXJkXHR4NTYwXHR4MTEyMFx0eDE2ODBcdHgyMjQwXHR4MjgwMFx0eDMzNjBcdHgzOTIwXHR4NDQ4MFx0eDUwNDBcdHg1NjAwXHR4NjE2MFx0eDY3MjBcc2wwXHNsbWF4aW11bTUwMFxwYXJkaXJuYXR1cmFsXHFjXHBhcnRpZ2h0ZW5mYWN0b3IwCgpcZjBcZnM1MCBcY2YyIEFsd2F5c1xjZjMgXApccGFyZFx0eDU2MFx0eDExMjBcdHgxNjgwXHR4MjI0MFx0eDI4MDBcdHgzMzYwXHR4MzkyMFx0eDQ0ODBcdHg1MDQwXHR4NTYwMFx0eDYxNjBcdHg2NzIwXHBhcmRpcm5hdHVyYWxccWNccGFydGlnaHRlbmZhY3RvcjAKXGNmMyBWaXNpYmxlXAoKXGZzMjggKG9uIFhMKX0BAAAAIwAAAAEAAAAHAAAAVFhULnJ0ZhAAAADP7rpitgEAAAAAAAAAAAAA", "BTTStreamDeckAlternateBackgroundColor" : "108.194754, 155.000000, 201.000000, 255.000000", "BTTStreamDeckAlternateIconColor3" : "255, 255, 255, 255", "BTTStreamDeckAlternateCornerRadius" : 12, "BTTStreamDeckIconColor3" : "255, 255, 255, 255", "BTTStreamDeckSN" : "CL48K2A00394" Example Retrieve Bitcoin Price (Java Script): --------------------------------------------- ![](https://docs.folivora.ai/docs/media/20220628155932.png) results matching "" =================== No results matching "" ====================== --- # Action JSON Definitions · GitBook [Action JSON Definitions](https://docs.folivora.ai/) ===================================================== BetterTouchTool Action JSON Definition Reference ================================================ This document provides a comprehensive reference for all BetterTouchTool actions and how to define them via JSON. Actions are configured using the `BTTPredefinedActionType` field with the corresponding action ID. **NOTE: WORK IN PROGRESS** This page is mostly AI generated and might contain hallucinated properties. I'm currently working through it. Important Notes --------------- ### JSON Format * JSON objects will be automatically recognized on import - you don't need to escape them as strings * Fields that accept JSON objects (like `BTTGenericActionConfig`, `BTTAdditionalActionData`, etc.) can be provided as regular JSON objects instead of escaped strings ### Common Fields * **BTTAdditionalActionData**: Many actions support this field for extended configuration options. It contains a JSON object with action-specific properties * **BTTGenericActionConfig**: Used for simple configurations, can be a string or JSON object depending on the action * **BTTGenericActionConfig2**: Secondary configuration field when additional data is needed Table of Contents ----------------- 1. [Mouse & Trackpad Actions](https://docs.folivora.ai/docs/2000_all_actions_details_json.html#mouse--trackpad-actions) 2. [Keyboard Actions](https://docs.folivora.ai/docs/2000_all_actions_details_json.html#keyboard-actions) 3. [Window Management Actions](https://docs.folivora.ai/docs/2000_all_actions_details_json.html#window-management-actions) 4. [System Actions](https://docs.folivora.ai/docs/2000_all_actions_details_json.html#system-actions) 5. [Application Control](https://docs.folivora.ai/docs/2000_all_actions_details_json.html#application-control) 6. [Media Controls](https://docs.folivora.ai/docs/2000_all_actions_details_json.html#media-controls) 7. [Display & Brightness](https://docs.folivora.ai/docs/2000_all_actions_details_json.html#display--brightness) 8. [Spaces & Mission Control](https://docs.folivora.ai/docs/2000_all_actions_details_json.html#spaces--mission-control) 9. [Screenshot Actions](https://docs.folivora.ai/docs/2000_all_actions_details_json.html#screenshot-actions) 10. [Clipboard Actions](https://docs.folivora.ai/docs/2000_all_actions_details_json.html#clipboard-actions) 11. [Text & Typing Actions](https://docs.folivora.ai/docs/2000_all_actions_details_json.html#text--typing-actions) 12. [Script Execution](https://docs.folivora.ai/docs/2000_all_actions_details_json.html#script-execution) 13. [BetterTouchTool Control](https://docs.folivora.ai/docs/2000_all_actions_details_json.html#bettertouchtool-control) 14. [Touch Bar Actions](https://docs.folivora.ai/docs/2000_all_actions_details_json.html#touch-bar-actions) 15. [Notch Bar Actions](https://docs.folivora.ai/docs/2000_all_actions_details_json.html#notch-bar-actions) 16. [Stream Deck Actions](https://docs.folivora.ai/docs/2000_all_actions_details_json.html#stream-deck-actions) 17. [Floating Menu Actions](https://docs.folivora.ai/docs/2000_all_actions_details_json.html#floating-menu-actions) 18. [Control Flow Actions](https://docs.folivora.ai/docs/2000_all_actions_details_json.html#control-flow-actions) 19. [Variable Actions](https://docs.folivora.ai/docs/2000_all_actions_details_json.html#variable-actions) 20. [Device Control](https://docs.folivora.ai/docs/2000_all_actions_details_json.html#device-control) 21. [UI Automation](https://docs.folivora.ai/docs/2000_all_actions_details_json.html#ui-automation) 22. [Custom Actions](https://docs.folivora.ai/docs/2000_all_actions_details_json.html#custom-actions) * * * Mouse & Trackpad Actions ------------------------ ### Left Click > Performs a standard left mouse click at the current cursor position. It will include the currently pressed modifier keys. Parameters: * **BTTPredefinedActionType**: 3 Example: { "BTTPredefinedActionType": 3 } ### Left Click - Without Modifier Keys > Performs a left mouse click at the current location. It will NOT include any modifier keys. Parameters: * **BTTPredefinedActionType**: 421 Example: { "BTTPredefinedActionType": 421 } ### Right Click > Performs a right mouse click at the current cursor position. It will include the currently pressed modifier keys. Parameters: * **BTTPredefinedActionType**: 4 Example: { "BTTPredefinedActionType": 4 } ### Middle Click > Performs a middle mouse click at the current location. It will include the currently pressed modifier keys. Parameters: * **BTTPredefinedActionType**: 1 Example: { "BTTPredefinedActionType": 1 } ### Double Left Click > Performs a double left mouse click at the current location. It will include the current modifier keys. Parameters: * **BTTPredefinedActionType**: 54 Example: { "BTTPredefinedActionType": 54 } ### Ctrl + Left Click > Presses the ctrl modifier key and then performs a left click. Parameters: * **BTTPredefinedActionType**: 87 Example: { "BTTPredefinedActionType": 87 } ### Opt + Left Click > Presses the option modifier key and then performs a left click. Parameters: * **BTTPredefinedActionType**: 88 Example: { "BTTPredefinedActionType": 88 } ### CMD + Left Click > Presses the command modifier key and then performs a left click. Parameters: * **BTTPredefinedActionType**: 2 Example: { "BTTPredefinedActionType": 2 } ### CMD + Double Left Click > Presses the command modifier key and then performs a double left click. This can e.g. be used to open a file in a new tab in Finder. Parameters: * **BTTPredefinedActionType**: 149 Example: { "BTTPredefinedActionType": 149 } ### CMD + Shift + Left Click > Presses the command and shift modifier keys and then performs a left click. Parameters: * **BTTPredefinedActionType**: 111 Example: { "BTTPredefinedActionType": 111 } ### Custom Click (Custom Mouse Buttons & Modifiers) > Performs custom mouse clicks with various options including button type, modifiers, and click behavior. Parameters: * **BTTPredefinedActionType**: 119 * **BTTClickType**: Which mouse button/action to simulate. Possible values: * `"left"` * `"right"` * `"middle"` * `"double_left"` * `"triple_left"` * `"button3"` through `"button8"` * **BTTModifiers**: Array of modifier keys to be held during the click. Possible items: * `"shift"` * `"control"`, `"left_control"`, `"right_control"` * `"option"`, `"left_option"`, `"right_option"` * `"command"`, `"left_command"`, `"right_command"` * `"function"` * **BTTIncludePressedModifiers**: Boolean - if true, includes physically pressed modifier keys in addition to specified ones * **BTTClickDownUpConfig**: Defines how the click is performed: * `"downAndUp"` - normal click (mouse-down + mouse-up) * `"downOnly"` - press and hold only * `"upOnly"` - release only * **BTTCustomClickConfig**: JSON object containing click configuration (alternative format) * `BTTClickCount`: Number of clicks (e.g., 1 for single click, 2 for double click) * `BTTClickButton`: Mouse button (0=left, 1=right, 2=middle) * **BTTCustomClickUpDownConfig**: Additional up/down configuration (optional) * **BTTAdditionalActionData**: JSON object (optional) * `BTTCustomClickIncludePressedModifiers`: boolean - include currently pressed modifiers Example 1 - Left Click + Shift + Command: { "BTTPredefinedActionType": 119, "BTTClickType": "left", "BTTModifiers": ["shift", "command"], "BTTIncludePressedModifiers": false, "BTTClickDownUpConfig": "downAndUp" } Example 2 - Right Click with physically pressed keys: { "BTTPredefinedActionType": 119, "BTTClickType": "right", "BTTModifiers": [], "BTTIncludePressedModifiers": true, "BTTClickDownUpConfig": "downAndUp" } Example 3 - Middle Click, Down-Only, with Shift and Left Control: { "BTTPredefinedActionType": 119, "BTTClickType": "middle", "BTTModifiers": ["shift", "left_control"], "BTTIncludePressedModifiers": false, "BTTClickDownUpConfig": "downOnly" } Example 4 - Alternative format using BTTCustomClickConfig: { "BTTPredefinedActionType": 119, "BTTCustomClickConfig": { "BTTClickCount": 2, "BTTClickButton": 0 }, "BTTAdditionalActionData": { "BTTCustomClickIncludePressedModifiers": true } } ### Move Mouse To Position > Moves the mouse cursor to a specific position on screen. Parameters: * **BTTPredefinedActionType**: 153 * **BTTMoveMouseToPosition**: Position coordinates as "x,y" (legacy) * **BTTMoveMouseRelative**: 1 for relative movement, 0 for absolute (legacy) * **BTTAdditionalActionData**: JSON object with all mouse movement configuration * `BTTMouseMoveX`: X coordinate position * `BTTMouseMoveY`: Y coordinate position * `BTTMouseMoveUnitX`: X unit type (0=px absolute, 1=% of window width, 2=% of screen width) * `BTTMouseMoveUnitY`: Y unit type (0=px absolute, 1=% of window height, 2=% of screen height) * `BTTMouseMoveAnchor`: Reference point for position (see below for values) * `BTTMouseMoveDuration`: Animation duration in seconds (default: 0.2) * `BTTMouseMoveWithoutPressedModifierKeys`: boolean - ignore currently pressed modifiers * `BTTMouseMoveScreenNameOrUUID`: Target screen identifier (for named screen anchors) * `BTTMouseMoveDragType`: Drag type for drag actions (left/right/middle button) * `BTTMouseMoveContinueDrag`: boolean - continue existing drag Anchor values: * 0: Default - Global position (origin top left corner of main screen) * 1-4: Relative to corners of active window (1=top left, 2=top right, 3=bottom left, 4=bottom right) * 5: Relative to center of active window * 6: Relative to current mouse cursor position * 7-10: Relative to text cursor position (7=top left, 8=top right, 9=bottom left, 10=bottom right) * 11-15: Relative to focused element (11=top left, 12=top right, 13=bottom left, 14=bottom right, 15=center) * 17: Relative to window default button center * 18: Relative to window cancel button center * 20: Relative to center of text cursor * 21: Relative to saved mouse cursor position (variable: saved\_mouse\_position) * 22: Relative to found image location (variable: image\_location) * 1001-1003: Relative to corners of main screen (1001=top right, 1002=bottom left, 1003=bottom right) * 1004-1007: Relative to corners of screen with mouse * 1008-1011: Relative to corners of screen with name Example: { "BTTPredefinedActionType": 153, "BTTAdditionalActionData": { "BTTMouseMoveX": 100, "BTTMouseMoveY": 50, "BTTMouseMoveUnitX": 1, "BTTMouseMoveUnitY": 1, "BTTMouseMoveAnchor": 5, "BTTMouseMoveDuration": 0.3 } } ### Save Current Mouse Position > Saves the current mouse cursor position for later restoration. Parameters: * **BTTPredefinedActionType**: 154 Example: { "BTTPredefinedActionType": 154 } ### Restore Saved Mouse Position > Restores the mouse cursor to a previously saved position. Parameters: * **BTTPredefinedActionType**: 155 Example: { "BTTPredefinedActionType": 155 } ### Start Drag > Initiates a drag operation at the current mouse position. Parameters: * **BTTPredefinedActionType**: 65 Example: { "BTTPredefinedActionType": 65 } ### Stop Drag > Ends the current drag operation. Parameters: * **BTTPredefinedActionType**: 66 Example: { "BTTPredefinedActionType": 66 } ### Toggle Mouse Speed > Toggles between different mouse speed settings. Parameters: * **BTTPredefinedActionType**: 126 Example: { "BTTPredefinedActionType": 126 } ### Toggle Cursor Size > Toggles the cursor between normal and large size. Parameters: * **BTTPredefinedActionType**: 123 Example: { "BTTPredefinedActionType": 123 } ### Set Cursor Size > Sets the cursor to a specific size. Parameters: * **BTTPredefinedActionType**: 411 * **BTTGenericActionConfig**: Cursor size value Example: { "BTTPredefinedActionType": 411, "BTTGenericActionConfig": "2.0" } ### Scroll > Sends scroll events. Parameters: * **BTTPredefinedActionType**: 272 * **BTTScrollBy**: Scroll amount and direction Example: { "BTTPredefinedActionType": 272, "BTTScrollBy": "5,0" } * * * Keyboard Actions ---------------- ### Type String > Types a predefined string of text. Parameters: * **BTTPredefinedActionType**: 193 * **BTTStringToType**: The string to type * **BTTMoveCursorLeftBy**: Number of characters to move cursor left after typing (optional) Example: { "BTTPredefinedActionType": 193, "BTTStringToType": "Hello World", "BTTMoveCursorLeftBy": 0 } ### Paste String > Pastes a predefined string of text (faster than typing). Parameters: * **BTTPredefinedActionType**: 118 * **BTTStringToType**: The string to paste * **BTTMoveCursorLeftBy**: Number of characters to move cursor left after pasting (optional) Example: { "BTTPredefinedActionType": 118, "BTTStringToType": "This text will be pasted", "BTTMoveCursorLeftBy": 0 } ### Send Keyboard Shortcut > Sends a keyboard shortcut to the system - just as if you had pressed it on your keyboard. Parameters: * **BTTPredefinedActionType**: 264 * **BTTShortcutToSend**: Key codes as comma-separated string. Format: modifier key codes (sorted highest to lowest), then standard key code * **BTTShortcutModifierKeys**: Modifier keys as integer (alternative to including in BTTShortcutToSend) * **BTTShortcutUpDown**: Optional - "onlyDown" to send only key down event, "onlyUp" to send only key up event Example: { "BTTPredefinedActionType": 264, "BTTShortcutToSend": "63,59,58,56,55,49" } To only send the key down event: { "BTTPredefinedActionType": 264, "BTTShortcutToSend": "63,59,58,56,55,49", "BTTShortcutUpDown": "onlyDown" } **Supported modifier key codes:** | Key Code | Modifier Key | | --- | --- | | 63 | function / fn | | 62 | right ctrl | | 61 | right option / opt | | 60 | right shift | | 59 | ctrl | | 58 | option / opt | | 56 | shift | | 55 | cmd | | 54 | right command | **Supported Standard key codes:** | Key Symbol | Key Code | Key Symbol | Key Code | | --- | --- | --- | --- | --- | | `0` | 29 | `Numpad 0` | 82 | | `1` | 18 | `Numpad 1` | 83 | | `2` | 19 | `Numpad 2` | 84 | | `3` | 20 | `Numpad 3` | 85 | | `4` | 21 | `Numpad 4` | 86 | | `5` | 23 | `Numpad 5` | 87 | | `6` | 22 | `Numpad 6` | 88 | | `7` | 26 | `Numpad 7` | 89 | | `8` | 28 | `Numpad 8` | 91 | | `9` | 25 | `Numpad 9` | 92 | | `A` | 0 | `Numpad *` | 67 | | `B` | 11 | `Numpad +` | 69 | | `C` | 8 | `Numpad -` | 78 | | `D` | 2 | `Numpad .` | 65 | | `E` | 14 | `Numpad /` | 75 | | `F` | 3 | `Numpad =` | 81 | | `G` | 5 | `Numpad clear` | 71 | | `H` | 4 | `:` or `;` | 41 | | `I` | 34 | `< or ,` | 43 | | `J` | 38 | `= or +` | 24 | | `K` | 40 | `>` or .\` | 47 | | `L` | 37 | `? or /` | 44 | | `M` | 46 | `! or 1` | 18 | | `N` | 45 | `"` or '\`' | 39 | | `O` | 31 | `# or 3` | 20 | | `P` | 35 | `$ or 4` | 21 | | `Q` | 12 | `% or 5` | 23 | | `R` | 15 | `& or 7` | 26 | | `S` | 1 | `' or "` | 39 | | `T` | 17 | `( or 9` | 25 | | `U` | 32 | `) or 0` | 29 | | `V` | 9 | `* or 8` | 28 | | `W` | 13 | `+ or =` | 24 | | `X` | 7 | `, or <` | 43 | | `Y` | 16 | `- or _` | 27 | | `Z` | 6 | `. or >` | 47 | | `[ or {` | 33 | `/ or ?` | 44 |\ | \`\\ or | \` | 42 | `] or }` | 30 | | `^ or 6` | 22 | `_ or -` | 27 | | `{ or [` | 33 | \` | or \` | 42 |\ | `} or ]` | 30 | \`~ or \`\` | 50 | ### Send Shortcut to Specific App > Sends a keyboard shortcut to a specific application. Parameters: * **BTTPredefinedActionType**: 128 * **BTTShortcutToSend**: Key codes as comma-separated string (same format as Send Keyboard Shortcut) * **BTTShortcutApp**: Bundle identifier or path of the target app * **BTTShortcutSwitchToAppFirst**: 1 to switch to app first, 0 otherwise * **BTTShortcutAppUnderCursor**: Special handling for app under cursor (optional) Example: { "BTTPredefinedActionType": 128, "BTTShortcutToSend": "55,1", "BTTShortcutApp": "com.apple.finder", "BTTShortcutSwitchToAppFirst": 1 } ### Function Keys (F1-F24) > Simulates pressing function keys. Parameters vary by key: * **BTTPredefinedActionType**: * F1: 33 * F2: 34 * F3: 35 * F4: 36 * F5: 37 * F6: 38 * F7: 39 * F8: 40 * F9: 41 * F10: 42 * F11: 43 * F12: 44 * F13: 130 * F14: 131 * F15: 132 * F16: 133 * F17: 134 * F18: 135 * F19: 303 * F20: 304 * F21: 305 * F22: 306 * F23: 307 * F24: 308 Example: { "BTTPredefinedActionType": 43 } ### Modifier Key Actions > Simulates pressing and releasing modifier keys. Parameters vary by modifier: * **BTTPredefinedActionType**: * Shift Down: 178 * Shift Up: 179 * Fn Down: 180 * Fn Up: 181 * Control Down: 182 * Control Up: 183 * Option Down: 184 * Option Up: 185 * Command Down: 186 * Command Up: 187 * Right Shift Down: 437 * Right Shift Up: 438 * Right Control Down: 439 * Right Control Up: 440 * Right Option Down: 441 * Right Option Up: 442 * Right Command Down: 443 * Right Command Up: 444 Example: { "BTTPredefinedActionType": 186 } ### ESC Key > Simulates pressing the Escape key. Parameters: * **BTTPredefinedActionType**: 189 Example: { "BTTPredefinedActionType": 189 } ### Toggle Caps Lock > Toggles the Caps Lock state on/off. Parameters: * **BTTPredefinedActionType**: 194 Example: { "BTTPredefinedActionType": 194 } ### Page Navigation Keys > Simulates page navigation keys. Parameters: * **BTTPredefinedActionType**: * Page Up: 60 * Page Down: 61 * Home: 62 * End: 63 * Forward Delete: 64 Example: { "BTTPredefinedActionType": 60 } ### Arrow Keys > Simulates arrow key presses. Parameters: * **BTTPredefinedActionType**: * Page Forward: 51 * Page Backward: 52 Example: { "BTTPredefinedActionType": 51 } ### Remap Key > Remaps one key to another. Parameters: * **BTTPredefinedActionType**: 483 * **BTTActionKeyRemapKeyboard**: Keyboard identifier * **BTTActionKeyRemapFromKey**: Key to remap from * **BTTActionKeyRemapToKey**: Key to remap to Example: { "BTTPredefinedActionType": 483, "BTTActionKeyRemapKeyboard": "all", "BTTActionKeyRemapFromKey": 50, "BTTActionKeyRemapToKey": 51 } * * * Window Management Actions ------------------------- ### Maximize Window > Maximizes the current window to full screen (not fullscreen mode). Parameters: * **BTTPredefinedActionType**: 21 Example: { "BTTPredefinedActionType": 21 } ### Maximize Window Left > Maximizes window to the left half of the screen. Parameters: * **BTTPredefinedActionType**: 19 Example: { "BTTPredefinedActionType": 19 } ### Maximize Window Right > Maximizes window to the right half of the screen. Parameters: * **BTTPredefinedActionType**: 20 Example: { "BTTPredefinedActionType": 20 } ### Resize Window to Quarters > Resizes window to specific quarter of the screen. Parameters: * **BTTPredefinedActionType**: * Top Left Quarter: 90 * Top Right Quarter: 92 * Bottom Left Quarter: 91 * Bottom Right Quarter: 93 Example: { "BTTPredefinedActionType": 90 } ### Resize Window to Thirds > Resizes window to specific third of the screen. Parameters: * **BTTPredefinedActionType**: * Left Third: 108 * Middle Third: 109 * Right Third: 110 * Left Two Thirds: 174 * Right Two Thirds: 175 Example: { "BTTPredefinedActionType": 108 } ### Resize Window to Halves > Resizes window to top or bottom half of the screen. Parameters: * **BTTPredefinedActionType**: * Top Half: 96 * Bottom Half: 95 Example: { "BTTPredefinedActionType": 96 } ### Center Window > Centers the current window on screen. Parameters: * **BTTPredefinedActionType**: 97 Example: { "BTTPredefinedActionType": 97 } ### Center Window on Next Monitor > Centers the window on the next monitor. Parameters: * **BTTPredefinedActionType**: 98 Example: { "BTTPredefinedActionType": 98 } ### Move Window to Next Monitor > Moves the current window to the next monitor. Parameters: * **BTTPredefinedActionType**: 47 Example: { "BTTPredefinedActionType": 47 } ### Maximize Window on Next Monitor > Maximizes the window on the next monitor. Parameters: * **BTTPredefinedActionType**: 48 Example: { "BTTPredefinedActionType": 48 } ### Restore Old Window Size > Restores window to its previous size before maximizing. Parameters: * **BTTPredefinedActionType**: 84 Example: { "BTTPredefinedActionType": 84 } ### Close Window Under Cursor > Closes the window under the mouse cursor. Parameters: * **BTTPredefinedActionType**: 102 Example: { "BTTPredefinedActionType": 102 } ### Minimize Window Under Cursor > Minimizes the window under the mouse cursor. Parameters: * **BTTPredefinedActionType**: 106 Example: { "BTTPredefinedActionType": 106 } ### Zoom Window Under Cursor > Zooms (green button) the window under cursor. Parameters: * **BTTPredefinedActionType**: 107 Example: { "BTTPredefinedActionType": 107 } ### Bring Window Under Cursor to Front > Brings the window under the cursor to the front. Parameters: * **BTTPredefinedActionType**: 204 Example: { "BTTPredefinedActionType": 204 } ### Move Window Left/Right > Moves window by a small amount left or right. Parameters: * **BTTPredefinedActionType**: * Move Left: 17 * Move Right: 18 Example: { "BTTPredefinedActionType": 17 } ### Start/Stop Moving Windows > Enables window moving mode with modifier keys. Parameters: * **BTTPredefinedActionType**: * Start Moving: 69 * Stop Moving: 70 * Toggle Moving: 74 Example: { "BTTPredefinedActionType": 69 } ### Start/Stop Resizing Windows > Enables window resizing mode with modifier keys. Parameters: * **BTTPredefinedActionType**: * Start Resizing: 71 * Stop Resizing: 72 * Toggle Resizing: 73 Example: { "BTTPredefinedActionType": 71 } ### Custom Move/Resize > Moves and resizes window with custom parameters. Parameters: * **BTTPredefinedActionType**: 251 * **BTTActionMoveResizeConfig**: JSON object with configuration (deprecated - use BTTAdditionalActionData) * `BTTWindowResizeX`: X position of window * `BTTWindowResizeY`: Y position of window * `BTTWindowResizeWidth`: Width of window * `BTTWindowResizeHeight`: Height of window * **BTTActionMoveResizeName**: Name/description (optional) * **BTTAdditionalActionData**: JSON object with advanced configuration * `BTTActionCustomMoveResizeUseRelativeValues`: boolean - Use relative positioning from current position * `BTTActionCustomMoveResizeMaintainAspectRatio`: boolean - Keep window aspect ratio when resizing * `BTTActionCustomMoveResizeX`: string - X position (supports variables like @variable\_name) * `BTTActionCustomMoveResizeY`: string - Y position (supports variables) * `BTTActionCustomMoveResizeWidth`: string - Width (supports variables) * `BTTActionCustomMoveResizeHeight`: string - Height (supports variables) Example: { "BTTPredefinedActionType": 251, "BTTAdditionalActionData": { "BTTActionCustomMoveResizeX": "100", "BTTActionCustomMoveResizeY": "100", "BTTActionCustomMoveResizeWidth": "800", "BTTActionCustomMoveResizeHeight": "600", "BTTActionCustomMoveResizeUseRelativeValues": false, "BTTActionCustomMoveResizeMaintainAspectRatio": true } } ### Move Window to Specific Size and Position > Moves window to exact coordinates and size. Parameters: * **BTTPredefinedActionType**: 446 * **BTTGenericActionConfig**: "x,y,width,height" Example: { "BTTPredefinedActionType": 446, "BTTGenericActionConfig": "100,100,1024,768" } ### Window Layout Management > Save and restore window layouts. Parameters: * **BTTPredefinedActionType**: * Save Current Layout: 269 * Restore Saved Layout: 268 * Save Layout with Name: 269 (with BTTWindowLayoutName) * Restore Layout with Name: 513 (with BTTWindowLayoutName) * **BTTWindowLayoutName**: Layout name (for named layouts) * **BTTWindowLayout**: Layout data (for restore) Example: { "BTTPredefinedActionType": 269, "BTTWindowLayoutName": "Work Layout" } ### Pin/Unpin Window to Float on Top > Makes window float above all others or removes float status. Parameters: * **BTTPredefinedActionType**: * Toggle Pin: 337 * Pin: 402 * Unpin: 401 * Remove All Float: 338 Example: { "BTTPredefinedActionType": 337 } ### Window Switcher > Shows a window switcher for the current app or all apps. Parameters: * **BTTPredefinedActionType**: * Current App: 99 * All Apps: 100 * Backwards: 378 * Activate Hovered: 476 * **BTTAdditionalActionData**: JSON object with window switcher configuration * `BTTActionWindowSwitcherIncludedAppBundleIdentifiers`: string - Comma-separated list of app bundle IDs to include * `BTTActionWindowSwitcherExcludedAppBundleIdentifiers`: string - Comma-separated list of app bundle IDs to exclude * `BTTActionWindowSwitcherIncludeDesktopBackground`: boolean - Include desktop background * `BTTActionWindowSwitcherIncludeMinimized`: boolean - Include minimized windows * `BTTActionWindowSwitcherIncludeHidden`: boolean - Include hidden windows * `BTTActionWindowSwitcherIncludeOffscreen`: boolean - Include offscreen windows * `BTTActionWindowSwitcherWindowsPerRow`: number - Number of windows per row in grid * `BTTActionWindowSwitcherSingleRow`: boolean - Display in single row mode * `BTTActionWindowSwitcherOrder`: number - Sort order (0=recent, 1=alphabetical, 2=app) * `BTTActionWindowSwitcherThumbnailQuality`: number - Thumbnail quality (0=low, 1=medium, 2=high) * `BTTActionWindowSwitcherShowWindowTitles`: boolean - Show window titles * `BTTActionWindowSwitcherShowWindowIcons`: boolean - Show app icons * `BTTActionWindowSwitcherColor`: string - Background color (hex) * `BTTActionWindowSwitcherBorderRadius`: number - Corner radius in pixels * `BTTActionWindowSwitcherHighlightColor`: string - Selection highlight color (hex) * `BTTActionWindowSwitcherTitleTextColor`: string - Title text color (hex) * `BTTActionWindowSwitcherDisplayMode`: number - Display mode (0=grid, 1=list, 2=coverflow) * `BTTActionWindowSwitcherCoverFlow`: boolean - Enable cover flow effect * `BTTActionWindowSwitcherActionExecuteMode`: number - Execution mode * `BTTActionWindowSwitcherBlockEventTap`: boolean - Block input during display * `BTTActionWindowSwitcherBackgroundAlpha`: number - Background transparency (0-1) * `BTTActionWindowSwitcherBorderWidth`: number - Border width in pixels * `BTTActionWindowSwitcherInnerBorderWidth`: number - Inner border width * `BTTActionWindowSwitcherWindowSeparatorSize`: number - Space between windows * `BTTActionWindowSwitcherHideAllOtherWindows`: boolean - Hide non-selected windows Example: { "BTTPredefinedActionType": 99, "BTTAdditionalActionData": { "BTTActionWindowSwitcherWindowsPerRow": 5, "BTTActionWindowSwitcherShowWindowTitles": true, "BTTActionWindowSwitcherShowWindowIcons": true, "BTTActionWindowSwitcherColor": "#000000", "BTTActionWindowSwitcherBackgroundAlpha": 0.8, "BTTActionWindowSwitcherBorderRadius": 10 } } ### Arrange Windows Side by Side > Arranges multiple windows side by side. Parameters: * **BTTPredefinedActionType**: * Two Windows: 317 * Two Windows (Last Used Right): 318 * Three Windows: 319 * Three Windows (Last Used Right): 320 * Four Windows: 322 * Four Windows (Last Used Right): 321 Example: { "BTTPredefinedActionType": 317 } * * * System Actions -------------- ### Sleep Display > Puts the display to sleep. Parameters: * **BTTPredefinedActionType**: 13 Example: { "BTTPredefinedActionType": 13 } ### Sleep Computer > Puts the computer to sleep. Parameters: * **BTTPredefinedActionType**: 14 Example: { "BTTPredefinedActionType": 14 } ### Logout > Logs out the current user. Parameters: * **BTTPredefinedActionType**: 15 Example: { "BTTPredefinedActionType": 15 } ### Lock Screen > Locks the screen. Parameters: * **BTTPredefinedActionType**: 158 Example: { "BTTPredefinedActionType": 158 } ### Unlock Screen > Unlocks the screen (requires password to be set). Parameters: * **BTTPredefinedActionType**: 159 * **BTTGenericActionConfig**: Password (stored securely) Example: { "BTTPredefinedActionType": 159, "BTTGenericActionConfig": "encrypted_password_data" } ### Start Screen Saver > Starts the configured screen saver. Parameters: * **BTTPredefinedActionType**: 202 Example: { "BTTPredefinedActionType": 202 } ### Empty Trash > Empties the trash. Parameters: * **BTTPredefinedActionType**: 156 Example: { "BTTPredefinedActionType": 156 } ### Toggle Do Not Disturb > Toggles Do Not Disturb mode on/off. Parameters: * **BTTPredefinedActionType**: 200 Example: { "BTTPredefinedActionType": 200 } ### Toggle Dark Mode > Toggles between light and dark mode. Parameters: * **BTTPredefinedActionType**: 197 Example: { "BTTPredefinedActionType": 197 } ### Toggle Night Shift > Toggles Night Shift on/off. Parameters: * **BTTPredefinedActionType**: 201 Example: { "BTTPredefinedActionType": 201 } ### Toggle True Tone > Toggles True Tone display on/off. Parameters: * **BTTPredefinedActionType**: 257 Example: { "BTTPredefinedActionType": 257 } ### Show Desktop > Shows the desktop by hiding all windows. Parameters: * **BTTPredefinedActionType**: 45 Example: { "BTTPredefinedActionType": 45 } ### Hide All Windows > Hides all windows of all applications. Parameters: * **BTTPredefinedActionType**: 50 Example: { "BTTPredefinedActionType": 50 } ### Hide All But Active Window > Hides all windows except the currently active one. Parameters: * **BTTPredefinedActionType**: 53 Example: { "BTTPredefinedActionType": 53 } ### Show All Windows > Shows all hidden windows. Parameters: * **BTTPredefinedActionType**: 488 Example: { "BTTPredefinedActionType": 488 } ### Show/Hide Hidden Files > Toggles visibility of hidden files in Finder. Parameters: * **BTTPredefinedActionType**: 16 Example: { "BTTPredefinedActionType": 16 } ### Notification Center > Shows the Notification Center. Parameters: * **BTTPredefinedActionType**: 122 Example: { "BTTPredefinedActionType": 122 } ### Control Center > Shows the Control Center. Parameters: * **BTTPredefinedActionType**: 290 Example: { "BTTPredefinedActionType": 290 } ### Close All Notifications > Closes all visible notifications. Parameters: * **BTTPredefinedActionType**: 289 Example: { "BTTPredefinedActionType": 289 } ### Show Character Viewer > Shows the macOS Character Viewer. Parameters: * **BTTPredefinedActionType**: 167 Example: { "BTTPredefinedActionType": 167 } ### Start Siri > Activates Siri. Parameters: * **BTTPredefinedActionType**: 173 Example: { "BTTPredefinedActionType": 173 } ### Eject > Ejects removable media. Parameters: * **BTTPredefinedActionType**: 30 Example: { "BTTPredefinedActionType": 30 } ### Refresh Status Bar Items > Refreshes all status bar items. Parameters: * **BTTPredefinedActionType**: 302 Example: { "BTTPredefinedActionType": 302 } * * * Application Control ------------------- ### Launch Application > Launches a specific application. Parameters: * **BTTPredefinedActionType**: 49 * **BTTLaunchPath**: Path to application or bundle identifier Example: { "BTTPredefinedActionType": 49, "BTTLaunchPath": "/Applications/Safari.app" } ### Show/Hide Specific Application > Shows or hides a specific application. Parameters: * **BTTPredefinedActionType**: 177 * **BTTAppToShowOrHide**: Bundle identifier or path * **BTTShowHideAppConfig**: Configuration options (optional) * **BTTGenericActionConfig2**: JSON object with behavior configuration (optional) * Additional show/hide behavior settings Example: { "BTTPredefinedActionType": 177, "BTTAppToShowOrHide": "com.apple.finder", "BTTGenericActionConfig2": { "showIfHidden": true, "hideIfVisible": true } } ### Quit App Under Cursor > Quits the application that owns the window under cursor. Parameters: * **BTTPredefinedActionType**: 247 Example: { "BTTPredefinedActionType": 247 } ### Hide App Under Cursor > Hides the application under cursor. Parameters: * **BTTPredefinedActionType**: 294 Example: { "BTTPredefinedActionType": 294 } ### Application Switcher > Shows the application switcher. Parameters: * **BTTPredefinedActionType**: 46 * **BTTPredefinedActionType**: 142 (Backward) Example: { "BTTPredefinedActionType": 46 } ### Activate Previous App > Switches to the previously active application. Parameters: * **BTTPredefinedActionType**: 367 Example: { "BTTPredefinedActionType": 367 } ### Activate Previous Window > Activates the previous window. Parameters: * **BTTPredefinedActionType**: 383 * **BTTPredefinedActionType**: 491 (Excluding Minimized) Example: { "BTTPredefinedActionType": 383 } ### Save Active Window > Saves reference to currently active window. Parameters: * **BTTPredefinedActionType**: 368 Example: { "BTTPredefinedActionType": 368 } ### Go Back to Saved Active Window > Returns to previously saved active window. Parameters: * **BTTPredefinedActionType**: 369 Example: { "BTTPredefinedActionType": 369 } ### Activate Specific Window > Activates a window by title or other criteria. Parameters: * **BTTPredefinedActionType**: 364 * **BTTGenericActionConfig**: Window title or identifier Example: { "BTTPredefinedActionType": 364, "BTTGenericActionConfig": "Document.txt" } ### Open Finder > Opens a new Finder window. Parameters: * **BTTPredefinedActionType**: 10 Example: { "BTTPredefinedActionType": 10 } ### Create New File in Finder > Creates a new file in the current Finder location. Parameters: * **BTTPredefinedActionType**: 85 Example: { "BTTPredefinedActionType": 85 } ### Open Finder Selection with Specific App > Opens selected files in Finder with a specific application. Parameters: * **BTTPredefinedActionType**: 157 * **BTTLaunchPath**: Path to application Example: { "BTTPredefinedActionType": 157, "BTTLaunchPath": "/Applications/TextEdit.app" } ### Open Selected Folder with App > Opens selected folder with specific app. Parameters: * **BTTPredefinedActionType**: 176 * **BTTLaunchPath**: Path to application Example: { "BTTPredefinedActionType": 176, "BTTLaunchPath": "/Applications/Visual Studio Code.app" } * * * Media Controls -------------- ### Play/Pause > Toggles media playback. Parameters: * **BTTPredefinedActionType**: 23 Example: { "BTTPredefinedActionType": 23 } ### Next Track > Skips to the next track. Parameters: * **BTTPredefinedActionType**: 27 Example: { "BTTPredefinedActionType": 27 } ### Previous Track > Goes to the previous track. Parameters: * **BTTPredefinedActionType**: 26 Example: { "BTTPredefinedActionType": 26 } ### Volume Up > Increases system volume. Parameters: * **BTTPredefinedActionType**: 24 Example: { "BTTPredefinedActionType": 24 } ### Volume Down > Decreases system volume. Parameters: * **BTTPredefinedActionType**: 25 Example: { "BTTPredefinedActionType": 25 } ### Volume Up (Small Step) > Increases volume by a small amount. Parameters: * **BTTPredefinedActionType**: 198 Example: { "BTTPredefinedActionType": 198 } ### Volume Down (Small Step) > Decreases volume by a small amount. Parameters: * **BTTPredefinedActionType**: 199 Example: { "BTTPredefinedActionType": 199 } ### Mute > Toggles system mute on/off. Parameters: * **BTTPredefinedActionType**: 22 Example: { "BTTPredefinedActionType": 22 } ### Set Volume > Sets volume to specific level. Parameters: * **BTTPredefinedActionType**: 373 * **BTTGenericActionConfig**: Volume level (0-100) Example: { "BTTPredefinedActionType": 373, "BTTGenericActionConfig": "50" } * * * Display & Brightness -------------------- ### Brightness Up > Increases display brightness. Parameters: * **BTTPredefinedActionType**: 28 Example: { "BTTPredefinedActionType": 28 } ### Brightness Down > Decreases display brightness. Parameters: * **BTTPredefinedActionType**: 29 Example: { "BTTPredefinedActionType": 29 } ### Brightness Up (Small Step) > Increases brightness by a small amount. Parameters: * **BTTPredefinedActionType**: 259 Example: { "BTTPredefinedActionType": 259 } ### Brightness Down (Small Step) > Decreases brightness by a small amount. Parameters: * **BTTPredefinedActionType**: 260 Example: { "BTTPredefinedActionType": 260 } ### External Monitor Brightness Up > Increases external monitor brightness. Parameters: * **BTTPredefinedActionType**: 120 Example: { "BTTPredefinedActionType": 120 } ### External Monitor Brightness Down > Decreases external monitor brightness. Parameters: * **BTTPredefinedActionType**: 121 Example: { "BTTPredefinedActionType": 121 } ### External Brightness Up (Small Step) > Increases external brightness by small amount. Parameters: * **BTTPredefinedActionType**: 261 Example: { "BTTPredefinedActionType": 261 } ### External Brightness Down (Small Step) > Decreases external brightness by small amount. Parameters: * **BTTPredefinedActionType**: 262 Example: { "BTTPredefinedActionType": 262 } ### Set Brightness > Sets display brightness to specific level. Parameters: * **BTTPredefinedActionType**: 370 * **BTTGenericActionConfig**: Brightness level (0-100) Example: { "BTTPredefinedActionType": 370, "BTTGenericActionConfig": "75" } ### Keyboard Illumination Up > Increases keyboard backlight brightness. Parameters: * **BTTPredefinedActionType**: 31 Example: { "BTTPredefinedActionType": 31 } ### Keyboard Illumination Down > Decreases keyboard backlight brightness. Parameters: * **BTTPredefinedActionType**: 32 Example: { "BTTPredefinedActionType": 32 } ### Set Keyboard Brightness > Sets keyboard brightness to specific level. Parameters: * **BTTPredefinedActionType**: 477 * **BTTGenericActionConfig**: Brightness level (0-100) Example: { "BTTPredefinedActionType": 477, "BTTGenericActionConfig": "50" } ### Toggle Mirroring > Toggles display mirroring on/off. Parameters: * **BTTPredefinedActionType**: 266 Example: { "BTTPredefinedActionType": 266 } ### AirPlay Mirroring > Opens AirPlay mirroring options. Parameters: * **BTTPredefinedActionType**: 127 Example: { "BTTPredefinedActionType": 127 } ### Toggle Super Brightness > Toggles super brightness mode for current display. Parameters: * **BTTPredefinedActionType**: 326 * **BTTAdditionalActionData**: JSON object (optional) * `BTTSuperBrightnessBrightness`: number - brightness level (default: 4) * `BTTSuperBrightnessSaturation`: float - saturation (default: 0.7) * `BTTSuperBrightnessContrast`: number - contrast (default: 9) * `BTTSuperBrightnessVideoMode`: boolean - video mode (default: false) * `BTTSuperBrightnessOpacity`: float - opacity (default: 0.5) Example: { "BTTPredefinedActionType": 326, "BTTAdditionalActionData": { "BTTSuperBrightnessBrightness": 5, "BTTSuperBrightnessSaturation": 0.8, "BTTSuperBrightnessContrast": 10 } } ### Enable Super Brightness > Enables super brightness for current display. Parameters: * **BTTPredefinedActionType**: 324 * **BTTAdditionalActionData**: JSON object (optional) * `BTTSuperBrightnessBrightness`: number - brightness level (default: 4) * `BTTSuperBrightnessSaturation`: float - saturation (default: 0.7) * `BTTSuperBrightnessContrast`: number - contrast (default: 9) * `BTTSuperBrightnessVideoMode`: boolean - video mode (default: false) * `BTTSuperBrightnessOpacity`: float - opacity (default: 0.5) Example: { "BTTPredefinedActionType": 324, "BTTAdditionalActionData": { "BTTSuperBrightnessBrightness": 5, "BTTSuperBrightnessSaturation": 0.8, "BTTSuperBrightnessContrast": 10 } } ### Disable Super Brightness > Disables super brightness for current display. Parameters: * **BTTPredefinedActionType**: 325 * **BTTAdditionalActionData**: JSON object (optional) * `BTTSuperBrightnessBrightness`: number - brightness level (default: 4) * `BTTSuperBrightnessSaturation`: float - saturation (default: 0.7) * `BTTSuperBrightnessContrast`: number - contrast (default: 9) * `BTTSuperBrightnessVideoMode`: boolean - video mode (default: false) * `BTTSuperBrightnessOpacity`: float - opacity (default: 0.5) Example: { "BTTPredefinedActionType": 325, "BTTAdditionalActionData": { "BTTSuperBrightnessBrightness": 5, "BTTSuperBrightnessSaturation": 0.8, "BTTSuperBrightnessContrast": 10 } } ### Move All Windows to Mouse Display > Moves all windows to the display where mouse is. Parameters: * **BTTPredefinedActionType**: 267 Example: { "BTTPredefinedActionType": 267 } ### Rotate Display Clockwise > Rotates the display 90 degrees clockwise. Parameters: * **BTTPredefinedActionType**: 314 Example: { "BTTPredefinedActionType": 314 } ### Rotate Display Counter-Clockwise > Rotates the display 90 degrees counter-clockwise. Parameters: * **BTTPredefinedActionType**: 315 Example: { "BTTPredefinedActionType": 315 } * * * Spaces & Mission Control ------------------------ ### Mission Control > Shows Mission Control. Parameters: * **BTTPredefinedActionType**: 7 Example: { "BTTPredefinedActionType": 7 } ### Mission Control & Show Desktop Preview > Shows Mission Control with desktop preview. Parameters: * **BTTPredefinedActionType**: 165 Example: { "BTTPredefinedActionType": 165 } ### Application Exposé > Shows all windows of current application. Parameters: * **BTTPredefinedActionType**: 6 Example: { "BTTPredefinedActionType": 6 } ### Switch to Desktop (1-19) > Switches to a specific desktop/space. Parameters: * **BTTPredefinedActionType**: * Desktop 1: 207 * Desktop 2: 208 * Desktop 3: 209 * Desktop 4: 210 * Desktop 5: 211 * Desktop 6: 212 * Desktop 7: 213 * Desktop 8: 214 * Desktop 9: 215 * Desktop 10-19: 226-235 Example: { "BTTPredefinedActionType": 207 } ### Move Window to Desktop (1-19) > Moves current window to specific desktop. Parameters: * **BTTPredefinedActionType**: * Desktop 1: 216 * Desktop 2: 217 * Desktop 3: 218 * Desktop 4: 219 * Desktop 5: 220 * Desktop 6: 222 * Desktop 7: 223 * Desktop 8: 224 * Desktop 9: 225 * Desktop 10-19: 236-245 Example: { "BTTPredefinedActionType": 216 } ### Switch Space Left/Right > Switches to the space on the left or right. Parameters: * **BTTPredefinedActionType**: * Left: 113 * Right: 114 * Left (No Animation): 527 * Right (No Animation): 528 Example: { "BTTPredefinedActionType": 113 } ### Move Window to Left/Right Space > Moves window to adjacent space. Parameters: * **BTTPredefinedActionType**: * Left Space: 151 * Right Space: 152 Example: { "BTTPredefinedActionType": 151 } ### Add New Space > Creates a new desktop space. Parameters: * **BTTPredefinedActionType**: 196 Example: { "BTTPredefinedActionType": 196 } ### Launchpad > Shows Launchpad. Parameters: * **BTTPredefinedActionType**: 115 Example: { "BTTPredefinedActionType": 115 } ### Dashboard > Shows Dashboard (deprecated in newer macOS). Parameters: * **BTTPredefinedActionType**: 8 Example: { "BTTPredefinedActionType": 8 } * * * Screenshot Actions ------------------ ### Take Screenshot > Takes a screenshot with configurable options. Parameters: * **BTTPredefinedActionType**: 169 * **BTTScreenshotOptions**: Screenshot configuration as integer or string * **BTTScreenshotDateFormat**: Date format for filename (optional) Example: { "BTTPredefinedActionType": 169, "BTTScreenshotOptions": "0" } ### Screenshot Window > Takes a screenshot of a specific window. Parameters: * **BTTPredefinedActionType**: 170 Example: { "BTTPredefinedActionType": 170 } ### Screenshot and Edit > Takes a screenshot and opens it for editing. Parameters: * **BTTPredefinedActionType**: 171 Example: { "BTTPredefinedActionType": 171 } ### Screenshot to Clipboard > Takes a screenshot directly to clipboard. Parameters: * **BTTPredefinedActionType**: 316 Example: { "BTTPredefinedActionType": 316 } ### Screenshot to Clipboard (New) > Enhanced screenshot to clipboard with more options. Parameters: * **BTTPredefinedActionType**: 500 * **BTTGenericActionConfig**: Configuration options Example: { "BTTPredefinedActionType": 500, "BTTGenericActionConfig": "{\"BTTScreenshotType\":1}" } ### Take Screenshot or Video > Opens screenshot/recording toolbar. Parameters: * **BTTPredefinedActionType**: 263 Example: { "BTTPredefinedActionType": 263 } ### Take Screenshot (Configurable) > Takes a screenshot with advanced configuration options. Parameters: * **BTTPredefinedActionType**: 495 * **BTTAdditionalActionData**: JSON object with screenshot configuration * `BTTActionScreenCaptureConfigurableMode`: number - Capture mode (0=selection, 1=window, 2=fullscreen) * `BTTActionScreenCaptureConfigurableShowSelection`: boolean - Show selection UI * `BTTActionScreenCaptureConfigurableRecordVideo`: boolean - Record video instead of screenshot * `BTTActionScreenCaptureConfigurableShowDesktopIcons`: boolean - Include desktop icons * `BTTActionScreenCaptureConfigurableCopyToClipboard`: boolean - Copy to clipboard * `BTTActionScreenCaptureConfigurableOpenWith`: string - App bundle ID to open screenshot with * `BTTActionScreenCaptureConfigurableVariableName`: string - Variable name to store file path Example: { "BTTPredefinedActionType": 495, "BTTAdditionalActionData": { "BTTActionScreenCaptureConfigurableMode": 0, "BTTActionScreenCaptureConfigurableShowSelection": true, "BTTActionScreenCaptureConfigurableCopyToClipboard": true, "BTTActionScreenCaptureConfigurableVariableName": "screenshot_path" } } ### Measure Area on Screen > Shows tool to measure distances on screen. Parameters: * **BTTPredefinedActionType**: 501 Example: { "BTTPredefinedActionType": 501 } * * * Clipboard Actions ----------------- ### Toggle Clipboard Manager > Shows/hides the clipboard manager. Parameters: * **BTTPredefinedActionType**: 203 * **BTTAdditionalActionData**: JSON object (optional) * `BTTActionClipboardManagerAutoSaveName`: string - auto-save identifier * `BTTActionClipboardManagerDontHide`: boolean - keep manager visible Example: { "BTTPredefinedActionType": 203, "BTTAdditionalActionData": { "BTTActionClipboardManagerAutoSaveName": "work-clipboard", "BTTActionClipboardManagerDontHide": true } } ### Show Clipboard Manager > Shows the clipboard manager window. Parameters: * **BTTPredefinedActionType**: 480 * **BTTAdditionalActionData**: JSON object (optional) * `BTTActionClipboardManagerAutoSaveName`: string - auto-save identifier * `BTTActionClipboardManagerDontHide`: boolean - keep manager visible Example: { "BTTPredefinedActionType": 480, "BTTAdditionalActionData": { "BTTActionClipboardManagerAutoSaveName": "work-clipboard", "BTTActionClipboardManagerDontHide": true } } ### Hide Clipboard Manager > Hides the clipboard manager window. Parameters: * **BTTPredefinedActionType**: 481 Example: { "BTTPredefinedActionType": 481 } ### Save Clipboard Contents > Temporarily saves current clipboard contents. Parameters: * **BTTPredefinedActionType**: 508 Example: { "BTTPredefinedActionType": 508 } ### Restore Clipboard Contents > Restores previously saved clipboard contents. Parameters: * **BTTPredefinedActionType**: 509 Example: { "BTTPredefinedActionType": 509 } ### Set Clipboard Contents > Sets clipboard to specific text or formatted content. Parameters: * **BTTPredefinedActionType**: 529 * **BTTAdditionalActionData**: JSON object with clipboard configuration * `BTTActionSetClipboardContentsString`: string - Plain text to set * `BTTActionSetClipboardContentsAttributedString`: string - Rich text/attributed string * `BTTActionSetClipboardContentsFormat`: number - Content format (0=plain text, 1=rich text) Example: { "BTTPredefinedActionType": 529, "BTTAdditionalActionData": { "BTTActionSetClipboardContentsString": "Text to copy", "BTTActionSetClipboardContentsFormat": 0 } } ### Upload Clipboard to Imgur > Uploads clipboard image to Imgur and copies URL. Parameters: * **BTTPredefinedActionType**: 297 Example: { "BTTPredefinedActionType": 297 } ### Copy Selected Text with JavaScript > Copies selected text transformed by JavaScript. Parameters: * **BTTPredefinedActionType**: 287 * **BTTRealJavaScriptString**: JavaScript code Example: { "BTTPredefinedActionType": 287, "BTTRealJavaScriptString": "return selectedText.toUpperCase();" } ### Transform Clipboard with JavaScript > Transforms clipboard contents using JavaScript. Parameters: * **BTTPredefinedActionType**: 448 * **BTTRealJavaScriptString**: JavaScript code Example: { "BTTPredefinedActionType": 448, "BTTRealJavaScriptString": "return clipboardContent.replace(/\\s+/g, ' ');" } ### Transform Clipboard with ChatGPT > Transforms clipboard using ChatGPT. Parameters: * **BTTPredefinedActionType**: 449 * **BTTChatGPTPrompt**: Prompt for transformation (stored in launchPath) * **BTTAdditionalActionData**: JSON object with configuration * `BTTChatGPTModelSelection`: Model to use ("gpt-4o-mini", "custom") - default: "gpt-4o-mini" * `BTTChatGPTModel`: Custom model identifier (when using "custom" selection) * `BTTChatGPTTransformerSystemPrompt`: System prompt for the AI * `BTTChatGPTTransformerUserPrompt`: User prompt template - default: "Make everything uppercase, don't add any comment:" * `BTTChatGPTTransformerExampleInput`: Example input for testing - default: "Some Test Text" * `BTTChatGPTNumberOfHistoryItems`: Number of previous requests to include - default: 0 * `BTTChatGPTTransformerShowMiniHUD`: boolean - show mini HUD while waiting - default: true * `BTTChatGPTTransformerAskWhatToDo`: boolean - always ask what to do when executing * `BTTChatGPTTransformerCustomURL`: Custom API endpoint URL * `BTTChatGPTKeepSelectedText`: boolean - keep text selected after transformation - default: true * `BTTChatGPTAppendSelectedText`: boolean - append selected text to user prompt - default: true * `BTTChatGPTImageFilePath`: Path to image file to attach * `BTTChatGPTImageType`: Image source type (0=clipboard, 1=file) * `BTTChatGPTAppendImage`: boolean - attach image to request * `BTTChatGPTUseStreaming`: boolean - stream response instead of waiting - default: false for clipboard * `BTTChatGPTCopyResponseToClipboard`: boolean - copy result to clipboard * `BTTChatGPTCopyResponseToVariable`: boolean - save result to variable * `BTTChatGPTCopyResponseToVariableName`: Variable name to store result * `BTTActionPasteFormat`: Paste format options * `BTTActionPasteInputFormat`: Input format for processing * `BTTChatGPTAPIKey`: OpenAI API key (stored securely) Example: { "BTTPredefinedActionType": 449, "BTTChatGPTPrompt": "Translate this to Spanish", "BTTAdditionalActionData": { "BTTChatGPTModelSelection": "gpt-4o-mini", "BTTChatGPTTransformerSystemPrompt": "You are a professional translator.", "BTTChatGPTTransformerUserPrompt": "Translate the following text to Spanish:", "BTTChatGPTCopyResponseToClipboard": true, "BTTChatGPTUseStreaming": true, "BTTChatGPTTransformerShowMiniHUD": true } } ### Paste Specific Clipboard Item > Pastes item from clipboard history. Parameters: * **BTTPredefinedActionType**: 489 * **BTTActionPasteFirstOrLast**: "first" or "last" or index Example: { "BTTPredefinedActionType": 489, "BTTActionPasteFirstOrLast": "first" } ### Delete Items from Clipboard Manager > Deletes selected items from clipboard history. Parameters: * **BTTPredefinedActionType**: 487 Example: { "BTTPredefinedActionType": 487 } ### Delete Specific Item from Clipboard > Deletes specific item from clipboard manager. Parameters: * **BTTPredefinedActionType**: 512 * **BTTGenericActionConfig**: Item identifier Example: { "BTTPredefinedActionType": 512, "BTTGenericActionConfig": "0" } ### Paste and Remove Item > Pastes and removes item from clipboard manager. Parameters: * **BTTPredefinedActionType**: 484 * **BTTActionPasteAndRemoveGroupName**: Group name (optional) * **BTTActionPasteFirstOrLast**: "first" or "last" * **BTTActionPasteOption**: Paste options (optional) * **BTTActionPasteTransformer**: Transformation to apply (optional) Example: { "BTTPredefinedActionType": 484, "BTTActionPasteFirstOrLast": "first" } ### Custom Paste > Pastes with custom options like plain text. Parameters: * **BTTPredefinedActionType**: 250 * **BTTActionItemsToPaste**: Items to paste * **BTTActionPasteOptions**: Paste options * **BTTActionPasteTransformer**: Transform option * **BTTActionPasteDeleteAfter**: Delete after paste flag Example: { "BTTPredefinedActionType": 250, "BTTActionPasteOptions": "{\"BTTPastePlainText\":true}" } ### Check Clipboard Change > Checks if clipboard has changed. Parameters: * **BTTPredefinedActionType**: 328 Example: { "BTTPredefinedActionType": 328 } ### Wait for Clipboard Change > Waits until clipboard content changes. Parameters: * **BTTPredefinedActionType**: 499 * **BTTGenericActionConfig**: Timeout in seconds (deprecated - use BTTAdditionalActionData) * **BTTAdditionalActionData**: JSON object with wait configuration * `BTTActionWaitForClipboardTimeout`: number - Wait timeout in seconds (default: 5) Example: { "BTTPredefinedActionType": 499, "BTTAdditionalActionData": { "BTTActionWaitForClipboardTimeout": 10 } } ### Enable/Disable Clipboard Manager Watcher > Controls clipboard monitoring. Parameters: * **BTTPredefinedActionType**: * Enable: 434 * Disable: 433 Example: { "BTTPredefinedActionType": 434 } ### Copy to Snippet Group > Copies to a specific snippet group. Parameters: * **BTTPredefinedActionType**: 485 * **BTTGenericActionConfig**: Group name Example: { "BTTPredefinedActionType": 485, "BTTGenericActionConfig": "Code Snippets" } ### Copy/Paste Text Style > Copies or pastes text formatting. Parameters: * **BTTPredefinedActionType**: * Copy Style: 496 * Paste Style: 497 Example: { "BTTPredefinedActionType": 496 } ### Change Formatting of Selected Text > Changes formatting of selected text with extensive customization options. Parameters: * **BTTPredefinedActionType**: 494 * **BTTAdditionalActionData**: JSON object with formatting configuration * `BTTActionChangeTextFormattingSetFontSize`: boolean - Set specific font size * `BTTActionChangeTextFormattingFontSizeFix`: number - Fixed font size to set (when SetFontSize is true) * `BTTActionChangeTextFormattingChangeFontSize`: boolean - Change font size relatively * `BTTActionChangeTextFormattingFontSizeChange`: number - Font size change amount (positive/negative) * `BTTActionChangeTextFormattingChangeFontColor`: boolean - Change font color * `BTTActionChangeTextFormattingFontColor`: string - Font color (hex format, e.g., "#FF0000") * `BTTActionChangeTextFormattingChangeBackgroundColor`: boolean - Change background color * `BTTActionChangeTextFormattingBackgroundColor`: string - Background color (hex format) * `BTTActionChangeTextFormattingUseTemplateString`: boolean - Use template string for advanced formatting * `BTTActionChangeTextFormattingTemplateString`: string - Template string with placeholders * `BTTActionChangeTextFormattingIgnoreFontSize`: boolean - Preserve original font size * `BTTActionChangeTextFormattingIgnoreFont`: boolean - Preserve original font * `BTTActionChangeTextFormattingIgnoreAlignment`: boolean - Preserve original alignment Example (Set fixed font size): { "BTTPredefinedActionType": 494, "BTTAdditionalActionData": { "BTTActionChangeTextFormattingSetFontSize": true, "BTTActionChangeTextFormattingFontSizeFix": 16 } } Example (Change font size relatively): { "BTTPredefinedActionType": 494, "BTTAdditionalActionData": { "BTTActionChangeTextFormattingChangeFontSize": true, "BTTActionChangeTextFormattingFontSizeChange": 2 } } Example (Change colors): { "BTTPredefinedActionType": 494, "BTTAdditionalActionData": { "BTTActionChangeTextFormattingChangeFontColor": true, "BTTActionChangeTextFormattingFontColor": "#FF0000", "BTTActionChangeTextFormattingChangeBackgroundColor": true, "BTTActionChangeTextFormattingBackgroundColor": "#FFFF00" } } Example (Use template string): { "BTTPredefinedActionType": 494, "BTTAdditionalActionData": { "BTTActionChangeTextFormattingUseTemplateString": true, "BTTActionChangeTextFormattingTemplateString": "**{{text}}**", "BTTActionChangeTextFormattingIgnoreFont": true } } ### Change Formatting of Clipboard Contents > Changes formatting of clipboard contents with extensive customization options. Parameters: * **BTTPredefinedActionType**: 495 * **BTTAdditionalActionData**: JSON object with formatting configuration * `BTTActionChangeTextFormattingSetFontSize`: boolean - Set specific font size * `BTTActionChangeTextFormattingFontSizeFix`: number - Fixed font size to set (when SetFontSize is true) * `BTTActionChangeTextFormattingChangeFontSize`: boolean - Change font size relatively * `BTTActionChangeTextFormattingFontSizeChange`: number - Font size change amount (positive/negative) * `BTTActionChangeTextFormattingChangeFontColor`: boolean - Change font color * `BTTActionChangeTextFormattingFontColor`: string - Font color (hex format, e.g., "#FF0000") * `BTTActionChangeTextFormattingChangeBackgroundColor`: boolean - Change background color * `BTTActionChangeTextFormattingBackgroundColor`: string - Background color (hex format) * `BTTActionChangeTextFormattingUseTemplateString`: boolean - Use template string for advanced formatting * `BTTActionChangeTextFormattingTemplateString`: string - Template string with placeholders * `BTTActionChangeTextFormattingIgnoreFontSize`: boolean - Preserve original font size * `BTTActionChangeTextFormattingIgnoreFont`: boolean - Preserve original font * `BTTActionChangeTextFormattingIgnoreAlignment`: boolean - Preserve original alignment Example (Multiple formatting changes): { "BTTPredefinedActionType": 495, "BTTAdditionalActionData": { "BTTActionChangeTextFormattingSetFontSize": true, "BTTActionChangeTextFormattingFontSizeFix": 14, "BTTActionChangeTextFormattingChangeFontColor": true, "BTTActionChangeTextFormattingFontColor": "#0000FF", "BTTActionChangeTextFormattingIgnoreAlignment": true } } * * * Text & Typing Actions --------------------- ### Save Selected Text to Variable > Saves currently selected text to a variable. Parameters: * **BTTPredefinedActionType**: 256 * **BTTVariableName**: Variable name Example: { "BTTPredefinedActionType": 256, "BTTVariableName": "selectedText" } ### Transform Selected Text with JavaScript > Transforms selected text using JavaScript. Parameters: * **BTTPredefinedActionType**: 284 * **BTTRealJavaScriptString**: JavaScript code Example: { "BTTPredefinedActionType": 284, "BTTRealJavaScriptString": "return selectedText.toLowerCase();" } ### Transform Selected Text with ChatGPT > Transforms selected text using ChatGPT. Parameters: * **BTTPredefinedActionType**: 384 * **BTTChatGPTPrompt**: Transformation prompt (stored in launchPath) * **BTTAdditionalActionData**: JSON object with configuration - same keys as Transform Clipboard with ChatGPT * `BTTChatGPTModelSelection`: Model to use ("gpt-4o-mini", "custom") - default: "gpt-4o-mini" * `BTTChatGPTModel`: Custom model identifier (when using "custom" selection) * `BTTChatGPTTransformerSystemPrompt`: System prompt for the AI * `BTTChatGPTTransformerUserPrompt`: User prompt template * `BTTChatGPTTransformerExampleInput`: Example input for testing * `BTTChatGPTNumberOfClipboardItemsToInclude`: number - Include clipboard history items * `BTTChatGPTClipboardItemSeparator`: string - Separator for clipboard items * `BTTChatGPTReplaceSelection`: boolean - Replace selected text with result * `BTTChatGPTInsertAsTyping`: boolean - Type out the response instead of pasting * `BTTChatGPTUsePrimaryLanguageModel`: boolean - Use primary language model * `BTTChatGPTScreenshotOption`: number - Screenshot option (0=none, 1=interactive, 2=focused window) * `BTTChatGPTAddTimeDate`: boolean - Include timestamp in prompt * `BTTChatGPTTokenCountOption`: number - Token counting mode * `BTTChatGPTAddNotchBarContent`: boolean - Include notch bar content * `BTTChatGPTAddMenuBarContent`: boolean - Include menu bar content * `BTTChatGPTAddHistoryModeDescription`: boolean - Include history mode description * `BTTChatGPTOpenAIKey`: string - OpenAI API key (stored securely) * `BTTChatGPTSystemPrompt`: string - System prompt (alternative to BTTChatGPTTransformerSystemPrompt) * `BTTChatGPTUserPrompt`: string - User prompt (alternative to BTTChatGPTTransformerUserPrompt) * `BTTChatGPTModelToUse`: string - Model to use (alternative to BTTChatGPTModel) * `BTTChatGPTNumberOfRecentChatMessages`: number - Include recent chat messages * `BTTChatGPTCustomURL`: string - Custom URL (alternative to BTTChatGPTTransformerCustomURL) * `BTTChatGPTPassPreviousMessages`: boolean - Pass previous messages in conversation * `BTTChatGPTNumberOfHistoryItems`: Number of previous requests to include * `BTTChatGPTTransformerShowMiniHUD`: boolean - show mini HUD while waiting * `BTTChatGPTTransformerAskWhatToDo`: boolean - always ask what to do * `BTTChatGPTTransformerCustomURL`: Custom API endpoint URL * `BTTChatGPTKeepSelectedText`: boolean - keep text selected * `BTTChatGPTAppendSelectedText`: boolean - append selected text to prompt * `BTTChatGPTImageFilePath`: Path to image file to attach * `BTTChatGPTImageType`: Image source type (0=clipboard, 1=file) * `BTTChatGPTAppendImage`: boolean - attach image to request * `BTTChatGPTUseStreaming`: boolean - stream response - default: true * `BTTChatGPTCopyResponseToClipboard`: boolean - copy result to clipboard * `BTTChatGPTCopyResponseToVariable`: boolean - save result to variable * `BTTChatGPTCopyResponseToVariableName`: Variable name to store result * `BTTActionPasteFormat`: Paste format options * `BTTActionPasteInputFormat`: Input format for processing * `BTTChatGPTAPIKey`: OpenAI API key (stored securely) Example: { "BTTPredefinedActionType": 384, "BTTChatGPTPrompt": "Fix grammar and spelling", "BTTAdditionalActionData": { "BTTChatGPTModelSelection": "gpt-4o-mini", "BTTChatGPTTransformerSystemPrompt": "You are a professional editor.", "BTTChatGPTCopyResponseToClipboard": true, "BTTChatGPTUseStreaming": true, "BTTChatGPTReplaceSelection": true, "BTTChatGPTScreenshotOption": 0 } } ### ChatGPT Selection to Clipboard & Variable > Processes selection with ChatGPT, saves to clipboard and variable. Parameters: * **BTTPredefinedActionType**: 471 * **BTTChatGPTPrompt**: Processing prompt (stored in launchPath) * **BTTVariableName**: Variable to save result (deprecated - use BTTChatGPTCopyResponseToVariableName) * **BTTAdditionalActionData**: JSON object with configuration - same keys as other ChatGPT actions * `BTTChatGPTModelSelection`: Model to use ("gpt-4o-mini", "custom") * `BTTChatGPTModel`: Custom model identifier * `BTTChatGPTTransformerSystemPrompt`: System prompt * `BTTChatGPTTransformerUserPrompt`: User prompt template * `BTTChatGPTTransformerExampleInput`: Example input * `BTTChatGPTNumberOfHistoryItems`: History items to include * `BTTChatGPTTransformerShowMiniHUD`: boolean - show mini HUD * `BTTChatGPTTransformerAskWhatToDo`: boolean - ask what to do * `BTTChatGPTTransformerCustomURL`: Custom API URL * `BTTChatGPTKeepSelectedText`: boolean - keep selected * `BTTChatGPTAppendSelectedText`: boolean - append selected text * `BTTChatGPTImageFilePath`: Image file path * `BTTChatGPTImageType`: Image source (0=clipboard, 1=file) * `BTTChatGPTAppendImage`: boolean - attach image * `BTTChatGPTUseStreaming`: boolean - stream response * `BTTChatGPTCopyResponseToClipboard`: boolean - copy to clipboard - default: true * `BTTChatGPTCopyResponseToVariable`: boolean - save to variable - default: true * `BTTChatGPTCopyResponseToVariableName`: Variable name - default: "BTTChatGPTResponse" * `BTTActionPasteFormat`: Paste format * `BTTActionPasteInputFormat`: Input format * `BTTChatGPTAPIKey`: API key (secure) Example: { "BTTPredefinedActionType": 471, "BTTChatGPTPrompt": "Summarize this text", "BTTAdditionalActionData": { "BTTChatGPTModelSelection": "gpt-4o-mini", "BTTChatGPTCopyResponseToClipboard": true, "BTTChatGPTCopyResponseToVariable": true, "BTTChatGPTCopyResponseToVariableName": "summary", "BTTChatGPTUseStreaming": true } } ### Reset ChatGPT Conversation > Resets the current ChatGPT conversation context. Parameters: * **BTTPredefinedActionType**: 385 Example: { "BTTPredefinedActionType": 385 } ### Cancel ChatGPT Request > Cancels ongoing ChatGPT request. Parameters: * **BTTPredefinedActionType**: 470 Example: { "BTTPredefinedActionType": 470 } ### OCR Area on Screen > Performs OCR on selected screen area. Parameters: * **BTTPredefinedActionType**: 498 * **BTTOCRLanguages**: Language codes (optional) Example: { "BTTPredefinedActionType": 498, "BTTOCRLanguages": "en,de" } ### Find Text on Screen > Searches for text on screen and clicks it. Parameters: * **BTTPredefinedActionType**: 426 * **BTTGenericActionConfig**: Text to find (deprecated - use BTTAdditionalActionData) * **BTTAdditionalActionData**: JSON object with find text configuration * `BTTActionFindTextAction`: number - Action on find (0=nothing, 1=move mouse, 2=click, 3=double click) * `BTTActionFindTextScreenArea`: string - Screen area to search (coordinates) * `BTTActionFindTextIsRegex`: boolean - Use regular expression matching * `BTTActionFindTextUseOCR`: boolean - Use OCR for text detection * `BTTActionFindTextString`: string - Text to find * `BTTActionFindTextCaseSensitive`: boolean - Case sensitive search * `BTTActionFindTextScreen`: number - Screen to search (0=all, 1=main, 2=mouse screen) * `BTTActionFindTextEnableVisualFeedback`: boolean - Show visual feedback on matches * `BTTActionFindTextVariableIdentifier`: string - Variable name to store result * `BTTActionFindTextMatchMultiple`: boolean - Find all matches * `BTTActionFindTextWaitFor`: number - Wait duration in seconds * `BTTActionFindTextWaitMode`: number - Wait behavior (0=fail if not found, 1=wait up to duration) * `BTTActionFindTextSelectElementContainingText`: boolean - Select container element * `BTTActionFindTextMaxDistanceElements`: number - Max distance between elements * `BTTActionFindTextHideMouseCursor`: boolean - Hide cursor during search Example: { "BTTPredefinedActionType": 426, "BTTAdditionalActionData": { "BTTActionFindTextString": "Submit", "BTTActionFindTextAction": 2, "BTTActionFindTextUseOCR": true, "BTTActionFindTextEnableVisualFeedback": true, "BTTActionFindTextWaitFor": 5 } } ### Wait for Text on Screen > Waits until specific text appears on screen. Parameters: * **BTTPredefinedActionType**: 427 * **BTTGenericActionConfig**: Text to wait for * **BTTGenericActionConfig2**: Timeout in seconds Example: { "BTTPredefinedActionType": 427, "BTTGenericActionConfig": "Loading complete", "BTTGenericActionConfig2": "10" } ### Force Check Selection Change > Forces check for text selection change. Parameters: * **BTTPredefinedActionType**: 493 Example: { "BTTPredefinedActionType": 493 } * * * Script Execution ---------------- ### Run Apple Script (Blocking) > Runs AppleScript and waits for completion. Parameters: * **BTTPredefinedActionType**: 172 * **BTTInlineAppleScript**: AppleScript code * **BTTAppleScriptFilePath**: Path to script file (optional) Example: { "BTTPredefinedActionType": 172, "BTTInlineAppleScript": "tell application \"Finder\" to activate" } ### Run Apple Script (Background) > Runs AppleScript in background without blocking. Parameters: * **BTTPredefinedActionType**: 195 * **BTTInlineAppleScript**: AppleScript code * **BTTAppleScriptFilePath**: Path to script file (optional) Example: { "BTTPredefinedActionType": 195, "BTTInlineAppleScript": "display notification \"Task Complete\"" } ### Run JavaScript > Executes JavaScript code. Parameters: * **BTTPredefinedActionType**: * Background: 252 * Main Thread: 253 * Core JavaScript: 281 * **BTTInlineAppleScript**: JavaScript code (for 252/253) * **BTTRealJavaScriptString**: JavaScript code (for 281) * **BTTAppleScriptFilePath**: Path to script file (optional) Example: { "BTTPredefinedActionType": 281, "BTTRealJavaScriptString": "console.log('Hello from BTT');" } ### Terminal Command (Blocking) > Runs terminal command and waits for completion. Parameters: * **BTTPredefinedActionType**: 246 * **BTTTerminalCommand**: Command to execute Example: { "BTTPredefinedActionType": 246, "BTTTerminalCommand": "ls -la" } ### Terminal Command (Background) > Runs terminal command in background. Parameters: * **BTTPredefinedActionType**: 137 * **BTTTerminalCommand**: Command to execute Example: { "BTTPredefinedActionType": 137, "BTTTerminalCommand": "open /Applications/Safari.app" } ### Shell Script Task > Runs shell script with more options. Parameters: * **BTTPredefinedActionType**: 206 * **BTTShellTaskActionScript**: Script content * **BTTShellTaskActionConfig**: Shell configuration (optional) Example: { "BTTPredefinedActionType": 206, "BTTShellTaskActionScript": "#!/bin/bash\necho 'Hello World'", "BTTShellTaskActionConfig": "/bin/bash" } ### Automator Workflow > Runs an Automator workflow. Parameters: * **BTTPredefinedActionType**: 138 * **BTTLaunchPath**: Path to workflow Example: { "BTTPredefinedActionType": 138, "BTTLaunchPath": "/path/to/workflow.workflow" } ### Run Apple Shortcut > Runs a Shortcuts app shortcut. Parameters: * **BTTPredefinedActionType**: 295 * **BTTGenericActionConfig**: Shortcut name or ID Example: { "BTTPredefinedActionType": 295, "BTTGenericActionConfig": "My Shortcut" } ### Trigger Apple Shortcut from System Settings > Triggers system-level shortcut. Parameters: * **BTTPredefinedActionType**: 519 * **BTTGenericActionConfig**: Shortcut identifier Example: { "BTTPredefinedActionType": 519, "BTTGenericActionConfig": "com.apple.shortcuts.12345" } * * * BetterTouchTool Control ----------------------- ### Open BTT Preferences > Opens BetterTouchTool preferences window. Parameters: * **BTTPredefinedActionType**: 105 Example: { "BTTPredefinedActionType": 105 } ### Open Specific BTT Settings > Opens specific section in BTT preferences. Parameters: * **BTTPredefinedActionType**: 374 * **BTTGenericActionConfig**: Settings section identifier Example: { "BTTPredefinedActionType": 374, "BTTGenericActionConfig": "gestures" } ### Restart BetterTouchTool > Restarts BetterTouchTool. Parameters: * **BTTPredefinedActionType**: 55 Example: { "BTTPredefinedActionType": 55 } ### Quit BetterTouchTool > Quits BetterTouchTool. Parameters: * **BTTPredefinedActionType**: 56 Example: { "BTTPredefinedActionType": 56 } ### Toggle BetterTouchTool > Enables/disables BetterTouchTool. Parameters: * **BTTPredefinedActionType**: 101 Example: { "BTTPredefinedActionType": 101 } ### Disable Gesture Recognition > Temporarily disables gesture recognition. Parameters: * **BTTPredefinedActionType**: 144 * **BTTDisableGestureRecognitionFor**: Duration (optional) Example: { "BTTPredefinedActionType": 144 } ### Disable Triggers for X Seconds > Disables all triggers temporarily. Parameters: * **BTTPredefinedActionType**: 502 * **BTTDisableTriggerForXSeconds**: Duration in seconds * **BTTDisableTriggerForUUID**: Specific trigger UUID (optional) Example: { "BTTPredefinedActionType": 502, "BTTDisableTriggerForXSeconds": "10" } ### Switch to Preset > Switches to a specific preset. Parameters: * **BTTPredefinedActionType**: 139 * **BTTPresetSwitchConfig**: Preset configuration * **BTTMasterPresetName**: Master preset name (optional) Example: { "BTTPredefinedActionType": 139, "BTTPresetSwitchConfig": "Default" } ### Toggle Preset > Enables/disables a specific preset. Parameters: * **BTTPredefinedActionType**: 258 * **BTTPresetSwitchConfig**: Preset configuration * **BTTMasterPresetName**: Master preset name (optional) Example: { "BTTPredefinedActionType": 258, "BTTPresetSwitchConfig": "Gaming" } ### Trigger Named Trigger > Executes a named trigger by name. Parameters: * **BTTPredefinedActionType**: 248 * **BTTNamedTriggerToTrigger**: Trigger name Example: { "BTTPredefinedActionType": 248, "BTTNamedTriggerToTrigger": "My Custom Action" } ### Trigger Actions for Item with UUID > Triggers actions of specific item by UUID. Parameters: * **BTTPredefinedActionType**: 400 * **BTTGenericActionConfig**: Item UUID Example: { "BTTPredefinedActionType": 400, "BTTGenericActionConfig": "12345-67890-abcdef" } ### Show BTT Menu Bar Status Item Menu > Shows BTT's menu bar menu. Parameters: * **BTTPredefinedActionType**: 425 Example: { "BTTPredefinedActionType": 425 } * * * Touch Bar Actions ----------------- ### Toggle Touch Bar > Shows/hides the Touch Bar. Parameters: * **BTTPredefinedActionType**: 188 Example: { "BTTPredefinedActionType": 188 } ### Show Touch Bar > Shows the Touch Bar. Parameters: * **BTTPredefinedActionType**: 282 Example: { "BTTPredefinedActionType": 282 } ### Hide Touch Bar > Hides the Touch Bar. Parameters: * **BTTPredefinedActionType**: 283 Example: { "BTTPredefinedActionType": 283 } ### Toggle Global Touch Bar > Toggles global Touch Bar visibility. Parameters: * **BTTPredefinedActionType**: 190 Example: { "BTTPredefinedActionType": 190 } ### Open Touch Bar Group > Opens a specific Touch Bar group. Parameters: * **BTTPredefinedActionType**: 205 * **BTTOpenGroupWithName**: Group name Example: { "BTTPredefinedActionType": 205, "BTTOpenGroupWithName": "Media Controls" } ### Close Current Touch Bar Group > Closes the currently open Touch Bar group. Parameters: * **BTTPredefinedActionType**: 191 Example: { "BTTPredefinedActionType": 191 } * * * Notch Bar Actions ----------------- ### Toggle Notch Bar Hidden > Shows/hides the Notch Bar. Parameters: * **BTTPredefinedActionType**: 301 Example: { "BTTPredefinedActionType": 301 } ### Show Notch Bar > Shows the Notch Bar. Parameters: * **BTTPredefinedActionType**: 312 Example: { "BTTPredefinedActionType": 312 } ### Hide Notch Bar > Hides the Notch Bar. Parameters: * **BTTPredefinedActionType**: 311 Example: { "BTTPredefinedActionType": 311 } ### Disable Notch Bar > Completely disables the Notch Bar. Parameters: * **BTTPredefinedActionType**: 299 Example: { "BTTPredefinedActionType": 299 } ### Disable Notch Bar for X Seconds > Temporarily disables Notch Bar. Parameters: * **BTTPredefinedActionType**: 299 * **BTTGenericActionConfig**: Duration in seconds Example: { "BTTPredefinedActionType": 299, "BTTGenericActionConfig": "30" } ### Toggle Notch Bar Mode > Toggles between Notch Bar modes. Parameters: * **BTTPredefinedActionType**: 300 Example: { "BTTPredefinedActionType": 300 } ### Open Notch Bar Group > Opens specific Notch Bar group. Parameters: * **BTTPredefinedActionType**: 310 * **BTTOpenGroupWithName**: Group name Example: { "BTTPredefinedActionType": 310, "BTTOpenGroupWithName": "System Info" } ### Close Current Notch Bar Group > Closes current Notch Bar group. Parameters: * **BTTPredefinedActionType**: 309 Example: { "BTTPredefinedActionType": 309 } * * * Stream Deck Actions ------------------- ### Open Stream Deck Group > Opens a Stream Deck button group. Parameters: * **BTTPredefinedActionType**: 341 * **BTTOpenGroupWithName**: Group name Example: { "BTTPredefinedActionType": 341, "BTTOpenGroupWithName": "Productivity" } ### Close Current Stream Deck Group > Closes current Stream Deck group. Parameters: * **BTTPredefinedActionType**: 340 Example: { "BTTPredefinedActionType": 340 } ### Stream Deck Brightness Control > Controls Stream Deck brightness. Parameters: * **BTTPredefinedActionType**: * Change Brightness: 343 * Set Brightness: 344 * **BTTGenericActionConfig**: Brightness value (0-100 for set, +/- for change) Example: { "BTTPredefinedActionType": 344, "BTTGenericActionConfig": "75" } ### Stream Deck Power Control > Controls Stream Deck power state. Parameters: * **BTTPredefinedActionType**: * Turn Off: 347 * Turn On: 348 * Toggle On/Off: 349 Example: { "BTTPredefinedActionType": 349 } ### Show/Hide Stream Deck Emulator > Controls Stream Deck emulator window. Parameters: * **BTTPredefinedActionType**: 365 Example: { "BTTPredefinedActionType": 365 } ### Activate Stream Deck Touch Screen Group > Activates touch screen configuration on Stream Deck+. Parameters: * **BTTPredefinedActionType**: 376 * **BTTGenericActionConfig**: Configuration group name Example: { "BTTPredefinedActionType": 376, "BTTGenericActionConfig": "Video Editing" } ### Temporarily Change Stream Deck Item > Temporarily changes display of Stream Deck button. Parameters: * **BTTPredefinedActionType**: 377 * **BTTGenericActionConfig**: Item UUID * **BTTGenericActionConfig2**: New display configuration Example: { "BTTPredefinedActionType": 377, "BTTGenericActionConfig": "button-uuid-123", "BTTGenericActionConfig2": "{\"title\":\"Temp Text\",\"backgroundColor\":\"#FF0000\"}" } * * * Floating Menu Actions --------------------- ### Show Floating Menu > Shows a specific floating menu. Parameters: * **BTTPredefinedActionType**: 386 * **BTTGenericActionConfig**: Menu identifier (legacy) * **BTTAdditionalActionData**: JSON object with menu configuration * `BTTMenuUUID`: UUID of the menu to show * `BTTMenuActionMenuID`: Alternative menu identifier * `BTTMenuActionMenuName`: Menu name (alternative to UUID) * `BTTMenuActionMenuItemUUID`: Specific item UUID to show * `BTTMenuActionMenuItemName`: Specific item name to show Example: { "BTTPredefinedActionType": 386, "BTTAdditionalActionData": { "BTTMenuUUID": "12345678-1234-1234-1234-123456789012", "BTTMenuActionMenuName": "MainMenu" } } ### Hide Floating Menu > Hides a specific floating menu. Parameters: * **BTTPredefinedActionType**: 387 * **BTTGenericActionConfig**: Menu identifier Example: { "BTTPredefinedActionType": 387, "BTTGenericActionConfig": "MainMenu" } ### Toggle Floating Menu > Toggles visibility of floating menu. Parameters: * **BTTPredefinedActionType**: 388 * **BTTGenericActionConfig**: Menu identifier (legacy) * **BTTAdditionalActionData**: JSON object with menu configuration * `BTTMenuUUID`: UUID of the menu to toggle * `BTTMenuActionMenuID`: Alternative menu identifier * `BTTMenuActionMenuName`: Menu name (alternative to UUID) * `BTTMenuActionMenuItemUUID`: Specific item UUID * `BTTMenuActionMenuItemName`: Specific item name Example: { "BTTPredefinedActionType": 388, "BTTAdditionalActionData": { "BTTMenuActionMenuName": "QuickActions" } } ### Open Floating Menu Submenu > Opens a submenu in floating menu. Parameters: * **BTTPredefinedActionType**: 472 * **BTTGenericActionConfig**: Submenu identifier Example: { "BTTPredefinedActionType": 472, "BTTGenericActionConfig": "FileMenu" } ### Close Floating Menu Submenu > Closes current floating menu submenu. Parameters: * **BTTPredefinedActionType**: 445 Example: { "BTTPredefinedActionType": 445 } ### Floating Menu Execute JavaScript > Executes JavaScript in floating menu context. Parameters: * **BTTPredefinedActionType**: 398 * **BTTGenericActionConfig**: Menu identifier * **BTTRealJavaScriptString**: JavaScript code Example: { "BTTPredefinedActionType": 398, "BTTGenericActionConfig": "MainMenu", "BTTRealJavaScriptString": "updateMenuItem('item1', 'New Text');" } ### Floating Menu Load HTML > Loads HTML/URL into floating menu web view. Parameters: * **BTTPredefinedActionType**: 397 * **BTTGenericActionConfig**: Menu identifier * **BTTGenericActionConfig2**: HTML or URL Example: { "BTTPredefinedActionType": 397, "BTTGenericActionConfig": "WebMenu", "BTTGenericActionConfig2": "Hello World" } ### Floating Menu Evaluate Scripts > Re-evaluates all scripts in floating menu. Parameters: * **BTTPredefinedActionType**: 389 * **BTTGenericActionConfig**: Menu identifier Example: { "BTTPredefinedActionType": 389, "BTTGenericActionConfig": "DynamicMenu" } ### Floating Menu Re-evaluate Position > Recalculates floating menu position. Parameters: * **BTTPredefinedActionType**: 390 * **BTTGenericActionConfig**: Menu identifier Example: { "BTTPredefinedActionType": 390, "BTTGenericActionConfig": "MainMenu" } ### Floating Menu Bring to Mouse Screen > Moves floating menu to screen with mouse. Parameters: * **BTTPredefinedActionType**: 399 * **BTTGenericActionConfig**: Menu identifier Example: { "BTTPredefinedActionType": 399, "BTTGenericActionConfig": "ToolsMenu" } ### Trigger Floating Menu Highlighted Item > Triggers the currently highlighted menu item. Parameters: * **BTTPredefinedActionType**: 393 * **BTTGenericActionConfig**: Menu identifier Example: { "BTTPredefinedActionType": 393, "BTTGenericActionConfig": "MainMenu" } ### Trigger Highlighted Item and Hide Menu > Triggers highlighted item and hides menu. Parameters: * **BTTPredefinedActionType**: 404 * **BTTGenericActionConfig**: Menu identifier Example: { "BTTPredefinedActionType": 404, "BTTGenericActionConfig": "QuickMenu" } ### Floating Menu Hover/Unhover > Controls hover state of floating menu. Parameters: * **BTTPredefinedActionType**: * Hover: 394 * Unhover: 395 * Toggle Hover: 396 * **BTTGenericActionConfig**: Menu identifier Example: { "BTTPredefinedActionType": 394, "BTTGenericActionConfig": "MainMenu" } ### Update Floating Menu Item Properties > Updates properties of floating menu item. Parameters: * **BTTPredefinedActionType**: 447 * **BTTGenericActionConfig**: JSON with item UUID and properties Example: { "BTTPredefinedActionType": 447, "BTTGenericActionConfig": "{\"uuid\":\"item-123\",\"title\":\"New Title\",\"enabled\":true}" } ### Update Floating Menu Properties > Updates properties of floating menu itself. Parameters: * **BTTPredefinedActionType**: 450 * **BTTGenericActionConfig**: JSON with menu UUID and properties Example: { "BTTPredefinedActionType": 450, "BTTGenericActionConfig": "{\"uuid\":\"menu-123\",\"position\":{\"x\":100,\"y\":200}}" } ### Reset Floating Menu Item Properties > Resets item properties to defaults. Parameters: * **BTTPredefinedActionType**: 451 * **BTTGenericActionConfig**: Item UUID Example: { "BTTPredefinedActionType": 451, "BTTGenericActionConfig": "item-123" } ### Run Floating Menu Content Scripts > Executes content scripts in floating menu. Parameters: * **BTTPredefinedActionType**: 469 * **BTTGenericActionConfig**: Menu identifier Example: { "BTTPredefinedActionType": 469, "BTTGenericActionConfig": "ScriptedMenu" } * * * Control Flow Actions -------------------- ### Delay (Async / Non-Blocking) > This action pauses the execution of the current action sequence but allows the BTT process to continue processing other stuff. Usually you'd use this action to add some delays to your action sequences, e.g. when waiting for some UI to react. If you need longer timeouts (e.g. to trigger something after 10 minutes) use the "Trigger Action Sequence After Timeout" action instead. Parameters: * **BTTPredefinedActionType**: 345 * **BTTDelayNextActionBy**: The amount of time to pause the action execution. Provided as number with a dot as decimal separator. Example: { "BTTPredefinedActionType": 345, "BTTDelayNextActionBy": 2.5 } ### Delay (Blocking) > This one freezes the BTT process for the specified amount of time, preventing any action processing during that time. You should only ever use this with small delays. Parameters: * **BTTPredefinedActionType**: 129 * **BTTDelayNextActionBy**: The amount of time to freeze / block the action execution. Provided as number with a dot as decimal separator. **Note**: Usually you should use the "Delay (Async / Non-Blocking) action instead. The blocking one is only helpful for very few usecases. Example: { "BTTPredefinedActionType": 129, "BTTDelayNextActionBy": 2.5 } ### Start Repeat > This marks the start of a for loop / repeat. All actions that come between this and the "End / Stop Repeat" action will be repeated. Parameters: * **BTTPredefinedActionType**: 329 * **BTTGenericActionConfig**: The name of the for loop * **BTTAdditionalActionData**: Contains further action configuration object * `BTTActionForLoopRepeat`: Number of times the for loop should repeat (number) * `BTTActionForLoopRepeatVariable`: If the number of repeats is controlled by a BTT variable, you can specify the variable here Example: { "BTTPredefinedActionType": 329, "BTTAdditionalActionData": { "BTTActionForLoopRepeat": 99 }, "BTTGenericActionConfig": "nameOfTheLoop" } ### End / Stop Repeat > Marks the end of the repeat / for loop. Parameters: * **BTTPredefinedActionType**: 332 Example: { "BTTPredefinedActionType": 332 } ### Break > Can only be used between "Start Repeat" and "End/Stop Repeat". Behaves like a standard break e.g. in JavaScript. Parameters: * **BTTPredefinedActionType**: 332 Example: { "BTTPredefinedActionType": 332 } ### Cancel Repeat > This will cancel the specified repeat loop (if it is running). Parameters: * **BTTPredefinedActionType**: 424 * **BTTGenericActionConfig**: The name of the repeat / loop that shall be canceled. Example: { "BTTPredefinedActionType": 424, "BTTGenericActionConfig": "theLoopIdentifier" } ### IF Condition > Starts conditional block based on variable. Parameters: * **BTTPredefinedActionType**: 330 * **BTTIfConditionFormat**: Condition format string * **BTTIfConditionData**: Condition data (base64 encoded) Example: { "BTTPredefinedActionType": 330, "BTTIfConditionFormat": "myVar == 'true'", "BTTIfConditionData": "base64_encoded_data" } ### IF JavaScript True > Conditional based on JavaScript evaluation. Parameters: * **BTTPredefinedActionType**: 431 * **BTTRealJavaScriptString**: JavaScript that returns boolean Example: { "BTTPredefinedActionType": 431, "BTTRealJavaScriptString": "return window.innerWidth > 1024;" } ### IF AppleScript True > Conditional based on AppleScript evaluation. Parameters: * **BTTPredefinedActionType**: 432 * **BTTInlineAppleScript**: AppleScript that returns boolean Example: { "BTTPredefinedActionType": 432, "BTTInlineAppleScript": "tell application \"System Events\" to return (name of first process whose frontmost is true) is \"Safari\"" } ### IF Image Visible > Conditional based on image visibility on screen. Parameters: * **BTTPredefinedActionType**: 405 * **BTTFindPositionOfImageImage**: Base64 encoded image * **BTTFindPositionOfImageImageDark**: Base64 encoded dark mode image (optional) Example: { "BTTPredefinedActionType": 405, "BTTFindPositionOfImageImage": "base64_image_data" } ### IF Text Visible > Conditional based on text visibility on screen. Parameters: * **BTTPredefinedActionType**: 428 * **BTTGenericActionConfig**: Text to find Example: { "BTTPredefinedActionType": 428, "BTTGenericActionConfig": "Submit Button" } ### ELSE > Else clause for IF conditions. Parameters: * **BTTPredefinedActionType**: 333 Example: { "BTTPredefinedActionType": 333 } ### END IF > Ends conditional block. Parameters: * **BTTPredefinedActionType**: 331 Example: { "BTTPredefinedActionType": 331 } ### Execute Action Sequence After Timeout (Cancellable) > This allows to execute an action sequence after a specific amount of time. While the previously described delay actions are only meant to be used for short delays, this one can also be used for longer delays. Additionally you can specify a name for the timer, which allows you to cancel it if necessary. Parameters: * **BTTPredefinedActionType**: 351 * **BTTGenericActionConfig**: The timeout in seconds as string using a dot as decimal separator * **BTTGenericActionConfig2**: The name of the timer * **BTTAdditionalActions**: An array of actions that shall be executed after the timeout Example: { "BTTPredefinedActionType": 351, "BTTGenericActionConfig2": "timerName", "BTTGenericActionConfig": "3.5", "BTTAdditionalActions": [\ {\ "BTTTriggerType": 740,\ "BTTPredefinedActionType": 366,\ "BTTTriggerClass": "BTTTriggerTypeCustomActionConfig",\ "BTTAdditionalActions": [\ {\ "BTTTriggerClass": "BTTTriggerTypeCustomActionConfig",\ "BTTPredefinedActionType": 3\ },\ {\ "BTTTriggerClass": "BTTTriggerTypeCustomActionConfig",\ "BTTPredefinedActionType": 3\ }\ ]\ }\ ] } ### Cancel Timed / Delayed Action Sequences > Cancels the execution of action sequences that has been scheduled via predefined action "Execute Action Sequence After Timeout (Cancellable)". Parameters: * **BTTPredefinedActionType**: 352 * **BTTGenericActionConfig2**: The name of the scheduled action sequence you want to cancel Example: { "BTTPredefinedActionType": 352, "BTTGenericActionConfig2": "theNameOfTheTimer" } ### Ask For Input & Save To Variable > Shows a floating input field and saves the entered text into a variable. Parameters: * **BTTPredefinedActionType**: 403 * **BTTAdditionalActionData**: Contains the configuration object * `BTTActionAskForInputPrompt`: The input prompt (string) * `BTTActionAskForInputVariableName`: The variable name (string) * `BTTActionAskForInputVariableType`: 0 - String or 1 Number * `BTTActionAskForInputOnlyHideOnEnterOrEsc`: 0: Hide when clicking outside, when hitting esc or when hitting enter. 1: Hide when hitting esc or when hitting enter * `BTTActionAskForInputUseActivatingWindow`: If set to 1 the window will take focus - might be necessary in some situations to receive keyboard input Example: { "BTTPredefinedActionType": 403, "BTTAdditionalActionData": { "BTTActionAskForInputVariableName": "address", "BTTActionAskForInputPrompt": "Enter your address:" } } ### Wait for Keyboard Input > This will pause the currently executing action sequence until the specified continue or cancel key has been pressed. Parameters: * **BTTPredefinedActionType**: 486 * **BTTActionWaitForKeyboardInputCancelKeyCode**: A keycode that cancels the action sequence when pressed (number) * **BTTActionWaitForKeyboardInputContinueKeyCode**: A keycode that continues the action sequence when pressed (number) * **BTTActionWaitForKeyboardInputTimeout**: Timeout in seconds (number) Example: { "BTTPredefinedActionType": 486, "BTTActionWaitForKeyboardInputCancelKeyCode": 7, "BTTActionWaitForKeyboardInputContinueKeyCode": 8, "BTTActionWaitForKeyboardInputTimeout": 10 } ### Wait for Conditions To Become True > This will pause the currently executing action sequence until the specified conditions have been met. Parameters: * **BTTPredefinedActionType**: 417 * **BTTWaitForConditionFormat**: The condition to be met (read only) * **BTTWaitForConditionData**: The condition to be met (data, can only be created via BTT UI) * **BTTGenericActionConfig**: An identifier to reference the wait * **BTTGenericActionConfig2**: A JSON string with the properties BTTActionWaitForConditionsInterval and BTTActionWaitForConditionsTimeout Example: { "BTTPredefinedActionType": 417, "BTTWaitForConditionFormat": "fingers_touching_trackpad >= 5", "BTTWaitForConditionData": "base64encodedconditiondata", "BTTGenericActionConfig": "identifier", "BTTGenericActionConfig2": "{\"BTTActionWaitForConditionsInterval\": 2, \"BTTActionWaitForConditionsTimeout\": 10}" } ### Cancel Wait for Conditions To Become True > This will cancel a wait for conditions action. Parameters: * **BTTPredefinedActionType**: 418 * **BTTGenericActionConfig**: The identifier of the condition wait that you want to cancel Example: { "BTTPredefinedActionType": 418, "BTTGenericActionConfig": "example" } ### Wait for Change Of Focused Window > This will pause the currently executing action sequence until the focused window changes. Parameters: * **BTTPredefinedActionType**: 423 * **BTTGenericActionConfig2**: A JSON string with the properties BTTActionWaitForFocusChangeInterval and BTTActionWaitForFocusChangeTimeout Example: { "BTTPredefinedActionType": 423, "BTTGenericActionConfig2": "{\"BTTActionWaitForFocusChangeInterval\": 2,\"BTTActionWaitForFocusChangeTimeout\": 10}" } Parameters: * **BTTPredefinedActionType**: 334 Example: { "BTTPredefinedActionType": 334 } ### Break > Breaks out of current loop or control structure. Parameters: * **BTTPredefinedActionType**: 331 Example: { "BTTPredefinedActionType": 331 } ### Continue With Next Action > Continues to next action in sequence. Parameters: * **BTTPredefinedActionType**: 366 Example: { "BTTPredefinedActionType": 366 } ### Stop All Action Sequences > Stops all running action sequences. Parameters: * **BTTPredefinedActionType**: 531 Example: { "BTTPredefinedActionType": 531 } ### Wait For Conditions > Waits for specific conditions to become true. Parameters: * **BTTPredefinedActionType**: 417 * **BTTWaitForConditionFormat**: Condition format * **BTTWaitForConditionData**: Condition data (base64) * **BTTGenericActionConfig2**: JSON object with configuration (optional) * `BTTActionWaitForConditionsInterval`: Check interval in seconds * `BTTActionWaitForConditionsTimeout`: Wait timeout in seconds * Other `BTTActionWaitForConditions*` keys for specific conditions Example: { "BTTPredefinedActionType": 417, "BTTWaitForConditionFormat": "variable == 'ready'", "BTTWaitForConditionData": "base64_data", "BTTGenericActionConfig2": { "BTTActionWaitForConditionsInterval": 0.5, "BTTActionWaitForConditionsTimeout": 30 } } ### Cancel Wait For Conditions > Cancels waiting for conditions. Parameters: * **BTTPredefinedActionType**: 418 Example: { "BTTPredefinedActionType": 418 } ### Wait For App Launch/Terminate > Waits for app state changes. Parameters: * **BTTPredefinedActionType**: * Launch: 413 * Terminate: 414 * Activate: 415 * Deactivate: 416 * **BTTGenericActionConfig**: App bundle identifier Example: { "BTTPredefinedActionType": 413, "BTTGenericActionConfig": "com.apple.Safari" } ### Wait For Image to Become Visible > Waits for image to appear on screen. Parameters: * **BTTPredefinedActionType**: 419 * **BTTFindPositionOfImageImage**: Base64 encoded image * **BTTGenericActionConfig2**: Timeout in seconds Example: { "BTTPredefinedActionType": 419, "BTTFindPositionOfImageImage": "base64_image_data", "BTTGenericActionConfig2": "10" } ### Wait For Focus Change > Waits for window focus to change. Parameters: * **BTTPredefinedActionType**: 423 * **BTTGenericActionConfig2**: JSON object with configuration * `BTTActionWaitForFocusChangeInterval`: Check interval in seconds (default: 0) * `BTTActionWaitForFocusChangeTimeout`: Wait timeout in seconds (optional) Example: { "BTTPredefinedActionType": 423, "BTTGenericActionConfig2": { "BTTActionWaitForFocusChangeInterval": 2, "BTTActionWaitForFocusChangeTimeout": 10 } } ### Wait For Keyboard Input > Waits for specific keyboard input. Parameters: * **BTTPredefinedActionType**: 486 * **BTTActionWaitForKeyboardInputContinueKeyCode**: Key code to continue (e.g., "36" for Return key) * **BTTActionWaitForKeyboardInputCancelKeyCode**: Key code to cancel (optional) * **BTTActionWaitForKeyboardInputTimeout**: Timeout in seconds (optional) Example: { "BTTPredefinedActionType": 486, "BTTActionWaitForKeyboardInputContinueKeyCode": "36", "BTTActionWaitForKeyboardInputCancelKeyCode": "53", "BTTActionWaitForKeyboardInputTimeout": 10 } ### Trigger Action Sequence After Timeout > Schedules actions to run after delay. Parameters: * **BTTPredefinedActionType**: 351 * **BTTGenericActionConfig**: Delay in seconds * **BTTActionImmediatelyContinueWithNext**: Continue flag (optional) * **BTTGenericActionConfig2**: Actions to trigger Example: { "BTTPredefinedActionType": 351, "BTTGenericActionConfig": "60", "BTTGenericActionConfig2": "{\"actions\":[{\"BTTPredefinedActionType\":371}]}" } ### Cancel Action Sequence After Timeout > Cancels scheduled action sequence. Parameters: * **BTTPredefinedActionType**: 352 * **BTTGenericActionConfig**: Sequence identifier Example: { "BTTPredefinedActionType": 352, "BTTGenericActionConfig": "scheduled-123" } * * * Variable Actions ---------------- ### Set Variable > Sets a persistent or temporary variable. Parameters: * **BTTPredefinedActionType**: 292 * **BTTVariableName**: Variable name * **BTTVariableValue**: Value to set * **BTTVariablePersist**: 1 for persistent, 0 for temporary * **BTTVariableType**: Variable type (optional) * **BTTVariableOnlySetIfNotYetDefined**: Only set if undefined (optional) Example: { "BTTPredefinedActionType": 292, "BTTVariableName": "counter", "BTTVariableValue": "0", "BTTVariablePersist": 1 } ### Increase Variable > Increases numeric variable value. Parameters: * **BTTPredefinedActionType**: 412 * **BTTVariableName**: Variable name * **BTTGenericActionConfig**: Amount to increase Example: { "BTTPredefinedActionType": 412, "BTTVariableName": "counter", "BTTGenericActionConfig": "1" } ### Toggle Variable > Toggles variable between values. Parameters: * **BTTPredefinedActionType**: 335 * **BTTVariableName**: Variable name * **BTTGenericActionConfig**: Toggle values configuration Example: { "BTTPredefinedActionType": 335, "BTTVariableName": "mode", "BTTGenericActionConfig": "{\"values\":[\"on\",\"off\"]}" } ### Toggle Multiple Variables / Cycle Through Multiple Actions > Toggles multiple variables at once or cycles through multiple actions. Parameters: * **BTTPredefinedActionType**: 335 * **BTTGenericActionConfig**: Multiple variable configuration * **BTTAdditionalActionData**: JSON object (optional) * `BTTActionCycleThroughMultipleResetAfterTimeout`: boolean - reset to first action after timeout * `BTTActionCycleThroughMultipleResetTimeout`: float - timeout in seconds Example: { "BTTPredefinedActionType": 335, "BTTGenericActionConfig": "{\"variables\":[{\"name\":\"var1\",\"values\":[\"a\",\"b\"]},{\"name\":\"var2\",\"values\":[\"1\",\"2\"]}]}", "BTTAdditionalActionData": { "BTTActionCycleThroughMultipleResetAfterTimeout": true, "BTTActionCycleThroughMultipleResetTimeout": 5.0 } } ### Toggle On/Off > Simple on/off toggle for variable. Parameters: * **BTTPredefinedActionType**: 346 * **BTTVariableName**: Variable name Example: { "BTTPredefinedActionType": 346, "BTTVariableName": "enabled" } ### Ask For Input & Save to Variable > Shows input dialog and saves to variable. Parameters: * **BTTPredefinedActionType**: 403 * **BTTVariableName**: Variable to save to * **BTTGenericActionConfig**: Input prompt text * **BTTAdditionalActionData**: JSON object with dialog configuration (optional) * `BTTActionAskForInputTitle`: Dialog title * `BTTActionAskForInputPlaceholder`: Placeholder text * `BTTActionAskForInputDefaultValue`: Default value * `BTTActionAskForInputIsSecure`: boolean - secure text entry * `BTTActionAskForInputAllowEmpty`: boolean - allow empty input * Other dialog configuration options Example: { "BTTPredefinedActionType": 403, "BTTVariableName": "userName", "BTTGenericActionConfig": "Please enter your name:", "BTTAdditionalActionData": { "BTTActionAskForInputTitle": "User Registration", "BTTActionAskForInputPlaceholder": "John Doe", "BTTActionAskForInputAllowEmpty": false } } ### Refresh Condition Values > Re-evaluates all condition-based variables. Parameters: * **BTTPredefinedActionType**: 350 Example: { "BTTPredefinedActionType": 350 } ### Show Variables View > Shows window with all current variables. Parameters: * **BTTPredefinedActionType**: 523 Example: { "BTTPredefinedActionType": 523 } * * * Device Control -------------- ### Connect Bluetooth Device > Connects to a Bluetooth device. Parameters: * **BTTPredefinedActionType**: 274 * **BTTActionBluetoothDeviceAddress**: Device address * **BTTActionBluetoothDeviceName**: Device name (optional) Example: { "BTTPredefinedActionType": 274, "BTTActionBluetoothDeviceAddress": "00:11:22:33:44:55" } ### Disconnect Bluetooth Device > Disconnects a Bluetooth device. Parameters: * **BTTPredefinedActionType**: 275 * **BTTActionBluetoothDeviceAddress**: Device address * **BTTActionBluetoothDeviceName**: Device name (optional) Example: { "BTTPredefinedActionType": 275, "BTTActionBluetoothDeviceName": "AirPods Pro" } ### Toggle Bluetooth Device > Toggles Bluetooth device connection. Parameters: * **BTTPredefinedActionType**: 276 * **BTTActionBluetoothDeviceAddress**: Device address * **BTTActionBluetoothDeviceName**: Device name (optional) Example: { "BTTPredefinedActionType": 276, "BTTActionBluetoothDeviceAddress": "00:11:22:33:44:55" } ### Enable Bluetooth > Enables Bluetooth on the system. Parameters: * **BTTPredefinedActionType**: 277 Example: { "BTTPredefinedActionType": 277 } ### Disable Bluetooth > Disables Bluetooth on the system. Parameters: * **BTTPredefinedActionType**: 278 Example: { "BTTPredefinedActionType": 278 } ### Toggle Bluetooth > Toggles Bluetooth on/off. Parameters: * **BTTPredefinedActionType**: 279 Example: { "BTTPredefinedActionType": 279 } ### Connect MIDI Device > Connects to a MIDI device. Parameters: * **BTTPredefinedActionType**: 271 * **BTTMidiDeviceName**: Device identifier Example: { "BTTPredefinedActionType": 271, "BTTMidiDeviceName": "MIDI Controller" } ### Send MIDI Command > Sends MIDI command to device. Parameters: * **BTTPredefinedActionType**: 462 * **BTTGenericActionConfig**: MIDI command data Example: { "BTTPredefinedActionType": 462, "BTTGenericActionConfig": "{\"channel\":1,\"note\":60,\"velocity\":127}" } ### Send Raw Data to Generic Device > Sends raw data to connected device. Parameters: * **BTTPredefinedActionType**: 379 * **BTTGenericActionConfig**: Device and data configuration Example: { "BTTPredefinedActionType": 379, "BTTGenericActionConfig": "{\"device\":\"device-id\",\"data\":\"raw-hex-data\"}" } ### Execute Generic Device Command > Executes command on generic device. Parameters: * **BTTPredefinedActionType**: 380 * **BTTGenericActionConfig2**: Command configuration * **BTTGenericActionConfig**: Command name Example: { "BTTPredefinedActionType": 380, "BTTGenericActionConfig": "Toggle LED", "BTTGenericActionConfig2": "{\"command\":\"led_toggle\"}" } ### Connect Sidecar > Connects iPad as Sidecar display. Parameters: * **BTTPredefinedActionType**: 506 * **BTTGenericActionConfig**: Device identifier (optional) Example: { "BTTPredefinedActionType": 506 } ### Disconnect Sidecar > Disconnects Sidecar display. Parameters: * **BTTPredefinedActionType**: 507 Example: { "BTTPredefinedActionType": 507 } ### BTT Mobile Actions > Controls BTT Mobile companion app. Parameters: * **BTTPredefinedActionType**: * Show Specific Menu: 452 * Show Trackpad: 453 (see Mobile Trackpad Widget below for configuration) * Show Menu Overview: 454 * Show Default Actions: 455 * Show File Browser: 456 * Disconnect: 457 * Show Menubar: 510 * Go Back: 511 * Enable: 514 * Disable: 515 Example: { "BTTPredefinedActionType": 453 } ### Mobile Trackpad Widget > Shows a configurable trackpad on BTT Mobile device. Parameters: * **BTTPredefinedActionType**: 453 * **BTTAdditionalActionData**: JSON object with trackpad configuration * `BTTMenuWidgetTrackpadTwoFingerScroll`: boolean - Enable two-finger scrolling * `BTTMenuWidgetTrackpadThreeFingerDrag`: boolean - Enable three-finger drag * `BTTMenuWidgetTrackpadDisableOnHost`: boolean - Disable when host is active * `BTTMenuWidgetTrackpadWidth`: number - Trackpad width * `BTTMenuWidgetTrackpadHeight`: number - Trackpad height * `BTTMenuWidgetTrackpadBorderWidth`: number - Border width * `BTTMenuWidgetTrackpadCornerRadius`: number - Corner radius * `BTTMenuWidgetTrackpadBorderColor`: string - Border color (hex) * `BTTMenuWidgetTrackpadFingerMoveColor`: string - Finger move color (hex) * `BTTMenuWidgetTrackpadFingerDragColor`: string - Finger drag color (hex) * `BTTMenuWidgetTrackpadFingerScrollColor`: string - Finger scroll color (hex) Example: { "BTTPredefinedActionType": 453, "BTTAdditionalActionData": { "BTTMenuWidgetTrackpadTwoFingerScroll": true, "BTTMenuWidgetTrackpadThreeFingerDrag": true, "BTTMenuWidgetTrackpadWidth": 300, "BTTMenuWidgetTrackpadHeight": 200, "BTTMenuWidgetTrackpadBorderColor": "#CCCCCC", "BTTMenuWidgetTrackpadCornerRadius": 10 } } ### Siri Remote Mouse Mode > Controls Siri Remote mouse mode. Parameters: * **BTTPredefinedActionType**: * Enable: 516 * Disable: 517 * Toggle: 166 Example: { "BTTPredefinedActionType": 166 } * * * UI Automation Actions --------------------- ### Find Position of Image on Screen > Finds image on screen and optionally clicks it. Parameters: * **BTTPredefinedActionType**: 291 * **BTTFindPositionOfImageImage**: Base64 encoded image (deprecated - use BTTAdditionalActionData) * **BTTFindPositionOfImageImageDark**: Base64 encoded dark mode image (optional, deprecated) * **BTTFindPositionOfImageConfig**: Configuration options (deprecated - use BTTAdditionalActionData) * **BTTAdditionalActionData**: JSON object with find image configuration * `BTTActionFindImagePath`: string - Path to image file * `BTTActionFindImageTolerance`: number - Match tolerance (0-100, default: 80) * `BTTActionFindImageContrastEnhance`: boolean - Enhance contrast before matching * `BTTActionFindImageMakeGrayscale`: boolean - Convert to grayscale before matching * `BTTActionFindImageBinaryThreshold`: number - Binary threshold for image processing (0-255) * `BTTActionFindImageMatchMultiple`: boolean - Find all matches instead of just the first * `BTTActionFindImageWaitFor`: number - Wait duration in seconds for image to appear * `BTTActionFindImageScreen`: number - Screen to search (0=all, 1=main, 2=mouse screen) * `BTTActionFindImageEnableVisualFeedback`: boolean - Show visual feedback on matches * `BTTActionFindImageVariableIdentifier`: string - Variable name to store result coordinates * `BTTActionFindImageWaitMode`: number - Wait behavior (0=fail if not found, 1=wait up to duration) * `BTTActionFindImageFuzzyMatching`: number - Fuzzy matching level (0-100) * `BTTActionFindImageAction`: number - Action on find (0=nothing, 1=move mouse, 2=click, 3=double click) * `BTTActionFindImageHideMouseCursor`: boolean - Hide mouse cursor during search Example: { "BTTPredefinedActionType": 291, "BTTAdditionalActionData": { "BTTActionFindImagePath": "/path/to/image.png", "BTTActionFindImageTolerance": 85, "BTTActionFindImageAction": 2, "BTTActionFindImageWaitFor": 5, "BTTActionFindImageEnableVisualFeedback": true, "BTTActionFindImageVariableIdentifier": "found_image_location" } } ### Scroll > Sends scroll events. Parameters: * **BTTPredefinedActionType**: 272 * **BTTScrollBy**: Scroll configuration Example: { "BTTPredefinedActionType": 272, "BTTScrollBy": "0,5" } ### Start/Stop Scroll Blocking > Blocks scroll events from reaching apps. Parameters: * **BTTPredefinedActionType**: * Start Blocking: 381 * Stop Blocking: 382 Example: { "BTTPredefinedActionType": 381 } ### Zoom (Pinch) > Performs zoom/pinch gesture. Parameters: * **BTTPredefinedActionType**: 478 * **BTTGenericActionConfig**: Zoom configuration Example: { "BTTPredefinedActionType": 478, "BTTGenericActionConfig": "{\"zoomIn\":true,\"amount\":1.5}" } ### Rotate > Performs rotation gesture. Parameters: * **BTTPredefinedActionType**: 479 * **BTTGenericActionConfig**: Rotation configuration Example: { "BTTPredefinedActionType": 479, "BTTGenericActionConfig": "{\"degrees\":90,\"clockwise\":true}" } ### Smart Zoom > Performs smart zoom (double tap with two fingers). Parameters: * **BTTPredefinedActionType**: 117 Example: { "BTTPredefinedActionType": 117 } ### Look Up > Shows definition/info for selected text. Parameters: * **BTTPredefinedActionType**: 116 Example: { "BTTPredefinedActionType": 116 } ### Show Context Menu > Shows context menu at current position. Parameters: * **BTTPredefinedActionType**: 288 * **BTTCustomContextMenu**: Custom menu configuration (optional) Example: { "BTTPredefinedActionType": 288 } ### Show Context Menu for Selection > Shows context menu for selected text. Parameters: * **BTTPredefinedActionType**: 353 Example: { "BTTPredefinedActionType": 353 } ### Trigger Menu Bar Item > Clicks a menu bar menu item. Parameters: * **BTTPredefinedActionType**: 124 * **BTTMenubarPath**: Menu path (e.g., "File;New") Example: { "BTTPredefinedActionType": 124, "BTTMenubarPath": "File;Save" } ### Trigger Context Menu Item > Clicks item in context menu. Parameters: * **BTTPredefinedActionType**: 162 * **BTTTriggerContextMenuPath**: Menu item path Example: { "BTTPredefinedActionType": 162, "BTTTriggerContextMenuPath": "Copy" } ### Click Status Bar Item > Clicks a status bar item. Parameters: * **BTTPredefinedActionType**: 375 * **BTTActionStatusItem**: Item identifier or position * **BTTActionStatusItemClickType**: Click type (optional) Example: { "BTTPredefinedActionType": 375, "BTTActionStatusItem": "Wi-Fi" } ### Show/Hide Status Bar Items > Controls visibility of status bar items. Parameters: * **BTTPredefinedActionType**: * Show Specific Item: 458 * Hide Items Left of Item: 460 * Show Items Left of Item: 461 * Toggle Items Left: 265 * Show All Items: 463 * Hide from Always Hidden: 467 * Show from Always Hidden: 466 * Toggle Always Hidden: 468 * **BTTActionStatusItem**: Item identifier Example: { "BTTPredefinedActionType": 265, "BTTActionStatusItem": "Bluetooth" } ### Move Status Bar Item > Moves status bar item to new position. Parameters: * **BTTPredefinedActionType**: 459 * **BTTActionStatusItem**: Item identifier * **BTTActionMoveToStatusItem**: New position Example: { "BTTPredefinedActionType": 459, "BTTActionStatusItem": "VPN", "BTTActionMoveToStatusItem": 3 } ### Search Menu Bar Status Items > Opens search for status bar items. Parameters: * **BTTPredefinedActionType**: 464 Example: { "BTTPredefinedActionType": 464 } ### Click Button in Active Window > Clicks a button by name in active window. Parameters: * **BTTPredefinedActionType**: 520 * **BTTGenericActionConfig**: Button name Example: { "BTTPredefinedActionType": 520, "BTTGenericActionConfig": "OK" } ### Change Slider Value > Changes slider value in active window. Parameters: * **BTTPredefinedActionType**: 521 * **BTTGenericActionConfig**: Slider identifier * **BTTGenericActionConfig2**: New value Example: { "BTTPredefinedActionType": 521, "BTTGenericActionConfig": "Volume", "BTTGenericActionConfig2": "75" } ### Interact with UI Element > Generic UI element interaction. Parameters: * **BTTPredefinedActionType**: 522 * **BTTActionInteractWithUIElementAction**: Action type * **BTTActionInteractWithUIElementBringToFront**: Bring to front flag * **BTTActionInteractWithUIElementOnlyFocusedWindow**: Only focused window * **BTTActionInteractWithUIElementOptions**: Additional options Example: { "BTTPredefinedActionType": 522, "BTTActionInteractWithUIElementAction": "click", "BTTActionInteractWithUIElementBringToFront": 1 } ### Show UI Element Viewers > Shows debugging viewers for UI elements. Parameters: * **BTTPredefinedActionType**: * Focused Element: 503 * Hovered Element: 504 * Visible Windows: 505 Example: { "BTTPredefinedActionType": 503 } ### Get Hovered Link/URL > Gets link or URL under mouse cursor. Parameters: * **BTTPredefinedActionType**: * Get Link: 524 * Get URL: 526 * **BTTVariableName**: Variable to store result Example: { "BTTPredefinedActionType": 526, "BTTVariableName": "hoveredURL" } ### Start/End Keyboard Input Blocking > Blocks keyboard input from reaching apps. Parameters: * **BTTPredefinedActionType**: * Start Blocking: 429 * End Blocking: 430 Example: { "BTTPredefinedActionType": 429 } ### Lock Mouse Axis Movement > Locks mouse movement to specific axis. Parameters: * **BTTPredefinedActionType**: * Lock X Start: 533 * Lock X End: 534 * Lock Y Start: 535 * Lock Y End: 536 Example: { "BTTPredefinedActionType": 533 } * * * Custom Actions -------------- ### Show Custom Context Menu > Shows a custom context menu with items. Parameters: * **BTTPredefinedActionType**: 327 * **BTTGenericActionConfig**: Menu configuration JSON * **BTTActionCustomScriptSettings**: Script settings (optional) Example: { "BTTPredefinedActionType": 327, "BTTGenericActionConfig": "{\"items\":[{\"title\":\"Option 1\",\"action\":248,\"trigger\":\"action1\"},{\"title\":\"Option 2\",\"action\":248,\"trigger\":\"action2\"}]}" } ### Show Custom HTML Menu > Shows menu with HTML content. Parameters: * **BTTPredefinedActionType**: 339 * **BTTGenericActionConfig**: HTML menu configuration Example: { "BTTPredefinedActionType": 339, "BTTGenericActionConfig": "{\"html\":\"

Custom Menu
\",\"width\":200,\"height\":300}" } ### Show Searchable List > Shows searchable list of items. Parameters: * **BTTPredefinedActionType**: 465 * **BTTGenericActionConfig**: List configuration (deprecated - use BTTAdditionalActionData) * **BTTActionCustomScriptSettings**: Script settings (optional) * **BTTAdditionalActionData**: JSON object with searchable list configuration * `BTTActionSearchableListIconBackgroundColor`: string - Icon background color (hex) * `BTTActionSearchableListInputBehavior`: number - Input behavior mode * `BTTActionSearchableListPosition`: number - List position on screen * `scriptSettings`: object - Script configuration for dynamic content Example: { "BTTPredefinedActionType": 465, "BTTAdditionalActionData": { "BTTActionSearchableListIconBackgroundColor": "#0084FF", "BTTActionSearchableListInputBehavior": 0, "BTTActionSearchableListPosition": 0, "scriptSettings": { "items": ["Item 1", "Item 2", "Item 3"], "placeholder": "Search..." } } } ### Show Floating Web View > Shows floating window with web content. Parameters: * **BTTPredefinedActionType**: 249 * **BTTActionURLToLoad**: URL or HTML file path * **BTTActionFloatingHTMLConfig**: Window configuration * **BTTActionFloatingHTMLName**: Window name (optional) Example: { "BTTPredefinedActionType": 249, "BTTActionURLToLoad": "https://example.com", "BTTActionFloatingHTMLConfig": "{\"width\":800,\"height\":600,\"x\":100,\"y\":100}" } ### Close Floating Web View > Closes floating web view window. Parameters: * **BTTPredefinedActionType**: 372 * **BTTGenericActionConfig**: Window identifier Example: { "BTTPredefinedActionType": 372, "BTTGenericActionConfig": "webview-1" } ### Show HUD > Shows heads-up display with message. Parameters: * **BTTPredefinedActionType**: 254 * **BTTHUDActionConfiguration**: HUD configuration including text and duration (deprecated - use BTTAdditionalActionData) * **BTTAdditionalActionData**: JSON object with HUD configuration * `BTTActionHUDText`: string - Main text to display * `BTTActionHUDIcon`: string - Path to icon image * `BTTActionHUDIconHeight`: number - Icon height in pixels * `BTTActionHUDIconWidth`: number - Icon width in pixels * `BTTActionHUDDuration`: number - Display duration in seconds * `BTTActionHUDBackgroundColor`: string - Background color (hex) * `BTTActionHUDTextColor`: string - Text color (hex) * `BTTActionHUDMinWidth`: number - Minimum HUD width * `BTTActionHUDMinHeight`: number - Minimum HUD height * `BTTActionHUDSize`: number - Size preset (0=small, 1=medium, 2=large) * `BTTActionHUDTextSize`: number - Font size in points * `BTTActionHUDSlideDirection`: number - Animation direction (0=fade, 1=slide from top, 2=slide from bottom) * `BTTActionHUDPosition`: number - Screen position (0=center, 1=top, 2=bottom, 3=left, 4=right) * `BTTActionHUDScreen`: number - Display screen (0=main, 1=mouse screen) * `BTTActionHUDOnlyShowWhenModifierPressed`: number - Show only with modifier key * `BTTActionHUDDetailsText`: string - Additional details text * `BTTActionHUDDetailsImage`: string - Path to additional image * `BTTActionHUDActionType`: number - HUD action type Example: { "BTTPredefinedActionType": 254, "BTTAdditionalActionData": { "BTTActionHUDText": "Action completed!", "BTTActionHUDDuration": 2, "BTTActionHUDBackgroundColor": "#000000", "BTTActionHUDTextColor": "#FFFFFF", "BTTActionHUDSize": 1, "BTTActionHUDPosition": 0, "BTTActionHUDSlideDirection": 0 } } ### Show Notification > Shows system notification. Parameters: * **BTTPredefinedActionType**: 371 * **BTTNotificationTitle**: Notification title * **BTTNotificationText**: Notification body Example: { "BTTPredefinedActionType": 371, "BTTNotificationTitle": "BetterTouchTool", "BTTNotificationText": "Task completed successfully" } ### Haptic Feedback > Triggers haptic feedback on trackpad. Parameters: * **BTTPredefinedActionType**: 255 * **BTTHapticFeedbackAction**: Pattern type (1-22) Example: { "BTTPredefinedActionType": 255, "BTTHapticFeedbackAction": 1 } ### Show Color Picker > Shows the color picker dialog. Parameters: * **BTTPredefinedActionType**: 94 Example: { "BTTPredefinedActionType": 94 } ### Show Cheat Sheet > Shows keyboard shortcut cheat sheet. Parameters: * **BTTPredefinedActionType**: 354 * **BTTAdditionalActionData**: JSON object with cheat sheet configuration * `BTTActionCheatSheetTitleTextColor`: string - Title text color (hex) * `BTTActionCheatSheetDescriptionTextColor`: string - Description text color (hex) * `BTTActionCheatSheetBackground`: string - Background color (hex) * `BTTActionCheatSheetBackgroundAlpha`: number - Background transparency (0-1) * `BTTActionCheatSheetItemsPerColumn`: number - Number of items per column * `BTTActionCheatSheetItemHeight`: number - Height of each item * `BTTActionCheatSheetWindowCornerRadius`: number - Window corner radius * `BTTActionCheatSheetWindowWidth`: number - Window width * `BTTActionCheatSheetWindowPadding`: number - Window padding * `BTTActionCheatSheetItemBackground`: string - Item background color (hex) * `BTTActionCheatSheetItemBorderColor`: string - Item border color (hex) * `BTTActionCheatSheetShowIcon`: boolean - Show app icons * `BTTActionCheatSheetShowActiveAppOnly`: boolean - Show only active app shortcuts Example: { "BTTPredefinedActionType": 354, "BTTAdditionalActionData": { "BTTActionCheatSheetBackground": "#000000", "BTTActionCheatSheetBackgroundAlpha": 0.9, "BTTActionCheatSheetTitleTextColor": "#FFFFFF", "BTTActionCheatSheetDescriptionTextColor": "#CCCCCC", "BTTActionCheatSheetItemsPerColumn": 10, "BTTActionCheatSheetShowIcon": true } } ### Hide/Toggle Cheat Sheet > Controls cheat sheet visibility. Parameters: * **BTTPredefinedActionType**: * Hide: 355 * Toggle: 356 Example: { "BTTPredefinedActionType": 356 } ### Open URL > Opens URL in default browser. Parameters: * **BTTPredefinedActionType**: 59 * **BTTOpenURL**: URL to open * **BTTOpenURLBrowser**: Specific browser (optional) * **BTTOpenURLTerminalCommand**: Use terminal command flag (optional) Example: { "BTTPredefinedActionType": 59, "BTTOpenURL": "https://folivora.ai", "BTTOpenURLBrowser": "com.apple.Safari" } ### Post Distributed Notification > Posts a system-wide notification. Parameters: * **BTTPredefinedActionType**: 136 * **BTTPostDistributedNotificationName**: Notification name * **BTTActionUserInfo**: Notification data (optional) Example: { "BTTPredefinedActionType": 136, "BTTPostDistributedNotificationName": "com.myapp.notification" } ### Change Input Source > Changes keyboard input source/language. Parameters: * **BTTPredefinedActionType**: 420 * **BTTGenericActionConfig**: Input source ID * **BTTAdditionalActionData**: JSON object with configuration (optional) * `BTTActionChangeInputSourceID`: Input source identifier * Other `BTTActionChangeInputSource*` keys for additional settings Example: { "BTTPredefinedActionType": 420, "BTTGenericActionConfig": "com.apple.keylayout.US", "BTTAdditionalActionData": { "BTTActionChangeInputSourceID": "com.apple.keylayout.US" } } ### Change Default Browser > Changes system default browser. Parameters: * **BTTPredefinedActionType**: 492 * **BTTGenericActionConfig**: Browser bundle identifier Example: { "BTTPredefinedActionType": 492, "BTTGenericActionConfig": "com.google.Chrome" } ### Set Function Key Mode > Sets function key behavior. Parameters: * **BTTPredefinedActionType**: 436 * **BTTGenericActionConfig**: Mode (0=F keys, 1=media keys) Example: { "BTTPredefinedActionType": 436, "BTTGenericActionConfig": "1" } ### Call macOS Service > Calls a macOS service by name. Parameters: * **BTTPredefinedActionType**: 435 * **BTTGenericActionConfig**: Service name Example: { "BTTPredefinedActionType": 435, "BTTGenericActionConfig": "Look Up in Dictionary" } ### Set Icon for File > Sets custom icon for file/folder/app. Parameters: * **BTTPredefinedActionType**: 473 * **BTTGenericActionConfig**: File path * **BTTGenericActionConfig2**: Icon path or data Example: { "BTTPredefinedActionType": 473, "BTTGenericActionConfig": "/Applications/MyApp.app", "BTTGenericActionConfig2": "/path/to/icon.icns" } ### Create Snap Area > Creates a new window snap area. Parameters: * **BTTPredefinedActionType**: 391 * **BTTGenericActionConfig**: Snap area configuration Example: { "BTTPredefinedActionType": 391, "BTTGenericActionConfig": "{\"x\":0,\"y\":0,\"width\":640,\"height\":480}" } ### Edit Snap Areas > Opens snap area editor. Parameters: * **BTTPredefinedActionType**: 392 Example: { "BTTPredefinedActionType": 392 } ### Trigger Snap Area > Triggers specific snap area. Parameters: * **BTTPredefinedActionType**: 168 * **BTTDragPointUUID**: Snap area identifier * **BTTResizeWindowToRect**: Window rect (optional) Example: { "BTTPredefinedActionType": 168, "BTTDragPointUUID": "left-half" } ### Plugin Action > Executes a BTT plugin action. Parameters: * **BTTPredefinedActionType**: 280 * **BTTGenericActionConfig2**: Plugin identifier * **BTTAdditionalActionData**: Plugin parameters Example: { "BTTPredefinedActionType": 280, "BTTGenericActionConfig2": "com.example.plugin", "BTTAdditionalActionData": "{\"action\":\"custom\"}" } ### Comment > No-op action for adding comments in action sequences. Parameters: * **BTTPredefinedActionType**: 490 * **BTTComment**: Comment text Example: { "BTTPredefinedActionType": 490, "BTTComment": "This is a comment explaining the next actions" } ### Separator > Visual separator in action lists. Parameters: * **BTTPredefinedActionType**: 323 Example: { "BTTPredefinedActionType": 323 } ### AI Actions > AI-related actions for ChatGPT integration. Parameters: * **BTTPredefinedActionType**: * Add User Message: 530 * Switch Model: 537 * **BTTGenericActionConfig**: AI configuration Example: { "BTTPredefinedActionType": 530, "BTTGenericActionConfig": "{\"message\":\"Hello AI\",\"conversation\":\"main\"}" } ### AI Chat Window > Opens an AI chat window with customizable settings. Parameters: * **BTTPredefinedActionType**: 999 * **BTTAdditionalActionData**: JSON object with AI configuration * `BTTAISystemPrompt`: string - System prompt for the AI * `BTTAIAPIKey`: string - API key for AI service (secure) * `BTTAIAPIKey1`: string - Alternative API key 1 * `BTTAIAPIKey2`: string - Alternative API key 2 * `BTTAICustomURL`: string - Custom API endpoint URL * `BTTAIModel`: string - Model identifier (e.g., "gpt-4o", "claude-3-5-sonnet-latest") * `BTTAISInitialScreenshot`: number - Screenshot capture option (0=None, 1=Interactive, 2=Focused Window) * `BTTAIUserChatBubbleColor`: string - Custom color for user messages (hex) * `BTTAISystemChatBubbleColor`: string - Custom color for AI responses (hex) * `BTTAIWindowBackgroundColor`: string - Background color for AI window (hex) Example: { "BTTPredefinedActionType": 999, "BTTAdditionalActionData": { "BTTAIModel": "gpt-4o", "BTTAISystemPrompt": "You are a helpful assistant", "BTTAISInitialScreenshot": 1, "BTTAIUserChatBubbleColor": "#0084FF", "BTTAISystemChatBubbleColor": "#E9E9EB" } } ### Stage Manager Actions > Controls macOS Stage Manager. Parameters: * **BTTPredefinedActionType**: * Enable/Disable: 360 * Activate Stage: 357 * Cycle Stages: 358 * Cycle Backward: 363 * Activate Stage with Apps: 359 * Show Switcher: 361 * Toggle Recent: 362 * **BTTStageManagerStageNumber**: Stage number (for activate) * **BTTStageManagerRequiredApps**: App identifiers (for activate with apps) * **BTTStageManagerRequiredWindows**: Window identifiers (optional) Example: { "BTTPredefinedActionType": 357, "BTTStageManagerStageNumber": "1" } ### Dock Actions > Performs actions on dock items. Parameters: * **BTTPredefinedActionType**: * Quit App: 145 * Minimize: 146 * Show All Windows: 147 * Send Shortcut: 148 Example: { "BTTPredefinedActionType": 145 } ### Toggle Actions > Various toggle actions. Parameters: * **BTTPredefinedActionType**: * Mouse Cursor Hidden: 140 * Cursor Size: 123 * Mouse Speed: 126 * Black Screen: 313 Example: { "BTTPredefinedActionType": 140 } ### Login/Security Actions > Login and security related actions. Parameters: * **BTTPredefinedActionType**: * Login Screen: 9 * Free Menu Bar: 86 Example: { "BTTPredefinedActionType": 9 } ### Advanced Click Actions > Clicks with specific modifiers. Parameters: * **BTTPredefinedActionType**: * Cmd+Click: 2 * Ctrl+Click: 87 * Alt+Click: 88 * Shift+Click: 89 * Cmd+Shift+Click: 111 * Cmd+Double Click: 149 Example: { "BTTPredefinedActionType": 2 } ### Gesture Control > Controls for trackpad/mouse gestures. Parameters: * **BTTPredefinedActionType**: * Begin Gesture: 75 * End Gesture: 76 * End Immediately: 83 * Swipe Left: 77 * Swipe Right: 78 * Swipe Up: 79 * Swipe Down: 80 * Rotate Left: 81 * Rotate Right: 82 Example: { "BTTPredefinedActionType": 75 } ### Zoom In/Out > System zoom controls. Parameters: * **BTTPredefinedActionType**: * Zoom In: 11 * Zoom Out: 12 Example: { "BTTPredefinedActionType": 11 } ### Window Snapping > Split screen and window snapping. Parameters: * **BTTPredefinedActionType**: * Split Screen Left: 163 * Split Screen Right: 164 Example: { "BTTPredefinedActionType": 163 } ### Fullscreen > Fullscreen control. Parameters: * **BTTPredefinedActionType**: 112 Example: { "BTTPredefinedActionType": 112 } ### No Action > Placeholder that performs no action. Parameters: * **BTTPredefinedActionType**: -1 Example: { "BTTPredefinedActionType": -1 } * * * Additional Missing Actions -------------------------- ### Change Default Browser/Handler > Changes the default application handler for specific file types, URL schemes, or UTIs. Parameters: > > * **BTTPredefinedActionType**: 492 > * **BTTAdditionalActionData**: JSON object with configuration > * `BTTActionChangeDefaultBrowserUTI`: string - Scheme/UTI/Extension (e.g. "http://", "adobe.pdf", ".txt") > * `BTTActionChangeDefaultBrowserApp`: object - Application info > * `name`: string - Application name > * `path`: string - Path to application > * `bundleIdentifier`: string - Bundle ID Example: > > { > "BTTPredefinedActionType": 492, > "BTTAdditionalActionData": { > "BTTActionChangeDefaultBrowserUTI": "http://", > "BTTActionChangeDefaultBrowserApp": { > "name": "Safari", > "path": "/Applications/Safari.app", > "bundleIdentifier": "com.apple.Safari" > } > } > } > > ### OCR (Extract Text from Image) > Performs optical character recognition on screen content or images. Parameters: > > * **BTTPredefinedActionType**: 498 > * **BTTAdditionalActionData**: JSON object with OCR configuration > * `BTTOCRSourceType`: number - Source type (0=screenshot, 1=file, 2=clipboard) > * `BTTOCRFileAtPath`: string - Path to image file (when sourceType=1) > * `BTTOCRAutoDetectLanguage`: boolean - Auto-detect language > * `BTTOCRLanguages`: array - Language codes (e.g., \["en-US", "de-DE"\]) > * `BTTOCRCustomWords`: array - Custom words for recognition > * `BTTOCRJoinBasedOnScreenCoordinates`: boolean - Join text based on position > * `BTTOCRJoinFoundStringsWithCharacter`: string - Character to join text (e.g., " " or "\\n") > * `BTTOCRSaveToVariable`: string - Variable name to save result > * `BTTOCRCopyToClipboard`: boolean - Copy result to clipboard Example: > > { > "BTTPredefinedActionType": 498, > "BTTAdditionalActionData": { > "BTTOCRSourceType": 0, > "BTTOCRAutoDetectLanguage": true, > "BTTOCRCopyToClipboard": true, > "BTTOCRSaveToVariable": "ocr_result" > } > } > > ### Remap Key > Remaps keyboard input with customizable modifier keys and key codes. Parameters: > > * **BTTPredefinedActionType**: 483 > * **BTTAdditionalActionData**: JSON object with key remapping configuration > * `BTTActionRemapKeyOutDownCommand`: number (0/1) - Command key on key down > * `BTTActionRemapKeyOutDownControl`: number (0/1) - Control key on key down > * `BTTActionRemapKeyOutDownShift`: number (0/1) - Shift key on key down > * `BTTActionRemapKeyOutDownOption`: number (0/1) - Option key on key down > * `BTTActionRemapKeyOutDownFn`: number (0/1) - Fn key on key down > * `BTTActionRemapKeyOutUpCommand`: number (0/1) - Command key on key up > * `BTTActionRemapKeyOutUpControl`: number (0/1) - Control key on key up > * `BTTActionRemapKeyOutUpShift`: number (0/1) - Shift key on key up > * `BTTActionRemapKeyOutUpOption`: number (0/1) - Option key on key up > * `BTTActionRemapKeyOutUpFn`: number (0/1) - Fn key on key up > * `BTTActionRemapKeyOutKeyUsingKeyCode`: boolean - Use key code instead of string > * `BTTActionRemapKeyOutKeyUsingString`: boolean - Use string instead of key code > * `BTTActionRemapKeyOutKeyString`: string - Key as string (when using string mode) > * `BTTActionRemapKeyOutKeyCode`: number - Key code (when using key code mode) Example: > > { > "BTTPredefinedActionType": 483, > "BTTAdditionalActionData": { > "BTTActionRemapKeyOutDownCommand": 1, > "BTTActionRemapKeyOutDownShift": 1, > "BTTActionRemapKeyOutKeyUsingKeyCode": true, > "BTTActionRemapKeyOutKeyCode": 0 > } > } > > ### Send Data to Connected BTT Mobile/iOS Device > Sends data to a connected BetterTouchTool mobile device. Parameters: > > * **BTTPredefinedActionType**: 285 > * **BTTAdditionalActionData**: JSON object with configuration > * `BTTGenericDeviceSendDataInputMode`: number - Input mode > * `BTTGenericDeviceSendDataKeySend`: string - Key to send > * `BTTGenericDeviceSendDataSendOnUp`: boolean - Send on key up > * `BTTGenericDeviceSendDataInput`: string - Data to send Example: > > { > "BTTPredefinedActionType": 285, > "BTTAdditionalActionData": { > "BTTGenericDeviceSendDataInputMode": 0, > "BTTGenericDeviceSendDataKeySend": "test_key", > "BTTGenericDeviceSendDataInput": "Hello from Mac!" > } > } > > ### Unlock Screen (with Password) > Unlocks the Mac screen using a stored password. Parameters: > > * **BTTPredefinedActionType**: 159 > * **BTTAdditionalActionData**: JSON object with configuration > * `unlockPassword`: string - The password (stored securely) Example: > > { > "BTTPredefinedActionType": 159, > "BTTAdditionalActionData": { > "unlockPassword": "encrypted_password_data" > } > } > > * * * Additional Notes ---------------- ### Action Sequences Multiple actions can be chained together by including them in an array: [\ {\ "BTTPredefinedActionType": 345,\ "BTTDelayNextActionBy": "1.0"\ },\ {\ "BTTPredefinedActionType": 193,\ "BTTStringToType": "Hello World"\ }\ ] ### Conditional Actions Many actions support conditions via the `BTTTriggerConditionsData` field: { "BTTPredefinedActionType": 49, "BTTLaunchPath": "/Applications/Safari.app", "BTTTriggerConditionsData": { "conditions": [\ {\ "type": "app_not_running",\ "bundle_identifier": "com.apple.Safari"\ }\ ] } } ### Action Categories Actions can be organized by category using `BTTActionCategory`: * 0: Standard * 1: Hover * 2: Long Press * 3: Touch Release * 4: Hover End * 5: Hyper Key Release * 6: Right Click * 7: Change to False * 8: Appear * 9: Disappear ### Helper Functions function getModifierBitmask(modifiers) { const modifierMap = { "Shift": 1 << 17, "Control": 1 << 18, "Left Control": 1 << 0, "Right Control": 1 << 13, "Option": 1 << 19, "Left Option": 1 << 5, "Right Option": 1 << 6, "Command": 1 << 20, "Left Command": 1 << 3, "Right Command": 1 << 4, "Function": 1 << 23 }; let bitmask = 0; for (const modifier of modifiers) { if (modifierMap[modifier] !== undefined) { bitmask |= modifierMap[modifier]; } else { console.warn(`Unknown modifier: ${modifier}`); } } return bitmask; } * 18: Custom Context Menu ### Generic Configuration Fields When specific property names aren't mapped for an action, these generic fields are used as fallbacks: * `BTTGenericActionConfig`: Primary configuration string/JSON (used when gesture.launchPath isn't specifically mapped) * `BTTGenericActionConfig2`: Secondary configuration (used when gesture.additionalActionString isn't specifically mapped) * `BTTAdditionalActionData`: Complex data as JSON or base64 (typically from gesture.actionData) ### Special Data Handling Some actions use special data storage: * `BTTFindPositionOfImageImage`: Base64 encoded image data * `BTTFindPositionOfImageImageDark`: Base64 encoded dark mode variant * `BTTActionCustomScriptSettings`: Base64 encoded script settings * `BTTAdditionalActionData`: Can contain JSON objects or base64 encoded data ### Shortcuts and Modifiers When using keyboard shortcuts: * `BTTShortcutToSend`: The actual key or key combination * `BTTShortcutModifierKeys`: Modifier keys for general shortcuts * `BTTRequiredModifierKeys`: Modifier keys for non-shortcut triggers * `BTTShortcutUpDown`: Whether to send key up/down events ### Best Practices 1. Always include `BTTPredefinedActionType` with the correct action ID 2. Use the specific property names documented here instead of generic fallbacks when possible 3. String values should be properly escaped in JSON 4. Numeric values can be strings or numbers depending on the action 5. Test actions individually before combining in sequences 6. Use conditions to make actions context-aware 7. Leverage variables for dynamic behavior 8. Group related actions using control flow structures This documentation covers all available BetterTouchTool actions as of the current version. Actions may be added or modified in future releases. results matching "" =================== No results matching "" ====================== --- # Simple JSON Format · GitBook [Simple JSON Format](https://docs.folivora.ai/) ================================================ BetterTouchTool Simple JSON Format ================================== BetterTouchTool 4.764 introduced a new "Simple JSON Format", which can currently be used with the predefined actions "Show Custom Context Menu (New)" and "Choose From List" and with Floating Menus. It allows to retrieve the content for those menus dynamically using Java Script & JSON. It allows you to use any of [BTT's Java Script capabilities](https://docs.folivora.ai/docs/1106_java_script.html) to produce the output JSON. * [BetterTouchTool Simple JSON Format](https://docs.folivora.ai/docs/1108_simple_format.html#bettertouchtool-simple-json-format) * [How to create dynamic menus based on the Simple JSON Format](https://docs.folivora.ai/docs/1108_simple_format.html#how-to-create-dynamic-menus-based-on-the-simple-json-format) * [Supported Properties](https://docs.folivora.ai/docs/1108_simple_format.html#supported-properties) * [Simple example](https://docs.folivora.ai/docs/1108_simple_format.html#simple-example) * [Allowed Properties:](https://docs.folivora.ai/docs/1108_simple_format.html#allowed-properties) * [title](https://docs.folivora.ai/docs/1108_simple_format.html#title) * [subtitle](https://docs.folivora.ai/docs/1108_simple_format.html#subtitle) * [subitems](https://docs.folivora.ai/docs/1108_simple_format.html#subitems) * [setvariable](https://docs.folivora.ai/docs/1108_simple_format.html#setvariable) * [templateitemuuid](https://docs.folivora.ai/docs/1108_simple_format.html#templateitemuuid) * [icon](https://docs.folivora.ai/docs/1108_simple_format.html#icon) * [action](https://docs.folivora.ai/docs/1108_simple_format.html#action) * [named](https://docs.folivora.ai/docs/1108_simple_format.html#named) * [uuid](https://docs.folivora.ai/docs/1108_simple_format.html#uuid) * [shortcut](https://docs.folivora.ai/docs/1108_simple_format.html#shortcut) * [js](https://docs.folivora.ai/docs/1108_simple_format.html#js) * [btt](https://docs.folivora.ai/docs/1108_simple_format.html#btt) * [keyboard](https://docs.folivora.ai/docs/1108_simple_format.html#keyboard) * [Action Categories](https://docs.folivora.ai/docs/1108_simple_format.html#action-categories) * [Examples](https://docs.folivora.ai/docs/1108_simple_format.html#examples) * [Example: Create an AI / App Launcher:](https://docs.folivora.ai/docs/1108_simple_format.html#example-create-an-ai--app-launcher) * [Example: Get result from Apple Shortcut:](https://docs.folivora.ai/docs/1108_simple_format.html#example-get-result-from-apple-shortcut) * [Example: Execute multiple actions from one item (example types abc)](https://docs.folivora.ai/docs/1108_simple_format.html#example-execute-multiple-actions-from-one-item-example-types-abc) * [Example: Fetch menu from some server:](https://docs.folivora.ai/docs/1108_simple_format.html#example-fetch-menu-from-some-server) * [Example: Usage With Custom Menu Bar Items](https://docs.folivora.ai/docs/1108_simple_format.html#example-usage-with-custom-menu-bar-items) * [Example: Floating Menu App Switcher](https://docs.folivora.ai/docs/1108_simple_format.html#example-floating-menu-app-switcher) * [Typescript Definition](https://docs.folivora.ai/docs/1108_simple_format.html#typescript-definition) How to create dynamic menus based on the Simple JSON Format ----------------------------------------------------------- For the predefined actions "Show Custom Context Menu" and "Choose From List" you need to click the "Retrieve Content Dynamically Via Java Script" checkbox. ![alt text](https://docs.folivora.ai/docs/media/image-19.png) For Floating Menus you need to set a Content Script. ![alt text](https://docs.folivora.ai/docs/media/image-18.png) Then you can have a async function that returns a JSON. You can use any of BTT's [scripting functions](https://docs.folivora.ai/docs/1106_java_script.html) inside that Java Script (e.g. run Shell or Apple Scripts and much more). **Note** Make sure to set the async function to call in the separate text field. Supported Properties -------------------- * [title](https://docs.folivora.ai/docs/1108_simple_format.html#title) * [subtitle](https://docs.folivora.ai/docs/1108_simple_format.html#subtitle) * [icon](https://docs.folivora.ai/docs/1108_simple_format.html#icon) * [setvariable](https://docs.folivora.ai/docs/1108_simple_format.html#setvariable) * [subitems](https://docs.folivora.ai/docs/1108_simple_format.html#subitems) * [templateItemUUID](https://docs.folivora.ai/docs/1108_simple_format.html#templateitemuuid) * [action](https://docs.folivora.ai/docs/1108_simple_format.html#action) Simple example -------------- async function retrieveJSON() { let items = [\ {\ "title": "trigger some shortcut",\ "icon": "sfsymbol::globe",\ "action": "shortcut::TheShortcutFromTheShortcutsApp"\ },\ {\ "title": "trigger some named trigger",\ "icon": "sfsymbol::house",\ "action": "named::TheNameOfTheBTTNamedTrigger"\ }\ ]; return JSON.stringify(items); } **Complex example** async function retrieveJSON() { let items = [\ {\ "title": "hello world",\ "icon": "sfsymbol::globe"\ },\ {\ title: "some title",\ subtitle: "some subtitle",\ subitems: [\ {\ title: "some sub-item",\ action: "named::NameOfNamedTriggerInBTT",\ icon: "sfsymbol::house::weight@@light::size@@30"\ },\ {\ title: "some sub-item2",\ icon: "base64::iVBORw0KGgoAAAANSUhEUgAAAAoAAAAKCAYAAACNMs+9AAAAFUlEQVR42mNkYPhfz0AEYBxVSF+FAP5FDvcfRYWgAAAAAElFTkSuQmCC",\ action: "shortcut::NameOfShortcutInShortcutsApp@@OptionalInput"\ },\ ],\ icon: "sfsymbol::star::color@@B53E93",\ // this shows various forms of actions. In case you are just triggering\ // a single action, it does not need to be an array.\ action: [\ `btt::paste_text@@{"text": "hello world"}`,\ "keyboard::0", //type a\ "keyboard::11", //type b\ "keyboard::8", //type c\ "js::runShellScript({script: `say hello`})",\ {\ btt: "paste_text",\ args: {\ text: "hello world 2",\ insert_by_pasting: true,\ },\ },\ \ {\ shortcut: "theNameOfTheShortcut",\ input: "some optional input",\ },\ ],\ },\ ]; return JSON.stringify(items); } ![](https://docs.folivora.ai/docs/image-5.png) ![](https://docs.folivora.ai/docs/image-7.png) You'll find more examples on [https://community.folivora.ai](https://community.folivora.ai/) for example here is an example that will list all apps / files in a specified folder: [Example to list all files in a folder](https://community.folivora.ai/t/show-folder-content-in-custom-context-menu/39331/3?u=andreas_hegenberg) * * * Allowed Properties: =================== title ----- supported properties color & size Examples: { "title": "hello::size@@30::color@@#000000" } Alternative syntax: { "title": { "text": "some title", "size": 30, "color": "#000000" } } * * * subtitle -------- supported properties color & size. Only works in the "choose from list action". Examples: { "subtitle": "some subtitle::size@@30::color@@#000000" } Alternative syntax: { "subtitle": { "text": "some subtitle", "size": 30, "color": "#000000" } } * * * subitems -------- Examples: { "title": "submenu", "subitems": [\ {\ "title": "hello"\ },\ {\ "title": "world"\ }\ ] } * * * setvariable ----------- this allows to set a variable value before the action is executed. If the simple string based action format is used, the **setvariable** must be at the top level of the item definition. If you have multiple actions all string based actions will use that setvariable definition. If you use the object based action definition you can set a variable per action. Examples: { "title": "some item title", "action": "keyboard::0" "setvariable": "variablename@@value" } Alternative syntax: { "title": "some item title", "setvariable": { "name": "variablename", "value": "test" }, "action": [\ "keyboard::0",\ "keyboard::1" \ ] } Alternative syntax with actions as objects: { "title": "some item title", "action": [\ {\ btt: "paste_text",\ setvariable: {\ name: "the_variable",\ value: "some text",\ },\ \ args: {\ text: "(BTT)@variable:the_variable(BTT)",\ insert_by_pasting: true,\ },\ },\ {\ btt: "paste_text",\ setvariable: {\ name: "some_other_variable",\ value: "some other text",\ },\ \ args: {\ text: "(BTT)@variable:some_other_variable(BTT)",\ insert_by_pasting: true,\ },\ } \ ] } * * * templateitemuuid ---------------- This is only for use within [Floating Menus](https://docs.folivora.ai/docs/1600_floating_menus.html) , it allows you to use the configuration of any Floating Menu Item you have created in the BTT UI as a template. You can get the UUID of any item in BTT by right-clicking it. The item used as a template can also be from a disabled menu and can even be disabled itself. Examples: [{\ templateItemUUID: "1D974882-9376-4B09-81FC-E427F79CBD25",\ "title": "some title"\ },\ {\ templateItemUUID: "1D974882-9376-4B09-81FC-E427F79CBD25",\ "title": "another title",\ "icon": "sfsymbol::sun.max"\ },\ {\ templateItemUUID: "1D974882-9376-4B09-81FC-E427F79CBD25",\ "title": "third title",\ "icon": "sfsymbol::house"\ }\ ] ![](https://docs.folivora.ai/docs/image-17.png) * * * icon ---- this allows to define an icon Supported properties: type (sfsymbol, size, path, base64, background, width, height) Examples: { "icon": "sfsymbol::star" } Or with more options: { "icon": "sfsymbol::star::weight@@light::color@@#fefefe::color@@#000000::background@@#B53E93" } From file: { "icon": "path::~/Downloads/test.png::width@@40::height@@40" } From base64: { "icon": "base64::base64code" } Alternative syntax: { "icon": { "type": "sfymbol", "sfymbol": "star", "weight": "light", "colors" : ["#000000", "#fefefe"], "background": "#B53E93", "size" : 30 } } * * * action ------ Supported properties named, shortcut, js, keyboard, uuid, btt. Can also be an array of actions. * * * ### named This will trigger a named trigger configured in BTT (see [http://docs.folivora.ai/docs/1002\_named\_triggers.html](http://docs.folivora.ai/docs/1002_named_triggers.html) ) {"title": "trigger named trigger", "action": "named::theNameOfTheNamedTrigger"}, Alternative syntax: { "title": "trigger named trigger alternative", "action": { "named": "helloworld" }, "icon": "sfsymbol::star.leadinghalf.filled" } * * * ### uuid This will trigger any trigger configured in BTT using its UUID {"title": "trigger via uuid", "action": "uuid::4ff033d2-8f67-490d-b281-3124d452ef07"}, Alternative syntax: { "title": "trigger via UUID alternative", "action": { "uuid": "4ff033d2-8f67-490d-b281-3124d452ef07" } } * * * ### shortcut This will trigger a shortcut configured in Apple's shortcuts app {"title": "trigger shortcut form shortcuts app", "action": "shortcut::theNameOfTheShortcut@@someOptionalInput"}, Alternative syntax: { "title": "trigger shortcut form shortcuts app alternative", "action": { "shortcut": "theNameOfTheShortcut", "input": "some optional input" } } * * * ### js This will run BTT Java Script which also allows to run shell scripts or apple scripts and trigger ny of BTT's scripting functions ([http://docs.folivora.ai/docs/1106\_java\_script.html](http://docs.folivora.ai/docs/1106_java_script.html) ) E.g. run some shell script: {"title": "say hello", "action": "js::runShellScript({script: `say hello`})"}, Or run some arbitrary apple script: { title: "show some apple script dialog", action: { js: `(async () => { // put the Apple Script into a string (back ticks are great for multi-line strings) let appleScript = \` set theDialogText to "The curent date and time is " & (current date) & "." set result to display dialog theDialogText return result \`; // this will execute the Apple Script and store the result in the result variable. let result = await runAppleScript(appleScript); // do whatever you want with the result // at the end you always need to call returnToBTT to exit the script / return the value to BTT. returnToBTT(result); // it is important that this function self-executes () })() `, }, }, * * * ### btt This can run any of BTT's scripting functions ([http://docs.folivora.ai/docs/1102\_apple\_script.html](http://docs.folivora.ai/docs/1102_apple_script.html) ). To see how to configure & trigger a specific action you can right-click the action in BTT and choose "copy java script to trigger action". "action": `btt::paste_text@@{"text": "hello world"}` Alternative syntax { "title": "paste item 1", "action": { "btt":"paste_text", "args": { "text": "ddasdas", "insert_by_pasting": true } } }, { "title": "application expose", "action": { "btt": "trigger_action", "args": { "json": { "BTTActionCategory": 0, "BTTPredefinedActionType": 6, "BTTPredefinedActionName": "Application Expose" } } } } * * * ### keyboard This can trigger a keyboard shortcut. It needs to constist of comma separated modifier keys (cmd, shift, opt, fn, ctrl) and one key code at the end. A list of key codes can e.g. be found here: [https://eastmanreference.com/complete-list-of-applescript-key-codes](https://eastmanreference.com/complete-list-of-applescript-key-codes) "action": "keyboard::shift,opt,0" Action Categories ----------------- Some items in BTT support different action categories, e.g. a floating menu button that can trigger one action on left-click but another action on right-click. If you want to make us of that, instead of defining your action via the "action" property, you need to define it via the "actions" property. The syntax for every action category defined in the "actions" object is the same as discussed in the previous section. { title: "test item 0", actions: { standard: "keyboard::0", rightclick: "keyboard::1" }, } Possible action category names are listed here, however they availability depends on the BTT feature you are using: * standard * rightclick * hover * longpress * touchrelease * hoverend * hyperkeyrelease * changetofalse * appear * disappear * ondrop Examples ======== Example: Create an AI / App Launcher: ------------------------------------- ![alt text](https://docs.folivora.ai/docs/media/image.jpg) The tutorial for this is available in our community forum: [https://community.folivora.ai/t/tutorial-ai-and-app-launcher-using-the-new-scriptable-choose-from-list/39811](https://community.folivora.ai/t/tutorial-ai-and-app-launcher-using-the-new-scriptable-choose-from-list/39811) Example: Get result from Apple Shortcut: ---------------------------------------- async function retrieveJSON() { let weather = await runAppleShortcut({name: "weather", "input": ""}); let items = [\ {"title": weather},\ {"title": "test item 2"},\ {"title": "test item 3", "icon": "sfsymbol::star"}\ ]; return JSON.stringify(items); } Example: Execute multiple actions from one item (example types abc) ------------------------------------------------------------------- async function retrieveJSON() { let items = [\ {\ "title": "multiple actions (type abc)", \ "action": [\ "keyboard::0", //type a\ "keyboard::11", //type b\ "keyboard::8", //type c\ ],\ "icon": "sfsymbol::keyboard"\ },\ ]; return JSON.stringify(items); } Example: Fetch menu from some server: ------------------------------------- async function retrieveJSON() { const response = await fetch('https://folivora.ai/various/test-menu.json'); const data = await response.json(); const jsonString = JSON.stringify(data); return jsonString; } Example: Usage With Custom Menu Bar Items ----------------------------------------- Works with custom menubar items as well when assigning the "Show Context Menu New" action: ![alt text](https://docs.folivora.ai/docs/media/image-6.png) Example: Floating Menu App Switcher ----------------------------------- Preset download: [https://share.folivora.ai/sharedPreset/55076196-7d17-4b8f-bbae-4dbd17c3ad87](https://share.folivora.ai/sharedPreset/55076196-7d17-4b8f-bbae-4dbd17c3ad87) ![](https://docs.folivora.ai/docs/image-20.png) Code: async function retrieveJSON() { // this calls a internal BTT function to get all launched apps sorted by last usage let apps = await BTTActions.copyLaunchedApplicationsInFrontToBackOrder(); let menuItems = []; let i=0; for (let app of apps) { // we only want to show 10 apps if(i>9) {break;} i++; let item = { templateItemUUID: "BFBD1B46-0E72-49CF-B4DB-C2CB017E82B2", title: "", action: `js::(async () => {runShellScript({script: 'open "${app.BundlePath}"'})})()`, icon: `path::${app.AppIconPath}::width@@40` }; menuItems.push(item); } return JSON.stringify(menuItems); } Typescript Definition ===================== Here is a basic \*.d.ts that tries to describe the structure: declare module "SimpleFormat" { // The root format is an array of SimpleFormatItems. export type SimpleFormat = SimpleFormatItemBase[]; export interface SimpleFormatItemBase { title?: string | AttributedText; meta?: string; // some meta information, can e.g. used when filtering searchable list type?: SimpleFormatItemType; submenu?: SimpleFormatItemBase[]; background?: string; icon?: string | IconDefinition; actions?: { [key in ActionCategory]?: Action }; // this can be used if an item supports more than one action category action?: Action; setvariable?: string | SetVariableDefinition; } // Represents a single "Choose From List" Item export interface SimpleFormatItemChooseFromList extends SimpleFormatItemBase { subtitle?: string | AttributedText; } // Represents a single Floating Menu Item export interface SimpleFormatItemFloatingMenu extends SimpleFormatItemBase { width?: number; height?: number; templateitemuuid?: string; // defines the base item to use as template } // Represents the definition of an icon, which can be specified in various ways. export interface IconDefinition { type: "sfsymbol" | "path" | "base64"; value?: string; // For 'sfsymbol' type. path?: string; // For 'path' type. base64?: string; // For 'base64' type. weight?: string; // Applicable for 'sfsymbol'. size?: number; // Applicable for 'sfsymbol'. colors?: RGBAColor[]; // Applicable for 'sfsymbol'. background?: RGBAColor; width?: number; height?: number; } // Represents a variable setting action. export interface SetVariableDefinition { name: string; value: string; } // Base interface for actions that can have a 'setvariable' property. interface BaseAction { setvariable?: string | SetVariableDefinition; } // Action type for executing BTT scripts. export interface BTTAction extends BaseAction { btt: string; input?: any; args?: any; json?: any; } // Action type for triggering named triggers in BTT. export interface NamedAction extends BaseAction { named: string; } // Action type for triggering actions by UUID in BTT. export interface UUIDAction extends BaseAction { uuid: string; } // Action type for executing JavaScript code. export interface JSAction extends BaseAction { js: string; } // Action type for performing keyboard shortcuts. export interface KeyboardAction extends BaseAction { keyboard: string; } // Action type for running Shortcuts app shortcuts. export interface ShortcutAction extends BaseAction { shortcut: string; input?: string; } // Defines the action, which can be a string, an action definition, or an array of actions. export type Action = | string | ActionString | ActionDefinition | (string | ActionString | ActionDefinition)[]; // Union type of all possible action definitions. export type ActionDefinition = | BTTAction | NamedAction | UUIDAction | JSAction | KeyboardAction | ShortcutAction; export type ActionCategory = | "standard" | "hover" | "longpress" //not yet supported | "touchrelease" //not yet supported | "hoverend" | "hyperkeyrelease" //not yet supported | "rightclick" | "changetofalse" //not yet supported | "appear" | "disappear" | "ondrop"; // Represents attributed text, which can be a simple string or an object with styling. export type AttributedText = | string | { text: string; color?: RGBAColor; size?: string; }; // Represents the possible item types, matching the Swift enum. export type SimpleFormatItemType = | "standard" | "separator" //requires BTT 4.805, in previous versions set the title of an item to --- | "back" //floating menu only | "textField" //floating menu only | "slider"; //floating menu only // these are attempts at defining the string based definitions type Digit = `${number}`; type Whitespace = " " | ""; type Comma = `${Whitespace},${Whitespace}`; export type RGBAColor = `rgba(${Whitespace}${Digit}${Whitespace}${Comma}${Digit}${Whitespace}${Comma}${Digit}${Whitespace}${Comma}${Digit}${Whitespace})`; // Type representing known icon types. type IconType = "sfsymbol" | "path" | "base64"; // Type representing known icon keys. type IconKey = | "weight" | "color" | "background" | "size" | "width" | "height"; // Type representing a key-value pair in icon strings. type IconKeyValuePair = `::${IconKey}@@${string}`; // Icon string pattern with up to 5 key-value pairs. export type IconString = | `${IconType}::${string}` | `${IconType}::${string}${IconKeyValuePair}` | `${IconType}::${string}${IconKeyValuePair}${IconKeyValuePair}` | `${IconType}::${string}${IconKeyValuePair}${IconKeyValuePair}${IconKeyValuePair}` | `${IconType}::${string}${IconKeyValuePair}${IconKeyValuePair}${IconKeyValuePair}${IconKeyValuePair}` | `${IconType}::${string}${IconKeyValuePair}${IconKeyValuePair}${IconKeyValuePair}${IconKeyValuePair}${IconKeyValuePair}`; // Type representing known action types. type ActionType = "btt" | "keyboard" | "js" | "uuid" | "named" | "shortcut"; // Type representing known action keys. type ActionKey = "input" | "function" | "args" | "json"; // Type representing a key-value pair in action strings. type ActionKeyValuePair = `@@${string}`; // Action string pattern with optional key-value pair. export type ActionString = | `${ActionType}::${string}` | `${ActionType}::${string}${ActionKeyValuePair}`; } results matching "" =================== No results matching "" ====================== --- # Stream Deck · GitBook [Stream Deck](https://docs.folivora.ai/) ========================================= BetterTouchTool Stream Deck =========================== Starting with version 3.800 BetterTouchTool supports all of the various Stream Deck devices: [https://www.elgato.com/de/stream-deck](https://www.elgato.com/de/stream-deck) Examples to get started: ------------------------ Download the example preset and look at the various examples described here. [Example Preset Direct Link](https://folivora.ai/releases/ExampleStreamDeck.bttpreset) List of examples: * [Standard button with various formatting options applied](https://docs.folivora.ai/docs/1301_stream_deck_standard_button.html) * [Button with different actions for long press and short press](https://docs.folivora.ai/docs/1302_stream_deck_long_press.html) * [Button which repeats its actions while being pressed](https://docs.folivora.ai/docs/1303_stream_deck_repeat.html) * [Showing / changing buttons while holding other buttons](https://docs.folivora.ai/docs/1304_changing_buttons_while_holding.html) * [Showing buttons only on specific devices](https://docs.folivora.ai/docs/1305_stream_deck_specific_devices.html) * [Groups](https://docs.folivora.ai/docs/1306_stream_deck_groups.html) * [Stream Deck Pedal](https://docs.folivora.ai/docs/1307_stream_deck_pedal.html) * [App Specific Configurations](https://docs.folivora.ai/docs/1308_stream_deck_appspecific.md) * [Script Widgets](https://docs.folivora.ai/docs/1309_script_widgets.html) * [Custom Swift Plugins](https://docs.folivora.ai/docs/1310_custom_swift_plugins.html) Basics: ------- ### Operating Mode BetterTouchTool supports two oeprating modes for the Stream Deck devices. ![stream_deck_modes](https://docs.folivora.ai/docs/media/stream_deck_1.png) ### Mode 1 (preferred): Fully Controlled by BetterTouchTool This is the preferred and most performant mode. In this mode, you must not be running the original Stream Deck software. BetterTouchTool directly talks to the Stream Deck devices. In this mode you just configure everything in BetterTouchTool. No additional setup is necessary. **This mode is only possible due to the open source code from the awesome Hammerspoon app. For even more advanced automations (via Lua scripting) you should check it out at [https://www.hammerspoon.org/](https://www.hammerspoon.org/) ** ### Mode 2: Stream Deck Plugin In this mode you'll need to install a Stream Deck Plugin and place multiple copies of it in your configuration in the original Stream Deck software. BetterTouchTool will then talk to the original Stream Deck software to render the buttons you configure. When pressing one of the buttons, the original Stream Deck software will talk to BetterTouchTool to execute the assigned actions. In Plugin mode it is recommended to use fixed identifiers to correctly place the BTT items on your Stream Deck. See next. ![stream_deck_modes](https://docs.folivora.ai/docs/media/stream_deck_plugin_mode.png) BetterTouchTool Stream Deck Layout Concept ------------------------------------------ The Stream Deck items in BTT are (like anything else in BTT) defined as a list. You can reorder that list by dragging the items around. By default BetterTouchTool starts placing buttons / widgets from that list on the top left of the Stream Deck and then just continues until the row is full. It then continues by placing items in the next row - and so on. If all rows are full, BTT automatically adds a new page and starts again on the top left of that page. In case you do have some more dynamic scenario, the order defined by the list in BTT might not be enough. For these cases there are two additional options: ### 1.) Display Order You can use the "display order" property in the settings of every item to define a additional ### 2.) Fixed Position However BetterTouchTool also allows you to specify specific positions for items. (e.g. row 3 col 2). If BTT is fully controlling the Stream Deck you can set the specific row and column in the item's configuration, otherwise you can tell BTT to place the item on a specific identifier defined in the Stream Deck app. By default all buttons are visible on any connected Stream Deck device, however you can make them only display only on devices with specific serial numbers ### 3.) Fixed Identifier in Plugin Mode When using BetterTouchTool in Plugin Mode, you can not specify the row / col directly. Instead you can set an identifier that matches the identifier you set in the Stream Deck software. ![](https://docs.folivora.ai/docs/media/20220713140406.png) results matching "" =================== No results matching "" ====================== --- # Notch Bar (Deprecated) · GitBook [Notch Bar (Deprecated)](https://docs.folivora.ai/) ==================================================== BetterTouchTool Notch Bar ========================= ### Deprecation Notice 06/2023: The Notch Bar functionality will sometime in the near future be migrated to the powerful new "Floating Menu / Widget" functionality. This should mostly be automatic, but if you start right now, I'd recommend to experiment with the Floating Menu's instead of the Notch Bar. * * * The Notch Bar was introduced with BetterTouchTool 3.690 and is intended to be a super customizable menubar replacement for any type of Mac. It is called Notch Bar, because it is especially useful on Macbooks with a Notch. ![notchbar](https://docs.folivora.ai/docs/media/notchbar.jpg) Also have a look at this recent MacStories article: [MacStories: Early Experiments with BetterTouchTools Notch Bar](https://www.macstories.net/mac/early-experiments-with-bettertouchtools-notch-bar-as-a-visual-shortcuts-launcher-for-macos/) Example Preset -------------- Here is a small example preset that showcases most of the Notch Bar functionality: [Example Preset Direct Link](https://folivora.ai/releases/ExampleNotchBarNew.bttpreset) Quick Start ----------- * If possible, **please use a dark wallpaper**, so your standard macOS menubar shows white icons and white text. In this mode the BTT Notch Bar works best. * As soon as you add your first Notch Bar trigger, your macOS menubar will go away. To hide the BTT Notch Bar use the predefined action "Toggle BTT Notch Bar" or right-click the black area. * The BTT Notch Bar offers two modes: **Widget Mode** and **Menubar Mode**. To switch between modes, **scroll up/down on the Notch Bar**, alternatively use the predefined action "Toggle BTT Notch Bar Mode" or right-click the Notch Bar. * Use the **Status Item Widget** to show the system's top right status items on the BTT Notch Bar. * There is currently a known incompatibility with an app called Magnet. The Notch Bar does not behave correctly while this app is running. **Please use the community platform to learn more or share your ideas / setups**: [https://community.folivora.ai](https://community.folivora.ai/) More Notch Bar Topics: ====================== * [Notch Bar Setup](https://docs.folivora.ai/docs/1201_notch_bar_setup.html) * [Notch Bar Item Placement](https://docs.folivora.ai/docs/1203_notch_bar_placement.html) * [Notch Bar Customization](https://docs.folivora.ai/docs/1202_notch_bar_customization.html) results matching "" =================== No results matching "" ====================== --- # Notch Bar Placement · GitBook [Notch Bar Placement](https://docs.folivora.ai/) ================================================= BetterTouchTool Notch Bar Item Placement ======================================== The Notch Bar is split into 4 parts. On the very left is a fixed area that is not scrollable. This is followed by a scrollable area that goes to the left edge of the Notch and another scrollable area that comes right after the Notch. At the end there is again a fixed non-scrollable area on the very right. ![notchbar](https://docs.folivora.ai/docs/media/notchbar-container-overview.png) The fixed areas have higher priority, this means if you put many items into the fixed left or right areas, the scrollable areas will become smaller. On standard screens you might not need both of the scrollable areas. ![notchbar](https://docs.folivora.ai/docs/media/placements.png) results matching "" =================== No results matching "" ====================== --- # Generic Devices · GitBook [Generic Devices](https://docs.folivora.ai/) ============================================= Generic Device Support ====================== Many input devices produce relatively simple output, however, they can be difficult to use without proper software support. To make it possible to use almost any input device with BetterTouchTool, I have begun working on "Generic Device Support." The concept is straightforward. BTT connects to a device and provides you with raw input data. You write a small JavaScript function that interprets the input data and activates triggers in BTT. This is a work in progress and there is not much documentation available yet. In this example video I'm using the Siri Remote as an example and show how to make BetterTouchTool recognize its buttons: ![](https://docs.folivora.ai/docs/media/generic_siri_remote.png) ![](https://docs.folivora.ai/docs/media/generic_triggers_analyzer.png) ![](https://docs.folivora.ai/docs/media/offered_triggers.png) ![](https://docs.folivora.ai/docs/media/generic_triggers_in_menu.png) results matching "" =================== No results matching "" ====================== --- # Notch Bar Customization · GitBook [Notch Bar Customization](https://docs.folivora.ai/) ===================================================== BetterTouchTool Notch Bar Customization ======================================= Standard Customization ---------------------- Every item or widget you put onto the Notch Bar does offer the option to add extra CSS styles or classes to it (scroll to the very bottom of the UI/Colors section). This is the easiest way to achieve customization. ![notchbar-customization](https://docs.folivora.ai/docs/media/notchbar_css.jpg) HTML Widgets ------------ BetterTouchTool allows you to add completely custom HTML, CSS and Java Script widgets. These widgets can contain any HTML/CSS/JS that is supported by the latest Safari. To trigger the actions assigned to the custom HTML widget in BTT, use the triggerAssignedActions function like this:
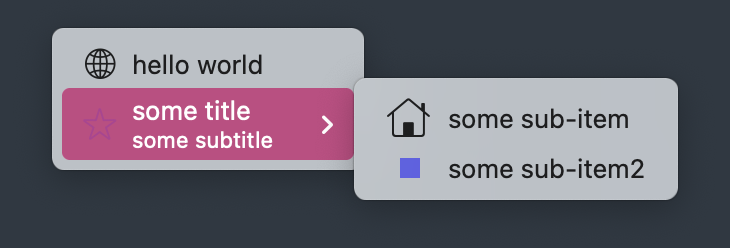
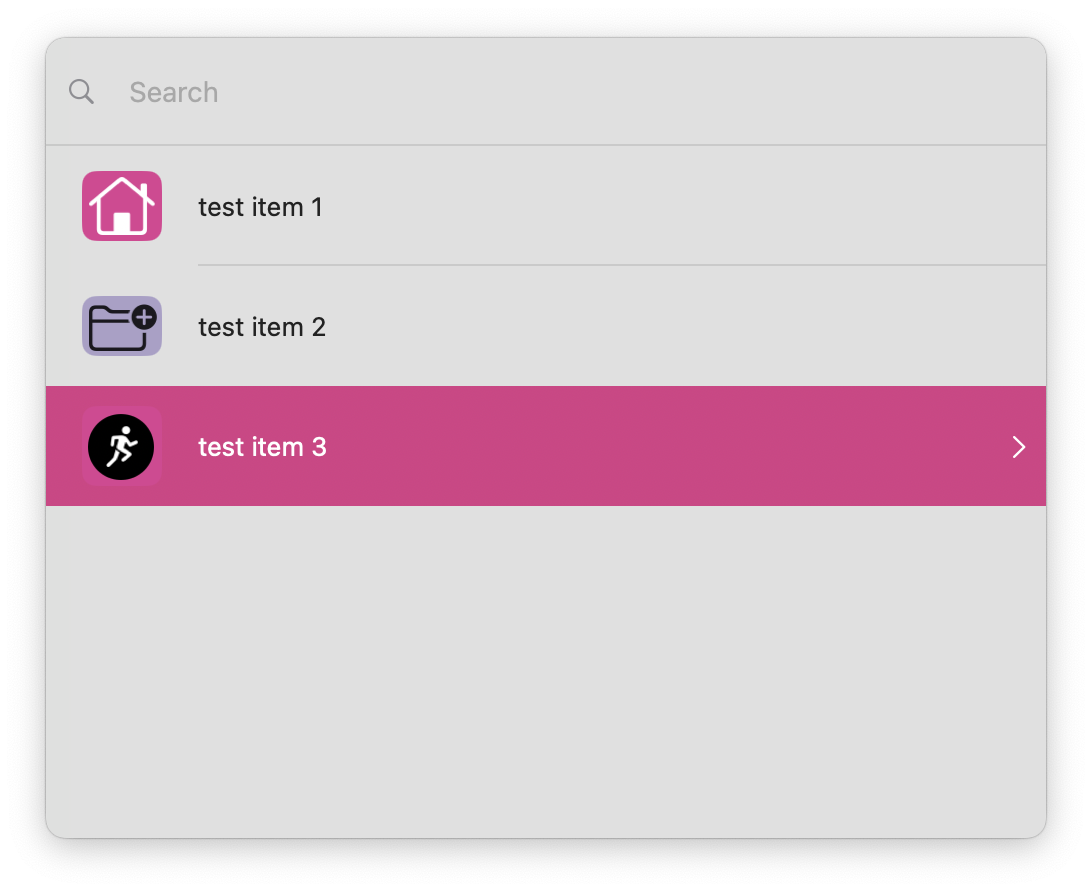
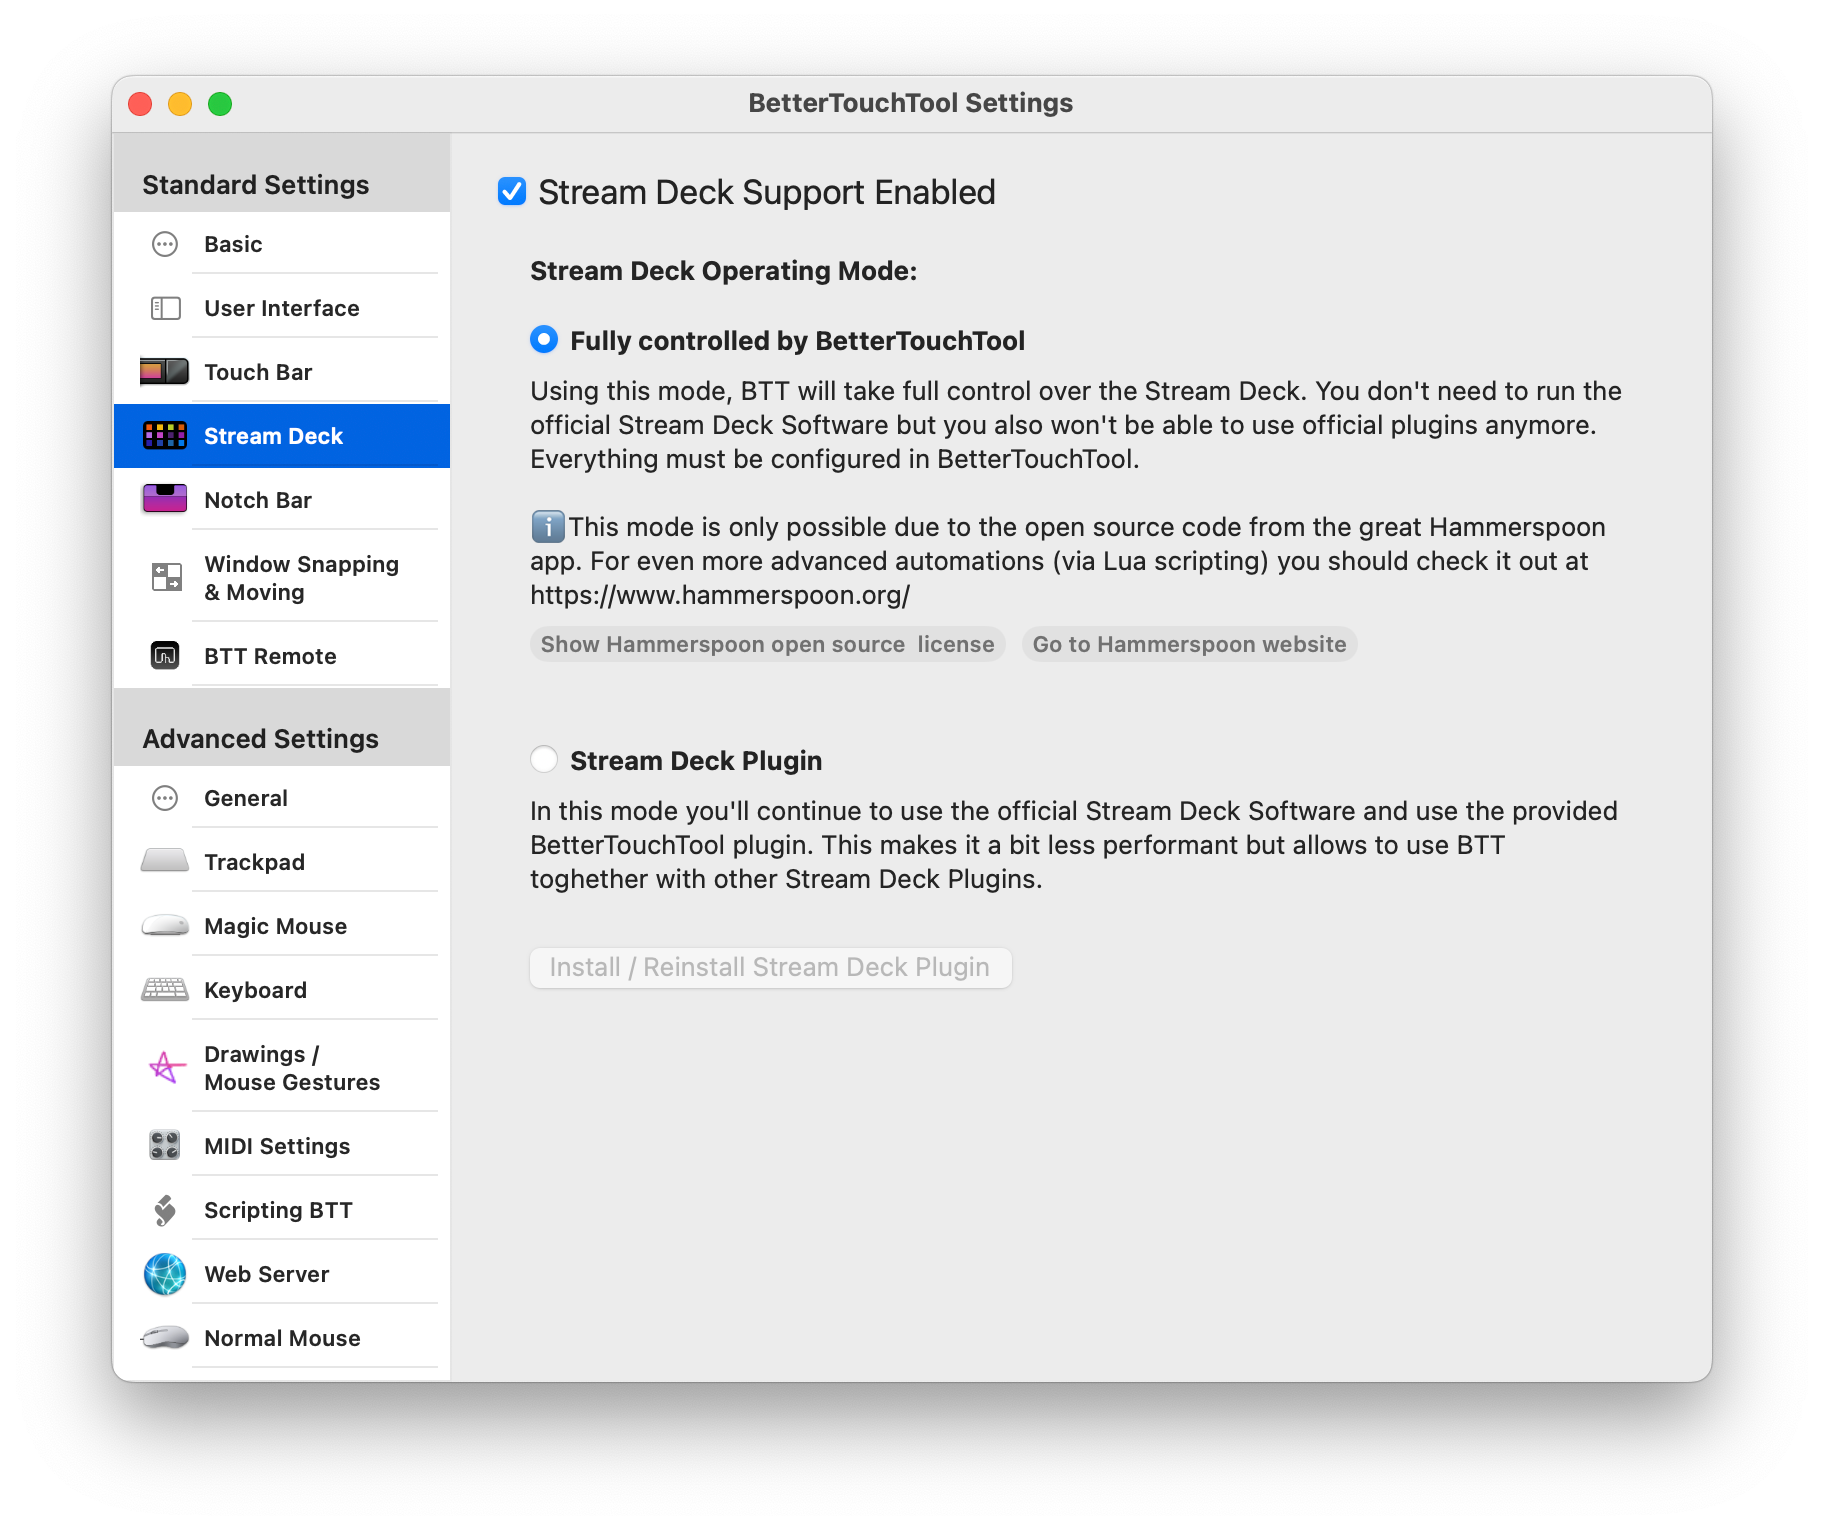
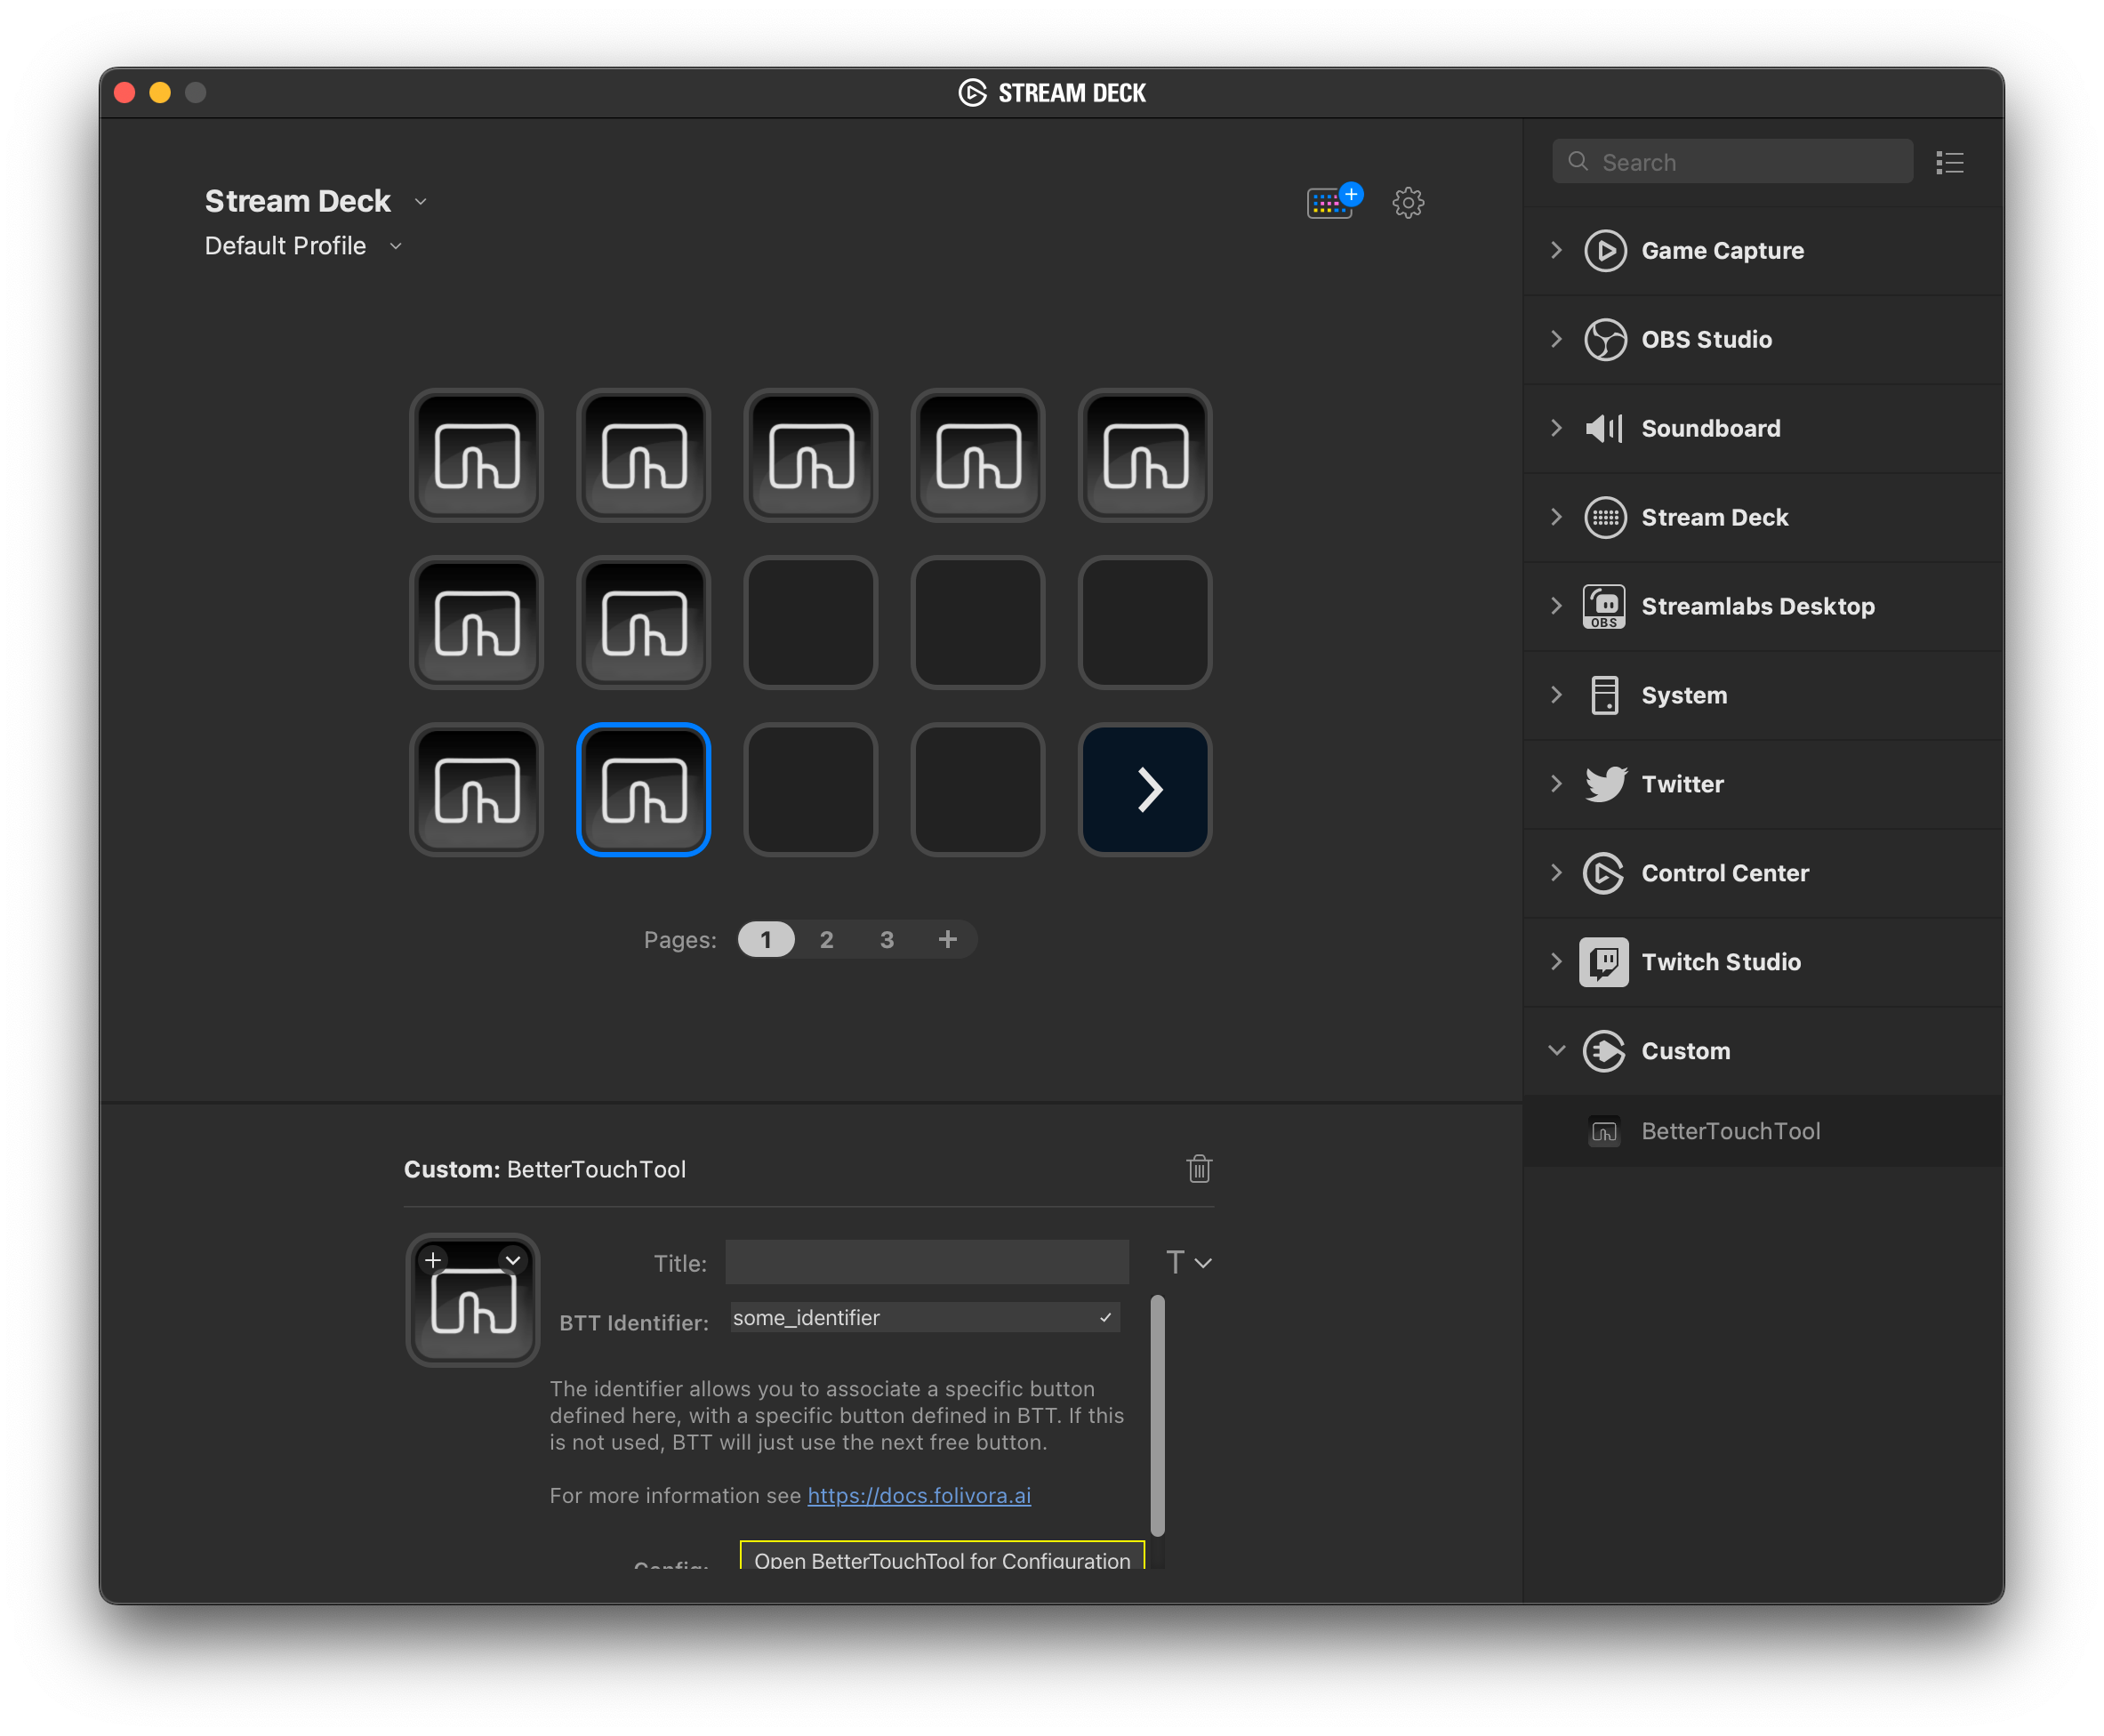
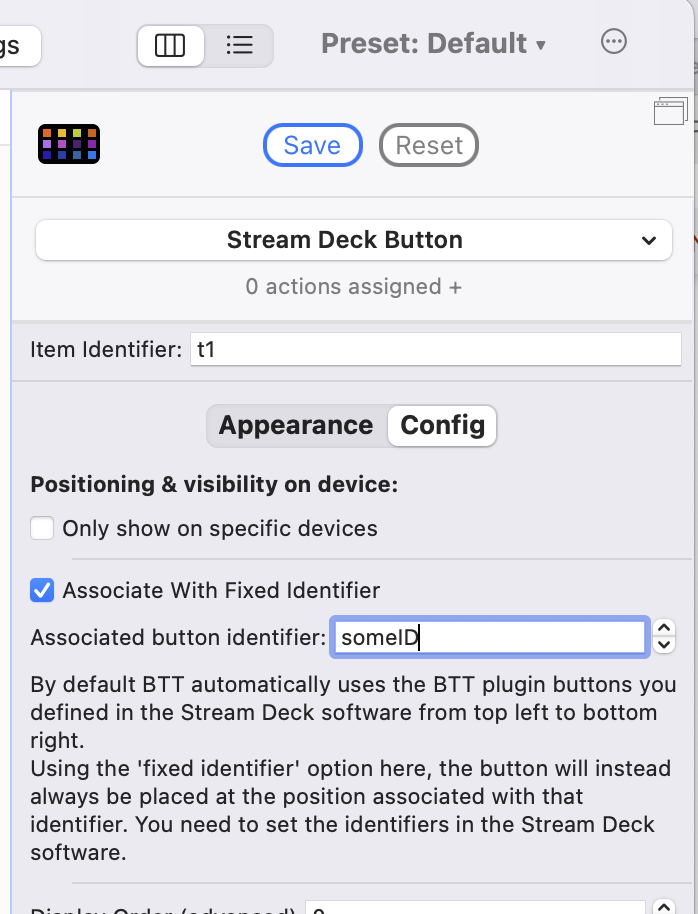


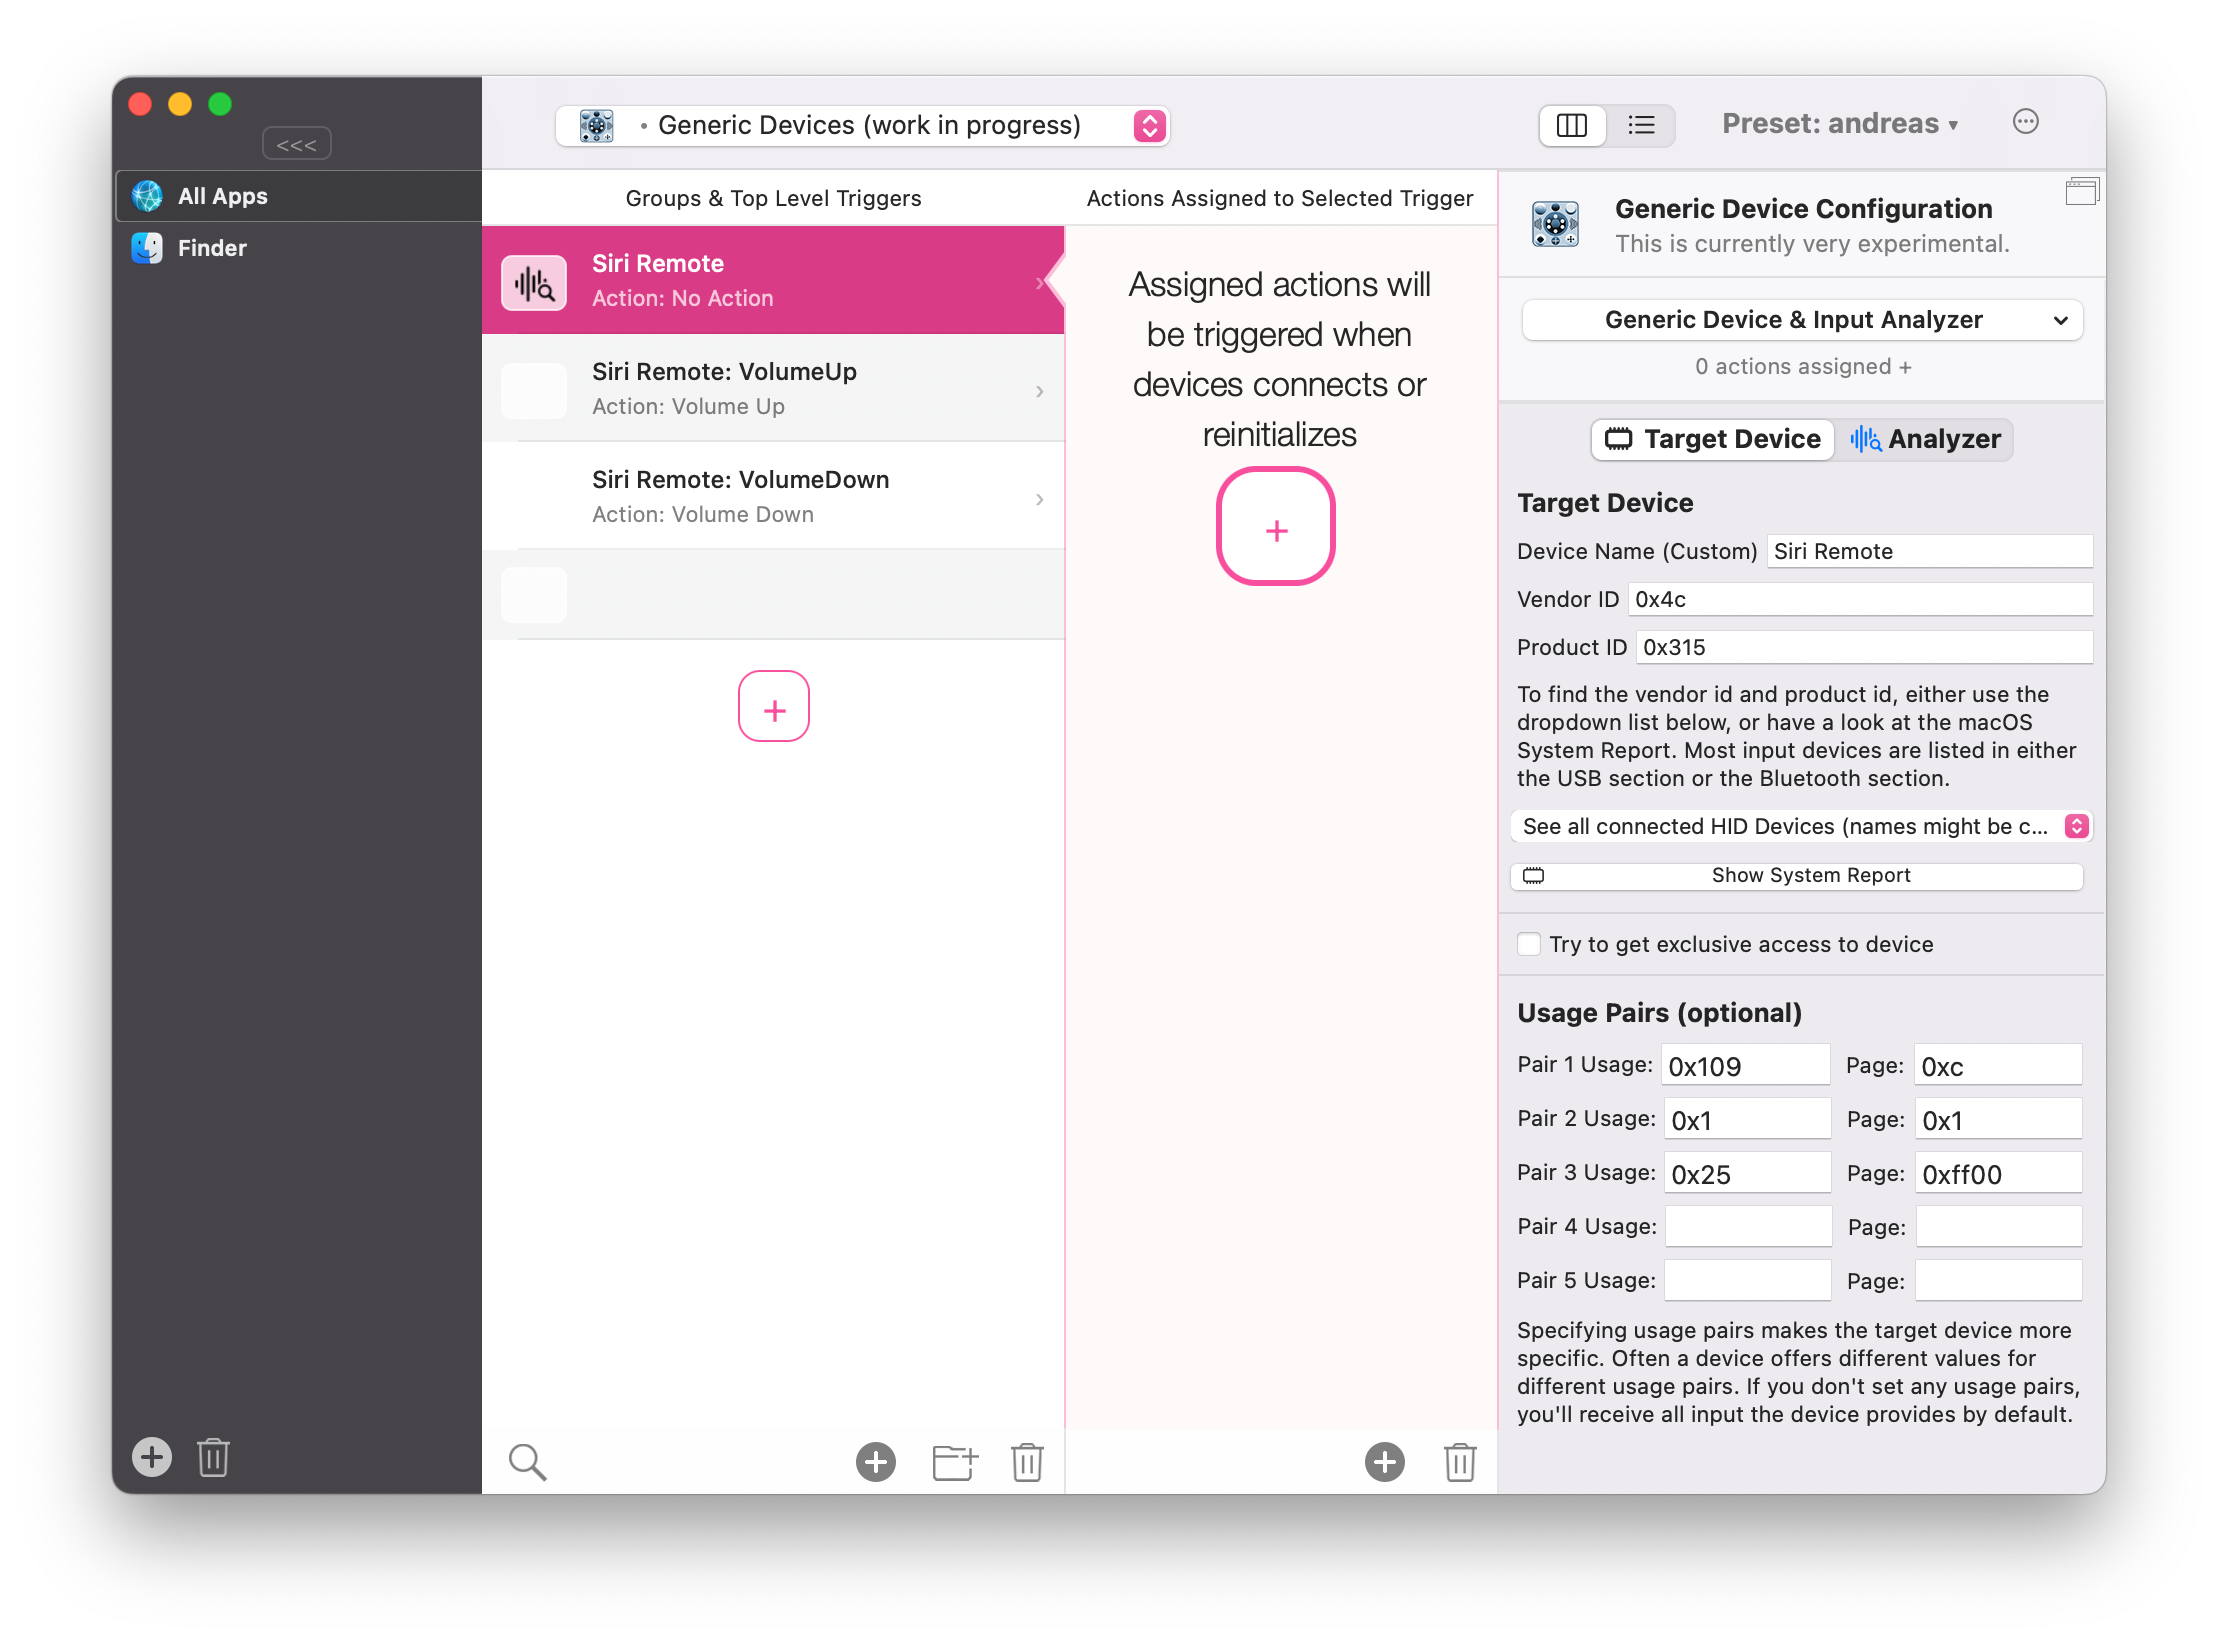
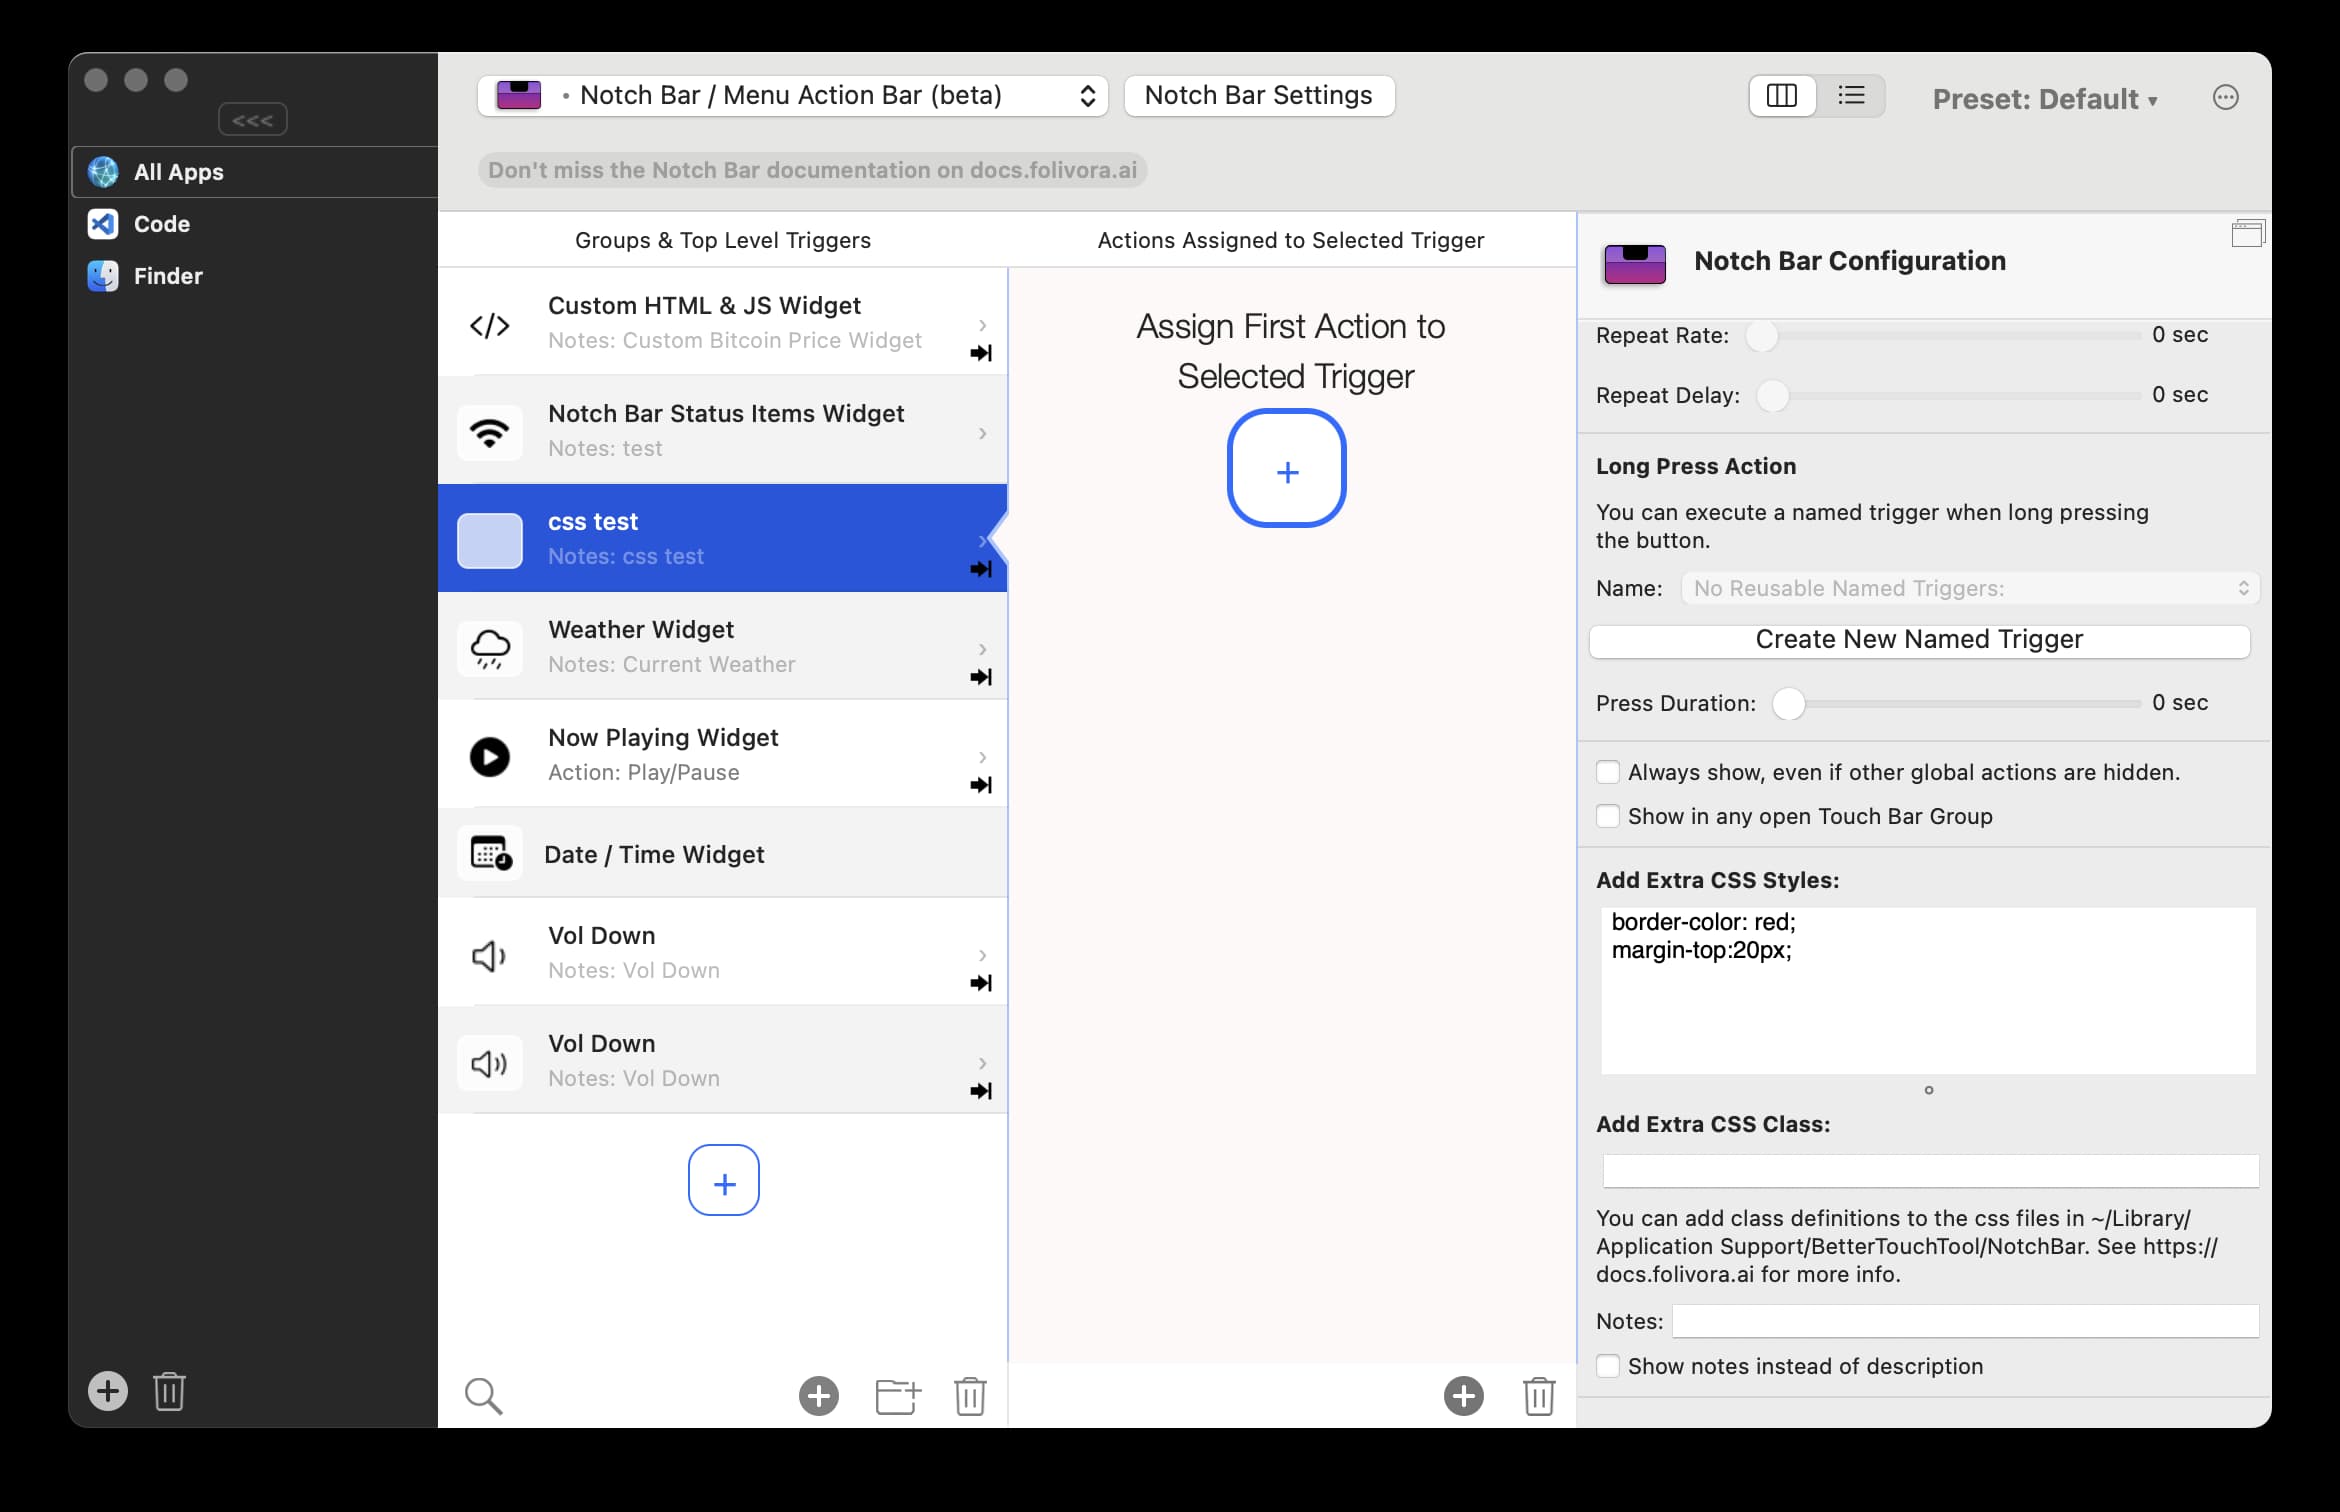
Something
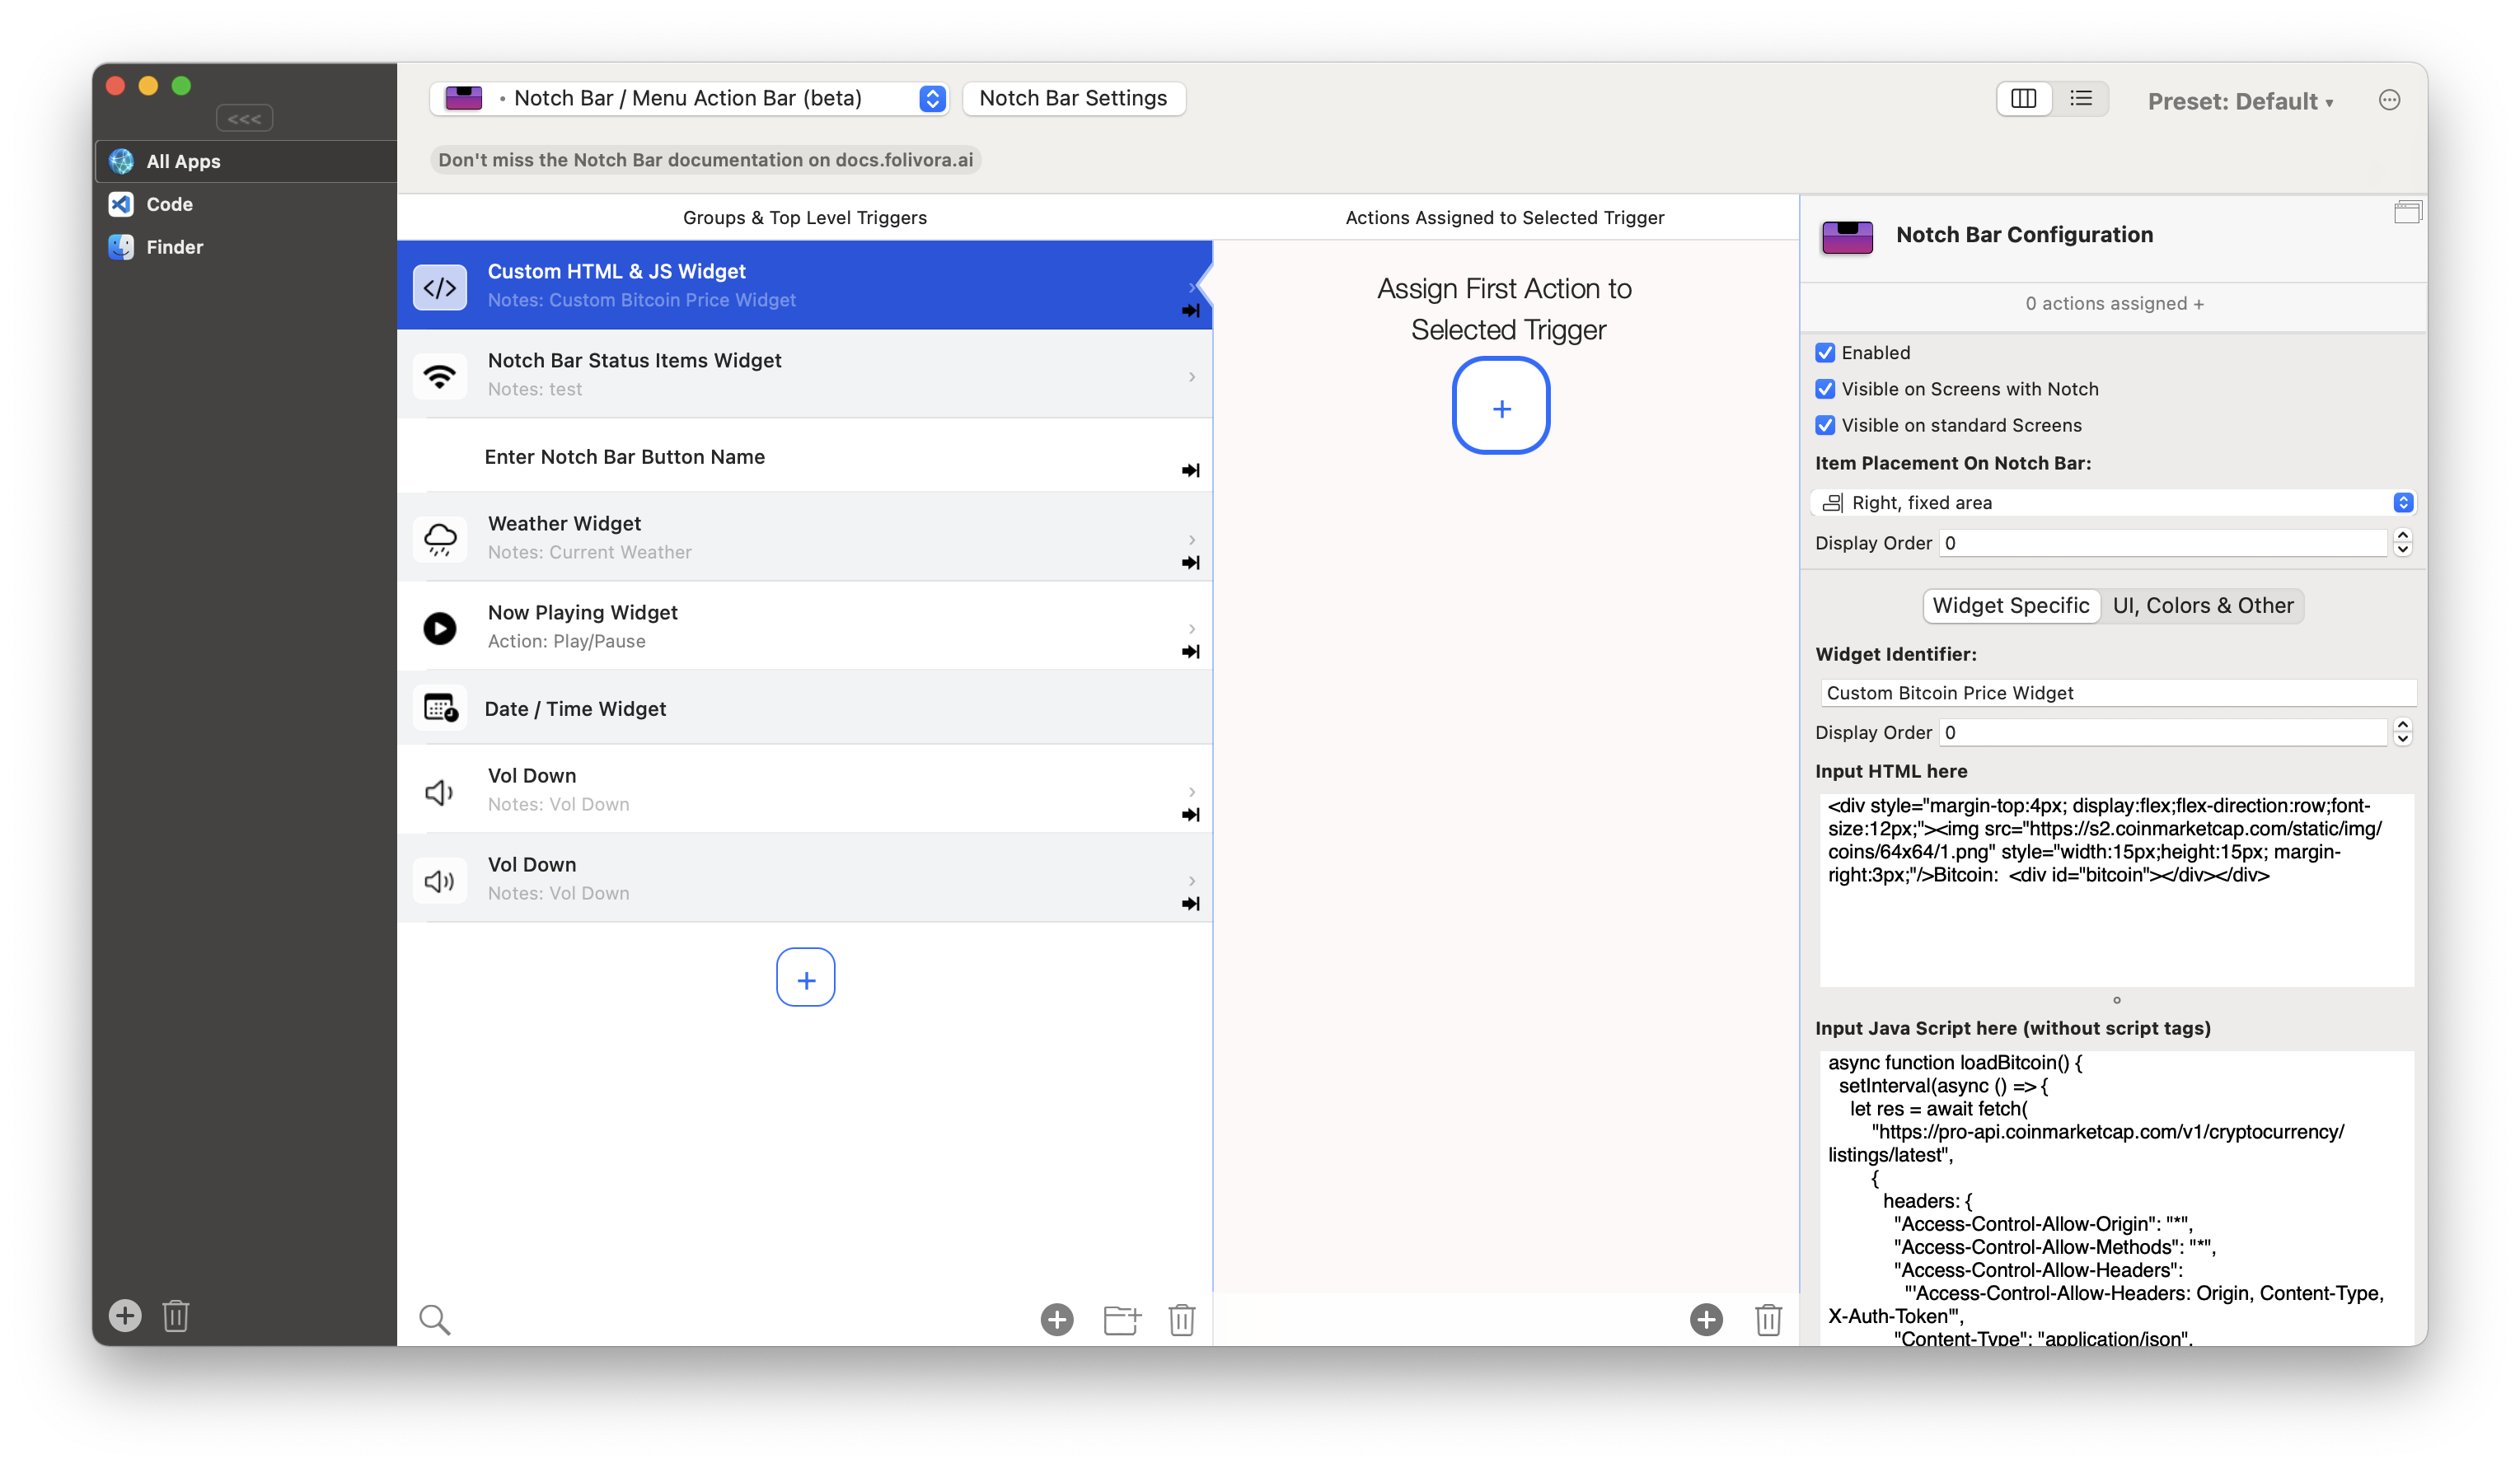
![notchbar-html-widget](https://docs.folivora.ai/docs/media/notchbar_custom_widget.png) Full Customization ------------------ The BTT Notch Bar is **completely** customizable because it is based on HTML5. All templates are located in ~/Library/Application Support/BetterTouchTool/NotchBar You can use any function available to the BTT floating webview, see * \[Floating HTML Menu\] (10\_0\_floating\_html\_menu.md) However these files can change when upgrading to a newer BTT version (BTT will ask what to do when a new version contains changes). In general it's best to just edit the two user files which will not be changed on BTT updates.: BTTNotchBarUser.css BTTNotchBarUser.js In case you need to include custom Notch Bar layouts in your presets, you can also move them to ~/Library/Application Support/BetterTouchTool/PresetBundles/YOURPRESETFOLDER, then they will be exported when you export your preset. ![notchbar](https://docs.folivora.ai/docs/media/notchbar_fullscreen.png) results matching "" =================== No results matching "" ====================== --- # Example Device Scripts · GitBook [Example Device Scripts](https://docs.folivora.ai/) ==================================================== User Generated Device Scripts to use the devices on macOS ========================================================= Surface Dial ------------ [Surface Dial on community.folivora.ai](https://community.folivora.ai/t/generic-devices-report-repeated-events-even-if-monitored-bytes-dont-change/30101/11?u=andreas_hegenberg) Griffin Power Mate ------------------ [https://heavyconsulting.net/blog/2023/2023-02-02-touch-of-power](https://heavyconsulting.net/blog/2023/2023-02-02-touch-of-power) Philips Foot Pedal ------------------ [Philips Foot Pedal on community.folivora.ai](https://community.folivora.ai/t/generic-devices-philips-footcontrol-acc2330/30751) Microsoft Presenter+ -------------------- [Microsoft Presenter+ community.folivora.ai](https://community.folivora.ai/t/generic-devices-help-microsoft-presenter/35915/5) Xbox Adaptive Controller ------------------------ [Xbox Adaptive Controller on community.folivora.ai](https://community.folivora.ai/t/generic-devices-please-give-function-analyzedeviceinput-access-to-the-previous-state/30592/9?u=andreas_hegenberg) PS4 Dualshock ------------- [PS4 Dualshock on community.folivora.ai](https://community.folivora.ai/t/generic-devices-ps4-dualshock/34868/10?u=andreas_hegenberg) results matching "" =================== No results matching "" ====================== --- # Notch Bar Setup · GitBook [Notch Bar Setup](https://docs.folivora.ai/) ============================================= BetterTouchTool Notch Bar Setup =============================== The Notch Bar setup allows you to hide or show specific containers on the Notch Bar. One important setting is the "Show original status icons" option. This allows you to either show the real macOS status items or hide them to make space for other things. If you decide to hide the original status icons for some mode, you can still use the "Status Items Widget" to get access to a subset of your items. By default the original status icons are shown while in Menubar Mode but are hidden in Widget Mode. ![notchbar-setup](https://docs.folivora.ai/docs/media/notchbar_settings.jpg) results matching "" =================== No results matching "" ====================== --- # Unknown \# h@llo.ai - Specialized Sub Agents Subagents can be configured in the "Automations, Named & Other Triggers" section: !\[Agent\](media/3013\_halloai\_subagents2025-09-17T06:44:03.803Z.png) To make them available in your main assistant, you need to enable them in the "allowed subagents" section in your main assistant configuration: !\[alt text\](media/3013\_halloai\_subagents2025-09-17T06:46:44.664Z.png) In case your subagent doesn't show up there, try to open & close your main assistant once. More coming soon! --- # 404 Not Found Not Found ========= The requested URL was not found on this server. * * * Apache Server at docs.folivora.ai Port 443 --- # 404 Not Found Not Found ========= The requested URL was not found on this server. * * * Apache Server at docs.folivora.ai Port 443 --- # 404 Not Found Not Found ========= The requested URL was not found on this server. * * * Apache Server at docs.folivora.ai Port 443 ---