# Table of Contents
- [Introduction | API Documentation](#introduction-api-documentation)
- [Introduction | Gophish User Guide](#introduction-gophish-user-guide)
- [License | Gophish User Guide](#license-gophish-user-guide)
- [What is Gophish? | Gophish User Guide](#what-is-gophish-gophish-user-guide)
- [Getting Started | Gophish User Guide](#getting-started-gophish-user-guide)
- [Installation | Gophish User Guide](#installation-gophish-user-guide)
- [Documentation | Gophish User Guide](#documentation-gophish-user-guide)
- [Changing Account Settings | Gophish User Guide](#changing-account-settings-gophish-user-guide)
- [Templates | Gophish User Guide](#templates-gophish-user-guide)
- [Groups | Gophish User Guide](#groups-gophish-user-guide)
- [Sending Profiles | Gophish User Guide](#sending-profiles-gophish-user-guide)
- [Settings | API Documentation](#settings-api-documentation)
- [Using the API | Gophish User Guide](#using-the-api-gophish-user-guide)
- [Building Your First Campaign | Gophish User Guide](#building-your-first-campaign-gophish-user-guide)
- [Introducing the Morning Catch Corporation | Gophish User Guide](#introducing-the-morning-catch-corporation-gophish-user-guide)
- [Creating the Sending Profile | Gophish User Guide](#creating-the-sending-profile-gophish-user-guide)
- [Landing Pages | Gophish User Guide](#landing-pages-gophish-user-guide)
- [Template Reference | Gophish User Guide](#template-reference-gophish-user-guide)
- [Creating the Landing Page | Gophish User Guide](#creating-the-landing-page-gophish-user-guide)
- [Importing Groups | Gophish User Guide](#importing-groups-gophish-user-guide)
- [FAQ | Gophish User Guide](#faq-gophish-user-guide)
- [Additional References | Gophish User Guide](#additional-references-gophish-user-guide)
- [Email Reporting | Gophish User Guide](#email-reporting-gophish-user-guide)
- [Launching the Campaign | Gophish User Guide](#launching-the-campaign-gophish-user-guide)
- [Attachment Tracking | Gophish User Guide](#attachment-tracking-gophish-user-guide)
- [Creating the Template | Gophish User Guide](#creating-the-template-gophish-user-guide)
- [Generating Reports | Gophish User Guide](#generating-reports-gophish-user-guide)
- [Logging | Gophish User Guide](#logging-gophish-user-guide)
- [Webhooks | Gophish User Guide](#webhooks-gophish-user-guide)
- [User Management | Gophish User Guide](#user-management-gophish-user-guide)
- [Campaigns | Gophish User Guide](#campaigns-gophish-user-guide)
- [Templates | API Documentation](#templates-api-documentation)
- [Landing Pages | API Documentation](#landing-pages-api-documentation)
- [User Management | API Documentation](#user-management-api-documentation)
- [Sending Profiles | API Documentation](#sending-profiles-api-documentation)
- [Users & Groups | API Documentation](#users-groups-api-documentation)
- [Campaigns | API Documentation](#campaigns-api-documentation)
- [Introduction | Python API Client](#introduction-python-api-client)
- [Email Protection | Cloudflare](#email-protection-cloudflare)
- [Connecting to Gophish | Python API Client](#connecting-to-gophish-python-api-client)
- [Campaigns | Python API Client](#campaigns-python-api-client)
- [Groups | Python API Client](#groups-python-api-client)
- [Templates | Python API Client](#templates-python-api-client)
- [Sending Profiles | Python API Client](#sending-profiles-python-api-client)
- [Landing Pages | Python API Client](#landing-pages-python-api-client)
---
# Introduction | API Documentation
Gophish was built from the ground-up with a JSON API that makes it easy for developers and sysadmins to automate simulated phishing campaigns.
These docs describe how to use the [Gophisharrow-up-right](https://getgophish.com/)
API. We hope you enjoy these docs, and please don't hesitate to [file an issuearrow-up-right](https://github.com/gophish/gophish/issues/new)
if you see anything missing.
circle-info
**Is Python your language of choice?** If so, we have a [fully-supported Python API clientarrow-up-right](https://docs.getgophish.com/python-api-client/)
that makes working with the Gophish API a piece of cake!
[hashtag](https://docs.getgophish.com/api-documentation/#use-cases)
Use Cases
----------------------------------------------------------------------------------
There are many reasons to use the Gophish API. The most common use case is to gather report information for a given campaign, so that you can build custom reports in software you're most familiar with, such as Excel or Numbers.
However, automating the creation of campaigns and campaign attributes such as templates, landing pages, and more provides the ability to create a fully automated phishing simulation program. This would allow campaigns to be run throughout the year automatically. This also allows the Gophish administrator to be included in the campaigns, since they wouldn't know exactly which day it would start!
[hashtag](https://docs.getgophish.com/api-documentation/#authorization)
Authorization
------------------------------------------------------------------------------------------
All API requests require the use of a generated API key. You can find your API key, or generate a new one, by navigating to the /settings endpoint, or clicking the “Settings” sidebar item.
To authenticate an API request, you should provide your API key in the `Authorization` header.
Alternatively, you may append the `api_key=[API_KEY]` as a GET parameter to authorize yourself to the API. But note that this is likely to leave traces in things like your history, if accessing the API through a browser.
Copy
GET /api/campaigns/?api_key=12345678901234567890123456789012
Parameter
Type
Description
`api_key`
`string`
**Required**. Your Gophish API key
[hashtag](https://docs.getgophish.com/api-documentation/#responses)
Responses
----------------------------------------------------------------------------------
Many API endpoints return the JSON representation of the resources created or edited. However, if an invalid request is submitted, or some other error occurs, Gophish returns a JSON response in the following format:
The `message` attribute contains a message commonly used to indicate errors or, in the case of deleting a resource, success that the resource was properly deleted.
The `success` attribute describes if the transaction was successful or not.
The `data` attribute contains any other metadata associated with the response. This will be an escaped string containing JSON data.
[hashtag](https://docs.getgophish.com/api-documentation/#status-codes)
Status Codes
----------------------------------------------------------------------------------------
Gophish returns the following status codes in its API:
Status Code
Description
200
`OK`
201
`CREATED`
400
`BAD REQUEST`
404
`NOT FOUND`
500
`INTERNAL SERVER ERROR`
[NextSettingschevron-right](https://docs.getgophish.com/api-documentation/settings)
Last updated 7 years ago
* [Use Cases](https://docs.getgophish.com/api-documentation/#use-cases)
* [Authorization](https://docs.getgophish.com/api-documentation/#authorization)
* [Responses](https://docs.getgophish.com/api-documentation/#responses)
* [Status Codes](https://docs.getgophish.com/api-documentation/#status-codes)
Copy
{
"message" : string,
"success" : bool,
"data" : string
}
---
# Introduction | Gophish User Guide

[hashtag](https://docs.getgophish.com/user-guide#welcome-to-gophish)
Welcome to Gophish!
---------------------------------------------------------------------------------------------
_Current Version: 0.10.1_
Gophish is a powerful, easy-to-use, open-source phishing toolkit meant to help pentesters and businesses conduct real-world phishing simulations.
This user guide introduces Gophish and shows how to use the software, building a complete campaign from start to finish.
[NextLicensechevron-right](https://docs.getgophish.com/user-guide/license)
Last updated 5 years ago
---
# License | Gophish User Guide
Copy
Gophish - Open-Source Phishing Framework
The MIT License (MIT)
Copyright (c) 2013 - 2020 Jordan Wright
Permission is hereby granted, free of charge, to any person obtaining a copy
of this software ("Gophish Community Edition") and associated documentation files (the "Software"), to deal
in the Software without restriction, including without limitation the rights
to use, copy, modify, merge, publish, distribute, sublicense, and/or sell
copies of the Software, and to permit persons to whom the Software is
furnished to do so, subject to the following conditions:
The above copyright notice and this permission notice shall be included in
all copies or substantial portions of the Software.
THE SOFTWARE IS PROVIDED "AS IS", WITHOUT WARRANTY OF ANY KIND, EXPRESS OR
IMPLIED, INCLUDING BUT NOT LIMITED TO THE WARRANTIES OF MERCHANTABILITY,
FITNESS FOR A PARTICULAR PURPOSE AND NONINFRINGEMENT. IN NO EVENT SHALL THE
AUTHORS OR COPYRIGHT HOLDERS BE LIABLE FOR ANY CLAIM, DAMAGES OR OTHER
LIABILITY, WHETHER IN AN ACTION OF CONTRACT, TORT OR OTHERWISE, ARISING FROM,
OUT OF OR IN CONNECTION WITH THE SOFTWARE OR THE USE OR OTHER DEALINGS IN
THE SOFTWARE.
[PreviousIntroductionchevron-left](https://docs.getgophish.com/user-guide)
[NextWhat is Gophish?chevron-right](https://docs.getgophish.com/user-guide/what-is-gophish)
Last updated 6 years ago
---
# What is Gophish? | Gophish User Guide
[hashtag](https://docs.getgophish.com/user-guide/what-is-gophish#what-is-gophish)
What is Gophish?
-------------------------------------------------------------------------------------------------------
Gophish is a phishing framework that makes the simulation of real-world phishing attacks dead-simple. The idea behind gophish is simple – make industry-grade phishing training available to everyone. “Available” in this case means two things –
* **Affordable** – Gophish is open-source software that is completely free for anyone to use.
* **Accessible** – Gophish is written in the Go programming language. This has the benefit that gophish releases are compiled binaries with no dependencies. In a nutshell, this makes installation as simple as "download and run"!
[PreviousLicensechevron-left](https://docs.getgophish.com/user-guide/license)
[NextInstallationchevron-right](https://docs.getgophish.com/user-guide/installation)
Last updated 7 years ago
---
# Getting Started | Gophish User Guide
[hashtag](https://docs.getgophish.com/user-guide/getting-started#running-gophish)
Running Gophish
------------------------------------------------------------------------------------------------------
Now that you have gophish installed, you’re ready to run the software. To launch gophish, open a command shell and navigate to the directory the gophish binary is located.
Then, execute the gophish binary. You will see some informational output showing both the admin and phishing web servers starting up, as well as the database being created. This output will tell you the port numbers you can use to connect to the web interfaces.
If you're running a version of Gophish **after** v0.10.1, then temporary admin credentials are printed in these logs which you can use to login.
Copy
[email protected]:~/src/github.com/gophish/gophish$ ./gophish
time="2020-06-30T08:04:33-05:00" level=warning msg="No contact address has been configured."
time="2020-06-30T08:04:33-05:00" level=warning msg="Please consider adding a contact_address entry in your config.json"
time="2020-06-30T08:04:33-05:00" level=info msg="Please login with the username admin and the password 1178f855283d03d3"
time="2020-06-30T08:04:33-05:00" level=info msg="Starting phishing server at http://0.0.0.0:80"
time="2020-06-30T08:04:33-05:00" level=info msg="Starting IMAP monitor manager"
time="2020-06-30T08:04:33-05:00" level=info msg="Starting admin server at https://127.0.0.1:3333"
time="2020-06-30T08:04:33-05:00" level=info msg="Background Worker Started Successfully - Waiting for Campaigns"
time="2020-06-30T08:04:33-05:00" level=info msg="Starting new IMAP monitor for user admin"
circle-info
If your phishing server is set to run on TCP port 80, then you may need to run Gophish as an administrator so that it can bind to the privileged port.
[hashtag](https://docs.getgophish.com/user-guide/getting-started#logging-in)
Logging In
--------------------------------------------------------------------------------------------
After Gophish starts up, you can open a browser and navigate to [https://127.0.0.1:3333arrow-up-right](https://127.0.0.1:3333/)
to reach the login page.
For versions of Gophish > 0.10.1, the temporary administrator credentials are printed in the logs when you first execute the Gophish binary. For versions of Gophish <= 0.10.1, the default credentials are:
Username: admin
Password: gophish
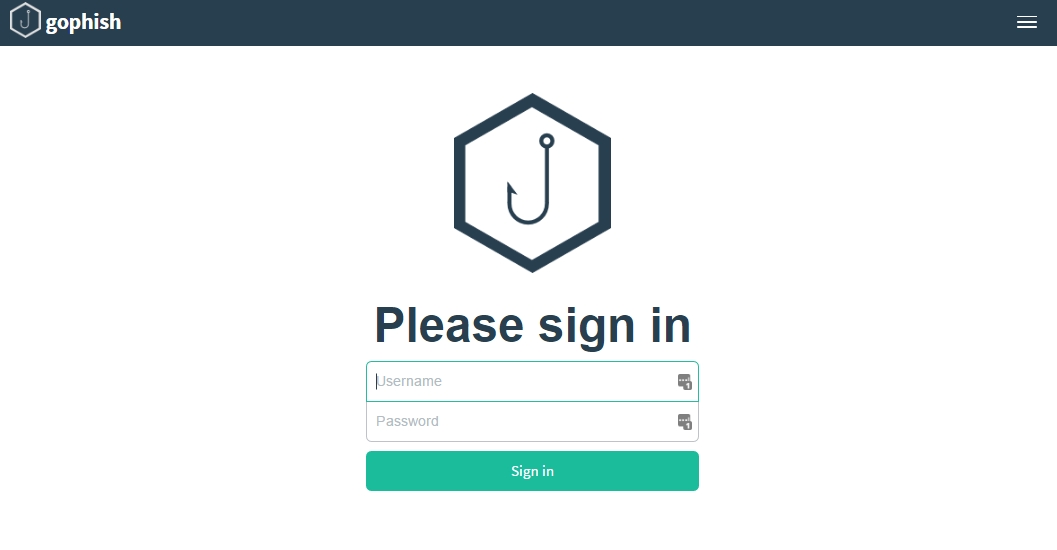
Login Screen
If you're using a version of Gophish > 0.10.1, then you will be required to reset your password after logging in for the first time.
circle-info
If you're running a version of Gophish newer than v0.10.1 and you need to set a default administrator password, you can do so by setting the `GOPHISH_INITIAL_ADMIN_PASSWORD` environment variable.
You will still be required to change your password after logging in for the first time.
[PreviousInstallationchevron-left](https://docs.getgophish.com/user-guide/installation)
[NextDocumentationchevron-right](https://docs.getgophish.com/user-guide/documentation)
Last updated 5 years ago
* [Running Gophish](https://docs.getgophish.com/user-guide/getting-started#running-gophish)
* [Logging In](https://docs.getgophish.com/user-guide/getting-started#logging-in)
---
# Installation | Gophish User Guide
[hashtag](https://docs.getgophish.com/user-guide/installation#installing-gophish-using-pre-built-binaries)
Installing Gophish Using Pre-Built Binaries
-----------------------------------------------------------------------------------------------------------------------------------------------------------
Gophish is provided as a [pre-built binaryarrow-up-right](https://github.com/gophish/gophish/releases)
for most operating systems. With this being the case, installation is as simple as downloading the ZIP file containing the binary that is built for your OS and extracting the contents.
[hashtag](https://docs.getgophish.com/user-guide/installation#installing-gophish-from-source)
Installing Gophish from Source
---------------------------------------------------------------------------------------------------------------------------------
One of the major benefits of having written gophish in the Go programming language is that it is extremely simple to build from source. All you will need is the Go language and a C compiler (such as gcc).
To install gophish, simply run `go get github.com/gophish/gophish`. This downloads gophish into your `$GOPATH`. Next, navigate to `$GOPATH/src/github.com/gophish/gophish` and run the command `go build`. This builds a gophish binary in the current directory.
[hashtag](https://docs.getgophish.com/user-guide/installation#understanding-the-config.json)
Understanding the `config.json`
---------------------------------------------------------------------------------------------------------------------------------
There are some settings that are configurable via a file called config.json, located in the gophish root directory. Here are some of the options that you can set to your preferences:
Key
Value (Default)
Description
admin\_server.listen\_url
127.0.0.1:3333
IP/Port of gophish admin server
admin\_server.use\_tls
false
Use TLS for admin server?
admin\_server.cert\_path
example.crt
Path to SSL Cert
admin\_server.key\_path
example.key
Path to SSL Private Key
admin\_server.trusted\_origins
\[\]
Comma separated list of trusted origins
phish\_server.listen\_url
0.0.0.0:80
IP/Port of the phishing server - this is where landing pages are hosted.
circle-exclamation
**Be careful:** Since the `config.json` file contains database credentials, you will want to ensure it is only readable by the correct user. For Linux users, you can do this using `chmod 640 config.json`.
###
[hashtag](https://docs.getgophish.com/user-guide/installation#exposing-gophish-to-the-internet)
Exposing Gophish to the Internet
By default, the `phish_server.listen_url` is configured to listen on all interfaces. This means that if the host Gophish is running on is exposed to the Internet (such as running on a VPS), the phishing server will be exposed to the Internet.
If you also want the admin server to be accessible over the Internet, you will need to change the entry for the `admin_server.listen_url` to `0.0.0.0:3333`.
The `phish_server.trusted_origins` option allows you to add addresses that you expect incoming connections to come from. This is helpful in cases where TLS termination is handled by a load balancer upstream, rather than the application itself.
circle-exclamation
**Be careful**: Exposing the admin server to the Internet should only be used if needed. Before exposing the admin server to the Internet, it's **highly recommended** to change the default password.
[hashtag](https://docs.getgophish.com/user-guide/installation#creating-ssl-certificate-and-private-keys)
Creating SSL Certificate and Private Keys
-------------------------------------------------------------------------------------------------------------------------------------------------------
> Note: As of 0.3, Gophish will by default create a self-signed certificate for the admin panel, so this steps would be optional.
It’s a good idea to have the admin server available over HTTPS. While automatic SSL cert/key generation will be included in a later release, for now let’s take a look at how we can leverage openssl to generate our cert and key for use with gophish (this assumes you already have openssl installed!)
We can start the certificate and key generation process with the following command:
Then, all we have to do is answer the CSR process that asks for details such as country, state, etc. Since this is a local self-signed cert, these won’t matter too much to us.
This creates two files, gophish.key and gophish.crt. After moving these files into the gophish root directory (in the same folder as config.json), we can have the following in our config.json file:
Now when we launch gophish, you’ll connect to the admin server over HTTPS and accept the self-signed certificate warning.
[hashtag](https://docs.getgophish.com/user-guide/installation#using-mysql)
Using MySQL
-------------------------------------------------------------------------------------------
The default database in Gophish is SQLite. This is perfectly functional, but some environments may benefit from leveraging a more robust database such as MySQL.
Support for Mysql has been added as of 0.3-dev. To setup Gophish for Mysql, a couple extra steps are needed.
###
[hashtag](https://docs.getgophish.com/user-guide/installation#update-config.json)
Update `config.json`
First, change the entries in `config.json` to match your deployment:
Example:
The format for the `db_path` entry is `username:password@(host:port)/database?charset=utf8&parseTime=True&loc=UTC`.
###
[hashtag](https://docs.getgophish.com/user-guide/installation#update-mysql-config)
Update MySQL Config
Gophish uses a datetime format that is incompatible with MySQL >= 5.7. To fix this, Add the following lines to the bottom of `/etc/mysql/mysql.cnf`:
The above settings are the default modes for MySQL, but with NO\_ZERO\_IN\_DATE and NO\_ZERO\_DATE removed.
###
[hashtag](https://docs.getgophish.com/user-guide/installation#create-the-database)
Create the Database
The last step you'll need to do to leverage Mysql is to create the `gophish` database. To do this, log into mysql and run the command
`CREATE DATABASE gophish CHARACTER SET utf8mb4 COLLATE utf8mb4_unicode_ci;`.
After that, you'll be good to go!
[hashtag](https://docs.getgophish.com/user-guide/installation#running-gophish)
Running Gophish
---------------------------------------------------------------------------------------------------
Now that you have gophish installed, you’re ready to run the software. To launch gophish, simply open a command shell and navigate to the directory the gophish binary is located.
Then, execute the gophish binary. You will see some informational output showing both the admin and phishing web servers starting up, as well as the database being created. This output will tell you the port numbers you can use to connect to the web interfaces.
[hashtag](https://docs.getgophish.com/user-guide/installation#running-gophish-as-a-service)
Running Gophish as a Service
-----------------------------------------------------------------------------------------------------------------------------
###
[hashtag](https://docs.getgophish.com/user-guide/installation#linux-distributions)
Linux Distributions
To run Gophish as a service in Linux distributions, you will need to setup a service script. You can refer to [this Github issuearrow-up-right](https://github.com/gophish/gophish/issues/586)
for an example implementation.
###
[hashtag](https://docs.getgophish.com/user-guide/installation#windows)
Windows
To run Gophish as a service in Windows, you can use [nssmarrow-up-right](http://nssm.cc/)
.
[PreviousWhat is Gophish?chevron-left](https://docs.getgophish.com/user-guide/what-is-gophish)
[NextGetting Startedchevron-right](https://docs.getgophish.com/user-guide/getting-started)
Last updated 3 years ago
* [Installing Gophish Using Pre-Built Binaries](https://docs.getgophish.com/user-guide/installation#installing-gophish-using-pre-built-binaries)
* [Installing Gophish from Source](https://docs.getgophish.com/user-guide/installation#installing-gophish-from-source)
* [Understanding the config.json](https://docs.getgophish.com/user-guide/installation#understanding-the-config.json)
* [Exposing Gophish to the Internet](https://docs.getgophish.com/user-guide/installation#exposing-gophish-to-the-internet)
* [Creating SSL Certificate and Private Keys](https://docs.getgophish.com/user-guide/installation#creating-ssl-certificate-and-private-keys)
* [Using MySQL](https://docs.getgophish.com/user-guide/installation#using-mysql)
* [Update config.json](https://docs.getgophish.com/user-guide/installation#update-config.json)
* [Update MySQL Config](https://docs.getgophish.com/user-guide/installation#update-mysql-config)
* [Create the Database](https://docs.getgophish.com/user-guide/installation#create-the-database)
* [Running Gophish](https://docs.getgophish.com/user-guide/installation#running-gophish)
* [Running Gophish as a Service](https://docs.getgophish.com/user-guide/installation#running-gophish-as-a-service)
* [Linux Distributions](https://docs.getgophish.com/user-guide/installation#linux-distributions)
* [Windows](https://docs.getgophish.com/user-guide/installation#windows)
Copy
openssl req -newkey rsa:2048 -nodes -keyout gophish.key -x509 -days 365 -out gophish.crt
Copy
"admin_server" : {
"listen_url" : "127.0.0.1:3333",
"use_tls" : true,
"cert_path" : "gophish.crt",
"key_path" : "gophish.key"
}
Copy
"db_name" : "mysql",
"db_path" : "root:@(:3306)/gophish?charset=utf8&parseTime=True&loc=UTC",
Copy
[mysqld]
sql_mode=ONLY_FULL_GROUP_BY,STRICT_TRANS_TABLES,ERROR_FOR_DIVISION_BY_ZERO,NO_AUTO_CREATE_USER,NO_ENGINE_SUBSTITUTION
Copy
[email protected]:~/src/github.com/gophish/gophish$ ./gophish
time="2020-06-30T08:04:33-05:00" level=warning msg="No contact address has been configured."
time="2020-06-30T08:04:33-05:00" level=warning msg="Please consider adding a contact_address entry in your config.json"
time="2020-06-30T08:04:33-05:00" level=info msg="Please login with the username admin and the password 1178f855283d03d3"
time="2020-06-30T08:04:33-05:00" level=info msg="Starting phishing server at http://0.0.0.0:80"
time="2020-06-30T08:04:33-05:00" level=info msg="Starting IMAP monitor manager"
time="2020-06-30T08:04:33-05:00" level=info msg="Starting admin server at https://127.0.0.1:3333"
time="2020-06-30T08:04:33-05:00" level=info msg="Background Worker Started Successfully - Waiting for Campaigns"
time="2020-06-30T08:04:33-05:00" level=info msg="Starting new IMAP monitor for user admin"
---
# Documentation | Gophish User Guide
[Changing Account Settingschevron-right](https://docs.getgophish.com/user-guide/documentation/changing-user-settings)
[Groupschevron-right](https://docs.getgophish.com/user-guide/documentation/groups)
[Templateschevron-right](https://docs.getgophish.com/user-guide/documentation/templates)
[Attachment Trackingchevron-right](https://docs.getgophish.com/user-guide/documentation/attachments)
[Landing Pageschevron-right](https://docs.getgophish.com/user-guide/documentation/landing-pages)
[Sending Profileschevron-right](https://docs.getgophish.com/user-guide/documentation/sending-profiles)
[Campaignschevron-right](https://docs.getgophish.com/user-guide/documentation/campaigns)
[Using the APIchevron-right](https://docs.getgophish.com/user-guide/documentation/using-the-api)
[Generating Reportschevron-right](https://docs.getgophish.com/user-guide/documentation/generating-reports)
[Email Reportingchevron-right](https://docs.getgophish.com/user-guide/documentation/email-reporting)
[Webhookschevron-right](https://docs.getgophish.com/user-guide/documentation/webhooks)
[User Managementchevron-right](https://docs.getgophish.com/user-guide/documentation/user-management)
[Loggingchevron-right](https://docs.getgophish.com/user-guide/documentation/logging)
[PreviousGetting Startedchevron-left](https://docs.getgophish.com/user-guide/getting-started)
[NextChanging Account Settingschevron-right](https://docs.getgophish.com/user-guide/documentation/changing-user-settings)
Last updated 7 years ago
---
# Changing Account Settings | Gophish User Guide
[hashtag](https://docs.getgophish.com/user-guide/documentation/changing-user-settings#changing-your-password-and-updating-settings)
Changing Your Password & Updating Settings
-----------------------------------------------------------------------------------------------------------------------------------------------------------------------------------
By clicking the "Settings" tab, you will navigate to the settings page. This page allows you to change your password, as well as update your API key.

Gophish Settings Page
To change your password, submit your current password, as well as the new password you would like to use, and click "Save". Any errors will be indicated on the page.
This page also provides the ability to reset your API key. To reset your API key, simply click the "Reset" button next to the existing API key.
You might need to refresh the page before continuing to use gophish. This should be fixed soon.
[PreviousDocumentationchevron-left](https://docs.getgophish.com/user-guide/documentation)
[NextGroupschevron-right](https://docs.getgophish.com/user-guide/documentation/groups)
Last updated 5 years ago
---
# Templates | Gophish User Guide
A "Template" is the content of the emails that are sent to targets. They can be imported from an existing email, or created from scratch. They also support sending attachments.
Additionally, templates can contain tracking images so that gophish knows when the user opens the email.
[hashtag](https://docs.getgophish.com/user-guide/documentation/templates#creating-templates)
Creating Templates
--------------------------------------------------------------------------------------------------------------------
To create a template, first navigate to the “Email Templates” page and click the “New Template” button.

New Template Dialog
###
[hashtag](https://docs.getgophish.com/user-guide/documentation/templates#using-the-html-editor)
Using the HTML Editor
A powerful feature of Gophish is the HTML editor. To switch between the HTML source code and the visual view, click the "Source" button.

HTML Editor
This is helpful to ensure that the email received by the user is pixel-perfect.
###
[hashtag](https://docs.getgophish.com/user-guide/documentation/templates#importing-an-email)
Importing an Email
Gophish supports the ability to import an email from the raw content. To do this, click the "Import Email" button and paste in the original email content. This content is usually found through the "View Original" feature of many mail clients:

Import Email
[PreviousGroupschevron-left](https://docs.getgophish.com/user-guide/documentation/groups)
[NextAttachment Trackingchevron-right](https://docs.getgophish.com/user-guide/documentation/attachments)
Last updated 5 years ago
* [Creating Templates](https://docs.getgophish.com/user-guide/documentation/templates#creating-templates)
* [Using the HTML Editor](https://docs.getgophish.com/user-guide/documentation/templates#using-the-html-editor)
* [Importing an Email](https://docs.getgophish.com/user-guide/documentation/templates#importing-an-email)
---
# Groups | Gophish User Guide
Gophish lets you manage groups of users targeted in campaigns.
[hashtag](https://docs.getgophish.com/user-guide/documentation/groups#creating-groups)
Creating Groups
-----------------------------------------------------------------------------------------------------------
To create a group, first navigate to the "Users & Groups" page in the navigation menu and click the button .
You will see the following dialog appear:

New Group Modal
To add a group, you need to specify a _unique_ group name, as well as at least one recipient.
###
[hashtag](https://docs.getgophish.com/user-guide/documentation/groups#adding-users-to-the-group)
Adding Users to the Group
You can add the users to the group in two ways:
####
[hashtag](https://docs.getgophish.com/user-guide/documentation/groups#manually-adding-users)
Manually Adding Users
To add users manually, fill in the text boxes for "First Name", "Last Name", "Email", and "Position" and click the "Add" button.
####
[hashtag](https://docs.getgophish.com/user-guide/documentation/groups#bulk-uploading-users)
Bulk Uploading Users
Adding users manually can be a pain. To fix this, Gophish lets you upload users in bulk from a CSV file.
The CSV format gophish expects has the following header values:
* First Name
* Last Name
* Email
* Position
To upload a CSV with user information, click the "Bulk Import Users" button and select the CSV you want to upload. Users are then uploaded and displayed in the dialog.
To save the group, click "Save changes".
[PreviousChanging Account Settingschevron-left](https://docs.getgophish.com/user-guide/documentation/changing-user-settings)
[NextTemplateschevron-right](https://docs.getgophish.com/user-guide/documentation/templates)
Last updated 7 years ago
* [Creating Groups](https://docs.getgophish.com/user-guide/documentation/groups#creating-groups)
* [Adding Users to the Group](https://docs.getgophish.com/user-guide/documentation/groups#adding-users-to-the-group)
---
# Sending Profiles | Gophish User Guide
To send emails, Gophish requires you to configure SMTP relay details called "Sending Profiles".
To setup a sending profile, click the "Sending Profiles" navigation entry in the sidebar and click the "New Profile" button.
> Note: If you're looking for a good testing SMTP server, I've had good luck with [Mailhogarrow-up-right](https://github.com/mailhog/MailHog)
> .
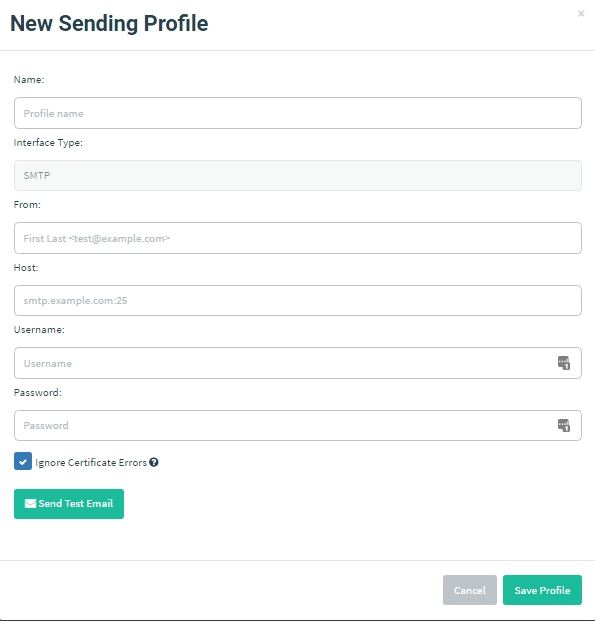
Sending Profiles
It's important to make sure that your "From" address is a valid email address format.
Additionally, make sure you setup your "Host" in the full `host:port` format.
To test your SMTP configuration, you can click the "Send Test Email" button:
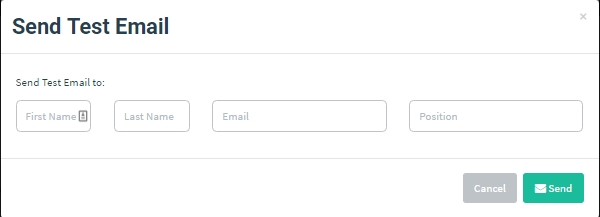
send test email
After entering the recipient details and clicking "Send", you should see a message indicating if the email was sent successfully.
[PreviousLanding Pageschevron-left](https://docs.getgophish.com/user-guide/documentation/landing-pages)
[NextCampaignschevron-right](https://docs.getgophish.com/user-guide/documentation/campaigns)
Last updated 7 years ago
---
# Settings | API Documentation
[hashtag](https://docs.getgophish.com/api-documentation/settings#reset-api-key)
Reset API Key
--------------------------------------------------------------------------------------------------
`POST` `https://localhost:3333/api/reset`
This endpoint allows you to reset your API key to a new, randomly generated key. This method requires you to authenticate using your existing API key.
####
[hashtag](https://docs.getgophish.com/api-documentation/settings#headers)
Headers
Name
Type
Description
Authorization
string
The existing API key.
200 API key successfully reset. The new API key is provided in the data response parameter.
Copy
{
"success": true,
"message": "API Key successfully reset!",
"data": "0123456789abcdef"
}
[PreviousIntroductionchevron-left](https://docs.getgophish.com/api-documentation)
[NextSending Profileschevron-right](https://docs.getgophish.com/api-documentation/sending-profiles)
Last updated 7 years ago
---
# Using the API | Gophish User Guide
Gophish was designed to be API-first. This means that the UI is just a wrapper around a powerful JSON RESTful API.
You can find our API documentation [here.arrow-up-right](https://docs.getgophish.com/api-documentation/)
[hashtag](https://docs.getgophish.com/user-guide/documentation/using-the-api#python-api-client)
Python API Client
----------------------------------------------------------------------------------------------------------------------
The Gophish team maintains an official [Python API clientarrow-up-right](https://github.com/gophish/api-client-python)
for easily interacting with the API.
[PreviousCampaignschevron-left](https://docs.getgophish.com/user-guide/documentation/campaigns)
[NextGenerating Reportschevron-right](https://docs.getgophish.com/user-guide/documentation/generating-reports)
Last updated 6 years ago
---
# Building Your First Campaign | Gophish User Guide
[Introducing the Morning Catch Corporationchevron-right](https://docs.getgophish.com/user-guide/building-your-first-campaign/introducing-the-morning-catch-corporation)
[Creating the Sending Profilechevron-right](https://docs.getgophish.com/user-guide/building-your-first-campaign/creating-the-sending-profile)
[Importing Groupschevron-right](https://docs.getgophish.com/user-guide/building-your-first-campaign/importing-groups)
[Creating the Templatechevron-right](https://docs.getgophish.com/user-guide/building-your-first-campaign/creating-the-template)
[Creating the Landing Pagechevron-right](https://docs.getgophish.com/user-guide/building-your-first-campaign/creating-the-landing-page)
[Launching the Campaignchevron-right](https://docs.getgophish.com/user-guide/building-your-first-campaign/launching-the-campaign)
[PreviousLoggingchevron-left](https://docs.getgophish.com/user-guide/documentation/logging)
[NextIntroducing the Morning Catch Corporationchevron-right](https://docs.getgophish.com/user-guide/building-your-first-campaign/introducing-the-morning-catch-corporation)
Last updated 5 years ago
---
# Introducing the Morning Catch Corporation | Gophish User Guide

Morning Catch
For this documentation, we will step through the process of setting up users, templates, and a full campaign from scratch for a fake company called Morning Catch. In this case, we are assuming the role of a security administrator of Morning Catch and have been given the authorization to perform this training.
As a note, this fake company is based on a great VM used specifically for testing phishing frameworks that you can download [herearrow-up-right](http://blog.cobaltstrike.com/2014/08/06/introducing-morning-catch-a-phishing-paradise/)
if you're interested.
The fake company will consist of 3 users: Richard Bourne, Boyd Jenius, and Haiti Moreo.
[PreviousBuilding Your First Campaignchevron-left](https://docs.getgophish.com/user-guide/building-your-first-campaign)
[NextCreating the Sending Profilechevron-right](https://docs.getgophish.com/user-guide/building-your-first-campaign/creating-the-sending-profile)
Last updated 7 years ago
---
# Creating the Sending Profile | Gophish User Guide
Creating a sending profile is easy for this campaign. Navigate to the "Sending Profiles" page and click "New Profile".
For my campaign, I'll be sending emails from Boyd Jenius, the system administrator. I'll use his name and email address in the "From" field.
I have my Morning Catch VM listening for inbound email on `192.168.56.101:25` so I will use that for my "Host".
> Remember: **Always** specify the port number when configuring a sending profile! Use the host:port format when specifying the Host.
You should wind up with something that looks like this:
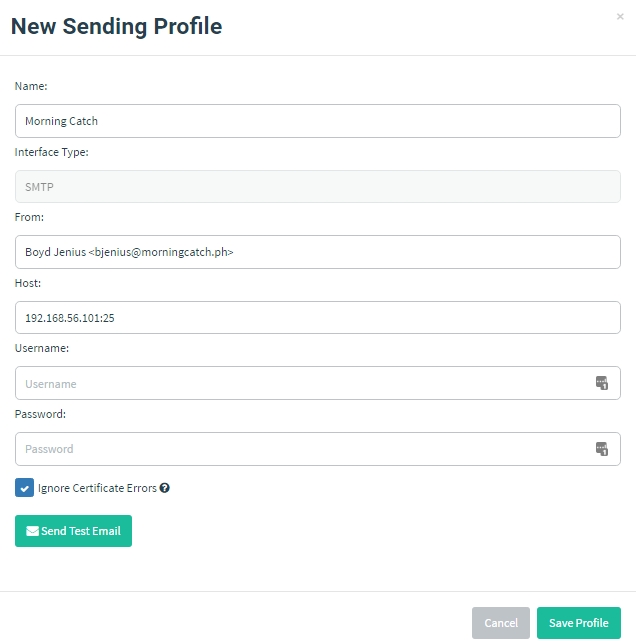
sending profile
If you want, you can send a test email to another recipient on the `morningcatch.ph` domain to ensure emails are relayed correctly.
After the settings are specified, click "Save Profile".
[PreviousIntroducing the Morning Catch Corporationchevron-left](https://docs.getgophish.com/user-guide/building-your-first-campaign/introducing-the-morning-catch-corporation)
[NextImporting Groupschevron-right](https://docs.getgophish.com/user-guide/building-your-first-campaign/importing-groups)
Last updated 7 years ago
---
# Landing Pages | Gophish User Guide
Landing pages are the actual HTML pages that are returned to the users when they click the phishing links they receive.
Landing pages support templating, capturing credentials, and redirecting users to another website after they submit their credentials.
> Note: Landing pages are stored in the database. Gophish generates a unique ID (called the `rid` parameter) for each recipient in a campaign, and uses this ID to dynamically load the correct landing page.
>
> To preview what a landing page will look like, you will need to either use the HTML editor seen below, or launch a test campaign. Simply browsing directly to the Gophish listener without specifying an `rid` parameter will display a generic 404 page.
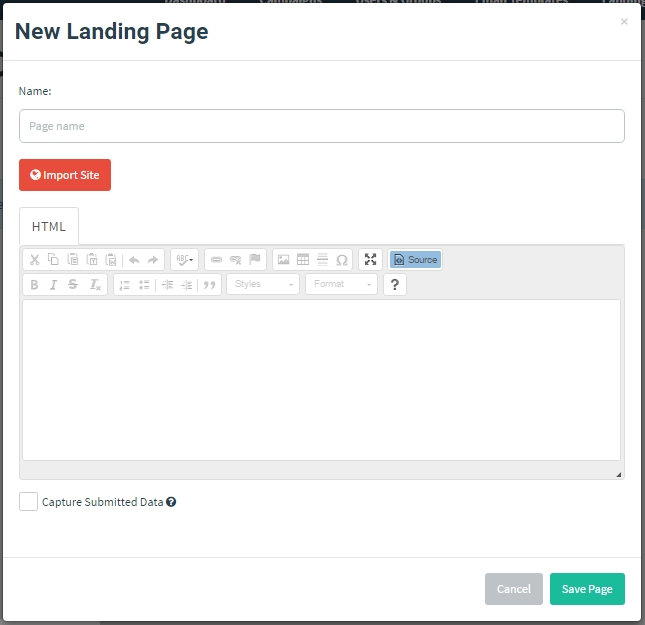
To create a landing page, click on the "Landing Pages" entry in the sidebar and click the "New Page" button.
Landing Pages
The landing page modal supports the same HTML WYSIWYG editor shown in the Templates section.
[hashtag](https://docs.getgophish.com/user-guide/documentation/landing-pages#importing-a-site-from-url)
Importing a Site From URL
--------------------------------------------------------------------------------------------------------------------------------------
A powerful feature of Gophish is the ability to import a site from a URL. To import a site, click the "Import Site" button.
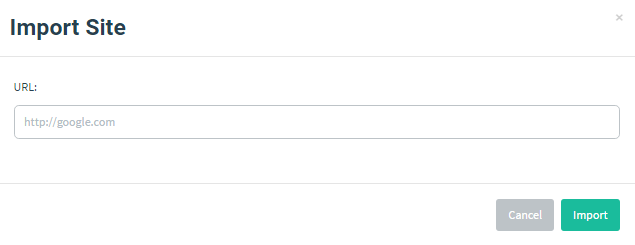 After entering the URL and clicking "Import", you should see the HTML of the URL populated into the editor.
[hashtag](https://docs.getgophish.com/user-guide/documentation/landing-pages#capturing-credentials)
Capturing Credentials
------------------------------------------------------------------------------------------------------------------------------
Gophish makes it easy to capture credentials from the landing page. To capture credentials, simply select the checkbox that says "Capture Submitted Data".
> Note: Credentials are stored **in plaintext**. If you don't want to capture passwords, don't select the "Capture Passwords" checkbox. Gophish will still capture other text fields, such as usernames.
###
[hashtag](https://docs.getgophish.com/user-guide/documentation/landing-pages#redirecting-users)
Redirecting Users
Red team assessments are all about preventing suspicion. To prevent users from becoming suspicious after entering credentials, you may want to redirect them to the original URL.
Gophish makes it easy to redirect users after they submit credentials. To redirect users, enter a URL in the "Redirect To:" text field that appears after the "Capture Submitted Data" checkbox is selected.
> Note: Make sure to include the full URL (including the scheme such as http:// or https://). Otherwise, browsers may interpret the URL as being relative to the Gophish URL.
[hashtag](https://docs.getgophish.com/user-guide/documentation/landing-pages#static-assets)
Static Assets
--------------------------------------------------------------------------------------------------------------
There may be times that you want to store assets such as HTML pages, CSS/JS resources or other static files. To use these in Gophish, just move them under the `static/endpoint` directory. You can then reference them using the URL `http[s]://phishing_server/static/filename`. For more background, see [this issue.arrow-up-right](https://github.com/gophish/gophish/issues/220)
[PreviousAttachment Trackingchevron-left](https://docs.getgophish.com/user-guide/documentation/attachments)
[NextSending Profileschevron-right](https://docs.getgophish.com/user-guide/documentation/sending-profiles)
Last updated 7 years ago
* [Importing a Site From URL](https://docs.getgophish.com/user-guide/documentation/landing-pages#importing-a-site-from-url)
* [Capturing Credentials](https://docs.getgophish.com/user-guide/documentation/landing-pages#capturing-credentials)
* [Redirecting Users](https://docs.getgophish.com/user-guide/documentation/landing-pages#redirecting-users)
* [Static Assets](https://docs.getgophish.com/user-guide/documentation/landing-pages#static-assets)
---
# Template Reference | Gophish User Guide
The following variables are available in templates and landing pages:
> Tip: Remember - Templates are _case sensitive_!
Variable
Description
{{.RId}}
The target's unique ID
{{.FirstName}}
The target's first name
{{.LastName}}
The target's last name
{{.Position}}
The target's position
{{.Email}}
The target's email address
{{.From}}
The spoofed sender
{{.TrackingURL}}
The URL to the tracking handler
{{.Tracker}}
An alias for ` `
{{.URL}}
The phishing URL
{{.BaseURL}}
The base URL with the path and `rid` parameter stripped. Useful for making links to static files.
[PreviousLaunching the Campaignchevron-left](https://docs.getgophish.com/user-guide/building-your-first-campaign/launching-the-campaign)
[NextAdditional Referenceschevron-right](https://docs.getgophish.com/user-guide/additional-references)
Last updated 7 years ago
---
# Creating the Landing Page | Gophish User Guide
The Morning Catch corporation has a webmail portal that we will clone for our landing page.
Start by navigating to the "Landing Pages" page and clicking the "New Page" button.
To import a site by URL, click the "Import Site" button. The webmail portal is located at `/mail/`, so I will use `http://192.168.56.101/mail/` as my import URL.
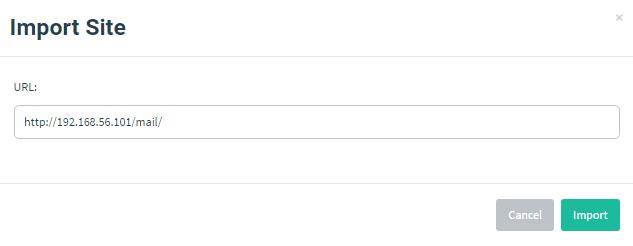 After the import, you'll see the HTML populated into the editor. Clicking the "Source" button shows a preview of the page.
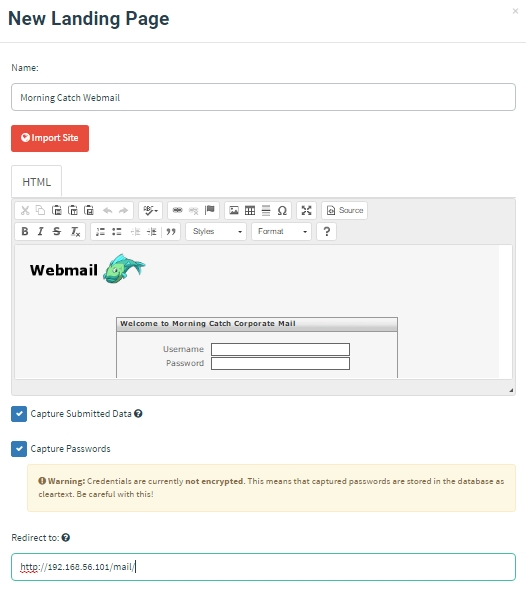
Preview
Finally, we'll capture submitted data and passwords by checking both options, and we'll redirect users to the webmail portal after they submit credentials.
Finally, click "Save Page" to save the landing page.
[PreviousCreating the Templatechevron-left](https://docs.getgophish.com/user-guide/building-your-first-campaign/creating-the-template)
[NextLaunching the Campaignchevron-right](https://docs.getgophish.com/user-guide/building-your-first-campaign/launching-the-campaign)
Last updated 7 years ago
---
# Importing Groups | Gophish User Guide
The first thing we need to do before we can launch a campaign is to figure out who to target. There are a ton of ways to gather/generate email addresses for potential targets. You can either harvest email addresses from public information using OSINT if you are aiming to simulate a realistic scenario.
Now that we have our list of users, let’s import them into gophish.
To add a group, navigate to the “Users & Groups” page and click “New Group”:

New Group Modal
Since we are performing phishing simulation for Morning Catch, we can call our group “Morning Catch Employees”.
Now we have to add the members. There are two ways to do this:
* Add each member’s details one at a time using the form inputs
* Bulk import the group from a CSV file
To save time (and typing!) let’s go with the CSV option.
[hashtag](https://docs.getgophish.com/user-guide/building-your-first-campaign/importing-groups#importing-from-csv)
Importing from CSV
------------------------------------------------------------------------------------------------------------------------------------------
The CSV format gophish expects has the following header values:
* First Name
* Last Name
* Email
* Position
So, the CSV for Morning Catch would look like the following:
After uploading this CSV using the “Bulk Import Users” button, we see that our members were added automatically:

Importing users
After clicking “Save changes”, we see a confirmation message that our group was created.
> Tip: If you don’t see the group show up right away, refresh the page and it should appear in the table.
[PreviousCreating the Sending Profilechevron-left](https://docs.getgophish.com/user-guide/building-your-first-campaign/creating-the-sending-profile)
[NextCreating the Templatechevron-right](https://docs.getgophish.com/user-guide/building-your-first-campaign/creating-the-template)
Last updated 7 years ago
Copy
First Name,Last Name,Position,Email
Richard,Bourne,CEO,[email protected]
Boyd,Jenius,Systems Administrator,[email protected]
Haiti,Moreo,Sales & Marketing,[email protected]
---
# FAQ | Gophish User Guide
[hashtag](https://docs.getgophish.com/user-guide/faq#unable-to-reach-admin-dashboard)
Unable to Reach Admin Dashboard
--------------------------------------------------------------------------------------------------------------------------
Let's say you've just loaded up Gophish, are trying to reach the admin dashboard, and encounter this error in your logs:
Copy
2018/11/15 21:42:22 http: TLS handshake error from 127.0.0.1:51419: tls: first record does not look like a TLS handshake
This means that you browsed to `http://admin_server` instead of `https://admin_server` (note the use of HTTPS).
[hashtag](https://docs.getgophish.com/user-guide/faq#how-to-bypass-spam-filters)
How to Bypass Spam Filters
----------------------------------------------------------------------------------------------------------------
There is no fool proof way to bypass spam filters - **this is a good thing!**
Something that might help increase deliverability is to set up your email infrastructure correctly to support modern email authentication protocols like SPF, DKIM, and DMARC. You can find more information about this [herearrow-up-right](https://www.trustedsec.com/blog/take-employees-phishing/)
.
However, for tests that aim to measure how users respond to phishing simulations, it's recommend to temporarily whitelist the IP address of the server running Gophish.
[hashtag](https://docs.getgophish.com/user-guide/faq#events-arent-showing-up-on-the-dashboard)
Events Aren't Showing Up on the Dashboard
---------------------------------------------------------------------------------------------------------------------------------------------
If you are seeing emails being sent successfully, but aren't seeing events show up on the dashboard, it likely means there is a configuration error somewhere. You can follow these tips to help track it down.
**Check the Email Template**
You want to make sure you're using the `{{.URL}}` template tag when creating links in your emails. Then, when you launch a campaign, Gophish will fill this in with whatever you use as the "URL" field when creating the campaign.
A good way to see if this is working correctly is to send a test email to yourself when building a campaign and looking at the link. It should be the URL you used when creating the campaign with a unique `rid` parameter. So, it should look like this: `http://your_url/?rid=XXXXX`.
circle-info
**Tip**: Don't try to put your Gophish URL directly into a template. It's very important to use the `{{.URL}}` template tag, since that's how Gophish knows to generate the unique URL for each recipient.
**Check the Campaign URL**
If the links in the email look good and you still don't see events showing up, then the next step is to make sure the URL you're using when building a campaign is correct.
When creating a campaign, the URL field **must point to the server running Gophish and must be reachable by the person opening the emails.** This can either be the external IP address of the server, or a domain name that has a DNS A record pointing to the server's IP address.
circle-info
**Tip:** Remember that the campaign URL must be reachable by the recipients clicking the links. If they can't reach the Gophish server, Gophish can't record those events.
To test this, you can manually browse to the URL you're expecting to use in your campaign. Without any `rid` parameters provided, you should see a basic `404 page not found` error. You should also see a log appear in your Gophish terminal.
circle-info
**Tip:** Remember that if your Gophish `phish_server` configuration is set to use HTTPS that you need to include the URL in your campaign as `https://your_url`.
Once manually browsing to your URL works, you can try to send a test email to yourself when building a campaign. If it works, you should see your landing page being returned. This means that the URL will likely work when used in a campaign, assuming it is reachable by all recipients.
[hashtag](https://docs.getgophish.com/user-guide/faq#submitted-form-data-isnt-being-captured)
Submitted Form Data Isn't Being Captured
-------------------------------------------------------------------------------------------------------------------------------------------
To capture data submitted through a landing page, you need to create an HTML `
---
# Additional References | Gophish User Guide
[hashtag](https://docs.getgophish.com/user-guide/additional-references#community-guides)
Community Guides
--------------------------------------------------------------------------------------------------------------
\*\*\*\*[**Simulated Phishing Educational Guide**arrow-up-right](http://tinyurl.com/PhishCampaign)
\*\*\*\*Author: [LarryGrimarrow-up-right](https://github.com/LarryGrim)
\*\*\*\*[**Practical Phishing with Gophish**arrow-up-right](https://medium.com/airwalk/practical-phishing-with-gophish-7dd384ad1840)
Author: [Jim Lambarrow-up-right](https://twitter.com/ovineOppressor)
\*\*\*\*[**Conducting USB Drop Tests With GoPhish**arrow-up-right](https://medium.com/@chrismerkel/conducting-usb-drop-tests-with-gophish-44cc7e1a88b9)
Author: [Chris Merkelarrow-up-right](https://twitter.com/chrismerkel)
\*\*\*\*[**Building Powerful Automation Flows in Gophish**arrow-up-right](https://github.com/dwtechnologies/dw-gophish-automation/blob/master/power-automate/Office365-Power-Automate.md)
\*\*\*\*Author: [Daniel Wellington Technologiesarrow-up-right](https://github.com/dwtechnologies)
\*\*\*\*[**How we brought security awareness through the company with automation of open source tools**arrow-up-right](https://medium.com/daniel-wellington-tech-stories/how-we-brought-security-awareness-through-the-company-with-automation-of-open-source-tools-and-a-b8dcf0234c69)
\*\*\*\*Author: [Daniel Wellington Technologiesarrow-up-right](https://github.com/dwtechnologies)
[hashtag](https://docs.getgophish.com/user-guide/additional-references#tools)
Tools
----------------------------------------------------------------------------------------
\*\*\*\*[**GoReport**arrow-up-right](https://github.com/chrismaddalena/GoReport)
\*\*\*\*Author: [Chris Maddalenaarrow-up-right](https://twitter.com/cmaddalena)
_A Python script to collect campaign data from Gophish and generate a report_
\*\*\*\*[**Phishbuckets**arrow-up-right](https://github.com/CommArc/phishbuckets)
\*\*\*\*Author: [snori74arrow-up-right](https://github.com/snori74)
_Command-line scripts to manage phishing campaigns with API calls to a Gophish server_
\*\*\*\*[**Lure**arrow-up-right](https://github.com/highmeh/lure)
\*\*\*\*Author: [Jayme (highmeh)arrow-up-right](https://twitter.com/highmeh)
_Lure assists in phishing target collection by pulling and parsing email addresses for a target organization. The results are normalized into a format recognized by Gophish, and then uploaded to the server._
\*\*\*\*[**GoLDAP**arrow-up-right](https://github.com/md-howsa/GoLDAP)
\*\*\*\*Author: Mohammed AlHowsa _A Python script that imports users from active directory to Gophish._
\*\*\*\*[**Phish Paste**arrow-up-right](https://github.com/glennzw/phishPaste)
\*\*\*\*Author: [Glenn Wilkinsonarrow-up-right](https://twitter.com/glennzw)
_Phish Paste is a tiny utility to copy templates, pages, and sending profiles between different Gophish user accounts._
\*\*\*\*[**DW GoPhish Reporter**arrow-up-right](https://github.com/dwtechnologies/gophish-owa-phishing-reporter/)
\*\*\*\*Author: [Daniel Wellington Technologiesarrow-up-right](https://github.com/dwtechnologies)
_This plugin makes it easy to report phishing for endusers. It will report using the native report function in gophish if it is a gophish phishing mail, if not it will capture all headers and content and send it to a mail defined where a security team can take a closer look_
\*\*\*\*[**DW Gophish Automation**arrow-up-right](https://github.com/dwtechnologies/dw-gophish-automation)
\*\*\*\*Author: [Daniel Wellington Technologiesarrow-up-right](https://github.com/dwtechnologies)
_This project is intended to automate the procedure internal phishing campaigns via Gophish as well as avoiding the GoPhish URL being flagged by google safebrowsing. The idea is to run it completely by itself by scheduling the scripts to run in the prefered manner._
[PreviousTemplate Referencechevron-left](https://docs.getgophish.com/user-guide/template-reference)
[NextFAQchevron-right](https://docs.getgophish.com/user-guide/faq)
Last updated 3 years ago
* [Community Guides](https://docs.getgophish.com/user-guide/additional-references#community-guides)
* [Tools](https://docs.getgophish.com/user-guide/additional-references#tools)
---
# Email Reporting | Gophish User Guide
Gophish supports the ability for users to report the simulated phishing emails they receive. This is to encourage users to report suspicious to their administrators, potentially catching malicious emails earlier.
Right now, we only support this reporting feature on the **server side** of things. While we don't yet have actual email extensions and add ons that can be used to facilitate this reporting, as of v0.9.0 we do support email reporting via IMAP.
[hashtag](https://docs.getgophish.com/user-guide/documentation/email-reporting#the-importance-of-email-reporting)
The Importance of Email Reporting
--------------------------------------------------------------------------------------------------------------------------------------------------------
When running phishing simulations, we often focus solely on how many users clicked the links and submitted their credentials to the spoofed page. However, I would argue that there's just as much if not more value in focusing on who reported the emails to their administrator.
Consider a simple scenario where we send out 100 simulated phishing emails. Let's look through two possible outcomes:
* **Outcome 1** - In this outcome, only 1 user clicks the link and submits credentials. That's great! However, no one reports the email. In this case, as an administrator our users were targeted by phishing and an attacker has a valid set of credentials, yet we don't know anything has happened.
* **Outcome 2** - In this outcome, 50 users click the link and only 1 user reports it. In this case sure, more users clicked the link, but as an administrator we now know that a phishing campaign is in progress and we can start the incident response process.
Reporting suspicious emails can help prevent the impact of a phishing campaign. It's recommended to build a culture that **rewards the users who report emails**. Even something small like an email to that employee and their manager thanking them for their vigilance can go a long ways. This gives positive feedback that will encourage users to report more emails in the future.
[hashtag](https://docs.getgophish.com/user-guide/documentation/email-reporting#reporting-via-imap)
Reporting via IMAP
--------------------------------------------------------------------------------------------------------------------------
A common (and good!) practice for organizations is to create an email address such as [\[email protected\]](https://docs.getgophish.com/cdn-cgi/l/email-protection)
and encourage employees to forward any suspicious emails. This is a great way to work towards building a collaborative relationship between the employee and security team.
As of v0.9.0, Gophish has the ability to check a configured mailbox via IMAP for campaign emails that have been reported. Once a campaign email is found, that result is updated to show that the user reported the email.
Each Gophish user has the ability to configure their own IMAP settings. These settings are found under "Account Settings > Reporting Settings".

IMAP Configuration Settings
The most common settings you'll need are the IMAP hostname, port, username, and password. It's commonly the case that you'll want to enable TLS but this is something you should confirm with your email provider.
###
[hashtag](https://docs.getgophish.com/user-guide/documentation/email-reporting#advanced-settings)
Advanced Settings
There is also a number of Advanced Settings that allow you to configure which folder campaign emails will be listed in or how often Gophish should poll for new results. Additionally, you can restrict it to only consider emails that have been reported from an address with your organizations domain name. Finally, Gophish can optionally delete campaign emails after they have been reported.

Advanced IMAP Settings
After IMAP settings have been configured, you can either save them or use the "Test Settings" button to confirm that Gophish can establish an IMAP connection.
[hashtag](https://docs.getgophish.com/user-guide/documentation/email-reporting#how-reporting-works-in-gophish)
How Reporting Works in Gophish
--------------------------------------------------------------------------------------------------------------------------------------------------
Every email sent by Gophish contains a link pointing to the [Landing Page](https://docs.getgophish.com/user-guide/documentation/landing-pages)
configured for the campaign. This URL looks like this:
The `rid` parameter specifies which recipient this link was generated for. To report an email sent by Gophish, an HTTP request needs to be made to:
Sending this HTTP request is usually handled by a mail client extension. As indicated earlier, we're still working on getting those developed. If you're interested in helping make this happen, please [open an issue on Github!arrow-up-right](https://github.com/gophish/gophish/issues)
[PreviousGenerating Reportschevron-left](https://docs.getgophish.com/user-guide/documentation/generating-reports)
[NextWebhookschevron-right](https://docs.getgophish.com/user-guide/documentation/webhooks)
Last updated 6 years ago
* [The Importance of Email Reporting](https://docs.getgophish.com/user-guide/documentation/email-reporting#the-importance-of-email-reporting)
* [Reporting via IMAP](https://docs.getgophish.com/user-guide/documentation/email-reporting#reporting-via-imap)
* [Advanced Settings](https://docs.getgophish.com/user-guide/documentation/email-reporting#advanced-settings)
* [How Reporting Works in Gophish](https://docs.getgophish.com/user-guide/documentation/email-reporting#how-reporting-works-in-gophish)
Copy
http://phish_server/?rid=1234567
Copy
http://phish_server/report?rid=1234567
---
# Launching the Campaign | Gophish User Guide
Now that we have all the pieces setup, we can launch the campaign!
To create a new campaign, navigate to the Campaigns page and click the "New Campaign" button.
Most of the settings should be self-explanatory. The only thing to look out for is the `URL` field. Since the IP address of our Gophish server is `192.168.1.1`, that's what we'll use:

settings
Once all the settings filled, click "Launch Campaign" to start sending the emails!
[hashtag](https://docs.getgophish.com/user-guide/building-your-first-campaign/launching-the-campaign#viewing-the-results)
Viewing the Results
--------------------------------------------------------------------------------------------------------------------------------------------------
After launching the campaign, you will be automatically redirected to the campaign results page. This will give you a realtime view as emails are sent, opened, and links are clicked.

results
Congrats on running your first campaign!
[PreviousCreating the Landing Pagechevron-left](https://docs.getgophish.com/user-guide/building-your-first-campaign/creating-the-landing-page)
[NextTemplate Referencechevron-right](https://docs.getgophish.com/user-guide/template-reference)
Last updated 7 years ago
---
# Attachment Tracking | Gophish User Guide
It is possible to add gophish [template variablesarrow-up-right](https://docs.getgophish.com/user-guide/template-reference)
to the contents of certain attachment file types. The following file types are supported:
Type
Extension
Sample Template
Word Document
.docx
[gophish\_word.docxarrow-up-right](https://github.com/gophish/user-guide/blob/master/documentation/example-attachments/gophish_word.docx)
Word Macro Enabled Document
.docm
[gophish\_word\_macro.docmarrow-up-right](https://github.com/gophish/user-guide/blob/master/documentation/example-attachments/gophish_word_macro.docm)
PowerPoint Presentation
.pptx
[gophish\_powerpoint.pptxarrow-up-right](https://github.com/gophish/user-guide/blob/master/documentation/example-attachments/gophish_powerpoint.pptx)
Excel Document
.xlsx
[gophish\_excel.xlsxarrow-up-right](https://github.com/gophish/user-guide/blob/master/documentation/example-attachments/gophish_excel.xlsx)
Excel Macro Enabled Document
.xlsm
[gophish\_excel\_macro.xlsmarrow-up-right](https://github.com/gophish/user-guide/blob/master/documentation/example-attachments/gophish_excel_macro.xlsm)
Plain Text File
.txt
[gophish\_text.txtarrow-up-right](https://github.com/gophish/user-guide/blob/master/documentation/example-attachments/gophish_text.txt)
HTML File
.html
[gophish\_html.htmlarrow-up-right](https://github.com/gophish/user-guide/blob/master/documentation/example-attachments/gophish_html.html)
Calendar File
.ics
[gophish\_invite.icsarrow-up-right](https://github.com/gophish/user-guide/blob/master/documentation/example-attachments/gophish_invite.ics)
Any template variables placed inside these documents will be converted to the appropriate values when a campaign is launched. Adding tracking images to Office documents can allow notification that a document has been opened or that macros have been enabled.
If you just want to get up and running, using the above templates is probably for you. Keep reading below if you're interested how these examples were created (specifically the Office documents which are more involved).
* * *
[hashtag](https://docs.getgophish.com/user-guide/documentation/attachments#plain-text-examples)
Plain Text Examples
------------------------------------------------------------------------------------------------------------------------
Below is a .txt file with several variables:
`foo.txt`
Copy
Hello {{.FirstName}},
This is a plain text file that was sent to {{.Email}}. If you could be so kind as to copy and paste this URL into your browser: {{.URL}}
As can be seen this is not immediately useful, but perhaps there are some scenarios where templating a plain text file is useful. Below is a portion of of an .ics calendar invitation file:
`invite.ics`
[hashtag](https://docs.getgophish.com/user-guide/documentation/attachments#office-document-examples)
Office Document Examples
----------------------------------------------------------------------------------------------------------------------------------
A more useful use case for this functionality is likely to be the tracking of Microsoft Office documents, specifically the conditions of (i) opening a document and (ii) enabling macros. Gophish supports several Office formats, but the approach is largely the same.
###
[hashtag](https://docs.getgophish.com/user-guide/documentation/attachments#tracking-office-document-being-opened)
Tracking Office document being Opened
We can add the `{{.TrackingURL}}` variable to an Office document as a "linked image". When the document is opened Word/Excel/PowerPoint will try load the image, thereby reaching out to the gophish server and marking the document as opened (ensure the Tracking URL is not included in the Email, as at this stage there is only one endpoint to indicated 'Opened'). The following steps can be used to achieve this:
1. Create a new Document
2. Select the `Insert` tab and then click `Quick Parts` and then `Field`

1. Scroll down on the left and select `IncludePicture`. In the Filename or URL input box enter `{{.TrackingURL}}` and tick the `Data not stored with document` box on the right (alternatively, in the Word Document press Alt+F9 to toggle Field Codes and paste in `INCLUDEPICTURE "{{.TrackingURL}}" \d`):

1. If you want to include template variables (e.g `{{.FirstName}}`) in the body of the Word document you will need to disable grammar and spelling checking (otherwise Word inserts proofErrors in the middle of the variable names). Select File > Options > Proofing and deselect `Check spelling as you type` and `Mark grammar errors as you type`.
The image below depicts the template Word file on the left, and the result after passing through gophish as a campaign attachment and being opened by a target user on the right.

###
[hashtag](https://docs.getgophish.com/user-guide/documentation/attachments#tracking-office-document-macro-execution)
Tracking Office document Macro execution
To track if macros have been enabled by a user we need macro code that reaches out to a gophish Template Variable (e.g. `{{.TrackerURL}}`) or hits a gophish endpoint (e.g. `{{.URL}}`). Focusing on the latter option, we would want the macro code to reach out to, for example, https://myphishingserver.com/?rid=aBC12345. There are many different ways to handle this, but simply inserting some gophish variables into the macro code doesn't work, as it's non-trivial to programatically edit macro code (it's packaged up in a binary format). The solution we came up with was to insert a text box in the document with the variables, and reference that text box from the macro code. The steps involved are:
1. Create a new Document
2. Create a textbox with contents `{{.URL}}`
3. Name the textbox "`urlbox`" by selecting the textbox and following the instructions below:
Windows: Home > Editing > Select > Selection Pane
Mac: Shape Format > Arrange > Selection Pane
1. Add the following macro code to the document (F11):
or for Excel:
1. Save and Exit
When the document is opened the user will be prompted to enable macros. If they do, the `{{.URL}}` will be opened. This allows the user to be presented with a page informing them that they have fallen victim to a phishing campaign.
(Note: In the future it'd be neater to use the `Application.Documents.CanCheckOut (URL)` method, but this is a HEAD request which requires some modification of the gophish Link Clicked code)
[PreviousTemplateschevron-left](https://docs.getgophish.com/user-guide/documentation/templates)
[NextLanding Pageschevron-right](https://docs.getgophish.com/user-guide/documentation/landing-pages)
Last updated 3 years ago
* [Plain Text Examples](https://docs.getgophish.com/user-guide/documentation/attachments#plain-text-examples)
* [Office Document Examples](https://docs.getgophish.com/user-guide/documentation/attachments#office-document-examples)
* [Tracking Office document being Opened](https://docs.getgophish.com/user-guide/documentation/attachments#tracking-office-document-being-opened)
* [Tracking Office document Macro execution](https://docs.getgophish.com/user-guide/documentation/attachments#tracking-office-document-macro-execution)
Copy
BEGIN:VCALENDAR
DTSTAMP:20210306T182251Z
DTSTART;TZID=Europe/London:20210306T183000
DTEND;TZID=Europe/London:20210306T190000
SUMMARY:Gophish Test Calendar
TZID:Europe/London
DESCRIPTION:Glenn is inviting you to a Zoom meeting.
n\nJoin Zoom Meeting\n{{.URL}}
LOCATION:{{.URL}}
END:VCALENDAR
Copy
Sub urlfetch()
Dim shp As Shape
For Each shp In ActiveDocument.Shapes
If shp.Name = "urlbox" Then
URL = shp.TextFrame.TextRange.Text
ActiveDocument.FollowHyperlink Address:=URL
End If
Next
End Sub
Public Sub AutoOpen()
urlfetch
End Sub
Copy
Sub urlfetch()
For Each shp In ActiveSheet.Shapes
If shp.Name = "urlbox" Then
Url = shp.TextFrame2.TextRange.Text
FollowHyperlink (Url)
End If
Next
End Sub
Public Sub Workbook_Open()
urlfetch
End Sub
---
# Creating the Template | Gophish User Guide
To create the template we will use for our Morning Catch campaign, first navigate to the "Email Templates" page and click the "New Template" button.

New Template Dialog
We notice that Morning Catch comes with a webmail portal. Let’s craft a simple template that suggests the user needs to go reset their password. Obviously, this is a simple scenario, and by using the "Import Email" feature, you can import existing emails directly into gophish for a greater effect.
We'll use the following subject line:
You'll notice we used the `{{.Email}}` template value. This will populate with the target's email address when the emails are sent. This is Gophish's way to tailor emails to individuals to increase the chance of success.
By clicking the "HTML" tab, we will see the editor we can use to create our HTML content:

HTML Editor
Since our content is pretty simple, we can just click the "Source" button and be taken to the more visual editor, which will be enough for our purposes:

Visual Editor
Our template will be simple for the sake of demonstration. I'll start by adding the message:
Speaking of links, now we need to add our phishing link. Highlight the word "here" and click the chain icon in the menu, exposing the "Link" dialog. In this dialog, we'll set the link to `{{.URL}}`, another template value, so that our link is automatically created and inserted into the email.

Link Menu
Finally, make sure the "Add Tracking Image" checkbox is checked, and click "Save Template".
[PreviousImporting Groupschevron-left](https://docs.getgophish.com/user-guide/building-your-first-campaign/importing-groups)
[NextCreating the Landing Pagechevron-right](https://docs.getgophish.com/user-guide/building-your-first-campaign/creating-the-landing-page)
Last updated 7 years ago
Copy
Password Reset for {{.Email}}
Copy
{{.FirstName}},
The password for {{.Email}} has expired. Please reset your password here.
Thanks,
Morning Catch IT Team
---
# Generating Reports | Gophish User Guide
Reporting is an important part of any Gophish campaign. To help facilitate generating reports, there are a few options you could consider:
[hashtag](https://docs.getgophish.com/user-guide/documentation/generating-reports#using-the-web-ui)
Using the Web UI
-------------------------------------------------------------------------------------------------------------------------
The Gophish dashboard gives a quick overview showing the results for a particular campaign:

In addition to providing the results in the dashboard, you have the option to export the raw logs from Gophish using the "Export CSV" button at the top of the page. You could then parse these CSV files using other software such as Excel or Google Sheets.
[hashtag](https://docs.getgophish.com/user-guide/documentation/generating-reports#using-goreport)
Using GoReport
---------------------------------------------------------------------------------------------------------------------
Gophish has an incredible community that has built tools around the API to help make reporting easy. A great example of this is called [GoReportarrow-up-right](https://github.com/chrismaddalena/GoReport)
.
[GoReportarrow-up-right](https://github.com/chrismaddalena/GoReport)
, created by Github user [@chrismaddalenaarrow-up-right](https://github.com/chrismaddalena/)
, provides a really simple, clean way to generate reports for a given Gophish campaign. You can use this script to generate reports for the campaign in either CSV or DOCX format.
[hashtag](https://docs.getgophish.com/user-guide/documentation/generating-reports#leveraging-the-api)
Leveraging the API
-----------------------------------------------------------------------------------------------------------------------------
If you are wanting to make custom reports, perhaps for one or more campaigns, we strongly suggest you consider leveraging the extensive [Gophish APIarrow-up-right](https://docs.getgophish.com/api-documentation/)
.
We have a [Python API clientarrow-up-right](https://github.com/gophish/api-client-python)
that can help facilitate getting the data you need from the API. You can find the documentation for the Python API client [herearrow-up-right](https://docs.getgophish.com/python-api-client/)
.
[PreviousUsing the APIchevron-left](https://docs.getgophish.com/user-guide/documentation/using-the-api)
[NextEmail Reportingchevron-right](https://docs.getgophish.com/user-guide/documentation/email-reporting)
Last updated 5 years ago
* [Using the Web UI](https://docs.getgophish.com/user-guide/documentation/generating-reports#using-the-web-ui)
* [Using GoReport](https://docs.getgophish.com/user-guide/documentation/generating-reports#using-goreport)
* [Leveraging the API](https://docs.getgophish.com/user-guide/documentation/generating-reports#leveraging-the-api)
---
# Logging | Gophish User Guide
[hashtag](https://docs.getgophish.com/user-guide/documentation/logging#configuring-logging)
Configuring Logging
--------------------------------------------------------------------------------------------------------------------
By default, logs are sent to the `stderr` filehandle in the terminal. However, there may be times you wish to store logs in a file.
###
[hashtag](https://docs.getgophish.com/user-guide/documentation/logging#sending-logs-to-a-file)
Sending Logs to a File
Prior to Gophish version 0.8.0, you can redirect logs from the terminal into a file using standard shell redirection:
Copy
$ ./gophish > gophish.log 2>&1
The downside to this is that logs will no longer show up in the terminal. Starting with Gophish version 0.8.0, you will have the option to configure additional logging directly within Gophish.
In your `config.json` file, modify the `logging` section to include whichever filename you wish to use for logging:
Copy
"logging": {
"filename": "gophish.log"
}
###
[hashtag](https://docs.getgophish.com/user-guide/documentation/logging#logging-to-external-sources)
Logging to External Sources
By configuring Gophish to send logs to a file, you also create the opportunity to send logs to external sources, such a SIEM. An example would be to use something like [Filebeatarrow-up-right](https://www.elastic.co/products/beats/filebeat)
to watch the log file and send the entries to an external source of your choosing.
[PreviousUser Managementchevron-left](https://docs.getgophish.com/user-guide/documentation/user-management)
[NextBuilding Your First Campaignchevron-right](https://docs.getgophish.com/user-guide/building-your-first-campaign)
Last updated 7 years ago
* [Configuring Logging](https://docs.getgophish.com/user-guide/documentation/logging#configuring-logging)
* [Sending Logs to a File](https://docs.getgophish.com/user-guide/documentation/logging#sending-logs-to-a-file)
* [Logging to External Sources](https://docs.getgophish.com/user-guide/documentation/logging#logging-to-external-sources)
---
# Webhooks | Gophish User Guide
Ever since Gophish was launched, we've had the ability to fetch campaign results via the API. But sometimes, you may want to have campaign updates pushed directly to you as they happen.
To solve this problem, as of v0.9.0 we've added support for webhooks.
When you configure a webhook, Gophish will make (optionally signed) HTTP requests to an endpoint you control. These requests include the JSON body of the event that just happened- the exact same JSON that you would normally receive via the API. This gives you real-time updates to your campaign as they happen.
Gophish supports multiple webhooks. Only users with the Admin role are able to create webhooks by navigating to the "Webhooks" sidebar entry and clicking the "New Webhook" button.

###
[hashtag](https://docs.getgophish.com/user-guide/documentation/webhooks#validating-signatures)
Validating Signatures
Each webhook sent by Gophish is signed using an optional secret. This signature is computed over the entire request JSON body using the HMAC-SHA256 hashing algorithm. This is a common practiced used elsewhere by organizations like [GitHubarrow-up-right](https://developer.github.com/webhooks/securing/)
, [Twitterarrow-up-right](https://developer.twitter.com/en/docs/accounts-and-users/subscribe-account-activity/guides/securing-webhooks)
, [Twilioarrow-up-right](https://www.twilio.com/docs/usage/webhooks/webhooks-security)
, and more.
This signature is sent in the `X-Gophish-Signature` header, which looks like this:
It's highly recommended to both set a secure secret as well as validating webhook signatures to ensure that events came from your Gophish instance.
###
[hashtag](https://docs.getgophish.com/user-guide/documentation/webhooks#event-format)
Event Format
Each event has the following format:
The following `message` values are supported:
Message
Description
Error Sending Email
Gophish was unable to send the email to the recipient
Email Sent
The email was successfully sent to the recipient
Email Opened
The recipient opened the email
Clicked Link
The recipient clicked the link in the email
Submitted Data
The recipient submitted data to the landing page
Email Reported
The recipient [reported](https://docs.getgophish.com/user-guide/documentation/email-reporting)
the campaign email 🎉
The "Email Opened", "Clicked Link", and "Submitted Data" events also include the `details` field which has the following format:
In this example, the `foo` field is data that was submitted to the landing page. Each form element will have its own key and list of values which will depend on the format of your landing page.
###
[hashtag](https://docs.getgophish.com/user-guide/documentation/webhooks#example-server)
Example Server
For an example on how to receive, validate, and parse webhook messages from Gophish, we've open-sourced an [example serverarrow-up-right](https://github.com/gophish/webhook)
you can find [on GitHubarrow-up-right](https://github.com/gophish/webhook)
. However, since we follow the same common signing pattern used by other webhook providers, most libraries should work with Gophish as well.
[PreviousEmail Reportingchevron-left](https://docs.getgophish.com/user-guide/documentation/email-reporting)
[NextUser Managementchevron-right](https://docs.getgophish.com/user-guide/documentation/user-management)
Last updated 5 years ago
* [Validating Signatures](https://docs.getgophish.com/user-guide/documentation/webhooks#validating-signatures)
* [Event Format](https://docs.getgophish.com/user-guide/documentation/webhooks#event-format)
* [Example Server](https://docs.getgophish.com/user-guide/documentation/webhooks#example-server)
Copy
POST /webhook HTTP/1.1
Host: localhost:9999
Accept-Encoding: gzip
Content-Length: 226
Content-Type: application/json
User-Agent: Go-http-client/1.1
X-Gophish-Signature: sha256=2be52d4b83eb7f19b0ecc75ebd6441cefea5512443eb18d38a8beb2e7584a66c
Copy
{
"email": "[email protected]",
"time": "2020-01-20T17:33:55.553906Z",
"message": "Email Opened",
"details": ""
}
Copy
"payload": {
"rid": "1234567",
"browser": {
"address": "127.0.0.1",
"user-agent": "Mozilla/5.0 (Macintosh; PPC Mac OS X 10_10_4; rv:1.9.3.20) Gecko/2017-08-09 20:28:42 Firefox/3.8",
},
"foo": ["bar"]
}
---
# User Management | Gophish User Guide
Gophish supports user accounts with different roles. Right now, we offer two separate roles that can be assigned to users:
* **User** - This role allows the user to do anything _except_ system-level administrative tasks, such as managing users, managing webhooks, etc.
* **Admin** - This is a system-level administrative role that has full permissions to manage the Gophish installation
To register new user accounts and manage existing ones, login as an administrative user and navigate to the "User Management" page:

[hashtag](https://docs.getgophish.com/user-guide/documentation/user-management#registering-a-new-user)
Registering a New User
----------------------------------------------------------------------------------------------------------------------------------
To register a new user, click the **"+ New User**" button, which will cause the following dialog to appear:

In this form, you can choose the username, password, role, and whether or not the user is required to reset their password when they first login.
[hashtag](https://docs.getgophish.com/user-guide/documentation/user-management#delete-a-user)
Delete a User
----------------------------------------------------------------------------------------------------------------
To delete a user, click the red trash can icon next to the username in the users list.
circle-info
You are required to have at least one user with the "Admin" role at all times. If you try to delete the last administrative user, Gophish will return an error.
[hashtag](https://docs.getgophish.com/user-guide/documentation/user-management#impersonate-a-user)
Impersonate A User
--------------------------------------------------------------------------------------------------------------------------
There may be cases where a user in Gophish is running into issues and would like help troubleshooting. To support this, Gophish has the ability to let administrators "impersonate" any user.
By clicking the yellow button next to the username in the users list, you will automatically be logged into a session for the given user, and interact with Gophish on that user's behalf.
When you are ready to return to your administrative session, you will need to logout, and log back in using your administrative credentials.
[PreviousWebhookschevron-left](https://docs.getgophish.com/user-guide/documentation/webhooks)
[NextLoggingchevron-right](https://docs.getgophish.com/user-guide/documentation/logging)
Last updated 5 years ago
* [Registering a New User](https://docs.getgophish.com/user-guide/documentation/user-management#registering-a-new-user)
* [Delete a User](https://docs.getgophish.com/user-guide/documentation/user-management#delete-a-user)
* [Impersonate A User](https://docs.getgophish.com/user-guide/documentation/user-management#impersonate-a-user)
---
# Campaigns | Gophish User Guide
Gophish is centered around launching campaigns. This involves sending emails to one or more groups and monitoring for opened emails, clicked links, or submitted credentials.
[hashtag](https://docs.getgophish.com/user-guide/documentation/campaigns#launching-a-campaign)
Launching a Campaign
------------------------------------------------------------------------------------------------------------------------
To configure and launch a campaign, click the "Campaigns" entry in the navigation sidebar.

New campaign dialog
Setting up a campaign requires the following fields to be provided:
* **Name** - The name of the campaign
* **Email Template** \- The email that is sent to campaign recipients. This is created in the [Email Templates](https://docs.getgophish.com/user-guide/documentation/templates)
section of the documentation.
* **Landing Page** - The HTML that is returned when a recipient clicks the link in the email template. This is created in the [Landing Pages](https://docs.getgophish.com/user-guide/documentation/landing-pages)
section of the documentation.
* **URL** - This is the URL that populates the `{{.URL}}` template value, commonly used in email templates. This should be a URL or IP address that points to the Gophish phishing server and is reachable by the recipient.
* **Launch Date** - This is the date that the campaign will begin. See Scheduling Campaigns for more information.
* **Send Emails By** - This is the date all emails will be sent by. See Scheduling Campaigns for more information.
* **Sending Profile** - This is the SMTP configuration to use when sending emails. This is created in the [Sending Profiles](https://docs.getgophish.com/user-guide/documentation/sending-profiles)
section of the documentation.
* **Groups** - This defines which groups of recipients should be included in the campaign.
###
[hashtag](https://docs.getgophish.com/user-guide/documentation/campaigns#scheduling-campaigns)
Scheduling Campaigns
Gophish supports scheduling campaigns, making it easy to plan campaigns in advance. There are two fields to consider when scheduling campaigns: the **Launch Date** and the **Send Emails By** date.
The **Launch Date** is when Gophish should start sending emails. By default, Gophish assumes you want the campaign to be launched immediately.
Gophish also assumes that you want all emails to be sent immediately after the campaign is launched, and to be sent as quickly as possible. However, there are times where you may wish to spread the emails over a period of time. Setting the **Send Emails By** date tells Gophish to spread emails evenly between the launch date and this date.
###
[hashtag](https://docs.getgophish.com/user-guide/documentation/campaigns#launching-the-campaign)
Launching the Campaign
After you have the campaign configuration ready to go, click the "Launch Campaign" button, click through the confirmation message, and you're good to go! Depending on your scheduling settings, Gophish will either launch the campaign immediately or will schedule the campaign to be launched at a later date.
[hashtag](https://docs.getgophish.com/user-guide/documentation/campaigns#viewing-campaign-results)
Viewing Campaign Results
--------------------------------------------------------------------------------------------------------------------------------
When a campaign is launched, you are automatically redirected to the campaign results screen:

On the results page, you will see overview information on the campaign status as well as detailed results for each target.
###
[hashtag](https://docs.getgophish.com/user-guide/documentation/campaigns#exporting-campaign-results)
Exporting Campaign Results
To export campaign results in CSV format, click the "Export CSV" format and select the type of results you want to export:
* **Results** - The current status for each target in the campaign.
Contains the following fields:
* **Raw Events** - Contains a stream of events as they occurred during the campaign.
###
[hashtag](https://docs.getgophish.com/user-guide/documentation/campaigns#completing-a-campaign)
Completing a Campaign
To complete a campaign, click the "Complete" button and confirm that you want to mark the campaign as completed.
###
[hashtag](https://docs.getgophish.com/user-guide/documentation/campaigns#deleting-a-campaign)
Deleting a Campaign
To delete a campaign, click the "Delete" button and confirm that you want to delete the campaign.
> Note: This **cannot** be undone, so be careful when deleting a campaign!
###
[hashtag](https://docs.getgophish.com/user-guide/documentation/campaigns#viewing-result-details)
Viewing Result Details
Gophish makes it easy to view the campaign results in a timeline format.
To view the timeline for each recipient, expand the row with the recipient's name.

The results pane shows what a campaign recipient did, such as opening the email, clicking the link, or attempting to submit data from the landing page.
Gophish also records information about the device that clicked the link or submitted data. This data is parsed from the browser's user-agent string. The operating system and browser version is displayed below the event details.
####
[hashtag](https://docs.getgophish.com/user-guide/documentation/campaigns#viewing-captured-credentials)
Viewing Captured Credentials
If you selected the "Capture Credentials" option when building a landing page, Gophish displays the credentials in the results pane. To view them, click the "View Details" dropdown which renders the captured credentials in a table.
[PreviousSending Profileschevron-left](https://docs.getgophish.com/user-guide/documentation/sending-profiles)
[NextUsing the APIchevron-right](https://docs.getgophish.com/user-guide/documentation/using-the-api)
Last updated 7 years ago
* [Launching a Campaign](https://docs.getgophish.com/user-guide/documentation/campaigns#launching-a-campaign)
* [Scheduling Campaigns](https://docs.getgophish.com/user-guide/documentation/campaigns#scheduling-campaigns)
* [Launching the Campaign](https://docs.getgophish.com/user-guide/documentation/campaigns#launching-the-campaign)
* [Viewing Campaign Results](https://docs.getgophish.com/user-guide/documentation/campaigns#viewing-campaign-results)
* [Exporting Campaign Results](https://docs.getgophish.com/user-guide/documentation/campaigns#exporting-campaign-results)
* [Completing a Campaign](https://docs.getgophish.com/user-guide/documentation/campaigns#completing-a-campaign)
* [Deleting a Campaign](https://docs.getgophish.com/user-guide/documentation/campaigns#deleting-a-campaign)
* [Viewing Result Details](https://docs.getgophish.com/user-guide/documentation/campaigns#viewing-result-details)
Copy
id, email, first_name, last_name, position, status, ip, latitude, longitude
---
# Templates | API Documentation
A "Template" is the content of the emails that are sent to targets. They can be imported from an existing email, or created from scratch.
Additionally, templates can contain tracking images so that gophish knows when the user opens the email.
Templates have the following structure:
Copy
{
id : int64
name : string
subject : string
text : string
html : string
modified_date : string(datetime)
attachments : list(attachment)
}
Templates support sending attachments. Attachments have the following structure:
Copy
content: string
type : string
name : string
> Note: The `content` field in an attachment is expected to be base64 encoded.
[hashtag](https://docs.getgophish.com/api-documentation/templates#get-templates)
Get Templates
---------------------------------------------------------------------------------------------------
`GET` `https://localhost:3333/api/templates`
Returns a list of templates.
####
[hashtag](https://docs.getgophish.com/api-documentation/templates#headers)
Headers
Name
Type
Description
Authorization
string
A valid API key
200
[hashtag](https://docs.getgophish.com/api-documentation/templates#get-template)
Get Template
-------------------------------------------------------------------------------------------------
`GET` `https://localhost:3333/api/templates/:id`
Returns a template with the provided ID.Returns a 404: Not Found error if the specified template doesn't exist.
####
[hashtag](https://docs.getgophish.com/api-documentation/templates#path-parameters)
Path Parameters
Name
Type
Description
id
integer
The template ID
####
[hashtag](https://docs.getgophish.com/api-documentation/templates#headers-1)
Headers
Name
Type
Description
Authorization
string
A valid API key
200
404
[hashtag](https://docs.getgophish.com/api-documentation/templates#create-template)
Create Template
-------------------------------------------------------------------------------------------------------
`POST` `https://localhost:3333/api/templates/`
Creates a new template from the provided JSON request body.
####
[hashtag](https://docs.getgophish.com/api-documentation/templates#headers-2)
Headers
Name
Type
Description
Authorization
string
A valid API key
####
[hashtag](https://docs.getgophish.com/api-documentation/templates#request-body)
Request Body
Name
Type
Description
Payload
object
The request body should be a JSON representation of a template. See the schema at the top of this page for the template format.
201
400 At least one text or HTML field must be specified, otherwise a 400: Bad Request error is returned
This method expects the template to be provided in JSON format. You must provide a template `name` and the `text` and/or `html` for the template.
circle-info
**Importing an Existing Email**
What better way to make pixel-perfect emails than by importing an existing email you already have in your inbox?
Using the [Import Email](https://docs.getgophish.com/api-documentation/templates#import-template)
endpoint, you can take a raw email and parse it as a valid Gophish template.
To add tracking, make sure you specify a `{{.Tracker}}` in the `html` field. The UI adds this automatically, but it needs to be specified if you're using the API.
This method returns the JSON representation of the template that was created.
[hashtag](https://docs.getgophish.com/api-documentation/templates#modify-template)
Modify Template
-------------------------------------------------------------------------------------------------------
`PUT` `https://localhost:3333/api/templates/:id`
Modifies an existing template.
####
[hashtag](https://docs.getgophish.com/api-documentation/templates#path-parameters-1)
Path Parameters
Name
Type
Description
id
integer
The template ID to modify
####
[hashtag](https://docs.getgophish.com/api-documentation/templates#headers-3)
Headers
Name
Type
Description
Authorization
string
A valid API key
####
[hashtag](https://docs.getgophish.com/api-documentation/templates#request-body-1)
Request Body
Name
Type
Description
Payload
object
The JSON representation of the template you wish to modify. The entire template must be provided, not just the fields you wish to update.
200
This method expects the template to be provided in JSON format. You must provide a full template, not just the fields you want to update.
This method returns the JSON representation of the template that was modified.
[hashtag](https://docs.getgophish.com/api-documentation/templates#delete-template)
Delete Template
-------------------------------------------------------------------------------------------------------
`DELETE` `https://localhost:3333/api/templates/:id`
Deletes a template by ID.
####
[hashtag](https://docs.getgophish.com/api-documentation/templates#path-parameters-2)
Path Parameters
Name
Type
Description
string
200
404 If no template is found with the provided ID, a 404: Not Found error is returned
Returns a 404 error if the specified template isn't found.
This method returns a status message indicating the template was deleted successfully.
[hashtag](https://docs.getgophish.com/api-documentation/templates#import-template)
Import Template
-------------------------------------------------------------------------------------------------------
`POST` `https://localhost:3333/api/import/email`
Imports an email as a template.
####
[hashtag](https://docs.getgophish.com/api-documentation/templates#headers-4)
Headers
Name
Type
Description
Authorization
string
A valid API key
####
[hashtag](https://docs.getgophish.com/api-documentation/templates#request-body-2)
Request Body
Name
Type
Description
convert\_links
boolean
Whether or not to convert the links within the email to automatically.
content
string
The original email content in RFC 2045 format, including the original headers.
200
Gophish provides the ability to parse an existing email to be used as a template. This makes it easy to repurpose legitimate emails for your phishing assessments.
This endpoint expects the raw email content in [RFC 2045 formatarrow-up-right](https://www.ietf.org/rfc/rfc2045.txt)
, including the original headers. Usually, this is found using the "Show Original" feature of email clients.
The request body for this endpoint is a JSON request in the form of:
By setting the `convert_links` attribute to `true`, Gophish will automatically change all the links in the email to `{{.URL}}`.
circle-info
**Note:** This method doesn't fully import the email as a template. Instead, it parses the email, returning a response that can be used with the "[Create Template](https://docs.getgophish.com/api-documentation/templates#create-template)
" endpoint.
[PreviousSending Profileschevron-left](https://docs.getgophish.com/api-documentation/sending-profiles)
[NextLanding Pageschevron-right](https://docs.getgophish.com/api-documentation/landing-pages)
Last updated 6 years ago
* [Get Templates](https://docs.getgophish.com/api-documentation/templates#get-templates)
* [Get Template](https://docs.getgophish.com/api-documentation/templates#get-template)
* [Create Template](https://docs.getgophish.com/api-documentation/templates#create-template)
* [Modify Template](https://docs.getgophish.com/api-documentation/templates#modify-template)
* [Delete Template](https://docs.getgophish.com/api-documentation/templates#delete-template)
* [Import Template](https://docs.getgophish.com/api-documentation/templates#import-template)
Copy
[\
{\
"id" : 1,\
"name" : "Password Reset Template",\
"subject" : "{{.FirstName}}, please reset your password.",\
"text" : "Please reset your password here: {{.URL}}",\
"html" : "Please reset your password here",\
"modified_date" : "2016-11-21T18:30:11.1477736-06:00",\
"attachments" : [],\
}\
]
Copy
{
"id" : 1,
"name" : "Password Reset Template",
"subject" : "{{.FirstName}}, please reset your password.",
"text" : "Please reset your password here: {{.URL}}",
"html" : "Please reset your password here",
"modified_date" : "2016-11-21T18:30:11.1477736-06:00",
"attachments" : [],
}
Copy
{
"message": "Template not found",
"success": false,
"data": null
}
Copy
{
"id" : 1,
"name" : "Password Reset Template",
"subject" : "{{.FirstName}}, please reset your password.",
"text" : "Please reset your password here: {{.URL}}",
"html" : "Please reset your password here",
"modified_date" : "2016-11-21T18:30:11.1477736-06:00",
"attachments" : [],
}
Copy
{
"message": "Need to specify at least plaintext or HTML content",
"success": false,
"data": null
}
Copy
Copy
{
"message": "Template deleted successfully!",
"success": true,
"data": null
}
Copy
{
"message": "Template not found",
"success": false,
"data": null
}
Copy
{
"text": "Email text",
"html": "Email HTML",
"subject": "Email subject"
}
Copy
{
content: string
convert_links: boolean
}
---
# Landing Pages | API Documentation
A "Landing Page" is the HTML content returned when targets click on the links in Gophish emails.
Landing pages have the following structure:
Copy
{
id : int64
name : string
html : string
capture_credentials : bool
capture_passwords : bool
modified_date : string(datetime)
redirect_url : string
}
[hashtag](https://docs.getgophish.com/api-documentation/landing-pages#get-landing-pages)
Get Landing Pages
---------------------------------------------------------------------------------------------------------------
`GET` `https://localhost:3333/api/pages/`
Returns a list of landing pages.
####
[hashtag](https://docs.getgophish.com/api-documentation/landing-pages#headers)
Headers
Name
Type
Description
Authorization
string
A valid API key
200
Copy
[ \
{\
"id": 1,\
"name": "Example Page",\
"html": "This is a test page",\
"capture_credentials": true,\
"capture_passwords": true,\
"redirect_url": "http://example.com",\
"modified_date": "2016-11-26T14:04:40.4130048-06:00"\
}\
]
[hashtag](https://docs.getgophish.com/api-documentation/landing-pages#get-landing-page)
Get Landing Page
-------------------------------------------------------------------------------------------------------------
`GET` `https://localhost:3333/api/pages/:id`
Returns a landing page given an ID.
####
[hashtag](https://docs.getgophish.com/api-documentation/landing-pages#path-parameters)
Path Parameters
Name
Type
Description
id
integer
The landing page ID
####
[hashtag](https://docs.getgophish.com/api-documentation/landing-pages#headers-1)
Headers
Name
Type
Description
Authorization
string
A valid API key
200
404
Returns a 404 error if the specified landing page isn't found.
[hashtag](https://docs.getgophish.com/api-documentation/landing-pages#create-landing-page)
Create Landing Page
-------------------------------------------------------------------------------------------------------------------
`POST` `https://localhost:3333/api/pages/`
Creates a landing page.
####
[hashtag](https://docs.getgophish.com/api-documentation/landing-pages#headers-2)
Headers
Name
Type
Description
Authorization
string
A valid API key
####
[hashtag](https://docs.getgophish.com/api-documentation/landing-pages#request-body)
Request Body
Name
Type
Description
Payload
object
The JSON representation of the landing page to be created
201
This method expects the landing page to be provided in JSON format. You must provide a landing page `name` and the `html` for the landing page.
circle-info
**Importing a Site**
Let Gophish do the hard work for you by importing a site. By using the [Import Site](https://docs.getgophish.com/api-documentation/landing-pages#import-site)
endpoint, you can simply give Gophish a URL and have the site fetched for you and returned in a format that can be used with this method.
####
[hashtag](https://docs.getgophish.com/api-documentation/landing-pages#capturing-credentials)
Capturing Credentials
Capturing credentials is a powerful feature of Gophish. By setting certain flags, you have the ability to capture all user input, or just non-password input.
To capture credentials, set the `capture_credentials` attribute. If you want to capture passwords as well, set the `capture_passwords` attribute.
By default, Gophish will not capture passwords, as they are stored in plaintext.
Gophish also provides the ability to redirect users to a URL after they submit credentials. This is controlled by setting the `redirect_url` attribute.
[hashtag](https://docs.getgophish.com/api-documentation/landing-pages#modify-landing-page)
Modify Landing Page
-------------------------------------------------------------------------------------------------------------------
`PUT` `https://localhost:3333/api/pages/:id`
Modifies an existing landing page.
####
[hashtag](https://docs.getgophish.com/api-documentation/landing-pages#path-parameters-1)
Path Parameters
Name
Type
Description
id
integer
The ID of the landing page to modify
####
[hashtag](https://docs.getgophish.com/api-documentation/landing-pages#headers-3)
Headers
Name
Type
Description
Authorization
string
A valid API key
####
[hashtag](https://docs.getgophish.com/api-documentation/landing-pages#request-body-1)
Request Body
Name
Type
Description
Payload
object
The JSON representation of the landing page to be modified
200
404
Returns a 404 error if the specified landing page isn't found.
This method expects the landing page to be provided in JSON format. You must provide a full landing page, not just the fields you want to update.
This method returns the JSON representation of the landing page that was modified.
[hashtag](https://docs.getgophish.com/api-documentation/landing-pages#delete-landing-page)
Delete Landing Page
-------------------------------------------------------------------------------------------------------------------
`DELETE` `https://localhost:3333/api/pages/:id`
Deletes a landing page.
####
[hashtag](https://docs.getgophish.com/api-documentation/landing-pages#path-parameters-2)
Path Parameters
Name
Type
Description
id
integer
The ID of the landing page to delete
####
[hashtag](https://docs.getgophish.com/api-documentation/landing-pages#headers-4)
Headers
Name
Type
Description
Authorization
string
A valid API key
200
404
Returns a 404 error if the specified landing page isn't found.
This method returns a status message indicating the landing page was deleted successfully.
[hashtag](https://docs.getgophish.com/api-documentation/landing-pages#import-site)
Import Site
---------------------------------------------------------------------------------------------------
`POST` `https://localhost:3333/api/import/site`
Fetches a URL to be later imported as a landing page
####
[hashtag](https://docs.getgophish.com/api-documentation/landing-pages#headers-5)
Headers
Name
Type
Description
Authorization
string
A valid API key
####
[hashtag](https://docs.getgophish.com/api-documentation/landing-pages#request-body-2)
Request Body
Name
Type
Description
include\_resources
boolean
Whether or not to create a `` tag in the resulting HTML to resolve static references (recommended: `false`)
url
string
The URL to fetch
200
This endpoint simply fetches and returns the HTML from a provided URL. If `include_resources` is `false` (recommended), a `` tag is added so that relative links in the HTML resolve from the original URL.
Additionally, if the HTML contains form elements, this endpoint adds another input, `__original_url`, that points to the original URL. This makes it possible to replay captured credentials later.
circle-info
**Note:** This API endpoint doesn't actually create a new landing page. Instead, you can use the HTML returned from this endpoint as an input to the [Create Landing Page](https://docs.getgophish.com/api-documentation/landing-pages#create-landing-page)
method.
[PreviousTemplateschevron-left](https://docs.getgophish.com/api-documentation/templates)
[NextUsers & Groupschevron-right](https://docs.getgophish.com/api-documentation/users-and-groups)
Last updated 7 years ago
* [Get Landing Pages](https://docs.getgophish.com/api-documentation/landing-pages#get-landing-pages)
* [Get Landing Page](https://docs.getgophish.com/api-documentation/landing-pages#get-landing-page)
* [Create Landing Page](https://docs.getgophish.com/api-documentation/landing-pages#create-landing-page)
* [Modify Landing Page](https://docs.getgophish.com/api-documentation/landing-pages#modify-landing-page)
* [Delete Landing Page](https://docs.getgophish.com/api-documentation/landing-pages#delete-landing-page)
* [Import Site](https://docs.getgophish.com/api-documentation/landing-pages#import-site)
Copy
{
"id": 1,
"name": "Example Page",
"html": "This is a test page",
"capture_credentials": true,
"capture_passwords": true,
"redirect_url": "http://example.com",
"modified_date": "2016-11-26T14:04:40.4130048-06:00"
}
Copy
{
"message": "Page not found",
"success": false,
"data": null
}
Copy
{
"id": 1,
"name": "Example Page",
"html": "This is a test page",
"capture_credentials": true,
"capture_passwords": true,
"redirect_url": "http://example.com",
"modified_date": "2016-11-26T14:04:40.4130048-06:00"
}
Copy
{
"id": 1,
"name": "Example Page",
"html": "This is a test page",
"capture_credentials": true,
"capture_passwords": true,
"redirect_url": "http://example.com",
"modified_date": "2016-11-26T14:04:40.4130048-06:00"
}
Copy
{
"message": "Page not found",
"success": false,
"data": null
}
Copy
{
"message": "Page Deleted Successfully",
"success": true,
"data": null
}
Copy
{
"message": "Page not found",
"success": false,
"data": null
}
Copy
{
"html": "..."
}
---
# User Management | API Documentation
Gophish supports having multiple user accounts. Each of these accounts are separate, with their own campaigns, landing pages, templates, etc.
Each user account in Gophish is assigned a **role**. These are global roles that describe the user's permissions within Gophish.
At the time of this writing, there are two roles:
Role
Slug
**Description**
User
`user`
A non-administrative user role. Users with this role can create objects and launch campaigns.
Admin
`admin`
An administrative user. Users with this role can manage system-wide settings as well as other user accounts within Gophish.
Users have the following format:
Copy
{
id : int64
username : string
role : Role
modified_date : string(datetime)
}
Each Role has the following format:
Copy
{
name : string
slug : string
description : string
}
[hashtag](https://docs.getgophish.com/api-documentation/user-management#get-users)
Get Users
-------------------------------------------------------------------------------------------------
`GET` `https://localhost:3333/api/users/`
Returns a list of all user accounts in Gophish.
####
[hashtag](https://docs.getgophish.com/api-documentation/user-management#headers)
Headers
Name
Type
Description
Authorization
string
A valid API key
200
[hashtag](https://docs.getgophish.com/api-documentation/user-management#get-user)
Get User
-----------------------------------------------------------------------------------------------
`GET` `https://localhost:3333/api/users/:id`
Returns a user with the given ID.
####
[hashtag](https://docs.getgophish.com/api-documentation/user-management#path-parameters)
Path Parameters
Name
Type
Description
id
integer
The user ID
####
[hashtag](https://docs.getgophish.com/api-documentation/user-management#headers-1)
Headers
Name
Type
Description
Authorization
string
A valid API key
200
404
[hashtag](https://docs.getgophish.com/api-documentation/user-management#create-user)
Create User
-----------------------------------------------------------------------------------------------------
`POST` `https://localhost:3333/api/users/`
Creates a new user.
####
[hashtag](https://docs.getgophish.com/api-documentation/user-management#headers-2)
Headers
Name
Type
Description
Authorization
string
####
[hashtag](https://docs.getgophish.com/api-documentation/user-management#request-body)
Request Body
Name
Type
Description
role
string
The role slug to use for the account
password
string
The password to set for the account
username
string
The username for the account
200
400 If an invalid request is provided, an error will be returned with the following format
[hashtag](https://docs.getgophish.com/api-documentation/user-management#modify-user)
Modify User
-----------------------------------------------------------------------------------------------------
`PUT` `https://localhost:3333/api/users/:id`
Modifies a user account. This can be used to change the role, reset the password, or change the username.
####
[hashtag](https://docs.getgophish.com/api-documentation/user-management#path-parameters-1)
Path Parameters
Name
Type
Description
id
string
The user ID
####
[hashtag](https://docs.getgophish.com/api-documentation/user-management#headers-3)
Headers
Name
Type
Description
Authorization
string
A valid API key
####
[hashtag](https://docs.getgophish.com/api-documentation/user-management#request-body-1)
Request Body
Name
Type
Description
role
string
The role slug to use for the account
password
string
The password to set for the account
username
string
The username for the account
200
400 If an invalid request is provided, an error will be returned in the following format:
404
[hashtag](https://docs.getgophish.com/api-documentation/user-management#delete-user)
Delete User
-----------------------------------------------------------------------------------------------------
`DELETE` `https://localhost:3333/api/users/:id`
Deletes a user, as well as every object (landing page, template, etc.) and campaign they've created.
####
[hashtag](https://docs.getgophish.com/api-documentation/user-management#path-parameters-2)
Path Parameters
Name
Type
Description
id
string
The user ID
####
[hashtag](https://docs.getgophish.com/api-documentation/user-management#headers-4)
Headers
Name
Type
Description
Authorization
string
A valid API key
200
404
Returns a 404 error if no user is found with the provided ID.
[PreviousCampaignschevron-left](https://docs.getgophish.com/api-documentation/campaigns)
Last updated 6 years ago
* [Get Users](https://docs.getgophish.com/api-documentation/user-management#get-users)
* [Get User](https://docs.getgophish.com/api-documentation/user-management#get-user)
* [Create User](https://docs.getgophish.com/api-documentation/user-management#create-user)
* [Modify User](https://docs.getgophish.com/api-documentation/user-management#modify-user)
* [Delete User](https://docs.getgophish.com/api-documentation/user-management#delete-user)
Copy
[\
{\
"id": 1,\
"username": "admin",\
"role": {\
"slug": "admin",\
"name": "Admin",\
"description": "System administrator with full permissions"\
}\
}\
]
Copy
[\
{\
"id": 1,\
"username": "admin",\
"role": {\
"slug": "admin",\
"name": "Admin",\
"description": "System administrator with full permissions"\
}\
}\
]
Copy
{
"message": "User not found",
"success": false,
"data": null
}
Copy
{
"id": 2,
"username": "exampleuser",
"role": {
"slug": "user",
"name": "User",
"description": "User role with edit access to objects and campaigns"
}
Copy
{
"message": "Username already taken",
"success": false,
"data": null
}
Copy
{
"id": 2,
"username": "exampleuser",
"role": {
"slug": "user",
"name": "User",
"description": "User role with edit access to objects and campaigns"
}
Copy
{
"message": "Username already taken",
"success": false,
"data": null
}
Copy
{
"message": "User not found",
"success": false,
"data": null
}
Copy
{
"message": "User deleted Successfully!",
"success": true,
"data": null
}
Copy
{
"message": "User not found",
"success": false,
"data": null
}
---
# Sending Profiles | API Documentation
A "Sending Profile" is the SMTP configuration that tells Gophish how to send emails.
Sending profiles support authentication and ignoring invalid SSL certificates.
Sending Profiles have the following structure:
Copy
{
id : int64
name : string
username : string (optional)
password : string (optional)
host : string
interface_type : string
from_address : string
ignore_cert_errors : boolean (default:false)
modified_date : string(datetime)
headers : array({key: string, value: string}) (optional)
}
[hashtag](https://docs.getgophish.com/api-documentation/sending-profiles#get-sending-profiles)
Get Sending Profiles
------------------------------------------------------------------------------------------------------------------------
`GET` `https://localhost/api/smtp/`
Gets a list of the sending profiles created by the authenticated user.
####
[hashtag](https://docs.getgophish.com/api-documentation/sending-profiles#headers)
Headers
Name
Type
Description
Authorization
string
A valid API key
200 A list of the sending profiles created by the authenticated user.
[hashtag](https://docs.getgophish.com/api-documentation/sending-profiles#get-sending-profile)
Get Sending Profile
----------------------------------------------------------------------------------------------------------------------
`GET` `https://localhost:3333/api/smtp/:id`
Returns a sending profile given an ID, returning a 404 error if no sending profile with the provided ID is found.
####
[hashtag](https://docs.getgophish.com/api-documentation/sending-profiles#path-parameters)
Path Parameters
Name
Type
Description
id
integer
The sending profile ID to return
####
[hashtag](https://docs.getgophish.com/api-documentation/sending-profiles#headers-1)
Headers
Name
Type
Description
Authorization
string
A valid API key
200
404
[hashtag](https://docs.getgophish.com/api-documentation/sending-profiles#create-sending-profile)
Create Sending Profile
----------------------------------------------------------------------------------------------------------------------------
`POST` `https://localhost:3333/api/smtp`
Creates a sending profile.
####
[hashtag](https://docs.getgophish.com/api-documentation/sending-profiles#headers-2)
Headers
Name
Type
Description
Authorization
string
A valid API key
####
[hashtag](https://docs.getgophish.com/api-documentation/sending-profiles#request-body)
Request Body
Name
Type
Description
Payload
object
The body of the request is a JSON representation of a sending profile. Refer to the introduction for the valid format of a sending profile.
201
400 If required fields aren't provided, or if a sending profile already exists with the provided name, a 400: Bad Request error will be returned.
This method expects the sending profile to be provided in JSON format. You must provide a sending profile `name`, the `from_address` which emails are sent from, and the SMTP relay `host`.
Sending Profiles support authentication by setting the `username` and `password`.
Additionally, many SMTP server deployments leverage self-signed certificates. To tell Gophish to ignore these invalid certificates, set the `ignore_cert_errors` field to `true`.
This method returns the JSON representation of the sending profile that was created.
[hashtag](https://docs.getgophish.com/api-documentation/sending-profiles#modify-sending-profile)
Modify Sending Profile
----------------------------------------------------------------------------------------------------------------------------
`PUT` `https://localhost:3333/api/smtp/:id`
Modifies an existing sending profile.
####
[hashtag](https://docs.getgophish.com/api-documentation/sending-profiles#path-parameters-1)
Path Parameters
Name
Type
Description
id
integer
The sending profile ID to modify
####
[hashtag](https://docs.getgophish.com/api-documentation/sending-profiles#headers-3)
Headers
Name
Type
Description
Authorization
string
A valid API key
####
[hashtag](https://docs.getgophish.com/api-documentation/sending-profiles#request-body-1)
Request Body
Name
Type
Description
Payload
object
The body of the request is a JSON representation of a sending profile. Refer to the introduction for the valid format of a sending profile.
200
404 If no sending profile exists with the provided ID, a 404: Not Found error is returned.
This method expects the sending profile to be provided in JSON format. You must provide a full sending profile, not just the fields you want to update.
This method returns the JSON representation of the sending profile that was modified.
[hashtag](https://docs.getgophish.com/api-documentation/sending-profiles#delete-sending-profile)
Delete Sending Profile
----------------------------------------------------------------------------------------------------------------------------
`DELETE` `https://localhost:3333/api/smtp/:id`
Deletes a sending profile by ID.
####
[hashtag](https://docs.getgophish.com/api-documentation/sending-profiles#path-parameters-2)
Path Parameters
Name
Type
Description
id
integer
The ID of the sending profile to delete
####
[hashtag](https://docs.getgophish.com/api-documentation/sending-profiles#headers-4)
Headers
Name
Type
Description
Authorization
string
A valid API key
200
404
Returns a 404 error if the specified sending profile isn't found.
This method returns a status message indicating the sending profile was deleted successfully.
[PreviousSettingschevron-left](https://docs.getgophish.com/api-documentation/settings)
[NextTemplateschevron-right](https://docs.getgophish.com/api-documentation/templates)
Last updated 7 years ago
* [Get Sending Profiles](https://docs.getgophish.com/api-documentation/sending-profiles#get-sending-profiles)
* [Get Sending Profile](https://docs.getgophish.com/api-documentation/sending-profiles#get-sending-profile)
* [Create Sending Profile](https://docs.getgophish.com/api-documentation/sending-profiles#create-sending-profile)
* [Modify Sending Profile](https://docs.getgophish.com/api-documentation/sending-profiles#modify-sending-profile)
* [Delete Sending Profile](https://docs.getgophish.com/api-documentation/sending-profiles#delete-sending-profile)
Copy
[\
{\
"id" : 1,\
"name":"Example Profile",\
"interface_type":"SMTP",\
"from_address":"John Doe <[email protected]>",\
"host":"smtp.example.com:25",\
"username":"",\
"password":"",\
"ignore_cert_errors":true,\
"modified_date": "2016-11-20T14:47:51.4131367-06:00",\
"headers": [\
{\
"key": "X-Header",\
"value": "Foo Bar"\
}\
]\
}\
]
Copy
{
"id" : 1,
"name":"Example Profile",
"interface_type":"SMTP",
"from_address":"John Doe <[email protected]>",
"host":"smtp.example.com:25",
"username":"",
"password":"",
"ignore_cert_errors":true,
"modified_date": "2016-11-20T14:47:51.4131367-06:00",
"headers": [\
{\
"key": "X-Header",\
"value": "Foo Bar"\
}\
]
}
Copy
{
"message": "SMTP not found",
"success": false,
"data": null
}
Copy
{
"id" : 1,
"name":"Example Profile",
"interface_type":"SMTP",
"from_address":"John Doe <[email protected]>",
"host":"smtp.example.com:25",
"username":"",
"password":"",
"ignore_cert_errors":true,
"modified_date": "2016-11-20T14:47:51.4131367-06:00",
"headers": [\
{\
"key": "X-Header",\
"value": "Foo Bar"\
}\
]
}
Copy
{
"message": "Error message indicating the issue",
"success": false,
"data": null
}
Copy
{
"id" : 1,
"name":"Example Profile",
"interface_type":"SMTP",
"from_address":"John Doe <[email protected]>",
"host":"smtp.example.com:25",
"username":"",
"password":"",
"ignore_cert_errors":true,
"modified_date": "2016-11-20T14:47:51.4131367-06:00",
"headers": [\
{\
"key": "X-Header",\
"value": "Foo Bar"\
}\
]
}
Copy
{
"message": "SMTP not found",
"success": false,
"data": null
}
Copy
{
"message": "SMTP deleted successfully!",
"success": true,
"data": null
}
Copy
{
"message": "SMTP not found",
"success": false,
"data": null
}
---
# Users & Groups | API Documentation
Gophish manages recipients for campaigns in groups. Each group can contain one or more recipients. Groups have the following format:
Copy
{
id : int64
name : string
targets : array(Target)
modified_date : string(datetime)
}
Each recipient in the `targets` field has the following format:
Copy
{
email : string
first_name : string
last_name : string
position : string
}
[hashtag](https://docs.getgophish.com/api-documentation/users-and-groups#get-groups)
Get Groups
----------------------------------------------------------------------------------------------------
`GET` `https://localhost:3333/api/groups/`
Returns a list of groups.
####
[hashtag](https://docs.getgophish.com/api-documentation/users-and-groups#headers)
Headers
Name
Type
Description
Authorization
string
A valid API key
200
[hashtag](https://docs.getgophish.com/api-documentation/users-and-groups#get-group)
Get Group
--------------------------------------------------------------------------------------------------
`GET` `https://localhost:3333/api/groups/:id`
Returns a group with the given ID.
####
[hashtag](https://docs.getgophish.com/api-documentation/users-and-groups#path-parameters)
Path Parameters
Name
Type
Description
id
integer
The group ID
####
[hashtag](https://docs.getgophish.com/api-documentation/users-and-groups#headers-1)
Headers
Name
Type
Description
Authorization
string
A valid API key
200
404
Returns a 404 error if no group is found with the provided ID.
[hashtag](https://docs.getgophish.com/api-documentation/users-and-groups#get-groups-summary)
Get Groups Summary
--------------------------------------------------------------------------------------------------------------------
`GET` `https://localhost:3333/api/groups/summary`
Returns a summary of each group.
####
[hashtag](https://docs.getgophish.com/api-documentation/users-and-groups#headers-2)
Headers
Name
Type
Description
Authorization
string
A valid API key
200
[hashtag](https://docs.getgophish.com/api-documentation/users-and-groups#get-group-summary)
Get Group Summary
------------------------------------------------------------------------------------------------------------------
`GET` `https://localhost:3333/api/groups/:id/summary`
Returns a summary for a group.
####
[hashtag](https://docs.getgophish.com/api-documentation/users-and-groups#path-parameters-1)
Path Parameters
Name
Type
Description
id
integer
The group ID
####
[hashtag](https://docs.getgophish.com/api-documentation/users-and-groups#headers-3)
Headers
Name
Type
Description
Authorization
string
A valid API key
200
404
It may be the case that you just want the number of members in a group, not necessarily the full member details. This API endpoint returns a summary for a group.
Returns a 404 error if no group is found with the provided ID.
[hashtag](https://docs.getgophish.com/api-documentation/users-and-groups#create-group)
Create Group
--------------------------------------------------------------------------------------------------------
`POST` `https://localhost:3333/api/groups/`
Creates a new group.
####
[hashtag](https://docs.getgophish.com/api-documentation/users-and-groups#headers-4)
Headers
Name
Type
Description
Authorization
string
A valid API key
####
[hashtag](https://docs.getgophish.com/api-documentation/users-and-groups#request-body)
Request Body
Name
Type
Description
Payload
object
The group to create in JSON format.
201
400 If an invalid request is provided, an error message will be returned
When creating a new group, you must specify a unique `name`, as well as a list of `targets`. Here's an example request body:
[hashtag](https://docs.getgophish.com/api-documentation/users-and-groups#modify-group)
Modify Group
--------------------------------------------------------------------------------------------------------
`PUT` `https://localhost:3333/api/groups/:id`
Modifies a group.
####
[hashtag](https://docs.getgophish.com/api-documentation/users-and-groups#path-parameters-2)
Path Parameters
Name
Type
Description
id
integer
The group ID
####
[hashtag](https://docs.getgophish.com/api-documentation/users-and-groups#headers-5)
Headers
Name
Type
Description
Authorization
string
A valid API key
####
[hashtag](https://docs.getgophish.com/api-documentation/users-and-groups#request-body-1)
Request Body
Name
Type
Description
Payload
object
The updated group content. The full group must be provided in JSON format.
200
404
This API endpoint allows you to modify an existing group. The request must include the complete group JSON, not just the fields you're wanting to update. This means that you need to include the matching `id` field. Here's an example request:
Returns a 404 if no group is found with the provided ID.
[hashtag](https://docs.getgophish.com/api-documentation/users-and-groups#delete-group)
Delete Group
--------------------------------------------------------------------------------------------------------
`DELETE` `https://localhost:3333/api/groups/:id`
Deletes a group
####
[hashtag](https://docs.getgophish.com/api-documentation/users-and-groups#path-parameters-3)
Path Parameters
Name
Type
Description
id
number
The group ID
####
[hashtag](https://docs.getgophish.com/api-documentation/users-and-groups#headers-6)
Headers
Name
Type
Description
Authorization
string
A valid API key
200
404
Returns a 404 error if no group is found with the provided ID.
[hashtag](https://docs.getgophish.com/api-documentation/users-and-groups#import-group)
Import Group
--------------------------------------------------------------------------------------------------------
`POST` `https://localhost:3333/api/import/group`
Reads and parses a CSV, returning data that can be used to create a group.
####
[hashtag](https://docs.getgophish.com/api-documentation/users-and-groups#headers-7)
Headers
Name
Type
Description
Authorization
string
A valid API key
####
[hashtag](https://docs.getgophish.com/api-documentation/users-and-groups#request-body-2)
Request Body
Name
Type
Description
file
object
A file upload containing the CSV content to parse.
200
This API endpoint allows you to upload a CSV, returning a list of group targets. For example, you can use the following `curl` command to upload the CSV:
The results of this API endpoint can be used as the `targets` parameter in a call to the [Create Group](https://docs.getgophish.com/api-documentation/users-and-groups#create-group)
endpoint.
[PreviousLanding Pageschevron-left](https://docs.getgophish.com/api-documentation/landing-pages)
[NextCampaignschevron-right](https://docs.getgophish.com/api-documentation/campaigns)
Last updated 7 years ago
* [Get Groups](https://docs.getgophish.com/api-documentation/users-and-groups#get-groups)
* [Get Group](https://docs.getgophish.com/api-documentation/users-and-groups#get-group)
* [Get Groups Summary](https://docs.getgophish.com/api-documentation/users-and-groups#get-groups-summary)
* [Get Group Summary](https://docs.getgophish.com/api-documentation/users-and-groups#get-group-summary)
* [Create Group](https://docs.getgophish.com/api-documentation/users-and-groups#create-group)
* [Modify Group](https://docs.getgophish.com/api-documentation/users-and-groups#modify-group)
* [Delete Group](https://docs.getgophish.com/api-documentation/users-and-groups#delete-group)
* [Import Group](https://docs.getgophish.com/api-documentation/users-and-groups#import-group)
Copy
[\
{\
"id": 1,\
"name": "Example Group",\
"modified_date": "2018-10-08T15:56:13.790016Z",\
"targets": [\
{\
"email": "[email protected]",\
"first_name": "Example",\
"last_name": "User",\
"position": ""\
},\
{\
"email": "[email protected]",\
"first_name": "Foo",\
"last_name": "Bar",\
"position": ""\
}\
]\
}\
]
Copy
{
"id": 1,
"name": "Example Group",
"modified_date": "2018-10-08T15:56:13.790016Z",
"targets": [\
{\
"email": "[email protected]",\
"first_name": "Example",\
"last_name": "User",\
"position": ""\
},\
{\
"email": "[email protected]",\
"first_name": "Foo",\
"last_name": "Bar",\
"position": ""\
}\
]
}
Copy
{
"message": "Group not found",
"success": false,
"data": null
}
Copy
[\
{\
"id": 1,\
"name": "Example Group",\
"modified_date": "2018-10-08T15:56:13.790016Z",\
"num_targets": 2\
}\
]
Copy
{
"id": 1,
"name": "Example Group",
"modified_date": "2018-10-08T15:56:13.790016Z",
"num_targets": 2
}
Copy
{
"message": "Group not found",
"success": false,
"data": null
}
Copy
{
"id": 1,
"name": "Example Group",
"modified_date": "2018-10-08T15:56:13.790016Z",
"targets": [\
{\
"email": "[email protected]",\
"first_name": "Example",\
"last_name": "User",\
"position": ""\
},\
{\
"email": "[email protected]",\
"first_name": "Foo",\
"last_name": "Bar",\
"position": ""\
}\
]
}
Copy
{
"message": "Group name not specified",
"success": false,
"data": null
}
Copy
{
"name": "Example Group",
"targets": [\
{\
"email": "[email protected]",\
"first_name": "Example",\
"last_name": "User",\
"position": ""\
},\
{\
"email": "[email protected]",\
"first_name": "Foo",\
"last_name": "Bar",\
"position": ""\
}\
]
}
Copy
{
"id": 1,
"name": "Example Modified Group",
"modified_date": "2018-10-08T15:56:13.790016Z",
"targets": [\
{\
"email": "[email protected]",\
"first_name": "Foo",\
"last_name": "Bar",\
"position": ""\
}\
]
}
Copy
{
"message": "Group not found",
"success": false,
"data": null
}
Copy
{
"id": 1,
"name": "Example Modified Go",
"targets": [\
{\
"email": "[email protected]",\
"first_name": "Foo",\
"last_name": "Bar",\
"position": ""\
}\
]
}
Copy
{
"message": "Group deleted successfully!",
"success": true,
"data": null
}
Copy
{
"message": "Group not found",
"success": false,
"data": null
}
Copy
[\
{\
"email": "[email protected]",\
"first_name": "Example",\
"last_name": "User",\
"position": "Systems Administrator"\
},\
{\
"email": "[email protected]",\
"first_name": "John",\
"last_name": "Doe",\
"position": "CEO"\
}\
]
Copy
curl -k https://localhost:3333/api/import/group -XPOST \
-F "file=@group_template.csv" \
-H "Authorization: Bearer 0123456789abcdef"
---
# Campaigns | API Documentation
Campaigns have the following structure:
Copy
{
id : int64
name : string
created_date : string(datetime)
launch_date : string(datetime)
send_by_date : string(datetime)
completed_date : string(datetime)
template : Template
page : Page
status : string
results : []Result
groups : []Group
timeline : []Event
smtp : SMTP
url : string
}
The `template`, `page`, `groups`, and `smtp` objects are all Gophish objects. Their format can be found at their various API endpoints.
###
[hashtag](https://docs.getgophish.com/api-documentation/campaigns#campaign-events)
Campaign Events
Gophish keeps track of every event for a campaign in it's `timeline`. Each event has the following format:
The `details` field is a string containing JSON which contains the raw data about an event (such as credentials that were submitted, user-agent information, and more). The `details` field has the following format:
###
[hashtag](https://docs.getgophish.com/api-documentation/campaigns#campaign-results)
Campaign Results
In addition to this, campaign results are maintained in the `results` attribute. This has a format similar to the members of a `Group`, in that they have the following structure:
[hashtag](https://docs.getgophish.com/api-documentation/campaigns#get-campaigns)
Get Campaigns
---------------------------------------------------------------------------------------------------
`GET` `https://localhost:3333/api/campaigns/`
Returns a list of campaigns.
####
[hashtag](https://docs.getgophish.com/api-documentation/campaigns#headers)
Headers
Name
Type
Description
Authorization
string
A valid API key
200
[hashtag](https://docs.getgophish.com/api-documentation/campaigns#get-campaign)
Get Campaign
-------------------------------------------------------------------------------------------------
`GET` `https://localhost:3333/api/campaigns/:id`
Returns a campaign given an ID.
####
[hashtag](https://docs.getgophish.com/api-documentation/campaigns#path-parameters)
Path Parameters
Name
Type
Description
id
integer
The campaign ID
####
[hashtag](https://docs.getgophish.com/api-documentation/campaigns#headers-1)
Headers
Name
Type
Description
Authorization
string
A valid API key
200
404
Returns a 404 error if the specified campaign isn't found.
[hashtag](https://docs.getgophish.com/api-documentation/campaigns#create-campaign)
Create Campaign
-------------------------------------------------------------------------------------------------------
`POST` `https://localhost:3333/api/campaigns/`
Creates and launches a new campaign.
####
[hashtag](https://docs.getgophish.com/api-documentation/campaigns#headers-2)
Headers
Name
Type
Description
Authorization
string
A valid API key
####
[hashtag](https://docs.getgophish.com/api-documentation/campaigns#request-body)
Request Body
Name
Type
Description
Payload
object
The campaign details. See the introduction above for the format of a campaign.
201
This method expects the campaign to be provided in JSON format. For the various objects in a campaign, such as the template, landing page, or sending profile, you need to provide the `name` attribute. Here's an example of a JSON payload to create a new campaign:
###
[hashtag](https://docs.getgophish.com/api-documentation/campaigns#scheduling-a-campaign)
Scheduling a Campaign
You can schedule a campaign to launch at a later time. To do this, simply put the desired time you want the campaign to launch in the `launch_date` attribute. Gophish expects the date to be provided in ISO8601 format.
Without setting a launch date, Gophish launches the campaign immediately.
###
[hashtag](https://docs.getgophish.com/api-documentation/campaigns#spreading-out-emails)
Spreading out Emails
By default, Gophish sends all the emails in a campaign as quickly as possible. Instead, you may wish to spread emails out over a period of minutes, hours, days, or weeks. This is possible by setting the `send_by_date` to an ISO8601 formatted datetime. It's important to note that this must be after the `launch_date`.
[hashtag](https://docs.getgophish.com/api-documentation/campaigns#get-campaign-results)
Get Campaign Results
-----------------------------------------------------------------------------------------------------------------
`GET` `https://localhost:3333/api/campaigns/:id/results`
Gets the results for a campaign.
####
[hashtag](https://docs.getgophish.com/api-documentation/campaigns#path-parameters-1)
Path Parameters
Name
Type
Description
id
integer
The campaign ID
####
[hashtag](https://docs.getgophish.com/api-documentation/campaigns#headers-3)
Headers
Name
Type
Description
Authorization
string
A valid API key
200
404
You may not always want the full campaign details, including the template, landing page, etc. Instead, you may just want to poll the campaign results for updates. This API endpoint only returns information that's relevant to the campaign results.
Returns a 404 error if the specified campaign isn't found.
[hashtag](https://docs.getgophish.com/api-documentation/campaigns#get-campaign-summary)
Get Campaign Summary
-----------------------------------------------------------------------------------------------------------------
`GET` `https://localhost:3333/api/campaigns/:id/summary`
Returns summary information about a campaign.
####
[hashtag](https://docs.getgophish.com/api-documentation/campaigns#path-parameters-2)
Path Parameters
Name
Type
Description
id
integer
The campaign ID
####
[hashtag](https://docs.getgophish.com/api-documentation/campaigns#headers-4)
Headers
Name
Type
Description
Authorization
string
A valid API key
200
404
Returns a 404 error if the specified campaign isn't found.
There may be cases where you aren't interested in the specific results, but rather want high-level statistics, or a "summary", about a campaign.
The response includes a `stats` object which has the following format:
[hashtag](https://docs.getgophish.com/api-documentation/campaigns#delete-campaign)
Delete Campaign
-------------------------------------------------------------------------------------------------------
`DELETE` `https://localhost:3333/api/campaigns/:id`
Deletes a campaign by ID.
####
[hashtag](https://docs.getgophish.com/api-documentation/campaigns#path-parameters-3)
Path Parameters
Name
Type
Description
id
integer
The campaign ID
####
[hashtag](https://docs.getgophish.com/api-documentation/campaigns#headers-5)
Headers
Name
Type
Description
Authorization
string
A valid API key
200
404
Returns a 404 error if the specified campaign isn't found.
[hashtag](https://docs.getgophish.com/api-documentation/campaigns#complete-campaign)
Complete Campaign
-----------------------------------------------------------------------------------------------------------
`GET` `https://localhost:3333/api/campaigns/:id/complete`
Marks a campaign as complete.
####
[hashtag](https://docs.getgophish.com/api-documentation/campaigns#path-parameters-4)
Path Parameters
Name
Type
Description
id
integer
The campaign ID
####
[hashtag](https://docs.getgophish.com/api-documentation/campaigns#headers-6)
Headers
Name
Type
Description
Authorization
string
A valid API key
200
[PreviousUsers & Groupschevron-left](https://docs.getgophish.com/api-documentation/users-and-groups)
[NextUser Managementchevron-right](https://docs.getgophish.com/api-documentation/user-management)
Last updated 7 years ago
* [Campaign Events](https://docs.getgophish.com/api-documentation/campaigns#campaign-events)
* [Campaign Results](https://docs.getgophish.com/api-documentation/campaigns#campaign-results)
* [Get Campaigns](https://docs.getgophish.com/api-documentation/campaigns#get-campaigns)
* [Get Campaign](https://docs.getgophish.com/api-documentation/campaigns#get-campaign)
* [Create Campaign](https://docs.getgophish.com/api-documentation/campaigns#create-campaign)
* [Scheduling a Campaign](https://docs.getgophish.com/api-documentation/campaigns#scheduling-a-campaign)
* [Spreading out Emails](https://docs.getgophish.com/api-documentation/campaigns#spreading-out-emails)
* [Get Campaign Results](https://docs.getgophish.com/api-documentation/campaigns#get-campaign-results)
* [Get Campaign Summary](https://docs.getgophish.com/api-documentation/campaigns#get-campaign-summary)
* [Delete Campaign](https://docs.getgophish.com/api-documentation/campaigns#delete-campaign)
* [Complete Campaign](https://docs.getgophish.com/api-documentation/campaigns#complete-campaign)
Copy
{
email : string
time : string(datetime)
message : string
details : string(JSON)
}
Copy
{
payload : object
browser : object
}
Copy
{
id : int64
first_name : string
last_name : string
position : string
status : string
ip : string
latitude : float
longitude : float
send_date : string(datetime)
reported : boolean
}
Copy
[\
{\
"id": 1,\
"name": "Example Campaign",\
"created_date": "2018-10-08T15:56:29.48815Z",\
"launch_date": "2018-10-08T15:56:00Z",\
"send_by_date": "0001-01-01T00:00:00Z",\
"completed_date": "0001-01-01T00:00:00Z",\
"template": {\
"id": 1,\
"name": "Example Template",\
"subject": "Click here!",\
"text": "",\
"html": "\u003chtml\u003e\n\u003chead\u003e\n\t\u003ctitle\u003e\u003c/title\u003e\n\u003c/head\u003e\n\u003cbody\u003e\n\u003cp\u003eClick \u003ca href=\"{{.URL}}\"\u003ehere\u003c/a\u003e!\u003c/p\u003e\n{{.Tracker}}\u003c/body\u003e\n\u003c/html\u003e\n",\
"modified_date": "2018-10-08T15:54:56.258392Z",\
"attachments": []\
},\
"page": {\
"id": 1,\
"name": "Example Landing Page",\
"html": "\u003chtml\u003e\u003chead\u003e\n\t\u003ctitle\u003e\u003c/title\u003e\n\u003c/head\u003e\n\u003cbody\u003e\n\u003cp\u003eLanding page HTML\u003c/p\u003e\n\n\n\u003c/body\u003e\u003c/html\u003e",\
"capture_credentials": false,\
"capture_passwords": false,\
"redirect_url": "",\
"modified_date": "2018-10-08T15:55:16.416396Z"\
},\
"status": "In progress",\
"results": [\
{\
"id": "hoqKYFn",\
"status": "Email Sent",\
"ip": "",\
"latitude": 0,\
"longitude": 0,\
"send_date": "2018-10-08T15:56:29.535158Z",\
"reported": false,\
"modified_date": "2018-10-08T15:56:29.535158Z",\
"email": "[email protected]",\
"first_name": "Example",\
"last_name": "User",\
"position": ""\
},\
{\
"id": "VYrDwtG",\
"status": "Clicked Link",\
"ip": "::1",\
"latitude": 0,\
"longitude": 0,\
"send_date": "2018-10-08T15:56:29.548722Z",\
"reported": false,\
"modified_date": "2018-10-08T15:56:46.955281Z",\
"email": "[email protected]",\
"first_name": "Foo",\
"last_name": "Bar",\
"position": ""\
}\
],\
"timeline": [\
{\
"email": "",\
"time": "2018-10-08T15:56:29.49172Z",\
"message": "Campaign Created",\
"details": ""\
},\
{\
"email": "[email protected]",\
"time": "2018-10-08T15:56:29.535158Z",\
"message": "Email Sent",\
"details": ""\
},\
{\
"email": "[email protected]",\
"time": "2018-10-08T15:56:29.548722Z",\
"message": "Email Sent",\
"details": ""\
},\
{\
"email": "[email protected]",\
"time": "2018-10-08T15:56:44.679743Z",\
"message": "Email Opened",\
"details": "{\"payload\":{\"rid\":[\"VYrDwtG\"]},\"browser\":{\"address\":\"::1\",\"user-agent\":\"Mozilla/5.0 (Macintosh; Intel Mac OS X 10_14_0) AppleWebKit/537.36 (KHTML, like Gecko) Chrome/69.0.3497.100 Safari/537.36\"}}"\
},\
{\
"email": "[email protected]",\
"time": "2018-10-08T15:56:46.955281Z",\
"message": "Clicked Link",\
"details": "{\"payload\":{\"rid\":[\"VYrDwtG\"]},\"browser\":{\"address\":\"::1\",\"user-agent\":\"Mozilla/5.0 (Macintosh; Intel Mac OS X 10_14_0) AppleWebKit/537.36 (KHTML, like Gecko) Chrome/69.0.3497.100 Safari/537.36\"}}"\
}\
],\
"smtp": {\
"id": 1,\
"interface_type": "SMTP",\
"name": "Example Sending Profile",\
"host": "localhost:1025",\
"from_address": "Test User \[email protected]\u003e",\
"ignore_cert_errors": true,\
"headers": [],\
"modified_date": "2018-09-04T01:24:21.691924069Z"\
},\
"url": "http://localhost"\
}\
]
Copy
{
"id": 1,
"name": "Example Campaign",
"created_date": "2018-10-08T15:56:29.48815Z",
"launch_date": "2018-10-08T15:56:00Z",
"send_by_date": "0001-01-01T00:00:00Z",
"completed_date": "0001-01-01T00:00:00Z",
"template": {
"id": 1,
"name": "Example Template",
"subject": "Click here!",
"text": "",
"html": "\u003chtml\u003e\n\u003chead\u003e\n\t\u003ctitle\u003e\u003c/title\u003e\n\u003c/head\u003e\n\u003cbody\u003e\n\u003cp\u003eClick \u003ca href=\"{{.URL}}\"\u003ehere\u003c/a\u003e!\u003c/p\u003e\n{{.Tracker}}\u003c/body\u003e\n\u003c/html\u003e\n",
"modified_date": "2018-10-08T15:54:56.258392Z",
"attachments": []
},
"page": {
"id": 1,
"name": "Example Landing Page",
"html": "\u003chtml\u003e\u003chead\u003e\n\t\u003ctitle\u003e\u003c/title\u003e\n\u003c/head\u003e\n\u003cbody\u003e\n\u003cp\u003eLanding page HTML\u003c/p\u003e\n\n\n\u003c/body\u003e\u003c/html\u003e",
"capture_credentials": false,
"capture_passwords": false,
"redirect_url": "",
"modified_date": "2018-10-08T15:55:16.416396Z"
},
"status": "In progress",
"results": [\
{\
"id": "hoqKYFn",\
"status": "Email Sent",\
"ip": "",\
"latitude": 0,\
"longitude": 0,\
"send_date": "2018-10-08T15:56:29.535158Z",\
"reported": false,\
"modified_date": "2018-10-08T15:56:29.535158Z",\
"email": "[email protected]",\
"first_name": "Example",\
"last_name": "User",\
"position": ""\
},\
{\
"id": "VYrDwtG",\
"status": "Clicked Link",\
"ip": "::1",\
"latitude": 0,\
"longitude": 0,\
"send_date": "2018-10-08T15:56:29.548722Z",\
"reported": false,\
"modified_date": "2018-10-08T15:56:46.955281Z",\
"email": "[email protected]",\
"first_name": "Foo",\
"last_name": "Bar",\
"position": ""\
}\
],
"timeline": [\
{\
"email": "",\
"time": "2018-10-08T15:56:29.49172Z",\
"message": "Campaign Created",\
"details": ""\
},\
{\
"email": "[email protected]",\
"time": "2018-10-08T15:56:29.535158Z",\
"message": "Email Sent",\
"details": ""\
},\
{\
"email": "[email protected]",\
"time": "2018-10-08T15:56:29.548722Z",\
"message": "Email Sent",\
"details": ""\
},\
{\
"email": "[email protected]",\
"time": "2018-10-08T15:56:44.679743Z",\
"message": "Email Opened",\
"details": "{\"payload\":{\"rid\":[\"VYrDwtG\"]},\"browser\":{\"address\":\"::1\",\"user-agent\":\"Mozilla/5.0 (Macintosh; Intel Mac OS X 10_14_0) AppleWebKit/537.36 (KHTML, like Gecko) Chrome/69.0.3497.100 Safari/537.36\"}}"\
},\
{\
"email": "[email protected]",\
"time": "2018-10-08T15:56:46.955281Z",\
"message": "Clicked Link",\
"details": "{\"payload\":{\"rid\":[\"VYrDwtG\"]},\"browser\":{\"address\":\"::1\",\"user-agent\":\"Mozilla/5.0 (Macintosh; Intel Mac OS X 10_14_0) AppleWebKit/537.36 (KHTML, like Gecko) Chrome/69.0.3497.100 Safari/537.36\"}}"\
}\
],
"smtp": {
"id": 1,
"interface_type": "SMTP",
"name": "Example Sending Profile",
"host": "localhost:1025",
"from_address": "Test User \[email protected]\u003e",
"ignore_cert_errors": true,
"headers": [],
"modified_date": "2018-09-04T01:24:21.691924069Z"
},
"url": "http://localhost"
}
Copy
{
"message": "Campaign not found",
"success": false,
"data": null
}
Copy
{
"id": 1,
"name": "Example Campaign",
"created_date": "2018-10-08T15:56:29.48815Z",
"launch_date": "2018-10-08T15:56:00Z",
"send_by_date": "0001-01-01T00:00:00Z",
"completed_date": "0001-01-01T00:00:00Z",
"template": {
"id": 1,
"name": "Example Template",
"subject": "Click here!",
"text": "",
"html": "\u003chtml\u003e\n\u003chead\u003e\n\t\u003ctitle\u003e\u003c/title\u003e\n\u003c/head\u003e\n\u003cbody\u003e\n\u003cp\u003eClick \u003ca href=\"{{.URL}}\"\u003ehere\u003c/a\u003e!\u003c/p\u003e\n{{.Tracker}}\u003c/body\u003e\n\u003c/html\u003e\n",
"modified_date": "2018-10-08T15:54:56.258392Z",
"attachments": []
},
"page": {
"id": 1,
"name": "Example Landing Page",
"html": "\u003chtml\u003e\u003chead\u003e\n\t\u003ctitle\u003e\u003c/title\u003e\n\u003c/head\u003e\n\u003cbody\u003e\n\u003cp\u003eLanding page HTML\u003c/p\u003e\n\n\n\u003c/body\u003e\u003c/html\u003e",
"capture_credentials": false,
"capture_passwords": false,
"redirect_url": "",
"modified_date": "2018-10-08T15:55:16.416396Z"
},
"status": "In progress",
"results": [\
{\
"id": "hoqKYFn",\
"status": "Email Sent",\
"ip": "",\
"latitude": 0,\
"longitude": 0,\
"send_date": "2018-10-08T15:56:29.535158Z",\
"reported": false,\
"modified_date": "2018-10-08T15:56:29.535158Z",\
"email": "[email protected]",\
"first_name": "Example",\
"last_name": "User",\
"position": ""\
},\
{\
"id": "VYrDwtG",\
"status": "Clicked Link",\
"ip": "::1",\
"latitude": 0,\
"longitude": 0,\
"send_date": "2018-10-08T15:56:29.548722Z",\
"reported": false,\
"modified_date": "2018-10-08T15:56:46.955281Z",\
"email": "[email protected]",\
"first_name": "Foo",\
"last_name": "Bar",\
"position": ""\
}\
],
"timeline": null,
"smtp": {
"id": 1,
"interface_type": "SMTP",
"name": "Example Sending Profile",
"host": "localhost:1025",
"from_address": "Test User \[email protected]\u003e",
"ignore_cert_errors": true,
"headers": [],
"modified_date": "2018-09-04T01:24:21.691924069Z"
},
"url": "http://localhost"
}
Copy
{
"name":"CC Example Campaign",
"template":{"name":"Example Template"},
"url":"http://localhost",
"page":{"name":"Example Landing Page"},
"smtp":{"name":"Example Sending Profile"},
"launch_date":"2018-10-08T16:20:00+00:00",
"send_by_date":null,
"groups":[{"name":"Example Group"}]
}
Copy
{
"id": 1,
"name": "Example Campaign",
"status": "In progress",
"results": [\
{\
"id": "hoqKYFn",\
"status": "Email Sent",\
"ip": "",\
"latitude": 0,\
"longitude": 0,\
"send_date": "2018-10-08T15:56:29.535158Z",\
"reported": false,\
"modified_date": "2018-10-08T15:56:29.535158Z",\
"email": "[email protected]",\
"first_name": "Example",\
"last_name": "User",\
"position": ""\
},\
{\
"id": "VYrDwtG",\
"status": "Clicked Link",\
"ip": "::1",\
"latitude": 0,\
"longitude": 0,\
"send_date": "2018-10-08T15:56:29.548722Z",\
"reported": false,\
"modified_date": "2018-10-08T15:56:46.955281Z",\
"email": "[email protected]",\
"first_name": "Foo",\
"last_name": "Bar",\
"position": ""\
}\
],
"timeline": [\
{\
"email": "",\
"time": "2018-10-08T15:56:29.49172Z",\
"message": "Campaign Created",\
"details": ""\
},\
{\
"email": "[email protected]",\
"time": "2018-10-08T15:56:29.535158Z",\
"message": "Email Sent",\
"details": ""\
},\
{\
"email": "[email protected]",\
"time": "2018-10-08T15:56:29.548722Z",\
"message": "Email Sent",\
"details": ""\
},\
{\
"email": "[email protected]",\
"time": "2018-10-08T15:56:44.679743Z",\
"message": "Email Opened",\
"details": "{\"payload\":{\"rid\":[\"VYrDwtG\"]},\"browser\":{\"address\":\"::1\",\"user-agent\":\"Mozilla/5.0 (Macintosh; Intel Mac OS X 10_14_0) AppleWebKit/537.36 (KHTML, like Gecko) Chrome/69.0.3497.100 Safari/537.36\"}}"\
},\
{\
"email": "[email protected]",\
"time": "2018-10-08T15:56:46.955281Z",\
"message": "Clicked Link",\
"details": "{\"payload\":{\"rid\":[\"VYrDwtG\"]},\"browser\":{\"address\":\"::1\",\"user-agent\":\"Mozilla/5.0 (Macintosh; Intel Mac OS X 10_14_0) AppleWebKit/537.36 (KHTML, like Gecko) Chrome/69.0.3497.100 Safari/537.36\"}}"\
}\
]
}
Copy
{
"message": "Campaign not found",
"success": false,
"data": null
}
Copy
{
"id": 1,
"created_date": "2018-10-08T15:56:29.48815Z",
"launch_date": "2018-10-08T15:56:00Z",
"send_by_date": "0001-01-01T00:00:00Z",
"completed_date": "0001-01-01T00:00:00Z",
"status": "In progress",
"name": "Example Campaign",
"stats": {
"total": 2,
"sent": 2,
"opened": 1,
"clicked": 1,
"submitted_data": 0,
"email_reported": 0,
"error": 0
}
}
Copy
{
"message": "Campaign not found",
"success": false,
"data": null
}
Copy
{
total : int
sent : int
opened : int
clicked : int
submitted_data : int
email_reported : int
}
Copy
{
"message": "Campaign deleted successfully!",
"success": true,
"data": null
}
Copy
{
"message": "Campaign not found",
"success": false,
"data": null
}
Copy
{
"message": "Campaign completed successfully!",
"success": true,
"data": null
}
---
# Introduction | Python API Client
Gophish was built from the ground-up to be API-first. This means that we build out the API endpoints for all of our features, and the UI is simply a wrapper around these endpoints.
To interface with Gophish using Python, we've created a `gophish` client library.
> If you want to access the API directly, please refer to our [API Documentationarrow-up-right](https://www.gitbook.com/book/gophish/api-documentation/details)
[hashtag](https://docs.getgophish.com/python-api-client/#installation)
Installation
----------------------------------------------------------------------------------------
To install the `gophish` library, simply run the command:
`pip install gophish`
[hashtag](https://docs.getgophish.com/python-api-client/#quickstart)
Quickstart
------------------------------------------------------------------------------------
Getting up and running with the Python library is quick and easy.
To start, simply create a client using the API key found in the [Settings pagearrow-up-right](https://gophish.gitbooks.io/user-guide/content/documentation/changing_user_settings.html#changing-your-password--updating-settings)
.
Copy
from gophish import Gophish
api_key = 'API_KEY'
api = Gophish(api_key)
Now you're ready to start using the API!
[NextConnecting to Gophishchevron-right](https://docs.getgophish.com/python-api-client/connecting-to-gophish)
Last updated 7 years ago
* [Installation](https://docs.getgophish.com/python-api-client/#installation)
* [Quickstart](https://docs.getgophish.com/python-api-client/#quickstart)
---
# Email Protection | Cloudflare
Please enable cookies.
Email Protection
================
You are unable to access this email address docs.getgophish.com
---------------------------------------------------------------
The website from which you got to this page is protected by Cloudflare. Email addresses on that page have been hidden in order to keep them from being accessed by malicious bots. **You must enable Javascript in your browser in order to decode the e-mail address**.
If you have a website and are interested in protecting it in a similar way, you can [sign up for Cloudflare](https://www.cloudflare.com/sign-up?utm_source=email_protection)
.
* [How does Cloudflare protect email addresses on website from spammers?](https://developers.cloudflare.com/waf/tools/scrape-shield/email-address-obfuscation/)
* [Can I sign up for Cloudflare?](https://developers.cloudflare.com/fundamentals/setup/account/create-account/)
Cloudflare Ray ID: **9c05b7ddcfc60854** • Your IP: Click to reveal 54.237.218.47 • Performance & security by [Cloudflare](https://www.cloudflare.com/5xx-error-landing)
---
# Connecting to Gophish | Python API Client
Connections to Gophish are established by creating an instance of `gophish.Gophish()`.
By default, the API client will try connecting to the host at `http://localhost:3333`.
[hashtag](https://docs.getgophish.com/python-api-client/connecting-to-gophish#changing-the-host)
Changing the Host
-----------------------------------------------------------------------------------------------------------------------
To change the host, simply set the host parameter to point to the admin interface on your Gophish instance:
Copy
from gophish import Gophish
api = Gophish(API_KEY, host='http://admin_server')
[hashtag](https://docs.getgophish.com/python-api-client/connecting-to-gophish#ignoring-ssl-certificates)
Ignoring SSL Certificates
---------------------------------------------------------------------------------------------------------------------------------------
All custom `kwargs` are sent to the underlying transport, which by default is the `requests` library.
This means it's easy to customize client behavior. For example, if you are using self-signed certificates with Gophish, you can ignore the warnings by setting `verify=False`.
Copy
from gophish import Gophish
api = Gophish(API_KEY, host='https://admin_server', verify=False)
[PreviousIntroductionchevron-left](https://docs.getgophish.com/python-api-client)
[NextCampaignschevron-right](https://docs.getgophish.com/python-api-client/campaigns)
Last updated 7 years ago
* [Changing the Host](https://docs.getgophish.com/python-api-client/connecting-to-gophish#changing-the-host)
* [Ignoring SSL Certificates](https://docs.getgophish.com/python-api-client/connecting-to-gophish#ignoring-ssl-certificates)
---
# Campaigns | Python API Client
The campaigns endpoint allows you to create, view, and manage Gophish campaigns.
[hashtag](https://docs.getgophish.com/python-api-client/campaigns#table-of-contents)
Table of Contents
-----------------------------------------------------------------------------------------------------------
* [Quick Example](https://docs.getgophish.com/python-api-client/campaigns#quick-example)
* [Models](https://docs.getgophish.com/python-api-client/campaigns#models)
* [Methods](https://docs.getgophish.com/python-api-client/campaigns#methods)
* [Examples](https://docs.getgophish.com/python-api-client/campaigns#examples)
[hashtag](https://docs.getgophish.com/python-api-client/campaigns#quick-example)
Quick Example
---------------------------------------------------------------------------------------------------
This example shows how to retrieve the names of every campaign launched in Gophish.
Copy
from gophish import Gophish
api_key = 'API_KEY'
api = Gophish(api_key)
for campaign in api.campaigns.get():
print campaign.name
###
[hashtag](https://docs.getgophish.com/python-api-client/campaigns#models)
Models
####
[hashtag](https://docs.getgophish.com/python-api-client/campaigns#gophish.models.result)
gophish.models.Result
**Attributes**
* `id` (int) The result ID
* `first_name` (str) The first name
* `last_name` (str) The last name
* `email` (str) The email address
* `position` (str) The position (job role)
* `ip` (str) The last seen IP address
* `latitude` (float) The latitude of the `ip`
* `longitude` (float) The longitude of the `ip`
* `status` (str) The users status in the campaign
**Methods**
* `__init__(self, **kwargs)` - Returns a new Result
Example:
####
[hashtag](https://docs.getgophish.com/python-api-client/campaigns#gophish.models.campaign)
gophish.models.Campaign
For each of the attributes in the campaign (groups, template, page, etc.), Gophish **only cares about the** `name`.
This means that you don't have to fetch the resources you want to use. You can simply create new ones with the correct name for the campaign (see the example below).
**Attributes**
* `id` (int) The result ID
* `results` (list(models.Result)) The campaign results
* `timeline` (list(models.TimelineEntry)) The timeline entries
* `name` (str) The campaign name
* `status` (str) The current status of the campaign
* `created_date` (optional: datetime.datetime) The campaign creation date
* `send_by_date` (optional: datetime.datetime) The date to send all emails by
* `launch_date` (optional: datetime.datetime) The scheduled time for campaign launch
* `template` (models.Template) The template to use in the campaign
* `page` (models.Page) The Landing Page to use in the campaign
* `smtp` (models.SMTP) The SMTP Profile to use when sending emails
* `url` (str) The URL to use when constructing links in phishing emails
**Methods**
* `__init__(self, **kwargs)` - Returns a new Campaign
Example:
####
[hashtag](https://docs.getgophish.com/python-api-client/campaigns#gophish.models.stat)
gophish.models.Stat
Statistics for a campaign's results.
The Gophish API never requires you to create campaign stats. Instead, they are returned as part of the campaign summary objects.
**Attributes**
* `total` (int) The total number of targets in the campaign
* `sent` (int) The number of emails that were successfully sent
* `opened` (int) The number of emails that were opened
* `clicked` (int) The number of emails that were clicked by recipients in the campaign
* `submitted_data` (int) The number of captured credentials from the campaign
* `email_reported` (int) The number of emails reported from the campaign
* `error` (int) The number of errors when sending emails in the campaign
####
[hashtag](https://docs.getgophish.com/python-api-client/campaigns#gophish.models.campaignsummary)
gophish.models.CampaignSummary
A summarized view of a campaign. This is a lightweight high level view of campaign results, which can be quicker than retrieving full campaign details.
The Gophish API never requires you to create campaign summaries. Instead, they are returned when hitting the campaign summary endpoint.
**Attributes**
* `id` (int) The result ID
* `name` (str) The campaign name
* `created_date` (optional: datetime.datetime) The campaign creation date
* `send_by_date` (optional: datetime.datetime) The date to send all emails by
* `launch_date` (optional: datetime.datetime) The scheduled time for campaign launch
* `status` (str) The current status of the campaign
* `stats` (list(models.Stat)) The stats of campaign results
**Methods**
* `__init__(self, **kwargs)` - Returns a new CampaignSummary
Example:
###
[hashtag](https://docs.getgophish.com/python-api-client/campaigns#methods)
Methods
####
[hashtag](https://docs.getgophish.com/python-api-client/campaigns#gophish.api.campaigns.get-campaign_id-none)
gophish.api.campaigns.get(campaign\_id=None)
Gets the details for one or more campaigns. To get a particular campaign, set the ID to the campaign ID.
If the `campaign_id` is not set, all campaigns owned by the current user will be returned.
**Returns**
* If the `campaign_id` is set: `models.Campaign`
* If `campaign_id` is `None`: `list(models.Campaign)`
####
[hashtag](https://docs.getgophish.com/python-api-client/campaigns#gophish.api.campaigns.post-campaign)
gophish.api.campaigns.post(campaign)
Creates and launches a new campaign. This endpoint requires you to submit a `gophish.models.Campaign` object.
**Returns**
The `gophish.models.Campaign` object that was created.
####
[hashtag](https://docs.getgophish.com/python-api-client/campaigns#gophish.api.campaigns.delete-campaign_id)
gophish.api.campaigns.delete(campaign\_id)
Deletes the campaign specified by `campaign_id`.
**Returns**
A `gophish.models.Status` message.
####
[hashtag](https://docs.getgophish.com/python-api-client/campaigns#gophish.api.campaigns.complete-campaign_id)
gophish.api.campaigns.complete(campaign\_id)
Completes the campaign specified by `campaign_id`.
**Returns**
A `gophish.models.Status` message.
####
[hashtag](https://docs.getgophish.com/python-api-client/campaigns#gophish.api.campaigns.summary-campaign_id-none)
gophish.api.campaigns.summary(campaign\_id=None)
Gets the summaries for one or more campaigns. To get a particular campaign, set the ID to the campaign ID.
If the `campaign_id` is not set, the summary object for all campaigns owned by the current user will be returned.
**Returns**
* If the `campaign_id` is set: `models.CampaignSummary`
* If `campaign_id` is `None`: `models.CampaignSummaries`
###
[hashtag](https://docs.getgophish.com/python-api-client/campaigns#examples)
Examples
Here are some examples to show how to use the API.
All of these examples assume the following setup:
####
[hashtag](https://docs.getgophish.com/python-api-client/campaigns#get-all-campaigns)
Get All Campaigns
####
[hashtag](https://docs.getgophish.com/python-api-client/campaigns#get-single-campaign)
Get Single Campaign
####
[hashtag](https://docs.getgophish.com/python-api-client/campaigns#create-new-campaign)
Create New Campaign
####
[hashtag](https://docs.getgophish.com/python-api-client/campaigns#get-campaign-summaries)
Get Campaign Summaries
[PreviousConnecting to Gophishchevron-left](https://docs.getgophish.com/python-api-client/connecting-to-gophish)
[NextGroupschevron-right](https://docs.getgophish.com/python-api-client/groups)
Last updated 3 years ago
* [Table of Contents](https://docs.getgophish.com/python-api-client/campaigns#table-of-contents)
* [Quick Example](https://docs.getgophish.com/python-api-client/campaigns#quick-example)
* [Models](https://docs.getgophish.com/python-api-client/campaigns#models)
* [Methods](https://docs.getgophish.com/python-api-client/campaigns#methods)
* [Examples](https://docs.getgophish.com/python-api-client/campaigns#examples)
Copy
result = Result(
first_name='Foo', last_name='Bar',
position='Tester', email='[email protected]')
Copy
groups = [Group(name='Existing Group')]
page = Page(name='Existing Page')
template = Template(name='Existing Template')
smtp = SMTP(name='Existing Profile')
url = 'http://phishing_server'
campaign = Campaign(
name='Example Campaign', groups=groups, page=page,
template=template, smtp=smtp)
Copy
summary = api.campaigns.summary(campaign_id=1)
print(summary.stats.as_dict())
Copy
from gophish import Gophish
from gophish.models import *
api_key = 'API_KEY'
api = Gophish(api_key)
Copy
campaigns = api.campaigns.get()
Copy
campaign = api.campaigns.get(campaign_id=1)
Copy
groups = [Group(name='Existing Group')]
page = Page(name='Existing Page')
template = Template(name='Existing Template')
smtp = SMTP(name='Existing Profile')
url = 'http://phishing_server'
campaign = Campaign(
name='Example Campaign', groups=groups, page=page,
template=template, smtp=smtp)
campaign = api.campaigns.post(campaign)
print campaign.id
Copy
summaries = api.campaigns.summary()
summary = api.campaigns.summary(campaign_id=1)
---
# Groups | Python API Client
The groups endpoint allows you to create, view, and manage Gophish groups.
[hashtag](https://docs.getgophish.com/python-api-client/groups#table-of-contents)
Table of Contents
--------------------------------------------------------------------------------------------------------
* [Quick Example](https://docs.getgophish.com/python-api-client/groups#quick-example)
* [Models](https://docs.getgophish.com/python-api-client/groups#models)
* [Methods](https://docs.getgophish.com/python-api-client/groups#methods)
* [Examples](https://docs.getgophish.com/python-api-client/groups#examples)
[hashtag](https://docs.getgophish.com/python-api-client/groups#quick-example)
Quick Example
------------------------------------------------------------------------------------------------
This example shows how to retrieve the name and size of every group in Gophish.
Copy
from gophish import Gophish
api_key = 'API_KEY'
api = Gophish(api_key)
for group in api.groups.get():
print '{} has {} users'.format(group.name, len(group.targets))
###
[hashtag](https://docs.getgophish.com/python-api-client/groups#models)
Models
####
[hashtag](https://docs.getgophish.com/python-api-client/groups#gophish.models.user)
gophish.models.User
**Attributes**
* `id` (int) The user ID
* `first_name` (str) The first name
* `last_name` (str) The last name
* `email` (str) The email address
* `position` (str) The position (job role)
**Methods**
* `__init__(self, **kwargs)` - Returns a new User Example:
####
[hashtag](https://docs.getgophish.com/python-api-client/groups#gophish.models.group)
gophish.models.Group
A group contains one or more `models.User` objects. The group name must be unique.
**Attributes**
* `id` (int) The group ID
* `targets` (list(models.User)) The group's users
* `name` (str) The group name
* `modified_date` (optional: datetime.datetime) The scheduled time for group launch
**Methods**
* `__init__(self, **kwargs)` - Returns a new Group
Example:
###
[hashtag](https://docs.getgophish.com/python-api-client/groups#methods)
Methods
####
[hashtag](https://docs.getgophish.com/python-api-client/groups#gophish.api.groups.get-group_id-none)
gophish.api.groups.get(group\_id=None)
Gets the details for one or more groups. To get a particular group, set the ID to the group ID.
If the `group_id` is not set, all groups owned by the current user will be returned.
**Returns**
* If the `group` is set: `models.Group`
* If `group_id` is `None`: `list(models.Group)`
####
[hashtag](https://docs.getgophish.com/python-api-client/groups#gophish.api.groups.post-group)
gophish.api.groups.post(group)
Creates a new group. This endpoint requires you to submit a `gophish.models.Group` object.
**Returns**
The `gophish.models.Group` object that was created.
####
[hashtag](https://docs.getgophish.com/python-api-client/groups#gophish.api.groups.put-group)
gophish.api.groups.put(group)
Edits an existing group. This endpoint requires you to submit an existing `gophish.models.Group` object with its `id` attribute set correctly.
**Returns**
The `gophish.models.Group` object that was edited.
####
[hashtag](https://docs.getgophish.com/python-api-client/groups#gophish.api.groups.delete-group_id)
gophish.api.groups.delete(group\_id)
Deletes the group specified by `group_id`.
**Returns**
A `gophish.models.Status` message.
###
[hashtag](https://docs.getgophish.com/python-api-client/groups#examples)
Examples
Here are some examples to show how to use the API.
All of these examples assume the following setup:
####
[hashtag](https://docs.getgophish.com/python-api-client/groups#get-all-groups)
Get All Groups
####
[hashtag](https://docs.getgophish.com/python-api-client/groups#get-single-group)
Get Single Group
####
[hashtag](https://docs.getgophish.com/python-api-client/groups#create-new-group)
Create New Group
[PreviousCampaignschevron-left](https://docs.getgophish.com/python-api-client/campaigns)
[NextTemplateschevron-right](https://docs.getgophish.com/python-api-client/templates)
Last updated 7 years ago
* [Table of Contents](https://docs.getgophish.com/python-api-client/groups#table-of-contents)
* [Quick Example](https://docs.getgophish.com/python-api-client/groups#quick-example)
* [Models](https://docs.getgophish.com/python-api-client/groups#models)
* [Methods](https://docs.getgophish.com/python-api-client/groups#methods)
* [Examples](https://docs.getgophish.com/python-api-client/groups#examples)
Copy
result = User(
first_name='Foo', last_name='Bar',
position='Tester', email='[email protected]')
Copy
from gophish.models import *
targets = [\
User(first_name='John', last_name='Doe', email='[email protected]'),\
User(first_name='Jane', last_name='Doe', email='[email protected]')]
group = Group(name='Doe Company', targets=targets)
Copy
from gophish import Gophish
from gophish.models import *
api_key = 'API_KEY'
api = Gophish(api_key)
Copy
groups = api.groups.get()
Copy
group = api.groups.get(group_id=1)
Copy
targets = [\
User(first_name='John', last_name='Doe', email='[email protected]'),\
User(first_name='Jane', last_name='Doe', email='[email protected]')]
group = Group(name='Doe Company', targets=targets)
group = api.groups.post(group)
print group.id
---
# Templates | Python API Client
Templates are the emails that are sent out by Gophish during a campaign.
The templates endpoint allows you to create, view, and manage Gophish templates.
[hashtag](https://docs.getgophish.com/python-api-client/templates#table-of-contents)
Table of Contents
-----------------------------------------------------------------------------------------------------------
* [Quick Example](https://docs.getgophish.com/python-api-client/templates#quick-example)
* [Models](https://docs.getgophish.com/python-api-client/templates#models)
* [Methods](https://docs.getgophish.com/python-api-client/templates#methods)
* [Examples](https://docs.getgophish.com/python-api-client/templates#examples)
[hashtag](https://docs.getgophish.com/python-api-client/templates#quick-example)
Quick Example
---------------------------------------------------------------------------------------------------
This example shows how to retrieve the name of every template in Gophish.
Copy
from gophish import Gophish
api_key = 'API_KEY'
api = Gophish(api_key)
for template in api.templates.get():
print template.name
###
[hashtag](https://docs.getgophish.com/python-api-client/templates#models)
Models
####
[hashtag](https://docs.getgophish.com/python-api-client/templates#gophish.models.attachment)
gophish.models.Attachment
**Attributes**
* `content` (str) The base64 encoded attachment content
* `type` (str) The content type of the attachment
* `name` (str) The attachment filename
**Methods**
* `__init__(self, **kwargs)` - Returns a new Attachment
Example:
####
[hashtag](https://docs.getgophish.com/python-api-client/templates#gophish.models.template)
gophish.models.Template
A template contains a name and the email content.
**Attributes**
* `id` (int) The template ID
* `name` (str) The template name
* `html` (str) The template HTML
* `text` (str) The template HTML
* `modified_date` (optional: datetime.datetime) The scheduled time for template launch
* `attachments` (list(models.Attachment)) The optional email attachments
**Methods**
* `__init__(self, **kwargs)` - Returns a new Template
Example:
###
[hashtag](https://docs.getgophish.com/python-api-client/templates#methods)
Methods
####
[hashtag](https://docs.getgophish.com/python-api-client/templates#gophish.api.templates.get-template_id-none)
gophish.api.templates.get(template\_id=None)
Gets the details for one or more templates. To get a particular template, set the ID to the template ID.
If the `template_id` is not set, all templates owned by the current user will be returned.
**Returns**
* If the `template` is set: `models.Template`
* If `template_id` is `None`: `list(models.Template)`
####
[hashtag](https://docs.getgophish.com/python-api-client/templates#gophish.api.templates.post-template)
gophish.api.templates.post(template)
Creates a new template. This endpoint requires you to submit a `gophish.models.Template` object.
**Returns**
The `gophish.models.Template` object that was created.
####
[hashtag](https://docs.getgophish.com/python-api-client/templates#gophish.api.templates.put-template)
gophish.api.templates.put(template)
Edits an existing template. This endpoint requires you to submit an existing `gophish.models.Template` object with its `id` attribute set correctly.
**Returns**
The `gophish.models.Template` object that was edited.
####
[hashtag](https://docs.getgophish.com/python-api-client/templates#gophish.api.templates.delete-template_id)
gophish.api.templates.delete(template\_id)
Deletes the template specified by `template_id`.
**Returns**
A `gophish.models.Status` message.
###
[hashtag](https://docs.getgophish.com/python-api-client/templates#examples)
Examples
Here are some examples to show how to use the API.
All of these examples assume the following setup:
####
[hashtag](https://docs.getgophish.com/python-api-client/templates#get-all-templates)
Get All Templates
####
[hashtag](https://docs.getgophish.com/python-api-client/templates#get-single-template)
Get Single Template
####
[hashtag](https://docs.getgophish.com/python-api-client/templates#create-new-template)
Create New Template
[PreviousGroupschevron-left](https://docs.getgophish.com/python-api-client/groups)
[NextLanding Pageschevron-right](https://docs.getgophish.com/python-api-client/landing-pages)
Last updated 6 years ago
* [Table of Contents](https://docs.getgophish.com/python-api-client/templates#table-of-contents)
* [Quick Example](https://docs.getgophish.com/python-api-client/templates#quick-example)
* [Models](https://docs.getgophish.com/python-api-client/templates#models)
* [Methods](https://docs.getgophish.com/python-api-client/templates#methods)
* [Examples](https://docs.getgophish.com/python-api-client/templates#examples)
Copy
todo
Copy
from gophish.models import *
template = Template(name='Test Template',
html="Click here)
Copy
from gophish import Gophish
from gophish.models import *
api_key = 'API_KEY'
api = Gophish(api_key)
Copy
templates = api.templates.get()
Copy
template = api.templates.get(template_id=1)
Copy
template = Template(name='Test Template',
html='Click here')
template = api.templates.post(template)
print template.id
---
# Sending Profiles | Python API Client
Sending profiles tell Gophish which SMTP servers to use when sending emails.
The SMTP endpoint allows you to create, view, and manage Gophish sending profiles.
[hashtag](https://docs.getgophish.com/python-api-client/sending-profiles#table-of-contents)
Table of Contents
------------------------------------------------------------------------------------------------------------------
* [Quick Example](https://docs.getgophish.com/python-api-client/sending-profiles#quick-example)
* [Models](https://docs.getgophish.com/python-api-client/sending-profiles#models)
* [Methods](https://docs.getgophish.com/python-api-client/sending-profiles#methods)
* [Examples](https://docs.getgophish.com/python-api-client/sending-profiles#examples)
[hashtag](https://docs.getgophish.com/python-api-client/sending-profiles#quick-example)
Quick Example
----------------------------------------------------------------------------------------------------------
This example shows how to retrieve the name of every sending profile in Gophish.
Copy
from gophish import Gophish
api_key = 'API_KEY'
api = Gophish(api_key)
for smtp in api.smtp.get():
print smtp.name
###
[hashtag](https://docs.getgophish.com/python-api-client/sending-profiles#models)
Models
####
[hashtag](https://docs.getgophish.com/python-api-client/sending-profiles#gophish.models.smtp)
gophish.models.SMTP
A sending profile contains the server address/port, and optional credentials.
**Attributes**
* `id` (int) The smtp ID
* `name` (str) The smtp name
* `interface_type` (str) The type of SMTP connection (for now, always use `SMTP`)
* `host` (str) The host:port of the SMTP server
* `from_address` (str) The address to send emails from (e.g. John Doe <[\[email protected\]](https://docs.getgophish.com/cdn-cgi/l/email-protection)
\>)
* `ignore_cert_errors` (bool) Whether or not to ignore SSL certificate validation errors (set to `true` in the case of self-signed certificates)
* `modified_date` (optional: datetime.datetime) The datetime this SMTP profile was previously modified
**Methods**
* `__init__(self, **kwargs)` - Returns a new SMTP object
###
[hashtag](https://docs.getgophish.com/python-api-client/sending-profiles#methods)
Methods
####
[hashtag](https://docs.getgophish.com/python-api-client/sending-profiles#gophish.api.smtp.get-smtp_id-none)
gophish.api.smtp.get(smtp\_id=None)
Gets the details for one or more sending profiles. To get a particular sending profiles, set the ID to the profile ID.
If the `smtp_id` is not set, all sending profiles owned by the current user will be returned.
**Returns**
* If the `smtp_id` is set: `models.SMTP`
* If `smtp_id` is `None`: `list(models.SMTP)`
####
[hashtag](https://docs.getgophish.com/python-api-client/sending-profiles#gophish.api.smtp.post-smtp)
gophish.api.smtp.post(smtp)
Creates a new sending profile. This endpoint requires you to submit a `gophish.models.SMTP` object.
**Returns**
The `gophish.models.SMTP` object that was created.
####
[hashtag](https://docs.getgophish.com/python-api-client/sending-profiles#gophish.api.smtp.put-smtp)
gophish.api.smtp.put(smtp)
Edits an existing sending profile. This endpoint requires you to submit an existing `gophish.models.SMTP` object with its `id` attribute set correctly.
**Returns**
The `gophish.models.SMTP` object that was edited.
####
[hashtag](https://docs.getgophish.com/python-api-client/sending-profiles#gophish.api.smtp.delete-smtp_id)
gophish.api.smtp.delete(smtp\_id)
Deletes the sending profile specified by `smtp_id`.
**Returns**
A `gophish.models.Status` message.
###
[hashtag](https://docs.getgophish.com/python-api-client/sending-profiles#examples)
Examples
Here are some examples to show how to use the API.
All of these examples assume the following setup:
####
[hashtag](https://docs.getgophish.com/python-api-client/sending-profiles#get-all-sending-profiles)
Get All Sending Profiles
####
[hashtag](https://docs.getgophish.com/python-api-client/sending-profiles#get-single-sending-profile)
Get Single Sending Profile
####
[hashtag](https://docs.getgophish.com/python-api-client/sending-profiles#create-new-sending-profile)
Create New Sending Profile
[PreviousLanding Pageschevron-left](https://docs.getgophish.com/python-api-client/landing-pages)
Last updated 7 years ago
* [Table of Contents](https://docs.getgophish.com/python-api-client/sending-profiles#table-of-contents)
* [Quick Example](https://docs.getgophish.com/python-api-client/sending-profiles#quick-example)
* [Models](https://docs.getgophish.com/python-api-client/sending-profiles#models)
* [Methods](https://docs.getgophish.com/python-api-client/sending-profiles#methods)
* [Examples](https://docs.getgophish.com/python-api-client/sending-profiles#examples)
Copy
from gophish import Gophish
from gophish.models import *
api_key = 'API_KEY'
api = Gophish(api_key)
Copy
smtp = api.smtp.get()
Copy
smtp = api.smtp.get(smtp_id=1)
Copy
smtp = SMTP(name='Test SMTP')
smtp.host = "localhost:25"
smtp.from_address = "John Doe <[email protected]>"
smtp.interface_type = "SMTP"
smtp.ignore_cert_errors = True
smtp = api.smtp.post(smtp)
print smtp.id
---
# Landing Pages | Python API Client
Landing pages contain the HTML that is rendered when a target clicks on a Gophish phishing link.
The pages endpoint allows you to create, view, and manage Gophish landing pages.
[hashtag](https://docs.getgophish.com/python-api-client/landing-pages#table-of-contents)
Table of Contents
---------------------------------------------------------------------------------------------------------------
* [Quick Example](https://docs.getgophish.com/python-api-client/landing-pages#quick-example)
* [Models](https://docs.getgophish.com/python-api-client/landing-pages#models)
* [Methods](https://docs.getgophish.com/python-api-client/landing-pages#methods)
* [Examples](https://docs.getgophish.com/python-api-client/landing-pages#examples)
[hashtag](https://docs.getgophish.com/python-api-client/landing-pages#quick-example)
Quick Example
-------------------------------------------------------------------------------------------------------
This example shows how to retrieve the name of every page in Gophish.
Copy
from gophish import Gophish
api_key = 'API_KEY'
api = Gophish(api_key)
for page in api.pages.get():
print page.name
###
[hashtag](https://docs.getgophish.com/python-api-client/landing-pages#models)
Models
####
[hashtag](https://docs.getgophish.com/python-api-client/landing-pages#gophish.models.page)
gophish.models.Page
A page contains one or more `models.User` objects. The page name must be unique.
**Attributes**
* `id` (int) The page ID
* `html` (str) The page HTML
* `name` (str) The page name
* `modified_date` (optional: datetime.datetime) The scheduled time for page launch
* `capture_credentials` (bool default:False) Whether or not the landing page should capture credentials
* `capture_passwords` (bool default:False) Whether or not the landing page should capture passwords
* `redirect_url` (str) The URL to redirect targets to after they submit data
**Methods**
* `__init__(self, **kwargs)` - Returns a new Landing Page
Example:
###
[hashtag](https://docs.getgophish.com/python-api-client/landing-pages#methods)
Methods
####
[hashtag](https://docs.getgophish.com/python-api-client/landing-pages#gophish.api.pages.get-page_id-none)
gophish.api.pages.get(page\_id=None)
Gets the details for one or more landing pages. To get a particular page, set the ID to the page ID.
If the `page_id` is not set, all landing pages owned by the current user will be returned.
**Returns**
* If the `page` is set: `models.Page`
* If `page_id` is `None`: `list(models.Page)`
####
[hashtag](https://docs.getgophish.com/python-api-client/landing-pages#gophish.api.pages.post-page)
gophish.api.pages.post(page)
Creates a new landing page. This endpoint requires you to submit a `gophish.models.Page` object.
**Returns**
The `gophish.models.Page` object that was created.
####
[hashtag](https://docs.getgophish.com/python-api-client/landing-pages#gophish.api.pages.put-page)
gophish.api.pages.put(page)
Edits an existing landing page. This endpoint requires you to submit an existing `gophish.models.Page` object with its `id` attribute set correctly.
**Returns**
The `gophish.models.Page` object that was edited.
####
[hashtag](https://docs.getgophish.com/python-api-client/landing-pages#gophish.api.pages.delete-page_id)
gophish.api.pages.delete(page\_id)
Deletes the page specified by `page_id`.
**Returns**
A `gophish.models.Status` message.
###
[hashtag](https://docs.getgophish.com/python-api-client/landing-pages#examples)
Examples
Here are some examples to show how to use the API.
All of these examples assume the following setup:
####
[hashtag](https://docs.getgophish.com/python-api-client/landing-pages#get-all-landing-pages)
Get All Landing Pages
####
[hashtag](https://docs.getgophish.com/python-api-client/landing-pages#get-single-landing-page)
Get Single Landing Page
####
[hashtag](https://docs.getgophish.com/python-api-client/landing-pages#create-new-landing-page)
Create New Landing Page
[PreviousTemplateschevron-left](https://docs.getgophish.com/python-api-client/templates)
[NextSending Profileschevron-right](https://docs.getgophish.com/python-api-client/sending-profiles)
Last updated 7 years ago
* [Table of Contents](https://docs.getgophish.com/python-api-client/landing-pages#table-of-contents)
* [Quick Example](https://docs.getgophish.com/python-api-client/landing-pages#quick-example)
* [Models](https://docs.getgophish.com/python-api-client/landing-pages#models)
* [Methods](https://docs.getgophish.com/python-api-client/landing-pages#methods)
* [Examples](https://docs.getgophish.com/python-api-client/landing-pages#examples)
Copy
from gophish.models import *
page = Page(name='Test Page',
html="Click here)
Copy
from gophish import Gophish
from gophish.models import *
api_key = 'API_KEY'
api = Gophish(api_key)
Copy
pages = api.pages.get()
Copy
page = api.pages.get(page_id=1)
Copy
page = Page(name='Test Page',
html="Click here)
page = api.pages.post(page)
print page.id
---
`
{{.URL}}
The phishing URL
{{.BaseURL}}
The base URL with the path and `rid` parameter stripped. Useful for making links to static files.
[PreviousLaunching the Campaignchevron-left](https://docs.getgophish.com/user-guide/building-your-first-campaign/launching-the-campaign)
[NextAdditional Referenceschevron-right](https://docs.getgophish.com/user-guide/additional-references)
Last updated 7 years ago
---
# Creating the Landing Page | Gophish User Guide
The Morning Catch corporation has a webmail portal that we will clone for our landing page.
Start by navigating to the "Landing Pages" page and clicking the "New Page" button.
To import a site by URL, click the "Import Site" button. The webmail portal is located at `/mail/`, so I will use `http://192.168.56.101/mail/` as my import URL.
 After the import, you'll see the HTML populated into the editor. Clicking the "Source" button shows a preview of the page.

Preview
Finally, we'll capture submitted data and passwords by checking both options, and we'll redirect users to the webmail portal after they submit credentials.
Finally, click "Save Page" to save the landing page.
[PreviousCreating the Templatechevron-left](https://docs.getgophish.com/user-guide/building-your-first-campaign/creating-the-template)
[NextLaunching the Campaignchevron-right](https://docs.getgophish.com/user-guide/building-your-first-campaign/launching-the-campaign)
Last updated 7 years ago
---
# Importing Groups | Gophish User Guide
The first thing we need to do before we can launch a campaign is to figure out who to target. There are a ton of ways to gather/generate email addresses for potential targets. You can either harvest email addresses from public information using OSINT if you are aiming to simulate a realistic scenario.
Now that we have our list of users, let’s import them into gophish.
To add a group, navigate to the “Users & Groups” page and click “New Group”:

New Group Modal
Since we are performing phishing simulation for Morning Catch, we can call our group “Morning Catch Employees”.
Now we have to add the members. There are two ways to do this:
* Add each member’s details one at a time using the form inputs
* Bulk import the group from a CSV file
To save time (and typing!) let’s go with the CSV option.
[hashtag](https://docs.getgophish.com/user-guide/building-your-first-campaign/importing-groups#importing-from-csv)
Importing from CSV
------------------------------------------------------------------------------------------------------------------------------------------
The CSV format gophish expects has the following header values:
* First Name
* Last Name
* Email
* Position
So, the CSV for Morning Catch would look like the following:
After uploading this CSV using the “Bulk Import Users” button, we see that our members were added automatically:

Importing users
After clicking “Save changes”, we see a confirmation message that our group was created.
> Tip: If you don’t see the group show up right away, refresh the page and it should appear in the table.
[PreviousCreating the Sending Profilechevron-left](https://docs.getgophish.com/user-guide/building-your-first-campaign/creating-the-sending-profile)
[NextCreating the Templatechevron-right](https://docs.getgophish.com/user-guide/building-your-first-campaign/creating-the-template)
Last updated 7 years ago
Copy
First Name,Last Name,Position,Email
Richard,Bourne,CEO,[email protected]
Boyd,Jenius,Systems Administrator,[email protected]
Haiti,Moreo,Sales & Marketing,[email protected]
---
# FAQ | Gophish User Guide
[hashtag](https://docs.getgophish.com/user-guide/faq#unable-to-reach-admin-dashboard)
Unable to Reach Admin Dashboard
--------------------------------------------------------------------------------------------------------------------------
Let's say you've just loaded up Gophish, are trying to reach the admin dashboard, and encounter this error in your logs:
Copy
2018/11/15 21:42:22 http: TLS handshake error from 127.0.0.1:51419: tls: first record does not look like a TLS handshake
This means that you browsed to `http://admin_server` instead of `https://admin_server` (note the use of HTTPS).
[hashtag](https://docs.getgophish.com/user-guide/faq#how-to-bypass-spam-filters)
How to Bypass Spam Filters
----------------------------------------------------------------------------------------------------------------
There is no fool proof way to bypass spam filters - **this is a good thing!**
Something that might help increase deliverability is to set up your email infrastructure correctly to support modern email authentication protocols like SPF, DKIM, and DMARC. You can find more information about this [herearrow-up-right](https://www.trustedsec.com/blog/take-employees-phishing/)
.
However, for tests that aim to measure how users respond to phishing simulations, it's recommend to temporarily whitelist the IP address of the server running Gophish.
[hashtag](https://docs.getgophish.com/user-guide/faq#events-arent-showing-up-on-the-dashboard)
Events Aren't Showing Up on the Dashboard
---------------------------------------------------------------------------------------------------------------------------------------------
If you are seeing emails being sent successfully, but aren't seeing events show up on the dashboard, it likely means there is a configuration error somewhere. You can follow these tips to help track it down.
**Check the Email Template**
You want to make sure you're using the `{{.URL}}` template tag when creating links in your emails. Then, when you launch a campaign, Gophish will fill this in with whatever you use as the "URL" field when creating the campaign.
A good way to see if this is working correctly is to send a test email to yourself when building a campaign and looking at the link. It should be the URL you used when creating the campaign with a unique `rid` parameter. So, it should look like this: `http://your_url/?rid=XXXXX`.
circle-info
**Tip**: Don't try to put your Gophish URL directly into a template. It's very important to use the `{{.URL}}` template tag, since that's how Gophish knows to generate the unique URL for each recipient.
**Check the Campaign URL**
If the links in the email look good and you still don't see events showing up, then the next step is to make sure the URL you're using when building a campaign is correct.
When creating a campaign, the URL field **must point to the server running Gophish and must be reachable by the person opening the emails.** This can either be the external IP address of the server, or a domain name that has a DNS A record pointing to the server's IP address.
circle-info
**Tip:** Remember that the campaign URL must be reachable by the recipients clicking the links. If they can't reach the Gophish server, Gophish can't record those events.
To test this, you can manually browse to the URL you're expecting to use in your campaign. Without any `rid` parameters provided, you should see a basic `404 page not found` error. You should also see a log appear in your Gophish terminal.
circle-info
**Tip:** Remember that if your Gophish `phish_server` configuration is set to use HTTPS that you need to include the URL in your campaign as `https://your_url`.
Once manually browsing to your URL works, you can try to send a test email to yourself when building a campaign. If it works, you should see your landing page being returned. This means that the URL will likely work when used in a campaign, assuming it is reachable by all recipients.
[hashtag](https://docs.getgophish.com/user-guide/faq#submitted-form-data-isnt-being-captured)
Submitted Form Data Isn't Being Captured
-------------------------------------------------------------------------------------------------------------------------------------------
To capture data submitted through a landing page, you need to create an HTML `
---
# Additional References | Gophish User Guide
[hashtag](https://docs.getgophish.com/user-guide/additional-references#community-guides)
Community Guides
--------------------------------------------------------------------------------------------------------------
\*\*\*\*[**Simulated Phishing Educational Guide**arrow-up-right](http://tinyurl.com/PhishCampaign)
\*\*\*\*Author: [LarryGrimarrow-up-right](https://github.com/LarryGrim)
\*\*\*\*[**Practical Phishing with Gophish**arrow-up-right](https://medium.com/airwalk/practical-phishing-with-gophish-7dd384ad1840)
Author: [Jim Lambarrow-up-right](https://twitter.com/ovineOppressor)
\*\*\*\*[**Conducting USB Drop Tests With GoPhish**arrow-up-right](https://medium.com/@chrismerkel/conducting-usb-drop-tests-with-gophish-44cc7e1a88b9)
Author: [Chris Merkelarrow-up-right](https://twitter.com/chrismerkel)
\*\*\*\*[**Building Powerful Automation Flows in Gophish**arrow-up-right](https://github.com/dwtechnologies/dw-gophish-automation/blob/master/power-automate/Office365-Power-Automate.md)
\*\*\*\*Author: [Daniel Wellington Technologiesarrow-up-right](https://github.com/dwtechnologies)
\*\*\*\*[**How we brought security awareness through the company with automation of open source tools**arrow-up-right](https://medium.com/daniel-wellington-tech-stories/how-we-brought-security-awareness-through-the-company-with-automation-of-open-source-tools-and-a-b8dcf0234c69)
\*\*\*\*Author: [Daniel Wellington Technologiesarrow-up-right](https://github.com/dwtechnologies)
[hashtag](https://docs.getgophish.com/user-guide/additional-references#tools)
Tools
----------------------------------------------------------------------------------------
\*\*\*\*[**GoReport**arrow-up-right](https://github.com/chrismaddalena/GoReport)
\*\*\*\*Author: [Chris Maddalenaarrow-up-right](https://twitter.com/cmaddalena)
_A Python script to collect campaign data from Gophish and generate a report_
\*\*\*\*[**Phishbuckets**arrow-up-right](https://github.com/CommArc/phishbuckets)
\*\*\*\*Author: [snori74arrow-up-right](https://github.com/snori74)
_Command-line scripts to manage phishing campaigns with API calls to a Gophish server_
\*\*\*\*[**Lure**arrow-up-right](https://github.com/highmeh/lure)
\*\*\*\*Author: [Jayme (highmeh)arrow-up-right](https://twitter.com/highmeh)
_Lure assists in phishing target collection by pulling and parsing email addresses for a target organization. The results are normalized into a format recognized by Gophish, and then uploaded to the server._
\*\*\*\*[**GoLDAP**arrow-up-right](https://github.com/md-howsa/GoLDAP)
\*\*\*\*Author: Mohammed AlHowsa _A Python script that imports users from active directory to Gophish._
\*\*\*\*[**Phish Paste**arrow-up-right](https://github.com/glennzw/phishPaste)
\*\*\*\*Author: [Glenn Wilkinsonarrow-up-right](https://twitter.com/glennzw)
_Phish Paste is a tiny utility to copy templates, pages, and sending profiles between different Gophish user accounts._
\*\*\*\*[**DW GoPhish Reporter**arrow-up-right](https://github.com/dwtechnologies/gophish-owa-phishing-reporter/)
\*\*\*\*Author: [Daniel Wellington Technologiesarrow-up-right](https://github.com/dwtechnologies)
_This plugin makes it easy to report phishing for endusers. It will report using the native report function in gophish if it is a gophish phishing mail, if not it will capture all headers and content and send it to a mail defined where a security team can take a closer look_
\*\*\*\*[**DW Gophish Automation**arrow-up-right](https://github.com/dwtechnologies/dw-gophish-automation)
\*\*\*\*Author: [Daniel Wellington Technologiesarrow-up-right](https://github.com/dwtechnologies)
_This project is intended to automate the procedure internal phishing campaigns via Gophish as well as avoiding the GoPhish URL being flagged by google safebrowsing. The idea is to run it completely by itself by scheduling the scripts to run in the prefered manner._
[PreviousTemplate Referencechevron-left](https://docs.getgophish.com/user-guide/template-reference)
[NextFAQchevron-right](https://docs.getgophish.com/user-guide/faq)
Last updated 3 years ago
* [Community Guides](https://docs.getgophish.com/user-guide/additional-references#community-guides)
* [Tools](https://docs.getgophish.com/user-guide/additional-references#tools)
---
# Email Reporting | Gophish User Guide
Gophish supports the ability for users to report the simulated phishing emails they receive. This is to encourage users to report suspicious to their administrators, potentially catching malicious emails earlier.
Right now, we only support this reporting feature on the **server side** of things. While we don't yet have actual email extensions and add ons that can be used to facilitate this reporting, as of v0.9.0 we do support email reporting via IMAP.
[hashtag](https://docs.getgophish.com/user-guide/documentation/email-reporting#the-importance-of-email-reporting)
The Importance of Email Reporting
--------------------------------------------------------------------------------------------------------------------------------------------------------
When running phishing simulations, we often focus solely on how many users clicked the links and submitted their credentials to the spoofed page. However, I would argue that there's just as much if not more value in focusing on who reported the emails to their administrator.
Consider a simple scenario where we send out 100 simulated phishing emails. Let's look through two possible outcomes:
* **Outcome 1** - In this outcome, only 1 user clicks the link and submits credentials. That's great! However, no one reports the email. In this case, as an administrator our users were targeted by phishing and an attacker has a valid set of credentials, yet we don't know anything has happened.
* **Outcome 2** - In this outcome, 50 users click the link and only 1 user reports it. In this case sure, more users clicked the link, but as an administrator we now know that a phishing campaign is in progress and we can start the incident response process.
Reporting suspicious emails can help prevent the impact of a phishing campaign. It's recommended to build a culture that **rewards the users who report emails**. Even something small like an email to that employee and their manager thanking them for their vigilance can go a long ways. This gives positive feedback that will encourage users to report more emails in the future.
[hashtag](https://docs.getgophish.com/user-guide/documentation/email-reporting#reporting-via-imap)
Reporting via IMAP
--------------------------------------------------------------------------------------------------------------------------
A common (and good!) practice for organizations is to create an email address such as [\[email protected\]](https://docs.getgophish.com/cdn-cgi/l/email-protection)
and encourage employees to forward any suspicious emails. This is a great way to work towards building a collaborative relationship between the employee and security team.
As of v0.9.0, Gophish has the ability to check a configured mailbox via IMAP for campaign emails that have been reported. Once a campaign email is found, that result is updated to show that the user reported the email.
Each Gophish user has the ability to configure their own IMAP settings. These settings are found under "Account Settings > Reporting Settings".

IMAP Configuration Settings
The most common settings you'll need are the IMAP hostname, port, username, and password. It's commonly the case that you'll want to enable TLS but this is something you should confirm with your email provider.
###
[hashtag](https://docs.getgophish.com/user-guide/documentation/email-reporting#advanced-settings)
Advanced Settings
There is also a number of Advanced Settings that allow you to configure which folder campaign emails will be listed in or how often Gophish should poll for new results. Additionally, you can restrict it to only consider emails that have been reported from an address with your organizations domain name. Finally, Gophish can optionally delete campaign emails after they have been reported.

Advanced IMAP Settings
After IMAP settings have been configured, you can either save them or use the "Test Settings" button to confirm that Gophish can establish an IMAP connection.
[hashtag](https://docs.getgophish.com/user-guide/documentation/email-reporting#how-reporting-works-in-gophish)
How Reporting Works in Gophish
--------------------------------------------------------------------------------------------------------------------------------------------------
Every email sent by Gophish contains a link pointing to the [Landing Page](https://docs.getgophish.com/user-guide/documentation/landing-pages)
configured for the campaign. This URL looks like this:
The `rid` parameter specifies which recipient this link was generated for. To report an email sent by Gophish, an HTTP request needs to be made to:
Sending this HTTP request is usually handled by a mail client extension. As indicated earlier, we're still working on getting those developed. If you're interested in helping make this happen, please [open an issue on Github!arrow-up-right](https://github.com/gophish/gophish/issues)
[PreviousGenerating Reportschevron-left](https://docs.getgophish.com/user-guide/documentation/generating-reports)
[NextWebhookschevron-right](https://docs.getgophish.com/user-guide/documentation/webhooks)
Last updated 6 years ago
* [The Importance of Email Reporting](https://docs.getgophish.com/user-guide/documentation/email-reporting#the-importance-of-email-reporting)
* [Reporting via IMAP](https://docs.getgophish.com/user-guide/documentation/email-reporting#reporting-via-imap)
* [Advanced Settings](https://docs.getgophish.com/user-guide/documentation/email-reporting#advanced-settings)
* [How Reporting Works in Gophish](https://docs.getgophish.com/user-guide/documentation/email-reporting#how-reporting-works-in-gophish)
Copy
http://phish_server/?rid=1234567
Copy
http://phish_server/report?rid=1234567
---
# Launching the Campaign | Gophish User Guide
Now that we have all the pieces setup, we can launch the campaign!
To create a new campaign, navigate to the Campaigns page and click the "New Campaign" button.
Most of the settings should be self-explanatory. The only thing to look out for is the `URL` field. Since the IP address of our Gophish server is `192.168.1.1`, that's what we'll use:

settings
Once all the settings filled, click "Launch Campaign" to start sending the emails!
[hashtag](https://docs.getgophish.com/user-guide/building-your-first-campaign/launching-the-campaign#viewing-the-results)
Viewing the Results
--------------------------------------------------------------------------------------------------------------------------------------------------
After launching the campaign, you will be automatically redirected to the campaign results page. This will give you a realtime view as emails are sent, opened, and links are clicked.

results
Congrats on running your first campaign!
[PreviousCreating the Landing Pagechevron-left](https://docs.getgophish.com/user-guide/building-your-first-campaign/creating-the-landing-page)
[NextTemplate Referencechevron-right](https://docs.getgophish.com/user-guide/template-reference)
Last updated 7 years ago
---
# Attachment Tracking | Gophish User Guide
It is possible to add gophish [template variablesarrow-up-right](https://docs.getgophish.com/user-guide/template-reference)
to the contents of certain attachment file types. The following file types are supported:
Type
Extension
Sample Template
Word Document
.docx
[gophish\_word.docxarrow-up-right](https://github.com/gophish/user-guide/blob/master/documentation/example-attachments/gophish_word.docx)
Word Macro Enabled Document
.docm
[gophish\_word\_macro.docmarrow-up-right](https://github.com/gophish/user-guide/blob/master/documentation/example-attachments/gophish_word_macro.docm)
PowerPoint Presentation
.pptx
[gophish\_powerpoint.pptxarrow-up-right](https://github.com/gophish/user-guide/blob/master/documentation/example-attachments/gophish_powerpoint.pptx)
Excel Document
.xlsx
[gophish\_excel.xlsxarrow-up-right](https://github.com/gophish/user-guide/blob/master/documentation/example-attachments/gophish_excel.xlsx)
Excel Macro Enabled Document
.xlsm
[gophish\_excel\_macro.xlsmarrow-up-right](https://github.com/gophish/user-guide/blob/master/documentation/example-attachments/gophish_excel_macro.xlsm)
Plain Text File
.txt
[gophish\_text.txtarrow-up-right](https://github.com/gophish/user-guide/blob/master/documentation/example-attachments/gophish_text.txt)
HTML File
.html
[gophish\_html.htmlarrow-up-right](https://github.com/gophish/user-guide/blob/master/documentation/example-attachments/gophish_html.html)
Calendar File
.ics
[gophish\_invite.icsarrow-up-right](https://github.com/gophish/user-guide/blob/master/documentation/example-attachments/gophish_invite.ics)
Any template variables placed inside these documents will be converted to the appropriate values when a campaign is launched. Adding tracking images to Office documents can allow notification that a document has been opened or that macros have been enabled.
If you just want to get up and running, using the above templates is probably for you. Keep reading below if you're interested how these examples were created (specifically the Office documents which are more involved).
* * *
[hashtag](https://docs.getgophish.com/user-guide/documentation/attachments#plain-text-examples)
Plain Text Examples
------------------------------------------------------------------------------------------------------------------------
Below is a .txt file with several variables:
`foo.txt`
Copy
Hello {{.FirstName}},
This is a plain text file that was sent to {{.Email}}. If you could be so kind as to copy and paste this URL into your browser: {{.URL}}
As can be seen this is not immediately useful, but perhaps there are some scenarios where templating a plain text file is useful. Below is a portion of of an .ics calendar invitation file:
`invite.ics`
[hashtag](https://docs.getgophish.com/user-guide/documentation/attachments#office-document-examples)
Office Document Examples
----------------------------------------------------------------------------------------------------------------------------------
A more useful use case for this functionality is likely to be the tracking of Microsoft Office documents, specifically the conditions of (i) opening a document and (ii) enabling macros. Gophish supports several Office formats, but the approach is largely the same.
###
[hashtag](https://docs.getgophish.com/user-guide/documentation/attachments#tracking-office-document-being-opened)
Tracking Office document being Opened
We can add the `{{.TrackingURL}}` variable to an Office document as a "linked image". When the document is opened Word/Excel/PowerPoint will try load the image, thereby reaching out to the gophish server and marking the document as opened (ensure the Tracking URL is not included in the Email, as at this stage there is only one endpoint to indicated 'Opened'). The following steps can be used to achieve this:
1. Create a new Document
2. Select the `Insert` tab and then click `Quick Parts` and then `Field`

1. Scroll down on the left and select `IncludePicture`. In the Filename or URL input box enter `{{.TrackingURL}}` and tick the `Data not stored with document` box on the right (alternatively, in the Word Document press Alt+F9 to toggle Field Codes and paste in `INCLUDEPICTURE "{{.TrackingURL}}" \d`):

1. If you want to include template variables (e.g `{{.FirstName}}`) in the body of the Word document you will need to disable grammar and spelling checking (otherwise Word inserts proofErrors in the middle of the variable names). Select File > Options > Proofing and deselect `Check spelling as you type` and `Mark grammar errors as you type`.
The image below depicts the template Word file on the left, and the result after passing through gophish as a campaign attachment and being opened by a target user on the right.

###
[hashtag](https://docs.getgophish.com/user-guide/documentation/attachments#tracking-office-document-macro-execution)
Tracking Office document Macro execution
To track if macros have been enabled by a user we need macro code that reaches out to a gophish Template Variable (e.g. `{{.TrackerURL}}`) or hits a gophish endpoint (e.g. `{{.URL}}`). Focusing on the latter option, we would want the macro code to reach out to, for example, https://myphishingserver.com/?rid=aBC12345. There are many different ways to handle this, but simply inserting some gophish variables into the macro code doesn't work, as it's non-trivial to programatically edit macro code (it's packaged up in a binary format). The solution we came up with was to insert a text box in the document with the variables, and reference that text box from the macro code. The steps involved are:
1. Create a new Document
2. Create a textbox with contents `{{.URL}}`
3. Name the textbox "`urlbox`" by selecting the textbox and following the instructions below:
Windows: Home > Editing > Select > Selection Pane
Mac: Shape Format > Arrange > Selection Pane
1. Add the following macro code to the document (F11):
or for Excel:
1. Save and Exit
When the document is opened the user will be prompted to enable macros. If they do, the `{{.URL}}` will be opened. This allows the user to be presented with a page informing them that they have fallen victim to a phishing campaign.
(Note: In the future it'd be neater to use the `Application.Documents.CanCheckOut (URL)` method, but this is a HEAD request which requires some modification of the gophish Link Clicked code)
[PreviousTemplateschevron-left](https://docs.getgophish.com/user-guide/documentation/templates)
[NextLanding Pageschevron-right](https://docs.getgophish.com/user-guide/documentation/landing-pages)
Last updated 3 years ago
* [Plain Text Examples](https://docs.getgophish.com/user-guide/documentation/attachments#plain-text-examples)
* [Office Document Examples](https://docs.getgophish.com/user-guide/documentation/attachments#office-document-examples)
* [Tracking Office document being Opened](https://docs.getgophish.com/user-guide/documentation/attachments#tracking-office-document-being-opened)
* [Tracking Office document Macro execution](https://docs.getgophish.com/user-guide/documentation/attachments#tracking-office-document-macro-execution)
Copy
BEGIN:VCALENDAR
DTSTAMP:20210306T182251Z
DTSTART;TZID=Europe/London:20210306T183000
DTEND;TZID=Europe/London:20210306T190000
SUMMARY:Gophish Test Calendar
TZID:Europe/London
DESCRIPTION:Glenn is inviting you to a Zoom meeting.
n\nJoin Zoom Meeting\n{{.URL}}
LOCATION:{{.URL}}
END:VCALENDAR
Copy
Sub urlfetch()
Dim shp As Shape
For Each shp In ActiveDocument.Shapes
If shp.Name = "urlbox" Then
URL = shp.TextFrame.TextRange.Text
ActiveDocument.FollowHyperlink Address:=URL
End If
Next
End Sub
Public Sub AutoOpen()
urlfetch
End Sub
Copy
Sub urlfetch()
For Each shp In ActiveSheet.Shapes
If shp.Name = "urlbox" Then
Url = shp.TextFrame2.TextRange.Text
FollowHyperlink (Url)
End If
Next
End Sub
Public Sub Workbook_Open()
urlfetch
End Sub
---
# Creating the Template | Gophish User Guide
To create the template we will use for our Morning Catch campaign, first navigate to the "Email Templates" page and click the "New Template" button.

New Template Dialog
We notice that Morning Catch comes with a webmail portal. Let’s craft a simple template that suggests the user needs to go reset their password. Obviously, this is a simple scenario, and by using the "Import Email" feature, you can import existing emails directly into gophish for a greater effect.
We'll use the following subject line:
You'll notice we used the `{{.Email}}` template value. This will populate with the target's email address when the emails are sent. This is Gophish's way to tailor emails to individuals to increase the chance of success.
By clicking the "HTML" tab, we will see the editor we can use to create our HTML content:

HTML Editor
Since our content is pretty simple, we can just click the "Source" button and be taken to the more visual editor, which will be enough for our purposes:

Visual Editor
Our template will be simple for the sake of demonstration. I'll start by adding the message:
Speaking of links, now we need to add our phishing link. Highlight the word "here" and click the chain icon in the menu, exposing the "Link" dialog. In this dialog, we'll set the link to `{{.URL}}`, another template value, so that our link is automatically created and inserted into the email.

Link Menu
Finally, make sure the "Add Tracking Image" checkbox is checked, and click "Save Template".
[PreviousImporting Groupschevron-left](https://docs.getgophish.com/user-guide/building-your-first-campaign/importing-groups)
[NextCreating the Landing Pagechevron-right](https://docs.getgophish.com/user-guide/building-your-first-campaign/creating-the-landing-page)
Last updated 7 years ago
Copy
Password Reset for {{.Email}}
Copy
{{.FirstName}},
The password for {{.Email}} has expired. Please reset your password here.
Thanks,
Morning Catch IT Team
---
# Generating Reports | Gophish User Guide
Reporting is an important part of any Gophish campaign. To help facilitate generating reports, there are a few options you could consider:
[hashtag](https://docs.getgophish.com/user-guide/documentation/generating-reports#using-the-web-ui)
Using the Web UI
-------------------------------------------------------------------------------------------------------------------------
The Gophish dashboard gives a quick overview showing the results for a particular campaign:

In addition to providing the results in the dashboard, you have the option to export the raw logs from Gophish using the "Export CSV" button at the top of the page. You could then parse these CSV files using other software such as Excel or Google Sheets.
[hashtag](https://docs.getgophish.com/user-guide/documentation/generating-reports#using-goreport)
Using GoReport
---------------------------------------------------------------------------------------------------------------------
Gophish has an incredible community that has built tools around the API to help make reporting easy. A great example of this is called [GoReportarrow-up-right](https://github.com/chrismaddalena/GoReport)
.
[GoReportarrow-up-right](https://github.com/chrismaddalena/GoReport)
, created by Github user [@chrismaddalenaarrow-up-right](https://github.com/chrismaddalena/)
, provides a really simple, clean way to generate reports for a given Gophish campaign. You can use this script to generate reports for the campaign in either CSV or DOCX format.
[hashtag](https://docs.getgophish.com/user-guide/documentation/generating-reports#leveraging-the-api)
Leveraging the API
-----------------------------------------------------------------------------------------------------------------------------
If you are wanting to make custom reports, perhaps for one or more campaigns, we strongly suggest you consider leveraging the extensive [Gophish APIarrow-up-right](https://docs.getgophish.com/api-documentation/)
.
We have a [Python API clientarrow-up-right](https://github.com/gophish/api-client-python)
that can help facilitate getting the data you need from the API. You can find the documentation for the Python API client [herearrow-up-right](https://docs.getgophish.com/python-api-client/)
.
[PreviousUsing the APIchevron-left](https://docs.getgophish.com/user-guide/documentation/using-the-api)
[NextEmail Reportingchevron-right](https://docs.getgophish.com/user-guide/documentation/email-reporting)
Last updated 5 years ago
* [Using the Web UI](https://docs.getgophish.com/user-guide/documentation/generating-reports#using-the-web-ui)
* [Using GoReport](https://docs.getgophish.com/user-guide/documentation/generating-reports#using-goreport)
* [Leveraging the API](https://docs.getgophish.com/user-guide/documentation/generating-reports#leveraging-the-api)
---
# Logging | Gophish User Guide
[hashtag](https://docs.getgophish.com/user-guide/documentation/logging#configuring-logging)
Configuring Logging
--------------------------------------------------------------------------------------------------------------------
By default, logs are sent to the `stderr` filehandle in the terminal. However, there may be times you wish to store logs in a file.
###
[hashtag](https://docs.getgophish.com/user-guide/documentation/logging#sending-logs-to-a-file)
Sending Logs to a File
Prior to Gophish version 0.8.0, you can redirect logs from the terminal into a file using standard shell redirection:
Copy
$ ./gophish > gophish.log 2>&1
The downside to this is that logs will no longer show up in the terminal. Starting with Gophish version 0.8.0, you will have the option to configure additional logging directly within Gophish.
In your `config.json` file, modify the `logging` section to include whichever filename you wish to use for logging:
Copy
"logging": {
"filename": "gophish.log"
}
###
[hashtag](https://docs.getgophish.com/user-guide/documentation/logging#logging-to-external-sources)
Logging to External Sources
By configuring Gophish to send logs to a file, you also create the opportunity to send logs to external sources, such a SIEM. An example would be to use something like [Filebeatarrow-up-right](https://www.elastic.co/products/beats/filebeat)
to watch the log file and send the entries to an external source of your choosing.
[PreviousUser Managementchevron-left](https://docs.getgophish.com/user-guide/documentation/user-management)
[NextBuilding Your First Campaignchevron-right](https://docs.getgophish.com/user-guide/building-your-first-campaign)
Last updated 7 years ago
* [Configuring Logging](https://docs.getgophish.com/user-guide/documentation/logging#configuring-logging)
* [Sending Logs to a File](https://docs.getgophish.com/user-guide/documentation/logging#sending-logs-to-a-file)
* [Logging to External Sources](https://docs.getgophish.com/user-guide/documentation/logging#logging-to-external-sources)
---
# Webhooks | Gophish User Guide
Ever since Gophish was launched, we've had the ability to fetch campaign results via the API. But sometimes, you may want to have campaign updates pushed directly to you as they happen.
To solve this problem, as of v0.9.0 we've added support for webhooks.
When you configure a webhook, Gophish will make (optionally signed) HTTP requests to an endpoint you control. These requests include the JSON body of the event that just happened- the exact same JSON that you would normally receive via the API. This gives you real-time updates to your campaign as they happen.
Gophish supports multiple webhooks. Only users with the Admin role are able to create webhooks by navigating to the "Webhooks" sidebar entry and clicking the "New Webhook" button.

###
[hashtag](https://docs.getgophish.com/user-guide/documentation/webhooks#validating-signatures)
Validating Signatures
Each webhook sent by Gophish is signed using an optional secret. This signature is computed over the entire request JSON body using the HMAC-SHA256 hashing algorithm. This is a common practiced used elsewhere by organizations like [GitHubarrow-up-right](https://developer.github.com/webhooks/securing/)
, [Twitterarrow-up-right](https://developer.twitter.com/en/docs/accounts-and-users/subscribe-account-activity/guides/securing-webhooks)
, [Twilioarrow-up-right](https://www.twilio.com/docs/usage/webhooks/webhooks-security)
, and more.
This signature is sent in the `X-Gophish-Signature` header, which looks like this:
It's highly recommended to both set a secure secret as well as validating webhook signatures to ensure that events came from your Gophish instance.
###
[hashtag](https://docs.getgophish.com/user-guide/documentation/webhooks#event-format)
Event Format
Each event has the following format:
The following `message` values are supported:
Message
Description
Error Sending Email
Gophish was unable to send the email to the recipient
Email Sent
The email was successfully sent to the recipient
Email Opened
The recipient opened the email
Clicked Link
The recipient clicked the link in the email
Submitted Data
The recipient submitted data to the landing page
Email Reported
The recipient [reported](https://docs.getgophish.com/user-guide/documentation/email-reporting)
the campaign email 🎉
The "Email Opened", "Clicked Link", and "Submitted Data" events also include the `details` field which has the following format:
In this example, the `foo` field is data that was submitted to the landing page. Each form element will have its own key and list of values which will depend on the format of your landing page.
###
[hashtag](https://docs.getgophish.com/user-guide/documentation/webhooks#example-server)
Example Server
For an example on how to receive, validate, and parse webhook messages from Gophish, we've open-sourced an [example serverarrow-up-right](https://github.com/gophish/webhook)
you can find [on GitHubarrow-up-right](https://github.com/gophish/webhook)
. However, since we follow the same common signing pattern used by other webhook providers, most libraries should work with Gophish as well.
[PreviousEmail Reportingchevron-left](https://docs.getgophish.com/user-guide/documentation/email-reporting)
[NextUser Managementchevron-right](https://docs.getgophish.com/user-guide/documentation/user-management)
Last updated 5 years ago
* [Validating Signatures](https://docs.getgophish.com/user-guide/documentation/webhooks#validating-signatures)
* [Event Format](https://docs.getgophish.com/user-guide/documentation/webhooks#event-format)
* [Example Server](https://docs.getgophish.com/user-guide/documentation/webhooks#example-server)
Copy
POST /webhook HTTP/1.1
Host: localhost:9999
Accept-Encoding: gzip
Content-Length: 226
Content-Type: application/json
User-Agent: Go-http-client/1.1
X-Gophish-Signature: sha256=2be52d4b83eb7f19b0ecc75ebd6441cefea5512443eb18d38a8beb2e7584a66c
Copy
{
"email": "[email protected]",
"time": "2020-01-20T17:33:55.553906Z",
"message": "Email Opened",
"details": ""
}
Copy
"payload": {
"rid": "1234567",
"browser": {
"address": "127.0.0.1",
"user-agent": "Mozilla/5.0 (Macintosh; PPC Mac OS X 10_10_4; rv:1.9.3.20) Gecko/2017-08-09 20:28:42 Firefox/3.8",
},
"foo": ["bar"]
}
---
# User Management | Gophish User Guide
Gophish supports user accounts with different roles. Right now, we offer two separate roles that can be assigned to users:
* **User** - This role allows the user to do anything _except_ system-level administrative tasks, such as managing users, managing webhooks, etc.
* **Admin** - This is a system-level administrative role that has full permissions to manage the Gophish installation
To register new user accounts and manage existing ones, login as an administrative user and navigate to the "User Management" page:

[hashtag](https://docs.getgophish.com/user-guide/documentation/user-management#registering-a-new-user)
Registering a New User
----------------------------------------------------------------------------------------------------------------------------------
To register a new user, click the **"+ New User**" button, which will cause the following dialog to appear:

In this form, you can choose the username, password, role, and whether or not the user is required to reset their password when they first login.
[hashtag](https://docs.getgophish.com/user-guide/documentation/user-management#delete-a-user)
Delete a User
----------------------------------------------------------------------------------------------------------------
To delete a user, click the red trash can icon next to the username in the users list.
circle-info
You are required to have at least one user with the "Admin" role at all times. If you try to delete the last administrative user, Gophish will return an error.
[hashtag](https://docs.getgophish.com/user-guide/documentation/user-management#impersonate-a-user)
Impersonate A User
--------------------------------------------------------------------------------------------------------------------------
There may be cases where a user in Gophish is running into issues and would like help troubleshooting. To support this, Gophish has the ability to let administrators "impersonate" any user.
By clicking the yellow button next to the username in the users list, you will automatically be logged into a session for the given user, and interact with Gophish on that user's behalf.
When you are ready to return to your administrative session, you will need to logout, and log back in using your administrative credentials.
[PreviousWebhookschevron-left](https://docs.getgophish.com/user-guide/documentation/webhooks)
[NextLoggingchevron-right](https://docs.getgophish.com/user-guide/documentation/logging)
Last updated 5 years ago
* [Registering a New User](https://docs.getgophish.com/user-guide/documentation/user-management#registering-a-new-user)
* [Delete a User](https://docs.getgophish.com/user-guide/documentation/user-management#delete-a-user)
* [Impersonate A User](https://docs.getgophish.com/user-guide/documentation/user-management#impersonate-a-user)
---
# Campaigns | Gophish User Guide
Gophish is centered around launching campaigns. This involves sending emails to one or more groups and monitoring for opened emails, clicked links, or submitted credentials.
[hashtag](https://docs.getgophish.com/user-guide/documentation/campaigns#launching-a-campaign)
Launching a Campaign
------------------------------------------------------------------------------------------------------------------------
To configure and launch a campaign, click the "Campaigns" entry in the navigation sidebar.

New campaign dialog
Setting up a campaign requires the following fields to be provided:
* **Name** - The name of the campaign
* **Email Template** \- The email that is sent to campaign recipients. This is created in the [Email Templates](https://docs.getgophish.com/user-guide/documentation/templates)
section of the documentation.
* **Landing Page** - The HTML that is returned when a recipient clicks the link in the email template. This is created in the [Landing Pages](https://docs.getgophish.com/user-guide/documentation/landing-pages)
section of the documentation.
* **URL** - This is the URL that populates the `{{.URL}}` template value, commonly used in email templates. This should be a URL or IP address that points to the Gophish phishing server and is reachable by the recipient.
* **Launch Date** - This is the date that the campaign will begin. See Scheduling Campaigns for more information.
* **Send Emails By** - This is the date all emails will be sent by. See Scheduling Campaigns for more information.
* **Sending Profile** - This is the SMTP configuration to use when sending emails. This is created in the [Sending Profiles](https://docs.getgophish.com/user-guide/documentation/sending-profiles)
section of the documentation.
* **Groups** - This defines which groups of recipients should be included in the campaign.
###
[hashtag](https://docs.getgophish.com/user-guide/documentation/campaigns#scheduling-campaigns)
Scheduling Campaigns
Gophish supports scheduling campaigns, making it easy to plan campaigns in advance. There are two fields to consider when scheduling campaigns: the **Launch Date** and the **Send Emails By** date.
The **Launch Date** is when Gophish should start sending emails. By default, Gophish assumes you want the campaign to be launched immediately.
Gophish also assumes that you want all emails to be sent immediately after the campaign is launched, and to be sent as quickly as possible. However, there are times where you may wish to spread the emails over a period of time. Setting the **Send Emails By** date tells Gophish to spread emails evenly between the launch date and this date.
###
[hashtag](https://docs.getgophish.com/user-guide/documentation/campaigns#launching-the-campaign)
Launching the Campaign
After you have the campaign configuration ready to go, click the "Launch Campaign" button, click through the confirmation message, and you're good to go! Depending on your scheduling settings, Gophish will either launch the campaign immediately or will schedule the campaign to be launched at a later date.
[hashtag](https://docs.getgophish.com/user-guide/documentation/campaigns#viewing-campaign-results)
Viewing Campaign Results
--------------------------------------------------------------------------------------------------------------------------------
When a campaign is launched, you are automatically redirected to the campaign results screen:

On the results page, you will see overview information on the campaign status as well as detailed results for each target.
###
[hashtag](https://docs.getgophish.com/user-guide/documentation/campaigns#exporting-campaign-results)
Exporting Campaign Results
To export campaign results in CSV format, click the "Export CSV" format and select the type of results you want to export:
* **Results** - The current status for each target in the campaign.
Contains the following fields:
* **Raw Events** - Contains a stream of events as they occurred during the campaign.
###
[hashtag](https://docs.getgophish.com/user-guide/documentation/campaigns#completing-a-campaign)
Completing a Campaign
To complete a campaign, click the "Complete" button and confirm that you want to mark the campaign as completed.
###
[hashtag](https://docs.getgophish.com/user-guide/documentation/campaigns#deleting-a-campaign)
Deleting a Campaign
To delete a campaign, click the "Delete" button and confirm that you want to delete the campaign.
> Note: This **cannot** be undone, so be careful when deleting a campaign!
###
[hashtag](https://docs.getgophish.com/user-guide/documentation/campaigns#viewing-result-details)
Viewing Result Details
Gophish makes it easy to view the campaign results in a timeline format.
To view the timeline for each recipient, expand the row with the recipient's name.

The results pane shows what a campaign recipient did, such as opening the email, clicking the link, or attempting to submit data from the landing page.
Gophish also records information about the device that clicked the link or submitted data. This data is parsed from the browser's user-agent string. The operating system and browser version is displayed below the event details.
####
[hashtag](https://docs.getgophish.com/user-guide/documentation/campaigns#viewing-captured-credentials)
Viewing Captured Credentials
If you selected the "Capture Credentials" option when building a landing page, Gophish displays the credentials in the results pane. To view them, click the "View Details" dropdown which renders the captured credentials in a table.
[PreviousSending Profileschevron-left](https://docs.getgophish.com/user-guide/documentation/sending-profiles)
[NextUsing the APIchevron-right](https://docs.getgophish.com/user-guide/documentation/using-the-api)
Last updated 7 years ago
* [Launching a Campaign](https://docs.getgophish.com/user-guide/documentation/campaigns#launching-a-campaign)
* [Scheduling Campaigns](https://docs.getgophish.com/user-guide/documentation/campaigns#scheduling-campaigns)
* [Launching the Campaign](https://docs.getgophish.com/user-guide/documentation/campaigns#launching-the-campaign)
* [Viewing Campaign Results](https://docs.getgophish.com/user-guide/documentation/campaigns#viewing-campaign-results)
* [Exporting Campaign Results](https://docs.getgophish.com/user-guide/documentation/campaigns#exporting-campaign-results)
* [Completing a Campaign](https://docs.getgophish.com/user-guide/documentation/campaigns#completing-a-campaign)
* [Deleting a Campaign](https://docs.getgophish.com/user-guide/documentation/campaigns#deleting-a-campaign)
* [Viewing Result Details](https://docs.getgophish.com/user-guide/documentation/campaigns#viewing-result-details)
Copy
id, email, first_name, last_name, position, status, ip, latitude, longitude
---
# Templates | API Documentation
A "Template" is the content of the emails that are sent to targets. They can be imported from an existing email, or created from scratch.
Additionally, templates can contain tracking images so that gophish knows when the user opens the email.
Templates have the following structure:
Copy
{
id : int64
name : string
subject : string
text : string
html : string
modified_date : string(datetime)
attachments : list(attachment)
}
Templates support sending attachments. Attachments have the following structure:
Copy
content: string
type : string
name : string
> Note: The `content` field in an attachment is expected to be base64 encoded.
[hashtag](https://docs.getgophish.com/api-documentation/templates#get-templates)
Get Templates
---------------------------------------------------------------------------------------------------
`GET` `https://localhost:3333/api/templates`
Returns a list of templates.
####
[hashtag](https://docs.getgophish.com/api-documentation/templates#headers)
Headers
Name
Type
Description
Authorization
string
A valid API key
200
[hashtag](https://docs.getgophish.com/api-documentation/templates#get-template)
Get Template
-------------------------------------------------------------------------------------------------
`GET` `https://localhost:3333/api/templates/:id`
Returns a template with the provided ID.Returns a 404: Not Found error if the specified template doesn't exist.
####
[hashtag](https://docs.getgophish.com/api-documentation/templates#path-parameters)
Path Parameters
Name
Type
Description
id
integer
The template ID
####
[hashtag](https://docs.getgophish.com/api-documentation/templates#headers-1)
Headers
Name
Type
Description
Authorization
string
A valid API key
200
404
[hashtag](https://docs.getgophish.com/api-documentation/templates#create-template)
Create Template
-------------------------------------------------------------------------------------------------------
`POST` `https://localhost:3333/api/templates/`
Creates a new template from the provided JSON request body.
####
[hashtag](https://docs.getgophish.com/api-documentation/templates#headers-2)
Headers
Name
Type
Description
Authorization
string
A valid API key
####
[hashtag](https://docs.getgophish.com/api-documentation/templates#request-body)
Request Body
Name
Type
Description
Payload
object
The request body should be a JSON representation of a template. See the schema at the top of this page for the template format.
201
400 At least one text or HTML field must be specified, otherwise a 400: Bad Request error is returned
This method expects the template to be provided in JSON format. You must provide a template `name` and the `text` and/or `html` for the template.
circle-info
**Importing an Existing Email**
What better way to make pixel-perfect emails than by importing an existing email you already have in your inbox?
Using the [Import Email](https://docs.getgophish.com/api-documentation/templates#import-template)
endpoint, you can take a raw email and parse it as a valid Gophish template.
To add tracking, make sure you specify a `{{.Tracker}}` in the `html` field. The UI adds this automatically, but it needs to be specified if you're using the API.
This method returns the JSON representation of the template that was created.
[hashtag](https://docs.getgophish.com/api-documentation/templates#modify-template)
Modify Template
-------------------------------------------------------------------------------------------------------
`PUT` `https://localhost:3333/api/templates/:id`
Modifies an existing template.
####
[hashtag](https://docs.getgophish.com/api-documentation/templates#path-parameters-1)
Path Parameters
Name
Type
Description
id
integer
The template ID to modify
####
[hashtag](https://docs.getgophish.com/api-documentation/templates#headers-3)
Headers
Name
Type
Description
Authorization
string
A valid API key
####
[hashtag](https://docs.getgophish.com/api-documentation/templates#request-body-1)
Request Body
Name
Type
Description
Payload
object
The JSON representation of the template you wish to modify. The entire template must be provided, not just the fields you wish to update.
200
This method expects the template to be provided in JSON format. You must provide a full template, not just the fields you want to update.
This method returns the JSON representation of the template that was modified.
[hashtag](https://docs.getgophish.com/api-documentation/templates#delete-template)
Delete Template
-------------------------------------------------------------------------------------------------------
`DELETE` `https://localhost:3333/api/templates/:id`
Deletes a template by ID.
####
[hashtag](https://docs.getgophish.com/api-documentation/templates#path-parameters-2)
Path Parameters
Name
Type
Description
string
200
404 If no template is found with the provided ID, a 404: Not Found error is returned
Returns a 404 error if the specified template isn't found.
This method returns a status message indicating the template was deleted successfully.
[hashtag](https://docs.getgophish.com/api-documentation/templates#import-template)
Import Template
-------------------------------------------------------------------------------------------------------
`POST` `https://localhost:3333/api/import/email`
Imports an email as a template.
####
[hashtag](https://docs.getgophish.com/api-documentation/templates#headers-4)
Headers
Name
Type
Description
Authorization
string
A valid API key
####
[hashtag](https://docs.getgophish.com/api-documentation/templates#request-body-2)
Request Body
Name
Type
Description
convert\_links
boolean
Whether or not to convert the links within the email to automatically.
content
string
The original email content in RFC 2045 format, including the original headers.
200
Gophish provides the ability to parse an existing email to be used as a template. This makes it easy to repurpose legitimate emails for your phishing assessments.
This endpoint expects the raw email content in [RFC 2045 formatarrow-up-right](https://www.ietf.org/rfc/rfc2045.txt)
, including the original headers. Usually, this is found using the "Show Original" feature of email clients.
The request body for this endpoint is a JSON request in the form of:
By setting the `convert_links` attribute to `true`, Gophish will automatically change all the links in the email to `{{.URL}}`.
circle-info
**Note:** This method doesn't fully import the email as a template. Instead, it parses the email, returning a response that can be used with the "[Create Template](https://docs.getgophish.com/api-documentation/templates#create-template)
" endpoint.
[PreviousSending Profileschevron-left](https://docs.getgophish.com/api-documentation/sending-profiles)
[NextLanding Pageschevron-right](https://docs.getgophish.com/api-documentation/landing-pages)
Last updated 6 years ago
* [Get Templates](https://docs.getgophish.com/api-documentation/templates#get-templates)
* [Get Template](https://docs.getgophish.com/api-documentation/templates#get-template)
* [Create Template](https://docs.getgophish.com/api-documentation/templates#create-template)
* [Modify Template](https://docs.getgophish.com/api-documentation/templates#modify-template)
* [Delete Template](https://docs.getgophish.com/api-documentation/templates#delete-template)
* [Import Template](https://docs.getgophish.com/api-documentation/templates#import-template)
Copy
[\
{\
"id" : 1,\
"name" : "Password Reset Template",\
"subject" : "{{.FirstName}}, please reset your password.",\
"text" : "Please reset your password here: {{.URL}}",\
"html" : "Please reset your password here",\
"modified_date" : "2016-11-21T18:30:11.1477736-06:00",\
"attachments" : [],\
}\
]
Copy
{
"id" : 1,
"name" : "Password Reset Template",
"subject" : "{{.FirstName}}, please reset your password.",
"text" : "Please reset your password here: {{.URL}}",
"html" : "Please reset your password here",
"modified_date" : "2016-11-21T18:30:11.1477736-06:00",
"attachments" : [],
}
Copy
{
"message": "Template not found",
"success": false,
"data": null
}
Copy
{
"id" : 1,
"name" : "Password Reset Template",
"subject" : "{{.FirstName}}, please reset your password.",
"text" : "Please reset your password here: {{.URL}}",
"html" : "Please reset your password here",
"modified_date" : "2016-11-21T18:30:11.1477736-06:00",
"attachments" : [],
}
Copy
{
"message": "Need to specify at least plaintext or HTML content",
"success": false,
"data": null
}
Copy
Copy
{
"message": "Template deleted successfully!",
"success": true,
"data": null
}
Copy
{
"message": "Template not found",
"success": false,
"data": null
}
Copy
{
"text": "Email text",
"html": "Email HTML",
"subject": "Email subject"
}
Copy
{
content: string
convert_links: boolean
}
---
# Landing Pages | API Documentation
A "Landing Page" is the HTML content returned when targets click on the links in Gophish emails.
Landing pages have the following structure:
Copy
{
id : int64
name : string
html : string
capture_credentials : bool
capture_passwords : bool
modified_date : string(datetime)
redirect_url : string
}
[hashtag](https://docs.getgophish.com/api-documentation/landing-pages#get-landing-pages)
Get Landing Pages
---------------------------------------------------------------------------------------------------------------
`GET` `https://localhost:3333/api/pages/`
Returns a list of landing pages.
####
[hashtag](https://docs.getgophish.com/api-documentation/landing-pages#headers)
Headers
Name
Type
Description
Authorization
string
A valid API key
200
Copy
[ \
{\
"id": 1,\
"name": "Example Page",\
"html": "This is a test page",\
"capture_credentials": true,\
"capture_passwords": true,\
"redirect_url": "http://example.com",\
"modified_date": "2016-11-26T14:04:40.4130048-06:00"\
}\
]
[hashtag](https://docs.getgophish.com/api-documentation/landing-pages#get-landing-page)
Get Landing Page
-------------------------------------------------------------------------------------------------------------
`GET` `https://localhost:3333/api/pages/:id`
Returns a landing page given an ID.
####
[hashtag](https://docs.getgophish.com/api-documentation/landing-pages#path-parameters)
Path Parameters
Name
Type
Description
id
integer
The landing page ID
####
[hashtag](https://docs.getgophish.com/api-documentation/landing-pages#headers-1)
Headers
Name
Type
Description
Authorization
string
A valid API key
200
404
Returns a 404 error if the specified landing page isn't found.
[hashtag](https://docs.getgophish.com/api-documentation/landing-pages#create-landing-page)
Create Landing Page
-------------------------------------------------------------------------------------------------------------------
`POST` `https://localhost:3333/api/pages/`
Creates a landing page.
####
[hashtag](https://docs.getgophish.com/api-documentation/landing-pages#headers-2)
Headers
Name
Type
Description
Authorization
string
A valid API key
####
[hashtag](https://docs.getgophish.com/api-documentation/landing-pages#request-body)
Request Body
Name
Type
Description
Payload
object
The JSON representation of the landing page to be created
201
This method expects the landing page to be provided in JSON format. You must provide a landing page `name` and the `html` for the landing page.
circle-info
**Importing a Site**
Let Gophish do the hard work for you by importing a site. By using the [Import Site](https://docs.getgophish.com/api-documentation/landing-pages#import-site)
endpoint, you can simply give Gophish a URL and have the site fetched for you and returned in a format that can be used with this method.
####
[hashtag](https://docs.getgophish.com/api-documentation/landing-pages#capturing-credentials)
Capturing Credentials
Capturing credentials is a powerful feature of Gophish. By setting certain flags, you have the ability to capture all user input, or just non-password input.
To capture credentials, set the `capture_credentials` attribute. If you want to capture passwords as well, set the `capture_passwords` attribute.
By default, Gophish will not capture passwords, as they are stored in plaintext.
Gophish also provides the ability to redirect users to a URL after they submit credentials. This is controlled by setting the `redirect_url` attribute.
[hashtag](https://docs.getgophish.com/api-documentation/landing-pages#modify-landing-page)
Modify Landing Page
-------------------------------------------------------------------------------------------------------------------
`PUT` `https://localhost:3333/api/pages/:id`
Modifies an existing landing page.
####
[hashtag](https://docs.getgophish.com/api-documentation/landing-pages#path-parameters-1)
Path Parameters
Name
Type
Description
id
integer
The ID of the landing page to modify
####
[hashtag](https://docs.getgophish.com/api-documentation/landing-pages#headers-3)
Headers
Name
Type
Description
Authorization
string
A valid API key
####
[hashtag](https://docs.getgophish.com/api-documentation/landing-pages#request-body-1)
Request Body
Name
Type
Description
Payload
object
The JSON representation of the landing page to be modified
200
404
Returns a 404 error if the specified landing page isn't found.
This method expects the landing page to be provided in JSON format. You must provide a full landing page, not just the fields you want to update.
This method returns the JSON representation of the landing page that was modified.
[hashtag](https://docs.getgophish.com/api-documentation/landing-pages#delete-landing-page)
Delete Landing Page
-------------------------------------------------------------------------------------------------------------------
`DELETE` `https://localhost:3333/api/pages/:id`
Deletes a landing page.
####
[hashtag](https://docs.getgophish.com/api-documentation/landing-pages#path-parameters-2)
Path Parameters
Name
Type
Description
id
integer
The ID of the landing page to delete
####
[hashtag](https://docs.getgophish.com/api-documentation/landing-pages#headers-4)
Headers
Name
Type
Description
Authorization
string
A valid API key
200
404
Returns a 404 error if the specified landing page isn't found.
This method returns a status message indicating the landing page was deleted successfully.
[hashtag](https://docs.getgophish.com/api-documentation/landing-pages#import-site)
Import Site
---------------------------------------------------------------------------------------------------
`POST` `https://localhost:3333/api/import/site`
Fetches a URL to be later imported as a landing page
####
[hashtag](https://docs.getgophish.com/api-documentation/landing-pages#headers-5)
Headers
Name
Type
Description
Authorization
string
A valid API key
####
[hashtag](https://docs.getgophish.com/api-documentation/landing-pages#request-body-2)
Request Body
Name
Type
Description
include\_resources
boolean
Whether or not to create a `` tag in the resulting HTML to resolve static references (recommended: `false`)
url
string
The URL to fetch
200
This endpoint simply fetches and returns the HTML from a provided URL. If `include_resources` is `false` (recommended), a `` tag is added so that relative links in the HTML resolve from the original URL.
Additionally, if the HTML contains form elements, this endpoint adds another input, `__original_url`, that points to the original URL. This makes it possible to replay captured credentials later.
circle-info
**Note:** This API endpoint doesn't actually create a new landing page. Instead, you can use the HTML returned from this endpoint as an input to the [Create Landing Page](https://docs.getgophish.com/api-documentation/landing-pages#create-landing-page)
method.
[PreviousTemplateschevron-left](https://docs.getgophish.com/api-documentation/templates)
[NextUsers & Groupschevron-right](https://docs.getgophish.com/api-documentation/users-and-groups)
Last updated 7 years ago
* [Get Landing Pages](https://docs.getgophish.com/api-documentation/landing-pages#get-landing-pages)
* [Get Landing Page](https://docs.getgophish.com/api-documentation/landing-pages#get-landing-page)
* [Create Landing Page](https://docs.getgophish.com/api-documentation/landing-pages#create-landing-page)
* [Modify Landing Page](https://docs.getgophish.com/api-documentation/landing-pages#modify-landing-page)
* [Delete Landing Page](https://docs.getgophish.com/api-documentation/landing-pages#delete-landing-page)
* [Import Site](https://docs.getgophish.com/api-documentation/landing-pages#import-site)
Copy
{
"id": 1,
"name": "Example Page",
"html": "This is a test page",
"capture_credentials": true,
"capture_passwords": true,
"redirect_url": "http://example.com",
"modified_date": "2016-11-26T14:04:40.4130048-06:00"
}
Copy
{
"message": "Page not found",
"success": false,
"data": null
}
Copy
{
"id": 1,
"name": "Example Page",
"html": "This is a test page",
"capture_credentials": true,
"capture_passwords": true,
"redirect_url": "http://example.com",
"modified_date": "2016-11-26T14:04:40.4130048-06:00"
}
Copy
{
"id": 1,
"name": "Example Page",
"html": "This is a test page",
"capture_credentials": true,
"capture_passwords": true,
"redirect_url": "http://example.com",
"modified_date": "2016-11-26T14:04:40.4130048-06:00"
}
Copy
{
"message": "Page not found",
"success": false,
"data": null
}
Copy
{
"message": "Page Deleted Successfully",
"success": true,
"data": null
}
Copy
{
"message": "Page not found",
"success": false,
"data": null
}
Copy
{
"html": "..."
}
---
# User Management | API Documentation
Gophish supports having multiple user accounts. Each of these accounts are separate, with their own campaigns, landing pages, templates, etc.
Each user account in Gophish is assigned a **role**. These are global roles that describe the user's permissions within Gophish.
At the time of this writing, there are two roles:
Role
Slug
**Description**
User
`user`
A non-administrative user role. Users with this role can create objects and launch campaigns.
Admin
`admin`
An administrative user. Users with this role can manage system-wide settings as well as other user accounts within Gophish.
Users have the following format:
Copy
{
id : int64
username : string
role : Role
modified_date : string(datetime)
}
Each Role has the following format:
Copy
{
name : string
slug : string
description : string
}
[hashtag](https://docs.getgophish.com/api-documentation/user-management#get-users)
Get Users
-------------------------------------------------------------------------------------------------
`GET` `https://localhost:3333/api/users/`
Returns a list of all user accounts in Gophish.
####
[hashtag](https://docs.getgophish.com/api-documentation/user-management#headers)
Headers
Name
Type
Description
Authorization
string
A valid API key
200
[hashtag](https://docs.getgophish.com/api-documentation/user-management#get-user)
Get User
-----------------------------------------------------------------------------------------------
`GET` `https://localhost:3333/api/users/:id`
Returns a user with the given ID.
####
[hashtag](https://docs.getgophish.com/api-documentation/user-management#path-parameters)
Path Parameters
Name
Type
Description
id
integer
The user ID
####
[hashtag](https://docs.getgophish.com/api-documentation/user-management#headers-1)
Headers
Name
Type
Description
Authorization
string
A valid API key
200
404
[hashtag](https://docs.getgophish.com/api-documentation/user-management#create-user)
Create User
-----------------------------------------------------------------------------------------------------
`POST` `https://localhost:3333/api/users/`
Creates a new user.
####
[hashtag](https://docs.getgophish.com/api-documentation/user-management#headers-2)
Headers
Name
Type
Description
Authorization
string
####
[hashtag](https://docs.getgophish.com/api-documentation/user-management#request-body)
Request Body
Name
Type
Description
role
string
The role slug to use for the account
password
string
The password to set for the account
username
string
The username for the account
200
400 If an invalid request is provided, an error will be returned with the following format
[hashtag](https://docs.getgophish.com/api-documentation/user-management#modify-user)
Modify User
-----------------------------------------------------------------------------------------------------
`PUT` `https://localhost:3333/api/users/:id`
Modifies a user account. This can be used to change the role, reset the password, or change the username.
####
[hashtag](https://docs.getgophish.com/api-documentation/user-management#path-parameters-1)
Path Parameters
Name
Type
Description
id
string
The user ID
####
[hashtag](https://docs.getgophish.com/api-documentation/user-management#headers-3)
Headers
Name
Type
Description
Authorization
string
A valid API key
####
[hashtag](https://docs.getgophish.com/api-documentation/user-management#request-body-1)
Request Body
Name
Type
Description
role
string
The role slug to use for the account
password
string
The password to set for the account
username
string
The username for the account
200
400 If an invalid request is provided, an error will be returned in the following format:
404
[hashtag](https://docs.getgophish.com/api-documentation/user-management#delete-user)
Delete User
-----------------------------------------------------------------------------------------------------
`DELETE` `https://localhost:3333/api/users/:id`
Deletes a user, as well as every object (landing page, template, etc.) and campaign they've created.
####
[hashtag](https://docs.getgophish.com/api-documentation/user-management#path-parameters-2)
Path Parameters
Name
Type
Description
id
string
The user ID
####
[hashtag](https://docs.getgophish.com/api-documentation/user-management#headers-4)
Headers
Name
Type
Description
Authorization
string
A valid API key
200
404
Returns a 404 error if no user is found with the provided ID.
[PreviousCampaignschevron-left](https://docs.getgophish.com/api-documentation/campaigns)
Last updated 6 years ago
* [Get Users](https://docs.getgophish.com/api-documentation/user-management#get-users)
* [Get User](https://docs.getgophish.com/api-documentation/user-management#get-user)
* [Create User](https://docs.getgophish.com/api-documentation/user-management#create-user)
* [Modify User](https://docs.getgophish.com/api-documentation/user-management#modify-user)
* [Delete User](https://docs.getgophish.com/api-documentation/user-management#delete-user)
Copy
[\
{\
"id": 1,\
"username": "admin",\
"role": {\
"slug": "admin",\
"name": "Admin",\
"description": "System administrator with full permissions"\
}\
}\
]
Copy
[\
{\
"id": 1,\
"username": "admin",\
"role": {\
"slug": "admin",\
"name": "Admin",\
"description": "System administrator with full permissions"\
}\
}\
]
Copy
{
"message": "User not found",
"success": false,
"data": null
}
Copy
{
"id": 2,
"username": "exampleuser",
"role": {
"slug": "user",
"name": "User",
"description": "User role with edit access to objects and campaigns"
}
Copy
{
"message": "Username already taken",
"success": false,
"data": null
}
Copy
{
"id": 2,
"username": "exampleuser",
"role": {
"slug": "user",
"name": "User",
"description": "User role with edit access to objects and campaigns"
}
Copy
{
"message": "Username already taken",
"success": false,
"data": null
}
Copy
{
"message": "User not found",
"success": false,
"data": null
}
Copy
{
"message": "User deleted Successfully!",
"success": true,
"data": null
}
Copy
{
"message": "User not found",
"success": false,
"data": null
}
---
# Sending Profiles | API Documentation
A "Sending Profile" is the SMTP configuration that tells Gophish how to send emails.
Sending profiles support authentication and ignoring invalid SSL certificates.
Sending Profiles have the following structure:
Copy
{
id : int64
name : string
username : string (optional)
password : string (optional)
host : string
interface_type : string
from_address : string
ignore_cert_errors : boolean (default:false)
modified_date : string(datetime)
headers : array({key: string, value: string}) (optional)
}
[hashtag](https://docs.getgophish.com/api-documentation/sending-profiles#get-sending-profiles)
Get Sending Profiles
------------------------------------------------------------------------------------------------------------------------
`GET` `https://localhost/api/smtp/`
Gets a list of the sending profiles created by the authenticated user.
####
[hashtag](https://docs.getgophish.com/api-documentation/sending-profiles#headers)
Headers
Name
Type
Description
Authorization
string
A valid API key
200 A list of the sending profiles created by the authenticated user.
[hashtag](https://docs.getgophish.com/api-documentation/sending-profiles#get-sending-profile)
Get Sending Profile
----------------------------------------------------------------------------------------------------------------------
`GET` `https://localhost:3333/api/smtp/:id`
Returns a sending profile given an ID, returning a 404 error if no sending profile with the provided ID is found.
####
[hashtag](https://docs.getgophish.com/api-documentation/sending-profiles#path-parameters)
Path Parameters
Name
Type
Description
id
integer
The sending profile ID to return
####
[hashtag](https://docs.getgophish.com/api-documentation/sending-profiles#headers-1)
Headers
Name
Type
Description
Authorization
string
A valid API key
200
404
[hashtag](https://docs.getgophish.com/api-documentation/sending-profiles#create-sending-profile)
Create Sending Profile
----------------------------------------------------------------------------------------------------------------------------
`POST` `https://localhost:3333/api/smtp`
Creates a sending profile.
####
[hashtag](https://docs.getgophish.com/api-documentation/sending-profiles#headers-2)
Headers
Name
Type
Description
Authorization
string
A valid API key
####
[hashtag](https://docs.getgophish.com/api-documentation/sending-profiles#request-body)
Request Body
Name
Type
Description
Payload
object
The body of the request is a JSON representation of a sending profile. Refer to the introduction for the valid format of a sending profile.
201
400 If required fields aren't provided, or if a sending profile already exists with the provided name, a 400: Bad Request error will be returned.
This method expects the sending profile to be provided in JSON format. You must provide a sending profile `name`, the `from_address` which emails are sent from, and the SMTP relay `host`.
Sending Profiles support authentication by setting the `username` and `password`.
Additionally, many SMTP server deployments leverage self-signed certificates. To tell Gophish to ignore these invalid certificates, set the `ignore_cert_errors` field to `true`.
This method returns the JSON representation of the sending profile that was created.
[hashtag](https://docs.getgophish.com/api-documentation/sending-profiles#modify-sending-profile)
Modify Sending Profile
----------------------------------------------------------------------------------------------------------------------------
`PUT` `https://localhost:3333/api/smtp/:id`
Modifies an existing sending profile.
####
[hashtag](https://docs.getgophish.com/api-documentation/sending-profiles#path-parameters-1)
Path Parameters
Name
Type
Description
id
integer
The sending profile ID to modify
####
[hashtag](https://docs.getgophish.com/api-documentation/sending-profiles#headers-3)
Headers
Name
Type
Description
Authorization
string
A valid API key
####
[hashtag](https://docs.getgophish.com/api-documentation/sending-profiles#request-body-1)
Request Body
Name
Type
Description
Payload
object
The body of the request is a JSON representation of a sending profile. Refer to the introduction for the valid format of a sending profile.
200
404 If no sending profile exists with the provided ID, a 404: Not Found error is returned.
This method expects the sending profile to be provided in JSON format. You must provide a full sending profile, not just the fields you want to update.
This method returns the JSON representation of the sending profile that was modified.
[hashtag](https://docs.getgophish.com/api-documentation/sending-profiles#delete-sending-profile)
Delete Sending Profile
----------------------------------------------------------------------------------------------------------------------------
`DELETE` `https://localhost:3333/api/smtp/:id`
Deletes a sending profile by ID.
####
[hashtag](https://docs.getgophish.com/api-documentation/sending-profiles#path-parameters-2)
Path Parameters
Name
Type
Description
id
integer
The ID of the sending profile to delete
####
[hashtag](https://docs.getgophish.com/api-documentation/sending-profiles#headers-4)
Headers
Name
Type
Description
Authorization
string
A valid API key
200
404
Returns a 404 error if the specified sending profile isn't found.
This method returns a status message indicating the sending profile was deleted successfully.
[PreviousSettingschevron-left](https://docs.getgophish.com/api-documentation/settings)
[NextTemplateschevron-right](https://docs.getgophish.com/api-documentation/templates)
Last updated 7 years ago
* [Get Sending Profiles](https://docs.getgophish.com/api-documentation/sending-profiles#get-sending-profiles)
* [Get Sending Profile](https://docs.getgophish.com/api-documentation/sending-profiles#get-sending-profile)
* [Create Sending Profile](https://docs.getgophish.com/api-documentation/sending-profiles#create-sending-profile)
* [Modify Sending Profile](https://docs.getgophish.com/api-documentation/sending-profiles#modify-sending-profile)
* [Delete Sending Profile](https://docs.getgophish.com/api-documentation/sending-profiles#delete-sending-profile)
Copy
[\
{\
"id" : 1,\
"name":"Example Profile",\
"interface_type":"SMTP",\
"from_address":"John Doe <[email protected]>",\
"host":"smtp.example.com:25",\
"username":"",\
"password":"",\
"ignore_cert_errors":true,\
"modified_date": "2016-11-20T14:47:51.4131367-06:00",\
"headers": [\
{\
"key": "X-Header",\
"value": "Foo Bar"\
}\
]\
}\
]
Copy
{
"id" : 1,
"name":"Example Profile",
"interface_type":"SMTP",
"from_address":"John Doe <[email protected]>",
"host":"smtp.example.com:25",
"username":"",
"password":"",
"ignore_cert_errors":true,
"modified_date": "2016-11-20T14:47:51.4131367-06:00",
"headers": [\
{\
"key": "X-Header",\
"value": "Foo Bar"\
}\
]
}
Copy
{
"message": "SMTP not found",
"success": false,
"data": null
}
Copy
{
"id" : 1,
"name":"Example Profile",
"interface_type":"SMTP",
"from_address":"John Doe <[email protected]>",
"host":"smtp.example.com:25",
"username":"",
"password":"",
"ignore_cert_errors":true,
"modified_date": "2016-11-20T14:47:51.4131367-06:00",
"headers": [\
{\
"key": "X-Header",\
"value": "Foo Bar"\
}\
]
}
Copy
{
"message": "Error message indicating the issue",
"success": false,
"data": null
}
Copy
{
"id" : 1,
"name":"Example Profile",
"interface_type":"SMTP",
"from_address":"John Doe <[email protected]>",
"host":"smtp.example.com:25",
"username":"",
"password":"",
"ignore_cert_errors":true,
"modified_date": "2016-11-20T14:47:51.4131367-06:00",
"headers": [\
{\
"key": "X-Header",\
"value": "Foo Bar"\
}\
]
}
Copy
{
"message": "SMTP not found",
"success": false,
"data": null
}
Copy
{
"message": "SMTP deleted successfully!",
"success": true,
"data": null
}
Copy
{
"message": "SMTP not found",
"success": false,
"data": null
}
---
# Users & Groups | API Documentation
Gophish manages recipients for campaigns in groups. Each group can contain one or more recipients. Groups have the following format:
Copy
{
id : int64
name : string
targets : array(Target)
modified_date : string(datetime)
}
Each recipient in the `targets` field has the following format:
Copy
{
email : string
first_name : string
last_name : string
position : string
}
[hashtag](https://docs.getgophish.com/api-documentation/users-and-groups#get-groups)
Get Groups
----------------------------------------------------------------------------------------------------
`GET` `https://localhost:3333/api/groups/`
Returns a list of groups.
####
[hashtag](https://docs.getgophish.com/api-documentation/users-and-groups#headers)
Headers
Name
Type
Description
Authorization
string
A valid API key
200
[hashtag](https://docs.getgophish.com/api-documentation/users-and-groups#get-group)
Get Group
--------------------------------------------------------------------------------------------------
`GET` `https://localhost:3333/api/groups/:id`
Returns a group with the given ID.
####
[hashtag](https://docs.getgophish.com/api-documentation/users-and-groups#path-parameters)
Path Parameters
Name
Type
Description
id
integer
The group ID
####
[hashtag](https://docs.getgophish.com/api-documentation/users-and-groups#headers-1)
Headers
Name
Type
Description
Authorization
string
A valid API key
200
404
Returns a 404 error if no group is found with the provided ID.
[hashtag](https://docs.getgophish.com/api-documentation/users-and-groups#get-groups-summary)
Get Groups Summary
--------------------------------------------------------------------------------------------------------------------
`GET` `https://localhost:3333/api/groups/summary`
Returns a summary of each group.
####
[hashtag](https://docs.getgophish.com/api-documentation/users-and-groups#headers-2)
Headers
Name
Type
Description
Authorization
string
A valid API key
200
[hashtag](https://docs.getgophish.com/api-documentation/users-and-groups#get-group-summary)
Get Group Summary
------------------------------------------------------------------------------------------------------------------
`GET` `https://localhost:3333/api/groups/:id/summary`
Returns a summary for a group.
####
[hashtag](https://docs.getgophish.com/api-documentation/users-and-groups#path-parameters-1)
Path Parameters
Name
Type
Description
id
integer
The group ID
####
[hashtag](https://docs.getgophish.com/api-documentation/users-and-groups#headers-3)
Headers
Name
Type
Description
Authorization
string
A valid API key
200
404
It may be the case that you just want the number of members in a group, not necessarily the full member details. This API endpoint returns a summary for a group.
Returns a 404 error if no group is found with the provided ID.
[hashtag](https://docs.getgophish.com/api-documentation/users-and-groups#create-group)
Create Group
--------------------------------------------------------------------------------------------------------
`POST` `https://localhost:3333/api/groups/`
Creates a new group.
####
[hashtag](https://docs.getgophish.com/api-documentation/users-and-groups#headers-4)
Headers
Name
Type
Description
Authorization
string
A valid API key
####
[hashtag](https://docs.getgophish.com/api-documentation/users-and-groups#request-body)
Request Body
Name
Type
Description
Payload
object
The group to create in JSON format.
201
400 If an invalid request is provided, an error message will be returned
When creating a new group, you must specify a unique `name`, as well as a list of `targets`. Here's an example request body:
[hashtag](https://docs.getgophish.com/api-documentation/users-and-groups#modify-group)
Modify Group
--------------------------------------------------------------------------------------------------------
`PUT` `https://localhost:3333/api/groups/:id`
Modifies a group.
####
[hashtag](https://docs.getgophish.com/api-documentation/users-and-groups#path-parameters-2)
Path Parameters
Name
Type
Description
id
integer
The group ID
####
[hashtag](https://docs.getgophish.com/api-documentation/users-and-groups#headers-5)
Headers
Name
Type
Description
Authorization
string
A valid API key
####
[hashtag](https://docs.getgophish.com/api-documentation/users-and-groups#request-body-1)
Request Body
Name
Type
Description
Payload
object
The updated group content. The full group must be provided in JSON format.
200
404
This API endpoint allows you to modify an existing group. The request must include the complete group JSON, not just the fields you're wanting to update. This means that you need to include the matching `id` field. Here's an example request:
Returns a 404 if no group is found with the provided ID.
[hashtag](https://docs.getgophish.com/api-documentation/users-and-groups#delete-group)
Delete Group
--------------------------------------------------------------------------------------------------------
`DELETE` `https://localhost:3333/api/groups/:id`
Deletes a group
####
[hashtag](https://docs.getgophish.com/api-documentation/users-and-groups#path-parameters-3)
Path Parameters
Name
Type
Description
id
number
The group ID
####
[hashtag](https://docs.getgophish.com/api-documentation/users-and-groups#headers-6)
Headers
Name
Type
Description
Authorization
string
A valid API key
200
404
Returns a 404 error if no group is found with the provided ID.
[hashtag](https://docs.getgophish.com/api-documentation/users-and-groups#import-group)
Import Group
--------------------------------------------------------------------------------------------------------
`POST` `https://localhost:3333/api/import/group`
Reads and parses a CSV, returning data that can be used to create a group.
####
[hashtag](https://docs.getgophish.com/api-documentation/users-and-groups#headers-7)
Headers
Name
Type
Description
Authorization
string
A valid API key
####
[hashtag](https://docs.getgophish.com/api-documentation/users-and-groups#request-body-2)
Request Body
Name
Type
Description
file
object
A file upload containing the CSV content to parse.
200
This API endpoint allows you to upload a CSV, returning a list of group targets. For example, you can use the following `curl` command to upload the CSV:
The results of this API endpoint can be used as the `targets` parameter in a call to the [Create Group](https://docs.getgophish.com/api-documentation/users-and-groups#create-group)
endpoint.
[PreviousLanding Pageschevron-left](https://docs.getgophish.com/api-documentation/landing-pages)
[NextCampaignschevron-right](https://docs.getgophish.com/api-documentation/campaigns)
Last updated 7 years ago
* [Get Groups](https://docs.getgophish.com/api-documentation/users-and-groups#get-groups)
* [Get Group](https://docs.getgophish.com/api-documentation/users-and-groups#get-group)
* [Get Groups Summary](https://docs.getgophish.com/api-documentation/users-and-groups#get-groups-summary)
* [Get Group Summary](https://docs.getgophish.com/api-documentation/users-and-groups#get-group-summary)
* [Create Group](https://docs.getgophish.com/api-documentation/users-and-groups#create-group)
* [Modify Group](https://docs.getgophish.com/api-documentation/users-and-groups#modify-group)
* [Delete Group](https://docs.getgophish.com/api-documentation/users-and-groups#delete-group)
* [Import Group](https://docs.getgophish.com/api-documentation/users-and-groups#import-group)
Copy
[\
{\
"id": 1,\
"name": "Example Group",\
"modified_date": "2018-10-08T15:56:13.790016Z",\
"targets": [\
{\
"email": "[email protected]",\
"first_name": "Example",\
"last_name": "User",\
"position": ""\
},\
{\
"email": "[email protected]",\
"first_name": "Foo",\
"last_name": "Bar",\
"position": ""\
}\
]\
}\
]
Copy
{
"id": 1,
"name": "Example Group",
"modified_date": "2018-10-08T15:56:13.790016Z",
"targets": [\
{\
"email": "[email protected]",\
"first_name": "Example",\
"last_name": "User",\
"position": ""\
},\
{\
"email": "[email protected]",\
"first_name": "Foo",\
"last_name": "Bar",\
"position": ""\
}\
]
}
Copy
{
"message": "Group not found",
"success": false,
"data": null
}
Copy
[\
{\
"id": 1,\
"name": "Example Group",\
"modified_date": "2018-10-08T15:56:13.790016Z",\
"num_targets": 2\
}\
]
Copy
{
"id": 1,
"name": "Example Group",
"modified_date": "2018-10-08T15:56:13.790016Z",
"num_targets": 2
}
Copy
{
"message": "Group not found",
"success": false,
"data": null
}
Copy
{
"id": 1,
"name": "Example Group",
"modified_date": "2018-10-08T15:56:13.790016Z",
"targets": [\
{\
"email": "[email protected]",\
"first_name": "Example",\
"last_name": "User",\
"position": ""\
},\
{\
"email": "[email protected]",\
"first_name": "Foo",\
"last_name": "Bar",\
"position": ""\
}\
]
}
Copy
{
"message": "Group name not specified",
"success": false,
"data": null
}
Copy
{
"name": "Example Group",
"targets": [\
{\
"email": "[email protected]",\
"first_name": "Example",\
"last_name": "User",\
"position": ""\
},\
{\
"email": "[email protected]",\
"first_name": "Foo",\
"last_name": "Bar",\
"position": ""\
}\
]
}
Copy
{
"id": 1,
"name": "Example Modified Group",
"modified_date": "2018-10-08T15:56:13.790016Z",
"targets": [\
{\
"email": "[email protected]",\
"first_name": "Foo",\
"last_name": "Bar",\
"position": ""\
}\
]
}
Copy
{
"message": "Group not found",
"success": false,
"data": null
}
Copy
{
"id": 1,
"name": "Example Modified Go",
"targets": [\
{\
"email": "[email protected]",\
"first_name": "Foo",\
"last_name": "Bar",\
"position": ""\
}\
]
}
Copy
{
"message": "Group deleted successfully!",
"success": true,
"data": null
}
Copy
{
"message": "Group not found",
"success": false,
"data": null
}
Copy
[\
{\
"email": "[email protected]",\
"first_name": "Example",\
"last_name": "User",\
"position": "Systems Administrator"\
},\
{\
"email": "[email protected]",\
"first_name": "John",\
"last_name": "Doe",\
"position": "CEO"\
}\
]
Copy
curl -k https://localhost:3333/api/import/group -XPOST \
-F "file=@group_template.csv" \
-H "Authorization: Bearer 0123456789abcdef"
---
# Campaigns | API Documentation
Campaigns have the following structure:
Copy
{
id : int64
name : string
created_date : string(datetime)
launch_date : string(datetime)
send_by_date : string(datetime)
completed_date : string(datetime)
template : Template
page : Page
status : string
results : []Result
groups : []Group
timeline : []Event
smtp : SMTP
url : string
}
The `template`, `page`, `groups`, and `smtp` objects are all Gophish objects. Their format can be found at their various API endpoints.
###
[hashtag](https://docs.getgophish.com/api-documentation/campaigns#campaign-events)
Campaign Events
Gophish keeps track of every event for a campaign in it's `timeline`. Each event has the following format:
The `details` field is a string containing JSON which contains the raw data about an event (such as credentials that were submitted, user-agent information, and more). The `details` field has the following format:
###
[hashtag](https://docs.getgophish.com/api-documentation/campaigns#campaign-results)
Campaign Results
In addition to this, campaign results are maintained in the `results` attribute. This has a format similar to the members of a `Group`, in that they have the following structure:
[hashtag](https://docs.getgophish.com/api-documentation/campaigns#get-campaigns)
Get Campaigns
---------------------------------------------------------------------------------------------------
`GET` `https://localhost:3333/api/campaigns/`
Returns a list of campaigns.
####
[hashtag](https://docs.getgophish.com/api-documentation/campaigns#headers)
Headers
Name
Type
Description
Authorization
string
A valid API key
200
[hashtag](https://docs.getgophish.com/api-documentation/campaigns#get-campaign)
Get Campaign
-------------------------------------------------------------------------------------------------
`GET` `https://localhost:3333/api/campaigns/:id`
Returns a campaign given an ID.
####
[hashtag](https://docs.getgophish.com/api-documentation/campaigns#path-parameters)
Path Parameters
Name
Type
Description
id
integer
The campaign ID
####
[hashtag](https://docs.getgophish.com/api-documentation/campaigns#headers-1)
Headers
Name
Type
Description
Authorization
string
A valid API key
200
404
Returns a 404 error if the specified campaign isn't found.
[hashtag](https://docs.getgophish.com/api-documentation/campaigns#create-campaign)
Create Campaign
-------------------------------------------------------------------------------------------------------
`POST` `https://localhost:3333/api/campaigns/`
Creates and launches a new campaign.
####
[hashtag](https://docs.getgophish.com/api-documentation/campaigns#headers-2)
Headers
Name
Type
Description
Authorization
string
A valid API key
####
[hashtag](https://docs.getgophish.com/api-documentation/campaigns#request-body)
Request Body
Name
Type
Description
Payload
object
The campaign details. See the introduction above for the format of a campaign.
201
This method expects the campaign to be provided in JSON format. For the various objects in a campaign, such as the template, landing page, or sending profile, you need to provide the `name` attribute. Here's an example of a JSON payload to create a new campaign:
###
[hashtag](https://docs.getgophish.com/api-documentation/campaigns#scheduling-a-campaign)
Scheduling a Campaign
You can schedule a campaign to launch at a later time. To do this, simply put the desired time you want the campaign to launch in the `launch_date` attribute. Gophish expects the date to be provided in ISO8601 format.
Without setting a launch date, Gophish launches the campaign immediately.
###
[hashtag](https://docs.getgophish.com/api-documentation/campaigns#spreading-out-emails)
Spreading out Emails
By default, Gophish sends all the emails in a campaign as quickly as possible. Instead, you may wish to spread emails out over a period of minutes, hours, days, or weeks. This is possible by setting the `send_by_date` to an ISO8601 formatted datetime. It's important to note that this must be after the `launch_date`.
[hashtag](https://docs.getgophish.com/api-documentation/campaigns#get-campaign-results)
Get Campaign Results
-----------------------------------------------------------------------------------------------------------------
`GET` `https://localhost:3333/api/campaigns/:id/results`
Gets the results for a campaign.
####
[hashtag](https://docs.getgophish.com/api-documentation/campaigns#path-parameters-1)
Path Parameters
Name
Type
Description
id
integer
The campaign ID
####
[hashtag](https://docs.getgophish.com/api-documentation/campaigns#headers-3)
Headers
Name
Type
Description
Authorization
string
A valid API key
200
404
You may not always want the full campaign details, including the template, landing page, etc. Instead, you may just want to poll the campaign results for updates. This API endpoint only returns information that's relevant to the campaign results.
Returns a 404 error if the specified campaign isn't found.
[hashtag](https://docs.getgophish.com/api-documentation/campaigns#get-campaign-summary)
Get Campaign Summary
-----------------------------------------------------------------------------------------------------------------
`GET` `https://localhost:3333/api/campaigns/:id/summary`
Returns summary information about a campaign.
####
[hashtag](https://docs.getgophish.com/api-documentation/campaigns#path-parameters-2)
Path Parameters
Name
Type
Description
id
integer
The campaign ID
####
[hashtag](https://docs.getgophish.com/api-documentation/campaigns#headers-4)
Headers
Name
Type
Description
Authorization
string
A valid API key
200
404
Returns a 404 error if the specified campaign isn't found.
There may be cases where you aren't interested in the specific results, but rather want high-level statistics, or a "summary", about a campaign.
The response includes a `stats` object which has the following format:
[hashtag](https://docs.getgophish.com/api-documentation/campaigns#delete-campaign)
Delete Campaign
-------------------------------------------------------------------------------------------------------
`DELETE` `https://localhost:3333/api/campaigns/:id`
Deletes a campaign by ID.
####
[hashtag](https://docs.getgophish.com/api-documentation/campaigns#path-parameters-3)
Path Parameters
Name
Type
Description
id
integer
The campaign ID
####
[hashtag](https://docs.getgophish.com/api-documentation/campaigns#headers-5)
Headers
Name
Type
Description
Authorization
string
A valid API key
200
404
Returns a 404 error if the specified campaign isn't found.
[hashtag](https://docs.getgophish.com/api-documentation/campaigns#complete-campaign)
Complete Campaign
-----------------------------------------------------------------------------------------------------------
`GET` `https://localhost:3333/api/campaigns/:id/complete`
Marks a campaign as complete.
####
[hashtag](https://docs.getgophish.com/api-documentation/campaigns#path-parameters-4)
Path Parameters
Name
Type
Description
id
integer
The campaign ID
####
[hashtag](https://docs.getgophish.com/api-documentation/campaigns#headers-6)
Headers
Name
Type
Description
Authorization
string
A valid API key
200
[PreviousUsers & Groupschevron-left](https://docs.getgophish.com/api-documentation/users-and-groups)
[NextUser Managementchevron-right](https://docs.getgophish.com/api-documentation/user-management)
Last updated 7 years ago
* [Campaign Events](https://docs.getgophish.com/api-documentation/campaigns#campaign-events)
* [Campaign Results](https://docs.getgophish.com/api-documentation/campaigns#campaign-results)
* [Get Campaigns](https://docs.getgophish.com/api-documentation/campaigns#get-campaigns)
* [Get Campaign](https://docs.getgophish.com/api-documentation/campaigns#get-campaign)
* [Create Campaign](https://docs.getgophish.com/api-documentation/campaigns#create-campaign)
* [Scheduling a Campaign](https://docs.getgophish.com/api-documentation/campaigns#scheduling-a-campaign)
* [Spreading out Emails](https://docs.getgophish.com/api-documentation/campaigns#spreading-out-emails)
* [Get Campaign Results](https://docs.getgophish.com/api-documentation/campaigns#get-campaign-results)
* [Get Campaign Summary](https://docs.getgophish.com/api-documentation/campaigns#get-campaign-summary)
* [Delete Campaign](https://docs.getgophish.com/api-documentation/campaigns#delete-campaign)
* [Complete Campaign](https://docs.getgophish.com/api-documentation/campaigns#complete-campaign)
Copy
{
email : string
time : string(datetime)
message : string
details : string(JSON)
}
Copy
{
payload : object
browser : object
}
Copy
{
id : int64
first_name : string
last_name : string
position : string
status : string
ip : string
latitude : float
longitude : float
send_date : string(datetime)
reported : boolean
}
Copy
[\
{\
"id": 1,\
"name": "Example Campaign",\
"created_date": "2018-10-08T15:56:29.48815Z",\
"launch_date": "2018-10-08T15:56:00Z",\
"send_by_date": "0001-01-01T00:00:00Z",\
"completed_date": "0001-01-01T00:00:00Z",\
"template": {\
"id": 1,\
"name": "Example Template",\
"subject": "Click here!",\
"text": "",\
"html": "\u003chtml\u003e\n\u003chead\u003e\n\t\u003ctitle\u003e\u003c/title\u003e\n\u003c/head\u003e\n\u003cbody\u003e\n\u003cp\u003eClick \u003ca href=\"{{.URL}}\"\u003ehere\u003c/a\u003e!\u003c/p\u003e\n{{.Tracker}}\u003c/body\u003e\n\u003c/html\u003e\n",\
"modified_date": "2018-10-08T15:54:56.258392Z",\
"attachments": []\
},\
"page": {\
"id": 1,\
"name": "Example Landing Page",\
"html": "\u003chtml\u003e\u003chead\u003e\n\t\u003ctitle\u003e\u003c/title\u003e\n\u003c/head\u003e\n\u003cbody\u003e\n\u003cp\u003eLanding page HTML\u003c/p\u003e\n\n\n\u003c/body\u003e\u003c/html\u003e",\
"capture_credentials": false,\
"capture_passwords": false,\
"redirect_url": "",\
"modified_date": "2018-10-08T15:55:16.416396Z"\
},\
"status": "In progress",\
"results": [\
{\
"id": "hoqKYFn",\
"status": "Email Sent",\
"ip": "",\
"latitude": 0,\
"longitude": 0,\
"send_date": "2018-10-08T15:56:29.535158Z",\
"reported": false,\
"modified_date": "2018-10-08T15:56:29.535158Z",\
"email": "[email protected]",\
"first_name": "Example",\
"last_name": "User",\
"position": ""\
},\
{\
"id": "VYrDwtG",\
"status": "Clicked Link",\
"ip": "::1",\
"latitude": 0,\
"longitude": 0,\
"send_date": "2018-10-08T15:56:29.548722Z",\
"reported": false,\
"modified_date": "2018-10-08T15:56:46.955281Z",\
"email": "[email protected]",\
"first_name": "Foo",\
"last_name": "Bar",\
"position": ""\
}\
],\
"timeline": [\
{\
"email": "",\
"time": "2018-10-08T15:56:29.49172Z",\
"message": "Campaign Created",\
"details": ""\
},\
{\
"email": "[email protected]",\
"time": "2018-10-08T15:56:29.535158Z",\
"message": "Email Sent",\
"details": ""\
},\
{\
"email": "[email protected]",\
"time": "2018-10-08T15:56:29.548722Z",\
"message": "Email Sent",\
"details": ""\
},\
{\
"email": "[email protected]",\
"time": "2018-10-08T15:56:44.679743Z",\
"message": "Email Opened",\
"details": "{\"payload\":{\"rid\":[\"VYrDwtG\"]},\"browser\":{\"address\":\"::1\",\"user-agent\":\"Mozilla/5.0 (Macintosh; Intel Mac OS X 10_14_0) AppleWebKit/537.36 (KHTML, like Gecko) Chrome/69.0.3497.100 Safari/537.36\"}}"\
},\
{\
"email": "[email protected]",\
"time": "2018-10-08T15:56:46.955281Z",\
"message": "Clicked Link",\
"details": "{\"payload\":{\"rid\":[\"VYrDwtG\"]},\"browser\":{\"address\":\"::1\",\"user-agent\":\"Mozilla/5.0 (Macintosh; Intel Mac OS X 10_14_0) AppleWebKit/537.36 (KHTML, like Gecko) Chrome/69.0.3497.100 Safari/537.36\"}}"\
}\
],\
"smtp": {\
"id": 1,\
"interface_type": "SMTP",\
"name": "Example Sending Profile",\
"host": "localhost:1025",\
"from_address": "Test User \[email protected]\u003e",\
"ignore_cert_errors": true,\
"headers": [],\
"modified_date": "2018-09-04T01:24:21.691924069Z"\
},\
"url": "http://localhost"\
}\
]
Copy
{
"id": 1,
"name": "Example Campaign",
"created_date": "2018-10-08T15:56:29.48815Z",
"launch_date": "2018-10-08T15:56:00Z",
"send_by_date": "0001-01-01T00:00:00Z",
"completed_date": "0001-01-01T00:00:00Z",
"template": {
"id": 1,
"name": "Example Template",
"subject": "Click here!",
"text": "",
"html": "\u003chtml\u003e\n\u003chead\u003e\n\t\u003ctitle\u003e\u003c/title\u003e\n\u003c/head\u003e\n\u003cbody\u003e\n\u003cp\u003eClick \u003ca href=\"{{.URL}}\"\u003ehere\u003c/a\u003e!\u003c/p\u003e\n{{.Tracker}}\u003c/body\u003e\n\u003c/html\u003e\n",
"modified_date": "2018-10-08T15:54:56.258392Z",
"attachments": []
},
"page": {
"id": 1,
"name": "Example Landing Page",
"html": "\u003chtml\u003e\u003chead\u003e\n\t\u003ctitle\u003e\u003c/title\u003e\n\u003c/head\u003e\n\u003cbody\u003e\n\u003cp\u003eLanding page HTML\u003c/p\u003e\n\n\n\u003c/body\u003e\u003c/html\u003e",
"capture_credentials": false,
"capture_passwords": false,
"redirect_url": "",
"modified_date": "2018-10-08T15:55:16.416396Z"
},
"status": "In progress",
"results": [\
{\
"id": "hoqKYFn",\
"status": "Email Sent",\
"ip": "",\
"latitude": 0,\
"longitude": 0,\
"send_date": "2018-10-08T15:56:29.535158Z",\
"reported": false,\
"modified_date": "2018-10-08T15:56:29.535158Z",\
"email": "[email protected]",\
"first_name": "Example",\
"last_name": "User",\
"position": ""\
},\
{\
"id": "VYrDwtG",\
"status": "Clicked Link",\
"ip": "::1",\
"latitude": 0,\
"longitude": 0,\
"send_date": "2018-10-08T15:56:29.548722Z",\
"reported": false,\
"modified_date": "2018-10-08T15:56:46.955281Z",\
"email": "[email protected]",\
"first_name": "Foo",\
"last_name": "Bar",\
"position": ""\
}\
],
"timeline": [\
{\
"email": "",\
"time": "2018-10-08T15:56:29.49172Z",\
"message": "Campaign Created",\
"details": ""\
},\
{\
"email": "[email protected]",\
"time": "2018-10-08T15:56:29.535158Z",\
"message": "Email Sent",\
"details": ""\
},\
{\
"email": "[email protected]",\
"time": "2018-10-08T15:56:29.548722Z",\
"message": "Email Sent",\
"details": ""\
},\
{\
"email": "[email protected]",\
"time": "2018-10-08T15:56:44.679743Z",\
"message": "Email Opened",\
"details": "{\"payload\":{\"rid\":[\"VYrDwtG\"]},\"browser\":{\"address\":\"::1\",\"user-agent\":\"Mozilla/5.0 (Macintosh; Intel Mac OS X 10_14_0) AppleWebKit/537.36 (KHTML, like Gecko) Chrome/69.0.3497.100 Safari/537.36\"}}"\
},\
{\
"email": "[email protected]",\
"time": "2018-10-08T15:56:46.955281Z",\
"message": "Clicked Link",\
"details": "{\"payload\":{\"rid\":[\"VYrDwtG\"]},\"browser\":{\"address\":\"::1\",\"user-agent\":\"Mozilla/5.0 (Macintosh; Intel Mac OS X 10_14_0) AppleWebKit/537.36 (KHTML, like Gecko) Chrome/69.0.3497.100 Safari/537.36\"}}"\
}\
],
"smtp": {
"id": 1,
"interface_type": "SMTP",
"name": "Example Sending Profile",
"host": "localhost:1025",
"from_address": "Test User \[email protected]\u003e",
"ignore_cert_errors": true,
"headers": [],
"modified_date": "2018-09-04T01:24:21.691924069Z"
},
"url": "http://localhost"
}
Copy
{
"message": "Campaign not found",
"success": false,
"data": null
}
Copy
{
"id": 1,
"name": "Example Campaign",
"created_date": "2018-10-08T15:56:29.48815Z",
"launch_date": "2018-10-08T15:56:00Z",
"send_by_date": "0001-01-01T00:00:00Z",
"completed_date": "0001-01-01T00:00:00Z",
"template": {
"id": 1,
"name": "Example Template",
"subject": "Click here!",
"text": "",
"html": "\u003chtml\u003e\n\u003chead\u003e\n\t\u003ctitle\u003e\u003c/title\u003e\n\u003c/head\u003e\n\u003cbody\u003e\n\u003cp\u003eClick \u003ca href=\"{{.URL}}\"\u003ehere\u003c/a\u003e!\u003c/p\u003e\n{{.Tracker}}\u003c/body\u003e\n\u003c/html\u003e\n",
"modified_date": "2018-10-08T15:54:56.258392Z",
"attachments": []
},
"page": {
"id": 1,
"name": "Example Landing Page",
"html": "\u003chtml\u003e\u003chead\u003e\n\t\u003ctitle\u003e\u003c/title\u003e\n\u003c/head\u003e\n\u003cbody\u003e\n\u003cp\u003eLanding page HTML\u003c/p\u003e\n\n\n\u003c/body\u003e\u003c/html\u003e",
"capture_credentials": false,
"capture_passwords": false,
"redirect_url": "",
"modified_date": "2018-10-08T15:55:16.416396Z"
},
"status": "In progress",
"results": [\
{\
"id": "hoqKYFn",\
"status": "Email Sent",\
"ip": "",\
"latitude": 0,\
"longitude": 0,\
"send_date": "2018-10-08T15:56:29.535158Z",\
"reported": false,\
"modified_date": "2018-10-08T15:56:29.535158Z",\
"email": "[email protected]",\
"first_name": "Example",\
"last_name": "User",\
"position": ""\
},\
{\
"id": "VYrDwtG",\
"status": "Clicked Link",\
"ip": "::1",\
"latitude": 0,\
"longitude": 0,\
"send_date": "2018-10-08T15:56:29.548722Z",\
"reported": false,\
"modified_date": "2018-10-08T15:56:46.955281Z",\
"email": "[email protected]",\
"first_name": "Foo",\
"last_name": "Bar",\
"position": ""\
}\
],
"timeline": null,
"smtp": {
"id": 1,
"interface_type": "SMTP",
"name": "Example Sending Profile",
"host": "localhost:1025",
"from_address": "Test User \[email protected]\u003e",
"ignore_cert_errors": true,
"headers": [],
"modified_date": "2018-09-04T01:24:21.691924069Z"
},
"url": "http://localhost"
}
Copy
{
"name":"CC Example Campaign",
"template":{"name":"Example Template"},
"url":"http://localhost",
"page":{"name":"Example Landing Page"},
"smtp":{"name":"Example Sending Profile"},
"launch_date":"2018-10-08T16:20:00+00:00",
"send_by_date":null,
"groups":[{"name":"Example Group"}]
}
Copy
{
"id": 1,
"name": "Example Campaign",
"status": "In progress",
"results": [\
{\
"id": "hoqKYFn",\
"status": "Email Sent",\
"ip": "",\
"latitude": 0,\
"longitude": 0,\
"send_date": "2018-10-08T15:56:29.535158Z",\
"reported": false,\
"modified_date": "2018-10-08T15:56:29.535158Z",\
"email": "[email protected]",\
"first_name": "Example",\
"last_name": "User",\
"position": ""\
},\
{\
"id": "VYrDwtG",\
"status": "Clicked Link",\
"ip": "::1",\
"latitude": 0,\
"longitude": 0,\
"send_date": "2018-10-08T15:56:29.548722Z",\
"reported": false,\
"modified_date": "2018-10-08T15:56:46.955281Z",\
"email": "[email protected]",\
"first_name": "Foo",\
"last_name": "Bar",\
"position": ""\
}\
],
"timeline": [\
{\
"email": "",\
"time": "2018-10-08T15:56:29.49172Z",\
"message": "Campaign Created",\
"details": ""\
},\
{\
"email": "[email protected]",\
"time": "2018-10-08T15:56:29.535158Z",\
"message": "Email Sent",\
"details": ""\
},\
{\
"email": "[email protected]",\
"time": "2018-10-08T15:56:29.548722Z",\
"message": "Email Sent",\
"details": ""\
},\
{\
"email": "[email protected]",\
"time": "2018-10-08T15:56:44.679743Z",\
"message": "Email Opened",\
"details": "{\"payload\":{\"rid\":[\"VYrDwtG\"]},\"browser\":{\"address\":\"::1\",\"user-agent\":\"Mozilla/5.0 (Macintosh; Intel Mac OS X 10_14_0) AppleWebKit/537.36 (KHTML, like Gecko) Chrome/69.0.3497.100 Safari/537.36\"}}"\
},\
{\
"email": "[email protected]",\
"time": "2018-10-08T15:56:46.955281Z",\
"message": "Clicked Link",\
"details": "{\"payload\":{\"rid\":[\"VYrDwtG\"]},\"browser\":{\"address\":\"::1\",\"user-agent\":\"Mozilla/5.0 (Macintosh; Intel Mac OS X 10_14_0) AppleWebKit/537.36 (KHTML, like Gecko) Chrome/69.0.3497.100 Safari/537.36\"}}"\
}\
]
}
Copy
{
"message": "Campaign not found",
"success": false,
"data": null
}
Copy
{
"id": 1,
"created_date": "2018-10-08T15:56:29.48815Z",
"launch_date": "2018-10-08T15:56:00Z",
"send_by_date": "0001-01-01T00:00:00Z",
"completed_date": "0001-01-01T00:00:00Z",
"status": "In progress",
"name": "Example Campaign",
"stats": {
"total": 2,
"sent": 2,
"opened": 1,
"clicked": 1,
"submitted_data": 0,
"email_reported": 0,
"error": 0
}
}
Copy
{
"message": "Campaign not found",
"success": false,
"data": null
}
Copy
{
total : int
sent : int
opened : int
clicked : int
submitted_data : int
email_reported : int
}
Copy
{
"message": "Campaign deleted successfully!",
"success": true,
"data": null
}
Copy
{
"message": "Campaign not found",
"success": false,
"data": null
}
Copy
{
"message": "Campaign completed successfully!",
"success": true,
"data": null
}
---
# Introduction | Python API Client
Gophish was built from the ground-up to be API-first. This means that we build out the API endpoints for all of our features, and the UI is simply a wrapper around these endpoints.
To interface with Gophish using Python, we've created a `gophish` client library.
> If you want to access the API directly, please refer to our [API Documentationarrow-up-right](https://www.gitbook.com/book/gophish/api-documentation/details)
[hashtag](https://docs.getgophish.com/python-api-client/#installation)
Installation
----------------------------------------------------------------------------------------
To install the `gophish` library, simply run the command:
`pip install gophish`
[hashtag](https://docs.getgophish.com/python-api-client/#quickstart)
Quickstart
------------------------------------------------------------------------------------
Getting up and running with the Python library is quick and easy.
To start, simply create a client using the API key found in the [Settings pagearrow-up-right](https://gophish.gitbooks.io/user-guide/content/documentation/changing_user_settings.html#changing-your-password--updating-settings)
.
Copy
from gophish import Gophish
api_key = 'API_KEY'
api = Gophish(api_key)
Now you're ready to start using the API!
[NextConnecting to Gophishchevron-right](https://docs.getgophish.com/python-api-client/connecting-to-gophish)
Last updated 7 years ago
* [Installation](https://docs.getgophish.com/python-api-client/#installation)
* [Quickstart](https://docs.getgophish.com/python-api-client/#quickstart)
---
# Email Protection | Cloudflare
Please enable cookies.
Email Protection
================
You are unable to access this email address docs.getgophish.com
---------------------------------------------------------------
The website from which you got to this page is protected by Cloudflare. Email addresses on that page have been hidden in order to keep them from being accessed by malicious bots. **You must enable Javascript in your browser in order to decode the e-mail address**.
If you have a website and are interested in protecting it in a similar way, you can [sign up for Cloudflare](https://www.cloudflare.com/sign-up?utm_source=email_protection)
.
* [How does Cloudflare protect email addresses on website from spammers?](https://developers.cloudflare.com/waf/tools/scrape-shield/email-address-obfuscation/)
* [Can I sign up for Cloudflare?](https://developers.cloudflare.com/fundamentals/setup/account/create-account/)
Cloudflare Ray ID: **9c05b7ddcfc60854** • Your IP: Click to reveal 54.237.218.47 • Performance & security by [Cloudflare](https://www.cloudflare.com/5xx-error-landing)
---
# Connecting to Gophish | Python API Client
Connections to Gophish are established by creating an instance of `gophish.Gophish()`.
By default, the API client will try connecting to the host at `http://localhost:3333`.
[hashtag](https://docs.getgophish.com/python-api-client/connecting-to-gophish#changing-the-host)
Changing the Host
-----------------------------------------------------------------------------------------------------------------------
To change the host, simply set the host parameter to point to the admin interface on your Gophish instance:
Copy
from gophish import Gophish
api = Gophish(API_KEY, host='http://admin_server')
[hashtag](https://docs.getgophish.com/python-api-client/connecting-to-gophish#ignoring-ssl-certificates)
Ignoring SSL Certificates
---------------------------------------------------------------------------------------------------------------------------------------
All custom `kwargs` are sent to the underlying transport, which by default is the `requests` library.
This means it's easy to customize client behavior. For example, if you are using self-signed certificates with Gophish, you can ignore the warnings by setting `verify=False`.
Copy
from gophish import Gophish
api = Gophish(API_KEY, host='https://admin_server', verify=False)
[PreviousIntroductionchevron-left](https://docs.getgophish.com/python-api-client)
[NextCampaignschevron-right](https://docs.getgophish.com/python-api-client/campaigns)
Last updated 7 years ago
* [Changing the Host](https://docs.getgophish.com/python-api-client/connecting-to-gophish#changing-the-host)
* [Ignoring SSL Certificates](https://docs.getgophish.com/python-api-client/connecting-to-gophish#ignoring-ssl-certificates)
---
# Campaigns | Python API Client
The campaigns endpoint allows you to create, view, and manage Gophish campaigns.
[hashtag](https://docs.getgophish.com/python-api-client/campaigns#table-of-contents)
Table of Contents
-----------------------------------------------------------------------------------------------------------
* [Quick Example](https://docs.getgophish.com/python-api-client/campaigns#quick-example)
* [Models](https://docs.getgophish.com/python-api-client/campaigns#models)
* [Methods](https://docs.getgophish.com/python-api-client/campaigns#methods)
* [Examples](https://docs.getgophish.com/python-api-client/campaigns#examples)
[hashtag](https://docs.getgophish.com/python-api-client/campaigns#quick-example)
Quick Example
---------------------------------------------------------------------------------------------------
This example shows how to retrieve the names of every campaign launched in Gophish.
Copy
from gophish import Gophish
api_key = 'API_KEY'
api = Gophish(api_key)
for campaign in api.campaigns.get():
print campaign.name
###
[hashtag](https://docs.getgophish.com/python-api-client/campaigns#models)
Models
####
[hashtag](https://docs.getgophish.com/python-api-client/campaigns#gophish.models.result)
gophish.models.Result
**Attributes**
* `id` (int) The result ID
* `first_name` (str) The first name
* `last_name` (str) The last name
* `email` (str) The email address
* `position` (str) The position (job role)
* `ip` (str) The last seen IP address
* `latitude` (float) The latitude of the `ip`
* `longitude` (float) The longitude of the `ip`
* `status` (str) The users status in the campaign
**Methods**
* `__init__(self, **kwargs)` - Returns a new Result
Example:
####
[hashtag](https://docs.getgophish.com/python-api-client/campaigns#gophish.models.campaign)
gophish.models.Campaign
For each of the attributes in the campaign (groups, template, page, etc.), Gophish **only cares about the** `name`.
This means that you don't have to fetch the resources you want to use. You can simply create new ones with the correct name for the campaign (see the example below).
**Attributes**
* `id` (int) The result ID
* `results` (list(models.Result)) The campaign results
* `timeline` (list(models.TimelineEntry)) The timeline entries
* `name` (str) The campaign name
* `status` (str) The current status of the campaign
* `created_date` (optional: datetime.datetime) The campaign creation date
* `send_by_date` (optional: datetime.datetime) The date to send all emails by
* `launch_date` (optional: datetime.datetime) The scheduled time for campaign launch
* `template` (models.Template) The template to use in the campaign
* `page` (models.Page) The Landing Page to use in the campaign
* `smtp` (models.SMTP) The SMTP Profile to use when sending emails
* `url` (str) The URL to use when constructing links in phishing emails
**Methods**
* `__init__(self, **kwargs)` - Returns a new Campaign
Example:
####
[hashtag](https://docs.getgophish.com/python-api-client/campaigns#gophish.models.stat)
gophish.models.Stat
Statistics for a campaign's results.
The Gophish API never requires you to create campaign stats. Instead, they are returned as part of the campaign summary objects.
**Attributes**
* `total` (int) The total number of targets in the campaign
* `sent` (int) The number of emails that were successfully sent
* `opened` (int) The number of emails that were opened
* `clicked` (int) The number of emails that were clicked by recipients in the campaign
* `submitted_data` (int) The number of captured credentials from the campaign
* `email_reported` (int) The number of emails reported from the campaign
* `error` (int) The number of errors when sending emails in the campaign
####
[hashtag](https://docs.getgophish.com/python-api-client/campaigns#gophish.models.campaignsummary)
gophish.models.CampaignSummary
A summarized view of a campaign. This is a lightweight high level view of campaign results, which can be quicker than retrieving full campaign details.
The Gophish API never requires you to create campaign summaries. Instead, they are returned when hitting the campaign summary endpoint.
**Attributes**
* `id` (int) The result ID
* `name` (str) The campaign name
* `created_date` (optional: datetime.datetime) The campaign creation date
* `send_by_date` (optional: datetime.datetime) The date to send all emails by
* `launch_date` (optional: datetime.datetime) The scheduled time for campaign launch
* `status` (str) The current status of the campaign
* `stats` (list(models.Stat)) The stats of campaign results
**Methods**
* `__init__(self, **kwargs)` - Returns a new CampaignSummary
Example:
###
[hashtag](https://docs.getgophish.com/python-api-client/campaigns#methods)
Methods
####
[hashtag](https://docs.getgophish.com/python-api-client/campaigns#gophish.api.campaigns.get-campaign_id-none)
gophish.api.campaigns.get(campaign\_id=None)
Gets the details for one or more campaigns. To get a particular campaign, set the ID to the campaign ID.
If the `campaign_id` is not set, all campaigns owned by the current user will be returned.
**Returns**
* If the `campaign_id` is set: `models.Campaign`
* If `campaign_id` is `None`: `list(models.Campaign)`
####
[hashtag](https://docs.getgophish.com/python-api-client/campaigns#gophish.api.campaigns.post-campaign)
gophish.api.campaigns.post(campaign)
Creates and launches a new campaign. This endpoint requires you to submit a `gophish.models.Campaign` object.
**Returns**
The `gophish.models.Campaign` object that was created.
####
[hashtag](https://docs.getgophish.com/python-api-client/campaigns#gophish.api.campaigns.delete-campaign_id)
gophish.api.campaigns.delete(campaign\_id)
Deletes the campaign specified by `campaign_id`.
**Returns**
A `gophish.models.Status` message.
####
[hashtag](https://docs.getgophish.com/python-api-client/campaigns#gophish.api.campaigns.complete-campaign_id)
gophish.api.campaigns.complete(campaign\_id)
Completes the campaign specified by `campaign_id`.
**Returns**
A `gophish.models.Status` message.
####
[hashtag](https://docs.getgophish.com/python-api-client/campaigns#gophish.api.campaigns.summary-campaign_id-none)
gophish.api.campaigns.summary(campaign\_id=None)
Gets the summaries for one or more campaigns. To get a particular campaign, set the ID to the campaign ID.
If the `campaign_id` is not set, the summary object for all campaigns owned by the current user will be returned.
**Returns**
* If the `campaign_id` is set: `models.CampaignSummary`
* If `campaign_id` is `None`: `models.CampaignSummaries`
###
[hashtag](https://docs.getgophish.com/python-api-client/campaigns#examples)
Examples
Here are some examples to show how to use the API.
All of these examples assume the following setup:
####
[hashtag](https://docs.getgophish.com/python-api-client/campaigns#get-all-campaigns)
Get All Campaigns
####
[hashtag](https://docs.getgophish.com/python-api-client/campaigns#get-single-campaign)
Get Single Campaign
####
[hashtag](https://docs.getgophish.com/python-api-client/campaigns#create-new-campaign)
Create New Campaign
####
[hashtag](https://docs.getgophish.com/python-api-client/campaigns#get-campaign-summaries)
Get Campaign Summaries
[PreviousConnecting to Gophishchevron-left](https://docs.getgophish.com/python-api-client/connecting-to-gophish)
[NextGroupschevron-right](https://docs.getgophish.com/python-api-client/groups)
Last updated 3 years ago
* [Table of Contents](https://docs.getgophish.com/python-api-client/campaigns#table-of-contents)
* [Quick Example](https://docs.getgophish.com/python-api-client/campaigns#quick-example)
* [Models](https://docs.getgophish.com/python-api-client/campaigns#models)
* [Methods](https://docs.getgophish.com/python-api-client/campaigns#methods)
* [Examples](https://docs.getgophish.com/python-api-client/campaigns#examples)
Copy
result = Result(
first_name='Foo', last_name='Bar',
position='Tester', email='[email protected]')
Copy
groups = [Group(name='Existing Group')]
page = Page(name='Existing Page')
template = Template(name='Existing Template')
smtp = SMTP(name='Existing Profile')
url = 'http://phishing_server'
campaign = Campaign(
name='Example Campaign', groups=groups, page=page,
template=template, smtp=smtp)
Copy
summary = api.campaigns.summary(campaign_id=1)
print(summary.stats.as_dict())
Copy
from gophish import Gophish
from gophish.models import *
api_key = 'API_KEY'
api = Gophish(api_key)
Copy
campaigns = api.campaigns.get()
Copy
campaign = api.campaigns.get(campaign_id=1)
Copy
groups = [Group(name='Existing Group')]
page = Page(name='Existing Page')
template = Template(name='Existing Template')
smtp = SMTP(name='Existing Profile')
url = 'http://phishing_server'
campaign = Campaign(
name='Example Campaign', groups=groups, page=page,
template=template, smtp=smtp)
campaign = api.campaigns.post(campaign)
print campaign.id
Copy
summaries = api.campaigns.summary()
summary = api.campaigns.summary(campaign_id=1)
---
# Groups | Python API Client
The groups endpoint allows you to create, view, and manage Gophish groups.
[hashtag](https://docs.getgophish.com/python-api-client/groups#table-of-contents)
Table of Contents
--------------------------------------------------------------------------------------------------------
* [Quick Example](https://docs.getgophish.com/python-api-client/groups#quick-example)
* [Models](https://docs.getgophish.com/python-api-client/groups#models)
* [Methods](https://docs.getgophish.com/python-api-client/groups#methods)
* [Examples](https://docs.getgophish.com/python-api-client/groups#examples)
[hashtag](https://docs.getgophish.com/python-api-client/groups#quick-example)
Quick Example
------------------------------------------------------------------------------------------------
This example shows how to retrieve the name and size of every group in Gophish.
Copy
from gophish import Gophish
api_key = 'API_KEY'
api = Gophish(api_key)
for group in api.groups.get():
print '{} has {} users'.format(group.name, len(group.targets))
###
[hashtag](https://docs.getgophish.com/python-api-client/groups#models)
Models
####
[hashtag](https://docs.getgophish.com/python-api-client/groups#gophish.models.user)
gophish.models.User
**Attributes**
* `id` (int) The user ID
* `first_name` (str) The first name
* `last_name` (str) The last name
* `email` (str) The email address
* `position` (str) The position (job role)
**Methods**
* `__init__(self, **kwargs)` - Returns a new User Example:
####
[hashtag](https://docs.getgophish.com/python-api-client/groups#gophish.models.group)
gophish.models.Group
A group contains one or more `models.User` objects. The group name must be unique.
**Attributes**
* `id` (int) The group ID
* `targets` (list(models.User)) The group's users
* `name` (str) The group name
* `modified_date` (optional: datetime.datetime) The scheduled time for group launch
**Methods**
* `__init__(self, **kwargs)` - Returns a new Group
Example:
###
[hashtag](https://docs.getgophish.com/python-api-client/groups#methods)
Methods
####
[hashtag](https://docs.getgophish.com/python-api-client/groups#gophish.api.groups.get-group_id-none)
gophish.api.groups.get(group\_id=None)
Gets the details for one or more groups. To get a particular group, set the ID to the group ID.
If the `group_id` is not set, all groups owned by the current user will be returned.
**Returns**
* If the `group` is set: `models.Group`
* If `group_id` is `None`: `list(models.Group)`
####
[hashtag](https://docs.getgophish.com/python-api-client/groups#gophish.api.groups.post-group)
gophish.api.groups.post(group)
Creates a new group. This endpoint requires you to submit a `gophish.models.Group` object.
**Returns**
The `gophish.models.Group` object that was created.
####
[hashtag](https://docs.getgophish.com/python-api-client/groups#gophish.api.groups.put-group)
gophish.api.groups.put(group)
Edits an existing group. This endpoint requires you to submit an existing `gophish.models.Group` object with its `id` attribute set correctly.
**Returns**
The `gophish.models.Group` object that was edited.
####
[hashtag](https://docs.getgophish.com/python-api-client/groups#gophish.api.groups.delete-group_id)
gophish.api.groups.delete(group\_id)
Deletes the group specified by `group_id`.
**Returns**
A `gophish.models.Status` message.
###
[hashtag](https://docs.getgophish.com/python-api-client/groups#examples)
Examples
Here are some examples to show how to use the API.
All of these examples assume the following setup:
####
[hashtag](https://docs.getgophish.com/python-api-client/groups#get-all-groups)
Get All Groups
####
[hashtag](https://docs.getgophish.com/python-api-client/groups#get-single-group)
Get Single Group
####
[hashtag](https://docs.getgophish.com/python-api-client/groups#create-new-group)
Create New Group
[PreviousCampaignschevron-left](https://docs.getgophish.com/python-api-client/campaigns)
[NextTemplateschevron-right](https://docs.getgophish.com/python-api-client/templates)
Last updated 7 years ago
* [Table of Contents](https://docs.getgophish.com/python-api-client/groups#table-of-contents)
* [Quick Example](https://docs.getgophish.com/python-api-client/groups#quick-example)
* [Models](https://docs.getgophish.com/python-api-client/groups#models)
* [Methods](https://docs.getgophish.com/python-api-client/groups#methods)
* [Examples](https://docs.getgophish.com/python-api-client/groups#examples)
Copy
result = User(
first_name='Foo', last_name='Bar',
position='Tester', email='[email protected]')
Copy
from gophish.models import *
targets = [\
User(first_name='John', last_name='Doe', email='[email protected]'),\
User(first_name='Jane', last_name='Doe', email='[email protected]')]
group = Group(name='Doe Company', targets=targets)
Copy
from gophish import Gophish
from gophish.models import *
api_key = 'API_KEY'
api = Gophish(api_key)
Copy
groups = api.groups.get()
Copy
group = api.groups.get(group_id=1)
Copy
targets = [\
User(first_name='John', last_name='Doe', email='[email protected]'),\
User(first_name='Jane', last_name='Doe', email='[email protected]')]
group = Group(name='Doe Company', targets=targets)
group = api.groups.post(group)
print group.id
---
# Templates | Python API Client
Templates are the emails that are sent out by Gophish during a campaign.
The templates endpoint allows you to create, view, and manage Gophish templates.
[hashtag](https://docs.getgophish.com/python-api-client/templates#table-of-contents)
Table of Contents
-----------------------------------------------------------------------------------------------------------
* [Quick Example](https://docs.getgophish.com/python-api-client/templates#quick-example)
* [Models](https://docs.getgophish.com/python-api-client/templates#models)
* [Methods](https://docs.getgophish.com/python-api-client/templates#methods)
* [Examples](https://docs.getgophish.com/python-api-client/templates#examples)
[hashtag](https://docs.getgophish.com/python-api-client/templates#quick-example)
Quick Example
---------------------------------------------------------------------------------------------------
This example shows how to retrieve the name of every template in Gophish.
Copy
from gophish import Gophish
api_key = 'API_KEY'
api = Gophish(api_key)
for template in api.templates.get():
print template.name
###
[hashtag](https://docs.getgophish.com/python-api-client/templates#models)
Models
####
[hashtag](https://docs.getgophish.com/python-api-client/templates#gophish.models.attachment)
gophish.models.Attachment
**Attributes**
* `content` (str) The base64 encoded attachment content
* `type` (str) The content type of the attachment
* `name` (str) The attachment filename
**Methods**
* `__init__(self, **kwargs)` - Returns a new Attachment
Example:
####
[hashtag](https://docs.getgophish.com/python-api-client/templates#gophish.models.template)
gophish.models.Template
A template contains a name and the email content.
**Attributes**
* `id` (int) The template ID
* `name` (str) The template name
* `html` (str) The template HTML
* `text` (str) The template HTML
* `modified_date` (optional: datetime.datetime) The scheduled time for template launch
* `attachments` (list(models.Attachment)) The optional email attachments
**Methods**
* `__init__(self, **kwargs)` - Returns a new Template
Example:
###
[hashtag](https://docs.getgophish.com/python-api-client/templates#methods)
Methods
####
[hashtag](https://docs.getgophish.com/python-api-client/templates#gophish.api.templates.get-template_id-none)
gophish.api.templates.get(template\_id=None)
Gets the details for one or more templates. To get a particular template, set the ID to the template ID.
If the `template_id` is not set, all templates owned by the current user will be returned.
**Returns**
* If the `template` is set: `models.Template`
* If `template_id` is `None`: `list(models.Template)`
####
[hashtag](https://docs.getgophish.com/python-api-client/templates#gophish.api.templates.post-template)
gophish.api.templates.post(template)
Creates a new template. This endpoint requires you to submit a `gophish.models.Template` object.
**Returns**
The `gophish.models.Template` object that was created.
####
[hashtag](https://docs.getgophish.com/python-api-client/templates#gophish.api.templates.put-template)
gophish.api.templates.put(template)
Edits an existing template. This endpoint requires you to submit an existing `gophish.models.Template` object with its `id` attribute set correctly.
**Returns**
The `gophish.models.Template` object that was edited.
####
[hashtag](https://docs.getgophish.com/python-api-client/templates#gophish.api.templates.delete-template_id)
gophish.api.templates.delete(template\_id)
Deletes the template specified by `template_id`.
**Returns**
A `gophish.models.Status` message.
###
[hashtag](https://docs.getgophish.com/python-api-client/templates#examples)
Examples
Here are some examples to show how to use the API.
All of these examples assume the following setup:
####
[hashtag](https://docs.getgophish.com/python-api-client/templates#get-all-templates)
Get All Templates
####
[hashtag](https://docs.getgophish.com/python-api-client/templates#get-single-template)
Get Single Template
####
[hashtag](https://docs.getgophish.com/python-api-client/templates#create-new-template)
Create New Template
[PreviousGroupschevron-left](https://docs.getgophish.com/python-api-client/groups)
[NextLanding Pageschevron-right](https://docs.getgophish.com/python-api-client/landing-pages)
Last updated 6 years ago
* [Table of Contents](https://docs.getgophish.com/python-api-client/templates#table-of-contents)
* [Quick Example](https://docs.getgophish.com/python-api-client/templates#quick-example)
* [Models](https://docs.getgophish.com/python-api-client/templates#models)
* [Methods](https://docs.getgophish.com/python-api-client/templates#methods)
* [Examples](https://docs.getgophish.com/python-api-client/templates#examples)
Copy
todo
Copy
from gophish.models import *
template = Template(name='Test Template',
html="Click here)
Copy
from gophish import Gophish
from gophish.models import *
api_key = 'API_KEY'
api = Gophish(api_key)
Copy
templates = api.templates.get()
Copy
template = api.templates.get(template_id=1)
Copy
template = Template(name='Test Template',
html='Click here')
template = api.templates.post(template)
print template.id
---
# Sending Profiles | Python API Client
Sending profiles tell Gophish which SMTP servers to use when sending emails.
The SMTP endpoint allows you to create, view, and manage Gophish sending profiles.
[hashtag](https://docs.getgophish.com/python-api-client/sending-profiles#table-of-contents)
Table of Contents
------------------------------------------------------------------------------------------------------------------
* [Quick Example](https://docs.getgophish.com/python-api-client/sending-profiles#quick-example)
* [Models](https://docs.getgophish.com/python-api-client/sending-profiles#models)
* [Methods](https://docs.getgophish.com/python-api-client/sending-profiles#methods)
* [Examples](https://docs.getgophish.com/python-api-client/sending-profiles#examples)
[hashtag](https://docs.getgophish.com/python-api-client/sending-profiles#quick-example)
Quick Example
----------------------------------------------------------------------------------------------------------
This example shows how to retrieve the name of every sending profile in Gophish.
Copy
from gophish import Gophish
api_key = 'API_KEY'
api = Gophish(api_key)
for smtp in api.smtp.get():
print smtp.name
###
[hashtag](https://docs.getgophish.com/python-api-client/sending-profiles#models)
Models
####
[hashtag](https://docs.getgophish.com/python-api-client/sending-profiles#gophish.models.smtp)
gophish.models.SMTP
A sending profile contains the server address/port, and optional credentials.
**Attributes**
* `id` (int) The smtp ID
* `name` (str) The smtp name
* `interface_type` (str) The type of SMTP connection (for now, always use `SMTP`)
* `host` (str) The host:port of the SMTP server
* `from_address` (str) The address to send emails from (e.g. John Doe <[\[email protected\]](https://docs.getgophish.com/cdn-cgi/l/email-protection)
\>)
* `ignore_cert_errors` (bool) Whether or not to ignore SSL certificate validation errors (set to `true` in the case of self-signed certificates)
* `modified_date` (optional: datetime.datetime) The datetime this SMTP profile was previously modified
**Methods**
* `__init__(self, **kwargs)` - Returns a new SMTP object
###
[hashtag](https://docs.getgophish.com/python-api-client/sending-profiles#methods)
Methods
####
[hashtag](https://docs.getgophish.com/python-api-client/sending-profiles#gophish.api.smtp.get-smtp_id-none)
gophish.api.smtp.get(smtp\_id=None)
Gets the details for one or more sending profiles. To get a particular sending profiles, set the ID to the profile ID.
If the `smtp_id` is not set, all sending profiles owned by the current user will be returned.
**Returns**
* If the `smtp_id` is set: `models.SMTP`
* If `smtp_id` is `None`: `list(models.SMTP)`
####
[hashtag](https://docs.getgophish.com/python-api-client/sending-profiles#gophish.api.smtp.post-smtp)
gophish.api.smtp.post(smtp)
Creates a new sending profile. This endpoint requires you to submit a `gophish.models.SMTP` object.
**Returns**
The `gophish.models.SMTP` object that was created.
####
[hashtag](https://docs.getgophish.com/python-api-client/sending-profiles#gophish.api.smtp.put-smtp)
gophish.api.smtp.put(smtp)
Edits an existing sending profile. This endpoint requires you to submit an existing `gophish.models.SMTP` object with its `id` attribute set correctly.
**Returns**
The `gophish.models.SMTP` object that was edited.
####
[hashtag](https://docs.getgophish.com/python-api-client/sending-profiles#gophish.api.smtp.delete-smtp_id)
gophish.api.smtp.delete(smtp\_id)
Deletes the sending profile specified by `smtp_id`.
**Returns**
A `gophish.models.Status` message.
###
[hashtag](https://docs.getgophish.com/python-api-client/sending-profiles#examples)
Examples
Here are some examples to show how to use the API.
All of these examples assume the following setup:
####
[hashtag](https://docs.getgophish.com/python-api-client/sending-profiles#get-all-sending-profiles)
Get All Sending Profiles
####
[hashtag](https://docs.getgophish.com/python-api-client/sending-profiles#get-single-sending-profile)
Get Single Sending Profile
####
[hashtag](https://docs.getgophish.com/python-api-client/sending-profiles#create-new-sending-profile)
Create New Sending Profile
[PreviousLanding Pageschevron-left](https://docs.getgophish.com/python-api-client/landing-pages)
Last updated 7 years ago
* [Table of Contents](https://docs.getgophish.com/python-api-client/sending-profiles#table-of-contents)
* [Quick Example](https://docs.getgophish.com/python-api-client/sending-profiles#quick-example)
* [Models](https://docs.getgophish.com/python-api-client/sending-profiles#models)
* [Methods](https://docs.getgophish.com/python-api-client/sending-profiles#methods)
* [Examples](https://docs.getgophish.com/python-api-client/sending-profiles#examples)
Copy
from gophish import Gophish
from gophish.models import *
api_key = 'API_KEY'
api = Gophish(api_key)
Copy
smtp = api.smtp.get()
Copy
smtp = api.smtp.get(smtp_id=1)
Copy
smtp = SMTP(name='Test SMTP')
smtp.host = "localhost:25"
smtp.from_address = "John Doe <[email protected]>"
smtp.interface_type = "SMTP"
smtp.ignore_cert_errors = True
smtp = api.smtp.post(smtp)
print smtp.id
---
# Landing Pages | Python API Client
Landing pages contain the HTML that is rendered when a target clicks on a Gophish phishing link.
The pages endpoint allows you to create, view, and manage Gophish landing pages.
[hashtag](https://docs.getgophish.com/python-api-client/landing-pages#table-of-contents)
Table of Contents
---------------------------------------------------------------------------------------------------------------
* [Quick Example](https://docs.getgophish.com/python-api-client/landing-pages#quick-example)
* [Models](https://docs.getgophish.com/python-api-client/landing-pages#models)
* [Methods](https://docs.getgophish.com/python-api-client/landing-pages#methods)
* [Examples](https://docs.getgophish.com/python-api-client/landing-pages#examples)
[hashtag](https://docs.getgophish.com/python-api-client/landing-pages#quick-example)
Quick Example
-------------------------------------------------------------------------------------------------------
This example shows how to retrieve the name of every page in Gophish.
Copy
from gophish import Gophish
api_key = 'API_KEY'
api = Gophish(api_key)
for page in api.pages.get():
print page.name
###
[hashtag](https://docs.getgophish.com/python-api-client/landing-pages#models)
Models
####
[hashtag](https://docs.getgophish.com/python-api-client/landing-pages#gophish.models.page)
gophish.models.Page
A page contains one or more `models.User` objects. The page name must be unique.
**Attributes**
* `id` (int) The page ID
* `html` (str) The page HTML
* `name` (str) The page name
* `modified_date` (optional: datetime.datetime) The scheduled time for page launch
* `capture_credentials` (bool default:False) Whether or not the landing page should capture credentials
* `capture_passwords` (bool default:False) Whether or not the landing page should capture passwords
* `redirect_url` (str) The URL to redirect targets to after they submit data
**Methods**
* `__init__(self, **kwargs)` - Returns a new Landing Page
Example:
###
[hashtag](https://docs.getgophish.com/python-api-client/landing-pages#methods)
Methods
####
[hashtag](https://docs.getgophish.com/python-api-client/landing-pages#gophish.api.pages.get-page_id-none)
gophish.api.pages.get(page\_id=None)
Gets the details for one or more landing pages. To get a particular page, set the ID to the page ID.
If the `page_id` is not set, all landing pages owned by the current user will be returned.
**Returns**
* If the `page` is set: `models.Page`
* If `page_id` is `None`: `list(models.Page)`
####
[hashtag](https://docs.getgophish.com/python-api-client/landing-pages#gophish.api.pages.post-page)
gophish.api.pages.post(page)
Creates a new landing page. This endpoint requires you to submit a `gophish.models.Page` object.
**Returns**
The `gophish.models.Page` object that was created.
####
[hashtag](https://docs.getgophish.com/python-api-client/landing-pages#gophish.api.pages.put-page)
gophish.api.pages.put(page)
Edits an existing landing page. This endpoint requires you to submit an existing `gophish.models.Page` object with its `id` attribute set correctly.
**Returns**
The `gophish.models.Page` object that was edited.
####
[hashtag](https://docs.getgophish.com/python-api-client/landing-pages#gophish.api.pages.delete-page_id)
gophish.api.pages.delete(page\_id)
Deletes the page specified by `page_id`.
**Returns**
A `gophish.models.Status` message.
###
[hashtag](https://docs.getgophish.com/python-api-client/landing-pages#examples)
Examples
Here are some examples to show how to use the API.
All of these examples assume the following setup:
####
[hashtag](https://docs.getgophish.com/python-api-client/landing-pages#get-all-landing-pages)
Get All Landing Pages
####
[hashtag](https://docs.getgophish.com/python-api-client/landing-pages#get-single-landing-page)
Get Single Landing Page
####
[hashtag](https://docs.getgophish.com/python-api-client/landing-pages#create-new-landing-page)
Create New Landing Page
[PreviousTemplateschevron-left](https://docs.getgophish.com/python-api-client/templates)
[NextSending Profileschevron-right](https://docs.getgophish.com/python-api-client/sending-profiles)
Last updated 7 years ago
* [Table of Contents](https://docs.getgophish.com/python-api-client/landing-pages#table-of-contents)
* [Quick Example](https://docs.getgophish.com/python-api-client/landing-pages#quick-example)
* [Models](https://docs.getgophish.com/python-api-client/landing-pages#models)
* [Methods](https://docs.getgophish.com/python-api-client/landing-pages#methods)
* [Examples](https://docs.getgophish.com/python-api-client/landing-pages#examples)
Copy
from gophish.models import *
page = Page(name='Test Page',
html="Click here)
Copy
from gophish import Gophish
from gophish.models import *
api_key = 'API_KEY'
api = Gophish(api_key)
Copy
pages = api.pages.get()
Copy
page = api.pages.get(page_id=1)
Copy
page = Page(name='Test Page',
html="Click here)
page = api.pages.post(page)
print page.id
---