# Table of Contents - [Navigation - TALL Stack E-commerce Framework](#navigation-tall-stack-e-commerce-framework) - [Discounts - TALL Stack E-commerce Framework](#discounts-tall-stack-e-commerce-framework) - [Controllers - TALL Stack E-commerce Framework](#controllers-tall-stack-e-commerce-framework) - [Customization - TALL Stack E-commerce Framework](#customization-tall-stack-e-commerce-framework) - [Customers - TALL Stack E-commerce Framework](#customers-tall-stack-e-commerce-framework) - [Installation - TALL Stack E-commerce Framework](#installation-tall-stack-e-commerce-framework) - [Contribution Guide - TALL Stack E-commerce Framework](#contribution-guide-tall-stack-e-commerce-framework) - [Brands - TALL Stack E-commerce Framework](#brands-tall-stack-e-commerce-framework) - [Dashboard - TALL Stack E-commerce Framework](#dashboard-tall-stack-e-commerce-framework) - [Attributes - TALL Stack E-commerce Framework](#attributes-tall-stack-e-commerce-framework) - [Locations - TALL Stack E-commerce Framework](#locations-tall-stack-e-commerce-framework) - [Control Panel - TALL Stack E-commerce Framework](#control-panel-tall-stack-e-commerce-framework) - [Categories - TALL Stack E-commerce Framework](#categories-tall-stack-e-commerce-framework) - [Configuration - TALL Stack E-commerce Framework](#configuration-tall-stack-e-commerce-framework) - [Collections - TALL Stack E-commerce Framework](#collections-tall-stack-e-commerce-framework) - [Installation - TALL Stack E-commerce Framework](#installation-tall-stack-e-commerce-framework) - [Orders - TALL Stack E-commerce Framework](#orders-tall-stack-e-commerce-framework) - [Media - TALL Stack E-commerce Framework](#media-tall-stack-e-commerce-framework) - [Legal - TALL Stack E-commerce Framework](#legal-tall-stack-e-commerce-framework) - [Stripe - TALL Stack E-commerce Framework](#stripe-tall-stack-e-commerce-framework) - [Products - TALL Stack E-commerce Framework](#products-tall-stack-e-commerce-framework) - [Reviews - TALL Stack E-commerce Framework](#reviews-tall-stack-e-commerce-framework) - [Requirements - TALL Stack E-commerce Framework](#requirements-tall-stack-e-commerce-framework) - [Two Factor Authenticator - TALL Stack E-commerce Framework](#two-factor-authenticator-tall-stack-e-commerce-framework) - [Roles & Permissions - TALL Stack E-commerce Framework](#roles-permissions-tall-stack-e-commerce-framework) - [Addons - TALL Stack E-commerce Framework](#addons-tall-stack-e-commerce-framework) - [Catalog Types - TALL Stack E-commerce Framework](#catalog-types-tall-stack-e-commerce-framework) - [Order Types - TALL Stack E-commerce Framework](#order-types-tall-stack-e-commerce-framework) - [Customer Types - TALL Stack E-commerce Framework](#customer-types-tall-stack-e-commerce-framework) - [Product Types - TALL Stack E-commerce Framework](#product-types-tall-stack-e-commerce-framework) - [Overview - TALL Stack E-commerce Framework](#overview-tall-stack-e-commerce-framework) - [Roles & Permissions - TALL Stack E-commerce Framework](#roles-permissions-tall-stack-e-commerce-framework) - [Brands - TALL Stack E-commerce Framework](#brands-tall-stack-e-commerce-framework) - [Attributes - TALL Stack E-commerce Framework](#attributes-tall-stack-e-commerce-framework) - [Sidebar Package - TALL Stack E-commerce Framework](#sidebar-package-tall-stack-e-commerce-framework) - [Managing Attributes - TALL Stack E-commerce Framework](#managing-attributes-tall-stack-e-commerce-framework) - [Render Hooks - TALL Stack E-commerce Framework](#render-hooks-tall-stack-e-commerce-framework) - [Configuration - TALL Stack E-commerce Framework](#configuration-tall-stack-e-commerce-framework) - [Two-Factor Authentication - TALL Stack E-commerce Framework](#two-factor-authentication-tall-stack-e-commerce-framework) - [Carriers - TALL Stack E-commerce Framework](#carriers-tall-stack-e-commerce-framework) - [Managing Staff Users - TALL Stack E-commerce Framework](#managing-staff-users-tall-stack-e-commerce-framework) - [Roles & Permissions - TALL Stack E-commerce Framework](#roles-permissions-tall-stack-e-commerce-framework) - [Introduction - TALL Stack E-commerce Framework](#introduction-tall-stack-e-commerce-framework) - [Logging In - TALL Stack E-commerce Framework](#logging-in-tall-stack-e-commerce-framework) - [Managing Brands - TALL Stack E-commerce Framework](#managing-brands-tall-stack-e-commerce-framework) - [Discovering Dashboard - TALL Stack E-commerce Framework](#discovering-dashboard-tall-stack-e-commerce-framework) - [Extending Shopper - TALL Stack E-commerce Framework](#extending-shopper-tall-stack-e-commerce-framework) - [General Settings - TALL Stack E-commerce Framework](#general-settings-tall-stack-e-commerce-framework) - [Legal Pages - TALL Stack E-commerce Framework](#legal-pages-tall-stack-e-commerce-framework) - [Managing Categories - TALL Stack E-commerce Framework](#managing-categories-tall-stack-e-commerce-framework) - [Managing Tags - TALL Stack E-commerce Framework](#managing-tags-tall-stack-e-commerce-framework) - [Managing Reviews - TALL Stack E-commerce Framework](#managing-reviews-tall-stack-e-commerce-framework) - [Inventory Locations - TALL Stack E-commerce Framework](#inventory-locations-tall-stack-e-commerce-framework) - [Managing Collections - TALL Stack E-commerce Framework](#managing-collections-tall-stack-e-commerce-framework) - [Advanced Pricing - TALL Stack E-commerce Framework](#advanced-pricing-tall-stack-e-commerce-framework) - [Payment Methods - TALL Stack E-commerce Framework](#payment-methods-tall-stack-e-commerce-framework) - [Standalone Installation - TALL Stack E-commerce Framework](#standalone-installation-tall-stack-e-commerce-framework) - [Managing Suppliers - TALL Stack E-commerce Framework](#managing-suppliers-tall-stack-e-commerce-framework) - [Shipping Carriers - TALL Stack E-commerce Framework](#shipping-carriers-tall-stack-e-commerce-framework) - [Shipping Zones - TALL Stack E-commerce Framework](#shipping-zones-tall-stack-e-commerce-framework) - [Cart - TALL Stack E-commerce Framework](#cart-tall-stack-e-commerce-framework) - [Managing Discounts - TALL Stack E-commerce Framework](#managing-discounts-tall-stack-e-commerce-framework) - [Managing Customers - TALL Stack E-commerce Framework](#managing-customers-tall-stack-e-commerce-framework) - [Taxes - TALL Stack E-commerce Framework](#taxes-tall-stack-e-commerce-framework) - [Requirements - TALL Stack E-commerce Framework](#requirements-tall-stack-e-commerce-framework) - [External Product (Dropshipping) - TALL Stack E-commerce Framework](#external-product-dropshipping-tall-stack-e-commerce-framework) - [Virtual Product - TALL Stack E-commerce Framework](#virtual-product-tall-stack-e-commerce-framework) - [Standard Product - TALL Stack E-commerce Framework](#standard-product-tall-stack-e-commerce-framework) - [Overview - TALL Stack E-commerce Framework](#overview-tall-stack-e-commerce-framework) - [Managing Products - TALL Stack E-commerce Framework](#managing-products-tall-stack-e-commerce-framework) - [Managing Orders - TALL Stack E-commerce Framework](#managing-orders-tall-stack-e-commerce-framework) - [Two Factor Authentication - TALL Stack E-commerce Framework](#two-factor-authentication-tall-stack-e-commerce-framework) - [Currencies - TALL Stack E-commerce Framework](#currencies-tall-stack-e-commerce-framework) - [Setup Store - TALL Stack E-commerce Framework](#setup-store-tall-stack-e-commerce-framework) - [Variant Product - TALL Stack E-commerce Framework](#variant-product-tall-stack-e-commerce-framework) - [Starter Kits - TALL Stack E-commerce Framework](#starter-kits-tall-stack-e-commerce-framework) - [Version Support Policy - TALL Stack E-commerce Framework](#version-support-policy-tall-stack-e-commerce-framework) - [Suppliers - TALL Stack E-commerce Framework](#suppliers-tall-stack-e-commerce-framework) - [Creating a Product - TALL Stack E-commerce Framework](#creating-a-product-tall-stack-e-commerce-framework) - [React Starter Kit - TALL Stack E-commerce Framework](#react-starter-kit-tall-stack-e-commerce-framework) - [Upgrade Guide - TALL Stack E-commerce Framework](#upgrade-guide-tall-stack-e-commerce-framework) - [From v2.2 to v2.3 - TALL Stack E-commerce Framework](#from-v2-2-to-v2-3-tall-stack-e-commerce-framework) - [From v2.7 to v2.8 - TALL Stack E-commerce Framework](#from-v2-7-to-v2-8-tall-stack-e-commerce-framework) - [Reviews - TALL Stack E-commerce Framework](#reviews-tall-stack-e-commerce-framework) - [From v2.9 to v2.10 - TALL Stack E-commerce Framework](#from-v2-9-to-v2-10-tall-stack-e-commerce-framework) - [From v2.8 to v2.9 - TALL Stack E-commerce Framework](#from-v2-8-to-v2-9-tall-stack-e-commerce-framework) - [Zones - TALL Stack E-commerce Framework](#zones-tall-stack-e-commerce-framework) - [Vue Starter Kit - TALL Stack E-commerce Framework](#vue-starter-kit-tall-stack-e-commerce-framework) - [From v2.6 to v2.7 - TALL Stack E-commerce Framework](#from-v2-6-to-v2-7-tall-stack-e-commerce-framework) - [Taxes - TALL Stack E-commerce Framework](#taxes-tall-stack-e-commerce-framework) - [From v2.1 to v2.2 - TALL Stack E-commerce Framework](#from-v2-1-to-v2-2-tall-stack-e-commerce-framework) - [From v2.4 to v2.5 - TALL Stack E-commerce Framework](#from-v2-4-to-v2-5-tall-stack-e-commerce-framework) - [From v2.5 to v2.6 - TALL Stack E-commerce Framework](#from-v2-5-to-v2-6-tall-stack-e-commerce-framework) - [Unknown](#unknown) - [Categories - TALL Stack E-commerce Framework](#categories-tall-stack-e-commerce-framework) - [Alert - TALL Stack E-commerce Framework](#alert-tall-stack-e-commerce-framework) - [Contribution Guide - TALL Stack E-commerce Framework](#contribution-guide-tall-stack-e-commerce-framework) - [Currencies - TALL Stack E-commerce Framework](#currencies-tall-stack-e-commerce-framework) - [Configuration - TALL Stack E-commerce Framework](#configuration-tall-stack-e-commerce-framework) - [Channels - TALL Stack E-commerce Framework](#channels-tall-stack-e-commerce-framework) - [Collections - TALL Stack E-commerce Framework](#collections-tall-stack-e-commerce-framework) - [Card - TALL Stack E-commerce Framework](#card-tall-stack-e-commerce-framework) - [Demo Store - TALL Stack E-commerce Framework](#demo-store-tall-stack-e-commerce-framework) - [Customers - TALL Stack E-commerce Framework](#customers-tall-stack-e-commerce-framework) - [Dashboard - TALL Stack E-commerce Framework](#dashboard-tall-stack-e-commerce-framework) - [Events - TALL Stack E-commerce Framework](#events-tall-stack-e-commerce-framework) - [Discounts - TALL Stack E-commerce Framework](#discounts-tall-stack-e-commerce-framework) - [Empty Card - TALL Stack E-commerce Framework](#empty-card-tall-stack-e-commerce-framework) - [Empty State - TALL Stack E-commerce Framework](#empty-state-tall-stack-e-commerce-framework) - [Heading - TALL Stack E-commerce Framework](#heading-tall-stack-e-commerce-framework) - [Empty State - TALL Stack E-commerce Framework](#empty-state-tall-stack-e-commerce-framework) --- # Navigation - TALL Stack E-commerce Framework > Documentation Index > ------------------- > > Fetch the complete documentation index at: [/llms.txt](https://docs.laravelshopper.dev/llms.txt) > > Use this file to discover all available pages before exploring further. [Skip to main content](https://docs.laravelshopper.dev/v1/extending/navigation#content-area) This is documentation for Shopper v1, which is no longer maintained. Please refer to the [v2 docs](https://docs.laravelshopper.dev/v2) for the latest information. The Control Panel navigation is quite customizable. You can add your own sections, pages, and subpages, as well as remove and modify existing ones. The navigation is controlled by the package [maatwebsite/laravel-sidebar](https://github.com/SpartnerNL/Laravel-Sidebar) . You need to create a sidebar to add your menus within the main sidebar of Shopper. You may register your sidebar like event in the `register()` method of a service provider. [​](https://docs.laravelshopper.dev/v1/extending/navigation#adding-navigation) Adding Navigation --------------------------------------------------------------------------------------------------- Let’s assume we’re creating a Sidebar folder under app folder, and want to add a Blog navigation item to the Content section of the navigation. To add this item, we’ll create first a `BlogSidebar` class. There is no command to create this class so you have to create it manually and it must extend from `Shopper\Framework\Sidebar\AbstractAdminSidebar` We will have an architecture similar to this one app/ Sidebar/ BlogSidebar.php We assume here that you have already seen how to add routes for our administration explained in this [section](https://docs.laravelshopper.dev/v1/extending/control-panel#adding-control-panel-routes) . Here we will assume that our `routes/shopper.php` file contains this use Illuminate\Support\Facades\Route; Route::prefix('blog')->group(function () { Route::resource('posts', 'PostController')->only(['index', 'create', 'edit']); }); You cannot use the notation `[PostController::class, 'index']` because this will not load and will generate an error. Everything is loaded directly from the RouteServiceProvider of Shopper Our BlogSidebar will look like this namespace App\Sidebar; use Maatwebsite\Sidebar\Group; use Maatwebsite\Sidebar\Item; use Maatwebsite\Sidebar\Menu; use Shopper\Framework\Sidebar\AbstractAdminSidebar; class BlogSidebar extends AbstractAdminSidebar { /** * Method used to define your sidebar menu groups and items. * * @param Menu $menu * @return Menu */ public function extendWith(Menu $menu): Menu { $menu->group(__('Blog'), function (Group $group) { $group->weight(22); $group->authorize(true); $group->item(__('Posts'), function (Item $item) { $item->weight(2); $item->authorize(true); $item->route('posts.index'); $item->icon(' '); }); }); return $menu; } } Now we will register our sidebar in our **AppServiceProvider** with the `register()` method namespace App\Providers; use App\Sidebar\BlogSidebar; use Darryldecode\Cart\Cart; use Illuminate\Support\ServiceProvider; use Illuminate\Support\Str; use Shopper\Framework\Events\BuildingSidebar; class AppServiceProvider extends ServiceProvider { /** * Register any application services. * * @return void */ public function register() { if ($this->app->isLocal()) { $this->app->register(\Barryvdh\LaravelIdeHelper\IdeHelperServiceProvider::class); } $this->app['events']->listen(BuildingSidebar::class, BlogSidebar::class); $this->app->singleton('wishlist', function ($app) { $storage = $app['session']; $events = $app['events']; $instanceName = 'cart_2'; return new Cart( $storage, $events, $instanceName, session()->getId(), config('shopping_cart') ); }); } /** * Bootstrap any application services. * * @return void */ public function boot() { Str::macro('readDuration', function (...$text) { $totalWords = str_word_count(implode(' ', $text)); $minutesToRead = round($totalWords / 200); return (int) max(1, $minutesToRead); }); } } We will have this in our sidebar ![Blog sidebar](https://mintcdn.com/shopperlabs-ee054f5e/6wDmKBjBTMPmRNSb/images/v1/sidebar-screen.png?w=2500&fit=max&auto=format&n=6wDmKBjBTMPmRNSb&q=85&s=190507e7d30a1682863f4a5a3fbbadf0) [​](https://docs.laravelshopper.dev/v1/extending/navigation#the-menu-&-item-class) The Menu & Item Class ----------------------------------------------------------------------------------------------------------- Each item you see in the navigation is an instance of the `Maatwebsite\Sidebar\Item` class. Each top-level `Menu` in a section can contain its own group of `Item` children. ### [​](https://docs.laravelshopper.dev/v1/extending/navigation#basic-api) Basic API The code examples above demonstrate how to add Navigation. Once you have a `Item` object, the following chainable methods are available to you: | Method | Parameters | Description | | --- | --- | --- | | `group()` | `$name` (string) | Define group name. | | `name()` | `$name` (string) | Define item name to overwrite the `group()` name value. | | `weight()` | `$weight` (int) | Define item order name. | | `route()` | `$name` (string) | Define a route automatically available in `routes/shopper.php` | | `url()` | `$url` (string) | Define a URL instead of a route. A string without a leading slash will be relative from the CP. A leading slash will be relative from the root. You may provide an absolute URL. | | `icon()` | `$icon` (string) | Define icon. | | `authorize()` | `$ability` (boolean) | Define authorization. | [Controllers](https://docs.laravelshopper.dev/v1/extending/controllers) [Forms](https://docs.laravelshopper.dev/v1/extending/forms) ⌘I --- # Discounts - TALL Stack E-commerce Framework > Documentation Index > ------------------- > > Fetch the complete documentation index at: [/llms.txt](https://docs.laravelshopper.dev/llms.txt) > > Use this file to discover all available pages before exploring further. [Skip to main content](https://docs.laravelshopper.dev/v1/discounts#content-area) This is documentation for Shopper v1, which is no longer maintained. Please refer to the [v2 docs](https://docs.laravelshopper.dev/v2) for the latest information. [Reviews](https://docs.laravelshopper.dev/v1/reviews) [Orders](https://docs.laravelshopper.dev/v1/orders) ⌘I --- # Controllers - TALL Stack E-commerce Framework > Documentation Index > ------------------- > > Fetch the complete documentation index at: [/llms.txt](https://docs.laravelshopper.dev/llms.txt) > > Use this file to discover all available pages before exploring further. [Skip to main content](https://docs.laravelshopper.dev/v1/extending/controllers#content-area) This is documentation for Shopper v1, which is no longer maintained. Please refer to the [v2 docs](https://docs.laravelshopper.dev/v2) for the latest information. Controllers group related Laravel request handling logic into single classes stored in the `app/Http/Controllers/` directory. In this section we will create our own controllers to add functionality to our admin panel. To configure your controllers, you need to look at the `controllers` key in the `shopper/system.php` configuration file. 'controllers' => [\ \ 'namespace' => 'App\\Http\\Controllers\\Shopper',\ \ ], This implies that all controllers that will be loaded into the shopper control panel must be in the `app/Http/Controllers/Shopper` folder. But you can change this namespace, you can change it for example to load them into a **CPanel** folder. For this your configuration should look like this 'controllers' => [\ \ 'namespace' => 'App\\Http\\Controllers\\CPanel',\ \ ], [​](https://docs.laravelshopper.dev/v1/extending/controllers#create-controller) Create Controller ---------------------------------------------------------------------------------------------------- You can create a controller using the following laravel command, which will generate a class in the `App\Http\Controllers\Shopper` namespace. php artisan make:controller Shopper\\PostController You can now add all your actions and set up the management of your articles namespace App\Http\Controllers\Shopper; use App\Http\Controllers\Controller; use Illuminate\Http\Request; class PostController extends Controller { // } [Control Panel](https://docs.laravelshopper.dev/v1/extending/control-panel) [Navigation](https://docs.laravelshopper.dev/v1/extending/navigation) ⌘I --- # Customization - TALL Stack E-commerce Framework > Documentation Index > ------------------- > > Fetch the complete documentation index at: [/llms.txt](https://docs.laravelshopper.dev/llms.txt) > > Use this file to discover all available pages before exploring further. [Skip to main content](https://docs.laravelshopper.dev/v1/customization#content-area) This is documentation for Shopper v1, which is no longer maintained. Please refer to the [v2 docs](https://docs.laravelshopper.dev/v2) for the latest information. Once you have installed Shopper, you need to set up a store to serve as your first location. After creating a new user, you need to login via the url `/shopper/login`. After logging in you need to fill in the required information to access the Shopper dashboard ![Shopper Config Example](https://mintcdn.com/shopperlabs-ee054f5e/jlpf_1VxeBnlQtP6/images/v1/customization.png?w=2500&fit=max&auto=format&n=jlpf_1VxeBnlQtP6&q=85&s=a8200f51c0ccfb1f865d0ef39c29692e) Defines your shop’s address country and state, where you are based as a seller. It determines default tax rates and customer locations. [​](https://docs.laravelshopper.dev/v1/customization#global) Global ---------------------------------------------------------------------- All thoses informations is stored using the **Setting** Model which is located `\Shopper\Core\Models\Setting` namespace Shopper\Core\Models; use Illuminate\Database\Eloquent\Model; class Setting extends Model { /** * The attributes that are mass assignable. * * @var array */ protected $fillable = [\ 'display_name',\ 'key',\ 'value',\ 'locked',\ ]; } ### [​](https://docs.laravelshopper.dev/v1/customization#fields) Fields | Name | Type | Notes | | --- | --- | --- | | `id` | autoinc | | | `key` | string | Unique, the configuration key that will be used to retrieve this information. | | `display_name` | string | Nullable, represents the display name for the key that has been set for better reading | | `value` | json | Nullable, represents the value of the key that will be displayed when the parameter is requested | | `locked` | boolean | default is false (0), allows to define if this parameter can be updated | ### [​](https://docs.laravelshopper.dev/v1/customization#component) Component Shopper is made of several Livewire components, to make the configuration easier and more adaptable to any kind of system. The component used to manage the configuration and customization of the store is found in the component configuration file `config/shopper/components.php`. So you can replace it and configure your store the way you want. Yes it’s magic 🎩 ### [​](https://docs.laravelshopper.dev/v1/customization#retrieving-setting) Retrieving setting By default to retrieve the value of a key you can use the helper function `shopper_setting()` passing the desired key as parameter shopper_setting('my_key') This value is cached for one day and under the key `shopper-setting-{$key}` [​](https://docs.laravelshopper.dev/v1/customization#store) Store -------------------------------------------------------------------- When you launch your store the first important thing to do is to fill in the information about this store. Your customers and the different services you might use need to know the information about your store. ![Store information](https://mintcdn.com/shopperlabs-ee054f5e/6wDmKBjBTMPmRNSb/images/v1/store-information.png?w=2500&fit=max&auto=format&n=6wDmKBjBTMPmRNSb&q=85&s=d363853f44395421484c6e4d1cd44170) The information stored in this section is available using the following keys: `shop_name` for the store name, `shop_email` for the email and `shop_country_id` for the Country. [​](https://docs.laravelshopper.dev/v1/customization#currency) Currency -------------------------------------------------------------------------- Choose the default currency for the store. Only one may be selected. ![Store currency](https://mintcdn.com/shopperlabs-ee054f5e/6wDmKBjBTMPmRNSb/images/v1/store-currency.png?w=2500&fit=max&auto=format&n=6wDmKBjBTMPmRNSb&q=85&s=b74529fea614c1c29266120a12259b15) For currency configurations we use the [moneyphp/money](https://github.com/moneyphp/money) package. At the moment, the formatter does it automatically depending on the currency. As you may have noticed in the code, there is also a helper that returns the currency you registered `shopper_currency()`. This will return the currency configured in your admin panel: **USD**, **XAF**, **EUR**, etc [​](https://docs.laravelshopper.dev/v1/customization#location) Location -------------------------------------------------------------------------- Most stores keep their products in different locations around the world. When setting up this configuration you need to define a location that will be set as the default location for your products. When shipping an order, the products to be delivered/shipped will start from this location and thus the shipping price can be set according to this. ![Store location](https://mintcdn.com/shopperlabs-ee054f5e/jlpf_1VxeBnlQtP6/images/v1/customization-map-off.png?w=2500&fit=max&auto=format&n=jlpf_1VxeBnlQtP6&q=85&s=0d49edd9183dd6697c2bbf9a9342080a) You must fill in the address of your location. You can specify GPS coordinates if you want customers to be able to geolocate you on a map with this information. Shopper uses mapbox to display this map. To configure your map you can go to the [mapbox documentation](https://docs.mapbox.com/mapbox-gl-js/api/) . ![Store location with mapbox](https://mintcdn.com/shopperlabs-ee054f5e/jlpf_1VxeBnlQtP6/images/v1/customization-map.png?w=2500&fit=max&auto=format&n=jlpf_1VxeBnlQtP6&q=85&s=cdfa263eb7a460451aa4432e901eeab2) The keys registered in the database during this section: `shop_street_address`, `shop_zipcode`, `shop_city`, `shop_phone_number`, `shop_lng` and `shop_lat`. If you modify the Livewire component that takes care of registering those information you can also decide to change the name of its keys. [​](https://docs.laravelshopper.dev/v1/customization#channel) Channel ------------------------------------------------------------------------ In today’s E-commerce the shop site is no longer the only point of sale. Channels represent a single sales channel, which can be one of the following things: * Website * Mobile application * Cashier in your physical store * Facebook shop, * Instagram shop, * etc or pretty much anything similar you can imagine. By default when you set up your store Shopper creates a sales channel at the same time as your first location with the same location information. (new ChannelRepository())->create([\ 'name' => $name = __('Web Store'),\ 'slug' => $name,\ 'url' => env('APP_URL'),\ 'is_default' => true,\ ]); This sales channel will be automatically assigned to all products that are added to your site. The implementation of a sales channel management will be done later [​](https://docs.laravelshopper.dev/v1/customization#social-links) Social Links ---------------------------------------------------------------------------------- If you want your customers to find you easily on social networks, you can fill in all the links directly by putting the full url. This step is completely optional ![Store social links](https://mintcdn.com/shopperlabs-ee054f5e/jlpf_1VxeBnlQtP6/images/v1/customization-social-media.png?w=2500&fit=max&auto=format&n=jlpf_1VxeBnlQtP6&q=85&s=a49854bb9d8052bf38a054ce68a9312c) The keys registered in the database during this section: `shop_facebook_link`, `shop_instagram_link` and `shop_twitter_link`. [​](https://docs.laravelshopper.dev/v1/customization#update-setting) Update setting -------------------------------------------------------------------------------------- You can update your store information when needed, edit your store images, update the complete address, the legal name of your shop, etc. Shopper at the moment doesn’t manage several currencies so you must select with what currency you will sell on your site. To edit your shop information, you must: * From your administration, on the blue sidebar click on the settings icon at the bottom of the page **Settings > General** ![Admin Panel setting](https://mintcdn.com/shopperlabs-ee054f5e/6wDmKBjBTMPmRNSb/images/v1/setting.jpg?w=2500&fit=max&auto=format&n=6wDmKBjBTMPmRNSb&q=85&s=892d66f4c19f971893b57334e54a3135) The component used to update store setting of the store is found in the component configuration file `config/shopper/components.php`, It’s the `Shopper\Framework\Http\Livewire\Settings\General` component. use Shopper\Http\Livewire\Components; return [\ 'livewire' => [\ \ 'settings.inventories.create' => Components\Settings\Inventories\Create::class,\ 'settings.inventories.edit' => Components\Settings\Inventories\Edit::class,\ 'settings.general' => Components\Settings\General::class,\ 'settings.legal.privacy' => Components\Settings\Legal\Privacy::class,\ 'settings.legal.refund' => Components\Settings\Legal\Refund::class,\ \ ];\ \ ]; ![Admin update setting](https://mintcdn.com/shopperlabs-ee054f5e/6wDmKBjBTMPmRNSb/images/v1/store-setting-update.png?w=2500&fit=max&auto=format&n=6wDmKBjBTMPmRNSb&q=85&s=e4f28b6687a986c90cf8dddee3738be2) In this interface you will update your store. Don’t forget that the model used is the model `Shopper\Models\Setting`. With the Shopper configuration you can completely change the architecture of this view and the data stored in the database. [Configuration](https://docs.laravelshopper.dev/v1/configuration) [Locations](https://docs.laravelshopper.dev/v1/locations) ⌘I --- # Customers - TALL Stack E-commerce Framework > Documentation Index > ------------------- > > Fetch the complete documentation index at: [/llms.txt](https://docs.laravelshopper.dev/llms.txt) > > Use this file to discover all available pages before exploring further. [Skip to main content](https://docs.laravelshopper.dev/v1/customers#content-area) This is documentation for Shopper v1, which is no longer maintained. Please refer to the [v2 docs](https://docs.laravelshopper.dev/v2) for the latest information. The first page under the “Customers” menu gives you a list of all the registered users on your shop. ![Customers](https://mintcdn.com/shopperlabs-ee054f5e/jlpf_1VxeBnlQtP6/images/v1/customers.png?w=2500&fit=max&auto=format&n=jlpf_1VxeBnlQtP6&q=85&s=0aa31c9418c3df9b9cf94a3f68da3971) During the [installation](https://docs.laravelshopper.dev/installing#update-existing-files) of Shopper, one of the first things required is to inherit to our model User the features of the model User that is in Shopper. [​](https://docs.laravelshopper.dev/v1/customers#fields) Fields ------------------------------------------------------------------ The model used is `App\Models\User` which extends the `\Shopper\Framework\Models\User\User` model. During the installation of Shopper, the `name` column of the users table is removed and replaced by 2 new fields which are `first_name` and `last_name`. | Name | Type | Required | Notes | | --- | --- | --- | --- | | `id` | autoinc | | auto | | `first_name` | string | no | Nullable | | `last_name` | string | yes | | | `email` | string | yes | Unique | | `password` | string | no | Nullable | | `email_verified_at` | timestamp | no | Nullable | | `gender` | enum | yes | values `['male', 'female']` | | `phone_number` | string | no | Nullable | | `birth_date` | date | no | Nullable | | `avatar_type` | string | no | default [ui-avatars](https://ui-avatars.com/) | | `avatar_location` | string | no | Nullable, picture filename | | `timezone` | string | no | Nullable | | `opt_in` | boolean | no | default `false`, this field is for mailing subcription | | `last_login_at` | timestamp | no | Nullable | | `last_login_ip` | string | no | Nullable | [​](https://docs.laravelshopper.dev/v1/customers#components) Components -------------------------------------------------------------------------- The components used to manage customers are found in the component configuration file `config/shopper/components.php`. use Shopper\Framework\Http\Livewire; return [\ \ 'livewire' => [\ 'modals.delete-customer' => Livewire\Modals\DeleteCustomer::class,\ \ 'customers.addresses' => Livewire\Customers\Addresses::class,\ 'customers.browse' => Livewire\Customers\Browse::class,\ 'customers.create' => Livewire\Customers\Create::class,\ 'customers.orders' => Livewire\Customers\Orders::class,\ 'customers.profile' => Livewire\Customers\Profile::class,\ 'customers.show' => Livewire\Customers\Show::class,\ \ 'tables.customers-table' => Livewire\Tables\CustomersTable::class,\ ];\ \ ]; [​](https://docs.laravelshopper.dev/v1/customers#manage-customers) Manage Customers -------------------------------------------------------------------------------------- When a new customer places an order with your store, their name and information are automatically added to your customer list. A customer profile is created when a customer interacts with your store. Alternatively, you can add a customer to your store manually. ### [​](https://docs.laravelshopper.dev/v1/customers#create-customer) Create customer From your Shopper admin, go to Customers and click on “Add customer” button. ![Create customer](https://mintcdn.com/shopperlabs-ee054f5e/jlpf_1VxeBnlQtP6/images/v1/create-customer.png?w=2500&fit=max&auto=format&n=jlpf_1VxeBnlQtP6&q=85&s=9fb8edef21162357889a730ae6b6fb69) When creating a customer manually, you should also fill in an address that will be used when he places an order in your store. ![customer address form](https://mintcdn.com/shopperlabs-ee054f5e/jlpf_1VxeBnlQtP6/images/v1/customer-address.png?w=2500&fit=max&auto=format&n=jlpf_1VxeBnlQtP6&q=85&s=1735428e1b0c0abd427fb5043d3a04b2) _Optional_: If the customer has agreed to receive marketing emails, and you have entered an email address, then in the Customer overview section, check Customer agreed to receive marketing emails. And you can also check the **Send customer credentials** checkbox to sent an email to the customer with their login information. ![customer notification](https://mintcdn.com/shopperlabs-ee054f5e/jlpf_1VxeBnlQtP6/images/v1/customer-notification.png?w=2500&fit=max&auto=format&n=jlpf_1VxeBnlQtP6&q=85&s=cca8a6ccc7d29662aa1e2679451709ee) The Livewire component used to create a client is `Shopper\Framework\Http\Livewire\Customers\Create` $customer = (new UserRepository())->create([\ 'last_name' => $this->last_name,\ 'first_name' => $this->first_name,\ 'email' => $this->email,\ 'password' => Hash::make($this->password),\ 'phone_number' => $this->phone_number,\ 'email_verified_at' => now()->toDateTimeString(),\ 'opt_in' => $this->opt_in,\ ]); $customer->assignRole(config('shopper.system.users.default_role')); The clients that are displayed in the listing page are those that have the `user` profile which is the default role associated with all clients. ### [​](https://docs.laravelshopper.dev/v1/customers#customer%E2%80%99s-information) Customer’s Information In the case where you would like to have more information on a given customer, you can click on the customer name row in the customer’s list. A new page appears. ![customer informations](https://mintcdn.com/shopperlabs-ee054f5e/jlpf_1VxeBnlQtP6/images/v1/customer-informations.png?w=2500&fit=max&auto=format&n=jlpf_1VxeBnlQtP6&q=85&s=d58d9c3b05112dd04467e841b7b6ed17) And in this page you can modify the information of a customer by clicking on the “update” button on the right of each information. The various sections provide you with some key data on the user: * **Customer information**, first and last name, e-mail address, picture, birth date, gender. * Registered **Addresses** * **Orders** Summary of purchases already made by the customer. Amount spent, payment type, order status. For more information on each order, click on the order number. Each of its pages are accessible via Livewire components, and are fully customizable to your needs. So don’t hesitate to modify them. [Collections](https://docs.laravelshopper.dev/v1/collections) [Products](https://docs.laravelshopper.dev/v1/products) ⌘I --- # Installation - TALL Stack E-commerce Framework > Documentation Index > ------------------- > > Fetch the complete documentation index at: [/llms.txt](https://docs.laravelshopper.dev/llms.txt) > > Use this file to discover all available pages before exploring further. [Skip to main content](https://docs.laravelshopper.dev/v2/installation#content-area) Shopper requires an existing Laravel 11.28+ or 12.x application. If you do not have one yet, create a new Laravel project first by following the [Laravel installation guide](https://laravel.com/docs/installation) . [​](https://docs.laravelshopper.dev/v2/installation#install-the-package) Install the Package ----------------------------------------------------------------------------------------------- Install `shopper/framework` via Composer: composer require shopper/framework If you have a cached config from a previous setup, run `php artisan config:clear` before installing. [​](https://docs.laravelshopper.dev/v2/installation#prepare-your-user-model) Prepare Your User Model ------------------------------------------------------------------------------------------------------- Shopper relies on your `User` model having certain relationships and methods for authentication, permissions, and admin panel access. Add the `InteractsWithShopper` trait and implement the `ShopperUser` interface on your User model: app/Models/User.php use Illuminate\Foundation\Auth\User as Authenticatable; use Shopper\Models\Contracts\ShopperUser; use Shopper\Traits\InteractsWithShopper; class User extends Authenticatable implements ShopperUser { use InteractsWithShopper; protected $hidden = [\ 'password',\ 'remember_token',\ 'store_two_factor_secret',\ 'store_two_factor_recovery_codes',\ ]; } The `InteractsWithShopper` trait provides relationships for roles, permissions, orders, addresses, and two-factor authentication. The `ShopperUser` interface ensures your model adheres to the contract expected by Shopper’s admin panel. [​](https://docs.laravelshopper.dev/v2/installation#run-the-installer) Run the Installer ------------------------------------------------------------------------------------------- The install command publishes configuration files, creates the asset symlink, and optionally runs migrations and seeders: php artisan shopper:install The installer performs these steps: 1. Publishes Shopper config files to `config/shopper/` 2. Publishes Spatie MediaLibrary migrations 3. Publishes Filament assets 4. Creates a symlink from `vendor/shopper/framework/public` to `public/cpanel` (or your configured prefix) 5. Prompts you to run migrations and seed the database with roles, permissions, and default data All Shopper database tables are prefixed with `sh_` by default to avoid conflicts with your existing tables. You can change this in `config/shopper/core.php`. [​](https://docs.laravelshopper.dev/v2/installation#create-an-admin-user) Create an Admin User ------------------------------------------------------------------------------------------------- Create your first admin user to access the dashboard: php artisan shopper:user The command prompts for an email, first name, last name, and password. The user is automatically assigned the administrator role. [​](https://docs.laravelshopper.dev/v2/installation#access-the-admin-panel) Access the Admin Panel ----------------------------------------------------------------------------------------------------- If you are using [Laravel Herd](https://herd.laravel.com/) or [Laravel Valet](https://laravel.com/docs/valet) , visit your application at: http://your-project.test/cpanel/login If you are using `php artisan serve`, the admin panel is available at `http://localhost:8000/cpanel/login`. The `/cpanel` prefix is configurable. See the [Configuration](https://docs.laravelshopper.dev/v2/configuration) page for details. [​](https://docs.laravelshopper.dev/v2/installation#next-steps) Next Steps ----------------------------------------------------------------------------- [Configuration\ -------------\ \ Customize the admin prefix, models, middleware, and settings.](https://docs.laravelshopper.dev/v2/configuration) [Dashboard\ ---------\ \ Learn about the dashboard components and how to customize them.](https://docs.laravelshopper.dev/v2/dashboard) [Products\ --------\ \ Start building your product catalog.](https://docs.laravelshopper.dev/v2/products) [Requirements](https://docs.laravelshopper.dev/v2/requirements) [Configuration](https://docs.laravelshopper.dev/v2/configuration) Ctrl+I --- # Contribution Guide - TALL Stack E-commerce Framework > Documentation Index > ------------------- > > Fetch the complete documentation index at: [/llms.txt](https://docs.laravelshopper.dev/llms.txt) > > Use this file to discover all available pages before exploring further. [Skip to main content](https://docs.laravelshopper.dev/v1/contributing#content-area) This is documentation for Shopper v1, which is no longer maintained. Please refer to the [v2 docs](https://docs.laravelshopper.dev/v2) for the latest information. [​](https://docs.laravelshopper.dev/v1/contributing#bug-reports) Bug Reports ------------------------------------------------------------------------------- To encourage active collaboration, Shopper strongly encourages pull requests, not just bug reports. “Bug reports” may also be sent in the form of a pull request containing a failing test. [​](https://docs.laravelshopper.dev/v1/contributing#pull-requests) Pull Requests ----------------------------------------------------------------------------------- * **Document any change in behaviour** - Make sure the `readme.md` and any other relevant documentation are kept up-to-date. * **Consider our release cycle** - We try to follow [SemVer v2.0.0](http://semver.org/) . * **One pull request per feature** - If you want to do more than one thing, send multiple pull requests. * **Send coherent history** - Make sure each individual commit in your pull request is meaningful. If you had to make multiple intermediate commits while developing, please [squash them](http://www.git-scm.com/book/en/v2/Git-Tools-Rewriting-History#Changing-Multiple-Commit-Messages) before submitting. **Happy coding**! [​](https://docs.laravelshopper.dev/v1/contributing#security-vulnerabilities) Security Vulnerabilities --------------------------------------------------------------------------------------------------------- If you discover a security vulnerability within Laravel, please send an email to the Shopper Team at [arthur@shopperlabs.co](mailto:arthur@shopperlabs.co) . All security vulnerabilities will be promptly addressed. [​](https://docs.laravelshopper.dev/v1/contributing#coding-style) Coding Style --------------------------------------------------------------------------------- Laravel follows the [PSR-2](https://github.com/php-fig/fig-standards/blob/master/accepted/PSR-2-coding-style-guide.md) coding standard and the [PSR-4](https://github.com/php-fig/fig-standards/blob/master/accepted/PSR-4-autoloader.md) autoloading standard. [​](https://docs.laravelshopper.dev/v1/contributing#code-of-conduct) Code of Conduct --------------------------------------------------------------------------------------- As contributors and maintainers of this project, we pledge to respect all people who contribute through reporting issues, posting feature requests, updating documentation, submitting pull requests or patches, and other activities. We are committed to making participation in this project a harassment-free experience for everyone, regardless of the level of experience, gender, gender identity and expression, sexual orientation, disability, personal appearance, body size, race, age, or religion. Examples of unacceptable behavior by participants include the use of sexual language or imagery, derogatory comments or personal attacks, trolling, public or private harassment, insults, or other unprofessional conduct. Project maintainers have the right and responsibility to remove, edit, or reject comments, commits, code, wiki edits, issues, and other contributions that are not aligned to this Code of Conduct. Project maintainers who do not follow the Code of Conduct may be removed from the project team. Instances of abusive, harassing, or otherwise unacceptable behavior may be reported by opening an issue or contacting one or more of the project maintainers. [Requirements](https://docs.laravelshopper.dev/v1/requirements) ⌘I --- # Brands - TALL Stack E-commerce Framework > Documentation Index > ------------------- > > Fetch the complete documentation index at: [/llms.txt](https://docs.laravelshopper.dev/llms.txt) > > Use this file to discover all available pages before exploring further. [Skip to main content](https://docs.laravelshopper.dev/v1/brands#content-area) This is documentation for Shopper v1, which is no longer maintained. Please refer to the [v2 docs](https://docs.laravelshopper.dev/v2) for the latest information. Unless you make your own products, you should always register the brands of your products in Shopper. If you sell your own products, you must at least create your company as a brand: this helps your customer find what they are looking for, and this can bring some valuable search engine points. [​](https://docs.laravelshopper.dev/v1/brands#overview) Overview ------------------------------------------------------------------- The management of brands is exactly the same as the one done in most of the e-commerce website creation tools: only the name can change. It is mainly used to facilitate the navigation of customers in your catalog, as it is increasingly common to search for a specific brand. ![Brands](https://mintcdn.com/shopperlabs-ee054f5e/jlpf_1VxeBnlQtP6/images/v1/brands.png?w=2500&fit=max&auto=format&n=jlpf_1VxeBnlQtP6&q=85&s=764dc4cc95f909d469f70206abe812e1) New brands are automatically activated and available for your online store, even if they do not contain any products yet. You must deactivate them so that they do not appear online. ### [​](https://docs.laravelshopper.dev/v1/brands#fields) Fields The model used is `Shopper\Framework\Models\Shop\Product\Brand`. | Name | Type | Required | Notes | | --- | --- | --- | --- | | `id` | autoinc | | auto | | `name` | string | yes | | | `slug` | string | yes | Unique, default value is auto generated using brand name | | `website` | string | no | Nullable | | `description` | longText | no | Nullable | | `position` | string | no | Default `0` | | `is_enabled` | boolean | no | Default `false` | | `seo_title` | string | no | Nullable, for seo title max length is 60 | | `seo_description` | string | no | Nullable, for seo description max length is 160 | Models are customizable, and we recommend changing the **Brand** model when you configure your site. To change the model you need to look at the configuration file `config/shopper/system.php` at the key `models`. return [\ 'models' => [\ /*\ * Eloquent model should be used to retrieve your brands. Of course,\ * it is often just the "Brand" model but you may use whatever you like.\ *\ * The model you want to use as a Brand model needs to extends the\ * `\Shopper\Framework\Models\Shop\Product\Brand` model.\ */\ 'brand' => \Shopper\Framework\Models\Shop\Product\Brand::class,\ \ /*\ * Eloquent model should be used to retrieve your categories. Of course,\ * it is often just the "Category" model but you may use whatever you like.\ *\ * The model you want to use as a Category model needs to extends the\ * `\Shopper\Framework\Models\Shop\Product\Category` model.\ */\ 'category' => \Shopper\Framework\Models\Shop\Product\Category::class,\ ]\ ]; 1. Create your own model that you have to use php artisan make:model Brand Once the `app/Models/Brand.php` model is created in our app folder, we will make it extend from the `Shopper\Framework\Models\Shop\Product\Brand` model available in Shopper. 2. Extend our Brand model from the Brand Shopper Model namespace App\Models; use Shopper\Framework\Models\Shop\Product; class Brand extends Product\Brand { } 3. Update `brand` key for the model on the `system.php` config file to use our new model return [\ 'models' => [\ /*\ * Eloquent model should be used to retrieve your brands. Of course,\ * it is often just the "Brand" model but you may use whatever you like.\ *\ * The model you want to use as a Brand model needs to extends the\ * `\Shopper\Framework\Models\Shop\Product\Brand` model.\ */\ 'brand' => \App\Models\Brand::class,\ \ /*\ * Eloquent model should be used to retrieve your categories. Of course,\ * it is often just the "Category" model but you may use whatever you like.\ *\ * The model you want to use as a Category model needs to extends the\ * `\Shopper\Framework\Models\Shop\Product\Category` model.\ */\ 'category' => \Shopper\Framework\Models\Shop\Product\Category::class,\ ]\ ]; ### [​](https://docs.laravelshopper.dev/v1/brands#components) Components Livewire components for managing brands are available in the component configuration file `config/shopper/components.php`. use Shopper\Framework\Http\Livewire; return [\ 'livewire' => [\ 'brands.browse' => Livewire\Brands\Browse::class,\ 'brands.create' => Livewire\Brands\Create::class,\ 'brands.edit' => Livewire\Brands\Edit::class,\ \ 'tables.brands-table' => Livewire\Tables\BrandsTable::class,\ ];\ ]; For handling tables in Shopper, we use [Laravel Livewire Tables](https://github.com/rappasoft/laravel-livewire-tables) package by Anthony Rappa. [​](https://docs.laravelshopper.dev/v1/brands#manage-brands) Manage Brands ----------------------------------------------------------------------------- The brands are accessible via the Brands Menu on the left sidebar. The display page is rendered by the Livewire component `Shopper\Framework\Http\Livewire\Brands\Browse` and for the display of the brands table is the component `Shopper\Framework\Http\Livewire\Tables\BrandsTable`. You can modify them in the component configuration file to use your own. ### [​](https://docs.laravelshopper.dev/v1/brands#create-brand) Create brand Click on the “Create” button on the brands page, and a creation form appears. ![Create brand](https://mintcdn.com/shopperlabs-ee054f5e/jlpf_1VxeBnlQtP6/images/v1/create-brand.png?w=2500&fit=max&auto=format&n=jlpf_1VxeBnlQtP6&q=85&s=47bffcbf52d736dcf2f0e9ad1f5e5d17) Save your changes in order to be taken back to the brand’s list. Required fields are marked with an **asterisk (\*)** The SEO section allows you to define how your brand information should be displayed in search engines. To modify the content you click on the button “Edit SEO preview” ![brand seo form](https://mintcdn.com/shopperlabs-ee054f5e/jlpf_1VxeBnlQtP6/images/v1/brand-seo.png?w=2500&fit=max&auto=format&n=jlpf_1VxeBnlQtP6&q=85&s=e05338dc7a86c3ad42bdd201ef23b3ac) By fill the data you will have a direct preview of the content. ### [​](https://docs.laravelshopper.dev/v1/brands#delete-brand) Delete brand To delete, deactivate or activate brands, you need to select the brand you want to delete and then click on the “Bulk Actions” button to choose the action you want to perform. ![delete brand](https://mintcdn.com/shopperlabs-ee054f5e/jlpf_1VxeBnlQtP6/images/v1/delete-brand.png?w=2500&fit=max&auto=format&n=jlpf_1VxeBnlQtP6&q=85&s=94785a63f4bdc7e9704227a83a2024eb) [​](https://docs.laravelshopper.dev/v1/brands#retrieve-data) Retrieve Data ----------------------------------------------------------------------------- Once you have your brands and you want to display them in your store, you can retrieve them this way in your controller namespace App\Http\Controllers; use App\Models\Brand; use App\Models\Product; use Carbon\Carbon; class HomeController extends Controller { public function home() { $products = Product::with('categories', 'attributes') ->publish() ->take(8) ->get() ->map(function ($product) { $product['is_new'] = $product->created_at ->addDays(8) ->greaterThanOrEqualTo(Carbon::now()); return $product; }); return view('home', [\ 'products' => $products,\ 'brands' => Brand::query()->get()->take(12),\ ]); } } Knowing that your brands can be displayed on several pages and places in your store, you can create a **View Composer** ([read more about View Composer](https://laravel.com/docs/9.x/views#view-composers) ). * Create your brand composer undo a custom folder `app/View/Composers` namespace App\View\Composers; use App\Models\Brand; use Illuminate\View\View; class BrandsComposer { public function compose(View $view) { $view->with('brands', Brand::enabled()->get()->take(12)); } } * Then you have to add it in your **AppServiceProvider** namespace App\Providers; use App\View\Composers\BrandsComposer; use Illuminate\Support\Facades\View; use Illuminate\Support\ServiceProvider; class AppServiceProvider extends ServiceProvider { public function boot() { View::composer('partials.brands', BrandsComposer::class); } } And in your front-end you can browse your brands to have a display like this ![Brands preview list](https://mintcdn.com/shopperlabs-ee054f5e/jlpf_1VxeBnlQtP6/images/v1/brand-lists.png?w=2500&fit=max&auto=format&n=jlpf_1VxeBnlQtP6&q=85&s=aa3e30a5de48e7002ee479e953a97be4) [Dashboard](https://docs.laravelshopper.dev/v1/dashboard) [Categories](https://docs.laravelshopper.dev/v1/categories) ⌘I --- # Dashboard - TALL Stack E-commerce Framework > Documentation Index > ------------------- > > Fetch the complete documentation index at: [/llms.txt](https://docs.laravelshopper.dev/llms.txt) > > Use this file to discover all available pages before exploring further. [Skip to main content](https://docs.laravelshopper.dev/v1/dashboard#content-area) This is documentation for Shopper v1, which is no longer maintained. Please refer to the [v2 docs](https://docs.laravelshopper.dev/v2) for the latest information. [​](https://docs.laravelshopper.dev/v1/dashboard#overview) Overview ---------------------------------------------------------------------- When you log into the control panel, you will be taken to the dashboard — a customizable screen dispatch with a Livewire component! Shopper is a free open-source e-commerce application based on the [TALL Stack](https://tallstack.dev/) and aims to build an e-commerce administration using only [Livewire](https://laravel-livewire.com/) components. The navigation at the left contains the available panels for everyday use: ![Shopper Global Set Example](https://mintcdn.com/shopperlabs-ee054f5e/jlpf_1VxeBnlQtP6/images/v1/dashboard.png?w=2500&fit=max&auto=format&n=jlpf_1VxeBnlQtP6&q=85&s=cd62f13457c523656fdeb7236d1eeea8) Clicking on each icon will open the panel or shows a list of available panels. [​](https://docs.laravelshopper.dev/v1/dashboard#components) Components -------------------------------------------------------------------------- The component that displays the dashboard is quite simple, so you can easily replace it to put your own. The component used is `Shopper\Http\Livewire\Pages\Dashboard` and can also be found in the components file `config/shopper/components.php`. namespace Shopper\Http\Livewire\Pages; use Livewire\Component; class Dashboard extends Component { public function render() { return view('shopper::livewire.pages.dashboard') ->layout('shopper::components.layouts.app', [\ 'title' => __('shopper::layout.sidebar.dashboard'),\ ]); } } [​](https://docs.laravelshopper.dev/v1/dashboard#layout) Layout ------------------------------------------------------------------ Shopper comes with a [Tailwind CSS](https://tailwindcss.com/) based design and you can [extend](https://docs.laravelshopper.dev/extending/control-panel) the default layout for your components. {{-- Your content here --}} All pages that will be on the administration must have this content and extend the default layout of Shopper [Media](https://docs.laravelshopper.dev/v1/media) [Brands](https://docs.laravelshopper.dev/v1/brands) ⌘I --- # Attributes - TALL Stack E-commerce Framework > Documentation Index > ------------------- > > Fetch the complete documentation index at: [/llms.txt](https://docs.laravelshopper.dev/llms.txt) > > Use this file to discover all available pages before exploring further. [Skip to main content](https://docs.laravelshopper.dev/v1/attributes#content-area) This is documentation for Shopper v1, which is no longer maintained. Please refer to the [v2 docs](https://docs.laravelshopper.dev/v2) for the latest information. [Products](https://docs.laravelshopper.dev/v1/products) [Reviews](https://docs.laravelshopper.dev/v1/reviews) ⌘I --- # Locations - TALL Stack E-commerce Framework > Documentation Index > ------------------- > > Fetch the complete documentation index at: [/llms.txt](https://docs.laravelshopper.dev/llms.txt) > > Use this file to discover all available pages before exploring further. [Skip to main content](https://docs.laravelshopper.dev/v1/locations#content-area) This is documentation for Shopper v1, which is no longer maintained. Please refer to the [v2 docs](https://docs.laravelshopper.dev/v2) for the latest information. By default when you install Shopper for the first time you configure and create your shop, and this allows you to create a first location which will have the information you defined. This is the initial location in which all products will be stored. If you have already used [Shopify](https://shopify.com/) it is a bit the same model, but a little simpler so that you can modify it because the system is accessible for any type of business. You can set up multiple locations in your store so that you can track inventory and have excel documents of the products ordered in each of your locations. Your locations can be retail stores, warehouses, popups, or any other place where you manage or store inventory. With multiple locations, you have better visibility into your inventory in your business. ![Locations](https://mintcdn.com/shopperlabs-ee054f5e/jlpf_1VxeBnlQtP6/images/v1/location-admin.png?w=2500&fit=max&auto=format&n=jlpf_1VxeBnlQtP6&q=85&s=665398abac3a7a98ec959c5aacc2b6f3) A location is a physical place or space where you perform any or all of the following activities: Selling products, shipping or fulfillment orders, and inventory inventory (this may even be your apartment). [​](https://docs.laravelshopper.dev/v1/locations#setup-locations) Setup locations ------------------------------------------------------------------------------------ From the administration area of your store you can’t manage more than 4 inventories. This system being still experimental we are working on it to make it simpler to facilitate the management of your store. ### [​](https://docs.laravelshopper.dev/v1/locations#fields) Fields The model used is `Shopper\Core\Models\Inventory`. | Name | Type | Required | Notes | | --- | --- | --- | --- | | `id` | autoinc | | auto | | `code` | string | yes | Unique, the code is a unique element that allows to index an inventory in a unique way, a bit like a slug | | `description` | text | no | nullable | | `email` | string | yes | Unique, the location email address | | `street_address` | string | yes | The address details (street, nr, building, etc) | | `street_address_plus` | string | no | The second address details (optional) | | `zipcode` | string | yes | National identification code. (optional) | | `city` | string | yes | The city/settlement | | `phone_number` | string | no | Nullable | | `priority` | integer | default (`0`) | no | | `latitude` | decimal | no | Nullable, GPS latitude coordinates | | `longitude` | decimal | no | Nullable, GPS longitude coordinates | | `is_default` | boolean | no | Default `false`, define location as defaut for stock | | `country_id` | string | yes | foreign key for country, each location must be linked to a country | ### [​](https://docs.laravelshopper.dev/v1/locations#components) Components The components used to manage locations are found in the component configuration file `config/shopper/components.php`. use Shopper\Core\Http\Livewire; use Shopper\Core\Http\Livewire\Components; return [\ \ 'livewire' => [\ \ 'modals.delete-inventory' => Livewire\Modals\DeleteInventory::class,\ \ 'settings.inventories.browse' => Components\Settings\Inventories\Browse::class,\ 'settings.inventories.create' => Components\Settings\Inventories\Create::class,\ 'settings.inventories.edit' => Components\Settings\Inventories\Edit::class,\ \ ];\ \ ]; You can expand each of its components to customize this section or replace the entire section if your system requires it. You can also change the views too and return your own views. [​](https://docs.laravelshopper.dev/v1/locations#manage-locations) Manage locations -------------------------------------------------------------------------------------- In your administration area you must click on the “cog” icon to display the settings page of your store. * From your admin panel, on the blue sidebar click on the cog icon, go to `Settings > Locations`. ![Setting location](https://mintcdn.com/shopperlabs-ee054f5e/6wDmKBjBTMPmRNSb/images/v1/settings-location.png?w=2500&fit=max&auto=format&n=6wDmKBjBTMPmRNSb&q=85&s=a3d19528fcc6c46d1d7f41bb00378938) ### [​](https://docs.laravelshopper.dev/v1/locations#add-location) Add location In your administration area you must click on the “cog” icon to display the settings page of your store. 1. Click Add location. 2. Enter a unique name and an address for the location. ![Add location](https://mintcdn.com/shopperlabs-ee054f5e/jlpf_1VxeBnlQtP6/images/v1/add-location.png?w=2500&fit=max&auto=format&n=jlpf_1VxeBnlQtP6&q=85&s=0a17e3675cbace598386618cbb6eb755) ### [​](https://docs.laravelshopper.dev/v1/locations#edit-location) Edit location To update a location you click on an available location among those you have saved and you will have the update page. ![update location](https://mintcdn.com/shopperlabs-ee054f5e/6wDmKBjBTMPmRNSb/images/v1/update-location.png?w=2500&fit=max&auto=format&n=6wDmKBjBTMPmRNSb&q=85&s=ae781fdd1786d24fd1694397b159ce0a) ### [​](https://docs.laravelshopper.dev/v1/locations#define-a-default-location) Define a default location The default location is the one in which all products will be collected with each order. If this location is empty the products will be searched in another and if it is the only one the product will be out of stock on your store. You select a location and during the modification you click on the checkbox **Set as default inventory** ![Set default location](https://mintcdn.com/shopperlabs-ee054f5e/jlpf_1VxeBnlQtP6/images/v1/default-location.png?w=2500&fit=max&auto=format&n=jlpf_1VxeBnlQtP6&q=85&s=e7d84ee2f689c8e0a8b16b5fb1c05961) ### [​](https://docs.laravelshopper.dev/v1/locations#delete-location) Delete location To delete a location you must click on a location to display it and at the bottom of the page you click on the delete button. ![Delete location](https://mintcdn.com/shopperlabs-ee054f5e/jlpf_1VxeBnlQtP6/images/v1/delete-location.png?w=2500&fit=max&auto=format&n=jlpf_1VxeBnlQtP6&q=85&s=f67e2bdc6625739ccc732a4f408a121e) Once the location removed, all inventories will changed and this could complicate your inventory management. This is why you have a confirmation modal to be sure that this is indeed what you want to proceed. [Customization](https://docs.laravelshopper.dev/v1/customization) [Roles & Permissions](https://docs.laravelshopper.dev/v1/roles-permissions) ⌘I --- # Control Panel - TALL Stack E-commerce Framework > Documentation Index > ------------------- > > Fetch the complete documentation index at: [/llms.txt](https://docs.laravelshopper.dev/llms.txt) > > Use this file to discover all available pages before exploring further. [Skip to main content](https://docs.laravelshopper.dev/v1/extending/control-panel#content-area) This is documentation for Shopper v1, which is no longer maintained. Please refer to the [v2 docs](https://docs.laravelshopper.dev/v2) for the latest information. The control panel may be customized in a number of different ways. You may add new pages, menus, a stylesheet, or maybe you just want to add some arbitrary Javascript. When you need to add features to your Shopper administration, you can first set up some configurations [​](https://docs.laravelshopper.dev/v1/extending/control-panel#adding-css-and-js-assets) Adding CSS and JS assets -------------------------------------------------------------------------------------------------------------------- Shopper can load extra stylesheets and Javascript files located in the `public/` directory. You may register assets to be loaded in the Control Panel using the `scripts` and `stylesheets` keys of the resources in the `config/shopper/admin.php` config file. This will accept a array of links. You can load the links locally or using cdn. They will be automatically loaded in the control panel 'resources' => [\ 'stylesheets' => [\ '/css/admin.css',\ 'https://cdn.jsdelivr.net/npm/bootstrap@5.1.3/dist/css/bootstrap.min.css',\ ],\ 'scripts' => [\ 'https://cdn.jsdelivr.net/npm/bootstrap@5.1.3/dist/js/bootstrap.min.js',\ '/js/admin.js',\ ],\ ], Depending on how you will use your css and js files, the order is important These commands will make Shopper expect files at `public/css/admin.css` and `public/js/admin.js` respectively for local links. [​](https://docs.laravelshopper.dev/v1/extending/control-panel#customize-shopper-theme) Customize Shopper theme ------------------------------------------------------------------------------------------------------------------ Shopper is built using Tallstack presets, but you are not limited to that because the base css file is already built for production. But if you want to customize your dashboard using Tailwind css you must first install Tailwind in your project. You can read the [documentation](https://tailwindcss.com/docs/guides/laravel) Shopper using Tailwind CSS, there are some Tailwind plugins you need to install first: Plugin Forms and Typography, Autoprefixer. You can install them via NPM or Yarn: yarn add -D tailwindcss @tailwindcss/forms @tailwindcss/typography autoprefixer After installing Tailwind, you need to create a `tailwind.config.js` file at the root of your project and add this content const colors = require('tailwindcss/colors') /** @type {import('tailwindcss').Config} */ module.exports = { darkMode: 'class', presets: [\ require('./vendor/shopper/framework/tailwind.config'),\ ], content: [\ './resources/**/*.blade.php',\ './vendor/shopper/framework/**/*.blade.php',\ './vendor/filament/**/*.blade.php',\ './vendor/rappasoft/laravel-livewire-tables/resources/views/**/*.blade.php',\ './vendor/wire-elements/modal/resources/views/*.blade.php',\ './vendor/wireui/wireui/resources/**/*.blade.php',\ './vendor/wireui/wireui/ts/**/*.ts',\ './vendor/wireui/wireui/src/View/**/*.php'\ ], theme: { extends: { colors: { primary: colors.blue, secondary: colors.slate, indigo: colors.blue, } } }, plugins: [\ require('@tailwindcss/forms'),\ require('@tailwindcss/typography'),\ ], } New versions of Laravel come with vite by default so if you want to customize the Shopper admin, you need to switch to `Laravel Mix` and in your `webpack.mix.js` file, register Tailwind CSS as a PostCSS plugin: const mix = require('laravel-mix') mix.postCss('resources/css/admin.css', 'public/css', [\ require('tailwindcss'),\ ]) Just load the default Tailwind CSS directives inside your `./resources/css/admin.css` @tailwind base; @tailwind components; @tailwind utilities; Then run `yarn run dev` Keep in mind the `admin.css` file must be load on the `resources` key of your `shopper/admin.php` config file And add Tailwind to the `postcss.config.js` file: module.export = { plugins: { tailwindcss: {}, autoprefixer: {}, }, } ### [​](https://docs.laravelshopper.dev/v1/extending/control-panel#branding-logo) Branding Logo After update (or not) the colors of your administration theme to reflect your brand. You’ll probably want to change the logo to display By default, Shopper logo is used next to your application name in the administration panel. You can choose between 2 options The first, and simplest, is to modify the value of the `brand` key in your `shopper/admin.php` configuration file, by entering the link to your logo. /* |-------------------------------------------------------------------------- | Admin Brand Name |-------------------------------------------------------------------------- | | This will be displayed on the login page and in the sidebar's header. | */ 'brand' => 'img/logo.svg', This will load using the Laravel `asset()` helper function. The 2nd option is to create a resources/views/vendor/shopper/components/brand.blade.php file to provide a customized logo: It can be a simple svg or an image tag. Shopper [​](https://docs.laravelshopper.dev/v1/extending/control-panel#adding-control-panel-routes) Adding control panel routes -------------------------------------------------------------------------------------------------------------------------- If you need to have custom routes for the control panel: 1. Create a routes file. Name it whatever you want, for example: `routes/shopper.php` 2. Then add this to your `shopper/routes.php` file so that all routes are dynamically loaded: 'custom_file' => base_path('routes/shopper.php'), 3. If you want to add middleware to further control access to the routes available in this file you can add in the key `middleware` of the `shopper/routes.php` file 'middleware' => [\ 'my-custom-middleware',\ 'permission:can-access',\ ], [Orders](https://docs.laravelshopper.dev/v1/orders) [Controllers](https://docs.laravelshopper.dev/v1/extending/controllers) ⌘I --- # Categories - TALL Stack E-commerce Framework > Documentation Index > ------------------- > > Fetch the complete documentation index at: [/llms.txt](https://docs.laravelshopper.dev/llms.txt) > > Use this file to discover all available pages before exploring further. [Skip to main content](https://docs.laravelshopper.dev/v1/categories#content-area) This is documentation for Shopper v1, which is no longer maintained. Please refer to the [v2 docs](https://docs.laravelshopper.dev/v2) for the latest information. For example, if you sell clothing, you might have “t-shirts”, “hoodies” and “pants” as categories. [​](https://docs.laravelshopper.dev/v1/categories#overview) Overview ----------------------------------------------------------------------- Shopper gives you a possibility to categorize your products in a very flexible way, which is one of the most vital functionalities of the modern e-commerce systems. The categories system in Shopper use the [Laravel Adjacency List](https://github.com/staudenmeir/laravel-adjacency-list) package to create categories trees like this Category | |\__ Women | \_ T-Shirts | \_ Shirts | \_ Dresses | \_ Shoes | |\__ Men | \_ Accessories | |--> Bags | |--> Jeans | |--> Sunglasses | \_ Jeans | \_ T-shirts | \_ Shoes | ![Categories](https://mintcdn.com/shopperlabs-ee054f5e/jlpf_1VxeBnlQtP6/images/v1/categories.png?w=2500&fit=max&auto=format&n=jlpf_1VxeBnlQtP6&q=85&s=af642194e1802ef53a7e5f6389a8fffa) ### [​](https://docs.laravelshopper.dev/v1/categories#fields) Fields The model used is `Shopper\Framework\Models\Shop\Product\Category`. | Name | Type | Required | Notes | | --- | --- | --- | --- | | `id` | autoinc | | auto | | `name` | string | yes | | | `slug` | string | yes | Unique, default value is generated using category name | | `description` | longText | no | Nullable | | `position` | string | no | Default `0` | | `is_enabled` | boolean | no | Default `false` | | `seo_title` | string | no | Nullable, for seo title max length is 60 | | `seo_description` | string | no | Nullable, for seo description max length is 160 | | `parent_id` | bigint | no | | Models are customizable, and we recommend changing the **Category** model when you configure your store. To change the model you need to look at the configuration file `config/shopper/system.php` at the key `models`. Let’s keep in mind the modification that was made in the previous section regarding [Brands](https://docs.laravelshopper.dev/brands) . return [\ 'models' => [\ /*\ * Eloquent model should be used to retrieve your brands. Of course,\ * it is often just the "Brand" model but you may use whatever you like.\ *\ * The model you want to use as a Brand model needs to extends the\ * `\Shopper\Framework\Models\Shop\Product\Brand` model.\ */\ 'brand' => \App\Models\Brand::class,\ \ /*\ * Eloquent model should be used to retrieve your categories. Of course,\ * it is often just the "Category" model but you may use whatever you like.\ *\ * The model you want to use as a Category model needs to extends the\ * `\Shopper\Framework\Models\Shop\Product\Category` model.\ */\ 'category' => \Shopper\Framework\Models\Shop\Product\Category::class,\ ]\ ]; 1. Create your own model that you have to use php artisan make:model Category Once the `app/Models/Category.php` model is created in our app folder, we will make it extend from the `Shopper\Framework\Models\Shop\Product\Category` model available in Shopper. 2. Extend our Category model from the Category Shopper Model namespace App\Models; use Shopper\Framework\Models\Shop\Product; class Category extends Product\Category { } 3. Update `category` key for the model on the `system.php` config file to use our new model return [\ 'models' => [\ /*\ * Eloquent model should be used to retrieve your brands. Of course,\ * it is often just the "Brand" model but you may use whatever you like.\ *\ * The model you want to use as a Brand model needs to extends the\ * `\Shopper\Framework\Models\Shop\Product\Brand` model.\ */\ 'brand' => \App\Models\Brand::class,\ \ /*\ * Eloquent model should be used to retrieve your categories. Of course,\ * it is often just the "Category" model but you may use whatever you like.\ *\ * The model you want to use as a Category model needs to extends the\ * `\Shopper\Framework\Models\Shop\Product\Category` model.\ */\ 'category' => \App\Models\Category::class,\ ]\ ]; ### [​](https://docs.laravelshopper.dev/v1/categories#components) Components Livewire components for managing categories are available in the component configuration file `config/shopper/components.php`. use Shopper\Framework\Http\Livewire; return [\ 'livewire' => [\ \ 'categories.browse' => Livewire\Categories\Browse::class,\ 'categories.create' => Livewire\Categories\Create::class,\ 'categories.edit' => Livewire\Categories\Edit::class,\ \ 'tables.categories-table' => Livewire\Tables\CategoriesTable::class,\ \ ];\ ]; [​](https://docs.laravelshopper.dev/v1/categories#manage-categories) Manage Categories ----------------------------------------------------------------------------------------- Categories are determinant of how people will navigate on your site and search for your products. You should focus on your category tree and how categories are organized even before you start creating product sheets. The categories are accessible via the **Categories** Menu on the left sidebar. The display page is rendered by the Livewire component `Shopper\Framework\Http\Livewire\Categories\Browse` and for the display of the categories table is the component `Shopper\Framework\Http\Livewire\Tables\CategoriesTable`. You can modify them in the component configuration file to use your own. ### [​](https://docs.laravelshopper.dev/v1/categories#create-category) Create category Click on the “Create” button on the categories page, and a creation form appears. ![Create category form](https://mintcdn.com/shopperlabs-ee054f5e/jlpf_1VxeBnlQtP6/images/v1/create-category.png?w=2500&fit=max&auto=format&n=jlpf_1VxeBnlQtP6&q=85&s=e2852cbd6b9e9055a947e30e214ed92f) Save your changes in order to be taken back to the categories list. Required fields are marked with an **asterisk (\*)** The SEO section allows you to define how your category information should be displayed in search engines. To modify the content you click on the button “Edit SEO preview”. It uses the same blade component as the brands. ![Seo form](https://mintcdn.com/shopperlabs-ee054f5e/jlpf_1VxeBnlQtP6/images/v1/seo-preview.gif?s=b6996a0be0021edb9b73abb9caaa09f8) Once you have finished configuring your category, save it, and you are ready to fill it with products. If you use another interface (e.g. API) to save your categories, you can save directly using your Model use App\Models\Category; $category = Category::create([\ 'name' => $name = 'Clothes',\ 'slug' => $name,\ 'is_enabled' => true,\ ]); The slug cannot be null, you have to fill in the value of the category name and according to that the slug will be generated. In case a slug already exists, the slug will be automatically extended to prevent duplicates: use App\Models\Category; $category1 = Category::create(['name' => 'Category', 'slug' => 'Category']); $category2 = Category::create(['name' => 'Category', 'slug' => 'Category']); echo $category1->slug; // category echo $category2->slug; // category-1 And if the category has a parent, the child’s slug will be generated with the parent’s directly This generation is done when adding a category in Shopper. But you can change this behavior by extending the category create [Shopper\\Framework\\Http\\Livewire\\Categories\\Create](https://github.com/shopperlabs/framework/blob/main/src/Http/Livewire/Categories/Create.php) Livewire component or by creating a new one. use App\Models\Category; $category = Category::create(['name' => 'Photo', 'slug' => 'photo']); $categoryChild = Category::create([\ 'name' => 'Camera',\ 'slug' => $this->parent ? $this->parent->slug . '-' . 'Camera' : 'Camera',\ 'parent_id' => $caregory->id\ ]); echo $category->slug; // photo echo $categoryChild->slug; // photo-camera #### [​](https://docs.laravelshopper.dev/v1/categories#create-category-with-parent) Create Category with parent use App\Models\Category; $parent = Category::create([\ 'name' => $name = 'Clothes',\ 'slug' => $name,\ 'is_enabled' => true,\ ]); $child = Category::create([\ 'name' => 'Jeans',\ 'slug' => 'jeans',\ 'parent_id' => $parent->id,\ 'is_enabled' => true,\ ]); On Shopper, to specify the parent category you just have to choose via the select field ![category parent](https://mintcdn.com/shopperlabs-ee054f5e/jlpf_1VxeBnlQtP6/images/v1/category-parent.png?w=2500&fit=max&auto=format&n=jlpf_1VxeBnlQtP6&q=85&s=16245ba5dfbf63dd2f224ae6dff903e7) ### [​](https://docs.laravelshopper.dev/v1/categories#update-category) Update category The “Modify” button allows you to modify the category. It is important to know that if you update the category name, the slug will automatically be updated as well. ![update category](https://mintcdn.com/shopperlabs-ee054f5e/6wDmKBjBTMPmRNSb/images/v1/update-category.png?w=2500&fit=max&auto=format&n=6wDmKBjBTMPmRNSb&q=85&s=79e12f548fbc394589a96c6151ddf4f9) [​](https://docs.laravelshopper.dev/v1/categories#retrieve-data) Retrieve Data --------------------------------------------------------------------------------- With Shopper Framework you are the master of your front-end. After extending the model you can make all the necessary queries to retrieve your data. We just recommend that you always use the `enabled` scope to ensure that only active categories are visible use App\Models\Category; $categories = Category::enabled()->get(), To find a category with his children or parent, etc. The following functions are available. * `ancestors()`: The model’s recursive parents. * `ancestorsAndSelf()`: The model’s recursive parents and itself. * `bloodline()`: The model’s ancestors, descendants and itself. * `children()`: The model’s direct children. * `childrenAndSelf()`: The model’s direct children and itself. * `descendants()`: The model’s recursive children. * `descendantsAndSelf()`: The model’s recursive children and itself. * `parent()`: The model’s direct parent. * `parentAndSelf()`: The model’s direct parent and itself. * `rootAncestor()`: The model’s topmost parent. * `siblings()`: The parent’s other children. * `siblingsAndSelf()`: All the parent’s children. $ancestors = Category::find($id)->ancestors; $categories = Category::with('descendants')->get(); $categories = Category::whereHas('siblings', function ($query) { $query->where('name', '=', 'Photo'); })->get(); $total = Category::find($id)->descendants()->count(); Category::find($id)->descendants()->update(['is_enabled' => false]); Category::find($id)->siblings()->delete(); The complete documentation is available in the readme of [Laravel Adjacency List](https://github.com/staudenmeir/laravel-adjacency-list) [Brands](https://docs.laravelshopper.dev/v1/brands) [Collections](https://docs.laravelshopper.dev/v1/collections) ⌘I --- # Configuration - TALL Stack E-commerce Framework > Documentation Index > ------------------- > > Fetch the complete documentation index at: [/llms.txt](https://docs.laravelshopper.dev/llms.txt) > > Use this file to discover all available pages before exploring further. [Skip to main content](https://docs.laravelshopper.dev/v1/configuration#content-area) This is documentation for Shopper v1, which is no longer maintained. Please refer to the [v2 docs](https://docs.laravelshopper.dev/v2) for the latest information. [​](https://docs.laravelshopper.dev/v1/configuration#config-files) Config Files ---------------------------------------------------------------------------------- With the installation of Shopper you will find new configurations files located in `config/shopper/`. They are PHP files named by area of responsibility. config/shopper/ admin.php auth.php components.php core.php media.php models.php routes.php settings.php And the `admin.php` is the main file, you can find various options to change the configuration of your Shopper installation. [​](https://docs.laravelshopper.dev/v1/configuration#system) System ---------------------------------------------------------------------- All the basic configurations for using shopper can be found in this file. The management of the locale, the models to use and additional resources (scripts and styles) to the administration. ### [​](https://docs.laravelshopper.dev/v1/configuration#brand-logo) Brand logo By default, the Shopper logo will be used as the brand logo in the administration panel. To update it you just have to fill in the logo link in your public folder /* |-------------------------------------------------------------------------- | Brand Name |-------------------------------------------------------------------------- | | This will be displayed on the login page and in the sidebar's header. | */ 'brand' => '/images/v1/logo.svg', ### [​](https://docs.laravelshopper.dev/v1/configuration#controllers) Controllers By default Shopper loads controllers that are defined in this namespace. You can change it if you have a different structure. These controllers are used to extend and add functionalities in the administration. In your config file you have the controllers key that define the controller’s namespace for your extended Controllers: 'controllers' => [\ 'namespace' => 'App\\Http\\Controllers\\Shopper',\ ], ### [​](https://docs.laravelshopper.dev/v1/configuration#models) Models Models used are defined in the models key, if you want to use your own models you can replace them on the `models.php` config file. 'brand' => \Shopper\Core\Models\Brand::class, 'category' => \Shopper\Core\Models\Category::class, 'collection' => \Shopper\Core\Models\Collection::class, 'product' => \Shopper\Core\Models\Product::class, ### [​](https://docs.laravelshopper.dev/v1/configuration#additional-resources) Additional resources During your work you may need to add your own style tables or javascript scenarios globally for all the pages, so you need to add them to relevant arrays. 'resources' => [\ 'stylesheets' => [\ //'css/custom.css',\ ],\ 'scripts' => [\ //'js/custom.js',\ ],\ ], [​](https://docs.laravelshopper.dev/v1/configuration#routes) Routes ---------------------------------------------------------------------- The configuration of the routes allows you to specify a prefix to access your dashboard, the addition of middleware and the configuration file to add more routes to your administration. ### [​](https://docs.laravelshopper.dev/v1/configuration#prefix) Prefix // config/shopper/admin.php 'prefix' => env('SHOPPER_PREFIX', 'cpanel'), The system installed on the website can be easily defined by the dashboard prefix, for example it is `wp-admin` for WordPress, and it gives an opportunity to automatically search for old vulnerable versions of software and gain control over it. There are other reasons but we won’t speak of them in this section. The point is that Shopper allows to change dashboard prefix to every other name, `admin` or `administrator` for example. ### [​](https://docs.laravelshopper.dev/v1/configuration#middleware) Middleware // config/shopper/routes.php 'middleware' => [], Shopper gives you the ability to add middleware to all of your routes. These middlewares will be applied to all the routes of your administration. ### [​](https://docs.laravelshopper.dev/v1/configuration#additional-dashboard-routes) Additional dashboard routes // Eg.: base_path('routes/shopper.php') 'custom_file' => null, By default none of your routes in the `web.php` file will be accessible and loaded in the shopper administration. So that your routes added in the sidebar can have the middleware applied to the dashboard, you must fill in an additional routing file and this will be automatically loaded by Shopper’s internal RouteServiceProvider. [​](https://docs.laravelshopper.dev/v1/configuration#components) Components ------------------------------------------------------------------------------ The main features of Shopper is to handle Livewire components to add new functionnalities to your admin panel. For this purpose you have a component file that lists all Livewire components used within Shopper. You can for each feature modify the associated or extends component to add functionality or even change the view to fit your own logic. Here is an example of some components use Shopper\Http\Livewire\Components; return [\ /*\ |--------------------------------------------------------------------------\ | Livewire Components\ |--------------------------------------------------------------------------\ |\ | Below you reference all the Livewire components that should be loaded\ | for your app. By default all components from Shopper Kit are loaded in.\ |\ */\ 'livewire' => [\ 'account.devices' => Components\Account\Devices::class,\ 'account.dropdown' => Components\Account\Dropdown::class,\ 'account.password' => Components\Account\Password::class,\ ],\ ]; [​](https://docs.laravelshopper.dev/v1/configuration#settings) Settings -------------------------------------------------------------------------- Settings are a very important part of an e-commerce site administration. Shopper has understood this very well and has set up a settings file, to allow you to add or modify the default settings of Shopper. In this file you can add parameters or delete those you don’t need to simplify your store or to make it larger return [\ \ /*\ |--------------------------------------------------------------------------\ | Setting Menu\ |--------------------------------------------------------------------------\ |\ | The menu for the generation of the page settings and layout.\ | BladeUIKit Heroicon is the icon used. See https://blade-ui-kit.com/blade-icons?set=1\ |\ */\ \ 'items' => [\ [\ 'name' => 'General',\ 'description' => 'View and update your store information.',\ 'icon' => 'heroicon-o-cog',\ 'route' => 'shopper.settings.shop',\ 'permission' => null,\ ],\ [\ 'name' => 'Staff & permissions',\ 'description' => 'View and manage what staff can see or do in your store.',\ 'icon' => 'heroicon-o-users',\ 'route' => 'shopper.settings.users',\ 'permission' => null,\ ],\ \ ],\ ]; [​](https://docs.laravelshopper.dev/v1/configuration#mapbox) Mapbox ---------------------------------------------------------------------- Shopper uses Mapbox to enter the geographic coordinates (latitude and longitude) of your store so that you can easily tell your customers your location. To activate mapbox you need to go to the [API](https://docs.mapbox.com/mapbox-gl-js/api/) documentation and create an API token. Once this is done you need to add the key `MAPBOX_PUBLIC_TOKEN` with the token value to your `.env` file MAPBOX_PUBLIC_TOKEN=your_token_here [​](https://docs.laravelshopper.dev/v1/configuration#update-configurations) Update Configurations ---------------------------------------------------------------------------------------------------- In your `config/filesystems.php` config file add the following to the disks and links section: 'disks' => [\ // Shopper Uploads Disks. [tl! highlight:13]\ 'avatars' => [ // [tl! collapse:start]\ 'driver' => 'local',\ 'root' => storage_path('app/avatars'),\ 'url' => env('APP_URL').'/avatars',\ 'visibility' => 'public',\ ], // [tl! collapse:end]\ \ 'uploads' => [ // [tl! collapse:start]\ 'driver' => 'local',\ 'root' => storage_path('app/uploads'),\ 'url' => env('APP_URL').'/uploads',\ 'visibility' => 'public',\ ], // [tl! collapse:end]\ \ ], /* |-------------------------------------------------------------------------- | Symbolic Links |-------------------------------------------------------------------------- | | Here you may configure the symbolic links that will be created when the | `storage:link` Artisan command is executed. The array keys should be | the locations of the links and the values should be their targets. | */ 'links' => [\ // [tl! highlight:2]\ public_path('avatars') => storage_path('app/avatars'),\ public_path('uploads') => storage_path('app/uploads'),\ ], ### [​](https://docs.laravelshopper.dev/v1/configuration#create-new-folders) Create New Folders After adding the 2 entries in the filesystem config file, you must create them and add them to the .gitignore file. In your storage directory create 2 new folders called `avatars` and `uploads`. mkdir storage/app/avatars && mkdir storage/app/uploads In each new folder that you have created (avatars and uploads) you must create a .gitignore file which will contain the following line * !.gitignore [Installation](https://docs.laravelshopper.dev/v1/installation) [Customization](https://docs.laravelshopper.dev/v1/customization) ⌘I --- # Collections - TALL Stack E-commerce Framework > Documentation Index > ------------------- > > Fetch the complete documentation index at: [/llms.txt](https://docs.laravelshopper.dev/llms.txt) > > Use this file to discover all available pages before exploring further. [Skip to main content](https://docs.laravelshopper.dev/v1/collections#content-area) This is documentation for Shopper v1, which is no longer maintained. Please refer to the [v2 docs](https://docs.laravelshopper.dev/v2) for the latest information. In most e-commerce tools, collections are considered as categories. And especially on Shopify, collections are a great feature for grouping products. And for the constitution of the collections we got closer to what Shopify offers in terms of configuration, and the management of collections in Shopper is inspired by Shopify. [​](https://docs.laravelshopper.dev/v1/collections#context) Context ---------------------------------------------------------------------- For example if you have a store that sells various electronic products, you will probably have categories like “Phones”, “Computers”, “Cameras” etc. Each of these categories may have several products that can be listed. And to try to group the products in an even more detailed way you can create for example a collection called “Gaming Collection” and specify in this collection that any product with certain conditions can be included. And that Gaming Collection can have products that even come from various categories in your site (desktop, laptop, monitor, and many others of the same type) or that don’t even have categories (very rare case in e-commerce sites). Let’s use Netflix as an example. Categories are essentially genres: adventure, action, horror, romance, etc., while collections are similar to a TV series or movie sequels that are ultimately meant to be viewed together. [​](https://docs.laravelshopper.dev/v1/collections#collections-vs-categories) Collections vs Categories ---------------------------------------------------------------------------------------------------------- The question is essential, it is difficult to find this type of configuration on e-commerce tools because most of the time categories, collections or taxonomies are used to perform the same action **group products**. The advantage of having collections in addition to categories in Shopper is to differentiate or optimize the search for products by customers in your store. ### [​](https://docs.laravelshopper.dev/v1/collections#depth) Depth A collection can’t have a child or a parent like a category. So all the collections are at the same hierachical level. ### [​](https://docs.laravelshopper.dev/v1/collections#condition) Condition Where products can be added to any category, collections cannot. Depending on the type of collection you want to create (Manual or Automatic) you will find yourself creating conditions or rules for the products that should be in that collection. [​](https://docs.laravelshopper.dev/v1/collections#overview) Overview ------------------------------------------------------------------------ As mentioned above, the collections in Shopper are inspired by [Shopify collections](https://help.shopify.com/en/manual/products/collections) . So there are also 2 types of collections: “Manual” and “Automatic” and the configuration for each is different. ![Collections](https://mintcdn.com/shopperlabs-ee054f5e/jlpf_1VxeBnlQtP6/images/v1/collections.png?w=2500&fit=max&auto=format&n=jlpf_1VxeBnlQtP6&q=85&s=40a3d259b04d9f515d011832e07616da) ### [​](https://docs.laravelshopper.dev/v1/collections#fields) Fields As the collections can be automatic, they are managed by 2 Models, the Collection model and the model for rules associated with automatic collections. Manual collections do not need to have rules. * Collection model is `Shopper\Framework\Models\Shop\Product\Collection`. * Rule model is `Shopper\Framework\Models\Shop\Product\CollectionRule` **Collection Model** | Name | Type | Required | Notes | | --- | --- | --- | --- | | `id` | autoinc | | auto | | `name` | string | yes | | | `slug` | string | yes | Unique, default value is generated using collection name | | `description` | longText | no | Nullable | | `type` | enum | yes | Values `['manual', 'auto']` | | `sort` | string | no | Nullable, potential values `alpha_asc`, `alpha_desc`, `price_desc`, `price_asc`, `created_desc`, `created_asc` | | `match_conditions` | enum | no | Nullable, `['all', 'any']` | | `published_at` | dateTimeTz | no | Default `now()` | **CollectionRule Model** | Name | Type | Required | Notes | | --- | --- | --- | --- | | `id` | autoinc | | auto | | `rule` | string | yes | current values `product_title`, `product_price`, `compare_at_price`, `inventory_stock`, `product_brand`, `product_category` | | `operator` | string | yes | current values `equals_to`, `not_equals_to`, `less_than`, `greater_than`, `starts_with`, `ends_with`, `contains`, `not_contains` | | `value` | string | yes | | | `collection_id` | bigint | no | Collection ID | Models are customizable, and we recommend changing the **Collection** model when you configure your store. To change the model you need to look at the configuration file `config/shopper/system.php` at the key `models`. Let’s keep in mind the modification that was made in the previous section regarding [Categories](https://docs.laravelshopper.dev/categories) . return [\ 'models' => [\ /*\ * Eloquent model should be used to retrieve your categories. Of course,\ * it is often just the "Category" model but you may use whatever you like.\ *\ * The model you want to use as a Category model needs to extends the\ * `\Shopper\Framework\Models\Shop\Product\Category` model.\ */\ 'category' => \App\Models\Category::class,\ \ /*\ * Eloquent model should be used to retrieve your collections. Of course,\ * it is often just the "Collection" model but you may use whatever you like.\ *\ * The model you want to use as a Collection model needs to extends the\ * `\Shopper\Framework\Models\Shop\Product\Collection` model.\ */\ 'collection' => \Shopper\Framework\Models\Shop\Product\Collection::class,\ ]\ ]; 1. Create your own model that you have to use php artisan make:model Collection Once the `app/Models/Collection.php` model is created in our app folder, we will make it extend from the `Shopper\Framework\Models\Shop\Product\Collection` model available in Shopper. 2. Extend our Collection model from the Collection Shopper Model namespace App\Models; use Shopper\Framework\Models\Shop\Product; class Collection extends Product\Collection { } 3. Update `Collection` key for the model on the `system.php` config file to use our new model return [\ 'models' => [\ /*\ * Eloquent model should be used to retrieve your categories. Of course,\ * it is often just the "Category" model but you may use whatever you like.\ *\ * The model you want to use as a Category model needs to extends the\ * `\Shopper\Framework\Models\Shop\Product\Category` model.\ */\ 'category' => \App\Models\Category::class,\ \ /*\ * Eloquent model should be used to retrieve your collections. Of course,\ * it is often just the "Collection" model but you may use whatever you like.\ *\ * The model you want to use as a Collection model needs to extends the\ * `\Shopper\Framework\Models\Shop\Product\Collection` model.\ */\ 'collection' => \App\Models\Collection::class,\ ]\ ]; ### [​](https://docs.laravelshopper.dev/v1/collections#components) Components Livewire components for managing collections are available in the component configuration file `config/shopper/components.php`. use Shopper\Framework\Http\Livewire; return [\ \ 'livewire' => [\ \ 'collections.browse' => Livewire\Collections\Browse::class,\ 'collections.create' => Livewire\Collections\Create::class,\ 'collections.edit' => Livewire\Collections\Edit::class,\ 'collections.products' => Livewire\Collections\Products::class,\ \ 'tables.collections-table' => Livewire\Tables\CollectionsTable::class,\ \ ];\ \ ]; [​](https://docs.laravelshopper.dev/v1/collections#manage-collections) Manage Collections -------------------------------------------------------------------------------------------- Form your Shopper admin on the sidebar go to **Collections**. The display page is rendered by the Livewire component `Shopper\Framework\Http\Livewire\Collections\Browse` and for the display of the collections table is the component `Shopper\Framework\Http\Livewire\Tables\CollectionsTable`. By default you will see this page without data which is rendered by a blade component of Shopper called [empty state](https://docs.laravelshopper.dev/extending/empty-state) . ![Collections empty data](https://mintcdn.com/shopperlabs-ee054f5e/jlpf_1VxeBnlQtP6/images/v1/collection-empty-state.png?w=2500&fit=max&auto=format&n=jlpf_1VxeBnlQtP6&q=85&s=aece77152ec52021239ffb1303dbb6ca) ### [​](https://docs.laravelshopper.dev/v1/collections#create-collection) Create collection Click on the “Create” button on the collections page, and a creation form appears. ![Create collection form](https://mintcdn.com/shopperlabs-ee054f5e/jlpf_1VxeBnlQtP6/images/v1/create-collection.png?w=2500&fit=max&auto=format&n=jlpf_1VxeBnlQtP6&q=85&s=76fd82f957299c50cde9d30b93751aae) Save your changes in order to be taken back to the collections list. Required fields are marked with an **asterisk (\*)**. You can create two types of collections as we said: Automatic and manual collection. Only automatic collections have rules for automating them. When you choose to create an automatic collection the rules section will be available in the creation form ![automatic collection rules](https://mintcdn.com/shopperlabs-ee054f5e/jlpf_1VxeBnlQtP6/images/v1/collection-rules.png?w=2500&fit=max&auto=format&n=jlpf_1VxeBnlQtP6&q=85&s=e663379e2e55e6168c6c164f677d69e1) After you create a collection, you can’t change its type. The Livewire component for collection creation is `Shopper\Framework\Http\Livewire\Collections\Create`. Here is the function to save a collection namespace Shopper\Framework\Http\Livewire\Collections; use Shopper\Framework\Models\Shop\Product\CollectionRule; use Shopper\Framework\Repositories\Ecommerce\CollectionRepository; class Create extends Component { public function store() { $this->validate($this->rules()); $collection = (new CollectionRepository())->create([\ 'name' => $this->name,\ 'slug' => $this->name,\ 'description' => $this->description,\ 'type' => $this->type,\ 'match_conditions' => $this->condition_match,\ 'seo_title' => $this->seoTitle,\ 'seo_description' => $this->seoDescription,\ 'published_at' => $this->publishedAt ?? now(),\ ]); if ($this->fileUrl) { $collection->addMedia($this->fileUrl) ->toMediaCollection(config('shopper.system.storage.disks.uploads')); } if ($this->type === 'auto' && count($this->conditions) > 0 && $this->rule) { foreach ($this->rule as $key => $value) { CollectionRule::query()->create([\ 'collection_id' => $collection->id,\ 'rule' => $this->rule[$key],\ 'operator' => $this->operator[$key],\ 'value' => $this->value[$key],\ ]); } $this->conditions = []; $this->resetConditionsFields(); } session()->flash('success', __('Collection successfully added!')); $this->redirectRoute('shopper.collections.edit', $collection); } } [​](https://docs.laravelshopper.dev/v1/collections#retrieve-data) Retrieve Data ---------------------------------------------------------------------------------- After extending the Shopper Collection model you can use your own model to retrieve data from the database. Here an example code. use App\Models\Collection; // To retrieve only manual collections $collections = Collection::manual()->get(); // To retrieve collection by slug $collection = Collection::findBySlug('summers-clothes'); To view the image of a collection you can consult the [media documentation](https://docs.laravelshopper.dev/media#retrieving-images) . And you can display collections in your frontend. ![example collection rules](https://mintcdn.com/shopperlabs-ee054f5e/jlpf_1VxeBnlQtP6/images/v1/collections-preview.png?w=2500&fit=max&auto=format&n=jlpf_1VxeBnlQtP6&q=85&s=7113a67955bd62671bdfe67d2ab3f554) [Categories](https://docs.laravelshopper.dev/v1/categories) [Customers](https://docs.laravelshopper.dev/v1/customers) ⌘I --- # Installation - TALL Stack E-commerce Framework > Documentation Index > ------------------- > > Fetch the complete documentation index at: [/llms.txt](https://docs.laravelshopper.dev/llms.txt) > > Use this file to discover all available pages before exploring further. [Skip to main content](https://docs.laravelshopper.dev/v1/installation#content-area) This is documentation for Shopper v1, which is no longer maintained. Please refer to the [v2 docs](https://docs.laravelshopper.dev/v2) for the latest information. [​](https://docs.laravelshopper.dev/v1/installation#supported-versions-of-laravel) Supported Versions of Laravel ------------------------------------------------------------------------------------------------------------------- **Laravel 8 and Laravel 9 are supported.** It feels like this section needs more than one sentence but it really doesn’t. That first one said all that needs saying. [​](https://docs.laravelshopper.dev/v1/installation#install-shopper) Install Shopper --------------------------------------------------------------------------------------- Shopper is really easy to install. After creating your new app or in an existing Laravel app (8+). There are 2 steps to follow to install Shopper. 1. Run `php artisan config:clear` to make sure your config isn’t cached. 2. Install `shopper/framework` with Composer. composer require shopper/framework --with-dependencies [​](https://docs.laravelshopper.dev/v1/installation#write-env-variables) Write Env Variables ----------------------------------------------------------------------------------------------- Next make sure to create a new database and add your database credentials to your .env file, you will also want to add your application URL in the `APP_URL` variable APP_URL=http://laravelshopper.test DB_HOST=localhost DB_DATABASE=homestead DB_USERNAME=homestead DB_PASSWORD=secret [​](https://docs.laravelshopper.dev/v1/installation#automatic-installation) Automatic Installation ----------------------------------------------------------------------------------------------------- After installing Shopper in your project via compose and configuring the database, now we will automatically install in the project. php artisan shopper:install This will install shopper, publish vendor files, create shopper and storage symlinks if they don’t exist in the public folder, run migrations and seeders classes. And we’re all good to go! [​](https://docs.laravelshopper.dev/v1/installation#update-existing-files) Update Existing Files --------------------------------------------------------------------------------------------------- Extend your current User Model (usually `app/Models/User.php`) using the `Shopper\Framework\Models\User\User as Authenticatable` alias: // app/Models/User.php use Shopper\Framework\Models\User\User as Authenticatable; class User extends Authenticatable { // ... } [​](https://docs.laravelshopper.dev/v1/installation#create-an-admin-user) Create an Admin user ------------------------------------------------------------------------------------------------- Now we can create a new superuser and sign into the Dashboard and start creating some content to display on the frontend. Run the following command to create a user with supreme (at the moment of creation) rights: php artisan shopper:admin And you will be prompted for the user email, firstname, lastname and password. You can now login to start create products ![Product creation screenshot](https://mintcdn.com/shopperlabs-ee054f5e/jlpf_1VxeBnlQtP6/images/v1/product-screenshot.png?w=2500&fit=max&auto=format&n=jlpf_1VxeBnlQtP6&q=85&s=8d149a167c718e798d1197d88edd6601) [​](https://docs.laravelshopper.dev/v1/installation#new-shopper-directory) New Shopper Directory --------------------------------------------------------------------------------------------------- After Shopper is installed, you’ll have 1 new directory in your project: * `config/shopper/` [​](https://docs.laravelshopper.dev/v1/installation#publish-vendor-files) Publish Vendor Files ------------------------------------------------------------------------------------------------- If you want to publish again Shopper’s vendor files run these commands: php artisan shopper:publish To run the project you may use the built-in server: `php artisan serve` After that, run `composer dump-autoload` to finish your installation! If your are using Laravel Valet you can easily access with your project name with `.test` at the end when you navigate on you project. http://laravelshopper.test/shopper/login [Requirements](https://docs.laravelshopper.dev/v1/requirements) [Configuration](https://docs.laravelshopper.dev/v1/configuration) ⌘I --- # Orders - TALL Stack E-commerce Framework > Documentation Index > ------------------- > > Fetch the complete documentation index at: [/llms.txt](https://docs.laravelshopper.dev/llms.txt) > > Use this file to discover all available pages before exploring further. [Skip to main content](https://docs.laravelshopper.dev/v1/orders#content-area) This is documentation for Shopper v1, which is no longer maintained. Please refer to the [v2 docs](https://docs.laravelshopper.dev/v2) for the latest information. [Discounts](https://docs.laravelshopper.dev/v1/discounts) [Control Panel](https://docs.laravelshopper.dev/v1/extending/control-panel) ⌘I --- # Media - TALL Stack E-commerce Framework > Documentation Index > ------------------- > > Fetch the complete documentation index at: [/llms.txt](https://docs.laravelshopper.dev/llms.txt) > > Use this file to discover all available pages before exploring further. [Skip to main content](https://docs.laravelshopper.dev/v1/media#content-area) This is documentation for Shopper v1, which is no longer maintained. Please refer to the [v2 docs](https://docs.laravelshopper.dev/v2) for the latest information. The Shopper Framework supports assigning images to products, brands, collections and categories. It is an additional layer provided by the framework with the help of the [Spatie Media Library](https://spatie.be/v1/laravel-medialibrary) We recommend organizing your images in a folder offline and keeping a backup in case you need them in the future or mistakenly alter one and wish to revert to the original. You can look at the [documentation](https://docs.laravelshopper.dev/configuration#update-configurations) for this purpose [​](https://docs.laravelshopper.dev/v1/media#configuration) Configuration ---------------------------------------------------------------------------- For uploading images we are using [FilePond](https://pqina.nl/) and some custom upload component with Livewire. ### [​](https://docs.laravelshopper.dev/v1/media#filepond) Filepond This component is used to update media at the product level and variants for products. ![filepond](https://mintcdn.com/shopperlabs-ee054f5e/jlpf_1VxeBnlQtP6/images/v1/filepond.png?w=2500&fit=max&auto=format&n=jlpf_1VxeBnlQtP6&q=85&s=8e11085663784d0d5844169d1de5fe78) Filepond is used in Shopper Framework only to update images, and for that it takes as parameters the images of your model. `$images` are a collection of media from the Spatie Media Library. So you have to set up the file upload in your Livewire component yourself. An example of file upload with filepond is available on Livewire you can learn more on this [link](https://www.laravel-livewire.com/screencasts/s5-integrating-with-filepond) . ### [​](https://docs.laravelshopper.dev/v1/media#single-upload) Single upload Single Upload is a reusable Livewire component created for single upload management with Livewire ![single upload](https://mintcdn.com/shopperlabs-ee054f5e/6wDmKBjBTMPmRNSb/images/v1/single-upload.png?w=2500&fit=max&auto=format&n=6wDmKBjBTMPmRNSb&q=85&s=752fa6c13272e4971b0fb9e049a20260) The component used is `Shopper\Http\Livewire\Components\Forms\Uploads\Single` To add it to your page you add this component to your view. Everything is done out of the box. You just add this to your Livewire component you can add a listener namespace App\Http\Livewire; use Livewire\Component; class MyComponent extends Component { public ?string $fileUrl = null; protected $listeners = [\ 'shopper:fileUpdated' => 'onFileUpdate'\ ]; public function onFileUpdate($file) { $this->fileUrl = $file; } public function store() { $model = YourModel::create([...]); if ($this->fileUrl) { $model->addMedia($this->fileUrl) ->toMediaCollection(config('shopper.core.storage.collection_name')); } } } To apply this action on your model you have to preapre your model with the Laravel Media Library [configuration](https://spatie.be/docs/laravel-medialibrary/v10/basic-usage/preparing-your-model) ### [​](https://docs.laravelshopper.dev/v1/media#multiple-upload) Multiple upload The component used is `Shopper\Http\Livewire\Components\Forms\Uploads\Multiple` To add it to your page you add this component to your view. ![multiple upload](https://mintcdn.com/shopperlabs-ee054f5e/jlpf_1VxeBnlQtP6/images/v1/multiple-upload.png?w=2500&fit=max&auto=format&n=jlpf_1VxeBnlQtP6&q=85&s=109e27cdc599c0ac3610da680df10581) namespace App\Http\Livewire; use Livewire\Component; class MyComponent extends Component { public $files = []; protected $listeners = [\ 'shopper:filesUpdated' => 'onFilesUpdated'\ ]; public function onFilesUpdate($files) { $this->files = $files; } public function store() { $model = YourModel::create([...]); if (collect($this->files)->isNotEmpty()) { collect($this->files)->each( fn ($file) => $model->addMedia($file)->toMediaCollection(config('shopper.core.storage.collection_name')) ); } } } [​](https://docs.laravelshopper.dev/v1/media#media-variants) Media Variants ------------------------------------------------------------------------------ The Spatie Media library supports defining various image sizes, so-called [Conversions](https://spatie.be/docs/laravel-medialibrary/v10/converting-images/defining-conversions) . The uploaded images will be then converted to the given sizes with the given parameters. For the moment in Shopper for all the Model that’s used Media Library the only conversion available is public function registerMediaConversions(?Media $media = null): void { $this->addMediaConversion('thumb200x200') ->fit(Manipulations::FIT_CROP, 200, 200); } But you can extend the different models to add conversions according to your needs. [​](https://docs.laravelshopper.dev/v1/media#retrieving-images) Retrieving Images ------------------------------------------------------------------------------------ ### [​](https://docs.laravelshopper.dev/v1/media#thumbnails) Thumbnails The presence of thumbnails is a very common scenario, which is why Shopper use them. $product->getUrl('thumb200x200') For more information on what’s available, see [Defining conversions](https://spatie.be/docs/laravel-medialibrary/v10/converting-images/defining-conversions#content-using-multiple-conversions) ### [​](https://docs.laravelshopper.dev/v1/media#primary) Primary To get an image with full url on a product, a brand or a collection $product->getFirstMediaUrl(config('shopper.core.storage.disk_name')) [Legal](https://docs.laravelshopper.dev/v1/legal) [Dashboard](https://docs.laravelshopper.dev/v1/dashboard) ⌘I --- # Legal - TALL Stack E-commerce Framework > Documentation Index > ------------------- > > Fetch the complete documentation index at: [/llms.txt](https://docs.laravelshopper.dev/llms.txt) > > Use this file to discover all available pages before exploring further. [Skip to main content](https://docs.laravelshopper.dev/v1/legal#content-area) This is documentation for Shopper v1, which is no longer maintained. Please refer to the [v2 docs](https://docs.laravelshopper.dev/v2) for the latest information. This section allows you to set up your pages for your privacy policy, return policy, terms of use and shipping policy to be presented to customers. [​](https://docs.laravelshopper.dev/v1/legal#fields) Fields -------------------------------------------------------------- The model used is `Shopper\Core\Models\Legal`. | Name | Type | Required | Notes | | --- | --- | --- | --- | | `id` | autoinc | | auto | | `title` | string | yes | Unique, title of the legal page | | `slug` | string | yes | Unique, this is dynamically generated based on the title | | `content` | longText | no | nullable, the text of the legal page | | `is_enabled` | boolean | no | Default `false`, define if this legal page is ready to use | [​](https://docs.laravelshopper.dev/v1/legal#components) Components ---------------------------------------------------------------------- The components used to manage Legal page are found in the component configuration file `config/shopper/components.php`. Each component corresponds to the page that is defined use Shopper\Http\Livewire\Components; return [\ 'livewire' => [\ \ 'settings.legal.privacy' => Components\Settings\Legal\Privacy::class,\ 'settings.legal.refund' => Components\Settings\Legal\Refund::class,\ 'settings.legal.shipping' => Components\Settings\Legal\Shipping::class,\ 'settings.legal.terms' => Components\Settings\Legal\Terms::class,\ \ ];\ \ ]; [​](https://docs.laravelshopper.dev/v1/legal#add-legal-content) Add Legal content ------------------------------------------------------------------------------------ In your administration area you must click on the “cog” icon to display the settings page of your store. * From your admin panel, on the blue sidebar click on the cog icon, go to `Settings > Legal`. ![legal setting](https://mintcdn.com/shopperlabs-ee054f5e/6wDmKBjBTMPmRNSb/images/v1/settings-legal.png?w=2500&fit=max&auto=format&n=6wDmKBjBTMPmRNSb&q=85&s=7dcc429b78303c2a5c938bdcd6896b85) Once in this page, all the legal pages are displayed as a tab. You can just fill in the content of each page and click on the Enable switch to retrieve the content of your page and display it in your front-end. ![legal pages](https://mintcdn.com/shopperlabs-ee054f5e/jlpf_1VxeBnlQtP6/images/v1/legal-screenshot.png?w=2500&fit=max&auto=format&n=jlpf_1VxeBnlQtP6&q=85&s=0b5f0ce12b5848251abb03f6acc87660) Shopper does not generate the routes for the legal pages, you should set them up yourself. As mentioned in the introduction of this documentation, the **Framework** is just an e-commerce administration [​](https://docs.laravelshopper.dev/v1/legal#retrieve-data) Retrieve Data ---------------------------------------------------------------------------- Once the information is filled in, we can display it to our users in the views we have created. To do this we will start by creating a controller that will take care of collecting our information and send it to a view php artisan make:controller LegalController We will add the functions for each of our pages and return the information to present them to our users. Our controller will look like this namespace App\Http\Controllers; use Shopper\Core\Models\Legal; class LegalController extends Controller { public function privacy() { return view('legal.privacy', [\ 'legal' => Legal::enabled()->where('slug', 'privacy-policy')->first(),\ ]); } public function refund() { return view('legal.refund', [\ 'legal' => Legal::enabled()->where('slug', 'refund-policy')->first(),\ ]); } public function terms() { return view('legal.terms', [\ 'legal' => Legal::enabled()->where('slug', 'terms-of-use')->first(),\ ]); } public function shipping() { return view('legal.shipping', [\ 'legal' => Legal::enabled()->where('slug', 'shipping-policy')->first(),\ ]); } } `Legal::enabled()` is a scope to retrieve the page only when it is available. This is a simple way to retrieve the pages but you can do it otherwise all the front-end code depends on you. To learn more about the scopes you can consult the [documentation](https://laravel.com/docs/10.x/eloquent#local-scopes) . ### [​](https://docs.laravelshopper.dev/v1/legal#routes) Routes Once we have created the controllers we will associate the routes that will allow us to display our contents. We will display our content in the `web.php`. use App\Http\Controllers\LegalController; /* * Legal routes */ Route::get('/privacy', [LegalController::class, 'privacy'])->name('legal.privacy'); Route::get('/terms-of-use', [LegalController::class, 'terms'])->name('legal.terms'); Route::get('/refund-policy', [LegalController::class, 'refund'])->name('legal.refund'); Route::get('/shipping', [LegalController::class, 'shipping'])->name('legal.shipping'); ### [​](https://docs.laravelshopper.dev/v1/legal#views) Views You can create views in this way to arrange the content of your legal pages. resources/views/legal/ privacy.blade.php terms.blade.php refund.blade.php shipping.blade.php It’s just an idea of how to make your views, not a recommendation. If your front-end is in react, vue or svelte you will not necessarily have the same architecture. So keep in mind that it’s just to display your content. Example of a view @extends('layouts.app') @section('body')
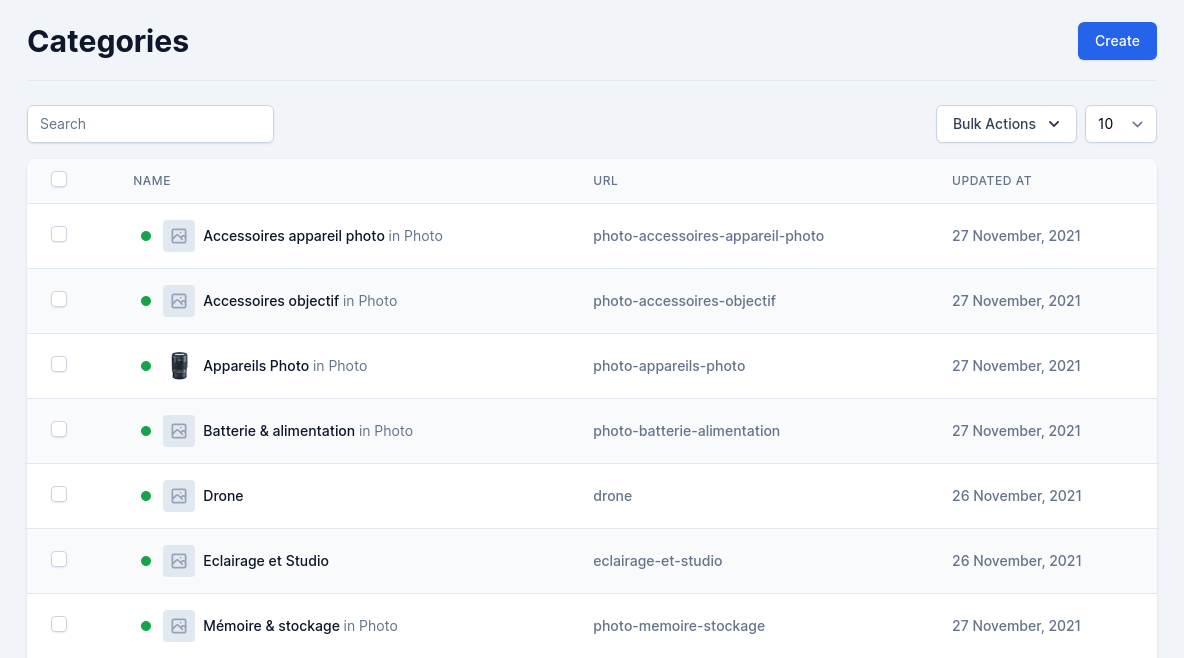
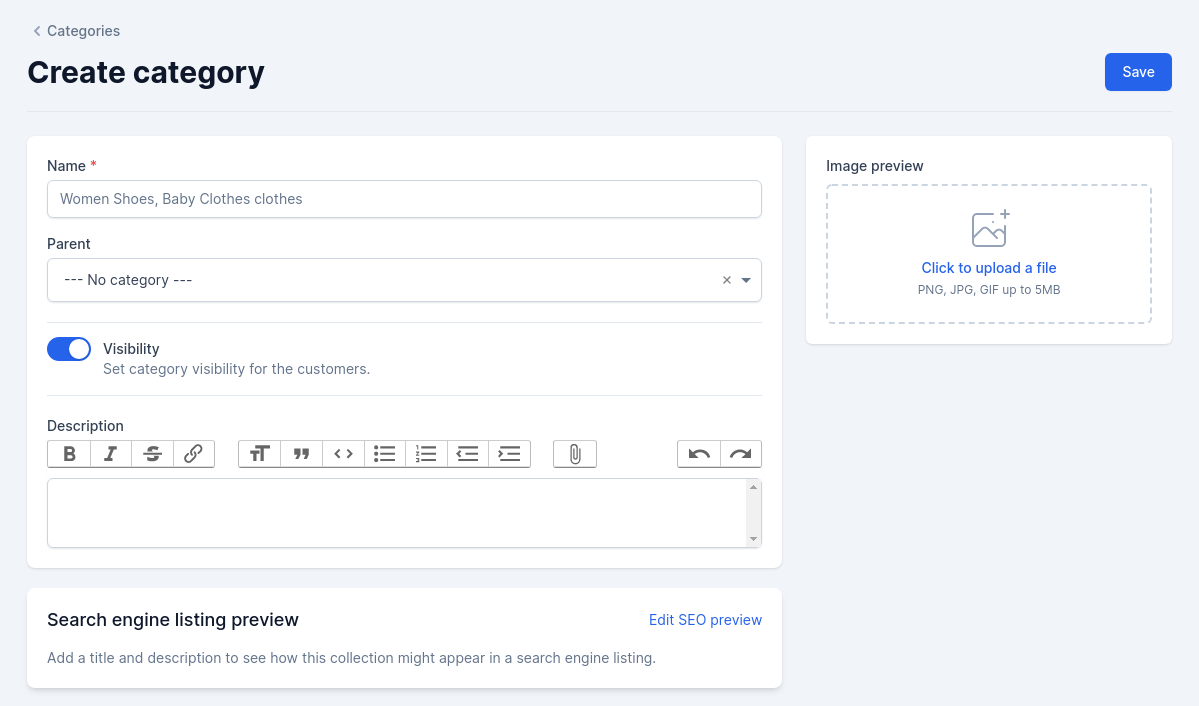
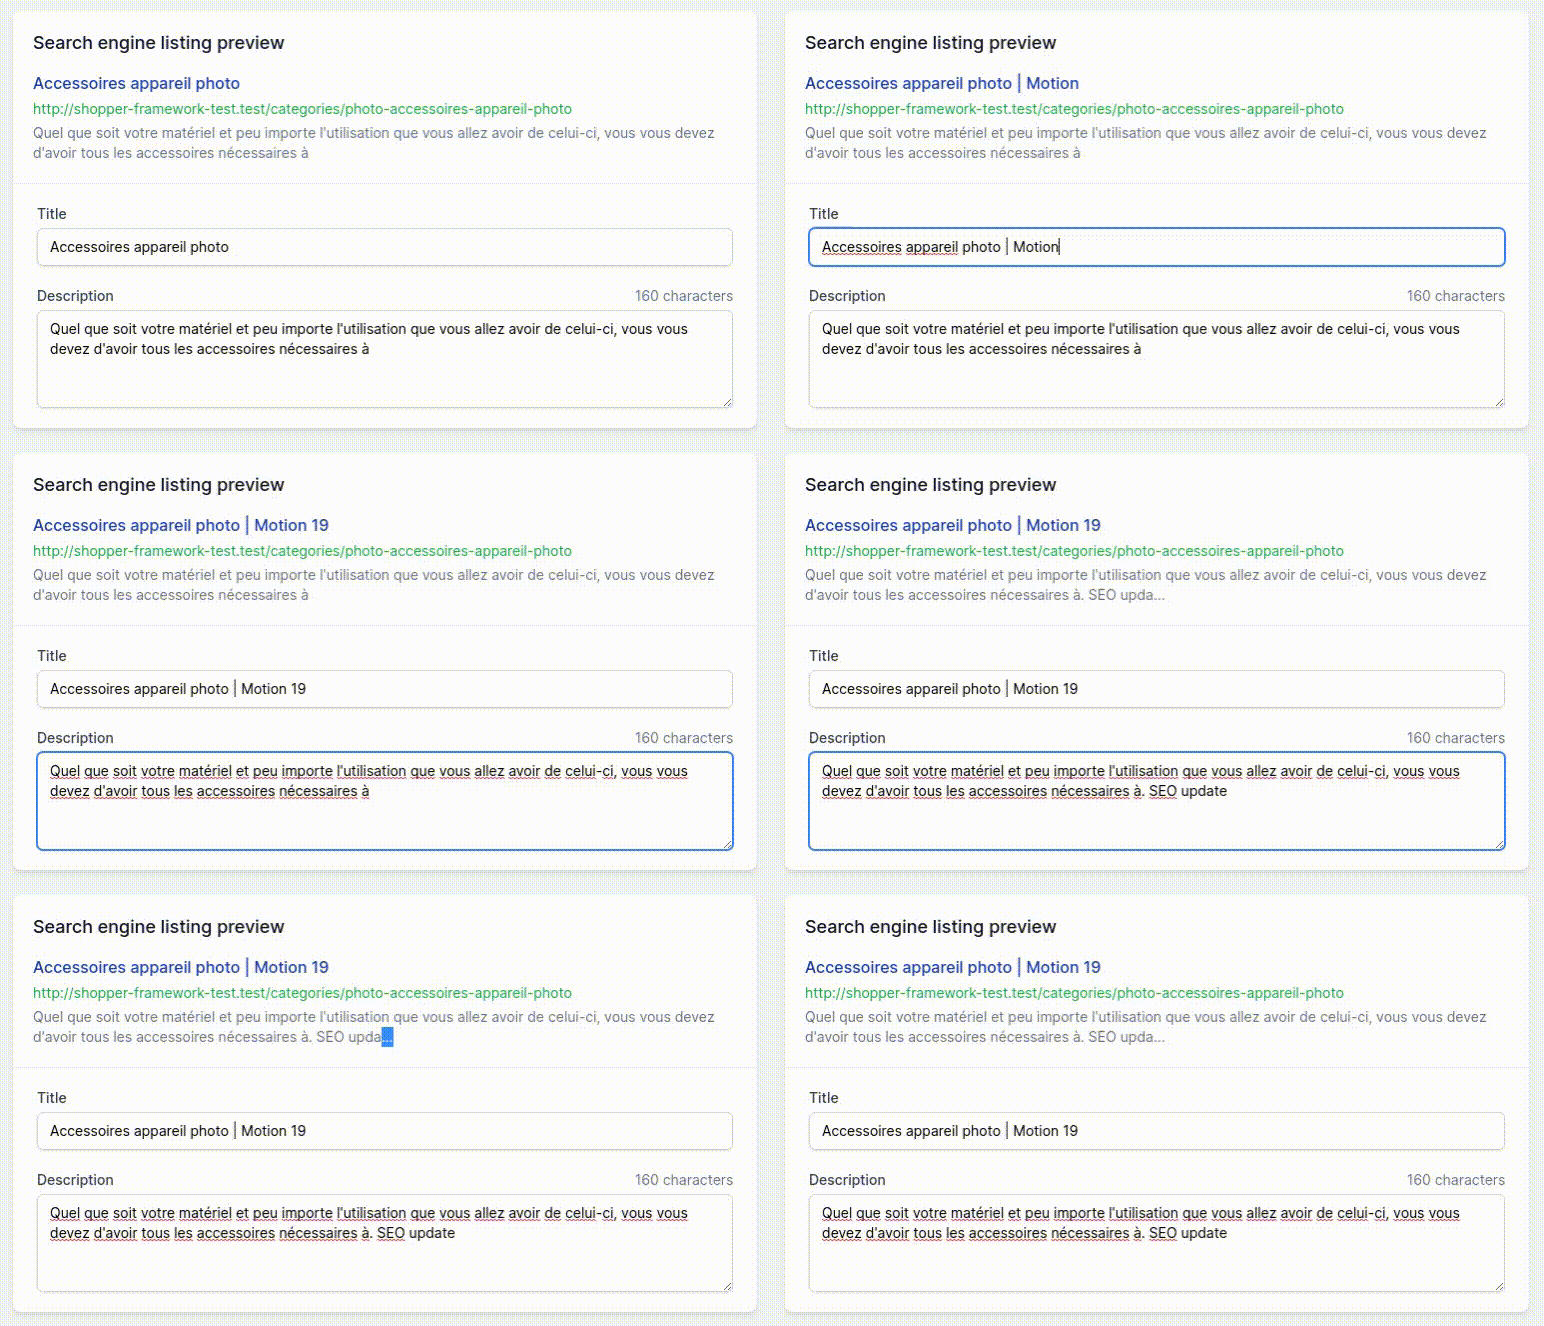
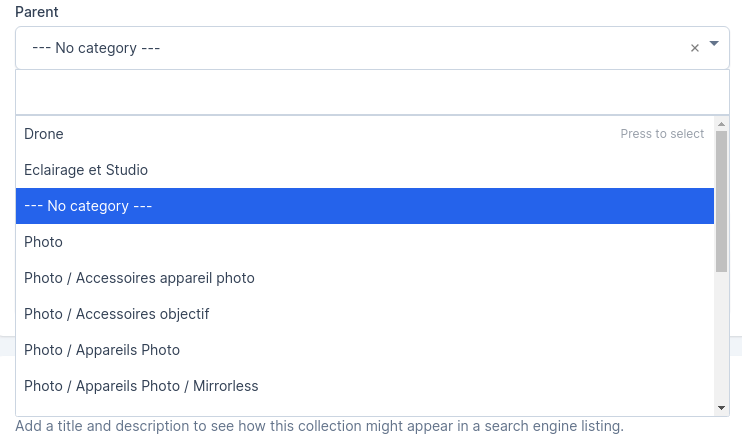
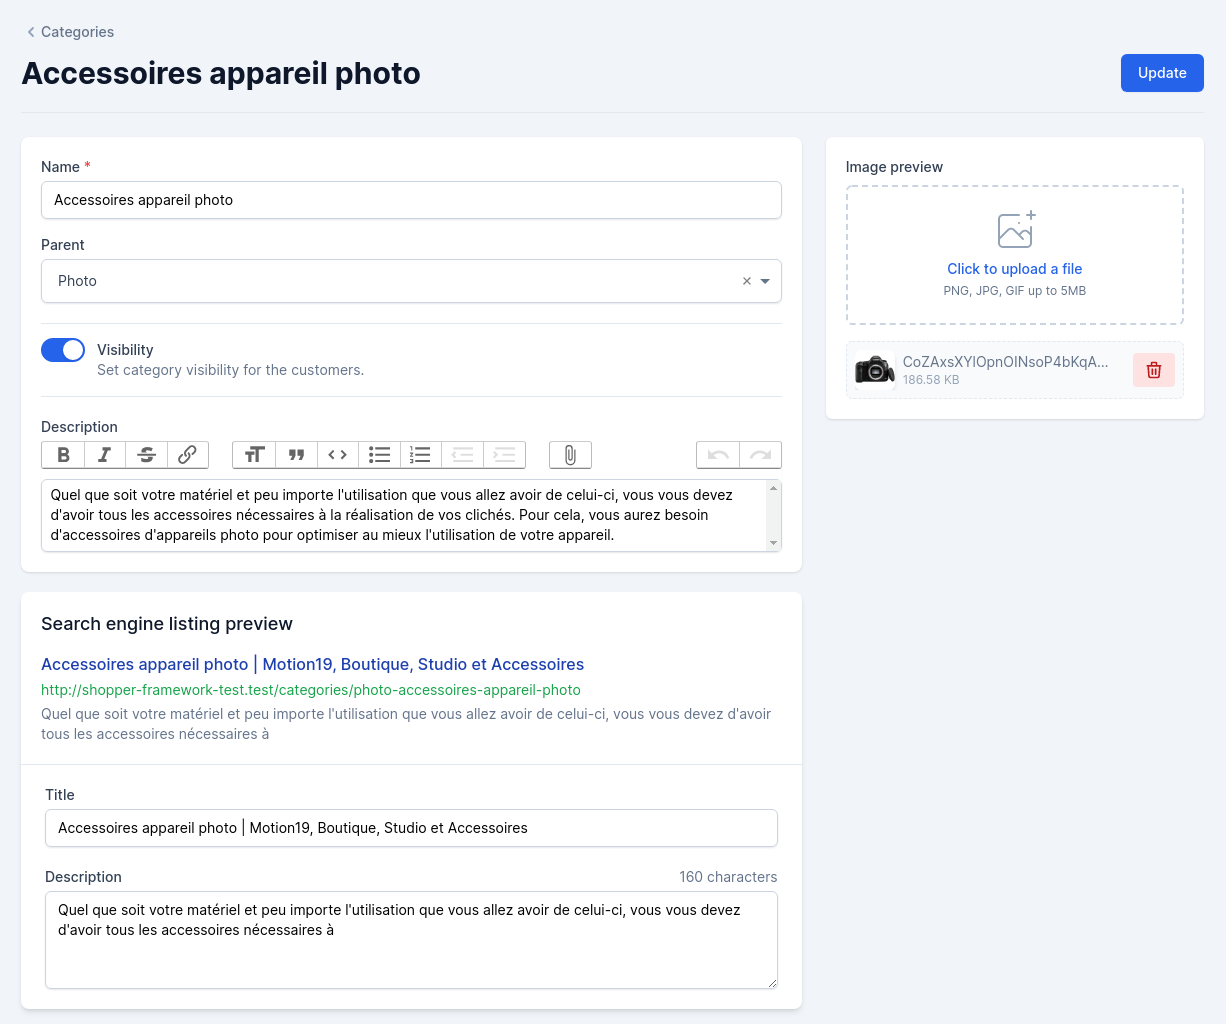
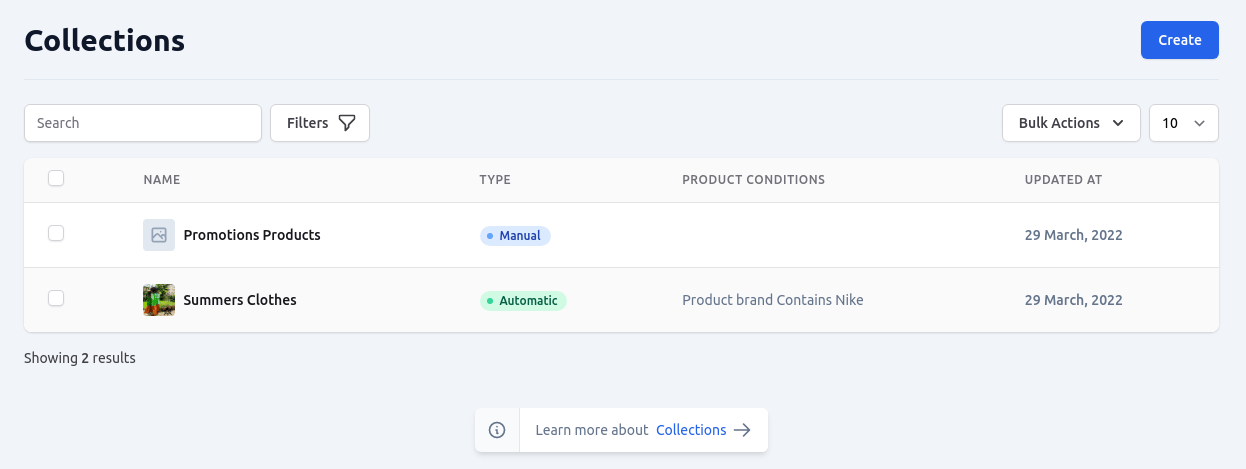
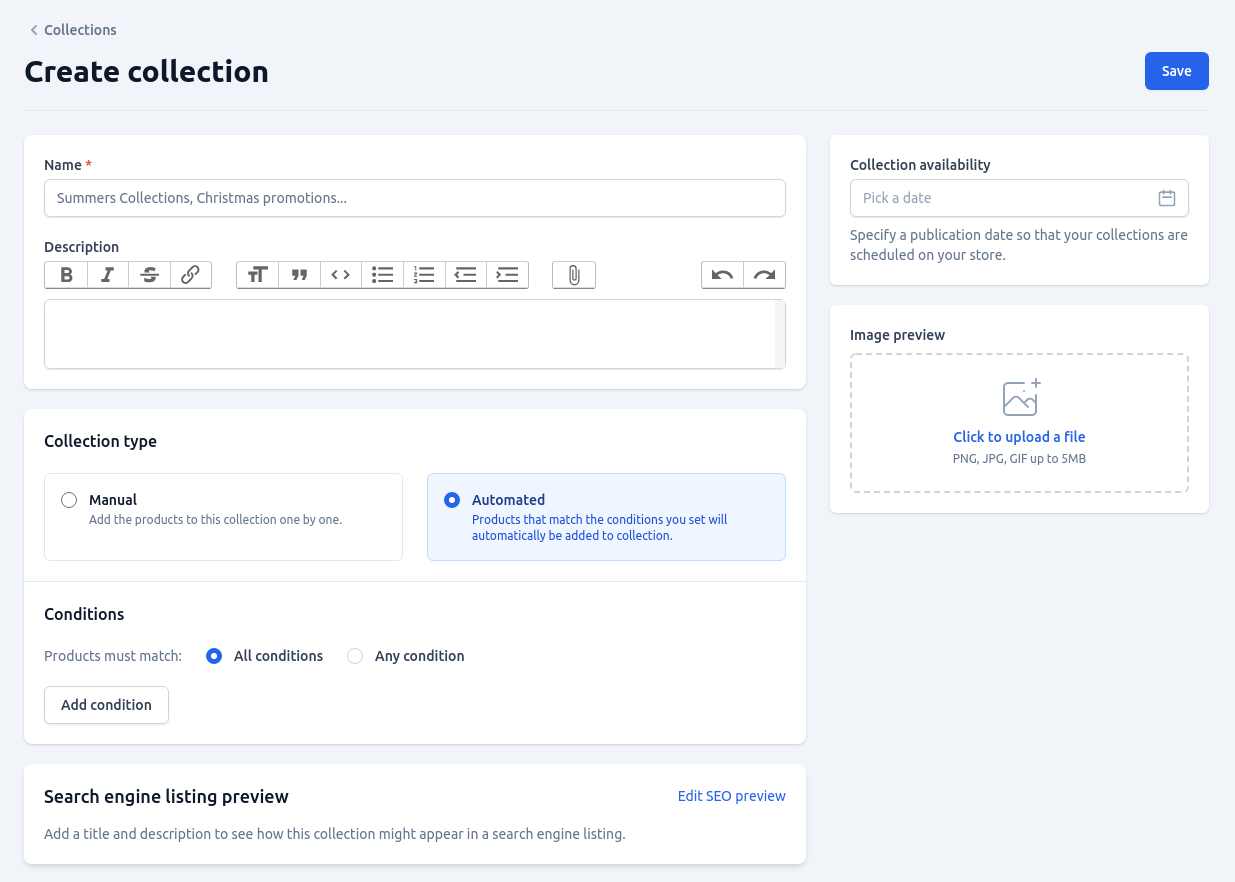
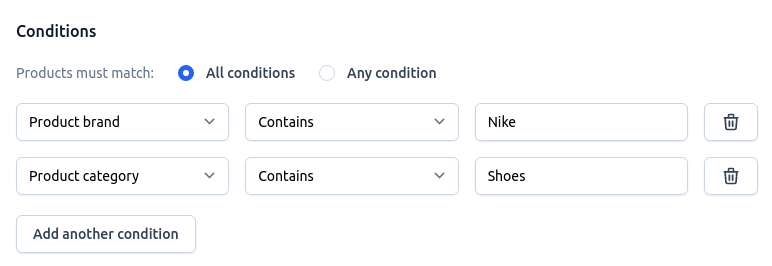
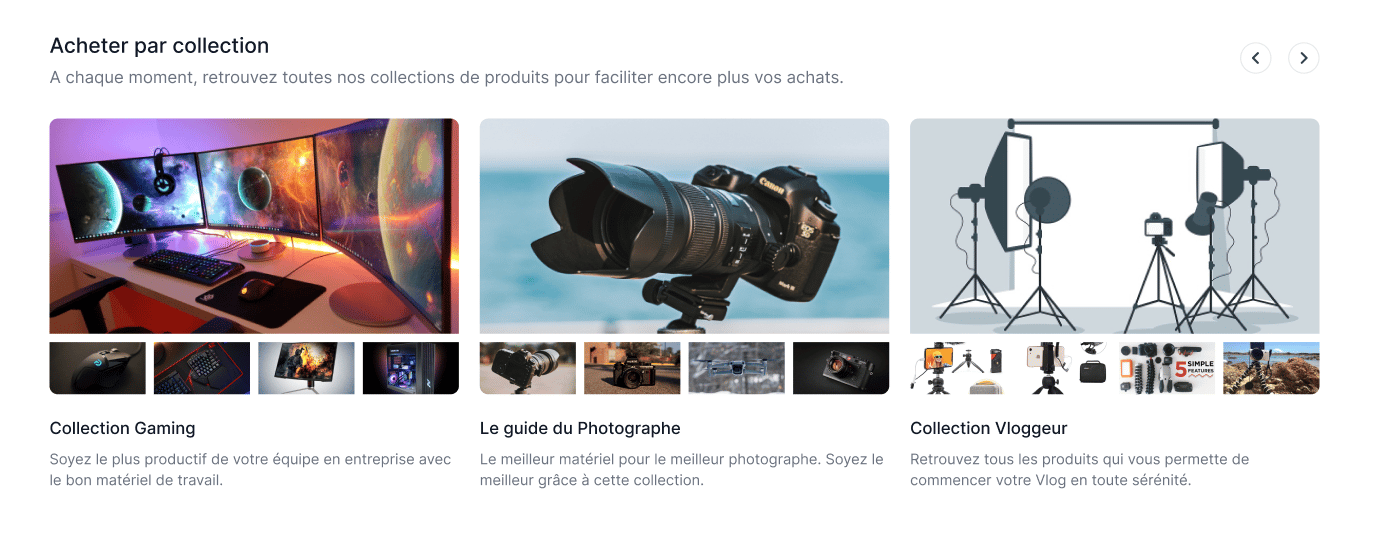
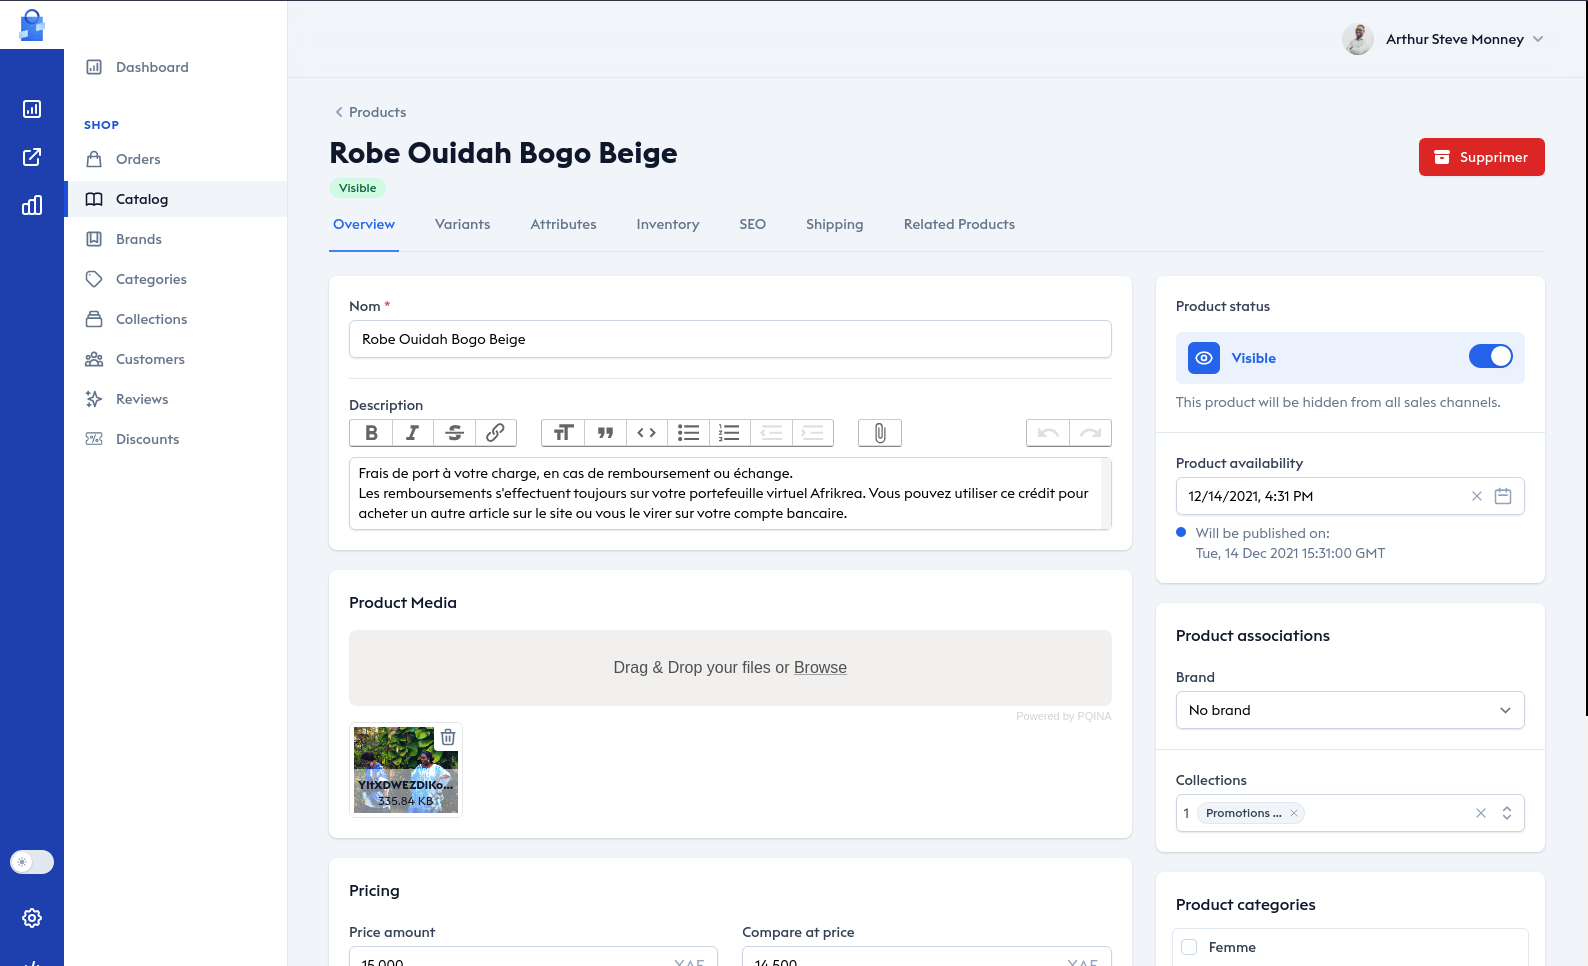
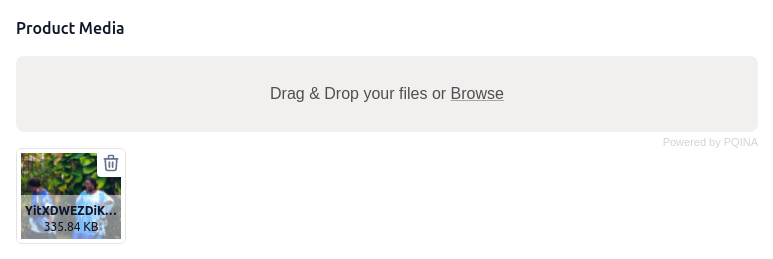
{{ __('Privacy Policy') }}

{{ __('Last update: :date', ['date' => $legal->created_at->format('d, F Y')]) }}
{!! $legal->content !!}
@endsection [Two Factor Authenticator](https://docs.laravelshopper.dev/v1/two-factor) [Media](https://docs.laravelshopper.dev/v1/media) ⌘I --- # Stripe - TALL Stack E-commerce Framework > Documentation Index > ------------------- > > Fetch the complete documentation index at: [/llms.txt](https://docs.laravelshopper.dev/llms.txt) > > Use this file to discover all available pages before exploring further. [Skip to main content](https://docs.laravelshopper.dev/v2/addons/stripe#content-area) The `shopper/stripe` package is a first-party Stripe driver for Shopper’s [payment system](https://docs.laravelshopper.dev/v2/payments) . It uses Stripe PaymentIntents to handle card payments with full support for 3D Secure authentication, manual and automatic capture, partial refunds, and webhook processing. [​](https://docs.laravelshopper.dev/v2/addons/stripe#installation) Installation ---------------------------------------------------------------------------------- composer require shopper/stripe The service provider is auto-discovered. It registers the `stripe` driver with the payment manager and merges the default configuration. [​](https://docs.laravelshopper.dev/v2/addons/stripe#configuration) Configuration ------------------------------------------------------------------------------------ Publish the config file: php artisan vendor:publish --tag=shopper-stripe-config This creates `config/shopper/stripe.php`: return [\ \ 'secret_key' => env('STRIPE_SECRET_KEY'),\ \ 'publishable_key' => env('STRIPE_PUBLISHABLE_KEY'),\ \ 'webhook_secret' => env('STRIPE_WEBHOOK_SECRET'),\ \ 'capture_method' => env('STRIPE_CAPTURE_METHOD', 'manual'),\ \ ]; Add your credentials to `.env`: STRIPE_SECRET_KEY=sk_test_... STRIPE_PUBLISHABLE_KEY=pk_test_... STRIPE_WEBHOOK_SECRET=whsec_... STRIPE_CAPTURE_METHOD=manual Never commit your Stripe keys to version control. Always use environment variables. [​](https://docs.laravelshopper.dev/v2/addons/stripe#capture-method) Capture Method -------------------------------------------------------------------------------------- The `capture_method` setting controls when funds are collected from the customer. | Value | Behavior | Use case | | --- | --- | --- | | `manual` | Authorize first, capture later from the admin panel | Physical goods, verify stock before charging | | `automatic` | Capture immediately when the customer confirms | Digital products, subscriptions, instant fulfillment | Manual capture is the default. When using manual capture, the payment status goes through `Pending → Authorized → Paid`. The merchant captures from the order detail page when ready. Authorization holds typically expire after **7 days** (varies by card network). You must capture within that window or the hold is released and the customer is not charged. [​](https://docs.laravelshopper.dev/v2/addons/stripe#payment-method-setup) Payment Method Setup -------------------------------------------------------------------------------------------------- Create a payment method record linked to the Stripe driver. This makes it selectable at checkout. use Shopper\Core\Models\PaymentMethod; PaymentMethod::query()->create([\ 'title' => 'Credit Card',\ 'slug' => 'credit-card',\ 'driver' => 'stripe',\ 'description' => 'Pay securely with your credit or debit card.',\ 'is_enabled' => true,\ ]); Assign it to the zones where Stripe should be available: $paymentMethod->zones()->attach([$europeZoneId, $northAmericaZoneId]); [​](https://docs.laravelshopper.dev/v2/addons/stripe#payment-flow) Payment Flow ---------------------------------------------------------------------------------- The Stripe driver uses the PaymentIntent API. Here’s the complete flow for a checkout with manual capture: ### [​](https://docs.laravelshopper.dev/v2/addons/stripe#1-initiate-at-checkout) 1\. Initiate at Checkout When the customer places an order, initiate the payment. The driver creates a Stripe PaymentIntent and returns a `clientSecret` for the frontend. use Shopper\Payment\Services\PaymentProcessingService; $service = resolve(PaymentProcessingService::class); $result = $service->initiate($order); if ($result->clientSecret) { session()->put('stripe_payment', [\ 'client_secret' => $result->clientSecret,\ 'publishable_key' => $result->data['publishable_key'],\ ]); return redirect()->route('stripe-payment', $order->number); } ### [​](https://docs.laravelshopper.dev/v2/addons/stripe#2-confirm-on-the-frontend) 2\. Confirm on the Frontend On your payment page, use Stripe.js with the Payment Element to collect card details and confirm the payment:
After the customer confirms, Stripe handles 3D Secure if required, then redirects to your `return_url`. ### [​](https://docs.laravelshopper.dev/v2/addons/stripe#3-handle-the-callback) 3\. Handle the Callback On the callback page, verify the payment status: use Shopper\Payment\Services\PaymentProcessingService; $service = resolve(PaymentProcessingService::class); $reference = $service->getLatestReference($order); $result = $service->authorize($order, $reference); if ($result->success) { return redirect()->route('order-confirmed', $order->number); } With manual capture, the order’s `payment_status` is now `Authorized`. With automatic capture, it goes straight to `Paid`. ### [​](https://docs.laravelshopper.dev/v2/addons/stripe#4-capture-from-the-admin-panel) 4\. Capture from the Admin Panel When the order is ready to ship, the merchant clicks **Capture payment** on the order detail page. This calls `capturePayment()` on the Stripe driver and collects the funds. The payment status changes from `Authorized` to `Paid`. [​](https://docs.laravelshopper.dev/v2/addons/stripe#webhooks) Webhooks -------------------------------------------------------------------------- Stripe sends webhook events for asynchronous payment updates. The driver handles these events and converts them into standardized actions. ### [​](https://docs.laravelshopper.dev/v2/addons/stripe#setting-up) Setting Up 1. In your [Stripe Dashboard](https://dashboard.stripe.com/webhooks) , create a webhook endpoint pointing to your application (e.g. `https://yourstore.com/webhooks/stripe`) 2. Copy the signing secret to your `.env`: STRIPE_WEBHOOK_SECRET=whsec_... 3. Create a webhook controller: namespace App\Http\Controllers; use Illuminate\Http\JsonResponse; use Illuminate\Http\Request; use Shopper\Payment\Facades\Payment; class StripeWebhookController extends Controller { public function __invoke(Request $request): JsonResponse { $driver = Payment::driver('stripe'); $result = $driver->handleWebhook( payload: [\ 'raw_body' => $request->getContent(),\ ], headers: [\ 'stripe_signature' => $request->header('Stripe-Signature'),\ ], ); if ($result->isIgnored()) { return response()->json(['status' => 'ignored']); } // Process the result based on the action // e.g., update order status, send notifications return response()->json(['status' => 'ok']); } } 4. Register the route (excluded from CSRF verification): Route::post('/webhooks/stripe', StripeWebhookController::class); ### [​](https://docs.laravelshopper.dev/v2/addons/stripe#handled-events) Handled Events | Stripe Event | Action | Description | | --- | --- | --- | | `payment_intent.amount_capturable_updated` | `authorized` | Payment authorized, ready to capture | | `payment_intent.succeeded` | `captured` | Payment captured successfully | | `payment_intent.payment_failed` | `failed` | Payment attempt failed | | `payment_intent.canceled` | `canceled` | Payment intent cancelled | | `charge.refunded` | `refunded` | Charge was refunded | All other events are returned as `ignored`. ### [​](https://docs.laravelshopper.dev/v2/addons/stripe#signature-verification) Signature Verification The driver verifies every webhook using the signing secret. If the signature is invalid, a `StripeException` is thrown. This prevents forged webhook payloads from being processed. [​](https://docs.laravelshopper.dev/v2/addons/stripe#refunds) Refunds ------------------------------------------------------------------------ The driver supports full and partial refunds through the `PaymentProcessingService`: $service = resolve(PaymentProcessingService::class); $reference = $service->getLatestReference($order); $result = $service->refund($order, $reference, $order->price_amount); For a partial refund, pass a specific amount in cents: $result = $service->refund( order: $order, reference: $reference, amount: 2000, reason: 'Product damaged', ); The order’s `payment_status` automatically updates to `PartiallyRefunded` or `Refunded` based on the total refunded amount compared to the order total. [​](https://docs.laravelshopper.dev/v2/addons/stripe#cancellation) Cancellation ---------------------------------------------------------------------------------- Cancel an authorized payment before capture to release the hold without processing a refund: $result = $service->cancel($order, $reference); The order’s `payment_status` changes to `Voided`. No funds are collected and no refund fees apply. [​](https://docs.laravelshopper.dev/v2/addons/stripe#testing) Testing ------------------------------------------------------------------------ ### [​](https://docs.laravelshopper.dev/v2/addons/stripe#stripe-test-cards) Stripe Test Cards Use Stripe’s [test card numbers](https://docs.stripe.com/testing#cards) in test mode: | Card Number | Scenario | | --- | --- | | `4242 4242 4242 4242` | Successful payment | | `4000 0025 0000 3155` | Requires 3D Secure authentication | | `4000 0000 0000 9995` | Declined (insufficient funds) | | `4000 0000 0000 0002` | Declined (generic) | ### [​](https://docs.laravelshopper.dev/v2/addons/stripe#webhook-testing) Webhook Testing Use the Stripe CLI to forward events to your local environment: stripe listen --forward-to localhost:8000/webhooks/stripe The CLI prints a webhook signing secret. Use it as `STRIPE_WEBHOOK_SECRET` during development. ### [​](https://docs.laravelshopper.dev/v2/addons/stripe#test-mode) Test Mode Make sure your `.env` uses `sk_test_` and `pk_test_` keys. Stripe automatically isolates test data from live data. ⌘I --- # Products - TALL Stack E-commerce Framework > Documentation Index > ------------------- > > Fetch the complete documentation index at: [/llms.txt](https://docs.laravelshopper.dev/llms.txt) > > Use this file to discover all available pages before exploring further. [Skip to main content](https://docs.laravelshopper.dev/v1/products#content-area) This is documentation for Shopper v1, which is no longer maintained. Please refer to the [v2 docs](https://docs.laravelshopper.dev/v2) for the latest information. [Customers](https://docs.laravelshopper.dev/v1/customers) [Attributes](https://docs.laravelshopper.dev/v1/attributes) ⌘I --- # Reviews - TALL Stack E-commerce Framework > Documentation Index > ------------------- > > Fetch the complete documentation index at: [/llms.txt](https://docs.laravelshopper.dev/llms.txt) > > Use this file to discover all available pages before exploring further. [Skip to main content](https://docs.laravelshopper.dev/v1/reviews#content-area) This is documentation for Shopper v1, which is no longer maintained. Please refer to the [v2 docs](https://docs.laravelshopper.dev/v2) for the latest information. [Attributes](https://docs.laravelshopper.dev/v1/attributes) [Discounts](https://docs.laravelshopper.dev/v1/discounts) ⌘I --- # Requirements - TALL Stack E-commerce Framework > Documentation Index > ------------------- > > Fetch the complete documentation index at: [/llms.txt](https://docs.laravelshopper.dev/llms.txt) > > Use this file to discover all available pages before exploring further. [Skip to main content](https://docs.laravelshopper.dev/v1/requirements#content-area) This is documentation for Shopper v1, which is no longer maintained. Please refer to the [v2 docs](https://docs.laravelshopper.dev/v2) for the latest information. Shopper is a modern PHP application, built as a [Laravel](https://laravel.com/) package, and has the same server requirements as — you guessed it — Laravel itself. To manipulate images (resize, crop, etc), you will also need the GD Library or ImageMagick. [​](https://docs.laravelshopper.dev/v1/requirements#server-requirements) Server Requirements ----------------------------------------------------------------------------------------------- To run Shopper you’ll need a server meeting the following requirements. These are all pretty standard in most modern hosting platforms. [​](https://docs.laravelshopper.dev/v1/requirements#php-version) PHP Version ------------------------------------------------------------------------------- * PHP 8.0+ [​](https://docs.laravelshopper.dev/v1/requirements#php-extension) PHP Extension ----------------------------------------------------------------------------------- * BCMath PHP Extension * Ctype PHP Extension * Exif PHP Extension * JSON PHP Extension * Mbstring PHP Extension * OpenSSL PHP Extension * PDO PHP Extension * Tokenizer PHP Extension * XML PHP Extension * GD Library or ImageMagick [​](https://docs.laravelshopper.dev/v1/requirements#database-engine) Database Engine --------------------------------------------------------------------------------------- * MySQL 8.0+ * MariaDB 10.2+ [​](https://docs.laravelshopper.dev/v1/requirements#recommended-hosts) Recommended Hosts ------------------------------------------------------------------------------------------- We recommend using [Digital Ocean](https://m.do.co/c/d6dca1691fb4) to host most Laravel sites. Their servers are fast, inexpensive, and we use them ourselves. _**Full disclosure:** that’s an affiliate link but we wouldn’t recommend them if it wasn’t an excellent option._ [​](https://docs.laravelshopper.dev/v1/requirements#development-environments) Development Environments --------------------------------------------------------------------------------------------------------- All of these requirements are satisfied by the [Laravel Homestead](https://laravel.com/v1/homestead) virtual machine, which makes it a great local Laravel development environment. Virtual machines aren’t for everybody though, so here are a couple of other options. ### [​](https://docs.laravelshopper.dev/v1/requirements#laravel-valet-macos) Laravel Valet (MacOS) [Laravel Valet](https://laravel.com/v1/valet) is a development environment for Mac minimalists If you are on Linux you must use this [version](https://cpriego.github.io/valet-linux) of Valet for Linux. No Vagrant, No Apache, No Nginx, No need to manually edit hosts file. It simply maps all the subdirectories in a “web” directory (such as `~/Sites`) to `.test` or `.localhost` domains. You can even share your sites publicly using local tunnels. We use it ourselves and it’s brilliant. ### [​](https://docs.laravelshopper.dev/v1/requirements#laragon-windows) Laragon (Windows) [Laragon](https://laragon.org/) and [WAMP](http://www.wampserver.com/) are both good choice for those of the Windows persuasion. You may also want to checkout [Laravel Sail](https://laravel.com/docs/8.x/sail) , which works well with Statamic. [Contribution Guide](https://docs.laravelshopper.dev/v1/contributing) [Installation](https://docs.laravelshopper.dev/v1/installation) ⌘I --- # Two Factor Authenticator - TALL Stack E-commerce Framework > Documentation Index > ------------------- > > Fetch the complete documentation index at: [/llms.txt](https://docs.laravelshopper.dev/llms.txt) > > Use this file to discover all available pages before exploring further. [Skip to main content](https://docs.laravelshopper.dev/v1/two-factor#content-area) This is documentation for Shopper v1, which is no longer maintained. Please refer to the [v2 docs](https://docs.laravelshopper.dev/v2) for the latest information. Two-step authentication (also known as two-factor authentication or multifactor authentication) provides a more secure login process. When you attempt to sign in, you need to complete two separate steps: 1. Enter the account password. 2. Authenticate through a mobile app security key. These two steps will make much more difficult for an unauthorized person to access your account. Even if they are able to find your password, they will not be able to connect without the second step. Authentication in two secure steps rests on the combination of two factors, which can be something you know (such as your combination of connection and password), something you have (such as a code to Only one use provided by an authentication application or SMS) or something you are (providing biometric authentication, such as a fingerprint). Two-step authentication can be configured for all accounts, but the store owner can not activate it for staff. The staff must put it in place for his own accounts. If you have multiple employees who manage your shop. [​](https://docs.laravelshopper.dev/v1/two-factor#enabling-two-factor-authentication) Enabling Two-Factor Authentication --------------------------------------------------------------------------------------------------------------------------- To enable two-step authentication, you’ll need first to download an authenticator app to your mobile device. The app will be able to scan QR codes and retrieve authentication data for you. Recommended authenticator apps: * [Google Authenticator](https://support.google.com/accounts/answer/1066447) * [Duo Mobile](https://guide.duo.com/third-party-accounts) * [Amazon AWS MFA](https://aws.amazon.com/iam/details/mfa) * [Authenticator](https://www.microsoft.com/store/p/microsoft-authenticator/9nblgggzmcj6) In addition, you should store the listed recovery codes in a secure password manager such as [1Password](https://1password.com/) . When you install an authenticator app, make sure that you follow its instructions carefully. After your app is successfully downloaded and set up, you can activate the feature in Shopper. From your administrator interface, click on your name with account picture in the upper right corner. Next click on **Personal Account** ![Account dropdown](https://mintcdn.com/shopperlabs-ee054f5e/jlpf_1VxeBnlQtP6/images/v1/account-dropdown.png?w=2500&fit=max&auto=format&n=jlpf_1VxeBnlQtP6&q=85&s=be1fa3ce2d4b4ff8b578b8f18609865b) Scroll to the two factor authenticate section on the screen, click **Enable authentication**. This action will trigger a modal to ask you to confirm your password ![Two factor section Screenshot](https://mintcdn.com/shopperlabs-ee054f5e/6wDmKBjBTMPmRNSb/images/v1/two-factor-section.png?w=2500&fit=max&auto=format&n=6wDmKBjBTMPmRNSb&q=85&s=941bb7eee7e6f3331130e0de528ba80b) Enter your current password in the space provided and click **Enable**. If the user loses access to their mobile device, the login page will allow them to authenticate using one of their recovery codes instead of the temporary token provided by their mobile device’s authenticator application. ![Two factor code Screenshot](https://mintcdn.com/shopperlabs-ee054f5e/6wDmKBjBTMPmRNSb/images/v1/two-factor-code.png?w=2500&fit=max&auto=format&n=6wDmKBjBTMPmRNSb&q=85&s=6c9c20e43800f4168cd4719be9b3971d) This feature is inspired by [Laravel Fortify](https://laravel.com/docs/9.x/fortify) which is implemented in [Laravel Jetstream](https://jetstream.laravel.com/2.x/introduction.html) Now when you try to log in, two-factor authentication will require your mobile device. [​](https://docs.laravelshopper.dev/v1/two-factor#logging-in-with-two-factor-authentication) Logging in with Two-Factor Authentication ----------------------------------------------------------------------------------------------------------------------------------------- You will go to the Shopper administration login page. You will enter your email address and password and click on the **Login** button. On the next page, you need to authenticate using the method you’ve used to set up two-factor authentication. ![Two factor login Screenshot](https://mintcdn.com/shopperlabs-ee054f5e/jlpf_1VxeBnlQtP6/images/v1/auth-two-factor-authentication.png?w=2500&fit=max&auto=format&n=jlpf_1VxeBnlQtP6&q=85&s=7ed80aae5e2381e0d449639a2ad22855) If you used a two-factor authentication app, open it and retrieve the code you will be given and click on the login button If you have rather copied the recovery codes in an application like 1Password you will have to recover a code, enter it to connect to your store. [​](https://docs.laravelshopper.dev/v1/two-factor#disable-two-factor-authentication) Disable Two-Factor Authentication ------------------------------------------------------------------------------------------------------------------------- From your administrator interface, click on your name and your account photo in the upper right corner and click on Personnal Account menu. In the Two-factor authentication section, use the Disable button for the authentication method you want to deactivate. This will ask you for a password confirmation, you enter your password and click on confirm to completely deactivate the Two-factor authentication. ![Two factor disable Screenshot](https://mintcdn.com/shopperlabs-ee054f5e/6wDmKBjBTMPmRNSb/images/v1/two-factor-disable.png?w=2500&fit=max&auto=format&n=6wDmKBjBTMPmRNSb&q=85&s=a3dc437b9edfebb18cb53ddcb1fcf5cd) [Roles & Permissions](https://docs.laravelshopper.dev/v1/roles-permissions) [Legal](https://docs.laravelshopper.dev/v1/legal) ⌘I --- # Roles & Permissions - TALL Stack E-commerce Framework > Documentation Index > ------------------- > > Fetch the complete documentation index at: [/llms.txt](https://docs.laravelshopper.dev/llms.txt) > > Use this file to discover all available pages before exploring further. [Skip to main content](https://docs.laravelshopper.dev/v1/roles-permissions#content-area) This is documentation for Shopper v1, which is no longer maintained. Please refer to the [v2 docs](https://docs.laravelshopper.dev/v2) for the latest information. To connect to the dashboard you need to have the role `administrator` this role can be found in the configuration file `config/shopper/core.php`. /* |-------------------------------------------------------------------------- | Configurations for the user |-------------------------------------------------------------------------- | | User configuration to manage user access using spatie/laravel-permission. | */ 'users' => [\ 'admin_role' => 'administrator',\ 'default_role' => 'user',\ ], After [creating an super admin](https://docs.laravelshopper.dev/installing#create-an-admin-user) we get the following result php artisan shopper:admin Create Admin User for Shopper administration panel Email Address [admin@admin.com]: > arthur@shopperlabs.io First Name [Shopper]: > Last Name [Admin]: > Password: > Confirm Password: > Creating admin account... User created successfully. After logged as an admin, you can add members with permissions on your staff to log in to your store and complete tasks like **adding products** or managing **orders** and use roles to control what sections of your store they can access. Permissions help you manage what your store’s staff can do in your admin. Roles let you delegate, and assign the level of access that your staff needs to do their jobs effectively. Permissions are associated with roles. Depending on the role that a member has, you can assign different types of permissions to it to limit or increase the actions they can do. All this management of roles and permissions is done using the [Laravel Permission](https://github.com/spatie/laravel-permission) package from [Spatie](https://spatie.be/) . At installation Shopper comes with 3 roles: **Administrator**, **Manager** and **User**, the user role cannot be modified from the administration interface because it is the role that will be assigned to any customer who will create his account on your shop. [​](https://docs.laravelshopper.dev/v1/roles-permissions#rbac-acl) RBAC ACL ------------------------------------------------------------------------------ RBAC (Role Based Access Control) or ACL (Access Control Layer) is an approach to restricting system access for users using roles system, Shopper allow to define the level of access for each user. With roles a user can access menus, pages. It is important to know that one Administrator can have multiple roles assigned. To view the roles and permissions management page, you must go to the `Settings > Staff & Permissions` ![Setting Staff & permissions](https://mintcdn.com/shopperlabs-ee054f5e/6wDmKBjBTMPmRNSb/images/v1/settings-staff.png?w=2500&fit=max&auto=format&n=6wDmKBjBTMPmRNSb&q=85&s=f237482c38938a35ed151ff2773c7a8e) ### [​](https://docs.laravelshopper.dev/v1/roles-permissions#fields) Fields The model used for the **Role** is `Shopper\Core\Models\Role` this model extend from the Spatie Role model. | Name | Type | Required | Notes | | --- | --- | --- | --- | | `id` | autoinc | | auto | | `name` | string | yes | Role name in lowercase such as an slug (Eg.: author) | | `guard_name` | string | no | This field is automatically filled in by Spatie | | `display_name` | string | no | Nullable, the readable name for the role (Eg.: Blog Author) | | `description` | text | no | Nullable, the role description | | `can_be_removed` | boolean | no | Default `true`, defines if a role can be deleted. Initially no role that comes with Shopper can be deleted from the interface. But the roles that will be added afterwards can be deleted. | And the **Permission** model is `Shopper\Core\Models\Permission` | Name | Type | Required | Notes | | --- | --- | --- | --- | | `id` | autoinc | | auto | | `name` | string | yes | Permission name in lowercase such as an slug (Eg.: create\_post) | | `guard_name` | string | no | This field is automatically filled in by Spatie | | `group_name` | string | no | Permissions can be grouped into groups to better organize them. The basic permissions that come with Shopper are mostly grouped together. | | `display_name` | string | no | Nullable, the readable name for the permission (Eg.: Create Post) | | `description` | text | no | Nullable, the permission description | | `can_be_removed` | boolean | no | Default `true`, defines if a permission can be deleted. Initially no permission that comes with Shopper can be deleted from the interface. But the permissions that will be added afterwards can be deleted. | The **Permission** model has some groups as shown here namespace Shopper\Framework\Models\User; use Spatie\Permission\Models\Permission as SpatiePermission; class Permission extends SpatiePermission { /** * Get a lists of permissions groups. */ public static function groups(): array { return [\ 'system' => __('System'),\ 'brands' => __('Brands'),\ 'categories' => __('Categories'),\ 'collections' => __('Collections'),\ 'products' => __('Products'),\ 'customers' => __('Customers'),\ 'orders' => __('Orders'),\ 'discounts' => __('Discounts'),\ ]; } } ### [​](https://docs.laravelshopper.dev/v1/roles-permissions#components) Components The components used to manage locations are found in the component configuration file `config/shopper/components.php`. use Shopper\Framework\Http\Livewire; use Shopper\Framework\Http\Livewire\Components; return [\ \ 'livewire' => [\ \ 'modals.delete-role' => Livewire\Modals\DeleteRole::class,\ 'modals.create-permission' => Livewire\Modals\CreatePermission::class,\ 'modals.create-role' => Livewire\Modals\CreateRole::class,\ \ 'settings.management.create-admin-user' => Components\Settings\Management\CreateAdminUser::class,\ 'settings.management.management' => Components\Settings\Management\Management::class,\ 'settings.management.permissions' => Components\Settings\Management\Permissions::class,\ 'settings.management.role' => Components\Settings\Management\Role::class,\ 'settings.management.users-role' => Components\Settings\Management\UsersRole::class,\ \ ];\ \ ]; [​](https://docs.laravelshopper.dev/v1/roles-permissions#manage-roles) Manage Roles -------------------------------------------------------------------------------------- A Role is a set of permissions to perform certain operations within the system, which is assigned to a chosen Administrator. As said previously Shopper at installation comes with 3 roles but 2 are accessible in the administration panel. The user role does not appear, modifying it could lead to bugs on your store so it is not listed here. ![roles and admins users](https://mintcdn.com/shopperlabs-ee054f5e/jlpf_1VxeBnlQtP6/images/v1/roles-admins.png?w=2500&fit=max&auto=format&n=jlpf_1VxeBnlQtP6&q=85&s=6590043eed343c9a6cde9ce047512319) It’s **strongly** advised to not change the name of roles when they are already assigned to users. If the role verification is done manually you will be forced to change this name in all **middleware**, **helpers**, **blade directives** etc. ### [​](https://docs.laravelshopper.dev/v1/roles-permissions#add-role) Add role To add a new role, you must click on `Add a new role` button. Required fields are marked with asterisks ![addd new role](https://mintcdn.com/shopperlabs-ee054f5e/jlpf_1VxeBnlQtP6/images/v1/add-role.png?w=2500&fit=max&auto=format&n=jlpf_1VxeBnlQtP6&q=85&s=6816db0ed5af2b9c67386a23cbbd2846) The added roles can be used later in your code to assign functionality or access to resources. ### [​](https://docs.laravelshopper.dev/v1/roles-permissions#update-role) Update role To modify a role you must click on the role you want to modify to access the edit form. And as already mentioned, all Shopper features are livewire components. So you can change everything at any time to fit your store. ![update role](https://mintcdn.com/shopperlabs-ee054f5e/6wDmKBjBTMPmRNSb/images/v1/update-role.png?w=2500&fit=max&auto=format&n=6wDmKBjBTMPmRNSb&q=85&s=c3988952e5d2f82a07b82a333a41ae15) ### [​](https://docs.laravelshopper.dev/v1/roles-permissions#create-admin) Create admin In addition to creating an administrator from the command line you can also do it from the Shopper interface, you just need to click on **Add Administrator** button. ![add new admin](https://mintcdn.com/shopperlabs-ee054f5e/jlpf_1VxeBnlQtP6/images/v1/add-admin.png?w=2500&fit=max&auto=format&n=jlpf_1VxeBnlQtP6&q=85&s=3d8af5812ed2e8dbe9c6d1454ccf0e97) Then you fill in the information of your administrator with the role chosen for him ![add new admin form](https://mintcdn.com/shopperlabs-ee054f5e/jlpf_1VxeBnlQtP6/images/v1/admin-user-form.png?w=2500&fit=max&auto=format&n=jlpf_1VxeBnlQtP6&q=85&s=5cc1b9150faec2d0c71768c65acce3e4) The actual role registration function looks like the code below. And the whole implementation class is `Shopper\Http\Livewire\Components\Settings\Management\CreateAdminUser` public function store() { $this->validate($this->rules(), $this->messages()); $user = (new UserRepository())->create([\ 'email' => $this->email,\ 'first_name' => $this->first_name,\ 'last_name' => $this->last_name,\ 'password' => Hash::make($this->password),\ 'phone_number' => $this->phone_number,\ 'gender' => $this->gender,\ 'email_verified_at' => now()->toDateTimeString(),\ ]); $role = Role::findById((int) $this->role_id); $user->assignRole([$role->name]); if ($this->send_mail) { $user->notify(new AdminSendCredentials($this->password)); } session()->flash('success', __('Admin :user added successfully.', ['user' => $user->full_name])); $this->redirectRoute('shopper.settings.users'); } ### [​](https://docs.laravelshopper.dev/v1/roles-permissions#create-permission) Create permission Let’s assume that you would like to add a new permission to ACL. You will need to choose the role because every single permissions are linked to a role. In the way that when a admin are granted of a specific role, he take all role’s permissions. ![Role's permissions example](https://mintcdn.com/shopperlabs-ee054f5e/jlpf_1VxeBnlQtP6/images/v1/permissions-browse.png?w=2500&fit=max&auto=format&n=jlpf_1VxeBnlQtP6&q=85&s=8e5c749fa805708b81a35111f8f54532) As you may have noticed all permissions are grouped by type, and the available types are mentioned above in this [section](https://docs.laravelshopper.dev/roles-permissions#fields) . To add a new permission you just need to click on the **Create permission** button. ![Add permission](https://mintcdn.com/shopperlabs-ee054f5e/jlpf_1VxeBnlQtP6/images/v1/add-permission.png?w=2500&fit=max&auto=format&n=jlpf_1VxeBnlQtP6&q=85&s=a8613108b6d83ac0a2db352d083c6d4c) After adding your permission it will be automatically associated with the role and therefore all administrators with this role will have this permission. If the permission has no group it will be in a `Custom permissions` section. ![new permission](https://mintcdn.com/shopperlabs-ee054f5e/jlpf_1VxeBnlQtP6/images/v1/custom-permissions.png?w=2500&fit=max&auto=format&n=jlpf_1VxeBnlQtP6&q=85&s=1dbccc63a63cae51ddb9099d390c5fea) [Locations](https://docs.laravelshopper.dev/v1/locations) [Two Factor Authenticator](https://docs.laravelshopper.dev/v1/two-factor) ⌘I --- # Addons - TALL Stack E-commerce Framework > Documentation Index > ------------------- > > Fetch the complete documentation index at: [/llms.txt](https://docs.laravelshopper.dev/llms.txt) > > Use this file to discover all available pages before exploring further. [Skip to main content](https://docs.laravelshopper.dev/v2/addons#content-area) Addons are the recommended way to package Shopper extensions. An addon is a self-contained unit that registers its routes, Livewire components, sidebar entries, views, and settings items through the `ShopperPanel` at boot time. When an addon is disabled, none of its assets are registered. [​](https://docs.laravelshopper.dev/v2/addons#creating-an-addon) Creating an Addon ------------------------------------------------------------------------------------- An addon is a class that extends `Shopper\Addon\BaseAddon` and implements `Shopper\Contracts\ShopperAddon`. The contract requires four methods: | Method | Return | Description | | --- | --- | --- | | `getId()` | `string` | Unique kebab-case identifier (`my-addon`) | | `getName()` | `string` | Display name; `BaseAddon` derives it from `getId()` automatically | | `register(ShopperPanel $panel)` | `void` | Called at registration time, bind routes, components, views, settings | | `boot(ShopperPanel $panel)` | `void` | Called after all addons are registered, use for cross-addon dependencies | | `isEnabled()` | `bool` | `BaseAddon` reads `config('shopper.addons.')`, defaulting to `true` | A minimal addon looks like this: use Shopper\Addon\BaseAddon; use Shopper\ShopperPanel; final class AnalyticsAddon extends BaseAddon { public function getId(): string { return 'analytics'; } public function register(ShopperPanel $panel): void { $panel->addonRoutes(fn () => require __DIR__.'/../routes/analytics.php'); $panel->addonLivewireComponents([\ 'analytics-dashboard' => \App\Livewire\Analytics\Dashboard::class,\ 'analytics-report' => \App\Livewire\Analytics\Report::class,\ ]); $panel->addonViews('analytics', __DIR__.'/../resources/views'); } } [​](https://docs.laravelshopper.dev/v2/addons#registering-an-addon) Registering an Addon ------------------------------------------------------------------------------------------- Register the addon in your application’s service provider using the `Shopper` facade: use Shopper\Facades\Shopper; public function boot(): void { Shopper::addon(new AnalyticsAddon); } The `AddonManager` checks `isEnabled()` before registering. If the addon is disabled via config, `register()` is never called and nothing is loaded. [​](https://docs.laravelshopper.dev/v2/addons#what-an-addon-can-register) What an Addon Can Register ------------------------------------------------------------------------------------------------------- ### [​](https://docs.laravelshopper.dev/v2/addons#routes) Routes $panel->addonRoutes(function () { Route::middleware(['shopper'])->group(function () { Route::get('/analytics', AnalyticsDashboard::class)->name('shopper.analytics.index'); Route::get('/analytics/{report}', AnalyticsReport::class)->name('shopper.analytics.report'); }); }); ### [​](https://docs.laravelshopper.dev/v2/addons#livewire-components) Livewire Components $panel->addonLivewireComponents([\ 'analytics-dashboard' => \App\Livewire\Analytics\Dashboard::class,\ ]); ### [​](https://docs.laravelshopper.dev/v2/addons#sidebar-navigation) Sidebar Navigation Pass a sidebar class that implements Shopper’s sidebar extension interface: $panel->addonSidebar(\App\Sidebar\AnalyticsSidebar::class); ### [​](https://docs.laravelshopper.dev/v2/addons#blade-views) Blade Views Register a view namespace so your Blade views are accessible as `analytics::dashboard`: $panel->addonViews('analytics', __DIR__.'/../resources/views'); ### [​](https://docs.laravelshopper.dev/v2/addons#settings-items) Settings Items Add entries to the Settings page. Each entry is a class-string mapped to a boolean controlling its visibility: $panel->addonSettingItems([\ \App\Livewire\Settings\AnalyticsSettings::class => true,\ ]); ### [​](https://docs.laravelshopper.dev/v2/addons#permissions) Permissions Declare additional permissions your addon introduces. They will be seeded alongside Shopper’s built-in permissions: $panel->addonPermissions([\ 'browse_analytics',\ 'export_analytics',\ ]); ### [​](https://docs.laravelshopper.dev/v2/addons#styles-and-scripts) Styles and Scripts Inject additional CSS or JS assets into the admin panel’s layout: $panel->addonStyles([asset('css/analytics.css')]); $panel->addonScripts([asset('js/analytics.js')]); [​](https://docs.laravelshopper.dev/v2/addons#disabling-an-addon) Disabling an Addon --------------------------------------------------------------------------------------- Set the addon’s ID to `false` in `config/shopper/addons.php`: return [\ 'analytics' => false,\ ]; When set to `false`, `BaseAddon::isEnabled()` returns `false` and the addon’s `register()` method is never called. Routes, components, sidebar entries, and assets are not loaded. [​](https://docs.laravelshopper.dev/v2/addons#checking-if-an-addon-is-active) Checking if an Addon is Active --------------------------------------------------------------------------------------------------------------- use Shopper\Facades\Shopper; Shopper::hasAddon('analytics'); $addon = Shopper::getAddon('analytics'); $addon->getName(); [​](https://docs.laravelshopper.dev/v2/addons#full-example-a-loyalty-points-addon) Full Example: A Loyalty Points Addon -------------------------------------------------------------------------------------------------------------------------- Here is a complete addon that adds a loyalty points feature to the Shopper admin: use Shopper\Addon\BaseAddon; use Shopper\ShopperPanel; final class LoyaltyAddon extends BaseAddon { public function getId(): string { return 'loyalty'; } public function register(ShopperPanel $panel): void { $panel->addonRoutes(function () { Route::middleware(['shopper'])->prefix('loyalty')->name('shopper.loyalty.')->group(function () { Route::get('/', \App\Livewire\Loyalty\Index::class)->name('index'); Route::get('/tiers', \App\Livewire\Loyalty\Tiers::class)->name('tiers'); }); }); $panel->addonLivewireComponents([\ 'loyalty-index' => \App\Livewire\Loyalty\Index::class,\ 'loyalty-tiers' => \App\Livewire\Loyalty\Tiers::class,\ 'loyalty-customer-points' => \App\Livewire\Loyalty\CustomerPoints::class,\ ]); $panel->addonViews('loyalty', __DIR__.'/../resources/views'); $panel->addonSidebar(\App\Sidebar\LoyaltySidebar::class); $panel->addonPermissions([\ 'browse_loyalty',\ 'edit_loyalty',\ ]); $panel->addonSettingItems([\ \App\Livewire\Settings\LoyaltySettings::class => true,\ ]); } public function boot(ShopperPanel $panel): void { \Shopper\View\CustomerRenderHook::class; $panel->renderHook( \Shopper\View\CustomerRenderHook::SHOW_TABS_END, fn (): string => '', ); } } Register it once in your service provider: use Shopper\Facades\Shopper; Shopper::addon(new LoyaltyAddon); [Render Hooks](https://docs.laravelshopper.dev/v2/render-hooks) [Sidebar Package](https://docs.laravelshopper.dev/v2/sidebar/overview) ⌘I --- # Catalog Types - TALL Stack E-commerce Framework > Documentation Index > ------------------- > > Fetch the complete documentation index at: [/llms.txt](https://docs.laravelshopper.dev/llms.txt) > > Use this file to discover all available pages before exploring further. [Skip to main content](https://docs.laravelshopper.dev/v2/reference/types/catalog#content-area) [​](https://docs.laravelshopper.dev/v2/reference/types/catalog#category) Category ------------------------------------------------------------------------------------ The `Category` interface represents a product category. import type { Category } from '@shopperlabs/shopper-types' ### [​](https://docs.laravelshopper.dev/v2/reference/types/catalog#definition) Definition interface Category extends Entity, SEOFields { name: string slug: string description: string | null is_enabled: boolean position: number parent_id: number | null metadata: Metadata slug_path?: string // Relationships image?: Media | null parent?: Category children?: Category[] products?: Product[] } ### [​](https://docs.laravelshopper.dev/v2/reference/types/catalog#usage-examples) Usage Examples import type { Category } from '@shopperlabs/shopper-types' function buildCategoryTree(categories: Category[]): Category[] { const map = new Map() const roots: Category[] = [] categories.forEach((cat) => map.set(cat.id, { ...cat, children: [] })) categories.forEach((cat) => { const category = map.get(cat.id)! if (cat.parent_id && map.has(cat.parent_id)) { map.get(cat.parent_id)!.children!.push(category) } else { roots.push(category) } }) return roots } // Get category breadcrumb function getCategoryPath(category: Category): string[] { return category.slug_path?.split('/') ?? [category.slug] } * * * [​](https://docs.laravelshopper.dev/v2/reference/types/catalog#brand) Brand ------------------------------------------------------------------------------ The `Brand` interface represents a product brand. import type { Brand } from '@shopperlabs/shopper-types' ### [​](https://docs.laravelshopper.dev/v2/reference/types/catalog#definition-2) Definition interface Brand extends Entity, SEOFields { name: string slug: string | null website: string | null description: string | null position: number is_enabled: boolean metadata: Metadata // Relationships image?: Media | null } * * * [​](https://docs.laravelshopper.dev/v2/reference/types/catalog#collection) Collection ---------------------------------------------------------------------------------------- The `Collection` interface represents a product collection. import type { Collection } from '@shopperlabs/shopper-types' ### [​](https://docs.laravelshopper.dev/v2/reference/types/catalog#definition-3) Definition interface Collection extends Entity, SEOFields { name: string slug: string description?: string | null type: CollectionType match_conditions: CollectionCondition | null sort: string | null published_at: DateEntity | null metadata: Metadata // Relationships image?: Media | null rules?: CollectionRule[] zones?: Zone[] products?: Product[] } ### [​](https://docs.laravelshopper.dev/v2/reference/types/catalog#collectiontype-enum) CollectionType Enum enum CollectionType { MANUAL = 'manual', AUTO = 'auto', } ### [​](https://docs.laravelshopper.dev/v2/reference/types/catalog#collectioncondition-enum) CollectionCondition Enum enum CollectionCondition { ALL = 'all', ANY = 'any', } ### [​](https://docs.laravelshopper.dev/v2/reference/types/catalog#collectionrule-interface) CollectionRule Interface interface CollectionRule extends Entity { rule: CollectionRuleType operator: CollectionOperator value: string collection_id: number collection?: Collection } enum CollectionRuleType { PRODUCT_TITLE = 'product_title', PRODUCT_BRAND = 'product_brand', PRODUCT_CATEGORY = 'product_category', PRODUCT_PRICE = 'product_price', COMPARE_AT_PRICE = 'compare_at_price', INVENTORY_STOCK = 'inventory_stock', PRODUCT_CREATED_AT = 'product_created_at', PRODUCT_FEATURED = 'product_featured', PRODUCT_RATING = 'product_rating', PRODUCT_SALES_COUNT = 'product_sales_count', } enum CollectionOperator { EQUALS_TO = 'equals_to', NOT_EQUAL_TO = 'not_equal_to', LESS_THAN = 'less_than', GREATER_THAN = 'greater_than', STARTS_WITH = 'starts_with', ENDS_WITH = 'ends_with', CONTAINS = 'contains', NOT_CONTAINS = 'not_contains', } * * * [​](https://docs.laravelshopper.dev/v2/reference/types/catalog#attribute) Attribute -------------------------------------------------------------------------------------- The `Attribute` interface represents a product attribute (color, size, etc.). import type { Attribute, AttributeValue } from '@shopperlabs/shopper-types' ### [​](https://docs.laravelshopper.dev/v2/reference/types/catalog#attribute-definition) Attribute Definition interface Attribute extends Entity { name: string slug: string type: FieldType icon: string | null description: string | null is_enabled: boolean is_searchable: boolean is_filterable: boolean type_formatted?: string // Relationships values?: AttributeValue[] } ### [​](https://docs.laravelshopper.dev/v2/reference/types/catalog#attributevalue-definition) AttributeValue Definition interface AttributeValue { id: number value: string key: string position: number attribute_id: number attribute?: Attribute } ### [​](https://docs.laravelshopper.dev/v2/reference/types/catalog#fieldtype-enum) FieldType Enum enum FieldType { TEXT = 'text', NUMBER = 'number', RICH_TEXT = 'richtext', SELECT = 'select', CHECKBOX = 'checkbox', COLOR_PICKER = 'colorpicker', DATE_PICKER = 'datepicker', } ### [​](https://docs.laravelshopper.dev/v2/reference/types/catalog#usage-examples-2) Usage Examples import type { Attribute } from '@shopperlabs/shopper-types' import { FieldType } from '@shopperlabs/shopper-types' // Get filterable attributes function getFilterableAttributes(attributes: Attribute[]): Attribute[] { return attributes.filter((attr) => attr.is_filterable && attr.is_enabled) } // Check if attribute has selectable values function hasSelectableValues(attribute: Attribute): boolean { return [FieldType.SELECT, FieldType.CHECKBOX, FieldType.COLOR_PICKER] .includes(attribute.type) } // Render attribute input based on type function getInputComponent(attribute: Attribute): string { switch (attribute.type) { case FieldType.TEXT: return 'TextInput' case FieldType.NUMBER: return 'NumberInput' case FieldType.RICH_TEXT: return 'RichTextEditor' case FieldType.SELECT: return 'Select' case FieldType.CHECKBOX: return 'CheckboxGroup' case FieldType.COLOR_PICKER: return 'ColorPicker' case FieldType.DATE_PICKER: return 'DatePicker' default: return 'TextInput' } } [Customer Types](https://docs.laravelshopper.dev/v2/reference/types/customer) ⌘I --- # Order Types - TALL Stack E-commerce Framework > Documentation Index > ------------------- > > Fetch the complete documentation index at: [/llms.txt](https://docs.laravelshopper.dev/llms.txt) > > Use this file to discover all available pages before exploring further. [Skip to main content](https://docs.laravelshopper.dev/v2/reference/types/order#content-area) [​](https://docs.laravelshopper.dev/v2/reference/types/order#order) Order ---------------------------------------------------------------------------- The `Order` interface represents a customer order with three independent statuses tracking order progress, payment, and shipping. import type { Order } from '@shopperlabs/shopper-types' ### [​](https://docs.laravelshopper.dev/v2/reference/types/order#definition) Definition interface Order extends Entity { number: string price_amount: number notes: string | null currency_code: string total_amount?: number status: OrderStatus payment_status: PaymentStatus shipping_status: ShippingStatus cancelled_at: DateEntity | null archived_at: DateEntity | null zone_id: number | null shipping_address_id: number | null billing_address_id: number | null payment_method_id: number | null customer_id: number | null channel_id: number | null parent_order_id: number | null shipping_option_id?: number | null metadata: Metadata // Relationships shippingOption?: CarrierOption shippingAddress?: OrderAddress | null billingAddress?: OrderAddress | null paymentMethod?: PaymentMethod | null zone?: Zone | null channel?: Channel | null parent?: Order | null customer?: Customer items?: OrderItem[] shippings?: OrderShipping[] children?: Order[] refund?: OrderRefund } ### [​](https://docs.laravelshopper.dev/v2/reference/types/order#orderstatus-enum) OrderStatus Enum Tracks the overall lifecycle of the order. enum OrderStatus { NEW = 'new', PROCESSING = 'processing', COMPLETED = 'completed', CANCELLED = 'cancelled', ARCHIVED = 'archived', } ### [​](https://docs.laravelshopper.dev/v2/reference/types/order#paymentstatus-enum) PaymentStatus Enum Tracks whether payment has been collected. enum PaymentStatus { PENDING = 'pending', AUTHORIZED = 'authorized', PAID = 'paid', PARTIALLY_REFUNDED = 'partially_refunded', REFUNDED = 'refunded', VOIDED = 'voided', } ### [​](https://docs.laravelshopper.dev/v2/reference/types/order#shippingstatus-enum) ShippingStatus Enum Tracks the overall shipping state at the order level. enum ShippingStatus { UNFULFILLED = 'unfulfilled', PARTIALLY_SHIPPED = 'partially_shipped', SHIPPED = 'shipped', PARTIALLY_DELIVERED = 'partially_delivered', DELIVERED = 'delivered', PARTIALLY_RETURNED = 'partially_returned', RETURNED = 'returned', } ### [​](https://docs.laravelshopper.dev/v2/reference/types/order#usage-examples) Usage Examples import type { Order } from '@shopperlabs/shopper-types' import { OrderStatus, PaymentStatus, ShippingStatus } from '@shopperlabs/shopper-types' function canCancel(order: Order): boolean { return ( order.status !== OrderStatus.CANCELLED && order.status !== OrderStatus.ARCHIVED && order.shipping_status === ShippingStatus.UNFULFILLED ) } function canCapture(order: Order): boolean { return order.payment_status === PaymentStatus.AUTHORIZED } function getStatusColor(status: OrderStatus): string { const colors: Record = { [OrderStatus.NEW]: '#3b82f6', [OrderStatus.PROCESSING]: '#2563eb', [OrderStatus.COMPLETED]: '#059669', [OrderStatus.CANCELLED]: '#ef4444', [OrderStatus.ARCHIVED]: '#6b7280', } return colors[status] } function calculateTotal(order: Order): number { return order.items?.reduce((sum, item) => sum + item.total, 0) ?? 0 } * * * [​](https://docs.laravelshopper.dev/v2/reference/types/order#orderitem) OrderItem ------------------------------------------------------------------------------------ The `OrderItem` interface represents a line item in an order. Each item tracks its own fulfillment status independently. import type { OrderItem } from '@shopperlabs/shopper-types' ### [​](https://docs.laravelshopper.dev/v2/reference/types/order#definition-2) Definition interface OrderItem extends Entity { name: string quantity: number unit_price_amount: number | null total: number sku: string | null product_id: number product_type: string order_id: number order_shipping_id: number | null fulfillment_status: FulfillmentStatus | null // Relationships order?: Order shipment?: OrderShipping } ### [​](https://docs.laravelshopper.dev/v2/reference/types/order#fulfillmentstatus-enum) FulfillmentStatus Enum Tracks item-level fulfillment, enabling partial shipments and multi-carrier delivery. enum FulfillmentStatus { PENDING = 'pending', FORWARDED_TO_SUPPLIER = 'forwarded_to_supplier', PROCESSING = 'processing', SHIPPED = 'shipped', DELIVERED = 'delivered', CANCELLED = 'cancelled', } * * * [​](https://docs.laravelshopper.dev/v2/reference/types/order#orderaddress) OrderAddress ------------------------------------------------------------------------------------------ The `OrderAddress` interface represents a shipping or billing address for an order. import type { OrderAddress } from '@shopperlabs/shopper-types' ### [​](https://docs.laravelshopper.dev/v2/reference/types/order#definition-3) Definition interface OrderAddress extends Entity { first_name: string last_name: string full_name: string street_address: string street_address_plus: string | null postal_code: string city: string state: string | null company: string | null phone: string | null country_name: string | null customer_id?: number | null customer?: Customer } * * * [​](https://docs.laravelshopper.dev/v2/reference/types/order#ordershipping) OrderShipping -------------------------------------------------------------------------------------------- The `OrderShipping` interface represents a shipment, a physical package sent to the customer. Each shipment tracks its own delivery progress and has a timeline of tracking events. import type { OrderShipping } from '@shopperlabs/shopper-types' ### [​](https://docs.laravelshopper.dev/v2/reference/types/order#definition-4) Definition interface OrderShipping extends Entity { status: ShipmentStatus | null shipped_at: DateEntity | null received_at: DateEntity | null returned_at: DateEntity | null tracking_number: string | null tracking_url: string | null voucher: Record | null order_id: number carrier_id: number | null // Relationships order?: Order carrier?: Carrier items?: OrderItem[] events?: OrderShippingEvent[] } ### [​](https://docs.laravelshopper.dev/v2/reference/types/order#shipmentstatus-enum) ShipmentStatus Enum Tracks the delivery progress of a single package. enum ShipmentStatus { PENDING = 'pending', PICKED_UP = 'picked_up', IN_TRANSIT = 'in_transit', AT_SORTING_CENTER = 'at_sorting_center', OUT_FOR_DELIVERY = 'out_for_delivery', DELIVERED = 'delivered', DELIVERY_FAILED = 'delivery_failed', RETURNED = 'returned', } * * * [​](https://docs.laravelshopper.dev/v2/reference/types/order#ordershippingevent) OrderShippingEvent ------------------------------------------------------------------------------------------------------ The `OrderShippingEvent` interface represents a tracking event in a shipment’s timeline. import type { OrderShippingEvent } from '@shopperlabs/shopper-types' ### [​](https://docs.laravelshopper.dev/v2/reference/types/order#definition-5) Definition interface OrderShippingEvent extends Entity { status: ShipmentStatus description: string | null location: string | null latitude: number | null longitude: number | null occurred_at: DateEntity | null metadata: Record | null order_shipping_id: number // Relationships shipment?: OrderShipping } * * * [​](https://docs.laravelshopper.dev/v2/reference/types/order#orderrefund) OrderRefund ---------------------------------------------------------------------------------------- The `OrderRefund` interface represents a refund for an order. import type { OrderRefund } from '@shopperlabs/shopper-types' ### [​](https://docs.laravelshopper.dev/v2/reference/types/order#definition-6) Definition interface OrderRefund extends Entity { refund_reason: string | null refund_amount: number | null status: OrderRefundStatus notes: string | null currency: string order_id: number user_id: number | null metadata: Metadata order?: Order } ### [​](https://docs.laravelshopper.dev/v2/reference/types/order#orderrefundstatus-enum) OrderRefundStatus Enum enum OrderRefundStatus { PENDING = 'pending', AWAITING = 'awaiting', TREATMENT = 'treatment', PARTIAL_REFUND = 'partial_refund', REFUNDED = 'refunded', CANCELLED = 'cancelled', REJECTED = 'rejected', } [Product Types](https://docs.laravelshopper.dev/v2/reference/types/product) [Customer Types](https://docs.laravelshopper.dev/v2/reference/types/customer) ⌘I --- # Customer Types - TALL Stack E-commerce Framework > Documentation Index > ------------------- > > Fetch the complete documentation index at: [/llms.txt](https://docs.laravelshopper.dev/llms.txt) > > Use this file to discover all available pages before exploring further. [Skip to main content](https://docs.laravelshopper.dev/v2/reference/types/customer#content-area) [​](https://docs.laravelshopper.dev/v2/reference/types/customer#customer) Customer ------------------------------------------------------------------------------------- The `Customer` interface represents a customer in your store. import type { Customer } from '@shopperlabs/shopper-types' ### [​](https://docs.laravelshopper.dev/v2/reference/types/customer#definition) Definition interface Customer extends Entity { first_name: string | null last_name: string email: string gender: GenderType | null phone_number: string | null birth_date: string | null email_verified_at: string | null avatar: AvatarType timezone?: string | null opt_in: boolean last_login_at: DateEntity | null last_login_ip?: string | null // Relationships addresses?: Address[] } ### [​](https://docs.laravelshopper.dev/v2/reference/types/customer#gendertype-enum) GenderType Enum enum GenderType { MALE = 'male', FEMALE = 'female', } ### [​](https://docs.laravelshopper.dev/v2/reference/types/customer#avatartype-interface) AvatarType Interface interface AvatarType { type: string url: string default: string } ### [​](https://docs.laravelshopper.dev/v2/reference/types/customer#usage-examples) Usage Examples import type { Customer } from '@shopperlabs/shopper-types' // Get full name function getCustomerName(customer: Customer): string { if (customer.first_name) { return `${customer.first_name} ${customer.last_name}` } return customer.last_name } // Get default shipping address function getDefaultShippingAddress(customer: Customer) { return customer.addresses?.find((addr) => addr.shipping_default) } // Check if customer has opted in to marketing function canSendMarketing(customer: Customer): boolean { return customer.opt_in && customer.email_verified_at !== null } * * * [​](https://docs.laravelshopper.dev/v2/reference/types/customer#address) Address ----------------------------------------------------------------------------------- The `Address` interface represents a customer address. import type { Address } from '@shopperlabs/shopper-types' ### [​](https://docs.laravelshopper.dev/v2/reference/types/customer#definition-2) Definition interface Address extends Entity { first_name: string | null last_name: string full_name: string company_name: string | null street_address: string street_address_plus?: string | null postal_code: string city: string state: string | null phone_number?: string | null type: AddressType metadata: Metadata shipping_default: boolean billing_default: boolean user_id: number country_id: number // Relationships country?: Country } ### [​](https://docs.laravelshopper.dev/v2/reference/types/customer#addresstype-enum) AddressType Enum enum AddressType { BILLING = 'billing', SHIPPING = 'shipping', } ### [​](https://docs.laravelshopper.dev/v2/reference/types/customer#usage-examples-2) Usage Examples import type { Address } from '@shopperlabs/shopper-types' import { AddressType } from '@shopperlabs/shopper-types' // Format address for display function formatAddress(address: Address): string { const lines = [\ address.full_name,\ address.company_name,\ address.street_address,\ address.street_address_plus,\ `${address.city}, ${address.state ?? ''} ${address.postal_code}`,\ address.country?.name,\ ].filter(Boolean) return lines.join('\n') } // Filter shipping addresses function getShippingAddresses(addresses: Address[]): Address[] { return addresses.filter((addr) => addr.type === AddressType.SHIPPING) } * * * [​](https://docs.laravelshopper.dev/v2/reference/types/customer#country) Country ----------------------------------------------------------------------------------- The `Country` interface represents a country. import type { Country } from '@shopperlabs/shopper-types' ### [​](https://docs.laravelshopper.dev/v2/reference/types/customer#definition-3) Definition interface Country { id: number name: string name_official: string region: string subregion: string cca3: string cca2: string flag: string svg_flag: string latitude: number longitude: number phone_calling_code: Record currencies: Record // Relationships zones?: Zone[] } [Order Types](https://docs.laravelshopper.dev/v2/reference/types/order) [Catalog Types](https://docs.laravelshopper.dev/v2/reference/types/catalog) ⌘I --- # Product Types - TALL Stack E-commerce Framework > Documentation Index > ------------------- > > Fetch the complete documentation index at: [/llms.txt](https://docs.laravelshopper.dev/llms.txt) > > Use this file to discover all available pages before exploring further. [Skip to main content](https://docs.laravelshopper.dev/v2/reference/types/product#content-area) [​](https://docs.laravelshopper.dev/v2/reference/types/product#product) Product ---------------------------------------------------------------------------------- The `Product` interface represents a product in your catalog. import type { Product } from '@shopperlabs/shopper-types' ### [​](https://docs.laravelshopper.dev/v2/reference/types/product#definition) Definition interface Product extends Entity, SEOFields, ShippingFields { name: string slug: string sku?: string | null barcode: string | null summary: string | null description: string | null security_stock: number | null featured: boolean is_visible: boolean type: ProductType | null published_at: DateEntity | null external_id: string | null stock: number variants_stock?: number supplier_id?: number | null brand_id: number | null metadata: Metadata // Relationships supplier?: Supplier brand?: Brand channels?: Channel[] categories?: Category[] options?: Attribute[] collections?: Collection[] tags?: ProductTag[] variants?: ProductVariant[] relatedProducts?: Product[] images?: Media[] | null reviews?: Review[] prices?: Price[] } ### [​](https://docs.laravelshopper.dev/v2/reference/types/product#producttype-enum) ProductType Enum enum ProductType { EXTERNAL = 'external', VIRTUAL = 'virtual', STANDARD = 'standard', VARIANT = 'variant', } ### [​](https://docs.laravelshopper.dev/v2/reference/types/product#usage-examples) Usage Examples import type { Product } from '@shopperlabs/shopper-types' import { ProductType } from '@shopperlabs/shopper-types' function isVariantProduct(product: Product): boolean { return product.type === ProductType.VARIANT } async function fetchProduct(slug: string): Promise { const response = await fetch(`/api/products/${slug}`) return response.json() } function isInStock(product: Product): boolean { if (product.type === ProductType.VARIANT) { return (product.variants_stock ?? 0) > 0 } return product.stock > 0 } function getProductImage(product: Product): string | null { return product.images?.[0]?.url ?? null } * * * [​](https://docs.laravelshopper.dev/v2/reference/types/product#productvariant) ProductVariant ------------------------------------------------------------------------------------------------ The `ProductVariant` interface represents a variant of a product (size, color, etc.). import type { ProductVariant } from '@shopperlabs/shopper-types' ### [​](https://docs.laravelshopper.dev/v2/reference/types/product#definition-2) Definition interface ProductVariant extends Entity, ShippingFields { name: string sku?: string | null barcode: string | null ean: string | null upc: string | null position: number allow_backorder: boolean product_id: number stock: number metadata: Metadata // Relationships product?: Product values?: AttributeValue[] images?: Media[] | null prices?: Price[] } ### [​](https://docs.laravelshopper.dev/v2/reference/types/product#usage-examples-2) Usage Examples import type { Product, ProductVariant } from '@shopperlabs/shopper-types' function findVariant( product: Product, attributes: Record ): ProductVariant | undefined { return product.variants?.find((variant) => { return variant.values?.every((value) => { const attr = value.attribute return attr && attributes[attr.slug] === value.key }) }) } function isVariantAvailable(variant: ProductVariant): boolean { return variant.stock > 0 || variant.allow_backorder } function getVariantPrice(variant: ProductVariant): number | null { return variant.prices?.[0]?.amount ?? null } * * * [​](https://docs.laravelshopper.dev/v2/reference/types/product#producttag) ProductTag ---------------------------------------------------------------------------------------- The `ProductTag` interface represents a simple label attached to products. import type { ProductTag } from '@shopperlabs/shopper-types' ### [​](https://docs.laravelshopper.dev/v2/reference/types/product#definition-3) Definition interface ProductTag extends Entity { name: string slug: string | null // Relationships products?: Product[] } ### [​](https://docs.laravelshopper.dev/v2/reference/types/product#usage-examples-3) Usage Examples import type { Product, ProductTag } from '@shopperlabs/shopper-types' function getProductsByTag(products: Product[], tagSlug: string): Product[] { return products.filter((product) => product.tags?.some((tag) => tag.slug === tagSlug) ) } function getTagNames(product: Product): string[] { return product.tags?.map((tag) => tag.name) ?? [] } [Overview](https://docs.laravelshopper.dev/v2/reference/typescript-types) [Order Types](https://docs.laravelshopper.dev/v2/reference/types/order) ⌘I --- # Overview - TALL Stack E-commerce Framework > Documentation Index > ------------------- > > Fetch the complete documentation index at: [/llms.txt](https://docs.laravelshopper.dev/llms.txt) > > Use this file to discover all available pages before exploring further. [Skip to main content](https://docs.laravelshopper.dev/v2/reference/typescript-types#content-area) The `@shopperlabs/shopper-types` package provides comprehensive TypeScript type definitions for all Shopper models and entities. These types are useful when building storefronts, mobile apps, or any TypeScript application that interacts with the Shopper API. [​](https://docs.laravelshopper.dev/v2/reference/typescript-types#installation) Installation ----------------------------------------------------------------------------------------------- npm yarn pnpm npm install @shopperlabs/shopper-types yarn add @shopperlabs/shopper-types pnpm add @shopperlabs/shopper-types As of v2.9 the package ships as ECMAScript Modules (`"type": "module"` with an `exports` map). Use `import` rather than CommonJS `require()`. ESM-first projects need no changes. [​](https://docs.laravelshopper.dev/v2/reference/typescript-types#usage) Usage --------------------------------------------------------------------------------- Import types directly from the package: import type { Product, ProductVariant, Order } from '@shopperlabs/shopper-types' // Use in your API calls async function getProduct(id: number): Promise { const response = await fetch(`/api/products/${id}`) return response.json() } // Type your component props interface ProductCardProps { product: Product } [​](https://docs.laravelshopper.dev/v2/reference/typescript-types#available-types) Available Types ----------------------------------------------------------------------------------------------------- The package exports types for all Shopper models: | Type | Description | | --- | --- | | `Product` | Product model with variants, categories, and media | | `ProductVariant` | Product variant with pricing and attributes | | `ProductTag` | Simple label for cross-cutting product organization | | `Order` | Order with items, addresses, and shipping | | `OrderItem` | Individual order line item | | `OrderShipping` | Shipment with tracking and carrier | | `OrderShippingEvent` | Tracking event in a shipment timeline | | `OrderAddress` | Shipping or billing address on an order | | `OrderRefund` | Refund request for an order | | `Customer` | Customer profile and addresses | | `Category` | Hierarchical product category | | `Brand` | Product brand | | `Collection` | Product collection (manual or automatic) | | `Attribute` | Product attribute definition | | `AttributeValue` | Attribute value option | | `Address` | Customer address | | `Channel` | Sales channel | | `Zone` | Shipping/pricing zone | | `Carrier` | Shipping carrier | | `CarrierOption` | Carrier shipping option | | `Currency` | Currency configuration | | `Discount` | Discount/coupon code | | `Inventory` | Inventory location | | `PaymentMethod` | Payment method | | `Review` | Product review | | `Supplier` | Product supplier | [​](https://docs.laravelshopper.dev/v2/reference/typescript-types#enums) Enums --------------------------------------------------------------------------------- The package also exports enums for type-safe status checks: import { ProductType, OrderStatus, PaymentStatus, ShippingStatus, CollectionType, AddressType } from '@shopperlabs/shopper-types' if (product.type === ProductType.VARIANT) { // Handle variant product } if (order.status === OrderStatus.COMPLETED) { // Order is complete } if (order.payment_status === PaymentStatus.AUTHORIZED) { // Payment can be captured } ### [​](https://docs.laravelshopper.dev/v2/reference/typescript-types#available-enums) Available Enums | Enum | Values | | --- | --- | | `ProductType` | `STANDARD`, `VARIANT`, `VIRTUAL`, `EXTERNAL` | | `OrderStatus` | `NEW`, `PROCESSING`, `COMPLETED`, `CANCELLED`, `ARCHIVED` | | `PaymentStatus` | `PENDING`, `AUTHORIZED`, `PAID`, `PARTIALLY_REFUNDED`, `REFUNDED`, `VOIDED` | | `ShippingStatus` | `UNFULFILLED`, `PARTIALLY_SHIPPED`, `SHIPPED`, `PARTIALLY_DELIVERED`, `DELIVERED`, `PARTIALLY_RETURNED`, `RETURNED` | | `FulfillmentStatus` | `PENDING`, `FORWARDED_TO_SUPPLIER`, `PROCESSING`, `SHIPPED`, `DELIVERED`, `CANCELLED` | | `ShipmentStatus` | `PENDING`, `PICKED_UP`, `IN_TRANSIT`, `AT_SORTING_CENTER`, `OUT_FOR_DELIVERY`, `DELIVERED`, `DELIVERY_FAILED`, `RETURNED` | | `OrderRefundStatus` | `PENDING`, `AWAITING`, `TREATMENT`, `PARTIAL_REFUND`, `REFUNDED`, `CANCELLED`, `REJECTED` | | `CollectionType` | `MANUAL`, `AUTO` | | `CollectionCondition` | `ALL`, `ANY` | | `CollectionRuleType` | `PRODUCT_TITLE`, `PRODUCT_BRAND`, `PRODUCT_CATEGORY`, `PRODUCT_PRICE`, `COMPARE_AT_PRICE`, `INVENTORY_STOCK`, `PRODUCT_CREATED_AT`, `PRODUCT_FEATURED`, `PRODUCT_RATING`, `PRODUCT_SALES_COUNT` | | `CollectionOperator` | `EQUALS_TO`, `NOT_EQUAL_TO`, `LESS_THAN`, `GREATER_THAN`, `STARTS_WITH`, `ENDS_WITH`, `CONTAINS`, `NOT_CONTAINS` | | `AddressType` | `BILLING`, `SHIPPING` | | `DiscountType` | `PERCENTAGE`, `FIXED_AMOUNT` | | `GenderType` | `MALE`, `FEMALE` | | `FieldType` | `TEXT`, `NUMBER`, `RICH_TEXT`, `SELECT`, `CHECKBOX`, `COLOR_PICKER`, `DATE_PICKER` | | `Weight` | `KG`, `G`, `LBS` | | `Length` | `M`, `CM`, `MM`, `FT`, `IN` | | `Volume` | `L`, `ML`, `GAL`, `FLOZ` | [​](https://docs.laravelshopper.dev/v2/reference/typescript-types#common-interfaces) Common Interfaces --------------------------------------------------------------------------------------------------------- ### [​](https://docs.laravelshopper.dev/v2/reference/typescript-types#entity) Entity All models extend the base `Entity` interface: interface Entity { id: number created_at?: DateEntity updated_at?: DateEntity deleted_at?: DateEntity | null } ### [​](https://docs.laravelshopper.dev/v2/reference/typescript-types#dateentity) DateEntity Dates are returned with both raw and human-readable formats: interface DateEntity { date: string // e.g., "2026-02-11 14:30:00" human: string // e.g., "2 hours ago" } ### [​](https://docs.laravelshopper.dev/v2/reference/typescript-types#price) Price Pricing information for products and variants: interface Price { amount: number | null compare_amount: number | null cost_amount: number | null currency_id: number currency_code: string currency?: Currency } ### [​](https://docs.laravelshopper.dev/v2/reference/typescript-types#shippingfields) ShippingFields Physical dimensions for shippable products: interface ShippingFields { width_unit: Length width_value: number | null weight_unit: Weight weight_value: number | null height_unit: Length height_value: number | null depth_unit: Length depth_value: number | null volume_unit: Volume volume_value: number | null } [​](https://docs.laravelshopper.dev/v2/reference/typescript-types#example-storefront-product-list) Example: Storefront Product List -------------------------------------------------------------------------------------------------------------------------------------- import type { Product, Category } from '@shopperlabs/shopper-types' import { ProductType } from '@shopperlabs/shopper-types' interface ProductListProps { products: Product[] category?: Category } function ProductList({ products, category }: ProductListProps) { return (
{category &&

{category.name}

} {products.map((product) => (

{product.name}

{product.description}

{product.type === ProductType.VARIANT && ( {product.variants?.length} variants )} {product.prices?.[0] && ( {product.prices[0].currency_code} {product.prices[0].amount} )}
))}
) } [​](https://docs.laravelshopper.dev/v2/reference/typescript-types#example-order-details) Example: Order Details ------------------------------------------------------------------------------------------------------------------ import type { Order, OrderItem } from '@shopperlabs/shopper-types' import { OrderStatus, PaymentStatus, ShippingStatus } from '@shopperlabs/shopper-types' function OrderDetails({ order }: { order: Order }) { const statusColors: Record = { [OrderStatus.NEW]: '#3b82f6', [OrderStatus.PROCESSING]: '#2563eb', [OrderStatus.COMPLETED]: '#059669', [OrderStatus.CANCELLED]: '#ef4444', [OrderStatus.ARCHIVED]: '#6b7280', } return (

Order #{order.number}

{order.status} {order.payment_status} {order.shipping_status}

Items

{order.items?.map((item: OrderItem) => (
{item.name} x{item.quantity} {item.unit_price_amount}
))} {order.shippingAddress && (

Shipping Address

{order.shippingAddress.full_name}

{order.shippingAddress.street_address}

{order.shippingAddress.city}, {order.shippingAddress.state}

{order.shippingAddress.postal_code}

)}
) } [​](https://docs.laravelshopper.dev/v2/reference/typescript-types#source-code) Source Code --------------------------------------------------------------------------------------------- The types are open source and available on GitHub: GitHub Repository ----------------- View the source code and contribute to the types package. [Product Types](https://docs.laravelshopper.dev/v2/reference/types/product) ⌘I --- # Roles & Permissions - TALL Stack E-commerce Framework > Documentation Index > ------------------- > > Fetch the complete documentation index at: [/llms.txt](https://docs.laravelshopper.dev/llms.txt) > > Use this file to discover all available pages before exploring further. [Skip to main content](https://docs.laravelshopper.dev/v2/acl#content-area) Shopper uses [spatie/laravel-permission](https://github.com/spatie/laravel-permission) to manage roles and permissions. Every admin user has one or more roles, and each role has a set of permissions that control access to admin panel sections and actions. Since all permissions are registered on Laravel’s gate, you can use Laravel’s built-in `can()` function and `@can` Blade directive. For a visual walkthrough of managing roles and permissions in the admin panel, see the User Guide pages: [Managing Staff](https://docs.laravelshopper.dev/v2/user-guide/administration/users) and [Roles & Permissions](https://docs.laravelshopper.dev/v2/user-guide/administration/roles) . [​](https://docs.laravelshopper.dev/v2/acl#configuration) Configuration -------------------------------------------------------------------------- Roles are configured in `config/shopper/admin.php`. These names are used throughout the system for authorization checks: 'roles' => [\ 'admin' => 'administrator',\ 'manager' => 'manager',\ 'user' => 'user',\ ], | Role | Purpose | Admin Access | | --- | --- | --- | | `administrator` | Full access to all admin panel features | Yes | | `manager` | Configurable access based on assigned permissions | Yes | | `user` | Customer role, assigned to storefront users | No | Do not rename roles after they have been assigned to users. Role names are used in middleware and authorization checks throughout the system. [​](https://docs.laravelshopper.dev/v2/acl#models) Models ------------------------------------------------------------ ### [​](https://docs.laravelshopper.dev/v2/acl#role) Role The model used is `Shopper\Models\Role`, which extends Spatie’s Role model with additional fields. | Column | Type | Nullable | Default | Description | | --- | --- | --- | --- | --- | | `id` | bigint | no | auto | Primary key | | `name` | string | no | \- | Role name in lowercase (e.g., `administrator`) | | `guard_name` | string | no | auto | Filled automatically by Spatie | | `display_name` | string | yes | null | Human-readable name | | `description` | text | yes | null | Role description | | `can_be_removed` | boolean | no | true | Whether the role can be deleted | The Role model provides an `isAdmin()` method: use Shopper\Models\Role; $role = Role::query()->where('name', 'administrator')->first(); $role->isAdmin(); // true ### [​](https://docs.laravelshopper.dev/v2/acl#permission) Permission The model used is `Shopper\Models\Permission`, which extends Spatie’s Permission model with grouping support. | Column | Type | Nullable | Default | Description | | --- | --- | --- | --- | --- | | `id` | bigint | no | auto | Primary key | | `name` | string | no | \- | Permission name (e.g., `browse_products`) | | `guard_name` | string | no | auto | Filled automatically by Spatie | | `group_name` | string | yes | null | Permission group for organization | | `display_name` | string | yes | null | Human-readable name | | `description` | text | yes | null | Permission description | | `can_be_removed` | boolean | no | true | Whether the permission can be deleted | ### [​](https://docs.laravelshopper.dev/v2/acl#permission-groups) Permission Groups Permissions are organized into groups for display in the admin panel: use Shopper\Models\Permission; Permission::groups(); This returns the built-in groups: `system`, `brands`, `categories`, `collections`, `products`, `customers`, `orders`, `discounts`. ### [​](https://docs.laravelshopper.dev/v2/acl#system-permissions) System Permissions The `system` group contains the global capabilities that gate everything outside the resource permissions: | Permission | Description | | --- | --- | | `access_setting` | Required for any write action on settings surfaces (PaymentMethods, Currencies, Carriers, Locations, Legal, Team, Roles, Permissions) | | `view_users` | Required to view the customers list and customer detail pages | Since v2.8, `access_setting` is the only permission that grants write access to PaymentMethods, Currencies, Carriers, Team management, and Role/Permission management. Roles that previously relied on `view_users` to mutate these surfaces must be granted `access_setting` to keep working. ### [​](https://docs.laravelshopper.dev/v2/acl#generating-permissions) Generating Permissions The `Permission::generate()` method creates five permissions for a given resource (browse, read, edit, add, delete): Permission::generate('brands'); // Creates: browse_brands, read_brands, add_brands, edit_brands, delete_brands Permission::generate('tags', 'products'); // Creates: browse_tags, read_tags, add_tags, edit_tags, delete_tags (in the "products" group) [​](https://docs.laravelshopper.dev/v2/acl#working-with-roles) Working with Roles ------------------------------------------------------------------------------------ ### [​](https://docs.laravelshopper.dev/v2/acl#creating-roles) Creating Roles To create a new role programmatically: use Shopper\Models\Role; $role = Role::query()->create([\ 'name' => 'warehouse-manager',\ 'display_name' => 'Warehouse Manager',\ 'description' => 'Manages inventory locations and stock levels.',\ ]); $role->givePermissionTo([\ 'browse_inventories',\ 'read_inventories',\ 'edit_inventories',\ 'browse_products',\ 'read_products',\ ]); ### [​](https://docs.laravelshopper.dev/v2/acl#assigning-roles) Assigning Roles Assign a role to a user: $user->assignRole('warehouse-manager'); $user->assignRole(config('shopper.admin.roles.admin')); ### [​](https://docs.laravelshopper.dev/v2/acl#checking-roles) Checking Roles The `InteractsWithShopper` trait on the User model provides role checking methods: $user->isAdmin(); // true if user has the administrator role $user->isManager(); // true if user has the manager role $user->hasRole('warehouse-manager'); [​](https://docs.laravelshopper.dev/v2/acl#working-with-permissions) Working with Permissions ------------------------------------------------------------------------------------------------ ### [​](https://docs.laravelshopper.dev/v2/acl#checking-permissions) Checking Permissions Use Laravel’s standard authorization: $user->hasPermissionTo('browse_products'); $user->can('edit_products'); In Blade templates: @can('add_products') Add Product @endcan In Livewire components, Shopper uses the `authorize()` method: public function mount(): void { $this->authorize('browse_products'); } ### [​](https://docs.laravelshopper.dev/v2/acl#creating-custom-permissions) Creating Custom Permissions To add a custom permission and assign it to a role: use Shopper\Models\Permission; use Shopper\Models\Role; $permission = Permission::query()->create([\ 'name' => 'view_analytics',\ 'group_name' => 'system',\ 'display_name' => 'View Analytics',\ 'description' => 'Access the analytics dashboard.',\ ]); $role = Role::query()->where('name', 'manager')->first(); $role->givePermissionTo($permission); Custom permissions without a recognized group appear in a “Custom permissions” section in the admin panel. ### [​](https://docs.laravelshopper.dev/v2/acl#revoking-permissions) Revoking Permissions To remove a permission from a role: $role->revokePermissionTo('delete_products'); [​](https://docs.laravelshopper.dev/v2/acl#admin-user-creation) Admin User Creation -------------------------------------------------------------------------------------- You can create an admin user from the command line: php artisan shopper:user Or programmatically: use App\Models\User; use Illuminate\Support\Facades\Hash; $admin = User::query()->create([\ 'first_name' => 'John',\ 'last_name' => 'Doe',\ 'email' => 'admin@example.com',\ 'password' => Hash::make('password'),\ 'email_verified_at' => now(),\ ]); $admin->assignRole(config('shopper.admin.roles.admin')); [​](https://docs.laravelshopper.dev/v2/acl#components) Components -------------------------------------------------------------------- To customize the roles and permissions admin UI: php artisan shopper:component:publish setting The relevant components in `config/shopper/components/setting.php`: use Shopper\Livewire; return [\ 'pages' => [\ 'team-index' => Livewire\Pages\Settings\Team\Index::class,\ 'team-roles' => Livewire\Pages\Settings\Team\RolePermission::class,\ ],\ 'components' => [\ 'settings.team.permissions' => Livewire\Components\Settings\Team\Permissions::class,\ 'settings.team.users' => Livewire\Components\Settings\Team\UsersRole::class,\ 'slide-overs.create-team-member' => Livewire\SlideOvers\CreateTeamMember::class,\ ],\ ]; [Media](https://docs.laravelshopper.dev/v2/media) [Two Factor Authentication](https://docs.laravelshopper.dev/v2/two-factor) ⌘I --- # Brands - TALL Stack E-commerce Framework > Documentation Index > ------------------- > > Fetch the complete documentation index at: [/llms.txt](https://docs.laravelshopper.dev/llms.txt) > > Use this file to discover all available pages before exploring further. [Skip to main content](https://docs.laravelshopper.dev/v2/brands#content-area) Brands represent manufacturers or labels for your products. They help customers identify and filter products from their favorite manufacturers, and they give your storefront structured navigation (e.g., a “Shop by Brand” page or a brand filter in search results). [​](https://docs.laravelshopper.dev/v2/brands#model) Model ------------------------------------------------------------- The model used is `Shopper\Models\Brand`, which extends `Shopper\Core\Models\Brand`. The core model provides the business logic, relationships, scopes, and slug generation. The admin model adds media collections and conversions through Spatie MediaLibrary. The core model implements `Shopper\Core\Models\Contracts\Brand` and uses the `HasSlug` trait for automatic slug generation with collision handling, and the `HasMediaCollections` trait for config-driven media support. ### [​](https://docs.laravelshopper.dev/v2/brands#extending-the-model) Extending the Model To add custom behavior, extend the admin model and update your configuration: namespace App\Models; use Shopper\Models\Brand as ShopperBrand; class Brand extends ShopperBrand { } Update `config/shopper/models.php`: return [\ 'brand' => \App\Models\Brand::class,\ ]; [​](https://docs.laravelshopper.dev/v2/brands#database-schema) Database Schema --------------------------------------------------------------------------------- | Column | Type | Nullable | Default | Description | | --- | --- | --- | --- | --- | | `id` | bigint | no | auto | Primary key | | `name` | string | no | \- | Brand name | | `slug` | string | yes | auto | URL-friendly identifier (unique) | | `website` | string | yes | null | Brand’s official website URL | | `description` | longtext | yes | null | Brand description (supports rich text) | | `position` | smallint (unsigned) | no | 0 | Display order position | | `is_enabled` | boolean | no | false | Brand visibility status | | `seo_title` | string(60) | yes | null | SEO meta title | | `seo_description` | string(160) | yes | null | SEO meta description | | `metadata` | jsonb | yes | null | Additional custom data | | `created_at` | timestamp | yes | null | Creation timestamp | | `updated_at` | timestamp | yes | null | Last update timestamp | [​](https://docs.laravelshopper.dev/v2/brands#slug-generation) Slug Generation --------------------------------------------------------------------------------- The `HasSlug` trait generates unique slugs automatically. When you set the `slug` attribute, the trait runs it through `Str::slug()` and appends an incrementing suffix (`-1`, `-2`, etc.) if a collision is detected. The trait also provides a `findBySlug()` static method: use Shopper\Models\Brand; $brand = Brand::findBySlug('nike'); [​](https://docs.laravelshopper.dev/v2/brands#relationships) Relationships ----------------------------------------------------------------------------- ### [​](https://docs.laravelshopper.dev/v2/brands#products) Products A brand has many [products](https://docs.laravelshopper.dev/v2/products) . This is a standard `HasMany` relationship using the configured product model. $brand->products; $brand->products()->count(); To get only published products for a brand (for storefront display): $brand->products()->publish()->get(); With eager loading: $brands = Brand::query()->with('products')->get(); [​](https://docs.laravelshopper.dev/v2/brands#query-scopes) Query Scopes --------------------------------------------------------------------------- ### [​](https://docs.laravelshopper.dev/v2/brands#enabled-brands) Enabled Brands The `enabled` scope filters brands where `is_enabled` is `true`. Use it for all storefront queries to exclude draft or hidden brands. use Shopper\Models\Brand; Brand::query()->enabled()->orderBy('position')->get(); [​](https://docs.laravelshopper.dev/v2/brands#status-management) Status Management ------------------------------------------------------------------------------------- The `updateStatus()` method provides a convenient way to toggle brand visibility: $brand->updateStatus(true); // enable $brand->updateStatus(false); // disable You can also update the field directly: $brand->update(['is_enabled' => true]); [​](https://docs.laravelshopper.dev/v2/brands#media) Media ------------------------------------------------------------- Brands support two media collections through [Spatie MediaLibrary](https://spatie.be/docs/laravel-medialibrary) , using the same config-driven collection names as [products](https://docs.laravelshopper.dev/v2/products#media) . | Collection | Config key | Behavior | Description | | --- | --- | --- | --- | | Default gallery | `shopper.media.storage.collection_name` | Multiple files | Brand images | | Thumbnail | `shopper.media.storage.thumbnail_collection` | Single file | Brand logo | To add a brand logo: $collection = config('shopper.media.storage.thumbnail_collection'); $brand->addMedia($file)->toMediaCollection($collection); To retrieve the logo URL with a specific conversion: $collection = config('shopper.media.storage.thumbnail_collection'); $url = $brand->getFirstMediaUrl($collection, 'medium'); From a URL: $collection = config('shopper.media.storage.thumbnail_collection'); $brand->addMediaFromUrl('https://example.com/nike-logo.png') ->toMediaCollection($collection); [​](https://docs.laravelshopper.dev/v2/brands#creating-brands) Creating Brands --------------------------------------------------------------------------------- To create a brand with a logo and SEO metadata: use Shopper\Models\Brand; $brand = Brand::query()->create([\ 'name' => 'Nike',\ 'slug' => 'nike',\ 'website' => 'https://nike.com',\ 'description' => 'Just Do It',\ 'is_enabled' => true,\ 'position' => 1,\ 'seo_title' => 'Nike - Official Products',\ 'seo_description' => 'Shop official Nike products including shoes, clothing, and accessories.',\ ]); $collection = config('shopper.media.storage.thumbnail_collection'); $brand->addMedia($logoFile)->toMediaCollection($collection); [​](https://docs.laravelshopper.dev/v2/brands#retrieving-brands) Retrieving Brands ------------------------------------------------------------------------------------- To get all enabled brands ordered by position: Brand::query()->enabled()->orderBy('position')->get(); To get brands that have at least one product, with product counts: $brands = Brand::query() ->enabled() ->has('products') ->withCount('products') ->get(); To find a brand by slug: $brand = Brand::findBySlug('nike'); For navigation or filter dropdowns where you only need name and slug: $brands = Brand::query() ->enabled() ->select(['id', 'name', 'slug']) ->orderBy('name') ->get(); [​](https://docs.laravelshopper.dev/v2/brands#metadata) Metadata ------------------------------------------------------------------- The `metadata` JSON column lets you store additional custom data that doesn’t warrant its own database column: $brand->update([\ 'metadata' => [\ 'country_of_origin' => 'USA',\ 'founded_year' => 1964,\ 'social' => [\ 'instagram' => '@nike',\ 'twitter' => '@nike',\ ],\ ],\ ]); $country = $brand->metadata['country_of_origin'] ?? null; [​](https://docs.laravelshopper.dev/v2/brands#configuration) Configuration ----------------------------------------------------------------------------- ### [​](https://docs.laravelshopper.dev/v2/brands#disabling-brands) Disabling Brands If you don’t need brands in your store, disable the feature in `config/shopper/features.php`: use Shopper\Enum\FeatureState; return [\ 'brand' => FeatureState::Disabled,\ ]; When disabled, the brand menu item is hidden from the sidebar, brand-related routes are not registered, and brand selection is removed from product forms. ### [​](https://docs.laravelshopper.dev/v2/brands#permissions) Permissions The admin panel generates four permissions for brand management: | Permission | Description | | --- | --- | | `browse_brands` | View the brands list | | `read_brands` | View a single brand | | `add_brands` | Create new brands | | `edit_brands` | Edit existing brands | | `delete_brands` | Delete brands | [​](https://docs.laravelshopper.dev/v2/brands#components) Components ----------------------------------------------------------------------- To customize the admin UI for brand management: php artisan shopper:component:publish brand This creates `config/shopper/components/brand.php`: use Shopper\Livewire; return [\ 'pages' => [\ 'brand-index' => Livewire\Pages\Brand\Index::class,\ ],\ 'components' => [\ 'slide-overs.brand-form' => Livewire\SlideOvers\BrandForm::class,\ ],\ ]; [​](https://docs.laravelshopper.dev/v2/brands#storefront-example) Storefront Example --------------------------------------------------------------------------------------- This example shows a brand listing page and a brand detail page with its published products. namespace App\Http\Controllers; use Shopper\Models\Brand; class BrandController extends Controller { public function index() { $brands = Brand::query() ->enabled() ->withCount('products') ->orderBy('position') ->get(); return view('brands.index', compact('brands')); } public function show(string $slug) { $brand = Brand::findBySlug($slug); $products = $brand->products() ->publish() ->paginate(12); return view('brands.show', compact('brand', 'products')); } } ### [​](https://docs.laravelshopper.dev/v2/brands#view-composer) View Composer For brands that appear in multiple views (header, footer, filters), use a View Composer to avoid repeating the query: namespace App\View\Composers; use Illuminate\View\View; use Shopper\Models\Brand; class BrandsComposer { public function compose(View $view): void { $view->with('brands', Brand::query() ->enabled() ->orderBy('position') ->take(12) ->get() ); } } Register it in your `AppServiceProvider`: use Illuminate\Support\Facades\View; public function boot(): void { View::composer(['partials.brands', 'filters.brands'], BrandsComposer::class); } [Pricing](https://docs.laravelshopper.dev/v2/pricing) [Categories](https://docs.laravelshopper.dev/v2/categories) ⌘I --- # Attributes - TALL Stack E-commerce Framework > Documentation Index > ------------------- > > Fetch the complete documentation index at: [/llms.txt](https://docs.laravelshopper.dev/llms.txt) > > Use this file to discover all available pages before exploring further. [Skip to main content](https://docs.laravelshopper.dev/v2/attributes#content-area) Attributes define product characteristics like Color, Size, or Material. They enable variable products, enhance filtering, and provide detailed product specifications. [​](https://docs.laravelshopper.dev/v2/attributes#models) Models ------------------------------------------------------------------- Shopper uses three models to manage attributes: | Model | Purpose | | --- | --- | | `Shopper\Core\Models\Attribute` | The attribute definition (Color, Size, Material) | | `Shopper\Core\Models\AttributeValue` | Possible values for an attribute (Red, Blue, Large) | | `Shopper\Core\Models\AttributeProduct` | Pivot linking attributes to products with a selected value | The Attribute model implements `Shopper\Core\Models\Contracts\Attribute` and uses the `HasSlug` trait for automatic slug generation. Unlike products or brands, the Attribute model is not configurable via `config/shopper/models.php` and has no admin model wrapper. [​](https://docs.laravelshopper.dev/v2/attributes#database-schema) Database Schema ------------------------------------------------------------------------------------- ### [​](https://docs.laravelshopper.dev/v2/attributes#attribute-table) Attribute Table | Column | Type | Nullable | Default | Description | | --- | --- | --- | --- | --- | | `id` | bigint | no | auto | Primary key | | `name` | string | no | \- | Attribute name | | `slug` | string | yes | auto | URL-friendly identifier (unique) | | `description` | string | yes | null | Attribute description | | `type` | string | no | \- | Field type enum value | | `icon` | string | yes | null | Icon identifier | | `is_enabled` | boolean | no | false | Attribute visibility | | `is_searchable` | boolean | no | false | Include in search | | `is_filterable` | boolean | no | false | Show in filters | | `created_at` | timestamp | yes | null | Creation timestamp | | `updated_at` | timestamp | yes | null | Last update timestamp | ### [​](https://docs.laravelshopper.dev/v2/attributes#attributevalue-table) AttributeValue Table | Column | Type | Nullable | Default | Description | | --- | --- | --- | --- | --- | | `id` | bigint | no | auto | Primary key | | `value` | string(50) | no | \- | Display value | | `key` | string | no | \- | Unique identifier key | | `position` | smallint | yes | 1 | Display order | | `attribute_id` | bigint | no | \- | Foreign key to attribute | ### [​](https://docs.laravelshopper.dev/v2/attributes#attributeproduct-table-pivot) AttributeProduct Table (Pivot) | Column | Type | Nullable | Description | | --- | --- | --- | --- | | `id` | bigint | no | Primary key | | `attribute_id` | bigint | no | Foreign key to attribute | | `product_id` | bigint | no | Foreign key to product | | `attribute_value_id` | bigint | yes | Foreign key to attribute value | | `attribute_custom_value` | longtext | yes | Custom value for text-based attributes | [​](https://docs.laravelshopper.dev/v2/attributes#field-types) Field Types ----------------------------------------------------------------------------- Attributes use the `FieldType` enum to determine input behavior: use Shopper\Core\Enum\FieldType; FieldType::Checkbox // Multiple selectable values FieldType::ColorPicker // Color selection FieldType::DatePicker // Date input FieldType::RichText // Rich text editor FieldType::Select // Single selection dropdown FieldType::Text // Single-line text input FieldType::Number // Numeric input | Type | Database Value | Has Predefined Values | Description | | --- | --- | --- | --- | | Checkbox | `checkbox` | Yes | Multiple values can be selected | | ColorPicker | `colorpicker` | Yes | Color values with picker | | DatePicker | `datepicker` | No | Date input field | | RichText | `richtext` | No | HTML content editor | | Select | `select` | Yes | Single value selection | | Text | `text` | No | Free text input | | Number | `number` | No | Integer or decimal input | ### [​](https://docs.laravelshopper.dev/v2/attributes#type-checking-methods) Type Checking Methods Each attribute type has helper methods to determine its behavior: $attribute->hasMultipleValues(); $attribute->hasSingleValue(); $attribute->hasTextValue(); Attribute::fieldsWithValues(); `hasMultipleValues()` returns `true` for Checkbox and ColorPicker. `hasSingleValue()` returns `true` for Select. `hasTextValue()` returns `true` for Text, Number, RichText, and DatePicker. `fieldsWithValues()` returns the types that require predefined values. [​](https://docs.laravelshopper.dev/v2/attributes#relationships) Relationships --------------------------------------------------------------------------------- ### [​](https://docs.laravelshopper.dev/v2/attributes#values) Values $attribute->values; To add values to an attribute: $attribute->values()->create([\ 'value' => 'Red',\ 'key' => 'color-red',\ 'position' => 1,\ ]); $attribute->values()->createMany([\ ['value' => 'Small', 'key' => 'size-s', 'position' => 1],\ ['value' => 'Medium', 'key' => 'size-m', 'position' => 2],\ ['value' => 'Large', 'key' => 'size-l', 'position' => 3],\ ]); ### [​](https://docs.laravelshopper.dev/v2/attributes#products) Products $attribute->products; Attach an attribute to a product with a predefined value: $attribute->products()->attach($productId, [\ 'attribute_value_id' => $valueId,\ ]); Or with a custom value: $attribute->products()->attach($productId, [\ 'attribute_custom_value' => 'Custom specification',\ ]); ### [​](https://docs.laravelshopper.dev/v2/attributes#variants-attributevalue) Variants (AttributeValue) AttributeValue can be linked to product variants: $attributeValue->variants; $attributeValue->variants()->attach($variantId); [​](https://docs.laravelshopper.dev/v2/attributes#slug-&-lookup) Slug & Lookup --------------------------------------------------------------------------------- The `HasSlug` trait generates unique slugs automatically and provides a `findBySlug()` static method: use Shopper\Core\Models\Attribute; $attribute = Attribute::findBySlug('color'); [​](https://docs.laravelshopper.dev/v2/attributes#query-scopes) Query Scopes ------------------------------------------------------------------------------- Filter attributes by their visibility and behavior flags: use Shopper\Core\Models\Attribute; Attribute::query()->enabled()->get(); Attribute::query()->isFilterable()->get(); Attribute::query()->isSearchable()->get(); Scopes can be combined: Attribute::query() ->enabled() ->isFilterable() ->with('values') ->get(); [​](https://docs.laravelshopper.dev/v2/attributes#status-management) Status Management ----------------------------------------------------------------------------------------- $attribute->updateStatus(true); $attribute->updateStatus(false); [​](https://docs.laravelshopper.dev/v2/attributes#display-helpers) Display Helpers ------------------------------------------------------------------------------------- $attribute->type_formatted; Attribute::typesFields(); `type_formatted` returns a translated label like “Checkbox”. `typesFields()` returns all available types with their labels. [​](https://docs.laravelshopper.dev/v2/attributes#working-with-attributeproduct) Working with AttributeProduct ----------------------------------------------------------------------------------------------------------------- The `AttributeProduct` model provides a computed `real_value` accessor: use Shopper\Core\Models\AttributeProduct; $attributeProduct = AttributeProduct::query()->find($id); // Get the actual value (custom or from value relationship) $attributeProduct->real_value; // Returns attribute_custom_value if set, otherwise value->value [​](https://docs.laravelshopper.dev/v2/attributes#creating-attributes) Creating Attributes --------------------------------------------------------------------------------------------- ### [​](https://docs.laravelshopper.dev/v2/attributes#attribute-with-predefined-values) Attribute with Predefined Values use Shopper\Core\Models\Attribute; use Shopper\Core\Enum\FieldType; // Create a color attribute $color = Attribute::query()->create([\ 'name' => 'Color',\ 'slug' => 'color',\ 'type' => FieldType::ColorPicker,\ 'is_enabled' => true,\ 'is_filterable' => true,\ ]); // Add color values $color->values()->createMany([\ ['value' => 'Red', 'key' => 'red', 'position' => 1],\ ['value' => 'Blue', 'key' => 'blue', 'position' => 2],\ ['value' => 'Green', 'key' => 'green', 'position' => 3],\ ]); ### [​](https://docs.laravelshopper.dev/v2/attributes#attribute-with-free-text) Attribute with Free Text // Create a text attribute (no predefined values needed) $material = Attribute::query()->create([\ 'name' => 'Material',\ 'slug' => 'material',\ 'type' => FieldType::Text,\ 'is_enabled' => true,\ 'is_searchable' => true,\ ]); [​](https://docs.laravelshopper.dev/v2/attributes#assigning-attributes-to-products) Assigning Attributes to Products ----------------------------------------------------------------------------------------------------------------------- use Shopper\Models\Product; $product = Product::query()->find($id); // Assign attribute with predefined value (via options relationship) $product->options()->attach($attributeId, [\ 'attribute_value_id' => $valueId,\ ]); // Assign attribute with custom value $product->options()->attach($attributeId, [\ 'attribute_custom_value' => '100% Cotton',\ ]); // Get product attributes with values foreach ($product->options as $attribute) { $valueId = $attribute->pivot->attribute_value_id; $customValue = $attribute->pivot->attribute_custom_value; } [​](https://docs.laravelshopper.dev/v2/attributes#retrieving-attributes) Retrieving Attributes ------------------------------------------------------------------------------------------------- use Shopper\Core\Models\Attribute; // Get all enabled attributes with values $attributes = Attribute::query() ->enabled() ->with('values') ->get(); // Get filterable attributes for storefront $filters = Attribute::query() ->enabled() ->isFilterable() ->with(['values' => fn ($q) => $q->orderBy('position')]) ->get(); // Get attribute by slug $size = Attribute::findBySlug('size'); $size->load('values'); [​](https://docs.laravelshopper.dev/v2/attributes#observer-behavior) Observer Behavior ----------------------------------------------------------------------------------------- The `AttributeObserver` handles cleanup when deleting: // When an attribute is deleted: // 1. All product associations are detached // 2. All attribute values are deleted $attribute->delete(); // Triggers observer cleanup [​](https://docs.laravelshopper.dev/v2/attributes#disabling-attribute-feature) Disabling Attribute Feature ------------------------------------------------------------------------------------------------------------- // config/shopper/features.php use Shopper\Enum\FeatureState; return [\ 'attribute' => FeatureState::Disabled,\ ]; [​](https://docs.laravelshopper.dev/v2/attributes#permissions) Permissions ----------------------------------------------------------------------------- The admin panel generates five permissions for attribute management: | Permission | Description | | --- | --- | | `browse_attributes` | View the attributes list | | `read_attributes` | View a single attribute | | `add_attributes` | Create new attributes | | `edit_attributes` | Edit existing attributes | | `delete_attributes` | Delete attributes | [​](https://docs.laravelshopper.dev/v2/attributes#components) Components --------------------------------------------------------------------------- Attribute components are part of the product configuration. To customize them: php artisan shopper:component:publish product Attribute-related components in `config/shopper/components/product.php`: use Shopper\Livewire; return [\ 'pages' => [\ // ...\ 'attribute-index' => Livewire\Pages\Attribute\Browse::class,\ ],\ 'components' => [\ // ...\ 'slide-overs.attribute-form' => Livewire\SlideOvers\AttributeForm::class,\ 'slide-overs.choose-product-attributes' => Livewire\SlideOvers\ChooseProductAttributes::class,\ 'slide-overs.attribute-values' => Livewire\SlideOvers\AttributeValues::class,\ ],\ ]; [​](https://docs.laravelshopper.dev/v2/attributes#storefront-example) Storefront Example ------------------------------------------------------------------------------------------- namespace App\Http\Controllers; use Shopper\Core\Models\Attribute; use Shopper\Models\Product; class ProductFilterController extends Controller { public function index() { // Get filterable attributes for sidebar $filters = Attribute::query() ->enabled() ->isFilterable() ->with(['values' => fn ($q) => $q->orderBy('position')]) ->get(); return view('products.index', compact('filters')); } public function filter(Request $request) { $query = Product::query()->publish(); foreach ($request->input('attributes', []) as $slug => $values) { $query->whereHas('options', function ($q) use ($slug, $values) { $q->where('slug', $slug) ->wherePivotIn('attribute_value_id', $values); }); } return $query->paginate(12); } } [​](https://docs.laravelshopper.dev/v2/attributes#use-cases) Use Cases ------------------------------------------------------------------------- | Attribute Type | Example | Use Case | | --- | --- | --- | | Checkbox | Size | Multiple sizes available for clothing | | ColorPicker | Color | Product color options | | Select | Material | Single material selection | | Text | SKU Suffix | Custom text per product | | Number | Weight | Numeric specifications | | DatePicker | Release Date | Product launch date | | RichText | Care Instructions | Detailed HTML content | [Collections](https://docs.laravelshopper.dev/v2/collections) [Reviews](https://docs.laravelshopper.dev/v2/reviews) ⌘I --- # Sidebar Package - TALL Stack E-commerce Framework > Documentation Index > ------------------- > > Fetch the complete documentation index at: [/llms.txt](https://docs.laravelshopper.dev/llms.txt) > > Use this file to discover all available pages before exploring further. [Skip to main content](https://docs.laravelshopper.dev/v2/sidebar/overview#content-area) The `shopper/sidebar` package is a headless sidebar builder for Laravel that allows you to create and manage sidebars with full customization support. Originally forked from [SpartnerNL/Laravel-Sidebar](https://github.com/SpartnerNL/Laravel-Sidebar) , it has been completely rewritten to support modern Laravel applications with Livewire and Alpine.js. [​](https://docs.laravelshopper.dev/v2/sidebar/overview#features) Features ----------------------------------------------------------------------------- * **Headless Architecture**: Full control over your sidebar’s HTML and styling * **Livewire Integration**: Built-in Livewire component for easy setup * **Alpine.js State Management**: Reactive sidebar state with collapse, expand, and responsive features * **LocalStorage Persistence**: User preferences are saved automatically * **Event-Based Extension**: Extend existing sidebars using Laravel events * **Caching Support**: Optional sidebar caching for performance * **Authorization**: Built-in authorization support for items and groups [​](https://docs.laravelshopper.dev/v2/sidebar/overview#architecture) Architecture ------------------------------------------------------------------------------------- The sidebar package is built around several key concepts: ### [​](https://docs.laravelshopper.dev/v2/sidebar/overview#menu) Menu The root container that holds all sidebar groups. Each sidebar has one menu that contains multiple groups. ### [​](https://docs.laravelshopper.dev/v2/sidebar/overview#group) Group A collection of related menu items with an optional heading. Groups can be collapsible and styled independently. ### [​](https://docs.laravelshopper.dev/v2/sidebar/overview#item) Item A single navigation entry that can have: * An icon * A badge (for notifications, counts, etc.) * An append element (additional action button) * Nested sub-items ### [​](https://docs.laravelshopper.dev/v2/sidebar/overview#contracts) Contracts The package uses contracts (interfaces) for all major components, allowing you to customize or replace default implementations: * `Shopper\Sidebar\Contracts\Sidebar` - Main sidebar interface * `Shopper\Sidebar\Contracts\Builder\Menu` - Menu builder * `Shopper\Sidebar\Contracts\Builder\Group` - Group builder * `Shopper\Sidebar\Contracts\Builder\Item` - Item builder * `Shopper\Sidebar\Contracts\Builder\Badge` - Badge builder * `Shopper\Sidebar\Contracts\Builder\Append` - Append builder [​](https://docs.laravelshopper.dev/v2/sidebar/overview#use-cases) Use Cases ------------------------------------------------------------------------------- ### [​](https://docs.laravelshopper.dev/v2/sidebar/overview#standalone-laravel-applications) Standalone Laravel Applications You can use this package in any Laravel application to create custom sidebars. See the [Standalone Installation](https://docs.laravelshopper.dev/v2/sidebar/standalone) guide. ### [​](https://docs.laravelshopper.dev/v2/sidebar/overview#extending-shopper) Extending Shopper If you’re using Shopper, you can extend the admin panel sidebar using the event-based system. See [Extending Shopper Navigation](https://docs.laravelshopper.dev/v2/sidebar/shopper-extension) for details. [​](https://docs.laravelshopper.dev/v2/sidebar/overview#requirements) Requirements ------------------------------------------------------------------------------------- * PHP 8.3+ * Laravel 11.x or 12.x * Livewire 3.x * Alpine.js 3.x [Addons](https://docs.laravelshopper.dev/v2/addons) [Extending Shopper](https://docs.laravelshopper.dev/v2/sidebar/shopper-extension) ⌘I --- # Managing Attributes - TALL Stack E-commerce Framework > Documentation Index > ------------------- > > Fetch the complete documentation index at: [/llms.txt](https://docs.laravelshopper.dev/llms.txt) > > Use this file to discover all available pages before exploring further. [Skip to main content](https://docs.laravelshopper.dev/v2/user-guide/catalog/attributes#content-area) Attributes define the characteristics of your products. They’re essential for creating product variants and helping customers filter and compare products. [​](https://docs.laravelshopper.dev/v2/user-guide/catalog/attributes#overview) Overview ------------------------------------------------------------------------------------------ Attributes describe product properties such as: * **Size** - Small, Medium, Large, XL * **Color** - Red, Blue, Green, Black * **Material** - Cotton, Polyester, Leather * **Storage** - 64GB, 128GB, 256GB [​](https://docs.laravelshopper.dev/v2/user-guide/catalog/attributes#accessing-attributes) Accessing Attributes ------------------------------------------------------------------------------------------------------------------ Click on **Attributes** in the sidebar to access attribute management. ![Attributes List](https://mintcdn.com/shopperlabs-ee054f5e/KQY6o7d4neR-LyIr/images/v2/attributes.png?w=2500&fit=max&auto=format&n=KQY6o7d4neR-LyIr&q=85&s=fadb106e3716144fdde1f55bc5b1f04b) [​](https://docs.laravelshopper.dev/v2/user-guide/catalog/attributes#creating-an-attribute) Creating an Attribute -------------------------------------------------------------------------------------------------------------------- To create a new attribute: 1. Click the **Create** button 2. Define the attribute details 3. Add attribute values 4. Click **Save** ![Create Attribute](https://mintcdn.com/shopperlabs-ee054f5e/KQY6o7d4neR-LyIr/images/v2/attribute-form.png?w=2500&fit=max&auto=format&n=KQY6o7d4neR-LyIr&q=85&s=30175046abc3792029189e76fc4dd5ad) ### [​](https://docs.laravelshopper.dev/v2/user-guide/catalog/attributes#attribute-fields) Attribute Fields | Field | Required | Description | | --- | --- | --- | | **Name** | Yes | The attribute name (e.g., “Color”, “Size”) | | **Type** | Yes | How values are selected (dropdown, radio, etc.) | | **Description** | No | Explain what this attribute represents | | **Enabled** | No | Toggle to activate the attribute | ### [​](https://docs.laravelshopper.dev/v2/user-guide/catalog/attributes#attribute-types) Attribute Types Choose how customers will select attribute values: | Type | Best For | | --- | --- | | **Dropdown** | Many options (countries, sizes) | | **Radio buttons** | Few options with clear differences | | **Checkbox** | Multiple selections allowed | | **Color swatch** | Color selection with visual preview | | **Text** | Custom customer input | [​](https://docs.laravelshopper.dev/v2/user-guide/catalog/attributes#attribute-values) Attribute Values ---------------------------------------------------------------------------------------------------------- After creating an attribute, add the possible values: | Attribute | Example Values | | --- | --- | | Size | XS, S, M, L, XL, XXL | | Color | Red, Blue, Green, Yellow, Black, White | | Material | Cotton, Wool, Polyester, Silk | [​](https://docs.laravelshopper.dev/v2/user-guide/catalog/attributes#using-attributes-on-products) Using Attributes on Products ---------------------------------------------------------------------------------------------------------------------------------- Once created, attributes can be assigned to products: ![Product Attributes](https://mintcdn.com/shopperlabs-ee054f5e/khtWzNt9B9rQhNq5/images/v2/product-attributes.png?w=2500&fit=max&auto=format&n=khtWzNt9B9rQhNq5&q=85&s=837cd51e240d7ba7a1d5da9a61a57798) Attributes enable you to: * Create product variants (e.g., a shirt in multiple sizes) * Allow customers to filter products * Compare products with similar attributes [​](https://docs.laravelshopper.dev/v2/user-guide/catalog/attributes#common-attribute-examples) Common Attribute Examples ---------------------------------------------------------------------------------------------------------------------------- ### [​](https://docs.laravelshopper.dev/v2/user-guide/catalog/attributes#fashion-/-apparel) Fashion / Apparel | Attribute | Values | | --- | --- | | Size | XS, S, M, L, XL | | Color | Various colors | | Material | Cotton, Polyester, etc. | | Fit | Slim, Regular, Loose | ### [​](https://docs.laravelshopper.dev/v2/user-guide/catalog/attributes#electronics) Electronics | Attribute | Values | | --- | --- | | Storage | 64GB, 128GB, 256GB | | Color | Black, White, Silver | | Memory | 4GB, 8GB, 16GB | ### [​](https://docs.laravelshopper.dev/v2/user-guide/catalog/attributes#food-&-beverages) Food & Beverages | Attribute | Values | | --- | --- | | Weight | 250g, 500g, 1kg | | Flavor | Vanilla, Chocolate, etc. | [​](https://docs.laravelshopper.dev/v2/user-guide/catalog/attributes#best-practices) Best Practices ------------------------------------------------------------------------------------------------------ Create attributes before adding products. It’s easier to set up your attribute structure first and then assign them to products. * **Be consistent** - Use the same attribute names across similar products * **Keep it simple** - Only create attributes that help customers make decisions * **Use clear names** - Attribute names should be instantly understandable * **Order logically** - Arrange values in a logical order (S, M, L, not M, S, L) For developer details, see the [Attributes documentation](https://docs.laravelshopper.dev/v2/attributes) . [Managing Collections](https://docs.laravelshopper.dev/v2/user-guide/catalog/collections) [Managing Tags](https://docs.laravelshopper.dev/v2/user-guide/catalog/tags) ⌘I --- # Render Hooks - TALL Stack E-commerce Framework > Documentation Index > ------------------- > > Fetch the complete documentation index at: [/llms.txt](https://docs.laravelshopper.dev/llms.txt) > > Use this file to discover all available pages before exploring further. [Skip to main content](https://docs.laravelshopper.dev/v2/render-hooks#content-area) Render hooks give you named injection points inside Shopper’s admin views. Instead of overriding templates, you register a callback on a hook name and Shopper renders your content in the right place at the right time. This is the recommended way to extend any admin page adding a custom banner to the order detail sidebar, inserting a widget above the product list, or injecting tracking scripts into the page head. [​](https://docs.laravelshopper.dev/v2/render-hooks#registering-a-hook) Registering a Hook --------------------------------------------------------------------------------------------- Hooks are registered on the `ShopperPanel` instance via the `Shopper` facade. The recommended place to register them is in the `boot()` method of your application’s service provider or in a dedicated extension service provider. use Shopper\Facades\Shopper; use Shopper\View\OrderRenderHook; Shopper::renderHook( OrderRenderHook::DETAIL_SIDEBAR_AFTER, fn (): string => view('orders.custom-sidebar-widget')->render(), ); The callback receives no arguments and must return a `string`. You can return any HTML, a rendered Blade view, or a Livewire component tag. ### [​](https://docs.laravelshopper.dev/v2/render-hooks#returning-a-blade-view) Returning a Blade View use Shopper\Facades\Shopper; use Shopper\View\ProductRenderHook; Shopper::renderHook( ProductRenderHook::EDIT_CONTENT_AFTER, fn (): string => view('products.seo-panel')->render(), ); ### [​](https://docs.laravelshopper.dev/v2/render-hooks#returning-a-livewire-component) Returning a Livewire Component use Shopper\Facades\Shopper; use Shopper\View\CustomerRenderHook; Shopper::renderHook( CustomerRenderHook::SHOW_TABS_END, fn (): string => '', ); ### [​](https://docs.laravelshopper.dev/v2/render-hooks#registering-multiple-hooks) Registering Multiple Hooks You can chain multiple `renderHook()` calls on the same `Shopper` instance: use Shopper\Facades\Shopper; use Shopper\View\LayoutRenderHook; Shopper::renderHook( LayoutRenderHook::HEAD_END, fn (): string => '', ); Shopper::renderHook( LayoutRenderHook::BODY_START, fn (): string => view('analytics.noscript-tag')->render(), ); Multiple callbacks registered on the same hook are rendered in the order they were registered, concatenated together. [​](https://docs.laravelshopper.dev/v2/render-hooks#disabling-a-hook) Disabling a Hook ----------------------------------------------------------------------------------------- Hooks registered from an addon respect the addon’s enabled state they are never registered when the addon is disabled. For application-level hooks, you can conditionally register them: if (config('features.custom_order_widget')) { Shopper::renderHook( OrderRenderHook::DETAIL_MAIN_AFTER, fn (): string => view('orders.external-status')->render(), ); } [​](https://docs.laravelshopper.dev/v2/render-hooks#available-hooks) Available Hooks --------------------------------------------------------------------------------------- ### [​](https://docs.laravelshopper.dev/v2/render-hooks#layout-hooks) Layout Hooks `LayoutRenderHook` covers the global admin layout present on every page. | Constant | Hook Name | Position | | --- | --- | --- | | `HEAD_START` | `shopper::head.start` | Immediately after `` | | `HEAD_END` | `shopper::head.end` | Immediately before `` | | `BODY_START` | `shopper::body.start` | Immediately after `` | | `BODY_END` | `shopper::body.end` | Immediately before `` | | `HEADER_START` | `shopper::header.start` | Start of the top navigation bar | | `HEADER_END` | `shopper::header.end` | End of the top navigation bar | | `CONTENT_START` | `shopper::content.start` | Before the main page content area | | `CONTENT_END` | `shopper::content.end` | After the main page content area | | `DASHBOARD_START` | `shopper::dashboard.start` | Top of the dashboard page | | `DASHBOARD_END` | `shopper::dashboard.end` | Bottom of the dashboard page | | `ACCOUNT_START` | `shopper::account.start` | Top of the account/profile page | | `ACCOUNT_END` | `shopper::account.end` | Bottom of the account/profile page | | `SETTINGS_INDEX_START` | `shopper::settings.index.start` | Top of the settings index page | | `SETTINGS_INDEX_END` | `shopper::settings.index.end` | Bottom of the settings index page | ### [​](https://docs.laravelshopper.dev/v2/render-hooks#product-hooks) Product Hooks `ProductRenderHook` targets the product list and product edit pages. | Constant | Hook Name | Position | | --- | --- | --- | | `INDEX_TABLE_BEFORE` | `shopper::products.index.table.before` | Above the products table | | `INDEX_TABLE_AFTER` | `shopper::products.index.table.after` | Below the products table | | `EDIT_HEADER_AFTER` | `shopper::product.edit.header.after` | Below the product page header | | `EDIT_TABS_BEFORE` | `shopper::product.edit.tabs.before` | Before the edit page tabs | | `EDIT_TABS_END` | `shopper::product.edit.tabs.end` | After the last edit page tab (use to add new tabs) | | `EDIT_CONTENT_BEFORE` | `shopper::product.edit.content.before` | Before the active tab content | | `EDIT_CONTENT_AFTER` | `shopper::product.edit.content.after` | After the active tab content | | `VARIANT_HEADER_AFTER` | `shopper::product.variant.header.after` | Below the variant page header | | `VARIANT_MAIN_AFTER` | `shopper::product.variant.main.after` | After the variant main content area | | `VARIANT_SIDEBAR_AFTER` | `shopper::product.variant.sidebar.after` | After the variant sidebar | ### [​](https://docs.laravelshopper.dev/v2/render-hooks#order-hooks) Order Hooks `OrderRenderHook` targets the order list, order detail, shipments, and abandoned carts pages. | Constant | Hook Name | Position | | --- | --- | --- | | `INDEX_TABLE_BEFORE` | `shopper::orders.index.table.before` | Above the orders table | | `INDEX_TABLE_AFTER` | `shopper::orders.index.table.after` | Below the orders table | | `DETAIL_HEADER_AFTER` | `shopper::order.detail.header.after` | Below the order detail page header | | `DETAIL_MAIN_BEFORE` | `shopper::order.detail.main.before` | Before the main content column | | `DETAIL_MAIN_AFTER` | `shopper::order.detail.main.after` | After the main content column | | `DETAIL_SIDEBAR_BEFORE` | `shopper::order.detail.sidebar.before` | Before the sidebar column | | `DETAIL_SIDEBAR_AFTER` | `shopper::order.detail.sidebar.after` | After the sidebar column | | `SHIPMENTS_TABLE_BEFORE` | `shopper::shipments.index.table.before` | Above the shipments table | | `SHIPMENTS_TABLE_AFTER` | `shopper::shipments.index.table.after` | Below the shipments table | | `ABANDONED_CARTS_TABLE_BEFORE` | `shopper::abandoned-carts.table.before` | Above the abandoned carts table | | `ABANDONED_CARTS_TABLE_AFTER` | `shopper::abandoned-carts.table.after` | Below the abandoned carts table | ### [​](https://docs.laravelshopper.dev/v2/render-hooks#customer-hooks) Customer Hooks `CustomerRenderHook` targets the customer list and customer detail pages. | Constant | Hook Name | Position | | --- | --- | --- | | `INDEX_TABLE_BEFORE` | `shopper::customers.index.table.before` | Above the customers table | | `INDEX_TABLE_AFTER` | `shopper::customers.index.table.after` | Below the customers table | | `CREATE_FORM_BEFORE` | `shopper::customer.create.form.before` | Before the new customer form | | `CREATE_FORM_AFTER` | `shopper::customer.create.form.after` | After the new customer form | | `SHOW_HEADER_AFTER` | `shopper::customer.show.header.after` | Below the customer detail header | | `SHOW_TABS_BEFORE` | `shopper::customer.show.tabs.before` | Before the customer detail tabs | | `SHOW_TABS_END` | `shopper::customer.show.tabs.end` | After the last customer tab (use to add new tabs) | | `SHOW_CONTENT_BEFORE` | `shopper::customer.show.content.before` | Before the active tab content | | `SHOW_CONTENT_AFTER` | `shopper::customer.show.content.after` | After the active tab content | ### [​](https://docs.laravelshopper.dev/v2/render-hooks#collection-hooks) Collection Hooks `CollectionRenderHook` targets the collection list and collection edit pages. | Constant | Hook Name | Position | | --- | --- | --- | | `INDEX_TABLE_BEFORE` | `shopper::collections.index.table.before` | Above the collections table | | `INDEX_TABLE_AFTER` | `shopper::collections.index.table.after` | Below the collections table | | `EDIT_FORM_BEFORE` | `shopper::collection.edit.form.before` | Before the collection edit form | | `EDIT_FORM_AFTER` | `shopper::collection.edit.form.after` | After the collection edit form | ### [​](https://docs.laravelshopper.dev/v2/render-hooks#catalog-hooks) Catalog Hooks `CatalogRenderHook` covers the catalog support pages: categories, brands, tags, attributes, and reviews. | Constant | Hook Name | Position | | --- | --- | --- | | `CATEGORIES_TABLE_BEFORE` | `shopper::categories.index.table.before` | Above the categories table | | `CATEGORIES_TABLE_AFTER` | `shopper::categories.index.table.after` | Below the categories table | | `BRANDS_TABLE_BEFORE` | `shopper::brands.index.table.before` | Above the brands table | | `BRANDS_TABLE_AFTER` | `shopper::brands.index.table.after` | Below the brands table | | `TAGS_TABLE_BEFORE` | `shopper::tags.index.table.before` | Above the tags table | | `TAGS_TABLE_AFTER` | `shopper::tags.index.table.after` | Below the tags table | | `ATTRIBUTES_TABLE_BEFORE` | `shopper::attributes.index.table.before` | Above the attributes table | | `ATTRIBUTES_TABLE_AFTER` | `shopper::attributes.index.table.after` | Below the attributes table | | `REVIEWS_TABLE_BEFORE` | `shopper::reviews.index.table.before` | Above the reviews table | | `REVIEWS_TABLE_AFTER` | `shopper::reviews.index.table.after` | Below the reviews table | ### [​](https://docs.laravelshopper.dev/v2/render-hooks#sales-hooks) Sales Hooks `SalesRenderHook` covers the discounts and suppliers pages. | Constant | Hook Name | Position | | --- | --- | --- | | `DISCOUNTS_TABLE_BEFORE` | `shopper::discounts.index.table.before` | Above the discounts table | | `DISCOUNTS_TABLE_AFTER` | `shopper::discounts.index.table.after` | Below the discounts table | | `SUPPLIERS_TABLE_BEFORE` | `shopper::suppliers.index.table.before` | Above the suppliers table | | `SUPPLIERS_TABLE_AFTER` | `shopper::suppliers.index.table.after` | Below the suppliers table | [​](https://docs.laravelshopper.dev/v2/render-hooks#example-injecting-an-external-status-badge-on-order-detail) Example: Injecting an External Status Badge on Order Detail ------------------------------------------------------------------------------------------------------------------------------------------------------------------------------ A real-world scenario: your store syncs orders to a fulfillment service (ShipStation, ShipBob, etc.) and you want to display the external status directly on the order detail page, without modifying any Shopper files. Create a Livewire component: use Livewire\Component; use Livewire\Attributes\Locked; final class ExternalOrderStatus extends Component { #[Locked] public int $orderId; public function render(): \Illuminate\Contracts\View\View { $status = ExternalFulfillmentService::getStatus($this->orderId); return view('livewire.external-order-status', ['status' => $status]); } } Register the hook in your service provider: use Shopper\Facades\Shopper; use Shopper\View\OrderRenderHook; public function boot(): void { Shopper::renderHook( OrderRenderHook::DETAIL_SIDEBAR_AFTER, fn (): string => '', ); } [​](https://docs.laravelshopper.dev/v2/render-hooks#using-hook-constants-vs-raw-strings) Using Hook Constants vs. Raw Strings -------------------------------------------------------------------------------------------------------------------------------- Always use the class constants instead of raw hook name strings. They are checked by static analysis, will trigger IDE autocompletion, and won’t silently break if a hook name changes in a future release. use Shopper\View\ProductRenderHook; Shopper::renderHook(ProductRenderHook::EDIT_CONTENT_AFTER, fn () => '...'); Shopper::renderHook('shopper::product.edit.content.after', fn () => '...'); [Controllers](https://docs.laravelshopper.dev/v2/extending/controllers) [Addons](https://docs.laravelshopper.dev/v2/addons) ⌘I --- # Configuration - TALL Stack E-commerce Framework > Documentation Index > ------------------- > > Fetch the complete documentation index at: [/llms.txt](https://docs.laravelshopper.dev/llms.txt) > > Use this file to discover all available pages before exploring further. [Skip to main content](https://docs.laravelshopper.dev/v2/sidebar/configuration#content-area) The sidebar package can be configured through the `config/sidebar.php` file. Publish it if you haven’t already: php artisan vendor:publish --provider="Shopper\Sidebar\SidebarServiceProvider" --tag="sidebar-config" [​](https://docs.laravelshopper.dev/v2/sidebar/configuration#configuration-options) Configuration Options ------------------------------------------------------------------------------------------------------------ ### [​](https://docs.laravelshopper.dev/v2/sidebar/configuration#caching) Caching 'cache' => [\ 'method' => null,\ 'duration' => 1440,\ ], | Option | Values | Description | | --- | --- | --- | | `method` | `null`, `static`, `user-based` | The caching strategy to use | | `duration` | integer | Cache duration in minutes | **Caching Methods:** * `null` - No caching, sidebar is rebuilt on every request * `static` - Cache the sidebar once for all users * `user-based` - Cache per user (useful when authorization differs per user) For production environments with static sidebars, use `static` caching to improve performance. ### [​](https://docs.laravelshopper.dev/v2/sidebar/configuration#dimensions) Dimensions 'width' => '17.5rem', 'collapsed_width' => '4.5rem', | Option | Default | Description | | --- | --- | --- | | `width` | `17.5rem` | The sidebar width when expanded | | `collapsed_width` | `4.5rem` | The sidebar width when collapsed | These values are available as CSS variables `--sidebar-width` and `--sidebar-collapsed-width`. ### [​](https://docs.laravelshopper.dev/v2/sidebar/configuration#responsive-breakpoint) Responsive Breakpoint 'breakpoint' => 1024, The pixel width below which the sidebar switches to mobile mode. In mobile mode: * The sidebar is hidden by default * Opening the sidebar shows it as an overlay * The sidebar cannot be collapsed (only opened/closed) ### [​](https://docs.laravelshopper.dev/v2/sidebar/configuration#collapsible) Collapsible 'collapsible' => true, Whether the sidebar can be collapsed on desktop screens. When set to `false`, the collapse functionality is disabled and the sidebar remains at full width. [​](https://docs.laravelshopper.dev/v2/sidebar/configuration#full-configuration-example) Full Configuration Example ---------------------------------------------------------------------------------------------------------------------- [\ 'method' => env('SIDEBAR_CACHE', null),\ 'duration' => 1440,\ ],\ \ /*\ |--------------------------------------------------------------------------\ | Sidebar Dimensions\ |--------------------------------------------------------------------------\ |\ | Configure the sidebar width for expanded and collapsed states.\ | These values will be injected as CSS variables.\ |\ */\ \ 'width' => '17.5rem',\ \ 'collapsed_width' => '4.5rem',\ \ /*\ |--------------------------------------------------------------------------\ | Responsive Breakpoint\ |--------------------------------------------------------------------------\ |\ | The breakpoint (in pixels) below which the sidebar switches to mobile\ | mode (hidden by default, shown via toggle).\ |\ */\ \ 'breakpoint' => 1024,\ \ /*\ |--------------------------------------------------------------------------\ | Collapsible\ |--------------------------------------------------------------------------\ |\ | Whether the sidebar can be collapsed on desktop.\ |\ */\ \ 'collapsible' => true,\ \ ]; [​](https://docs.laravelshopper.dev/v2/sidebar/configuration#environment-variables) Environment Variables ------------------------------------------------------------------------------------------------------------ You can use environment variables for deployment flexibility: SIDEBAR_CACHE=static 'cache' => [\ 'method' => env('SIDEBAR_CACHE', null),\ 'duration' => env('SIDEBAR_CACHE_DURATION', 1440),\ ], [​](https://docs.laravelshopper.dev/v2/sidebar/configuration#accessing-configuration) Accessing Configuration ---------------------------------------------------------------------------------------------------------------- Use the helper functions to access configuration values: use function Shopper\Sidebar\sidebar_config; use function Shopper\Sidebar\sidebar_width; use function Shopper\Sidebar\sidebar_collapsed_width; use function Shopper\Sidebar\sidebar_breakpoint; use function Shopper\Sidebar\sidebar_is_collapsible; // Get any config value $cacheMethod = sidebar_config('cache.method'); // Get dimensions $width = sidebar_width(); // '17.5rem' $collapsed = sidebar_collapsed_width(); // '4.5rem' // Get responsive settings $breakpoint = sidebar_breakpoint(); // 1024 $collapsible = sidebar_is_collapsible(); // true [​](https://docs.laravelshopper.dev/v2/sidebar/configuration#injecting-css-variables) Injecting CSS Variables ---------------------------------------------------------------------------------------------------------------- Use the helper functions to inject CSS variables in your layout: The `data-*` attributes are automatically read by the Alpine.js sidebar store to configure its behavior. [​](https://docs.laravelshopper.dev/v2/sidebar/configuration#customizing-views) Customizing Views ---------------------------------------------------------------------------------------------------- Publish the views to customize the sidebar rendering: php artisan vendor:publish --provider="Shopper\Sidebar\SidebarServiceProvider" --tag="sidebar-views" This publishes the following views to `resources/views/vendor/sidebar/`: | View | Description | | --- | --- | | `menu.blade.php` | The root menu container | | `group.blade.php` | A sidebar group with optional heading | | `item.blade.php` | A single menu item | | `badge.blade.php` | Item badge component | | `append.blade.php` | Item append action component | ### [​](https://docs.laravelshopper.dev/v2/sidebar/configuration#example-customizing-the-item-view) Example: Customizing the Item View {{-- resources/views/vendor/sidebar/item.blade.php --}}
  • withSpa()) wire:navigate @endif @if($item->getNewTab()) target="_blank" @endif class="flex items-center gap-3 p-2 rounded-lg" > @if($item->getIcon()) @endif {{ $item->getName() }} @foreach($item->getBadges() as $badge) @include('sidebar::badge', ['badge' => $badge]) @endforeach @if($item->getItems()->count())
      @foreach($item->getItems() as $subItem) @include('sidebar::item', ['item' => $subItem]) @endforeach
    @endif
  • [​](https://docs.laravelshopper.dev/v2/sidebar/configuration#clearing-the-cache) Clearing the Cache ------------------------------------------------------------------------------------------------------ To clear the sidebar cache, use Laravel’s cache commands: # Clear all cache php artisan cache:clear # Or clear specific tag (if using tagged cache) php artisan cache:forget sidebar The package also provides a `SidebarFlusher` service that you can use programmatically: use Shopper\Sidebar\Infrastructure\SidebarFlusher; app(SidebarFlusher::class)->flush(); [Standalone Installation](https://docs.laravelshopper.dev/v2/sidebar/standalone) [Overview](https://docs.laravelshopper.dev/v2/extending/components/overview) ⌘I --- # Two-Factor Authentication - TALL Stack E-commerce Framework > Documentation Index > ------------------- > > Fetch the complete documentation index at: [/llms.txt](https://docs.laravelshopper.dev/llms.txt) > > Use this file to discover all available pages before exploring further. [Skip to main content](https://docs.laravelshopper.dev/v2/user-guide/administration/two-factor#content-area) Two-factor authentication (2FA) adds an extra layer of security to your administrator account. Even if someone discovers your password, they won’t be able to access your account without the second factor. [​](https://docs.laravelshopper.dev/v2/user-guide/administration/two-factor#what-is-two-factor-authentication) What is Two-Factor Authentication? ---------------------------------------------------------------------------------------------------------------------------------------------------- 2FA requires two forms of verification: 1. **Something you know** - Your password 2. **Something you have** - A code from your phone This means an attacker would need both your password AND your phone to access your account. [​](https://docs.laravelshopper.dev/v2/user-guide/administration/two-factor#enabling-two-factor-authentication) Enabling Two-Factor Authentication ----------------------------------------------------------------------------------------------------------------------------------------------------- ### [​](https://docs.laravelshopper.dev/v2/user-guide/administration/two-factor#step-1-access-security-settings) Step 1: Access Security Settings 1. Click on your profile avatar in the sidebar 2. Go to your account settings 3. Find the Two-Factor Authentication section ![Two-Factor Section](https://mintcdn.com/shopperlabs-ee054f5e/eVX_9bJEbNf6CmDO/images/v2/two-factor-section.png?w=2500&fit=max&auto=format&n=eVX_9bJEbNf6CmDO&q=85&s=ec63eba62405060cc6c0343233f819d8) ### [​](https://docs.laravelshopper.dev/v2/user-guide/administration/two-factor#step-2-start-setup) Step 2: Start Setup Click **Enable** to begin the setup process. ![Two-Factor Setup](https://mintcdn.com/shopperlabs-ee054f5e/eVX_9bJEbNf6CmDO/images/v2/two-factor-authentication.png?w=2500&fit=max&auto=format&n=eVX_9bJEbNf6CmDO&q=85&s=076ea7caf44475d2557945ca27a5b05a) ### [​](https://docs.laravelshopper.dev/v2/user-guide/administration/two-factor#step-3-scan-qr-code) Step 3: Scan QR Code 1. Install an authenticator app on your phone: * Google Authenticator * Authy * Microsoft Authenticator * 1Password 2. Open the app and scan the QR code displayed on screen 3. The app will generate a 6-digit code ### [​](https://docs.laravelshopper.dev/v2/user-guide/administration/two-factor#step-4-verify-setup) Step 4: Verify Setup Enter the code from your authenticator app to verify: ![Two-Factor Code](https://mintcdn.com/shopperlabs-ee054f5e/eVX_9bJEbNf6CmDO/images/v2/two-factor-code.png?w=2500&fit=max&auto=format&n=eVX_9bJEbNf6CmDO&q=85&s=0c139b3f4f782ece784dd33b4e802d12) ### [​](https://docs.laravelshopper.dev/v2/user-guide/administration/two-factor#step-5-save-recovery-codes) Step 5: Save Recovery Codes After enabling 2FA, you’ll receive recovery codes. **Save these securely!** Recovery codes are one-time use codes that can help you regain access if you lose your phone. Store your recovery codes in a safe place, like a password manager or a secure physical location. Don’t store them on your phone. [​](https://docs.laravelshopper.dev/v2/user-guide/administration/two-factor#logging-in-with-2fa) Logging In with 2FA ----------------------------------------------------------------------------------------------------------------------- After enabling two-factor authentication: 1. Enter your email and password as usual 2. You’ll be prompted for a verification code 3. Open your authenticator app 4. Enter the 6-digit code 5. You’re logged in! [​](https://docs.laravelshopper.dev/v2/user-guide/administration/two-factor#disabling-two-factor-authentication) Disabling Two-Factor Authentication ------------------------------------------------------------------------------------------------------------------------------------------------------- If you need to disable 2FA: 1. Go to your account settings 2. Find the Two-Factor Authentication section 3. Click **Disable** 4. Confirm your decision ![Disable Two-Factor](https://mintcdn.com/shopperlabs-ee054f5e/eVX_9bJEbNf6CmDO/images/v2/two-factor-disable.png?w=2500&fit=max&auto=format&n=eVX_9bJEbNf6CmDO&q=85&s=f81029fb34aaeafca21ab7cf8f9b4582) Only disable 2FA temporarily if necessary. Re-enable it as soon as possible to maintain account security. [​](https://docs.laravelshopper.dev/v2/user-guide/administration/two-factor#recovery-options) Recovery Options ----------------------------------------------------------------------------------------------------------------- ### [​](https://docs.laravelshopper.dev/v2/user-guide/administration/two-factor#lost-your-phone) Lost Your Phone? If you’ve lost access to your authenticator: 1. **Use a recovery code** - Enter one of your saved recovery codes 2. **Contact an administrator** - They may be able to reset your 2FA 3. **Use backup device** - If you set up 2FA on multiple devices ### [​](https://docs.laravelshopper.dev/v2/user-guide/administration/two-factor#recovery-codes) Recovery Codes Each recovery code can only be used once. After using a code: * That code is no longer valid * Generate new codes if you’re running low * Keep at least 2-3 codes available at all times [​](https://docs.laravelshopper.dev/v2/user-guide/administration/two-factor#best-practices) Best Practices ------------------------------------------------------------------------------------------------------------- Enable for All Admins --------------------- Require 2FA for all staff with admin access. Secure Recovery Codes --------------------- Store recovery codes separately from your password. Use a Trusted App ----------------- Choose a reputable authenticator app. Backup Device ------------- Set up 2FA on a backup device if possible. [​](https://docs.laravelshopper.dev/v2/user-guide/administration/two-factor#recommended-authenticator-apps) Recommended Authenticator Apps --------------------------------------------------------------------------------------------------------------------------------------------- | App | Platform | Features | | --- | --- | --- | | **Google Authenticator** | iOS, Android | Simple, widely supported | | **Authy** | iOS, Android, Desktop | Cloud backup, multi-device | | **Microsoft Authenticator** | iOS, Android | Microsoft integration | | **1Password** | All platforms | Password manager integration | [​](https://docs.laravelshopper.dev/v2/user-guide/administration/two-factor#troubleshooting) Troubleshooting --------------------------------------------------------------------------------------------------------------- ### [​](https://docs.laravelshopper.dev/v2/user-guide/administration/two-factor#code-not-working) Code Not Working? * **Check the time** - Your phone’s time must be accurate * **Try the next code** - Codes refresh every 30 seconds * **Use a recovery code** - If you can’t generate valid codes ### [​](https://docs.laravelshopper.dev/v2/user-guide/administration/two-factor#locked-out) Locked Out? 1. Try using a recovery code 2. Contact another administrator 3. As a last resort, contact technical support For developer details, see the [Two-Factor Authentication documentation](https://docs.laravelshopper.dev/v2/two-factor) . [Roles & Permissions](https://docs.laravelshopper.dev/v2/user-guide/administration/roles) ⌘I --- # Carriers - TALL Stack E-commerce Framework > Documentation Index > ------------------- > > Fetch the complete documentation index at: [/llms.txt](https://docs.laravelshopper.dev/llms.txt) > > Use this file to discover all available pages before exploring further. [Skip to main content](https://docs.laravelshopper.dev/v2/carriers#content-area) Carriers represent shipping providers and their delivery options. Shopper uses a two-level structure with carriers (the shipping company) and carrier options (specific delivery methods with prices per zone). Shopper provides a flexible shipping system that supports both manual rate configuration and real-time API integration with major carriers like UPS, FedEx, and USPS. [​](https://docs.laravelshopper.dev/v2/carriers#models) Models ----------------------------------------------------------------- Shopper uses two models to manage shipping: | Model | Purpose | | --- | --- | | `Shopper\Core\Models\Carrier` | The shipping provider (UPS, FedEx, local delivery) | | `Shopper\Core\Models\CarrierOption` | Specific delivery methods with pricing per zone | The Carrier model implements `Shopper\Core\Models\Contracts\Carrier` and uses the `HasSlug` and `HasZones` traits. It is not configurable via `config/shopper/models.php`. [​](https://docs.laravelshopper.dev/v2/carriers#database-schema) Database Schema ----------------------------------------------------------------------------------- ### [​](https://docs.laravelshopper.dev/v2/carriers#carrier-table) Carrier Table | Column | Type | Nullable | Default | Description | | --- | --- | --- | --- | --- | | `id` | bigint | no | auto | Primary key | | `name` | string | no | \- | Carrier name | | `slug` | string | yes | auto | URL-friendly identifier (unique) | | `driver` | string | yes | null | Shipping driver code (ups, fedex, usps, or null for manual) | | `link_url` | string | yes | null | Carrier website URL | | `description` | string | yes | null | Carrier description | | `shipping_amount` | integer | yes | null | Default shipping amount (cents) | | `is_enabled` | boolean | no | false | Carrier visibility | | `metadata` | json | yes | null | Additional custom data | | `created_at` | timestamp | yes | null | Creation timestamp | | `updated_at` | timestamp | yes | null | Last update timestamp | ### [​](https://docs.laravelshopper.dev/v2/carriers#carrieroption-table) CarrierOption Table | Column | Type | Nullable | Default | Description | | --- | --- | --- | --- | --- | | `id` | bigint | no | auto | Primary key | | `name` | string | no | \- | Option name (unique) | | `description` | string(255) | yes | null | Option description | | `price` | integer | no | \- | Shipping price (cents) | | `is_enabled` | boolean | no | false | Option visibility | | `carrier_id` | bigint | no | \- | FK to carrier | | `zone_id` | bigint | no | \- | FK to zone | | `metadata` | json | yes | null | Additional custom data | | `created_at` | timestamp | yes | null | Creation timestamp | | `updated_at` | timestamp | yes | null | Last update timestamp | [​](https://docs.laravelshopper.dev/v2/carriers#shipping-drivers) Shipping Drivers ------------------------------------------------------------------------------------- Shopper uses a driver-based architecture for shipping, similar to [Laravel’s Mail](https://laravel.com/docs/mail) or [Queue systems](https://laravel.com/docs/queues) . This allows you to connect carriers directly to shipping provider APIs for real-time rate calculation, or use manual rates stored in your database. ### [​](https://docs.laravelshopper.dev/v2/carriers#available-drivers) Available Drivers | Driver | Code | Description | | --- | --- | --- | | Manual | `manual` | Rates come from `CarrierOption` records in your database | | UPS | `ups` | Real-time rates from UPS API | | FedEx | `fedex` | Real-time rates from FedEx API | | USPS | `usps` | Real-time rates from USPS API | ### [​](https://docs.laravelshopper.dev/v2/carriers#driver-configuration) Driver Configuration All driver credentials are stored in your `.env` file. Publish the shipping configuration file to customize drivers: php artisan vendor:publish --tag=shopper-config This creates `config/shopper/shipping.php`: return [\ 'drivers' => [\ 'ups' => [\ 'enabled' => env('SHIPPING_UPS_ENABLED', false),\ 'sandbox' => env('SHIPPING_SANDBOX', false),\ 'credentials' => [\ 'client_id' => env('UPS_CLIENT_ID'),\ 'client_secret' => env('UPS_CLIENT_SECRET'),\ 'user_id' => env('UPS_USER_ID'),\ 'account_number' => env('UPS_ACCOUNT_NUMBER'),\ ],\ ],\ \ 'fedex' => [\ 'enabled' => env('SHIPPING_FEDEX_ENABLED', false),\ 'sandbox' => env('SHIPPING_SANDBOX', false),\ 'credentials' => [\ 'client_id' => env('FEDEX_CLIENT_ID'),\ 'client_secret' => env('FEDEX_CLIENT_SECRET'),\ 'account_number' => env('FEDEX_ACCOUNT_NUMBER'),\ ],\ ],\ \ 'usps' => [\ 'enabled' => env('SHIPPING_USPS_ENABLED', false),\ 'sandbox' => env('SHIPPING_SANDBOX', false),\ 'credentials' => [\ 'client_id' => env('USPS_CLIENT_ID'),\ 'client_secret' => env('USPS_CLIENT_SECRET'),\ ],\ ],\ ],\ \ 'units' => env('SHIPPING_UNITS', 'metric'),\ ]; Add the credentials to your `.env` file: SHIPPING_UPS_ENABLED=true SHIPPING_SANDBOX=true UPS_CLIENT_ID=your-client-id UPS_CLIENT_SECRET=your-client-secret UPS_USER_ID=your-user-id UPS_ACCOUNT_NUMBER=your-account-number ### [​](https://docs.laravelshopper.dev/v2/carriers#using-the-shipping-facade) Using the Shipping Facade The `Shipping` facade provides access to the shipping manager and all registered drivers: use Shopper\Shipping\Facades\Shipping; $driver = Shipping::driver('ups'); $allDrivers = Shipping::availableDrivers(); $configured = Shipping::configuredDrivers(); $isReady = Shipping::isConfigured('fedex'); ### [​](https://docs.laravelshopper.dev/v2/carriers#carrier-driver-integration) Carrier Driver Integration The Carrier model provides methods to work with shipping drivers: $carrier = Carrier::query()->where('driver', 'ups')->first(); if ($carrier->usesApiDriver()) { $driver = $carrier->getShippingDriver(); $isConfigured = $carrier->isDriverConfigured(); } When a carrier has a driver assigned, Shopper uses that driver to fetch real-time rates from the carrier’s API. When no driver is assigned (or set to `manual`), rates come from the CarrierOption records in your database. [​](https://docs.laravelshopper.dev/v2/carriers#calculating-shipping-rates) Calculating Shipping Rates --------------------------------------------------------------------------------------------------------- The `CarrierRateService` provides a unified way to get shipping rates, regardless of whether the carrier uses an API driver or manual configuration. use Shopper\Shipping\Services\CarrierRateService; use Shopper\Shipping\DataTransferObjects\Address; use Shopper\Shipping\DataTransferObjects\Package; $service = app(CarrierRateService::class); $from = new Address( firstName: 'Store', lastName: 'Warehouse', street: '123 Warehouse St', city: 'Los Angeles', postalCode: '90001', state: 'CA', country: 'US', ); $to = new Address( firstName: 'John', lastName: 'Doe', street: '456 Customer Ave', city: 'New York', postalCode: '10001', state: 'NY', country: 'US', ); $packages = [\ new Package(\ length: 30,\ width: 20,\ height: 15,\ weight: 2.5,\ unit: 'metric',\ ),\ ]; ### [​](https://docs.laravelshopper.dev/v2/carriers#getting-rates-for-a-carrier) Getting Rates for a Carrier $rates = $service->getRatesForCarrier( carrier: $carrier, from: $from, to: $to, packages: $packages, zone: $zone, ); For carriers with an API driver, rates are fetched from the carrier’s API. For manual carriers, rates come from the CarrierOption records associated with the specified zone. ### [​](https://docs.laravelshopper.dev/v2/carriers#getting-rates-for-a-zone) Getting Rates for a Zone To get all available shipping rates for a zone across all enabled carriers: $rates = $service->getRatesForZone( zone: $zone, from: $from, to: $to, packages: $packages, ); ### [​](https://docs.laravelshopper.dev/v2/carriers#shippingrate-dto) ShippingRate DTO Both methods return a collection of `ShippingRate` objects: foreach ($rates as $rate) { $rate->serviceCode; $rate->serviceName; $rate->amount; $rate->currency; $rate->carrierCode; $rate->estimatedDays; $rate->formattedAmount(); } [​](https://docs.laravelshopper.dev/v2/carriers#custom-shipping-drivers) Custom Shipping Drivers --------------------------------------------------------------------------------------------------- Shopper’s shipping system is designed for extensibility. You can create custom drivers for any shipping provider not included by default, such as DHL, Canada Post, Colissimo, or regional carriers. ### [​](https://docs.laravelshopper.dev/v2/carriers#creating-a-driver) Creating a Driver A shipping driver must implement the `ShippingDriver` contract. The easiest approach is to extend the abstract `Driver` class, which provides sensible defaults for optional methods. Create your driver class: namespace App\Shipping\Drivers; use Illuminate\Support\Collection; use Shopper\Shipping\Drivers\Driver; use Shopper\Shipping\DataTransferObjects\Address; use Shopper\Shipping\DataTransferObjects\Package; use Shopper\Shipping\DataTransferObjects\ShippingRate; use Shopper\Shipping\Exceptions\ShippingException; final class DhlDriver extends Driver { public function __construct( private readonly string $apiKey, private readonly string $accountNumber, private readonly bool $sandbox = false, ) {} public function code(): string { return 'dhl'; } public function name(): string { return 'DHL Express'; } public function logo(): ?string { return asset('images/carriers/dhl.svg'); } public function isConfigured(): bool { return filled($this->apiKey) && filled($this->accountNumber); } public function calculateRates(Address $from, Address $to, array $packages): Collection { if (! $this->isConfigured()) { throw ShippingException::notConfigured('dhl'); } $packages = $this->normalizePackages($packages); $response = Http::withHeaders([\ 'DHL-API-Key' => $this->apiKey,\ ])->post($this->getApiUrl().'/rates', [\ 'accountNumber' => $this->accountNumber,\ 'originAddress' => $this->formatAddress($from),\ 'destinationAddress' => $this->formatAddress($to),\ 'packages' => $this->formatPackages($packages),\ ]); if ($response->failed()) { throw ShippingException::apiError('dhl', $response->body()); } return collect($response->json('products'))->map(fn (array $product) => new ShippingRate( serviceCode: $product['productCode'], serviceName: $product['productName'], amount: (int) ($product['totalPrice'] * 100), currency: $product['priceCurrency'], carrierCode: 'dhl', estimatedDays: $product['deliveryCapabilities']['estimatedDeliveryDays'] ?? null, )); } private function getApiUrl(): string { return $this->sandbox ? 'https://express.api.dhl.com/mydhlapi/test' : 'https://express.api.dhl.com/mydhlapi'; } private function formatAddress(Address $address): array { return [\ 'postalCode' => $address->postalCode,\ 'cityName' => $address->city,\ 'countryCode' => $address->country,\ ]; } private function formatPackages(array $packages): array { return array_map(fn (Package $p) => [\ 'weight' => $p->weight,\ 'dimensions' => [\ 'length' => $p->length,\ 'width' => $p->width,\ 'height' => $p->height,\ ],\ ], $packages); } } ### [​](https://docs.laravelshopper.dev/v2/carriers#the-driver-contract) The Driver Contract The `ShippingDriver` contract defines the following methods: | Method | Return | Description | | --- | --- | --- | | `code()` | `string` | Unique identifier for the driver | | `name()` | `string` | Human-readable name displayed in the admin | | `logo()` | `?string` | URL to the carrier’s logo | | `isConfigured()` | `bool` | Whether required credentials are set | | `supportsRealTimeRates()` | `bool` | Whether the driver can fetch rates from an API | | `supportsLabels()` | `bool` | Whether the driver can generate shipping labels | | `supportsTracking()` | `bool` | Whether the driver can track shipments | | `calculateRates()` | `Collection` | Get shipping rates for the given addresses and packages | | `createShipment()` | `Shipment` | Create a shipment and get the label | | `track()` | `TrackingInfo` | Get tracking information for a shipment | The abstract `Driver` class provides default implementations for `supportsRealTimeRates()`, `supportsLabels()`, and `supportsTracking()` (all return `true`), and throws `ShippingException::notSupported()` for `createShipment()` and `track()`. Override these methods as needed for your driver. ### [​](https://docs.laravelshopper.dev/v2/carriers#registering-the-driver) Registering the Driver Register your custom driver in a service provider using the `extend` method on the Shipping facade: namespace App\Providers; use App\Shipping\Drivers\DhlDriver; use Illuminate\Support\ServiceProvider; use Shopper\Shipping\Facades\Shipping; class ShippingServiceProvider extends ServiceProvider { public function boot(): void { Shipping::extend('dhl', function (): DhlDriver { $config = config('shopper.shipping.drivers.dhl', []); return new DhlDriver( apiKey: $config['credentials']['api_key'] ?? '', accountNumber: $config['credentials']['account_number'] ?? '', sandbox: $config['sandbox'] ?? false, ); }); } } The closure receives the driver name as a parameter and must return an instance of `ShippingDriver`. Drivers are resolved lazily, meaning the closure is only called when the driver is first accessed. ### [​](https://docs.laravelshopper.dev/v2/carriers#adding-configuration) Adding Configuration Add your driver configuration to `config/shopper/shipping.php`: 'drivers' => [\ // ... existing drivers\ \ 'dhl' => [\ 'enabled' => env('SHIPPING_DHL_ENABLED', false),\ 'sandbox' => env('SHIPPING_SANDBOX', false),\ 'credentials' => [\ 'api_key' => env('DHL_API_KEY'),\ 'account_number' => env('DHL_ACCOUNT_NUMBER'),\ ],\ ],\ ], Once registered, your driver appears automatically in the carrier form dropdown and can be assigned to carriers like any built-in driver. ### [​](https://docs.laravelshopper.dev/v2/carriers#driver-capabilities) Driver Capabilities The abstract `Driver` class provides a `normalizePackages()` helper method that converts between metric and imperial units. This is useful since different carriers expect different unit systems: public function calculateRates(Address $from, Address $to, array $packages): Collection { $packages = $this->normalizePackages($packages, 'imperial'); // ... } Pass `'metric'` for carriers expecting centimeters and kilograms, or `'imperial'` for those expecting inches and pounds. [​](https://docs.laravelshopper.dev/v2/carriers#relationships) Relationships ------------------------------------------------------------------------------- ### [​](https://docs.laravelshopper.dev/v2/carriers#carrier-options) Carrier Options $carrier->options; $carrier->options()->enabled()->get(); $carrier->options()->create([\ 'name' => 'Express Delivery',\ 'price' => 15,\ 'zone_id' => $zoneId,\ 'is_enabled' => true,\ ]); ### [​](https://docs.laravelshopper.dev/v2/carriers#zone-carrieroption) Zone (CarrierOption) $option->zone; CarrierOption::query() ->where('zone_id', $zoneId) ->enabled() ->get(); ### [​](https://docs.laravelshopper.dev/v2/carriers#carrier-carrieroption) Carrier (CarrierOption) $option->carrier; [​](https://docs.laravelshopper.dev/v2/carriers#query-scopes) Query Scopes ----------------------------------------------------------------------------- use Shopper\Core\Models\Carrier; use Shopper\Core\Models\CarrierOption; Carrier::query()->enabled()->get(); CarrierOption::query()->enabled()->get(); [​](https://docs.laravelshopper.dev/v2/carriers#price-handling) Price Handling --------------------------------------------------------------------------------- CarrierOption prices are stored in cents: $option = CarrierOption::query()->create([\ 'name' => 'Standard Shipping',\ 'price' => 1000,\ 'zone_id' => $zoneId,\ 'carrier_id' => $carrierId,\ ]); shopper_money_format($option->price, $zone->currency->code); [​](https://docs.laravelshopper.dev/v2/carriers#creating-carriers) Creating Carriers --------------------------------------------------------------------------------------- ### [​](https://docs.laravelshopper.dev/v2/carriers#manual-carrier) Manual Carrier For carriers where you define rates manually in the database: use Shopper\Core\Models\Carrier; $carrier = Carrier::query()->create([\ 'name' => 'Local Delivery',\ 'slug' => 'local-delivery',\ 'description' => 'Same-day delivery within city limits',\ 'is_enabled' => true,\ ]); $carrier->options()->createMany([\ [\ 'name' => 'Standard',\ 'price' => 5,\ 'zone_id' => $localZoneId,\ 'is_enabled' => true,\ ],\ [\ 'name' => 'Express (2 hours)',\ 'price' => 15,\ 'zone_id' => $localZoneId,\ 'is_enabled' => true,\ ],\ ]); ### [​](https://docs.laravelshopper.dev/v2/carriers#api-connected-carrier) API-Connected Carrier For carriers using a shipping driver to fetch real-time rates: $carrier = Carrier::query()->create([\ 'name' => 'UPS',\ 'slug' => 'ups',\ 'driver' => 'ups',\ 'link_url' => 'https://ups.com',\ 'is_enabled' => true,\ ]); With an API driver, you don’t need to create CarrierOption records. Rates are fetched directly from the carrier’s API when needed. ### [​](https://docs.laravelshopper.dev/v2/carriers#free-shipping-option) Free Shipping Option $freeShipping = Carrier::query()->create([\ 'name' => 'Free Shipping',\ 'slug' => 'free-shipping',\ 'description' => 'Free standard shipping',\ 'is_enabled' => true,\ ]); $freeShipping->options()->create([\ 'name' => 'Free Standard Delivery',\ 'price' => 0,\ 'zone_id' => $domesticZoneId,\ 'is_enabled' => true,\ 'metadata' => [\ 'min_order_amount' => 5000,\ 'estimated_days' => '5-7',\ ],\ ]); [​](https://docs.laravelshopper.dev/v2/carriers#retrieving-carriers) Retrieving Carriers ------------------------------------------------------------------------------------------- use Shopper\Core\Models\Carrier; use Shopper\Core\Models\CarrierOption; $carriers = Carrier::query() ->enabled() ->with(['options' => fn ($q) => $q->enabled()]) ->get(); $carrier = Carrier::query() ->where('slug', 'fedex') ->first(); $options = CarrierOption::query() ->where('zone_id', $zoneId) ->enabled() ->with('carrier') ->orderBy('price') ->get(); $cheapest = CarrierOption::query() ->where('zone_id', $zoneId) ->enabled() ->orderBy('price') ->first(); [​](https://docs.laravelshopper.dev/v2/carriers#working-with-orders) Working with Orders ------------------------------------------------------------------------------------------- use Shopper\Core\Models\Order; use Shopper\Core\Models\OrderShipping; $order->shippingOption; OrderShipping::query()->create([\ 'order_id' => $order->id,\ 'carrier_id' => $carrierId,\ 'shipped_at' => now(),\ 'tracking_number' => 'TRACK123456',\ 'tracking_url' => 'https://fedex.com/track/TRACK123456',\ ]); [​](https://docs.laravelshopper.dev/v2/carriers#storefront-example) Storefront Example ----------------------------------------------------------------------------------------- ### [​](https://docs.laravelshopper.dev/v2/carriers#checkout-shipping-selection) Checkout Shipping Selection The origin address for shipping calculations should come from your store’s inventory (warehouse). Shopper uses the `Inventory` model to represent physical locations where products are stored and shipped from. namespace App\Http\Controllers; use Shopper\Core\Models\Inventory; use Shopper\Core\Models\Zone; use Shopper\Shipping\Services\CarrierRateService; use Shopper\Shipping\DataTransferObjects\Address; use Shopper\Shipping\DataTransferObjects\Package; class CheckoutController extends Controller { public function __construct( private readonly CarrierRateService $rateService, ) {} public function showShipping(?int $inventoryId = null) { $inventory = $this->getShippingInventory($inventoryId); $zone = $this->getCustomerZone(); $from = $this->getInventoryAddress($inventory); $to = $this->getCustomerAddress(); $packages = $this->getCartPackages(); $shippingOptions = $this->rateService->getRatesForZone( zone: $zone, from: $from, to: $to, packages: $packages, ); return view('checkout.shipping', compact('shippingOptions')); } private function getShippingInventory(?int $inventoryId = null): Inventory { if ($inventoryId) { return Inventory::query()->findOrFail($inventoryId); } return Inventory::query()->default()->firstOrFail(); } private function getInventoryAddress(Inventory $inventory): Address { return new Address( firstName: $inventory->name, lastName: '', street: $inventory->street_address, street2: $inventory->street_address_plus, city: $inventory->city, postalCode: $inventory->postal_code, state: $inventory->state ?? '', country: $inventory->country->cca2, phone: $inventory->phone_number, email: $inventory->email, ); } private function getCustomerAddress(): Address { $address = Cart::shippingAddress(); return new Address( firstName: $address->first_name, lastName: $address->last_name, street: $address->street_address, city: $address->city, postalCode: $address->postal_code, state: $address->state ?? '', country: $address->country_name, ); } private function getCartPackages(): array { return [\ new Package(\ length: Cart::totalLength(),\ width: Cart::totalWidth(),\ height: Cart::totalHeight(),\ weight: Cart::totalWeight(),\ ),\ ]; } private function getCustomerZone(): Zone { $address = Cart::shippingAddress(); return Zone::query() ->whereHas('countries', fn ($q) => $q->where('name', $address->country_name)) ->first(); } } If your store has multiple warehouses, you can pass the inventory ID to ship from a specific location. This is useful for selecting the nearest warehouse to the customer or the one with available stock: return redirect()->route('checkout.shipping', ['inventoryId' => $nearestInventory->id]); [​](https://docs.laravelshopper.dev/v2/carriers#use-cases) Use Cases ----------------------------------------------------------------------- | Carrier | Options | | --- | --- | | USPS | Priority Mail, First-Class, Media Mail | | FedEx | Ground, Express, Overnight | | UPS | Ground, 2-Day, Next Day Air | | DHL | Express, Economy, Freight | | Local | Same-Day, Pick-up | | Scenario | Implementation | | --- | --- | | Flat rate shipping | Manual carrier with single option at fixed price | | Free shipping threshold | Use metadata for min\_order\_amount | | Zone-based pricing | Create options per zone for manual carriers | | Real-time rates | Assign a shipping driver to the carrier | | Hybrid approach | Manual carriers for local, API drivers for national/international | [Legal](https://docs.laravelshopper.dev/v2/legal) [Payment Methods](https://docs.laravelshopper.dev/v2/payment-methods) ⌘I --- # Managing Staff Users - TALL Stack E-commerce Framework > Documentation Index > ------------------- > > Fetch the complete documentation index at: [/llms.txt](https://docs.laravelshopper.dev/llms.txt) > > Use this file to discover all available pages before exploring further. [Skip to main content](https://docs.laravelshopper.dev/v2/user-guide/administration/users#content-area) Staff users are the people who help manage your store. Shopper allows you to create multiple admin accounts with different levels of access. [​](https://docs.laravelshopper.dev/v2/user-guide/administration/users#overview) Overview -------------------------------------------------------------------------------------------- The Staff management section allows you to: * Add new administrators * Manage existing staff accounts * Assign roles and permissions * Enable/disable accounts [​](https://docs.laravelshopper.dev/v2/user-guide/administration/users#accessing-staff-settings) Accessing Staff Settings ---------------------------------------------------------------------------------------------------------------------------- 1. Click on **Settings** in the sidebar 2. Select **Staff** from the settings menu ![Staff List](https://mintcdn.com/shopperlabs-ee054f5e/eVX_9bJEbNf6CmDO/images/v2/settings-staff.png?w=2500&fit=max&auto=format&n=eVX_9bJEbNf6CmDO&q=85&s=f7c238a7b613c2198e2546e1dafdc51d) [​](https://docs.laravelshopper.dev/v2/user-guide/administration/users#adding-a-new-admin) Adding a New Admin ---------------------------------------------------------------------------------------------------------------- To add a new staff member: 1. Click the **Add admin** button 2. Fill in the administrator details 3. Assign a role 4. Click **Save** ![Add Administrator](https://mintcdn.com/shopperlabs-ee054f5e/KQY6o7d4neR-LyIr/images/v2/add-admin.png?w=2500&fit=max&auto=format&n=KQY6o7d4neR-LyIr&q=85&s=7d267d9880b44e754a990b15b9b7e894) ### [​](https://docs.laravelshopper.dev/v2/user-guide/administration/users#admin-fields) Admin Fields | Field | Required | Description | | --- | --- | --- | | **First name** | Yes | Staff member’s first name | | **Last name** | Yes | Staff member’s last name | | **Email** | Yes | Login email address (must be unique) | | **Phone** | No | Contact phone number | | **Role** | Yes | Permission level for this user | | **Send invite** | No | Email login credentials | [​](https://docs.laravelshopper.dev/v2/user-guide/administration/users#staff-roles) Staff Roles -------------------------------------------------------------------------------------------------- Each staff member is assigned a role that determines what they can access: | Role | Typical Access | | --- | --- | | **Administrator** | Full access to all features | | **Manager** | Most features except settings | | **Editor** | Product and content management | | **Support** | Orders and customer management | Create roles that match your team structure. The principle of least privilege suggests giving users only the access they need for their job. [​](https://docs.laravelshopper.dev/v2/user-guide/administration/users#managing-existing-staff) Managing Existing Staff -------------------------------------------------------------------------------------------------------------------------- ### [​](https://docs.laravelshopper.dev/v2/user-guide/administration/users#edit-staff-member) Edit Staff Member 1. Click on a staff member’s name 2. Update their information 3. Click **Save** ### [​](https://docs.laravelshopper.dev/v2/user-guide/administration/users#disable-staff-member) Disable Staff Member Instead of deleting, you can disable a staff account: * They won’t be able to log in * Their activity history is preserved * Can be re-enabled later ### [​](https://docs.laravelshopper.dev/v2/user-guide/administration/users#delete-staff-member) Delete Staff Member Permanently remove a staff account: * Use with caution - this cannot be undone * Consider disabling instead for record-keeping [​](https://docs.laravelshopper.dev/v2/user-guide/administration/users#your-profile) Your Profile ---------------------------------------------------------------------------------------------------- Each staff member can manage their own profile: ![User Profile](https://mintcdn.com/shopperlabs-ee054f5e/khtWzNt9B9rQhNq5/images/v2/profile.png?w=2500&fit=max&auto=format&n=khtWzNt9B9rQhNq5&q=85&s=18d53f734498dfa2dff5e053f6f1ee1b) From your profile, you can: * Update personal information * Change your password * Enable two-factor authentication * Set notification preferences [​](https://docs.laravelshopper.dev/v2/user-guide/administration/users#best-practices) Best Practices -------------------------------------------------------------------------------------------------------- Unique Accounts --------------- Give each person their own account - never share credentials. Strong Passwords ---------------- Require strong passwords for all admin accounts. Enable 2FA ---------- Encourage or require two-factor authentication. Regular Audits -------------- Periodically review who has access to your admin. [​](https://docs.laravelshopper.dev/v2/user-guide/administration/users#security-recommendations) Security Recommendations ---------------------------------------------------------------------------------------------------------------------------- 1. **Remove inactive accounts** - Disable accounts for staff who leave 2. **Use role-based access** - Don’t give everyone admin access 3. **Enable two-factor** - Add an extra layer of security 4. **Monitor activity** - Keep track of who does what 5. **Regular password changes** - Encourage periodic password updates For developer details, see the [Roles & Permissions documentation](https://docs.laravelshopper.dev/v2/acl) . [Advanced Pricing](https://docs.laravelshopper.dev/v2/user-guide/marketing/pricing) [Roles & Permissions](https://docs.laravelshopper.dev/v2/user-guide/administration/roles) ⌘I --- # Roles & Permissions - TALL Stack E-commerce Framework > Documentation Index > ------------------- > > Fetch the complete documentation index at: [/llms.txt](https://docs.laravelshopper.dev/llms.txt) > > Use this file to discover all available pages before exploring further. [Skip to main content](https://docs.laravelshopper.dev/v2/user-guide/administration/roles#content-area) Roles and permissions allow you to control what each staff member can do in your store’s administration panel. This ensures security and prevents unauthorized access to sensitive areas. [​](https://docs.laravelshopper.dev/v2/user-guide/administration/roles#overview) Overview -------------------------------------------------------------------------------------------- The access control system consists of: * **Roles** - Groups of permissions assigned to users * **Permissions** - Individual actions a user can perform [​](https://docs.laravelshopper.dev/v2/user-guide/administration/roles#accessing-roles-&-permissions) Accessing Roles & Permissions -------------------------------------------------------------------------------------------------------------------------------------- 1. Click on **Settings** in the sidebar 2. Navigate to the access control section [​](https://docs.laravelshopper.dev/v2/user-guide/administration/roles#understanding-permissions) Understanding Permissions ------------------------------------------------------------------------------------------------------------------------------ Permissions control access to specific actions: ![Permissions](https://mintcdn.com/shopperlabs-ee054f5e/khtWzNt9B9rQhNq5/images/v2/permissions.png?w=2500&fit=max&auto=format&n=khtWzNt9B9rQhNq5&q=85&s=111bc194767b2c85103bcb8ee86d0e10) ### [​](https://docs.laravelshopper.dev/v2/user-guide/administration/roles#permission-categories) Permission Categories | Category | Examples | | --- | --- | | **Products** | View, create, edit, delete products | | **Orders** | View orders, process refunds | | **Customers** | View customer data, edit accounts | | **Settings** | Access configuration options | | **Staff** | Manage other administrators | ### [​](https://docs.laravelshopper.dev/v2/user-guide/administration/roles#browsing-permissions) Browsing Permissions View all available permissions in the system: ![Browse Permissions](https://mintcdn.com/shopperlabs-ee054f5e/khtWzNt9B9rQhNq5/images/v2/permissions.png?w=2500&fit=max&auto=format&n=khtWzNt9B9rQhNq5&q=85&s=111bc194767b2c85103bcb8ee86d0e10) [​](https://docs.laravelshopper.dev/v2/user-guide/administration/roles#managing-roles) Managing Roles -------------------------------------------------------------------------------------------------------- ### [​](https://docs.laravelshopper.dev/v2/user-guide/administration/roles#creating-a-role) Creating a Role To create a new role: 1. Navigate to Roles 2. Click **Create role** 3. Enter a name and description 4. Select permissions 5. Click **Save** ![Add Role](https://mintcdn.com/shopperlabs-ee054f5e/KQY6o7d4neR-LyIr/images/v2/add-role.png?w=2500&fit=max&auto=format&n=KQY6o7d4neR-LyIr&q=85&s=6fcadf4b4975e386a452af40af50938c) ### [​](https://docs.laravelshopper.dev/v2/user-guide/administration/roles#role-fields) Role Fields | Field | Description | | --- | --- | | **Name** | Role name (e.g., “Store Manager”) | | **Description** | What this role is for | | **Permissions** | List of allowed actions | ### [​](https://docs.laravelshopper.dev/v2/user-guide/administration/roles#updating-a-role) Updating a Role Modify an existing role: ![Update Role](https://mintcdn.com/shopperlabs-ee054f5e/eVX_9bJEbNf6CmDO/images/v2/update-role.png?w=2500&fit=max&auto=format&n=eVX_9bJEbNf6CmDO&q=85&s=397ff21ef2a64070b89283793e3b74ea) Changes apply immediately to all users with that role. [​](https://docs.laravelshopper.dev/v2/user-guide/administration/roles#creating-permissions) Creating Permissions -------------------------------------------------------------------------------------------------------------------- Add custom permissions for your specific needs: ![Add Permission](https://mintcdn.com/shopperlabs-ee054f5e/KQY6o7d4neR-LyIr/images/v2/add-permission.png?w=2500&fit=max&auto=format&n=KQY6o7d4neR-LyIr&q=85&s=3606457fa4203b414a10a9506f360149) [​](https://docs.laravelshopper.dev/v2/user-guide/administration/roles#custom-permissions) Custom Permissions ---------------------------------------------------------------------------------------------------------------- Create permissions tailored to your business: ![Custom Permissions](https://mintcdn.com/shopperlabs-ee054f5e/6wDmKBjBTMPmRNSb/images/v2/custom-permissions.png?w=2500&fit=max&auto=format&n=6wDmKBjBTMPmRNSb&q=85&s=aeb9b21c54387baecbdc646c3c07f370) [​](https://docs.laravelshopper.dev/v2/user-guide/administration/roles#common-role-examples) Common Role Examples -------------------------------------------------------------------------------------------------------------------- ### [​](https://docs.laravelshopper.dev/v2/user-guide/administration/roles#store-manager) Store Manager Full operational access: * All product permissions * All order permissions * All customer permissions * Limited settings access ### [​](https://docs.laravelshopper.dev/v2/user-guide/administration/roles#content-editor) Content Editor Focus on catalog management: * View/edit products * View/edit categories * View/edit collections * No order or customer access ### [​](https://docs.laravelshopper.dev/v2/user-guide/administration/roles#support-agent) Support Agent Customer service focus: * View orders * View customers * Limited edit capabilities * No product management ### [​](https://docs.laravelshopper.dev/v2/user-guide/administration/roles#marketing) Marketing Promotional access: * View products * Manage discounts * Manage collections * No customer data access [​](https://docs.laravelshopper.dev/v2/user-guide/administration/roles#best-practices) Best Practices -------------------------------------------------------------------------------------------------------- Start Restrictive ----------------- Begin with minimal permissions and add as needed. Group Logically --------------- Create roles that match actual job functions. Review Regularly ---------------- Audit roles periodically to ensure they’re still appropriate. Document Roles -------------- Keep clear descriptions of what each role can do. [​](https://docs.laravelshopper.dev/v2/user-guide/administration/roles#permission-hierarchy) Permission Hierarchy -------------------------------------------------------------------------------------------------------------------- Some permissions may depend on others. For example, to edit a product, a user typically also needs permission to view products. When assigning permissions, consider: 1. **View** - Can see the information 2. **Create** - Can add new items 3. **Edit** - Can modify existing items 4. **Delete** - Can remove items (most sensitive) [​](https://docs.laravelshopper.dev/v2/user-guide/administration/roles#security-considerations) Security Considerations -------------------------------------------------------------------------------------------------------------------------- * **Audit trails** - Track who changed what * **Separation of duties** - Don’t give one person all permissions * **Regular reviews** - Remove unnecessary access * **Test roles** - Verify permissions work as expected For developer details, see the [Roles & Permissions documentation](https://docs.laravelshopper.dev/v2/acl) . [Managing Staff Users](https://docs.laravelshopper.dev/v2/user-guide/administration/users) [Two-Factor Authentication](https://docs.laravelshopper.dev/v2/user-guide/administration/two-factor) ⌘I --- # Introduction - TALL Stack E-commerce Framework > Documentation Index > ------------------- > > Fetch the complete documentation index at: [/llms.txt](https://docs.laravelshopper.dev/llms.txt) > > Use this file to discover all available pages before exploring further. [Skip to main content](https://docs.laravelshopper.dev/v2/user-guide/getting-started/introduction#content-area) Shopper gives you a complete administration panel to manage your online store. From this panel, you can create products, process orders, manage customers, set up discounts, and configure every aspect of your store without writing any code. ![Shopper administration dashboard](https://mintcdn.com/shopperlabs-ee054f5e/RoQo55-CU3i212Mj/images/v2/admin-dashboard.png?w=2500&fit=max&auto=format&n=RoQo55-CU3i212Mj&q=85&s=3b3539668ff3bb8da4a00e9c7ea6004c) [​](https://docs.laravelshopper.dev/v2/user-guide/getting-started/introduction#what-you-can-do) What You Can Do ------------------------------------------------------------------------------------------------------------------ Product Management ------------------ Create and manage products with variants, images, pricing, and inventory. Organize them into categories, collections, and brands. Order Processing ---------------- Track customer orders from placement to delivery. Manage payments, shipping, and fulfillment from a single screen. Customer Management ------------------- View customer profiles, order history, and addresses. Keep track of who is buying what. Discounts & Promotions ---------------------- Create discount codes with conditions, usage limits, and expiration dates to drive sales. Store Settings -------------- Configure your store name, currencies, locations, legal pages, and more. Team Management --------------- Add staff members, assign roles, and control who can access what in the admin panel. [​](https://docs.laravelshopper.dev/v2/user-guide/getting-started/introduction#who-is-this-guide-for) Who Is This Guide For? ------------------------------------------------------------------------------------------------------------------------------- This User Guide is designed for **store administrators and managers** who use Shopper daily to manage their e-commerce operations. No technical knowledge is required. Every feature is explained with step-by-step instructions. Looking for developer documentation? The [Documentation](https://docs.laravelshopper.dev/v2/getting-started) tab covers installation, configuration, model references, and customization options. [​](https://docs.laravelshopper.dev/v2/user-guide/getting-started/introduction#getting-help) Getting Help ------------------------------------------------------------------------------------------------------------ If you need assistance while using Shopper: * Join the [Discord community](https://discord.gg/CC444Gy7) to connect with other users and the Shopper team * Check the [GitHub repository](https://github.com/shopperlabs/shopper) for updates and known issues [​](https://docs.laravelshopper.dev/v2/user-guide/getting-started/introduction#next-steps) Next Steps -------------------------------------------------------------------------------------------------------- Ready to get started? Learn how to [log in to your administration panel](https://docs.laravelshopper.dev/v2/user-guide/getting-started/login) . [Logging In](https://docs.laravelshopper.dev/v2/user-guide/getting-started/login) ⌘I --- # Logging In - TALL Stack E-commerce Framework > Documentation Index > ------------------- > > Fetch the complete documentation index at: [/llms.txt](https://docs.laravelshopper.dev/llms.txt) > > Use this file to discover all available pages before exploring further. [Skip to main content](https://docs.laravelshopper.dev/v2/user-guide/getting-started/login#content-area) To manage your store, you need to log in to the Shopper administration panel. This guide will walk you through the login process. [​](https://docs.laravelshopper.dev/v2/user-guide/getting-started/login#accessing-the-login-page) Accessing the Login Page ----------------------------------------------------------------------------------------------------------------------------- Your Shopper administration panel is accessible at your website URL followed by `/cpanel`. For example: https://your-store.com/cpanel/login ![Shopper Login Page](https://mintcdn.com/shopperlabs-ee054f5e/khtWzNt9B9rQhNq5/images/v2/login.png?w=2500&fit=max&auto=format&n=khtWzNt9B9rQhNq5&q=85&s=de34de2d51c36edd7d987e2105df2e05) [​](https://docs.laravelshopper.dev/v2/user-guide/getting-started/login#logging-in) Logging In ------------------------------------------------------------------------------------------------- 1. Enter your **email address** in the first field 2. Enter your **password** in the second field 3. Click the **Log in** button If you’ve enabled two-factor authentication on your account, you’ll be prompted to enter a verification code after submitting your credentials. Learn more about [Two-Factor Authentication](https://docs.laravelshopper.dev/v2/user-guide/administration/two-factor) . [​](https://docs.laravelshopper.dev/v2/user-guide/getting-started/login#forgot-your-password) Forgot Your Password? ---------------------------------------------------------------------------------------------------------------------- If you’ve forgotten your password: 1. Click the **Forgot your password?** link on the login page 2. Enter your email address 3. Check your email for a password reset link 4. Follow the instructions in the email to create a new password [​](https://docs.laravelshopper.dev/v2/user-guide/getting-started/login#after-logging-in) After Logging In ------------------------------------------------------------------------------------------------------------- Once logged in, you’ll be taken to the **Dashboard**, which provides an overview of your store’s activity. From here, you can navigate to any section of the administration panel using the sidebar on the left. ![Shopper Dashboard](https://mintcdn.com/shopperlabs-ee054f5e/RoQo55-CU3i212Mj/images/v2/dashboard.png?w=2500&fit=max&auto=format&n=RoQo55-CU3i212Mj&q=85&s=f0758881e9389c054561c14decfe3c9d) [​](https://docs.laravelshopper.dev/v2/user-guide/getting-started/login#logging-out) Logging Out --------------------------------------------------------------------------------------------------- To log out of your account: 1. Click on your **profile picture** in the bottom-left corner of the sidebar 2. Select **Log out** from the dropdown menu ![Account dropdown](https://mintcdn.com/shopperlabs-ee054f5e/KQY6o7d4neR-LyIr/images/v2/account-dropdown.png?w=2500&fit=max&auto=format&n=KQY6o7d4neR-LyIr&q=85&s=11dd3aa069fd0fc646ef1f4e7a992b90) [Introduction](https://docs.laravelshopper.dev/v2/user-guide/getting-started/introduction) [Discovering Dashboard](https://docs.laravelshopper.dev/v2/user-guide/getting-started/dashboard) ⌘I --- # Managing Brands - TALL Stack E-commerce Framework > Documentation Index > ------------------- > > Fetch the complete documentation index at: [/llms.txt](https://docs.laravelshopper.dev/llms.txt) > > Use this file to discover all available pages before exploring further. [Skip to main content](https://docs.laravelshopper.dev/v2/user-guide/catalog/brands#content-area) Brands help customers identify and find products from their favorite manufacturers. Managing brands effectively can improve navigation and boost customer trust. [​](https://docs.laravelshopper.dev/v2/user-guide/catalog/brands#overview) Overview -------------------------------------------------------------------------------------- Brands in Shopper represent the manufacturers or labels of your products. They help customers: * Filter products by manufacturer * Find all products from a specific brand * Make informed purchasing decisions [​](https://docs.laravelshopper.dev/v2/user-guide/catalog/brands#accessing-brands) Accessing Brands ------------------------------------------------------------------------------------------------------ Click on **Brands** in the sidebar to access the brand management page. ![Brands List](https://mintcdn.com/shopperlabs-ee054f5e/KQY6o7d4neR-LyIr/images/v2/brands.png?w=2500&fit=max&auto=format&n=KQY6o7d4neR-LyIr&q=85&s=386aee484528f75288410475ea1de413) [​](https://docs.laravelshopper.dev/v2/user-guide/catalog/brands#creating-a-brand) Creating a Brand ------------------------------------------------------------------------------------------------------ To add a new brand to your store: 1. Click the **Create** button on the Brands page 2. Fill in the brand details 3. Click **Save** to create the brand ![Create Brand](https://mintcdn.com/shopperlabs-ee054f5e/KQY6o7d4neR-LyIr/images/v2/brand-create.png?w=2500&fit=max&auto=format&n=KQY6o7d4neR-LyIr&q=85&s=980cc008a42c73cf07eda22b0ce35977) ### [​](https://docs.laravelshopper.dev/v2/user-guide/catalog/brands#brand-fields) Brand Fields | Field | Required | Description | | --- | --- | --- | | **Name** | Yes | The brand name as it will appear to customers | | **Website** | No | The brand’s official website URL | | **Description** | No | A brief description of the brand | | **Logo** | No | Upload a logo image for the brand | | **Enabled** | No | Toggle to show/hide the brand on your store | ### [​](https://docs.laravelshopper.dev/v2/user-guide/catalog/brands#seo-settings) SEO Settings Optimize your brand pages for search engines: | Field | Description | | --- | --- | | **SEO Title** | Custom title for search engine results (max 60 characters) | | **SEO Description** | Meta description for search engines (max 160 characters) | [​](https://docs.laravelshopper.dev/v2/user-guide/catalog/brands#brand-states) Brand States ---------------------------------------------------------------------------------------------- Brands can be in two states: * **Enabled** - Visible on your storefront and available for product assignment * **Disabled** - Hidden from your storefront but products remain associated New brands are automatically enabled when created. Disable a brand if you want to temporarily hide it without removing product associations. [​](https://docs.laravelshopper.dev/v2/user-guide/catalog/brands#empty-state) Empty State -------------------------------------------------------------------------------------------- When you first access the Brands page with no brands created, you’ll see a helpful empty state prompting you to create your first brand. ![Brand Empty State](https://mintcdn.com/shopperlabs-ee054f5e/KQY6o7d4neR-LyIr/images/v2/brand-empty-state.png?w=2500&fit=max&auto=format&n=KQY6o7d4neR-LyIr&q=85&s=91b4c1b8c6a6ce623bdc6e0fd1baf51b) [​](https://docs.laravelshopper.dev/v2/user-guide/catalog/brands#displaying-brands-on-your-store) Displaying Brands on Your Store ------------------------------------------------------------------------------------------------------------------------------------ Once you have brands configured, they can be displayed on your storefront for customers to browse. ![Brands Display](https://mintcdn.com/shopperlabs-ee054f5e/6wDmKBjBTMPmRNSb/images/v2/brand-lists.png?w=2500&fit=max&auto=format&n=6wDmKBjBTMPmRNSb&q=85&s=ca6a8f20a06d62469f6fc33a80801da6) [​](https://docs.laravelshopper.dev/v2/user-guide/catalog/brands#best-practices) Best Practices -------------------------------------------------------------------------------------------------- * **Use official logos** - Always use the official brand logo when available * **Keep descriptions concise** - A brief description helps customers understand what the brand offers * **Optimize for SEO** - Add relevant keywords to help customers find brands through search * **Regular updates** - Keep brand information current, especially for websites and descriptions For developer details, see the [Brands documentation](https://docs.laravelshopper.dev/v2/brands) . [Legal Pages](https://docs.laravelshopper.dev/v2/user-guide/store-setup/legal) [Managing Categories](https://docs.laravelshopper.dev/v2/user-guide/catalog/categories) ⌘I --- # Discovering Dashboard - TALL Stack E-commerce Framework > Documentation Index > ------------------- > > Fetch the complete documentation index at: [/llms.txt](https://docs.laravelshopper.dev/llms.txt) > > Use this file to discover all available pages before exploring further. [Skip to main content](https://docs.laravelshopper.dev/v2/user-guide/getting-started/dashboard#content-area) The Dashboard is your command center for managing your online store. Let’s explore its key elements and learn how to navigate efficiently. [​](https://docs.laravelshopper.dev/v2/user-guide/getting-started/dashboard#overview) Overview ------------------------------------------------------------------------------------------------- When you log in, you’ll see the main dashboard which displays key metrics and quick access to important features. ![Shopper Dashboard](https://mintcdn.com/shopperlabs-ee054f5e/RoQo55-CU3i212Mj/images/v2/dashboard.png?w=2500&fit=max&auto=format&n=RoQo55-CU3i212Mj&q=85&s=f0758881e9389c054561c14decfe3c9d) [​](https://docs.laravelshopper.dev/v2/user-guide/getting-started/dashboard#main-navigation) Main Navigation --------------------------------------------------------------------------------------------------------------- The sidebar on the left side of the screen is your main navigation tool. It provides access to all sections of your store management: | Section | Description | | --- | --- | | **Dashboard** | Overview of your store’s performance and recent activity | | **Products** | Manage your product catalog | | **Categories** | Organize products into categories | | **Collections** | Create curated product collections | | **Brands** | Manage product brands | | **Customers** | View and manage customer accounts | | **Orders** | Process and track orders | | **Discounts** | Create and manage discount codes | | **Reviews** | Moderate customer reviews | | **Settings** | Configure your store settings | [​](https://docs.laravelshopper.dev/v2/user-guide/getting-started/dashboard#quick-actions) Quick Actions ----------------------------------------------------------------------------------------------------------- From the dashboard, you can quickly access common tasks: * View recent orders * Check new customer registrations * Monitor product inventory * Access store settings [​](https://docs.laravelshopper.dev/v2/user-guide/getting-started/dashboard#settings-panel) Settings Panel ------------------------------------------------------------------------------------------------------------- Click on **Settings** in the sidebar to access all configuration options for your store. ![Settings Panel](https://mintcdn.com/shopperlabs-ee054f5e/eVX_9bJEbNf6CmDO/images/v2/settings.png?w=2500&fit=max&auto=format&n=eVX_9bJEbNf6CmDO&q=85&s=486b8c3295a823452375de2e65b1d1f8) The settings panel includes: * **General** - Store name, description, and basic information * **Locations** - Manage inventory locations * **Staff** - Manage administrator accounts * **Legal** - Terms of service and privacy policies * **And more…** [​](https://docs.laravelshopper.dev/v2/user-guide/getting-started/dashboard#your-profile) Your Profile --------------------------------------------------------------------------------------------------------- Access your personal profile settings by clicking on your avatar at the top of the header. ![User Profile](https://mintcdn.com/shopperlabs-ee054f5e/khtWzNt9B9rQhNq5/images/v2/profile.png?w=2500&fit=max&auto=format&n=khtWzNt9B9rQhNq5&q=85&s=18d53f734498dfa2dff5e053f6f1ee1b) From here you can: * Update your personal information * Change your password * Enable two-factor authentication * Log out of your account [Logging In](https://docs.laravelshopper.dev/v2/user-guide/getting-started/login) [General Settings](https://docs.laravelshopper.dev/v2/user-guide/store-setup/general-settings) ⌘I --- # Extending Shopper - TALL Stack E-commerce Framework > Documentation Index > ------------------- > > Fetch the complete documentation index at: [/llms.txt](https://docs.laravelshopper.dev/llms.txt) > > Use this file to discover all available pages before exploring further. [Skip to main content](https://docs.laravelshopper.dev/v2/sidebar/shopper-extension#content-area) This guide covers how to add custom navigation items to the Shopper admin panel using the sidebar extension system. [​](https://docs.laravelshopper.dev/v2/sidebar/shopper-extension#overview) Overview -------------------------------------------------------------------------------------- Shopper uses an event-based system to build the sidebar. When the sidebar is rendered, it dispatches a `SidebarBuilder` event that you can listen to and add your own menu groups and items. [​](https://docs.laravelshopper.dev/v2/sidebar/shopper-extension#creating-a-sidebar-extension) Creating a Sidebar Extension ------------------------------------------------------------------------------------------------------------------------------ ### [​](https://docs.laravelshopper.dev/v2/sidebar/shopper-extension#1-create-an-extension-class) 1\. Create an Extension Class Create a class that extends `AbstractAdminSidebar`: group(__('Blog'), function (Group $group): void { $group->weight(5); $group->setAuthorized(); $group->item(__('Posts'), function (Item $item): void { $item->weight(1); $item->setAuthorized(); $item->useSpa(); $item->route('shopper.blog.posts.index'); $item->setIcon('untitledui-file-02'); }); $group->item(__('Categories'), function (Item $item): void { $item->weight(2); $item->setAuthorized(); $item->useSpa(); $item->route('shopper.blog.categories.index'); $item->setIcon('untitledui-folder'); }); }); return $menu; } } The `$this->user` property is available in your extension class to access the authenticated user for authorization checks. ### [​](https://docs.laravelshopper.dev/v2/sidebar/shopper-extension#2-register-the-extension) 2\. Register the Extension Register your sidebar extension in a service provider: app['events']->listen(SidebarBuilder::class, BlogSidebar::class); } } Make sure to register the listener in the `register()` method, not `boot()`, to ensure it’s registered before the sidebar is built. [​](https://docs.laravelshopper.dev/v2/sidebar/shopper-extension#weight-system) Weight System ------------------------------------------------------------------------------------------------ The `weight` value determines the order of items and groups. Lower values appear first: | Section | Weight | | --- | --- | | Dashboard | 1 | | Catalog | 2 | | Sales | 3 | | Customers | 4 | | Your Extension | 5-9 | | Settings (footer) | 10+ | Choose a weight value that positions your menu in the desired location. [​](https://docs.laravelshopper.dev/v2/sidebar/shopper-extension#adding-sub-items) Adding Sub-Items ------------------------------------------------------------------------------------------------------ Items can have nested sub-items for dropdown menus: $group->item(__('Blog'), function (Item $item): void { $item->weight(1); $item->setAuthorized(); $item->route('shopper.blog.posts.index'); $item->setIcon('untitledui-file-02'); // Sub-items $item->item(__('All Posts'), function (Item $subItem): void { $subItem->weight(1); $subItem->setAuthorized(); $subItem->useSpa(); $subItem->route('shopper.blog.posts.index'); }); $item->item(__('Create Post'), function (Item $subItem): void { $subItem->weight(2); $subItem->setAuthorized(); $subItem->useSpa(); $subItem->route('shopper.blog.posts.create'); }); }); Add `sh-items-has-child` to the parent item class to enable the proper dropdown styling. [​](https://docs.laravelshopper.dev/v2/sidebar/shopper-extension#authorization) Authorization ------------------------------------------------------------------------------------------------ ### [​](https://docs.laravelshopper.dev/v2/sidebar/shopper-extension#permission-based-authorization) Permission-Based Authorization Use Laravel’s authorization system to control visibility: $group->item(__('Posts'), function (Item $item): void { // Only show if user can manage posts $item->setAuthorized(fn() => $this->user?->can('manage_posts')); // ... rest of configuration }); ### [​](https://docs.laravelshopper.dev/v2/sidebar/shopper-extension#role-based-authorization) Role-Based Authorization $group->item(__('Admin Settings'), function (Item $item): void { $item->setAuthorized(fn() => $this->user?->hasRole('admin')); // ... rest of configuration }); [​](https://docs.laravelshopper.dev/v2/sidebar/shopper-extension#adding-badges) Adding Badges ------------------------------------------------------------------------------------------------ Show notification counts or labels on menu items: $group->item(__('Orders'), function (Item $item): void { // ... item configuration // Add a badge with pending order count $item->badge(function (Badge $badge): void { $count = Order::pending()->count(); if ($count > 0) { $badge->setValue($count); $badge->setClass('bg-danger-500 text-white'); } }); }); [​](https://docs.laravelshopper.dev/v2/sidebar/shopper-extension#adding-quick-actions-append) Adding Quick Actions (Append) ------------------------------------------------------------------------------------------------------------------------------ Add action buttons next to menu items: $group->item(__('Products'), function (Item $item): void { // ... item configuration // Add a "+" button to quickly create a product $item->append(function (Append $append): void { $append->route('shopper.products.create'); $append->setIcon('untitledui-plus'); $append->setName(__('Add Product')); $append->setClass('sh-sidebar-item-nav'); $append->setAuthorized(fn() => $this->user?->can('create_products')); }); }); [​](https://docs.laravelshopper.dev/v2/sidebar/shopper-extension#complete-example) Complete Example ------------------------------------------------------------------------------------------------------ Here’s a complete example of a blog sidebar extension: group(__('Content'), function (Group $group): void { $group->weight(5); $group->setAuthorized(); $group->item(__('Blog'), function (Item $item): void { $item->weight(1); $item->setAuthorized(fn() => $this->user?->can('manage_blog')); $item->route('shopper.blog.posts.index'); $item->setIcon('untitledui-edit-04'); // Badge for draft posts $item->badge(function (Badge $badge): void { $drafts = Post::draft()->count(); if ($drafts > 0) { $badge->setValue($drafts); $badge->setClass('text-xs bg-warning-100 text-warning-700'); } }); // Quick create button $item->append(function (Append $append): void { $append->route('shopper.blog.posts.create'); $append->setIcon('untitledui-plus'); $append->setName(__('New Post')); }); // Sub-items $item->item(__('All Posts'), function (Item $subItem): void { $subItem->weight(1); $subItem->setAuthorized(); $subItem->useSpa(); $subItem->route('shopper.blog.posts.index'); }); $item->item(__('Categories'), function (Item $subItem): void { $subItem->weight(2); $subItem->setAuthorized(); $subItem->useSpa(); $subItem->route('shopper.blog.categories.index'); }); $item->item(__('Tags'), function (Item $subItem): void { $subItem->weight(3); $subItem->setAuthorized(); $subItem->useSpa(); $subItem->route('shopper.blog.tags.index'); }); }); $group->item(__('Pages'), function (Item $item): void { $item->weight(2); $item->setAuthorized(fn() => $this->user?->can('manage_pages')); $item->useSpa(); $item->route('shopper.pages.index'); $item->setIcon('untitledui-file-06'); }); }); return $menu; } } [​](https://docs.laravelshopper.dev/v2/sidebar/shopper-extension#using-closures-for-dynamic-sidebars) Using Closures for Dynamic Sidebars -------------------------------------------------------------------------------------------------------------------------------------------- For simpler cases, you can use a closure instead of a class: use Illuminate\Support\Facades\Event; use Shopper\Sidebar\SidebarBuilder; Event::listen(SidebarBuilder::class, function (SidebarBuilder $sidebar) { $menu = $sidebar->getMenu(); $menu->group('Quick Links', function ($group) { $group->weight(100); $group->item('Documentation') ->setUrl('https://docs.example.com') ->isNewTab() ->setIcon('untitledui-book-open'); }); $sidebar->add($menu); }); [​](https://docs.laravelshopper.dev/v2/sidebar/shopper-extension#routes-configuration) Routes Configuration -------------------------------------------------------------------------------------------------------------- Add your routes in the `routes/shopper.php` file (configured in `config/shopper/routes.php`): use Illuminate\Support\Facades\Route; Route::prefix('blog')->name('blog.')->group(function (): void { Route::get('posts', [PostController::class, 'index'])->name('posts.index'); Route::get('posts/create', [PostController::class, 'create'])->name('posts.create'); Route::get('categories', [CategoryController::class, 'index'])->name('categories.index'); }); All routes in `routes/shopper.php` are automatically prefixed with the Shopper route prefix and have the `shopper.` route name prefix. So `posts.index` becomes `shopper.blog.posts.index`. [Sidebar Package](https://docs.laravelshopper.dev/v2/sidebar/overview) [Standalone Installation](https://docs.laravelshopper.dev/v2/sidebar/standalone) ⌘I --- # General Settings - TALL Stack E-commerce Framework > Documentation Index > ------------------- > > Fetch the complete documentation index at: [/llms.txt](https://docs.laravelshopper.dev/llms.txt) > > Use this file to discover all available pages before exploring further. [Skip to main content](https://docs.laravelshopper.dev/v2/user-guide/store-setup/general-settings#content-area) The General Settings page allows you to configure your store’s basic information. This is one of the first things you should set up when starting with Shopper. [​](https://docs.laravelshopper.dev/v2/user-guide/store-setup/general-settings#accessing-general-settings) Accessing General Settings ---------------------------------------------------------------------------------------------------------------------------------------- 1. Click on **Settings** in the sidebar 2. Select **General** from the settings menu ![General Settings](https://mintcdn.com/shopperlabs-ee054f5e/khtWzNt9B9rQhNq5/images/v2/setting-general.png?w=2500&fit=max&auto=format&n=khtWzNt9B9rQhNq5&q=85&s=6812035b423cd5fb65ea8db15790f472) [​](https://docs.laravelshopper.dev/v2/user-guide/store-setup/general-settings#store-information) Store Information ---------------------------------------------------------------------------------------------------------------------- ### [​](https://docs.laravelshopper.dev/v2/user-guide/store-setup/general-settings#store-details) Store Details Configure the basic information about your store: | Field | Description | | --- | --- | | **Store name** | The name of your store as it will appear to customers | | **Store email** | The main contact email for your store | | **Store phone** | Contact phone number (optional) | ### [​](https://docs.laravelshopper.dev/v2/user-guide/store-setup/general-settings#store-address) Store Address Set your store’s physical address. This information may be used for: * Invoice generation * Shipping calculations * Legal compliance [​](https://docs.laravelshopper.dev/v2/user-guide/store-setup/general-settings#store-initialization) Store Initialization ---------------------------------------------------------------------------------------------------------------------------- When you first set up Shopper, you’ll go through an initialization wizard that helps you configure the essential settings. ### [​](https://docs.laravelshopper.dev/v2/user-guide/store-setup/general-settings#step-1-store-information) Step 1 - Store Information ![Initialization Step 1](https://mintcdn.com/shopperlabs-ee054f5e/khtWzNt9B9rQhNq5/images/v2/initialization-step-1.png?w=2500&fit=max&auto=format&n=khtWzNt9B9rQhNq5&q=85&s=203c770a01aaa9338c73be36314920da) ### [​](https://docs.laravelshopper.dev/v2/user-guide/store-setup/general-settings#step-2-address-setup) Step 2 - Address Setup ![Initialization Step 2](https://mintcdn.com/shopperlabs-ee054f5e/khtWzNt9B9rQhNq5/images/v2/initialization-step-2.png?w=2500&fit=max&auto=format&n=khtWzNt9B9rQhNq5&q=85&s=47c689dfd081f83ae3bfddeb8a2a6d54) ### [​](https://docs.laravelshopper.dev/v2/user-guide/store-setup/general-settings#step-3-social-links) Step 3 - Social Links ![Initialization Step 3](https://mintcdn.com/shopperlabs-ee054f5e/khtWzNt9B9rQhNq5/images/v2/initialization-step-3.png?w=2500&fit=max&auto=format&n=khtWzNt9B9rQhNq5&q=85&s=c9aff1d7140842f1b982b09f896ecb78) [​](https://docs.laravelshopper.dev/v2/user-guide/store-setup/general-settings#saving-changes) Saving Changes ---------------------------------------------------------------------------------------------------------------- After making any changes to your settings: 1. Review your changes 2. Click the **Save** button at the bottom of the form 3. A confirmation message will appear when your changes are saved Make sure to keep your store information up to date, especially your contact email, as this is how customers and the system will reach you. For developer details, see the [Setup Store documentation](https://docs.laravelshopper.dev/v2/setup-store) . [Discovering Dashboard](https://docs.laravelshopper.dev/v2/user-guide/getting-started/dashboard) [Inventory Locations](https://docs.laravelshopper.dev/v2/user-guide/store-setup/locations) ⌘I --- # Legal Pages - TALL Stack E-commerce Framework > Documentation Index > ------------------- > > Fetch the complete documentation index at: [/llms.txt](https://docs.laravelshopper.dev/llms.txt) > > Use this file to discover all available pages before exploring further. [Skip to main content](https://docs.laravelshopper.dev/v2/user-guide/store-setup/legal#content-area) Legal pages are essential for any e-commerce store. They protect both you and your customers by clearly outlining the rules and policies of your business. [​](https://docs.laravelshopper.dev/v2/user-guide/store-setup/legal#why-legal-pages-matter) Why Legal Pages Matter --------------------------------------------------------------------------------------------------------------------- Legal pages help you: * Comply with local and international regulations (GDPR, CCPA, etc.) * Protect your business from liability * Build trust with customers * Define clear terms for transactions [​](https://docs.laravelshopper.dev/v2/user-guide/store-setup/legal#accessing-legal-settings) Accessing Legal Settings ------------------------------------------------------------------------------------------------------------------------- 1. Click on **Settings** in the sidebar 2. Select **Legal** from the settings menu ![Legal Settings](https://mintcdn.com/shopperlabs-ee054f5e/khtWzNt9B9rQhNq5/images/v2/legal.png?w=2500&fit=max&auto=format&n=khtWzNt9B9rQhNq5&q=85&s=1133acdacf8e53d0d8259a7f1903a696) [​](https://docs.laravelshopper.dev/v2/user-guide/store-setup/legal#available-legal-pages) Available Legal Pages ------------------------------------------------------------------------------------------------------------------- Shopper allows you to configure the following legal documents: | Page | Purpose | | --- | --- | | **Terms of Service** | Defines the rules and guidelines for using your store | | **Privacy Policy** | Explains how you collect, use, and protect customer data | | **Refund Policy** | Outlines your return and refund procedures | | **Shipping Policy** | Details your shipping methods, times, and costs | [​](https://docs.laravelshopper.dev/v2/user-guide/store-setup/legal#editing-legal-content) Editing Legal Content ------------------------------------------------------------------------------------------------------------------- To edit a legal page: 1. Click on the page you want to edit 2. Use the rich text editor to write or paste your content 3. Click **Save** to publish your changes [​](https://docs.laravelshopper.dev/v2/user-guide/store-setup/legal#writing-your-legal-pages) Writing Your Legal Pages ------------------------------------------------------------------------------------------------------------------------- ### [​](https://docs.laravelshopper.dev/v2/user-guide/store-setup/legal#terms-of-service) Terms of Service Your Terms of Service should include: * Acceptance of terms * User responsibilities * Prohibited activities * Intellectual property rights * Limitation of liability * Dispute resolution ### [​](https://docs.laravelshopper.dev/v2/user-guide/store-setup/legal#privacy-policy) Privacy Policy Your Privacy Policy should cover: * What data you collect * How you use the data * How you protect customer data * Cookie usage * Third-party services * Customer rights regarding their data ### [​](https://docs.laravelshopper.dev/v2/user-guide/store-setup/legal#refund-policy) Refund Policy Your Refund Policy should explain: * Eligibility for refunds * Timeframe for requesting refunds * Refund process * Exceptions * Exchange options Consider consulting with a legal professional to ensure your policies comply with applicable laws in your jurisdiction and the regions where you sell. [​](https://docs.laravelshopper.dev/v2/user-guide/store-setup/legal#displaying-legal-pages-on-your-storefront) Displaying Legal Pages on Your Storefront ----------------------------------------------------------------------------------------------------------------------------------------------------------- Shopper stores the content of your legal pages, but does not create the storefront routes automatically. Your developer needs to set up the pages on your website to display this content. Once configured, legal pages are typically: * Linked in your website footer * Shown during checkout when required * Accessible from customer account pages Legal pages are not published to your storefront automatically. Ask your developer to create the routes and views to display them. See the [Legal developer documentation](https://docs.laravelshopper.dev/v2/legal) for implementation details. For developer details, see the [Legal documentation](https://docs.laravelshopper.dev/v2/legal) . [Taxes](https://docs.laravelshopper.dev/v2/user-guide/store-setup/taxes) [Managing Brands](https://docs.laravelshopper.dev/v2/user-guide/catalog/brands) ⌘I --- # Managing Categories - TALL Stack E-commerce Framework > Documentation Index > ------------------- > > Fetch the complete documentation index at: [/llms.txt](https://docs.laravelshopper.dev/llms.txt) > > Use this file to discover all available pages before exploring further. [Skip to main content](https://docs.laravelshopper.dev/v2/user-guide/catalog/categories#content-area) Categories are essential for organizing your product catalog. They help customers navigate your store and find products easily. [​](https://docs.laravelshopper.dev/v2/user-guide/catalog/categories#overview) Overview ------------------------------------------------------------------------------------------ Categories create a hierarchical structure for your products. You can create: * **Parent categories** - Top-level categories (e.g., “Clothing”, “Electronics”) * **Subcategories** - Nested categories (e.g., “Men’s Shirts” under “Clothing”) [​](https://docs.laravelshopper.dev/v2/user-guide/catalog/categories#accessing-categories) Accessing Categories ------------------------------------------------------------------------------------------------------------------ Click on **Categories** in the sidebar to access the category management page. ![Categories List](https://mintcdn.com/shopperlabs-ee054f5e/KQY6o7d4neR-LyIr/images/v2/categories.png?w=2500&fit=max&auto=format&n=KQY6o7d4neR-LyIr&q=85&s=34cae50520a98e9a45f2a1613aca618b) [​](https://docs.laravelshopper.dev/v2/user-guide/catalog/categories#creating-a-category) Creating a Category ---------------------------------------------------------------------------------------------------------------- To add a new category: 1. Click the **Create** button on the Categories page 2. Fill in the category details 3. Click **Save** to create the category ![Create Category](https://mintcdn.com/shopperlabs-ee054f5e/KQY6o7d4neR-LyIr/images/v2/category-create.png?w=2500&fit=max&auto=format&n=KQY6o7d4neR-LyIr&q=85&s=f2d236efb947b12807a47ce3042651d1) ### [​](https://docs.laravelshopper.dev/v2/user-guide/catalog/categories#category-fields) Category Fields | Field | Required | Description | | --- | --- | --- | | **Name** | Yes | The category name displayed to customers | | **Parent category** | No | Select a parent to create a subcategory | | **Description** | No | Detailed description of the category | | **Image** | No | A representative image for the category | | **Enabled** | No | Toggle to show/hide the category | ### [​](https://docs.laravelshopper.dev/v2/user-guide/catalog/categories#seo-settings) SEO Settings Improve your category pages visibility in search engines: | Field | Description | | --- | --- | | **SEO Title** | Custom title for search results | | **SEO Description** | Meta description for the category page | [​](https://docs.laravelshopper.dev/v2/user-guide/catalog/categories#category-hierarchy) Category Hierarchy -------------------------------------------------------------------------------------------------------------- Categories can be nested to create a logical structure: Electronics ├── Computers │ ├── Laptops │ └── Desktops ├── Phones │ ├── Smartphones │ └── Accessories └── Audio ├── Headphones └── Speakers To create a subcategory: 1. Create a new category 2. Select the parent category from the dropdown 3. Save the category [​](https://docs.laravelshopper.dev/v2/user-guide/catalog/categories#managing-category-order) Managing Category Order ------------------------------------------------------------------------------------------------------------------------ Categories can be reordered to control how they appear in navigation: * Use drag-and-drop to reorder categories * Position determines the display order on your storefront [​](https://docs.laravelshopper.dev/v2/user-guide/catalog/categories#category-states) Category States -------------------------------------------------------------------------------------------------------- * **Enabled** - Visible to customers and appears in navigation * **Disabled** - Hidden from customers but products remain categorized Create a clear and logical category structure from the start. Reorganizing categories later may affect URLs and SEO. [​](https://docs.laravelshopper.dev/v2/user-guide/catalog/categories#best-practices) Best Practices ------------------------------------------------------------------------------------------------------ Keep it Simple -------------- Don’t create too many levels. 2-3 levels deep is usually sufficient. Use Clear Names --------------- Category names should be descriptive and match what customers search for. Add Images ---------- Visual categories help customers navigate faster. Plan Ahead ---------- Think about your full product range before creating the category structure. For developer details, see the [Categories documentation](https://docs.laravelshopper.dev/v2/categories) . [Managing Brands](https://docs.laravelshopper.dev/v2/user-guide/catalog/brands) [Managing Collections](https://docs.laravelshopper.dev/v2/user-guide/catalog/collections) ⌘I --- # Managing Tags - TALL Stack E-commerce Framework > Documentation Index > ------------------- > > Fetch the complete documentation index at: [/llms.txt](https://docs.laravelshopper.dev/llms.txt) > > Use this file to discover all available pages before exploring further. [Skip to main content](https://docs.laravelshopper.dev/v2/user-guide/catalog/tags#content-area) Tags are flat, flexible labels you attach to products for cross-cutting organization. Unlike [categories](https://docs.laravelshopper.dev/v2/user-guide/catalog/categories) (which are hierarchical) or [collections](https://docs.laravelshopper.dev/v2/user-guide/catalog/collections) (which can be rule-based), tags are simple keywords that help you group products across your catalog. Common uses for tags include seasonal labels (“Summer 2026”), marketing campaigns (“Flash Sale”), product attributes (“Eco-Friendly”), or storefront filters (“New Arrival”, “Best Seller”). [​](https://docs.laravelshopper.dev/v2/user-guide/catalog/tags#accessing-tags) Accessing Tags ------------------------------------------------------------------------------------------------ 1. Click on **Products** in the sidebar 2. Select **Tags** from the submenu ![Tags list page](https://mintcdn.com/shopperlabs-ee054f5e/RoQo55-CU3i212Mj/images/v2/tags-list.png?w=2500&fit=max&auto=format&n=RoQo55-CU3i212Mj&q=85&s=83e5713bbf93b2c59f5f977b435d3871) The tags list shows all your tags with their name, slug, and creation date. You can search, edit, and delete tags from this page. [​](https://docs.laravelshopper.dev/v2/user-guide/catalog/tags#creating-a-tag) Creating a Tag ------------------------------------------------------------------------------------------------ To create a new tag: 1. Click the **Create tag** button 2. Enter the tag name 3. Click **Save** ![Create tag form](https://mintcdn.com/shopperlabs-ee054f5e/RoQo55-CU3i212Mj/images/v2/tags-create.png?w=2500&fit=max&auto=format&n=RoQo55-CU3i212Mj&q=85&s=6b142b2b8c75b523d6b9711017c99be8) | Field | Required | Description | | --- | --- | --- | | **Name** | Yes | The tag label (e.g., “Summer 2026”, “New Arrival”) | | **Slug** | Auto | Generated automatically from the name. Used in URLs on your storefront. | The slug is generated automatically from the tag name and cannot be edited manually. If two tags have the same name, the slug is made unique by appending a number (e.g., “summer-2026-1”). [​](https://docs.laravelshopper.dev/v2/user-guide/catalog/tags#editing-a-tag) Editing a Tag ---------------------------------------------------------------------------------------------- To update an existing tag: 1. Click the **Edit** icon next to the tag 2. Modify the name 3. Click **Save** ![Edit tag form](https://mintcdn.com/shopperlabs-ee054f5e/RoQo55-CU3i212Mj/images/v2/tags-edit.png?w=2500&fit=max&auto=format&n=RoQo55-CU3i212Mj&q=85&s=d7edea8b8f7e341b0c1a790ebf5e4778) [​](https://docs.laravelshopper.dev/v2/user-guide/catalog/tags#deleting-tags) Deleting Tags ---------------------------------------------------------------------------------------------- To remove a tag: 1. Click the **Delete** icon next to the tag 2. Confirm the deletion You can also select multiple tags and use the bulk delete action to remove several at once. Deleting a tag removes it from all products that use it. The products themselves are not affected. [​](https://docs.laravelshopper.dev/v2/user-guide/catalog/tags#assigning-tags-to-products) Assigning Tags to Products ------------------------------------------------------------------------------------------------------------------------ Tags are assigned to products from the product edit form, not from the tags page. When editing a product: 1. Go to the product’s edit page 2. Find the **Tags** field 3. Select existing tags or create a new one inline 4. Click **Save** ![Tags field on product edit form](https://mintcdn.com/shopperlabs-ee054f5e/RoQo55-CU3i212Mj/images/v2/tags-product.png?w=2500&fit=max&auto=format&n=RoQo55-CU3i212Mj&q=85&s=188c953a0149764c7c7a78913261e5d7) You can create new tags directly from the product edit form without going to the Tags page. Just type a new tag name and select **Create** from the dropdown. [​](https://docs.laravelshopper.dev/v2/user-guide/catalog/tags#tags-vs-categories-vs-collections) Tags vs Categories vs Collections -------------------------------------------------------------------------------------------------------------------------------------- | Feature | Tags | Categories | Collections | | --- | --- | --- | --- | | **Structure** | Flat labels | Hierarchical tree | Flat groups | | **Assignment** | Manual per product | Manual per product | Manual or automatic (rule-based) | | **Best for** | Cross-cutting labels, campaigns | Product taxonomy, navigation | Marketing groups, curated lists | | **Example** | ”Eco-Friendly”, “Flash Sale” | Electronics > Computers > Laptops | ”Summer Essentials”, “Best Sellers” | [​](https://docs.laravelshopper.dev/v2/user-guide/catalog/tags#common-tag-strategies) Common Tag Strategies -------------------------------------------------------------------------------------------------------------- | Strategy | Tags | Use Case | | --- | --- | --- | | Seasonal | ”Spring 2026”, “Summer 2026” | Rotate seasonal products on your storefront | | Marketing | ”Flash Sale”, “Clearance” | Highlight promotional products | | Product traits | ”Organic”, “Handmade”, “Vegan” | Help customers filter by values | | Internal | ”Low Margin”, “Restock Soon” | Track products without showing on storefront | Tags are visible on your storefront if your developer builds filtering based on them. If a tag is for internal use only, you can use it without displaying it to customers. For developer details on tags, see the [Product Tags documentation](https://docs.laravelshopper.dev/v2/product-tags) . [Managing Attributes](https://docs.laravelshopper.dev/v2/user-guide/catalog/attributes) [Managing Suppliers](https://docs.laravelshopper.dev/v2/user-guide/catalog/suppliers) ⌘I --- # Managing Reviews - TALL Stack E-commerce Framework > Documentation Index > ------------------- > > Fetch the complete documentation index at: [/llms.txt](https://docs.laravelshopper.dev/llms.txt) > > Use this file to discover all available pages before exploring further. [Skip to main content](https://docs.laravelshopper.dev/v2/user-guide/sales/reviews#content-area) Customer reviews build trust and help other shoppers make purchasing decisions. Shopper allows you to manage and moderate reviews on your products. [​](https://docs.laravelshopper.dev/v2/user-guide/sales/reviews#overview) Overview ------------------------------------------------------------------------------------- The Reviews section allows you to: * View all product reviews * Approve or reject reviews * Respond to customer feedback * Monitor review ratings [​](https://docs.laravelshopper.dev/v2/user-guide/sales/reviews#accessing-reviews) Accessing Reviews ------------------------------------------------------------------------------------------------------- Click on **Reviews** in the sidebar to access review management. [​](https://docs.laravelshopper.dev/v2/user-guide/sales/reviews#review-list) Review List ------------------------------------------------------------------------------------------- The review list displays all reviews submitted by customers: | Column | Description | | --- | --- | | **Product** | The reviewed product | | **Customer** | Who wrote the review | | **Rating** | Star rating (1-5) | | **Status** | Approved, pending, rejected | | **Date** | When the review was submitted | ### [​](https://docs.laravelshopper.dev/v2/user-guide/sales/reviews#empty-state) Empty State If you don’t have any reviews yet: ![Reviews Empty State](https://mintcdn.com/shopperlabs-ee054f5e/khtWzNt9B9rQhNq5/images/v2/reviews-empty-state.png?w=2500&fit=max&auto=format&n=khtWzNt9B9rQhNq5&q=85&s=76ec1c3b458614300bab469dd589043f) [​](https://docs.laravelshopper.dev/v2/user-guide/sales/reviews#review-moderation) Review Moderation ------------------------------------------------------------------------------------------------------- ### [​](https://docs.laravelshopper.dev/v2/user-guide/sales/reviews#review-workflow) Review Workflow 1. **Customer submits review** - After purchasing a product 2. **Review enters queue** - Pending moderation (if enabled) 3. **Admin reviews** - Approve, edit, or reject 4. **Published** - Approved reviews appear on product pages ### [​](https://docs.laravelshopper.dev/v2/user-guide/sales/reviews#moderation-actions) Moderation Actions | Action | Effect | | --- | --- | | **Approve** | Review is published on the product page | | **Reject** | Review is hidden and not displayed | | **Edit** | Modify the review content (use sparingly) | | **Delete** | Permanently remove the review | [​](https://docs.laravelshopper.dev/v2/user-guide/sales/reviews#review-details) Review Details ------------------------------------------------------------------------------------------------- Each review contains: * **Rating** - Star rating from 1 to 5 * **Title** - Review headline * **Content** - Full review text * **Author** - Customer name or anonymous * **Date** - Submission date * **Verified purchase** - If the customer bought the product [​](https://docs.laravelshopper.dev/v2/user-guide/sales/reviews#responding-to-reviews) Responding to Reviews --------------------------------------------------------------------------------------------------------------- You can respond to reviews to: * Thank customers for positive feedback * Address concerns in negative reviews * Provide additional product information * Show that you value customer input ### [​](https://docs.laravelshopper.dev/v2/user-guide/sales/reviews#response-best-practices) Response Best Practices Be Professional --------------- Always maintain a professional tone, even for negative reviews. Respond Promptly ---------------- Quick responses show you care about customer feedback. Be Helpful ---------- Offer solutions for any issues mentioned in reviews. Say Thanks ---------- Appreciate customers who take time to review. [​](https://docs.laravelshopper.dev/v2/user-guide/sales/reviews#review-guidelines) Review Guidelines ------------------------------------------------------------------------------------------------------- Consider establishing review guidelines for your store: ### [​](https://docs.laravelshopper.dev/v2/user-guide/sales/reviews#what-to-approve) What to Approve * Honest product feedback (positive or negative) * Helpful information for other shoppers * Verified purchase reviews ### [​](https://docs.laravelshopper.dev/v2/user-guide/sales/reviews#what-to-reject) What to Reject * Spam or promotional content * Offensive language or personal attacks * Reviews for wrong products * Fake or misleading reviews * Reviews containing personal information [​](https://docs.laravelshopper.dev/v2/user-guide/sales/reviews#impact-of-reviews) Impact of Reviews ------------------------------------------------------------------------------------------------------- Reviews affect your business in several ways: | Impact | Description | | --- | --- | | **Trust** | Positive reviews build credibility | | **SEO** | Review content helps search rankings | | **Conversion** | Products with reviews convert better | | **Feedback** | Learn what customers like/dislike | [​](https://docs.laravelshopper.dev/v2/user-guide/sales/reviews#best-practices) Best Practices ------------------------------------------------------------------------------------------------- Encourage reviews by sending follow-up emails after purchase, making the review process easy, and showing appreciation for customer feedback. * **Enable review reminders** - Automated emails asking for reviews * **Moderate consistently** - Apply the same standards to all reviews * **Learn from feedback** - Use negative reviews to improve products * **Showcase reviews** - Display reviews prominently on product pages * **Respond to all reviews** - Especially negative ones, to show you care For developer details, see the [Reviews documentation](https://docs.laravelshopper.dev/v2/reviews) . [Managing Customers](https://docs.laravelshopper.dev/v2/user-guide/sales/customers) [Managing Discounts](https://docs.laravelshopper.dev/v2/user-guide/marketing/discounts) ⌘I --- # Inventory Locations - TALL Stack E-commerce Framework > Documentation Index > ------------------- > > Fetch the complete documentation index at: [/llms.txt](https://docs.laravelshopper.dev/llms.txt) > > Use this file to discover all available pages before exploring further. [Skip to main content](https://docs.laravelshopper.dev/v2/user-guide/store-setup/locations#content-area) Locations in Shopper represent physical places where you store your inventory. This could be warehouses, retail stores, or any other location where you keep products. [​](https://docs.laravelshopper.dev/v2/user-guide/store-setup/locations#why-use-multiple-locations) Why Use Multiple Locations? ---------------------------------------------------------------------------------------------------------------------------------- Managing inventory across multiple locations allows you to: * Track stock levels at different warehouses * Fulfill orders from the nearest location * Manage inventory for physical retail stores * Keep accurate stock counts across your business [​](https://docs.laravelshopper.dev/v2/user-guide/store-setup/locations#accessing-locations) Accessing Locations ------------------------------------------------------------------------------------------------------------------- 1. Click on **Settings** in the sidebar 2. Select **Inventories** from the settings menu ![Locations List](https://mintcdn.com/shopperlabs-ee054f5e/eVX_9bJEbNf6CmDO/images/v2/setting-locations.png?w=2500&fit=max&auto=format&n=eVX_9bJEbNf6CmDO&q=85&s=916b56a32f4be2c929725356d6e59080) [​](https://docs.laravelshopper.dev/v2/user-guide/store-setup/locations#default-inventory) Default Inventory --------------------------------------------------------------------------------------------------------------- When you set up Shopper, a default inventory location is created for you. This location is used as the primary inventory source. ![Default Location](https://mintcdn.com/shopperlabs-ee054f5e/eVX_9bJEbNf6CmDO/images/v2/setting-location-default.png?w=2500&fit=max&auto=format&n=eVX_9bJEbNf6CmDO&q=85&s=13f400901f5c673442d48b6e149df21e) [​](https://docs.laravelshopper.dev/v2/user-guide/store-setup/locations#creating-a-new-location) Creating a New Location --------------------------------------------------------------------------------------------------------------------------- To add a new inventory location: 1. Click the **Create** button on the Locations page 2. Fill in the inventory details ![Create Location](https://mintcdn.com/shopperlabs-ee054f5e/khtWzNt9B9rQhNq5/images/v2/setting-location-create.png?w=2500&fit=max&auto=format&n=khtWzNt9B9rQhNq5&q=85&s=32bafef52550f2db550e52d2c3fb6d6b) ### [​](https://docs.laravelshopper.dev/v2/user-guide/store-setup/locations#location-fields) Location Fields | Field | Description | | --- | --- | | **Name** | A descriptive name for the location (e.g., “Main Warehouse”) | | **Email** | Contact email for this location | | **Phone** | Contact phone number | | **Street address** | Physical address of the location | | **Street address line 2** | Additional address line (optional) | | **City** | City where the location is situated | | **Zip code** | Postal/ZIP code | | **State** | State/Province/region | | **Country** | Country selection | | **Description** | Additional notes about the location (optional) | [​](https://docs.laravelshopper.dev/v2/user-guide/store-setup/locations#editing-a-location) Editing a Location ----------------------------------------------------------------------------------------------------------------- To modify an existing location: 1. Click on the location name in the list 2. Update the desired fields 3. Click **Save** to apply changes ![Update Location](https://mintcdn.com/shopperlabs-ee054f5e/khtWzNt9B9rQhNq5/images/v2/location-update.png?w=2500&fit=max&auto=format&n=khtWzNt9B9rQhNq5&q=85&s=c141042e3b12a534d8c95bfd39016040) [​](https://docs.laravelshopper.dev/v2/user-guide/store-setup/locations#setting-a-default-location) Setting a Default Location --------------------------------------------------------------------------------------------------------------------------------- One location must be set as the default. This location will be used: * As the primary inventory source * For new products when no location is specified * As the default shipping origin To change the default location, select a different location and mark it as default in the location settings. Keep your location information accurate, especially addresses, as they may be used for shipping calculations and customer communications. For developer details, see the [Locations documentation](https://docs.laravelshopper.dev/v2/locations) . [General Settings](https://docs.laravelshopper.dev/v2/user-guide/store-setup/general-settings) [Currencies](https://docs.laravelshopper.dev/v2/user-guide/store-setup/currencies) ⌘I --- # Managing Collections - TALL Stack E-commerce Framework > Documentation Index > ------------------- > > Fetch the complete documentation index at: [/llms.txt](https://docs.laravelshopper.dev/llms.txt) > > Use this file to discover all available pages before exploring further. [Skip to main content](https://docs.laravelshopper.dev/v2/user-guide/catalog/collections#content-area) Collections allow you to group products together for marketing and merchandising purposes. Unlike categories, collections are flexible groupings that can include products from different categories. [​](https://docs.laravelshopper.dev/v2/user-guide/catalog/collections#overview) Overview ------------------------------------------------------------------------------------------- Collections are useful for: * **Seasonal promotions** - “Summer Collection”, “Holiday Gifts” * **Marketing campaigns** - “Best Sellers”, “New Arrivals” * **Thematic groupings** - “Eco-Friendly Products”, “Made in France” [​](https://docs.laravelshopper.dev/v2/user-guide/catalog/collections#accessing-collections) Accessing Collections --------------------------------------------------------------------------------------------------------------------- Click on **Collections** in the sidebar to access collection management. ![Collections List](https://mintcdn.com/shopperlabs-ee054f5e/KQY6o7d4neR-LyIr/images/v2/collections.png?w=2500&fit=max&auto=format&n=KQY6o7d4neR-LyIr&q=85&s=5e1bc4cf2c868572e87de4faaf7134d0) [​](https://docs.laravelshopper.dev/v2/user-guide/catalog/collections#creating-a-collection) Creating a Collection --------------------------------------------------------------------------------------------------------------------- To create a new collection: 1. Click the **Create** button 2. Fill in the collection details 3. Add products to the collection 4. Click **Save** ![Create Collection](https://mintcdn.com/shopperlabs-ee054f5e/KQY6o7d4neR-LyIr/images/v2/collection-create.png?w=2500&fit=max&auto=format&n=KQY6o7d4neR-LyIr&q=85&s=39081674efdc98f14eef057171b7ec88) ### [​](https://docs.laravelshopper.dev/v2/user-guide/catalog/collections#collection-fields) Collection Fields | Field | Required | Description | | --- | --- | --- | | **Name** | Yes | The collection name | | **Description** | No | Describe what this collection represents | | **Image** | No | A cover image for the collection | | **Type** | Yes | Manual or Automatic (rule-based) | | **Published** | No | Toggle to publish the collection | [​](https://docs.laravelshopper.dev/v2/user-guide/catalog/collections#collection-types) Collection Types ----------------------------------------------------------------------------------------------------------- ### [​](https://docs.laravelshopper.dev/v2/user-guide/catalog/collections#manual-collections) Manual Collections Manually select which products belong to the collection: * Full control over which products are included * Products stay in the collection until you remove them * Best for curated selections ### [​](https://docs.laravelshopper.dev/v2/user-guide/catalog/collections#automatic-collections) Automatic Collections Use rules to automatically include products: ![Collection Rules](https://mintcdn.com/shopperlabs-ee054f5e/KQY6o7d4neR-LyIr/images/v2/collection-rules.png?w=2500&fit=max&auto=format&n=KQY6o7d4neR-LyIr&q=85&s=043b5b8e7632a0c10f3b2cc2c878b6db) Available rule conditions include: | Condition | Example | | --- | --- | | **Product title** | Contains “organic” | | **Product type** | Equals “T-Shirt” | | **Price** | Greater than $50 | | **Brand** | Is “Nike” | | **Tag** | Contains “sale” | Automatic collections update dynamically. When a product matches the rules, it’s automatically added. When it no longer matches, it’s removed. [​](https://docs.laravelshopper.dev/v2/user-guide/catalog/collections#collection-preview) Collection Preview --------------------------------------------------------------------------------------------------------------- Preview how your collection will appear to customers: ![Collection Preview](https://mintcdn.com/shopperlabs-ee054f5e/6wDmKBjBTMPmRNSb/images/v2/collection-preview.png?w=2500&fit=max&auto=format&n=6wDmKBjBTMPmRNSb&q=85&s=4449270eba66daa042df7d99f9c81fbe) [​](https://docs.laravelshopper.dev/v2/user-guide/catalog/collections#collections-on-storefront) Collections on Storefront ----------------------------------------------------------------------------------------------------------------------------- Customers can browse your collections on the storefront: ![Storefront Collections](https://mintcdn.com/shopperlabs-ee054f5e/3ZB91-BonuCgmULq/images/v2/starterkit-collections.png?w=2500&fit=max&auto=format&n=3ZB91-BonuCgmULq&q=85&s=72584c9c1880425c5caf9370578dc83c) [​](https://docs.laravelshopper.dev/v2/user-guide/catalog/collections#use-cases) Use Cases --------------------------------------------------------------------------------------------- New Arrivals ------------ Create an automatic collection for products added in the last 30 days. Sale Items ---------- Group all discounted products for easy customer access. Gift Guides ----------- Manually curate products perfect for gifting occasions. Trending -------- Highlight your most popular products. [​](https://docs.laravelshopper.dev/v2/user-guide/catalog/collections#best-practices) Best Practices ------------------------------------------------------------------------------------------------------- * **Update regularly** - Keep seasonal collections fresh and relevant * **Use compelling images** - Collection images should be eye-catching * **Write descriptions** - Help customers understand what makes the collection special * **Feature on homepage** - Use collections to drive traffic to key products For developer details, see the [Collections documentation](https://docs.laravelshopper.dev/v2/collections) . [Managing Categories](https://docs.laravelshopper.dev/v2/user-guide/catalog/categories) [Managing Attributes](https://docs.laravelshopper.dev/v2/user-guide/catalog/attributes) ⌘I --- # Advanced Pricing - TALL Stack E-commerce Framework > Documentation Index > ------------------- > > Fetch the complete documentation index at: [/llms.txt](https://docs.laravelshopper.dev/llms.txt) > > Use this file to discover all available pages before exploring further. [Skip to main content](https://docs.laravelshopper.dev/v2/user-guide/marketing/pricing#content-area) Beyond basic product pricing, Shopper offers advanced pricing features to help you implement sophisticated pricing strategies. [​](https://docs.laravelshopper.dev/v2/user-guide/marketing/pricing#overview) Overview ----------------------------------------------------------------------------------------- Advanced pricing allows you to: * Set up sale prices and compare-at prices * Create customer group pricing * Implement quantity-based discounts * Schedule price changes [​](https://docs.laravelshopper.dev/v2/user-guide/marketing/pricing#basic-price-structure) Basic Price Structure ------------------------------------------------------------------------------------------------------------------- Every product has these pricing fields: | Field | Description | | --- | --- | | **Price** | The current selling price | | **Compare at price** | Original price (shows as strikethrough) | | **Cost per item** | Your cost (for margin calculations) | ![Product Pricing](https://mintcdn.com/shopperlabs-ee054f5e/khtWzNt9B9rQhNq5/images/v2/product-pricing.png?w=2500&fit=max&auto=format&n=khtWzNt9B9rQhNq5&q=85&s=2b15adf1147a109755a417f953be61d9) [​](https://docs.laravelshopper.dev/v2/user-guide/marketing/pricing#sale-pricing) Sale Pricing ------------------------------------------------------------------------------------------------- To put a product on sale: 1. Set the **Price** to the sale price 2. Set the **Compare at price** to the original price 3. The original price will display as strikethrough ### [​](https://docs.laravelshopper.dev/v2/user-guide/marketing/pricing#example) Example | Field | Value | Display | | --- | --- | --- | | Price | $24.99 | Current price | | Compare at price | $34.99 | ~$34.99~ | Customers see: ~~34.99  ∗∗34.99~~ \*\*34.99  ∗∗24.99\*\* (Save 29%) [​](https://docs.laravelshopper.dev/v2/user-guide/marketing/pricing#cost-and-profit) Cost and Profit ------------------------------------------------------------------------------------------------------- Track your margins by entering the cost per item: | Field | Value | | --- | --- | | Price | $49.99 | | Cost | $20.00 | | **Profit** | $29.99 | | **Margin** | 60% | Always enter your product costs to accurately track profit margins and make informed pricing decisions. [​](https://docs.laravelshopper.dev/v2/user-guide/marketing/pricing#variant-pricing) Variant Pricing ------------------------------------------------------------------------------------------------------- When products have variants, you can set different prices: | Variant | Price | | --- | --- | | Small | $29.99 | | Medium | $29.99 | | Large | $34.99 | | XL | $39.99 | This is useful for: * Size-based pricing (larger = more expensive) * Premium option pricing * Material-based pricing [​](https://docs.laravelshopper.dev/v2/user-guide/marketing/pricing#pricing-strategies) Pricing Strategies ------------------------------------------------------------------------------------------------------------- Competitive Pricing ------------------- Price products similar to competitors. Value Pricing ------------- Price based on perceived value to customers. Bundle Pricing -------------- Offer discounts when products are bought together. Dynamic Pricing --------------- Adjust prices based on demand and inventory. [​](https://docs.laravelshopper.dev/v2/user-guide/marketing/pricing#price-display) Price Display --------------------------------------------------------------------------------------------------- Prices appear throughout your store: * Product listing pages * Product detail pages * Shopping cart * Checkout * Order confirmations ### [​](https://docs.laravelshopper.dev/v2/user-guide/marketing/pricing#currency-formatting) Currency Formatting Prices are formatted according to your currency settings: | Currency | Format | | --- | --- | | USD | $1,234.56 | | EUR | €1.234,56 | | GBP | £1,234.56 | [​](https://docs.laravelshopper.dev/v2/user-guide/marketing/pricing#best-practices) Best Practices ----------------------------------------------------------------------------------------------------- ### [​](https://docs.laravelshopper.dev/v2/user-guide/marketing/pricing#setting-prices) Setting Prices * **Research competitors** - Know what similar products cost * **Consider costs** - Ensure profitable margins * **Test prices** - A/B test different price points * **Round strategically** - 29.99vs29.99 vs 29.99vs30.00 ### [​](https://docs.laravelshopper.dev/v2/user-guide/marketing/pricing#managing-sales) Managing Sales * **Plan ahead** - Schedule sales in advance * **Limit duration** - Create urgency with end dates * **Track results** - Monitor sales performance * **Restore prices** - Remember to revert after sales end Use the “Compare at price” feature to show value even when not running a sale - display the “regular” price to emphasize everyday savings. [​](https://docs.laravelshopper.dev/v2/user-guide/marketing/pricing#pricing-checklist) Pricing Checklist ----------------------------------------------------------------------------------------------------------- Before publishing a product, verify: * [ ] Price is set correctly * [ ] Compare at price (if applicable) is higher than price * [ ] Cost per item is entered for margin tracking * [ ] Variant prices are consistent with your strategy * [ ] Currency formatting looks correct For developer details, see the [Pricing documentation](https://docs.laravelshopper.dev/v2/pricing) . [Managing Discounts](https://docs.laravelshopper.dev/v2/user-guide/marketing/discounts) [Managing Staff Users](https://docs.laravelshopper.dev/v2/user-guide/administration/users) ⌘I --- # Payment Methods - TALL Stack E-commerce Framework > Documentation Index > ------------------- > > Fetch the complete documentation index at: [/llms.txt](https://docs.laravelshopper.dev/llms.txt) > > Use this file to discover all available pages before exploring further. [Skip to main content](https://docs.laravelshopper.dev/v2/user-guide/store-setup/payment-methods#content-area) Payment methods define how customers can pay at checkout. You can offer credit card payments via Stripe, cash on delivery, bank transfers, or mobile money, and restrict each method to specific [zones](https://docs.laravelshopper.dev/v2/user-guide/store-setup/zones) . [​](https://docs.laravelshopper.dev/v2/user-guide/store-setup/payment-methods#accessing-payment-methods) Accessing Payment Methods ------------------------------------------------------------------------------------------------------------------------------------- 1. Click on **Settings** in the sidebar 2. Select **Payment Methods** from the settings menu ![Payment methods list](https://mintcdn.com/shopperlabs-ee054f5e/RoQo55-CU3i212Mj/images/v2/payment-methods-list.png?w=2500&fit=max&auto=format&n=RoQo55-CU3i212Mj&q=85&s=acffeaf1453baff2878fc3f38762e93e) The payment methods list shows all configured methods with their driver, status, and last update date. [​](https://docs.laravelshopper.dev/v2/user-guide/store-setup/payment-methods#adding-a-payment-method) Adding a Payment Method --------------------------------------------------------------------------------------------------------------------------------- To add a new payment method: 1. Click the **Create** button 2. Fill in the payment method details 3. Click **Save** ![Add payment method form](https://mintcdn.com/shopperlabs-ee054f5e/RoQo55-CU3i212Mj/images/v2/payment-methods-create.png?w=2500&fit=max&auto=format&n=RoQo55-CU3i212Mj&q=85&s=280a256a7cae3f441b3e7fe65049ef1f) ### [​](https://docs.laravelshopper.dev/v2/user-guide/store-setup/payment-methods#payment-method-fields) Payment Method Fields | Field | Required | Description | | --- | --- | --- | | **Title** | Yes | The name shown to customers at checkout (e.g., “Credit Card”, “PayPal”) | | **Slug** | Yes | Auto-generated from the title | | **Driver** | No | The payment provider that processes this method. Choose **Manual** for offline payments or **Stripe** for card payments | | **Link URL** | No | External URL for the payment provider | | **Description** | No | Explanation shown to customers when selecting this method | | **Instructions** | No | Post-purchase instructions (e.g., bank transfer details) | ### [​](https://docs.laravelshopper.dev/v2/user-guide/store-setup/payment-methods#understanding-drivers) Understanding Drivers The driver connects a payment method to a payment provider: | Driver | How it works | Example | | --- | --- | --- | | **Manual** | No online processing. You handle payment outside of Shopper | Cash on delivery, bank transfer, check | | **Stripe** | Payments processed via Stripe (requires API keys) | Credit cards, Apple Pay, Google Pay | ![select payment method driver](https://mintcdn.com/shopperlabs-ee054f5e/RoQo55-CU3i212Mj/images/v2/payment-methods-driver.png?w=2500&fit=max&auto=format&n=RoQo55-CU3i212Mj&q=85&s=ea538cc612fc75638ca44a9e7f9139e9) Drivers like Stripe require API credentials configured by your developer. If a driver shows “Not Configured” in the dropdown, the API keys have not been set up yet. See the [Payments developer documentation](https://docs.laravelshopper.dev/v2/payments) for setup instructions. [​](https://docs.laravelshopper.dev/v2/user-guide/store-setup/payment-methods#assigning-to-zones) Assigning to Zones ----------------------------------------------------------------------------------------------------------------------- Payment methods are assigned to [zones](https://docs.laravelshopper.dev/v2/user-guide/store-setup/zones) when creating or editing a zone. A payment method only appears at checkout if it belongs to the customer’s zone. To make a payment method available in a zone: 1. Go to **Settings > Zones** 2. Edit the zone 3. Select the payment method in the **Payment methods** field 4. Click **Save** [​](https://docs.laravelshopper.dev/v2/user-guide/store-setup/payment-methods#managing-payment-methods) Managing Payment Methods ----------------------------------------------------------------------------------------------------------------------------------- ### [​](https://docs.laravelshopper.dev/v2/user-guide/store-setup/payment-methods#editing-a-payment-method) Editing a Payment Method Click the **Edit** icon next to a method, update the fields, and click **Save**. ### [​](https://docs.laravelshopper.dev/v2/user-guide/store-setup/payment-methods#enabling-or-disabling) Enabling or Disabling Toggle the **Status** switch in the list to quickly enable or disable a payment method. Disabled methods are not shown at checkout. ### [​](https://docs.laravelshopper.dev/v2/user-guide/store-setup/payment-methods#deleting-a-payment-method) Deleting a Payment Method Click the **Delete** icon and confirm. Active orders that used this method are not affected. [​](https://docs.laravelshopper.dev/v2/user-guide/store-setup/payment-methods#common-setups) Common Setups ------------------------------------------------------------------------------------------------------------- | Payment Method | Driver | Best For | | --- | --- | --- | | Credit Card | Stripe | Online stores accepting card payments | | Cash on Delivery | Manual | Local deliveries where customers pay on receipt | | Bank Transfer | Manual | B2B orders or high-value purchases | | Mobile Money | Manual | Markets where mobile payments are common (Africa, Asia) | [​](https://docs.laravelshopper.dev/v2/user-guide/store-setup/payment-methods#best-practices) Best Practices --------------------------------------------------------------------------------------------------------------- Offer Multiple Options ---------------------- Customers are more likely to complete checkout when they see a payment method they trust. Zone-Specific Methods --------------------- Some methods work only in certain regions. Assign them to the right zones. Clear Instructions ------------------ For manual methods like bank transfers, provide clear payment instructions so customers know what to do after ordering. Test Payments ------------- Use your payment provider’s test/sandbox mode to verify the checkout flow before going live. For developer details on payment drivers, custom providers, and transaction management, see the [Payments documentation](https://docs.laravelshopper.dev/v2/payments) . [Shipping Carriers](https://docs.laravelshopper.dev/v2/user-guide/store-setup/carriers) [Taxes](https://docs.laravelshopper.dev/v2/user-guide/store-setup/taxes) ⌘I --- # Standalone Installation - TALL Stack E-commerce Framework > Documentation Index > ------------------- > > Fetch the complete documentation index at: [/llms.txt](https://docs.laravelshopper.dev/llms.txt) > > Use this file to discover all available pages before exploring further. [Skip to main content](https://docs.laravelshopper.dev/v2/sidebar/standalone#content-area) This guide covers how to install and use the sidebar package in a standalone Laravel application (without Shopper). [​](https://docs.laravelshopper.dev/v2/sidebar/standalone#installation) Installation --------------------------------------------------------------------------------------- Install the package via Composer: composer require shopper/sidebar Publish the configuration file: php artisan vendor:publish --provider="Shopper\Sidebar\SidebarServiceProvider" --tag="sidebar-config" Optionally, publish the views for customization: php artisan vendor:publish --provider="Shopper\Sidebar\SidebarServiceProvider" --tag="sidebar-views" [​](https://docs.laravelshopper.dev/v2/sidebar/standalone#setting-up-the-middleware) Setting Up the Middleware ----------------------------------------------------------------------------------------------------------------- Add the sidebar resolver middleware to your route group or in `bootstrap/app.php`: Route::middleware(['web', \Shopper\Sidebar\Middleware\ResolveSidebars::class]) ->group(function () { ... }); Or in Laravel 11+ with `bootstrap/app.php`: ->withMiddleware(function (Middleware $middleware) { $middleware->appendToGroup('web', [\ \Shopper\Sidebar\Middleware\ResolveSidebars::class,\ ]); }) [​](https://docs.laravelshopper.dev/v2/sidebar/standalone#creating-a-sidebar) Creating a Sidebar --------------------------------------------------------------------------------------------------- ### [​](https://docs.laravelshopper.dev/v2/sidebar/standalone#1-create-a-sidebar-class) 1\. Create a Sidebar Class Create a class that implements the `Sidebar` contract: menu->group('Main', function (Group $group): void { $group->weight(1); $group->setAuthorized(); $group->setGroupItemsClass('space-y-1'); $group->item('Dashboard', function (Item $item): void { $item->weight(1); $item->setAuthorized(); $item->route('dashboard'); $item->setIcon('heroicon-o-home'); }); $group->item('Users', function (Item $item): void { $item->weight(2); $item->setAuthorized(); $item->route('users.index'); $item->setIcon('heroicon-o-users'); // Add sub-items $item->item('All Users', function (Item $subItem): void { $subItem->route('users.index'); }); $item->item('Create User', function (Item $subItem): void { $subItem->route('users.create'); }); }); }); $this->menu->group('Settings', function (Group $group): void { $group->weight(10); $group->setAuthorized(); $group->item('General', function (Item $item): void { $item->weight(1); $item->route('settings.general'); $item->setIcon('heroicon-o-cog'); }); }); } public function getMenu(): Menu { return $this->menu; } } ### [​](https://docs.laravelshopper.dev/v2/sidebar/standalone#2-register-the-sidebar) 2\. Register the Sidebar Register your sidebar in a service provider using the `SidebarManager`: register(AdminSidebar::class); } } Don’t forget to register the service provider in `config/app.php` or `bootstrap/providers.php`. [​](https://docs.laravelshopper.dev/v2/sidebar/standalone#using-the-sidebar) Using the Sidebar ------------------------------------------------------------------------------------------------- ### [​](https://docs.laravelshopper.dev/v2/sidebar/standalone#option-1-livewire-component) Option 1: Livewire Component The easiest way to use the sidebar is with the built-in Livewire component: @livewire('sidebar', [\ 'sidebarClass' => \App\Sidebar\AdminSidebar::class,\ 'class' => 'h-full',\ 'collapsible' => true,\ ]) ### [​](https://docs.laravelshopper.dev/v2/sidebar/standalone#option-2-custom-blade-implementation) Option 2: Custom Blade Implementation For full control, use the `SidebarRenderer` directly: @php $sidebar = app(\App\Sidebar\AdminSidebar::class); $sidebar->build(); $renderer = app(\Shopper\Sidebar\Presentation\SidebarRenderer::class); $renderedSidebar = $renderer->render($sidebar); @endphp [​](https://docs.laravelshopper.dev/v2/sidebar/standalone#alpine-js-store-setup) Alpine.js Store Setup --------------------------------------------------------------------------------------------------------- The sidebar uses an Alpine.js store for state management. Add the store to your JavaScript: import Alpine from 'alpinejs' import sidebarStore from './vendor/sidebar/stores/sidebar' Alpine.store('sidebar', sidebarStore()) Alpine.start() document.addEventListener('alpine:init', () => { Alpine.store('sidebar').init() }) To get the source JavaScript files, publish them: php artisan vendor:publish --provider="Shopper\Sidebar\SidebarServiceProvider" --tag="sidebar-js" This will publish the files to `resources/js/vendor/sidebar/`. ### [​](https://docs.laravelshopper.dev/v2/sidebar/standalone#store-api) Store API The sidebar store provides these properties and methods: **State properties:** | Property | Description | | --- | --- | | `$store.sidebar.isOpen` | Mobile: sidebar visibility | | `$store.sidebar.isCollapsed` | Desktop: collapsed state | | `$store.sidebar.collapsible` | Whether collapse is enabled | | `$store.sidebar.currentPath` | Current URL path | **Sidebar visibility (mobile):** $store.sidebar.open() $store.sidebar.close() **Sidebar collapse (desktop):** $store.sidebar.toggle() $store.sidebar.collapse() $store.sidebar.expand() $store.sidebar.toggleCollapse() **Group management:** $store.sidebar.toggleGroup(label) $store.sidebar.isGroupCollapsed(label) $store.sidebar.collapseGroup(label) $store.sidebar.expandGroup(label) **Navigation tracking (for SPA):** $store.sidebar.isActive(url) [​](https://docs.laravelshopper.dev/v2/sidebar/standalone#css-variables) CSS Variables ----------------------------------------------------------------------------------------- Add CSS variables to your layout for sidebar dimensions: [​](https://docs.laravelshopper.dev/v2/sidebar/standalone#menu-item-api) Menu Item API ----------------------------------------------------------------------------------------- ### [​](https://docs.laravelshopper.dev/v2/sidebar/standalone#basic-item-options) Basic Item Options $group->item('Label', function (Item $item): void { // URL or Route $item->setUrl('/path'); // Direct URL $item->route('route.name'); // Route name $item->route('route.name', ['id' => 1]); // Route with parameters // Icon $item->setIcon( icon: 'heroicon-o-home', type: 'blade', // 'blade' or 'svg' iconClass: 'size-5', attributes: ['stroke-width' => '1.5'], ); // Ordering $item->weight(1); // Sort order (lower = higher) // Authorization $item->setAuthorized(); // Always authorized $item->setAuthorized(fn() => auth()->user()->isAdmin()); // Conditional // Behavior $item->useSpa(); // Use wire:navigate for Livewire $item->isNewTab(); // Open in new tab // CSS Classes $item->setItemClass('my-item-class'); $item->setActiveClass('active'); }); ### [​](https://docs.laravelshopper.dev/v2/sidebar/standalone#adding-badges) Adding Badges $item->badge('New'); // Simple text badge $item->badge(5); // Number badge $item->badge('3', 'bg-red-500 text-white'); // Styled badge $item->badge(function (Badge $badge): void { $badge->setValue($this->getNotificationCount()); $badge->setClass('bg-primary-500 text-white'); $badge->color('danger'); }); ### [​](https://docs.laravelshopper.dev/v2/sidebar/standalone#adding-append-elements) Adding Append Elements Append elements are additional action buttons displayed next to the item: $item->append('/users/create', 'heroicon-o-plus', 'Add User'); $item->append(function (Append $append): void { $append->route('users.create'); $append->setIcon('heroicon-o-plus', 'blade', 'size-4'); $append->setName('Add User'); $append->setClass('hover:bg-gray-100'); }); ### [​](https://docs.laravelshopper.dev/v2/sidebar/standalone#sub-items) Sub-Items $item->item('Sub Item 1', function (Item $subItem): void { $subItem->route('sub.route.1'); }); $item->item('Sub Item 2', function (Item $subItem): void { $subItem->route('sub.route.2'); }); [​](https://docs.laravelshopper.dev/v2/sidebar/standalone#group-api) Group API --------------------------------------------------------------------------------- $menu->group('Group Name', function (Group $group): void { $group->weight(1); // Sort order $group->setAuthorized(); // Authorization $group->hideHeading(); // Hide the group heading $group->collapsible(true); // Allow collapsing // CSS Classes $group->setClass('my-group-class'); $group->setHeadingClass('my-heading-class'); $group->setGroupItemsClass('space-y-1'); // Add items $group->item('Item', function (Item $item): void { // ... }); }); [​](https://docs.laravelshopper.dev/v2/sidebar/standalone#helper-functions) Helper Functions ----------------------------------------------------------------------------------------------- The package provides namespaced helper functions: use function Shopper\Sidebar\sidebar_config; use function Shopper\Sidebar\sidebar_width; use function Shopper\Sidebar\sidebar_collapsed_width; use function Shopper\Sidebar\sidebar_breakpoint; use function Shopper\Sidebar\sidebar_is_collapsible; $value = sidebar_config('cache.method', 'default'); $width = sidebar_width(); $collapsed = sidebar_collapsed_width(); $breakpoint = sidebar_breakpoint(); $collapsible = sidebar_is_collapsible(); // true/false [Extending Shopper](https://docs.laravelshopper.dev/v2/sidebar/shopper-extension) [Configuration](https://docs.laravelshopper.dev/v2/sidebar/configuration) ⌘I --- # Managing Suppliers - TALL Stack E-commerce Framework > Documentation Index > ------------------- > > Fetch the complete documentation index at: [/llms.txt](https://docs.laravelshopper.dev/llms.txt) > > Use this file to discover all available pages before exploring further. [Skip to main content](https://docs.laravelshopper.dev/v2/user-guide/catalog/suppliers#content-area) Suppliers represent external vendors or manufacturers who provide products for your store. This is primarily used in **dropshipping** scenarios where products are shipped directly from the supplier to the customer, without you handling inventory yourself. The supplier feature must be enabled by your developer before it appears in the admin panel. If you don’t see “Suppliers” in the sidebar, ask your developer to enable it in the configuration. [​](https://docs.laravelshopper.dev/v2/user-guide/catalog/suppliers#accessing-suppliers) Accessing Suppliers --------------------------------------------------------------------------------------------------------------- When the feature is enabled, suppliers appear under the Products section: 1. Click on **Products** in the sidebar 2. Select **Suppliers** from the submenu ![Suppliers list page](https://mintcdn.com/shopperlabs-ee054f5e/RoQo55-CU3i212Mj/images/v2/suppliers-list.png?w=2500&fit=max&auto=format&n=RoQo55-CU3i212Mj&q=85&s=84aeadc0c4da61c314e658d6390bcda7) [​](https://docs.laravelshopper.dev/v2/user-guide/catalog/suppliers#adding-a-supplier) Adding a Supplier ----------------------------------------------------------------------------------------------------------- To add a new supplier: 1. Click the **Add supplier** button 2. Fill in the supplier details 3. Click **Save** ![Add supplier form](https://mintcdn.com/shopperlabs-ee054f5e/RoQo55-CU3i212Mj/images/v2/suppliers-create.png?w=2500&fit=max&auto=format&n=RoQo55-CU3i212Mj&q=85&s=8358710b67cc4946077a5ce1522e7626) ### [​](https://docs.laravelshopper.dev/v2/user-guide/catalog/suppliers#supplier-fields) Supplier Fields | Field | Required | Description | | --- | --- | --- | | **Name** | Yes | The supplier’s company name | | **Email** | No | Contact email for placing orders | | **Phone** | No | Contact phone number | | **Contact Name** | No | Primary contact person at the supplier | | **Website** | No | Supplier’s website URL | | **Description** | No | Details about the supplier and their products | | **Notes** | No | Internal notes (not visible to customers) | | **Status** | No | Whether the supplier is active | [​](https://docs.laravelshopper.dev/v2/user-guide/catalog/suppliers#editing-a-supplier) Editing a Supplier ------------------------------------------------------------------------------------------------------------- To update a supplier’s information: 1. Click the **Edit** icon next to the supplier 2. Modify the fields you want to change 3. Click **Save** [​](https://docs.laravelshopper.dev/v2/user-guide/catalog/suppliers#enabling-or-disabling-a-supplier) Enabling or Disabling a Supplier ----------------------------------------------------------------------------------------------------------------------------------------- Toggle the **Status** switch in the list to quickly enable or disable a supplier. Disabled suppliers are still linked to their products but are marked as inactive. [​](https://docs.laravelshopper.dev/v2/user-guide/catalog/suppliers#linking-products-to-suppliers) Linking Products to Suppliers ----------------------------------------------------------------------------------------------------------------------------------- Products are linked to suppliers from the product edit form. When creating or editing an **External** product: 1. Go to the product’s edit page 2. Find the **Supplier** dropdown 3. Select the supplier 4. Click **Save** ![Supplier field on product form](https://mintcdn.com/shopperlabs-ee054f5e/RoQo55-CU3i212Mj/images/v2/suppliers-product.png?w=2500&fit=max&auto=format&n=RoQo55-CU3i212Mj&q=85&s=8d56c898dc9610fb23a7d648b47606e4) Only **External** products can be linked to suppliers. Standard, variant, and virtual products are managed from your own inventory. [​](https://docs.laravelshopper.dev/v2/user-guide/catalog/suppliers#how-dropshipping-works) How Dropshipping Works --------------------------------------------------------------------------------------------------------------------- When a customer orders a product linked to a supplier, the order flow is: 1. **Customer places order** on your store 2. **You receive the order** in the admin panel 3. **You forward the order** to the supplier (via email, their portal, or API) 4. **Supplier ships directly** to the customer 5. **You add tracking info** from the supplier to the order 6. **Customer receives the product** The key difference from regular orders is that you never handle the physical product. The supplier ships directly to your customer. With dropshipping, you depend on the supplier’s inventory and shipping speed. Make sure to verify your supplier’s reliability before listing their products. Delays or quality issues reflect on your store. [​](https://docs.laravelshopper.dev/v2/user-guide/catalog/suppliers#supplier-information-to-collect) Supplier Information to Collect --------------------------------------------------------------------------------------------------------------------------------------- When onboarding a new supplier, gather this information: | Information | Why You Need It | | --- | --- | | **Order email** | To send purchase orders when customers buy | | **Product catalog** | To know what they offer and at what price | | **Lead time** | To set customer expectations for delivery | | **Return policy** | To handle customer returns | | **Payment terms** | To manage your cash flow (Net 30, prepaid, etc.) | | **Minimum order** | To know if there’s a minimum quantity per order | [​](https://docs.laravelshopper.dev/v2/user-guide/catalog/suppliers#best-practices) Best Practices ----------------------------------------------------------------------------------------------------- Verify First ------------ Order samples from a supplier before listing their products. Test quality, packaging, and delivery time. Track Margins ------------- Use the cost price field on products to track your profit margin on supplier products. Communicate Clearly ------------------- Set clear expectations with suppliers about order format, shipping requirements, and branding. Keep Notes Updated ------------------ Use the Notes field to track payment terms, minimum orders, and special instructions. For developer details on suppliers, fulfillment workflows, and the dropshipping API, see the [Suppliers documentation](https://docs.laravelshopper.dev/v2/suppliers) . [Managing Tags](https://docs.laravelshopper.dev/v2/user-guide/catalog/tags) [Overview](https://docs.laravelshopper.dev/v2/user-guide/catalog/products/overview) ⌘I --- # Shipping Carriers - TALL Stack E-commerce Framework > Documentation Index > ------------------- > > Fetch the complete documentation index at: [/llms.txt](https://docs.laravelshopper.dev/llms.txt) > > Use this file to discover all available pages before exploring further. [Skip to main content](https://docs.laravelshopper.dev/v2/user-guide/store-setup/carriers#content-area) Carriers are the shipping providers that deliver your products to customers. You can add carriers like UPS, FedEx, DHL, or your own local delivery service, and configure delivery options with pricing for each [shipping zone](https://docs.laravelshopper.dev/v2/user-guide/store-setup/zones) . Shopper supports two types of carriers: * **Manual carriers** where you set flat-rate prices for each delivery option * **API-connected carriers** that fetch real-time shipping rates from the carrier’s system (UPS, FedEx, USPS) [​](https://docs.laravelshopper.dev/v2/user-guide/store-setup/carriers#accessing-carriers) Accessing Carriers ---------------------------------------------------------------------------------------------------------------- 1. Click on **Settings** in the sidebar 2. Select **Carriers** from the settings menu ![Carriers list page](https://mintcdn.com/shopperlabs-ee054f5e/RoQo55-CU3i212Mj/images/v2/carriers-list.png?w=2500&fit=max&auto=format&n=RoQo55-CU3i212Mj&q=85&s=1646a01889a992a174090d663c6b6d8f) The carriers list shows all your configured carriers with their driver type, status, and last update date. You can enable or disable a carrier directly from the list using the status toggle. [​](https://docs.laravelshopper.dev/v2/user-guide/store-setup/carriers#adding-a-carrier) Adding a Carrier ------------------------------------------------------------------------------------------------------------ To add a new shipping carrier: 1. Click the **Add carrier** button 2. Fill in the carrier details 3. Click **Save** ![Add carrier form](https://mintcdn.com/shopperlabs-ee054f5e/RoQo55-CU3i212Mj/images/v2/carriers-create.png?w=2500&fit=max&auto=format&n=RoQo55-CU3i212Mj&q=85&s=05f4ea7275a0d2eba3fad5b0cc61eea3) ### [​](https://docs.laravelshopper.dev/v2/user-guide/store-setup/carriers#carrier-fields) Carrier Fields | Field | Required | Description | | --- | --- | --- | | **Name** | Yes | The carrier’s name (e.g., “UPS”, “Local Delivery”, “Colissimo”) | | **Driver** | Yes | How rates are calculated. Choose **Manual** for flat rates, or a provider like **UPS** for real-time rates | | **Website** | No | The carrier’s website URL | | **Description** | No | A short description of the carrier | ### [​](https://docs.laravelshopper.dev/v2/user-guide/store-setup/carriers#choosing-a-driver) Choosing a Driver The driver determines how shipping rates are calculated: | Driver | How it works | When to use | | --- | --- | --- | | **Manual** | You set fixed prices for each delivery option | Local delivery, flat-rate shipping, free shipping | | **UPS** | Rates are fetched from the UPS API in real time | You have a UPS account and want dynamic pricing | | **FedEx** | Rates are fetched from the FedEx API in real time | You have a FedEx account and want dynamic pricing | | **USPS** | Rates are fetched from the USPS API in real time | You ship within the United States | ![select carrier driver](https://mintcdn.com/shopperlabs-ee054f5e/RoQo55-CU3i212Mj/images/v2/carriers-driver.png?w=2500&fit=max&auto=format&n=RoQo55-CU3i212Mj&q=85&s=c7a897a5ae1185f077c250672873023a) API-connected drivers (UPS, FedEx, USPS) require API credentials to be configured by your developer. If a driver shows a “Not Configured” badge in the dropdown, the credentials have not been set up yet. See the [Carriers developer documentation](https://docs.laravelshopper.dev/v2/carriers) for setup instructions. [​](https://docs.laravelshopper.dev/v2/user-guide/store-setup/carriers#managing-carriers) Managing Carriers -------------------------------------------------------------------------------------------------------------- ### [​](https://docs.laravelshopper.dev/v2/user-guide/store-setup/carriers#editing-a-carrier) Editing a Carrier To update a carrier’s information: 1. Click the **Edit** icon next to the carrier you want to modify 2. Update the fields you want to change 3. Click **Save** ### [​](https://docs.laravelshopper.dev/v2/user-guide/store-setup/carriers#enabling-or-disabling-a-carrier) Enabling or Disabling a Carrier You can quickly enable or disable a carrier without editing it by toggling the **Status** switch directly in the carriers list. Disabled carriers are not shown as shipping options during checkout. ### [​](https://docs.laravelshopper.dev/v2/user-guide/store-setup/carriers#deleting-a-carrier) Deleting a Carrier To remove a carrier: 1. Click the **Delete** icon next to the carrier 2. Confirm the deletion Deleting a carrier also removes all its delivery options. If you have active orders using this carrier’s shipping, consider disabling it instead of deleting it. [​](https://docs.laravelshopper.dev/v2/user-guide/store-setup/carriers#setting-up-delivery-options) Setting Up Delivery Options ---------------------------------------------------------------------------------------------------------------------------------- After creating a carrier, you need to add delivery options with pricing. Delivery options are configured per [zone](https://docs.laravelshopper.dev/v2/user-guide/store-setup/zones) , so the same carrier can have different options and prices for different regions. To add a delivery option: 1. Go to **Settings > Zones** 2. Select the zone where you want to add shipping options 3. In the **Shipping Options** section, click **Add shipping option** 4. Select the carrier and fill in the delivery details 5. Click **Save** ![Add delivery option form](https://mintcdn.com/shopperlabs-ee054f5e/RoQo55-CU3i212Mj/images/v2/zone-delivery-method-form.png?w=2500&fit=max&auto=format&n=RoQo55-CU3i212Mj&q=85&s=fc0d1b501f799f219abb7d5fe232d5ab) ### [​](https://docs.laravelshopper.dev/v2/user-guide/store-setup/carriers#delivery-option-fields) Delivery Option Fields | Field | Required | Description | | --- | --- | --- | | **Carrier** | Yes | Which carrier provides this delivery option | | **Name** | Yes | The option name shown at checkout (e.g., “Standard Delivery”, “Express 24h”) | | **Description** | No | Details about delivery time or conditions | | **Price** | Yes | The shipping price for this option in the zone’s currency | | **Status** | No | Whether this option is available at checkout | Create multiple delivery options for the same carrier to offer different speed/price tiers. For example, a carrier could have “Standard (3-5 days)” at 5.99and"Express(nextday)"at5.99 and "Express (next day)" at 5.99and"Express(nextday)"at14.99. ### [​](https://docs.laravelshopper.dev/v2/user-guide/store-setup/carriers#viewing-delivery-options) Viewing Delivery Options All delivery options for a zone are displayed in the zone’s detail page under the **Shipping Options** section. Each option shows the carrier name, option name, price, and status. ![Zone shipping options list](https://mintcdn.com/shopperlabs-ee054f5e/RoQo55-CU3i212Mj/images/v2/zone-delivery-methods.png?w=2500&fit=max&auto=format&n=RoQo55-CU3i212Mj&q=85&s=48b904dd872f77623424b0fb7c5c2df4) ### [​](https://docs.laravelshopper.dev/v2/user-guide/store-setup/carriers#editing-or-removing-delivery-options) Editing or Removing Delivery Options To edit a delivery option, click the **Edit** icon next to it. To remove it, click the **Delete** icon and confirm. [​](https://docs.laravelshopper.dev/v2/user-guide/store-setup/carriers#common-setups) Common Setups ------------------------------------------------------------------------------------------------------ Here are typical carrier configurations for different store types: ### [​](https://docs.laravelshopper.dev/v2/user-guide/store-setup/carriers#local-business) Local Business | Carrier | Option | Price | | --- | --- | --- | | Local Delivery | Same-day delivery | $8.00 | | Local Delivery | In-store pickup | Free | ### [​](https://docs.laravelshopper.dev/v2/user-guide/store-setup/carriers#national-store) National Store | Carrier | Option | Price | | --- | --- | --- | | Standard Shipping | 5-7 business days | $5.99 | | Express Shipping | 2-3 business days | $12.99 | | Free Shipping | Orders over $50 | Free | ### [​](https://docs.laravelshopper.dev/v2/user-guide/store-setup/carriers#international-store) International Store | Carrier | Option | Price | | --- | --- | --- | | UPS (API) | Ground, Express, Overnight | Real-time rates | | DHL | International Express | $24.99 | | Free Shipping | Orders over $100 (domestic only) | Free | [​](https://docs.laravelshopper.dev/v2/user-guide/store-setup/carriers#free-shipping) Free Shipping ------------------------------------------------------------------------------------------------------ To offer free shipping: 1. Create a carrier named “Free Shipping” 2. Add a delivery option with a price of **0** 3. In the description, specify any conditions (e.g., “Free on orders over $50”) You can combine free shipping with paid options. Customers see all available options at checkout and choose the one they prefer. [​](https://docs.laravelshopper.dev/v2/user-guide/store-setup/carriers#best-practices) Best Practices -------------------------------------------------------------------------------------------------------- Name Clearly ------------ Use descriptive names that include delivery time: “Standard (3-5 days)” is better than just “Standard”. Price by Zone ------------- Set different prices for different zones. Domestic shipping is usually cheaper than international. Offer Choices ------------- Give customers at least 2 shipping options: a budget option and a faster option. Test at Checkout ---------------- After setting up carriers, place a test order to verify shipping options appear correctly. For developer details on carriers, shipping drivers, and custom driver integration, see the [Carriers documentation](https://docs.laravelshopper.dev/v2/carriers) . [Shipping Zones](https://docs.laravelshopper.dev/v2/user-guide/store-setup/zones) [Payment Methods](https://docs.laravelshopper.dev/v2/user-guide/store-setup/payment-methods) ⌘I --- # Shipping Zones - TALL Stack E-commerce Framework > Documentation Index > ------------------- > > Fetch the complete documentation index at: [/llms.txt](https://docs.laravelshopper.dev/llms.txt) > > Use this file to discover all available pages before exploring further. [Skip to main content](https://docs.laravelshopper.dev/v2/user-guide/store-setup/zones#content-area) A shipping zone is a group of countries that share the same currency, payment methods, and delivery options. For example, you might have a “Europe” zone with EUR currency and Colissimo/DHL delivery, and a “North America” zone with USD currency and UPS/FedEx delivery. Zones are central to how your store operates. When a customer checks out, Shopper matches their shipping address to a zone and uses it to determine: * Which **currency** to charge in * Which **payment methods** to show (Stripe, PayPal, Cash on Delivery) * Which **delivery options** are available and at what price * Which **tax rules** apply You need at least one enabled zone before customers can complete checkout. [​](https://docs.laravelshopper.dev/v2/user-guide/store-setup/zones#accessing-zones) Accessing Zones ------------------------------------------------------------------------------------------------------- 1. Click on **Settings** in the sidebar 2. Select **Zones** from the settings menu ![Shipping Zones list](https://mintcdn.com/shopperlabs-ee054f5e/3ZB91-BonuCgmULq/images/v2/starterkit-zones.png?w=2500&fit=max&auto=format&n=3ZB91-BonuCgmULq&q=85&s=1c7f1a27b08f1a1ce95305c492857849) The zones page shows all your configured zones. Click on a zone to view its details, shipping options, and connected carriers. [​](https://docs.laravelshopper.dev/v2/user-guide/store-setup/zones#creating-a-zone) Creating a Zone ------------------------------------------------------------------------------------------------------- To create a new zone: 1. Click the **plus icon** button 2. Fill in the zone details 3. Click **Save** ![Create zone form](https://mintcdn.com/shopperlabs-ee054f5e/KQY6o7d4neR-LyIr/images/v2/add-zone.png?w=2500&fit=max&auto=format&n=KQY6o7d4neR-LyIr&q=85&s=001bbbac843b7e60b6a377c9c6c99d9f) ### [​](https://docs.laravelshopper.dev/v2/user-guide/store-setup/zones#zone-fields) Zone Fields | Field | Required | Description | | --- | --- | --- | | **Name** | Yes | A descriptive name (e.g., “Europe”, “North America”, “Africa”) | | **Code** | No | A short identifier code (e.g., “EU”, “NA”, “AF”) | | **Countries** | Yes | The countries included in this zone. A country can only belong to one zone. | | **Currency** | Yes | The currency used for pricing and checkout in this zone. Each zone has exactly one currency. | | **Visibility** | No | Whether this zone is active. Disabled zones are not matched during checkout. | | **Payment methods** | Yes | Which payment methods are available in this zone (e.g., Stripe, Cash on Delivery) | | **Carriers** | Yes | Which shipping carriers serve this zone (e.g., UPS, Colissimo, Local Delivery) | | **Metadata** | No | Optional key-value data for custom use | Countries already assigned to another zone are grayed out in the country selector. Each country can only belong to one zone. [​](https://docs.laravelshopper.dev/v2/user-guide/store-setup/zones#zone-detail-page) Zone Detail Page --------------------------------------------------------------------------------------------------------- After creating a zone, click on it to view its detail page. The detail page shows the zone’s configuration and its shipping options. ![Zone detail page](https://mintcdn.com/shopperlabs-ee054f5e/3ZB91-BonuCgmULq/images/v2/starterkit-enable-zone.png?w=2500&fit=max&auto=format&n=3ZB91-BonuCgmULq&q=85&s=408cfebf3a65f880e4a055421ab6684a) [​](https://docs.laravelshopper.dev/v2/user-guide/store-setup/zones#editing-a-zone) Editing a Zone ----------------------------------------------------------------------------------------------------- To update a zone’s settings: 1. Click on the zone from the zones list 2. Click the **Edit** button 3. Modify the fields you want to change 4. Click **Save** You can change the zone’s name, code, countries, currency, payment methods, and carriers at any time. Changing a zone’s currency affects how prices are displayed to customers in that region. Make sure you have [prices](https://docs.laravelshopper.dev/v2/user-guide/marketing/pricing) configured in the new currency before switching. [​](https://docs.laravelshopper.dev/v2/user-guide/store-setup/zones#what%E2%80%99s-configured-inside-a-zone) What’s Configured Inside a Zone ----------------------------------------------------------------------------------------------------------------------------------------------- Each zone connects three things together for a region: | What | Purpose | Where to manage | | --- | --- | --- | | **Countries** | Which countries belong to this zone | Zone form | | **Currency** | What currency customers pay in | Zone form | | **Payment methods** | How customers can pay (Stripe, Cash on Delivery, etc.) | Zone form (select from available methods) | | **Carriers** | Which shipping providers serve this zone | Zone form (select from available carriers) | | **Shipping options** | Specific delivery options with pricing | Zone detail page (see [Carriers](https://docs.laravelshopper.dev/v2/user-guide/store-setup/carriers)
    ) | | **Tax rules** | Tax rates applied at checkout | Managed separately in tax settings | You need to create [carriers](https://docs.laravelshopper.dev/v2/user-guide/store-setup/carriers) and payment methods before you can assign them to a zone. Set those up first, then create your zones. [​](https://docs.laravelshopper.dev/v2/user-guide/store-setup/zones#zones-in-orders) Zones in Orders ------------------------------------------------------------------------------------------------------- When viewing orders, you can see which zone applies to each order. This helps you understand which shipping and payment rules were used. ![Orders showing zone information](https://mintcdn.com/shopperlabs-ee054f5e/3ZB91-BonuCgmULq/images/v2/orders-with-zone.png?w=2500&fit=max&auto=format&n=3ZB91-BonuCgmULq&q=85&s=75e4d0e3feee810f95ce6a3d22cc93ba) [​](https://docs.laravelshopper.dev/v2/user-guide/store-setup/zones#common-zone-setups) Common Zone Setups ------------------------------------------------------------------------------------------------------------- ### [​](https://docs.laravelshopper.dev/v2/user-guide/store-setup/zones#single-country-store) Single-Country Store If you only sell domestically, create one zone: | Zone | Countries | Currency | Carriers | | --- | --- | --- | --- | | Domestic | Your country | Your currency | Local carriers | ### [​](https://docs.laravelshopper.dev/v2/user-guide/store-setup/zones#multi-region-store) Multi-Region Store For stores selling across regions: | Zone | Countries | Currency | Carriers | | --- | --- | --- | --- | | Domestic | France | EUR | Colissimo, Chronopost | | Europe | Germany, Belgium, Spain, Italy | EUR | DHL, UPS | | North America | United States, Canada | USD | FedEx, UPS | | Africa | Cameroon, Senegal, Ivory Coast | XAF | DHL Express | ### [​](https://docs.laravelshopper.dev/v2/user-guide/store-setup/zones#global-store-with-few-zones) Global Store with Few Zones Keep it simple with broad zones: | Zone | Countries | Currency | | --- | --- | --- | | Domestic | Your country | Your currency | | International | All others | USD | [​](https://docs.laravelshopper.dev/v2/user-guide/store-setup/zones#best-practices) Best Practices ----------------------------------------------------------------------------------------------------- Start Simple ------------ Begin with a domestic zone and expand to international zones as your business grows. Group by Cost ------------- Countries with similar shipping costs should share a zone to simplify pricing. One Currency per Zone --------------------- Each zone uses one currency. If you sell in EUR and USD, you need separate zones. Test Checkout ------------- After configuring zones, place test orders from different countries to verify everything works. [​](https://docs.laravelshopper.dev/v2/user-guide/store-setup/zones#related-pages) Related Pages --------------------------------------------------------------------------------------------------- Carriers -------- Set up shipping carriers and configure delivery options. Currencies ---------- Manage the currencies available in your store. Zones Documentation ------------------- Developer reference for zones, relationships, and configuration. [Currencies](https://docs.laravelshopper.dev/v2/user-guide/store-setup/currencies) [Shipping Carriers](https://docs.laravelshopper.dev/v2/user-guide/store-setup/carriers) ⌘I --- # Cart - TALL Stack E-commerce Framework > Documentation Index > ------------------- > > Fetch the complete documentation index at: [/llms.txt](https://docs.laravelshopper.dev/llms.txt) > > Use this file to discover all available pages before exploring further. [Skip to main content](https://docs.laravelshopper.dev/v2/cart#content-area) The `shopper/cart` package handles everything between “Add to cart” and “Place order”. It manages cart lines, validates stock, applies discounts, calculates taxes, and converts completed carts into orders. All through a clean, testable API. Every monetary value is stored in **cents** as an unsigned integer. A product priced at $25.00 is stored as `2500`. [​](https://docs.laravelshopper.dev/v2/cart#how-it-works) How It Works ------------------------------------------------------------------------- The cart system has five main pieces: 1. **CartManager** handles cart operations: add, update, remove, apply coupons, calculate totals 2. **CartSessionManager** persists the current cart in the session for storefront use 3. **Pipeline system** calculates totals through a configurable chain of pipes (subtotals → discounts → taxes → total) 4. **DiscountValidator** enforces coupon rules: eligibility, usage limits, zones, minimum amounts 5. **CreateOrderFromCartAction** converts a cart into an order within a database transaction [​](https://docs.laravelshopper.dev/v2/cart#cart-manager) Cart Manager ------------------------------------------------------------------------- The `CartManager` is the primary API for all cart operations. It is registered as a singleton and injected with the `CartPipelineRunner`. use Shopper\Cart\CartManager; $manager = resolve(CartManager::class); ### [​](https://docs.laravelshopper.dev/v2/cart#adding-items) Adding Items Pass any model that implements `Priceable`, typically a `Product` or `ProductVariant`. The manager looks up the unit price from the purchasable’s price list using the cart’s currency. $line = $manager->add($cart, $product); $line = $manager->add($cart, $product, quantity: 3); $line = $manager->add($cart, $variant, metadata: [\ 'gift_wrap' => true,\ 'message' => 'Happy birthday!',\ ]); Adding the same purchasable twice increments the existing line’s quantity instead of creating a duplicate. $manager->add($cart, $product, quantity: 2); // quantity: 2 $manager->add($cart, $product, quantity: 3); // quantity: 5 ### [​](https://docs.laravelshopper.dev/v2/cart#stock-validation) Stock Validation Every `add()` and `update()` call checks available stock. If the purchasable implements `Stockable` and `allow_backorder` is false, an `InsufficientStockException` is thrown when the requested quantity exceeds available inventory. use Shopper\Cart\Exceptions\InsufficientStockException; try { $manager->add($cart, $product, quantity: 100); } catch (InsufficientStockException $e) { $e->purchasable; // The product or variant $e->available; // Current stock level $e->requested; // Quantity that was requested } Products with `allow_backorder` set to `true` bypass stock checks entirely. ### [​](https://docs.laravelshopper.dev/v2/cart#updating-a-line) Updating a Line $updated = $manager->update($cart, $lineId, [\ 'quantity' => 5,\ ]); $updated = $manager->update($cart, $lineId, [\ 'metadata' => ['gift_wrap' => false],\ ]); ### [​](https://docs.laravelshopper.dev/v2/cart#removing-lines) Removing Lines $manager->remove($cart, $lineId); $manager->clear($cart); ### [​](https://docs.laravelshopper.dev/v2/cart#applying-coupons) Applying Coupons The `applyCoupon()` method validates that the discount code exists in the database before setting it on the cart. The actual discount calculation happens during the pipeline. use Shopper\Cart\Exceptions\InvalidDiscountException; try { $manager->applyCoupon($cart, 'SUMMER20'); } catch (InvalidDiscountException $e) { // Discount code not found } $manager->removeCoupon($cart); Removing a coupon also deletes all line adjustments that were created by the discount pipeline. ### [​](https://docs.laravelshopper.dev/v2/cart#adding-addresses) Adding Addresses use Shopper\Core\Enum\AddressType; $manager->addAddress($cart, AddressType::Shipping, [\ 'first_name' => 'John',\ 'last_name' => 'Doe',\ 'address_1' => '123 Main St',\ 'city' => 'New York',\ 'postal_code' => '10001',\ 'country_id' => $countryId,\ ]); $manager->addAddress($cart, AddressType::Billing, $billingData); If an address of the same type already exists, it is updated instead of duplicated. ### [​](https://docs.laravelshopper.dev/v2/cart#calculating-totals) Calculating Totals use Shopper\Cart\Pipelines\CartPipelineContext; $context = $manager->calculate($cart); $context->subtotal; // Sum of line subtotals (before discounts/tax) $context->discountTotal; // Total discount amount $context->taxTotal; // Total tax amount $context->total; // Final total $context->taxInclusive; // Whether tax is included in prices ### [​](https://docs.laravelshopper.dev/v2/cart#completed-cart-guard) Completed Cart Guard All mutating operations (`add`, `update`, `remove`, `clear`, `applyCoupon`, `removeCoupon`) throw `CartCompletedException` if the cart has already been completed. This prevents modifications after an order has been placed. use Shopper\Cart\Exceptions\CartCompletedException; $cart->update(['completed_at' => now()]); $manager->add($cart, $product); // throws CartCompletedException [​](https://docs.laravelshopper.dev/v2/cart#session-management) Session Management ------------------------------------------------------------------------------------- The `CartSessionManager` handles cart persistence in the HTTP session. Use it in your storefront to retrieve or create the current customer’s cart. ### [​](https://docs.laravelshopper.dev/v2/cart#using-the-facade) Using the Facade use Shopper\Cart\Facades\Cart; $cart = Cart::current(); $cart = Cart::create(); $cart = Cart::create(['channel_id' => $channelId, 'zone_id' => $zoneId]); Cart::use($existingCart); Cart::associate($user); Cart::forget(); ### [​](https://docs.laravelshopper.dev/v2/cart#behavior) Behavior * `current()` returns `null` if no cart exists in the session and `auto_create` is `false` * `current()` returns `null` if the session cart has been completed (it won’t return stale carts) * `create()` stores the new cart’s ID in the session and sets the `currency_code` from `shopper_currency()` * `associate()` sets the `customer_id` on the current cart. Call this after login * `forget()` removes the cart ID from the session without deleting the cart itself [​](https://docs.laravelshopper.dev/v2/cart#models) Models ------------------------------------------------------------- ### [​](https://docs.laravelshopper.dev/v2/cart#cart) Cart Shopper\Cart\Models\Cart | Column | Type | Nullable | Description | | --- | --- | --- | --- | | `id` | bigint | | Primary key | | `customer_id` | bigint | Yes | FK to `users` | | `channel_id` | bigint | Yes | FK to `shopper_channels` | | `zone_id` | bigint | Yes | FK to `shopper_zones` | | `currency_code` | string | | ISO currency code (e.g. `USD`) | | `coupon_code` | string | Yes | Applied discount code | | `completed_at` | timestamp | Yes | Set when cart is converted to order | | `metadata` | json | Yes | Custom data | | `created_at` | timestamp | | | | `updated_at` | timestamp | | | #### [​](https://docs.laravelshopper.dev/v2/cart#relationships) Relationships $cart->lines; // HasMany $cart->addresses; // HasMany $cart->customer; // BelongsTo $cart->channel; // BelongsTo $cart->zone; // BelongsTo #### [​](https://docs.laravelshopper.dev/v2/cart#methods) Methods $cart->isCompleted(); // bool, checks if completed_at is set $cart->shippingAddress(); // ?CartAddress, address with type Shipping $cart->billingAddress(); // ?CartAddress, address with type Billing ### [​](https://docs.laravelshopper.dev/v2/cart#cartline) CartLine Shopper\Cart\Models\CartLine | Column | Type | Nullable | Description | | --- | --- | --- | --- | | `id` | bigint | | Primary key | | `cart_id` | bigint | | FK to cart | | `purchasable_type` | string | | Morph type (`Product`, `ProductVariant`, etc.) | | `purchasable_id` | bigint | | Morph ID | | `quantity` | unsigned int | | Item quantity | | `unit_price_amount` | unsigned int | | Price per unit in cents | | `metadata` | json | Yes | Custom data | #### [​](https://docs.laravelshopper.dev/v2/cart#relationships-2) Relationships $line->cart; // BelongsTo $line->purchasable; // MorphTo, Product, ProductVariant, etc. $line->adjustments; // HasMany $line->taxLines; // HasMany ### [​](https://docs.laravelshopper.dev/v2/cart#cartaddress) CartAddress Shopper\Cart\Models\CartAddress | Column | Type | Nullable | Description | | --- | --- | --- | --- | | `id` | bigint | | Primary key | | `cart_id` | bigint | | FK to cart | | `type` | string | | `shipping` or `billing` (AddressType enum) | | `country_id` | bigint | Yes | FK to `shopper_countries` | | `first_name` | string | Yes | | | `last_name` | string | | | | `company` | string | Yes | | | `address_1` | string | | Street address | | `address_2` | string | Yes | Apartment, suite, etc. | | `city` | string | | | | `state` | string | Yes | | | `postal_code` | string | | | | `phone` | string | Yes | | The `full_name` accessor combines `first_name` and `last_name`. ### [​](https://docs.laravelshopper.dev/v2/cart#cartlineadjustment) CartLineAdjustment Shopper\Cart\Models\CartLineAdjustment | Column | Type | Nullable | Description | | --- | --- | --- | --- | | `id` | bigint | | Primary key | | `cart_line_id` | bigint | | FK to cart line | | `discount_id` | bigint | Yes | FK to discount | | `amount` | unsigned int | | Discount amount in cents | | `code` | string | Yes | Coupon code | ### [​](https://docs.laravelshopper.dev/v2/cart#cartlinetaxline) CartLineTaxLine Shopper\Cart\Models\CartLineTaxLine | Column | Type | Nullable | Description | | --- | --- | --- | --- | | `id` | bigint | | Primary key | | `cart_line_id` | bigint | | FK to cart line | | `tax_rate_id` | bigint | Yes | FK to tax rate | | `code` | string | | Tax code | | `name` | string | | Tax name (e.g. “VAT”) | | `rate` | decimal(8,4) | | Tax rate (e.g. `20.0000` for 20%) | | `amount` | unsigned int | | Tax amount in cents | [​](https://docs.laravelshopper.dev/v2/cart#calculation-pipeline) Calculation Pipeline ----------------------------------------------------------------------------------------- Cart totals are calculated through a pipeline of configurable steps. Each pipe receives a `CartPipelineContext`, performs its calculation, and passes it to the next pipe. ### [​](https://docs.laravelshopper.dev/v2/cart#default-pipeline) Default Pipeline use Shopper\Cart\Pipelines\CalculateLines; use Shopper\Cart\Pipelines\ApplyDiscounts; use Shopper\Cart\Pipelines\CalculateTax; use Shopper\Cart\Pipelines\Calculate; // config/shopper/cart.php 'pipelines' => [\ 'cart' => [\ CalculateLines::class,\ ApplyDiscounts::class,\ CalculateTax::class,\ Calculate::class,\ ],\ ], ### [​](https://docs.laravelshopper.dev/v2/cart#pipeline-steps) Pipeline Steps **1\. CalculateLines**. Computes the subtotal for each line (`unit_price_amount × quantity`) and sums them into `$context->subtotal`. **2\. ApplyDiscounts**. If the cart has a `coupon_code`, validates the discount through `DiscountValidator` and calculates the discount amount. For percentage discounts, each line gets `(lineSubtotal × rate / 100)`. For fixed amount discounts, the amount is distributed proportionally across lines. Creates `CartLineAdjustment` records. **3\. CalculateTax**. Resolves the shipping address country and calculates tax for each line using the core `TaxCalculator`. The taxable amount per line is `(lineSubtotal - discountAmount)`. Creates `CartLineTaxLine` records. **4\. Calculate**. Computes the final total. If tax is inclusive: `total = subtotal - discountTotal`. If tax is exclusive: `total = subtotal - discountTotal + taxTotal`. The minimum total is always `0`. ### [​](https://docs.laravelshopper.dev/v2/cart#custom-pipeline) Custom Pipeline You can replace or extend the pipeline in `config/shopper/cart.php`. Add a custom pipe to handle shipping costs, loyalty points, or any other calculation: 'pipelines' => [\ 'cart' => [\ CalculateLines::class,\ ApplyDiscounts::class,\ App\Cart\Pipes\ApplyShippingCost::class,\ CalculateTax::class,\ Calculate::class,\ ],\ ], Your custom pipe must implement `__invoke(CartPipelineContext $context, Closure $next)`: namespace App\Cart\Pipes; use Closure; use Shopper\Cart\Pipelines\CartPipelineContext; final class ApplyShippingCost { public function __invoke(CartPipelineContext $context, Closure $next): mixed { // Your calculation logic here return $next($context); } } [​](https://docs.laravelshopper.dev/v2/cart#discount-validation) Discount Validation --------------------------------------------------------------------------------------- When a coupon is applied during the pipeline, the `DiscountValidator` runs a series of checks before the discount is calculated. Each check produces a clear, translatable error message. ### [​](https://docs.laravelshopper.dev/v2/cart#validation-rules) Validation Rules | Rule | Condition | Error Key | | --- | --- | --- | | Active | `discount->is_active` must be true | `discount.not_active` | | Started | `discount->start_at` must be in the past | `discount.not_started` | | Not expired | `discount->end_at` must be null or in the future | `discount.expired` | | Usage limit | Total uses must be under the global limit | `discount.usage_limit_reached` | | Per-user limit | Customer must not have exceeded their per-user limit | `discount.already_used` | | Eligibility | If restricted to specific customers, the cart customer must be in the list | `discount.customer_not_eligible` | | Requires login | If eligibility is set, or the discount has a per-user limit, the cart must have a `customer_id` | `discount.requires_login` | | Zone | If the discount has a `zone_id`, it must match `cart->zone_id` | `discount.not_available_in_zone` | | Minimum amount | Cart subtotal must meet the minimum purchase requirement | `discount.min_amount_not_reached` | | Minimum quantity | Total line quantity must meet the minimum quantity requirement | `discount.min_quantity_not_reached` | ### [​](https://docs.laravelshopper.dev/v2/cart#discount-application-modes) Discount Application Modes Discounts support two application scopes via `discount->apply_to`: * **Order** (`DiscountApplyTo::Order`). Applies to all cart lines * **Specific products**. Applies only to lines matching the products/variants configured on the discount And two discount types: * **Percentage**. Each applicable line gets `(lineSubtotal × value / 100)` * **Fixed amount**. The fixed amount is distributed proportionally across applicable lines based on their share of the total subtotal [​](https://docs.laravelshopper.dev/v2/cart#order-conversion) Order Conversion --------------------------------------------------------------------------------- The `CreateOrderFromCartAction` converts a completed cart into an order. This is the bridge between the storefront cart and the order management system. use Shopper\Cart\Actions\CreateOrderFromCartAction; $action = resolve(CreateOrderFromCartAction::class); $order = $action->execute($cart); ### [​](https://docs.laravelshopper.dev/v2/cart#what-happens) What Happens The entire operation runs inside a database transaction with a `FOR UPDATE` lock on the cart: 1. **Reserves the discount**. If a coupon is applied, locks the discount row with `lockForUpdate`, validates the per-user limit against `orders.discount_id`, and increments `total_use` atomically only if the global `usage_limit` has not been reached 2. **Calculates totals**. Runs the full pipeline to get final amounts 3. **Creates order addresses**. Copies cart shipping/billing addresses to `OrderAddress` records 4. **Creates the order**. With `price_amount`, `tax_amount`, `currency_code`, all foreign keys, and the discount snapshot (`discount_id`, `discount_code`, `discount_type`, `discount_value_at_apply`, `discount_currency_code`) 5. **Creates order items and reserves stock**. One order item per cart line, including the discount amount from adjustments. For every line whose purchasable tracks inventory, stock is reserved through the `StockReserver` contract under a `lockForUpdate` row lock on the stockable. If the reservable quantity is less than the line quantity, `InsufficientStockException` is thrown and the whole transaction rolls back 6. **Creates order tax lines**. Via `CreateOrderTaxLinesAction` 7. **Marks cart as completed**. Sets `completed_at` to prevent further modifications 8. **Dispatches `CartCompleted` event**. With the cart and the created order If the cart has already been completed, `CartCompletedException` is thrown before any work begins. The `FOR UPDATE` lock prevents race conditions from concurrent checkout attempts. ### [​](https://docs.laravelshopper.dev/v2/cart#discount-limit-exceptions) Discount Limit Exceptions Two failure paths around discount limits can short-circuit the transaction. `DiscountLimitReachedException::global($code)` is thrown when the global `usage_limit` was exhausted between cart validation and order commit. `DiscountLimitReachedException::perUser($code)` is thrown when the customer has already redeemed a discount with `usage_limit_per_user` set. In both cases the transaction rolls back and no order is created. use Shopper\Cart\Actions\CreateOrderFromCartAction; use Shopper\Cart\Exceptions\DiscountLimitReachedException; try { $order = resolve(CreateOrderFromCartAction::class)->execute($cart); } catch (DiscountLimitReachedException $e) { return back()->with('error', 'This discount can no longer be used.'); } For the full enforcement model, see [Usage Limit Enforcement](https://docs.laravelshopper.dev/v2/discounts#usage-limit-enforcement) on the Discounts page. ### [​](https://docs.laravelshopper.dev/v2/cart#stock-reservation) Stock Reservation Stock is reserved during checkout, inside the same transaction that creates the order, rather than asynchronously after the order commits. This closes the oversell window where two concurrent checkouts could each read the same last unit and both succeed. Reservation is delegated to the `Shopper\Core\Contracts\StockReserver` contract: namespace Shopper\Core\Contracts; use Illuminate\Database\Eloquent\Model; use Shopper\Core\Models\Contracts\Stockable; interface StockReserver { public function reserve(Stockable $product, int $quantity, ?Model $reference = null, ?int $userId = null): int; } The default implementation, `LockingStockReserver`, takes a `lockForUpdate` row lock on the stockable, decrements the available quantity, and returns the amount actually reserved. The action throws `InsufficientStockException` when that amount is short of the requested quantity. Only purchasables that return `true` from `tracksInventory()` are reserved, so virtual and external products are skipped. To plug in a custom strategy, such as reserving against an external warehouse system, bind your own implementation in a service provider: use Shopper\Core\Contracts\StockReserver; $this->app->bind(StockReserver::class, WarehouseStockReserver::class); [​](https://docs.laravelshopper.dev/v2/cart#events) Events ------------------------------------------------------------- | Event | Dispatched When | Properties | | --- | --- | --- | | `CartCompleted` | Cart is converted to an order | `Cart $cart`, `Order $order` | | `CouponApplied` | Coupon code is set on a cart | `Cart $cart`, `string $code` | | `CouponRemoved` | Coupon code is cleared from a cart | `Cart $cart` | use Shopper\Cart\Events\CartCompleted; use Shopper\Cart\Events\CouponApplied; use Shopper\Cart\Events\CouponRemoved; [​](https://docs.laravelshopper.dev/v2/cart#configuration) Configuration --------------------------------------------------------------------------- Publish the configuration file: php artisan vendor:publish --tag=shopper-cart-config // config/shopper/cart.php return [\ 'pipelines' => [\ 'cart' => [\ CalculateLines::class,\ ApplyDiscounts::class,\ CalculateTax::class,\ Calculate::class,\ ],\ ],\ \ 'session' => [\ 'key' => 'shopper_cart', // Session key for storing cart ID\ 'auto_create' => false, // Auto-create cart when current() is called\ ],\ \ 'prune_after_days' => 30, // Days before abandoned carts are pruned\ \ 'models' => [\ 'cart' => Cart::class, // Swappable via model contracts\ 'cart_line' => CartLine::class,\ ],\ ]; ### [​](https://docs.laravelshopper.dev/v2/cart#model-swapping) Model Swapping The `Cart` and `CartLine` models implement core contracts (`CartContract`, `CartLineContract`) and use the `HasModelContract` trait. You can replace them with your own models: // config/shopper/cart.php 'models' => [\ 'cart' => App\Models\Cart::class,\ 'cart_line' => App\Models\CartLine::class,\ ], Your custom models must implement the corresponding contracts from `Shopper\Core\Models\Contracts`. [​](https://docs.laravelshopper.dev/v2/cart#abandoned-carts) Abandoned Carts ------------------------------------------------------------------------------- A cart is considered “abandoned” when it has items but no activity for a configurable period. Shopper tracks this automatically and provides both an admin interface and programmatic tools to manage abandoned carts. ### [​](https://docs.laravelshopper.dev/v2/cart#admin-panel) Admin Panel The admin panel includes an Abandoned Carts page under the Orders section. It lists all carts that are not completed, have at least one line item, and have been inactive for longer than the configured threshold. Administrators can view cart contents, the customer (if authenticated), and the associated channel. ### [​](https://docs.laravelshopper.dev/v2/cart#configuration-2) Configuration Two config keys in `config/shopper/cart.php` control abandoned cart behavior: 'abandoned_after_minutes' => 60, // Cart is "abandoned" after 60 minutes of inactivity 'prune_after_days' => 30, // Abandoned carts are deleted after 30 days ### [​](https://docs.laravelshopper.dev/v2/cart#querying-abandoned-carts) Querying Abandoned Carts To find abandoned carts programmatically, for example to send recovery emails: use Shopper\Cart\Models\Cart; $abandonedCarts = Cart::query() ->whereNull('completed_at') ->whereHas('lines') ->whereNotNull('customer_id') ->where('updated_at', '<', now()->subMinutes( config('shopper.cart.abandoned_after_minutes', 60) )) ->with(['customer', 'lines.purchasable']) ->get(); ### [​](https://docs.laravelshopper.dev/v2/cart#pruning) Pruning Abandoned carts that are too old are cleaned up with a scheduled command: php artisan shopper:prune-carts php artisan shopper:prune-carts --days=7 By default, carts that haven’t been updated in the last 30 days (configurable via `prune_after_days`) are deleted. Only carts where `completed_at` is `null` are pruned. Completed carts are kept as historical records tied to their orders. Schedule the command in your `routes/console.php`: use Illuminate\Support\Facades\Schedule; Schedule::command('shopper:prune-carts')->daily(); [​](https://docs.laravelshopper.dev/v2/cart#storefront-implementation) Storefront Implementation --------------------------------------------------------------------------------------------------- This section shows how to build a complete cart experience in your storefront. The examples are based on the patterns used in the [Shopper demo store](https://demo.laravelshopper.dev/) . ### [​](https://docs.laravelshopper.dev/v2/cart#cart-session-helper) Cart Session Helper A common pattern is to create a `cartSession()` helper that handles cart creation with the correct zone and channel. This avoids repeating the creation logic across your controllers and components: // app/helpers.php use Shopper\Cart\CartSessionManager; use Shopper\Cart\Models\Cart; use Shopper\Core\Models\Channel; function cartSession(): Cart { $session = resolve(CartSessionManager::class); $cart = $session->current(); if (! $cart) { $defaultChannel = Channel::query()->scopes('default')->first(); $cart = $session->create([\ 'currency_code' => shopper_currency(),\ 'channel_id' => $defaultChannel?->id,\ 'zone_id' => session('zone_id'),\ 'customer_id' => auth()->id(),\ ]); } return $cart; } Register the helper in your `composer.json`: { "autoload": { "files": ["app/helpers.php"] } } ### [​](https://docs.laravelshopper.dev/v2/cart#associating-cart-on-login) Associating Cart on Login When a guest adds items to their cart and then logs in, the cart should be associated with their account. Register a listener for the `Login` event in your `AppServiceProvider`: use Illuminate\Auth\Events\Login; use Illuminate\Support\Facades\Event; use Shopper\Cart\CartSessionManager; public function boot(): void { Event::listen(Login::class, function (Login $event): void { resolve(CartSessionManager::class)->associate($event->user); }); } ### [​](https://docs.laravelshopper.dev/v2/cart#add-to-cart-action) Add to Cart Action Create a dedicated action class that handles adding both products and variants to the cart: namespace App\Actions\Cart; use App\Models\Product; use App\Models\ProductVariant; use Shopper\Cart\CartManager; use Shopper\Cart\Models\CartLine; final readonly class AddToCart { public function __construct( private CartManager $cartManager, ) {} public function handle(Product $product, ?ProductVariant $variant = null): CartLine { $purchasable = $variant ?? $product; return $this->cartManager->add(cartSession(), $purchasable); } } ### [​](https://docs.laravelshopper.dev/v2/cart#livewire-cart-component) Livewire Cart Component Here is a complete Livewire component for displaying and managing the cart as a slide-over panel: namespace App\Livewire; use App\Models\ProductVariant; use Illuminate\Contracts\View\View; use Illuminate\Support\Collection; use Livewire\Attributes\On; use Livewire\Component; use Shopper\Cart\CartManager; use Shopper\Cart\CartSessionManager; use Shopper\Cart\Models\CartLine; final class ShoppingCart extends Component { public int|float $subtotal = 0; /** @var Collection */ public Collection $items; public function mount(): void { $this->loadCart(); } #[On('cartUpdated')] public function loadCart(): void { $cart = resolve(CartSessionManager::class)->current(); if (! $cart) { $this->items = collect(); $this->subtotal = 0; return; } $cart->load('lines.purchasable'); $cart->lines->loadMorph('purchasable', [\ ProductVariant::class => ['product'],\ ]); $this->items = $cart->lines; $context = resolve(CartManager::class)->calculate($cart); $this->subtotal = $context->subtotal; } public function removeFromCart(int $lineId): void { resolve(CartManager::class)->remove(cartSession(), $lineId); $this->loadCart(); $this->dispatch('cartUpdated'); } public function render(): View { return view('livewire.shopping-cart'); } } The corresponding Blade view displays each cart line with its product details and a remove button:

    @if ($items->isEmpty())

    Your cart is empty.

    @else
      @foreach ($items as $line)
    • @if ($line->purchasable instanceof \App\Models\ProductVariant) {{ $line->purchasable->product->name }} - {{ $line->purchasable->name }} @else {{ $line->purchasable->name }} @endif

      Qty: {{ $line->quantity }} · {{ shopper_money_format($line->unit_price_amount, cartSession()->currency_code) }}

    • @endforeach

    Subtotal: {{ shopper_money_format($subtotal, cartSession()->currency_code) }}

    @endif
    ### [​](https://docs.laravelshopper.dev/v2/cart#cart-header-button) Cart Header Button A small component that displays the cart item count in the navigation. It listens for the `cartUpdated` event to refresh automatically: namespace App\Livewire; use Illuminate\Contracts\View\View; use Livewire\Attributes\On; use Livewire\Component; use Shopper\Cart\CartSessionManager; final class ShoppingCartButton extends Component { public int $count = 0; public function mount(): void { $this->updateCount(); } #[On('cartUpdated')] public function updateCount(): void { $cart = resolve(CartSessionManager::class)->current(); $this->count = $cart ? $cart->lines->sum('quantity') : 0; } public function render(): View { return view('livewire.shopping-cart-button'); } } ### [​](https://docs.laravelshopper.dev/v2/cart#displaying-cart-totals) Displaying Cart Totals Use the `CartManager::calculate()` method to get the full breakdown. The returned `CartPipelineContext` contains all computed values: $context = resolve(CartManager::class)->calculate($cart);

    Subtotal: {{ shopper_money_format($context->subtotal, $cart->currency_code) }}

    @if ($context->discountTotal > 0)

    Discount: -{{ shopper_money_format($context->discountTotal, $cart->currency_code) }}

    @endif @if ($context->taxTotal > 0)

    Tax: {{ shopper_money_format($context->taxTotal, $cart->currency_code) }}

    @endif

    Total: {{ shopper_money_format($context->total, $cart->currency_code) }}

    ### [​](https://docs.laravelshopper.dev/v2/cart#applying-a-coupon) Applying a Coupon Validate and apply a discount code to the cart. The actual discount calculation happens during the pipeline when `calculate()` is called: use Shopper\Cart\Exceptions\InvalidDiscountException; try { resolve(CartManager::class)->applyCoupon($cart, $couponCode); } catch (InvalidDiscountException $e) { return back()->with('error', $e->getMessage()); } ### [​](https://docs.laravelshopper.dev/v2/cart#setting-checkout-addresses) Setting Checkout Addresses Add shipping and billing addresses to the cart before converting to an order: use Shopper\Core\Enum\AddressType; $manager = resolve(CartManager::class); $manager->addAddress($cart, AddressType::Shipping, [\ 'first_name' => $request->first_name,\ 'last_name' => $request->last_name,\ 'address_1' => $request->address,\ 'city' => $request->city,\ 'postal_code' => $request->postal_code,\ 'country_id' => $request->country_id,\ ]); $manager->addAddress($cart, AddressType::Billing, $billingData); ### [​](https://docs.laravelshopper.dev/v2/cart#converting-to-order) Converting to Order When the customer completes checkout, convert the cart into an order. The action runs inside a database transaction, calculates final totals, creates order records, and marks the cart as completed. If a discount limit is hit at commit time, catch `DiscountLimitReachedException` and surface a friendly message: use Shopper\Cart\Actions\CreateOrderFromCartAction; use Shopper\Cart\Exceptions\DiscountLimitReachedException; use Shopper\Cart\Facades\Cart; try { $order = resolve(CreateOrderFromCartAction::class)->execute(Cart::current()); } catch (DiscountLimitReachedException $e) { return back()->with('error', 'This discount can no longer be used.'); } Cart::forget(); After converting the cart to an order, call `Cart::forget()` to clear the session. The cart is marked as completed and cannot be modified, but the session should be cleaned up so `Cart::current()` returns `null`. See the [Payments](https://docs.laravelshopper.dev/v2/payments) page for processing the order payment. [Customers](https://docs.laravelshopper.dev/v2/customers) [Discounts](https://docs.laravelshopper.dev/v2/discounts) ⌘I --- # Managing Discounts - TALL Stack E-commerce Framework > Documentation Index > ------------------- > > Fetch the complete documentation index at: [/llms.txt](https://docs.laravelshopper.dev/llms.txt) > > Use this file to discover all available pages before exploring further. [Skip to main content](https://docs.laravelshopper.dev/v2/user-guide/marketing/discounts#content-area) Discounts are a powerful way to attract customers, boost sales, and reward loyalty. Shopper provides flexible discount options for your marketing campaigns. [​](https://docs.laravelshopper.dev/v2/user-guide/marketing/discounts#overview) Overview ------------------------------------------------------------------------------------------- The Discounts section allows you to: * Create discount codes * Set up automatic discounts * Define discount rules and conditions * Track discount usage * Schedule promotional periods [​](https://docs.laravelshopper.dev/v2/user-guide/marketing/discounts#accessing-discounts) Accessing Discounts ----------------------------------------------------------------------------------------------------------------- Click on **Discounts** in the sidebar to access discount management. ### [​](https://docs.laravelshopper.dev/v2/user-guide/marketing/discounts#empty-state) Empty State If you haven’t created any discounts yet: ![Discounts Empty State](https://mintcdn.com/shopperlabs-ee054f5e/khtWzNt9B9rQhNq5/images/v2/discounts-empty-state.png?w=2500&fit=max&auto=format&n=khtWzNt9B9rQhNq5&q=85&s=b72eb122094456e5a6072ce0957d59bf) [​](https://docs.laravelshopper.dev/v2/user-guide/marketing/discounts#creating-a-discount) Creating a Discount ----------------------------------------------------------------------------------------------------------------- To create a new discount: 1. Click the **Create** button 2. Configure the discount settings 3. Set conditions and limits 4. Click **Save** ![Create Discount](https://mintcdn.com/shopperlabs-ee054f5e/khtWzNt9B9rQhNq5/images/v2/discount-create.png?w=2500&fit=max&auto=format&n=khtWzNt9B9rQhNq5&q=85&s=a5e77759dc5aa383251608ba3ba1b141) ### [​](https://docs.laravelshopper.dev/v2/user-guide/marketing/discounts#discount-types) Discount Types | Type | Description | Example | | --- | --- | --- | | **Percentage** | Discount as a percentage | 20% off | | **Fixed amount** | Specific amount off | $10 off | | **Free shipping** | Removes shipping cost | Free delivery | ### [​](https://docs.laravelshopper.dev/v2/user-guide/marketing/discounts#discount-configuration) Discount Configuration | Field | Description | | --- | --- | | **Code** | The code customers enter (e.g., SUMMER20) | | **Type** | Percentage, fixed amount, or free shipping | | **Value** | The discount amount or percentage | | **Applies to** | Entire order, specific products, or collections | [​](https://docs.laravelshopper.dev/v2/user-guide/marketing/discounts#discount-conditions) Discount Conditions ----------------------------------------------------------------------------------------------------------------- Set rules for when the discount can be used: ### [​](https://docs.laravelshopper.dev/v2/user-guide/marketing/discounts#minimum-requirements) Minimum Requirements | Condition | Example | | --- | --- | | **Minimum purchase** | Order must be at least $50 | | **Minimum quantity** | Cart must have at least 3 items | ### [​](https://docs.laravelshopper.dev/v2/user-guide/marketing/discounts#customer-eligibility) Customer Eligibility | Option | Description | | --- | --- | | **All customers** | Anyone can use the discount | | **Specific customers** | Only selected customers | | **Customer groups** | Based on customer segments | ### [​](https://docs.laravelshopper.dev/v2/user-guide/marketing/discounts#product-restrictions) Product Restrictions | Option | Description | | --- | --- | | **All products** | Applies to everything | | **Specific products** | Only selected products | | **Specific collections** | Products in certain collections | | **Specific brands** | Products from certain brands | [​](https://docs.laravelshopper.dev/v2/user-guide/marketing/discounts#usage-limits) Usage Limits --------------------------------------------------------------------------------------------------- Control how the discount can be used: | Limit | Description | | --- | --- | | **Total uses** | Maximum times the discount can be used | | **Uses per customer** | Limit per individual customer | | **One per order** | Can’t combine with other discounts | [​](https://docs.laravelshopper.dev/v2/user-guide/marketing/discounts#scheduling-discounts) Scheduling Discounts ------------------------------------------------------------------------------------------------------------------- Set active periods for your discounts: * **Start date** - When the discount becomes active * **End date** - When the discount expires * **No end date** - Discount runs indefinitely [​](https://docs.laravelshopper.dev/v2/user-guide/marketing/discounts#discount-strategies) Discount Strategies ----------------------------------------------------------------------------------------------------------------- Welcome Discount ---------------- Offer first-time customers a discount on their initial purchase. Seasonal Sales -------------- Create time-limited discounts for holidays and seasons. Cart Recovery ------------- Send abandoned cart emails with exclusive discount codes. Loyalty Rewards --------------- Reward repeat customers with special discounts. [​](https://docs.laravelshopper.dev/v2/user-guide/marketing/discounts#best-practices) Best Practices ------------------------------------------------------------------------------------------------------- Use unique, memorable discount codes that are easy to type. Avoid confusing characters like 0/O or 1/l/I. * **Clear naming** - Make codes descriptive (SUMMER2024, FREESHIP) * **Set limits** - Protect margins with usage limits * **Track performance** - Monitor which discounts drive sales * **Create urgency** - Use end dates to encourage quick action * **Test first** - Always test discounts before promoting them [​](https://docs.laravelshopper.dev/v2/user-guide/marketing/discounts#common-discount-examples) Common Discount Examples --------------------------------------------------------------------------------------------------------------------------- | Campaign | Code | Type | Value | | --- | --- | --- | --- | | Welcome offer | WELCOME10 | Percentage | 10% off first order | | Free shipping | FREESHIP | Free shipping | Orders over $50 | | Flash sale | FLASH25 | Percentage | 25% off, 24 hours only | | Holiday | HOLIDAY15 | Percentage | 15% off storewide | For developer details, see the [Discounts documentation](https://docs.laravelshopper.dev/v2/discounts) . [Managing Reviews](https://docs.laravelshopper.dev/v2/user-guide/sales/reviews) [Advanced Pricing](https://docs.laravelshopper.dev/v2/user-guide/marketing/pricing) ⌘I --- # Managing Customers - TALL Stack E-commerce Framework > Documentation Index > ------------------- > > Fetch the complete documentation index at: [/llms.txt](https://docs.laravelshopper.dev/llms.txt) > > Use this file to discover all available pages before exploring further. [Skip to main content](https://docs.laravelshopper.dev/v2/user-guide/sales/customers#content-area) Your customers are essential to your business. Shopper helps you manage customer information, track their orders, and build lasting relationships. [​](https://docs.laravelshopper.dev/v2/user-guide/sales/customers#overview) Overview --------------------------------------------------------------------------------------- The Customers section allows you to: * View all registered customers * Access customer details and order history * Manage customer addresses * Send notifications to customers * Create customers manually [​](https://docs.laravelshopper.dev/v2/user-guide/sales/customers#accessing-customers) Accessing Customers ------------------------------------------------------------------------------------------------------------- Click on **Customers** in the sidebar to access customer management. ![Customers List](https://mintcdn.com/shopperlabs-ee054f5e/KQY6o7d4neR-LyIr/images/v2/customers.png?w=2500&fit=max&auto=format&n=KQY6o7d4neR-LyIr&q=85&s=bde24e25998e8aaf124018ca8bddbc2c) [​](https://docs.laravelshopper.dev/v2/user-guide/sales/customers#customer-list) Customer List ------------------------------------------------------------------------------------------------- The customer list displays: | Column | Description | | --- | --- | | **Name** | Customer’s full name | | **Email** | Contact email address | | **Orders** | Number of orders placed | | **Amount spent** | Total spending amount | | **Created** | When they registered | ### [​](https://docs.laravelshopper.dev/v2/user-guide/sales/customers#empty-state) Empty State If you don’t have any customers yet, you’ll see a helpful prompt: ![Customers Empty State](https://mintcdn.com/shopperlabs-ee054f5e/KQY6o7d4neR-LyIr/images/v2/customers-empty-state.png?w=2500&fit=max&auto=format&n=KQY6o7d4neR-LyIr&q=85&s=faff23c3530d6f2d4e5f6edff5e72d5b) [​](https://docs.laravelshopper.dev/v2/user-guide/sales/customers#customer-details) Customer Details ------------------------------------------------------------------------------------------------------- Click on a customer to view their complete profile: ![Customer Information](https://mintcdn.com/shopperlabs-ee054f5e/KQY6o7d4neR-LyIr/images/v2/customer-information.png?w=2500&fit=max&auto=format&n=KQY6o7d4neR-LyIr&q=85&s=838e0671b23d1bd24c434ee6ccef9a1c) ### [​](https://docs.laravelshopper.dev/v2/user-guide/sales/customers#profile-information) Profile Information * **Personal details** - Name, email, phone * **Account status** - Active, disabled * **Marketing preferences** - Email subscriptions * **Notes** - Internal notes about the customer ### [​](https://docs.laravelshopper.dev/v2/user-guide/sales/customers#addresses) Addresses View and manage customer addresses: ![Customer Addresses](https://mintcdn.com/shopperlabs-ee054f5e/KQY6o7d4neR-LyIr/images/v2/customer-address.png?w=2500&fit=max&auto=format&n=KQY6o7d4neR-LyIr&q=85&s=77d4a3d4a9f838da944af51afd48c7f0) Customers can have multiple addresses: * **Default shipping address** * **Default billing address** * **Additional addresses** ### [​](https://docs.laravelshopper.dev/v2/user-guide/sales/customers#order-history) Order History View all orders placed by the customer: * Order numbers and dates * Order totals * Payment and fulfillment status [​](https://docs.laravelshopper.dev/v2/user-guide/sales/customers#creating-a-customer) Creating a Customer ------------------------------------------------------------------------------------------------------------- To manually add a customer: 1. Click the **Create** button on the Customers page 2. Fill in the customer details 3. Click **Save** ![Create Customer](https://mintcdn.com/shopperlabs-ee054f5e/KQY6o7d4neR-LyIr/images/v2/create-customer.png?w=2500&fit=max&auto=format&n=KQY6o7d4neR-LyIr&q=85&s=0591196abe159fd95580d7c047edc055) ### [​](https://docs.laravelshopper.dev/v2/user-guide/sales/customers#customer-fields) Customer Fields | Field | Required | Description | | --- | --- | --- | | **First name** | Yes | Customer’s first name | | **Last name** | Yes | Customer’s last name | | **Email** | Yes | Unique email address | | **Phone** | No | Contact phone number | | **Password** | No | Account password (or send invite) | ![Customer Creation](https://mintcdn.com/shopperlabs-ee054f5e/KQY6o7d4neR-LyIr/images/v2/customer-create.png?w=2500&fit=max&auto=format&n=KQY6o7d4neR-LyIr&q=85&s=c998ff1be424c250f6c5923016457732) [​](https://docs.laravelshopper.dev/v2/user-guide/sales/customers#customer-notification) Customer Notification ----------------------------------------------------------------------------------------------------------------- Send notifications to customers: ![Customer Notification](https://mintcdn.com/shopperlabs-ee054f5e/KQY6o7d4neR-LyIr/images/v2/customer-notification.png?w=2500&fit=max&auto=format&n=KQY6o7d4neR-LyIr&q=85&s=9fa8aefee4a4ba35daf2eb2ba3c049e5) Common notifications include: * Order confirmations * Shipping updates * Marketing emails * Password resets [​](https://docs.laravelshopper.dev/v2/user-guide/sales/customers#customer-account-storefront) Customer Account (Storefront) ------------------------------------------------------------------------------------------------------------------------------- Customers can manage their own accounts on your storefront: ![Customer Account](https://mintcdn.com/shopperlabs-ee054f5e/3ZB91-BonuCgmULq/images/v2/starterkit-account.png?w=2500&fit=max&auto=format&n=3ZB91-BonuCgmULq&q=85&s=f477e434078fac4fcceecb8122172112) They can: * Update personal information * Manage addresses * View order history * Change password ![Customer Addresses](https://mintcdn.com/shopperlabs-ee054f5e/3ZB91-BonuCgmULq/images/v2/starterkit-addresses.png?w=2500&fit=max&auto=format&n=3ZB91-BonuCgmULq&q=85&s=ab974084dd106039afeabe87519c16ee) [​](https://docs.laravelshopper.dev/v2/user-guide/sales/customers#customer-authentication) Customer Authentication --------------------------------------------------------------------------------------------------------------------- Customers register and log in through your storefront: ![Customer Auth](https://mintcdn.com/shopperlabs-ee054f5e/3ZB91-BonuCgmULq/images/v2/starterkit-auth.png?w=2500&fit=max&auto=format&n=3ZB91-BonuCgmULq&q=85&s=609dc3809d0e9d6c044a241541d73d81) [​](https://docs.laravelshopper.dev/v2/user-guide/sales/customers#best-practices) Best Practices --------------------------------------------------------------------------------------------------- Protect Data ------------ Handle customer data responsibly and comply with privacy laws. Segment Customers ----------------- Group customers for targeted marketing. Track Behavior -------------- Monitor purchasing patterns to understand your audience. Stay Connected -------------- Maintain communication to build loyalty. [​](https://docs.laravelshopper.dev/v2/user-guide/sales/customers#customer-data-privacy) Customer Data Privacy ----------------------------------------------------------------------------------------------------------------- If a customer requests their data to be removed (GDPR “right to be forgotten”), you can anonymize their account: 1. Go to the customer’s profile page 2. Click the **Anonymize** action 3. Confirm the action This replaces the customer’s personal information (name, email, phone, avatar) with anonymous data and deletes all their addresses. Order history is preserved for your records, but the customer’s identity is removed. Anonymization cannot be undone. The customer’s personal data is permanently replaced. Only use this when a customer explicitly requests data removal. Encourage customers to create accounts by offering benefits like faster checkout, order tracking, and exclusive offers. For developer details, see the [Customers documentation](https://docs.laravelshopper.dev/v2/customers) . [Managing Orders](https://docs.laravelshopper.dev/v2/user-guide/sales/orders) [Managing Reviews](https://docs.laravelshopper.dev/v2/user-guide/sales/reviews) ⌘I --- # Taxes - TALL Stack E-commerce Framework > Documentation Index > ------------------- > > Fetch the complete documentation index at: [/llms.txt](https://docs.laravelshopper.dev/llms.txt) > > Use this file to discover all available pages before exploring further. [Skip to main content](https://docs.laravelshopper.dev/v2/user-guide/store-setup/taxes#content-area) Taxes are calculated automatically at checkout based on where the customer’s order is being shipped. You define tax zones (geographic regions), set percentage rates for each zone, and Shopper handles the calculation for every order. Shopper supports both **tax-inclusive pricing** (VAT, common in Europe where tax is included in the displayed price) and **tax-exclusive pricing** (sales tax, common in the US where tax is added at checkout). [​](https://docs.laravelshopper.dev/v2/user-guide/store-setup/taxes#accessing-tax-settings) Accessing Tax Settings --------------------------------------------------------------------------------------------------------------------- 1. Click on **Settings** in the sidebar 2. Select **Taxes** from the settings menu ![Tax settings page](https://mintcdn.com/shopperlabs-ee054f5e/RoQo55-CU3i212Mj/images/v2/taxes-list.png?w=2500&fit=max&auto=format&n=RoQo55-CU3i212Mj&q=85&s=9ffa8a8952fb530e490c20e0aeb7a432) [​](https://docs.laravelshopper.dev/v2/user-guide/store-setup/taxes#creating-a-tax-zone) Creating a Tax Zone --------------------------------------------------------------------------------------------------------------- A tax zone maps to a country (and optionally a province/state). To create one: 1. Click the **Add tax zone** button 2. Select the country 3. Optionally enter a province/state code (e.g., “CA” for California) 4. Choose whether prices include tax (**tax-inclusive**) or tax is added at checkout (**tax-exclusive**) 5. Click **Save** ![Create tax zone form](https://mintcdn.com/shopperlabs-ee054f5e/RoQo55-CU3i212Mj/images/v2/tax-zone-form.png?w=2500&fit=max&auto=format&n=RoQo55-CU3i212Mj&q=85&s=77008ebdefd9e2d0627249cfac3d7902) ### [​](https://docs.laravelshopper.dev/v2/user-guide/store-setup/taxes#tax-zone-fields) Tax Zone Fields | Field | Required | Description | | --- | --- | --- | | **Country** | Yes | The country this tax zone applies to | | **Province/State** | No | A specific province or state code (e.g., “CA”, “NY”). Leave empty for country-wide rules | | **Name** | No | A label to identify this zone (e.g., “Standard VAT”, “California Sales Tax”) | | **Tax Inclusive** | Yes | If ON, prices already include tax (VAT). If OFF, tax is added at checkout (sales tax) | ### [​](https://docs.laravelshopper.dev/v2/user-guide/store-setup/taxes#tax-inclusive-vs-tax-exclusive) Tax-Inclusive vs Tax-Exclusive | Setting | How it works | Common in | | --- | --- | --- | | **Tax Inclusive (ON)** | A product listed at 100 EUR already includes tax. The tax amount is extracted from the price. | Europe (VAT), Australia (GST) | | **Tax Exclusive (OFF)** | A product listed at 100hastaxaddedontopatcheckout(e.g.,100 has tax added on top at checkout (e.g., 100hastaxaddedontopatcheckout(e.g.,100 + 10tax\=10 tax = 10tax\=110). | United States, Canada | [​](https://docs.laravelshopper.dev/v2/user-guide/store-setup/taxes#adding-tax-rates) Adding Tax Rates --------------------------------------------------------------------------------------------------------- Each tax zone needs at least one tax rate. The **default rate** applies to all products in the zone unless a more specific override exists. To add a rate: 1. Select a tax zone from the list 2. Click **Add rate** 3. Enter the rate name, code, and percentage 4. Toggle **Default** if this is the zone’s primary rate 5. Click **Save** ![Add tax rate form](https://mintcdn.com/shopperlabs-ee054f5e/RoQo55-CU3i212Mj/images/v2/tax-rate-form.png?w=2500&fit=max&auto=format&n=RoQo55-CU3i212Mj&q=85&s=023278ec318efeefa39983d16c85bd64) ### [​](https://docs.laravelshopper.dev/v2/user-guide/store-setup/taxes#tax-rate-fields) Tax Rate Fields | Field | Required | Description | | --- | --- | --- | | **Name** | Yes | Rate name shown on invoices (e.g., “TVA 20%”, “State Sales Tax”) | | **Code** | No | Machine-readable identifier (e.g., “FR\_VAT\_STANDARD”) | | **Rate** | Yes | The percentage (e.g., 20 for 20%) | | **Default** | Yes | If ON, this rate applies to all products that don’t match a specific override | | **Combinable** | No | Whether this rate stacks with rates from a parent zone | ### [​](https://docs.laravelshopper.dev/v2/user-guide/store-setup/taxes#multiple-rates-per-zone) Multiple Rates per Zone Some countries have different tax rates for different types of products. For example, France has: | Rate | Percentage | Applies to | | --- | --- | --- | | Standard VAT | 20% | Most products | | Reduced VAT | 5.5% | Food, books | | Zero VAT | 0% | Certain essential goods | Create each rate in the same zone. The default rate applies to all products. Use **rate overrides** to assign non-default rates to specific products or categories. [​](https://docs.laravelshopper.dev/v2/user-guide/store-setup/taxes#rate-overrides) Rate Overrides ----------------------------------------------------------------------------------------------------- Overrides let you apply a non-default tax rate to specific products, product types, or categories. For example, you can set food products to use the 5.5% reduced rate instead of the default 20%. ![Tax rate override form](https://mintcdn.com/shopperlabs-ee054f5e/RoQo55-CU3i212Mj/images/v2/tax-rate-override.png?w=2500&fit=max&auto=format&n=RoQo55-CU3i212Mj&q=85&s=cdc392b3664e97af749a805abfa368b8) ### [​](https://docs.laravelshopper.dev/v2/user-guide/store-setup/taxes#override-types) Override Types | Type | What it targets | Example | | --- | --- | --- | | **Product Type** | All products of a type (standard, virtual, external) | Virtual products with digital tax rate | | **Product** | A specific product | A book with zero-rated VAT | | **Category** | All products in a category | Food category with reduced rate | [​](https://docs.laravelshopper.dev/v2/user-guide/store-setup/taxes#best-practices) Best Practices ----------------------------------------------------------------------------------------------------- Start with Defaults ------------------- Set up one default rate per zone. Add overrides only when needed for specific product categories. Know Your Rules --------------- Tax rules vary by country. Consult your accountant or tax advisor for the correct rates. Test Both Modes --------------- Test checkout with both tax-inclusive (VAT) and tax-exclusive (sales tax) zones to verify prices display correctly. Use Codes --------- Give each rate a clear code (e.g., “FR\_VAT\_20”) for easy identification in reports and invoices. For developer details on tax calculation, custom tax providers, and the tax pipeline, see the [Taxes documentation](https://docs.laravelshopper.dev/v2/taxes) . [Payment Methods](https://docs.laravelshopper.dev/v2/user-guide/store-setup/payment-methods) [Legal Pages](https://docs.laravelshopper.dev/v2/user-guide/store-setup/legal) ⌘I --- # Requirements - TALL Stack E-commerce Framework > Documentation Index > ------------------- > > Fetch the complete documentation index at: [/llms.txt](https://docs.laravelshopper.dev/llms.txt) > > Use this file to discover all available pages before exploring further. [Skip to main content](https://docs.laravelshopper.dev/v2/requirements#content-area) Shopper is a Laravel package and shares the same server requirements as Laravel itself. To manipulate images (resize, crop, etc), you will also need the GD Library or ImageMagick. [​](https://docs.laravelshopper.dev/v2/requirements#server-requirements) Server Requirements ----------------------------------------------------------------------------------------------- * PHP 8.3+ * MySQL 8+ / MariaDB 10.2+ / PostgreSQL 15+ ### [​](https://docs.laravelshopper.dev/v2/requirements#php-extensions) PHP Extensions The following PHP extensions are required: | Extension | Purpose | | --- | --- | | `intl` | Currency formatting, locale support, and internationalization | | `gd` or `imagick` | Image manipulation for product, category, and brand media | | `soap` | Carrier API calls (UPS, FedEx, USPS) for shipping rate calculation | Most PHP installations include `intl` and `gd` by default. The `soap` extension may need to be installed separately depending on your hosting environment. [​](https://docs.laravelshopper.dev/v2/requirements#package-requirements) Package Requirements ------------------------------------------------------------------------------------------------- | Package | Version | | --- | --- | | Laravel | 11.28+ / 12.x / 13.x | | Filament | 4.11+ | Shopper’s Laravel version support follows Filament’s compatibility. If Filament supports a Laravel version, Shopper supports it too. [​](https://docs.laravelshopper.dev/v2/requirements#development-environments) Development Environments --------------------------------------------------------------------------------------------------------- ### [​](https://docs.laravelshopper.dev/v2/requirements#laravel-herd) Laravel Herd [Laravel Herd](https://herd.laravel.com/) is the recommended development environment for both macOS and Windows. It provides PHP, Nginx, and database services with zero configuration. Herd includes all required PHP extensions out of the box. ### [​](https://docs.laravelshopper.dev/v2/requirements#laravel-valet) Laravel Valet [Laravel Valet](https://laravel.com/docs/valet) is a lightweight development environment for macOS. It maps all subdirectories in a directory (such as `~/Sites`) to `.test` domains. You can share your sites publicly using local tunnels. ### [​](https://docs.laravelshopper.dev/v2/requirements#docker) Docker Any Docker setup that satisfies the PHP and database requirements will work. The [Shopper demo store](https://github.com/shopperlabs/demo.laravelshopper.dev) uses Docker with FrankenPHP (Laravel Octane) as a reference. [Contribution Guide](https://docs.laravelshopper.dev/v2/contributing) [Installation](https://docs.laravelshopper.dev/v2/installation) ⌘I --- # External Product (Dropshipping) - TALL Stack E-commerce Framework > Documentation Index > ------------------- > > Fetch the complete documentation index at: [/llms.txt](https://docs.laravelshopper.dev/llms.txt) > > Use this file to discover all available pages before exploring further. [Skip to main content](https://docs.laravelshopper.dev/v2/user-guide/catalog/products/external-product#content-area) An external product is an item listed in your store but **fulfilled and shipped by a third-party supplier**. You don’t hold inventory. When a customer places an order, the supplier handles storage, packing, and shipping directly to the customer. This is the foundation of a **dropshipping** business model. [​](https://docs.laravelshopper.dev/v2/user-guide/catalog/products/external-product#when-to-use-external-products) When to Use External Products --------------------------------------------------------------------------------------------------------------------------------------------------- Use the External product type when: * **Dropshipping**. You sell products that a supplier ships directly to your customers * **Affiliate products**. You list products from another store and earn a commission * **Marketplace model**. You curate products from multiple vendors in your catalog * **Print-on-demand**. Items are printed and shipped by a third-party service * **Made-to-order**. Products manufactured by a partner after the order is placed [​](https://docs.laravelshopper.dev/v2/user-guide/catalog/products/external-product#how-dropshipping-works-with-shopper) How Dropshipping Works with Shopper --------------------------------------------------------------------------------------------------------------------------------------------------------------- The typical dropshipping flow with External products: 1. You list the product in your store with your own pricing and branding 2. A customer places an order on your store 3. You forward the order to your supplier 4. The supplier ships the product directly to your customer 5. You keep the profit margin (your price minus supplier cost) [​](https://docs.laravelshopper.dev/v2/user-guide/catalog/products/external-product#what-makes-external-products-unique) What Makes External Products Unique --------------------------------------------------------------------------------------------------------------------------------------------------------------- External products have the most simplified configuration since fulfillment is handled externally: | Feature | Available | Notes | | --- | --- | --- | | **Shipping** | No | Handled by the supplier | | **Inventory tracking** | No | Managed by the supplier | | **Attributes** | No | Product specs come from the supplier | | **Variants** | No | Create separate external products for each option | | **Digital files** | No | Not applicable | | **Pricing** | Yes | Set your retail price (markup over supplier cost) | | **SEO** | Yes | Optimize for your store’s search visibility | | **Categories & collections** | Yes | Organize in your catalog as usual | | **Media** | Yes | Use supplier images or your own product photos | [​](https://docs.laravelshopper.dev/v2/user-guide/catalog/products/external-product#configuring-an-external-product) Configuring an External Product ------------------------------------------------------------------------------------------------------------------------------------------------------- After creating an external product through the [creation wizard](https://docs.laravelshopper.dev/v2/user-guide/catalog/products/creating-product) , the configuration focuses on: ### [​](https://docs.laravelshopper.dev/v2/user-guide/catalog/products/external-product#pricing-strategy) Pricing Strategy The key to dropshipping profitability is your pricing: | Field | Description | | --- | --- | | **Price** | Your retail selling price (what the customer pays) | | **Compare at price** | Optional higher price to show a deal | | **Cost per item** | The supplier’s price (your cost). The difference is your profit margin. | **Example pricing calculation:** * Supplier price (cost): $25.00 * Your retail price: $59.99 * Compare at price: $79.99 * **Your profit margin: $34.99 per sale** A common dropshipping markup is 2x to 3x the supplier cost. Research competitor pricing to find the sweet spot between competitiveness and profitability. ### [​](https://docs.laravelshopper.dev/v2/user-guide/catalog/products/external-product#product-information) Product Information Even though the product is fulfilled externally, you should provide: * **Compelling descriptions**. Write unique descriptions rather than copying the supplier’s text. This helps SEO and builds customer trust. * **Quality images**. Use high-resolution product photos. Request sample products from your supplier for original photography when possible. * **Accurate details**. Ensure your product descriptions match what the supplier actually ships. [​](https://docs.laravelshopper.dev/v2/user-guide/catalog/products/external-product#example-creating-a-dropshipping-product) Example: Creating a Dropshipping Product ------------------------------------------------------------------------------------------------------------------------------------------------------------------------ Let’s create a “Minimalist Wooden Watch” from a dropshipping supplier: 1. **Type**: Select “External Product” 2. **General info**: Name it “Minimalist Wooden Watch, Natural Bamboo”, write a unique product description that highlights craftsmanship and sustainability 3. **Associations**: Brand “EcoTime” (your private label), category “Accessories > Watches”, collection “Eco-Friendly” 4. **Media**: Upload supplier product photos (front, side, on wrist, packaging) 5. **Stock**: Skip, supplier manages inventory After creation: * **Pricing**: Price 89.00,compareat89.00, compare at 89.00,compareat129.00, cost $28.00 (supplier price) * **SEO**: Title “Bamboo Wood Watch - Eco-Friendly Minimalist Timepiece” * **Related products**: Link to other watches and accessories in your store [​](https://docs.laravelshopper.dev/v2/user-guide/catalog/products/external-product#managing-supplier-relationships) Managing Supplier Relationships ------------------------------------------------------------------------------------------------------------------------------------------------------- While Shopper handles the storefront, you’ll manage supplier relationships outside the platform: | Aspect | Your Responsibility | | --- | --- | | **Order forwarding** | Send customer orders to your supplier | | **Inventory sync** | Check supplier stock availability regularly | | **Shipping times** | Communicate realistic delivery times to customers | | **Returns** | Coordinate returns between customer and supplier | | **Quality control** | Order samples to verify product quality | Always verify supplier reliability before listing products. Order samples, check shipping times, and ensure quality meets your standards. Your brand reputation depends on the supplier’s execution. [​](https://docs.laravelshopper.dev/v2/user-guide/catalog/products/external-product#dropshipping-best-practices) Dropshipping Best Practices ----------------------------------------------------------------------------------------------------------------------------------------------- Unique Descriptions ------------------- Write original product descriptions. Avoid copying supplier text. It hurts SEO and looks generic. Realistic Shipping Times ------------------------ Be transparent about delivery times, especially for international suppliers. Quality Samples --------------- Order the product yourself before listing it. Verify quality, packaging, and shipping speed. Profit Margins -------------- Account for marketing costs, returns, and refunds when setting your markup. [​](https://docs.laravelshopper.dev/v2/user-guide/catalog/products/external-product#differences-from-other-product-types) Differences from Other Product Types ----------------------------------------------------------------------------------------------------------------------------------------------------------------- | Aspect | Standard | External (Dropshipping) | | --- | --- | --- | | Inventory | You manage stock | Supplier manages stock | | Shipping | You ship to customer | Supplier ships to customer | | Upfront investment | Buy inventory first | No inventory needed | | Profit margins | Higher (you control costs) | Lower (supplier sets costs) | | Fulfillment speed | Under your control | Depends on supplier | | Quality control | You inspect products | Limited visibility | | Risk | Unsold inventory | Supplier reliability | [Virtual Product](https://docs.laravelshopper.dev/v2/user-guide/catalog/products/virtual-product) [Variant Product](https://docs.laravelshopper.dev/v2/user-guide/catalog/products/variant-product) ⌘I --- # Virtual Product - TALL Stack E-commerce Framework > Documentation Index > ------------------- > > Fetch the complete documentation index at: [/llms.txt](https://docs.laravelshopper.dev/llms.txt) > > Use this file to discover all available pages before exploring further. [Skip to main content](https://docs.laravelshopper.dev/v2/user-guide/catalog/products/virtual-product#content-area) A virtual product is a **digital or intangible item** that doesn’t require physical shipping. Customers receive their purchase through a download link, an access code, or an online account. There’s no need for inventory tracking, shipping calculations, or package dimensions. [​](https://docs.laravelshopper.dev/v2/user-guide/catalog/products/virtual-product#when-to-use-virtual-products) When to Use Virtual Products ------------------------------------------------------------------------------------------------------------------------------------------------ Use the Virtual product type when you sell: * **Digital downloads**. Ebooks, music, software, templates, presets * **Online courses**. Video courses, tutorials, educational content * **Software licenses**. Activation keys, subscription codes * **Memberships**. Access to premium content or services * **Digital art**. Photos, illustrations, design assets * **Documents**. Reports, guides, legal templates [​](https://docs.laravelshopper.dev/v2/user-guide/catalog/products/virtual-product#what-makes-virtual-products-unique) What Makes Virtual Products Unique ------------------------------------------------------------------------------------------------------------------------------------------------------------ Virtual products have a simplified configuration compared to physical products: | Feature | Available | Notes | | --- | --- | --- | | **Shipping** | No | No physical delivery needed | | **Inventory tracking** | No | Digital goods have unlimited stock | | **Attributes** | No | Not applicable for digital items | | **Variants** | No | Use separate products for different tiers | | **Digital files** | Yes | Upload downloadable files for customers | | **Pricing** | Yes | Full pricing support including compare-at prices | | **SEO** | Yes | Optimize for search visibility | | **Categories & collections** | Yes | Organize alongside physical products | [​](https://docs.laravelshopper.dev/v2/user-guide/catalog/products/virtual-product#managing-digital-files) Managing Digital Files ------------------------------------------------------------------------------------------------------------------------------------ The key feature of virtual products is the ability to attach downloadable files that customers receive after purchase. ### [​](https://docs.laravelshopper.dev/v2/user-guide/catalog/products/virtual-product#uploading-files) Uploading Files After creating your virtual product, navigate to the **Files** section: 1. Click **Add file** or drag and drop your files 2. Upload one or more files (PDF, ZIP, MP3, MP4, etc.) 3. Files are stored securely and only accessible to customers who purchase the product ### [​](https://docs.laravelshopper.dev/v2/user-guide/catalog/products/virtual-product#file-types) File Types You can upload any file type. Common formats include: | Category | Common formats | | --- | --- | | Documents | PDF, DOCX, XLSX, PPTX | | Images | PNG, JPG, PSD, AI, SVG | | Audio | MP3, WAV, FLAC, AAC | | Video | MP4, MOV, AVI, MKV | | Software | ZIP, DMG, EXE, MSI | | Archives | ZIP, RAR, TAR.GZ | For large files, consider compressing them into a ZIP archive before uploading. This reduces upload time and provides a single download for customers. [​](https://docs.laravelshopper.dev/v2/user-guide/catalog/products/virtual-product#pricing-virtual-products) Pricing Virtual Products ---------------------------------------------------------------------------------------------------------------------------------------- Virtual products support the same pricing options as physical products: | Field | Description | | --- | --- | | **Price** | The regular selling price | | **Compare at price** | Show a crossed-out original price (useful for promotions) | | **Cost per item** | Your cost for profit margin calculations | You can set prices in multiple currencies if your store supports it. Virtual products often use the compare-at price for limited-time offers or launch promotions. For example, an online course priced at 49withacompare−atpriceof49 with a compare-at price of 49withacompare−atpriceof99 shows customers they’re getting a deal. [​](https://docs.laravelshopper.dev/v2/user-guide/catalog/products/virtual-product#example-creating-a-virtual-product) Example: Creating a Virtual Product ------------------------------------------------------------------------------------------------------------------------------------------------------------- Let’s create a “Photography Masterclass” online course: 1. **Type**: Select “Virtual Product” 2. **General info**: Name it “Photography Masterclass: From Beginner to Pro”, add a description covering what students will learn, the curriculum outline, and what’s included 3. **Associations**: Category “Courses > Photography”, collection “Best Sellers” 4. **Media**: Upload a course cover image and preview screenshots of the video content 5. **Stock**: Skip, no physical inventory needed After creation: * **Files**: Upload the course ZIP file containing video lessons, PDF workbook, and preset pack * **Pricing**: 79.00,compareat79.00, compare at 79.00,compareat149.00 * **SEO**: Title “Photography Masterclass Online Course”, optimize description with keywords like “learn photography”, “photo editing course” [​](https://docs.laravelshopper.dev/v2/user-guide/catalog/products/virtual-product#best-practices) Best Practices -------------------------------------------------------------------------------------------------------------------- Clear Deliverables ------------------ Clearly describe what files or access customers will receive after purchase. Preview Content --------------- Use images and descriptions to give customers a preview of what they’re buying. File Organization ----------------- Bundle multiple files into a well-organized ZIP with a README or guide. Pricing Strategy ---------------- Use compare-at pricing for launches and time-limited promotions. [​](https://docs.laravelshopper.dev/v2/user-guide/catalog/products/virtual-product#differences-from-standard-products) Differences from Standard Products ------------------------------------------------------------------------------------------------------------------------------------------------------------ | Aspect | Standard Product | Virtual Product | | --- | --- | --- | | Delivery | Physical shipping | Instant download | | Inventory | Tracked with stock levels | Unlimited availability | | Shipping config | Weight, dimensions required | Not applicable | | Attributes | Material, size, etc. | Not applicable | | Files | Not applicable | Downloadable files attached | | Returns | Physical return process | Refund-based (no return) | [Standard Product](https://docs.laravelshopper.dev/v2/user-guide/catalog/products/standard-product) [External Product (Dropshipping)](https://docs.laravelshopper.dev/v2/user-guide/catalog/products/external-product) ⌘I --- # Standard Product - TALL Stack E-commerce Framework > Documentation Index > ------------------- > > Fetch the complete documentation index at: [/llms.txt](https://docs.laravelshopper.dev/llms.txt) > > Use this file to discover all available pages before exploring further. [Skip to main content](https://docs.laravelshopper.dev/v2/user-guide/catalog/products/standard-product#content-area) A standard product is the most common product type in e-commerce. It represents a **physical item** that you stock in your warehouse and ship to customers. Examples include clothing, electronics, books, furniture, food items, or any tangible goods. [​](https://docs.laravelshopper.dev/v2/user-guide/catalog/products/standard-product#when-to-use-standard-products) When to Use Standard Products --------------------------------------------------------------------------------------------------------------------------------------------------- Use the Standard product type when: * You sell a physical item that needs to be shipped * The product does not have variations (no size/color options) * You manage inventory for this product * The product has weight and dimensions for shipping calculations If your physical product comes in multiple options (different sizes, colors, materials), use the [Variant Product](https://docs.laravelshopper.dev/v2/user-guide/catalog/products/variant-product) type instead. [​](https://docs.laravelshopper.dev/v2/user-guide/catalog/products/standard-product#what-makes-standard-products-unique) What Makes Standard Products Unique --------------------------------------------------------------------------------------------------------------------------------------------------------------- After creating a Standard product through the [creation wizard](https://docs.laravelshopper.dev/v2/user-guide/catalog/products/creating-product) , you have access to these additional features: | Feature | Description | | --- | --- | | **Shipping** | Configure weight and package dimensions for carrier calculations | | **Attributes** | Add product characteristics (material, care instructions, etc.) | | **Inventory** | Track stock levels with history and safety stock alerts | | **Pricing** | Set prices in multiple currencies with compare-at and cost prices | [​](https://docs.laravelshopper.dev/v2/user-guide/catalog/products/standard-product#configuring-shipping) Configuring Shipping --------------------------------------------------------------------------------------------------------------------------------- The shipping section lets you define the physical characteristics of your product for accurate shipping rate calculations. ![Product Shipping Configuration](https://mintcdn.com/shopperlabs-ee054f5e/khtWzNt9B9rQhNq5/images/v2/product-shipping.png?w=2500&fit=max&auto=format&n=khtWzNt9B9rQhNq5&q=85&s=b63285911c119b79f005879b73ff80bd) | Field | Description | | --- | --- | | **Weight** | Product weight with unit selection (kg, g, lb, oz) | | **Height** | Package height with unit selection (cm, m, in, ft) | | **Width** | Package width with unit selection | | **Depth** | Package depth with unit selection | | **Volume** | Package volume (calculated or manual) with unit selection (l, ml, fl oz) | Accurate weight and dimensions are essential for calculating shipping costs with carriers. Measure your product when packaged, not just the item alone. [​](https://docs.laravelshopper.dev/v2/user-guide/catalog/products/standard-product#managing-attributes) Managing Attributes ------------------------------------------------------------------------------------------------------------------------------- Attributes let you add structured information about your product’s characteristics. This is useful for displaying product specs on your storefront or enabling filtering in your catalog. ![Product Attributes](https://mintcdn.com/shopperlabs-ee054f5e/khtWzNt9B9rQhNq5/images/v2/product-attributes.png?w=2500&fit=max&auto=format&n=khtWzNt9B9rQhNq5&q=85&s=837cd51e240d7ba7a1d5da9a61a57798) Common attributes for standard products: * **Material**. Cotton, polyester, leather, wood, metal * **Color**. When it’s a single-color product without variants * **Care instructions**. Machine washable, hand wash only * **Country of origin**. Where the product is manufactured * **Warranty**. Duration and coverage details To add attributes: 1. Navigate to your product’s **Attributes** tab 2. Click **Add attribute** 3. Select an attribute from your attribute library 4. Fill in the value for this product ![Add Product Attributes](https://mintcdn.com/shopperlabs-ee054f5e/khtWzNt9B9rQhNq5/images/v2/product-add-attributes.png?w=2500&fit=max&auto=format&n=khtWzNt9B9rQhNq5&q=85&s=48157e24a9dc10bd0684b7ada2181ed6) Attributes must be created first in the [Attributes](https://docs.laravelshopper.dev/v2/user-guide/catalog/attributes) section before they can be assigned to products. [​](https://docs.laravelshopper.dev/v2/user-guide/catalog/products/standard-product#inventory-management) Inventory Management --------------------------------------------------------------------------------------------------------------------------------- The inventory section shows your current stock levels and provides a complete history of stock movements. ![Product Inventory](https://mintcdn.com/shopperlabs-ee054f5e/khtWzNt9B9rQhNq5/images/v2/product-inventory.png?w=2500&fit=max&auto=format&n=khtWzNt9B9rQhNq5&q=85&s=2b3891b67672b41d0afb1240fece2db7) ### [​](https://docs.laravelshopper.dev/v2/user-guide/catalog/products/standard-product#stock-information) Stock Information | Field | Description | | --- | --- | | **Current stock** | The total available quantity across all locations | | **SKU** | Your internal stock keeping unit identifier | | **Barcode** | Product barcode for scanning (UPC, EAN, ISBN) | | **Safety stock** | The minimum stock level before a low-stock alert is triggered | ### [​](https://docs.laravelshopper.dev/v2/user-guide/catalog/products/standard-product#adding-inventory) Adding Inventory You can manually adjust stock levels by adding or removing inventory: ![Add Inventory](https://mintcdn.com/shopperlabs-ee054f5e/khtWzNt9B9rQhNq5/images/v2/product-inventory-add.png?w=2500&fit=max&auto=format&n=khtWzNt9B9rQhNq5&q=85&s=8b4bf7e02db36d55b6bbacd20209a254) 1. Click **Add stock** in the inventory section 2. Select the inventory location 3. Enter the quantity to add (positive) or remove (negative) 4. The stock history will record this adjustment with a timestamp ### [​](https://docs.laravelshopper.dev/v2/user-guide/catalog/products/standard-product#stock-history) Stock History Every stock movement is recorded with: * The date and time of the change * The quantity adjusted (added or removed) * The user who made the change * The reference (manual adjustment, order, etc.) [​](https://docs.laravelshopper.dev/v2/user-guide/catalog/products/standard-product#pricing) Pricing ------------------------------------------------------------------------------------------------------- Configure how much your product costs. See [Managing Products](https://docs.laravelshopper.dev/v2/user-guide/catalog/products/managing-products) for detailed pricing configuration. ![Product Pricing](https://mintcdn.com/shopperlabs-ee054f5e/khtWzNt9B9rQhNq5/images/v2/product-pricing.png?w=2500&fit=max&auto=format&n=khtWzNt9B9rQhNq5&q=85&s=2b15adf1147a109755a417f953be61d9) [​](https://docs.laravelshopper.dev/v2/user-guide/catalog/products/standard-product#example-creating-a-standard-product) Example: Creating a Standard Product ---------------------------------------------------------------------------------------------------------------------------------------------------------------- Let’s walk through creating a “Leather Messenger Bag”: 1. **Type**: Select “Standard Product” 2. **General info**: Name it “Leather Messenger Bag”, add a description highlighting the craftsmanship and features 3. **Associations**: Assign to brand “Heritage Craft”, category “Bags > Messenger Bags”, collection “New Arrivals” 4. **Media**: Upload photos from multiple angles (front, back, inside, strap detail) 5. **Stock**: SKU `BAG-LEATH-001`, initial quantity 50, safety stock 10 After creation: * **Shipping**: Weight 1.2 kg, dimensions 40x30x10 cm * **Attributes**: Material “Full grain leather”, Color “Brown”, Origin “Italy” * **Pricing**: 189.00,compareat189.00, compare at 189.00,compareat229.00, cost $85.00 * **SEO**: Title “Leather Messenger Bag - Heritage Craft”, description with keywords [​](https://docs.laravelshopper.dev/v2/user-guide/catalog/products/standard-product#best-practices) Best Practices --------------------------------------------------------------------------------------------------------------------- Accurate Dimensions ------------------- Always measure packed products for accurate shipping calculations. Safety Stock ------------ Set safety stock levels to avoid selling items you can’t fulfill. Detailed Attributes ------------------- Add relevant attributes to help customers make informed decisions. Multiple Images --------------- Show your product from every angle. Customers can’t touch it online. [Creating a Product](https://docs.laravelshopper.dev/v2/user-guide/catalog/products/creating-product) [Virtual Product](https://docs.laravelshopper.dev/v2/user-guide/catalog/products/virtual-product) ⌘I --- # Overview - TALL Stack E-commerce Framework > Documentation Index > ------------------- > > Fetch the complete documentation index at: [/llms.txt](https://docs.laravelshopper.dev/llms.txt) > > Use this file to discover all available pages before exploring further. [Skip to main content](https://docs.laravelshopper.dev/v2/user-guide/catalog/products/overview#content-area) Products are the core of your e-commerce store. Shopper supports multiple product types to cover a wide range of selling scenarios, from physical goods to digital downloads and dropshipping. [​](https://docs.laravelshopper.dev/v2/user-guide/catalog/products/overview#accessing-products) Accessing Products --------------------------------------------------------------------------------------------------------------------- Click on **Products** in the sidebar to access the product management page. Here you can see all your products, filter by status, type, or category, and quickly access any product for editing. ![Products List](https://mintcdn.com/shopperlabs-ee054f5e/khtWzNt9B9rQhNq5/images/v2/products.png?w=2500&fit=max&auto=format&n=khtWzNt9B9rQhNq5&q=85&s=34fdc8030fa27b764cfd89c383f732f3) If you haven’t created any products yet, you’ll see an empty state with a button to create your first product. ![Products Empty State](https://mintcdn.com/shopperlabs-ee054f5e/khtWzNt9B9rQhNq5/images/v2/products-empty-state.png?w=2500&fit=max&auto=format&n=khtWzNt9B9rQhNq5&q=85&s=ddd442018103b862a3ea7d59bb71e0c5) [​](https://docs.laravelshopper.dev/v2/user-guide/catalog/products/overview#product-types) Product Types ----------------------------------------------------------------------------------------------------------- Shopper offers four product types, each designed for a specific selling scenario. When creating a product, you’ll choose the type that best fits what you’re selling. ![Product Type Selection](https://mintcdn.com/shopperlabs-ee054f5e/khtWzNt9B9rQhNq5/images/v2/product-add-step-type.png?w=2500&fit=max&auto=format&n=khtWzNt9B9rQhNq5&q=85&s=894de85e52ddbefa0b2ba159669d7613) Standard Product ---------------- Physical goods that require shipping. This is the most common product type for stores selling tangible items like clothing, electronics, or furniture. Virtual Product --------------- Digital products that don’t require shipping. Ideal for downloadable files, software licenses, online courses, or subscriptions. External Product ---------------- Products fulfilled by a third-party supplier. Perfect for dropshipping, where you sell products without holding inventory. Variant Product --------------- Products with multiple options like size, color, or material. Each combination becomes a separate variant with its own price, stock, and SKU. [​](https://docs.laravelshopper.dev/v2/user-guide/catalog/products/overview#choosing-the-right-type) Choosing the Right Type ------------------------------------------------------------------------------------------------------------------------------- | What you’re selling | Recommended type | | --- | --- | | Physical items you stock and ship yourself | **Standard** | | Digital files (ebooks, music, software) | **Virtual** | | Online courses or memberships | **Virtual** | | Items shipped directly by a supplier | **External** (Dropshipping) | | A t-shirt in multiple sizes and colors | **Variant** | | A single unique handmade item | **Standard** | | Affiliate products from another store | **External** (Dropshipping) | | A phone case in 10 colors | **Variant** | The product type is set during creation and cannot be changed afterward. Make sure to choose the correct type before proceeding. [​](https://docs.laravelshopper.dev/v2/user-guide/catalog/products/overview#type-capabilities) Type Capabilities ------------------------------------------------------------------------------------------------------------------- Not all features are available for every product type. Here’s what each type supports: | Feature | Standard | Virtual | External | Variant | | --- | --- | --- | --- | --- | | Shipping & dimensions | Yes | No | No | Yes | | Inventory tracking | Yes | No | No | Yes (per variant) | | Product attributes | Yes | No | No | Yes | | Variants (size, color…) | No | No | No | Yes | | Digital file downloads | No | Yes | No | No | | Pricing | Yes | Yes | Yes | Yes (per variant) | | SEO | Yes | Yes | Yes | Yes | | Categories & collections | Yes | Yes | Yes | Yes | | Related products | Yes | Yes | Yes | Yes | | Media (images) | Yes | Yes | Yes | Yes | [​](https://docs.laravelshopper.dev/v2/user-guide/catalog/products/overview#what%E2%80%99s-next) What’s Next? ---------------------------------------------------------------------------------------------------------------- Create a Product ---------------- Follow the step-by-step wizard to create your first product. Manage Products --------------- Learn how to edit pricing, SEO, media, and more after creation. For developer details, see the [Products documentation](https://docs.laravelshopper.dev/v2/products) . [Managing Suppliers](https://docs.laravelshopper.dev/v2/user-guide/catalog/suppliers) [Creating a Product](https://docs.laravelshopper.dev/v2/user-guide/catalog/products/creating-product) ⌘I --- # Managing Products - TALL Stack E-commerce Framework > Documentation Index > ------------------- > > Fetch the complete documentation index at: [/llms.txt](https://docs.laravelshopper.dev/llms.txt) > > Use this file to discover all available pages before exploring further. [Skip to main content](https://docs.laravelshopper.dev/v2/user-guide/catalog/products/managing-products#content-area) After creating a product, you can manage all its details from the product edit page. This guide covers the common management tasks available for all product types. [​](https://docs.laravelshopper.dev/v2/user-guide/catalog/products/managing-products#product-edit-page) Product Edit Page ---------------------------------------------------------------------------------------------------------------------------- Click on any product from the products list to open its edit page. The page is organized into tabs based on your product type: ![Product Edit Page](https://mintcdn.com/shopperlabs-ee054f5e/khtWzNt9B9rQhNq5/images/v2/product-edit.png?w=2500&fit=max&auto=format&n=khtWzNt9B9rQhNq5&q=85&s=e9eba1c967357e2d933f0f6524557b81) [​](https://docs.laravelshopper.dev/v2/user-guide/catalog/products/managing-products#pricing) Pricing -------------------------------------------------------------------------------------------------------- The pricing section lets you configure your product’s price, comparison price, and cost. If your store supports multiple currencies, you can set prices in each currency. ![Product Pricing](https://mintcdn.com/shopperlabs-ee054f5e/khtWzNt9B9rQhNq5/images/v2/product-pricing.png?w=2500&fit=max&auto=format&n=khtWzNt9B9rQhNq5&q=85&s=2b15adf1147a109755a417f953be61d9) | Field | Description | | --- | --- | | **Price** | The regular selling price shown to customers | | **Compare at price** | The original price displayed with a strikethrough to indicate a discount. Leave empty if the product is not on sale. | | **Cost per item** | Your cost to acquire or produce the item. Used for profit margin calculations and not visible to customers. | ### [​](https://docs.laravelshopper.dev/v2/user-guide/catalog/products/managing-products#multi-currency-pricing) Multi-Currency Pricing If you have multiple currencies configured in your store: * Each currency has its own set of price fields * Set appropriate prices for each market (don’t just convert; consider local pricing strategies) * The customer sees the price in their local currency based on your store’s currency detection ![Multi-Currency Pricing](https://mintcdn.com/shopperlabs-ee054f5e/khtWzNt9B9rQhNq5/images/v2/product-add-pricing.png?w=2500&fit=max&auto=format&n=khtWzNt9B9rQhNq5&q=85&s=95f407909220453bce6df9262266a4c4) For variant products, pricing is set at the variant level. The parent product doesn’t have its own price. Each variant can have a different price. ### [​](https://docs.laravelshopper.dev/v2/user-guide/catalog/products/managing-products#pricing-strategies) Pricing Strategies | Strategy | How to configure | | --- | --- | | **Fixed price** | Set only the “Price” field | | **Sale price** | Set “Price” lower than “Compare at price” | | **Cost-plus** | Fill “Cost per item” to track margins, set “Price” with your desired markup | | **Anchor pricing** | Set a high “Compare at price” to make the actual price feel like a deal | [​](https://docs.laravelshopper.dev/v2/user-guide/catalog/products/managing-products#media-management) Media Management -------------------------------------------------------------------------------------------------------------------------- Manage your product’s visual content, including thumbnail and gallery images. ### [​](https://docs.laravelshopper.dev/v2/user-guide/catalog/products/managing-products#thumbnail) Thumbnail The thumbnail is your product’s primary image. It appears in: * Product listings and search results * Shopping cart and checkout * Order confirmations and invoices ### [​](https://docs.laravelshopper.dev/v2/user-guide/catalog/products/managing-products#product-gallery) Product Gallery Additional images shown on the product detail page: * Upload multiple images for different angles * Drag and drop to reorder images * Delete images you no longer need **Image recommendations:** * Minimum resolution: 800x800 pixels * Consistent aspect ratio across products (square works best for most stores) * Clean white or neutral background for the thumbnail * Lifestyle and detail shots for gallery images [​](https://docs.laravelshopper.dev/v2/user-guide/catalog/products/managing-products#seo-optimization) SEO Optimization -------------------------------------------------------------------------------------------------------------------------- Optimize your product pages for search engines to drive organic traffic. ![Product SEO](https://mintcdn.com/shopperlabs-ee054f5e/khtWzNt9B9rQhNq5/images/v2/product-seo.png?w=2500&fit=max&auto=format&n=khtWzNt9B9rQhNq5&q=85&s=4292b5e3b45af07132bc9b901ae62a33) | Field | Description | Best practice | | --- | --- | --- | | **SEO Title** | The title shown in search engine results | Keep under 60 characters. Include the product name and a key benefit. | | **SEO Description** | The meta description shown below the title in search results | Keep under 160 characters. Describe the product and include a call to action. | | **URL handle** | The URL slug for the product page | Use lowercase, hyphen-separated words. Keep it short and descriptive. | ### [​](https://docs.laravelshopper.dev/v2/user-guide/catalog/products/managing-products#seo-tips) SEO Tips * **Include keywords** naturally in the title and description. Think about what customers search for * **Be specific**. “Red Leather Crossbody Bag” is better than “Nice Bag” * **Add a call to action** in the meta description, such as “Shop now”, “Free shipping”, “Limited edition” * **Avoid duplicate content**. Each product should have unique SEO text If left empty, search engines will use your product name as the title and pull text from your description. It’s always better to set these explicitly for optimal results. [​](https://docs.laravelshopper.dev/v2/user-guide/catalog/products/managing-products#related-products) Related Products -------------------------------------------------------------------------------------------------------------------------- Link related products to encourage customers to explore more of your catalog and increase average order value. ![Related Products](https://mintcdn.com/shopperlabs-ee054f5e/khtWzNt9B9rQhNq5/images/v2/related-product.png?w=2500&fit=max&auto=format&n=khtWzNt9B9rQhNq5&q=85&s=ca91c16e377c1d87471b163b74bb367f) ### [​](https://docs.laravelshopper.dev/v2/user-guide/catalog/products/managing-products#adding-related-products) Adding Related Products 1. Navigate to the **Related Products** section on your product 2. Click **Add related product** 3. Search for and select products to link 4. Related products appear on the product detail page on your storefront ### [​](https://docs.laravelshopper.dev/v2/user-guide/catalog/products/managing-products#when-to-use-related-products) When to Use Related Products | Use case | Example | | --- | --- | | **Complementary items** | Shoes → Shoe cleaner, laces, socks | | **Same category** | Blue dress → Other dresses in similar style | | **Frequently bought together** | Phone → Phone case, screen protector | | **Upsell** | Basic model → Premium model of same product | | **Accessories** | Camera → Lens, tripod, bag | [​](https://docs.laravelshopper.dev/v2/user-guide/catalog/products/managing-products#visibility-&-publishing) Visibility & Publishing ---------------------------------------------------------------------------------------------------------------------------------------- Control when and where your product is visible. ### [​](https://docs.laravelshopper.dev/v2/user-guide/catalog/products/managing-products#visibility-toggle) Visibility Toggle * **Visible**: Product appears on your storefront and in search results * **Hidden**: Product exists in the admin but is not shown to customers Use hidden mode to: * Prepare products before a launch * Temporarily remove seasonal items * Hide products being updated or photographed ### [​](https://docs.laravelshopper.dev/v2/user-guide/catalog/products/managing-products#publication-date) Publication Date The **Published at** date controls when the product goes live: * **Past or current date**: Product is immediately available (if visible) * **Future date**: Product is scheduled and will become available at that date and time Combine a future publication date with “Visible” to schedule product launches. The product won’t appear until the scheduled date. [​](https://docs.laravelshopper.dev/v2/user-guide/catalog/products/managing-products#channels) Channels ---------------------------------------------------------------------------------------------------------- If your store uses multiple sales channels, you can control which channels a product appears on: * **Web store**. Your main online store * **Mobile app**. If you have a mobile shopping app * **POS**. Point of sale / in-store * **Marketplace**. Third-party marketplace listings Each product can be assigned to one or more channels. [​](https://docs.laravelshopper.dev/v2/user-guide/catalog/products/managing-products#product-on-storefront) Product on Storefront ------------------------------------------------------------------------------------------------------------------------------------ Here’s how a fully configured product appears to customers: ![Product on Storefront](https://mintcdn.com/shopperlabs-ee054f5e/3ZB91-BonuCgmULq/images/v2/starterkit-product-view.png?w=2500&fit=max&auto=format&n=3ZB91-BonuCgmULq&q=85&s=37f2d57a629a90148e11fe5c201ea5e1) * * * ![Product Detail on Store](https://mintcdn.com/shopperlabs-ee054f5e/3ZB91-BonuCgmULq/images/v2/store-product-detail.png?w=2500&fit=max&auto=format&n=3ZB91-BonuCgmULq&q=85&s=68cfe3c1ab728ae62db7e280cf00b058) [​](https://docs.laravelshopper.dev/v2/user-guide/catalog/products/managing-products#common-actions) Common Actions ---------------------------------------------------------------------------------------------------------------------- | Action | How | | --- | --- | | **Edit product info** | Click on the product, modify fields, save | | **Change visibility** | Toggle the visibility switch | | **Update stock** | Go to Inventory tab, add/adjust stock | | **Update pricing** | Go to Pricing tab, modify prices, save | | **Delete product** | Click delete action (irreversible) | | **Duplicate product** | Use the duplicate action to create a copy | Deleting a product is permanent and removes all associated variants, stock history, and pricing. Consider hiding the product instead if you might need it again. For developer details, see the [Products documentation](https://docs.laravelshopper.dev/v2/products) . [Variant Product](https://docs.laravelshopper.dev/v2/user-guide/catalog/products/variant-product) [Managing Orders](https://docs.laravelshopper.dev/v2/user-guide/sales/orders) ⌘I --- # Managing Orders - TALL Stack E-commerce Framework > Documentation Index > ------------------- > > Fetch the complete documentation index at: [/llms.txt](https://docs.laravelshopper.dev/llms.txt) > > Use this file to discover all available pages before exploring further. [Skip to main content](https://docs.laravelshopper.dev/v2/user-guide/sales/orders#content-area) When a customer places an order on your store, it appears in the **Orders** section of your admin panel. From here, you manage everything: confirm payment, prepare shipments, track delivery, and handle issues. [​](https://docs.laravelshopper.dev/v2/user-guide/sales/orders#order-list) Order List ---------------------------------------------------------------------------------------- Click **Orders** in the sidebar to see all your orders. The list shows each order’s number, date, total amount, and three status badges that tell you where the order stands at a glance. ![Orders list with status badges](https://mintcdn.com/shopperlabs-ee054f5e/oIKaIi3fMpfukx2M/images/v2/orders.png?w=2500&fit=max&auto=format&n=oIKaIi3fMpfukx2M&q=85&s=1a42b03ff1bea67b042679cc4339d1ba) ### [​](https://docs.laravelshopper.dev/v2/user-guide/sales/orders#tabs) Tabs The tabs at the top filter orders by their current state: | Tab | What it shows | | --- | --- | | **All** | Every order in your store | | **Open** | New and processing orders that still need attention | | **Paid** | Orders where payment has been received | | **Fulfilled** | Orders that have been shipped or partially shipped | | **Cancelled** | Orders that were cancelled | | **Archived** | Orders you’ve archived | ### [​](https://docs.laravelshopper.dev/v2/user-guide/sales/orders#filters) Filters Click the filter icon to narrow down your list. You can filter by order number, customer, order status, payment status, shipping status, date range, zone, channel, or currency. [​](https://docs.laravelshopper.dev/v2/user-guide/sales/orders#order-detail) Order Detail -------------------------------------------------------------------------------------------- Click on any order to open its detail page. The page is split into two areas: the main content on the left and customer information on the right. ![Order detail page](https://mintcdn.com/shopperlabs-ee054f5e/oIKaIi3fMpfukx2M/images/v2/order-detail.png?w=2500&fit=max&auto=format&n=oIKaIi3fMpfukx2M&q=85&s=dad13c6a17bab919eb3655e73bc336a9) The header stays visible as you scroll. It shows: * The **order number** * Three **status badges** for order status, payment status, and shipping status * **Action buttons** for processing the order (see [Actions](https://docs.laravelshopper.dev/v2/user-guide/sales/orders#actions) below) * **Previous / Next** arrows to navigate between orders * The **order date**, **customer name** (linked to their profile), and **sales channel** ### [​](https://docs.laravelshopper.dev/v2/user-guide/sales/orders#main-content) Main Content The left side of the page contains three sections: **Fulfillment**. A visual progress bar showing where the order is in the fulfillment process (New → Processing → Shipped → Completed). If there are items that haven’t been assigned to a shipment yet, a **Create Shipping Label** button appears here. **Products**. The list of items in the order with their thumbnail, name, quantity, fulfillment status badge, and price. **Summary**. Payment status, payment method, subtotal, shipping carrier and fee, and the order total. The right side shows: * **Customer profile**. Name, avatar, and a link to their full profile. Below that, how long they’ve been a customer and how many orders they’ve placed. * **Contact information**. Email and phone number. * **Shipping address**. The delivery address for this order. * **Billing address**. Displayed separately, or “Same address” if it matches the shipping address. * **Private notes**. A text field where you can leave internal comments. Only your team can see these. [​](https://docs.laravelshopper.dev/v2/user-guide/sales/orders#order-status) Order Status -------------------------------------------------------------------------------------------- Every order has three independent statuses that track different aspects of the order. ### [​](https://docs.laravelshopper.dev/v2/user-guide/sales/orders#order-status-2) Order Status The overall state of the order. | Status | Color | Meaning | | --- | --- | --- | | **New** | Blue | Order just came in, hasn’t been looked at yet | | **Processing** | Purple | You’re actively working on this order | | **Completed** | Teal | Everything is done, paid and delivered | | **Cancelled** | Red | Order was cancelled | | **Archived** | Gray | Order removed from active list | ### [​](https://docs.laravelshopper.dev/v2/user-guide/sales/orders#payment-status) Payment Status Tracks whether you’ve received the money. | Status | Color | Meaning | | --- | --- | --- | | **Payment pending** | Yellow | Waiting for payment | | **Authorized** | Blue | Funds are held on the customer’s card but not yet collected | | **Paid** | Green | Payment received | | **Partially refunded** | Orange | Some of the amount has been refunded | | **Refunded** | Gray | Full amount refunded | | **Voided** | Red | Payment was cancelled before any money was collected | **Authorized** means the payment provider confirmed the customer has funds, but you haven’t captured (collected) them yet. This is common for physical goods where you want to verify stock before charging. ### [​](https://docs.laravelshopper.dev/v2/user-guide/sales/orders#shipping-status) Shipping Status Tracks where the physical goods are. | Status | Color | Meaning | | --- | --- | --- | | **Unfulfilled** | Yellow | No items have been shipped yet | | **Partially shipped** | Blue | Some items shipped, others are still waiting | | **Shipped** | Indigo | All items have been shipped | | **Partially delivered** | Purple | Some packages arrived, others still in transit | | **Delivered** | Green | Everything has been delivered | | **Partially returned** | Orange | Some items were returned | | **Returned** | Gray | All items were returned | [​](https://docs.laravelshopper.dev/v2/user-guide/sales/orders#actions) Actions ---------------------------------------------------------------------------------- The actions available depend on the current state of the order. They appear in the header, some as standalone buttons, others in the **More actions** dropdown. ### [​](https://docs.laravelshopper.dev/v2/user-guide/sales/orders#capture-payment) Capture Payment ![Capture payment button](https://mintcdn.com/shopperlabs-ee054f5e/oIKaIi3fMpfukx2M/images/v2/order-capture-button.png?w=2500&fit=max&auto=format&n=oIKaIi3fMpfukx2M&q=85&s=b75315564293a126e5775633905c5c8a) Appears when the payment status is **Authorized**. Clicking it charges the customer for the authorized amount. A confirmation dialog will appear since this action cannot be undone. After capture, the payment status changes to **Paid** and the button disappears. ### [​](https://docs.laravelshopper.dev/v2/user-guide/sales/orders#archive) Archive Appears when the order is not completed and not paid. Moves the order to the Archived tab. Archiving an order affects your revenue reports. Use this for orders that will never be fulfilled, like spam or test orders. ### [​](https://docs.laravelshopper.dev/v2/user-guide/sales/orders#more-actions) More Actions The dropdown contains context-sensitive actions: | Action | When it appears | What it does | | --- | --- | --- | | **Start processing** | Order is **New** | Changes order status to Processing and sets item fulfillment to Preparing | | **Mark as paid** | Payment is **Pending** or **Authorized** | Changes payment status directly to Paid (without going through the payment provider) | | **Mark complete** | Order is **Processing** and payment is **Paid** | Changes order status to Completed | | **Cancel order** | Order can be cancelled | Cancels the order and records the cancellation date | [​](https://docs.laravelshopper.dev/v2/user-guide/sales/orders#fulfillment) Fulfillment ------------------------------------------------------------------------------------------ Fulfillment is the process of getting the ordered items to the customer. Shopper tracks this at two levels: the **order level** (shipping status) and the **item level** (fulfillment status per product). ### [​](https://docs.laravelshopper.dev/v2/user-guide/sales/orders#creating-a-shipment) Creating a Shipment When an order has items that haven’t been shipped yet, the **Create Shipping Label** button appears in the fulfillment section. ![Fulfillment section](https://mintcdn.com/shopperlabs-ee054f5e/oIKaIi3fMpfukx2M/images/v2/order-fulfillment.png?w=2500&fit=max&auto=format&n=oIKaIi3fMpfukx2M&q=85&s=d62e4236f37c026798d1add345321633) Clicking it opens a panel where you: 1. **Select a carrier**. Choose from your configured shipping carriers 2. **Add tracking info** (optional). Enter a tracking number and tracking URL 3. **Select items**. Pick which items to include in this shipment ![Create shipping label panel](https://mintcdn.com/shopperlabs-ee054f5e/oIKaIi3fMpfukx2M/images/v2/order-create-shipping-label.png?w=2500&fit=max&auto=format&n=oIKaIi3fMpfukx2M&q=85&s=b8dbe385b16039c298565c75dcf4c0e6) Once created, the shipment appears in the **Shipments** page and the selected items are marked as assigned. ### [​](https://docs.laravelshopper.dev/v2/user-guide/sales/orders#partial-shipments) Partial Shipments You don’t have to ship everything at once. If an order has 5 items and only 3 are ready, create a shipment with those 3 items. The remaining 2 stay as unfulfilled and you can create a second shipment later. The shipping status updates automatically: * First shipment created → **Partially shipped** * All items shipped → **Shipped** * First package delivered → **Partially delivered** * All packages delivered → **Delivered** [​](https://docs.laravelshopper.dev/v2/user-guide/sales/orders#shipments) Shipments -------------------------------------------------------------------------------------- The **Shipments** page gives you a dedicated view of all shipments across your orders. Access it from the sidebar under Orders. ![Shipments page](https://mintcdn.com/shopperlabs-ee054f5e/ywp8fx5EJ88vkRrq/images/v2/shipments.png?w=2500&fit=max&auto=format&n=ywp8fx5EJ88vkRrq&q=85&s=654b0a867eec7f554752252627162e86) ### [​](https://docs.laravelshopper.dev/v2/user-guide/sales/orders#tabs-2) Tabs | Tab | Shows | | --- | --- | | **All** | Every shipment | | **Pending** | Shipments with labels created but not yet picked up | | **In Transit** | Shipments that have been picked up and are on their way | | **Delivered** | Shipments that reached their destination | | **Failed** | Shipments where delivery failed | ### [​](https://docs.laravelshopper.dev/v2/user-guide/sales/orders#shipment-detail) Shipment Detail Click the eye icon on any shipment to open its detail panel. This panel shows: ![Shipment detail panel](https://mintcdn.com/shopperlabs-ee054f5e/ywp8fx5EJ88vkRrq/images/v2/shipment-detail.png?w=2500&fit=max&auto=format&n=ywp8fx5EJ88vkRrq&q=85&s=96892e7f1994f36ef08817d742939406) **Tracking progress**. A 5-step visual tracker: 1 [](https://docs.laravelshopper.dev/v2/user-guide/sales/orders#) Label created Shipping label generated, waiting for carrier pickup. 2 [](https://docs.laravelshopper.dev/v2/user-guide/sales/orders#) Picked up Carrier has collected the package. 3 [](https://docs.laravelshopper.dev/v2/user-guide/sales/orders#) In transit Package is on its way to the destination. 4 [](https://docs.laravelshopper.dev/v2/user-guide/sales/orders#) Out for delivery Package is with the local delivery driver. 5 [](https://docs.laravelshopper.dev/v2/user-guide/sales/orders#) Delivered Package has been delivered to the customer. **Shipment details**. Shipped date, received date, and tracking number (linked to tracking URL if provided). **Products**. The items included in this shipment with their fulfillment status. **Timeline**. A chronological log of every event for this shipment. Each event records the status, date, location, and an optional description. ### [​](https://docs.laravelshopper.dev/v2/user-guide/sales/orders#adding-tracking-events) Adding Tracking Events Click **Add event** in the shipment detail panel to log a new tracking update. Select the status, set the date, and optionally add a location and description. This is useful when you receive updates from your carrier and want to keep the timeline accurate. ### [​](https://docs.laravelshopper.dev/v2/user-guide/sales/orders#marking-as-delivered) Marking as Delivered When a shipment arrives, click **Mark as delivered**. This updates the shipment status and all its items to Delivered. If this was the last pending shipment on the order, the order automatically moves to **Completed**. [​](https://docs.laravelshopper.dev/v2/user-guide/sales/orders#typical-order-flow) Typical Order Flow -------------------------------------------------------------------------------------------------------- Here’s how a standard order moves through the system: 1 [](https://docs.laravelshopper.dev/v2/user-guide/sales/orders#) Order placed A customer completes checkout. The order appears as **New** with payment **Pending** and shipping **Unfulfilled**. 2 [](https://docs.laravelshopper.dev/v2/user-guide/sales/orders#) Payment received Depending on your payment method, the payment status changes to **Paid** (automatic capture) or **Authorized** (manual capture). If authorized, you capture it when ready. 3 [](https://docs.laravelshopper.dev/v2/user-guide/sales/orders#) Start processing Click **Start processing** to indicate you’re preparing the order. Items move to **Preparing** status. 4 [](https://docs.laravelshopper.dev/v2/user-guide/sales/orders#) Create shipment Click **Create Shipping Label**, select a carrier, add tracking info, and pick the items to ship. The shipping status updates to **Shipped** (or **Partially shipped** if not all items are included). 5 [](https://docs.laravelshopper.dev/v2/user-guide/sales/orders#) Track delivery Add tracking events as the carrier provides updates. The shipment timeline shows the package’s journey. 6 [](https://docs.laravelshopper.dev/v2/user-guide/sales/orders#) Delivery confirmed Mark the shipment as delivered. The order status automatically changes to **Completed**. [​](https://docs.laravelshopper.dev/v2/user-guide/sales/orders#abandoned-carts) Abandoned Carts -------------------------------------------------------------------------------------------------- Sometimes customers add items to their cart but leave without completing checkout. Shopper tracks these as abandoned carts, giving you visibility into potential lost sales. A cart is considered abandoned when it has items but no activity for a configurable period (default: 60 minutes). ### [​](https://docs.laravelshopper.dev/v2/user-guide/sales/orders#viewing-abandoned-carts) Viewing Abandoned Carts To see abandoned carts: 1. Go to **Orders** in the sidebar 2. Click the **Abandoned Carts** tab ![Abandoned carts list](https://mintlify.s3.us-west-1.amazonaws.com/shopperlabs-ee054f5e/images/v2/ug-abandoned-carts.png) The abandoned carts list shows each cart with the customer name (or “Guest” for anonymous shoppers), the number of items, the channel, and when the cart was last active. ### [​](https://docs.laravelshopper.dev/v2/user-guide/sales/orders#cart-details) Cart Details Click on any abandoned cart to view its contents. The detail panel shows the items the customer had in their cart and their contact information (if they were logged in). ![Abandoned cart detail](https://mintlify.s3.us-west-1.amazonaws.com/shopperlabs-ee054f5e/images/v2/ug-abandoned-cart-detail.png) ### [​](https://docs.laravelshopper.dev/v2/user-guide/sales/orders#what-you-can-learn) What You Can Learn Abandoned carts help you understand: * **Which products are being abandoned** to identify pricing or UX issues * **At what stage customers leave** to improve your checkout flow * **Whether logged-in customers abandon more than guests** to target recovery efforts Look for patterns in abandoned carts. If many customers abandon carts with the same product, the price may be too high or the shipping cost may be surprising at checkout. ### [​](https://docs.laravelshopper.dev/v2/user-guide/sales/orders#automatic-cleanup) Automatic Cleanup Abandoned carts older than 30 days are automatically cleaned up to keep your database lean. This threshold is configurable by your developer in the [Cart configuration](https://docs.laravelshopper.dev/v2/cart#pruning) . For developer details on querying abandoned carts and building recovery email flows, see the [Cart documentation](https://docs.laravelshopper.dev/v2/cart#abandoned-carts) . For developer details, see the [Orders documentation](https://docs.laravelshopper.dev/v2/orders) . [Managing Products](https://docs.laravelshopper.dev/v2/user-guide/catalog/products/managing-products) [Managing Customers](https://docs.laravelshopper.dev/v2/user-guide/sales/customers) ⌘I --- # Two Factor Authentication - TALL Stack E-commerce Framework > Documentation Index > ------------------- > > Fetch the complete documentation index at: [/llms.txt](https://docs.laravelshopper.dev/llms.txt) > > Use this file to discover all available pages before exploring further. [Skip to main content](https://docs.laravelshopper.dev/v2/two-factor#content-area) Secure your account with two-step authentication Two-step authentication (also known as two-factor authentication or multifactor authentication) provides a more secure login process. When you attempt to sign in, you need to complete two separate steps: * Enter the account password. * Authenticate through a mobile app security key. These two steps will make much more difficult for an unauthorized person to access your account. Even if they are able to find your password, they will not be able to connect without the second step. Authentication in two secure steps rests on the combination of two factors, which can be something you know (such as your combination of connection and password), something you have (such as a code to Only one use provided by an authentication application or SMS) or something you are (providing biometric authentication, such as a fingerprint). Two-step authentication can be configured for all accounts, but the store owner can not activate it for staff. The staff must put it in place for his own accounts. If you have multiple employees who manage your shop. [​](https://docs.laravelshopper.dev/v2/two-factor#configuration) Configuration --------------------------------------------------------------------------------- Two-factor authentication must be enabled in your configuration before the feature becomes available in the UI. In the `config/shopper/auth.php` file, set the `2fa_enabled` option to `true`: config/shopper/auth.php '2fa_enabled' => env('SHOPPER_ENABLED_TWO_FACTOR', true), You can also control this via your `.env` file: SHOPPER_ENABLED_TWO_FACTOR=true When this option is set to `false` (the default), the two-factor authentication section will not appear on the account page and the login flow will not prompt for a second factor even if a user has previously configured it. [​](https://docs.laravelshopper.dev/v2/two-factor#enabling-two-factor-authentication) Enabling Two-Factor Authentication --------------------------------------------------------------------------------------------------------------------------- To enable two-step authentication, you’ll need first to download an authenticator app to your mobile device. The app will be able to scan QR codes and retrieve authentication data for you. Recommended authenticator apps: * [Google Authenticator](https://support.google.com/accounts/answer/1066447) * [Duo Mobile](https://guide.duo.com/third-party-accounts) * [Amazon AWS MFA](https://aws.amazon.com/iam/details/mfa) * [Authenticator](https://www.microsoft.com/store/p/microsoft-authenticator/9nblgggzmcj6) In addition, you should store the listed recovery codes in a secure password manager such as [1Password](https://1password.com/) . When you install an authenticator app, make sure that you follow its instructions carefully. After your app is successfully downloaded and set up, you can activate the feature in Shopper. From your administrator interface, click on your name with account picture in the upper right corner. Next click on **Personal Account** Scroll to the two factor authenticate section on the screen, click **Enable authentication**. This action will trigger a modal to ask you to confirm your password ![Two factor section Screenshot](https://mintcdn.com/shopperlabs-ee054f5e/eVX_9bJEbNf6CmDO/images/v2/two-factor-section.png?w=2500&fit=max&auto=format&n=eVX_9bJEbNf6CmDO&q=85&s=ec63eba62405060cc6c0343233f819d8) Enter your current password in the space provided and click **Enable**. If the user loses access to their mobile device, the login page will allow them to authenticate using one of their recovery codes instead of the temporary token provided by their mobile device’s authenticator application. ![Two factor code Screenshot](https://mintcdn.com/shopperlabs-ee054f5e/eVX_9bJEbNf6CmDO/images/v2/two-factor-code.png?w=2500&fit=max&auto=format&n=eVX_9bJEbNf6CmDO&q=85&s=0c139b3f4f782ece784dd33b4e802d12) Now when you try to log in, two-factor authentication will require your mobile device. [​](https://docs.laravelshopper.dev/v2/two-factor#logging-in-with-two-factor-authentication) Logging in with Two-Factor Authentication ----------------------------------------------------------------------------------------------------------------------------------------- Go to the Shopper administration login page and enter your email address and password. Click the **Login** button. The login form will switch to a two-factor challenge, prompting you to enter your authentication code. If you used a two-factor authentication app, open it and enter the code displayed, then click **Login**. If you can’t access your authenticator app, click **Use a recovery code** and enter one of your saved recovery codes to authenticate. [​](https://docs.laravelshopper.dev/v2/two-factor#disable-two-factor-authentication) Disable Two-Factor Authentication ------------------------------------------------------------------------------------------------------------------------- From your administrator interface, click on your name and your account photo in the upper right corner and click on Personal Account menu. In the Two-factor authentication section, use the Disable button for the authentication method you want to deactivate. This will ask you for a password confirmation, you enter your password and click on confirm to completely deactivate the Two-factor authentication. ![Two factor disable Screenshot](https://mintcdn.com/shopperlabs-ee054f5e/eVX_9bJEbNf6CmDO/images/v2/two-factor-disable.png?w=2500&fit=max&auto=format&n=eVX_9bJEbNf6CmDO&q=85&s=f81029fb34aaeafca21ab7cf8f9b4582) [​](https://docs.laravelshopper.dev/v2/two-factor#developer-integration) Developer Integration ------------------------------------------------------------------------------------------------- ### [​](https://docs.laravelshopper.dev/v2/two-factor#interfaces-and-traits) Interfaces and Traits Two-factor authentication is implemented through two focused interfaces (following the Interface Segregation Principle): **`Shopper\Contracts\HasStoreAuthentication`** manages the TOTP secret and QR code: * `getStoreAuthenticationSecret(): ?string` * `saveStoreAuthenticationSecret(?string $secret): void` * `getStoreAuthenticationHolderName(): string` * `getStoreAuthenticationQrCodeSvg(): string` * `getStoreAuthenticationQrCodeUrl(): string` **`Shopper\Contracts\HasStoreAuthenticationRecovery`** manages recovery codes: * `getStoreAuthenticationRecoveryCodes(): ?array` * `saveStoreAuthenticationRecoveryCodes(?array $codes): void` * `replaceStoreAuthenticationRecoveryCode(string $code): void` The default implementation is provided by two traits: use Shopper\Contracts\HasStoreAuthentication; use Shopper\Contracts\HasStoreAuthenticationRecovery; use Shopper\Traits\InteractsWithStoreAuthentication; use Shopper\Traits\InteractsWithStoreAuthenticationRecovery; class User extends Authenticatable implements HasStoreAuthentication, HasStoreAuthenticationRecovery { use InteractsWithStoreAuthentication; use InteractsWithStoreAuthenticationRecovery; } ### [​](https://docs.laravelshopper.dev/v2/two-factor#database-columns) Database Columns The following columns are added to the `users` table by Shopper’s migrations: | Column | Type | Description | | --- | --- | --- | | `two_factor_secret` | text (nullable) | Encrypted TOTP secret | | `two_factor_recovery_codes` | text (nullable) | Encrypted JSON array of recovery codes | | `two_factor_confirmed_at` | timestamp (nullable) | When 2FA was confirmed | [Roles & Permissions](https://docs.laravelshopper.dev/v2/acl) [Events](https://docs.laravelshopper.dev/v2/events) ⌘I --- # Currencies - TALL Stack E-commerce Framework > Documentation Index > ------------------- > > Fetch the complete documentation index at: [/llms.txt](https://docs.laravelshopper.dev/llms.txt) > > Use this file to discover all available pages before exploring further. [Skip to main content](https://docs.laravelshopper.dev/v2/user-guide/store-setup/currencies#content-area) Currencies define what monetary units your store uses for pricing and transactions. Proper currency configuration is essential for displaying correct prices to your customers. [​](https://docs.laravelshopper.dev/v2/user-guide/store-setup/currencies#accessing-currency-settings) Accessing Currency Settings ------------------------------------------------------------------------------------------------------------------------------------ 1. Click on **Settings** in the sidebar 2. Select **General** from the settings menu ![Currency Settings](https://mintcdn.com/shopperlabs-ee054f5e/eVX_9bJEbNf6CmDO/images/v2/store-currency.png?w=2500&fit=max&auto=format&n=eVX_9bJEbNf6CmDO&q=85&s=1a6948aff863c6dc7af11956cf6796ca) [​](https://docs.laravelshopper.dev/v2/user-guide/store-setup/currencies#default-currency) Default Currency -------------------------------------------------------------------------------------------------------------- Your store has one default currency that is used for: * Product pricing * Order totals * Reports and analytics * Default display currency Choose your default currency carefully during initial setup, as changing it later may affect existing product prices and orders. [​](https://docs.laravelshopper.dev/v2/user-guide/store-setup/currencies#currency-configuration) Currency Configuration -------------------------------------------------------------------------------------------------------------------------- For each currency, you can configure: | Setting | Description | | --- | --- | | **Currency code** | The ISO 4217 code (e.g., USD, EUR, GBP) | | **Symbol** | The currency symbol (e.g., $, €, £) | | **Symbol position** | Whether the symbol appears before or after the amount | | **Decimal separator** | Character used for decimals (e.g., ”.” or ”,“) | | **Thousands separator** | Character used for thousands (e.g., ”,” or ” “) | | **Decimal places** | Number of decimal places to display | [​](https://docs.laravelshopper.dev/v2/user-guide/store-setup/currencies#common-currency-formats) Common Currency Formats ---------------------------------------------------------------------------------------------------------------------------- Here are some examples of how different currencies are typically formatted: | Currency | Code | Format Example | | --- | --- | --- | | US Dollar | USD | $1,234.56 | | Euro | EUR | €1.234,56 | | British Pound | GBP | £1,234.56 | | Japanese Yen | JPY | ¥1,234 | [​](https://docs.laravelshopper.dev/v2/user-guide/store-setup/currencies#enabling-additional-currencies) Enabling Additional Currencies ------------------------------------------------------------------------------------------------------------------------------------------ If your store serves international customers, you may want to enable additional currencies: 1. Navigate to the Currencies settings 2. Add the currencies you want to support 3. Configure the exchange rates if applicable 4. Set display preferences for each currency If you’re selling internationally, consider using a currency conversion service to keep exchange rates up to date automatically. [​](https://docs.laravelshopper.dev/v2/user-guide/store-setup/currencies#how-currencies-work-with-zones) How Currencies Work with Zones ------------------------------------------------------------------------------------------------------------------------------------------ Each [zone](https://docs.laravelshopper.dev/v2/user-guide/store-setup/zones) is assigned one currency. When a customer checks out from a zone, they see prices and pay in that zone’s currency. This means: * A product can have different prices in different currencies (e.g., $29.99 USD in the US zone, 27.99 EUR in the Europe zone) * You set prices per currency on each product from the [product edit page](https://docs.laravelshopper.dev/v2/user-guide/catalog/products/managing-products) * The zone determines which currency the customer sees at checkout Shopper does not automatically convert prices between currencies. You set each price manually per currency. This gives you full control over pricing strategy in each market. For developer details, see the [Currencies documentation](https://docs.laravelshopper.dev/v2/currencies) . [Inventory Locations](https://docs.laravelshopper.dev/v2/user-guide/store-setup/locations) [Shipping Zones](https://docs.laravelshopper.dev/v2/user-guide/store-setup/zones) ⌘I --- # Setup Store - TALL Stack E-commerce Framework > Documentation Index > ------------------- > > Fetch the complete documentation index at: [/llms.txt](https://docs.laravelshopper.dev/llms.txt) > > Use this file to discover all available pages before exploring further. [Skip to main content](https://docs.laravelshopper.dev/v2/setup-store#content-area) After installing Shopper and creating your admin user, log in at `/cpanel/login` to start the setup wizard. The wizard collects your store’s basic information, address, and social links, then creates your first inventory location and default sales channel. [​](https://docs.laravelshopper.dev/v2/setup-store#settings-model) Settings Model ------------------------------------------------------------------------------------ Store configuration is managed through key-value pairs in the `Shopper\Core\Models\Setting` model. Each setting has a unique key, an optional display name, and a JSON value. ### [​](https://docs.laravelshopper.dev/v2/setup-store#database-schema) Database Schema | Column | Type | Nullable | Default | Description | | --- | --- | --- | --- | --- | | `id` | bigint | no | auto | Primary key | | `key` | string | no | \- | Configuration key (unique) | | `display_name` | string | yes | null | Human-readable label | | `value` | json | yes | null | Setting value | | `locked` | boolean | no | false | Whether the setting can be updated | ### [​](https://docs.laravelshopper.dev/v2/setup-store#retrieving-settings) Retrieving Settings By default, to retrieve the value of a key you can use the helper function `shopper_setting()` passing the desired key as parameter shopper_setting('my_key') This value is cached for one day and under the key `shopper-setting-{$key}` by default, but if you want to retrieve each time the latest value you pass the second param `withCache` to **false** shopper_setting('my_key', withCache: false); [​](https://docs.laravelshopper.dev/v2/setup-store#store) Store ------------------------------------------------------------------ When you launch your store the first important thing to do is to fill in the information about this store. Your customers and the different services you might use need to know the information about your store. ![Store information](https://mintcdn.com/shopperlabs-ee054f5e/khtWzNt9B9rQhNq5/images/v2/initialization-step-1.png?w=2500&fit=max&auto=format&n=khtWzNt9B9rQhNq5&q=85&s=203c770a01aaa9338c73be36314920da) The information stored in this section is available using the following keys: * `name` the store name, * `email` the store email * `currencies` array ids for the store currencies * `default_currency_id` default currency id of the store * `country_id` default country location of the store. * `about` description and information about your store [​](https://docs.laravelshopper.dev/v2/setup-store#address) Address ---------------------------------------------------------------------- Most stores keep their products in different locations around the world. When setting up this configuration you need to define an address that will be set as the default location for your products. When shipping an order, the products to be delivered/shipped will start from this location and thus the shipping price can be set according to this. ![Store address](https://mintcdn.com/shopperlabs-ee054f5e/khtWzNt9B9rQhNq5/images/v2/initialization-step-2.png?w=2500&fit=max&auto=format&n=khtWzNt9B9rQhNq5&q=85&s=47c689dfd081f83ae3bfddeb8a2a6d54) The keys registered in database during this section: `street_address`, `postal_code`, `city`, `phone_number` [​](https://docs.laravelshopper.dev/v2/setup-store#social-links) Social Links -------------------------------------------------------------------------------- If you want your customers to find you easily on social networks, you can fill in all the links directly by putting the full url. This step is completely optional ![Store social links](https://mintcdn.com/shopperlabs-ee054f5e/khtWzNt9B9rQhNq5/images/v2/initialization-step-3.png?w=2500&fit=max&auto=format&n=khtWzNt9B9rQhNq5&q=85&s=c9aff1d7140842f1b982b09f896ecb78) The keys registered in the database during this section: `facebook_link`, `instagram_link` and `twitter_link`. The Livewire components used during the setup wizard are part of Shopper core and are not customizable. This is a mandatory step before accessing the dashboard. [​](https://docs.laravelshopper.dev/v2/setup-store#channel) Channel ---------------------------------------------------------------------- In today’s E-commerce the shop site is no longer the only point of sale. Channels represent a single sales channel, which can be one of the following things: * Website * Mobile application * Cashier in your physical store * Facebook shop, * Instagram shop, * etc or pretty much anything similar you can imagine. When you set up your store Shopper creates a sales channel at the same time as your first location with the same address information. Channel::query()->create([\ 'name' => $name = __('Web Store'),\ 'slug' => $name,\ 'url' => env('APP_URL'),\ 'is_default' => true,\ ]); This sales channel will be automatically assigned to all products that are added to your site. The implementation of a sales channel management will be done later [​](https://docs.laravelshopper.dev/v2/setup-store#update-setting) Update setting ------------------------------------------------------------------------------------ You can update your store information when needed, edit your store images, update the complete address, the legal name of your shop, etc. To edit your shop information: * From your administration, on the sidebar click on the settings icon at the bottom of the page **Settings > General** The component used to update store setting of the store is found in the component configuration file `config/shopper/components/setting.php` if published, It’s the `Shopper\Livewire\Pages\Settings\General` component under the key `pages.general`. use Shopper\Livewire\Components; use Shopper\Livewire\Pages; return [\ 'pages' => [\ 'setting-index' => Pages\Settings\Index::class,\ 'general' => Pages\Settings\General::class,\ 'inventory-index' => Pages\Settings\Locations\Index::class,\ // ...\ ];\ \ 'components' => [\ // ...\ ],\ ]; ![Update store setting](https://mintcdn.com/shopperlabs-ee054f5e/khtWzNt9B9rQhNq5/images/v2/setting-general.png?w=2500&fit=max&auto=format&n=khtWzNt9B9rQhNq5&q=85&s=6812035b423cd5fb65ea8db15790f472) In this interface you will update your store. Don’t forget that the model used is the model `Shopper\Core\Models\Setting`. With the Shopper configuration you can completely change the architecture of this view and the data stored in the database. [Taxes](https://docs.laravelshopper.dev/v2/taxes) [Channels](https://docs.laravelshopper.dev/v2/channels) ⌘I --- # Variant Product - TALL Stack E-commerce Framework > Documentation Index > ------------------- > > Fetch the complete documentation index at: [/llms.txt](https://docs.laravelshopper.dev/llms.txt) > > Use this file to discover all available pages before exploring further. [Skip to main content](https://docs.laravelshopper.dev/v2/user-guide/catalog/products/variant-product#content-area) A variant product is a **physical item that comes in multiple options**. Instead of creating separate products for each size or color, you create one parent product and generate variants for every combination. Each variant has its own SKU, price, stock level, and image. [​](https://docs.laravelshopper.dev/v2/user-guide/catalog/products/variant-product#when-to-use-variant-products) When to Use Variant Products ------------------------------------------------------------------------------------------------------------------------------------------------ Use the Variant product type when: * A product comes in **multiple sizes** (S, M, L, XL, XXL) * A product is available in **different colors** (Red, Blue, Black) * A product has **different materials** (Cotton, Polyester, Silk) * A product has **capacity options** (64GB, 128GB, 256GB) * Any combination of the above (Size + Color, Color + Material, etc.) **Do NOT use variants when:** | Scenario | Better approach | | --- | --- | | Completely different products | Create separate Standard products | | Products with only price differences | Use separate Standard products with different names | | Digital products with tiers | Create separate Virtual products | | Bundles or kits | Use related products | [​](https://docs.laravelshopper.dev/v2/user-guide/catalog/products/variant-product#how-variants-work) How Variants Work -------------------------------------------------------------------------------------------------------------------------- Variants are built from **attributes**, structured properties you define for your products. Here’s the flow: 1. Create a **Variant** product 2. Attach **attributes** to the product (e.g., Size, Color) 3. Each attribute has **values** (Size: S, M, L / Color: Red, Blue) 4. **Generate variants** from all combinations 5. Configure each variant (price, stock, image) ### [​](https://docs.laravelshopper.dev/v2/user-guide/catalog/products/variant-product#examplet-shirt-with-size-and-color) Example: T-Shirt with Size and Color **Attributes:** * Size: S, M, L, XL * Color: Red, Blue, Black **Generated variants (12 total):** | Variant | SKU | Price | Stock | | --- | --- | --- | --- | | S / Red | TSH-S-RED | $29.99 | 25 | | S / Blue | TSH-S-BLU | $29.99 | 30 | | S / Black | TSH-S-BLK | $29.99 | 20 | | M / Red | TSH-M-RED | $29.99 | 40 | | M / Blue | TSH-M-BLU | $29.99 | 35 | | M / Black | TSH-M-BLK | $29.99 | 45 | | L / Red | TSH-L-RED | $32.99 | 20 | | L / Blue | TSH-L-BLU | $32.99 | 25 | | L / Black | TSH-L-BLK | $32.99 | 30 | | XL / Red | TSH-XL-RED | $34.99 | 15 | | XL / Blue | TSH-XL-BLU | $34.99 | 20 | | XL / Black | TSH-XL-BLK | $34.99 | 10 | [​](https://docs.laravelshopper.dev/v2/user-guide/catalog/products/variant-product#setting-up-variant-attributes) Setting Up Variant Attributes -------------------------------------------------------------------------------------------------------------------------------------------------- Before generating variants, you need to attach attributes to your product. ### [​](https://docs.laravelshopper.dev/v2/user-guide/catalog/products/variant-product#prerequisites) Prerequisites Make sure you have created the necessary attributes in the [Attributes](https://docs.laravelshopper.dev/v2/user-guide/catalog/attributes) section. Variant-compatible attributes typically use these field types: * **Select**. A dropdown list of values (most common for variants) * **Color picker**. Visual color selection * **Checkbox**. Multiple selectable values ### [​](https://docs.laravelshopper.dev/v2/user-guide/catalog/products/variant-product#adding-attributes-to-your-product) Adding Attributes to Your Product 1. Navigate to your variant product’s **Attributes** tab 2. Click **Add attribute** 3. Select the attributes you want to use for variants (e.g., Size, Color) 4. The attribute values become the options for variant generation ![Product Attributes for Variants](https://mintcdn.com/shopperlabs-ee054f5e/khtWzNt9B9rQhNq5/images/v2/product-attributes.png?w=2500&fit=max&auto=format&n=khtWzNt9B9rQhNq5&q=85&s=837cd51e240d7ba7a1d5da9a61a57798) [​](https://docs.laravelshopper.dev/v2/user-guide/catalog/products/variant-product#generating-variants) Generating Variants ------------------------------------------------------------------------------------------------------------------------------ Once attributes are attached, you can generate all variant combinations automatically. ### [​](https://docs.laravelshopper.dev/v2/user-guide/catalog/products/variant-product#automatic-generation) Automatic Generation 1. Go to the **Variants** tab on your product 2. Click **Generate variants** 3. Shopper calculates all possible combinations from your attribute values 4. Review the generated list. Each combination is shown with a default SKU 5. You can edit the SKU and set an initial price before confirming 6. Click **Save** to create all variants at once ![Generate Variants](https://mintcdn.com/shopperlabs-ee054f5e/khtWzNt9B9rQhNq5/images/v2/product-variants-generate.png?w=2500&fit=max&auto=format&n=khtWzNt9B9rQhNq5&q=85&s=a705217e5a89a62d84890d46dd98f73d) The number of variants equals the product of all attribute value counts. For example: 4 sizes x 3 colors = 12 variants. Keep this manageable, too many combinations can be hard to maintain. ### [​](https://docs.laravelshopper.dev/v2/user-guide/catalog/products/variant-product#adding-individual-variants) Adding Individual Variants You can also add variants one at a time: 1. Go to the **Variants** tab 2. Click **Add variant** 3. Fill in the variant details step by step The individual variant creation wizard has 4 steps: **Step 1: General** * Variant name * SKU (must be unique) * Select attribute values for this variant **Step 2: Media** * Variant-specific thumbnail * Additional images for this variant **Step 3: Pricing** * Price per currency * Compare at price * Cost per item **Step 4: Stock** * Barcode * Initial quantity [​](https://docs.laravelshopper.dev/v2/user-guide/catalog/products/variant-product#managing-variants) Managing Variants -------------------------------------------------------------------------------------------------------------------------- After generation, you can manage each variant individually. ![Variants List](https://mintcdn.com/shopperlabs-ee054f5e/khtWzNt9B9rQhNq5/images/v2/product-variants-list.png?w=2500&fit=max&auto=format&n=khtWzNt9B9rQhNq5&q=85&s=8a7d2b873dfd1e656d22184749241b9c) ### [​](https://docs.laravelshopper.dev/v2/user-guide/catalog/products/variant-product#variant-properties) Variant Properties Each variant can have its own: | Property | Description | | --- | --- | | **Name** | Descriptive name (auto-generated from attribute values) | | **SKU** | Unique stock keeping unit for this specific variant | | **Barcode** | Unique barcode (UPC, EAN) for this variant | | **Price** | Different pricing per variant and per currency | | **Compare at price** | Show original price for discounted variants | | **Cost** | Your cost for this variant (for margin calculations) | | **Quantity** | Stock level for this specific combination | | **Image** | A specific image showing this color/option | | **Weight & dimensions** | Shipping info if it varies by size | | **Allow backorder** | Whether to accept orders when out of stock | ### [​](https://docs.laravelshopper.dev/v2/user-guide/catalog/products/variant-product#editing-a-variant) Editing a Variant Click on any variant in the list to open its detail panel where you can update: ![Edit Variant](https://mintcdn.com/shopperlabs-ee054f5e/XoSZwCN20z18JMLk/images/v2/product-variant-edit.png?w=2500&fit=max&auto=format&n=XoSZwCN20z18JMLk&q=85&s=8b66a92195e072b5167304444db201ca) * All pricing fields (per currency if multi-currency is enabled) * Stock levels and barcode * Weight and package dimensions * Variant-specific images ### [​](https://docs.laravelshopper.dev/v2/user-guide/catalog/products/variant-product#deleting-variants) Deleting Variants If you discontinue a specific option (e.g., removing the “XS” size): 1. Find the variant in the list 2. Click the delete action 3. Confirm the deletion Deleting a variant is permanent and removes its stock history. If a variant is temporarily unavailable, consider setting its stock to 0 instead. [​](https://docs.laravelshopper.dev/v2/user-guide/catalog/products/variant-product#variant-pricing-strategies) Variant Pricing Strategies -------------------------------------------------------------------------------------------------------------------------------------------- ### [​](https://docs.laravelshopper.dev/v2/user-guide/catalog/products/variant-product#same-price-for-all) Same Price for All All variants at the same price point: * Basic t-shirt: All sizes and colors at $29.99 ### [​](https://docs.laravelshopper.dev/v2/user-guide/catalog/products/variant-product#price-by-size) Price by Size Larger sizes cost more due to material usage: * S/M: $29.99 * L/XL: $34.99 * XXL: $39.99 ### [​](https://docs.laravelshopper.dev/v2/user-guide/catalog/products/variant-product#price-by-option) Price by Option Premium options at a higher price: * Standard colors (Black, White, Gray): $49.99 * Limited edition colors (Gold, Rose): $59.99 ### [​](https://docs.laravelshopper.dev/v2/user-guide/catalog/products/variant-product#per-variant-pricing) Per-Variant Pricing Each combination has its own price: * Useful for products where cost varies significantly by option [​](https://docs.laravelshopper.dev/v2/user-guide/catalog/products/variant-product#shipping-for-variant-products) Shipping for Variant Products -------------------------------------------------------------------------------------------------------------------------------------------------- Variant products support shipping configuration at both levels: * **Parent product**: Default shipping dimensions shared by all variants * **Individual variants**: Override dimensions when a variant differs (e.g., XL is heavier) ![Variant Product Shipping](https://mintcdn.com/shopperlabs-ee054f5e/khtWzNt9B9rQhNq5/images/v2/product-shipping.png?w=2500&fit=max&auto=format&n=khtWzNt9B9rQhNq5&q=85&s=b63285911c119b79f005879b73ff80bd) [​](https://docs.laravelshopper.dev/v2/user-guide/catalog/products/variant-product#inventory-per-variant) Inventory Per Variant ---------------------------------------------------------------------------------------------------------------------------------- Stock is tracked individually for each variant: * Each variant has its own quantity and safety stock level * The parent product shows total stock across all variants * When a variant reaches safety stock level, you’re alerted for that specific combination * Out-of-stock variants can be hidden or shown as unavailable while others remain purchasable [​](https://docs.laravelshopper.dev/v2/user-guide/catalog/products/variant-product#storefront-display) Storefront Display ---------------------------------------------------------------------------------------------------------------------------- On your storefront, variant products display option selectors that let customers choose their preferred combination: ![Variant Selection on Storefront](https://mintcdn.com/shopperlabs-ee054f5e/3ZB91-BonuCgmULq/images/v2/starterkit-product-view.png?w=2500&fit=max&auto=format&n=3ZB91-BonuCgmULq&q=85&s=37f2d57a629a90148e11fe5c201ea5e1) When a customer selects different options: * The **price** updates if variants have different prices * The **image** can change to show the selected variant (e.g., different color) * **Availability** is shown for the selected combination * The **Add to cart** button adapts based on stock [​](https://docs.laravelshopper.dev/v2/user-guide/catalog/products/variant-product#example-creating-a-variant-product) Example: Creating a Variant Product ------------------------------------------------------------------------------------------------------------------------------------------------------------- Let’s create a “Classic Cotton Hoodie” with Size and Color options: 1. **Type**: Select “Variant Product” 2. **General info**: Name “Classic Cotton Hoodie”, describe the material and fit 3. **Associations**: Brand “UrbanWear”, categories “Clothing > Hoodies”, collection “Fall Collection” 4. **Media**: Upload lifestyle photos showing different colors 5. **Stock**: SKU for parent product `HOOD-CLASSIC` (variants will have their own SKUs) After creation: 1. **Attributes**: Attach “Size” (S, M, L, XL) and “Color” (Navy, Gray, Black) 2. **Generate variants**: Creates 12 combinations automatically 3. **Pricing**: S/M at 59.99,L/XLat59.99, L/XL at 59.99,L/XLat64.99 4. **Stock**: Set quantities per variant based on your inventory 5. **Images**: Upload color-specific photos for each color variant 6. **Shipping**: Weight 0.5 kg for S/M, 0.6 kg for L/XL [​](https://docs.laravelshopper.dev/v2/user-guide/catalog/products/variant-product#best-practices) Best Practices -------------------------------------------------------------------------------------------------------------------- Limit Combinations ------------------ Keep variant count manageable. 3 sizes x 3 colors (9 variants) is easier to manage than 6 sizes x 8 colors (48 variants). Unique SKUs ----------- Use a consistent SKU pattern: PRODUCT-SIZE-COLOR (e.g., HOOD-M-NAV). Color-Specific Images --------------------- Upload variant-specific images for color options so customers see exactly what they’ll receive. Stock Alerts ------------ Set safety stock on popular variants to avoid stockouts on your best sellers. [​](https://docs.laravelshopper.dev/v2/user-guide/catalog/products/variant-product#limitations) Limitations -------------------------------------------------------------------------------------------------------------- * A product can use up to **3 variant attributes** (e.g., Size + Color + Material) * The total number of variants is the product of all attribute values * Consider splitting into separate products if you exceed 50+ variants * Product type cannot be changed after creation, so plan ahead For developer details, see the [Product Variants documentation](https://docs.laravelshopper.dev/v2/product-variants) . [External Product (Dropshipping)](https://docs.laravelshopper.dev/v2/user-guide/catalog/products/external-product) [Managing Products](https://docs.laravelshopper.dev/v2/user-guide/catalog/products/managing-products) ⌘I --- # Starter Kits - TALL Stack E-commerce Framework > Documentation Index > ------------------- > > Fetch the complete documentation index at: [/llms.txt](https://docs.laravelshopper.dev/llms.txt) > > Use this file to discover all available pages before exploring further. [Skip to main content](https://docs.laravelshopper.dev/v2/starter-kits#content-area) Shopper is a headless e-commerce framework. It ships without a frontend, giving you full control over how customers interact with your store. You can build your storefront with any technology: React, Vue, Svelte, or server-rendered Blade. If you want to skip the blank canvas and start from a working storefront, Shopper provides **Starter Kits**. Each kit is a complete, production-ready storefront that gets copied directly into your Laravel application. Once installed, the code belongs to you. Modify anything, delete what you don’t need, or use it as a reference to build something entirely different. [​](https://docs.laravelshopper.dev/v2/starter-kits#starter-kits-vs-themes) Starter Kits vs Themes ----------------------------------------------------------------------------------------------------- Starter kits are not themes. The distinction matters. A theme is a runtime dependency. Your application relies on it, receives updates from it, and can switch between themes. A starter kit is scaffolding used once: the installer copies files into your project, installs dependencies, and removes itself. There is no hidden package to update, no active dependency at runtime. If you want to “switch” starter kits, you start a new project. This is by design. The trade-off is intentional: you get full ownership and freedom to customize every line of code, at the cost of not being able to swap frontends with a click. Starter Kit Theme (out of scope) -------------------------------- -------------------------------- Scaffold, used once Runtime, active permanently Code belongs to the developer Managed by the system Not switchable Switchable from admin Manual merge for updates Update = dependency upgrade [​](https://docs.laravelshopper.dev/v2/starter-kits#scope) Scope ------------------------------------------------------------------- Shopper starter kits cover **Laravel storefronts** only: Laravel + Livewire and Laravel + Inertia.js (Vue or React within the Laravel context). Projects outside of Laravel (standalone Vue/React SPAs, Svelte, mobile apps) consume the Shopper API independently and are distributed through their own channels (GitHub, ThemeForest, Gumroad, etc.). These are not in scope for the starter kit system. [​](https://docs.laravelshopper.dev/v2/starter-kits#available-kits) Available Kits ------------------------------------------------------------------------------------- ### [​](https://docs.laravelshopper.dev/v2/starter-kits#livewire) Livewire The [Livewire Starter Kit](https://docs.laravelshopper.dev/v2/livewire-starter-kit) is a full-stack Laravel storefront built with [Livewire 3](https://livewire.laravel.com/) , [Flux UI](https://fluxui.dev/) and [Tailwind CSS v4](https://tailwindcss.com/) . It provides reactive components for product browsing, cart management, multi-step checkout with Stripe payment, customer accounts, and multi-currency zone support. Because Shopper’s admin panel is also built with Livewire, you can reuse patterns and components across your admin and storefront. ![Livewire Starter Kit storefront](https://mintcdn.com/shopperlabs-ee054f5e/3ZB91-BonuCgmULq/images/v2/livewire-starterkit.png?w=2500&fit=max&auto=format&n=3ZB91-BonuCgmULq&q=85&s=67798d06db133449fab25998e45cdb61) ### [​](https://docs.laravelshopper.dev/v2/starter-kits#react) React The [React Starter Kit](https://docs.laravelshopper.dev/v2/react-starter-kit) is an [Inertia.js](https://inertiajs.com/) storefront built with [React 19](https://react.dev/) , [shadcn/ui](https://ui.shadcn.com/) and [Tailwind CSS v4](https://tailwindcss.com/) . It keeps the full power of Laravel on the backend with no separate API layer, and is type-safe end to end through [Wayfinder](https://github.com/laravel/wayfinder) routes and a PHP-to-TypeScript transformer. ### [​](https://docs.laravelshopper.dev/v2/starter-kits#vue) Vue The [Vue Starter Kit](https://docs.laravelshopper.dev/v2/vue-starter-kit) is an [Inertia.js](https://inertiajs.com/) storefront built with [Vue 3](https://vuejs.org/) , [shadcn-vue](https://www.shadcn-vue.com/) and [Tailwind CSS v4](https://tailwindcss.com/) . It shares the same Laravel backend as the React kit, so the only difference is the frontend layer. The React and Vue kits share an identical backend (controllers, actions, DTOs, models, and routes). Choose the kit that matches your frontend stack; everything you read about one applies to the other. [​](https://docs.laravelshopper.dev/v2/starter-kits#how-it-works) How It Works --------------------------------------------------------------------------------- The `shopper:kit:install` command is built into Shopper. No additional package is required. When you run it with a kit package name, the installer performs the following pipeline: 1. **Backup** your `composer.json` for rollback if anything fails 2. **Detect** the kit package on Packagist, GitHub, Bitbucket, or GitLab 3. **Download** the kit temporarily via `composer require` 4. **Read** the `shopper-kit.yaml` manifest from the kit package 5. **Validate** PHP, Laravel, and Shopper version constraints 6. **Copy** files from the kit into your project according to `export_paths` 7. **Install** Composer dependencies declared in the manifest 8. **Run** post-install commands (migrations, storage link, asset build) 9. **Write** a `.shopper-kit` state file tracking installed files with SHA-256 hashes 10. **Remove** the kit package from your `composer.json` 11. **Clean up** the backup file After installation, every file lives in your project. The kit package is gone from your dependencies. [​](https://docs.laravelshopper.dev/v2/starter-kits#the-manifest) The Manifest --------------------------------------------------------------------------------- Every starter kit contains a `shopper-kit.yaml` manifest at its root. This file declares everything the installer needs: metadata, version constraints, which files to copy, which dependencies to install, and what commands to run after installation. name: "My Storefront" description: "A modern storefront for Shopper." version: "1.0.0" author: "acme" url: "https://github.com/acme/my-storefront" shopper: "^2.7" php: "^8.4" laravel: "^12.0" export_paths: - resources/views - resources/css - routes/web.php - app/Livewire dependencies: - livewire/livewire: "^3.7" dev_dependencies: [] post_install: - php artisan migrate - npm install && npm run build | Field | Required | Description | | --- | --- | --- | | `name` | Yes | Display name of the kit | | `export_paths` | Yes | Files and directories to copy into the project | | `description` | No | Short description | | `version` | No | Semantic version (defaults to `0.0.0`) | | `author` | No | Author name | | `url` | No | Kit repository URL | | `php` | No | PHP version constraint (defaults to `*`) | | `laravel` | No | Laravel version constraint (defaults to `*`) | | `shopper` | No | Shopper version constraint (defaults to `*`) | | `dependencies` | No | Composer packages to install | | `dev_dependencies` | No | Composer dev packages to install | | `post_install` | No | Shell commands to run after file copy | The installer blocks certain paths for security: `.env`, `composer.json`, `composer.lock`, `vendor/`, `.git/`, and `node_modules/` are never copied, even if listed in `export_paths`. [​](https://docs.laravelshopper.dev/v2/starter-kits#the-shopper-kit-state-file) The `.shopper-kit` State File ---------------------------------------------------------------------------------------------------------------- After installation, a `.shopper-kit` file is created at the root of your project. It records which kit was installed, its version, and the SHA-256 hash of every copied file. { "kit": "shopper/livewire-starter-kit", "version": "1.0.0", "installed_at": "2026-04-06T14:32:00+00:00", "files": { "app/Livewire/Pages/Home.php": "sha256:abc123...", "resources/views/pages/home.blade.php": "sha256:def456..." } } This file should be committed to git. It enables future diff commands to detect which files you have modified locally since installation and which files have changed upstream in a new kit version. [​](https://docs.laravelshopper.dev/v2/starter-kits#creating-your-own-starter-kit) Creating Your Own Starter Kit ------------------------------------------------------------------------------------------------------------------- Shopper provides a scaffolding command to create a new starter kit with the correct structure. php artisan shopper:kit:init The command prompts you for the kit name, package name (in `vendor/name` format), description, and author. It then creates a directory with the following structure: my-starter-kit/ ├── shopper-kit.yaml # Manifest. Configure export_paths and dependencies ├── composer.json # Package metadata with type "shopper-starter-kit" ├── README.md # Installation instructions ├── resources/ │ ├── views/ │ ├── css/ │ └── js/ └── routes/ From there, add your storefront files and update `shopper-kit.yaml` to declare which paths should be exported. Publish your kit on Packagist or a Git repository, and anyone can install it with `shopper:kit:install`. You can specify a custom directory for the kit with the `--path` option. php artisan shopper:kit:init --path=../my-starter-kit [Events](https://docs.laravelshopper.dev/v2/events) [Livewire](https://docs.laravelshopper.dev/v2/livewire-starter-kit) ⌘I --- # Version Support Policy - TALL Stack E-commerce Framework > Documentation Index > ------------------- > > Fetch the complete documentation index at: [/llms.txt](https://docs.laravelshopper.dev/llms.txt) > > Use this file to discover all available pages before exploring further. [Skip to main content](https://docs.laravelshopper.dev/v2/version-support-policy#content-area) Shopper follows [Semantic Versioning](https://semver.org/) . Minor and patch releases never contain breaking changes. Major releases are aligned with Filament’s major versions, though a Filament major bump does not automatically trigger a Shopper major if the upgrade requires minimal changes for users. [​](https://docs.laravelshopper.dev/v2/version-support-policy#support-policy) Support Policy ----------------------------------------------------------------------------------------------- | Version | Filament | New features | Bug fixes | Security fixes | | --- | --- | --- | --- | --- | | 1.x | 2.x | Ended Jul 2023 | Ended Jul 2023 | Ended Jul 2023 | | 2.x | 4.x | Until October 2026 | Until April 2027 | Until October 2027 | | 3.x | 5.x | Until Shopper 4.x stable release | ~1 year after Shopper 4.x stable release | ~2 years after Shopper 4.x stable release | [​](https://docs.laravelshopper.dev/v2/version-support-policy#new-features) New Features ------------------------------------------------------------------------------------------- Pull requests for new features are only accepted for the latest major version. Once a new major version is released, the Shopper team will no longer accept pull requests for new features in previous versions. Any open pull requests will either be redirected to target the latest major version or closed, depending on conflicts with the new target branch. [​](https://docs.laravelshopper.dev/v2/version-support-policy#bug-fixes) Bug Fixes ------------------------------------------------------------------------------------- After a major version is released, the Shopper team will continue to merge pull requests for bug fixes in the previous major version for one year. After this period, pull requests for that version will no longer be accepted. The Shopper team processes bug reports for supported versions in chronological order, though critical bugs may be prioritized. Bug fixes are typically developed only for the latest major version. However, contributors can backport fixes to other supported versions by submitting pull requests. [​](https://docs.laravelshopper.dev/v2/version-support-policy#security-fixes) Security Fixes ----------------------------------------------------------------------------------------------- The Shopper team currently plans to continue providing security fixes for major versions for at least two years. If you discover a security vulnerability in Shopper, please report it through [GitHub](https://github.com/shopperlabs/shopper/security) . All security vulnerabilities will be addressed promptly. Please note that while a Shopper version may receive security fixes, its underlying dependencies (PHP, Laravel, Filament, and Livewire) may no longer be supported. Therefore, applications using older versions of Shopper could still be vulnerable to security issues in these dependencies. [From v2.1 to v2.2](https://docs.laravelshopper.dev/v2/upgrade/v2-1-to-v2-2) ⌘I --- # Suppliers - TALL Stack E-commerce Framework > Documentation Index > ------------------- > > Fetch the complete documentation index at: [/llms.txt](https://docs.laravelshopper.dev/llms.txt) > > Use this file to discover all available pages before exploring further. [Skip to main content](https://docs.laravelshopper.dev/v2/suppliers#content-area) Suppliers represent external vendors or manufacturers who provide products for your store. This is primarily used in **dropshipping** scenarios where products are shipped directly from the supplier to the customer, without you handling inventory. The supplier feature is gated behind a feature flag. It must be enabled in your `config/shopper/features.php` configuration file. [​](https://docs.laravelshopper.dev/v2/suppliers#model) Model ---------------------------------------------------------------- The model used is `Shopper\Core\Models\Supplier`. It implements `Shopper\Core\Models\Contracts\Supplier` and uses the `HasSlug` trait for automatic slug generation. The model is configurable via `config/shopper/models.php`. ### [​](https://docs.laravelshopper.dev/v2/suppliers#extending-the-model) Extending the Model To add custom behavior, extend the model and update your configuration: namespace App\Models; use Shopper\Core\Models\Supplier as BaseSupplier; class Supplier extends BaseSupplier { } Update `config/shopper/models.php`: return [\ 'supplier' => \App\Models\Supplier::class,\ ]; [​](https://docs.laravelshopper.dev/v2/suppliers#feature-flag) Feature Flag ------------------------------------------------------------------------------ Enable the supplier feature in `config/shopper/features.php`: use Shopper\Core\Enum\FeatureState; return [\ // ...\ 'supplier' => FeatureState::Enabled,\ ]; When enabled, the Suppliers page appears under Products in the admin sidebar, and the supplier select field becomes visible on External product forms. [​](https://docs.laravelshopper.dev/v2/suppliers#database-schema) Database Schema ------------------------------------------------------------------------------------ | Column | Type | Nullable | Default | Description | | --- | --- | --- | --- | --- | | `id` | bigint | no | auto | Primary key | | `name` | string | no | \- | Supplier name | | `slug` | string | yes | auto | URL-friendly identifier (unique) | | `email` | string | yes | null | Contact email | | `phone` | string | yes | null | Contact phone | | `contact_name` | string | yes | null | Primary contact person | | `website` | string | yes | null | Supplier website URL | | `description` | longText | yes | null | Detailed description | | `notes` | longText | yes | null | Internal notes | | `is_enabled` | boolean | no | false | Supplier visibility | | `metadata` | jsonb | yes | null | Additional custom data | | `created_at` | timestamp | yes | null | Creation timestamp | | `updated_at` | timestamp | yes | null | Last update timestamp | [​](https://docs.laravelshopper.dev/v2/suppliers#relationships) Relationships -------------------------------------------------------------------------------- ### [​](https://docs.laravelshopper.dev/v2/suppliers#products) Products A supplier can have many products linked to it: // Get all products from a supplier $supplier->products; // Collection // Get enabled products $supplier->products() ->where('is_visible', true) ->get(); // Count products per supplier $supplier->products()->count(); ### [​](https://docs.laravelshopper.dev/v2/suppliers#product-%E2%86%92-supplier) Product → Supplier Each product can optionally belong to one supplier: // Get a product's supplier $product->supplier; // Supplier (nullable) // Check if a product has a supplier if ($product->supplier_id) { // This is a dropshipped product } // Get all products from a specific supplier Product::query() ->where('supplier_id', $supplier->id) ->get(); [​](https://docs.laravelshopper.dev/v2/suppliers#query-scopes) Query Scopes ------------------------------------------------------------------------------ use Shopper\Core\Models\Supplier; // Get only enabled suppliers Supplier::query()->enabled()->get(); [​](https://docs.laravelshopper.dev/v2/suppliers#creating-suppliers) Creating Suppliers ------------------------------------------------------------------------------------------ use Shopper\Core\Models\Supplier; $supplier = Supplier::query()->create([\ 'name' => 'TechParts Co., Ltd',\ 'email' => 'orders@techparts.com',\ 'phone' => '+86 755 1234 5678',\ 'contact_name' => 'Zhang Wei',\ 'website' => 'https://techparts.com',\ 'description' => 'Electronics components and accessories manufacturer based in Shenzhen.',\ 'notes' => 'Minimum order: 50 units. Lead time: 5-7 days.',\ 'is_enabled' => true,\ 'metadata' => [\ 'payment_terms' => 'net_30',\ 'currency' => 'USD',\ 'minimum_order' => 50,\ ],\ ]); [​](https://docs.laravelshopper.dev/v2/suppliers#updating-status) Updating Status ------------------------------------------------------------------------------------ // Enable a supplier $supplier->updateStatus(enabled: true); // Disable a supplier $supplier->updateStatus(enabled: false); [​](https://docs.laravelshopper.dev/v2/suppliers#retrieving-suppliers) Retrieving Suppliers ---------------------------------------------------------------------------------------------- // Get all enabled suppliers $suppliers = Supplier::query() ->enabled() ->withCount('products') ->get(); // Find by slug $supplier = Supplier::query() ->where('slug', 'techparts-co') ->firstOrFail(); // Search suppliers $results = Supplier::query() ->where('name', 'like', "%{$search}%") ->orWhere('email', 'like', "%{$search}%") ->enabled() ->get(); [​](https://docs.laravelshopper.dev/v2/suppliers#linking-products-to-suppliers) Linking Products to Suppliers ---------------------------------------------------------------------------------------------------------------- Products of type `External` can be linked to a supplier. The `supplier_id` column on the products table stores this relationship: use Shopper\Core\Enum\ProductType; use Shopper\Models\Product; // Create an external product linked to a supplier $product = Product::query()->create([\ 'name' => 'Wireless Bluetooth Earbuds',\ 'slug' => 'wireless-bluetooth-earbuds',\ 'type' => ProductType::External,\ 'supplier_id' => $supplier->id,\ 'is_visible' => true,\ // ... other product fields\ ]); // Change a product's supplier $product->update(['supplier_id' => $newSupplier->id]); // Remove supplier link $product->update(['supplier_id' => null]); [​](https://docs.laravelshopper.dev/v2/suppliers#dropshipping-workflow) Dropshipping Workflow ------------------------------------------------------------------------------------------------ The supplier feature is designed to work with the [Fulfillment](https://docs.laravelshopper.dev/v2/fulfillment) system. Here’s the complete flow: ### [​](https://docs.laravelshopper.dev/v2/suppliers#1-setup) 1\. Setup // Create your supplier $supplier = Supplier::query()->create([\ 'name' => 'Shenzhen TechParts',\ 'email' => 'orders@techparts.com',\ 'is_enabled' => true,\ ]); // Link products to supplier $product->update(['supplier_id' => $supplier->id]); ### [​](https://docs.laravelshopper.dev/v2/suppliers#2-customer-places-order) 2\. Customer Places Order When a customer orders a product linked to a supplier, the order is created normally. The item’s `fulfillment_status` starts as `Pending`. ### [​](https://docs.laravelshopper.dev/v2/suppliers#3-forward-to-supplier) 3\. Forward to Supplier After receiving the customer’s payment, you place the order with your supplier using the customer’s shipping address: use Shopper\Core\Enum\FulfillmentStatus; // Mark items as forwarded $order->items() ->whereHas('product', fn ($q) => $q->where('supplier_id', $supplier->id)) ->update(['fulfillment_status' => FulfillmentStatus::ForwardedToSupplier]); ### [​](https://docs.laravelshopper.dev/v2/suppliers#4-supplier-ships) 4\. Supplier Ships When the supplier provides tracking information: $shipment = $order->shippings()->create([\ 'carrier_id' => $carrierId,\ 'tracking_number' => $supplierTracking,\ 'tracking_url' => $supplierTrackingUrl,\ 'shipped_at' => now(),\ ]); $order->items() ->where('fulfillment_status', FulfillmentStatus::ForwardedToSupplier) ->update([\ 'order_shipping_id' => $shipment->id,\ 'fulfillment_status' => FulfillmentStatus::Shipped,\ ]); ### [​](https://docs.laravelshopper.dev/v2/suppliers#5-delivery-confirmation) 5\. Delivery Confirmation $shipment->update(['received_at' => now()]); $shipment->items()->update([\ 'fulfillment_status' => FulfillmentStatus::Delivered,\ ]); [​](https://docs.laravelshopper.dev/v2/suppliers#querying-by-supplier) Querying by Supplier ---------------------------------------------------------------------------------------------- // Get all pending orders for a supplier $pendingItems = OrderItem::query() ->whereIn('fulfillment_status', [\ FulfillmentStatus::Pending,\ FulfillmentStatus::ForwardedToSupplier,\ ]) ->whereHas('product', fn ($q) => $q->where('supplier_id', $supplier->id)) ->with(['order.customer', 'order.shippingAddress']) ->get(); // Get supplier revenue (items sold) $revenue = OrderItem::query() ->whereHas('product', fn ($q) => $q->where('supplier_id', $supplier->id)) ->where('fulfillment_status', FulfillmentStatus::Delivered) ->sum(DB::raw('unit_price_amount * quantity')); [​](https://docs.laravelshopper.dev/v2/suppliers#permissions) Permissions ---------------------------------------------------------------------------- The supplier feature uses the following permissions: | Permission | Description | | --- | --- | | `browse_suppliers` | View the suppliers list | | `read_suppliers` | View supplier details | | `add_suppliers` | Create new suppliers | | `edit_suppliers` | Update existing suppliers | | `delete_suppliers` | Delete suppliers | // Check permission $user->hasPermissionTo('browse_suppliers'); // Assign permission to a role $role->givePermissionTo('browse_suppliers'); [​](https://docs.laravelshopper.dev/v2/suppliers#components) Components -------------------------------------------------------------------------- The supplier feature registers its components through the product configuration. Publish the product components to customize: php artisan shopper:component:publish product This includes: // In config/shopper/components/product.php return [\ 'pages' => [\ 'supplier-index' => Livewire\Pages\Supplier\Index::class,\ // ...\ ],\ 'components' => [\ 'slide-overs.supplier-form' => Livewire\SlideOvers\SupplierForm::class,\ // ...\ ],\ ]; [​](https://docs.laravelshopper.dev/v2/suppliers#metadata) Metadata ---------------------------------------------------------------------- The `metadata` column (JSON) can store any additional supplier-specific data: $supplier = Supplier::query()->create([\ 'name' => 'FastShip Logistics',\ 'metadata' => [\ 'payment_terms' => 'net_30',\ 'currency' => 'USD',\ 'minimum_order' => 100,\ 'lead_time_days' => 7,\ 'return_policy' => '30 days',\ 'api_endpoint' => 'https://api.fastship.com/v2',\ ],\ ]); // Access metadata $terms = $supplier->metadata['payment_terms']; [Payment Methods](https://docs.laravelshopper.dev/v2/payment-methods) [Media](https://docs.laravelshopper.dev/v2/media) ⌘I --- # Creating a Product - TALL Stack E-commerce Framework > Documentation Index > ------------------- > > Fetch the complete documentation index at: [/llms.txt](https://docs.laravelshopper.dev/llms.txt) > > Use this file to discover all available pages before exploring further. [Skip to main content](https://docs.laravelshopper.dev/v2/user-guide/catalog/products/creating-product#content-area) Creating a product in Shopper is done through a guided wizard that walks you through each step. The process is the same for all product types, with some steps adapting based on the type you choose. [​](https://docs.laravelshopper.dev/v2/user-guide/catalog/products/creating-product#starting-the-wizard) Starting the Wizard ------------------------------------------------------------------------------------------------------------------------------- From the Products page, click the **Create** button to open the product creation wizard. [​](https://docs.laravelshopper.dev/v2/user-guide/catalog/products/creating-product#step-1-choose-the-product-type) Step 1: Choose the Product Type ------------------------------------------------------------------------------------------------------------------------------------------------------ The first step asks you to select the type of product you want to create. Each type is presented as a card with an icon and a description to help you make the right choice. ![Choose Product Type](https://mintcdn.com/shopperlabs-ee054f5e/khtWzNt9B9rQhNq5/images/v2/product-add-step-type.png?w=2500&fit=max&auto=format&n=khtWzNt9B9rQhNq5&q=85&s=894de85e52ddbefa0b2ba159669d7613) The available types are: * **Standard**. Physical products that require shipping * **Virtual**. Digital products (downloads, subscriptions, courses) * **External**. Dropshipping products fulfilled by a third party * **Variant**. Products with multiple options (size, color, material) If your store only sells one type of product, your administrator can configure a default product type in the settings. In that case, this step will be skipped automatically. Select your product type and click **Next** to continue. [​](https://docs.laravelshopper.dev/v2/user-guide/catalog/products/creating-product#step-2-general-information) Step 2: General Information ---------------------------------------------------------------------------------------------------------------------------------------------- This step collects the core information about your product. ![Product General Information](https://mintcdn.com/shopperlabs-ee054f5e/khtWzNt9B9rQhNq5/images/v2/product-add-step-info.png?w=2500&fit=max&auto=format&n=khtWzNt9B9rQhNq5&q=85&s=655e3fbe3f546ec5312a8dd1df53f57c) | Field | Required | Description | | --- | --- | --- | | **Name** | Yes | The product name displayed to customers. A URL-friendly slug is generated automatically. | | **Summary** | No | A short description shown in product listings and cards. | | **Description** | No | The full product description with rich formatting (bold, lists, links, etc.). | | **Visible** | | Toggle whether the product appears on your storefront. Useful to prepare products before launching. | | **Published at** | Yes | The date and time when the product becomes available. You can schedule future publications. | The **Name** field automatically generates a URL slug (e.g., “Blue Running Shoes” becomes `blue-running-shoes`). You can modify the slug later in the product settings. [​](https://docs.laravelshopper.dev/v2/user-guide/catalog/products/creating-product#step-3-associations) Step 3: Associations -------------------------------------------------------------------------------------------------------------------------------- Link your product to the organizational structures of your store. ![Product Associations](https://mintcdn.com/shopperlabs-ee054f5e/khtWzNt9B9rQhNq5/images/v2/product-add-step-relations.png?w=2500&fit=max&auto=format&n=khtWzNt9B9rQhNq5&q=85&s=85335faf82fb2d7546dc80b3949680cc) | Field | Description | | --- | --- | | **Brand** | Associate the product with a brand. Only visible if you have brands configured in your store. | | **Categories** | Assign one or more categories. Categories are hierarchical, so selecting a subcategory automatically includes parent context. | | **Channels** | Choose which sales channels this product appears on (e.g., web store, mobile app, POS). | | **Collections** | Add the product to one or more manual collections for curated groupings. | You can always update associations after creation. If you haven’t set up categories or brands yet, you can skip this step and come back later. [​](https://docs.laravelshopper.dev/v2/user-guide/catalog/products/creating-product#step-4-media) Step 4: Media ------------------------------------------------------------------------------------------------------------------ Upload images to showcase your product. ![Product Media Upload](https://mintcdn.com/shopperlabs-ee054f5e/khtWzNt9B9rQhNq5/images/v2/product-add-step-4.png?w=2500&fit=max&auto=format&n=khtWzNt9B9rQhNq5&q=85&s=cff5d5669a674ffdd70513a1e896f2a7) | Element | Description | | --- | --- | | **Thumbnail** | The main image shown in product listings, search results, and cards. Upload one image. | | **Product images** | Additional images shown on the product detail page. Upload multiple images for different angles or details. | **Image best practices:** * Use high-resolution images (minimum 800x800px recommended) * Keep a consistent aspect ratio across products * Show the product from multiple angles * Use a clean background for the thumbnail [​](https://docs.laravelshopper.dev/v2/user-guide/catalog/products/creating-product#step-5-stock-&-inventory) Step 5: Stock & Inventory ------------------------------------------------------------------------------------------------------------------------------------------ Set up the initial inventory information for your product. ![Product Stock & Inventory](https://mintcdn.com/shopperlabs-ee054f5e/khtWzNt9B9rQhNq5/images/v2/product-add-step-5.png?w=2500&fit=max&auto=format&n=khtWzNt9B9rQhNq5&q=85&s=41db884bf0b03d55a9789ce06a9e2cbd) | Field | Required | Description | | --- | --- | --- | | **SKU** | No | Stock Keeping Unit, a unique identifier for your product in your inventory system. | | **Barcode** | No | The product barcode (UPC, EAN, ISBN, etc.) for scanning and identification. | | **Quantity** | No | The initial stock quantity available for sale. | | **Safety stock** | No | The minimum stock level that triggers a low-stock alert. When inventory reaches this number, you’ll be notified to reorder. | For **Variant** products, inventory is managed at the variant level (per size/color combination), not at the parent product level. You’ll configure stock for each variant after creation. For **Virtual** and **External** products, inventory tracking is typically not needed since there’s no physical stock to manage. [​](https://docs.laravelshopper.dev/v2/user-guide/catalog/products/creating-product#completing-the-creation) Completing the Creation --------------------------------------------------------------------------------------------------------------------------------------- After filling in all the steps, click **Save** to create your product. You’ll be redirected to the product detail page where you can: * Configure pricing * Set up shipping dimensions (Standard & Variant products) * Add product attributes (Standard & Variant products) * Upload digital files (Virtual products) * Generate variants (Variant products) * Optimize SEO settings * Link related products [​](https://docs.laravelshopper.dev/v2/user-guide/catalog/products/creating-product#what%E2%80%99s-next) What’s Next? ------------------------------------------------------------------------------------------------------------------------ Depending on your product type, continue with the specific guide: Standard Product ---------------- Configure shipping, attributes, and inventory for physical goods. Virtual Product --------------- Upload digital files and configure access for downloadable products. External Product ---------------- Set up dropshipping product details and supplier information. Variant Product --------------- Create variants from attribute combinations like size and color. [Overview](https://docs.laravelshopper.dev/v2/user-guide/catalog/products/overview) [Standard Product](https://docs.laravelshopper.dev/v2/user-guide/catalog/products/standard-product) ⌘I --- # React Starter Kit - TALL Stack E-commerce Framework > Documentation Index > ------------------- > > Fetch the complete documentation index at: [/llms.txt](https://docs.laravelshopper.dev/llms.txt) > > Use this file to discover all available pages before exploring further. [Skip to main content](https://docs.laravelshopper.dev/v2/react-starter-kit#content-area) The React Starter Kit is a complete storefront for Shopper, built with [Inertia.js](https://inertiajs.com/) and [React 19](https://react.dev/) . It keeps the full power of Laravel on the backend, with no separate API layer to maintain, while delivering a modern single-page application experience on the frontend. The design system uses [shadcn/ui](https://ui.shadcn.com/) components and [Tailwind CSS v4](https://tailwindcss.com/) , and every route is fully type-safe thanks to [Laravel Wayfinder](https://github.com/laravel/wayfinder) and a PHP-to-TypeScript transformer. ![React Starter Kit storefront](https://mintcdn.com/shopperlabs-ee054f5e/6wDmKBjBTMPmRNSb/images/v2/inertia-starterkit.png?w=2500&fit=max&auto=format&n=6wDmKBjBTMPmRNSb&q=85&s=2653484f2220852b09ce259a37c75718) [​](https://docs.laravelshopper.dev/v2/react-starter-kit#prerequisites) Prerequisites ---------------------------------------------------------------------------------------- | Requirement | Version | | --- | --- | | PHP | 8.4+ | | Laravel | 12.0+ | | Shopper | 2.9+ | | Node.js | 20+ | [​](https://docs.laravelshopper.dev/v2/react-starter-kit#installation) Installation -------------------------------------------------------------------------------------- The `shopper:kit:install` command is built into Shopper. No additional package is required. php artisan shopper:kit:install shopperlabs/react-starter-kit The installer downloads the kit, reads its [manifest](https://docs.laravelshopper.dev/v2/starter-kits#the-manifest) , copies all storefront files into your project, and installs the following dependencies. | Package | Version | Purpose | | --- | --- | --- | | `inertiajs/inertia-laravel` | ^3.0 | Inertia server-side adapter for Laravel | | `laravel/fortify` | ^1.37 | Authentication backend (login, register, 2FA) | | `laravel/wayfinder` | ^0.1.14 | Typed route helpers generated from your routes | | `spatie/laravel-typescript-transformer` | ^3.2 | Generates TypeScript types from PHP DTOs and enums | | `shopper/stripe` | ^2.9 | Stripe payment integration | After installing dependencies, the kit runs its post-install commands: database migrations, storage symlink creation, npm install, and the frontend asset build. Once complete, the kit package is removed from your `composer.json`. The code is yours. On an existing project, create a new branch before installing so you can review every change. git checkout -b storefront php artisan shopper:kit:install shopperlabs/react-starter-kit [​](https://docs.laravelshopper.dev/v2/react-starter-kit#project-structure) Project Structure ------------------------------------------------------------------------------------------------ The starter kit publishes files into standard Laravel directories. The backend is shared with the [Vue Starter Kit](https://docs.laravelshopper.dev/v2/vue-starter-kit) ; only the `resources/js` frontend differs. Here is the full structure. app/ ├── Actions/ │ ├── Cart/ │ │ └── AddToCart.php │ ├── Checkout/ │ │ ├── BuildShippingPackages.php │ │ ├── FetchDeliveryRates.php │ │ ├── FetchPaymentMethods.php │ │ └── ResolveZoneForCountry.php │ ├── Fortify/ │ │ ├── CreateNewUser.php │ │ └── ResetUserPassword.php │ ├── Product/ │ │ ├── AddProductReviewAction.php │ │ ├── BuildVariantOptions.php │ │ └── ResolveVariantAvailability.php │ ├── CreateOrder.php │ ├── GetCountriesByZone.php │ └── ZoneSessionManager.php ├── Concerns/ │ ├── InteractsWithStorefrontMedia.php │ ├── PasswordValidationRules.php │ └── ProfileValidationRules.php ├── DTO/ │ ├── AddressData.php │ ├── CountryByZoneData.php │ ├── PriceData.php │ └── ProductReviewsData.php ├── Http/ │ ├── Controllers/ │ │ ├── Account/ # Address and order management │ │ ├── Settings/ # Profile and security │ │ ├── Shop/ # Home, products, cart, checkout, zone │ │ └── StripeWebhookController.php │ ├── Middleware/ │ │ ├── HandleAppearance.php │ │ └── HandleInertiaRequests.php │ └── Requests/Settings/ # Profile and password form requests ├── Models/ │ ├── Category.php │ ├── Channel.php │ ├── Collection.php │ ├── Product.php │ ├── ProductVariant.php │ └── User.php ├── Providers/ │ ├── AppServiceProvider.php │ ├── FortifyServiceProvider.php │ └── TypeScriptTransformerServiceProvider.php ├── Traits/ │ └── HasProductPricing.php ├── CheckoutSession.php └── helpers.php resources/js/ ├── components/ │ ├── account/ # Order status badge │ ├── shop/ # Product cards, price display, zone selector, Stripe form │ └── ui/ # shadcn/ui primitives (button, dialog, select, ...) ├── hooks/ # useCart, useShop, useStripeElements, useAppearance ├── layouts/ # Storefront, account, settings, and auth layouts ├── lib/ # format, stripe, and utility helpers ├── pages/ │ ├── account/ # Orders, order detail, addresses │ ├── auth/ # Login, register, password reset, 2FA │ ├── settings/ # Profile, appearance, security │ └── shop/ # Home, catalog, product, cart, checkout ├── types/ # Shared and generated TypeScript types └── app.tsx # Inertia application entry point routes/ ├── web.php # Storefront, checkout, account routes └── settings.php # Profile and security routes tests/ ├── Feature/Auth/ # Authentication tests └── Feature/Settings/ # Profile and security tests [​](https://docs.laravelshopper.dev/v2/react-starter-kit#routing) Routing ---------------------------------------------------------------------------- The starter kit defines all storefront routes in `routes/web.php`. Unlike the Livewire kit, each page is rendered by a dedicated controller that returns an Inertia response. Routes are named so you can reference them through Wayfinder in your React components. ### [​](https://docs.laravelshopper.dev/v2/react-starter-kit#public-routes) Public Routes | Route | Controller | Description | | --- | --- | --- | | `GET /` | `Shop\HomeController` | Homepage with featured collections, products, and categories | | `GET /shop` | `Shop\ProductController@index` | Product catalog with search and filtering | | `GET /shop/{product:slug}` | `Shop\ProductController@show` | Product detail with variant selection | | `GET /categories` | `Shop\CategoryController@index` | All categories | | `GET /categories/{category:slug}` | `Shop\CategoryController@show` | Products in a category | | `GET /collections/{collection:slug}` | `Shop\CollectionController@show` | Products in a collection | | `GET /search` | `Shop\SearchController` | Full-text search across products | | `GET /cart` | `Shop\CartController@index` | Shopping cart | Cart mutations are exposed as their own throttled endpoints: `POST /cart` adds a line, `PATCH /cart/{line}` updates a quantity, `DELETE /cart/{line}` removes a line, and `DELETE /cart` clears the cart. The active pricing zone is changed with `PATCH /zone`. ### [​](https://docs.laravelshopper.dev/v2/react-starter-kit#authenticated-routes) Authenticated Routes These routes require the user to be logged in and have a verified email. | Route | Controller | Description | | --- | --- | --- | | `GET /checkout` | `Shop\CheckoutController@index` | Multi-step checkout flow | | `GET /checkout/payment/{number}` | `Shop\StripePaymentController` | Stripe Payment Element | | `GET /checkout/success/{order}` | `Shop\CheckoutSuccessController` | Order confirmation | | `GET /account/orders` | `Account\OrderController@index` | Order history | | `GET /account/orders/{order}` | `Account\OrderController@show` | Order detail | | `GET /account/addresses` | `Account\AddressController@index` | Address management | | `GET /settings/profile` | `Settings\ProfileController@edit` | Profile settings | | `GET /settings/appearance` | Inertia page | Dark mode / appearance | | `GET /settings/security` | `Settings\SecurityController@edit` | Password and two-factor authentication | The checkout flow posts to dedicated endpoints for each step (`checkout/shipping-address`, `checkout/shipping-option`, `checkout/prepare-payment`, `checkout/place-order`). The Stripe webhook endpoint is registered at `/webhooks/stripe` with rate limiting. [​](https://docs.laravelshopper.dev/v2/react-starter-kit#architecture) Architecture -------------------------------------------------------------------------------------- The starter kit follows a clear separation of concerns. Business logic lives in Action classes, data structures in DTOs, HTTP handling in controllers, and UI in React components. This makes it straightforward to modify any part of the storefront without affecting others. ### [​](https://docs.laravelshopper.dev/v2/react-starter-kit#actions) Actions Actions are single-responsibility classes that encapsulate business logic. They are resolved from the container, so you can swap implementations or add dependencies as needed. use App\Actions\Cart\AddToCart; use App\Actions\Checkout\FetchDeliveryRates; use App\Actions\CreateOrder; resolve(AddToCart::class)->handle($product, $selectedVariant); resolve(FetchDeliveryRates::class)->handle($addressData, $packages); resolve(CreateOrder::class)->handle(); The checkout flow is split into four focused actions. | Action | Responsibility | | --- | --- | | `BuildShippingPackages` | Builds package dimensions from cart items for carrier rate requests | | `FetchDeliveryRates` | Queries available carriers and returns shipping rate options | | `FetchPaymentMethods` | Loads payment methods available for the customer’s country | | `ResolveZoneForCountry` | Resolves the pricing zone for a given country with caching | Order creation is wrapped in `CreateOrder`, which uses `Cache::lock` for idempotency and verifies cart ownership before converting the cart into an order. ### [​](https://docs.laravelshopper.dev/v2/react-starter-kit#dtos) DTOs Data Transfer Objects provide type-safe structures for data passed between the backend and the React frontend. Because the kit uses the TypeScript Transformer, these DTOs also become TypeScript types your components can import. | DTO | Purpose | | --- | --- | | `AddressData` | Structured address data for forms and checkout | | `CountryByZoneData` | Zone session data (zone ID, country code, currency code) | | `PriceData` | Formatted price with amount, currency, and comparison price | | `ProductReviewsData` | Aggregated review data (average rating, count, distribution) | ### [​](https://docs.laravelshopper.dev/v2/react-starter-kit#controllers) Controllers Each storefront page is rendered by a controller in `app/Http/Controllers/`. Controllers query Shopper’s models, wrap data in DTOs, and return an Inertia response that renders the matching page component. use App\Models\Product; use Inertia\Inertia; use Inertia\Response; public function show(Product $product): Response { return Inertia::render('shop/product', [\ 'product' => $product->load('variants', 'medias'),\ ]); } To change what a page receives, edit its controller. To change how it looks, edit the matching page component in `resources/js/pages/`. ### [​](https://docs.laravelshopper.dev/v2/react-starter-kit#inertia-shared-data) Inertia Shared Data The `HandleInertiaRequests` middleware shares global data with every page, so your components always have access to the authenticated user and the current shop state without re-fetching it. The `shop` prop carries the cart count, the selected zone, the active currency, available channels and zones, the tax label, and navigation categories. 'shop' => fn (): array => [\ 'cart_count' => $cart?->lines->sum('quantity') ?? 0,\ 'zone' => $zone,\ 'currency' => current_currency(),\ 'tax_label' => current_tax_label(),\ // navigation categories, channels, available zones ...\ ], On the frontend, the `useShop` hook reads this shared data, and `useCart` exposes the cart count and mutation helpers. ### [​](https://docs.laravelshopper.dev/v2/react-starter-kit#models) Models The starter kit publishes model files that extend Shopper’s base models. These are configured in `config/shopper/models.php` so that Shopper’s internals use your extended versions. // app/Models/Product.php class Product extends Shopper\Models\Product { use App\Concerns\InteractsWithStorefrontMedia; // Add your own methods, scopes, or relationships here } You can add custom logic directly to these models. Any method you add is available throughout the storefront and in Shopper’s admin panel. The `InteractsWithStorefrontMedia` trait appends `thumbnail` and `images` attributes to every JSON response, so your React components receive ready-to-use media URLs. ### [​](https://docs.laravelshopper.dev/v2/react-starter-kit#checkoutsession) CheckoutSession The `CheckoutSession` class defines constants for session keys used throughout the checkout flow. This provides a single place to reference all checkout-related session data. use App\CheckoutSession; session()->get(CheckoutSession::KEY); // 'checkout' session()->get(CheckoutSession::SHIPPING_ADDRESS); // 'checkout.shipping_address' session()->get(CheckoutSession::BILLING_ADDRESS); // 'checkout.billing_address' session()->get(CheckoutSession::SHIPPING_OPTION); // 'checkout.shipping_option' session()->get(CheckoutSession::PAYMENT); // 'checkout.payment' ### [​](https://docs.laravelshopper.dev/v2/react-starter-kit#helpers) Helpers The `app/helpers.php` file defines three global functions used across the storefront. | Function | Purpose | | --- | --- | | `cartSession()` | Returns the current cart or creates a new one with the active zone, currency, and channel | | `current_currency()` | Returns the currency code for the selected zone, or the store default from `shopper_currency()` | | `current_tax_label()` | Returns the tax label (“TTC” or “HT”) based on the zone’s tax configuration | ### [​](https://docs.laravelshopper.dev/v2/react-starter-kit#type-safety) Type Safety This kit is type-safe end to end. Three tools work together so your React components never guess at the shape of backend data. | Tool | What it provides | | --- | --- | | Wayfinder | Typed route helpers generated from `routes/web.php`, so `shop.product` becomes an importable function | | TypeScript Transformer | Generates TypeScript definitions from your PHP DTOs and enums into `resources/js/types` | | `@shopperlabs/shopper-types` | Shared domain types (Address, Cart, Order, Product, and enums) published as an npm package | The `TypeScriptTransformerServiceProvider` registers the transformer. Run the generation command after changing a DTO to refresh the TypeScript types your components import. [​](https://docs.laravelshopper.dev/v2/react-starter-kit#checkout-flow) Checkout Flow ---------------------------------------------------------------------------------------- The checkout is a multi-step process handled by `CheckoutController`. Each step posts to its own endpoint and validates its data before proceeding to the next. **Step 1 - Shipping Address.** The customer enters a new address or selects one of their saved addresses. The address is stored in the session and attached to the cart via `CartManager::addAddress()`. **Step 2 - Delivery Options.** The `BuildShippingPackages` action builds package data from the cart, then `FetchDeliveryRates` queries configured [carriers](https://docs.laravelshopper.dev/v2/carriers) for available shipping rates based on the address and packages. The customer selects a delivery option. **Step 3 - Payment.** `FetchPaymentMethods` loads available [payment methods](https://docs.laravelshopper.dev/v2/payments) for the customer’s country. When the customer places the order, the `CreateOrder` action converts the cart into an order inside a database transaction, adds shipping costs, and initiates payment processing through Shopper’s `PaymentProcessingService`. For Stripe payments, the customer is redirected to a dedicated payment page (`StripePaymentController`) that renders the Stripe Payment Element through the `useStripeElements` hook. The `StripeWebhookController` handles payment confirmation webhooks. [​](https://docs.laravelshopper.dev/v2/react-starter-kit#zones-and-currency) Zones and Currency -------------------------------------------------------------------------------------------------- The starter kit uses Shopper’s [zone system](https://docs.laravelshopper.dev/v2/zones) for multi-currency and regional pricing. The `ZoneSelector` component in the footer lets customers pick their country. When a zone is selected, the `ZoneSessionManager` stores a `CountryByZoneData` DTO in the session with the zone ID, country code, and currency code. All prices across the storefront update to reflect the zone’s currency through the shared `shop` prop. If no zone is selected, the storefront falls back to your store’s default currency from `shopper_currency()`. The `current_tax_label()` helper checks the zone’s tax configuration to display “TTC” (tax-inclusive) or “HT” (tax-exclusive) labels alongside prices. To enable zone selection, create at least one active zone in your Shopper admin panel. You can optionally set a default zone using the `SHOPPER_DEFAULT_ZONE` environment variable. [​](https://docs.laravelshopper.dev/v2/react-starter-kit#customization) Customization ---------------------------------------------------------------------------------------- Once installed, every file belongs to your project. Here are the most common customization paths. ### [​](https://docs.laravelshopper.dev/v2/react-starter-kit#styling) Styling All views use shadcn/ui components and Tailwind CSS v4. Modify colors, spacing, and layouts by editing the components in `resources/js`. UI primitives live in `resources/js/components/ui/`, and the storefront chrome is in `resources/js/layouts/storefront/`. ### [​](https://docs.laravelshopper.dev/v2/react-starter-kit#pages) Pages Each page is a React component in `resources/js/pages/`. Edit any `.tsx` file to change a page’s layout or content. To change the data a page receives, edit its controller in `app/Http/Controllers/`. ### [​](https://docs.laravelshopper.dev/v2/react-starter-kit#checkout) Checkout To modify the checkout flow, edit the action classes in `app/Actions/Checkout/`. Each action handles one concern, so you can change how shipping rates are calculated without touching payment logic. To add a new payment provider, implement the provider using Shopper’s [payment system](https://docs.laravelshopper.dev/v2/payments) and register it in your admin panel. The checkout will automatically pick it up through `FetchPaymentMethods`. ### [​](https://docs.laravelshopper.dev/v2/react-starter-kit#adding-pages) Adding Pages Create a controller, register a named route in `routes/web.php`, and add the matching React component under `resources/js/pages/`. use App\Models\Page; use Inertia\Inertia; use Inertia\Response; class AboutController extends Controller { public function __invoke(): Response { return Inertia::render('about'); } } // routes/web.php Route::get('about', AboutController::class)->name('about'); // resources/js/pages/about.tsx export default function About() { return

    About Us

    ; } ### [​](https://docs.laravelshopper.dev/v2/react-starter-kit#models-2) Models Add methods, scopes, or relationships directly to the model files in `app/Models/`. These models extend Shopper’s base models, so all existing functionality is preserved. use Illuminate\Database\Eloquent\Builder; class Product extends Shopper\Models\Product { public function scopeFeatured(Builder $query): Builder { return $query->where('is_featured', true); } } [Livewire](https://docs.laravelshopper.dev/v2/livewire-starter-kit) [Vue](https://docs.laravelshopper.dev/v2/vue-starter-kit) ⌘I --- # Upgrade Guide - TALL Stack E-commerce Framework > Documentation Index > ------------------- > > Fetch the complete documentation index at: [/llms.txt](https://docs.laravelshopper.dev/llms.txt) > > Use this file to discover all available pages before exploring further. [Skip to main content](https://docs.laravelshopper.dev/v2/upgrade#content-area) Shopper documentation always reflects the latest release of the current major version. When a new minor version ships, the docs are updated to match. Upgrade guides document every breaking change, new feature, and migration step between versions. [​](https://docs.laravelshopper.dev/v2/upgrade#before-you-start) Before You Start ------------------------------------------------------------------------------------ Before upgrading, take these precautions: 1. **Back up your database.** E-commerce data (orders, customers, prices) is difficult to recover if a migration fails. 2. **Run the upgrade on a staging environment first.** Verify everything works before touching production. 3. **If upgrading across multiple versions** (e.g., v2.2 to v2.5), follow each guide in sequence. Do not skip versions. [​](https://docs.laravelshopper.dev/v2/upgrade#upgrade-guides) Upgrade Guides -------------------------------------------------------------------------------- | From | To | Summary | | --- | --- | --- | | [v2.9](https://docs.laravelshopper.dev/v2/upgrade/v2-9-to-v2-10) | v2.10 | Security release: admin authorization audit, slide-over IDOR fix, exact tax on discounted totals (`TaxableItem` contract change), atomic stock reservation (`StockReserver` contract, `Stockable::tracksInventory()`), guest per-user discount block. No database migrations | | [v2.8](https://docs.laravelshopper.dev/v2/upgrade/v2-8-to-v2-9) | v2.9 | Laravel 13 support, onboarding wizard rebuilt on Filament Schema, cache stores scalars instead of models, Stripe SDK upgraded to v19. No database migrations | | [v2.7](https://docs.laravelshopper.dev/v2/upgrade/v2-7-to-v2-8) | v2.8 | Security release: authorization guards across admin Livewire components, atomic discount reservation, `orders` discount snapshot columns | | [v2.6](https://docs.laravelshopper.dev/v2/upgrade/v2-6-to-v2-7) | v2.7 | Money values stored in smallest currency unit (cents), slide-over components replaced, 2FA split into SOLID interfaces | | [v2.5](https://docs.laravelshopper.dev/v2/upgrade/v2-5-to-v2-6) | v2.6 | Cart package, tax system, auth models moved to admin package, event renaming, render hooks | | [v2.4](https://docs.laravelshopper.dev/v2/upgrade/v2-4-to-v2-5) | v2.5 | Order system split into three independent statuses (order, payment, shipping), payment drivers, shipment tracking | | [v2.2](https://docs.laravelshopper.dev/v2/upgrade/v2-2-to-v2-3) | v2.3 | Product Tags feature with new permissions and feature flag | | [v2.1](https://docs.laravelshopper.dev/v2/upgrade/v2-1-to-v2-2) | v2.2 | Repository pattern removed, Model Contracts system, Filament v4, ShopperUser trait, sidebar redesign | There is no upgrade guide for v2.3 to v2.4. That release only added Spanish translations and internal render hooks with no breaking changes. [​](https://docs.laravelshopper.dev/v2/upgrade#getting-help) Getting Help ---------------------------------------------------------------------------- If you encounter issues during an upgrade: * Check the [GitHub Issues](https://github.com/shopperlabs/shopper/issues) * Join the [Discord community](https://discord.gg/CC444Gy7) * Review the [changelog](https://github.com/shopperlabs/shopper/releases) [Vue](https://docs.laravelshopper.dev/v2/vue-starter-kit) [From v2.9 to v2.10](https://docs.laravelshopper.dev/v2/upgrade/v2-9-to-v2-10) ⌘I --- # From v2.2 to v2.3 - TALL Stack E-commerce Framework > Documentation Index > ------------------- > > Fetch the complete documentation index at: [/llms.txt](https://docs.laravelshopper.dev/llms.txt) > > Use this file to discover all available pages before exploring further. [Skip to main content](https://docs.laravelshopper.dev/v2/upgrade/v2-2-to-v2-3#content-area) **Estimated Upgrade Time:** 5-10 minutes for most applications. [​](https://docs.laravelshopper.dev/v2/upgrade/v2-2-to-v2-3#updating-dependencies) Updating Dependencies ----------------------------------------------------------------------------------------------------------- Update your `composer.json` file to require Shopper 2.3: "require": { "shopper/framework": "^2.3" } Then run: composer update -W After updating Composer dependencies, run the migrations: php artisan migrate * * * [​](https://docs.laravelshopper.dev/v2/upgrade/v2-2-to-v2-3#new-features) New Features ----------------------------------------------------------------------------------------- ### [​](https://docs.laravelshopper.dev/v2/upgrade/v2-2-to-v2-3#product-tags) Product Tags Shopper 2.3 introduces **Product Tags**, simple flat labels you can attach to products for cross-cutting organization. Unlike categories (hierarchical) or collections (rule-based), tags are flexible and ideal for seasonal labels, marketing campaigns, or storefront filtering. See the [Product Tags documentation](https://docs.laravelshopper.dev/v2/product-tags) for full details. #### [​](https://docs.laravelshopper.dev/v2/upgrade/v2-2-to-v2-3#new-permissions) New Permissions New permissions have been added for **tags**. For existing installations, create them and assign to your admin role: use Shopper\Core\Models\Permission; use Spatie\Permission\Models\Role; Permission::generate('tags', 'products'); $admin = Role::findByName('administrator'); $admin->givePermissionTo([\ 'browse_tags',\ 'read_tags',\ 'edit_tags',\ 'add_tags',\ 'delete_tags',\ ]); If you don’t create these permissions, users will not be able to access the Tags page or manage tags from the product form. #### [​](https://docs.laravelshopper.dev/v2/upgrade/v2-2-to-v2-3#new-feature-flag) New Feature Flag A new `tag` feature flag has been added to `config/shopper/features.php`. If you have a published config file, add: use Shopper\Enum\FeatureState; return [\ // ... existing features\ 'tag' => FeatureState::Enabled,\ ]; Set to `FeatureState::Disabled` if you don’t need tags in your store. #### [​](https://docs.laravelshopper.dev/v2/upgrade/v2-2-to-v2-3#published-components) Published Components If you have published product components via `php artisan shopper:component:publish product`, add the new tag page to your `config/shopper/components/product.php`: 'pages' => [\ // ... existing pages\ 'tag-index' => \Shopper\Livewire\Pages\Tag\Index::class,\ ], * * * [​](https://docs.laravelshopper.dev/v2/upgrade/v2-2-to-v2-3#migration-checklist) Migration Checklist ------------------------------------------------------------------------------------------------------- 1 [](https://docs.laravelshopper.dev/v2/upgrade/v2-2-to-v2-3#) Update dependencies Update `shopper/framework` to `^2.3` in `composer.json`, then run `composer update -W`. 2 [](https://docs.laravelshopper.dev/v2/upgrade/v2-2-to-v2-3#) Run migrations Run `php artisan migrate` to create the `product_tags` table. 3 [](https://docs.laravelshopper.dev/v2/upgrade/v2-2-to-v2-3#) Create new permissions Run `Permission::generate('tags', 'products')` and assign the five generated permissions (`browse_tags`, `read_tags`, `edit_tags`, `add_tags`, `delete_tags`) to the `administrator` role. 4 [](https://docs.laravelshopper.dev/v2/upgrade/v2-2-to-v2-3#) Update published config files If you have published `config/shopper/features.php`, add the `tag` feature flag. If you have published `config/shopper/components/product.php`, add the `tag-index` component entry. 5 [](https://docs.laravelshopper.dev/v2/upgrade/v2-2-to-v2-3#) Clear caches Run `php artisan optimize:clear`. [From v2.4 to v2.5](https://docs.laravelshopper.dev/v2/upgrade/v2-4-to-v2-5) [From v2.1 to v2.2](https://docs.laravelshopper.dev/v2/upgrade/v2-1-to-v2-2) ⌘I --- # From v2.7 to v2.8 - TALL Stack E-commerce Framework > Documentation Index > ------------------- > > Fetch the complete documentation index at: [/llms.txt](https://docs.laravelshopper.dev/llms.txt) > > Use this file to discover all available pages before exploring further. [Skip to main content](https://docs.laravelshopper.dev/v2/upgrade/v2-7-to-v2-8#content-area) **Estimated Upgrade Time:** 5 to 15 minutes. v2.8 is a pure security release with no breaking API changes. v2.8.0 patches two security advisories disclosed responsibly by [@baradika](https://github.com/baradika) : * Authorization bypass in admin Livewire components (CWE-862 / CWE-285) * Race condition on `Discount.usage_limit` allows silent over-redemption (CWE-362 / CWE-840) Upgrade as soon as possible. Both advisories are public on the [Shopper GitHub Security Advisories](https://github.com/shopperlabs/shopper/security/advisories) page. [​](https://docs.laravelshopper.dev/v2/upgrade/v2-7-to-v2-8#updating-dependencies) Updating Dependencies ----------------------------------------------------------------------------------------------------------- Update the following dependency in your application’s `composer.json` file: `shopper/framework` to `^2.8` Then run: composer update -W php artisan migrate [​](https://docs.laravelshopper.dev/v2/upgrade/v2-7-to-v2-8#database-migration) Database Migration ----------------------------------------------------------------------------------------------------- v2.8 ships one additive migration. It adds five nullable columns to the `orders` table to snapshot the discount that was redeemed at order placement time: | Column | Type | Purpose | | --- | --- | --- | | `discount_id` | bigint FK (nullOnDelete) | Link to the discount that was redeemed | | `discount_code` | string | Snapshot of the code used (kept even if the discount is later edited or deleted) | | `discount_type` | string(32) | Snapshot of the discount type (`percentage` / `fixed_amount`) | | `discount_value_at_apply` | unsigned int | Snapshot of the discount value at apply time | | `discount_currency_code` | char(3) | Currency the discount was applied in | Existing rows are left untouched. The snapshot follows the Shopify pattern: an order keeps the discount it was placed with, even after the originating discount is edited or deleted. [​](https://docs.laravelshopper.dev/v2/upgrade/v2-7-to-v2-8#high-impact-changes) High Impact Changes ------------------------------------------------------------------------------------------------------- ### [​](https://docs.laravelshopper.dev/v2/upgrade/v2-7-to-v2-8#discount-limit-enforcement) Discount Limit Enforcement **Likelihood of Impact: High if you call `CreateOrderFromCartAction` directly.** _Affects any storefront code that converts carts to orders outside the default checkout flow._ Two production bugs around `Discount.usage_limit` are fixed in v2.8. Both can now throw a new exception from `CreateOrderFromCartAction::execute()`. The global usage counter (`total_use`) is now incremented atomically inside the order-creation transaction. The discount row is locked with `lockForUpdate`, then a conditional `UPDATE` increments `total_use` **only if** it is still below `usage_limit`. If zero rows are affected, the limit was reached between cart validation and commit and `DiscountLimitReachedException::global()` is thrown. The order is **not** created and the transaction rolls back. The per-user limit (`usage_limit_per_user`) previously read from `DiscountDetail.total_use`, a counter that was never incremented. It now counts prior orders on the new `orders.discount_id` column. The check runs in two places: `DiscountValidator` rejects the code at cart-apply time (so the customer is not surprised at checkout), and `CreateOrderFromCartAction` re-checks at commit and throws `DiscountLimitReachedException::perUser()` if the customer redeemed it between cart apply and commit. Update your checkout controller to catch the new exception: use Shopper\Cart\Actions\CreateOrderFromCartAction; use Shopper\Cart\Exceptions\DiscountLimitReachedException; use Shopper\Cart\Facades\Cart; try { $order = resolve(CreateOrderFromCartAction::class)->execute(Cart::current()); } catch (DiscountLimitReachedException $e) { return back()->with('error', 'This discount can no longer be used. Please remove the code and try again.'); } For full details on both limits, see the [Discounts page](https://docs.laravelshopper.dev/v2/discounts#usage-limit-enforcement) . [​](https://docs.laravelshopper.dev/v2/upgrade/v2-7-to-v2-8#medium-impact-changes) Medium Impact Changes ----------------------------------------------------------------------------------------------------------- ### [​](https://docs.laravelshopper.dev/v2/upgrade/v2-7-to-v2-8#custom-livewire-admin-components) Custom Livewire Admin Components **Likelihood of Impact: Medium** _Affects applications with custom Livewire components extending Shopper’s admin surfaces._ v2.8 tightens authorization across every Shopper admin Livewire component. If you have custom components that extend or mimic Shopper’s order, product, customer, or settings surfaces, audit them against the new patterns. Skipping this audit leaves the same bypass surface that v2.8 closed in Shopper itself. #### [​](https://docs.laravelshopper.dev/v2/upgrade/v2-7-to-v2-8#chain-authorize-on-filament-actions) Chain `authorize()` on Filament actions Filament `Action` handlers should declare their ability on the action itself, not inside the closure. This hides the button when the user lacks the ability, instead of throwing a 403 on click: Action::make('cancel') ->action(function () { $this->authorize('edit_orders'); // ... }); Action::make('cancel') ->authorize('edit_orders') ->action(function () { // ... }); #### [​](https://docs.laravelshopper.dev/v2/upgrade/v2-7-to-v2-8#authorize-livewire-methods-on-the-first-line) Authorize Livewire methods on the first line Every public method that mutates state must call `$this->authorize()` first: public function leaveNotes(): void { $this->authorize('edit_orders'); // ... } #### [​](https://docs.laravelshopper.dev/v2/upgrade/v2-7-to-v2-8#lock-public-eloquent-properties) Lock public Eloquent properties Any `public Model $x` property on a Livewire component must be marked `#[Locked]` so it cannot be rebound from the browser. This is the pattern Shopper now applies to `Order`, `OrderShipping`, `Discount`, `Review`, `ShopperUser`, `Role`, `Inventory`, `Legal`, and `Product`: use Livewire\Attributes\Locked; use Shopper\Models\Order; #[Locked] public Order $order; #### [​](https://docs.laravelshopper.dev/v2/upgrade/v2-7-to-v2-8#allow-list-input-on-store-methods) Allow-list input on `store()` methods When persisting user input from the browser, use an explicit `Arr::only(...)` allow-list instead of `Arr::except(...)`. The latter is what allowed the `_password` hidden-field leak that v2.8 closed in `Customers/Create::store()`: $data = Arr::except($payload, ['_token']); $data = Arr::only($payload, ['first_name', 'last_name', 'email']); ### [​](https://docs.laravelshopper.dev/v2/upgrade/v2-7-to-v2-8#settings-permissions-tightened) Settings Permissions Tightened **Likelihood of Impact: Medium** _Affects custom roles that previously relied on the loose permission scope._ Five settings surfaces moved from `view_users` to `access_setting`. If you have custom roles, audit them to make sure the right people retain access: | Surface | Before | After | | --- | --- | --- | | `Settings/Team/Index::createRole` | `view_users` | `access_setting` | | `Settings/Team/Index` DeleteAction | `view_users` | `access_setting` | | `Settings/Team/RolePermission` save/generate/create | `view_users` | `access_setting` | | `PaymentMethods` / `Currencies` / `Carriers` `ToggleColumn`, record actions, bulk actions | `view_users` | `access_setting` | | `Settings/Team/Permissions::togglePermission` / `removePermission` | `view_users` | `access_setting` (and guards against null lookups) | Roles that managed payment methods, currencies, carriers, team, or permissions must now have `access_setting` granted. [​](https://docs.laravelshopper.dev/v2/upgrade/v2-7-to-v2-8#low-impact-changes) Low Impact Changes ----------------------------------------------------------------------------------------------------- ### [​](https://docs.laravelshopper.dev/v2/upgrade/v2-7-to-v2-8#product-barcode-validation) Product Barcode Validation Product barcodes are now validated against `^[A-Za-z0-9\-]*$` server-side. This closes a stored XSS surface on the admin barcode renderer. If you have existing products with non-alphanumeric barcodes, they will fail re-validation on next save, so clean them up before upgrading. ### [​](https://docs.laravelshopper.dev/v2/upgrade/v2-7-to-v2-8#discount-snapshot-on-orders) Discount Snapshot on Orders Orders now snapshot the discount at placement time. If you have storefront pages or admin extensions that read the discount tied to an order, prefer the new snapshot columns over `Order::discount` for historical accuracy. The relationship is still there but will return `null` if the originating discount has been deleted. $order->discount_code; $order->discount_type; $order->discount_value_at_apply; $order->discount_currency_code; [​](https://docs.laravelshopper.dev/v2/upgrade/v2-7-to-v2-8#migration-checklist) Migration Checklist ------------------------------------------------------------------------------------------------------- 1 [](https://docs.laravelshopper.dev/v2/upgrade/v2-7-to-v2-8#) Update composer Set `shopper/framework` to `^2.8` and run `composer update -W`. 2 [](https://docs.laravelshopper.dev/v2/upgrade/v2-7-to-v2-8#) Run the migration Run `php artisan migrate` to add the five `orders.discount_*` columns. 3 [](https://docs.laravelshopper.dev/v2/upgrade/v2-7-to-v2-8#) Catch DiscountLimitReachedException Wrap `CreateOrderFromCartAction::execute()` calls in your checkout controller to surface a friendly message to the customer when a discount limit is hit at commit time. 4 [](https://docs.laravelshopper.dev/v2/upgrade/v2-7-to-v2-8#) Audit custom Livewire components For every custom Livewire admin component, chain `->authorize()` on Filament actions, call `$this->authorize()` on Livewire method handlers, and mark `public Model $x` properties with `#[Locked]`. 5 [](https://docs.laravelshopper.dev/v2/upgrade/v2-7-to-v2-8#) Audit custom roles Grant `access_setting` to roles that need to manage payment methods, currencies, carriers, team members, or permissions. 6 [](https://docs.laravelshopper.dev/v2/upgrade/v2-7-to-v2-8#) Sanitize existing barcodes Find products with non-alphanumeric barcodes and clean them up before saving. 7 [](https://docs.laravelshopper.dev/v2/upgrade/v2-7-to-v2-8#) Run tests Run `php artisan test`. The new authorization guards may reveal tests that were using under-privileged users. [From v2.8 to v2.9](https://docs.laravelshopper.dev/v2/upgrade/v2-8-to-v2-9) [From v2.6 to v2.7](https://docs.laravelshopper.dev/v2/upgrade/v2-6-to-v2-7) ⌘I --- # Reviews - TALL Stack E-commerce Framework > Documentation Index > ------------------- > > Fetch the complete documentation index at: [/llms.txt](https://docs.laravelshopper.dev/llms.txt) > > Use this file to discover all available pages before exploring further. [Skip to main content](https://docs.laravelshopper.dev/v2/reviews#content-area) Reviews allow customers to rate and review products. Shopper provides a flexible review system with approval workflows, rating calculations, and polymorphic relationships. [​](https://docs.laravelshopper.dev/v2/reviews#model) Model -------------------------------------------------------------- The model used is `Shopper\Core\Models\Review`. It implements `Shopper\Core\Models\Contracts\Review`. Unlike products or brands, the Review model is not configurable via `config/shopper/models.php` and has no admin model wrapper. Products gain review capabilities through the `InteractsWithReviews` trait, which implements the `Shopper\Core\Contracts\HasReviews` interface. This is already applied to the Product model. [​](https://docs.laravelshopper.dev/v2/reviews#database-schema) Database Schema ---------------------------------------------------------------------------------- | Column | Type | Nullable | Default | Description | | --- | --- | --- | --- | --- | | `id` | bigint | no | auto | Primary key | | `rating` | integer | no | \- | Rating value (typically 1-5) | | `title` | text | yes | null | Review title | | `content` | text | yes | null | Review content | | `is_recommended` | boolean | no | false | Customer recommends product | | `approved` | boolean | no | false | Review approval status | | `reviewrateable_id` | bigint | no | \- | Polymorphic relation ID (product) | | `reviewrateable_type` | string | no | \- | Polymorphic relation type | | `author_id` | bigint | no | \- | Polymorphic relation ID (user) | | `author_type` | string | no | \- | Polymorphic relation type | | `created_at` | timestamp | yes | null | Creation timestamp | | `updated_at` | timestamp | yes | null | Last update timestamp | [​](https://docs.laravelshopper.dev/v2/reviews#relationships) Relationships ------------------------------------------------------------------------------ ### [​](https://docs.laravelshopper.dev/v2/reviews#reviewrateable-product) Reviewrateable (Product) // Get the reviewed entity (usually a product) $review->reviewrateable; // Product model ### [​](https://docs.laravelshopper.dev/v2/reviews#author-user) Author (User) // Get the review author $review->author; // User model [​](https://docs.laravelshopper.dev/v2/reviews#hasreviews-contract) HasReviews Contract ------------------------------------------------------------------------------------------ Products implement the `HasReviews` contract via the `InteractsWithReviews` trait: use Shopper\Core\Contracts\HasReviews; use Shopper\Core\Models\Traits\InteractsWithReviews; class Product extends Model implements HasReviews { use InteractsWithReviews; } [​](https://docs.laravelshopper.dev/v2/reviews#rating-methods) Rating Methods -------------------------------------------------------------------------------- ### [​](https://docs.laravelshopper.dev/v2/reviews#getting-ratings) Getting Ratings // Get all ratings for a product $product->ratings; // Collection of Review models // Get all ratings with sorting $product->getAllRatings($product->id, 'desc'); // Get only approved ratings $product->getApprovedRatings($product->id); // Get pending (not approved) ratings $product->getNotApprovedRatings($product->id); // Get recent ratings $product->getRecentRatings($product->id, 5); // Get recent ratings by user $product->getRecentUserRatings($userId, 5, approved: true); ### [​](https://docs.laravelshopper.dev/v2/reviews#rating-counts) Rating Counts // Count all ratings $product->countRating(); // Returns integer // Get rating sum $product->sumRating(); // Collection with sum ### [​](https://docs.laravelshopper.dev/v2/reviews#average-ratings) Average Ratings // Get average rating $product->averageRating(); // Collection with average // Get average rating rounded to 1 decimal $product->averageRating(round: 1); // e.g., 4.5 // Get average rating of approved reviews only $product->averageRating(round: 1, onlyApproved: true); ### [​](https://docs.laravelshopper.dev/v2/reviews#rating-percentage) Rating Percentage // Get percentage of 5-star ratings $product->ratingPercent(5); // e.g., 85.5 // Useful for displaying rating distribution $distribution = [\ 5 => $product->ratingPercent(5),\ 4 => $product->ratingPercent(4),\ 3 => $product->ratingPercent(3),\ 2 => $product->ratingPercent(2),\ 1 => $product->ratingPercent(1),\ ]; [​](https://docs.laravelshopper.dev/v2/reviews#creating-reviews) Creating Reviews ------------------------------------------------------------------------------------ ### [​](https://docs.laravelshopper.dev/v2/reviews#via-product-model) Via Product Model use Shopper\Models\Product; $product = Product::query()->find($id); // Create a review $review = $product->rating([\ 'rating' => 5,\ 'title' => 'Excellent product!',\ 'content' => 'This product exceeded my expectations.',\ 'is_recommended' => true,\ 'approved' => false, // Pending approval\ ], $user); ### [​](https://docs.laravelshopper.dev/v2/reviews#via-review-model) Via Review Model use Shopper\Core\Models\Review; $review = new Review; $review = $review->createRating($product, [\ 'rating' => 4,\ 'title' => 'Good quality',\ 'content' => 'Happy with my purchase.',\ 'is_recommended' => true,\ ], $user); ### [​](https://docs.laravelshopper.dev/v2/reviews#direct-creation) Direct Creation $review = Review::query()->create([\ 'rating' => 5,\ 'title' => 'Love it!',\ 'content' => 'Best purchase I made.',\ 'is_recommended' => true,\ 'approved' => false,\ 'reviewrateable_id' => $product->id,\ 'reviewrateable_type' => get_class($product),\ 'author_id' => $user->id,\ 'author_type' => get_class($user),\ ]); [​](https://docs.laravelshopper.dev/v2/reviews#updating-reviews) Updating Reviews ------------------------------------------------------------------------------------ // Via product model $product->updateRating($reviewId, [\ 'rating' => 4,\ 'content' => 'Updated review content.',\ ]); // Via review model $review = new Review; $review->updateRating($reviewId, [\ 'title' => 'Updated title',\ 'content' => 'Updated content',\ ]); [​](https://docs.laravelshopper.dev/v2/reviews#approval-management) Approval Management ------------------------------------------------------------------------------------------ // Approve a review $review->updatedApproved(true); // Unapprove a review $review->updatedApproved(false); // Direct update $review->update(['approved' => true]); [​](https://docs.laravelshopper.dev/v2/reviews#deleting-reviews) Deleting Reviews ------------------------------------------------------------------------------------ // Via product model $product->deleteRating($reviewId); // Via review model $review = new Review; $review->deleteRating($reviewId); // Direct delete Review::query()->find($reviewId)->delete(); [​](https://docs.laravelshopper.dev/v2/reviews#retrieving-reviews) Retrieving Reviews ---------------------------------------------------------------------------------------- use Shopper\Core\Models\Review; // Get all reviews $reviews = Review::query() ->with(['author', 'reviewrateable']) ->latest() ->get(); // Get pending reviews $pending = Review::query() ->where('approved', false) ->with('author') ->get(); // Get approved reviews for a product $productReviews = Review::query() ->where('reviewrateable_id', $productId) ->where('reviewrateable_type', Product::class) ->where('approved', true) ->with('author') ->latest() ->paginate(10); // Get reviews by user $userReviews = Review::query() ->where('author_id', $userId) ->where('author_type', User::class) ->with('reviewrateable') ->get(); [​](https://docs.laravelshopper.dev/v2/reviews#configuration) Configuration ------------------------------------------------------------------------------ ### [​](https://docs.laravelshopper.dev/v2/reviews#disabling-reviews) Disabling Reviews If your store doesn’t need product reviews, disable the feature in `config/shopper/features.php`: use Shopper\Enum\FeatureState; return [\ 'review' => FeatureState::Disabled,\ ]; ### [​](https://docs.laravelshopper.dev/v2/reviews#permissions) Permissions The admin panel generates five permissions for review management: | Permission | Description | | --- | --- | | `browse_reviews` | View the reviews list | | `read_reviews` | View a single review | | `add_reviews` | Create new reviews | | `edit_reviews` | Edit existing reviews | | `delete_reviews` | Delete reviews | [​](https://docs.laravelshopper.dev/v2/reviews#components) Components ------------------------------------------------------------------------ To customize the admin UI for review management: php artisan shopper:component:publish review Creates `config/shopper/components/review.php`: use Shopper\Livewire; return [\ 'pages' => [\ 'review-index' => Livewire\Pages\Reviews\Index::class,\ ],\ 'components' => [\ 'slide-overs.review-detail' => Livewire\SlideOvers\ReviewDetail::class,\ ],\ ]; [​](https://docs.laravelshopper.dev/v2/reviews#storefront-example) Storefront Example ---------------------------------------------------------------------------------------- ### [​](https://docs.laravelshopper.dev/v2/reviews#review-display) Review Display namespace App\Http\Controllers; use Shopper\Models\Product; class ProductController extends Controller { public function show(string $slug) { $product = Product::findBySlug($slug); // Get approved reviews $reviews = $product->ratings() ->where('approved', true) ->with('author') ->latest() ->paginate(10); // Get rating stats $averageRating = $product->averageRating(1, onlyApproved: true)->first(); $reviewCount = $product->ratings()->where('approved', true)->count(); // Rating distribution $distribution = []; for ($i = 5; $i >= 1; $i--) { $count = $product->ratings() ->where('approved', true) ->where('rating', $i) ->count(); $distribution[$i] = [\ 'count' => $count,\ 'percentage' => $reviewCount > 0 ? ($count / $reviewCount) * 100 : 0,\ ]; } return view('products.show', compact( 'product', 'reviews', 'averageRating', 'reviewCount', 'distribution' )); } } ### [​](https://docs.laravelshopper.dev/v2/reviews#review-submission) Review Submission namespace App\Http\Controllers; use Shopper\Models\Product; class ReviewController extends Controller { public function store(Request $request, Product $product) { $validated = $request->validate([\ 'rating' => 'required|integer|min:1|max:5',\ 'title' => 'nullable|string|max:255',\ 'content' => 'nullable|string|max:2000',\ 'is_recommended' => 'boolean',\ ]); // Check if user already reviewed this product $existingReview = $product->ratings() ->where('author_id', auth()->id()) ->where('author_type', get_class(auth()->user())) ->exists(); if ($existingReview) { return back()->with('error', 'You have already reviewed this product.'); } // Create review (pending approval) $product->rating([\ ...$validated,\ 'approved' => false,\ ], auth()->user()); return back()->with('success', 'Thank you! Your review is pending approval.'); } } ### [​](https://docs.laravelshopper.dev/v2/reviews#review-management-admin) Review Management (Admin) namespace App\Http\Controllers\Admin; use Shopper\Core\Models\Review; class ReviewController extends Controller { public function index() { $reviews = Review::query() ->with(['author', 'reviewrateable']) ->latest() ->paginate(20); return view('admin.reviews.index', compact('reviews')); } public function approve(Review $review) { $review->updatedApproved(true); return back()->with('success', 'Review approved.'); } public function reject(Review $review) { $review->delete(); return back()->with('success', 'Review deleted.'); } } [​](https://docs.laravelshopper.dev/v2/reviews#blade-template-example) Blade Template Example ------------------------------------------------------------------------------------------------ {{-- Product rating summary --}}
    {{ $averageRating ?? 0 }} /5
    @for ($i = 1; $i <= 5; $i++) @endfor

    Based on {{ $reviewCount }} reviews

    {{-- Rating distribution --}}
    @foreach ($distribution as $rating => $data)
    {{ $rating }} stars
    {{ $data['count'] }}
    @endforeach
    {{-- Reviews list --}} @foreach ($reviews as $review)
    {{ $review->author->full_name }} {{ $review->rating }}/5 {{ $review->created_at->diffForHumans() }}
    @if ($review->title)

    {{ $review->title }}

    @endif

    {{ $review->content }}

    @if ($review->is_recommended) ✓ Recommends this product @endif
    @endforeach [​](https://docs.laravelshopper.dev/v2/reviews#use-cases) Use Cases ---------------------------------------------------------------------- | Method | Use Case | | --- | --- | | `averageRating()` | Display product rating stars | | `countRating()` | Show total review count | | `ratingPercent()` | Build rating distribution chart | | `getApprovedRatings()` | Display reviews on product page | | `getNotApprovedRatings()` | Admin review moderation queue | | `getRecentUserRatings()` | Customer review history | [Attributes](https://docs.laravelshopper.dev/v2/attributes) [Customers](https://docs.laravelshopper.dev/v2/customers) ⌘I --- # From v2.9 to v2.10 - TALL Stack E-commerce Framework > Documentation Index > ------------------- > > Fetch the complete documentation index at: [/llms.txt](https://docs.laravelshopper.dev/llms.txt) > > Use this file to discover all available pages before exploring further. [Skip to main content](https://docs.laravelshopper.dev/v2/upgrade/v2-9-to-v2-10#content-area) **Estimated Upgrade Time:** 5 to 15 minutes. Most applications only need to update the dependency and clear the cache. The longer end applies if you implemented the `TaxableItem` contract, built a custom product model against `Stockable`, or registered the stock reservation listener yourself. v2.10 is a security and correctness release. It closes authorization gaps across the admin panel, fixes an IDOR on the pricing and variant slide-overs, taxes the discounted line total exactly, and reserves stock atomically during checkout. The breaking changes below only affect applications that extended the tax, stock, or checkout internals. Storefronts that consume Shopper through its public models and actions need no code changes. It contains no database migrations. [​](https://docs.laravelshopper.dev/v2/upgrade/v2-9-to-v2-10#updating-dependencies) Updating Dependencies ------------------------------------------------------------------------------------------------------------ Update the following dependency in your application’s `composer.json` file: `shopper/framework` to `^2.10` Then run: composer update -W php artisan optimize:clear [​](https://docs.laravelshopper.dev/v2/upgrade/v2-9-to-v2-10#high-impact-changes) High Impact Changes -------------------------------------------------------------------------------------------------------- ### [​](https://docs.laravelshopper.dev/v2/upgrade/v2-9-to-v2-10#taxableitem-contract-replaces-two-methods-with-one) TaxableItem Contract Replaces Two Methods With One **Likelihood of Impact: High if you implemented `TaxableItem` directly.** _Affects applications with a custom tax adapter or a custom tax calculation provider that builds its own taxable items._ The `Shopper\Core\Contracts\TaxableItem` contract previously exposed the taxable amount as a unit price plus a quantity. Tax was then calculated per unit and multiplied back, which overcharged exclusive zones by a cent and unbalanced inclusive VAT breakdowns whenever a line total was not evenly divisible by its quantity. The contract now exposes a single line total and the provider taxes it in one pass. The `getTaxableAmount()` and `getQuantity()` methods are removed and replaced by `getTaxableTotal()`: // Before public function getTaxableAmount(): int { ... } public function getQuantity(): int { ... } // After public function getTaxableTotal(): int { return $this->amount * $this->quantity; } If you wrote a custom `TaxCalculationProvider` that read `$item->getTaxableAmount() * $item->getQuantity()`, replace that expression with `$item->getTaxableTotal()`. The built-in `CartLineTaxAdapter` and `OrderItemTaxAdapter` are already updated. ### [​](https://docs.laravelshopper.dev/v2/upgrade/v2-9-to-v2-10#stockable-contract-adds-tracksinventory) Stockable Contract Adds tracksInventory() **Likelihood of Impact: High if you swapped the product or variant model.** _Affects applications that bound a custom model against the `Product`, `ProductVariant`, or `Stockable` contract._ Stock reservation now skips products that do not track inventory, such as virtual and external products. To decide this, the `Shopper\Core\Models\Contracts\Stockable` contract gained a `tracksInventory(): bool` method. Because `Stockable` is the base of both the product and variant contracts, any custom model that implements one of them must add the method, or it will fail to satisfy the interface at runtime. Mirror the logic from the built-in `Product` model: public function tracksInventory(): bool { return $this->isStandard() || $this->isVariant(); } If your model always carries inventory, return `true` unconditionally. [​](https://docs.laravelshopper.dev/v2/upgrade/v2-9-to-v2-10#medium-impact-changes) Medium Impact Changes ------------------------------------------------------------------------------------------------------------ ### [​](https://docs.laravelshopper.dev/v2/upgrade/v2-9-to-v2-10#stock-reservation-moved-into-the-checkout-transaction) Stock Reservation Moved Into the Checkout Transaction **Likelihood of Impact: Medium** _Affects applications that registered the old reservation listener or instantiate `CreateOrderFromCartAction` manually._ Stock was previously reserved by a queued `ReserveOrderItemStockListener` that fired after the order transaction committed, with no row lock. Two concurrent checkouts reading the same last unit could both succeed and oversell. Reservation now happens synchronously inside `CreateOrderFromCartAction`, under a `lockForUpdate` row lock, through the new `Shopper\Core\Contracts\StockReserver` contract. If the available quantity falls short, `InsufficientStockException` is thrown and the whole order rolls back. The `Shopper\Core\Listeners\Orders\ReserveOrderItemStockListener` class is removed. If you registered it in your application’s `EventServiceProvider`, drop that entry: // Remove any mapping like this from your $listen array: OrderItemCreated::class => [\ ReserveOrderItemStockListener::class, // class no longer exists\ ], `CreateOrderFromCartAction` also gained a `StockReserver` constructor dependency. Always resolve it from the container so the dependency is injected for you, and never instantiate it with `new`: $order = resolve(CreateOrderFromCartAction::class)->execute($cart); To customize reservation, for example against an external warehouse, bind your own implementation: use Shopper\Core\Contracts\StockReserver; $this->app->bind(StockReserver::class, WarehouseStockReserver::class); ### [​](https://docs.laravelshopper.dev/v2/upgrade/v2-9-to-v2-10#guest-carts-cannot-apply-per-user-discounts) Guest Carts Cannot Apply Per-User Discounts **Likelihood of Impact: Medium** _Affects storefronts that let anonymous visitors apply coupons._ A coupon with `usage_limit_per_user` set was only checked when the cart had a `customer_id`, so a guest could redeem a once-per-customer code on every anonymous checkout. Both `DiscountValidator` and `CreateOrderFromCartAction` now reject these coupons for guest carts with the `discount.requires_login` error. If your storefront surfaces validation messages, handle this case by prompting the visitor to sign in before applying the coupon. Carts that already have an authenticated `customer_id` are unaffected. [​](https://docs.laravelshopper.dev/v2/upgrade/v2-9-to-v2-10#low-impact-changes) Low Impact Changes ------------------------------------------------------------------------------------------------------ ### [​](https://docs.laravelshopper.dev/v2/upgrade/v2-9-to-v2-10#admin-authorization-tightened) Admin Authorization Tightened **Likelihood of Impact: Low** _Affects applications with custom roles that granted coarse permissions._ A full audit added explicit `authorize()` calls to every mutating Filament action and Livewire method across the admin panel, and locked previously public model properties on the pricing and variant slide-overs. Standard role setups are unaffected. If you built custom roles that relied on a coarse permission to reach a finer operation, for example granting `add_products` to manage variants, grant the specific permission instead, such as `add_product_variants`. [​](https://docs.laravelshopper.dev/v2/upgrade/v2-9-to-v2-10#migration-checklist) Migration Checklist -------------------------------------------------------------------------------------------------------- 1 [](https://docs.laravelshopper.dev/v2/upgrade/v2-9-to-v2-10#) Update composer Set `shopper/framework` to `^2.10` and run `composer update -W`. 2 [](https://docs.laravelshopper.dev/v2/upgrade/v2-9-to-v2-10#) Update TaxableItem implementers Replace `getTaxableAmount()` and `getQuantity()` with `getTaxableTotal()` on any class that implements `TaxableItem`. 3 [](https://docs.laravelshopper.dev/v2/upgrade/v2-9-to-v2-10#) Add tracksInventory() to custom models If you swapped the product or variant model, add `tracksInventory(): bool` to satisfy the `Stockable` contract. 4 [](https://docs.laravelshopper.dev/v2/upgrade/v2-9-to-v2-10#) Remove the old reservation listener Drop any reference to `ReserveOrderItemStockListener` from your `EventServiceProvider`. 5 [](https://docs.laravelshopper.dev/v2/upgrade/v2-9-to-v2-10#) Resolve checkout action from the container Replace any `new CreateOrderFromCartAction(...)` with `resolve(CreateOrderFromCartAction::class)`. 6 [](https://docs.laravelshopper.dev/v2/upgrade/v2-9-to-v2-10#) Review guest coupon flows If anonymous visitors can apply coupons, handle the `discount.requires_login` error for per-user discounts. 7 [](https://docs.laravelshopper.dev/v2/upgrade/v2-9-to-v2-10#) Run tests Run `php artisan test` to confirm the upgrade is clean. [Upgrade Guide](https://docs.laravelshopper.dev/v2/upgrade) [From v2.8 to v2.9](https://docs.laravelshopper.dev/v2/upgrade/v2-8-to-v2-9) ⌘I --- # From v2.8 to v2.9 - TALL Stack E-commerce Framework > Documentation Index > ------------------- > > Fetch the complete documentation index at: [/llms.txt](https://docs.laravelshopper.dev/llms.txt) > > Use this file to discover all available pages before exploring further. [Skip to main content](https://docs.laravelshopper.dev/v2/upgrade/v2-8-to-v2-9#content-area) **Estimated Upgrade Time:** 5 to 20 minutes. Most applications only need to update dependencies and clear the cache. The longer end applies if you customized the onboarding wizard or run custom Stripe SDK code. v2.9 adds Laravel 13 support, rebuilds the store onboarding wizard on Filament’s native Schema, and hardens how settings and dashboard data are cached. It contains no database migrations. The breaking changes below only affect applications that extended internal admin surfaces or pinned the Stripe SDK. [​](https://docs.laravelshopper.dev/v2/upgrade/v2-8-to-v2-9#updating-dependencies) Updating Dependencies ----------------------------------------------------------------------------------------------------------- Update the following dependency in your application’s `composer.json` file: `shopper/framework` to `^2.9` Then run: composer update -W php artisan cache:clear The `cache:clear` step matters during this upgrade. v2.9 changes what Shopper stores in the cache for settings, the default currency, and two dashboard widgets. A cache warmed by v2.8 holds serialized Eloquent models; if those entries survive the upgrade, the v2.9 code that expects scalar values can surface a `__PHP_Incomplete_Class` error until the keys expire. Clearing the cache once after deploying removes that window. [​](https://docs.laravelshopper.dev/v2/upgrade/v2-8-to-v2-9#laravel-13-support) Laravel 13 Support ----------------------------------------------------------------------------------------------------- v2.9 adds `laravel/framework ^13.0` to the supported range. The supported matrix is now Laravel 11.28+, 12.x, and 13.x on PHP 8.3 and 8.4. The only blocker for Laravel 13 was `spatie/laravel-livewire-wizard`, which capped `illuminate/support` at `^12`. That package powered the onboarding wizard and has been removed (see below). Several supporting dependencies were also bumped: `filament/filament` to `^4.11`, `stripe/stripe-php` to `^19.0`, and a handful of smaller packages. If you want to move to Laravel 13, follow the [official Laravel upgrade guide](https://laravel.com/docs/upgrade) for your application code. Shopper itself requires no changes on your part beyond the dependency update. [​](https://docs.laravelshopper.dev/v2/upgrade/v2-8-to-v2-9#high-impact-changes) High Impact Changes ------------------------------------------------------------------------------------------------------- ### [​](https://docs.laravelshopper.dev/v2/upgrade/v2-8-to-v2-9#stripe-sdk-upgraded-to-v19) Stripe SDK Upgraded to v19 **Likelihood of Impact: High if you use the Stripe SDK directly.** _Affects applications with custom Stripe code built on `stripe/stripe-php`._ The root `stripe/stripe-php` constraint moved from `^16.0` to `^19.0`, a three-major-version jump that aligns the framework with the `shopper/stripe` package. Shopper’s own `StripeDriver` only received PHPStan annotations and behaves identically, but the SDK upgrade applies to your entire application. If you call the Stripe SDK directly anywhere, review the changelogs for [v17](https://github.com/stripe/stripe-php/releases) , [v18](https://github.com/stripe/stripe-php/releases) , and [v19](https://github.com/stripe/stripe-php/releases) before deploying. Major versions of the SDK track Stripe API changes and can alter resource constructors and pagination behavior. Test every Stripe integration point after upgrading. If you only use the `shopper/stripe` package through Shopper’s payment system, no action is required. [​](https://docs.laravelshopper.dev/v2/upgrade/v2-8-to-v2-9#medium-impact-changes) Medium Impact Changes ----------------------------------------------------------------------------------------------------------- ### [​](https://docs.laravelshopper.dev/v2/upgrade/v2-8-to-v2-9#onboarding-wizard-rebuilt-on-filament-schema) Onboarding Wizard Rebuilt on Filament Schema **Likelihood of Impact: Medium** _Affects applications that customized or embedded the store initialization wizard._ The store initialization wizard was rewritten. It previously used `spatie/laravel-livewire-wizard` with one wizard component and three step components. It is now a single Livewire component, `InitializationWizard`, backed by Filament’s native `Wizard` schema, with a new `Shopper\Components\OnboardingWizard` class that preserves the horizontal stepper layout. As a result, `spatie/laravel-livewire-wizard` is no longer a dependency of Shopper. If your application relied on it being pulled in transitively, require it explicitly: composer require spatie/laravel-livewire-wizard The three step components and their registered Livewire aliases were removed: If you embedded any of these aliases in your own views, remove them. The onboarding flow is now driven entirely by the single `initialize-wizard` component, and the merchant-facing experience is unchanged. ### [​](https://docs.laravelshopper.dev/v2/upgrade/v2-8-to-v2-9#settings-trait-method-is-now-protected) Settings Trait Method Is Now Protected **Likelihood of Impact: Medium** _Affects custom Livewire components that use the `SaveSettings` trait._ `SaveSettings::saveSettings()` changed from `public` to `protected` and gained a second parameter: public function saveSettings(array $keys): void protected function saveSettings(array $keys, bool $locked = true): void Making the method `protected` prevents Livewire from exposing it as a directly callable wire action, which was the bypass surface this release closes. If you used the trait in a custom component and called `saveSettings()` from outside the class (for example from a test, or via `wire:click="saveSettings"`), wrap it in a public action you control: public function save(): void { $this->saveSettings($this->form->getState()); } The method now also wraps all writes in a database transaction and batches the locked-attribute check, so a single call performs fewer queries than before. Pass `false` as the second argument when you need to store unlocked settings. [​](https://docs.laravelshopper.dev/v2/upgrade/v2-8-to-v2-9#low-impact-changes) Low Impact Changes ----------------------------------------------------------------------------------------------------- ### [​](https://docs.laravelshopper.dev/v2/upgrade/v2-8-to-v2-9#cache-stores-scalars-not-models) Cache Stores Scalars, Not Models Three helpers and two dashboard widgets now cache primitive values and rehydrate on read, instead of serializing Eloquent models into the cache. | Location | Before | After | | --- | --- | --- | | `shopper_setting()` | cached the `Setting` model | caches the resolved value | | `shopper_currency()` | cached the `Currency` model | caches the currency `code` string | | `RecentOrders` widget | cached an Eloquent collection | caches order IDs, re-queries with eager loads | | `TopSellingProducts` widget | cached an Eloquent collection | caches scalar stats, re-queries products | The return value of `shopper_setting()` and `shopper_currency()` is unchanged, so application code that calls these helpers needs no edits. The only thing to do is the one-time `php artisan cache:clear` from the dependency step. If you read these cache keys directly (for example `Cache::get('shopper-setting.name')`), note that they now hold the scalar value rather than a model instance. ### [​](https://docs.laravelshopper.dev/v2/upgrade/v2-8-to-v2-9#extended-textinputselect-component) Extended `TextInputSelect` Component If you extended `Shopper\Components\Form\TextInputSelect` and overrode `hydrateState()`, update the override to match the new Filament signature: public function hydrateState(?array &$hydratedDefaultState, bool $andCallHydrationHooks = true): void public function hydrateState(?array &$hydratedDefaultState, bool $shouldCallHydrationHooks = true, bool $shouldApplyStateCasts = true, array &$appliedStateCastPaths = []): void This is a required sync with the parent Filament `TextInput` and only affects you if you subclassed the component. ### [​](https://docs.laravelshopper.dev/v2/upgrade/v2-8-to-v2-9#typescript-types-are-now-esm) TypeScript Types Are Now ESM The `@shopperlabs/shopper-types` package migrated from CommonJS to ECMAScript Modules. The `package.json` now declares `"type": "module"` and ships an `exports` map. ESM-first projects are unaffected. If you consumed the package through CommonJS `require()`, switch to `import`: import type { Product, Order } from '@shopperlabs/shopper-types' Two type definitions were also corrected: `Discount.min_required` narrowed from `string` to the `DiscountRequirement` enum, and `TaxRateRule.reference_id` widened from `string` to `string | number`. See the [TypeScript types reference](https://docs.laravelshopper.dev/v2/reference/typescript-types) for the full list. [​](https://docs.laravelshopper.dev/v2/upgrade/v2-8-to-v2-9#migration-checklist) Migration Checklist ------------------------------------------------------------------------------------------------------- 1 [](https://docs.laravelshopper.dev/v2/upgrade/v2-8-to-v2-9#) Update composer Set `shopper/framework` to `^2.9` and run `composer update -W`. 2 [](https://docs.laravelshopper.dev/v2/upgrade/v2-8-to-v2-9#) Clear the cache Run `php artisan cache:clear` to drop v2.8 cache entries that held serialized models. 3 [](https://docs.laravelshopper.dev/v2/upgrade/v2-8-to-v2-9#) Review custom Stripe code If you call `stripe/stripe-php` directly, review the v17, v18, and v19 changelogs and test every Stripe integration point. 4 [](https://docs.laravelshopper.dev/v2/upgrade/v2-8-to-v2-9#) Audit onboarding customizations Remove any usage of the `initialize-store-information`, `initialize-store-address`, or `initialize-store-social-link` aliases. Require `spatie/laravel-livewire-wizard` directly if you still depend on it. 5 [](https://docs.laravelshopper.dev/v2/upgrade/v2-8-to-v2-9#) Update SaveSettings callers If you used the `SaveSettings` trait and called `saveSettings()` externally, wrap it in a public action since the method is now protected. 6 [](https://docs.laravelshopper.dev/v2/upgrade/v2-8-to-v2-9#) Update extended components If you extended `TextInputSelect` and overrode `hydrateState()`, update the signature to match Filament. 7 [](https://docs.laravelshopper.dev/v2/upgrade/v2-8-to-v2-9#) Update TypeScript imports If you consumed `@shopperlabs/shopper-types` via CommonJS, switch to ESM imports. 8 [](https://docs.laravelshopper.dev/v2/upgrade/v2-8-to-v2-9#) Run tests Run `php artisan test` to confirm the upgrade is clean. [From v2.9 to v2.10](https://docs.laravelshopper.dev/v2/upgrade/v2-9-to-v2-10) [From v2.7 to v2.8](https://docs.laravelshopper.dev/v2/upgrade/v2-7-to-v2-8) ⌘I --- # Zones - TALL Stack E-commerce Framework > Documentation Index > ------------------- > > Fetch the complete documentation index at: [/llms.txt](https://docs.laravelshopper.dev/llms.txt) > > Use this file to discover all available pages before exploring further. [Skip to main content](https://docs.laravelshopper.dev/v2/zones#content-area) Zones define geographic regions for your store. Each zone groups countries together and associates them with a [currency](https://docs.laravelshopper.dev/v2/currencies) , [carriers](https://docs.laravelshopper.dev/v2/carriers) , [payment methods](https://docs.laravelshopper.dev/v2/payment-methods) , and [tax rules](https://docs.laravelshopper.dev/v2/taxes) . When a customer checks out, Shopper resolves their zone from the shipping address and uses it to determine available shipping options, payment methods, and tax rates. [​](https://docs.laravelshopper.dev/v2/zones#model) Model ------------------------------------------------------------ The model used is `Shopper\Core\Models\Zone`. It uses the `HasSlug` trait for automatic slug generation. The model is not configurable via `config/shopper/models.php`. [​](https://docs.laravelshopper.dev/v2/zones#database-schema) Database Schema -------------------------------------------------------------------------------- | Column | Type | Nullable | Default | Description | | --- | --- | --- | --- | --- | | `id` | bigint | no | auto | Primary key | | `name` | string | no | \- | Zone name (unique) | | `slug` | string | yes | auto | URL-friendly identifier (unique) | | `code` | string | yes | null | Short code identifier (unique) | | `is_enabled` | boolean | no | false | Zone visibility | | `currency_id` | bigint | yes | null | FK to currencies table | | `metadata` | jsonb | yes | null | Additional custom data | | `created_at` | timestamp | yes | null | Creation timestamp | | `updated_at` | timestamp | yes | null | Last update timestamp | ### [​](https://docs.laravelshopper.dev/v2/zones#pivot-table) Pivot Table The `zone_has_relations` pivot table connects zones to countries, carriers, payment methods, and collections through a polymorphic relationship. | Column | Type | Description | | --- | --- | --- | | `zone_id` | bigint | FK to zone | | `zonable_type` | string | Morph type (Country, Carrier, PaymentMethod, Collection) | | `zonable_id` | bigint | FK to the related model | [​](https://docs.laravelshopper.dev/v2/zones#relationships) Relationships ---------------------------------------------------------------------------- ### [​](https://docs.laravelshopper.dev/v2/zones#currency) Currency Each zone is associated with one currency. This determines which currency is used for pricing and checkout in that zone. $zone->currency; // Currency model $zone->currency_code; // "EUR" (computed accessor) ### [​](https://docs.laravelshopper.dev/v2/zones#countries) Countries Zones group multiple countries together. When a customer enters a shipping address, Shopper resolves the zone by matching the country. $zone->countries; $zone->countries()->attach([$franceId, $germanyId, $belgiumId]); ### [​](https://docs.laravelshopper.dev/v2/zones#carriers) Carriers Carriers (shipping providers) are scoped to zones. A carrier available in Europe may not be available in North America. $zone->carriers; $zone->carriers()->attach([$colissimoId, $dhlId]); ### [​](https://docs.laravelshopper.dev/v2/zones#payment-methods) Payment Methods Payment methods are scoped to zones. For example, iDEAL is only available in the Netherlands zone. $zone->paymentMethods; $zone->paymentMethods()->attach([$stripeId, $idealId]); ### [​](https://docs.laravelshopper.dev/v2/zones#shipping-options) Shipping Options Each zone has shipping options (carrier options with rates) available at checkout: $zone->shippingOptions; ### [​](https://docs.laravelshopper.dev/v2/zones#collections) Collections [Collections](https://docs.laravelshopper.dev/v2/collections) can be scoped to specific zones for region-specific merchandising: $zone->collections; [​](https://docs.laravelshopper.dev/v2/zones#query-scopes) Query Scopes -------------------------------------------------------------------------- The `enabled` scope filters zones that are active: use Shopper\Core\Models\Zone; Zone::query()->enabled()->get(); [​](https://docs.laravelshopper.dev/v2/zones#computed-attributes) Computed Attributes ---------------------------------------------------------------------------------------- The Zone model provides computed attributes that return comma-separated names for related entities: $zone->countries_name; // "France, Germany, Belgium" $zone->carriers_name; // "Colissimo, DHL" $zone->payments_name; // "Stripe, iDEAL" $zone->currency_code; // "EUR" [​](https://docs.laravelshopper.dev/v2/zones#haszones-trait) HasZones Trait ------------------------------------------------------------------------------ Models that can be scoped to zones use the `HasZones` trait. This is already applied to `PaymentMethod`, `Carrier`, and `Collection` models. use Shopper\Core\Models\Traits\HasZones; $model->zones; $model->zones()->attach([$zoneId1, $zoneId2]); [​](https://docs.laravelshopper.dev/v2/zones#creating-zones) Creating Zones ------------------------------------------------------------------------------ To create a zone for the European market: use Shopper\Core\Models\Zone; use Shopper\Core\Models\Country; $zone = Zone::query()->create([\ 'name' => 'Europe',\ 'code' => 'EU',\ 'is_enabled' => true,\ 'currency_id' => $eurCurrency->id,\ ]); $countries = Country::query() ->whereIn('cca2', ['FR', 'DE', 'BE', 'NL', 'ES', 'IT']) ->pluck('id'); $zone->countries()->attach($countries); $zone->carriers()->attach([$colissimoId, $dhlId]); $zone->paymentMethods()->attach([$stripeId]); [​](https://docs.laravelshopper.dev/v2/zones#retrieving-zones) Retrieving Zones ---------------------------------------------------------------------------------- To find the zone for a customer’s shipping address: $zone = Zone::query() ->enabled() ->whereHas('countries', fn ($q) => $q->where('id', $countryId)) ->first(); To get all enabled zones with their currencies: $zones = Zone::query() ->enabled() ->with('currency') ->get(); [​](https://docs.laravelshopper.dev/v2/zones#components) Components ---------------------------------------------------------------------- The zone management components are part of the settings configuration. To customize: php artisan shopper:component:publish setting Zone-related components in `config/shopper/components/setting.php`: use Shopper\Livewire; return [\ 'pages' => [\ 'zones' => Livewire\Pages\Settings\Zones::class,\ ],\ 'components' => [\ 'settings.zones.detail' => Livewire\Components\Settings\Zones\Detail::class,\ 'settings.zones.shipping-options' => Livewire\Components\Settings\Zones\ZoneShippingOptions::class,\ ],\ ]; [Channels](https://docs.laravelshopper.dev/v2/channels) [Locations](https://docs.laravelshopper.dev/v2/locations) ⌘I --- # Vue Starter Kit - TALL Stack E-commerce Framework > Documentation Index > ------------------- > > Fetch the complete documentation index at: [/llms.txt](https://docs.laravelshopper.dev/llms.txt) > > Use this file to discover all available pages before exploring further. [Skip to main content](https://docs.laravelshopper.dev/v2/vue-starter-kit#content-area) The Vue Starter Kit is a complete storefront for Shopper, built with [Inertia.js](https://inertiajs.com/) and [Vue 3](https://vuejs.org/) . It keeps the full power of Laravel on the backend, with no separate API layer to maintain, while delivering a modern single-page application experience on the frontend. The design system uses [shadcn-vue](https://www.shadcn-vue.com/) components and [Tailwind CSS v4](https://tailwindcss.com/) , and every route is fully type-safe thanks to [Laravel Wayfinder](https://github.com/laravel/wayfinder) and a PHP-to-TypeScript transformer. ![Vue Starter Kit storefront](https://mintcdn.com/shopperlabs-ee054f5e/6wDmKBjBTMPmRNSb/images/v2/inertia-starterkit.png?w=2500&fit=max&auto=format&n=6wDmKBjBTMPmRNSb&q=85&s=2653484f2220852b09ce259a37c75718) [​](https://docs.laravelshopper.dev/v2/vue-starter-kit#prerequisites) Prerequisites -------------------------------------------------------------------------------------- | Requirement | Version | | --- | --- | | PHP | 8.4+ | | Laravel | 12.0+ | | Shopper | 2.9+ | | Node.js | 20+ | [​](https://docs.laravelshopper.dev/v2/vue-starter-kit#installation) Installation ------------------------------------------------------------------------------------ The `shopper:kit:install` command is built into Shopper. No additional package is required. php artisan shopper:kit:install shopperlabs/vue-starter-kit The installer downloads the kit, reads its [manifest](https://docs.laravelshopper.dev/v2/starter-kits#the-manifest) , copies all storefront files into your project, and installs the following dependencies. | Package | Version | Purpose | | --- | --- | --- | | `inertiajs/inertia-laravel` | ^3.0 | Inertia server-side adapter for Laravel | | `laravel/fortify` | ^1.34 | Authentication backend (login, register, 2FA) | | `laravel/wayfinder` | ^0.1.14 | Typed route helpers generated from your routes | | `spatie/laravel-typescript-transformer` | ^3.2 | Generates TypeScript types from PHP DTOs and enums | | `shopper/stripe` | ^2.9 | Stripe payment integration | After installing dependencies, the kit runs its post-install commands: database migrations, storage symlink creation, npm install, and the frontend asset build. Once complete, the kit package is removed from your `composer.json`. The code is yours. On an existing project, create a new branch before installing so you can review every change. git checkout -b storefront php artisan shopper:kit:install shopperlabs/vue-starter-kit [​](https://docs.laravelshopper.dev/v2/vue-starter-kit#project-structure) Project Structure ---------------------------------------------------------------------------------------------- The starter kit publishes files into standard Laravel directories. The backend is shared with the [React Starter Kit](https://docs.laravelshopper.dev/v2/react-starter-kit) ; only the `resources/js` frontend differs. Here is the full structure. app/ ├── Actions/ │ ├── Cart/ │ │ └── AddToCart.php │ ├── Checkout/ │ │ ├── BuildShippingPackages.php │ │ ├── FetchDeliveryRates.php │ │ ├── FetchPaymentMethods.php │ │ └── ResolveZoneForCountry.php │ ├── Fortify/ │ │ ├── CreateNewUser.php │ │ └── ResetUserPassword.php │ ├── Product/ │ │ ├── AddProductReviewAction.php │ │ ├── BuildVariantOptions.php │ │ └── ResolveVariantAvailability.php │ ├── CreateOrder.php │ ├── GetCountriesByZone.php │ └── ZoneSessionManager.php ├── Concerns/ │ ├── InteractsWithStorefrontMedia.php │ ├── PasswordValidationRules.php │ └── ProfileValidationRules.php ├── DTO/ │ ├── AddressData.php │ ├── CountryByZoneData.php │ ├── PriceData.php │ └── ProductReviewsData.php ├── Http/ │ ├── Controllers/ │ │ ├── Account/ # Address and order management │ │ ├── Settings/ # Profile and security │ │ ├── Shop/ # Home, products, cart, checkout, zone │ │ └── StripeWebhookController.php │ ├── Middleware/ │ │ ├── HandleAppearance.php │ │ └── HandleInertiaRequests.php │ └── Requests/Settings/ # Profile and password form requests ├── Models/ │ ├── Category.php │ ├── Channel.php │ ├── Collection.php │ ├── Product.php │ ├── ProductVariant.php │ └── User.php ├── Providers/ │ ├── AppServiceProvider.php │ ├── FortifyServiceProvider.php │ └── TypeScriptTransformerServiceProvider.php ├── Traits/ │ └── HasProductPricing.php ├── CheckoutSession.php └── helpers.php resources/js/ ├── components/ │ ├── account/ # Order status badge │ ├── shop/ # Product cards, price display, zone selector, Stripe form │ └── ui/ # shadcn-vue primitives (button, dialog, select, ...) ├── composables/ # useCart, useShop, useStripeElements, useAppearance ├── layouts/ # Storefront, account, settings, and auth layouts ├── lib/ # format, stripe, and utility helpers ├── pages/ │ ├── account/ # Orders, order detail, addresses │ ├── auth/ # Login, register, password reset, 2FA │ ├── settings/ # Profile, appearance, security │ └── shop/ # Home, catalog, product, cart, checkout ├── types/ # Shared and generated TypeScript types └── app.ts # Inertia application entry point routes/ ├── web.php # Storefront, checkout, account routes └── settings.php # Profile and security routes tests/ ├── Feature/Auth/ # Authentication tests └── Feature/Settings/ # Profile and security tests [​](https://docs.laravelshopper.dev/v2/vue-starter-kit#routing) Routing -------------------------------------------------------------------------- The starter kit defines all storefront routes in `routes/web.php`. Unlike the Livewire kit, each page is rendered by a dedicated controller that returns an Inertia response. Routes are named so you can reference them through Wayfinder in your Vue components. ### [​](https://docs.laravelshopper.dev/v2/vue-starter-kit#public-routes) Public Routes | Route | Controller | Description | | --- | --- | --- | | `GET /` | `Shop\HomeController` | Homepage with featured collections, products, and categories | | `GET /shop` | `Shop\ProductController@index` | Product catalog with search and filtering | | `GET /shop/{product:slug}` | `Shop\ProductController@show` | Product detail with variant selection | | `GET /categories` | `Shop\CategoryController@index` | All categories | | `GET /categories/{category:slug}` | `Shop\CategoryController@show` | Products in a category | | `GET /collections/{collection:slug}` | `Shop\CollectionController@show` | Products in a collection | | `GET /search` | `Shop\SearchController` | Full-text search across products | | `GET /cart` | `Shop\CartController@index` | Shopping cart | Cart mutations are exposed as their own throttled endpoints: `POST /cart` adds a line, `PATCH /cart/{line}` updates a quantity, `DELETE /cart/{line}` removes a line, and `DELETE /cart` clears the cart. The active pricing zone is changed with `PATCH /zone`. ### [​](https://docs.laravelshopper.dev/v2/vue-starter-kit#authenticated-routes) Authenticated Routes These routes require the user to be logged in and have a verified email. | Route | Controller | Description | | --- | --- | --- | | `GET /checkout` | `Shop\CheckoutController@index` | Multi-step checkout flow | | `GET /checkout/payment/{number}` | `Shop\StripePaymentController` | Stripe Payment Element | | `GET /checkout/success/{order}` | `Shop\CheckoutSuccessController` | Order confirmation | | `GET /account/orders` | `Account\OrderController@index` | Order history | | `GET /account/orders/{order}` | `Account\OrderController@show` | Order detail | | `GET /account/addresses` | `Account\AddressController@index` | Address management | | `GET /settings/profile` | `Settings\ProfileController@edit` | Profile settings | | `GET /settings/appearance` | Inertia page | Dark mode / appearance | | `GET /settings/security` | `Settings\SecurityController@edit` | Password and two-factor authentication | The checkout flow posts to dedicated endpoints for each step (`checkout/shipping-address`, `checkout/shipping-option`, `checkout/prepare-payment`, `checkout/place-order`). The Stripe webhook endpoint is registered at `/webhooks/stripe` with rate limiting. [​](https://docs.laravelshopper.dev/v2/vue-starter-kit#architecture) Architecture ------------------------------------------------------------------------------------ The starter kit follows a clear separation of concerns. Business logic lives in Action classes, data structures in DTOs, HTTP handling in controllers, and UI in Vue components. This makes it straightforward to modify any part of the storefront without affecting others. ### [​](https://docs.laravelshopper.dev/v2/vue-starter-kit#actions) Actions Actions are single-responsibility classes that encapsulate business logic. They are resolved from the container, so you can swap implementations or add dependencies as needed. use App\Actions\Cart\AddToCart; use App\Actions\Checkout\FetchDeliveryRates; use App\Actions\CreateOrder; resolve(AddToCart::class)->handle($product, $selectedVariant); resolve(FetchDeliveryRates::class)->handle($addressData, $packages); resolve(CreateOrder::class)->handle(); The checkout flow is split into four focused actions. | Action | Responsibility | | --- | --- | | `BuildShippingPackages` | Builds package dimensions from cart items for carrier rate requests | | `FetchDeliveryRates` | Queries available carriers and returns shipping rate options | | `FetchPaymentMethods` | Loads payment methods available for the customer’s country | | `ResolveZoneForCountry` | Resolves the pricing zone for a given country with caching | Order creation is wrapped in `CreateOrder`, which uses `Cache::lock` for idempotency and verifies cart ownership before converting the cart into an order. ### [​](https://docs.laravelshopper.dev/v2/vue-starter-kit#dtos) DTOs Data Transfer Objects provide type-safe structures for data passed between the backend and the Vue frontend. Because the kit uses the TypeScript Transformer, these DTOs also become TypeScript types your components can import. | DTO | Purpose | | --- | --- | | `AddressData` | Structured address data for forms and checkout | | `CountryByZoneData` | Zone session data (zone ID, country code, currency code) | | `PriceData` | Formatted price with amount, currency, and comparison price | | `ProductReviewsData` | Aggregated review data (average rating, count, distribution) | ### [​](https://docs.laravelshopper.dev/v2/vue-starter-kit#controllers) Controllers Each storefront page is rendered by a controller in `app/Http/Controllers/`. Controllers query Shopper’s models, wrap data in DTOs, and return an Inertia response that renders the matching page component. use App\Models\Product; use Inertia\Inertia; use Inertia\Response; public function show(Product $product): Response { return Inertia::render('shop/product', [\ 'product' => $product->load('variants', 'medias'),\ ]); } To change what a page receives, edit its controller. To change how it looks, edit the matching page component in `resources/js/pages/`. ### [​](https://docs.laravelshopper.dev/v2/vue-starter-kit#inertia-shared-data) Inertia Shared Data The `HandleInertiaRequests` middleware shares global data with every page, so your components always have access to the authenticated user and the current shop state without re-fetching it. The `shop` prop carries the cart count, the selected zone, the active currency, available channels and zones, the tax label, and navigation categories. 'shop' => fn (): array => [\ 'cart_count' => $cart?->lines->sum('quantity') ?? 0,\ 'zone' => $zone,\ 'currency' => current_currency(),\ 'tax_label' => current_tax_label(),\ // navigation categories, channels, available zones ...\ ], On the frontend, the `useShop` composable reads this shared data, and `useCart` exposes the cart count and mutation helpers. ### [​](https://docs.laravelshopper.dev/v2/vue-starter-kit#models) Models The starter kit publishes model files that extend Shopper’s base models. These are configured in `config/shopper/models.php` so that Shopper’s internals use your extended versions. // app/Models/Product.php class Product extends Shopper\Models\Product { use App\Concerns\InteractsWithStorefrontMedia; // Add your own methods, scopes, or relationships here } You can add custom logic directly to these models. Any method you add is available throughout the storefront and in Shopper’s admin panel. The `InteractsWithStorefrontMedia` trait appends `thumbnail` and `images` attributes to every JSON response, so your Vue components receive ready-to-use media URLs. ### [​](https://docs.laravelshopper.dev/v2/vue-starter-kit#checkoutsession) CheckoutSession The `CheckoutSession` class defines constants for session keys used throughout the checkout flow. This provides a single place to reference all checkout-related session data. use App\CheckoutSession; session()->get(CheckoutSession::KEY); // 'checkout' session()->get(CheckoutSession::SHIPPING_ADDRESS); // 'checkout.shipping_address' session()->get(CheckoutSession::BILLING_ADDRESS); // 'checkout.billing_address' session()->get(CheckoutSession::SHIPPING_OPTION); // 'checkout.shipping_option' session()->get(CheckoutSession::PAYMENT); // 'checkout.payment' ### [​](https://docs.laravelshopper.dev/v2/vue-starter-kit#helpers) Helpers The `app/helpers.php` file defines three global functions used across the storefront. | Function | Purpose | | --- | --- | | `cartSession()` | Returns the current cart or creates a new one with the active zone, currency, and channel | | `current_currency()` | Returns the currency code for the selected zone, or the store default from `shopper_currency()` | | `current_tax_label()` | Returns the tax label (“TTC” or “HT”) based on the zone’s tax configuration | ### [​](https://docs.laravelshopper.dev/v2/vue-starter-kit#type-safety) Type Safety This kit is type-safe end to end. Three tools work together so your Vue components never guess at the shape of backend data. | Tool | What it provides | | --- | --- | | Wayfinder | Typed route helpers generated from `routes/web.php`, so `shop.product` becomes an importable function | | TypeScript Transformer | Generates TypeScript definitions from your PHP DTOs and enums into `resources/js/types` | | `@shopperlabs/shopper-types` | Shared domain types (Address, Cart, Order, Product, and enums) published as an npm package | The `TypeScriptTransformerServiceProvider` registers the transformer. Run the generation command after changing a DTO to refresh the TypeScript types your components import. [​](https://docs.laravelshopper.dev/v2/vue-starter-kit#checkout-flow) Checkout Flow -------------------------------------------------------------------------------------- The checkout is a multi-step process handled by `CheckoutController`. Each step posts to its own endpoint and validates its data before proceeding to the next. **Step 1 - Shipping Address.** The customer enters a new address or selects one of their saved addresses. The address is stored in the session and attached to the cart via `CartManager::addAddress()`. **Step 2 - Delivery Options.** The `BuildShippingPackages` action builds package data from the cart, then `FetchDeliveryRates` queries configured [carriers](https://docs.laravelshopper.dev/v2/carriers) for available shipping rates based on the address and packages. The customer selects a delivery option. **Step 3 - Payment.** `FetchPaymentMethods` loads available [payment methods](https://docs.laravelshopper.dev/v2/payments) for the customer’s country. When the customer places the order, the `CreateOrder` action converts the cart into an order inside a database transaction, adds shipping costs, and initiates payment processing through Shopper’s `PaymentProcessingService`. For Stripe payments, the customer is redirected to a dedicated payment page (`StripePaymentController`) that renders the Stripe Payment Element through the `useStripeElements` composable. The `StripeWebhookController` handles payment confirmation webhooks. [​](https://docs.laravelshopper.dev/v2/vue-starter-kit#zones-and-currency) Zones and Currency ------------------------------------------------------------------------------------------------ The starter kit uses Shopper’s [zone system](https://docs.laravelshopper.dev/v2/zones) for multi-currency and regional pricing. The `ZoneSelector` component in the footer lets customers pick their country. When a zone is selected, the `ZoneSessionManager` stores a `CountryByZoneData` DTO in the session with the zone ID, country code, and currency code. All prices across the storefront update to reflect the zone’s currency through the shared `shop` prop. If no zone is selected, the storefront falls back to your store’s default currency from `shopper_currency()`. The `current_tax_label()` helper checks the zone’s tax configuration to display “TTC” (tax-inclusive) or “HT” (tax-exclusive) labels alongside prices. To enable zone selection, create at least one active zone in your Shopper admin panel. You can optionally set a default zone using the `SHOPPER_DEFAULT_ZONE` environment variable. [​](https://docs.laravelshopper.dev/v2/vue-starter-kit#customization) Customization -------------------------------------------------------------------------------------- Once installed, every file belongs to your project. Here are the most common customization paths. ### [​](https://docs.laravelshopper.dev/v2/vue-starter-kit#styling) Styling All views use shadcn-vue components and Tailwind CSS v4. Modify colors, spacing, and layouts by editing the components in `resources/js`. UI primitives live in `resources/js/components/ui/`, and the storefront chrome is in `resources/js/layouts/storefront/`. ### [​](https://docs.laravelshopper.dev/v2/vue-starter-kit#pages) Pages Each page is a Vue single-file component in `resources/js/pages/`. Edit any `.vue` file to change a page’s layout or content. To change the data a page receives, edit its controller in `app/Http/Controllers/`. ### [​](https://docs.laravelshopper.dev/v2/vue-starter-kit#checkout) Checkout To modify the checkout flow, edit the action classes in `app/Actions/Checkout/`. Each action handles one concern, so you can change how shipping rates are calculated without touching payment logic. To add a new payment provider, implement the provider using Shopper’s [payment system](https://docs.laravelshopper.dev/v2/payments) and register it in your admin panel. The checkout will automatically pick it up through `FetchPaymentMethods`. ### [​](https://docs.laravelshopper.dev/v2/vue-starter-kit#adding-pages) Adding Pages Create a controller, register a named route in `routes/web.php`, and add the matching Vue component under `resources/js/pages/`. use Inertia\Inertia; use Inertia\Response; class AboutController extends Controller { public function __invoke(): Response { return Inertia::render('about'); } } // routes/web.php Route::get('about', AboutController::class)->name('about'); ### [​](https://docs.laravelshopper.dev/v2/vue-starter-kit#models-2) Models Add methods, scopes, or relationships directly to the model files in `app/Models/`. These models extend Shopper’s base models, so all existing functionality is preserved. use Illuminate\Database\Eloquent\Builder; class Product extends Shopper\Models\Product { public function scopeFeatured(Builder $query): Builder { return $query->where('is_featured', true); } } [React](https://docs.laravelshopper.dev/v2/react-starter-kit) [Upgrade Guide](https://docs.laravelshopper.dev/v2/upgrade) ⌘I --- # From v2.6 to v2.7 - TALL Stack E-commerce Framework > Documentation Index > ------------------- > > Fetch the complete documentation index at: [/llms.txt](https://docs.laravelshopper.dev/llms.txt) > > Use this file to discover all available pages before exploring further. [Skip to main content](https://docs.laravelshopper.dev/v2/upgrade/v2-6-to-v2-7#content-area) **Estimated Upgrade Time:** 30 to 90 minutes depending on how much storefront code interacts with monetary values.v2.7 ships with an AI-assisted upgrade package. Install it before upgrading to get guided migration prompts. [​](https://docs.laravelshopper.dev/v2/upgrade/v2-6-to-v2-7#ai-assisted-upgrade-recommended) AI-Assisted Upgrade (Recommended) --------------------------------------------------------------------------------------------------------------------------------- Shopper v2.7 includes `shopper/upgrade`, a temporary package with [Laravel Boost](https://github.com/laravel/boost) skills that guide your AI assistant through each breaking change. composer require shopper/upgrade:^2.7 --dev php artisan boost:install This registers 4 upgrade skills in your AI assistant: | Skill | What it does | | --- | --- | | `shopper-upgrade-money-storage` | Migrates storefront code to smallest currency unit | | `shopper-upgrade-slide-overs` | Migrates custom slide-over components | | `shopper-upgrade-two-factor-auth` | Migrates 2FA traits to SOLID interfaces | | `shopper-upgrade-filament-schemas` | Migrates InteractsWithForms to InteractsWithSchemas | Each skill checks if the migration applies to your project before suggesting changes. After completing the upgrade, remove the package: composer remove shopper/upgrade --dev [​](https://docs.laravelshopper.dev/v2/upgrade/v2-6-to-v2-7#updating-dependencies) Updating Dependencies ----------------------------------------------------------------------------------------------------------- Update the following dependencies in your application’s `composer.json` file: `shopper/framework` to `^2.7` `shopper/stripe` to `^2.7` (If installed) Then run: composer update -W v2.7 requires **Laravel 11.28+** or **Laravel 12.x**. If you are on an earlier Laravel 11 version, update Laravel first. Filament minimum version is now **4.9**. * * * [​](https://docs.laravelshopper.dev/v2/upgrade/v2-6-to-v2-7#high-impact-changes) High Impact Changes ------------------------------------------------------------------------------------------------------- ### [​](https://docs.laravelshopper.dev/v2/upgrade/v2-6-to-v2-7#money-storage-smallest-currency-unit) Money Storage: Smallest Currency Unit **Likelihood of Impact: High** _Affects all applications that read or write monetary values (prices, orders, cart totals, payment gateway calls)._ This is the most critical change in v2.7. All monetary values are now stored and returned in the **smallest currency unit** (cents for USD/EUR/GBP, raw value for zero-decimal currencies like XAF/JPY). This follows the Stripe/Shopify standard. **What changed:** All Eloquent price accessors (get/set) have been removed from `Order`, `OrderItem`, `Price`, `CarrierOption`, `CartLine`, `CartLineTaxLine`, `CartLineAdjustment`, and `Discount`. #### [​](https://docs.laravelshopper.dev/v2/upgrade/v2-6-to-v2-7#reading-prices) Reading prices Model properties now return the raw database value (smallest unit) instead of human-readable values: $order->price_amount; $price->amount; These return `1200` and `16300` respectively, not `12.00` and `163.00`. For display, use `shopper_money_format()`: shopper_money_format($order->price_amount, $order->currency_code); #### [​](https://docs.laravelshopper.dev/v2/upgrade/v2-6-to-v2-7#writing-prices) Writing prices Pass the value in cents directly. The setter no longer multiplies by 100: Order::create(['price_amount' => 12.00]); Order::create(['price_amount' => 1200]); Price::create(['amount' => 163]); Price::create(['amount' => 16300]); #### [​](https://docs.laravelshopper.dev/v2/upgrade/v2-6-to-v2-7#cart-pipeline) Cart pipeline `CartPipelineRunner` no longer divides results by 100. All values are in cents: $context = $cartManager->calculate($cart); $context->subtotal; // 25.00 $context->subtotal; // 2500 #### [​](https://docs.laravelshopper.dev/v2/upgrade/v2-6-to-v2-7#payment-gateways) Payment gateways Values are already in cents. Remove any manual multiplication: Stripe::charge($order->price_amount * 100); Stripe::charge($order->price_amount); #### [​](https://docs.laravelshopper.dev/v2/upgrade/v2-6-to-v2-7#zero-decimal-currencies) Zero-decimal currencies If you use zero-decimal currencies (XAF, JPY, KRW, etc.), existing data was incorrectly multiplied by 100. Run the fix command: # Preview what will change php artisan shopper:upgrade:fix-zero-decimal-currencies --dry-run # Apply the fix php artisan shopper:upgrade:fix-zero-decimal-currencies Put your site in maintenance mode before running this command. It modifies prices, orders, order items, carrier options, cart lines, and discounts. #### [​](https://docs.laravelshopper.dev/v2/upgrade/v2-6-to-v2-7#new-helpers) New helpers Two new helpers are available: | Helper | Purpose | | --- | --- | | `zero_decimal_currencies()` | Returns the list of zero-decimal currency codes | | `is_no_division_currency($code)` | Checks if a currency code is zero-decimal | #### [​](https://docs.laravelshopper.dev/v2/upgrade/v2-6-to-v2-7#moneyinput-component) MoneyInput component A new Filament form component handles the conversion between human values (form display) and smallest unit (database) automatically: use Shopper\Components\Form\MoneyInput; MoneyInput::make('price') ->currency('USD') ->suffix('USD'); If no currency is specified, it defaults to the shop’s configured currency. For zero-decimal currencies, the mask precision adjusts to 0 automatically. #### [​](https://docs.laravelshopper.dev/v2/upgrade/v2-6-to-v2-7#filament-table-columns) Filament table columns Replace `->money()` with the `->currency()` macro: TextColumn::make('amount')->money(fn ($record) => $record->currencyCode) TextColumn::make('amount')->currency(fn ($record) => $record->currencyCode) **Existing database data for standard currencies (USD, EUR, GBP) is already correct**. The old setters stored values in cents. No migration needed for these currencies. * * * ### [​](https://docs.laravelshopper.dev/v2/upgrade/v2-6-to-v2-7#slide-over-components-replaced) Slide-Over Components Replaced **Likelihood of Impact: High** _Affects applications with custom slide-over components extending Shopper’s base class._ Shopper’s internal `SlideOverComponent` and `SlideOverPanel` classes have been removed and replaced by the [`laravelcm/livewire-slide-overs`](https://github.com/laravelcm/livewire-slide-overs) package. If you created custom slide-over components that extend Shopper’s base class, update the import: use Shopper\Livewire\Components\SlideOverComponent; use Laravelcm\LivewireSlideOvers\SlideOverComponent; The `closePanelWithEvents()` method no longer exists: $this->closePanelWithEvents(['eventName']); $this->dispatch('eventName'); $this->closePanel(); * * * [​](https://docs.laravelshopper.dev/v2/upgrade/v2-6-to-v2-7#medium-impact-changes) Medium Impact Changes ----------------------------------------------------------------------------------------------------------- ### [​](https://docs.laravelshopper.dev/v2/upgrade/v2-6-to-v2-7#two-factor-authentication-solid-interfaces) Two-Factor Authentication: SOLID Interfaces **Likelihood of Impact: Medium** _Affects applications that override the User model and use two-factor authentication._ The monolithic `TwoFactorAuthenticatable` trait has been split into focused interfaces and traits: use Shopper\Traits\TwoFactorAuthenticatable; use Shopper\Contracts\HasStoreAuthentication; use Shopper\Contracts\HasStoreAuthenticationRecovery; use Shopper\Traits\InteractsWithStoreAuthentication; use Shopper\Traits\InteractsWithStoreAuthenticationRecovery; class User extends Authenticatable class User extends Authenticatable implements HasStoreAuthentication, HasStoreAuthenticationRecovery { use TwoFactorAuthenticatable; use InteractsWithStoreAuthentication; use InteractsWithStoreAuthenticationRecovery; } The two-factor columns on the users table have been renamed to avoid conflicts with Laravel Fortify’s own 2FA columns. Update the `$hidden` array on your User model: protected $hidden = [\ 'password',\ 'remember_token',\ 'two_factor_secret', \ 'two_factor_recovery_codes', \ 'store_two_factor_secret', \ 'store_two_factor_recovery_codes', \ ]; ### [​](https://docs.laravelshopper.dev/v2/upgrade/v2-6-to-v2-7#filament-hasforms-to-hasschemas) Filament HasForms to HasSchemas **Likelihood of Impact: Medium** _Affects applications with custom Filament components that use `InteractsWithForms`._ Shopper now uses `InteractsWithSchemas` instead of `InteractsWithForms`. If you have custom components in `app/Shopper/` or `app/Livewire/`: use Filament\Forms\Concerns\InteractsWithForms; use Filament\Forms\Contracts\HasForms; use Filament\Schemas\Concerns\InteractsWithSchemas; use Filament\Schemas\Contracts\HasSchemas; `InteractsWithForms` still works in Filament 4.x. This migration is recommended but not urgent. ### [​](https://docs.laravelshopper.dev/v2/upgrade/v2-6-to-v2-7#dependency-version-bumps) Dependency Version Bumps **Likelihood of Impact: Medium** _Affects all applications._ | Dependency | Before | After | | --- | --- | --- | | `laravel/framework` | `^11.0\|^12.0` | `^11.28\|^12.0` | | `filament/filament` | `^4.7` | `^4.9` | | `spatie/laravel-permission` | `^6.24` | `^6.24\|^7.0` | * * * [​](https://docs.laravelshopper.dev/v2/upgrade/v2-6-to-v2-7#low-impact-changes) Low Impact Changes ----------------------------------------------------------------------------------------------------- ### [​](https://docs.laravelshopper.dev/v2/upgrade/v2-6-to-v2-7#interactswithslideoverform-trait) InteractsWithSlideOverForm Trait 10 slide-over form components now use the shared `InteractsWithSlideOverForm` trait and a generic Blade view. Their dedicated Blade views have been removed: `add-collection-form.blade.php`, `attribute-form.blade.php`, `brand-form.blade.php`, `category-form.blade.php`, `create-team-member.blade.php`, `discount-form.blade.php`, `supplier-form.blade.php`, `update-variant.blade.php` If you published and customized any of these views, you’ll need to adapt to the new generic view or override the component’s `render()` method. ### [​](https://docs.laravelshopper.dev/v2/upgrade/v2-6-to-v2-7#shipment-event-date-validation) Shipment Event Date Validation Shipment events now enforce chronological ordering. You cannot create an event with a date earlier than the previous event. The `RecordShipmentEventAction` validates this server-side. ### [​](https://docs.laravelshopper.dev/v2/upgrade/v2-6-to-v2-7#nested-sortable-categories) Nested Sortable Categories Categories can now be reordered with drag & drop in the admin panel. No code changes required. ### [​](https://docs.laravelshopper.dev/v2/upgrade/v2-6-to-v2-7#collection-price-rules) Collection Price Rules Automatic collection price rules now filter by the shop’s default currency when evaluating products. * * * [​](https://docs.laravelshopper.dev/v2/upgrade/v2-6-to-v2-7#new-features) New Features ----------------------------------------------------------------------------------------- ### [​](https://docs.laravelshopper.dev/v2/upgrade/v2-6-to-v2-7#upgrade-package) Upgrade Package `shopper/upgrade` is a new temporary package with Laravel Boost skills for AI-assisted upgrades and an artisan command for zero-decimal currency data fixes. Install it before upgrading, remove it after. ### [​](https://docs.laravelshopper.dev/v2/upgrade/v2-6-to-v2-7#moneyinput-component-2) MoneyInput Component A new `MoneyInput` Filament form component that handles currency-aware conversion between human values and smallest unit storage. * * * [​](https://docs.laravelshopper.dev/v2/upgrade/v2-6-to-v2-7#migration-checklist) Migration Checklist ------------------------------------------------------------------------------------------------------- 1 [](https://docs.laravelshopper.dev/v2/upgrade/v2-6-to-v2-7#) Install the upgrade package Run `composer require shopper/upgrade:^2.7 --dev` and `php artisan boost:install` to get AI-assisted migration prompts. 2 [](https://docs.laravelshopper.dev/v2/upgrade/v2-6-to-v2-7#) Update storefront price reads Replace direct price property access with `shopper_money_format()` for display. Use raw values for calculations. 3 [](https://docs.laravelshopper.dev/v2/upgrade/v2-6-to-v2-7#) Update storefront price writes Pass values in smallest currency unit to all `create()` / `update()` calls on monetary fields. 4 [](https://docs.laravelshopper.dev/v2/upgrade/v2-6-to-v2-7#) Update payment gateway code Remove any `* 100` multiplication before sending to Stripe or other providers. 5 [](https://docs.laravelshopper.dev/v2/upgrade/v2-6-to-v2-7#) Fix zero-decimal currency data Run `php artisan shopper:upgrade:fix-zero-decimal-currencies` if you use XAF, JPY, or other zero-decimal currencies. 6 [](https://docs.laravelshopper.dev/v2/upgrade/v2-6-to-v2-7#) Update slide-over imports Replace `Shopper\Livewire\Components\SlideOverComponent` with `Laravelcm\LivewireSlideOvers\SlideOverComponent` in any custom slide-overs. 7 [](https://docs.laravelshopper.dev/v2/upgrade/v2-6-to-v2-7#) Update 2FA traits and hidden fields Replace `TwoFactorAuthenticatable` with the new interfaces and traits if you override the User model. Update your `$hidden` array to use `store_two_factor_secret` and `store_two_factor_recovery_codes` instead of the old column names. 8 [](https://docs.laravelshopper.dev/v2/upgrade/v2-6-to-v2-7#) Update dependencies Run `composer update -W` after setting `shopper/framework` to `^2.7`. 9 [](https://docs.laravelshopper.dev/v2/upgrade/v2-6-to-v2-7#) Run tests Run `php artisan test` and fix assertions that expect human-readable price values instead of cents. 10 [](https://docs.laravelshopper.dev/v2/upgrade/v2-6-to-v2-7#) Remove upgrade package Run `composer remove shopper/upgrade --dev` when done. [From v2.7 to v2.8](https://docs.laravelshopper.dev/v2/upgrade/v2-7-to-v2-8) [From v2.5 to v2.6](https://docs.laravelshopper.dev/v2/upgrade/v2-5-to-v2-6) ⌘I --- # Taxes - TALL Stack E-commerce Framework > Documentation Index > ------------------- > > Fetch the complete documentation index at: [/llms.txt](https://docs.laravelshopper.dev/llms.txt) > > Use this file to discover all available pages before exploring further. [Skip to main content](https://docs.laravelshopper.dev/v2/taxes#content-area) Shopper calculates taxes per line item, based on where an order is being shipped. You define geographic zones, assign percentage rates to each zone, and optionally override those rates for specific products, product types, or categories. The cart pipeline applies all of this automatically during checkout. All tax amounts are stored in **cents** as unsigned integers, consistent with the rest of the monetary system. [​](https://docs.laravelshopper.dev/v2/taxes#how-it-works) How It Works -------------------------------------------------------------------------- The tax system has four main pieces: 1. **TaxZone**: a geographic area (country, or country + province) with a tax inclusion policy and an optional custom provider 2. **TaxRate**: a percentage rate attached to a zone; one rate per zone is marked as the default 3. **TaxRateRule**: a targeting rule on a rate; when a cart line matches a rule, its rate takes priority over the zone’s default 4. **TaxCalculationProvider**: the service responsible for receiving a taxable item and a context, and returning `TaxLine` value objects When the cart is being calculated, the `CalculateTax` pipeline step reads the shipping address, resolves the matching `TaxZone`, picks the applicable `TaxRate`, and persists a `CartLineTaxLine` record for every cart line with a non-zero tax amount. [​](https://docs.laravelshopper.dev/v2/taxes#tax-zones) Tax Zones -------------------------------------------------------------------- A tax zone defines where a tax configuration applies. It maps to a country and optionally to a specific province or state within that country. The most important setting on a zone is `is_tax_inclusive`, which determines whether prices already include tax (VAT, common in Europe) or whether tax is added on top (sales tax, common in the US). use Shopper\Core\Models\Country; use Shopper\Core\Models\TaxZone; $france = Country::query()->where('cca2', 'FR')->firstOrFail(); TaxZone::query()->create([\ 'country_id' => $france->id,\ 'name' => 'Standard VAT',\ 'is_tax_inclusive' => true,\ ]); $usa = Country::query()->where('cca2', 'US')->firstOrFail(); TaxZone::query()->create([\ 'country_id' => $usa->id,\ 'province_code' => 'CA',\ 'name' => 'California Sales Tax',\ 'is_tax_inclusive' => false,\ ]); When the calculator resolves a zone for a shipping address, it first tries to find a zone matching both the country and province. If none exists, it falls back to a country-level zone with no `province_code`. The `display_name` accessor produces a human-readable label by combining country and zone name (for example, `France — Standard VAT`). ### [​](https://docs.laravelshopper.dev/v2/taxes#zone-schema) Zone Schema | Column | Type | Description | | --- | --- | --- | | `country_id` | `unsignedBigInteger` | The country this zone applies to | | `province_code` | `nullable string` | ISO province/state code (`CA`, `NY`, `IDF`) | | `name` | `nullable string` | Optional label to identify the zone in the admin | | `is_tax_inclusive` | `boolean` | Whether prices already include tax (VAT) or not (sales tax) | | `provider_id` | `nullable unsignedBigInteger` | Custom tax provider; falls back to the system default when null | | `parent_id` | `nullable unsignedBigInteger` | Parent zone for hierarchical configurations | | `metadata` | `nullable jsonb` | Arbitrary data for custom providers | The combination of `country_id` and `province_code` is unique, you cannot have two zones for the same country/province pair. The TaxZone model is configurable via `config/shopper/models.php`. ### [​](https://docs.laravelshopper.dev/v2/taxes#zone-relationships) Zone Relationships | Relationship | Type | Description | | --- | --- | --- | | `country()` | `BelongsTo` | The country this zone is scoped to | | `rates()` | `HasMany` | All tax rates defined for this zone | | `provider()` | `BelongsTo` | The custom tax provider assigned to this zone | | `parent()` | `BelongsTo` | Parent zone | | `children()` | `HasMany` | Child zones | [​](https://docs.laravelshopper.dev/v2/taxes#tax-rates) Tax Rates -------------------------------------------------------------------- Each zone has one or more rates. One rate should be marked as `is_default` it applies to every item in the zone that does not match a more specific override rule. use Shopper\Core\Models\TaxRate; TaxRate::query()->create([\ 'tax_zone_id' => $franceZone->id,\ 'name' => 'TVA 20%',\ 'code' => 'FR_VAT_STANDARD',\ 'rate' => 20.0,\ 'is_default' => true,\ ]); France has a reduced VAT rate of 5.5% on food. You can define it as a separate non-default rate on the same zone, then target it at the right product category using a rule: TaxRate::query()->create([\ 'tax_zone_id' => $franceZone->id,\ 'name' => 'TVA reduce 5.5%',\ 'code' => 'FR_VAT_REDUCED',\ 'rate' => 5.5,\ 'is_default' => false,\ ]); ### [​](https://docs.laravelshopper.dev/v2/taxes#tax-rate-schema) Tax Rate Schema | Column | Type | Description | | --- | --- | --- | | `tax_zone_id` | `unsignedBigInteger` | The zone this rate belongs to | | `name` | `string` | Display name shown on invoices (`TVA 20%`) | | `code` | `nullable string` | Machine-readable identifier (`FR_VAT_STANDARD`) | | `rate` | `decimal(8,4)` | Percentage value `20.0` means 20% | | `is_default` | `boolean` | Applied when no override rule matches the item | | `is_combinable` | `boolean` | Whether this rate stacks with rates from a parent zone | | `metadata` | `nullable jsonb` | Arbitrary data for external providers | The TaxRate model is configurable via `config/shopper/models.php`. ### [​](https://docs.laravelshopper.dev/v2/taxes#rate-relationships) Rate Relationships | Relationship | Type | Description | | --- | --- | --- | | `taxZone()` | `BelongsTo` | The zone this rate is attached to | | `rules()` | `HasMany` | Override rules that activate this rate for specific items | [​](https://docs.laravelshopper.dev/v2/taxes#tax-rate-rules) Tax Rate Rules ------------------------------------------------------------------------------ Rules let you override the default rate for specific items. The calculator checks all non-default rates with rules first. The first rule that matches the cart line wins; if none matches, the zone’s default rate is used. A rule has two fields: `reference_type` identifies what kind of entity to match, and `reference_id` holds the specific value to match against. use Shopper\Core\Models\TaxRateRule; TaxRateRule::query()->create([\ 'tax_rate_id' => $reducedRate->id,\ 'reference_type' => 'category',\ 'reference_id' => (string) $foodCategory->id,\ ]); This rule tells the calculator: “whenever a cart line belongs to the food category, use the 5.5% rate instead of the default 20%.” You can also target a specific product: TaxRateRule::query()->create([\ 'tax_rate_id' => $zeroVatRate->id,\ 'reference_type' => 'product',\ 'reference_id' => (string) $childrenBook->id,\ ]); Or an entire product type, which is useful for applying different rules to virtual goods versus physical ones: TaxRateRule::query()->create([\ 'tax_rate_id' => $digitalRate->id,\ 'reference_type' => 'product_type',\ 'reference_id' => 'virtual',\ ]); ### [​](https://docs.laravelshopper.dev/v2/taxes#rule-reference-types) Rule Reference Types | `reference_type` | `reference_id` | Matches when | | --- | --- | --- | | `product_type` | A `ProductType` enum value (`standard`, `virtual`, `external`) | The item’s product type equals the value | | `product` | A product primary key, as a string | The item’s exact product ID matches | | `category` | A category primary key, as a string | The item belongs to that category | ### [​](https://docs.laravelshopper.dev/v2/taxes#rule-schema) Rule Schema | Column | Type | Description | | --- | --- | --- | | `id` | bigint | Primary key | | `tax_rate_id` | bigint | FK to tax rate | | `reference_type` | string | Entity type to match (`product_type`, `product`, `category`) | | `reference_id` | string | Entity value or ID to match against | The combination of `tax_rate_id`, `reference_type`, and `reference_id` is unique. You cannot attach the same rule twice to the same rate. [​](https://docs.laravelshopper.dev/v2/taxes#inclusive-vs-exclusive-taxes) Inclusive vs Exclusive Taxes ---------------------------------------------------------------------------------------------------------- The `is_tax_inclusive` flag on the zone controls the math behind the tax amount. **Tax-exclusive** (sales tax): tax is added on top of the price. The customer pays more than the listed price: tax = unit_price × rate / 100 total = unit_price + tax A 100productwitha10100 product with a 10% exclusive tax costs \*\*100productwitha10110\*\* at checkout. **Tax-inclusive** (VAT): tax is already embedded in the listed price. The customer pays exactly the listed price, but the tax authority receives a portion: tax = price − (price / (1 + rate / 100)) total = price (unchanged) A €100 product with 20% VAT inclusive: tax = €100 - (€100 / 1.2) = **€16.67**, amount before tax = **€83.33**. Shopper handles both formulas automatically in `SystemTaxProvider`. The zone’s `is_tax_inclusive` value is also propagated through the pipeline context so storefronts can present prices correctly showing “VAT included” or displaying tax as an addition at checkout. [​](https://docs.laravelshopper.dev/v2/taxes#cart-integration) Cart Integration ---------------------------------------------------------------------------------- Tax calculation is part of the cart pipeline and runs automatically whenever you call `Cart::calculate()`. The `CalculateTax` step runs after discounts are applied, ensuring taxes are computed on the post-discount amount. The step does the following for each cart line: 1. Reads the cart’s shipping address country and province 2. Builds a `TaxCalculationContext` from those values 3. Passes a `CartLineTaxAdapter` for the line to `TaxCalculator::calculate()` 4. Deletes any existing `CartLineTaxLine` records for that line 5. Creates new `CartLineTaxLine` records with the resulting tax lines 6. Accumulates the tax total on the pipeline context use Shopper\Cart\Facades\Cart; $cart = Cart::calculate($cart); $cart->tax_amount; foreach ($cart->lines as $line) { $line->taxLines; } If no matching tax zone exists for the shipping address, the `CalculateTax` step skips silently and no tax lines are created. [​](https://docs.laravelshopper.dev/v2/taxes#persisting-tax-lines-on-orders) Persisting Tax Lines on Orders -------------------------------------------------------------------------------------------------------------- When a cart is converted into an order, tax lines are snapshotted onto the order using `CreateOrderTaxLinesAction`. This snapshot preserves the exact tax breakdown at the moment of purchase future changes to zones or rates have no impact on historical orders. use Shopper\Core\Actions\CreateOrderTaxLinesAction; app(CreateOrderTaxLinesAction::class)->execute($order); The action resolves the shipping address country, runs `TaxCalculator::calculate()` for each order item, creates an `OrderTaxLine` record for each result, and updates `tax_amount` on both the order item and the order itself. ### [​](https://docs.laravelshopper.dev/v2/taxes#ordertaxline-schema) OrderTaxLine Schema | Column | Type | Description | | --- | --- | --- | | `taxable_type` | `string` | Polymorphic type (`Order` or `OrderItem`) | | `taxable_id` | `unsignedBigInteger` | Polymorphic ID | | `tax_rate_id` | `nullable unsignedBigInteger` | Reference to the rate used at time of purchase | | `code` | `string` | Rate code snapshot | | `name` | `string` | Rate name snapshot | | `rate` | `decimal(8,4)` | Rate percentage snapshot | | `amount` | `unsignedInteger` | Tax amount in cents | ### [​](https://docs.laravelshopper.dev/v2/taxes#accessing-tax-lines-on-an-order) Accessing Tax Lines on an Order use Shopper\Core\Models\Contracts\Order; $order = resolve(Order::class)::query() ->with(['items.taxLines', 'taxLines']) ->find($orderId); $order->tax_amount; foreach ($order->items as $item) { $item->tax_amount; foreach ($item->taxLines as $taxLine) { $taxLine->name; $taxLine->rate; $taxLine->amount; } } [​](https://docs.laravelshopper.dev/v2/taxes#tax-providers) Tax Providers ---------------------------------------------------------------------------- A `TaxProvider` record links a zone to a custom tax calculation service. When a zone has an enabled provider, the calculator uses that provider instead of the built-in system. ### [​](https://docs.laravelshopper.dev/v2/taxes#provider-schema) Provider Schema | Column | Type | Description | | --- | --- | --- | | `id` | bigint | Primary key | | `identifier` | string | Unique provider code (e.g., `avalara`, `taxjar`) | | `is_enabled` | boolean | Whether the provider is active | ### [​](https://docs.laravelshopper.dev/v2/taxes#custom-tax-providers) Custom Tax Providers The built-in `SystemTaxProvider` handles most use cases. For regions that require an external API like Avalara, TaxJar, or a homegrown tax service, you can implement the `TaxCalculationProvider` contract and assign it to specific zones. The contract is simple: use Shopper\Core\Contracts\TaxCalculationProvider; use Shopper\Core\Contracts\TaxableItem; use Shopper\Core\Taxes\TaxCalculationContext; use Shopper\Core\Taxes\TaxLine; interface TaxCalculationProvider { public function identifier(): string; /** @return array */ public function getTaxLines(TaxableItem $item, TaxCalculationContext $context): array; } Here is a complete implementation that calls a fictional external tax API: use Shopper\Core\Contracts\TaxCalculationProvider; use Shopper\Core\Contracts\TaxableItem; use Shopper\Core\Taxes\TaxCalculationContext; use Shopper\Core\Taxes\TaxLine; final class AvalaraTaxProvider implements TaxCalculationProvider { public function __construct( private readonly AvalartaClient $client, ) {} public function identifier(): string { return 'avalara'; } public function getTaxLines(TaxableItem $item, TaxCalculationContext $context): array { $response = $this->client->calculate( amount: $item->getTaxableTotal(), countryCode: $context->countryCode, provinceCode: $context->provinceCode, ); return [\ new TaxLine(\ taxRateId: 0,\ name: $response->description,\ code: $response->jurisdictionCode,\ rate: $response->rate,\ amount: $response->taxAmountInCents,\ ),\ ]; } } Register the provider in your service provider: use Shopper\Core\Contracts\TaxCalculationProvider; $this->app->bind(TaxCalculationProvider::class, AvalaraTaxProvider::class); Then create a `TaxProvider` record and link it to the zone that should use it: use Shopper\Core\Models\TaxProvider; $provider = TaxProvider::query()->create([\ 'identifier' => 'avalara',\ 'is_enabled' => true,\ ]); $usZone->update(['provider_id' => $provider->id]); When the calculator resolves a zone that has an enabled provider, it instantiates that provider from the container instead of falling back to the system default. Each unique country/province combination is cached in memory for the duration of the request, so the provider is only resolved once per zone. ### [​](https://docs.laravelshopper.dev/v2/taxes#the-taxcalculationcontext) The TaxCalculationContext The `TaxCalculationContext` is a read-only value object that carries the geographic information needed to resolve the correct zone and provider: | Property | Type | Description | | --- | --- | --- | | `countryCode` | `string` | ISO 3166-1 alpha-2 country code (`FR`, `US`, `DE`) | | `provinceCode` | `?string` | ISO province/state code (`CA`, `NY`) | | `customerId` | `?int` | The authenticated customer’s ID, for future customer-level tax rules | | `resolvedZone` | `?TaxZone` | Pre-resolved zone; set internally by the calculator to avoid redundant queries | ### [​](https://docs.laravelshopper.dev/v2/taxes#the-taxableitem-contract) The TaxableItem Contract Any object you pass to `TaxCalculator::calculate()` must implement `Shopper\Core\Contracts\TaxableItem`: | Method | Return | Description | | --- | --- | --- | | `getTaxableTotal()` | `int` | The full taxable line total in cents, after any item-level adjustments (unit price times quantity) | | `getProductType()` | `?string` | Product type value (`standard`, `virtual`, `external`) | | `getProductId()` | `?int` | The product’s primary key | | `getCategoryIds()` | `array` | Primary keys of all categories the product belongs to | The contract exposes a single `getTaxableTotal()` rather than a separate unit amount and quantity. The provider taxes that total in one pass, so a line whose total is not evenly divisible by its quantity is never rounded per unit. This keeps exclusive zones from overcharging by a cent and keeps inclusive VAT breakdowns balanced (net plus tax always equals gross). Shopper ships two ready-made adapters: * `CartLineTaxAdapter` wraps a `CartLine` for use during cart calculation; the taxable total is the post-discount line total in cents * `OrderItemTaxAdapter` wraps an `OrderItem` for use in `CreateOrderTaxLinesAction`; the taxable total is `unit_price_amount` times `quantity` in cents If you are building a custom checkout flow or need to calculate taxes outside of a cart, you can implement `TaxableItem` directly on any of your objects and call `TaxCalculator::calculate()` with a manually constructed `TaxCalculationContext`. [Fulfillment](https://docs.laravelshopper.dev/v2/fulfillment) [Setup Store](https://docs.laravelshopper.dev/v2/setup-store) ⌘I --- # From v2.1 to v2.2 - TALL Stack E-commerce Framework > Documentation Index > ------------------- > > Fetch the complete documentation index at: [/llms.txt](https://docs.laravelshopper.dev/llms.txt) > > Use this file to discover all available pages before exploring further. [Skip to main content](https://docs.laravelshopper.dev/v2/upgrade/v2-1-to-v2-2#content-area) **Estimated Upgrade Time:** 15-30 minutes for most applications. [​](https://docs.laravelshopper.dev/v2/upgrade/v2-1-to-v2-2#requirements) Requirements ----------------------------------------------------------------------------------------- Shopper 2.2 requires: | Dependency | Version | | --- | --- | | PHP | ^8.3 | | Laravel | ^11.0 \| ^12.0 | | Filament | ^4.5 | | Livewire | ^3.6 | | Tailwind CSS | ^4.1 | **Laravel 10 is no longer supported.** You must upgrade to Laravel 11 or 12 before upgrading to Shopper 2.2. [​](https://docs.laravelshopper.dev/v2/upgrade/v2-1-to-v2-2#updating-dependencies) Updating Dependencies ----------------------------------------------------------------------------------------------------------- Update your `composer.json` file to require Shopper 2.2: "require": { "php": "^8.3", "laravel/framework": "^11.0|^12.0", "shopper/framework": "^2.2" } Then run: composer update -W After updating Composer dependencies, run the migrations: php artisan migrate * * * [​](https://docs.laravelshopper.dev/v2/upgrade/v2-1-to-v2-2#high-impact-changes) High Impact Changes ------------------------------------------------------------------------------------------------------- ### [​](https://docs.laravelshopper.dev/v2/upgrade/v2-1-to-v2-2#repository-pattern-removed) Repository Pattern Removed **Likelihood of Impact: High** The Repository pattern has been completely removed in favor of a configurable Model Contract system. This is a **breaking change** if you were using repositories directly. #### [​](https://docs.laravelshopper.dev/v2/upgrade/v2-1-to-v2-2#before-v2-1) Before (v2.1) use Shopper\Core\Repositories\ProductRepository; use Shopper\Core\Repositories\UserRepository; // Using repositories $products = (new ProductRepository)->all(); $user = (new UserRepository)->create([...]); // Dependency injection public function __construct( private ProductRepository $productRepository ) {} #### [​](https://docs.laravelshopper.dev/v2/upgrade/v2-1-to-v2-2#after-v2-2) After (v2.2) use Shopper\Models\Product; use Shopper\Core\Models\Contracts\Product as ProductContract; // Using models directly with Model $products = Product::query()->get(); // Or via the contract for configured model $products = resolve(ProductContract::class)::query()->get(); // Type-hint the contract public function __construct( public ProductContract $product ) {} The `query()` method automatically uses the configured model class from `config/shopper/models.php`. ### [​](https://docs.laravelshopper.dev/v2/upgrade/v2-1-to-v2-2#configuration-users-key-renamed-to-roles) Configuration: `users` Key Renamed to `roles` **Likelihood of Impact: High** The `users` configuration key in `config/shopper/core.php` has been renamed to `roles` with updated sub-keys. #### [​](https://docs.laravelshopper.dev/v2/upgrade/v2-1-to-v2-2#before-v2-1-2) Before (v2.1) // config/shopper/core.php 'users' => [\ 'admin_role' => 'administrator',\ 'manager_role' => 'manager',\ 'default_role' => 'user',\ ], #### [​](https://docs.laravelshopper.dev/v2/upgrade/v2-1-to-v2-2#after-v2-2-2) After (v2.2) // config/shopper/core.php 'roles' => [\ 'admin' => 'administrator',\ 'manager' => 'manager',\ 'user' => 'user',\ ], **Update your code references:** // Before config('shopper.core.users.admin_role') config('shopper.core.users.default_role') // After config('shopper.core.roles.admin') config('shopper.core.roles.user') ### [​](https://docs.laravelshopper.dev/v2/upgrade/v2-1-to-v2-2#shopperuser-interface-&-trait) ShopperUser Interface & Trait **Likelihood of Impact: High** The `Shopper\Core\Models\User` model has been removed. Your User model must now implement the `ShopperUser` interface and use the `ShopperUser` trait. #### [​](https://docs.laravelshopper.dev/v2/upgrade/v2-1-to-v2-2#before-v2-1-3) Before (v2.1) namespace App\Models; use Shopper\Core\Models\User as ShopperUser; class User extends ShopperUser { // ... } #### [​](https://docs.laravelshopper.dev/v2/upgrade/v2-1-to-v2-2#after-v2-2-3) After (v2.2) namespace App\Models; use Illuminate\Foundation\Auth\User as Authenticatable; use Shopper\Core\Models\Contracts\ShopperUser as ShopperUserContract; use Shopper\Core\Traits\ShopperUser; class User extends Authenticatable implements ShopperUserContract { use ShopperUser; protected $fillable = [\ 'first_name',\ 'last_name',\ 'email',\ 'password',\ 'phone_number',\ 'birth_date',\ 'gender',\ 'avatar_type',\ 'avatar_location',\ 'timezone',\ 'opt_in',\ ]; protected $hidden = [\ 'password',\ 'remember_token',\ 'two_factor_recovery_codes',\ 'two_factor_secret',\ ]; } The `ShopperUser` trait provides all the necessary methods: `isAdmin()`, `isManager()`, `isVerified()`, `addresses()`, `orders()`, and the `customers`/`administrators` scopes. ### [​](https://docs.laravelshopper.dev/v2/upgrade/v2-1-to-v2-2#filament-v4-upgrade) Filament v4 Upgrade **Likelihood of Impact: High** **Shopper v2.2** requires **Filament v4.5**. If you have customized any Filament components or forms, review the [Filament v4 upgrade guide](https://filamentphp.com/docs/4.x/upgrade-guide) . Key changes affecting Shopper users: * Form schema syntax has been updated * Modal components have been replaced with Filament Actions * Table syntax has been updated * * * [​](https://docs.laravelshopper.dev/v2/upgrade/v2-1-to-v2-2#medium-impact-changes) Medium Impact Changes ----------------------------------------------------------------------------------------------------------- ### [​](https://docs.laravelshopper.dev/v2/upgrade/v2-1-to-v2-2#new-models-in-configuration) New Models in Configuration **Likelihood of Impact: Medium** New models have been added to `config/shopper/models.php`: `address`, `inventory`, `order`, and `supplier`. If you have a published `config/shopper/models.php`, add these entries: return [\ 'address' => \Shopper\Core\Models\Address::class,\ // ... existing models ...\ 'inventory' => \Shopper\Core\Models\Inventory::class,\ 'order' => \Shopper\Core\Models\Order::class,\ 'supplier' => \Shopper\Core\Models\Supplier::class,\ ]; ### [​](https://docs.laravelshopper.dev/v2/upgrade/v2-1-to-v2-2#new-permissions) New Permissions **Likelihood of Impact: Medium** New permissions have been added for **reviews**, **product variants**, and **suppliers**. These must be created in your database for existing installations. Create the permissions and assign them to your admin role: use Shopper\Core\Models\Permission; use Spatie\Permission\Models\Role; Permission::generate('reviews', 'products'); Permission::generate('product_variants', 'products'); Permission::generate('suppliers', 'products'); $admin = Role::findByName('administrator'); $admin->givePermissionTo([\ 'browse_reviews',\ 'read_reviews',\ 'edit_reviews',\ 'add_reviews',\ 'delete_reviews',\ 'browse_product_variants',\ 'read_product_variants',\ 'edit_product_variants',\ 'add_product_variants',\ 'delete_product_variants',\ 'browse_suppliers',\ 'read_suppliers',\ 'edit_suppliers',\ 'add_suppliers',\ 'delete_suppliers',\ ]); You can run this code in a migration, a tinker session, or create the permissions directly from the admin UI in the Roles & Permissions settings page. If you don’t create these permissions, users attempting to access Reviews, Product Variants, or Suppliers pages will encounter authorization errors. ### [​](https://docs.laravelshopper.dev/v2/upgrade/v2-1-to-v2-2#order-number-generator-configuration) Order Number Generator Configuration **Likelihood of Impact: Medium** The order number generator configuration in `config/shopper/orders.php` has been updated with new options for more flexible number formatting. #### [​](https://docs.laravelshopper.dev/v2/upgrade/v2-1-to-v2-2#before-v2-1-4) Before (v2.1) 'generator' => [\ 'start_sequence_from' => 1,\ 'prefix' => 'SH_',\ 'pad_length' => 1,\ 'pad_string' => '0',\ ], #### [​](https://docs.laravelshopper.dev/v2/upgrade/v2-1-to-v2-2#after-v2-2-4) After (v2.2) 'generator' => [\ 'prefix' => 'ORD',\ 'separator' => '-',\ 'date_format' => 'Ymd',\ 'start_sequence_from' => 1,\ 'pad_length' => 6,\ 'pad_string' => '0',\ ], New options: * `separator`: character between each part of the number * `date_format`: PHP date format included in the number (set to `null` to disable) * `prefix` can now be set to `null` to disable Examples of generated numbers depending on configuration: * Default (`prefix => null`) → `20250123-000001` * With prefix (`prefix => 'ORD'`) → `ORD-20250123-000001` * Without date (`date_format => null`) → `000001` ### [​](https://docs.laravelshopper.dev/v2/upgrade/v2-1-to-v2-2#custom-modal-components-removed) Custom Modal Components Removed **Likelihood of Impact: Medium** Several custom modal components have been removed and replaced with Filament Actions or slide-overs: | Removed Component | Replacement | | --- | --- | | `Modals\CreatePermission` | Integrated into parent component | | `Modals\CreateRole` | Integrated into parent component | | `Modals\ConfirmPassword` | Filament Action | | `Modals\LogoutOthersBrowser` | Filament Action | | `Modals\PaymentMethodForm` | Slide-over | | `Modals\CollectionProductsList` | `SlideOvers\CollectionProductsList` | | `Modals\RelatedProductsList` | `SlideOvers\RelatedProductsList` | If you have overridden these components, update your `config/shopper/components/setting.php`: // The modals section has been removed // Modal functionality is now built into parent components 'components' => [\ 'settings.locations.form' => Components\Settings\Locations\InventoryForm::class,\ 'settings.legal.privacy' => Components\Settings\Legal\Privacy::class,\ // ... other components\ \ 'slide-overs.create-team-member' => Livewire\SlideOvers\CreateTeamMember::class,\ // ... slide-overs\ ], ### [​](https://docs.laravelshopper.dev/v2/upgrade/v2-1-to-v2-2#custom-button-components-removed) Custom Button Components Removed **Likelihood of Impact: Medium** Custom button Blade components have been removed in favor of Filament’s button components: | Removed Component | Replacement | | --- | --- | | `` | `` | | `` | `` | | `` | `` | #### [​](https://docs.laravelshopper.dev/v2/upgrade/v2-1-to-v2-2#before-v2-1-5) Before (v2.1) Save Changes #### [​](https://docs.laravelshopper.dev/v2/upgrade/v2-1-to-v2-2#after-v2-2-5) After (v2.2) Save Changes ### [​](https://docs.laravelshopper.dev/v2/upgrade/v2-1-to-v2-2#card-with-gray-heading-removed) Card with Gray Heading Removed **Likelihood of Impact: Medium** The `` component has been removed. Use the standard `` component or Filament’s Section component instead. * * * [​](https://docs.laravelshopper.dev/v2/upgrade/v2-1-to-v2-2#low-impact-changes) Low Impact Changes ----------------------------------------------------------------------------------------------------- ### [​](https://docs.laravelshopper.dev/v2/upgrade/v2-1-to-v2-2#tailwind-css-v4) Tailwind CSS v4 **Likelihood of Impact: Low** Shopper 2.2 uses Tailwind CSS v4. If you have custom CSS that extends Shopper’s styles, review the [Tailwind v4 upgrade guide](https://tailwindcss.com/docs/v4-beta) . The CSS architecture has been updated - if you’ve customized styles, you may need to update your imports. ### [​](https://docs.laravelshopper.dev/v2/upgrade/v2-1-to-v2-2#postgresql-support) PostgreSQL Support **Likelihood of Impact: Low** Shopper 2.2 adds official PostgreSQL support. No action required for MySQL/MariaDB users. ### [​](https://docs.laravelshopper.dev/v2/upgrade/v2-1-to-v2-2#sidebar-redesign) Sidebar Redesign **Likelihood of Impact: Low** The admin sidebar has been redesigned with Alpine.js state management: * Collapsible sidebar with persistent state via localStorage * New submenu support with arrow indicators * Improved mobile responsiveness If you have customized sidebar views, update them to use the new structure in `resources/views/components/layouts/app/sidebar/`. ### [​](https://docs.laravelshopper.dev/v2/upgrade/v2-1-to-v2-2#sku-uniqueness-for-variants) SKU Uniqueness for Variants **Likelihood of Impact: Low** Product variant SKUs now have a composite unique constraint scoped to `product_id`. This means: * SKUs must be unique within a product (not globally) * Auto-generated SKUs now use format: `{PRODUCT_SKU}-{VARIANT_SLUG}` If you have custom variant creation logic, ensure SKUs are unique per product. ### [​](https://docs.laravelshopper.dev/v2/upgrade/v2-1-to-v2-2#hasprices-trait-new-getprice-method) HasPrices Trait: New `getPrice()` Method **Likelihood of Impact: Low** A new `getPrice()` method has been added to the `HasPrices` trait: // Get price for default currency $variant->getPrice(); // ?Price // Get price for specific currency $variant->getPrice('USD'); // ?Price This method is now part of the `Priceable` contract. * * * [​](https://docs.laravelshopper.dev/v2/upgrade/v2-1-to-v2-2#deprecations) Deprecations ----------------------------------------------------------------------------------------- The following features are deprecated and will be removed in v3.0: | Deprecated | Replacement | | --- | --- | | Repository classes | Model contracts with `resolvedQuery()` | | `config('shopper.core.users.*')` | `config('shopper.core.roles.*')` | * * * [​](https://docs.laravelshopper.dev/v2/upgrade/v2-1-to-v2-2#migration-checklist) Migration Checklist ------------------------------------------------------------------------------------------------------- 1 [](https://docs.laravelshopper.dev/v2/upgrade/v2-1-to-v2-2#) Update requirements Ensure your environment runs PHP ^8.3 and Laravel ^11.0 or ^12.0 before proceeding. 2 [](https://docs.laravelshopper.dev/v2/upgrade/v2-1-to-v2-2#) Update dependencies Update `shopper/framework` to `^2.2` in `composer.json`, then run `composer update -W`. 3 [](https://docs.laravelshopper.dev/v2/upgrade/v2-1-to-v2-2#) Run migrations Run `php artisan migrate` to apply all new migrations. 4 [](https://docs.laravelshopper.dev/v2/upgrade/v2-1-to-v2-2#) Rename \`users\` key to \`roles\` in config In `config/shopper/core.php`, rename the `users` key to `roles` and update its sub-keys (`admin_role` → `admin`, `default_role` → `user`). 5 [](https://docs.laravelshopper.dev/v2/upgrade/v2-1-to-v2-2#) Add new models to configuration In `config/shopper/models.php`, add the `address`, `inventory`, `order`, and `supplier` entries if you have a published config file. 6 [](https://docs.laravelshopper.dev/v2/upgrade/v2-1-to-v2-2#) Create new permissions Run `Permission::generate()` for `reviews`, `product_variants`, and `suppliers`, then assign the generated permissions to the `administrator` role. 7 [](https://docs.laravelshopper.dev/v2/upgrade/v2-1-to-v2-2#) Update order number generator configuration In `config/shopper/orders.php`, update the generator array to include the new `separator` and `date_format` keys. 8 [](https://docs.laravelshopper.dev/v2/upgrade/v2-1-to-v2-2#) Update User model Replace `extends ShopperUser` with `implements ShopperUserContract` and add `use ShopperUser` in your `App\Models\User` class. 9 [](https://docs.laravelshopper.dev/v2/upgrade/v2-1-to-v2-2#) Replace repository usage Replace all direct repository class usage with model contracts resolved via `resolve(ContractClass::class)` or direct model queries. 10 [](https://docs.laravelshopper.dev/v2/upgrade/v2-1-to-v2-2#) Update custom Blade components Replace `` with the equivalent `` variants. Update any overridden modal components to their slide-over replacements. 11 [](https://docs.laravelshopper.dev/v2/upgrade/v2-1-to-v2-2#) Clear caches Run `php artisan optimize:clear`. [From v2.2 to v2.3](https://docs.laravelshopper.dev/v2/upgrade/v2-2-to-v2-3) [Version Support Policy](https://docs.laravelshopper.dev/v2/version-support-policy) ⌘I --- # From v2.4 to v2.5 - TALL Stack E-commerce Framework > Documentation Index > ------------------- > > Fetch the complete documentation index at: [/llms.txt](https://docs.laravelshopper.dev/llms.txt) > > Use this file to discover all available pages before exploring further. [Skip to main content](https://docs.laravelshopper.dev/v2/upgrade/v2-4-to-v2-5#content-area) **Estimated Upgrade Time:** 15-30 minutes for most applications. [​](https://docs.laravelshopper.dev/v2/upgrade/v2-4-to-v2-5#updating-dependencies) Updating Dependencies ----------------------------------------------------------------------------------------------------------- Update your `composer.json` file to require Shopper 2.5: "require": { "shopper/framework": "^2.5" } Then run: composer update -W After updating Composer dependencies, run the migrations: php artisan migrate The `shopper/payment` package is now a dependency of `shopper/framework` and is installed automatically. It provides the payment driver system, transaction tracking, and the `PaymentProcessingService`.For Stripe support, install the driver addon separately: `composer require shopper/stripe`. See the [Stripe addon documentation](https://docs.laravelshopper.dev/v2/addons/stripe) for setup instructions. * * * [​](https://docs.laravelshopper.dev/v2/upgrade/v2-4-to-v2-5#high-impact-changes) High Impact Changes ------------------------------------------------------------------------------------------------------- ### [​](https://docs.laravelshopper.dev/v2/upgrade/v2-4-to-v2-5#three-status-order-system) Three-Status Order System **Likelihood of Impact: High** The monolithic `OrderStatus` enum has been split into three independent enums, each tracking a different concern: | Concern | Enum | Values | | --- | --- | --- | | Order lifecycle | `OrderStatus` | `New`, `Processing`, `Completed`, `Cancelled`, `Archived` | | Payment | `PaymentStatus` | `Pending`, `Authorized`, `Paid`, `PartiallyRefunded`, `Refunded`, `Voided` | | Shipping | `ShippingStatus` | `Unfulfilled`, `PartiallyShipped`, `Shipped`, `PartiallyDelivered`, `Delivered`, `PartiallyReturned`, `Returned` | The old `OrderStatus` values `Pending`, `Registered`, `Paid`, `Shipped`, `Delivered`, and `Returned` have been removed. You must update any code that references these values. #### [​](https://docs.laravelshopper.dev/v2/upgrade/v2-4-to-v2-5#before-v2-4) Before (v2.4) use Shopper\Core\Enum\OrderStatus; // Check payment if ($order->status === OrderStatus::Paid) { // ... } // Check shipping if ($order->status === OrderStatus::Shipped) { // ... } // Check delivery if ($order->status === OrderStatus::Delivered) { // ... } #### [​](https://docs.laravelshopper.dev/v2/upgrade/v2-4-to-v2-5#after-v2-5) After (v2.5) use Shopper\Core\Enum\OrderStatus; use Shopper\Core\Enum\PaymentStatus; use Shopper\Core\Enum\ShippingStatus; // Check payment if ($order->payment_status === PaymentStatus::Paid) { // ... } // Check shipping if ($order->shipping_status === ShippingStatus::Shipped) { // ... } // Check delivery if ($order->shipping_status === ShippingStatus::Delivered) { // ... } The Order model now provides convenience methods for common status checks: `isNew()`, `isProcessing()`, `isCompleted()`, `isArchived()`, `isPaid()`, `isPaymentAuthorized()`, `isRefunded()`, `isShipped()`, `isShippingPending()`. #### [​](https://docs.laravelshopper.dev/v2/upgrade/v2-4-to-v2-5#automatic-data-migration) Automatic Data Migration The migration automatically maps your existing order statuses to the new three-status system. No manual data migration is needed. | Old `status` value | New `status` | New `payment_status` | New `shipping_status` | | --- | --- | --- | --- | | `pending` | `new` | `pending` | `unfulfilled` | | `registered` | `processing` | `pending` | `unfulfilled` | | `paid` | `processing` | `paid` | `unfulfilled` | | `shipped` | `processing` | `paid` | `shipped` | | `delivered` | `processing` | `paid` | `delivered` | | `completed` | `completed` | `paid` | _(unchanged)_ | | `cancelled` | `cancelled` | _(unchanged)_ | _(unchanged)_ | If you have custom order status values beyond the ones listed above, they will **not** be migrated automatically. You must handle them manually before or after running `php artisan migrate`. ### [​](https://docs.laravelshopper.dev/v2/upgrade/v2-4-to-v2-5#paymentmethod-&-carrier-logo-handling) PaymentMethod & Carrier Logo Handling **Likelihood of Impact: High** The `logo` column has been removed from both the `payment_methods` and `carriers` tables. Logos are now managed through [Spatie Media Library](https://spatie.be/docs/laravel-medialibrary) . A new `driver` column has been added to both tables. #### [​](https://docs.laravelshopper.dev/v2/upgrade/v2-4-to-v2-5#before-v2-4-2) Before (v2.4) // Accessing logos $paymentMethod->logo; // string|null, file path $carrier->logo; // string|null, file path #### [​](https://docs.laravelshopper.dev/v2/upgrade/v2-4-to-v2-5#after-v2-5-2) After (v2.5) // Accessing logos via Media Library $paymentMethod->logoUrl(); // ?string, full URL or null $carrier->logoUrl(); // ?string, full URL or null Both models now implement `Spatie\MediaLibrary\HasMedia` and use the `HasMedia` trait. If you stored logos using the old `logo` column, you need to manually re-upload them through the admin panel or migrate the files to the media library programmatically. The old column data is removed by the migration. ### [​](https://docs.laravelshopper.dev/v2/upgrade/v2-4-to-v2-5#payment-system) Payment System **Likelihood of Impact: High** Shopper 2.5 introduces a complete payment driver system through the new `shopper/payment` package, which is included as a dependency of `shopper/framework`. Key components: * **`PaymentProcessingService`**. Orchestrates payment operations (initiate, authorize, capture, refund, cancel) through drivers * **`PaymentTransaction`** model. Records every payment operation with driver, type, status, amount, and provider reference * **`PaymentDriver`** contract. Interface for implementing payment providers * **`PaymentManager`**. Resolves and manages payment drivers (a manual driver is included by default) New enums in `Shopper\Payment\Enum`: | Enum | Values | | --- | --- | | `TransactionType` | `Initiate`, `Authorize`, `Capture`, `Refund`, `Cancel` | | `TransactionStatus` | `Pending`, `Success`, `Failed` | The admin panel now includes a **Capture payment** button on the order detail page for orders with `PaymentStatus::Authorized`. For Stripe payments, install the addon: `composer require shopper/stripe`. See the [Payments documentation](https://docs.laravelshopper.dev/v2/payments) for the full API reference. * * * [​](https://docs.laravelshopper.dev/v2/upgrade/v2-4-to-v2-5#medium-impact-changes) Medium Impact Changes ----------------------------------------------------------------------------------------------------------- ### [​](https://docs.laravelshopper.dev/v2/upgrade/v2-4-to-v2-5#order-contract-interface) Order Contract Interface **Likelihood of Impact: Medium** If you implement a custom Order model through the `Shopper\Core\Models\Contracts\Order` interface, you must add the following methods: public function setDefaultOrderStatus(): void; public function canBeCancelled(): bool; public function isNotCancelled(): bool; public function isNew(): bool; public function isProcessing(): bool; public function isCompleted(): bool; public function isArchived(): bool; public function isPaid(): bool; public function isPaymentPending(): bool; public function isPaymentAuthorized(): bool; public function isRefunded(): bool; public function isShipped(): bool; public function isShippingPending(): bool; Use `Shopper\Core\Models\Order` as a reference implementation. The model sets default statuses automatically via `setDefaultOrderStatus()` in its `booted()` method. ### [​](https://docs.laravelshopper.dev/v2/upgrade/v2-4-to-v2-5#column-renamed-canceled_at-to-cancelled_at) Column Renamed: `canceled_at` to `cancelled_at` **Likelihood of Impact: Medium** The `canceled_at` column on the orders table has been renamed to `cancelled_at` (double-L British spelling) for consistency. #### [​](https://docs.laravelshopper.dev/v2/upgrade/v2-4-to-v2-5#before-v2-4-3) Before (v2.4) $order->canceled_at; #### [​](https://docs.laravelshopper.dev/v2/upgrade/v2-4-to-v2-5#after-v2-5-3) After (v2.5) $order->cancelled_at; Update any code, queries, or Blade templates that reference the old column name. ### [​](https://docs.laravelshopper.dev/v2/upgrade/v2-4-to-v2-5#orderitem-fulfillment-tracking) OrderItem Fulfillment Tracking **Likelihood of Impact: Medium** Two new columns have been added to the `order_items` table: * `fulfillment_status`. Tracks per-item fulfillment using the new `FulfillmentStatus` enum (`Pending`, `ForwardedToSupplier`, `Processing`, `Shipped`, `Delivered`, `Cancelled`) * `order_shipping_id`. Links each item to a specific shipment This enables partial fulfillment: different items in the same order can be at different fulfillment stages and shipped in different packages. If you query or manipulate order items directly, be aware of these new columns. No action is required unless you have custom logic that conflicts. ### [​](https://docs.laravelshopper.dev/v2/upgrade/v2-4-to-v2-5#order-detail-page-decomposed-into-components) Order Detail Page Decomposed into Components **Likelihood of Impact: Medium** The order detail page has been restructured from a single monolithic page into independent, overridable Livewire components. Each section of the page is now its own component, registered in `config/shopper/components/order.php`. Components marked **New** were added in v2.5. Components marked **Existing** were already present but have been refactored. | Component | Alias | Type | Description | | --- | --- | --- | --- | | `Index` | `shopper-order-index` | Existing | Order listing with filters and tabs | | `Detail` | `shopper-order-detail` | Existing | Order detail page (refactored, now uses sub-components) | | **`Shipments`** | `shopper-order-shipments` | **New** | Centralized shipment list with filters and tab navigation | | **`Fulfillment`** | `shopper-order-fulfillment` | **New** | Fulfillment progress stepper, shipping address, create shipment button | | **`OrderCustomer`** | `shopper-order-customer` | **New** | Customer info, shipping and billing addresses | | **`OrderItems`** | `shopper-order-items` | **New** | Paginated order items with fulfillment status badges | | **`OrderNotes`** | `shopper-order-notes` | **New** | Notes editor with save action | | **`OrderSummary`** | `shopper-order-summary` | **New** | Financial summary, shipping method, payment method | | **`ShipmentTimeline`** | `shopper-order-shipment-timeline` | **New** | Shipment event timeline with “Add event” action | | **`CreateShippingLabel`** | `shopper-slide-overs.create-shipping-label` | **New** | Slide-over form to create a shipment and assign unfulfilled items | | **`ShipmentDetail`** | `shopper-slide-overs.shipment-detail` | **New** | Slide-over with shipment detail, event timeline, and delivery actions | If you have published order components via `php artisan shopper:component:publish order`, update your `config/shopper/components/order.php` to include the new entries: 'pages' => [\ 'order-index' => \Shopper\Livewire\Pages\Order\Index::class,\ 'order-detail' => \Shopper\Livewire\Pages\Order\Detail::class,\ 'order-shipments' => \Shopper\Livewire\Pages\Order\Shipments::class, \ ], 'components' => [\ 'order-customer' => \Shopper\Livewire\Components\Orders\OrderCustomer::class, \ 'order-fulfillment' => \Shopper\Livewire\Components\Orders\Fulfillment::class, \ 'order-items' => \Shopper\Livewire\Components\Orders\OrderItems::class, \ 'order-notes' => \Shopper\Livewire\Components\Orders\OrderNotes::class, \ 'order-shipment-timeline' => \Shopper\Livewire\Components\Orders\ShipmentTimeline::class, \ 'order-summary' => \Shopper\Livewire\Components\Orders\OrderSummary::class, \ 'slide-overs.create-shipping-label' => \Shopper\Livewire\SlideOvers\CreateShippingLabel::class, \ 'slide-overs.shipment-detail' => \Shopper\Livewire\SlideOvers\ShipmentDetail::class, \ ], You can override any component by pointing the config key to your own class. For example, to customize how order items are displayed, create your own component extending `Shopper\Livewire\Components\Orders\OrderItems` and update the config entry. ### [​](https://docs.laravelshopper.dev/v2/upgrade/v2-4-to-v2-5#ordershipping-status-column-&-events) OrderShipping: Status Column & Events **Likelihood of Impact: Medium** The `order_shipping` table has a new `status` column (using the `ShipmentStatus` enum with 8 values) and the `shipped_at` column is now nullable. A new `order_shipping_events` table tracks the complete delivery timeline for each shipment. The `OrderShipping` model now uses the `HasFulfillmentTransitions` trait, which provides a state machine for valid status transitions: use Shopper\Core\Enum\ShipmentStatus; // Check allowed transitions $shipment->canTransitionTo(ShipmentStatus::InTransit); // bool // Execute a transition (logs an event automatically) $shipment->transitionTo(ShipmentStatus::InTransit, [\ 'location' => 'Distribution Center',\ 'description' => 'Package picked up by carrier',\ ]); See the [Fulfillment documentation](https://docs.laravelshopper.dev/v2/fulfillment) for the full transition map. * * * [​](https://docs.laravelshopper.dev/v2/upgrade/v2-4-to-v2-5#low-impact-changes) Low Impact Changes ----------------------------------------------------------------------------------------------------- ### [​](https://docs.laravelshopper.dev/v2/upgrade/v2-4-to-v2-5#new-events) New Events **Likelihood of Impact: Low** Three new events have been added in `Shopper\Core\Events\Orders`: | Event | When it fires | | --- | --- | | `OrderArchived` | An order is archived | | `OrderShipmentCreated` | A new shipment is created for an order | | `OrderShipmentDelivered` | A shipment is marked as delivered | The `SyncOrderShippingStatusListener` automatically listens to `OrderShipmentCreated` and syncs the order’s `shipping_status` based on all items’ fulfillment states. ### [​](https://docs.laravelshopper.dev/v2/upgrade/v2-4-to-v2-5#new-enums) New Enums **Likelihood of Impact: Low** Four new enums have been added to `Shopper\Core\Enum`: | Enum | Values | | --- | --- | | `PaymentStatus` | `Pending`, `Authorized`, `Paid`, `PartiallyRefunded`, `Refunded`, `Voided` | | `ShippingStatus` | `Unfulfilled`, `PartiallyShipped`, `Shipped`, `PartiallyDelivered`, `Delivered`, `PartiallyReturned`, `Returned` | | `ShipmentStatus` | `Pending`, `PickedUp`, `InTransit`, `AtSortingCenter`, `OutForDelivery`, `Delivered`, `DeliveryFailed`, `Returned` | | `FulfillmentStatus` | `Pending`, `ForwardedToSupplier`, `Processing`, `Shipped`, `Delivered`, `Cancelled` | All follow the same pattern as existing enums: backed string enums implementing `HasColor`, `HasIcon`, and `HasLabel`. ### [​](https://docs.laravelshopper.dev/v2/upgrade/v2-4-to-v2-5#translation-keys) Translation Keys **Likelihood of Impact: Low** New translation keys have been added under `shopper-core::status.*` for the new enums. If you have published and customized the Shopper core translations, add the new keys from the `packages/core/resources/lang/en/status.php` file. The old `OrderStatus` translation keys for removed values (`pending`, `registered`, `paid`, `shipped`, `delivered`, `returned`) are no longer used. * * * [​](https://docs.laravelshopper.dev/v2/upgrade/v2-4-to-v2-5#new-features) New Features ----------------------------------------------------------------------------------------- ### [​](https://docs.laravelshopper.dev/v2/upgrade/v2-4-to-v2-5#payment-driver-system) Payment Driver System The new `shopper/payment` package provides a driver-based payment architecture. Drivers handle payment operations while Shopper manages the order’s `payment_status` automatically. A manual driver is included for offline payments, and [Stripe](https://docs.laravelshopper.dev/v2/addons/stripe) is available as an addon. ### [​](https://docs.laravelshopper.dev/v2/upgrade/v2-4-to-v2-5#capture-payment-in-admin) Capture Payment in Admin Orders with `PaymentStatus::Authorized` now display a **Capture payment** button on the order detail page. Clicking it calls the payment driver’s `capturePayment()` method, records a transaction, and updates the payment status to `Paid`. ### [​](https://docs.laravelshopper.dev/v2/upgrade/v2-4-to-v2-5#shipment-tracking) Shipment Tracking Each shipment now tracks its delivery progress through a `ShipmentStatus` state machine with automatic event logging. The `OrderShippingEvent` model records status changes with timestamps, location data, and optional GPS coordinates. ### [​](https://docs.laravelshopper.dev/v2/upgrade/v2-4-to-v2-5#shipments-management) Shipments Management A new Shipments page in the admin panel provides a centralized view of all shipments with filtering by status, order, and carrier. * * * [​](https://docs.laravelshopper.dev/v2/upgrade/v2-4-to-v2-5#migration-checklist) Migration Checklist ------------------------------------------------------------------------------------------------------- 1 [](https://docs.laravelshopper.dev/v2/upgrade/v2-4-to-v2-5#) Update dependencies Update `shopper/framework` to `^2.5` in `composer.json`, then run `composer update -W`. 2 [](https://docs.laravelshopper.dev/v2/upgrade/v2-4-to-v2-5#) Run migrations Run `php artisan migrate` to apply all new migrations, including the three-status order system and the media library columns for payment methods and carriers. 3 [](https://docs.laravelshopper.dev/v2/upgrade/v2-4-to-v2-5#) Replace removed OrderStatus values Replace all references to the removed `OrderStatus` values (`Pending`, `Registered`, `Paid`, `Shipped`, `Delivered`, `Returned`) with the equivalent `PaymentStatus` and `ShippingStatus` values. 4 [](https://docs.laravelshopper.dev/v2/upgrade/v2-4-to-v2-5#) Rename \`canceled\_at\` to \`cancelled\_at\` Update any code, queries, or Blade templates that reference `$order->canceled_at` to use `$order->cancelled_at`. 5 [](https://docs.laravelshopper.dev/v2/upgrade/v2-4-to-v2-5#) Replace logo property with \`logoUrl()\` Replace `$paymentMethod->logo` and `$carrier->logo` with `$paymentMethod->logoUrl()` and `$carrier->logoUrl()`. Re-upload existing logos through the admin panel if needed. 6 [](https://docs.laravelshopper.dev/v2/upgrade/v2-4-to-v2-5#) Update custom Order model If you use a custom Order model implementing `Shopper\Core\Models\Contracts\Order`, add the new contract methods (`isNew()`, `isPaid()`, `isShipped()`, etc.). 7 [](https://docs.laravelshopper.dev/v2/upgrade/v2-4-to-v2-5#) Update published order components If you have published `config/shopper/components/order.php`, add the new page and component entries for shipments, fulfillment, customer, items, notes, summary, and the two new slide-overs. 8 [](https://docs.laravelshopper.dev/v2/upgrade/v2-4-to-v2-5#) Install Stripe addon (optional) Run `composer require shopper/stripe` if you want Stripe payment support. See the [Stripe addon documentation](https://docs.laravelshopper.dev/v2/addons/stripe) for setup. 9 [](https://docs.laravelshopper.dev/v2/upgrade/v2-4-to-v2-5#) Clear caches Run `php artisan optimize:clear`. [From v2.5 to v2.6](https://docs.laravelshopper.dev/v2/upgrade/v2-5-to-v2-6) [From v2.2 to v2.3](https://docs.laravelshopper.dev/v2/upgrade/v2-2-to-v2-3) ⌘I --- # From v2.5 to v2.6 - TALL Stack E-commerce Framework > Documentation Index > ------------------- > > Fetch the complete documentation index at: [/llms.txt](https://docs.laravelshopper.dev/llms.txt) > > Use this file to discover all available pages before exploring further. [Skip to main content](https://docs.laravelshopper.dev/v2/upgrade/v2-5-to-v2-6#content-area) **Estimated Upgrade Time:** 15 to 45 minutes depending on how much you customized auth models and event listeners. [​](https://docs.laravelshopper.dev/v2/upgrade/v2-5-to-v2-6#updating-dependencies) Updating Dependencies ----------------------------------------------------------------------------------------------------------- You should update the following dependencies in your application’s `composer.json` file: `shopper/framework` to `^2.6` `shopper/stripe` to `^2.6` (If installed) Then run: composer update -W After updating, run the migrations: php artisan migrate v2.6 ships one new package: `shopper/cart`. The tax system is built into `shopper/core`. Both are included in `shopper/framework` and installed automatically. Their migrations run with the standard `php artisan migrate` command. * * * [​](https://docs.laravelshopper.dev/v2/upgrade/v2-5-to-v2-6#high-impact-changes) High Impact Changes ------------------------------------------------------------------------------------------------------- ### [​](https://docs.laravelshopper.dev/v2/upgrade/v2-5-to-v2-6#auth-models-and-traits-moved-from-core-to-admin) Auth Models and Traits Moved from Core to Admin **Likelihood of Impact: High** _Affects applications that import Role, Permission, ShopperUser, or HasProfilePhoto directly._ The `Role` and `Permission` models, the `ShopperUser` and `HasProfilePhoto` traits, and the `spatie/laravel-permission` dependency have all moved from `shopper/core` to `shopper/admin`. If you import any of these directly in your application code, update the namespaces: | Before (v2.5) | After (v2.6) | | --- | --- | | `Shopper\Core\Models\Role` | `Shopper\Models\Role` | | `Shopper\Core\Models\Permission` | `Shopper\Models\Permission` | | `Shopper\Core\Models\Contracts\ShopperUser` | `Shopper\Models\Contracts\ShopperUser` | | `Shopper\Core\Traits\ShopperUser` | `Shopper\Traits\InteractsWithShopper` | | `Shopper\Core\Models\Traits\HasProfilePhoto` | `Shopper\Traits\HasProfilePhoto` | The old namespaces are still present in `shopper/core` as deprecated aliases and will continue to work until v3.0, but you should migrate at your earliest convenience. The role configuration has also moved. If you referenced the admin role from `config/shopper/core.php`, update to `config/shopper/admin.php`: #### [​](https://docs.laravelshopper.dev/v2/upgrade/v2-5-to-v2-6#before-v2-5) Before (v2.5) config('shopper.core.roles.admin') #### [​](https://docs.laravelshopper.dev/v2/upgrade/v2-5-to-v2-6#after-v2-6) After (v2.6) config('shopper.admin.roles.admin') * * * [​](https://docs.laravelshopper.dev/v2/upgrade/v2-5-to-v2-6#medium-impact-changes) Medium Impact Changes ----------------------------------------------------------------------------------------------------------- ### [​](https://docs.laravelshopper.dev/v2/upgrade/v2-5-to-v2-6#new-migrations) New Migrations v2.6 adds 15 new migrations across two packages. Run `php artisan migrate` after updating. **Tax system (shopper/core):** | Migration | Description | | --- | --- | | `2026_02_24_000001_create_tax_providers_table` | Tax provider registry | | `2026_02_24_000002_create_tax_zones_table` | Geographic tax zones | | `2026_02_24_000003_create_tax_rates_table` | Rates and override rules | | `2026_02_25_000001_add_tax_amount_to_orders_table` | `tax_amount` column on orders | | `2026_02_25_000002_add_tax_columns_to_order_items_table` | `tax_amount` and `tax_rate_id` on order items | | `2026_02_25_000003_create_order_tax_lines_table` | Tax line snapshots | | `2026_02_25_000004_add_allow_backorder_to_products_table` | `allow_backorder` column on products | | `2026_02_25_000005_make_user_id_nullable_on_inventory_histories_table` | `user_id` becomes nullable | **Cart package (shopper/cart):** | Migration | Description | | --- | --- | | `2026_03_01_000001_create_carts_table` | Cart model | | `2026_03_01_000002_create_cart_lines_table` | Cart line items | | `2026_03_01_000003_create_cart_addresses_table` | Billing and shipping addresses | | `2026_03_01_000004_create_cart_line_adjustments_table` | Discount adjustments per line | | `2026_03_01_000005_create_cart_line_tax_lines_table` | Tax lines per cart line | **Performance (shopper/admin):** | Migration | Description | | --- | --- | | `2026_02_26_000001_add_status_indexes_to_orders_table` | Indexes on order status columns | ### [​](https://docs.laravelshopper.dev/v2/upgrade/v2-5-to-v2-6#order-and-product-event-renaming) Order and Product Event Renaming **Likelihood of Impact: Medium** _Affects applications with listeners registered for `OrderCancel` or `AddNoteToOrder` events._ Two events have been renamed for consistency. If you registered listeners for either of these events, update your `EventServiceProvider`: | Before (v2.5) | After (v2.6) | | --- | --- | | `Shopper\Core\Events\Orders\OrderCancel` | `Shopper\Core\Events\Orders\OrderCancelled` | | `Shopper\Core\Events\Orders\AddNoteToOrder` | `Shopper\Core\Events\Orders\OrderNoteAdded` | #### [​](https://docs.laravelshopper.dev/v2/upgrade/v2-5-to-v2-6#before-v2-5-2) Before (v2.5) use Shopper\Core\Events\Orders\OrderCancel; use Shopper\Core\Events\Orders\AddNoteToOrder; protected $listen = [\ OrderCancel::class => [CancelOrderHandler::class],\ AddNoteToOrder::class => [NotifyTeam::class],\ ]; #### [​](https://docs.laravelshopper.dev/v2/upgrade/v2-5-to-v2-6#after-v2-6-2) After (v2.6) use Shopper\Core\Events\Orders\OrderCancelled; use Shopper\Core\Events\Orders\OrderNoteAdded; protected $listen = [\ OrderCancelled::class => [CancelOrderHandler::class],\ OrderNoteAdded::class => [NotifyTeam::class],\ ]; ### [​](https://docs.laravelshopper.dev/v2/upgrade/v2-5-to-v2-6#render-hooks-enum-replaced-by-scoped-classes) Render Hooks: Enum Replaced by Scoped Classes **Likelihood of Impact: Medium** _Affects applications that registered render hooks using the `RenderHook` enum in v2.5._ The `RenderHook` enum (`Shopper\Enum\RenderHook`) from v2.5 had 6 layout-level hooks. It has been replaced by seven scoped classes organized by business domain. If you used any of these hooks, update to `LayoutRenderHook`: | Before (v2.5) | After (v2.6) | | --- | --- | | `RenderHook::HeadStart` | `LayoutRenderHook::HEAD_START` | | `RenderHook::HeadEnd` | `LayoutRenderHook::HEAD_END` | | `RenderHook::BodyStart` | `LayoutRenderHook::BODY_START` | | `RenderHook::BodyEnd` | `LayoutRenderHook::BODY_END` | | `RenderHook::ContentStart` | `LayoutRenderHook::CONTENT_START` | | `RenderHook::ContentEnd` | `LayoutRenderHook::CONTENT_END` | The new classes are in the `Shopper\View` namespace. See the [Render Hooks](https://docs.laravelshopper.dev/v2/render-hooks) documentation for the complete list of available hooks across all 7 scoped classes. #### [​](https://docs.laravelshopper.dev/v2/upgrade/v2-5-to-v2-6#before-v2-5-3) Before (v2.5) use Shopper\Enum\RenderHook; Shopper::renderHook(RenderHook::HeadEnd, fn () => '...'); #### [​](https://docs.laravelshopper.dev/v2/upgrade/v2-5-to-v2-6#after-v2-6-3) After (v2.6) use Shopper\View\LayoutRenderHook; Shopper::renderHook(LayoutRenderHook::HEAD_END, fn () => '...'); * * * [​](https://docs.laravelshopper.dev/v2/upgrade/v2-5-to-v2-6#low-impact-changes) Low Impact Changes ----------------------------------------------------------------------------------------------------- ### [​](https://docs.laravelshopper.dev/v2/upgrade/v2-5-to-v2-6#allow_backorder-column-added-to-products) `allow_backorder` Column Added to Products A new boolean column `allow_backorder` has been added to the products table. It defaults to `false`. No action is required, the migration handles it automatically. When `allow_backorder` is `true` on a product or variant, the cart’s `add()` and `update()` methods skip the stock availability check entirely, allowing the item to be added regardless of inventory level. ### [​](https://docs.laravelshopper.dev/v2/upgrade/v2-5-to-v2-6#user_id-nullable-on-inventory-histories) `user_id` Nullable on Inventory Histories The `user_id` foreign key on the `inventory_histories` table is now nullable. This accommodates stock changes triggered by automated processes rather than an admin action. No action is required. ### [​](https://docs.laravelshopper.dev/v2/upgrade/v2-5-to-v2-6#system-permissions-cleanup) System Permissions Cleanup Three system permissions have been removed from the seeder and are no longer created on fresh installations: | Removed permission | Reason | | --- | --- | | `manage_mail` | No longer used by any component | | `impersonate` | No longer used by any component | | `setting_analytics` | No longer used by any component | For existing installations these permissions remain in your database but have no effect. You can delete them manually if you want to keep your permissions table clean: use Shopper\Models\Permission; Permission::query()->whereIn('name', ['manage_mail', 'impersonate', 'setting_analytics'])->delete(); ### [​](https://docs.laravelshopper.dev/v2/upgrade/v2-5-to-v2-6#server-side-authorization-enforced-across-admin-components) Server-Side Authorization Enforced Across Admin Components **Likelihood of Impact: Medium** _Affects applications with custom roles beyond the default administrator role._ All admin Livewire pages and slide-overs now enforce permissions server-side via `$this->authorize()`. Previously, many components relied only on sidebar visibility to restrict access, so a direct URL or Livewire call was enough to bypass the check. The following table lists every area that is now protected and the permission required: | Area | Permission | | --- | --- | | Settings pages (General, Carriers, Payment Methods, Taxes, Tax Zones, Legal) | `access_setting` | | Tax rate overrides slide-over | `access_setting` | | Shipping zone and rate slide-overs | `access_setting` | | Team management pages and slide-overs | `view_users` | | Product attributes slide-over | `edit_attributes` | | Product pricing slide-over | `edit_products` | | Choose product attributes slide-over | `edit_products` | | Related products slide-over | `edit_products` | | Generate variants slide-over | `edit_product_variants` | | Update variant slide-over | `edit_product_variants` | | Collection products and rules slide-overs | `edit_collections` | | Re-order categories slide-over | `edit_categories` | | Create shipping label slide-over | `edit_orders` | | Reviews index page and detail slide-over | `browse_reviews` | | Tags index page | `browse_tags` | The `administrator` role is not affected as it holds all permissions by default. For custom roles, assign the relevant permissions before upgrading: use Spatie\Permission\Models\Role; $role = Role::findByName('manager'); $role->givePermissionTo([\ 'access_setting',\ 'view_users',\ 'edit_attributes',\ 'edit_products',\ 'edit_product_variants',\ 'edit_collections',\ 'edit_categories',\ 'edit_orders',\ 'browse_reviews',\ 'browse_tags',\ ]); Review all custom roles in your installation and assign the permissions appropriate to their scope before upgrading. Users with insufficient permissions will receive a 403 response. ### [​](https://docs.laravelshopper.dev/v2/upgrade/v2-5-to-v2-6#shopper-enums-now-implement-shopper\core\contracts) Shopper Enums Now Implement `Shopper\Core\Contracts` Shopper’s internal enums (`OrderStatus`, `ProductType`, etc.) now implement `HasLabel`, `HasIcon`, `HasColor`, and `HasDescription` from `Shopper\Core\Contracts` instead of `Filament\Support\Contracts`. This removes the Filament dependency from `shopper/core` and keeps the core package framework-agnostic. This has no impact on your application. Since Shopper runs on top of Filament, your own custom enums can continue to implement either `Filament\Support\Contracts` or `Shopper\Core\Contracts`. The method signatures are identical. * * * [​](https://docs.laravelshopper.dev/v2/upgrade/v2-5-to-v2-6#new-features) New Features ----------------------------------------------------------------------------------------- ### [​](https://docs.laravelshopper.dev/v2/upgrade/v2-5-to-v2-6#cart-package) Cart Package `shopper/cart` is now bundled with Shopper. It provides a full cart management system with pipeline-based calculation, discount validation, tax integration, and order conversion. See the [Cart documentation](https://docs.laravelshopper.dev/v2/cart) for setup and usage. ### [​](https://docs.laravelshopper.dev/v2/upgrade/v2-5-to-v2-6#tax-system) Tax System A built-in tax system is now available. Configure tax zones per country (or country + province), assign rates, and define override rules for specific products, product types, or categories. Taxes are calculated automatically in the cart pipeline. See the [Taxes documentation](https://docs.laravelshopper.dev/v2/taxes) for full details. ### [​](https://docs.laravelshopper.dev/v2/upgrade/v2-5-to-v2-6#dashboard-analytics) Dashboard Analytics The dashboard now includes five new Livewire components: a 12-month revenue bar chart, stat cards with month-over-month trends, a recent orders table, a top-selling products table, and an interactive setup guide. All data is cached with stale-while-revalidate semantics. See the [Dashboard documentation](https://docs.laravelshopper.dev/v2/dashboard) . ### [​](https://docs.laravelshopper.dev/v2/upgrade/v2-5-to-v2-6#abandoned-carts) Abandoned Carts A new admin page at **Orders → Abandoned Carts** lists carts that have been inactive for longer than the configured threshold (default: 60 minutes). The threshold is configurable in `config/shopper/cart.php`: 'abandoned_after_minutes' => 60, ### [​](https://docs.laravelshopper.dev/v2/upgrade/v2-5-to-v2-6#addon-system) Addon System Shopper now has a first-class addon API for packaging extensions. An addon can register routes, Livewire components, sidebar entries, views, settings items, and permissions as a single unit. See the [Addons documentation](https://docs.laravelshopper.dev/v2/addons) . ### [​](https://docs.laravelshopper.dev/v2/upgrade/v2-5-to-v2-6#render-hooks) Render Hooks 62 named render hooks are now available across all admin pages. Use them to inject content into specific positions without modifying any Shopper views. See the [Render Hooks documentation](https://docs.laravelshopper.dev/v2/render-hooks) . * * * [​](https://docs.laravelshopper.dev/v2/upgrade/v2-5-to-v2-6#migration-checklist) Migration Checklist ------------------------------------------------------------------------------------------------------- 1 [](https://docs.laravelshopper.dev/v2/upgrade/v2-5-to-v2-6#) Update dependencies Run `composer update -W` after updating `shopper/framework` to `^2.6`. 2 [](https://docs.laravelshopper.dev/v2/upgrade/v2-5-to-v2-6#) Run migrations Run `php artisan migrate` to apply all 15 new migrations. 3 [](https://docs.laravelshopper.dev/v2/upgrade/v2-5-to-v2-6#) Update auth model namespaces Replace `Shopper\Core\Models\Role` → `Shopper\Models\Role` and `Shopper\Core\Models\Permission` → `Shopper\Models\Permission` wherever you import them. 4 [](https://docs.laravelshopper.dev/v2/upgrade/v2-5-to-v2-6#) Update auth trait namespaces Replace `Shopper\Core\Traits\ShopperUser` → `Shopper\Traits\InteractsWithShopper` and `Shopper\Core\Models\Traits\HasProfilePhoto` → `Shopper\Traits\HasProfilePhoto`. 5 [](https://docs.laravelshopper.dev/v2/upgrade/v2-5-to-v2-6#) Update renamed events Replace `OrderCancel` → `OrderCancelled` and `AddNoteToOrder` → `OrderNoteAdded` in your event listeners. 6 [](https://docs.laravelshopper.dev/v2/upgrade/v2-5-to-v2-6#) Update render hooks Replace the old `RenderHook` enum constants with the new scoped class constants if you used render hooks in v2.5. 7 [](https://docs.laravelshopper.dev/v2/upgrade/v2-5-to-v2-6#) Update role config key Replace `config('shopper.core.users.admin_role')` with `config('shopper.admin.roles.admin')` if you referenced it directly. 8 [](https://docs.laravelshopper.dev/v2/upgrade/v2-5-to-v2-6#) Review custom role permissions Assign `access_setting`, `view_users`, `edit_attributes`, `edit_products`, `edit_product_variants`, `edit_collections`, `edit_categories`, `edit_orders`, `browse_reviews`, and `browse_tags` to any custom role that should access the corresponding areas. Optionally delete the unused `manage_mail`, `impersonate`, and `setting_analytics` permissions from your database. [From v2.6 to v2.7](https://docs.laravelshopper.dev/v2/upgrade/v2-6-to-v2-7) [From v2.4 to v2.5](https://docs.laravelshopper.dev/v2/upgrade/v2-4-to-v2-5) ⌘I --- # Unknown \# TALL Stack E-commerce Framework > Headless e-commerce administration built with Laravel to create and manage online store. ## Docs - \[Attributes\](https://docs.laravelshopper.dev/v1/attributes.md) - \[Brands\](https://docs.laravelshopper.dev/v1/brands.md): Most e-commerce sites sell products from several manufacturers. And each supplier can be represented by a brand. - \[Categories\](https://docs.laravelshopper.dev/v1/categories.md): Categories are the primary way to group products with similar features. You can also add subcategories if desired. - \[Collections\](https://docs.laravelshopper.dev/v1/collections.md): Collections, although not strictly the same, are akin to Categories. They serve to allow you to add products ,either explicitly or via certain criteria, for use on your store. - \[Configuration\](https://docs.laravelshopper.dev/v1/configuration.md): Shopper uses standard Laravel config files and environment variables for application-level settings - \[Contribution Guide\](https://docs.laravelshopper.dev/v1/contributing.md): Contributions are accepted via Pull Requests on \[Github\](https://github.com/shopperlabs/shopper). - \[Customers\](https://docs.laravelshopper.dev/v1/customers.md): In e-commerce stores, customers are one if not the fundamental point for the functioning of your store. - \[Customization\](https://docs.laravelshopper.dev/v1/customization.md) - \[Dashboard\](https://docs.laravelshopper.dev/v1/dashboard.md): The dashboard is a user-customizable screen. One of Shopper's main goals is to enable stores to easily customize the modules. - \[Discounts\](https://docs.laravelshopper.dev/v1/discounts.md) - \[Control Panel\](https://docs.laravelshopper.dev/v1/extending/control-panel.md): Learn how to customize the Shopper control panel by adding CSS, JS assets, customizing the theme, branding logo, and adding custom routes. - \[Controllers\](https://docs.laravelshopper.dev/v1/extending/controllers.md): Learn how to create and configure custom controllers for the Shopper admin panel. - \[Navigation\](https://docs.laravelshopper.dev/v1/extending/navigation.md): Learn how to customize and extend the Shopper control panel navigation by adding your own sections, pages, and menu items. - \[Installation\](https://docs.laravelshopper.dev/v1/installation.md): Quick start guide for installing and configuring Shopper on your existing Laravel App - \[Legal\](https://docs.laravelshopper.dev/v1/legal.md): As with any e-commerce site, it is important for users to know the terms and conditions and privacy policy that your site offers. This is for their own safety and yours as well. - \[Locations\](https://docs.laravelshopper.dev/v1/locations.md) - \[Media\](https://docs.laravelshopper.dev/v1/media.md) - \[Orders\](https://docs.laravelshopper.dev/v1/orders.md) - \[Products\](https://docs.laravelshopper.dev/v1/products.md) - \[Requirements\](https://docs.laravelshopper.dev/v1/requirements.md) - \[Reviews\](https://docs.laravelshopper.dev/v1/reviews.md) - \[Roles & Permissions\](https://docs.laravelshopper.dev/v1/roles-permissions.md): Manage access and permissions of your users and members in your store. - \[Two Factor Authenticator\](https://docs.laravelshopper.dev/v1/two-factor.md): Secure your account with two-step authentication ## Optional - \[Community\](https://discord.gg/r4VUvHm34) - \[Blog\](https://laravelshopper.dev/blog) --- # Categories - TALL Stack E-commerce Framework > Documentation Index > ------------------- > > Fetch the complete documentation index at: [/llms.txt](https://docs.laravelshopper.dev/llms.txt) > > Use this file to discover all available pages before exploring further. [Skip to main content](https://docs.laravelshopper.dev/v2/categories#content-area) Categories provide a hierarchical organization structure for your products. Shopper uses nested categories with parent-child relationships, allowing unlimited depth. You can model complex product taxonomies like Electronics > Computers > Laptops without artificial limits. [​](https://docs.laravelshopper.dev/v2/categories#model) Model ----------------------------------------------------------------- The model used is `Shopper\Models\Category`, which extends `Shopper\Core\Models\Category`. It implements the `Shopper\Core\Models\Contracts\Category` contract and `Spatie\MediaLibrary\HasMedia` for media support. The core model provides the business logic (relationships, scopes, slug generation, hierarchical structure via [laravel-adjacency-list](https://github.com/staudenmeir/laravel-adjacency-list) ), while the admin model adds media collections and conversions through `HasMedia` and `RegistersMediaCollections` traits. This separation means the core model has no dependency on Spatie MediaLibrary. Media support is added at the admin layer. ### [​](https://docs.laravelshopper.dev/v2/categories#extending-the-model) Extending the Model To add custom behavior, extend the admin model and update your configuration: namespace App\Models; use Shopper\Models\Category as ShopperCategory; class Category extends ShopperCategory { } Update `config/shopper/models.php`: return [\ 'category' => \App\Models\Category::class,\ ]; [​](https://docs.laravelshopper.dev/v2/categories#database-schema) Database Schema ------------------------------------------------------------------------------------- | Column | Type | Nullable | Default | Description | | --- | --- | --- | --- | --- | | `id` | bigint | no | auto | Primary key | | `name` | string | no | \- | Category name | | `slug` | string | yes | auto | URL-friendly identifier (unique, auto-generated) | | `description` | longtext | yes | null | Category description | | `position` | smallint | no | 0 | Display order position | | `is_enabled` | boolean | no | false | Category visibility status | | `seo_title` | string(60) | yes | null | SEO meta title | | `seo_description` | string(160) | yes | null | SEO meta description | | `metadata` | jsonb | yes | null | Additional custom data | | `parent_id` | bigint | yes | null | Foreign key to parent category | | `created_at` | timestamp | yes | null | Creation timestamp | | `updated_at` | timestamp | yes | null | Last update timestamp | The `slug` column is nullable at the database level, but is always auto-generated from the `name` when you set it. You never need to set it manually. [​](https://docs.laravelshopper.dev/v2/categories#hierarchical-structure) Hierarchical Structure --------------------------------------------------------------------------------------------------- Categories support unlimited nesting levels, so you can organize products into deeply nested taxonomies: Electronics (parent_id: null) ├── Computers (parent_id: 1) │ ├── Laptops (parent_id: 2) │ └── Desktops (parent_id: 2) ├── Phones (parent_id: 1) │ ├── Smartphones (parent_id: 5) │ └── Accessories (parent_id: 5) └── Audio (parent_id: 1) [​](https://docs.laravelshopper.dev/v2/categories#media) Media ----------------------------------------------------------------- Categories support two media collections through [Spatie MediaLibrary](https://spatie.be/docs/laravel-medialibrary) , using the same config-driven collection names as [products](https://docs.laravelshopper.dev/v2/products#media) . | Collection | Config key | Behavior | Description | | --- | --- | --- | --- | | Default gallery | `shopper.media.storage.collection_name` | Multiple files | Category images | | Thumbnail | `shopper.media.storage.thumbnail_collection` | Single file | Primary image for listings and navigation | Both collections accept JPEG, PNG, WebP, AVIF, and SVG files by default (configurable in `config/shopper/media.php`). To display a category’s thumbnail on your storefront: The collection names are defined in `config/shopper/media.php` under the `storage` key. The `getFirstMediaUrl` method returns the URL for the first media in a collection. If no media has been uploaded, a fallback URL is returned instead. You can also request a specific conversion size like `medium` (500x500) or `large` (800x800). use Shopper\Models\Category; $category = Category::query()->find($id); $collection = config('shopper.media.storage.thumbnail_collection'); $thumbnailUrl = $category->getFirstMediaUrl($collection); $mediumUrl = $category->getFirstMediaUrl($collection, 'medium'); To add a thumbnail to a category programmatically: $collection = config('shopper.media.storage.thumbnail_collection'); $category->addMedia($pathToImage) ->toMediaCollection($collection); [​](https://docs.laravelshopper.dev/v2/categories#relationships) Relationships --------------------------------------------------------------------------------- ### [​](https://docs.laravelshopper.dev/v2/categories#parent-category) Parent Category Every category can optionally belong to a parent category. Use this to build breadcrumbs or display the parent context: $category->parent; if ($category->parent) { $breadcrumb = $category->ancestors; } ### [​](https://docs.laravelshopper.dev/v2/categories#child-categories) Child Categories Using the `laravel-adjacency-list` package, categories expose a full set of hierarchical relationships: The `children` relationship returns direct children only. Use `descendants` for all recursive children (children of children, etc.) and `ancestors` for all recursive parents up to the root. $category->children; $category->descendants; $category->ancestors; $category->descendantsAndSelf; ### [​](https://docs.laravelshopper.dev/v2/categories#descendant-categories) Descendant Categories The `descendantCategories()` relationship returns a `HasManyOfDescendants` Eloquent relation, which means you can use it in `whereHas()`, `withCount()`, and other query builder contexts. This differs from `descendants()` which is a recursive scope and cannot be used the same way. $categoriesWithDescendants = Category::query() ->withCount('descendantCategories') ->get(); ### [​](https://docs.laravelshopper.dev/v2/categories#products) Products Categories have a polymorphic many-to-many relationship with products through the `product_has_relations` table: $category->products; $category->products()->count(); $category->products()->publish()->get(); [​](https://docs.laravelshopper.dev/v2/categories#available-tree-methods) Available Tree Methods --------------------------------------------------------------------------------------------------- The `laravel-adjacency-list` package provides these methods for traversing the hierarchy: | Method | Description | | --- | --- | | `ancestors()` | The model’s recursive parents | | `ancestorsAndSelf()` | The model’s recursive parents and itself | | `bloodline()` | The model’s ancestors, descendants and itself | | `children()` | The model’s direct children | | `childrenAndSelf()` | The model’s direct children and itself | | `descendants()` | The model’s recursive children | | `descendantsAndSelf()` | The model’s recursive children and itself | | `parent()` | The model’s direct parent | | `parentAndSelf()` | The model’s direct parent and itself | | `rootAncestor()` | The model’s topmost parent | | `siblings()` | The parent’s other children | | `siblingsAndSelf()` | All the parent’s children | $ancestors = Category::query()->find($id)->ancestors; $categories = Category::with('descendants')->get(); $total = Category::query()->find($id)->descendants()->count(); Category::query()->find($id)->descendants()->update(['is_enabled' => false]); [​](https://docs.laravelshopper.dev/v2/categories#query-scopes) Query Scopes ------------------------------------------------------------------------------- ### [​](https://docs.laravelshopper.dev/v2/categories#enabled-categories) Enabled Categories Filter categories that are visible to customers: Category::query()->enabled()->get(); ### [​](https://docs.laravelshopper.dev/v2/categories#root-categories) Root Categories Get only top-level categories (those without a parent): Category::query()->whereNull('parent_id')->get(); Using the tree structure to get the full hierarchy: Category::tree()->get(); [​](https://docs.laravelshopper.dev/v2/categories#custom-paths-&-slug-behavior) Custom Paths & Slug Behavior --------------------------------------------------------------------------------------------------------------- Categories automatically generate slug paths for nested URLs. For a category “Laptops” under “Computers” under “Electronics”, `$category->slug_path` returns `electronics/computers/laptops`: public function getCustomPaths(): array { return [\ [\ 'name' => 'slug_path',\ 'column' => 'slug',\ 'separator' => '/',\ ],\ ]; } When a category has a parent, the `CategoryObserver` automatically combines the parent’s slug with the category name on creation and update. For example, creating a “Laptops” category under a parent with slug `computers` produces the slug `computers-laptops`. This ensures slug uniqueness across the hierarchy. [​](https://docs.laravelshopper.dev/v2/categories#methods-&-helpers) Methods & Helpers ----------------------------------------------------------------------------------------- ### [​](https://docs.laravelshopper.dev/v2/categories#find-by-slug) Find by Slug The `findBySlug` static method looks up a category by its slug and throws a `ModelNotFoundException` if not found: use Shopper\Models\Category; $category = Category::findBySlug('electronics'); ### [​](https://docs.laravelshopper.dev/v2/categories#label-with-path) Label with Path The `getLabelOptionName()` method returns the full hierarchical path as a formatted string, useful for select dropdowns and admin interfaces: For a category “Laptops” nested under “Computers” under “Electronics”, the method returns `Electronics / Computers / Laptops`. $category->getLabelOptionName(); ### [​](https://docs.laravelshopper.dev/v2/categories#status-management) Status Management Toggle a category’s visibility with `updateStatus()`: Pass `true` to enable a category or `false` to disable it. $category->updateStatus(true); $category->updateStatus(false); [​](https://docs.laravelshopper.dev/v2/categories#creating-categories) Creating Categories --------------------------------------------------------------------------------------------- Create a root category by omitting the `parent_id`: $electronics = Category::query()->create([\ 'name' => 'Electronics',\ 'is_enabled' => true,\ 'position' => 1,\ ]); Create a subcategory by setting `parent_id`: $computers = Category::query()->create([\ 'name' => 'Computers',\ 'parent_id' => $electronics->id,\ 'is_enabled' => true,\ ]); [​](https://docs.laravelshopper.dev/v2/categories#retrieving-categories) Retrieving Categories ------------------------------------------------------------------------------------------------- Root categories with their children: $categories = Category::query() ->whereNull('parent_id') ->enabled() ->with('children') ->orderBy('position') ->get(); Full category tree: $tree = Category::query() ->enabled() ->tree() ->get() ->toTree(); A category with all its descendants: $category = Category::query() ->where('slug', 'electronics') ->with('descendants') ->first(); $breadcrumb = $category->ancestors; For navigation menus with nested enabled children: $navCategories = Category::query() ->whereNull('parent_id') ->enabled() ->with(['children' => fn ($q) => $q->enabled()]) ->orderBy('position') ->get(); [​](https://docs.laravelshopper.dev/v2/categories#working-with-products) Working with Products ------------------------------------------------------------------------------------------------- Products in this category only: $category = Category::query()->find($id); $products = $category->products; Products in category and all descendants: $categoryIds = $category->descendants->pluck('id')->push($category->id); $products = Product::query() ->publish() ->whereHas('categories', fn ($q) => $q->whereIn('id', $categoryIds)) ->get(); [​](https://docs.laravelshopper.dev/v2/categories#metadata) Metadata ----------------------------------------------------------------------- The `metadata` JSON column lets you store arbitrary key-value data on a category without modifying the schema. This is useful for storing custom attributes like banner colors, display preferences, or integration identifiers: $category = Category::query()->create([\ 'name' => 'Summer Sale',\ 'is_enabled' => true,\ 'metadata' => [\ 'banner_color' => '#FF6B35',\ 'featured_on_homepage' => true,\ 'external_id' => 'cat_abc123',\ ],\ ]); $color = $category->metadata['banner_color']; [​](https://docs.laravelshopper.dev/v2/categories#disabling-category-feature) Disabling Category Feature ----------------------------------------------------------------------------------------------------------- If your store doesn’t use categories, you can disable the feature entirely. This removes the category section from the admin panel: In your `config/shopper/features.php` file, set the category feature to disabled: use Shopper\Enum\FeatureState; return [\ 'category' => FeatureState::Disabled,\ ]; ### [​](https://docs.laravelshopper.dev/v2/categories#permissions) Permissions The admin panel generates four permissions for category management: | Permission | Description | | --- | --- | | `browse_categories` | View the categories list | | `read_categories` | View a single category | | `add_categories` | Create new categories | | `edit_categories` | Edit existing categories | | `delete_categories` | Delete categories | [​](https://docs.laravelshopper.dev/v2/categories#components) Components --------------------------------------------------------------------------- You can publish the Livewire components to customize the admin UI for categories: php artisan shopper:component:publish category Creates `config/shopper/components/category.php`: use Shopper\Livewire; return [\ 'pages' => [\ 'category-index' => Livewire\Pages\Category\Index::class,\ ],\ 'components' => [\ 'slide-overs.category-form' => Livewire\SlideOvers\CategoryForm::class,\ 'slide-overs.re-order-categories' => Livewire\SlideOvers\ReOrderCategories::class,\ ],\ ]; [​](https://docs.laravelshopper.dev/v2/categories#storefront-example) Storefront Example ------------------------------------------------------------------------------------------- Here is a complete controller for displaying categories and their products on your storefront. The `show` method collects products from the category and all its descendants, so browsing “Electronics” also returns products from “Computers”, “Laptops”, etc. namespace App\Http\Controllers; use Shopper\Models\Category; use Shopper\Models\Product; class CategoryController extends Controller { public function index() { $categories = Category::query() ->whereNull('parent_id') ->enabled() ->with(['children' => fn ($q) => $q->enabled()]) ->withCount('products') ->orderBy('position') ->get(); return view('categories.index', compact('categories')); } public function show(string $slug) { $category = Category::findBySlug($slug); abort_unless($category->is_enabled, 404); $category->load('ancestors'); $categoryIds = $category->descendants ->pluck('id') ->push($category->id); $products = Product::query() ->publish() ->whereHas('categories', fn ($q) => $q->whereIn('id', $categoryIds)) ->paginate(12); return view('categories.show', compact('category', 'products')); } } [Brands](https://docs.laravelshopper.dev/v2/brands) [Collections](https://docs.laravelshopper.dev/v2/collections) ⌘I --- # Alert - TALL Stack E-commerce Framework > Documentation Index > ------------------- > > Fetch the complete documentation index at: [/llms.txt](https://docs.laravelshopper.dev/llms.txt) > > Use this file to discover all available pages before exploring further. [Skip to main content](https://docs.laravelshopper.dev/v2/extending/components/alert#content-area) The Alert component displays colored feedback messages to users. It supports different colors for various contexts like warnings, errors, success messages, and general information. [​](https://docs.laravelshopper.dev/v2/extending/components/alert#preview) Preview ------------------------------------------------------------------------------------- Attention RequiredPlease review your settings before proceeding with this action. [​](https://docs.laravelshopper.dev/v2/extending/components/alert#usage) Usage --------------------------------------------------------------------------------- [​](https://docs.laravelshopper.dev/v2/extending/components/alert#props) Props --------------------------------------------------------------------------------- [​](https://docs.laravelshopper.dev/v2/extending/components/alert#param-message) message string required The main alert message content. [​](https://docs.laravelshopper.dev/v2/extending/components/alert#param-color) color string default:"warning" The alert color theme. Options: `info`, `danger`, `success`, `warning`. [​](https://docs.laravelshopper.dev/v2/extending/components/alert#param-title) title string default:"null" Optional title displayed above the message. [​](https://docs.laravelshopper.dev/v2/extending/components/alert#param-icon) icon string default:"null" Optional Filament icon name to display. [​](https://docs.laravelshopper.dev/v2/extending/components/alert#param-icon-size) iconSize IconSize default:"Medium" Size of the icon. Options: `Small`, `Medium`, `Large`. [​](https://docs.laravelshopper.dev/v2/extending/components/alert#color-variants) Color Variants --------------------------------------------------------------------------------------------------- ### [​](https://docs.laravelshopper.dev/v2/extending/components/alert#info) Info InformationThis is an informational message to help guide the user. ### [​](https://docs.laravelshopper.dev/v2/extending/components/alert#success) Success SuccessYour changes have been saved successfully. ### [​](https://docs.laravelshopper.dev/v2/extending/components/alert#warning) Warning WarningThis action may have unintended consequences. Please proceed with caution. ### [​](https://docs.laravelshopper.dev/v2/extending/components/alert#danger) Danger ErrorSomething went wrong. Please try again or contact support. [​](https://docs.laravelshopper.dev/v2/extending/components/alert#examples) Examples --------------------------------------------------------------------------------------- ### [​](https://docs.laravelshopper.dev/v2/extending/components/alert#alert-without-title) Alert Without Title You can create alerts without a title for simpler messages. ### [​](https://docs.laravelshopper.dev/v2/extending/components/alert#alert-without-icon) Alert Without Icon ### [​](https://docs.laravelshopper.dev/v2/extending/components/alert#using-in-forms) Using in Forms Alerts are commonly used to display validation summaries or important notices in forms:
    [​](https://docs.laravelshopper.dev/v2/extending/components/alert#blade-component-source) Blade Component Source ------------------------------------------------------------------------------------------------------------------- The Alert component is located at `packages/admin/resources/views/components/alert.blade.php`: @php use Filament\Support\Enums\IconSize; @endphp @props([\ 'message',\ 'color' => 'warning',\ 'title' => null,\ 'icon' => null,\ 'iconSize' => IconSize::Medium,\ ]) @php if (! $iconSize instanceof IconSize) { $iconSize = filled($iconSize) ? IconSize::tryFrom($iconSize) ?? $iconSize : null; } $containerClass = \Illuminate\Support\Arr::toCssClasses([\ 'rounded-lg p-4 ring-1',\ match ($color) {\ 'info' => 'bg-info-50 ring-info-200 dark:ring-info-400/20 dark:bg-info-800/30',\ 'danger' => 'bg-danger-50 ring-danger-200 dark:ring-danger-400/20 dark:bg-danger-800/30',\ 'success' => 'bg-success-50 ring-success-200 dark:ring-success-400/20 dark:bg-success-800/30',\ 'warning' => 'bg-warning-50 ring-warning-200 dark:ring-warning-400/20 dark:bg-warning-800/30',\ default => 'bg-custom-50 ring-custom-200 dark:ring-custom-400/20 dark:bg-custom-800/30',\ },\ ]); @endphp
    twMerge(['class' => $containerClass]) }}>
    @if ($icon)
    @endif
    @if ($title)

    {{ $title }}

    @endif

    {{ $message }}

    [Card](https://docs.laravelshopper.dev/v2/extending/components/card) [Heading](https://docs.laravelshopper.dev/v2/extending/components/heading) ⌘I --- # Contribution Guide - TALL Stack E-commerce Framework > Documentation Index > ------------------- > > Fetch the complete documentation index at: [/llms.txt](https://docs.laravelshopper.dev/llms.txt) > > Use this file to discover all available pages before exploring further. [Skip to main content](https://docs.laravelshopper.dev/v2/contributing#content-area) Contributions are accepted via Pull Requests on [Github](https://github.com/shopperlabs/shopper) . [​](https://docs.laravelshopper.dev/v2/contributing#bug-reports) Bug Reports ------------------------------------------------------------------------------- To encourage active collaboration, Shopper strongly encourages pull requests, not just bug reports. “Bug reports” may also be sent in the form of a pull request containing a failing test. [​](https://docs.laravelshopper.dev/v2/contributing#pull-requests) Pull Requests ----------------------------------------------------------------------------------- * **Document any change in behaviour** - Make sure the `readme.md` and any other relevant documentation are kept up-to-date. * **Consider our release cycle** - We try to follow [SemVer v2.0.0](http://semver.org/) . * **One pull request per feature** - If you want to do more than one thing, send multiple pull requests. * **Send coherent history** - Make sure each individual commit in your pull request is meaningful. If you had to make multiple intermediate commits while developing, please [squash them](http://www.git-scm.com/book/en/v2/Git-Tools-Rewriting-History#Changing-Multiple-Commit-Messages) before submitting. **Happy coding**! [​](https://docs.laravelshopper.dev/v2/contributing#security-vulnerabilities) Security Vulnerabilities --------------------------------------------------------------------------------------------------------- If you discover a security vulnerability within Shopper, please email us at [arthur@shopperlabs.co](mailto:arthur@shopperlabs.co) . All security vulnerabilities will be promptly addressed. [​](https://docs.laravelshopper.dev/v2/contributing#coding-style) Coding Style --------------------------------------------------------------------------------- Laravel follows the [PSR-2](https://github.com/php-fig/fig-standards/blob/master/accepted/PSR-2-coding-style-guide.md) coding standard and the [PSR-4](https://github.com/php-fig/fig-standards/blob/master/accepted/PSR-4-autoloader.md) autoloading standard. [​](https://docs.laravelshopper.dev/v2/contributing#code-of-conduct) Code of Conduct --------------------------------------------------------------------------------------- As contributors and maintainers of this project, we pledge to respect all people who contribute through reporting issues, posting feature requests, updating documentation, submitting pull requests or patches, and other activities. We are committed to making participation in this project a harassment-free experience for everyone, regardless of the level of experience, gender, gender identity and expression, sexual orientation, disability, personal appearance, body size, race, age, or religion. Examples of unacceptable behavior by participants include the use of sexual language or imagery, derogatory comments or personal attacks, trolling, public or private harassment, insults, or other unprofessional conduct. Project maintainers have the right and responsibility to remove, edit, or reject comments, commits, code, wiki edits, issues, and other contributions that are not aligned to this Code of Conduct. Project maintainers who do not follow the Code of Conduct may be removed from the project team. Instances of abusive, harassing, or otherwise unacceptable behavior may be reported by opening an issue or contacting one or more of the project maintainers. [Demo Store](https://docs.laravelshopper.dev/v2/demo-store) [Requirements](https://docs.laravelshopper.dev/v2/requirements) ⌘I --- # Currencies - TALL Stack E-commerce Framework > Documentation Index > ------------------- > > Fetch the complete documentation index at: [/llms.txt](https://docs.laravelshopper.dev/llms.txt) > > Use this file to discover all available pages before exploring further. [Skip to main content](https://docs.laravelshopper.dev/v2/currencies#content-area) Currencies define the monetary units used across your store. Each [zone](https://docs.laravelshopper.dev/v2/zones) is associated with a currency, and each [price](https://docs.laravelshopper.dev/v2/pricing) record is linked to a currency. Shopper supports multi-currency pricing out of the box, with over 150 currencies seeded during installation. [​](https://docs.laravelshopper.dev/v2/currencies#model) Model ----------------------------------------------------------------- The model used is `Shopper\Core\Models\Currency`. It implements `Shopper\Core\Models\Contracts\Currency`. The model has a global `enabled` scope that automatically filters out disabled currencies (see [Pricing](https://docs.laravelshopper.dev/v2/pricing#currency-model) for details). ### [​](https://docs.laravelshopper.dev/v2/currencies#database-schema) Database Schema | Column | Type | Nullable | Default | Description | | --- | --- | --- | --- | --- | | `id` | bigint | no | auto | Primary key | | `name` | string | no | \- | Currency name (e.g., “US Dollar”) | | `code` | string(10) | no | \- | ISO 4217 code (e.g., “USD”), unique | | `symbol` | string(25) | no | \- | Currency symbol (e.g., ”$“) | | `format` | string(50) | no | \- | Display format pattern | | `exchange_rate` | decimal(10,2) | yes | null | Exchange rate relative to base currency | | `is_enabled` | boolean | no | true | Whether the currency is active | [​](https://docs.laravelshopper.dev/v2/currencies#how-currencies-are-created) How Currencies are Created ----------------------------------------------------------------------------------------------------------- Currencies are defined in a JSON file at `core/database/data/currencies.json`. When you run `php artisan shopper:install`, a migration reads this file and inserts all currencies into the database. Shopper ships with over 150 currencies out of the box, so you rarely need to add more. If you do need a custom currency, create a migration that inserts it into the `currencies` table directly. [​](https://docs.laravelshopper.dev/v2/currencies#how-setup-store-currencies) How Setup Store Currencies ----------------------------------------------------------------------------------------------------------- After installing Shopper, you need to [set up your store](https://docs.laravelshopper.dev/v2/setup-store) and during this step you’ll choose the currencies you want for your store and set the one that will be used by default. But once you’ve done this, in your general settings `Settings > General`, you can change these currencies. ![Store currency](https://mintcdn.com/shopperlabs-ee054f5e/eVX_9bJEbNf6CmDO/images/v2/store-currency.png?w=2500&fit=max&auto=format&n=eVX_9bJEbNf6CmDO&q=85&s=1a6948aff863c6dc7af11956cf6796ca) [​](https://docs.laravelshopper.dev/v2/currencies#zero-decimal-currencies) Zero-Decimal Currencies ----------------------------------------------------------------------------------------------------- Some currencies have no subdivision (no “cents”). For example, the Japanese Yen (JPY) and the Central African CFA Franc (XAF) are stored as whole numbers, so 1000 JPY is 1000, not 10.00. Shopper handles this automatically. The `is_no_division_currency()` helper checks if a currency code is zero-decimal, and `zero_decimal_currencies()` returns the full list: is_no_division_currency('XAF'); // true is_no_division_currency('USD'); // false zero_decimal_currencies(); // ['BIF', 'CLP', 'DJF', 'GNF', 'HTG', 'JPY', 'KMF', 'KRW',\ // 'MGA', 'PYG', 'RWF', 'VND', 'VUV', 'XAF', 'XAG', 'XAU',\ // 'XDR', 'XOF', 'XPF'] The `shopper_money_format()` helper and the `MoneyInput` form component both use this to determine whether to divide/multiply by 100. See the [Pricing documentation](https://docs.laravelshopper.dev/v2/pricing) for details. [​](https://docs.laravelshopper.dev/v2/currencies#relation-to-other-entities) Relation to Other Entities ----------------------------------------------------------------------------------------------------------- ### [​](https://docs.laravelshopper.dev/v2/currencies#store) Store A store has a default currency and can have many currencies. These currencies are then used in other relations, such as when associating a zone with a currency. These 2 values are available throw the `Shopper\Core\Models\Setting` Model, under the values `default_currency_id` and `currencies` for the `key` column. The `shopper_setting('default_currency_id')` helper will return the id of the default currency and `shopper_setting('currencies')` will return and array of currencies setup for your store ### [​](https://docs.laravelshopper.dev/v2/currencies#zone) Zone Each Zone is associated with a currency. A currency can be used in more than one zone, but a zone can have only one currency. The relation is available on a Zone throw the `currency` relation and will return a `Shopper\Core\Models\Currency` object. You can also access the currency code through the attribute `currency_code` on the zone. ### [​](https://docs.laravelshopper.dev/v2/currencies#price) Price The Price entity is used to represent a price associated with an entity, for example for products or variants. Each price is associated with a currency. The relation is available on a Price throw the `currency` relation and will return a `Shopper\Core\Models\Currency` object. You can also access the currency code through the attribute `currency_code` on the zone. [Locations](https://docs.laravelshopper.dev/v2/locations) [Legal](https://docs.laravelshopper.dev/v2/legal) ⌘I --- # Configuration - TALL Stack E-commerce Framework > Documentation Index > ------------------- > > Fetch the complete documentation index at: [/llms.txt](https://docs.laravelshopper.dev/llms.txt) > > Use this file to discover all available pages before exploring further. [Skip to main content](https://docs.laravelshopper.dev/v2/configuration#content-area) Shopper publishes its configuration files to `config/shopper/` during installation. These files control the admin panel behavior, model resolution, feature flags, media handling, and more. Component configuration files are published separately on demand. [​](https://docs.laravelshopper.dev/v2/configuration#configuration-files) Configuration Files ------------------------------------------------------------------------------------------------ The following files are published by `php artisan shopper:install`: | File | Package | Purpose | | --- | --- | --- | | `admin.php` | admin | Admin panel prefix, domain, roles, branding, locales | | `auth.php` | admin | Authentication guard, 2FA toggle, password reset | | `core.php` | core | Database table prefix, barcode type | | `features.php` | admin | Feature flags for each admin module | | `media.php` | admin | Media storage, MIME types, max sizes, image conversions | | `models.php` | admin | Model class resolution for every Shopper entity | | `orders.php` | core | Order number generator format | | `routes.php` | admin | Additional middleware and custom route files | | `settings.php` | admin | Settings page registry | Additional config files are published when you install optional packages like `shopper/cart` (`cart.php`), `shopper/payment` (`payment.php`), `shopper/shipping` (`shipping.php`), and `shopper/stripe` (`stripe.php`). [​](https://docs.laravelshopper.dev/v2/configuration#admin-panel) Admin Panel -------------------------------------------------------------------------------- By default, the admin panel is accessible at `/cpanel`. You can change this prefix in `config/shopper/admin.php` or by adding the `SHOPPER_PREFIX` variable to your `.env` file: config/shopper/admin.php 'prefix' => env('SHOPPER_PREFIX', 'cpanel'), If you change the prefix, run `php artisan shopper:link` to recreate the asset symlink with the new name. To bind the admin panel to a specific domain, set the `SHOPPER_DOMAIN` environment variable. This uses Laravel’s `Route::domain()` under the hood: config/shopper/admin.php 'domain' => env('SHOPPER_DOMAIN'), You can also customize the admin panel branding (logo, favicon, and Filament primary color): config/shopper/admin.php 'brand' => null, 'favicon' => null, 'primary_color' => \Filament\Support\Colors\Color::Blue, The `primary_color` key accepts any [Filament color](https://filamentphp.com/docs/support/colors) constant. After changing your primary color in your Tailwind config, update this value to keep Filament elements consistent. ### [​](https://docs.laravelshopper.dev/v2/configuration#avatar-colors) Avatar Colors Default colors for auto-generated user avatars (UI Avatars). Values are hexadecimal without the `#` prefix: config/shopper/admin.php 'avatar' => [\ 'color' => '1d4ed8',\ 'bg_color' => 'dbeafe',\ ], ### [​](https://docs.laravelshopper.dev/v2/configuration#locales) Locales Available languages in the admin panel. Each entry maps a locale code to a display label and a flag code (ISO 3166-1 alpha-2, lowercase) used for the flag SVG: config/shopper/admin.php 'locales' => [\ 'en' => ['label' => 'English', 'flag' => 'gb'],\ 'fr' => ['label' => 'Français', 'flag' => 'fr'],\ ], ### [​](https://docs.laravelshopper.dev/v2/configuration#custom-pages) Custom Pages If you create custom Livewire page components for the admin panel, configure the namespace and view path: config/shopper/admin.php 'pages' => [\ 'namespace' => 'App\\Livewire\\Shopper',\ 'view_path' => resource_path('views/livewire/shopper'),\ ], [​](https://docs.laravelshopper.dev/v2/configuration#database-table-prefix) Database Table Prefix ---------------------------------------------------------------------------------------------------- All Shopper tables are prefixed with `sh_` by default so they do not conflict with your application’s existing tables. config/shopper/core.php 'table_prefix' => 'sh_', Set the table prefix before running `php artisan shopper:install`. Changing it after installation requires writing a custom migration to rename all existing Shopper tables. [​](https://docs.laravelshopper.dev/v2/configuration#feature-flags) Feature Flags ------------------------------------------------------------------------------------ The `features.php` config controls which sections of the admin panel are active. Set any feature to `FeatureState::Disabled` to hide it from the UI entirely: config/shopper/features.php use Shopper\Enum\FeatureState; return [\ 'attribute' => FeatureState::Enabled,\ 'brand' => FeatureState::Enabled,\ 'category' => FeatureState::Enabled,\ 'collection' => FeatureState::Enabled,\ 'discount' => FeatureState::Enabled,\ 'review' => FeatureState::Enabled,\ 'supplier' => FeatureState::Disabled,\ 'tag' => FeatureState::Enabled,\ ]; For example, if your store does not use product reviews, set `'review' => FeatureState::Disabled` and the reviews page, sidebar link, and product form tab disappear from the admin panel. [​](https://docs.laravelshopper.dev/v2/configuration#models) Models ---------------------------------------------------------------------- Shopper resolves model classes through `config/shopper/models.php`. To use your own model for any entity, replace the class in this file. The entire system (admin panel, relationships, route bindings) uses the configured class automatically. Models that have media support (images, thumbnails) use the `Shopper\Models` namespace from the admin package. Models without media use the `Shopper\Core\Models` namespace from the core package. When swapping a model, extend the class listed in the config comment for that entry. config/shopper/models.php use Shopper\Models; return [\ 'address' => Shopper\Core\Models\Address::class,\ 'brand' => Models\Brand::class,\ 'category' => Models\Category::class,\ 'collection' => Models\Collection::class,\ 'product' => Models\Product::class,\ 'variant' => Models\ProductVariant::class,\ 'channel' => Shopper\Core\Models\Channel::class,\ 'inventory' => Shopper\Core\Models\Inventory::class,\ 'order' => Shopper\Core\Models\Order::class,\ 'supplier' => Shopper\Core\Models\Supplier::class,\ 'tax_zone' => Shopper\Core\Models\TaxZone::class,\ 'tax_rate' => Shopper\Core\Models\TaxRate::class,\ ]; See the [Introduction](https://docs.laravelshopper.dev/v2/getting-started) page for more details on model swapping and extensibility. [​](https://docs.laravelshopper.dev/v2/configuration#authentication) Authentication -------------------------------------------------------------------------------------- The `auth.php` config controls the authentication guard, two-factor authentication, and password reset flow for the admin panel: config/shopper/auth.php return [\ 'guard' => 'web',\ '2fa_enabled' => false,\ 'password_reset' => true,\ ]; Set `2fa_enabled` to `true` to require two-factor authentication for admin users. See the [Two-Factor Authentication](https://docs.laravelshopper.dev/v2/two-factor) page for setup details. [​](https://docs.laravelshopper.dev/v2/configuration#middleware) Middleware ------------------------------------------------------------------------------ Shopper lets you add extra middleware to all authenticated admin routes. This is useful for logging, rate limiting, or custom access control: config/shopper/routes.php 'middleware' => [], [​](https://docs.laravelshopper.dev/v2/configuration#custom-routes) Custom Routes ------------------------------------------------------------------------------------ By default, your `web.php` routes are not loaded inside the admin panel. To add custom routes that share Shopper’s authentication middleware, point to a dedicated route file: config/shopper/routes.php 'custom_file' => base_path('routes/shopper.php'), Routes defined in this file are automatically loaded with the admin panel’s middleware stack. [​](https://docs.laravelshopper.dev/v2/configuration#components) Components ------------------------------------------------------------------------------ Shopper’s admin UI is built from Livewire components that you can override individually. Each feature has a component configuration file listing its pages and components. To publish a feature’s component config, run the publish command with the feature name: php artisan shopper:component:publish category This creates `config/shopper/components/category.php` where you can point any component to your own class. Available features: | Feature | Config file | | --- | --- | | `account` | `components/account.php` | | `brand` | `components/brand.php` | | `category` | `components/category.php` | | `collection` | `components/collection.php` | | `customer` | `components/customer.php` | | `dashboard` | `components/dashboard.php` | | `discount` | `components/discount.php` | | `order` | `components/order.php` | | `product` | `components/product.php` | | `review` | `components/review.php` | | `setting` | `components/setting.php` | You can publish all component configs at once with `php artisan shopper:component:publish` (no argument). [​](https://docs.laravelshopper.dev/v2/configuration#settings) Settings -------------------------------------------------------------------------- Shopper uses a class-based approach for settings pages. Each setting is a class that implements the `Shopper\Contracts\SettingItem` interface. The `settings.php` config registers which settings are enabled: config/shopper/settings.php use Shopper\Settings\Items; return [\ 'items' => [\ Items\GeneralSetting::class => true,\ Items\StaffSetting::class => true,\ Items\LocationSetting::class => true,\ Items\PaymentSetting::class => true,\ Items\CarrierSetting::class => true,\ Items\LegalSetting::class => true,\ Items\ZoneSetting::class => true,\ Items\TaxSetting::class => true,\ Items\CurrencySetting::class => true,\ ],\ ]; To disable a setting page, set its value to `false`. ### [​](https://docs.laravelshopper.dev/v2/configuration#creating-a-custom-setting) Creating a Custom Setting To create your own setting page, extend the `Shopper\Settings\Setting` base class: namespace App\Settings; use Shopper\Settings\Setting; final class MyCustomSetting extends Setting { public function name(): string { return 'My Custom Setting'; } public function description(): string { return 'Manage your custom configuration.'; } public function icon(): string { return 'heroicon-o-cog'; } public function url(): string { return route('shopper.settings.custom'); } public function order(): int { return 10; } public function permission(): ?string { return 'manage_custom_settings'; } } Then register it in the `settings.php` config file: 'items' => [\ App\Settings\MyCustomSetting::class => true,\ ], ### [​](https://docs.laravelshopper.dev/v2/configuration#programmatic-registration) Programmatic Registration You can also register settings at runtime through the `SettingManager`: use Shopper\Settings\SettingManager; app(SettingManager::class)->add(App\Settings\MyCustomSetting::class); Disabling setting items removes the corresponding interface from the admin panel. Make sure your team does not need access to those settings before disabling them. [​](https://docs.laravelshopper.dev/v2/configuration#order-number-format) Order Number Format ------------------------------------------------------------------------------------------------ The `orders.php` config controls how order numbers are generated. You can customize the prefix, separator, date format, and sequence padding: config/shopper/orders.php 'generator' => [\ 'prefix' => 'ORD',\ 'separator' => '-',\ 'date_format' => 'Ymd',\ 'start_sequence_from' => 1,\ 'pad_length' => 6,\ 'pad_string' => '0',\ ], Examples of generated numbers depending on configuration: | Configuration | Result | | --- | --- | | Default | `ORD-20260328-000001` | | `'prefix' => null` | `20260328-000001` | | `'date_format' => null` | `ORD-000001` | | `'prefix' => null, 'date_format' => null` | `000001` | [Installation](https://docs.laravelshopper.dev/v2/installation) [Dashboard](https://docs.laravelshopper.dev/v2/dashboard) ⌘I --- # Channels - TALL Stack E-commerce Framework > Documentation Index > ------------------- > > Fetch the complete documentation index at: [/llms.txt](https://docs.laravelshopper.dev/llms.txt) > > Use this file to discover all available pages before exploring further. [Skip to main content](https://docs.laravelshopper.dev/v2/channels#content-area) Channels represent different sales platforms where your products can be sold. Examples include your main website, mobile app, marketplace integrations, or physical stores. [​](https://docs.laravelshopper.dev/v2/channels#model) Model --------------------------------------------------------------- The model used is `Shopper\Core\Models\Channel`. It implements `Shopper\Core\Models\Contracts\Channel` and uses the `HasSlug` trait for automatic slug generation. The model is configurable via `config/shopper/models.php`. ### [​](https://docs.laravelshopper.dev/v2/channels#extending-the-model) Extending the Model To add custom behavior, extend the model and update your configuration: namespace App\Models; use Shopper\Core\Models\Channel as BaseChannel; class Channel extends BaseChannel { } Update `config/shopper/models.php`: return [\ 'channel' => \App\Models\Channel::class,\ ]; [​](https://docs.laravelshopper.dev/v2/channels#database-schema) Database Schema ----------------------------------------------------------------------------------- | Column | Type | Nullable | Default | Description | | --- | --- | --- | --- | --- | | `id` | bigint | no | auto | Primary key | | `name` | string | no | \- | Channel name | | `slug` | string | yes | auto | URL-friendly identifier (unique) | | `description` | text | yes | null | Channel description | | `timezone` | string | yes | null | Channel timezone | | `url` | string | yes | null | Channel URL | | `is_default` | boolean | no | false | Default channel flag | | `is_enabled` | boolean | no | false | Channel visibility | | `metadata` | json | yes | null | Additional custom data | | `created_at` | timestamp | yes | null | Creation timestamp | | `updated_at` | timestamp | yes | null | Last update timestamp | [​](https://docs.laravelshopper.dev/v2/channels#relationships) Relationships ------------------------------------------------------------------------------- ### [​](https://docs.laravelshopper.dev/v2/channels#products) Products Channels have a many-to-many polymorphic relationship with products: // Get all products for a channel $channel->products; // Collection of Product models // Add products to channel $channel->products()->attach([$productId1, $productId2]); // Remove products from channel $channel->products()->detach($productId); // Sync products $channel->products()->sync($productIds); [​](https://docs.laravelshopper.dev/v2/channels#query-scopes) Query Scopes ----------------------------------------------------------------------------- use Shopper\Core\Models\Channel; // Get only the default channel Channel::query()->default()->first(); // Get only enabled channels Channel::query()->enabled()->get(); // Combine scopes Channel::query() ->enabled() ->where('timezone', 'UTC') ->get(); [​](https://docs.laravelshopper.dev/v2/channels#observer-behavior) Observer Behavior --------------------------------------------------------------------------------------- The `ChannelObserver` ensures only one channel can be default: // When creating/updating a channel with is_default = true: // 1. Any existing default channel is set to is_default = false // 2. The new/updated channel becomes the default $channel = Channel::query()->create([\ 'name' => 'Mobile App',\ 'is_default' => true, // Previous default is automatically unset\ ]); [​](https://docs.laravelshopper.dev/v2/channels#default-channel) Default Channel ----------------------------------------------------------------------------------- You can retrieve the default channel using the `default` scope: use Shopper\Core\Models\Channel; // Get the default channel $channel = Channel::query()->default()->first(); // Use in controllers public function index() { $channel = Channel::query()->default()->first(); $products = Product::query() ->forChannel($channel->id) ->publish() ->get(); } [​](https://docs.laravelshopper.dev/v2/channels#creating-channels) Creating Channels --------------------------------------------------------------------------------------- ### [​](https://docs.laravelshopper.dev/v2/channels#default-website-channel) Default Website Channel use Shopper\Core\Models\Channel; $channel = Channel::query()->create([\ 'name' => 'Website',\ 'slug' => 'website',\ 'description' => 'Main e-commerce website',\ 'url' => 'https://example.com',\ 'timezone' => 'UTC',\ 'is_default' => true,\ 'is_enabled' => true,\ ]); ### [​](https://docs.laravelshopper.dev/v2/channels#additional-channels) Additional Channels // Mobile app channel $mobileChannel = Channel::query()->create([\ 'name' => 'Mobile App',\ 'slug' => 'mobile-app',\ 'description' => 'iOS and Android mobile application',\ 'timezone' => 'UTC',\ 'is_enabled' => true,\ ]); // Marketplace channel $marketplaceChannel = Channel::query()->create([\ 'name' => 'Amazon',\ 'slug' => 'amazon',\ 'description' => 'Amazon marketplace integration',\ 'url' => 'https://amazon.com/store/your-store',\ 'is_enabled' => true,\ 'metadata' => [\ 'marketplace_id' => 'ATVPDKIKX0DER',\ 'seller_id' => 'A1234567890',\ ],\ ]); [​](https://docs.laravelshopper.dev/v2/channels#retrieving-channels) Retrieving Channels ------------------------------------------------------------------------------------------- use Shopper\Core\Models\Channel; // Get all enabled channels $channels = Channel::query()->enabled()->get(); // Get default channel $default = Channel::query()->default()->first(); // Get channel by slug $channel = Channel::query() ->where('slug', 'website') ->first(); // Get channel with products $channel = Channel::query() ->with('products') ->where('slug', 'mobile-app') ->first(); // Get channels with product counts $channels = Channel::query() ->enabled() ->withCount('products') ->get(); [​](https://docs.laravelshopper.dev/v2/channels#assigning-products-to-channels) Assigning Products to Channels ----------------------------------------------------------------------------------------------------------------- use Shopper\Models\Product; $product = Product::query()->find($id); // Assign to channels (via product) $product->channels()->attach([$channelId1, $channelId2]); // Get products for a specific channel $products = Product::query() ->forChannel($channelId) ->publish() ->get(); // Get products available on multiple channels $products = Product::query() ->forChannel([$channelId1, $channelId2]) ->publish() ->get(); [​](https://docs.laravelshopper.dev/v2/channels#storefront-example) Storefront Example ----------------------------------------------------------------------------------------- namespace App\Http\Controllers; use Shopper\Core\Models\Channel; use Shopper\Models\Product; class ProductController extends Controller { public function index() { // Get products for default channel $channel = Channel::query()->default()->first(); $products = Product::query() ->forChannel($channel->id) ->publish() ->with(['brand', 'categories']) ->paginate(12); return view('products.index', compact('products')); } } ### [​](https://docs.laravelshopper.dev/v2/channels#multi-channel-api) Multi-Channel API namespace App\Http\Controllers\Api; use Shopper\Core\Models\Channel; use Shopper\Models\Product; class ProductController extends Controller { public function index(Request $request) { $channelSlug = $request->header('X-Channel', 'website'); $channel = Channel::query() ->where('slug', $channelSlug) ->enabled() ->firstOrFail(); $products = Product::query() ->forChannel($channel->id) ->publish() ->paginate(20); return response()->json($products); } } [​](https://docs.laravelshopper.dev/v2/channels#use-cases) Use Cases ----------------------------------------------------------------------- | Channel | Example Use | | --- | --- | | Website | Main e-commerce storefront | | Mobile App | iOS/Android application | | Marketplace | Amazon, eBay, Etsy integration | | POS | Physical store point of sale | | Wholesale | B2B customer portal | | Social | Facebook/Instagram shop | [​](https://docs.laravelshopper.dev/v2/channels#best-practices) Best Practices --------------------------------------------------------------------------------- 1. **Default Channel**: Always have one default channel for fallback 2. **Product Assignment**: Assign products to relevant channels during creation 3. **Timezone**: Set appropriate timezone for each channel 4. **Metadata**: Use metadata for channel-specific configuration (API keys, etc.) // Example: Channel-specific pricing $channel = Channel::query()->find($id); $apiKey = $channel->metadata['api_key'] ?? null; $merchantId = $channel->metadata['merchant_id'] ?? null; [Setup Store](https://docs.laravelshopper.dev/v2/setup-store) [Zones](https://docs.laravelshopper.dev/v2/zones) ⌘I --- # Collections - TALL Stack E-commerce Framework > Documentation Index > ------------------- > > Fetch the complete documentation index at: [/llms.txt](https://docs.laravelshopper.dev/llms.txt) > > Use this file to discover all available pages before exploring further. [Skip to main content](https://docs.laravelshopper.dev/v2/collections#content-area) Collections are curated groups of products for marketing and merchandising. Unlike categories, collections can be manually curated or automatically populated based on rules. [​](https://docs.laravelshopper.dev/v2/collections#model) Model ------------------------------------------------------------------ The model used is `Shopper\Models\Collection`, which extends `Shopper\Core\Models\Collection`. The core model provides the business logic, relationships, scopes, rule evaluation, and slug generation. The admin model adds media collections and conversions through Spatie MediaLibrary. The core model implements `Shopper\Core\Models\Contracts\Collection` and uses the `HasSlug` trait for automatic slug generation with collision handling. ### [​](https://docs.laravelshopper.dev/v2/collections#extending-the-model) Extending the Model To add custom behavior, extend the admin model and update your configuration: namespace App\Models; use Shopper\Models\Collection as ShopperCollection; class Collection extends ShopperCollection { } Update `config/shopper/models.php`: return [\ 'collection' => \App\Models\Collection::class,\ ]; [​](https://docs.laravelshopper.dev/v2/collections#database-schema) Database Schema -------------------------------------------------------------------------------------- ### [​](https://docs.laravelshopper.dev/v2/collections#collection-table) Collection Table | Column | Type | Nullable | Default | Description | | --- | --- | --- | --- | --- | | `id` | bigint | no | auto | Primary key | | `name` | string | no | \- | Collection name | | `slug` | string | no | auto | URL-friendly identifier (unique) | | `description` | longtext | yes | null | Collection description | | `type` | string | no | \- | Collection type (manual/auto) | | `sort` | string | yes | null | Product sorting method | | `match_conditions` | string | yes | null | Rule matching logic (all/any) | | `published_at` | datetime | yes | null | Publication date | | `seo_title` | string(60) | yes | null | SEO meta title | | `seo_description` | string(160) | yes | null | SEO meta description | | `metadata` | json | yes | null | Additional custom data | ### [​](https://docs.laravelshopper.dev/v2/collections#collectionrule-table) CollectionRule Table | Column | Type | Nullable | Description | | --- | --- | --- | --- | | `id` | bigint | no | Primary key | | `rule` | string | no | Rule type identifier | | `operator` | string | no | Comparison operator | | `value` | string | no | Value to compare against | | `collection_id` | bigint | no | Foreign key to collection | [​](https://docs.laravelshopper.dev/v2/collections#collection-types) Collection Types ---------------------------------------------------------------------------------------- use Shopper\Core\Enum\CollectionType; CollectionType::Manual // Products are manually selected CollectionType::Auto // Products are added based on rules ### [​](https://docs.laravelshopper.dev/v2/collections#type-checking) Type Checking $collection->isManual(); // true for manual collections $collection->isAutomatic(); // true for automatic collections [​](https://docs.laravelshopper.dev/v2/collections#relationships) Relationships ---------------------------------------------------------------------------------- ### [​](https://docs.laravelshopper.dev/v2/collections#products) Products A collection groups products together for merchandising, such as “Summer Essentials”, “New Arrivals”, or “Black Friday Deals”. For manual collections, you explicitly attach and detach products. For automatic collections, products are matched by rules (see [Collection Rules](https://docs.laravelshopper.dev/v2/collections#collection-rules) ). $collection->products; For manual collections, manage products with the standard Eloquent relationship methods: $collection->products()->attach([$productId1, $productId2]); $collection->products()->detach($productId); $collection->products()->sync($productIds); ### [​](https://docs.laravelshopper.dev/v2/collections#zones) Zones Collections can be scoped to specific geographic zones. This is useful when a promotion or product group only applies to certain markets. $collection->zones; $collection->zones()->attach([$zoneId1, $zoneId2]); $collection->zones()->detach($zoneId); $collection->zones()->sync($zoneIds); From the zone side, you can retrieve all associated collections: $zone = Zone::query()->find($id); $zone->collections; ### [​](https://docs.laravelshopper.dev/v2/collections#rules-automatic-collections) Rules (Automatic Collections) Automatic collections use rules to determine which products belong to them. Each rule defines a condition that products must match. $collection->rules; Add a rule that matches products whose title contains “summer”: use Shopper\Core\Enum\Operator; use Shopper\Core\Enum\Rule; $collection->rules()->create([\ 'rule' => Rule::ProductTitle,\ 'operator' => Operator::Contains,\ 'value' => 'summer',\ ]); [​](https://docs.laravelshopper.dev/v2/collections#slug-&-lookup) Slug & Lookup ---------------------------------------------------------------------------------- The `HasSlug` trait generates unique slugs automatically and provides a `findBySlug()` static method: use Shopper\Models\Collection; $collection = Collection::findBySlug('summer-essentials'); [​](https://docs.laravelshopper.dev/v2/collections#query-scopes) Query Scopes -------------------------------------------------------------------------------- Filter collections by type: Collection::query()->manual()->get(); Collection::query()->automatic()->get(); The `published` scope filters collections that have a `published_at` date in the past or present: Collection::query()->published()->get(); [​](https://docs.laravelshopper.dev/v2/collections#collection-rules) Collection Rules ---------------------------------------------------------------------------------------- ### [​](https://docs.laravelshopper.dev/v2/collections#rule-types) Rule Types use Shopper\Core\Enum\Rule; Rule::ProductTitle // Match product title Rule::ProductPrice // Match product price Rule::CompareAtPrice // Match compare at price Rule::InventoryStock // Match stock level Rule::ProductBrand // Match product brand Rule::ProductCategory // Match product category Rule::ProductCreatedAt // Match product creation date Rule::ProductFeatured // Match featured status Rule::ProductRating // Match average rating Rule::ProductSalesCount // Match total units sold | Rule | Database Value | Description | | --- | --- | --- | | Product Title | `product_title` | Match against product name | | Product Price | `product_price` | Match against `amount` on prices table (stored in cents) | | Compare Price | `compare_at_price` | Match against `compare_amount` on prices table (stored in cents) | | Inventory Stock | `inventory_stock` | Match against stock level | | Product Brand | `product_brand` | Match against brand name | | Product Category | `product_category` | Match against category name | | Product Created Date | `product_created_at` | Match against creation date | | Product Featured | `product_featured` | Match featured status (1 or 0) | | Product Rating | `product_rating` | Match average approved rating | | Product Sales Count | `product_sales_count` | Match total units sold (paid/shipped/delivered/completed orders only) | **Price rules** (`ProductPrice`, `CompareAtPrice`) store values in cents. Pass the value in cents directly (e.g., `'5000'` for $50.00). Price rules are evaluated against the shop’s default currency.**Sales count** (`ProductSalesCount`) only counts units from orders with a valid status: `paid`, `shipped`, `delivered`, or `completed`. ### [​](https://docs.laravelshopper.dev/v2/collections#operators) Operators use Shopper\Core\Enum\Operator; Operator::EqualsTo // equals_to Operator::NotEqualTo // not_equal_to Operator::GreaterThan // greater_than Operator::LessThan // less_than Operator::StartsWith // starts_with Operator::EndsWith // ends_with Operator::Contains // contains Operator::NotContains // not_contains ### [​](https://docs.laravelshopper.dev/v2/collections#match-conditions) Match Conditions When a collection has multiple rules, `match_conditions` determines how they combine. With `all`, every rule must match. With `any`, a single matching rule is enough. $collection->match_conditions = 'all'; $collection->match_conditions = 'any'; [​](https://docs.laravelshopper.dev/v2/collections#display-helpers) Display Helpers -------------------------------------------------------------------------------------- The `firstRule()` method returns a human-readable summary of the collection’s rules, like “Product title contains Summer + 2 other”: $collection->firstRule(); [​](https://docs.laravelshopper.dev/v2/collections#creating-collections) Creating Collections ------------------------------------------------------------------------------------------------ ### [​](https://docs.laravelshopper.dev/v2/collections#manual-collection) Manual Collection use Shopper\Models\Collection; use Shopper\Core\Enum\CollectionType; $collection = Collection::query()->create([\ 'name' => 'Summer Essentials',\ 'type' => CollectionType::Manual,\ 'published_at' => now(),\ ]); $collection->products()->attach([$product1->id, $product2->id]); ### [​](https://docs.laravelshopper.dev/v2/collections#automatic-collection) Automatic Collection Automatic collections populate themselves based on rules. Here’s a “Sale Items” collection that matches products under $50 with “sale” in the title: use Shopper\Core\Enum\CollectionType; use Shopper\Core\Enum\Operator; use Shopper\Core\Enum\Rule; $collection = Collection::query()->create([\ 'name' => 'Sale Items',\ 'type' => CollectionType::Auto,\ 'match_conditions' => 'all',\ 'published_at' => now(),\ ]); $collection->rules()->createMany([\ [\ 'rule' => Rule::ProductPrice,\ 'operator' => Operator::LessThan,\ 'value' => '5000',\ ],\ [\ 'rule' => Rule::ProductTitle,\ 'operator' => Operator::Contains,\ 'value' => 'sale',\ ],\ ]); ### [​](https://docs.laravelshopper.dev/v2/collections#best-sellers-collection) Best Sellers Collection A collection that automatically includes products with more than 10 units sold: $collection = Collection::query()->create([\ 'name' => 'Best Sellers',\ 'type' => CollectionType::Auto,\ 'match_conditions' => 'all',\ 'published_at' => now(),\ ]); $collection->rules()->create([\ 'rule' => Rule::ProductSalesCount,\ 'operator' => Operator::GreaterThan,\ 'value' => '10',\ ]); ### [​](https://docs.laravelshopper.dev/v2/collections#top-rated-collection) Top Rated Collection $collection = Collection::query()->create([\ 'name' => 'Top Rated',\ 'type' => CollectionType::Auto,\ 'match_conditions' => 'all',\ 'published_at' => now(),\ ]); $collection->rules()->create([\ 'rule' => Rule::ProductRating,\ 'operator' => Operator::GreaterThan,\ 'value' => '3', // Average rating > 3 (4-5 stars)\ ]); [​](https://docs.laravelshopper.dev/v2/collections#retrieving-collections) Retrieving Collections ---------------------------------------------------------------------------------------------------- All published collections: $collections = Collection::query()->published()->get(); A collection with its published products: $collection = Collection::findBySlug('summer-essentials'); $products = $collection->productsQuery()->publish()->get(); Filter by type: $manualCollections = Collection::query()->manual()->get(); $autoCollections = Collection::query() ->automatic() ->with('rules') ->get(); [​](https://docs.laravelshopper.dev/v2/collections#retrieving-products) Retrieving Products ---------------------------------------------------------------------------------------------- Shopper provides built-in methods to retrieve products from collections, handling both manual and automatic collections transparently. ### [​](https://docs.laravelshopper.dev/v2/collections#basic-usage) Basic Usage The `getProducts()` method works for both collection types. For manual collections it returns attached products. For automatic collections it evaluates the rules and returns matching products. $collection = Collection::query()->find($id); $products = $collection->getProducts(); For pagination or additional filtering, use `productsQuery()` which returns an Eloquent builder: $products = $collection->productsQuery()->paginate(12); $products = $collection->productsQuery() ->where('featured', true) ->orderBy('name') ->get(); ### [​](https://docs.laravelshopper.dev/v2/collections#how-it-works) How It Works For **manual collections**, `getProducts()` returns the attached products via the `products()` relationship. For **automatic collections**, `getProducts()` evaluates all defined rules and returns matching products: * **Match All**: All rules must be satisfied (AND logic) * **Match Any**: At least one rule must be satisfied (OR logic) $collection = Collection::query() ->where('slug', 'sale-items') ->with('rules') ->first(); $products = $collection->getProducts(); ### [​](https://docs.laravelshopper.dev/v2/collections#rule-evaluation) Rule Evaluation The `CollectionProductsQuery` class handles rule evaluation for all supported rules: | Rule | Column/Relation | Supported Operators | | --- | --- | --- | | `ProductTitle` | `name` | All string operators | | `ProductPrice` | `amount` (prices table) | Numeric operators | | `CompareAtPrice` | `compare_amount` (prices table) | Numeric operators | | `InventoryStock` | `inventoryHistories` | Numeric operators | | `ProductBrand` | `brand` relation | All string operators | | `ProductCategory` | `categories` relation | All string operators | | `ProductCreatedAt` | `created_at` | `equals_to`, `less_than`, `greater_than` | | `ProductFeatured` | `featured` | `equals_to` | | `ProductRating` | `ratings` relation (AVG) | Numeric operators | | `ProductSalesCount` | `order_items` (SUM quantity) | Numeric operators | use Shopper\Core\Queries\CollectionProductsQuery; $query = new CollectionProductsQuery(); $products = $query->get($collection); For further customization, use the query builder: $builder = $query->query($collection); $products = $builder->with('brand')->paginate(10); [​](https://docs.laravelshopper.dev/v2/collections#automatic-synchronization) Automatic Synchronization ---------------------------------------------------------------------------------------------------------- For automatic collections, Shopper keeps the product associations in sync with the collection rules. Products are stored in the pivot table for optimal query performance. ### [​](https://docs.laravelshopper.dev/v2/collections#how-sync-works) How Sync Works Synchronization happens automatically via observers: | Event | Action | | --- | --- | | Product created/updated | Product is added/removed from matching collections | | Collection saved | All matching products are synced | | Collection rule added/updated/deleted | Collection products are re-synced | ### [​](https://docs.laravelshopper.dev/v2/collections#manual-sync-command) Manual Sync Command You can manually sync automatic collections using the artisan command: # Sync all automatic collections php artisan shopper:collections:sync # Sync a specific collection php artisan shopper:collections:sync --collection=1 ### [​](https://docs.laravelshopper.dev/v2/collections#sync-action) Sync Action For programmatic sync, use the `SyncCollectionProductsAction`: use Shopper\Core\Actions\SyncCollectionProductsAction; use Shopper\Models\Collection; $collection = Collection::query()->find($id); $action = new SyncCollectionProductsAction(); $syncedCount = $action->execute($collection); ### [​](https://docs.laravelshopper.dev/v2/collections#background-jobs) Background Jobs Sync operations run in queued jobs to avoid blocking requests: * `SyncCollectionProductsJob` - Syncs a single collection * `SyncProductWithCollectionsJob` - Syncs a product with all automatic collections Configure your queue worker to process these jobs: php artisan queue:work [​](https://docs.laravelshopper.dev/v2/collections#media) Media ------------------------------------------------------------------ Collections support two media collections through [Spatie MediaLibrary](https://spatie.be/docs/laravel-medialibrary) , using the same config-driven collection names as [products](https://docs.laravelshopper.dev/v2/products#media) . | Collection | Config key | Behavior | Description | | --- | --- | --- | --- | | Default gallery | `shopper.media.storage.collection_name` | Multiple files | Collection images | | Thumbnail | `shopper.media.storage.thumbnail_collection` | Single file | Collection cover image | To add a collection cover image: $mediaCollection = config('shopper.media.storage.thumbnail_collection'); $collection->addMedia($file)->toMediaCollection($mediaCollection); To retrieve the cover URL: $mediaCollection = config('shopper.media.storage.thumbnail_collection'); $url = $collection->getFirstMediaUrl($mediaCollection, 'medium'); [​](https://docs.laravelshopper.dev/v2/collections#configuration) Configuration ---------------------------------------------------------------------------------- ### [​](https://docs.laravelshopper.dev/v2/collections#disabling-collections) Disabling Collections // config/shopper/features.php use Shopper\Enum\FeatureState; return [\ 'collection' => FeatureState::Disabled,\ ]; ### [​](https://docs.laravelshopper.dev/v2/collections#permissions) Permissions The admin panel generates five permissions for collection management: | Permission | Description | | --- | --- | | `browse_collections` | View the collections list | | `read_collections` | View a single collection | | `add_collections` | Create new collections | | `edit_collections` | Edit existing collections | | `delete_collections` | Delete collections | [​](https://docs.laravelshopper.dev/v2/collections#components) Components ---------------------------------------------------------------------------- To customize the admin UI for collection management: php artisan shopper:component:publish collection Creates `config/shopper/components/collection.php`: use Shopper\Livewire; return [\ 'pages' => [\ 'collection-index' => Livewire\Pages\Collection\Index::class,\ 'collection-edit' => Livewire\Pages\Collection\Edit::class,\ ],\ 'components' => [\ 'collections.products' => Livewire\Components\Collection\CollectionProducts::class,\ \ 'slide-overs.collection-rules' => Livewire\SlideOvers\CollectionRules::class,\ 'slide-overs.add-collection-form' => Livewire\SlideOvers\AddCollectionForm::class,\ 'slide-overs.collection-products-list' => Livewire\SlideOvers\CollectionProductsList::class,\ ],\ ]; [​](https://docs.laravelshopper.dev/v2/collections#storefront-example) Storefront Example -------------------------------------------------------------------------------------------- namespace App\Http\Controllers; use Shopper\Models\Collection; class CollectionController extends Controller { public function index() { $collections = Collection::query() ->published() ->withCount('products') ->get(); return view('collections.index', compact('collections')); } public function show(string $slug) { $collection = Collection::findBySlug($slug); // Works for both manual and automatic collections $products = $collection->productsQuery() ->with(['brand', 'media']) ->paginate(12); return view('collections.show', compact('collection', 'products')); } } [​](https://docs.laravelshopper.dev/v2/collections#use-cases) Use Cases -------------------------------------------------------------------------- | Type | Example | Description | | --- | --- | --- | | Manual | Gift Guides | Curated selection of gift ideas | | Manual | Editor’s Picks | Hand-picked featured products | | Auto | New Arrivals | `ProductCreatedAt` greater than 30 days ago | | Auto | Sale Items | `CompareAtPrice` greater than 0 | | Auto | Low Stock | `InventoryStock` less than 5 | | Auto | Featured | `ProductFeatured` equals 1 | | Auto | Best Sellers | `ProductSalesCount` greater than 10 | | Auto | Top Rated | `ProductRating` greater than 3 | [Categories](https://docs.laravelshopper.dev/v2/categories) [Attributes](https://docs.laravelshopper.dev/v2/attributes) ⌘I --- # Card - TALL Stack E-commerce Framework > Documentation Index > ------------------- > > Fetch the complete documentation index at: [/llms.txt](https://docs.laravelshopper.dev/llms.txt) > > Use this file to discover all available pages before exploring further. [Skip to main content](https://docs.laravelshopper.dev/v2/extending/components/card#content-area) The Card component is the primary container used throughout Shopper to group related content. It provides a consistent visual treatment with a subtle border and background. [​](https://docs.laravelshopper.dev/v2/extending/components/card#preview) Preview ------------------------------------------------------------------------------------ Card TitleThis is a description that explains what this card contains. Your content goes here. This could be forms, tables, or any other content. [​](https://docs.laravelshopper.dev/v2/extending/components/card#usage) Usage --------------------------------------------------------------------------------

    Your content goes here

    [​](https://docs.laravelshopper.dev/v2/extending/components/card#props) Props -------------------------------------------------------------------------------- [​](https://docs.laravelshopper.dev/v2/extending/components/card#param-title) title string | Slot default:"null" The card header title. Can be a string or a slot for custom content. [​](https://docs.laravelshopper.dev/v2/extending/components/card#param-description) description string default:"null" Optional description text displayed below the title. [​](https://docs.laravelshopper.dev/v2/extending/components/card#examples) Examples -------------------------------------------------------------------------------------- ### [​](https://docs.laravelshopper.dev/v2/extending/components/card#basic-card) Basic Card A simple card without title or description.

    A simple card without title or description.

    ### [​](https://docs.laravelshopper.dev/v2/extending/components/card#card-with-title-only) Card with Title Only Product Information Display product details in an organized manner.

    Display product details in an organized manner.

    ### [​](https://docs.laravelshopper.dev/v2/extending/components/card#card-with-custom-title-slot) Card with Custom Title Slot You can pass a custom slot for the title to include additional elements:

    Custom Title

    Action

    Card content with custom header.

    ### [​](https://docs.laravelshopper.dev/v2/extending/components/card#card-with-form-content) Card with Form Content Account SettingsUpdate your account information below. Name Email
    Name
    Email
    [​](https://docs.laravelshopper.dev/v2/extending/components/card#blade-component-source) Blade Component Source ------------------------------------------------------------------------------------------------------------------ The Card component is located at `packages/admin/resources/views/components/card.blade.php`: @props([\ 'title' => null,\ 'description' => null,\ ])
    twMerge(['class' => 'sh-card p-1.5 bg-gray-50 dark:bg-gray-950 rounded-lg ring-1 ring-gray-200 dark:ring-white/10 overflow-hidden']) }} > @if ($title)
    @if ($title instanceof \Illuminate\View\ComponentSlot) {{ $title }} @else @endif
    @endif
    {{ $slot }}
    [Overview](https://docs.laravelshopper.dev/v2/extending/components/overview) [Alert](https://docs.laravelshopper.dev/v2/extending/components/alert) ⌘I --- # Demo Store - TALL Stack E-commerce Framework > Documentation Index > ------------------- > > Fetch the complete documentation index at: [/llms.txt](https://docs.laravelshopper.dev/llms.txt) > > Use this file to discover all available pages before exploring further. [Skip to main content](https://docs.laravelshopper.dev/v2/demo-store#content-area) The official Shopper demo is a complete e-commerce application with a storefront and admin panel. It covers product browsing, variant selection, multi-step checkout, customer accounts, a blog, and multi-zone support with country-based currency switching. The full source code is [available on GitHub](https://github.com/shopperlabs/demo.laravelshopper.dev) . Visit the live demo ------------------- Browse the storefront and explore the admin panel at demo.laravelshopper.dev ![Shopper demo store homepage](https://mintcdn.com/shopperlabs-ee054f5e/ODdNSuAfTcCBRwzz/images/demo-store.jpg?w=2500&fit=max&auto=format&n=ODdNSuAfTcCBRwzz&q=85&s=683e1872c689b170ebe3ff3bd001f9a7) [​](https://docs.laravelshopper.dev/v2/demo-store#what%E2%80%99s-included) What’s Included --------------------------------------------------------------------------------------------- The demo store covers the full e-commerce experience: * **Product catalog** with categories, collections, attribute filtering, and search * **Product pages** with variant selection, image gallery, multi-currency pricing, and reviews * **Multi-step checkout** with address selection, shipping method, and payment (Stripe, NotchPay, Cash) * **Customer accounts** with profile management, address book, and order history * **Blog** with articles, categories, featured images, and rich content * **Multi-zone support** with country-based currency switching and shipping options * **Admin panel** at `/cpanel` powered by Shopper with Filament [​](https://docs.laravelshopper.dev/v2/demo-store#key-patterns) Key Patterns ------------------------------------------------------------------------------- The demo is designed as a reference implementation. Here are the main patterns you can study in the codebase. **Extending Shopper models** with custom logic. The demo’s `Product` model adds a `HasProductPricing` trait for multi-currency price formatting, and all catalog models (Category, Brand, Collection) are extended in `app/Models/` to show how model swapping works in practice. **Multi-step checkout** built with Livewire. The `CheckoutWizard` component orchestrates three steps (Shipping, Delivery, Payment), each as its own Livewire component under `app/Livewire/Checkout/`. Session state is managed through a dedicated `CheckoutSession` class. **Domain actions** for business logic. Instead of putting logic in controllers, the demo uses Action classes in `app/Actions/` for operations like `CreateOrder`, `AddToCart`, and `ResolveVariantAvailability`. Each action has a single responsibility and is easy to test. **Extending the admin sidebar.** The demo adds a Blog section to Shopper’s admin panel through `app/Sidebar/BlogSidebar.php`, with custom Livewire pages for managing posts and categories under `app/Livewire/Shopper/Blog/`. **Multi-currency pricing** via shipping zones. The `ZoneSessionManager` action and `ZoneSelector` slide-over component handle country-based currency switching. The `HasProductPricing` trait on the Product model formats prices based on the active zone’s currency. **Payment gateway integration** with multiple providers. The checkout supports Stripe (with webhooks via `StripeWebhookController`), NotchPay, and Cash on Delivery, configured through `config/shopper/payment.php`. **Feature toggling.** The demo disables the Suppliers feature in `config/shopper/features.php` to show that you can turn off any part of Shopper you don’t need. [​](https://docs.laravelshopper.dev/v2/demo-store#admin-panel-access) Admin Panel Access ------------------------------------------------------------------------------------------- You can log in to the admin panel at [`/cpanel`](https://demo.laravelshopper.dev/cpanel) : * **Email:** `admin@laravelshopper.dev` * **Password:** `demo.Shopper@2026!` The demo database is reset periodically. Please be respectful when editing data. [​](https://docs.laravelshopper.dev/v2/demo-store#source-code) Source Code ----------------------------------------------------------------------------- The full source code is available on GitHub. You can clone it and run it locally to explore the codebase, modify it, or use it as a starting point for your own store. GitHub Repository ----------------- Browse the source code on GitHub To run the demo locally, clone the repository and run the setup command. This handles environment configuration, database migrations, and seeding with demo data. git clone https://github.com/shopperlabs/demo.laravelshopper.dev.git shopper-demo && cd shopper-demo composer install npm install && npm run build composer setup Then access the storefront at the URL provided by your local server. The storefront is built with Livewire 3, Volt, and Flux UI, styled with Tailwind CSS 4. The production deployment uses Docker with FrankenPHP (Octane). [Introduction](https://docs.laravelshopper.dev/v2/getting-started) [Contribution Guide](https://docs.laravelshopper.dev/v2/contributing) ⌘I --- # Customers - TALL Stack E-commerce Framework > Documentation Index > ------------------- > > Fetch the complete documentation index at: [/llms.txt](https://docs.laravelshopper.dev/llms.txt) > > Use this file to discover all available pages before exploring further. [Skip to main content](https://docs.laravelshopper.dev/v2/customers#content-area) Customers are users who have the customer role and can place orders in your store. Shopper extends your Laravel User model with e-commerce specific fields and relationships. [​](https://docs.laravelshopper.dev/v2/customers#user-model-integration) User Model Integration -------------------------------------------------------------------------------------------------- Shopper doesn’t create a separate Customer model. Instead, it extends your existing `App\Models\User` model with the `InteractsWithShopper` trait and `ShopperUser` contract. namespace App\Models; use Illuminate\Foundation\Auth\User as Authenticatable; use Shopper\Models\Contracts\ShopperUser; use Shopper\Traits\InteractsWithShopper; class User extends Authenticatable implements ShopperUser { use InteractsWithShopper; } The `InteractsWithShopper` trait provides: * `HasRoles` (Spatie Permission) for role-based access control * `HasDiscounts` for customer-specific discount eligibility * `HasProfilePhoto` for avatar management [​](https://docs.laravelshopper.dev/v2/customers#database-schema) Database Schema ------------------------------------------------------------------------------------ ### [​](https://docs.laravelshopper.dev/v2/customers#user-table-modifications) User Table Modifications Shopper modifies the standard Laravel `users` table: | Column | Type | Nullable | Default | Description | | --- | --- | --- | --- | --- | | `id` | bigint | no | auto | Primary key | | `first_name` | string | yes | null | First name | | `last_name` | string | no | \- | Last name | | `email` | string | no | \- | Email address (unique) | | `password` | string | yes | null | Password (nullable for social auth) | | `email_verified_at` | timestamp | yes | null | Email verification date | | `gender` | string | yes | null | Gender enum value | | `phone_number` | string | yes | null | Phone number | | `birth_date` | date | yes | null | Birth date | | `avatar_type` | string | no | avatar\_ui | Avatar source type | | `avatar_location` | string | yes | null | Avatar file path | | `timezone` | string | yes | null | User timezone | | `opt_in` | boolean | no | false | Marketing email consent | | `last_login_at` | timestamp | yes | null | Last login timestamp | | `last_login_ip` | string | yes | null | Last login IP address | ### [​](https://docs.laravelshopper.dev/v2/customers#address-table) Address Table | Column | Type | Nullable | Default | Description | | --- | --- | --- | --- | --- | | `id` | bigint | no | auto | Primary key | | `first_name` | string | no | \- | First name | | `last_name` | string | no | \- | Last name | | `company_name` | string | yes | null | Company name | | `street_address` | string | no | \- | Street address | | `street_address_plus` | string | yes | null | Additional address line | | `postal_code` | string | no | \- | Postal/ZIP code | | `city` | string | no | \- | City | | `state` | string | yes | null | State/province/region | | `phone_number` | string | yes | null | Phone number | | `shipping_default` | boolean | no | false | Default shipping address | | `billing_default` | boolean | no | false | Default billing address | | `type` | string | yes | null | Address type enum | | `country_id` | bigint | yes | null | FK to countries | | `user_id` | bigint | no | \- | FK to users | [​](https://docs.laravelshopper.dev/v2/customers#gender-type) Gender Type ---------------------------------------------------------------------------- The `GenderType` enum defines available gender options: use Shopper\Core\Enum\GenderType; GenderType::Male // male GenderType::Female // female [​](https://docs.laravelshopper.dev/v2/customers#address-type) Address Type ------------------------------------------------------------------------------ The `AddressType` enum defines address categories: use Shopper\Core\Enum\AddressType; AddressType::Billing // billing AddressType::Shipping // shipping [​](https://docs.laravelshopper.dev/v2/customers#relationships) Relationships -------------------------------------------------------------------------------- ### [​](https://docs.laravelshopper.dev/v2/customers#orders) Orders // Get all customer orders $customer->orders; // Collection of Order models // Get recent orders $customer->orders() ->latest() ->take(5) ->get(); ### [​](https://docs.laravelshopper.dev/v2/customers#addresses) Addresses // Get all customer addresses $customer->addresses; // Collection of Address models // Get default shipping address $customer->addresses() ->where('shipping_default', true) ->first(); // Get default billing address $customer->addresses() ->where('billing_default', true) ->first(); [​](https://docs.laravelshopper.dev/v2/customers#query-scopes) Query Scopes ------------------------------------------------------------------------------ use App\Models\User; // Get only customers (users with 'user' role) User::query()->customers()->get(); // Get administrators (admin or manager roles) User::query()->administrators()->get(); [​](https://docs.laravelshopper.dev/v2/customers#role-checking) Role Checking -------------------------------------------------------------------------------- // Check if user is an admin $user->isAdmin(); // Check if user is a manager $user->isManager(); // Check if email is verified $user->isVerified(); [​](https://docs.laravelshopper.dev/v2/customers#computed-attributes) Computed Attributes -------------------------------------------------------------------------------------------- // Get full name $customer->full_name; // "John Doe" // Get formatted birth date $customer->birth_date_formatted; // "15, January 1990" // Get roles as comma-separated string $customer->roles_label; // "User, VIP" // Get profile picture URL $customer->picture; // Avatar URL (ui-avatars or uploaded) [​](https://docs.laravelshopper.dev/v2/customers#address-model) Address Model -------------------------------------------------------------------------------- The model used is `Shopper\Core\Models\Address`. It implements `Shopper\Core\Models\Contracts\Address` and is configurable via `config/shopper/models.php`. ### [​](https://docs.laravelshopper.dev/v2/customers#extending-the-address-model) Extending the Address Model namespace App\Models; use Shopper\Core\Models\Address as BaseAddress; class Address extends BaseAddress { // Add your customizations here } Update `config/shopper/models.php`: return [\ 'address' => \App\Models\Address::class,\ ]; ### [​](https://docs.laravelshopper.dev/v2/customers#address-relationships) Address Relationships Each address belongs to a user and optionally to a country: $address->user; // The customer who owns this address $address->country; // The Country model (nullable) ### [​](https://docs.laravelshopper.dev/v2/customers#address-methods) Address Methods The Address model provides helpers for checking default status: $address->isShippingDefault(); // true if this is the default shipping address $address->isBillingDefault(); // true if this is the default billing address $address->full_name; // "John Doe" (computed from first_name + last_name) [​](https://docs.laravelshopper.dev/v2/customers#creating-customers) Creating Customers ------------------------------------------------------------------------------------------ ### [​](https://docs.laravelshopper.dev/v2/customers#basic-customer) Basic Customer use App\Models\User; use Shopper\Core\Enum\GenderType; use Illuminate\Support\Facades\Hash; $customer = User::query()->create([\ 'first_name' => 'John',\ 'last_name' => 'Doe',\ 'email' => 'john@example.com',\ 'password' => Hash::make('password'),\ 'gender' => GenderType::Male,\ 'email_verified_at' => now(),\ ]); // Assign customer role $customer->assignRole(config('shopper.admin.roles.user')); ### [​](https://docs.laravelshopper.dev/v2/customers#customer-with-address) Customer with Address use Shopper\Core\Models\Address; use Shopper\Core\Enum\AddressType; $customer = User::query()->create([\ 'first_name' => 'Jane',\ 'last_name' => 'Doe',\ 'email' => 'jane@example.com',\ 'gender' => GenderType::Female,\ 'phone_number' => '+1234567890',\ 'opt_in' => true,\ ]); $customer->assignRole(config('shopper.admin.roles.user')); // Add shipping address $customer->addresses()->create([\ 'first_name' => 'Jane',\ 'last_name' => 'Doe',\ 'street_address' => '123 Main Street',\ 'city' => 'New York',\ 'postal_code' => '10001',\ 'country_id' => $countryId,\ 'type' => AddressType::Shipping,\ 'shipping_default' => true,\ ]); [​](https://docs.laravelshopper.dev/v2/customers#retrieving-customers) Retrieving Customers ---------------------------------------------------------------------------------------------- use App\Models\User; // Get all customers $customers = User::query() ->customers() ->latest() ->get(); // Search customers $customers = User::query() ->customers() ->where(function ($query) use ($search) { $query->where('first_name', 'like', "%{$search}%") ->orWhere('last_name', 'like', "%{$search}%") ->orWhere('email', 'like', "%{$search}%"); }) ->get(); // Get customer with addresses and orders $customer = User::query() ->with(['addresses', 'orders']) ->findOrFail($id); // Get customers who opted in for marketing $marketingList = User::query() ->customers() ->where('opt_in', true) ->get(); // Get verified customers only $verified = User::query() ->customers() ->whereNotNull('email_verified_at') ->get(); [​](https://docs.laravelshopper.dev/v2/customers#managing-addresses) Managing Addresses ------------------------------------------------------------------------------------------ use Shopper\Core\Models\Address; // Create address for customer $address = Address::query()->create([\ 'user_id' => $customer->id,\ 'first_name' => 'John',\ 'last_name' => 'Doe',\ 'street_address' => '456 Oak Avenue',\ 'city' => 'Los Angeles',\ 'postal_code' => '90001',\ 'country_id' => $countryId,\ 'type' => AddressType::Billing,\ 'billing_default' => true,\ ]); // Update default address Address::query() ->where('user_id', $customer->id) ->where('type', AddressType::Shipping) ->update(['shipping_default' => false]); $newDefault = Address::query()->find($addressId); $newDefault->update(['shipping_default' => true]); [​](https://docs.laravelshopper.dev/v2/customers#observer-behavior) Observer Behavior ---------------------------------------------------------------------------------------- When a user is deleted, the `InteractsWithShopper` trait automatically: * Detaches all roles * Deletes all addresses // When deleting a user: $customer->delete(); // Roles are detached and addresses are deleted automatically [​](https://docs.laravelshopper.dev/v2/customers#role-configuration) Role Configuration ------------------------------------------------------------------------------------------ Roles are defined in `config/shopper/admin.php`: return [\ 'roles' => [\ 'admin' => 'administrator',\ 'manager' => 'manager',\ 'user' => 'user',\ ],\ ]; [​](https://docs.laravelshopper.dev/v2/customers#permissions) Permissions ---------------------------------------------------------------------------- The admin panel generates five permissions for customer management: | Permission | Description | | --- | --- | | `browse_customers` | View the customers list | | `read_customers` | View a single customer profile | | `add_customers` | Create new customers | | `edit_customers` | Edit customer profiles | | `delete_customers` | Delete or anonymize customers | [​](https://docs.laravelshopper.dev/v2/customers#components) Components -------------------------------------------------------------------------- To customize the admin UI for customer management: php artisan shopper:component:publish customer Creates `config/shopper/components/customer.php`: use Shopper\Livewire; use Shopper\Livewire\Components; return [\ 'pages' => [\ 'customer-index' => Livewire\Pages\Customers\Index::class,\ 'customer-create' => Livewire\Pages\Customers\Create::class,\ 'customer-show' => Livewire\Pages\Customers\Show::class,\ ],\ 'components' => [\ 'customers.addresses' => Components\Customers\Addresses::class,\ 'customers.orders' => Components\Customers\Orders::class,\ 'customers.profile' => Components\Customers\Profile::class,\ ],\ ]; [​](https://docs.laravelshopper.dev/v2/customers#storefront-example) Storefront Example ------------------------------------------------------------------------------------------ namespace App\Http\Controllers; use App\Models\User; use Shopper\Core\Models\Address; use Shopper\Core\Enum\GenderType; use Shopper\Core\Enum\AddressType; use Illuminate\Support\Facades\Hash; class AccountController extends Controller { public function show() { $customer = auth()->user(); return view('account.show', [\ 'customer' => $customer,\ 'orders' => $customer->orders()->latest()->paginate(10),\ 'addresses' => $customer->addresses,\ ]); } public function updateProfile(Request $request) { $validated = $request->validate([\ 'first_name' => 'required|string|max:255',\ 'last_name' => 'required|string|max:255',\ 'phone_number' => 'nullable|string|max:20',\ 'birth_date' => 'nullable|date',\ 'opt_in' => 'boolean',\ ]); auth()->user()->update($validated); return back()->with('success', 'Profile updated successfully'); } public function storeAddress(Request $request) { $validated = $request->validate([\ 'first_name' => 'required|string',\ 'last_name' => 'required|string',\ 'street_address' => 'required|string',\ 'city' => 'required|string',\ 'postal_code' => 'required|string',\ 'country_id' => 'required|exists:countries,id',\ 'type' => 'required|in:billing,shipping',\ ]); auth()->user()->addresses()->create([\ ...$validated,\ 'type' => AddressType::from($validated['type']),\ ]); return back()->with('success', 'Address added successfully'); } } [​](https://docs.laravelshopper.dev/v2/customers#use-cases) Use Cases ------------------------------------------------------------------------ | Scope | Description | | --- | --- | | `customers()` | Users with ‘user’ role | | `administrators()` | Users with ‘admin’ or ‘manager’ role | | Method | Description | | --- | --- | | `isAdmin()` | Check if user has admin role | | `isManager()` | Check if user has manager role | | `isVerified()` | Check if email is verified | [Reviews](https://docs.laravelshopper.dev/v2/reviews) [Cart](https://docs.laravelshopper.dev/v2/cart) ⌘I --- # Dashboard - TALL Stack E-commerce Framework > Documentation Index > ------------------- > > Fetch the complete documentation index at: [/llms.txt](https://docs.laravelshopper.dev/llms.txt) > > Use this file to discover all available pages before exploring further. [Skip to main content](https://docs.laravelshopper.dev/v2/dashboard#content-area) The dashboard is the first screen after login. It shows store health at a glance: revenue trends, key metrics, recent orders, top products, and an onboarding guide that auto-dismisses once the store is configured. ![Shopper admin dashboard with stat cards, revenue chart, top products, and recent orders](https://mintcdn.com/shopperlabs-ee054f5e/RoQo55-CU3i212Mj/images/v2/dashboard.png?w=2500&fit=max&auto=format&n=RoQo55-CU3i212Mj&q=85&s=f0758881e9389c054561c14decfe3c9d) [​](https://docs.laravelshopper.dev/v2/dashboard#components) Components -------------------------------------------------------------------------- The dashboard is composed of five Livewire components, each with independent caching and a focused responsibility. ### [​](https://docs.laravelshopper.dev/v2/dashboard#revenuechart) RevenueChart Displays monthly revenue as a bar chart for the last 12 months. Data is grouped by month in a single aggregated query and cached with flexible TTL (fresh for 5 minutes, stale up to 30 minutes). The chart supports a currency filter. When you have multiple active currencies, a dropdown lets you switch between them. The Y-axis and tooltip are formatted using `Intl.NumberFormat` with the store’s locale and currency symbol. The revenue query supports MySQL, PostgreSQL, and SQLite with database-specific date expressions. ### [​](https://docs.laravelshopper.dev/v2/dashboard#statcards) StatCards Shows four summary cards comparing the current month to the previous month: | Card | Metric | Scope | | --- | --- | --- | | Revenue | Sum of `price_amount` on paid orders | Current currency | | Products | Total product count, monthly new products for trend | All types | | Orders | Count of paid orders, monthly count for trend | All currencies | | Customers | Count of users with the `customer` scope, monthly new customers for trend | All | Each card shows the percentage change versus the previous month, with a green or red trend indicator. Cards link to their respective admin sections. ### [​](https://docs.laravelshopper.dev/v2/dashboard#recentorders) RecentOrders A table of the 7 most recent orders, excluding orders with Cancelled or Archived status. Each row shows the order number, first product with thumbnail, total amount, payment status badge, and links to the order detail page. ### [​](https://docs.laravelshopper.dev/v2/dashboard#topsellingproducts) TopSellingProducts Ranks the top 6 products by total quantity sold across paid orders. Variant sales are aggregated back to the parent product. Each row shows the product thumbnail, name, total units sold, and average review score. ### [​](https://docs.laravelshopper.dev/v2/dashboard#setupguide) SetupGuide An interactive checklist that guides new stores through the essential configuration steps. It appears on first login and auto-detects completion by querying the database: ![Shopper setup guide with progress bar and expandable steps](https://mintcdn.com/shopperlabs-ee054f5e/RoQo55-CU3i212Mj/images/v2/dashboard-setup-guide.png?w=2500&fit=max&auto=format&n=RoQo55-CU3i212Mj&q=85&s=c7d3513647ed8fb2e931e98557d47817) | Step | Completed when | Permission | | --- | --- | --- | | Add a product | At least one product exists | `add_products` | | Create a collection | At least one collection exists | `add_collections` | | Set up shipping zones | At least one enabled shipping zone exists | `access_setting` | | Set up payment methods | At least one enabled payment method exists | `access_setting` | | Configure taxes | At least one tax zone exists | `access_setting` | When all steps are marked complete, the guide saves a `setup_guide_done` setting and dispatches a `setup-guide-completed` event to hide itself. It does not reappear on subsequent visits. The guide can also be dismissed early with the dismiss button. [​](https://docs.laravelshopper.dev/v2/dashboard#caching) Caching -------------------------------------------------------------------- Each dashboard component caches its data independently. The cache keys and TTLs are: | Component | Cache key | Fresh TTL | Stale TTL | | --- | --- | --- | --- | | RevenueChart | `dashboard:revenue:{currency}` | 5 min | 30 min | | StatCards | `dashboard:stat-cards:{locale}` | 5 min | 30 min | | RecentOrders | `dashboard:recent-orders` | 1 min | 5 min | | TopSellingProducts | `dashboard:top-selling-products` | 5 min | 30 min | To clear the dashboard cache manually (for example after a data import), flush the keys: use Illuminate\Support\Facades\Cache; Cache::forget('dashboard:revenue:USD'); Cache::forget('dashboard:stat-cards:en'); Cache::forget('dashboard:recent-orders'); Cache::forget('dashboard:top-selling-products'); [​](https://docs.laravelshopper.dev/v2/dashboard#access-requirements) Access Requirements -------------------------------------------------------------------------------------------- The dashboard middleware checks two conditions before rendering the page. The user must be an admin or have the `access_dashboard` permission. The store must have the `email` and `street_address` settings configured (these are set during the initial store setup). If the settings are missing, the middleware redirects to the store initialization page. If the user lacks permission, a 403 response is returned. [​](https://docs.laravelshopper.dev/v2/dashboard#customizing-the-dashboard) Customizing the Dashboard -------------------------------------------------------------------------------------------------------- ### [​](https://docs.laravelshopper.dev/v2/dashboard#replacing-the-entire-page) Replacing the Entire Page The dashboard page is registered in the components configuration. Publish the dashboard component config to swap it with your own implementation: php artisan shopper:component:publish dashboard This creates `config/shopper/components/dashboard.php`: use Shopper\Livewire\Components; use Shopper\Livewire\Pages; return [\ 'pages' => [\ 'dashboard' => Pages\Dashboard::class,\ ],\ 'components' => [\ 'locale-switcher' => Components\LocaleSwitcher::class,\ ],\ ]; Replace the page class with your own component: 'pages' => [\ 'dashboard' => App\Livewire\Pages\Dashboard::class,\ ], Your component only needs to render a view with the app layout. The simplest override: namespace App\Livewire\Pages; use Illuminate\Contracts\View\View; use Livewire\Component; final class Dashboard extends Component { public function render(): View { return view('dashboard.index') ->layout('shopper::components.layouts.app', [\ 'title' => 'Dashboard',\ ]); } } ### [​](https://docs.laravelshopper.dev/v2/dashboard#overriding-individual-components) Overriding Individual Components If you want to replace a single widget (for example, swap the revenue chart for a custom report), publish the dashboard Blade view and edit it directly. First, publish Shopper’s views: php artisan vendor:publish --tag=shopper-views Then open `resources/views/vendor/shopper/livewire/pages/dashboard.blade.php`. The view renders each component via Livewire tags that you can replace: Replace any tag with your own Livewire component or plain Blade content. [​](https://docs.laravelshopper.dev/v2/dashboard#adding-content-via-render-hooks) Adding Content via Render Hooks -------------------------------------------------------------------------------------------------------------------- If you only want to inject content above or below the dashboard without replacing the page or publishing views, use the layout render hooks: use Shopper\Facades\Shopper; use Shopper\View\LayoutRenderHook; Shopper::renderHook( LayoutRenderHook::DASHBOARD_START, fn (): string => view('dashboard.store-alert-banner')->render(), ); Shopper::renderHook( LayoutRenderHook::DASHBOARD_END, fn (): string => view('dashboard.custom-reports')->render(), ); Register these hooks in a service provider’s `boot` method. See the [Render Hooks](https://docs.laravelshopper.dev/v2/render-hooks) documentation for the full list of available injection points. [Configuration](https://docs.laravelshopper.dev/v2/configuration) [Products](https://docs.laravelshopper.dev/v2/products) ⌘I --- # Events - TALL Stack E-commerce Framework > Documentation Index > ------------------- > > Fetch the complete documentation index at: [/llms.txt](https://docs.laravelshopper.dev/llms.txt) > > Use this file to discover all available pages before exploring further. [Skip to main content](https://docs.laravelshopper.dev/v2/events#content-area) Shopper dispatches events at key moments in the order, product, and cart lifecycle. These events allow you to hook into the system and add custom behavior like sending notifications, syncing with external services, updating analytics, or triggering workflows without modifying any Shopper code. Events are organized by domain across two namespaces: * `Shopper\Core\Events` order and product events * `Shopper\Cart\Events` cart events use Shopper\Core\Events\Orders\OrderCompleted; use Shopper\Core\Events\Orders\OrderPaid; use Shopper\Core\Events\Products\ProductCreated; [​](https://docs.laravelshopper.dev/v2/events#listening-to-events) Listening to Events ----------------------------------------------------------------------------------------- Register listeners in your application’s `EventServiceProvider` or use Laravel’s event discovery: use Shopper\Core\Events\Orders\OrderCompleted; use Shopper\Core\Events\Orders\OrderPaid; protected $listen = [\ OrderPaid::class => [\ GenerateInvoice::class,\ SendPaymentConfirmation::class,\ ],\ OrderCompleted::class => [\ SendOrderCompletedEmail::class,\ ],\ ]; Every event carries the relevant model as a public property, accessible directly in your listener: use Shopper\Core\Events\Orders\OrderPaid; class GenerateInvoice { public function handle(OrderPaid $event): void { $order = $event->order; $order->load('items', 'customer', 'billingAddress'); Invoice::generate($order); } } [​](https://docs.laravelshopper.dev/v2/events#order-events) Order Events --------------------------------------------------------------------------- Order events cover the full lifecycle of a purchase, from creation to completion, cancellation, or archival. ### [​](https://docs.laravelshopper.dev/v2/events#available-events) Available Events | Event | Payload | Trigger | | --- | --- | --- | | `OrderCreated` | `Order $order` | Order is inserted in the database | | `OrderPaid` | `Order $order` | Admin marks order as paid | | `OrderCompleted` | `Order $order` | Admin marks order as completed | | `OrderShipped` | `Order $order` | All items reach shipped status | | `OrderCancelled` | `Order $order` | Admin cancels the order | | `OrderArchived` | `Order $order` | Admin archives the order | | `OrderDeleted` | `Order $order` | Order is soft-deleted | | `OrderNoteAdded` | `Order $order` | Admin adds a note to the order | All order events carry a single `public Order $order` property. ### [​](https://docs.laravelshopper.dev/v2/events#lifecycle-flow) Lifecycle Flow OrderCreated │ ├── OrderPaid │ │ │ ├── OrderShipped ──→ OrderCompleted │ │ │ └── OrderCancelled │ ├── OrderCancelled │ ├── OrderArchived │ └── OrderDeleted ### [​](https://docs.laravelshopper.dev/v2/events#how-they-are-dispatched) How They Are Dispatched `OrderCreated` and `OrderDeleted` are dispatched automatically via the model observer. They fire on every insert and soft-delete, regardless of where the operation originates. use Shopper\Core\Models\Order; $order = Order::query()->create([...]); Status-related events (`OrderPaid`, `OrderCompleted`, `OrderCancelled`, `OrderArchived`) are dispatched from the admin panel when an administrator changes the order status. `OrderShipped` is dispatched by `SyncOrderShippingStatusAction` when the aggregated shipping status of all items transitions to `Shipped`. This happens automatically after shipment events are recorded, so you don’t dispatch it manually. ### [​](https://docs.laravelshopper.dev/v2/events#queueing) Queueing All order events implement `ShouldDispatchAfterCommit`, meaning listeners run on the queue after the database transaction commits. | Event | Queued | | --- | --- | | `OrderCreated` | Yes | | `OrderPaid` | Yes | | `OrderCompleted` | Yes | | `OrderShipped` | Yes | | `OrderCancelled` | Yes | | `OrderArchived` | Yes | | `OrderDeleted` | Yes | | `OrderNoteAdded` | Yes | [​](https://docs.laravelshopper.dev/v2/events#shipment-events) Shipment Events --------------------------------------------------------------------------------- Shipment events track the creation and delivery of individual packages within an order. A single order can have multiple shipments. ### [​](https://docs.laravelshopper.dev/v2/events#available-events-2) Available Events | Event | Payload | Trigger | | --- | --- | --- | | `OrderShipmentCreated` | `Order $order`, `OrderShipping $shipment` | A new shipment is created with a shipping label | | `OrderShipmentDelivered` | `Order $order`, `OrderShipping $shipment` | A shipment is marked as delivered | Both shipment events carry two properties: the order and the specific shipment. This is useful when an order has multiple packages and you need to know which one was created or delivered. use Shopper\Core\Events\Orders\OrderShipmentDelivered; class NotifyCustomerOfDelivery { public function handle(OrderShipmentDelivered $event): void { $order = $event->order; $shipment = $event->shipment; $trackingNumber = $shipment->tracking_number; $deliveredItems = $shipment->items; } } ### [​](https://docs.laravelshopper.dev/v2/events#shipment-vs-order-events) Shipment vs Order Events Shipment events fire at the **package level**, order events fire at the **order level**: | Scenario | Events fired | | --- | --- | | First package shipped (2 of 3 items) | `OrderShipmentCreated` | | Second package shipped (last item) | `OrderShipmentCreated`, `OrderShipped` | | First package delivered | `OrderShipmentDelivered` | | Last package delivered | `OrderShipmentDelivered`, then `OrderCompleted` (if order is processing) | [​](https://docs.laravelshopper.dev/v2/events#product-events) Product Events ------------------------------------------------------------------------------- Product events are dispatched when products are created, updated, or deleted through the admin panel. ### [​](https://docs.laravelshopper.dev/v2/events#available-events-3) Available Events | Event | Payload | Trigger | | --- | --- | --- | | `ProductCreated` | `Product $product` | Product is created via admin | | `ProductUpdated` | `Product $product` | Product is updated via admin | | `ProductDeleted` | `Product $product` | Product is deleted via admin | use Shopper\Core\Events\Products\ProductCreated; class SyncProductToCatalog { public function handle(ProductCreated $event): void { $product = $event->product; ExternalCatalog::push($product); } } All product events implement `ShouldDispatchAfterCommit`, so listeners run on the queue after the database transaction commits. [​](https://docs.laravelshopper.dev/v2/events#example-order-notification-system) Example: Order Notification System ---------------------------------------------------------------------------------------------------------------------- Here’s how you might use Shopper events to build a notification flow for your store. Each listener handles a single responsibility. Register your listeners: use Shopper\Core\Events\Orders\OrderCreated; use Shopper\Core\Events\Orders\OrderPaid; use Shopper\Core\Events\Orders\OrderShipped; use Shopper\Core\Events\Orders\OrderShipmentDelivered; protected $listen = [\ OrderCreated::class => [\ SendOrderConfirmationToCustomer::class,\ NotifyWarehouseTeam::class,\ ],\ OrderPaid::class => [\ GenerateInvoice::class,\ SyncPaymentToAccounting::class,\ ],\ OrderShipped::class => [\ SendShippingConfirmation::class,\ ],\ OrderShipmentDelivered::class => [\ SendDeliveryConfirmation::class,\ RequestProductReview::class,\ ],\ ]; A listener that sends a shipping confirmation: use Shopper\Core\Events\Orders\OrderShipped; class SendShippingConfirmation implements ShouldQueue { public function handle(OrderShipped $event): void { $order = $event->order; $order->load('customer', 'shippings.carrier'); Mail::to($order->customer->email) ->send(new OrderShippedMail($order)); } } [​](https://docs.laravelshopper.dev/v2/events#cart-events) Cart Events ------------------------------------------------------------------------- Cart events are dispatched when a cart reaches a key state during the checkout process. ### [​](https://docs.laravelshopper.dev/v2/events#available-events-4) Available Events | Event | Payload | Trigger | | --- | --- | --- | | `CartCompleted` | `Cart $cart` | Cart is converted to an order | | `CouponApplied` | `Cart $cart`, `string $code` | A coupon code is successfully applied to the cart | | `CouponRemoved` | `Cart $cart`, `string $code` | A coupon code is removed from the cart | Cart events are in the `Shopper\Cart\Events` namespace: use Shopper\Cart\Events\CartCompleted; use Shopper\Cart\Events\CouponApplied; use Shopper\Cart\Events\CouponRemoved; ### [​](https://docs.laravelshopper.dev/v2/events#example-sending-a-cart-recovery-email-on-coupon-removal) Example: Sending a Cart Recovery Email on Coupon Removal use Shopper\Cart\Events\CouponRemoved; class OfferAlternativeCoupon { public function handle(CouponRemoved $event): void { $cart = $event->cart; $removedCode = $event->code; $customer = $cart->customer; if ($customer) { Mail::to($customer->email)->send(new AlternativeDiscountMail($cart)); } } } [​](https://docs.laravelshopper.dev/v2/events#all-events-reference) All Events Reference ------------------------------------------------------------------------------------------- | Namespace | Event | Payload | Queued | | --- | --- | --- | --- | | `Events\Orders` | `OrderCreated` | `Order $order` | Yes | | `Events\Orders` | `OrderPaid` | `Order $order` | Yes | | `Events\Orders` | `OrderCompleted` | `Order $order` | Yes | | `Events\Orders` | `OrderShipped` | `Order $order` | Yes | | `Events\Orders` | `OrderCancelled` | `Order $order` | Yes | | `Events\Orders` | `OrderArchived` | `Order $order` | Yes | | `Events\Orders` | `OrderDeleted` | `Order $order` | Yes | | `Events\Orders` | `OrderNoteAdded` | `Order $order` | Yes | | `Events\Orders` | `OrderShipmentCreated` | `Order $order`, `OrderShipping $shipment` | Yes | | `Events\Orders` | `OrderShipmentDelivered` | `Order $order`, `OrderShipping $shipment` | Yes | | `Events\Products` | `ProductCreated` | `Product $product` | Yes | | `Events\Products` | `ProductUpdated` | `Product $product` | Yes | | `Events\Products` | `ProductDeleted` | `Product $product` | Yes | | `Cart\Events` | `CartCompleted` | `Cart $cart` | No | | `Cart\Events` | `CouponApplied` | `Cart $cart`, `string $code` | No | | `Cart\Events` | `CouponRemoved` | `Cart $cart`, `string $code` | No | [Two Factor Authentication](https://docs.laravelshopper.dev/v2/two-factor) [Starter Kits](https://docs.laravelshopper.dev/v2/starter-kits) ⌘I --- # Discounts - TALL Stack E-commerce Framework > Documentation Index > ------------------- > > Fetch the complete documentation index at: [/llms.txt](https://docs.laravelshopper.dev/llms.txt) > > Use this file to discover all available pages before exploring further. [Skip to main content](https://docs.laravelshopper.dev/v2/discounts#content-area) Discounts allow you to create promotional offers for your customers. Shopper supports percentage and fixed amount discounts with flexible application rules, eligibility conditions, and usage limits. [​](https://docs.laravelshopper.dev/v2/discounts#models) Models ------------------------------------------------------------------ Shopper uses two models to manage discounts: | Model | Purpose | | --- | --- | | `Shopper\Core\Models\Discount` | The discount definition (code, type, value, rules) | | `Shopper\Core\Models\DiscountDetail` | Polymorphic link connecting discounts to specific products or customers | The Discount model implements `Shopper\Core\Models\Contracts\Discount`. Neither model is configurable via `config/shopper/models.php`. [​](https://docs.laravelshopper.dev/v2/discounts#database-schema) Database Schema ------------------------------------------------------------------------------------ ### [​](https://docs.laravelshopper.dev/v2/discounts#discount-table) Discount Table | Column | Type | Nullable | Default | Description | | --- | --- | --- | --- | --- | | `id` | bigint | no | auto | Primary key | | `code` | string | no | \- | Unique discount code | | `type` | string | no | \- | Discount type enum | | `value` | integer | no | \- | Discount value (percentage or cents) | | `is_active` | boolean | no | false | Discount visibility | | `apply_to` | string | no | \- | Application scope enum | | `min_required` | string | no | \- | Requirement type enum | | `min_required_value` | string | yes | null | Minimum value required | | `eligibility` | string | no | \- | Eligibility type enum | | `usage_limit` | integer | yes | null | Maximum total uses | | `usage_limit_per_user` | boolean | no | false | Limit one use per customer | | `total_use` | integer | no | 0 | Current total usage count | | `start_at` | datetime | no | \- | Discount start date | | `end_at` | datetime | yes | null | Discount end date (null = no expiry) | | `zone_id` | bigint | yes | null | FK to zone (null = all zones) | | `metadata` | json | yes | null | Additional custom data | | `created_at` | timestamp | yes | null | Creation timestamp | | `updated_at` | timestamp | yes | null | Last update timestamp | ### [​](https://docs.laravelshopper.dev/v2/discounts#discountable-table-pivot) Discountable Table (Pivot) | Column | Type | Nullable | Description | | --- | --- | --- | --- | | `id` | bigint | no | Primary key | | `condition` | string | yes | Condition type (apply\_to, eligibility) | | `total_use` | integer | no | Usage count for this relation | | `discountable_id` | bigint | no | Polymorphic relation ID | | `discountable_type` | string | no | Polymorphic relation type | | `discount_id` | bigint | no | FK to discount | [​](https://docs.laravelshopper.dev/v2/discounts#discount-type) Discount Type -------------------------------------------------------------------------------- The `DiscountType` enum defines value types: use Shopper\Core\Enum\DiscountType; DiscountType::Percentage // percentage - e.g., 10% off DiscountType::FixedAmount // fixed_amount - e.g., $10 off | Type | Database Value | Value Handling | | --- | --- | --- | | Percentage | `percentage` | Stored as-is (10 = 10%) | | Fixed Amount | `fixed_amount` | Stored in cents (1000 = $10.00) | [​](https://docs.laravelshopper.dev/v2/discounts#discount-application) Discount Application ---------------------------------------------------------------------------------------------- The `DiscountApplyTo` enum defines where the discount applies: use Shopper\Core\Enum\DiscountApplyTo; DiscountApplyTo::Order // order - Applies to entire order DiscountApplyTo::Products // products - Applies to specific products | Scope | Database Value | Description | | --- | --- | --- | | Order | `order` | Discount applies to total order amount | | Products | `products` | Discount applies only to linked products | [​](https://docs.laravelshopper.dev/v2/discounts#discount-eligibility) Discount Eligibility ---------------------------------------------------------------------------------------------- The `DiscountEligibility` enum defines who can use the discount: use Shopper\Core\Enum\DiscountEligibility; DiscountEligibility::Everyone // everyone - All customers DiscountEligibility::Customers // customers - Specific customers only | Eligibility | Database Value | Description | | --- | --- | --- | | Everyone | `everyone` | Any customer can use | | Customers | `customers` | Only linked customers can use | [​](https://docs.laravelshopper.dev/v2/discounts#discount-requirements) Discount Requirements ------------------------------------------------------------------------------------------------ The `DiscountRequirement` enum defines minimum conditions: use Shopper\Core\Enum\DiscountRequirement; DiscountRequirement::None // none - No minimum DiscountRequirement::Price // price - Minimum order amount DiscountRequirement::Quantity // quantity - Minimum items count | Requirement | Database Value | min\_required\_value | | --- | --- | --- | | None | `none` | Not used | | Price | `price` | Minimum amount in cents | | Quantity | `quantity` | Minimum item count | [​](https://docs.laravelshopper.dev/v2/discounts#discount-condition) Discount Condition ------------------------------------------------------------------------------------------ The `DiscountCondition` enum is used on the `DiscountDetail` pivot model to distinguish whether a linked record represents a product (the discount applies to) or a customer (who is eligible): use Shopper\Core\Enum\DiscountCondition; DiscountCondition::ApplyTo // apply_to - Links a product to the discount DiscountCondition::Eligibility // eligibility - Links a customer to the discount [​](https://docs.laravelshopper.dev/v2/discounts#relationships) Relationships -------------------------------------------------------------------------------- ### [​](https://docs.laravelshopper.dev/v2/discounts#items-discountdetail) Items (DiscountDetail) use Shopper\Core\Enum\DiscountCondition; // Get all discount items (products or customers) $discount->items; // Collection of DiscountDetail models // Add a product to discount $discount->items()->create([\ 'condition' => DiscountCondition::ApplyTo,\ 'discountable_type' => Product::class,\ 'discountable_id' => $productId,\ ]); // Add eligible customer $discount->items()->create([\ 'condition' => DiscountCondition::Eligibility,\ 'discountable_type' => User::class,\ 'discountable_id' => $userId,\ ]); ### [​](https://docs.laravelshopper.dev/v2/discounts#zone) Zone // Get discount zone (market) $discount->zone; // Zone model or null // Restrict discount to a zone $discount->update(['zone_id' => $zoneId]); [​](https://docs.laravelshopper.dev/v2/discounts#value-handling) Value Handling ---------------------------------------------------------------------------------- Fixed amount values are stored in cents. Percentage values are stored as the percentage number. For a $10 fixed discount, store `1000` (cents). For a 15% percentage discount, store `15`: Discount::query()->create([\ 'code' => 'SAVE10',\ 'type' => DiscountType::FixedAmount,\ 'value' => 1000, // 1000 cents = $10.00\ ]); Discount::query()->create([\ 'code' => 'SAVE15',\ 'type' => DiscountType::Percentage,\ 'value' => 15, // 15%\ ]); [​](https://docs.laravelshopper.dev/v2/discounts#usage-limit-enforcement) Usage Limit Enforcement ---------------------------------------------------------------------------------------------------- Discounts can cap the total number of redemptions with `usage_limit` and restrict each customer to one redemption with `usage_limit_per_user`. Both limits are enforced with strong consistency guarantees so that a coupon can never be silently over-redeemed under concurrent checkout. ### [​](https://docs.laravelshopper.dev/v2/discounts#global-usage-limit) Global Usage Limit The `usage_limit` column caps the total number of redemptions across all customers. The `total_use` counter is incremented atomically inside the `CreateOrderFromCartAction` transaction: 1. The discount row is locked with `lockForUpdate` to serialize concurrent checkouts. 2. A conditional `UPDATE` increments `total_use` **only if** it is still below `usage_limit`. 3. If the conditional update affects zero rows, the limit was exhausted between cart validation and commit. `DiscountLimitReachedException::global()` is thrown and the order transaction rolls back, so no order is created. This compare-and-swap pattern is what fixes the silent over-redemption issue that was patched in v2.8. ### [​](https://docs.laravelshopper.dev/v2/discounts#per-user-limit) Per-User Limit When `usage_limit_per_user` is `true`, each customer can redeem the discount at most once. The check counts prior orders on the `orders.discount_id` column (introduced in v2.8), not the legacy `DiscountDetail.total_use` counter: use Shopper\Models\Order; Order::query() ->where('discount_id', $discount->id) ->where('customer_id', $cart->customer_id) ->exists(); The same query runs in two places. `DiscountValidator` rejects the code at cart-apply time so the customer is not surprised at checkout. `CreateOrderFromCartAction` re-checks at commit and throws `DiscountLimitReachedException::perUser()` if the customer redeemed it between cart apply and commit. A per-user limit is meaningless without an identified customer, so a guest cart (no `customer_id`) can never apply a discount that sets `usage_limit_per_user`. Both `DiscountValidator` and `CreateOrderFromCartAction` reject it with the `discount.requires_login` error rather than letting a guest redeem a once-per-customer code on every anonymous checkout. ### [​](https://docs.laravelshopper.dev/v2/discounts#helpers) Helpers $discount->hasReachedLimit(); if ($discount->usage_limit !== null) { $remaining = $discount->usage_limit - $discount->total_use; } ### [​](https://docs.laravelshopper.dev/v2/discounts#handling-discountlimitreachedexception) Handling DiscountLimitReachedException Wrap your checkout flow to surface a friendly message to the customer when either limit is hit at commit time: use Shopper\Cart\Actions\CreateOrderFromCartAction; use Shopper\Cart\Exceptions\DiscountLimitReachedException; try { $order = resolve(CreateOrderFromCartAction::class)->execute($cart); } catch (DiscountLimitReachedException $e) { return back()->with('error', 'This discount can no longer be used.'); } The exception has two static constructors that match the two limit types: | Constructor | Thrown When | | --- | --- | | `DiscountLimitReachedException::global($code)` | Global `usage_limit` was reached between cart validation and order commit | | `DiscountLimitReachedException::perUser($code)` | Customer already redeemed a discount with `usage_limit_per_user` set | [​](https://docs.laravelshopper.dev/v2/discounts#creating-discounts) Creating Discounts ------------------------------------------------------------------------------------------ ### [​](https://docs.laravelshopper.dev/v2/discounts#percentage-discount-for-all-orders) Percentage Discount for All Orders use Shopper\Core\Models\Discount; use Shopper\Core\Enum\DiscountType; use Shopper\Core\Enum\DiscountApplyTo; use Shopper\Core\Enum\DiscountEligibility; use Shopper\Core\Enum\DiscountRequirement; $discount = Discount::query()->create([\ 'code' => 'SUMMER20',\ 'type' => DiscountType::Percentage,\ 'value' => 20, // 20% off\ 'is_active' => true,\ 'apply_to' => DiscountApplyTo::Order,\ 'eligibility' => DiscountEligibility::Everyone,\ 'min_required' => DiscountRequirement::None,\ 'start_at' => now(),\ 'end_at' => now()->addMonth(),\ ]); ### [​](https://docs.laravelshopper.dev/v2/discounts#fixed-amount-discount-with-minimum-order) Fixed Amount Discount with Minimum Order $discount = Discount::query()->create([\ 'code' => 'SAVE10',\ 'type' => DiscountType::FixedAmount,\ 'value' => 1000, // 1000 cents = $10 off\ 'is_active' => true,\ 'apply_to' => DiscountApplyTo::Order,\ 'eligibility' => DiscountEligibility::Everyone,\ 'min_required' => DiscountRequirement::Price,\ 'min_required_value' => '5000', // Minimum 5000 cents = $50 order\ 'start_at' => now(),\ 'usage_limit' => 100, // Max 100 uses\ ]); ### [​](https://docs.laravelshopper.dev/v2/discounts#product-specific-discount) Product-Specific Discount $discount = Discount::query()->create([\ 'code' => 'PRODUCT15',\ 'type' => DiscountType::Percentage,\ 'value' => 15,\ 'is_active' => true,\ 'apply_to' => DiscountApplyTo::Products,\ 'eligibility' => DiscountEligibility::Everyone,\ 'min_required' => DiscountRequirement::None,\ 'start_at' => now(),\ ]); // Link specific products $discount->items()->createMany([\ [\ 'condition' => 'apply_to',\ 'discountable_type' => Product::class,\ 'discountable_id' => $product1->id,\ ],\ [\ 'condition' => 'apply_to',\ 'discountable_type' => Product::class,\ 'discountable_id' => $product2->id,\ ],\ ]); ### [​](https://docs.laravelshopper.dev/v2/discounts#vip-customer-discount) VIP Customer Discount $discount = Discount::query()->create([\ 'code' => 'VIP30',\ 'type' => DiscountType::Percentage,\ 'value' => 30,\ 'is_active' => true,\ 'apply_to' => DiscountApplyTo::Order,\ 'eligibility' => DiscountEligibility::Customers,\ 'min_required' => DiscountRequirement::None,\ 'start_at' => now(),\ 'usage_limit_per_user' => true, // One use per customer\ ]); // Link eligible customers foreach ($vipCustomers as $customer) { $discount->items()->create([\ 'condition' => 'eligibility',\ 'discountable_type' => User::class,\ 'discountable_id' => $customer->id,\ ]); } [​](https://docs.laravelshopper.dev/v2/discounts#retrieving-discounts) Retrieving Discounts ---------------------------------------------------------------------------------------------- use Shopper\Core\Models\Discount; // Get all active discounts $discounts = Discount::query() ->where('is_active', true) ->where('start_at', '<=', now()) ->where(function ($q) { $q->whereNull('end_at') ->orWhere('end_at', '>', now()); }) ->get(); // Get discount by code $discount = Discount::query() ->where('code', 'SUMMER20') ->where('is_active', true) ->first(); // Get discounts for a zone $discounts = Discount::query() ->where('is_active', true) ->where(function ($q) use ($zoneId) { $q->whereNull('zone_id') ->orWhere('zone_id', $zoneId); }) ->get(); // Get discounts with available uses $discounts = Discount::query() ->where('is_active', true) ->where(function ($q) { $q->whereNull('usage_limit') ->orWhereColumn('total_use', '<', 'usage_limit'); }) ->get(); [​](https://docs.laravelshopper.dev/v2/discounts#discount-validation) Discount Validation -------------------------------------------------------------------------------------------- When a coupon is applied to a cart via `CartManager::applyCoupon()`, the [Cart package](https://docs.laravelshopper.dev/v2/cart#discount-validation) validates the discount automatically during the calculation pipeline. You do not need to build manual validation logic. The built-in `DiscountValidator` checks all rules (active status, date range, usage limits, eligibility, zone, minimum amounts) and produces clear error messages. For cases outside the cart pipeline where you need to check a discount programmatically: use Shopper\Core\Models\Discount; $discount = Discount::query() ->where('code', $code) ->where('is_active', true) ->first(); if ($discount && ! $discount->hasReachedLimit()) { // Discount is valid and has remaining uses } [​](https://docs.laravelshopper.dev/v2/discounts#configuration) Configuration -------------------------------------------------------------------------------- ### [​](https://docs.laravelshopper.dev/v2/discounts#disabling-discounts) Disabling Discounts If your store doesn’t use discount codes, disable the feature in `config/shopper/features.php`: use Shopper\Enum\FeatureState; return [\ 'discount' => FeatureState::Disabled,\ ]; ### [​](https://docs.laravelshopper.dev/v2/discounts#permissions) Permissions The admin panel generates five permissions for discount management: | Permission | Description | | --- | --- | | `browse_discounts` | View the discounts list | | `read_discounts` | View a single discount | | `add_discounts` | Create new discounts | | `edit_discounts` | Edit existing discounts | | `delete_discounts` | Delete discounts | [​](https://docs.laravelshopper.dev/v2/discounts#components) Components -------------------------------------------------------------------------- To customize the admin UI for discount management: php artisan shopper:component:publish discount Creates `config/shopper/components/discount.php`: use Shopper\Livewire; return [\ 'pages' => [\ 'discount-index' => Livewire\Pages\Discount\Index::class,\ ],\ 'components' => [\ 'slide-overs.discount-form' => Livewire\SlideOvers\DiscountForm::class,\ ],\ ]; [​](https://docs.laravelshopper.dev/v2/discounts#storefront-example) Storefront Example ------------------------------------------------------------------------------------------ Applying a discount code on the storefront uses the [Cart package](https://docs.laravelshopper.dev/v2/cart) API. The `CartManager::applyCoupon()` method validates the code exists, and the calculation pipeline handles the rest (validation rules, discount calculation, and adjustment creation): namespace App\Http\Controllers; use Illuminate\Http\Request; use Shopper\Cart\CartManager; use Shopper\Cart\Exceptions\InvalidDiscountException; use Shopper\Cart\Facades\Cart; class CouponController extends Controller { public function apply(Request $request) { $request->validate(['code' => 'required|string']); $manager = resolve(CartManager::class); try { $manager->applyCoupon(Cart::current(), $request->code); } catch (InvalidDiscountException $e) { return back()->with('error', 'Invalid discount code.'); } return back()->with('success', 'Discount applied.'); } public function remove() { resolve(CartManager::class)->removeCoupon(Cart::current()); return back()->with('success', 'Discount removed.'); } } [​](https://docs.laravelshopper.dev/v2/discounts#use-cases) Use Cases ------------------------------------------------------------------------ | Scenario | Type | Apply To | Eligibility | Requirement | | --- | --- | --- | --- | --- | | Site-wide sale | Percentage | Order | Everyone | None | | Free shipping over $50 | Fixed | Order | Everyone | Price | | Buy 3+ get 10% off | Percentage | Order | Everyone | Quantity | | VIP member exclusive | Percentage | Order | Customers | None | | Product clearance | Percentage | Products | Everyone | None | | First order discount | Fixed | Order | Customers | None | [Cart](https://docs.laravelshopper.dev/v2/cart) [Orders](https://docs.laravelshopper.dev/v2/orders) ⌘I --- # Empty Card - TALL Stack E-commerce Framework > Documentation Index > ------------------- > > Fetch the complete documentation index at: [/llms.txt](https://docs.laravelshopper.dev/llms.txt) > > Use this file to discover all available pages before exploring further. [Skip to main content](https://docs.laravelshopper.dev/v2/extending/components/empty-card#content-area) The Empty Card component displays a centered empty state within card or panel areas. It’s more compact than the full Empty State component. [​](https://docs.laravelshopper.dev/v2/extending/components/empty-card#preview) Preview ------------------------------------------------------------------------------------------ No zones availableCreate shipping zones to define where you deliver products. [​](https://docs.laravelshopper.dev/v2/extending/components/empty-card#usage) Usage -------------------------------------------------------------------------------------- [​](https://docs.laravelshopper.dev/v2/extending/components/empty-card#props) Props -------------------------------------------------------------------------------------- [​](https://docs.laravelshopper.dev/v2/extending/components/empty-card#param-heading) heading string required The main heading text. [​](https://docs.laravelshopper.dev/v2/extending/components/empty-card#param-description) description string default:"null" Optional description text below the heading. [​](https://docs.laravelshopper.dev/v2/extending/components/empty-card#param-icon) icon string default:"null" Icon name to display above the heading (uses Blade Icons). [​](https://docs.laravelshopper.dev/v2/extending/components/empty-card#param-action) action Slot default:"null" Optional slot for action buttons. [​](https://docs.laravelshopper.dev/v2/extending/components/empty-card#examples) Examples -------------------------------------------------------------------------------------------- ### [​](https://docs.laravelshopper.dev/v2/extending/components/empty-card#with-action-button) With Action Button No productsStart by adding your first product to the catalog. Add Product ### [​](https://docs.laravelshopper.dev/v2/extending/components/empty-card#without-icon) Without Icon No addresses savedCustomer addresses will appear here. [​](https://docs.laravelshopper.dev/v2/extending/components/empty-card#blade-component-source) Blade Component Source ------------------------------------------------------------------------------------------------------------------------ @props([\ 'heading',\ 'description' => null,\ 'icon' => null,\ 'action' => null,\ ])
    twMerge(['class' => 'flex flex-col items-center justify-center px-8 py-10 text-center']) }} > @if ($icon)
    @svg($icon, 'size-5', ['aria-hidden' => 'true'])
    @endif

    $icon])> {{ $heading }}

    @if ($description)

    {{ $description }}

    @endif @if ($action)
    {{ $action }}
    @endif
    [Empty State](https://docs.laravelshopper.dev/v2/extending/components/empty-state) [Stock Badge](https://docs.laravelshopper.dev/v2/extending/components/stock-badge) ⌘I --- # Empty State - TALL Stack E-commerce Framework > Documentation Index > ------------------- > > Fetch the complete documentation index at: [/llms.txt](https://docs.laravelshopper.dev/llms.txt) > > Use this file to discover all available pages before exploring further. [Skip to main content](https://docs.laravelshopper.dev/v2/extending/components/empty-state#content-area) The Empty State component is used to display a helpful message when there’s no data to show. It combines an illustration, title, description, and an optional call-to-action button. [​](https://docs.laravelshopper.dev/v2/extending/components/empty-state#preview) Preview ------------------------------------------------------------------------------------------- No products yetGet started by creating your first product. Products are the items you sell in your store.Create Product [​](https://docs.laravelshopper.dev/v2/extending/components/empty-state#usage) Usage --------------------------------------------------------------------------------------- [​](https://docs.laravelshopper.dev/v2/extending/components/empty-state#props) Props --------------------------------------------------------------------------------------- [​](https://docs.laravelshopper.dev/v2/extending/components/empty-state#param-title) title string required The main heading text for the empty state. [​](https://docs.laravelshopper.dev/v2/extending/components/empty-state#param-content) content string required Descriptive text explaining the empty state and what action can be taken. [​](https://docs.laravelshopper.dev/v2/extending/components/empty-state#param-button) button string | false default:"false" Text for the call-to-action button. Set to `false` to hide the button. [​](https://docs.laravelshopper.dev/v2/extending/components/empty-state#param-permission) permission string | false default:"false" Permission name required to show the button. Uses Laravel’s `@can` directive. [​](https://docs.laravelshopper.dev/v2/extending/components/empty-state#param-url) url string | false default:"false" URL for the button link. Use this for navigation to a create page. [​](https://docs.laravelshopper.dev/v2/extending/components/empty-state#param-panel) panel string | null default:"null" Panel name to dispatch an event for opening a slide-over or modal. Alternative to `url`. [​](https://docs.laravelshopper.dev/v2/extending/components/empty-state#examples) Examples --------------------------------------------------------------------------------------------- ### [​](https://docs.laravelshopper.dev/v2/extending/components/empty-state#basic-empty-state) Basic Empty State No orders foundWhen customers place orders, they will appear here. ### [​](https://docs.laravelshopper.dev/v2/extending/components/empty-state#with-url-action) With URL Action ### [​](https://docs.laravelshopper.dev/v2/extending/components/empty-state#with-panel-action) With Panel Action Use a panel action to open a slide-over or modal instead of navigating: ### [​](https://docs.laravelshopper.dev/v2/extending/components/empty-state#without-button) Without Button When you don’t want to show an action button: No reviews yetReviews will appear here once customers start leaving feedback on their purchases. ### [​](https://docs.laravelshopper.dev/v2/extending/components/empty-state#custom-slot-content) Custom Slot Content The default slot is used for the illustration on the left side: {{-- Custom SVG or image --}} [​](https://docs.laravelshopper.dev/v2/extending/components/empty-state#usage-in-livewire-components) Usage in Livewire Components ------------------------------------------------------------------------------------------------------------------------------------- Empty states are typically rendered conditionally when a collection is empty: @if ($products->isEmpty()) @else {{-- Product list/table --}} @endif [​](https://docs.laravelshopper.dev/v2/extending/components/empty-state#blade-component-source) Blade Component Source ------------------------------------------------------------------------------------------------------------------------- The Empty State component is located at `packages/admin/resources/views/components/empty-state.blade.php`: @props([\ 'title',\ 'content',\ 'button' => false,\ 'permission' => false,\ 'url' => false,\ 'panel' => null,\ ])
    twMerge(['class' => 'relative w-full lg:flex lg:items-center py-8 lg:py-12']) }} >
    {{ $slot }}

    {{ $title }}

    {{ $content }}

    @if ($permission) @can($permission) @if ($url) {{ $button }} @elseif ($panel) {{ $button }} @endif @endcan @endif
    [Section Heading](https://docs.laravelshopper.dev/v2/extending/components/section-heading) [Empty Card](https://docs.laravelshopper.dev/v2/extending/components/empty-card) ⌘I --- # Heading - TALL Stack E-commerce Framework > Documentation Index > ------------------- > > Fetch the complete documentation index at: [/llms.txt](https://docs.laravelshopper.dev/llms.txt) > > Use this file to discover all available pages before exploring further. [Skip to main content](https://docs.laravelshopper.dev/v2/extending/components/heading#content-area) The Heading component is used for main page titles. It displays a large, bold heading with an optional action slot for buttons or other controls. [​](https://docs.laravelshopper.dev/v2/extending/components/heading#preview) Preview --------------------------------------------------------------------------------------- Products Add Product [​](https://docs.laravelshopper.dev/v2/extending/components/heading#usage) Usage ----------------------------------------------------------------------------------- Products Add Product [​](https://docs.laravelshopper.dev/v2/extending/components/heading#slots) Slots ----------------------------------------------------------------------------------- [​](https://docs.laravelshopper.dev/v2/extending/components/heading#param-title) title Slot required The heading title. Can be plain text or a custom slot with additional elements. [​](https://docs.laravelshopper.dev/v2/extending/components/heading#param-action) action Slot Optional slot for action buttons or controls aligned to the right. [​](https://docs.laravelshopper.dev/v2/extending/components/heading#examples) Examples ----------------------------------------------------------------------------------------- ### [​](https://docs.laravelshopper.dev/v2/extending/components/heading#simple-heading) Simple Heading Dashboard Dashboard ### [​](https://docs.laravelshopper.dev/v2/extending/components/heading#heading-with-action-button) Heading with Action Button Categories New Category Categories New Category ### [​](https://docs.laravelshopper.dev/v2/extending/components/heading#heading-with-multiple-actions) Heading with Multiple Actions Orders ExportCreate Order Orders
    Export Create Order
    ### [​](https://docs.laravelshopper.dev/v2/extending/components/heading#custom-title-slot) Custom Title Slot For more complex titles, you can use the title as a slot:
    Product: iPhone 15 Published
    Unpublish
    [​](https://docs.laravelshopper.dev/v2/extending/components/heading#blade-component-source) Blade Component Source --------------------------------------------------------------------------------------------------------------------- The Heading component is located at `packages/admin/resources/views/components/heading.blade.php`:
    twMerge(['class' => 'space-y-3 sm:flex sm:items-center sm:justify-between sm:space-x-4 sm:space-y-0']) }} > @if ($title instanceof \Illuminate\View\ComponentSlot) {{ $title }} @else

    {{ $title }}

    @endif @isset($action) {{ $action }} @endisset
    [Alert](https://docs.laravelshopper.dev/v2/extending/components/alert) [Section Heading](https://docs.laravelshopper.dev/v2/extending/components/section-heading) ⌘I --- # Empty State - TALL Stack E-commerce Framework > Documentation Index > ------------------- > > Fetch the complete documentation index at: [/llms.txt](https://docs.laravelshopper.dev/llms.txt) > > Use this file to discover all available pages before exploring further. [Skip to main content](https://docs.laravelshopper.dev/v2/extending/empty-state#content-area) [​](https://docs.laravelshopper.dev/v2/extending/empty-state#empty-state) Empty State ======================================================================================== ⌘I ---











