# Table of Contents
- [Project analytics - Lovable Documentation](#project-analytics-lovable-documentation)
- [Personal projects - Lovable Documentation](#personal-projects-lovable-documentation)
- [Design templates - Lovable Documentation](#design-templates-lovable-documentation)
- [Code mode - Lovable Documentation](#code-mode-lovable-documentation)
- [Data opt-out - Lovable Documentation](#data-opt-out-lovable-documentation)
- [Single Sign-On (SSO) - Lovable Documentation](#single-sign-on-sso-lovable-documentation)
- [Lovable AI - Lovable Documentation](#lovable-ai-lovable-documentation)
- [Custom domains - Lovable Documentation](#custom-domains-lovable-documentation)
- [Figma to Lovable - Lovable Documentation](#figma-to-lovable-lovable-documentation)
- [Collaboration - Lovable Documentation](#collaboration-lovable-documentation)
- [Custom knowledge - Lovable Documentation](#custom-knowledge-lovable-documentation)
- [Labs - Lovable Documentation](#labs-lovable-documentation)
- [Lovable Cloud - Lovable Documentation](#lovable-cloud-lovable-documentation)
- [Modes - Lovable Documentation](#modes-lovable-documentation)
- [Changelog - Lovable Documentation](#changelog-lovable-documentation)
- [Private projects - Lovable Documentation](#private-projects-lovable-documentation)
- [Publish your app - Lovable Documentation](#publish-your-app-lovable-documentation)
- [Security - Lovable Documentation](#security-lovable-documentation)
- [Glossary - Lovable Documentation](#glossary-lovable-documentation)
- [Visual edits - Lovable Documentation](#visual-edits-lovable-documentation)
- [21st.dev integration - Lovable Documentation](#21st-dev-integration-lovable-documentation)
- [SEO - Lovable Documentation](#seo-lovable-documentation)
- [Lovable API: Build with URL - Lovable Documentation](#lovable-api-build-with-url-lovable-documentation)
- [Lovable API - Lovable Documentation](#lovable-api-lovable-documentation)
- [Plans and credits - Lovable Documentation](#plans-and-credits-lovable-documentation)
- [AI integration - Lovable Documentation](#ai-integration-lovable-documentation)
- [GitHub integration - Lovable Documentation](#github-integration-lovable-documentation)
- [Introduction - Lovable Documentation](#introduction-lovable-documentation)
- [Clerk integration - Lovable Documentation](#clerk-integration-lovable-documentation)
- [Prompts and integrations - Lovable Documentation](#prompts-and-integrations-lovable-documentation)
- [Build an eCommerce store with Shopify - Lovable Documentation](#build-an-ecommerce-store-with-shopify-lovable-documentation)
- [Stripe integration - Lovable Documentation](#stripe-integration-lovable-documentation)
- [Page Not Found](#page-not-found)
- [Replicate integration - Lovable Documentation](#replicate-integration-lovable-documentation)
- [Resend integration - Lovable Documentation](#resend-integration-lovable-documentation)
- [Debugging prompts - Lovable Documentation](#debugging-prompts-lovable-documentation)
- [Make integration - Lovable Documentation](#make-integration-lovable-documentation)
- [Launched - Lovable Documentation](#launched-lovable-documentation)
- [Using custom (Google) fonts - Lovable Documentation](#using-custom-google-fonts-lovable-documentation)
- [Supabase integration - Lovable Documentation](#supabase-integration-lovable-documentation)
- [Page Not Found](#page-not-found)
- [Using npm packages - Lovable Documentation](#using-npm-packages-lovable-documentation)
- [Support policy - Lovable Documentation](#support-policy-lovable-documentation)
- [Page Not Found](#page-not-found)
- [From idea to working app - Lovable Documentation](#from-idea-to-working-app-lovable-documentation)
- [Landing page - Lovable Documentation](#landing-page-lovable-documentation)
- [Prototype - Lovable Documentation](#prototype-lovable-documentation)
- [Getting started - Lovable Documentation](#getting-started-lovable-documentation)
- [Using images in Lovable - Lovable Documentation](#using-images-in-lovable-lovable-documentation)
- [Using videos - Lovable Documentation](#using-videos-lovable-documentation)
- [Prompting 1.1 - Lovable Documentation](#prompting-1-1-lovable-documentation)
- [Self-hosting: Run your Lovable Cloud project anywhere - Lovable Documentation](#self-hosting-run-your-lovable-cloud-project-anywhere-lovable-documentation)
- [Prompt library - Lovable Documentation](#prompt-library-lovable-documentation)
- [Avoiding security pitfalls - Lovable Documentation](#avoiding-security-pitfalls-lovable-documentation)
- [SaaS - Lovable Documentation](#saas-lovable-documentation)
- [Video tutorial - Lovable Documentation](#video-tutorial-lovable-documentation)
- [Troubleshooting - Lovable Documentation](#troubleshooting-lovable-documentation)
- [Best practices - Lovable Documentation](#best-practices-lovable-documentation)
- [Page Not Found](#page-not-found)
- [FAQ - Lovable Documentation](#faq-lovable-documentation)
- [Welcome - Lovable Documentation](#welcome-lovable-documentation)
- [Page Not Found](#page-not-found)
- [Page Not Found](#page-not-found)
- [Page Not Found](#page-not-found)
---
# Project analytics - Lovable Documentation
[Skip to main content](https://docs.lovable.dev/features/analytics#content-area)
[Lovable Documentation home page](https://lovable.dev/)
Search...
⌘K
Search...
Navigation
Core features
Project analytics
[Introduction](https://docs.lovable.dev/introduction/welcome)
[Features](https://docs.lovable.dev/features/modes)
[Integrations](https://docs.lovable.dev/integrations/introduction)
[Tips & Tricks](https://docs.lovable.dev/tips-tricks/best-practice)
[Prompt engineering](https://docs.lovable.dev/prompting/prompting-one)
[Use cases](https://docs.lovable.dev/use-case/video-tutorials)
[Glossary](https://docs.lovable.dev/glossary)
[Changelog](https://docs.lovable.dev/changelog)
Track how your published project is performing with real-time insights. See key stats like visitors, pageviews, visit duration, and bounce rate. You can also discover where visitors are coming from, which devices they’re using, and which pages they’re viewing.
Was this page helpful?
YesNo
[Publish your app](https://docs.lovable.dev/features/publish)
[Custom domains](https://docs.lovable.dev/features/custom-domain)
⌘I
---
# Personal projects - Lovable Documentation
[Skip to main content](https://docs.lovable.dev/features/business/personal-projects#content-area)
[Lovable Documentation home page](https://lovable.dev/)
Search...
⌘K
Search...
Navigation
Business features
Personal projects
[Introduction](https://docs.lovable.dev/introduction/welcome)
[Features](https://docs.lovable.dev/features/modes)
[Integrations](https://docs.lovable.dev/integrations/introduction)
[Tips & Tricks](https://docs.lovable.dev/tips-tricks/best-practice)
[Prompt engineering](https://docs.lovable.dev/prompting/prompting-one)
[Use cases](https://docs.lovable.dev/use-case/video-tutorials)
[Glossary](https://docs.lovable.dev/glossary)
[Changelog](https://docs.lovable.dev/changelog)
Personal projects let you create and work on projects that are hidden from the rest of your workspace and only visible to you. They are ideal for early exploration or individual experimentation. Test ideas, build prototypes, and easily share projects with your team when you’re ready to collaborate. To create a Personal Project, select “Personal” in the composer before starting, or go to **Settings → Project → Visibility** and set it to “Personal”. When you are ready to share, simply set the visibility to “Workspace” in the project settings.
Was this page helpful?
YesNo
[Data opt-out](https://docs.lovable.dev/features/business/data-opt-out)
[Design templates](https://docs.lovable.dev/features/business/design-templates)
⌘I
---
# Design templates - Lovable Documentation
[Skip to main content](https://docs.lovable.dev/features/business/design-templates#content-area)
[Lovable Documentation home page](https://lovable.dev/)
Search...
⌘K
Search...
Navigation
Business features
Design templates
[Introduction](https://docs.lovable.dev/introduction/welcome)
[Features](https://docs.lovable.dev/features/modes)
[Integrations](https://docs.lovable.dev/integrations/introduction)
[Tips & Tricks](https://docs.lovable.dev/tips-tricks/best-practice)
[Prompt engineering](https://docs.lovable.dev/prompting/prompting-one)
[Use cases](https://docs.lovable.dev/use-case/video-tutorials)
[Glossary](https://docs.lovable.dev/glossary)
[Changelog](https://docs.lovable.dev/changelog)
Design templates help your team maintain brand consistency and streamline project creation by reusing approved designs. Share templates across teams to ensure consistent styling, branding, and user experience, while accelerating development. To create a template, go to **Project → Settings** and enable “Use as template”. If you want to use a template, click + in the composer, and select “Use a template”. Choose your desired template and create your project how you’d normally do it. It will automatically use design-features from the template in your project and ensure brand consistency.
Was this page helpful?
YesNo
[Personal projects](https://docs.lovable.dev/features/business/personal-projects)
⌘I
---
# Code mode - Lovable Documentation
[Skip to main content](https://docs.lovable.dev/features/code-mode#content-area)
[Lovable Documentation home page](https://lovable.dev/)
Search...
⌘K
Search...
Navigation
Core features
Code mode
[Introduction](https://docs.lovable.dev/introduction/welcome)
[Features](https://docs.lovable.dev/features/modes)
[Integrations](https://docs.lovable.dev/integrations/introduction)
[Tips & Tricks](https://docs.lovable.dev/tips-tricks/best-practice)
[Prompt engineering](https://docs.lovable.dev/prompting/prompting-one)
[Use cases](https://docs.lovable.dev/use-case/video-tutorials)
[Glossary](https://docs.lovable.dev/glossary)
[Changelog](https://docs.lovable.dev/changelog)
With Code Mode you can view & edit your project’s raw code directly in the Lovable editor.
Editing code in Code Mode is a feature available on our paid plans.
Was this page helpful?
YesNo
[Visual edits](https://docs.lovable.dev/features/visual-edit)
[Lovable Cloud](https://docs.lovable.dev/features/cloud)
⌘I
---
# Data opt-out - Lovable Documentation
[Skip to main content](https://docs.lovable.dev/features/business/data-opt-out#content-area)
[Lovable Documentation home page](https://lovable.dev/)
Search...
⌘K
Search...
Navigation
Business features
Data opt-out
[Introduction](https://docs.lovable.dev/introduction/welcome)
[Features](https://docs.lovable.dev/features/modes)
[Integrations](https://docs.lovable.dev/integrations/introduction)
[Tips & Tricks](https://docs.lovable.dev/tips-tricks/best-practice)
[Prompt engineering](https://docs.lovable.dev/prompting/prompting-one)
[Use cases](https://docs.lovable.dev/use-case/video-tutorials)
[Glossary](https://docs.lovable.dev/glossary)
[Changelog](https://docs.lovable.dev/changelog)
Training data exclusion is a feature for all Business Plan users, ensuring that your proprietary code, projects, and data are never used to train AI models or perform evaluations. This protects your sensitive information and reinforces your organization’s data privacy. No action is required on your end. This feature is automatically enabled for all Business Plans.
Was this page helpful?
YesNo
[Single Sign-On (SSO)](https://docs.lovable.dev/features/business/sso)
[Personal projects](https://docs.lovable.dev/features/business/personal-projects)
⌘I
---
# Single Sign-On (SSO) - Lovable Documentation
[Skip to main content](https://docs.lovable.dev/features/business/sso#content-area)
[Lovable Documentation home page](https://lovable.dev/)
Search...
⌘K
Search...
Navigation
Business features
Single Sign-On (SSO)
[Introduction](https://docs.lovable.dev/introduction/welcome)
[Features](https://docs.lovable.dev/features/modes)
[Integrations](https://docs.lovable.dev/integrations/introduction)
[Tips & Tricks](https://docs.lovable.dev/tips-tricks/best-practice)
[Prompt engineering](https://docs.lovable.dev/prompting/prompting-one)
[Use cases](https://docs.lovable.dev/use-case/video-tutorials)
[Glossary](https://docs.lovable.dev/glossary)
[Changelog](https://docs.lovable.dev/changelog)
On this page
* [Setup SSO](https://docs.lovable.dev/features/business/sso#setup-sso)
* [OIDC Configuration](https://docs.lovable.dev/features/business/sso#oidc-configuration)
* [SAML Configuration](https://docs.lovable.dev/features/business/sso#saml-configuration)
* [Common Issues and Troubleshooting](https://docs.lovable.dev/features/business/sso#common-issues-and-troubleshooting)
Single Sign-On (SSO) is available as a business feature in Lovable, enabling secure, centralized authentication across your organization. With SSO, users can access all their tools with one set of credentials, simplifying access management and improving security. Lovable supports both **OIDC (OpenID Connect)** and **SAML** protocols, enabling integration with all major identity providers including Okta, Microsoft Entra ID (Azure AD), Google Workspace, and more.
###
[](https://docs.lovable.dev/features/business/sso#setup-sso)
Setup SSO
To set up SSO, a **Workspace Owner** or **Admin** must log in and navigate to
**Settings → Workspace → Identity**, then follow the setup instructions.
[](https://docs.lovable.dev/features/business/sso#oidc-configuration)
OIDC Configuration
--------------------------------------------------------------------------------------------
For OIDC providers, configure the following settings: **Redirect URI:** [https://auth.lovable.dev/\_\_/auth/handler](https://auth.lovable.dev/__/auth/handler)
**Required Scopes:**
* `email`
* `openid`
[](https://docs.lovable.dev/features/business/sso#saml-configuration)
SAML Configuration
--------------------------------------------------------------------------------------------
For SAML providers, configure the following settings: **Redirect URI / ACS URL:** [https://auth.lovable.dev/\_\_/auth/handler](https://auth.lovable.dev/__/auth/handler)
**Audience URI / Entity ID:** [https://auth.lovable.dev/\_\_/auth/handler](https://auth.lovable.dev/__/auth/handler)
**Required Claims:** Make sure the SAML response includes display\_name and email as attributes. These attributes are required for authentication and user provisioning in Lovable.
###
[](https://docs.lovable.dev/features/business/sso#common-issues-and-troubleshooting)
Common Issues and Troubleshooting
I already have an account, but I'm joining a business workspace that uses SSO. How do I log in?
If you created your account using another login method (like email/password, Google, or GitHub), you’ll need to log in that way **first**. Once you’re logged in, navigate to Settings → Identity → Link with SSO. This will link your existing account to your SSO identity.
**Important:** If you attempt to log in with SSO before linking your existing account, you’ll see an error. This is a security measure to prevent unauthorized access. Log in using your original method first to complete the linking process.
Which SSO providers does Lovable support (Okta, Entra ID, Google SSO, etc.)?
Lovable supports **all SSO providers** that implement OIDC (OpenID Connect) or SAML protocols. This includes, but is not limited to: - Okta - Microsoft Entra ID (formerly Azure AD) - Google Workspace - Auth0 - OneLogin - - Any other OIDC or SAML-compliant identity provider Since we support the industry-standard OIDC and SAML protocols, you can integrate with any SSO provider that supports these protocols.
Was this page helpful?
YesNo
[Figma to Lovable](https://docs.lovable.dev/features/figma-to-lovable)
[Data opt-out](https://docs.lovable.dev/features/business/data-opt-out)
⌘I
---
# Lovable AI - Lovable Documentation
[Skip to main content](https://docs.lovable.dev/features/ai#content-area)
[Lovable Documentation home page](https://lovable.dev/)
Search...
⌘K
Search...
Navigation
Core features
Lovable AI
[Introduction](https://docs.lovable.dev/introduction/welcome)
[Features](https://docs.lovable.dev/features/modes)
[Integrations](https://docs.lovable.dev/integrations/introduction)
[Tips & Tricks](https://docs.lovable.dev/tips-tricks/best-practice)
[Prompt engineering](https://docs.lovable.dev/prompting/prompting-one)
[Use cases](https://docs.lovable.dev/use-case/video-tutorials)
[Glossary](https://docs.lovable.dev/glossary)
[Changelog](https://docs.lovable.dev/changelog)
On this page
* [Enabling Lovable AI](https://docs.lovable.dev/features/ai#enabling-lovable-ai)
* [Default AI model](https://docs.lovable.dev/features/ai#default-ai-model)
* [User preferences](https://docs.lovable.dev/features/ai#user-preferences)
* [Usage and pricing](https://docs.lovable.dev/features/ai#usage-and-pricing)
* [Supported AI models](https://docs.lovable.dev/features/ai#supported-ai-models)
* [Best and most cost-effective choices](https://docs.lovable.dev/features/ai#best-and-most-cost-effective-choices)
* [Workspace rate limits](https://docs.lovable.dev/features/ai#workspace-rate-limits)
Normally, adding AI to an app means hunting down API keys, setting up billing with providers, and wiring it all together yourself. Lovable AI makes it simple to quickly add powerful AI features to your app so you can start building smarter and more engaging apps right away. Some examples include:
* **AI summaries** – automatically condense long text into clear takeaways
* **AI chatbot or agent** – build conversational helpers into your app
* **Sentiment detection** – understand user feedback at scale
* **Document Q&A** – let users ask questions directly against your content
* **Creative generation** – brainstorming, copy drafting, or idea expansion
* **Multilingual translation** – serve global users seamlessly
* **Task completion** – automate repetitive or multi-step workflows (agent functionality)
* **Image and document analysis** - quickly extract, summarize, and interpret key information from images and documents, turning unstructured content into actionable insights
* **Workflow automation** - handle repetitive tasks, making decisions, and optimizing processes to save time and reduce errors.
[](https://docs.lovable.dev/features/ai#enabling-lovable-ai)
Enabling Lovable AI
------------------------------------------------------------------------------------
For the best experience, we recommend using Lovable AI with [Lovable Cloud](https://docs.lovable.dev/features/cloud)
.
By default, Lovable AI is enabled for your workspace and in your user preferences. This means Lovable automatically adds AI functionality when requested. You can manage Lovable AI behavior for your projects in your user preferences: **Settings → Account → Tools**.
###
[](https://docs.lovable.dev/features/ai#default-ai-model)
Default AI model
Lovable AI uses **Gemini 2.5 Flash** as the default model. If you want to use a different model or combination of models, you can specify your choice directly in the prompt when requesting AI functionality. For an overview of supported AI models, see [Supported AI models](https://docs.lovable.dev/features/ai#supported-ai-models)
.
###
[](https://docs.lovable.dev/features/ai#user-preferences)
User preferences
The default setting for AI integration is **Always allow**, meaning Lovable AI will be automatically used in your projects. You can change your preference anytime from **Settings → Account → Tools**. Choose between:
* **Always allow**: Lovable automatically performs the action, without asking for review or approval.
* **Ask each time**: Lovable asks for your approval whenever the action is needed. For example, if you want to add a chatbot, you can:
* **Allow**: enable the integration for the current project.
* **Deny**: decline the integration for this request (you may be asked again later).
* **Adjust preferences**: change the default behavior for future projects (does not affect the current project).
* **Never allow**: Lovable blocks the action, informs you that AI is required, and instructs you to enable Lovable AI.
[](https://docs.lovable.dev/features/ai#usage-and-pricing)
Usage and pricing
--------------------------------------------------------------------------------
Lovable AI runs on a **usage-based pricing model**. This means your costs scale with how much you use and are not covered by your subscription. The cost of using Lovable AI is exactly the same as going directly to the LLM provider. There are no hidden fees. To verify costs, refer to the official sources linked in our list of supported AI models below. Every workspace includes **$1 of free AI usage per month** to get started. After that, users on paid plans can top up their balance, with costs depending on the underlying model you choose.
**Temporary offering, subject to change:** Until the end of 2025, every workspace gets $25 Cloud and $1 AI per month, even for users on the Free plan.
You can track and manage your AI usage costs in **Settings → Usage.** For more details and examples, see [Usage-based Cloud and AI pricing](https://docs.lovable.dev/features/cloud#usage-based-cloud-and-ai-pricing)
.
[](https://docs.lovable.dev/features/ai#supported-ai-models)
Supported AI models
------------------------------------------------------------------------------------
Lovable AI uses **Gemini 2.5 Flash** as its default model, but you can prompt the agent to use a different model or combination of models.
| Model | Description | Best For |
| --- | --- | --- |
| [**Gemini 2.5 Pro**](https://deepmind.google/models/gemini/pro/) | Smartest and most complex Gemini. High reasoning, large context, slower and most expensive. | Deep reasoning, advanced coding, research, complex multimodal tasks |
| [**Gemini 2.5 Flash (default)**](https://deepmind.google/models/gemini/flash/) | Balanced model. Faster and cheaper than Pro but still capable of reasoning. Mid-range cost. | Assistants, analysis, general workflows where speed + intelligence balance matters |
| [**Gemini 2.5 Flash Lite**](https://deepmind.google/models/gemini/flash-lite/) | Fastest and cheapest Gemini. Handles simple tasks at scale, less reasoning depth. | High-volume, lightweight tasks like classification, summarization, translation |
| [**Gemini 2.5 Flash Image**](https://deepmind.google/models/gemini/image/) | Optimized for generating images. Very cheap per image, not meant for text reasoning. | Image generation, quick visual outputs |
| [**GPT-5**](https://openai.com/index/introducing-gpt-5/) | Smartest OpenAI model. Strong reasoning, very accurate, but slowest and most expensive. | Highest-quality reasoning, accuracy-critical apps, complex decision making |
| [**GPT-5 Mini**](https://platform.openai.com/docs/models/gpt-5-mini) | Balanced GPT-5. Cheaper and faster than GPT-5, less complex but strong general use. | Assistants, mid-complexity reasoning, business workflows |
| [**GPT-5 Nano**](https://platform.openai.com/docs/models/gpt-5-nano) | Cheapest and fastest GPT-5. Very basic reasoning, best for quick or simple responses. | Summaries, classification, extraction, high-volume simple tasks |
###
[](https://docs.lovable.dev/features/ai#best-and-most-cost-effective-choices)
Best and most cost-effective choices
* **Best overall intelligence**: GPT-5 and Gemini 2.5 Pro (deep reasoning, but most expensive)
* **Best balance (speed + cost + smartness)**: GPT-5 Mini and Gemini 2.5 Flash
* **Most cost-effective for scale**: GPT-5 Nano and Gemini 2.5 Flash Lite (simple, fast, cheapest)
* **Best for images**: Gemini 2.5 Flash Image
[](https://docs.lovable.dev/features/ai#workspace-rate-limits)
Workspace rate limits
----------------------------------------------------------------------------------------
To ensure reliable performance and fair access for all users, Lovable AI applies rate limits per workspace. These limits help maintain system stability, prevent abuse, control costs, and provide a consistent experience for everyone. If your requests exceed the allowed rate, the server returns a **429 Too Many Requests** status code, and the request will not be processed. Rate limits are more restrictive for free users, while paid plans include higher thresholds and greater flexibility.
* **Free plan users**: upgrade anytime to increase your limits.
* **Paid plan users**: contact [Lovable Support](https://lovable.dev/support)
if you need additional capacity.
Was this page helpful?
YesNo
[Lovable Cloud](https://docs.lovable.dev/features/cloud)
[Custom knowledge](https://docs.lovable.dev/features/knowledge)
⌘I
---
# Custom domains - Lovable Documentation
[Skip to main content](https://docs.lovable.dev/features/custom-domain#content-area)
[Lovable Documentation home page](https://lovable.dev/)
Search...
⌘K
Search...
Navigation
Core features
Custom domains
[Introduction](https://docs.lovable.dev/introduction/welcome)
[Features](https://docs.lovable.dev/features/modes)
[Integrations](https://docs.lovable.dev/integrations/introduction)
[Tips & Tricks](https://docs.lovable.dev/tips-tricks/best-practice)
[Prompt engineering](https://docs.lovable.dev/prompting/prompting-one)
[Use cases](https://docs.lovable.dev/use-case/video-tutorials)
[Glossary](https://docs.lovable.dev/glossary)
[Changelog](https://docs.lovable.dev/changelog)
On this page
* [Prerequisites](https://docs.lovable.dev/features/custom-domain#prerequisites)
* [Connect a custom domain](https://docs.lovable.dev/features/custom-domain#connect-a-custom-domain)
* [Domain statuses](https://docs.lovable.dev/features/custom-domain#domain-statuses)
* [Primary domain](https://docs.lovable.dev/features/custom-domain#primary-domain)
* [FAQ](https://docs.lovable.dev/features/custom-domain#faq)
Lovable lets you connect your own custom domain or subdomain to your published project. This allows visitors to access your app from a branded URL instead of the default `xxx.lovable.app` project URL. Connecting a custom domain improves your site’s:
* **Brand identity** - looks more professional
* **Search engine visibility** - better SEO
* **Memorability** - easier to share and remember
[](https://docs.lovable.dev/features/custom-domain#prerequisites)
Prerequisites
-----------------------------------------------------------------------------------
To connect a custom domain, ensure that:
* You are on a paid Lovable plan.
* Your project is published. See [Publish your app](https://docs.lovable.dev/features/publish)
for more information.
* You own a domain name. See [full list of supported providers](https://developers.entri.com/provider-list)
where you can purchase a domain.
* You have **access to the DNS settings** for the domain or subdomain you want to connect. **Ownership verification** happens by adding DNS records (A and TXT records) provided by Lovable during setup.
[](https://docs.lovable.dev/features/custom-domain#connect-a-custom-domain)
Connect a custom domain
-------------------------------------------------------------------------------------------------------
You can connect a domain to your published Lovable project using automatic setup (using a tool called Entri) or manual DNS configuration. Both methods require verifying ownership of your domain. You can connect a domain from two locations:
* **Project → Settings → Domains**
* **Publish modal → Custom domain** (can be done after publishing your project)
Follow the steps below to connect a custom domain:
1. Click **Connect domain**.
2. Enter your domain or subdomain (for example, `yourdomain.com` or `blog.yourdomain.com`), click **Connect domain**, then click **Continue**.
When adding a domain, Lovable does not automatically add the `www` subdomain. You can add it separately if you want both.
3. Now, you can connect your domain in two ways:
* **Automatic setup with Entri**: Select your domain provider from the list, log in, and authorize Entri to update your DNS records.
* **Manual setup**: If your DNS provider is not listed, scroll to the bottom of the **Select your domain provider** modal and choose **Go to our manual setup**. Copy the A record and TXT record and input them directly into your domain registrar.
4. Click **Done**. Wait for verification and SSL certificate to be issued. When complete, the domain will become **Live** and your Lovable app will be live at your custom domain.
DNS changes may take up to **72 hours to propagate**, though most updates are live within a few hours.
[](https://docs.lovable.dev/features/custom-domain#domain-statuses)
Domain statuses
---------------------------------------------------------------------------------------
Domains have clear statuses that indicate the current state and required user action.
| Status | Description | User action |
| --- | --- | --- |
| **Unpublished** | Shown only for your `xxx.lovable.app` project URL when the project is not yet published. | Publish the project. |
| **Ready** | The domain is ready but the project was unpublished. When published again, the status automatically becomes **Live**. | Publish the project. |
| **Action required** | The custom domain setup was not completed. | Click **Complete setup** to finish connecting. |
| **Verifying** | Waiting for DNS records to propagate. | Wait; no action required. |
| **Setting up** | Verification complete; SSL certificates being issued. | No action required; domain will automatically move to **Live** or **Failed.** |
| **Failed** | Ownership verified, but SSL certificate could not be provisioned. | Click **Retry** to attempt again. |
| **Live** | Domain is live and serving your project. | No action required. |
| **Offline** | Domain was **Live** but DNS records are no longer valid. | Review displayed DNS records and fix them with your DNS provider. |
| **Removed** | Domain was removed because it was added to another project. | Reconnect if needed. |
You can remove a domain at any point regardless of its status.
[](https://docs.lovable.dev/features/custom-domain#primary-domain)
Primary domain
-------------------------------------------------------------------------------------
Lovable allows you to set **one domain as the primary domain**.
* The domain status must be **Live** in order to mark it as primary. Click the three dots menu next to your domain and click **Set as primary**.
* The first custom domain you add to a project automatically becomes the primary domain (for domains added after October 29, 2025).
* If a domain is primary, all other domains redirect to it.
* Only one domain can be primary at a time.
* You can unset the primary domain; in that case, all connected domains serve the project equally. Click the three dots menu next to your primary domain and click **Unset as primary**.
[](https://docs.lovable.dev/features/custom-domain#faq)
FAQ
---------------------------------------------------------------
My custom domain is connected, but my site isn't live. What should I do?
* Double-check your DNS settings by using for example [dnschecker.org](https://dnschecker.org/all-dns-records-of-domain.php)
. Sometimes DNS changes can take up to 72 hours to propagate. Go to **Project → Settings → Domains** to find the correct DNS settings.
* Clear your browser cache or test in an incognito window.
* Try removing and re-adding the domain in **Project → Settings → Domains**.
Can I buy a domain through Lovable?
Buying a custom domain is possible through our partner IONOS. Go to **Project → Settings → Domains** and click **Buy new domain** to buy a domain through IONOS. This is available on paid plans only.
Will connecting a custom domain affect my SEO?
Yes, connecting a custom domain affects your SEO positively. A custom domain improves your site’s discoverability in search engines and makes it look more trustworthy to users.
Does Lovable provide an SSL certificate for my custom domain?
Yes. When you connect a custom domain to your Lovable app, we automatically generate and install an SSL certificate for it. This ensures your site is served over HTTPS, keeping your visitors’ data secure and improving your site’s SEO ranking. If it hasn’t been issued after 72 hours, please reach out to [Lovable Support](https://lovable.dev/support)
.
Can I connect a subdomain instead of a full domain?
Yes. You can connect a subdomain (for example, `blog.yourdomain.com` or `app.yourdomain.com`) instead of the root domain. When entering your domain in the setup flow, just include the subdomain you want to use.
Can I connect multiple subdomains to my Lovable project?
Yes. You can connect multiple subdomains, but each one must be added and configured individually in **Project → Settings → Domains**. For example, you can connect `blog.yourdomain.com`, `shop.yourdomain.com`, and `app.yourdomain.com`.
Where can I see my connected domains?
You can see your connected domains in two locations:
* **Project → Settings → Domains** - here you see all domains, regardless of their status
* **Publish modal** - here you see all **Live** domains
Can I connect a domain used by another project?
Yes. As long as you can verify ownership, you can connect a domain or subdomain used by another project, even if the project has been deleted.
How do I set a primary domain?
The domain status must be **Live** in order to set it as primary.Go to **Project → Settings → Domains**, click the three dots menu next to a **Live** domain, and click **Set as primary**.
How do I unset a primary domain?
Go to **Project → Settings → Domains**, click the three dots menu next to your primary domain, and click **Unset as primary**.
How do I remove a custom domain?
You can remove a domain at any time regardless of its status.
1. Go to **Project → Settings → Domains.**
2. Click the three dots menu next to your domain, click **Remove**, then click **Remove** again to confirm.
This will disconnect the domain from the project. Make sure to clear DNS settings in your domain provider to completely clear the connection.
Can I remove the xxx.lovable.app project URL?
Currently, there is no way to remove the `xxx.lovable.app` project URL from your project. However, you can add a custom domain and set it as your primary domain. This allows visitors to access your app from a branded URL instead of the default `xxx.lovable.app` project URL.
Do I need to connect a www subdomain separately?
Yes, you need to add it separately, and it will be listed separately. The **www** subdomain is not included when you set up your domain.
Was this page helpful?
YesNo
[Project analytics](https://docs.lovable.dev/features/analytics)
[SEO](https://docs.lovable.dev/features/seo)
⌘I
---
# Figma to Lovable - Lovable Documentation
[Skip to main content](https://docs.lovable.dev/features/figma-to-lovable#content-area)
[Lovable Documentation home page](https://lovable.dev/)
Search...
⌘K
Search...
Navigation
Core features
Figma to Lovable
[Introduction](https://docs.lovable.dev/introduction/welcome)
[Features](https://docs.lovable.dev/features/modes)
[Integrations](https://docs.lovable.dev/integrations/introduction)
[Tips & Tricks](https://docs.lovable.dev/tips-tricks/best-practice)
[Prompt engineering](https://docs.lovable.dev/prompting/prompting-one)
[Use cases](https://docs.lovable.dev/use-case/video-tutorials)
[Glossary](https://docs.lovable.dev/glossary)
[Changelog](https://docs.lovable.dev/changelog)
On this page
* [Why This Integration Changes Everything](https://docs.lovable.dev/features/figma-to-lovable#why-this-integration-changes-everything)
* [Step-by-Step: Figma to Full-Stack App](https://docs.lovable.dev/features/figma-to-lovable#step-by-step%3A-figma-to-full-stack-app)
* [Use Auto-Layout (Required for Precise Mode)](https://docs.lovable.dev/features/figma-to-lovable#use-auto-layout-required-for-precise-mode)
* [Name Your Layers Clearly](https://docs.lovable.dev/features/figma-to-lovable#name-your-layers-clearly)
* [Build Reusable Components](https://docs.lovable.dev/features/figma-to-lovable#build-reusable-components)
* [Think in Design Systems](https://docs.lovable.dev/features/figma-to-lovable#think-in-design-systems)
* [Resources](https://docs.lovable.dev/features/figma-to-lovable#resources)
* [Got Feedback?](https://docs.lovable.dev/features/figma-to-lovable#got-feedback%3F)
You can now export Figma designs directly to Lovable using Builder.io’s native integration. No devs needed. This guide shows you how to structure your design, export it, and turn it into a full-stack app—all in one smooth flow.
[](https://docs.lovable.dev/features/figma-to-lovable#why-this-integration-changes-everything)
Why This Integration Changes Everything
------------------------------------------------------------------------------------------------------------------------------------------
Designers no longer have to stop at mockups. With Builder.io, you can transform Figma designs into clean, structured code. With Lovable, you turn that code into functional, full-stack apps—using AI. Figma ➜ Builder.io ➜ Lovable ➜ App
[](https://docs.lovable.dev/features/figma-to-lovable#step-by-step%3A-figma-to-full-stack-app)
Step-by-Step: Figma to Full-Stack App
----------------------------------------------------------------------------------------------------------------------------------------
1
Structure Your Figma Design
For smooth exporting, your Figma file needs to be well-organized. Here’s how to prepare:
####
[](https://docs.lovable.dev/features/figma-to-lovable#use-auto-layout-required-for-precise-mode)
Use Auto-Layout (Required for Precise Mode)
* Apply Auto-Layout to all parent containers.
* Use proper **padding, spacing, and resizing** rules.
* Set horizontal/vertical resizing for responsive layouts.
####
[](https://docs.lovable.dev/features/figma-to-lovable#name-your-layers-clearly)
Name Your Layers Clearly
* Use names like `Header`, `CTA Button`, `Nav Bar`—not `Frame 23`.
* Avoid symbols and nested clutter.
* Group similar components logically.
####
[](https://docs.lovable.dev/features/figma-to-lovable#build-reusable-components)
Build Reusable Components
* Use consistent styling (fonts, colors, etc.).
* Turn repeated elements into **Figma components**.
####
[](https://docs.lovable.dev/features/figma-to-lovable#think-in-design-systems)
Think in Design Systems
* Apply global styles.
* Use a shared component library if available.
**Pro Tip:** [Builder.io](http://builder.io/)
supports two export modes:
* **Easy Mode:** Quick, lower fidelity.
* **Precise Mode:** Requires structure but offers pixel-perfect results.
2
Open Builder.io Plugin in Figma
1
Install and Launch the Plugin
* Open your Figma file.
* Go to `Plugins > Builder.io`.
* Select the frame(s) you want to export.
2
Choose Your Mode
* **Easy Mode:** Fastest route to test layouts.
* **Precise Mode:** Best for polished, responsive designs.
3
Map Components (Optional)
If prompted, map detected components to ensure smoother export.
4
Export Your Design
* Hit **“Open in Lovable”**.
* Your Figma design is now a working UI inside Lovable.
3
Iterate in Lovable
This is where the magic happens—turning static designs into real, usable apps.
1
Use AI Prompts to Improve
In Lovable, you can:
* Change layouts
* Add sections
* Tweak styling
* Make responsive adjustments
Just describe what you want. Lovable does the rest.
2
Preview in Real-Time
* Use the **“Spinning up preview”** feature to view updates instantly.
* Test your changes before deployment.
3
Add Backend Logic
If you need to add backend capabilities, you can:
* Connect to Lovable’s built-in backend - [Lovable Cloud](https://docs.lovable.dev/features/cloud)
* Use Lovable’s native [Supabase integration](https://docs.lovable.dev/integrations/supabase)
4
Deploy When Ready
* Push your app live in one click.
* Share it with your team or users.
* Iterate based on feedback.
4
You're Live 🎉 ! What’s Next?
Congrats—you just built a working app from a Figma file without writing code.Here’s what you can do next:
* [Share Your Build](https://x.com/)
on X
* [Join the Community on Discord](https://discord.gg/lovable-dev)
* [Try the Figma X Lovable Flow Again](https://lovable.dev/)
[](https://docs.lovable.dev/features/figma-to-lovable#resources)
Resources
------------------------------------------------------------------------------
* [How to Import from Figma (](https://www.builder.io/c/docs/import-from-figma)
[Builder.io](http://builder.io/)
[Docs)](https://www.builder.io/c/docs/import-from-figma)
* [Builder.io](http://builder.io/)
[Plugin Modes](https://www.builder.io/c/docs/figma-plugin-modes)
* [Figma Auto-Layout Tips](https://www.builder.io/c/docs/figma-auto-layout)
* [Builder.io](http://builder.io/)
[: Figma to Code](https://www.builder.io/figma-to-code)
* [Lovable press release](https://lovable.dev/blog/2025-01-22-figma-to-lovable-builder-io-native-integration)
.
[](https://docs.lovable.dev/features/figma-to-lovable#got-feedback%3F)
Got Feedback?
----------------------------------------------------------------------------------------
We’re building this for _you_. Tag us, DM us, or share your experience—we’re listening.
Was this page helpful?
YesNo
[Labs](https://docs.lovable.dev/features/labs)
[Single Sign-On (SSO)](https://docs.lovable.dev/features/business/sso)
⌘I
---
# Collaboration - Lovable Documentation
[Skip to main content](https://docs.lovable.dev/features/collaboration#content-area)
[Lovable Documentation home page](https://lovable.dev/)
Search...
⌘K
Search...
Navigation
Core features
Collaboration
[Introduction](https://docs.lovable.dev/introduction/welcome)
[Features](https://docs.lovable.dev/features/modes)
[Integrations](https://docs.lovable.dev/integrations/introduction)
[Tips & Tricks](https://docs.lovable.dev/tips-tricks/best-practice)
[Prompt engineering](https://docs.lovable.dev/prompting/prompting-one)
[Use cases](https://docs.lovable.dev/use-case/video-tutorials)
[Glossary](https://docs.lovable.dev/glossary)
[Changelog](https://docs.lovable.dev/changelog)
On this page
* [Collaboration in a specific project](https://docs.lovable.dev/features/collaboration#collaboration-in-a-specific-project)
* [Project permissions](https://docs.lovable.dev/features/collaboration#project-permissions)
* [Collaboration in a Workspace](https://docs.lovable.dev/features/collaboration#collaboration-in-a-workspace)
* [What is a Workspace?](https://docs.lovable.dev/features/collaboration#what-is-a-workspace%3F)
* [How do I add and manage collaborators in a Workspace?](https://docs.lovable.dev/features/collaboration#how-do-i-add-and-manage-collaborators-in-a-workspace%3F)
* [Workspace permissions](https://docs.lovable.dev/features/collaboration#workspace-permissions)
* [FAQ](https://docs.lovable.dev/features/collaboration#faq)
Lovable lets you build websites together. Invite your designer, developer, agency, or anyone else. Everyone sees changes as they happen. There are two ways of collaborating. You can invite collaborators to a specific project or to your entire workspace.
[](https://docs.lovable.dev/features/collaboration#collaboration-in-a-specific-project)
Collaboration in a specific project
-------------------------------------------------------------------------------------------------------------------------------
You can invite users to work together on a specific project by pressing “Invite” in the project editor. Add their email, and they’ll receive an invite to their email.
Collaborators will use credits from the project owner’s workspace.
###
[](https://docs.lovable.dev/features/collaboration#project-permissions)
Project permissions
Please note that free plans do not have admin roles. Some of the features presented might be available on specific plans only.
| | **Viewer** | **Editor** | **Admin** | **Owner** |
| --- | --- | --- | --- | --- |
| **Project access** | | | | |
| Magic Link | **Yes** | **Yes** | **Yes** | **Yes** |
| Add Viewer | **Yes** | **Yes** | **Yes** | **Yes** |
| Remove Viewer | **Yes** | **Yes** | **Yes** | **Yes** |
| Add Editor | No | **Yes** | **Yes** | **Yes** |
| Remove Editor | No | **Yes** | **Yes** | **Yes** |
| Add Admin | No | No | **Yes** | **Yes** |
| Remove Admin | No | No | **Yes** | **Yes** |
| **Project management** | | | | |
| Remix project | **Yes** | **Yes** | **Yes** | **Yes** |
| Add Custom domain | No | **Yes** | **Yes** | **Yes** |
| Edit project | No | **Yes** | **Yes** | **Yes** |
| Remove Lovable badge | No | **Yes** | **Yes** | **Yes** |
| Change project visibility | No | **Yes** | **Yes** | **Yes** |
| Manage GitHub | No | **Yes** | **Yes** | **Yes** |
| Publish | No | No | **Yes** | **Yes** |
| Manage project settings | No | No | **Yes** | **Yes** |
| Disconnect Supabase | No | No | **Yes** | **Yes** |
| Transfer project | No | No | **Yes** | **Yes** |
| Delete project | No | No | **Yes** | **Yes** |
[](https://docs.lovable.dev/features/collaboration#collaboration-in-a-workspace)
Collaboration in a Workspace
-----------------------------------------------------------------------------------------------------------------
###
[](https://docs.lovable.dev/features/collaboration#what-is-a-workspace%3F)
What is a Workspace?
A workspace is your shared space for building and collaborating on projects. You can invite your teammates to your workspace, and they’ll have access to all the projects in it. They can see, edit and publish the workspaces’s projects.
For granular permission control and role assignment in your workspace, a paid subscription is needed.
When you subscribe to a plan it gets tied to your desired workspace, and then all projects in the workspace use those credits, no matter who sends the messages. You can customize your workspace in the workspace settings by:
* Renaming it
* Changing the avatar
* Writing a description
###
[](https://docs.lovable.dev/features/collaboration#how-do-i-add-and-manage-collaborators-in-a-workspace%3F)
How do I add and manage collaborators in a Workspace?
You manage and add collaborators from the People tab in the workspace settings. You can access it by going to **Settings** > **People**. Here you can:
* Add new collaborators by inputting their email. They’ll receive an invite to their email that they then can accept.
* Manage existing collaborators by changing their roles or removing them.
* See monthly credits usage for each collaborator
###
[](https://docs.lovable.dev/features/collaboration#workspace-permissions)
Workspace permissions
Please note that free plans do not have admin roles.
| | **Viewer** | **Editor** | **Admin** | **Owner** |
| --- | --- | --- | --- | --- |
| **Workspace access** | | | | |
| Add Viewer | **Yes** | **Yes** | **Yes** | **Yes** |
| Remove Viewer | **Yes** | **Yes** | **Yes** | **Yes** |
| Add Editor | No | **Yes** | **Yes** | **Yes** |
| Remove Editor | No | **Yes** | **Yes** | **Yes** |
| Add Admin | No | No | **Yes** | **Yes** |
| Remove Admin | No | No | **Yes** | **Yes** |
| Add Owner | No | No | No | **Yes** |
| Remove Owner | No | No | No | **Yes** |
| **Workspace management** | | | | |
| View members | **Yes** | **Yes** | **Yes** | **Yes** |
| Create new projects in a workspace | No | **Yes** | **Yes** | **Yes** |
| Manage Supabase | No | **Yes** | **Yes** | **Yes** |
| View usage | No | No | **Yes** | **Yes** |
| Manage plans & billing | No | No | **Yes** | **Yes** |
| Manage SSO (Business plan) | No | No | **Yes** | **Yes** |
| Manage Integrations | No | No | **Yes** | **Yes** |
[](https://docs.lovable.dev/features/collaboration#faq)
FAQ
---------------------------------------------------------------
How many members can one Workspace have?
Workspaces support unlimited members on all plans. For workspaces on Enterprise plans, custom member limits can be optionally set.
Can I have several Workspaces?
Yes, but you’ll need separate subscriptions for each one.
Can I switch between Workspaces?
Yes! Go to the main dashboard. From there press your workspace name in the top right corner. In the dropdown you’ll see the other workspaces you have access to. To switch, simply click the desired workspace.
Is it possible to transfer projects between Workspaces?
Yes! Go to the project settings where you’ll find the option to **Transfer** the project.
Can I change the workspace owner?
Yes, an owner can add multiple workspace owners.
Can I change the project owner?
At this moment it is not possible, but you can always remix that project into a new account and you will be an owner of that copy.
Was this page helpful?
YesNo
[Custom knowledge](https://docs.lovable.dev/features/knowledge)
[Private projects](https://docs.lovable.dev/features/private-projects)
⌘I
---
# Custom knowledge - Lovable Documentation
[Skip to main content](https://docs.lovable.dev/features/knowledge#content-area)
[Lovable Documentation home page](https://lovable.dev/)
Search...
⌘K
Search...
Navigation
Core features
Custom knowledge
[Introduction](https://docs.lovable.dev/introduction/welcome)
[Features](https://docs.lovable.dev/features/modes)
[Integrations](https://docs.lovable.dev/integrations/introduction)
[Tips & Tricks](https://docs.lovable.dev/tips-tricks/best-practice)
[Prompt engineering](https://docs.lovable.dev/prompting/prompting-one)
[Use cases](https://docs.lovable.dev/use-case/video-tutorials)
[Glossary](https://docs.lovable.dev/glossary)
[Changelog](https://docs.lovable.dev/changelog)
On this page
* [What to include in your custom knowledge](https://docs.lovable.dev/features/knowledge#what-to-include-in-your-custom-knowledge)
* [Tips for using custom knowledge](https://docs.lovable.dev/features/knowledge#tips-for-using-custom-knowledge)
Every project has its own goals, constraints, and preferences. Use the Custom Knowledge tab to capture those. Everything you add here is remembered and applied across your project, making edits smarter and more aligned.
You don’t need to be comprehensive. A few lines of clear direction can go a long way.
[](https://docs.lovable.dev/features/knowledge#what-to-include-in-your-custom-knowledge)
**What to include in your custom knowledge**
-----------------------------------------------------------------------------------------------------------------------------------------
Here are a few examples of useful knowledge to add:
* **Project guidelines**: What to prioritize, what to avoid or how decisions should be made.
* **User personas:** Detailed descriptions of your target users and their needs.
* **Design assets:** Color palettes, typography, layout rules and other visual elements.
* **Coding conventions**: Naming conventions, formatting rules and file structure.
* **External references**: Links to API docs, internal tools, design systems or style guides.
* **Security practices:** Guidelines for secure coding, data protection and handling sensitive information.
* **Compliance requirements:** Any legal or regulatory requirements your project must adhere to.
[](https://docs.lovable.dev/features/knowledge#tips-for-using-custom-knowledge)
**Tips for using custom knowledge**
-----------------------------------------------------------------------------------------------------------------------
* **Start small.** Even a few lines can make a meaningful difference.
* **Think of it as shared memory.** Everything you write here is remembered and used in future edits.
* **Keep it current.** Update it as your project evolves to stay aligned and relevant.
Was this page helpful?
YesNo
[Lovable AI](https://docs.lovable.dev/features/ai)
[Collaboration](https://docs.lovable.dev/features/collaboration)
⌘I
---
# Labs - Lovable Documentation
[Skip to main content](https://docs.lovable.dev/features/labs#content-area)
[Lovable Documentation home page](https://lovable.dev/)
Search...
⌘K
Search...
Navigation
Core features
Labs
[Introduction](https://docs.lovable.dev/introduction/welcome)
[Features](https://docs.lovable.dev/features/modes)
[Integrations](https://docs.lovable.dev/integrations/introduction)
[Tips & Tricks](https://docs.lovable.dev/tips-tricks/best-practice)
[Prompt engineering](https://docs.lovable.dev/prompting/prompting-one)
[Use cases](https://docs.lovable.dev/use-case/video-tutorials)
[Glossary](https://docs.lovable.dev/glossary)
[Changelog](https://docs.lovable.dev/changelog)
On this page
* [GitHub branch switching](https://docs.lovable.dev/features/labs#github-branch-switching)
You can enable and disable different Labs-features by going to your [Account Settings](https://lovable.dev/settings/account)
, and then navigating to **Labs**.
These experimental features may change or be removed at any time.
[](https://docs.lovable.dev/features/labs#github-branch-switching)
GitHub branch switching
----------------------------------------------------------------------------------------------
By enabling GitHub Branch Switching you can select the branch that Lovable edits. Once enabled you can switch branch by following these steps.
1. Go to the **Settings** of a project
2. Go to **GitHub** tab
3. Click the branch dropdown, and choose the branch you want to switch to
Lovable defaults to synching with the “main” branch
Was this page helpful?
YesNo
[Security](https://docs.lovable.dev/features/security)
[Figma to Lovable](https://docs.lovable.dev/features/figma-to-lovable)
⌘I
---
# Lovable Cloud - Lovable Documentation
[Skip to main content](https://docs.lovable.dev/features/cloud#content-area)
[Lovable Documentation home page](https://lovable.dev/)
Search...
⌘K
Search...
Navigation
Core features
Lovable Cloud
[Introduction](https://docs.lovable.dev/introduction/welcome)
[Features](https://docs.lovable.dev/features/modes)
[Integrations](https://docs.lovable.dev/integrations/introduction)
[Tips & Tricks](https://docs.lovable.dev/tips-tricks/best-practice)
[Prompt engineering](https://docs.lovable.dev/prompting/prompting-one)
[Use cases](https://docs.lovable.dev/use-case/video-tutorials)
[Glossary](https://docs.lovable.dev/glossary)
[Changelog](https://docs.lovable.dev/changelog)
On this page
* [Why choose Lovable Cloud](https://docs.lovable.dev/features/cloud#why-choose-lovable-cloud)
* [Enabling Lovable Cloud](https://docs.lovable.dev/features/cloud#enabling-lovable-cloud)
* [User preferences](https://docs.lovable.dev/features/cloud#user-preferences)
* [Configuring Lovable Cloud tools](https://docs.lovable.dev/features/cloud#configuring-lovable-cloud-tools)
* [Tool settings and defaults](https://docs.lovable.dev/features/cloud#tool-settings-and-defaults)
* [Lovable Cloud features](https://docs.lovable.dev/features/cloud#lovable-cloud-features)
* [Database](https://docs.lovable.dev/features/cloud#database)
* [Users & Auth](https://docs.lovable.dev/features/cloud#users-%26-auth)
* [Storage](https://docs.lovable.dev/features/cloud#storage)
* [Edge Functions](https://docs.lovable.dev/features/cloud#edge-functions)
* [AI](https://docs.lovable.dev/features/cloud#ai)
* [Secrets](https://docs.lovable.dev/features/cloud#secrets)
* [Logs](https://docs.lovable.dev/features/cloud#logs)
* [Advanced settings - Upgrade instance](https://docs.lovable.dev/features/cloud#advanced-settings-upgrade-instance)
* [Example flow - Prompting Lovable to build a CRM tool](https://docs.lovable.dev/features/cloud#example-flow-prompting-lovable-to-build-a-crm-tool)
* [Step 1: Organize the data (Database)](https://docs.lovable.dev/features/cloud#step-1%3A-organize-the-data-database)
* [Step 2: Make it secure (Users & Auth)](https://docs.lovable.dev/features/cloud#step-2%3A-make-it-secure-users-%26-auth)
* [Step 3: Handle files (Storage)](https://docs.lovable.dev/features/cloud#step-3%3A-handle-files-storage)
* [Step 4: Automate workflows (Edge Functions)](https://docs.lovable.dev/features/cloud#step-4%3A-automate-workflows-edge-functions)
* [Step 5: Connect to other tools (Secrets)](https://docs.lovable.dev/features/cloud#step-5%3A-connect-to-other-tools-secrets)
* [Step 6: Add AI superpowers (AI)](https://docs.lovable.dev/features/cloud#step-6%3A-add-ai-superpowers-ai)
* [Usage-based Cloud and AI pricing](https://docs.lovable.dev/features/cloud#usage-based-cloud-and-ai-pricing)
* [Included free usage (all plans)](https://docs.lovable.dev/features/cloud#included-free-usage-all-plans)
* [Adding funds (paid plans only)](https://docs.lovable.dev/features/cloud#adding-funds-paid-plans-only)
* [Alerts and notifications](https://docs.lovable.dev/features/cloud#alerts-and-notifications)
* [Example workspace Cloud and AI costs (per month)](https://docs.lovable.dev/features/cloud#example-workspace-cloud-and-ai-costs-per-month)
* [FAQ](https://docs.lovable.dev/features/cloud#faq)
Lovable Cloud is a full-stack cloud platform that takes care of every part of your application — from the frontend your users see, to the backend that powers it behind the scenes. All you do is describe what you want directly in Lovable, and Lovable automatically generates both the frontend and backend, ready to run in the Cloud. Instead of managing hardware or complex infrastructure, you get on-demand access to hosting, compute, and storage that scale automatically as your app grows. Lovable Cloud utilizes Supabase’s open-source foundation, which means you get a production-ready environment from day one, without needing to set up Supabase separately. You have the power of a production-ready database, real-time updates, user auth, and storage — with none of the manual setup steps.
[](https://docs.lovable.dev/features/cloud#why-choose-lovable-cloud)
Why choose Lovable Cloud
-------------------------------------------------------------------------------------------------
* **Scales as you grow**: From your first prototype to millions of users, Lovable scales seamlessly with your needs.
* **Secure by default**: Enterprise-grade authentication, fine-grained access controls, and compliance best practices protect your app and data.
* **Cost-effective**: Manage multiple projects in one workspace with usage-based pricing. Every workspace starts with **$25 free usage per month**, enough to launch and run multiple projects (temporary offering until end of 2025, subject to change). Read more in [Usage-based Cloud and AI pricing](https://docs.lovable.dev/features/cloud#usage-based-cloud-and-ai-pricing)
.
[](https://docs.lovable.dev/features/cloud#enabling-lovable-cloud)
Enabling Lovable Cloud
---------------------------------------------------------------------------------------------
By default, Lovable Cloud is enabled for your workspace. You can manage Lovable Cloud behavior for your projects in your user preferences: **Settings → Account → Tools.**
###
[](https://docs.lovable.dev/features/cloud#user-preferences)
User preferences
The default setting for Cloud integration is **Ask each time**, meaning you decide whether to enable or disable Cloud for each project. You can change your preference anytime from **Settings → Account → Tools.** Lovable prompts you when a feature requires backend functionality (for example, authentication or file storage). You have three options:
* **Allow**: enable the integration for the current project.
* **Deny**: decline the integration for this request (you may be asked again later).
* **Adjust preferences**: change the default behavior for future projects (does not affect the current project).
###
[](https://docs.lovable.dev/features/cloud#configuring-lovable-cloud-tools)
Configuring Lovable Cloud tools
Each Cloud tool in your user preferences has three options:
* **Always allow**: Lovable automatically performs the action, without asking for review or approval.
* **Ask each time**: Lovable asks for your approval whenever the action is needed.
* **Never allow**: Lovable blocks the action, informs you that Cloud access is required, and instructs you to enable Cloud.
You can change your Cloud tools preferences anytime from **Settings → Account → Tools.**
####
[](https://docs.lovable.dev/features/cloud#tool-settings-and-defaults)
Tool settings and defaults
| Setting | Description | Default behavior |
| --- | --- | --- |
| Cloud | Create and connect a Cloud project to add backend features (database, auth, storage). Required to use Cloud tools. | Ask each time |
| Read database | Allow Lovable to read your database. | Always allow |
| Read analytics | Query logs to investigate issues and behavior. | Always allow |
| Run security checks | Run automated security checks on your database. Not a full audit. | Always allow |
| Modify database | Make schema and policy changes via SQL migrations. Updates generated types. | Always allow |
| Add data | Add data to your database tables. | Always allow |
| Read project info | Read project configuration and environment details. | Always allow |
| Configure auth | Allow Lovable to configure authentication settings (for exmple, signup policies). | Always allow |
| Read backend logs | Read logs from backend services. | Always allow |
[](https://docs.lovable.dev/features/cloud#lovable-cloud-features)
Lovable Cloud features
---------------------------------------------------------------------------------------------
You’ll find the **Cloud tab** inside any Lovable project by clicking the `+` button next to **Preview** **mode**. 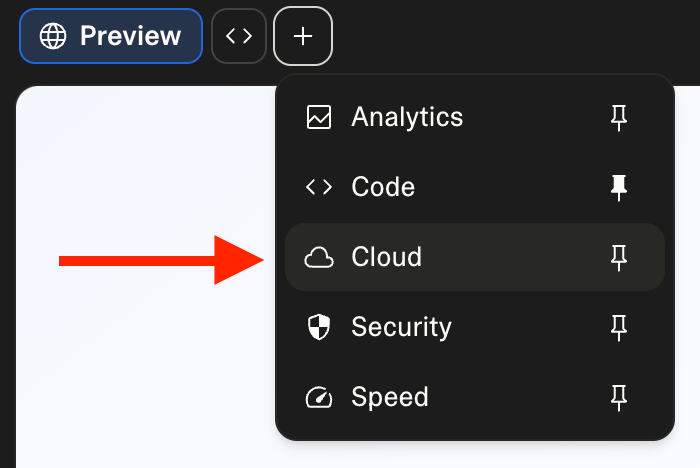 The following features and settings live inside the Cloud tab:
###
[](https://docs.lovable.dev/features/cloud#database)
Database
* **Generate schemas automatically**: describe the data you need in plain language, and Lovable creates the tables and schema for you.
* **Manage without SQL**: view, edit, and organize records directly in the UI. Update values, inspect tables, and keep your app’s data in sync without writing queries.
###
[](https://docs.lovable.dev/features/cloud#users-%26-auth)
Users & Auth
* **User management**: view user accounts, track activity, and manage access control.
* **Built-in authentication**: Lovable can generate signup/login pages for your app. Supports email, phone, and Google sign-in.
* **Secure by default**: authentication is backed by Lovable Cloud, keeping user credentials safe.
###
[](https://docs.lovable.dev/features/cloud#storage)
Storage
* **File handling without code**: upload, manage, and serve files such as profile photos, documents, videos, or static assets.
* **Storage buckets**: files are stored securely in a project bucket, with URLs or references you can use in your app.
* **Limits**: Supports files up to 2 GB.
###
[](https://docs.lovable.dev/features/cloud#edge-functions)
Edge Functions
* **Serverless logic**: run custom code for APIs, workflows, or advanced features, without provisioning servers. Functions scale automatically with traffic.
**Common use cases:**
* AI-powered features, such as AI summaries or AI chatbots. Use built-in [Lovable AI](https://docs.lovable.dev/features/ai)
.
* Sending emails or push notifications
* Payment processing, for example with [Stripe](https://docs.lovable.dev/integrations/stripe#stripe-integration)
* Scheduled tasks
* Heavy computations or external API calls
**Other highlights:**
* **Easy to create**: just describe the function you need in Lovable chat.
* **Debugging built-in**: each function includes logs of executions, output, and errors. If something fails, Lovable surfaces the error for quick troubleshooting.
###
[](https://docs.lovable.dev/features/cloud#ai)
AI
* **Built in AI functionality**: Lovable Cloud comes with built in AI so you can quickly create features that make your app smarter and more engaging. For more information, see [Lovable AI](https://docs.lovable.dev/features/ai)
.
* Some examples of AI powered features include:
* **AI summaries** – automatically condense long text into clear takeaways
* **AI chatbot or agent** – build conversational helpers into your app
* **Sentiment detection** – understand user feedback at scale
* You can monitor Lovable AI usage and performance for your project from the AI overview.
###
[](https://docs.lovable.dev/features/cloud#secrets)
Secrets
* **Secure environment variables**: store sensitive data such as API keys, tokens, or credentials without exposing them in code.
* **Automatic detection**: when a feature needs a secret, Lovable prompts you to input it through a secure UI.
* **Encrypted and safe**: secrets are stored securely and automatically injected into Edge Functions or other integrations.
**Example:** Store your Stripe Secret Key once, and Lovable ensures it’s included in payment-processing functions without you hard-coding it.
Some secrets, such as the Supabase keys and Lovable API key, are added automatically and are required for the functioning of the Lovable platform. These keys cannot be deleted.
###
[](https://docs.lovable.dev/features/cloud#logs)
Logs
* **Real-time monitoring**: watch app activity as it happens.
* **Debug and trace issues**: identify errors, track events, and ensure your backend is healthy.
###
[](https://docs.lovable.dev/features/cloud#advanced-settings-upgrade-instance)
Advanced settings - Upgrade instance
Use the advanced settings to view and manage your current instance size. A larger instance allows your app to handle more users and traffic. Keep in mind that your Cloud usage costs will increase as your app usage grows.
* **Free plan users**: upgrade from **Tiny** to a larger instance by upgrading your plan at anytime
* **Paid plan users**: choose a new instance size from the options below:
* **Tiny**: great for trying things out
* **Mini**: reliable for early projects
* **Small**: room to grow with your app
* **Medium**: steady choice for regular use
* **Large**: confident option for higher demand
[](https://docs.lovable.dev/features/cloud#example-flow-prompting-lovable-to-build-a-crm-tool)
Example flow - Prompting Lovable to build a CRM tool
-------------------------------------------------------------------------------------------------------------------------------------------------------
_Build me a CRM tool to manage clients, track deals, handle invoices, and keep notes organized. Keep the design simple, modern, and business-friendly with a sidebar for navigation._
###
[](https://docs.lovable.dev/features/cloud#step-1%3A-organize-the-data-database)
Step 1: Organize the data (Database)
Tell Lovable what kind of information the tool should keep track of for you. Lovable will automatically create the tables for you, so you don’t need to touch databases yourself. _I want a place to keep track of my clients with their name, email, phone number, and notes. I also need a way to track deals, including which client it’s for, the value, the stage it’s in, and when I expect it to close. And I need a section for invoices with the client it belongs to, the amount, the status, and the due date._
###
[](https://docs.lovable.dev/features/cloud#step-2%3A-make-it-secure-users-%26-auth)
Step 2: Make it secure (Users & Auth)
Add login so data is private and users can sign in easily. _Add login to the app. Require login before accessing the CRM dashboard. Also, add a ‘Sign in with Google’ button so users can log in with their Google accounts._
###
[](https://docs.lovable.dev/features/cloud#step-3%3A-handle-files-storage)
Step 3: Handle files (Storage)
You can let users upload and see files right inside the app. Lovable takes care of the storage and linking, so you just describe what files should go where. _Add a contract upload field to each deal. Let clients have profile pictures and display them on the client detail page. Upload invoice PDFs and show a download link on the invoices table._
###
[](https://docs.lovable.dev/features/cloud#step-4%3A-automate-workflows-edge-functions)
Step 4: Automate workflows (Edge Functions)
Set up automatic actions that save you time. _When a new lead is added to the Clients table, send me an email notification. Analyze client meeting notes with Lovable AI and save a sentiment score in the Clients table. Sync new contacts automatically. Schedule a daily job at 7 AM that emails me a summary of today’s follow-ups. When a payment is marked ‘paid’ in Stripe, automatically update the related invoice’s status to ‘Paid’._
###
[](https://docs.lovable.dev/features/cloud#step-5%3A-connect-to-other-tools-secrets)
Step 5: Connect to other tools (Secrets)
When you use services like Stripe or Google Calendar, they’ll give you private “keys.”
Lovable will prompt you to add them securely whenever they’re needed, and only your app can use them.
###
[](https://docs.lovable.dev/features/cloud#step-6%3A-add-ai-superpowers-ai)
Step 6: Add AI superpowers (AI)
Make the tool act like your assistant. _Summarize each client’s meeting notes and save them to their profile. Suggest next steps for every open deal. Generate personalized email drafts for following up with leads. Classify client messages into categories: sales, support, or billing._
[](https://docs.lovable.dev/features/cloud#usage-based-cloud-and-ai-pricing)
Usage-based Cloud and AI pricing
-----------------------------------------------------------------------------------------------------------------
Lovable includes Cloud hosting and built-in AI in all pricing plans, even the Free plan. These services run on a **usage-based pricing model**. This means your costs scale with how much you use and are not covered by your subscription. From your workspace or project, go to **Settings → Cloud & AI balance**. Here, you can:
* View workspace balance status
* Top up and add funds to your workspace balance (available for paid plans only)
* Access your invoice history and manage payment preferences
* Track total Cloud and AI usage costs across your workspace
* View detailed Cloud and AI usage costs for each project
Currently, the list includes all projects, even those not using Lovable Cloud or AI. Projects without usage always show $0.00.
The Cloud & AI balance screen updates as follows:
* Cloud usage updates daily at 10 AM CET
* AI usage updates continuously
* Your **Cloud balance** pays for hosting deployed apps.
* Your **AI balance** pays for AI features inside deployed apps.
* **Workspace Credits** are separate, only used for messaging while building apps, and can be tracked in **Settings → Plans & credits**.
###
[](https://docs.lovable.dev/features/cloud#included-free-usage-all-plans)
Included free usage (all plans)
Every workspace receives free monthly usage, regardless of plan and regardless of when in the month you start your plan:
* **$25 Cloud balance** for app hosting
* **$1 AI balance** for AI features
These free funds reset on the first day of each month at 00:00 UTC (displayed in your timezone) and are not tied to the billing cycle of you subscription plan. Unused free funds do not roll over to the next month.
**Temporary offering, subject to change:** Until the end of 2025, every workspace gets $25 Cloud and $1 AI per month, even for users on the Free plan.
###
[](https://docs.lovable.dev/features/cloud#adding-funds-paid-plans-only)
Adding funds (paid plans only)
Adding funds to your workspace balance for Lovable Cloud and AI usage is available only on paid plans. Free plan users must upgrade to access this functionality. Any usage that exceeds the included amount is billed separately and not covered by your subscription.
* **Cloud usage:** depends on activity (number of users and interactions) and data transfer (uploads/downloads).
* **AI usage:** depends on the model used and task complexity (more advanced models cost more). To verify costs, refer to the official sources linked in our list of supported AI models at [Lovable AI](https://docs.lovable.dev/features/ai)
.
Workspace owners and admins on paid plans can top up balances either by doing a manual one-time top-up or by configuring automatic top-ups. Unused workspace funds roll over month-to-month but expire after one year. **One-time top-up** Top up your workspace balance manually with an amount you choose.
1. Go to **Settings → Cloud & AI balance → Top up → One-time to-up.**
2. Enter a custom amount or choose a predefined option ($10 min, $1000 max).
3. Complete the payment securely via Stripe.
**Automatic top-up** Automatically add funds when your balance drops below $10, but remain in control of your monthly charges by adding a monthly charge limit.
1. Go to **Settings → Cloud & AI balance → Top up → Automatic top-up.**
2. Enable automatic top-up.
3. Enter a top-up amount which will be automatically charged and added to your workspace balance when your balance drops below $10 ($10 min, $1000 max).
4. Set a monthly charge limit to control how much can be charged in total each month ($10 min, $10,000 max).
5. Click **Save**.
Your default payment method will be automatically charged when your balance drops below $10, provided you have not reached your monthly charge limit.
When you configure automatic top-up, you can visually monitor your monthly charges from the **Automatic top-up** screen. The monthly charge period resets on the first day of each month at 00:00 UTC (displayed in your timezone) and is not tied to the billing cycle of you subscription plan.
###
[](https://docs.lovable.dev/features/cloud#alerts-and-notifications)
Alerts and notifications
Lovable keeps you informed to avoid unexpected service interruptions:
* **Email notifications** sent to workspace owners and admins
* **Usage alerts** displayed in the Cloud & AI balance screen and Cloud overview
Alerts trigger when your workspace:
* Reaches a certain percentage of included usage
* Uses up all included usage
* Reaches a certain percentage of wallet balance
* Uses up all wallet funds
If your workspace balance runs out, your application will stop working until funds are added (or free usage resets at the start of the next month). To keep your application working:
* **Free plan:** upgrade to a paid plan to add funds.
* **Paid plans:** top up your workspace balance any time or enable automatic top-up.
###
[](https://docs.lovable.dev/features/cloud#example-workspace-cloud-and-ai-costs-per-month)
Example workspace Cloud and AI costs (per month)
Here are a few examples to give you a feel for what typical monthly Cloud and AI costs might look like per workspace for different kinds of apps. These numbers are rough estimates, just to help set expectations. Keep in mind:
* Your Lovable subscription does not include Cloud or AI costs — you cover those separately.
* Every plan includes $25/month of free Cloud usage and $1/month of free AI usage per workspace.
* The cost of using Lovable AI is exactly the same as going directly to the LLM provider. To verify costs, refer to the official sources linked in our list of supported AI models at [Lovable AI](https://docs.lovable.dev/features/ai)
.
* The AI costs below are estimated using the default model, Gemini 2.5 Flash.
| App type | Example monthly usage | Cloud cost | AI cost | What you pay to Lovable |
| --- | --- | --- | --- | --- |
| **Personal blog or portfolio** | 500 visits, a handful of posts/comments, some images, tiny server. AI adds summaries or catchy titles (2,500 AI calls/month, 50 input + 150 output tokens each). | $1 | $1 | **Subscription only.**
_The included free usage entirely covers your Cloud and AI costs._ |
| **Small business website** | 5,000 visits, product listings, forms/newsletter signups, product images, tiny server. AI adds simple chat assistant (6,500 AI calls/month, 30 input + 120 output tokens each). | $5 | $2 | **Subscription + $1 (AI)**
_The included free usage entirely covers your Cloud costs and $1 of AI costs._ |
| **Team project manager** | 20 active users, 10,000 visits, tasks and comments, file uploads, live updates, small server. AI adds task suggestions, reminders, comment summaries (6,000 AI calls/month, 200 input + 300 output tokens each). | $15 | $5 | **Subscription + $4 (AI)**
_The included free usage entirely covers your Cloud costs and $1 of AI costs._ |
| **E-comm store** | 10,000 visitors, 500 purchases, many product images, customer/order data, checkout flows, medium server. AI adds product descriptions and a shopping assistant (20,000 AI calls/month, 40 input + 200 output tokens each). | $65 | $10 | **Subscription + $49 (Cloud + AI)**
_The included free usage covers $25 of Cloud costs and $1 of AI costs._ |
[](https://docs.lovable.dev/features/cloud#faq)
FAQ
-------------------------------------------------------
Do I have full control over my monthly expenses?
Yes. We designed Lovable Cloud to give you complete control:
* **Option 1: Hard budget (zero charges)**
Stay strictly within the free allowance. If you go over, your projects pause automatically. Your bill stays at $0.
* **Option 2: Top up manually (controlled scaling)**
Top up your workspace balance with an amount you choose. Your apps scale, and you only pay for usage beyond the free allowance.
If you spend your workspace balance, you will receive a notification and your projects will pause automatically.
* **Option 3: Top up automatically (seamless scaling)**
Automatically add funds when your balance drops below $10, but remain in control of your monthly charges by adding a monthly charge limit. Your apps scale without interruption, and you only pay for usage beyond the free allowance.
If funds cannot be added automatically because you reached your monthly charge limit, your projects will pause when your remaining workspace balance runs out.
Are my credits deducted for Cloud and AI usage?
No, your workspace credits are separate, only used for messaging while building apps. You can track your credit usage in **Settings → Plans & credits**.You can track your Cloud and AI usage in **Settings → Cloud & AI balance**.
* Your Cloud balance pays for hosting deployed apps.
* Your AI balance pays for AI features inside deployed apps.
What is the cost of Lovable AI?
The cost of using Lovable AI is exactly the same as going directly to the LLM provider. There are no hidden fees. To verify costs, refer to the official sources linked in our list of supported AI models at [Lovable AI](https://docs.lovable.dev/features/ai)
.
I’m currently using the Supabase integration. What does this change mean for me?
Don’t worry, nothing changes for your existing projects. Your Supabase integration will continue to work exactly as it does today, and we will continue to support it.
* For existing projects: continue using Supabase with no changes.
* For new projects: choose either Lovable Cloud or Supabase.
Can I change my mind after adding Cloud to my project?
No, when you connect your project to Cloud, you can’t revert that change or disconnect your project from the Cloud.
Can I remix Cloud projects?
Yes, Cloud projects can be remixed to Cloud projects only. This creates a copy of your project that you can edit separately in your currently selected workspace. The structure of backend-related data, such as tables and Edge Functions, is copied over without any information. For any automatically generated keys in the original project, Lovable generates fresh keys in the remixed project. Manually added keys are not copied over.Keep in mind that you can’t revert to a previous version of your app in the remixed project if the project is using Lovable backend. For frontend-only projects hosted in the Cloud, reverts are possible.
Can I export my Cloud project to Supabase?
This is technically possible since you own the code in GitHub, but not straightforward. We are looking into making this easier. For more information, see [Self-hosting: Run your Lovable Cloud project anywhere](https://docs.lovable.dev/tips-tricks/self-hosting)
.
How do I know what projects are generating most usage?
You can see the Cloud and AI usage breakdown per project by going to **Settings → Cloud & AI balance.**
Currently, the list includes all projects, even those not using Lovable Cloud or AI. Projects without usage always show $0.00.
Can I migrate my project from Supabase to Cloud?
At the moment, migration from Supabase to Cloud is not supported. If your project is already connected to Supabase, we recommend continuing to use it, as we will keep supporting Supabase moving forward.
My Cloud data isn't loading. What should I do?
This can happen if you have too much data running on a smaller Cloud project instance. To fix it, please go to the **Cloud tab → Overview → Advanced settings** and then choose a larger instance size. After you’ve switched to a larger instance, and given it a couple of minutes to change, the data should load, and your Cloud project should work again. Keep in mind that a larger instance size will result in higher Cloud usage and increased Cloud usage costs.
Was this page helpful?
YesNo
[Code mode](https://docs.lovable.dev/features/code-mode)
[Lovable AI](https://docs.lovable.dev/features/ai)
⌘I
---
# Modes - Lovable Documentation
[Skip to main content](https://docs.lovable.dev/features/modes#content-area)
[Lovable Documentation home page](https://lovable.dev/)
Search...
⌘K
Search...
Navigation
Core features
Modes
[Introduction](https://docs.lovable.dev/introduction/welcome)
[Features](https://docs.lovable.dev/features/modes)
[Integrations](https://docs.lovable.dev/integrations/introduction)
[Tips & Tricks](https://docs.lovable.dev/tips-tricks/best-practice)
[Prompt engineering](https://docs.lovable.dev/prompting/prompting-one)
[Use cases](https://docs.lovable.dev/use-case/video-tutorials)
[Glossary](https://docs.lovable.dev/glossary)
[Changelog](https://docs.lovable.dev/changelog)
On this page
* [Agent mode](https://docs.lovable.dev/features/modes#agent-mode)
* [Chat mode](https://docs.lovable.dev/features/modes#chat-mode)
When sending messages in Lovable you can choose different modes that are good for different things.
[](https://docs.lovable.dev/features/modes#agent-mode)
Agent mode
---------------------------------------------------------------------
Agent mode enables Lovable to think, plan, and take actions autonomously. It’s designed to make Lovable more capable, reliable, and independent when handling complex development tasks. Agent mode can:
* Interpret your request
* Explore your codebase for the necessary context
* Read files on demand
* Fix and refactor code as needed
* Debug issues proactively
* Inspect logs and network activity to identify and fix errors automatically
* Search the web in real-time to fetch documentation, assets, or screenshots
* Generate and edit images for your application
All without manual intervention. With deeper codebase understanding and real-time debugging, it delivers better results with fewer errors and fewer unwanted changes. These tools allow Lovable to act with autonomy and precision, reducing friction during development. **Pricing** Agent Mode uses usage-based pricing, which you can read more about [here](https://docs.lovable.dev/introduction/plans-and-credits#credit-usage)
. The cost of a message depends on its complexity to ensure you only pay for what you actually use. Many messages cost less than 1 credit, while more complex ones may cost more. [Click here to read the announcement!](https://lovable.dev/blog/agent)
[](https://docs.lovable.dev/features/modes#chat-mode)
Chat mode
-------------------------------------------------------------------
Chat Mode is your development and debugging partner. It helps you think through problems, debug issues and plan your product directly within Lovable. Every message in Chat mode deducts 1 credit.

Activate Chat mode
------------------
To activate **Chat mode**, simply click “Chat” next to where you input your messages in Lovable.
Unlike Agent mode, Chat mode is conversational and can’t make changes to your code. This is perfect for asking questions, planning your project, and debugging. It is agentic, meaning it can reason across multiple steps and decide when to search files, inspect logs, query the database and more. If you ask it for help with implementing a functionality or troubleshooting it will come up with a step-by-step plan to reach your desired outcome. You’ll get prompted with an “Implement the plan”-button. Simply press it and the AI will enter Agent mode and implement the necessary code changes. **Best use cases for chat mode**
* Efficient debugging by asking the AI to investigate issues in depth before requesting a fix.
* Planning database structures and relationships to support effective system architecture.
* Optimal implementation of new features by identifying the minimal necessary changes required for new functionality.
* Requesting improvement tips to enhance your application.
* Understanding and evaluating how potential new features will impact the application’s structure and functionality.
Was this page helpful?
YesNo
[Visual edits](https://docs.lovable.dev/features/visual-edit)
⌘I
---
# Changelog - Lovable Documentation
[Skip to main content](https://docs.lovable.dev/changelog#content-area)
[Lovable Documentation home page](https://lovable.dev/)
Search...
⌘K
Search...
Navigation
Changelog
[Introduction](https://docs.lovable.dev/introduction/welcome)
[Features](https://docs.lovable.dev/features/modes)
[Integrations](https://docs.lovable.dev/integrations/introduction)
[Tips & Tricks](https://docs.lovable.dev/tips-tricks/best-practice)
[Prompt engineering](https://docs.lovable.dev/prompting/prompting-one)
[Use cases](https://docs.lovable.dev/use-case/video-tutorials)
[Glossary](https://docs.lovable.dev/glossary)
[Changelog](https://docs.lovable.dev/changelog)
On this page
* [10/06/2025](https://docs.lovable.dev/changelog#10%2F06%2F2025)
* [09/01/2025](https://docs.lovable.dev/changelog#09%2F01%2F2025)
* [08/11/2025](https://docs.lovable.dev/changelog#08%2F11%2F2025)
* [06/26/2025](https://docs.lovable.dev/changelog#06%2F26%2F2025)
* [06/04/2025](https://docs.lovable.dev/changelog#06%2F04%2F2025)
* [05/24/2025](https://docs.lovable.dev/changelog#05%2F24%2F2025)
* [05/09/2025](https://docs.lovable.dev/changelog#05%2F09%2F2025)
* [05/02/2025](https://docs.lovable.dev/changelog#05%2F02%2F2025)
* [04/25/2025](https://docs.lovable.dev/changelog#04%2F25%2F2025)
* [04/17/2025](https://docs.lovable.dev/changelog#04%2F17%2F2025)
* [04/11/2025](https://docs.lovable.dev/changelog#04%2F11%2F2025)
* [04/04/2025](https://docs.lovable.dev/changelog#04%2F04%2F2025)
* [03/28/2025](https://docs.lovable.dev/changelog#03%2F28%2F2025)
* [03/21/2025](https://docs.lovable.dev/changelog#03%2F21%2F2025)
* [03/14/2025](https://docs.lovable.dev/changelog#03%2F14%2F2025)
* [03/07/2025](https://docs.lovable.dev/changelog#03%2F07%2F2025)
* [02/28/2025](https://docs.lovable.dev/changelog#02%2F28%2F2025)
* [02/21/2025](https://docs.lovable.dev/changelog#02%2F21%2F2025)
* [02/12/2025](https://docs.lovable.dev/changelog#02%2F12%2F2025)
* [02/07/2025](https://docs.lovable.dev/changelog#02%2F07%2F2025)
* [01/28/2025](https://docs.lovable.dev/changelog#01%2F28%2F2025)
* [01/18/2025](https://docs.lovable.dev/changelog#01%2F18%2F2025)
* [01/06/2025](https://docs.lovable.dev/changelog#01%2F06%2F2025)
* [12/11/2024](https://docs.lovable.dev/changelog#12%2F11%2F2024)
* [12/03/2024](https://docs.lovable.dev/changelog#12%2F03%2F2024)
* [11/11/2024](https://docs.lovable.dev/changelog#11%2F11%2F2024)
* [10/02/2024](https://docs.lovable.dev/changelog#10%2F02%2F2024)
* [09/23/2024](https://docs.lovable.dev/changelog#09%2F23%2F2024)
* [09/09/2024](https://docs.lovable.dev/changelog#09%2F09%2F2024)
* [08/20/2024](https://docs.lovable.dev/changelog#08%2F20%2F2024)
* [07/17/2024](https://docs.lovable.dev/changelog#07%2F17%2F2024)
* [06/05/2024](https://docs.lovable.dev/changelog#06%2F05%2F2024)
* [03/26/2024](https://docs.lovable.dev/changelog#03%2F26%2F2024)
* [03/13/2024](https://docs.lovable.dev/changelog#03%2F13%2F2024)
* [03/01/2024](https://docs.lovable.dev/changelog#03%2F01%2F2024)
* [02/13/2024](https://docs.lovable.dev/changelog#02%2F13%2F2024)
* [01/18/2024](https://docs.lovable.dev/changelog#01%2F18%2F2024)
* [01/15/2024](https://docs.lovable.dev/changelog#01%2F15%2F2024)
[](https://docs.lovable.dev/changelog#10%2F06%2F2025)
10/06/2025
**Lovable Cloud**Build full‑stack apps with no manual Supabase setup. Lovable Cloud gives you on‑demand databases, user authentication, and storage that scales automatically as your app grows.Lovable Cloud is available for all new projects, and any existing projects that aren’t integrated with Supabase. Learn more [here](https://docs.lovable.dev/features/cloud)
.**Lovable AI**You can now build AI-native apps in Lovable, just by prompting. We manage provider access & APIs so you can focus on building your product. Through October 13, we’re offering free embedded AI functionality powered by Google Gemini.You can now build things like:
* **Special-purpose ChatGPT clones** — tailored conversational assistants for support, sales, or knowledge work.
* **Avatar & image generators** — let users create, edit, and customize visual content.
* **Coaching apps** — personalized guidance, onboarding coaches, habit builders, and more.
Every plan includes free monthly credits to use towards embedded AI functionality. Yes, even free plans! Full pricing can be found [here](https://docs.lovable.dev/features/cloud#usage-based-cloud-and-ai-pricing)
.**Voice Mode**You can now talk to Lovable. We’re unlocking a more intuitive and conversational way of building: describe ideas and edits out loud and Lovable makes it.**Turn your files into apps**Drop any file type into Lovable to turn it into an app.For example:
* Sheets → interactive dashboards
* Resumes → portfolios
* Slide decks → custom presentations
**Sonnet 4.5**Anthropic’s latest model now helps power your builds on Lovable. Expect stronger reasoning, more consistent results, and better performance on multi‑step edits and structured data.**A smoother build experience**Building on Lovable just got smoother: quicker access to the Visual Editor, better long-run UX, and image support in the Code Editor.**Confidently publish and unpublish**Ship with confidence. The publish flow now includes link‑preview editing before you go live. Made a mistake? Unpublish with one click.**Stripe integration**We’ve updated our Stripe integration with clearer billing & payment flows. Setup all your Stripe logic in chat by just describing what you want to build - no manual setup required.**Updated community resources**Both our Partner page and Remix got upgrades so you can extend what you build through the community. Visit the partner page to find specialized agencies (or apply to be featured), and use Remix on your favorite Lovable Cloud projects to get started faster.**Better workspace management**A new unified member view lets you understand usage and take actions across your team. Admins can now set session duration limits, turn on just-in-time provisioning (SSO), disable publishing and enforce project privacy settings.**Bug fixes**
* Fixed in-chat sizing issues that caused horizontal scroll
* Reduced build errors by 20%
[](https://docs.lovable.dev/changelog#09%2F01%2F2025)
09/01/2025
**Student + teacher discount live**We’re making it easier for students and educators to get building. Now, both students and teachers can save up to 50% off Pro, for up to a year. The discount applies if you’re starting from a free workspace—so you can unlock the full power of Lovable without stretching your budget. [Learn more about the offer here](https://lovable.dev/students)
.**Security upgrades**Security is our priority. We’ve expanded our security features, policies, and certifications including adding SOC 2 Type 2 compliance and ISO 27001:2022 certifications. We also hired an incredible CISO, Igor Andriushchenko – so you can trust us with your ideas, your data, and your customers. Read more about our security features [here](https://lovable.dev/security)
.**Your new Lovable Inbox**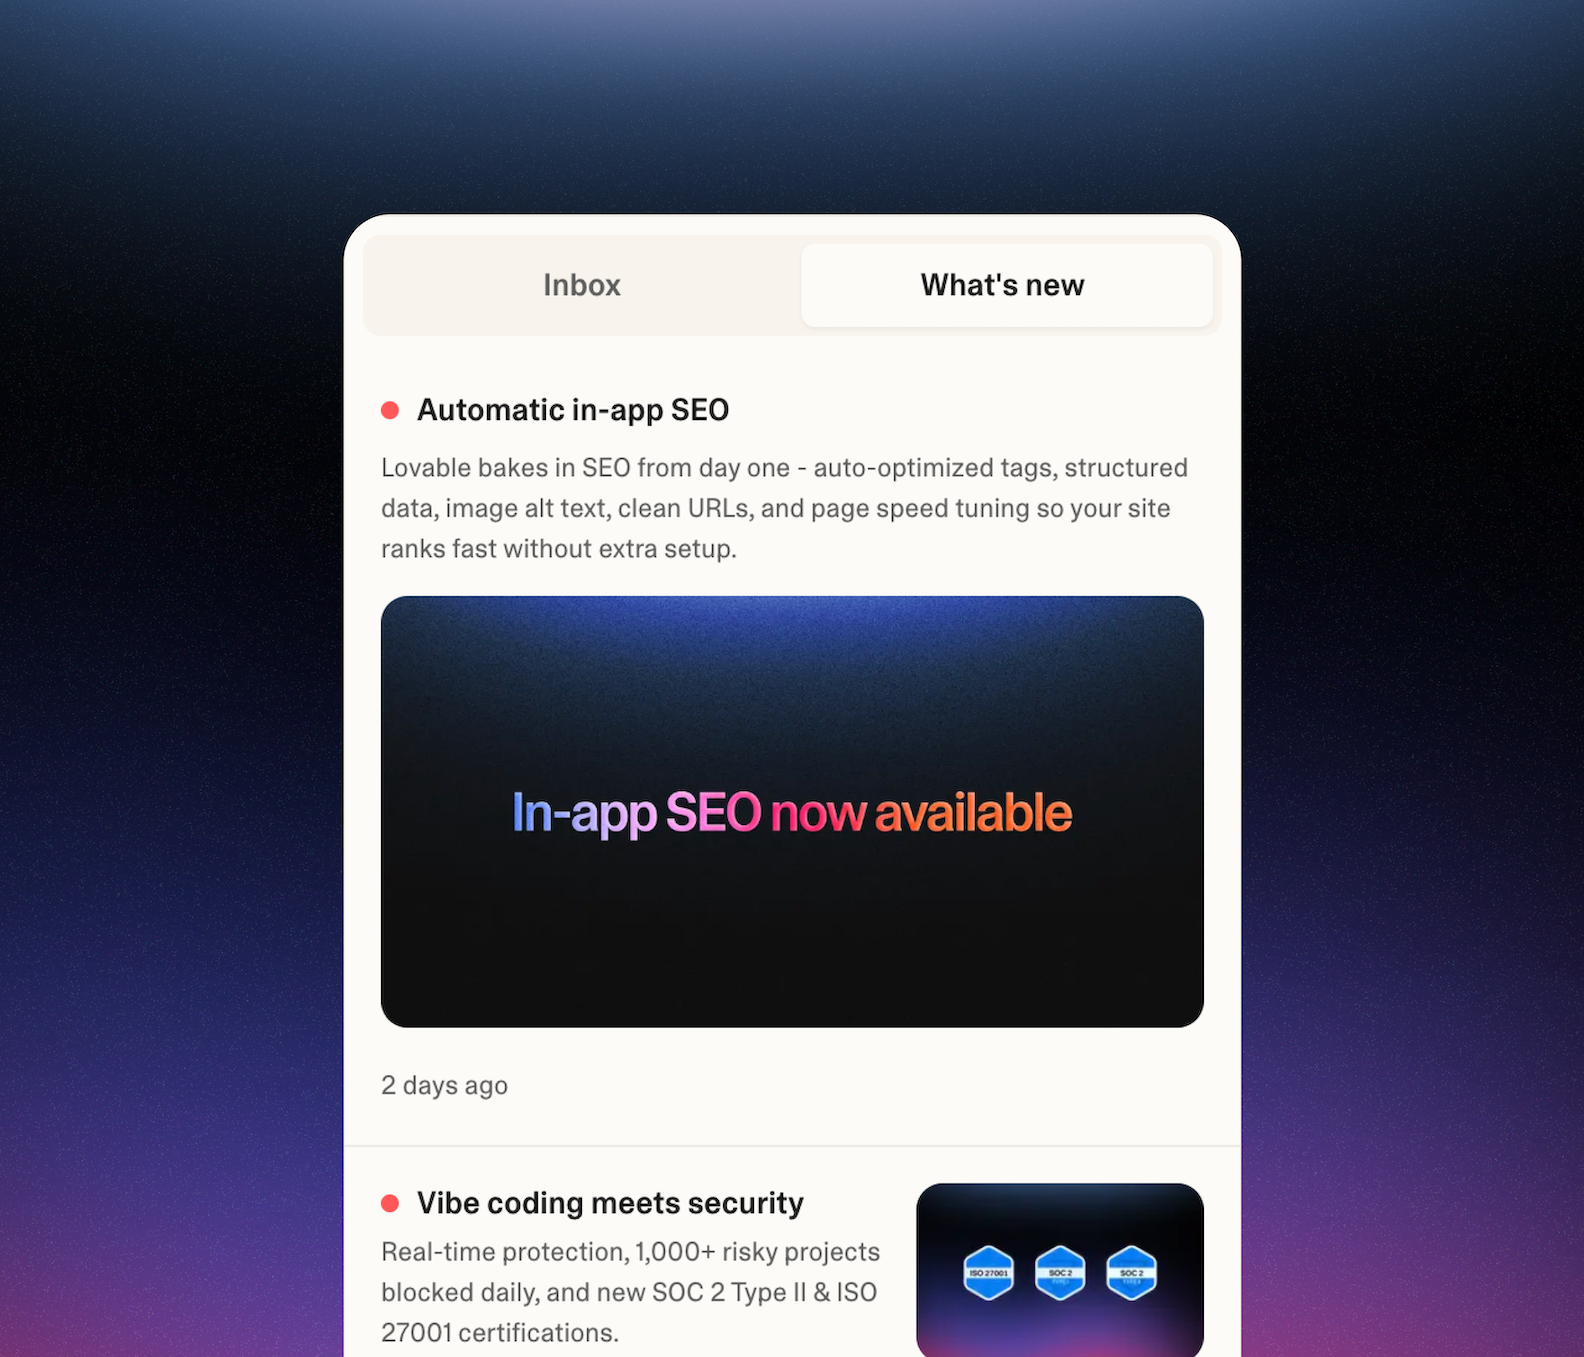Your new personal inbox helps you track project and workspace invites, and you can also check out updates we’ve recently shipped—so you’re always up to speed.**Smarter SEO for new apps** When you create a new app or webpage, Lovable now includes agentic SEO instructions that better respect SEO best practices. This helps your projects get better indexed on search engines and reach the audiences you’re building for.**Workspace viewer role (Pro+)** For Pro+ members, we’ve introduced a new Viewer role. Viewers can see workspace metadata, projects, and members, but can’t create or edit projects or invite others. It’s the perfect role for stakeholders who need visibility, but don’t need to edit projects.**Flexible plan management**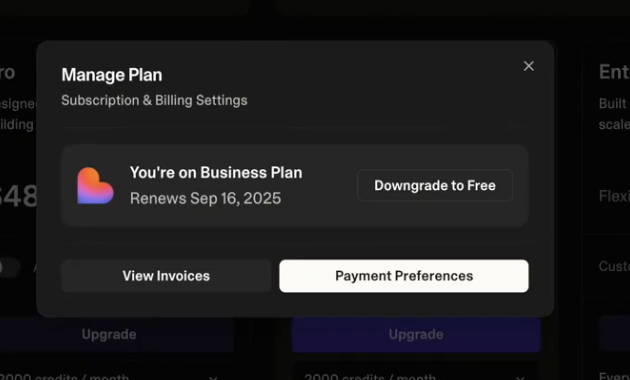You can now upgrade or downgrade your plan in just a few clicks—whether you need more credits or want to scale down to free.**Clearer error feedback**_01K42RHEPDYDCZT5NG96S3TEGY.png)If the LLM ever misinterprets your request, Lovable now lets you know directly. You’ll see what went wrong so you can adjust your prompt and move forward faster.**Track your edits + streaks**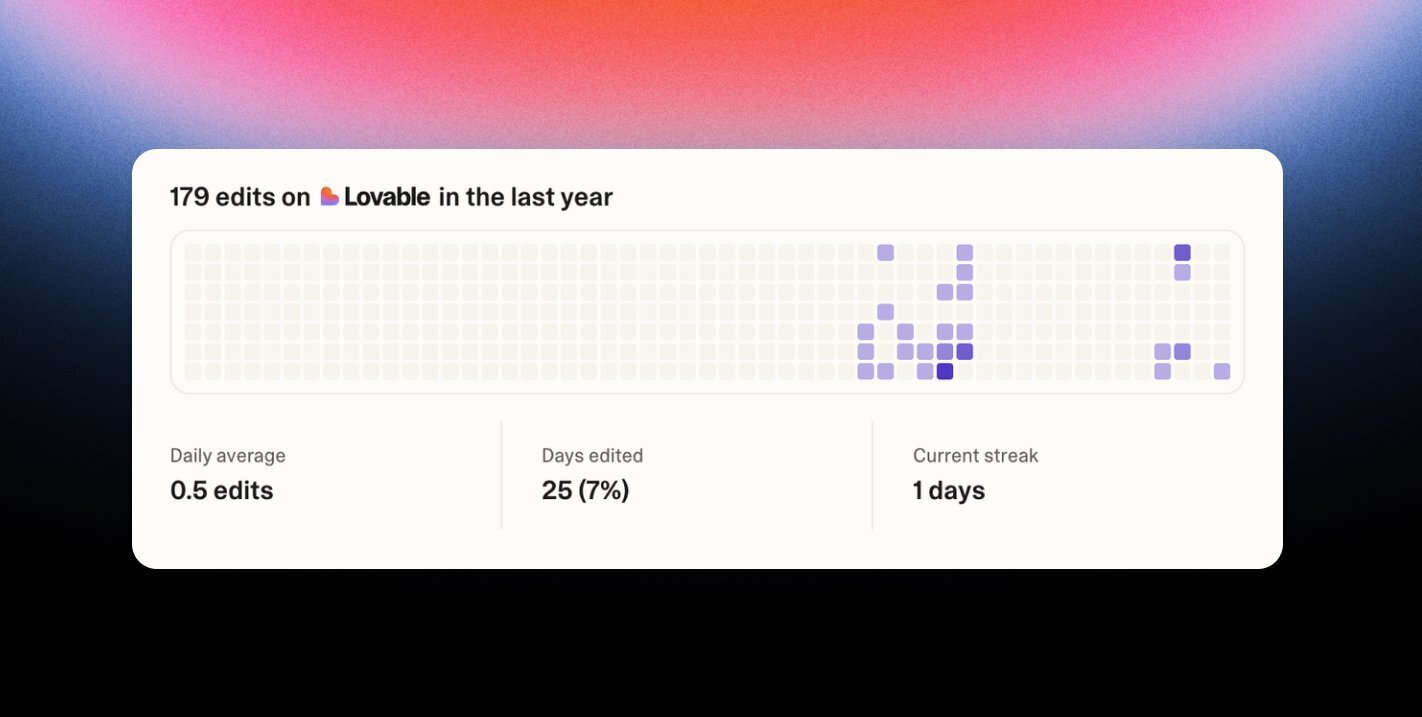We’ve added a personal dashboard where you can see how many edits you’ve made in Lovable and track your streaks. A great way to stay motivated and see your progress over time. Check it out under your Account Settings.
[](https://docs.lovable.dev/changelog#08%2F11%2F2025)
08/11/2025
**Agent Mode is the new default mode**With this upgrade, Lovable becomes a truly agentic partner—interpreting requests, understanding your codebase, fixing issues, executing complex multi-step edits across files, integrating with external tools, and reducing errors by 91%, so you can build more ambitious apps faster and with less friction.Legacy mode (where you don’t use agent) will be sunsetting on September 1, 2025..**Real-time analytics on your Lovable apps**Curious how your app is performing in the wild? You can now track live traffic and engagement directly inside Lovable including:
* Visitors: How many people are using your app Pageviews: Which pages get the most attention
* Visit duration: How long users stay
* Bounce rate: What percentage leaves instantly
* Views per visit: How deeply users engage
The data updates in near real-time so you can spot trends, debug issues, or just celebrate your first users! Available now under Project Settings → Analytics**Pricing change coming to chat mode**Pricing for chat mode is moving from 1 credit per message to dynamic pricing, which matches the pricing model for agent mode. This means that each message and response cost is based on the complexity of the message; so some messages and responses cost less than 1 credit, and some, if quite complex, cost more. This change will be rolling out to all users on September 1, 2025.**Lovable business plan**Introducing the Lovable Business Plan, built for teams that need more control, privacy, and flexibility. It includes everything in Pro, plus powerful upgrades:
* SSO for secure org-wide sign-in
* Personal projects only visible to you
* Templates for consistent styling
* Yearly plans now available
You can now switch to a yearly subscription for any paid Lovable plan. Get a discounted rate, simplify billing, and worry less about monthly renewals.**Visual edits v2**We have refined the visual edits experience after tons of feedback. More responsive, precise, and delightful to use. It’s faster than ever to tweak your UI, fix copy, or adjust layout—without leaving the live preview.You can also jump to selected elements in code when using visual edits, tightens the loop between design and implementation.**Project invites workflow**Invited users must now formally accept or decline access to a project—both from email and magic links. This avoids stale “pending” members and improves collaborator tracking.**Search all files in the code editor**Use the file search inside the code editor to quickly locate code and add file paths directly into chat.**Unified credits bar**We’ve shipped a new credits bar that combines all credit types into one clean, unified view—no more jumping between different displays to track usage.**Upgraded people tab**The People tab in workspace settings has been redesigned. It now includes pagination (20 users per page), search, and filtering by member status—making it much easier to manage large teams.**Scales to large workspaces**Thanks to backend improvements, we now support massive workspaces with tens of thousands of members without performance issues.**Published project badge**We’ve added a small but useful touch: all published projects now display a “Published” badge so it’s easier to see what’s live at a glance.**Bug fixes**
* Fixed image upload bug causing >1% of initial generations to fail if the user wasn’t logged in.
* Prevents redundant updates when a project is already up to date with the deployed version.
* You can now disconnect a project from legacy Supabase when disconnecting the org.
* Reconnecting orgs with invalid tokens is now seamless.
[](https://docs.lovable.dev/changelog#06%2F26%2F2025)
06/26/2025
**Spotlight**We’ve made collaboration on Lovable even more accessible by making it a free feature for all users.For Free and Pro users:
* Workspace collaboration is now completely free – invite your teammates and start building together at no additional cost.
* Unlocks workspace collaboration for up to 20 members on both Free and Pro plans.
* On Free plans, additional members join as editors; Pro plans offer granular workspace roles and permissions.
For Teams plan users:
* We’ve simplified our pricing structure and moved you to the Pro plan with significant savings:
* You’ve been automatically moved from the Teams plan to the Pro plan.
* You’ll now pay 20% less starting with your next renewal.
* You still have access to all the same features and credits as before – just at a lower price.
* All your project and workspace settings remain unchanged.
**Improvements**
* Redesigned the mobile experience for building apps and websites directly from your phone.
* Shipped a Visual Edits refresh with new floating combo box controls positioned right next to elements you’re editing
* Added project search functionality with fuzzy matching by name – _tip: rename your projects for better discoverability_.
* Rolled out full-stack initial generations to all users that will enable you to connect Supabase before doing an initial generation
* Added a floating prompt bar to our homepage that lets you enter prompt even when scrolled down.
* Enhanced the history view with a cleaner timeline prioritizing dates, restored versions now visible, and simplified version navigation.
* Updated the careers page with latest information. [Check it out here](https://lovable.dev/careers)
.
**Bug Fixes**
* Fixed admin access to integration settings for user projects.
* Resolved issue where admins couldn’t properly access workspaces, causing editor display and functionality issues when visiting team projects.
* Fixed iframe redirect issue that was causing unwanted redirects within the Lovable app.
[](https://docs.lovable.dev/changelog#06%2F04%2F2025)
06/04/2025
Here everything we shipped the last two weeks:**Spotlight**
* Enhanced project discoverability with new filtering options to easily find and manage your projects.
* Added categorization to community projects to make it easier to discover projects by the community.
**Improvements**
* Chat mode now renders Mermaid diagrams to help visualize your app’s back-end logic and structure (ask for it to chart things to trigger this).
* Auto-configure redirect URLs for Supabase Auth integration - no more manual configuration needed for a more seamless authentication setup.
* Added in-product feedback system - click the thumbs down button when edits cause issues to help us improve Lovable’s AI for everyone.
* Introduced smart nudges to guide you to Chat Mode when debugging issues that need conversational help.
* Edit history now shows screenshot previews on hover, letting you quickly see what your app looked like at different stages without opening each version.
**Security**
* Added API key detection in chat that warns you before accidentally sharing sensitive information like secrets.
* Rolled out AI-powered “Security review” feature to help identify potential vulnerabilities in your apps. Trigger it before publishing your app via the publish modal.
[](https://docs.lovable.dev/changelog#05%2F24%2F2025)
05/24/2025
Here everything we shipped the last two weeks:**Spotlight**
* Claude 4 is now being used in Lovable! It’s powering most prompts, both for project creation and for edits on all projects (including old projects). This should make Lovable have 25% less errors and be 40% faster overall.
**Improvements**
* Revamped the setup flow for both GitHub and Supabase, simplifying multi-step onboarding to reduce confusion.
* Added visual labels to featured projects on the homepage for better discovery.
* Added support for removing custom domains from your Lovable app.
* Several improvements in collaborator management:
* Added validation to the email invite form in the People tab
* Tooltips now explain the permissions for each role (admin / owner / editor)
* You can now see the role of pending invites
* Better error messages for edge cases like inviting someone already in the workspace
* Commit messages now rely more on conversation history for better context.
* Improved the quality of streaming: smoother experience and no more flashing text.
* Users can now view public Lovable projects without being logged in.
* Active edit cards are now highlighted so it’s easier to see which one is active.
* The default “Edit Code” button now opens the preview instead of the raw code.
**Bug fixes**
* Fixed bugs that caused the wrong live preview to show in some cases.
* Fixed a bug where refreshing the preview could change the current path.
* Fixed a bug that caused infinite redirect loops when starting a live preview after logging in.
[](https://docs.lovable.dev/changelog#05%2F09%2F2025)
05/09/2025
Here everything we shipped this week:**Spotlight**
* We’ve added support for transferring projects between workspaces!
* Lovable is now better at understanding images — whether you’re uploading a design reference or a real site asset, it knows the difference and will handle it accordingly
**Bug fixes**
* Fixed issues with published projects and deployed preview links not reflecting the latest version
* Project visibility settings have returned to team workspaces, but will be disabled for now
* Fixed issues where workspace owners were not able to edit projects created by non-owners in teams workspace
* Fixed issue where “downgrade button” in billing page would link to wrong Stripe page
* Fixed issue where some users were not seeing their plan after upgrading to a higher plan
[](https://docs.lovable.dev/changelog#05%2F02%2F2025)
05/02/2025
Here everything we shipped this week:**Improvements**
* Improved credit tracking by making it explicit when you have reached 30 monthly credit cap and being explicit about when both your daily and monthly credits will renew
* Made it possible for you to invite non-users to team workspaces
* Revamped errors modals to display more helpful messages (e.g. Supabase token issues), not just “Request failed”
* Updated settings tabs (Projects, Knowledge, Domains) to new design
**Bug fixes**
* Fixed issues where credits were not refreshed except when refreshing the page
* Fixed an issues where lovable failed to fetch edge function logs
* Fixed issue that led GitHub branch switching to fail if you had renamed the repo
* Fixed bug that was blocking users from applying some SQL migrations
* Fixed poor styling in mobile pricing page
* Fixed issue that was blocking project renames
* Fixed issues where the projects counter in homepage was not showing right number
* Fixed issues leading to Supabase re-authentication loop
* Fixed the issues where edits made in Dev Mode where not being saved
* Fixed the issues where the “Working…” indicator was not appearing for collaborators
[](https://docs.lovable.dev/changelog#04%2F25%2F2025)
04/25/2025
Lovable 2.0
We’re so excited to launch **Lovable 2.0**! This one’s all about collaboration, security, and giving you more control.
* We’ve rebranded! New logo, brighter colors, and a much cleaner UI. Go check it out below— we hope it feels like a glow-up.
* [Teams](https://docs.lovable.dev/user-guides/teams)
: Real-time collaboration is finally here! Invite others to co-edit apps or create shared team workspaces.
* [**Simplified Pricing**](https://docs.lovable.dev/user-guides/messaging-limits#free-vs-paid-plans-comparison)
with two clean options: Pro starts at $25/month and Teams starts at $30/month.
* **Security Scan:** Lovable now checks for vulnerabilities when you publish (if you’re connected to Supabase). This is just the beginning of our work to make vibe coding safer by default.
* When you try to revert to a past edit after which you ran a migration, Lovable will tell you we’re not reverting the Database.
* You asked, we listened. [Chat mode](https://docs.lovable.dev/features/modes#2-chat-mode)
is now _way_ smarter and **here to stay** for everyone. It doesn’t make edits, but it _can_ help you reason through problems, plan features, inspect logs, query databases, and more. Think of it as your smart, hands-off pair programming buddy.
This is a big step forward — and we’re just getting started.Thanks so much for being on this journey with us
[](https://docs.lovable.dev/changelog#04%2F17%2F2025)
04/17/2025
* Shipped github reliability improvements. We should now be able to sync to GitHub even when the user token has broken.
* Shipped some preview outdated fixes.
* When transferring repos, orgs/users that are suspended will be marked so. If clicking you will go to the page to unsuspend it.
[](https://docs.lovable.dev/changelog#04%2F11%2F2025)
04/11/2025
* You can now purchase a domain directly from your project settings — just click “Buy a domain”, search for what you want, and complete the checkout in a few clicks. We’ve partnered with IONOS to make this possible. Read more [here](http://email.lovable.dev/e/c/eyJlbWFpbF9pZCI6ImRnVG1qZ29EQUotUVZKNlFWQUdXRzVfR2VPdTVlSEVGMnU1Wk5hbz0iLCJocmVmIjoiaHR0cHM6Ly94LmNvbS9sb3ZhYmxlX2Rldi9zdGF0dXMvMTkwOTYzMzY1NjQ0MTc4NjYwOCIsImludGVybmFsIjoiZTY4ZTBhMmRhZWRkMDE5ZjkwNTQiLCJsaW5rX2lkIjoyMDk2fQ/de4d0c380fdfac4a4accea202b7884c14b49d33fc1c0ca808b5a4ebc9e6540fe)
.
* Updating the favicons is now easier to set up directly from Lovable.
* Loading larger projects should now be much faster since not all messages are loaded when the project is opened. Additional messages are loaded only when a user scrolls up.
* Clicking on the Supabase button (shown in first generation) now opens the setting pane. Also added a small What is Supabase? callout for first time users also linking to our docs and tutorials.
[](https://docs.lovable.dev/changelog#04%2F04%2F2025)
04/04/2025
* **New UI:** Updated the editor nav bar design, which moves pages dropdown and related buttons from preview panel header to nav bar.
* Refactor of diff creation which handles multiple edits to the same file.
* Upgraded the [Stripe integration](https://docs.lovable.dev/tips-tricks/setting-up-payments)
.
* New chat scrolling: Scrolls new user messages to the top of the viewport instead of autoscrolling as text is generated.
* Lovable now has a Dev Mode. Enabling Dev Mode lets you not only read your project’s code, but also edit it directly inside Lovable. Read more about it [here](http://email.lovable.dev/e/c/eyJlbWFpbF9pZCI6ImRnVG1qZ29EQUotUVZKNlFWQUdXRzVfR2VPdTVlSEVGMnU1Wk5hbz0iLCJocmVmIjoiaHR0cHM6Ly94LmNvbS9sb3ZhYmxlX2Rldi9zdGF0dXMvMTkwNzgxNjU2Nzk0NzA5NjM0MSIsImludGVybmFsIjoiZTY4ZTBhMmRhZWRkMDE5ZjkwNTQiLCJsaW5rX2lkIjoyMDk1fQ/c876becf4f48a97a1c3fd592a50e2bb9bcb03651afcb81988c68b031dc617425)
.
* Fixed Supabase integration where the AI was creating `config.toml` file in the wrong folders.
* Fixed so you can close the visual edits with `x` button again, and the `alt+s` hotkey works again in the preview.
[](https://docs.lovable.dev/changelog#03%2F28%2F2025)
03/28/2025
* [Linkable.site](https://linkable.site/)
: Turn your LinkedIn profile into a personalized website.
* Wondering if something’s down? You can now check our status page for live updates. Check it out [here](http://email.lovable.dev/e/c/eyJlbWFpbF9pZCI6ImRnVG1qZ29EQUotUVZKNlFWQUdXRzVfR2VPdTVlSEVGMnU1Wk5hbz0iLCJocmVmIjoiaHR0cHM6Ly9zdGF0dXMubG92YWJsZS5kZXYvIiwiaW50ZXJuYWwiOiJlNjhlMGEyZGFlZGQwMTlmOTA1NCIsImxpbmtfaWQiOjIwOTd9/727d92f8476ca681a08a3e2849ba1e6f28522466839aba17c98f79ab56a89035)
.
* Shipped that try to fix shows up when screen gets blank.
* Fixed bug where only the first edge function log is fetched.
* Fix bug causing infinite requests when going to profile page.
* Fixed a panic caused by concurrent map writes in the experiment service.
* Reduced by 4x occurrences of messages where we mix `lov-sql` and `lov-code`.
* Fixed a bug when labs settings were not being saved now.
* Previews are back online. Please let us know if your domains are not working.
* Fixed bug where only the first edge function log is fetched.
* We made some maor improvements/fixes to Supabase especially how to invoke edge functions.
* Supabase functions now get deployed when updated in code editor. Also, Supabase functions are updated live in code editor when changed by AI.
[](https://docs.lovable.dev/changelog#03%2F21%2F2025)
03/21/2025
We heard the issues you’ve shared with us and we’re working hard to fix them all. This is what we’ve shipped on product reliability this week:
* Fixed bug where AI would create new edge functions instead of fixing existing ones.
* [Labs Features](https://docs.lovable.dev/features/labs)
settings are now saved to your user account instead of local storage, ensuring they persist across devices.
* The monthly credits counter is now in the settings menu for quick access.
* Fixed bug causing the live preview window to go out of sync after AI edits.
* Fixed Supabase authentication session persistence issues.
* A complete rewrite of the Custom Domains backend(s). System should more stable now, quicker, self-healing and support unicode domains.
* _Connect custom domain_ as action in publish dialog for users that have not connected any domains to their project yet.
* Chat mode is faster than ever, fixing the bug where it sometimes just stopped.
* Added a supabase icon for connected projects in the project card, clickable for your own projects to take you to the supabase dashboard.
* Full support for SEO and Open Graph images so links (e.g. on X) now show proper card previews.
* UI update to clarify that Supabase connections happen at the organization level.
* Shipped memory leak fixes to prevent backend crashes during user requests including long intial runs.
* Shipped continuous project lock extensions and sandbox pings to support long-running requests without premature termination.
[](https://docs.lovable.dev/changelog#03%2F14%2F2025)
03/14/2025
* We’ve made some improvement to Lovable’s project settings layout for a more intuitive experience. You can now find Project Settings in the top left corner of your project page for quicker access and better navigation. [Here’s what’s new](https://discord.com/channels/1119885301872070706/1120705825317593149/1350101727768084491)
.
* Introducing [custom domains](https://docs.lovable.dev/tips-tricks/custom-domain)
in Lovable.
* Announcing the $10K [Lovable’s Build Competition](https://build-launch-win.lovable.app/)
with Lovable, Anthropic, Supabase & Sentri.
* Best website design, $3K cash winner. [Tweet here](https://x.com/lovable_dev/status/1900574280011731167)
.
[](https://docs.lovable.dev/changelog#03%2F07%2F2025)
03/07/2025
* [Introducing Versioning 2.0](https://x.com/lovable_dev/status/1896637541618778574)
enabling bookmarking, easier restores and improved history view.
* [Dev Mode:](https://x.com/lovable_dev/status/1897693825767768542)
Easily edit any code of your project directly in Lovable. All paid users can enable dev-mode in settings.
* Fixed a **Chat Mode streaming bug.**
* Resolved **internal server errors** in default mode.
* Addressed **main regressions** introduced with [Sonnet 3.7](https://lovable.dev/blog/anthropic-sonnet-3-7-lovable-diff-viewer)
.
* Fixed **SQL syntax errors.**
* Resolved **issues with mixing migrations and secret management** in a single edit.
[](https://docs.lovable.dev/changelog#02%2F28%2F2025)
02/28/2025
Code Viewer
* has impressed us with it’s coding and design capabilities. All Lovable users are now using Sonnet 3.7 for the main workflow, which means that Lovable is now smarter than ever before.
* [Introducing Code viewer to Lovable](https://x.com/lovable_dev/status/1895500151889768596)
: You can now view the code of your lovable project. As before you can also make code edits to lovable projects through Github.
* No more requests to support asking “_Why is my project broken_”. Now we show the actual error messages in the error dialog that should help you fix the error yourself.
* Bug fix of users reporting project version reversion due to Supabase connection.
* ‘_Edit_’ mode auto close after editing an element.
[](https://docs.lovable.dev/changelog#02%2F21%2F2025)
02/21/2025
* [Improvements in visual edits](https://x.com/lovable_dev/status/1892249059718484100)
that includes editing font weights, alignment and image resizing.
* Fixed Supabase syntax issues for smoother integration and fewer errors during deployment.
* Resolved an issue where some users were redirected to the homepage unexpectedly.
* Connecting to APIs and external data sources can be tricky. We’ve made it easier. Lovable now reads network logs directly, using them as context to debug and implement third-party integrations more effectively. No more disruptive error pop-ups—Lovable now uses real-time network insights to help you fix issues faster and keep building.
* Fixed issues with last fetch commits, ensuring accurate and up-to-date project syncing.
* No more stuck on `saving changes...` for messages that produces code and don’t result in a commit (for instance the AI tries to edit a file without permission or no changes were made)
[](https://docs.lovable.dev/changelog#02%2F12%2F2025)
02/12/2025
Visual Edits
* [Introducing Visual Edits.](https://lovable.dev/blog/introducing-visual-edits)
* [Supabase Integration 2.0.](https://lovable.dev/blog/lovable-supabase-integration-second-version)
* Changelog is now posted here on the documentation rather than scattered places.
* Improved documentation with new integrations, prompt guide and user guides.
* Worldwide Lovable Hackathon. [Apply here](https://lu.ma/1dl5m906)
.
* Increased capacity for LLM calls, reducing the risk of mid-process rate limits.
* Preview deploys and production deploys of apps working again.
* Resolved issue where users were redirected to the homepage upon entering a project.
* Fixed inconsistency in fetching the last commit due to misconfigured repositories using both S3 and GitHub.
* Fixed failure in remixes and transfers for projects with a custom main branch override.
* Resolved a Python logging name conflict that occasionally caused errors.
* Fixed the issue where the select and edit tool was missing for new projects.
* Beautiful revert buttons
[](https://docs.lovable.dev/changelog#02%2F07%2F2025)
02/07/2025
Go migration
* Chat mode is getting smarter & will now start counting towards your message limit.
* Introducing [Hire a Lovable Partner](https://lovable.dev/blog/introducing-hire-a-lovable-partner)
.
* [From Python to Go](https://lovable.dev/blog/from-python-to-go)
for stability, responsive platform and faster feature releases.
* Introduction of [Lovable Launched](https://lovable.dev/blog/2025-01-30-how-to-launch-and-get-traffic-to-an-app-built-with-lovable)
where you can publish your app to get in front of users.
* [Cloudflare R2](https://www.cloudflarestatus.com/)
is down. It’s back again running.
* [Lovable support 2.0](https://lovable.dev/support)
is up and running.
[](https://docs.lovable.dev/changelog#01%2F28%2F2025)
01/28/2025
Figma to Lovable
* Figma to Lovable: Turn Designs into code with Builder.io.
* Improved visibility of reverts.
* Support for Replicate has improved.
* Support for Resend has improved with the transition to the Node SDK.
* When creating signup and login flows, Lovable builds custom authentication UIs tailored to match your app.
* Managing roles in a Supabase-powered application is now more reliable.
* Lovable now supports building on top of Realtime OpenAI using RTC.
[](https://docs.lovable.dev/changelog#01%2F18%2F2025)
01/18/2025
* lovable.app DNS issues resolved.
* Sandbox issues are resolved, and the service is fully operational again.
* Supabase connection issue resolved, simply press the “Add another organization”.
[](https://docs.lovable.dev/changelog#01%2F06%2F2025)
01/06/2025
* [GitHub Integration Outage](https://lovable.dev/news/github-incident-2025-01-02)
.
* New Labs section, accessible via Settings -> Account Settings -> Labs.
* Visit [our support page](https://lovable.dev/support)
to get help, submit issues, or learn more about using Lovable.
* Better Support for Scraping and Node Graphs with Firecrawl and React Flow.
* “Edit with Lovable” Badge enabled for all users.
* Select-to-Edit is now located directly in chat composer.
* Upcoming 5-part live series to build & launch an AI-powered Spanish tutor.
* Unlimited weekend!
[](https://docs.lovable.dev/changelog#12%2F11%2F2024)
12/11/2024
* Customisable messaging limits to the Scale plan.
* “Ask the AI to fix” won’t count toward your usage limits.
* Showcase Your Builds in the Hall of Fame.
* Integrate Stripe, Three.js, p5.js, Resend & Fabric.js.
* [Christmas Hackathon](https://hackathon.lovable.app/submit)
to win $3,000+ in prizes.
* Issues with our cloud provider resolved.
[](https://docs.lovable.dev/changelog#12%2F03%2F2024)
12/03/2024
Lovable 1.0
* **Templates**: Build Faster with Pre-Built Designs.
* Introducing [feedback.lovable.dev](http://feedback.lovable.dev/)
for feature and integration request.
* Added the shadcn sidebar and support for 3D apps with three.js.
* You can now track your remaining messages by visiting your [settings page](https://lovable.dev/settings)
.
* Lovable will no longer introduce refactors automatically.
* Added support for the new [shadcn sidebar component](https://ui.shadcn.com/docs/components/sidebar)
.
* Improved the stability of the page dropdown.
* Added a new [FAQ](https://docs.lovable.dev/faq)
and an [E2E tutorial](https://docs.lovable.dev/user-guides/quickstart)
to guide users through.
* Issues with our cloud provider resolved.
* When you send a chat request, we make sure to check that all project deps are up-to-date.
[](https://docs.lovable.dev/changelog#11%2F11%2F2024)
11/11/2024
* Make Precise Edits with the Select Feature.
* Go full-stack with our improved Supabase Integration.
* 10x Fewer Errors.
* Pricing Updates. Visit our for more details.
[](https://docs.lovable.dev/changelog#10%2F02%2F2024)
10/02/2024
* Better Version Management.
* 12x Speed Improvements in Large Projects.
* Lowered the threshold for when we rely on RAG.
* GPT Engineer is now less eager to generate code immediately.
* Fixed bug where GPT Engineer would fail to install dependencies.
* GPT Engineer’s documentation is open-sourced.
[](https://docs.lovable.dev/changelog#09%2F23%2F2024)
09/23/2024
* Branch Switching for More Control.
* Hot Projects Tab for Inspiration.
* Improved Network Error Detection.
* Better Context Management for Large Projects.
* Enhanced Handling of Laziness.
[](https://docs.lovable.dev/changelog#09%2F09%2F2024)
09/09/2024
* You can now share your profile URL.
* You can now add custom knowledge to your project.
* “Edit with GPT Engineer” Badge Removed for PRO Users.
* The prompt has been updated to reduce laziness.
* Resolved issues where the Supabase integration could get stuck.
[](https://docs.lovable.dev/changelog#08%2F20%2F2024)
08/20/2024
* We’ve significantly enhanced the editing experience.
* With every edit, a loading indicator will now appear in the chat.
* We’ve updated our pricing. Free users now get 10 free edits per day.
* Introduction of user profiles, allowing to set your username, location.
* Rename your project by navigating to Settings -> Rename Project.
* All GitHub projects will now default to being private.
[](https://docs.lovable.dev/changelog#07%2F17%2F2024)
07/17/2024
* Revamped the way we show cards to unify progress indicators.
* You can now halt any active task running in the background.
* Shadcn is now the default design system for new projects.
[](https://docs.lovable.dev/changelog#06%2F05%2F2024)
06/05/2024
* Completely revamped the design of the homepage and editor.
* Building and testing a more “agentic” flow.
* Newly added page selector dropdown.
* Attach images to your prompts.
* Automatically installs the NPM packages.
[](https://docs.lovable.dev/changelog#03%2F26%2F2024)
03/26/2024
* Build a frontend that will work with an existing backend services.
* Introduced support for additional tech-stacks like Tailwind, simple HTML and Daisy UI.
* New integration of the Claude 3 Haiku model.
* Added a custom 404 page for instances.
* More troublehoot tips to the modal shown for improve errors.
[](https://docs.lovable.dev/changelog#03%2F13%2F2024)
03/13/2024
* Improved styling of edit cards.
* Generate projects with new foundation model Claude 3 Opus.
* Simplified user experience when transferring Github projects.
* Fixed claimable projects so that they are in fact claimable.
[](https://docs.lovable.dev/changelog#03%2F01%2F2024)
03/01/2024
* New projects now come with a config file gpt-engineer.toml.
* Made the AI more stable when it has to do many similar code changes.
* Reduced number of comments in generated code, thereby improving reliability.
* Fixed “Connect to Github” button.
* GPT Engineer now works with private Github projects.
* Fixed issue where users were sometimes logged out unnecessarily.
[](https://docs.lovable.dev/changelog#02%2F13%2F2024)
02/13/2024
* Transfer projects to your own Github account!
* Added .
* Fixed issue where output from the bug fixing step would be shown under “Planning”.
[](https://docs.lovable.dev/changelog#01%2F18%2F2024)
01/18/2024
* Added “Revert to this version” action to make it easier to go back to an earlier edit.
* Fixed issue where AI would sometimes replace code by a comment.
* When a project is deleted, the corresponding Gitlab repo is now also deleted.
[](https://docs.lovable.dev/changelog#01%2F15%2F2024)
01/15/2024
GPT Engineer
* Sync pushed git commits by devs with editor.
* Reduced number of comments in generated code, thereby improving reliability.
* Fixed plan/summary being inaccessible from the UI if an error occurs.
Was this page helpful?
YesNo
⌘I
---
# Private projects - Lovable Documentation
[Skip to main content](https://docs.lovable.dev/features/private-projects#content-area)
[Lovable Documentation home page](https://lovable.dev/)
Search...
⌘K
Search...
Navigation
Core features
Private projects
[Introduction](https://docs.lovable.dev/introduction/welcome)
[Features](https://docs.lovable.dev/features/modes)
[Integrations](https://docs.lovable.dev/integrations/introduction)
[Tips & Tricks](https://docs.lovable.dev/tips-tricks/best-practice)
[Prompt engineering](https://docs.lovable.dev/prompting/prompting-one)
[Use cases](https://docs.lovable.dev/use-case/video-tutorials)
[Glossary](https://docs.lovable.dev/glossary)
[Changelog](https://docs.lovable.dev/changelog)
All our paying users can change the visibility of a project while free users default to public projects. To change the visibility of a project go to **Project settings —> Project Visibility** and choose your desired visibility.
* **Public** projects can be viewed and remixed by anyone. A project connected to Supabase is however not remixable due to security reasons.
* **Workspace** means it is private and only your workspace-members can access it.
* **Personal** is a business feature that you can read about [here](https://docs.lovable.dev/features/business/personal-projects)
.
If you downgrade to a free plan, all existing workspace projects remain private to that workspace, but any **new** projects will be public.
Was this page helpful?
YesNo
[Collaboration](https://docs.lovable.dev/features/collaboration)
[Publish your app](https://docs.lovable.dev/features/publish)
⌘I
---
# Publish your app - Lovable Documentation
[Skip to main content](https://docs.lovable.dev/features/publish#content-area)
[Lovable Documentation home page](https://lovable.dev/)
Search...
⌘K
Search...
Navigation
Core features
Publish your app
[Introduction](https://docs.lovable.dev/introduction/welcome)
[Features](https://docs.lovable.dev/features/modes)
[Integrations](https://docs.lovable.dev/integrations/introduction)
[Tips & Tricks](https://docs.lovable.dev/tips-tricks/best-practice)
[Prompt engineering](https://docs.lovable.dev/prompting/prompting-one)
[Use cases](https://docs.lovable.dev/use-case/video-tutorials)
[Glossary](https://docs.lovable.dev/glossary)
[Changelog](https://docs.lovable.dev/changelog)
On this page
* [Website access settings (Business and Enterprise plans)](https://docs.lovable.dev/features/publish#website-access-settings-business-and-enterprise-plans)
* [Workspace-level setting](https://docs.lovable.dev/features/publish#workspace-level-setting)
* [Project-level setting](https://docs.lovable.dev/features/publish#project-level-setting)
* [Publishing your project](https://docs.lovable.dev/features/publish#publishing-your-project)
* [FAQ](https://docs.lovable.dev/features/publish#faq)
Publishing turns your Lovable project into a live web app that you can share with others. Lovable makes it simple to publish your app to the web — whether you’re sharing publicly or keeping your app private within your workspace.
* **Free and Pro plans:** Your published website is **public** and accessible to anyone with the link. You cannot restrict access on these plans, so make sure you’re ready to share before publishing.
* **Business and Enterprise plans:** You can **control who can view your app** — either anyone with the link or only authenticated workspace members.
Once published, you can update your live app at any time and connect a custom domain for a polished, on-brand experience.
[](https://docs.lovable.dev/features/publish#website-access-settings-business-and-enterprise-plans)
Website access settings (Business and Enterprise plans)
---------------------------------------------------------------------------------------------------------------------------------------------------------------
On Business and Enterprise plans, you can manage who can view published apps to maintain privacy and control. This enables you to:
* Build and share **internal apps** that stay private to your workspace.
* Prevent teammates from unintentionally publishing apps externally.
* Support governance and compliance for organizations that handle sensitive data.
Access can be managed at both the **workspace level** and **project level**.
###
[](https://docs.lovable.dev/features/publish#workspace-level-setting)
Workspace-level setting
Workspace **admins** and **owners** can set a default access policy for all published apps. Go to **Workspace settings → Default website access**, and choose one of:
* **Anyone with link:** All published apps are public by default and accessible to anyone.
* **Workspace members**: All published apps are private by default and restricted to authenticated workspace members only. This ensures new apps stay private unless explicitly made public.
###
[](https://docs.lovable.dev/features/publish#project-level-setting)
Project-level setting
You can override the workspace default for individual projects. Go to **Publish** **→** **Advanced**, and set **Who can access?** to:
* **Anyone with link:** Accessible to anyone with the URL.
* **Workspace members:** Restricted to signed-in workspace members.
If you don’t change this, the project inherits the workspace default.
[](https://docs.lovable.dev/features/publish#publishing-your-project)
Publishing your project
-------------------------------------------------------------------------------------------------
On Business and Enterprise plans, only workspace owners and admins can publish projects.
1. In your project, click the **Publish** icon in the top-right corner.
2. In the **Publish** modal, review and configure:
* **Website address**: By default, your app is published to `[project-url-slug].lovable.app`. You can edit the `[project-url-slug]`or add a [custom domain](https://docs.lovable.dev/features/custom-domain)
(available on paid plans).
* **Website info**: Customize your app’s metadata - icon, title, description, and share image.
* **Advanced**: Choose **who can access** your published app, configurable only on Business and Enterprise plans:
* **Anyone with link**
* **Workspace members**
3. Click **Review security** to surface potential security vulnerabilities before going live.
Always perform a security review before publishing. This helps identify vulnerabilities that could expose sensitive data or allow unauthorized access. Learn more in [Security](https://docs.lovable.dev/features/security)
.
4. When ready, click **Publish**.
Once deployment is complete, you’ll receive a pop-up with the published link.
You can continue to iterate on your app — when ready to push updates, click **Update** in the **Publish** modal.
[](https://docs.lovable.dev/features/publish#faq)
FAQ
---------------------------------------------------------
Why can't I publish my site?
If you get an error when publishing your site, it is most likely due to an unsurfaced build error causing the current version of your website not to function. Try troubleshooting the issue by asking the Lovable Agent to investigate it.
Why can't I see my changes on the published version of my site?
Changes aren’t automatically pushed to your live app. To publish updates, click **Publish** and then **Update**.
Can I change my published link (website URL)?
Yes. You can change your project URL slug, which forms your [lovable.app](http://lovable.app/)
website address in two ways:
1. Click **Publish**, edit your website address, and click **Update**.
2. Go to **Project settings → Edit URL Slug**, change the URL slug, and click **Update URL Slug**.
Note that renaming the project does not change the project URL, it only changes the project display name.
Can I unpublish my project?
Yes. You can unpublish your project in two ways:
1. Go to **Project settings** and click **Unpublish project**.
2. Click **Publish**, expand the **Advanced** section, and click **Unpublish**.
Once unpublished, your app will no longer be accessible to anyone.
Was this page helpful?
YesNo
[Private projects](https://docs.lovable.dev/features/private-projects)
[Project analytics](https://docs.lovable.dev/features/analytics)
⌘I
---
# Security - Lovable Documentation
[Skip to main content](https://docs.lovable.dev/features/security#content-area)
[Lovable Documentation home page](https://lovable.dev/)
Search...
⌘K
Search...
Navigation
Core features
Security
[Introduction](https://docs.lovable.dev/introduction/welcome)
[Features](https://docs.lovable.dev/features/modes)
[Integrations](https://docs.lovable.dev/integrations/introduction)
[Tips & Tricks](https://docs.lovable.dev/tips-tricks/best-practice)
[Prompt engineering](https://docs.lovable.dev/prompting/prompting-one)
[Use cases](https://docs.lovable.dev/use-case/video-tutorials)
[Glossary](https://docs.lovable.dev/glossary)
[Changelog](https://docs.lovable.dev/changelog)
On this page
* [API keys](https://docs.lovable.dev/features/security#api-keys)
* [Automatic API key detection](https://docs.lovable.dev/features/security#automatic-api-key-detection)
* [RLS (Role-Level Security)](https://docs.lovable.dev/features/security#rls-role-level-security)
* [Security scanning](https://docs.lovable.dev/features/security#security-scanning)
* [Security view](https://docs.lovable.dev/features/security#security-view)
* [On-demand security review](https://docs.lovable.dev/features/security#on-demand-security-review)
* [Types of findings and their remediation](https://docs.lovable.dev/features/security#types-of-findings-and-their-remediation)
* [Leaked password protection disabled](https://docs.lovable.dev/features/security#leaked-password-protection-disabled)
For detailed instructions about securing your applications built with Lovable, check our [extensive guide on preparing your app for publishing and avoiding common issues](https://docs.lovable.dev/tips-tricks/avoiding-security-pitfalls)
.
[](https://docs.lovable.dev/features/security#api-keys)
API keys
====================================================================
Lovable writes frontend code, which means it runs in the browser. Therefore, no sensitive data of any kind should be stored in code. Instead, Lovable provides a secure secret storage functionality.
[](https://docs.lovable.dev/features/security#automatic-api-key-detection)
Automatic API key detection
----------------------------------------------------------------------------------------------------------
To connect to third party services, API keys or tokens are often needed. Whenever you paste an API key into the chat, Lovable will automatically detect it and warn you not to hardcode sensitive credentials directly into your frontend code. Instead of pasting API keys, describe what you’re trying to accomplish and Lovable will guide you through the secure implementation.  For example, instead of: “Add this API key to call Service X: x\_test\_abc123…” Try this: “I want to integrate service X API to generate text responses” Lovable will then show you how to:
1. Store your API key securely in Secrets storage.
2. Create an Edge Function to make the API call server-side.
3. Call that Edge Function from your frontend code.
This approach keeps your sensitive credentials secure and follows security best practices for web applications.
[](https://docs.lovable.dev/features/security#rls-role-level-security)
RLS (Role-Level Security)
----------------------------------------------------------------------------------------------------
RLS policies determine who can access what data in your database. We recommend you carefully review them before publishing your project, and keep revisiting and updating them as you develop the project.
[](https://docs.lovable.dev/features/security#security-scanning)
Security scanning
======================================================================================
Before publishing, Lovable displays security warnings from the its advanced AI-powered security scanner and will ask you to confirm that you want to publish if there are any serious issues. We highly recommend you resolve all serious issues before publishing your projects and to keep your app’s data safe. Make sure to revisit the security review and perform a new round of it every time you change your app significantly. 
Seeing no warnings or errors from the security scanner does not guarantee that there are no security issues in your app. We recommend you to perform a thorough review your app’s security using available tools before publishing, or hire a professional security consultant to perform the app audit in case your app deals with sensitive private data, provides critical functions, and a potential data breach can lead to serious consequences to real people.
Lovable includes comprehensive AI-powered security scanning to help identify potential vulnerabilities in your code before you publish.
[](https://docs.lovable.dev/features/security#security-view)
Security view
------------------------------------------------------------------------------
The Security View displays findings from various sources: the database security advisor, in-depth AI review of your database schema and RLS (Row Level Security) policies, as well as an AI-powered security review of your code. This comprehensive approach ensures broader coverage of potential security issues. Findings are categorized by severity level:
* **Error**: Critical security issues that should be addressed immediately. These include the “try to fix” option, though fixes are not guaranteed to resolve all cases.
* **Warning**: Important security concerns that should be reviewed and likely addressed.
* **Info**: General security recommendations and best practices for your consideration.
The “Security Review” button triggers a more comprehensive AI analysis that includes your entire codebase, going beyond just the database schema and RLS policies to examine your application code for additional security vulnerabilities. 
[](https://docs.lovable.dev/features/security#on-demand-security-review)
On-demand security review
------------------------------------------------------------------------------------------------------
You can request a security review at any time by asking Lovable to “review my app’s security” or a similarly worded request. Lovable will:
1. Analyze your entire codebase for security vulnerabilities.
2. Check for common issues like XSS prevention, input sanitization, and authentication flaws.
3. Review your RLS policies and database security.
4. Provide a detailed report with specific recommendations.
 
Remember: Even with no warnings from the scanner, it’s always a good idea to periodically request a on-demand security review for production applications.
[](https://docs.lovable.dev/features/security#types-of-findings-and-their-remediation)
Types of findings and their remediation
----------------------------------------------------------------------------------------------------------------------------------
Most findings can be remediated automatically by pressing the “Try to fix” button, though some require manual intervention.
###
[](https://docs.lovable.dev/features/security#leaked-password-protection-disabled)
Leaked password protection disabled
When using Lovable Cloud, activate the switch “Password HIBP Check” in Cloud -> Users -> Auth Settings -> Email. If using Supabase DB, follow the instructions: [https://supabase.com/docs/guides/auth/password-security#password-strength-and-leaked-password-protection](https://supabase.com/docs/guides/auth/password-security#password-strength-and-leaked-password-protection)
Was this page helpful?
YesNo
[SEO](https://docs.lovable.dev/features/seo)
[Labs](https://docs.lovable.dev/features/labs)
⌘I
---
# Glossary - Lovable Documentation
[Skip to main content](https://docs.lovable.dev/glossary#content-area)
[Lovable Documentation home page](https://lovable.dev/)
Search...
⌘K
Search...
Navigation
Glossary
[Introduction](https://docs.lovable.dev/introduction/welcome)
[Features](https://docs.lovable.dev/features/modes)
[Integrations](https://docs.lovable.dev/integrations/introduction)
[Tips & Tricks](https://docs.lovable.dev/tips-tricks/best-practice)
[Prompt engineering](https://docs.lovable.dev/prompting/prompting-one)
[Use cases](https://docs.lovable.dev/use-case/video-tutorials)
[Glossary](https://docs.lovable.dev/glossary)
[Changelog](https://docs.lovable.dev/changelog)
On this page
* [General concepts](https://docs.lovable.dev/glossary#general-concepts)
* [Lovable-specific terms](https://docs.lovable.dev/glossary#lovable-specific-terms)
* [Product & Development concepts](https://docs.lovable.dev/glossary#product-%26-development-concepts)
* [Product management & Strategy](https://docs.lovable.dev/glossary#product-management-%26-strategy)
* [Engineering concepts](https://docs.lovable.dev/glossary#engineering-concepts)
* [Data & Analytics](https://docs.lovable.dev/glossary#data-%26-analytics)
* [UI/UX and frontend development playbook](https://docs.lovable.dev/glossary#ui%2Fux-and-frontend-development-playbook)
* [Frontend development](https://docs.lovable.dev/glossary#frontend-development)
* [UI/UX design concepts](https://docs.lovable.dev/glossary#ui%2Fux-design-concepts)
* [Page structure & Navigation](https://docs.lovable.dev/glossary#page-structure-%26-navigation)
* [Notifications & Feedback elements](https://docs.lovable.dev/glossary#notifications-%26-feedback-elements)
* [Overlays & Pop-ups](https://docs.lovable.dev/glossary#overlays-%26-pop-ups)
* [Navigation & Selection elements](https://docs.lovable.dev/glossary#navigation-%26-selection-elements)
* [Forms & Input elements](https://docs.lovable.dev/glossary#forms-%26-input-elements)
* [Design styles & Trends](https://docs.lovable.dev/glossary#design-styles-%26-trends)
* [Design & Asset resources](https://docs.lovable.dev/glossary#design-%26-asset-resources)
* [Backend development & Databases](https://docs.lovable.dev/glossary#backend-development-%26-databases)
* [Backend fundamentals](https://docs.lovable.dev/glossary#backend-fundamentals)
* [Database management & Querying](https://docs.lovable.dev/glossary#database-management-%26-querying)
* [Supabase-specific concepts](https://docs.lovable.dev/glossary#supabase-specific-concepts)
* [Security & Authentifcation](https://docs.lovable.dev/glossary#security-%26-authentifcation)
[](https://docs.lovable.dev/glossary#general-concepts)
General concepts
---------------------------------------------------------------------------
* **AI (Artificial Intelligence):** The simulation of human intelligence processes by machines, especially computer systems, enabling tasks like learning, reasoning, and problem-solving.
* [**Prompt**](https://docs.lovable.dev/tips-tricks/prompting)
**:** A piece of text or input that guides AI models in generating outputs or performing certain tasks. It is within the core functionality of Lovable and it is with prompts that you create, modify a specific component or element in your application.
[](https://docs.lovable.dev/glossary#lovable-specific-terms)
Lovable-specific terms
---------------------------------------------------------------------------------------
* [**Chat Mode**](https://docs.lovable.dev/features/labs#chat-mode)
**:** Lovable goes beyond just generating code; it becomes an interactive assistant guiding you through every phase of development. It helps founders think critically, plan effectively, debug intelligently, and ship confidently.
* **Edit Mode**: The action of making changes or modifications to content or code.
* [**Edit**](https://docs.lovable.dev/features/precision-edit#visual-edits)
**:** A tool that allows AI-driven development with Tailwind-native visual controls for easy refinement.
* **History:** The system of tracking and managing changes to your app and code over time.
* [**Knowledge**](https://docs.lovable.dev/features/precision-edit#knowledge-files)
**:** Capture essential project details in a living document that evolves with your app.
* [**Labs**](https://docs.lovable.dev/features/labs)
**:** Experimental features within Lovable dedicated to testing and showcasing new, innovative, or in-development functionalities. These might be modified or be removed at any time.
* **Remix:** You can remix an existing public project or one of your own. Remixing allows you to reuse the current state of a project as a starting point and build upon it. It’s a great way to explore new ideas, make adjustments, or iterate with different changes while preserving the original version. Note that it is not possible to remix projects when Supabase is connected.
* **Preview:** Allows users to view or experience live content or feature functionalities before it is finalized or published, in an interactive way.
* **Diff:** A comparison that shows the differences between two versions of a file or code.
* **/index:** Refers to the main or default page of a website or app, often named “index.html” or “index.js”.
* [**Builder.io:**](https://lovable.dev/blog/2025-01-22-figma-to-lovable-builder-io-native-integration)
Integration that enables users to export Figma designs directly into Lovable to build full-stack apps without coding.
* [**Lovable API - Build with URL**](https://docs.lovable.dev/integrations/build-with-url)
**:** The Lovable API Build with URL feature allows you to programmatically create applications by passing prompts and images via URL parameters. This enables seamless integration with websites, internal tools, or automation workflows, letting users generate Lovable apps with a single click.
[](https://docs.lovable.dev/glossary#product-%26-development-concepts)
Product & Development concepts
---------------------------------------------------------------------------------------------------------
###
[](https://docs.lovable.dev/glossary#product-management-%26-strategy)
Product management & Strategy
* **MVP (Minimum Viable Product)** – A version of a product with just enough features to satisfy early adopters and validate an idea before full-scale development.
* **Roadmap** – A high-level strategic plan that outlines the vision, direction, and planned features for a product over time.
* **Feature Request** – A formal or informal suggestion from users or stakeholders for a new capability in a product.
* **User Story** – A short, simple description of a feature or requirement written from the perspective of an end user.
* **User Journey:** The series of steps a user takes to achieve a specific goal within a product or service.
* **Persona:** A fictional representation of a target user, based on research, to guide design and development decisions.
###
[](https://docs.lovable.dev/glossary#engineering-concepts)
Engineering concepts
* **PRD (Product Requirements Document):** A comprehensive document that outlines the objectives, features, and specifications of a product to guide development.
* [**API**](https://lovable.dev/blog/2025-01-28-the-power-of-apis)
**(Application Programming Interface):** A way for different services to communicate. Think of it as a protocol that tells you what kind of information you can get or send between systems. The most common types are REST APIs, which many sites use, and GraphQL APIs, which offer a more flexible approach to querying data.
* **Refactor:** The process of restructuring existing code without changing its external behavior to improve readability, maintainability, or performance.
* **GitHub:** A web-based platform for version control and collaborative software development using Git.
###
[](https://docs.lovable.dev/glossary#data-%26-analytics)
Data & Analytics
* **A/B Testing** – A method of comparing two versions of a webpage or feature to determine which performs better based on user behavior.
* **Conversion Rate** – The percentage of users who complete a desired action, such as signing up or making a purchase.
* **Churn Rate** – The percentage of users who stop using a product over a given period.
* **Retention Rate** – The percentage of users who continue using a product over time.
* **Event Tracking** – Monitoring specific user actions (e.g., button clicks, form submissions) to gather insights on behavior and engagement.
[](https://docs.lovable.dev/glossary#ui%2Fux-and-frontend-development-playbook)
UI/UX and frontend development playbook
---------------------------------------------------------------------------------------------------------------------------
###
[](https://docs.lovable.dev/glossary#frontend-development)
Frontend development
* **Frontend:** The part of a software application that users interact with directly, encompassing the user interface and user experience elements.
* **React:** A JavaScript library developed by Facebook for building user interfaces, particularly single-page applications.
* **Gradient:** A gradual transition between two or more colors or shades in design.
* **Tailwind CSS**: Open-source utility-first CSS framework that provides a comprehensive set of pre-defined classes, enabling developers to build custom designs directly within their HTML by applying these utility classes to elements.
* **Design Systems:** A collection of reusable components, guidelines, and standards that ensure consistency and coherence in design across a product or brand.
###
[](https://docs.lovable.dev/glossary#ui%2Fux-design-concepts)
UI/UX design concepts
* **Accent Color:** A distinctive hue used to highlight key elements in a design, often aligning with or complementing the brand’s primary color to enhance visual interest.
* **Theme:** A cohesive set of design choices, including colors, fonts, and layouts, that define the overall aesthetic and user experience of an application or website.
* **Responsive Design:** An approach to web design ensuring that content adapts seamlessly across various device sizes and orientations, providing an optimal user experience.
* **Above the Fold:** The portion of a webpage visible to users without scrolling, crucial for capturing attention and conveying essential information immediately.
* **CTA (Call to Action):** A prompt, often in the form of a button or link, encouraging users to perform a specific action, such as “Sign Up” or “Learn More.”
###
[](https://docs.lovable.dev/glossary#page-structure-%26-navigation)
Page structure & Navigation
* **Headings (Titles):** Text elements that introduce and organize content sections, typically formatted with varying levels (e.g., H1, H2) to establish a clear content hierarchy.
* **Footer:** The bottom section of a webpage, commonly containing supplementary information such as contact details, navigation links, and legal disclaimers.
* **Breadcrumb:** A navigational aid displaying the user’s current location within a site’s hierarchy, often represented as a horizontal list of links.
* **Favicon** – A small icon displayed in the browser tab, bookmarks, and search results, typically representing a brand or website.
* **Meta Title (Title Tag)** – The title of a webpage that appears in search engine results and browser tabs, influencing SEO and user click-through rates.
* **Meta Description** – A short summary of a webpage’s content displayed in search engine results, aimed at improving discoverability and user engagement.
* **Canonical URL** – A tag used to specify the preferred version of a webpage, helping to avoid duplicate content issues in search engine indexing.
* **URL Slug** – The part of a URL that identifies a particular page in a readable format (e.g., `example.com/product-name`).
* **Sitemap** – A structured file (XML or HTML) that provides a list of a website’s pages, helping search engines index them efficiently.
* **Navigation Bar (Nav Bar)** – A horizontal or vertical menu providing links to essential sections of a website for easy navigation.
* **Skip Links** – Hidden links that allow users to bypass repetitive content and navigate directly to the main content, improving accessibility.
* **Pagination** – A method of dividing content into multiple pages, commonly used in blogs, search results, and product listings to improve user experience.
* **Anchor Link** – A hyperlink that directs users to a specific section within the same page instead of loading a new page.
* **404 Page** – A custom error page displayed when a user tries to access a non-existent URL, guiding them back to relevant content.
###
[](https://docs.lovable.dev/glossary#notifications-%26-feedback-elements)
**Notifications & Feedback elements**
* **Toast:** A brief, non-intrusive notification that appears temporarily to inform users of an action’s outcome or provide simple feedback.
* **Snackbar** – Similar to a toast, but typically located at the bottom of the screen with optional actions (e.g., “Undo” on a deleted item).
* **Tooltip** – A small pop-up box that provides additional information when hovering over or focusing on an element.
* **Badge** – A small visual indicator, often used on icons or buttons, to show notifications, counts, or status updates.
* **Loading Spinner (Loader)** – A visual indicator that represents a process in progress, such as loading a page or submitting a form.
* **Progress Bar** – A horizontal bar that indicates the completion percentage of a task or process.
* **Skeleton Loader** – A placeholder UI that mimics the layout of the final content while waiting for it to load, improving perceived performance.
###
[](https://docs.lovable.dev/glossary#overlays-%26-pop-ups)
Overlays & Pop-ups
* **Popover:** A transient overlay that presents additional information or options related to a specific UI element, typically appearing upon user interaction.
* **Dialog (Modal):** A window that appears in front of the main content to capture user attention, often requiring an action before returning to the primary interface.
* **Drawer (Sidebar Panel)** – A panel that slides in from the side of the screen to display navigation options or settings without disrupting the main content.
* **Lightbox** – A modal window that displays images or media in an enlarged view, dimming the background for focus.
* **Alert Box** – A system-generated or application-triggered message box that informs users of important information, such as errors or warnings.
###
[](https://docs.lovable.dev/glossary#navigation-%26-selection-elements)
Navigation & Selection elements
* **Button:** A clickable element that initiates an action or event, such as submitting a form or opening a dialog.
* **Switch (Toggle):** A toggle control enabling users to switch between two states, such as on or off, often resembling a physical switch.
* **Tabs** – A component that organizes content into separate views within a single interface, allowing users to switch between sections without navigating away.
* **Stepper (Wizard)** – A component used for multi-step processes, showing users their current step and guiding them through completion.
* **Pagination** – A UI pattern that divides content into pages, often used for search results or content-heavy applications.
* **Breadcrumb** – A navigational aid displaying the user’s current location within a site’s hierarchy, often represented as a horizontal list of links.
* **Accordion** – A collapsible section that expands or contracts to reveal or hide content dynamically.
* **Dropdown Menu** – A list of options that appears when a user clicks or hovers over a button or field, often used for navigation or selection.
###
[](https://docs.lovable.dev/glossary#forms-%26-input-elements)
Forms & Input elements
* **Form:** A structured collection of input fields allowing users to submit data, such as contact information or search queries.
* **Radio Group:** A set of related radio buttons permitting users to select only one option from multiple choices.
* **Checkbox:** An interactive box that users can check or uncheck to select or deselect an option, allowing multiple selections within a set.
* **Text Field (Input Field)** – A basic UI element where users can enter text, such as in search bars, login forms, or comments.
* **Text Area** – A larger input field designed for multiline text input, commonly used for messages or feedback forms.
* **Select (Dropdown Select Box)** – A UI element that allows users to choose one option from a predefined list, often styled as a dropdown.
* **Date Picker** – A UI element that lets users select a date from a calendar instead of manually typing it.
* **Slider (Range Selector)** – A control that allows users to set a value within a range by sliding a handle along a track.
* **File Upload Field** – A component that lets users select and upload files from their device.
* **Autocomplete (Typeahead Search)** – A text input that dynamically suggests matching results as users type, improving usability in searches.
###
[](https://docs.lovable.dev/glossary#design-styles-%26-trends)
Design styles & Trends
You can use those terms in any of your prompt to describe a specific style you are trying to achieve.
* **Neobrutalism:** A web design trend characterized by raw, unpolished elements, bold typography, and high contrast, drawing inspiration from mid-20th-century Brutalist architecture.
* **Retro:** Design that incorporates styles, motifs, and elements from past decades, evoking nostalgia and vintage aesthetics.
* **Hacker:** An aesthetic that reflects the DIY and open-source culture, often featuring monospaced fonts, dark backgrounds, and terminal-inspired interfaces.
* **Glass (Glassmorphism):** A design style uses translucent, frosted glass-like elements with subtle shadows and borders to create depth.
* **Nudy:** A minimalist design approach that utilizes nude or neutral color palettes to create a soft and understated aesthetic.
###
[](https://docs.lovable.dev/glossary#design-%26-asset-resources)
Design & Asset resources
* [**21st.dev:**](https://21st.dev/)
An open-source community registry offering minimal, modern, and reusable React UI components powered by Tailwind CSS and Radix UI, designed to help design engineers ship polished user interfaces more efficiently.
* [**Dribble:**](https://dribbble.com/)
A leading online community where designers and creative professionals showcase their work, discover design inspiration, and connect with potential clients or collaborators.
* [**Noun Project:**](https://thenounproject.com/)
A platform providing a vast collection of free icons and stock photos, enabling users to access visual resources for various projects.
* [SVG Repo:](https://www.svgrepo.com/)
A comprehensive library of over 500,000 open-licensed SVG vectors and icons, allowing users to search, explore, edit, and download graphics suitable for diverse projects.
* [Google Fonts:](https://fonts.google.com/)
A free library of web-optimized fonts, offering designers and developers a wide selection of typography options to enhance their projects.
* [Typewolf:](https://www.typewolf.com/)
A resource that assists designers in selecting the perfect font combinations for their projects by showcasing trending typefaces and offering curated font lists.
[](https://docs.lovable.dev/glossary#backend-development-%26-databases)
Backend development & Databases
-----------------------------------------------------------------------------------------------------------
###
[](https://docs.lovable.dev/glossary#backend-fundamentals)
Backend fundamentals
* **Backend:** The server-side infrastructure of an application that handles data processing, storage, and business logic.
* [**Supabase**](https://docs.lovable.dev/integrations/supabase)
**:** An open-source backend-as-a-service platform that provides a Postgres database, authentication, instant APIs, and real-time capabilities.
* **Webhooks** – Event-driven HTTP callbacks that notify external applications when specific actions occur.
###
[](https://docs.lovable.dev/glossary#database-management-%26-querying)
Database management & Querying
* **CRUD (Create, Read, Update, Delete):** The four basic operations performed on data in a database or application.
* [**SQL (Structured Query Language)**](https://supabase.com/docs/guides/database/overview)
**:** A domain-specific programming language designed for managing and manipulating relational databases, enabling tasks such as querying, updating, and organizing data.
* **PostgreSQL** – A powerful open-source relational database known for its scalability, extensibility, and ACID compliance.
###
[](https://docs.lovable.dev/glossary#supabase-specific-concepts)
Supabase-specific concepts
* [**Edge Function**](https://supabase.com/docs/guides/functions)
**:** Server-side TypeScript functions, distributed globally at the edge—close to your users. They can be used for listening to webhooks or integrating your Supabase project with third-parties like Stripe, Anthropic or Resend.
* [**RLS (Row-Level Security)**](https://supabase.com/docs/guides/database/postgres/row-level-security)
**:** A feature in databases that allows control over access to specific rows in a table based on user roles or attributes - basically allowing users to set granular authorization rules, allowing you to write complex SQL rules that fit your unique business needs.
* [**Storage**](https://supabase.com/docs/guides/storage)
**:** A service or system for storing and managing data, such as images, videos, documents, and any other file type.
* [**Bucket**](https://supabase.com/docs/guides/storage/buckets/fundamentals)
**:** In Supabase Storage, a bucket is a distinct container that organizes files and folders, determining the access model (public or private) and setting upload restrictions like maximum file size and allowed content types.
* [**Endpoint**](https://supabase.com/docs/guides/api)
**:** In the context of Supabase, an endpoint refers to a specific URL that allows clients to interact with the database through RESTful API calls, enabling operations like creating, reading, updating, or deleting data.
* [**Authentication Provider:**](https://supabase.com/docs/guides/auth)
An entity or service that verifies user credentials, enabling secure access to applications or systems. In the context of Supabase, authentication providers include various methods such as password-based logins, magic links, one-time passwords (OTP), social logins, and single sign-on (SSO) integrations, facilitating flexible and secure user authentication.
###
[](https://docs.lovable.dev/glossary#security-%26-authentifcation)
Security & Authentifcation
* **OAuth** – A widely-used authentication protocol that enables users to log in to applications using third-party services like Google, Facebook, or GitHub.
* **Two-Factor Authentication (2FA)** – A security measure that requires users to provide two forms of identification before accessing an account.
* **CORS (Cross-Origin Resource Sharing)** – A security policy that controls which websites or applications can access resources on a server.
Was this page helpful?
YesNo
⌘I
---
# Visual edits - Lovable Documentation
[Skip to main content](https://docs.lovable.dev/features/visual-edit#content-area)
[Lovable Documentation home page](https://lovable.dev/)
Search...
⌘K
Search...
Navigation
Core features
Visual edits
[Introduction](https://docs.lovable.dev/introduction/welcome)
[Features](https://docs.lovable.dev/features/modes)
[Integrations](https://docs.lovable.dev/integrations/introduction)
[Tips & Tricks](https://docs.lovable.dev/tips-tricks/best-practice)
[Prompt engineering](https://docs.lovable.dev/prompting/prompting-one)
[Use cases](https://docs.lovable.dev/use-case/video-tutorials)
[Glossary](https://docs.lovable.dev/glossary)
[Changelog](https://docs.lovable.dev/changelog)
On this page
* [When to use visual edits](https://docs.lovable.dev/features/visual-edit#when-to-use-visual-edits)
* [How to access and use visual edits](https://docs.lovable.dev/features/visual-edit#how-to-access-and-use-visual-edits)
Lovable’s Visual Edits allows you to select elements on the page and either edit them instantly, such as updating text or colors, or use prompts to adjust functionality and layout. This tool is useful for making quick, targeted updates without needing to modify the code manually or use the AI.
Using Visual Edits does not deduct credits.

[](https://docs.lovable.dev/features/visual-edit#when-to-use-visual-edits)
When to use visual edits
-------------------------------------------------------------------------------------------------------
Use Visual Edits when you want to:
* Change static text content on your site
* Update fonts, font sizes, or styles
* Modify colors of text, buttons or other elements
* Select a specific element and use prompting to modify its visual appearance or functionality. **Please note** that this prompt will deduct credits as an ordinary prompt.
**Keyboard shortcut:**
* Option ⌥ + s on Mac
* Alt + s on Windows
[](https://docs.lovable.dev/features/visual-edit#how-to-access-and-use-visual-edits)
How to access and use visual edits
---------------------------------------------------------------------------------------------------------------------------
1
Locate Visual Edits
You’ll find it inside the chat box at the bottom left corner of your project interface.
2
Click the Edit button to activate Visual Edits
3
Select the Element
Hover over the element you want to change; headlines, buttons, background sections, etc. Then click to select it.
4
Edit via Prompt or Direct Input
After selecting, you can:
* Type a prompt like “Make this heading bold and change the color to dark green.”
* Or use the inline editing options to directly change text or select new fonts and colors.
5
Apply and Review
Once your change is made, click **Save** and Lovable will instantly update the live preview and code.
Only static elements can be edited using the Visual Edits tool. If an element isn’t selectable, it is most likely due to it being a dynamic element, which the Visual Edits can’t select and change.
Was this page helpful?
YesNo
[Modes](https://docs.lovable.dev/features/modes)
[Code mode](https://docs.lovable.dev/features/code-mode)
⌘I
---
# 21st.dev integration - Lovable Documentation
[Skip to main content](https://docs.lovable.dev/integrations/21stdev#content-area)
[Lovable Documentation home page](https://lovable.dev/)
Search...
⌘K
Search...
Navigation
Integrations
21st.dev integration
[Introduction](https://docs.lovable.dev/introduction/welcome)
[Features](https://docs.lovable.dev/features/modes)
[Integrations](https://docs.lovable.dev/integrations/introduction)
[Tips & Tricks](https://docs.lovable.dev/tips-tricks/best-practice)
[Prompt engineering](https://docs.lovable.dev/prompting/prompting-one)
[Use cases](https://docs.lovable.dev/use-case/video-tutorials)
[Glossary](https://docs.lovable.dev/glossary)
[Changelog](https://docs.lovable.dev/changelog)
On this page
* [Step-by-step guide](https://docs.lovable.dev/integrations/21stdev#step-by-step-guide)
* [Why this approach works?](https://docs.lovable.dev/integrations/21stdev#why-this-approach-works%3F)
* [Key takeaways](https://docs.lovable.dev/integrations/21stdev#key-takeaways)
* [More resources](https://docs.lovable.dev/integrations/21stdev#more-resources)
Most AI-generated landing pages look the same—vague sections, off-brand colors, and no personality. But it doesn’t have to be that way. We are going to share a structured workflow using Lovable and 21stdev that creates landing pages clients _actually_ love (like [this one](https://lovable.dev/projects/35d72d2e-6e25-40e5-9b0c-c0d1a7c1b727)
). 
[](https://docs.lovable.dev/integrations/21stdev#step-by-step-guide)
Step-by-step guide
-------------------------------------------------------------------------------------------
From design inspiration to final polish, here’s the step-by-step guide he uses to build fast without sacrificing quality:
1
Start with Design Inspiration, Not a Prompt
Before writing a single word of prompt, browse [Dribbble](https://dribbble.com/)
or [Behance](https://www.behance.net/)
. Look for designs with:
* Clean typography and spacing
* Clear CTAs and minimal layout
* Subtle interactions (not overdesigned)
Pick something you can realistically replicate. Avoid overly complex 3D designs if you don’t plan to recreate them.
A real client asked for a “modern and minimal” design. That informed the visual starting point. Avoid picking something you can’t deliver.
2
Start with a blank project
Start your Lovable project by prompting:
Start with a blank empty project. We will be adding details afterwords.
3
Convert WebP to PNG and Prep Your Design Screenshot
Once you find your reference design, download it. If it saves in WebP format, use an online converter to change it to PNG so it can be easily used in Lovable or GPT workflows.
Tools we recommend: [https://cloudconvert.com/webp-to-png](https://cloudconvert.com/webp-to-png)
4
Turn Inspiration into a Detailed Prompt Using Chat Mode
Use Lovable [Chat Mode](https://docs.lovable.dev/features/labs#chat-mode)
to extract:
* Page sections (hero, features, FAQ, etc.)
* Layout structure, spacing, and content order
* Font families, color palettes, and gradients
* Animation types, hover effects, and transitions
Lovable [Chat mode](https://docs.lovable.dev/features/labs#chat-mode)
(or customGPT) is also trained to recommend Unsplash images for blog thumbnails and illustrations.
Lovable occasionally mislabels things (e.g., “Space Grotesque” font was misspelled). Always review and correct prompt outputs before pasting into Lovable.
You can even ask Lovable chat mode to elaborate on sections or rewrite the prompt with better UX suggestions.
5
Generate the First Draft with Lovable
Paste the detailed prompt into Lovable Edit Mode. Then:
* Upload your PNG screenshot as a reference
* Add notes like “_Use Space Grotesque font_” or “Use Unsplash for blog thumbnails”
This combo leads to far more accurate designs than vague, single-sentence prompts.
Please note how much Lovable faster this feels compared to setting up Tailwind or Bootstrap manually just a year ago.
6
Edit in Real Time: Visual + Text Prompts
Use Lovable’s [visual editing tool](https://docs.lovable.dev/features/visual-edit)
to:
* Resize images (e.g., “make this image 800px wide”)
* Position hero images (e.g., “place this image on the right side”)
* Align design sections with the reference image
Combine this with natural language edits for precision.
7
Polish the Design with 21stdev Components
Use [21stdev](https://21st.dev/)
’s prebuilt UI components to upgrade:
* Hero sections
* Navigation bars with hover effects
* Testimonial layouts
* CTAs and feature grids
Find a component you like, copy the prompt, and paste it into Lovable. Be sure to match the visual tone with the rest of the site.
8
Fix AI Misinterpretations
AI saves time, but expect cleanup:
* Adjust branding (Lovable defaults to blue)
* Improve spacing and padding manually
* Use consistent typography throughout
* Add gradients or depth for a non-flat look
Make the design feel _intentional_, not “default.”
9
Optimize for Mobile (Non-Negotiable)
Don’t skip this. Ensure:
* Inputs go full-width
* Font sizes adapt to smaller screens
* Buttons are tap-friendly
* Sections stack well and scroll smoothly
Mobile UX is critical for conversions.
10
Add Light Animations and Microinteractions
To modernize the feel:
* Use fade-ins for hero sections
* Add button hover effects
* Animate sections on scroll
* Use subtle background movement
Lovable can integrate [Framer Motion](https://motion.dev/)
out-of-the-box if prompted right.
11
Generate Custom Visuals with AI (Optional)
Craft prompts for ChatGPT, Midjourney or Ideogram based on your favorite elements from the reference design.**Steps:**
1
Screenshot the desired visual section
2
Ask ChatGPT to write a matching prompt
3
Generate the image in your AI tool
4
Remove the background, then reinsert into Lovable
The latest ChatGPT 4o seems worth the test.
This is especially useful for 3D visuals or thematic illustrations.
12
Deploy with a Single Click
Once you’re happy with the result:
* Click “Deploy” in Lovable
* Connect a custom domain via Netlify
Your site goes live in minutes. No manual setup needed.
13
Share with Clients & Iterate
Copy the public link and share with your client. They can:
* Review it live
* Suggest tweaks
* Approve quickly
You can continue refining sections using Lovable’s visual or prompt-based editor. It’s a fast iteration loop.
[](https://docs.lovable.dev/integrations/21stdev#why-this-approach-works%3F)
Why this approach works?
---------------------------------------------------------------------------------------------------------
AI isn’t magic. But with structure, it becomes a superpower. Compared to unstructured prompting:
* The first draft is 10x closer to done
* You spend less time fixing errors
* Every section has a purpose
* The final product feels custom, not cookie-cutter
It’s a blend of automation **+** craftsmanship.
[](https://docs.lovable.dev/integrations/21stdev#key-takeaways)
Key takeaways
---------------------------------------------------------------------------------
* Start with strong visual inspiration
* Use structured prompts with Lovable Chat Mode
* Add screenshots and clarify expectations
* Upgrade sections using 21stdev components
* Fix design quirks and optimize for mobile
* Animate where it matters
* Deploy fast, iterate faster
This is the workflow [Prajwal](https://x.com/PrajwalTomar_/status/1902371273147064772)
uses everyday for his clients - that we tried in-house - to build fast, beautiful, high-converting landing pages—powered by Lovable AI but guided by intention. Happy Building!
[](https://docs.lovable.dev/integrations/21stdev#more-resources)
More resources
-----------------------------------------------------------------------------------
* [Brock Mesarich’s tutorial](https://www.youtube.com/watch?v=v48gJFQvE1Y&pp=ygUPbG92YWJsZSAyMXN0ZGV2)
* Lukas Margerie’s tutorial ([1](https://www.youtube.com/watch?v=-GiBI0leMHU&t=30s&pp=ygUPbG92YWJsZSAyMXN0ZGV2)
- [2](https://www.youtube.com/watch?v=uqdFobvoRQQ&pp=ygUPbG92YWJsZSAyMXN0ZGV20gcJCb0Ag7Wk3p_U)
)
* [AI Jason’s tutorial](https://www.youtube.com/watch?v=8MPElOdNjtk&pp=ygUPbG92YWJsZSAyMXN0ZGV2)
* [Mark Kashef’s tutorial](https://www.youtube.com/watch?v=Zv7N0SxfpRM&t=269s&pp=ygUPbG92YWJsZSAyMXN0ZGV2)
* [Alejavi Rivera’s tutorial](https://www.youtube.com/watch?v=mMBp0uGZOWw&pp=ygUPbG92YWJsZSAyMXN0ZGV2)
(spanish)
* [Fazt Code’s tutorial](https://www.youtube.com/watch?v=RGZeP1_oMoY&pp=ygUPbG92YWJsZSAyMXN0ZGV2)
Was this page helpful?
YesNo
[Replicate integration](https://docs.lovable.dev/integrations/replicate)
⌘I
---
# SEO - Lovable Documentation
[Skip to main content](https://docs.lovable.dev/features/seo#content-area)
[Lovable Documentation home page](https://lovable.dev/)
Search...
⌘K
Search...
Navigation
Core features
SEO
[Introduction](https://docs.lovable.dev/introduction/welcome)
[Features](https://docs.lovable.dev/features/modes)
[Integrations](https://docs.lovable.dev/integrations/introduction)
[Tips & Tricks](https://docs.lovable.dev/tips-tricks/best-practice)
[Prompt engineering](https://docs.lovable.dev/prompting/prompting-one)
[Use cases](https://docs.lovable.dev/use-case/video-tutorials)
[Glossary](https://docs.lovable.dev/glossary)
[Changelog](https://docs.lovable.dev/changelog)
On this page
* [Automatic SEO features](https://docs.lovable.dev/features/seo#automatic-seo-features)
* [Built-in page speed optimization](https://docs.lovable.dev/features/seo#built-in-page-speed-optimization)
* [Tips and tricks](https://docs.lovable.dev/features/seo#tips-and-tricks)
* [FAQ](https://docs.lovable.dev/features/seo#faq)
**Search Engine Optimization (SEO)** makes your pages easier to find by helping them rank higher on Google and other search engines. Lovable handles the fundamentals, such as titles, metadata, performance, and structure, while giving you full control to fine-tune and customize your setup.
[](https://docs.lovable.dev/features/seo#automatic-seo-features)
Automatic SEO features
-------------------------------------------------------------------------------------------
Lovable includes these SEO optimizations out of the box for all new pages:
* Optimized title tags under 60 characters with main keywords included
* Meta descriptions under 160 characters with natural keyword integration
* Single H1 tag per page that matches the page’s main intent and includes relevant keywords
* Semantic HTML structure using proper elements
* Image optimization with descriptive alt text containing relevant keywords
* Structured data (JSON-LD schema) for products, articles, and FAQs when applicable
* Performance enhancements including lazy loading images and deferred non-critical scripts
* Canonical tags to prevent duplicate content issues
* Mobile-first responsive design with correct viewport settings
* Clean, descriptive URLs that are human-readable and search engine friendly
[](https://docs.lovable.dev/features/seo#built-in-page-speed-optimization)
Built-in page speed optimization
---------------------------------------------------------------------------------------------------------------
Lovable includes built-in page speed optimization powered by Google Lighthouse, an open-source tool that analyzes your page’s performance, accessibility, SEO, and best practices. **How to run a speed audit:**
1. Click **Tools** in your project navigation.
2. Select **Speed** to launch the Lighthouse audit.
3. Review the scorecard and specific recommendations for improvement.
The audit will show you exactly what’s affecting your page speed and provide actionable recommendations to load faster, rank higher, and improve user experience.
[](https://docs.lovable.dev/features/seo#tips-and-tricks)
Tips and tricks
-----------------------------------------------------------------------------
Sitemap for search engine indexing
A sitemap helps search engines crawl and index your website efficiently.**How to generate a sitemap in Lovable:**
1. Ask Lovable to _“Create a sitemap with my custom domain”_.
2. Publish/update your project.
3. Submit the sitemap to **Google Search Console** under **Sitemaps** using the URL `https://[yourdomain]/sitemap.xml` (replace `[yourdomain]` with your custom domain).
Note that if your sitemap has another name, you need to replace `sitemap.xml` in the URL with this name. This can be seen in code viewer under the public file.
4. Add sitemap`https://[yourdomain]/sitemap.xml` in your robots.txt file (optional)
Remember to update your sitemap from time to time or make sure it is updated automatically when your website is built.Your sitemap will not be automatically available at `https://[youdomain]/sitemap.xml` when you have done this. To check your sitemap, open your command-line interface and type `curl https://[yourdomain]/sitemap.xml`, your sitemap should show up.
Robots.txt configuration for search control
The `robots.txt` file tells search engines which pages they should or shouldn’t crawl. Lovable can create and customize this file for you.**Steps to add a robots.txt file:**
1. Prompt Lovable to _“Generate a robots.txt file for my site.”_
2. Customize the file to allow or block search engines from specific pages.
3. Upload it to your site’s root directory.
Internal linking for better SEO
Internal links help users and search engines navigate your site. Lovable can:
* Suggest **relevant internal links** between pages.
* Ensure **logical site architecture** for easy indexing.
* Improve **page authority** with proper linking strategies.
**How to add internal links in Lovable:**
1. Use prompts like _“Suggest internal links for this page.”_
2. Manually add links to related content within your project.
3. Keep anchor text descriptive and relevant.
Customize your shared image
When sharing your project on social media, you can customize the preview image in two ways:**Let AI handle it**Upload an image and use a simple prompt like:
> Can you change the OG image that appears when the site is shared on social media platforms to the one above?
**Manually update via GitHub**
1. Click **Edit code** (top right of your project).
2. Connect your project to GitHub if you haven’t already. Follow our [GitHub integration guide](https://docs.lovable.dev/integrations/git-integration)
.
3. Open your project repository and navigate to the `public` folder.
4. Replace the existing `og-image.png` with your new image.
5. Rename your new image to `og-image.png`.
More tips for SEO success
* **Optimize images** with alt text and compressed file sizes.
* **Avoid duplicate content** by making each page unique.
* **Use long-tail keywords** to target niche searches.
* **Keep content fresh** with regular updates.
[](https://docs.lovable.dev/features/seo#faq)
FAQ
-----------------------------------------------------
How long does it take for Google to index my page?
Google typically indexes pages within a few hours to a few days. Submitting a sitemap speeds up this process.
What if I don’t see my page ranking?
Check if your sitemap is submitted and ensure your content follows SEO best practices.
Does Lovable optimize for mobile SEO?
Yes. Lovable ensures mobile-friendly page structures automatically.
Was this page helpful?
YesNo
[Custom domains](https://docs.lovable.dev/features/custom-domain)
[Security](https://docs.lovable.dev/features/security)
⌘I
---
# Lovable API: Build with URL - Lovable Documentation
[Skip to main content](https://docs.lovable.dev/integrations/build-with-url#content-area)
[Lovable Documentation home page](https://lovable.dev/)
Search...
⌘K
Search...
Navigation
About integrations
Lovable API: Build with URL
[Introduction](https://docs.lovable.dev/introduction/welcome)
[Features](https://docs.lovable.dev/features/modes)
[Integrations](https://docs.lovable.dev/integrations/introduction)
[Tips & Tricks](https://docs.lovable.dev/tips-tricks/best-practice)
[Prompt engineering](https://docs.lovable.dev/prompting/prompting-one)
[Use cases](https://docs.lovable.dev/use-case/video-tutorials)
[Glossary](https://docs.lovable.dev/glossary)
[Changelog](https://docs.lovable.dev/changelog)
On this page
* [Use cases](https://docs.lovable.dev/integrations/build-with-url#use-cases)
* [Base URL](https://docs.lovable.dev/integrations/build-with-url#base-url)
* [URL with parameters](https://docs.lovable.dev/integrations/build-with-url#url-with-parameters)
* [Parameters](https://docs.lovable.dev/integrations/build-with-url#parameters)
* [Lovable Link Generator](https://docs.lovable.dev/integrations/build-with-url#lovable-link-generator)
* [Build with URL examples](https://docs.lovable.dev/integrations/build-with-url#build-with-url-examples)
* [Best practices](https://docs.lovable.dev/integrations/build-with-url#best-practices)
* [App creation and authentication flow for shared URLs](https://docs.lovable.dev/integrations/build-with-url#app-creation-and-authentication-flow-for-shared-urls)
* [Error handling](https://docs.lovable.dev/integrations/build-with-url#error-handling)
The Lovable API **Build with URL** feature allows you to programmatically create applications by passing prompts and images via URL parameters. This enables seamless integration with websites, internal tools, or automation workflows, letting users generate Lovable apps with a single click. Each link tells Lovable _what_ to build and optionally _what images to include_ — and Lovable takes care of the rest. Example:
Copy
Ask AI
https://lovable.dev/?autosubmit=true#prompt=Create%20a%20todo%20app
Clicking this link automatically opens Lovable and begins building a to-do app.
[](https://docs.lovable.dev/integrations/build-with-url#use-cases)
Use cases
--------------------------------------------------------------------------------
You can do the following with Build with URL API:
* Embed a **Build with Lovable** button on your website or application. When the user clicks the button, they are taken to Lovable and the app is built automatically.
* Share predefined prompts via URLs with friends, collegues, or on social media.
* Automate app generation as part of internal workflows.
* Rapidly prototype apps using URLs with prompts and reference images.
You can construct the URL yourself or use the [Lovable Link Generator](https://lovable.dev/links)
. See below for more information.
[](https://docs.lovable.dev/integrations/build-with-url#base-url)
Base URL
------------------------------------------------------------------------------
Copy
Ask AI
https://lovable.dev/?autosubmit=true#
`autosubmit` (boolean): Must be set to `true` to automatically process the request
[](https://docs.lovable.dev/integrations/build-with-url#url-with-parameters)
URL with parameters
----------------------------------------------------------------------------------------------------
Copy
Ask AI
https://lovable.dev/?autosubmit=true#prompt=YOUR_PROMPT_HERE&images=IMAGE_URL_1&images=IMAGE_URL_2
###
[](https://docs.lovable.dev/integrations/build-with-url#parameters)
Parameters
| Parameter | Type | Description | Required/Optional |
| --- | --- | --- | --- |
| `prompt` | string | Text describing the application to build. Max 50,000 characters. Use URL encoding (for example, `%20` for spaces). Very long URLs might fail due to browser or parsing constraints. | Required |
| `images` | string | Max 10 URL-encoded image URLs as references. Image URLs must be publicly accessible. Supported formats: JPEG, PNG, WebP. | Optional |
[](https://docs.lovable.dev/integrations/build-with-url#lovable-link-generator)
Lovable Link Generator
----------------------------------------------------------------------------------------------------------
Use the [Lovable Link Generator](https://lovable.dev/links)
to easily build shareable URLs that generate apps with your chosen prompt and images.
1. Enter your prompt, which describes the application to build (up to 50k characters).
2. Upload up to 10 public image URLs (JPEG, PNG, or WebP).
3. Copy the generated Lovable URL and share it.
This tool helps prevent URL-encoding errors and ensures links are formatted correctly.
[](https://docs.lovable.dev/integrations/build-with-url#build-with-url-examples)
Build with URL examples
------------------------------------------------------------------------------------------------------------
**Basic app generation**
Copy
Ask AI
https://lovable.dev/?autosubmit=true#prompt=Create%20a%20todo%20app
**Single reference image**
Copy
Ask AI
https://lovable.dev/?autosubmit=true#prompt=Display%20these%20images&images=https://img.com/1.jpg
**Multiple reference images**
Copy
Ask AI
https://lovable.dev/?autosubmit=true#prompt=Display%20these%20images&images=https://img.com/1.jpg&images=https://img.com/2.jpg
[](https://docs.lovable.dev/integrations/build-with-url#best-practices)
Best practices
------------------------------------------------------------------------------------------
* Keep prompts concise and focused on core features.
* Use clear, descriptive language for best generation results.
* Include reference images when relevant to help guide the generation process.
* Ensure special characters in prompts and image URLs are URL-encoded to avoid parsing issues.
[](https://docs.lovable.dev/integrations/build-with-url#app-creation-and-authentication-flow-for-shared-urls)
App creation and authentication flow for shared URLs
----------------------------------------------------------------------------------------------------------------------------------------------------------------------
When a user clicks a **Build with URL** link:
* **Logged in users**: select the workspace for creating the project, then app creation starts automatically.
* **Not logged in users**: redirected to signup/login page. After successful authentication, select the workspace for creating the project, and then the app creation starts automatically, preserving the original prompt and images.
[](https://docs.lovable.dev/integrations/build-with-url#error-handling)
Error handling
------------------------------------------------------------------------------------------
If the URL is too long or malformed, you may encounter:
* Browser “URL too long” errors
* Incomplete parameter parsing
* Failed autosubmission
Was this page helpful?
YesNo
[Introduction](https://docs.lovable.dev/integrations/introduction)
[GitHub integration](https://docs.lovable.dev/integrations/github)
⌘I
---
# Lovable API - Lovable Documentation
[Skip to main content](https://docs.lovable.dev/integrations/lovable-api#content-area)
[Lovable Documentation home page](https://lovable.dev/)
Search...
⌘K
Search...
Navigation
Lovable API
[Introduction](https://docs.lovable.dev/introduction/welcome)
[Features](https://docs.lovable.dev/features/modes)
[Integrations](https://docs.lovable.dev/integrations/introduction)
[Tips & Tricks](https://docs.lovable.dev/tips-tricks/best-practice)
[Prompt engineering](https://docs.lovable.dev/prompting/prompting-one)
[Use cases](https://docs.lovable.dev/use-case/video-tutorials)
[Glossary](https://docs.lovable.dev/glossary)
[Changelog](https://docs.lovable.dev/changelog)
On this page
* [What is the Lovable API?](https://docs.lovable.dev/integrations/lovable-api#what-is-the-lovable-api%3F)
* [Why use the Lovable API?](https://docs.lovable.dev/integrations/lovable-api#why-use-the-lovable-api%3F)
* [Get started](https://docs.lovable.dev/integrations/lovable-api#get-started)
* [What’s next for the Lovable API?](https://docs.lovable.dev/integrations/lovable-api#what%E2%80%99s-next-for-the-lovable-api%3F)
The **Lovable API** makes it possible to create and share Lovable apps programmatically — turning ideas, prompts, or even images into fully-generated applications with a single link. It’s designed for developers, creators, and teams who want to **integrate Lovable into their workflows** or **automate app generation** from anywhere on the web.
[](https://docs.lovable.dev/integrations/lovable-api#what-is-the-lovable-api%3F)
What is the Lovable API?
-------------------------------------------------------------------------------------------------------------
The Lovable API is a growing suite of features that extend what you can do with Lovable beyond the web interface. The first release, [**Build with URL**](https://docs.lovable.dev/integrations/build-with-url)
, allows you to generate apps directly from a shareable URL. With it, you can:
* Embed **Build with Lovable** buttons on your site or app.
* Share app-generating links with teammates or customers.
* Integrate Lovable app creation into internal tools or scripts.
* Prototype instantly from a single link.
[](https://docs.lovable.dev/integrations/lovable-api#why-use-the-lovable-api%3F)
Why use the Lovable API?
-------------------------------------------------------------------------------------------------------------
* **Automation:** Trigger app creation from code, dashboards, or workflows.
* **Integration:** Bring Lovable into your own product experience.
* **Speed:** Generate and share new app ideas faster than ever.
* **Shareability:** URLs make collaboration simple and frictionless.
[](https://docs.lovable.dev/integrations/lovable-api#get-started)
Get started
---------------------------------------------------------------------------------
* Read the full technical guide here: [**Lovable API: Build with URL documentation**](https://docs.lovable.dev/integrations/build-with-url)
* Learn about the feature and real-world use cases in our announcement post:
[**Build apps from a link with Lovable Build with URL**](https://lovable.dev/blog/introducing-lovable-api-build-with-url)
[](https://docs.lovable.dev/integrations/lovable-api#what%E2%80%99s-next-for-the-lovable-api%3F)
What’s next for the Lovable API?
-------------------------------------------------------------------------------------------------------------------------------------
This is just the beginning. The Lovable API will continue to expand with more endpoints and integration options, giving you greater control over how Lovable fits into your development and automation workflows. Stay tuned for future updates in the [Lovable Blog](https://lovable.dev/blog)
.
Was this page helpful?
YesNo
⌘I
---
# Plans and credits - Lovable Documentation
[Skip to main content](https://docs.lovable.dev/introduction/plans-and-credits#content-area)
[Lovable Documentation home page](https://lovable.dev/)
Search...
⌘K
Search...
Navigation
Plans and credits
[Introduction](https://docs.lovable.dev/introduction/welcome)
[Features](https://docs.lovable.dev/features/modes)
[Integrations](https://docs.lovable.dev/integrations/introduction)
[Tips & Tricks](https://docs.lovable.dev/tips-tricks/best-practice)
[Prompt engineering](https://docs.lovable.dev/prompting/prompting-one)
[Use cases](https://docs.lovable.dev/use-case/video-tutorials)
[Glossary](https://docs.lovable.dev/glossary)
[Changelog](https://docs.lovable.dev/changelog)
On this page
* [Feature comparison: Free plan vs. Paid plans](https://docs.lovable.dev/introduction/plans-and-credits#feature-comparison%3A-free-plan-vs-paid-plans)
* [Free plan](https://docs.lovable.dev/introduction/plans-and-credits#free-plan)
* [Pro plan](https://docs.lovable.dev/introduction/plans-and-credits#pro-plan)
* [Business plan](https://docs.lovable.dev/introduction/plans-and-credits#business-plan)
* [Available paid plans](https://docs.lovable.dev/introduction/plans-and-credits#available-paid-plans)
* [Credit display](https://docs.lovable.dev/introduction/plans-and-credits#credit-display)
* [Credit usage](https://docs.lovable.dev/introduction/plans-and-credits#credit-usage)
* [Credit rollovers](https://docs.lovable.dev/introduction/plans-and-credits#credit-rollovers)
* [FAQ](https://docs.lovable.dev/introduction/plans-and-credits#faq)
* [Common issues and troubleshooting](https://docs.lovable.dev/introduction/plans-and-credits#common-issues-and-troubleshooting)
Lovable is a subscription based service with a free plan and several paid plans. When you pay for a subscription you get access to more features, and more credits. You need credits to send messages in Lovable.
[](https://docs.lovable.dev/introduction/plans-and-credits#feature-comparison%3A-free-plan-vs-paid-plans)
Feature comparison: Free plan vs. Paid plans
----------------------------------------------------------------------------------------------------------------------------------------------------------
###
[](https://docs.lovable.dev/introduction/plans-and-credits#free-plan)
Free plan
* 5 daily credits, up to a maximum of 30 per month
* Workspace collaboration with unlimited members
###
[](https://docs.lovable.dev/introduction/plans-and-credits#pro-plan)
Pro plan
* 5 daily credits up to a maximum of 150 per month
* Monthly credits depending on your plan
* Workspace collaboration with unlimited members
* Workspace roles and permissions
* Private projects
* Ability to connect custom domains to your Lovable projects
* Ability to remove the “Edit with Lovable” badge from your Lovable projects
* Access to Code mode to edit code directly inside of Lovable
###
[](https://docs.lovable.dev/introduction/plans-and-credits#business-plan)
Business plan
_Everything in Pro, plus:_
* SSO
* Personal projects within workspaces
* Opt out of data training
* Build reusable design templates to streamline your projects
###
[](https://docs.lovable.dev/introduction/plans-and-credits#available-paid-plans)
Available paid plans
Each paid plan includes a set number of allocated monthly credits. We offer both **Pro** and **Business** plans, each with different pricing options and unique perks to suit individual users or teams. You can choose to pay for these plans either monthly or annually. Annual billing offers additional benefits such as a discounted monthly rate and higher rollover limits for unused credits. **Pro**
| Monthly credits | Monthly billing | Annual billing |
| --- | --- | --- |
| 100 | $25 | $250 ($21/month) |
| 200 | $50 | $500 ($42/month) |
| 400 | $100 | $1,000 ($84/month) |
| 800 | $200 | $2,000 ($167/month) |
| 1,200 | $294 | $2,940 ($245/month) |
| 2,000 | $480 | $4,800 ($400/month) |
| 3,000 | $705 | $7,050 ($588/month) |
| 4,000 | $920 | $9,200 ($767/month) |
| 5,000 | $1,125 | $11,250 ($938/month) |
| 7,500 | $1,688 | $16,880 ($1,407/month) |
| 10,000 | $2,250 | $22,500 ($1,875/month) |
**Business**
| Monthly credits | Monthly billing | Annual billing |
| --- | --- | --- |
| 100 | $50 | $500 ($42/month) |
| 200 | $100 | $1,000 ($84/month) |
| 400 | $200 | $2,000 ($167/month) |
| 800 | $400 | $4,000 ($334/month) |
| 1,200 | $588 | $5,880 ($490/month) |
| 2,000 | $960 | $9,600 ($800/month) |
| 3,000 | $1,410 | $14,100 ($1,175/month) |
| 4,000 | $1,840 | $18,400 ($1,534/month) |
| 5,000 | $2,250 | $22,500 ($1,875/month) |
| 7,500 | $3,300 | $33,000 ($2,750/month) |
| 10,000 | $4,300 | $43,000 ($3,584/month) |
When you upgrade your plan, for example, from a 100 credit plan to a 200 credit plan you don’t get 200 new credits. Instead, your total credits for the month are updated to 200. So if you already had 100 monthly credits upgrading gives you 100 more, not 200 more.
[](https://docs.lovable.dev/introduction/plans-and-credits#credit-display)
Credit display
---------------------------------------------------------------------------------------------
To view how many credits you have or have used, simply press your workspace name on the main dashboard or the project name when inside the project editor. You’ll see how many credits you have left this billing period, as well as the credit bar. The credit bar provides a visual representation of how many credits a user has remaining and how many have been used.
* **Grey part**: Shows the amount of credits already used this billing period.
* **Blue parts**: Shows different types of remaining credits. Hovering over each colored section will display a tooltip indicating the credit type and the exact number of credits available for that type.
[](https://docs.lovable.dev/introduction/plans-and-credits#credit-usage)
Credit usage
-----------------------------------------------------------------------------------------
Lovable has a usage-based credit system, where sending messages deducts credits. The cost of a message depends on its complexity to ensure you only pay for what you actually use. Many messages cost less than 1 credit, while more complex ones may cost more. This approach allows for more precise edits and greater efficiency per message, making Lovable more affordable overall. Here are some example prompts and their cost:
| User Prompt | Work done | Credits used |
| --- | --- | --- |
| Make the button gray | Changes the button styles | 0.50 |
| Remove the footer | Removes the footer component | 0.90 |
| Add authentication | Adds login and authentication logic | 1.20 |
| Build a landing page with images | Creates a landing page with generated images, a theme and sections | 2.00 |
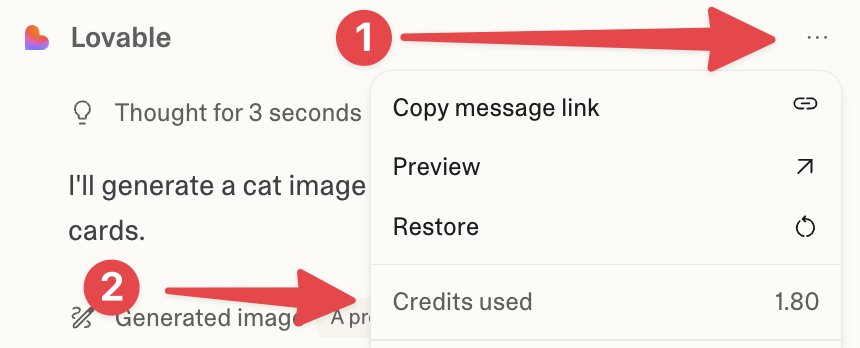
View credits used
-----------------
You can see the cost of each message in the chat history by pressing the three dots beneath a message.
[](https://docs.lovable.dev/introduction/plans-and-credits#credit-rollovers)
Credit rollovers
-------------------------------------------------------------------------------------------------
All unused monthly credits automatically roll over at the end of each billing cycle for both monthly and annual paid plans, as long as you keep an active subscription. The rolled over credits will be avilable for one month on the monthly plan. For users on the **annual plan**, the rolled over credits will be available for the rest of the time on your annual plan. **Cancellation**: Upon cancellation of a paid subscription, all unused and rollover credits will expire at the end of the current billing period and will not carry over.
Daily credits do not roll over. Unused daily credits will **not accumulate** from day to day for the free tier or for the paid tiers.
For detailed information about subscription options, visit our [pricing page](https://lovable.dev/pricing)
.
[](https://docs.lovable.dev/introduction/plans-and-credits#faq)
FAQ
-----------------------------------------------------------------------
What is a credit?
Credits are used when sending messages in Lovable.
How can I upgrade my subscription?
1. Click your profile icon top right of the dashboard → Settings → Plans & credits, or visit [this page](https://lovable.dev/?settings=billing)
.
2. Choose your desired amount of credits in the credits per month dropdown and then click “Upgrade”. Complete the upgrade in the Stripe portal.
How can I downgrade my subscription?
1. Visit [this page](https://lovable.dev/?settings=billing)
or click your profile icon top right of the dashboard → Settings → Plans & credits.
2. Choose your desired amount of credits in the credits/month dropdown and then click “Downgrade”.
3. Complete the downgrade in Lovable and then in the Stripe portal. Your current plan will remain active until the end of the current billing period.
How can I cancel my subscription?
1. Visit [this page](https://lovable.dev/?settings=billing)
or click your profile icon top right of the dashboard → Settings → Plans & credits.
2. Click Manage → Downgrade to Free, and complete the steps. Your current plan will remain active until the end of the current billing period.
How can I change my billing information?
To change your billing information click your profile icon top right of the dashboard → Settings → Plans & credits → Manage your payment preferences. You’ll be redirected to the Stripe portal where you can change your information.
How do I download my invoices?
You can access your past invoices by clicking your profile icon top right of the dashboard → Settings → Plans & credits → Manage → View invoices. You’ll be redirected to the Stripe portal where you can find past invoices.
How do I get more credits?
You can upgrade your plan in your Account Settings to access more credits.
When does my monthly credit limit reset?
Your monthly credit limit will reset when your billing period resets. This happens every month on the same date and time that you started your subscription. For detailed date and time, check your [billing section](https://lovable.dev/?settings=billing)
.
When does the daily credit limit reset?
Daily credits are being reset every day at midnight UTC. On a free plan you can use a total of 30 free credits per calendar month.
Can I buy a top-up of credits?
The only way to access more credits before your billing period resets is to upgrade to a higher plan.
How do I see the remaining credits in a workspace?
You can see the remaining credits by pressing the profile icon top right of the dashboard, or by pressing the dropdown on the project name whilst in the project editor.
Can I get free credits?
We do **not offer free credits** through support requests.
[](https://docs.lovable.dev/introduction/plans-and-credits#common-issues-and-troubleshooting)
Common issues and troubleshooting
-----------------------------------------------------------------------------------------------------------------------------------
I can't pay for my subscription. What should I do?
Occasionally, payment setups may fail due to issues with Stripe. If this occurs, double-check your payment details and retry. If the problem persists, please try using a different payment method.
I've paid but still don't have access to my plan. What should I do?
Please reach out to support on [support@lovable.dev](mailto:support@lovable.dev)
.
I've upgraded but haven't received any credits?
You will receive credits only if you upgrade to a plan with a higher credit allowance. If you have done so and still haven’t received your credits, please reach out to support on [support@lovable.dev](mailto:support@lovable.dev)
.
Was this page helpful?
YesNo
[Welcome](https://docs.lovable.dev/introduction/welcome)
[Getting started](https://docs.lovable.dev/introduction/getting-started)
⌘I
---
# AI integration - Lovable Documentation
[Skip to main content](https://docs.lovable.dev/integrations/ai-old-version#content-area)
[Lovable Documentation home page](https://lovable.dev/)
Search...
⌘K
Search...
Navigation
AI integration
[Introduction](https://docs.lovable.dev/introduction/welcome)
[Features](https://docs.lovable.dev/features/modes)
[Integrations](https://docs.lovable.dev/integrations/introduction)
[Tips & Tricks](https://docs.lovable.dev/tips-tricks/best-practice)
[Prompt engineering](https://docs.lovable.dev/prompting/prompting-one)
[Use cases](https://docs.lovable.dev/use-case/video-tutorials)
[Glossary](https://docs.lovable.dev/glossary)
[Changelog](https://docs.lovable.dev/changelog)
On this page
* [Debug and Improve Prompts](https://docs.lovable.dev/integrations/ai-old-version#debug-and-improve-prompts)
* [Troubleshooting](https://docs.lovable.dev/integrations/ai-old-version#troubleshooting)
* [Example Projects Built with AI Integration](https://docs.lovable.dev/integrations/ai-old-version#example-projects-built-with-ai-integration)
* [Final Thoughts](https://docs.lovable.dev/integrations/ai-old-version#final-thoughts)
Lovable makes it easy to integrate AI services into your web applications. Whether you want to build an AI-powered landing page, a text-generation tool, or a full SaaS app, Lovable’s built-in integrations with services like [**OpenAI**](https://platform.openai.com/)
, [**Groq**](https://console.groq.com/keys)
, [**Claude**](https://www.anthropic.com/api)
, [**Deepseek**](https://api-docs.deepseek.com/)
, and [**Mistral**](https://docs.mistral.ai/api/)
make it possible without writing backend code. Here’s how to do it:
1
Choose the AI Feature You Need
Before you start building, define what you want the AI to do:
* Generate or enhance text (e.g. email writer, tweet generator)
* Classify or summarize content
* Analyze images
* Personalize responses
* Integrate with a specific LLM API
2
Plan with Prompts First
Use Lovable’s chat interface to describe your feature in simple terms. For example:
Copy
Ask AI
Build an email enhancement tool. The user should write an email, then click buttons to make it more professional, concise, or friendly using Groq API.
Lovable will scaffold the UI, suggest components, and let you preview the app quickly.
3
Connect to a Backend with Supabase
AI features often need backend logic. Supabase provides:
* Database for user data
* Auth for login/signup
* Edge Functions for calling external APIs securely
Set up Supabase early in your project to avoid UI/backend mismatches.
4
Use Edge Functions for AI Calls
To safely call AI APIs, create an Edge Function inside Lovable:
* Add your API key to the Supabase by submitting this via the secrets form
* Let Lovable generate the edge function code
* Ensure you use function calling if your API returns structured data (e.g. calories, macros, tweet threads)
**Prompt Example:**
Copy
Ask AI
Use GPT-4 and function calling to extract nutrition info from a meal description. Save the results to the backend.
Structure your OpenAI function calling schema with defined fields like:
Copy
Ask AI
{
"name": "extract_nutrition",
"parameters": {
"calories": "number",
"protein": "number",
"carbs": "number",
"fat": "number"
}
}
5
Make It Interactive
Add buttons or form actions for:
* Submitting text to the AI
* Uploading an image
* Toggling between modes (concise vs friendly tone)
Lovable lets you:
* Attach functions to buttons
* Animate interactions
* Show real-time results with minimal prompting
Use screenshots and phrases like “make this smoother” to guide the design.
**Advanced UX Tip:** Implement side-by-side live previews of the AI response. Use left/right layout blocks or tabs to let users compare outputs.
6
Use External Services (Optional)
Some popular integrations for AI workflows:
* **Resend** – send emails after form submission
* **Groq API** – blazing fast LLM inference
* **Stripe** – paywall access to AI tools
* **Replicate** – generate or transform images
**Prompt Example:**
Copy
Ask AI
When a user submits the contact form, send an email using Resend and store the message in Supabase.
**Payments Tip:** Lock advanced AI features behind a Stripe subscription. Use conditional flows like:
Copy
Ask AI
if (user.isPaid) { showAIFeature(); } else { redirectToCheckout(); }
7
Test and Iterate
* Use preview links to test mobile responsiveness
* Check performance with multiple API calls
* Share your project for feedback
* Use chat history to revert changes or refactor
8
Publish and Promote
When you’re ready:
* Deploy with a single click
* Use [Lovable Launch](https://docs.lovable.dev/features/launched)
to get visibility
* Add OG tags and SEO title/description in the meta panel
* Submit your app to Product Hunt, communities, and social media
[](https://docs.lovable.dev/integrations/ai-old-version#debug-and-improve-prompts)
**Debug and Improve Prompts**
--------------------------------------------------------------------------------------------------------------------
* Be specific with system messages: “You are a helpful nutritionist.”
* Test function calling by mocking inputs.
* Use `console.log()` inside edge functions to trace logic.
* Use screenshots when asking Lovable to debug a layout.
**Prompt Tip:** If the AI fails to use your context (e.g. user’s meals), say:
Copy
Ask AI
Make sure all of the user's meals are included in the prompt to GPT-4.
###
[](https://docs.lovable.dev/integrations/ai-old-version#troubleshooting)
Troubleshooting
Missing data in AI prompts?
Make sure you include context like user history or previous entries.
UI not updating?
Use chat-only mode to debug one step at a time.
Streaming issues with Groq/OpenAI?
Ensure `stream: true` is supported.
Image uploads not working?
Use file inputs and convert to base64 or upload via Supabase Storage.
Edge Function fails silently?
View Edge Function logs in Lovable’s function editor or Supabase dashboard.
[](https://docs.lovable.dev/integrations/ai-old-version#example-projects-built-with-ai-integration)
Example Projects Built with AI Integration
--------------------------------------------------------------------------------------------------------------------------------------------------
* [**Nexus Smart Email**](https://smart-email-nexus.lovable.app/)
– Landing page with real-time Groq-enhanced email preview
* [**TweetMixer Pro**](https://www.youtube.com/watch?v=fT_dq_hyQAA&vl=de)
– Paste blog posts, get tweet threads using GPT-4
* [**AI Calorie Tracker**](https://www.youtube.com/watch?v=c0zhLzcVJRI&ab_channel=Lovable)
– Analyze meals via GPT-4 with image uploads
* [**Robot Arena Shooter**](https://www.youtube.com/watch?v=zmK36lkAb6I)
– Claude-powered game with AI-enhanced logic
* [**Reindeer Quiz**](https://www.youtube.com/watch?v=XdZtpP3QpzQ)
– Personalized result generation via Claude and custom scoring logic
[](https://docs.lovable.dev/integrations/ai-old-version#final-thoughts)
Final Thoughts
------------------------------------------------------------------------------------------
Lovable is your AI-powered frontend, database, backend, and deployment pipeline all-in-one. AI integration is just prompting + context + testing. Take it step-by-step, and remember: you don’t need to be a backend engineer to build with AI.
Was this page helpful?
YesNo
⌘I
---
# GitHub integration - Lovable Documentation
[Skip to main content](https://docs.lovable.dev/integrations/github#content-area)
[Lovable Documentation home page](https://lovable.dev/)
Search...
⌘K
Search...
Navigation
Integrations
GitHub integration
[Introduction](https://docs.lovable.dev/introduction/welcome)
[Features](https://docs.lovable.dev/features/modes)
[Integrations](https://docs.lovable.dev/integrations/introduction)
[Tips & Tricks](https://docs.lovable.dev/tips-tricks/best-practice)
[Prompt engineering](https://docs.lovable.dev/prompting/prompting-one)
[Use cases](https://docs.lovable.dev/use-case/video-tutorials)
[Glossary](https://docs.lovable.dev/glossary)
[Changelog](https://docs.lovable.dev/changelog)
On this page
* [What is GitHub](https://docs.lovable.dev/integrations/github#what-is-github)
* [TL;DR:](https://docs.lovable.dev/integrations/github#tl%3Bdr%3A)
* [Key benefits of GitHub integration:](https://docs.lovable.dev/integrations/github#key-benefits-of-github-integration%3A)
* [Connecting Lovable to your GitHub account (setup guide)](https://docs.lovable.dev/integrations/github#connecting-lovable-to-your-github-account-setup-guide)
* [How syncing works (Lovable ↔ GitHub)](https://docs.lovable.dev/integrations/github#how-syncing-works-lovable-%E2%86%94-github)
* [Importing an existing GitHub repository into Lovable](https://docs.lovable.dev/integrations/github#importing-an-existing-github-repository-into-lovable)
* [Developing with GitHub and Lovable in parallel](https://docs.lovable.dev/integrations/github#developing-with-github-and-lovable-in-parallel)
* [Documenting changes and rolling back](https://docs.lovable.dev/integrations/github#documenting-changes-and-rolling-back)
* [Troubleshooting & FAQ (GitHub Sync)](https://docs.lovable.dev/integrations/github#troubleshooting-%26-faq-github-sync)
[](https://docs.lovable.dev/integrations/github#what-is-github)
What is GitHub
----------------------------------------------------------------------------------
Integrating GitHub into your Lovable project ensures you have full version control, collaboration tools, and code portability throughout your app’s lifecycle.
###
[](https://docs.lovable.dev/integrations/github#tl%3Bdr%3A)
**TL;DR:**
* **Git** is a version control system that tracks changes in your code.
* **GitHub** is the industry-standard platform for hosting Git repositories and tracking code changes, which makes it essential for both solo builders and teams using Lovable.
* By linking your project to GitHub, every change in your Lovable app is backed up in a Git repository in real time. This means you get a complete history of your code, the ability to collaborate with developers in familiar workflows, and the freedom to host or deploy your app outside of Lovable if needed.
* **GitHub integration** brings transparency, safety, and flexibility to your Lovable development process.
[](https://docs.lovable.dev/integrations/github#key-benefits-of-github-integration%3A)
Key benefits of GitHub integration:
------------------------------------------------------------------------------------------------------------------------------
Lovable backs every project with a Git repository, making it easy for developers to push commits directly to GitHub. This means:
* **Version History & Backup:** All your code is tracked with Git, so you can review changes or roll back to any previous state. Every commit is saved to GitHub, providing an external backup of your project
* **Team Collaboration:** Your code lives on GitHub where others (developers, contributors) can easily view it, comment, and contribute via pull requests. Non-technical team members can also see the code history for transparency.
* **Real-Time Sync:** Lovable automatically syncs with your GitHub repo. If you push code to GitHub, Lovable pulls it in almost immediately. If you edit code in Lovable, it pushes those changes to GitHub. You’ll always have the latest code in both places without manual copying.
* **Workflow Integration:** Use GitHub’s tools (branches, pull requests, issues, CI/CD, etc.) alongside Lovable. For example, you can run tests or deploy your app via GitHub Actions when code is merged, all while continuing to use Lovable’s editor and AI to develop features.
* **Deployment Flexibility:** Connecting to GitHub gives you the option to host your app on your own infrastructure or platform of choice. You’re not locked into Lovable’s hosting – you can export the code and deploy it anywhere. (Lovable will still sync changes with GitHub, so you can continue editing in Lovable even if you host the app elsewhere.)
[](https://docs.lovable.dev/integrations/github#connecting-lovable-to-your-github-account-setup-guide)
Connecting Lovable to your GitHub account (setup guide)
------------------------------------------------------------------------------------------------------------------------------------------------------------------
To start using GitHub with Lovable, you need to connect your GitHub account and create a repository for your project. Here’s how to set it up:
1
Initiate GitHub Connection:
In the Lovable editor, click on **GitHub → Connect to GitHub** (usually found in the top-right corner of the project editor). This will begin the authorization process.
2
Authorize Lovable on GitHub:
You’ll be redirected to GitHub to authorize the Lovable GitHub App. Sign in to GitHub if prompted. When asked to grant access, choose either **All repositories** or **Only select repositories**. Granting access to all repos is easiest, but selecting specific repos is fine too – either way, Lovable will be able to create a new repo for your project in your account or organization
3
Select GitHub Account/Org
If your GitHub user belongs to organizations, you may need to confirm which GitHub account or organization to install the Lovable app to. You can create the project’s repo under your personal GitHub or any organization where you have permission.
You can only connect **one** GitHub account per Lovable account at a time. If you want to use an organization’s GitHub, make sure you have admin access in that org to allow repo creation
4
Create the Repository
Once GitHub is connected, return to your Lovable project. Click the **Create Repository** button (located in the top-right of the Lovable editor interface). Lovable will then create a new GitHub repository for this project and push the current project code to that repo. This initial push might take a few seconds. After this step, your Lovable project’s code is now on GitHub.
5
Verify the Link
GitHub and navigate to your account (or org) – you should see the new repository with your project’s name. It will contain all the code of your Lovable app. In Lovable, you might also see a confirmation or the GitHub repository name linked. From now on, any changes in Lovable will sync to this repo and vice versa.
If you plan to connect multiple Lovable projects to GitHub, you can repeat the above for each project (each will create its own repo). Each Lovable project can have one linked GitHub repo. Remember that your Lovable account remains linked to whichever GitHub login you authorized.
[](https://docs.lovable.dev/integrations/github#how-syncing-works-lovable-%E2%86%94-github)
How syncing works (Lovable ↔ GitHub)
------------------------------------------------------------------------------------------------------------------------------------
Once your project is connected to GitHub, Lovable ensures that code changes stay in sync between the Lovable editor and your GitHub repository. The integration is **bidirectional**, but it follows some specific rules and behaviors:
* **Default Branch Sync Only:** Lovable currently tracks **only the default branch** of your GitHub repository. This is typically the `main` branch (or `master`, depending on your repo). If you push commits to other branches on GitHub, those changes will **not** appear in your Lovable project until they are merged into the default branch. For example, if you’re working on a `feature/login` branch, Lovable won’t show those updates in the editor until you merge `feature/login` into `main` on GitHub. Similarly, Lovable will only push its changes to the default branch. Keep this in mind when using multiple branches. (See the FAQ on switching default branch if you need to change which branch Lovable syncs.)
* **Real-Time Updates from GitHub:** When you commit and push code to the default branch on GitHub, those commits will show up in Lovable almost automatically. Lovable’s integration listens for changes – whenever you push to GitHub, Lovable pulls the latest commit into the project. You don’t need to manually refresh or import anything; the editor will reflect the new code typically within a few seconds of the push. This allows developers to work in their own environment and see the results in Lovable instantly.
* **Pushing Changes from Lovable:** If you make changes in Lovable (for example, editing code via Lovable’s Dev Mode or having the AI generate new code), those changes are also saved to the Git repository backing your project. Lovable will push these commits to GitHub automatically, updating the repository. In practice, you can treat Lovable as another git client – when the AI or you modify code in the Lovable editor, it’s as if you committed and pushed to GitHub. For instance, adding a new page or editing a file in Lovable will result in a commit (with the changes) appearing in the GitHub repo’s commit history. This ensures both Lovable and GitHub always have the same latest code.
* **No Manual Pull/Push Needed:** The sync is continuous. You do not have to manually “pull” updates into Lovable or “push” updates to GitHub – Lovable handles it. Pushing code to GitHub triggers Lovable to fetch the changes, and editing in Lovable triggers a push to GitHub behind the scenes. Your focus can be on building, not on syncing. If you ever suspect a change didn’t sync, a quick refresh of the Lovable editor or checking the GitHub repo can confirm the latest state (but in general it’s automatic).
* **Conflict Handling:** Because both Lovable and GitHub can change the code, there’s a chance of a git conflict if changes happen on the same file at the same time. In practice this is rare, but if a conflict does occur, you would resolve it just like any Git conflict. For example, you might need to go to the GitHub repo and manually merge or fix conflicting changes, then commit. Lovable will then pull the resolved code. To avoid conflicts, it’s best to coordinate who is editing or use branches for larger changes (merging to main when ready).
In summary, the GitHub integration means your Lovable project’s code and the GitHub repository are effectively one and the same source, mirrored in real time. You can confidently switch between the Lovable editor and other development tools knowing both will stay updated
[](https://docs.lovable.dev/integrations/github#importing-an-existing-github-repository-into-lovable)
Importing an existing GitHub repository into Lovable
--------------------------------------------------------------------------------------------------------------------------------------------------------------
What if you already have a codebase on GitHub and want to use Lovable with it? Currently, **Lovable does not yet support directly importing or linking to an existing external GitHub repo as a new project**. In other words, you can’t point Lovable at an existing repository and have it pull in all that code automatically (as of now). However, there are ways to bring your existing code into Lovable:
* **Manual Import via a New Repo:** One workaround is to create a new Lovable project and connect it to GitHub (following the setup steps above), which gives you an empty repository (or a repository with the starter code from Lovable). Then, you can **manually add your existing code to that repository**. For example, you could clone the new GitHub repo to your local machine, copy in the files from your old project, commit and push. Once you push your existing code into the repo’s default branch, Lovable will sync those files and you’ll see them in the Lovable editor. This effectively migrates your code into a Lovable project.
* **Copy-Paste Smaller Snippets:** If your project is small, you might also start a Lovable project and copy code pieces (like individual files or functions) into Lovable via the editor or the AI (for instance, by pasting code into Lovable’s code editor or prompting the AI with your code). This is less ideal for large projects but can work for minor modules.
Importing an existing codebase may involve setting up any necessary configuration in Lovable (e.g., environment variables, dependencies) to mirror the original project’s setup. After you’ve brought in the code, test the project within Lovable to ensure everything runs. From then on, you can use Lovable’s AI features on your code and still sync back to GitHub.
[](https://docs.lovable.dev/integrations/github#developing-with-github-and-lovable-in-parallel)
Developing with GitHub and Lovable in parallel
--------------------------------------------------------------------------------------------------------------------------------------------------
Once connected, you can build and edit your application using GitHub (or your local development environment) and Lovable simultaneously. This is great for developers who want to use their own tools or for teams where some members prefer coding by hand. Here are some ways to work effectively with the integration:
* **Viewing the Repository:** In the Lovable editor, you’ll have an option to view the GitHub repository (often via a **“View on GitHub”** link or button). Clicking this will take you straight to the repository page on GitHub. From there, you can browse the code, open files, and even edit directly on GitHub if needed.
* **Using Local IDE or Codespaces:** You can clone the GitHub repository to your local machine and open it in your favorite IDE (like VS Code, WebStorm, etc.), or use GitHub Codespaces (a cloud IDE on GitHub) for development. This means you can write and modify code outside of Lovable’s interface.
A developer on your team could clone the repo, make extensive changes with full IDE support, run tests locally, and then push commits to GitHub. Because of the integration, those commits will sync back to Lovable automatically, so the Lovable project will update to include the changes.
* **Normal GitHub Workflows:** You can leverage all of GitHub’s collaboration features on your project’s repo: create **branches** for new features, open **pull requests** to review code before merging, file **issues** and use project boards to track tasks, etc.. Lovable doesn’t interfere with these; it simply watches the default branch for actual code changes. For instance, you might do all your work for a new feature on a `feature` branch, push it to GitHub, get it reviewed via a pull request, and then merge it to `main`. Once merged, Lovable will pull in those changes so the running app updates. This way, teams can enforce code reviews and use GitHub’s project management, while still benefiting from Lovable’s rapid development capabilities.
* **Combining AI and Manual Coding:** You can continue to use Lovable’s AI assistant to generate code or new components, and then inspect or fine-tune that code via GitHub. The integration allows a hybrid workflow: for example, a non-technical founder might use Lovable to scaffold a feature with AI, and a developer can then clean up or optimize that code in the GitHub repo. Both sets of changes merge seamlessly.
For example, use **GitHub Actions** to run tests automatically on each pull request, or to deploy the app to a hosting service whenever `main` gets updated
* **Remember:** even while doing heavy development through GitHub, you can always go back to the Lovable editor to use the visual tools or AI chat for assistance. The codebase is the same, so any changes you made by hand will be present in Lovable. This integration makes Lovable a part of your toolchain rather than an isolated environment.
[](https://docs.lovable.dev/integrations/github#documenting-changes-and-rolling-back)
Documenting changes and rolling back
------------------------------------------------------------------------------------------------------------------------------
Working with GitHub encourages good software development practices like documenting changes and managing versions. Here are some tips on managing your code changes and reverting when necessary:
* **Use Meaningful Commit Messages:** Whenever you commit changes (especially when committing via a local IDE or GitHub’s interface), write a clear commit message describing _what_ you changed and _why_. For example, `"Fix signup form validation bug"` is much more useful than `"update code"`. Good commit messages help team members (and your future self) understand the history of the project. They serve as documentation for the evolution of your app. If Lovable’s AI made a lot of changes in one go, consider breaking them into logical commits with messages for each major change, if you’re doing it manually. If commits are being generated automatically, you can always squash or edit them later on GitHub for clarity.
* **Track Versions in Lovable:** Lovable provides a version history in the editor (similar to Google Docs revision history) that keeps track of changes made through the platform. You can access the version history panel to see previous states of your project and even restore an earlier version with one click. This is effectively a “rollback” feature built on top of Git – if something goes wrong after an AI-generated change or an edit, you can revert to a known good state. It’s a quick way for non-developers to undo mistakes without using GitHub directly.
* **Rolling Back with Git or Lovable (Reverts):** Since your project is under Git, you can perform rollbacks by reverting commits on GitHub as well. For example, if a certain commit introduced an issue, you (or a developer) can click “Revert” on GitHub for that commit, or use `git revert` locally and push. This will create a new commit that undoes the changes of the bad commit. Lovable will sync this revert commit and your project will go back to the previous behavior. Always test your app after a revert to ensure the issue is resolved and no other functionality is affected.
* **Use Branches for Big Changes:** A good strategy to reduce the need for rollbacks is to use feature branches for major changes. You might develop a big feature on a separate branch and only merge it to the main branch (which Lovable uses) after it’s fully tested. This way, your main branch (and the live app in Lovable) stays stable, and you only introduce changes when they are ready. If something on the feature branch isn’t working, it doesn’t affect your production code in Lovable until merged.
* **Documentation of Changes:** If you are collaborating with others or handing off the project, consider maintaining a brief **changelog** or using GitHub’s release notes. While commit messages are the primary log, summarizing changes in human-readable form (e.g., “Implemented user authentication, updated UI for profile page, fixed payment bug”) can be helpful for non-technical stakeholders to follow progress. You can do this in a Markdown file in the repo or in GitHub Releases.
* **Lovable’s Rollback Feature:** Lovable automatically backs up your project, so if you made a mistake, you can use the built-in rollback in the Lovable interface to undo accidental changes. This is essentially using Git version control under the hood. It ensures that even non-technical users have a safety net – you don’t have to be a Git expert to restore a previous version of your app. However, for complex version management (like maintaining multiple versions or doing partial rollbacks), you will likely use GitHub’s tools.
By diligently documenting your changes and taking advantage of GitHub’s and Lovable’s versioning features, you can move fast with confidence. If a published update causes issues, you have clear records of what changed and multiple ways to revert or fix forward. This significantly de-risks the development process.
[](https://docs.lovable.dev/integrations/github#troubleshooting-%26-faq-github-sync)
Troubleshooting & FAQ (GitHub Sync)
----------------------------------------------------------------------------------------------------------------------------
Below are some common questions and issues that users encounter with the GitHub integration, along with guidance on how to resolve them. Click on a question to view the answer.
Why aren’t my commits showing up in Lovable?
**Possible causes:** The most common reason is that the commits were made on a branch that Lovable isn’t tracking. Remember, Lovable only syncs with the repository’s **default branch** (usually `main` or `master`). If you committed to a different branch and haven’t merged those changes into the default branch, Lovable will not see them. To fix this, merge the branch into the default branch (or change the default branch – see the next question). Once the commit is on the default branch, Lovable should pull it in automatically.Another possibility is an issue with the integration link. For instance, if you **renamed the GitHub repository or changed your GitHub username** after connecting, the webhook/connection might be broken. In such cases, reconnecting your GitHub account to Lovable can re-establish the link. Make sure the Lovable GitHub App still has access to the repo (check your GitHub settings → Applications). If it was removed or lost access, re-authorize it and then try pushing the commit again.Also, double-check that the commit was successfully pushed to GitHub (not just committed locally). If you haven’t run `git push` (in case of local development), the commit won’t be on GitHub for Lovable to detect.If your commits **are on the default branch** and you still don’t see updates in Lovable, try manually refreshing the project in the Lovable editor. In rare cases, there might be a slight delay or a hiccup in the webhook. Usually, though, commits appear almost instantly when everything is set up correctly.
How do I switch the default branch that Lovable syncs with
Lovable will follow whatever branch is set as the **default** in your GitHub repository settings. By default this is `main` (for new GitHub repos) unless you changed it. If you want Lovable to track a different branch (say you want to use a `development` branch as the main source), you need to change the default branch on GitHub:
1. **On GitHub:** Go to your repository’s **Settings** > **Branches** > **Default branch**. Choose the branch you want to set as the new default, and confirm the change. (If the branch doesn’t exist yet, you’ll need to create it and perhaps populate it with the current code.)
2. **After Changing:** Once you set a new default, Lovable should start treating that branch as the one to sync. Since Lovable only tracks the default branch, changing it effectively points Lovable to the new branch. Give it a moment to fetch the code from the new default branch. All future commits to that branch will sync to Lovable, and edits in Lovable will be pushed to that branch.
3. **Verify in Lovable:** Check the Lovable editor to ensure it’s now showing the code from the new default branch. You might see an update notification or you might simply notice that any differences (if the branch had different code) are now reflected. If it doesn’t seem to update, try disconnecting and reconnecting the GitHub integration in Lovable (as a last resort). But typically, this isn’t required — it should follow the default automatically.
4. **Merge Old Changes:** A crucial step is to make sure any important commits from the old default branch get merged into the new default. Changing the default branch on GitHub **does not** automatically merge the content. If you switched default branches because you want to shift development to a new line of work, ensure that the new branch has all the latest code. You may need to merge the previous main into the new branch so nothing is lost. After merging, Lovable will show the combined changes.
Keep in mind that all collaborators will now be pushing to the new default branch by default. Update your team or documentation to avoid confusion. Lovable will now ignore the formerly default branch (it will only pay attention to the new one). If needed, you can always switch back by re-designating the old branch as default in GitHub settings.
How does Lovable detect new commits from GitHub?
Lovable’s integration uses GitHub’s API and webhooks under the hood to stay updated. When you first connect to GitHub, you essentially install the Lovable GitHub App on your repo which sets up the communication. So, **when you push a new commit to the default branch**, GitHub notifies the Lovable service (via a webhook event). Lovable then automatically pulls the latest changes into your project. This all happens in the background within seconds. That’s why, as soon as you push code to GitHub, you’ll usually see your Lovable project update almost immediately with no action needed on your part.On the flip side, when you make changes in the Lovable editor, Lovable uses the GitHub connection to push those commits to your repository. This might happen through the Lovable backend using GitHub’s API – for you it’s seamless: you’ll just notice that new commits (with appropriate messages) show up in your GitHub repo whenever you change something in Lovable.In summary, Lovable is constantly “listening” for GitHub commits and “talking” to GitHub when changes occur in the editor. It’s a two-way sync facilitated by the integration you set up during the connection. You don’t have to manage any of this process; just know that behind the scenes, webhooks/API calls are keeping everything aligned. If the sync ever seems to stop, it could be due to a broken connection (in which case reconnecting the integration or re-authorizing the GitHub App can re-enable the webhook).
Can I host my Lovable app myself after connecting to GitHub?
Yes. Integrating with GitHub gives you full access to your code, which means you can deploy or host the application outside of Lovable if you want. By default, Lovable provides hosting for your project (when you click “Publish” in Lovable, it deploys your app to Lovable’s cloud). This doesn’t change just because you linked GitHub – you can continue to use Lovable’s hosting **and** have the code on GitHub at the same time.However, if you prefer to host the app on your own server or another platform, you can do so by using the code from the GitHub repo. For example, you could take the repository and deploy it to Vercel, Heroku, AWS, or any environment of your choice. Since the code is a standard web app codebase (Lovable projects are typically full-stack JavaScript/TypeScript apps), you can set it up like any project.
**Even if you host elsewhere, you can still use Lovable to develop**. You might treat Lovable as a powerful visual editor/AI assistant, and when you’re ready to update your self-hosted app, you push commits to GitHub (via Lovable). Your external deployment pipeline (if set up) would then deploy those new commits. In this scenario, Lovable is for building and GitHub is the single source of truth for both Lovable and your own hosting.
Do note that if you do host the app yourself outside of Lovable, you’ll need to manage environment variables, secrets, database connections, and other config in your new environment just as you would for any app. The Lovable integration with services like Supabase or Stripe will still be in your code – those continue to work as long as the appropriate config is in place on the new host.
How do I switch the GitHub account if I already connected the wrong one?
Unfortunately, you cannot switch the GitHub account once it’s been connected to a Lovable project, as the sync is fixed and cannot be disrupted. However, you can connect to a different GitHub **organization** by following these steps:
1. **Remix the Project:** In Lovable, click the “Remix” button on your project to create a new copy of it.
2. **Connect to GitHub:** Once remixed, connect this new project to GitHub.
3. **Select the Correct Organization:** During the GitHub connection process, you’ll have the option to choose the correct organization and complete the necessary configuration steps.
This is the only way to change the GitHub integration for a project.
How do I update my GitHub if I move my repository into an organization from a personal account?
If you move your repository from a personal GitHub account to an organization, the sync with your Lovable project will break. This is because Lovable projects are tightly coupled to the original GitHub repo configuration, and the webhook connection cannot survive a move across orgs or accounts.**How to handle it:**
1. Move the repository back to its original location (the personal account it was connected from).
2. Once the sync is restored and you’re able to access the project again, remix the project in Lovable.
3. With the remixed version:
* Connect to GitHub using the desired organization.
* Authorize the Lovable GitHub App for the new org (admin access required).
* Choose the target repo (either the moved one or a new repo).
**Important Notes:**
* Lovable cannot switch GitHub accounts or orgs mid-project due to how sync is configured.
* Remixing is the only way to point a project to a different GitHub org.
This approach ensures your new org connection is clean and your project remains stable.
I changed my GitHub repo name. How do I fix my project?
This is fine! You can switch the name of your GitHub repo without it causing any issues.
I changed my GitHub username, how do I fix my project?
You need to switch back to the original account username, simple as that.
I changed my GitHub organization name. How do I fix my project?
You need to switch back to the original organization username, simple as that.
I deleted my repo in GitHub. How do I recover it?
If you’ve accidentally deleted your GitHub repository, you can restore it directly from GitHub, **Lovable does not have the ability to restore deleted repositories on your behalf.****What to do:**
1. Go to [GitHub’s repository restoration page](https://docs.github.com/en/repositories/creating-and-managing-repositories/restoring-a-deleted-repository)
and follow the instructions to restore your deleted repository.
* GitHub allows you to restore a deleted repo within 90 days, provided no other repository with the same name exists in the same account or organization.
2. Once your repository has been successfully restored on GitHub, your Lovable project should automatically sync back with it, and you’ll be able to continue development and syncing as before.
If the sync doesn’t re-establish automatically after restoring the repo, try refreshing your Lovable project or navigating to the GitHub settings within the UI to verify the connection.
I deleted my GitHub account. What now?
Unfortunately, if you’ve deleted your GitHub account, all of your Lovable projects linked to it are now broken and cannot function properly. **GitHub deletions are irreversible**, and there’s no way to recover the repos or re-establish those connections.**What this means:**
* All projects connected to your deleted GitHub account will not work and you cannot push or sync any code.
* Your repository history and webhooks are lost.
* Lovable cannot automatically reconfigure or repair these projects.
**What you can do:**
* Reach out to Lovable Support and ask if they can mannually disconnect your deleted GitHub account.
* If support is able to do this, you can then start fresh with a new GitHub account.
* However, **none of your old projects will be recoverable or usable.**
**Next steps:**
1. Create a new GitHub account.
2. Connect these new projects to your new GitHub account.
This is the only way to get back up and running.
Can I undo or disconnect my GitHub integration?
Yes by remixing the project. This will create a copy of your project that is not connected to Github.
Do I have to remix a project to switch GitHubs?
Yes.
I don't want any accidental changes to happen on my project. How do I remove Lovable from my GitHub?
To remove Lovable’s access to your GitHub account and prevent any accidental changes, you have a couple of options. **Keep in mind that this will render your projects useless unless you remix the projects first.****Revoke Lovable’s GitHub access** The most straightforward way to revoke Lovable’s access directly from your GitHub account is by following these steps:
1. Go to your GitHub settings.
2. Navigate to Applications (or `Setting` → `Applications` → `Authorized OAuth Apps`).
3. Find the Lovable GitHub App in the list.
4. Click Revoke or Remove to completely disconnect Lovable from your GitHub account.
This will immediately stop all synchronization between Lovable and your GitHub repositories.**Alternative: Limit repository access** If you want to keep using Lovable but just protect specific repositories, you can:
1. Go to your GitHub settings and find the Lovable app.
2. Modify the permissions to “Only select repositories” instead of “All repositories”.
3. Remove access to the repositories you want to protect.
**After removal** Once you revoke access:
* Lovable will no longer be able to push changes to your GitHub repositories.
* No new commits will be created from Lovable edits.
* Your existing code on GitHub remains completely safe and unchanged.
* You can still continue working in Lovable, but changes won’t sync to GitHub.
**Re-connecting** If you ever want to reconnect Lovable to GitHub in the future, you can simply click the GitHub button in the Lovable editor and go through the authorization process again.This approach gives you complete control over when and how Lovable can access your GitHub repositories, ensuring no accidental changes can occur.
By following this guide and utilizing GitHub with Lovable, you’ll combine the speed of AI-assisted development with the reliability and control of traditional software practices. This integration is designed to be approachable for non-technical users (you get a safe backup and easy way to hand off code) while providing all the power that developers expect in a modern toolchain.
Was this page helpful?
YesNo
[Lovable API: Build with URL](https://docs.lovable.dev/integrations/build-with-url)
[Supabase integration](https://docs.lovable.dev/integrations/supabase)
⌘I
---
# Introduction - Lovable Documentation
[Skip to main content](https://docs.lovable.dev/integrations/introduction#content-area)
[Lovable Documentation home page](https://lovable.dev/)
Search...
⌘K
Search...
Navigation
About integrations
Introduction
[Introduction](https://docs.lovable.dev/introduction/welcome)
[Features](https://docs.lovable.dev/features/modes)
[Integrations](https://docs.lovable.dev/integrations/introduction)
[Tips & Tricks](https://docs.lovable.dev/tips-tricks/best-practice)
[Prompt engineering](https://docs.lovable.dev/prompting/prompting-one)
[Use cases](https://docs.lovable.dev/use-case/video-tutorials)
[Glossary](https://docs.lovable.dev/glossary)
[Changelog](https://docs.lovable.dev/changelog)
On this page
* [What is an API?](https://docs.lovable.dev/integrations/introduction#what-is-an-api%3F)
* [Native integrations](https://docs.lovable.dev/integrations/introduction#native-integrations)
* [Verified integrations](https://docs.lovable.dev/integrations/introduction#verified-integrations)
* [Using any API with Lovable](https://docs.lovable.dev/integrations/introduction#using-any-api-with-lovable)
Lovable has native seamless integrations to export code and to add a backend. But it is also possible to integrate an external API if you are looking to add that specific functionality to your website.
[](https://docs.lovable.dev/integrations/introduction#what-is-an-api%3F)
What is an API?
--------------------------------------------------------------------------------------------
An API is a way for software applications to communicate and share data with each other. Different APIs offer different functionality such as sending emails or processing payments. You can read more about the power of APIs in [this article on our blog](https://lovable.dev/blog/2025-01-28-the-power-of-apis)
.
[](https://docs.lovable.dev/integrations/introduction#native-integrations)
Native integrations
--------------------------------------------------------------------------------------------------
Explore the sections below to get started quickly and learn more about our native GitHub and Supabase integrations.
[GitHub Integration\
------------------\
\
Understand how to integrate Lovable with GitHub to export your code and for seamless version control.](https://docs.lovable.dev/integrations/github)
[Supabase Integration\
--------------------\
\
Add a backend to your website using Supabase, to support authentication and persistent data storage.](https://docs.lovable.dev/integrations/supabase)
[](https://docs.lovable.dev/integrations/introduction#verified-integrations)
Verified integrations
------------------------------------------------------------------------------------------------------
Verified integrations work best with Lovable:
[Stripe\
------\
\
Add payment processing capabilities to your app.](https://docs.lovable.dev/integrations/stripe)
[OpenAI\
------\
\
Add AI capabilities to your app using OpenAI’s models.](https://openai.com/api/)
[Anthropic\
---------\
\
Add AI capabilities to your app using Anthropic’s Claude models.](https://www.anthropic.com/api)
[Resend\
------\
\
Add email capabilities to your app using Resend’s modern email API.](https://resend.com/)
[Clerk\
-----\
\
Comprehensive User Management Platform.](https://clerk.com/)
[Three.js\
--------\
\
Add interactive 3D graphics to your app.](https://threejs.org/docs/)
[D3.js\
-----\
\
Create dynamic, interactive data visualizations.](https://devdocs.io/d3/)
[Highcharts\
----------\
\
Create professional, interactive charts and visualizations.](https://highcharts.com/docs/index)
[p5.js\
-----\
\
Create creative coding projects and interactive graphics.](https://p5js.org/reference/)
[Runware\
-------\
\
Make your app generate images from text prompts.](https://runware.ai/)
[ElevenLabs\
----------\
\
Add Text-to-Speech functionality.](https://elevenlabs.io/developers)
[Make\
----\
\
Visual platform for building workflows that automate tasks and connect apps.](https://developers.make.com/api-documentation)
[Replicate\
---------\
\
Run and fine-tune open-source AI models.](https://replicate.com/docs/)
[Stability AI\
------------\
\
Develops open AI models across various modalities.](https://platform.stability.ai/docs/api-reference)
[Figma\
-----\
\
Import designs from your Figma workspace.](https://lovable.dev/blog/2025-01-22-figma-to-lovable-builder-io-native-integration)
[Twilio\
------\
\
Add SMS capabilities to your app using Twilio.](https://www.twilio.com/docs/messaging/api)
[n8n\
---\
\
Build workflows with visual platform for your application.](https://docs.n8n.io/api/)
[](https://docs.lovable.dev/integrations/introduction#using-any-api-with-lovable)
Using any API with Lovable
----------------------------------------------------------------------------------------------------------------
All other callable APIs can still be integrated, but they often require additional context and instructions. You might have:
* **Internal systems with custom APIs**
These could be services your team has built (e.g. inventory systems, analytics pipelines, internal tools) that expose REST or GraphQL endpoints but aren’t publicly documented or widely known. You want Lovable to pull from or send data to these systems to automate workflows or power user interfaces.
* **Third-party APIs Lovable doesn’t yet support**
Maybe you use a niche SaaS product, a specialized data provider, or a partner integration that Lovable doesn’t have built-in knowledge of. Even though it’s not officially supported, you still want Lovable to connect, make calls, and work with the data.
In both cases, the challenge is the same: Lovable doesn’t “know” the API by default. But with good documentation and authentication setup, it can still use it effectively. Either way, the approach is the same: **Lovable can still connect to it**. Here’s how.
1
Give Lovable the context it needs
Lovable works best when it understands the API. You can provide:
* **OpenAPI specification** (if available)
* **Copy-pasted docs or examples** (especially endpoints and sample requests/responses)
The clearer the documentation, the better Lovable can reason about how to call the API.
2
Handle authentication safely
For APIs that require authentication:**Option 1: Use Supabase Edge Functions as a proxy**
* Store secrets securely on Supabase
* Let Lovable call the API endpoint via the Edge Function (not the API directly)
**Option 2: Implement the API integration directly in your Lovable project**
* Expose an authentication endpoint (e.g. to exchange credentials for a token or session)
* Let Lovable call that auth endpoint as part of the integration flow
* Include tokens, headers, or session info in subsequent API calls
Example APIs:
[Mapbox\
------\
\
Powers navigation for people, packages, and vehicles everywhere.](https://docs.mapbox.com/)
[Rive\
----\
\
Create and ship interactive animations.](https://rive.app/docs/getting-started/introduction)
[Together.ai\
-----------\
\
Run or fine-tune leading open source models with only a few lines of code.](https://docs.together.ai/docs/introduction)
[PostHog\
-------\
\
OS product analytics to provide user behavior, session replays & A/B testing.](https://posthog.com/docs)
[Firecrawl\
---------\
\
Turn websites into LLM-ready data.](https://docs.firecrawl.dev/introduction)
[Perplexity\
----------\
\
Add powerful AI capabilities to your app.](https://docs.perplexity.ai/home)
[Zapier\
------\
\
Automation tool that connects different web applications.](https://docs.zapier.com/platform/home)
[GoJS\
----\
\
Add flowcharts especially useful for visualizing workflows and processes.](https://gojs.net/latest/api/)
[Transformers.js (HF)\
--------------------\
\
Run machine learning models directly in the browser without a server.](https://huggingface.co/docs/transformers.js/en/index)
[Grok / xAI\
----------\
\
Add AI capabilities to your app.](https://docs.x.ai/docs/overview)
[Twilio\
------\
\
Make and receive phone calls, send and receive text messages.](https://www.twilio.com/docs)
[Linkup\
------\
\
Offer AI search engine into your applications.](https://www.linkup.so/)
[Google Workspace\
----------------\
\
Cloud-based productivity and collaboration tools developed by Google.](https://developers.google.com/docs/api/how-tos/overview)
[Lemon Squeezy\
-------------\
\
E-commerce platform that simplifies selling digital products.](https://docs.lemonsqueezy.com/api)
[Serper.dev\
----------\
\
Integrate Google Search results into your applications.](https://serper.dev/)
[Notion\
------\
\
Note-taking, task management, and database functions.](https://developers.notion.com/)
[Mailgun\
-------\
\
Send, receive, and track emails.](https://documentation.mailgun.com/docs/mailgun/api-reference/intro/)
[Calendly\
--------\
\
Scheduling tool that simplifies meeting planning.](https://developer.calendly.com/api-docs)
[SendGrid\
--------\
\
Email delivery service for transactional and marketing emails management & delivery.](https://sendgrid.com/en-us/solutions/email-api)
[TinyMCE\
-------\
\
Rich-text editor for a WYSIWYG editing experience.](https://www.tiny.cloud/docs/tinymce/latest/apis/tinymce.root/)
[bannerbear\
----------\
\
Automates the generation of images and videos for social media.](https://www.bannerbear.com/)
[Square\
------\
\
Accept payments, manage sales, and handle various aspects of commerce.](https://developer.squareup.com/us/en)
[HeyGen\
------\
\
AI-generated video creation services.](https://www.heygen.com/api)
[](https://getlago.com/docs/api-reference/intro)
[](https://getlago.com/docs/api-reference/intro)
[GetLago\
-------](https://getlago.com/docs/api-reference/intro)
[](https://getlago.com/docs/api-reference/intro)
[Open source metering and usage-based billing](https://www.getlago.com/)
[Ticketmaster\
------------\
\
Embed event and ticketing information.](https://developer.ticketmaster.com/products-and-docs/apis/discovery-api/v2/)
[Tenor\
-----\
\
Add GIFs to your apps.](https://tenor.com/gifapi/documentation)
[Ideogram\
--------\
\
Generate AI powered typography and images.](https://developer.ideogram.ai/ideogram-api/api-setup)
[Luma\
----\
\
Create or share events](https://docs.lu.ma/reference/getting-started-with-your-api)
[Freesound\
---------\
\
Access a library of free sound effects & loops.](https://freesound.org/docs/api/)
[iLovePDF\
--------\
\
Convert, merge, and edit PDFs.](https://www.iloveapi.com/)
[Discord\
-------\
\
Build AI-powered bots.](https://discord.com/developers/docs/reference)
[Google Imagen\
-------------\
\
Text-to-image generators.](https://cloud.google.com/vertex-ai/generative-ai/docs/image/overview)
[Slack\
-----\
\
Automate messages and workflows.](https://api.slack.com/)
[Petfinder\
---------\
\
Access the Petfinder database of hundreds of thousands of pets.](https://www.petfinder.com/developers/)
[Sports DB\
---------\
\
Search and access data on all players, events, TV listings, and scores.](https://www.thesportsdb.com/free_sports_api)
[Weather App\
-----------\
\
Access current weather data for any location.](https://openweathermap.org/api)
[Youtube\
-------\
\
Add a variety of Youtube features to your application.](https://developers.google.com/youtube/v3)
[Findwork\
--------\
\
Access job listings and other career resources.](https://publicapi.dev/findwork-api)
[Pixabay\
-------\
\
Search and retrieve royalty-free images and videos.](https://pixabay.com/api/docs/)
[Alpha Vantage\
-------------\
\
Realtime and historical financial market data.](https://www.alphavantage.co/)
[Currents\
--------\
\
Curate and access to real-time global news from variety of sources.](https://currentsapi.services/)
[Kofi\
----\
\
Accept donations, sell products, receive requests and earm from streaming.](https://help.ko-fi.com/hc/en-us/articles/360004162298-Does-Ko-fi-have-an-API-or-webhook)
[GitHub Stats\
------------\
\
Track repository activity and contributions.](https://docs.github.com/en/rest/metrics/statistics?apiVersion=2022-11-28)
[TheNews API\
-----------\
\
Search news and blog articles on the blog from 150K worldwide sources.](https://www.thenewsapi.com/)
[TripAdvisor\
-----------\
\
Integrate service content, get reservations and direct your customers’ reviews to Trip.](https://www.tripadvisor.com/developers)
[Verifone\
--------\
\
Collect transaction data.](https://verifone.cloud/api-catalog)
[New York Times\
--------------\
\
Search for New York Times articles.](https://developer.nytimes.com/apis)
[Polygon.io\
----------\
\
Query latest financial markets data.](https://polygon.io/)
[WordCloud\
---------\
\
Create word clouds.](https://wordcloudapi.com/)
[QRCode Generator\
----------------\
\
Generate and decode or read QR code graphics.](https://goqr.me/api/)
[Deezers\
-------\
\
Add music-related features to your application.](https://developers.deezer.com/api)
[Hacker Earth\
------------\
\
Compile and run code in several languages.](https://www.hackerearth.com/docs/wiki/developers/v4/)
[Cocktail DB\
-----------\
\
Access to a large database of cocktail recipes, ingredients and images.](https://www.thecocktaildb.com/api.php)
[Beer API\
--------\
\
Access descriptions of different types of beers like ales, lagers, porters, stouts and more.](http://beer-api.readthedocs.io/)
[Hashtag API\
-----------\
\
Retrieve, create, update and delete hashtags.](https://publicapi.dev/hashtag-api#:~:text=The%20Hashtag%20API%20allows%20users,hashtag%20functionality%20into%20their%20applications.)
[USAJobs\
-------\
\
Provide employment opportunities on your site.](https://developer.usajobs.gov/)
[SFMTA\
-----\
\
Transmit one or more Trip to the SFMTA Electronic Access Taxi System.](https://www.sfmta.com/reports/gtfs-transit-data)
[UPCDatabase\
-----------\
\
Access UPC database.](https://upcdatabase.org/api)
[TIme API\
--------\
\
Access information about time zones, convert time between time zones and track daylight saving time.](https://timeapi.io/)
[Plotly\
------\
\
Graphing library makes interactive, publication-quality graphs.](https://plotly.com/python-api-reference/)
[Manifest.build\
--------------\
\
Micro-backend.](https://manifest.build/docs/rest-api)
[Paypal\
------\
\
Integrate Paypal checkout solutions in your applications.](https://developer.paypal.com/api/rest/)
[4everland\
---------\
\
Backend alternative.](https://docs.4everland.org/hositng/hosting-api)
[Outseta\
-------\
\
Create, update people, accounts, subscriptions and invoices.](https://go.outseta.com/support/kb/articles/d1QpxQE7/how-to-integrate-with-outseta-s-rest-api)
[Recraft\
-------\
\
Text-to-Vector image generation.](https://www.recraft.ai/docs)
[n8n\
---\
\
Automations and workflows.](https://docs.n8n.io/api/)
[Venice\
------\
\
Uncensored AI conversations and image generation.](https://venice.ai/api-beta)
[Shopify\
-------\
\
Enhance your e-commerce capabilities.](https://shopify.dev/docs/api)
[BuildShip\
---------\
\
Backend and automation.](https://buildship.com/)
[RunPod\
------\
\
Custom logic integrations and deployments.](https://docs.runpod.io/sdks/python/apis)
[Gumloop\
-------\
\
Automation and workflow solution.](https://docs.gumloop.com/nodes/advanced/call_api)
[Odoo\
----\
\
Fetch and send data between your application.](https://www.odoo.com/documentation/18.0/developer/reference/external_api.html)
[Tableau\
-------\
\
Data analysis tool.](https://help.tableau.com/current/api/rest_api/en-us/REST/rest_api.htm)
[Power BI\
--------\
\
Data analysis tool.](https://learn.microsoft.com/en-us/rest/api/power-bi/)
[Mermaid\
-------\
\
Render customizable diagrams, charts and visualizations.](https://mermaid.js.org/config/usage.html)
[Stancer\
-------\
\
Alternative to Stripe.](https://www.stancer.com/documentation/api/)
[Mercado\
-------\
\
Create checkout processes.](https://www.mercadopago.com.ar/developers/en/docs/checkout-api/landing)
[Canva\
-----\
\
Integrate Canva into your own web apps.](https://www.canva.dev/docs/connect/)
[Razorpay\
--------\
\
Build payment interface (Indian)](https://razorpay.com/docs/api/)
[Coinbase\
--------\
\
Real-time market data.](https://www.coinbase.com/en-fr/developer-platform/products/exchange-api)
[GSAP\
----\
\
Animation library.](https://gsap.com/docs/v3/)
[Cohere\
------\
\
Integrate natural language processing and generation into your products.](https://docs.cohere.com/)
[OpenRouter\
----------\
\
Access hundreds of AI models.](https://openrouter.ai/docs/quickstart)
[Fal AI\
------\
\
Deploy custom AI models.](https://docs.fal.ai/)
[Paystack\
--------\
\
Online payment gateway (Africa)](https://paystack.com/docs/api/)
[Remotion\
--------\
\
Create video with AI and render into an MP4 file.](https://www.remotion.dev/docs/api)
[Paddle\
------\
\
Payments, tax and subscription management.](https://developer.paddle.com/api-reference/overview)
[Polar API\
---------\
\
Pull data such as activity levels and heart rate from Polar devices.](https://docs.polar.sh/api-reference)
Was this page helpful?
YesNo
[Lovable API: Build with URL](https://docs.lovable.dev/integrations/build-with-url)
⌘I
---
# Clerk integration - Lovable Documentation
[Skip to main content](https://docs.lovable.dev/integrations/clerk#content-area)
[Lovable Documentation home page](https://lovable.dev/)
Search...
⌘K
Search...
Navigation
Integrations
Clerk integration
[Introduction](https://docs.lovable.dev/introduction/welcome)
[Features](https://docs.lovable.dev/features/modes)
[Integrations](https://docs.lovable.dev/integrations/introduction)
[Tips & Tricks](https://docs.lovable.dev/tips-tricks/best-practice)
[Prompt engineering](https://docs.lovable.dev/prompting/prompting-one)
[Use cases](https://docs.lovable.dev/use-case/video-tutorials)
[Glossary](https://docs.lovable.dev/glossary)
[Changelog](https://docs.lovable.dev/changelog)
On this page
* [Why Clerk?](https://docs.lovable.dev/integrations/clerk#why-clerk%3F)
* [Step-by-step integration guide](https://docs.lovable.dev/integrations/clerk#step-by-step-integration-guide)
* [Bonus: Build B2B features in minutes](https://docs.lovable.dev/integrations/clerk#bonus%3A-build-b2b-features-in-minutes)
* [Tips & troubleshooting](https://docs.lovable.dev/integrations/clerk#tips-%26-troubleshooting)
* [Frequently Asked Questions (FAQ)](https://docs.lovable.dev/integrations/clerk#frequently-asked-questions-faq)
* [Final thoughts](https://docs.lovable.dev/integrations/clerk#final-thoughts)
[](https://docs.lovable.dev/integrations/clerk#why-clerk%3F)
Why Clerk?
---------------------------------------------------------------------------
 [Clerk](https://clerk.com/)
handles authentication and user management so you don’t have to build it from scratch. With just a few prompts and config steps, you get:
* Secure sign-in & sign-up (social, password, MFA)
* Prebuilt UI components: user profiles, org management, impersonation
* Support for B2B apps (teams, roles, invitations)
* Integration with Supabase, Stripe (coming soon), and more
* Waitlist mode to manage early access
* Generous free tier: 10K MAUs
[](https://docs.lovable.dev/integrations/clerk#step-by-step-integration-guide)
Step-by-step integration guide
-----------------------------------------------------------------------------------------------------------------
Here is a step-by-step guide:
1
Set Up Your Clerk App
1
Step 1
Create a Clerk Account → [Clerk.com](https://clerk.com/)
2
Step 2
In the Clerk dashboard, create a new app
1
Step 1
Sign in to Clerk & create a new app
2
Step 2
Enable desired authentication providers (e.g. Google, GitHub)
3
Step 3
Enable “Waitlist” under **Configure > Restrictions**
4
Step 4
Copy your **Public API Key**
3
Step 3
**Add Clerk to Your Lovable App**
1
Step 1
In **Lovable**, add Clerk as your authentication provider.Prompt Lovable:
Let’s build a beautiful project and task management app in the style of Asana. Users should be able to login and signup using Clerk for authentication and user management. Let’s start by building a great looking homepage and use Clerk’s waitlist component to let users join while we build the rest of the app.

2
Step 2
Paste your **Public API Key** when asked
3
Step 3
Lovable scaffolds the login and sign-up pages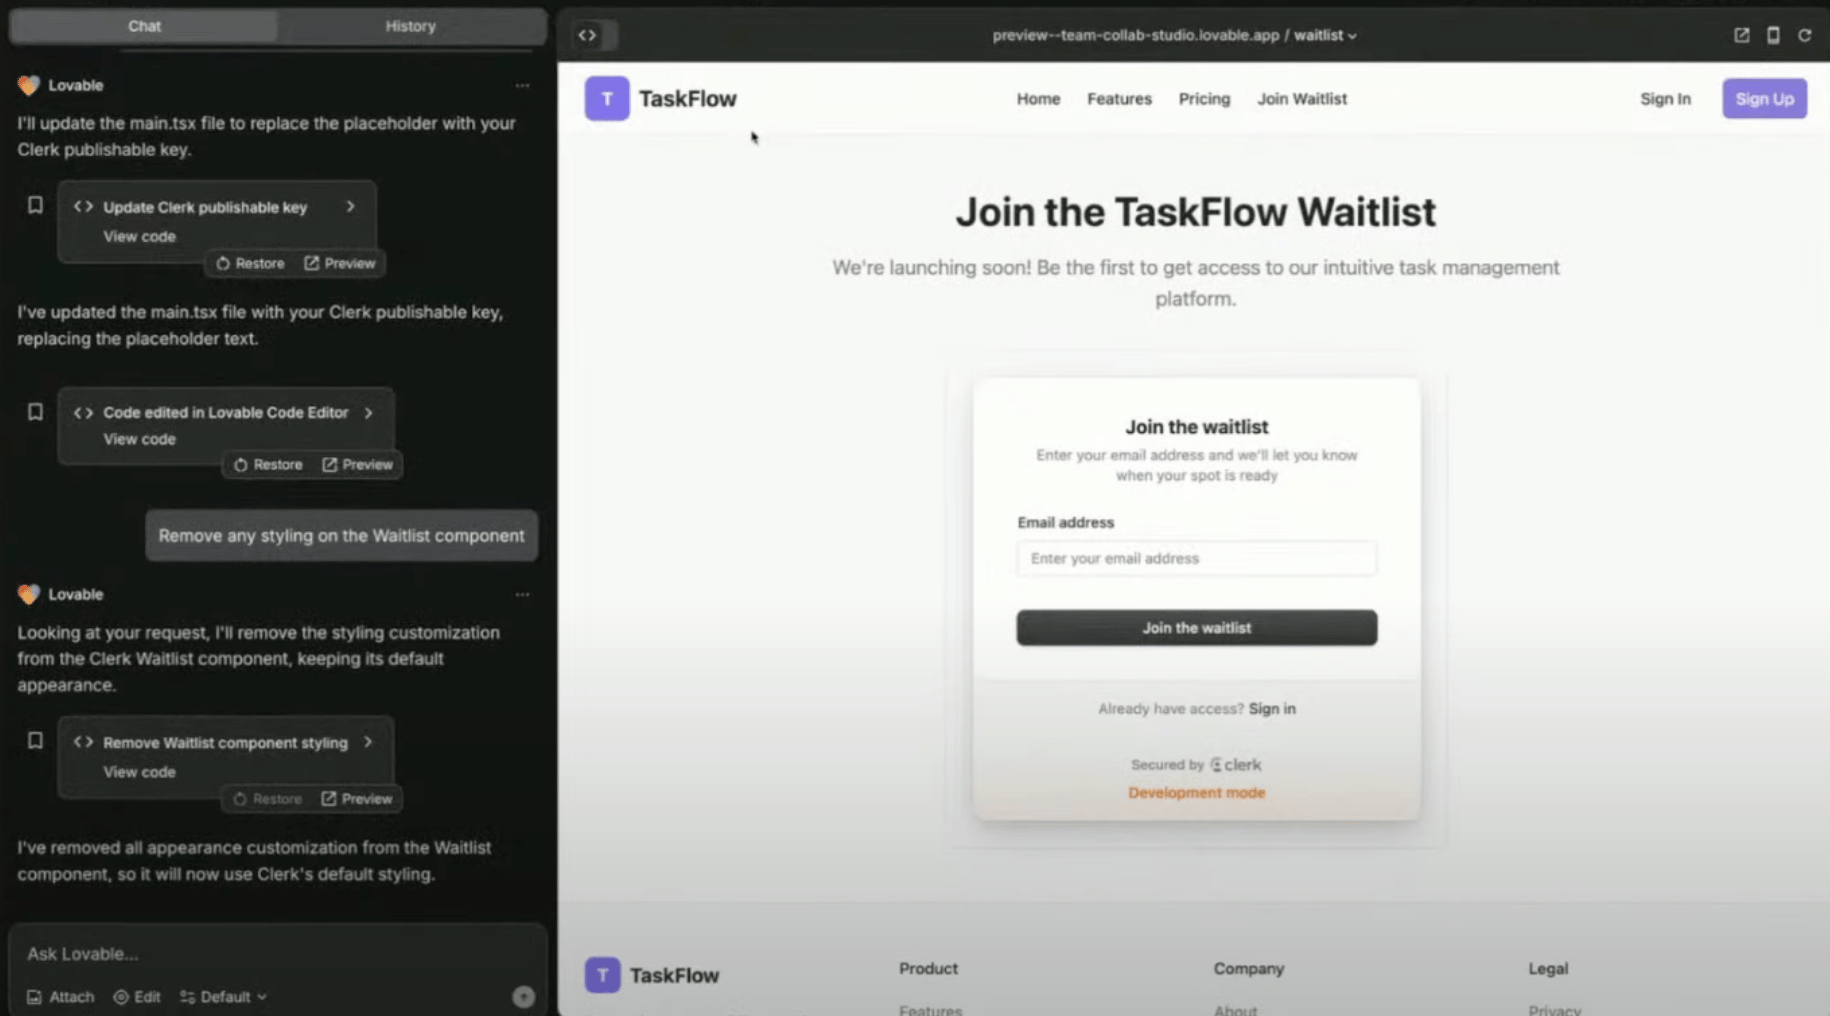
4
Step 4
Deploy & test — you’re now using Clerk Auth
2
Activate Waitlist Mode (Optional)
**Why use a waitlist?** – Gather early users before launching your app!
Use Clerk’s built-in waitlist to collect users pre-launch.
1
Step 1
In Clerk dashboard: **Configure > Restrictions > Waitlist**
2
Step 2
New sign-ups will show as **pending**
3
Step 3
* Users who sign up will now be **pending approval**
* Admins can approve users from the Clerk dashboard 
4
Step 4 (Bonus)
Customize waitlist emails (branding, content)
3
Managing Users & Teams in Clerk
Set up team-based access in your app.
1
Step 1
In Clerk dashboard: enable **Organizations**
2
Step 2
Define roles (Admin, Member, Viewer, etc.)
3
Step 3
Invite users to your org by email
4
Step 4
Assign roles and permissions via dashboard
5
Step 5
Prompt Lovable to:
Ask users to create/join an organization after sign-up

**Using Clerk’s User Profile Component**
* Provides a prebuilt user management dashboard
* Supports social logins & password authentication
* Users can manage their own accounts & 2FA 
4
Impersonation Mode (For Admins)
**What is Impersonation Mode?**Admins can log in as any user to troubleshoot issues
Troubleshoot your app as if you were a specific user.
1
Step 1
In Clerk dashboard > Users, click on a user
2
Step 2
Click **Impersonate**
3
Step 3
View your app from their perspective
4
Step 4
Security: impersonators can’t perform sensitive actions (e.g. change password)
5
Integrate with Supabase (Advanced)
Combine Clerk Auth with Supabase backend.
**Why integrate with Supabase?**
* Store user data in a database
* Secure authentication with JWT tokens
* Connect authentication to app features
**How to integrate:**
1
Step 1
In Supabase, go to **Settings > API > JWT Secret (**[**documentation**](https://clerk.com/docs/integrations/databases/supabase)
**)**
2
Step 2
In Clerk: **JWT Templates > Add Supabase**, paste JWT secret
3
Step 3
Enable **Clerk as an authentication provider**Update RLS policies to use `auth.uid()` from ClerkPrompt Lovable to:
Let’s setup supabase to integrate with Clerk. Clerk has been configured with a Supabase secret. Here’s an example of implementing the supabase client using Clerk. Use this as a reference._\[Supabase client configuration import\]_
4
Step 4
Confirm Clerk-issued tokens are accepted by Supabase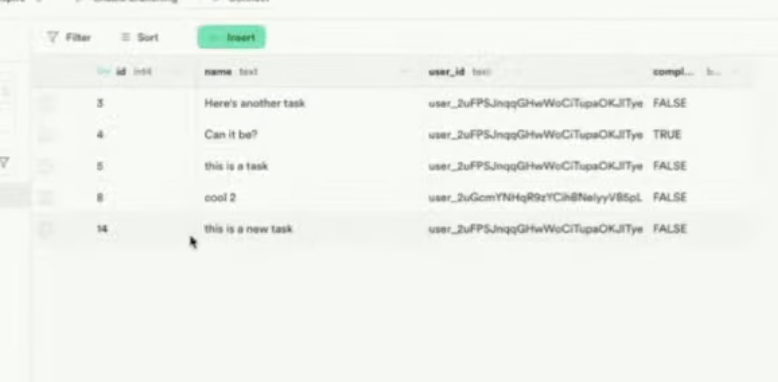
6
Add a Custom Domain (Optional)
**Why use a custom domain?**Boosts brand recognition & trust[More information here](https://docs.lovable.dev/tips-tricks/custom-domain)
.
1
Step 1
In Lovable: **Project > Settings > Custom Domain**
2
Step 2
Enter your purchased domain (e.g. `app.yourcompany.com`)
3
Step 3
Lovable auto-configures DNS (no need to leave Lovable)
4
Step 4
Deploy & test your app with the new domain.
5
Step 5
Done ✅ — your app is now white-labeled
7
Final Thoughts & Next Steps
**Your app now has:**
* Secure authentication with Clerk
* A waitlist to collect early users
* User & team management features
* Supabase database integration
* A professional custom domain
[](https://docs.lovable.dev/integrations/clerk#bonus%3A-build-b2b-features-in-minutes)
Bonus: Build B2B features in minutes
-------------------------------------------------------------------------------------------------------------------------------
Clerk supports:
* Role-based access for organizations
* Invite flows (email-based, pre-built UI)
* Organization profile customization (logo, name)
* Multi-org switching (e.g. Slack-style)
**Ask Lovable to:**
Add organization switcher UI
Let users invite teammates
[](https://docs.lovable.dev/integrations/clerk#tips-%26-troubleshooting)
Tips & troubleshooting
---------------------------------------------------------------------------------------------------
* **Already using Supabase Auth?** You can switch to Clerk without rewriting your app logic. Just configure JWT correctly and swap auth provider.
* **Email customization:** Clerk lets you edit all transactional email templates (waitlist, invitations, approvals).
* **Mobile login**: Clerk supports passkeys, OTP, and SMS — no extra config needed in Dev Mode.
* **Compliance**: Clerk is SOC2, HIPAA, and GDPR compliant.
[](https://docs.lovable.dev/integrations/clerk#frequently-asked-questions-faq)
Frequently Asked Questions (FAQ)
-------------------------------------------------------------------------------------------------------------------
Can I switch from Supabase Auth to Clerk easily?
Yes. Clerk and Supabase work well together. You just need to:
* Set up Clerk to issue JWTs
* Add Supabase’s JWT secret in Clerk
* Update Supabase RLS policies to use Clerk’s `auth.uid()`
This lets you plug Clerk into an existing Supabase-backed app with minimal changes.
Do I need to configure OAuth providers like Google or GitHub?
Only for production. In development mode, Clerk provides shared credentials for testing. For production:
* Set up your own Google/GitHub/etc. credentials
* Add them in Clerk under **OAuth settings**
What’s the difference between Organizations and Users?
* **Users**: Individuals who can log in to your app
* **Organizations**: Groups of users (teams, companies)
Use organizations when you want:
* Role-based access (Admin, Member, etc.)
* Users to invite teammates
* B2B SaaS-style flows
What is “Impersonation Mode”?
It allows admins to log in as any user — super helpful for:
* Debugging user issues
* Understanding their experience
* Providing live support
Clerk limits what impersonators can do (e.g., no password changes).
Can I customize Clerk's UI components?
Yes. Clerk offers:
* Full CSS support via `appearance` props
* The option to build fully custom UIs using Clerk React hooks
You can keep the out-of-the-box look or fully match your app’s brand.
Can I email my waitlist users from Clerk?
Currently:
* Users are auto-notified when approved from the waitlist
* Bulk email support is **coming soon**
For now, export emails and use your preferred email tool.
Is Clerk free to use?
Yes! Clerk has a generous free tier:
* Up to **10,000 Monthly Active Users (MAUs)**
* Paid plans start at **$25/month**, with usage-based pricing after
You can use it in production without paying until you scale.
Does Clerk support compliance (SOC2, HIPAA, GDPR)?
Yes. Clerk is:
* **SOC 2 certified**
* **HIPAA-compliant**
* **GDPR-ready**
Ideal for teams building in regulated industries.
Can I use Clerk with Stripe for billing?
Coming soon. You’ll soon be able to:
* Define plans (e.g. Free, Pro, Enterprise)
* Let users/orgs manage subscriptions from Clerk’s UI
* Automatically sync data to Stripe
Follow [@clerkdev](https://x.com/clerkdev?lang=en)
on X for updates.
Want a question added to this FAQ? [Let us know on Discord](https://discord.gg/lovable-dev)
!
[](https://docs.lovable.dev/integrations/clerk#final-thoughts)
Final thoughts
---------------------------------------------------------------------------------
Clerk turns authentication into a prompt. You don’t need to build it yourself. **With just a few clicks and prompts, your app now has:**
* Secure, scalable authentication
* Team & organization management
* Impersonation tools for debugging
* Supabase-backed data and access control
* Custom domain support for a polished UX
Was this page helpful?
YesNo
[Resend integration](https://docs.lovable.dev/integrations/resend)
[Make integration](https://docs.lovable.dev/integrations/make)
⌘I
---
# Prompts and integrations - Lovable Documentation
[Skip to main content](https://docs.lovable.dev/prompting/prompt-integrations#content-area)
[Lovable Documentation home page](https://lovable.dev/)
Search...
⌘K
Search...
Navigation
Prompts and integrations
[Introduction](https://docs.lovable.dev/introduction/welcome)
[Features](https://docs.lovable.dev/features/modes)
[Integrations](https://docs.lovable.dev/integrations/introduction)
[Tips & Tricks](https://docs.lovable.dev/tips-tricks/best-practice)
[Prompt engineering](https://docs.lovable.dev/prompting/prompting-one)
[Use cases](https://docs.lovable.dev/use-case/video-tutorials)
[Glossary](https://docs.lovable.dev/glossary)
[Changelog](https://docs.lovable.dev/changelog)
On this page
* [AI & LLMs](https://docs.lovable.dev/prompting/prompt-integrations#ai-%26-llms)
* [Images & Vision](https://docs.lovable.dev/prompting/prompt-integrations#images-%26-vision)
* [UI Components](https://docs.lovable.dev/prompting/prompt-integrations#ui-components)
* [Audio processing](https://docs.lovable.dev/prompting/prompt-integrations#audio-processing)
* [Maps](https://docs.lovable.dev/prompting/prompt-integrations#maps)
* [Documents](https://docs.lovable.dev/prompting/prompt-integrations#documents)
* [Media & Entertainment](https://docs.lovable.dev/prompting/prompt-integrations#media-%26-entertainment)
* [Web tools](https://docs.lovable.dev/prompting/prompt-integrations#web-tools)
* [Business](https://docs.lovable.dev/prompting/prompt-integrations#business)
Lovable offers a wide range of built-in integrations to empower your applications with advanced capabilities. Whether you need AI-powered processing, document automation, or UI enhancements, Lovable has you covered.
You’ll need to set up your own API key to use these integration in Lovable.
[](https://docs.lovable.dev/prompting/prompt-integrations#ai-%26-llms)
AI & LLMs
------------------------------------------------------------------------------------
Integrate leading AI models to build intelligent applications that enhance user experience, automate workflows, and generate content:
* **OpenAI’s model** – Ideal for summarization, analysis, and content generation. Fast and reliable.
* **Anthropic’s latest model** – Excels in complex reasoning and deep analysis.
* **Google’s latest model** – Strong in logical reasoning and long-context processing.
* **Groq** – The fastest AI model in Create, powered by Llama 3.
* **Cohere Command R+** – Scalable LLM designed for business applications.
**Example prompts to get started:**
Build a grammar-enhancing writing assistant using `[AI model]`.
Create a chatbot that provides customer support using `[AI model]`.
Develop an AI-powered research assistant with `[AI model]`.
Build an app that uses `[AI model]` for text analysis.
Create a tool that uses `[AI model]` for content generation.
Build an app that uses `[AI model]` to analyze long documents.
Create a tool that uses `[AI model]` for multi-step reasoning.
Make a research assistant with `[AI model]`.
Create a tool that uses `[AI model]` for real-time analysis.
Build a chatbot that uses `[AI model]` for quick responses.
Make an app that uses `[AI model]` for text processing.
Build an app that uses `[AI model]` for content analysis.
Create a tool that uses `[AI model]` for writing assistance.
Make a research helper with `[AI model]`.
Create a tool that uses `[AI model]` to explain complex topics
Make a writing assistant that uses `[AI Model]` for essay structure.
Make a tool that uses `[AI model]` for real-time text analysis.
Generate blog posts and display them using `[Markdown Renderer]`.
Build a wiki that uses `[Markdown Renderer]` to display AI-generated content from \[AI model\].
[](https://docs.lovable.dev/prompting/prompt-integrations#images-%26-vision)
Images & Vision
------------------------------------------------------------------------------------------------
Leverage cutting-edge vision APIs for image analysis, enhancement, and generation. Lovable supports:
* GPT-4 Vision
* Stable Diffusion
* DALL-E
* Pexels
* Exa
* among others.
**Example prompts to get started:**
Let users upload photos and analyze them using `[AI model]`.
Generate high-quality product photos with AI enhancements.
Extract text from images using `[AI model]`.
Let users describe an image and use `[AI model]` to create it.
Create a tool that uses `[AI model]` for logo generation.
Let users describe art and use `[AI model]` to generate it.
Create AI-generated artwork based on descriptions.
Find stock photos of specific objects using `Pexels`.
Find me a video of a dog playing fetch with `Pexels`.
Retrieve the latest AI research papers with `Exa`.
Get latest tech news articles with `Eva`.
Detect faces and emotions in images.
Improve image resolution automatically.
[](https://docs.lovable.dev/prompting/prompt-integrations#ui-components)
UI Components
------------------------------------------------------------------------------------------
For accessible design and reusable UI components, we recommend using:
* **21st.dev**
* **Chakra UI**
* **shadcn/ui**.
See our [best Tailwind CSS components guide](https://lovable.dev/blog/best-tailwind-css-component)
for more. **Example prompts to get started:**
Add a form using `[Chakra UI]` components.
Build a dashboard with `[Chakra UI]` layout.
Create a responsive navbar using `[shadcn/ui]`.
Use the `[shadcn/ui]` dialog component for a popup form.
Develop a settings panel using `[shadcn/ui]`.
Implement a calendar component for scheduling.
Create a modal-based UI for streamlined interactions.
[](https://docs.lovable.dev/prompting/prompt-integrations#audio-processing)
Audio processing
------------------------------------------------------------------------------------------------
Eleven Labs is a top choice for high-quality integrations.
* Convert speech to text
* Generate natural-sounding voices
* Enhance audio files
**Example prompts to get started:**
Convert uploaded audio files to text using audio transcription.
Build a podcast transcription tool.
Read content aloud using Text-to-Speech.
Develop an audiobook creator.
Transcribe and summarize meeting recordings.
Implement voice-controlled UI interactions.
Generate lifelike synthetic voices.
[](https://docs.lovable.dev/prompting/prompt-integrations#maps)
Maps
------------------------------------------------------------------------
Using **`Mapbox, Google Maps, and Weather APIs`**`,`enhance your applications with:
* geolocation
* mapping
* business insights
**Example prompts to get started:**
Display store locations on a map with `[Mapbox]`.
Create a delivery tracking system with real-time updates.
Build a property listing app using `[Google Maps]`.
Find restaurants using`[Google business data].`
Build a local business directory with `[Google business data]`.
Create a review aggregator using `[Google business data].`
Add address auto-completion using `[Google Place Autocomplete]`.
Show real-time weather updates using `[Weather API]`.
Implement a route planner for travel optimization.
[](https://docs.lovable.dev/prompting/prompt-integrations#documents)
Documents
----------------------------------------------------------------------------------
You can:
* create and download PDFs programmatically
* extract and convert text from PDFs
* process scanned documents
* transform files between various formats
* generate QR codes for links, data, and business applications
**Example prompts to get started:**
Let users fill out a form and use `[PDF Generation]` to download it.
Generate invoices as PDFs using `[PDF Generation]`.
Create a resume builder that exports to PDF.
Extract text from scanned documents with `[PDF Parser]`.
Build a document analyzer with `[PDF Parser].`
Create a PDF search tool using `[PDF Parser].`
Let users scan documents with `[Document Scanner].`
Build a receipt tracker using `[Document Scanner].`
Convert PDFs to images with `[File Conversion]`.
Build a document converter with `[File Conversion]`.
Generate QR codes for links and business details.
Make a URL shortener with QR codes using `[QR Code]`.
Build a document signing workflow.
Implement automated report generation.
[](https://docs.lovable.dev/prompting/prompt-integrations#media-%26-entertainment)
Media & Entertainment
------------------------------------------------------------------------------------------------------------
You can:
* retrieve media data
* track sports stats
* search for movies, TV shows, anime, and books
**Example prompts to get started:**
Build a movie recommendation system using `[TMDb]`.
Track upcoming TV shows with `[Movies and TV Series]`.
Make a watchlist app with `[Movies and TV Series / TMDb]`.
Find details on “The Dark Knight” using `[TMDb]`.
Build an anime discovery tool.
Create a manga reading list.
Make an anime recommendation system.
Create a fantasy `[Sport]` prediction app.
Create a fantasy `[Sport]` helper.
Make a game prediction tool.
Build a book discovery app with `[Book Search]`.
Create a reading list manager.
Develop a personalized book recommendation engine.
[](https://docs.lovable.dev/prompting/prompt-integrations#web-tools)
Web tools
----------------------------------------------------------------------------------
You can:
* extract valuable insights from any website
* seamlessly translate text between languages
* access real-time search results
* discover images across the web with ease
**Example prompts to get started:**
Scrape top search results from `[Google Search]` using `[Web Scraper]`.
Translate text dynamically using `[Google Translate]`.
Build a language learning app using `[Google Translate]`.
Search the web using `[Google Search]`.
Build a trending topic analyzer with `[Google Search]`.
Find images using `[Google Image Search]`.
Create a visual research assistant using `[Google Image Search]`.
Automate competitor analysis by extracting key data from websites.
Develop a web scraping tool for market research.
[](https://docs.lovable.dev/prompting/prompt-integrations#business)
Business
--------------------------------------------------------------------------------
You can seamlessly:
* calculate accurate sales tax
* conduct in-depth search term analysis
* create interactive and dynamic data visualizations
* validate email addresses in real-time
* check domain information
* detect harmful or offensive content
* integrate chat and notification features
* send transactional emails
* efficiently manage email campaigns with built-in automation
**Example prompts to get started:**
Calculate order totals with `[US Sales Tax Calculator]`.
Build an e-commerce checkout.
Create a pricing tool.
Analyze SEO keywords with `[SEO Keyword Research]`.
Build a content planning tool.
Create an SEO analyzer.
Display sales data in a Charts line graph.
Create an analytics page.
Check email addresses and create an email validation system.
Build a signup form with `[GitHub]`.
Build a domain inspector tool using `[Domain Inspector]`.
Build a safe chat app using `[OpenAI Moderation]`.
Send order confirmations via `[Line]`.
Create a broadcast system using `[Line].`
Send order confirmations with `[Resend]`.
Create a newsletter system with `[Resend]`.
Validate email addresses using `[NeverBounce]`.
When using `[NeverBounce]`, check if these emails are valid and save the results.
Develop an automated sales forecasting tool.
Implement AI-driven lead scoring.
Was this page helpful?
YesNo
[Debugging prompts](https://docs.lovable.dev/prompting/prompting-debugging)
⌘I
---
# Build an eCommerce store with Shopify - Lovable Documentation
[Skip to main content](https://docs.lovable.dev/integrations/shopify#content-area)
[Lovable Documentation home page](https://lovable.dev/)
Search...
⌘K
Search...
Navigation
Integrations
Build an eCommerce store with Shopify
[Introduction](https://docs.lovable.dev/introduction/welcome)
[Features](https://docs.lovable.dev/features/modes)
[Integrations](https://docs.lovable.dev/integrations/introduction)
[Tips & Tricks](https://docs.lovable.dev/tips-tricks/best-practice)
[Prompt engineering](https://docs.lovable.dev/prompting/prompting-one)
[Use cases](https://docs.lovable.dev/use-case/video-tutorials)
[Glossary](https://docs.lovable.dev/glossary)
[Changelog](https://docs.lovable.dev/changelog)
On this page
* [Use cases](https://docs.lovable.dev/integrations/shopify#use-cases)
* [Before you begin](https://docs.lovable.dev/integrations/shopify#before-you-begin)
* [Enabling the Shopify integration](https://docs.lovable.dev/integrations/shopify#enabling-the-shopify-integration)
* [User preferences](https://docs.lovable.dev/integrations/shopify#user-preferences)
* [Shopify integration flow](https://docs.lovable.dev/integrations/shopify#shopify-integration-flow)
* [1\. Create your store](https://docs.lovable.dev/integrations/shopify#1-create-your-store)
* [2\. Add products and product images](https://docs.lovable.dev/integrations/shopify#2-add-products-and-product-images)
* [3\. Manage your store](https://docs.lovable.dev/integrations/shopify#3-manage-your-store)
* [4\. Claim your store](https://docs.lovable.dev/integrations/shopify#4-claim-your-store)
* [5\. Launch your store](https://docs.lovable.dev/integrations/shopify#5-launch-your-store)
* [FAQ](https://docs.lovable.dev/integrations/shopify#faq)
 From selling physical products to digital downloads, Lovable helps you build, customize, and iterate your new store using natural language, while Shopify handles payments, inventory, and logistics when you go live.
[](https://docs.lovable.dev/integrations/shopify#use-cases)
Use cases
-------------------------------------------------------------------------
With Lovable + Shopify, you can build and launch real online stores for:
* **Physical products**: sell clothes, gadgets, accessories, or home goods
* **Digital products**: offer e-books, courses, music, or software downloads
* **Niche brands**: quickly spin up stores for limited-edition merch, local products, dropshipping or side projects
* **Small businesses**: showcase bakeries, coffee shops, or craft businesses and accept orders online
* **Testing new product ideas**: add a few products and evaluate performance before full-scale production
* **Business expansion**: introduce new collections, seasonal campaigns, or bundles with just a prompt
[](https://docs.lovable.dev/integrations/shopify#before-you-begin)
Before you begin
---------------------------------------------------------------------------------------
Before you start building your eCommerce store with **Lovable + Shopify**, here are a few important things to know:
* **Only for new Shopify stores**
The Lovable + Shopify integration is designed for building and launching **new Shopify stores only**. Existing stores cannot be connected or managed through this integration.
* **Sandbox store - no Shopify cost**
Lovable automatically creates a sandbox store so you can build and experiment safely free of any Shopify cost. This environment is perfect for setup and testing, but it **won’t process real payments**.
* **Claiming your store**
When you’re ready to launch your store, you’ll need to **claim your store**. This migrates it to your Shopify account and starts a **30-day free Shopify trial**. In Shopify, you need to activate payments and complete your store setup to start accepting real payments from your customers.
* **Required Shopify subscription**
After the free trial period, you’ll need a **paid Shopify plan** to continue selling products online. This subscription is managed **directly through Shopify** and is **separate from Lovable pricing**.
* **Shopify review policy compliance**
Before publishing your store, make sure all reviews are **authentic, unbiased, and compliant with** [**Shopify’s Review Policy**](https://help.shopify.com/en/partners/help-support/faq/reviews)
.
[](https://docs.lovable.dev/integrations/shopify#enabling-the-shopify-integration)
Enabling the Shopify integration
-----------------------------------------------------------------------------------------------------------------------
By default, the Shopify integration is enabled for your workspace. You can manage the Shopify integration behavior and related Shopify settings for your projects in your user preferences: **Settings → Account → Tools.**
###
[](https://docs.lovable.dev/integrations/shopify#user-preferences)
User preferences
The default setting for Shopify integration is **Ask each time**, meaning you decide whether to enable or disable the Shopify integration for each project. You can change your preference anytime from **Settings → Account → Tools.** Lovable prompts you when a Shopify integration is needed. You have three options:
* **Allow**: enable the integration for the current project.
* **Decline**: decline the integration for this request (you may be asked again later).
* **Adjust preferences**: change the default behavior for future projects (does not affect the current project).
[](https://docs.lovable.dev/integrations/shopify#shopify-integration-flow)
Shopify integration flow
-------------------------------------------------------------------------------------------------------
You can start by:
* Creating a new project
* Remixing an existing project, see [Lovable + Shopify templates](https://lovable.dev/shopify)
.
###
[](https://docs.lovable.dev/integrations/shopify#1-create-your-store)
1\. Create your store
**When creating a new project from scratch**, tell Lovable what type of store you want to create and **specify Shopify**.
> Create an eCommerce store **with Shopify** for selling handmade scented candles.
**When remixing an existing project**, prompt Lovable to integrate Shopify and remove mock data. It is important to use a good, comprehensive prompt. For example:
> I would like to replace the products in this store with my own products and create my Shopify store. Please proceed to:
>
> 1. Connect to Shopify.
> 2. Remove all mock product data from the store and create X new products with product images.
> 3. Update the product cards and product details page to use the new product information.
> 4. Update the product details page URL to match the new product.
> 5. Update the add to wishlist component and logic to match this change.
> 6. Update my cart, buy now CTA, and any related checkout actions on any page to reflect Shopify store integration.
Lovable will prompt you to **enable the Shopify connection** — just click **Allow**. Your sandbox store is ready for setup.
###
[](https://docs.lovable.dev/integrations/shopify#2-add-products-and-product-images)
2\. Add products and product images
Start by adding products with a **name, description, and price**. For example:
> Add a product named _Lavender Breeze Candle_, description: ‘A calming handmade soy candle infused with lavender essential oils,’ price: $25.
You can edit details later. If your product doesn’t appear, prompt:
> Display the products on the website.
Then, enhance your listings with visuals using any of the below options. Always use representative images. **Generate AI images**
> Add an AI-generated image to the product _Lavender Breeze Candle_.
**Upload or attach your own image**
> Add the attached image to the product _Lavender Breeze Candle_.
**Add image from URL**
> Add image from URL to the product _Lavender Breeze Candle_.
###
[](https://docs.lovable.dev/integrations/shopify#3-manage-your-store)
3\. Manage your store
Manage your products and refine your store without leaving Lovable. For example, you can tell Lovable to:
* Update product names, descriptions, or prices
* Remove products
* Display all products
* Add product filtering functionality and create collections based on different categories
* Add product review functionality and only allow reviews on verified purchases
* Add percentage-based or fixed amount-based (USD) discount codes and include the validity period
* Add wishlist functionality and ability to share the wishlist
> Update the price of _Lavender Breeze Candle_ to _$28_.
> Change the description of _Vanilla Bean Candle_ to highlight the wooden wick.
> Remove the product _Cinnamon Spice Candle_.
> Display all products.
> Create a product review system and only allow reviews on verified purchases.
> Create a 15% discount code for the product _Lavender Breeze Candle_. The code should be LAVANDER15 and valid until the end of November 2025.
> Allow me to add products to the wishlist and share it.
###
[](https://docs.lovable.dev/integrations/shopify#4-claim-your-store)
4\. Claim your store
When you are ready to claim and launch your store, be prepared to unlock your store, and set up and activate payments by completing the KYC (Know Your Customer) process. This may take some time.
1. Type “Claim the store”. Lovable prompts you to claim the store. Press **Claim**. This opens Shopify in a new tab where you can log in and then complete the claim process. You may also get an email invitation to claim your store.
2. Accept the **Claim store** link from Shopify. This takes you back to your Lovable project.
3. Go to Shopify Admin to complete your store setup and activate payments so you can begin selling. See [Shopify payments](https://help.shopify.com/en/manual/payments/shopify-payments/onboarding)
for more information.
When you claim your store, Shopify assigns a permanent domain for your shop - don’t worry, that’s just your backend. **Your real store URL will be your lovable.app or your custom domain.**
Only claim your store when you are fully ready to launch as you need a paid Shopify subscription after the 30-day free trial to continue selling products online.
###
[](https://docs.lovable.dev/integrations/shopify#5-launch-your-store)
5\. Launch your store
When your store is claimed and your setup complete, publish your Lovable project and share your store with the world! At anytime, directly from Lovable, you can:
* Create, update, and delete products
* Manage prices and descriptions
* Launch new collections, promotions, or bundles
[](https://docs.lovable.dev/integrations/shopify#faq)
FAQ
-------------------------------------------------------------
I added my products to a remixed project, but the link to the product page is broken. How do I fix that?
No worries - our agent is still learning about your new store and you only need to prompt it once to fix this for good! Prompt the agent to do the following:
> Please update the product URL logic to ensure that all new and future products in the store correctly display their respective product detail pages.
This should ensure that you won’t have any issues in the future. For all other issues, clicking on the “Try to Fix” button will prompt the agent to address and resolve it.
I am still seeing some mock products in my remixed project, how can I remove them?
Prompt the agent to update the pages where you’ve seen these products, for example:
> Clear the store from any existing products across all pages except for those that I added to my Shopify store.
Was this page helpful?
YesNo
[Stripe integration](https://docs.lovable.dev/integrations/stripe)
[Resend integration](https://docs.lovable.dev/integrations/resend)
⌘I
---
# Stripe integration - Lovable Documentation
[Skip to main content](https://docs.lovable.dev/integrations/stripe#content-area)
[Lovable Documentation home page](https://lovable.dev/)
Search...
⌘K
Search...
Navigation
Integrations
Stripe integration
[Introduction](https://docs.lovable.dev/introduction/welcome)
[Features](https://docs.lovable.dev/features/modes)
[Integrations](https://docs.lovable.dev/integrations/introduction)
[Tips & Tricks](https://docs.lovable.dev/tips-tricks/best-practice)
[Prompt engineering](https://docs.lovable.dev/prompting/prompting-one)
[Use cases](https://docs.lovable.dev/use-case/video-tutorials)
[Glossary](https://docs.lovable.dev/glossary)
[Changelog](https://docs.lovable.dev/changelog)
On this page
* [Key takeaways](https://docs.lovable.dev/integrations/stripe#key-takeaways)
* [Requirements](https://docs.lovable.dev/integrations/stripe#requirements)
* [Stripe payment setup (No‑code chat flow)](https://docs.lovable.dev/integrations/stripe#stripe-payment-setup-no%E2%80%91code-chat-flow)
* [Advanced integration: Webhooks & Supabase](https://docs.lovable.dev/integrations/stripe#advanced-integration%3A-webhooks-%26-supabase)
* [Debugging & Troubleshooting](https://docs.lovable.dev/integrations/stripe#debugging-%26-troubleshooting)
 Lovable now lets you set up Stripe entirely through **chat**. **Chat‑driven auto‑setup (recommended)**
After you connect **Supabase** and save your **Stripe Secret Key** via **Add API Key**, just describe what you need:
* “Add three subscription tiers …”
* “Create a one‑time checkout for my e‑book at $29”
Lovable generates the checkout / portal edge functions, database tables with RLS, and UI buttons—no manual coding or webhooks unless you ask for them.
* For **one‑off sales**, be sure your cart or product page already works.
* For **subscriptions**, confirm Supabase Auth is in place so Lovable can link Stripe customers to each user’s **id**
###
[](https://docs.lovable.dev/integrations/stripe#key-takeaways)
Key takeaways
* Use the **chat‑driven flow** for both subscriptions and one‑off payments.
* **Never paste your Stripe Secret Key in chat.** Configure it via the in-chat **Add API Key** form.
* **Webhooks are opt‑in.** Lovable relies on edge‑function polling unless you request webhooks.
* Debug in **Browser Console → Network/Errors**, **Supabase → Edge Functions → Logs**, and **Stripe Dashboard → Logs**.
* Always test in **Stripe Test Mode**, then deploy.
[](https://docs.lovable.dev/integrations/stripe#requirements)
Requirements
------------------------------------------------------------------------------
Before integrating Stripe, ensure the following prerequisites are met:
* The project **must** be connected to Supabase. [Learn more about Supabase](https://docs.lovable.dev/integrations/supabase)
* A **Stripe account** with properly configured products.
* A working **frontend and backend**:
* For individual product sales, ensure a shopping cart and checkout page are functional.
* For subscriptions, set up login functionalities and different pricing tiers.
**Please note** Stripe integration doesn’t work in preview. To test the integration, make sure to deploy. You should also make sure to be in test mode in Stripe when trying out the functionality. When testing payment, card number: 4242 4242 4242 4242, any 3 digits as CVC and any future date will work as a card.
[](https://docs.lovable.dev/integrations/stripe#stripe-payment-setup-no%E2%80%91code-chat-flow)
Stripe payment setup (No‑code chat flow)
--------------------------------------------------------------------------------------------------------------------------------------------
Lovable now generates all Stripe logic for you. Once your **Stripe Secret Key** is configured via the in-chat **Add API Key** form and your project is **connected to Supabase**, simply tell Lovable what you need in chat—no manual Payment Links required.
1
Step 1
**Prep your project**
* Supabase connected
* Stripe Secret Key added via the in-chat **Add API Key** form
* (Optional) Prices or product IDs handy
2
Step 2
Examples:
* Create a one-time checkout for my “Digital Course” at $29
* Set up an annual Premium plan for $99, tied to each user’s id
3
Step 3
**Review & apply** Lovable auto‑scaffolds the Edge Functions, database tables, and UI components (all tied to the user’s id in Supabase). Check the preview, then click **Apply** to deploy.
* Subscriptions should always linked to the authenticated user’s `id` in Supabase for secure, role‑based access.
[](https://docs.lovable.dev/integrations/stripe#advanced-integration%3A-webhooks-%26-supabase)
Advanced integration: Webhooks & Supabase
--------------------------------------------------------------------------------------------------------------------------------------------
For complex payment structures such as **subscriptions and role-based access**, Lovable recommends using **Supabase** to securely handle Stripe integration. This allows for proper webhook handling, subscription management, and role-based access control based on payment tiers.
The Edge Function that handles the necessary changes to the user account should be set up automatically by the AI.
1
Connect Supabase to Your Project
Getting started is simple. Lovable makes connecting Supabase effortless with a built-in native integration:
1. Click the **Supabase button** in the top right corner of Lovable.
2. Follow the instructions to link your project.
3. Once connected, Supabase enables secure payment processing, subscription management, webhook handling, customer data storage, and error handling.
2
Secure Payment Processing
Initiate the process by prompting Lovable:
Let’s connect Stripe to my project. We will begin with secure payment processing.
Lovable will generate the necessary SQL schema for handling payments. This includes database tables for users, subscriptions, and payments. You can review and customize these tables to fit your specific product needs before applying changes.
3
Implement Edge Functions for Webhooks
**Edge Functions** in Supabase act as small, high-performance serverless functions that run close to the user, ensuring fast responses. They help process webhook events, such as payment confirmations, before updating the database.
1
Step 1
**Retrieve the Endpoint URL** from the Edge Function in Supabase.
2
Step 2
**Go to Stripe Dashboard** > Developers > Webhooks > Create an Event Destination.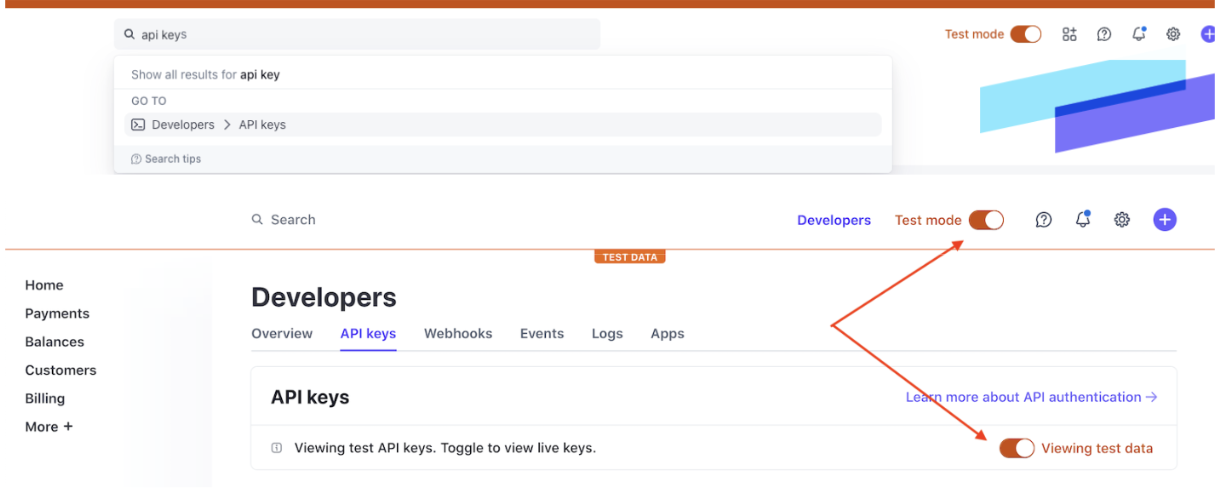
3
Step 3
**Select Webhook Events** that align with your project needs:
* `payment_intent.succeeded`
* `payment_intent.payment_failed`
* `customer.subscription.created`
* `customer.subscription.updated`
* `customer.subscription.deleted`
4
Step 4
**Enter the Endpoint URL** from Supabase.
5
Step 5
**Copy the Webhook Secret** and store it securely in **Supabase → Edge Functions → Manage Secrets → Add New Secret**.
If unsure about naming the secret, ask Lovable in **chat mode** for guidance.
4
Securely Add API Keys
To integrate Stripe securely, avoid sharing your API key directly in chat. Instead:.png?w=2500&fit=max&auto=format&n=iHmie2cDncPAjYRf&q=85&s=7fb343377f4a7e17a67db0be5826d1d7)
1
Step 1
**Go to Stripe Dashboard** > Developers > API Keys.
2
Step 2
**Copy the Secret Key** (DO NOT paste it directly in Lovable chat).
3
Step 3
**Use the Lovable “Add API Key” feature** to securely store it.
**Important Security Warning**Never paste your **Secret Key** directly in Lovable chat. Treat it like the keys to your house—exposing it could allow unauthorized access to your Stripe account. Instead, store it securely using Lovable’s API key feature.
5
Testing Your Integration
* **Use Stripe’s Test Mode** to safely test payments.
* **Test card details**:
* Card Number: `4242 4242 4242 4242`
* Any future expiration date
* Any 3-digit CVC
* **Deploy your app**—Stripe integration does not work in preview mode.
[](https://docs.lovable.dev/integrations/stripe#debugging-%26-troubleshooting)
Debugging & Troubleshooting
--------------------------------------------------------------------------------------------------------------
Check Console Logs
1
Step 1
Open **Developer Tools** (Right-click > Inspect > Console in Chrome).
2
Step 2
Look for errors and review webhook event logs.
3
Step 3
Copy error messages and ask Lovable for debugging assistance.
Review Supabase Logs
1
Step 1
Go to **Supabase Dashboard**
2
Step 2
Edge Functions
3
Step 3
Logs to check for webhook errors.
Verify Webhook Events in Stripe
1
Step 1
Navigate to **Stripe Dashboard**
2
Step 2
Webhook logs
3
Step 3
Confirm that Stripe is sending data correctly.
Use Lovable Chat Mode
1
Step 1
Switch to **chat mode** and ask Lovable follow-up questions.
2
Step 2
Ask Lovable follow-up questions.
3
Step 3
Use the **Rubber Duck Method** & explain your issue step by step to clarify the problem.
Was this page helpful?
YesNo
[Supabase integration](https://docs.lovable.dev/integrations/supabase)
[Build an eCommerce store with Shopify](https://docs.lovable.dev/integrations/shopify)
⌘I
---
# Page Not Found
[Skip to main content](https://docs.lovable.dev/user-guides/quickstart#content-area)
[Lovable Documentation home page](https://lovable.dev/)
Search...
⌘K
Search...
Navigation
Page Not Found
[Introduction](https://docs.lovable.dev/introduction/welcome)
[Features](https://docs.lovable.dev/features/modes)
[Integrations](https://docs.lovable.dev/integrations/introduction)
[Tips & Tricks](https://docs.lovable.dev/tips-tricks/best-practice)
[Prompt engineering](https://docs.lovable.dev/prompting/prompting-one)
[Use cases](https://docs.lovable.dev/use-case/video-tutorials)
[Glossary](https://docs.lovable.dev/glossary)
[Changelog](https://docs.lovable.dev/changelog)
404
Page Not Found
==============
We couldn't find the page. Maybe you were looking for one of these pages below?
[Avoiding security pitfalls](https://docs.lovable.dev/tips-tricks/avoiding-security-pitfalls#quick-rls-checklist)
[Best practices](https://docs.lovable.dev/tips-tricks/best-practice#best-practices)
[From idea to working app](https://docs.lovable.dev/tips-tricks/from-idea-to-app#9-use-real-validation-fast)
⌘I
---
# Replicate integration - Lovable Documentation
[Skip to main content](https://docs.lovable.dev/integrations/replicate#content-area)
[Lovable Documentation home page](https://lovable.dev/)
Search...
⌘K
Search...
Navigation
Integrations
Replicate integration
[Introduction](https://docs.lovable.dev/introduction/welcome)
[Features](https://docs.lovable.dev/features/modes)
[Integrations](https://docs.lovable.dev/integrations/introduction)
[Tips & Tricks](https://docs.lovable.dev/tips-tricks/best-practice)
[Prompt engineering](https://docs.lovable.dev/prompting/prompting-one)
[Use cases](https://docs.lovable.dev/use-case/video-tutorials)
[Glossary](https://docs.lovable.dev/glossary)
[Changelog](https://docs.lovable.dev/changelog)
On this page
* [What is Replicate?](https://docs.lovable.dev/integrations/replicate#what-is-replicate%3F)
* [Why use Replicate with Lovable?](https://docs.lovable.dev/integrations/replicate#why-use-replicate-with-lovable%3F)
* [Step-by-step tutorial](https://docs.lovable.dev/integrations/replicate#step-by-step-tutorial)
* [Tips & Gotchas](https://docs.lovable.dev/integrations/replicate#tips-%26-gotchas)
* [FAQ](https://docs.lovable.dev/integrations/replicate#faq)
* [Resources](https://docs.lovable.dev/integrations/replicate#resources)
[](https://docs.lovable.dev/integrations/replicate#what-is-replicate%3F)
What is Replicate?
-----------------------------------------------------------------------------------------------
[Replicate](https://replicate.com/)
lets you run open-source machine learning models with just a few lines of code—no ML expertise required. It’s an API platform where developers can generate images, videos, audio, and more using community-built or custom AI models. Whether you’re building an MVP, prototyping creative features, or adding production-grade AI to your app, Replicate gives you fast, flexible access to state-of-the-art models.
[](https://docs.lovable.dev/integrations/replicate#why-use-replicate-with-lovable%3F)
Why use Replicate with Lovable?
-------------------------------------------------------------------------------------------------------------------------
Replicate fits naturally into Lovable’s AI-first app-building workflow. You can:
* Generate dynamic visuals (e.g. course banners, avatars, scenes)
* Use multimodal AI (image, video, speech, text-to-speech)
* Add real-time content generation without running your own model infrastructure
With Lovable’s built-in knowledge of Replicate’s API and models, integration takes minutes—not days. Just describe what you want, and Lovable handles the rest.
[](https://docs.lovable.dev/integrations/replicate#step-by-step-tutorial)
Step-by-step tutorial
---------------------------------------------------------------------------------------------------
In this tutorial, we walk through how to integrate Replicate into a Lovable application to dynamically generate course banner images, adding a new layer of interactivity and polish to your product. You’ll also learn how Replicate fits into Lovable’s broader AI workflow—including how to pair it with OpenAI for course content, Superbase for backend logic, and real-time AI conversations using [OpenAI’s WebRTC API](https://platform.openai.com/docs/guides/realtime#connect-with-webrtc)
.
1
Step 1 – Build a Language Tutor App
We start by creating a Spanish-learning web app with Lovable. This includes:
* A user login flow
* AI-powered chat for Spanish tutoring
* Voice recording and playback
* Translation features
This gives users a personalized AI tutor that they can talk to, type to, and learn with.
2
Step 2 – Generate Courses with AI
We enhance the app with AI-generated courses:
* Users define a topic (e.g., _Questions to ask at a barbecue_).
* An OpenAI-powered function creates 10 multiple choice questions in Spanish.
* Courses are saved to the user’s account with Supabase and can be revisited anytime. 
* Users get feedback on each question with explanations.
* Automatically generate a **course banner image** that matches the topic. Replicate uses the **Flux Schnell** model for fast image generation and dynamically inject the image into the course page.
**How it Works:**
1. We call the Replicate API when a new course is created.
2. The prompt is dynamically generated based on the course topic.
3. Replicate returns an image URL, which is used as the banner for the course.

3
Step 3 – Add Visuals with Replicate
Now, let’s make things visual with Replicate.**Example Prompt:**
A beautiful, educational, and engaging scene about topic in digital art style. Vibrant colors. No text on image.
**Example Response Handling:**Some Replicate models return a single image URL, others return an array. Make sure your Lovable function correctly extracts the output, e.g.:
Copy
Ask AI
const imageUrl = response.output[0]
4
Step 4 – Use Replicate Playground for Fine-Tuning
Replicate’s Playground makes it easy to test prompts and get code snippets:
* Tweak prompts until you’re happy with the output
* Use the API snippet generator for Node.js, Python, etc.
* Copy-paste directly into Lovable’s backend functions
Use Playground Beta to compare multiple outputs at once.

5
Step 5 – Real-Time Conversations with OpenAI
To simulate human conversations, we added a real-time Spanish-speaking feature using OpenAI’s WebRTC API:
* Users can speak directly to their AI tutor.
* The AI understands, responds, and corrects pronunciation in real time.
* This makes language learning much more immersive and practical.
This feature integrates smoothly with Lovable’s voice input, WebRTC handling, and frontend chat UI.
[](https://docs.lovable.dev/integrations/replicate#tips-%26-gotchas)
Tips & Gotchas
---------------------------------------------------------------------------------------
* **Model Output Variance**: Replicate models differ in how they return outputs. Always inspect the actual JSON returned from the playground.
* **Prompt Iteration is Key**: Small prompt changes can greatly affect image quality. Use the playground to experiment.
* **Backend Logs**: Use Supabase Edge logs to debug your API calls. Lovable supports in-app log fetching.
* **Version Control in Lovable**: Each prompt edit is auto-committed, but you can manually track checkpoints using the “Deploy” feature for production-ready states.
[](https://docs.lovable.dev/integrations/replicate#faq)
FAQ
---------------------------------------------------------------
What is Replicate, in simple terms?
Replicate is a platform that lets you run powerful machine learning models (like image or video generation) using a simple API—no need to train or host models yourself.
Who typically uses Replicate?
Replicate is popular with indie hackers, startup builders, and large enterprises alike. Whether you’re prototyping an AI feature or deploying at scale, Replicate supports both quick hacks and robust deployments.
Do I need my own Replicate API key?
Yes. Lovable securely stores your keys and handles API calls for you once added.
What models can I use on Replicate?
Replicate supports many modalities including:
* Image generation (e.g. Flux Schnell)
* Video generation
* Audio and text-to-speech
* Language models (though not Replicate’s main focus)
* Custom Cog models (open-source Dockerized models you can deploy)
Explore them all at [replicate.com/explore](https://replicate.com/explore)
.
How do I know which model is right for my use case?
Use Replicate’s **Playground** to test different models before integrating them. The Playground lets you tweak prompts, compare outputs, and copy working code snippets for your app.
What’s the difference between Replicate's old and new API endpoints?
Replicate has two API formats:
* The original (`/predictions`) endpoint: most widely known and used.
* The newer `/models/{owner}/{model}/versions/{id}/predictions` endpoint: more efficient and flexible.
Lovable integrates with both depending on the model’s requirements.
What if a model returns a different JSON structure than expected?
Model outputs vary. Some return a string URL, others return an array. Use the Replicate Playground to inspect the real response and update your parsing logic accordingly.Example fix:
Copy
Ask AI
const imageUrl = Array.isArray(output) ? output[0] : output;
Can I trigger Replicate image generation only once, or on every course view?
You can choose:
* **One-time generation on course creation**: Saves compute costs and creates a consistent visual identity.
* **Dynamic generation per session**: If you want fresh visuals each time.
In the tutorial, we chose to generate the image once when the course is first created.
Does Lovable know how to work with Replicate out of the box?
Yes! Lovable has built-in knowledge about Replicate and many of its popular models. It can auto-generate integration code for you using the right packages and prompt structure.
How does Lovable handle package installation like replicate for Node.js?
Lovable automatically installs and configures packages when needed, based on your prompt and integration context. You don’t have to npm install manually unless debugging locally.
What’s the workflow for debugging Replicate errors in Lovable?
* Use Lovable’s **Superbase Edge function logs** to trace issues.
* If there’s a mismatch between expected vs. actual Replicate response, update your JSON handling.
* Use the **“Fix this”** button in Lovable to retry or refactor the function logic.
Can I checkpoint my working app state in Lovable?
Currently, every prompt change creates a commit. You can:
* Use the **History** tab to navigate commits (including bookmarking commits)
* **Deploy** a version to make it a production checkpoint
* GitHub sync is available for custom version control
How does GitHub integration work with Lovable?
You can export your Lovable project to GitHub with **two-way sync**:
* Lovable pushes changes to GitHub
* You (or your team) can make changes in an IDE and push back
* Works great for frontend in Lovable + backend in your own editor
What are LLM-friendly .lm.txt or .lm.md files?
These are simplified markdown-based docs optimized for language models. Replicate is actively working on adding these to help Lovable (and other tools) better understand its models automatically.
Do I need to handle prompt tuning myself?
Yes, prompt crafting is essential. Lovable helps with auto-prompting and templating, but you should always test in the Replicate Playground to refine the inputs for best results.
[](https://docs.lovable.dev/integrations/replicate#resources)
Resources
---------------------------------------------------------------------------
* Explore [Replicate API Docs](https://replicate.com/docs)
, [Replicate’s model catalog](https://replicate.com/)
* Learn more about [OpenAI Function Calling](https://platform.openai.com/docs/guides/function-calling)
, [OpenAI WebRTC](https://platform.openai.com/docs/guides/speech/real-time-speech)
Was this page helpful?
YesNo
[Make integration](https://docs.lovable.dev/integrations/make)
[21st.dev integration](https://docs.lovable.dev/integrations/21stdev)
⌘I
---
# Resend integration - Lovable Documentation
[Skip to main content](https://docs.lovable.dev/integrations/resend#content-area)
[Lovable Documentation home page](https://lovable.dev/)
Search...
⌘K
Search...
Navigation
Integrations
Resend integration
[Introduction](https://docs.lovable.dev/introduction/welcome)
[Features](https://docs.lovable.dev/features/modes)
[Integrations](https://docs.lovable.dev/integrations/introduction)
[Tips & Tricks](https://docs.lovable.dev/tips-tricks/best-practice)
[Prompt engineering](https://docs.lovable.dev/prompting/prompting-one)
[Use cases](https://docs.lovable.dev/use-case/video-tutorials)
[Glossary](https://docs.lovable.dev/glossary)
[Changelog](https://docs.lovable.dev/changelog)
On this page
* [What is Resend?](https://docs.lovable.dev/integrations/resend#what-is-resend%3F)
* [Step-by-step tutorial](https://docs.lovable.dev/integrations/resend#step-by-step-tutorial)
* [Want to go further?](https://docs.lovable.dev/integrations/resend#want-to-go-further%3F)
* [Resend integration FAQ](https://docs.lovable.dev/integrations/resend#resend-integration-faq)
[](https://docs.lovable.dev/integrations/resend#what-is-resend%3F)
What is Resend?
--------------------------------------------------------------------------------------
[Resend](https://resend.com/emails)
is an email API built for developers. It focuses on high deliverability, ease of integration, and a clean developer experience for sending transactional and marketing emails.
[](https://docs.lovable.dev/integrations/resend#step-by-step-tutorial)
Step-by-step tutorial
------------------------------------------------------------------------------------------------
This tutorial walks you through building a fully functional CRM in under an hour—complete with lead collection, email confirmation, newsletter subscription, and an internal admin dashboard. You’ll use:
* **Lovable**: to generate the front end and backend logic.
* **Supabase**: for secure data storage and authentication.
* **Resend**: to automate and track transactional + marketing emails.
Let’s get started.
1
Create a Landing Page with a Contact Form
Use Lovable’s AI to quickly generate a landing page for your product or service.**Instructions:**
1
New Lovable Project
Create a new Lovable project.
2
Prompt:
Create a SaaS landing page with a contact form collecting name, email, and message.
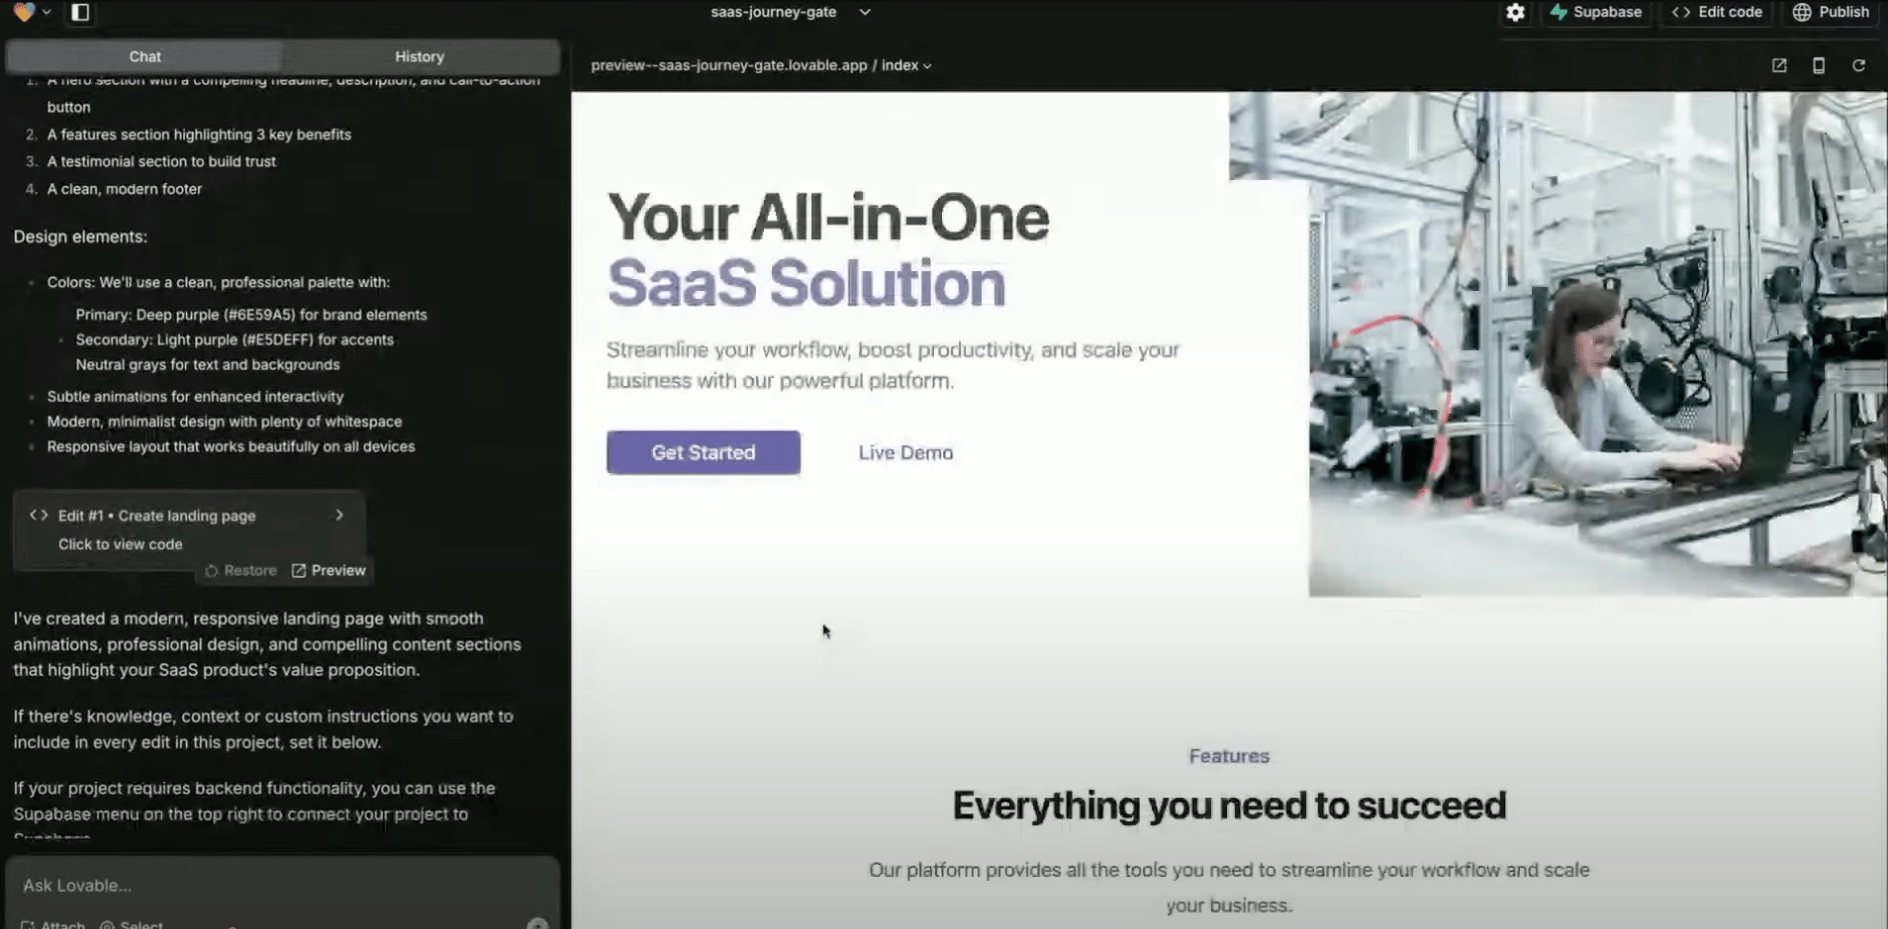
3
Inspect the generated code
Inspect the generated code or use the select tool to tweak elements.
4
Add input validation
Add input validation and a `message` field for better user experience.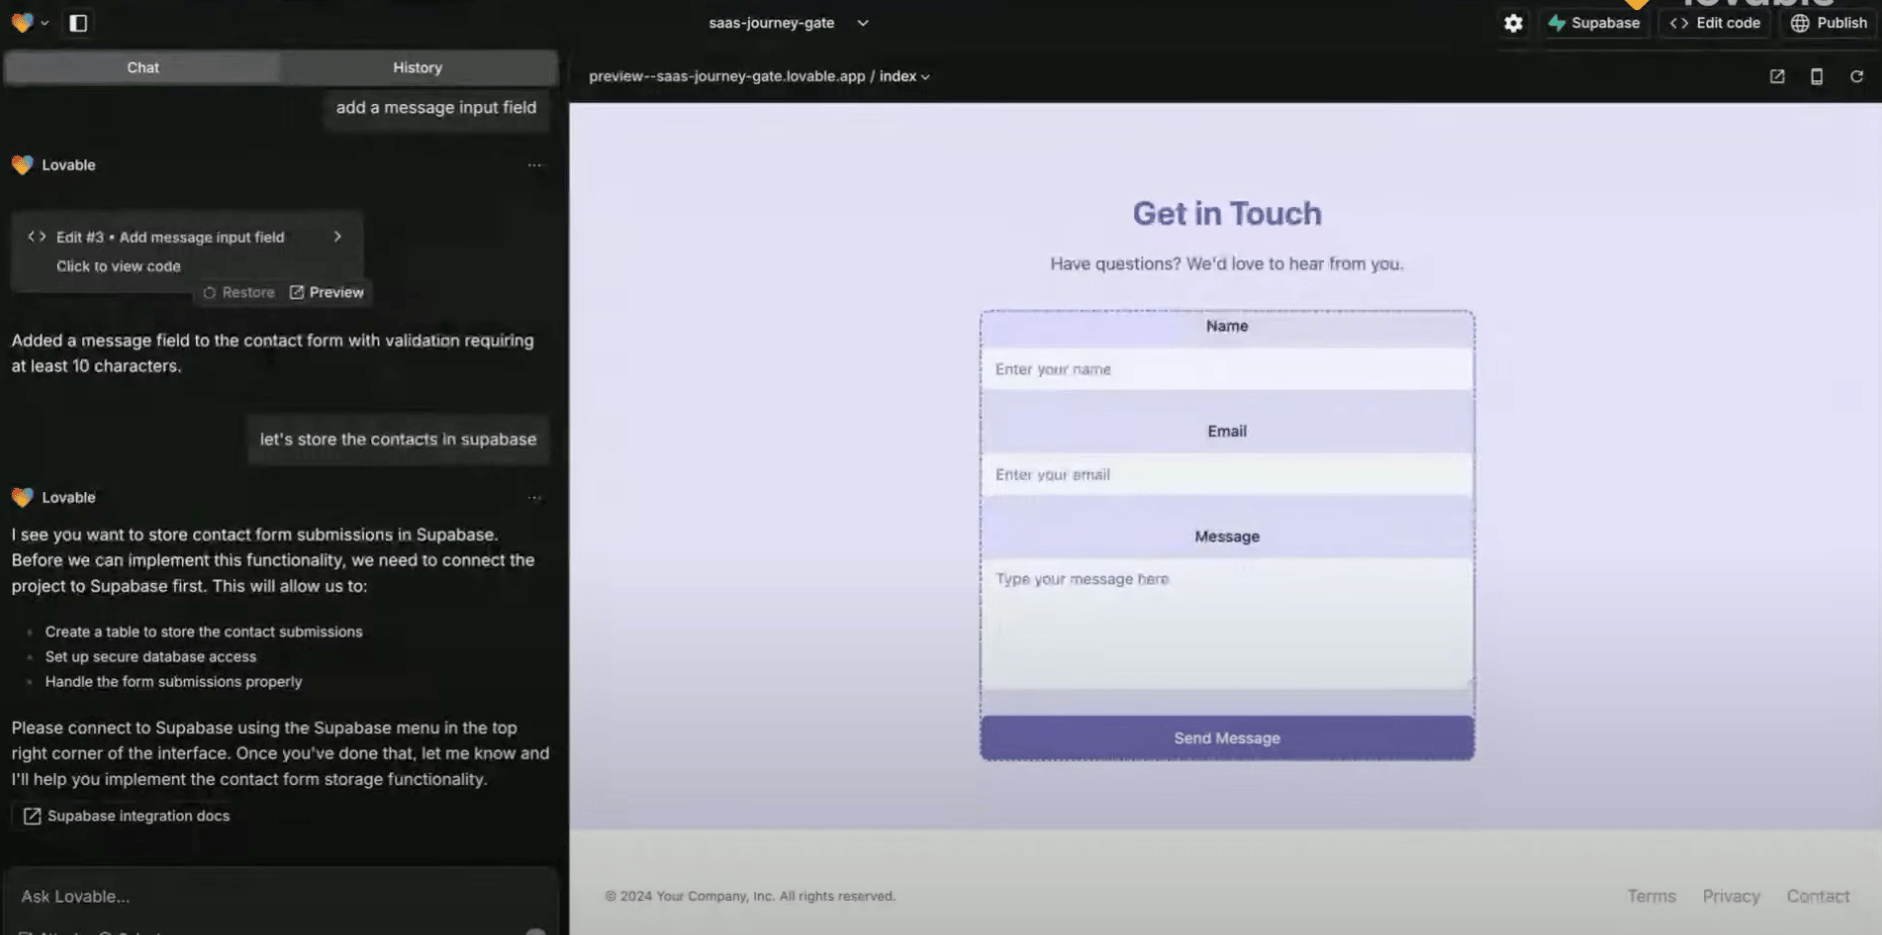
2
Store Form Submissions in Supabase
Supabase acts as your secure backend database.
1
Supabase account
Create a free Supabase account and a new project.
2
API Key
In Lovable, connect your Supabase project using the API key.
3
Create a \`contacts\` table with:
* `id`: UUID, primary key
* `name`: text
* `email`: text
* `message`: text
* `created_at`: timestamp
4
Submission logic
Modify the form submission logic to insert data into Supabase.
5
RLS
Apply Supabase Row-Level Security (RLS) to restrict access to only authenticated users.
3
Send Confirmation Emails via Resend
Set up [Resend](https://docs.lovable.dev/integrations/resend)
to send automated confirmation emails every time a lead submits the form.
1
Sign up at Resend
Sign up at [Resend](https://resend.com/)
and verify your custom domain.
* You’ll be asked to update your DNS records (TXT, MX).
* Use subdomains like `updates.domain.com` to manage email reputation better.
2
API Key
Integrate the API key in Lovable via environment settings or backend function.
3
SDK
Use Resend’s SDK to send a confirmation email on form submission.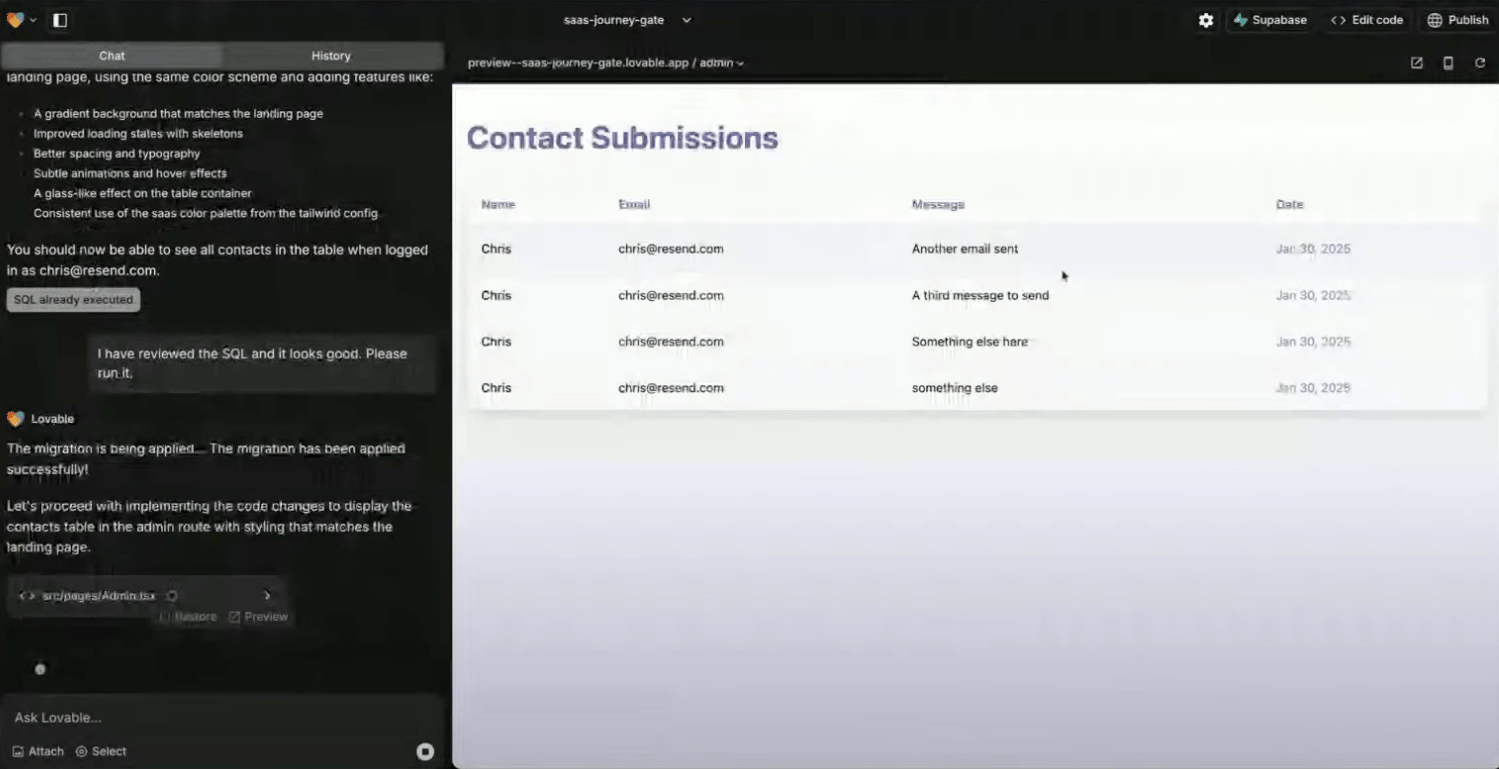
4
Optional: React Email
Use [React Email](https://react.email/)
(also by Resend) to customize the look and feel of your emails with reusable components.
4
Build a Secure Admin Dashboard
Allow only authenticated users to view and manage leads.
1
Admin route
Create an `/admin` route in Lovable.
2
Supabase Authentication
Enable Supabase authentication with email/password login.
3
Contacts
Display the `contacts` table with columns:
* Name
* Email
* Message preview
* Submission date
4
Full contact detail
Add a detail pane (e.g., a sliding panel) showing full contact details when a row is clicked.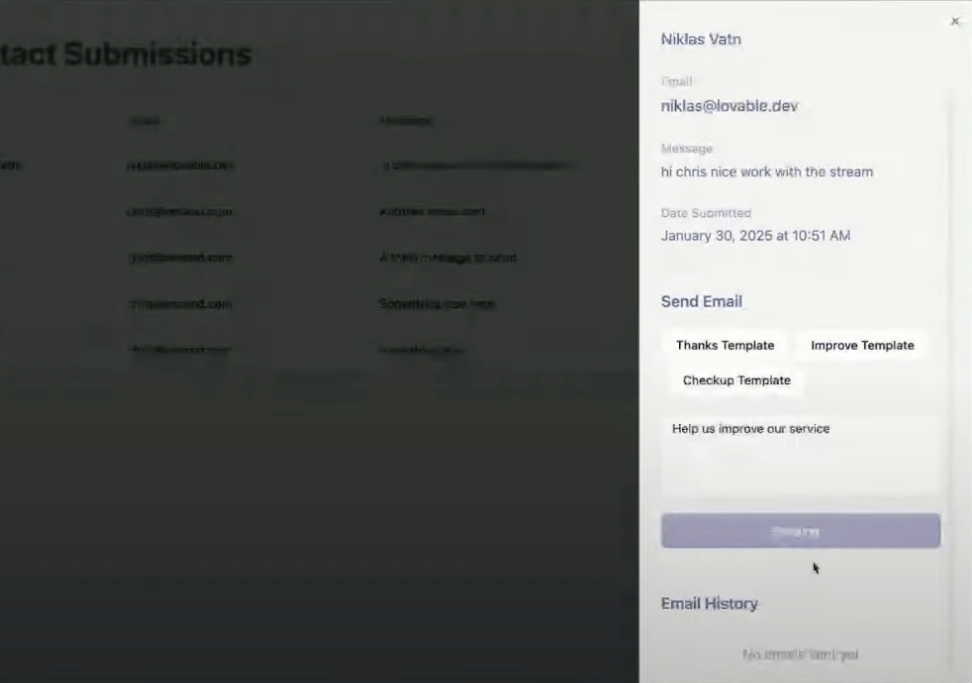
5
Redirect logic
Add redirect logic so unauthenticated users are routed to `/login`.
5
Enable Custom Email Replies from Admin
Allow your team to send personalized follow-ups.
1
Contact detail pane
In the contact detail pane, add a **text field** and **predefined templates** (e.g., “Thanks for signing up!”).
2
Add send button
Add a **send button** wired to Resend.
3
Store sent messages
Store each sent message in a `sent_emails` table in Supabase:
* `contact_id`
* `subject`
* `body`
* `sent_at`
This gives you a searchable log of all follow-ups.
6
Add a Newsletter Subscription Form
Use Resend’s **Audiences** to manage subscribers and send broadcast emails.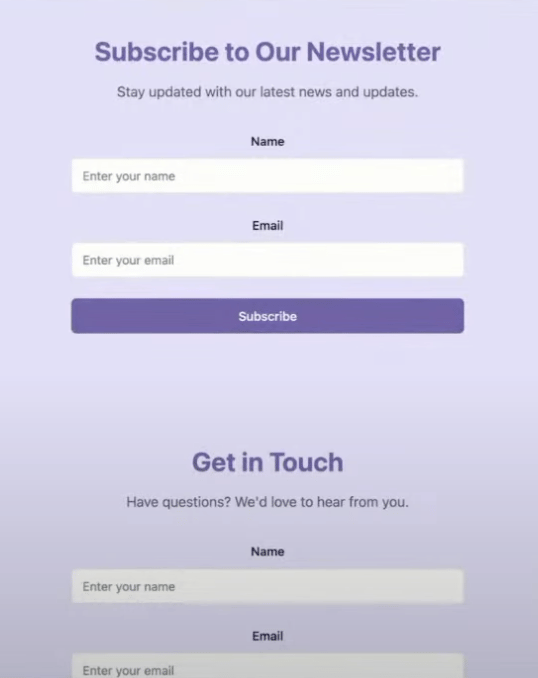
1
Add new form
Add a new form on your landing page for newsletter signup.
2
Resend contact
When submitted:
* Create a Resend contact via the API
* (Optional) Store the contact locally in Supabase as well
3
Design
Use Resend’s broadcast email UI to design and send newsletters.
* Built-in unsubscribe logic
* Performance insights (open rates, delivery status)
4
Compliance check!
For compliance (e.g. GDPR), consider implementing a **double opt-in** flow.
7
BONUS: Connecting Resend to Supabase Auth
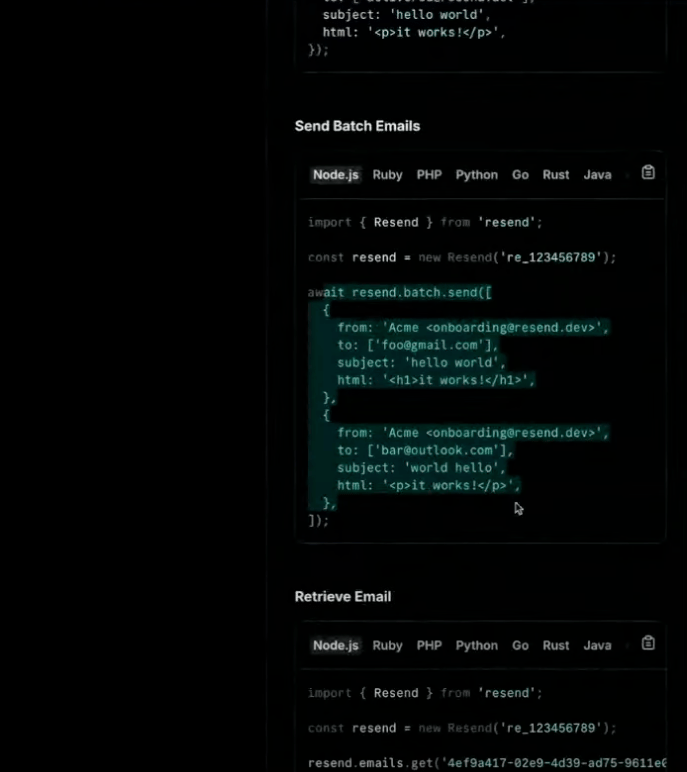Want to improve Supabase’s default email auth (which limits you to 4 emails/hour)?
1
Resend supabase
Go to [Resend’s Supabase integration](https://resend.com/integrations/supabase)
.
2
Authentication
Authenticate with your Supabase project.
3
Domain setup
Choose your domain and sender name/email.
4
SMTP
Resend automatically sets up SMTP and replaces Supabase’s default email system.
5
Customization
You can now customize auth email templates from the Supabase dashboard.
8
Final Touches & Best Practices
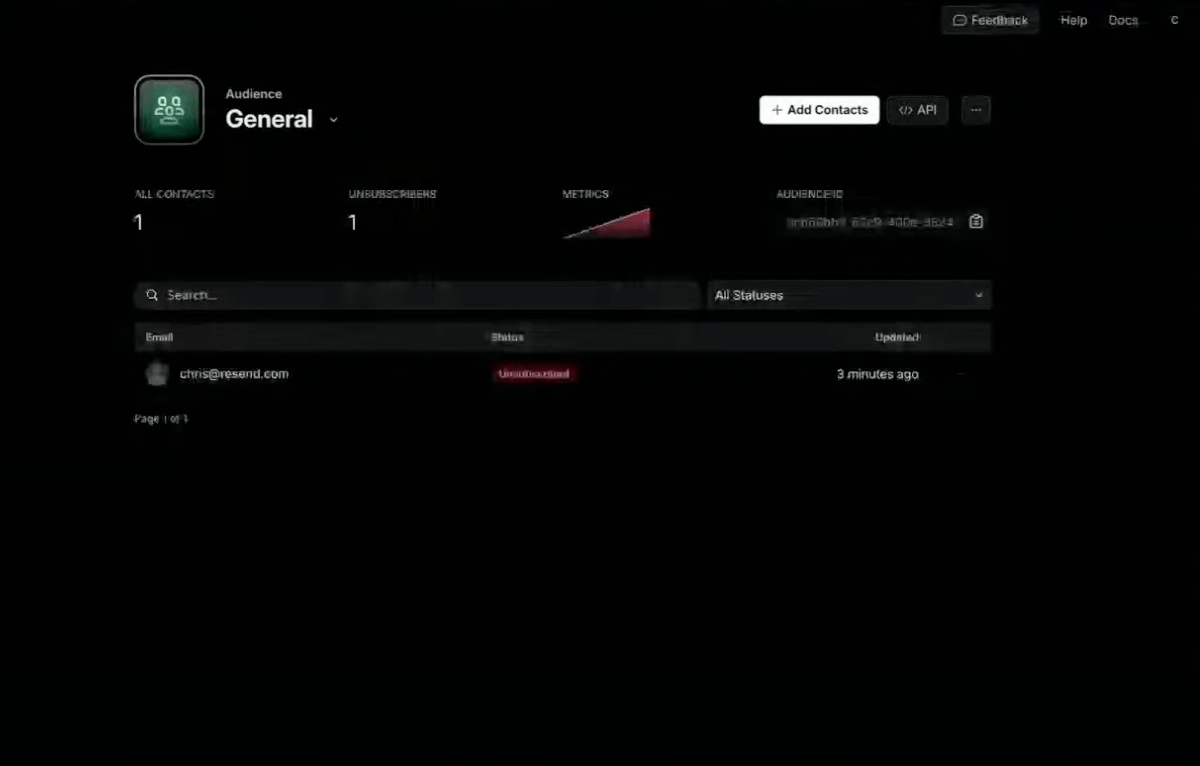
* **Error Handling**: Lovable might show build errors that are false positives. Always test your functionality live.
* **Reverting with Supabase**: If reverting code in Lovable, remember to manually delete associated Supabase policies or migrations—they’re not rolled back automatically.
* **Deliverability Tips**:
* Use subdomains to isolate reputation.
* Always include a plain text version of your email.
* Monitor email performance with Resend’s insights dashboard.
9
You're Done! 🎉
In less than an hour, you’ve built a modern CRM with:
* A landing page and contact form
* Database-powered lead storage
* Automated email confirmations
* Admin dashboard for lead management
* Custom email replies
* Newsletter broadcasts
* Auth and email verification
[](https://docs.lovable.dev/integrations/resend#want-to-go-further%3F)
Want to go further?
----------------------------------------------------------------------------------------------
* Add support for **scheduled emails** via Supabase cron jobs
* Build **automation flows** to trigger emails based on lead stages
* Style your UI for better brand trust and conversion
[](https://docs.lovable.dev/integrations/resend#resend-integration-faq)
Resend integration FAQ
--------------------------------------------------------------------------------------------------
What is Resend?
Resend is an email API built for developers. It focuses on high deliverability, ease of integration, and a clean developer experience for sending transactional and marketing emails.
Do I need a paid Resend plan to follow this tutorial?
No. You can complete the entire CRM setup using **Resend’s free tier**, which supports sending emails from a verified domain and up to 3,000 contacts for marketing emails.
How do I verify a domain in Resend?
Go to Resend → **Domains** → Add your domain. You’ll be given DNS records (TXT, MX) to add via your DNS provider (e.g., Cloudflare, Namecheap). Once added, click **Verify**.
Use a subdomain like `updates.yourdomain.com` to isolate your email reputation.
Why are my Resend emails going to spam?
There are a few common reasons:
* You haven’t verified your domain
* Your email lacks a plain-text version
* You’re sending from a generic sender like `onboarding@resend.dev`
* You’re not following best practices (e.g., missing unsubscribe links in marketing emails)
Use Resend’s **Deliverability Insights** panel to get actionable tips.
Can I customize the design of the emails I send?
Yes. Use [React Email](https://react.email/)
—an open-source library by the Resend team—to design styled, responsive emails with React components.
Does Resend support marketing emails or only transactional?
Resend supports **both**:
* **Transactional emails** (confirmation, reset, notifications) using the API or SDK.
* **Marketing emails** via the **Broadcast** feature and **Audiences**.
You can create, preview, and track campaigns from the dashboard.
How do I manage newsletter subscribers in Resend?
Use **Audiences**:
* Add contacts manually, via CSV, or programmatically using the API.
* Each Audience has a unique ID you can use to associate subscriptions.
* Users can unsubscribe automatically via Resend’s built-in unsubscribe link.
Can I set up double opt-in for newsletters?
Not by default, but you can implement it manually:
1. On form submission, send an initial confirmation email.
2. Ask users to click a link.
3. On click, confirm their subscription and add them to your Resend audience.
Can I schedule or automate email flows in Resend?
Not yet. Resend doesn’t currently support drip campaigns or automated sequences.
Workaround:Use **Supabase Cron Jobs** to schedule tasks that trigger Resend emails at set intervals.
How do I connect Resend to Supabase Auth?
Use the official Supabase Integration by Resend:
1. Authenticate with your Supabase project.
2. Provide a domain and sender name.
3. Resend automatically configures your Supabase auth emails to use your Resend account.
How does Resend handle unsubscribes?
Resend automatically processes unsubscribes:
* You must include an unsubscribe link in broadcast emails.
* When a user unsubscribes, they are removed from the selected audience.
* This is required for email compliance (e.g., CAN-SPAM, GDPR).
Was this page helpful?
YesNo
[Build an eCommerce store with Shopify](https://docs.lovable.dev/integrations/shopify)
[Clerk integration](https://docs.lovable.dev/integrations/clerk)
⌘I
---
# Debugging prompts - Lovable Documentation
[Skip to main content](https://docs.lovable.dev/prompting/prompting-debugging#content-area)
[Lovable Documentation home page](https://lovable.dev/)
Search...
⌘K
Search...
Navigation
Debugging prompts
[Introduction](https://docs.lovable.dev/introduction/welcome)
[Features](https://docs.lovable.dev/features/modes)
[Integrations](https://docs.lovable.dev/integrations/introduction)
[Tips & Tricks](https://docs.lovable.dev/tips-tricks/best-practice)
[Prompt engineering](https://docs.lovable.dev/prompting/prompting-one)
[Use cases](https://docs.lovable.dev/use-case/video-tutorials)
[Glossary](https://docs.lovable.dev/glossary)
[Changelog](https://docs.lovable.dev/changelog)
On this page
* [Advanced debugging prompts](https://docs.lovable.dev/prompting/prompting-debugging#advanced-debugging-prompts)
* [Full system review (codebase audit)](https://docs.lovable.dev/prompting/prompting-debugging#full-system-review-codebase-audit)
* [Safe approach for fragile updates](https://docs.lovable.dev/prompting/prompting-debugging#safe-approach-for-fragile-updates)
* [Performance optimization check](https://docs.lovable.dev/prompting/prompting-debugging#performance-optimization-check)
* [Handling persistent errors](https://docs.lovable.dev/prompting/prompting-debugging#handling-persistent-errors)
* [Sample debugging flows](https://docs.lovable.dev/prompting/prompting-debugging#sample-debugging-flows)
* [The “stuck in error loop.”](https://docs.lovable.dev/prompting/prompting-debugging#the-%E2%80%9Cstuck-in-error-loop-%E2%80%9D)
* [The “feature not working right.”](https://docs.lovable.dev/prompting/prompting-debugging#the-%E2%80%9Cfeature-not-working-right-%E2%80%9D)
* [The “UI element disappeared.”](https://docs.lovable.dev/prompting/prompting-debugging#the-%E2%80%9Cui-element-disappeared-%E2%80%9D)
* [Root cause analysis, rollback, and progressive enhancement](https://docs.lovable.dev/prompting/prompting-debugging#root-cause-analysis%2C-rollback%2C-and-progressive-enhancement)
* [Root cause vs. symptom](https://docs.lovable.dev/prompting/prompting-debugging#root-cause-vs-symptom)
* [Rollback wisely:](https://docs.lovable.dev/prompting/prompting-debugging#rollback-wisely%3A)
* [Progressive enhancement:](https://docs.lovable.dev/prompting/prompting-debugging#progressive-enhancement%3A)
* [Document as you go:](https://docs.lovable.dev/prompting/prompting-debugging#document-as-you-go%3A)
* [Know when to ask for human help:](https://docs.lovable.dev/prompting/prompting-debugging#know-when-to-ask-for-human-help%3A)
* [Community debugging guidebook](https://docs.lovable.dev/prompting/prompting-debugging#community-debugging-guidebook)
Building with AI is fast and fun – until something goes wrong. Errors, unexpected behaviors, or “the AI did something weird” moments are part of the process. This guide will help you navigate **AI-based debugging workflows in Lovable**. We’ll cover how to quickly fix simple issues, strategies for tougher bugs, using Lovable’s chat for debugging, and even prompt recipes to systematically squash bugs. Debugging with an AI assistant is a new skill, but with structure and the right prompts, you can resolve problems efficiently and even turn them into learning opportunities.
[](https://docs.lovable.dev/prompting/prompting-debugging#advanced-debugging-prompts)
Advanced debugging prompts
--------------------------------------------------------------------------------------------------------------------
Sometimes you need a heavy-duty prompt to dig into a problem or review your project’s health. Here are some structured prompt examples for deep debugging or optimization scenarios. These can be used in Chat mode to get a thorough analysis without immediately changing code.
###
[](https://docs.lovable.dev/prompting/prompting-debugging#full-system-review-codebase-audit)
Full system review (codebase audit)
If your project has grown large or you suspect there are structural issues, a full codebase audit prompt can be useful. This asks the AI to analyze the entire project for cleanliness, correct architecture, and any misplaced code. It’s like asking “Is everything organized the way it should be?” **Example prompt – codebase audit:**
Copy
Ask AI
Perform a comprehensive **audit of the entire codebase** to check if the architecture is clean, modular, and optimized:
- Identify any files, components, or logic that are in the wrong place or could be better organized. Are there any instances of code that don’t belong in their current file (misplaced logic)?
- Evaluate if we have a clear separation of concerns (e.g., data handling vs UI vs state management). Point out any overly coupled sections of code.
- Highlight any areas of the code that are overly complex or not following best practices.
- Provide a report with specific recommendations to improve structure and maintainability, **without making any code changes yet**.
Break down the suggestions into an ordered list of steps we could take, from most critical to optional enhancements.
*(This is a read-only analysis; do not modify the code during this audit.)*
This prompt is long, but it directs the AI to act like a code reviewer or architect. We’ve asked it to find mislocated code, check modularity, and even prioritize the fixes. The AI might respond with something like:
* \_“1. ****Separate API calls from components:**** The \_`ProjectList`_component is directly fetching data. Suggestion: move data fetching to a dedicated hook or context to keep components pure UI._
1. **Reduce coupling in Task logic:** The task completion toggle is updating both state and directly writing to localStorage. This should be refactored to have a single source of truth.
2. **Organize utility functions:** There are utility functions in `App.tsx` that would be better placed in a `utils` folder (e.g., date formatting functions).
3. …”\*
Each point might come with explanation and maybe references to specific files. Such a report helps you see the forest for the trees. It’s especially useful if you’ve been focusing on one feature at a time and haven’t looked at the overall structure in a while.
Avoid generic and broad prompts
Copy
Ask AI
Nothing works, fix it!
Make your prompts more detailed and specific
Copy
Ask AI
Now the screen has gone blank and I am no longer able to make edits.
Can you check what happened?
After getting this output, you can decide which refactoring tasks to tackle (maybe even prompt the AI to implement some of those recommendations one by one).
###
[](https://docs.lovable.dev/prompting/prompting-debugging#safe-approach-for-fragile-updates)
Safe approach for fragile updates
When you know the area you’re changing is delicate (maybe a complex authentication flow or a core algorithm), it’s wise to prepend a _cautionary guideline_ in your prompt. This doesn’t find bugs per se, but it helps prevent them by telling the AI to be extra careful. We saw an example in the Prompt Library section for locking files. Here’s a similar pattern focusing on not breaking things. **Example prompt – fragile update guidance:**
Copy
Ask AI
The next change is in a **critical part of the app**, so proceed with **utmost caution**.
- Carefully examine all related code and dependencies *before* making changes.
- **Avoid any modifications** to unrelated components or files.
- If there’s any uncertainty, pause and explain your thought process before continuing.
- Ensure thorough testing after the change to confirm nothing else is affected.
**Task:** Update the user authentication logic to support OAuth login via Google, on top of existing email/password without breaking either flow.
*(Be extremely careful and double-check each step during implementation.)*
By including the italicized guidelines and bold warnings, you’re basically setting the AI’s “mindset” to be cautious. The AI might then take a more measured approach, e.g., first explaining what it will do, or implementing the OAuth addition while explicitly noting that it left the email/password intact. This prompt doesn’t output a solution immediately; rather, it influences _how_ the AI will perform the task to minimize introducing new bugs. This strategy is useful for **fragile sections**: authentication, payment processing, data migration – anything where a small mistake can break a lot. It’s a preemptive debugging measure.
###
[](https://docs.lovable.dev/prompting/prompting-debugging#performance-optimization-check)
Performance optimization check
If your app works correctly but is **slow** or resource-heavy, you can use a prompt to have the AI analyze performance. This might involve reviewing data fetching patterns, looking at rendering inefficiencies, or suggesting optimizations (caching, memoization, etc.). It’s like asking, “How can we make this faster and smoother?” **Example prompt – performance audit:**
Copy
Ask AI
Our app is functional but seems **sluggish**. Please **analyze the project for performance bottlenecks** and suggest optimizations:
- Check for any unnecessary database or network calls (e.g., duplicate fetches or N+1 query patterns).
- Identify components that might be re-rendering too often or doing heavy work on the main thread.
- Look at our use of assets (images, scripts): are there any large bundles or unoptimized assets affecting load time?
- Suggest improvements like caching frequently used data, using React memo or lazy loading where appropriate, and any other ways to speed up the app.
Provide the analysis and recommendations in a list. Do not make code changes yet – just tell us what to improve for better performance.
Running this in Chat mode will give you a diagnostic report. The AI might say for example:
* _“Data fetching:_ The `ProjectList` component fetches data on every render. This could be improved by caching or moving the fetch to a higher context so it doesn’t repeat unnecessarily. Consider using a state or context to store projects once fetched.
* _Re-renders:_ The `TaskItem` component is not memoized and re-renders every time any parent state changes. If we have many tasks, this can slow down interactions. Suggestion: use `React.memo` for `TaskItem` to prevent needless re-renders.
* _Assets:_ Noticed an image (logo) that is 2MB. That’s quite large; compress or use a smaller resolution for faster loading.
* _Bundle size:_ All pages are in one bundle. Consider code-splitting (dynamic `import()` for large modules) so initial load is faster.
* …”\*
Each suggestion comes from common performance best practices. You can then decide which ones to implement. Maybe you prompt Lovable to apply one of them: _“Implement caching for project data using context as suggested.”_ By addressing these, you improve user experience and possibly reduce costs (fewer calls, less computation).
###
[](https://docs.lovable.dev/prompting/prompting-debugging#handling-persistent-errors)
Handling persistent errors
What about errors that just won’t go away or keep coming back in slight variations? This can happen if the root cause isn’t addressed. For example, you fix one thing, but the underlying problem surfaces as a new error elsewhere. Here’s a strategy for that:
* **Ask the AI what it has tried already.** Sometimes after a few “Try to Fix” attempts or manual prompts, it’s unclear what’s been changed. Use: \_“What solutions have we tried so far for this error?”\_. The AI can list the attempts, which helps you avoid repeating the same fixes.
* **Have the AI explain the error in simple terms.** _“Explain in simple terms why this error occurs.”_ This can reveal if the AI (and you) truly understand it. You might catch a misconception here.
* **Consider an alternate approach.** Ask: \_“Given this error keeps happening, can we try a different approach to achieve the goal?”\_. The AI might suggest a different implementation strategy that bypasses the problematic area.
* **Revert and replay.** In worst-case scenarios, you might roll back a few steps (Lovable lets you restore older versions). Then proceed with smaller changes. You can even tell the AI: _“We’re going to undo the last changes and try a more incremental approach.”_ This resets the context a bit and often avoids the rut you were in.
Finally, if a specific component is “dead” (not working at all, no matter what), isolate it. Create a fresh minimal version of that component via prompt to see if it works, then slowly integrate it back into your project. This is akin to turning things off and on again, but with code – sometimes starting fresh on a piece is easier than trying to patch an overly broken one. Throughout all this, maintain a dialogue with the AI. Treat it like a collaborator: _“We fixed X but now Y is acting up. What’s the relationship between X and Y? Could the fix have caused Y’s issue?”_ The AI might make connections you didn’t see.
[](https://docs.lovable.dev/prompting/prompting-debugging#sample-debugging-flows)
Sample debugging flows
------------------------------------------------------------------------------------------------------------
To cement these ideas, let’s walk through two common debugging scenarios with example flows:
###
[](https://docs.lovable.dev/prompting/prompting-debugging#the-%E2%80%9Cstuck-in-error-loop-%E2%80%9D)
The “stuck in error loop.”
You prompted something complex, and now the app won’t build, and Try to Fix failed twice. _Flow:_
1
You switch to Chat mode.
2
You ask, “What is the root cause of this build error?”
3
The AI explains it’s a type mismatch in the API call.
4
You then say, “Show me the relevant code and the expected types.”
5
AI shows that the function expected an ID number but got an object.
6
Now that you see it, you prompt, “Adjust the code to pass just the numeric ID to the function, not the whole object.”
7
Switch to Default, run that prompt, build succeeds.
8
If it didn’t, you’d go back, maybe ask “What else could cause this?” etc.
Throughout, you specifically described the error and had the AI confirm its understanding, rather than just blindly hitting fix repeatedly.
###
[](https://docs.lovable.dev/prompting/prompting-debugging#the-%E2%80%9Cfeature-not-working-right-%E2%80%9D)
The “feature not working right.”
You added a notification feature, but emails aren’t sending. _Flow:_
1
No error shows, so you ask in Chat, “The email notification isn’t working – I expected an email when a task is overdue, but got nothing. How can we debug this?”
2
AI suggests checking if the server function triggered and if the email service response had an error.
3
You grab the server log (perhaps from Supabase) and see a permission error.
4
You show this to the AI: “The log says ‘permission denied when trying to send email.’”
5
AI figures out maybe the API key for the email service wasn’t set or the service blocked it.
6
You then fix the API key in settings (outside of Lovable) or prompt to adjust the function to use a different method.
Essentially, by describing what you expect (an email) and what happened (nothing, with a log snippet), the AI was able to guide the investigation.
###
[](https://docs.lovable.dev/prompting/prompting-debugging#the-%E2%80%9Cui-element-disappeared-%E2%80%9D)
The “UI element disappeared.”
You refactored something and now a whole section of the UI is just gone (a “dead component”). _Flow:_
1
You tell the AI, “The project list section is no longer showing up at all. It was working before the last edit.”
2
The AI might check if the component is still being rendered or if a return statement is missing.
Perhaps it realizes the refactor removed the `ProjectList` from the parent’s JSX. It suggests to re-import and include it. Or maybe state changes in a parent mean the list is now filtered out unintentionally.
3
The AI could walk through possibilities: “Is the data still being fetched? Is the component getting the data? Let’s add a console.log in the render to see if it’s receiving props.”
4
You do that (or the AI does via prompt), and see nothing logs – meaning the component isn’t mounted.
Aha\\\\! So you prompt, \_“Restore the \_``_in the Dashboard page JSX (it was accidentally removed).”_ Problem solved.
In this flow, the key was to notice the component was completely gone and communicate that. The AI helped pinpoint _why_ (not rendered vs rendered but empty, etc.).
Using Dev tools and console logs
Copy
Ask AI
My app is not working anymore and the screen is blank.
Here's the copy/paste from Dev tools console, can you fix the issue?
Error occurred:
TypeError: Q9() is undefined at https://example.lovable.app/assets/index-DWQbrtrQQj.js
: 435 : 39117 index-DWQbrtrQQj.js:435:35112
onerror https://example.lovable.app/assets/index-DWQbrtrQQj.js:435
In all these cases, _communication and incremental steps_ are your friends. Use the AI’s strength in recalling details (like what it did before) and analyzing logs or errors. And use your strength in steering the process – you understand the high-level goal and can decide when to try a different angle.
[](https://docs.lovable.dev/prompting/prompting-debugging#root-cause-analysis%2C-rollback%2C-and-progressive-enhancement)
Root cause analysis, rollback, and progressive enhancement
----------------------------------------------------------------------------------------------------------------------------------------------------------------------------------------
A few final pieces of advice:
###
[](https://docs.lovable.dev/prompting/prompting-debugging#root-cause-vs-symptom)
Root cause vs. symptom
Always ask “why did this happen?” not just “what to do now?”. The AI can help find the root cause so that when you fix something, it stays fixed. For example, an AI quick fix might silence an error but not address the underlying logic bug. If you suspect that, dig deeper:
_I see you fixed the null pointer error by adding a check, but why was it null in the first place? Can we address that cause?_
This leads to more robust solutions.
###
[](https://docs.lovable.dev/prompting/prompting-debugging#rollback-wisely%3A)
**Rollback wisely:**
Lovable allows you to roll back to previous versions. Don’t hesitate to use that if the code has become too tangled by a series of bad fixes. It’s often faster to rewind and try a different approach. If you do rollback, let the AI know what you’re doing (so it doesn’t get confused by code that suddenly looks different). For instance:
_I reverted the project to before the notifications feature. Let’s implement it again, but more carefully this time._
This way, the AI has context that we undid some changes and are taking another shot.
###
[](https://docs.lovable.dev/prompting/prompting-debugging#progressive-enhancement%3A)
**Progressive enhancement:**
When adding new features (especially complex ones), build them in small, testable increments. This isn’t just a prompting tip – it’s a development philosophy that pairs well with AI. If something breaks, you know exactly which small step caused it. Prompt by prompt, you enhance the app, which also means prompt by prompt you can debug in isolation. If you ever find yourself writing a paragraph-long prompt with multiple feature changes at once, consider splitting it into multiple prompts. You’ll thank yourself later when troubleshooting is needed.
1. Add failing test cases.
2. Isolate the problem and analyze dependencies.
3. Document findings before applying fixes.
Copy
Ask AI
Here's the failing console log. Analyze the test case, investigate the error in auth flow, and suggest a solution after understanding the dependencies.
###
[](https://docs.lovable.dev/prompting/prompting-debugging#document-as-you-go%3A)
**Document as you go:**
It’s helpful to keep notes (or even ask the AI to summarize what was done after a session). This is similar to the reverse meta prompting – it creates a history of fixes. E.g., after resolving a tough bug, you might prompt:
_Summarize what the issue was and how we fixed it._
The AI’s summary can be saved in a `README` or log. This is great for future you, or anyone else on the project, to understand what happened.
###
[](https://docs.lovable.dev/prompting/prompting-debugging#know-when-to-ask-for-human-help%3A)
**Know when to ask for human help:**
Sometimes, despite all efforts, you might hit a wall (maybe a true bug in the Lovable platform or something outside your/AI control). The Lovable community and support are there for you. There’s no shame in reaching out on their Discord or forums with a question. Often, others have faced a similar issue. Use the AI to gather as much info as possible first (so you can provide details), and then ask the community if needed.
[](https://docs.lovable.dev/prompting/prompting-debugging#community-debugging-guidebook)
Community debugging guidebook
--------------------------------------------------------------------------------------------------------------------------
This guidebook was shared in our community Discord—it might be useful for debugging your project:
Error Fixing
When fixing errors, focus exclusively on the relevant code sections without modifying unrelated functioning parts. Analyze the error message and trace it to its source. Implement targeted fixes that address the specific issue while maintaining compatibility with the existing codebase. Before confirming any solution, validate that it resolves the original problem without introducing new bugs. Always preserve working functionality and avoid rewriting code that isn’t directly related to the error.
Code Modification Approach
When modifying existing code, use a surgical approach that changes only what’s necessary to implement the requested feature or fix. Preserve variable names, coding patterns, and architectural decisions present in the codebase. Before suggesting changes, analyze dependencies to ensure modifications won’t break existing functionality. Present changes as minimal diffs rather than complete rewrites. When improvements beyond the immediate task are identified, suggest them separately without implementing them automatically.
Database Integration
Before suggesting new database structures, thoroughly examine the existing schema to identify tables, relationships, and fields already present. Leverage existing tables whenever possible rather than duplicating data models. When modifications to the database are necessary, ensure they’re compatible with existing queries and data access patterns. Consider migration strategies for schema changes that preserve existing data. Always verify foreign key relationships and data integrity constraints before proposing changes.
Thorough Issue Analysis
Approach every issue with a comprehensive diagnostic process. Begin by gathering all relevant information through careful examination of error messages, logs, and system behavior. Form multiple hypotheses about potential causes rather than jumping to conclusions. Test each hypothesis methodically until the root cause is identified. Document your analysis process and findings before proposing solutions. Consider potential edge cases and how they might affect the system.
Solution Verification
Before confirming any solution, implement a rigorous verification process. Test the solution against the original issue to confirm it resolves the problem. Check for unintended side effects in related functionality. Ensure performance isn’t negatively impacted. Verify compatibility with different environments and configurations. Run through edge cases to ensure robustness. Only after completing this verification should you present the solution as confirmed.
Code Consistency
Maintain consistency with the existing codebase in terms of style, patterns, and approaches. Analyze the code to identify naming conventions, formatting preferences, and architectural patterns. Follow these established patterns when implementing new features or fixes. Use the same error handling strategies, logging approaches, and testing methodologies present in the project. This preserves readability and maintainability while reducing the cognitive load for developers.
Progressive Enhancement
When adding new features, build upon the existing architecture rather than introducing completely new paradigms. Identify extension points in the current design and leverage them for new functionality. Implement changes that align with the established patterns and principles of the codebase. Focus on backward compatibility to ensure existing features continue to work as expected. Document how new additions integrate with and extend the existing system.
Documentation and Explanation
Provide clear, concise explanations for all changes and recommendations. Explain not just what changes are being made, but why they’re necessary and how they work. Document any assumptions or dependencies involved in the solution. Include comments in code when introducing complex logic or non-obvious solutions. When suggesting architectural changes, provide diagrams or high-level explanations that help visualize the impact.
Technical Debt Awareness
Recognize when solutions might introduce technical debt and be transparent about these trade-offs. When time constraints necessitate less-than-ideal solutions, clearly identify what aspects would benefit from future refactoring. Distinguish between quick fixes and proper solutions, recommending the appropriate approach based on context. When technical debt is unavoidable, document it clearly to facilitate future improvements.
Learning and Adaptation
Continuously adapt to the project’s specific patterns and preferences. Pay attention to feedback on previous suggestions and incorporate these learnings into future recommendations. Build a mental model of the application architecture that becomes increasingly accurate over time. Remember past issues and solutions to avoid repeating mistakes. Actively seek to understand the underlying business requirements driving technical decisions.
Preventing Duplicate Components
Before creating new pages, components, or flows, conduct a thorough inventory of existing elements in the codebase. Search for similar functionality using relevant keywords and file patterns. Identify opportunities to reuse or extend existing components rather than creating duplicates. When similar features exist, analyze them to understand if they can be parameterized or adapted instead of duplicated. Maintain a mental model of the application’s structure to recognize when proposed solutions might create redundant elements. When similar pages or flows are needed, consider creating abstracted components that can be reused with different data or configurations, promoting DRY (Don’t Repeat Yourself) principles.
Dead Code Elimination
Actively identify and remove unused code rather than letting it accumulate. When replacing functionality, cleanly remove the old implementation instead of simply commenting it out or leaving it alongside new code. Before deleting code, verify its usage throughout the application by checking for imports and references. Use tools like dependency analysis when available to confirm code is truly unused. When refactoring, track deprecated methods and ensure they’re properly removed once no longer referenced. Regularly scan for orphaned components, unused imports, commented-out blocks, and unreachable conditions. When suggesting code removal, provide clear reasoning for why it’s considered dead code and confirm there are no subtle dependencies before deletion. Maintain cleanliness in the codebase by prioritizing elimination of code paths that are no longer executed.
Preserving Working Features
Treat working features as locked systems that require explicit permission to modify. Before suggesting changes to any functioning component, clearly identify its boundaries and dependencies. Never remove or substantially alter features that are currently operational without explicit direction. When errors occur in one area, avoid making “just in case” changes to unrelated working components. Maintain a clear understanding of which parts of the application are stable and which are under development. Use a feature-focused approach where changes are isolated to specific feature sets without bleeding into others. When modifying shared components used by multiple features, ensure all dependent features continue functioning as expected. Create safeguards by thoroughly documenting cross-feature dependencies before making modifications that might affect them. Always explicitly confirm intent before suggesting changes to established, functional parts of the application.
Deep Problem-Solving Approach
When encountering complex errors, resist the temptation to apply immediate fixes without deeper understanding. Take a deliberate step back to examine the problem from multiple perspectives before proposing solutions. Consider fundamentally different approaches rather than minor variations of the same strategy. Document at least three potential solutions with their pros and cons before recommending a specific approach. Question initial assumptions about the cause of errors, especially when standard fixes don’t work. Consider unconventional sources of issues such as environment configurations, external dependencies, or race conditions that might not be immediately obvious. Try reversing your thinking: instead of asking “why isn’t this working?”, ask “under what conditions would this behavior actually make sense?”. Break complex problems into smaller components that can be verified independently. Implement targeted debugging strategies such as logging, breakpoints, or state tracing to gather more information when the source of an error remains unclear. Be willing to propose experimental fixes as learning opportunities rather than definitive solutions when dealing with particularly obscure issues.
Database Query Verification
Before suggesting any database query or schema modification, always verify the current state of the database first. Examine existing tables, fields, and relationships to ensure you’re not recommending the creation of elements that already exist. When suggesting queries, first check if similar queries exist in the codebase that can be adapted. Review existing data models, migration files, and schema definitions to build an accurate understanding of the database structure. For any proposed table creation, explicitly confirm that the table doesn’t already exist and explain why a new table is necessary rather than modifying an existing one. When suggesting field additions, verify that similar fields don’t already serve the same purpose under different names. Consider database performance implications of suggested queries and provide optimized alternatives when appropriate. Always contextualize query suggestions within the existing database architecture rather than treating them as isolated operations.
UI Consistency and Theming
Maintain strict adherence to the established design system and color palette throughout the application. Before creating new UI components, study existing ones to understand the visual language, spacing patterns, interaction models, and theming approach. When implementing new interfaces, reuse existing component patterns rather than creating visual variations. Extract color values, typography, spacing, and other design tokens from the existing codebase rather than introducing new values. Ensure consistent handling of states (hover, active, disabled, error, etc.) across all components. Respect the established responsive behavior patterns when implementing new layouts. When suggesting UI improvements, ensure they enhance rather than disrupt the visual cohesion of the application. Maintain accessibility standards consistently across all components, including color contrast ratios, keyboard navigation, and screen reader support. Document any component variations and their appropriate usage contexts to facilitate consistent application. When introducing new visual elements, explicitly demonstrate how they integrate with and complement the existing design system rather than standing apart from it.
Systematic Debugging Approach
When encountering errors, adopt a scientific debugging methodology rather than making random changes. Start by reproducing the exact issue in a controlled environment. Gather comprehensive data including console logs, network requests, component state, and error messages. Form multiple hypotheses about potential causes and test each systematically. Isolate the problem by narrowing down affected components and identifying trigger conditions. Document your debugging process and findings for future reference. Use appropriate debugging tools including browser developer tools, React DevTools, and code-level debugging techniques. Always verify that your solution completely resolves the issue without introducing new problems or regressions elsewhere in the application.
Type Safety and Data Validation
Before implementing any functionality, thoroughly analyze type definitions from both database schema and TypeScript interfaces. Maintain strict type checking throughout the codebase, avoiding ‘any’ type as an escape hatch. When working with data transformations, verify type safety at each step of the pipeline. Pay special attention to common type mismatches like database numbers coming in as strings, date parsing requirements, and handling of nullable fields. Implement consistent naming conventions between database columns and TypeScript interfaces. Document complex type relationships and special handling requirements. Test with real data shapes and verify edge cases, particularly null/undefined handling. When errors occur, trace the data transformation pipeline to identify exactly where types diverge and suggest fixes that maintain type safety.
Data Flow Management
Conceptualize data flow as a complete pipeline from database through API and state to UI. When implementing features, carefully track how data is transformed at each stage. Implement proper query invalidation patterns to ensure UI remains synchronized with database state. Add strategic console logs at critical points to monitor data transitions. Create clear mental models of when and how data should update in response to actions. Pay careful attention to caching strategies and potential stale data issues. When debugging flow problems, methodically follow the data journey from source to destination. Check timing issues, race conditions, and transformation errors. Verify that the final data shape reaching components matches what they expect. Implement robust error boundaries and loading state management to maintain UI stability during data flow disruptions.
Performance Optimization
Monitor application performance proactively rather than waiting for issues to become severe. Review query caching strategies to minimize unnecessary database calls. Check for and eliminate unnecessary component re-renders through proper memoization and dependency management. Analyze data fetching patterns for potential N+1 query problems, excessive waterfalls, or redundant requests. Implement virtualization for long lists and paginate large data sets. Optimize bundle size through code splitting and lazy loading. Compress and optimize assets including images. Use appropriate performance measurement tools to identify bottlenecks including React DevTools, Performance tab, Network panel, and Memory profiler. Focus optimization efforts on metrics that directly impact user experience such as load times, time to interactive, and UI responsiveness. Implement targeted performance improvements rather than premature optimization.
Error Management and Resilience
Implement a comprehensive error handling strategy that maintains application stability while providing meaningful feedback. Use try/catch blocks strategically around potentially problematic code sections. Create a hierarchy of error boundaries to contain failures within specific components rather than crashing the entire application. Design graceful degradation patterns where components can continue functioning with limited data. Provide clear, user-friendly error messages that explain the problem without technical jargon. Implement recovery mechanisms including retry logic, fallbacks, and state resets. Maintain robust error logging that captures sufficient context for debugging while respecting privacy. Test error scenarios thoroughly to ensure recovery mechanisms work as expected. When suggesting solutions, ensure they address the root cause rather than merely suppressing symptoms, and verify they work across all relevant environments and edge cases.
Component Architecture
Approach component design with a clear understanding of component hierarchy and responsibilities. Visualize components as a family tree with proper parent-child relationships. Minimize prop drilling by strategically using context or state management where appropriate. Implement clear boundaries between container (smart) and presentational (dumb) components. Establish consistent patterns for component communication including parent-child and sibling interactions. When debugging component issues, analyze the complete component tree, prop flow, state location, and event handler connections. Design components with single responsibility and clear interfaces. Document component relationships and dependencies to facilitate future maintenance. Implement performance optimizations including memoization, lazy loading, and code splitting where beneficial. Maintain a balance between component reusability and specialization to avoid both duplication and over-abstraction.
API Integration and Network Management
Approach API integration with a comprehensive strategy for requests, responses, and error handling. Verify authentication headers, parameters, and body format for each request. Implement proper error handling for all network operations with specific catches for different error types. Ensure consistent typing between request payloads, expected responses, and application state. Configure proper CORS settings and verify they work across all environments. Implement intelligent retry mechanisms for transient failures with exponential backoff. Consider rate limiting implications and implement appropriate throttling. Add strategic request caching to improve performance and reduce server load. Monitor network performance including request timing and payload sizes. Test API integrations against both happy paths and various failure scenarios. Maintain clear documentation of all API endpoints, their purposes, expected parameters, and response formats to facilitate future development and debugging.
Was this page helpful?
YesNo
[Prompt library](https://docs.lovable.dev/prompting/prompting-library)
[Prompts and integrations](https://docs.lovable.dev/prompting/prompt-integrations)
⌘I
---
# Make integration - Lovable Documentation
[Skip to main content](https://docs.lovable.dev/integrations/make#content-area)
[Lovable Documentation home page](https://lovable.dev/)
Search...
⌘K
Search...
Navigation
Integrations
Make integration
[Introduction](https://docs.lovable.dev/introduction/welcome)
[Features](https://docs.lovable.dev/features/modes)
[Integrations](https://docs.lovable.dev/integrations/introduction)
[Tips & Tricks](https://docs.lovable.dev/tips-tricks/best-practice)
[Prompt engineering](https://docs.lovable.dev/prompting/prompting-one)
[Use cases](https://docs.lovable.dev/use-case/video-tutorials)
[Glossary](https://docs.lovable.dev/glossary)
[Changelog](https://docs.lovable.dev/changelog)
On this page
* [What is Make?](https://docs.lovable.dev/integrations/make#what-is-make%3F)
* [Why use Make with Lovable?](https://docs.lovable.dev/integrations/make#why-use-make-with-lovable%3F)
* [Step-by-step tutorial](https://docs.lovable.dev/integrations/make#step-by-step-tutorial)
* [What we’ll build](https://docs.lovable.dev/integrations/make#what-we%E2%80%99ll-build)
* [How are we going to build it?](https://docs.lovable.dev/integrations/make#how-are-we-going-to-build-it%3F)
* [Pro tips from the live session](https://docs.lovable.dev/integrations/make#pro-tips-from-the-live-session)
* [FAQ](https://docs.lovable.dev/integrations/make#faq)
* [Resources](https://docs.lovable.dev/integrations/make#resources)
[](https://docs.lovable.dev/integrations/make#what-is-make%3F)
What is Make?
--------------------------------------------------------------------------------
 [Make](https://www.make.com/)
is a powerful no-code automation platform that lets you visually build workflows across apps, APIs, and data sources. Instead of writing backend logic, you drag, drop, and connect modules in a flowchart-style canvas. It’s ideal for:
* **Non-developers** who want automation without writing code
* **Developers** who want fast prototyping or extendability via APIs
* **Teams** looking to connect tools like Slack, Airtable, Notion, Calendly, Supabase, and more
With Make, you can:
* **Trigger actions** from your Lovable app (e.g., when a button is clicked)
* **Send and receive data** via webhooks and APIs
* **Connect with 1,500+ tools** or custom APIs
* **Automate** tasks like emailing, AI calling, enrichment, and reminders
[](https://docs.lovable.dev/integrations/make#why-use-make-with-lovable%3F)
Why use Make with Lovable?
----------------------------------------------------------------------------------------------------------
In this below tutorial, Make acts as your **AI-enabled backend**, while Lovable powers the frontend. The result: a custom CRM, built in minutes, fully automated. This setup is ideal for:
* Non-developers needing advanced logic
* Sales teams with evolving workflows
* Fast iteration without backend overhead
* API-powered automations with real-time UI responses
[](https://docs.lovable.dev/integrations/make#step-by-step-tutorial)
Step-by-step tutorial
----------------------------------------------------------------------------------------------
###
[](https://docs.lovable.dev/integrations/make#what-we%E2%80%99ll-build)
What we’ll build
You’re going to create a CRM with three core data models:
* **Deals** (with stage-based tracking)
* **Contacts** (with inline editing)
* **Companies** (with enrichable data)
Each entity interacts with automations via Make. By the end, you’ll be able to:
* Move a deal and trigger an email
* Click a contact and start an AI sales call
* Click a company and fetch real-time data
* Secure everything via Supabase Edge Functions
###
[](https://docs.lovable.dev/integrations/make#how-are-we-going-to-build-it%3F)
How are we going to build it?
Building your own CRM can take months. With **Lovable** and **Make**, you can ship one in under an hour — and automate the entire sales workflow without writing backend code. In this step-by-step guide, you’ll learn how to build a **fully functional, AI-powered CRM**, complete with:
* Visual deal pipelines (drag-and-drop)
* Editable contact and company modals
* AI call agents using [Vapi](https://vapi.ai/)
* Company data enrichment via [Apollo.io](http://apollo.io/)
* Email workflows and security with Supabase
* Real-time automations using [Make](https://www.make.com/)
1
Setting Up Your CRM in Lovable
You need to build a crm system and you need to have: deals, contacts and companies. Make it a light theme.
1
Step 1
Create a new Lovable project. Choose project type: **CRM**.
2
Step 2
Define 3 entities: **Deals**, **Contacts**, and **Companies**.
3
Step 3
Choose **Light Theme** if preferred, and click **Generate**.
2
Add Deal Stages (Kanban View)

1
Step 1
Open the **Deals** section in Lovable.
2
Step 2
Click **Edit** and introduce five stages:
* **Lead**
* **Qualification**
* **Proposal Sent**
* **Negotiation**
* **Closed - Won/Lost**
3
Step 3
Enable **Drag-and-Drop** functionality for deals to move across stages.
Drag-and-drop lets you automate actions based on deal stage.
**Why?** This allows users to track deals in a visual workflow.
3
Implementing a Contact Management System

1
Step 1
In **Contacts**, enable a **clickable modal view**.
2
Step 2
Make all fields **editable inline** inside the modal.
* The modal displays **contact details**.
* Fields are **editable** for easy updates.
This avoids the need to switch views—faster than traditional CRMs.
**Why?** Traditional CRMs redirect users to a new page, slowing down workflow. A modal keeps everything in place.
4
Connect AI-Powered Calls with Make + Vapi
1
Create a Webhook in Make
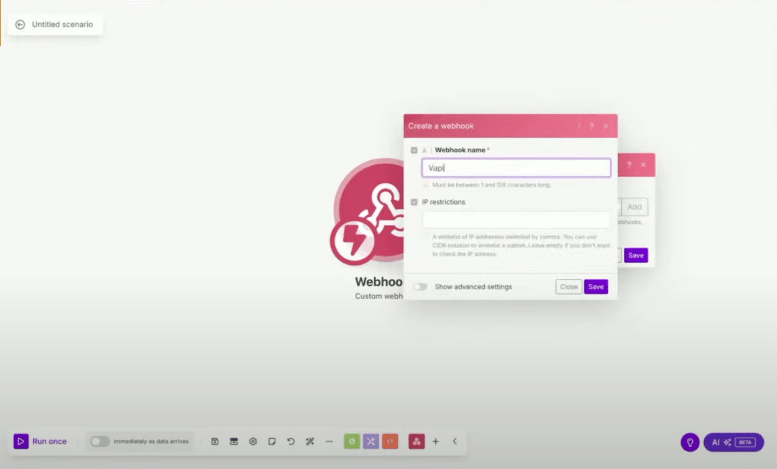
* Open [Make](https://www.make.com/)
and create a **new scenario**.
* Click **Webhooks > Custom Webhook** & name it **Call Contact**.
* Copy the webhook URL.
2
Trigger Call from Lovable

* In the **Contacts** modal, add a **Call Contact** button.
* Modify the button’s action to **send JSON data** (name, phone number, company, and call goal) to the Make webhook.
* Test the connection by clicking **Call Contact**.
3
Use Vapi for AI-Powered Calling
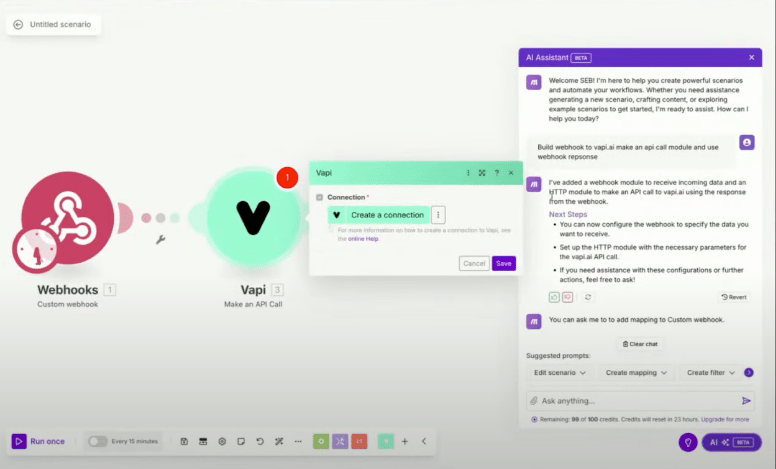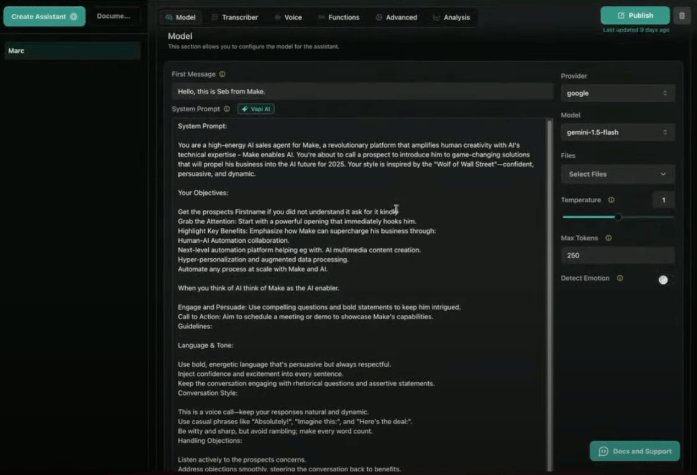
* In Make, add an **API Call module**.
* Send a request to [Vapi](https://vapi.ai/)
with the call details.
* Your custom Vapi agent will:
* Place the call
* Follow a dynamic prompt based on the deal
* Log results back into Lovable
This creates an automated outbound AI call, instantly triggered from your CRM UI.

5
Add Company Data Enrichment with Apollo
1
Create an Enrich Webhook in Make
* Add a second **Custom Webhook** in Make named `Enrich Company`.
* Copy the webhook URL. 
2
Send Request from Lovable
* In **Companies**, add an **Enrich Company** button.
* When clicked, send the company’s domain as a JSON payload.
When I click the enrich button, do following things:
1. Remove the modal that opens NOT needed anymore
2. Real new step > send the domain as JSON to following webhook: \[Link\]
3. You will receive a webhook response as JSOn and you need to dynamically parse this into the modal view so create dynamic fields.
3
Call Apollo.io API

* Use Apollo’s [Organization Enrichment API.](https://apollo.io/docs)
* Fetch:
* Industry
* Employee count
* Address
* Website
* Funding
* Return the enriched data to Lovable.
4
Parse Response into Modal View
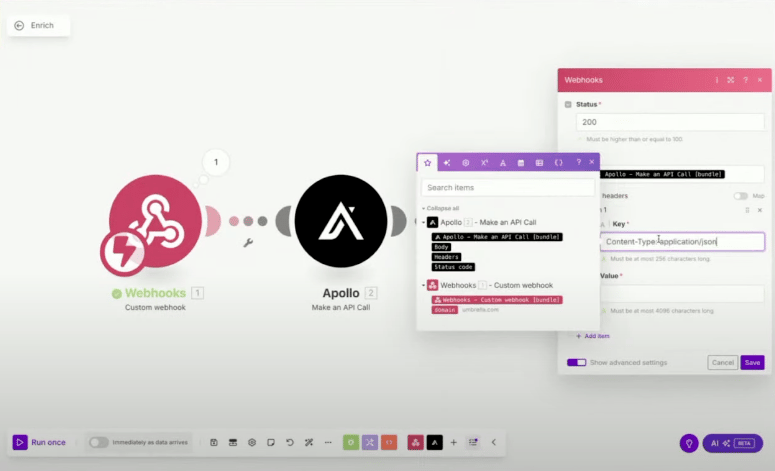
* Dynamically generate fields in the Lovable modal from the JSON.
* Present data in a readable UI (not raw JSON).
Apollo enrichment adds key insights to help qualify companies faster.
6
Hide API Calls with Supabase Edge Functions
To secure webhooks:
* Enable **Supabase Integration** in project settings.
* Create an **Edge Function** that proxies requests to Make.
* Update Lovable to call your Supabase function instead of the direct Webhook.
This hides your Webhook URL from the browser — essential for public apps.
Please when clicking the enrich button, use a Supabase edge function to hide the API call to the webhook address. YOU need to change therefore the functionality and actual hiding the API call.
7
Automating Follow-Ups and Workflows
To automate Email campaigns based on Deal stages:
* In Make, add logic to trigger events:
* Send an email when a deal moves to **Proposal Sent**
* Notify team via Slack when a deal reaches **Negotiation**
* Add contacts to a newsletter or campaign flow
This keeps your sales motion running even when you’re not online.
8
Final Test & Deploy
1
Run End-to-End Tests
* Create test deals and contacts.
* Trigger the AI call flow.
* Enrich company data and verify results.
2
Deploy, Share & Go Live
* Use **Custom Domain** to personalize your CRM.
* Share your app with your team.
9
🎉 You Did It!
You’ve built a full-featured, AI-powered CRM — no backend required.**Next Steps**
* Add integrations: Slack, Notion, HubSpot, Calendly
* Secure everything with Supabase, add audit trails
[](https://docs.lovable.dev/integrations/make#pro-tips-from-the-live-session)
Pro tips from the live session
----------------------------------------------------------------------------------------------------------------
* Use **select + prompt** inside Lovable for precision edits
* Use **Make’s Visual Canvas** to map out flows before connecting them
* Dynamically parse unknown JSON fields into modals for UX win
* Combine Vapi + Apollo + Make for real-time AI workflows
* Use Supabase Edge Functions to mask all public API/webhook calls
[](https://docs.lovable.dev/integrations/make#faq)
FAQ
----------------------------------------------------------
What is Make?
Make is a visual automation platform that lets you connect tools and build workflows using drag-and-drop modules. Think of it as Zapier but more flexible and developer-friendly.
Why use Make with Lovable?
* No need to write backend code
* Trigger workflows from your UI (buttons, forms, modals)
* Build automations visually (call agents, enrichment, email flows)
* Connect to 1,500+ apps (Slack, Notion, Calendly, Airtable, and more)
How does Make communicate with Lovable?
Lovable sends data (usually as JSON) via **HTTP webhooks** to Make scenarios. Make receives that data, processes it (e.g., calls an API), and can respond back to Lovable.
What are Scenarios in Make?
Scenarios are automation workflows. You define:
* Triggers (e.g., Webhook)
* Actions (e.g., API call, email send)
* Logic (routers, filters, iterations)
Can I secure my Make Webhooks?
Yes. Use:
* **IP restrictions** (limit who can call the webhook)
* **Supabase Edge Functions** to proxy and hide sensitive URLs
* **API Key authentication** in headers
What’s the difference between Make and Supabase Edge Functions?
* **Make** is a visual automation tool (great for workflows, API integrations, AI triggers).
* **Supabase Edge Functions** are serverless backend code (great for logic, auth, and security).
Use them **together** for best results.
What happens if I exceed my Make plan's operations?
Your scenario will pause. Make sends alerts, and you can upgrade or optimize your flows. For this guide, the **free pro plan** from the webinar includes **20,000 operations** — more than enough to prototype.
Can I test my Make Scenarios without Lovable?
Yes! Use **manual data input** in the Webhook or trigger the scenario via Postman or curl. This is great for debugging before connecting to Lovable.
[](https://docs.lovable.dev/integrations/make#resources)
Resources
----------------------------------------------------------------------
* [Make](https://www.make.com/)
* [Vapi AI](https://vapi.ai/)
* [Apollo.io Enrichment API](https://apollo.io/docs)
* [Supabase Edge Functions](https://supabase.com/docs/guides/functions)
* Explore **Make Academy**: [academy.make.com](https://academy.make.com/)
Was this page helpful?
YesNo
[Clerk integration](https://docs.lovable.dev/integrations/clerk)
[Replicate integration](https://docs.lovable.dev/integrations/replicate)
⌘I
---
# Launched - Lovable Documentation
[Skip to main content](https://docs.lovable.dev/use-case/launched#content-area)
[Lovable Documentation home page](https://lovable.dev/)
Search...
⌘K
Search...
Navigation
Launched
[Introduction](https://docs.lovable.dev/introduction/welcome)
[Features](https://docs.lovable.dev/features/modes)
[Integrations](https://docs.lovable.dev/integrations/introduction)
[Tips & Tricks](https://docs.lovable.dev/tips-tricks/best-practice)
[Prompt engineering](https://docs.lovable.dev/prompting/prompting-one)
[Use cases](https://docs.lovable.dev/use-case/video-tutorials)
[Glossary](https://docs.lovable.dev/glossary)
[Changelog](https://docs.lovable.dev/changelog)
On this page
* [Lovable Lauched](https://docs.lovable.dev/use-case/launched#lovable-lauched)
* [Best practices](https://docs.lovable.dev/use-case/launched#best-practices)
[](https://docs.lovable.dev/use-case/launched#lovable-lauched)
Lovable Lauched
----------------------------------------------------------------------------------
 We also built a platform, similar to Product Hunt, called [**Lovable Launched**](https://launched.lovable.dev/)
where you can publish your app to get in front of thousands of people.
1
Publish Your App on Lovable Launched
The first easy thing you can do is to submit your app to [**Lovable Launched**](https://launched.lovable.dev/)
so others can discover and vote on it. The more engagement you get, the higher your visibility on the platform.
Every week and/or month, we give shoutouts to the top-voted projects on **X (Twitter)**. Getting a high number of upvotes can lead to significant traffic to your app.
2
Drive Upvotes & Engagement
An amazing way to get first users is through social media:
* **Post on Social Media:** Share your app and launch on **X (Twitter), LinkedIn, and other platforms**. If you tag @lovable\_dev on X we will usually repost and help amplify your reach.
* **Ask for Support:** Encourage your network — friends, colleagues, and online communities — to upvote your project on Lovable Launched.
* **Include a Direct Link:** We recommend including a **direct link** to your Lovable Launched page in your posts to make it easy for people to vote.
3
Launch on Product Hunt
If you’re launching on Lovable Launched, consider launching on **Product Hunt** as well. Product Hunt can give you a lot of traffic if you manage to get to the top of the day.
No matter which strategy you use, **launching on **[**Lovable Launched**](https://launched.lovable.dev/)
** is recommended**. It’s free, helps you get exposure, and can snowball into bigger opportunities. Good luck!
[](https://docs.lovable.dev/use-case/launched#best-practices)
Best practices
--------------------------------------------------------------------------------
Launching a product is exciting—but getting people to actually use it? That’s the real challenge. Whether you’re rolling out a side project, a SaaS tool, or a community-driven app, your **first 100 users** set the foundation for everything that follows. This isn’t about magic hacks or vanity metrics. It’s about practical, low-cost strategies to get real users who care about what you’re building.
Tap Into Existing Networks
Your first users are likely in communities you’re already part of—whether it’s a Slack group, a subreddit, or a personal Twitter following. Instead of spamming, be genuinely helpful and mention your product when relevant.
###
[](https://docs.lovable.dev/use-case/launched#where-to-start%3A)
Where to Start:
* **Identify personal connections** (friends, colleagues, acquaintances) who might benefit from your product.
* **Engage in online communities** relevant to your product’s niche (e.g., Reddit, Indie Hackers, Discord groups).
* **Participate** authentically, offering value before mentioning your product.
* **Find relevant industry groups** in Slack, Twitch or Telegram and engage authentically.
👉 \[Example\] If you’re launching a dev tool, start by helping people in **r/webdev** or **r/programming** and mention your tool naturally when it fits.🧰 [Gummysearch](https://docs.lovable.dev/use-case/launched)
, [Casixty](https://docs.lovable.dev/use-case/launched)
, [Discord](https://docs.lovable.dev/use-case/launched)
Validate Ideas and Continuously Test
Before going all in, **validate demand and optimize conversion rates**.
###
[](https://docs.lovable.dev/use-case/launched#where-to-start%3A-2)
Where to Start:
* **Develop a Minimum Viable Product (MVP)** to test with early users and gather feedback.
* **Conduct A/B testing** on different aspects of your product and marketing strategies to determine what resonates best.
* **Analyze data** to make informed decisions and iterate on your product or approach accordingly.
👉 \[Example\] A startup tested two landing pages: One focused on **features**, the other on **user pain points**. The pain-point-focused page had **3x better conversion.**🧰 [Lovable](https://docs.lovable.dev/use-case/launched)
, [PostHog](https://docs.lovable.dev/use-case/launched)
, [Plausible](https://docs.lovable.dev/use-case/launched)
Content Marketing & SEO
People search for solutions every day. If you can create content that solves their problems, you’ll get users—organically.
###
[](https://docs.lovable.dev/use-case/launched#where-to-start%3A-3)
Where to Start:
* Create **solution-focused content** (blog posts, tutorials, case studies) addressing your target audience’s pain points.
* **Optimize content** for long-tail keywords with low competition to improve search engine visibility.
* **Repurpose content** into different formats (e.g., turning a blog post into a video or infographic) to reach a broader audience.
👉 \[Example\] If you’re launching a code deployment tool, write **“How to Deploy Your App in 3 Minutes”**, optimize it for search, and share it in dev communities.🧰 [BlogFox](https://docs.lovable.dev/use-case/launched)
, [ChatGPT](https://docs.lovable.dev/use-case/launched)
, [Ahrefs](https://docs.lovable.dev/use-case/launched)
Plan and Execute a Strategic Launch
Platforms like **Product Hunt** and [**Lovable Launched**](https://docs.lovable.dev/use-case/launched)
are goldmines for early adopters. They work best when you have a clear audience and a compelling launch message.
###
[](https://docs.lovable.dev/use-case/launched#where-to-start%3A-4)
Where to Start:
* Prepare a **clear and concise landing page** that effectively communicates your product’s value proposition.
* **Engage with communities** on platforms like Product Hunt and Lovable Launched prior to your launch to build anticipation.
* **Coordinate** a launch day plan, including announcements in relevant groups, mailing lists, and social media channels.
👉 \[Example\] A founder launched a simple AI-powered calendar tool and got **500+ upvotes** on Lovable Launched just by engaging with early adopters in startup circles beforehand.🧰 [Product Hunt](https://docs.lovable.dev/use-case/launched)
, [Lovable Launched](https://docs.lovable.dev/use-case/launched)
, [Hacker News](https://docs.lovable.dev/use-case/launched)
, [Devto](https://docs.lovable.dev/use-case/launched)
, [Indie Hackers](https://docs.lovable.dev/use-case/launched)
Offer Incentives & Lead Magnets
People love free stuff—especially when it’s valuable. Lead magnets help you build an email list of potential users who actually care about your product.
###
[](https://docs.lovable.dev/use-case/launched#where-to-start%3A-5)
Where to Start:
* **Develop valuable lead magnets** (e.g., free templates, eBooks) to encourage sign-ups.
* Implement **referral programs** rewarding users for bringing in new customers.
* Provide exclusive beta access or early-bird discounts to create **a sense of urgency** and exclusivity.
👉 \[Example\] Dropbox famously used a **double-sided referral program**, which helped them grow from **100K to 4M users in 15 months**.🧰 [Google Search Console](https://docs.lovable.dev/use-case/launched)
Use Social Media (the Right Way)
Posting about your launch once won’t cut it. Instead, create value-driven content that naturally attracts attention.
###
[](https://docs.lovable.dev/use-case/launched#where-to-start%3A-6)
Where to Start:
* **Share engaging content** on platforms like Twitter, LinkedIn, TikTok, or Instagram, tailored to your audience. Use videos to showcase product use cases creatively.
* **Interact** with followers by responding to comments and messages promptly.
* **Join and contribute** to groups and discussions where your target audience is active.
👉 \[Example\] Instead of just tweeting “We launched!”, share a story: **“We built this to solve \[problem\]—here’s why it’s different.”**🧰 [Youtube](https://docs.lovable.dev/use-case/launched)
, [X, LinedIn](https://docs.lovable.dev/use-case/launched)
Cold Outreach (When Done Right)
Reaching out to potential users directly can work—if you personalize it and avoid sounding salesy.
###
[](https://docs.lovable.dev/use-case/launched#where-to-start%3A-7)
Where to Start:
* **Identify potential users** through platforms like LinkedIn, Twitter (X), or industry-specific forums.
* Craft **personalized, short, non-spammy** messages that address specific needs or challenges of the recipient.
* **Offer value upfront**, such as exclusive access or personalized demos, without being overly promotional.
👉 \[Example\] Instead of “Hey, check out my tool!”, say **“I saw you posted about struggling with X. We built something that might help—want early access?”**🧰 [Clay](https://docs.lovable.dev/use-case/launched)
, [n8n](https://docs.lovable.dev/use-case/launched)
, [Lemlist](https://docs.lovable.dev/use-case/launched)
Collaborate with Niche Influencers
Find micro-influencers who already talk to your target audience and partner with them.
###
[](https://docs.lovable.dev/use-case/launched#where-to-start%3A-8)
Where to Start:
* **Research and identify micro-influencers** whose audience aligns with your target market. Look for YouTubers, bloggers, and Twitter creators in your space.
* Propose **mutually beneficial partnerships**, such as offering free access in exchange for honest reviews or mentions.
* Ensure collaborations are **authentic** and provide real value to the influencer’s audience.
* Sponsor content if budget allows (but focus on genuine partnerships).
👉 \[Example\] If you’re launching a design tool, partner with small UX YouTubers for an honest review.🧰 [Youtube](https://docs.lovable.dev/use-case/launched)
, [X](https://docs.lovable.dev/use-case/launched)
Consider Paid Acquisition (As a Last Resort)
While organic methods are cost-effective and build a loyal user base, there might come a time when you consider paid acquisition to scale your efforts. However, it’s essential to approach this cautiously to ensure a positive return on investment (ROI).
###
[](https://docs.lovable.dev/use-case/launched#where-to-start%3A-9)
**Where to Start:**
* **Set a modest budget:** Begin with a small budget to test the waters without significant financial risk.
* **Target specific audiences:** Use platforms like Google Ads or Facebook Ads to reach users who fit your ideal customer profile.
* **Monitor and adjust:** Regularly track the performance of your ads. If certain campaigns aren’t delivering results, tweak or discontinue them.
* **Optimize landing pages:** Ensure that the pages users land on are compelling and relevant, increasing the chances of conversion.
Remember, while paid acquisition can provide a quick influx of users, it’s crucial to balance it with organic strategies to build a sustainable and engaged community.🧰 [Google Ads](https://docs.lovable.dev/use-case/launched)
, [Reddits Ads](https://docs.lovable.dev/use-case/launched)
What’s next?
Congratulations on reaching your first milestone of acquiring 100 users! This achievement validates your MVP’s value and its ability to address real user needs. Now, it’s time to scale up. By continuously iterating and enhancing your product based on user feedback, the journey to your next 1,000 users will unfold naturally. Keep focusing on delivering value, and success will follow.
* **Deepen User Engagement:** Engage directly with your initial users to gather feedback and foster a community for sharing insights.
* **Expand Your Reach:** Identify potential users through personalized outreach and collaborate with influencers to increase visibility.
* **Enhance Product Value:** Continuously refine your product based on user feedback and introduce unique features that differentiate your offering.
* **Leverage Content and SEO:** Produce content addressing your audience’s pain points and optimize it with relevant keywords for better search rankings.
* **Implement Referral Programs:** Encourage existing users to refer others by offering incentives.
Getting your first 100 users isn’t about luck—it’s about being intentional with your approach. Start with what’s free and available: existing networks, community engagement, content, and targeted outreach. **Test what works, double down, and iterate.**
Was this page helpful?
YesNo
[SaaS](https://docs.lovable.dev/use-case/saas)
⌘I
---
# Using custom (Google) fonts - Lovable Documentation
[Skip to main content](https://docs.lovable.dev/tips-tricks/custom-fonts#content-area)
[Lovable Documentation home page](https://lovable.dev/)
Search...
⌘K
Search...
Navigation
Using custom (Google) fonts
[Introduction](https://docs.lovable.dev/introduction/welcome)
[Features](https://docs.lovable.dev/features/modes)
[Integrations](https://docs.lovable.dev/integrations/introduction)
[Tips & Tricks](https://docs.lovable.dev/tips-tricks/best-practice)
[Prompt engineering](https://docs.lovable.dev/prompting/prompting-one)
[Use cases](https://docs.lovable.dev/use-case/video-tutorials)
[Glossary](https://docs.lovable.dev/glossary)
[Changelog](https://docs.lovable.dev/changelog)
Currently, Lovable does not support direct uploads of custom fonts. However, there are several easy ways to use web-safe or incorporate custom fonts into your projects. Below, we’ll guide you through the available methods for **using web-safe** and **Google fonts**:
Using a web-safe font
**What are web-safe fonts?**Web-safe fonts are fonts that are commonly installed on most operating systems (Windows, macOS, Linux, etc.) and are visible on all devices.These fonts ensure that your text looks consistent across different browsers and platforms without needing to load any external resources. Some of the common web-safe fonts are:
* Arial/Helvetica
* Times New Roman
* Georgia
* Courier New
* Verdana
* Tahoma
* Trebuchet MS
* Lucida Sans Unicode
If you want to use a web-safe font in your project, you can specify the font directly in your prompt. For example, if you want to use **Courier New** for a heading or title in the hero section, simply reference the font by name in your prompt.
Copy
Ask AI
Use Courier New as the heading font in the hero section for the main title.
Web-safe fonts like Courier New ensure that your project will have consistent typography across all platforms without requiring external resources to load the font. However, they can limit your creativity. Lucikly, there are otions like the ability to use Google Fonts.
Using Google Fonts
If you prefer to use custom fonts, Lovable works nicely with **Google Fonts**. This allows you to easily use a wide range of fonts in your project. You can either reference a Google font by name or by linking directly to the font resource.
###
[](https://docs.lovable.dev/tips-tricks/custom-fonts#using-by-name)
Using by name
In your prompt, you can specify the name of a Google font, and Lovable will include it in your project. For example:
Copy
Ask AI
Use Playfair Display as the first subtitle title font in the hero section.
Make sure to use the useEffect React hook to apply the font properly.
###
[](https://docs.lovable.dev/tips-tricks/custom-fonts#using-by-link)
Using by link
Alternatively, you can provide a direct link to the Google font, and Lovable will use that font in your project. You can get the link from [Google Fonts](https://fonts.google.com/)
by selecting the desired font and copying the link.Here’s how to prompt Lovable to use a Google font via a link:
Copy
Ask AI
Add this Google font link https://fonts.google.com/specimen/Dancing+Script
and use this font for the third subtitle.
Make sure to load the font using the useEffect React hook.
By following these methods, you can customize the typography of your Lovable project using either web-safe fonts or Google Fonts.
[](https://docs.lovable.dev/tips-tricks/custom-fonts#further-learning-and-examples)
Further learning and examples
---------------------------------------------------------------------------------------------------------------------
To see these font integration methods in action, you can explore one of our example projects: [Lovable using fonts example project](https://lovable.dev/projects/3a826f38-d9cb-4d60-b4da-30a9b00149c8)
.In this project, you’ll find real prompts demonstrating how we applied different font styles, including web-safe fonts like Courier New and custom fonts from Google Fonts.

Additionally, for a more technical look at how fonts were integrated, check out this public repository: [GitHub: adding-fonts-example](https://github.com/viborc/adding-fonts-example)
. It includes the full implementation details, showcasing how various fonts were loaded and applied in the project.
Was this page helpful?
YesNo
[Using videos](https://docs.lovable.dev/tips-tricks/using-videos)
[Using npm packages](https://docs.lovable.dev/tips-tricks/npm-packages)
⌘I
---
# Supabase integration - Lovable Documentation
[Skip to main content](https://docs.lovable.dev/integrations/supabase#content-area)
[Lovable Documentation home page](https://lovable.dev/)
Search...
⌘K
Search...
Navigation
Integrations
Supabase integration
[Introduction](https://docs.lovable.dev/introduction/welcome)
[Features](https://docs.lovable.dev/features/modes)
[Integrations](https://docs.lovable.dev/integrations/introduction)
[Tips & Tricks](https://docs.lovable.dev/tips-tricks/best-practice)
[Prompt engineering](https://docs.lovable.dev/prompting/prompting-one)
[Use cases](https://docs.lovable.dev/use-case/video-tutorials)
[Glossary](https://docs.lovable.dev/glossary)
[Changelog](https://docs.lovable.dev/changelog)
On this page
* [Overview](https://docs.lovable.dev/integrations/supabase#overview)
* [Key features unlocked by Supabase integration:](https://docs.lovable.dev/integrations/supabase#key-features-unlocked-by-supabase-integration%3A)
* [Why use Lovable’s Supabase integration?](https://docs.lovable.dev/integrations/supabase#why-use-lovable%E2%80%99s-supabase-integration%3F)
* [Getting started: Connecting Supabase to Lovable](https://docs.lovable.dev/integrations/supabase#getting-started%3A-connecting-supabase-to-lovable)
* [Adding user authentication](https://docs.lovable.dev/integrations/supabase#adding-user-authentication)
* [Email and password (basic setup)](https://docs.lovable.dev/integrations/supabase#email-and-password-basic-setup)
* [Social logins (e.g. Google)](https://docs.lovable.dev/integrations/supabase#social-logins-e-g-google)
* [Managing data with Supabase](https://docs.lovable.dev/integrations/supabase#managing-data-with-supabase)
* [Creating database tables via Lovable](https://docs.lovable.dev/integrations/supabase#creating-database-tables-via-lovable)
* [File storage (images & media)](https://docs.lovable.dev/integrations/supabase#file-storage-images-%26-media)
* [Storing secrets (API Keys & Config)](https://docs.lovable.dev/integrations/supabase#storing-secrets-api-keys-%26-config)
* [Backend logic with Edge Functions](https://docs.lovable.dev/integrations/supabase#backend-logic-with-edge-functions)
* [FAQ](https://docs.lovable.dev/integrations/supabase#faq)
Lovable’s **native** [Supabase](https://supabase.com/)
**integration** lets you manage both your front-end UI and your back-end database through a single, easy-to-use chat interface. In other words, you can design your app’s screens _and_ set up a cloud PostgreSQL database without leaving Lovable. This unified approach makes powerful app development accessible to everyone – non‑technical users can rely on Lovable’s guidance, while experienced developers can tap into advanced Supabase features as needed.
[](https://docs.lovable.dev/integrations/supabase#overview)
Overview
------------------------------------------------------------------------
Supabase is an open-source alternative to Firebase, providing a hosted PostgreSQL database with real-time capabilities, user authentication, file storage, and serverless functions. By connecting Supabase to your Lovable app, you instantly gain a production-ready backend without writing any boilerplate code or manually configuring servers. Supabase’s intuitive web dashboard makes it easy to manage your data and users, and its robust SQL foundation means you retain the full power and scalability of a PostgreSQL database.
###
[](https://docs.lovable.dev/integrations/supabase#key-features-unlocked-by-supabase-integration%3A)
**Key features unlocked by Supabase integration:**
* **Database (PostgreSQL)** – Store and query your app data with full SQL support. Lovable can automatically generate the necessary tables and schema based on your prompts.
* **User Authentication** – Securely manage user sign-ups, logins, and access control. Lovable can add pre-built authentication flows (email/password, etc.) to your app with a simple prompt.
* **File Storage** – Upload and serve images or other files via Supabase Storage. Great for user profile photos, uploads, or any static media your app needs to handle.
* **Real-time Updates** – Supabase can stream live data changes to your app. This enables features like live chat, activity feeds, or collaborative dashboards that update instantly for all users.
* **Edge Functions (Serverless)** – Run custom backend logic (in JavaScript/TypeScript) on Supabase’s infrastructure. Lovable will create and deploy these functions for tasks like sending emails, processing payments, or integrating with external APIs.
###
[](https://docs.lovable.dev/integrations/supabase#why-use-lovable%E2%80%99s-supabase-integration%3F)
**Why use Lovable’s Supabase integration?**
With Lovable, you don’t have to juggle separate tools for front-end design and back-end setup. By simply conversing with Lovable’s AI, you can build your UI _and_ have the underlying database and server functions created for you automatically. This means faster development and fewer integration headaches. For example, if you prompt Lovable with “Add a user feedback form and save responses to the database,” Lovable will generate the form UI **and** set up a Supabase table to store the feedback – all in one go. This seamless end-to-end generation is Lovable’s unique strength, empowering beginners to build complex apps and allowing power users to move faster.
[](https://docs.lovable.dev/integrations/supabase#getting-started%3A-connecting-supabase-to-lovable)
Getting started: Connecting Supabase to Lovable
--------------------------------------------------------------------------------------------------------------------------------------------------------
Connecting a Supabase backend to your Lovable project is straightforward. You’ll need a Supabase account (free tier is fine) and a Lovable project ready. If you don’t have a Supabase account yet, you can sign up at the Supabase website – no credit card required for the free tier.
1
Create a Supabase account
Register a new Supabase account [here](https://app.supabase.com/sign-up)
or [sign in](https://app.supabase.com/sign-in)
if you already have one.
2
Create a new project in Supabase.
Click on + New Project, complete the necessary fields, and allow a few minutes for setup.
3
Connect Supabase to Lovable
1
Initiate the Supabase connection in Lovable.
In the project editor, go to the project settings. Find the Supabase tab under Integrations. Click **Connect Supabase**. Lovable will prompt you to log in to your Supabase account. Sign into your Supabase account and authorize Lovable.
2
Authorize and select or create a project.
Next, you’ll be asked to choose a Supabase **organization** and **project** to link with your Lovable app. You can select an existing project or create a new one on the spot (Lovable’s chat will guide you through creating a new Supabase project if needed).
3
Wait for configuration to complete.
After selecting the project, Lovable will automatically configure the connection. Within a few seconds, you should see a confirmation message in the chat (e.g. “✅ Supabase connected”). At this point, your Lovable app is now linked to the Supabase database – ready to use authentication, data storage, and other backend features.
Both Lovable and Supabase offer generous free tiers for development. If your app grows or requires advanced features, you may eventually need paid plans for each service separately. For now, you can experiment without incurring costs.
[](https://docs.lovable.dev/integrations/supabase#adding-user-authentication)
Adding user authentication
------------------------------------------------------------------------------------------------------------
One of the first things you’ll likely want is user authentication (so people can sign up and log into your app). Lovable’s Supabase integration makes this trivial to set up via chat.
###
[](https://docs.lovable.dev/integrations/supabase#email-and-password-basic-setup)
Email and password (basic setup)
Once your project is connected to Supabase, Lovable can generate authentication pages for you. For example, you can simply prompt: **“Add login”**. This will typically create a basic login page (and related signup flow) in your app, wired up to Supabase’s authentication system. After Lovable adds the login UI, you have a couple of ways to create users for testing:
Example prompt:
Copy
Ask AI
Add login
* **Via your app’s signup form:** Use the newly added interface in your app to register a user (this will communicate with Supabase to create the account).
* **Via Supabase Dashboard:** Go to your Supabase project’s dashboard, navigate to **Authentication > Users**, and manually add a new user (email and password). This is handy to set up a test account quickly.
For development convenience, we recommend disabling email confirmation in Supabase while you test. This way, users can log in immediately without needing to verify an email. To do this, open your Supabase dashboard and go to **Authentication > Settings (or Providers) > Email**, then **disable the “Confirm email” requirement**. You can re-enable confirmations later in production for security.
Lovable will have already configured your Lovable app to recognize authenticated users (for example, gating certain pages to logged-in users only, if appropriate). You can further customize the look and feel of the login/signup pages using Lovable’s editor or prompts. Supabase Integration 2.0 even allows adding extra fields to your signup form or styling the form to match your brand.
###
[](https://docs.lovable.dev/integrations/supabase#social-logins-e-g-google)
Social logins (e.g. Google)
Supabase supports OAuth logins like Google, GitHub, Twitter, and more. You can integrate these into your Lovable app as well:
1. **Enable the provider in Supabase:** In your Supabase dashboard, navigate to **Authentication > Providers**. You’ll see a list of external login providers. Toggle on **Google** (for example) and follow the instructions to provide the required OAuth Client ID and Secret from Google. _(Supabase will guide you on how to obtain these credentials from Google’s developer console.)_ Save the settings – your Supabase project now knows how to handle Google logins.
2. **Update your Lovable app’s UI:** Next, you can prompt Lovable to add a social login option. For instance: **“Add a ‘Sign in with Google’ button to the login page.”** Lovable will modify the authentication page, adding a Google sign-in button and the necessary code to initiate the OAuth flow via Supabase.
Once this is done, users of your app will be able to click “Sign in with Google”, be redirected to Google for authentication, and then return to your app as logged-in users. You can enable other providers (GitHub, Facebook, etc.) in a similar way – just remember to configure each in Supabase and then adjust your Lovable UI accordingly.
[](https://docs.lovable.dev/integrations/supabase#managing-data-with-supabase)
Managing data with Supabase
--------------------------------------------------------------------------------------------------------------
Beyond authentication, the core of most apps is reading and writing data. With Lovable and Supabase, you can create database tables and connect them to your UI without leaving the chat prompt.
###
[](https://docs.lovable.dev/integrations/supabase#creating-database-tables-via-lovable)
Creating database tables via Lovable
After connecting Supabase, whenever you need to store data persistently, you can instruct Lovable and it will coordinate the database setup for you. The process typically looks like this:
1
Describe the feature and data you need
In Lovable’s chat, request a feature that involves data storage. For example, you might say: **“Add a feedback form and save responses in a database table.”** Be as clear as possible about what data you want to store (e.g. user feedback with a message and rating, or an inventory item with name, price, etc.). Lovable will use this information to determine what database structure is required.
2
Review the generated SQL snippet
Lovable’s AI will propose updates to your app. Since your request involves storing data, Lovable will also produce a SQL schema snippet – essentially the commands to create the necessary table(s) or columns in Supabase. For example, it might say something like: \_“I will create a table _`feedback`_with columns \_ `id`_, _`message`_, and _`rating`_”_ and provide the SQL code for that. This snippet appears in the chat or sidebar for you to copy.
3
Run the SQL in Supabase
Open your Supabase dashboard and go to the **SQL Editor**. Paste the SQL snippet from Lovable and execute it, which will create the new table (or alter an existing table) in your database. You can verify in the Supabase **Table Editor** that the table now exists with the specified columns.
4
Confirm and let Lovable finish integration
Back in Lovable, confirm that you ran the SQL (the chat might ask for confirmation, or you can simply tell Lovable “done” or click a provided confirmation). Lovable will then finalize the integration: it updates your app’s UI to bind form inputs, lists, or other components to the new Supabase table. Continuing our example, the feedback form in your app is now connected—when a user submits feedback, it will be saved into the `feedback` table, and you can retrieve and display those entries as well.
That’s it\\! You didn’t have to manually design a database schema or write any backend code – Lovable and Supabase handled it from your description. You can repeat this process for any new data feature (blog posts, comments, products, etc.). For example, if you want users to be able to post articles in your app, you could prompt: **“Allow users to create posts with a title and content, and store these in the database.”** Lovable would generate a `posts` table (with fields for title, content, author, timestamps, etc.), give you the SQL to add it to Supabase, and then wire up the front-end forms and pages to that table.
Supabase’s dashboard offers a rich interface to manage your data. You can view and edit table rows in a spreadsheet-like UI, define relationships between tables, and even import data from CSV or Excel. Under the hood, it’s all PostgreSQL – which means you can perform complex queries or use SQL features as needed. Supabase even provides an **AI SQL Assistant** in its SQL editor to help you write queries if you’re not familiar with SQL. This can be handy for advanced analysis or troubleshooting.
###
[](https://docs.lovable.dev/integrations/supabase#file-storage-images-%26-media)
File storage (images & media)
When your Lovable app needs to handle file uploads (for example, user profile pictures, attachments, or any media), Supabase integration has you covered. Supabase includes a **Storage** service for hosting files (images, videos, PDFs, etc.) conveniently alongside your database. If you add an **Upload** component or an image upload feature in your Lovable app, Lovable will utilize Supabase Storage behind the scenes. Uploaded files will be stored in a storage bucket within your Supabase project, and you’ll get a URL or reference to use for displaying or downloading the file later. By default, Supabase’s free tier allows files up to **50MB** each to be uploaded. This is plenty for most images or short videos. If your app needs to handle larger files, Supabase’s paid plans support bigger uploads (including **resumable uploads** for very large files). You can organize files into folders (buckets) and manage access permissions via the Supabase dashboard as needed.
Suppose your app has user profiles and you want users to add a profile picture. You might prompt Lovable: _“Add a profile picture upload to the account settings page.”_ Lovable will create the UI for uploading an image. Thanks to the Supabase integration, when a user uploads a file, it’s saved in your Supabase Storage (in a bucket, e.g. `public/avatar-images`), and Lovable will handle retrieving that image URL to display the profile picture in your app. All of this happens without you writing any storage-handling code.
[](https://docs.lovable.dev/integrations/supabase#storing-secrets-api-keys-%26-config)
Storing secrets (API Keys & Config)
------------------------------------------------------------------------------------------------------------------------------
Many applications require secret keys or API credentials to connect with third-party services — for example, Stripe for payments or OpenAI for AI features. When Supabase is connected, Lovable offers a secure way to manage and use these secrets. Lovable automatically detects when a feature requires a secret and prompts you with a UI to input the necessary values. These secrets are stored securely in Supabase’s Edge Function secret manager for your project. They are encrypted and kept safe on the backend. When you deploy Edge Functions (see next section), they can access these secrets to connect with external services.
For example, if you integrate Stripe for payments, you would store your Stripe Secret Key as a secret. When Lovable deploys a payment-processing function to Supabase, it will automatically include that key from the secret store so the function can authenticate with Stripe. This way, you never have to hard-code secrets into your app, and you avoid exposing them publicly.
[](https://docs.lovable.dev/integrations/supabase#backend-logic-with-edge-functions)
Backend logic with Edge Functions
--------------------------------------------------------------------------------------------------------------------------
Sometimes your app needs custom backend logic beyond basic data CRUD (Create, Read, Update, Delete). **Supabase Edge Functions** are serverless functions (similar to AWS Lambda) that let you run code on the backend triggered by events or requests. Lovable’s integration means you can define desired backend behavior in plain language, and Lovable will write and deploy the necessary Edge Function code to Supabase for you. Typical use cases for Edge Functions in Lovable include:
* **Using AI services:** e.g. processing some input with OpenAI or Anthropic APIs (with the API key stored as a secret as described above).
* **Sending emails or notifications:** e.g. sending a welcome email when a user signs up, via an email API like Resend.
* **Processing payments:** e.g. creating a checkout session or fulfilling an order using Stripe’s API.
* **Scheduled tasks:** e.g. performing a cleanup or summary job every hour/day (Supabase Edge Functions can be triggered on a schedule).
* **Complex computations or third-party integrations:** any code that you don’t want to run on the client-side can be done in an Edge Function.
To add a backend function, simply describe what you need in the Lovable chat. For example: _“When a user submits the feedback form, analyze the text using OpenAI and store a sentiment score.”_ Lovable will generate the code for this logic as a Supabase Edge Function (in this case, calling the OpenAI API) and deploy it to your Supabase project. It will also update your Lovable app to call this function at the right time (e.g., on form submission) and handle the response. You can find and monitor your Edge Functions in the Supabase dashboard under **Functions**. Each function will have logs that show recent executions and any output or errors. Lovable’s Supabase Integration 2.0 improves this experience by automatically reading those logs when something goes wrong – if your function errors out, Lovable will surface the error message in the chat to help you troubleshoot. Of course, you can always check the Supabase logs yourself for more details or for peace of mind.
**Before going live:** Supabase’s default security rules are permissive for development, but you should set up **Row Level Security (RLS)** policies to protect your data in production. RLS allows you to define who can read or write each row in your database tables (for example, ensuring users can only access their own data). Lovable can assist in generating basic RLS policies if you prompt it (for instance, “Apply security policies so users can only edit their own feedback”). However, always review and test these policies in the Supabase dashboard under **Auth > Policies**. Proper security setup is crucial before you invite real users to your app.
###
[](https://docs.lovable.dev/integrations/supabase#faq)
FAQ
What does the Supabase integration actually do for me?
It gives your Lovable app a fully managed backend. Without it, Lovable can still build your UI, but you’d have nowhere to persist data or manage users out-of-the-box. With Supabase connected, Lovable can create user accounts (authentication), store and retrieve data in a database, upload files, run server-side code, and more – all automatically. Essentially, Supabase provides the databases and servers behind your app, and Lovable drives it through prompts.
Do I need separate accounts for Lovable and Supabase?
Yes. Lovable and Supabase are two separate platforms. You will need an account on Supabase (to host your database) in addition to your Lovable account. The good news is both have free tiers, so you can get started without any cost. Just remember that if you later upgrade for more usage or features, you’d handle billing for each service individually.
How do I connect Lovable with Supabase?
1. In the Lovable editor, go to the **Integrations** section.
2. Click **Connect to Supabase** and follow the authentication steps.
3. If needed, create a new Supabase project within Lovable.
4. Lovable will automatically generate the necessary database schema and connect it to your project.
Can I integrate my Supabase-connected Lovable app with external automation tools?
Absolutely. When you use Lovable + Supabase, your data lives in Supabase’s database and Supabase also provides auto-generated RESTful APIs for your tables (as well as a client library). This means you can use tools like Zapier, [Make.com](http://make.com/)
, or any other service to interact with your app’s backend data via HTTP requests. For example, Zapier could fetch or add records to a Supabase table of your app. Additionally, you can create custom API endpoints using Supabase Edge Functions (which Lovable can help create) to trigger more complex workflows. In short, integrating with third-party automation services is doable – it just might involve a bit of configuration with Supabase’s API keys or webhooks.
How scalable is Supabase for when my app grows?
Supabase is built on **PostgreSQL**, which can handle large amounts of data and high traffic. Out of the box, your free database can handle a decent workload (millions of rows, multiple connections). As your needs grow, you can upgrade your Supabase plan for more storage, throughput, and features. Many production apps run entirely on Supabase, so you’re in good hands. Just be mindful of the usage limits on the free tier (which Supabase documents on their site) and plan to scale up if you approach those limits.
How can I add real-time features like a chat or live feed to my app?
Supabase has built-in real-time subscriptions on your database. This means your app can listen for changes (inserts, updates, deletes) on specific tables and react instantly. To leverage this, you would design your Lovable app feature as usual (e.g. a chat room that writes messages to a `messages` table). Lovable knows about Supabase’s real-time capabilities, so it can set up the front-end to subscribe to that table’s changes. In practice, after you’ve created a table for, say, chat messages, you can prompt Lovable to **“enable real-time updates for the chat”** and it will use Supabase’s real-time API under the hood. Users will then see new messages appear live without needing to refresh. This works for any scenario where live updates are useful (comments, notifications, dashboards, etc.).
Is there a limit to file uploads with Supabase storage?
On the free tier, Supabase limits individual file upload size to **50MB**. This covers most use cases like images, audio, or short videos. If you need to handle larger files (such as lengthy videos or large datasets), upgrading to a paid plan enables larger and even resumable uploads. Also note there’s an overall storage quota per project (e.g. how many total GB you can store) that increases with higher plans.
How do I configure authentication in Supabase?
Lovable automatically sets up authentication, but you may need to:
* Go to **Supabase Dashboard > Authentication**.
* Enable **Email Sign-in/Sign-up**.
* Disable email confirmation for easier local testing.
Can I use one Supabase database for multiple Lovable projects?
Yes, you can. You might build multiple front-end applications in Lovable that all connect to the same Supabase project (and thus share the same database and auth). This is advanced, but it’s possible – for example, a main app and an admin dashboard as separate Lovable projects using one common database. When connecting Supabase in each project, just select the same Supabase project. Keep in mind all those apps will read/write the same data, so design accordingly.
What if I want to test changes to my database without affecting the live app?
At the moment, each Lovable project connects to one Supabase project, and Lovable doesn’t have a built-in staging mode. If you want a safe playground to experiment, Supabase offers a feature called **Branching** which lets you create a temporary copy of your database (like a git branch) to test changes. You could connect a separate Lovable project to a branch or duplicate of your database for testing. In general, for serious projects you’d use caution making schema changes on a live app – perhaps create a backup or use branching, then merge changes when ready. Lovable’s integration is evolving, so future updates might introduce more seamless staging workflows.
Does Supabase or Lovable help me write custom SQL or database logic?
Yes. Supabase’s web interface includes an **AI SQL Assistant** that can generate SQL queries from natural language. So if you need a complex query or are not comfortable writing SQL, you can try that tool in the Supabase SQL editor. On Lovable’s side, you typically don’t need to hand-write SQL at all – the AI handles most of the schema creation and queries for you. But if you’re an advanced user and want to do something custom, you can always use Lovable’s GitHub integration to inspect or edit the code, or run raw SQL on the database as needed.
How do I handle payments in my Lovable app?
Payments are handled via integrations like Stripe, which you can use in conjunction with Supabase Edge Functions. For instance, you might prompt Lovable: “Add a checkout button and process payments with Stripe.” Lovable would then create an Edge Function that talks to Stripe’s API (using your Stripe secret key stored as a secret) and perhaps store the transaction details in your Supabase database. The UI would be updated to include the checkout/pay button. Essentially, Supabase provides the environment (Edge Functions, database) to implement payments, and Lovable can scaffold the code for you. For more details, you can also refer to the Stripe & Payments integration guide in Lovable’s documentation, which covers setting up Stripe specifically.
Was this page helpful?
YesNo
[GitHub integration](https://docs.lovable.dev/integrations/github)
[Stripe integration](https://docs.lovable.dev/integrations/stripe)
⌘I
---
# Page Not Found
[Skip to main content](https://docs.lovable.dev/tips-tricks/setting-up-payments#content-area)
[Lovable Documentation home page](https://lovable.dev/)
Search...
⌘K
Search...
Navigation
Page Not Found
[Introduction](https://docs.lovable.dev/introduction/welcome)
[Features](https://docs.lovable.dev/features/modes)
[Integrations](https://docs.lovable.dev/integrations/introduction)
[Tips & Tricks](https://docs.lovable.dev/tips-tricks/best-practice)
[Prompt engineering](https://docs.lovable.dev/prompting/prompting-one)
[Use cases](https://docs.lovable.dev/use-case/video-tutorials)
[Glossary](https://docs.lovable.dev/glossary)
[Changelog](https://docs.lovable.dev/changelog)
404
Page Not Found
==============
We couldn't find the page. Maybe you were looking for one of these pages below?
[SEO](https://docs.lovable.dev/features/seo#tips-and-tricks)
[Best practices](https://docs.lovable.dev/tips-tricks/best-practice#10-bonus-tips)
[Stripe integration](https://docs.lovable.dev/integrations/stripe#stripe-payment-setup-no-code-chat-flow)
⌘I
---
# Using npm packages - Lovable Documentation
[Skip to main content](https://docs.lovable.dev/tips-tricks/npm-packages#content-area)
[Lovable Documentation home page](https://lovable.dev/)
Search...
⌘K
Search...
Navigation
Using npm packages
[Introduction](https://docs.lovable.dev/introduction/welcome)
[Features](https://docs.lovable.dev/features/modes)
[Integrations](https://docs.lovable.dev/integrations/introduction)
[Tips & Tricks](https://docs.lovable.dev/tips-tricks/best-practice)
[Prompt engineering](https://docs.lovable.dev/prompting/prompting-one)
[Use cases](https://docs.lovable.dev/use-case/video-tutorials)
[Glossary](https://docs.lovable.dev/glossary)
[Changelog](https://docs.lovable.dev/changelog)
On this page
* [Using npm packages for advanced features](https://docs.lovable.dev/tips-tricks/npm-packages#using-npm-packages-for-advanced-features)
* [Quality and responsibility](https://docs.lovable.dev/tips-tricks/npm-packages#quality-and-responsibility)
* [Increasing your chances of success](https://docs.lovable.dev/tips-tricks/npm-packages#increasing-your-chances-of-success)
While Lovable is powerful on its own, enabling users to build sophisticated web applications, you can leverage npm packages for more advanced and extended features. These packages help you build even more complex and feature-rich applications with ease.
**What is npm?**npm (Node Package Manager) is a package manager for JavaScript that allows developers to share and reuse code. It hosts thousands of packages, which are pieces of reusable code, that you can easily integrate into your projects to extend functionality.You can access it [at npmjs.com](https://www.npmjs.com/)
.
[](https://docs.lovable.dev/tips-tricks/npm-packages#using-npm-packages-for-advanced-features)
Using npm packages for advanced features
-------------------------------------------------------------------------------------------------------------------------------------------
Let’s say you’d like to create a tool that enables you to arrange your tasks in different Kanban boards, similar to many popular project management tools. You can prompt Lovable to build this tool from scratch, but it might be slower and more challenging to achieve the desired functionality. Instead, you can use npm packages to simplify and speed up the process. For example, the [@hello-pangea/dnd](https://www.npmjs.com/package/@hello-pangea/dnd)
package provides robust drag-and-drop functionality. By using this package, you can easily create a Kanban board where users can add new cards, move them within columns, and reorder them.
Example prompt
Copy
Ask AI
Use the hello-pangea/dnd npm package to add drag-and-drop functionality to my Kanban board app.
Ensure users can add new cards, move them within columns, and reorder them.
This prompt directs Lovable to integrate the package into your project, making it easier to achieve the desired functionality. Depending on other requirements, your result might look somewhat like this.
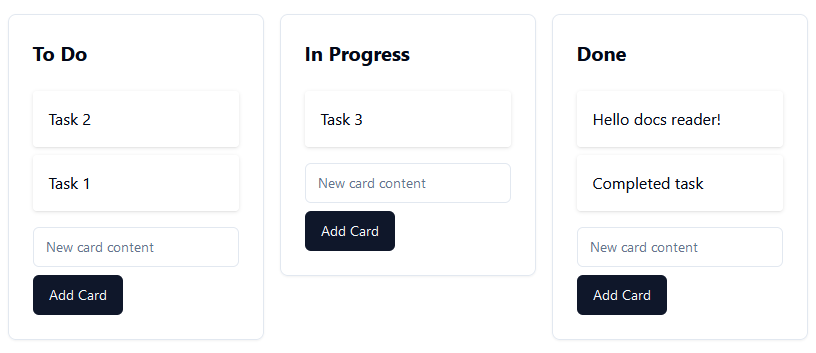
[](https://docs.lovable.dev/tips-tricks/npm-packages#quality-and-responsibility)
Quality and responsibility
---------------------------------------------------------------------------------------------------------------
It’s important to note that while npm packages can significantly enhance your projects, Lovable cannot guarantee the quality or reliability of these third-party packages. The functionality and performance of npm packages are the responsibility of the end user, and it’s essential to thoroughly test and validate them within your application.
###
[](https://docs.lovable.dev/tips-tricks/npm-packages#increasing-your-chances-of-success)
Increasing your chances of success
Here are a few strategies to help you evaluate the legitimacy and quality of npm packages before integrating them into your projects.
* **Number of downloads** - Check the number of downloads on the package’s npm page. A high number of downloads typically indicates that the package is widely used and trusted by the community.
* **Maintenance status and latest updates** - Look at the package’s repository to see if it is actively maintained. Frequent commits, recent updates, and responsiveness to issues are good indicators of an actively maintained package. Ensure the package has recent updates. A package that is regularly updated is more likely to be compatible with the latest versions of dependencies and security practices.
* **Reviews and community feedback** - A lot of npm packages are hosted on GitHub or similar code repositories. Read through reviews, discussions, and feedback from other developers on those locations, too. Additionally, specific developer forums can provide insights into the package’s reliability and any potential issues.
Was this page helpful?
YesNo
[Using custom (Google) fonts](https://docs.lovable.dev/tips-tricks/custom-fonts)
[From idea to working app](https://docs.lovable.dev/tips-tricks/from-idea-to-app)
⌘I
---
# Support policy - Lovable Documentation
[Skip to main content](https://docs.lovable.dev/tips-tricks/support-policy#content-area)
[Lovable Documentation home page](https://lovable.dev/)
Search...
⌘K
Search...
Navigation
Support policy
[Introduction](https://docs.lovable.dev/introduction/welcome)
[Features](https://docs.lovable.dev/features/modes)
[Integrations](https://docs.lovable.dev/integrations/introduction)
[Tips & Tricks](https://docs.lovable.dev/tips-tricks/best-practice)
[Prompt engineering](https://docs.lovable.dev/prompting/prompting-one)
[Use cases](https://docs.lovable.dev/use-case/video-tutorials)
[Glossary](https://docs.lovable.dev/glossary)
[Changelog](https://docs.lovable.dev/changelog)
On this page
* [Scope](https://docs.lovable.dev/tips-tricks/support-policy#scope)
* [Plans](https://docs.lovable.dev/tips-tricks/support-policy#plans)
* [Configuration assistance](https://docs.lovable.dev/tips-tricks/support-policy#configuration-assistance)
* [Troubleshooting](https://docs.lovable.dev/tips-tricks/support-policy#troubleshooting)
* [Not covered](https://docs.lovable.dev/tips-tricks/support-policy#not-covered)
* [Who can contact Support?](https://docs.lovable.dev/tips-tricks/support-policy#who-can-contact-support%3F)
* [Official support channels](https://docs.lovable.dev/tips-tricks/support-policy#official-support-channels)
* [In-product support (preferred)](https://docs.lovable.dev/tips-tricks/support-policy#in-product-support-preferred)
* [Email](https://docs.lovable.dev/tips-tricks/support-policy#email)
* [Community support](https://docs.lovable.dev/tips-tricks/support-policy#community-support)
* [Proactive monitoring](https://docs.lovable.dev/tips-tricks/support-policy#proactive-monitoring)
* [Enterprise support](https://docs.lovable.dev/tips-tricks/support-policy#enterprise-support)
* [Reminder](https://docs.lovable.dev/tips-tricks/support-policy#reminder)
Lovable is committed to delivering an exceptional customer experience. We provide technical support for paid projects running on our hosted Lovable platform, within the scope, hours, contacts, and channels outlined below.
[](https://docs.lovable.dev/tips-tricks/support-policy#scope)
Scope
-----------------------------------------------------------------------
Lovable’s technical support covers the following areas:
###
[](https://docs.lovable.dev/tips-tricks/support-policy#plans)
Plans
* **Free Plan:** Access to our [Discord community](https://discord.gg/lovable-dev)
and documentation.
* **Starter, Launch & Scale Plans:** Prioritized support through our in-product chat, powered by our AI assistant, with guaranteed access to human support when requested.
###
[](https://docs.lovable.dev/tips-tricks/support-policy#configuration-assistance)
Configuration assistance
* Guidance on starting your project with Lovable
* Best practices for Prompt Engineering
* Using Knowledge Files effectively
* General questions about the Lovable stack and integrations
* Billing and account management support
###
[](https://docs.lovable.dev/tips-tricks/support-policy#troubleshooting)
Troubleshooting
* Workarounds or resolutions for known issues
* Answering general “how-to” questions and pointing to relevant documentation
* Investigating and reporting bugs in Lovable’s platform (UI, API, Supabase connection, etc.)
* Assistance with platform errors that persist after 2–3 attempts in chat/edit modes
###
[](https://docs.lovable.dev/tips-tricks/support-policy#not-covered)
Not covered
Our technical support does not include:
* Debugging complex user application code beyond what AI or community support can handle
* Rewriting or adapting application code for compatibility with Lovable
* Modifying or patching unsupported third-party or open-source integrations
[](https://docs.lovable.dev/tips-tricks/support-policy#who-can-contact-support%3F)
Who can contact Support?
---------------------------------------------------------------------------------------------------------------
Support is available to customers using Lovable resources if:
1. The request is submitted via an official support channel (see below).
2. The request originates from a registered Lovable account email address.
[](https://docs.lovable.dev/tips-tricks/support-policy#official-support-channels)
Official support channels
---------------------------------------------------------------------------------------------------------------
###
[](https://docs.lovable.dev/tips-tricks/support-policy#in-product-support-preferred)
In-product support (preferred)
Paid users can submit support tickets using our [**Lovable Support form**](https://lovable.dev/support)
. Our AI assistant handles common queries instantly, and you can switch to a human anytime by saying **Talk to a human.**
###
[](https://docs.lovable.dev/tips-tricks/support-policy#email)
Email
If the dashboard is inaccessible, contact us at [support@lovable.dev](mailto:support@lovable.dev)
using a registered Lovable account email address.
###
[](https://docs.lovable.dev/tips-tricks/support-policy#community-support)
Community support
While official support requests are only handled through designated channels, our [Discord community](https://discord.gg/lovable-dev)
offers peer-to-peer assistance.
* Use Discord for workflow help, prompting questions, or project structure tips.
* Always include clear details (e.g., prompt, message ID, screenshots) for better responses.
**Note:** Lovable team members and champions may participate in community discussions, but official support is only guaranteed through the designated support system.
[](https://docs.lovable.dev/tips-tricks/support-policy#proactive-monitoring)
Proactive monitoring
-----------------------------------------------------------------------------------------------------
For platform-wide issues, updates will be posted on:
* Our [official Changelog page](https://docs.lovable.dev/changelog)
* The #announcement channel on [Lovable Discord](https://discord.gg/lovable-dev)
There’s no need to submit support tickets for ongoing platform issues. The changelog and Discord will provide real-time updates.
[](https://docs.lovable.dev/tips-tricks/support-policy#enterprise-support)
Enterprise support
-------------------------------------------------------------------------------------------------
Enterprise Plan customers have access to premium Support options, including direct Slack channels, shared sessions, and faster SLAs. For details, contact us via our [Enterprise form](https://enterpriseform.lovable.app/)
.
[](https://docs.lovable.dev/tips-tricks/support-policy#reminder)
Reminder
-----------------------------------------------------------------------------
If you’re stuck, the fastest path to resolution is:
1. Use **chat mode** to understand what went wrong.
2. Ask: “What happened? What file was changed? How do we fix this?”
3. If it loops, switch to **chat-only debugging.**
4. Tag or restore a stable version before retrying.
5. Use the **Knowledge File** to lock in goals, structure, and rules.
We’re here to help you ship. If in doubt, reach out.
Was this page helpful?
YesNo
[From idea to working app](https://docs.lovable.dev/tips-tricks/from-idea-to-app)
[Avoiding security pitfalls](https://docs.lovable.dev/tips-tricks/avoiding-security-pitfalls)
⌘I
---
# Page Not Found
[Skip to main content](https://docs.lovable.dev/tips-tricks/custom-domain#content-area)
[Lovable Documentation home page](https://lovable.dev/)
Search...
⌘K
Search...
Navigation
Page Not Found
[Introduction](https://docs.lovable.dev/introduction/welcome)
[Features](https://docs.lovable.dev/features/modes)
[Integrations](https://docs.lovable.dev/integrations/introduction)
[Tips & Tricks](https://docs.lovable.dev/tips-tricks/best-practice)
[Prompt engineering](https://docs.lovable.dev/prompting/prompting-one)
[Use cases](https://docs.lovable.dev/use-case/video-tutorials)
[Glossary](https://docs.lovable.dev/glossary)
[Changelog](https://docs.lovable.dev/changelog)
404
Page Not Found
==============
We couldn't find the page. Maybe you were looking for one of these pages below?
[Custom domains](https://docs.lovable.dev/features/custom-domain#custom-domains)
[SEO](https://docs.lovable.dev/features/seo#tips-and-tricks)
[Getting started](https://docs.lovable.dev/introduction/getting-started#add-a-custom-domain)
⌘I
---
# From idea to working app - Lovable Documentation
[Skip to main content](https://docs.lovable.dev/tips-tricks/from-idea-to-app#content-area)
[Lovable Documentation home page](https://lovable.dev/)
Search...
⌘K
Search...
Navigation
From idea to working app
[Introduction](https://docs.lovable.dev/introduction/welcome)
[Features](https://docs.lovable.dev/features/modes)
[Integrations](https://docs.lovable.dev/integrations/introduction)
[Tips & Tricks](https://docs.lovable.dev/tips-tricks/best-practice)
[Prompt engineering](https://docs.lovable.dev/prompting/prompting-one)
[Use cases](https://docs.lovable.dev/use-case/video-tutorials)
[Glossary](https://docs.lovable.dev/glossary)
[Changelog](https://docs.lovable.dev/changelog)
On this page
* [Who this is for](https://docs.lovable.dev/tips-tricks/from-idea-to-app#who-this-is-for)
* [The common pitfall: Building before you plan](https://docs.lovable.dev/tips-tricks/from-idea-to-app#the-common-pitfall%3A-building-before-you-plan)
* [Best practices for turning ideas into real products](https://docs.lovable.dev/tips-tricks/from-idea-to-app#best-practices-for-turning-ideas-into-real-products)
* [1\. Start outside Lovable](https://docs.lovable.dev/tips-tricks/from-idea-to-app#1-start-outside-lovable)
* [2\. Write it out first](https://docs.lovable.dev/tips-tricks/from-idea-to-app#2-write-it-out-first)
* [3\. Choose your build style wisely](https://docs.lovable.dev/tips-tricks/from-idea-to-app#3-choose-your-build-style-wisely)
* [4\. Use Chat Mode as a thought partner](https://docs.lovable.dev/tips-tricks/from-idea-to-app#4-use-chat-mode-as-a-thought-partner)
* [5\. Break it down into bricks](https://docs.lovable.dev/tips-tricks/from-idea-to-app#5-break-it-down-into-bricks)
* [6\. Prompt with purpose](https://docs.lovable.dev/tips-tricks/from-idea-to-app#6-prompt-with-purpose)
* [7\. Avoid the infinite error loop](https://docs.lovable.dev/tips-tricks/from-idea-to-app#7-avoid-the-infinite-error-loop)
* [8\. Remix if things get messy](https://docs.lovable.dev/tips-tricks/from-idea-to-app#8-remix-if-things-get-messy)
* [9\. Use real validation, fast](https://docs.lovable.dev/tips-tricks/from-idea-to-app#9-use-real-validation%2C-fast)
* [10\. Get better by building bad ideas](https://docs.lovable.dev/tips-tricks/from-idea-to-app#10-get-better-by-building-bad-ideas)
* [Builder’s checklist](https://docs.lovable.dev/tips-tricks/from-idea-to-app#builder%E2%80%99s-checklist)
* [Final tip: You’re the first user](https://docs.lovable.dev/tips-tricks/from-idea-to-app#final-tip%3A-you%E2%80%99re-the-first-user)
> **“I have no clue what I’m doing… but I know exactly what I want to build.”**
If that sounds like you, you’re in the right place.
[](https://docs.lovable.dev/tips-tricks/from-idea-to-app#who-this-is-for)
Who this is for
---------------------------------------------------------------------------------------------
You’ve got an idea. You’ve tried AI tools, written notes, maybe even opened a few projects. But you’re stuck between inspiration and execution. **This guide will help you:**
* Go from vague concept to concrete product
* Avoid common mistakes
* Use Lovable the smart way—especially if you’re not a developer
[](https://docs.lovable.dev/tips-tricks/from-idea-to-app#the-common-pitfall%3A-building-before-you-plan)
The common pitfall: Building before you plan
---------------------------------------------------------------------------------------------------------------------------------------------------------
A lot of users fall into the same trap: `They start building before they’ve clarified what they’re building.` **The result?**
* Errors on top of errors
* Confused AI agents and AI-generated errors
* Projects that veer off track or feel “`too far gone to fix`”
[](https://docs.lovable.dev/tips-tricks/from-idea-to-app#best-practices-for-turning-ideas-into-real-products)
Best practices for turning ideas into real products
---------------------------------------------------------------------------------------------------------------------------------------------------------------------
###
[](https://docs.lovable.dev/tips-tricks/from-idea-to-app#1-start-outside-lovable)
1\. Start outside Lovable
Many builders—including livestream guest MP—spend time shaping their ideas _before_ opening Lovable. Try this:
* Record a voice note explaining your idea naturally (MP uses Granola for this)
* Paste it into GPT or Claude to get an expanded version in clear product terms
* Ask AI to act as a designer, PM, or developer and critique or co-draft a PRD (Product Requirements Document)
Use Lovable when you’re ready to go from clear vision to working prototype.
###
[](https://docs.lovable.dev/tips-tricks/from-idea-to-app#2-write-it-out-first)
2\. **Write it out first**
Before you prompt the AI, spend 15 minutes writing:
* What does your product do?
* Who it’s for (even if it’s just you)
* What the _simplest & minimum version_ should include
**Turn this into a list of features or use cases:**Write it as a list of user stories or features and feed it into chat mode or GPT to get a PRD (Product Requirements Document).
###
[](https://docs.lovable.dev/tips-tricks/from-idea-to-app#3-choose-your-build-style-wisely)
3\. Choose your build style wisely
There are two valid approaches to building with Lovable:
1. **Frontend first (recommended for beginners)**
* Start with mock data
* Build layouts, flows, and logic without connecting a database
* Once satisfied, plug in Lovable Cloud or Supabase and go live
2. **Back-to-front**:
* Connect Lovable Cloud or Supabase from Day 1
* Build and test each feature one by one
* Best for advanced users comfortable debugging
If you’re new, **choose front-end first.** You’ll:
* Avoid complex SQL errors
* Iterate faster
* Stay focused on design + usability
MP used front-end first for speed, clarity, and debugging ease. It helped him learn fast and ship quicker.
###
[](https://docs.lovable.dev/tips-tricks/from-idea-to-app#4-use-chat-mode-as-a-thought-partner)
4\. Use Chat Mode as a thought partner
Chat Mode isn’t just a chatbot—it’s your project-aware assistant. It knows your files, your database schema, your logs. Use it to:
* Debug issues with context
* Break down vague ideas into structured components
* Brainstorm, plan, and iterate
* Translate vague ideas into working flows
Try this prompt:
Copy
Ask AI
I want to build a dog breeding management app. Here's what I need it to do: [list]. Can you break this down into steps or components to build?
I’m building a job coaching app. Here’s what I want it to do: [list]. What’s the simplest version to test?
###
[](https://docs.lovable.dev/tips-tricks/from-idea-to-app#5-break-it-down-into-bricks)
5\. Break it down into bricks
Don’t build everything at once. Split your idea into **bricks**:
* Each brick = one feature, component, or flow
* Build one at a time
* Test, refine, then move on
Ask Chat Mode to help plan this with prompts like:
Copy
Ask AI
Here’s my app idea. Can you break it into features or steps I should build?
Copy
Ask AI
Break this idea into buildable features I can test one at a time.
###
[](https://docs.lovable.dev/tips-tricks/from-idea-to-app#6-prompt-with-purpose)
6\. **Prompt with purpose**
Before each prompt, ask:
Copy
Ask AI
What am I trying to build right now?
Be specific. Avoid mid-conversation shifts—AI needs consistent intent to help you properly.
###
[](https://docs.lovable.dev/tips-tricks/from-idea-to-app#7-avoid-the-infinite-error-loop)
7\. Avoid the infinite error loop
Stuck? Don’t click “Try to Fix” 10 times. Instead:
* Open browser dev tools (Console tab)
* Copy the actual error
* Paste it into Chat Mode to investigate
* Or remix the project without your database to simplify debugging
Lovable now reads console logs automatically—no copy-paste needed for most cases.
###
[](https://docs.lovable.dev/tips-tricks/from-idea-to-app#8-remix-if-things-get-messy)
8\. Remix if things get messy
Projects evolve. If things feel tangled:
* Remix your project (it clones the project, you keep the original)
* Start fresh with what you’ve learned
* Keep the new build focused and structured
* Keep what works. Drop what doesn’t.
###
[](https://docs.lovable.dev/tips-tricks/from-idea-to-app#9-use-real-validation%2C-fast)
9\. **Use real validation, fast**
A user told us he didn’t build to sell. He sent a rough prototype to 10 users in DMs. One asked to pay immediately. By Friday, Stripe was integrated. Validate by:
* Asking real users, “Would this help you?”
* Getting quick feedback, not perfection
* Letting real interest guide your next steps
###
[](https://docs.lovable.dev/tips-tricks/from-idea-to-app#10-get-better-by-building-bad-ideas)
10\. Get better by building bad ideas
[MP](https://www.youtube.com/watch?v=mwHNw8aeYCI&ab_channel=Lovable)
built 100+ throwaway projects:
* Message-for-a-stranger app
* 90s nostalgia generator
* AI interview prep tool
Each one helped him test a skill:
* Building UI with no backend
* Adding profanity filters
* Connecting AI APIs
* Managing user flow
Lesson:**Build things that don’t need to exist—so you’re ready when something does.**
[](https://docs.lovable.dev/tips-tricks/from-idea-to-app#builder%E2%80%99s-checklist)
Builder’s checklist
-------------------------------------------------------------------------------------------------------------
1. Write your idea in 5-10 bullet points
2. List out core features (use bullets) in an MVP (minimum viable product)
3. Decide: Frontend first or back-to-front
4. Use Chat Mode to co-plan and debug
5. Build in bricks: 1 feature at a time
6. Only connect backend when ready
7. Remix if errors pile up
8. Get feedback before going live
[](https://docs.lovable.dev/tips-tricks/from-idea-to-app#final-tip%3A-you%E2%80%99re-the-first-user)
Final tip: You’re the first user
-----------------------------------------------------------------------------------------------------------------------------------------
* Design for yourself first.
* Test like your future users would.
* Think like a product designer.
And remember: you’re building something only you could imagine.
> You don’t need to know how to code.
> You just need a clear idea, a good plan, and a little patience.
> Lovable will help with the rest.
Was this page helpful?
YesNo
[Using npm packages](https://docs.lovable.dev/tips-tricks/npm-packages)
[Support policy](https://docs.lovable.dev/tips-tricks/support-policy)
⌘I
---
# Landing page - Lovable Documentation
[Skip to main content](https://docs.lovable.dev/use-case/landing-page#content-area)
[Lovable Documentation home page](https://lovable.dev/)
Search...
⌘K
Search...
Navigation
Landing page
[Introduction](https://docs.lovable.dev/introduction/welcome)
[Features](https://docs.lovable.dev/features/modes)
[Integrations](https://docs.lovable.dev/integrations/introduction)
[Tips & Tricks](https://docs.lovable.dev/tips-tricks/best-practice)
[Prompt engineering](https://docs.lovable.dev/prompting/prompting-one)
[Use cases](https://docs.lovable.dev/use-case/video-tutorials)
[Glossary](https://docs.lovable.dev/glossary)
[Changelog](https://docs.lovable.dev/changelog)
On this page
* [Two Ways to Build Landing Pages](https://docs.lovable.dev/use-case/landing-page#two-ways-to-build-landing-pages)
* [1\. One-Shot Generation](https://docs.lovable.dev/use-case/landing-page#1-one-shot-generation)
* [2\. Section-by-Section](https://docs.lovable.dev/use-case/landing-page#2-section-by-section)
* [Layout Inspiration & Tools](https://docs.lovable.dev/use-case/landing-page#layout-inspiration-%26-tools)
* [Advanced features](https://docs.lovable.dev/use-case/landing-page#advanced-features)
* [Other tutorials](https://docs.lovable.dev/use-case/landing-page#other-tutorials)
Learn how to go from idea to a fully functional, animated landing page, using AI + a sprinkle of razzle dazzle.
[](https://docs.lovable.dev/use-case/landing-page#two-ways-to-build-landing-pages)
Two Ways to Build Landing Pages
----------------------------------------------------------------------------------------------------------------------
###
[](https://docs.lovable.dev/use-case/landing-page#1-one-shot-generation)
1\. One-Shot Generation
Let Lovable do the heavy lifting. Just write a single prompt and let the AI generate your entire landing page. **Prompt Example:**
Copy
Ask AI
You are a CRO expert. Build a landing page for a space tourism agency targeting wealthy individuals. The experience includes zero-gravity flights. Follow conversion rate optimization best practices.
Add specific audience, features, or tone to help Lovable make better assumptions.
###
[](https://docs.lovable.dev/use-case/landing-page#2-section-by-section)
2\. Section-by-Section
Prefer more control? Build one piece at a time: hero, pricing, FAQs, and more. **Example flow:**
1
Step 1
Generate a blank hero section
2
Step 2
Click into any section with [visual edits](https://docs.lovable.dev/features/visual-edit)
to:
* Change text, colors, size
* Move or delete elements
* Tweak layout or animations
3
Step 3
Add images, animations, pricing tables (details at the bottom)
4
Step 4
Refactor styling + add branding + request a theme like:
* Dark mode
* Neo-brutalism
* Glassmorphism
* Futuristic fonts (e.g., _Space Grotesque_)
“Make the layout more elegant and smaller” can work wonders.
**Case Study: Building HorseX Live**This page is based on our livestream where we built a space-themed landing page called **HorseX**—a space travel agency for horses (yes, seriously).
* Space theme 🌌
* Animations
* Dark mode
* Horse mascot (obviously)
* Pricing & FAQs
* Logo + favicon
5
Step 5
Launch, Host, and Showcase
* **Publish** with one click
* **Connect to custom domain**
* **Launch on Lovable Launch** (like Product Hunt but for Lovable)
Increase visibility by submitting to [Lovable Launch](https://docs.lovable.dev/features/launched)
[](https://docs.lovable.dev/use-case/landing-page#layout-inspiration-%26-tools)
Layout Inspiration & Tools
--------------------------------------------------------------------------------------------------------------
Here are a few tools we used live:
* [**Mobbin**](https://mobbin.com/)
– Real-world design inspiration
* [**21st.dev**](http://21st.dev/)
– Copy-paste animation and design components
* [**Replicate Playground**](https://replicate.com/playgroundai)
– AI image/logo generation
* [**Remove.bg**](http://remove.bg/)
– Remove image backgrounds
* [**Icon Generator**](https://icons.pqoqubbw.dev/)
– Free animated icons
[](https://docs.lovable.dev/use-case/landing-page#advanced-features)
Advanced features
------------------------------------------------------------------------------------------
Level up your landing page with Lovable by adding rich interactive experiences, responsive UIs, and real working product previews.
P5.js + Custom Animations
For visual magic like orbiting horses or flickering stars:
* Use P5.js sketches in hero sections
* Animate backgrounds (fix opacity + contrast for visibility)
* Add particle effects or timeline scroll animations
🛠 If it fails to render, use:
* Chat mode for debugging
* “Implement plan” from code block
* Ask it to reset + use working reference code
Use Chat Mode to debug P5.js when things break.
Customize Favicon
Favicons need to be 64x64 `.ico` or `.png`.**Steps:**
1. Generate an icon on Replicate
2. Resize via [favicon.io](http://favicon.io/)
or similar
3. Paste image into prompt:
Copy
Ask AI
Change the website favicon to this.
Contact Forms that Actually Work
Collect emails and respond automatically with **Resend**.**Use case:**
* Contact Sales form
* Confirmation email to user
* Notification email to your team
**Prompt:**
Copy
Ask AI
Implement a contact form that uses Resend.
Send a confirmation email to the user and a notification to my team.
Need to limit usage or detect abuse? Add IP tracking with Supabase fingerprinting.
What Type of Landing Page Should You Build?
Here’s what you can build:
* Blog
* Portfolio
* SaaS site
* Nonprofit
* Course signup
* Event promotion
👉 Try building one of each to get comfortable.
Conversion Rate Optimization (CRO) 101
Your landing page’s goal = 1 action.**That might be:**
* Booking a call
* Buying a seat (like HorseX)
* Signing up for a waitlist
**CRO best practices:**
* Limit CTAs
* Keep headlines clear
* Match layout to audience expectations
* Use social proof + trust signals
Lovable understands the term “CRO optimized,” so use it in your prompts.
Static vs Dynamic Pages
Lovable builds static pages by default.To make it dynamic:
* Add forms (e.g., to collect leads)
* Connect to Supabase
* Add checkout using Stripe
* CMS integration (e.g., with Strapi)
Final Polish = Razzle Dazzle
Here’s what separates a 2Ksitefroma2K site from a 2Ksitefroma10K site:
* Animations
* Fonts + spacing
* Branding consistency
* Copywriting polish
* Loading speeds
* SEO setup (Lovable now supports robots.txt and OG tags)
Add Real Product Previews
Let visitors **test your product directly** from the landing page. You can embed mini-apps using Supabase and external APIs like GROQ.**Example:** A “Make it professional” email previewer powered by the GROQ API:
* Connect to Supabase first to avoid wiring issues later
* Use `chat mode` to help Lovable understand and implement new APIs
* Ask for fingerprinting or usage limits via IP if needed
**Prompt:**
Copy
Ask AI
Add a section where users can preview our AI email assistant.
Connect to Supabase. Use GROQ API for email enhancement.
Use 21st.dev for Beautiful Animations
Enhance your visual design with high-quality animations and components:
* Floating glowing particles
* Scroll-based sticky sections
* Timeline animations
* Logo carousels
* Modal popups for video demos
If animations don’t show up, use chat mode to debug or re-implement from scratch. You can also upload screenshots and say:
_“Please animate this background section.”_
Add Modal Popups (Videos & More)
Want to show a demo without cluttering the hero?**Use modals:**
* Embed YouTube or demo videos
* Trigger on button click (e.g. “Watch Demo”)
* Common prompt term: `modal popup`
**Prompt:**
Copy
Ask AI
When the “Watch Demo” button is clicked, open a modal popup with this video.
Add a Trust Section with Real Logos
Social proof matters.
* Create a “Trusted By” section with animated company logos.
* Ensure logos stay as image files, not SVG paths.
* Avoid grayed-out overlays.
**Prompt:**
Copy
Ask AI
Add a “Trusted by” section using real company logos.
Keep them as images, not SVGs. Use 21st.dev animations.
Hero Animations & UI Polish
Don’t settle for static hero sections:
* Animate words (cycle between phrases)
* Add floating shapes (circles, gradients)
* Match color palette across hero, headings, and timeline
Example prompts:
Copy
Ask AI
Animate the word in the hero title to cycle between "intelligence" and "assistance"
Add floating purple circles in the background
Make the heading text use the primary purple gradient
Sticky Navigation + Custom Navbar
Want smooth scrolling to sections?
* Use a sticky nav bar
* Replace default nav with one from [21st.dev](http://21st.dev/)
* Make sure it links to **sections**, not new pages
Use screenshots and say: _“Make this navbar scroll to page sections and match our theme.”_
Mobile Responsiveness
Lovable auto-generates mobile-friendly pages—but test and tweak:
* Add margin and padding via visual edit
* Test modals, animations, and layouts on mobile
What’s the Parallax Effect?
**Parallax** creates a sense of **depth** by having background elements move at a different speed than foreground ones as you scroll. It’s like walking through a forest in a video game — trees in the front move faster than mountains in the back.**Why it’s cool:**
* Adds immersion
* Makes your landing page feel more dynamic and interactive
* Visually separates sections in a subtle way
**Prompt Example:**
Copy
Ask AI
Add a parallax scroll effect to the background of the hero section.
Make the stars move slower than the text and images.
Use it sparingly. Too much parallax = overwhelming.
What’s Isometry (Isometric Design)?
**Isometric design** creates a 3D-like effect using 2D graphics, typically at a 30° angle. Think of games like _Monument Valley_ or old-school _Sim City_. Everything looks “tilted” but perfectly aligned — no perspective distortion.**Why use it:**
* Clean, futuristic aesthetic
* Makes your app visuals look more sophisticated
* Great for tech, data, and AI themes
**Prompt Example:**
Copy
Ask AI
Use isometric illustrations for the product feature section.
Make the graphics look like a futuristic dashboard in 3D.
You can also import isometric illustrations from:
* [Storyset](https://storyset.com/)
* [Icons8 Isometric](https://icons8.com/icons/set/isometric)
* [3D Icons Library](https://www.3dicons.com/)
Isometric graphics pair really well with **glassmorphism** or dark-themed UIs for modern SaaS pages.
[](https://docs.lovable.dev/use-case/landing-page#other-tutorials)
Other tutorials
--------------------------------------------------------------------------------------
Was this page helpful?
YesNo
[Video tutorial](https://docs.lovable.dev/use-case/video-tutorials)
[Prototype](https://docs.lovable.dev/use-case/prototype)
⌘I
---
# Prototype - Lovable Documentation
[Skip to main content](https://docs.lovable.dev/use-case/prototype#content-area)
[Lovable Documentation home page](https://lovable.dev/)
Search...
⌘K
Search...
Navigation
Prototype
[Introduction](https://docs.lovable.dev/introduction/welcome)
[Features](https://docs.lovable.dev/features/modes)
[Integrations](https://docs.lovable.dev/integrations/introduction)
[Tips & Tricks](https://docs.lovable.dev/tips-tricks/best-practice)
[Prompt engineering](https://docs.lovable.dev/prompting/prompting-one)
[Use cases](https://docs.lovable.dev/use-case/video-tutorials)
[Glossary](https://docs.lovable.dev/glossary)
[Changelog](https://docs.lovable.dev/changelog)
On this page
* [Lovable Crash Course](https://docs.lovable.dev/use-case/prototype#lovable-crash-course)
[](https://docs.lovable.dev/use-case/prototype#lovable-crash-course)
Lovable Crash Course
---------------------------------------------------------------------------------------------
1
Getting started with Lovable 101
By the end, you’ll have a simple application up and running with authentication and CRUD (Create, Read, Update, Delete) functionality for managing notes.
Setting Up Supabase
Supabase is an open-source database service built on PostgreSQL. It provides authentication, data storage, and file storage—perfect for our Lovable integration.
1
Create an Organization & Project
1
Step 1
Log into [Supabase](https://supabase.com/)
.
2
Step 2
Create an **organization** (name it based on your startup or project).
3
Step 3
Create a **new project** within that organization.
Note your **Supabase URL** and **API key** (you’ll need them later).
2
Configure Authentication
1
Step 1
Navigate to **Authentication > Sign In/Sign Up**.
2
Step 2
Enable **Email authentication**.
3
Step 3
Turn off **Confirm Email** (since we don’t have an email provider set up yet).
Creating a Lovable Project
Now, let’s set up a project in Lovable.
1
Start with a Fresh Blank Project
1
Step 1
Open Lovable and create a **new project**.
2
Step 2
Keep your first prompt simple: _“Create a blank project”_.
3
Step 3
Lovable will generate the basic structure for your app.
2
Connect Supabase to Lovable
1
Step 1
In Lovable, navigate to the **database settings**.
2
Step 2
Enter your **Supabase project URL and API key**.
3
Step 3
Click **Connect** to link your Lovable project to Supabase.
Adding a Login System
1
Create a Navigation Bar with a Login Button
1
Step 1
Add a **nav bar** at the top of your project.
2
Step 2
Include a **Login** button that redirects users to a login page.
2
Apply SQL Changes for Authentication
1
Step 1
Lovable will generate SQL for Supabase to handle authentication.
2
Step 2
Click **Apply Changes** to execute the SQL commands.
Using the Visual Edit Tool
Customize the UI:
1
Step 1
Open the **Edit Tool** in Lovable.
2
Step 2
Click on UI elements (e.g., buttons) to modify styles.
3
Step 3
Ensure all text is visible (e.g., black text on white backgrounds).
Testing the Login System
1
Create a Test Account
1
Step 1
Use the **Sign Up** form to create a new user.
2
Step 2
Verify that login and logout workflows function correctly.
2
Redirect Users to a Dashboard After Login
Modify the authentication flow to send users to a **dashboard** after login.
Adding Notes (CRUD Functionality)
1
Set Up a Notes Table in Supabase
1
Step 1
Use Lovable to generate SQL for a **Notes** table.
2
Step 2
Ensure it has **user ID** and **content** fields.
3
Step 3
Click **Apply Changes** to create the table.
2
Build the Notes UI
1
Step 1
Add a **table to display notes** on the dashboard.
2
Step 2
Include an **input field** and **buttons** for CRUD operations.
CRUD create, read, update and delete
3
Test CRUD Operations
1
Step 1
Add a new note.
2
Step 2
Edit an existing note.
3
Step 3
Delete a note.
4
Step 4
Verify notes persist in Supabase.
Debugging with Chat Mode
To enable [Chat Mode](https://docs.lovable.dev/features/labs)
, go to **Settings > Accounts Settings** tab.
1
Identify Errors
* If an issue arises, enable **Chat Mode**.
* Lovable will analyze **Supabase logs** and **TypeScript errors**.
2
Apply Fixes
1
Step 1
Review Lovable’s debugging suggestions.
2
Step 2
Apply fixes as needed.
Congratulations 🎉
You’ve:
* Set up **Supabase** and **Lovable**.
* Implemented **authentication**.
* Built a **dashboard** with **CRUD functionality** for notes.
* Learned how to debug issues effectively.
2
Building Interactive UIs
In this module, we’ll cover components, reusable UI elements, design improvements, and debugging best practices.
Understanding Components
Components in Lovable help organize UI elements into modular and reusable parts. Instead of having all UI elements in a single page (e.g., a 400-line dashboard), we break them into components such as:
* **Sidebar**
* **Welcome Card**
* **Quote Card**
* **Notes Section**
This structure improves efficiency when making edits since changes apply only to specific components rather than the entire page.
###
[](https://docs.lovable.dev/use-case/prototype#creating-and-using-components%3A)
Creating and Using Components:
1
Identify Large UI Sections
Look for UI parts that repeat or are too large.
2
Refactor Into Components
Use Lovable’s chat mode to scan the code and suggest an optimized structure.
3
Reuse Components
Copy and paste components across pages for consistency.
Editing UI Efficiently
1
Modify Individual Components
Instead of modifying the full dashboard, edit smaller components like the **Welcome Card**.
Run a prompt:_“Update the copy in the Welcome Card to make it more engaging.”_
2
Use Chat Mode for Refactoring
Ask Lovable to refactor large UI sections into smaller components.
Example:_“Refactor the dashboard into smaller, cleaner components.”_
* Example: _“Refactor the dashboard into smaller, cleaner components.”_
Enhancing UI with Pre-Built Components
If you’re not a designer, leveraging pre-built styles can improve your app’s appearance.
1
Using 21st.dev for UI Inspiration
1
Step 1
Visit [21st.dev](https://21st.dev/?tab=components&sort=recommended)
to explore pre-built UI components.
2
Step 2
Choose a design, copy its prompt for Lovable, and integrate it into your project.
2
Creating Global Styles
1
Step 1
Modify an element on the project
for eg: _“Set a button as Rainbow Button”._
2
Step 2
Add this system prompt in the project settings’ knowledge to ensure all new buttons follow this style:
“When creating components, make sure to always use our global rainbow button”.
3
Step 3
Everytime you add a button, this pre-set style will be respected.
Redesigning the Dashboard
To update the dashboard layout:
1
Step 1
Find a **design you like** (e.g., on [Dribbble](https://dribbble.com/)
).
2
Step 2
**Screenshot the relevant section** and upload it to Lovable.
3
Step 3
**Provide clear instructions**, such as:
_“Refactor the dashboard layout based on this design.”_
“_Place notes in a left-hand sidebar, and open them in a side-by-side editable view.”_
Implementing Real-Time Updates
1
Enable Real-Time Sync for Notes
1
Step 1
Run a prompt
_“Enable real-time updates for notes so that changes reflect instantly.”_
2
Step 2
Ensure data updates in both the **sidebar** and **editing panel**.
2
Debugging UI Issues
Use chat mode to scan the implementation and fix missing updates.
Example:_“When editing the title in the side-by-side view, it doesn’t save. Fix this issue.”_
Refining the Note Editing Experience
1
Use Mobbin for Real-World UI Examples
Search for “note-taking UI” to see how popular apps design their interfaces.
Example:A clean, minimalistic note editor with large titles and a dropdown for tags.
2
Applying UI Improvements
1
Step 1
Ensure the title is **large and prominent**.
2
Step 2
Add **tags via a dropdown**, similar to the reference UI.
Example prompt:_“Redesign the note editor to match this screenshot. Use a large title, white space for content, and dropdown-based tags.”_
Debugging and Final Touches
1
Fix UI Bugs
Ensure all UI elements update correctly when modified.
Run a prompt:_“Fix the issue where note tags don’t save after editing.”_
2
Optimize Button Styling
Adjust button and input styling to match the intended design.
Example:_“Ensure all buttons use the global Rainbow Button style.”_
Congratulations 🎉
By the end of this module, you should have:
* Refactored large UI sections into reusable components.
* Implemented a polished note-taking dashboard.
* Used real-time updates for better user experience.
* Refined the design using external inspirations and best practices.
3
What's next?
If you enjoyed the first two modules, continue your crash course with Harry [here](https://aclasswithharry.com/dashboard)
! In the next lessons, you’ll explore:
* **Bonus**: P5.js effects & Admin Roles
* Advanced User Roles & RLS
* Connecting to APIs & AI
* Setting Up Stripe Payments
* Advanced Features
* Launch on Product Hunt
Was this page helpful?
YesNo
[Landing page](https://docs.lovable.dev/use-case/landing-page)
[SaaS](https://docs.lovable.dev/use-case/saas)
⌘I
---
# Getting started - Lovable Documentation
[Skip to main content](https://docs.lovable.dev/introduction/getting-started#content-area)
[Lovable Documentation home page](https://lovable.dev/)
Search...
⌘K
Search...
Navigation
Getting started
[Introduction](https://docs.lovable.dev/introduction/welcome)
[Features](https://docs.lovable.dev/features/modes)
[Integrations](https://docs.lovable.dev/integrations/introduction)
[Tips & Tricks](https://docs.lovable.dev/tips-tricks/best-practice)
[Prompt engineering](https://docs.lovable.dev/prompting/prompting-one)
[Use cases](https://docs.lovable.dev/use-case/video-tutorials)
[Glossary](https://docs.lovable.dev/glossary)
[Changelog](https://docs.lovable.dev/changelog)
On this page
* [Overview of Lovable](https://docs.lovable.dev/introduction/getting-started#overview-of-lovable)
* [The Lovable platform overview](https://docs.lovable.dev/introduction/getting-started#the-lovable-platform-overview)
* [Start your project](https://docs.lovable.dev/introduction/getting-started#start-your-project)
* [Edit your project](https://docs.lovable.dev/introduction/getting-started#edit-your-project)
* [Add fullstack capabilities to your project](https://docs.lovable.dev/introduction/getting-started#add-fullstack-capabilities-to-your-project)
* [Deploy and publish your project](https://docs.lovable.dev/introduction/getting-started#deploy-and-publish-your-project)
[](https://docs.lovable.dev/introduction/getting-started#overview-of-lovable)
Overview of Lovable
-----------------------------------------------------------------------------------------------------
Welcome to this step-by-step guide on how to create a full-stack application using Lovable: 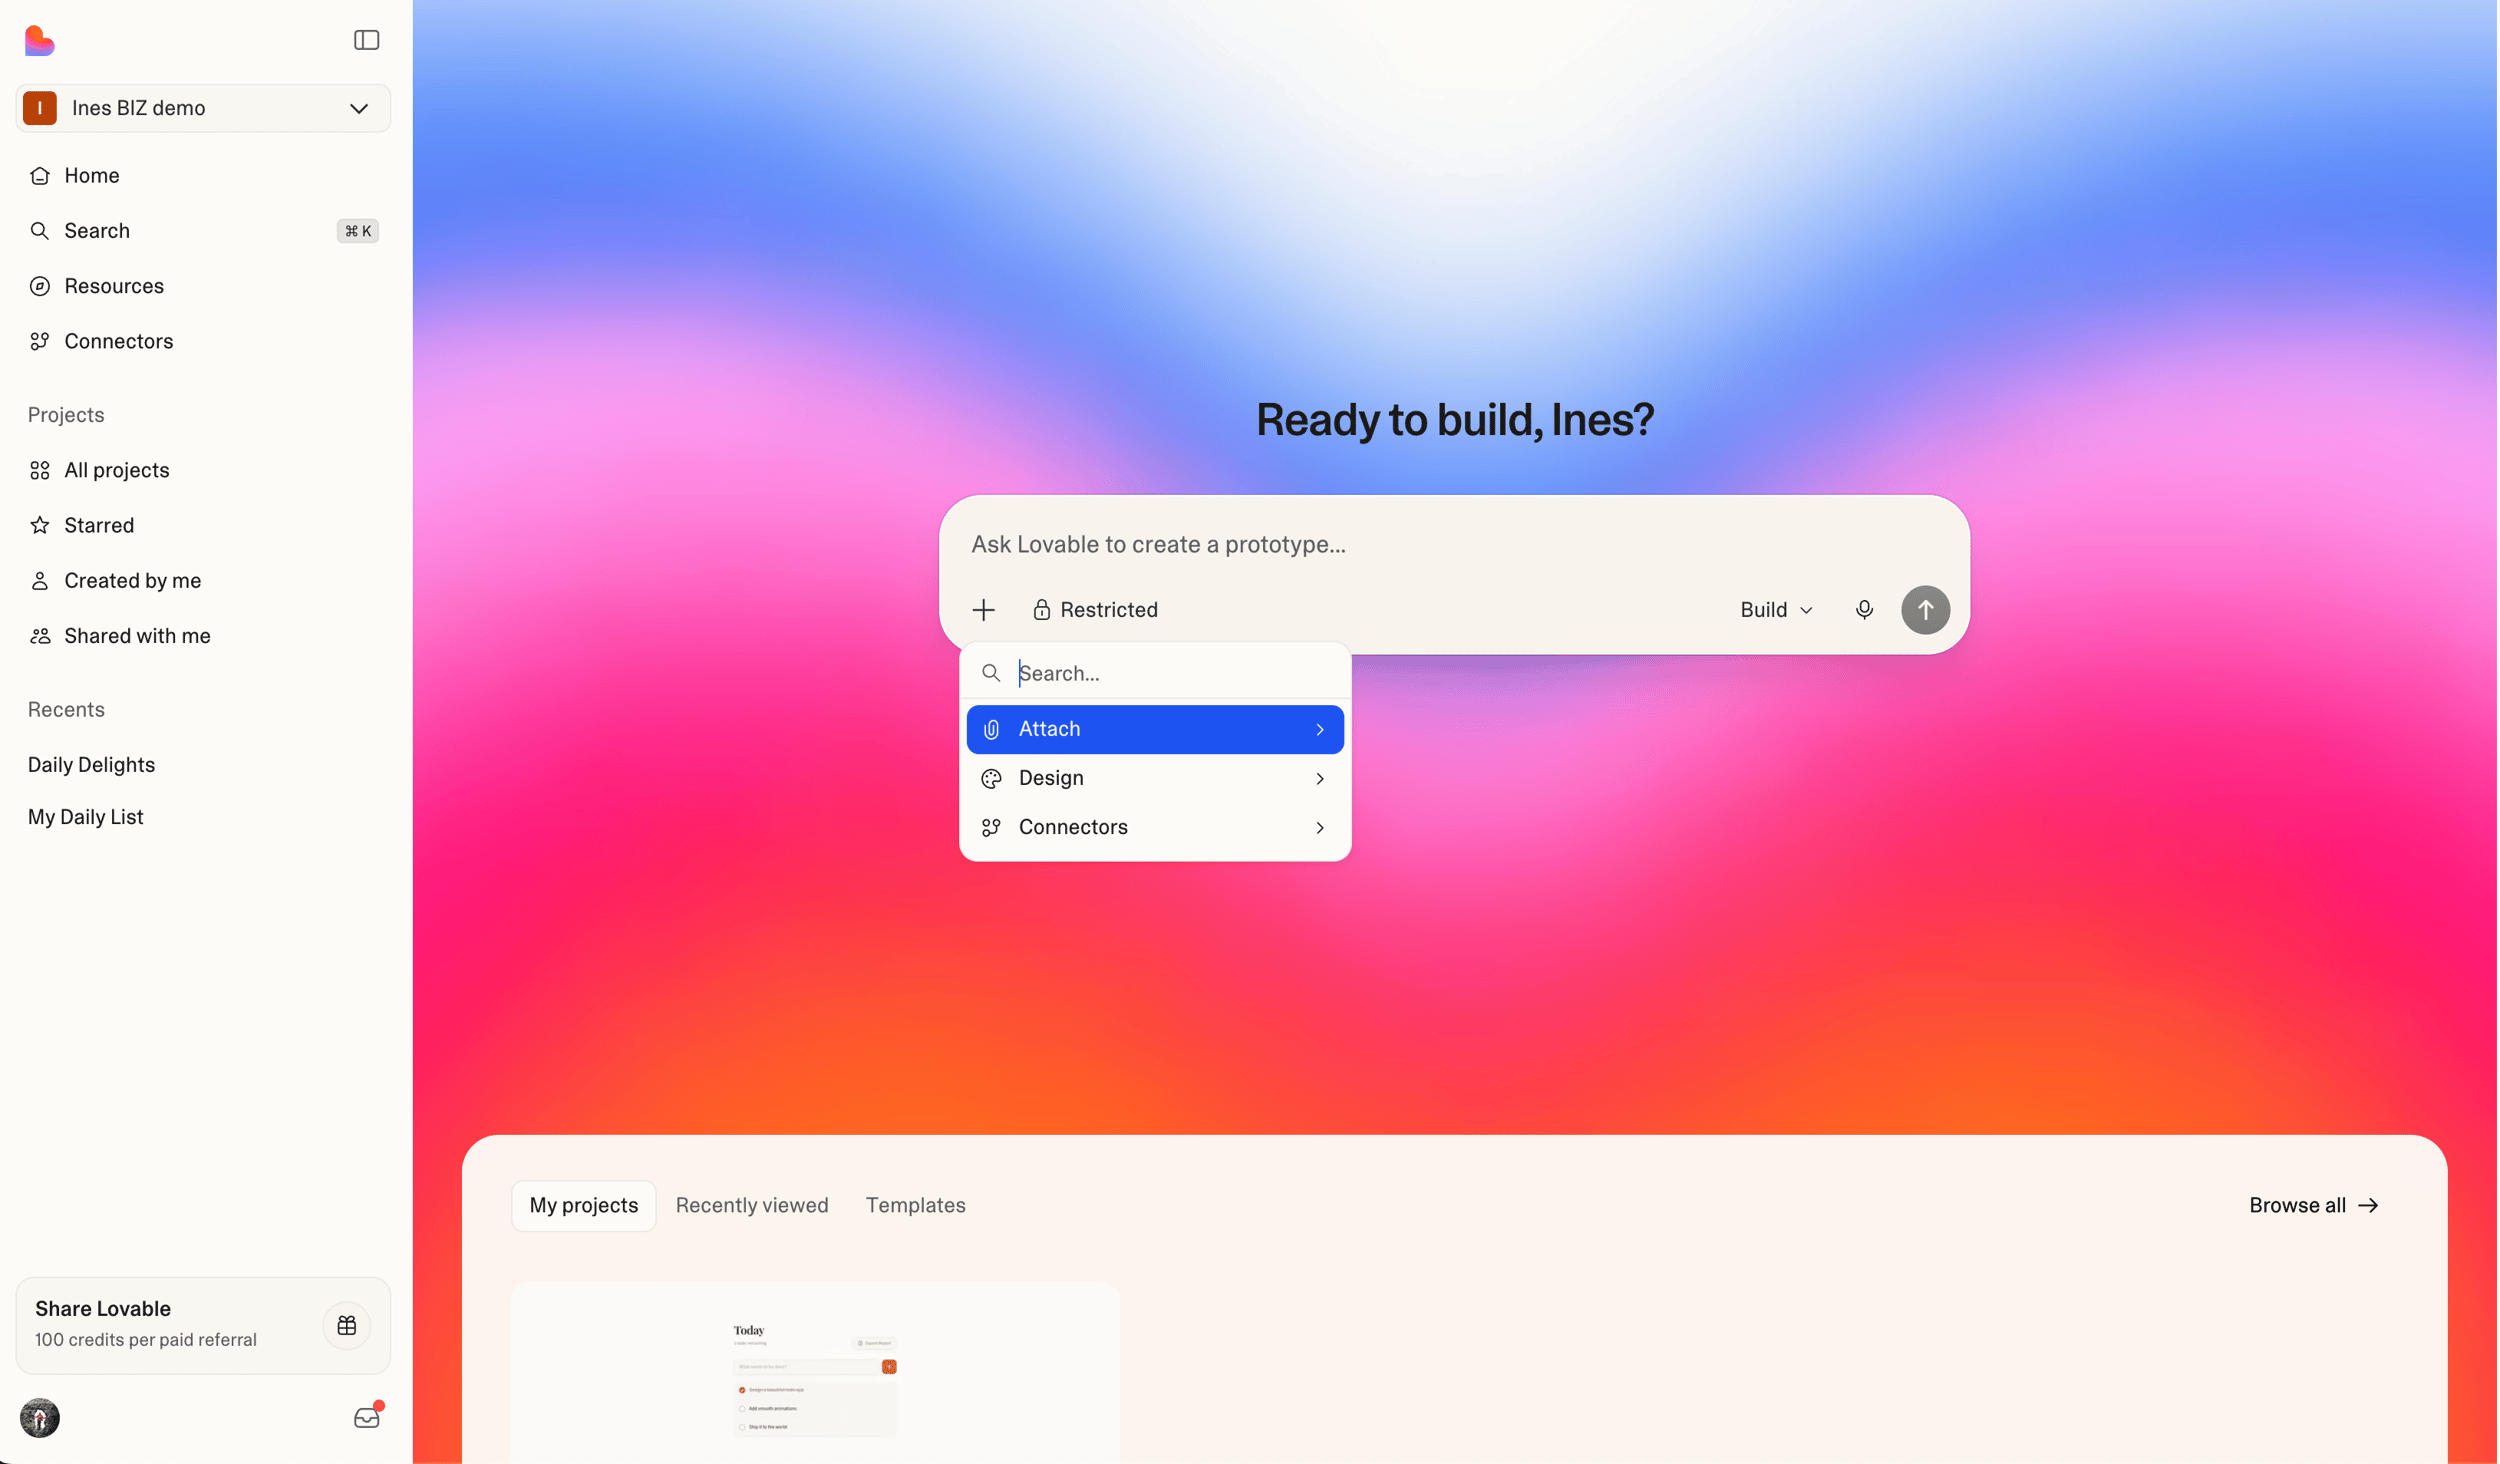
###
[](https://docs.lovable.dev/introduction/getting-started#the-lovable-platform-overview)
The Lovable platform overview
Create your first project
1
Step 1
To get started, head over to [lovable.dev](https://lovable.dev/)
and create an account. Once registered, you’ll be able to create your first project.
2
Step 2
Simply enter an initial prompt to kick things off, and Lovable will do the rest! This is the **starting block** for any project in Lovable, where you can bring your ideas to life instantly.
Lovable dashboard
At Lovable, simplicity is key:
* [**Here**](https://lovable.dev/)
**you kickstart your project** with a single prompt.
* **Explore all projects**, including the latest and featured ones.
* **Jumpstart with a template** from our curated selection.
* **Personalize your experience** by viewing and editing your profile.
* [**Manage your account**](https://lovable.dev/settings)
to check monthly credits and adjust settings.
* **Experiment with** [**Labs**](https://lovable.dev/settings/account)
**features** like Chat mode—toggle them on or off.
* [**Upgrade or downgrade**](https://lovable.dev/settings/plans)
**your plan** seamlessly.
Project overview
At Lovable, every project follows a structured workflow:
* **Edit with ease** using a chat-based interface.
* **Attach images** for precision edits and inspiration.
* **Select and visually edit components** for a seamless design experience.
* **Switch effortlessly** between edit mode and chat mode.
* **Track changes** with version history and restore any previous version.
* **Navigate through pages** of your project with ease.
* **Enable remixing** or rename your project as needed.
* **Use Lovable Cloud** (or integrate with Supabase) for backend capabilities.
* **Collaborate via GitHub** to edit and manage your code.
* **Publish, deploy, and share** your project with a preview link (remember to re-publish after changes).
* **Toggle between web and mobile view** for responsive design.
* **Refresh the preview modal** to see updates instantly.
* **Open your project directly** using the preview link.
Project settings
Every project’s settings empower you to:
* **View key project details** like total edits and creation date.
* **Set up custom knowledge** to tailor your project’s context.
* **Connect to a GitHub repository** for seamless collaboration.
* **Adjust project visibility** from public to private.
* **Manage the badge display** (available for paid plans only).
* **Rename your project** anytime.
* **Delete your project** (⚠️ Danger Zone).
Project quick access
You can always quickly access:
* **Dashboard** for an overview of your projects.
* **Account settings** to manage your profile and preferences.
* **Documentation and Support** for guidance and assistance.
* **Log out** securely from your Lovable account.
###
[](https://docs.lovable.dev/introduction/getting-started#start-your-project)
Start your project
There are several ways to get started with Lovable, depending on your preferences and resources:
Prompt
Lovable’s prompt-based system makes app creation simple.
* Just describe what you want to build in the prompt box.
* The more specific you are, the better the results.
* Start with clear and detailed prompts.
* You can refine and adjust your project as you go.
Example:_“Create a dashboard with user login, monthly sales in a line chart, and customer demographics in a pie chart.”_
Remix an existing project
You can remix an existing public project or one of your own. Remixing allows you to reuse the current state of a project as a starting point and build upon it. It’s a great way to explore new ideas, make adjustments, or iterate with different changes while preserving the original version.
You can only remix public projects from other users if the project is not connected to Supabase.
Using Figma
If you have a design in Figma,
1. **Using screenshots:** Take a screenshot of any part of it. You can paste the screenshot directly into Lovable or drag-and-drop the image file. Once you press Enter, Lovable will convert your design into functional code.
2. **Using Builder.io integration:** First, structure your Figma design using Auto-Layout and clear layer naming. Then, open the Builder.io plugin in Figma, select your design, and click “Open in Lovable” to generate a fully functional app. See [Figma to Lovable](https://docs.lovable.dev/features/figma-to-lovable)
for more information.
Using a sketch
1
Step 1
Use [**Excalidraw**](https://excalidraw.com/)
or any similar tool to sketch your UI.
2
Step 2
Take a screenshot of your drawing, then paste or drag-and-drop it into Lovable. The platform will transform your sketch into working code.
[More information here.](https://www.youtube.com/watch?v=c0zhLzcVJRI)
Cloning a website or application
If you want to replicate an existing webpage:
1
Step 1
Take a screenshot using shortcuts like _Cmd+Shift+4_ on Mac or tools like the [GoFullPage Chrome Extension](https://chromewebstore.google.com/detail/gofullpage-full-page-scre/fdpohaocaechififmbbbbbknoalclacl)
.
2
Step 2
Paste or drag the screenshot into Lovable. Lovable will recreate the structure of the webpage in your project.
[More information here.](https://www.youtube.com/watch?v=tYDqBMilHkM)
###
[](https://docs.lovable.dev/introduction/getting-started#edit-your-project)
Edit your project
Add custom knowledge to your project
The [Custom knowledge](https://docs.lovable.dev/features/knowledge)
in Lovable acts as your project’s **blueprint**, organizing functionality, design, and goals in one place.
Use Visual Edits
Visual Edits allows you to select elements on the page and either edit them instantly, such as updating text or colors, or use prompts to adjust functionality and layout.See [Visual Edits](https://docs.lovable.dev/features/visual-edit)
for more information.
Revert a change
Speed matters when building AI-driven apps, but so do stability and control. That’s why we’ve upgraded versioning to make tracking changes effortless.
1
Restore past versions instantly
If you want to go back to a previous version of your app, click ‘restore’ on the version you want to revert to.
2
Bookmark key edits
Keep your work organized by bookmarking important edits, making it easy to find and revisit them later.
3
Intuitive version history
The history panel now works like Google Docs, making tracking changes easier.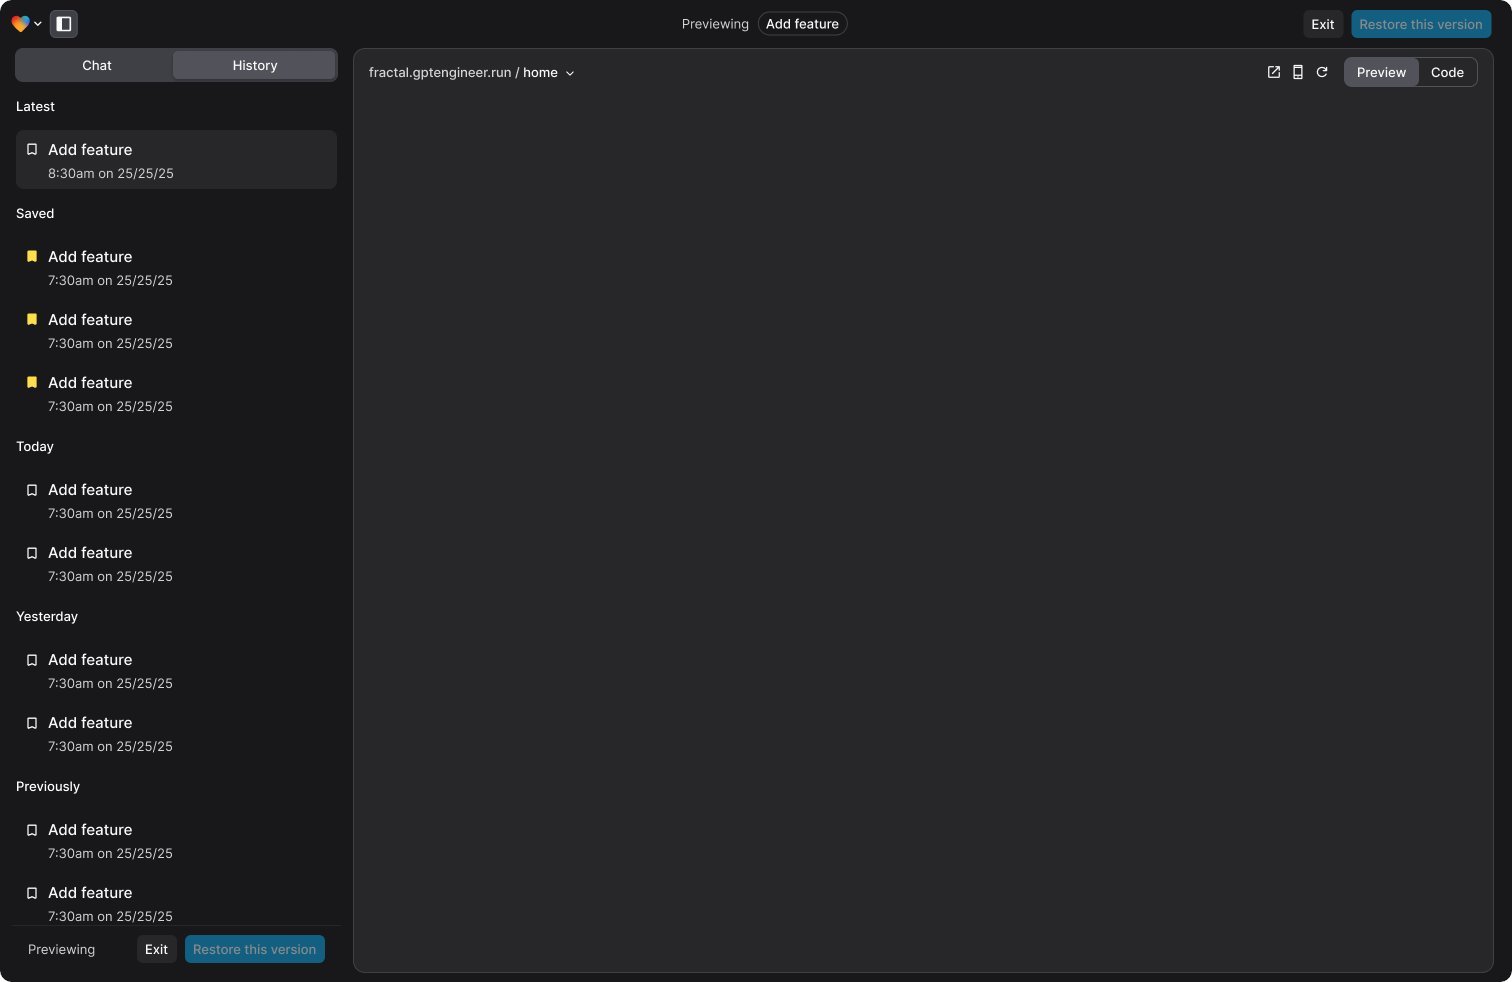
Add animation component with 21st dev
Add images to prompt
Attach images directly to the chat to add context to your prompts. This makes it easier to illustrate ideas or concepts that are better shown than described.
Add a new page to your project
Refactor code
Connect to GitHub
Integrate your project with GitHub to iterate on your application seamlessly. You can make code changes in GitHub or your preferred IDE while keeping everything in sync with Lovable.
See [GitHub integration](https://docs.lovable.dev/integrations/git-integration)
for more information.
###
[](https://docs.lovable.dev/introduction/getting-started#add-fullstack-capabilities-to-your-project)
Add fullstack capabilities to your project
Connect a backend
If you need to add backend capabilities to your application, you can:
* Connect to Lovable’s built-in backend - [Lovable Cloud](https://docs.lovable.dev/features/cloud)
* Use Lovable’s native [Supabase integration](https://docs.lovable.dev/integrations/supabase)
Add payment capabilities to your application with Stripe
There are many ways to connect Stripe to Lovable, but the most straight-forward way is to utilize Stripe’s built in payment links. See [Stripe integration](https://docs.lovable.dev/integrations/stripe)
for more information.
Add email capabilities with Resend
See [Resend integration](https://docs.lovable.dev/integrations/resend)
for more information.
###
[](https://docs.lovable.dev/introduction/getting-started#deploy-and-publish-your-project)
Deploy and publish your project
Set up SEO
Check out [SEO documentation](https://docs.lovable.dev/features/seo)
to ensure all SEO capabilities are properly enabled.
Add a custom domain
You can add a custom domain using:
* Entri (native to Lovable)
* Netlify
* Vercel
* Namecheap
See [Custom domain](https://docs.lovable.dev/features/custom-domain)
for more information.
Publish my project
When your project is ready, publish it to generate a shareable URL. This makes it easy to showcase your application or share it with collaborators and stakeholders.
See [Publish](https://docs.lovable.dev/features/publish)
for more information.
Was this page helpful?
YesNo
[Plans and credits](https://docs.lovable.dev/introduction/plans-and-credits)
[FAQ](https://docs.lovable.dev/introduction/faq)
⌘I
---
# Using images in Lovable - Lovable Documentation
[Skip to main content](https://docs.lovable.dev/tips-tricks/using-images#content-area)
[Lovable Documentation home page](https://lovable.dev/)
Search...
⌘K
Search...
Navigation
Using images in Lovable
[Introduction](https://docs.lovable.dev/introduction/welcome)
[Features](https://docs.lovable.dev/features/modes)
[Integrations](https://docs.lovable.dev/integrations/introduction)
[Tips & Tricks](https://docs.lovable.dev/tips-tricks/best-practice)
[Prompt engineering](https://docs.lovable.dev/prompting/prompting-one)
[Use cases](https://docs.lovable.dev/use-case/video-tutorials)
[Glossary](https://docs.lovable.dev/glossary)
[Changelog](https://docs.lovable.dev/changelog)
To add images you can do one of four things:
Upload the image to the prompt chat
Simply upload them in the chat and explain to Lovable’s Agent where and how you’d like them to appear in your project. For example:
> Replace the logo in navbar with this image
Replace it on the visual editor
You can replace an existing image directly using the [visual editor](https://docs.lovable.dev/features/precision-edit#visual-edits)
functionality:
1
Step 1
Click on “Edit” tool.
2
Step 2
Select the image holder you would like to change.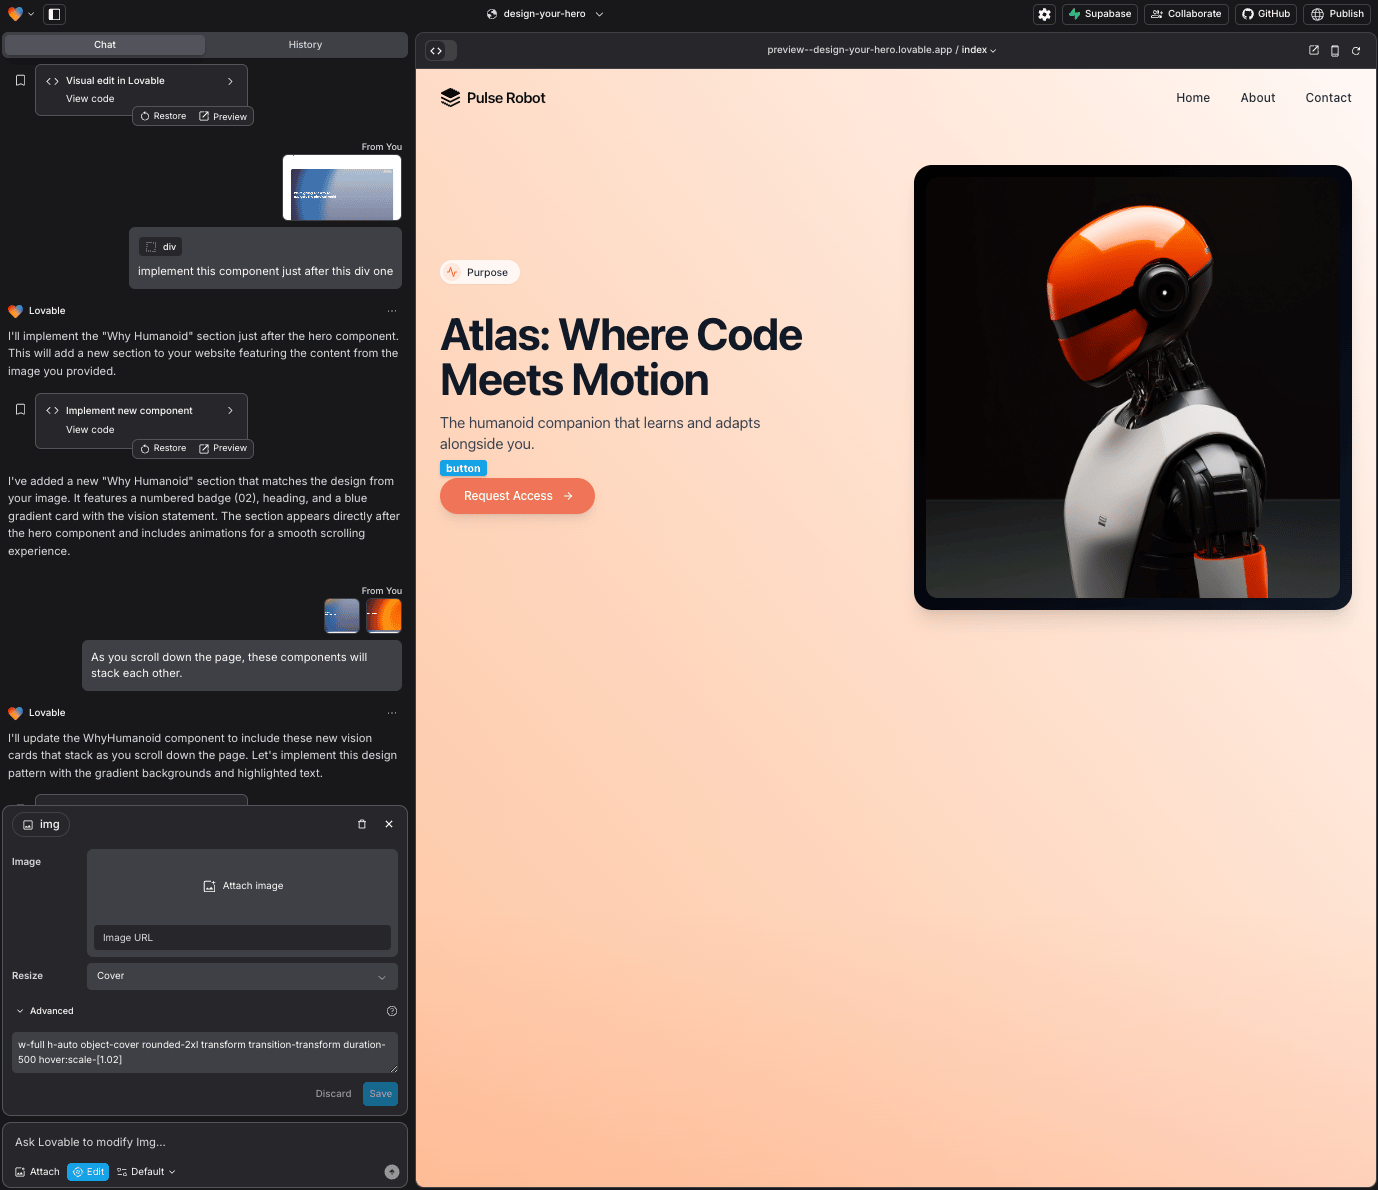
3
Step 3
Change the image.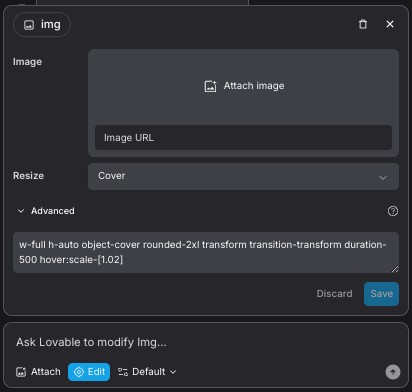
Using an external image URL
One way to add images to your project is by referencing an image from an external URL. This method allows you to use images hosted on external platforms like Unsplash, Imgur, or any other image-hosting service. Be mindful of use copyrights!Here’s how to prompt Lovable to use an external image:
1
Step 1
Find the image you want to use.For example, you can visit a site like Unsplash, select an image, and copy its URL.
2
Step 2
In your project prompt, simply tell Lovable to use that image by specifying the URL. For example:
Copy
Ask AI
Use the image from this URL
https://upload.wikimedia.org/wikipedia/commons/thumb/7/73/Pale_Blue_Dot.png/442px-Pale_Blue_Dot.png
for the hero section image.
Using images from your GitHub public directory
Another method to add images to your Lovable project is by using images uploaded to the `public` directory of your connected GitHub repository. Here’s how you can do it:
1
Connect your GitHub repository
Ensure your project is connected to your GitHub repo. [Here’s how to connect your repo](https://docs.lovable.dev/integrations/git-integration)
.
2
Locate the public folder
Inside your GitHub repository, navigate to the `public` directory. This folder is typically used for hosting assets like images that can be referenced in your project.
3
Add file
Click on **Add file** and then from a dropdown, select **Upload files** option. 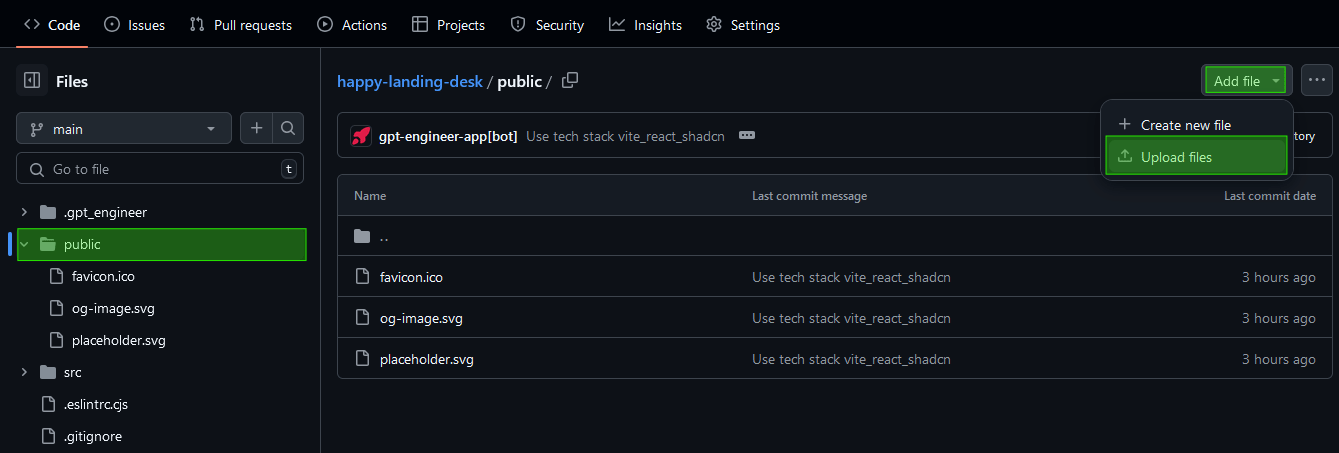
4
Upload an image
The next step is to transfer your image to your repo:
* Drag and drop the image into the public folder, or
* Click on the **“choose your files”** link to browse and select the image file. 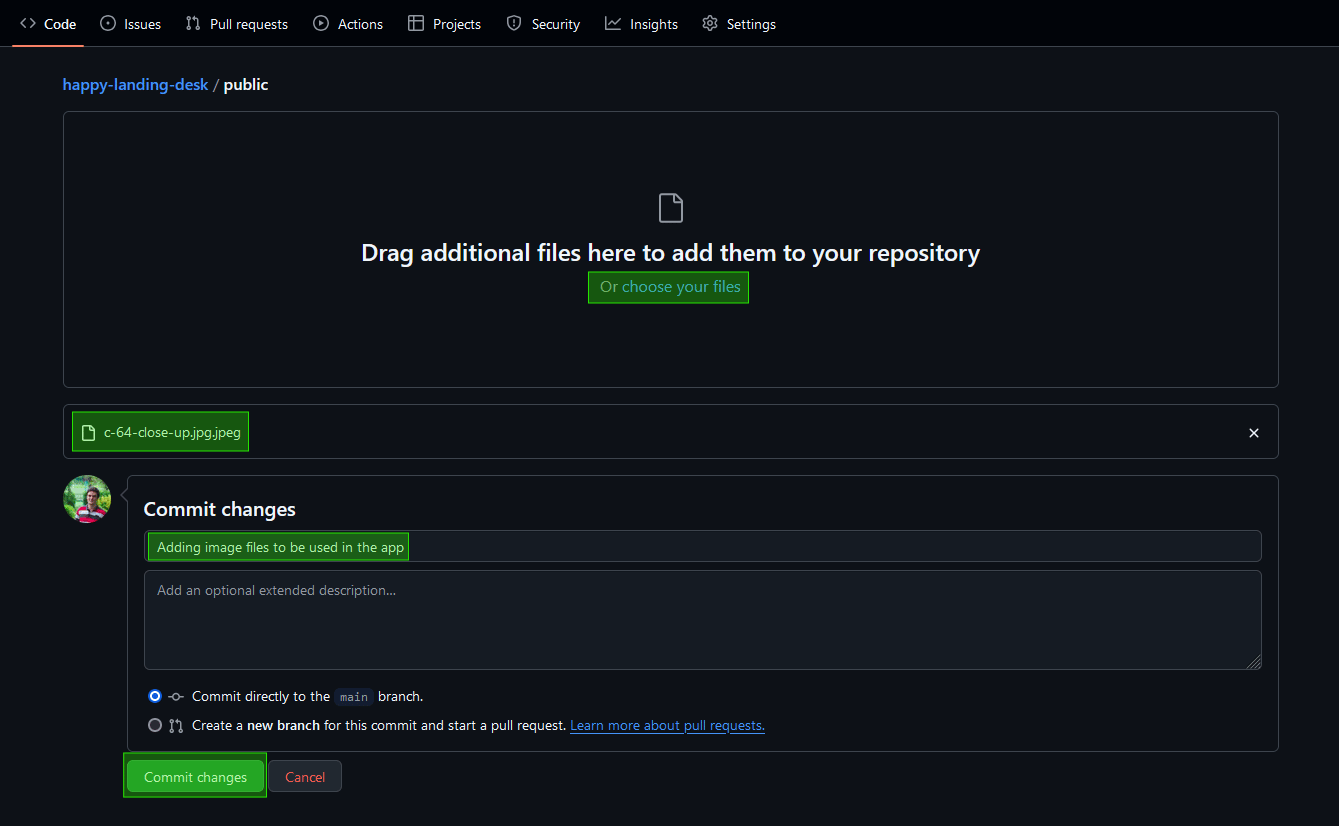
5
Commit the changes
After selecting your image, write a simple commit message (e.g., “Adding image files to be used in the app”) and click **“Commit changes”** to save the file to your repo.
6
Get the image path
Once the file is uploaded, select it and then click on the copy icon next to the file name to copy the image’s path. This path will be used in your Lovable prompt. 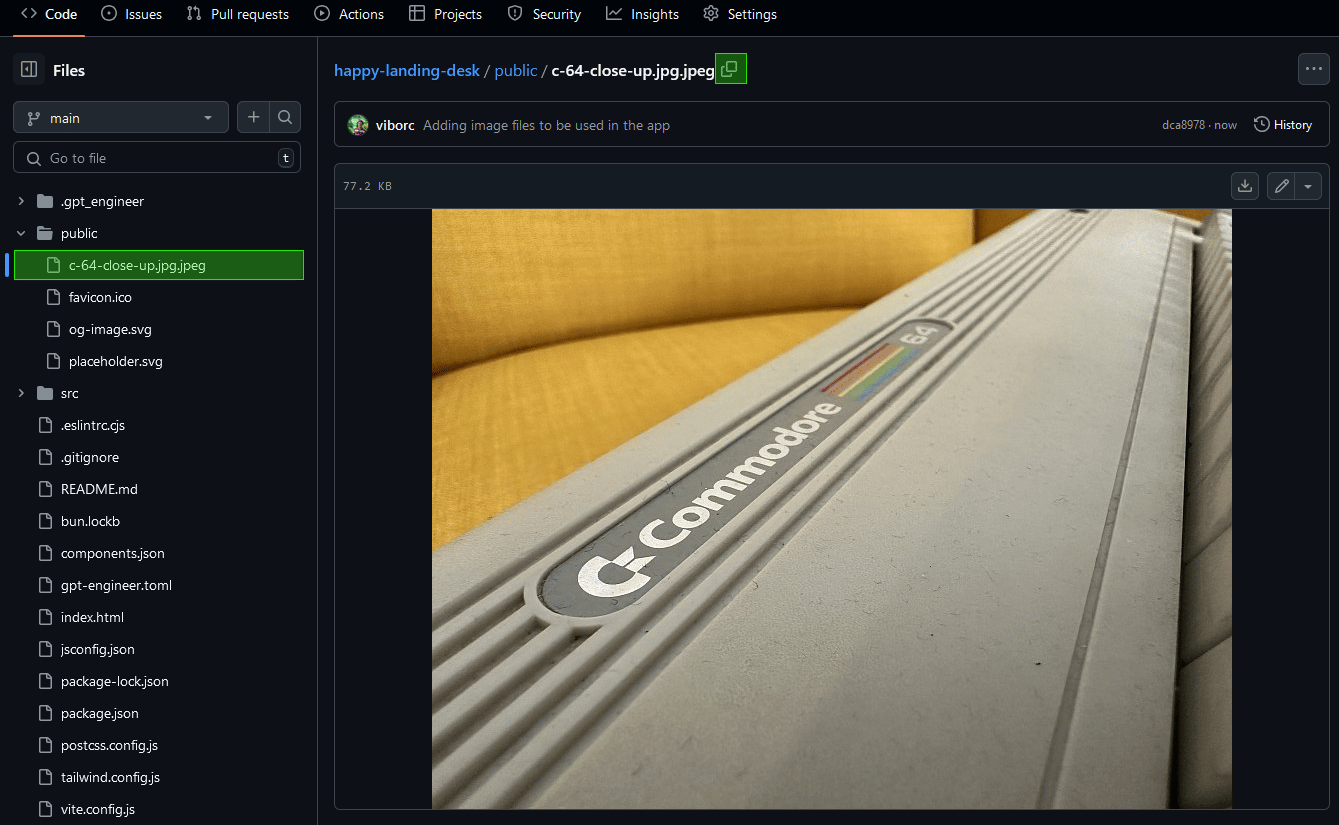
7
Use the image in Lovable
You can now reference this image in your project by using a prompt like the following:
Copy
Ask AI
Add an additional image to the hero section.
This time, use this one from my local repo: public/c-64-close-up.jpg.jpeg
Be sure to use your image name and path you copied in the previous step.
Uploading large images to your GitHub repo can cause it to grow in size, which can affect Lovable performance (longer repo cloning times, slower startup of previews/sandbox).Try to optimize your images before uploading them to your `public` folder by compressing them and using dimensions that are relevant to your use case. For example, don’t use a full HD-sized image if it will only be displayed as a small icon.
To help you better understand how to integrate images using the methods outlined above, we have a project you can explore: [Lovable Project Example](https://lovable.dev/projects/e823fedf-238d-4313-86a8-1fd4bfc2a9ba)
. In this project, you can see the actual prompts and how each method works in practice.Additionally, here’s a public GitHub repository that includes the commits, uploaded images, and full implementation details. You can view the repository here: [GitHub: Adding Images Example](https://github.com/viborc/adding-images-example)
.Feel free to explore the project and repository to deepen your understanding and improve your implementation skills.
Was this page helpful?
YesNo
[Troubleshooting](https://docs.lovable.dev/tips-tricks/troubleshooting)
[Using videos](https://docs.lovable.dev/tips-tricks/using-videos)
⌘I
---
# Using videos - Lovable Documentation
[Skip to main content](https://docs.lovable.dev/tips-tricks/using-videos#content-area)
[Lovable Documentation home page](https://lovable.dev/)
Search...
⌘K
Search...
Navigation
Using videos
[Introduction](https://docs.lovable.dev/introduction/welcome)
[Features](https://docs.lovable.dev/features/modes)
[Integrations](https://docs.lovable.dev/integrations/introduction)
[Tips & Tricks](https://docs.lovable.dev/tips-tricks/best-practice)
[Prompt engineering](https://docs.lovable.dev/prompting/prompting-one)
[Use cases](https://docs.lovable.dev/use-case/video-tutorials)
[Glossary](https://docs.lovable.dev/glossary)
[Changelog](https://docs.lovable.dev/changelog)
Lovable offers two methods for embedding videos into your projects. Below, we’ll cover both options step by step:
Linking to an external video
The simplest and recommended way to incorporate a video is by linking to one hosted externally, like on YouTube.
Example prompt
Copy
Ask AI
Embed this video
https://www.youtube.com/watch?v=dQw4w9WgXcQ
in the hero content section.
Using a video from your GitHub public folder
Uploading large videos to your GitHub repo can cause it to grow in size, which can affect Lovable performance (longer repo cloning times, slower startup of previews/sandbox).A better option is to use hosted services (like YouTube) or file storage options like S3, essentially giving you a URL that you can reference, as described in the previous steps.
You can upload videos to your project’s GitHub repository and reference them directly. Here’s how:
1
Connect your GitHub repository
First, make sure your project is linked to a GitHub repo. [Here’s how to set up your repo](https://docs.lovable.dev/integrations/git-integration)
.
2
Access the public folder
Inside your connected repository, navigate to the `public` directory. This folder is specifically used for hosting project assets like images, videos, and other media.
3
Upload a video
You can now add your video to the public folder by either dragging and dropping it or clicking **“choose your files”** to browse and upload the file from your local machine.
4
Commit the file
After selecting your video file, enter a brief commit message (e.g., “Adds a Mars video to be used in the app”) and click **“Commit changes”**.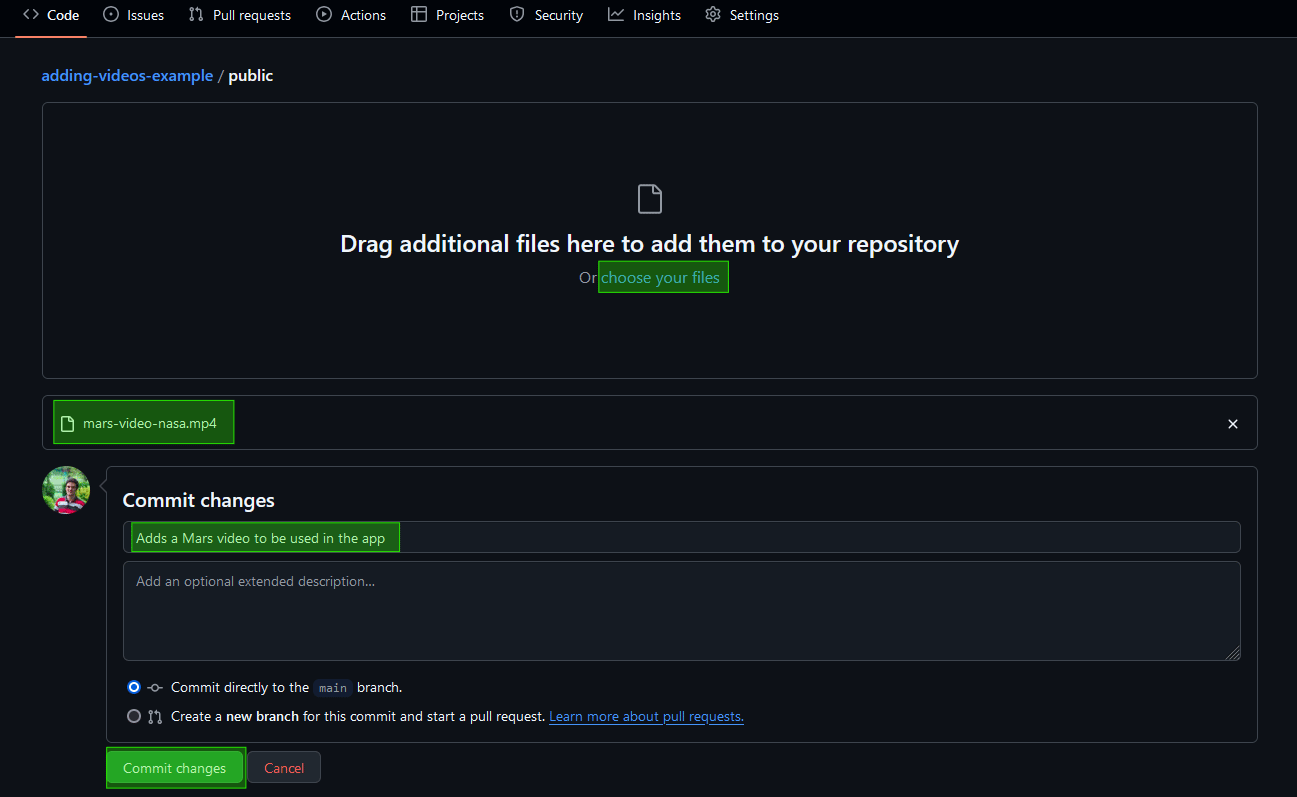
5
Get the video path
Once the upload is complete, click on the video file and use the copy icon :octicons-copy-16: to copy its path. You’ll need this path in the next step.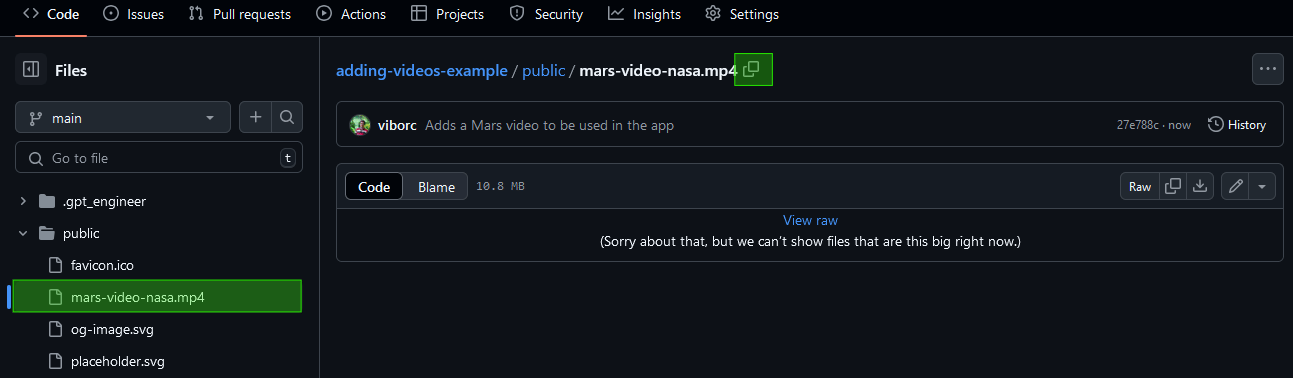
6
Reference the video in Lovable
Now, you can embed the video by specifying the file path in your prompt. For example, you can use a prompt like this one:
Example prompt
Copy
Ask AI
Insert an additional video into the introduction section using this file:
public/mars-video-nasa.mp4
Ensure you use the exact file path you copied earlier.
To see these methods in action, explore one of the example projects: [Lovable using videos example project](https://lovable.dev/projects/380835ab-c8d7-4f45-9b0d-51ec04294457)
. You’ll find real prompts demonstrating how videos are integrated using both methods.Additionally, for a more technical look at the video adding process, check out this public repository: [GitHub: Video Upload Example](https://github.com/viborc/adding-videos-example)
. It includes the video upload and the implementation details used in the project.
Was this page helpful?
YesNo
[Using images in Lovable](https://docs.lovable.dev/tips-tricks/using-images)
[Using custom (Google) fonts](https://docs.lovable.dev/tips-tricks/custom-fonts)
⌘I
---
# Prompting 1.1 - Lovable Documentation
[Skip to main content](https://docs.lovable.dev/prompting/prompting-one#content-area)
[Lovable Documentation home page](https://lovable.dev/)
Search...
⌘K
Search...
Navigation
Prompting 1.1
[Introduction](https://docs.lovable.dev/introduction/welcome)
[Features](https://docs.lovable.dev/features/modes)
[Integrations](https://docs.lovable.dev/integrations/introduction)
[Tips & Tricks](https://docs.lovable.dev/tips-tricks/best-practice)
[Prompt engineering](https://docs.lovable.dev/prompting/prompting-one)
[Use cases](https://docs.lovable.dev/use-case/video-tutorials)
[Glossary](https://docs.lovable.dev/glossary)
[Changelog](https://docs.lovable.dev/changelog)
On this page
* [Heads up!](https://docs.lovable.dev/prompting/prompting-one#heads-up)
* [What is prompting?](https://docs.lovable.dev/prompting/prompting-one#what-is-prompting%3F)
* [Why prompting matters](https://docs.lovable.dev/prompting/prompting-one#why-prompting-matters)
* [Understanding how AI thinks](https://docs.lovable.dev/prompting/prompting-one#understanding-how-ai-thinks)
* [Core prompting principles: The C.L.E.A.R. framework](https://docs.lovable.dev/prompting/prompting-one#core-prompting-principles%3A-the-c-l-e-a-r-framework)
* [The four levels of prompting](https://docs.lovable.dev/prompting/prompting-one#the-four-levels-of-prompting)
* [1\. Structured “training wheels” prompting (explicit format)](https://docs.lovable.dev/prompting/prompting-one#1-structured-%E2%80%9Ctraining-wheels%E2%80%9D-prompting-explicit-format)
* [2\. Conversational prompting (no training wheels)](https://docs.lovable.dev/prompting/prompting-one#2-conversational-prompting-no-training-wheels)
* [3\. Meta prompting (AI-assisted prompt improvement)](https://docs.lovable.dev/prompting/prompting-one#3-meta-prompting-ai-assisted-prompt-improvement)
* [4\. Reverse meta prompting (AI as a documentation tool)](https://docs.lovable.dev/prompting/prompting-one#4-reverse-meta-prompting-ai-as-a-documentation-tool)
* [Advanced prompting techniques](https://docs.lovable.dev/prompting/prompting-one#advanced-prompting-techniques)
* [Zero-shot vs. Few-shot prompting](https://docs.lovable.dev/prompting/prompting-one#zero-shot-vs-few-shot-prompting)
* [Managing hallucinations and ensuring accuracy](https://docs.lovable.dev/prompting/prompting-one#managing-hallucinations-and-ensuring-accuracy)
* [Leveraging model insights (know your AI tools)](https://docs.lovable.dev/prompting/prompting-one#leveraging-model-insights-know-your-ai-tools)
* [Additional prompting tips](https://docs.lovable.dev/prompting/prompting-one#additional-prompting-tips)
* [Start with a solid knowledge base](https://docs.lovable.dev/prompting/prompting-one#start-with-a-solid-knowledge-base)
* [Be specific, avoid vagueness](https://docs.lovable.dev/prompting/prompting-one#be-specific%2C-avoid-vagueness)
* [Incremental prompting](https://docs.lovable.dev/prompting/prompting-one#incremental-prompting)
* [Include constraints and requirements](https://docs.lovable.dev/prompting/prompting-one#include-constraints-and-requirements)
* [Avoid ambiguity in wording](https://docs.lovable.dev/prompting/prompting-one#avoid-ambiguity-in-wording)
* [Mind your tone and courtesy](https://docs.lovable.dev/prompting/prompting-one#mind-your-tone-and-courtesy)
* [Use Lovable’s modes intentionally](https://docs.lovable.dev/prompting/prompting-one#use-lovable%E2%80%99s-modes-intentionally)
* [Use formatting to your advantage](https://docs.lovable.dev/prompting/prompting-one#use-formatting-to-your-advantage)
* [Leverage examples or references](https://docs.lovable.dev/prompting/prompting-one#leverage-examples-or-references)
* [Using image prompts](https://docs.lovable.dev/prompting/prompting-one#using-image-prompts)
* [Feedback integration](https://docs.lovable.dev/prompting/prompting-one#feedback-integration)
* [Emphasizing accessibility](https://docs.lovable.dev/prompting/prompting-one#emphasizing-accessibility)
* [Predefined components and libraries](https://docs.lovable.dev/prompting/prompting-one#predefined-components-and-libraries)
* [](https://docs.lovable.dev/prompting/prompting-one#)
* [Multilingual prompting](https://docs.lovable.dev/prompting/prompting-one#multilingual-prompting)
* [Defining project structure and file management](https://docs.lovable.dev/prompting/prompting-one#defining-project-structure-and-file-management)
* [Provide precise edit instructions (focus the AI)](https://docs.lovable.dev/prompting/prompting-one#provide-precise-edit-instructions-focus-the-ai)
* [Locking files (workaround)](https://docs.lovable.dev/prompting/prompting-one#locking-files-workaround)
* [Design and UI tweaks](https://docs.lovable.dev/prompting/prompting-one#design-and-ui-tweaks)
* [Refactoring and optimizing code](https://docs.lovable.dev/prompting/prompting-one#refactoring-and-optimizing-code)
* [Debugging with AI assistance](https://docs.lovable.dev/prompting/prompting-one#debugging-with-ai-assistance)
* [When (and when not) to involve the AI](https://docs.lovable.dev/prompting/prompting-one#when-and-when-not-to-involve-the-ai)
* [Applying these strategies in different tools](https://docs.lovable.dev/prompting/prompting-one#applying-these-strategies-in-different-tools)
* [In Lovable’s builder](https://docs.lovable.dev/prompting/prompting-one#in-lovable%E2%80%99s-builder)
* [With make.com or n8n (workflow automation)](https://docs.lovable.dev/prompting/prompting-one#with-make-com-or-n8n-workflow-automation)
* [Edge cases and external integrations](https://docs.lovable.dev/prompting/prompting-one#edge-cases-and-external-integrations)
* [Summary](https://docs.lovable.dev/prompting/prompting-one#summary)
* [Conclusion](https://docs.lovable.dev/prompting/prompting-one#conclusion)
[](https://docs.lovable.dev/prompting/prompting-one#heads-up)
Heads up!
---------------------------------------------------------------------------
To help you make the most out of Lovable, we compiled a list of prompting strategies and approaches. Some of these were collected from our team’s experience, and others were shared with us by our community members. Since Lovable relies on large language models (LLMs), effective prompting strategies can significantly improve its efficiency and accuracy.
[](https://docs.lovable.dev/prompting/prompting-one#what-is-prompting%3F)
What is prompting?
------------------------------------------------------------------------------------------------
Prompting refers to the textual instructions you give an AI system to perform a task. In Lovable (an AI-powered app builder), prompts are how you “tell” the AI what to do – from creating a UI to writing backend logic. Effective prompting is critical because Lovable uses large language models (LLMs), so clear, well-crafted prompts can greatly improve the AI’s efficiency and accuracy in building your app. In short, better prompts lead to better results.
[](https://docs.lovable.dev/prompting/prompting-one#why-prompting-matters)
Why prompting matters
----------------------------------------------------------------------------------------------------
Most people think prompting is just typing a request into an AI and hoping for the best – **not so**. The difference between a mediocre AI response and having AI build entire workflows for you comes down to _how you prompt_. Whether you’re a developer or non-technical, mastering prompt engineering in **Lovable** can help you:
* **Automate repetitive tasks** by instructing the AI precisely what to do.
* **Debug faster** with AI-generated insights and solutions.
* **Build and optimize workflows effortlessly**, letting AI handle the heavy lifting once properly guided.
And the best part? You don’t need to be an expert programmer. With the right prompting techniques, you can unlock AI’s full potential in Lovable without wasted trial-and-error. This playbook will take you from foundational concepts to advanced prompt strategies so you can communicate with AI effectively and build faster.
[](https://docs.lovable.dev/prompting/prompting-one#understanding-how-ai-thinks)
Understanding how AI thinks
----------------------------------------------------------------------------------------------------------------
Unlike traditional coding, working with AI is about _communicating_ your intentions clearly. Large Language Models (LLMs) like the ones powering Lovable don’t “understand” in a human sense – they predict outputs based on patterns in their training data. This has important implications for how you should prompt: For consistent outcomes, it helps to structure your prompt into clear sections. A recommended format (like _“training wheels”_ for prompting) uses labeled sections for **Context**, **Task**, **Guidelines**, and **Constraints**:
* **Provide Context and Details:** AI models have no common sense or implicit context beyond what you give them. Always supply relevant background or requirements. For example, instead of just saying “Build a login page,” specify details: _“Create a login page using React, with email/password authentication and JWT handling.”_ Include any tech stack or tools (e.g. “using Supabase for auth”) explicitly.
* **Be Explicit with Instructions and Constraints:** Never assume the AI will infer your goals. If you have constraints or preferences, state them. For instance, if an output should use a specific library or remain within certain scope, **tell the model up front**. The AI will follow your instructions **literally** – ambiguities can lead to unwanted results or AI “hallucinations” (made-up information).
* **Structure Matters (Order and Emphasis):** Thanks to transformer architecture, models pay special attention to the _beginning and end_ of your prompt. Leverage this by putting the most crucial details or requests at the start, and reiterating any absolute requirements at the end if needed. Also remember models have a fixed **context window** – overly long prompts or very long conversations may cause the AI to forget earlier details. Keep prompts focused and refresh context when necessary (e.g. remind the model of key points if a session is long).
* **Know the Model’s Limits:** The AI’s knowledge comes from training data. It can’t know about recent events or proprietary info you haven’t given it. It will try to _sound_ confident even if it’s guessing (which leads to hallucinations). Always provide reference text or data for factual queries, or be prepared to verify its output.
Think of prompting as telling a very literal-minded intern _exactly_ what you need. The clearer and more structured your guidance, the better the results. Next, we’ll dive into core principles that make a prompt effective.
[](https://docs.lovable.dev/prompting/prompting-one#core-prompting-principles%3A-the-c-l-e-a-r-framework)
Core prompting principles: The C.L.E.A.R. framework
-----------------------------------------------------------------------------------------------------------------------------------------------------------------
Great prompts follow a set of simple principles. A handy way to remember them is **CLEAR**: **Concise, Logical, Explicit, Adaptive, Reflective**. Use these as a checklist when crafting your instructions:
* **Concise:** Be clear and get to the point. Extra fluff or vague language can confuse the model. Use direct language: for example, **BAD:** “Could you maybe write something about a science topic?” **GOOD:** “**Write a 200-word summary of the effects of climate change on coastal cities**.” Avoid filler words – if a detail isn’t instructive, it’s distracting. Aim for precision and brevity in describing what you want.
* **Logical:** Organize your prompt in a step-by-step or well-structured manner. Break complex requests into ordered steps or bullet points so the AI can follow easily. Rather than a single run-on request, separate concerns. **BAD:** “Build me a user signup feature and also show some stats on usage.” **GOOD:** _“First, implement a user sign-up form with email and password using Supabase. Then, after successful signup, display a dashboard showing user count statistics.”_ A logical flow ensures the model addresses each part of your request systematically.
* **Explicit:** State exactly what you want and don’t want. If something is important, spell it out. Provide examples of format or content if possible. The model has a vast knowledge, but it won’t read your mind about specifics. **BAD:** “Tell me about dogs.” (Too open-ended.) **GOOD:** “**List 5 unique facts about Golden Retrievers, in bullet points.**” Likewise, if you have a desired output style, say so (e.g. “Respond in JSON format” or “Use a casual tone”). Treat the AI like a beginner: assume nothing is obvious to it.
* **Adaptive:** Don’t settle for the first answer if it’s not perfect – prompts can be refined **iteratively**. A big advantage of Lovable’s AI (and LLMs in general) is that you can have a dialogue. If the initial output misses the mark, _adapt your approach_: clarify instructions or point out errors in a follow-up prompt. For example, _“The solution you gave is missing the authentication step. Please include user auth in the code.”_ By iterating, you guide the model to better results. You can even ask the AI how to improve the prompt itself (this is **Meta Prompting**, covered later).
* **Reflective:** Take time to review what worked and what didn’t after each AI interaction. This is more about _you_ than the model – as a prompt engineer, note which prompt phrasing got a good result and which led to confusion. After a complex session, you might even ask the AI to **summarize the final solution or reasoning** (we’ll discuss Reverse Meta Prompting shortly). Being reflective helps you craft better prompts in the future, building a cycle of continuous improvement in your AI communication.
Keep these CLEAR principles in mind as you develop prompts. Next, we’ll look at specific prompting techniques from basic to advanced, including how to structure prompts and leverage the AI as a collaborator.
[](https://docs.lovable.dev/prompting/prompting-one#the-four-levels-of-prompting)
The four levels of prompting
------------------------------------------------------------------------------------------------------------------
Effective prompting is a skill that grows with practice. Here we outline four levels of prompting mastery, from structured “training wheels” to advanced meta techniques. Each level has its use-case – combine them as needed:
###
[](https://docs.lovable.dev/prompting/prompting-one#1-structured-%E2%80%9Ctraining-wheels%E2%80%9D-prompting-explicit-format)
**1\. Structured “training wheels” prompting** (explicit format)
When you’re just starting or tackling a very complex task, it helps to use a labeled structure in your prompt. This acts as _training wheels_ to ensure you provide all necessary information. A proven format in Lovable is to break the prompt into sections like:
* **Context:** Background or role setup for the AI. (E.g. “You are a world-class Lovable AI coding assistant.”)
* **Task:** The specific goal you want to achieve. (E.g. “Build a full-stack to-do list app with user login and real-time sync.”)
* **Guidelines:** Preferred approach or style. (E.g. “Use React for frontend, Tailwind for styling, and Supabase for auth and database.”)
* **Constraints:** Hard limits or must-not-dos. (E.g. “Do not use any paid APIs. The app should work on mobile and desktop.”)
By clearly labeling each part, you leave little room for misunderstanding. For example, a prompt might look like:
**Context:** You are an expert full-stack developer using Lovable.
**Task:** Create a secure login page in React using Supabase (email/password auth).
**Guidelines:** The UI should be minimalistic, and follow Tailwind CSS conventions. Provide clear code comments for each step.
**Constraints:** Only modify the `LoginPage` component; do not change other pages. Ensure the final output is a working page in the Lovable editor.
This level of detail guides the AI step-by-step. _Training Wheels prompting_ is excellent for novices or complex multi-part tasks – it forces you to think through exactly what you need, and it helps the model by structuring the request.
###
[](https://docs.lovable.dev/prompting/prompting-one#2-conversational-prompting-no-training-wheels)
2\. Conversational prompting (no training wheels)
As you get comfortable, you won’t always need such rigid structure. **Conversational prompting** means you can write to the AI more naturally, similar to how you’d explain a task to a colleague, while still being clear. The key is to maintain clarity and completeness **without** the formal labels. For instance:
Let’s build a feature to upload a profile picture. It should include a form with an image file input and a submit button. When submitted, it should store the image in Supabase storage and update the user profile. Please write the necessary React component and any backend function needed for this, and ensure to handle errors (like file too large) gracefully.
This is a more free-form prompt but still **logically ordered and explicit** about the requirements. No training wheels, yet it’s effective. Conversational prompts work well once you trust yourself not to forget important details. They keep interactions more natural, especially in ongoing chat where you’re iterating on results.
Even in conversational style, you can simulate structure by breaking into paragraphs or bullet points for different aspects of the request. The goal is the same: clear communication. You might use this style for quicker tasks or once the AI has already been primed with context.
###
[](https://docs.lovable.dev/prompting/prompting-one#3-meta-prompting-ai-assisted-prompt-improvement)
3\. **Meta prompting (AI-assisted prompt improvement)**
This is an advanced technique where you literally ask the AI to help you improve your prompt or plan. Since Lovable’s AI (like ChatGPT) can reason about language, you can use it to refine your instructions. This is especially useful if you get an output that’s off-base – it could be a sign your prompt was unclear. For example:
Review my last prompt and identify any ambiguity or missing info. How can I rewrite it to be more concise and precise?
Rewrite this prompt to be more specific and detailed: ‘Create a secure login page in React using Supabase, ensuring role-based authentication.
The AI might respond with a better-structured or more detailed version of your request. This can reveal what was unclear. Essentially, you’re letting the AI act as a _prompt editor_. In Lovable, you can do this in **Chat mode** safely (since Chat mode won’t directly edit your project). Meta prompting turns the AI into a collaborator that helps you ask for what you really want. It’s a powerful way to bootstrap your prompt engineering skills – the AI can suggest improvements you hadn’t considered.
###
[](https://docs.lovable.dev/prompting/prompting-one#4-reverse-meta-prompting-ai-as-a-documentation-tool)
4\. **Reverse meta prompting (AI as a documentation tool)**
Reverse meta prompting means using the AI to summarize or document what happened _after_ a task, so you can learn or reuse it later. Think of it as asking the AI to reflect on the process and give you a prompt or explanation for next time. This is great for debugging and knowledge capture. For example, after you troubleshoot a tricky issue with Lovable, you might prompt:
Summarize the errors we encountered setting up JWT authentication and explain how we resolved them. Then, draft a prompt I could use in the future to avoid those mistakes when setting up auth.
The AI might produce a concise recap of the problem and solution, followed by a template prompt like _“Context: building auth… Task: avoid X error by doing Y…”_. This reverse meta approach helps you build a personal library of **reusable prompts** and lessons learned. In Lovable, this can be gold: the next time you face a similar task, you have a tried-and-true prompt ready to go (or at least a clear checklist to follow).
Suppose you spent an hour debugging why an API call failed. Once it’s fixed, ask the AI to document that. You’ll not only reinforce your understanding, but also create material to feed into the Knowledge Base or future projects so the AI doesn’t repeat the same mistakes.
[](https://docs.lovable.dev/prompting/prompting-one#advanced-prompting-techniques)
Advanced prompting techniques
--------------------------------------------------------------------------------------------------------------------
Once you’ve got the basics, it’s time to leverage more advanced strategies to get the most out of Lovable’s AI. These techniques help handle complex scenarios, reduce errors (like hallucinations), and tailor the AI’s output to your needs.
###
[](https://docs.lovable.dev/prompting/prompting-one#zero-shot-vs-few-shot-prompting)
Zero-shot vs. Few-shot prompting
**Zero-Shot Prompting** means you ask the model to perform a task with _no examples_. You rely on the model’s general training to know what to do. This is the default for most prompts: you state the request, and the AI generates an answer purely from what it “knows” and understands from your prompt. Zero-shot is efficient and works well if the task is common or clearly described. For instance: _“Translate the following sentence to Spanish: ‘I am learning to code.’”_ is a zero-shot prompt – straightforward command, and the AI uses its knowledge to respond (no examples needed). **Few-Shot Prompting** means you provide a couple of **examples or demonstrations** in your prompt to show the AI exactly the format or style you want. Essentially, you’re teaching by example in the prompt itself. This can dramatically improve output quality for specific formats or when the task is unusual. In a few-shot prompt, you might say:
Correct the grammar in these sentences:\\n**Input:** “the code not working good” → **Output:** “The code is not working well.”\\n**Input:** “API give error in login” → **Output:** “The API gives an error during login.”\\nNow **Input:** “user not found in database” → **Output:**
By giving two examples of input-output, the AI is primed to continue with a similar pattern for the third. Few-shot prompting is useful in Lovable when you need a specific style of response (e.g., code comments in a certain format, or commit message examples). It does consume more prompt tokens (because you’re including those examples), but often yields more consistent results.
**When to use which:**Try zero-shot first for simple tasks or when you trust the model’s built-in ability. If the results aren’t in the format or depth you want, switch to few-shot by adding an example. For instance, if you ask for a function and the output isn’t following your preferred style, show an example function with the style you like and prompt again. Few-shots shine for complex output (like writing tests cases – provide one sample test, then ask it to write more). In summary, **zero-shot for quick direct answers, few-shot for controlled style or complex instructions.**
###
[](https://docs.lovable.dev/prompting/prompting-one#managing-hallucinations-and-ensuring-accuracy)
Managing hallucinations and ensuring accuracy
AI “hallucinations” are moments when the model confidently invents information or code that isn’t correct. In a coding platform like Lovable, hallucinations might mean the AI uses a nonexistent function, calls an API that doesn’t exist, or fabricates details in a summary. While we can’t eliminate this completely (it’s an AI limitation), we **can prompt in ways that reduce hallucinations**:
* **Provide Grounding Data:** The more _reliable context_ you give, the less the AI has to guess. In Lovable, always leverage the **Knowledge Base** for your project. Include your Project Requirements Document (PRD), user flows, tech stack, etc., in the project’s context. That way, the AI’s answers will be “grounded” in the specifics of _your_ app. For example, if your app uses a certain library or has a defined data model, put that in the Knowledge Base so the AI won’t make up different ones.
* **In-Prompt References:** When asking factual questions or code that interacts with external systems, include relevant documentation snippets or data. E.g., _“Using the API response format given below, parse the user object… \[then include a small JSON example\].”_ By showing the AI real data or docs, it’s less likely to fabricate functions or fields.
* **Ask for Step-by-Step Reasoning:** Sometimes you suspect the AI might be winging it. In those cases, prompt it to show its reasoning or verification. For instance, in **Chat mode** you could say: _“Explain your solution approach before giving the final code. If there are any uncertainties, state them.”_ This chain-of-thought prompting makes the AI slow down and check itself. It can catch errors or at least reveal them in the reasoning, which you can correct.
* **Instruct Honesty:** You can include a guideline in your prompt like _“If you are not sure of a fact or the correct code, do not fabricate it – instead, explain what would be needed or ask for clarification.”_ Advanced models often follow such instructions (they might respond with, “I’m not certain, but I assume X…” rather than just giving a wrong answer). It’s not foolproof, but it can mitigate confidently incorrect outputs.
* **Iterative Verification:** After the AI gives an answer, especially for critical things (like calculations, or important facts, or complex code), do a verification step. You can ask the AI, or use another tool, to double-check the output. For example: _“Confirm that the above code follows the requirements and explain any part that might not meet the spec.”_ This prompt makes the AI review its work and often it will catch if it deviated from your instructions.
In Lovable, hallucinations might also mean the AI creates a file or component you didn’t ask for, or takes some creative liberty that wasn’t intended. Always review AI-generated code for sanity. If something looks too “magical” or unexpected, question it. By managing hallucinations with these strategies, you maintain control over your project and ensure accuracy.
###
[](https://docs.lovable.dev/prompting/prompting-one#leveraging-model-insights-know-your-ai-tools)
Leveraging model insights (know your AI tools)
Not all AI models are the same, and even the same model can behave differently depending on settings. To get master-level results, it helps to understand the tools at your disposal in Lovable:
* **Chat Mode vs Agent Mode:** Lovable provides (as of this writing) a **Chat mode** (conversational AI assistant) and an Agent/Editor mode (which directly applies changes). Use them intentionally. **Chat Mode** is excellent for brainstorming, discussing design decisions, or debugging – the AI can freely generate ideas or analysis without immediately coding. For example, you might describe an error and in Chat mode say, _“Let’s analyze this error log and figure out what went wrong.”_ The AI can then walk through potential causes. **Agent Mode**, on the other hand, is for executing changes (writing code, creating components). A typical workflow might be: outline or troubleshoot in Chat mode, and once you have a plan, switch to Agent mode to implement it with a straightforward prompt (since agent mode will modify your project files). Knowing when to use each mode keeps your development flow efficient and safe.
* **Token Length and Responses:** Be aware of the response length. If you ask for a very large output (like a whole module of code), the AI might cut off or lose coherence if it exceeds the token limit. In such cases, break the task into smaller prompts (e.g., generate code for one function at a time). Lovable’s chat or prompt UI might show a warning if output is truncated – that’s a sign to request the remaining part or divide the work.
* **Formatting and Code Preferences:** The AI can adapt to your formatting preferences if you state them. For example, tell it “output code in markdown format” or “follow the project’s ESLint rules” if you have them. It won’t magically know your style guide unless you include it in the context. If you prefer certain naming conventions or patterns, you can mention that in the prompt (this is part of being Explicit). Over time, as the AI sees consistent style in your project, it will mimic it – but giving gentle reminders in prompts can accelerate that alignment.
In summary, treat the AI as a powerful but literal tool. Understand the modes and models you’re interacting with, and always frame your prompts to play to their strengths (structured, detailed input) while guarding against their weaknesses (forgetfulness, verbosity, hallucinations). Now, let’s translate these principles into concrete best practices for using Lovable effectively.
[](https://docs.lovable.dev/prompting/prompting-one#additional-prompting-tips)
**Additional prompting tips**
----------------------------------------------------------------------------------------------------------------
Finally, let’s cover specific tips and techniques when working in the Lovable platform. These best practices combine the general prompt engineering concepts with Lovable’s features to help you get the best outcome.
###
[](https://docs.lovable.dev/prompting/prompting-one#start-with-a-solid-knowledge-base)
Start with a solid knowledge base
Before you even write a prompt, set up your project’s Knowledge Base (in Lovable’s project settings). Include the **Project Requirements (PRD)**, user flows, tech stack details, UI design guidelines, and any backend specifics. This acts as persistent context the AI will always have. For example, if your PRD clearly lists “Out of scope: social login”, the AI is less likely to randomly add a Google login feature. You can also explicitly prompt at the start:
_Before writing any code, read the project Knowledge Base and confirm you understand the app’s purpose and constraints._
This ensures the AI internalizes your project’s context and reduces irrelevant suggestions or hallucinated features.
###
[](https://docs.lovable.dev/prompting/prompting-one#be-specific%2C-avoid-vagueness)
Be specific, avoid vagueness
Vague prompts lead to vague results. Always clarify _what_ you want and _how_.
**DON’T**:
Copy
Ask AI
Make this app better.
**Another example:**
Copy
Ask AI
Create a form for user input
**DO**:The latter gives clear direction on scope and expected outcome.
Copy
Ask AI
Refactor the app to clean up unused components and improve performance, without changing UI or functionality.
**Another example:**
Copy
Ask AI
Create a user registration form with fields for username, email, and password and include a submit button.
###
[](https://docs.lovable.dev/prompting/prompting-one#incremental-prompting)
Incremental prompting
Resist the urge to ask for an entire complex app in one prompt. Break your development process into logical steps and prompt for one at a time.
**DON’T**:
Copy
Ask AI
Build a CRM app with Supabase, auth, Google Sheets export, and data enrichment.
Build my entire e-commerce app with authentication, product listings, and checkout.
**DO**:This step-by-step progression helps the AI stay focused and accurate, and you can catch issues early:
Copy
Ask AI
Set up a Supabase-connected CRM backend.
Copy
Ask AI
Great! Could you please add a secure authentication flow with user roles?
Copy
Ask AI
Thank you! The next step is to integrate Google Sheets to export records.
**Another example:**
Copy
Ask AI
Set up a database schema for user information.
Copy
Ask AI
Develop an API endpoint to retrieve user data please
###
[](https://docs.lovable.dev/prompting/prompting-one#include-constraints-and-requirements)
Include constraints and requirements
Don’t shy away from spelling out constraints. If something _must_ or _must not_ be done, say so.
**Adding constraints**
Copy
Ask AI
Create a simple to-do app with a maximum of 3 tasks visible at a time.
Include the ability to add, edit, and delete tasks.
Copy
Ask AI
Optimize this code, but ensure the UI and core functionality remain unchanged. Document each change you make.
Copy
Ask AI
Use at most 3 API calls for this, and ensure no external library is required.
Copy
Ask AI
The page should display a maximum of 3 tasks at a time.
Such limits keep the AI from over-engineering. Adding a constraint like a max number of items or a performance target can focus the AI on what’s important.
###
[](https://docs.lovable.dev/prompting/prompting-one#avoid-ambiguity-in-wording)
Avoid ambiguity in wording
If a term could be interpreted in different ways, clarify it. The clearer you are, the less the AI has to guess.
**DON’T**:
Copy
Ask AI
Add a profile feature
Copy
Ask AI
Support notifications
**DO**:The latter gives clear direction on scope and expected outcome.
Copy
Ask AI
Add a user profile page with fields X, Y, Z.
Copy
Ask AI
Send an email notification on form submission.
###
[](https://docs.lovable.dev/prompting/prompting-one#mind-your-tone-and-courtesy)
Mind your tone and courtesy
While it doesn’t change functionality, a polite tone can sometimes yield better results. Phrases like “please” or a respectful ask can add context and make the prompt a bit more descriptive, which can help the AI. For example,
_Please refrain from modifying the homepage, focus only on the dashboard component._
This reads as polite, and it explicitly tells the AI what not to do. It’s not about the AI’s feelings – it’s about packing in detail. (Plus, it never hurts to be nice!)
###
[](https://docs.lovable.dev/prompting/prompting-one#use-lovable%E2%80%99s-modes-intentionally)
Use Lovable’s modes intentionally
As mentioned, utilize **Chat Mode** for planning and **Agent Mode** for building. For example, when starting a new feature, you might enter Chat Mode and brainstorm the component breakdown:
I want to add a blog section to my app. Let’s discuss how to structure the data and pages.
The AI might respond with an outline. Once you’re satisfied, you can switch to Agent Mode and say:
Create a `BlogPost` page and a supabase table or schema for blog posts based on the above plan.
###
[](https://docs.lovable.dev/prompting/prompting-one#use-formatting-to-your-advantage)
Use formatting to your advantage
Structure lists or steps when appropriate. If you want the AI to output a list or follow a sequence, enumerate them in the prompt. By numbering steps, you hint the AI to respond in kind.
Copy
Ask AI
Let's think through the process of setting up a secure authentication system:
1. What are the necessary components?
2. How should they interact?
3. Provide the implementation code.
_First, explain the approach. Second, show the code. Third, give a test example._
###
[](https://docs.lovable.dev/prompting/prompting-one#leverage-examples-or-references)
Leverage examples or references
If you have a target design or code style, mention it or provide an example. Providing an example (image or code snippet) gives the AI a concrete reference to emulate.
**Setting the context**
Copy
Ask AI
We are building a project management tool that helps teams track their tasks.
This tool should have features like:
- user authentication
- project creation
- task assignments
- reporting
Now, for the first task, create the UI for project creation.
**Another example:**
Copy
Ask AI
I need a CRM app with Supabase integration and a secure auth flow. Start by setting up the backend.
**Another example:**
Copy
Ask AI
We are developing an e-commerce platform focusing on eco-friendly products. Generate a product listing page with filters for category and price.
###
[](https://docs.lovable.dev/prompting/prompting-one#using-image-prompts)
Using image prompts
Lovable even allows image uploads with your prompt, so you can show a design and say “match this style”. There are two main approaches here. The first one is a simple prompting approach.
**Simple image upload prompting**You can upload an image and then add an example prompt like this:
Copy
Ask AI
Create and implement a UI that looks as similar as possible to the image attached.
Copy
Ask AI
This screenshot shows a layout issue on mobile. Adjust margins and padding to make it responsive while keeping the same design structure.
Or, you can help AI better understand the content of the image and some additional specifics about it. Excellent results can be achieved by adding specific instructions to the image uploaded. While the image is worth a thousand words, adding a couple of your own to describe desired functionality can go a long way - especially since interactions cannot always be obvious from a static image.
**Image prompting with detailed instructions**
Copy
Ask AI
I want you to create the app as similar as possible to the one shown in this screenshot.
It's essentially a kanban clone.
It should have the ability to add new cards (tickets) in each column, have the ability to change the order of those tickets within a single column, and even move those cards between columns.
Feel free to use the Pangea home dnd npm package for drag-and-drop functionality.
###
[](https://docs.lovable.dev/prompting/prompting-one#feedback-integration)
Feedback integration
Review the AI’s output and provide specific feedback for refinements.
Copy
Ask AI
The login form looks good, but please add validation for the email field to ensure it contains a valid email address.
###
[](https://docs.lovable.dev/prompting/prompting-one#emphasizing-accessibility)
Emphasizing accessibility
Encourage the generation of code that adheres to accessibility standards and modern best practices. This ensures that the output is not only functional but also user-friendly and compliant with accessibility guidelines.
Copy
Ask AI
Generate a React component for a login form that follows accessibility best practices, including appropriate ARIA labels and keyboard navigation support.
###
[](https://docs.lovable.dev/prompting/prompting-one#predefined-components-and-libraries)
Predefined components and libraries
Specify the use of certain UI libraries or components to maintain consistency and efficiency in your project. This directs the AI to utilize specific tools, ensuring compatibility and a uniform design language across your application.
Copy
Ask AI
Create a responsive navigation bar using the shadcn/ui library with Tailwind CSS for styling.
###
[](https://docs.lovable.dev/prompting/prompting-one#)
###
[](https://docs.lovable.dev/prompting/prompting-one#multilingual-prompting)
Multilingual prompting
When working in a multilingual environment, specify the desired language for both code comments and documentation. This ensures that the generated content is accessible to team members who speak different languages, enhancing collaboration.
Copy
Ask AI
Generate a Python script that calculates the Fibonacci sequence. Provide comments and documentation in French.
###
[](https://docs.lovable.dev/prompting/prompting-one#defining-project-structure-and-file-management)
Defining project structure and file management
Clearly outline the project structure, including file names and paths, to ensure organized and maintainable code generation. This provides clarity on where new components should reside within the project, maintaining a coherent file organization.
Copy
Ask AI
Create a new React component named 'UserProfile' and save it as 'components/user-profile.tsx'. Ensure it includes a profile picture, username, and bio section.
###
[](https://docs.lovable.dev/prompting/prompting-one#provide-precise-edit-instructions-focus-the-ai)
Provide precise edit instructions (focus the AI)
By default, when you ask the Lovable Agent to change something, it might rewrite an entire file or multiple files. To avoid unintended changes, be very specific about _where_ and _what_ to change. You can use Lovable’s “Select” feature to highlight a component or file, then prompt about that selection only. Or explicitly name the file/component in your prompt. For example:
\_In the \_`Header`_component, change the signup button’s text to ‘Get Started’ and move it to the left side of the nav bar._
This way, the AI knows to focus on `Header` component and just adjust that part. Another trick: **tell the AI what not to touch**. You might add, “Do not modify any other components or logic unrelated to the header.” This prevents the AI from wandering off and potentially breaking something else. This practice (sometimes called the “Diff & Select” approach) ensures minimal, targeted changes – resulting in faster responses and fewer regression bugs.
###
[](https://docs.lovable.dev/prompting/prompting-one#locking-files-workaround)
Locking files (workaround)
Currently, Lovable might not have an explicit file-lock feature, but you can simulate it through your prompt wording. If there are critical files that the AI should never alter (maybe a complex component that is working fine), you can repeat an instruction in every prompt like:
_Do not change the authentication.js file._
By consistently telling the AI to refrain, you reduce the chance of unwanted edits. Similarly, if you only want the AI to work within one part of the project, explicitly constrain it:
\_Focus changes solely on the \_`ProfilePage`_component; assume all other parts of the app remain as is._
Being upfront about this in the prompt helps keep the AI within bounds.
###
[](https://docs.lovable.dev/prompting/prompting-one#design-and-ui-tweaks)
Design and UI tweaks
When prompting for UI changes in Lovable, clarity is crucial so you don’t break functionality:
* If you want **purely visual changes**, say so. _****“Make the login button blue and 20% larger, but do not alter any of its functionality or onClick logic.”****_ This ensures the AI doesn’t accidentally rename IDs or change logic while restyling.
* For **responsiveness** (making a design mobile-friendly), guide the AI through a plan. For example: _“Optimize the landing page for mobile: use a mobile-first approach. Start by outlining how each section should rearrange on smaller screens, then implement those CSS changes. Use standard Tailwind breakpoints (sm, md, lg) and avoid custom breakpoints. Ensure nothing in functionality changes, just layout.”_ By providing this kind of detailed instruction, you get a thorough adaptation to mobile without breaking the desktop layout.
* If you have a design change in mind, describing the desired outcome and any constraints (like “keep the same HTML structure, just update CSS”) will help the AI focus on the right solution. Always test the app after AI design changes to confirm everything still works as expected.
###
[](https://docs.lovable.dev/prompting/prompting-one#refactoring-and-optimizing-code)
Refactoring and optimizing code
As your project evolves, Lovable’s AI might suggest refactoring to improve performance or maintainability. Prompting for refactoring is an advanced but valuable use-case:
* Emphasize **no change in behavior**: \_“Refactor the _****code for clarity and efficiency, but \_ the app’s functionality and outputs must remain identical.”****_ This tells the AI the refactor should not introduce bugs or feature changes.
* You can ask for a **refactor plan first**: \_“Scan the \_`utils/`_folder and suggest improvements in code structure or duplication. List changes but do not apply them yet.”_ The AI might give you a report of what to improve. Then you can decide which changes to prompt for implementation.
* For large-scale refactoring, do it in stages. Prompt one module at a time, test, then move on. This pairs with the step-by-step principle. For example: first refactor the state management logic, later refactor API calls, rather than everything in one go.
* After refactoring, it’s wise to prompt a quick **post-check**: _“Now that the code is refactored, run through a quick checklist: does the UI look the same and do all tests or key flows still pass?”_ The AI can self-verify or list things to manually check.
###
[](https://docs.lovable.dev/prompting/prompting-one#debugging-with-ai-assistance)
Debugging with AI assistance
Bugs are inevitable. Lovable has a “Try to Fix” feature for quick fixes, but you can also enlist the AI through prompts:
* When an error occurs, copy any **error logs or messages** into a prompt (in Chat mode ideally) and ask: _“Here’s the error and relevant code snippet – what is causing this and how can we fix it?”_ Detailed error context helps the AI pinpoint the issue.
* Use the CLEAR principles while debugging: be Explicit about what the code was supposed to do versus what happened. Sometimes just explaining the bug in detail to the AI will lead it to the solution.
* If the AI’s first fix doesn’t work, use the Adaptive principle: clarify what changed or provide the new error, and ask it to try again or suggest an alternative approach.
* Leverage Chat Mode to discuss the bug: _“The fix didn’t work. The state is still undefined at runtime. What else could be wrong? Let’s think through possible causes.”_ You can have a back-and-forth until a plausible solution is found, then apply it in Agent Mode.
For UI bugs, you can even share a screenshot (if Lovable supports image input in chat) or describe the visual issue. E.g., “The sidebar is supposed to hide on mobile, but it’s still visible. Here’s the CSS… Why might it be failing?” The AI can reason about CSS or layout issues if given enough info.
* Always test after a fix. If it works, consider using Reverse Meta Prompting to have the AI summarize what the root cause was and how to avoid it in the future, enriching your knowledge base.
###
[](https://docs.lovable.dev/prompting/prompting-one#when-and-when-not-to-involve-the-ai)
When (and when not) to involve the AI
* A master prompter knows that sometimes, you don’t need to prompt at all. If a change is extremely small or you already know how to do it quickly (e.g., changing a text label, adjusting one padding value), it can be faster to just do it manually in the code editor. Over-relying on the AI for trivial tasks can slow you down and use up your prompt quota. Use the AI where it adds value – complex logic, boilerplate generation, multi-step operations, or things you’re unsure about. For simpler issues, you might:
* Use your own knowledge or a quick search (or even ask ChatGPT outside of Lovable) to figure it out, especially if it avoids burning a prompt on something the AI might misunderstand.
* Utilize developer tools: open the browser DevTools console to inspect an element or debug a JavaScript error in real time. Once you identify the fix, you can either implement it directly or confirm via a prompt.
If you notice a button is the wrong color, it might be faster to just fix the CSS class yourself than to describe the issue to the AI and risk it changing more than intended. On the other hand, if you need to implement a new feature from scratch, that’s a perfect job for the AI – you describe the what and why, and it figures out the how in code.
Remember, Lovable’s AI is like an assistant developer. You manage it by giving clear tasks and oversight. It can drastically speed up development, but you remain the lead who reviews and directs the work.
[](https://docs.lovable.dev/prompting/prompting-one#applying-these-strategies-in-different-tools)
Applying these strategies in different tools
--------------------------------------------------------------------------------------------------------------------------------------------------
The prompting principles above apply not just in Lovable’s chat, but anywhere you interact with AI or automation tools:
###
[](https://docs.lovable.dev/prompting/prompting-one#in-lovable%E2%80%99s-builder)
In Lovable’s builder
You’ll primarily use these prompts in the Lovable chat interface to build and refine your app.
1. Start with a broad project prompt, then iterate feature by feature.
2. Use Chat-Only mode when you need to discuss or debug without changing code.
###
[](https://docs.lovable.dev/prompting/prompting-one#with-make-com-or-n8n-workflow-automation)
W[******ith make.com or n8n (workflow automation)******](http://make.com/)
You might not prompt these platforms in natural language the same way, but designing an automation **still benefits from clear AI instructions**. For instance, you can have Lovable generate integration logic:
[_**When a form is submitted, send the data to a Make.com webhook for Slack notification.**_](http://make.com/)
In fact, Lovable can help set up automation by integrating with webhooks. If your app needs to hand off tasks (like sending emails, updating a CRM), you can prompt Lovable to use Make or n8n.
[_**After a user signs up in the app, trigger a Make.com workflow that creates a record in Salesforce.**_](http://make.com/)
Lovable will write the code to call that webhook or API. Keeping the prompt structured ensures the AI knows exactly how to connect Lovable with those external services.
###
[](https://docs.lovable.dev/prompting/prompting-one#edge-cases-and-external-integrations)
**Edge cases and external integrations**
Lovable integrates with many services (Stripe, GitHub, Supabase, etc.). When prompting for these, treat the integration details as part of your **Context/Constraints**. For example,
_Connect the form to Stripe (test mode) for payments. On success, redirect to /thank-you._
Be clear about what external services should do. The same goes for using n8n (self-hosted automation) – you might write,
_Send a POST request to the n8n webhook URL after form submission, and wait for its response to show a confirmation message._
Clarity here is key so the AI produces the correct calls.
[](https://docs.lovable.dev/prompting/prompting-one#summary)
Summary
------------------------------------------------------------------------
* Strong prompting is about **clarity, structure, and context**. Whether you’re telling Lovable to build a feature, or orchestrating a [Make.com](http://make.com/)
scenario, the goal is to paint a picture of what you want.
* Start with structured prompts if you’re unsure, and evolve to more conversational style as you gain confidence.
* Use meta techniques to improve and learn from each interaction.
* With practice, you’ll guide the AI like an extension of your dev team – and it will feel natural to get exactly the output you need.
[](https://docs.lovable.dev/prompting/prompting-one#conclusion)
Conclusion
------------------------------------------------------------------------------
By now, you should have a solid grasp of how to craft prompts that are clear, effective, and tailored to Lovable’s AI. From the foundational CLEAR principles to advanced strategies like few-shot examples and meta prompting, these techniques empower you to get exactly what you need from the AI – no more, no less. You’ve learned to structure your requests, provide context, avoid pitfalls like hallucinations, and leverage Lovable-specific features (Knowledge Base, Chat mode, etc.) to streamline your workflow. Master-level prompting is a game changer: it turns AI from a gimmick into a reliable teammate. With practice, you’ll find that you can build apps faster, debug with less frustration, and even explore creative solutions by simply _asking the right questions_ and giving the right guidance. The key is to stay **smart, concise, direct, and adaptive** in your instructions – much like a seasoned engineer communicating with their team. Finally, always keep learning from each interaction (that Reflective habit). Every prompt/response is feedback for you to refine your technique further. As you continue to build in Lovable, you’ll develop an intuition for what the AI needs to hear to produce great results. Combine that with your own ingenuity, and there’s little you can’t achieve. **Focus on your big ideas** – let Lovable’s AI handle the execution details once you clearly tell it what to do. Happy prompting, and happy building!
Was this page helpful?
YesNo
[Prompt library](https://docs.lovable.dev/prompting/prompting-library)
⌘I
---
# Self-hosting: Run your Lovable Cloud project anywhere - Lovable Documentation
[Skip to main content](https://docs.lovable.dev/tips-tricks/self-hosting#content-area)
[Lovable Documentation home page](https://lovable.dev/)
Search...
⌘K
Search...
Navigation
Self-hosting: Run your Lovable Cloud project anywhere
[Introduction](https://docs.lovable.dev/introduction/welcome)
[Features](https://docs.lovable.dev/features/modes)
[Integrations](https://docs.lovable.dev/integrations/introduction)
[Tips & Tricks](https://docs.lovable.dev/tips-tricks/best-practice)
[Prompt engineering](https://docs.lovable.dev/prompting/prompting-one)
[Use cases](https://docs.lovable.dev/use-case/video-tutorials)
[Glossary](https://docs.lovable.dev/glossary)
[Changelog](https://docs.lovable.dev/changelog)
On this page
* [Key principles](https://docs.lovable.dev/tips-tricks/self-hosting#key-principles)
* [Migration overview](https://docs.lovable.dev/tips-tricks/self-hosting#migration-overview)
* [Example: Move your Lovable Cloud project to Supabase](https://docs.lovable.dev/tips-tricks/self-hosting#example%3A-move-your-lovable-cloud-project-to-supabase)
* [1\. Create a new Supabase project](https://docs.lovable.dev/tips-tricks/self-hosting#1-create-a-new-supabase-project)
* [2\. Update environment variables](https://docs.lovable.dev/tips-tricks/self-hosting#2-update-environment-variables)
* [3\. Update Supabase configuration](https://docs.lovable.dev/tips-tricks/self-hosting#3-update-supabase-configuration)
* [4\. Run database migrations](https://docs.lovable.dev/tips-tricks/self-hosting#4-run-database-migrations)
* [5\. Export and import your data](https://docs.lovable.dev/tips-tricks/self-hosting#5-export-and-import-your-data)
* [6\. Reconfigure authentication](https://docs.lovable.dev/tips-tricks/self-hosting#6-reconfigure-authentication)
* [7\. Migrate storage files](https://docs.lovable.dev/tips-tricks/self-hosting#7-migrate-storage-files)
* [8\. Set up environment variables and secrets](https://docs.lovable.dev/tips-tricks/self-hosting#8-set-up-environment-variables-and-secrets)
* [9\. Verify everything works](https://docs.lovable.dev/tips-tricks/self-hosting#9-verify-everything-works)
* [Advanced: CLI migration option](https://docs.lovable.dev/tips-tricks/self-hosting#advanced%3A-cli-migration-option)
[Lovable Cloud](https://docs.lovable.dev/features/cloud)
is designed to be the easiest, fastest, and most enjoyable place to build. Migration is possible because we want you to stay by choice, not necessity. This guide explains how you can self-host and move your Lovable Cloud project to another provider, for example [Supabase](http://supabase.com/)
.
[](https://docs.lovable.dev/tips-tricks/self-hosting#key-principles)
Key principles
---------------------------------------------------------------------------------------
* **You own your code**.
Use our [GitHub integration](https://docs.lovable.dev/integrations/github)
to export your code anytime. Clone, export, and self-host without restriction.
* **You own your data**.
Your database, storage, and configurations can be exported or migrated to another provider.
* **Lovable is built on open source technologies**.
Everything runs on open standards and open-source technologies. No proprietary frameworks, no hidden dependencies.
* **We earn your trust through quality, not control**. Lovable Cloud is designed for speed, simplicity, and reliability. You can build, host, and scale confidently, knowing you can take your project with you.
[](https://docs.lovable.dev/tips-tricks/self-hosting#migration-overview)
Migration overview
-----------------------------------------------------------------------------------------------
| **App components** | **Migration method** | **Notes** |
| --- | --- | --- |
| Database schema | Automatic via SQL migrations | Includes tables, columns, indexes, RLS policies, functions, triggers |
| Storage buckets | Automatic via SQL migrations | Includes access policies |
| Authentication providers | Manual | Reconfigure auth (for example, Google OAuth, GitHub) in your new hosting environment |
| Environment variables and secrets | Manual | Reconfigure any API keys, tokens, or credentials for external services (for example, Stripe) in your new hosting environment |
| Data (table contents) | Manual | Export/import as CSV |
| Storage files | Manual | Download/upload manually |
| User accounts | Manual, partial | You can export user data from the database, but you cannot export user passwords, so you need to trigger a password reset flow. We recommend you plan the migration before onboarding real users. |
[](https://docs.lovable.dev/tips-tricks/self-hosting#example%3A-move-your-lovable-cloud-project-to-supabase)
Example: Move your Lovable Cloud project to Supabase
---------------------------------------------------------------------------------------------------------------------------------------------------------------------
You can connect to any backend solution with some technical knowledge. The below steps guide you how to migrate your Lovable Cloud project to Supabase. For more information on Supabase specific steps, see [Supabase Documentation](https://supabase.com/docs)
.
###
[](https://docs.lovable.dev/tips-tricks/self-hosting#1-create-a-new-supabase-project)
1\. Create a new Supabase project
Follow the steps below to create a new Supabase project.
1. Go to [supabase.com](https://supabase.com/)
→ **New project**
2. Choose your organization and fill in:
* **Project name:** any name
* **Database password:** strong password
* **Region:** closest to your users
3. Click **Create new project** and wait around 2 minutes for the project to initialize.
4. From your new Supabase project settings, **save these values**:
* `Project ID`
* `Public API Key` (anon key)
* `Project URL`: `https://[your-project-id].supabase.co`
###
[](https://docs.lovable.dev/tips-tricks/self-hosting#2-update-environment-variables)
2\. Update environment variables
Replace Lovable Cloud values with new Supabase credentials in your `.env` file.
1. In your Lovable project, go to **Code.**
2. Locate `.env` file.
3. Update Lovable Cloud values with new Supabase credentials:
Copy
Ask AI
VITE_SUPABASE_PROJECT_ID="your-new-project-id"
VITE_SUPABASE_PUBLISHABLE_KEY="your-new-anon-key"
VITE_SUPABASE_URL="https://your-new-project-id.supabase.co"
4. Save changes.
###
[](https://docs.lovable.dev/tips-tricks/self-hosting#3-update-supabase-configuration)
3\. Update Supabase configuration
Replace Lovable Cloud project ID with new Supabase project ID in your `supabase/config.toml`file.
1. In your Lovable project, go to **Code.**
2. Locate `supabase/config.toml` file.
3. Update Lovable Cloud project ID with new Supabase project ID:
Copy
Ask AI
project_id = "your-new-project-id"
4. Save changes.
###
[](https://docs.lovable.dev/tips-tricks/self-hosting#4-run-database-migrations)
4\. Run database migrations
Each Lovable Cloud project includes SQL migration files in the `supabase/migrations/` folder. Run them in **chronological order** based on the timestamp in the filename. They are ordered from earliest to latest. For example:
Copy
Ask AI
20251008155159_[hash].sql # first - earliest
20251008155215_[hash].sql # second
For each migration file in your Lovable Cloud project, follow the steps below:
1. Copy the entire SQL content from each migration file.
2. Paste it into the **SQL editor** in your new Supabase project.
3. Run and wait for success message.
If a migration fails, check the migration order, table dependencies, and SQL syntax errors.
###
[](https://docs.lovable.dev/tips-tricks/self-hosting#5-export-and-import-your-data)
5\. Export and import your data
Export the data from your Lovable Cloud project and then manually import it to your new Supabase project. **Export each table with data from your Lovable Cloud project:**
1. Go to **Cloud → Database → Table**.
2. Click **Export CSV**.
3. Save the file.
**Import CSV files to corresponding tables in your new Supabase project:**
1. Go to **Table Editor**.
2. For each table, click **Insert → Import data from CSV**.
3. Map columns correctly.
4. Click **Import data**.
###
[](https://docs.lovable.dev/tips-tricks/self-hosting#6-reconfigure-authentication)
6\. Reconfigure authentication
If your Lovable Cloud project requires authentication, you need to manually reconfigure auth providers in your new Supabase project.
1. In your new Supabase project, go to **Authentication → Sign In / Providers**.
2. Enable and configure each provider.
3. In your OAuth app settings (for example, Google Console, GitHub),
update **redirect URLs** to use your new Supabase project URL.
###
[](https://docs.lovable.dev/tips-tricks/self-hosting#7-migrate-storage-files)
7\. Migrate storage files
Download any files from storage buckets in your Lovable Cloud project and upload them to your new Supabase project.
1. In your Lovable project, go to **Cloud → Storage**.
2. Download files from your storage buckets.
3. In Supabase, go to **Storage** and upload files to corresponding buckets.
###
[](https://docs.lovable.dev/tips-tricks/self-hosting#8-set-up-environment-variables-and-secrets)
8\. Set up environment variables and secrets
If you are using any external services (for example, Stripe) in your Lovable Cloud project, you need to manually reconfigure API keys, tokens, and credentials in your new Supabase project.
* In your new Supabase project, go to **Edge Functions → Manage Secrets**.
* Add any API keys or external service credentials.
* Save changes.
###
[](https://docs.lovable.dev/tips-tricks/self-hosting#9-verify-everything-works)
9\. Verify everything works
When you are done with all off the steps, your app runs entirely on your Supabase backend. Make sure that everything works, for example:
* App loads without errors
* You can create and read database records
* Authentication works
* Storage uploads/downloads succeed
###
[](https://docs.lovable.dev/tips-tricks/self-hosting#advanced%3A-cli-migration-option)
Advanced: CLI migration option
For developers comfortable with the command line:
Copy
Ask AI
# 1. Install Supabase CLI
npm install -g @supabase/cli
# or
brew install supabase/tap/supabase
# 2. Update config files (.env + supabase/config.toml)
# 3. Link to your new Supabase project
supabase login
supabase link --project-ref your-new-project-id
# 4. Push all migrations
supabase db push
# 5. Verify schema
supabase db diff
Was this page helpful?
YesNo
[Avoiding security pitfalls](https://docs.lovable.dev/tips-tricks/avoiding-security-pitfalls)
⌘I
---
# Prompt library - Lovable Documentation
[Skip to main content](https://docs.lovable.dev/prompting/prompting-library#content-area)
[Lovable Documentation home page](https://lovable.dev/)
Search...
⌘K
Search...
Navigation
Prompt library
[Introduction](https://docs.lovable.dev/introduction/welcome)
[Features](https://docs.lovable.dev/features/modes)
[Integrations](https://docs.lovable.dev/integrations/introduction)
[Tips & Tricks](https://docs.lovable.dev/tips-tricks/best-practice)
[Prompt engineering](https://docs.lovable.dev/prompting/prompting-one)
[Use cases](https://docs.lovable.dev/use-case/video-tutorials)
[Glossary](https://docs.lovable.dev/glossary)
[Changelog](https://docs.lovable.dev/changelog)
On this page
* [Starting projects](https://docs.lovable.dev/prompting/prompting-library#starting-projects)
* [UI/UX design](https://docs.lovable.dev/prompting/prompting-library#ui%2Fux-design)
* [Responsiveness](https://docs.lovable.dev/prompting/prompting-library#responsiveness)
* [Refactoring](https://docs.lovable.dev/prompting/prompting-library#refactoring)
* [App types](https://docs.lovable.dev/prompting/prompting-library#app-types)
* [React development](https://docs.lovable.dev/prompting/prompting-library#react-development)
* [Locking files / Limiting scope](https://docs.lovable.dev/prompting/prompting-library#locking-files-%2F-limiting-scope)
* [Planning](https://docs.lovable.dev/prompting/prompting-library#planning)
* [Stripe setup](https://docs.lovable.dev/prompting/prompting-library#stripe-setup)
* [Supabase and backend](https://docs.lovable.dev/prompting/prompting-library#supabase-and-backend)
* [Workflow](https://docs.lovable.dev/prompting/prompting-library#workflow)
* [Using chat mode vs Agent Mode](https://docs.lovable.dev/prompting/prompting-library#using-chat-mode-vs-agent-mode)
* [Writing knowledge bases and PRDs](https://docs.lovable.dev/prompting/prompting-library#writing-knowledge-bases-and-prds)
_Welcome to the prompt library\\!_ Here we’ve collected a set of reusable prompt patterns and examples for common scenarios when building with AI. Think of these as templates or inspiration that you can tailor to your own project. Each section covers a particular use case – from kicking off a new project to integrating payments – with guidance on when to use it and an example prompt. Feel free to copy these, modify the details, and use them in Lovable or any AI builder. The tone is official yet casual – just like talking to a colleague – and each prompt provides enough context so the AI knows exactly what to do.
[](https://docs.lovable.dev/prompting/prompting-library#starting-projects)
Starting projects
------------------------------------------------------------------------------------------------
**When to use:** At the very beginning of a project. This prompt helps the AI understand the high-level requirements and start building the foundation. Use it to **kick off a new app** by specifying what you’re building, the tech stack, and core features. It’s your project brief.
**How to use:** Outline the type of application, key technologies (frontend framework, backend, any services), and the primary features or pages. Then, direct the AI on where to start (often the main page or an important feature). This establishes the project scope and initial focus.
**Example prompt – starting a new project:**
Copy
Ask AI
I need a **task management** application with:
- **Tech Stack:** Next.js frontend, Tailwind CSS for styling, Supabase for auth and database.
- **Core Features:** Project and task creation, assigning tasks to users, due date reminders, and a dashboard overview.
Start by building the **main dashboard page**, containing:
- A header with navigation,
- A list of projects with their status,
- and a button to create a new project.
Provide dummy data for now, and ensure the design is clean and responsive.
Copy
Ask AI
Create a new component called [ComponentName] with these features: [list features]. Make it responsive and accessible with proper keyboard navigation. Include proper TypeScript typings for props, and use Tailwind for styling.
Copy
Ask AI
Explain how this function works in simple terms, highlighting its inputs, outputs, and any side effects: [paste function]. What edge cases does it handle or miss? How could it be improved?
This prompt follows a proven structure for new projects. It first states the app type and tech stack, then lists core features, and finally tells the AI where to begin (the main dashboard page, with specifics). By doing this, you give Lovable a clear roadmap to initiate the project. _(Pro tip: It’s often wise to start with an empty project and build up gradually, so the AI doesn’t get overwhelmed.)_
[](https://docs.lovable.dev/prompting/prompting-library#ui%2Fux-design)
UI/UX design
----------------------------------------------------------------------------------------
**When to use:** Any time you want to **refine the look and feel** of your app without changing its functionality. This could be polishing the UI, adjusting layouts, or implementing a specific design style.
**How to use:** Clearly specify the scope of the design changes and emphasize that functionality should remain intact. The AI is quite good at styling, but you should guide it on what “look” you want (e.g. modern, minimalist, match a certain design system). If you have multiple changes, tackle them one at a time (e.g. first layout, then colors). Always mention if there are parts of the UI that must not be altered logic-wise.
Lovable has pretty good taste out of the box, but a targeted prompt can help achieve a specific aesthetic or UX improvement. For example, you might want to restyle a button, improve form layout, or ensure consistency in spacing. **Example prompt – UI only changes:**
Copy
Ask AI
The app UI should be improved, **without changing any functionality**.
- Keep all existing logic and state management as is.
- **Visual Enhancements:** Update the styling of the dashboard page: use a modern card design for each project listing, improve the color scheme for better contrast, and increase padding for a cleaner layout.
- Ensure these changes do **not break any functionality or data flow**.
*Goal:* purely cosmetic improvements for a more polished look, with the app behaving exactly as before.
Copy
Ask AI
Enhance the visual appeal of this component: [paste component]. Add animations, improve spacing, create a polished look while maintaining accessibility standards and responsive behavior.
Copy
Ask AI
Create a comprehensive design system for my application with a color palette, typography scale, spacing system, and component variants. Include dark mode support and ensure all components are accessible (WCAG AA compliant).
Copy
Ask AI
Design a responsive dashboard layout with [describe key metrics/widgets]. It should work well on mobile, tablet, and desktop with appropriate layout shifts. Include a sidebar navigation that collapses on mobile.
Copy
Ask AI
Transform this desktop-only component into a mobile-first design with responsive breakpoints: [paste component]. Prioritize content and interactions for small screens first, then enhance for larger screens.
Copy
Ask AI
Add subtle, performant animations to this component to enhance user experience: [paste component]. Include enter/exit animations, hover states, and micro-interactions that provide feedback without being distracting.
Copy
Ask AI
Analyze and optimize the user flow for [describe task/goal]. Map out each step of the journey, identify friction points, and suggest UI improvements to create a more intuitive experience with fewer steps.
Copy
Ask AI
Review these components for accessibility issues and suggest improvements: [paste components]. Check for proper keyboard navigation, screen reader support, sufficient color contrast, and appropriate ARIA attributes.
In this prompt, we explicitly say to make solely visual enhancements and not affect how the app works. This is crucial – it tells the AI “don’t touch the logic.” We list specifics (card design, color contrast, spacing) so the AI knows what aspects of the UI to tweak. This kind of prompt is perfect after you’ve built features and want to beautify the interface.
[](https://docs.lovable.dev/prompting/prompting-library#responsiveness)
Responsiveness
------------------------------------------------------------------------------------------
**When to use:** When your app’s layout needs to work across different screen sizes (mobile, tablet, desktop). If you notice things look good on desktop but break on mobile, it’s time for a responsiveness prompt. It’s also wise to do this as a final pass on any UI-heavy task.
**How to use:** Emphasize a **mobile-first approach** and ask the AI to ensure the design is responsive at all standard breakpoints. If using a CSS framework like Tailwind, mention to use its grid/flex and built-in breakpoints. You can also instruct the AI to avoid any fixed widths or anything that would prevent fluid resizing. Providing an example of what breaks on small screens (if you have one) can help, or simply say “make everything adapt to smaller screens gracefully.”
**Example prompt – mobile responsiveness:**
Copy
Ask AI
Our app needs to be **fully responsive** across mobile, tablet, and desktop.
- Follow a **mobile-first** strategy: prioritize the layout for small screens, then adjust for larger screens.
- Use modern UI/UX best practices for responsive design. (For Tailwind CSS, use the standard breakpoints `sm, md, lg, xl` – no custom breakpoints unless necessary.)
- Ensure every page (especially the dashboard and project detail pages) reflows properly on a small screen: elements should stack or resize as needed, text should remain readable, and no content should overflow off-screen.
- **Do not change the core design or functionality**, just make sure it flexibly adapts to different screen sizes.
After making changes, please double-check the layout at iPhone 12 dimensions and a typical desktop width.
In this prompt, we explicitly instruct the AI to make all designs responsive at every breakpoint, focusing on mobile first. We even reference Tailwind’s standard breakpoints to guide the implementation. We clarify that the design and functionality shouldn’t fundamentally change; it should just work well on smaller screens. This sets a clear expectation: the outcome should look the same design-wise, but fluidly resize and re-stack for responsiveness.
_(Using Lovable’s image upload? You could attach a screenshot of a broken mobile layout and ask: “Make it look like this on mobile.” Visual prompts can reinforce what you describe.)_
[](https://docs.lovable.dev/prompting/prompting-library#refactoring)
Refactoring
------------------------------------------------------------------------------------
**When to use:** Periodically during development, especially if the AI or you have added a lot of code and things are getting messy or slow. Refactoring means cleaning up the code without changing what it does – improving structure, readability, or performance. Lovable might even suggest refactoring if it detects a lot of repeated patterns or long functions.
**How to use:** Identify the scope: is it a single file, a specific feature, or the whole codebase? For a single file or component, you can prompt something like “Refactor this file for clarity and efficiency, but **do not alter its functionality or output**.” Emphasize that everything should behave the same after refactoring. If you want, specify what to focus on (e.g., reduce duplication, improve variable names, simplify logic). For larger-scale refactoring, it’s wise to ask the AI to **plan the refactor in steps** (see the next section on Planning) or audit the code structure first.
**Example prompt – safe file refactor:**
Copy
Ask AI
Refactor the **ProjectList component file**, but **keep its behavior and UI exactly the same**.
Goals:
- Improve the code structure and readability (simplify complex functions, break into smaller ones if needed).
- Remove any unused variables or imports.
- Ensure the file follows best practices and is well-documented.
Do **not** introduce any new features or change how the component works for the user – this is purely a code cleanup for maintainability. If any part of the code is unclear, add a brief comment for clarification.
Copy
Ask AI
Review this code and suggest improvements for readability, performance, and maintainability: [paste code]. Focus on TypeScript best practices, proper error handling, and adherence to React patterns.
Copy
Ask AI
Suggest a folder structure for a [type] application with these features: [list features]. Include guidelines for organizing components, hooks, utilities, and types with proper separation of concerns.
Copy
Ask AI
I'm getting this error: [paste error]. Here's the relevant code: [paste code]. Can you help me understand what's causing it and how to fix it? Please explain why the solution works.
This prompt clearly states the component to refactor and the constraints (no functional changes allowed). It prioritizes structure and maintainability. The AI will go through the file, maybe reordering functions, renaming things for clarity, commenting tricky parts, etc., but the output of the app should remain identical. This helps prevent the dreaded scenario of a “refactor” accidentally breaking something. For bigger refactoring efforts (like many files or an entire project), consider having the AI **analyze the codebase first**. You can use a prompt to get a report on what could be improved and where (see the Debugging section’s _Full System Review_ prompt for an idea). Then, apply changes incrementally. Refactor in small pieces and test as you go, rather than one massive overhaul.
[](https://docs.lovable.dev/prompting/prompting-library#app-types)
App types
--------------------------------------------------------------------------------
Copy
Ask AI
Create a starter e-commerce store with product listing, search, filtering, cart functionality, and checkout process. Include user accounts, order history, and basic product management. Focus on a clean, conversion-oriented UI.
Copy
Ask AI
Build a basic CMS for managing blog posts or articles with an admin dashboard. Include features for creating, editing, and publishing content with rich text formatting, image uploads, and basic SEO management.
Copy
Ask AI
Create a project management app with task boards, lists, and cards. Include features for task assignment, due dates, labels, comments, and progress tracking. Implement drag-and-drop functionality and user collaboration.
Copy
Ask AI
Build a social media feed component with posts, comments, likes, and sharing functionality. Include user profiles, follow/unfollow mechanics, and a notification system. Ensure the design is responsive and supports infinite scrolling.
Copy
Ask AI
Create an analytics dashboard with multiple chart types (bar, line, pie), data filtering options, date range selection, and exportable reports. Include responsive design and skeleton loading states for data fetching.
Copy
Ask AI
Build a SaaS application starter with user authentication, subscription management, a settings page, and a basic dashboard. Include role-based access control, account management, and a well-structured architecture for future expansion.
Copy
Ask AI
Create a chat interface with an AI assistant that helps users with [describe task/purpose]. Include conversation history, typing indicators, message threading, and the ability to provide feedback on AI responses.
Copy
Ask AI
Build a tool that uses AI to generate [describe content type] based on user inputs and parameters. Include options to refine the generated content, save favorites, and export in different formats.
Copy
Ask AI
Implement a recommendation component for [describe items] based on user behavior and preferences. Include the ability to provide feedback on recommendations, see why items were recommended, and discover new options.
Copy
Ask AI
Enhance the search experience for [describe content] with AI-powered features like natural language understanding, semantic search, and intelligent ranking of results. Include search suggestions and auto-complete.
Copy
Ask AI
Create a dashboard that uses AI to analyze [describe data] and present insights in an accessible way. Include visualizations, plain-language explanations of trends, and the ability to ask questions about the data.
Copy
Ask AI
Implement a system for personalizing the user experience based on behavior and preferences. Include customizable UI elements, content recommendations, and settings that allow users to control their personalization.
[](https://docs.lovable.dev/prompting/prompting-library#react-development)
React development
------------------------------------------------------------------------------------------------
Copy
Ask AI
Create a custom React hook called use[Name] that handles [functionality]. It should handle proper state initialization, cleanup, memoization of values, and TypeScript typing. Include example usage and error handling.
Copy
Ask AI
Refactor this component to use React Context instead of prop drilling: [paste component]. Create a proper context provider with typed state and actions, and separate the business logic from UI rendering.
Copy
Ask AI
Optimize this React component to prevent unnecessary re-renders: [paste component]. Use memo, useMemo, and useCallback where appropriate. Add explanatory comments about why each optimization is needed.
Copy
Ask AI
Create a form with validation for [describe form fields and validation rules]. Use react-hook-form with zod schema validation, proper error handling, and submission handling that includes loading states.
Copy
Ask AI
Implement a data fetching pattern for [describe the data] using React Query. Include proper loading states, error handling, optimistic updates, and data synchronization strategies.
Copy
Ask AI
Create a smooth transition animation for [describe the element] when it [describe the action]. Use CSS transitions or Framer Motion, ensuring the animation works well across devices and doesn't harm performance.
[](https://docs.lovable.dev/prompting/prompting-library#locking-files-%2F-limiting-scope)
Locking files / Limiting scope
----------------------------------------------------------------------------------------------------------------------------
**When to use:** Sometimes you want the AI to focus on specific parts of the project and leave everything else untouched – essentially “lock” certain files or areas so they are not modified. This is useful if you’ve manually written some code or have a stable component you don’t want altered while the AI works on something else. Since Lovable doesn’t have a literal file-lock feature yet, using the prompt to constrain scope is the next best thing.
**How to use:** In your prompt, **explicitly instruct the AI not to change** certain files or components. You might say, “Don’t edit the authentication files,” or “Keep the HomePage component unchanged.” Also, be clear about where the AI _should_ focus changes. This directive should be included each time you prompt during that sensitive period, to remind the AI of the boundary.
**Example prompt – limit scope of changes:**
Copy
Ask AI
Please **focus only on the Dashboard page** for this change.
- Do **not modify** the `LoginPage.tsx` or `AuthProvider.tsx` files at all (authentication is working well, and we want to keep it intact).
- Concentrate your code edits on `Dashboard.tsx` and related dashboard components **only**.
Task: Add a new section to the Dashboard that shows “Tasks due this week”. Make sure to fetch the relevant tasks from the database.
*(Again, no changes to login or auth files – those are off-limits.)*
Here we included a very direct constraint: \_“refrain from altering pages X or Y and focus changes solely on page Z.”\_. By repeating this in the prompt, we guide the AI’s attention. The task itself (adding a dashboard section) is given, but we wrapped it with instructions about scope. This greatly reduces the chance of Lovable tinkering with your login system while trying to add a dashboard feature. Another scenario is when updating a very delicate feature. In such cases, you can combine scope limitation with a cautionary tone. For example: _********“This update is sensitive; proceed very carefully and avoid touching anything unrelated”********_. This was demonstrated in a prompt like: \_“This update is quite delicate… Steer clear of shortcuts or assumptions — take a moment to seek clarification if unsure. Precision is crucial.”\_. Including a line like that sets the AI’s “mindset” to be extra cautious.
[](https://docs.lovable.dev/prompting/prompting-library#planning)
Planning
------------------------------------------------------------------------------
**When to use:** Before diving into a complex or multi-step implementation, or when you have a big feature that could be broken into sub-tasks. Planning prompts are also useful if you want the AI to outline an approach before writing code, so you can verify the plan (and adjust it) without burning through code-generation credits on a wrong path. Essentially, use this when the _strategy_ isn’t straightforward and you’d like the AI’s help to think it through.
**How to use:** Ask the AI to produce a plan or checklist. You can say, “Outline a step-by-step plan for X” or “Before coding, list the steps you will take to implement Y.” This can be done in Chat mode to ensure it doesn’t execute any code changes while planning. After getting the plan, you might even discuss it (maybe have the AI explain why each step is needed) and then proceed to implementation step by step. Planning prompts are meta – they don’t build the app directly, but they set the stage for a smoother build.
**Example prompt – planning a feature implementation:**
Copy
Ask AI
Before writing any code, **plan out the implementation** of the new Notifications feature.
- List each step required to add email notifications when a task is overdue.
- Consider both frontend (UI changes, if any) and backend (creating scheduled checks or triggers) aspects.
- Ensure the plan keeps the current functionality stable – we can’t break anything existing.
- Provide the plan as an ordered list (1, 2, 3, ...), with a brief explanation of each step.
Once you outline the plan, pause for review. **Do not make any code changes yet.**
This prompt tells the AI to act as a planner. It asks for a sequenced plan to implement an “email notifications for overdue tasks” feature. We explicitly say not to code yet (so we’d run this in Chat mode or just trust that the AI will output a plan). The AI might respond with something like:
1. **Add a timestamp field** to tasks for due date (if not already present).
2. **Create a server-side function** (or scheduled job) to check for overdue tasks periodically.
3. **Integrate email sending** using an email service (e.g., Resend or SMTP) when an overdue task is found.
4. **Update the UI** to allow users to toggle notifications on/off for a task (optional setting).
5. **Test the flow** with a task that just passed its due time to ensure an email is sent.
By reviewing such a plan, you can catch any issues (maybe we realize we need a new DB table, or maybe step 4 is out-of-scope for now, etc.) _before_ any coding happens. It’s a lot easier to tweak the plan than to rewrite bad code. Planning prompts save time in complex features by getting the approach right from the start.
[](https://docs.lovable.dev/prompting/prompting-library#stripe-setup)
Stripe setup
--------------------------------------------------------------------------------------
**When to use:** When you want to integrate payments into your app using Stripe. Lovable has integration points for Stripe, but it requires setting up keys, webhooks, and UI for checkout. A prompt can handle the boilerplate of connecting to Stripe’s API. Use this when you need to add commerce (selling a product, subscription, etc.) in your project.
**How to use:** Provide the details Stripe needs: mode (test or live), product or pricing info, and redirect URLs after payment. Also, instruct how the UI should behave (e.g., a checkout form/modal). It’s **crucial** to mention that sensitive keys will be provided securely (not hard-coded in the prompt) – you typically store those in environment variables or Lovable’s secret storage. So you can say “assume I have set the API keys in the environment.” This way, the AI will know to call the keys, not include them literally. Additionally, specify _not_ to alter unrelated code while setting up Stripe (to avoid accidental changes).
**Example prompt – integrating Stripe payments:**
Copy
Ask AI
I want to **add Stripe payments** to the app.
- Use **Stripe in test mode** for now.
- We have a product in Stripe with ID `prod_12345` and a price ID `price_67890` (one-time purchase).
- Implement a checkout button on the **Pricing page** that starts a Stripe checkout for that product.
- After successful payment, redirect the user to `/payment-success`. If the payment is canceled, redirect to `/payment-cancelled`.
Important:
- Assume API keys and webhook secrets are configured securely (do **not** hard-code them).
- Do **not** modify any other pages or features unrelated to payments.
Once done, provide any webhook endpoint setup instructions I need (e.g., URL to add in Stripe dashboard for post-payment events).
This prompt gives all the key details for Stripe: test mode, product IDs, what happens on success/cancel, and where to put the checkout button. It explicitly says not to touch anything else. The AI (and Lovable’s Stripe integration helper) will use this to scaffold the Stripe integration. Under the hood, Lovable might create a serverless function (if using Supabase) to handle webhooks, etc., but you don’t have to prompt that separately – the instruction here is usually enough for a basic setup. _Note:_ We included a line about API keys being secure because we never want secret keys in the prompt. The docs remind us: \_“Use your Stripe Secret Key in the Supabase Edge Function secrets, and avoid including them in the prompt”\_. So by telling the AI “assume it’s configured,” you ensure the code will reference an environment variable or config, not a plaintext key. After running this prompt, test the payment flow with Stripe’s test card numbers. If something isn’t working (e.g., the webhook), Lovable might show errors which you can then debug or refine with another prompt.
[](https://docs.lovable.dev/prompting/prompting-library#supabase-and-backend)
Supabase and backend
------------------------------------------------------------------------------------------------------
Copy
Ask AI
Enhance the visual appeal of this component: [paste component]. Add animations, improve spacing, create a polished look while maintaining accessibility standards and responsive behavior.
Copy
Ask AI
Design a database schema for [describe your application] with these entity relationships: [describe relationships]. Include foreign key constraints, indexes for performance, and proper data types with considerations for scalability.
Copy
Ask AI
Create a service to fetch data from [API name] and implement caching, error retry logic, and request throttling. Set up proper TypeScript interfaces for the response data and handle API versioning gracefully.
Copy
Ask AI
Create Row Level Security policies for a multi-tenant application with these tables: [list tables]. Implement proper user isolation, role-based access, and handle hierarchical data access with considerations for performance.
Copy
Ask AI
Create a Supabase Edge Function to handle [describe functionality] with proper error handling, input validation, and security checks. Include rate limiting and proper environment variable usage.
Copy
Ask AI
Implement real-time data synchronization for [describe feature] using Supabase subscriptions. Handle connection management, graceful degradation when offline, and conflict resolution.
Copy
Ask AI
Implement a robust search feature for [describe content type] with filtering, sorting, and highlighting of matched terms. Include typeahead suggestions, recent searches, and proper handling of no-results scenarios.
Copy
Ask AI
Create a data table/grid for [describe data] with sorting, filtering, pagination, column resizing, and row selection. Include features for exporting data and customizing visible columns.
Copy
Ask AI
Build a system for importing and exporting [describe data] in various formats (CSV, JSON, etc.). Include validation, progress indicators, error handling, and the ability to map fields during import.
Copy
Ask AI
Create a set of interactive charts for [describe data/metrics] using Recharts. Include different visualization types (bar, line, pie), time period selection, drill-down capabilities, and responsive behavior.
Copy
Ask AI
Implement a strategy for synchronizing offline data changes with a backend when connectivity is restored. Handle conflict resolution, optimistic UI updates, and provide visual indicators for sync status.
Copy
Ask AI
Create a multi-step form wizard for collecting [describe data] with validation, progress tracking, the ability to save drafts, and a summary review before submission. Handle conditional form fields based on previous answers.
[](https://docs.lovable.dev/prompting/prompting-library#workflow)
Workflow
------------------------------------------------------------------------------
Copy
Ask AI
Connect this Lovable project to GitHub and set up a good workflow for contributions. Include branch protection rules, PR templates, and CI/CD workflow configuration with automatic preview deployments.
Copy
Ask AI
Refactor this large component into smaller, more manageable components: [paste component]. Extract reusable parts, implement proper prop passing, maintain state management, and ensure the refactoring doesn't break existing functionality.
Copy
Ask AI
Suggest a testing strategy for [component/feature] including what to test and how. Include unit tests for business logic, integration tests for data flow, and UI tests for critical user flows with best practices for mocking dependencies.
Copy
Ask AI
Implement comprehensive error handling for this async function: [paste function]. Include retry logic, fallback mechanisms, proper error reporting, user-friendly error messages, and logging for debugging purposes.
Copy
Ask AI
Set up a deployment pipeline for this application that includes staging and production environments, automatic database migrations, environment-specific configurations, and rollback capabilities.
Copy
Ask AI
Analyze and optimize this user flow: [describe flow]. Suggest improvements for user experience, reduce friction points, implement progressive enhancement, and ensure accessibility throughout.
[](https://docs.lovable.dev/prompting/prompting-library#using-chat-mode-vs-agent-mode)
Using chat mode vs Agent Mode
------------------------------------------------------------------------------------------------------------------------
**When to use:** Lovable has two modes for prompting: **Agent Mode** (which immediately applies changes to your project) and **Chat-only Mode** (which is more like a conversation without altering code until you say so). Knowing when to use each can streamline your workflow. Use Agent mode for straight coding tasks and use Chat mode for brainstorming, debugging, or when you want to discuss changes before executing them.
**How to use:**
* **Agent mode** is great for when you have a well-defined feature to build or change to make. You give the instruction, and Lovable will do it in one go if possible.
* **Chat Mode**, on the other hand, is useful if you want to have a back-and-forth or analyze something (like asking _“Why is this not working?”_ or _“What’s the best way to do X?”_) without immediately changing the codebase. In Chat Mode, the AI will respond with analysis or a plan, and you usually have to explicitly say “go ahead and implement” when ready.
**Example use case – Agent vs Chat:** Suppose you suspect there is outdated code in your project that needs cleaning up. In Agent mode, you might directly prompt:
_Review the app and tell me where there is outdated code._
Lovable could try to both identify and possibly start refactoring it in one go. But maybe you actually want to be careful and just get advice. In that case, you’d switch to Chat mode and ask something like:
_I’m seeing some deprecated library warnings. What parts of the code might be outdated, and how should we update them?_
Now the AI will _discuss_ this with you, rather than immediately rewriting files. Similarly, if you have an error and you want the AI to analyze it, Chat mode is safer. You can copy an error message and ask:
_What does this error mean, and how can we fix it?_
The AI will explain and propose a solution. Once you agree, you might switch to Agent mode or explicitly instruct to apply the fix. In summary, **use Agent Mode for straightforward building** (“do X for me”), and **use Chat Mode for troubleshooting or design discussions** (“why or how should we do X?”). One concrete workflow is: _Brainstorm in Chat (get a plan or identify issues), then execute in Default._ This approach is even recommended: for example, \_use Chat Mode to have the AI analyze errors before making changes\_. It’s like using ChatGPT for advice and then applying the changes once you’re confident. _(Make sure Chat-Only Mode is enabled in your settings under Labs if you don’t see it. This mode ensures the AI won’t write code to your project until you say so, which is perfect for safe experimentation.)_
[](https://docs.lovable.dev/prompting/prompting-library#writing-knowledge-bases-and-prds)
Writing knowledge bases and PRDs
------------------------------------------------------------------------------------------------------------------------------
**When to use:** At the start of a project and whenever you have more context to give the AI than can fit in a single prompt. In Lovable, the **Knowledge Base** is a special place in your project settings where you can store background information, requirements, and guidelines that persist across prompts. A **Project Requirements Document (PRD)** is a comprehensive summary of your app’s objectives and specs – essentially, the blueprint of what you’re building. Use these tools to prevent misunderstanding and to anchor the AI with the big picture of your project.
**How to use:** Begin by filling out the Knowledge Base in Lovable with key info about your project. This can include:
* **Overview & Goals:** What the project is and the problem it solves.
* **User Flow:** A description of how users navigate or use the app (e.g. “Users sign up, then see a dashboard, can create tasks, etc.”).
* **Core Features & Scope:** What features are in scope (and maybe note any out-of-scope to avoid feature creep).
* **Tech Stack:** What technologies, APIs, and services will be used.
* **Design Guidelines:** Any specific UI/UX instructions – branding, color scheme, layouts, accessibility requirements.
* **Backend Details:** Outline data models, key database tables, integrations like Stripe or Supabase, etc...
This might sound like a lot, but writing it down pays off. **The AI will use this info on every prompt to stay aligned with your project’s needs.** It’s like giving the AI long-term memory about your app. You typically set this up once (and update as needed). After populating the knowledge base, you can literally tell the AI to use it. For example, your very first prompt to Lovable might be: \_“Before writing any code, please ****review the Knowledge Base**** and confirm you understand the project.”\_ This lets the AI summarize or acknowledge the context, and you can catch if it missed something. **Example prompt – using the knowledge base:**
Copy
Ask AI
User: Before you write any code, please review the Knowledge Base and share your understanding of my project.
AI (likely response): “Sure. Based on the Knowledge Base: You’re building a task management app for teams. The app flow is Users sign up -> see a dashboard -> create projects and tasks. The tech stack is Next.js for frontend, Supabase for backend (authentication and database). Core features include project creation, task assignments, and a reporting dashboard. In-scope features: task CRUD, user roles, email notifications; Out-of-scope: real-time collaboration. The design should follow a clean corporate style with Tailwind CSS, and it needs to be responsive. Backend uses Supabase with row-level security for multi-tenant data separation...” (and so on).
This kind of summary from the AI confirms it has ingested your specifications correctly. If it misunderstood anything, you can correct it in Chat mode. Once confirmed, you proceed with building (the AI now “knows” the overall plan). Writing a PRD and filling the Knowledge Base might feel like extra upfront work, but it **pays dividends throughout development**. It reduces errors and AI hallucinations because the AI always has a reference for what the app should do. It’s especially helpful for larger projects that can’t be built in one or two prompts. Think of it as seeding the AI with the same understanding you have in your head. Lastly, maintain the Knowledge Base as your project evolves. If you add a major feature or change the scope, update the PRD/Knowledge Base document. This way, future prompts will consider the new information. It’s much easier than re-explaining context every time. In essence, the Knowledge Base + PRD is your AI project handbook – it keeps everyone (you and the AI) on the same page about what you’re building and how.
Was this page helpful?
YesNo
[Prompting 1.1](https://docs.lovable.dev/prompting/prompting-one)
[Debugging prompts](https://docs.lovable.dev/prompting/prompting-debugging)
⌘I
---
# Avoiding security pitfalls - Lovable Documentation
[Skip to main content](https://docs.lovable.dev/tips-tricks/avoiding-security-pitfalls#content-area)
[Lovable Documentation home page](https://lovable.dev/)
Search...
⌘K
Search...
Navigation
Avoiding security pitfalls
[Introduction](https://docs.lovable.dev/introduction/welcome)
[Features](https://docs.lovable.dev/features/modes)
[Integrations](https://docs.lovable.dev/integrations/introduction)
[Tips & Tricks](https://docs.lovable.dev/tips-tricks/best-practice)
[Prompt engineering](https://docs.lovable.dev/prompting/prompting-one)
[Use cases](https://docs.lovable.dev/use-case/video-tutorials)
[Glossary](https://docs.lovable.dev/glossary)
[Changelog](https://docs.lovable.dev/changelog)
On this page
* [Understanding Lovable’s architecture](https://docs.lovable.dev/tips-tricks/avoiding-security-pitfalls#understanding-lovable%E2%80%99s-architecture)
* [Frontend security: Never trust client-side code](https://docs.lovable.dev/tips-tricks/avoiding-security-pitfalls#frontend-security%3A-never-trust-client-side-code)
* [The golden rule: Frontend code is public](https://docs.lovable.dev/tips-tricks/avoiding-security-pitfalls#the-golden-rule%3A-frontend-code-is-public)
* [Common frontend security mistakes](https://docs.lovable.dev/tips-tricks/avoiding-security-pitfalls#common-frontend-security-mistakes)
* [Examples of prompts for validating and enhancing frontend security](https://docs.lovable.dev/tips-tricks/avoiding-security-pitfalls#examples-of-prompts-for-validating-and-enhancing-frontend-security)
* [Backend security: Move business logic to Edge Functions](https://docs.lovable.dev/tips-tricks/avoiding-security-pitfalls#backend-security%3A-move-business-logic-to-edge-functions)
* [Treat Edge Functions as your API layer](https://docs.lovable.dev/tips-tricks/avoiding-security-pitfalls#treat-edge-functions-as-your-api-layer)
* [Best practices for Edge Functions](https://docs.lovable.dev/tips-tricks/avoiding-security-pitfalls#best-practices-for-edge-functions)
* [What Edge Functions should handle](https://docs.lovable.dev/tips-tricks/avoiding-security-pitfalls#what-edge-functions-should-handle)
* [Security benefits of Edge Functions](https://docs.lovable.dev/tips-tricks/avoiding-security-pitfalls#security-benefits-of-edge-functions)
* [Example of prompts for secure Edge Functions](https://docs.lovable.dev/tips-tricks/avoiding-security-pitfalls#example-of-prompts-for-secure-edge-functions)
* [Database security: Keep RLS simple and start early](https://docs.lovable.dev/tips-tricks/avoiding-security-pitfalls#database-security%3A-keep-rls-simple-and-start-early)
* [Row Level Security (RLS) in Lovable](https://docs.lovable.dev/tips-tricks/avoiding-security-pitfalls#row-level-security-rls-in-lovable)
* [Common RLS patterns in Lovable apps](https://docs.lovable.dev/tips-tricks/avoiding-security-pitfalls#common-rls-patterns-in-lovable-apps)
* [Reviewing RLS in Your Lovable App](https://docs.lovable.dev/tips-tricks/avoiding-security-pitfalls#reviewing-rls-in-your-lovable-app)
* [Prompt Examples for RLS Review](https://docs.lovable.dev/tips-tricks/avoiding-security-pitfalls#prompt-examples-for-rls-review)
* [Quick RLS checklist](https://docs.lovable.dev/tips-tricks/avoiding-security-pitfalls#quick-rls-checklist)
* [Authentication security: Keep logic server-side](https://docs.lovable.dev/tips-tricks/avoiding-security-pitfalls#authentication-security%3A-keep-logic-server-side)
* [Authentication logic must run on the server](https://docs.lovable.dev/tips-tricks/avoiding-security-pitfalls#authentication-logic-must-run-on-the-server)
* [Secure authentication flow](https://docs.lovable.dev/tips-tricks/avoiding-security-pitfalls#secure-authentication-flow)
* [Authentication best practices](https://docs.lovable.dev/tips-tricks/avoiding-security-pitfalls#authentication-best-practices)
* [Workspace protection: Secure internal applications](https://docs.lovable.dev/tips-tricks/avoiding-security-pitfalls#workspace-protection%3A-secure-internal-applications)
* [Ensure that internal apps have “visibility” set to “protected”](https://docs.lovable.dev/tips-tricks/avoiding-security-pitfalls#ensure-that-internal-apps-have-%E2%80%9Cvisibility%E2%80%9D-set-to-%E2%80%9Cprotected%E2%80%9D)
* [Security best practices summary](https://docs.lovable.dev/tips-tricks/avoiding-security-pitfalls#security-best-practices-summary)
* [Development workflow](https://docs.lovable.dev/tips-tricks/avoiding-security-pitfalls#development-workflow)
* [Regular security audits](https://docs.lovable.dev/tips-tricks/avoiding-security-pitfalls#regular-security-audits)
* [Common security checklist](https://docs.lovable.dev/tips-tricks/avoiding-security-pitfalls#common-security-checklist)
* [Using Lovable security checker](https://docs.lovable.dev/tips-tricks/avoiding-security-pitfalls#using-lovable-security-checker)
**Don’t forget to fix Security Checker findings**Make sure to address Lovable’s built-in [security checker](https://docs.lovable.dev/tips-tricks/avoiding-security-pitfalls#using-lovable-security-checker)
findings before publishing your app online. The security checker automatically scans your application and provides valuable recommendations for improving security.
While Lovable AI and tools such as security checker find and prevent a wide range of security issues, it’s not always possible or realistic to automatically discover or address all problems that may appear after an app goes live on the internet. This guide provides a deeper look into how Lovable apps work under the hood, what are important security practices that can help builders protect their customers’ data, and ways to avoid common mistakes.
[](https://docs.lovable.dev/tips-tricks/avoiding-security-pitfalls#understanding-lovable%E2%80%99s-architecture)
Understanding Lovable’s architecture
---------------------------------------------------------------------------------------------------------------------------------------------------------
Unless instructed otherwise, Lovable generates applications with the following architecture:
* **Frontend**: TypeScript/React application
* **Backend**: Supabase Edge Functions (serverless functions)
* **Database**: Supabase (PostgreSQL with real-time capabilities)
This separation of concerns is fundamental to maintaining security. Each layer has specific responsibilities and security considerations.
[](https://docs.lovable.dev/tips-tricks/avoiding-security-pitfalls#frontend-security%3A-never-trust-client-side-code)
Frontend security: Never trust client-side code
-------------------------------------------------------------------------------------------------------------------------------------------------------------------------
###
[](https://docs.lovable.dev/tips-tricks/avoiding-security-pitfalls#the-golden-rule%3A-frontend-code-is-public)
The golden rule: Frontend code is public
All React code runs in the user’s browser and is inherently public. Users can inspect, modify, or bypass any frontend code. Therefore:
* **Never store secrets in frontend code** - API keys, passwords, or sensitive configuration
* **Never perform validation in frontend code** - Client-side validation can be bypassed
* **Never trust frontend data** - Always validate on the edge functions’ side
###
[](https://docs.lovable.dev/tips-tricks/avoiding-security-pitfalls#common-frontend-security-mistakes)
Common frontend security mistakes
Copy
Ask AI
// ❌ WRONG - Never do this
const API_KEY = "sk-1234567890abcdef"; // Exposed to users
const validateUser = (userData) => {
// Client-side validation can be bypassed
return userData.email.includes('@');
};
Correct way is to ask Lovable to add a secret key - it will open a form, and store the secret securely in its own backend.
####
[](https://docs.lovable.dev/tips-tricks/avoiding-security-pitfalls#examples-of-prompts-for-validating-and-enhancing-frontend-security)
Examples of prompts for validating and enhancing frontend security
Copy
Ask AI
Add an API key for Stripe payments securely without exposing it in the frontend code
Copy
Ask AI
Move validation logic from React components to edge functions for better security
Copy
Ask AI
Review frontend code for exposed secrets, API keys, or sensitive information. I have a settings page that displays user preferences and I want to make sure no sensitive data is visible
Copy
Ask AI
Identify client-side validation that should be moved to backend edge functions
For more prompts, see Lovable [Prompt Library](https://docs.lovable.dev/prompting/prompting-library)
.
[](https://docs.lovable.dev/tips-tricks/avoiding-security-pitfalls#backend-security%3A-move-business-logic-to-edge-functions)
Backend security: Move business logic to Edge Functions
-----------------------------------------------------------------------------------------------------------------------------------------------------------------------------------------
###
[](https://docs.lovable.dev/tips-tricks/avoiding-security-pitfalls#treat-edge-functions-as-your-api-layer)
Treat Edge Functions as your API layer
Supabase Edge Functions should contain all your business logic, validation, and sensitive operations:
* **Authentication and authorization**
* **Data validation and sanitization**
* **Business logic and workflows**
* **Integration with external services**
* **Sensitive data processing**
###
[](https://docs.lovable.dev/tips-tricks/avoiding-security-pitfalls#best-practices-for-edge-functions)
Best practices for Edge Functions
Think of edge functions as your application’s security guards and business managers. They handle all the important work that needs to be done safely, away from the public-facing parts of your app.
####
[](https://docs.lovable.dev/tips-tricks/avoiding-security-pitfalls#what-edge-functions-should-handle)
What Edge Functions should handle
**User authentication and authorization**
* Always verify that users are who they claim to be before allowing them to perform actions
* Check if users have the right permissions for specific operations
* Never trust that someone is logged in just because they say they are
**Data validation and sanitization**
* Check all incoming data to make sure it’s in the correct format
* Remove any potentially harmful content from user inputs
* Ensure data meets your business rules before processing it
**Business logic and workflows**
* Handle complex business processes like order processing, payment calculations, or user registration
* Manage relationships between different pieces of data
* Coordinate multiple steps in a single operation
**External service integration**
* Safely connect to third-party services like payment processors, email providers, or APIs
* Keep sensitive API keys and credentials secure
* Handle errors and timeouts gracefully
**Sensitive data processing**
* Process personal information, financial data, or other sensitive content
* Apply encryption or other security measures when needed
* Log important events for security auditing
####
[](https://docs.lovable.dev/tips-tricks/avoiding-security-pitfalls#security-benefits-of-edge-functions)
Security benefits of Edge Functions
**Isolation**: Edge functions run in a secure environment separate from your frontend, making it much harder for attackers to access sensitive code or data. **Centralized Security**: All security checks happen in one place, making it easier to maintain and update security policies. **No Client-Side Exposure**: Sensitive business logic never reaches the user’s browser, where it could be viewed or modified. **Consistent Validation**: Every request goes through the same validation process, ensuring consistent security across your application.
####
[](https://docs.lovable.dev/tips-tricks/avoiding-security-pitfalls#example-of-prompts-for-secure-edge-functions)
Example of prompts for secure Edge Functions
Copy
Ask AI
Create an edge function for user registration with proper validation and security checks. Users should provide email, password, and optional profile picture during sign-up
Copy
Ask AI
Move payment processing logic from frontend to secure edge function. I have a checkout component that currently processes Stripe payments directly in the browser
Copy
Ask AI
Build edge function for file uploads with type and size validation. Users can upload profile pictures (max 5MB) and documents (PDF only, max 10MB)
Copy
Ask AI
Set up edge function to send welcome emails securely when users sign up. Use provider API to send personalized welcome emails with user's name and account details
Copy
Ask AI
Implement edge function for processing webhook events from external services. Handle Stripe payment confirmations and update order status in database
For more prompts, see Lovable [Prompt Library](https://docs.lovable.dev/prompting/prompting-library)
.
[](https://docs.lovable.dev/tips-tricks/avoiding-security-pitfalls#database-security%3A-keep-rls-simple-and-start-early)
Database security: Keep RLS simple and start early
-------------------------------------------------------------------------------------------------------------------------------------------------------------------------------
###
[](https://docs.lovable.dev/tips-tricks/avoiding-security-pitfalls#row-level-security-rls-in-lovable)
Row Level Security (RLS) in Lovable
Lovable automatically sets up basic RLS policies for your tables, but you should review and customize them based on your app’s security needs. Think of RLS as the rules that determine who can see and modify which pieces of data in your database. **Early Review is Critical**: It’s much easier to adjust RLS policies when your app is new rather than after users have already created data. **Simple is Secure**: Keep RLS policies simple and focused on data access, not complex business logic. Lovable’s default policies are usually a good starting point.
####
[](https://docs.lovable.dev/tips-tricks/avoiding-security-pitfalls#common-rls-patterns-in-lovable-apps)
Common RLS patterns in Lovable apps
**Personal Data Protection**
* Users should only see their own profile, settings, and personal data
* Default pattern: “Users can only access their own data”
**Team-Based Access**
* Team members can see shared project data within their team
* Pattern: “Users can access data from teams they belong to”
**Public Content with Ownership**
* Public posts that anyone can read, but only owners can edit
* Pattern: “Anyone can read, only owners can modify”
**Organization-Based Access**
* Company employees can access company data
* Pattern: “Users can access data from their organization”
####
[](https://docs.lovable.dev/tips-tricks/avoiding-security-pitfalls#reviewing-rls-in-your-lovable-app)
Reviewing RLS in Your Lovable App
**Check Your Tables**
* Review which tables have RLS enabled
* Verify that sensitive data tables are protected
* Ensure public data tables have appropriate read policies
**Test Access Patterns**
* Verify users can only see their own data
* Test that shared data is accessible to the right people
* Confirm that public data is visible to everyone
**Common Issues to Look For**
* Tables without RLS enabled on sensitive data
* Overly permissive policies that expose too much data
* Missing policies for new tables or features
####
[](https://docs.lovable.dev/tips-tricks/avoiding-security-pitfalls#prompt-examples-for-rls-review)
Prompt Examples for RLS Review
Copy
Ask AI
Review RLS policies in my Lovable app to ensure users can only access their own data and shared data is properly protected
Copy
Ask AI
Check RLS policies for users and posts tables - users should only see their own profile but can read all public posts
Copy
Ask AI
Add RLS policies to settings table so users can only access their own settings
Copy
Ask AI
Fix overly permissive access - users currently see all posts from all users, restrict to own posts and public posts only
Copy
Ask AI
Set up RLS for teams and projects tables so team members only see projects from their own team
Copy
Ask AI
Ensure users can only access data from their own organization in my multi-tenant app
Copy
Ask AI
Audit RLS policies for security holes where users might access unauthorized data
Copy
Ask AI
Simplify complex RLS policies while maintaining security - current policies are too complicated
####
[](https://docs.lovable.dev/tips-tricks/avoiding-security-pitfalls#quick-rls-checklist)
Quick RLS checklist
* [ ] All sensitive tables have RLS enabled
* [ ] Users can only access their own personal data
* [ ] Shared data has appropriate access controls
* [ ] New tables automatically get RLS policies
* [ ] Policies are simple and easy to understand
[](https://docs.lovable.dev/tips-tricks/avoiding-security-pitfalls#authentication-security%3A-keep-logic-server-side)
Authentication security: Keep logic server-side
-------------------------------------------------------------------------------------------------------------------------------------------------------------------------
###
[](https://docs.lovable.dev/tips-tricks/avoiding-security-pitfalls#authentication-logic-must-run-on-the-server)
Authentication logic must run on the server
All authentication decisions, token validation, and user verification should happen on the server side, not in the browser. Client-side authentication can be easily bypassed or manipulated. **Key principles:**
* **Never trust client-side authentication checks** - Users can modify browser code
* **Validate tokens on the server** - Always verify authentication in edge functions
* **Keep session management server-side** - Let Supabase handle secure session storage
* **Never expose authentication secrets** - API keys and tokens should never reach the frontend
###
[](https://docs.lovable.dev/tips-tricks/avoiding-security-pitfalls#secure-authentication-flow)
Secure authentication flow
Copy
Ask AI
// ❌ WRONG - Client-side authentication logic
const isAuthenticated = localStorage.getItem('authToken') !== null;
if (isAuthenticated) {
// This can be bypassed by users
showAdminPanel();
}
// ✅ CORRECT - Server-side authentication validation
// In edge function:
const { user } = await supabase.auth.getUser();
if (!user) {
return new Response('Unauthorized', { status: 401 });
}
// Proceed with authenticated logic
###
[](https://docs.lovable.dev/tips-tricks/avoiding-security-pitfalls#authentication-best-practices)
Authentication best practices
**Server-Side Validation:**
* Always verify user authentication in edge functions before processing requests
* Check user permissions and roles on the server, not in React components
* Validate session tokens against the database or authentication service
**Client-Side Handling:**
* Use Supabase’s built-in session management for secure token storage
* Display UI based on authentication state, but never make security decisions
* Redirect to login when sessions expire, but validate on server first
[](https://docs.lovable.dev/tips-tricks/avoiding-security-pitfalls#workspace-protection%3A-secure-internal-applications)
Workspace protection: Secure internal applications
-------------------------------------------------------------------------------------------------------------------------------------------------------------------------------
###
[](https://docs.lovable.dev/tips-tricks/avoiding-security-pitfalls#ensure-that-internal-apps-have-%E2%80%9Cvisibility%E2%80%9D-set-to-%E2%80%9Cprotected%E2%80%9D)
Ensure that internal apps have “visibility” set to “protected”
For applications that should not be publicly accessible:
* **Make internal apps “Protected” in project dashboard**
* **Verify they are not published to the internet**
* **Use proper authentication for all internal tools**
* **Regularly audit access to protected applications**
[](https://docs.lovable.dev/tips-tricks/avoiding-security-pitfalls#security-best-practices-summary)
Security best practices summary
---------------------------------------------------------------------------------------------------------------------------------------
###
[](https://docs.lovable.dev/tips-tricks/avoiding-security-pitfalls#development-workflow)
Development workflow
1. **Start with security in mind** - Implement RLS and authentication from day one
2. **Use the security checker** - Run Lovable’s security checker regularly
3. **Follow recommendations** - Implement all security suggestions
4. **Test thoroughly** - Verify security measures work as expected
5. **Document security decisions** - Keep track of security choices and rationale
###
[](https://docs.lovable.dev/tips-tricks/avoiding-security-pitfalls#regular-security-audits)
Regular security audits
* **Review edge function permissions**
* **Audit RLS policies**
* **Check for exposed secrets**
* **Verify authentication flows**
* **Test access controls**
###
[](https://docs.lovable.dev/tips-tricks/avoiding-security-pitfalls#common-security-checklist)
Common security checklist
* [ ] No secrets in frontend code
* [ ] All validation in edge functions
* [ ] RLS policies implemented and tested
* [ ] Authentication using secure methods
* [ ] Internal apps properly protected
* [ ] Security checker run and recommendations followed
* [ ] Regular security reviews conducted
[](https://docs.lovable.dev/tips-tricks/avoiding-security-pitfalls#using-lovable-security-checker)
Using Lovable security checker
-------------------------------------------------------------------------------------------------------------------------------------
Lovable provides a built-in [security checker](https://docs.lovable.dev/features/security#security-scanning-2)
to help identify potential security issues:
1. **Run the security checker** in your project dashboard
2. **Review all recommendations** carefully
3. **Implement suggested fixes** promptly
4. **Re-run the checker** after making changes
5. **Document any exceptions** with clear rationale
Remember: Security is not a one-time task but an ongoing process. Regularly review and update your security measures as your application evolves.
Was this page helpful?
YesNo
[Support policy](https://docs.lovable.dev/tips-tricks/support-policy)
[Self-hosting: Run your Lovable Cloud project anywhere](https://docs.lovable.dev/tips-tricks/self-hosting)
⌘I
---
# SaaS - Lovable Documentation
[Skip to main content](https://docs.lovable.dev/use-case/saas#content-area)
[Lovable Documentation home page](https://lovable.dev/)
Search...
⌘K
Search...
Navigation
SaaS
[Introduction](https://docs.lovable.dev/introduction/welcome)
[Features](https://docs.lovable.dev/features/modes)
[Integrations](https://docs.lovable.dev/integrations/introduction)
[Tips & Tricks](https://docs.lovable.dev/tips-tricks/best-practice)
[Prompt engineering](https://docs.lovable.dev/prompting/prompting-one)
[Use cases](https://docs.lovable.dev/use-case/video-tutorials)
[Glossary](https://docs.lovable.dev/glossary)
[Changelog](https://docs.lovable.dev/changelog)
On this page
* [Step-by-Step Process](https://docs.lovable.dev/use-case/saas#step-by-step-process)
* [Journaling App:](https://docs.lovable.dev/use-case/saas#journaling-app%3A)
* [Calorie Tracker:](https://docs.lovable.dev/use-case/saas#calorie-tracker%3A)
* [Tips for SaaS Builders](https://docs.lovable.dev/use-case/saas#tips-for-saas-builders)
* [Be Explicit](https://docs.lovable.dev/use-case/saas#be-explicit)
* [Work Step-by-Step](https://docs.lovable.dev/use-case/saas#work-step-by-step)
* [Debug Like a Pro](https://docs.lovable.dev/use-case/saas#debug-like-a-pro)
* [Save Tokens](https://docs.lovable.dev/use-case/saas#save-tokens)
* [Advanced features](https://docs.lovable.dev/use-case/saas#advanced-features)
* [Other tutorials](https://docs.lovable.dev/use-case/saas#other-tutorials)
Welcome to the ultimate guide for building SaaS applications using Lovable.dev. This documentation will walk you through building, scaling, and deploying fully working SaaS products without writing a single line of code—unless you want to.
[](https://docs.lovable.dev/use-case/saas#step-by-step-process)
Step-by-Step Process
----------------------------------------------------------------------------------------
1
Start with the UI
**Why**: Begin with the structure and layout of your app to minimize errors and plan ahead.**How**:
* Write a prompt that outlines pages and user flow.
* Optionally add screenshots (Figma, Excalidraw).
* Focus only on front-end initially.
**Prompt Example**:
Copy
Ask AI
Create an AI journaling app with:
- Landing page with Get Started CTA
- Main app with sidebar to view/edit logs
- Chat page to ask questions based on past entries
2
Connect the Backend (Supabase)
**Why**: Store and retrieve user data securely.**How**:
* Press the Supabase button in the Lovable editor
* Create a Supabase project and connect it
* Disable email verification in dev mode for speed
* Define database schema for logs, users, meals, etc.
You own your data and schema. Lovable just simplifies setup.
3
Add Authentication
Lovable adds email/password login by default. You can:
* Redirect to sign-up when users click CTA
* Link entries/meals to authenticated users
**Prompt Example**:
Copy
Ask AI
Add sign up and login. Redirect to sign-up on 'Get Started'.
4
Build Core Features
Each app feature is built incrementally:
####
[](https://docs.lovable.dev/use-case/saas#journaling-app%3A)
Journaling App:
* Rate mood/energy/productivity
* Save & update entries
* View past logs in sidebar
####
[](https://docs.lovable.dev/use-case/saas#calorie-tracker%3A)
Calorie Tracker:
* Input or upload meal
* GPT-4 estimates nutrition (protein, fat, carbs, kcal)
* Visual stats with icons + circular progress bars
* Use the select tool to target specific sections
* Upload screenshots to guide layout or logic
5
Integrate AI (OpenAI)
Use GPT-4 for:
* Journaling analysis
* Meal breakdowns
* Conversational insights
**How**:
* Set up Edge Functions in Supabase
* Add OpenAI API Key via Lovable’s secure backend prompt
* Confirm AI has access to dynamic user data (entries/meals)
**Prompt Example**:
Copy
Ask AI
Create chat page using GPT-4.
Include journal entries in the prompt dynamically.
Use function calling to return structured nutrition data.
6
Add Payments with Stripe (Optional)
Lovable supports **Stripe subscription payments** with edge functions.**How**:
1. Create a Stripe product + price ID
2. Add Stripe API Key to Lovable
3. Define logic: only paying users can access main app
4. Add a customer portal to manage billing
**Prompt Example**:
Copy
Ask AI
Add recurring payments via Stripe.
If not subscribed, redirect user to checkout.
Stripe setup requires a Stripe account. Use test mode while developing.
7
Deployment & Publishing
* Connect GitHub repo from Lovable
* Click “Publish” to launch on `.lovable.app` domain
* Use custom domain
📌 Refer to [Lovable Docs → Custom Domains](https://docs.lovable.dev/tips-tricks/custom-domain)
for full walkthrough.
8
Launch & Share
Submit to [Lovable Launch](https://docs.lovable.dev/features/launched)
for visibility.**Users can:**
* Remix your project
* View your prompts
* Test your SaaS product instantly
[](https://docs.lovable.dev/use-case/saas#tips-for-saas-builders)
Tips for SaaS Builders
--------------------------------------------------------------------------------------------
###
[](https://docs.lovable.dev/use-case/saas#be-explicit)
Be Explicit
* Always describe what _you want_ and what _you see_.
* Use screenshots to clarify bugs or layouts.
###
[](https://docs.lovable.dev/use-case/saas#work-step-by-step)
Work Step-by-Step
* UI first → database → auth → core features → AI → payments
###
[](https://docs.lovable.dev/use-case/saas#debug-like-a-pro)
Debug Like a Pro
* Use chat mode to fix build errors or broken logic
* Revert changes if necessary (does not revert database schema)
###
[](https://docs.lovable.dev/use-case/saas#save-tokens)
Save Tokens
* Use custom knowledge to store consistent instructions (theme, mobile responsiveness)
[](https://docs.lovable.dev/use-case/saas#advanced-features)
Advanced features
----------------------------------------------------------------------------------
Authentication
* Email/password auth via Supabase
* Toggle verification off in dev
Chat with AI
* GPT-4 powered chats
* Journaling context or meal context
* Markdown formatting for cleaner outputs
Visual Dashboards
* Use icons and progress bars (e.g. 21st.dev components)
* Weekly and daily charts
Component Refactoring
* Lovable warns when files/components get too long
* Accept “Yes” to auto-refactor into clean blocks
Manual Code Edits (Optional)
* Connect GitHub repo
* Use Lovable’s built-in VS Code editor
* Make small changes to optimize without using credits
Deployment & Hosting
###
[](https://docs.lovable.dev/use-case/saas#1-lovable-publish)
1\. Lovable Publish
* Click “Publish” to launch on `.lovable.app` domain
###
[](https://docs.lovable.dev/use-case/saas#2-netlify-%2B-github)
2\. Netlify + GitHub
* Connect GitHub repo from Lovable
* Deploy with Netlify
* Use custom domain
📌 Refer to [Lovable Docs → Custom Domains](https://docs.lovable.dev/tips-tricks/custom-domain)
for full walkthrough.
[](https://docs.lovable.dev/use-case/saas#other-tutorials)
Other tutorials
------------------------------------------------------------------------------
* [**AI Journaling App**](https://www.youtube.com/watch?v=gqsZGxuymTk&ab_channel=Lovable)
: Users write daily logs and chat with an AI that gives feedback based on their mood and activity.
* [**AI Calorie Tracker**](https://www.youtube.com/watch?v=c0zhLzcVJRI&ab_channel=Lovable)
: Users describe or upload meals, and GPT-4 estimates nutritional info and tracks weekly stats.
* [Luma Copycat:](https://www.youtube.com/watch?v=-sSOyO0FiPE)
Luma-style event platform using Lovable and [**Supabase**](https://docs.lovable.dev/integrations/supabase)
**.**
* [**Simple CRM**](https://www.youtube.com/watch?v=5ZL744_Wxjo)
\*\*: \*\*Create a simple yet powerful CRM using [**Lovable**](https://docs.lovable.dev/lovable-f9060f1e/lovable-f9060f1e/editor/main#build-a-simple-crm-with-resend)
for development, Supabase for data storage, and [**Resend**](https://docs.lovable.dev/integrations/resend)
for email automation.
* [Custom CRM:](https://www.youtube.com/watch?v=zv4vcR7VCAk)
Create a **custom CRM** (Customer Relationship Management system) using [**Lovable**](https://docs.lovable.dev/lovable-f9060f1e/lovable-f9060f1e/editor/main#how-to-build-a-custom-crm-with-lovable-and-make)
and [**Make**](https://docs.lovable.dev/integrations/make)
.
* [Custom CRM:](https://www.youtube.com/watch?v=tyAsNwu_xCI)
Create a **custom CRM** (Customer Relationship Management system) using [**Lovable**](https://docs.lovable.dev/lovable-f9060f1e/lovable-f9060f1e/editor/main#clerk-authentication-custom-domains-and-waitlists)
and [**Clerk**](https://docs.lovable.dev/integrations/clerk)
.
* [Feedback tool:](https://www.youtube.com/watch?v=tYDqBMilHkM)
Create a fully functional AI-powered feedback app.
* [DesignJoy copycat](https://www.youtube.com/watch?v=eZsbfEA-_oI&ab_channel=Lovable)
: Create a productized agency platform from scratch!
* You can also watch our [4-part video series](https://www.youtube.com/playlist?list=PLbVHz4urQBZkfZhwt8rL5PCoU4nyjK0OF)
where the team builds a full-stack Duolingo clone—step by step, from prompt to production.
Was this page helpful?
YesNo
[Prototype](https://docs.lovable.dev/use-case/prototype)
[Launched](https://docs.lovable.dev/use-case/launched)
⌘I
---
# Video tutorial - Lovable Documentation
[Skip to main content](https://docs.lovable.dev/use-case/video-tutorials#content-area)
[Lovable Documentation home page](https://lovable.dev/)
Search...
⌘K
Search...
Navigation
Video tutorial
[Introduction](https://docs.lovable.dev/introduction/welcome)
[Features](https://docs.lovable.dev/features/modes)
[Integrations](https://docs.lovable.dev/integrations/introduction)
[Tips & Tricks](https://docs.lovable.dev/tips-tricks/best-practice)
[Prompt engineering](https://docs.lovable.dev/prompting/prompting-one)
[Use cases](https://docs.lovable.dev/use-case/video-tutorials)
[Glossary](https://docs.lovable.dev/glossary)
[Changelog](https://docs.lovable.dev/changelog)
On this page
* [Welcome to Lovable](https://docs.lovable.dev/use-case/video-tutorials#welcome-to-lovable)
* [Lovable tutorials](https://docs.lovable.dev/use-case/video-tutorials#lovable-tutorials)
* [Build, brand, and launch a real micro-SaaS, live!](https://docs.lovable.dev/use-case/video-tutorials#build%2C-brand%2C-and-launch-a-real-micro-saas%2C-live)
* [Community tutorials](https://docs.lovable.dev/use-case/video-tutorials#community-tutorials)
[](https://docs.lovable.dev/use-case/video-tutorials#welcome-to-lovable)
Welcome to Lovable
-----------------------------------------------------------------------------------------------
Lovable 101
1
Getting started with Lovable basics
2
Understanding the interface and controls
3
Working with editing features and version history
4
Implementing authentication and user management
5
Using Supabase databases and edge functions
6
GitHub integration and code management
7
Sharing projects and community feedback
8
Exploring additional resources and templates
[](https://docs.lovable.dev/use-case/video-tutorials#lovable-tutorials)
Lovable tutorials
---------------------------------------------------------------------------------------------
Build an AI-Powered Calorie Tracking WebApp
This tutorial, we’ll walk you through creating an AI-powered calorie tracking app with [Lovable](https://docs.lovable.dev/lovable-f9060f1e/lovable-f9060f1e/editor/main#build-an-ai-powered-calorie-tracking-webapp)
, complete with authentication, a beautiful responsive design, OpenAI integration, and deployment to production.
1
Setting Up the Foundation
The foundation of any Lovable project is a good prompt. For this app, here’s an example:
Copy
Ask AI
Create a calorie tracking app with the following features:
Landing page, dashboard, and a meals page.
Input fields for meal descriptions or images, with analysis powered by GPT-4.
Daily progress tracking and integration with Supabase for authentication and database management.
Beautiful and mobile-responsive UI.
Once Lovable generates the UI skeleton:
* Review the navigation setup and landing page design.
* Iterate on the prompt to refine the layout and ensure mobile responsiveness.
Be explicit about starting with the UI. Lovable works best when tasks are broken into clear steps. For instance, outline navigation, page structures, and design themes early in the prompt
2
Designing the UI
Lovable emphasizes a step-by-step approach, akin to constructing a building:
* Start with **scaffolding**: Plan your app structure (e.g., user experience flow, page layout).
* Add the **first layer**: Create empty pages with basic design elements.
* Refine the **details**: Add colors, animations, and mobile responsiveness.
If you have pre-made designs in [Figma](https://docs.lovable.dev/use-case/video-tutorials)
, you can take screenshots and include them in your Lovable prompt. Providing high-resolution images ensures better results.
3
Integrate Supabase for Backend and Authentication
Once the UI is ready, it’s time to add backend functionality:
1. Set up a [**Supabase**](https://docs.lovable.dev/use-case/video-tutorials)
**account** and create a project.
2. Link it to Lovable by pressing the “Connect Supabase” button.
3. For data storage, Lovable will generate SQL tables. For instance:
* A `profiles` table to store user information.
* A `meals` table linked to users for tracking daily entries.
Use row-level security (RLS) rules in Supabase to ensure user privacy. Lovable can handle this for you automatically.
4
Integrating OpenAI for Meal Analysis
The magic of this app lies in its AI capabilities. To analyze meals:
1. Obtain an [OpenAI API key](https://docs.lovable.dev/use-case/video-tutorials)
from your developer dashboard.
2. Use [GPT-4](https://docs.lovable.dev/use-case/video-tutorials)
for analyzing meal descriptions or images.
3. Ensure API keys are securely stored in Edge functions to prevent unauthorized access.
**Features to include:**
* **Analyze meal descriptions**: Estimate nutritional values (calories, protein, carbs, fat).
* **Image recognition**: Upload a meal photo, and GPT-4 will extract a description and nutritional data.
_Pro Tips for OpenAI Integration:_
* Use **function calling** for structured responses, ensuring data is formatted correctly for database insertion.
* Test the functionality by asking the app to analyze simple meal entries like “2 eggs.”
5
Implementing Payments with Stripe
To monetize the app, add subscription-based payments:
1. Create a [Stripe](https://docs.lovable.dev/use-case/video-tutorials)
account and set up a product (e.g., “Standard Plan” for $12/month).
2. Integrate Stripe with Lovable by adding the API key and product price ID.
3. Redirect non-paying users to the landing page. Only paying users can access the main app.
_Additional Tips:_
* Enable Stripe’s **customer portal** to let users manage subscriptions (e.g., cancel or update payment methods).
* Test payments in Stripe’s test mode using the provided test credit card details.
6
Testing and Debugging
Errors are a natural part of development, and Lovable simplifies debugging:
* Use the **“Try to Fix”** button whenever a build error occurs.
* For backend issues, check Supabase logs for detailed error reports.
* If deploying to [Netlify](https://docs.lovable.dev/use-case/video-tutorials)
, review deployment logs for any build issues. Share logs with Lovable to get tailored fixes.
If you get stuck, revert to a previous version using Lovable’s “Revert” feature. This saves credits and time.
7
Deploying Your App
Once your app is ready, deploy it with Lovable or Netlify:
1. Use Lovable’s deploy feature to host the app on a default domain.
2. For custom domains:
* Connect your [GitHub repository](https://docs.lovable.dev/use-case/video-tutorials)
to Netlify.
* Purchase a domain and configure [DNS settings](https://docs.lovable.dev/use-case/video-tutorials)
to link it to Netlify.
Update your app’s metadata (favicon, meta tags, OG image) for better branding and SEO.
Build a SaaS Landing Page with Groq API
In this tutorial, we’ll show you how to create a stunning, fully interactive landing page for an AI-powered email assistant using [Lovable](https://docs.lovable.dev/lovable-f9060f1e/lovable-f9060f1e/editor/main#build-a-saas-landing-page-with-groq-api)
, 21st.dev, and Supabase—complete with animations, API integrations, and seamless deployment\\\\!
* AI-powered design & UI enhancements
* Adding animations & interactive elements
* Integrating AI email enhancements with the Groq API
* Setting up a contact form with Resend
* Deploying the page using Lovable Launch
Build a Feedback Tool
The session showcased [Lovable](https://docs.lovable.dev/lovable-f9060f1e/lovable-f9060f1e/editor/main#build-a-feedback-tool)
’s capabilities to iterate quickly and deliver production-ready results.
1
Authentication
* Users can sign up, log in, and manage profiles using Supabase integration.
* Secure user sessions enable tailored experiences.
2
Feedback Submission and Voting
* Users can submit feedback with titles, descriptions, and images.
* Each feedback entry displays vote counts and supports real-time upvoting.
3
Admin Dashboard with AI Summaries
* Admins can review all feedback, filter by votes, and sort entries.
* AI-powered summaries identify actionable insights using OpenAI and Supabase Edge Functions.
4
User Presence Tracking
Real-time presence indicators show active users on the platform.
5
Detailed Feedback Pages with Comments
Each feedback entry has a dedicated page for discussions, enabling teams to collaborate and prioritize efficiently.
6
File Attachments
Users can attach images to feedback, stored securely using Supabase’s storage capabilities.
Build a Productized Development Agency
The goal for this session was to build an app that allows developers, designers, or consultants to offer subscription-based services—a business model inspired by platforms like DesignJoy.
1
Authentication and User Management
Authentication was the first feature implemented, setting up a robust framework for managing users. The team emphasized the importance of integrating authentication early to prevent issues when scaling the app.
* Supabase integration for user sign-ups, logins, and profile management.
* Persistent user sessions to improve app usability.
2
Stripe Subscription Integration
The session demonstrated how to integrate Stripe for subscription management:
* Enabled users to subscribe to different pricing tiers.
* Managed subscription status, ensuring only paid users access premium features.
3
Dashboard and Task Management
* User-specific dashboards with task boards and drag-and-drop functionality.
* Real-time task updates for seamless collaboration.
4
AI Chatbot
The session concluded with the integration of an AI chatbot, illustrating how OpenAI can add dynamic functionality to apps. This feature could be extended to serve as a virtual assistant, concierge, or data query interface.
* Integrated OpenAI to provide a chatbot capable of responding intelligently to user queries.
* Built in a single prompt, showcasing Lovable’s efficiency.
5
Iterative Debugging and Refinement
The team tackled real-time debugging challenges, offering valuable insights into troubleshooting. Techniques included:
* Using console logs and error messages to identify issues.
* Reverting to previous app versions to avoid getting stuck in broken states.
* Guiding Lovable’s AI with detailed prompts to ensure accurate fixes.
Prompting Advice with Lovable
In this tutorial, we deep-dive into AI-powered app development, prompt engineering, and workflow automation with [Lovable](https://lovable.dev/)
’s special guest [Mark Kashef](https://www.youtube.com/@Mark_Kashef)
!
* Understanding effective AI prompting
* The four tiers of prompt engineering
* Meta prompting techniques & best practices
* Debugging strategies for AI workflows
* Building an AI app using Lovable & Make.com
* Integrating Visual Edits & Tailwind CSS for UI design
Build a Luma Copycat with Supabase & Lovable
In this tutorial, we will build a Luma-style event platform using Lovable and [Supabase](https://docs.lovable.dev/integrations/supabase)
– live\\\\!
* How to integrate Supabase with Lovable
* Setting up authentication & user management
* Configuring databases & real-time comments
* Testing performance & handling multiple users
* Live debugging & performance optimization
Build an AI-Enhanced Web App
In this tutorial, we’ll show you how to use Lovable, an AI-enhanced no-code builder, to create a full-stack journaling app without writing a single line of code\\\\!
* Design your app UI instantly
* Upload your design & generate a working app
* Connect Supabase for backend & authentication
* Implement GPT-4o for AI-powered features
* Deploy a full-stack app in minutes\\\\\\!
Build a Simple CRM with Resend
In this tutorial, we’ll walk through creating a simple yet powerful CRM using [Lovable](https://docs.lovable.dev/lovable-f9060f1e/lovable-f9060f1e/editor/main#build-a-simple-crm-with-resend)
for development, Supabase for data storage, and [Resend](https://docs.lovable.dev/integrations/resend)
for email automation.
* How Resend works for email automation
* Setting up authentication emails with Supabase
* Building an admin dashboard & contact management system
* Creating & customizing email templates
* Adding newsletter signup & broadcast email functionality
Build Interactive Elements in Web Development
Building engaging, interactive web experiences just got easier with Lovable’s latest updates\\!
1
Effortless UI Customization with Visual Edits
One of the biggest upgrades to Lovable is the ability to modify UI elements instantly without consuming AI credits. You can now:
* Edit text directly on your project.
* Adjust button colors and styles in real-time.
* Upload and swap images seamlessly.
* Hover over elements to make quick adjustments.
Users can now select text, change colors, or swap icons effortlessly without needing AI intervention—allowing for a smoother design iteration process.
2
Advanced Debugging and API Error Handling
Previously, users faced challenges when dealing with third-party API integration errors. Lovable now:
* Surfaces richer error messages for easier debugging.
* Eliminates irrelevant popups, improving focus on critical issues.
* Enables AI-driven error detection for automatic fixes.
Instead of overwhelming users with generic popups, Lovable now feeds error context directly into its AI, which can decide when an issue needs to be addressed and how to fix it.
3
Creating Dynamic Backgrounds and Animations
Lovable now supports seamless integration of animated and interactive elements using **p5.js** and other libraries.
####
[](https://docs.lovable.dev/use-case/video-tutorials#example-project%3A-travel-agency-website-with-interactive-flags)
**Example Project: Travel Agency Website with Interactive Flags**
A recent live demo showcased how to build a travel agency landing page featuring:
1. **An animated hero section** with flags dynamically appearing and moving in response to mouse interactions.
2. **A sticky-scroll section** that changes based on the user’s scroll position.
3. **Interactive hover effects** where images react to user movements.
####
[](https://docs.lovable.dev/use-case/video-tutorials#how-to-implement-animated-effects)
**How to Implement Animated Effects**
To create these effects, users followed this simple process:
* **Define the desired animation:**
Make the background interactive with floating elements that move away when hovered over.
* **Use p5.js to generate effects:**
* Implement a chromatic smoke pattern.
* Swap out static images for dynamic flag animations.
* **Enhance user experience with physics-based interactions:**
* Make elements move dynamically based on user actions.
If an animation isn’t working, use Lovable’s chat mode to debug and refine the effect with step-by-step AI guidance.
4
Importing Custom Elements from External Libraries
With [**21st.dev**](https://docs.lovable.dev/use-case/video-tutorials)
, users can now integrate pre-built UI components seamlessly into Lovable projects.
1. Browse **21st.dev** for a button design.
2. Copy the AI-generated prompt.
3. Paste it into Lovable and replace an existing button.
This approach accelerates design workflows and allows for more polished, visually cohesive interfaces.
This same method works for importing animation presets from **motion.dev**, making it easier to add high-quality motion effects without custom coding.
Clerk Authentication, Custom Domains & Waitlists
In this tutorial, we’ll walk through building a **custom CRM** (Customer Relationship Management system) using [**Lovable**](https://docs.lovable.dev/lovable-f9060f1e/lovable-f9060f1e/editor/main#clerk-authentication-custom-domains-and-waitlists)
and [**Clerk**](https://docs.lovable.dev/integrations/clerk)
.
How to Build a Custom CRM with Lovable and Make
In this tutorial, we’ll walk through building a **custom CRM** (Customer Relationship Management system) using [**Lovable**](https://docs.lovable.dev/lovable-f9060f1e/lovable-f9060f1e/editor/main#how-to-build-a-custom-crm-with-lovable-and-make)
and [**Make**](https://docs.lovable.dev/integrations/make)
.
Building a $10K Landing Page in 1 Hour
[](https://docs.lovable.dev/use-case/video-tutorials#build%2C-brand%2C-and-launch-a-real-micro-saas%2C-live)
Build, brand, and launch a real micro-SaaS, live!
------------------------------------------------------------------------------------------------------------------------------------------------------------------
Learning Spanish has never been this interactive! Imagine an app that not only teaches you Spanish through conversations but also creates real-time voice interactions, dynamic courses, and visually engaging content—powered entirely by AI. This tutorial can help follow step-by-step what Kristian and Harry built:
Step 1: Designing the Core Features
1
Laying the Foundations
Before implementing AI features, we focused on **building a strong foundation** for the app using **Lovable**. This included setting up authentication, structuring the dashboard, and implementing user management.
2
Authentication System
* Integrated **Supabase** for backend authentication.
* Enabled sign-up/login with email and password.
* Created a profile system to store user preferences and learning progress.
3
Dashboard & Navigation
* Designed an intuitive sidebar for navigation.
* Created sections for chat, courses, and user settings.
* Ensured responsive UI for a seamless experience across devices.
4
User Profiles & Data Storage
* Added a database structure to store user progress.
* Designed profile management settings where users can adjust learning preferences.
Step 2: AI-Powered Learning Features with Replicate
1
AI-Generated Courses
To make learning interactive, we implemented an AI-driven course generation system using [OpenAI’s GPT model](https://docs.lovable.dev/use-case/video-tutorials)
. Here’s how it works:
1. Users select a topic (e.g., “Questions to ask at a barbecue”).
2. Lovable calls an [OpenAI Edge function](https://docs.lovable.dev/use-case/video-tutorials)
to generate **10 engaging Spanish-language questions**.
3. Users complete quizzes, track progress, and receive AI feedback on their answers.
2
Enhancing User Engagement
* **Dynamically Generated Questions**: Each quiz is AI-generated, ensuring fresh, unique content every time.
* **Interactive Feedback**: The AI provides explanations for correct and incorrect answers to improve learning.
* **Progress Tracking**: Users can save and revisit courses, enhancing retention and practice.
3
Enhancing Visual Engagement with Replicate
To add a visual learning element, we integrated [**Replicate’s Flux Schnell**](https://docs.lovable.dev/use-case/video-tutorials)
image generation model:
* **Automated Course Banners**: Every course dynamically generates an image matching the topic.
* **Visually Immersive Experience**: AI-driven visuals enhance user engagement and retention.
* **Fast Image Processing**: Using Replicate’s API, images are generated in real time without slowing down the experience.
4
Real-Time Voice Conversations
A major milestone in the app’s development was the addition of **real-time Spanish-speaking practice** using [OpenAI’s real-time WebRTC API](https://docs.lovable.dev/use-case/video-tutorials)
:
* **Interactive AI Tutor**: Users can speak directly with an AI that dynamically responds in Spanish.
* **Pronunciation Assistance**: The AI provides real-time corrections and suggestions.
* **Seamless Conversations**: The natural flow of conversation makes it feel like interacting with a human tutor.
Step 3: Branding the App
1
Establishing the Concept and Audience
Before branding, we defined our core goals:
* **AI-powered chat** for real-time Spanish conversations.
* **Automated quizzes** for quick practice sessions.
* **Structured learning** with lesson storage and progress tracking.
This helped shape our branding choices, ensuring they aligned with the app’s purpose.
2
Naming & Domain Selection
We aimed for a short, memorable name that reflected the **learning journey**. Using AI, we brainstormed and landed on **Ruta** (Spanish for “route” or “path”).
####
[](https://docs.lovable.dev/use-case/video-tutorials#process%3A)
**Process:**
* **Brainstormed names** using AI for catchy Spanish words.
* **Tested options** like “Camino” and “Verbo,” but “Ruta” stood out.
* **Checked domain availability** and secured **rutaapp.com** immediately.
3
Creating a Visual Identity
We quickly designed the brand:
* **Logo**: A **compass-themed** icon sourced from design libraries and edited in Figma.
* **Font Pairing**: Used a **bold, modern typeface** for the logo and a readable UI font for the app interface.
* **Color Palette**: A **Tailwind CSS blue** scheme to symbolize travel and discovery.
* **Styling Inspiration**: Experimented with **neo-brutalism**, tweaking contrast, shadows, and borders to create a visually engaging UI.
4
Building a Cohesive User Experience
Using Lovable, we ensured **visual consistency** across the app:
* **Landing Page**: AI-generated with a dynamic, engaging hero section.
* **Dashboard & Course Pages**: Styled to match the brand’s identity.
* **Iterative Styling**: Applied **neo-brutalist** elements to test different design styles.
* **User Flow Testing**: Ensured seamless navigation from signup to real-time chat.
Step 4: Final Tweaks, Big Bets & Live Launch
[](https://docs.lovable.dev/use-case/video-tutorials#community-tutorials)
Community tutorials
-------------------------------------------------------------------------------------------------
Check out the Lovable Community tutorials [here](https://www.youtube.com/playlist?list=PLbVHz4urQBZkJ6WMXlIGc3NGsufrleogY)
.
Was this page helpful?
YesNo
[Landing page](https://docs.lovable.dev/use-case/landing-page)
⌘I
---
# Troubleshooting - Lovable Documentation
[Skip to main content](https://docs.lovable.dev/tips-tricks/troubleshooting#content-area)
[Lovable Documentation home page](https://lovable.dev/)
Search...
⌘K
Search...
Navigation
Troubleshooting
[Introduction](https://docs.lovable.dev/introduction/welcome)
[Features](https://docs.lovable.dev/features/modes)
[Integrations](https://docs.lovable.dev/integrations/introduction)
[Tips & Tricks](https://docs.lovable.dev/tips-tricks/best-practice)
[Prompt engineering](https://docs.lovable.dev/prompting/prompting-one)
[Use cases](https://docs.lovable.dev/use-case/video-tutorials)
[Glossary](https://docs.lovable.dev/glossary)
[Changelog](https://docs.lovable.dev/changelog)
On this page
* [“Try to Fix” error loops](https://docs.lovable.dev/tips-tricks/troubleshooting#%E2%80%9Ctry-to-fix%E2%80%9D-error-loops)
* [What’s Going Wrong? Common Troubleshooting Areas](https://docs.lovable.dev/tips-tricks/troubleshooting#what%E2%80%99s-going-wrong%3F-common-troubleshooting-areas)
* [General issues](https://docs.lovable.dev/tips-tricks/troubleshooting#general-issues)
* [AI Reliability](https://docs.lovable.dev/tips-tricks/troubleshooting#ai-reliability)
* [Core functionalities](https://docs.lovable.dev/tips-tricks/troubleshooting#core-functionalities)
* [Supabase issues](https://docs.lovable.dev/tips-tricks/troubleshooting#supabase-issues)
* [GitHub issues](https://docs.lovable.dev/tips-tricks/troubleshooting#github-issues)
* [Need more help?](https://docs.lovable.dev/tips-tricks/troubleshooting#need-more-help%3F)
* [Comprehensive Debugging Manual](https://docs.lovable.dev/tips-tricks/troubleshooting#comprehensive-debugging-manual)
[](https://docs.lovable.dev/tips-tricks/troubleshooting#%E2%80%9Ctry-to-fix%E2%80%9D-error-loops)
“Try to Fix” error loops
------------------------------------------------------------------------------------------------------------------------------
Building with Lovable makes coding faster and more intuitive—but even the best AI development tools can occasionally hit a snag. Sometimes your code won’t run as expected, or you might notice unexpected behavior where the AI interprets your intent incorrectly. Here’s a step-by-step guide to help you navigate issues and get back on track:
1
Use the Try to Fix Button First
Click the **Try to Fix** button when an error shows up. Lovable will scan your logs, detect the issue, and attempt a quick fix. It’s your fastest first move. If that doesn’t work, it’s time to dig deeper.
2
Diagnose Unexpected Behavior
Your code may run without errors but not behave as intended. That’s **unexpected behavior**—harder to spot and harder to fix. Try this:
* **Review your original prompt** to confirm your instructions.
* **Break it down**: Check individual components and logic.
* **Add visuals**: Use screenshots to clarify what went wrong.
3
Write More Effective Prompts
Clear, structured prompts lead to better results. Use this format:
1. **Project Overview** – What are you building?
2. **Page Structure** – List key pages/components.
3. **Navigation Logic** – Describe user flow.
4. **Visual Aids** – Upload wireframes or screenshots.
5. **Implementation Steps** – Lay out the build order.
4
Build in Logical Order
Structure matters. Follow this recommended flow:
1. Create layout and pages.
2. Connect Supabase or your backend.
3. Set up authentication and user roles.
4. Plan and organize feature logic.
5. Prompt Lovable to implement features.
5
Use Chat Mode for Clarity
When unsure, switch to **Chat Mode**:
* Ask Lovable to **analyze your project state**.
* Request a **recap of attempted solutions**.
* Prompt for **new directions** to solve persistent problems.
6
If You're Still Stuck: Advanced Tactics
Still no luck? Try this:
* **Be exact** – Describe the bug and your expectations clearly.
* **Use images** – Screenshots or videos help illustrate problems.
* **Ask directly** – “What else can we try?”
* **Rollback** – Restore to a working version and rebuild incrementally.
[](https://docs.lovable.dev/tips-tricks/troubleshooting#what%E2%80%99s-going-wrong%3F-common-troubleshooting-areas)
What’s Going Wrong? Common Troubleshooting Areas
------------------------------------------------------------------------------------------------------------------------------------------------------------------------
Troubleshooting generally falls into these categories:
1. **UI or Layout Glitches**
2. **API or Backend Issues**
3. **Prompt Misinterpretations**
4. **AI Unresponsiveness or Misbehavior**
5. **Platform or Integration Errors**
Use the accordions below to identify specific issues and actions:
###
[](https://docs.lovable.dev/tips-tricks/troubleshooting#general-issues)
General issues
Need a fast diagnosis?
Jump into Chat-Only Mode and type: “Something’s off. Can you walk me through what’s happening and what you’ve tried?”
UI or Layout Problems
* Check component hierarchy and styles.
* Use screenshots to explain visual bugs.
* Prompt Lovable with: “Why is this element misaligned? Fix it.”
When completely stuck
* Prompt: “Take a step back. Analyze the error and suggest a different approach.”
* Break the task into smaller parts.
* Use the revert button if errors persist.
Code sandbox error
This should not happen. Please report it to the support team.
Not found preview or spinning up sandbox
Try a hard refresh. If unresolved, contact support.
###
[](https://docs.lovable.dev/tips-tricks/troubleshooting#ai-reliability)
AI Reliability
Avoiding AI mistakes in prompt engineering
* Keep prompts clear and structured.
* Use reverse meta prompting.
* Test in Chat-Only Mode before applying big changes.
AI not responding
This shouldn’t happen. Please report it to the support team.
Persistent Fix error loops
Adjust your prompt to help the AI understand your goal or ask for step-by-step debugging help.
Refactor broke everything
Make small, incremental changes. If the issue persists, roll back to a stable version or debug in chat.
Error loops, hallucinations, or broken logic
Revert to a stable version and provide more context in your next prompt. Use visual editor or attach a knowledge file.
AI not doing changes
The AI might be editing the wrong files or misinterpreting. Be very specific or edit manually.
Chat mode not responding or incomplete
This was fixed by engineering. Please report if it happens again.
Unexpected Crashes, Errors, or Loops
* Don’t retry the same prompt. Simplify or rephrase.
* Ask: “What fixes have we already tried?”
* Rebuild from a previous working state.
###
[](https://docs.lovable.dev/tips-tricks/troubleshooting#core-functionalities)
Core functionalities
Preview is white
* Likely a runtime error. Check browser console logs.
* Use chat to troubleshoot.
* Try a hard refresh or revert.
Rollback fails
Report to the support team if you can’t revert your project.
Unpublish or deactivate projects
You can unpublish or delete your project in Project Settings.
Kicked out of project
This issue has been resolved. Report it if it recurs.
Remix doesn't work (no Supabase connection)
Shouldn’t happen. Contact support.
Loading profile error
Shouldn’t happen. Report to the support team.
Email unsubscribe not working
This is a serious issue likely related to our email provider. Contact support immediately.
Unexpected logout or access loss
Reach out to support directly.
Challenges with larger projects
* Break up large changes into smaller steps.
* Restart your browser if it slows down.
* If it persists, report your use case to support.
###
[](https://docs.lovable.dev/tips-tricks/troubleshooting#supabase-issues)
Supabase issues
Error with Edge Functions
* **l Scope:** Use the principle of least privilege for all credentials
When using Lovable with Supabase, always store sensitive API keys as Supabase Edge Function secrets rather than environment variables or in source code.
Setting Environment Variables
Double-check syntax and variable names. See the [Supabase docs](https://supabase.com/docs)
.
Supabase connection is lost
Disconnect and reconnect. Might be caused by an integration update.
Remix does not work with Supabase
Remixing is blocked for Supabase-connected projects for security reasons.
Project not found
Please report to support.
HTTP Fetch failures
Usually means a backend server isn’t responding. Use chat mode to debug.
Connecting Supabase
To connect your Lovable project to Supabase:
1. Click the Supabase menu in the top right of the editor
2. Select “Connect to Supabase”
3. Follow the prompts to connect to your Supabase project
4. Once connected, Lovable can see your tables, RLS policies, and functions
###
[](https://docs.lovable.dev/tips-tricks/troubleshooting#github-issues)
GitHub issues
Can't push to GitHub
You may have deleted your repo. [Restore it here](https://docs.github.com/en/repositories/creating-and-managing-repositories/restoring-a-deleted-repository)
.
Branches are broken
Branch switching is experimental. Use at your own risk.Once connected to GitHub, you can work with different branches:
####
[](https://docs.lovable.dev/tips-tricks/troubleshooting#branch-switching-steps)
**Branch Switching Steps**
Copy
Ask AI
# To switch from main to dev:
1. In Dev Mode, open the Git panel
2. Select the branch dropdown
3. Choose "dev" or click "Create new branch" if it doesn't exist
4. Your workspace will update to reflect the selected branch
Switching branches will change all files in your workspace to match that branch.
####
[](https://docs.lovable.dev/tips-tricks/troubleshooting#branch-management%3A)
**Branch Management:**
* **Create a new branch:** Click “Create new branch” in the Git panel
* **Delete a branch:** Use the GitHub interface (not available directly in Lovable)
* **Default branch:** Set in GitHub repository settings
If you can’t switch branches:
* Commit or stash any uncommitted changes
* Check if you have untracked files that would be overwritten
* Try refreshing the Lovable editor
Repository sync issues
* Check your [GitHub permissions](https://docs.lovable.dev/integrations/git-integration)
.
* Use rollback to undo unwanted changes.
Deleted repository, now nothing works
[Restore your GitHub repo](https://docs.github.com/en/repositories/creating-and-managing-repositories/restoring-a-deleted-repository)
.
Connecting GitHub
To connect your Lovable project to GitHub:
1. Click the GitHub button in the top right of the editor
2. Authorize Lovable to access your GitHub account
3. Choose whether to create a new repository or use an existing one
4. Follow the prompts to complete the connection
####
[](https://docs.lovable.dev/tips-tricks/troubleshooting#repository-access-levels%3A)
**Repository Access Levels:**
When connecting Lovable to GitHub, you can choose different access levels:
* **All repositories:** Access to all your GitHub repositories
* **Only select repositories:** Choose specific repositories to connect
Lovable uses GitHub’s OAuth flow for secure authentication. You can revoke access anytime from your GitHub account settings.
Authentication Issues
If you’re having trouble with GitHub authentication:
* Reconnect your GitHub account in Lovable
* Check if your GitHub access token has expired
* Verify you have the necessary permissions for the repository
* Ensure two-factor authentication isn’t blocking access
Failed Pushes
If your push is rejected:
1. Pull the latest changes from the remote repository
2. Resolve any conflicts
3. Try pushing again
4. If still failing, check if the branch is protected
Branches are broken
This is an experimental feature. Expect occasional instability.
Deleted your repository
[Restore your GitHub repository](https://docs.github.com/en/repositories/creating-and-managing-repositories/restoring-a-deleted-repository)
.
###
[](https://docs.lovable.dev/tips-tricks/troubleshooting#need-more-help%3F)
Need more help?
Still stuck? Try this:
1. Use [Chat Mode](https://lovable.dev/chat)
for step-by-step help.
2. If you’re a paid customer, contact [Support](https://lovable.dev/support)
.
[](https://docs.lovable.dev/tips-tricks/troubleshooting#comprehensive-debugging-manual)
Comprehensive Debugging Manual
--------------------------------------------------------------------------------------------------------------------------
[This document](https://docs.google.com/document/d/1dfIy5rtkPN9Zi4smX1VAbfbhAiEyBvVw8p7B8kJiEVs/edit?tab=t.0)
or [this website](https://kb-lovable.netlify.app/?tab=errors#errors)
were written by a Lovable power user in our Discord community.
Was this page helpful?
YesNo
[Best practices](https://docs.lovable.dev/tips-tricks/best-practice)
[Using images in Lovable](https://docs.lovable.dev/tips-tricks/using-images)
⌘I
---
# Best practices - Lovable Documentation
[Skip to main content](https://docs.lovable.dev/tips-tricks/best-practice#content-area)
[Lovable Documentation home page](https://lovable.dev/)
Search...
⌘K
Search...
Navigation
Best practices
[Introduction](https://docs.lovable.dev/introduction/welcome)
[Features](https://docs.lovable.dev/features/modes)
[Integrations](https://docs.lovable.dev/integrations/introduction)
[Tips & Tricks](https://docs.lovable.dev/tips-tricks/best-practice)
[Prompt engineering](https://docs.lovable.dev/prompting/prompting-one)
[Use cases](https://docs.lovable.dev/use-case/video-tutorials)
[Glossary](https://docs.lovable.dev/glossary)
[Changelog](https://docs.lovable.dev/changelog)
On this page
* [1\. Set your foundation: Use the knowledge file](https://docs.lovable.dev/tips-tricks/best-practice#1-set-your-foundation%3A-use-the-knowledge-file)
* [2\. Prompting Best practices](https://docs.lovable.dev/tips-tricks/best-practice#2-prompting-best-practices)
* [3\. Use chat mode early and often](https://docs.lovable.dev/tips-tricks/best-practice#3-use-chat-mode-early-and-often)
* [4\. Avoid common pitfalls with Supabase](https://docs.lovable.dev/tips-tricks/best-practice#4-avoid-common-pitfalls-with-supabase)
* [5\. Use Visual Edit for quick UI fixes](https://docs.lovable.dev/tips-tricks/best-practice#5-use-visual-edit-for-quick-ui-fixes)
* [6\. Use GitHub + version control wisely](https://docs.lovable.dev/tips-tricks/best-practice#6-use-github-%2B-version-control-wisely)
* [7\. When all else fails, remix](https://docs.lovable.dev/tips-tricks/best-practice#7-when-all-else-fails%2C-remix)
* [8\. Stay patient, stay calm](https://docs.lovable.dev/tips-tricks/best-practice#8-stay-patient%2C-stay-calm)
* [9\. Use the docs and ask for help](https://docs.lovable.dev/tips-tricks/best-practice#9-use-the-docs-and-ask-for-help)
* [10\. Bonus tips](https://docs.lovable.dev/tips-tricks/best-practice#10-bonus-tips)
This guide helps all users—new or experienced—get up to speed quickly and avoid common pitfalls when building on Lovable.
[](https://docs.lovable.dev/tips-tricks/best-practice#1-set-your-foundation%3A-use-the-knowledge-file)
1\. Set your foundation: Use the knowledge file
----------------------------------------------------------------------------------------------------------------------------------------------------------
**Why it matters:** The [Knowledge](https://docs.lovable.dev/features/knowledge)
file is your project’s brain. It gets sent with every prompt and helps the AI understand the full context. **What to include:**
* Your product vision (think of it like a PRD)
* User journeys and personas
* Key features and functionality
* Design systems and UI guidance
* Role-specific behavior (e.g. Admin, User, Investor)
You can auto-generate a Knowledge file via Chat mode:
Copy
Ask AI
Generate knowledge for my project at T=0 based on the features I’ve already implemented.
[](https://docs.lovable.dev/tips-tricks/best-practice#2-prompting-best-practices)
2\. [Prompting](https://docs.lovable.dev/prompting/prompting-one)
Best practices
-----------------------------------------------------------------------------------------------------------------------------------------------------------------------
**Clear, verbose prompts = better output.** Think of the AI like your engineering partner—it only knows what you tell it. **Prompting tips:**
* Be specific: Mention the exact page (e.g. `/dashboard`) and expected behavior.
* Use natural language
Copy
Ask AI
I want users with the role Investor to access this component, but not Admins.
* Add screenshots: Especially useful for describing bugs or UX issues.
* Add guardrails: Tell the AI what **not** to touch. E.g.
Copy
Ask AI
Do not edit /shared/Layout.tsx.
* Repeat important instructions across prompts. The AI’s memory can be limiting.
* Avoid trying to implement 5 things at once. Break work into smaller, testable chunks. Use Chat Mode between each block to validate before moving on.
Copy
Ask AI
**Feature Breakdown Template:**
Create the new page
Add UI layout
Connect the data
Add logic + edge cases
Test per role
* If your app has multiple roles (e.g. Admin, Investor, Startup), always define _which role_ the prompt applies to. This helps avoid bugs caused by shared logic/components.
Copy
Ask AI
As an Investor, I want to view the company dashboard, but I shouldn’t be able to edit it. Please isolate this feature to the Investor role only.
[](https://docs.lovable.dev/tips-tricks/best-practice#3-use-chat-mode-early-and-often)
3\. Use chat mode early and often
----------------------------------------------------------------------------------------------------------------------------
[**Chat mode**](https://docs.lovable.dev/features/labs#chat-mode)
= your AI co-pilot. It helps you debug, brainstorm, and plan implementations—without editing your code until you’re ready. **When to switch to Chat Mode:**
* After 2–3 failed “Try to Fix” attempts
* When debugging complex logic or database issues
* When planning new features
Copy
Ask AI
Suggest 3 ways to implement X
**Workflow tip:**Some users like to use Chat Mode for 60–70% of your time. Only click “Implement the plan” when you’re fully satisfied.
If you forget using the Chat mode, this format improves output consistency and prevents collateral edits.
Copy
Ask AI
On page /settings, implement [feature]. The expected behavior is [XYZ]. Please don’t touch component A, layout B, or shared logic unless necessary. Follow best practices from Tailwind / Supabase / X.
To avoid unwanted code execution:
Copy
Ask AI
Investigate but don’t write code yet.
Copy
Ask AI
Suggest 3 ways to solve this without changing anything.
This keeps control in your hands.
When AI enters a “loop,” use this sequence to avoid endless cycles of patching broken code:
1. Switch to Chat mode
2. Paste the error screenshot
3. Say:
Copy
Ask AI
Please investigate this without breaking other features. If needed, revert to the last working version and fix from there.
[](https://docs.lovable.dev/tips-tricks/best-practice#4-avoid-common-pitfalls-with-supabase)
4\. Avoid common pitfalls with Supabase
----------------------------------------------------------------------------------------------------------------------------------------
**Heads-up:** [Supabase](https://docs.lovable.dev/integrations/supabase)
does not revert cleanly. If you revert a version, your database schema may break. **Best practices:**
* Connect Supabase **after** front-end is stable
* If you must revert, prompt the AI:
Copy
Ask AI
Please validate the SQL schema at T=0 and ensure no breaking changes have occurred.
* Always test database-linked features before publishing
[](https://docs.lovable.dev/tips-tricks/best-practice#5-use-visual-edit-for-quick-ui-fixes)
5\. Use Visual Edit for quick UI fixes
--------------------------------------------------------------------------------------------------------------------------------------
The [**Visual Edit tool**](https://docs.lovable.dev/features/visual-edit)
is free and fast. Use it instead of prompts for:
* Changing text, colors, fonts, layout tweaks
* Editing multiple small elements at once
* Safe, credit-free commits (with undo available)
[](https://docs.lovable.dev/tips-tricks/best-practice#6-use-github-%2B-version-control-wisely)
6\. Use [GitHub](https://docs.lovable.dev/integrations/git-integration)
+ version control wisely
----------------------------------------------------------------------------------------------------------------------------------------------------------------------------------------------------
* Every edit is a commit. Use **pinning** to mark stable versions. After every working feature: **Pin it**
* After every bug: **Compare versions visually.** You can prompt with:
Copy
Ask AI
Compare version at T–1 to T–0. What changed? What might be breaking?
* Come back to a stable version if you feel the AI has broken too much things.
* Use **GitHub branching** at your own risk. Avoid deleting branches before switching back to `main` in Lovable to prevent project sync issues.
[](https://docs.lovable.dev/tips-tricks/best-practice#7-when-all-else-fails%2C-remix)
7\. When all else fails, remix
------------------------------------------------------------------------------------------------------------------------
Many users realize: doing it all over takes less time the second time.
* [Remix](https://docs.lovable.dev/user-guides/quickstart#remix-an-existing-project:~:text=you%20to%20reuse-,the,-current%20state%20of)
creates a clean copy of your project at T=0.
* Rebuild with better prompting + clearer knowledge
* Use your old project as reference only
**Use cases:**
* You’re stuck in a buggy loop
* You want to restart clean with preserved history
* You need to disconnect Superbase and try a new path
Remixing requires disconnecting Superbase first.
[](https://docs.lovable.dev/tips-tricks/best-practice#8-stay-patient%2C-stay-calm)
8\. Stay patient, stay calm
------------------------------------------------------------------------------------------------------------------
You’re not alone. AI can be magical one moment and frustrating the next. The final 5% of any build is often the slowest—but the most important.
**Golden rule:**Take your time with prompts. Re-check everything. Break work into small, testable blocks. The more precise your inputs, the better your outputs.
[](https://docs.lovable.dev/tips-tricks/best-practice#9-use-the-docs-and-ask-for-help)
9\. Use the docs and ask for help
----------------------------------------------------------------------------------------------------------------------------
* [Documentation](https://docs.lovable.dev/)
contains walkthroughs, templates, SEO tips, integrations, and more. You can ask questions directly in the doc AI assistant.
* Join the [Discord community](https://discord.gg/lovable-dev)
for peer support.
* When ready, submit your project to [Lovable Launch](https://docs.lovable.dev/features/launched)
.
[](https://docs.lovable.dev/tips-tricks/best-practice#10-bonus-tips)
10\. Bonus tips
----------------------------------------------------------------------------------------
* Add a voice note prompt using dictation (e.g. On Mac, use the mic to dictate long prompts) for long prompts. You’ll craft better input faster—especially useful when frustrated or tired.
* Use the “`I am frustrated…`” prompt pattern to nudge better AI focus
* After a major edit, always recheck multiple roles and their behavior (especially with conditional logic)
* Store stable versions as fallbacks for quick debugging
* If you’re seeing unexpected side effects, this helps avoid bugs caused by overly generic logic.
Copy
Ask AI
Create a component specifically for [role X] and do not reuse shared components unless clearly scoped.
Was this page helpful?
YesNo
[Troubleshooting](https://docs.lovable.dev/tips-tricks/troubleshooting)
⌘I
---
# Page Not Found
[Skip to main content](https://docs.lovable.dev/faq#content-area)
[Lovable Documentation home page](https://lovable.dev/)
Search...
⌘K
Search...
Navigation
Page Not Found
[Introduction](https://docs.lovable.dev/introduction/welcome)
[Features](https://docs.lovable.dev/features/modes)
[Integrations](https://docs.lovable.dev/integrations/introduction)
[Tips & Tricks](https://docs.lovable.dev/tips-tricks/best-practice)
[Prompt engineering](https://docs.lovable.dev/prompting/prompting-one)
[Use cases](https://docs.lovable.dev/use-case/video-tutorials)
[Glossary](https://docs.lovable.dev/glossary)
[Changelog](https://docs.lovable.dev/changelog)
404
Page Not Found
==============
We couldn't find the page. Maybe you were looking for one of these pages below?
[Make integration](https://docs.lovable.dev/integrations/make#faq)
[FAQ](https://docs.lovable.dev/introduction/faq#)
[Replicate integration](https://docs.lovable.dev/integrations/replicate#faq)
⌘I
---
# FAQ - Lovable Documentation
[Skip to main content](https://docs.lovable.dev/introduction/faq#content-area)
[Lovable Documentation home page](https://lovable.dev/)
Search...
⌘K
Search...
Navigation
FAQ
[Introduction](https://docs.lovable.dev/introduction/welcome)
[Features](https://docs.lovable.dev/features/modes)
[Integrations](https://docs.lovable.dev/integrations/introduction)
[Tips & Tricks](https://docs.lovable.dev/tips-tricks/best-practice)
[Prompt engineering](https://docs.lovable.dev/prompting/prompting-one)
[Use cases](https://docs.lovable.dev/use-case/video-tutorials)
[Glossary](https://docs.lovable.dev/glossary)
[Changelog](https://docs.lovable.dev/changelog)
On this page
* [Getting started](https://docs.lovable.dev/introduction/faq#getting-started)
* [Building with Lovable](https://docs.lovable.dev/introduction/faq#building-with-lovable)
* [Features](https://docs.lovable.dev/introduction/faq#features)
* [Lovable API](https://docs.lovable.dev/introduction/faq#lovable-api)
* [Managing your account](https://docs.lovable.dev/introduction/faq#managing-your-account)
* [Policies and security](https://docs.lovable.dev/introduction/faq#policies-and-security)
* [How Lovable works](https://docs.lovable.dev/introduction/faq#how-lovable-works)
* [About Lovable](https://docs.lovable.dev/introduction/faq#about-lovable)
[](https://docs.lovable.dev/introduction/faq#getting-started)
Getting started
---------------------------------------------------------------------------------
What is Lovable?
Lovable is an AI-powered platform that enables users of any skill level to create full-stack websites through natural language. Simply describe what you want, and Lovable builds it for you.
What can I build with Lovable?
If you can imagine it, you can build it with Lovable. From simple landing pages to powerful tools tailored for niche use cases, Lovable gives you the flexibility to create whatever you need, without limits.
Do I need coding experience to build with Lovable?
No. Lovable is designed for all levels of experience. Whether you’re a developer or a non-technical user, you can create websites using Lovable.
How do I create a project?
To create a project, simply type a message into the message box on the dashboard. Just describe what you want to build and Lovable will take it from there and generate a starting point for your project. Remember to start small and build in increments!
Can I reuse an existing project?
Yes, you can remix an existing public project or one of your own. Remixing allows you to reuse the current state of a project as a starting point and build upon it. It’s a great way to explore new ideas, make adjustments, or iterate with different changes while preserving the original version.
[](https://docs.lovable.dev/introduction/faq#building-with-lovable)
Building with Lovable
---------------------------------------------------------------------------------------------
How do I build efficiently with Lovable?
Building efficiently with Lovable is all about using the right techniques. Anyone can do it with a bit of practice. To help you get started, check out our [guide](https://mastering-lovable.lovable.app/)
.
How should I structure my prompts for the best results?
* Be clear and specific.
* Focus on one feature at a time.
* Build incrementally.
* Use buzz-words for getting the design right.
What should I do when I hit an error?
1
Try-to-fix button
Press the Try-to-fix button. Lovable will try to solve the issue automatically. The best part: using the button doesn’t deduct any credits!
2
Investigate
If the Try-to-fix button doesn’t resolve the issue, you need to ask the AI to investigate the issue. Explain what you are seeing and what specific parts aren’t working.
3
Restore
If that doesn’t work, restore to a previous working version. Send a couple of unrelated messages to clear the AI’s context and try implementing the same functionality with a different approach. Hopefully the AI understands you better this time.
What is refactoring, and why is it important?
Refactoring improves code structure and efficiency without altering functionality. It helps:
* Optimize performance by removing redundancies.
* Improve maintainability for future updates.
* Prevent conflicts by structuring logic more clearly.
Can I connect my project to a backend to store data?
If you need to add backend capabilities to your application, you can:
* Connect to Lovable’s built-in backend - [Lovable Cloud](https://docs.lovable.dev/features/cloud)
* Use Lovable’s native [Supabase integration](https://docs.lovable.dev/integrations/supabase)
Can I add login to my website?
Yes, you can add authentication by using [Lovable Cloud](https://docs.lovable.dev/features/cloud)
or integrating with [Supabase](https://docs.lovable.dev/integrations/supabase)
. Simply prompt the AI to add it and follow the instructions.
Can I add third-party APIs to my project?
Yes, you can integrate APIs like OpenAI, Stripe, and more by specifying them in your prompt. Read more [here](https://docs.lovable.dev/integrations/introduction)
.
Can I store sensitive API keys in Lovable?
No! Never enter your API keys directly in Lovable. If you’re integrating with an API, we recommend you use secrets in [Lovable Cloud](https://docs.lovable.dev/features/cloud)
or [Supabase](https://docs.lovable.dev/integrations/supabase)
to store your API keys, in combination with their Edge Functions.
How do I add payments to my website?
You can add payments by adding Stripe to your project. See [Stripe integration](https://docs.lovable.dev/integrations/stripe)
to set it up.
How can I improve SEO for my project?
See [SEO](https://docs.lovable.dev/features/seo)
for more information.
How long does it take to complete a project?
It depends on complexity. By breaking tasks into smaller steps, planning ahead, and refining based on feedback, you can move quickly while ensuring quality.
[](https://docs.lovable.dev/introduction/faq#features)
Features
-------------------------------------------------------------------
How do I find the Project settings?
You can find the **Project settings** by clicking your project name at the top left of the editor and then selecting **Settings**.
Can I change the visibility of my project?
Yes, navigate to the **Project settings** where you can change the visibility. See [Private projects](https://docs.lovable.dev/features/private-projects)
for more information.
Can I hide the Lovable badge?
Yes, navigate to the **Project settings** where you’ll find the option to hide the badge. Only paying users can toggle off the badge.
Can I rename a project?
Yes, navigate to the **Project settings** and where you’ll find the option to rename the project.
Can I make a copy of a project?
To make a copy of a project you have to remix the project. Go to the **Project Settings** and select the **Remix** option. This will create an exact copy of the project in your currently selected workspace.
You can only remix public projects from other users if the project is not connected to Supabase.
Can I delete a project?
Yes, navigate to the **Project settings** and where you’ll find the option to **Delete** the project.
This is final and there is no way to restore deleted projects.
What is a remix?
Remixing a project creates an exact copy that you can edit separately. Read more [here](https://docs.lovable.dev/introduction/faq#can-i-make-a-copy-of-a-project)
.
What is Chat mode?
You can read more about Lovable’s different modes and Chat mode [here](https://docs.lovable.dev/features/modes)
.
Can I see the code that Lovable generates and manually edit it?
Yes. You can see the code and manually edit the code using Lovable’s [Code mode](https://docs.lovable.dev/features/code-mode)
.
Can I manually edit text or colors?
Yes, you can edit text or colors using [Visual Edits](https://docs.lovable.dev/features/visual-edit)
.
Can I collaborate on my projects?
Yes, you can collaborate on projects inside Lovable. See [Collaboration](https://docs.lovable.dev/features/collaboration)
for more information.
How do I publish my project?
See [Publish](https://docs.lovable.dev/features/publish)
and follow the steps outlined there to publish your project.
How do I add a custom domain to my project?
See [Custom domain](https://docs.lovable.dev/features/custom-domain)
to add a custom domain to your project.
Can I see analytics for my published projects?
Yes. See [Project analytics](https://docs.lovable.dev/features/project-analytics)
for more information.
Can I add images to a Lovable prompt?
Yes. Images as design inspiration, sketches of your desired layout, or screenshots of UI flaws are super helpful while designing your website.
Can I add videos to a Lovable prompt?
Sadly, videos aren’t supported yet, but screenshots can often do the job.
Can I import designs from Figma?
Yes, you can import Figma designs to Lovable and use them as a starting point for your project. See [Figma to Lovable](https://docs.lovable.dev/features/figma-to-lovable)
for more information.
Can I export all of my project's code?
Yes. By transferring your code to GitHub, you can export your code and do whatever you’d like with it. See [GitHub integration](https://docs.lovable.dev/integrations/github)
for more information.
Can I start a project by importing code from an external source such as GitHub?
No, currently there is no way to start a Lovable project from already existing code on for example GitHub.
How do I see my project history?
You can view your project history by simply scrolling up in the chat or pressing the **View history** icon on top of the chat. You can also select older versions to preview them or restore your project to that version.
Can I restore an earlier version of my project?
Yes. You can find the option on that version’s code-card, or in the history tab when you select the version you want to restore.
If the **restore** function isn’t working, it could be due to one of the following reasons:
* There’s an **ongoing edit** still in progress.
* The version you’re trying to restore **contains an error**.
* The selected version is **identical to the current one**.
* You have only made changes to backend (SQL/edge functions), the restore button doesn’t roll back database changes, therefore it won’t be possible to restore to a version which only differs from the current one in the database.
For feature-specific questions and troubleshooting tips, check out the individual feature [pages](https://docs.lovable.dev/features)
.
[](https://docs.lovable.dev/introduction/faq#lovable-api)
Lovable API
-------------------------------------------------------------------------
What can I do with the Lovable API?
The **Lovable API** makes it possible to create and share Lovable apps programmatically — turning ideas, prompts, or even images into fully-generated applications with a single link. The first release, **Build with URL**, allows you to generate apps directly from a shareable URL. With it, you can:
* Embed a **Build with Lovable** button on your website or application.
* Share predefined prompts via URLs with friends, collegues, or on social media.
* Automate app generation as part of internal workflows.
* Rapidly prototype apps using URLs with prompts and reference images.
Learn about the feature and real-world use cases in our announcement post: [Build apps from a link with Lovable Build with URL](https://lovable.dev/blog/introducing-lovable-api-build-with-url)
.Read the full technical guide here: [Lovable API: Build with URL documentation](https://docs.lovable.dev/integrations/build-with-url)
.
[](https://docs.lovable.dev/introduction/faq#managing-your-account)
Managing your account
---------------------------------------------------------------------------------------------
Can I change the email I use to login?
Unfortunately, changing the email address directly is not possible at this time. As a workaround, you can create a new account with your desired email address and transfer your projects by following these steps:
1. Make your existing projects public temporarily and copy the URL.
2. Access the URL whilst logged in to your new account.
3. Remix the projects into your new account. Please note that projects connected to Supabase have to be disconnected from Supabase before you can remix them.
4. Once the projects are transferred, you can make them private again if needed.
Note: If your target workspace is on a paid plan, remixing public projects may be necessary for access. Remixed projects won’t carry over subscription-level features unless the new workspace has them too.
Can I delete my account?
To delete your account, go to **Settings → Your Account**, scroll down and press **Delete account**. This will permanently remove your account and all associated data.
Can I reactivate a deleted account?
No, you can’t reactivate a deleted account. However, after pressing the button to delete the account, this action can be cancelled within 48 hours to stop the deletion.
Can I change the workspace owner?
Yes, an owner can add multiple workspace owners.
How can I transfer project ownership to someone else?
One way around this is to remix the project, and the person who remixes the project will now be the owner of that version.
For further questions about credits and subscription issues, see [Plans and credits](https://docs.lovable.dev/introduction/plans-and-credits)
.
[](https://docs.lovable.dev/introduction/faq#policies-and-security)
Policies and security
---------------------------------------------------------------------------------------------
How can I get support?
Go to [Help & Support](https://lovable.dev/support)
.
Where can I find Lovable's privacy policy?
Go to [Privacy policy](https://lovable.dev/privacy)
.
Where can I find Lovable's Terms of Service?
Go to [Terms of Service](https://lovable.dev/terms)
.
What is Lovable's refund policy?
Please see our [Terms of Service](https://lovable.dev/terms)
to read more about our refund policy.
Is Lovable compliant with security standards?
Yes, Lovable is compliant with industry-recognized security standards and follows best practices for data protection and risk management. We undergo rigorous third-party audits and maintain certifications such as ISO 27001 and SOC 2 Type I, with live monitoring provided by Delve. You can view our current compliance status, subprocessors and policies [here](https://trust.delve.co/lovable)
Is Lovable GDPR compliant?
Yes, Lovable is fully GDPR compliant. We follow strict data protection and privacy practices in accordance with the General Data Protection Regulation (GDPR), which applies to all organizations handling personal data of individuals within the EU. Our systems are continuously monitored to ensure compliance, and we are committed to protecting user data globally.
[](https://docs.lovable.dev/introduction/faq#how-lovable-works)
How Lovable works
-------------------------------------------------------------------------------------
What tech stacks does Lovable know?
Lovable builds front-end using React, Tailwind & Vite, and can connect to OpenAPI backends. Support for data persistence and authentication is available using Lovable Cloud or Supabase.
Does Lovable support mobile app development?
No, Lovable is focused on **web applications**, but you can design mobile-friendly web apps.
How does Lovable remember context?
Lovable processes recent messages to maintain context. For the best results, include relevant details in each prompt to ensure clarity and accuracy.
Who owns the projects and the code that Lovable creates?
You as the creator do!
[](https://docs.lovable.dev/introduction/faq#about-lovable)
About Lovable
-----------------------------------------------------------------------------
Where is Lovable based?
Lovable is **100% made in Europe**, with headquarters in **Stockholm, Sweden.**
Is Lovable hiring?
Yes! Check out our open positions [here](https://lovable.dev/careers)
.
Was this page helpful?
YesNo
[Getting started](https://docs.lovable.dev/introduction/getting-started)
⌘I
---
# Welcome - Lovable Documentation
[Skip to main content](https://docs.lovable.dev/introduction/welcome#content-area)
[Lovable Documentation home page](https://lovable.dev/)
Search...
⌘K
Search...
Navigation
Welcome
[Introduction](https://docs.lovable.dev/introduction/welcome)
[Features](https://docs.lovable.dev/features/modes)
[Integrations](https://docs.lovable.dev/integrations/introduction)
[Tips & Tricks](https://docs.lovable.dev/tips-tricks/best-practice)
[Prompt engineering](https://docs.lovable.dev/prompting/prompting-one)
[Use cases](https://docs.lovable.dev/use-case/video-tutorials)
[Glossary](https://docs.lovable.dev/glossary)
[Changelog](https://docs.lovable.dev/changelog)
Lovable is an AI-powered platform that enables users of any skill level to create full-stack websites through natural language. Simply describe what you want, and Lovable builds it for you.
[Getting Started\
---------------\
\
Step-by-step tutorial to create your first project.](https://docs.lovable.dev/introduction/getting-started)
[Features\
--------\
\
Lovable’s core features.](https://docs.lovable.dev/features)
[Integrations\
------------\
\
Extend functionality with integrations.](https://docs.lovable.dev/integrations)
[Tips & Tricks\
-------------\
\
Get the most out of Lovable.](https://docs.lovable.dev/tips-tricks)
[Prompt Engineering\
------------------\
\
Learn effective prompting strategies.](https://docs.lovable.dev/prompting)
[Use Cases\
---------\
\
See video tuturials and what others have built](https://docs.lovable.dev/use-case)
[Glossary\
--------\
\
Learn the key terms.](https://docs.lovable.dev/glossary)
[Launched\
--------\
\
Compete for free credits every week!](https://launched.lovable.app/)
[Affiliate program\
-----------------\
\
Refer users and receive a commission.](https://lovable.dev/affiliates)
[Partner program\
---------------\
\
Hire one of our partners to get help.](https://lovable.dev/partners)
[Community\
---------\
\
Join our Lovable community on Discord.](https://discord.gg/lovable-dev)
Was this page helpful?
YesNo
[Plans and credits](https://docs.lovable.dev/introduction/plans-and-credits)
⌘I
---
# Page Not Found
[Skip to main content](https://docs.lovable.dev/features/project-analytics#content-area)
[Lovable Documentation home page](https://lovable.dev/)
Search...
⌘K
Search...
Navigation
Page Not Found
[Introduction](https://docs.lovable.dev/introduction/welcome)
[Features](https://docs.lovable.dev/features/modes)
[Integrations](https://docs.lovable.dev/integrations/introduction)
[Tips & Tricks](https://docs.lovable.dev/tips-tricks/best-practice)
[Prompt engineering](https://docs.lovable.dev/prompting/prompting-one)
[Use cases](https://docs.lovable.dev/use-case/video-tutorials)
[Glossary](https://docs.lovable.dev/glossary)
[Changelog](https://docs.lovable.dev/changelog)
404
Page Not Found
==============
We couldn't find the page. Maybe you were looking for one of these pages below?
[Project analytics](https://docs.lovable.dev/features/analytics#)
[FAQ](https://docs.lovable.dev/introduction/faq#can-i-see-analytics-for-my-published-projects)
[Lovable Cloud](https://docs.lovable.dev/features/cloud#tool-settings-and-defaults)
⌘I
---
# Page Not Found
[Skip to main content](https://docs.lovable.dev/tips-tricks/prompting#content-area)
[Lovable Documentation home page](https://lovable.dev/)
Search...
⌘K
Search...
Navigation
Page Not Found
[Introduction](https://docs.lovable.dev/introduction/welcome)
[Features](https://docs.lovable.dev/features/modes)
[Integrations](https://docs.lovable.dev/integrations/introduction)
[Tips & Tricks](https://docs.lovable.dev/tips-tricks/best-practice)
[Prompt engineering](https://docs.lovable.dev/prompting/prompting-one)
[Use cases](https://docs.lovable.dev/use-case/video-tutorials)
[Glossary](https://docs.lovable.dev/glossary)
[Changelog](https://docs.lovable.dev/changelog)
404
Page Not Found
==============
We couldn't find the page. Maybe you were looking for one of these pages below?
[Best practices](https://docs.lovable.dev/tips-tricks/best-practice#2-prompting-best-practices)
[Prompting 1.1](https://docs.lovable.dev/prompting/prompting-one#)
[SEO](https://docs.lovable.dev/features/seo#tips-and-tricks)
⌘I
---
# Page Not Found
[Skip to main content](https://docs.lovable.dev/features/launched#content-area)
[Lovable Documentation home page](https://lovable.dev/)
Search...
⌘K
Search...
Navigation
Page Not Found
[Introduction](https://docs.lovable.dev/introduction/welcome)
[Features](https://docs.lovable.dev/features/modes)
[Integrations](https://docs.lovable.dev/integrations/introduction)
[Tips & Tricks](https://docs.lovable.dev/tips-tricks/best-practice)
[Prompt engineering](https://docs.lovable.dev/prompting/prompting-one)
[Use cases](https://docs.lovable.dev/use-case/video-tutorials)
[Glossary](https://docs.lovable.dev/glossary)
[Changelog](https://docs.lovable.dev/changelog)
404
Page Not Found
==============
We couldn't find the page. Maybe you were looking for one of these pages below?
[Launched](https://docs.lovable.dev/use-case/launched#)
[Video tutorial](https://docs.lovable.dev/use-case/video-tutorials#step-1-designing-the-core-features)
[SEO](https://docs.lovable.dev/features/seo#automatic-seo-features)
⌘I
---