# Table of Contents
- [BMAD Commands - Maestro](#bmad-commands-maestro)
- [Maestro - Maestro](#maestro-maestro)
- [Achievements - Maestro](#achievements-maestro)
- [Features - Maestro](#features-maestro)
- [Deep Links - Maestro](#deep-links-maestro)
- [Encore Features - Maestro](#encore-features-maestro)
- [Director's Notes - Maestro](#director-s-notes-maestro)
- [Configuration - Maestro](#configuration-maestro)
- [Auto Run + Playbooks - Maestro](#auto-run-playbooks-maestro)
- [Context Management - Maestro](#context-management-maestro)
- [Getting Started - Maestro](#getting-started-maestro)
- [Overview - Maestro](#overview-maestro)
- [Feedback - Maestro](#feedback-maestro)
- [Document Graph - Maestro](#document-graph-maestro)
- [Group Chat - Maestro](#group-chat-maestro)
- [Git and Worktrees - Maestro](#git-and-worktrees-maestro)
- [History - Maestro](#history-maestro)
- [General Usage - Maestro](#general-usage-maestro)
- [Keyboard Shortcuts - Maestro](#keyboard-shortcuts-maestro)
- [Local Manifest - Maestro](#local-manifest-maestro)
- [Command Line Interface - Maestro](#command-line-interface-maestro)
- [Cue Overview - Maestro](#cue-overview-maestro)
- [Installation - Maestro](#installation-maestro)
- [Cue Event Types - Maestro](#cue-event-types-maestro)
- [Cue Advanced Patterns - Maestro](#cue-advanced-patterns-maestro)
- [Unknown](#unknown)
- [Unknown](#unknown)
- [Cue Configuration - Maestro](#cue-configuration-maestro)
- [MCP Server - Maestro](#mcp-server-maestro)
- [Memories - Maestro](#memories-maestro)
- [Multiple Claude Accounts - Maestro](#multiple-claude-accounts-maestro)
- [Cue Examples - Maestro](#cue-examples-maestro)
- [OpenSpec Commands - Maestro](#openspec-commands-maestro)
- [Performance Profiling - Maestro](#performance-profiling-maestro)
- [Playbook Exchange - Maestro](#playbook-exchange-maestro)
- [Provider Notes - Maestro](#provider-notes-maestro)
- [Prompt Customization - Maestro](#prompt-customization-maestro)
- [Themes Gallery - Maestro](#themes-gallery-maestro)
- [Remote Control - Maestro](#remote-control-maestro)
- [Spec-Kit Commands - Maestro](#spec-kit-commands-maestro)
- [Slash Commands - Maestro](#slash-commands-maestro)
- [Troubleshooting & Support - Maestro](#troubleshooting-support-maestro)
- [Usage Dashboard - Maestro](#usage-dashboard-maestro)
- [Release Notes - Maestro](#release-notes-maestro)
- [SSH Remote Execution - Maestro](#ssh-remote-execution-maestro)
- [Maestro Symphony - Maestro](#maestro-symphony-maestro)
---
# BMAD Commands - Maestro
[Skip to main content](https://docs.runmaestro.ai/bmad-commands#content-area)
[Maestro home page](https://runmaestro.ai/)
Search...
⌘K
Search...
Navigation
Auto Run
BMAD Commands
On this page
* [BMAD Commands](https://docs.runmaestro.ai/bmad-commands#bmad-commands)
* [What Is Included](https://docs.runmaestro.ai/bmad-commands#what-is-included)
* [Important Prerequisite](https://docs.runmaestro.ai/bmad-commands#important-prerequisite)
* [Updating The Bundle](https://docs.runmaestro.ai/bmad-commands#updating-the-bundle)
* [Editing Prompts](https://docs.runmaestro.ai/bmad-commands#editing-prompts)
[](https://docs.runmaestro.ai/bmad-commands#bmad-commands)
BMAD Commands
============================================================================
Maestro bundles a curated set of prompts from [bmad-code-org/BMAD-METHOD](https://github.com/bmad-code-org/BMAD-METHOD)
and exposes them in **Settings -> AI Commands**. You can review, edit, reset, and refresh these prompts the same way you can with Spec-Kit and OpenSpec.
[](https://docs.runmaestro.ai/bmad-commands#what-is-included)
What Is Included
----------------------------------------------------------------------------------
The BMAD bundle covers the main workflow families published by BMAD:
* **Core utilities** like `/bmad-help`, `/bmad-brainstorming`, `/bmad-party-mode`, `/bmad-index-docs`, and review-oriented prompts
* **Analysis workflows** like `/bmad-bmm-market-research`, `/bmad-bmm-domain-research`, `/bmad-bmm-technical-research`, and `/bmad-bmm-create-product-brief`
* **Planning workflows** like `/bmad-bmm-create-prd`, `/bmad-bmm-validate-prd`, `/bmad-bmm-edit-prd`, and `/bmad-bmm-create-ux-design`
* **Solutioning workflows** like `/bmad-bmm-create-architecture`, `/bmad-bmm-create-epics-and-stories`, and `/bmad-bmm-check-implementation-readiness`
* **Implementation workflows** like `/bmad-bmm-sprint-planning`, `/bmad-bmm-create-story`, `/bmad-bmm-dev-story`, `/bmad-bmm-code-review`, and `/bmad-bmm-qa-automate`
* **Quick flow workflows** like `/bmad-bmm-quick-spec`, `/bmad-bmm-quick-dev`, and `/bmad-bmm-quick-dev-new-preview`
[](https://docs.runmaestro.ai/bmad-commands#important-prerequisite)
Important Prerequisite
----------------------------------------------------------------------------------------------
Many BMAD prompts assume the target repository already contains BMAD’s project artifacts such as the `_bmad/` directory, workflow configs, sprint files, and generated planning documents. If those files are missing, the prompt may still provide guidance, but BMAD works best when the repository has already been prepared with the BMAD installer or equivalent project structure.
[](https://docs.runmaestro.ai/bmad-commands#updating-the-bundle)
Updating The Bundle
----------------------------------------------------------------------------------------
From the AI Commands settings panel, use **Check for Updates** in the BMAD section to pull the latest upstream workflow text from BMAD. This updates Maestro’s cached copy of the upstream prompts while preserving any local edits you have made in the app.
[](https://docs.runmaestro.ai/bmad-commands#editing-prompts)
Editing Prompts
--------------------------------------------------------------------------------
Each bundled BMAD command can be:
* expanded to inspect the current prompt
* edited and saved locally
* reset back to the bundled default
Local edits are stored in Maestro’s application data and do not modify the upstream BMAD project.
Was this page helpful?
YesNo
[OpenSpec Commands](https://docs.runmaestro.ai/openspec-commands)
[Encore Features](https://docs.runmaestro.ai/encore-features)
⌘I
---
# Maestro - Maestro
[Skip to main content](https://docs.runmaestro.ai/#content-area)
[Maestro home page](https://runmaestro.ai/)
Search...
⌘K
Search...
Navigation
Overview
Maestro
On this page
* [Video Walkthroughs](https://docs.runmaestro.ai/#video-walkthroughs)
* [Full Walkthrough (~27 min)](https://docs.runmaestro.ai/#full-walkthrough-27-min)
* [Quick Onboarding (~6 min)](https://docs.runmaestro.ai/#quick-onboarding-6-min)
* [Start Here](https://docs.runmaestro.ai/#start-here)
> Maestro hones fractured attention into focused intent.
Maestro is a cross-platform desktop app for orchestrating your fleet of AI agents and projects. It’s a high-velocity solution for hackers who are juggling multiple projects in parallel. Designed for power users who live on the keyboard and rarely touch the mouse. Collaborate with AI to create detailed specification documents, then let Auto Run execute them automatically, each task in a fresh session with clean context. Allowing for long-running unattended sessions, my current record is nearly 24 hours of continuous runtime. Run multiple agents in parallel with a Linear/Superhuman-level responsive interface. Currently supporting **Claude Code**, **Codex** (OpenAI), **OpenCode**, and **Factory Droid** with plans for additional agentic coding tools (Gemini CLI, Qwen3 Coder) based on user demand. 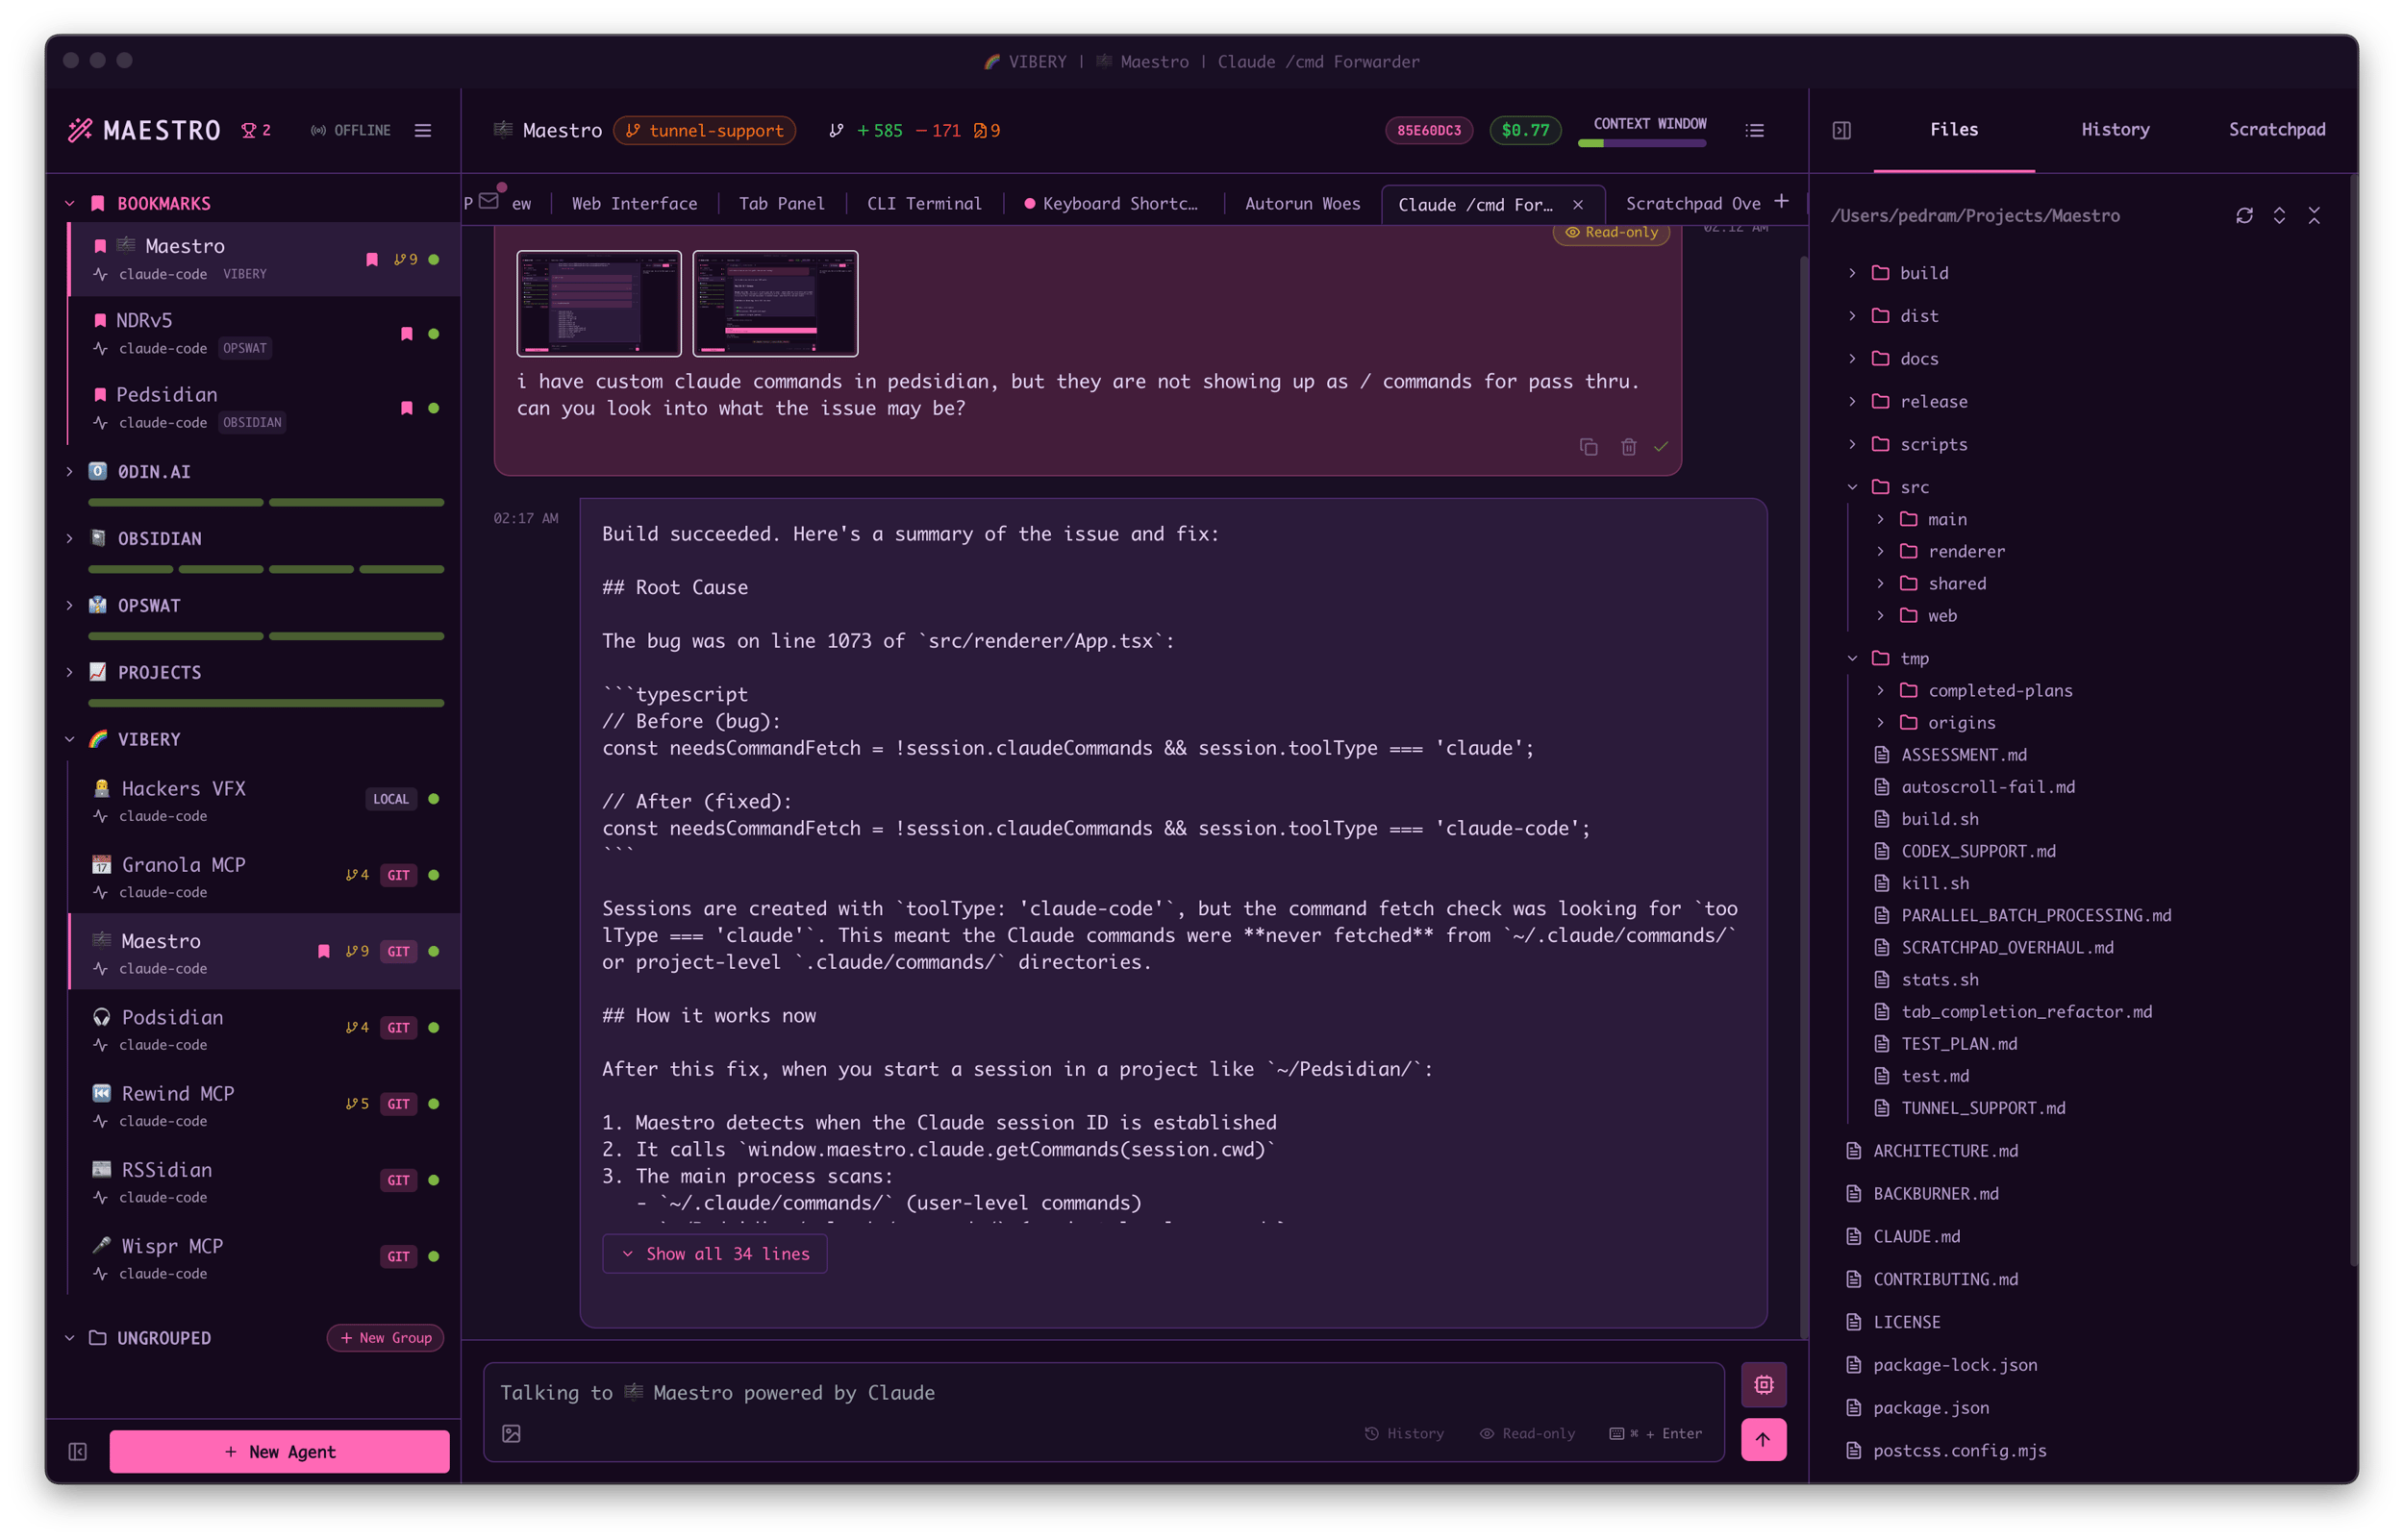
[](https://docs.runmaestro.ai/#video-walkthroughs)
Video Walkthroughs
-------------------------------------------------------------------------
###
[](https://docs.runmaestro.ai/#full-walkthrough-27-min)
Full Walkthrough (~27 min)
###
[](https://docs.runmaestro.ai/#quick-onboarding-6-min)
Quick Onboarding (~6 min)
[](https://docs.runmaestro.ai/#start-here)
Start Here
---------------------------------------------------------
* [Installation](https://docs.runmaestro.ai/installation)
* [Getting Started](https://docs.runmaestro.ai/getting-started)
* [Features](https://docs.runmaestro.ai/features)
* [Auto Run + Playbooks](https://docs.runmaestro.ai/autorun-playbooks)
* [Playbook Exchange](https://docs.runmaestro.ai/playbook-exchange)
* [Keyboard Shortcuts](https://docs.runmaestro.ai/keyboard-shortcuts)
Was this page helpful?
YesNo
[Overview](https://docs.runmaestro.ai/about/overview)
⌘I
---
# Achievements - Maestro
[Skip to main content](https://docs.runmaestro.ai/achievements#content-area)
[Maestro home page](https://runmaestro.ai/)
Search...
⌘K
Search...
Navigation
Reference
Achievements
On this page
* [Conductor Ranks](https://docs.runmaestro.ai/achievements#conductor-ranks)
* [Reaching the Top](https://docs.runmaestro.ai/achievements#reaching-the-top)
* [Sharing Your Achievements](https://docs.runmaestro.ai/achievements#sharing-your-achievements)
* [Stats Captured in Share Images](https://docs.runmaestro.ai/achievements#stats-captured-in-share-images)
* [Keyboard Mastery](https://docs.runmaestro.ai/achievements#keyboard-mastery)
* [Leaderboard](https://docs.runmaestro.ai/achievements#leaderboard)
Maestro features a conductor-themed achievement system that tracks your cumulative Auto Run time. The focus is simple: **longest run wins**. As you accumulate Auto Run hours, you level up through 11 ranks inspired by the hierarchy of orchestral conductors. 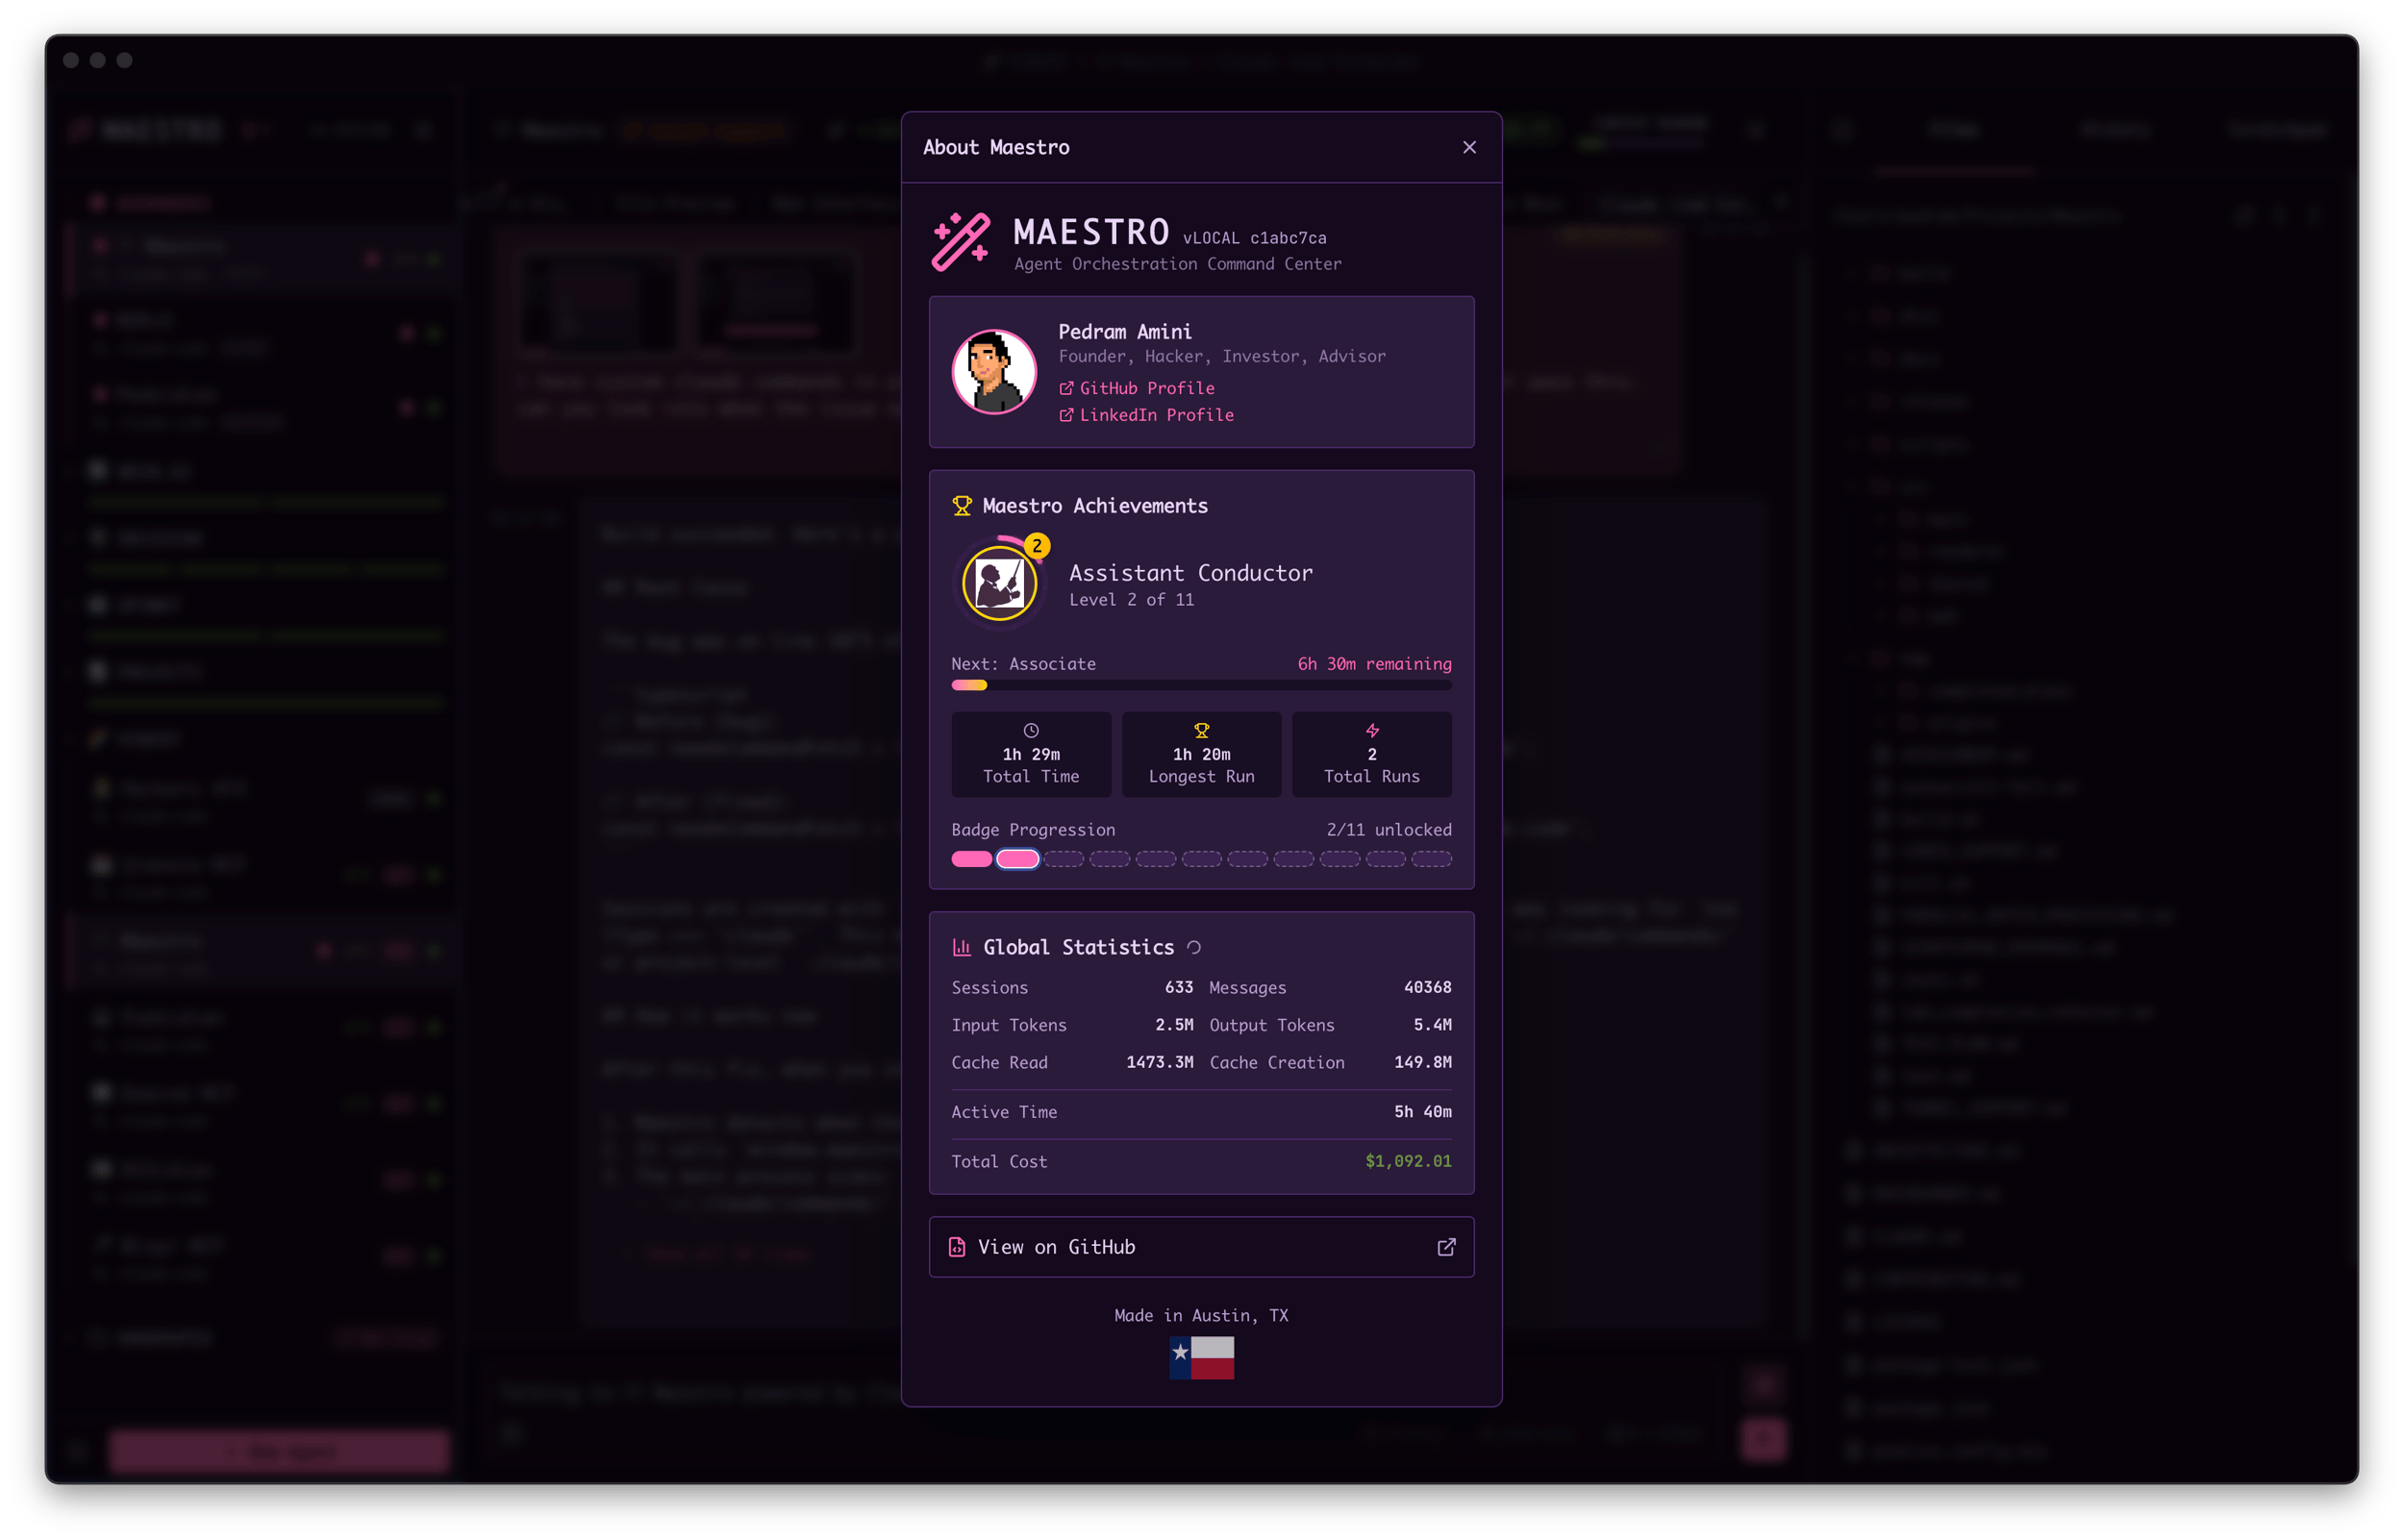
[](https://docs.runmaestro.ai/achievements#conductor-ranks)
Conductor Ranks
-------------------------------------------------------------------------------
| Level | Rank | Time Required | Example Conductor |
| --- | --- | --- | --- |
| 1 | **Apprentice Conductor** | 15 minutes | Gustavo Dudamel (early career) |
| 2 | **Assistant Conductor** | 1 hour | Marin Alsop |
| 3 | **Associate Conductor** | 8 hours | Yannick Nezet-Seguin |
| 4 | **Resident Conductor** | 24 hours | Jaap van Zweden |
| 5 | **Principal Guest Conductor** | 1 week | Esa-Pekka Salonen |
| 6 | **Chief Conductor** | 30 days | Andris Nelsons |
| 7 | **Music Director** | 3 months | Sir Simon Rattle |
| 8 | **Maestro Emeritus** | 6 months | Bernard Haitink |
| 9 | **World Maestro** | 1 year | Kirill Petrenko |
| 10 | **Grand Maestro** | 5 years | Riccardo Muti |
| 11 | **Titan of the Baton** | 10 years | Leonard Bernstein |
[](https://docs.runmaestro.ai/achievements#reaching-the-top)
Reaching the Top
---------------------------------------------------------------------------------
Since Auto Runs can execute in parallel across multiple Maestro sessions, achieving **Titan of the Baton** (Level 11) is technically feasible in less than 10 calendar years. Run 10 agents simultaneously with worktrees and you could theoretically hit that milestone in about a year of real time. But let’s be real — getting to Level 11 is going to take some serious hacking. You’ll need a well-orchestrated fleet of agents running around the clock, carefully crafted playbooks that loop indefinitely, and the infrastructure to keep it all humming. It’s the ultimate test of your Maestro skills. The achievement panel shows your current rank, progress to the next level, and total accumulated time. Each rank includes flavor text and information about a legendary conductor who exemplifies that level of mastery.
[](https://docs.runmaestro.ai/achievements#sharing-your-achievements)
Sharing Your Achievements
---------------------------------------------------------------------------------------------------
Generate a shareable image of your achievements to celebrate milestones or compare progress with other Maestro users. The share image captures **unique statistics not tracked anywhere else** in the app. 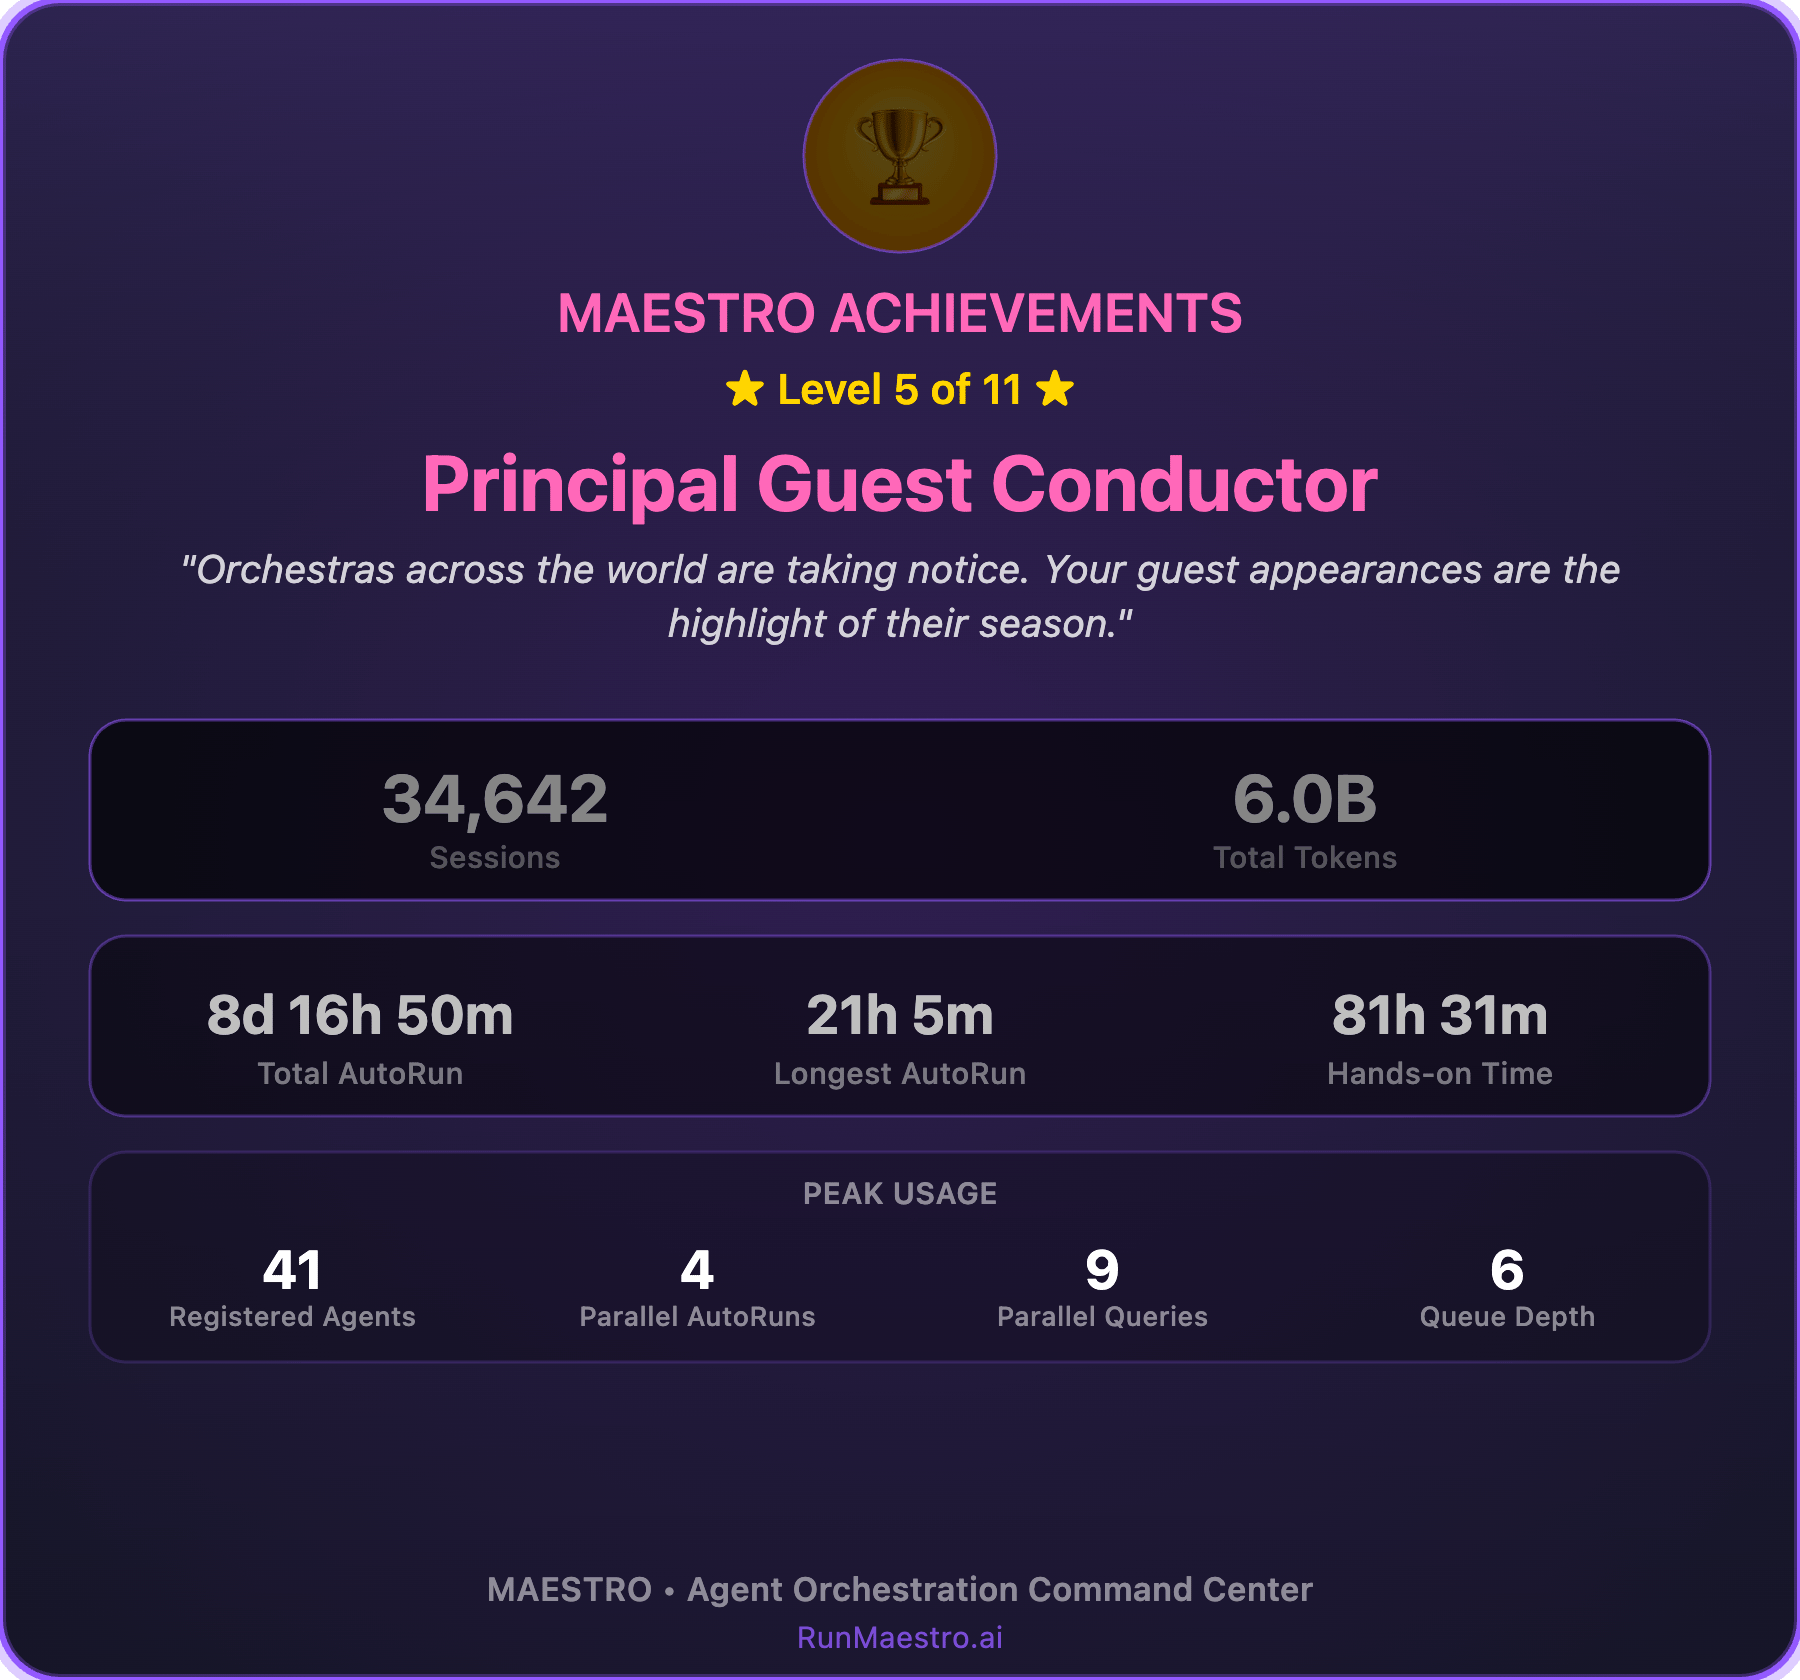 **To generate a share image:**
1. Open the Achievements panel
2. Click **Share** in the header
3. Choose **Copy to Clipboard** or **Save as Image**
###
[](https://docs.runmaestro.ai/achievements#stats-captured-in-share-images)
Stats Captured in Share Images
The share image includes comprehensive usage statistics:
| Stat | Description |
| --- | --- |
| **Sessions** | Total number of AI sessions created |
| **Total Tokens** | Cumulative tokens processed across all sessions |
| **Total AutoRun** | Cumulative Auto Run execution time |
| **Longest AutoRun** | Your personal record for longest continuous Auto Run |
| **Hands-on Time** | Time spent actively interacting with Maestro |
| **Registered Agents** | Peak number of agents you’ve configured |
| **Parallel AutoRuns** | Peak simultaneous Auto Runs achieved |
| **Parallel Queries** | Peak simultaneous AI queries in flight |
| **Queue Depth** | Peak message queue depth reached |
These peak usage stats are tracked automatically and persist across sessions. They represent your high-water marks — evidence of your most intensive Maestro orchestrations.
[](https://docs.runmaestro.ai/achievements#keyboard-mastery)
Keyboard Mastery
---------------------------------------------------------------------------------
Separate from Conductor ranks, Maestro tracks your **keyboard mastery** based on shortcut usage. As you discover and use more keyboard shortcuts, you level up through 5 mastery levels:
| Level | Title | Shortcuts Used |
| --- | --- | --- |
| 0 | Beginner | 0-24% |
| 1 | Student | 25-49% |
| 2 | Performer | 50-74% |
| 3 | Virtuoso | 75-99% |
| 4 | Keyboard Maestro | 100% |
Your current keyboard mastery level and progress are shown in the **Keyboard Shortcuts panel** (press `?` or `Cmd/Ctrl+/` to open). The panel displays which shortcuts you’ve used (marked with a checkmark) and which remain to be discovered. See [Keyboard Shortcuts](https://docs.runmaestro.ai/keyboard-shortcuts)
for the full shortcut reference.
[](https://docs.runmaestro.ai/achievements#leaderboard)
Leaderboard
-----------------------------------------------------------------------
Opt-in to compete with fellow Maestro users on the global **Leaderboard** at [RunMaestro.ai](https://runmaestro.ai/)
. Sign up to have your stats tracked and compete for top rankings. 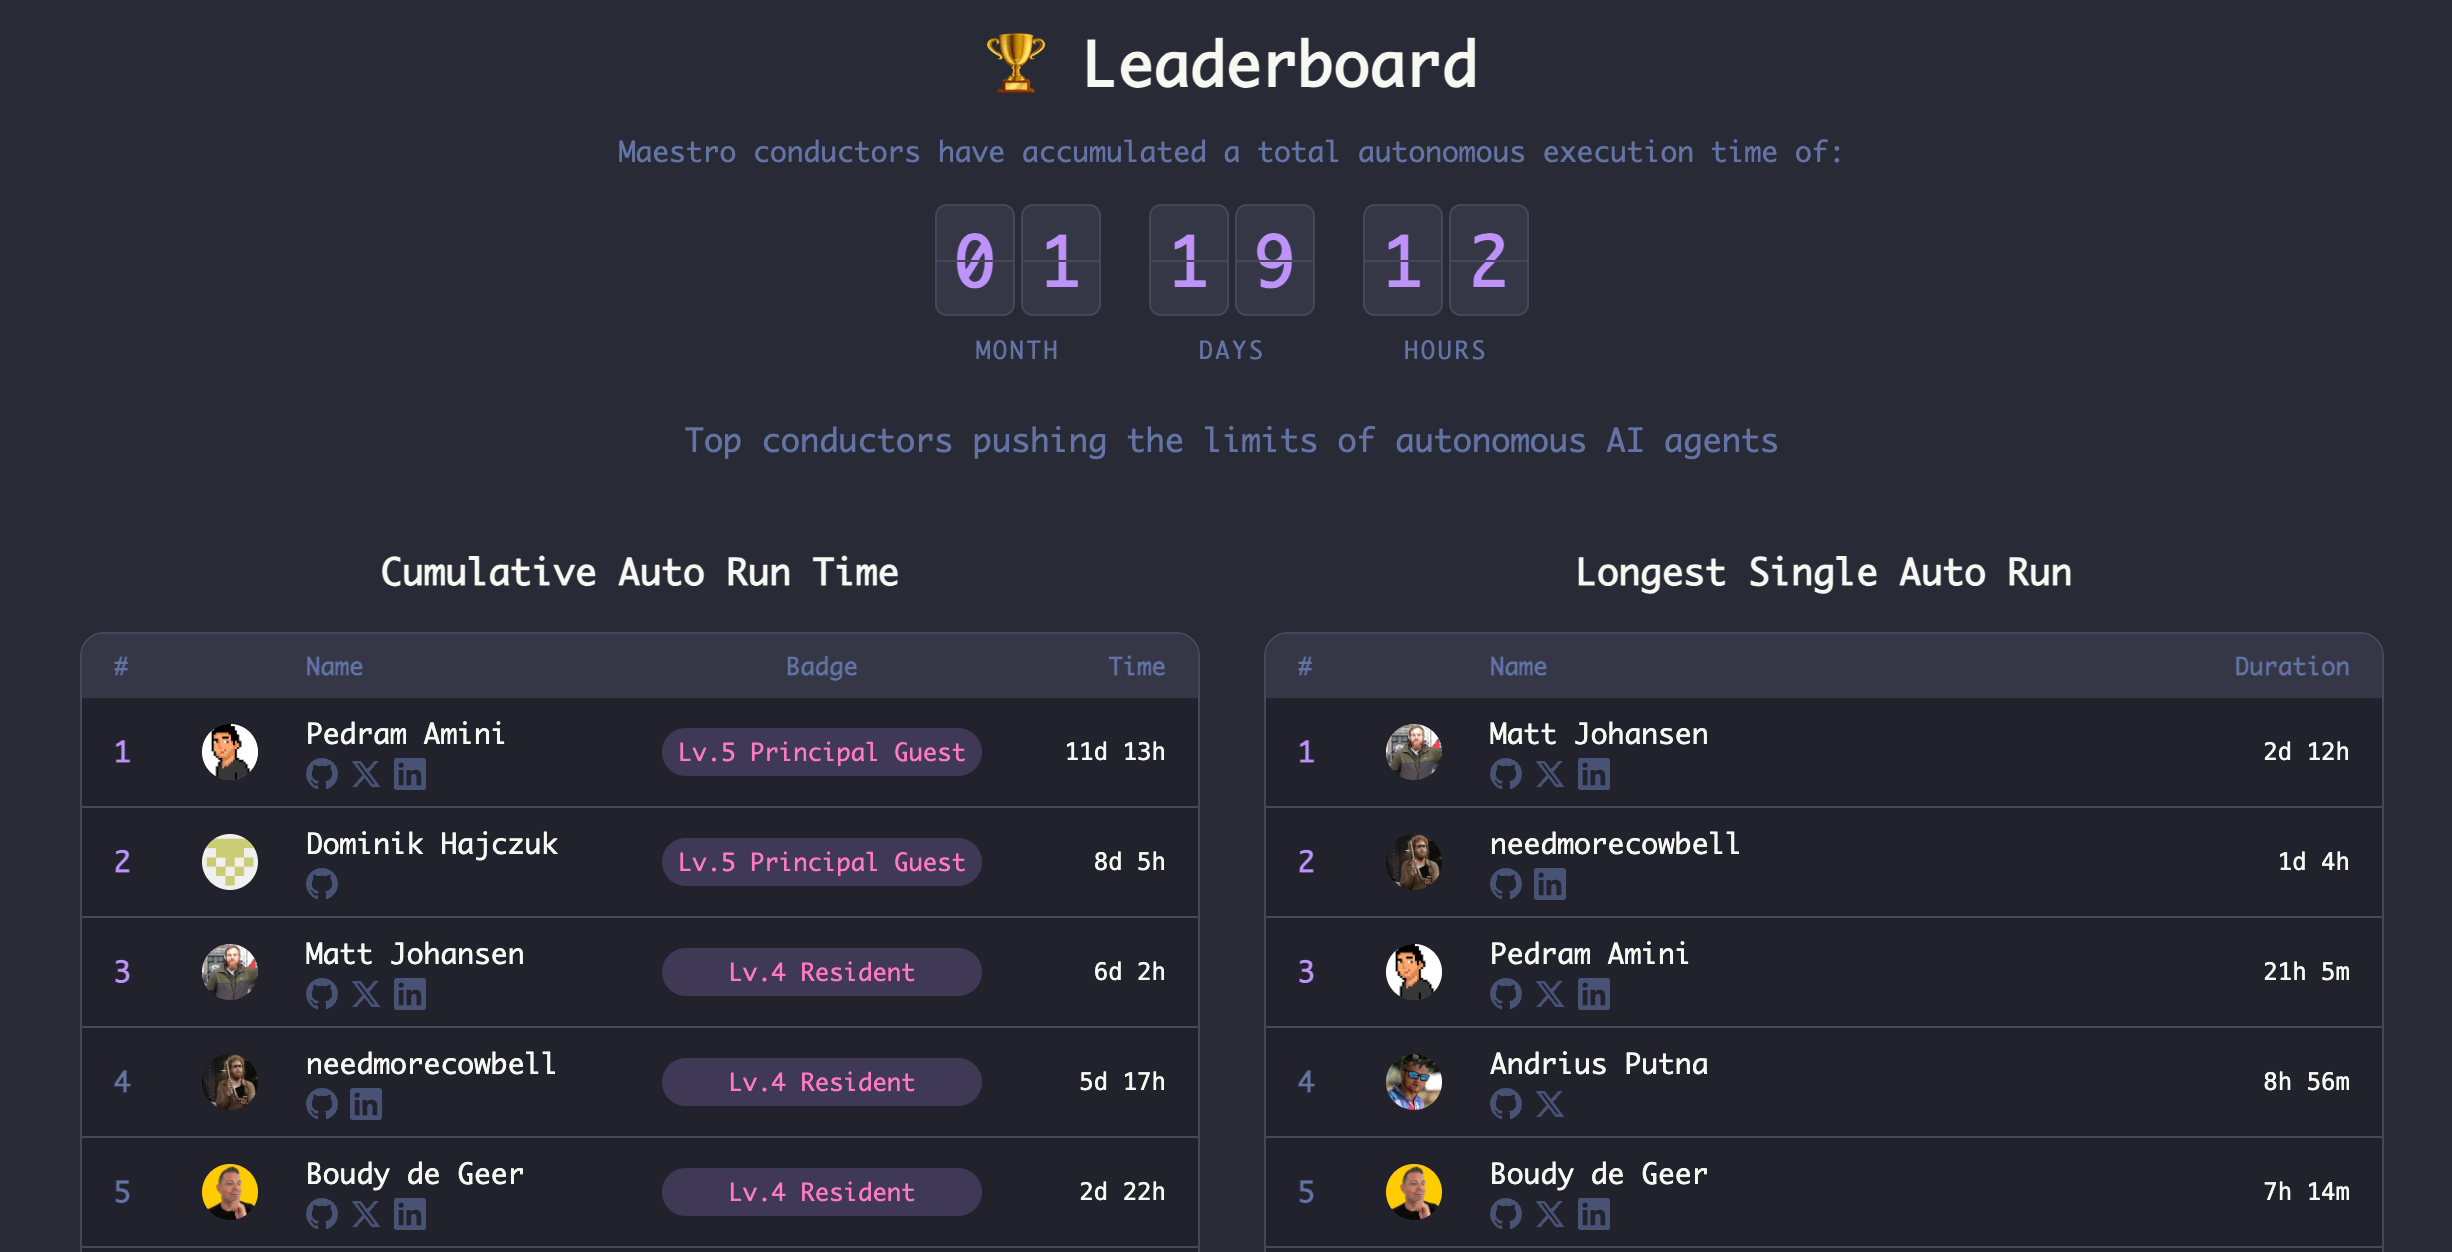 The leaderboard tracks two competitive categories:
| Category | Description |
| --- | --- |
| **Cumulative Auto Run Time** | Total time spent in Auto Run across all sessions |
| **Longest Single Auto Run** | Personal record for longest continuous Auto Run |
Each entry shows the user’s conductor badge level, social links, and ranking. Your stats sync across devices when you’re signed in, so your achievements follow you wherever you use Maestro.
Was this page helpful?
YesNo
[Release Notes](https://docs.runmaestro.ai/releases)
[Performance Profiling](https://docs.runmaestro.ai/performance-profiling)
⌘I
---
# Features - Maestro
[Skip to main content](https://docs.runmaestro.ai/features#content-area)
[Maestro home page](https://runmaestro.ai/)
Search...
⌘K
Search...
Navigation
Overview
Features
On this page
* [Power Features](https://docs.runmaestro.ai/features#power-features)
* [Core Features](https://docs.runmaestro.ai/features#core-features)
[](https://docs.runmaestro.ai/features#power-features)
Power Features
-------------------------------------------------------------------------
* 🌳 **[Git Worktrees](https://docs.runmaestro.ai/git-worktrees)
** - Run AI agents in parallel on isolated branches. Create worktree sub-agents from the git branch menu, each operating in their own directory. Work interactively in the main repo while sub-agents process tasks independently — then create PRs with one click. True parallel development without conflicts.
* 🤖 **[Auto Run & Playbooks](https://docs.runmaestro.ai/autorun-playbooks)
** - File-system-based task runner that processes markdown checklists through AI agents. Create Playbooks (collections of Auto Run documents) for repeatable workflows, run in loops, and track progress with full history. Each task gets its own AI session for clean conversation context.
* 🏪 **[Playbook Exchange](https://docs.runmaestro.ai/playbook-exchange)
** - Browse and import community-contributed playbooks directly into your Auto Run folder. Categories, search, and one-click import get you started with proven workflows for security audits, code reviews, documentation, and more.
* 🎵 **[Maestro Symphony](https://docs.runmaestro.ai/symphony)
** - Contribute to open source by donating AI tokens. Browse registered projects, select GitHub issues, and let Maestro clone, process Auto Run docs, and create PRs automatically. Distributed computing for AI-assisted development. _(Encore Feature — enable in Settings > Encore Features)_
* 💬 **[Group Chat](https://docs.runmaestro.ai/group-chat)
** - Coordinate multiple AI agents in a single conversation. A moderator AI orchestrates discussions, routing questions to the right agents and synthesizing their responses for cross-project questions and architecture discussions.
* 🌐 **[Remote Control](https://docs.runmaestro.ai/remote-control)
** - Built-in web server with QR code access. Monitor and control all your agents from your phone. Supports local network access and remote tunneling via Cloudflare for access from anywhere.
* 🔗 **[SSH Remote Execution](https://docs.runmaestro.ai/ssh-remote-execution)
** - Run AI agents on remote hosts via SSH. Leverage powerful cloud VMs, access tools not installed locally, or work with projects requiring specific environments — all while controlling everything from your local Maestro instance.
* 💻 **[Command Line Interface](https://docs.runmaestro.ai/cli)
** - Full CLI (`maestro-cli`) for headless operation. List agents/groups, run playbooks, manage settings and agent configs — all from the command line. Settings changes take effect instantly in the running app.
* 🚀 **Multi-Agent Management** - Run unlimited agents in parallel. Each agent has its own workspace, conversation history, and isolated context.
* 📬 **Message Queueing** - Queue messages while AI is busy; they’re sent automatically when the agent becomes ready. Never lose a thought.
* 🔐 **[Global Environment Variables](https://docs.runmaestro.ai/configuration#global-environment-variables)
** - Configure environment variables once in Settings and they apply to all agent processes and terminal sessions. Perfect for API keys, proxy settings, and tool paths.
[](https://docs.runmaestro.ai/features#core-features)
Core Features
-----------------------------------------------------------------------
* 🔄 **Dual-Mode Sessions** - Each agent has both an AI Terminal and Command Terminal. Switch seamlessly between AI conversation and shell commands with `Cmd+J` / `Ctrl+J`.
* ⌨️ **[Keyboard-First Design](https://docs.runmaestro.ai/keyboard-shortcuts)
** - Full keyboard control with customizable shortcuts and [mastery tracking](https://docs.runmaestro.ai/achievements)
that rewards you for leveling up. `Cmd+K` / `Ctrl+K` quick actions, rapid agent switching, and focus management designed for flow state.
* 📋 **Session Discovery** - Automatically discovers and imports existing sessions from all supported providers, including conversations from before Maestro was installed. Browse, search, star, rename, and resume any session.
* 🔀 **Git Integration** - Automatic repo detection, branch display, diff viewer, commit logs, and git-aware file completion. Work with git without leaving the app.
* 📁 **[File Explorer](https://docs.runmaestro.ai/general-usage)
** - Browse project files with syntax highlighting, markdown preview, and image viewing. Reference files in prompts with `@` mentions.
* 🕸️ **[Document Graph](https://docs.runmaestro.ai/document-graph)
** - Visualize markdown file relationships and wiki-link connections in an interactive graph. Navigate with keyboard shortcuts, adjust depth, and see how your documentation connects.
* 🔍 **[Powerful Output Filtering](https://docs.runmaestro.ai/general-usage)
** - Search and filter AI output with include/exclude modes, regex support, and per-response local filters.
* ⚡ **[Slash Commands](https://docs.runmaestro.ai/slash-commands)
** - Extensible command system with autocomplete. Create custom commands with template variables for your workflows. Includes bundled [Spec-Kit](https://docs.runmaestro.ai/speckit-commands)
for feature specifications and [OpenSpec](https://docs.runmaestro.ai/openspec-commands)
for change proposals.
* 💾 **Draft Auto-Save** - Never lose work. Drafts are automatically saved and restored per session.
* 🏷️ **[Automatic Tab Naming](https://docs.runmaestro.ai/general-usage#automatic-tab-naming)
** - Tabs are automatically named based on your first message. No more “New Session” clutter — each tab gets a descriptive, relevant name.
* 🔔 **Custom Notifications** - Execute any command when agents complete tasks, perfect for audio alerts, logging, or integration with your notification stack.
* 🎨 **[Beautiful Themes](https://github.com/RunMaestro/Maestro/blob/main/THEMES.md)
** - 17 built-in themes across dark (Dracula, Monokai, Nord, Tokyo Night, Catppuccin Mocha, Gruvbox Dark), light (GitHub, Solarized, One Light, Gruvbox Light, Catppuccin Latte, Ayu Light), and vibe (Pedurple, Maestro’s Choice, Dre Synth, InQuest) categories, plus a fully customizable theme builder.
* ⏱️ **[WakaTime Integration](https://docs.runmaestro.ai/configuration#wakatime-integration)
** - Automatic time tracking via WakaTime with optional per-file write activity tracking across all supported agents.
* 💰 **Cost Tracking** - Real-time token usage and cost tracking per session and globally.
* 📊 **[Usage Dashboard](https://docs.runmaestro.ai/usage-dashboard)
** - Comprehensive analytics for tracking AI usage patterns. View aggregated statistics, compare agent performance, analyze activity heatmaps, and export data to CSV. Access via `Opt+Cmd+U` / `Alt+Ctrl+U`. _(Encore Feature — enable in Settings > Encore Features)_
* 🎬 **[Director’s Notes](https://docs.runmaestro.ai/director-notes)
** - Bird’s-eye view of all agent activity in a unified timeline. Aggregate history from every agent, search and filter entries, and generate AI-powered synopses of recent work. Access via `Cmd+Shift+O` / `Ctrl+Shift+O`. _(Encore Feature — enable in Settings > Encore Features)_
* 🏆 **[Achievements](https://docs.runmaestro.ai/achievements)
** - Level up from Apprentice to Titan of the Baton based on cumulative Auto Run time. 11 conductor-themed ranks to unlock.
* 💬 **[Conversational Feedback](https://docs.runmaestro.ai/feedback)
** - Submit bug reports and feature requests through an AI-guided conversation. The agent asks clarifying questions, checks for duplicate issues, and creates a well-structured GitHub issue — no forms to fill out.
> **Note**: Maestro currently supports Claude Code, Codex (OpenAI), OpenCode, and Factory Droid as fully-integrated providers. Support for additional providers (Gemini CLI, Qwen3 Coder) is planned for future releases based on community demand.
Was this page helpful?
YesNo
[Overview](https://docs.runmaestro.ai/about/overview)
[Themes Gallery](https://docs.runmaestro.ai/screenshots)
⌘I
---
# Deep Links - Maestro
[Skip to main content](https://docs.runmaestro.ai/deep-links#content-area)
[Maestro home page](https://runmaestro.ai/)
Search...
⌘K
Search...
Navigation
Integrations
Deep Links
On this page
* [Deep Links](https://docs.runmaestro.ai/deep-links#deep-links)
* [URL Format](https://docs.runmaestro.ai/deep-links#url-format)
* [Available Actions](https://docs.runmaestro.ai/deep-links#available-actions)
* [Usage](https://docs.runmaestro.ai/deep-links#usage)
* [From Terminal](https://docs.runmaestro.ai/deep-links#from-terminal)
* [From Tab Menu](https://docs.runmaestro.ai/deep-links#from-tab-menu)
* [OS Notification Clicks](https://docs.runmaestro.ai/deep-links#os-notification-clicks)
* [Template Variables](https://docs.runmaestro.ai/deep-links#template-variables)
* [From Scripts and External Tools](https://docs.runmaestro.ai/deep-links#from-scripts-and-external-tools)
* [Platform Behavior](https://docs.runmaestro.ai/deep-links#platform-behavior)
* [Related](https://docs.runmaestro.ai/deep-links#related)
[](https://docs.runmaestro.ai/deep-links#deep-links)
Deep Links
===================================================================
Maestro registers the `maestro://` URL protocol, enabling navigation to specific agents, tabs, and groups from external tools, scripts, shell commands, and OS notification clicks.
[](https://docs.runmaestro.ai/deep-links#url-format)
URL Format
-------------------------------------------------------------------
maestro://[action]/[parameters]
###
[](https://docs.runmaestro.ai/deep-links#available-actions)
Available Actions
| URL | Action |
| --- | --- |
| `maestro://focus` | Bring Maestro window to foreground |
| `maestro://session/{sessionId}` | Navigate to an agent |
| `maestro://session/{sessionId}/tab/{tabId}` | Navigate to a specific tab within an agent |
| `maestro://group/{groupId}` | Expand a group and focus its first agent |
IDs containing special characters (`/`, `?`, `#`, `%`, etc.) are automatically URI-encoded and decoded.
[](https://docs.runmaestro.ai/deep-links#usage)
Usage
---------------------------------------------------------
###
[](https://docs.runmaestro.ai/deep-links#from-terminal)
From Terminal
# macOS
open "maestro://session/abc123"
open "maestro://session/abc123/tab/def456"
open "maestro://group/my-group-id"
open "maestro://focus"
# Linux
xdg-open "maestro://session/abc123"
# Windows
start maestro://session/abc123
###
[](https://docs.runmaestro.ai/deep-links#from-tab-menu)
From Tab Menu
Right-click or hover on any AI tab to reveal the tab overlay menu, which includes a **Copy Deep Link** option. This copies the full `maestro://session/{id}/tab/{tabId}` URL to your clipboard — ready to paste into chat, tickets, documentation, or scripts.
###
[](https://docs.runmaestro.ai/deep-links#os-notification-clicks)
OS Notification Clicks
When Maestro is running in the background and an agent completes a task, the OS notification is automatically linked to the originating agent and tab. Clicking the notification brings Maestro to the foreground and navigates directly to that agent’s tab. This works out of the box — no configuration needed. Ensure **OS Notifications** are enabled in Settings.
###
[](https://docs.runmaestro.ai/deep-links#template-variables)
Template Variables
Deep link URLs are available as template variables in system prompts, custom AI commands, and Auto Run documents:
| Variable | Description | Example Value |
| --- | --- | --- |
| `{{AGENT_DEEP_LINK}}` | Link to the current agent | `maestro://session/abc123` |
| `{{TAB_DEEP_LINK}}` | Link to the current agent + active tab | `maestro://session/abc123/tab/def456` |
| `{{GROUP_DEEP_LINK}}` | Link to the agent’s group (empty if ungrouped) | `maestro://group/grp789` |
These variables can be used in:
* **System prompts** — give AI agents awareness of their own deep link for cross-referencing
* **Custom AI commands** — include deep links in generated output
* **Auto Run documents** — reference agents in batch automation workflows
* **Custom notification commands** — include deep links in TTS or logging scripts
###
[](https://docs.runmaestro.ai/deep-links#from-scripts-and-external-tools)
From Scripts and External Tools
Any application can launch Maestro deep links by opening the URL. This enables integrations like:
* CI/CD pipelines that open a specific agent after deployment
* Shell scripts that navigate to a group after batch operations
* Alfred/Raycast workflows for quick agent access
* Bookmarks for frequently-used agents
[](https://docs.runmaestro.ai/deep-links#platform-behavior)
Platform Behavior
---------------------------------------------------------------------------------
| Platform | Mechanism |
| --- | --- |
| **macOS** | `app.on('open-url')` delivers the URL to the running instance |
| **Windows/Linux** | `app.on('second-instance')` delivers the URL via argv to the primary instance |
| **Cold start** | URL is buffered and processed after the window is ready |
Maestro uses a single-instance lock — opening a deep link when Maestro is already running delivers the URL to the existing instance rather than launching a new one.
In development mode, protocol registration is skipped by default to avoid overriding the production app’s handler. Set `REGISTER_DEEP_LINKS_IN_DEV=1` to enable it during development.
[](https://docs.runmaestro.ai/deep-links#related)
Related
-------------------------------------------------------------
* [Configuration](https://docs.runmaestro.ai/configuration)
— OS notification settings
* [General Usage](https://docs.runmaestro.ai/general-usage)
— Core UI and workflow patterns
* [MCP Server](https://docs.runmaestro.ai/mcp-server)
— Connect AI applications to Maestro
Was this page helpful?
YesNo
[MCP Server](https://docs.runmaestro.ai/mcp-server)
[Release Notes](https://docs.runmaestro.ai/releases)
⌘I
---
# Encore Features - Maestro
[Skip to main content](https://docs.runmaestro.ai/encore-features#content-area)
[Maestro home page](https://runmaestro.ai/)
Search...
⌘K
Search...
Navigation
Encore Features
Encore Features
On this page
* [Enabling Encore Features](https://docs.runmaestro.ai/encore-features#enabling-encore-features)
* [Available Features](https://docs.runmaestro.ai/encore-features#available-features)
* [For Developers](https://docs.runmaestro.ai/encore-features#for-developers)
Encore Features are Maestro’s system for shipping powerful capabilities that aren’t essential for every user. They’re disabled by default and completely invisible when off — no shortcuts, no menu items, no command palette entries. This keeps the core app lean while letting power users opt into advanced workflows. Think of them as a precursor to a full plugin marketplace: each Encore Feature adds significant functionality, but only for users who want it.
[](https://docs.runmaestro.ai/encore-features#enabling-encore-features)
Enabling Encore Features
----------------------------------------------------------------------------------------------------
Open **Settings** (`Cmd+,` / `Ctrl+,`) and navigate to the **Encore Features** tab. Toggle individual features on or off. Each feature may have its own configuration options that appear when enabled. 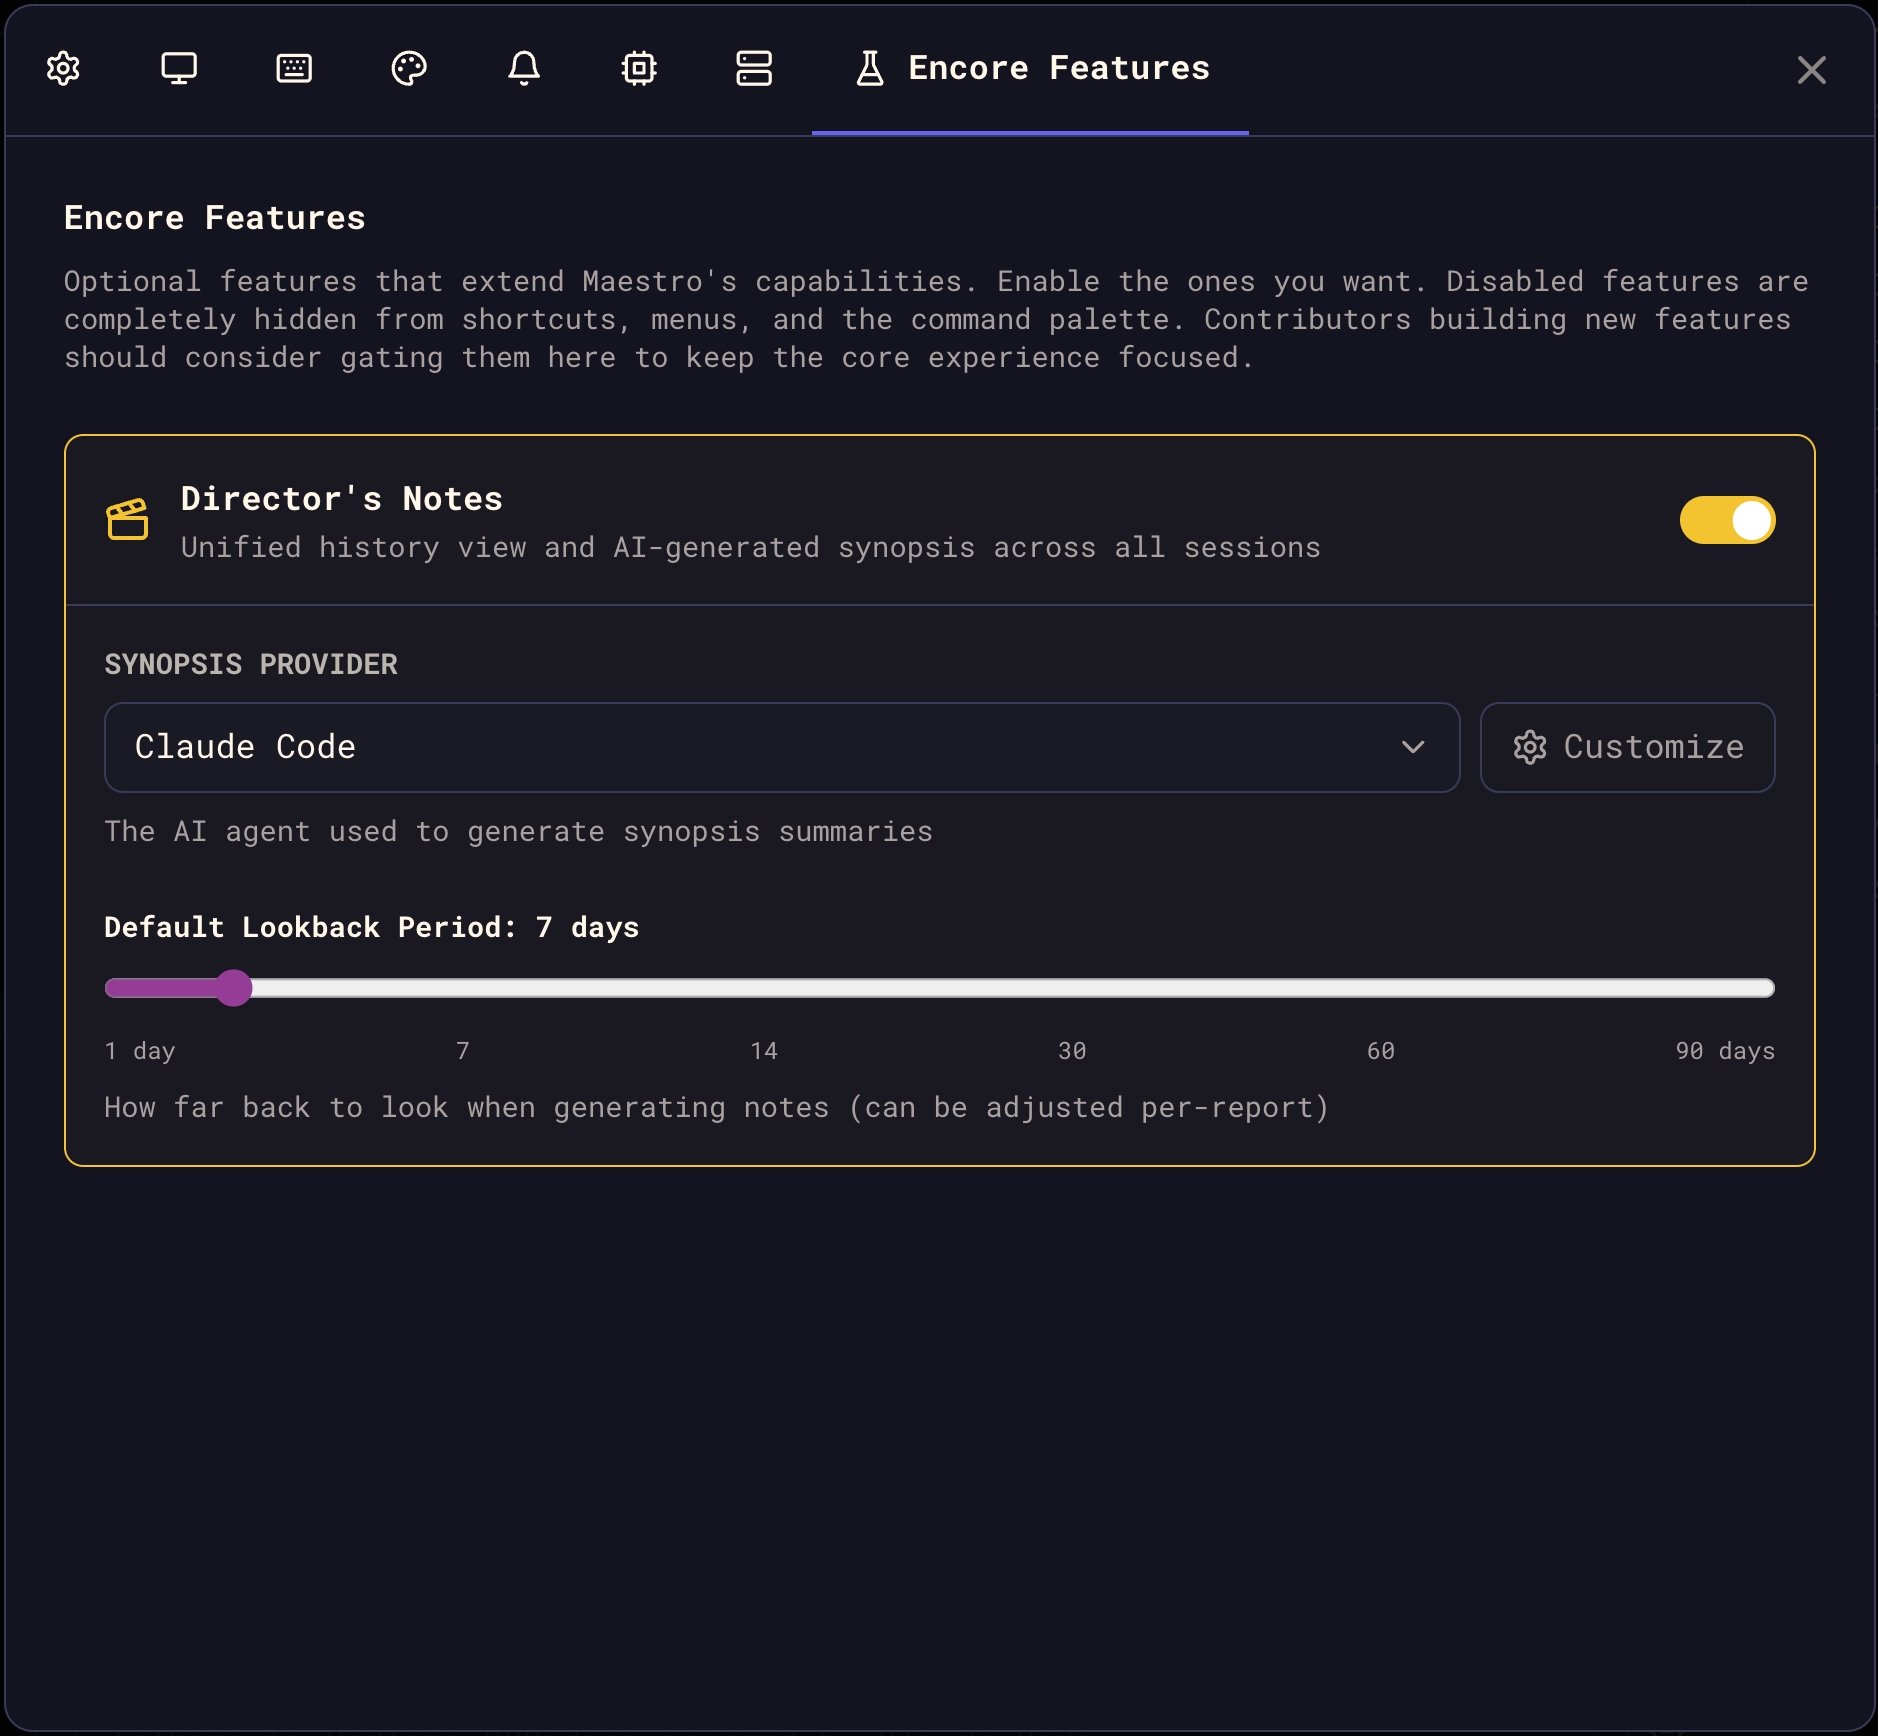
[](https://docs.runmaestro.ai/encore-features#available-features)
Available Features
----------------------------------------------------------------------------------------
| Feature | Shortcut | Description |
| --- | --- | --- |
| [Director’s Notes](https://docs.runmaestro.ai/director-notes) | `Cmd+Shift+O` / `Ctrl+Shift+O` | Unified timeline of all agent activity with AI-powered synopses |
| [Usage Dashboard](https://docs.runmaestro.ai/usage-dashboard) | `Opt+Cmd+U` / `Alt+Ctrl+U` | Comprehensive analytics for tracking AI usage patterns |
| [Maestro Symphony](https://docs.runmaestro.ai/symphony) | `Cmd+Shift+Y` / `Ctrl+Shift+Y` | Contribute to open source by donating AI tokens |
| [Maestro Cue](https://docs.runmaestro.ai/maestro-cue) | `Cmd+Shift+E` / `Ctrl+Shift+E` | Event-driven automation: file changes, timers, agent chaining, GitHub polling, and task tracking |
[](https://docs.runmaestro.ai/encore-features#for-developers)
For Developers
--------------------------------------------------------------------------------
Want to build a new Encore Feature? The architecture is designed for easy extension — add a flag, wire up the toggle, gate the access points, and your feature ships behind a clean opt-in. See the [Encore Features contributor guide](https://github.com/RunMaestro/Maestro/blob/main/CONTRIBUTING.md#encore-features-feature-gating)
for the full implementation checklist, architecture details, and the canonical reference implementation (Director’s Notes).
Was this page helpful?
YesNo
[BMAD Commands](https://docs.runmaestro.ai/bmad-commands)
[Director's Notes](https://docs.runmaestro.ai/director-notes)
⌘I
---
# Director's Notes - Maestro
[Skip to main content](https://docs.runmaestro.ai/director-notes#content-area)
[Maestro home page](https://runmaestro.ai/)
Search...
⌘K
Search...
Navigation
Encore Features
Director's Notes
On this page
* [Opening Director’s Notes](https://docs.runmaestro.ai/director-notes#opening-director%E2%80%99s-notes)
* [Tabs](https://docs.runmaestro.ai/director-notes#tabs)
* [Unified History](https://docs.runmaestro.ai/director-notes#unified-history)
* [AI Overview](https://docs.runmaestro.ai/director-notes#ai-overview)
* [Help](https://docs.runmaestro.ai/director-notes#help)
* [Keyboard Shortcuts](https://docs.runmaestro.ai/director-notes#keyboard-shortcuts)
* [Modal](https://docs.runmaestro.ai/director-notes#modal)
* [Unified History](https://docs.runmaestro.ai/director-notes#unified-history-2)
* [Detail View](https://docs.runmaestro.ai/director-notes#detail-view)
* [Settings](https://docs.runmaestro.ai/director-notes#settings)
* [Tips](https://docs.runmaestro.ai/director-notes#tips)
Director’s Notes is your bird’s-eye view of everything happening across all your AI agents. Instead of switching between tabs to check what each agent has been doing, Director’s Notes aggregates all history entries into a single, searchable, filterable timeline — and can generate an AI-powered synopsis of recent activity.
Director’s Notes is an **Encore Feature** — it’s disabled by default. Enable it in **Settings > Encore Features** to access the shortcut, menu entry, and command palette action.

[](https://docs.runmaestro.ai/director-notes#opening-director%E2%80%99s-notes)
Opening Director’s Notes
-----------------------------------------------------------------------------------------------------------
**Keyboard shortcut:**
* macOS: `Cmd+Shift+O`
* Windows/Linux: `Ctrl+Shift+O`
**From Quick Actions:**
* Press `Cmd+K` / `Ctrl+K` and search for “Director’s Notes”
[](https://docs.runmaestro.ai/director-notes#tabs)
Tabs
-----------------------------------------------------------
Director’s Notes has three tabs:
###
[](https://docs.runmaestro.ai/director-notes#unified-history)
Unified History
The primary view — a chronological list of all history entries from every agent, newest first. 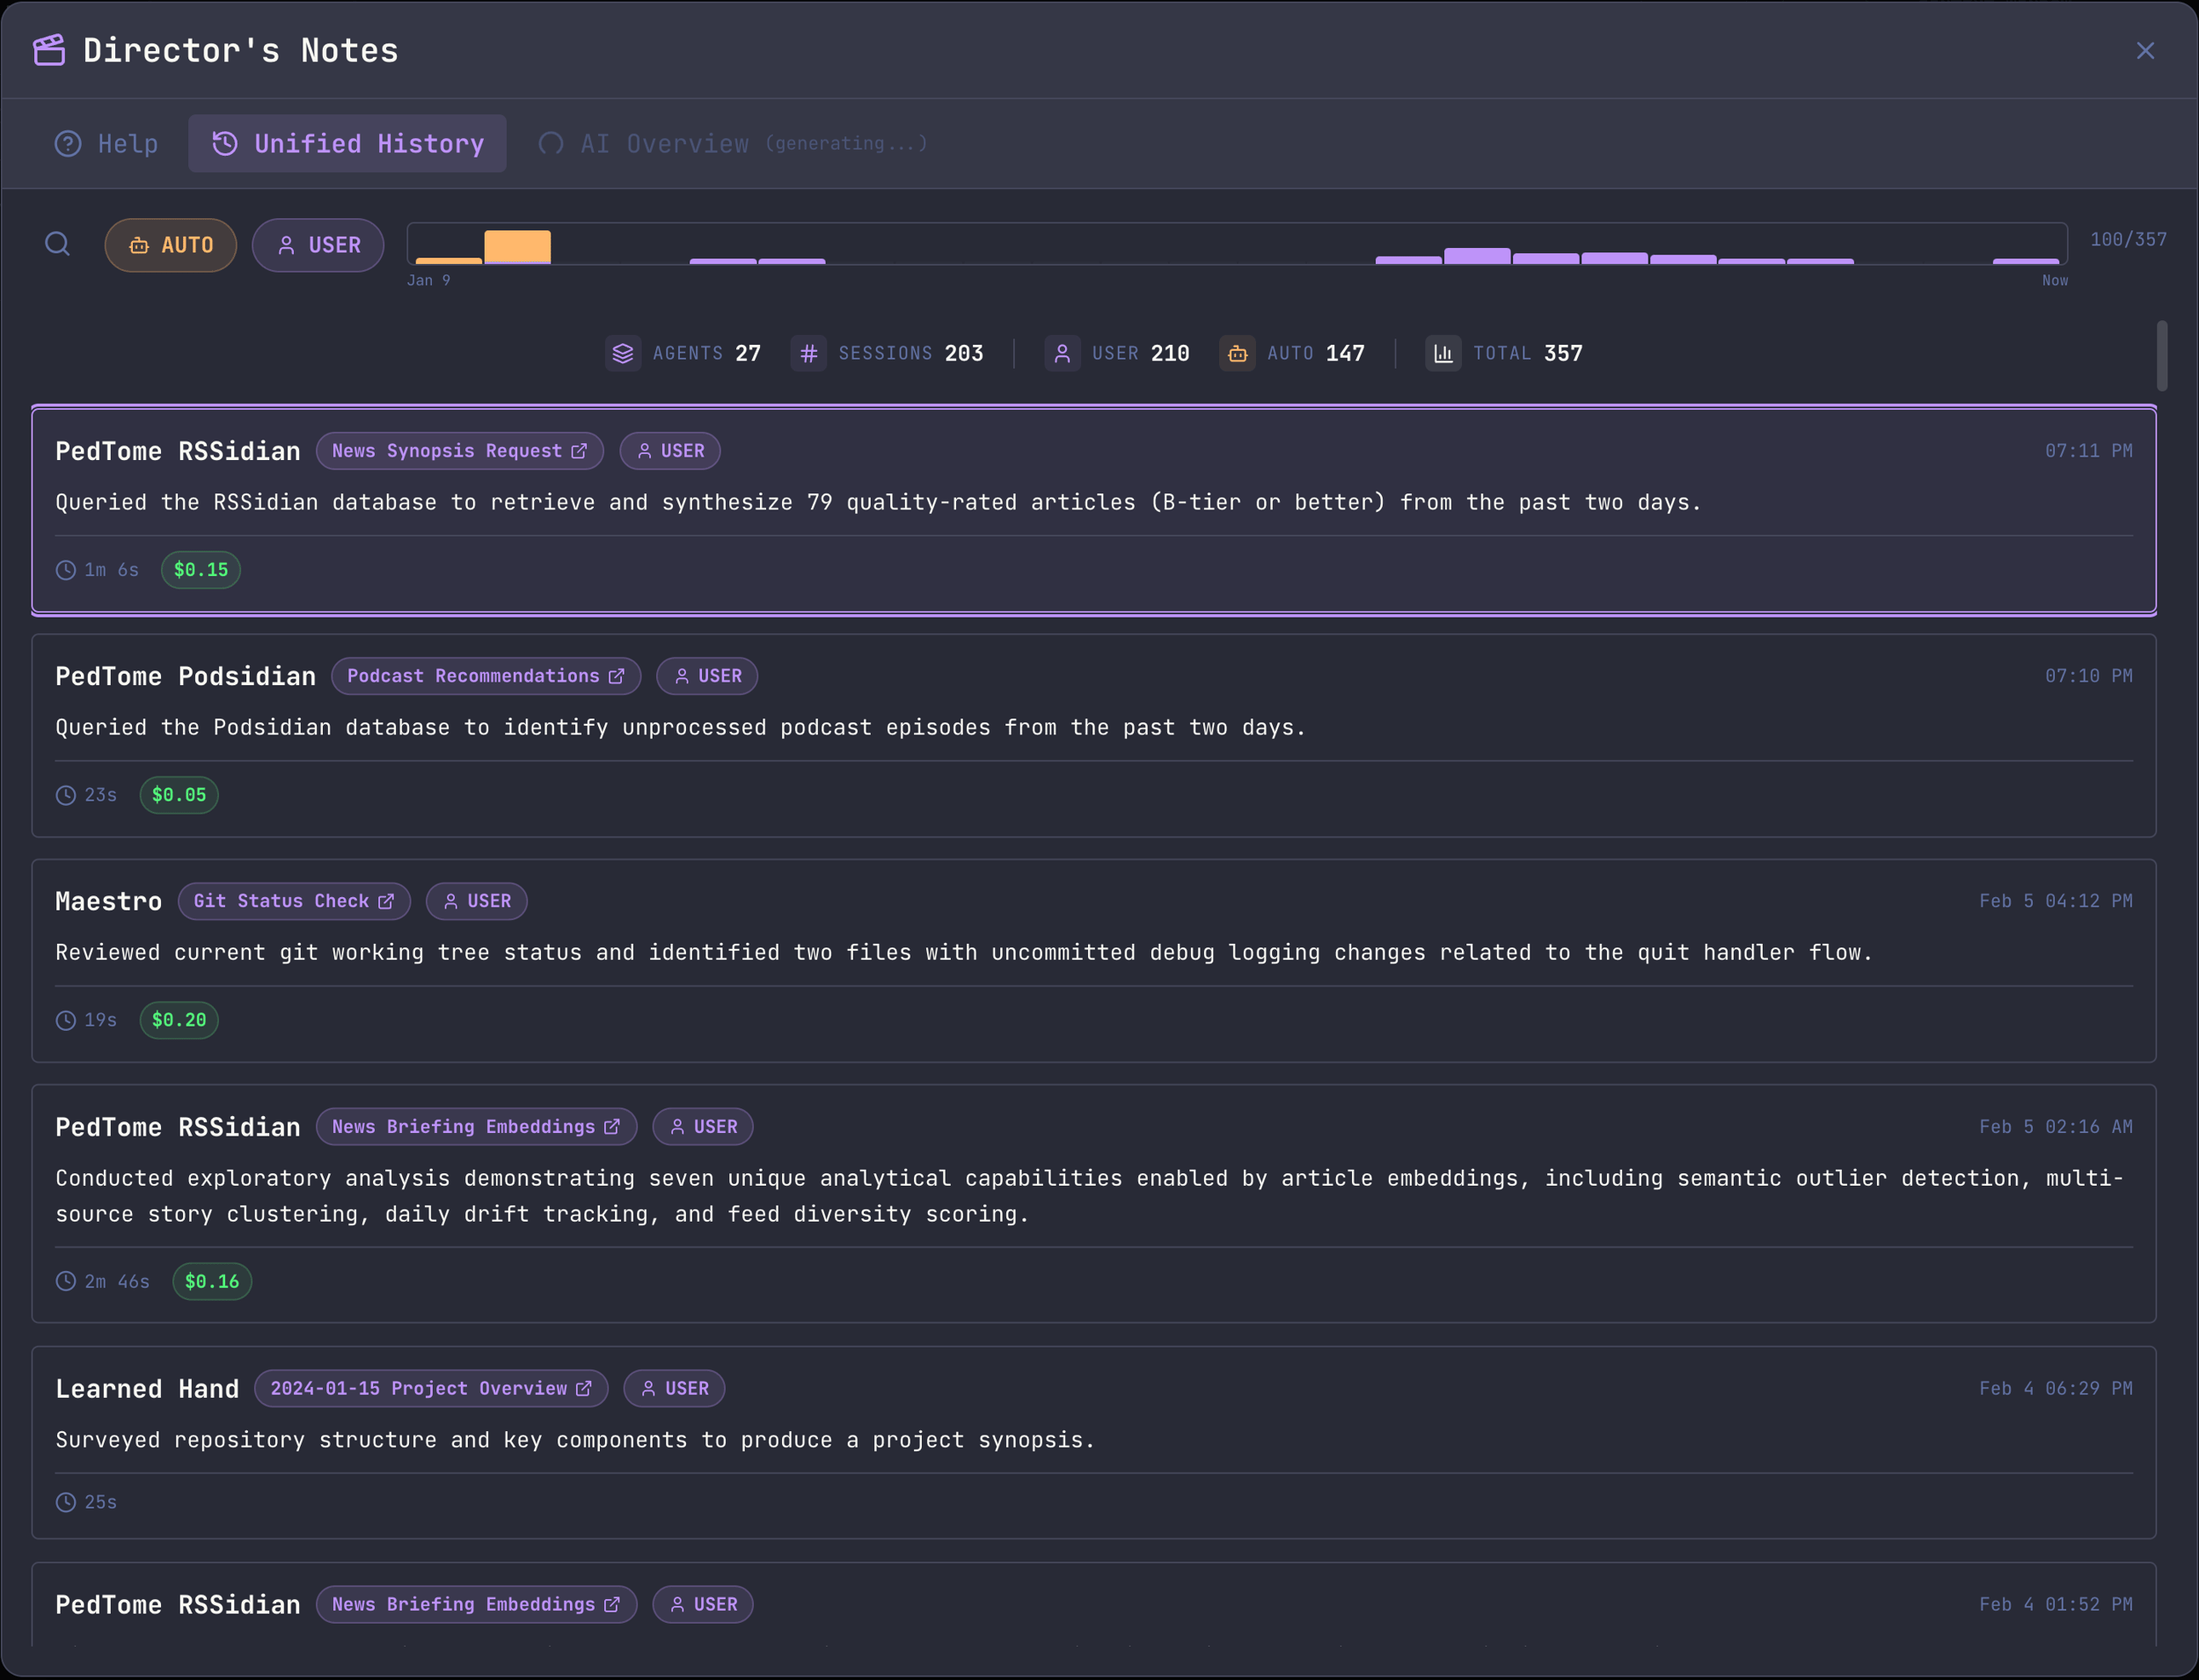 **Filtering:**
* **AUTO / USER** toggle buttons filter by entry type
* **Search** (`Cmd+F` / `Ctrl+F`) filters by summary text or agent name
* **Activity Graph** shows entry distribution over time; right-click to change the lookback window (24 hours through all time)
**Stats Bar:** A centered aggregate stats bar displays key metrics across the current dataset:
* Total queries, sessions, AUTO entries, USER entries, and total cost
**Entry Details:** Each entry shows:
* **Agent name** — which Maestro agent produced the entry
* **Task name pill** — clickable link to the originating session
* **Type badge** (AUTO or USER)
* **Summary** of what was accomplished
* **Duration** and **cost** (when available)
* **Timestamp**
Click any entry to open the **Detail Modal** with full response text, token breakdown, and navigation controls (Prev/Next or arrow keys). **Session Navigation:** Click the session pill on any entry to jump directly to that agent’s tab — Director’s Notes closes and focuses the agent with the relevant session loaded. **Infinite Scroll:** Entries load progressively (100 at a time). Scroll to load more as needed.
###
[](https://docs.runmaestro.ai/director-notes#ai-overview)
AI Overview
An AI-generated synopsis of recent activity across all agents. This tab uses a configurable AI provider to read history files and produce a structured report. 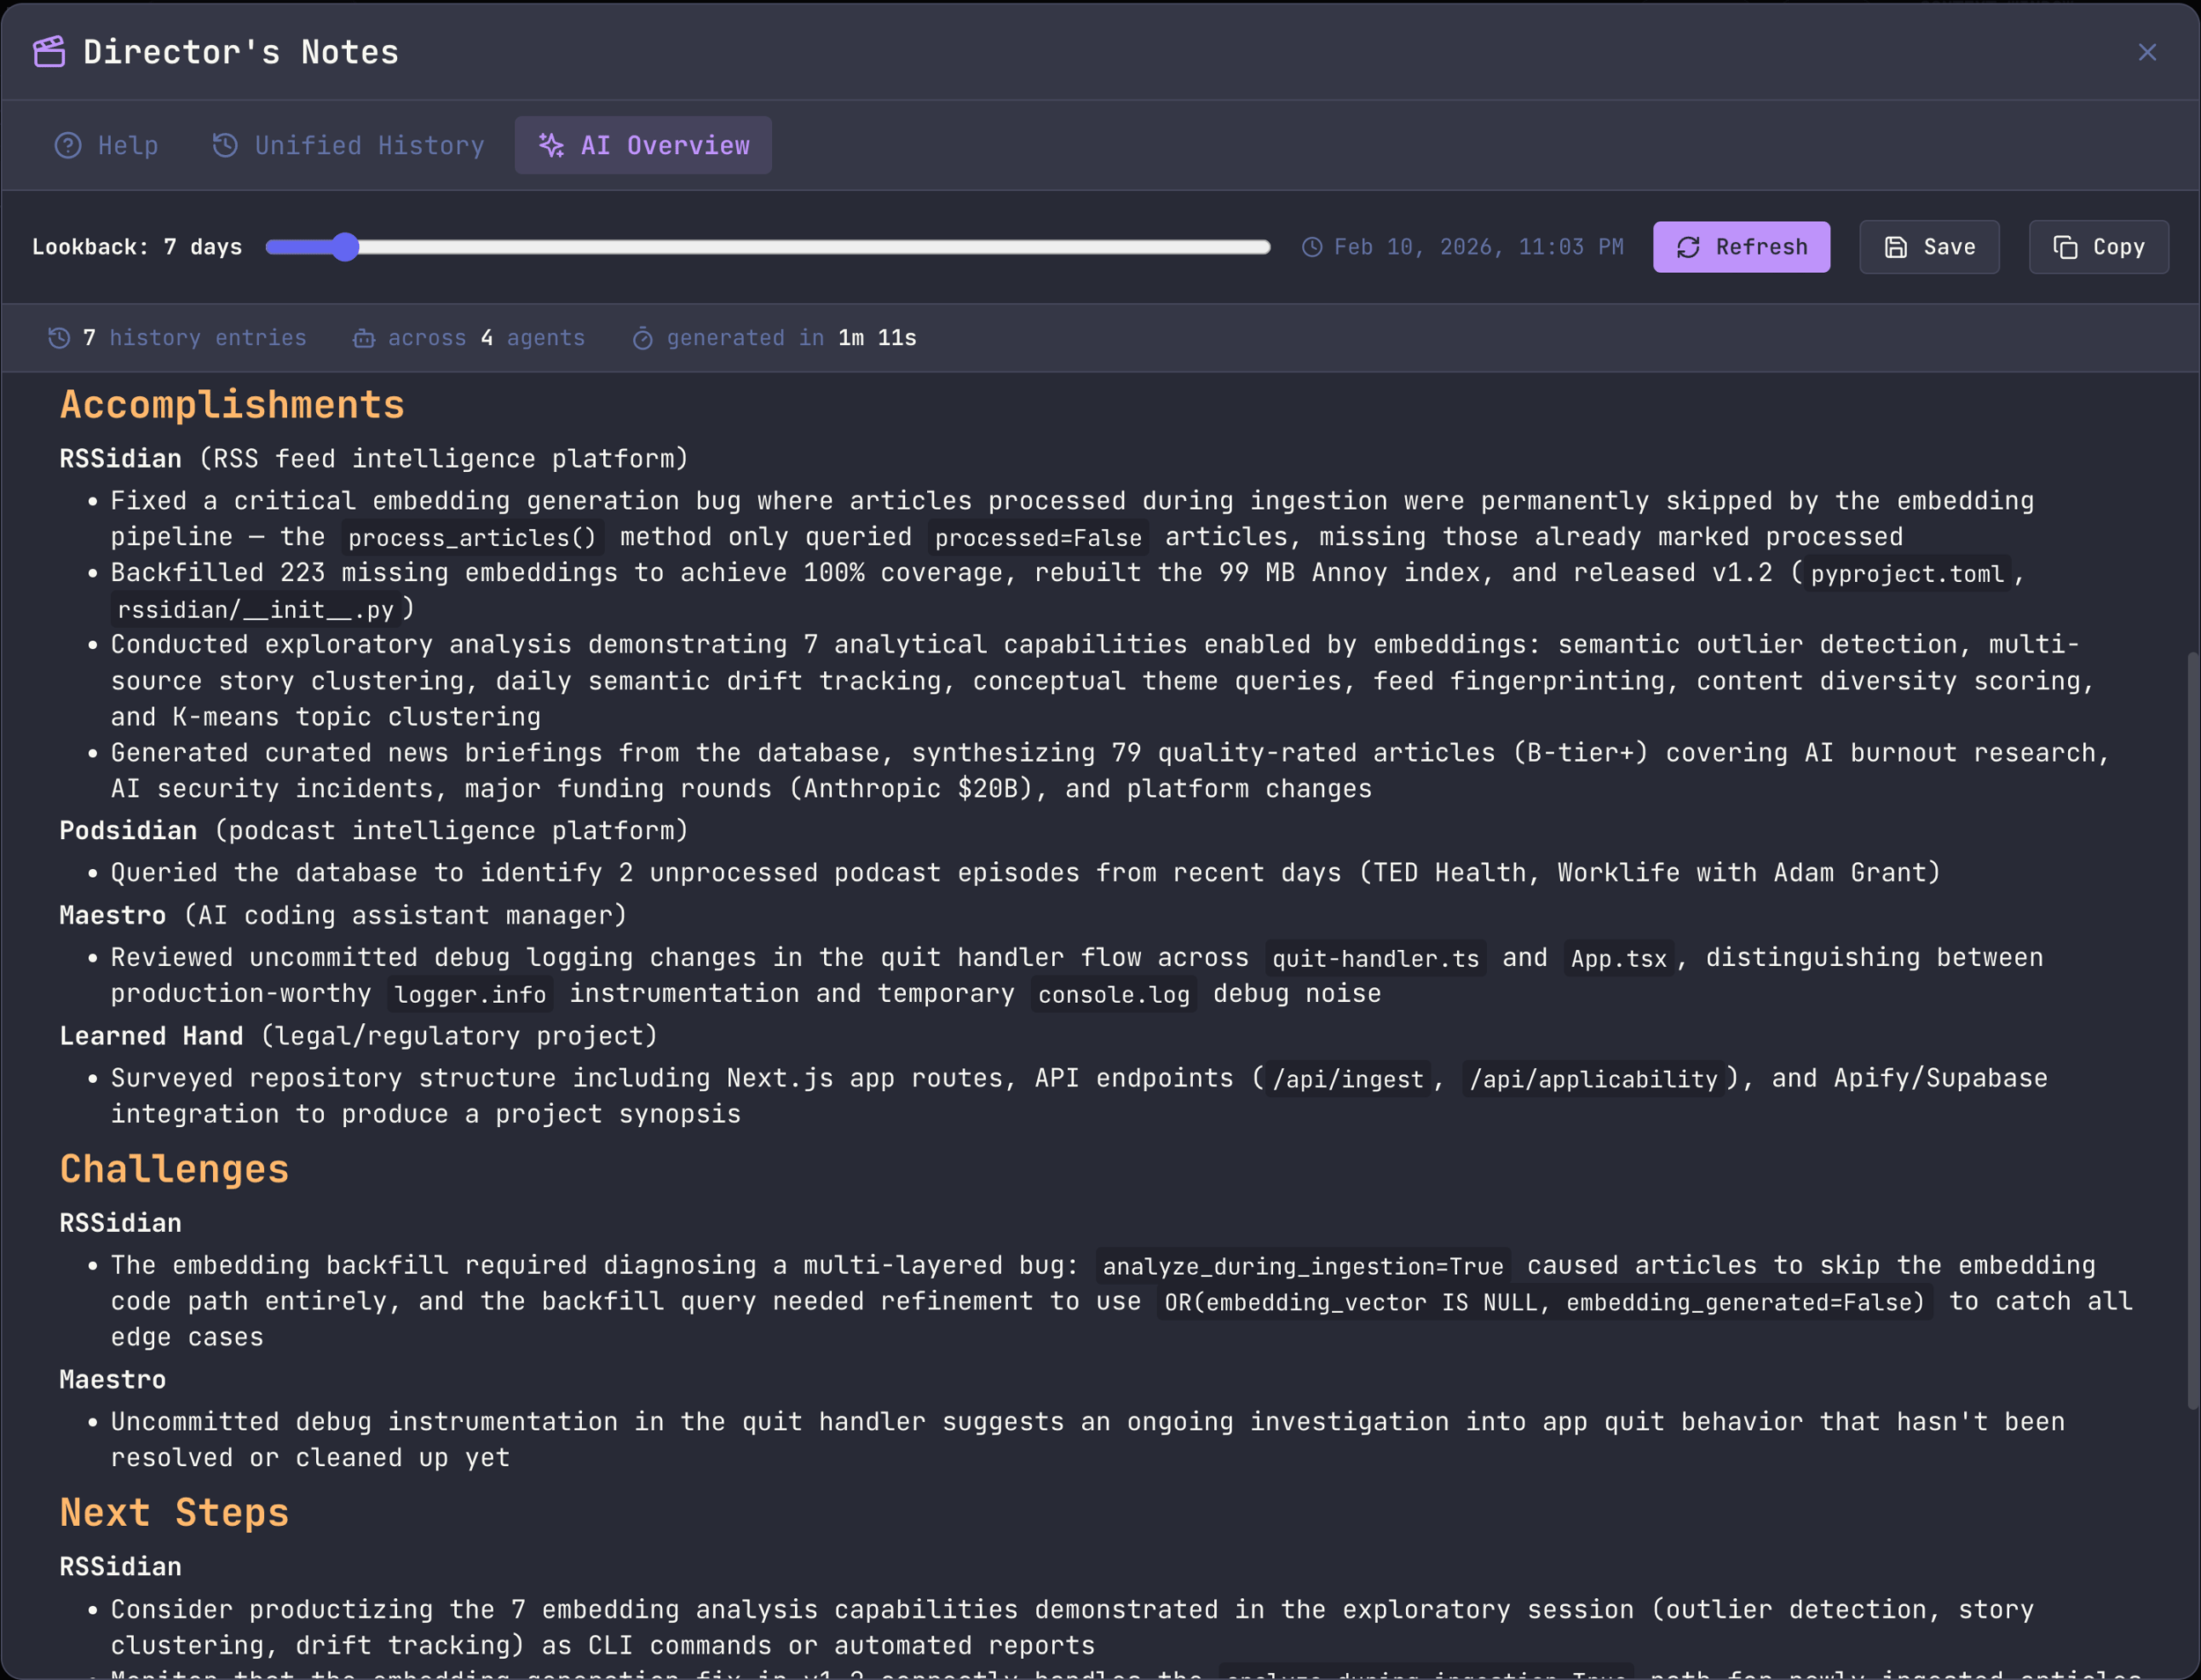 **Controls:**
* **Lookback slider** — Adjust from 1 to 90 days to control the analysis window
* **Refresh** — Regenerate the synopsis with current settings
* **Save** — Export the synopsis as a markdown file
* **Copy** — Copy the raw markdown to clipboard
**Stats Bar:** After generation, a stats bar shows:
* Number of history entries analyzed
* Number of agents with activity
* Generation time
**Synopsis Content:** The AI produces a structured report organized by agent/project with sections for:
* **Accomplishments** — What was completed
* **Challenges** — Issues encountered or unresolved
* **Next Steps** — Recommended follow-up actions
The synopsis is rendered as rich markdown with full formatting support. **Provider Configuration:** Configure which AI provider generates the synopsis in **Settings > Encore Features**. Any installed agent (Claude Code, Codex, OpenCode) can be used. The default lookback window is also configurable there.
The AI Overview tab becomes available once the synopsis has finished generating. A spinning indicator on the tab shows generation is in progress. Results are cached for the session — switching tabs won’t trigger a regeneration.
###
[](https://docs.runmaestro.ai/director-notes#help)
Help
A built-in reference guide explaining all Director’s Notes features, entry types, keyboard shortcuts, and workflows.
[](https://docs.runmaestro.ai/director-notes#keyboard-shortcuts)
Keyboard Shortcuts
---------------------------------------------------------------------------------------
| Shortcut | Action |
| --- | --- |
| `Cmd+Shift+O` / `Ctrl+Shift+O` | Open Director’s Notes |
| `Cmd+Shift+[` / `Ctrl+Shift+[` | Previous tab |\
| `Cmd+Shift+]` / `Ctrl+Shift+]` | Next tab |
| `Esc` | Close modal (or close search if open) |
###
[](https://docs.runmaestro.ai/director-notes#unified-history-2)
Unified History
| Shortcut | Action |
| --- | --- |
| `Cmd+F` / `Ctrl+F` | Open search filter |
| `Up` / `Down` | Navigate between entries |
| `Enter` | Open detail view for selected entry |
| `Esc` | Close search or close detail view |
###
[](https://docs.runmaestro.ai/director-notes#detail-view)
Detail View
| Shortcut | Action |
| --- | --- |
| `Left` / `Right` | Navigate to previous/next entry |
| `Esc` | Close detail view |
[](https://docs.runmaestro.ai/director-notes#settings)
Settings
-------------------------------------------------------------------
Access Director’s Notes settings via **Settings > Encore Features** (enable Director’s Notes first):
| Setting | Description |
| --- | --- |
| **AI Provider** | Which agent generates the AI Overview synopsis |
| **Default Lookback** | Default number of days for the AI Overview lookback slider |
| **Custom Path** | Optional custom binary path for the synopsis provider |
| **Custom Args** | Optional custom arguments for the synopsis provider |
[](https://docs.runmaestro.ai/director-notes#tips)
Tips
-----------------------------------------------------------
* **Use AI Overview after an Auto Run session** to get a quick summary of everything that was accomplished across all agents
* **Search by agent name** in Unified History to isolate work from a specific project
* **Right-click the activity graph** to quickly change the time window without scrolling
* **Save or copy the synopsis** to include in standup notes, PRs, or project documentation
* **Session navigation** lets you jump directly from a history entry to the agent that produced it — great for resuming or reviewing work
Was this page helpful?
YesNo
[Encore Features](https://docs.runmaestro.ai/encore-features)
[Usage Dashboard](https://docs.runmaestro.ai/usage-dashboard)
⌘I
---
# Configuration - Maestro
[Skip to main content](https://docs.runmaestro.ai/configuration#content-area)
[Maestro home page](https://runmaestro.ai/)
Search...
⌘K
Search...
Navigation
General Usage
Configuration
On this page
* [Settings Overview](https://docs.runmaestro.ai/configuration#settings-overview)
* [Maestro Prompts](https://docs.runmaestro.ai/configuration#maestro-prompts)
* [Conductor Profile](https://docs.runmaestro.ai/configuration#conductor-profile)
* [What to Include](https://docs.runmaestro.ai/configuration#what-to-include)
* [Example Profile](https://docs.runmaestro.ai/configuration#example-profile)
* [How Agents Use It](https://docs.runmaestro.ai/configuration#how-agents-use-it)
* [Using in Custom Commands](https://docs.runmaestro.ai/configuration#using-in-custom-commands)
* [Global Environment Variables](https://docs.runmaestro.ai/configuration#global-environment-variables)
* [How to Configure](https://docs.runmaestro.ai/configuration#how-to-configure)
* [Example Configuration](https://docs.runmaestro.ai/configuration#example-configuration)
* [Important Features](https://docs.runmaestro.ai/configuration#important-features)
* [Environment Variable Precedence](https://docs.runmaestro.ai/configuration#environment-variable-precedence)
* [Use Cases](https://docs.runmaestro.ai/configuration#use-cases)
* [Agent-Specific Overrides](https://docs.runmaestro.ai/configuration#agent-specific-overrides)
* [Checking for Updates](https://docs.runmaestro.ai/configuration#checking-for-updates)
* [Pre-release Channel (Beta Opt-in)](https://docs.runmaestro.ai/configuration#pre-release-channel-beta-opt-in)
* [Notifications & Sound](https://docs.runmaestro.ai/configuration#notifications-%26-sound)
* [OS Notifications](https://docs.runmaestro.ai/configuration#os-notifications)
* [Custom Notification](https://docs.runmaestro.ai/configuration#custom-notification)
* [Toast Notifications](https://docs.runmaestro.ai/configuration#toast-notifications)
* [When Notifications Trigger](https://docs.runmaestro.ai/configuration#when-notifications-trigger)
* [Sleep Prevention](https://docs.runmaestro.ai/configuration#sleep-prevention)
* [When Sleep Prevention Activates](https://docs.runmaestro.ai/configuration#when-sleep-prevention-activates)
* [Platform Support](https://docs.runmaestro.ai/configuration#platform-support)
* [Linux Desktop Environment Notes](https://docs.runmaestro.ai/configuration#linux-desktop-environment-notes)
* [WakaTime Integration](https://docs.runmaestro.ai/configuration#wakatime-integration)
* [What Gets Tracked](https://docs.runmaestro.ai/configuration#what-gets-tracked)
* [Detailed File Tracking](https://docs.runmaestro.ai/configuration#detailed-file-tracking)
* [Supported Tools](https://docs.runmaestro.ai/configuration#supported-tools)
* [Activity Categories](https://docs.runmaestro.ai/configuration#activity-categories)
* [Storage Location](https://docs.runmaestro.ai/configuration#storage-location)
* [Cross-Device Sync (Beta)](https://docs.runmaestro.ai/configuration#cross-device-sync-beta)
[](https://docs.runmaestro.ai/configuration#settings-overview)
Settings Overview
------------------------------------------------------------------------------------
Open Settings with `Cmd+,` / `Ctrl+,` or via **Quick Actions** (`Cmd+K` / `Ctrl+K`) → “Open Settings”. Settings are organized into tabs:
| Tab | Contents |
| --- | --- |
| **General** | About Me (conductor profile), shell configuration, input send behavior, default toggles (history, thinking), automatic tab naming, power management, updates, privacy, usage stats, storage location |
| **Display** | Font family and size, terminal width, log level and buffer, max output lines per response, document graph settings, context window warnings |
| **Shortcuts** | Customize keyboard shortcuts (see [Keyboard Shortcuts](https://docs.runmaestro.ai/keyboard-shortcuts)
) |
| **Themes** | Dark, light, and vibe mode themes, custom theme builder with import/export |
| **Notifications** | OS notifications, custom command notifications, toast notification duration |
| **AI Commands** | View and edit slash commands, [Spec-Kit](https://docs.runmaestro.ai/speckit-commands)
, [OpenSpec](https://docs.runmaestro.ai/openspec-commands)
, and [BMAD](https://docs.runmaestro.ai/bmad-commands)
prompts |
| **Maestro Prompts** | Browse and edit the 23 core system prompts (wizard, Auto Run, group chat, context, etc.). Changes take effect immediately; reset to bundled defaults at any time |
| **SSH Hosts** | Configure remote hosts for [SSH agent execution](https://docs.runmaestro.ai/ssh-remote-execution) |
| **Environment** | Global environment variables that cascade to all agents and terminal sessions |
| **WakaTime** _(in General tab)_ | WakaTime integration toggle, API key, detailed file tracking |
[](https://docs.runmaestro.ai/configuration#maestro-prompts)
Maestro Prompts
--------------------------------------------------------------------------------
Maestro ships with 23 core system prompts that control wizard conversations, Auto Run behavior, group chat moderation, context management, and more. You can customize any of them via the **Maestro Prompts** tab in Settings. **To edit a prompt:**
1. Open **Settings** (`Cmd+,` / `Ctrl+,`) → **Maestro Prompts** tab
2. Select a prompt from the category list on the left
3. Edit the content in the editor
4. Click **Save** — changes take effect immediately (no restart needed)
**To reset a prompt:** Click **Reset to Default** to restore the bundled version. This also takes effect immediately. Customizations are stored separately from bundled prompts and survive app updates. You can also access the four most common prompts directly from **Quick Actions** (`Cmd+K` / `Ctrl+K`): Maestro System Prompt, Auto Run Default, Commit Command, and Group Chat Moderator. For template variables, the `{{INCLUDE:name}}` and `{{REF:name}}` directives, creating reusable prompt fragments, and more, see the full [Prompt Customization](https://docs.runmaestro.ai/prompt-customization)
guide.
[](https://docs.runmaestro.ai/configuration#conductor-profile)
Conductor Profile
------------------------------------------------------------------------------------
The **Conductor Profile** (Settings → General → **About Me**) is a short description of yourself that gets injected into every AI agent’s system prompt. This helps agents understand your background, preferences, and communication style so they can tailor responses accordingly. **To configure:**
1. Open **Settings** (`Cmd+,` / `Ctrl+,`) → **General** tab
2. Find the **About Me** text area at the top
3. Write a brief profile describing yourself
###
[](https://docs.runmaestro.ai/configuration#what-to-include)
What to Include
A good conductor profile is concise (a few sentences to a short paragraph) and covers:
* **Your role/background**: Developer, researcher, team lead, etc.
* **Technical context**: Languages you work with, tools you prefer, platforms you use
* **Communication preferences**: Direct vs. detailed, level of explanation needed
* **Work style**: Preferences for how agents should approach tasks
###
[](https://docs.runmaestro.ai/configuration#example-profile)
Example Profile
Security researcher. macOS desktop. TypeScript and Python for tools.
Direct communication, no fluff. Action over process. Push back on bad ideas.
Generate markdown for Obsidian. CST timezone.
###
[](https://docs.runmaestro.ai/configuration#how-agents-use-it)
How Agents Use It
When you start a session, Maestro includes your conductor profile in the system prompt sent to the AI agent. This means:
* Agents adapt their response style to match your preferences
* Technical context helps agents make appropriate assumptions
* Communication preferences reduce back-and-forth clarification
###
[](https://docs.runmaestro.ai/configuration#using-in-custom-commands)
Using in Custom Commands
You can reference your conductor profile in [slash commands](https://docs.runmaestro.ai/slash-commands)
using the `{{CONDUCTOR_PROFILE}}` template variable. This is useful for commands that need to remind agents of your preferences mid-conversation.
[](https://docs.runmaestro.ai/configuration#global-environment-variables)
Global Environment Variables
----------------------------------------------------------------------------------------------------------
Configure environment variables once in Settings and they automatically apply to all AI agent processes and terminal sessions. This is perfect for managing API keys, proxy settings, custom tool paths, and other shared configuration.
###
[](https://docs.runmaestro.ai/configuration#how-to-configure)
How to Configure
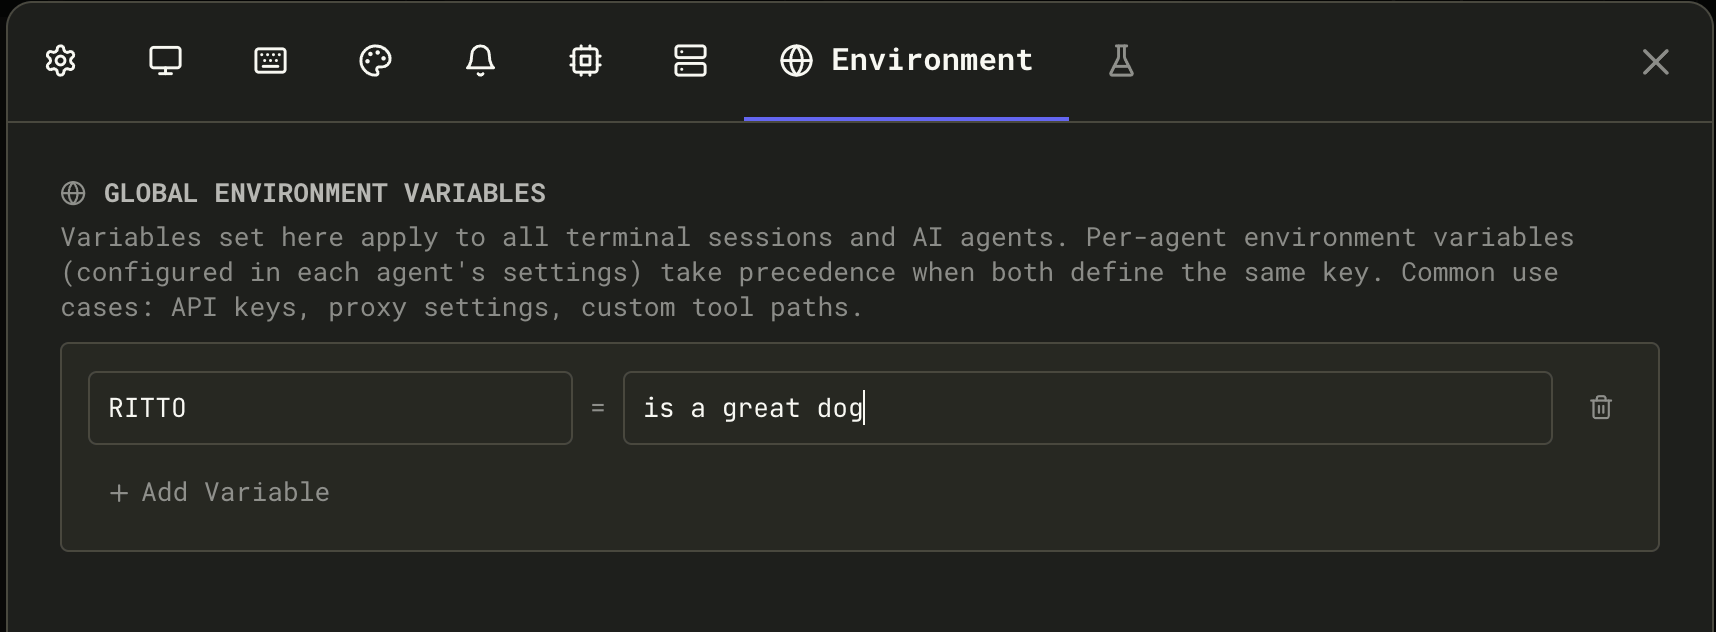
1. Open **Settings** (`Cmd+,` / `Ctrl+,`) → **Environment** tab
2. Add your variables in `KEY=VALUE` format using the **Add Variable** button
3. Variables apply immediately to new agent sessions and terminals
###
[](https://docs.runmaestro.ai/configuration#example-configuration)
Example Configuration
ANTHROPIC_API_KEY=sk-proj-xxxxx
HTTP_PROXY=http://proxy.company.com:8080
HTTPS_PROXY=http://proxy.company.com:8080
DEBUG=maestro:*
MY_TOOL_PATH=~/tools/custom
###
[](https://docs.runmaestro.ai/configuration#important-features)
Important Features
* **Path expansion**: Use `~/` for home directory (e.g., `~/workspace` expands to `/Users/username/workspace`)
* **Quotes for special characters**: Variables with spaces or special characters should be quoted
* **Applied to both agents and terminals**: Global vars are available to all agent processes (Claude, OpenCode, etc.) and all terminal sessions
* **Agent-specific overrides**: You can override global variables with agent-specific settings (in agent configuration)
* **Persist across sync**: Global environment variables are included when you export or sync settings to another device
###
[](https://docs.runmaestro.ai/configuration#environment-variable-precedence)
Environment Variable Precedence
When an agent or terminal is spawned, variables are merged in this order (highest to lowest priority):
1. **Session-level overrides** - Temporary per-session customizations
2. **Global environment variables** (Settings) - Applied to all agents and terminals
3. **Agent-specific configuration** - Default settings for a particular agent
4. **System environment** - System and parent process variables
This means a session-level override will take precedence over the global setting, which takes precedence over agent defaults.
###
[](https://docs.runmaestro.ai/configuration#use-cases)
Use Cases
* **API keys**: Set `ANTHROPIC_API_KEY` once → all Claude sessions can access it
* **Proxy settings**: Set `HTTP_PROXY` and `HTTPS_PROXY` → all network requests respect the proxy
* **Custom tool paths**: Set `MY_TOOLS=/opt/mytools` → agents can find custom utilities
* **Debugging**: Set `DEBUG=maestro:*` → enable consistent logging across all sessions
* **Language settings**: Set `LANG=en_US.UTF-8` → consistent text encoding
###
[](https://docs.runmaestro.ai/configuration#agent-specific-overrides)
Agent-Specific Overrides
To override a global variable for a specific agent:
1. In the agent configuration panel, scroll to **Environment Variables (optional)**
2. Add the variable with the override value
3. This session-specific value takes precedence over the global setting
[](https://docs.runmaestro.ai/configuration#checking-for-updates)
Checking for Updates
------------------------------------------------------------------------------------------
Maestro checks for updates automatically on startup (configurable in Settings → General → **Check for updates on startup**). **To manually check for updates:**
* **Quick Actions:** `Cmd+K` / `Ctrl+K` → “Check for Updates”
* **Menu:** Click the hamburger menu (☰) → “Check for Updates”
When an update is available, you’ll see:
* Current version and new version number
* Release notes summary
* **Download** button to get the latest release from GitHub
* Option to enable/disable automatic update checks
###
[](https://docs.runmaestro.ai/configuration#pre-release-channel-beta-opt-in)
Pre-release Channel (Beta Opt-in)
By default, Maestro only notifies you about stable releases. If you want to try new features before they’re officially released, you can opt into the pre-release channel. **To enable beta updates:**
1. Open **Settings** (`Cmd+,` / `Ctrl+,`) → **General** tab
2. Toggle **Include beta and release candidate updates** on
**What changes:**
* Update checks will include pre-release versions (e.g., `v0.11.1-rc`, `v0.12.0-beta`)
* You’ll receive notifications for beta, release candidate (rc), and alpha releases
* The Update dialog will show all available pre-release versions
**Pre-release version types:**
| Suffix | Description |
| --- | --- |
| `-alpha` | Early development, may be unstable |
| `-beta` | Feature-complete but still testing |
| `-rc` | Release candidate, nearly ready for stable |
| `-dev` | Development builds |
| `-canary` | Cutting-edge nightly builds |
**Reverting to stable:** Toggle the setting off and download the latest stable release from GitHub. Pre-releases won’t auto-downgrade to stable versions.
Pre-release versions may contain experimental features and bugs. Use at your own risk. If you encounter issues, you can always download the latest stable release from [GitHub Releases](https://github.com/RunMaestro/Maestro/releases)
.
[](https://docs.runmaestro.ai/configuration#notifications-&-sound)
Notifications & Sound
--------------------------------------------------------------------------------------------
Configure audio and visual notifications in **Settings** (`Cmd+,` / `Ctrl+,`) → **Notifications** tab.
###
[](https://docs.runmaestro.ai/configuration#os-notifications)
OS Notifications
Enable desktop notifications to be alerted when:
* An AI task completes
* A long-running command finishes
* The agent requires attention
**To enable:**
1. Toggle **Enable OS Notifications** on
2. Click **Test Notification** to verify it works
###
[](https://docs.runmaestro.ai/configuration#custom-notification)
Custom Notification
Execute a custom command when AI tasks complete. Use any notification method that fits your workflow. **To configure:**
1. Toggle **Enable Custom Notification** on
2. Set the **Command Chain** — the command(s) that accept text via stdin:
* **macOS:** `say` (text-to-speech), `afplay /path/to/sound.wav` (audio file)
* **Linux:** `notify-send "Maestro"`, `espeak`, `paplay /path/to/sound.wav`
* **Windows:** PowerShell scripts or third-party tools
* **Custom:** Any command or script that accepts stdin
3. Click **Test** to verify your command works
4. Click **Stop** to interrupt a running test
**Command chaining:** Chain multiple commands together using pipes to mix and match tools. Examples:
* `say` — speak aloud using macOS text-to-speech
* `tee ~/log.txt | say` — log to a file AND speak aloud
* `notify-send "Maestro" && espeak` — show desktop notification and speak (Linux)
* `afplay ~/sounds/done.wav` — play a sound file (macOS)
###
[](https://docs.runmaestro.ai/configuration#toast-notifications)
Toast Notifications
In-app toast notifications appear in the corner when events occur. Configure how long they stay visible:
| Duration | Behavior |
| --- | --- |
| **Off** | Toasts are disabled entirely |
| **5s / 10s / 20s / 30s** | Toast disappears after the specified time |
| **Never** | Toast stays until manually dismissed |
###
[](https://docs.runmaestro.ai/configuration#when-notifications-trigger)
When Notifications Trigger
Notifications are sent when:
* An AI task completes (OS notification + optional custom notification)
* A long-running command finishes (OS notification)
[](https://docs.runmaestro.ai/configuration#sleep-prevention)
Sleep Prevention
----------------------------------------------------------------------------------
Maestro can prevent your computer from sleeping while AI agents are actively working, ensuring long-running tasks complete without interruption. **To enable:**
1. Open **Settings** (`Cmd+,` / `Ctrl+,`) → **General** tab
2. Scroll to the **Power** section
3. Toggle **Prevent sleep while working** on
###
[](https://docs.runmaestro.ai/configuration#when-sleep-prevention-activates)
When Sleep Prevention Activates
Sleep prevention automatically activates when:
* Any session is **busy** (agent processing a request)
* **Auto Run** is active (processing tasks)
* **Group Chat** is in progress (moderator or agents responding)
When all activity stops, sleep prevention deactivates automatically.
###
[](https://docs.runmaestro.ai/configuration#platform-support)
Platform Support
| Platform | Support Level | Notes |
| --- | --- | --- |
| **macOS** | Full support | Equivalent to running `caffeinate`. Check Activity Monitor → View → Columns → “Preventing Sleep” to verify. |
| **Windows** | Full support | Uses `SetThreadExecutionState`. Verify with `powercfg /requests` in admin CMD. |
| **Linux** | Varies by desktop environment | Works on GNOME, KDE, XFCE via D-Bus. See notes below. |
###
[](https://docs.runmaestro.ai/configuration#linux-desktop-environment-notes)
Linux Desktop Environment Notes
Sleep prevention on Linux uses standard freedesktop.org interfaces:
* **GNOME, KDE, XFCE**: Full support via D-Bus screen saver inhibition
* **Minimal window managers** (i3, sway, dwm, bspwm): May not work. These environments typically don’t run a screen saver daemon.
**If sleep prevention doesn’t work on Linux:**
1. Ensure `xdg-screensaver` is installed
2. Verify a D-Bus screen saver service is running
3. Some systems may need `gnome-screensaver`, `xscreensaver`, or equivalent
On unsupported Linux configurations, the feature silently does nothing — your system will sleep normally according to its power settings.
[](https://docs.runmaestro.ai/configuration#wakatime-integration)
WakaTime Integration
------------------------------------------------------------------------------------------
Maestro integrates with [WakaTime](https://wakatime.com/)
to track coding activity across your AI sessions. The WakaTime CLI is auto-installed when you enable the integration. **To enable:**
1. Open **Settings** (`Cmd+,` / `Ctrl+,`) → **General** tab
2. Toggle **Enable WakaTime tracking** on
3. Enter your API key (get it from [wakatime.com/settings/api-key](https://wakatime.com/settings/api-key)
)
###
[](https://docs.runmaestro.ai/configuration#what-gets-tracked)
What Gets Tracked
By default, Maestro sends **app-level heartbeats** — WakaTime sees time spent in Maestro as a single project entry with language detected from your project’s manifest files (e.g., `tsconfig.json` → TypeScript).
###
[](https://docs.runmaestro.ai/configuration#detailed-file-tracking)
Detailed File Tracking
Enable **Detailed file tracking** to send per-file heartbeats for write operations. When an agent writes or edits a file, Maestro sends that file path to WakaTime with:
* The file’s language (detected from extension)
* A write flag indicating the file was modified
* Project name and branch
File paths (not file content) are sent to WakaTime’s servers. This setting defaults to off and requires two explicit opt-ins (WakaTime enabled + detailed tracking enabled).
###
[](https://docs.runmaestro.ai/configuration#supported-tools)
Supported Tools
File heartbeats are generated for write operations across all supported agents:
| Agent | Tracked Tools |
| --- | --- |
| Claude Code | Write, Edit, NotebookEdit |
| Codex | write\_to\_file, str\_replace\_based\_edit\_tool, create\_file |
| OpenCode | write, patch |
Read operations and shell commands are excluded to avoid inflating tracked time.
###
[](https://docs.runmaestro.ai/configuration#activity-categories)
Activity Categories
Maestro assigns WakaTime categories based on how the session was initiated:
* **Interactive sessions** (user-driven) are tracked as `building`
* **Auto Run / batch sessions** are tracked as `ai coding`
This lets you distinguish time you spent actively directing agents from time the AI worked autonomously on your WakaTime dashboard.
[](https://docs.runmaestro.ai/configuration#storage-location)
Storage Location
----------------------------------------------------------------------------------
Settings are stored in:
* **macOS**: `~/Library/Application Support/maestro/`
* **Windows**: `%APPDATA%/maestro/`
* **Linux**: `~/.config/maestro/`
[](https://docs.runmaestro.ai/configuration#cross-device-sync-beta)
Cross-Device Sync (Beta)
------------------------------------------------------------------------------------------------
Maestro can sync settings, sessions, and groups across multiple devices by storing them in a cloud-synced folder like iCloud Drive, Dropbox, or OneDrive. **Setup:**
1. Open **Settings** (`Cmd+,` / `Ctrl+,`) → **General** tab
2. Scroll to **Storage Location**
3. Click **Choose Folder…** and select a synced folder:
* **iCloud Drive**: `~/Library/Mobile Documents/com~apple~CloudDocs/Maestro`
* **Dropbox**: `~/Dropbox/Maestro`
* **OneDrive**: `~/OneDrive/Maestro`
4. Maestro will migrate your existing settings to the new location
5. Restart Maestro for changes to take effect
6. Repeat on your other devices, selecting the same synced folder
**What syncs:**
* Settings and preferences
* Session configurations
* Groups and organization
* Agent configurations
* Session origins and metadata
**What stays local:**
* Window size and position (device-specific)
* The bootstrap file that points to your sync location
**Important limitations:**
* **Single-device usage**: Only run Maestro on one device at a time. Running simultaneously on multiple devices can cause sync conflicts where the last write wins.
* **No conflict resolution**: If settings are modified on two devices before syncing completes, one set of changes will be lost.
* **Restart required**: Changes to storage location require an app restart to take effect.
To reset to the default location, click **Use Default** in the Storage Location settings.
Was this page helpful?
YesNo
[Feedback](https://docs.runmaestro.ai/feedback)
[Auto Run + Playbooks](https://docs.runmaestro.ai/autorun-playbooks)
⌘I
---
# Auto Run + Playbooks - Maestro
[Skip to main content](https://docs.runmaestro.ai/autorun-playbooks#content-area)
[Maestro home page](https://runmaestro.ai/)
Search...
⌘K
Search...
Navigation
Auto Run
Auto Run + Playbooks
On this page
* [Setting Up Auto Run](https://docs.runmaestro.ai/autorun-playbooks#setting-up-auto-run)
* [Creating Tasks](https://docs.runmaestro.ai/autorun-playbooks#creating-tasks)
* [Running Single Documents](https://docs.runmaestro.ai/autorun-playbooks#running-single-documents)
* [Running Multiple Auto Run Documents](https://docs.runmaestro.ai/autorun-playbooks#running-multiple-auto-run-documents)
* [Playbooks](https://docs.runmaestro.ai/autorun-playbooks#playbooks)
* [Inline Wizard](https://docs.runmaestro.ai/autorun-playbooks#inline-wizard)
* [Playbook Exchange](https://docs.runmaestro.ai/autorun-playbooks#playbook-exchange)
* [Progress Tracking](https://docs.runmaestro.ai/autorun-playbooks#progress-tracking)
* [Session Isolation](https://docs.runmaestro.ai/autorun-playbooks#session-isolation)
* [Environment Variables](https://docs.runmaestro.ai/autorun-playbooks#environment-variables)
* [History & Tracking](https://docs.runmaestro.ai/autorun-playbooks#history-%26-tracking)
* [Expanded Editor View](https://docs.runmaestro.ai/autorun-playbooks#expanded-editor-view)
* [Saving Documents](https://docs.runmaestro.ai/autorun-playbooks#saving-documents)
* [Image Support](https://docs.runmaestro.ai/autorun-playbooks#image-support)
* [Stopping the Runner](https://docs.runmaestro.ai/autorun-playbooks#stopping-the-runner)
* [Parallel Auto Runs](https://docs.runmaestro.ai/autorun-playbooks#parallel-auto-runs)
* [Run in Worktree](https://docs.runmaestro.ai/autorun-playbooks#run-in-worktree)
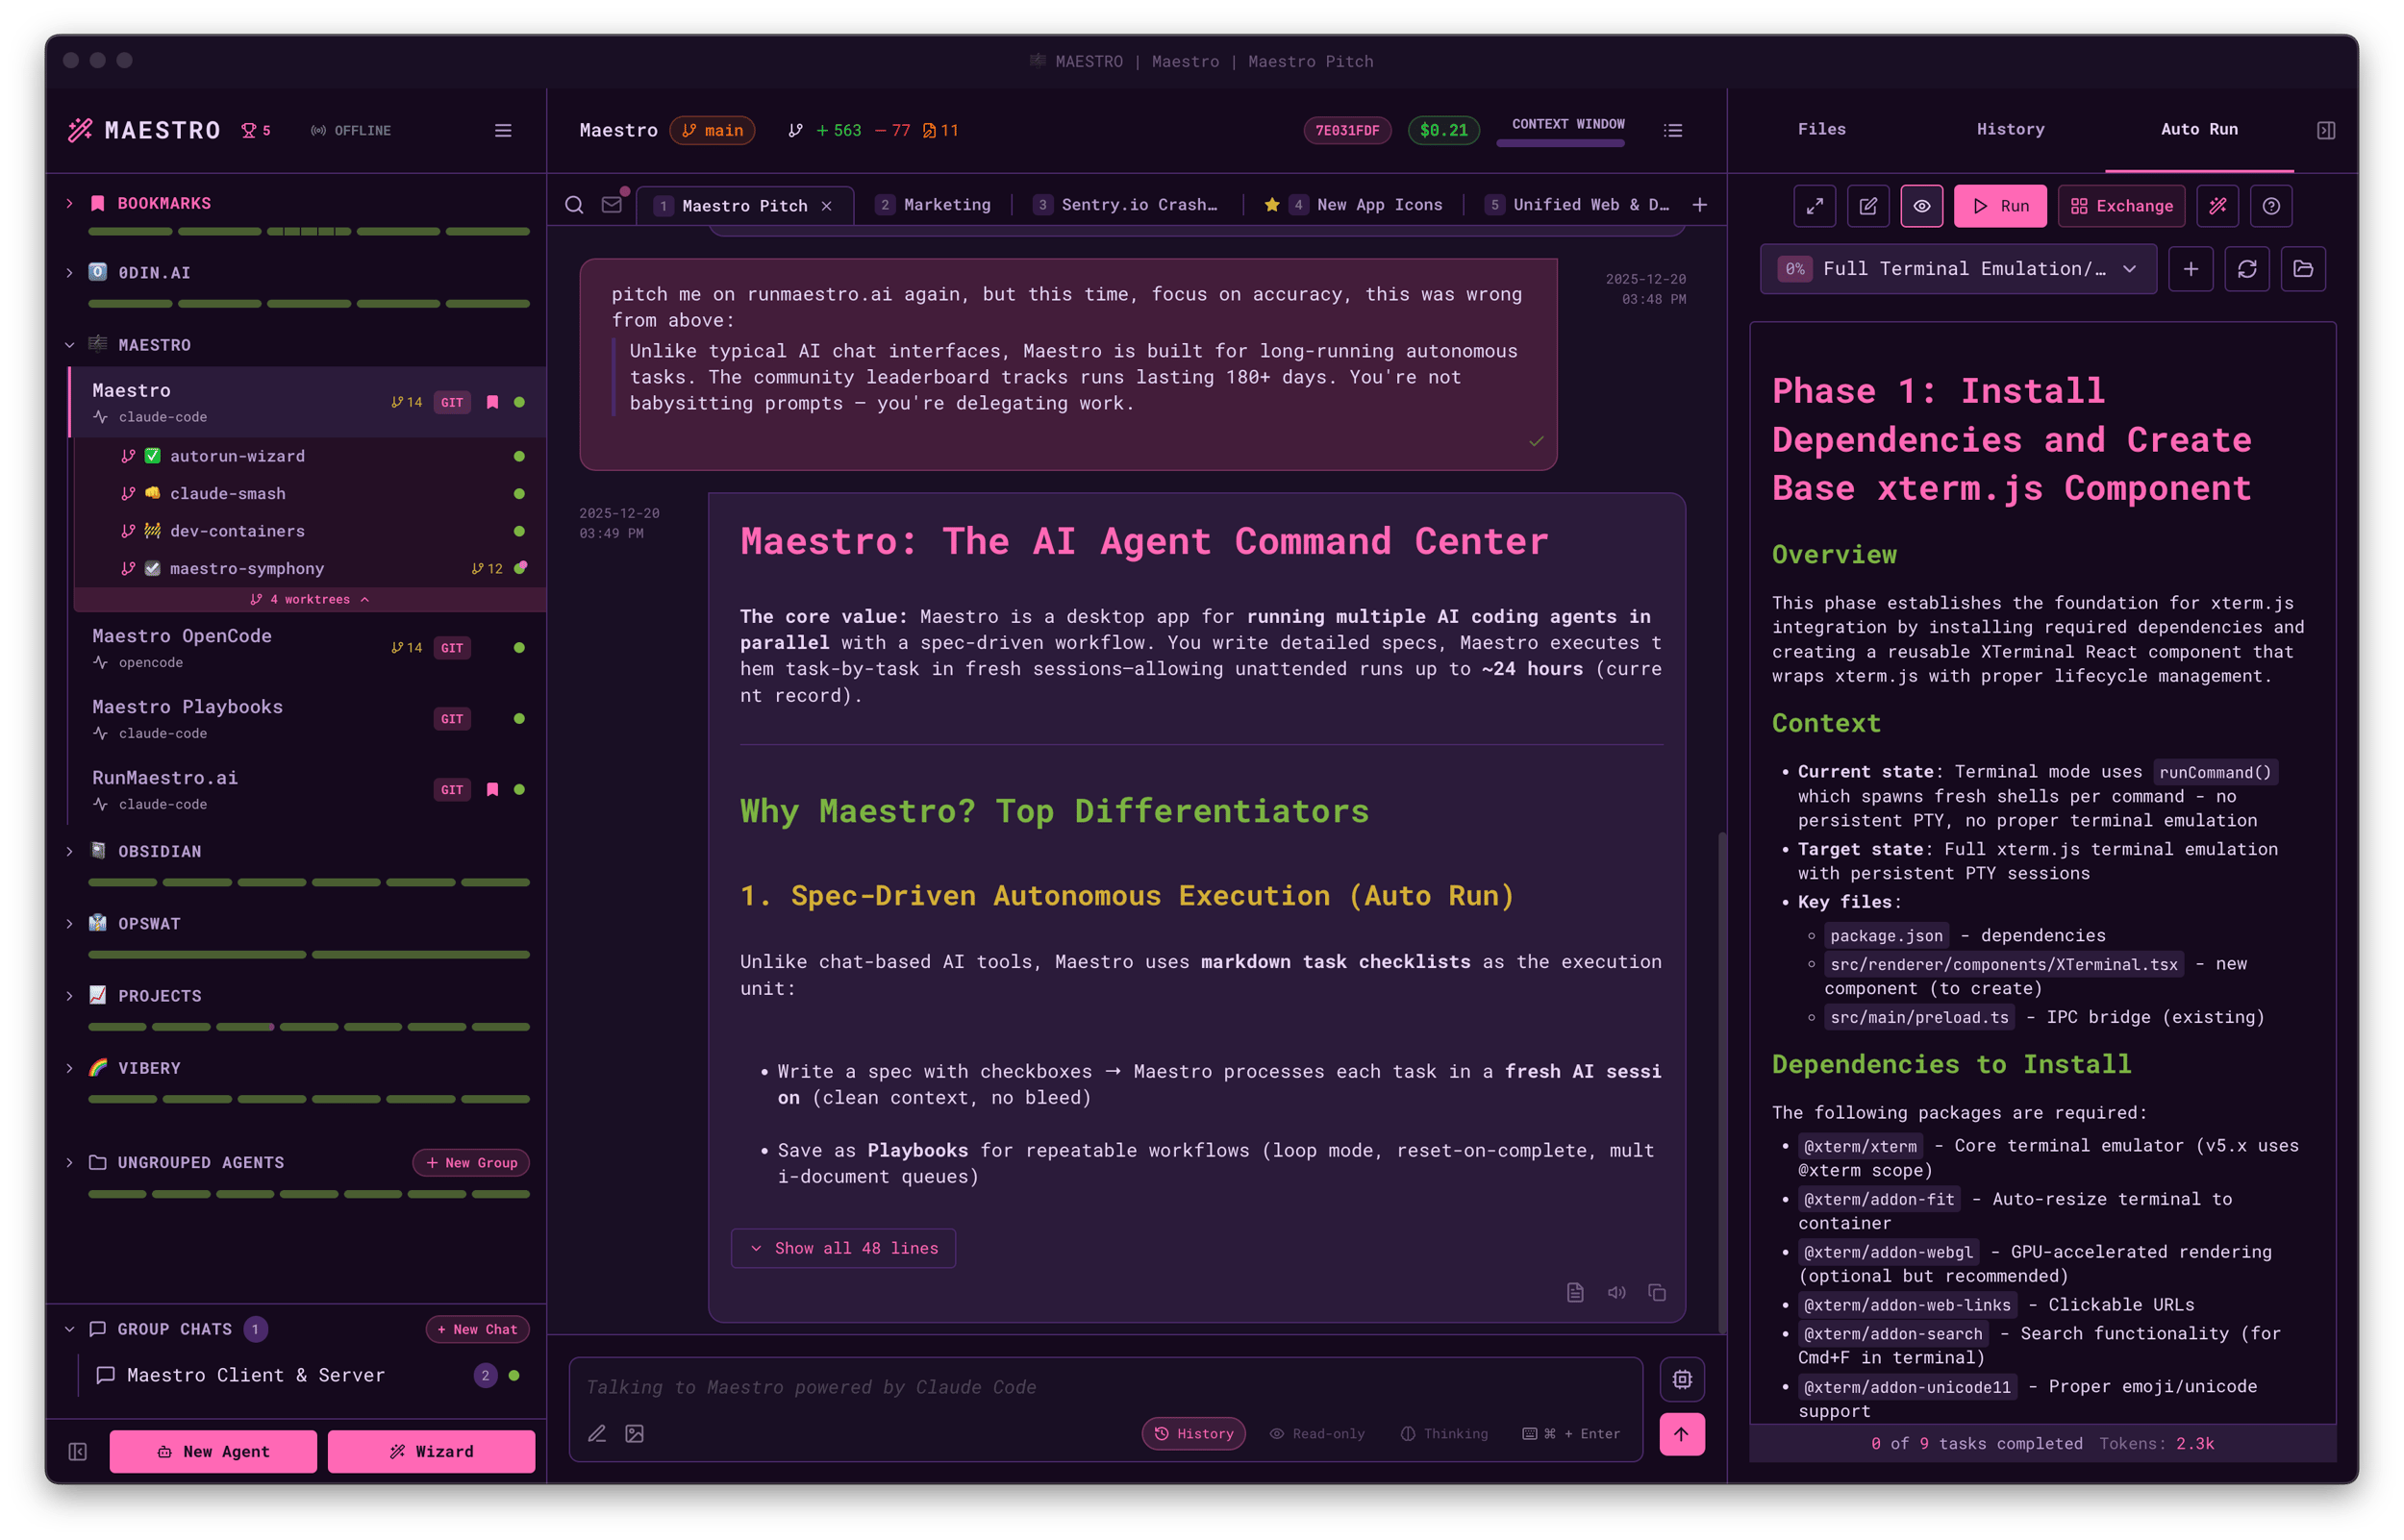
Auto Run is a file-system-based document runner that lets you process tasks using AI agents. Select a folder containing markdown documents with task checkboxes, and Maestro will work through them one by one, spawning a fresh AI session for each task. 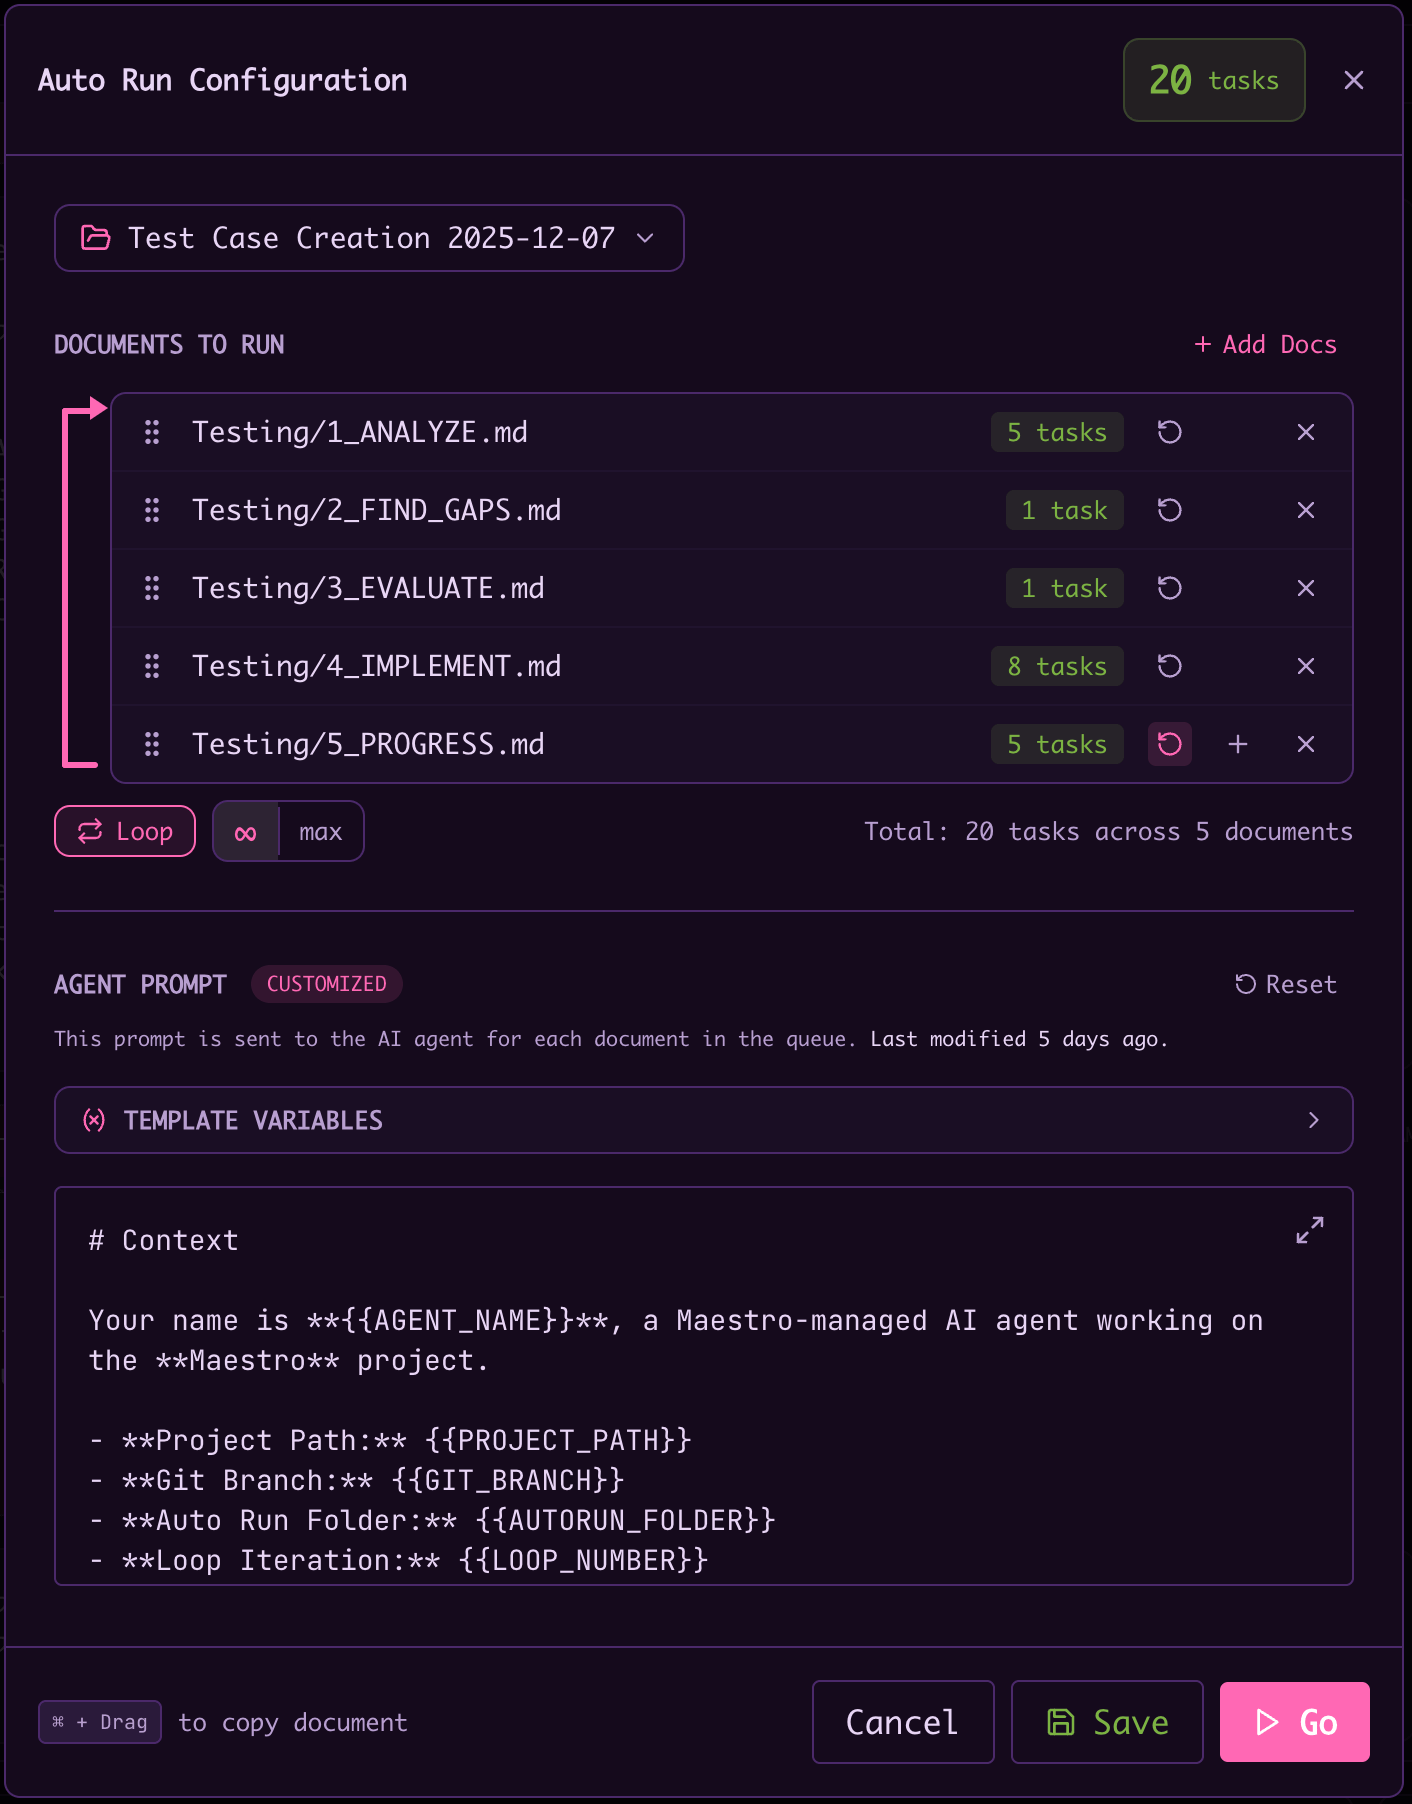
[](https://docs.runmaestro.ai/autorun-playbooks#setting-up-auto-run)
Setting Up Auto Run
--------------------------------------------------------------------------------------------
1. Navigate to the **Auto Run** tab in the right panel (`Cmd+Shift+1`)
2. Select a folder containing your markdown task documents
3. Each `.md` file becomes a selectable document
[](https://docs.runmaestro.ai/autorun-playbooks#creating-tasks)
Creating Tasks
----------------------------------------------------------------------------------
Use markdown checkboxes in your documents:
# Feature Implementation Plan
- [ ] Implement user authentication
- [ ] Add unit tests for the login flow
- [ ] Update API documentation
**Tip**: Press `Cmd+L` (Mac) or `Ctrl+L` (Windows/Linux) to quickly insert a new checkbox at your cursor position.
[](https://docs.runmaestro.ai/autorun-playbooks#running-single-documents)
Running Single Documents
------------------------------------------------------------------------------------------------------
1. Select a document from the dropdown
2. Click the **Run** button (or the ▶ icon)
3. Customize the agent prompt if needed, then click **Go**
[](https://docs.runmaestro.ai/autorun-playbooks#running-multiple-auto-run-documents)
Running Multiple Auto Run Documents
----------------------------------------------------------------------------------------------------------------------------
Auto Run supports running multiple documents in sequence:
1. Click **Run** to open the Auto Run configuration modal
2. Click **\+ Add Docs** to add more documents to the queue
3. Drag to reorder documents as needed
4. Configure options per document:
* **Reset on Completion** - Creates a working copy in `runs/` subfolder instead of modifying the original. The original document is never touched, and working copies (e.g., `TASK-1735192800000-loop-1.md`) serve as audit logs.
* **Duplicate** - Add the same document multiple times
5. Enable **Loop Mode** to cycle back to the first document after completing the last
6. Click **Go** to start running documents
[](https://docs.runmaestro.ai/autorun-playbooks#playbooks)
Playbooks
------------------------------------------------------------------------
Save your Auto Run configurations as Playbooks for reuse:
1. Configure your documents, order, and options
2. Click **Save as Playbook** and enter a name
3. Load saved playbooks from the **Load Playbook** dropdown
4. Update or discard changes to loaded playbooks
###
[](https://docs.runmaestro.ai/autorun-playbooks#inline-wizard)
Inline Wizard
Generate new playbooks from within an existing session using the **Inline Wizard**:
1. Type `/wizard` in any AI tab (or click the Wizard button in the Auto Run panel)
2. Have a conversation with the AI about your project goals
3. Watch the confidence gauge build as the AI understands your requirements
4. At 80%+ confidence, the AI generates detailed Auto Run documents
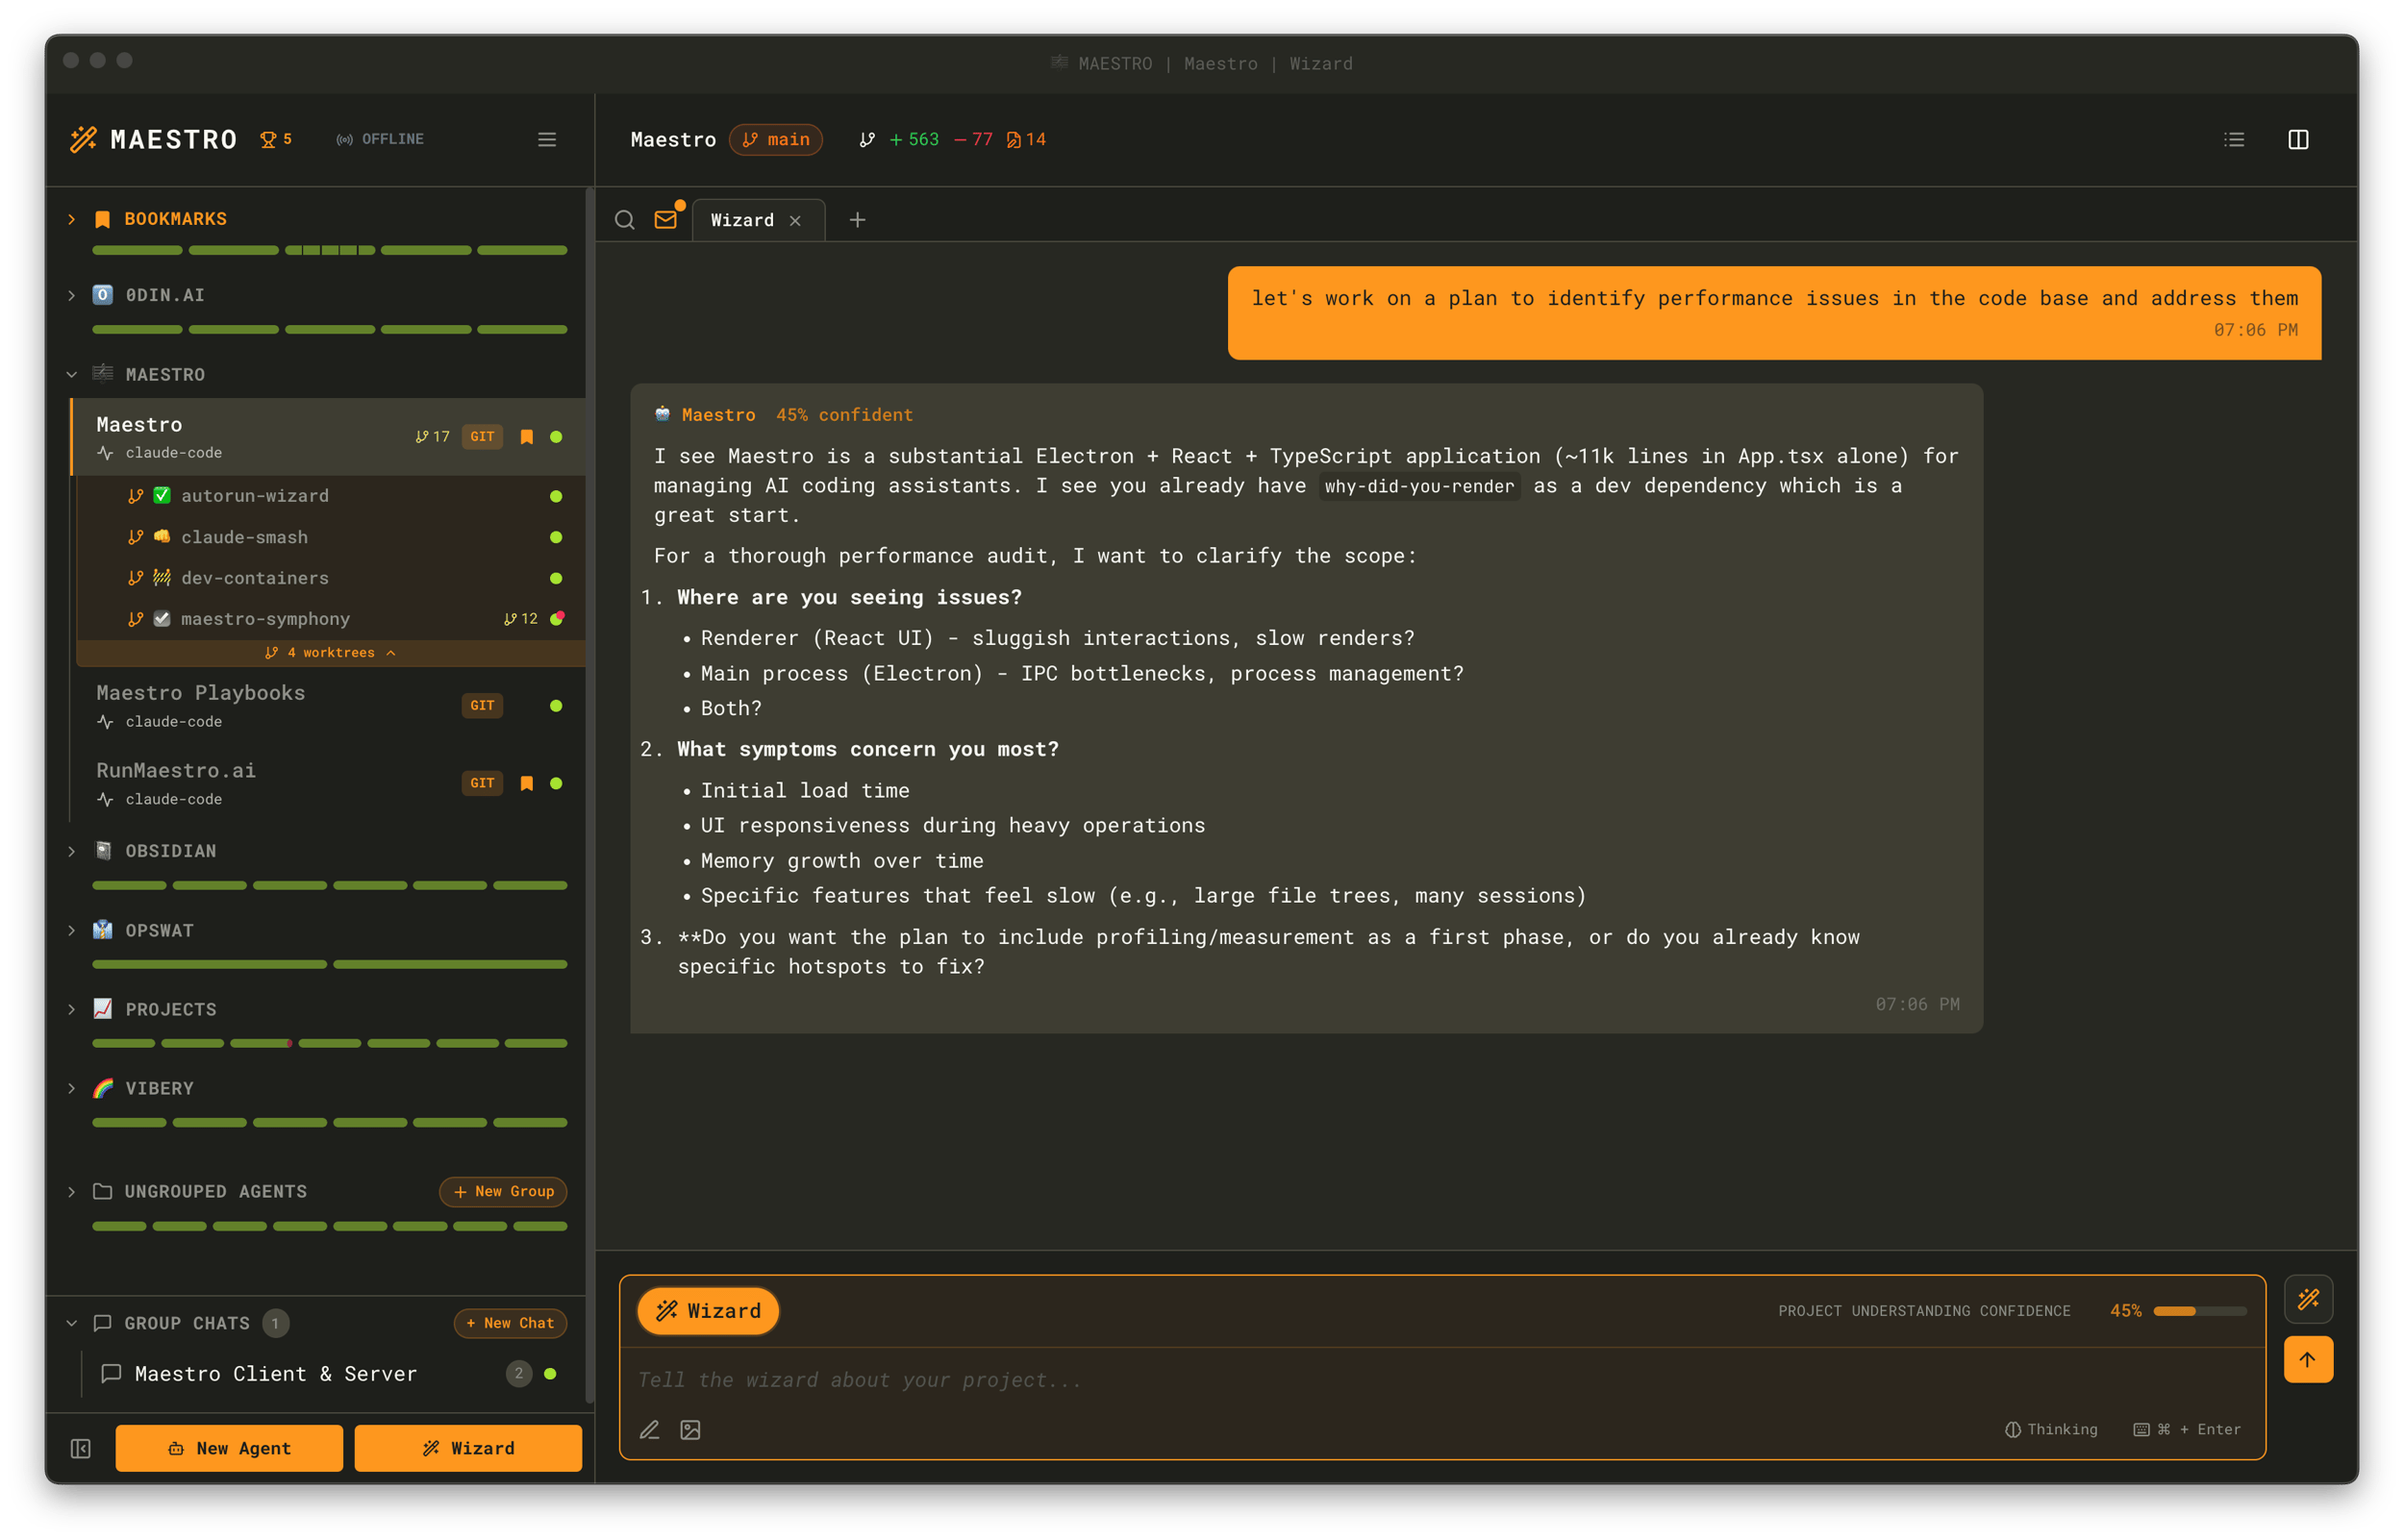 The Inline Wizard creates documents in a unique subfolder under your Auto Run folder, keeping generated playbooks organized. When complete, your tab is renamed to reflect the project and you can immediately start running the generated tasks.
###
[](https://docs.runmaestro.ai/autorun-playbooks#playbook-exchange)
Playbook Exchange
Looking for pre-built playbooks? The [Playbook Exchange](https://docs.runmaestro.ai/playbook-exchange)
offers community-contributed playbooks for common workflows like security audits, code reviews, and documentation generation. Open it via Quick Actions (`Cmd+K`) or click the Exchange button in the Auto Run panel.
[](https://docs.runmaestro.ai/autorun-playbooks#progress-tracking)
Progress Tracking
----------------------------------------------------------------------------------------
The runner will:
* Process tasks serially from top to bottom
* Skip documents with no unchecked tasks
* Show progress: “Document X of Y” and “Task X of Y”
* Mark tasks as complete (`- [x]`) when done
* Log each completion to the **History** panel
[](https://docs.runmaestro.ai/autorun-playbooks#session-isolation)
Session Isolation
----------------------------------------------------------------------------------------
Each task executes in a completely fresh AI session with its own unique session ID. This provides:
* **Clean context** - No conversation history bleeding between tasks
* **Predictable behavior** - Tasks in looping playbooks execute identically each iteration
* **Independent execution** - The agent approaches each task without memory of previous work
This isolation is critical for playbooks with `Reset on Completion` documents that loop indefinitely. Each loop creates a fresh working copy from the original document, and the AI approaches it without memory of previous iterations.
> **Note:** [Nudge messages](https://docs.runmaestro.ai/general-usage#creating-agents)
> configured on an agent do not apply to Auto Run tasks. Nudge messages are only appended to interactive AI messages typed by the user. If you need persistent instructions for Auto Run tasks, include them directly in your task document or use environment variables.
[](https://docs.runmaestro.ai/autorun-playbooks#environment-variables)
Environment Variables
------------------------------------------------------------------------------------------------
Maestro sets environment variables that your agent hooks can use to customize behavior:
| Variable | Value | Description |
| --- | --- | --- |
| `MAESTRO_SESSION_RESUMED` | `1` | Set when resuming an existing session (not set for new sessions) |
**Example: Conditional Hook Execution** Since Maestro spawns a new agent process for each message (batch mode), agent “session start” hooks will run on every turn. Use `MAESTRO_SESSION_RESUMED` to skip hooks on resumed sessions:
# In your agent's session start hook
[ "$MAESTRO_SESSION_RESUMED" = "1" ] && exit 0
# ... rest of your hook logic for new sessions only
This works with any agent provider (Claude Code, Codex, OpenCode) since the environment variable is set by Maestro before spawning the agent process.
[](https://docs.runmaestro.ai/autorun-playbooks#history-&-tracking)
History & Tracking
------------------------------------------------------------------------------------------
Each completed task is logged to the History panel with:
* **AUTO** label indicating automated execution
* **Session ID** pill (clickable to jump to that AI conversation)
* **Summary** of what the agent accomplished
* **Full response** viewable by clicking the entry
**Keyboard navigation in History**:
* `Up/Down Arrow` - Navigate entries
* `Enter` - View full response
* `Esc` - Close detail view and return to list
[](https://docs.runmaestro.ai/autorun-playbooks#expanded-editor-view)
Expanded Editor View
----------------------------------------------------------------------------------------------
For editing complex Auto Run documents, use the **Expanded Editor** — a fullscreen modal that provides more screen real-estate. **To open the Expanded Editor:**
* Click the **expand icon** (↗️) in the top-right corner of the Auto Run panel
* Or press `Cmd+Shift+E` (Mac) / `Ctrl+Shift+E` (Windows/Linux) to toggle
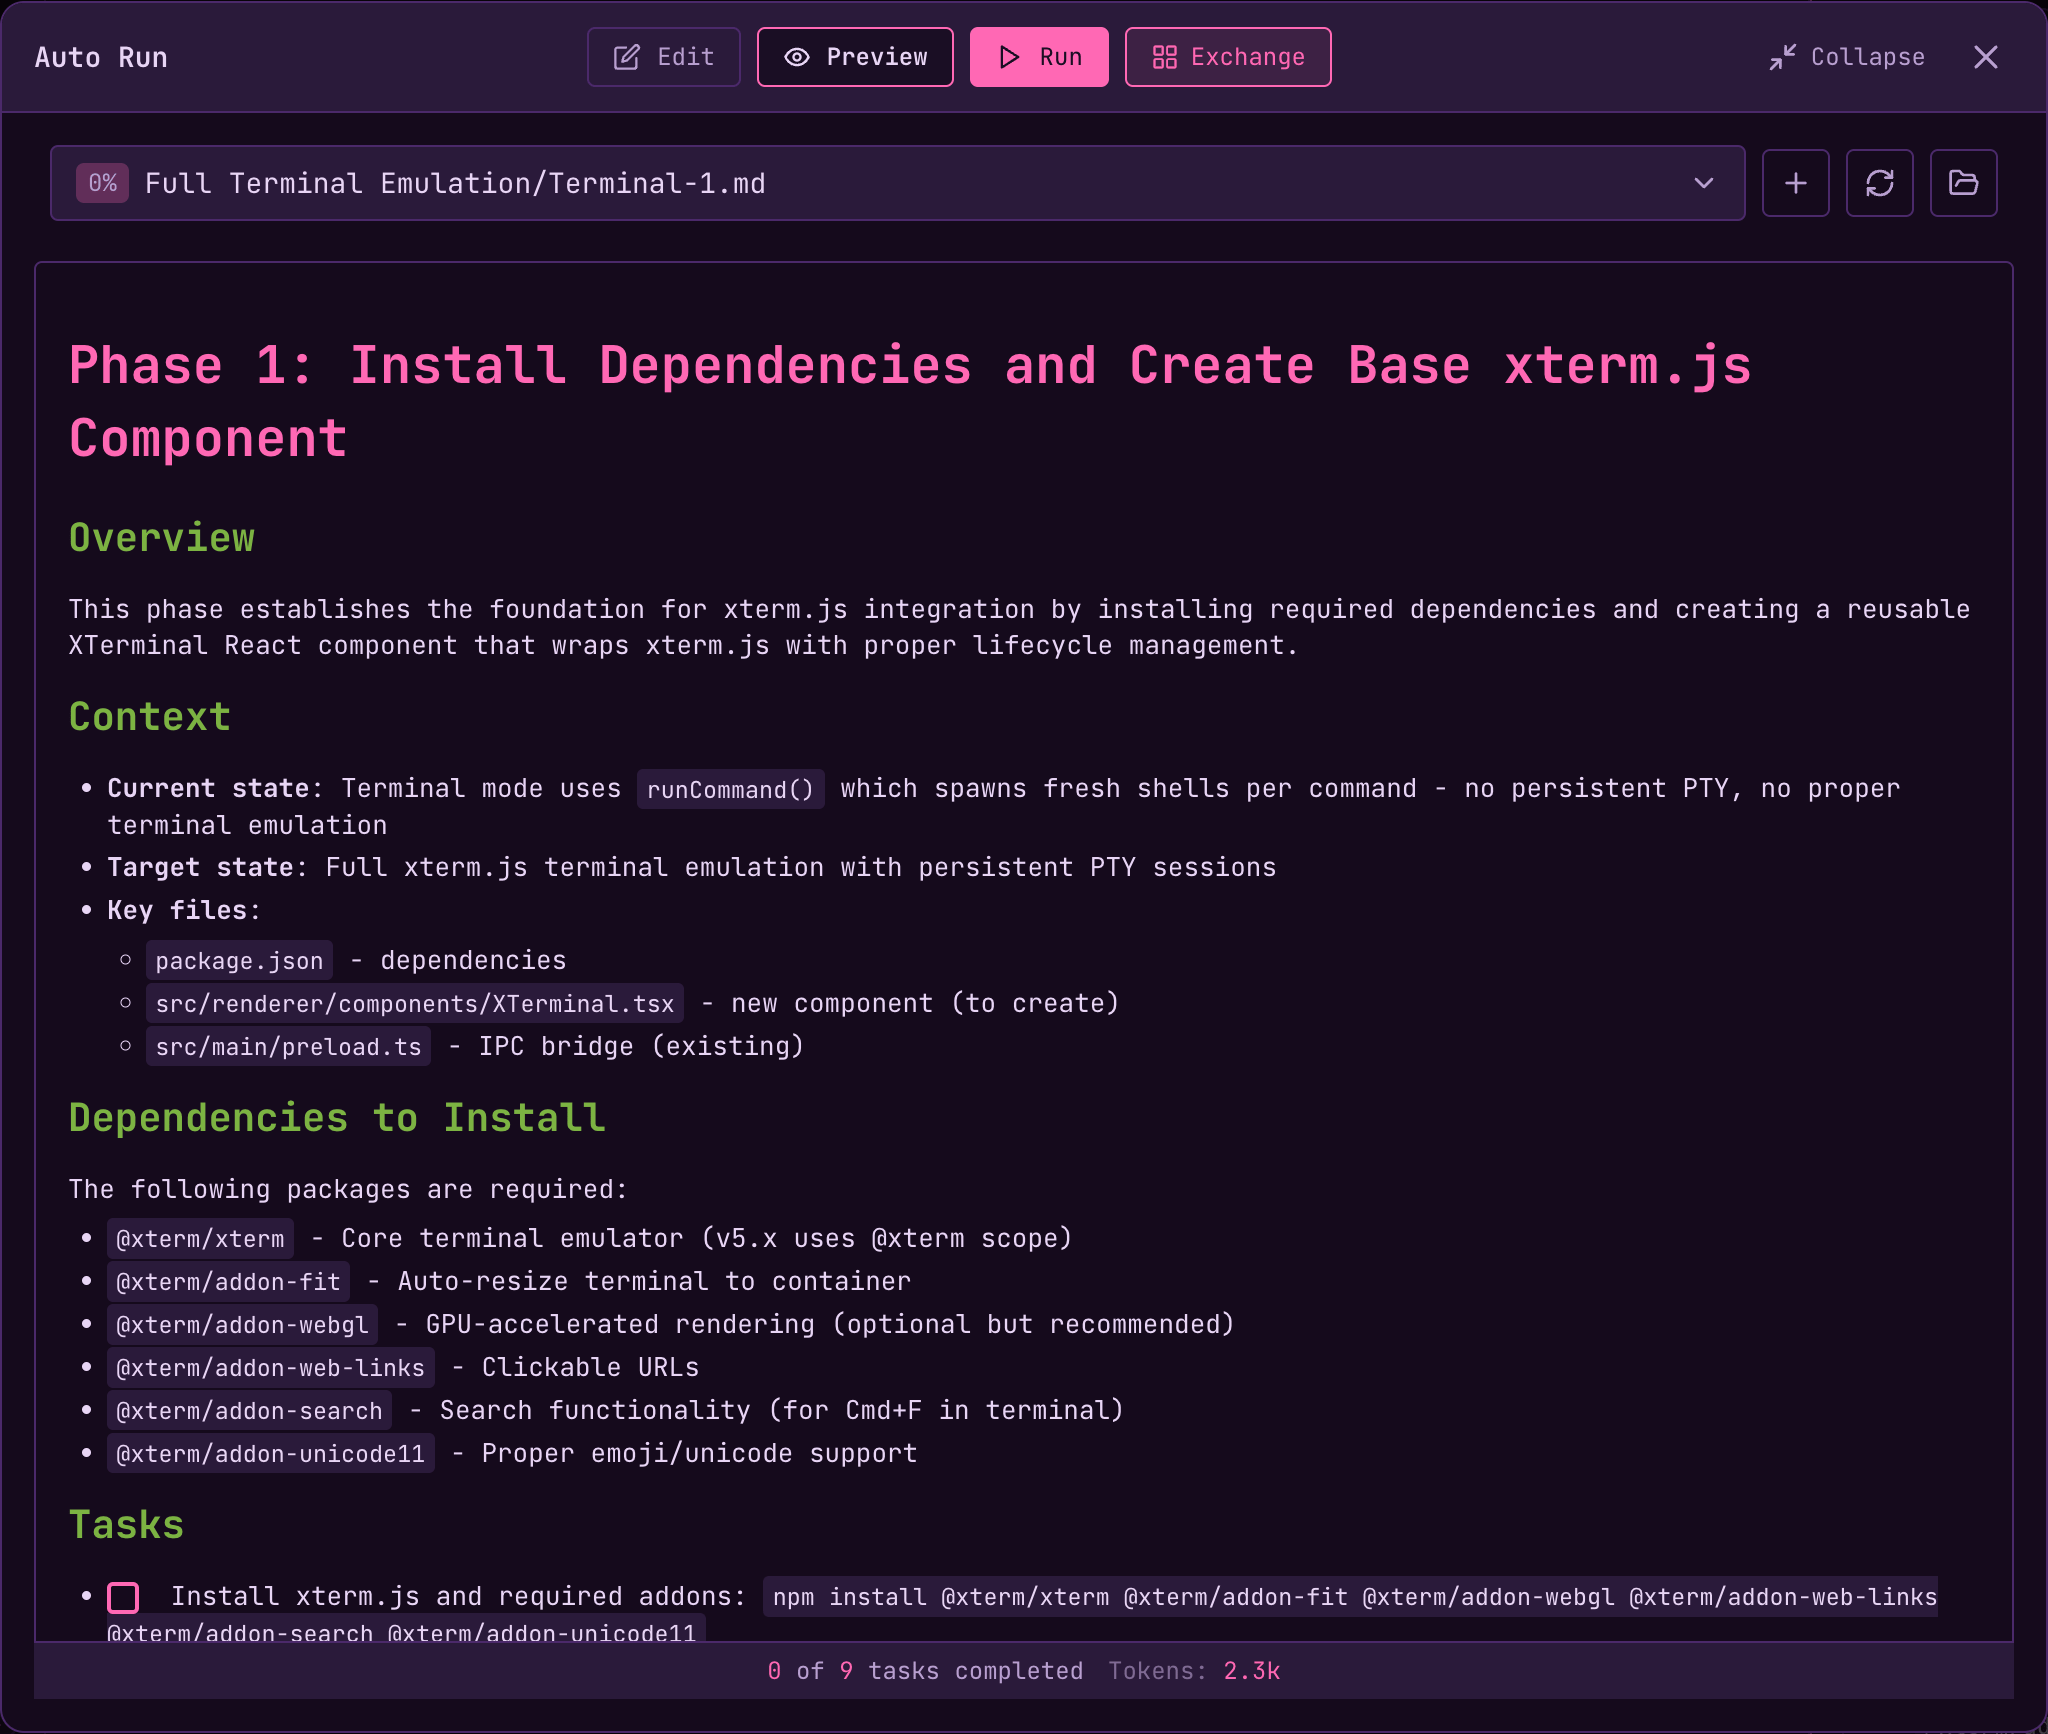 The Expanded Editor provides:
* **Edit/Preview toggle** — Switch between editing markdown and previewing rendered output
* **Document selector** — Switch between documents without closing the modal
* **Run controls** — Start, stop, and monitor Auto Run progress from the expanded view
* **Task progress** — See “X of Y tasks completed” and token count at the bottom
* **Full toolbar** — Create new documents, refresh, and open folder
Click **Collapse** or press `Esc` to return to the sidebar panel view.
[](https://docs.runmaestro.ai/autorun-playbooks#saving-documents)
Saving Documents
--------------------------------------------------------------------------------------
Save your changes with `Cmd+S` (Mac) or `Ctrl+S` (Windows/Linux), or click the **Save** button in the editor footer. The editor shows “Unsaved changes” and a **Revert** button when you have pending edits. Full undo/redo support with `Cmd+Z` / `Cmd+Shift+Z`. **Note**: Switching documents discards unsaved changes. Save before switching if you want to preserve your edits.
[](https://docs.runmaestro.ai/autorun-playbooks#image-support)
Image Support
--------------------------------------------------------------------------------
Paste images directly into your documents. Images are saved to an `images/` subfolder with relative paths for portability.
[](https://docs.runmaestro.ai/autorun-playbooks#stopping-the-runner)
Stopping the Runner
--------------------------------------------------------------------------------------------
Click the **Stop** button at any time. The runner will:
* Complete the current task before stopping
* Preserve all completed work
* Allow you to resume later by clicking Run again
[](https://docs.runmaestro.ai/autorun-playbooks#parallel-auto-runs)
Parallel Auto Runs
------------------------------------------------------------------------------------------
Auto Run can execute in parallel across different agents without conflicts — each agent works in its own project directory, so there’s no risk of clobbering each other’s work. **Same project, parallel work:** To run multiple Auto Runs in the same repository simultaneously, create worktree sub-agents from the git branch menu (see [Git Worktrees](https://docs.runmaestro.ai/git-worktrees)
). Each worktree operates in an isolated directory with its own branch, enabling true parallel task execution on the same codebase.
###
[](https://docs.runmaestro.ai/autorun-playbooks#run-in-worktree)
Run in Worktree
You can dispatch an Auto Run directly into a new git worktree from the run configuration modal. This spins up an isolated branch and directory for the entire run, keeping your main working tree clean. 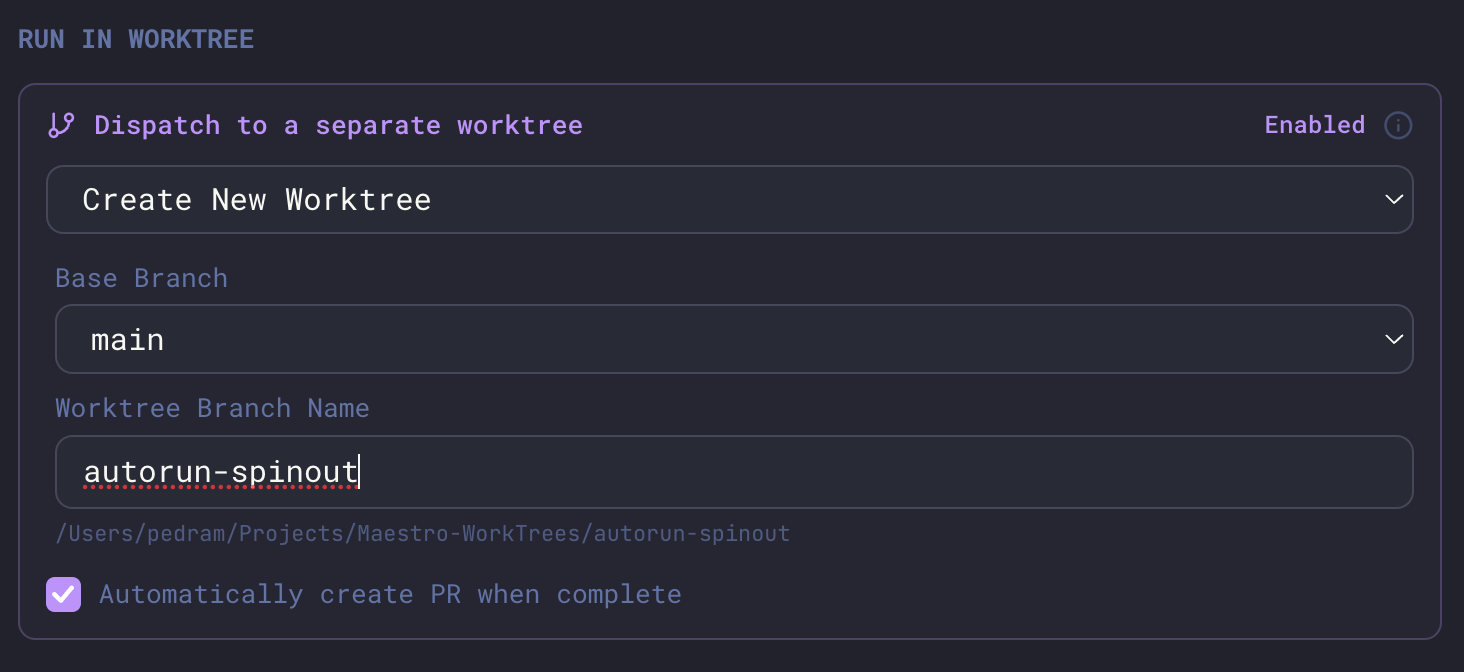
| Option | Description |
| --- | --- |
| **Dispatch to a separate worktree** | Toggle to enable worktree isolation for this run |
| **Worktree selection** | Create a new worktree or select an existing one |
| **Base Branch** | The branch to base the new worktree on (e.g., `main`) |
| **Worktree Branch Name** | Name for the new branch — also used as the worktree directory name |
| **Automatically create PR** | When checked, Maestro opens a pull request from the worktree branch when the run completes |
This is the recommended workflow for longer Auto Runs — your main branch stays untouched, all changes land on a dedicated branch, and you get a PR at the end ready for review.
Was this page helpful?
YesNo
[Configuration](https://docs.runmaestro.ai/configuration)
[Playbook Exchange](https://docs.runmaestro.ai/playbook-exchange)
⌘I
---
# Context Management - Maestro
[Skip to main content](https://docs.runmaestro.ai/context-management#content-area)
[Maestro home page](https://runmaestro.ai/)
Search...
⌘K
Search...
Navigation
General Usage
Context Management
On this page
* [Tab Menu](https://docs.runmaestro.ai/context-management#tab-menu)
* [Tab Close Operations](https://docs.runmaestro.ai/context-management#tab-close-operations)
* [Tab Export](https://docs.runmaestro.ai/context-management#tab-export)
* [Context Window Warnings](https://docs.runmaestro.ai/context-management#context-window-warnings)
* [Why Context Usage Matters](https://docs.runmaestro.ai/context-management#why-context-usage-matters)
* [Configuring Warnings](https://docs.runmaestro.ai/context-management#configuring-warnings)
* [Compact & Continue](https://docs.runmaestro.ai/context-management#compact-%26-continue)
* [How Compaction Works](https://docs.runmaestro.ai/context-management#how-compaction-works)
* [Merging Sessions](https://docs.runmaestro.ai/context-management#merging-sessions)
* [Sending to Another Agent](https://docs.runmaestro.ai/context-management#sending-to-another-agent)
[](https://docs.runmaestro.ai/context-management#tab-menu)
Tab Menu
-----------------------------------------------------------------------
Hover over any tab with an established session to access the tab menu overlay: 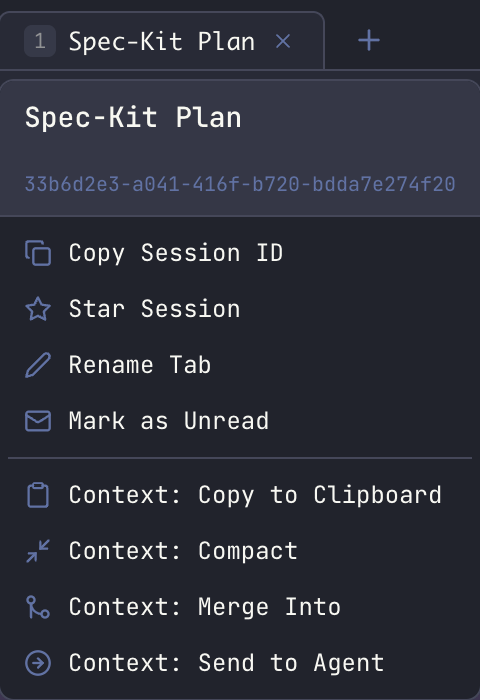
| Action | Requires Session | Description |
| --- | --- | --- |
| **Copy Session ID** | Yes | Copy the session ID to clipboard (for session continuity) |
| **Star Session** | Yes | Bookmark this session for quick access |
| **Rename Tab** | Yes | Give the tab a descriptive name |
| **Mark as Unread** | Yes | Add unread indicator to the tab |
| **Export as HTML** | No (1+ logs) | Export conversation as self-contained HTML file |
| **Context: Copy to Clipboard** | No (1+ logs) | Copy the full conversation to clipboard |
| **Context: Compact** | No (5+ logs) | Compress context while preserving key information |
| **Context: Merge Into** | Yes | Merge this context into another session |
| **Context: Send to Agent** | Yes | Transfer context to a different agent |
| **Context: Publish as GitHub Gist** | No (1+ logs) | Share conversation as a public or secret GitHub Gist (requires `gh` CLI) |
| **Move to First Position** | No | Move this tab to the first position |
| **Move to Last Position** | No | Move this tab to the last position |
###
[](https://docs.runmaestro.ai/context-management#tab-close-operations)
Tab Close Operations
The tab menu also provides bulk close operations for managing multiple tabs: 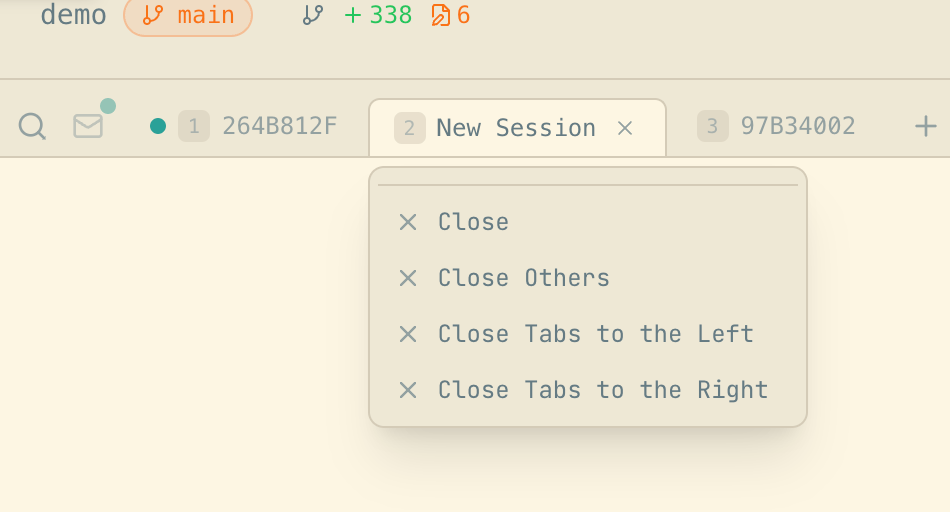
| Action | Description |
| --- | --- |
| **Close** | Close the current tab |
| **Close Others** | Close all tabs except this one |
| **Close Tabs to the Left** | Close all tabs to the left of this one |
| **Close Tabs to the Right** | Close all tabs to the right of this one |
These operations respect the **Unread Filter**: when the filter is active, only visible tabs are affected — hidden “read” tabs are preserved. **Position-aware options:** The menu intelligently hides inapplicable options:
* First tab: “Close Tabs to the Left” is disabled
* Last tab: “Close Tabs to the Right” is disabled
* Single tab: “Close” and “Close Others” are disabled
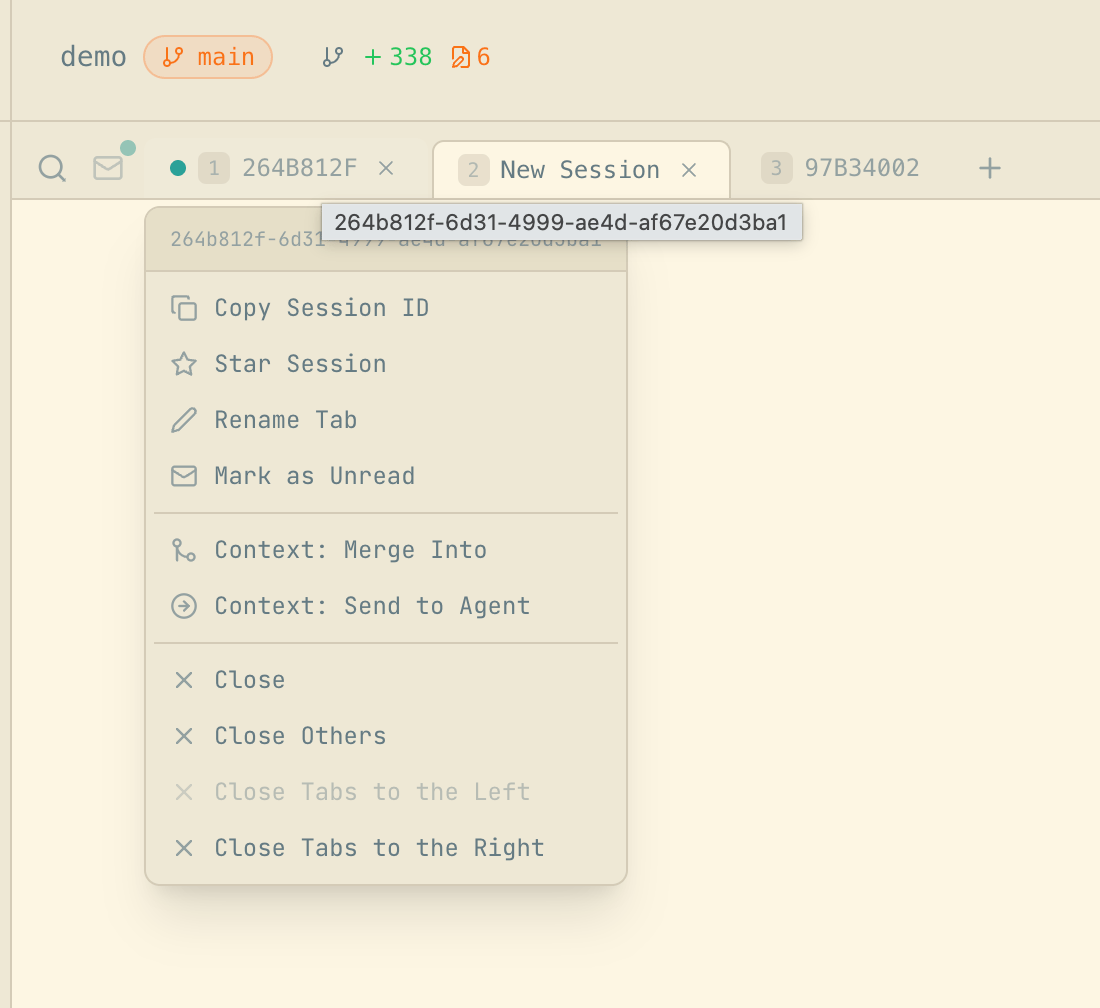 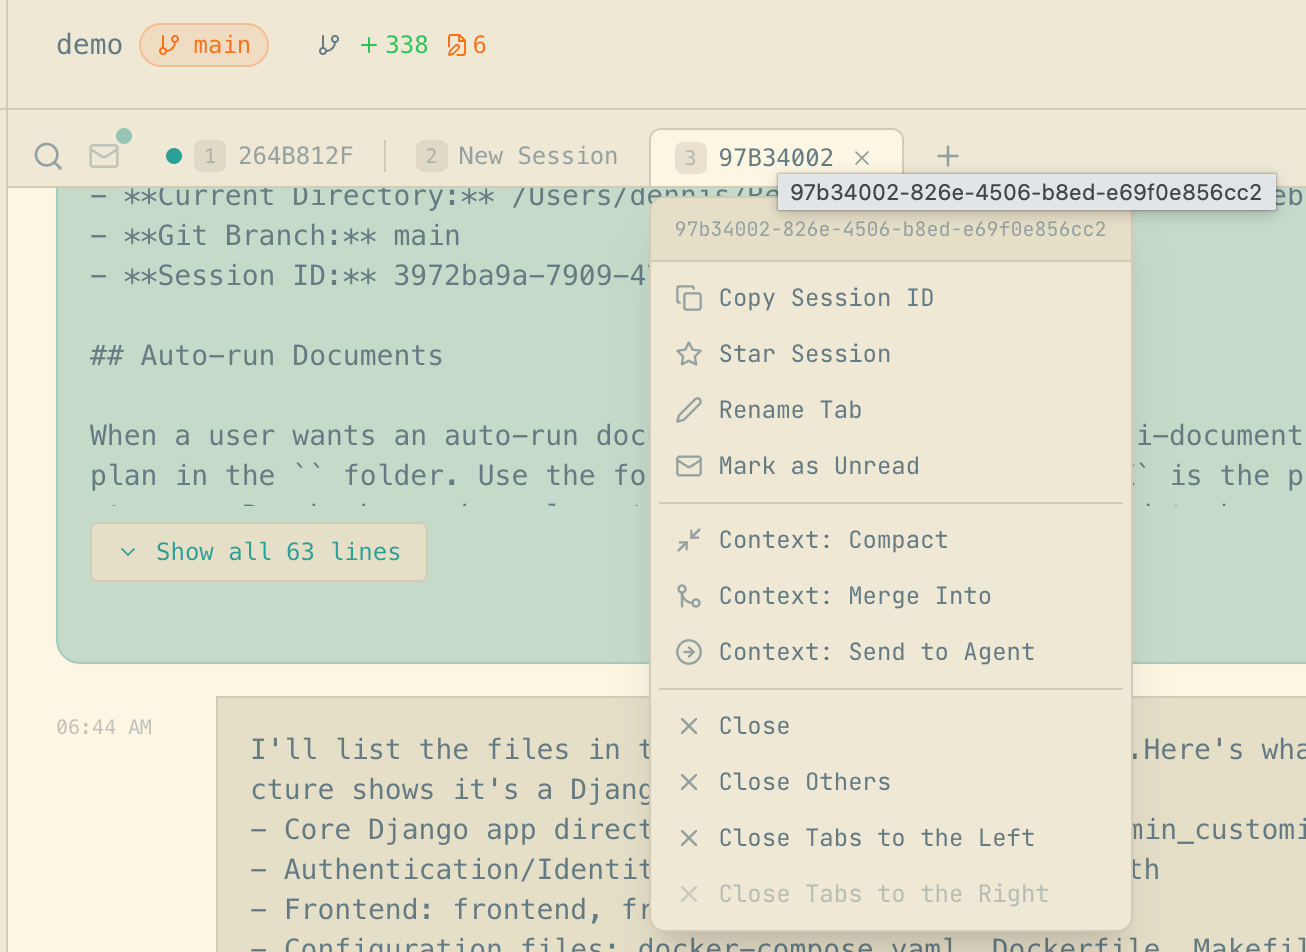 All close operations support **undo** — press `Cmd+Shift+T` / `Ctrl+Shift+T` to reopen recently closed tabs (up to 25 tabs are remembered). These actions are also available via **Quick Actions** (`Cmd+K` / `Ctrl+K`) with keyboard shortcuts displayed: 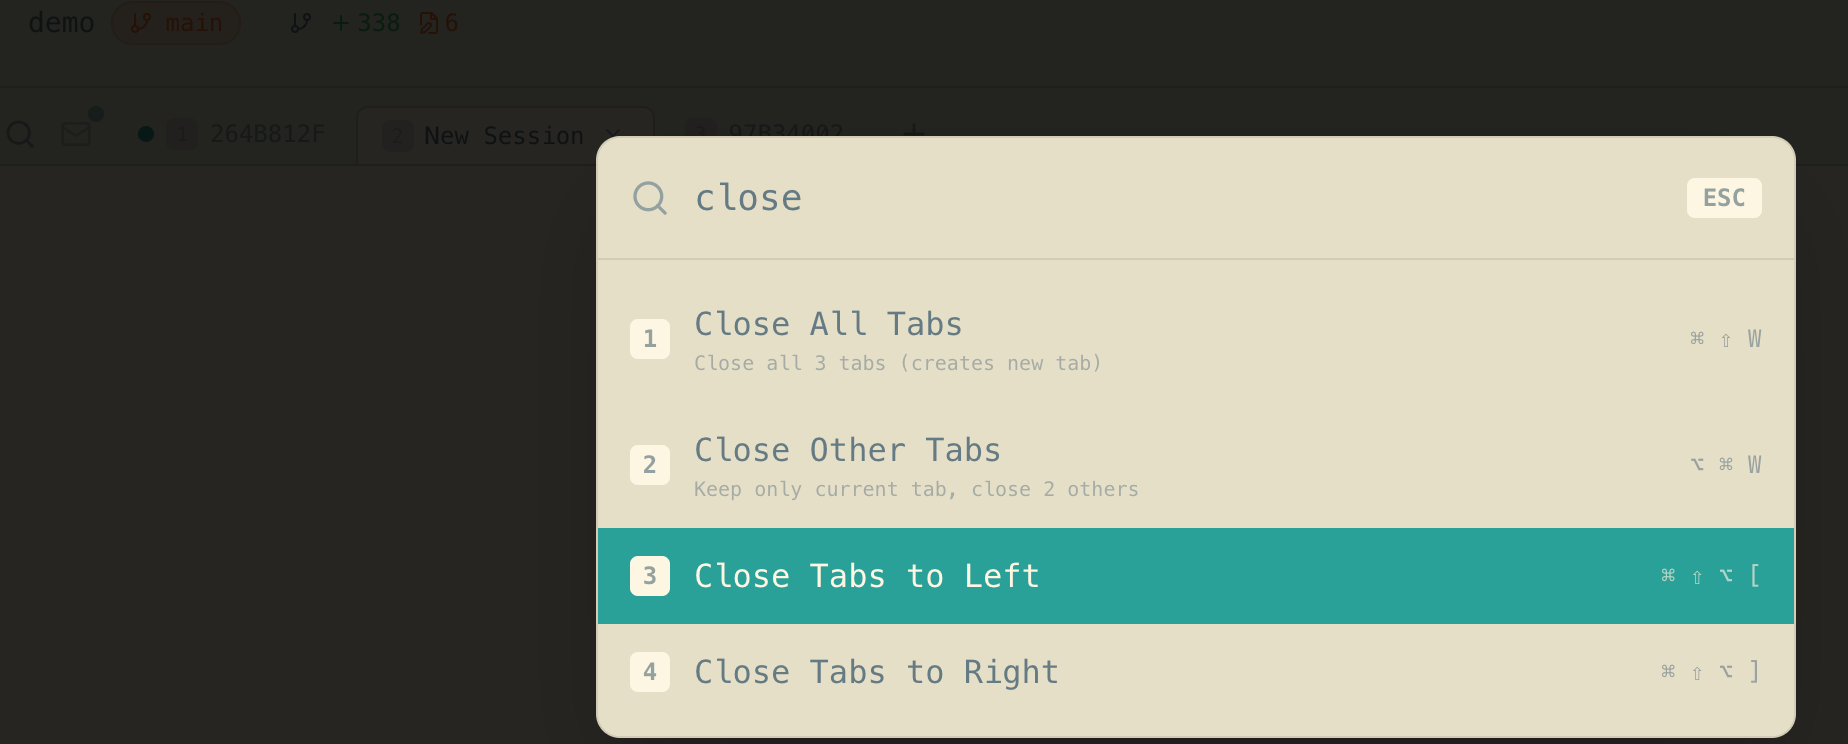
[](https://docs.runmaestro.ai/context-management#tab-export)
Tab Export
---------------------------------------------------------------------------
Export any tab conversation as a self-contained HTML file:
1. Hover over the tab → **Export as HTML**
2. Choose a save location when prompted
The exported HTML file includes:
* **Full conversation history** with all messages
* **Your current theme colors** — the export adopts your active Maestro theme
* **Maestro branding** with links to the website and GitHub
* **Session metadata** — agent type, working directory, timestamps, token usage
* **Rendered markdown** — code blocks, tables, and formatting preserved
This is useful for sharing conversations, creating documentation, or archiving important sessions. **Alternative sharing options:**
* **Context: Copy to Clipboard** — Copy the raw conversation text to clipboard (for pasting into documents or chat)
* **Context: Publish as GitHub Gist** — Share as a public or secret GitHub Gist (requires `gh` CLI to be installed)
* * *
Context management lets you combine or transfer conversation history between sessions and agents, enabling powerful workflows where you can:
* **Compact & continue** — Compress your context to stay within token limits while preserving key information
* **Merge sessions** — Combine context from multiple conversations into one
* **Transfer to other agents** — Send your context to a different AI agent (e.g., Claude Code → Codex)
[](https://docs.runmaestro.ai/context-management#context-window-warnings)
Context Window Warnings
-----------------------------------------------------------------------------------------------------
As your conversation grows, Maestro monitors context window usage and displays warnings when you’re approaching limits.  The warning banner appears below the input box showing:
* Current context usage percentage
* **Compact & Continue** button for one-click context compression
###
[](https://docs.runmaestro.ai/context-management#why-context-usage-matters)
Why Context Usage Matters
**Operating near context limits degrades AI performance.** When context reaches ~80% capacity or higher:
* The AI loses access to earlier parts of your conversation
* Important decisions, code changes, and context get pushed out
* Response quality drops as the model struggles to maintain coherence
* You may experience more hallucinations and forgotten instructions
For best results, **compact your context before reaching 60-70% usage** — don’t wait for the red warning.
###
[](https://docs.runmaestro.ai/context-management#configuring-warnings)
Configuring Warnings
Customize warning thresholds in **Settings** (`Cmd+,` / `Ctrl+,`) → **Display** → **Context Window Warnings**: 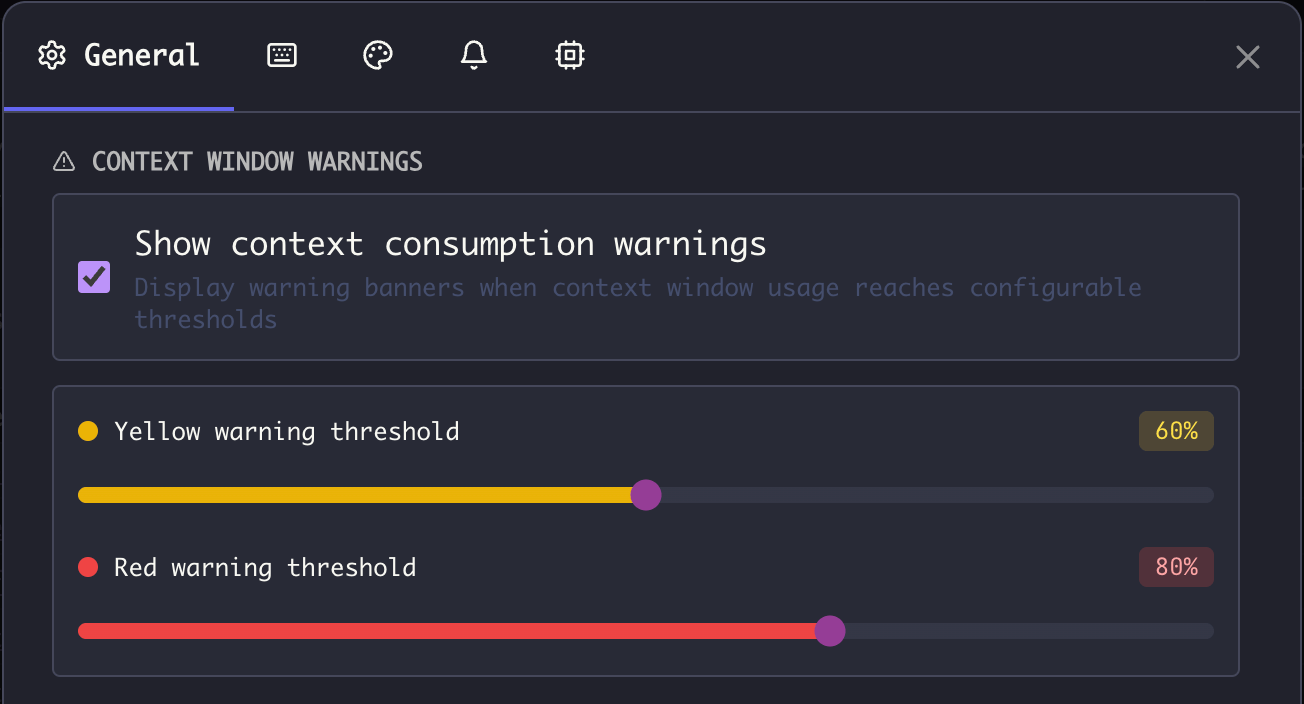
| Setting | Default | Description |
| --- | --- | --- |
| **Show context consumption warnings** | Enabled | Toggle warning banners on/off |
| **Yellow warning threshold** | 60% | Early warning — good time to consider compacting |
| **Red warning threshold** | 80% | Critical — compact immediately to avoid degradation |
**Recommended thresholds:**
* Set yellow to **50-60%** if you prefer earlier warnings
* Set red to **70-80%** — going higher risks quality degradation
* Lower both thresholds if you frequently work on complex tasks that require the AI to remember many details
[](https://docs.runmaestro.ai/context-management#compact-&-continue)
Compact & Continue
-------------------------------------------------------------------------------------------
When your conversation approaches context limits, you can compress it while preserving essential information:
1. **Hover over** a tab → **“Context: Compact”**, or use **Command Palette** (`Cmd+K` / `Ctrl+K`) → “Context: Compact”
2. The AI compacts the conversation, extracting key decisions, code changes, and context
3. A new tab opens with the compressed context, ready to continue working
**When to use:**
* The context warning sash appears (yellow at 60%, red at 80% usage)
* You want to continue a long conversation without losing important context
* You need to free up context space for new tasks
**What gets preserved:**
* Key decisions and their rationale
* Code changes and file modifications
* Important technical details and constraints
* Current task state and next steps
###
[](https://docs.runmaestro.ai/context-management#how-compaction-works)
How Compaction Works
Compaction uses a multi-pass approach to handle conversations of any size: **Eligibility Check:** Compaction requires any one of these conditions:
* Context usage ≥ 25% (as reported by the agent), OR
* Estimated conversation size ≥ 2,000 tokens (~8k characters), OR
* At least 8 meaningful messages (user and AI exchanges)
Multiple fallbacks ensure compaction is available even when the context gauge resets to 0 (which can happen when context fills up) — as long as there’s meaningful conversation history, you can compact it. **Single-Pass Compaction (< 50k tokens):** For smaller conversations, the entire context is sent to a fresh AI agent in batch mode, which returns a compressed summary. **Chunked Compaction (≥ 50k tokens):** For larger conversations that exceed 50,000 tokens:
1. **Chunking** — The conversation is split into chunks of ~50k tokens each
2. **Parallel summarization** — Each chunk is sent to a separate batch-mode agent process
3. **Combination** — Chunk summaries are combined together
4. **Consolidation** — If the combined result exceeds 40k tokens, additional passes reduce it further
**Consolidation Passes:** When chunk summaries combine to more than 40k tokens, the system performs up to 3 consolidation passes:
* Each pass asks the AI to aggressively reduce the summary while preserving key information
* A pass is only accepted if it reduces size by at least 10%
* Consolidation stops early if no meaningful reduction is achieved
This ensures that even a conversation at 95%+ context capacity (e.g., 190k tokens) will be compacted to a manageable size (~40k tokens or less) that leaves room for continued work. **Progress Indicators:** During compaction, you’ll see status updates:
* “Extracting context…” — Preparing the conversation
* “Summarizing chunk 1/4…” — Processing large conversations in parts
* “Consolidation pass 1/3…” — Additional reduction passes if needed
* “Finalizing compacted context…” — Creating the new tab
[](https://docs.runmaestro.ai/context-management#merging-sessions)
Merging Sessions
---------------------------------------------------------------------------------------
Combine context from multiple sessions or tabs into one:
1. **Hover over** a tab → **“Context: Merge Into”**, or use **Command Palette** (`Cmd+K` / `Ctrl+K`) → “Context: Merge Into”
2. Search for or select the target session/tab from the modal
3. Review the merge preview showing estimated token count
4. Optionally enable **Clean context** to remove duplicates and reduce size
5. Click **“Merge Into”**
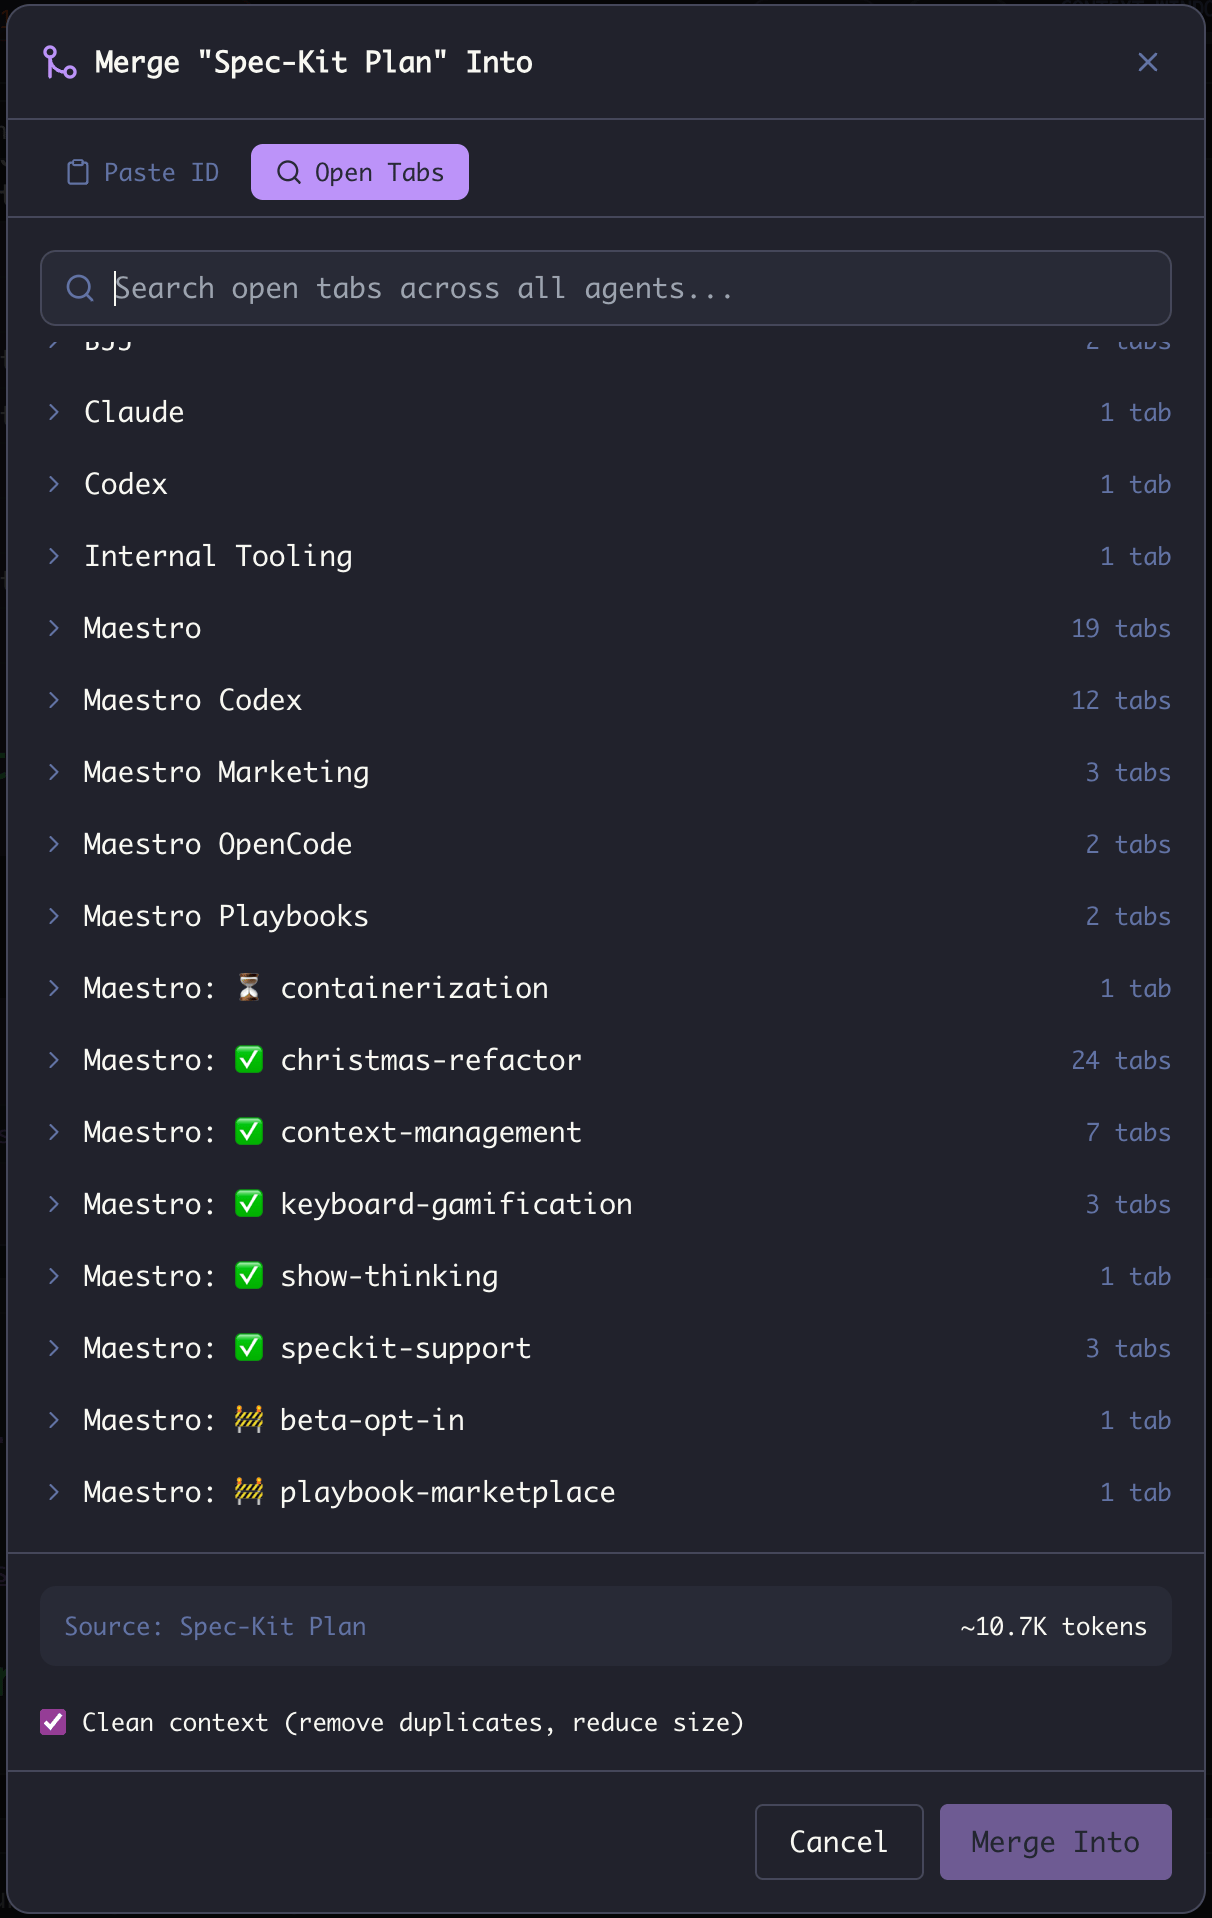 The modal shows:
* **Paste ID** tab — Enter a specific session ID directly
* **Open Tabs** tab — Browse all open tabs across all agents
* **Token estimate** — Shows source size and estimated size after cleaning
* **Agent grouping** — Tabs organized by agent with tab counts
The merged context creates a new tab in the target session with conversation history from both sources. Use this to consolidate related conversations or bring context from an older session into a current one. **What gets merged:**
* Full conversation history (user messages and AI responses)
* Token estimates are shown before merge to help you stay within context limits
**Tips:**
* You can merge tabs within the same session or across different sessions
* Large merges (100k+ tokens) will show a warning but still proceed
* Self-merge (same tab to itself) is prevented
* Enable “Clean context” for large merges to reduce token count
[](https://docs.runmaestro.ai/context-management#sending-to-another-agent)
Sending to Another Agent
-------------------------------------------------------------------------------------------------------
Transfer your context to a different AI agent:
1. **Hover over** a tab → **“Context: Send to Agent”**, or use **Command Palette** (`Cmd+K` / `Ctrl+K`) → “Context: Send to Agent”
2. Search for or select the target agent from the list
3. Review the token estimate and cleaning options
4. Click **“Send to Session”**
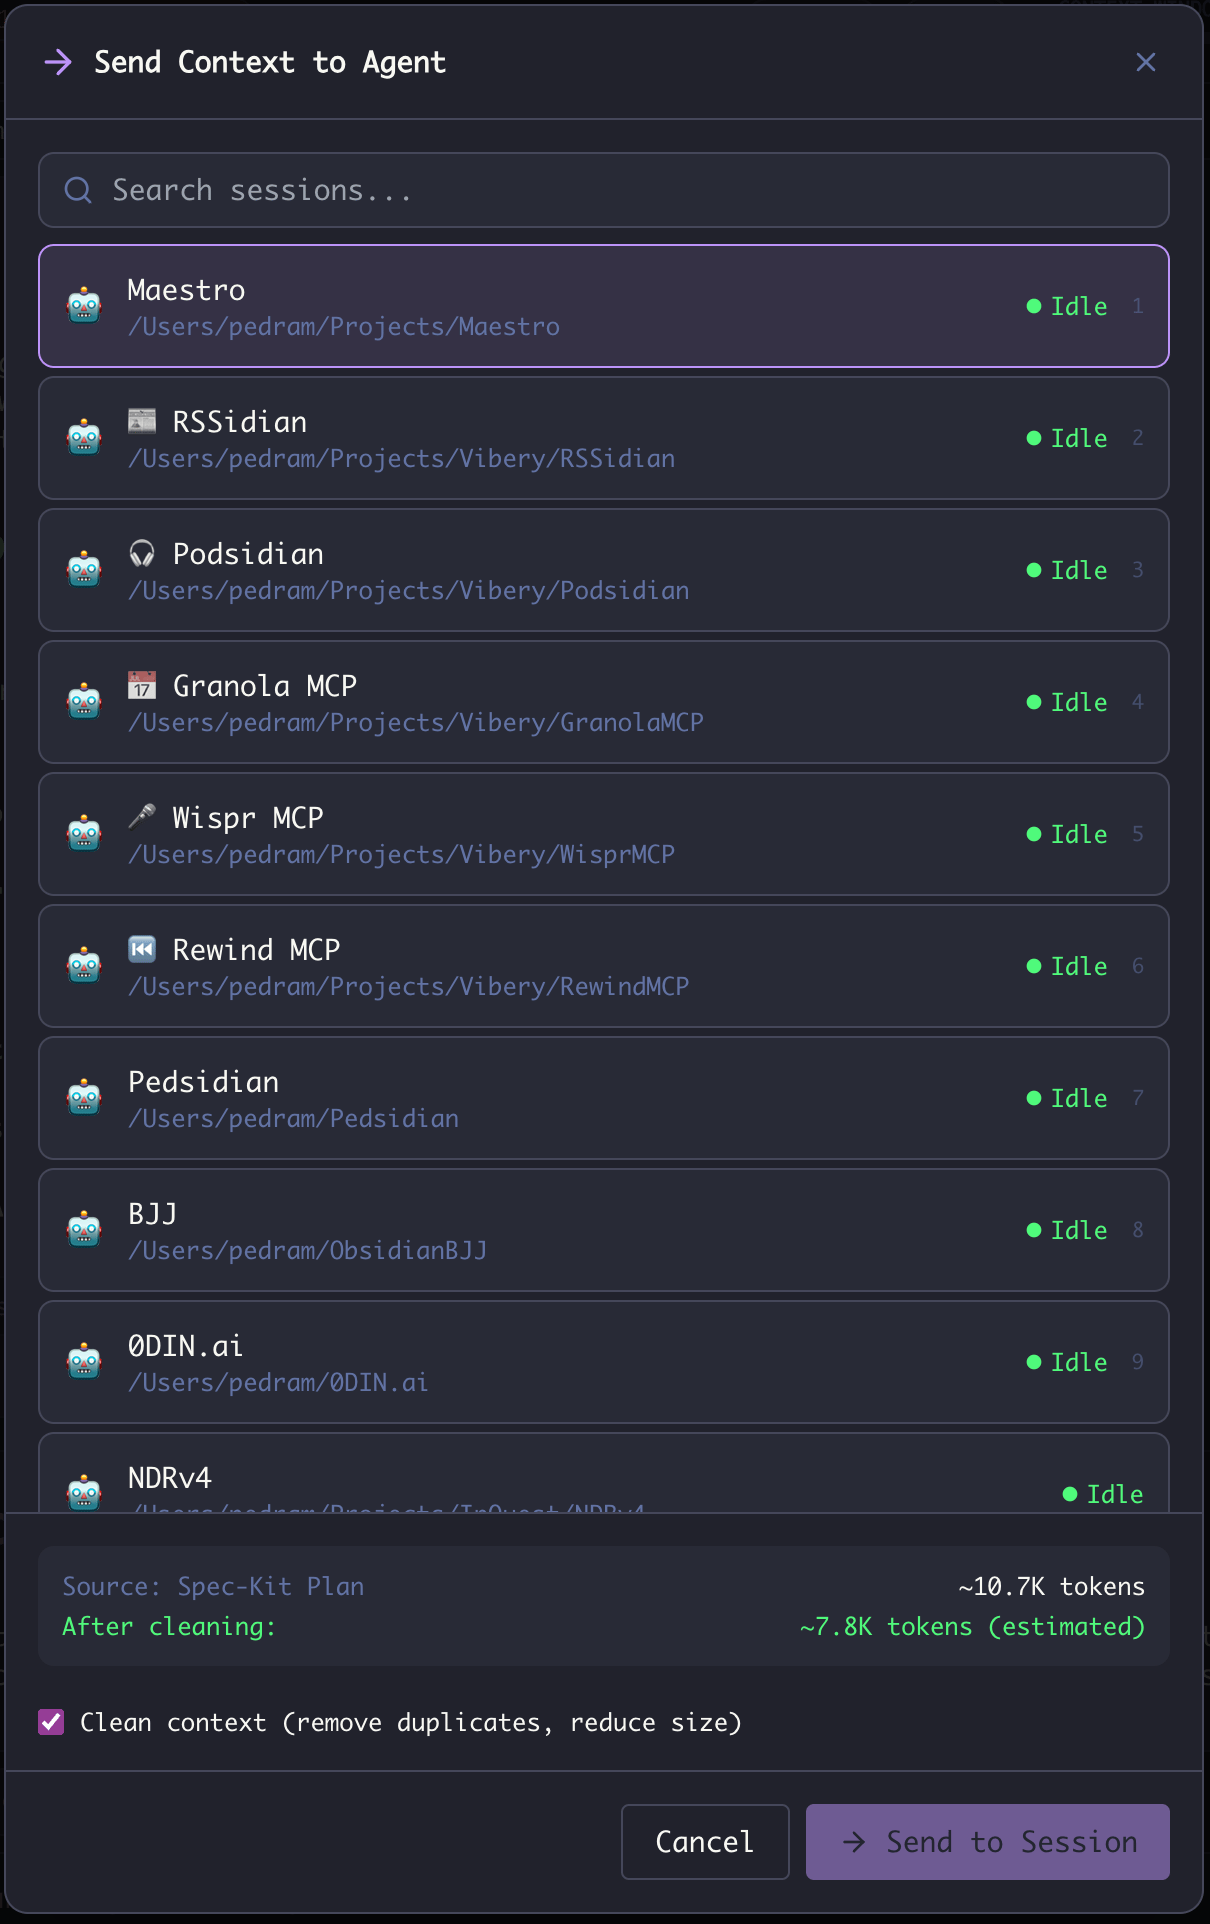 The modal shows:
* **Searchable agent list** with status indicators (Idle, Busy, etc.)
* **Agent paths** to distinguish between agents with similar names
* **Token estimate** — Shows source size and estimated size after cleaning
* **Clean context option** — Remove duplicates and reduce size before transfer
**Context Cleaning:** When transferring between agents, the context can be automatically cleaned to:
* Remove duplicate messages and verbose output
* Condense while preserving key information
* Optimize token usage for the target session
Cleaning is enabled by default but can be disabled for verbatim transfers. **Use Cases:**
* Start a task in Claude Code, then hand off to Codex for a different perspective
* Transfer a debugging session to an agent with different tool access
* Move context to an agent pointing at a different project directory
* Share context with a worktree sub-agent working on the same codebase
Was this page helpful?
YesNo
[Memories](https://docs.runmaestro.ai/memories)
[Document Graph](https://docs.runmaestro.ai/document-graph)
⌘I
---
# Getting Started - Maestro
[Skip to main content](https://docs.runmaestro.ai/getting-started#content-area)
[Maestro home page](https://runmaestro.ai/)
Search...
⌘K
Search...
Navigation
Getting Started
Getting Started
On this page
* [1\. Install and launch](https://docs.runmaestro.ai/getting-started#1-install-and-launch)
* [2\. Create an agent](https://docs.runmaestro.ai/getting-started#2-create-an-agent)
* [Introductory Tour](https://docs.runmaestro.ai/getting-started#introductory-tour)
* [3\. Open a project](https://docs.runmaestro.ai/getting-started#3-open-a-project)
* [4\. Start a conversation](https://docs.runmaestro.ai/getting-started#4-start-a-conversation)
* [5\. Try Auto Run](https://docs.runmaestro.ai/getting-started#5-try-auto-run)
This guide gets you from install to a first productive session with Maestro.
[](https://docs.runmaestro.ai/getting-started#1-install-and-launch)
1\. Install and launch
----------------------------------------------------------------------------------------------
Follow the [Installation](https://docs.runmaestro.ai/installation)
instructions for your platform, then launch Maestro.
[](https://docs.runmaestro.ai/getting-started#2-create-an-agent)
2\. Create an agent
----------------------------------------------------------------------------------------
Maestro supports **Claude Code**, **Codex** (OpenAI), **OpenCode**, and **Factory Droid** as providers. Make sure at least one is installed and authenticated.
Maestro is a pass-through to your provider. Your MCP tools, custom skills, permissions, and authentication all work in Maestro exactly as they do when running the provider directly. The only difference is batch mode execution—Maestro sends a prompt and receives a response rather than running an interactive session.
Click the **New Agent** button in the bottom-left sidebar (or press `Cmd+N` / `Ctrl+N`). You’ll see the **New Agent** selector: 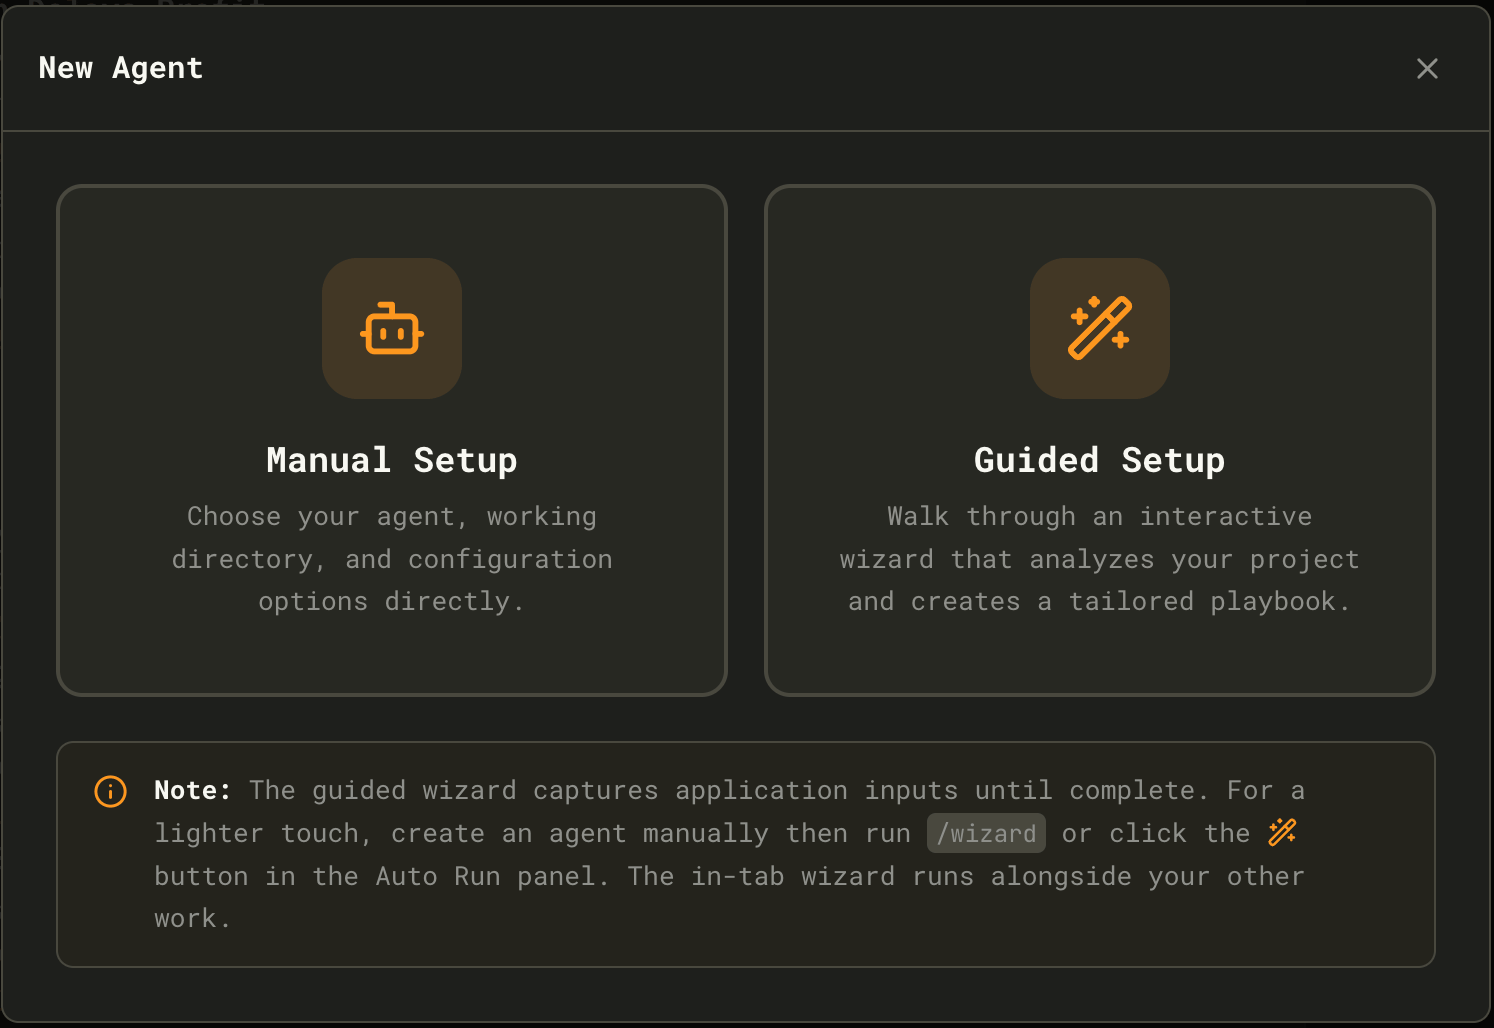 **Manual Setup** — Choose your agent, working directory, and configuration options directly. Best for power users who want full control. **Guided Setup** (Recommended for new users) — Launches the **Onboarding Wizard**, which walks you through:
1. Selecting an AI provider
2. Choosing your project directory
3. Having a discovery conversation where the AI learns about your project
4. Generating an initial Auto Run Playbook with tasks
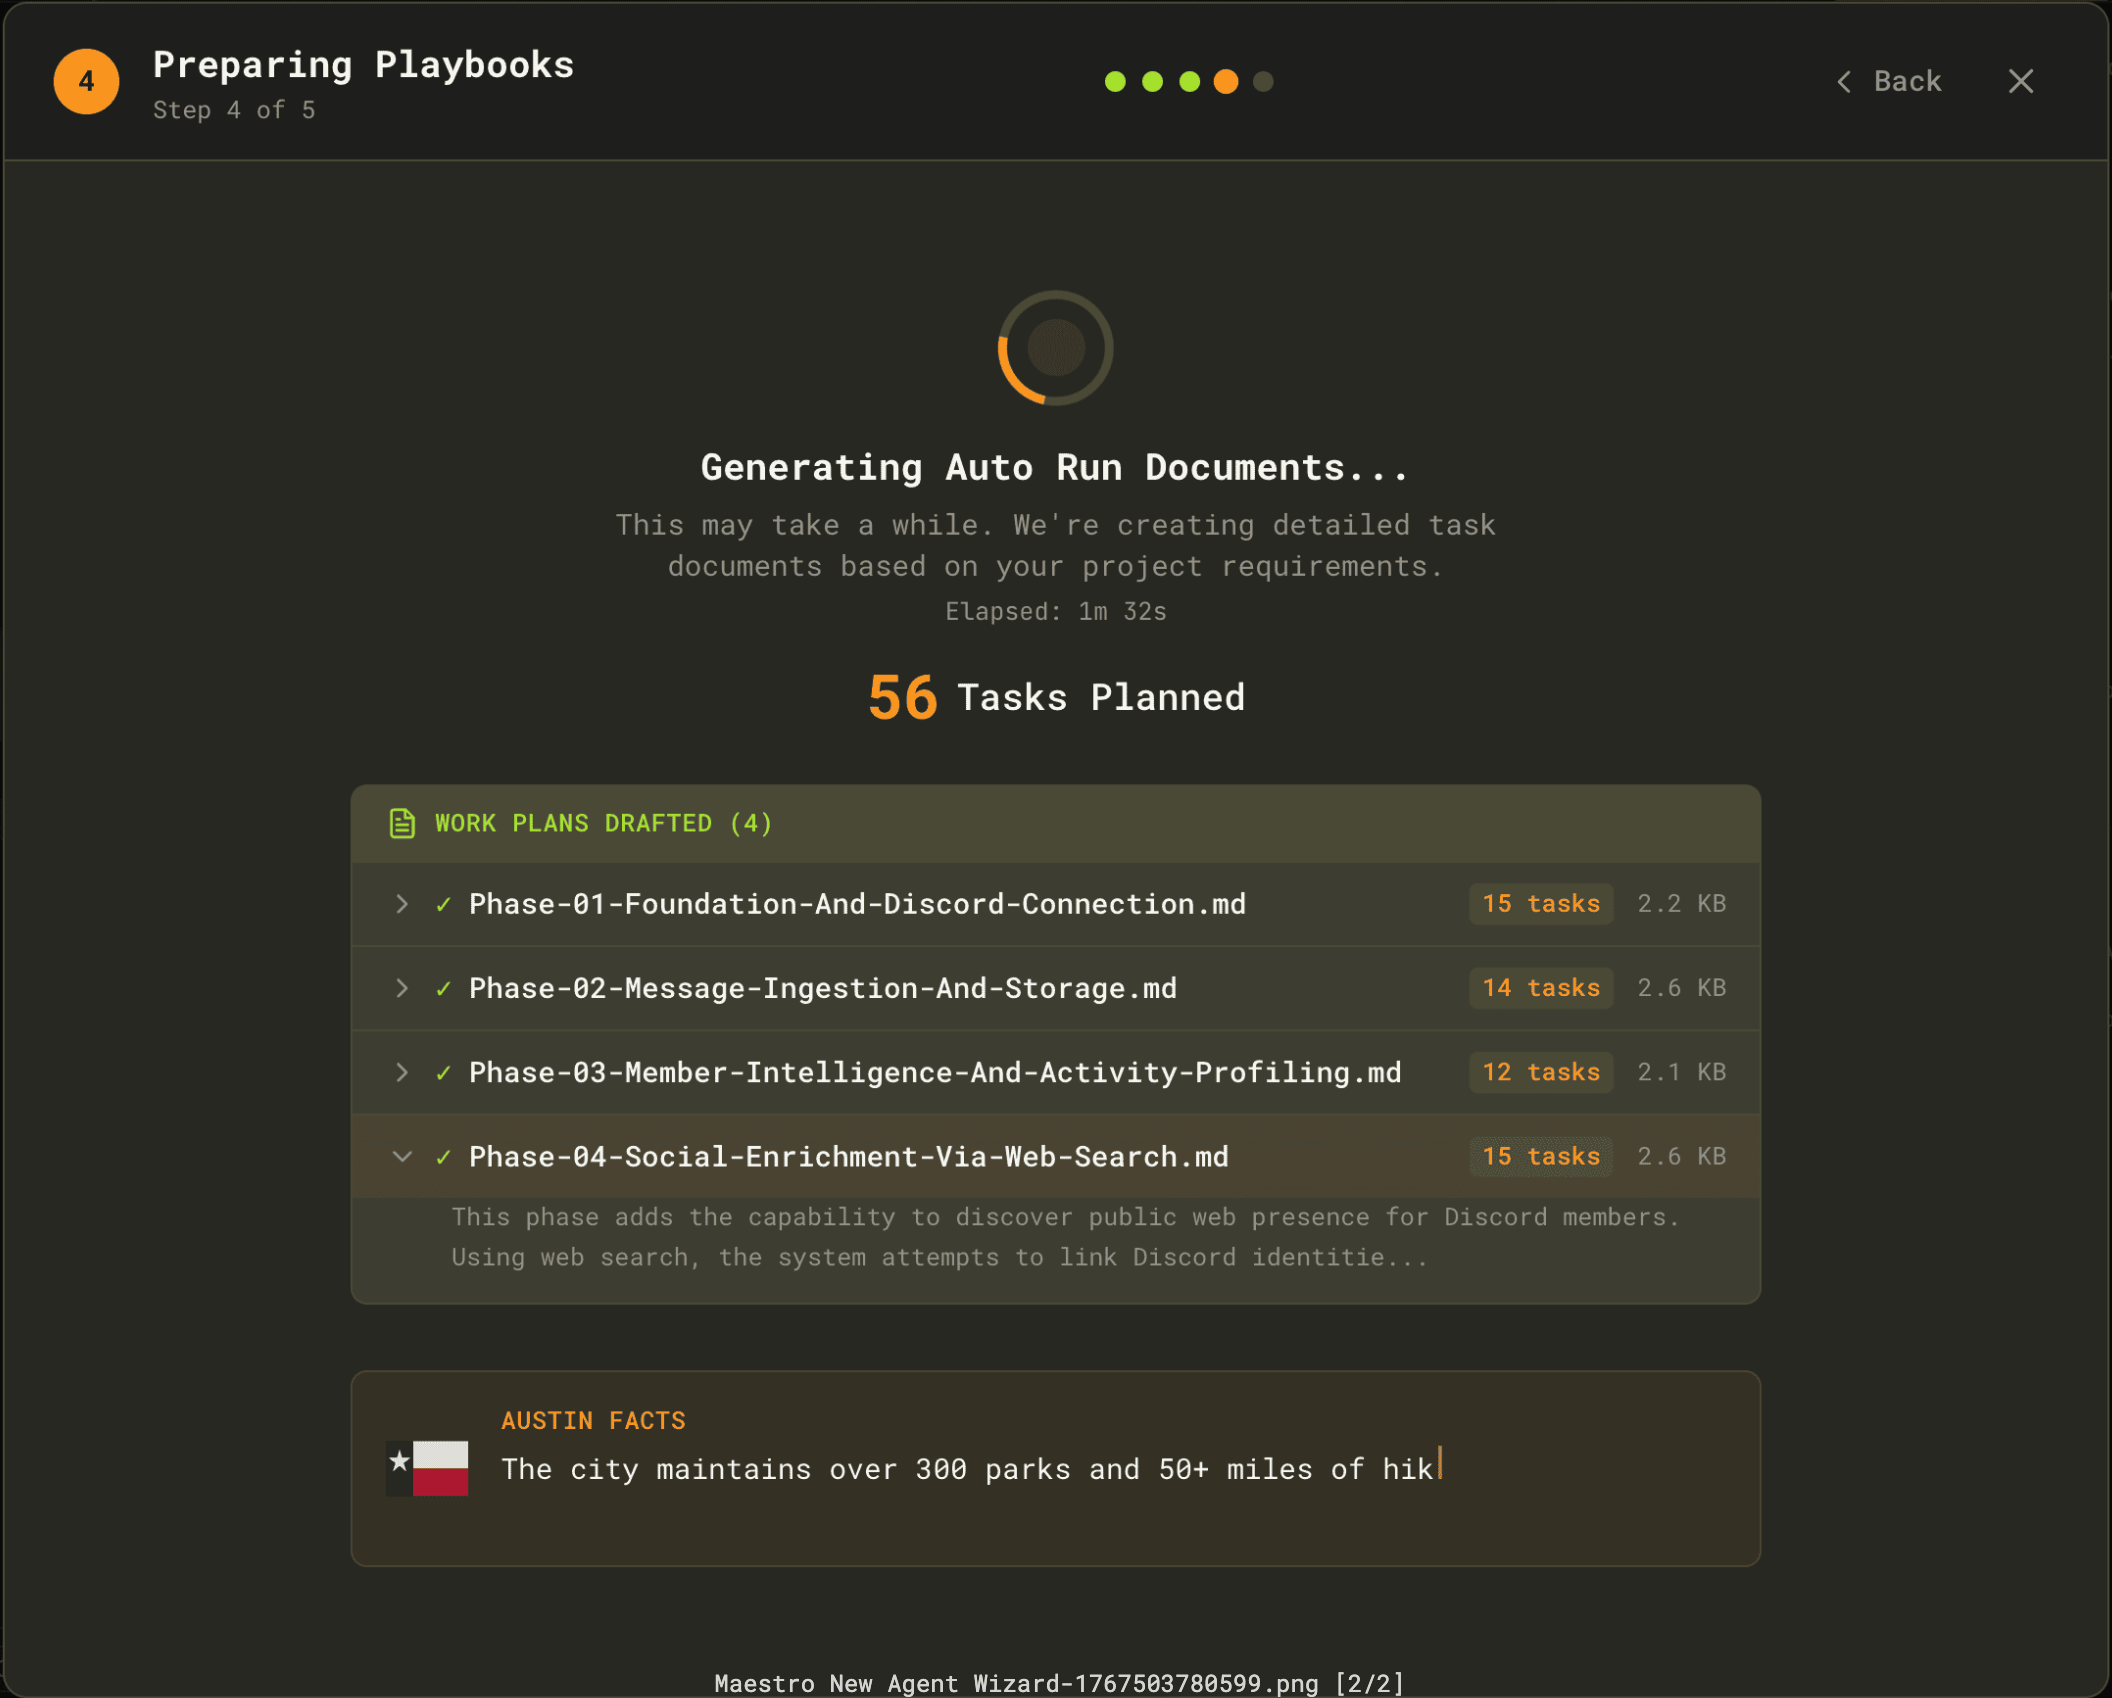 The Wizard creates a fully configured agent with an Auto Run document folder ready to go. Generated documents are saved to an `Initiation/` subfolder within `.maestro/playbooks/` to keep them organized separately from documents you create later.
The guided wizard captures application input until it completes. For a lighter touch, create an agent manually, then run the `/wizard` slash command or click the wand button in the Auto Run panel. The in-tab wizard runs alongside your other work.
###
[](https://docs.runmaestro.ai/getting-started#introductory-tour)
Introductory Tour
After completing the Wizard, you’ll be offered an **Introductory Tour** that highlights key UI elements:
* The AI Terminal and how to interact with it
* The Auto Run panel and how document processing works
* File Explorer and preview features
* Keyboard shortcuts for power users
You can skip the tour and access it later via **Quick Actions** (`Cmd+K` / `Ctrl+K`) → “Start Tour”.
[](https://docs.runmaestro.ai/getting-started#3-open-a-project)
3\. Open a project
--------------------------------------------------------------------------------------
Point your new agent at a project directory. Maestro will detect git repos automatically and enable git-aware features like diffs, logs, and worktrees.
[](https://docs.runmaestro.ai/getting-started#4-start-a-conversation)
4\. Start a conversation
--------------------------------------------------------------------------------------------------
Use the **AI Terminal** to talk with your AI provider, and the **Command Terminal** for shell commands. Toggle between them with `Cmd+J` / `Ctrl+J`. Each tab in the AI Terminal is a separate session.
[](https://docs.runmaestro.ai/getting-started#5-try-auto-run)
5\. Try Auto Run
----------------------------------------------------------------------------------
Create a markdown checklist, then run it through Auto Run to see the spec-driven workflow in action. See [Auto Run + Playbooks](https://docs.runmaestro.ai/autorun-playbooks)
for a full walkthrough.
Was this page helpful?
YesNo
[Installation](https://docs.runmaestro.ai/installation)
[General Usage](https://docs.runmaestro.ai/general-usage)
⌘I
---
# Overview - Maestro
[Skip to main content](https://docs.runmaestro.ai/about/overview#content-area)
[Maestro home page](https://runmaestro.ai/)
Search...
⌘K
Search...
Navigation
Overview
Overview
On this page
* [Spec-Driven Workflow](https://docs.runmaestro.ai/about/overview#spec-driven-workflow)
* [Key Concepts](https://docs.runmaestro.ai/about/overview#key-concepts)
Maestro hones fractured attention into focused intent. It is built for developers who need to coordinate multiple AI agents, repositories, and long-running tasks without leaving a keyboard-first workflow.
[](https://docs.runmaestro.ai/about/overview#spec-driven-workflow)
Spec-Driven Workflow
-------------------------------------------------------------------------------------------
Maestro enables a **specification-first approach** to AI-assisted development. Instead of ad-hoc prompting, you collaboratively build detailed specs with the AI, then execute them systematically:
1. **PLAN** — Discuss the feature with the AI agent
2. **SPECIFY** — Create markdown docs with task checklists in the Auto Run document folder
3. **EXECUTE** — Auto Run works through tasks, spawning a fresh session per task
4. **REFINE** — Review results, update specs, and repeat
**Why this works:**
* **Deliberate planning** — Conversation forces you to think through requirements before coding
* **Documented specs** — Your markdown files become living documentation
* **Clean execution** — Each task runs in isolation with no context bleed
* **Iterative refinement** — Review, adjust specs, re-run — specs evolve with your understanding
**Example workflow:**
1. **Plan**: In the AI Terminal, discuss your feature: _“I want to add user authentication with OAuth support”_
2. **Specify**: Ask the AI to help create a spec: _“Create a markdown checklist for implementing this feature”_
3. **Save**: Copy the spec to your Auto Run document folder (or have the AI write it directly)
4. **Execute**: Switch to Auto Run tab, select the doc, click Run — Maestro handles the rest
5. **Review**: Check the History tab for results, refine specs as needed
This approach mirrors methodologies like [Spec-Kit](https://github.com/github/spec-kit)
, but with a graphical interface, real-time AI collaboration, and multi-agent parallelism.
[](https://docs.runmaestro.ai/about/overview#key-concepts)
Key Concepts
---------------------------------------------------------------------------
| Concept | Description |
| --- | --- |
| **Agent** | A Maestro workspace tied to a project directory, backed by a provider (Claude Code, Codex, or OpenCode). Each agent has a Command Terminal and AI Terminal. |
| **Provider** | The underlying AI coding assistant (Claude Code, OpenAI Codex, or OpenCode) that powers an agent. |
| **Session / Tab** | A conversation with the AI provider. Sessions and tabs are 1:1 — each tab represents one session. Agents can have multiple tabs for parallel conversations. |
| **Group** | Organizational container for agents. Group by project, client, or workflow. |
| **Group Chat** | Multi-agent conversation coordinated by a moderator. Ask questions across multiple agents and get synthesized answers. |
| **Git Worktree** | An isolated working directory linked to a separate branch. Worktree sub-agents appear nested under their parent in the agent list and can create PRs. |
| **AI Terminal** | The conversation interface with your AI provider. Supports `@` file mentions, slash commands, and image attachments. |
| **Command Terminal** | A PTY shell for running commands directly. Tab completion for files, git branches, and command history. |
| **Session Explorer** | Browse all past sessions for an agent. Star, rename, search, and resume any previous conversation. |
| **Auto Run** | Automated task runner that processes markdown checklists. Spawns a fresh session per task. |
| **Playbook** | A saved collection of Auto Run documents with document order, options, and settings for repeatable workflows. |
| **History** | Timestamped log of all actions (user commands, AI responses, Auto Run completions) with session links. |
| **Remote Control** | Web interface for mobile access. Local network or remote via Cloudflare tunnel. |
| **CLI** | Headless command-line tool for scripting, automation, and CI/CD integration. |
| **Provider Pass-Through** | Maestro delegates all AI work to your installed provider (Claude Code, Codex, OpenCode). Your MCP tools, custom skills, permissions, and authentication all carry over—Maestro runs them in batch mode (prompt in, response out) rather than interactive mode. |
Was this page helpful?
YesNo
[Maestro](https://docs.runmaestro.ai/)
[Features](https://docs.runmaestro.ai/features)
⌘I
---
# Feedback - Maestro
[Skip to main content](https://docs.runmaestro.ai/feedback#content-area)
[Maestro home page](https://runmaestro.ai/)
Search...
⌘K
Search...
Navigation
General Usage
Feedback
On this page
* [Prerequisites](https://docs.runmaestro.ai/feedback#prerequisites)
* [Sending Feedback](https://docs.runmaestro.ai/feedback#sending-feedback)
* [1\. Open the Feedback Modal](https://docs.runmaestro.ai/feedback#1-open-the-feedback-modal)
* [2\. Choose an AI Agent](https://docs.runmaestro.ai/feedback#2-choose-an-ai-agent)
* [3\. Describe Your Issue](https://docs.runmaestro.ai/feedback#3-describe-your-issue)
* [4\. Review and Submit](https://docs.runmaestro.ai/feedback#4-review-and-submit)
* [Duplicate Detection](https://docs.runmaestro.ai/feedback#duplicate-detection)
* [After Submission](https://docs.runmaestro.ai/feedback#after-submission)
Maestro includes a built-in feedback system that uses AI to help you craft well-structured GitHub issues. Instead of filling out a form, you have a short conversation — the AI asks clarifying questions, checks for duplicates, and submits a polished issue on your behalf.
[](https://docs.runmaestro.ai/feedback#prerequisites)
Prerequisites
-----------------------------------------------------------------------
* [GitHub CLI](https://cli.github.com/)
(`gh`) must be installed
* You must be authenticated (`gh auth login`)
[](https://docs.runmaestro.ai/feedback#sending-feedback)
Sending Feedback
-----------------------------------------------------------------------------
###
[](https://docs.runmaestro.ai/feedback#1-open-the-feedback-modal)
1\. Open the Feedback Modal
Click the **Feedback** button in the bottom-left corner of the sidebar, next to **New Agent**.  You can also open it via **Quick Actions** (`Cmd+K` / `Ctrl+K`) → “Send Feedback”.
###
[](https://docs.runmaestro.ai/feedback#2-choose-an-ai-agent)
2\. Choose an AI Agent
Select which installed AI provider will conduct the feedback conversation. Maestro auto-detects available agents (Claude Code, Codex, OpenCode) and pre-selects the first one found. 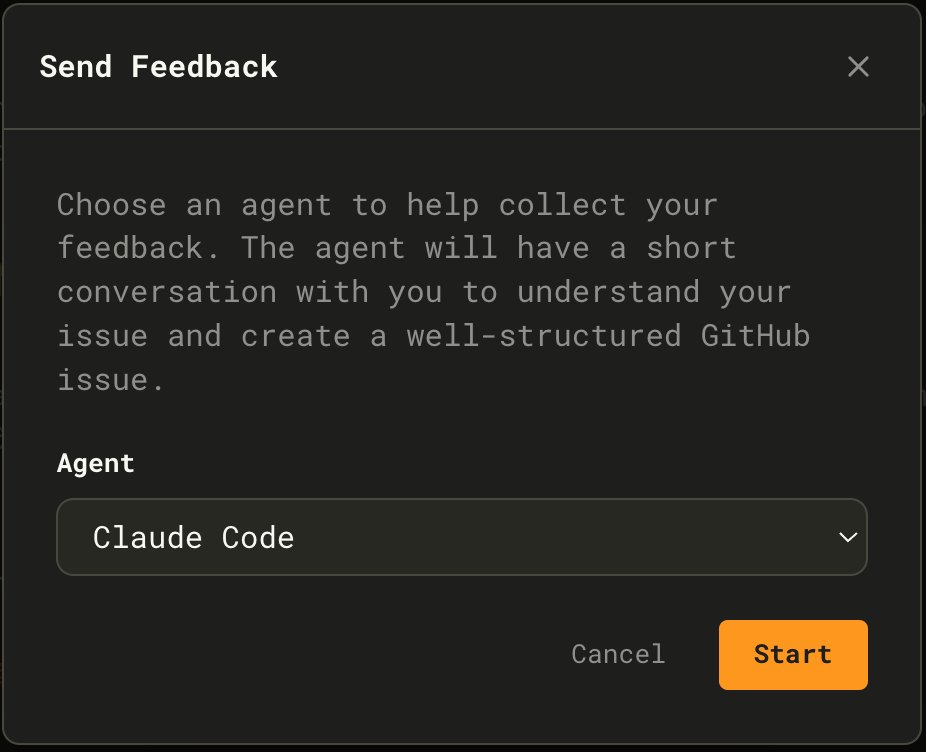 Click **Start** to begin.
###
[](https://docs.runmaestro.ai/feedback#3-describe-your-issue)
3\. Describe Your Issue
Tell the AI what’s on your mind — a bug you hit, a feature you want, or general feedback. The AI classifies your input and asks targeted follow-up questions:
* **Bug reports** — What happened? What was expected? Steps to reproduce?
* **Feature requests** — Use case? Desired outcome? Why it matters?
A confidence bar at the top tracks how well the AI understands your issue. As you answer questions, it fills toward 100%. 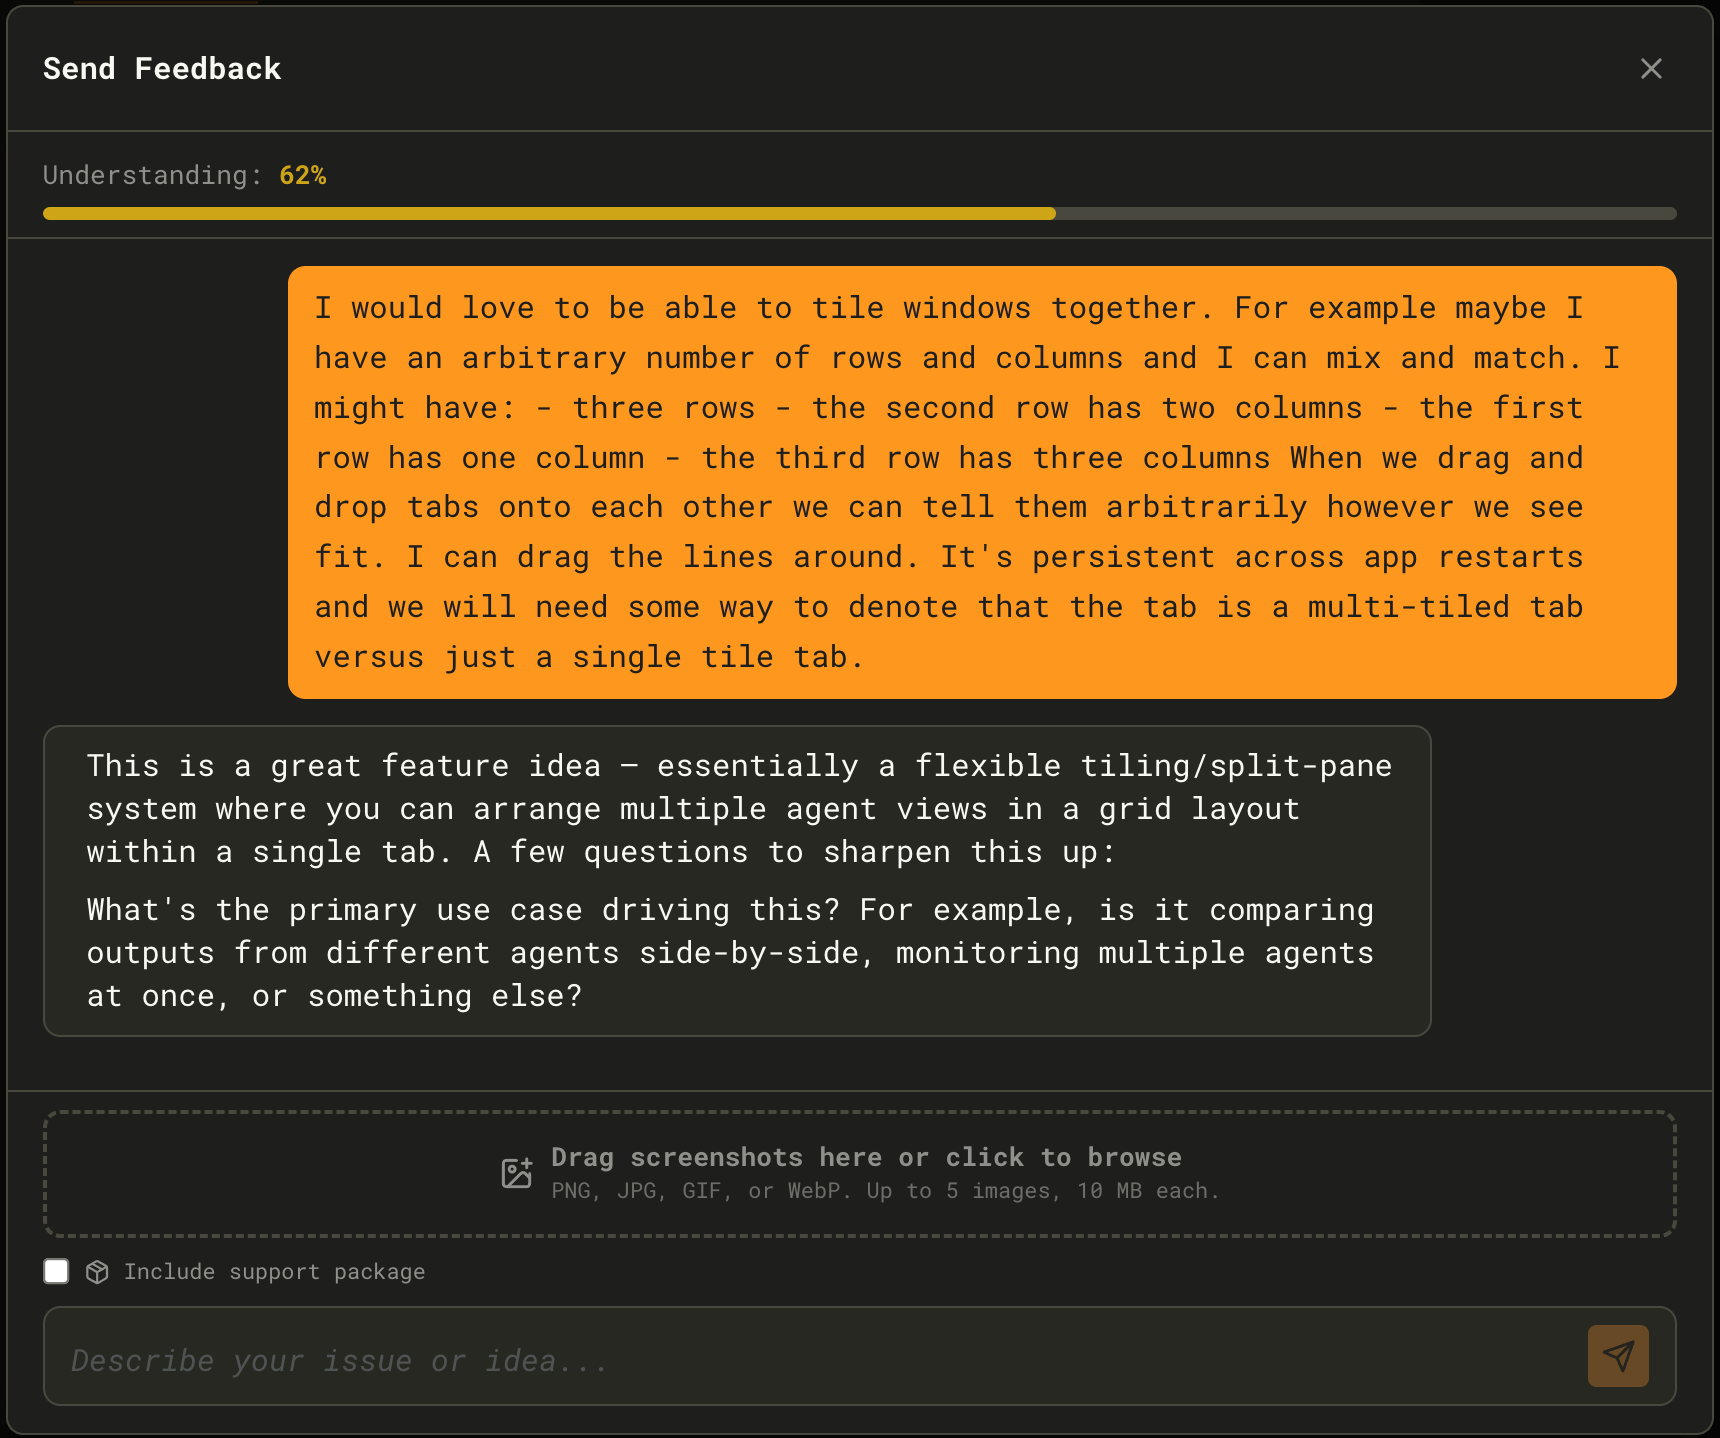 **Optional attachments:**
* Drag and drop up to 5 screenshots (PNG, JPG, GIF, or WebP — 10 MB each)
* Check **Include support package** to attach debug information
###
[](https://docs.runmaestro.ai/feedback#4-review-and-submit)
4\. Review and Submit
Once understanding reaches **80%**, a green **Submit Feedback** button appears. The AI presents a structured summary of what it will submit. Review the summary, tweak anything by continuing the conversation, then click **Submit**. 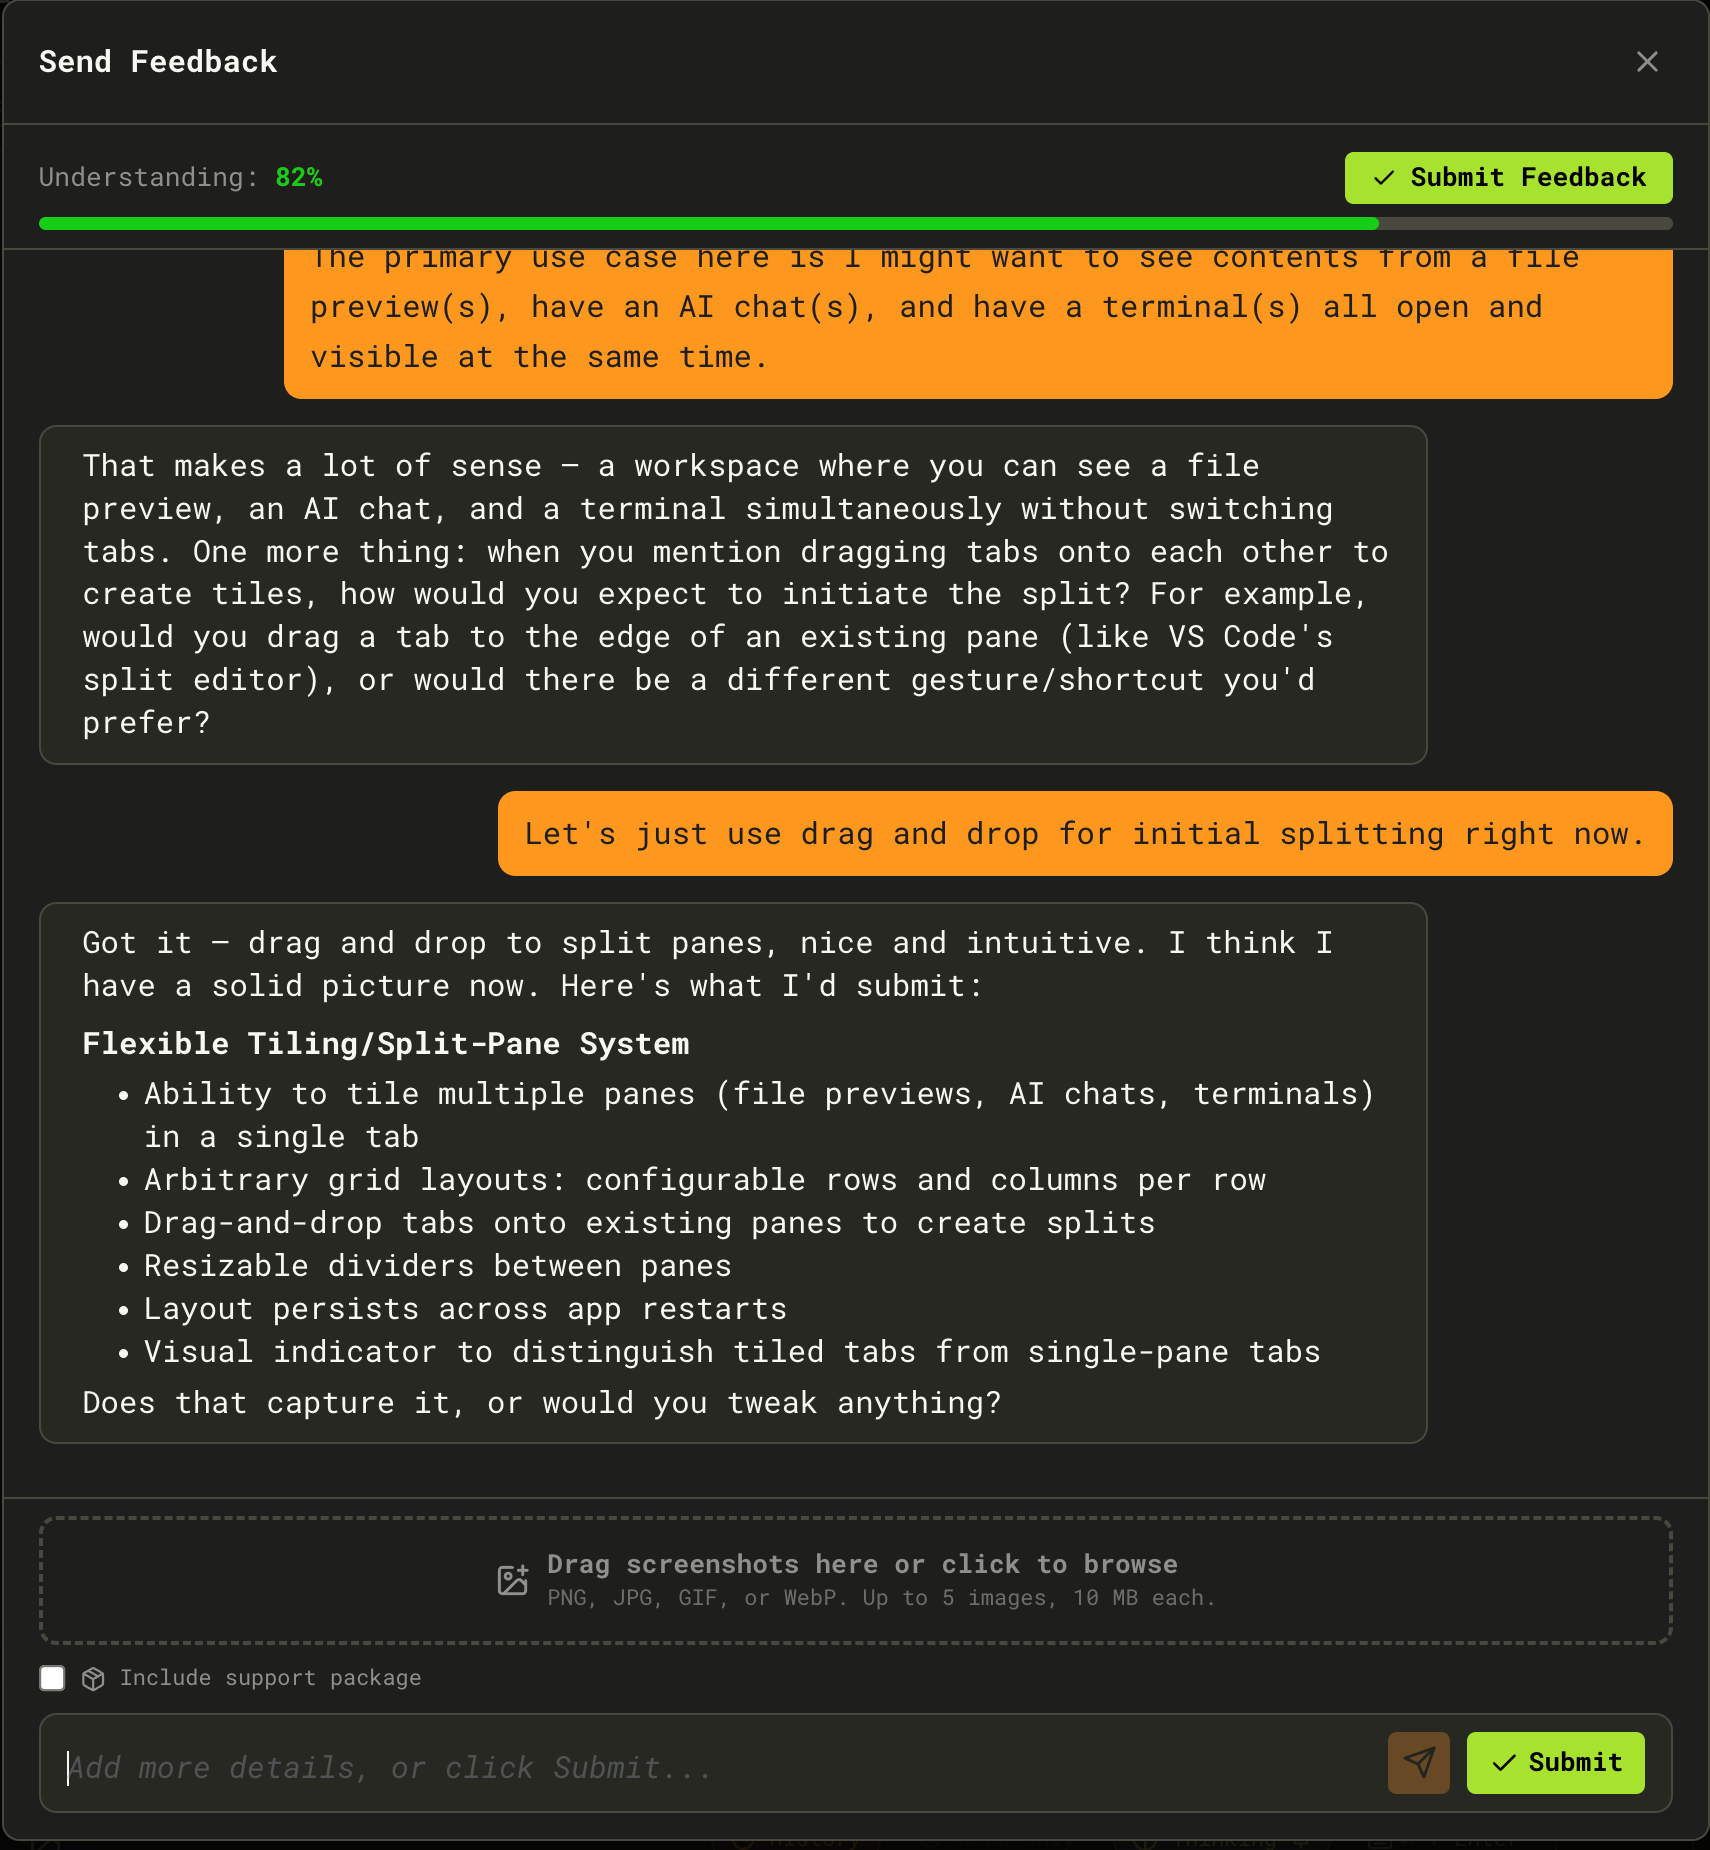
###
[](https://docs.runmaestro.ai/feedback#duplicate-detection)
Duplicate Detection
As you describe your issue, Maestro searches existing GitHub issues in the background. If similar issues are found, an inline card appears listing them. You can:
* **Subscribe to an existing issue** — Your context is added as a comment with a +1 reaction
* **Create a new issue anyway** — Bypasses the match and files a fresh issue
This prevents duplicate reports while still capturing your unique context.
###
[](https://docs.runmaestro.ai/feedback#after-submission)
After Submission
Once submitted, you’ll see a confirmation with:
* A direct link to the new GitHub issue
* A copy-to-clipboard button for the issue URL
* An option to open the issue in your browser
Was this page helpful?
YesNo
[SSH Remote Execution](https://docs.runmaestro.ai/ssh-remote-execution)
[Configuration](https://docs.runmaestro.ai/configuration)
⌘I
---
# Document Graph - Maestro
[Skip to main content](https://docs.runmaestro.ai/document-graph#content-area)
[Maestro home page](https://runmaestro.ai/)
Search...
⌘K
Search...
Navigation
General Usage
Document Graph
On this page
* [Opening the Document Graph](https://docs.runmaestro.ai/document-graph#opening-the-document-graph)
* [From File Preview](https://docs.runmaestro.ai/document-graph#from-file-preview)
* [From Quick Actions](https://docs.runmaestro.ai/document-graph#from-quick-actions)
* [From the File Explorer](https://docs.runmaestro.ai/document-graph#from-the-file-explorer)
* [From File Context Menu](https://docs.runmaestro.ai/document-graph#from-file-context-menu)
* [Using Go to File](https://docs.runmaestro.ai/document-graph#using-go-to-file)
* [Navigating the Graph](https://docs.runmaestro.ai/document-graph#navigating-the-graph)
* [Mouse Controls](https://docs.runmaestro.ai/document-graph#mouse-controls)
* [Graph Controls](https://docs.runmaestro.ai/document-graph#graph-controls)
* [Depth Control](https://docs.runmaestro.ai/document-graph#depth-control)
* [External Links](https://docs.runmaestro.ai/document-graph#external-links)
* [Search](https://docs.runmaestro.ai/document-graph#search)
* [Understanding the Graph](https://docs.runmaestro.ai/document-graph#understanding-the-graph)
* [Node Types](https://docs.runmaestro.ai/document-graph#node-types)
* [Edge Types](https://docs.runmaestro.ai/document-graph#edge-types)
* [Node Information](https://docs.runmaestro.ai/document-graph#node-information)
* [Tips for Effective Use](https://docs.runmaestro.ai/document-graph#tips-for-effective-use)
* [Workflow Integration](https://docs.runmaestro.ai/document-graph#workflow-integration)
* [Large Documentation Sets](https://docs.runmaestro.ai/document-graph#large-documentation-sets)
* [Understanding Documentation Structure](https://docs.runmaestro.ai/document-graph#understanding-documentation-structure)
* [Keyboard Shortcut Summary](https://docs.runmaestro.ai/document-graph#keyboard-shortcut-summary)
The Document Graph provides an interactive visualization of your markdown files and their connections. See how documents link to each other through wiki-links (`[[link]]`) and standard markdown links, making it easy to understand your documentation structure at a glance. 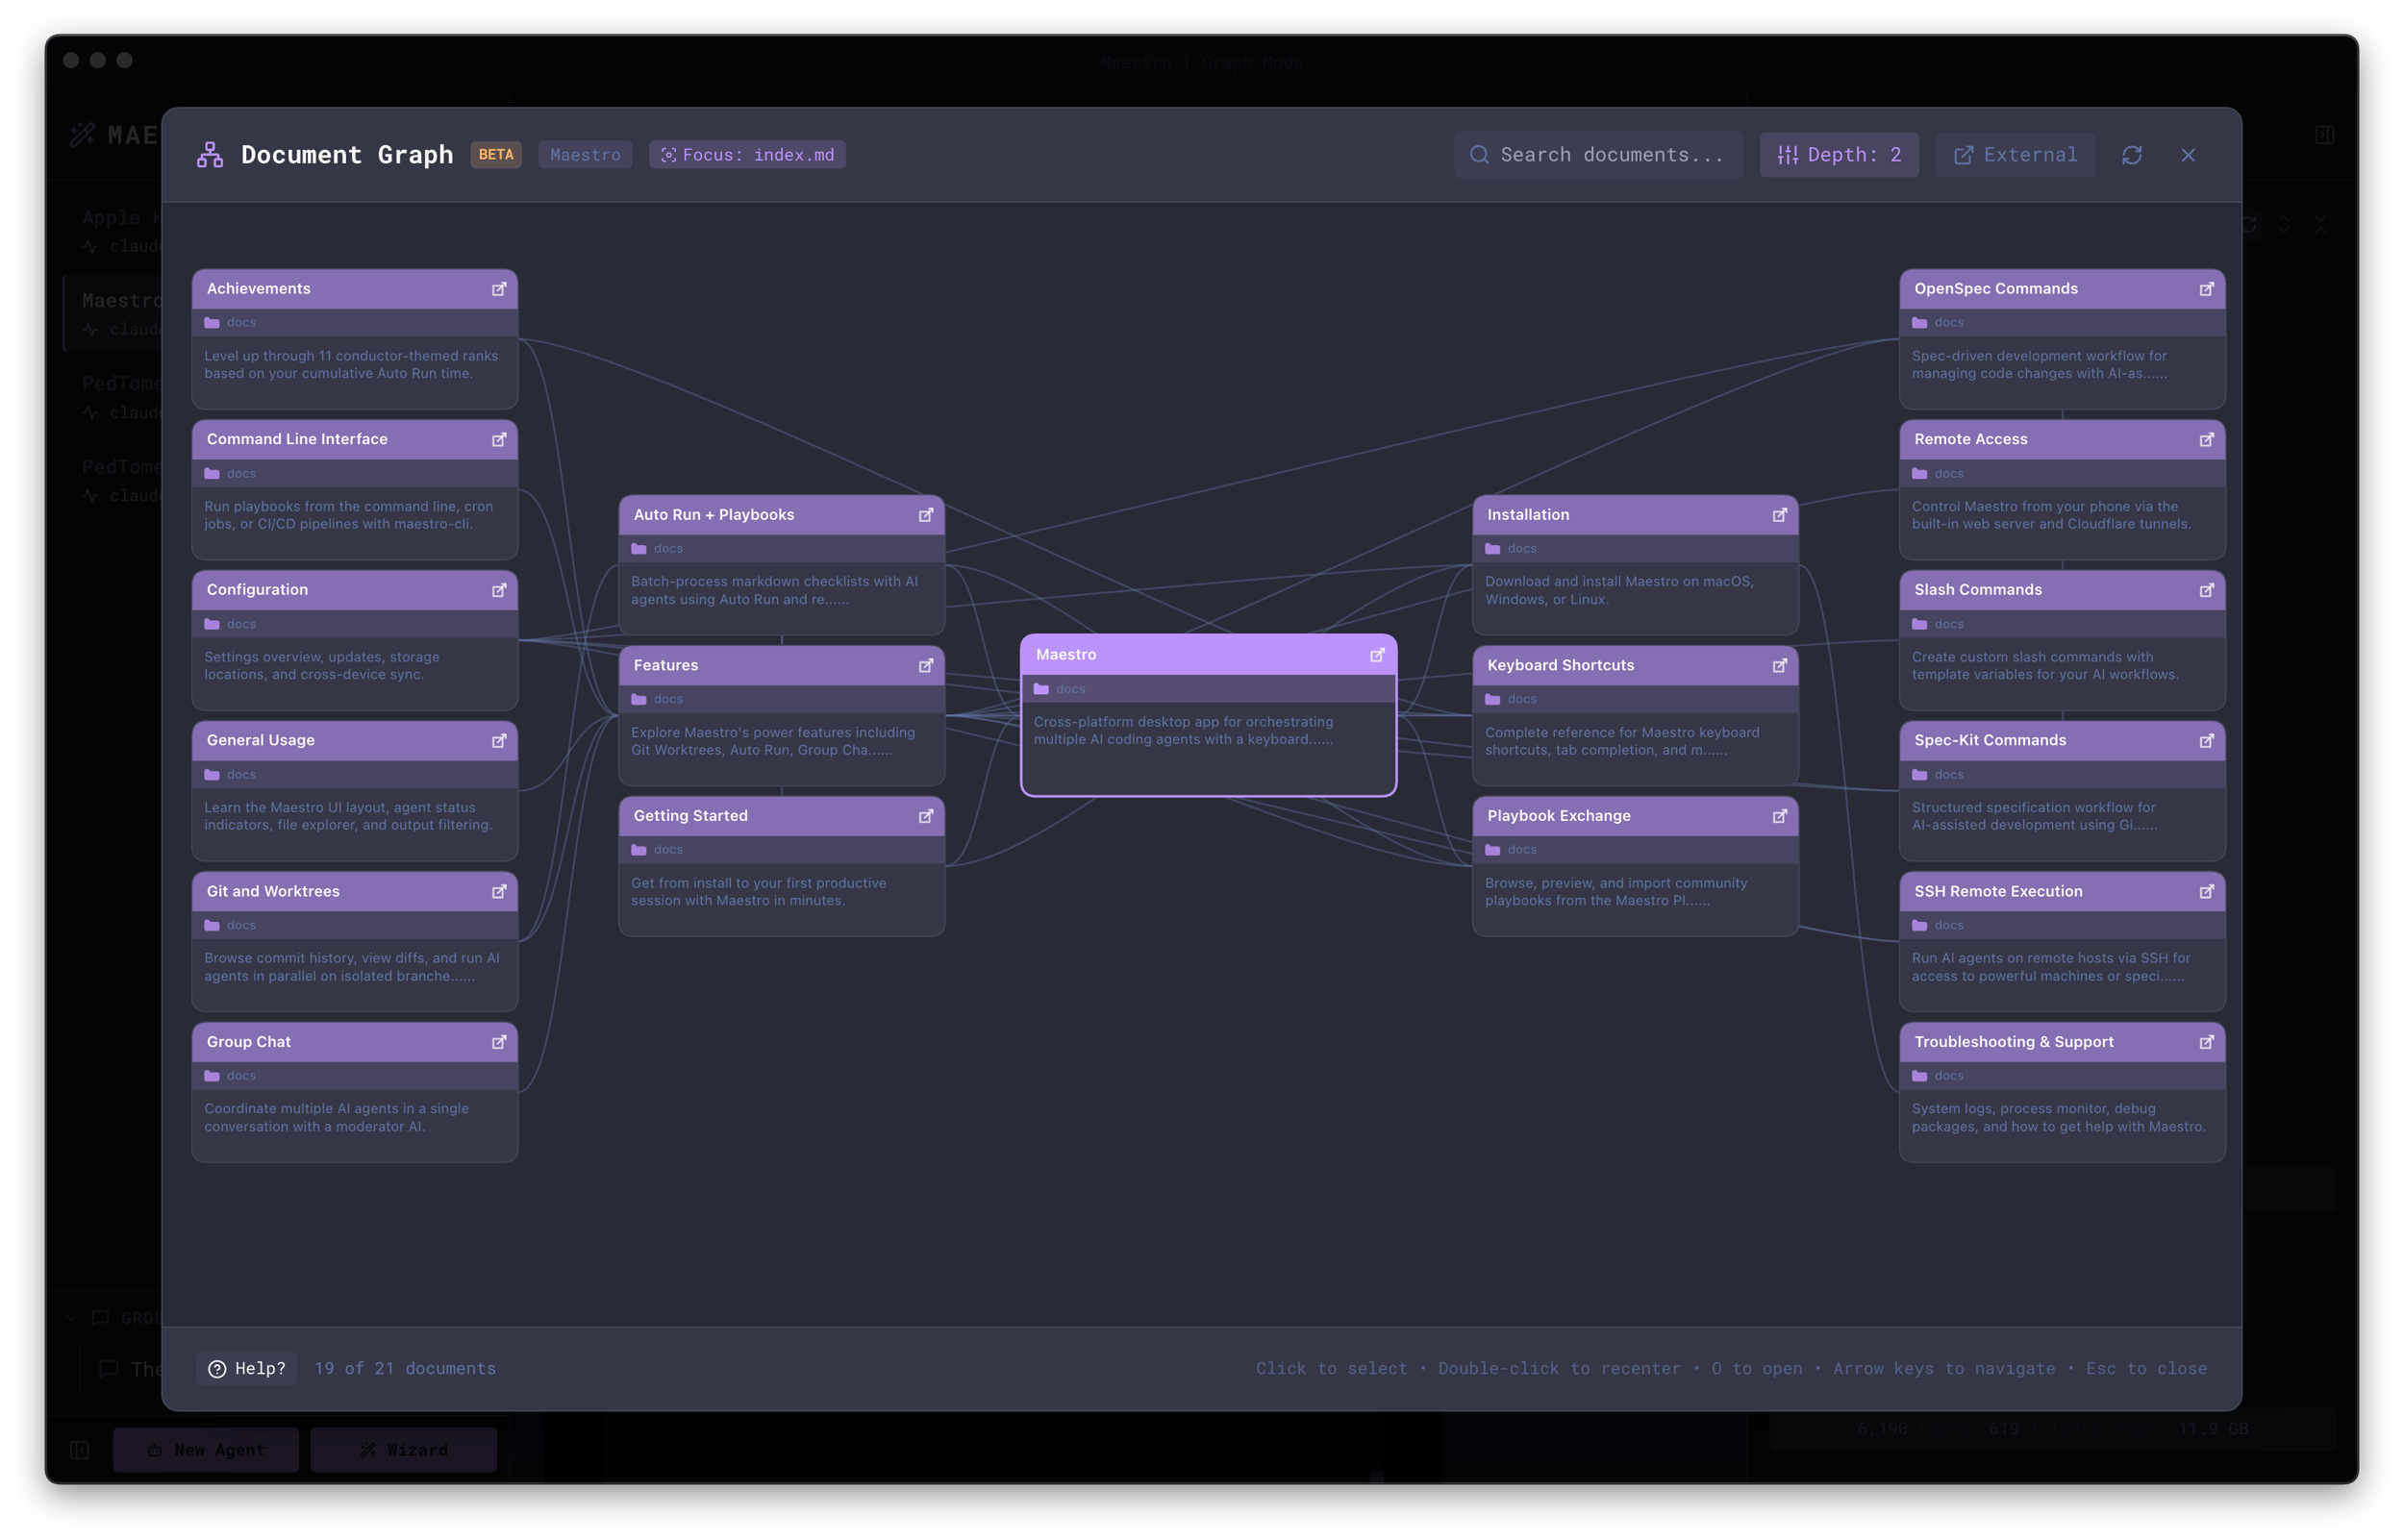
[](https://docs.runmaestro.ai/document-graph#opening-the-document-graph)
Opening the Document Graph
-------------------------------------------------------------------------------------------------------
There are several ways to access the Document Graph:
###
[](https://docs.runmaestro.ai/document-graph#from-file-preview)
From File Preview
When viewing a markdown file in File Preview, press `Cmd+Shift+G` / `Ctrl+Shift+G` to open the Document Graph focused on that file. Press `Esc` to return to the File Preview. This is the primary way to open the Document Graph.
###
[](https://docs.runmaestro.ai/document-graph#from-quick-actions)
From Quick Actions
Press `Cmd+K` / `Ctrl+K` and search for “Open Last Document Graph” to re-open the most recently viewed graph.
The “Open Last Document Graph” option only appears after you’ve opened a Document Graph at least once during your session.
###
[](https://docs.runmaestro.ai/document-graph#from-the-file-explorer)
From the File Explorer
After you’ve opened a Document Graph at least once, a **graph icon** (branch icon) appears in the Files tab header. Click it to re-open the last viewed graph. 
###
[](https://docs.runmaestro.ai/document-graph#from-file-context-menu)
From File Context Menu
Right-click any markdown file in the File Explorer and select **Document Graph** to open the graph focused on that file.
###
[](https://docs.runmaestro.ai/document-graph#using-go-to-file)
Using Go to File
Press `Cmd+G` / `Ctrl+G` to open the fuzzy file finder, navigate to any markdown file, then use `Cmd+Shift+G` to jump to the Document Graph from there.
[](https://docs.runmaestro.ai/document-graph#navigating-the-graph)
Navigating the Graph
-------------------------------------------------------------------------------------------
The Document Graph is designed for keyboard-first navigation:
| Action | Key |
| --- | --- |
| Navigate between nodes | `Arrow Keys` (spatial detection) |
| Recenter view on node | `Enter` (for document nodes) |
| Open external URL | `Enter` (for external link nodes) |
| Open document in File Preview | `O` |
| Focus search | `Cmd/Ctrl+F` |
| Close graph or help panel | `Esc` |
###
[](https://docs.runmaestro.ai/document-graph#mouse-controls)
Mouse Controls
* **Click** a node to select it
* **Double-click** a node to recenter the view on it
* **Drag** nodes to reposition them
* **Scroll** to zoom in and out
* **Pan** by dragging the background
[](https://docs.runmaestro.ai/document-graph#graph-controls)
Graph Controls
-------------------------------------------------------------------------------
The toolbar at the top of the Document Graph provides several options:
###
[](https://docs.runmaestro.ai/document-graph#depth-control)
Depth Control
Adjust the **Depth** slider to control how many levels of connections are shown from the focused document:
* **Depth: 0 (All)** — Show all connected documents regardless of distance
* **Depth: 1** — Show only direct connections
* **Depth: 2** — Show connections and their connections (default)
* **Depth: 3-5** — Show deeper relationship chains
Lower depth values keep the graph focused and improve performance; higher values reveal more of the document ecosystem. The depth can be adjusted from 0 (All) to 5.
###
[](https://docs.runmaestro.ai/document-graph#external-links)
External Links
Toggle **External** to show or hide external URL links found in your documents:
* **Enabled** — External links appear as separate domain nodes (e.g., “github.com”, “docs.example.com”)
* **Disabled** — Only internal document relationships are shown
External link nodes help you see which external resources your documentation references.
###
[](https://docs.runmaestro.ai/document-graph#search)
Search
Use the search box to filter documents by name. Matching documents are highlighted in the graph.
[](https://docs.runmaestro.ai/document-graph#understanding-the-graph)
Understanding the Graph
-------------------------------------------------------------------------------------------------
###
[](https://docs.runmaestro.ai/document-graph#node-types)
Node Types
* **Document nodes** — Your markdown files, showing the filename and a preview of content
* **External link nodes** — Domains of external URLs referenced in your documents
* **Focused node** — The currently selected document (highlighted with a different border)
###
[](https://docs.runmaestro.ai/document-graph#edge-types)
Edge Types
Lines between nodes represent different types of connections:
* **Wiki-links** — `[[document-name]]` style links
* **Markdown links** — `[text](path/to/file.md)` style links
* **External links** — Links to URLs outside your project
###
[](https://docs.runmaestro.ai/document-graph#node-information)
Node Information
Each document node displays:
* **Filename** — The document name
* **Folder indicator** — Shows the parent directory (e.g., “docs”)
* **Content preview** — A snippet of the document’s content
[](https://docs.runmaestro.ai/document-graph#tips-for-effective-use)
Tips for Effective Use
-----------------------------------------------------------------------------------------------
###
[](https://docs.runmaestro.ai/document-graph#workflow-integration)
Workflow Integration
1. Use `Cmd+G` to quickly find a file
2. Open it in File Preview to read or edit
3. Press `Cmd+Shift+G` to see its connections in the Document Graph
4. Press `O` to open a connected document
5. Press `Esc` to return to File Preview
###
[](https://docs.runmaestro.ai/document-graph#large-documentation-sets)
Large Documentation Sets
For projects with many markdown files:
* Start with **Depth: 1** to see immediate connections
* Increase depth gradually to explore relationships
* Use **Search** to find specific documents quickly
* Drag nodes to organize the view — positions persist
###
[](https://docs.runmaestro.ai/document-graph#understanding-documentation-structure)
Understanding Documentation Structure
The Document Graph is especially useful for:
* **Auditing links** — Find orphaned documents with no incoming links
* **Understanding navigation** — See how documents connect for readers
* **Planning restructuring** — Visualize the impact of moving or renaming files
* **Onboarding** — Help new team members understand documentation architecture
[](https://docs.runmaestro.ai/document-graph#keyboard-shortcut-summary)
Keyboard Shortcut Summary
-----------------------------------------------------------------------------------------------------
| Action | macOS | Windows/Linux |
| --- | --- | --- |
| Open from File Preview | `Cmd+Shift+G` | `Ctrl+Shift+G` |
| Re-open last graph | Via `Cmd+K` menu | Via `Ctrl+K` menu |
| Go to File (fuzzy finder) | `Cmd+G` | `Ctrl+G` |
| Navigate nodes | `Arrow Keys` | `Arrow Keys` |
| Recenter on node | `Enter` | `Enter` |
| Open document in preview | `O` | `O` |
| Focus search | `Cmd+F` | `Ctrl+F` |
| Close graph | `Esc` | `Esc` |
Was this page helpful?
YesNo
[Context Management](https://docs.runmaestro.ai/context-management)
[Git and Worktrees](https://docs.runmaestro.ai/git-worktrees)
⌘I
---
# Group Chat - Maestro
[Skip to main content](https://docs.runmaestro.ai/group-chat#content-area)
[Maestro home page](https://runmaestro.ai/)
Search...
⌘K
Search...
Navigation
General Usage
Group Chat
On this page
* [When to Use Group Chat](https://docs.runmaestro.ai/group-chat#when-to-use-group-chat)
* [How It Works](https://docs.runmaestro.ai/group-chat#how-it-works)
* [The Moderator’s Role](https://docs.runmaestro.ai/group-chat#the-moderator%E2%80%99s-role)
* [Example Conversation](https://docs.runmaestro.ai/group-chat#example-conversation)
* [Remote Agents in Group Chat](https://docs.runmaestro.ai/group-chat#remote-agents-in-group-chat)
* [Tips for Effective Group Chats](https://docs.runmaestro.ai/group-chat#tips-for-effective-group-chats)
* [Managing Group Chats](https://docs.runmaestro.ai/group-chat#managing-group-chats)
* [Input Features](https://docs.runmaestro.ai/group-chat#input-features)
Group Chat is currently in **Beta**. The feature is functional but under active development.
Group Chat lets you coordinate multiple AI agents in a single conversation. A moderator AI orchestrates the discussion, routing questions to the right agents and synthesizing their responses. 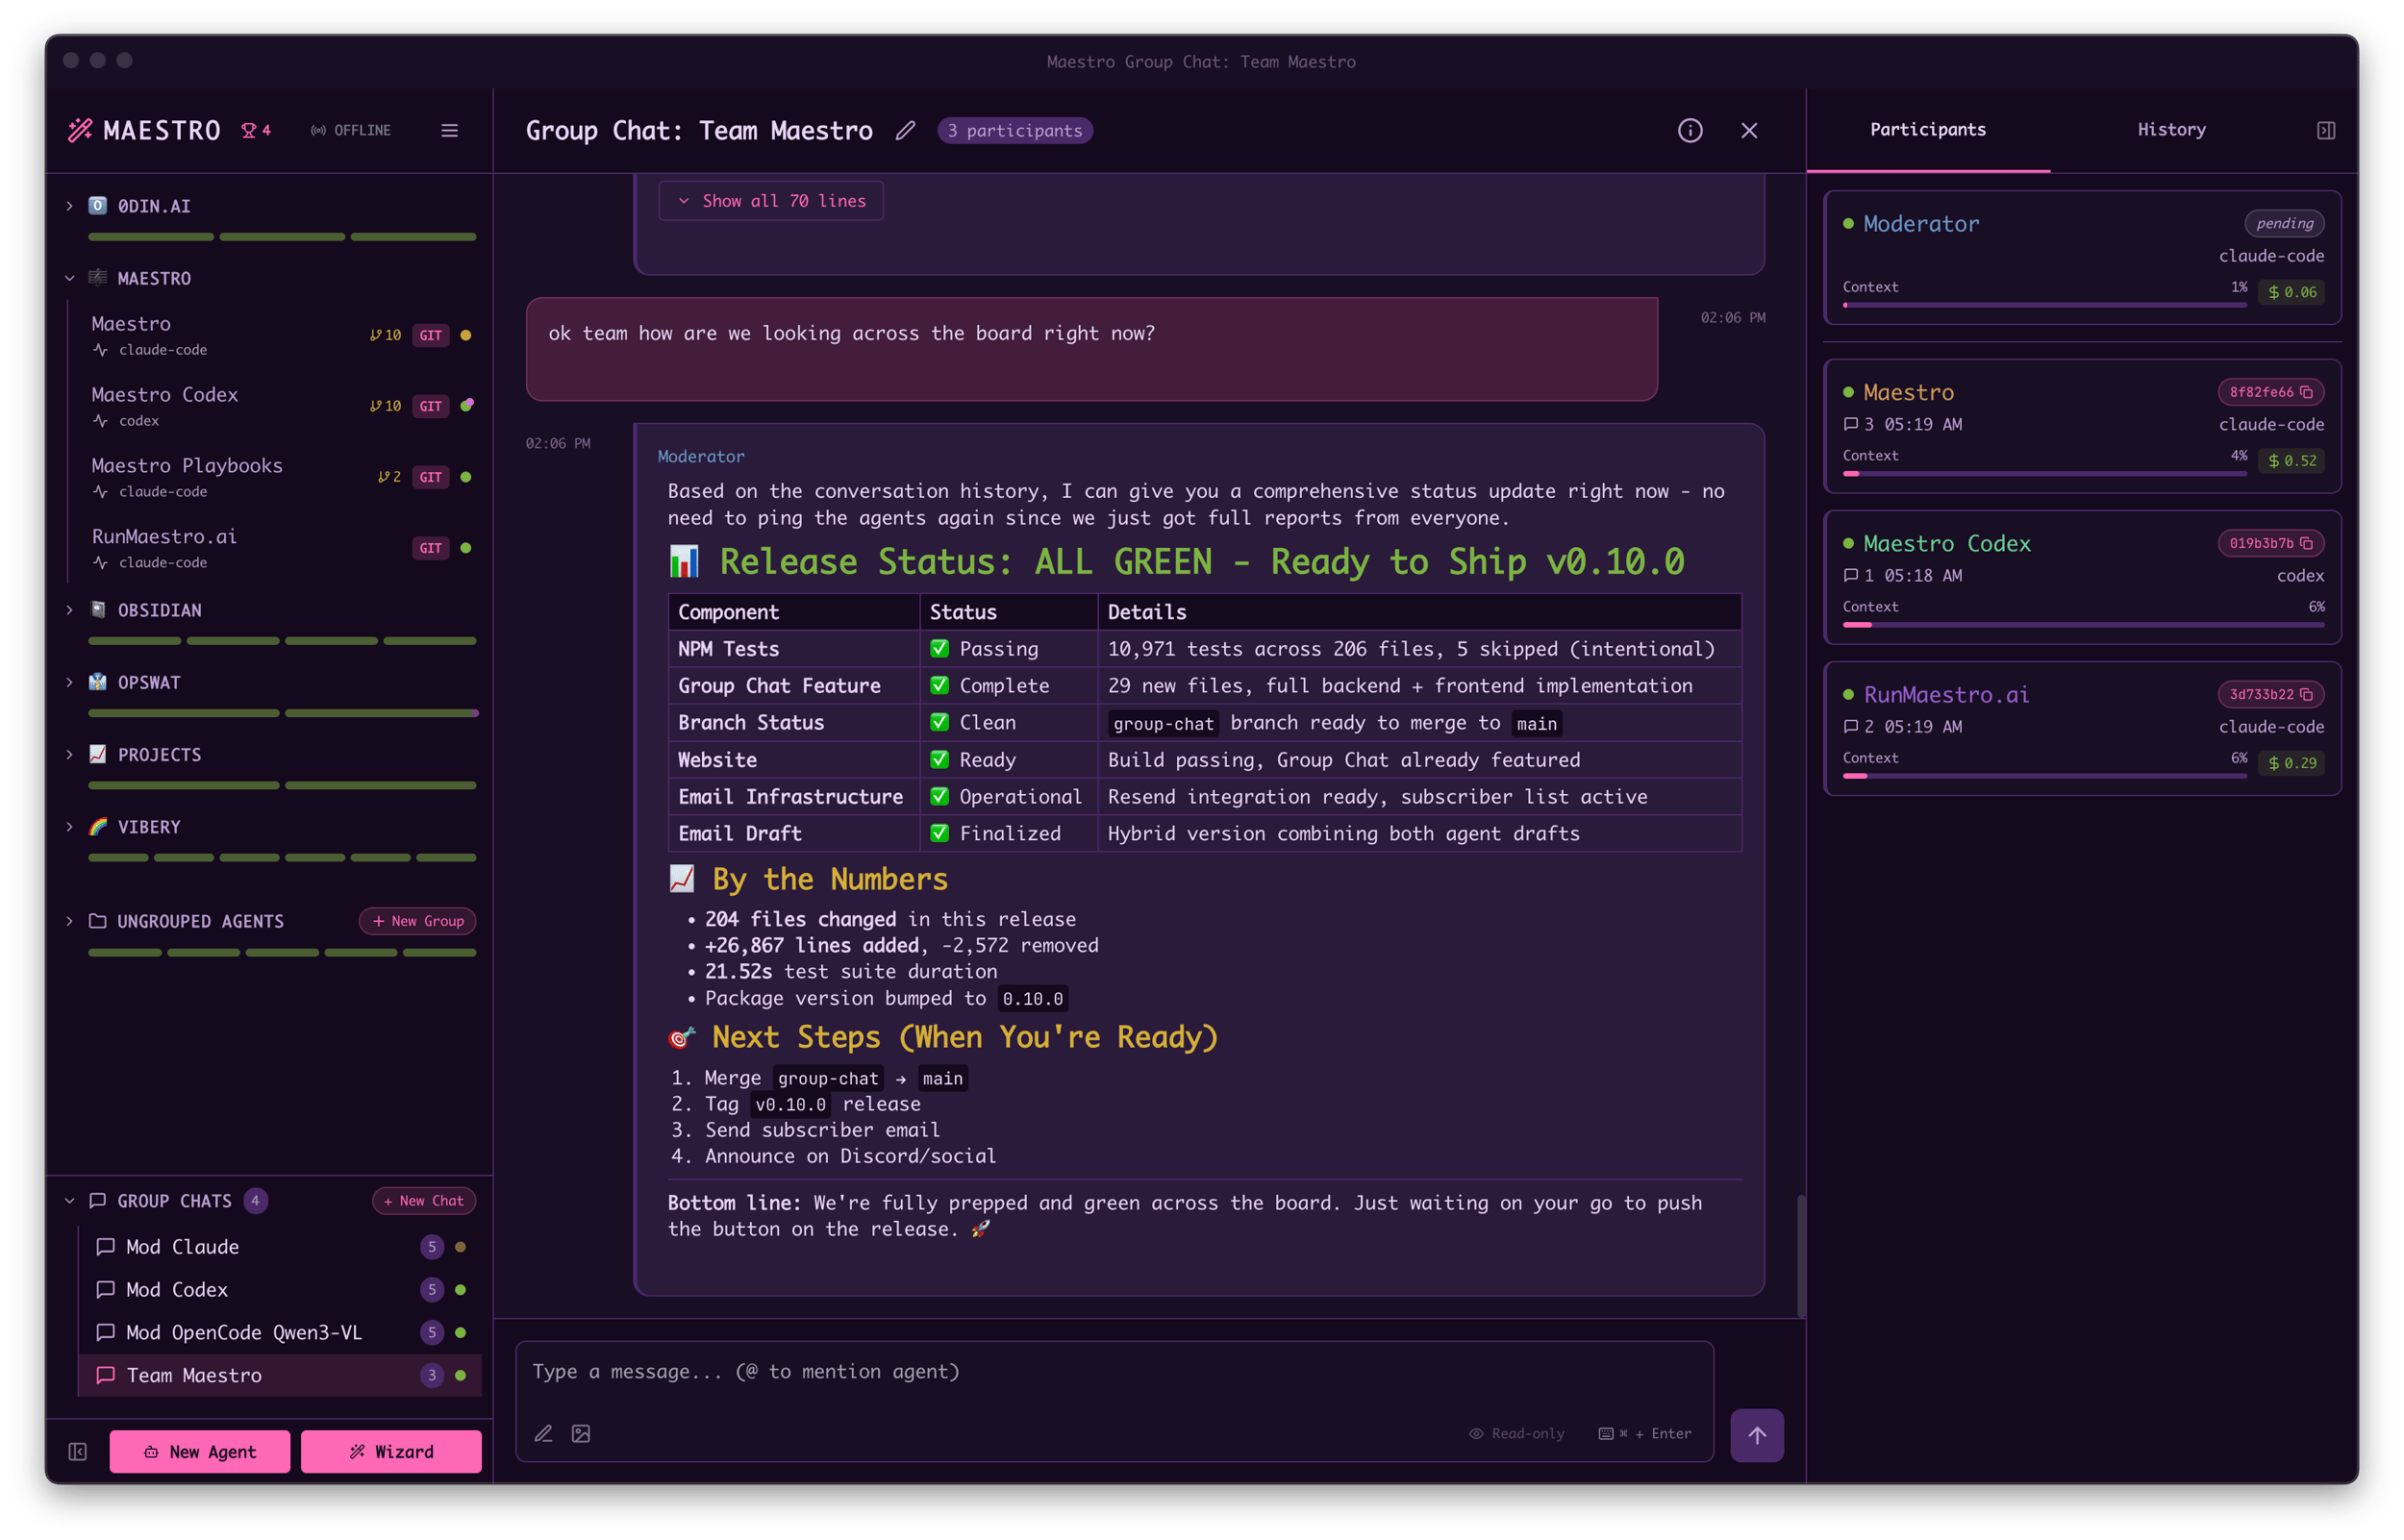
[](https://docs.runmaestro.ai/group-chat#when-to-use-group-chat)
When to Use Group Chat
-------------------------------------------------------------------------------------------
* **Cross-project questions**: “How does the frontend authentication relate to the backend API?”
* **Architecture discussions**: Get perspectives from agents with different codebase contexts
* **Comparative analysis**: “Compare the testing approach in these three repositories”
* **Knowledge synthesis**: Combine expertise from specialized agents
* **Cross-machine collaboration**: Coordinate agents running on different machines via [SSH Remote Execution](https://docs.runmaestro.ai/ssh-remote-execution)
[](https://docs.runmaestro.ai/group-chat#how-it-works)
How It Works
-----------------------------------------------------------------------
1. **Create a Group Chat** — Use keyboard shortcut `Opt+Cmd+C` / `Alt+Ctrl+C`, click ”+ New Chat” in the Group Chats section of the sidebar, or use Quick Actions (`Cmd+K` / `Ctrl+K`)
2. **Select a moderator** — Choose which AI agent (Claude Code, OpenCode, or Codex) will coordinate the conversation
3. **@mention agents** — In your message, @mention any Maestro session (e.g., `@Frontend`, `@Backend`). Agents are automatically added as participants when mentioned.
4. **Send your question** — The moderator receives it first and decides how to proceed
5. **Moderator coordinates** — Routes to relevant agents via @mentions, can make multiple rounds
6. **Agents respond** — Each agent works in their own project context
7. **Moderator synthesizes** — Combines responses into a coherent answer
Agents are automatically added as participants when you or the moderator @mention them. You don’t need to pre-configure participants — just @mention any active Maestro session by name.
[](https://docs.runmaestro.ai/group-chat#the-moderator%E2%80%99s-role)
The Moderator’s Role
-----------------------------------------------------------------------------------------------
The moderator is an AI that controls the conversation flow:
* **Direct answers**: For simple questions, the moderator responds directly
* **Delegation**: For complex questions, @mentions the appropriate agents
* **Follow-up**: If agent responses are incomplete, keeps asking until satisfied
* **Synthesis**: Combines multiple agent perspectives into a final answer
The moderator won’t return to you until your question is properly answered — it will keep going back to agents as many times as needed.
[](https://docs.runmaestro.ai/group-chat#example-conversation)
Example Conversation
---------------------------------------------------------------------------------------
You: "How does @Maestro relate to @RunMaestro.ai?"
Moderator: "Let me gather information from both projects.
@Maestro @RunMaestro.ai - please explain your role in the ecosystem."
[Agents work in parallel...]
Maestro: "I'm the core Electron desktop app for AI orchestration..."
RunMaestro.ai: "I'm the marketing website and leaderboard..."
Moderator: "Here's how they relate:
- Maestro is the desktop app (the product)
- RunMaestro.ai is the website (discovery and community)
- They share theme definitions for visual consistency
Next steps: Would you like details on any specific integration?"
[](https://docs.runmaestro.ai/group-chat#remote-agents-in-group-chat)
Remote Agents in Group Chat
-----------------------------------------------------------------------------------------------------
Group Chat works seamlessly with [SSH Remote Execution](https://docs.runmaestro.ai/ssh-remote-execution)
. You can mix local and remote agents in the same conversation: 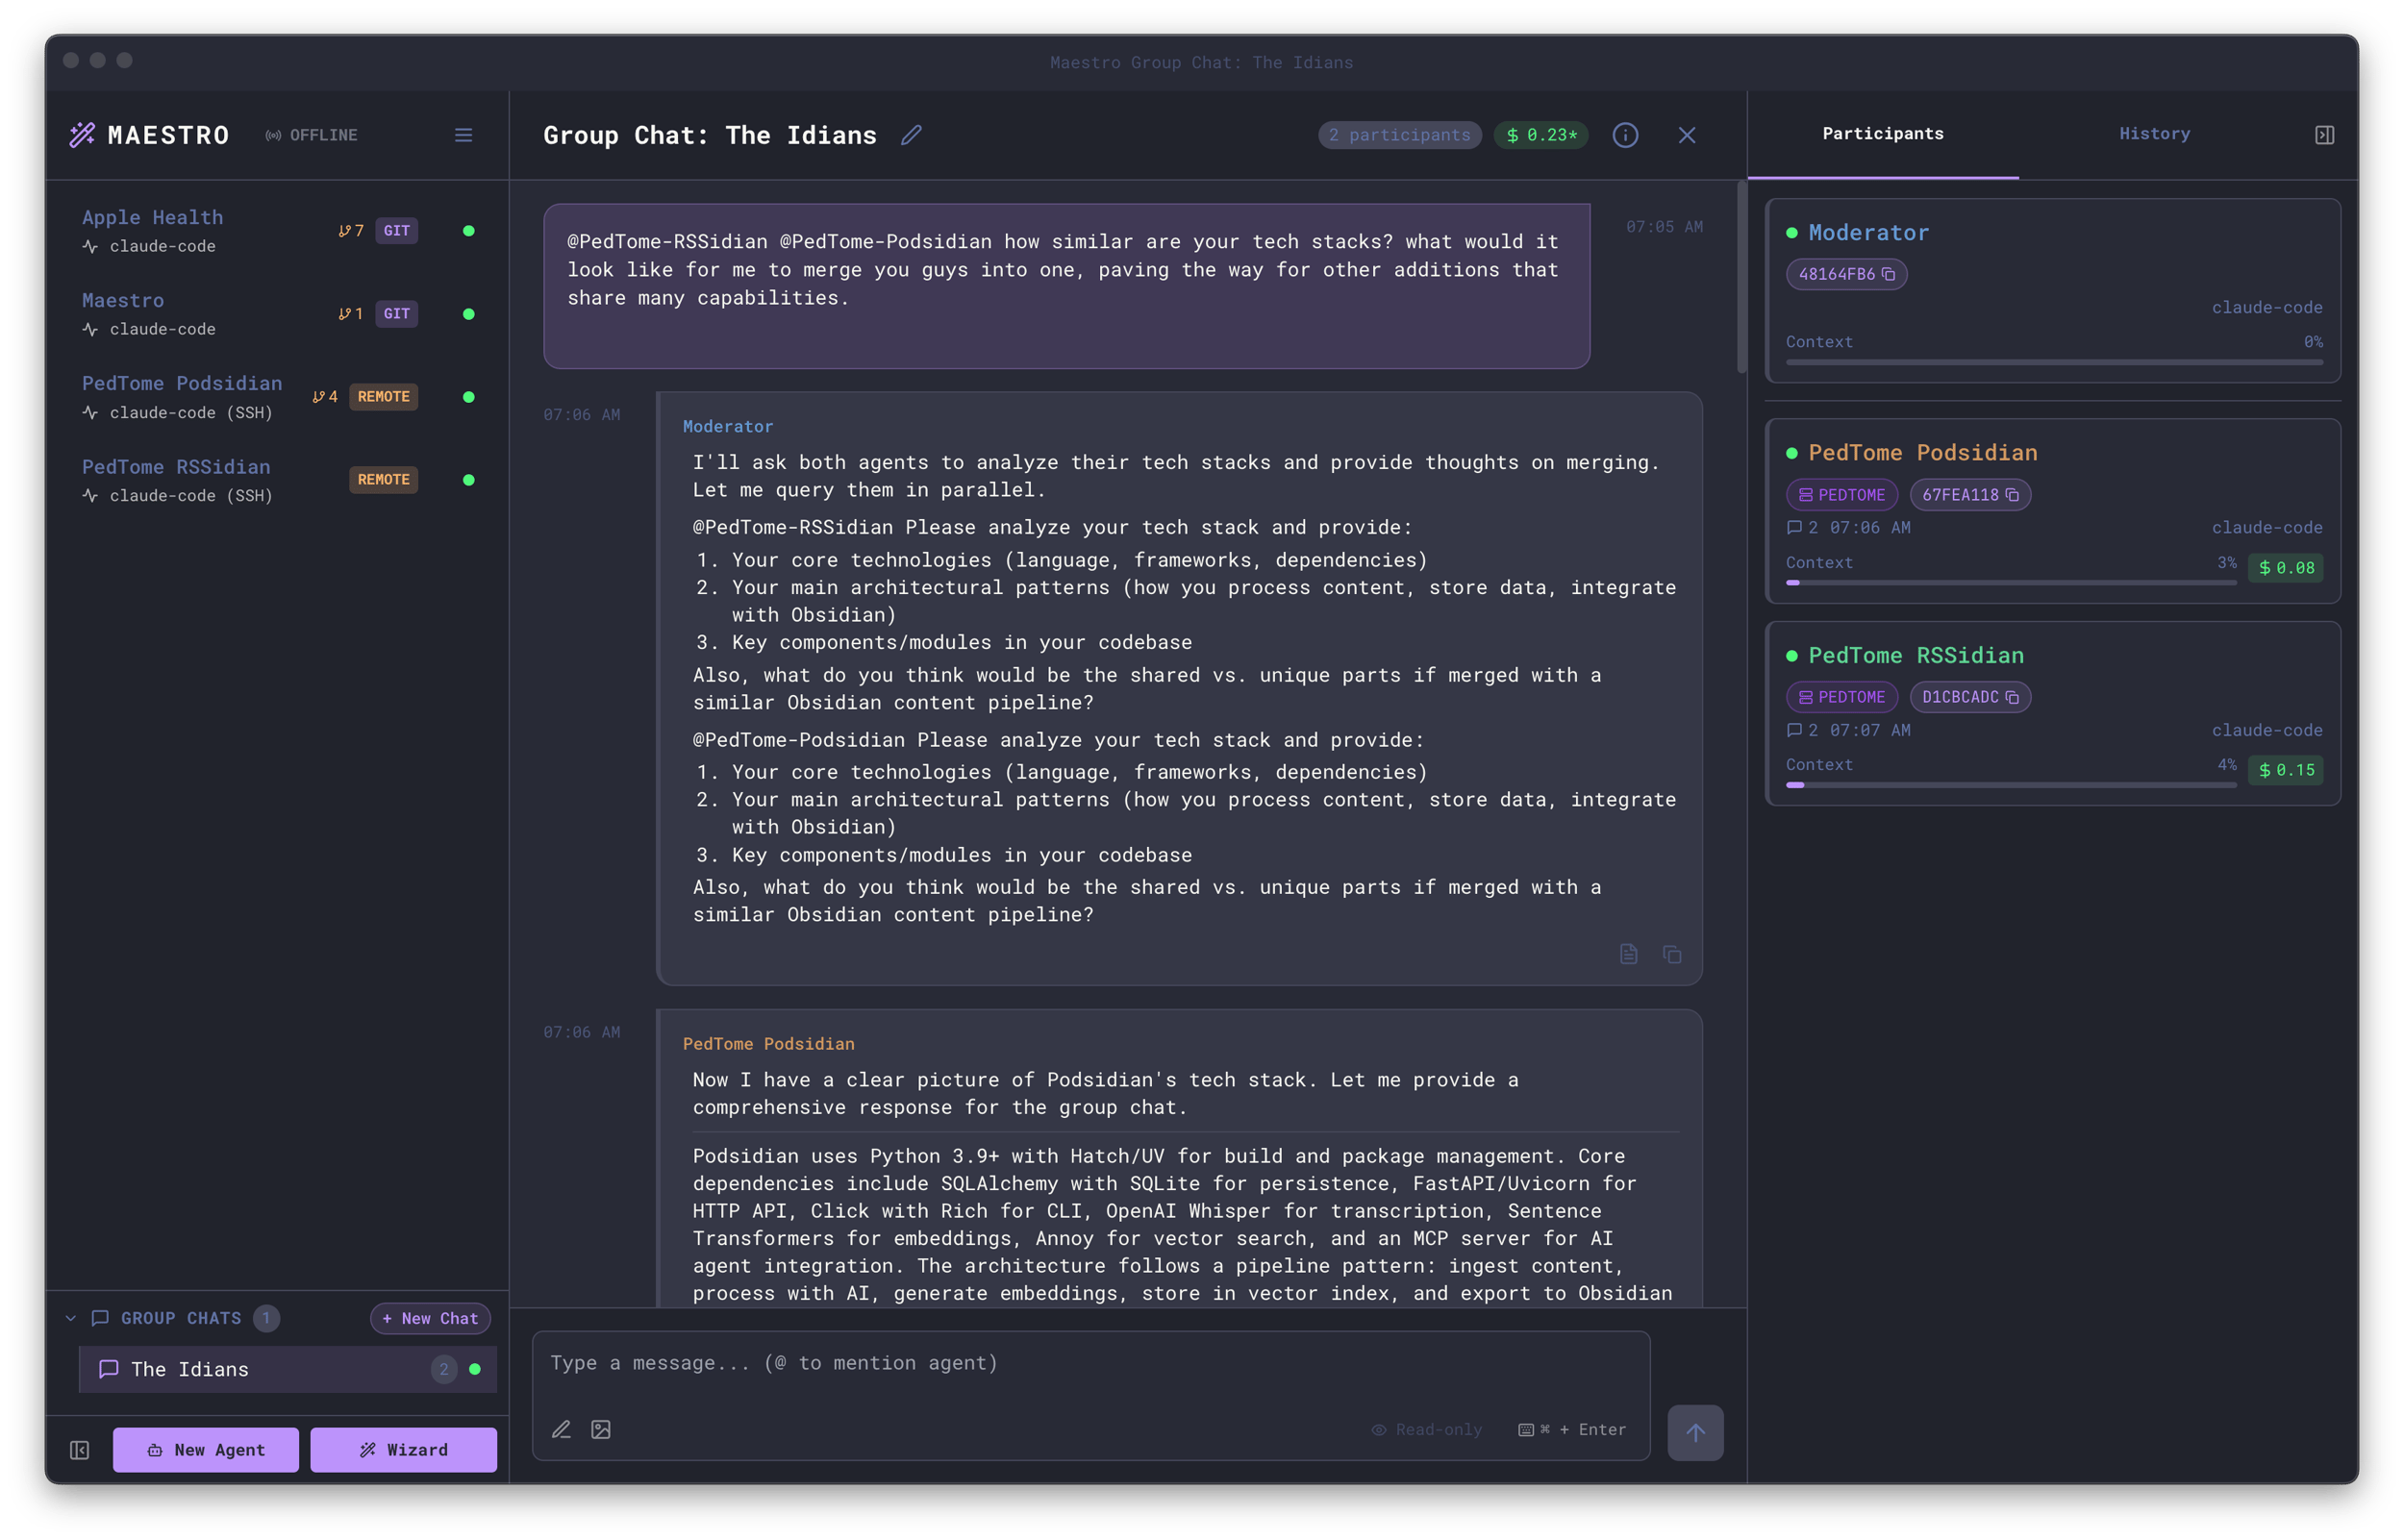 **Supported configurations:**
* Local moderator with remote participants
* Remote moderator with local participants
* Any mix of local and remote agents
* Agents spread across multiple SSH hosts
Remote agents are identified by the **REMOTE** pill in the participant list. Each agent works in their own environment — the moderator coordinates across machines transparently. **Use cases for remote Group Chat:**
* Compare implementations across development and production environments
* Get perspectives from agents with access to different servers
* Coordinate changes that span multiple machines
* Synthesize information from agents with different tool installations
[](https://docs.runmaestro.ai/group-chat#tips-for-effective-group-chats)
Tips for Effective Group Chats
-----------------------------------------------------------------------------------------------------------
* **Name agents descriptively** — Agent names appear in the chat, so “Frontend-React” is clearer than “Agent1”
* **Be specific in questions** — The more context you provide, the better the moderator can route
* **@mention explicitly** — You can direct questions to specific agents: “What does @Backend think?”
* **Let the moderator work** — It may take multiple rounds for complex questions
* **Mix local and remote** — Combine agents across machines for maximum coverage
* **Hyphenated names for spaces** — If your session name has spaces, use hyphens in @mentions (e.g., `@My-Project` for “My Project”)
[](https://docs.runmaestro.ai/group-chat#managing-group-chats)
Managing Group Chats
---------------------------------------------------------------------------------------
Right-click on a group chat in the sidebar to access the context menu:
| Action | Description |
| --- | --- |
| **Edit** | Change the moderator agent or customize its settings (CLI args, path, environment variables) |
| **Rename** | Change the group chat name |
| **Delete** | Remove the group chat and its conversation history |
[](https://docs.runmaestro.ai/group-chat#input-features)
Input Features
---------------------------------------------------------------------------
The Group Chat input supports the same features as direct agent conversations:
* **Read-only mode** — Toggle to prevent agents from modifying files (participants receive the mode flag)
* **Image attachments** — Attach images to include in your message
* **Prompt Composer** — Open the full prompt composer with `Cmd+Shift+P` / `Ctrl+Shift+P`
* **Enter/Cmd+Enter toggle** — Switch between send behaviors
* **Message queuing** — Messages are queued if the moderator or agents are busy
Was this page helpful?
YesNo
[Git and Worktrees](https://docs.runmaestro.ai/git-worktrees)
[Remote Control](https://docs.runmaestro.ai/remote-control)
⌘I
---
# Git and Worktrees - Maestro
[Skip to main content](https://docs.runmaestro.ai/git-worktrees#content-area)
[Maestro home page](https://runmaestro.ai/)
Search...
⌘K
Search...
Navigation
General Usage
Git and Worktrees
On this page
* [Git Log Viewer](https://docs.runmaestro.ai/git-worktrees#git-log-viewer)
* [Diff Viewer](https://docs.runmaestro.ai/git-worktrees#diff-viewer)
* [Git Worktrees](https://docs.runmaestro.ai/git-worktrees#git-worktrees)
* [Managing Worktrees](https://docs.runmaestro.ai/git-worktrees#managing-worktrees)
* [Creating a Worktree Sub-Agent](https://docs.runmaestro.ai/git-worktrees#creating-a-worktree-sub-agent)
* [Worktree Actions](https://docs.runmaestro.ai/git-worktrees#worktree-actions)
* [Creating Pull Requests](https://docs.runmaestro.ai/git-worktrees#creating-pull-requests)
* [Removing Worktrees](https://docs.runmaestro.ai/git-worktrees#removing-worktrees)
* [Use Cases](https://docs.runmaestro.ai/git-worktrees#use-cases)
* [Tips](https://docs.runmaestro.ai/git-worktrees#tips)
Maestro integrates deeply with Git, providing visual tools for exploring repository history and enabling parallel development with worktree sub-agents.
[](https://docs.runmaestro.ai/git-worktrees#git-log-viewer)
Git Log Viewer
------------------------------------------------------------------------------
Browse your commit history directly in Maestro: 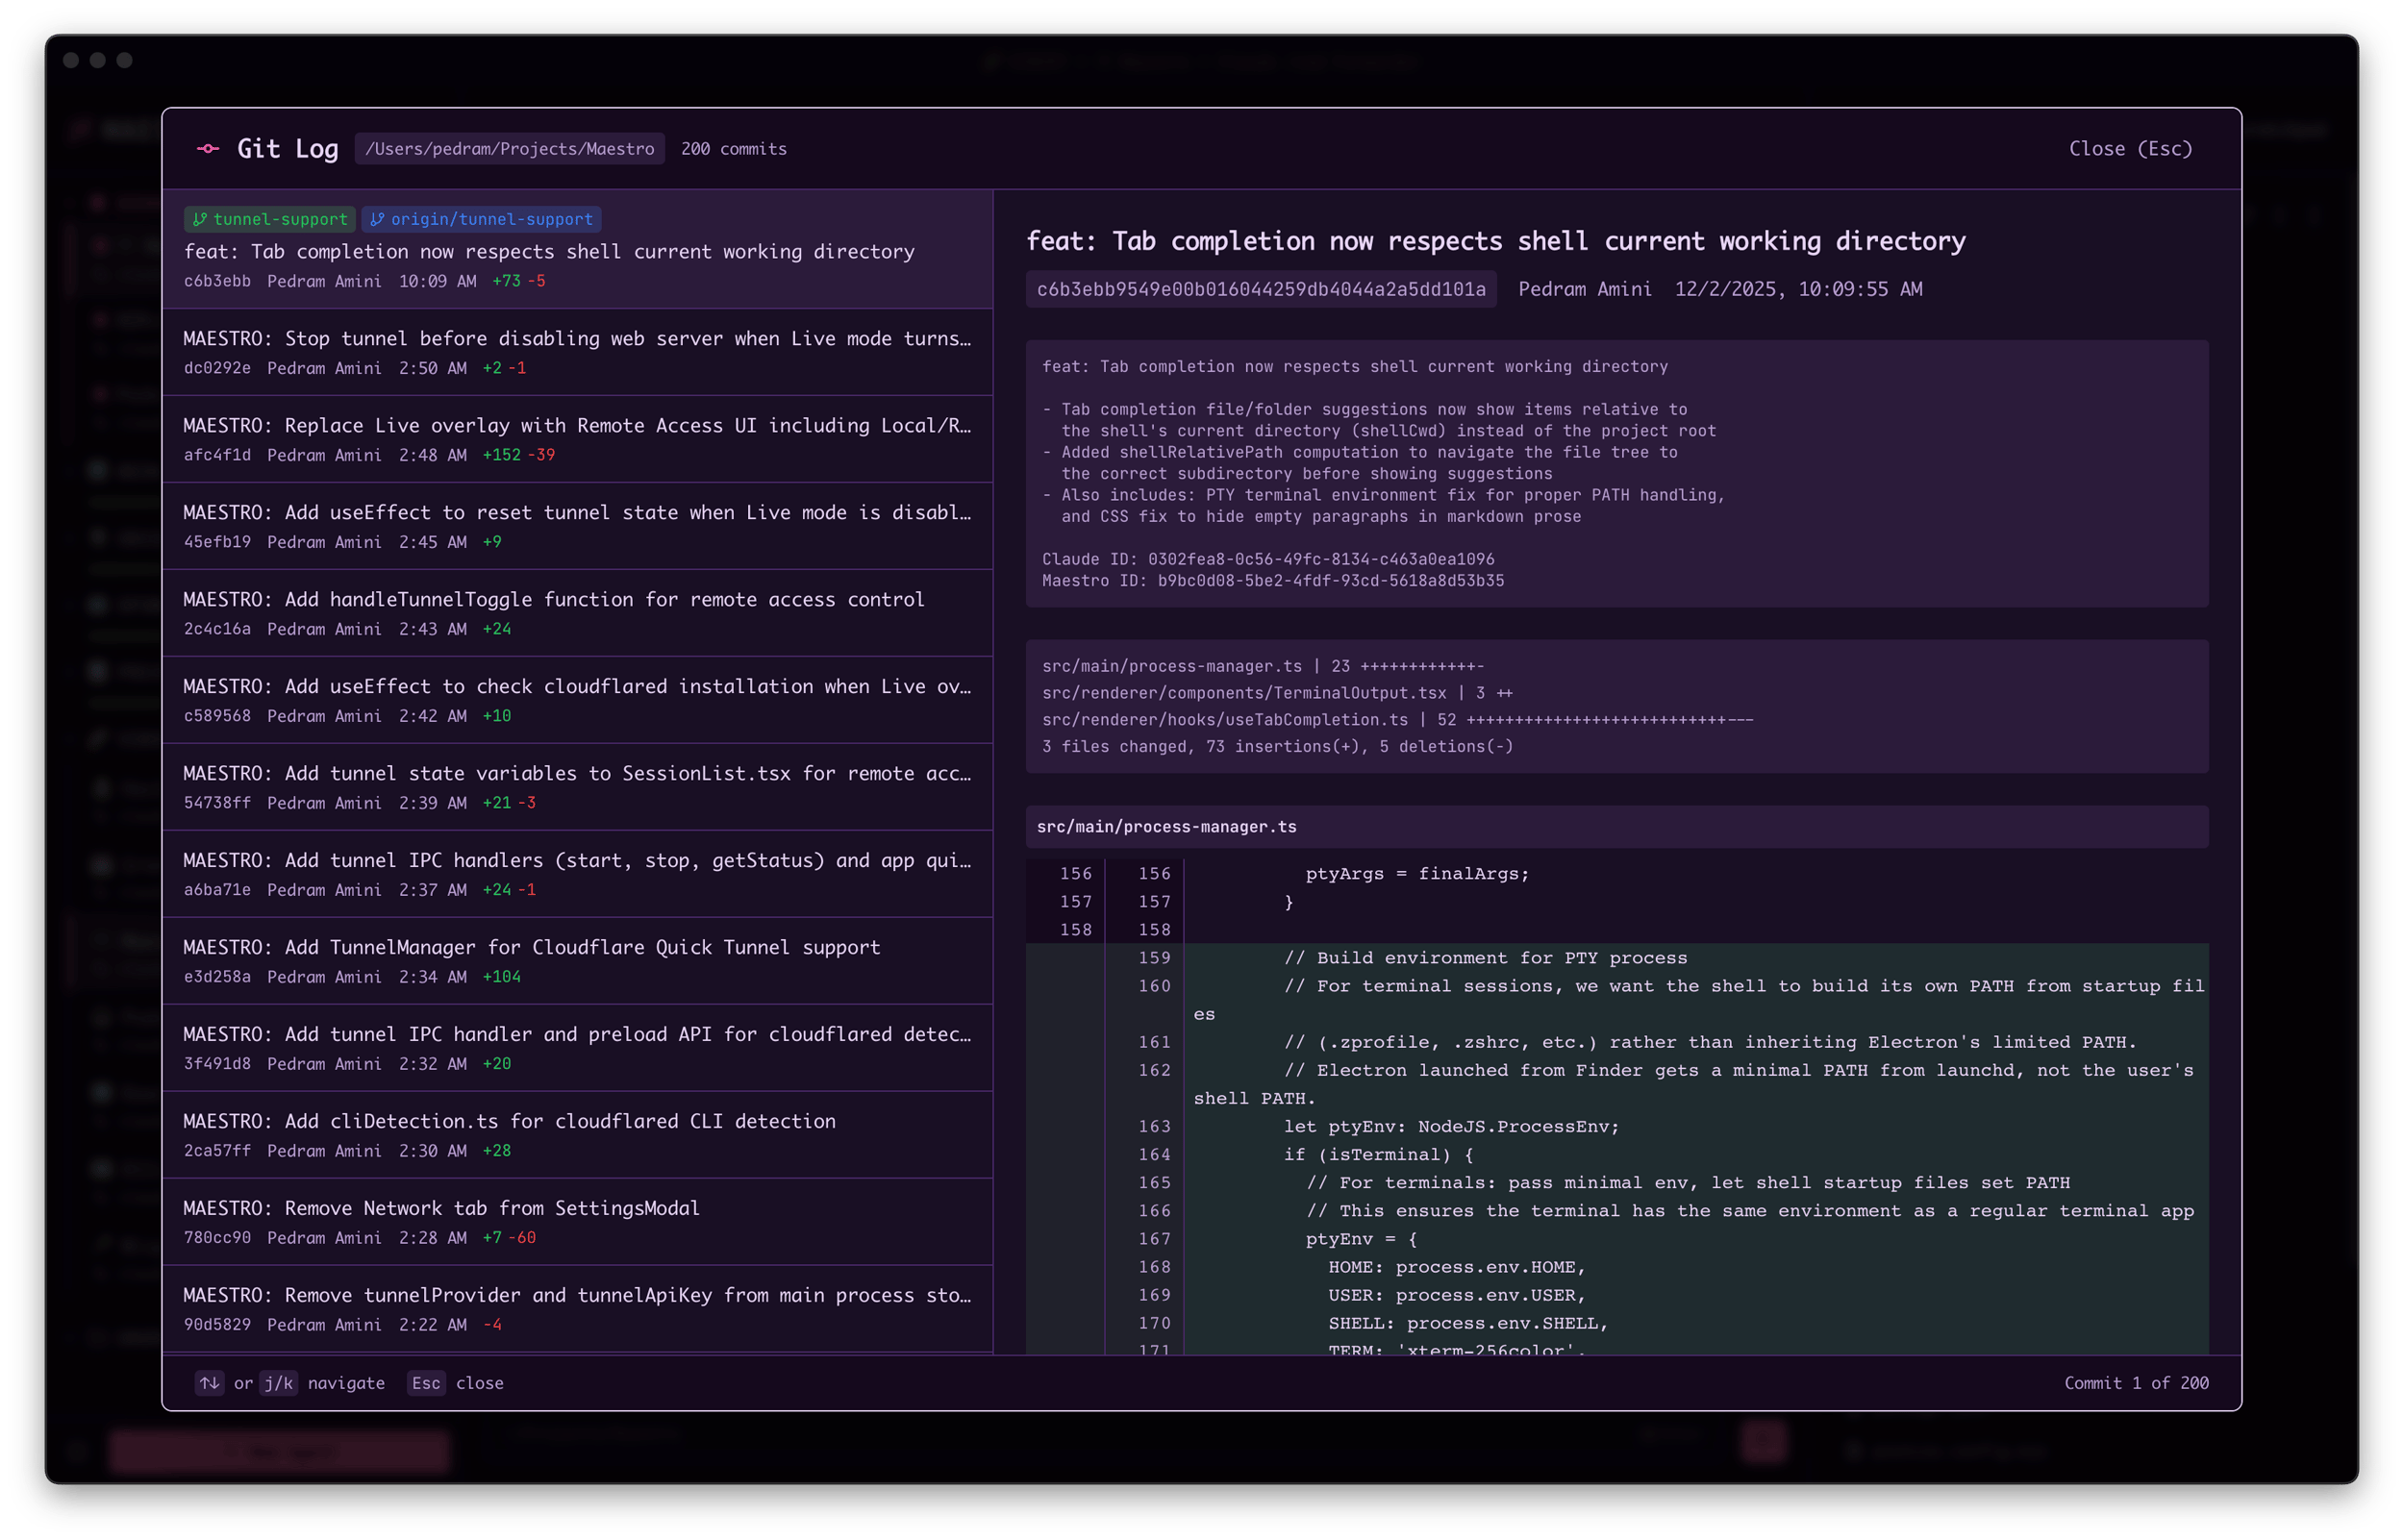 The log viewer shows:
* **Commit history** with messages, authors, and timestamps
* **Branch visualization** with merge points
* **Quick navigation** to any commit
Access via **Command Palette** (`Cmd+K` / `Ctrl+K`) → “Git Log” or the git menu in the Left Bar.
[](https://docs.runmaestro.ai/git-worktrees#diff-viewer)
Diff Viewer
------------------------------------------------------------------------
Review file changes with syntax-highlighted diffs: 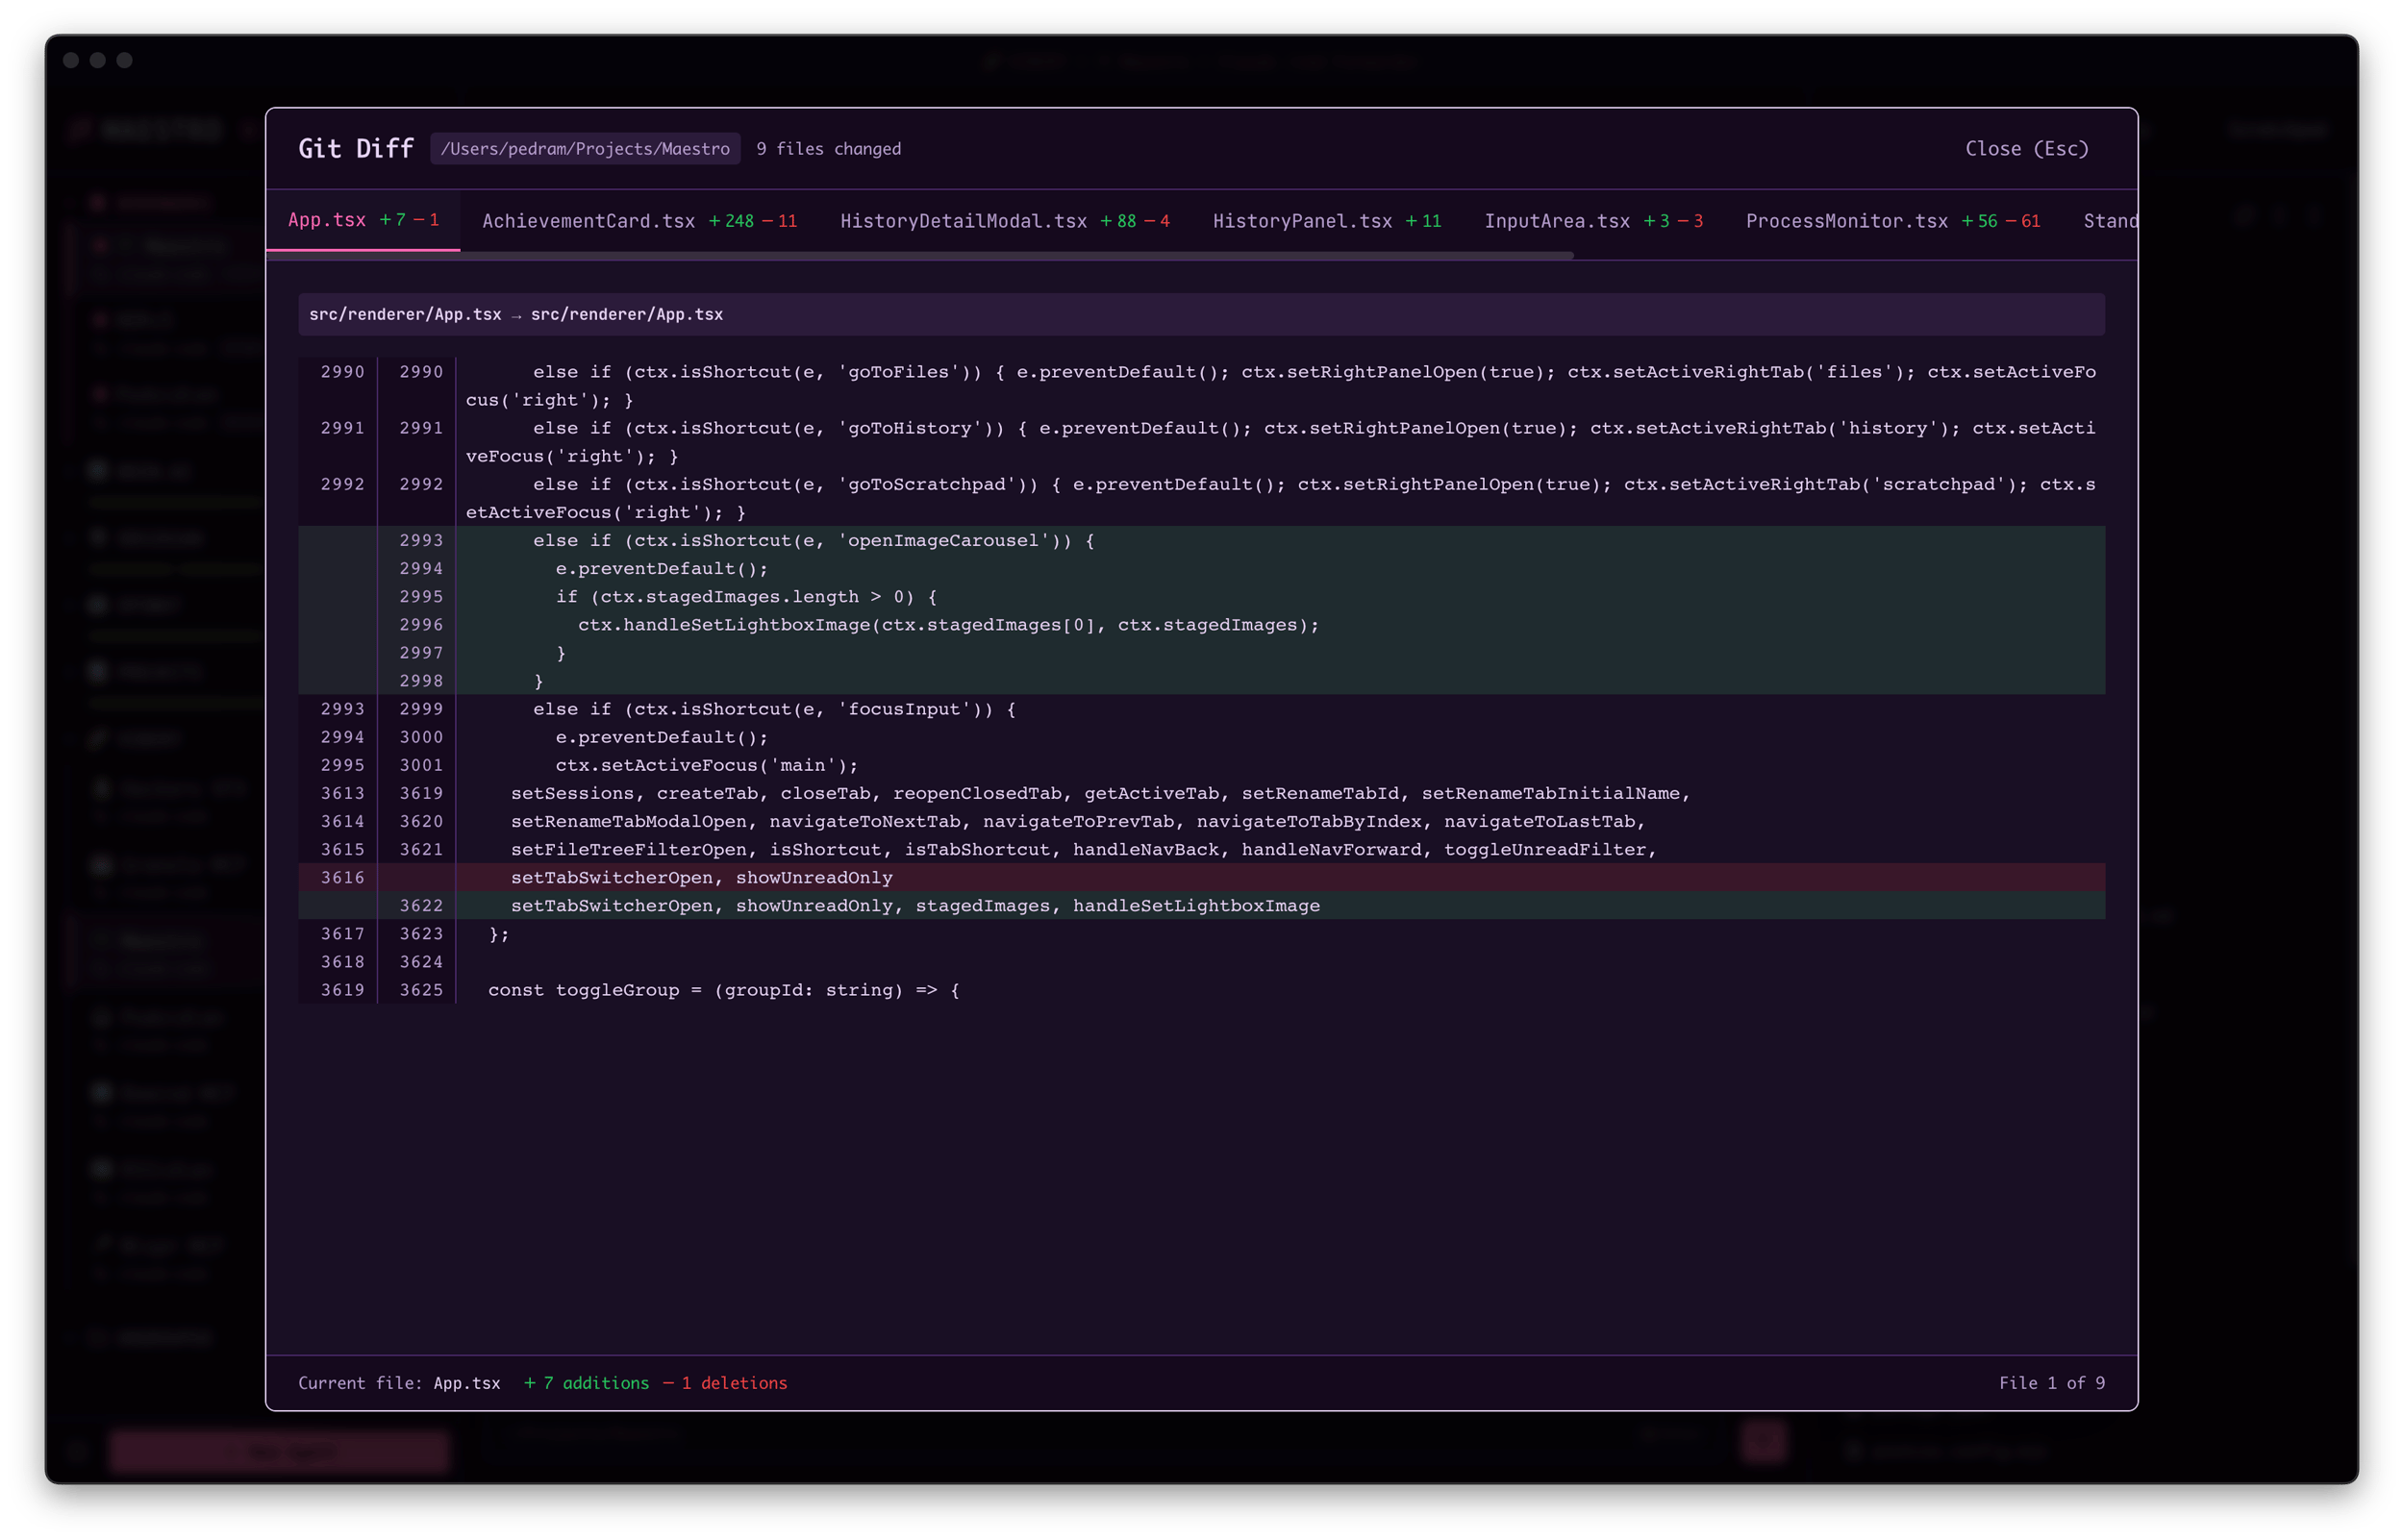 The diff viewer displays:
* **Side-by-side comparison** of file versions
* **Syntax highlighting** matched to file type
* **Line-by-line changes** with additions and deletions clearly marked
Access diffs from the git log viewer by clicking any commit, or use **Command Palette** → “Git Diff”.
* * *
[](https://docs.runmaestro.ai/git-worktrees#git-worktrees)
Git Worktrees
----------------------------------------------------------------------------
Git worktrees enable true parallel development by letting you run multiple AI agents on separate branches simultaneously. Each worktree operates in its own isolated directory, so there’s no risk of conflicts between parallel work streams.
###
[](https://docs.runmaestro.ai/git-worktrees#managing-worktrees)
Managing Worktrees
Worktree sub-agents appear nested under their parent agent in the Left Bar: 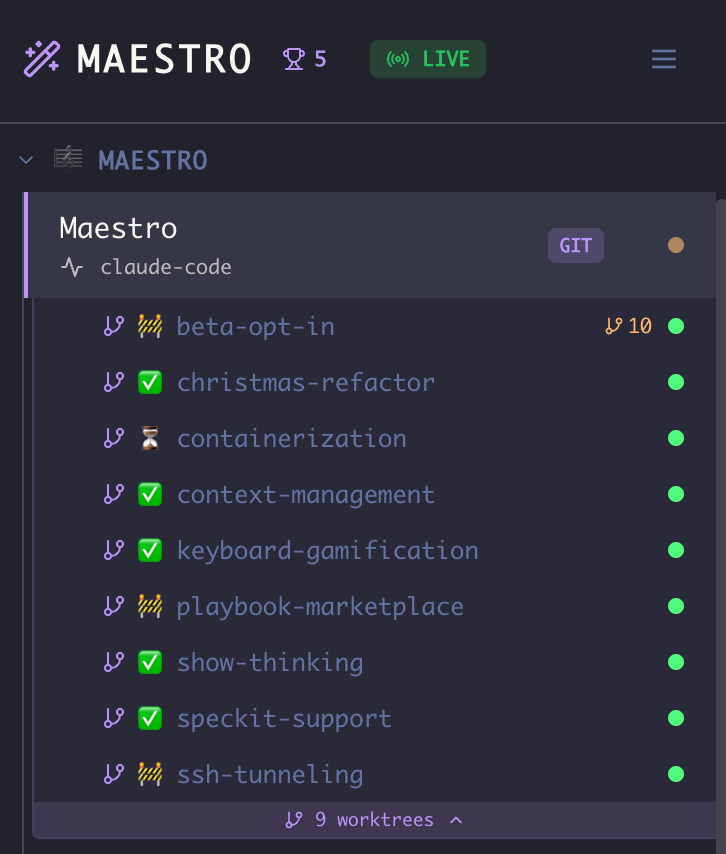
* **Nested Display** — Worktree sub-agents appear in a drawer below their parent agent, styled with a subtle accent background
* **Branch Icon** — Worktree children show a `GitBranch` icon next to their name
* **Collapse/Expand** — Click the worktree count band below the parent session to show/hide worktree children (e.g., “2 worktrees ▾”)
* **Independent Operation** — Each worktree agent has its own working directory, conversation history, and state
###
[](https://docs.runmaestro.ai/git-worktrees#creating-a-worktree-sub-agent)
Creating a Worktree Sub-Agent
There are two ways to access worktree configuration: **From the Header (Main Panel):**
1. Select an agent that’s in a git repository
2. Hover over the **branch pill** in the header (shows the current branch name, e.g., “main”)
3. In the hover overlay, click **“Configure Worktrees”**
**From the Context Menu (Left Bar):**
1. Right-click an agent in the session list
2. Select **“Configure Worktrees”** (only shown for git repositories)
In the configuration modal: 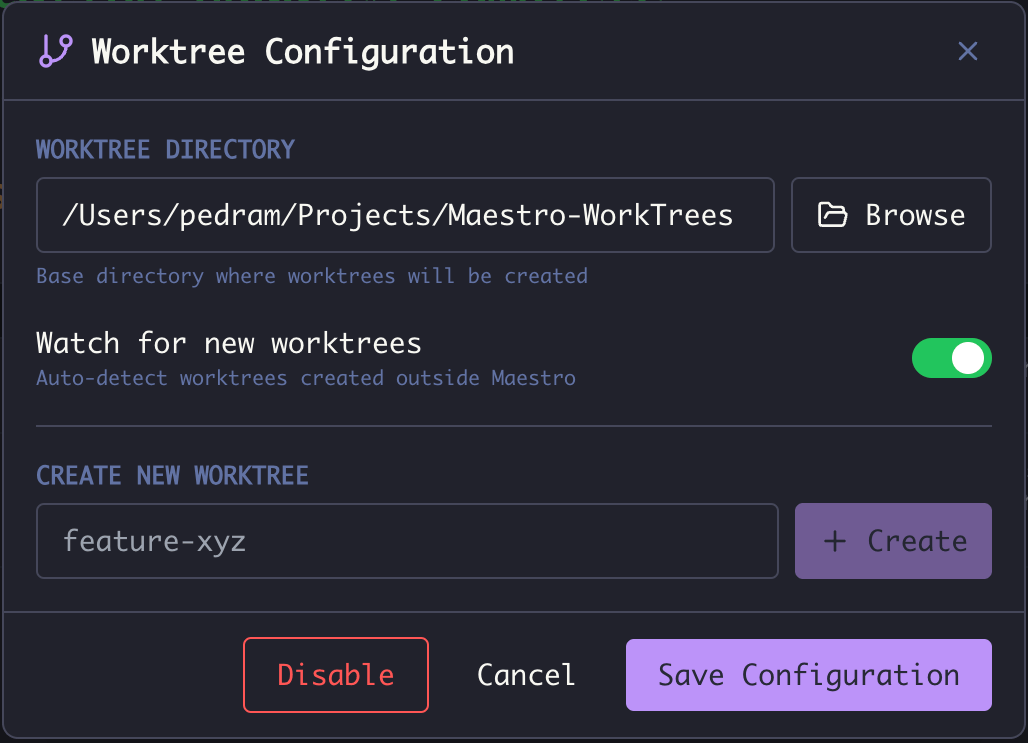
| Option | Description |
| --- | --- |
| **Worktree Directory** | Base folder where worktrees are created (should be outside the main repo). You can browse to select it (local sessions) or type the path directly. |
| **Watch for new worktrees** | Auto-detect worktrees created outside Maestro (e.g., via command line) |
| **Create New Worktree** | Enter a branch name and click **Create** to instantly create a new worktree sub-agent |
**Tip:** Configure the worktree directory to be outside your main repository (e.g., `~/Projects/Maestro-WorkTrees/`). This keeps worktrees organized and prevents them from appearing in your main repo’s file tree. **Note:** Once configured, you can quickly create additional worktrees by right-clicking the parent session and selecting **“Create Worktree”** (bypasses the full configuration modal).
###
[](https://docs.runmaestro.ai/git-worktrees#worktree-actions)
Worktree Actions
Right-click any worktree sub-agent to access management options: 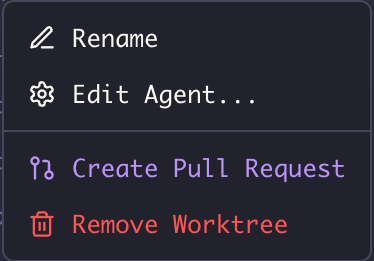
| Action | Description |
| --- | --- |
| **Rename** | Change the display name of the worktree agent |
| **Edit Agent…** | Modify agent configuration |
| **Duplicate…** | Create a new agent with the same configuration |
| **Create Pull Request** | Open a PR from this worktree’s branch |
| **Remove Worktree** | Delete the worktree agent (see below) |
###
[](https://docs.runmaestro.ai/git-worktrees#creating-pull-requests)
Creating Pull Requests
When you’re done with work in a worktree:
1. **Right-click** the worktree agent → **Create Pull Request**, or
2. Press `Cmd+K` / `Ctrl+K` with the worktree active → search “Create Pull Request”
The PR modal shows:
* Source branch (your worktree branch)
* Target branch (configurable)
* Auto-generated title and description based on your work
**Requirements:** GitHub CLI (`gh`) must be installed and authenticated. Maestro will detect if it’s missing and show installation instructions.
###
[](https://docs.runmaestro.ai/git-worktrees#removing-worktrees)
Removing Worktrees
When removing a worktree, you have two options: 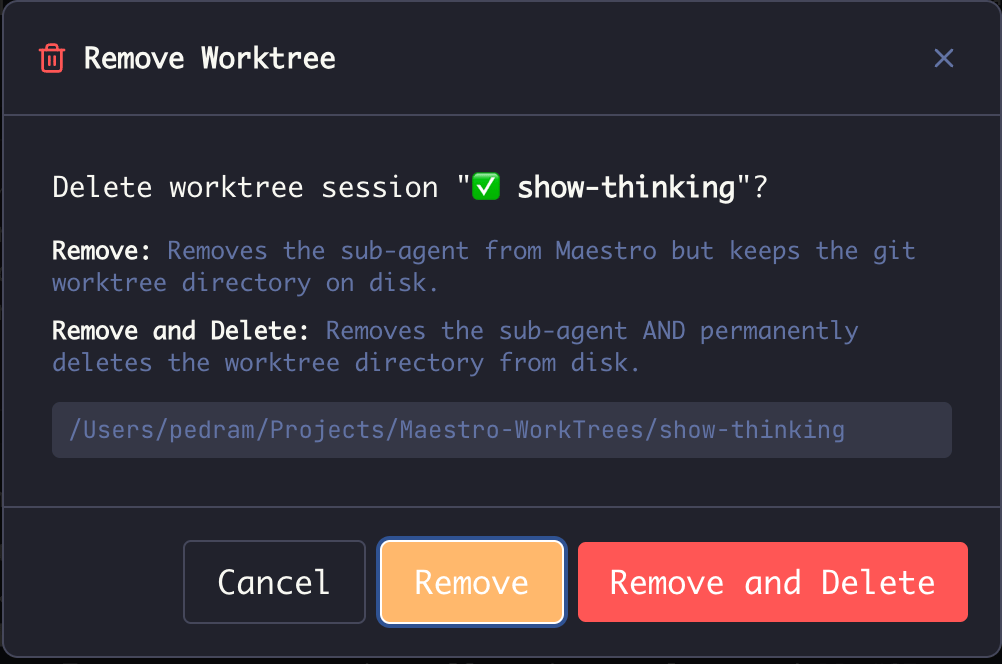
| Option | What It Does |
| --- | --- |
| **Remove** | Removes the sub-agent from Maestro but keeps the git worktree directory on disk |
| **Remove and Delete** | Removes the sub-agent AND permanently deletes the worktree directory from disk |
The confirmation dialog shows the full path to the worktree directory so you know exactly what will be affected.
[](https://docs.runmaestro.ai/git-worktrees#use-cases)
Use Cases
--------------------------------------------------------------------
| Scenario | How Worktrees Help |
| --- | --- |
| **Background Auto Run** | Run Auto Run in a worktree while working interactively in the main repo |
| **Feature Branches** | Spin up a sub-agent for each feature branch |
| **Code Review** | Create a worktree to review and iterate on a PR without switching branches |
| **Parallel Experiments** | Try different approaches simultaneously without git stash/pop |
**Auto Run integration:** You can dispatch an Auto Run directly into a new worktree from the run configuration modal — no need to create the worktree first. See [Run in Worktree](https://docs.runmaestro.ai/autorun-playbooks#run-in-worktree)
for details. **CLI integration:** The same worktree-backed Auto Run is also reachable from the command line via `maestro-cli auto-run --worktree --branch --worktree-path --launch` (add `--create-pr` to open a PR on completion). See [CLI — Configuring Auto-Run](https://docs.runmaestro.ai/cli#configuring-auto-run)
.
[](https://docs.runmaestro.ai/git-worktrees#tips)
Tips
----------------------------------------------------------
* **Name branches descriptively** — The branch name becomes the worktree directory name
* **Use a dedicated worktree folder** — Keep all worktrees in one place outside the main repo
* **Clean up when done** — Remove worktree agents after merging PRs to avoid clutter
* **Watch for Changes** — Enable file watching to keep the file tree in sync with worktree activity
* **Run multiple dev instances** — Use `VITE_PORT` environment variable to run Maestro in multiple worktrees simultaneously:
# In main worktree
npm run dev
# In worktree 2 (different terminal/directory)
VITE_PORT=5174 npm run dev
Was this page helpful?
YesNo
[Document Graph](https://docs.runmaestro.ai/document-graph)
[Group Chat](https://docs.runmaestro.ai/group-chat)
⌘I
---
# History - Maestro
[Skip to main content](https://docs.runmaestro.ai/history#content-area)
[Maestro home page](https://runmaestro.ai/)
Search...
⌘K
Search...
Navigation
General Usage
History
On this page
* [Entry Types](https://docs.runmaestro.ai/history#entry-types)
* [Auto Entries](https://docs.runmaestro.ai/history#auto-entries)
* [User Entries](https://docs.runmaestro.ai/history#user-entries)
* [Filtering History](https://docs.runmaestro.ai/history#filtering-history)
* [By Type](https://docs.runmaestro.ai/history#by-type)
* [By Keyword](https://docs.runmaestro.ai/history#by-keyword)
* [By Time Range](https://docs.runmaestro.ai/history#by-time-range)
* [Entry Details](https://docs.runmaestro.ai/history#entry-details)
* [Navigation](https://docs.runmaestro.ai/history#navigation)
* [Validating Entries](https://docs.runmaestro.ai/history#validating-entries)
* [Resuming Sessions](https://docs.runmaestro.ai/history#resuming-sessions)
* [Keyboard Navigation](https://docs.runmaestro.ai/history#keyboard-navigation)
* [List View](https://docs.runmaestro.ai/history#list-view)
* [Detail View](https://docs.runmaestro.ai/history#detail-view)
* [Cross-Host Shared History](https://docs.runmaestro.ai/history#cross-host-shared-history)
* [Storage](https://docs.runmaestro.ai/history#storage)
* [Help Panel](https://docs.runmaestro.ai/history#help-panel)
The History panel provides a timestamped log of all agent activity — both automated (Auto Run) and manual (user interactions). Use it to review past work, resume sessions, and validate completed tasks. 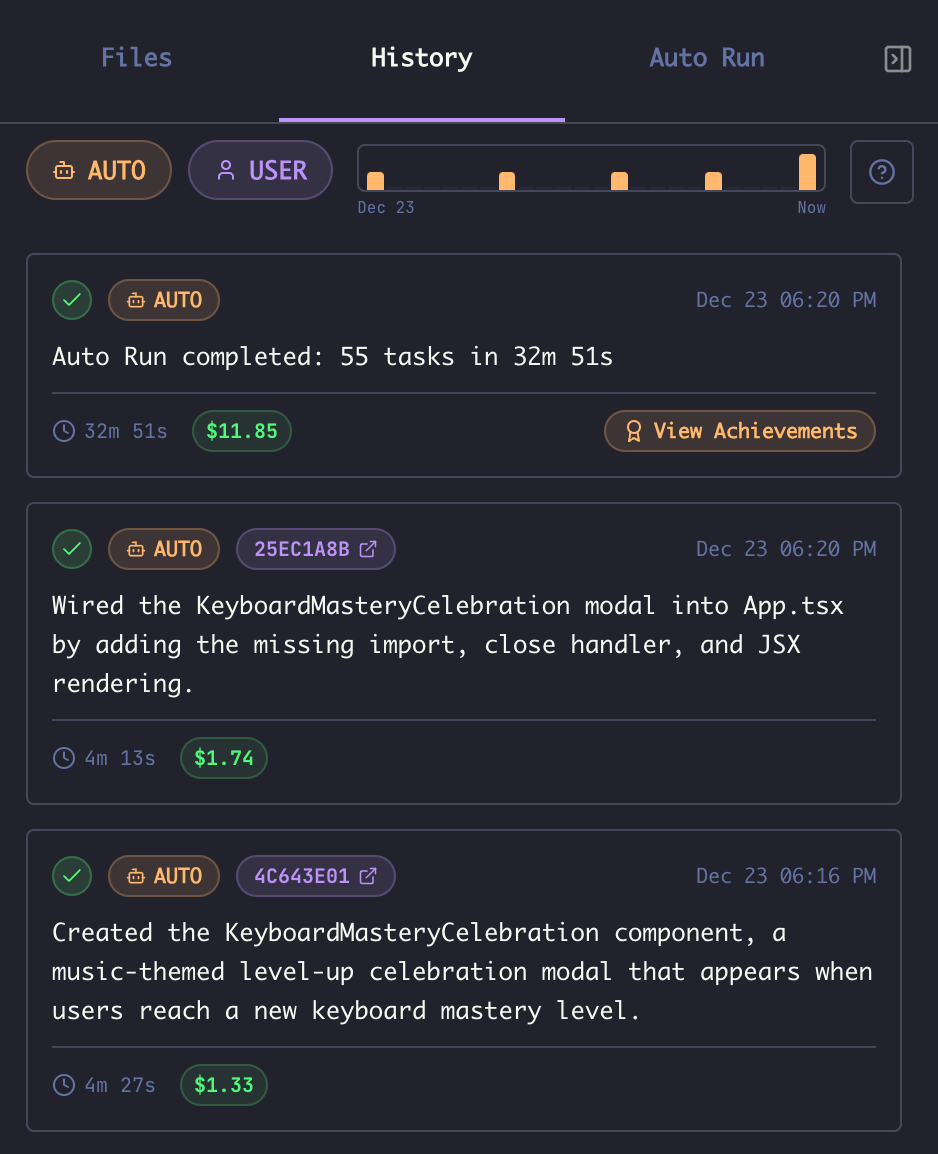
[](https://docs.runmaestro.ai/history#entry-types)
Entry Types
------------------------------------------------------------------
History entries are categorized by source:
| Type | Label | Description |
| --- | --- | --- |
| **AUTO** | 🤖 AUTO | Entries created by Auto Run task completions |
| **USER** | 👤 USER | Entries created manually by the user |
###
[](https://docs.runmaestro.ai/history#auto-entries)
Auto Entries
Auto entries are created automatically when Auto Run completes a task. Each entry includes:
* **Summary** of what the agent accomplished
* **Session ID** (clickable to jump to that conversation)
* **Duration** and **cost** of the task
* **Timestamp** of completion
###
[](https://docs.runmaestro.ai/history#user-entries)
User Entries
User entries are created in three ways:
1. **History Toggle** — Enable the **History** pill in the AI input box. Every prompt-response cycle automatically creates a user history entry.
2. **`/history` Command** — Run `/history` to create a synopsis entry covering all activity since the last time you ran the command. This is useful for periodic summaries without logging every single interaction.
3. **`/clear` Command** — Running `/clear` automatically creates a history entry before clearing the conversation, preserving a synopsis of your work.
**Toggle the default History behavior** in Settings → General → “Enable ‘History’ by default for new tabs”.
[](https://docs.runmaestro.ai/history#filtering-history)
Filtering History
------------------------------------------------------------------------------
###
[](https://docs.runmaestro.ai/history#by-type)
By Type
Use the **AUTO** and **USER** filter buttons at the top of the History panel to show or hide each entry type:
* Click **AUTO** to toggle Auto Run entries
* Click **USER** to toggle user-created entries
* Both can be active simultaneously
###
[](https://docs.runmaestro.ai/history#by-keyword)
By Keyword
Press `Cmd+F` / `Ctrl+F` to open the search box, or click in the filter area to type. The search matches against:
* Entry summaries
* Session names and IDs
* Full response content
###
[](https://docs.runmaestro.ai/history#by-time-range)
By Time Range
The **Graph View** at the top shows activity distribution over time. **Right-click the graph** to change the time range:
* 24 hours
* 72 hours
* 1 week
* 2 weeks
* 1 month
* 6 months
* 1 year
* All time
The graph bars are clickable — click a time period to jump to entries from that window. Hover over any bar to see the exact count and time range.
[](https://docs.runmaestro.ai/history#entry-details)
Entry Details
----------------------------------------------------------------------
Click any history entry to open the **Detail View**: 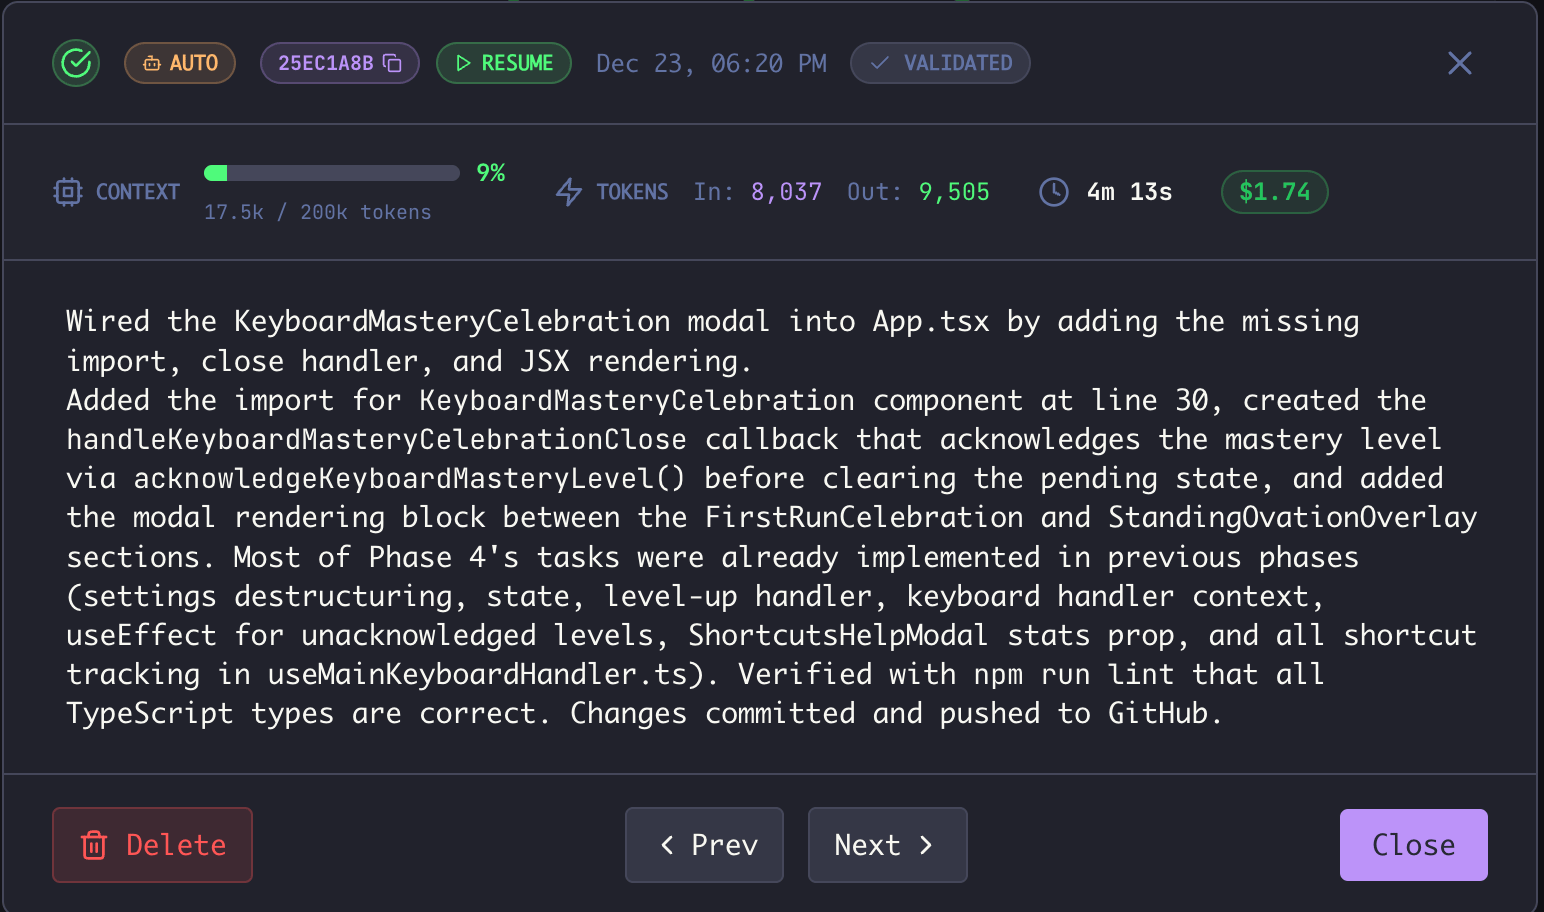 The detail view shows:
* **Full entry header** with type badge, session ID, timestamp, and validation status
* **Context usage** — tokens consumed and context window percentage
* **Token breakdown** — input tokens, output tokens
* **Duration** and **cost**
* **Full summary text** of what was accomplished
* **RESUME button** — Jump directly to the AI session to continue from where Maestro left off
###
[](https://docs.runmaestro.ai/history#navigation)
Navigation
* **Prev / Next** buttons to navigate between entries (or use `←` / `→` arrow keys)
* **Close** button to return to the list view
* **Delete** button to remove the entry (with confirmation dialog)
[](https://docs.runmaestro.ai/history#validating-entries)
Validating Entries
--------------------------------------------------------------------------------
The **Validated** flag helps you track which Auto Run tasks have been human-reviewed.  **To mark an entry as validated:**
1. Open the entry detail view
2. Click the **VALIDATED** toggle in the header
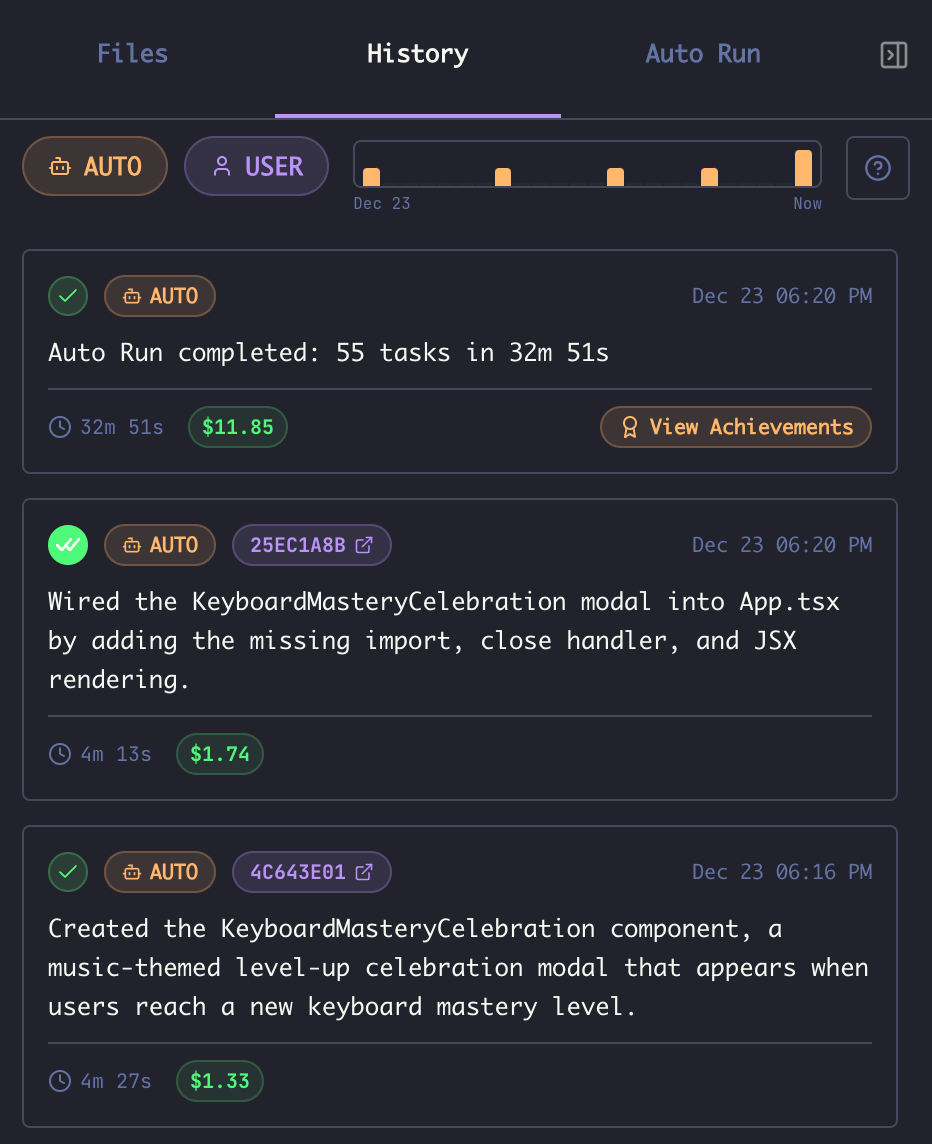 Validated entries show a **checkmark icon** (✓✓) in the list view, making it easy to see at a glance which tasks have been reviewed. **Workflow tip:** After an Auto Run session completes, use the History panel to review each task:
1. Open the first AUTO entry
2. Click **RESUME** to jump to the session and verify the work
3. If satisfied, toggle **VALIDATED**
4. Click **Next** to review the next entry
5. Repeat until all entries are validated
This ensures human oversight of automated work while maintaining the full context needed to continue any task.
[](https://docs.runmaestro.ai/history#resuming-sessions)
Resuming Sessions
------------------------------------------------------------------------------
Every history entry with a Session ID has a **RESUME** button. Clicking it:
1. Opens the AI Terminal for that agent
2. Loads the exact session where the work was done
3. Positions you to continue the conversation
This is especially powerful for Auto Run tasks — you can pick up exactly where the agent left off, with full conversation context preserved.
[](https://docs.runmaestro.ai/history#keyboard-navigation)
Keyboard Navigation
----------------------------------------------------------------------------------
###
[](https://docs.runmaestro.ai/history#list-view)
List View
| Key | Action |
| --- | --- |
| `↑` / `↓` | Navigate between entries |
| `Enter` | Open detail view for selected entry |
| `Cmd+F` / `Ctrl+F` | Open search filter |
| `Esc` | Clear selection or close search |
###
[](https://docs.runmaestro.ai/history#detail-view)
Detail View
| Key | Action |
| --- | --- |
| `←` / `→` | Navigate to previous/next entry |
| `Esc` | Close detail view, return to list |
[](https://docs.runmaestro.ai/history#cross-host-shared-history)
Cross-Host Shared History
----------------------------------------------------------------------------------------------
When working with [SSH Remote Execution](https://docs.runmaestro.ai/ssh-remote-execution)
, history entries can be synchronized across machines. Remote entries appear with a **☁ Remote** pill and a hostname badge showing their origin. This enables:
* **Same user, multiple machines** — see your work from any machine you use
* **Team collaboration** — see what teammates have done on a shared project
Enable this per-session via the **Sync history to remote** toggle in the SSH Remote Execution dropdown. See [Collaborating over SSH](https://docs.runmaestro.ai/ssh-remote-execution#collaborating-over-ssh)
for full details.
[](https://docs.runmaestro.ai/history#storage)
Storage
----------------------------------------------------------
History is stored per-session in JSON files within the `history/` subdirectory of your Maestro data folder:
* **macOS**: `~/Library/Application Support/maestro/history/.json`
* **Windows**: `%APPDATA%/maestro/history/.json`
* **Linux**: `~/.config/maestro/history/.json`
The maximum number of entries per session is controlled by the **Maximum Log Buffer** setting in Settings → Display (default: 5,000). History files can be passed to AI agents as context for understanding past work patterns.
[](https://docs.runmaestro.ai/history#help-panel)
Help Panel
----------------------------------------------------------------
Click the **?** button in the History panel header to open a detailed guide explaining all features, entry types, status indicators, and keyboard shortcuts.
Was this page helpful?
YesNo
[Prompt Customization](https://docs.runmaestro.ai/prompt-customization)
[Memories](https://docs.runmaestro.ai/memories)
⌘I
---
# General Usage - Maestro
[Skip to main content](https://docs.runmaestro.ai/general-usage#content-area)
[Maestro home page](https://runmaestro.ai/)
Search...
⌘K
Search...
Navigation
General Usage
General Usage
On this page
* [UI Overview](https://docs.runmaestro.ai/general-usage#ui-overview)
* [Agent Status Indicators](https://docs.runmaestro.ai/general-usage#agent-status-indicators)
* [File Explorer and Preview](https://docs.runmaestro.ai/general-usage#file-explorer-and-preview)
* [Breadcrumb Navigation](https://docs.runmaestro.ai/general-usage#breadcrumb-navigation)
* [File Editing](https://docs.runmaestro.ai/general-usage#file-editing)
* [Publish as GitHub Gist](https://docs.runmaestro.ai/general-usage#publish-as-github-gist)
* [@ File Mentions](https://docs.runmaestro.ai/general-usage#%40-file-mentions)
* [Prompt Composer](https://docs.runmaestro.ai/general-usage#prompt-composer)
* [Input Toggles](https://docs.runmaestro.ai/general-usage#input-toggles)
* [Configuring Defaults](https://docs.runmaestro.ai/general-usage#configuring-defaults)
* [Send Key Configuration](https://docs.runmaestro.ai/general-usage#send-key-configuration)
* [Image Carousel](https://docs.runmaestro.ai/general-usage#image-carousel)
* [Output Filtering](https://docs.runmaestro.ai/general-usage#output-filtering)
* [Global Filter](https://docs.runmaestro.ai/general-usage#global-filter)
* [Per-Response Filters](https://docs.runmaestro.ai/general-usage#per-response-filters)
* [Filter Modes](https://docs.runmaestro.ai/general-usage#filter-modes)
* [Text vs Regex Matching](https://docs.runmaestro.ai/general-usage#text-vs-regex-matching)
* [Filter Controls](https://docs.runmaestro.ai/general-usage#filter-controls)
* [Placeholders](https://docs.runmaestro.ai/general-usage#placeholders)
* [Use Cases](https://docs.runmaestro.ai/general-usage#use-cases)
* [Command Interpreter](https://docs.runmaestro.ai/general-usage#command-interpreter)
* [Agent Management](https://docs.runmaestro.ai/general-usage#agent-management)
* [Creating Agents](https://docs.runmaestro.ai/general-usage#creating-agents)
* [Editing Agents](https://docs.runmaestro.ai/general-usage#editing-agents)
* [Deleting Agents](https://docs.runmaestro.ai/general-usage#deleting-agents)
* [Agent Configuration via Quick Actions](https://docs.runmaestro.ai/general-usage#agent-configuration-via-quick-actions)
* [Left Panel Operations](https://docs.runmaestro.ai/general-usage#left-panel-operations)
* [Filtering and Search](https://docs.runmaestro.ai/general-usage#filtering-and-search)
* [Bookmarks](https://docs.runmaestro.ai/general-usage#bookmarks)
* [Groups](https://docs.runmaestro.ai/general-usage#groups)
* [Drag and Drop](https://docs.runmaestro.ai/general-usage#drag-and-drop)
* [Context Menu](https://docs.runmaestro.ai/general-usage#context-menu)
* [Sidebar Width](https://docs.runmaestro.ai/general-usage#sidebar-width)
* [Collapsed Mode](https://docs.runmaestro.ai/general-usage#collapsed-mode)
* [Tab Management](https://docs.runmaestro.ai/general-usage#tab-management)
* [Automatic Tab Naming](https://docs.runmaestro.ai/general-usage#automatic-tab-naming)
* [Manual Tab Renaming](https://docs.runmaestro.ai/general-usage#manual-tab-renaming)
* [Session Management](https://docs.runmaestro.ai/general-usage#session-management)
[](https://docs.runmaestro.ai/general-usage#ui-overview)
UI Overview
------------------------------------------------------------------------
Maestro features a three-panel layout:
* **Left Panel** - Agent list with grouping, filtering, search, bookmarks, and drag-and-drop organization
* **Main Panel** - Center workspace with two modes per agent:
* **AI Terminal** - Converse with your AI provider (Claude Code, Codex, or OpenCode). Supports multiple tabs (each tab is a session), `@` file mentions, image attachments, slash commands, and draft auto-save.
* **Command Terminal** - PTY shell with tab completion for files, branches, tags, and command history.
* **Views**: Session Explorer, File Preview, Git Diffs, Git Logs
* **Right Panel** - Three tabs: File Explorer, History Viewer, and Auto Run

[](https://docs.runmaestro.ai/general-usage#agent-status-indicators)
Agent Status Indicators
------------------------------------------------------------------------------------------------
Each agent shows a color-coded status indicator:
* 🟢 **Green** - Ready and waiting
* 🟡 **Yellow** - Agent is thinking or waiting for user input
* 🔴 **Red** - No connection with agent
* 🟠 **Pulsing Orange** - Attempting to establish connection
* 🔴 **Red Badge** - Unread messages (small red dot overlapping top-right of status indicator, iPhone-style)
[](https://docs.runmaestro.ai/general-usage#file-explorer-and-preview)
File Explorer and Preview
----------------------------------------------------------------------------------------------------
The **File Explorer** (Right Panel → Files tab) lets you browse project files. Click any file to open it in the **File Preview** view. 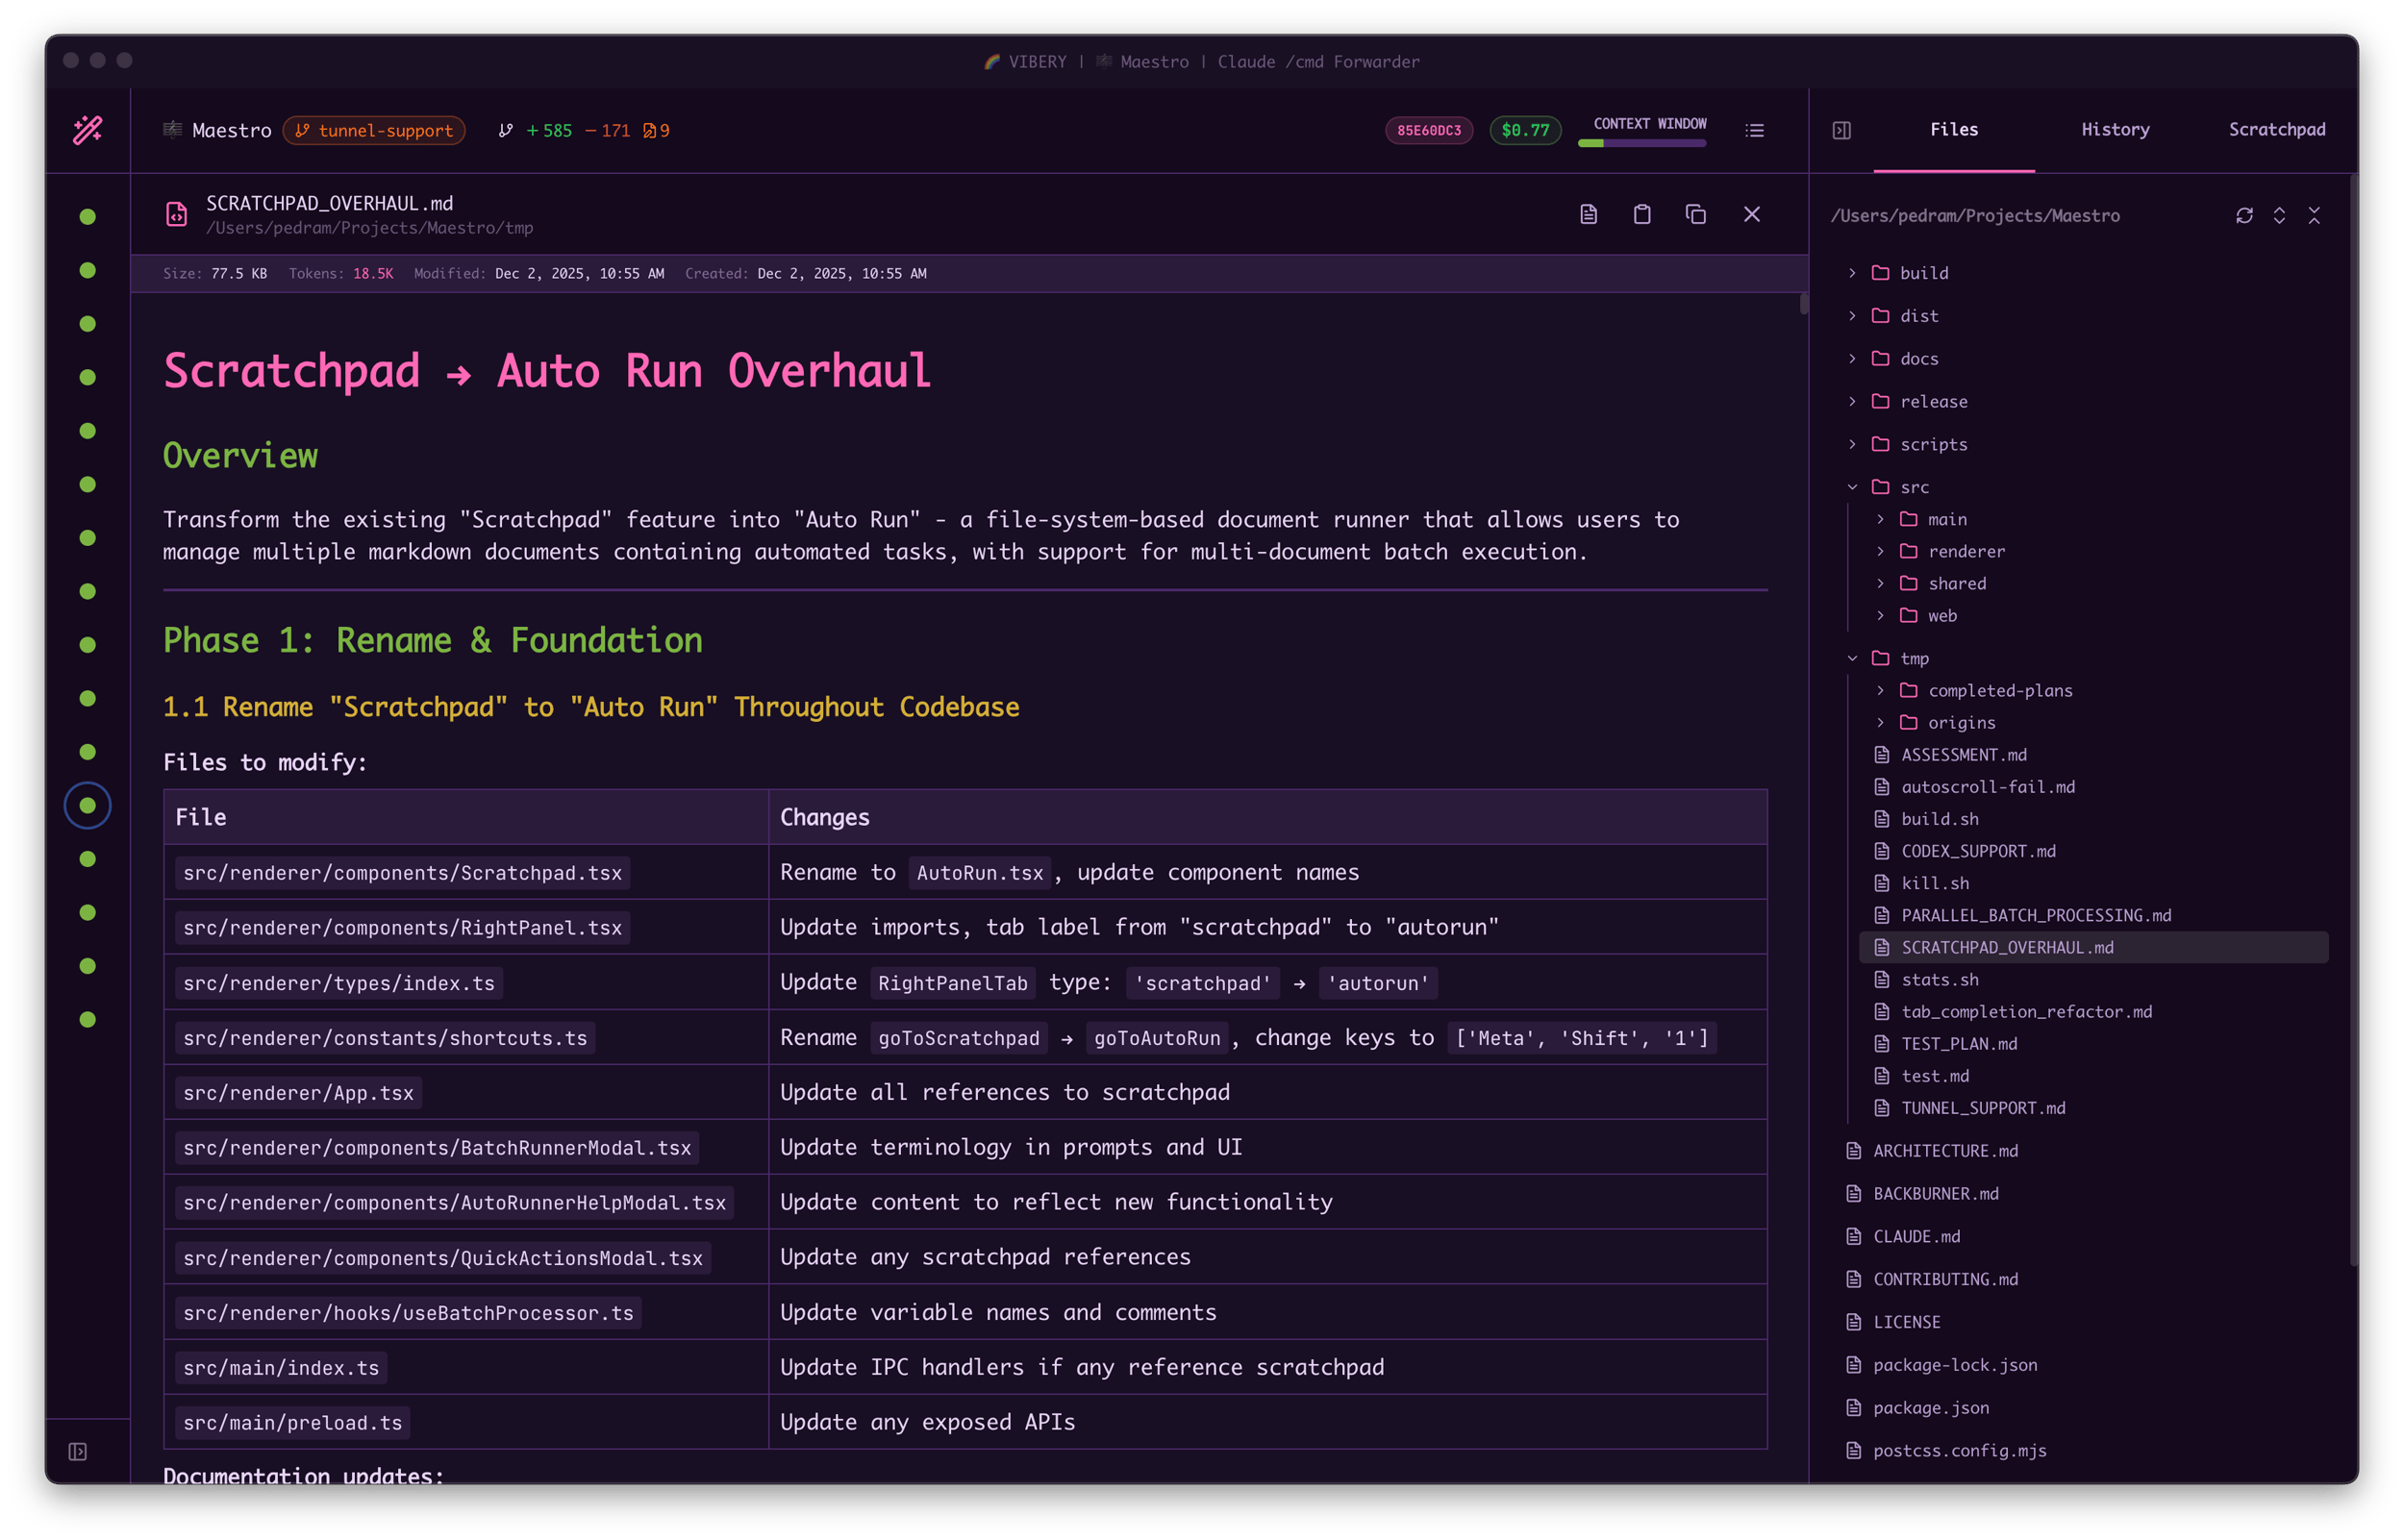 **File Preview features:**
* **Syntax highlighting** for code files
* **Markdown rendering** with toggle between raw/preview (`Cmd+E` / `Ctrl+E`)
* **Image viewing** for common image formats
* **Line numbers** for easy reference
* **Search within file** (`Cmd+F` / `Ctrl+F`)
###
[](https://docs.runmaestro.ai/general-usage#breadcrumb-navigation)
Breadcrumb Navigation
When you open a file, a **breadcrumb trail** appears showing your navigation history. Click any breadcrumb to jump back to a previously viewed file. This makes it easy to compare files or return to where you were.
###
[](https://docs.runmaestro.ai/general-usage#file-editing)
File Editing
Files can be edited directly in the preview. Press `Cmd+S` / `Ctrl+S` to save changes. If you navigate away or close the preview with unsaved changes, a confirmation dialog will ask whether to discard them.
###
[](https://docs.runmaestro.ai/general-usage#publish-as-github-gist)
Publish as GitHub Gist
Share files directly as GitHub Gists from the File Preview: **Prerequisites:**
* [GitHub CLI](https://cli.github.com/)
(`gh`) must be installed
* You must be authenticated (`gh auth login`)
**To publish a file:**
1. Open a file in File Preview
2. Click the **Share icon** (↗) in the header toolbar, or
3. Use `Cmd+K` / `Ctrl+K` → “Publish Document as GitHub Gist”
**Visibility options:**
| Option | Description |
| --- | --- |
| **Publish Secret** (default) | Creates an unlisted gist — not searchable, only accessible via direct link |
| **Publish Public** | Creates a public gist — visible on your profile and searchable |
The confirmation modal focuses “Publish Secret” by default, so you can press `Enter` to quickly publish. Press `Esc` to cancel. **After publishing:**
* The gist URL is automatically copied to your clipboard
* A toast notification appears with a link to open the gist in your browser
The share button only appears when viewing files (not in edit mode) and when GitHub CLI is available and authenticated.
###
[](https://docs.runmaestro.ai/general-usage#@-file-mentions)
@ File Mentions
Reference files in your AI prompts using `@` mentions:
1. Type `@` followed by a filename
2. Select from the autocomplete dropdown
3. The file path is inserted, giving the AI context about that file
[](https://docs.runmaestro.ai/general-usage#prompt-composer)
Prompt Composer
--------------------------------------------------------------------------------
For complex prompts that need more editing space, use the **Prompt Composer** — a fullscreen editing modal. **To open the Prompt Composer:**
* Press `Cmd+Shift+P` / `Ctrl+Shift+P`, or
* Click the **pencil icon** (✏️) in the bottom-left corner of the AI input box
 The Prompt Composer provides:
* **Full-screen editing space** for complex, multi-paragraph prompts
* **Character and token count** displayed in the footer
* **All input controls** — History toggle, Read-only mode, Thinking toggle, and send shortcut indicator
* **Image attachment support** via the image icon in the footer
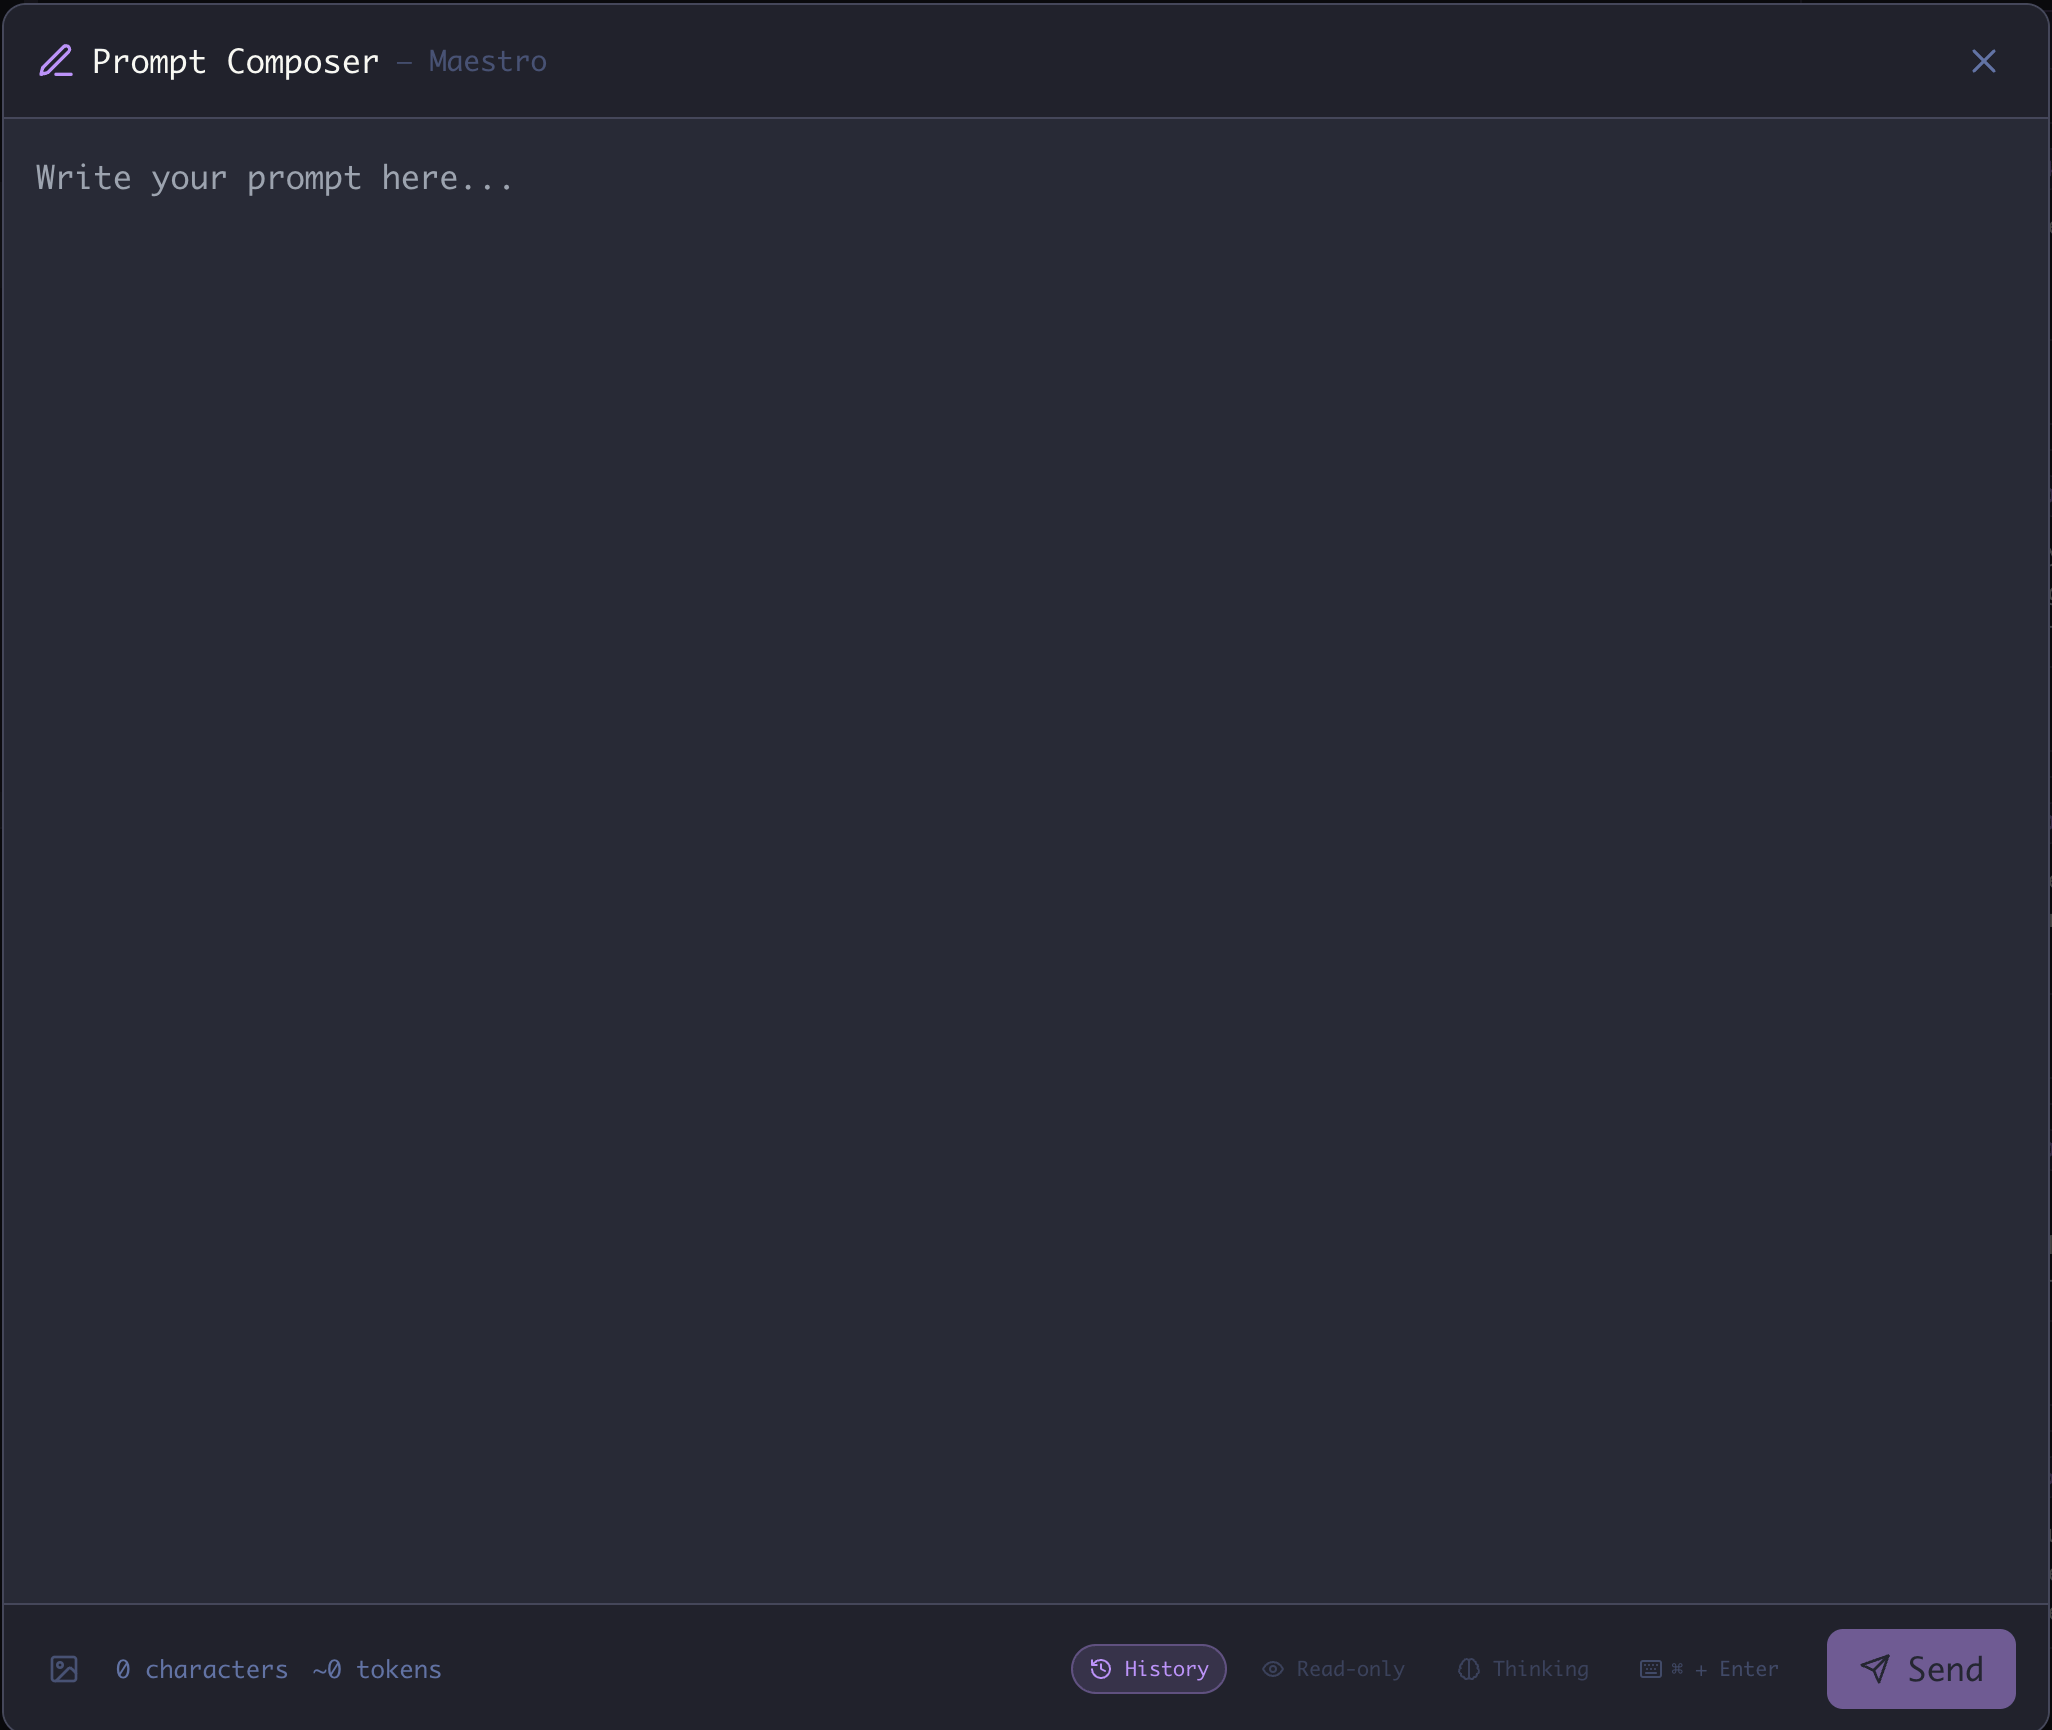 When you’re done editing, click **Send** or press the displayed shortcut to send your message. The composer closes automatically and your prompt is sent to the AI.
[](https://docs.runmaestro.ai/general-usage#input-toggles)
Input Toggles
----------------------------------------------------------------------------
The AI input box includes three toggle buttons that control session behavior: 
| Toggle | Shortcut | Description |
| --- | --- | --- |
| **History** | `Cmd+S` / `Ctrl+S` | Save a synopsis of each completion to the [History panel](https://docs.runmaestro.ai/history) |
| **Read-only** | `Cmd+R` / `Ctrl+R` | Enable plan/read-only mode — AI can read but not modify files |
| **Thinking** | `Cmd+Shift+K` / `Ctrl+Shift+K` | Show streaming thinking/reasoning as the AI works |
**Per-tab persistence:** Each toggle state is saved per tab. If you enable Thinking on one tab, it stays enabled for that tab even when you switch away and back.
###
[](https://docs.runmaestro.ai/general-usage#configuring-defaults)
Configuring Defaults
Set the default state for new tabs in **Settings** (`Cmd+,` / `Ctrl+,`) → **General**: 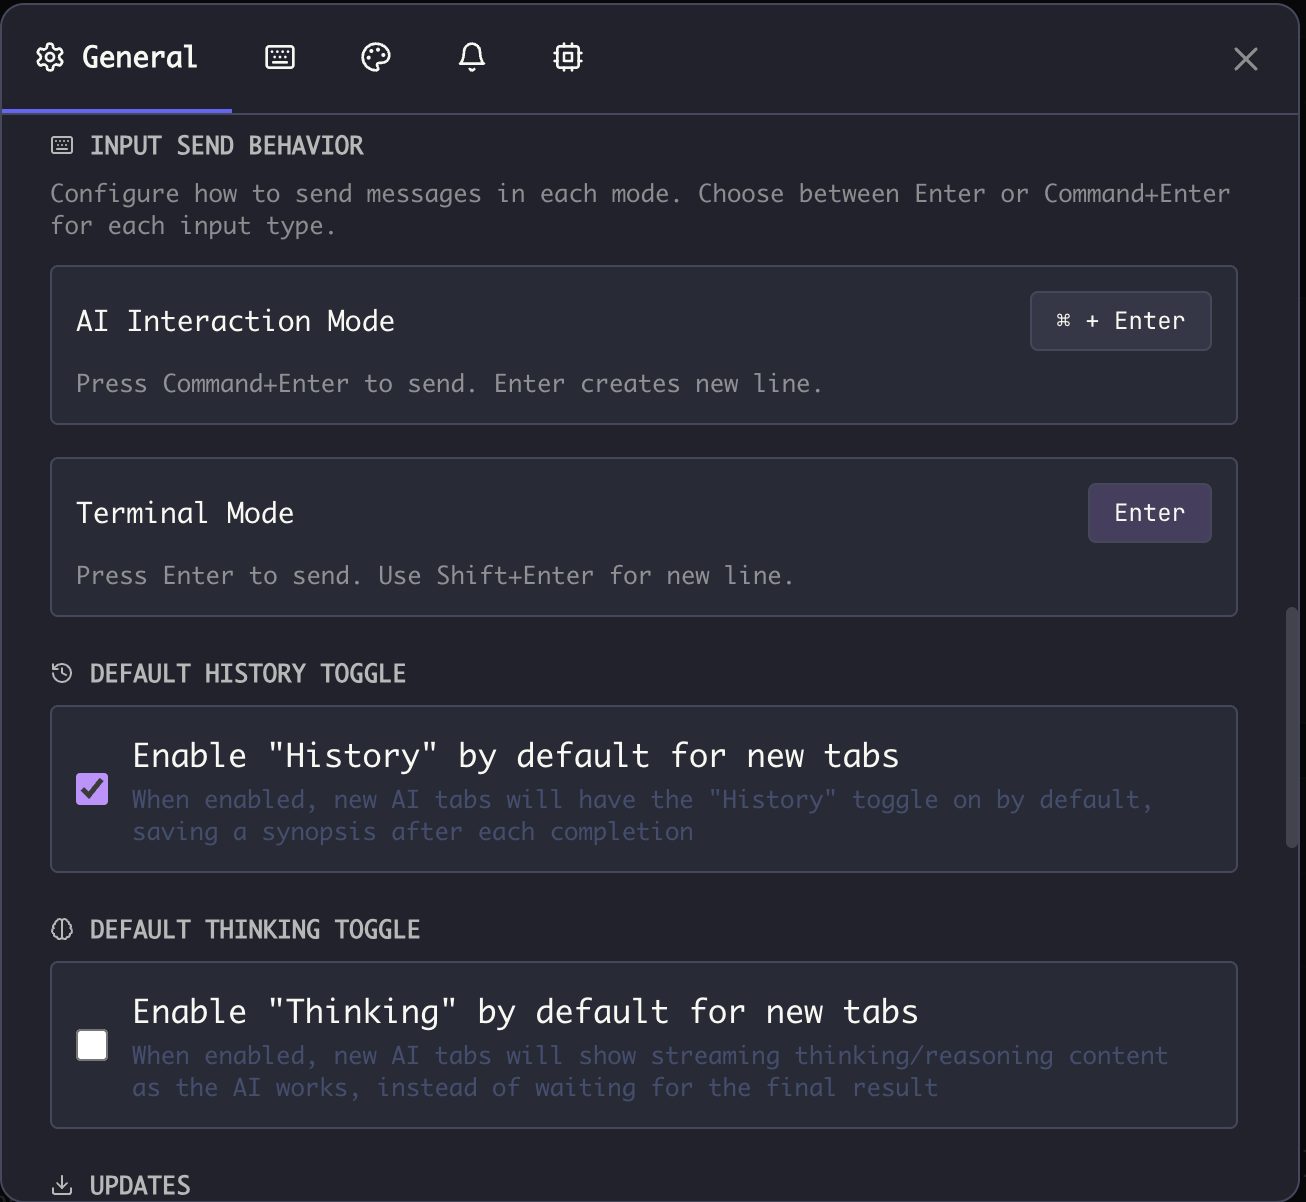
| Setting | Description |
| --- | --- |
| **Enable “History” by default** | New tabs save synopses to History automatically |
| **Enable “Thinking” by default** | New tabs show thinking/reasoning content by default |
###
[](https://docs.runmaestro.ai/general-usage#send-key-configuration)
Send Key Configuration
Configure how messages are sent in each mode:
| Mode | Options | Description |
| --- | --- | --- |
| **AI Interaction Mode** | `Enter` or `Cmd+Enter` | Choose your preferred send key for AI conversations |
| **Terminal Mode** | `Enter` or `Cmd+Enter` | Choose your preferred send key for shell commands |
* When set to `Cmd+Enter` / `Ctrl+Enter`, pressing `Enter` alone creates a new line (for multi-line input)
* When set to `Enter`, use `Shift+Enter` for new lines
* The current send key is displayed in the input box (e.g., ”⌘ + Enter”)
* **Per-tab override:** Click the send key indicator in the input box to toggle between modes for that tab
[](https://docs.runmaestro.ai/general-usage#image-carousel)
Image Carousel
------------------------------------------------------------------------------
When working with image attachments, use the **Image Carousel** to view, manage, and remove images. **To open the Image Carousel:**
* Press `Cmd+Y` / `Ctrl+Y`, or
* Click the image icon in the input box when images are attached
**Carousel controls:**
* **Arrow keys** — Navigate between images
* **Delete** or **Backspace** — Remove the currently selected image
* **Click the X** — Remove an image by clicking its remove button
* **Esc** — Close the carousel
Images can be attached via drag-and-drop, paste, or the attachment button. The carousel shows all images queued for the current message.
[](https://docs.runmaestro.ai/general-usage#output-filtering)
Output Filtering
----------------------------------------------------------------------------------
Filter and search through AI output to find specific content or hide noise.
###
[](https://docs.runmaestro.ai/general-usage#global-filter)
Global Filter
The global filter applies to all AI output in the current session. **To open the global filter:**
* Click the filter icon in the output toolbar
* The filter bar appears at the top of the output area
###
[](https://docs.runmaestro.ai/general-usage#per-response-filters)
Per-Response Filters
Each AI response has its own local filter. Hover over a response to reveal the filter icon, then click to open the filter bar for that specific response.
###
[](https://docs.runmaestro.ai/general-usage#filter-modes)
Filter Modes
| Mode | Icon | Description |
| --- | --- | --- |
| **Include** | ➕ (green) | Show only lines matching the query |
| **Exclude** | ➖ (red) | Hide lines matching the query |
Click the mode icon to toggle between Include and Exclude.
###
[](https://docs.runmaestro.ai/general-usage#text-vs-regex-matching)
Text vs Regex Matching
| Mode | Indicator | Description |
| --- | --- | --- |
| **Plain text** | `Aa` | Case-insensitive substring matching |
| **Regex** | `.*` | Regular expression pattern matching |
Click the indicator to toggle between plain text and regex mode.
###
[](https://docs.runmaestro.ai/general-usage#filter-controls)
Filter Controls
* **Query input** — Type your search term or regex pattern
* **Esc** — Clear the filter and close the filter bar
* **Click outside** — If the query is empty, the filter bar closes
###
[](https://docs.runmaestro.ai/general-usage#placeholders)
Placeholders
The placeholder text updates to reflect the current mode:
* “Include by keyword” / “Exclude by keyword” for plain text
* “Include by RegEx” / “Exclude by RegEx” for regex mode
###
[](https://docs.runmaestro.ai/general-usage#use-cases)
Use Cases
**Finding specific content:**
* Set to **Include** mode with plain text
* Type a keyword like “error” or “function”
* Only matching lines are shown
**Hiding verbose output:**
* Set to **Exclude** mode with plain text
* Type patterns like “debug” or “verbose”
* Matching lines are hidden from view
**Complex pattern matching:**
* Enable **Regex** mode
* Use patterns like `\berror\b` for word boundaries
* Or `^\s*#` to match comment lines
[](https://docs.runmaestro.ai/general-usage#command-interpreter)
Command Interpreter
----------------------------------------------------------------------------------------
The command interpreter can be focused for a clean, terminal-only experience when you collapse the left panel. 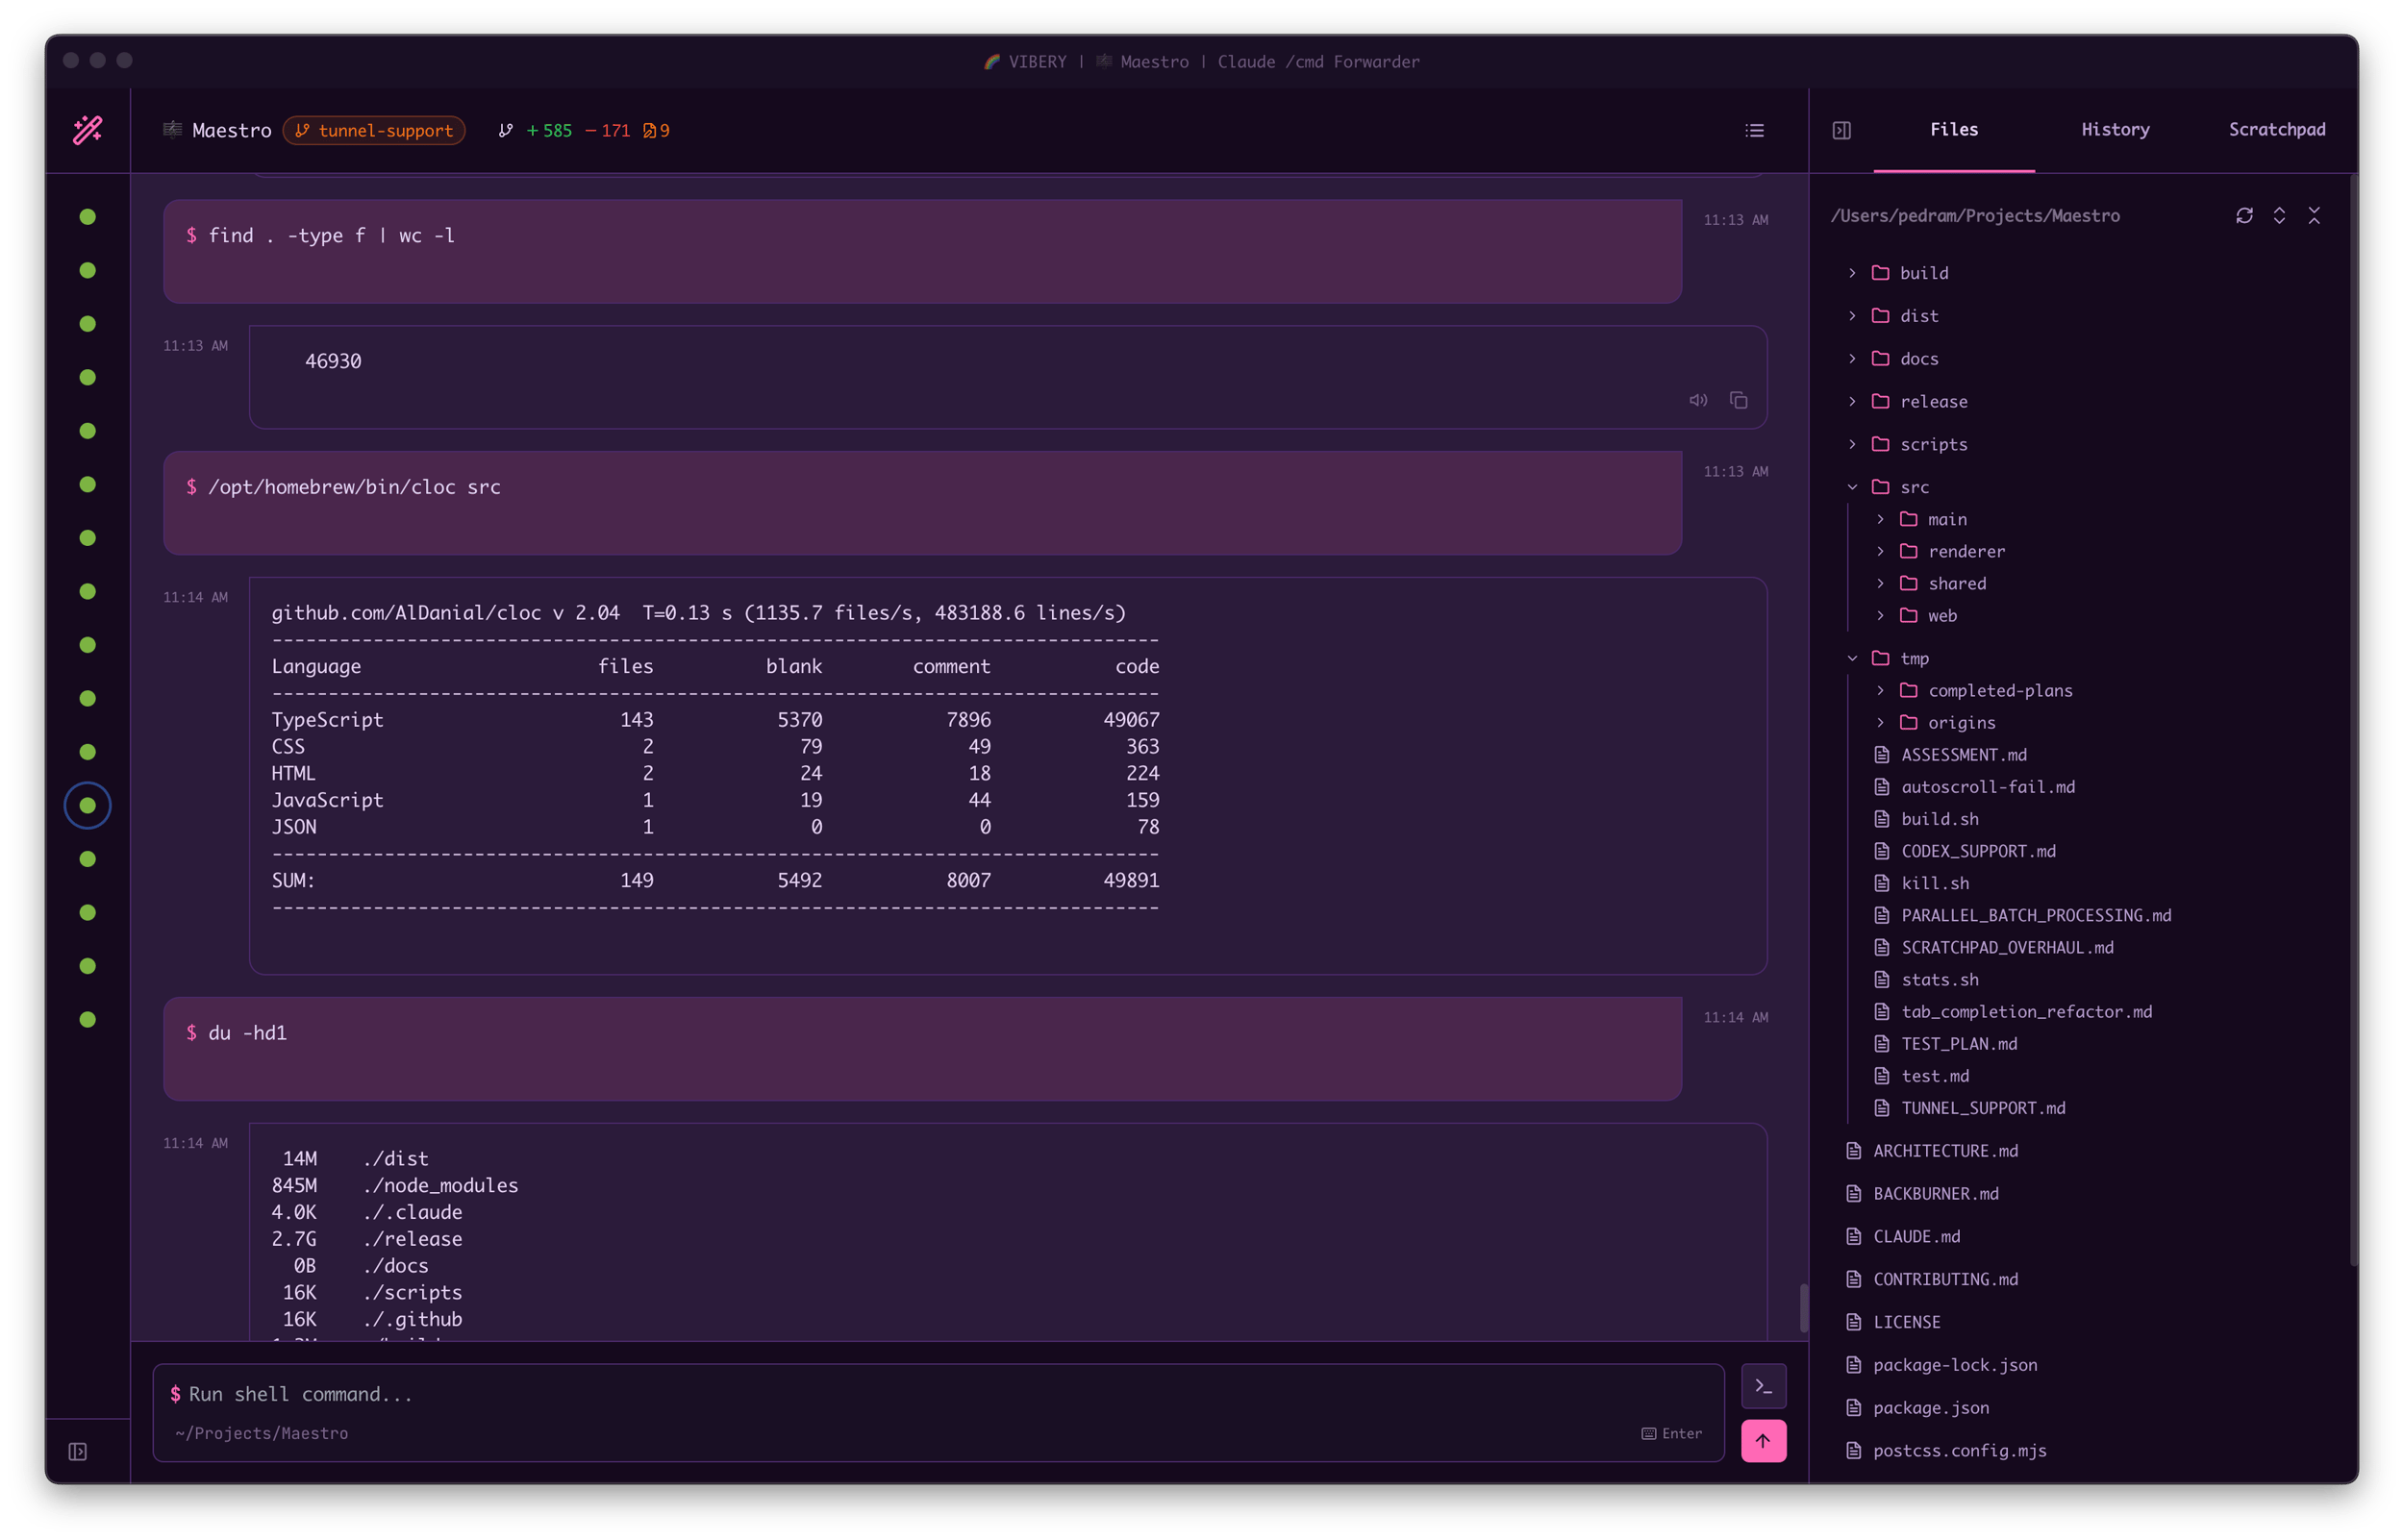
[](https://docs.runmaestro.ai/general-usage#agent-management)
Agent Management
----------------------------------------------------------------------------------
Agents are the core of Maestro — each agent represents an AI coding assistant running in its own workspace.
###
[](https://docs.runmaestro.ai/general-usage#creating-agents)
Creating Agents
**To create a new agent:**
1. Press `Cmd+N` / `Ctrl+N`, or click the **New Agent** button in the bottom-left sidebar
2. Choose **Manual Setup** or **Guided Setup** (Wizard) — see [Getting Started](https://docs.runmaestro.ai/getting-started)
for details on each path
3. For Manual Setup: select an available AI provider (Claude Code, Codex, OpenCode, or Factory Droid), choose a working directory, and optionally name the agent
**Advanced configuration options:**
* **New Session Message** — A hidden message prefixed to the first message whenever a new session (tab) is created. Use this for initial context, setup instructions, or persona definitions that should apply at the start of every conversation. Not visible in chat.
* **Nudge Message** — A hidden message appended to every interactive user message sent to the agent. This is useful for persistent instructions or reminders that guide the agent’s behavior across all conversations. **Note:** Nudge messages only apply to interactive AI messages — they are not included in Auto Run tasks.
* **Custom Path** — Override the default executable path
* **Custom Arguments** — Additional command-line arguments
* **Environment Variables** — Custom environment variables for the agent process
* **Model Selection** — Choose a specific model (if the provider supports it)
###
[](https://docs.runmaestro.ai/general-usage#editing-agents)
Editing Agents
Right-click any agent in the left panel and select **Edit Agent…** to modify its configuration. You can change the name, new session message, nudge message, custom paths, arguments, environment variables, and model.
###
[](https://docs.runmaestro.ai/general-usage#deleting-agents)
Deleting Agents
Right-click an agent and select **Remove Agent** to delete it. This removes the agent from Maestro but does not delete any files or AI session data.
###
[](https://docs.runmaestro.ai/general-usage#agent-configuration-via-quick-actions)
Agent Configuration via Quick Actions
Use `Cmd+K` / `Ctrl+K` → “Edit Agent” to quickly access agent configuration for the current session.
[](https://docs.runmaestro.ai/general-usage#left-panel-operations)
Left Panel Operations
--------------------------------------------------------------------------------------------
The left panel (sidebar) contains your agent list, groups, and navigation controls.
###
[](https://docs.runmaestro.ai/general-usage#filtering-and-search)
Filtering and Search
Press `Cmd+F` / `Ctrl+F` while the sidebar is focused to open the session filter. The filter:
* Searches agent names and AI tab names
* Automatically expands groups containing matches
* Shows matching bookmarked agents
* Searches worktree branch names
###
[](https://docs.runmaestro.ai/general-usage#bookmarks)
Bookmarks
Pin important agents to the top of the list:
* Right-click an agent → **Add Bookmark**
* Or use the context menu to toggle bookmark status
Bookmarked agents appear in a collapsible “Bookmarks” section at the top of the left panel.
###
[](https://docs.runmaestro.ai/general-usage#groups)
Groups
Organize agents into groups for better project management: **Creating groups:**
* `Cmd+K` / `Ctrl+K` → “Create Group”
* Groups have a name and emoji for visual identification
**Moving agents to groups:**
* Right-click an agent → **Move to Group** → Select target group
* Or drag-and-drop agents between groups
**Collapsing/Expanding:**
* Click the group header to collapse or expand
* Groups remember their collapsed state
###
[](https://docs.runmaestro.ai/general-usage#drag-and-drop)
Drag and Drop
Rearrange agents by dragging them:
* Drag agents between groups
* Drag to reorder within a group
* Drag to the “Ungrouped” section to remove from a group
###
[](https://docs.runmaestro.ai/general-usage#context-menu)
Context Menu
Right-click any agent for quick actions:
* **Rename** — Change the agent’s display name
* **Edit Agent…** — Open configuration modal
* **Add/Remove Bookmark** — Toggle bookmark status
* **Move to Group** — Organize into groups
* **Create Worktree** — Create a git worktree sub-agent (if configured)
* **Configure Worktrees** — Set up worktree configuration
* **Remove Agent** — Delete the agent from Maestro
###
[](https://docs.runmaestro.ai/general-usage#sidebar-width)
Sidebar Width
Drag the right edge of the sidebar to resize it. The width is persisted across sessions.
###
[](https://docs.runmaestro.ai/general-usage#collapsed-mode)
Collapsed Mode
Click the sidebar toggle (`Opt+Cmd+Left` / `Alt+Ctrl+Left`) to collapse the sidebar to icon-only mode. In collapsed mode:
* Agents show as icons with status indicators
* Hover for agent name tooltip
* Click to select an agent
[](https://docs.runmaestro.ai/general-usage#tab-management)
Tab Management
------------------------------------------------------------------------------
Each agent session can have multiple tabs, allowing you to work on different tasks within the same project workspace.
###
[](https://docs.runmaestro.ai/general-usage#automatic-tab-naming)
Automatic Tab Naming
When you send your first message to a new tab, Maestro automatically generates a descriptive name based on your request. This helps you identify tabs at a glance without manual renaming. **How it works:**
1. When you start a new conversation in a tab, your first message is analyzed
2. An AI generates a concise, relevant name (2-5 words)
3. The tab name updates automatically once the name is generated
4. If you’ve already renamed the tab, automatic naming is skipped
**Examples of generated tab names:**
| Your message | Generated name |
| --- | --- |
| ”Help me implement user authentication with JWT” | JWT Auth Implementation |
| ”Fix the bug in the checkout flow” | Checkout Bug Fix |
| ”Add dark mode support to the app” | Dark Mode Support |
| ”Refactor the database queries” | Database Query Refactor |
**Configuring automatic tab naming:**
* Go to **Settings** (`Cmd+,` / `Ctrl+,`) → **General**
* Toggle **Automatic Tab Naming** on or off
* Default: Enabled
Automatic tab naming uses the same AI agent as your session, including SSH remote configurations. The naming request runs in parallel with your main prompt, so there’s no delay to your workflow.
###
[](https://docs.runmaestro.ai/general-usage#manual-tab-renaming)
Manual Tab Renaming
You can always rename tabs manually:
* Right-click a tab → **Rename Tab**
* Or double-click the tab name to edit it directly
* Manual names take precedence over automatic naming
[](https://docs.runmaestro.ai/general-usage#session-management)
Session Management
--------------------------------------------------------------------------------------
Browse, star, rename, and resume past sessions. The Session Explorer (`Cmd+Shift+L` / `Ctrl+Shift+L`) shows all conversations for an agent with search, filtering, and quick actions. 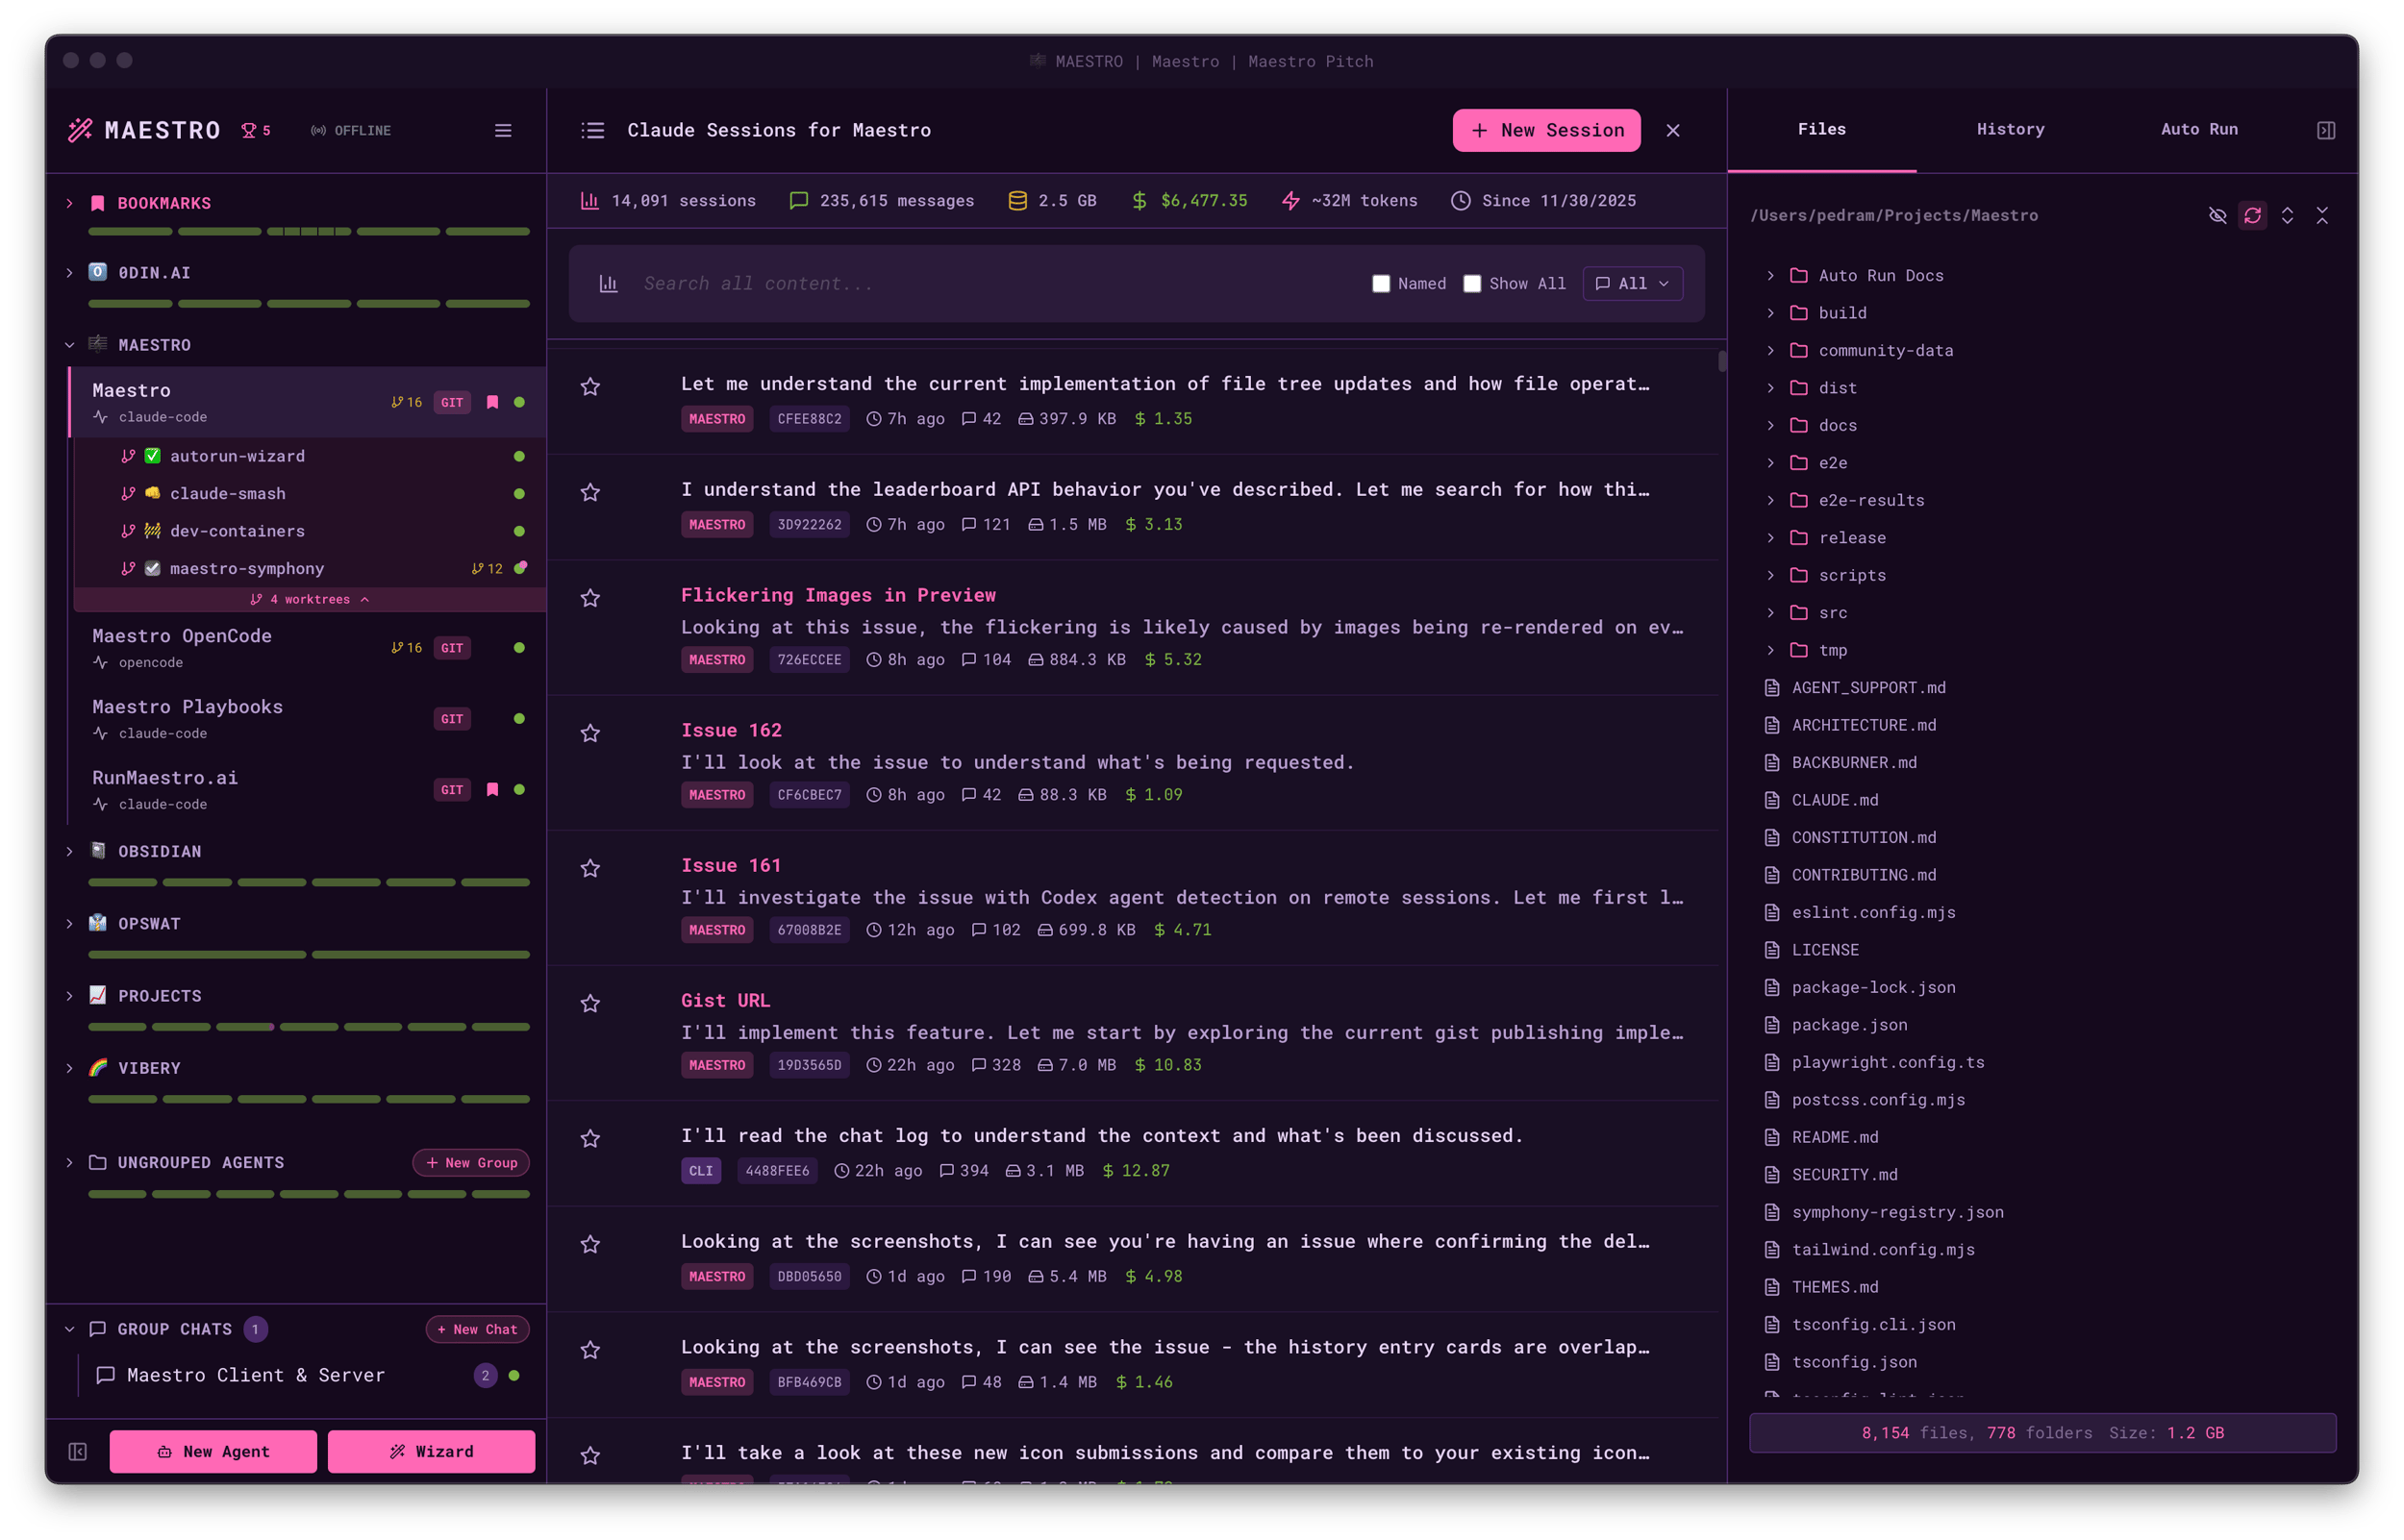
Was this page helpful?
YesNo
[Getting Started](https://docs.runmaestro.ai/getting-started)
[Keyboard Shortcuts](https://docs.runmaestro.ai/keyboard-shortcuts)
⌘I
---
# Keyboard Shortcuts - Maestro
[Skip to main content](https://docs.runmaestro.ai/keyboard-shortcuts#content-area)
[Maestro home page](https://runmaestro.ai/)
Search...
⌘K
Search...
Navigation
General Usage
Keyboard Shortcuts
On this page
* [Quick Actions (Cmd+K)](https://docs.runmaestro.ai/keyboard-shortcuts#quick-actions-cmd%2Bk)
* [Global Shortcuts](https://docs.runmaestro.ai/keyboard-shortcuts#global-shortcuts)
* [Panel Shortcuts](https://docs.runmaestro.ai/keyboard-shortcuts#panel-shortcuts)
* [AI Tab Shortcuts](https://docs.runmaestro.ai/keyboard-shortcuts#ai-tab-shortcuts)
* [Tab Management Shortcuts](https://docs.runmaestro.ai/keyboard-shortcuts#tab-management-shortcuts)
* [Tab Switcher](https://docs.runmaestro.ai/keyboard-shortcuts#tab-switcher)
* [Input & Output](https://docs.runmaestro.ai/keyboard-shortcuts#input-%26-output)
* [Font Size](https://docs.runmaestro.ai/keyboard-shortcuts#font-size)
* [Command Terminal](https://docs.runmaestro.ai/keyboard-shortcuts#command-terminal)
* [Tab Completion](https://docs.runmaestro.ai/keyboard-shortcuts#tab-completion)
* [@ File Mentions (AI Terminal)](https://docs.runmaestro.ai/keyboard-shortcuts#%40-file-mentions-ai-terminal)
* [Navigation & Search](https://docs.runmaestro.ai/keyboard-shortcuts#navigation-%26-search)
* [File Preview](https://docs.runmaestro.ai/keyboard-shortcuts#file-preview)
* [Document Graph](https://docs.runmaestro.ai/keyboard-shortcuts#document-graph)
* [Customizing Shortcuts](https://docs.runmaestro.ai/keyboard-shortcuts#customizing-shortcuts)
* [Keyboard Mastery](https://docs.runmaestro.ai/keyboard-shortcuts#keyboard-mastery)
[](https://docs.runmaestro.ai/keyboard-shortcuts#quick-actions-cmd+k)
Quick Actions (Cmd+K)
-----------------------------------------------------------------------------------------------
The command palette is your gateway to nearly every action in Maestro. Press `Cmd+K` (Mac) or `Ctrl+K` (Windows/Linux) to open it. 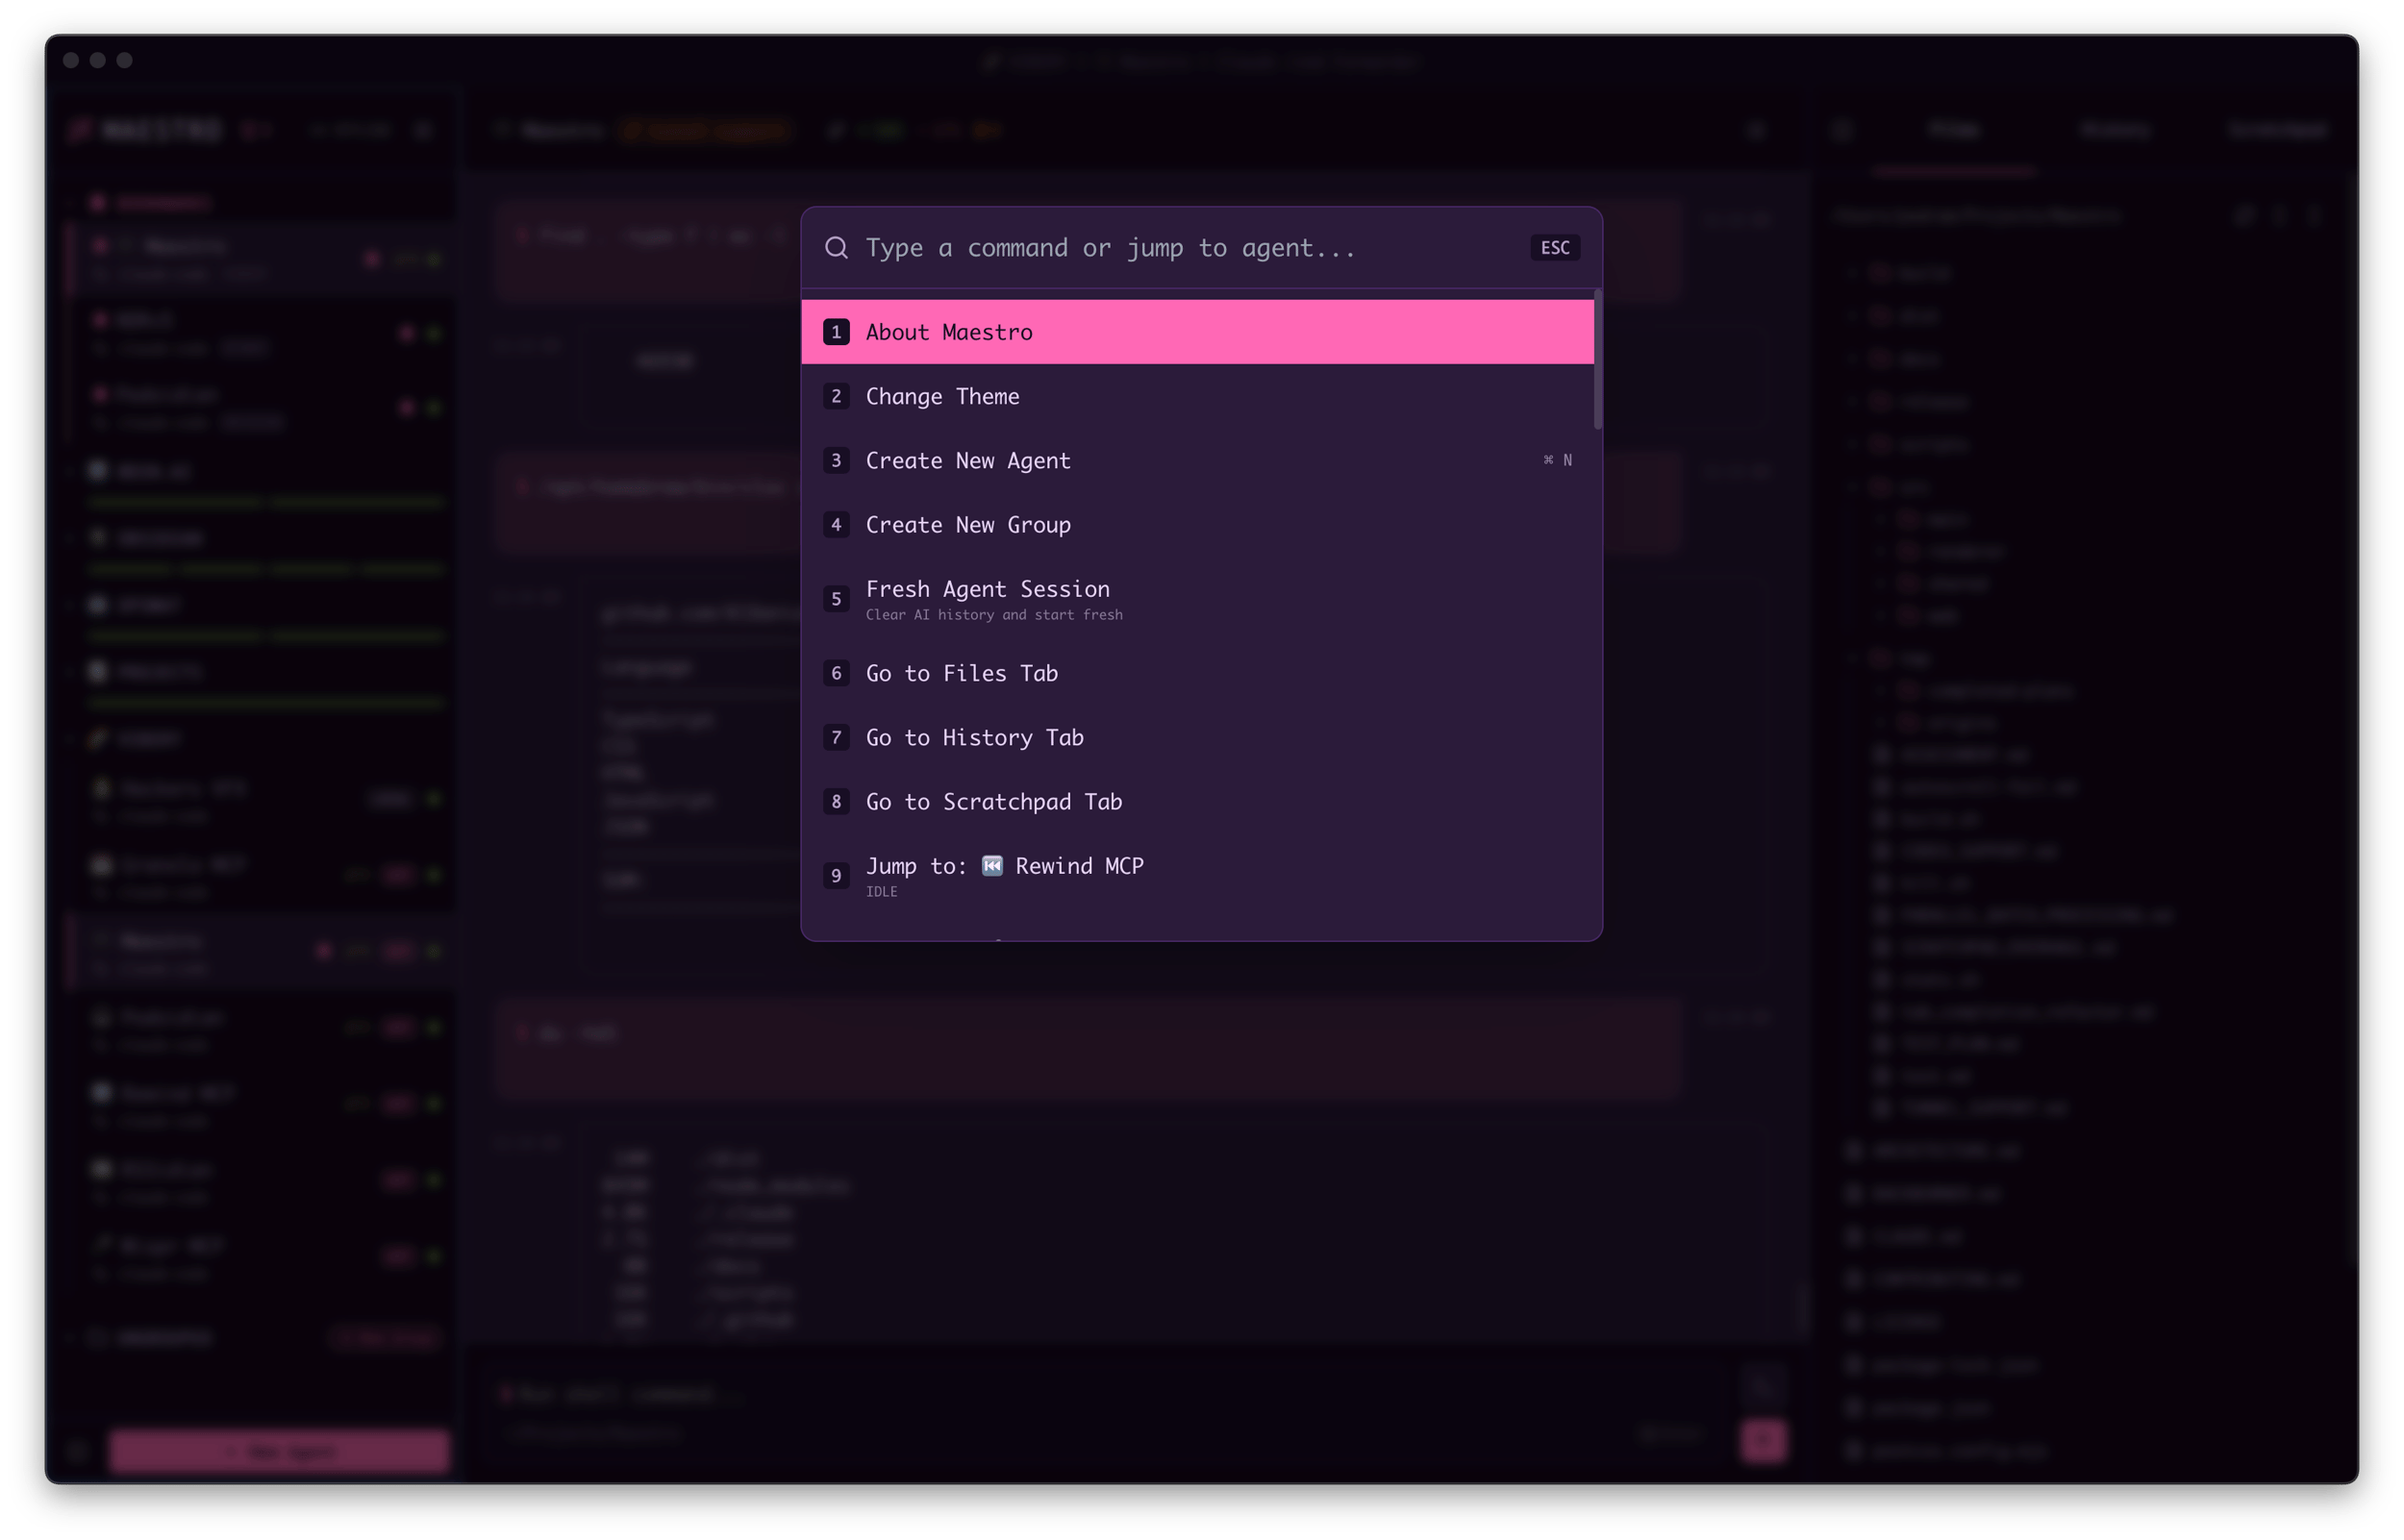
[](https://docs.runmaestro.ai/keyboard-shortcuts#global-shortcuts)
Global Shortcuts
---------------------------------------------------------------------------------------
| Action | macOS | Windows/Linux |
| --- | --- | --- |
| Quick Actions | `Cmd+K` | `Ctrl+K` |
| Agent Switcher | `Cmd+O` | `Ctrl+O` |
| Toggle Left Panel | `Opt+Cmd+Left` | `Alt+Ctrl+Left` |
| Toggle Right Panel | `Opt+Cmd+Right` | `Alt+Ctrl+Right` |
| New Agent | `Cmd+N` | `Ctrl+N` |
| New Agent Wizard | `Cmd+Shift+N` | `Ctrl+Shift+N` |
| New Group Chat | `Opt+Cmd+C` | `Alt+Ctrl+C` |
| Remove Agent | `Cmd+Shift+Backspace` | `Ctrl+Shift+Backspace` |
| Move Agent to Group | `Cmd+Shift+M` | `Ctrl+Shift+M` |
| Previous Agent | `Cmd+[` | `Ctrl+[` |\
| Next Agent | `Cmd+]` | `Ctrl+]` |
| Navigate Back | `Cmd+Shift+,` | `Ctrl+Shift+,` |
| Navigate Forward | `Cmd+Shift+.` | `Ctrl+Shift+.` |
| Jump to Agent (1-9, 0=10th) | `Opt+Cmd+NUMBER` | `Alt+Ctrl+NUMBER` |
| Switch AI/Shell Mode | `Cmd+J` | `Ctrl+J` |
| Toggle Input/Output Focus | `Cmd+.` | `Ctrl+.` |
| Focus Left Panel | `Cmd+Shift+A` | `Ctrl+Shift+A` |
| Show Shortcuts Help | `Cmd+/` | `Ctrl+/` |
| Open Settings | `Cmd+,` | `Ctrl+,` |
| Open Agent Settings | `Opt+Cmd+,` | `Alt+Ctrl+,` |
| View Agent Sessions | `Cmd+Shift+L` | `Ctrl+Shift+L` |
| System Log Viewer | `Opt+Cmd+L` | `Alt+Ctrl+L` |
| System Process Monitor | `Opt+Cmd+P` | `Alt+Ctrl+P` |
| Usage Dashboard | `Opt+Cmd+U` | `Alt+Ctrl+U` |
| Jump to Nearest Terminal | `Opt+Cmd+J` | `Alt+Ctrl+J` |
| Jump to Bottom | `Opt+J` | `Alt+J` |
| Toggle Bookmark | `Cmd+Shift+B` | `Ctrl+Shift+B` |
| Maestro Symphony | `Cmd+Shift+Y` | `Ctrl+Shift+Y` |
| Director’s Notes | `Cmd+Shift+O` | `Ctrl+Shift+O` |
| Maestro Cue | `Opt+Q` | `Alt+Q` |
| Forced Parallel Send | `Cmd+Shift+Enter` | `Ctrl+Shift+Enter` |
| Cycle Focus Areas | `Tab` | `Tab` |
| Cycle Focus Backwards | `Shift+Tab` | `Shift+Tab` |
[](https://docs.runmaestro.ai/keyboard-shortcuts#panel-shortcuts)
Panel Shortcuts
-------------------------------------------------------------------------------------
| Action | macOS | Windows/Linux |
| --- | --- | --- |
| Go to Files Tab | `Cmd+Shift+F` | `Ctrl+Shift+F` |
| Go to History Tab | `Cmd+Shift+H` | `Ctrl+Shift+H` |
| Go to Auto Run Tab | `Cmd+Shift+1` | `Ctrl+Shift+1` |
| Toggle Edit/Preview (Markdown) | `Cmd+E` | `Ctrl+E` |
| Toggle Auto Run Expanded | `Cmd+Shift+E` | `Ctrl+Shift+E` |
| Insert Checkbox (Auto Run) | `Cmd+L` | `Ctrl+L` |
| View Git Diff | `Cmd+Shift+D` | `Ctrl+Shift+D` |
| View Git Log | `Cmd+Shift+G` | `Ctrl+Shift+G` |
| Fuzzy File Search | `Cmd+G` | `Ctrl+G` |
[](https://docs.runmaestro.ai/keyboard-shortcuts#ai-tab-shortcuts)
AI Tab Shortcuts
---------------------------------------------------------------------------------------
These shortcuts work in AI Terminal mode and affect the current tab:
| Action | macOS | Windows/Linux |
| --- | --- | --- |
| Toggle Save to History | `Cmd+S` | `Ctrl+S` |
| Toggle Read-Only Mode | `Cmd+R` | `Ctrl+R` |
| Toggle Show Thinking | `Cmd+Shift+K` | `Ctrl+Shift+K` |
| Toggle Tab Star | `Cmd+Shift+S` | `Ctrl+Shift+S` |
| Toggle Tab Unread | `Opt+Shift+U` | `Alt+Shift+U` |
| Filter Unread Agents | `Cmd+Shift+U` | `Ctrl+Shift+U` |
| Filter Unread Tabs | `Cmd+U` | `Ctrl+U` |
| Next Unread/Draft Tab | `Opt+Cmd+Down` | `Alt+Ctrl+Down` |
| Open Image Carousel | `Cmd+Y` | `Ctrl+Y` |
| Open Prompt Composer | `Cmd+Shift+P` | `Ctrl+Shift+P` |
Toggle states are saved per-tab. See [Input Toggles](https://docs.runmaestro.ai/general-usage#input-toggles)
for details on configuring defaults.
[](https://docs.runmaestro.ai/keyboard-shortcuts#tab-management-shortcuts)
Tab Management Shortcuts
-------------------------------------------------------------------------------------------------------
| Action | macOS | Windows/Linux |
| --- | --- | --- |
| New Tab | `Cmd+T` | `Ctrl+T` |
| New Browser Tab | `Cmd+B` | `Ctrl+B` |
| New File Tab | `Opt+N` | `Alt+N` |
| New Terminal Tab | `Ctrl+Shift+` + `` ` `` | `Ctrl+Shift+` + `` ` `` |
| Focus Browser Address Bar | `Cmd+L` | `Ctrl+L` |
| Close Tab | `Cmd+W` | `Ctrl+W` |
| Close All Tabs | `Cmd+Shift+W` | `Ctrl+Shift+W` |
| Close Other Tabs | `Opt+Cmd+W` | `Alt+Ctrl+W` |
| Close Tabs to Left | `Cmd+Shift+Opt+[` | `Ctrl+Shift+Alt+[` |\
| Close Tabs to Right | `Cmd+Shift+Opt+]` | `Ctrl+Shift+Alt+]` |
| Reopen Closed Tab | `Cmd+Shift+T` | `Ctrl+Shift+T` |
| Previous Tab | `Cmd+Shift+[` | `Ctrl+Shift+[` |\
| Next Tab | `Cmd+Shift+]` | `Ctrl+Shift+]` |
| Tab Switcher | `Opt+Cmd+T` | `Alt+Ctrl+T` |
| Rename Tab | `Cmd+Shift+R` | `Ctrl+Shift+R` |
| Go to Tab 1-9 | `Cmd+1` through `Cmd+9` | `Ctrl+1` through `Ctrl+9` |
| Go to Last Tab | `Cmd+0` | `Ctrl+0` |
###
[](https://docs.runmaestro.ai/keyboard-shortcuts#tab-switcher)
Tab Switcher
The Tab Switcher provides fuzzy search across all open tabs with quick navigation: 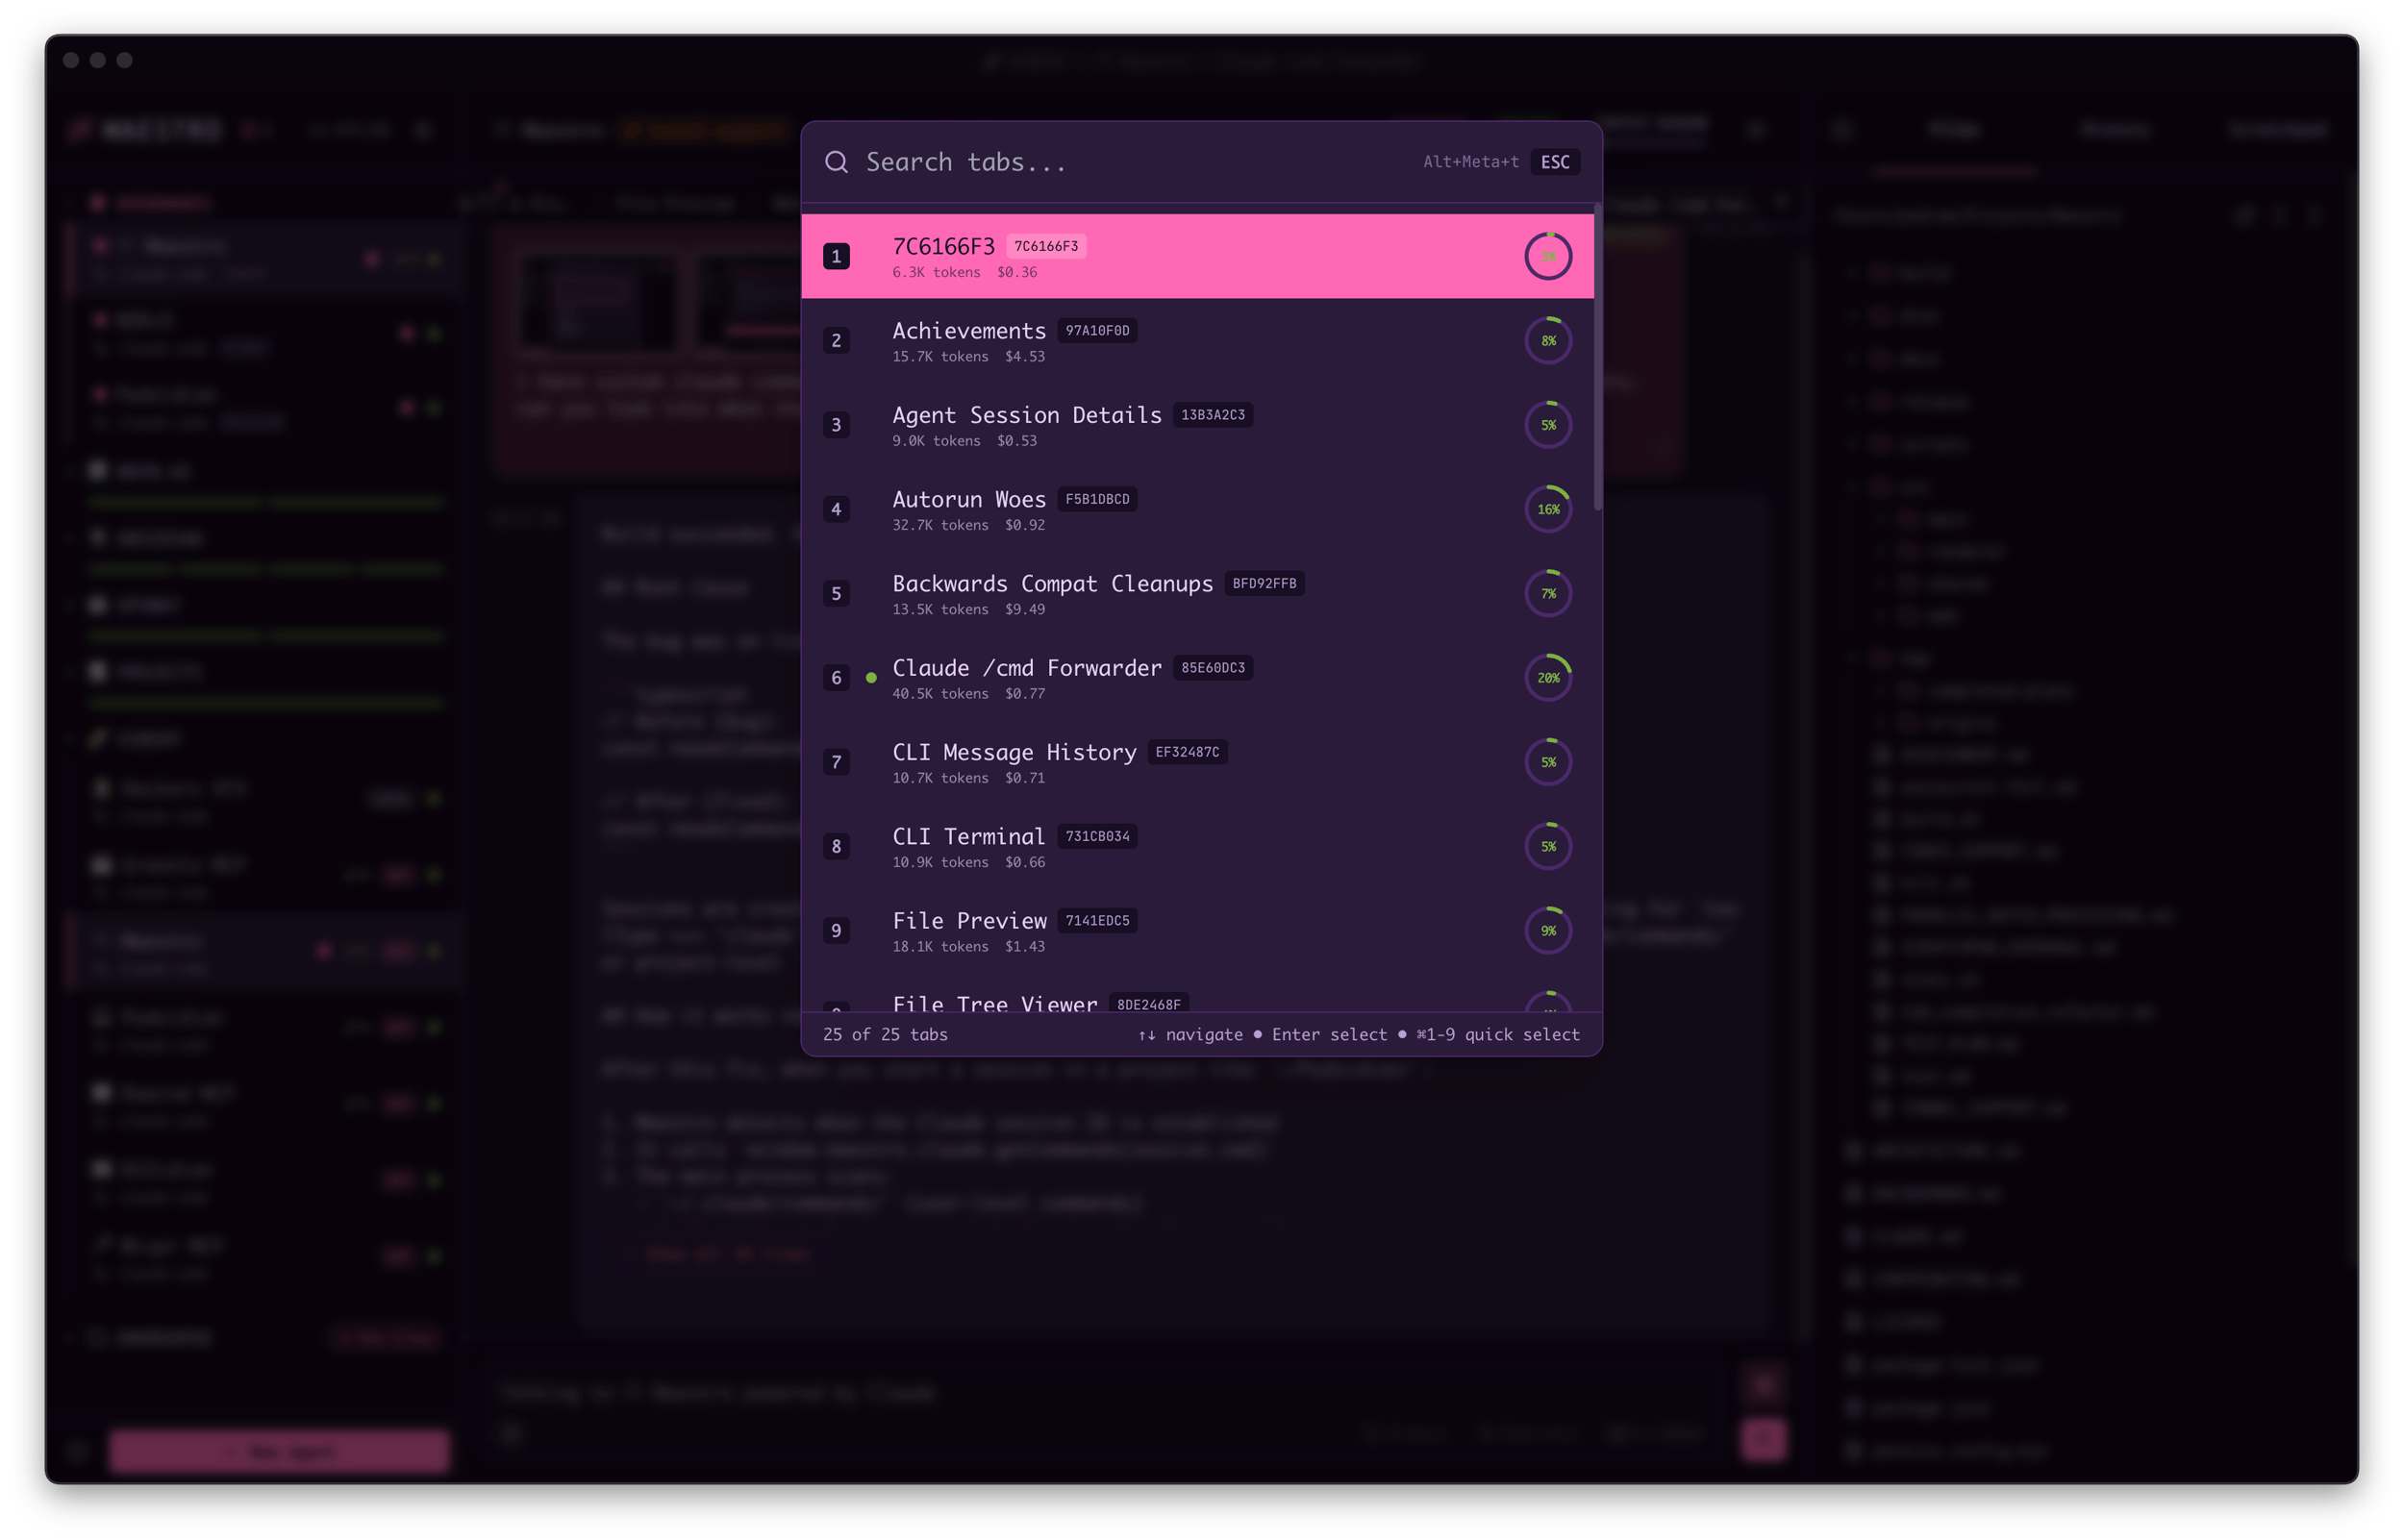
* **Search** — Type to filter tabs by name or session ID
* **Quick select** — Press `1-9` to jump directly to a numbered tab
* **Navigate** — Use `Up/Down Arrow` to move through results
* **Select** — Press `Enter` to switch to the highlighted tab
* **Context info** — Each tab shows token count, cost, and context usage
The bulk close operations (Close All, Close Others, Close Left, Close Right) are also available via the [Tab Menu](https://docs.runmaestro.ai/context-management#tab-close-operations)
hover overlay and Quick Actions (`Cmd+K`).
[](https://docs.runmaestro.ai/keyboard-shortcuts#input-&-output)
Input & Output
-----------------------------------------------------------------------------------
| Action | Key |
| --- | --- |
| Send Message | `Enter` or `Cmd+Enter` (configurable in Settings) |
| Multiline Input | `Shift+Enter` |
| Navigate Command History | `Up Arrow` while in input |
| Slash Commands | Type `/` to open autocomplete |
| Focus Output | `Esc` while in input |
| Focus Input | `Esc` while in output |
| Open Output Search | `Cmd+F` while in output |
| Scroll Output | `Up/Down Arrow` while in output |
| Page Up/Down | `Alt+Up/Down Arrow` while in output |
| Jump to Top/Bottom | `Cmd+Up/Down Arrow` while in output |
[](https://docs.runmaestro.ai/keyboard-shortcuts#font-size)
Font Size
-------------------------------------------------------------------------
| Action | macOS | Windows/Linux |
| --- | --- | --- |
| Increase Font Size | `Cmd+=` | `Ctrl+=` |
| Decrease Font Size | `Cmd+-` | `Ctrl+-` |
| Reset Font Size | `Cmd+Shift+0` | `Ctrl+Shift+0` |
[](https://docs.runmaestro.ai/keyboard-shortcuts#command-terminal)
Command Terminal
---------------------------------------------------------------------------------------
| Action | macOS | Windows/Linux |
| --- | --- | --- |
| Clear Terminal | `Cmd+Shift+K` | `Ctrl+Shift+K` |
###
[](https://docs.runmaestro.ai/keyboard-shortcuts#tab-completion)
Tab Completion
The Command Terminal provides intelligent tab completion for faster command entry:
| Action | Key |
| --- | --- |
| Open Tab Completion | `Tab` (when there’s input text) |
| Navigate Suggestions | `Up/Down Arrow` |
| Select Suggestion | `Enter` |
| Cycle Filter Types | `Tab` (while dropdown is open, git repos only) |
| Cycle Filter Backwards | `Shift+Tab` (while dropdown is open) |
| Close Dropdown | `Esc` |
**Completion Sources:**
* **History** - Previous shell commands from your session
* **Files/Folders** - Files and directories in your current working directory
* **Git Branches** - Local and remote branches (git repos only)
* **Git Tags** - Available tags (git repos only)
In git repositories, filter buttons appear in the dropdown header allowing you to filter by type (All, History, Branches, Tags, Files). Use `Tab`/`Shift+Tab` to cycle through filters or click directly.
[](https://docs.runmaestro.ai/keyboard-shortcuts#@-file-mentions-ai-terminal)
@ File Mentions (AI Terminal)
---------------------------------------------------------------------------------------------------------------
In AI mode, use `@` to reference files in your prompts:
| Action | Key |
| --- | --- |
| Open File Picker | Type `@` followed by a search term |
| Navigate Suggestions | `Up/Down Arrow` |
| Select File | `Tab` or `Enter` |
| Close Dropdown | `Esc` |
**Example**: Type `@readme` to see matching files, then select to insert the file reference into your prompt. The AI will have context about the referenced file.
[](https://docs.runmaestro.ai/keyboard-shortcuts#navigation-&-search)
Navigation & Search
---------------------------------------------------------------------------------------------
| Action | macOS | Windows/Linux |
| --- | --- | --- |
| Navigate Agents | `Up/Down Arrow` while in sidebar | `Up/Down Arrow` while in sidebar |
| Select Agent | `Enter` while in sidebar | `Enter` while in sidebar |
| Filter Sessions (in Left Panel) | `Cmd+F` | `Ctrl+F` |
| Navigate Files | `Up/Down Arrow` while in file tree | `Up/Down Arrow` while in file tree |
| Filter Files (in Files tab) | `Cmd+F` | `Ctrl+F` |
| Filter History (in History tab) | `Cmd+F` | `Ctrl+F` |
| Search Output (in Main Window) | `Cmd+F` | `Ctrl+F` |
| Search System Logs | `Cmd+F` | `Ctrl+F` |
| Search Director’s Notes | `Cmd+F` | `Ctrl+F` |
| Open File Preview | `Enter` on selected file | `Enter` on selected file |
| Close Preview/Filter/Modal | `Esc` | `Esc` |
[](https://docs.runmaestro.ai/keyboard-shortcuts#file-preview)
File Preview
-------------------------------------------------------------------------------
| Action | macOS | Windows/Linux |
| --- | --- | --- |
| Copy File Path | `Cmd+P` | `Ctrl+P` |
| Open Search | `Cmd+F` | `Ctrl+F` |
| Go Back | `Cmd+Left` | `Ctrl+Left` |
| Go Forward | `Cmd+Right` | `Ctrl+Right` |
| Scroll | `Up/Down Arrow` | `Up/Down Arrow` |
| Close | `Esc` | `Esc` |
[](https://docs.runmaestro.ai/keyboard-shortcuts#document-graph)
Document Graph
-----------------------------------------------------------------------------------
| Action | Key |
| --- | --- |
| Navigate to connected nodes | `Arrow Keys` |
| Re-center on node (document) | `Enter` |
| Open URL (external link) | `Enter` |
| Open document in File Preview | `O` |
| Close the graph | `Esc` |
[](https://docs.runmaestro.ai/keyboard-shortcuts#customizing-shortcuts)
Customizing Shortcuts
-------------------------------------------------------------------------------------------------
Most shortcuts can be remapped to fit your workflow:
1. Open **Settings** (`Cmd+,` / `Ctrl+,`) → **Shortcuts** tab
2. Find the action you want to remap
3. Click the current key binding (shows the shortcut like `⌘ K` or `Ctrl+K`)
4. Press your desired key combination
5. The new binding is saved immediately
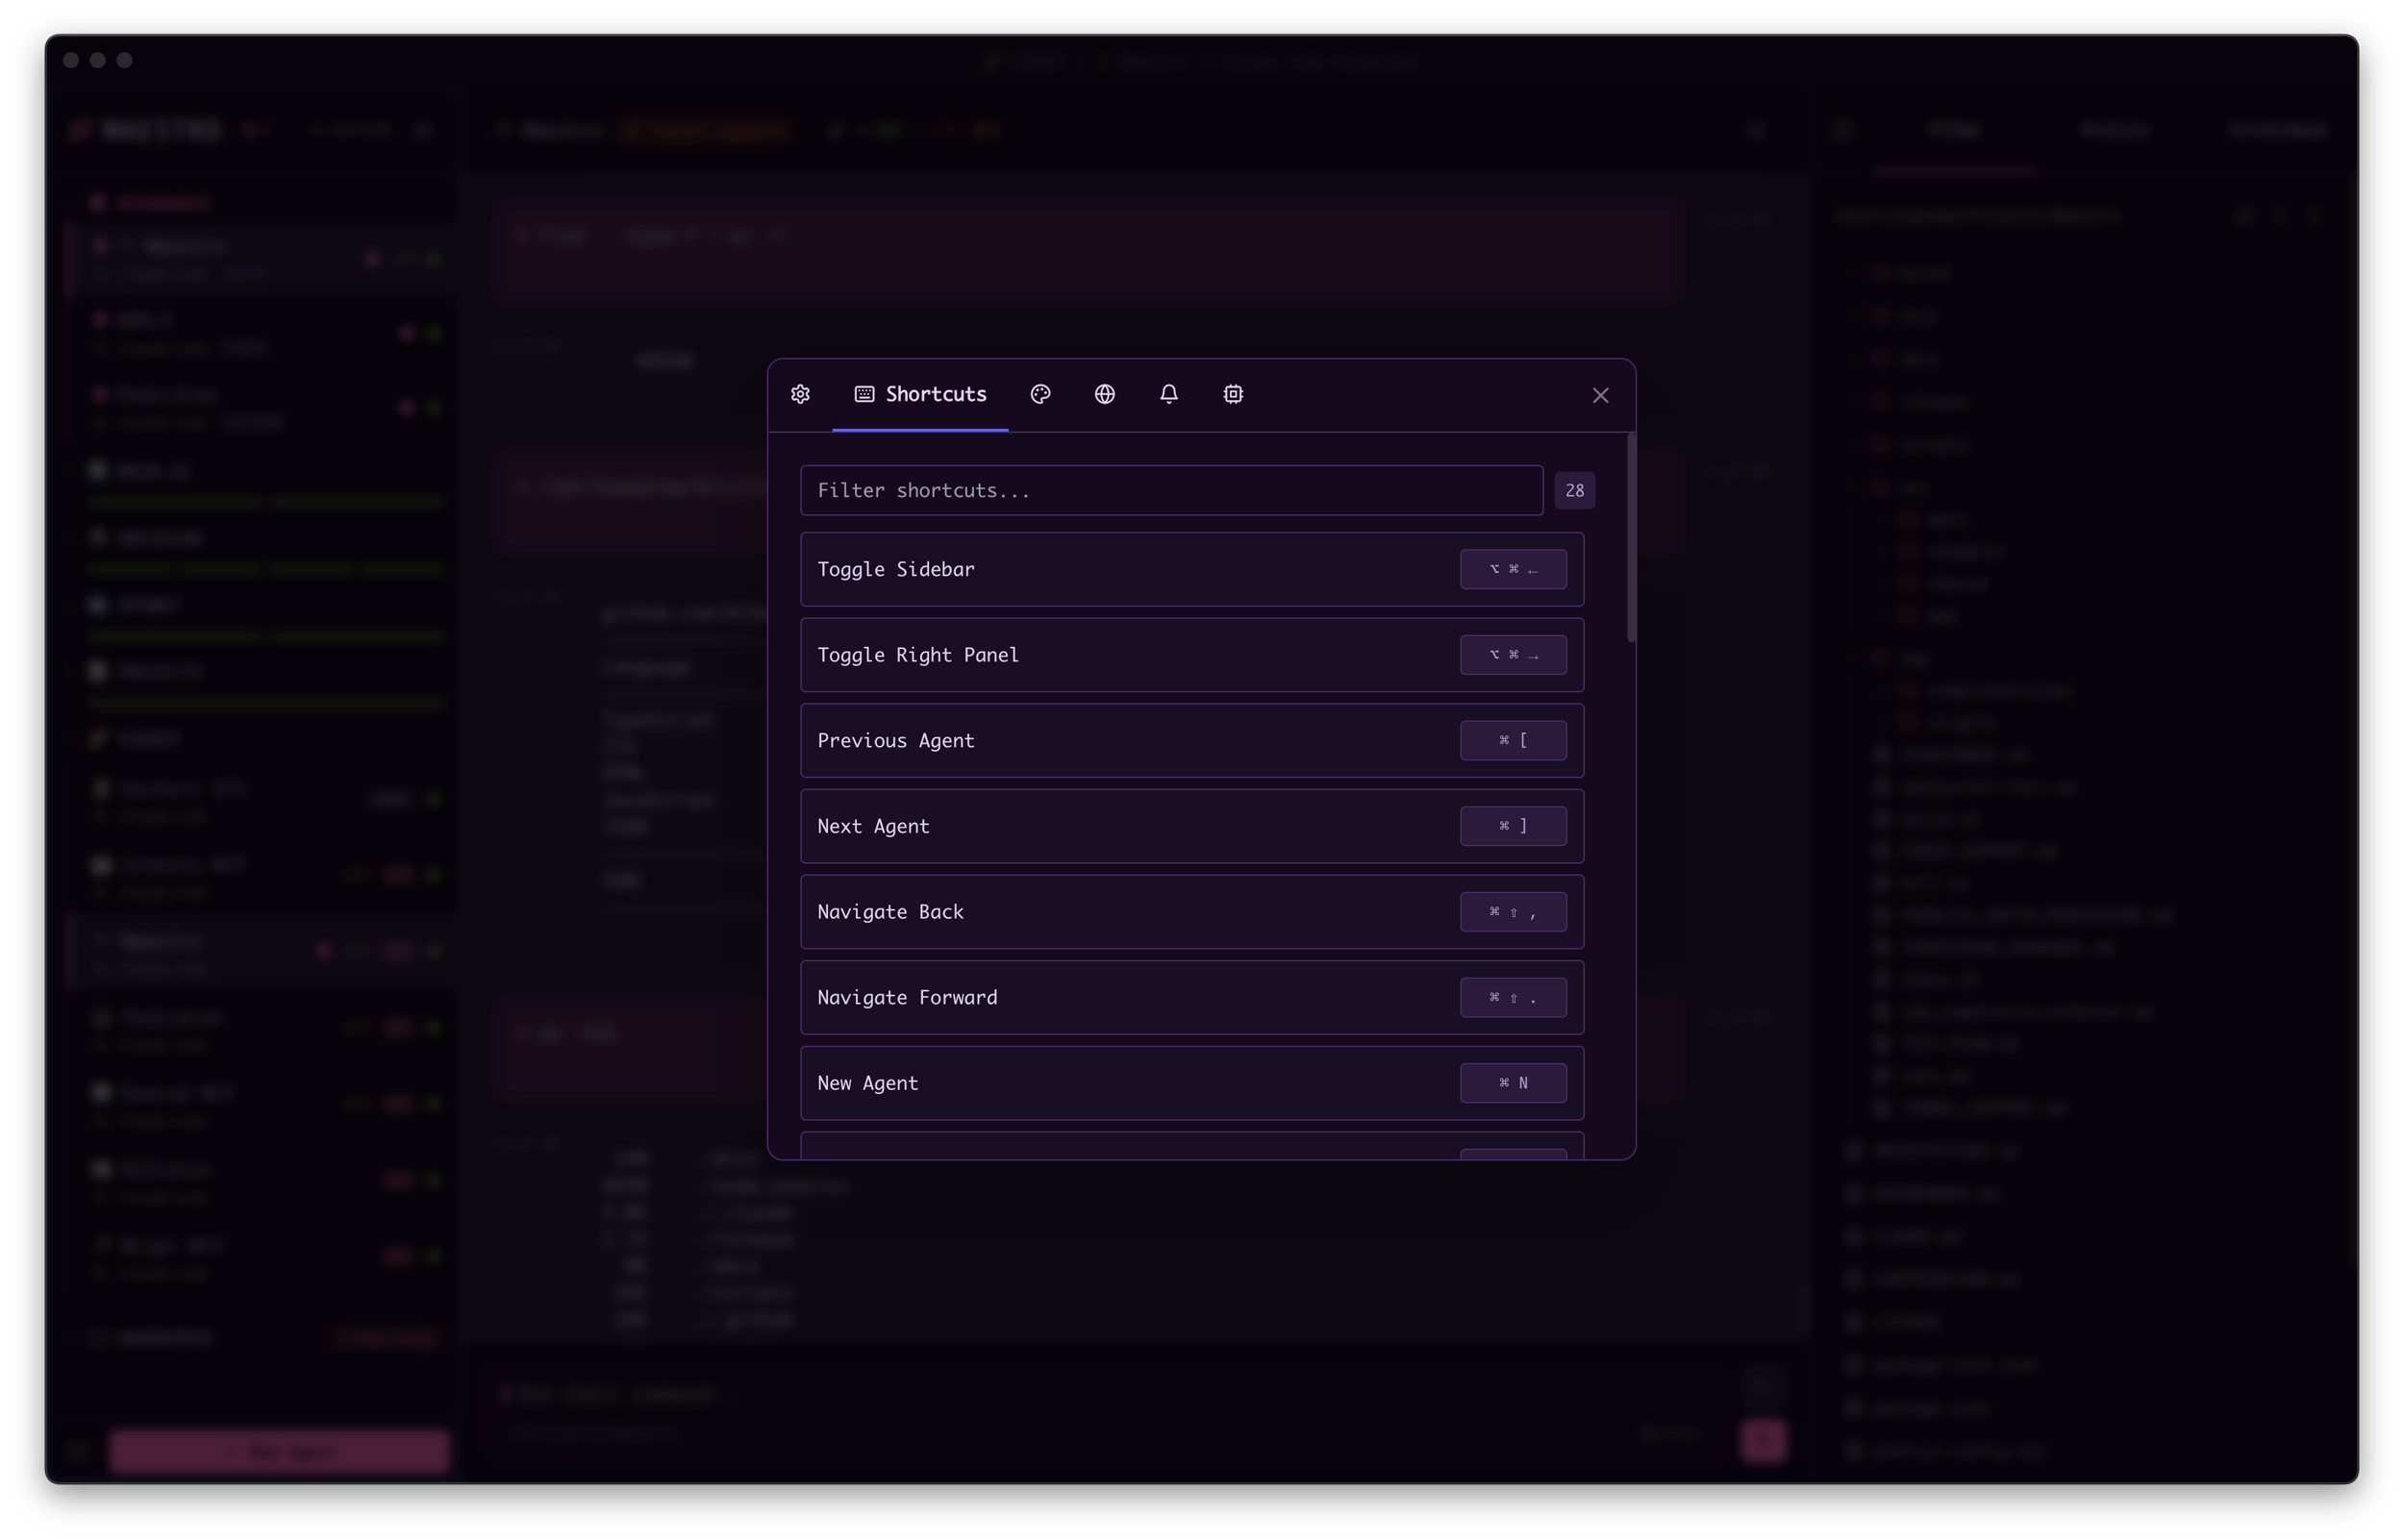 **Tips:**
* Press `Esc` while recording to cancel without changing the shortcut
* Modifier keys alone (Cmd, Ctrl, Alt, Shift) won’t register — you need a final key
* Some shortcuts are fixed and cannot be remapped (like `Esc` to close modals)
* Conflicting shortcuts will override the previous binding
**Resetting shortcuts:** There’s currently no “reset to default” button — if you need to restore defaults, you can find the original bindings in this documentation or delete the shortcuts from your settings file.
[](https://docs.runmaestro.ai/keyboard-shortcuts#keyboard-mastery)
Keyboard Mastery
---------------------------------------------------------------------------------------
Maestro tracks your keyboard shortcut usage and rewards you for becoming a power user. As you discover and use more shortcuts, you’ll level up through 5 mastery levels:
| Level | Title | Threshold |
| --- | --- | --- |
| 0 | **Beginner** | 0% |
| 1 | **Student** | 25% |
| 2 | **Performer** | 50% |
| 3 | **Virtuoso** | 75% |
| 4 | **Keyboard Maestro** | 100% |
**Tracking your progress:**
* Open the **Shortcuts Help** panel (`Cmd+/` / `Ctrl+/`) to see your mastery percentage and current level
* Each shortcut displays a checkmark once you’ve used it
* A progress bar shows how many shortcuts you’ve mastered out of the total
* When you reach a new level, you’ll see a celebration with confetti
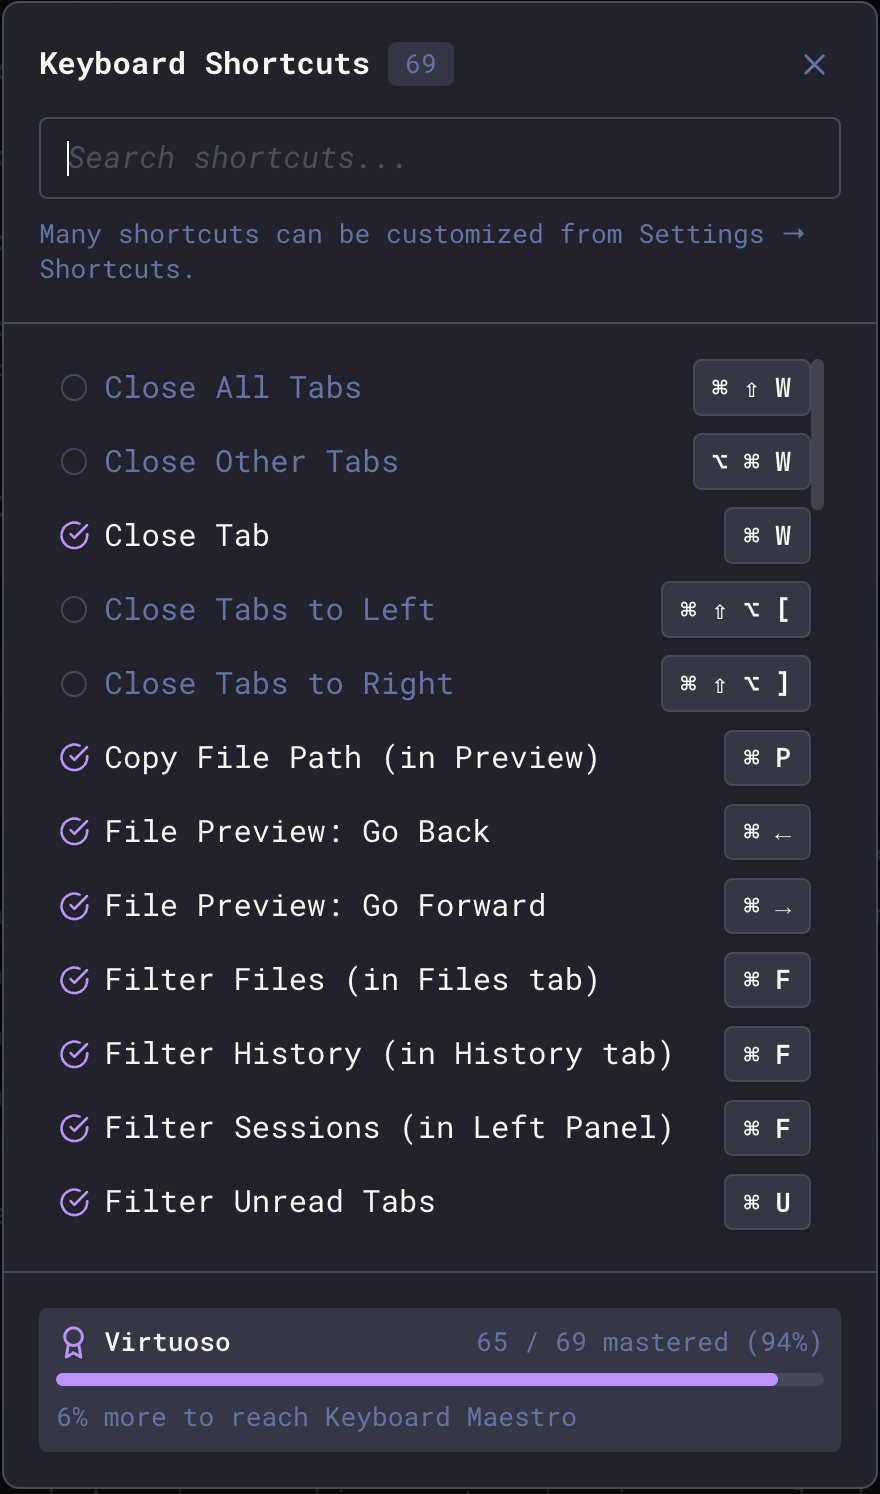 The modal shows all available shortcuts with checkmarks indicating which you’ve mastered. Use the search bar to find specific shortcuts quickly. **Why keyboard shortcuts matter:** Using shortcuts keeps you in flow state, reduces context switching, and dramatically speeds up your workflow. Maestro is designed for keyboard-first operation — the less you reach for the mouse, the faster you’ll work. Keyboard Mastery is separate from [Conductor Ranks](https://docs.runmaestro.ai/achievements)
, which track cumulative Auto Run time. Both systems reward you for mastering different aspects of Maestro.
Was this page helpful?
YesNo
[General Usage](https://docs.runmaestro.ai/general-usage)
[Slash Commands](https://docs.runmaestro.ai/slash-commands)
⌘I
---
# Local Manifest - Maestro
[Skip to main content](https://docs.runmaestro.ai/local-manifest#content-area)
[Maestro home page](https://runmaestro.ai/)
Search...
⌘K
Search...
Navigation
Auto Run
Local Manifest
On this page
* [Local Manifest for Custom Playbooks](https://docs.runmaestro.ai/local-manifest#local-manifest-for-custom-playbooks)
* [Overview](https://docs.runmaestro.ai/local-manifest#overview)
* [Use Cases](https://docs.runmaestro.ai/local-manifest#use-cases)
* [1\. Bespoke Playbooks](https://docs.runmaestro.ai/local-manifest#1-bespoke-playbooks)
* [2\. Playbook Development](https://docs.runmaestro.ai/local-manifest#2-playbook-development)
* [How It Works](https://docs.runmaestro.ai/local-manifest#how-it-works)
* [Merge Semantics](https://docs.runmaestro.ai/local-manifest#merge-semantics)
* [Path Resolution](https://docs.runmaestro.ai/local-manifest#path-resolution)
* [Schema](https://docs.runmaestro.ai/local-manifest#schema)
* [Required Fields](https://docs.runmaestro.ai/local-manifest#required-fields)
* [Optional Fields](https://docs.runmaestro.ai/local-manifest#optional-fields)
* [Creating a Local Playbook](https://docs.runmaestro.ai/local-manifest#creating-a-local-playbook)
* [Step 1: Create Playbook Files](https://docs.runmaestro.ai/local-manifest#step-1-create-playbook-files)
* [Step 2: Create local-manifest.json](https://docs.runmaestro.ai/local-manifest#step-2-create-local-manifest-json)
* [Step 3: Open Playbook Exchange](https://docs.runmaestro.ai/local-manifest#step-3-open-playbook-exchange)
* [Step 4: Import and Use](https://docs.runmaestro.ai/local-manifest#step-4-import-and-use)
* [Hot Reload](https://docs.runmaestro.ai/local-manifest#hot-reload)
* [Error Handling](https://docs.runmaestro.ai/local-manifest#error-handling)
* [Invalid JSON](https://docs.runmaestro.ai/local-manifest#invalid-json)
* [Missing Required Fields](https://docs.runmaestro.ai/local-manifest#missing-required-fields)
* [Local Path Doesn’t Exist](https://docs.runmaestro.ai/local-manifest#local-path-doesn%E2%80%99t-exist)
* [File Watch Errors](https://docs.runmaestro.ai/local-manifest#file-watch-errors)
* [UI Indicators](https://docs.runmaestro.ai/local-manifest#ui-indicators)
* [Development Workflow](https://docs.runmaestro.ai/local-manifest#development-workflow)
* [Testing Before Publishing](https://docs.runmaestro.ai/local-manifest#testing-before-publishing)
* [Overriding Official Playbooks](https://docs.runmaestro.ai/local-manifest#overriding-official-playbooks)
* [Troubleshooting](https://docs.runmaestro.ai/local-manifest#troubleshooting)
* [Playbook Doesn’t Appear](https://docs.runmaestro.ai/local-manifest#playbook-doesn%E2%80%99t-appear)
* [Import Fails](https://docs.runmaestro.ai/local-manifest#import-fails)
* [Hot Reload Not Working](https://docs.runmaestro.ai/local-manifest#hot-reload-not-working)
* [Related Files](https://docs.runmaestro.ai/local-manifest#related-files)
* [Security Considerations](https://docs.runmaestro.ai/local-manifest#security-considerations)
* [Future Enhancements](https://docs.runmaestro.ai/local-manifest#future-enhancements)
[](https://docs.runmaestro.ai/local-manifest#local-manifest-for-custom-playbooks)
Local Manifest for Custom Playbooks
=========================================================================================================================
The local manifest feature allows you to extend the Playbook Exchange with custom or work-in-progress playbooks that are stored locally instead of in the public GitHub repository.
[](https://docs.runmaestro.ai/local-manifest#overview)
Overview
-------------------------------------------------------------------
* **File Location:** `/local-manifest.json` (same directory as `marketplace-cache.json`)
* **Format:** Same structure as the official `manifest.json` from GitHub
* **Optional:** If the file doesn’t exist, Maestro works normally with official playbooks only
* **Hot Reload:** Changes to `local-manifest.json` automatically refresh the Playbook Exchange
[](https://docs.runmaestro.ai/local-manifest#use-cases)
Use Cases
---------------------------------------------------------------------
###
[](https://docs.runmaestro.ai/local-manifest#1-bespoke-playbooks)
1\. Bespoke Playbooks
Create organization-specific playbooks that aren’t suitable for public sharing:
* Internal tools and workflows
* Proprietary processes
* Environment-specific automation
* Company-specific security policies
###
[](https://docs.runmaestro.ai/local-manifest#2-playbook-development)
2\. Playbook Development
Iterate on new playbooks locally before submitting them to the [Maestro-Playbooks repository](https://github.com/RunMaestro/Maestro-Playbooks)
:
* Test playbook structure and documents
* Refine prompts and loop behavior
* Validate asset bundling
* Preview in the UI before publishing
[](https://docs.runmaestro.ai/local-manifest#how-it-works)
How It Works
---------------------------------------------------------------------------
###
[](https://docs.runmaestro.ai/local-manifest#merge-semantics)
Merge Semantics
When both official and local manifests exist, they are merged by `id`:
1. **Override:** Local playbooks with the same `id` as official ones **override** the official version
2. **Append:** Local playbooks with unique `id`s are **added** to the catalog
3. **Source Tagging:** All playbooks are tagged with `source: 'official' | 'local'` for UI distinction
**Example:**
Official playbooks: [A, B, C]
Local playbooks: [B_custom, D]
Merged result: [A, B_custom, C, D]
↑ override ↑ append
###
[](https://docs.runmaestro.ai/local-manifest#path-resolution)
Path Resolution
Local playbooks support local filesystem paths:
* **Absolute paths:** `/Users/me/.maestro/custom-playbooks/security`
* **Tilde paths:** `~/maestro-playbooks/security`
* **Import behavior:** Files are copied from the local path instead of fetched from GitHub
[](https://docs.runmaestro.ai/local-manifest#schema)
Schema
---------------------------------------------------------------
The local manifest uses the exact same structure as the official manifest. See [examples/local-manifest.json](https://docs.runmaestro.ai/examples/local-manifest.json)
for a complete example.
###
[](https://docs.runmaestro.ai/local-manifest#required-fields)
Required Fields
Each playbook entry must include:
* `id` - Unique identifier (use same ID as official to override)
* `title` - Display name
* `description` - Short description for search and tiles
* `category` - Top-level category
* `author` - Creator name
* `lastUpdated` - Date in YYYY-MM-DD format
* `path` - **Local filesystem path** or GitHub path
* `documents` - Array of document entries with `filename` and `resetOnCompletion`
* `loopEnabled` - Whether to loop through documents
* `prompt` - Custom prompt or `null` for Maestro default
###
[](https://docs.runmaestro.ai/local-manifest#optional-fields)
Optional Fields
* `subcategory` - Nested category
* `authorLink` - URL to author’s website
* `tags` - Searchable keyword array
* `maxLoops` - Maximum loop iterations (null for unlimited)
* `assets` - Asset files from `assets/` subfolder
[](https://docs.runmaestro.ai/local-manifest#creating-a-local-playbook)
Creating a Local Playbook
-----------------------------------------------------------------------------------------------------
###
[](https://docs.runmaestro.ai/local-manifest#step-1-create-playbook-files)
Step 1: Create Playbook Files
Organize your playbook in a local directory:
~/my-playbooks/security-audit/
├── 1_SCAN.md
├── 2_ANALYZE.md
├── 3_REPORT.md
├── README.md (optional)
└── assets/
├── config.yaml
└── rules.json
###
[](https://docs.runmaestro.ai/local-manifest#step-2-create-local-manifest-json)
Step 2: Create local-manifest.json
Location: `/local-manifest.json` On macOS: `~/Library/Application Support/Maestro/local-manifest.json`
{
"lastUpdated": "2026-01-17",
"playbooks": [\
{\
"id": "security-audit-internal",\
"title": "Internal Security Audit",\
"description": "Custom security audit for our infrastructure",\
"category": "Security",\
"author": "Security Team",\
"lastUpdated": "2026-01-17",\
"path": "~/my-playbooks/security-audit",\
"documents": [\
{ "filename": "1_SCAN", "resetOnCompletion": false },\
{ "filename": "2_ANALYZE", "resetOnCompletion": true },\
{ "filename": "3_REPORT", "resetOnCompletion": false }\
],\
"loopEnabled": false,\
"prompt": null,\
"assets": ["config.yaml", "rules.json"]\
}\
]
}
###
[](https://docs.runmaestro.ai/local-manifest#step-3-open-playbook-exchange)
Step 3: Open Playbook Exchange
Your local playbook will appear with a **“Local”** badge, distinguishing it from official playbooks.
###
[](https://docs.runmaestro.ai/local-manifest#step-4-import-and-use)
Step 4: Import and Use
Import works the same as official playbooks - files are copied from your local path to the Auto Run folder.
[](https://docs.runmaestro.ai/local-manifest#hot-reload)
Hot Reload
-----------------------------------------------------------------------
Changes to `local-manifest.json` trigger an automatic refresh:
1. Edit your local manifest
2. Save the file
3. The Playbook Exchange automatically reloads (500ms debounce)
4. No need to restart Maestro
This enables rapid iteration during playbook development.
[](https://docs.runmaestro.ai/local-manifest#error-handling)
Error Handling
-------------------------------------------------------------------------------
###
[](https://docs.runmaestro.ai/local-manifest#invalid-json)
Invalid JSON
**Behavior:** Warning logged, empty array used, Maestro continues with official playbooks only **Fix:** Validate JSON syntax using a JSON validator
###
[](https://docs.runmaestro.ai/local-manifest#missing-required-fields)
Missing Required Fields
**Behavior:** Invalid entries are skipped with warnings, valid entries are loaded **Fix:** Ensure all playbooks have `id`, `title`, `path`, and `documents`
###
[](https://docs.runmaestro.ai/local-manifest#local-path-doesn%E2%80%99t-exist)
Local Path Doesn’t Exist
**Behavior:** Clear error message during import, playbook listing works normally **Fix:** Verify the `path` field points to an existing directory
###
[](https://docs.runmaestro.ai/local-manifest#file-watch-errors)
File Watch Errors
**Behavior:** Warning logged, hot reload disabled, normal operation continues **Effect:** You’ll need to restart Maestro to see manifest changes
[](https://docs.runmaestro.ai/local-manifest#ui-indicators)
UI Indicators
-----------------------------------------------------------------------------
Local playbooks are visually distinguished in the Playbook Exchange with a blue “Local” badge: 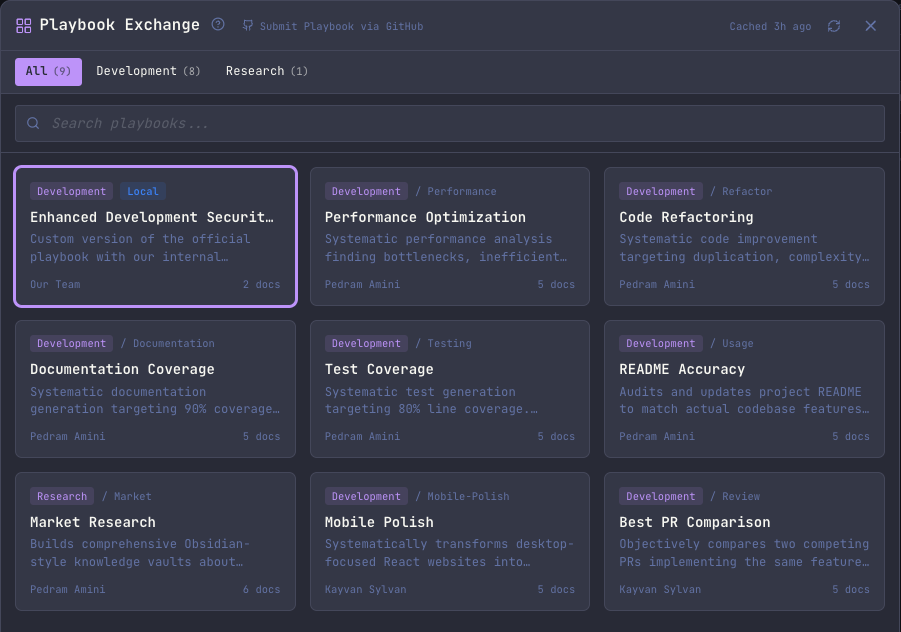
* **Badge:** Blue “Local” badge next to category
* **Tooltip:** “Custom local playbook” on hover
* **Search:** Works across both official and local playbooks
* **Categories:** New categories from local playbooks appear in filters
[](https://docs.runmaestro.ai/local-manifest#development-workflow)
Development Workflow
-------------------------------------------------------------------------------------------
###
[](https://docs.runmaestro.ai/local-manifest#testing-before-publishing)
Testing Before Publishing
1. Create your playbook files locally
2. Add to `local-manifest.json`
3. Test import and execution in Maestro
4. Refine documents and prompts
5. When ready, submit a PR to [Maestro-Playbooks](https://github.com/RunMaestro/Maestro-Playbooks)
6. Remove from local manifest once published
###
[](https://docs.runmaestro.ai/local-manifest#overriding-official-playbooks)
Overriding Official Playbooks
Use the same `id` as the official playbook to test modifications:
{
"id": "development-security", // Same as official
"title": "Dev Security (Custom)",
"path": "~/my-version/dev-security",
...
}
This allows you to:
* Add custom documents
* Modify prompts
* Change loop behavior
* Test improvements before contributing
[](https://docs.runmaestro.ai/local-manifest#troubleshooting)
Troubleshooting
---------------------------------------------------------------------------------
###
[](https://docs.runmaestro.ai/local-manifest#playbook-doesn%E2%80%99t-appear)
Playbook Doesn’t Appear
1. Check JSON syntax in `local-manifest.json`
2. Verify all required fields are present
3. Look for warnings in console logs
4. Ensure `path` field is set correctly
###
[](https://docs.runmaestro.ai/local-manifest#import-fails)
Import Fails
1. Verify the local `path` exists
2. Check file permissions on playbook directory
3. Ensure documents have `.md` extension
4. Verify assets exist in `assets/` subfolder
###
[](https://docs.runmaestro.ai/local-manifest#hot-reload-not-working)
Hot Reload Not Working
1. Check console for file watcher errors
2. Verify `local-manifest.json` path is correct
3. Try restarting Maestro
4. Check file system permissions
[](https://docs.runmaestro.ai/local-manifest#related-files)
Related Files
-----------------------------------------------------------------------------
* **Manifest types:** `src/shared/marketplace-types.ts`
* **Marketplace handlers:** `src/main/ipc/handlers/marketplace.ts`
* **Import logic:** `marketplace:importPlaybook` handler
* **UI component:** `src/renderer/components/MarketplaceModal.tsx`
* **React hook:** `src/renderer/hooks/batch/useMarketplace.ts`
[](https://docs.runmaestro.ai/local-manifest#security-considerations)
Security Considerations
-------------------------------------------------------------------------------------------------
* Local manifest is **not synced** or shared
* Paths are validated before file operations
* Local-only playbooks remain private
* No network requests for local paths
* File watching is non-blocking and fails gracefully
[](https://docs.runmaestro.ai/local-manifest#future-enhancements)
Future Enhancements
-----------------------------------------------------------------------------------------
Potential improvements for consideration:
* JSON schema validation
* Visual editor for local manifest
* UI controls to manage local playbooks
* Relative paths from Auto Run directory
* Local manifest templates
* Import/export for sharing local manifests
Was this page helpful?
YesNo
[Playbook Exchange](https://docs.runmaestro.ai/playbook-exchange)
[Spec-Kit Commands](https://docs.runmaestro.ai/speckit-commands)
⌘I
---
# Command Line Interface - Maestro
[Skip to main content](https://docs.runmaestro.ai/cli#content-area)
[Maestro home page](https://runmaestro.ai/)
Search...
⌘K
Search...
Navigation
Providers & CLI
Command Line Interface
On this page
* [Installation](https://docs.runmaestro.ai/cli#installation)
* [Usage](https://docs.runmaestro.ai/cli#usage)
* [Sending Messages to Agents](https://docs.runmaestro.ai/cli#sending-messages-to-agents)
* [Listing Sessions](https://docs.runmaestro.ai/cli#listing-sessions)
* [Creating and Removing Agents](https://docs.runmaestro.ai/cli#creating-and-removing-agents)
* [Listing Resources](https://docs.runmaestro.ai/cli#listing-resources)
* [Running Playbooks](https://docs.runmaestro.ai/cli#running-playbooks)
* [Prompt Customization](https://docs.runmaestro.ai/cli#prompt-customization)
* [Reading Prompts (prompts list / prompts get)](https://docs.runmaestro.ai/cli#reading-prompts-prompts-list-%2F-prompts-get)
* [Managing Settings](https://docs.runmaestro.ai/cli#managing-settings)
* [Managing Agent Configuration](https://docs.runmaestro.ai/cli#managing-agent-configuration)
* [Managing SSH Remotes](https://docs.runmaestro.ai/cli#managing-ssh-remotes)
* [Partial IDs](https://docs.runmaestro.ai/cli#partial-ids)
* [JSON Output](https://docs.runmaestro.ai/cli#json-output)
* [Desktop Integration](https://docs.runmaestro.ai/cli#desktop-integration)
* [Open a File](https://docs.runmaestro.ai/cli#open-a-file)
* [Refresh the File Tree](https://docs.runmaestro.ai/cli#refresh-the-file-tree)
* [Refresh Auto Run Documents](https://docs.runmaestro.ai/cli#refresh-auto-run-documents)
* [Configuring Auto-Run](https://docs.runmaestro.ai/cli#configuring-auto-run)
* [Checking Status](https://docs.runmaestro.ai/cli#checking-status)
* [Cue Automation](https://docs.runmaestro.ai/cli#cue-automation)
* [Listing Subscriptions](https://docs.runmaestro.ai/cli#listing-subscriptions)
* [Triggering a Subscription](https://docs.runmaestro.ai/cli#triggering-a-subscription)
* [Scheduling with Cron](https://docs.runmaestro.ai/cli#scheduling-with-cron)
* [Agent Integration](https://docs.runmaestro.ai/cli#agent-integration)
* [Requirements](https://docs.runmaestro.ai/cli#requirements)
Maestro includes a CLI tool (`maestro-cli`) for sending messages to agents, browsing sessions, running playbooks, managing settings, and controlling resources from the command line, cron jobs, or CI/CD pipelines. The CLI requires Node.js (which you already have if you’re using Claude Code).
[](https://docs.runmaestro.ai/cli#installation)
Installation
----------------------------------------------------------------
The CLI is bundled with Maestro as a JavaScript file. Create a shell wrapper to run it:
# macOS (after installing Maestro.app)
printf '#!/bin/bash\nnode "/Applications/Maestro.app/Contents/Resources/maestro-cli.js" "$@"\n' | sudo tee /usr/local/bin/maestro-cli && sudo chmod +x /usr/local/bin/maestro-cli
# Linux (deb/rpm installs to /opt)
printf '#!/bin/bash\nnode "/opt/Maestro/resources/maestro-cli.js" "$@"\n' | sudo tee /usr/local/bin/maestro-cli && sudo chmod +x /usr/local/bin/maestro-cli
# Windows (PowerShell as Administrator) - create a batch file
@"
@echo off
node "%ProgramFiles%\Maestro\resources\maestro-cli.js" %*
"@ | Out-File -FilePath "$env:ProgramFiles\Maestro\maestro-cli.cmd" -Encoding ASCII
Alternatively, run directly with Node.js:
node "/Applications/Maestro.app/Contents/Resources/maestro-cli.js" list groups
[](https://docs.runmaestro.ai/cli#usage)
Usage
--------------------------------------------------
###
[](https://docs.runmaestro.ai/cli#sending-messages-to-agents)
Sending Messages to Agents
Send a message to an agent and receive a structured JSON response. Supports creating new sessions or resuming existing ones for multi-turn conversations.
# Send a message to an agent (creates a new session)
maestro-cli send "describe the authentication flow"
# Resume an existing session for follow-up
maestro-cli send "now add rate limiting" -s
# Send in read-only mode (agent can read but not modify files)
maestro-cli send "analyze the code structure" -r
The response is always JSON:
{
"agentId": "a1b2c3d4-...",
"agentName": "My Agent",
"sessionId": "abc123def456",
"response": "The authentication flow works by...",
"success": true,
"usage": {
"inputTokens": 1000,
"outputTokens": 500,
"cacheReadInputTokens": 200,
"cacheCreationInputTokens": 100,
"totalCostUsd": 0.05,
"contextWindow": 200000,
"contextUsagePercent": 1
}
}
On failure, `success` is `false` and an `error` field is included:
{
"success": false,
"error": "Agent not found: bad-id",
"code": "AGENT_NOT_FOUND"
}
| Flag | Description |
| --- | --- |
| `-s, --session ` | Resume an existing session instead of creating a new one |
| `-r, --read-only` | Run in read-only/plan mode (agent cannot modify files) |
| `-t, --tab` | Open/focus the agent’s session tab in the Maestro desktop app |
| `-l, --live` | Route the message through the Maestro desktop so it appears in the agent’s tab |
| `--new-tab` | With `--live`, create a new AI tab and send the prompt into it |
| `-f, --force` | With `--live`, bypass the busy-state guard so you can dispatch concurrent writes to a single agent’s active tab. Requires `allowConcurrentSend=true`; otherwise exits with code `FORCE_NOT_ALLOWED` |
Error codes: `AGENT_NOT_FOUND`, `AGENT_UNSUPPORTED`, `CLAUDE_NOT_FOUND`, `CODEX_NOT_FOUND`, `INVALID_OPTIONS`, `FORCE_NOT_ALLOWED`, `MAESTRO_NOT_RUNNING`, `SESSION_NOT_FOUND`, `COMMAND_FAILED`. Supported agent types: `claude-code`, `codex`.
###
[](https://docs.runmaestro.ai/cli#listing-sessions)
Listing Sessions
Browse an agent’s session history, sorted most recent to oldest. Supports pagination with limit/skip and keyword search.
# List the 25 most recent sessions
maestro-cli list sessions
# Limit to 10 results
maestro-cli list sessions -l 10
# Paginate: skip the first 25, show next 25
maestro-cli list sessions -k 25
# Page 3 of 10-item pages
maestro-cli list sessions -l 10 -k 20
# Search for sessions by keyword (matches session name and first message)
maestro-cli list sessions -s "authentication"
# Combine limit, skip, and search with JSON output
maestro-cli list sessions -l 50 -k 0 -s "refactor" --json
| Flag | Description | Default |
| --- | --- | --- |
| `-l, --limit ` | Maximum number of sessions to return | 25 |
| `-k, --skip ` | Number of sessions to skip (for pagination) | 0 |
| `-s, --search ` | Filter by keyword in session name or first message | — |
| `--json` | Output as JSON | — |
JSON output includes full session metadata:
{
"success": true,
"agentId": "a1b2c3d4-...",
"agentName": "My Agent",
"totalCount": 42,
"filteredCount": 3,
"sessions": [\
{\
"sessionId": "abc123",\
"sessionName": "Auth refactor",\
"modifiedAt": "2026-02-08T10:00:00.000Z",\
"firstMessage": "Help me refactor the auth module...",\
"messageCount": 12,\
"costUsd": 0.05,\
"inputTokens": 5000,\
"outputTokens": 2000,\
"durationSeconds": 300,\
"starred": true\
}\
]
}
Currently supported for `claude-code` agents.
###
[](https://docs.runmaestro.ai/cli#creating-and-removing-agents)
Creating and Removing Agents
Create agents directly from the command line. Requires the Maestro desktop app to be running.
# Create a Claude Code agent with a working directory
maestro-cli create-agent "My Agent" -d /path/to/project
# Create a Codex agent with custom model and environment variables
maestro-cli create-agent "Codex Worker" -d . -t codex --model gpt-5.3-codex --env API_KEY=abc123
# Create an agent with SSH remote execution
maestro-cli create-agent "Remote Agent" -d /home/user/project -t claude-code --ssh-remote
# Create an agent with all options
maestro-cli create-agent "Full Config" -d /workspace \
-t claude-code \
-g \
--nudge "Always write tests" \
--new-session-message "You are a senior engineer working on project X" \
--custom-path /usr/local/bin/claude \
--custom-args "--verbose" \
--env DEBUG=true --env LOG_LEVEL=info \
--model opus \
--effort high \
--context-window 200000 \
--provider-path /custom/provider \
--ssh-remote \
--ssh-cwd /remote/workdir \
--auto-run-folder ~/playbooks/full-config
# Remove an agent
maestro-cli remove-agent
| Flag | Description | Default |
| --- | --- | --- |
| `-d, --cwd ` | Working directory for the agent (required) | — |
| `-t, --type ` | Agent type (claude-code, codex, opencode, factory-droid) | `claude-code` |
| `-g, --group ` | Group ID to assign the agent to | — |
| `--nudge ` | Nudge message appended to every user message | — |
| `--new-session-message ` | Message prefixed to first message in new sessions | — |
| `--custom-path ` | Custom binary path for the agent CLI | — |
| `--custom-args ` | Custom CLI arguments | — |
| `--env ` | Environment variable (repeatable) | — |
| `--model ` | Model override (e.g., sonnet, opus) | — |
| `--effort ` | Effort/reasoning level override | — |
| `--context-window ` | Context window size in tokens | — |
| `--provider-path ` | Custom provider path | — |
| `--ssh-remote ` | SSH remote ID for remote execution | — |
| `--ssh-cwd ` | Working directory override on the SSH remote | — |
| `--auto-run-folder ` | Auto Run / playbooks folder for this agent | `/.maestro/playbooks` |
| `--json` | Machine-readable JSON output | — |
###
[](https://docs.runmaestro.ai/cli#listing-resources)
Listing Resources
# List all groups
maestro-cli list groups
# List all agents
maestro-cli list agents
maestro-cli list agents -g
maestro-cli list agents --group
# Show agent details (history, usage stats, cost)
maestro-cli show agent
# List all playbooks (or filter by agent)
maestro-cli list playbooks
maestro-cli list playbooks -a
maestro-cli list playbooks --agent
# Show playbook details
maestro-cli show playbook
###
[](https://docs.runmaestro.ai/cli#running-playbooks)
Running Playbooks
# Run a playbook
maestro-cli playbook
# Dry run (shows what would be executed)
maestro-cli playbook --dry-run
# Run without writing to history
maestro-cli playbook --no-history
# Wait for agent if busy, with verbose output
maestro-cli playbook --wait --verbose
# Debug mode for troubleshooting
maestro-cli playbook --debug
# Clean orphaned playbooks (for deleted sessions)
maestro-cli clean playbooks
maestro-cli clean playbooks --dry-run
###
[](https://docs.runmaestro.ai/cli#prompt-customization)
Prompt Customization
The CLI uses the same core system prompts as the desktop app. When you customize prompts via Settings → **Maestro Prompts**, those customizations are stored in `core-prompts-customizations.json` in the Maestro data directory and are automatically picked up by the CLI during playbook runs. The prompts most relevant to CLI playbook execution are:
| Prompt ID | Controls |
| --- | --- |
| `autorun-default` | Default Auto Run task execution behavior |
| `autorun-synopsis` | Synopsis generation after task completion |
| `commit-command` | `/commit` command behavior |
| `maestro-system-prompt` | Maestro system context injected into sessions |
| `context-grooming` | Context grooming during transfers |
To customize these prompts, either use the desktop app’s **Maestro Prompts** tab or edit the JSON file directly:
# macOS
~/Library/Application Support/Maestro/core-prompts-customizations.json
# Linux
~/.config/Maestro/core-prompts-customizations.json
# Windows
%APPDATA%\Maestro\core-prompts-customizations.json
The file format is:
{
"prompts": {
"autorun-default": {
"content": "Your customized prompt content...",
"isModified": true,
"modifiedAt": "2026-04-11T..."
}
}
}
###
[](https://docs.runmaestro.ai/cli#reading-prompts-prompts-list-/-prompts-get)
Reading Prompts (`prompts list` / `prompts get`)
The CLI exposes Maestro’s prompt registry directly so other agents can self-fetch reference material on demand. Parent prompts can use the `{{REF:name}}` directive (see [Prompt Customization → Include Directives](https://docs.runmaestro.ai/prompt-customization#include-directives)
) to expand into a one-line pointer; the agent then runs `prompts get` to retrieve the full content.
# List every available prompt id with description and category
maestro-cli prompts list
# JSON output for scripting
maestro-cli prompts list --json
# Print a specific prompt's content (honors user customizations)
maestro-cli prompts get _maestro-cli
maestro-cli prompts get autorun-default
# Include metadata in the response
maestro-cli prompts get _maestro-cue --json
`prompts get` returns the same content the desktop app would deliver, so customizations made via Settings → **Maestro Prompts** are reflected immediately. Bundled include fragments use a leading underscore in their id (e.g., `_maestro-cli`, `_history-format`); standalone prompts do not.
###
[](https://docs.runmaestro.ai/cli#managing-settings)
Managing Settings
View and modify any Maestro configuration setting directly from the CLI. Changes take effect immediately in the running desktop app — no restart required.
# List all settings with current values
maestro-cli settings list
# List with descriptions (great for understanding what each setting does)
maestro-cli settings list -v
# Filter by category
maestro-cli settings list -c appearance
maestro-cli settings list -c shell -v
# Show only setting keys
maestro-cli settings list --keys-only
# Get a specific setting
maestro-cli settings get fontSize
maestro-cli settings get activeThemeId
# Get nested settings with dot-notation
maestro-cli settings get encoreFeatures.directorNotes
# Get with full details (type, default, description)
maestro-cli settings get fontSize -v
# Set a setting (type is auto-detected)
maestro-cli settings set fontSize 16
maestro-cli settings set audioFeedbackEnabled true
maestro-cli settings set activeThemeId monokai
maestro-cli settings set defaultShowThinking on
# Set complex values with explicit JSON
maestro-cli settings set localIgnorePatterns --raw '["node_modules",".git","dist"]'
# Reset a setting to its default value
maestro-cli settings reset fontSize
| Flag | Description | Commands |
| --- | --- | --- |
| `-v, --verbose` | Show descriptions for each setting | `list`, `get` |
| `--keys-only` | Show only setting key names | `list` |
| `--defaults` | Show default values alongside current values | `list` |
| `-c, --category ` | Filter by category (appearance, shell, editor, etc.) | `list` |
| `--show-secrets` | Show sensitive values like API keys (masked by default) | `list` |
| `--raw ` | Pass an explicit JSON value | `set` |
| `--json` | Machine-readable JSON output | all |
**Categories:** appearance, editor, shell, notifications, updates, logging, web, ssh, file-indexing, context, document-graph, stats, accessibility, integrations, onboarding, advanced, internal.
Use `maestro-cli settings list -v` from inside an AI agent conversation to give the agent full context about every available setting and what it controls.
###
[](https://docs.runmaestro.ai/cli#managing-agent-configuration)
Managing Agent Configuration
Each agent (Claude Code, Codex, OpenCode, Factory Droid) can have its own configuration for custom paths, CLI arguments, environment variables, and model overrides.
# List all agent configurations
maestro-cli settings agent list
# List config for a specific agent
maestro-cli settings agent list claude-code
# Get a specific agent config value
maestro-cli settings agent get codex model
maestro-cli settings agent get claude-code customPath
# Set agent config values
maestro-cli settings agent set codex contextWindow 128000
maestro-cli settings agent set claude-code customPath /usr/local/bin/claude
maestro-cli settings agent set codex customEnvVars --raw '{"DEBUG":"true"}'
# Remove an agent config key
maestro-cli settings agent reset codex model
| Flag | Description | Commands |
| --- | --- | --- |
| `-v, --verbose` | Show descriptions for each config key | `list`, `get` |
| `--raw ` | Pass an explicit JSON value | `set` |
| `--json` | Machine-readable JSON output | all |
**Common agent config keys:**
| Key | Type | Description |
| --- | --- | --- |
| `customPath` | string | Custom path to the agent CLI binary |
| `customArgs` | string | Additional CLI arguments |
| `customEnvVars` | object | Extra environment variables |
| `model` | string | Model override (e.g., `gpt-5.3-codex`, `o3`) |
| `contextWindow` | number | Context window size in tokens |
| `reasoningEffort` | string | Reasoning effort level (`low`, `medium`, `high`) |
Settings and agent config changes made via the CLI are automatically detected by the running Maestro desktop app. The app watches for file changes and reloads immediately — it’s as if you toggled the setting in the Settings modal yourself.
###
[](https://docs.runmaestro.ai/cli#managing-ssh-remotes)
Managing SSH Remotes
Create, list, and remove SSH remote configurations. These commands read and write directly to the Maestro settings file — no running desktop app required.
# List all configured SSH remotes
maestro-cli list ssh-remotes
# Create a new SSH remote
maestro-cli create-ssh-remote "Dev Server" -H 192.168.1.100 -u deploy
# Create with SSH config mode (uses ~/.ssh/config)
maestro-cli create-ssh-remote "Prod" -H prod-host --ssh-config
# Create with all options
maestro-cli create-ssh-remote "Build Server" \
-H build.example.com \
-p 2222 \
-u ci \
-k ~/.ssh/build_key \
--env PATH=/usr/local/bin --env NODE_ENV=production \
--set-default
# Remove an SSH remote
maestro-cli remove-ssh-remote
| Flag | Description | Default |
| --- | --- | --- |
| `-H, --host ` | SSH hostname or IP (required; Host pattern with `--ssh-config`) | — |
| `-p, --port ` | SSH port | `22` |
| `-u, --username ` | SSH username | — |
| `-k, --key ` | Path to private key file | — |
| `--env ` | Remote environment variable (repeatable) | — |
| `--ssh-config` | Use `~/.ssh/config` for connection settings | — |
| `--disabled` | Create in disabled state | — |
| `--set-default` | Set as the global default SSH remote | — |
| `--json` | Machine-readable JSON output | — |
SSH remote changes made via the CLI are detected by the running Maestro desktop app through file watching, just like settings changes.
[](https://docs.runmaestro.ai/cli#partial-ids)
Partial IDs
--------------------------------------------------------------
All commands that accept an agent ID, group ID, or SSH remote ID support partial matching. You only need to type enough characters to uniquely identify the resource:
# These are equivalent if "a1b2" uniquely matches one agent
maestro-cli send a1b2c3d4-e5f6-7890-abcd-ef1234567890 "hello"
maestro-cli send a1b2 "hello"
If the partial ID is ambiguous, the CLI will show all matches.
[](https://docs.runmaestro.ai/cli#json-output)
JSON Output
--------------------------------------------------------------
By default, commands output human-readable formatted text. Use `--json` for machine-parseable output:
# Human-readable output (default)
maestro-cli list groups
GROUPS (2)
🎨 Frontend
group-abc123
⚙️ Backend
group-def456
# JSON output for scripting
maestro-cli list groups --json
{"type":"group","id":"group-abc123","name":"Frontend","emoji":"🎨","collapsed":false,"timestamp":...}
{"type":"group","id":"group-def456","name":"Backend","emoji":"⚙️","collapsed":false,"timestamp":...}
# Note: list agents outputs a JSON array (not JSONL)
maestro-cli list agents --json
[{"id":"agent-abc123","name":"My Agent","toolType":"claude-code","cwd":"/path/to/project",...}]
# Running a playbook with JSON streams events
maestro-cli playbook --json
{"type":"start","timestamp":...,"playbook":{...}}
{"type":"document_start","timestamp":...,"document":"tasks.md","taskCount":5}
{"type":"task_start","timestamp":...,"taskIndex":0}
{"type":"task_complete","timestamp":...,"success":true,"summary":"...","elapsedMs":8000,"usageStats":{...}}
{"type":"document_complete","timestamp":...,"document":"tasks.md","tasksCompleted":5}
{"type":"loop_complete","timestamp":...,"iteration":1,"tasksCompleted":5,"elapsedMs":60000}
{"type":"complete","timestamp":...,"success":true,"totalTasksCompleted":5,"totalElapsedMs":60000,"totalCost":0.05}
The `send` command always outputs JSON (no `--json` flag needed).
###
[](https://docs.runmaestro.ai/cli#desktop-integration)
Desktop Integration
Commands for interacting with the running Maestro desktop app. These are especially useful for AI agents to trigger UI updates after creating or modifying files.
####
[](https://docs.runmaestro.ai/cli#open-a-file)
Open a File
Open a file as a preview tab in the Maestro desktop app:
maestro-cli open-file [--session ]
####
[](https://docs.runmaestro.ai/cli#refresh-the-file-tree)
Refresh the File Tree
Refresh the file tree sidebar after creating multiple files or making significant filesystem changes:
maestro-cli refresh-files [--session ]
####
[](https://docs.runmaestro.ai/cli#refresh-auto-run-documents)
Refresh Auto Run Documents
Refresh the Auto Run document list after creating or modifying auto-run documents:
maestro-cli refresh-auto-run [--session ]
###
[](https://docs.runmaestro.ai/cli#configuring-auto-run)
Configuring Auto-Run
Set up and optionally launch an auto-run session with one or more markdown documents. Documents must be `.md` files containing `- [ ]` checkbox tasks.
# Configure documents for auto-run
maestro-cli auto-run doc1.md doc2.md
# Configure and immediately launch
maestro-cli auto-run doc1.md doc2.md --agent --launch
# Add a custom prompt for the agent
maestro-cli auto-run doc1.md --prompt "Focus on test coverage"
# Save as a reusable playbook
maestro-cli auto-run doc1.md doc2.md --save-as "Auth Rewrite"
# Enable looping (re-run documents after completion)
maestro-cli auto-run doc1.md --loop --launch
# Loop with a maximum number of iterations
maestro-cli auto-run doc1.md --loop --max-loops 3 --launch
# Reset task checkboxes on completion (useful with looping)
maestro-cli auto-run doc1.md --reset-on-completion --loop --launch
# Run the auto-run inside a fresh git worktree on a dedicated branch
maestro-cli auto-run doc1.md --agent --launch \
--worktree --branch feature/auto-x --worktree-path ../repo-auto-x
# Open a PR against the repo's default branch when the auto-run finishes
maestro-cli auto-run doc1.md --agent --launch \
--worktree --branch feature/auto-x --worktree-path ../repo-auto-x \
--create-pr
# Target a specific base branch for the PR
maestro-cli auto-run doc1.md --agent --launch \
--worktree --branch feature/auto-x --worktree-path ../repo-auto-x \
--create-pr --pr-target-branch develop
| Flag | Description |
| --- | --- |
| `-a, --agent ` | Target agent to run the documents (partial ID supported) |
| `-s, --session ` | Deprecated — use `--agent` instead |
| `-p, --prompt ` | Custom prompt/instructions for the agent |
| `--loop` | Enable looping (re-run documents after completion) |
| `--max-loops ` | Maximum number of loop iterations (implies `--loop`) |
| `--save-as ` | Save the configuration as a named playbook |
| `--launch` | Immediately start the auto-run after configuring |
| `--reset-on-completion` | Reset task checkboxes when documents complete |
| `--worktree` | Run the auto-run inside a git worktree (requires `--launch`, `--branch`, and `--worktree-path`) |
| `--branch ` | Branch name for the worktree (created if it does not exist) |
| `--worktree-path ` | Filesystem path for the worktree (must be a sibling of the repo, not nested inside it) |
| `--create-pr` | Open a GitHub PR when the auto-run completes successfully |
| `--pr-target-branch ` | Target branch for the PR (defaults to the repo’s default branch) |
Worktree mode reuses the desktop app’s Auto Run pipeline: the app creates the worktree (or reuses an existing one on the same repo), checks out the requested branch, dispatches the agent inside the worktree, and — when `--create-pr` is set — runs `gh pr create` once the batch completes. See [Git Worktrees](https://docs.runmaestro.ai/git-worktrees.md)
for more on worktree behavior.
###
[](https://docs.runmaestro.ai/cli#checking-status)
Checking Status
Check if the Maestro desktop app is running and reachable:
maestro-cli status
Returns the app version, uptime, and connection status.
[](https://docs.runmaestro.ai/cli#cue-automation)
Cue Automation
--------------------------------------------------------------------
Interact with Maestro Cue subscriptions directly from the command line.
###
[](https://docs.runmaestro.ai/cli#listing-subscriptions)
Listing Subscriptions
List all Cue subscriptions across all agents:
maestro-cli cue list
# JSON output (for scripting)
maestro-cli cue list --json
Shows each subscription’s name, event type, agent, enabled status, and last trigger time.
###
[](https://docs.runmaestro.ai/cli#triggering-a-subscription)
Triggering a Subscription
Manually trigger a Cue subscription by name, bypassing its normal event conditions:
# Trigger a subscription
maestro-cli cue trigger
# Trigger with a custom prompt (overrides the configured prompt)
maestro-cli cue trigger --prompt "Deploy to staging only"
# JSON output (for scripting)
maestro-cli cue trigger --json
| Flag | Description |
| --- | --- |
| `-p, --prompt ` | Override the subscription’s configured prompt |
| `--source-agent-id ` | Identify the originating agent (populates `{{CUE_SOURCE_AGENT_ID}}`) |
| `--json` | Output as JSON (for scripting and CI/CD integration) |
The `--prompt` flag is especially useful for `cli.trigger` subscriptions, where the prompt text is available in the subscription’s template as `{{CUE_CLI_PROMPT}}`. **Examples:**
# Trigger a review pipeline after finishing work
maestro-cli cue trigger "code-review" --prompt "Review the changes in the auth module"
# Trigger a deploy from CI
maestro-cli cue trigger "deploy" --prompt "Deploy commit abc123 to production" --json
# Re-run a failed automation
maestro-cli cue trigger "lint-on-save"
[](https://docs.runmaestro.ai/cli#scheduling-with-cron)
Scheduling with Cron
--------------------------------------------------------------------------------
# Run a playbook every hour (use --json for log parsing)
0 * * * * /usr/local/bin/maestro-cli playbook --json >> /var/log/maestro.jsonl 2>&1
[](https://docs.runmaestro.ai/cli#agent-integration)
Agent Integration
--------------------------------------------------------------------------
Maestro agents are automatically informed about `maestro-cli` through the system prompt. Each agent receives the platform-appropriate CLI invocation command via the `{{MAESTRO_CLI_PATH}}` template variable, which resolves to the full `node "/path/to/maestro-cli.js"` command for the current OS. This means agents can:
* **Read settings** to understand the current Maestro configuration
* **Change settings** on behalf of the user (e.g., “switch to the nord theme”, “increase font size”)
* **Manage agent configs** (e.g., “set the Codex context window to 128000”)
* **List resources** like agents, groups, and playbooks
* **Open files** in the Maestro file preview tab
* **Refresh the file tree** after creating or modifying files
* **Configure and launch auto-runs** with documents they create
* **Send messages** to other agents for inter-agent coordination
* **Discover Cue subscriptions** with `cue list` and **trigger automation pipelines** with `cue trigger`
When a user asks an agent to change a Maestro setting, the agent can use the CLI directly rather than instructing the user to navigate the settings modal. Changes take effect instantly. The system prompt instructs agents to use `settings list -v` to discover available settings with descriptions, giving them full context to reason about configuration changes.
[](https://docs.runmaestro.ai/cli#requirements)
Requirements
----------------------------------------------------------------
* At least one AI agent CLI must be installed and in PATH (Claude Code, Codex, or OpenCode)
* Maestro config files must exist (created automatically when you use the GUI)
Was this page helpful?
YesNo
[Multiple Claude Accounts](https://docs.runmaestro.ai/multi-claude)
[MCP Server](https://docs.runmaestro.ai/mcp-server)
⌘I
---
# Cue Overview - Maestro
[Skip to main content](https://docs.runmaestro.ai/maestro-cue#content-area)
[Maestro home page](https://runmaestro.ai/)
Search...
Ctrl K
Search...
Navigation
Maestro Cue
Cue Overview
On this page
* [What Can Cue Do?](https://docs.runmaestro.ai/maestro-cue#what-can-cue-do)
* [Enabling Cue](https://docs.runmaestro.ai/maestro-cue#enabling-cue)
* [Quick Start](https://docs.runmaestro.ai/maestro-cue#quick-start)
* [The Cue Modal](https://docs.runmaestro.ai/maestro-cue#the-cue-modal)
* [Sessions Table](https://docs.runmaestro.ai/maestro-cue#sessions-table)
* [Run Now](https://docs.runmaestro.ai/maestro-cue#run-now)
* [Activity Log](https://docs.runmaestro.ai/maestro-cue#activity-log)
* [YAML Editor](https://docs.runmaestro.ai/maestro-cue#yaml-editor)
* [Help](https://docs.runmaestro.ai/maestro-cue#help)
* [Pipeline Editor](https://docs.runmaestro.ai/maestro-cue#pipeline-editor)
* [Inspecting a Pipeline](https://docs.runmaestro.ai/maestro-cue#inspecting-a-pipeline)
* [Configuration File](https://docs.runmaestro.ai/maestro-cue#configuration-file)
* [Event Types](https://docs.runmaestro.ai/maestro-cue#event-types)
* [Template Variables](https://docs.runmaestro.ai/maestro-cue#template-variables)
* [Advanced Features](https://docs.runmaestro.ai/maestro-cue#advanced-features)
* [Keyboard Shortcuts](https://docs.runmaestro.ai/maestro-cue#keyboard-shortcuts)
* [History Integration](https://docs.runmaestro.ai/maestro-cue#history-integration)
* [Requirements](https://docs.runmaestro.ai/maestro-cue#requirements)
* [Tips](https://docs.runmaestro.ai/maestro-cue#tips)
Maestro Cue is an event-driven automation engine that watches for things happening in your projects and automatically sends prompts to your agents in response. Instead of manually kicking off tasks, you define **subscriptions** — trigger-prompt pairings — in a YAML file, and Cue handles the rest.
Maestro Cue is an **Encore Feature** — it’s disabled by default. Enable it in **Settings > Encore Features** to access the shortcut, modal, and automation engine.
[](https://docs.runmaestro.ai/maestro-cue#what-can-cue-do)
What Can Cue Do?
-------------------------------------------------------------------------------
A few examples of what you can automate with Cue:
* **Run linting whenever TypeScript files change** — watch `src/**/*.ts` and prompt an agent to lint on every save
* **Generate a morning standup** — schedule at 9:00 AM on weekdays to scan recent git activity and draft a report
* **Chain agents together** — when your build agent finishes, automatically trigger a test agent, then a deploy agent
* **Triage new GitHub PRs** — poll for new pull requests and prompt an agent to review the diff
* **Track TODO progress** — scan markdown files for unchecked tasks and prompt an agent to work on the next one
* **Fan out deployments** — when a build completes, trigger multiple deploy agents simultaneously
* **Trigger from the CLI** — run `maestro-cli cue trigger` to fire a subscription on demand from scripts, CI/CD, or other agents
[](https://docs.runmaestro.ai/maestro-cue#enabling-cue)
Enabling Cue
------------------------------------------------------------------------
1. Open **Settings** (`Cmd+,` / `Ctrl+,`)
2. Navigate to the **Encore Features** tab
3. Toggle **Maestro Cue** on
Once enabled, Maestro automatically scans all your active agents for `.maestro/cue.yaml` files in their project roots. The Cue engine starts immediately — no restart required.
[](https://docs.runmaestro.ai/maestro-cue#quick-start)
Quick Start
----------------------------------------------------------------------
Create a file called `.maestro/cue.yaml` in your project (inside the `.maestro/` directory at the project root):
subscriptions:
- name: lint-on-save
event: file.changed
watch: 'src/**/*.ts'
prompt: |
The file {{CUE_FILE_PATH}} was just modified.
Please run the linter and fix any issues.
That’s it. Whenever a `.ts` file in `src/` changes, Cue sends that prompt to the agent with the file path filled in automatically.
[](https://docs.runmaestro.ai/maestro-cue#the-cue-modal)
The Cue Modal
--------------------------------------------------------------------------
Open the Cue dashboard to monitor and manage all automation activity. **Keyboard shortcut:**
* macOS: `Option+Q`
* Windows/Linux: `Alt+Q`
**From Quick Actions:**
* Press `Cmd+K` / `Ctrl+K` and search for “Maestro Cue”
The modal has two tabs: **Dashboard** and **Pipeline Editor**. An **Enabled** toggle in the header lets you start and stop the engine globally.
###
[](https://docs.runmaestro.ai/maestro-cue#sessions-table)
Sessions Table
The Dashboard tab shows all agents with Cue configurations: 
| Column | Description |
| --- | --- |
| **Session** | Agent name |
| **Agent** | Provider type (Claude Code, Codex, OpenCode, etc.) |
| **Pipelines** | Color-coded dots for each pipeline configured on this agent |
| **Status** | Green = active, yellow = paused, “No Config” = no YAML found |
| **Last Triggered** | How long ago the most recent event fired |
| **Subs** | Number of subscriptions in the YAML |
| **Queue** | Events waiting to be processed |
Each row has three action buttons:
* **Run Now** — Manually trigger a subscription on demand
* **Edit YAML** — Open the inline YAML editor for that agent
* **View in Pipeline** — Jump to the Pipeline Editor filtered to that agent
###
[](https://docs.runmaestro.ai/maestro-cue#run-now)
Run Now
Each subscription row in the Sessions Table has a **Run Now** button that manually triggers it, bypassing its normal event conditions. This is useful for testing new subscriptions or re-running a failed automation without waiting for the next event.
###
[](https://docs.runmaestro.ai/maestro-cue#activity-log)
Activity Log
A chronological record of completed and failed runs. Click any entry to expand full details including the event payload, run ID, and exit code. 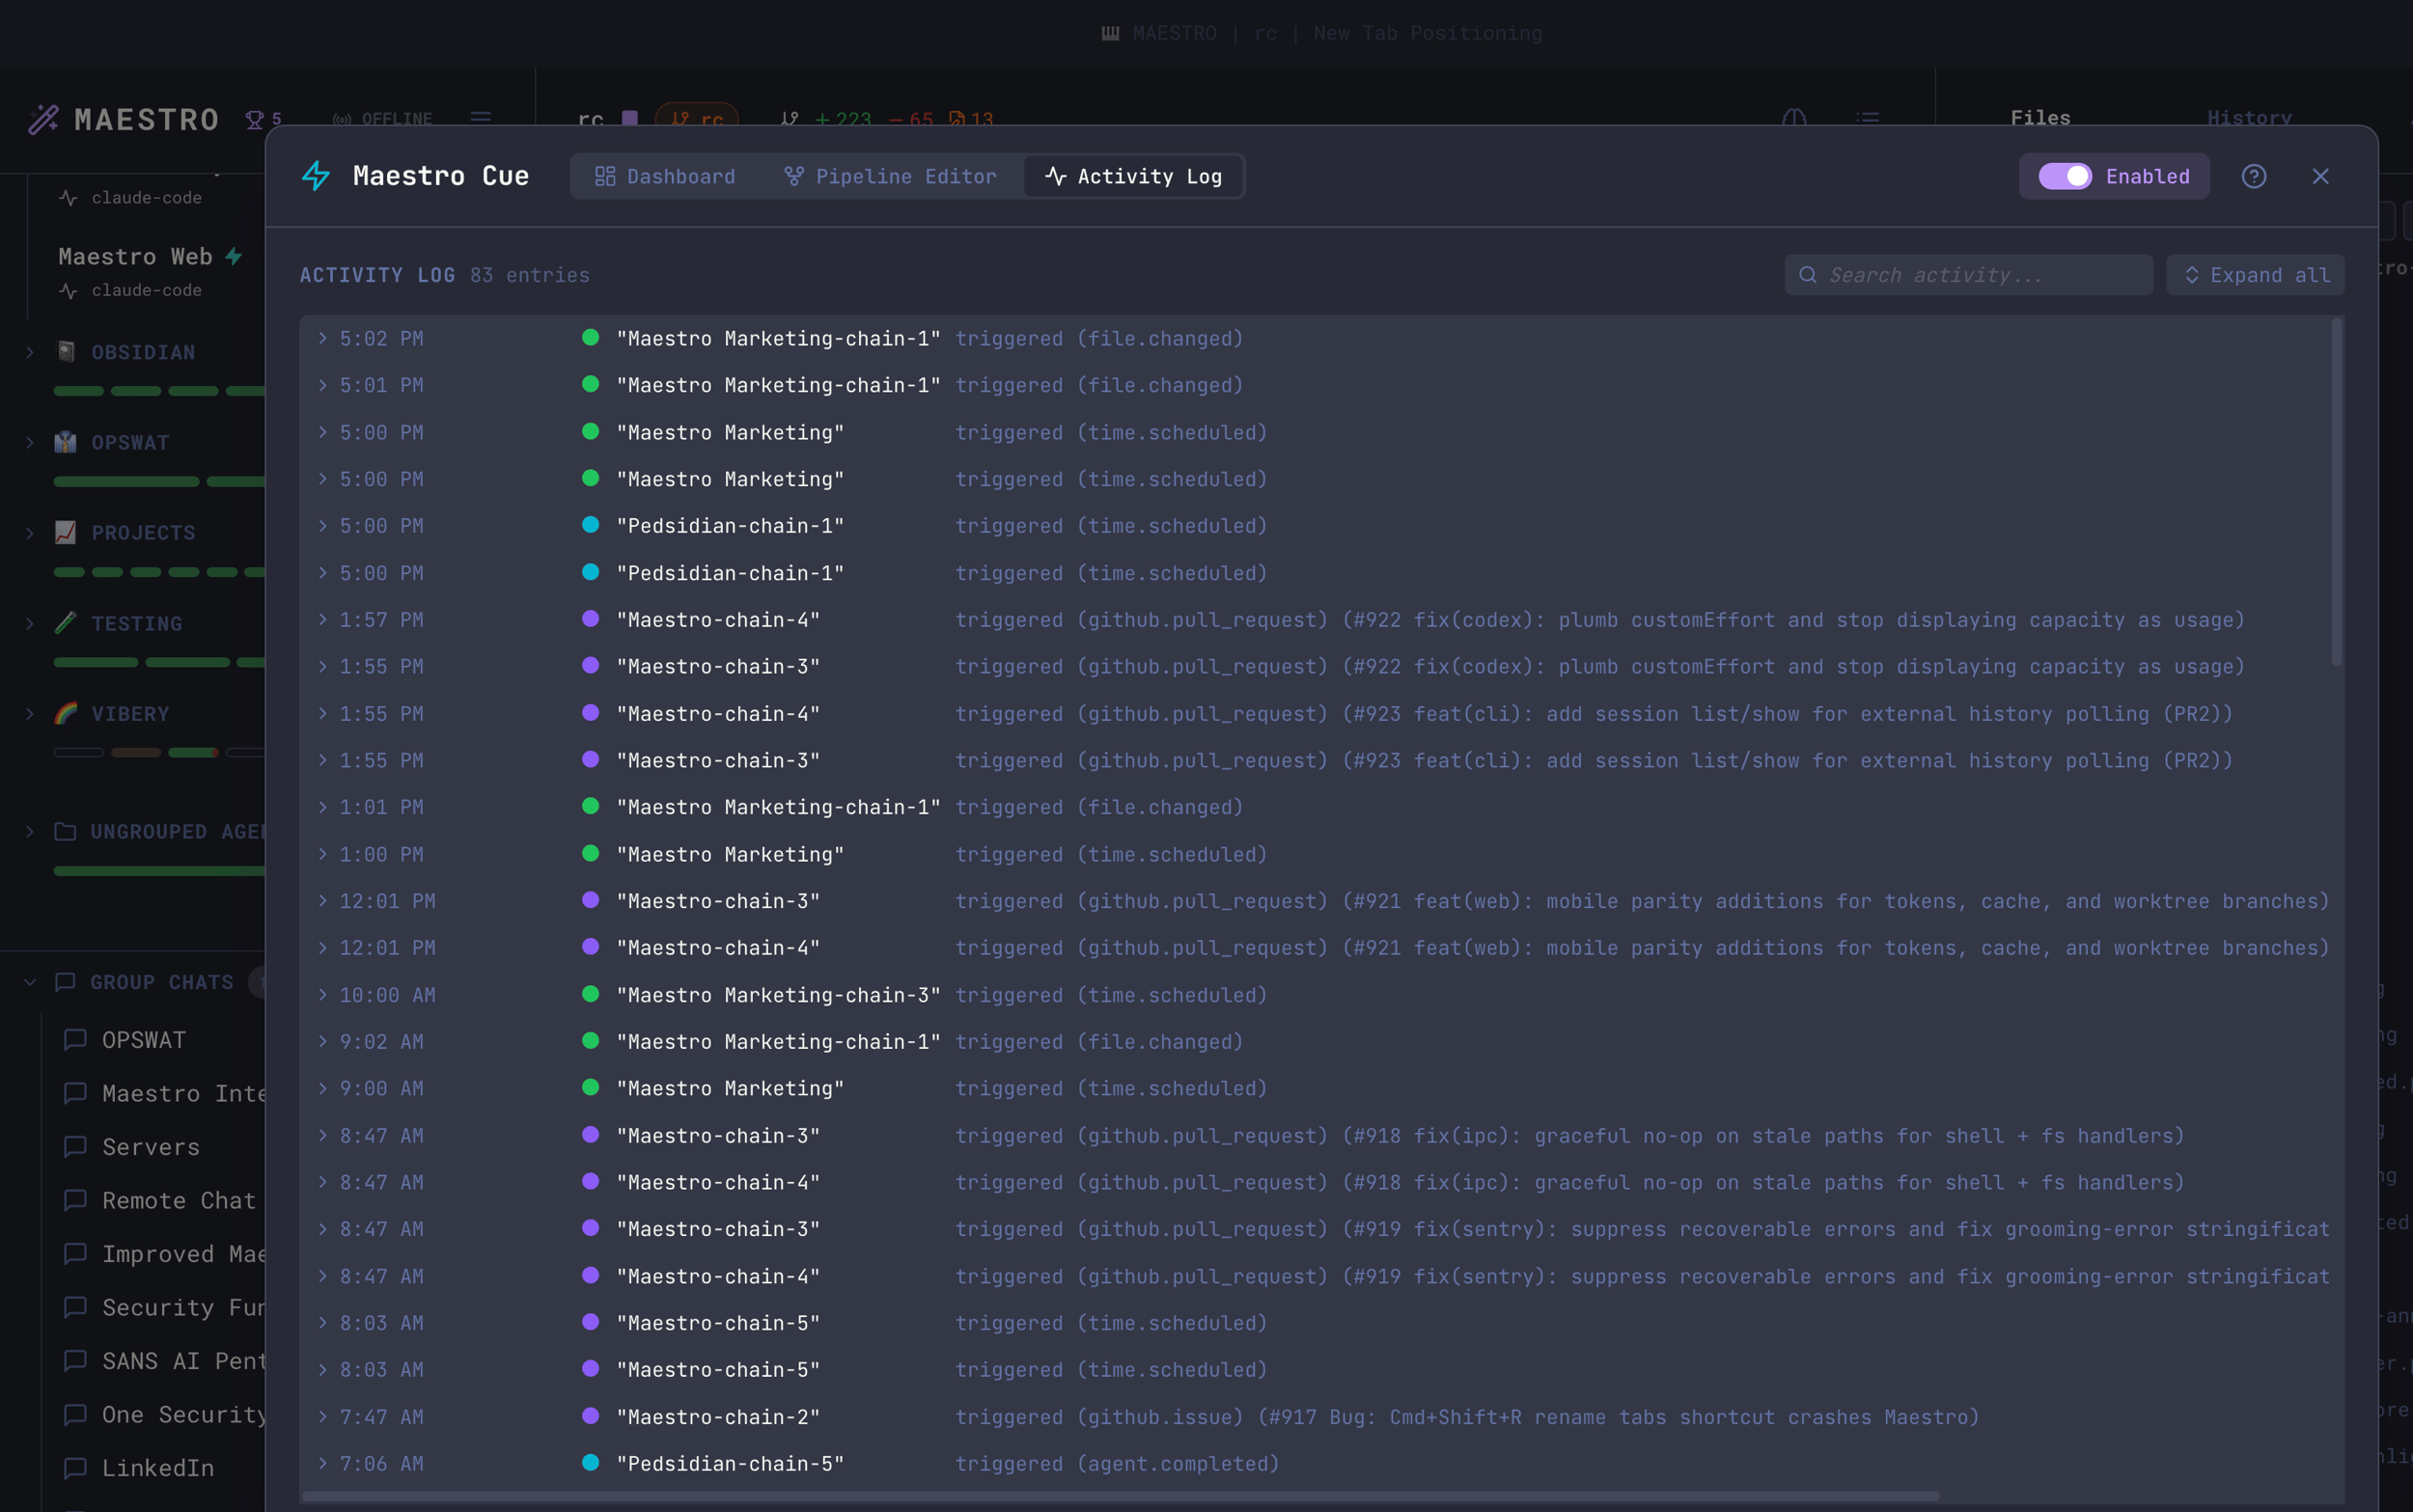 Each entry shows:
* Subscription name and trigger type (e.g. `[github.pull_request]`)
* Status (completed, failed, timeout, stopped)
* Duration
* Timestamp
Expand an entry to see the full event data — for GitHub triggers this includes the PR/issue number, title, author, URL, and body.
###
[](https://docs.runmaestro.ai/maestro-cue#yaml-editor)
YAML Editor
Click **Edit YAML** on any session row to open the inline editor. The left side offers **pattern templates** (Startup, Heartbeat, Scheduled, Reactive, Sequential Chain, PR Review, Issue Triage, Task Queue, and more) — click one to insert a pre-configured subscription block. An **AI Assist** panel lets you describe what you want in plain English and have the agent edit the config for you. 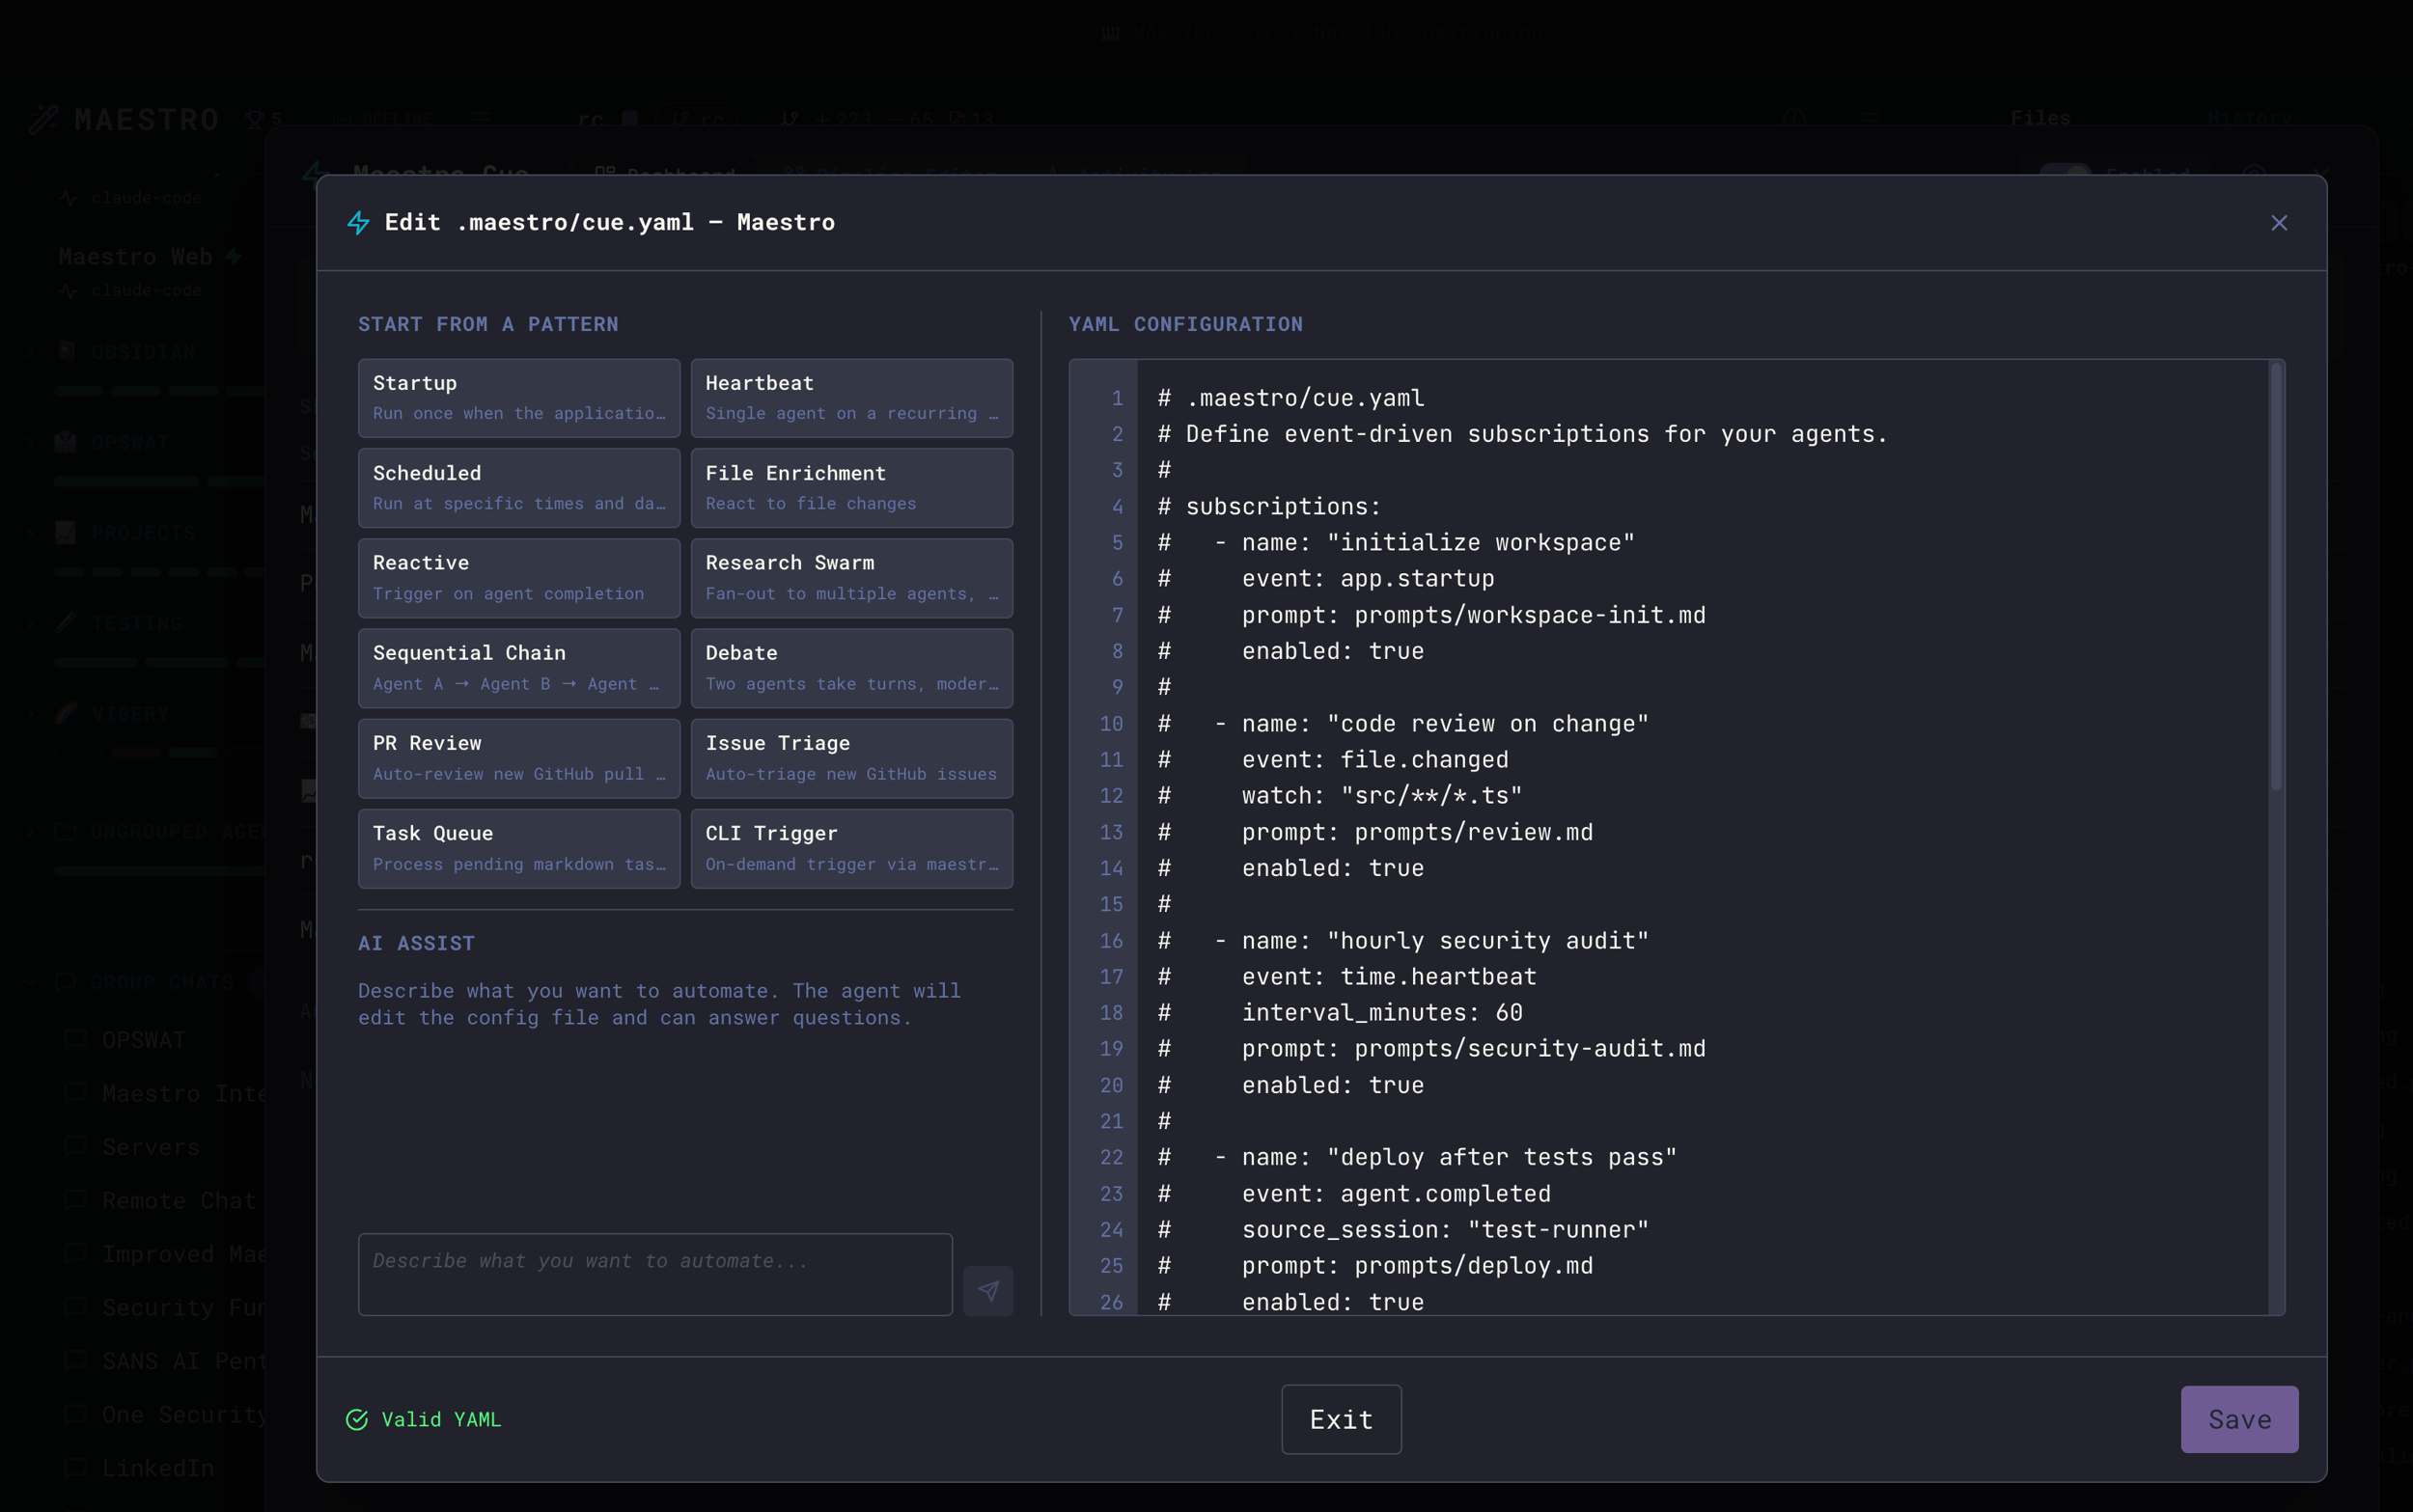 The right side shows your YAML with real-time validation — a green **Valid YAML** indicator appears at the bottom when the config parses correctly. Click **Save** to write the file; the engine hot-reloads automatically.
###
[](https://docs.runmaestro.ai/maestro-cue#help)
Help
Built-in reference guide accessible from the modal header. Covers configuration syntax, event types, and template variables.
[](https://docs.runmaestro.ai/maestro-cue#pipeline-editor)
Pipeline Editor
------------------------------------------------------------------------------
The **Pipeline Editor** tab visualizes your Cue subscriptions as a node graph — triggers on the left, agents on the right, with edges showing how events flow through your automation. 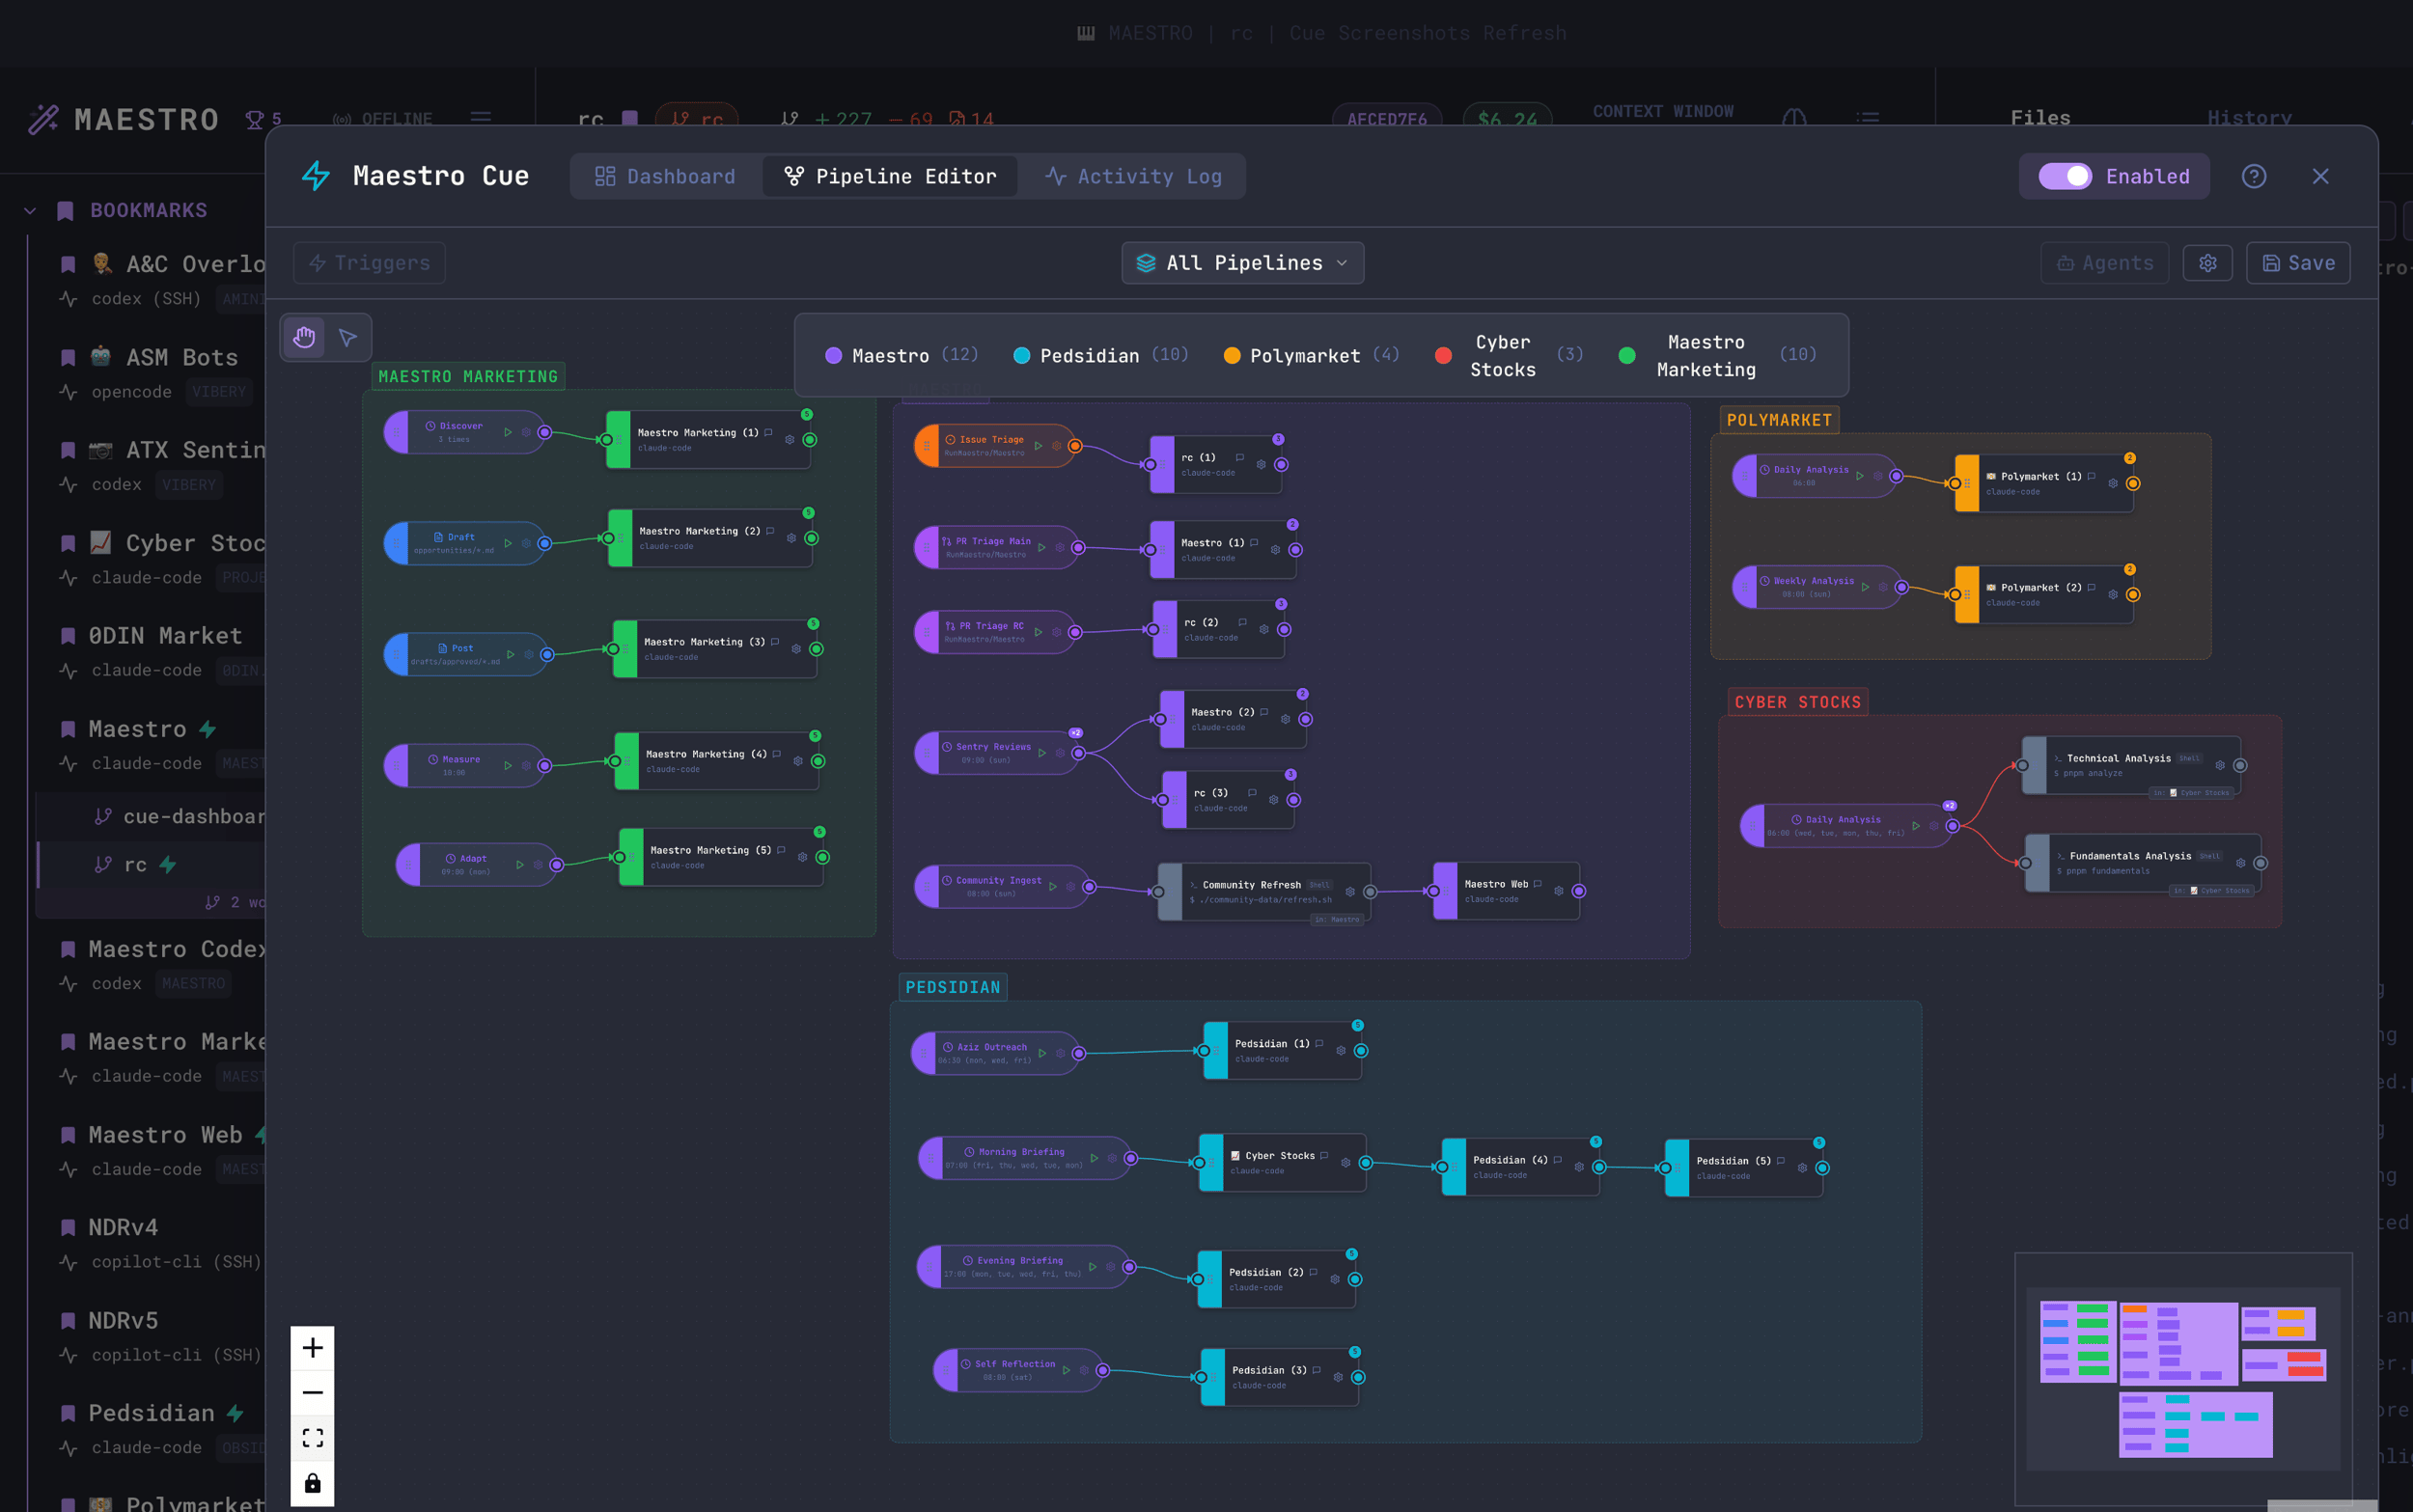 Each pipeline is color-coded and labeled. Trigger nodes show the event type and configuration (glob patterns, schedule times, etc.), while agent nodes show the provider type. Pipelines from all agents are displayed together so you can see cross-agent relationships at a glance. A pipeline can contain **multiple trigger lines** — for example, a daily scan and a weekly review grouped under a single “Monitoring” pipeline. Use the `# Pipeline:` comment and `-chain-N` naming convention in your YAML to group subscriptions. See [Pipelines](https://docs.runmaestro.ai/maestro-cue-configuration#pipelines)
in the Configuration Reference for details.
###
[](https://docs.runmaestro.ai/maestro-cue#inspecting-a-pipeline)
Inspecting a Pipeline
Click any pipeline name in the top bar or select a node to drill into a single pipeline. Side drawers open for **Triggers** (left) and **Agents** (right), showing full configuration details. Selecting an agent node reveals its prompt text inline. 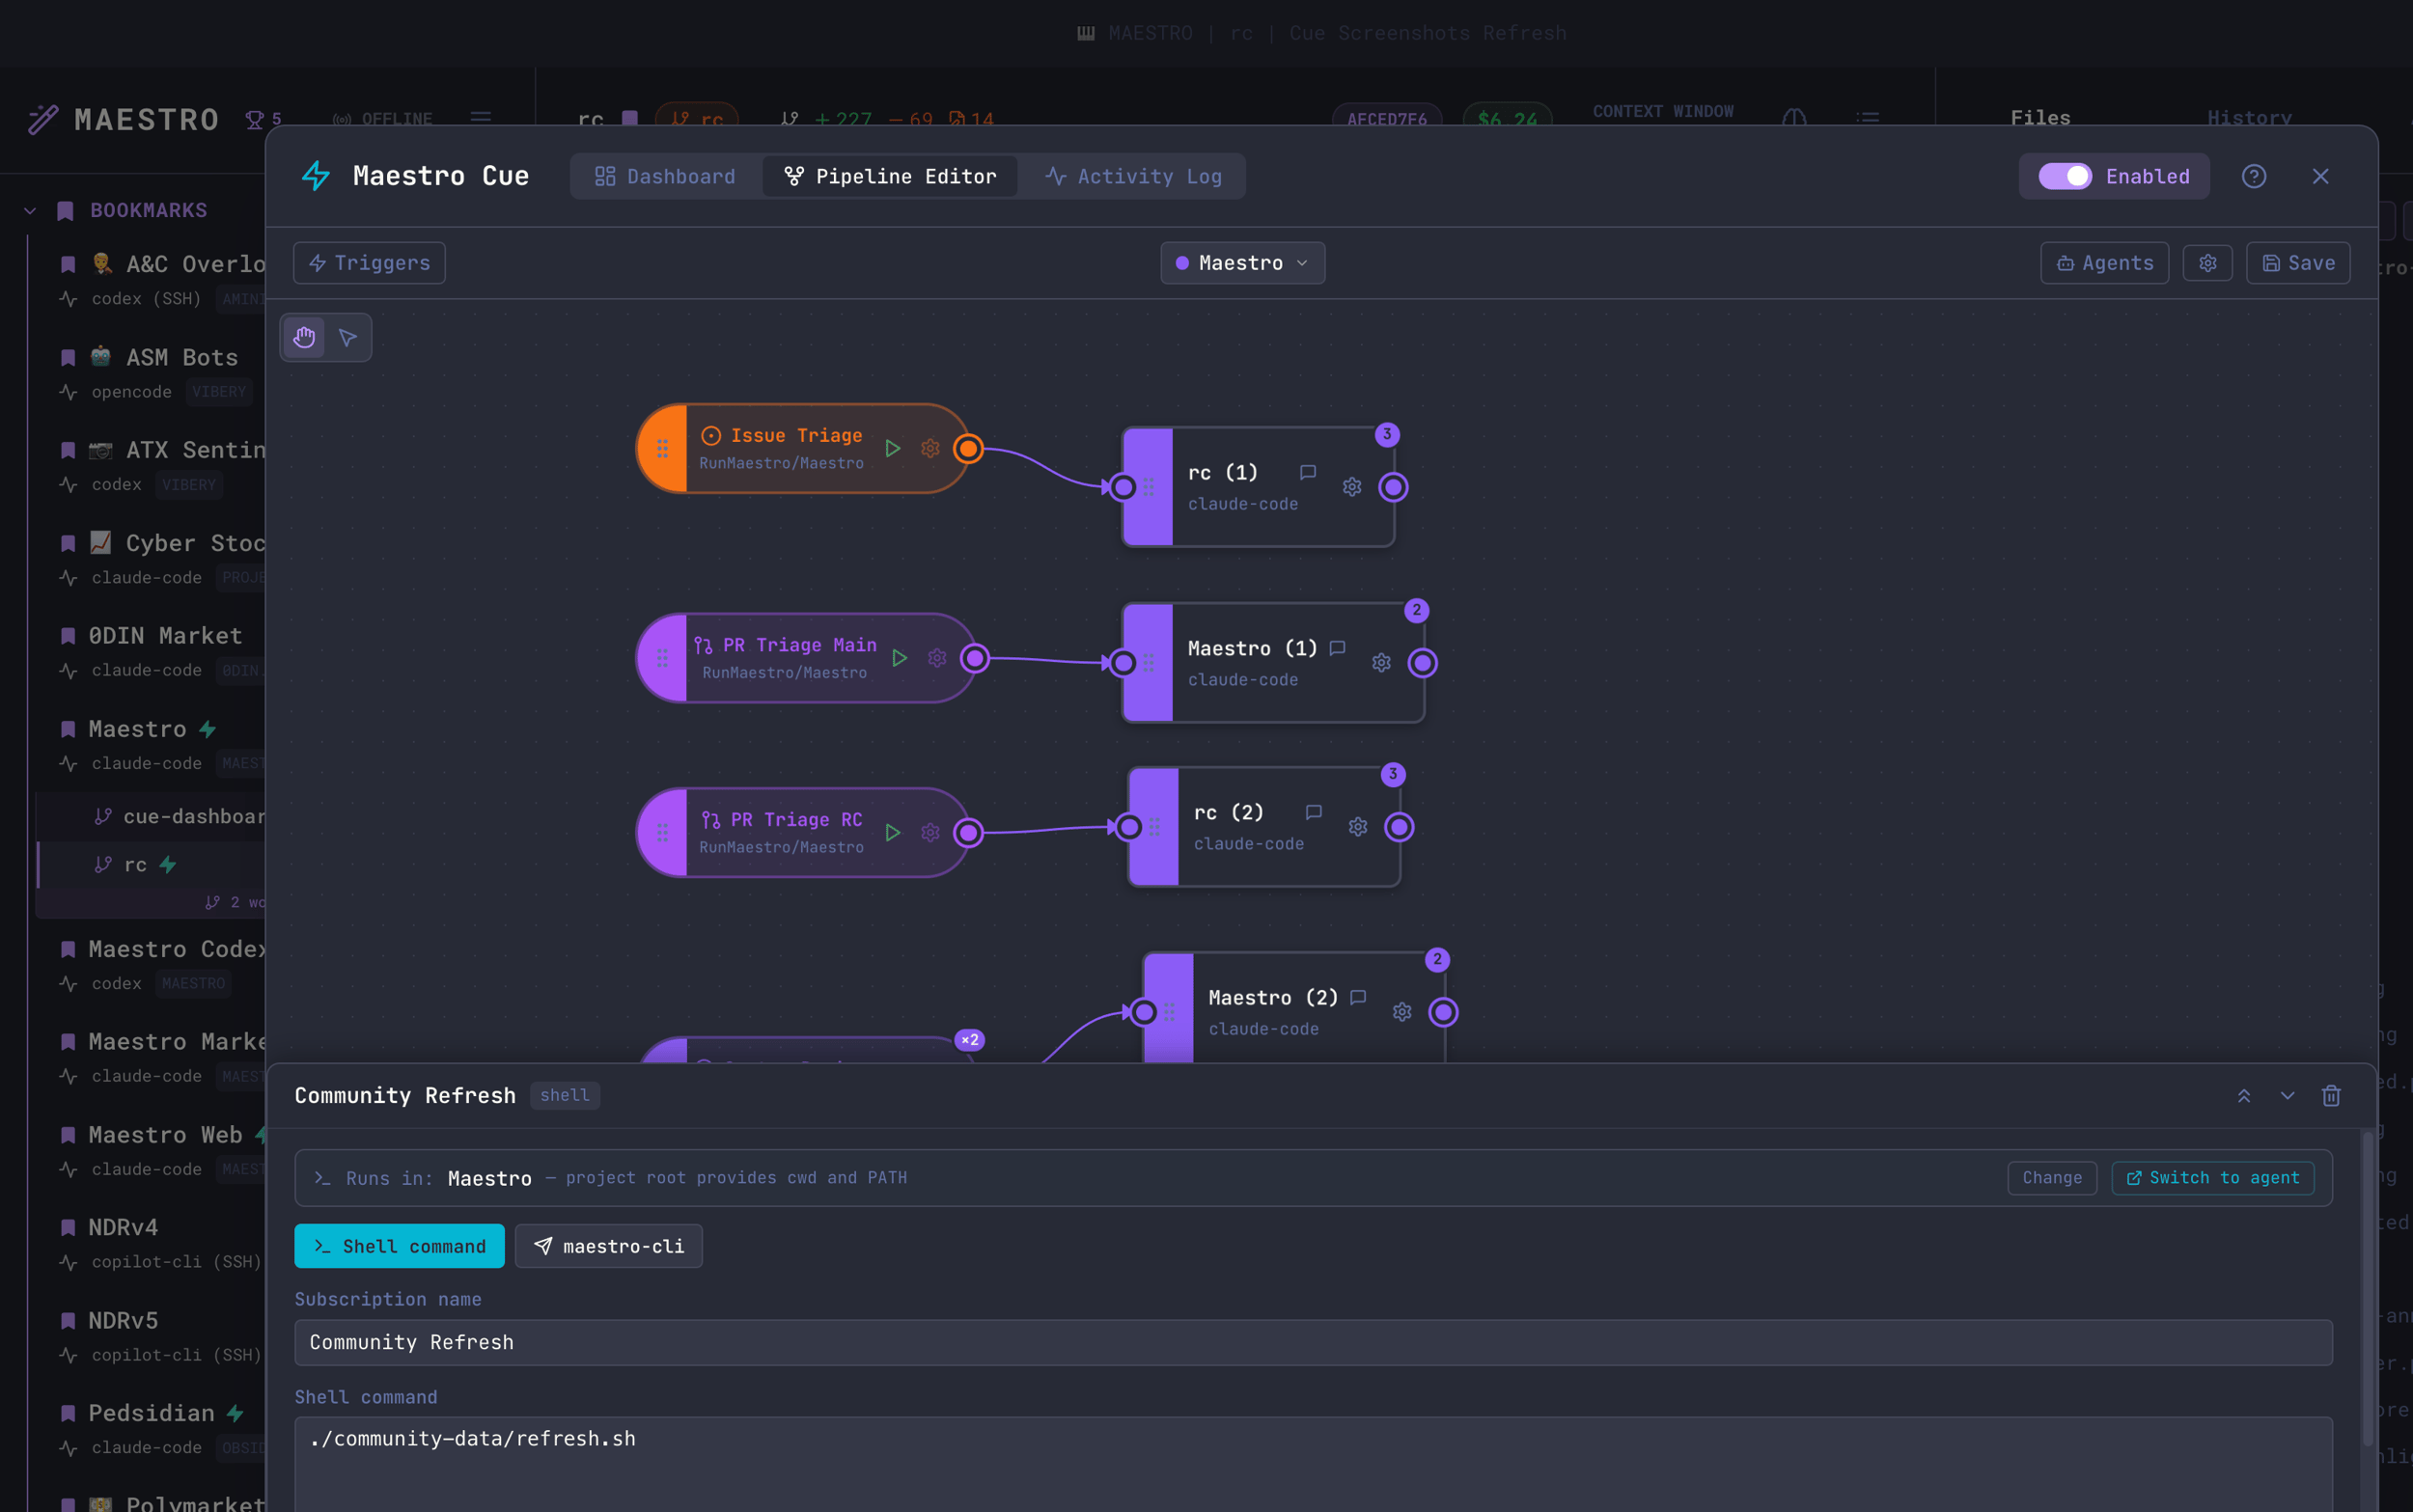 The Triggers drawer lists all event types with their configurations (filter patterns, poll intervals, etc.). The Agents drawer shows all available agents with status indicators, and clicking one displays the prompt that will be sent when the trigger fires. Use the **Switch to Agent** link at the bottom to jump directly to that agent’s workspace.
[](https://docs.runmaestro.ai/maestro-cue#configuration-file)
Configuration File
------------------------------------------------------------------------------------
Cue is configured via a `.maestro/cue.yaml` file placed inside the `.maestro/` directory at your project root. See the [Configuration Reference](https://docs.runmaestro.ai/maestro-cue-configuration)
for the complete YAML schema.
[](https://docs.runmaestro.ai/maestro-cue#event-types)
Event Types
----------------------------------------------------------------------
Cue supports nine event types that trigger subscriptions:
| Event Type | Trigger | Key Fields |
| --- | --- | --- |
| `app.startup` | Maestro launches | — |
| `time.heartbeat` | Periodic timer (“every N minutes”) | `interval_minutes` |
| `time.scheduled` | Specific times and days of the week | `schedule_times`, `schedule_days` |
| `file.changed` | File created, modified, or deleted | `watch` (glob pattern) |
| `agent.completed` | Another agent finishes a task | `source_session` |
| `task.pending` | Unchecked markdown tasks found | `watch` (glob pattern) |
| `github.pull_request` | New PR opened on GitHub | `repo` (optional) |
| `github.issue` | New issue opened on GitHub | `repo` (optional) |
| `cli.trigger` | Manual trigger via `maestro-cli` | — |
See [Event Types](https://docs.runmaestro.ai/maestro-cue-events)
for detailed documentation and examples for each type.
[](https://docs.runmaestro.ai/maestro-cue#template-variables)
Template Variables
------------------------------------------------------------------------------------
Prompts support `{{VARIABLE}}` syntax for injecting event data. When Cue fires a subscription, it replaces template variables with the actual event payload before sending the prompt to the agent.
prompt: |
A new PR was opened: {{CUE_GH_TITLE}} (#{{CUE_GH_NUMBER}})
Author: {{CUE_GH_AUTHOR}}
Branch: {{CUE_GH_BRANCH}} -> {{CUE_GH_BASE_BRANCH}}
URL: {{CUE_GH_URL}}
Please review this PR and provide feedback.
See [Advanced Patterns](https://docs.runmaestro.ai/maestro-cue-advanced)
for the complete template variable reference.
[](https://docs.runmaestro.ai/maestro-cue#advanced-features)
Advanced Features
----------------------------------------------------------------------------------
Cue supports sophisticated automation patterns beyond simple trigger-prompt pairings:
* **[Fan-out](https://docs.runmaestro.ai/maestro-cue-advanced#fan-out)
** — One trigger fires against multiple target agents simultaneously
* **[Fan-in](https://docs.runmaestro.ai/maestro-cue-advanced#fan-in)
** — Wait for multiple agents to complete before triggering
* **[Payload filtering](https://docs.runmaestro.ai/maestro-cue-advanced#filtering)
** — Conditionally trigger based on event data (glob matching, comparisons, negation)
* **[Agent chaining](https://docs.runmaestro.ai/maestro-cue-advanced#agent-chaining)
** — Build multi-step pipelines where each agent’s output feeds the next
* **[Concurrency control](https://docs.runmaestro.ai/maestro-cue-advanced#concurrency-control)
** — Limit simultaneous runs and queue overflow events
See [Advanced Patterns](https://docs.runmaestro.ai/maestro-cue-advanced)
for full documentation.
[](https://docs.runmaestro.ai/maestro-cue#keyboard-shortcuts)
Keyboard Shortcuts
------------------------------------------------------------------------------------
| Shortcut | Action |
| --- | --- |
| `Option+Q` / `Alt+Q` | Open Cue Modal |
| `Esc` | Close modal |
[](https://docs.runmaestro.ai/maestro-cue#history-integration)
History Integration
--------------------------------------------------------------------------------------
Cue-triggered runs appear in the History panel with a teal **CUE** badge. Each entry records:
* The subscription name that triggered it
* The event type
* The source session (for agent completion chains)
Filter by CUE entries in the History panel or in Director’s Notes (when both Encore Features are enabled) to isolate automated activity from manual work.
[](https://docs.runmaestro.ai/maestro-cue#requirements)
Requirements
------------------------------------------------------------------------
* **GitHub CLI (`gh`)** — Required only for `github.pull_request` and `github.issue` events. Must be installed and authenticated (`gh auth login`).
* **File watching** — `file.changed` and `task.pending` events use filesystem watchers. No additional dependencies required.
* **CLI triggers** — `cli.trigger` events require `maestro-cli` to be installed. See the [CLI documentation](https://docs.runmaestro.ai/cli#cue-automation)
for setup.
[](https://docs.runmaestro.ai/maestro-cue#tips)
Tips
--------------------------------------------------------
* **Start simple** — Begin with a single `file.changed` or `time.heartbeat` subscription before building complex chains
* **Use the YAML editor** — The inline editor validates your config in real-time, catching errors before they reach the engine
* **Check the Activity Log** — If a subscription isn’t firing, the activity log shows failures with error details
* **Prompt files vs inline** — For complex prompts, point the `prompt` field at a `.md` file instead of inlining YAML
* **Hot reload** — The engine watches `.maestro/cue.yaml` for changes and reloads automatically — no need to restart Maestro
* **Template variables** — Use `{{CUE_TRIGGER_NAME}}` in prompts so the agent knows which automation triggered it
Was this page helpful?
YesNo
[Maestro Symphony](https://docs.runmaestro.ai/symphony)
[Cue Configuration](https://docs.runmaestro.ai/maestro-cue-configuration)
Ctrl+I


---
# Installation - Maestro
[Skip to main content](https://docs.runmaestro.ai/installation#content-area)
[Maestro home page](https://runmaestro.ai/)
Search...
Ctrl K
Search...
Navigation
Getting Started
Installation
On this page
* [Download](https://docs.runmaestro.ai/installation#download)
* [Requirements](https://docs.runmaestro.ai/installation#requirements)
* [WSL2 Users (Windows Subsystem for Linux)](https://docs.runmaestro.ai/installation#wsl2-users-windows-subsystem-for-linux)
* [Recommended WSL2 Setup](https://docs.runmaestro.ai/installation#recommended-wsl2-setup)
* [Accessing Files from Windows](https://docs.runmaestro.ai/installation#accessing-files-from-windows)
* [Troubleshooting WSL2](https://docs.runmaestro.ai/installation#troubleshooting-wsl2)
* [Building from Source](https://docs.runmaestro.ai/installation#building-from-source)
[](https://docs.runmaestro.ai/installation#download)
Download
-----------------------------------------------------------------
Download the latest release for your platform from the [Releases](https://github.com/RunMaestro/Maestro/releases)
page:
* **macOS**: `.dmg` or `.zip` (available for both Intel and Apple Silicon)
* **Windows**: `.exe` installer or portable `.exe` (no installation required)
* **Linux**: `.AppImage`, `.deb`, or `.rpm` (available for both x86\_64 and arm64)
* **Upgrading**: Simply replace the old binary with the new one. All your data (sessions, settings, playbooks, history) persists in your [config directory](https://docs.runmaestro.ai/configuration)
.
[](https://docs.runmaestro.ai/installation#requirements)
Requirements
-------------------------------------------------------------------------
* At least one supported AI coding agent installed and authenticated:
* [Claude Code](https://docs.anthropic.com/en/docs/claude-code)
— Anthropic’s AI coding assistant (fully integrated)
* [Codex](https://github.com/openai/codex)
— OpenAI’s coding agent (fully integrated)
* [OpenCode](https://github.com/sst/opencode)
— Open-source AI coding assistant (fully integrated)
* [Factory Droid](https://docs.factory.ai/cli)
— Factory’s AI coding assistant (fully integrated)
* [Gemini CLI](https://github.com/google-gemini/gemini-cli)
, [Qwen3 Coder](https://github.com/QwenLM/Qwen-Agent)
— Planned support
* Git (optional, for git-aware features)
Maestro is a pass-through to your provider. Your MCP tools, custom skills, permissions, and authentication all work in Maestro exactly as they do when running the provider directly—Maestro just orchestrates the conversation flow in batch mode.
[](https://docs.runmaestro.ai/installation#wsl2-users-windows-subsystem-for-linux)
WSL2 Users (Windows Subsystem for Linux)
-------------------------------------------------------------------------------------------------------------------------------
When developing or running Maestro with WSL2, always clone and run from the **native Linux filesystem** (e.g., `/home/username/maestro`), NOT from Windows-mounted paths (`/mnt/c/...`, `/mnt/d/...`).
Using Windows mounts causes several critical issues:
| Issue | Symptom |
| --- | --- |
| Socket binding failures | `EPERM: operation not permitted` when starting dev server |
| Electron sandbox crashes | `FATAL:sandbox_host_linux.cc` errors |
| npm install failures | Timeouts, `ENOTEMPTY` rename errors |
| Git corruption | Missing index files, spurious lock files |
###
[](https://docs.runmaestro.ai/installation#recommended-wsl2-setup)
Recommended WSL2 Setup
# Clone to Linux filesystem (not /mnt/...)
cd ~
git clone https://github.com/RunMaestro/Maestro.git
cd maestro
# Install dependencies
npm install
# Run in development mode
npm run dev
###
[](https://docs.runmaestro.ai/installation#accessing-files-from-windows)
Accessing Files from Windows
You can browse your WSL2 files from Windows Explorer using:
\\wsl$\Ubuntu\home\\maestro
###
[](https://docs.runmaestro.ai/installation#troubleshooting-wsl2)
Troubleshooting WSL2
If you encounter `electron-rebuild` failures, try setting the temp directory:
TMPDIR=/tmp npm run rebuild
For persistent issues, see [Troubleshooting](https://docs.runmaestro.ai/troubleshooting)
for additional WSL-specific guidance.
[](https://docs.runmaestro.ai/installation#building-from-source)
Building from Source
-----------------------------------------------------------------------------------------
If you prefer to build Maestro from source:
# Prerequisites: Node.js 22.0.0 or higher
node --version # Verify version
# Clone the repository
git clone https://github.com/RunMaestro/Maestro.git
cd maestro
# Install dependencies
npm install
# Run in development mode
npm run dev
# Or build for production
npm run build
npm run package
Building from source requires native module compilation (node-pty, better-sqlite3). On Windows, you’ll need the [Visual Studio Build Tools](https://visualstudio.microsoft.com/visual-cpp-build-tools/)
. On macOS, you’ll need Xcode Command Line Tools (`xcode-select --install`).
Was this page helpful?
YesNo
[Themes Gallery](https://docs.runmaestro.ai/screenshots)
[Getting Started](https://docs.runmaestro.ai/getting-started)
Ctrl+I
---
# Cue Event Types - Maestro
[Skip to main content](https://docs.runmaestro.ai/maestro-cue-events#content-area)
[Maestro home page](https://runmaestro.ai/)
Search...
Ctrl K
Search...
Navigation
Maestro Cue
Cue Event Types
On this page
* [app.startup](https://docs.runmaestro.ai/maestro-cue-events#app-startup)
* [time.heartbeat](https://docs.runmaestro.ai/maestro-cue-events#time-heartbeat)
* [time.scheduled](https://docs.runmaestro.ai/maestro-cue-events#time-scheduled)
* [file.changed](https://docs.runmaestro.ai/maestro-cue-events#file-changed)
* [agent.completed](https://docs.runmaestro.ai/maestro-cue-events#agent-completed)
* [task.pending](https://docs.runmaestro.ai/maestro-cue-events#task-pending)
* [github.pull\_request](https://docs.runmaestro.ai/maestro-cue-events#github-pull_request)
* [github.issue](https://docs.runmaestro.ai/maestro-cue-events#github-issue)
* [cli.trigger](https://docs.runmaestro.ai/maestro-cue-events#cli-trigger)
Cue supports nine event types. Each type watches for a different kind of activity and produces a payload that can be injected into prompts via [template variables](https://docs.runmaestro.ai/maestro-cue-advanced#template-variables)
.
[](https://docs.runmaestro.ai/maestro-cue-events#app-startup)
app.startup
-----------------------------------------------------------------------------
Fires exactly once when the Maestro application launches. Ideal for workspace setup, dependency installation, health checks, or any initialization that should happen once per session. **Required fields:** None beyond the universal `name`, `event`, and either `prompt` or `prompt_file`. **Behavior:**
* Fires once per application launch
* Does NOT re-fire when toggling Cue on/off in Settings
* Does not re-fire on YAML hot-reload (deduplication by subscription name)
* Resets on session removal (so re-adding the session fires again on next app launch)
* Not affected by sleep/wake reconciliation
* Works with `fan_out`, `filter`, `output_prompt`, and `prompt_file`
**Example:**
subscriptions:
- name: init-workspace
event: app.startup
prompt: |
Set up the development environment:
1. Run `npm install` if node_modules is missing
2. Check that required env vars are set
3. Report any issues found
**Payload fields:**
| Field | Type | Description |
| --- | --- | --- |
| `reason` | string | Always `"system_startup"` |
* * *
[](https://docs.runmaestro.ai/maestro-cue-events#time-heartbeat)
time.heartbeat
-----------------------------------------------------------------------------------
Fires on a periodic timer. The subscription triggers immediately when the engine starts, then repeats at the configured interval. **Required fields:**
| Field | Type | Description |
| --- | --- | --- |
| `interval_minutes` | number | Minutes between triggers (must be > 0) |
**Behavior:**
* Fires immediately on engine start (or when the subscription is first loaded)
* Reconciles missed intervals after system sleep — if your machine sleeps through one or more intervals, Cue fires a catch-up event on wake
* The interval resets after each trigger, not after each run completes
**Example:**
subscriptions:
- name: hourly-summary
event: time.heartbeat
interval_minutes: 60
prompt: |
Generate a summary of git activity in the last hour.
Run `git log --oneline --since="1 hour ago"` and organize by author.
**Payload fields:** None specific to this event type. Use common variables like `{{CUE_TRIGGER_NAME}}` and `{{CUE_EVENT_TIMESTAMP}}`.
* * *
[](https://docs.runmaestro.ai/maestro-cue-events#time-scheduled)
time.scheduled
-----------------------------------------------------------------------------------
Fires at specific times and days of the week — a cron-like trigger for precise scheduling. **Required fields:**
| Field | Type | Description |
| --- | --- | --- |
| `schedule_times` | string\[\] | Array of times in `HH:MM` format (24-hour clock) |
**Optional fields:**
| Field | Type | Default | Description |
| --- | --- | --- | --- |
| `schedule_days` | string\[\] | every day | Days of the week to run: `mon`, `tue`, `wed`, `thu`, `fri`, `sat`, `sun` |
**Behavior:**
* Checks every 60 seconds if the current time matches any `schedule_times` entry
* If `schedule_days` is set, the current day must also match
* Does **not** fire immediately on engine start (unlike `time.heartbeat`)
* Multiple times per day are supported — add multiple entries to `schedule_times`
**Example — weekday standup:**
subscriptions:
- name: morning-standup
event: time.scheduled
schedule_times:
- '09:00'
schedule_days:
- mon
- tue
- wed
- thu
- fri
prompt: |
Generate a standup report:
1. Run `git log --oneline --since="yesterday"` to find recent changes
2. Check for any failing tests
3. Summarize what was accomplished and what's next
**Example — multiple times daily:**
subscriptions:
- name: status-check
event: time.scheduled
schedule_times:
- '09:00'
- '13:00'
- '17:00'
prompt: |
Run a quick health check on all services.
**Payload fields:**
| Field | Description | Example |
| --- | --- | --- |
| `matched_time` | The scheduled time that matched | `09:00` |
| `matched_day` | The day of the week when it triggered | `mon` |
* * *
[](https://docs.runmaestro.ai/maestro-cue-events#file-changed)
file.changed
-------------------------------------------------------------------------------
Fires when files matching a glob pattern are created, modified, or deleted. **Required fields:**
| Field | Type | Description |
| --- | --- | --- |
| `watch` | string (glob) | Glob pattern for files to monitor |
**Behavior:**
* Monitors for `add`, `change`, and `unlink` (delete) events
* Debounces by 5 seconds per file — rapid saves to the same file produce a single event
* The glob is evaluated relative to the project root
* Standard glob syntax: `*` matches within a directory, `**` matches across directories
**Example:**
subscriptions:
- name: test-on-change
event: file.changed
watch: 'src/**/*.{ts,tsx}'
filter:
changeType: '!unlink' # Don't trigger on file deletions
prompt: |
The file {{CUE_FILE_PATH}} was {{CUE_EVENT_TYPE}}.
Run the tests related to this file and report results.
**Payload fields:**
| Variable | Description | Example |
| --- | --- | --- |
| `{{CUE_FILE_PATH}}` | Absolute path to the changed file | `/project/src/app.ts` |
| `{{CUE_FILE_NAME}}` | Filename only | `app.ts` |
| `{{CUE_FILE_DIR}}` | Directory containing the file | `/project/src` |
| `{{CUE_FILE_EXT}}` | File extension (with dot) | `.ts` |
| `{{CUE_FILE_CHANGE_TYPE}}` | Change type | `add`, `change`, `unlink` |
The `changeType` field is also available in [filters](https://docs.runmaestro.ai/maestro-cue-advanced#filtering)
.
* * *
[](https://docs.runmaestro.ai/maestro-cue-events#agent-completed)
agent.completed
-------------------------------------------------------------------------------------
Fires when another Maestro agent finishes a task. This is the foundation for agent chaining — building multi-step pipelines where one agent’s completion triggers the next. **Required fields:**
| Field | Type | Description |
| --- | --- | --- |
| `source_session` | string or list | Name(s) of the agent(s) to watch for completion |
**Behavior:**
* **Single source** (string): Fires immediately when the named agent completes
* **Multiple sources** (list): Waits for **all** named agents to complete before firing (fan-in). See [Fan-In](https://docs.runmaestro.ai/maestro-cue-advanced#fan-in)
* The source agent’s output is captured and available via `{{CUE_SOURCE_OUTPUT}}` (truncated to 5,000 characters)
* Matches agent names as shown in the Left Bar
**Example — single source:**
subscriptions:
- name: deploy-after-build
event: agent.completed
source_session: 'builder'
filter:
exitCode: 0 # Only deploy if build succeeded
prompt: |
The build agent completed successfully.
Output: {{CUE_SOURCE_OUTPUT}}
Deploy to staging with `npm run deploy:staging`.
**Example — fan-in (multiple sources):**
subscriptions:
- name: integration-tests
event: agent.completed
source_session:
- 'backend-build'
- 'frontend-build'
prompt: |
Both builds completed. Run the full integration test suite.
**Payload fields:**
| Variable | Description | Example |
| --- | --- | --- |
| `{{CUE_SOURCE_SESSION}}` | Name of the completing agent(s) | `builder` |
| `{{CUE_SOURCE_OUTPUT}}` | Truncated stdout from the source (max 5K chars) | `Build succeeded` |
| `{{CUE_SOURCE_STATUS}}` | Run status (`completed`, `failed`, `timeout`) | `completed` |
| `{{CUE_SOURCE_EXIT_CODE}}` | Process exit code | `0` |
| `{{CUE_SOURCE_DURATION}}` | Run duration in milliseconds | `15000` |
| `{{CUE_SOURCE_TRIGGERED_BY}}` | Name of the subscription that triggered the source run | `lint-on-save` |
These fields are also available in [filters](https://docs.runmaestro.ai/maestro-cue-advanced#filtering)
. The `triggeredBy` field is particularly useful when a source agent has multiple Cue subscriptions but you only want to chain from a specific one. See [Selective Chaining](https://docs.runmaestro.ai/maestro-cue-examples#selective-chaining-with-triggeredby)
for a complete example.
* * *
[](https://docs.runmaestro.ai/maestro-cue-events#task-pending)
task.pending
-------------------------------------------------------------------------------
Watches markdown files for unchecked task items (`- [ ]`) and fires when pending tasks are found. **Required fields:**
| Field | Type | Description |
| --- | --- | --- |
| `watch` | string (glob) | Glob pattern for markdown files to scan |
**Optional fields:**
| Field | Type | Default | Description |
| --- | --- | --- | --- |
| `poll_minutes` | number | 1 | Minutes between scans (minimum 1) |
**Behavior:**
* Scans files matching the glob pattern at the configured interval
* Fires when unchecked tasks (`- [ ]`) are found
* Only fires when the task list changes (new tasks appear or existing ones are modified)
* The full task list is formatted and available via `{{CUE_TASK_LIST}}`
* File content (truncated to 10K characters) is available via `{{CUE_TASK_CONTENT}}`
**Example:**
subscriptions:
- name: todo-worker
event: task.pending
watch: '**/*.md'
poll_minutes: 5
prompt: |
Found {{CUE_TASK_COUNT}} pending tasks in {{CUE_TASK_FILE}}:
{{CUE_TASK_LIST}}
Pick the most important task and complete it.
When finished, mark it as done by changing `- [ ]` to `- [x]`.
**Payload fields:**
| Variable | Description | Example |
| --- | --- | --- |
| `{{CUE_TASK_FILE}}` | Path to the file containing tasks | `/project/TODO.md` |
| `{{CUE_TASK_FILE_NAME}}` | Filename only | `TODO.md` |
| `{{CUE_TASK_FILE_DIR}}` | Directory containing the file | `/project` |
| `{{CUE_TASK_COUNT}}` | Number of pending tasks found | `3` |
| `{{CUE_TASK_LIST}}` | Formatted list with line numbers | `L5: Write unit tests` |
| `{{CUE_TASK_CONTENT}}` | Full file content (truncated to 10K chars) | _(file contents)_ |
* * *
[](https://docs.runmaestro.ai/maestro-cue-events#github-pull_request)
github.pull\_request
----------------------------------------------------------------------------------------------
Polls GitHub for new pull requests using the GitHub CLI (`gh`). **Optional fields:**
| Field | Type | Default | Description |
| --- | --- | --- | --- |
| `repo` | string | auto | GitHub repo in `owner/repo` format. Auto-detected from git remote if omitted |
| `poll_minutes` | number | 5 | Minutes between polls (minimum 1) |
**Behavior:**
* Requires the [GitHub CLI](https://cli.github.com/)
(`gh`) to be installed and authenticated
* On first run, seeds the “seen” list with existing PRs — only **new** PRs trigger events
* Tracks seen PRs in a local database with 30-day retention
* Auto-detects the repository from the git remote if `repo` is not specified
**Example:**
subscriptions:
- name: pr-reviewer
event: github.pull_request
poll_minutes: 3
filter:
draft: false # Skip draft PRs
base_branch: main # Only PRs targeting main
prompt: |
New PR: {{CUE_GH_TITLE}} (#{{CUE_GH_NUMBER}})
Author: {{CUE_GH_AUTHOR}}
Branch: {{CUE_GH_BRANCH}} -> {{CUE_GH_BASE_BRANCH}}
Labels: {{CUE_GH_LABELS}}
URL: {{CUE_GH_URL}}
{{CUE_GH_BODY}}
Review this PR for:
1. Code quality and style consistency
2. Potential bugs or edge cases
3. Test coverage
**Payload fields:**
| Variable | Description | Example |
| --- | --- | --- |
| `{{CUE_GH_TYPE}}` | Always `pull_request` | `pull_request` |
| `{{CUE_GH_NUMBER}}` | PR number | `42` |
| `{{CUE_GH_TITLE}}` | PR title | `Add user authentication` |
| `{{CUE_GH_AUTHOR}}` | Author’s GitHub login | `octocat` |
| `{{CUE_GH_URL}}` | HTML URL to the PR | `https://github.com/org/repo/pull/42` |
| `{{CUE_GH_BODY}}` | PR description (truncated) | _(PR body text)_ |
| `{{CUE_GH_LABELS}}` | Comma-separated label names | `bug, priority-high` |
| `{{CUE_GH_STATE}}` | PR state | `open` |
| `{{CUE_GH_BRANCH}}` | Head (source) branch | `feature/auth` |
| `{{CUE_GH_BASE_BRANCH}}` | Base (target) branch | `main` |
| `{{CUE_GH_REPO}}` | Repository in `owner/repo` format | `RunMaestro/Maestro` |
* * *
[](https://docs.runmaestro.ai/maestro-cue-events#github-issue)
github.issue
-------------------------------------------------------------------------------
Polls GitHub for new issues using the GitHub CLI (`gh`). Behaves identically to `github.pull_request` but for issues. **Optional fields:**
| Field | Type | Default | Description |
| --- | --- | --- | --- |
| `repo` | string | auto | GitHub repo in `owner/repo` format |
| `poll_minutes` | number | 5 | Minutes between polls (minimum 1) |
**Behavior:** Same as `github.pull_request` — requires GitHub CLI, seeds on first run, tracks seen issues. **Example:**
subscriptions:
- name: issue-triage
event: github.issue
poll_minutes: 5
filter:
labels: '!wontfix' # Skip issues labeled wontfix
prompt: |
New issue: {{CUE_GH_TITLE}} (#{{CUE_GH_NUMBER}})
Author: {{CUE_GH_AUTHOR}}
Assignees: {{CUE_GH_ASSIGNEES}}
Labels: {{CUE_GH_LABELS}}
{{CUE_GH_BODY}}
Triage this issue:
1. Identify the area of the codebase affected
2. Estimate complexity (small/medium/large)
3. Suggest which team member should handle it
**Payload fields:** Same as `github.pull_request`, except:
| Variable | Description | Example |
| --- | --- | --- |
| `{{CUE_GH_TYPE}}` | Always `issue` | `issue` |
| `{{CUE_GH_ASSIGNEES}}` | Comma-separated assignee logins | `alice, bob` |
The branch-specific variables (`{{CUE_GH_BRANCH}}`, `{{CUE_GH_BASE_BRANCH}}`) are not available for issues.
* * *
[](https://docs.runmaestro.ai/maestro-cue-events#cli-trigger)
cli.trigger
-----------------------------------------------------------------------------
Fires only when explicitly triggered from the command line via `maestro-cli cue trigger `. Unlike other event types, `cli.trigger` has no background watcher or poller — it waits for a manual invocation. **No additional fields required** — just `name`, `event`, `prompt`, and optionally `enabled`. **Behavior:**
* Does nothing on its own — only fires when you run `maestro-cli cue trigger `
* Supports an optional `--prompt` flag to override or supply the prompt at invocation time
* The override text is available in the prompt template as `{{CUE_CLI_PROMPT}}`
* Ideal for deployment scripts, CI/CD integration, on-demand reviews, or ad-hoc automation
**Example:**
subscriptions:
- name: deploy
event: cli.trigger
prompt: |
Run the deployment pipeline for the current branch.
Additional instructions: {{CUE_CLI_PROMPT}}
enabled: true
**Triggering from the command line:**
# Basic trigger — uses the configured prompt as-is
maestro-cli cue trigger deploy
# With a prompt override — {{CUE_CLI_PROMPT}} receives this text
maestro-cli cue trigger deploy --prompt "Deploy to staging only"
# JSON output for scripting
maestro-cli cue trigger deploy --json
**Discovering available subscriptions:**
# List all subscriptions across agents
maestro-cli cue list
**Payload fields:**
| Variable | Description | Example |
| --- | --- | --- |
| `{{CUE_CLI_PROMPT}}` | Prompt text passed via `--prompt` flag | `Deploy to staging` |
| `{{CUE_TRIGGER_NAME}}` | Name of the subscription that was triggered | `deploy` |
| `{{CUE_EVENT_TYPE}}` | Always `cli.trigger` | `cli.trigger` |
Was this page helpful?
YesNo
[Cue Configuration](https://docs.runmaestro.ai/maestro-cue-configuration)
[Cue Advanced Patterns](https://docs.runmaestro.ai/maestro-cue-advanced)
Ctrl+I
---
# Cue Advanced Patterns - Maestro
[Skip to main content](https://docs.runmaestro.ai/maestro-cue-advanced#content-area)
[Maestro home page](https://runmaestro.ai/)
Search...
Ctrl K
Search...
Navigation
Maestro Cue
Cue Advanced Patterns
On this page
* [Fan-Out](https://docs.runmaestro.ai/maestro-cue-advanced#fan-out)
* [Fan-In](https://docs.runmaestro.ai/maestro-cue-advanced#fan-in)
* [Filtering](https://docs.runmaestro.ai/maestro-cue-advanced#filtering)
* [Filter Syntax](https://docs.runmaestro.ai/maestro-cue-advanced#filter-syntax)
* [Expression Types](https://docs.runmaestro.ai/maestro-cue-advanced#expression-types)
* [Dot Notation](https://docs.runmaestro.ai/maestro-cue-advanced#dot-notation)
* [Examples](https://docs.runmaestro.ai/maestro-cue-advanced#examples)
* [Agent Chaining](https://docs.runmaestro.ai/maestro-cue-advanced#agent-chaining)
* [Simple Chain](https://docs.runmaestro.ai/maestro-cue-advanced#simple-chain)
* [Diamond Pattern](https://docs.runmaestro.ai/maestro-cue-advanced#diamond-pattern)
* [Template Variables](https://docs.runmaestro.ai/maestro-cue-advanced#template-variables)
* [Common Variables (All Events)](https://docs.runmaestro.ai/maestro-cue-advanced#common-variables-all-events)
* [File Variables (file.changed, task.pending)](https://docs.runmaestro.ai/maestro-cue-advanced#file-variables-file-changed-task-pending)
* [Task Variables (task.pending)](https://docs.runmaestro.ai/maestro-cue-advanced#task-variables-task-pending)
* [Agent Variables (agent.completed)](https://docs.runmaestro.ai/maestro-cue-advanced#agent-variables-agent-completed)
* [GitHub Variables (github.pull\_request, github.issue)](https://docs.runmaestro.ai/maestro-cue-advanced#github-variables-github-pull_request-github-issue)
* [Standard Variables](https://docs.runmaestro.ai/maestro-cue-advanced#standard-variables)
* [Concurrency Control](https://docs.runmaestro.ai/maestro-cue-advanced#concurrency-control)
* [max\_concurrent](https://docs.runmaestro.ai/maestro-cue-advanced#max_concurrent)
* [queue\_size](https://docs.runmaestro.ai/maestro-cue-advanced#queue_size)
* [Timeout](https://docs.runmaestro.ai/maestro-cue-advanced#timeout)
* [Sleep/Wake Reconciliation](https://docs.runmaestro.ai/maestro-cue-advanced#sleep%2Fwake-reconciliation)
* [Persistence](https://docs.runmaestro.ai/maestro-cue-advanced#persistence)
Cue supports sophisticated automation patterns beyond simple trigger-prompt pairings. This guide covers the advanced features that enable complex multi-agent workflows.
[](https://docs.runmaestro.ai/maestro-cue-advanced#fan-out)
Fan-Out
-----------------------------------------------------------------------
Fan-out sends a single trigger’s prompt to multiple target agents simultaneously. Use this when one event should kick off parallel work across several agents. **How it works:** Add a `fan_out` field with a list of agent names. When the trigger fires, Cue spawns a run against each target agent.
subscriptions:
- name: parallel-deploy
event: agent.completed
source_session: 'build-agent'
fan_out:
- 'deploy-staging'
- 'deploy-production'
- 'deploy-docs'
prompt: |
Build completed. Deploy the latest artifacts.
Source output: {{CUE_SOURCE_OUTPUT}}
In this example, when `build-agent` finishes, Cue sends the same prompt to three different agents in parallel. **Notes:**
* Each fan-out target runs independently — failures in one don’t affect others
* All targets receive the same prompt with the same template variable values
* Fan-out targets must be agent names visible in the Left Bar
* Fan-out respects `max_concurrent` — if slots are full, excess runs are queued
[](https://docs.runmaestro.ai/maestro-cue-advanced#fan-in)
Fan-In
---------------------------------------------------------------------
Fan-in waits for **multiple** source agents to complete before firing a single trigger. Use this to coordinate work that depends on several agents finishing first. **How it works:** Set `source_session` to a list of agent names. Cue waits for all of them to complete before firing the subscription.
subscriptions:
- name: integration-tests
event: agent.completed
source_session:
- 'backend-build'
- 'frontend-build'
- 'api-tests'
prompt: |
All prerequisite agents have completed.
Run the full integration test suite with `npm run test:integration`.
settings:
timeout_minutes: 60 # Wait up to 60 minutes for all sources
timeout_on_fail: continue # Fire anyway if timeout is reached
**Behavior:**
* Cue tracks completions from each source agent independently
* The subscription fires only when **all** listed sources have completed
* If `timeout_on_fail` is `'continue'`, the subscription fires with partial data after the timeout
* If `timeout_on_fail` is `'break'` (default), the subscription is marked as timed out and does not fire
* Completion tracking resets after the subscription fires
[](https://docs.runmaestro.ai/maestro-cue-advanced#filtering)
Filtering
---------------------------------------------------------------------------
Filters let you conditionally trigger subscriptions based on event payload data. All filter conditions are AND’d — every condition must pass for the subscription to fire.
###
[](https://docs.runmaestro.ai/maestro-cue-advanced#filter-syntax)
Filter Syntax
Filters are key-value pairs where the key is a payload field name and the value is an expression:
filter:
field_name: expression
###
[](https://docs.runmaestro.ai/maestro-cue-advanced#expression-types)
Expression Types
| Expression | Meaning | Example |
| --- | --- | --- |
| `"value"` | Exact string match | `extension: ".ts"` |
| `123` | Exact numeric match | `exitCode: 0` |
| `true`/`false` | Exact boolean match | `draft: false` |
| `"!value"` | Negation (not equal) | `status: "!failed"` |
| `">=N"` | Greater than or equal | `taskCount: ">=3"` |
| `">N"` | Greater than | `durationMs: ">60000"` |
| `"<=N"` | Less than or equal | `exitCode: "<=1"` |
| `"=3'
prompt: |
{{CUE_TASK_COUNT}} tasks are pending. Work through them in priority order.
**Skip files in test directories:**
- name: lint-src-only
event: file.changed
watch: '**/*.ts'
filter:
path: '!**/test/**'
prompt: Lint {{CUE_FILE_PATH}}.
[](https://docs.runmaestro.ai/maestro-cue-advanced#agent-chaining)
Agent Chaining
-------------------------------------------------------------------------------------
Agent chaining connects multiple agents in a pipeline where each agent’s completion triggers the next. This is built on `agent.completed` events with optional filtering.
###
[](https://docs.runmaestro.ai/maestro-cue-advanced#simple-chain)
Simple Chain
subscriptions:
# Step 1: Lint
- name: lint
event: file.changed
watch: 'src/**/*.ts'
prompt: Run the linter on {{CUE_FILE_PATH}}.
# Step 2: Test (after lint passes)
- name: test-after-lint
event: agent.completed
source_session: 'lint-agent'
filter:
exitCode: 0
prompt: Lint passed. Run the related test suite.
# Step 3: Build (after tests pass)
- name: build-after-test
event: agent.completed
source_session: 'test-agent'
filter:
exitCode: 0
prompt: Tests passed. Build the project with `npm run build`.
###
[](https://docs.runmaestro.ai/maestro-cue-advanced#diamond-pattern)
Diamond Pattern
Combine fan-out and fan-in for complex workflows:
┌─── backend-build ───┐
trigger ──┤ ├── integration-tests
└─── frontend-build ──┘
subscriptions:
# Fan-out: trigger both builds
- name: parallel-builds
event: file.changed
watch: 'src/**/*'
fan_out:
- 'backend-agent'
- 'frontend-agent'
prompt: Source changed. Rebuild your component.
# Fan-in: wait for both, then test
- name: integration-tests
event: agent.completed
source_session:
- 'backend-agent'
- 'frontend-agent'
prompt: Both builds complete. Run integration tests.
[](https://docs.runmaestro.ai/maestro-cue-advanced#template-variables)
Template Variables
---------------------------------------------------------------------------------------------
All prompts support `{{VARIABLE}}` syntax. Variables are replaced with event payload data before the prompt is sent to the agent.
###
[](https://docs.runmaestro.ai/maestro-cue-advanced#common-variables-all-events)
Common Variables (All Events)
| Variable | Description |
| --- | --- |
| `{{CUE_EVENT_TYPE}}` | Event type that triggered this |
| `{{CUE_EVENT_TIMESTAMP}}` | ISO 8601 timestamp |
| `{{CUE_TRIGGER_NAME}}` | Subscription name |
| `{{CUE_RUN_ID}}` | Unique run UUID |
###
[](https://docs.runmaestro.ai/maestro-cue-advanced#file-variables-file-changed-task-pending)
File Variables (`file.changed`, `task.pending`)
| Variable | Description |
| --- | --- |
| `{{CUE_FILE_PATH}}` | Absolute file path |
| `{{CUE_FILE_NAME}}` | Filename only |
| `{{CUE_FILE_DIR}}` | Directory path |
| `{{CUE_FILE_EXT}}` | Extension (with dot) |
| `{{CUE_FILE_CHANGE_TYPE}}` | Change type: `add`, `change`, `unlink` |
###
[](https://docs.runmaestro.ai/maestro-cue-advanced#task-variables-task-pending)
Task Variables (`task.pending`)
| Variable | Description |
| --- | --- |
| `{{CUE_TASK_FILE}}` | File path with pending tasks |
| `{{CUE_TASK_FILE_NAME}}` | Filename only |
| `{{CUE_TASK_FILE_DIR}}` | Directory path |
| `{{CUE_TASK_COUNT}}` | Number of pending tasks |
| `{{CUE_TASK_LIST}}` | Formatted list (line number: task text) |
| `{{CUE_TASK_CONTENT}}` | Full file content (truncated to 10K) |
###
[](https://docs.runmaestro.ai/maestro-cue-advanced#agent-variables-agent-completed)
Agent Variables (`agent.completed`)
| Variable | Description |
| --- | --- |
| `{{CUE_SOURCE_SESSION}}` | Source agent name(s) |
| `{{CUE_SOURCE_OUTPUT}}` | Source agent output (truncated to 5K) |
| `{{CUE_SOURCE_STATUS}}` | Run status (`completed`, `failed`, `timeout`) |
| `{{CUE_SOURCE_EXIT_CODE}}` | Process exit code |
| `{{CUE_SOURCE_DURATION}}` | Run duration in milliseconds |
| `{{CUE_SOURCE_TRIGGERED_BY}}` | Subscription that triggered the source run |
###
[](https://docs.runmaestro.ai/maestro-cue-advanced#github-variables-github-pull_request-github-issue)
GitHub Variables (`github.pull_request`, `github.issue`)
| Variable | Description | PR | Issue |
| --- | --- | --- | --- |
| `{{CUE_GH_TYPE}}` | `pull_request` or `issue` | Y | Y |
| `{{CUE_GH_NUMBER}}` | PR/issue number | Y | Y |
| `{{CUE_GH_TITLE}}` | Title | Y | Y |
| `{{CUE_GH_AUTHOR}}` | Author login | Y | Y |
| `{{CUE_GH_URL}}` | HTML URL | Y | Y |
| `{{CUE_GH_BODY}}` | Body text (truncated) | Y | Y |
| `{{CUE_GH_LABELS}}` | Labels (comma-separated) | Y | Y |
| `{{CUE_GH_STATE}}` | State (`open` / `closed`) | Y | Y |
| `{{CUE_GH_REPO}}` | Repository (`owner/repo`) | Y | Y |
| `{{CUE_GH_BRANCH}}` | Head branch | Y | |
| `{{CUE_GH_BASE_BRANCH}}` | Base branch | Y | |
| `{{CUE_GH_ASSIGNEES}}` | Assignees (comma-separated) | | Y |
###
[](https://docs.runmaestro.ai/maestro-cue-advanced#standard-variables)
Standard Variables
Cue prompts also have access to all standard Maestro template variables (like `{{PROJECT_ROOT}}`, `{{TIMESTAMP}}`, etc.) — the same variables available in Auto Run playbooks and system prompts.
[](https://docs.runmaestro.ai/maestro-cue-advanced#concurrency-control)
Concurrency Control
-----------------------------------------------------------------------------------------------
Control how many Cue-triggered runs can execute simultaneously and how overflow events are handled.
###
[](https://docs.runmaestro.ai/maestro-cue-advanced#max_concurrent)
max\_concurrent
Limits parallel runs per agent. When all slots are occupied, new events are queued.
settings:
max_concurrent: 3 # Up to 3 runs at once
**Range:** 1–10. **Default:** 1 (serial execution). With `max_concurrent: 1` (default), events are processed one at a time in order. This is the safest setting — it prevents agents from receiving overlapping prompts. Increase `max_concurrent` when your subscriptions are independent and don’t conflict with each other (e.g., reviewing different PRs, scanning different files).
###
[](https://docs.runmaestro.ai/maestro-cue-advanced#queue_size)
queue\_size
Controls how many events can wait when all concurrent slots are full.
settings:
queue_size: 20 # Buffer up to 20 events
**Range:** 0–50. **Default:** 10.
* Events beyond the queue limit are **dropped** (silently discarded)
* Set to `0` to disable queuing — events that can’t run immediately are discarded
* The current queue depth is visible in the Cue Modal’s sessions table
###
[](https://docs.runmaestro.ai/maestro-cue-advanced#timeout)
Timeout
Prevents runaway agents from blocking the pipeline.
settings:
timeout_minutes: 45 # Kill runs after 45 minutes
timeout_on_fail: continue # Let downstream subscriptions proceed anyway
**`timeout_on_fail` options:**
* `break` (default) — Timed-out runs are marked as failed. Downstream `agent.completed` subscriptions see the failure.
* `continue` — Timed-out runs are stopped, but downstream subscriptions still fire with whatever data is available. Useful for fan-in patterns where you’d rather proceed with partial results than block the entire pipeline.
[](https://docs.runmaestro.ai/maestro-cue-advanced#sleep/wake-reconciliation)
Sleep/Wake Reconciliation
-----------------------------------------------------------------------------------------------------------
Cue handles system sleep gracefully:
* **`time.heartbeat`** subscriptions reconcile missed intervals on wake. If your machine sleeps through three intervals, Cue fires one catch-up event (not three).
* **File watchers** (`file.changed`, `task.pending`) resume monitoring on wake. Changes that occurred during sleep may trigger events depending on the OS file system notification behavior.
* **GitHub pollers** resume polling on wake. Any PRs/issues created during sleep are detected on the next poll.
The engine uses a heartbeat mechanism to detect sleep periods. This is transparent — no configuration needed.
[](https://docs.runmaestro.ai/maestro-cue-advanced#persistence)
Persistence
-------------------------------------------------------------------------------
Cue persists its state in a local SQLite database:
* **Event journal** — Records all events (completed, failed, timed out) for the Activity Log
* **GitHub seen tracking** — Remembers which PRs/issues have already triggered events (30-day retention)
* **Heartbeat** — Tracks engine uptime for sleep/wake detection
Events older than 7 days are automatically pruned to keep the database lean.
Was this page helpful?
YesNo
[Cue Event Types](https://docs.runmaestro.ai/maestro-cue-events)
[Cue Examples](https://docs.runmaestro.ai/maestro-cue-examples)
Ctrl+I
---
# Unknown
```json
{
"lastUpdated": "2026-01-17",
"playbooks": [
{
"id": "my-custom-playbook",
"title": "My Custom Security Audit",
"description": "Internal security audit playbook for our organization",
"category": "Custom",
"author": "Internal Team",
"lastUpdated": "2026-01-17",
"path": "/Users/me/.maestro/custom-playbooks/security-audit",
"documents": [
{
"filename": "1_SCAN",
"resetOnCompletion": false
},
{
"filename": "2_ANALYZE",
"resetOnCompletion": true
},
{
"filename": "3_REPORT",
"resetOnCompletion": false
}
],
"loopEnabled": false,
"maxLoops": null,
"prompt": null,
"assets": ["config.yaml", "rules.json"]
},
{
"id": "development-security",
"title": "Enhanced Development Security (Override)",
"description": "Custom version of the official playbook with our internal modifications",
"category": "Development",
"author": "Our Team",
"lastUpdated": "2026-01-17",
"path": "~/maestro-playbooks/dev-security",
"documents": [
{
"filename": "SETUP",
"resetOnCompletion": false
},
{
"filename": "SCAN",
"resetOnCompletion": true
}
],
"loopEnabled": true,
"maxLoops": 3,
"prompt": "Custom prompt for our workflow"
}
]
}
```
---
# Unknown
\> ## Documentation Index
> Fetch the complete documentation index at: https://docs.runmaestro.ai/llms.txt
> Use this file to discover all available pages before exploring further.
# Git and Worktrees
> Browse commit history, view diffs, and run AI agents in parallel on isolated branches with Git worktree sub-agents.
Maestro integrates deeply with Git, providing visual tools for exploring repository history and enabling parallel development with worktree sub-agents.
## Git Log Viewer
Browse your commit history directly in Maestro:
 The log viewer shows:
\* \*\*Commit history\*\* with messages, authors, and timestamps
\* \*\*Branch visualization\*\* with merge points
\* \*\*Quick navigation\*\* to any commit
Access via \*\*Command Palette\*\* (\`Cmd+K\` / \`Ctrl+K\`) → "Git Log" or the git menu in the Left Bar.
## Diff Viewer
Review file changes with syntax-highlighted diffs:
The log viewer shows:
\* \*\*Commit history\*\* with messages, authors, and timestamps
\* \*\*Branch visualization\*\* with merge points
\* \*\*Quick navigation\*\* to any commit
Access via \*\*Command Palette\*\* (\`Cmd+K\` / \`Ctrl+K\`) → "Git Log" or the git menu in the Left Bar.
## Diff Viewer
Review file changes with syntax-highlighted diffs:
 The diff viewer displays:
\* \*\*Side-by-side comparison\*\* of file versions
\* \*\*Syntax highlighting\*\* matched to file type
\* \*\*Line-by-line changes\*\* with additions and deletions clearly marked
Access diffs from the git log viewer by clicking any commit, or use \*\*Command Palette\*\* → "Git Diff".
\*\*\*
## Git Worktrees
Git worktrees enable true parallel development by letting you run multiple AI agents on separate branches simultaneously. Each worktree operates in its own isolated directory, so there's no risk of conflicts between parallel work streams.
### Managing Worktrees
Worktree sub-agents appear nested under their parent agent in the Left Bar:
The diff viewer displays:
\* \*\*Side-by-side comparison\*\* of file versions
\* \*\*Syntax highlighting\*\* matched to file type
\* \*\*Line-by-line changes\*\* with additions and deletions clearly marked
Access diffs from the git log viewer by clicking any commit, or use \*\*Command Palette\*\* → "Git Diff".
\*\*\*
## Git Worktrees
Git worktrees enable true parallel development by letting you run multiple AI agents on separate branches simultaneously. Each worktree operates in its own isolated directory, so there's no risk of conflicts between parallel work streams.
### Managing Worktrees
Worktree sub-agents appear nested under their parent agent in the Left Bar:
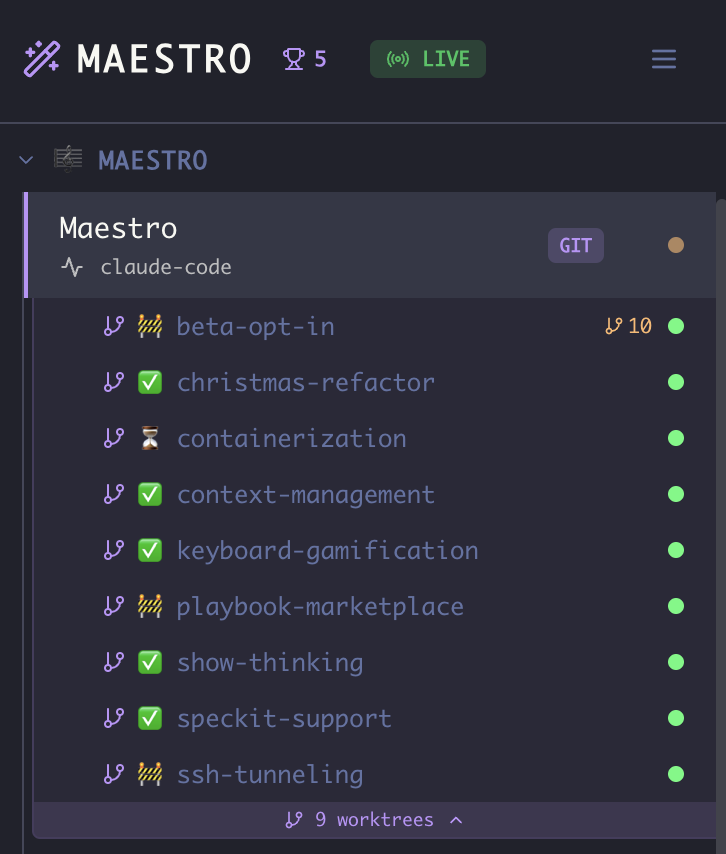 \* \*\*Nested Display\*\* — Worktree sub-agents appear in a drawer below their parent agent, styled with a subtle accent background
\* \*\*Branch Icon\*\* — Worktree children show a \`GitBranch\` icon next to their name
\* \*\*Collapse/Expand\*\* — Click the worktree count band below the parent session to show/hide worktree children (e.g., "2 worktrees ▾")
\* \*\*Independent Operation\*\* — Each worktree agent has its own working directory, conversation history, and state
### Creating a Worktree Sub-Agent
There are two ways to access worktree configuration:
\*\*From the Header (Main Panel):\*\*
1. Select an agent that's in a git repository
2. Hover over the \*\*branch pill\*\* in the header (shows the current branch name, e.g., "main")
3. In the hover overlay, click \*\*"Configure Worktrees"\*\*
\*\*From the Context Menu (Left Bar):\*\*
1. Right-click an agent in the session list
2. Select \*\*"Configure Worktrees"\*\* (only shown for git repositories)
In the configuration modal:
\* \*\*Nested Display\*\* — Worktree sub-agents appear in a drawer below their parent agent, styled with a subtle accent background
\* \*\*Branch Icon\*\* — Worktree children show a \`GitBranch\` icon next to their name
\* \*\*Collapse/Expand\*\* — Click the worktree count band below the parent session to show/hide worktree children (e.g., "2 worktrees ▾")
\* \*\*Independent Operation\*\* — Each worktree agent has its own working directory, conversation history, and state
### Creating a Worktree Sub-Agent
There are two ways to access worktree configuration:
\*\*From the Header (Main Panel):\*\*
1. Select an agent that's in a git repository
2. Hover over the \*\*branch pill\*\* in the header (shows the current branch name, e.g., "main")
3. In the hover overlay, click \*\*"Configure Worktrees"\*\*
\*\*From the Context Menu (Left Bar):\*\*
1. Right-click an agent in the session list
2. Select \*\*"Configure Worktrees"\*\* (only shown for git repositories)
In the configuration modal:
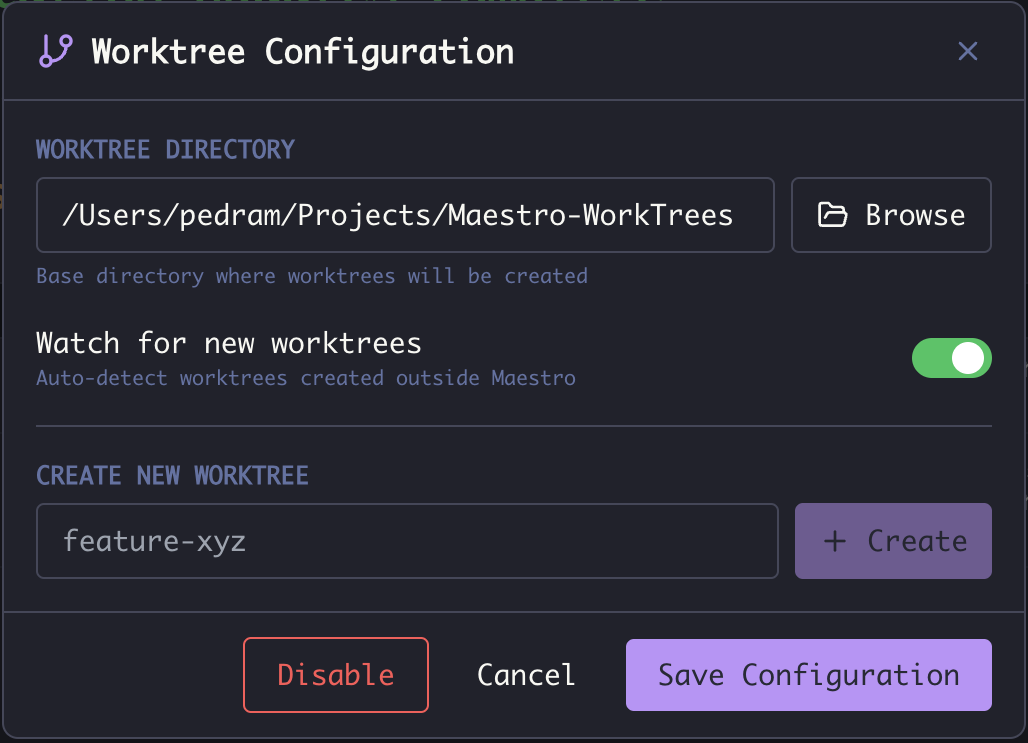 | Option | Description |
| --------------------------- | -------------------------------------------------------------------------------------------------------------------------------------------------- |
| \*\*Worktree Directory\*\* | Base folder where worktrees are created (should be outside the main repo). You can browse to select it (local sessions) or type the path directly. |
| \*\*Watch for new worktrees\*\* | Auto-detect worktrees created outside Maestro (e.g., via command line) |
| \*\*Create New Worktree\*\* | Enter a branch name and click \*\*Create\*\* to instantly create a new worktree sub-agent |
\*\*Tip:\*\* Configure the worktree directory to be outside your main repository (e.g., \`~/Projects/Maestro-WorkTrees/\`). This keeps worktrees organized and prevents them from appearing in your main repo's file tree.
\*\*Note:\*\* Once configured, you can quickly create additional worktrees by right-clicking the parent session and selecting \*\*"Create Worktree"\*\* (bypasses the full configuration modal).
### Worktree Actions
Right-click any worktree sub-agent to access management options:
| Option | Description |
| --------------------------- | -------------------------------------------------------------------------------------------------------------------------------------------------- |
| \*\*Worktree Directory\*\* | Base folder where worktrees are created (should be outside the main repo). You can browse to select it (local sessions) or type the path directly. |
| \*\*Watch for new worktrees\*\* | Auto-detect worktrees created outside Maestro (e.g., via command line) |
| \*\*Create New Worktree\*\* | Enter a branch name and click \*\*Create\*\* to instantly create a new worktree sub-agent |
\*\*Tip:\*\* Configure the worktree directory to be outside your main repository (e.g., \`~/Projects/Maestro-WorkTrees/\`). This keeps worktrees organized and prevents them from appearing in your main repo's file tree.
\*\*Note:\*\* Once configured, you can quickly create additional worktrees by right-clicking the parent session and selecting \*\*"Create Worktree"\*\* (bypasses the full configuration modal).
### Worktree Actions
Right-click any worktree sub-agent to access management options:
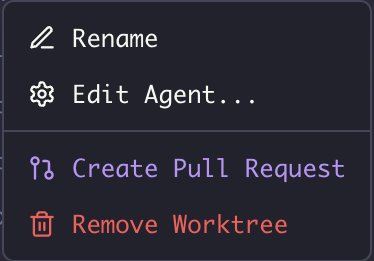 | Action | Description |
| ----------------------- | ---------------------------------------------- |
| \*\*Rename\*\* | Change the display name of the worktree agent |
| \*\*Edit Agent...\*\* | Modify agent configuration |
| \*\*Duplicate...\*\* | Create a new agent with the same configuration |
| \*\*Create Pull Request\*\* | Open a PR from this worktree's branch |
| \*\*Remove Worktree\*\* | Delete the worktree agent (see below) |
### Creating Pull Requests
When you're done with work in a worktree:
1. \*\*Right-click\*\* the worktree agent → \*\*Create Pull Request\*\*, or
2. Press \`Cmd+K\` / \`Ctrl+K\` with the worktree active → search "Create Pull Request"
The PR modal shows:
\* Source branch (your worktree branch)
\* Target branch (configurable)
\* Auto-generated title and description based on your work
\*\*Requirements:\*\* GitHub CLI (\`gh\`) must be installed and authenticated. Maestro will detect if it's missing and show installation instructions.
### Removing Worktrees
When removing a worktree, you have two options:
| Action | Description |
| ----------------------- | ---------------------------------------------- |
| \*\*Rename\*\* | Change the display name of the worktree agent |
| \*\*Edit Agent...\*\* | Modify agent configuration |
| \*\*Duplicate...\*\* | Create a new agent with the same configuration |
| \*\*Create Pull Request\*\* | Open a PR from this worktree's branch |
| \*\*Remove Worktree\*\* | Delete the worktree agent (see below) |
### Creating Pull Requests
When you're done with work in a worktree:
1. \*\*Right-click\*\* the worktree agent → \*\*Create Pull Request\*\*, or
2. Press \`Cmd+K\` / \`Ctrl+K\` with the worktree active → search "Create Pull Request"
The PR modal shows:
\* Source branch (your worktree branch)
\* Target branch (configurable)
\* Auto-generated title and description based on your work
\*\*Requirements:\*\* GitHub CLI (\`gh\`) must be installed and authenticated. Maestro will detect if it's missing and show installation instructions.
### Removing Worktrees
When removing a worktree, you have two options:
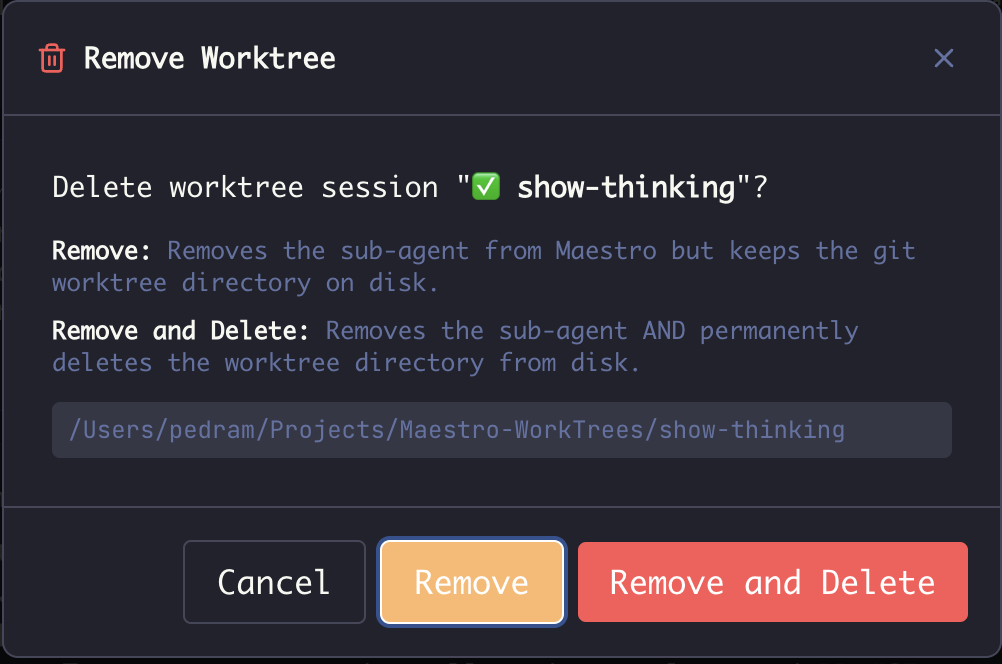 | Option | What It Does |
| --------------------- | ------------------------------------------------------------------------------- |
| \*\*Remove\*\* | Removes the sub-agent from Maestro but keeps the git worktree directory on disk |
| \*\*Remove and Delete\*\* | Removes the sub-agent AND permanently deletes the worktree directory from disk |
The confirmation dialog shows the full path to the worktree directory so you know exactly what will be affected.
## Use Cases
| Scenario | How Worktrees Help |
| ------------------------ | -------------------------------------------------------------------------- |
| \*\*Background Auto Run\*\* | Run Auto Run in a worktree while working interactively in the main repo |
| \*\*Feature Branches\*\* | Spin up a sub-agent for each feature branch |
| \*\*Code Review\*\* | Create a worktree to review and iterate on a PR without switching branches |
| \*\*Parallel Experiments\*\* | Try different approaches simultaneously without git stash/pop |
\*\*Auto Run integration:\*\* You can dispatch an Auto Run directly into a new worktree from the run configuration modal — no need to create the worktree first. See \[Run in Worktree\](./autorun-playbooks#run-in-worktree) for details.
\*\*CLI integration:\*\* The same worktree-backed Auto Run is also reachable from the command line via \`maestro-cli auto-run --worktree --branch --worktree-path --launch\` (add \`--create-pr\` to open a PR on completion). See \[CLI — Configuring Auto-Run\](./cli#configuring-auto-run).
## Tips
\* \*\*Name branches descriptively\*\* — The branch name becomes the worktree directory name
\* \*\*Use a dedicated worktree folder\*\* — Keep all worktrees in one place outside the main repo
\* \*\*Clean up when done\*\* — Remove worktree agents after merging PRs to avoid clutter
\* \*\*Watch for Changes\*\* — Enable file watching to keep the file tree in sync with worktree activity
\* \*\*Run multiple dev instances\*\* — Use \`VITE\_PORT\` environment variable to run Maestro in multiple worktrees simultaneously:
\`\`\`bash theme={"theme":"dracula"}
# In main worktree
npm run dev
# In worktree 2 (different terminal/directory)
VITE\_PORT=5174 npm run dev
\`\`\`
---
# Cue Configuration - Maestro
[Skip to main content](https://docs.runmaestro.ai/maestro-cue-configuration#content-area)
[Maestro home page](https://runmaestro.ai/)
Search...
⌘K
Search...
Navigation
Maestro Cue
Cue Configuration
On this page
* [File Location](https://docs.runmaestro.ai/maestro-cue-configuration#file-location)
* [Full Schema](https://docs.runmaestro.ai/maestro-cue-configuration#full-schema)
* [Sharing a workspace across agents](https://docs.runmaestro.ai/maestro-cue-configuration#sharing-a-workspace-across-agents)
* [Subscriptions](https://docs.runmaestro.ai/maestro-cue-configuration#subscriptions)
* [Required Fields](https://docs.runmaestro.ai/maestro-cue-configuration#required-fields)
* [Optional Fields](https://docs.runmaestro.ai/maestro-cue-configuration#optional-fields)
* [Prompt Field](https://docs.runmaestro.ai/maestro-cue-configuration#prompt-field)
* [Output Prompt (Two-Phase Runs)](https://docs.runmaestro.ai/maestro-cue-configuration#output-prompt-two-phase-runs)
* [Pipelines](https://docs.runmaestro.ai/maestro-cue-configuration#pipelines)
* [Labels](https://docs.runmaestro.ai/maestro-cue-configuration#labels)
* [Disabling Subscriptions](https://docs.runmaestro.ai/maestro-cue-configuration#disabling-subscriptions)
* [Settings](https://docs.runmaestro.ai/maestro-cue-configuration#settings)
* [timeout\_minutes](https://docs.runmaestro.ai/maestro-cue-configuration#timeout_minutes)
* [timeout\_on\_fail](https://docs.runmaestro.ai/maestro-cue-configuration#timeout_on_fail)
* [max\_concurrent](https://docs.runmaestro.ai/maestro-cue-configuration#max_concurrent)
* [queue\_size](https://docs.runmaestro.ai/maestro-cue-configuration#queue_size)
* [Validation](https://docs.runmaestro.ai/maestro-cue-configuration#validation)
* [Complete Example](https://docs.runmaestro.ai/maestro-cue-configuration#complete-example)
Cue is configured via a `.maestro/cue.yaml` file placed inside the `.maestro/` directory at your project root. The engine watches this file for changes and hot-reloads automatically.
[](https://docs.runmaestro.ai/maestro-cue-configuration#file-location)
File Location
----------------------------------------------------------------------------------------
your-project/
├── .maestro/
│ └── cue.yaml # Cue configuration
├── src/
├── package.json
└── ...
Maestro discovers this file automatically when the Cue Encore Feature is enabled. Each agent that has a `.maestro/cue.yaml` in its project root gets its own independent Cue engine instance.
[](https://docs.runmaestro.ai/maestro-cue-configuration#full-schema)
Full Schema
------------------------------------------------------------------------------------
# Pipeline comment — groups subscriptions into a named pipeline in the UI
# Pipeline: My Pipeline (color: #06b6d4)
# Subscriptions define trigger-prompt pairings
subscriptions:
- name: string # Required. Unique identifier for this subscription
event: string # Required. Event type (see Event Types)
enabled: boolean # Optional. Default: true
prompt: string # Required (or use prompt_file). Inline prompt text
prompt_file: string # Required (or use prompt). Path to a .md file
output_prompt: string # Optional. Follow-up prompt sent after the main run completes
output_prompt_file: string # Optional. Path to a .md file for the output prompt
label: string # Optional. Human-readable label displayed in the Cue dashboard
agent_id: string # Optional. UUID of the target agent
# Event-specific fields
interval_minutes: number # Required for time.heartbeat
schedule_times: list # Required for time.scheduled (HH:MM strings)
schedule_days: list # Optional for time.scheduled (mon, tue, wed, thu, fri, sat, sun)
watch: string # Required for file.changed, task.pending (glob pattern)
source_session: string | list # Required for agent.completed
fan_out: list # Optional. Target session names for fan-out
filter: object # Optional. Payload field conditions
repo: string # Optional for github.* (auto-detected if omitted)
poll_minutes: number # Optional for github.*, task.pending
# Global settings (all optional — sensible defaults applied)
settings:
timeout_minutes: number # Default: 30. Max run duration before timeout
timeout_on_fail: string # Default: 'break'. What to do on timeout: 'break' or 'continue'
max_concurrent: number # Default: 1. Simultaneous runs (1-10)
queue_size: number # Default: 10. Max queued events (0-50)
owner_agent_id: string # Optional. Pin this cue.yaml to a single agent (id or name). See "Sharing a workspace".
[](https://docs.runmaestro.ai/maestro-cue-configuration#sharing-a-workspace-across-agents)
Sharing a workspace across agents
--------------------------------------------------------------------------------------------------------------------------------
When two or more agents are registered against the same project directory (for example, one agent using Opus and another using Sonnet, both pointing at the same vault), every _unowned_ subscription (one without an explicit `agent_id`) would otherwise fire once per agent. Maestro resolves this as follows:
* **`settings.owner_agent_id` set and matched by some agent in the root** — that agent is the owner; other agents in the same root skip unowned subscriptions.
* **`settings.owner_agent_id` set but matched by nobody** — the config is dead. Every agent in that project root skips unowned subscriptions, and each row in the Cue dashboard is flagged with a red warning linking to this setting.
* **`settings.owner_agent_id` unset and multiple agents share the root** — the first agent in the session list wins. Non-winner rows in the Cue dashboard are flagged with a red warning naming the winner and pointing to `owner_agent_id` as the override.
Accepted values for `owner_agent_id`: the agent’s internal id (UUID) **or** its display name (e.g. `Obsidian`). Subscriptions with an explicit `agent_id` continue to fan out independently of ownership — useful when a single shared config intentionally targets multiple agents in the same workspace.
[](https://docs.runmaestro.ai/maestro-cue-configuration#subscriptions)
Subscriptions
----------------------------------------------------------------------------------------
Each subscription is a trigger-prompt pairing. When the trigger fires, Cue sends the prompt to the agent.
###
[](https://docs.runmaestro.ai/maestro-cue-configuration#required-fields)
Required Fields
| Field | Type | Description |
| --- | --- | --- |
| `name` | string | Unique identifier. Used in logs, history, and as a reference in chains |
| `event` | string | One of the nine [event types](https://docs.runmaestro.ai/maestro-cue-events) |
| `prompt` | string | The prompt to send as inline text. Required unless `prompt_file` is specified |
Either `prompt` or `prompt_file` must be provided. If both are present, `prompt_file` takes precedence.
###
[](https://docs.runmaestro.ai/maestro-cue-configuration#optional-fields)
Optional Fields
| Field | Type | Default | Description |
| --- | --- | --- | --- |
| `enabled` | boolean | `true` | Set to `false` to pause a subscription without removing it |
| `agent_id` | string (UUID) | — | UUID of the target agent. Auto-assigned by the Pipeline Editor |
| `prompt_file` | string | — | Path to a `.md` file containing the prompt (alternative to inline `prompt`) |
| `interval_minutes` | number | — | Timer interval. Required for `time.heartbeat` |
| `schedule_times` | list of strings | — | Times in `HH:MM` format. Required for `time.scheduled` |
| `schedule_days` | list of strings | — | Days of week (`mon`–`sun`). Optional for `time.scheduled` |
| `watch` | string (glob) | — | File glob pattern. Required for `file.changed`, `task.pending` |
| `source_session` | string or list | — | Source agent name(s). Required for `agent.completed` |
| `fan_out` | list of strings | — | Target agent names to fan out to |
| `filter` | object | — | Payload conditions (see [Filtering](https://docs.runmaestro.ai/maestro-cue-advanced#filtering)
| Option | What It Does |
| --------------------- | ------------------------------------------------------------------------------- |
| \*\*Remove\*\* | Removes the sub-agent from Maestro but keeps the git worktree directory on disk |
| \*\*Remove and Delete\*\* | Removes the sub-agent AND permanently deletes the worktree directory from disk |
The confirmation dialog shows the full path to the worktree directory so you know exactly what will be affected.
## Use Cases
| Scenario | How Worktrees Help |
| ------------------------ | -------------------------------------------------------------------------- |
| \*\*Background Auto Run\*\* | Run Auto Run in a worktree while working interactively in the main repo |
| \*\*Feature Branches\*\* | Spin up a sub-agent for each feature branch |
| \*\*Code Review\*\* | Create a worktree to review and iterate on a PR without switching branches |
| \*\*Parallel Experiments\*\* | Try different approaches simultaneously without git stash/pop |
\*\*Auto Run integration:\*\* You can dispatch an Auto Run directly into a new worktree from the run configuration modal — no need to create the worktree first. See \[Run in Worktree\](./autorun-playbooks#run-in-worktree) for details.
\*\*CLI integration:\*\* The same worktree-backed Auto Run is also reachable from the command line via \`maestro-cli auto-run --worktree --branch --worktree-path --launch\` (add \`--create-pr\` to open a PR on completion). See \[CLI — Configuring Auto-Run\](./cli#configuring-auto-run).
## Tips
\* \*\*Name branches descriptively\*\* — The branch name becomes the worktree directory name
\* \*\*Use a dedicated worktree folder\*\* — Keep all worktrees in one place outside the main repo
\* \*\*Clean up when done\*\* — Remove worktree agents after merging PRs to avoid clutter
\* \*\*Watch for Changes\*\* — Enable file watching to keep the file tree in sync with worktree activity
\* \*\*Run multiple dev instances\*\* — Use \`VITE\_PORT\` environment variable to run Maestro in multiple worktrees simultaneously:
\`\`\`bash theme={"theme":"dracula"}
# In main worktree
npm run dev
# In worktree 2 (different terminal/directory)
VITE\_PORT=5174 npm run dev
\`\`\`
---
# Cue Configuration - Maestro
[Skip to main content](https://docs.runmaestro.ai/maestro-cue-configuration#content-area)
[Maestro home page](https://runmaestro.ai/)
Search...
⌘K
Search...
Navigation
Maestro Cue
Cue Configuration
On this page
* [File Location](https://docs.runmaestro.ai/maestro-cue-configuration#file-location)
* [Full Schema](https://docs.runmaestro.ai/maestro-cue-configuration#full-schema)
* [Sharing a workspace across agents](https://docs.runmaestro.ai/maestro-cue-configuration#sharing-a-workspace-across-agents)
* [Subscriptions](https://docs.runmaestro.ai/maestro-cue-configuration#subscriptions)
* [Required Fields](https://docs.runmaestro.ai/maestro-cue-configuration#required-fields)
* [Optional Fields](https://docs.runmaestro.ai/maestro-cue-configuration#optional-fields)
* [Prompt Field](https://docs.runmaestro.ai/maestro-cue-configuration#prompt-field)
* [Output Prompt (Two-Phase Runs)](https://docs.runmaestro.ai/maestro-cue-configuration#output-prompt-two-phase-runs)
* [Pipelines](https://docs.runmaestro.ai/maestro-cue-configuration#pipelines)
* [Labels](https://docs.runmaestro.ai/maestro-cue-configuration#labels)
* [Disabling Subscriptions](https://docs.runmaestro.ai/maestro-cue-configuration#disabling-subscriptions)
* [Settings](https://docs.runmaestro.ai/maestro-cue-configuration#settings)
* [timeout\_minutes](https://docs.runmaestro.ai/maestro-cue-configuration#timeout_minutes)
* [timeout\_on\_fail](https://docs.runmaestro.ai/maestro-cue-configuration#timeout_on_fail)
* [max\_concurrent](https://docs.runmaestro.ai/maestro-cue-configuration#max_concurrent)
* [queue\_size](https://docs.runmaestro.ai/maestro-cue-configuration#queue_size)
* [Validation](https://docs.runmaestro.ai/maestro-cue-configuration#validation)
* [Complete Example](https://docs.runmaestro.ai/maestro-cue-configuration#complete-example)
Cue is configured via a `.maestro/cue.yaml` file placed inside the `.maestro/` directory at your project root. The engine watches this file for changes and hot-reloads automatically.
[](https://docs.runmaestro.ai/maestro-cue-configuration#file-location)
File Location
----------------------------------------------------------------------------------------
your-project/
├── .maestro/
│ └── cue.yaml # Cue configuration
├── src/
├── package.json
└── ...
Maestro discovers this file automatically when the Cue Encore Feature is enabled. Each agent that has a `.maestro/cue.yaml` in its project root gets its own independent Cue engine instance.
[](https://docs.runmaestro.ai/maestro-cue-configuration#full-schema)
Full Schema
------------------------------------------------------------------------------------
# Pipeline comment — groups subscriptions into a named pipeline in the UI
# Pipeline: My Pipeline (color: #06b6d4)
# Subscriptions define trigger-prompt pairings
subscriptions:
- name: string # Required. Unique identifier for this subscription
event: string # Required. Event type (see Event Types)
enabled: boolean # Optional. Default: true
prompt: string # Required (or use prompt_file). Inline prompt text
prompt_file: string # Required (or use prompt). Path to a .md file
output_prompt: string # Optional. Follow-up prompt sent after the main run completes
output_prompt_file: string # Optional. Path to a .md file for the output prompt
label: string # Optional. Human-readable label displayed in the Cue dashboard
agent_id: string # Optional. UUID of the target agent
# Event-specific fields
interval_minutes: number # Required for time.heartbeat
schedule_times: list # Required for time.scheduled (HH:MM strings)
schedule_days: list # Optional for time.scheduled (mon, tue, wed, thu, fri, sat, sun)
watch: string # Required for file.changed, task.pending (glob pattern)
source_session: string | list # Required for agent.completed
fan_out: list # Optional. Target session names for fan-out
filter: object # Optional. Payload field conditions
repo: string # Optional for github.* (auto-detected if omitted)
poll_minutes: number # Optional for github.*, task.pending
# Global settings (all optional — sensible defaults applied)
settings:
timeout_minutes: number # Default: 30. Max run duration before timeout
timeout_on_fail: string # Default: 'break'. What to do on timeout: 'break' or 'continue'
max_concurrent: number # Default: 1. Simultaneous runs (1-10)
queue_size: number # Default: 10. Max queued events (0-50)
owner_agent_id: string # Optional. Pin this cue.yaml to a single agent (id or name). See "Sharing a workspace".
[](https://docs.runmaestro.ai/maestro-cue-configuration#sharing-a-workspace-across-agents)
Sharing a workspace across agents
--------------------------------------------------------------------------------------------------------------------------------
When two or more agents are registered against the same project directory (for example, one agent using Opus and another using Sonnet, both pointing at the same vault), every _unowned_ subscription (one without an explicit `agent_id`) would otherwise fire once per agent. Maestro resolves this as follows:
* **`settings.owner_agent_id` set and matched by some agent in the root** — that agent is the owner; other agents in the same root skip unowned subscriptions.
* **`settings.owner_agent_id` set but matched by nobody** — the config is dead. Every agent in that project root skips unowned subscriptions, and each row in the Cue dashboard is flagged with a red warning linking to this setting.
* **`settings.owner_agent_id` unset and multiple agents share the root** — the first agent in the session list wins. Non-winner rows in the Cue dashboard are flagged with a red warning naming the winner and pointing to `owner_agent_id` as the override.
Accepted values for `owner_agent_id`: the agent’s internal id (UUID) **or** its display name (e.g. `Obsidian`). Subscriptions with an explicit `agent_id` continue to fan out independently of ownership — useful when a single shared config intentionally targets multiple agents in the same workspace.
[](https://docs.runmaestro.ai/maestro-cue-configuration#subscriptions)
Subscriptions
----------------------------------------------------------------------------------------
Each subscription is a trigger-prompt pairing. When the trigger fires, Cue sends the prompt to the agent.
###
[](https://docs.runmaestro.ai/maestro-cue-configuration#required-fields)
Required Fields
| Field | Type | Description |
| --- | --- | --- |
| `name` | string | Unique identifier. Used in logs, history, and as a reference in chains |
| `event` | string | One of the nine [event types](https://docs.runmaestro.ai/maestro-cue-events) |
| `prompt` | string | The prompt to send as inline text. Required unless `prompt_file` is specified |
Either `prompt` or `prompt_file` must be provided. If both are present, `prompt_file` takes precedence.
###
[](https://docs.runmaestro.ai/maestro-cue-configuration#optional-fields)
Optional Fields
| Field | Type | Default | Description |
| --- | --- | --- | --- |
| `enabled` | boolean | `true` | Set to `false` to pause a subscription without removing it |
| `agent_id` | string (UUID) | — | UUID of the target agent. Auto-assigned by the Pipeline Editor |
| `prompt_file` | string | — | Path to a `.md` file containing the prompt (alternative to inline `prompt`) |
| `interval_minutes` | number | — | Timer interval. Required for `time.heartbeat` |
| `schedule_times` | list of strings | — | Times in `HH:MM` format. Required for `time.scheduled` |
| `schedule_days` | list of strings | — | Days of week (`mon`–`sun`). Optional for `time.scheduled` |
| `watch` | string (glob) | — | File glob pattern. Required for `file.changed`, `task.pending` |
| `source_session` | string or list | — | Source agent name(s). Required for `agent.completed` |
| `fan_out` | list of strings | — | Target agent names to fan out to |
| `filter` | object | — | Payload conditions (see [Filtering](https://docs.runmaestro.ai/maestro-cue-advanced#filtering)
) |
| `repo` | string | — | GitHub repo (`owner/repo`). Auto-detected from git remote |
| `poll_minutes` | number | varies | Poll interval for `github.*` (default 5) and `task.pending` (default 1) |
| `output_prompt` | string | — | Follow-up prompt sent after the main run completes successfully |
| `output_prompt_file` | string | — | Path to a `.md` file for the output prompt (alternative to inline) |
| `label` | string | — | Human-readable label displayed in the Cue dashboard and pipeline editor |
###
[](https://docs.runmaestro.ai/maestro-cue-configuration#prompt-field)
Prompt Field
Prompts can be provided inline or via a separate file. **Inline prompt:**
prompt: |
Please lint the file {{CUE_FILE_PATH}} and fix any errors.
**File reference (using `prompt_file`):**
prompt_file: .maestro/prompts/my-prompt.md
File paths are resolved relative to the project root. Prompt files support the same `{{VARIABLE}}` template syntax as inline prompts. Using `prompt_file` keeps your `cue.yaml` clean when prompts are long or complex — the Pipeline Editor uses this approach by default, storing prompt files in `.maestro/prompts/`.
###
[](https://docs.runmaestro.ai/maestro-cue-configuration#output-prompt-two-phase-runs)
Output Prompt (Two-Phase Runs)
The `output_prompt` field enables a two-phase execution pattern. When the main `prompt` completes successfully, Cue automatically sends the `output_prompt` as a follow-up — with the first run’s output included as context. This is useful for workflows where one phase generates data and a second phase acts on it:
subscriptions:
- name: test-and-report
event: time.heartbeat
interval_minutes: 60
prompt: |
Run the full test suite with `npm test` and capture the results.
output_prompt: |
Based on the test results above, generate a summary report.
Include pass/fail counts and highlight any regressions.
You can also use `output_prompt_file` to reference a `.md` file instead of inline text:
subscriptions:
- name: analyze-and-summarize
event: file.changed
watch: 'src/**/*.ts'
prompt: Analyze {{CUE_FILE_PATH}} for code quality issues.
output_prompt_file: prompts/summarize-analysis.md
The output prompt only fires when the main run completes successfully. If the main run times out or fails, the output phase is skipped.
###
[](https://docs.runmaestro.ai/maestro-cue-configuration#pipelines)
Pipelines
A **pipeline** groups multiple subscriptions under a single name in the Pipeline Editor. This is useful when you have related automations (e.g., a daily scan and a weekly review) that logically belong together. **Defining a pipeline:** Add a pipeline comment at the top of your `cue.yaml`, then use a naming convention to group subscriptions:
# Pipeline: My Pipeline (color: #06b6d4)
subscriptions:
- name: My Pipeline
event: time.scheduled
schedule_times:
- '09:00'
prompt_file: .maestro/prompts/my-pipeline-daily.md
- name: My Pipeline-chain-1
event: time.scheduled
schedule_times:
- '17:00'
prompt_file: .maestro/prompts/my-pipeline-eod.md
**How it works:**
1. The `# Pipeline: Name (color: hex)` comment declares the pipeline name and its color in the UI
2. The first subscription’s `name` matches the pipeline name exactly
3. Additional subscriptions in the same pipeline use the convention `Name-chain-N` (e.g., `My Pipeline-chain-1`, `My Pipeline-chain-2`)
4. All subscriptions with matching names appear as separate trigger lines within a single pipeline in the Pipeline Editor
**Notes:**
* The `color` in the comment sets the pipeline’s dot color in the UI (any valid hex color)
* Each subscription in a pipeline can have its own event type, schedule, and prompt — they don’t need to share configuration
* Use the `label` field to give each line a descriptive name (e.g., “Daily Analysis”, “Weekly Review”)
* The Pipeline Editor creates this structure automatically when you use the visual editor
###
[](https://docs.runmaestro.ai/maestro-cue-configuration#labels)
Labels
The `label` field provides a human-readable name displayed in the Cue dashboard and pipeline editor. When subscriptions are grouped into a pipeline, the label distinguishes each line within the pipeline.
subscriptions:
- name: pr-review
label: 'PR Review Bot'
event: github.pull_request
prompt: Review the PR at {{CUE_GH_URL}}.
###
[](https://docs.runmaestro.ai/maestro-cue-configuration#disabling-subscriptions)
Disabling Subscriptions
Set `enabled: false` to pause a subscription without deleting it:
subscriptions:
- name: nightly-report
event: time.heartbeat
interval_minutes: 1440
enabled: false # Paused — won't fire until re-enabled
prompt: Generate a daily summary report.
[](https://docs.runmaestro.ai/maestro-cue-configuration#settings)
Settings
------------------------------------------------------------------------------
The optional `settings` block configures global engine behavior. All fields have sensible defaults — you only need to include settings you want to override.
###
[](https://docs.runmaestro.ai/maestro-cue-configuration#timeout_minutes)
timeout\_minutes
**Default:** `30` | **Type:** positive number Maximum duration (in minutes) for a single Cue-triggered run. If an agent takes longer than this, the run is terminated.
settings:
timeout_minutes: 60 # Allow up to 1 hour per run
###
[](https://docs.runmaestro.ai/maestro-cue-configuration#timeout_on_fail)
timeout\_on\_fail
**Default:** `'break'` | **Type:** `'break'` or `'continue'` What happens when a run times out:
* **`break`** — Stop the run and mark it as failed. No further processing for this event.
* **`continue`** — Stop the run but allow downstream subscriptions (in fan-in chains) to proceed with partial data.
settings:
timeout_on_fail: continue # Don't block the pipeline on slow agents
###
[](https://docs.runmaestro.ai/maestro-cue-configuration#max_concurrent)
max\_concurrent
**Default:** `1` | **Type:** integer, 1–10 Maximum number of Cue-triggered runs that can execute simultaneously for this agent. Additional events are queued.
settings:
max_concurrent: 3 # Allow up to 3 parallel runs
###
[](https://docs.runmaestro.ai/maestro-cue-configuration#queue_size)
queue\_size
**Default:** `10` | **Type:** integer, 0–50 Maximum number of events that can be queued when all concurrent slots are occupied. Events beyond this limit are dropped. Set to `0` to disable queueing — events that can’t run immediately are discarded.
settings:
queue_size: 20 # Buffer up to 20 events
[](https://docs.runmaestro.ai/maestro-cue-configuration#validation)
Validation
----------------------------------------------------------------------------------
The engine validates your YAML on every load. Common validation errors:
| Error | Fix |
| --- | --- |
| `"name" is required` | Every subscription needs a unique `name` field |
| `"event" is required` | Specify one of the nine event types |
| `"prompt" is required` | Provide inline text or a file path |
| `"interval_minutes" is required` | `time.heartbeat` events must specify a positive interval |
| `"schedule_times" is required` | `time.scheduled` events must have at least one `HH:MM` time |
| `"watch" is required` | `file.changed` and `task.pending` events need a glob pattern |
| `"source_session" is required` | `agent.completed` events need the name of the source agent |
| `"max_concurrent" must be between 1-10` | Keep concurrent runs within the allowed range |
| `"queue_size" must be between 0-50` | Keep queue size within the allowed range |
| `filter key must be string/number/bool` | Filter values only accept primitive types |
The inline YAML editor in the Cue Modal shows validation errors in real-time as you type. A green **Valid YAML** indicator at the bottom confirms your config parses correctly. 
[](https://docs.runmaestro.ai/maestro-cue-configuration#complete-example)
Complete Example
----------------------------------------------------------------------------------------------
A realistic configuration demonstrating a pipeline with multiple trigger lines, mixed event types, and external prompt files:
# Pipeline: DevOps (color: #10b981)
subscriptions:
# Lint TypeScript files on save
- name: DevOps
label: Lint on Save
event: file.changed
watch: 'src/**/*.ts'
filter:
extension: '.ts'
prompt: |
The file {{CUE_FILE_PATH}} was modified.
Run `npx eslint {{CUE_FILE_PATH}} --fix` and report any remaining issues.
# Morning standup on weekdays
- name: DevOps-chain-1
label: Morning Standup
event: time.scheduled
schedule_times:
- '09:00'
schedule_days:
- mon
- tue
- wed
- thu
- fri
prompt: |
Generate a standup report from recent git activity.
# Review new PRs automatically
- name: DevOps-chain-2
label: PR Review
event: github.pull_request
poll_minutes: 3
filter:
draft: false
prompt: |
A new PR needs review: {{CUE_GH_TITLE}} (#{{CUE_GH_NUMBER}})
Author: {{CUE_GH_AUTHOR}}
Branch: {{CUE_GH_BRANCH}} -> {{CUE_GH_BASE_BRANCH}}
URL: {{CUE_GH_URL}}
{{CUE_GH_BODY}}
Please review this PR for code quality, potential bugs, and style issues.
# Work on pending tasks from TODO.md
- name: DevOps-chain-3
label: Task Worker
event: task.pending
watch: 'TODO.md'
poll_minutes: 5
prompt: |
There are {{CUE_TASK_COUNT}} pending tasks in {{CUE_TASK_FILE}}:
{{CUE_TASK_LIST}}
Pick the highest priority task and complete it.
When done, check off the task in the file.
settings:
timeout_minutes: 45
max_concurrent: 2
queue_size: 15
All four subscriptions appear as separate trigger lines within a single **DevOps** pipeline in the Pipeline Editor.
Was this page helpful?
YesNo
[Cue Overview](https://docs.runmaestro.ai/maestro-cue)
[Cue Event Types](https://docs.runmaestro.ai/maestro-cue-events)
⌘I
---
# MCP Server - Maestro
[Skip to main content](https://docs.runmaestro.ai/mcp-server#content-area)
[Maestro home page](https://runmaestro.ai/)
Search...
⌘K
Search...
Navigation
Integrations
MCP Server
On this page
* [MCP Server](https://docs.runmaestro.ai/mcp-server#mcp-server)
* [Overview](https://docs.runmaestro.ai/mcp-server#overview)
* [Available Tools](https://docs.runmaestro.ai/mcp-server#available-tools)
* [SearchMaestro](https://docs.runmaestro.ai/mcp-server#searchmaestro)
* [Connecting AI Applications](https://docs.runmaestro.ai/mcp-server#connecting-ai-applications)
* [Claude Desktop](https://docs.runmaestro.ai/mcp-server#claude-desktop)
* [Claude Code](https://docs.runmaestro.ai/mcp-server#claude-code)
* [Cursor](https://docs.runmaestro.ai/mcp-server#cursor)
* [VS Code](https://docs.runmaestro.ai/mcp-server#vs-code)
* [Other MCP-Compatible Applications](https://docs.runmaestro.ai/mcp-server#other-mcp-compatible-applications)
* [Example Queries](https://docs.runmaestro.ai/mcp-server#example-queries)
* [Technical Details](https://docs.runmaestro.ai/mcp-server#technical-details)
* [Related Resources](https://docs.runmaestro.ai/mcp-server#related-resources)
[](https://docs.runmaestro.ai/mcp-server#mcp-server)
MCP Server
===================================================================
Maestro provides a hosted MCP (Model Context Protocol) server that allows AI applications to search and retrieve information from the Maestro documentation. The server is automatically generated and hosted by [Mintlify](https://mintlify.com/)
.
[](https://docs.runmaestro.ai/mcp-server#overview)
Overview
---------------------------------------------------------------
The MCP server exposes a `SearchMaestro` tool that enables AI assistants to find relevant documentation, code examples, API references, and guides from the Maestro knowledge base. When connected, your AI assistant can proactively search the documentation while generating responses—not just when explicitly asked. **MCP Server URL:**
https://docs.runmaestro.ai/mcp
[](https://docs.runmaestro.ai/mcp-server#available-tools)
Available Tools
-----------------------------------------------------------------------------
###
[](https://docs.runmaestro.ai/mcp-server#searchmaestro)
SearchMaestro
Search across the Maestro knowledge base to find relevant information. **Use this tool when you need to:**
* Answer questions about Maestro features and functionality
* Find specific documentation pages
* Understand how features work
* Locate implementation details and code examples
**Returns:**
* Contextual content with titles
* Direct links to documentation pages
[](https://docs.runmaestro.ai/mcp-server#connecting-ai-applications)
Connecting AI Applications
---------------------------------------------------------------------------------------------------
###
[](https://docs.runmaestro.ai/mcp-server#claude-desktop)
Claude Desktop
Add the MCP server to your Claude Desktop configuration (`claude_desktop_config.json`):
{
"mcpServers": {
"maestro": {
"url": "https://docs.runmaestro.ai/mcp"
}
}
}
###
[](https://docs.runmaestro.ai/mcp-server#claude-code)
Claude Code
Add to your Claude Code MCP settings:
{
"mcpServers": {
"maestro": {
"url": "https://docs.runmaestro.ai/mcp"
}
}
}
###
[](https://docs.runmaestro.ai/mcp-server#cursor)
Cursor
In Cursor settings, go to **Features > MCP Servers** and add:
https://docs.runmaestro.ai/mcp
###
[](https://docs.runmaestro.ai/mcp-server#vs-code)
VS Code
For VS Code with MCP support, add to your MCP configuration:
{
"mcpServers": {
"maestro": {
"url": "https://docs.runmaestro.ai/mcp"
}
}
}
###
[](https://docs.runmaestro.ai/mcp-server#other-mcp-compatible-applications)
Other MCP-Compatible Applications
Any application that supports the Model Context Protocol can connect using the server URL:
https://docs.runmaestro.ai/mcp
[](https://docs.runmaestro.ai/mcp-server#example-queries)
Example Queries
-----------------------------------------------------------------------------
Once connected, your AI assistant can use the `SearchMaestro` tool to answer questions like:
* “How do I set up Auto Run in Maestro?”
* “What keyboard shortcuts are available?”
* “How does Group Chat work?”
* “How do I configure git worktrees?”
* “What AI agents does Maestro support?”
[](https://docs.runmaestro.ai/mcp-server#technical-details)
Technical Details
---------------------------------------------------------------------------------
* **Protocol**: Model Context Protocol (MCP)
* **Transport**: HTTP/HTTPS (Streamable HTTP)
* **Authentication**: None required (public read-only access)
* **Rate Limits**: Standard API rate limits apply
* **Hosting**: Automatically managed by Mintlify
The MCP server only indexes pages included in the documentation navigation. Hidden or excluded pages are not searchable.
[](https://docs.runmaestro.ai/mcp-server#related-resources)
Related Resources
---------------------------------------------------------------------------------
* [Model Context Protocol Documentation](https://modelcontextprotocol.io/)
* [Maestro Documentation](https://docs.runmaestro.ai/)
* [GitHub Repository](https://github.com/RunMaestro/Maestro)
Was this page helpful?
YesNo
[Command Line Interface](https://docs.runmaestro.ai/cli)
[Deep Links](https://docs.runmaestro.ai/deep-links)
⌘I
---
# Memories - Maestro
[Skip to main content](https://docs.runmaestro.ai/memories#content-area)
[Maestro home page](https://runmaestro.ai/)
Search...
⌘K
Search...
Navigation
General Usage
Memories
On this page
* [Opening the Viewer](https://docs.runmaestro.ai/memories#opening-the-viewer)
* [What You’re Looking At](https://docs.runmaestro.ai/memories#what-you%E2%80%99re-looking-at)
* [How Memory is Organized](https://docs.runmaestro.ai/memories#how-memory-is-organized)
* [MEMORY.md (the index)](https://docs.runmaestro.ai/memories#memory-md-the-index)
* [Entry files (the actual memories)](https://docs.runmaestro.ai/memories#entry-files-the-actual-memories)
* [Editing Memory](https://docs.runmaestro.ai/memories#editing-memory)
* [Creating a New Memory](https://docs.runmaestro.ai/memories#creating-a-new-memory)
* [Deleting a Memory](https://docs.runmaestro.ai/memories#deleting-a-memory)
* [Storage Location](https://docs.runmaestro.ai/memories#storage-location)
* [How Claude Uses Memory](https://docs.runmaestro.ai/memories#how-claude-uses-memory)
* [Related](https://docs.runmaestro.ai/memories#related)
The Memories view exposes Claude Code’s per-project persistent memory — the small markdown files Claude writes about you, your preferences, the project, and external references — as a first-class panel inside Maestro. Open it, read what’s been remembered, edit anything that’s wrong, add new entries by hand, or delete what’s stale. 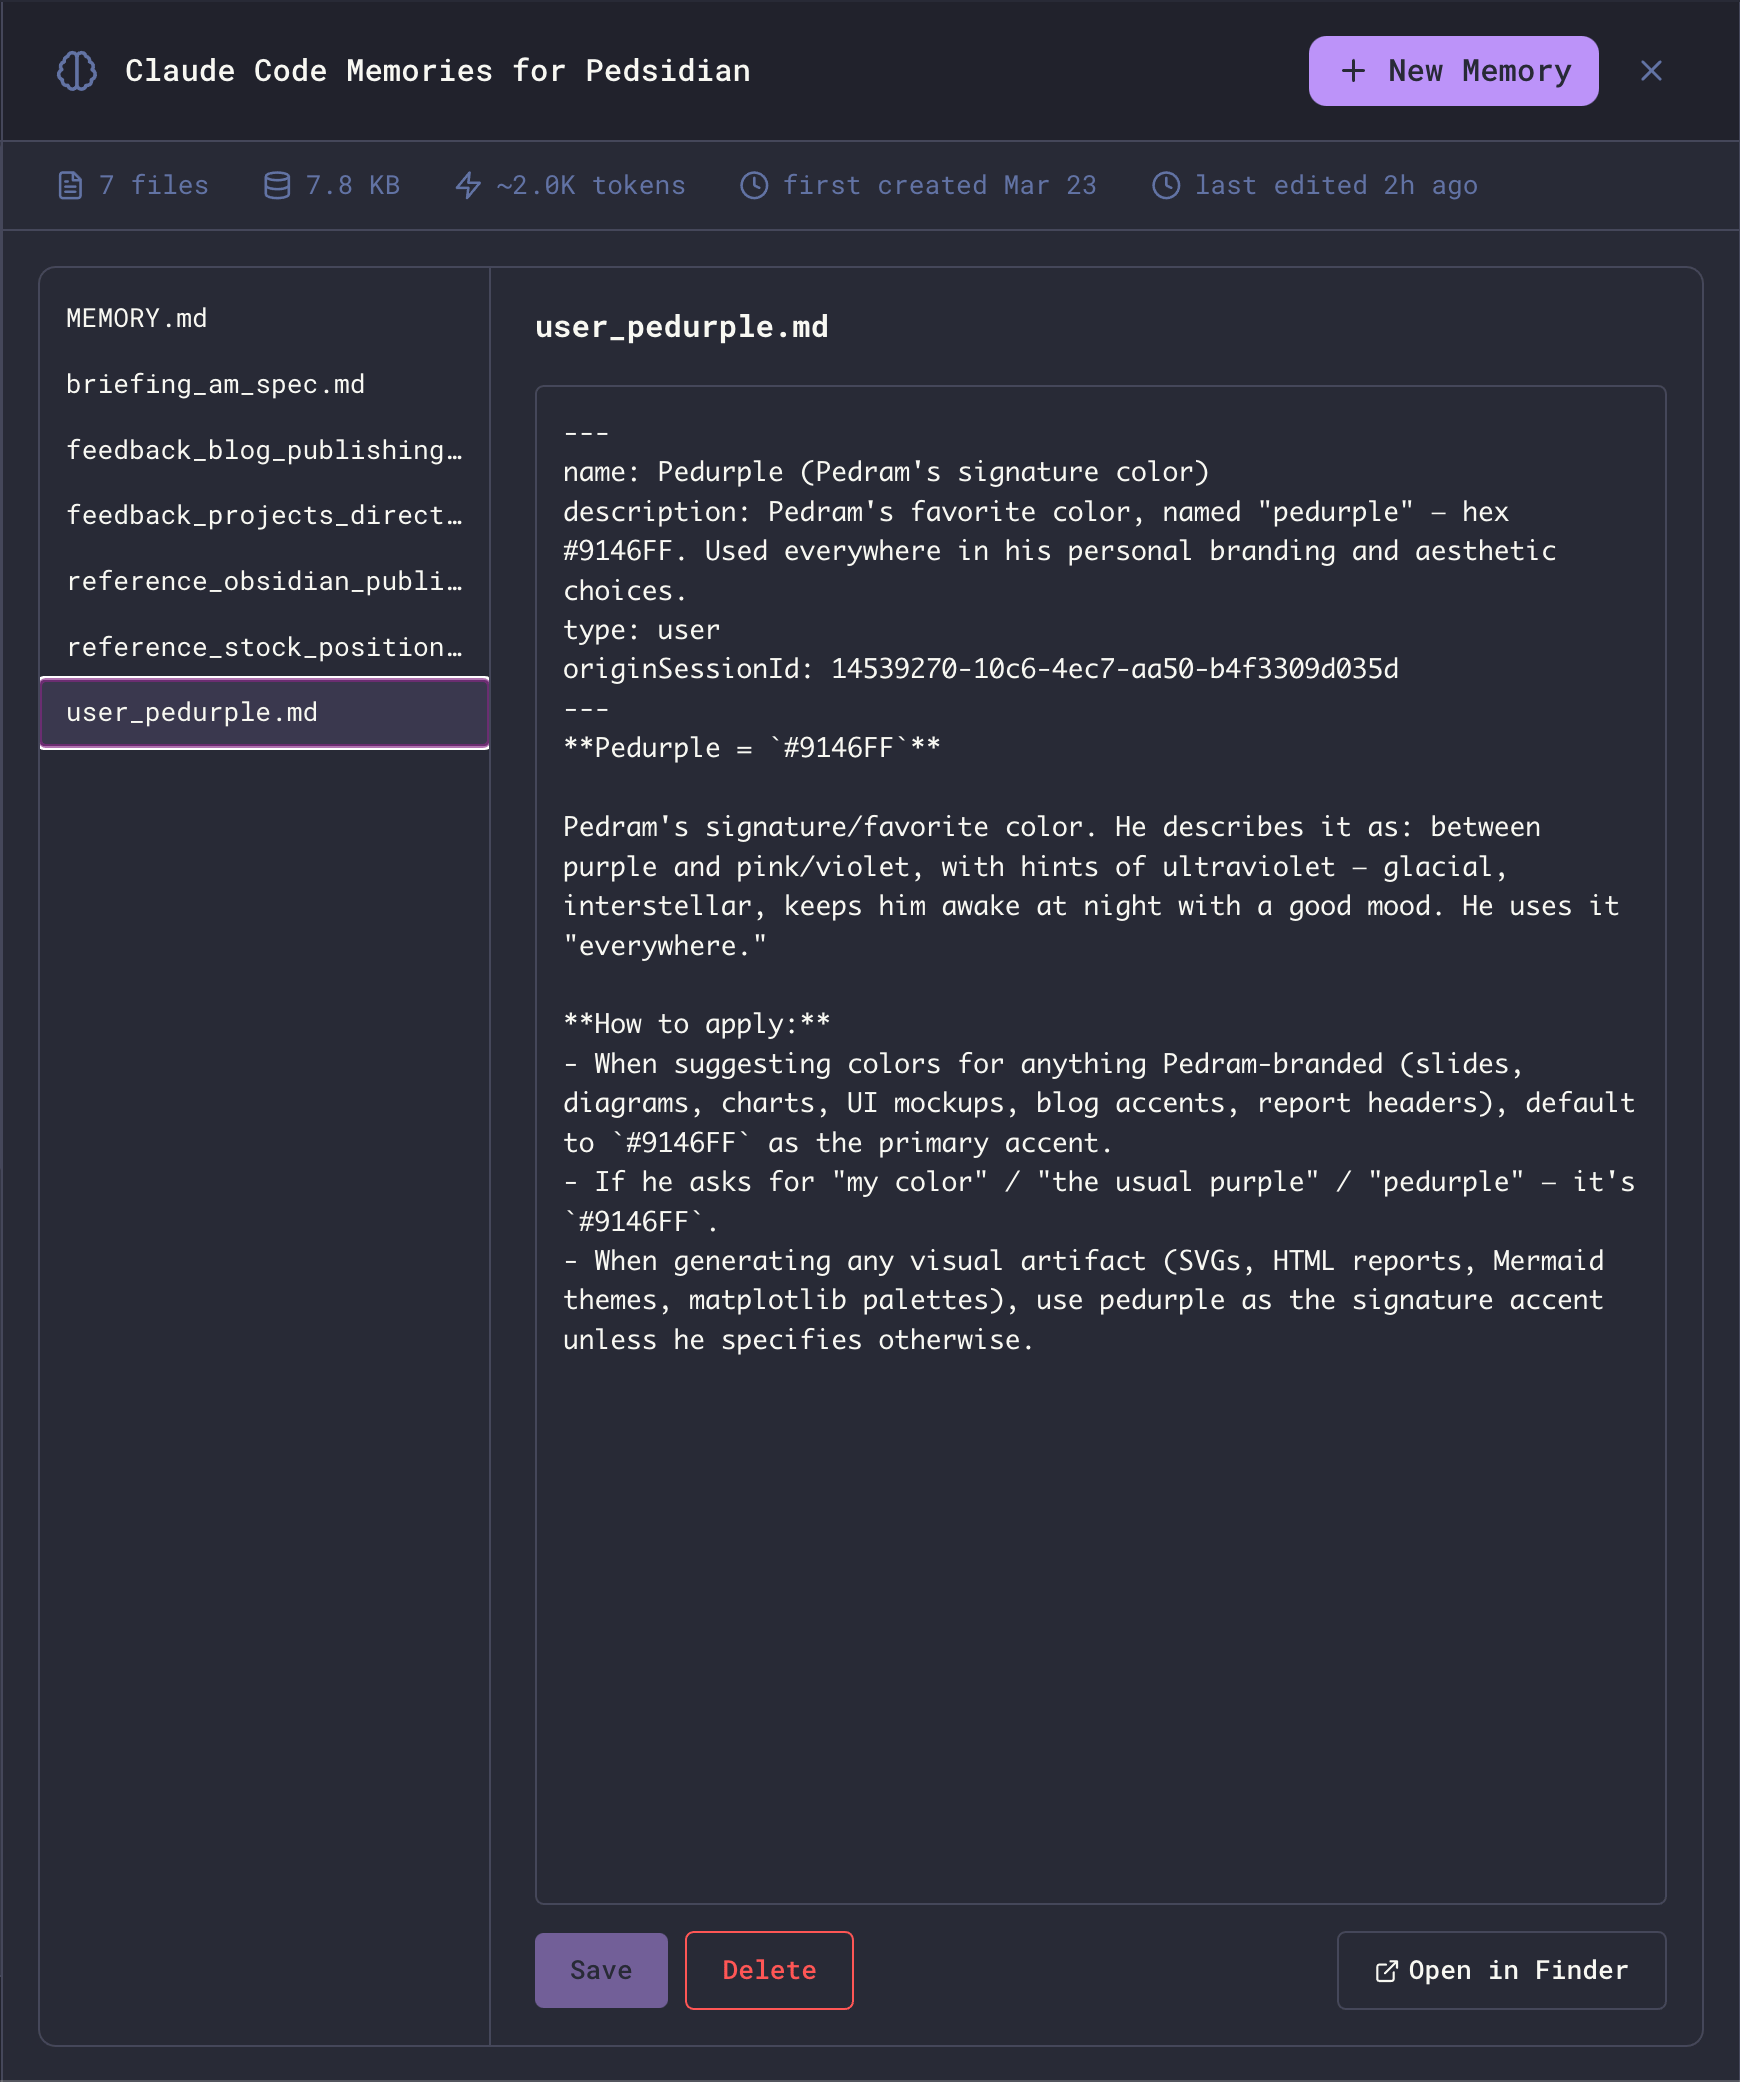
[](https://docs.runmaestro.ai/memories#opening-the-viewer)
Opening the Viewer
---------------------------------------------------------------------------------
Click the **brain icon** in the main header to open the full-panel Memories overlay. Press `Esc` to close it. The button appears only when the active agent supports per-project memory. **Today that’s Claude Code only.** Other agents (Codex, OpenCode, Factory Droid, etc.) don’t expose this surface — the button will be hidden for them.
[](https://docs.runmaestro.ai/memories#what-you%E2%80%99re-looking-at)
What You’re Looking At
-------------------------------------------------------------------------------------------------
Claude Code stores memory per project as a directory of small markdown files. The viewer mirrors that one-to-one:
* **Left pane** — list of every `.md` file in the project’s memory directory, each row annotated with an estimated token count so you can see at a glance which entries are paying for themselves. `MEMORY.md` is always pinned to the top; everything else is alphabetical.
* **Right pane** — a markdown editor for the selected file. A live token estimate sits next to the filename in the editor header and updates as you type.
* **Stats bar** — file count, total bytes on disk, an estimated token cost (~4 bytes/token), first-created and last-edited timestamps.
The **Open in Finder** button (bottom right) reveals the underlying directory on disk if you want to inspect or back it up manually.
[](https://docs.runmaestro.ai/memories#how-memory-is-organized)
How Memory is Organized
-------------------------------------------------------------------------------------------
Each Claude Code project has two flavors of memory file:
###
[](https://docs.runmaestro.ai/memories#memory-md-the-index)
MEMORY.md (the index)
`MEMORY.md` is a one-line-per-entry pointer file. Each entry is short (under ~150 chars) and links to the actual memory:
# Memory index
Pointers to individual memory files. One line per entry, under ~150 chars:
- [Workflow preferences](feedback_workflow.md) — testing, linting, code reuse, PR preferences
- [Auto Run Docs location](reference_autorun_docs.md) — Path to implementation plans directory
Claude reads `MEMORY.md` on every turn to decide which entries are relevant, then loads only those entries into context. Keep it tight — long index files defeat the purpose.
###
[](https://docs.runmaestro.ai/memories#entry-files-the-actual-memories)
Entry files (the actual memories)
Each entry is its own markdown file with YAML frontmatter classifying it:
---
name: Pedurple (Pedram's signature color)
description: Pedram's favorite color, named "pedurple" — hex #9146FF.
type: user
---
**Pedurple = `#9146FF`**
Pedram's signature/favorite color. He describes it as: between purple and pink/violet…
The `type` field is one of:
| Type | Purpose |
| --- | --- |
| **`user`** | Facts about who you are — role, expertise, responsibilities, preferences |
| **`feedback`** | Corrections and validations — “do this”, “don’t do that”, with the reasoning behind it |
| **`project`** | Time-sensitive context about the work — deadlines, owners, motivations |
| **`reference`** | Pointers to external systems — Linear projects, dashboards, channels, paths |
The viewer doesn’t enforce these types; they’re a convention Claude uses when reading and writing memory.
[](https://docs.runmaestro.ai/memories#editing-memory)
Editing Memory
-------------------------------------------------------------------------
Click any file in the left pane to load it into the editor. Edits are local until you press **Save** — switching files (or closing the viewer) with unsaved changes prompts a discard confirmation. The list shows a modified marker next to the selected file when there are unsaved changes, and the stats bar refreshes after every save so file size and timestamps stay accurate.
[](https://docs.runmaestro.ai/memories#creating-a-new-memory)
Creating a New Memory
---------------------------------------------------------------------------------------
Click **\+ New Memory** in the header. The first file you create in an empty project is suggested as `MEMORY.md` (the index); subsequent files default to `new-memory.md`, `new-memory-2.md`, and so on. The `.md` extension is added automatically if you omit it. Filenames must be unique within the project. New files are pre-populated with starter content:
* **`MEMORY.md`** — a starter index template with one example pointer line.
* **Any other file** — a starter entry with empty `name`, `description`, and `type: user` frontmatter ready to fill in.
Edit and **Save** as usual.
[](https://docs.runmaestro.ai/memories#deleting-a-memory)
Deleting a Memory
-------------------------------------------------------------------------------
With an entry selected, click **Delete** (bottom right). You’ll get a standard confirmation dialog before the file is removed. `MEMORY.md` is the index and cannot be deleted from the viewer — if you really need to wipe it, use **Open in Finder** and delete it manually. Removing it from disk effectively resets Claude’s memory for the project, since the index is what tells it which entries exist.
[](https://docs.runmaestro.ai/memories#storage-location)
Storage Location
-----------------------------------------------------------------------------
Memory lives outside your project directory, under your Claude Code config:
* **macOS**: `~/.claude/projects//memory/`
* **Linux**: `~/.claude/projects//memory/`
* **Windows**: `%USERPROFILE%\.claude\projects\\memory\`
`` is your project’s absolute path with every non-alphanumeric character replaced by `-`. For example, `/Users/you/Projects/Maestro` becomes `-Users-you-Projects-Maestro`. Because storage is keyed off the project path, **opening the same project from a different absolute path (e.g., a git worktree under a different directory) yields a separate memory store.** This is by design — worktrees are independent workspaces.
[](https://docs.runmaestro.ai/memories#how-claude-uses-memory)
How Claude Uses Memory
-----------------------------------------------------------------------------------------
Claude Code is instructed to:
1. **Read** `MEMORY.md` whenever it might be relevant — to decide which entries to load.
2. **Save** new memories when it learns something durable about you, your preferences, or the project — without being asked.
3. **Update or remove** stale entries when it discovers they’re wrong or out of date.
4. **Skip** anything already derivable from the code, git history, or `CLAUDE.md` — memory is for things that can’t be re-derived.
You can prompt Claude directly: “remember that I prefer X” or “forget the entry about Y” both work. The viewer is for the cases where you want to inspect, audit, or hand-edit what’s been written without going through the agent.
[](https://docs.runmaestro.ai/memories#related)
Related
-----------------------------------------------------------
* [Context Management](https://docs.runmaestro.ai/context-management)
— how Maestro shapes what reaches the agent each turn
* [Prompt Customization](https://docs.runmaestro.ai/prompt-customization)
— editing the system prompts that govern memory behavior
Was this page helpful?
YesNo
[History](https://docs.runmaestro.ai/history)
[Context Management](https://docs.runmaestro.ai/context-management)
⌘I
---
# Multiple Claude Accounts - Maestro
[Skip to main content](https://docs.runmaestro.ai/multi-claude#content-area)
[Maestro home page](https://runmaestro.ai/)
Search...
⌘K
Search...
Navigation
Providers & CLI
Multiple Claude Accounts
On this page
* [How It Works](https://docs.runmaestro.ai/multi-claude#how-it-works)
* [One-Time Setup](https://docs.runmaestro.ai/multi-claude#one-time-setup)
* [1\. Authenticate Each Account](https://docs.runmaestro.ai/multi-claude#1-authenticate-each-account)
* [2\. Symlink Shared Resources](https://docs.runmaestro.ai/multi-claude#2-symlink-shared-resources)
* [What’s Shared vs. Account-Specific](https://docs.runmaestro.ai/multi-claude#what%E2%80%99s-shared-vs-account-specific)
* [Configuring Agents in Maestro](https://docs.runmaestro.ai/multi-claude#configuring-agents-in-maestro)
* [When Creating a New Agent](https://docs.runmaestro.ai/multi-claude#when-creating-a-new-agent)
* [When Editing an Existing Agent](https://docs.runmaestro.ai/multi-claude#when-editing-an-existing-agent)
* [Recommended Setup](https://docs.runmaestro.ai/multi-claude#recommended-setup)
* [Tips](https://docs.runmaestro.ai/multi-claude#tips)
Use two or more Claude Code Max subscriptions (e.g., personal and work accounts) with Maestro by pointing each agent at a separate Claude configuration directory. This lets you spread work across multiple accounts’ quotas while keeping shared settings, sessions, and plugins.
[](https://docs.runmaestro.ai/multi-claude#how-it-works)
How It Works
-------------------------------------------------------------------------
Claude Code stores its configuration and auth credentials in `~/.claude` by default. The `CLAUDE_CONFIG_DIR` environment variable overrides this location. By creating a separate config directory per account — each with its own OAuth credentials — and symlinking shared resources back to a canonical source, you get:
* **Separate billing/authentication** per account
* **Shared sessions** — resume any session from either account
* **Shared settings, plugins, commands, plans, and skills** — configure once, use everywhere
[](https://docs.runmaestro.ai/multi-claude#one-time-setup)
One-Time Setup
-----------------------------------------------------------------------------
This setup is done once on your machine, outside of Maestro.
###
[](https://docs.runmaestro.ai/multi-claude#1-authenticate-each-account)
1\. Authenticate Each Account
Start Claude Code normally and complete OAuth for your first account:
claude
# Complete OAuth for account A (e.g., personal)
Copy the authenticated config to a named directory:
cp -a ~/.claude ~/.claude-personal
Then authenticate your second account:
mv ~/.claude/.claude.json ~/.claude/.claude.json.bak
claude
# Complete OAuth for account B (e.g., work)
cp -a ~/.claude ~/.claude-work
rm ~/.claude/.claude.json.bak
The main `~/.claude/` directory doesn’t need its own `.claude.json`. It serves as the canonical source for shared resources.
###
[](https://docs.runmaestro.ai/multi-claude#2-symlink-shared-resources)
2\. Symlink Shared Resources
For each account directory, replace local copies with symlinks back to `~/.claude` so settings, plugins, and sessions stay in sync:
# Repeat for each account directory (e.g., ~/.claude-personal, ~/.claude-work)
CONFIG_DIR=~/.claude-personal
# Back up directories that will be symlinked
mv $CONFIG_DIR/projects $CONFIG_DIR/projects-pre
mv $CONFIG_DIR/todos $CONFIG_DIR/todos-pre
mv $CONFIG_DIR/session-env $CONFIG_DIR/session-env-pre
# Remove files/dirs that will become symlinks
rm -rf $CONFIG_DIR/commands $CONFIG_DIR/ide $CONFIG_DIR/plans $CONFIG_DIR/plugins $CONFIG_DIR/skills
rm -f $CONFIG_DIR/settings.json $CONFIG_DIR/CLAUDE.md
# Create symlinks
ln -s ~/.claude/commands $CONFIG_DIR/commands
ln -s ~/.claude/ide $CONFIG_DIR/ide
ln -s ~/.claude/plans $CONFIG_DIR/plans
ln -s ~/.claude/plugins $CONFIG_DIR/plugins
ln -s ~/.claude/skills $CONFIG_DIR/skills
ln -s ~/.claude/settings.json $CONFIG_DIR/settings.json
ln -s ~/.claude/CLAUDE.md $CONFIG_DIR/CLAUDE.md
ln -s ~/.claude/todos $CONFIG_DIR/todos
ln -s ~/.claude/session-env $CONFIG_DIR/session-env
ln -s ../.claude/projects $CONFIG_DIR/projects
###
[](https://docs.runmaestro.ai/multi-claude#what%E2%80%99s-shared-vs-account-specific)
What’s Shared vs. Account-Specific
| Resource | Shared? | Notes |
| --- | --- | --- |
| `projects/` (sessions) | Shared | Enables cross-account session resume |
| `settings.json`, `plugins/`, `commands/`, `plans/`, `skills/` | Shared | Configure once, use everywhere |
| `CLAUDE.md` | Shared | Global instructions apply to all accounts |
| `.claude.json` | Per-account | OAuth tokens and account identity |
| `history.jsonl` | Per-account | Recent session list differs per account |
[](https://docs.runmaestro.ai/multi-claude#configuring-agents-in-maestro)
Configuring Agents in Maestro
-----------------------------------------------------------------------------------------------------------
Once your config directories exist, point each Maestro agent at the right one using the `CLAUDE_CONFIG_DIR` environment variable.
###
[](https://docs.runmaestro.ai/multi-claude#when-creating-a-new-agent)
When Creating a New Agent
1. Click **+** in the sidebar to create a new agent
2. Select **Claude Code** as the provider
3. Expand the **Environment Variables** section
4. Click **\+ Add Variable**
5. Set `CLAUDE_CONFIG_DIR` to your account’s config path (e.g., `/Users/you/.claude-personal`)
###
[](https://docs.runmaestro.ai/multi-claude#when-editing-an-existing-agent)
When Editing an Existing Agent
1. Right-click an agent in the sidebar → **Edit Agent**, or use `Cmd+E` / `Ctrl+E`
2. Scroll to the **Environment Variables** section
3. Add `CLAUDE_CONFIG_DIR` with the path to the desired account’s config directory
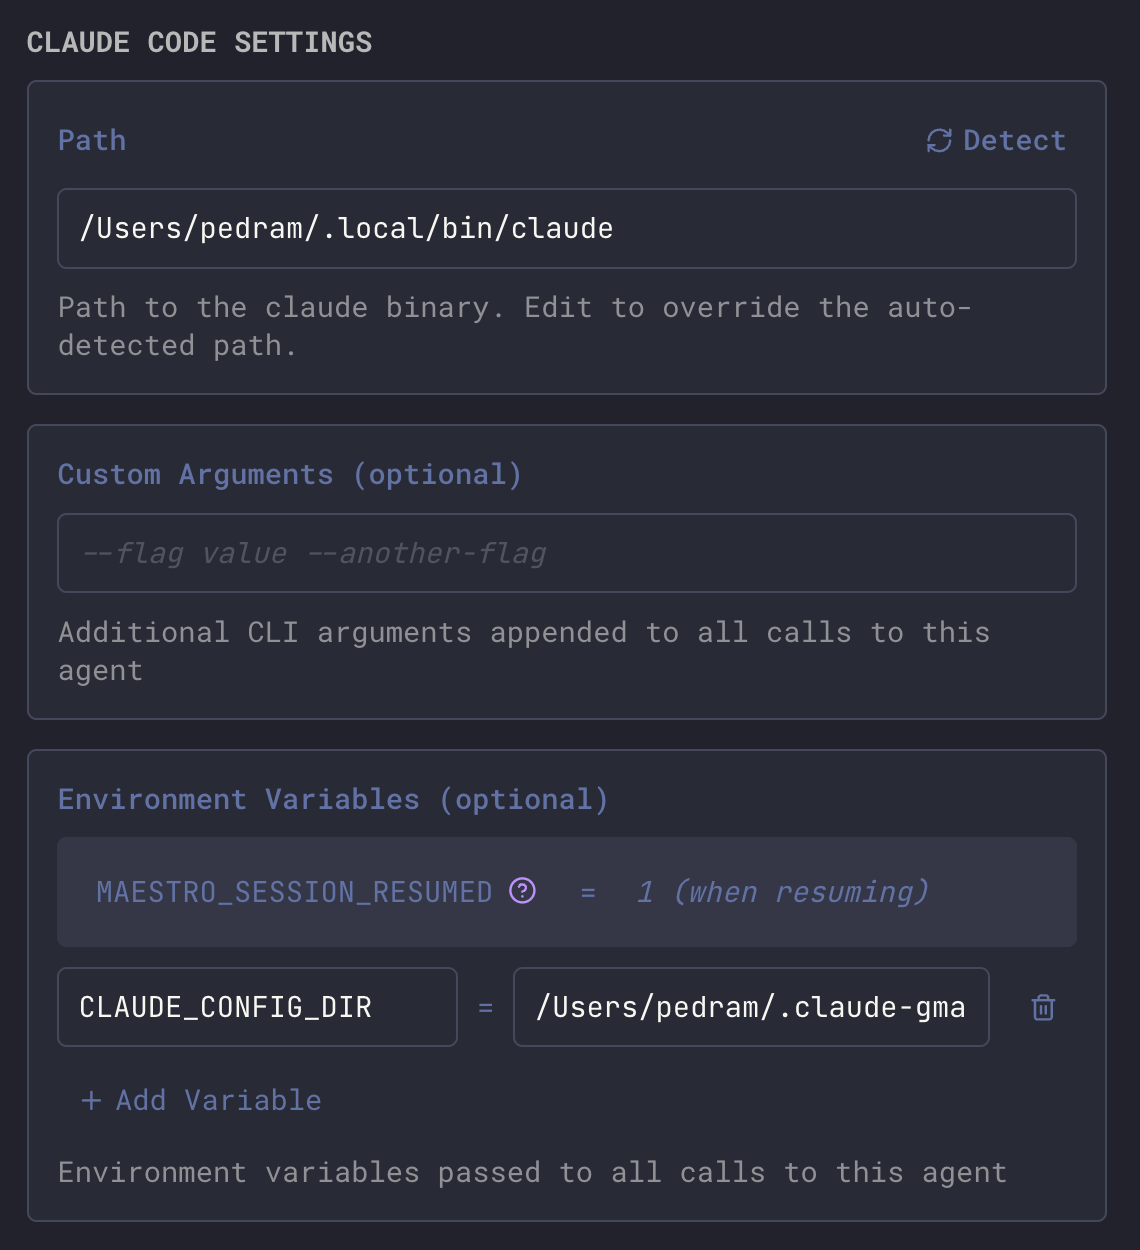
###
[](https://docs.runmaestro.ai/multi-claude#recommended-setup)
Recommended Setup
Create one agent per account and name them clearly:
| Agent Name | `CLAUDE_CONFIG_DIR` |
| --- | --- |
| Claude (Personal) | `/Users/you/.claude-personal` |
| Claude (Work) | `/Users/you/.claude-work` |
This way you can see at a glance which account’s quota you’re using. When one account hits its limit, switch to the other.
[](https://docs.runmaestro.ai/multi-claude#tips)
Tips
---------------------------------------------------------
* **Session resume works cross-account** — because `projects/` is symlinked, you can start a session on one account and resume it on another.
* **Don’t run both on the same project simultaneously** — two Claude instances writing to the same session files can cause contention. Use one at a time per project.
* **Symlinks may break after Claude Code updates** — if an update recreates a directory, re-run the symlink commands from step 2.
Was this page helpful?
YesNo
[Provider Notes](https://docs.runmaestro.ai/provider-notes)
[Command Line Interface](https://docs.runmaestro.ai/cli)
⌘I
---
# Cue Examples - Maestro
[Skip to main content](https://docs.runmaestro.ai/maestro-cue-examples#content-area)
[Maestro home page](https://runmaestro.ai/)
Search...
Ctrl K
Search...
Navigation
Maestro Cue
Cue Examples
On this page
* [Pipeline Grouping](https://docs.runmaestro.ai/maestro-cue-examples#pipeline-grouping)
* [Workspace Initialization](https://docs.runmaestro.ai/maestro-cue-examples#workspace-initialization)
* [CI-Style Pipeline](https://docs.runmaestro.ai/maestro-cue-examples#ci-style-pipeline)
* [Scheduled Automation](https://docs.runmaestro.ai/maestro-cue-examples#scheduled-automation)
* [Selective Chaining with triggeredBy](https://docs.runmaestro.ai/maestro-cue-examples#selective-chaining-with-triggeredby)
* [Research Swarm](https://docs.runmaestro.ai/maestro-cue-examples#research-swarm)
* [PR Review with Targeted Follow-Up](https://docs.runmaestro.ai/maestro-cue-examples#pr-review-with-targeted-follow-up)
* [TODO Task Queue](https://docs.runmaestro.ai/maestro-cue-examples#todo-task-queue)
* [Multi-Environment Deploy](https://docs.runmaestro.ai/maestro-cue-examples#multi-environment-deploy)
* [Issue Triage Bot](https://docs.runmaestro.ai/maestro-cue-examples#issue-triage-bot)
* [Debate Pattern](https://docs.runmaestro.ai/maestro-cue-examples#debate-pattern)
* [Scheduled Report with Conditional Chain](https://docs.runmaestro.ai/maestro-cue-examples#scheduled-report-with-conditional-chain)
* [CLI-Triggered Code Review](https://docs.runmaestro.ai/maestro-cue-examples#cli-triggered-code-review)
* [CI/CD Deploy Pipeline](https://docs.runmaestro.ai/maestro-cue-examples#ci%2Fcd-deploy-pipeline)
Complete, copy-paste-ready `.maestro/cue.yaml` configurations for common workflows. Each example is self-contained — drop it into your project’s `.maestro/` directory and adjust agent names to match your Left Bar.
[](https://docs.runmaestro.ai/maestro-cue-examples#pipeline-grouping)
Pipeline Grouping
-------------------------------------------------------------------------------------------
Group related automations under a single pipeline — multiple trigger lines appear as one pipeline in the Pipeline Editor instead of cluttering the dropdown.
# Pipeline: Monitoring (color: #06b6d4)
subscriptions:
# Daily scan — runs every morning
- name: Monitoring
label: Daily Scan
event: time.scheduled
schedule_times:
- '06:00'
schedule_days:
- mon
- tue
- wed
- thu
- fri
- sat
- sun
prompt: |
Run the daily monitoring workflow:
1. Scan for new activity
2. Compare against yesterday's snapshot
3. Generate a briefing in journal/{{DATE}}.md
# Weekly review — runs Sunday mornings
- name: Monitoring-chain-1
label: Weekly Review
event: time.scheduled
schedule_times:
- '08:00'
schedule_days:
- sun
prompt: |
Generate a weekly performance review.
Summarize activity, highlight trends, and flag issues.
settings:
timeout_minutes: 45
max_concurrent: 1
**How it works:**
1. The `# Pipeline: Monitoring (color: #06b6d4)` comment declares the pipeline name and UI color
2. The first subscription’s `name` matches the pipeline name (`Monitoring`)
3. Additional subscriptions use `Name-chain-N` (e.g., `Monitoring-chain-1`)
4. The `label` field gives each line a descriptive name in the UI
Both subscriptions appear as trigger lines within a single **Monitoring** pipeline. Each can have its own event type, schedule, and prompt.
* * *
[](https://docs.runmaestro.ai/maestro-cue-examples#workspace-initialization)
Workspace Initialization
---------------------------------------------------------------------------------------------------------
Run setup tasks once when the Maestro application launches — install dependencies, verify environment, run health checks. **Agents needed:** `setup-agent`
subscriptions:
- name: init-workspace
event: app.startup
prompt: |
Initialize the workspace:
1. Run `npm install` if node_modules is missing or outdated
2. Verify required environment variables are set
3. Run `npm run build` to ensure the project compiles
Report any issues found.
This fires exactly once per application launch. Toggling Cue off and back on does NOT re-fire it. Only an application restart triggers it again. Editing the YAML does not re-trigger it.
* * *
[](https://docs.runmaestro.ai/maestro-cue-examples#ci-style-pipeline)
CI-Style Pipeline
-------------------------------------------------------------------------------------------
Lint, test, and deploy in sequence. Each step only runs if the previous one succeeded. **Agents needed:** `linter`, `tester`, `deployer` The `linter` agent’s `.maestro/cue.yaml`:
subscriptions:
- name: lint-on-save
event: file.changed
watch: 'src/**/*.{ts,tsx}'
prompt: |
Run `npx eslint {{CUE_FILE_PATH}} --fix`.
Report any errors that couldn't be auto-fixed.
The `tester` agent’s `.maestro/cue.yaml`:
subscriptions:
- name: test-after-lint
event: agent.completed
source_session: 'linter'
filter:
status: completed
exitCode: 0
prompt: |
Lint passed. Run `npm test` and report results.
The `deployer` agent’s `.maestro/cue.yaml`:
subscriptions:
- name: deploy-after-tests
event: agent.completed
source_session: 'tester'
filter:
status: completed
exitCode: 0
prompt: |
Tests passed. Deploy to staging with `npm run deploy:staging`.
* * *
[](https://docs.runmaestro.ai/maestro-cue-examples#scheduled-automation)
Scheduled Automation
-------------------------------------------------------------------------------------------------
Run prompts at specific times and days using `time.scheduled`. Unlike `time.heartbeat` (which fires every N minutes), scheduled triggers fire at exact clock times. **Agent needed:** `ops`
subscriptions:
# Morning standup report on weekdays
- name: morning-standup
event: time.scheduled
schedule_times:
- '09:00'
schedule_days:
- mon
- tue
- wed
- thu
- fri
prompt: |
Generate a standup report:
1. Run `git log --oneline --since="yesterday"` for recent changes
2. Check for any open PRs needing review
3. Summarize what was done and what's next
# End-of-day summary at 5 PM on weekdays
- name: eod-summary
event: time.scheduled
schedule_times:
- '17:00'
schedule_days:
- mon
- tue
- wed
- thu
- fri
prompt: |
Generate an end-of-day summary with today's commits and open items.
# Weekend maintenance at midnight Saturday
- name: weekend-maintenance
event: time.scheduled
schedule_times:
- '00:00'
schedule_days:
- sat
prompt: |
Run maintenance tasks:
1. Clean up old build artifacts
2. Update dependencies with `npm outdated`
3. Generate a dependency report
* * *
[](https://docs.runmaestro.ai/maestro-cue-examples#selective-chaining-with-triggeredby)
Selective Chaining with triggeredBy
-------------------------------------------------------------------------------------------------------------------------------
When an agent has multiple subscriptions but only one should chain to another agent, use the `triggeredBy` filter. This field contains the subscription name that triggered the completing run. **Agents needed:** `worker` (has multiple cue subscriptions), `reviewer` The `worker` agent’s `.maestro/cue.yaml`:
subscriptions:
# This one should NOT trigger the reviewer
- name: routine-cleanup
event: time.heartbeat
interval_minutes: 60
prompt: Run `npm run clean` and remove stale build artifacts.
# This one should NOT trigger the reviewer either
- name: lint-check
event: file.changed
watch: 'src/**/*.ts'
prompt: Lint {{CUE_FILE_PATH}}.
# Only THIS one should trigger the reviewer
- name: implement-feature
event: github.issue
filter:
labels: 'enhancement'
prompt: |
New feature request: {{CUE_GH_TITLE}} (#{{CUE_GH_NUMBER}})
{{CUE_GH_BODY}}
Implement this feature following existing patterns.
The `reviewer` agent’s `.maestro/cue.yaml`:
subscriptions:
- name: review-new-feature
event: agent.completed
source_session: 'worker'
filter:
triggeredBy: 'implement-feature' # Only chains from this specific subscription
status: completed
prompt: |
The worker just implemented a feature. Review the changes:
{{CUE_SOURCE_OUTPUT}}
Check for:
1. Code quality and consistency
2. Missing test coverage
3. Documentation gaps
The `triggeredBy` filter also supports glob patterns: `triggeredBy: "implement-*"` matches any subscription name starting with `implement-`.
* * *
[](https://docs.runmaestro.ai/maestro-cue-examples#research-swarm)
Research Swarm
-------------------------------------------------------------------------------------
Fan out a question to multiple agents, then fan in to synthesize results. **Agents needed:** `coordinator`, `researcher-a`, `researcher-b`, `researcher-c` The `coordinator` agent’s `.maestro/cue.yaml`:
subscriptions:
# Fan-out: send the research question to all researchers
- name: dispatch-research
event: file.changed
watch: 'research-question.md'
fan_out:
- 'researcher-a'
- 'researcher-b'
- 'researcher-c'
prompt: |
Research the following question from different angles.
File: {{CUE_FILE_PATH}}
Read the file and provide a thorough analysis.
# Fan-in: synthesize when all researchers finish
- name: synthesize-results
event: agent.completed
source_session:
- 'researcher-a'
- 'researcher-b'
- 'researcher-c'
prompt: |
All researchers have completed their analysis.
Combined outputs:
{{CUE_SOURCE_OUTPUT}}
Synthesize these perspectives into a single coherent report.
Highlight agreements, contradictions, and key insights.
settings:
timeout_minutes: 60
timeout_on_fail: continue # Synthesize with partial results if someone times out
* * *
[](https://docs.runmaestro.ai/maestro-cue-examples#pr-review-with-targeted-follow-up)
PR Review with Targeted Follow-Up
---------------------------------------------------------------------------------------------------------------------------
Auto-review new PRs, then selectively notify a security reviewer only for PRs that touch auth code. **Agents needed:** `pr-reviewer`, `security-reviewer` The `pr-reviewer` agent’s `.maestro/cue.yaml`:
subscriptions:
- name: review-all-prs
event: github.pull_request
poll_minutes: 3
filter:
draft: false
base_branch: main
prompt: |
New PR: {{CUE_GH_TITLE}} (#{{CUE_GH_NUMBER}})
Author: {{CUE_GH_AUTHOR}}
Branch: {{CUE_GH_BRANCH}} -> {{CUE_GH_BASE_BRANCH}}
URL: {{CUE_GH_URL}}
{{CUE_GH_BODY}}
Review for code quality, bugs, and style.
In your output, list all files changed.
The `security-reviewer` agent’s `.maestro/cue.yaml`:
subscriptions:
- name: security-review
event: agent.completed
source_session: 'pr-reviewer'
filter:
triggeredBy: 'review-all-prs'
status: completed
prompt: |
A PR was just reviewed. Check if any auth/security-sensitive files were changed:
{{CUE_SOURCE_OUTPUT}}
If auth, session, or permission-related code was modified:
1. Audit the changes for security vulnerabilities
2. Check for injection, XSS, or auth bypass risks
3. Verify proper input validation
If no security-sensitive files were changed, respond with "No security review needed."
* * *
[](https://docs.runmaestro.ai/maestro-cue-examples#todo-task-queue)
TODO Task Queue
---------------------------------------------------------------------------------------
Watch a markdown file for unchecked tasks and work through them sequentially. **Agents needed:** `task-worker`
subscriptions:
- name: work-todos
event: task.pending
watch: 'TODO.md'
poll_minutes: 2
filter:
taskCount: '>=1'
prompt: |
There are {{CUE_TASK_COUNT}} pending tasks in {{CUE_TASK_FILE}}:
{{CUE_TASK_LIST}}
Pick the FIRST unchecked task and complete it.
When done, change `- [ ]` to `- [x]` in the file.
Do NOT work on more than one task at a time.
settings:
max_concurrent: 1 # Serial execution — one task at a time
* * *
[](https://docs.runmaestro.ai/maestro-cue-examples#multi-environment-deploy)
Multi-Environment Deploy
---------------------------------------------------------------------------------------------------------
Fan out deployments to staging, production, and docs after a build passes. **Agents needed:** `builder`, `deploy-staging`, `deploy-prod`, `deploy-docs` The `builder` agent’s `.maestro/cue.yaml`:
subscriptions:
- name: build-on-push
event: file.changed
watch: 'src/**/*'
prompt: |
Source files changed. Run a full build with `npm run build`.
Report success or failure.
Any agent with visibility to `builder` (e.g., `deploy-staging`):
subscriptions:
- name: fan-out-deploy
event: agent.completed
source_session: 'builder'
filter:
triggeredBy: 'build-on-push'
exitCode: 0
fan_out:
- 'deploy-staging'
- 'deploy-prod'
- 'deploy-docs'
prompt: |
Build succeeded. Deploy your target environment.
Build output: {{CUE_SOURCE_OUTPUT}}
* * *
[](https://docs.runmaestro.ai/maestro-cue-examples#issue-triage-bot)
Issue Triage Bot
-----------------------------------------------------------------------------------------
Auto-triage new GitHub issues by labeling and assigning them. **Agents needed:** `triage-bot`
subscriptions:
- name: triage-issues
event: github.issue
poll_minutes: 5
filter:
state: open
labels: '!triaged' # Skip already-triaged issues
prompt: |
New issue needs triage: {{CUE_GH_TITLE}} (#{{CUE_GH_NUMBER}})
Author: {{CUE_GH_AUTHOR}}
Labels: {{CUE_GH_LABELS}}
{{CUE_GH_BODY}}
Triage this issue:
1. Identify the component/area affected
2. Estimate complexity (small / medium / large)
3. Suggest priority (P0-P3)
4. Recommend an assignee based on the area
5. Run `gh issue edit {{CUE_GH_NUMBER}} --add-label "triaged"` to mark as triaged
* * *
[](https://docs.runmaestro.ai/maestro-cue-examples#debate-pattern)
Debate Pattern
-------------------------------------------------------------------------------------
Two agents analyze a problem independently, then a third synthesizes their perspectives. **Agents needed:** `advocate`, `critic`, `judge` The config that triggers the debate (on any agent with visibility):
subscriptions:
- name: start-debate
event: file.changed
watch: 'debate-topic.md'
fan_out:
- 'advocate'
- 'critic'
prompt: |
Read {{CUE_FILE_PATH}} and analyze the proposal.
You are assigned a role — argue from that perspective:
- advocate: argue IN FAVOR, highlight benefits and opportunities
- critic: argue AGAINST, highlight risks and weaknesses
Be thorough and specific.
The `judge` agent’s `.maestro/cue.yaml`:
subscriptions:
- name: synthesize-debate
event: agent.completed
source_session:
- 'advocate'
- 'critic'
prompt: |
Both sides of the debate have been presented.
Arguments:
{{CUE_SOURCE_OUTPUT}}
As the judge:
1. Summarize each side's strongest points
2. Identify where they agree and disagree
3. Render a verdict with your reasoning
4. Propose a path forward that addresses both perspectives
settings:
timeout_minutes: 45
timeout_on_fail: continue
* * *
[](https://docs.runmaestro.ai/maestro-cue-examples#scheduled-report-with-conditional-chain)
Scheduled Report with Conditional Chain
---------------------------------------------------------------------------------------------------------------------------------------
Generate an hourly report, but only notify a summary agent when there’s meaningful activity. **Agents needed:** `reporter`, `summarizer` The `reporter` agent’s `.maestro/cue.yaml`:
subscriptions:
- name: hourly-git-report
event: time.heartbeat
interval_minutes: 60
prompt: |
Generate a report of git activity in the last hour.
Run `git log --oneline --since="1 hour ago"`.
If there are commits, format them as a structured report.
If there are no commits, respond with exactly: "NO_ACTIVITY"
The `summarizer` agent’s `.maestro/cue.yaml`:
subscriptions:
- name: summarize-activity
event: agent.completed
source_session: 'reporter'
filter:
triggeredBy: 'hourly-git-report'
status: completed
prompt: |
The hourly reporter just finished. Here's its output:
{{CUE_SOURCE_OUTPUT}}
If the output says "NO_ACTIVITY", respond with "Nothing to summarize."
Otherwise, create a concise executive summary of the development activity.
* * *
[](https://docs.runmaestro.ai/maestro-cue-examples#cli-triggered-code-review)
CLI-Triggered Code Review
-----------------------------------------------------------------------------------------------------------
Set up an on-demand code review that agents or CI can trigger from the command line. **Agents needed:** `reviewer` The `reviewer` agent’s `.maestro/cue.yaml`:
subscriptions:
- name: code-review
event: cli.trigger
label: Code Review
prompt: |
Review the current git diff and provide feedback.
{{CUE_CLI_PROMPT}}
Steps:
1. Run `git diff` to see the changes
2. Check for correctness, security issues, and style
3. Summarize what changed and flag any concerns
enabled: true
**Triggering:**
# Basic review using the configured prompt
maestro-cli cue trigger code-review
# Review with specific focus
maestro-cli cue trigger code-review --prompt "Focus on the auth module changes"
* * *
[](https://docs.runmaestro.ai/maestro-cue-examples#ci/cd-deploy-pipeline)
CI/CD Deploy Pipeline
---------------------------------------------------------------------------------------------------
Trigger a deploy from CI or scripts, passing the environment as the prompt. **Agents needed:** `deployer` The `deployer` agent’s `.maestro/cue.yaml`:
subscriptions:
- name: deploy
event: cli.trigger
label: Deploy
prompt: |
Deploy the current branch.
Target: {{CUE_CLI_PROMPT}}
1. Run the test suite
2. Build the project
3. Deploy to the specified environment
4. Verify the deployment is healthy
enabled: true
- name: post-deploy-verify
event: agent.completed
source_session: 'deployer'
filter:
triggeredBy: 'deploy'
status: completed
prompt: |
The deploy just finished. Run smoke tests and verify the deployment is healthy.
Report any issues immediately.
**Triggering from CI:**
# From a CI pipeline
maestro-cli cue trigger deploy --prompt "staging" --json
# From a release script
maestro-cli cue trigger deploy --prompt "production"
Was this page helpful?
YesNo
[Cue Advanced Patterns](https://docs.runmaestro.ai/maestro-cue-advanced)
[Provider Notes](https://docs.runmaestro.ai/provider-notes)
Ctrl+I
---
# OpenSpec Commands - Maestro
[Skip to main content](https://docs.runmaestro.ai/openspec-commands#content-area)
[Maestro home page](https://runmaestro.ai/)
Search...
⌘K
Search...
Navigation
Auto Run
OpenSpec Commands
On this page
* [OpenSpec vs. Spec-Kit](https://docs.runmaestro.ai/openspec-commands#openspec-vs-spec-kit)
* [Core Workflow](https://docs.runmaestro.ai/openspec-commands#core-workflow)
* [Stage 1: Proposal (/openspec.proposal)](https://docs.runmaestro.ai/openspec-commands#stage-1-proposal-%2Fopenspec-proposal)
* [Stage 2: Apply (/openspec.apply)](https://docs.runmaestro.ai/openspec-commands#stage-2-apply-%2Fopenspec-apply)
* [Stage 3: Archive (/openspec.archive)](https://docs.runmaestro.ai/openspec-commands#stage-3-archive-%2Fopenspec-archive)
* [Maestro-Specific Commands](https://docs.runmaestro.ai/openspec-commands#maestro-specific-commands)
* [/openspec.implement — Generate Auto Run Documents](https://docs.runmaestro.ai/openspec-commands#%2Fopenspec-implement-%E2%80%94-generate-auto-run-documents)
* [/openspec.help — Workflow Overview](https://docs.runmaestro.ai/openspec-commands#%2Fopenspec-help-%E2%80%94-workflow-overview)
* [Directory Structure](https://docs.runmaestro.ai/openspec-commands#directory-structure)
* [Spec Delta Format](https://docs.runmaestro.ai/openspec-commands#spec-delta-format)
* [OpenSpec CLI Commands](https://docs.runmaestro.ai/openspec-commands#openspec-cli-commands)
* [Viewing & Managing Commands](https://docs.runmaestro.ai/openspec-commands#viewing-%26-managing-commands)
* [Auto-Updates](https://docs.runmaestro.ai/openspec-commands#auto-updates)
* [Tips for Best Results](https://docs.runmaestro.ai/openspec-commands#tips-for-best-results)
OpenSpec is a spec-driven development tool from [Fission-AI/OpenSpec](https://github.com/Fission-AI/OpenSpec)
that ensures alignment between humans and AI coding assistants before any code is written. Maestro bundles these workflow commands and keeps them updated automatically.
[](https://docs.runmaestro.ai/openspec-commands#openspec-vs-spec-kit)
OpenSpec vs. Spec-Kit
-----------------------------------------------------------------------------------------------
Maestro offers two complementary spec-driven development tools:
| Feature | OpenSpec | Spec-Kit |
| --- | --- | --- |
| **Focus** | Change management & proposals | Feature specifications |
| **Workflow** | Proposal → Apply → Archive | Constitution → Specify → Plan → Tasks |
| **Best For** | Iterative changes, brownfield projects | New features, greenfield development |
| **Output** | Change proposals with spec deltas | Feature specifications and task lists |
| **Directory** | `openspec/` | `specs/` or project root |
**Use OpenSpec when:**
* Making iterative changes to existing features
* You need explicit change proposals before implementation
* Working on brownfield projects with existing specifications
* You want a clear archive of completed changes
**Use Spec-Kit when:**
* Defining new features from scratch
* Establishing project constitutions and principles
* Creating detailed feature specifications
* Breaking down work into implementation tasks
Both tools integrate with Maestro’s Auto Run for autonomous execution.
[](https://docs.runmaestro.ai/openspec-commands#core-workflow)
Core Workflow
--------------------------------------------------------------------------------
OpenSpec follows a three-stage cycle:
###
[](https://docs.runmaestro.ai/openspec-commands#stage-1-proposal-/openspec-proposal)
Stage 1: Proposal (`/openspec.proposal`)
Create a change proposal before writing any code:
1. Reviews `openspec/project.md` for project conventions
2. Runs `openspec list` to see active changes and `openspec list --specs` for existing capabilities
3. Scaffolds `proposal.md`, `tasks.md`, and optional `design.md`
4. Creates spec deltas showing what will be ADDED, MODIFIED, or REMOVED
5. Validates with `openspec validate --strict`
**Creates:** A `openspec/changes//` directory with:
* `proposal.md` — Why and what
* `tasks.md` — Implementation checklist
* `specs//spec.md` — Spec deltas
###
[](https://docs.runmaestro.ai/openspec-commands#stage-2-apply-/openspec-apply)
Stage 2: Apply (`/openspec.apply`)
Implement the approved proposal:
1. Reads proposal and tasks
2. Implements tasks sequentially
3. Updates task checkboxes as work completes
4. Ensures approval gate is passed before starting
**Tip:** Only start implementation after the proposal is reviewed and approved.
###
[](https://docs.runmaestro.ai/openspec-commands#stage-3-archive-/openspec-archive)
Stage 3: Archive (`/openspec.archive`)
After deployment, archive the completed change:
1. Moves `changes//` to `changes/archive/YYYY-MM-DD-/`
2. Updates source-of-truth specs if capabilities changed
3. Validates the archived change with `openspec validate --strict`
**CLI command:** `openspec archive --yes` (use `--skip-specs` for tooling-only changes that don’t affect capabilities)
[](https://docs.runmaestro.ai/openspec-commands#maestro-specific-commands)
Maestro-Specific Commands
--------------------------------------------------------------------------------------------------------
###
[](https://docs.runmaestro.ai/openspec-commands#/openspec-implement-%E2%80%94-generate-auto-run-documents)
`/openspec.implement` — Generate Auto Run Documents
Bridges OpenSpec with Maestro’s Auto Run:
1. Reads the proposal and tasks from a change
2. Converts tasks into Auto Run document format with phases
3. Saves to `.maestro/playbooks/` with task checkboxes (filename: `OpenSpec--Phase-XX-[Description].md`)
4. Preserves task IDs (T001, T002, etc.) for traceability
5. Groups related tasks into logical phases (5–15 tasks each)
###
[](https://docs.runmaestro.ai/openspec-commands#/openspec-help-%E2%80%94-workflow-overview)
`/openspec.help` — Workflow Overview
Get help with OpenSpec concepts and Maestro integration.
[](https://docs.runmaestro.ai/openspec-commands#directory-structure)
Directory Structure
--------------------------------------------------------------------------------------------
OpenSpec uses a clear separation between current truth and proposed changes:
openspec/
├── project.md # Project conventions
├── specs/ # Current truth - what IS built
│ └── /
│ ├── spec.md # Requirements and scenarios
│ └── design.md # Technical patterns
└── changes/ # Proposals - what SHOULD change
├── /
│ ├── proposal.md # Why, what, impact
│ ├── tasks.md # Implementation checklist
│ └── specs/ # Spec deltas (ADDED/MODIFIED/REMOVED)
└── archive/ # Completed changes
[](https://docs.runmaestro.ai/openspec-commands#spec-delta-format)
Spec Delta Format
----------------------------------------------------------------------------------------
Changes use explicit operation headers:
## ADDED Requirements
### Requirement: New Feature
The system SHALL provide...
#### Scenario: Success case
- **WHEN** user performs action
- **THEN** expected result
## MODIFIED Requirements
### Requirement: Existing Feature
[Complete updated requirement text]
## REMOVED Requirements
### Requirement: Old Feature
**Reason**: [Why removing]
**Migration**: [How to handle]
[](https://docs.runmaestro.ai/openspec-commands#openspec-cli-commands)
OpenSpec CLI Commands
------------------------------------------------------------------------------------------------
The OpenSpec CLI provides these essential commands:
| Command | Purpose |
| --- | --- |
| `openspec list` | Display active changes in `changes/` |
| `openspec list --specs` | List existing capability specs |
| `openspec show ` | View change or spec details |
| `openspec validate --strict` | Comprehensive validation |
| `openspec archive --yes` | Archive after deployment |
| `openspec spec list --long` | Enumerate all specifications |
[](https://docs.runmaestro.ai/openspec-commands#viewing-&-managing-commands)
Viewing & Managing Commands
------------------------------------------------------------------------------------------------------------
Access OpenSpec commands via **Settings → AI Commands** tab. Here you can:
* **View all commands** — Click the chevron to expand and see the full prompt
* **Check for Updates** — Pull the latest workflow from GitHub
* **Edit prompts** — Customize prompts for your workflow
* **Reset to default** — Restore modified prompts to bundled version
Commands marked with a **Maestro** badge are Maestro-specific additions to the upstream workflow.
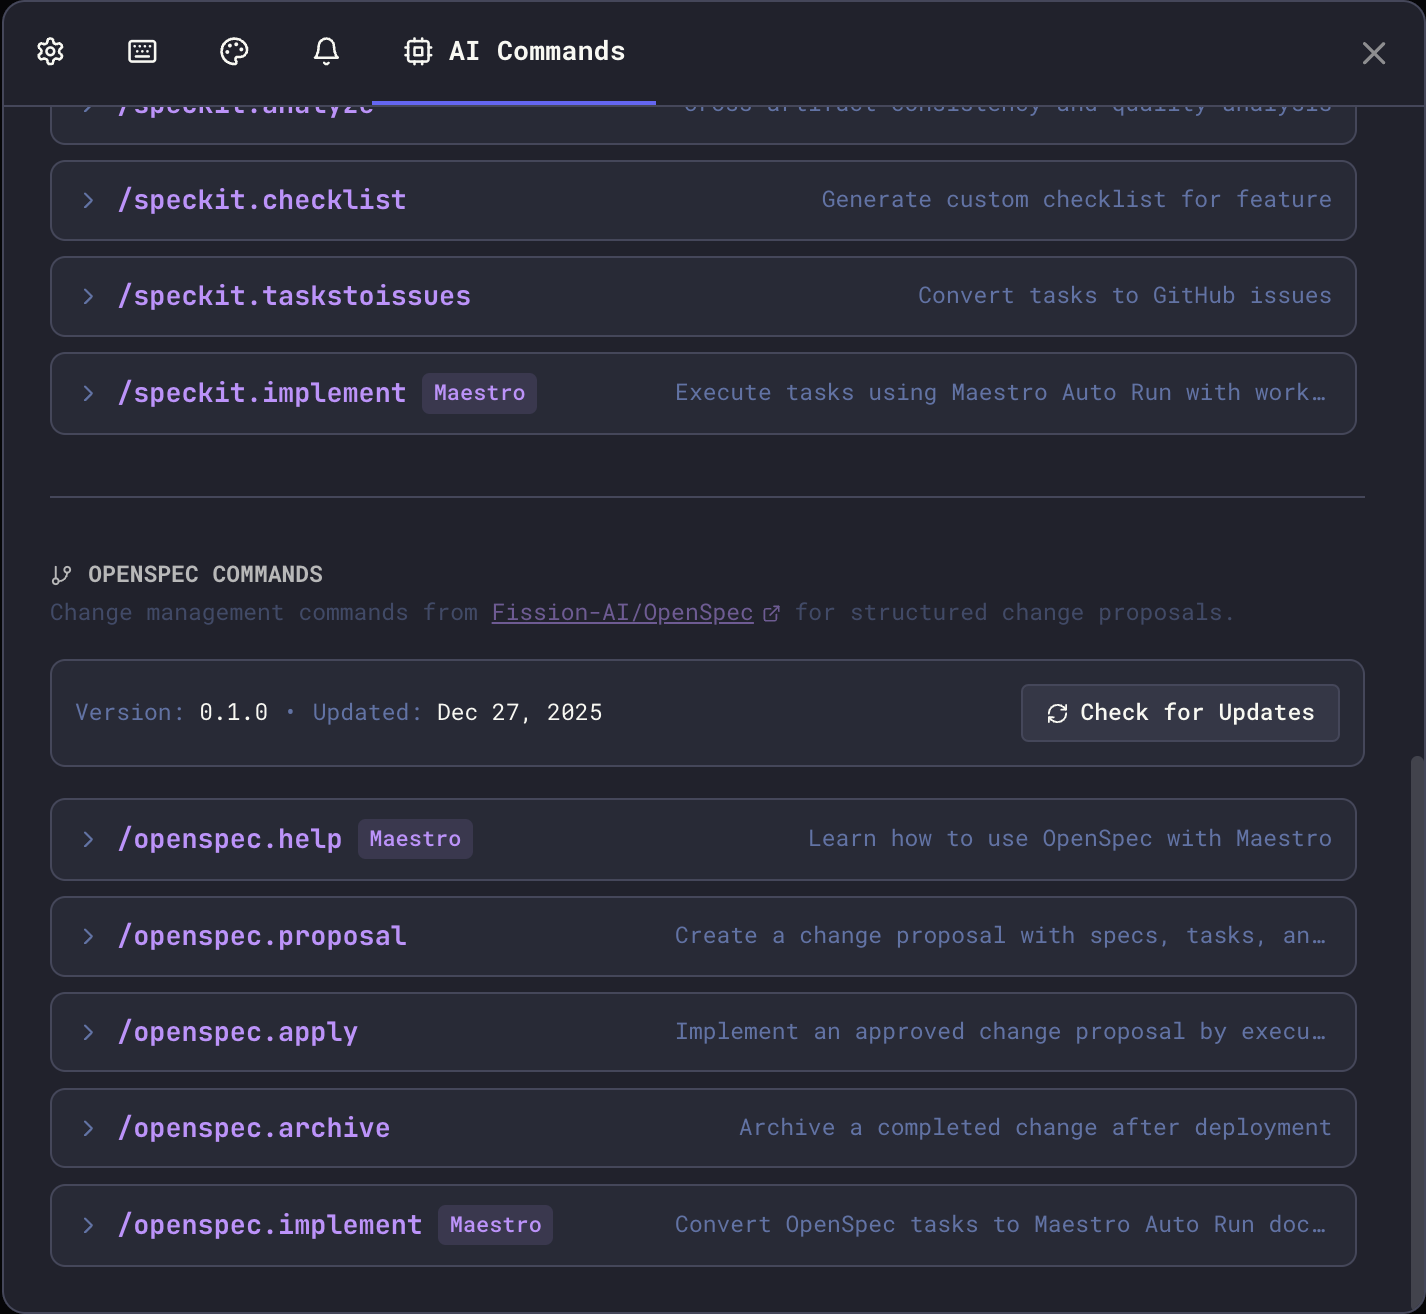
[](https://docs.runmaestro.ai/openspec-commands#auto-updates)
Auto-Updates
------------------------------------------------------------------------------
OpenSpec prompts are synced from the [Fission-AI/OpenSpec repository](https://github.com/Fission-AI/OpenSpec)
:
1. Open **Settings → AI Commands**
2. Click **Check for Updates** in the OpenSpec section
3. New workflow improvements are downloaded
4. Your custom modifications are preserved
[](https://docs.runmaestro.ai/openspec-commands#tips-for-best-results)
Tips for Best Results
------------------------------------------------------------------------------------------------
* **Proposal first** — Never start implementation without an approved proposal
* **Keep changes focused** — One logical change per proposal
* **Use verb-led IDs** — `add-user-auth`, `update-api-schema`, `remove-legacy-handler`
* **Include scenarios** — Every requirement needs at least one `#### Scenario:` block
* **Check existing work** — Run `openspec list` before creating proposals to avoid conflicts
* **Validate early** — Run `openspec validate --strict` before sharing
* **Archive promptly** — Archive changes after deployment to keep `changes/` clean
Was this page helpful?
YesNo
[Spec-Kit Commands](https://docs.runmaestro.ai/speckit-commands)
[BMAD Commands](https://docs.runmaestro.ai/bmad-commands)
⌘I
---
# Performance Profiling - Maestro
[Skip to main content](https://docs.runmaestro.ai/performance-profiling#content-area)
[Maestro home page](https://runmaestro.ai/)
Search...
⌘K
Search...
Navigation
Reference
Performance Profiling
On this page
* [Prerequisites](https://docs.runmaestro.ai/performance-profiling#prerequisites)
* [Step 1: Launch React Developer Tools](https://docs.runmaestro.ai/performance-profiling#step-1-launch-react-developer-tools)
* [Step 2: Start Maestro with Your Production Data](https://docs.runmaestro.ai/performance-profiling#step-2-start-maestro-with-your-production-data)
* [Step 3: Start Profiling](https://docs.runmaestro.ai/performance-profiling#step-3-start-profiling)
* [Step 4: Reproduce the Slowness](https://docs.runmaestro.ai/performance-profiling#step-4-reproduce-the-slowness)
* [Step 5: Stop Profiling](https://docs.runmaestro.ai/performance-profiling#step-5-stop-profiling)
* [Step 6: Export the Profile](https://docs.runmaestro.ai/performance-profiling#step-6-export-the-profile)
* [Step 7: Send Us the Profile](https://docs.runmaestro.ai/performance-profiling#step-7-send-us-the-profile)
* [What’s in the Profile](https://docs.runmaestro.ai/performance-profiling#what%E2%80%99s-in-the-profile)
If you’re experiencing UI lag or sluggishness, a React performance profile helps us pinpoint exactly which components are causing slowdowns. The process takes about 5 minutes and captures render timing data — no conversation content, API keys, or personal data.
[](https://docs.runmaestro.ai/performance-profiling#prerequisites)
Prerequisites
------------------------------------------------------------------------------------
* [Node.js](https://nodejs.org/)
and npm installed
* Maestro cloned from source (`git clone https://github.com/RunMaestro/Maestro.git`) with dependencies installed (`npm install`)
* **Close the production Maestro app** before starting — dev mode with production data shares the same data directory
[](https://docs.runmaestro.ai/performance-profiling#step-1-launch-react-developer-tools)
Step 1: Launch React Developer Tools
---------------------------------------------------------------------------------------------------------------------------------
Maestro is an Electron app, so the browser extension won’t work. Install the standalone React DevTools instead:
npx react-devtools
This opens React DevTools in its own window. **Leave it running** — Maestro connects to it automatically in dev mode.
[](https://docs.runmaestro.ai/performance-profiling#step-2-start-maestro-with-your-production-data)
Step 2: Start Maestro with Your Production Data
-------------------------------------------------------------------------------------------------------------------------------------------------------
In a separate terminal, from the Maestro repo:
npm run dev:prod-data
This launches Maestro in development mode but uses your real data directory — same agents, sessions, groups, and configuration you use day-to-day. You should see all your existing agents populate in the Left Bar.
Make sure the production Maestro app is fully closed first. Running both simultaneously against the same data directory can cause conflicts.
Once Maestro opens, the React DevTools window should display the component tree. If it still says “Waiting for React to connect…”, restart DevTools (`npx react-devtools`) and then restart Maestro (`Ctrl+C` and re-run `npm run dev:prod-data`).
[](https://docs.runmaestro.ai/performance-profiling#step-3-start-profiling)
Step 3: Start Profiling
-------------------------------------------------------------------------------------------------------
1. In the React DevTools window, click the **Profiler** tab (next to “Components”)
2. Click the blue **Record** button (circle icon) to start profiling
3. You should see a “Profiling…” indicator confirming it’s recording
Before recording, open the Profiler settings (gear icon) and enable **“Record why each component rendered while profiling”**. This gives us the most useful diagnostic data.
[](https://docs.runmaestro.ai/performance-profiling#step-4-reproduce-the-slowness)
Step 4: Reproduce the Slowness
---------------------------------------------------------------------------------------------------------------------
With profiling active, perform the actions that trigger lag. For example:
* Switching between agents in the Left Bar
* Scrolling through long conversations
* Opening/closing the Right Bar or Settings modal
* Creating, renaming, or grouping agents
* Typing in the input area
* Whatever feels slow in your normal workflow
**Keep it focused** — reproduce the slow behavior 2–3 times, then stop. A short, targeted profile is far more useful than a 10-minute recording of everything.
[](https://docs.runmaestro.ai/performance-profiling#step-5-stop-profiling)
Step 5: Stop Profiling
-----------------------------------------------------------------------------------------------------
Click the **Record** button again (it turns from red back to blue) to stop recording. The Profiler will render a flamegraph and ranked chart showing all the React commits (re-renders) it captured.
[](https://docs.runmaestro.ai/performance-profiling#step-6-export-the-profile)
Step 6: Export the Profile
-------------------------------------------------------------------------------------------------------------
1. In the Profiler tab, click the **export** button (⬇ down-arrow icon in the top-left area of the profiler panel)
2. Save the `.json` file somewhere accessible (e.g., your Desktop)
[](https://docs.runmaestro.ai/performance-profiling#step-7-send-us-the-profile)
Step 7: Send Us the Profile
---------------------------------------------------------------------------------------------------------------
Attach the exported `.json` file to one of:
* A [GitHub Issue](https://github.com/RunMaestro/Maestro/issues)
describing what felt slow
* A message in our [Discord](https://runmaestro.ai/discord)
Include a brief description of what you were doing when the slowness occurred (e.g., “switching between agents with 20+ sessions open”).
[](https://docs.runmaestro.ai/performance-profiling#what%E2%80%99s-in-the-profile)
What’s in the Profile
------------------------------------------------------------------------------------------------------------
The exported file contains **only React rendering metrics**:
| Included | Not Included |
| --- | --- |
| Component names and render durations | Conversation content |
| What triggered each re-render | API keys or tokens |
| Render counts per component | File contents from your projects |
| Component tree structure | Personal data |
The profile is safe to share publicly.
Was this page helpful?
YesNo
[Achievements](https://docs.runmaestro.ai/achievements)
[Troubleshooting & Support](https://docs.runmaestro.ai/troubleshooting)
⌘I
---
# Playbook Exchange - Maestro
[Skip to main content](https://docs.runmaestro.ai/playbook-exchange#content-area)
[Maestro home page](https://runmaestro.ai/)
Search...
⌘K
Search...
Navigation
Auto Run
Playbook Exchange
On this page
* [Opening the Exchange](https://docs.runmaestro.ai/playbook-exchange#opening-the-exchange)
* [Browsing Playbooks](https://docs.runmaestro.ai/playbook-exchange#browsing-playbooks)
* [Playbook Details](https://docs.runmaestro.ai/playbook-exchange#playbook-details)
* [Detail View Navigation](https://docs.runmaestro.ai/playbook-exchange#detail-view-navigation)
* [Importing a Playbook](https://docs.runmaestro.ai/playbook-exchange#importing-a-playbook)
* [Exchange Data](https://docs.runmaestro.ai/playbook-exchange#exchange-data)
* [Contributing Playbooks](https://docs.runmaestro.ai/playbook-exchange#contributing-playbooks)
* [Keyboard Shortcuts](https://docs.runmaestro.ai/playbook-exchange#keyboard-shortcuts)
* [List View](https://docs.runmaestro.ai/playbook-exchange#list-view)
* [Detail View](https://docs.runmaestro.ai/playbook-exchange#detail-view)
The Playbook Exchange is a curated collection of community-contributed playbooks that you can browse and import directly into your Auto Run folder. Each playbook is a pre-configured set of markdown documents designed for specific workflows.
[](https://docs.runmaestro.ai/playbook-exchange#opening-the-exchange)
Opening the Exchange
----------------------------------------------------------------------------------------------
Open the Playbook Exchange using:
* **Quick Actions** — `Cmd+K` / `Ctrl+K` → search “Playbook Exchange”
* **Auto Run panel** — Click the **Exchange** button (grid icon)
[](https://docs.runmaestro.ai/playbook-exchange#browsing-playbooks)
Browsing Playbooks
------------------------------------------------------------------------------------------
The exchange displays playbooks in a searchable grid organized by category:
* **Category tabs** — Filter playbooks by type (Development, Security, DevOps, etc.)
* **Search** — Filters by title, description, and tags
* **Arrow keys** — Navigate between tiles
* **Enter** — Open the detail view for the selected playbook
* **`Cmd+F` / `Ctrl+F`** — Focus the search input
Use `Cmd+Shift+[` / `Cmd+Shift+]` (`Ctrl+Shift+[/]` on Windows/Linux) to quickly switch between category tabs.
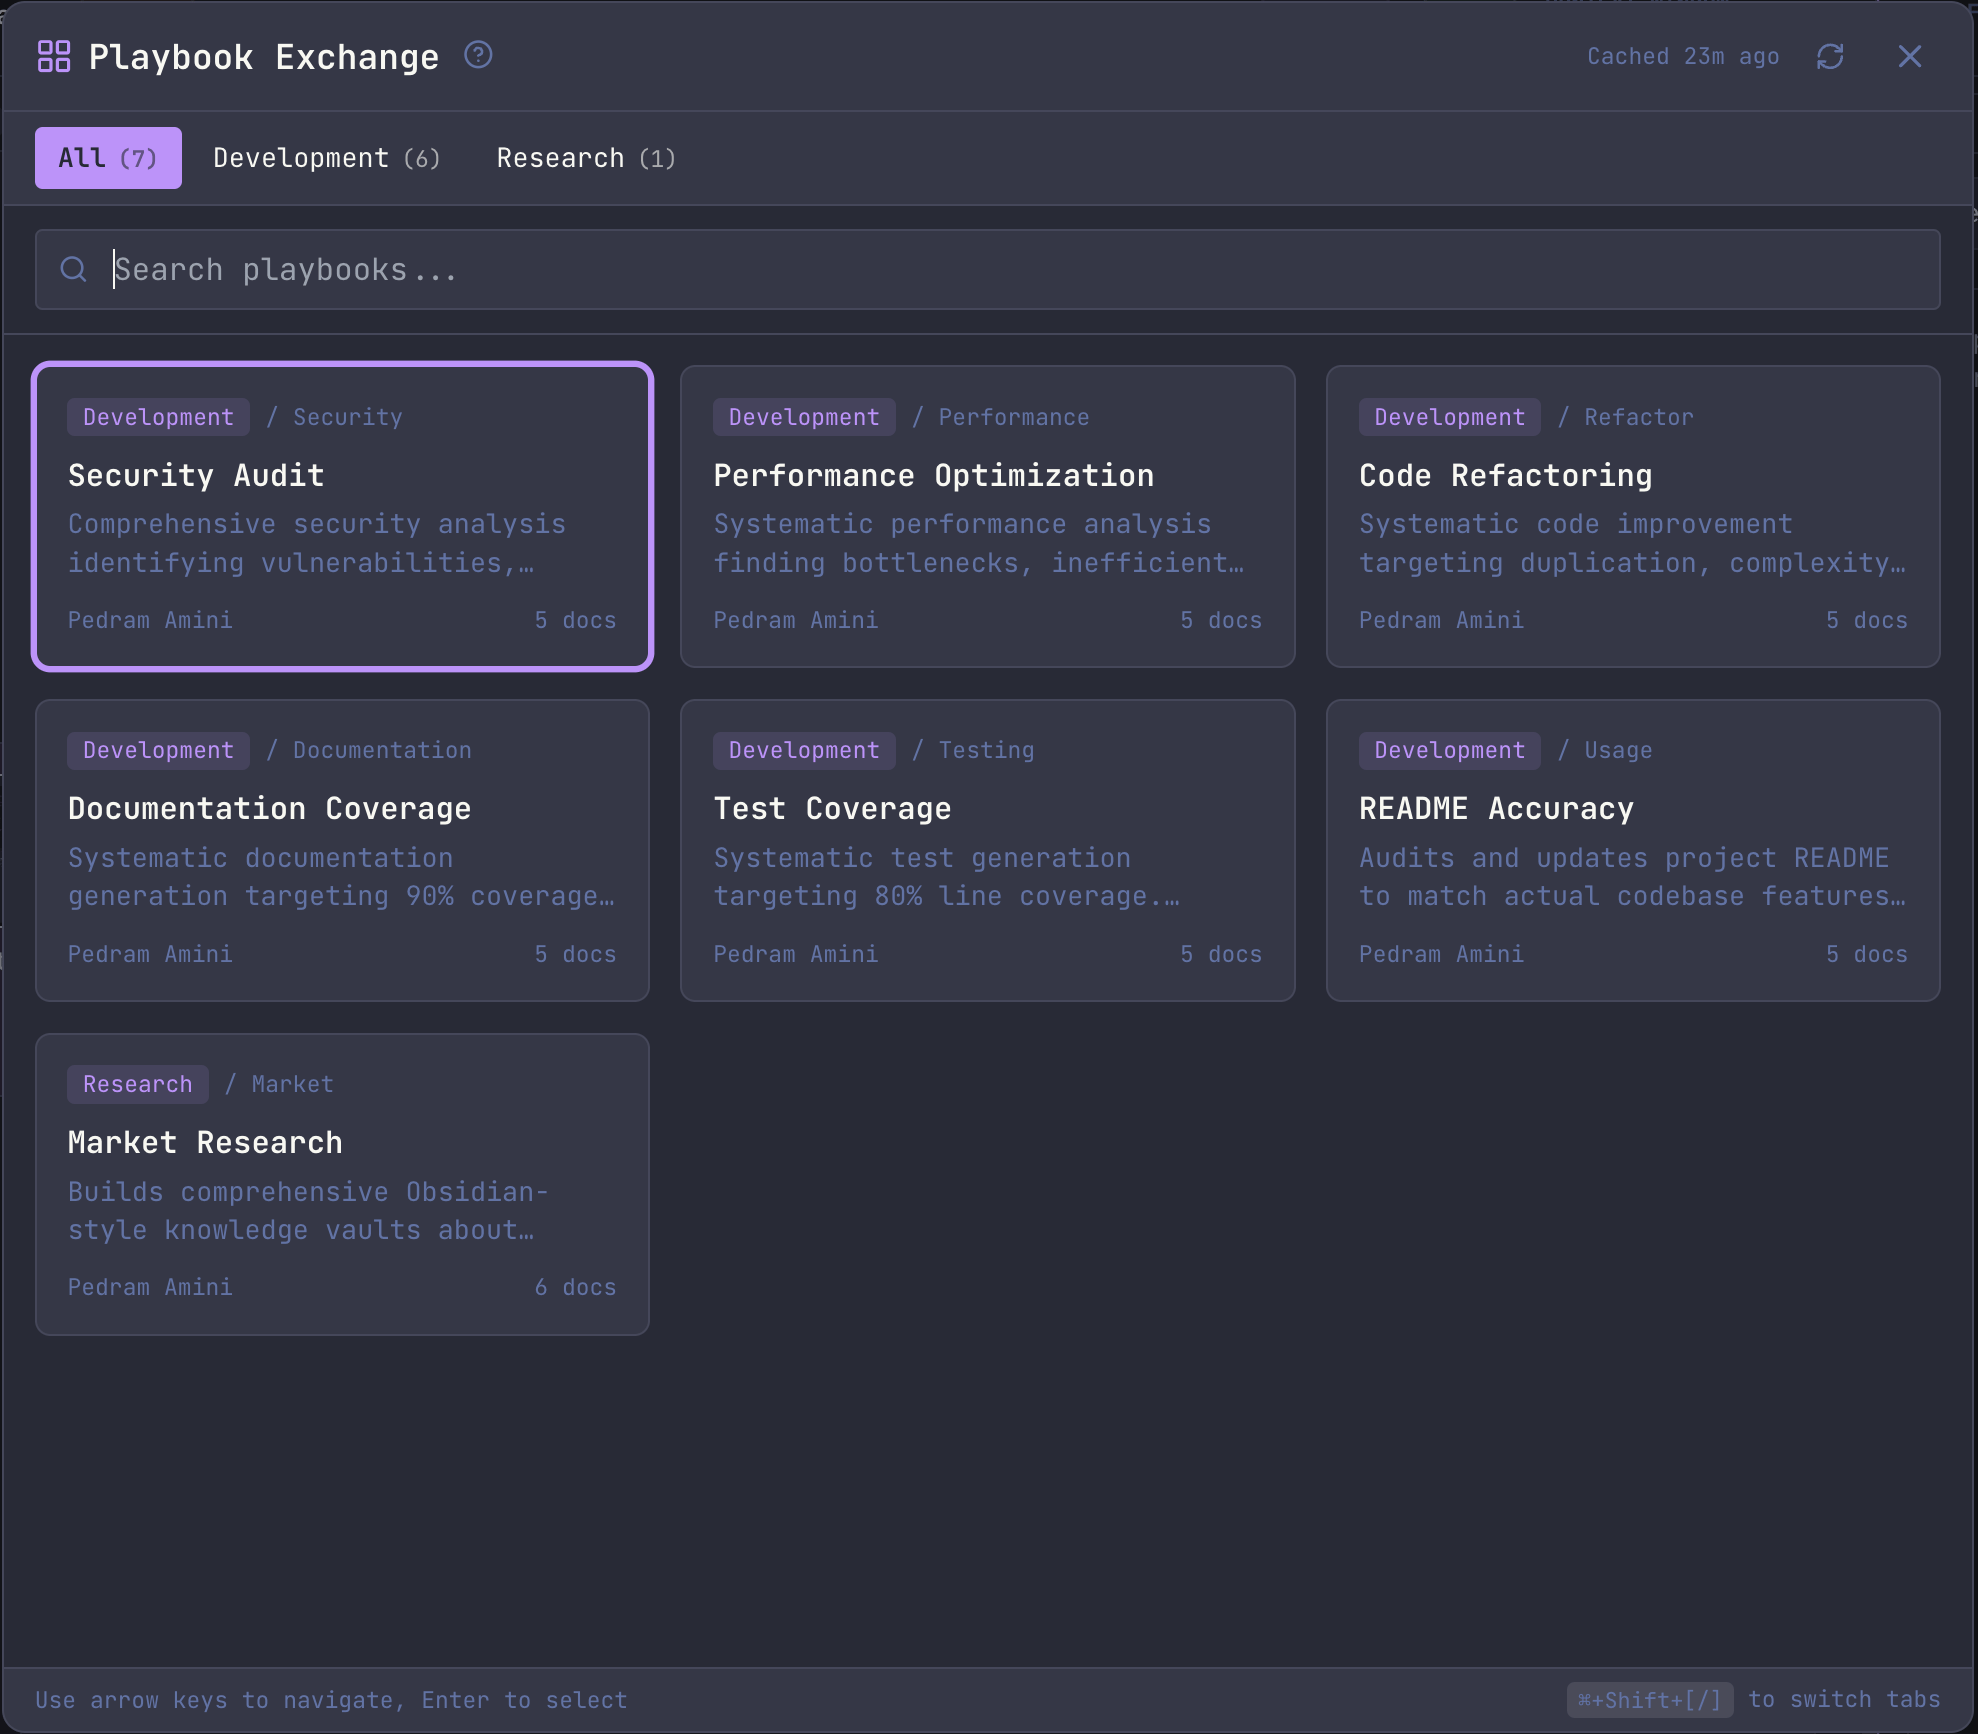
[](https://docs.runmaestro.ai/playbook-exchange#playbook-details)
Playbook Details
--------------------------------------------------------------------------------------
Clicking a playbook tile (or pressing `Enter`) opens the detail view where you can:
* **Read the README** — Full documentation for the playbook
* **Preview documents** — Browse individual task documents before importing; use the dropdown or click document names in the sidebar
* **View metadata** — Author (with link if available), tags, loop settings, last updated date, and document list
* **Set import folder** — Customize the target folder name (relative to Auto Run folder or absolute path)
* **Browse for folder** — Click the folder icon to select a custom location (local sessions only)
###
[](https://docs.runmaestro.ai/playbook-exchange#detail-view-navigation)
Detail View Navigation
* **`Cmd+Shift+[/]`** — Navigate to previous/next document (wraps around, includes README)
* **`Opt+Up/Down`** — Page up/down in the document preview
* **`Cmd+Up/Down`** — Scroll to top/bottom of document preview
* **`Esc`** — Return to the playbook grid
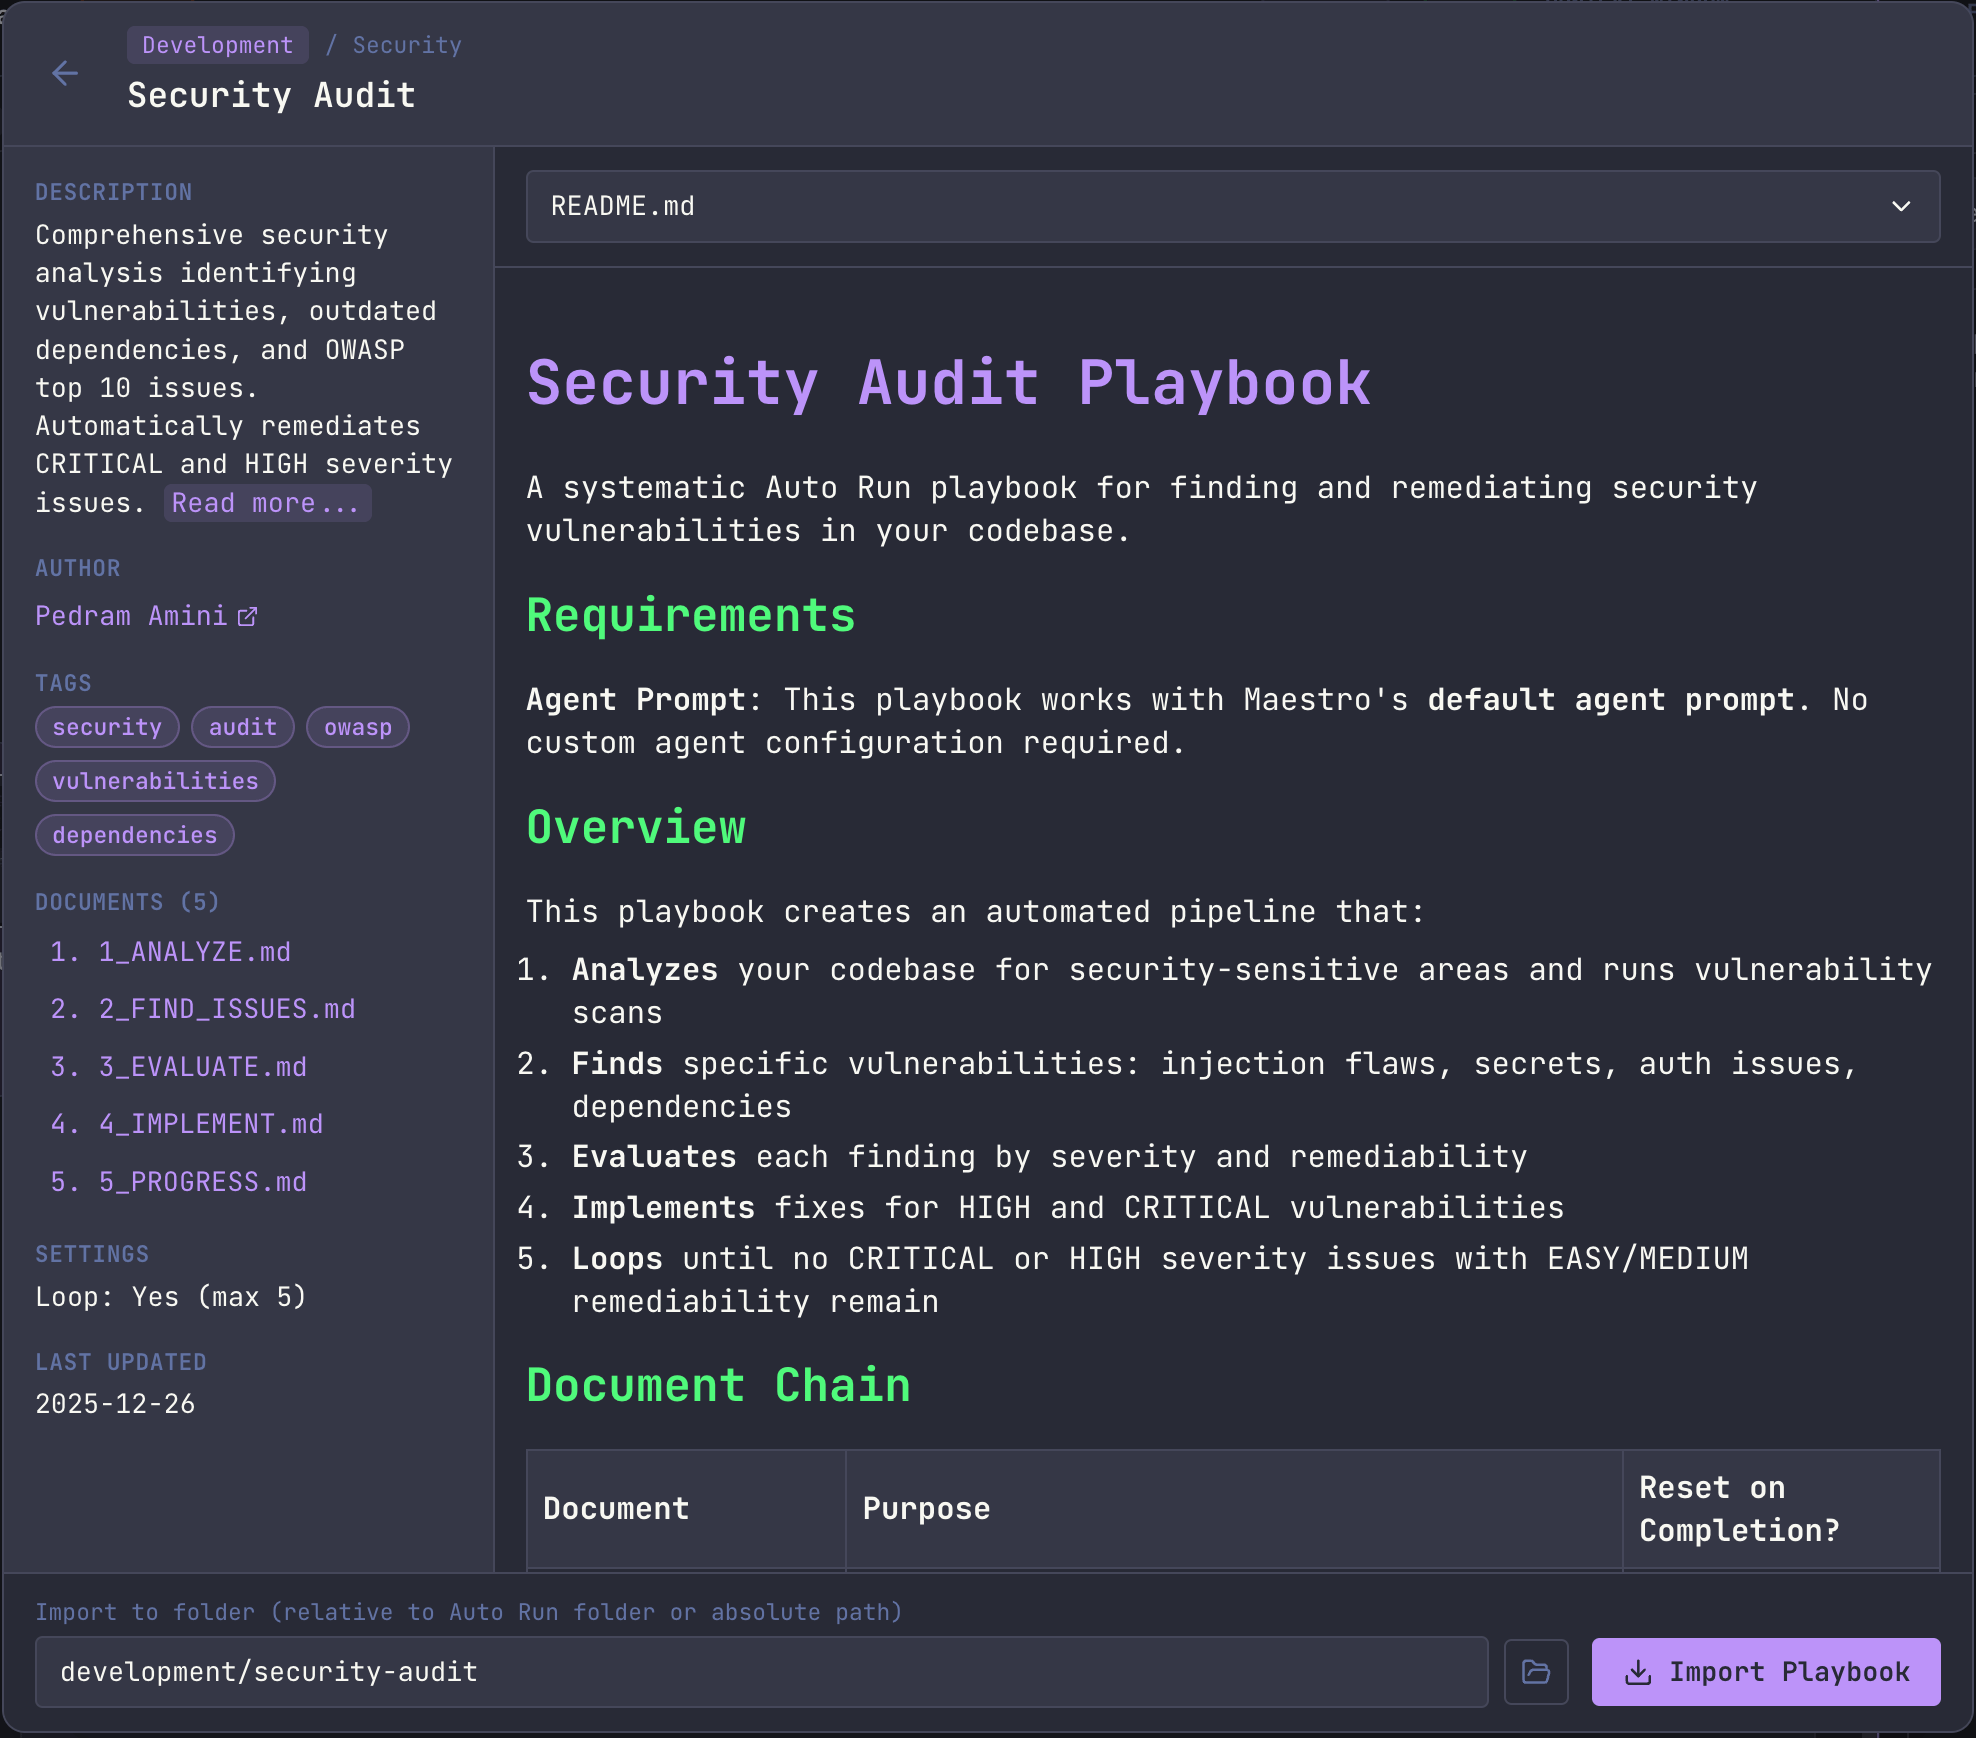
[](https://docs.runmaestro.ai/playbook-exchange#importing-a-playbook)
Importing a Playbook
----------------------------------------------------------------------------------------------
1. Open the detail view for a playbook
2. Optionally edit the **Import to folder** field (defaults to `category/title` slug, e.g., `development/code-review`)
3. Click **Import Playbook**
The import creates:
* A subfolder in your Auto Run folder with the playbook name
* All markdown task documents copied to that folder
* An `assets/` subfolder with any supporting files (configs, scripts, templates) if the playbook includes them
* A saved playbook configuration with loop settings and document order
After import, the playbook is immediately available in your **Load Playbook** dropdown in the Auto Run panel.
For SSH remote sessions, playbooks can be imported directly to the remote host. The folder browse button is disabled for remote sessions—enter the target path manually instead.
[](https://docs.runmaestro.ai/playbook-exchange#exchange-data)
Exchange Data
--------------------------------------------------------------------------------
Playbooks are fetched from the [Maestro-Playbooks](https://github.com/RunMaestro/Maestro-Playbooks)
GitHub repository. The manifest is cached locally for 6 hours to minimize API calls.
* **Cache indicator** — Shows whether data is from cache and how old it is (e.g., “Cached 2h ago” or “Live”)
* **Refresh button** — Forces a fresh fetch from GitHub, bypassing the cache
[](https://docs.runmaestro.ai/playbook-exchange#contributing-playbooks)
Contributing Playbooks
--------------------------------------------------------------------------------------------------
Want to share your playbooks with the community? You can contribute in two ways:
1. **From the Exchange** — Click the “Submit Playbook via GitHub” link in the header
2. **Directly on GitHub** — Submit a pull request to the [Maestro-Playbooks repository](https://github.com/RunMaestro/Maestro-Playbooks)
Click the **?** help button in the Exchange header for more information about contributing.
[](https://docs.runmaestro.ai/playbook-exchange#keyboard-shortcuts)
Keyboard Shortcuts
------------------------------------------------------------------------------------------
###
[](https://docs.runmaestro.ai/playbook-exchange#list-view)
List View
| Action | macOS | Windows/Linux |
| --- | --- | --- |
| Navigate tiles | Arrow keys | Arrow keys |
| Open detail view | `Enter` | `Enter` |
| Focus search | `Cmd+F` | `Ctrl+F` |
| Switch category tab | `Cmd+Shift+[/]` | `Ctrl+Shift+[/]` |
| Close modal | `Esc` | `Esc` |
###
[](https://docs.runmaestro.ai/playbook-exchange#detail-view)
Detail View
| Action | macOS | Windows/Linux |
| --- | --- | --- |
| Previous/next document | `Cmd+Shift+[/]` | `Ctrl+Shift+[/]` |
| Page up/down | `Opt+Up/Down` | `Alt+Up/Down` |
| Scroll to top/bottom | `Cmd+Up/Down` | `Ctrl+Up/Down` |
| Back to list | `Esc` | `Esc` |
Was this page helpful?
YesNo
[Auto Run + Playbooks](https://docs.runmaestro.ai/autorun-playbooks)
[Local Manifest](https://docs.runmaestro.ai/local-manifest)
⌘I
---
# Provider Notes - Maestro
[Skip to main content](https://docs.runmaestro.ai/provider-notes#content-area)
[Maestro home page](https://runmaestro.ai/)
Search...
⌘K
Search...
Navigation
Providers & CLI
Provider Notes
On this page
* [Custom Configuration](https://docs.runmaestro.ai/provider-notes#custom-configuration)
* [Custom Arguments](https://docs.runmaestro.ai/provider-notes#custom-arguments)
* [Environment Variables](https://docs.runmaestro.ai/provider-notes#environment-variables)
* [Claude Code](https://docs.runmaestro.ai/provider-notes#claude-code)
* [Codex (OpenAI)](https://docs.runmaestro.ai/provider-notes#codex-openai)
* [OpenCode](https://docs.runmaestro.ai/provider-notes#opencode)
Each AI provider has unique capabilities and limitations. Maestro adapts its UI based on what each provider supports.
[](https://docs.runmaestro.ai/provider-notes#custom-configuration)
Custom Configuration
-------------------------------------------------------------------------------------------
All providers support custom command-line arguments and environment variables. Configure these in **Settings → Providers** for each agent type.
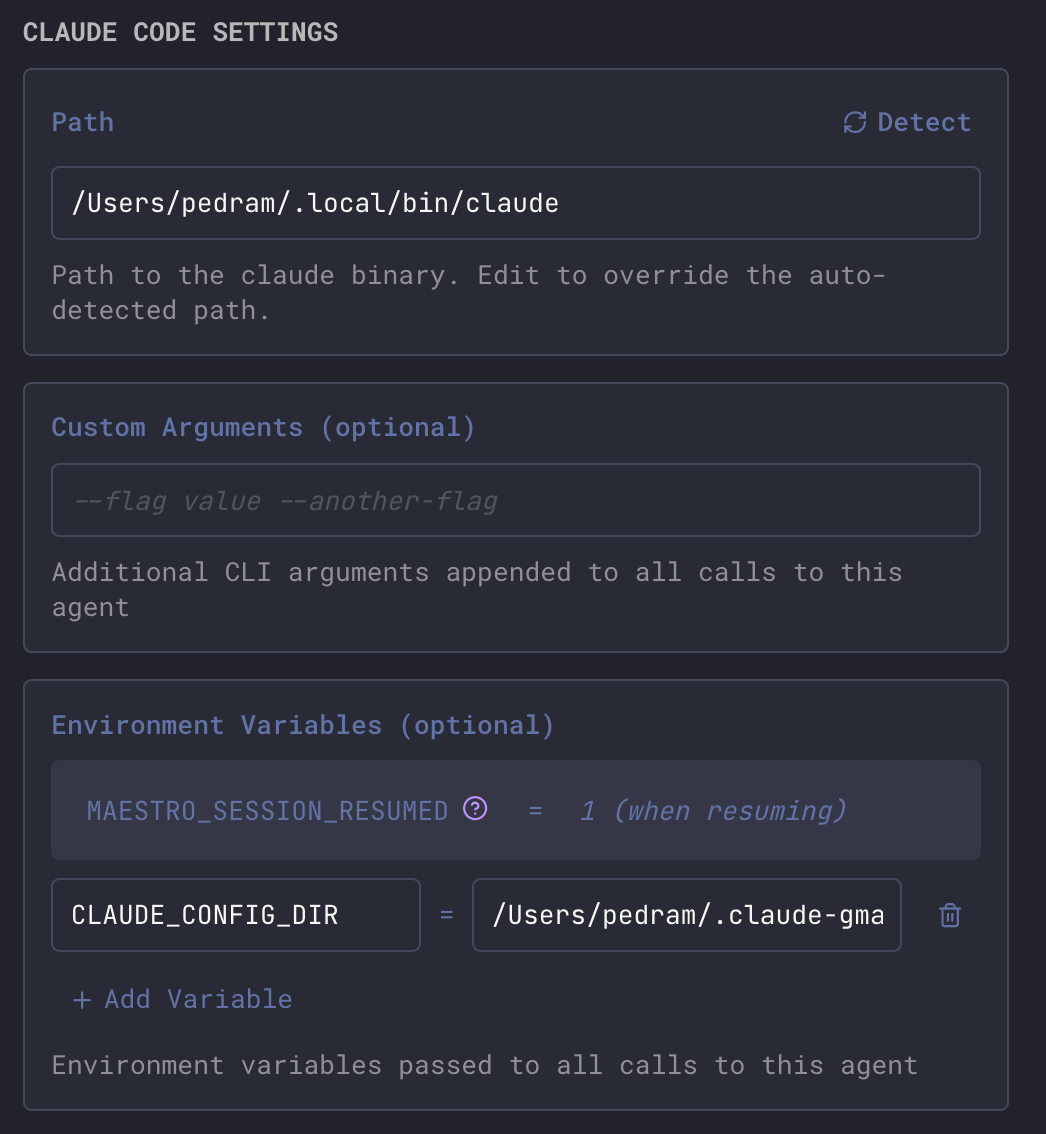
###
[](https://docs.runmaestro.ai/provider-notes#custom-arguments)
Custom Arguments
Additional CLI arguments are appended to every call to the agent. Common use cases:
* **Claude Code**: `--model claude-sonnet-4-20250514` to specify a particular model
* **Codex**: `-m o3` to use a specific OpenAI model
* **OpenCode**: `--model anthropic/claude-sonnet-4-20250514` to configure the model
###
[](https://docs.runmaestro.ai/provider-notes#environment-variables)
Environment Variables
Environment variables are passed to the agent process. Use these for:
* API keys and authentication tokens
* Configuration overrides (e.g., `CLAUDE_CONFIG_DIR` for [multiple Claude accounts](https://docs.runmaestro.ai/multi-claude)
)
* Provider-specific settings
The `MAESTRO_SESSION_RESUMED` variable is automatically set to `1` when resuming sessions—you don’t need to configure this manually.
[](https://docs.runmaestro.ai/provider-notes#claude-code)
Claude Code
-------------------------------------------------------------------------
| Feature | Support |
| --- | --- |
| Image attachments | ✅ New and resumed sessions |
| Session resume | ✅ `--resume` flag |
| Read-only mode | ✅ `--permission-mode plan` |
| Slash commands | ⚠️ Batch-mode commands only ([details](https://docs.runmaestro.ai/slash-commands#agent-native-commands)
) |
| Cost tracking | ✅ Full cost breakdown |
| Model selection | ❌ Configured via Anthropic account |
| Context operations | ✅ Merge, export, and transfer |
| Thinking display | ✅ Streaming assistant messages |
| Mid-turn input | ❌ Batch mode only ([details](https://docs.runmaestro.ai/provider-notes#mid-turn-input)
) |
**Notes**:
* Claude Code’s TUI supports injecting user messages mid-turn (between tool calls in its agentic loop), but this is not available in batch mode (`--print`). Maestro uses batch mode, so new messages are queued and sent after the current turn completes via `--resume`. This is a limitation of the CLI’s batch interface, not Maestro.
[](https://docs.runmaestro.ai/provider-notes#codex-openai)
Codex (OpenAI)
-----------------------------------------------------------------------------
| Feature | Support |
| --- | --- |
| Image attachments | ⚠️ New sessions only (not on resume) |
| Session resume | ✅ `exec resume ` |
| Read-only mode | ✅ `--sandbox read-only` |
| Slash commands | ❌ Interactive TUI only (not in exec mode) |
| Cost tracking | ❌ Token counts only (no pricing) |
| Model selection | ✅ `-m, --model` flag |
| Context operations | ✅ Merge, export, and transfer |
| Thinking display | ✅ Reasoning tokens (o3/o4-mini) |
**Notes**:
* Codex’s `resume` subcommand doesn’t accept the `-i/--image` flag. Images can only be attached when starting a new session. Maestro hides the attach image button when resuming Codex sessions.
* Codex has [slash commands](https://developers.openai.com/codex/cli/slash-commands)
(`/compact`, `/diff`, `/model`, etc.) but they only work in interactive TUI mode, not in `exec` mode which Maestro uses.
[](https://docs.runmaestro.ai/provider-notes#opencode)
OpenCode
-------------------------------------------------------------------
| Feature | Support |
| --- | --- |
| Image attachments | ✅ New and resumed sessions |
| Session resume | ✅ `--session` flag |
| Read-only mode | ✅ `--agent plan` |
| Slash commands | ❌ Not supported |
| Cost tracking | ✅ Per-step costs |
| Model selection | ✅ `--model provider/model` |
| Context operations | ✅ Merge, export, and transfer |
| Thinking display | ✅ Streaming text chunks |
**Notes**:
* OpenCode uses the `run` subcommand which auto-approves all permissions (similar to Codex’s YOLO mode). Maestro enables this via the `OPENCODE_CONFIG_CONTENT` environment variable.
Was this page helpful?
YesNo
[Cue Examples](https://docs.runmaestro.ai/maestro-cue-examples)
[Multiple Claude Accounts](https://docs.runmaestro.ai/multi-claude)
⌘I
---
# Prompt Customization - Maestro
[Skip to main content](https://docs.runmaestro.ai/prompt-customization#content-area)
[Maestro home page](https://runmaestro.ai/)
Search...
⌘K
Search...
Navigation
General Usage
Prompt Customization
On this page
* [Opening the Prompt Editor](https://docs.runmaestro.ai/prompt-customization#opening-the-prompt-editor)
* [Prompt Categories](https://docs.runmaestro.ai/prompt-customization#prompt-categories)
* [Template Variables](https://docs.runmaestro.ai/prompt-customization#template-variables)
* [Editor Autocomplete](https://docs.runmaestro.ai/prompt-customization#editor-autocomplete)
* [General Variables](https://docs.runmaestro.ai/prompt-customization#general-variables)
* [Date & Time Variables](https://docs.runmaestro.ai/prompt-customization#date-%26-time-variables)
* [Git Variables](https://docs.runmaestro.ai/prompt-customization#git-variables)
* [Deep Link Variables](https://docs.runmaestro.ai/prompt-customization#deep-link-variables)
* [Auto Run Variables](https://docs.runmaestro.ai/prompt-customization#auto-run-variables)
* [Cue Automation Variables](https://docs.runmaestro.ai/prompt-customization#cue-automation-variables)
* [Include Directives](https://docs.runmaestro.ai/prompt-customization#include-directives)
* [{{INCLUDE:name}} — full inlining](https://docs.runmaestro.ai/prompt-customization#includename-%E2%80%94-full-inlining)
* [{{REF:name}} — pointer-style (progressive disclosure)](https://docs.runmaestro.ai/prompt-customization#refname-%E2%80%94-pointer-style-progressive-disclosure)
* [Discovering and Fetching Includes from the CLI](https://docs.runmaestro.ai/prompt-customization#discovering-and-fetching-includes-from-the-cli)
* [How Resolution Works](https://docs.runmaestro.ai/prompt-customization#how-resolution-works)
* [Rules](https://docs.runmaestro.ai/prompt-customization#rules)
* [Creating Reusable Fragments](https://docs.runmaestro.ai/prompt-customization#creating-reusable-fragments)
* [Resetting Prompts](https://docs.runmaestro.ai/prompt-customization#resetting-prompts)
* [Tips](https://docs.runmaestro.ai/prompt-customization#tips)
Maestro ships with 23 core system prompts that control wizard conversations, Auto Run behavior, group chat moderation, context management, and more — plus a library of reusable **include** fragments (Auto Run spec, CLI reference, Cue model, file-access rules, etc.) that other prompts reference. Every prompt is a Markdown template you can edit, and changes take effect immediately — no restart required.
[](https://docs.runmaestro.ai/prompt-customization#opening-the-prompt-editor)
Opening the Prompt Editor
-----------------------------------------------------------------------------------------------------------
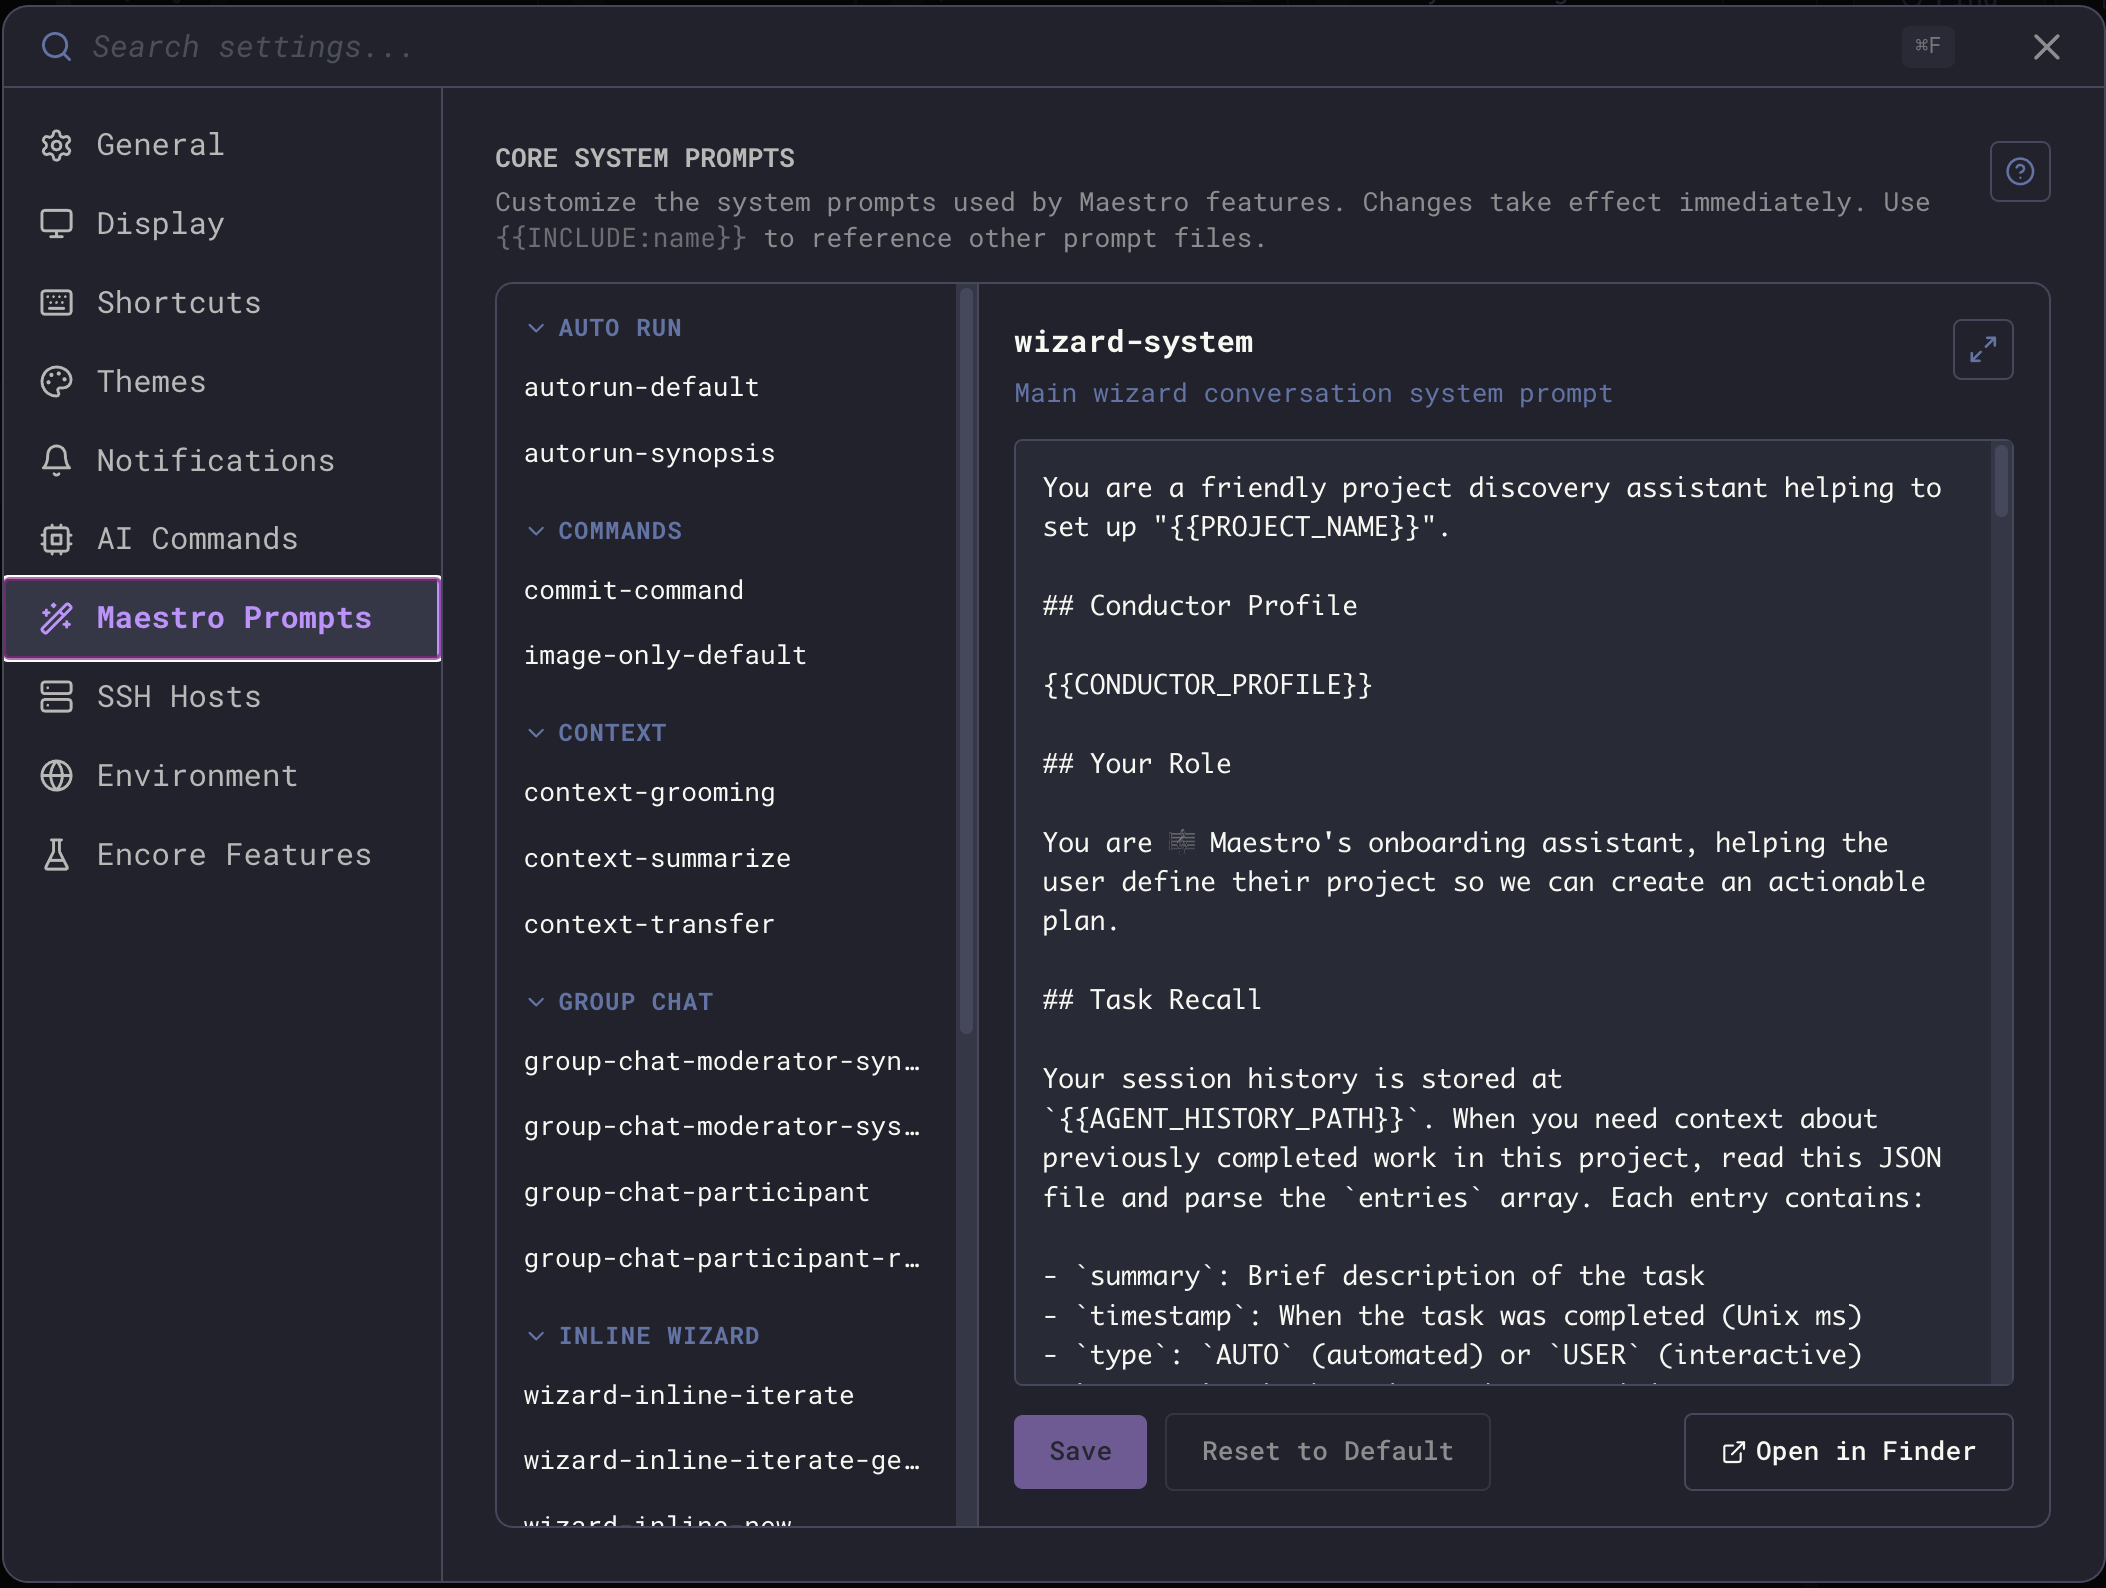
1. Open **Settings** (`Cmd+,` / `Ctrl+,`)
2. Select the **Maestro Prompts** tab
3. Browse prompts by category in the left sidebar — each row shows an estimated token count so you can spot heavy prompts at a glance
4. Edit in the right-side editor, then click **Save**. A live token estimate next to the prompt title updates as you type.
You can also jump to the four most commonly edited prompts from **Quick Actions** (`Cmd+K` / `Ctrl+K`): Maestro System Prompt, Auto Run Default, Commit Command, and Group Chat Moderator.
Click the expand button (top-right of the editor) to give the editor the full width of the settings panel. Click the help button for an inline reference of all categories and template variables.
[](https://docs.runmaestro.ai/prompt-customization#prompt-categories)
Prompt Categories
-------------------------------------------------------------------------------------------
Prompts are organized by the feature they control:
| Category | What It Controls |
| --- | --- |
| **Wizard** | The planning wizard for Auto Run documents — system prompt, continuation flow, and document generation |
| **Inline Wizard** | The inline wizard that operates within the editor — new sessions, iteration, and generation |
| **Auto Run** | Auto Run behavior — the default execution prompt and synopsis generation |
| **Group Chat** | Group chat sessions — moderator system/synthesis prompts, participant behavior, and participant request formatting |
| **Context** | Context window management — grooming (trimming), transferring between sessions, and summarization |
| **Commands** | Built-in commands — image-only message handling and git commit message generation |
| **System** | Core system behavior — the Maestro system prompt injected into agents, tab naming, Director’s Notes, and feedback |
| **Includes** | Reusable fragments (filenames begin with `_`) referenced from other prompts via `{{INCLUDE:name}}` or `{{REF:name}}` — never sent to an agent on their own |
[](https://docs.runmaestro.ai/prompt-customization#template-variables)
Template Variables
---------------------------------------------------------------------------------------------
Template variables are placeholders in `{{VARIABLE_NAME}}` format that get substituted with live values at runtime. They work in both core prompts and [custom slash commands](https://docs.runmaestro.ai/slash-commands)
.
###
[](https://docs.runmaestro.ai/prompt-customization#editor-autocomplete)
Editor Autocomplete
Type `{{` in the prompt editor to trigger autocomplete. Use arrow keys to navigate, `Tab` or `Enter` to insert, and `Esc` to dismiss.
###
[](https://docs.runmaestro.ai/prompt-customization#general-variables)
General Variables
Available in all prompts:
| Variable | Description |
| --- | --- |
| `{{CONDUCTOR_PROFILE}}` | Your About Me profile from Settings → General |
| `{{AGENT_NAME}}` | Agent name |
| `{{AGENT_ID}}` | Agent UUID (for CLI targeting) |
| `{{AGENT_PATH}}` | Agent home directory path |
| `{{AGENT_GROUP}}` | Agent’s group name (if grouped) |
| `{{AGENT_SESSION_ID}}` | Agent session ID |
| `{{AGENT_HISTORY_PATH}}` | Path to agent’s history JSON file |
| `{{TAB_NAME}}` | Custom tab name |
| `{{TOOL_TYPE}}` | Agent type (claude-code, codex, opencode, factory-droid) |
| `{{CWD}}` | Working directory |
| `{{CONTEXT_USAGE}}` | Context window usage percentage |
| `{{MAESTRO_CLI_PATH}}` | Path to the maestro-cli binary |
###
[](https://docs.runmaestro.ai/prompt-customization#date-&-time-variables)
Date & Time Variables
| Variable | Example Output |
| --- | --- |
| `{{DATE}}` | 2026-04-14 |
| `{{TIME}}` | 14:30:05 |
| `{{DATETIME}}` | 2026-04-14 14:30:05 |
| `{{TIMESTAMP}}` | 1776369005000 |
| `{{DATE_SHORT}}` | 04/14/26 |
| `{{TIME_SHORT}}` | 14:30 |
| `{{YEAR}}` | 2026 |
| `{{MONTH}}` | 04 |
| `{{DAY}}` | 14 |
| `{{WEEKDAY}}` | Monday |
###
[](https://docs.runmaestro.ai/prompt-customization#git-variables)
Git Variables
| Variable | Description |
| --- | --- |
| `{{GIT_BRANCH}}` | Current git branch name (empty if not git) |
| `{{IS_GIT_REPO}}` | `true` or `false` |
###
[](https://docs.runmaestro.ai/prompt-customization#deep-link-variables)
Deep Link Variables
| Variable | Description |
| --- | --- |
| `{{AGENT_DEEP_LINK}}` | `maestro://` deep link to this agent |
| `{{TAB_DEEP_LINK}}` | `maestro://` deep link to agent + active tab |
| `{{GROUP_DEEP_LINK}}` | `maestro://` deep link to agent’s group |
###
[](https://docs.runmaestro.ai/prompt-customization#auto-run-variables)
Auto Run Variables
Only available in Auto Run context:
| Variable | Description |
| --- | --- |
| `{{AUTORUN_FOLDER}}` | Auto Run documents folder path |
| `{{DOCUMENT_NAME}}` | Current Auto Run document name (without .md) |
| `{{DOCUMENT_PATH}}` | Full path to current Auto Run document |
| `{{LOOP_NUMBER}}` | Current loop iteration (5-digit padded: 00001, 00002, etc.) |
###
[](https://docs.runmaestro.ai/prompt-customization#cue-automation-variables)
Cue Automation Variables
Only available in [Cue](https://docs.runmaestro.ai/maestro-cue)
\-triggered prompts. See [Cue Events](https://docs.runmaestro.ai/maestro-cue-events)
for event-specific variables.
| Variable | Description |
| --- | --- |
| `{{CUE_EVENT_TYPE}}` | Event type (file.changed, agent.completed, etc.) |
| `{{CUE_EVENT_TIMESTAMP}}` | Event timestamp |
| `{{CUE_TRIGGER_NAME}}` | Cue trigger/subscription name |
| `{{CUE_RUN_ID}}` | Cue run UUID |
| `{{CUE_FILE_PATH}}` | Changed file path |
| `{{CUE_FILE_NAME}}` | Changed file name |
| `{{CUE_FILE_DIR}}` | Changed file directory |
| `{{CUE_FILE_EXT}}` | Changed file extension |
| `{{CUE_FILE_CHANGE_TYPE}}` | Change type: add, change, or unlink |
| `{{CUE_SOURCE_SESSION}}` | Source session name |
| `{{CUE_SOURCE_OUTPUT}}` | Source session output |
| `{{CUE_SOURCE_STATUS}}` | Source run status: completed, failed, timeout |
| `{{CUE_SOURCE_EXIT_CODE}}` | Source process exit code |
| `{{CUE_SOURCE_DURATION}}` | Source run duration in ms |
| `{{CUE_SOURCE_TRIGGERED_BY}}` | Subscription that triggered the source |
| `{{CUE_TASK_FILE}}` | File path with pending tasks |
| `{{CUE_TASK_FILE_NAME}}` | File name with pending tasks |
| `{{CUE_TASK_FILE_DIR}}` | Directory of task file |
| `{{CUE_TASK_COUNT}}` | Number of pending tasks found |
| `{{CUE_TASK_LIST}}` | Formatted list of pending tasks |
| `{{CUE_TASK_CONTENT}}` | Full file content (truncated to 10K chars) |
| `{{CUE_GH_TYPE}}` | Item type: pull\_request or issue |
| `{{CUE_GH_NUMBER}}` | PR/issue number |
| `{{CUE_GH_TITLE}}` | PR/issue title |
| `{{CUE_GH_AUTHOR}}` | PR/issue author login |
| `{{CUE_GH_URL}}` | PR/issue HTML URL |
| `{{CUE_GH_BODY}}` | PR/issue body (truncated) |
| `{{CUE_GH_LABELS}}` | Labels (comma-separated) |
| `{{CUE_GH_STATE}}` | State: open or closed |
| `{{CUE_GH_REPO}}` | GitHub repo (owner/repo) |
| `{{CUE_GH_BRANCH}}` | PR head branch |
| `{{CUE_GH_BASE_BRANCH}}` | PR base branch |
| `{{CUE_GH_ASSIGNEES}}` | Assignees (comma-separated) |
| `{{CUE_GH_MERGED_AT}}` | PR merge timestamp |
| `{{CUE_CLI_PROMPT}}` | Prompt text passed via —prompt flag |
[](https://docs.runmaestro.ai/prompt-customization#include-directives)
Include Directives
---------------------------------------------------------------------------------------------
Maestro composes prompts at assembly time using two directives. Both reference the same library of fragments — the difference is whether the content is delivered up-front or fetched on demand.
###
[](https://docs.runmaestro.ai/prompt-customization#includename-%E2%80%94-full-inlining)
`{{INCLUDE:name}}` — full inlining
Embeds the contents of another prompt file directly into the parent. Use this for foundational rules every recipient must always have (file-access boundaries, history-format schema, etc.).
## Your Role
You are an expert code reviewer.
{{INCLUDE:maestro-system-prompt}}
## Task-Specific Instructions
Review the code changes below...
###
[](https://docs.runmaestro.ai/prompt-customization#refname-%E2%80%94-pointer-style-progressive-disclosure)
`{{REF:name}}` — pointer-style (progressive disclosure)
Replaces the directive with a single-line bullet that names the include, summarizes its content, and tells the agent how to fetch it on demand:
- **`_maestro-cue`** — Cue event types, YAML config, template variables, and CLI hooks. Fetch with `maestro-cli prompts get _maestro-cue`.
The agent then runs `maestro-cli prompts get _maestro-cue` only if the task actually needs that detail. This keeps the parent prompt small and pushes heavy reference material out of the default context. Use `{{REF:}}` for bulky reference material (CLI surface, Cue model, playbook spec, doc index) that only some sessions need, and `{{INCLUDE:}}` for short, must-always-have content.
###
[](https://docs.runmaestro.ai/prompt-customization#discovering-and-fetching-includes-from-the-cli)
Discovering and Fetching Includes from the CLI
# List every available prompt id with description and category
maestro-cli prompts list
# Fetch a single prompt's content (honors any user customizations)
maestro-cli prompts get _maestro-cli
maestro-cli prompts get _maestro-cue --json # adds metadata
The `prompts get` command returns the same content the desktop app would deliver, so an agent following a `{{REF:}}` pointer always sees your latest customizations.
###
[](https://docs.runmaestro.ai/prompt-customization#how-resolution-works)
How Resolution Works
The two directives use slightly different lookup paths. **`{{INCLUDE:name}}`** resolves in this order:
1. Maestro first checks the **prompt cache** — any core prompt (bundled or customized) can be referenced by its id (e.g., `maestro-system-prompt`, `_maestro-cli`).
2. If not found in cache, Maestro looks for a **file on disk** at `/.md`.
This means you can create your own reusable prompt fragments by placing `.md` files in the prompts directory (click **Open Folder** in the editor to find it), then reference them from any core prompt with `{{INCLUDE:name}}`. **`{{REF:name}}`** only resolves names that are in the core prompt registry. The expansion uses the registered description, so the directive needs metadata that on-disk-only fragments don’t have. To use `{{REF:}}` with your own content, edit one of the existing core prompts (e.g., add an `_includes` of your own to the registry by extending the codebase) or stick with `{{INCLUDE:}}` for ad-hoc fragments.
###
[](https://docs.runmaestro.ai/prompt-customization#rules)
Rules
* **Naming convention**: Bundled include fragments use a leading underscore (e.g., `_maestro-cli.md`, `_history-format.md`). Your own fragments can use any name; the underscore is purely a visual signal that the file is meant to be referenced rather than used standalone.
* **Resolution order**: `{{REF:}}` directives are expanded first (they consult the in-memory prompt registry only), then `{{INCLUDE:}}` directives are inlined recursively against cache + disk.
* **Max depth**: `{{INCLUDE:}}` nests up to 3 levels deep. Beyond that, the directive is left as-is.
* **Circular references**: If prompt A includes B which includes A, the cycle is detected and the second inclusion is skipped.
* **Missing references**: If a name can’t be resolved, the directive text is left unchanged in the output.
* **Case-sensitive**: The name must match exactly (e.g., `{{INCLUDE:my-fragment}}` looks for `my-fragment` in cache or `my-fragment.md` on disk).
* **Refs are non-recursive**: A `{{REF:name}}` always expands to a literal pointer line; the resolver does not chase further directives inside the referenced file.
###
[](https://docs.runmaestro.ai/prompt-customization#creating-reusable-fragments)
Creating Reusable Fragments
You can create your own prompt fragments that aren’t part of the core set:
1. Click **Open Folder** in the prompt editor to open the prompts directory.
2. Create a new `.md` file (e.g., `_my-coding-standards.md` — leading underscore optional but recommended for fragments).
3. Write your reusable content.
4. Reference it from any core prompt with `{{INCLUDE:_my-coding-standards}}`.
This is useful for shared instructions you want injected into multiple prompts — coding standards, project context, team conventions, response formatting rules, etc. (`{{REF:}}` only works against the bundled registry — use `{{INCLUDE:}}` for your own files.)
Custom fragment files in the prompts directory are not shown in the editor’s category list — they’re referenced via `{{INCLUDE:name}}` only. Core prompts are the ones you browse and edit in the sidebar.
[](https://docs.runmaestro.ai/prompt-customization#resetting-prompts)
Resetting Prompts
-------------------------------------------------------------------------------------------
Click **Reset to Default** on any prompt to restore the bundled version. This removes your customization and takes effect immediately. Customizations are stored in a separate file (`core-prompts-customizations.json` in your Maestro data directory) and survive app updates. Only prompts you’ve explicitly edited are stored — everything else uses the bundled defaults.
[](https://docs.runmaestro.ai/prompt-customization#tips)
Tips
-----------------------------------------------------------------
* **Start small**: Try editing the `maestro-system-prompt` first — it’s the system context injected into every agent session and has the highest impact.
* **Use includes for shared context**: If you want the same instructions in multiple prompts, create a fragment file and use `{{INCLUDE:name}}` rather than duplicating text.
* **Use refs for big optional context**: When the shared content is bulky and only some sessions need it (CLI reference, Cue model, playbook spec), use `{{REF:name}}` instead of `{{INCLUDE:name}}` so the parent prompt stays small and the agent can self-fetch via `maestro-cli prompts get `.
* **Test with Quick Actions**: The four most common prompts are accessible from `Cmd+K` / `Ctrl+K` for fast iteration.
* **Variables are case-insensitive**: `{{date}}` and `{{DATE}}` both work, but uppercase is conventional.
* **Autocomplete helps**: Type `{{` in the editor and browse all available variables with descriptions. No need to memorize them.
Was this page helpful?
YesNo
[Slash Commands](https://docs.runmaestro.ai/slash-commands)
[History](https://docs.runmaestro.ai/history)
⌘I
---
# Themes Gallery - Maestro
[Skip to main content](https://docs.runmaestro.ai/screenshots#content-area)
[Maestro home page](https://runmaestro.ai/)
Search...
⌘K
Search...
Navigation
Overview
Themes Gallery
On this page
* [Available Themes](https://docs.runmaestro.ai/screenshots#available-themes)
* [Dark Themes](https://docs.runmaestro.ai/screenshots#dark-themes)
* [Light Themes](https://docs.runmaestro.ai/screenshots#light-themes)
* [Vibe Themes](https://docs.runmaestro.ai/screenshots#vibe-themes)
* [Custom Theme](https://docs.runmaestro.ai/screenshots#custom-theme)
* [Changing Themes](https://docs.runmaestro.ai/screenshots#changing-themes)
Maestro ships with 18 carefully crafted themes across three categories, plus a Custom theme builder. Screenshots below show each theme in action.
[](https://docs.runmaestro.ai/screenshots#available-themes)
Available Themes
--------------------------------------------------------------------------------
For a screenshot example of every option, see [THEMES.md](https://github.com/RunMaestro/Maestro/blob/main/THEMES.md)
on GitHub. You can also flip through the available themes at [RunMaestro.ai](https://runmaestro.ai/)
. 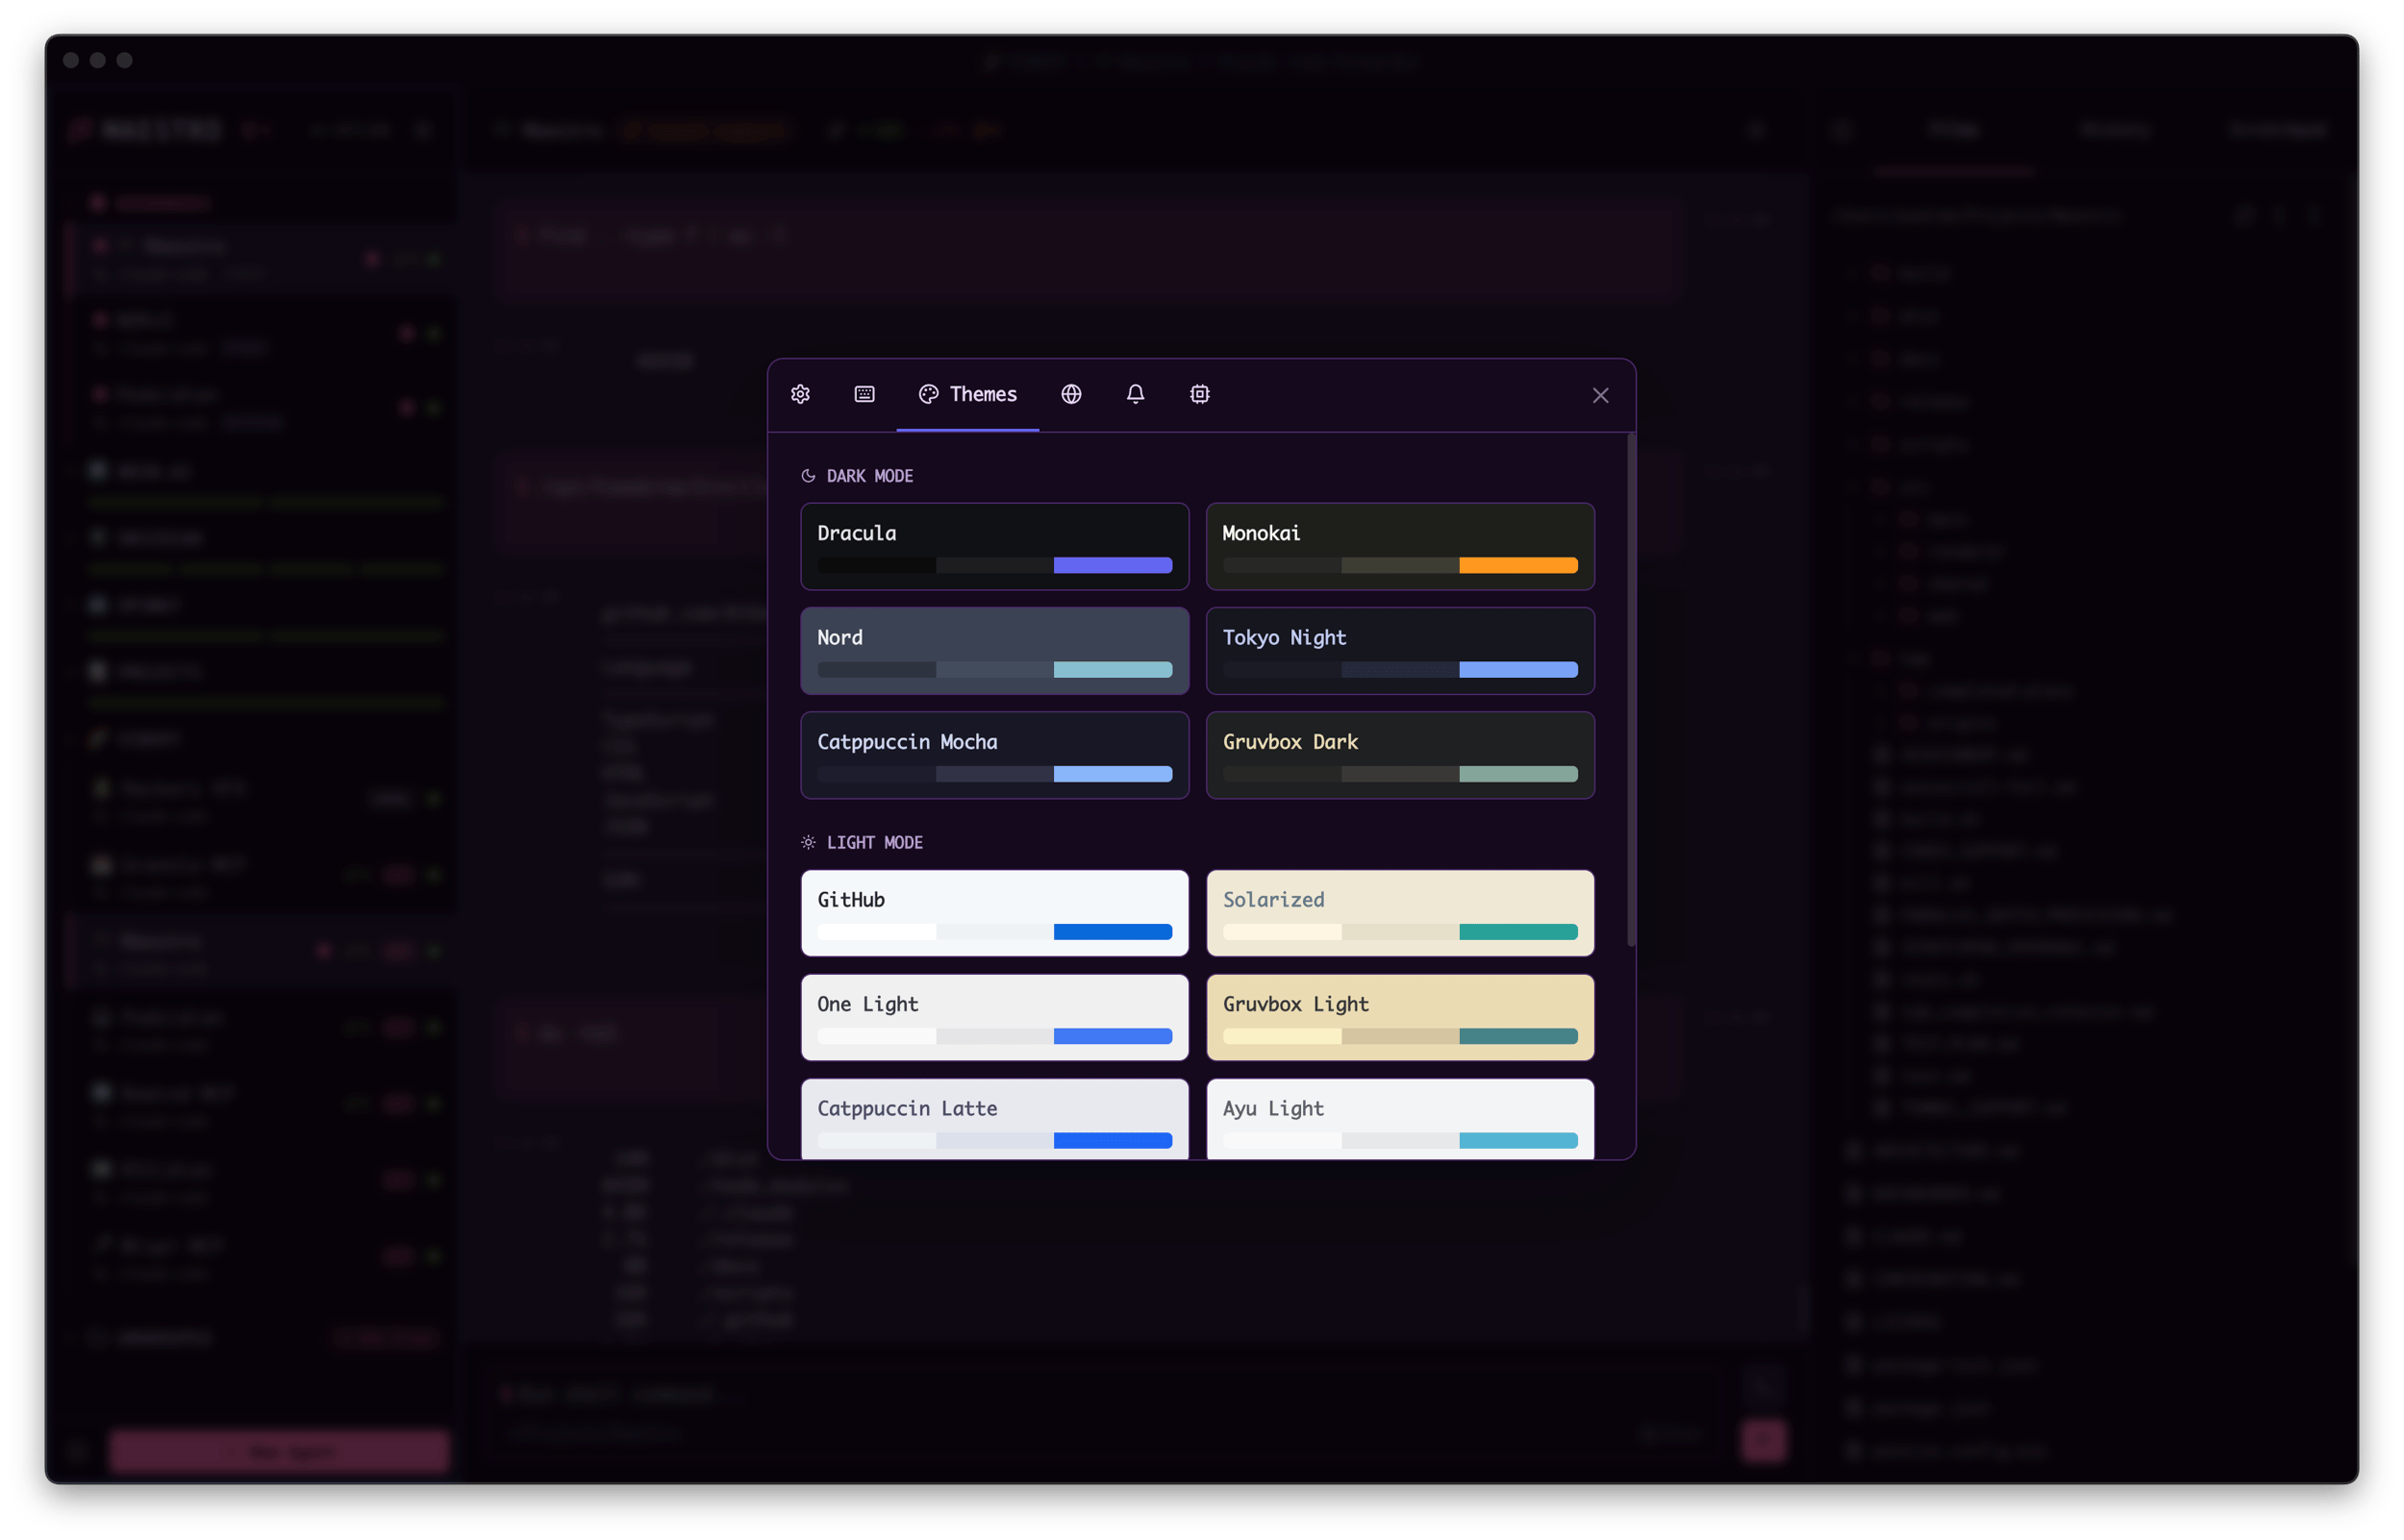
###
[](https://docs.runmaestro.ai/screenshots#dark-themes)
Dark Themes
* **Dracula** — Classic purple-accented dark theme
* **Monokai** — Vibrant syntax highlighting on dark background
* **Nord** — Cool, bluish Arctic-inspired palette
* **Tokyo Night** — Soft neon on deep blue
* **Catppuccin Mocha** — Soothing pastel dark theme
* **Gruvbox Dark** — Retro groove with warm earth tones
###
[](https://docs.runmaestro.ai/screenshots#light-themes)
Light Themes
* **GitHub** — GitHub’s clean light mode
* **Solarized** — Precision colors for readability
* **One Light** — Atom’s light theme with magenta accents
* **Gruvbox Light** — Retro groove in light mode
* **Catppuccin Latte** — Soothing pastel light theme
* **Ayu Light** — Bright, modern light theme
###
[](https://docs.runmaestro.ai/screenshots#vibe-themes)
Vibe Themes
Custom themes with unique personality:
* **Pedurple** — Deep purple aesthetic (shown in most screenshots)
* **Maestro’s Choice** — Golden accents on midnight blue
* **Dre Synth** — Cyberpunk cyan and magenta
* **InQuest** — Minimal black with crimson accents
###
[](https://docs.runmaestro.ai/screenshots#custom-theme)
Custom Theme
Build your own theme using the Custom Theme Builder with import/export support.
[](https://docs.runmaestro.ai/screenshots#changing-themes)
Changing Themes
------------------------------------------------------------------------------
1. Press `Cmd+K` (Mac) or `Ctrl+K` (Windows/Linux)
2. Type “theme” and select **Change Theme**
3. Use arrow keys to preview themes live
4. Press `Enter` to apply
Or go to **Settings** (`Cmd+,`) → **Themes** tab.
Was this page helpful?
YesNo
[Features](https://docs.runmaestro.ai/features)
[Installation](https://docs.runmaestro.ai/installation)
⌘I
---
# Remote Control - Maestro
[Skip to main content](https://docs.runmaestro.ai/remote-control#content-area)
[Maestro home page](https://runmaestro.ai/)
Search...
⌘K
Search...
Navigation
General Usage
Remote Control
On this page
* [Mobile Web Interface](https://docs.runmaestro.ai/remote-control#mobile-web-interface)
* [Core Features](https://docs.runmaestro.ai/remote-control#core-features)
* [Gestures and Navigation](https://docs.runmaestro.ai/remote-control#gestures-and-navigation)
* [Input Features](https://docs.runmaestro.ai/remote-control#input-features)
* [Local Access (Same Network)](https://docs.runmaestro.ai/remote-control#local-access-same-network)
* [Remote Control (Outside Your Network)](https://docs.runmaestro.ai/remote-control#remote-control-outside-your-network)
* [Custom Port Configuration](https://docs.runmaestro.ai/remote-control#custom-port-configuration)
* [Connection Handling](https://docs.runmaestro.ai/remote-control#connection-handling)
* [Automatic Reconnection](https://docs.runmaestro.ai/remote-control#automatic-reconnection)
* [Offline Mode](https://docs.runmaestro.ai/remote-control#offline-mode)
* [Connection Status Indicator](https://docs.runmaestro.ai/remote-control#connection-status-indicator)
* [Screenshots](https://docs.runmaestro.ai/remote-control#screenshots)
* [Related](https://docs.runmaestro.ai/remote-control#related)
Maestro includes a built-in web server for mobile remote control:
1. **Automatic Security** — Web server runs on a random port with an auto-generated security token (UUID) embedded in the URL
2. **QR Code Access** — Scan a QR code to connect instantly from your phone
3. **Live Sessions** — Sessions marked as “live” become accessible through the web interface (protected by the security token)
4. **Remote Tunneling** — Access Maestro from anywhere via Cloudflare tunnel (requires `cloudflared` CLI)
[](https://docs.runmaestro.ai/remote-control#mobile-web-interface)
Mobile Web Interface
-------------------------------------------------------------------------------------------
The mobile web interface provides a comprehensive remote control experience:
###
[](https://docs.runmaestro.ai/remote-control#core-features)
Core Features
* Real-time session monitoring and command input
* Device color scheme preference support (light/dark mode)
* Connection status indicator with automatic reconnection (30-second countdown timer)
* Offline queue for commands typed while disconnected (persisted to localStorage, up to 50 commands)
* Multi-tab support with tab bar and tab search modal
###
[](https://docs.runmaestro.ai/remote-control#gestures-and-navigation)
Gestures and Navigation
* Swipe gestures (left/right/up/down) for common actions
* Pull-to-refresh functionality
* Long-press menu for mode switching (AI ↔ Terminal)
###
[](https://docs.runmaestro.ai/remote-control#input-features)
Input Features
* Recent command chips for quick access
* Slash command autocomplete
* Command history drawer
[](https://docs.runmaestro.ai/remote-control#local-access-same-network)
Local Access (Same Network)
-------------------------------------------------------------------------------------------------------
1. Click the **OFFLINE** button in the Left Bar header to enable the web interface
2. The button changes to **LIVE** (pulsing) and a QR code overlay appears automatically
3. Scan the QR code or copy the secure URL to access from your phone on the same network
The web interface uses your local IP address (e.g., `192.168.x.x`) for LAN accessibility. Both devices must be on the same network.
[](https://docs.runmaestro.ai/remote-control#remote-control-outside-your-network)
Remote Control (Outside Your Network)
---------------------------------------------------------------------------------------------------------------------------
To access Maestro from outside your local network (e.g., on mobile data or from another location):
1. Install cloudflared: `brew install cloudflared` (macOS) or [download for other platforms](https://developers.cloudflare.com/cloudflare-one/connections/connect-networks/downloads/)
2. Enable the web interface (**OFFLINE** → **LIVE**)
3. Toggle **Remote Control** in the Live overlay panel
4. A secure Cloudflare tunnel URL (e.g., `https://abc123.trycloudflare.com`) will be generated within ~30 seconds
5. Use the **Local/Remote** pill selector to switch between QR codes
6. The tunnel stays active as long as Maestro is running — no time limits, no Cloudflare account required
The Remote tab automatically activates when the tunnel connects successfully.
[](https://docs.runmaestro.ai/remote-control#custom-port-configuration)
Custom Port Configuration
-----------------------------------------------------------------------------------------------------
By default, Maestro assigns a **random port** each time the web server starts. This is a security-by-obscurity measure — attackers can’t easily guess which port to target. However, if you need a **fixed port** (e.g., for firewall rules, reverse proxies, or persistent tunnel configurations), you can enable custom port mode:
1. Click the **LIVE** button to open the Live overlay panel
2. Toggle **Custom Port** to enable static port mode
3. Enter your desired port number (1–65535)
4. The server restarts automatically on the new port
**Use cases for custom ports:**
* Punching a hole through a firewall or NAT
* Configuring a reverse proxy (nginx, Caddy)
* Setting up persistent SSH tunnels
* Integration with home automation systems
**Security Trade-off**: Using a custom port removes one layer of security-by-obscurity. The randomized port and auto-generated auth token in the URL work together to protect access. With a custom port, you’re relying solely on the auth token for security.**Recommendations when using custom ports:**
* Use Cloudflare tunnel for remote access instead of exposing ports directly
* Ensure your network firewall is properly configured
* Consider additional authentication at the network level
[](https://docs.runmaestro.ai/remote-control#connection-handling)
Connection Handling
-----------------------------------------------------------------------------------------
The mobile interface includes robust connection management:
###
[](https://docs.runmaestro.ai/remote-control#automatic-reconnection)
Automatic Reconnection
* When disconnected, a 30-second countdown timer displays before automatic reconnection
* Manual **Retry** button available for immediate reconnection
* Reconnection attempts counter shows progress (e.g., “Attempt 3 of 10”)
###
[](https://docs.runmaestro.ai/remote-control#offline-mode)
Offline Mode
* Commands typed while offline are queued (up to 50 commands)
* Queued commands are persisted to localStorage and survive page reloads
* Commands automatically send when connection is restored
* An **Offline Queue Banner** shows the number of pending commands
###
[](https://docs.runmaestro.ai/remote-control#connection-status-indicator)
Connection Status Indicator
* Displays as a dismissible banner when connection is lost
* Shows different states: **Connecting**, **Authenticating**, **Disconnected**, **No internet**
* Expandable error details for troubleshooting
[](https://docs.runmaestro.ai/remote-control#screenshots)
Screenshots
-------------------------------------------------------------------------
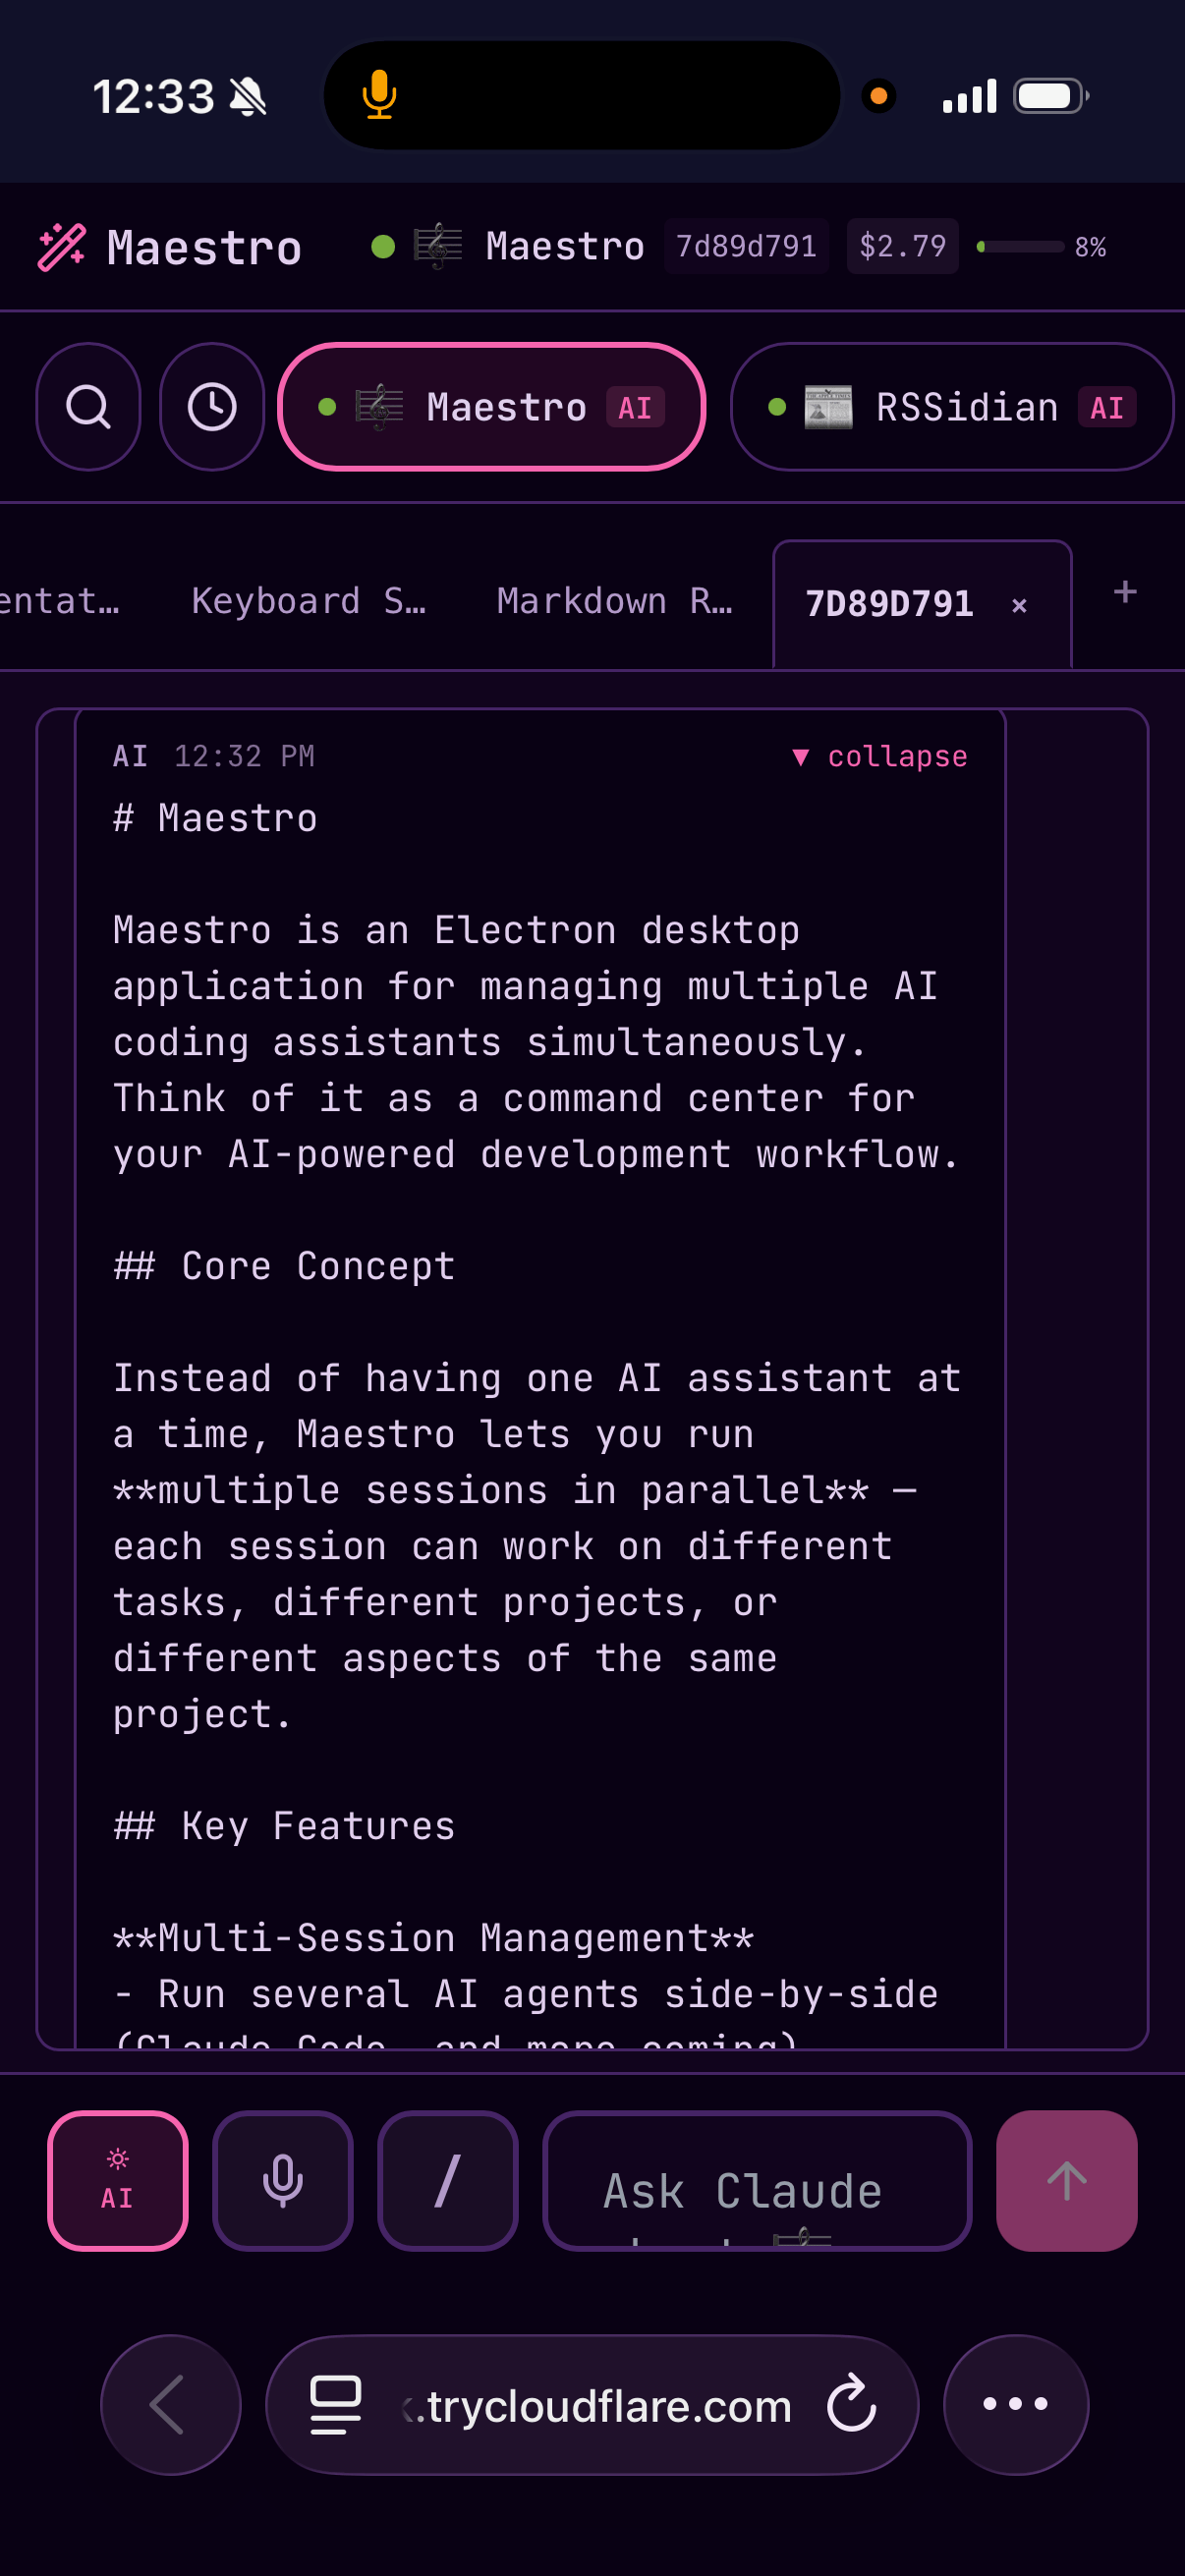 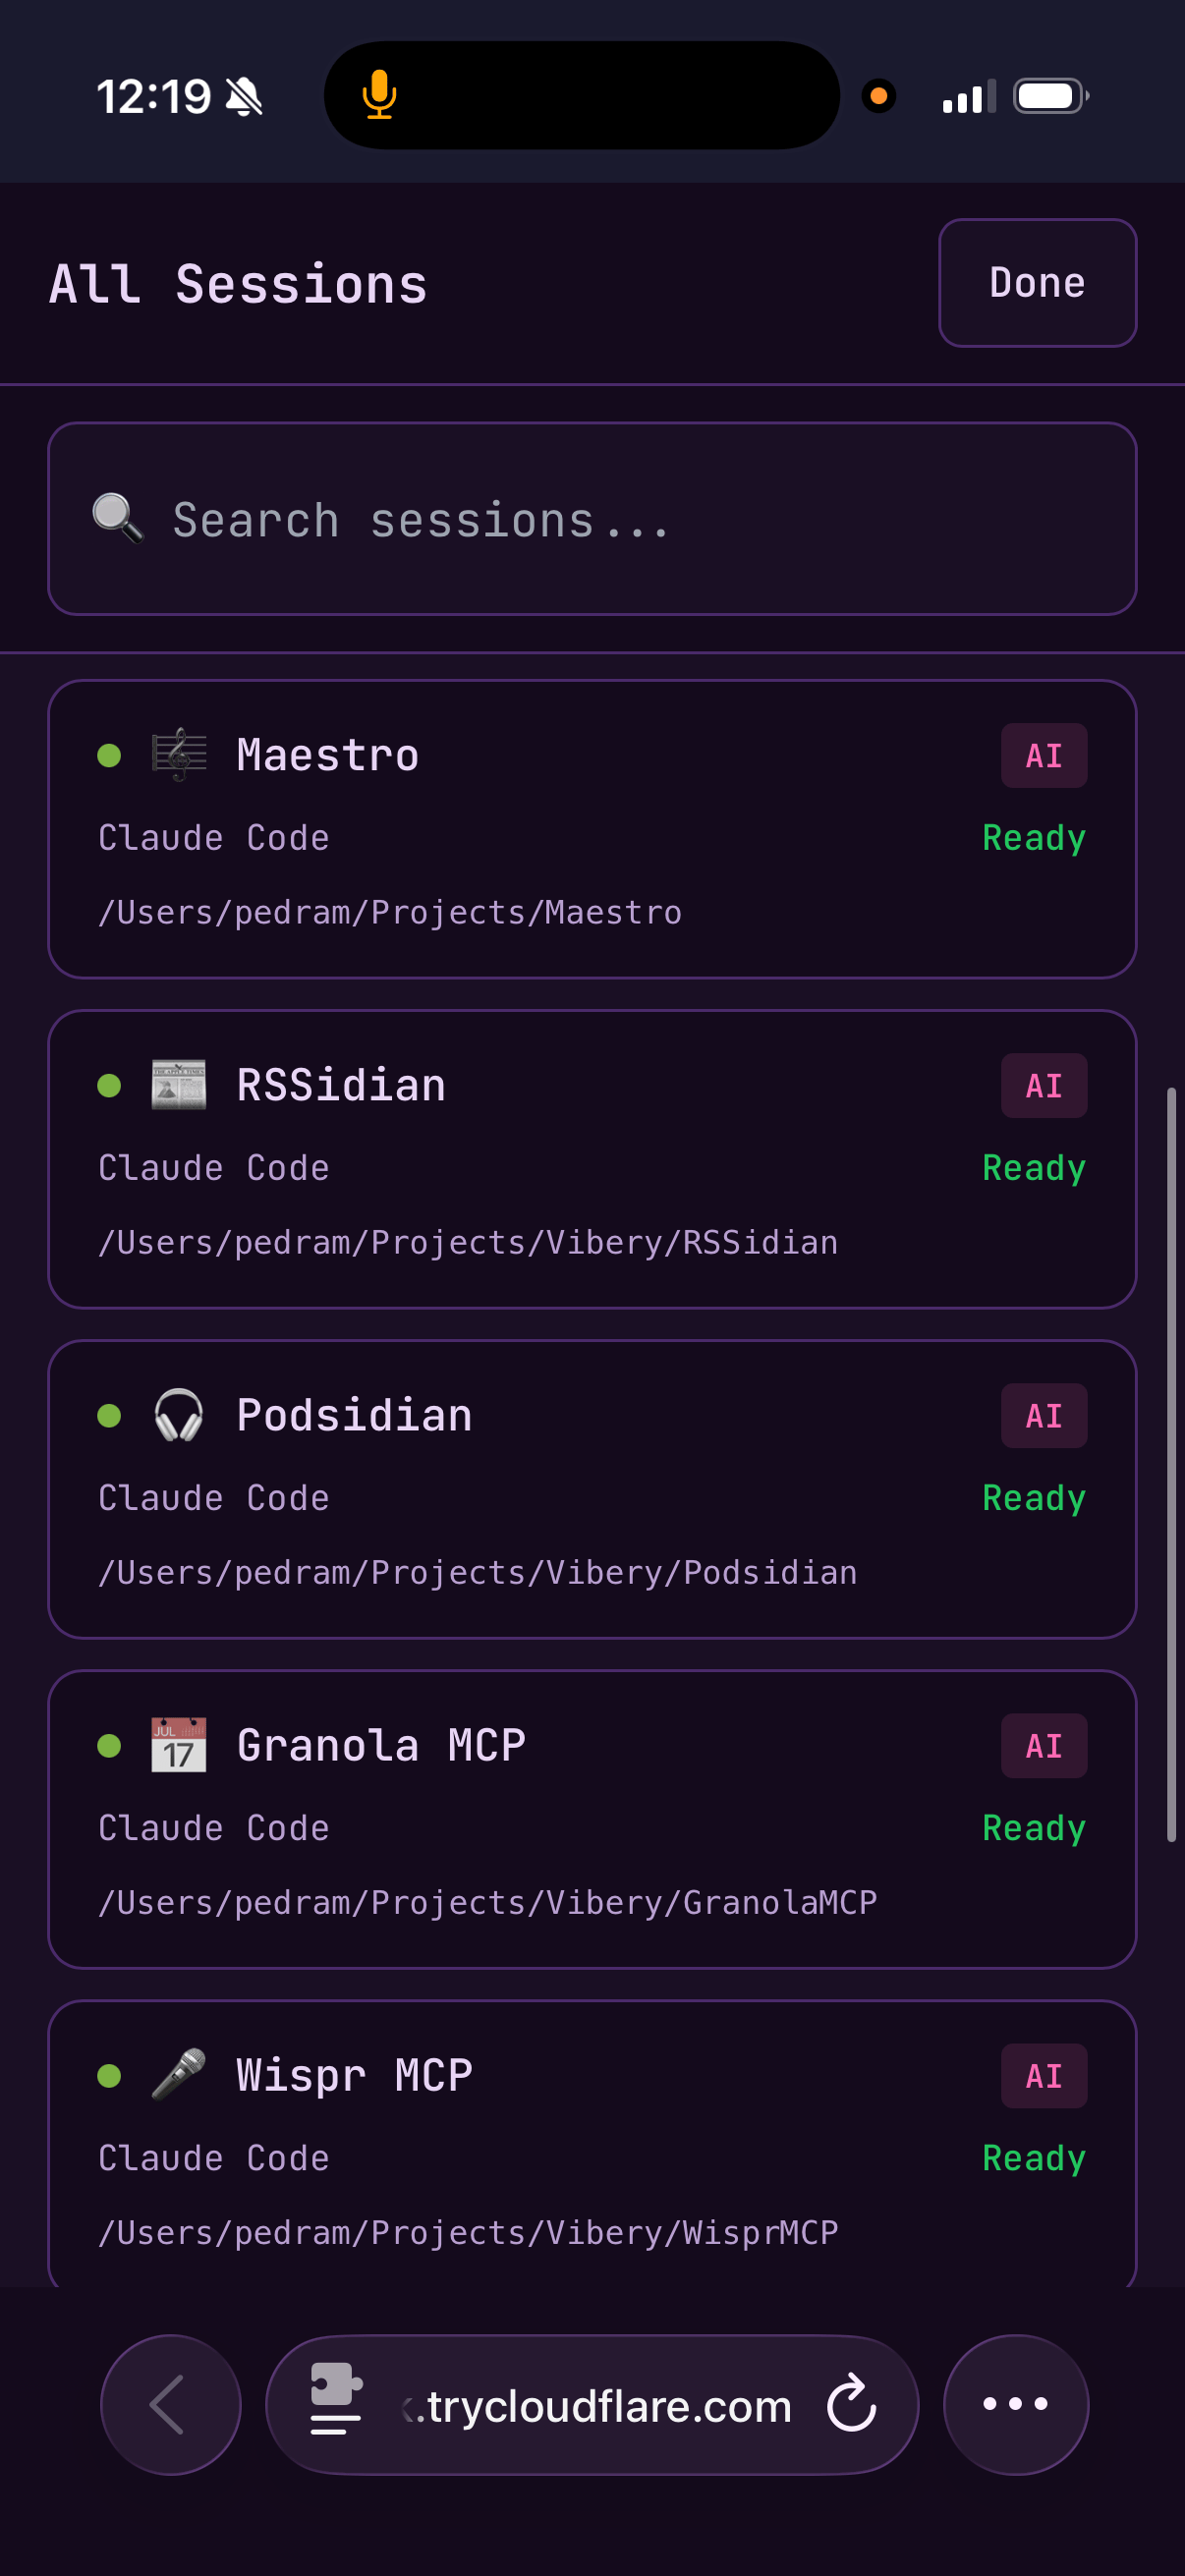 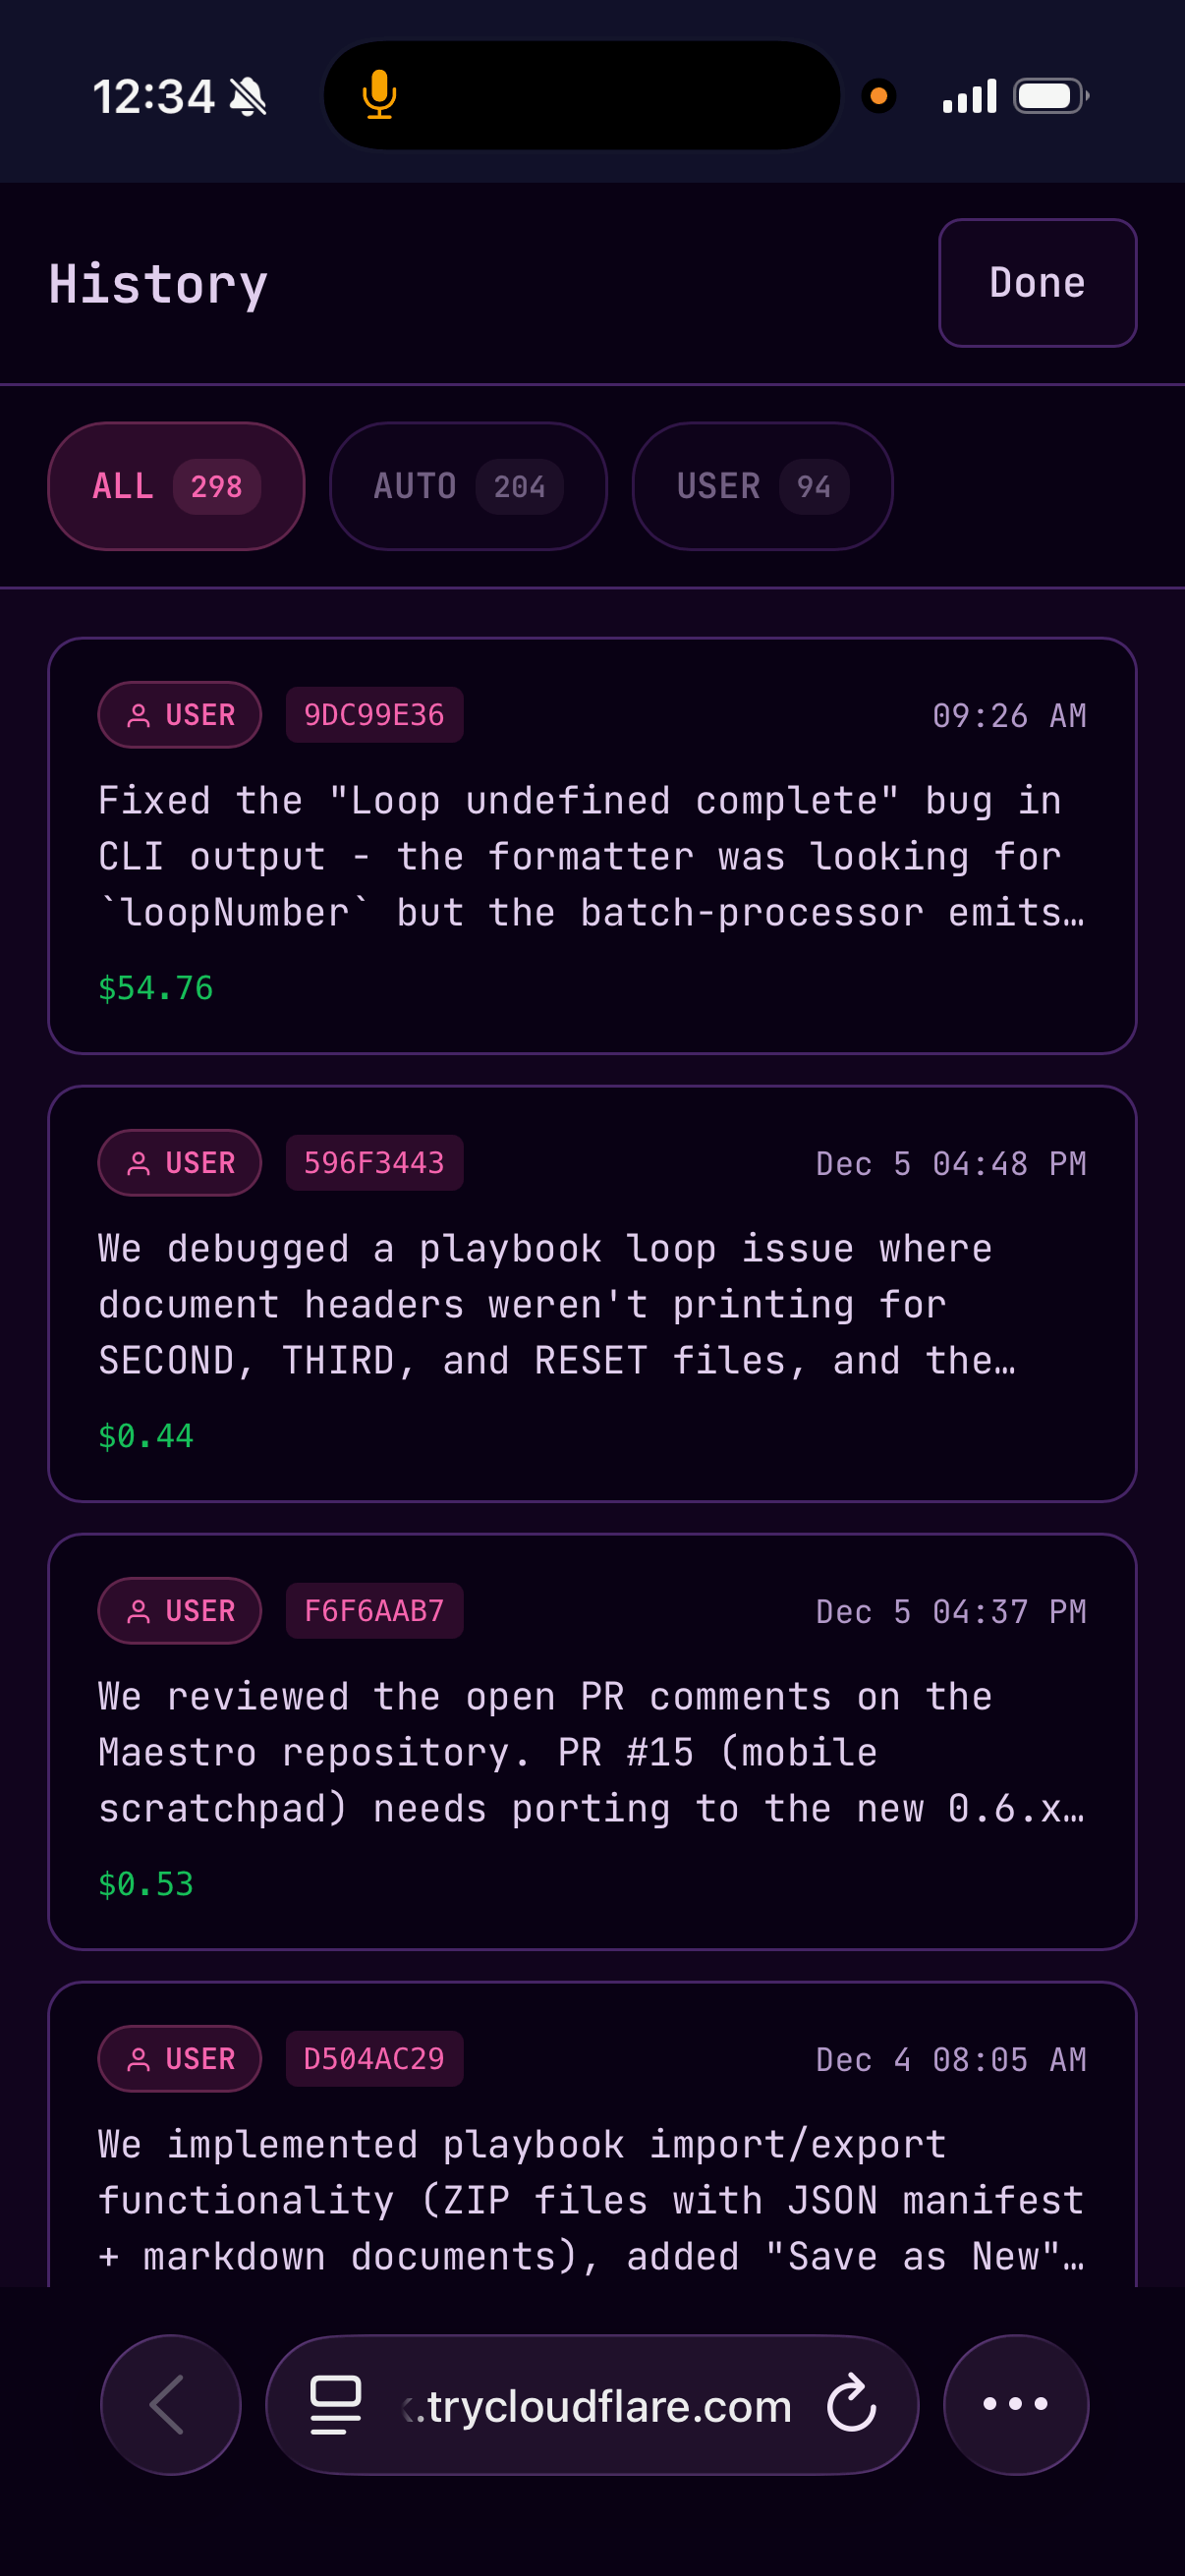
[](https://docs.runmaestro.ai/remote-control#related)
Related
-----------------------------------------------------------------
* [Configuration](https://docs.runmaestro.ai/configuration)
— General settings including web interface options
* [SSH Remote Execution](https://docs.runmaestro.ai/ssh-remote-execution)
— Running Maestro on remote servers
Was this page helpful?
YesNo
[Group Chat](https://docs.runmaestro.ai/group-chat)
[SSH Remote Execution](https://docs.runmaestro.ai/ssh-remote-execution)
⌘I
---
# Spec-Kit Commands - Maestro
[Skip to main content](https://docs.runmaestro.ai/speckit-commands#content-area)
[Maestro home page](https://runmaestro.ai/)
Search...
⌘K
Search...
Navigation
Auto Run
Spec-Kit Commands
On this page
* [Spec-Kit vs. Wizard](https://docs.runmaestro.ai/speckit-commands#spec-kit-vs-wizard)
* [Viewing & Managing Commands](https://docs.runmaestro.ai/speckit-commands#viewing-%26-managing-commands)
* [Prerequisites](https://docs.runmaestro.ai/speckit-commands#prerequisites)
* [Core Workflow (Recommended Order)](https://docs.runmaestro.ai/speckit-commands#core-workflow-recommended-order)
* [1\. /speckit.constitution — Define Project Principles](https://docs.runmaestro.ai/speckit-commands#1-%2Fspeckit-constitution-%E2%80%94-define-project-principles)
* [2\. /speckit.specify — Create Feature Specification](https://docs.runmaestro.ai/speckit-commands#2-%2Fspeckit-specify-%E2%80%94-create-feature-specification)
* [3\. /speckit.clarify — Identify Gaps](https://docs.runmaestro.ai/speckit-commands#3-%2Fspeckit-clarify-%E2%80%94-identify-gaps)
* [4\. /speckit.plan — Implementation Planning](https://docs.runmaestro.ai/speckit-commands#4-%2Fspeckit-plan-%E2%80%94-implementation-planning)
* [5\. /speckit.tasks — Generate Tasks](https://docs.runmaestro.ai/speckit-commands#5-%2Fspeckit-tasks-%E2%80%94-generate-tasks)
* [6\. /speckit.implement — Execute with Auto Run](https://docs.runmaestro.ai/speckit-commands#6-%2Fspeckit-implement-%E2%80%94-execute-with-auto-run)
* [Analysis & Quality Commands](https://docs.runmaestro.ai/speckit-commands#analysis-%26-quality-commands)
* [/speckit.analyze — Cross-Artifact Analysis](https://docs.runmaestro.ai/speckit-commands#%2Fspeckit-analyze-%E2%80%94-cross-artifact-analysis)
* [/speckit.checklist — Requirements Quality Validation](https://docs.runmaestro.ai/speckit-commands#%2Fspeckit-checklist-%E2%80%94-requirements-quality-validation)
* [/speckit.taskstoissues — Export to GitHub Issues](https://docs.runmaestro.ai/speckit-commands#%2Fspeckit-taskstoissues-%E2%80%94-export-to-github-issues)
* [Getting Help](https://docs.runmaestro.ai/speckit-commands#getting-help)
* [Updating Commands](https://docs.runmaestro.ai/speckit-commands#updating-commands)
* [Tips for Best Results](https://docs.runmaestro.ai/speckit-commands#tips-for-best-results)
Spec-Kit is a structured specification workflow from [GitHub’s spec-kit project](https://github.com/github/spec-kit)
that helps teams create clear, actionable specifications before implementation. Maestro bundles these commands and you can check for updates manually via Settings. 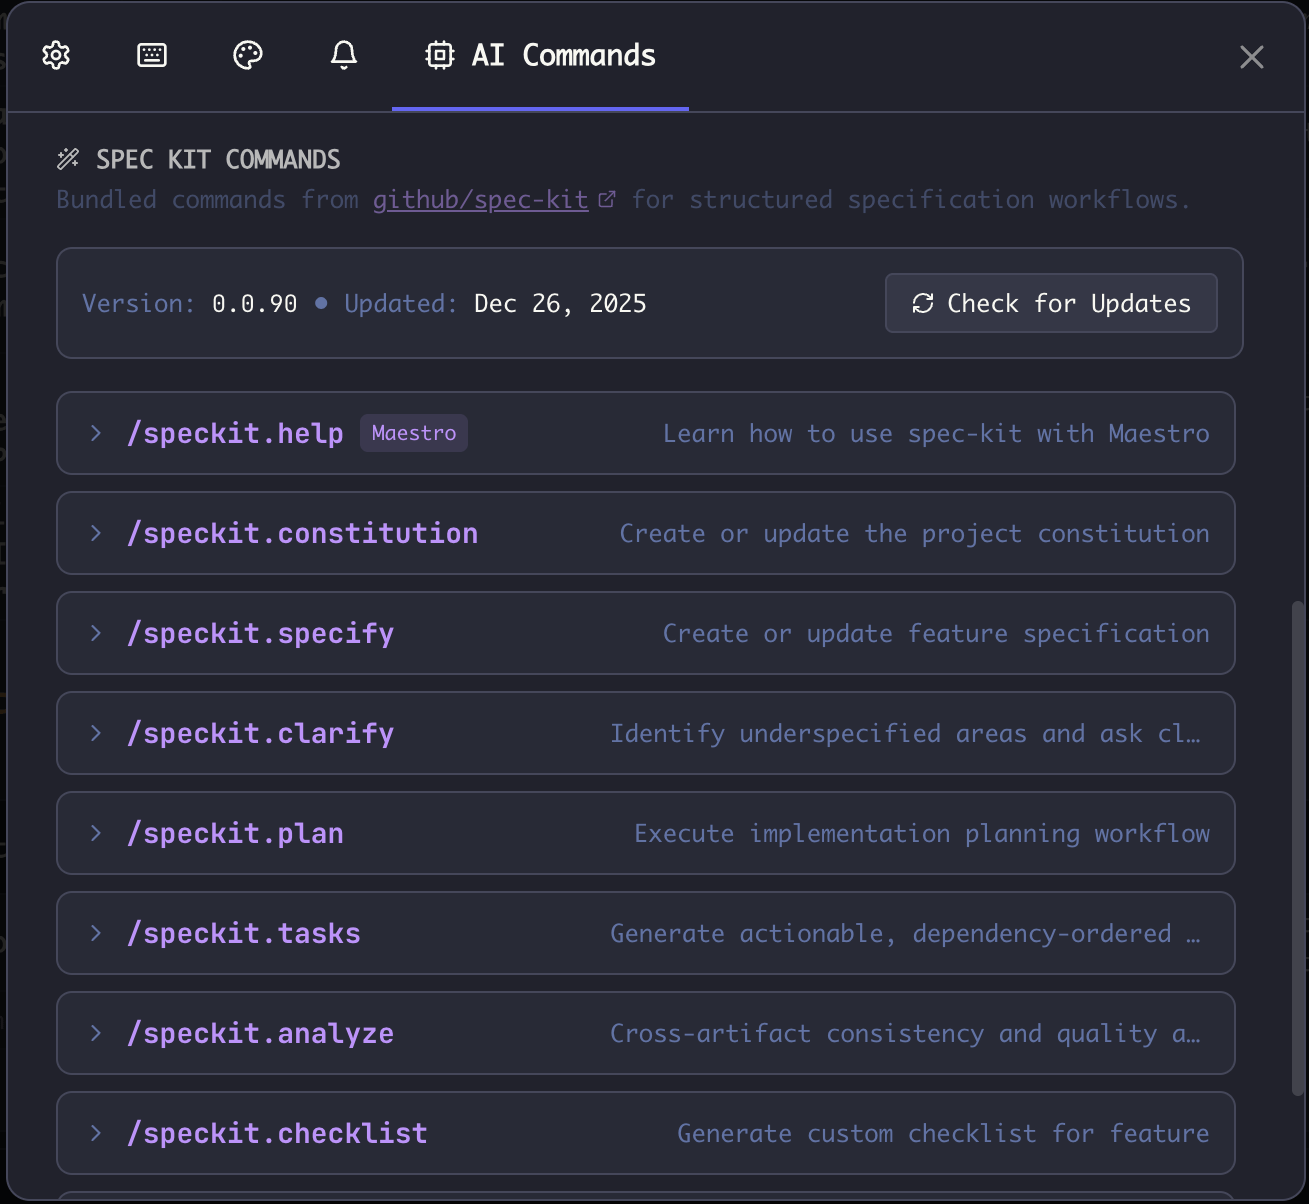
[](https://docs.runmaestro.ai/speckit-commands#spec-kit-vs-wizard)
Spec-Kit vs. Wizard
------------------------------------------------------------------------------------------
Maestro offers two paths to structured development:
| Feature | Spec-Kit | Onboarding Wizard |
| --- | --- | --- |
| **Approach** | Manual, command-driven workflow | Guided, conversational flow |
| **Best For** | Experienced users, complex projects | New users, quick setup |
| **Output** | Constitution, specs, tasks → Auto Run docs | Phase 1 Auto Run document |
| **Control** | Full control at each step | Streamlined, opinionated |
| **Learning Curve** | Moderate | Low |
| **Storage Location** | `.specify/` directory in project root | `.maestro/playbooks/Initiation/` |
**Use Spec-Kit when:**
* You want fine-grained control over specification phases
* You’re working on complex features requiring detailed planning
* You prefer explicit command-driven workflows
* You want to create reusable constitutions and specifications
**Use the Wizard when:**
* You’re starting a new project from scratch
* You want to get up and running quickly
* You prefer conversational, guided experiences
Both approaches ultimately produce markdown documents for Auto Run execution.
[](https://docs.runmaestro.ai/speckit-commands#viewing-&-managing-commands)
Viewing & Managing Commands
-----------------------------------------------------------------------------------------------------------
Access Spec-Kit commands via **Settings → AI Commands** tab. Here you can:
* **View all commands** — See descriptions and expand to view full prompts
* **Check for Updates** — Manually pull the latest prompts from GitHub releases
* **Edit prompts** — Customize any command (modifications are preserved across updates)
* **Reset to Default** — Restore a modified prompt to the bundled version
Commands marked with a Maestro badge (`/speckit.help`, `/speckit.implement`) are Maestro-specific and not updated from upstream.
[](https://docs.runmaestro.ai/speckit-commands#prerequisites)
Prerequisites
-------------------------------------------------------------------------------
Maestro does not automatically create the folder structure or scripts required to run Spec-Kit. You’ll need to set these up manually. Get started: Follow the instructions in the “Get Started” section of the [GitHub Spec-Kit repository](https://github.com/github/spec-kit?tab=readme-ov-file#1-install-specify-cli)
:
# Create new project
specify init
# Or initialize in existing project
specify init . --ai claude
# or
specify init --here --ai claude
[](https://docs.runmaestro.ai/speckit-commands#core-workflow-recommended-order)
Core Workflow (Recommended Order)
---------------------------------------------------------------------------------------------------------------------
###
[](https://docs.runmaestro.ai/speckit-commands#1-/speckit-constitution-%E2%80%94-define-project-principles)
1\. `/speckit.constitution` — Define Project Principles
Start here to establish your project’s foundational values, constraints, and guidelines. The constitution guides all subsequent specifications and ensures consistency across features. **Creates:** `.specify/memory/constitution.md` — A versioned constitution document with core principles, technical constraints, team conventions, and governance rules.
###
[](https://docs.runmaestro.ai/speckit-commands#2-/speckit-specify-%E2%80%94-create-feature-specification)
2\. `/speckit.specify` — Create Feature Specification
Define the feature you want to build with clear requirements, acceptance criteria, and boundaries. Creates a new numbered Git branch and initializes the spec directory structure. **Creates:** `specs/-/spec.md` — A detailed feature specification with scope, functional requirements, user scenarios, and success criteria. Also creates a `checklists/requirements.md` validation checklist.
###
[](https://docs.runmaestro.ai/speckit-commands#3-/speckit-clarify-%E2%80%94-identify-gaps)
3\. `/speckit.clarify` — Identify Gaps
Review your specification for ambiguities, missing details, and edge cases. The AI asks up to 5 targeted clarification questions sequentially, encoding answers directly into the spec. **Updates:** `specs/-/spec.md` — Adds a `## Clarifications` section with session-dated answers, and propagates clarifications to relevant spec sections. **Tip:** Run `/speckit.clarify` multiple times — each pass catches different gaps. Use early termination signals (“done”, “good”, “no more”) to stop questioning.
###
[](https://docs.runmaestro.ai/speckit-commands#4-/speckit-plan-%E2%80%94-implementation-planning)
4\. `/speckit.plan` — Implementation Planning
Convert your specification into a high-level implementation plan. Includes technical context, constitution compliance checks, and multi-phase design workflow. **Creates:** Multiple artifacts in the feature directory:
* `plan.md` — Implementation plan with phases and milestones
* `research.md` — Resolved unknowns and technology decisions (Phase 0)
* `data-model.md` — Entities, fields, and relationships (Phase 1)
* `contracts/` — API contracts in OpenAPI/GraphQL format (Phase 1)
* `quickstart.md` — Getting started guide (Phase 1)
###
[](https://docs.runmaestro.ai/speckit-commands#5-/speckit-tasks-%E2%80%94-generate-tasks)
5\. `/speckit.tasks` — Generate Tasks
Break your plan into specific, actionable tasks with dependencies clearly mapped. Tasks are organized by user story and structured in phases. **Creates:** `specs/-/tasks.md` — A dependency-ordered task list with:
* **Phase 1:** Setup (project initialization)
* **Phase 2:** Foundational (blocking prerequisites)
* **Phase 3+:** User stories in priority order (P1, P2, P3…)
* **Final Phase:** Polish & cross-cutting concerns
Each task has an ID (T001, T002…), optional `[P]` marker for parallelizable tasks, and `[US#]` labels linking to user stories.
###
[](https://docs.runmaestro.ai/speckit-commands#6-/speckit-implement-%E2%80%94-execute-with-auto-run)
6\. `/speckit.implement` — Execute with Auto Run
**Maestro-specific command.** Converts your tasks into Auto Run documents that Maestro can execute autonomously. This bridges spec-kit’s structured approach with Maestro’s multi-agent capabilities. **Creates:** Markdown documents in `.maestro/playbooks/` with naming pattern:
.maestro/playbooks/SpecKit--Phase-01-[Description].md
.maestro/playbooks/SpecKit--Phase-02-[Description].md
Each phase document is self-contained, includes Spec Kit context references, preserves task IDs (T001, T002…) and user story markers (\[US1\], \[US2\]) for traceability.
[](https://docs.runmaestro.ai/speckit-commands#analysis-&-quality-commands)
Analysis & Quality Commands
-----------------------------------------------------------------------------------------------------------
###
[](https://docs.runmaestro.ai/speckit-commands#/speckit-analyze-%E2%80%94-cross-artifact-analysis)
`/speckit.analyze` — Cross-Artifact Analysis
Verify consistency across your constitution, specifications, and tasks. Performs a read-only analysis that catches:
* **Duplications** — Near-duplicate requirements
* **Ambiguities** — Vague adjectives lacking measurable criteria
* **Underspecification** — Missing acceptance criteria or undefined components
* **Constitution violations** — Conflicts with project principles (always CRITICAL severity)
* **Coverage gaps** — Requirements without tasks, or orphaned tasks
**Outputs:** A structured Markdown report with severity ratings (Critical/High/Medium/Low), coverage metrics, and suggested next actions. Does not modify any files.
###
[](https://docs.runmaestro.ai/speckit-commands#/speckit-checklist-%E2%80%94-requirements-quality-validation)
`/speckit.checklist` — Requirements Quality Validation
Generate “unit tests for requirements” — checklists that validate the _quality_ of your requirements, not the implementation. Each checklist item tests whether requirements are complete, clear, consistent, and measurable. **Creates:** `specs/-/checklists/.md` (e.g., `ux.md`, `api.md`, `security.md`) Example items:
* “Are visual hierarchy requirements defined with measurable criteria?” \[Completeness\]
* “Is ‘fast loading’ quantified with specific timing thresholds?” \[Clarity\]
* “Are error handling requirements defined for all API failure modes?” \[Gap\]
**Note:** This is NOT for QA testing implementation — it validates that requirements are well-written before implementation begins.
###
[](https://docs.runmaestro.ai/speckit-commands#/speckit-taskstoissues-%E2%80%94-export-to-github-issues)
`/speckit.taskstoissues` — Export to GitHub Issues
Convert your tasks directly into GitHub Issues. **Requirements:**
* `gh` CLI installed and authenticated
* GitHub MCP server tool (`github/github-mcp-server/issue_write`)
* Remote must be a GitHub URL
**Caution:** Only creates issues in the repository matching your Git remote — will refuse to create issues elsewhere.
[](https://docs.runmaestro.ai/speckit-commands#getting-help)
Getting Help
-----------------------------------------------------------------------------
Run `/speckit.help` to get an overview of the workflow and tips for best results. This Maestro-specific command provides:
* Command overview with recommended workflow order
* Integration tips for Auto Run
* Links to upstream documentation
[](https://docs.runmaestro.ai/speckit-commands#updating-commands)
Updating Commands
---------------------------------------------------------------------------------------
Spec-Kit prompts can be updated from the [GitHub spec-kit repository](https://github.com/github/spec-kit)
releases:
1. Open **Settings → AI Commands**
2. Click **Check for Updates** button
3. Latest prompts are downloaded from the most recent GitHub release
4. Your custom modifications are preserved — edited prompts are not overwritten
The version number (e.g., `v0.0.90`) and last refresh date are shown at the top of the Spec Kit Commands section. **Note:** Custom Maestro commands (`/speckit.help`, `/speckit.implement`) are bundled with Maestro and not updated from upstream.
[](https://docs.runmaestro.ai/speckit-commands#tips-for-best-results)
Tips for Best Results
-----------------------------------------------------------------------------------------------
* **Start with constitution** — Even for small projects, defining principles helps maintain consistency and catch violations early
* **Iterate on specifications** — Use `/speckit.clarify` multiple times to refine your spec; accept recommended answers for faster iteration
* **Keep specs focused** — One feature per specification cycle works best; use numbered branches (`1-feature-name`, `2-other-feature`)
* **Review before implementing** — Use `/speckit.analyze` after `/speckit.tasks` to catch issues before coding
* **Validate requirements first** — Use `/speckit.checklist` to verify requirements are clear and complete before implementation
* **Leverage parallelism** — With Maestro, run multiple spec-kit workflows simultaneously across different agents using worktrees
Was this page helpful?
YesNo
[Local Manifest](https://docs.runmaestro.ai/local-manifest)
[OpenSpec Commands](https://docs.runmaestro.ai/openspec-commands)
⌘I
---
# Slash Commands - Maestro
[Skip to main content](https://docs.runmaestro.ai/slash-commands#content-area)
[Maestro home page](https://runmaestro.ai/)
Search...
⌘K
Search...
Navigation
General Usage
Slash Commands
On this page
* [Built-in Maestro Commands](https://docs.runmaestro.ai/slash-commands#built-in-maestro-commands)
* [Skills Enumeration](https://docs.runmaestro.ai/slash-commands#skills-enumeration)
* [Custom AI Commands](https://docs.runmaestro.ai/slash-commands#custom-ai-commands)
* [Conductor Variables](https://docs.runmaestro.ai/slash-commands#conductor-variables)
* [Agent Variables](https://docs.runmaestro.ai/slash-commands#agent-variables)
* [Path Variables](https://docs.runmaestro.ai/slash-commands#path-variables)
* [Auto Run Variables](https://docs.runmaestro.ai/slash-commands#auto-run-variables)
* [Date/Time Variables](https://docs.runmaestro.ai/slash-commands#date%2Ftime-variables)
* [Git & Context Variables](https://docs.runmaestro.ai/slash-commands#git-%26-context-variables)
* [Passing Arguments to Commands](https://docs.runmaestro.ai/slash-commands#passing-arguments-to-commands)
* [Spec-Kit Commands](https://docs.runmaestro.ai/slash-commands#spec-kit-commands)
* [OpenSpec Commands](https://docs.runmaestro.ai/slash-commands#openspec-commands)
* [Agent Native Commands](https://docs.runmaestro.ai/slash-commands#agent-native-commands)
* [Supported in Batch Mode](https://docs.runmaestro.ai/slash-commands#supported-in-batch-mode)
* [Not Supported in Batch Mode](https://docs.runmaestro.ai/slash-commands#not-supported-in-batch-mode)
Maestro includes an extensible slash command system with autocomplete. Type `/` in the input area to open the autocomplete menu, use arrow keys to navigate, and press `Tab` or `Enter` to select.
[](https://docs.runmaestro.ai/slash-commands#built-in-maestro-commands)
Built-in Maestro Commands
-----------------------------------------------------------------------------------------------------
Maestro provides built-in slash commands that are handled internally (not sent to the AI agent):
| Command | Description |
| --- | --- |
| `/history` | Generate a synopsis of recent work and add to the History panel |
| `/wizard` | Start the planning wizard for Auto Run documents |
| `/skills` | List available Claude Code skills for this project _(Claude Code only)_ |
The `/wizard` command can take optional natural language input: `/wizard add user authentication feature` to provide initial context.
###
[](https://docs.runmaestro.ai/slash-commands#skills-enumeration)
Skills Enumeration
The `/skills` command displays all Claude Code skills available in your project. Skills are extensions that provide domain-specific knowledge and capabilities to Claude Code.
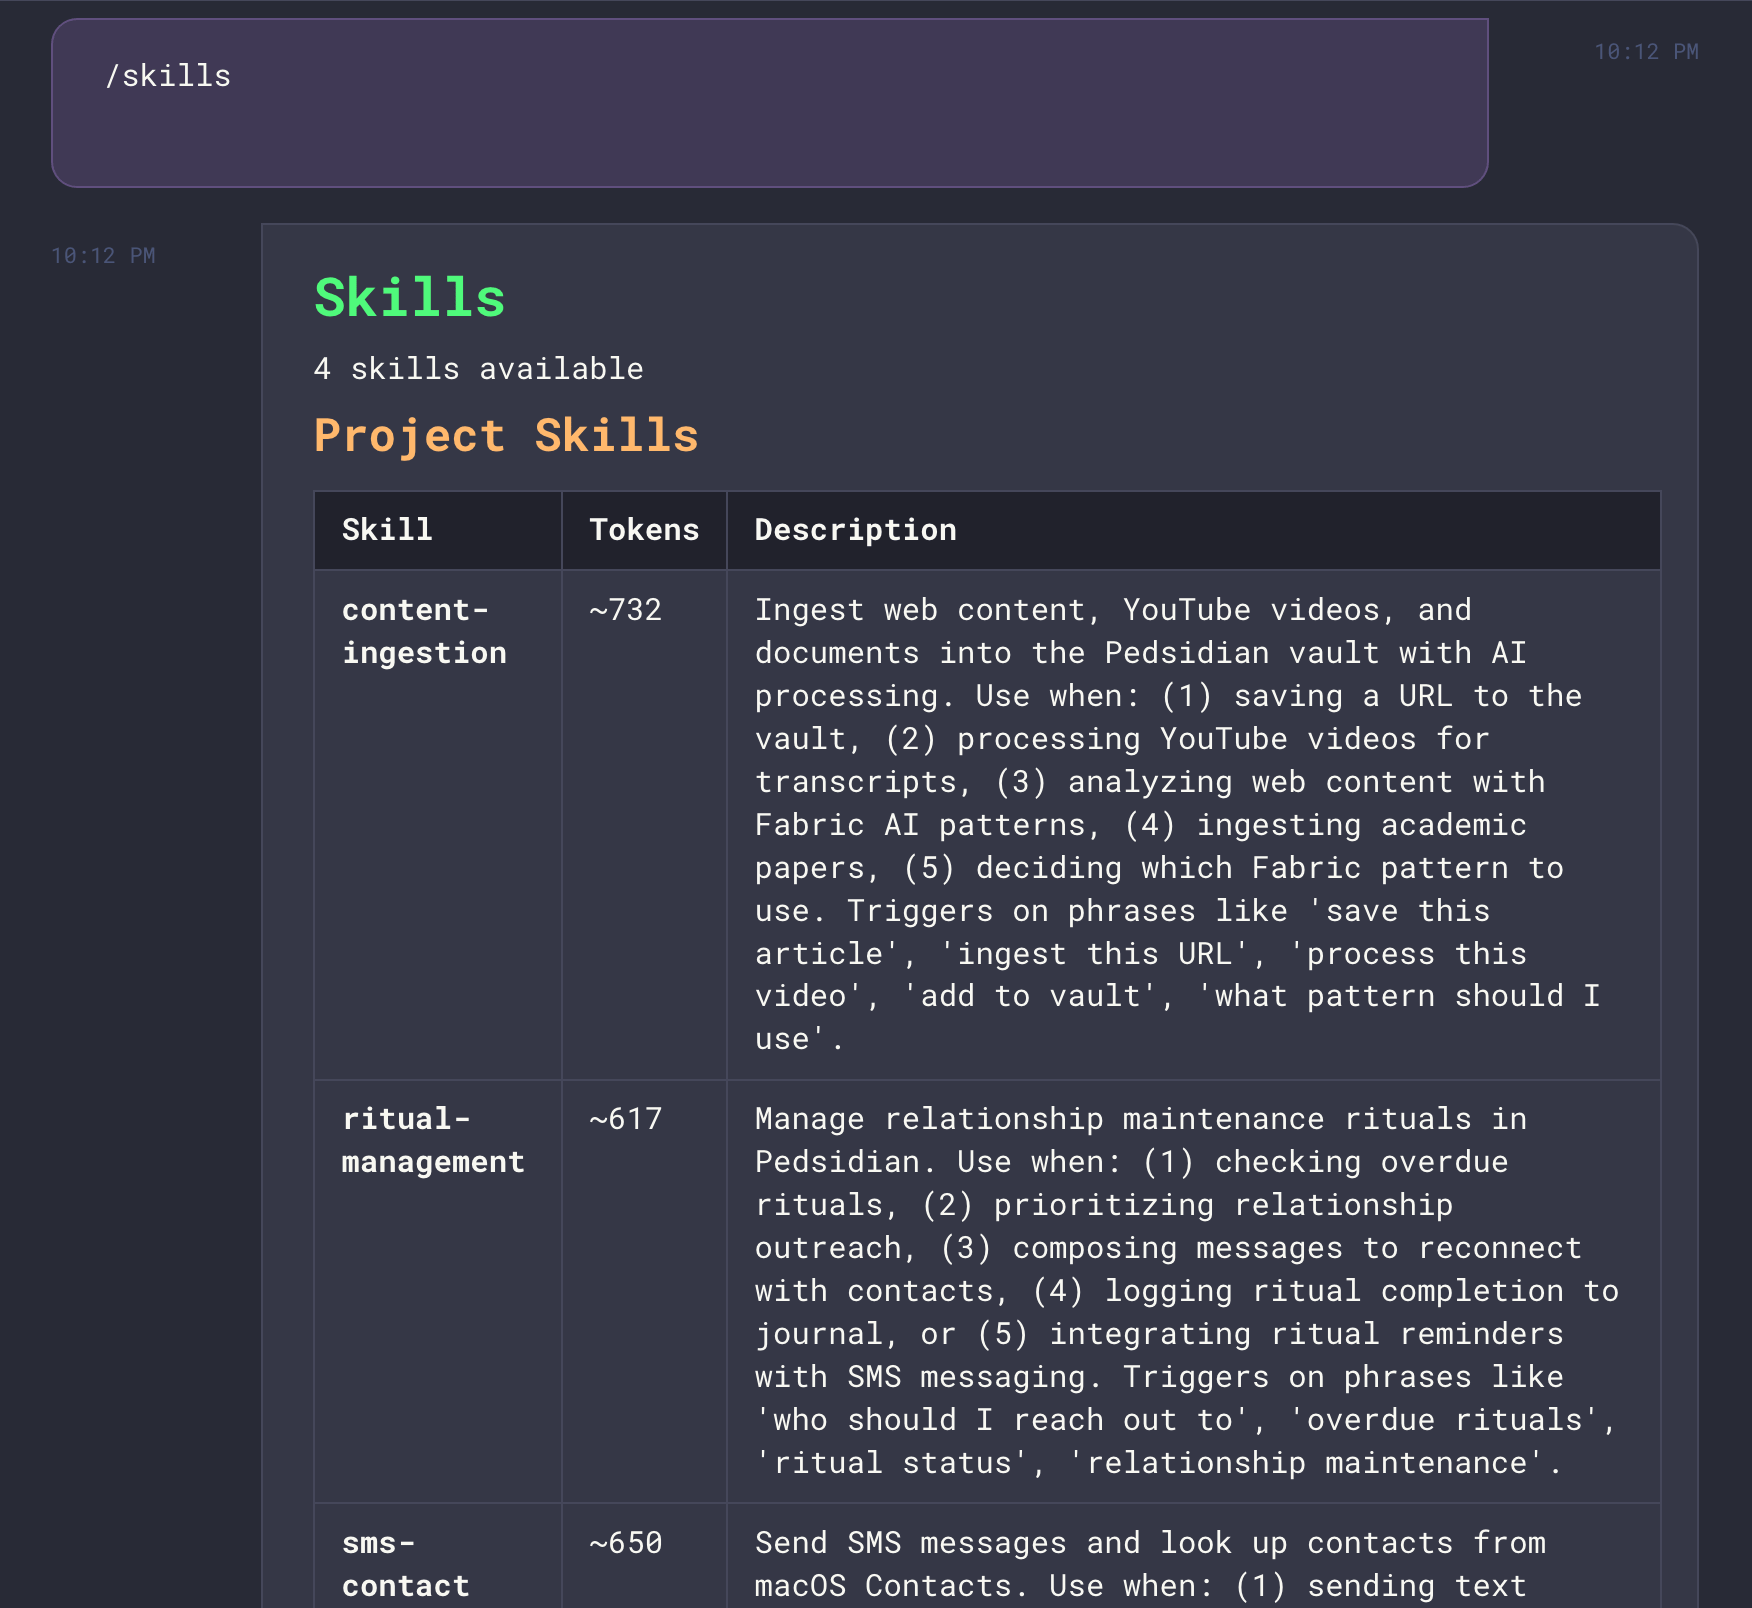
Skills are loaded from:
* **Project skills**: `.claude/skills//skill.md` in your project directory
* **User skills**: `~/.claude/skills//skill.md` for personal skills
Each skill is displayed with its name, approximate token count, and description. This command is only available when using Claude Code as your AI provider.
The `/skills` command is a Maestro feature that reads skill files directly—it doesn’t invoke Claude Code’s native `/skills` command (which requires an interactive terminal).
[](https://docs.runmaestro.ai/slash-commands#custom-ai-commands)
Custom AI Commands
---------------------------------------------------------------------------------------
Create your own slash commands in **Settings → AI Commands**. Each command has a trigger (e.g., `/deploy`) and a prompt that gets sent to the AI agent. Commands support **template variables** that are automatically substituted at runtime. These same variables also work in [core system prompts](https://docs.runmaestro.ai/prompt-customization)
.
###
[](https://docs.runmaestro.ai/slash-commands#conductor-variables)
Conductor Variables
| Variable | Description |
| --- | --- |
| `{{CONDUCTOR_PROFILE}}` | Your “About Me” profile from Settings → General. Tells agents about your background, preferences, and communication style. |
###
[](https://docs.runmaestro.ai/slash-commands#agent-variables)
Agent Variables
| Variable | Description |
| --- | --- |
| `{{AGENT_NAME}}` | Agent name |
| `{{AGENT_PATH}}` | Agent home directory path (full path to project) |
| `{{AGENT_GROUP}}` | Agent’s group name (if grouped) |
| `{{AGENT_SESSION_ID}}` | Agent session ID (for conversation continuity) |
| `{{TAB_NAME}}` | Custom tab name (alias: `SESSION_NAME`) |
| `{{TOOL_TYPE}}` | Agent type (claude-code, codex, opencode, factory-droid) |
###
[](https://docs.runmaestro.ai/slash-commands#path-variables)
Path Variables
| Variable | Description |
| --- | --- |
| `{{CWD}}` | Current working directory |
| `{{AUTORUN_FOLDER}}` | Auto Run documents folder path |
###
[](https://docs.runmaestro.ai/slash-commands#auto-run-variables)
Auto Run Variables
| Variable | Description |
| --- | --- |
| `{{DOCUMENT_NAME}}` | Current Auto Run document name (without .md) |
| `{{DOCUMENT_PATH}}` | Full path to current Auto Run document |
| `{{LOOP_NUMBER}}` | Current loop iteration (5-digit padded: 00001, 00002, etc.) |
###
[](https://docs.runmaestro.ai/slash-commands#date/time-variables)
Date/Time Variables
| Variable | Description |
| --- | --- |
| `{{DATE}}` | Current date (YYYY-MM-DD) |
| `{{TIME}}` | Current time (HH:MM:SS) |
| `{{DATETIME}}` | Full datetime (YYYY-MM-DD HH:MM:SS) |
| `{{TIMESTAMP}}` | Unix timestamp in milliseconds |
| `{{DATE_SHORT}}` | Short date (MM/DD/YY) |
| `{{TIME_SHORT}}` | Short time (HH:MM) |
| `{{YEAR}}` | Current year (YYYY) |
| `{{MONTH}}` | Current month (01-12) |
| `{{DAY}}` | Current day (01-31) |
| `{{WEEKDAY}}` | Day of week (Monday, Tuesday, etc.) |
###
[](https://docs.runmaestro.ai/slash-commands#git-&-context-variables)
Git & Context Variables
| Variable | Description |
| --- | --- |
| `{{GIT_BRANCH}}` | Current git branch name (requires git repo) |
| `{{IS_GIT_REPO}}` | ”true” or “false” |
| `{{CONTEXT_USAGE}}` | Current context window usage percentage |
**Example**: A custom `/standup` command with prompt:
It's {{WEEKDAY}}, {{DATE}}. I'm on branch {{GIT_BRANCH}} at {{AGENT_PATH}}.
Summarize what I worked on yesterday and suggest priorities for today.
###
[](https://docs.runmaestro.ai/slash-commands#passing-arguments-to-commands)
Passing Arguments to Commands
Any text typed after a slash command is treated as arguments and included in the prompt sent to the agent. **Explicit placement with `$ARGUMENTS`**: Use `$ARGUMENTS` in your prompt to control exactly where user input is inserted:
# Prompt for /plan command
Create a plan for: $ARGUMENTS
Typing `/plan user authentication flow` sends: `Create a plan for: user authentication flow` **Automatic appending**: If your prompt doesn’t contain `$ARGUMENTS`, any trailing text is automatically appended after the prompt:
# Prompt for /commit command
Please commit all changes with a descriptive message
Typing `/commit fix the login bug` sends:
Please commit all changes with a descriptive message
fix the login bug
Use `$ARGUMENTS` for precise control over where user input appears within your prompt. Omit it for simple commands where appending is sufficient.
[](https://docs.runmaestro.ai/slash-commands#spec-kit-commands)
Spec-Kit Commands
-------------------------------------------------------------------------------------
Maestro bundles [GitHub’s spec-kit](https://github.com/github/spec-kit)
methodology for structured feature development:
| Command | Description |
| --- | --- |
| `/speckit.help` | Learn how to use spec-kit with Maestro |
| `/speckit.constitution` | Create or update the project constitution |
| `/speckit.specify` | Create or update feature specification |
| `/speckit.clarify` | Identify underspecified areas and ask clarification questions |
| `/speckit.plan` | Execute implementation planning workflow |
| `/speckit.tasks` | Generate actionable, dependency-ordered tasks |
| `/speckit.analyze` | Cross-artifact consistency and quality analysis |
| `/speckit.checklist` | Generate custom checklist for feature |
| `/speckit.taskstoissues` | Convert tasks to GitHub issues |
| `/speckit.implement` | Execute tasks using Maestro Auto Run with worktree support |
See [Spec-Kit Commands](https://docs.runmaestro.ai/speckit-commands)
for the complete workflow guide.
[](https://docs.runmaestro.ai/slash-commands#openspec-commands)
OpenSpec Commands
-------------------------------------------------------------------------------------
Maestro bundles [OpenSpec](https://github.com/Fission-AI/OpenSpec)
for spec-driven change management. These commands help you propose, implement, and archive changes systematically:
| Command | Description |
| --- | --- |
| `/openspec.help` | Learn how to use OpenSpec with Maestro |
| `/openspec.proposal` | Create a change proposal with specs, tasks, and optional design docs |
| `/openspec.apply` | Implement an approved change proposal by executing tasks |
| `/openspec.archive` | Archive a completed change after deployment |
| `/openspec.implement` | Convert OpenSpec tasks to Maestro Auto Run documents |
See [OpenSpec Commands](https://docs.runmaestro.ai/openspec-commands)
for the complete workflow guide and directory structure.
[](https://docs.runmaestro.ai/slash-commands#agent-native-commands)
Agent Native Commands
---------------------------------------------------------------------------------------------
When using Claude Code, Maestro automatically discovers and displays the agent’s native slash commands in the autocomplete menu. These commands are sent via the `system/init` event when Claude Code starts and appear with a “Claude Code command” label to distinguish them from Maestro’s custom commands.
###
[](https://docs.runmaestro.ai/slash-commands#supported-in-batch-mode)
Supported in Batch Mode
Claude Code runs in batch/print mode within Maestro, which means only certain native commands work. The following commands are **supported**:
| Command | Description |
| --- | --- |
| `/compact` | Compact conversation history to reduce context usage |
| `/cost` | Show token usage and cost for the session |
| `/init` | Initialize a CLAUDE.md file in the project |
| `/pr-comments` | Address PR review comments |
| `/release-notes` | Generate release notes |
| `/review` | Request a code review |
| `/security-review` | Perform a security review |
Additionally, any **custom commands from Claude Code plugins/skills** (e.g., `/commit`, `/pdf`, `/docx`) are fully supported and will appear in the autocomplete menu.
###
[](https://docs.runmaestro.ai/slash-commands#not-supported-in-batch-mode)
Not Supported in Batch Mode
The following Claude Code commands are **interactive-only** and don’t work through Maestro:
| Command | Reason |
| --- | --- |
| `/mcp` | MCP server management requires interactive TUI |
| `/help` | Help display is interactive |
| `/clear` | Conversation clearing is handled differently in batch mode |
| `/config` | Configuration requires interactive prompts |
| `/model` | Model switching mid-session requires TUI |
| `/permissions` | Permission management is interactive |
| `/memory` | Memory/CLAUDE.md editing requires TUI |
| `/rewind` | Conversation rewind requires interactive selection |
| `/vim` | Vim mode is a TUI feature |
| `/doctor` | Diagnostics run as a separate CLI command |
| `/login` / `/logout` | Authentication is interactive |
| `/bug` | Bug reporting requires interactive input |
For commands like `/mcp` or `/config`, use the Claude Code CLI directly in a terminal: `claude mcp` or `claude config`.
Was this page helpful?
YesNo
[Keyboard Shortcuts](https://docs.runmaestro.ai/keyboard-shortcuts)
[Prompt Customization](https://docs.runmaestro.ai/prompt-customization)
⌘I
---
# Troubleshooting & Support - Maestro
[Skip to main content](https://docs.runmaestro.ai/troubleshooting#content-area)
[Maestro home page](https://runmaestro.ai/)
Search...
⌘K
Search...
Navigation
Reference
Troubleshooting & Support
On this page
* [Frequently Asked Questions](https://docs.runmaestro.ai/troubleshooting#frequently-asked-questions)
* [System Logs](https://docs.runmaestro.ai/troubleshooting#system-logs)
* [Process Monitor](https://docs.runmaestro.ai/troubleshooting#process-monitor)
* [Agent Errors](https://docs.runmaestro.ai/troubleshooting#agent-errors)
* [Debug Package](https://docs.runmaestro.ai/troubleshooting#debug-package)
* [What’s Included](https://docs.runmaestro.ai/troubleshooting#what%E2%80%99s-included)
* [Privacy Protections](https://docs.runmaestro.ai/troubleshooting#privacy-protections)
* [WSL2 Issues (Windows)](https://docs.runmaestro.ai/troubleshooting#wsl2-issues-windows)
* [Common WSL2 Problems](https://docs.runmaestro.ai/troubleshooting#common-wsl2-problems)
* [Getting Help](https://docs.runmaestro.ai/troubleshooting#getting-help)
[](https://docs.runmaestro.ai/troubleshooting#frequently-asked-questions)
Frequently Asked Questions
--------------------------------------------------------------------------------------------------------
**Do my MCP tools, skills, and permissions work in Maestro?** Yes. Maestro is a pass-through—it calls your provider (Claude Code, Codex, OpenCode) in batch mode rather than interactive mode. Whatever works when you run the provider directly will work in Maestro. Your MCP servers, custom skills, authentication, and tool permissions all carry over automatically. **What’s the difference between running the provider directly vs. through Maestro?** The only difference is execution mode. When you run Claude Code directly, it’s interactive—you send a message, watch it work, and respond in real-time. Maestro runs in batch mode: it sends a prompt, the provider processes it fully, and returns the response. This enables unattended automation via Auto Run and parallel agent management. Everything else—your tools, permissions, context—remains identical.
* * *
[](https://docs.runmaestro.ai/troubleshooting#system-logs)
System Logs
--------------------------------------------------------------------------
Maestro maintains detailed system logs that help diagnose issues. Access them via:
* **Keyboard:** `Opt+Cmd+L` (Mac) / `Alt+Ctrl+L` (Windows/Linux)
* **Quick Actions:** `Cmd+K` / `Ctrl+K` → “View System Logs”
* **Menu:** Click the hamburger menu (☰) in the Left Panel → “System Logs”
The **System Log Viewer** shows:
* Timestamped log entries with severity levels (debug, info, warn, error, toast, autorun)
* Filterable by log level via clickable level pills and searchable text (`Cmd+F` / `Ctrl+F`)
* Real-time updates as new logs are generated
* Detail view with full message content and source module
**Log levels** can be configured in **Settings** → **General** → **System Log Level**. Higher levels show fewer logs — Debug shows all logs, Error shows only errors.
[](https://docs.runmaestro.ai/troubleshooting#process-monitor)
Process Monitor
----------------------------------------------------------------------------------
Monitor all running processes spawned by Maestro:
* **Keyboard:** `Opt+Cmd+P` (Mac) / `Alt+Ctrl+P` (Windows/Linux)
* **Quick Actions:** `Cmd+K` / `Ctrl+K` → “View System Processes”
* **Menu:** Click the hamburger menu (☰) in the Left Panel → “Process Monitor”
The **Process Monitor** displays a hierarchical tree view:
* **Groups** — Session groups containing their member sessions
* **Sessions** — Each session shows its AI agent and terminal processes
* **Process details** — PID, runtime, working directory, Claude session ID (for AI processes)
* **Group Chat processes** — Moderator and participant processes for active group chats
* **Wizard processes** — Active wizard conversations and playbook generation
**Process types shown:**
| Type | Description |
| --- | --- |
| AI Agent | Main Claude Code (or other agent) process |
| Terminal | Shell process for the session |
| Batch | Auto Run document processing agent |
| Synopsis | Context compaction synopsis generation |
| Moderator | Group chat moderator process |
| Participant | Group chat participant agent |
| Wizard | Wizard conversation process |
| Wizard Gen | Playbook document generation process |
**Features:**
* Click a process row to view detailed information (command, arguments, session ID)
* Double-click or press `Enter` to navigate to the session/tab
* `K` or `Delete` to kill a selected process
* `R` to refresh the process list
* Expand/collapse buttons in header to control tree visibility
This is useful when an agent becomes unresponsive or you need to diagnose process-related issues.
[](https://docs.runmaestro.ai/troubleshooting#agent-errors)
Agent Errors
----------------------------------------------------------------------------
When an AI agent encounters an error, Maestro displays a modal with clear recovery options. Common error types include:
| Error Type | Description | Recovery Options |
| --- | --- | --- |
| **Authentication Required** | API key expired or invalid | Re-authenticate, check API key settings |
| **Context Limit Reached** | Conversation exceeded token limit | Start new session, compact context |
| **Rate Limit Exceeded** | Too many API requests | Wait and retry, reduce request frequency |
| **Connection Error** | Network connectivity issue | Check internet, retry connection |
| **Agent Error** | Agent process crashed unexpectedly | Restart agent, start new session |
| **Permission Denied** | File or operation access denied | Check permissions, run with appropriate access |
Each error modal shows:
* Error type and description
* Agent and session context
* Timestamp of when the error occurred
* Collapsible JSON details for debugging
* Recovery action buttons specific to the error type
[](https://docs.runmaestro.ai/troubleshooting#debug-package)
Debug Package
------------------------------------------------------------------------------
If you encounter deep-seated issues that are difficult to diagnose, Maestro can generate a **Debug Package** — a compressed bundle of diagnostic information that you can safely share when reporting bugs. **To create a Debug Package:**
1. Press `Cmd+K` (Mac) or `Ctrl+K` (Windows/Linux) to open Quick Actions
2. Search for “Create Debug Package”
3. Choose a save location for the `.zip` file
4. Attach the file to your [GitHub issue](https://github.com/RunMaestro/Maestro/issues)
###
[](https://docs.runmaestro.ai/troubleshooting#what%E2%80%99s-included)
What’s Included
The debug package collects metadata and configuration — never your conversations or sensitive data: **Always included:**
| File | Contents |
| --- | --- |
| `system-info.json` | OS, CPU, memory, Electron/Node versions, app uptime |
| `settings.json` | App preferences with sensitive values redacted |
| `agents.json` | Agent configurations, availability, and capability flags |
| `external-tools.json` | Shell, git, GitHub CLI, and cloudflared availability |
| `windows-diagnostics.json` | Windows-specific diagnostics (minimal on other platforms) |
| `groups.json` | Session group configurations |
| `processes.json` | Active process information |
| `web-server.json` | Web server and Cloudflare tunnel status |
| `storage-info.json` | Storage paths and sizes |
**Optional (toggleable in UI):**
| File | Contents |
| --- | --- |
| `sessions.json` | Session metadata (names, states, tab counts — no conversations) |
| `logs.json` | Recent system log entries |
| `errors.json` | Current error states and recent error events |
| `group-chats.json` | Group chat metadata (participant lists, routing — no messages) |
| `batch-state.json` | Auto Run state and document queue |
###
[](https://docs.runmaestro.ai/troubleshooting#privacy-protections)
Privacy Protections
The debug package is designed to be **safe to share publicly**:
* **API keys and tokens** — Replaced with `[REDACTED]`
* **Passwords and secrets** — Never included
* **Conversation content** — Excluded entirely (no AI responses, no user messages)
* **File contents** — Not included from your projects
* **Custom prompts** — Not included (may contain sensitive context)
* **File paths** — Sanitized to replace your username with `~`
* **Environment variables** — Only counts shown, not values (may contain secrets)
* **Custom agent arguments** — Only `[SET]` or `[NOT SET]` shown, not actual values
**Example path sanitization:**
* Before: `/Users/johndoe/Projects/MyApp`
* After: `~/Projects/MyApp`
[](https://docs.runmaestro.ai/troubleshooting#wsl2-issues-windows)
WSL2 Issues (Windows)
--------------------------------------------------------------------------------------------
If you’re running Maestro through WSL2, most issues stem from using Windows-mounted paths. See the [WSL2 installation guide](https://docs.runmaestro.ai/installation#wsl2-users-windows-subsystem-for-linux)
for the recommended setup.
###
[](https://docs.runmaestro.ai/troubleshooting#common-wsl2-problems)
Common WSL2 Problems
**“EPERM: operation not permitted” on socket binding** The Vite dev server or Electron cannot bind to ports when running from `/mnt/...` paths. **Solution:** Move your project to the native Linux filesystem:
mv /mnt/c/projects/maestro ~/maestro
cd ~/maestro
npm install
npm run dev
**“FATAL:sandbox\_host\_linux.cc” Electron crash** The Electron sandbox cannot operate correctly on Windows-mounted filesystems. **Solution:** Run from the Linux filesystem (`/home/...`), not from `/mnt/...`. **npm install timeouts or ENOTEMPTY errors** Cross-filesystem operations between WSL and Windows are unreliable for npm’s file operations. **Solution:** Clone and install from the Linux filesystem:
cd ~
git clone https://github.com/RunMaestro/Maestro.git
cd maestro
npm install
**electron-rebuild failures** The Windows temp directory may be inaccessible from WSL. **Solution:** Override the temp directory:
TMPDIR=/tmp npm run rebuild
**Git index corruption or lock file errors** NTFS and Linux inode handling are incompatible, causing git metadata issues. **Solution:** If you see “missing index” or spurious `.git/index.lock` errors:
rm -f .git/index.lock
git checkout -f
For new projects, always clone to the Linux filesystem from the start. **Fonts not found** The Interface Font picker in the Settings dialog asks Linux fontconfig what fonts exist in the WSL environment. It is not querying native Windows fonts directly; it’s using `fc-list` to resolve them, which by default only sees Linux-side fonts. To see Windows fonts, you need to teach fontconfig about `/mnt/c/Windows/Fonts`, then rebuild the font cache. Some fonts may also be stored in the user’s `AppData\Local` folder. To fix, update `fontconfig`’s configuration in WSL, replacing `$USER` accordingly:
mkdir -p ~/.config/fontconfig/conf.d
cat > ~/.config/fontconfig/conf.d/50-windows-fonts.conf <<'EOF'
/mnt/c/Windows/Fonts
/mnt/c/Users/$USER/AppData/Local/Microsoft/Windows/Fonts
EOF
Then rebuild the cache: `fc-cache -f -v`
[](https://docs.runmaestro.ai/troubleshooting#getting-help)
Getting Help
----------------------------------------------------------------------------
* **GitHub Issues**: [Report bugs or request features](https://github.com/RunMaestro/Maestro/issues)
* **Discord**: [Join the community](https://runmaestro.ai/discord)
* **Documentation**: [Docs site](https://docs.runmaestro.ai/)
, [CONTRIBUTING.md](https://github.com/RunMaestro/Maestro/blob/main/CONTRIBUTING.md)
, and [ARCHITECTURE.md](https://github.com/RunMaestro/Maestro/blob/main/ARCHITECTURE.md)
Was this page helpful?
YesNo
[Performance Profiling](https://docs.runmaestro.ai/performance-profiling)
⌘I
---
# Usage Dashboard - Maestro
[Skip to main content](https://docs.runmaestro.ai/usage-dashboard#content-area)
[Maestro home page](https://runmaestro.ai/)
Search...
⌘K
Search...
Navigation
Encore Features
Usage Dashboard
On this page
* [Opening the Dashboard](https://docs.runmaestro.ai/usage-dashboard#opening-the-dashboard)
* [Dashboard Tabs](https://docs.runmaestro.ai/usage-dashboard#dashboard-tabs)
* [Overview](https://docs.runmaestro.ai/usage-dashboard#overview)
* [Agents](https://docs.runmaestro.ai/usage-dashboard#agents)
* [Activity](https://docs.runmaestro.ai/usage-dashboard#activity)
* [Auto Run](https://docs.runmaestro.ai/usage-dashboard#auto-run)
* [Time Range Filtering](https://docs.runmaestro.ai/usage-dashboard#time-range-filtering)
* [Keyboard Navigation](https://docs.runmaestro.ai/usage-dashboard#keyboard-navigation)
* [Exporting Data](https://docs.runmaestro.ai/usage-dashboard#exporting-data)
* [Data Collection](https://docs.runmaestro.ai/usage-dashboard#data-collection)
* [What’s Tracked](https://docs.runmaestro.ai/usage-dashboard#what%E2%80%99s-tracked)
* [What’s NOT Tracked](https://docs.runmaestro.ai/usage-dashboard#what%E2%80%99s-not-tracked)
* [Enabling/Disabling Collection](https://docs.runmaestro.ai/usage-dashboard#enabling%2Fdisabling-collection)
* [Accessibility](https://docs.runmaestro.ai/usage-dashboard#accessibility)
* [Additional Features](https://docs.runmaestro.ai/usage-dashboard#additional-features)
* [Tips](https://docs.runmaestro.ai/usage-dashboard#tips)
The Usage Dashboard provides comprehensive analytics for tracking your AI usage patterns across all sessions. View aggregated statistics, compare agent performance, and explore activity patterns over time. 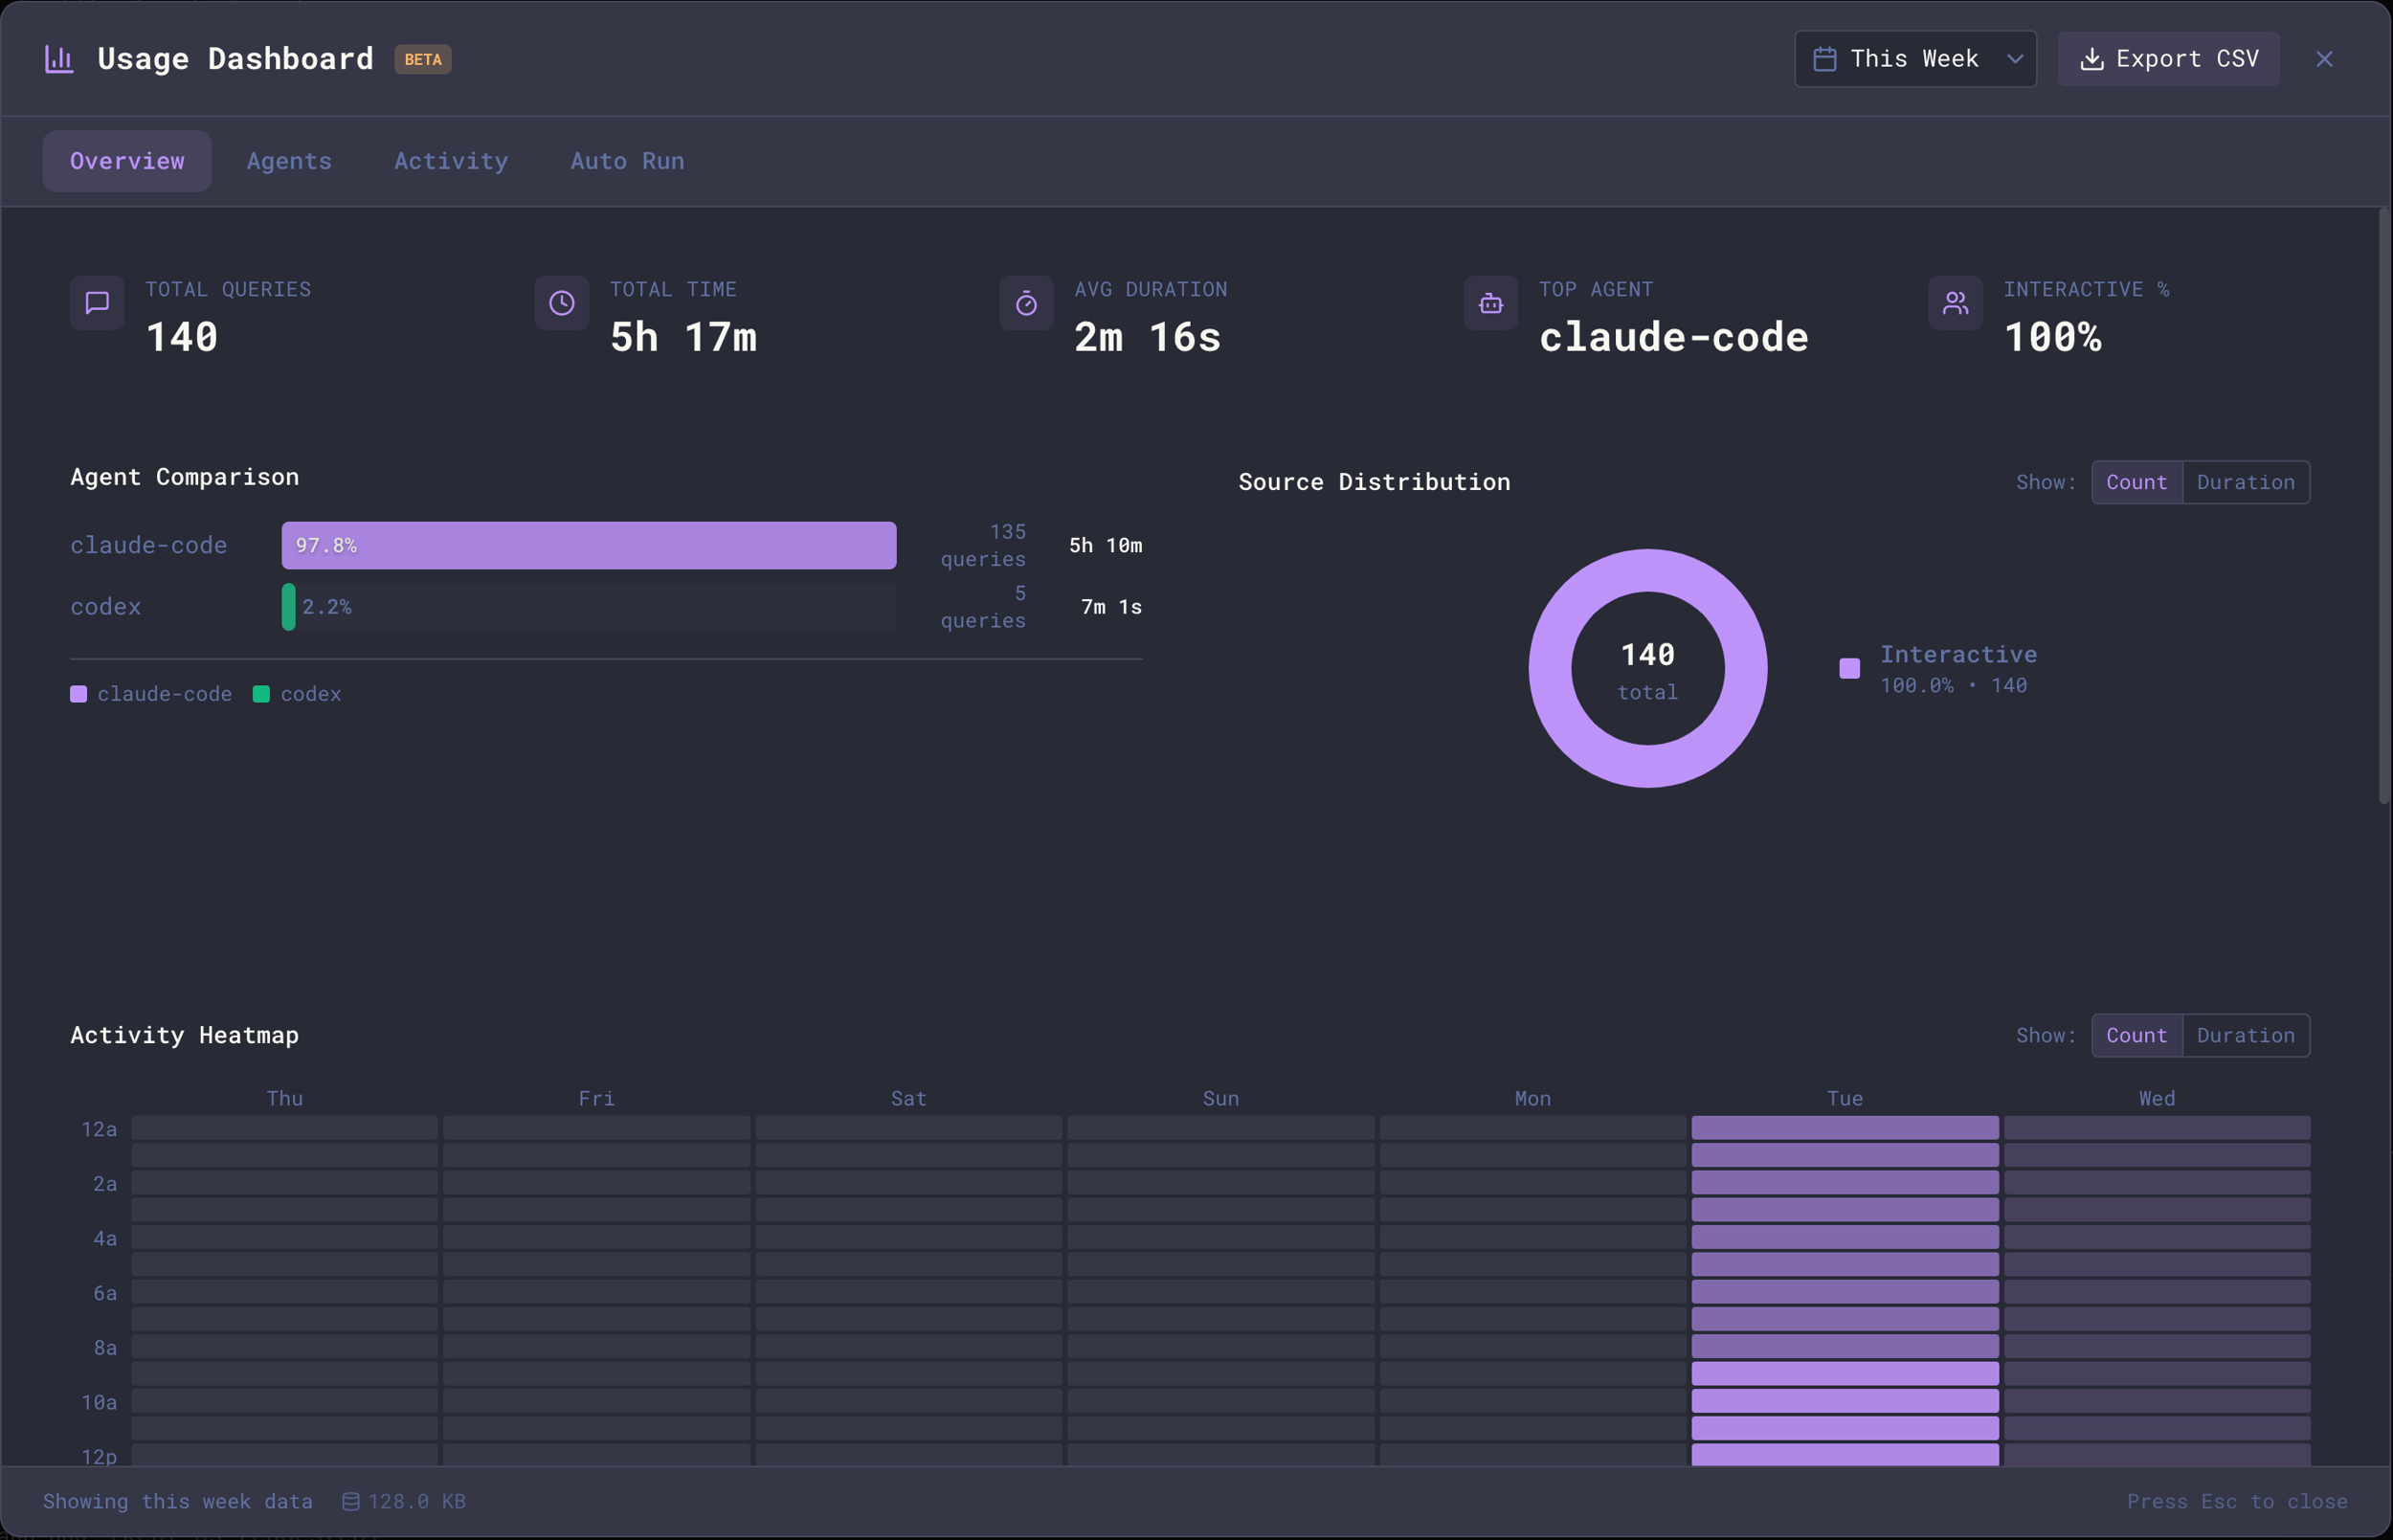
The Usage Dashboard only tracks activity from within Maestro. It does not include historical data from before you started using Maestro, nor does it capture usage from agents run outside of Maestro (e.g., directly from the command line).
[](https://docs.runmaestro.ai/usage-dashboard#opening-the-dashboard)
Opening the Dashboard
----------------------------------------------------------------------------------------------
**Keyboard shortcut:**
* macOS: `Opt+Cmd+U`
* Windows/Linux: `Alt+Ctrl+U`
**From the menu:**
1. Click the hamburger menu (☰) in the top-left corner
2. Select **Usage Dashboard**
**From Quick Actions:**
* Press `Cmd+K` / `Ctrl+K` and search for “Usage Dashboard”
[](https://docs.runmaestro.ai/usage-dashboard#dashboard-tabs)
Dashboard Tabs
--------------------------------------------------------------------------------
The dashboard is organized into four tabs, each providing different insights into your usage:
###
[](https://docs.runmaestro.ai/usage-dashboard#overview)
Overview
The Overview tab gives you a high-level summary of your AI usage: **Summary Cards:**
* **Sessions** — Total number of registered sessions
* **Total Queries** — Number of messages sent to AI agents
* **Total Time** — Cumulative time spent waiting for AI responses
* **Avg Duration** — Average response time per query
* **Top Agent** — Your most-used AI agent
* **Interactive %** — Percentage of queries from interactive (non-Auto Run) sessions
**Agent Comparison:** A horizontal bar chart showing usage distribution across your AI agents. See at a glance which agents you use most, with query counts and time spent per agent. **Source Distribution:** A donut chart breaking down your queries by source:
* **Interactive** — Manual queries from AI Terminal conversations
* **Auto Run** — Automated queries from playbook execution
Toggle between **Count** (number of queries) and **Duration** (time spent) views. **Location Distribution:** A donut chart showing the breakdown between local and remote (SSH) queries. Useful for understanding how much work is done locally versus on remote machines. **Peak Hours:** A 24-hour bar chart showing when you’re most active. Each bar represents an hour of the day (0–23), with height indicating query count or duration. The peak hour is highlighted. Toggle between Count and Duration views. **Activity Heatmap:** A GitHub-style heatmap showing your activity patterns throughout the week. Each cell represents an hour of the day, with color intensity indicating activity level. Toggle between Count and Duration views to see different perspectives. **Duration Trends:** A line chart showing how your query durations vary over time. Useful for spotting performance trends or changes in workload.
###
[](https://docs.runmaestro.ai/usage-dashboard#agents)
Agents
The Agents tab provides detailed per-agent analytics: **Session Statistics:**
* **Total Sessions** — Count of registered sessions
* **By Agent** — Breakdown by agent type (Claude Code, Codex, etc.) with color-coded indicators
* **Git Repos vs Folders** — How many sessions are Git repositories versus plain directories
* **Remote vs Local** — Sessions running on remote SSH hosts versus local machine
**Agent Comparison:**
* Full agent comparison chart showing query counts and time spent per agent
* Side-by-side visual comparison of your agent usage patterns
###
[](https://docs.runmaestro.ai/usage-dashboard#activity)
Activity
The Activity tab shows your usage patterns over time:
* Duration trends chart showing how your usage varies
* Time-based filtering to spot patterns
* Useful for understanding your productivity cycles
###
[](https://docs.runmaestro.ai/usage-dashboard#auto-run)
Auto Run
The Auto Run tab focuses specifically on automated playbook execution: **Metric Cards:**
* **Total Sessions** — Number of Auto Run sessions
* **Tasks Done** — Total tasks completed (with attempted count)
* **Avg Tasks/Session** — Average tasks completed per Auto Run session
* **Success Rate** — Percentage of tasks that completed successfully
* **Avg Session** — Average duration of an Auto Run session
* **Avg Task** — Average duration per individual task
**Tasks Completed Over Time:** A mini bar chart showing task completions by date (last 14 days). Hover over bars to see exact counts and success percentages for each day.
[](https://docs.runmaestro.ai/usage-dashboard#time-range-filtering)
Time Range Filtering
--------------------------------------------------------------------------------------------
Use the time range dropdown in the top-right corner to filter all dashboard data:
| Range | Description |
| --- | --- |
| **Today** | Current day only |
| **This Week** | Current week (default) |
| **This Month** | Current calendar month |
| **This Year** | Current calendar year |
| **All Time** | Everything since you started using Maestro |
The selected time range applies to all tabs and charts. Your preferred time range is saved and restored between sessions.
[](https://docs.runmaestro.ai/usage-dashboard#keyboard-navigation)
Keyboard Navigation
------------------------------------------------------------------------------------------
| Shortcut | Action |
| --- | --- |
| `Cmd+Shift+[` / `Ctrl+Shift+[` | Previous tab |\
| `Cmd+Shift+]` / `Ctrl+Shift+]` | Next tab |
| `Arrow Up/Down` | Navigate between chart sections |
| `Home` | Jump to first section |
| `End` | Jump to last section |
| `Esc` | Close dashboard |
[](https://docs.runmaestro.ai/usage-dashboard#exporting-data)
Exporting Data
--------------------------------------------------------------------------------
Click **Export CSV** in the top-right corner to download your usage data as a CSV file. The export includes:
* Query timestamps
* Agent information
* Duration metrics
* Source categorization (interactive vs. Auto Run)
Use exported data for further analysis in spreadsheet applications or to share usage reports.
[](https://docs.runmaestro.ai/usage-dashboard#data-collection)
Data Collection
----------------------------------------------------------------------------------
###
[](https://docs.runmaestro.ai/usage-dashboard#what%E2%80%99s-tracked)
What’s Tracked
The Usage Dashboard collects:
* **Query events** — Each message sent to an AI agent, including duration and which agent handled it
* **Auto Run sessions** — Start/end times of automated playbook runs
* **Auto Run tasks** — Individual task completions within playbooks
###
[](https://docs.runmaestro.ai/usage-dashboard#what%E2%80%99s-not-tracked)
What’s NOT Tracked
* Message content (your prompts and AI responses)
* File contents or paths
* Token counts or costs (tracked per-session in the main UI, not aggregated in the dashboard)
* Activity outside of Maestro
###
[](https://docs.runmaestro.ai/usage-dashboard#enabling/disabling-collection)
Enabling/Disabling Collection
Stats collection is enabled by default. To disable:
1. Open **Settings** (`Cmd+,` / `Ctrl+,`)
2. Go to the **General** tab
3. Find **Usage Dashboard** section (marked with Beta badge)
4. Toggle off **Enable stats collection**
You can also set your **Default dashboard time range** here (Today, This Week, This Month, This Year, or All Time). Disabling collection stops new data from being recorded but preserves existing data in the dashboard.
[](https://docs.runmaestro.ai/usage-dashboard#accessibility)
Accessibility
------------------------------------------------------------------------------
The Usage Dashboard supports colorblind-friendly chart palettes using high-contrast colors from the Wong palette. This mode is enabled programmatically via the `colorBlindMode` setting.
The colorblind mode setting is available in the application configuration but not yet exposed in the Settings UI. It will use accessible colors automatically when enabled.
[](https://docs.runmaestro.ai/usage-dashboard#additional-features)
Additional Features
------------------------------------------------------------------------------------------
**Real-time Updates:** The dashboard automatically refreshes when new queries are recorded. An “Updated” indicator briefly appears when new data arrives. **Database Size:** The footer displays the current size of the stats database, helping you monitor storage usage over time.
[](https://docs.runmaestro.ai/usage-dashboard#tips)
Tips
------------------------------------------------------------
* **Check the Activity Heatmap** to understand your most productive hours
* **Use Peak Hours** to identify your most productive time of day
* **Compare agents** to see if one consistently performs faster than others
* **Monitor Auto Run vs. Interactive** ratio to understand your automation level
* **Export regularly** if you want to track long-term trends externally
* **Use time filtering** to focus on recent activity or see the big picture
Was this page helpful?
YesNo
[Director's Notes](https://docs.runmaestro.ai/director-notes)
[Maestro Symphony](https://docs.runmaestro.ai/symphony)
⌘I
---
# Release Notes - Maestro
[Skip to main content](https://docs.runmaestro.ai/releases#content-area)
[Maestro home page](https://runmaestro.ai/)
Search...
⌘K
Search...
Navigation
Reference
Release Notes
On this page
* [Release Notes](https://docs.runmaestro.ai/releases#release-notes)
* [v0.16.x - Maestro Cue](https://docs.runmaestro.ai/releases#v0-16-x-maestro-cue)
* [New Features](https://docs.runmaestro.ai/releases#new-features)
* [Bug Fixes](https://docs.runmaestro.ai/releases#bug-fixes)
* [v0.15.x - Maestro Symphony](https://docs.runmaestro.ai/releases#v0-15-x-maestro-symphony)
* [Major 0.15.x Additions](https://docs.runmaestro.ai/releases#major-0-15-x-additions)
* [Changes in v0.15.3](https://docs.runmaestro.ai/releases#changes-in-v0-15-3)
* [Previous Releases in this Series](https://docs.runmaestro.ai/releases#previous-releases-in-this-series)
* [v0.14.x - Doc Graphs, SSH Agents, Inline Wizard](https://docs.runmaestro.ai/releases#v0-14-x-doc-graphs-ssh-agents-inline-wizard)
* [Smaller Changes in 0.14.x](https://docs.runmaestro.ai/releases#smaller-changes-in-0-14-x)
* [Previous Releases in this Series](https://docs.runmaestro.ai/releases#previous-releases-in-this-series-2)
* [v0.13.x - Playbook Exchange & Usage Dashboard](https://docs.runmaestro.ai/releases#v0-13-x-playbook-exchange-%26-usage-dashboard)
* [Changes](https://docs.runmaestro.ai/releases#changes)
* [v0.13.1 Changes](https://docs.runmaestro.ai/releases#v0-13-1-changes)
* [v0.13.0 Changes](https://docs.runmaestro.ai/releases#v0-13-0-changes)
* [Previous Releases in this Series](https://docs.runmaestro.ai/releases#previous-releases-in-this-series-3)
* [v0.12.x - Thinking, Spec-Kits, Context Management](https://docs.runmaestro.ai/releases#v0-12-x-thinking-spec-kits-context-management)
* [Show Thinking](https://docs.runmaestro.ai/releases#show-thinking)
* [GitHub Spec-Kit Integration](https://docs.runmaestro.ai/releases#github-spec-kit-integration)
* [Context Management Tools](https://docs.runmaestro.ai/releases#context-management-tools)
* [Changes Specific to v0.12.3:](https://docs.runmaestro.ai/releases#changes-specific-to-v0-12-3)
* [Previous Releases in this Series](https://docs.runmaestro.ai/releases#previous-releases-in-this-series-4)
* [v0.11.x - Worktrees](https://docs.runmaestro.ai/releases#v0-11-x-worktrees)
* [Other Changes](https://docs.runmaestro.ai/releases#other-changes)
* [v0.10.x - Group Chat](https://docs.runmaestro.ai/releases#v0-10-x-group-chat)
* [Changes](https://docs.runmaestro.ai/releases#changes-2)
* [Previous Releases in this Series](https://docs.runmaestro.ai/releases#previous-releases-in-this-series-5)
* [v0.9.x - Codex & OpenCode Support](https://docs.runmaestro.ai/releases#v0-9-x-codex-%26-opencode-support)
* [Changes](https://docs.runmaestro.ai/releases#changes-3)
* [Previous Releases in this Series](https://docs.runmaestro.ai/releases#previous-releases-in-this-series-6)
* [v0.8.x - Nudge Messages](https://docs.runmaestro.ai/releases#v0-8-x-nudge-messages)
* [Changes](https://docs.runmaestro.ai/releases#changes-4)
* [Previous Releases in this Series](https://docs.runmaestro.ai/releases#previous-releases-in-this-series-7)
* [v0.7.x - Onboarding and Interface Tour](https://docs.runmaestro.ai/releases#v0-7-x-onboarding-and-interface-tour)
* [Onboarding, Wizard, and Tours](https://docs.runmaestro.ai/releases#onboarding-wizard-and-tours)
* [UI / UX Enhancements](https://docs.runmaestro.ai/releases#ui-%2F-ux-enhancements)
* [Auto Run Workflow Improvements](https://docs.runmaestro.ai/releases#auto-run-workflow-improvements)
* [Application Behavior / Core Fixes](https://docs.runmaestro.ai/releases#application-behavior-%2F-core-fixes)
* [Update System](https://docs.runmaestro.ai/releases#update-system)
* [Previous Releases in this Series](https://docs.runmaestro.ai/releases#previous-releases-in-this-series-8)
* [v0.6.x - Autorun Overhaul](https://docs.runmaestro.ai/releases#v0-6-x-autorun-overhaul)
* [Previous Releases in this Series](https://docs.runmaestro.ai/releases#previous-releases-in-this-series-9)
* [v0.5.x](https://docs.runmaestro.ai/releases#v0-5-x)
* [Changes](https://docs.runmaestro.ai/releases#changes-5)
* [Previous Releases in this Series](https://docs.runmaestro.ai/releases#previous-releases-in-this-series-10)
* [v0.4.x](https://docs.runmaestro.ai/releases#v0-4-x)
* [Changes](https://docs.runmaestro.ai/releases#changes-6)
* [Previous Releases in this Series](https://docs.runmaestro.ai/releases#previous-releases-in-this-series-11)
* [v0.3.x](https://docs.runmaestro.ai/releases#v0-3-x)
* [Changes](https://docs.runmaestro.ai/releases#changes-7)
* [Previous Releases in this Series](https://docs.runmaestro.ai/releases#previous-releases-in-this-series-12)
* [v0.2.x](https://docs.runmaestro.ai/releases#v0-2-x)
* [Previous Releases in this Series](https://docs.runmaestro.ai/releases#previous-releases-in-this-series-13)
* [v0.1.x](https://docs.runmaestro.ai/releases#v0-1-x)
* [Previous Releases in this Series](https://docs.runmaestro.ai/releases#previous-releases-in-this-series-14)
* [Downloading Releases](https://docs.runmaestro.ai/releases#downloading-releases)
[](https://docs.runmaestro.ai/releases#release-notes)
Release Notes
=======================================================================
This page documents the version history of Maestro, including new features, improvements, and bug fixes for each release.
Maestro can update itself automatically! This feature was introduced in **v0.8.7** (December 16, 2025). Enable auto-updates in Settings to stay current.
* * *
[](https://docs.runmaestro.ai/releases#v0-16-x-maestro-cue)
v0.16.x - Maestro Cue
-------------------------------------------------------------------------------------
**Latest: v0.16.6-RC** | In Development
###
[](https://docs.runmaestro.ai/releases#new-features)
New Features
* **Maestro Cue** — Event-driven automation engine that watches for file changes, time intervals, agent completions, GitHub PRs/issues, and pending markdown tasks to trigger automated prompts. Configured via `.maestro/cue.yaml` per project. Gated as an Encore Feature
* **Environment tab** — Dedicated Settings tab for managing global environment variables passed to all agents
* **Static history graph with viewport indicator** — The activity graph in the History panel no longer shifts as you scroll; instead, a sliding indicator line with a timestamp label shows your current position in the timeline
* **File preview tab filtering** — New setting to control whether file preview tabs remain visible when the unread filter is active, with a redesigned Tab Filtering section in Display settings
* **Cloudflare tunnel auto-restart** — The web/mobile tunnel automatically restarts when the web server port changes
* **Custom TTS notifications** — Synopsis text is now sent to custom notification commands for user-initiated tasks
###
[](https://docs.runmaestro.ai/releases#bug-fixes)
Bug Fixes
* **Auto Run document clarity** — Rewrote the Auto Run instructions in the system prompt for improved agent comprehension
* **openExternal guard** — Prevented relative paths from being passed to `shell.openExternal`, suppressing RangeError noise
* * *
[](https://docs.runmaestro.ai/releases#v0-15-x-maestro-symphony)
v0.15.x - Maestro Symphony
-----------------------------------------------------------------------------------------------
**Latest: v0.15.3** | Released April 5, 2026
###
[](https://docs.runmaestro.ai/releases#major-0-15-x-additions)
Major 0.15.x Additions
🎶 **Maestro Symphony** — Contribute to open source with AI assistance! Browse curated issues from open-source projects with the `runmaestro.ai` label, clone repos with one click, and automatically process the relevant Auto Run playbooks. Track your contributions, streaks, and stats. You’re contributing CPU and tokens towards your favorite open-source projects and features. 🎬 **Director’s Notes** — Aggregates history across all agents into a unified timeline with search, filters, and an activity graph. Includes an AI Overview tab that generates a structured synopsis of recent work. Off by default, gated behind a new “Encore Features” panel under settings. This is a precursor to an eventual plugin system, allowing for extensions and customizations without bloating the core app. 🏷️ **Conductor Profile** — Available under Settings > General. Provide a short description on how Maestro agents should interface with you. 🧠 **Three-State Thinking Toggle** — The thinking toggle now cycles through three modes: off, on, and sticky. Sticky mode keeps thinking content visible after the response completes. Cycle with CMD/CTRL+SHIFT+K. 🤖 **Factory.ai Droid Support** — Added support for the [Factory.ai](https://factory.ai/product/cli)
droid agent. Full session management and output parsing integration.
[](https://docs.runmaestro.ai/releases#changes-in-v0-15-3)
Changes in v0.15.3
---------------------------------------------------------------------------------
* **CLI settings management:** Full `maestro-cli settings` command suite — list, get, set, and reset any Maestro setting from the command line. Includes per-agent configuration (custom paths, args, env vars, model overrides). Supports category filtering, verbose descriptions, and machine-readable JSON output for scripting
* **Live settings reload:** Settings changes made via the CLI are automatically detected by the running desktop app — no restart required
* **Plan-Mode toggle:** Claude Code and OpenCode agents now show “Plan-Mode” instead of “Read-Only” for the read-only toggle, matching their native terminology
* **Solarized Dark theme:** New Solarized Dark color theme with tuned contrast for tags, code blocks, and pill labels
* **Files pane icon theme:** Choose between default and rich icon themes in the files pane — rich theme adds colorful, language-specific icons for 70+ file types and folder categories. Toggle under Settings > Display
* **Persistent web link:** The web/mobile interface link now persists across app restarts — no need to re-enable it each session
* **OpenCode v1.2+ session support:** Automatically reads OpenCode’s new SQLite session storage format alongside the legacy JSONL format
* **Group chat @mentions:** Use `@agent-name` syntax in the prompt composer to direct messages to specific agents in group chat
* **Group chat over SSH:** Group chat synthesis and moderation now run correctly on SSH remote agents instead of always spawning locally
* **Group chat participant management:** Remove button on participant cards lets you remove stale or unwanted participants from a group chat
* **Batch resume/abort:** New controls in the right panel for resuming or aborting batch operations
* **Default worktree directory:** Worktree configuration now defaults to the parent of the agent’s working directory instead of blank
* **Drawfinity in Symphony:** Added Drawfinity to the Symphony project registry
###
[](https://docs.runmaestro.ai/releases#previous-releases-in-this-series)
Previous Releases in this Series
* **v0.15.2** (March 12, 2026) - Maestro Symphony
* **v0.15.1** (March 3, 2026) - Maestro Symphony
* * *
[](https://docs.runmaestro.ai/releases#v0-14-x-doc-graphs-ssh-agents-inline-wizard)
v0.14.x - Doc Graphs, SSH Agents, Inline Wizard
---------------------------------------------------------------------------------------------------------------------------------------
**Latest: v0.14.5** | Released January 24, 2026 Changes in this point release include:
* Desktop app performance improvements (more to come on this, we want Maestro blazing fast) 🐌
* Added local manifest feature for custom playbooks 📖
* Agents are now inherently aware of your activity history as seen in the history panel 📜 (this is built-in cross-context memory!)
* Added markdown rendering support for AI responses in mobile view 📱
* Bugfix in tracking costs from JSONL files that were aged out 🏦
* Added BlueSky social media handle for leaderboard 🦋
* Added options to disable GPU rendering and confetti 🎊
* Better handling of large files in preview 🗄️
* Bug fix in Claude context calculation 🧮
* Addressed bug in OpenSpec version reporting 🐛
The major contributions to 0.14.x remain: 🗄️ Document Graphs. Launch from file preview or from the File tree panel. Explore relationships between Markdown documents that contain links between documents and to URLs. 📶 SSH support for agents. Manage a remote agent with feature parity over SSH. Includes support for Git and File tree panels. Manage agents on remote systems or in containers. This even works for Group Chat, which is rad as hell. 🧙♂️ Added an in-tab wizard for generating Auto Run Playbooks via `/wizard` or a new button in the Auto Run panel.
###
[](https://docs.runmaestro.ai/releases#smaller-changes-in-0-14-x)
Smaller Changes in 0.14.x
* Improved User Dashboard, available from hamburger menu, command palette or hotkey 🎛️
* Leaderboard tracking now works across multiple systems and syncs level from cloud 🏆
* Agent duplication. Pro tip: Consider a group of unused “Template” agents ✌️
* New setting to prevent system from going to sleep while agents are active 🛏️
* The tab menu has a new “Publish as GitHub Gist” option 📝
* The tab menu has options to move the tab to the first or last position 🔀
* [Maestro-Playbooks](https://github.com/pedramamini/Maestro-Playbooks)
can now contain non-markdown assets 📙
* Improved default shell detection 🐚
* Added logic to prevent overlapping TTS notifications 💬
* Added “Toggle Bookmark” shortcut (CTRL/CMD+SHIFT+B) ⌨️
* Gist publishing now shows previous URLs with copy button 📋
Thanks for the contributions: @t1mmen @aejfager @Crumbgrabber @whglaser @b3nw @deandebeer @shadown @breki @charles-dyfis-net @ronaldeddings @jlengrand @ksylvan
###
[](https://docs.runmaestro.ai/releases#previous-releases-in-this-series-2)
Previous Releases in this Series
* **v0.14.4** (January 11, 2026) - Doc Graphs, SSH Agents, Inline Wizard
* **v0.14.3** (January 9, 2026) - Doc Graphs, SSH Agents, Inline Wizard
* **v0.14.2** (January 7, 2026) - Doc Graphs, SSH Agents, Inline Wizard
* **v0.14.1** (January 6, 2026) - Doc Graphs, SSH Agents, Inline Wizard
* **v0.14.0** (January 2, 2026) - Document Graphs and Agents over SSH
* * *
[](https://docs.runmaestro.ai/releases#v0-13-x-playbook-exchange-&-usage-dashboard)
v0.13.x - Playbook Exchange & Usage Dashboard
-------------------------------------------------------------------------------------------------------------------------------------
**Latest: v0.13.2** | Released December 29, 2025
###
[](https://docs.runmaestro.ai/releases#changes)
Changes
* TAKE TWO! Fixed Linux ARM64 build architecture contamination issues 🏗️
###
[](https://docs.runmaestro.ai/releases#v0-13-1-changes)
v0.13.1 Changes
* Fixed Linux ARM64 build architecture contamination issues 🏗️
* Enhanced error handling for Auto Run batch processing 🚨
###
[](https://docs.runmaestro.ai/releases#v0-13-0-changes)
v0.13.0 Changes
* Added a global usage dashboard, data collection begins with this install 🎛️
* Added a Playbook Exchange for downloading pre-defined Auto Run playbooks from [Maestro-Playbooks](https://github.com/pedramamini/Maestro-Playbooks)
📕
* Bundled OpenSpec commands for structured change proposals 📝
* Added pre-release channel support for beta/RC updates 🧪
* Implemented global hands-on time tracking across sessions ⏱️
* Added new keyboard shortcut for agent settings (Opt+Cmd+, | Ctrl+Alt+,) ⌨️
* Added directory size calculation with file/folder counts in file explorer 📊
* Added sleep detection to exclude laptop sleep from time tracking ⏰
###
[](https://docs.runmaestro.ai/releases#previous-releases-in-this-series-3)
Previous Releases in this Series
* **v0.13.1** (December 29, 2025) - Playbook Exchange & Usage Dashboard
* **v0.13.0** (December 29, 2025) - Playbook Exchange & Usage Dashboard
* * *
[](https://docs.runmaestro.ai/releases#v0-12-x-thinking-spec-kits-context-management)
v0.12.x - Thinking, Spec-Kits, Context Management
-------------------------------------------------------------------------------------------------------------------------------------------
**Latest: v0.12.3** | Released December 28, 2025 The big changes in the v0.12.x line are the following three:
[](https://docs.runmaestro.ai/releases#show-thinking)
Show Thinking
-----------------------------------------------------------------------
🤔 There is now a toggle to show thinking for the agent, the default for new tabs is off, though this can be changed under Settings > General. The toggle shows next to History and Read-Only. Very similar pattern. This has been the #1 most requested feature, though personally, I don’t think I’ll use it as I prefer to not see the details of the work, but the results of the work. Just as we work with our colleagues.
[](https://docs.runmaestro.ai/releases#github-spec-kit-integration)
GitHub Spec-Kit Integration
---------------------------------------------------------------------------------------------------
🎯 Added [GitHub Spec-Kit](https://github.com/github/spec-kit)
commands into Maestro with a built-in updater to grab the latest prompts from the repository. We do override `/speckit-implement` (the final step) to create Auto Run docs and guide the user through their execution, which thanks to Wortrees from v0.11.x allows us to run in parallel!
[](https://docs.runmaestro.ai/releases#context-management-tools)
Context Management Tools
---------------------------------------------------------------------------------------------
📖 Added context management options from tab right-click menu. You can now compress, merge, and transfer contexts between agents. You will received (configurable) warnings at 60% and 80% context consumption with a hint to compact.
[](https://docs.runmaestro.ai/releases#changes-specific-to-v0-12-3)
Changes Specific to v0.12.3:
----------------------------------------------------------------------------------------------------
* We now have hosted documentation through Mintlify 📚
* Export any tab conversation as self-contained themed HTML file 📄
* Publish files as private/public Gists 🌐
* Added tab hover overlay menu with close operations and export 📋
* Added social handles to achievement share images 🏆
###
[](https://docs.runmaestro.ai/releases#previous-releases-in-this-series-4)
Previous Releases in this Series
* **v0.12.1** (December 27, 2025) - Thinking, Spec-Kits, Context Management
* **v0.12.0** (December 25, 2025) - Thinking, Spec-Kits, Context Management
* * *
[](https://docs.runmaestro.ai/releases#v0-11-x-worktrees)
v0.11.x - Worktrees
---------------------------------------------------------------------------------
**Latest: v0.11.0** | Released December 22, 2025 🌳 GitHub Worktree support was added. Any agent bound to a Git repository has the option to enable worktrees, each of which show up as a sub-agent with their own write-lock and Auto Run capability. Now you can truly develop in parallel on the same project and issue PRs when you’re ready, all from within Maestro. Huge improvement, major thanks to @petersilberman.
###
[](https://docs.runmaestro.ai/releases#other-changes)
Other Changes
* @ file mentions now include documents from your Auto Run folder (which may not live in your agent working directory) 🗄️
* The wizard is now capable of detecting and continuing on past started projects 🧙
* Bug fixes 🐛🐜🐞
* * *
[](https://docs.runmaestro.ai/releases#v0-10-x-group-chat)
v0.10.x - Group Chat
-----------------------------------------------------------------------------------
**Latest: v0.10.2** | Released December 22, 2025
###
[](https://docs.runmaestro.ai/releases#changes-2)
Changes
* Export group chats as self-contained HTML ⬇️
* Enhanced system process viewer now has details view with full process args 💻
* Update button hides until platform binaries are available in releases. ⏳
* Added Auto Run stall detection at the loop level, if no documents are updated after a loop 🔁
* Improved Codex session discovery 🔍
* Windows compatibility fixes 🐛
* 64-bit Linux ARM build issue fixed (thanks @LilYoopug) 🐜
* Addressed session enumeration issues with Codex and OpenCode 🐞
* Addressed pathing issues around gh command (thanks @oliveiraantoniocc) 🐝
###
[](https://docs.runmaestro.ai/releases#previous-releases-in-this-series-5)
Previous Releases in this Series
* **v0.10.1** (December 21, 2025) - Group Chat
* **v0.10.0** (December 21, 2025) - Group Chat
* * *
[](https://docs.runmaestro.ai/releases#v0-9-x-codex-&-opencode-support)
v0.9.x - Codex & OpenCode Support
-------------------------------------------------------------------------------------------------------------
**Latest: v0.9.1** | Released December 18, 2025
###
[](https://docs.runmaestro.ai/releases#changes-3)
Changes
* Add Sentry crashing reporting monitoring with opt-out 🐛
* Stability fixes on v0.9.0 along with all the changes it brought along, including…
* Major refactor to enable supporting of multiple providers 👨👩👧👦
* Added OpenAI Codex support 👨💻
* Added OpenCode support 👩💻
* Error handling system detects and recovers from agent failures 🚨
* Added option to specify CLI arguments to AI providers ✨
* Bunch of other little tweaks and additions 💎
###
[](https://docs.runmaestro.ai/releases#previous-releases-in-this-series-6)
Previous Releases in this Series
* **v0.9.0** (December 18, 2025) - Codex & OpenCode Support
* * *
[](https://docs.runmaestro.ai/releases#v0-8-x-nudge-messages)
v0.8.x - Nudge Messages
-----------------------------------------------------------------------------------------
**Latest: v0.8.8** | Released December 17, 2025
###
[](https://docs.runmaestro.ai/releases#changes-4)
Changes
* Added “Nudge” messages. Short static copy to include with every interactive message sent, perhaps to remind the agent on how to work 📌
* Addressed various resource consumption issues to reduce battery cost 📉
* Implemented fuzzy file search in quick actions for instant navigation 🔍
* Added “clear” command support to clean terminal shell logs 🧹
* Simplified search highlighting by integrating into markdown pipeline ✨
* Enhanced update checker to filter pre-release tags like -rc, -beta 🚀
* Fixed RPM package compatibility for OpenSUSE Tumbleweed 🐧 (H/T @JOduMonT)
* Added libuuid1 support alongside standard libuuid dependency 📦
* Introduced Cmd+Shift+U shortcut for tab unread toggle ⌨️
* Enhanced keyboard navigation for marking tabs unread 🎯
* Expanded Linux distribution support with smart dependencies 🌐
* Major underlying code re-structuring for maintainability 🧹
* Improved stall detection to allow for individual docs to stall out while not affecting the entire playbook 📖 (H/T @mattjay)
* Added option to select a static listening port for remote control 🎮 (H/T @b3nw)
###
[](https://docs.runmaestro.ai/releases#previous-releases-in-this-series-7)
Previous Releases in this Series
* **v0.8.7** (December 16, 2025) - Automatic Updates
* **v0.8.6** (December 16, 2025) - Markdown Improvements
* **v0.8.5** (December 15, 2025) - Worktrees
* **v0.8.4** (December 14, 2025) - Leaderboard
* **v0.8.3** (December 14, 2025) - Leaderboard
* **v0.8.2** (December 14, 2025) - RunMaestro.ai Leaderboard
* **v0.8.1** (December 13, 2025) - RunMaestro.ai Leaderboard (Signed!)
* **v0.8.0** (December 12, 2025) - RunMaestro.ai Leaderboard
* * *
[](https://docs.runmaestro.ai/releases#v0-7-x-onboarding-and-interface-tour)
v0.7.x - Onboarding and Interface Tour
-----------------------------------------------------------------------------------------------------------------------
**Latest: v0.7.4** | Released December 12, 2025 Minor bugfixes on top of v0.7.3:
###
[](https://docs.runmaestro.ai/releases#onboarding-wizard-and-tours)
Onboarding, Wizard, and Tours
* Implemented comprehensive onboarding wizard with integrated tour system 🚀
* Added project-understanding confidence display to wizard UI 🎨
* Enhanced keyboard navigation across all wizard screens ⌨️
* Added analytics tracking for wizard and tour completion 📈
* Added First Run Celebration modal with confetti animation 🎉
###
[](https://docs.runmaestro.ai/releases#ui-/-ux-enhancements)
UI / UX Enhancements
* Added expand-to-fullscreen button for Auto Run interface 🖥️
* Created dedicated modal component and improved modal priority constants for expanded Auto Run view 📐
* Enhanced user experience with fullscreen editing capabilities ✨
* Fixed tab name display to correctly show full name for active tabs 🏷️
* Added performance optimizations with throttling and caching for scrolling ⚡
* Implemented drag-and-drop reordering for execution queue items 🎯
* Enhanced toast context with agent name for OS notifications 📢
###
[](https://docs.runmaestro.ai/releases#auto-run-workflow-improvements)
Auto Run Workflow Improvements
* Created phase document generation for Auto Run workflow 📄
* Added real-time log streaming to the LogViewer component 📊
###
[](https://docs.runmaestro.ai/releases#application-behavior-/-core-fixes)
Application Behavior / Core Fixes
* Added validation to prevent nested worktrees inside the main repository 🚫
* Fixed process manager to properly emit exit events on errors 🔧
* Fixed process exit handling to ensure proper cleanup 🧹
###
[](https://docs.runmaestro.ai/releases#update-system)
Update System
* Implemented automatic update checking on application startup 🚀
* Added settings toggle for enabling/disabling startup update checks ⚙️
###
[](https://docs.runmaestro.ai/releases#previous-releases-in-this-series-8)
Previous Releases in this Series
* **v0.7.3** (December 12, 2025) - Onboarding and Interface Tour
* **v0.7.2** (December 9, 2025)
* **v0.7.1** (December 8, 2025)
* **v0.7.0** (December 7, 2025) - Maestro CLI
* * *
[](https://docs.runmaestro.ai/releases#v0-6-x-autorun-overhaul)
v0.6.x - Autorun Overhaul
---------------------------------------------------------------------------------------------
**Latest: v0.6.1** | Released December 4, 2025 In this release…
* Added recursive subfolder support for Auto Run markdown files 🗂️
* Enhanced document tree display with expandable folder navigation 🌳
* Enabled creating documents in subfolders with path selection 📁
* Improved batch runner UI with inline progress bars and loop indicators 📊
* Fixed execution queue display bug for immediate command processing 🐛
* Added folder icons and better visual hierarchy for document browser 🎨
* Implemented dynamic task re-counting for batch run loop iterations 🔄
* Enhanced create document modal with location selector dropdown 📍
* Improved progress tracking with per-document completion visualization 📈
* Added support for nested folder structures in document management 🏗️
Plus the pre-release ALPHA…
* Template vars now set context in default autorun prompt 🚀
* Added Enter key support for queued message confirmation dialog ⌨️
* Kill process capability added to System Process Monitor 💀
* Toggle markdown rendering added to Cmd+K Quick Actions 📝
* Fixed cloudflared detection in packaged app environments 🔧
* Added debugging logs for process exit diagnostics 🐛
* Tab switcher shows last activity timestamps and filters by project 🕐
* Slash commands now fill text on Tab/Enter instead of executing ⚡
* Added GitHub Actions workflow for auto-assigning issues/PRs 🤖
* Graceful handling for playbooks with missing documents implemented ✨
* Added multi-document batch processing for Auto Run 🚀
* Introduced Git worktree support for parallel execution 🌳
* Created playbook system for saving run configurations 📚
* Implemented document reset-on-completion with loop mode 🔄
* Added drag-and-drop document reordering interface 🎯
* Built Auto Run folder selector with file management 📁
* Enhanced progress tracking with per-document metrics 📊
* Integrated PR creation after worktree completion 🔀
* Added undo/redo support in document editor ↩️
* Implemented auto-save with 5-second debounce 💾
###
[](https://docs.runmaestro.ai/releases#previous-releases-in-this-series-9)
Previous Releases in this Series
* **v0.6.0** (December 4, 2025)
* * *
[](https://docs.runmaestro.ai/releases#v0-5-x)
v0.5.x
---------------------------------------------------------
**Latest: v0.5.1** | Released December 2, 2025
###
[](https://docs.runmaestro.ai/releases#changes-5)
Changes
* Added “Made with Maestro” badge to README header 🎯
* Redesigned app icon with darker purple color scheme 🎨
* Created new SVG badge for project attribution 🏷️
* Added side-by-side image diff viewer for git changes 🖼️
* Enhanced confetti animation with realistic cannon-style bursts 🎊
* Fixed z-index layering for standing ovation overlay 📊
* Improved tab switcher to show all named sessions 🔍
* Enhanced batch synopsis prompts for cleaner summaries 📝
* Added binary file detection in git diff parser 🔧
* Implemented git file reading at specific refs 📁
###
[](https://docs.runmaestro.ai/releases#previous-releases-in-this-series-10)
Previous Releases in this Series
* **v0.5.0** (December 2, 2025) - Tunnel Support
* * *
[](https://docs.runmaestro.ai/releases#v0-4-x)
v0.4.x
---------------------------------------------------------
**Latest: v0.4.1** | Released December 2, 2025
###
[](https://docs.runmaestro.ai/releases#changes-6)
Changes
* Added Tab Switcher modal for quick navigation between AI tabs 🚀
* Implemented @ mention file completion for AI mode references 📁
* Added navigation history with back/forward through sessions and tabs ⏮️
* Introduced tab completion filters for branches, tags, and files 🌳
* Added unread tab indicators and filtering for better organization 📬
* Implemented token counting display with human-readable formatting 🔢
* Added markdown rendering toggle for AI responses in terminal 📝
* Removed built-in slash commands in favor of custom AI commands 🎯
* Added context menu for sessions with rename, bookmark, move options 🖱️
* Enhanced file preview with stats showing size, tokens, timestamps 📊
* Added token counting with js-tiktoken for file preview stats bar 🔢
* Implemented Tab Switcher modal for fuzzy-search navigation (Opt+Cmd+T) 🔍
* Added Save to History toggle (Cmd+S) for automatic work synopsis tracking 💾
* Enhanced tab completion with @ mentions for file references in AI prompts 📎
* Implemented navigation history with back/forward shortcuts (Cmd+Shift+,/.) 🔙
* Added git branches and tags to intelligent tab completion system 🌿
* Enhanced markdown rendering with syntax highlighting and toggle view 📝
* Added right-click context menus for session management and organization 🖱️
* Improved mobile app with better WebSocket reconnection and status badges 📱
###
[](https://docs.runmaestro.ai/releases#previous-releases-in-this-series-11)
Previous Releases in this Series
* **v0.4.0** (December 1, 2025) - Achievements Unlocked
* * *
[](https://docs.runmaestro.ai/releases#v0-3-x)
v0.3.x
---------------------------------------------------------
**Latest: v0.3.1** | Released November 30, 2025
###
[](https://docs.runmaestro.ai/releases#changes-7)
Changes
* Fixed tab handling requiring explicitly selected Claude session 🔧
* Added auto-scroll navigation for slash command list selection ⚡
* Implemented TTS audio feedback for toast notifications speak 🔊
* Fixed shortcut case sensitivity using lowercase key matching 🔤
* Added Cmd+Shift+J shortcut to jump to bottom instantly ⬇️
* Sorted shortcuts alphabetically in help modal for discovery 📑
* Display full commit message body in git log view 📝
* Added expand/collapse all buttons to process tree header 🌳
* Support synopsis process type in process tree parsing 🔍
* Renamed “No Group” to “UNGROUPED” for better clarity ✨
###
[](https://docs.runmaestro.ai/releases#previous-releases-in-this-series-12)
Previous Releases in this Series
* **v0.3.0** (November 30, 2025) - Tab Support Release
* * *
[](https://docs.runmaestro.ai/releases#v0-2-x)
v0.2.x
---------------------------------------------------------
**Latest: v0.2.3** | Released November 29, 2025
* Enhanced mobile web interface with session sync and history panel 📱
* Added ThinkingStatusPill showing real-time token counts and elapsed time ⏱️
* Implemented task count badges and session deduplication for batch runner 📊
* Added TTS stop control and improved voice synthesis compatibility 🔊
* Created image lightbox with navigation, clipboard, and delete features 🖼️
* Fixed UI bugs in search, auto-scroll, and sidebar interactions 🐛
* Added global Claude stats with streaming updates across projects 📈
* Improved markdown checkbox styling and collapsed palette hover UX ✨
* Enhanced scratchpad with search, image paste, and attachment support 🔍
* Added splash screen with logo and progress bar during startup 🎨
###
[](https://docs.runmaestro.ai/releases#previous-releases-in-this-series-13)
Previous Releases in this Series
* **v0.2.2** (November 29, 2025)
* **v0.2.1** (November 28, 2025)
* **v0.2.0** (November 28, 2025) - Web Remote Release
* * *
[](https://docs.runmaestro.ai/releases#v0-1-x)
v0.1.x
---------------------------------------------------------
**Latest: v0.1.6** | Released November 27, 2025
* Added template variables for dynamic AI command customization 🎯
* Implemented session bookmarking with star icons and dedicated section ⭐
* Enhanced Git Log Viewer with smarter date formatting 📅
* Improved GitHub release workflow to handle partial failures gracefully 🔧
* Added collapsible template documentation in AI Commands panel 📚
* Updated default commit command with session ID traceability 🔍
* Added tag indicators for custom-named sessions visually 🏷️
* Improved Git Log search UX with better focus handling 🎨
* Fixed input placeholder spacing for better readability 📝
* Updated documentation with new features and template references 📖
###
[](https://docs.runmaestro.ai/releases#previous-releases-in-this-series-14)
Previous Releases in this Series
* **v0.1.5** (November 27, 2025)
* **v0.1.4** (November 27, 2025)
* **v0.1.3** (November 27, 2025)
* **v0.1.2** (November 27, 2025)
* **v0.1.1** (November 27, 2025)
* **v0.1.0** (November 27, 2025)
* * *
[](https://docs.runmaestro.ai/releases#downloading-releases)
Downloading Releases
-------------------------------------------------------------------------------------
All releases are available on the [GitHub Releases page](https://github.com/RunMaestro/Maestro/releases)
. Maestro is available for:
* **macOS** - Apple Silicon (arm64) and Intel (x64)
* **Windows** - x64
* **Linux** - x64 and arm64, AppImage, deb, and rpm packages
Was this page helpful?
YesNo
[Deep Links](https://docs.runmaestro.ai/deep-links)
[Achievements](https://docs.runmaestro.ai/achievements)
⌘I
---
# SSH Remote Execution - Maestro
[Skip to main content](https://docs.runmaestro.ai/ssh-remote-execution#content-area)
[Maestro home page](https://runmaestro.ai/)
Search...
⌘K
Search...
Navigation
General Usage
SSH Remote Execution
On this page
* [Overview](https://docs.runmaestro.ai/ssh-remote-execution#overview)
* [Configuring SSH Remotes](https://docs.runmaestro.ai/ssh-remote-execution#configuring-ssh-remotes)
* [Adding a Remote Host](https://docs.runmaestro.ai/ssh-remote-execution#adding-a-remote-host)
* [Using SSH Config File](https://docs.runmaestro.ai/ssh-remote-execution#using-ssh-config-file)
* [Importing from SSH Config](https://docs.runmaestro.ai/ssh-remote-execution#importing-from-ssh-config)
* [How It Works](https://docs.runmaestro.ai/ssh-remote-execution#how-it-works)
* [Field Labels](https://docs.runmaestro.ai/ssh-remote-execution#field-labels)
* [Clearing SSH Config Mode](https://docs.runmaestro.ai/ssh-remote-execution#clearing-ssh-config-mode)
* [Connection Testing](https://docs.runmaestro.ai/ssh-remote-execution#connection-testing)
* [Setting a Global Default](https://docs.runmaestro.ai/ssh-remote-execution#setting-a-global-default)
* [Per-Session Configuration](https://docs.runmaestro.ai/ssh-remote-execution#per-session-configuration)
* [Configuring a Session](https://docs.runmaestro.ai/ssh-remote-execution#configuring-a-session)
* [How It Works](https://docs.runmaestro.ai/ssh-remote-execution#how-it-works-2)
* [Status Visibility](https://docs.runmaestro.ai/ssh-remote-execution#status-visibility)
* [Full Remote Capabilities](https://docs.runmaestro.ai/ssh-remote-execution#full-remote-capabilities)
* [Remote File System Access](https://docs.runmaestro.ai/ssh-remote-execution#remote-file-system-access)
* [Remote Auto Run](https://docs.runmaestro.ai/ssh-remote-execution#remote-auto-run)
* [Remote Git Worktrees](https://docs.runmaestro.ai/ssh-remote-execution#remote-git-worktrees)
* [Remote Command Terminal](https://docs.runmaestro.ai/ssh-remote-execution#remote-command-terminal)
* [Group Chat with Remote Agents](https://docs.runmaestro.ai/ssh-remote-execution#group-chat-with-remote-agents)
* [Collaborating over SSH](https://docs.runmaestro.ai/ssh-remote-execution#collaborating-over-ssh)
* [How Shared History Works](https://docs.runmaestro.ai/ssh-remote-execution#how-shared-history-works)
* [Enabling Shared History](https://docs.runmaestro.ai/ssh-remote-execution#enabling-shared-history)
* [Use Case: Same User, Multiple Machines](https://docs.runmaestro.ai/ssh-remote-execution#use-case-same-user-multiple-machines)
* [Use Case: Team Collaboration on a Shared Server](https://docs.runmaestro.ai/ssh-remote-execution#use-case-team-collaboration-on-a-shared-server)
* [Entry Limits](https://docs.runmaestro.ai/ssh-remote-execution#entry-limits)
* [Notes](https://docs.runmaestro.ai/ssh-remote-execution#notes)
* [Troubleshooting](https://docs.runmaestro.ai/ssh-remote-execution#troubleshooting)
* [Authentication Errors](https://docs.runmaestro.ai/ssh-remote-execution#authentication-errors)
* [Connection Errors](https://docs.runmaestro.ai/ssh-remote-execution#connection-errors)
* [Agent Errors](https://docs.runmaestro.ai/ssh-remote-execution#agent-errors)
* [Tips](https://docs.runmaestro.ai/ssh-remote-execution#tips)
* [Security Considerations](https://docs.runmaestro.ai/ssh-remote-execution#security-considerations)
* [Limitations](https://docs.runmaestro.ai/ssh-remote-execution#limitations)
Run AI agents on remote machines via SSH instead of locally. This enables you to leverage powerful remote servers, access tools not installed on your local machine, or work with projects that must run in specific environments.
[](https://docs.runmaestro.ai/ssh-remote-execution#overview)
Overview
-------------------------------------------------------------------------
SSH Remote Execution wraps agent commands in SSH, executing them on a configured remote host while streaming output back to Maestro. Your local Maestro instance remains the control center, but the AI agent runs remotely. **Use cases:**
* Run agents on a powerful cloud VM with more CPU/RAM
* Access tools or SDKs installed only on specific servers
* Work with codebases that require particular OS or architecture
* Execute agents in secure/isolated environments
* Coordinate multiple agents across different machines in [Group Chat](https://docs.runmaestro.ai/group-chat)
* Run Auto Run playbooks on remote projects
[](https://docs.runmaestro.ai/ssh-remote-execution#configuring-ssh-remotes)
Configuring SSH Remotes
-------------------------------------------------------------------------------------------------------
###
[](https://docs.runmaestro.ai/ssh-remote-execution#adding-a-remote-host)
Adding a Remote Host
1. Open **Settings** (`Cmd+,` / `Ctrl+,`)
2. Navigate to the **SSH Hosts** tab
3. Click **Add SSH Remote**
4. Configure the connection:
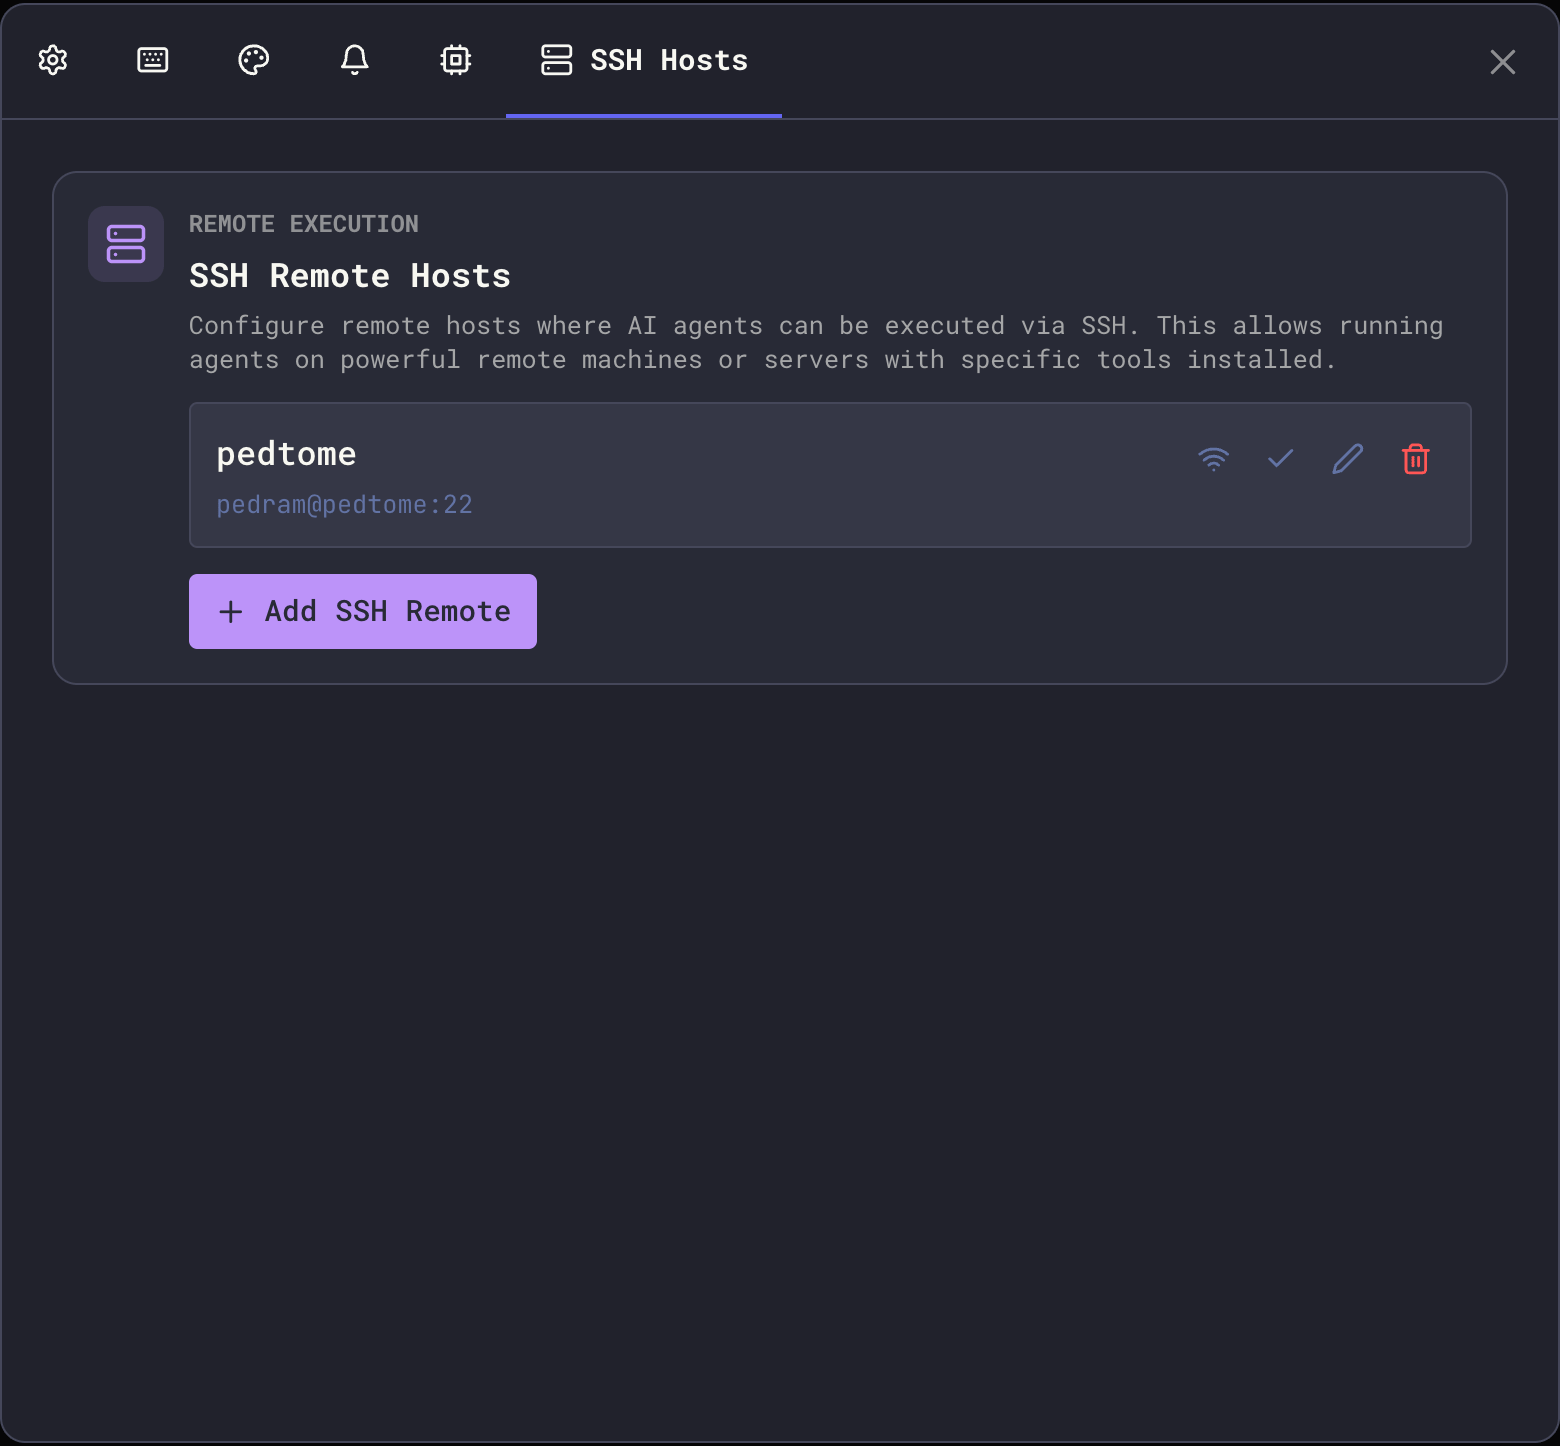
| Field | Description |
| --- | --- |
| **Name** | Display name for this remote (e.g., “Dev Server”, “GPU Box”) |
| **Host** | Hostname or IP address (or SSH config Host pattern when using SSH config) |
| **Port** | SSH port (default: 22) |
| **Username** | SSH username for authentication (optional when using SSH config) |
| **Private Key Path** | Path to your SSH private key (optional when using SSH config) |
| **Remote Working Directory** | Optional default working directory on the remote host |
| **Environment Variables** | Optional key-value pairs to set on the remote |
| **Enabled** | Toggle to temporarily disable without deleting |
5. Click **Test Connection** to verify connectivity
6. Click **Save** to store the configuration
###
[](https://docs.runmaestro.ai/ssh-remote-execution#using-ssh-config-file)
Using SSH Config File
Maestro can import connection settings from your `~/.ssh/config` file, making setup faster and more consistent with your existing SSH workflow.
####
[](https://docs.runmaestro.ai/ssh-remote-execution#importing-from-ssh-config)
Importing from SSH Config
When adding a new remote, Maestro automatically detects hosts defined in your SSH config:
1. Click **Add SSH Remote**
2. If SSH config hosts are detected, you’ll see an **Import from SSH Config** dropdown
3. Select a host to auto-fill settings from your config
4. The form shows “Using SSH Config” indicator when importing
####
[](https://docs.runmaestro.ai/ssh-remote-execution#how-it-works)
How It Works
When using SSH config mode:
* **Host** becomes the SSH config Host pattern (e.g., `dev-server` instead of `192.168.1.100`)
* **Username** and **Private Key Path** become optional—SSH inherits them from your config
* **Port** defaults to your config’s value (only sent to SSH if overriding a non-default port)
* You can still override any field to customize the connection
Example `~/.ssh/config`:
Host dev-server
HostName 192.168.1.100
User developer
IdentityFile ~/.ssh/dev_key
Port 2222
Host gpu-box
HostName gpu.example.com
User admin
IdentityFile ~/.ssh/gpu_key
ProxyJump bastion
With the above config, you can:
1. Select “dev-server” from the dropdown
2. Leave username/key fields empty (inherited from config)
3. Optionally override specific settings
4. Benefit from advanced features like `ProxyJump` for bastion hosts
####
[](https://docs.runmaestro.ai/ssh-remote-execution#field-labels)
Field Labels
When using SSH config mode, field labels indicate which values are optional:
* **Username (optional)** — leave empty to use SSH config’s `User`
* **Private Key Path (optional)** — leave empty to use SSH config’s `IdentityFile`
####
[](https://docs.runmaestro.ai/ssh-remote-execution#clearing-ssh-config-mode)
Clearing SSH Config Mode
To switch back to manual configuration:
1. Click the **×** button next to “Using SSH Config” indicator
2. Fill in all required fields manually
###
[](https://docs.runmaestro.ai/ssh-remote-execution#connection-testing)
Connection Testing
Before saving, you can test your SSH configuration:
* **Basic test**: Verifies SSH connectivity and authentication
* **Agent test**: Checks if the AI agent command is available on the remote host
A successful test shows the remote hostname. Failed tests display specific error messages to help diagnose issues.
###
[](https://docs.runmaestro.ai/ssh-remote-execution#setting-a-global-default)
Setting a Global Default
Click the checkmark icon next to any remote to set it as the **global default**. When set:
* The “Default” badge appears next to the remote name
* The default remote is highlighted in selection dropdowns
* New sessions still require explicit selection — the default serves as a visual indicator of your preferred remote
Click the checkmark again to clear the default.
The global default is a convenience marker, not an automatic setting. Each session must explicitly select an SSH remote via the “SSH Remote Execution” dropdown in the New Agent dialog or session configuration.
[](https://docs.runmaestro.ai/ssh-remote-execution#per-session-configuration)
Per-Session Configuration
-----------------------------------------------------------------------------------------------------------
Each session can have its own SSH remote setting configured when creating the session or editing its configuration.
###
[](https://docs.runmaestro.ai/ssh-remote-execution#configuring-a-session)
Configuring a Session
1. When creating a new agent session (via New Agent dialog or the wizard), find the **SSH Remote Execution** dropdown
2. Select an option:
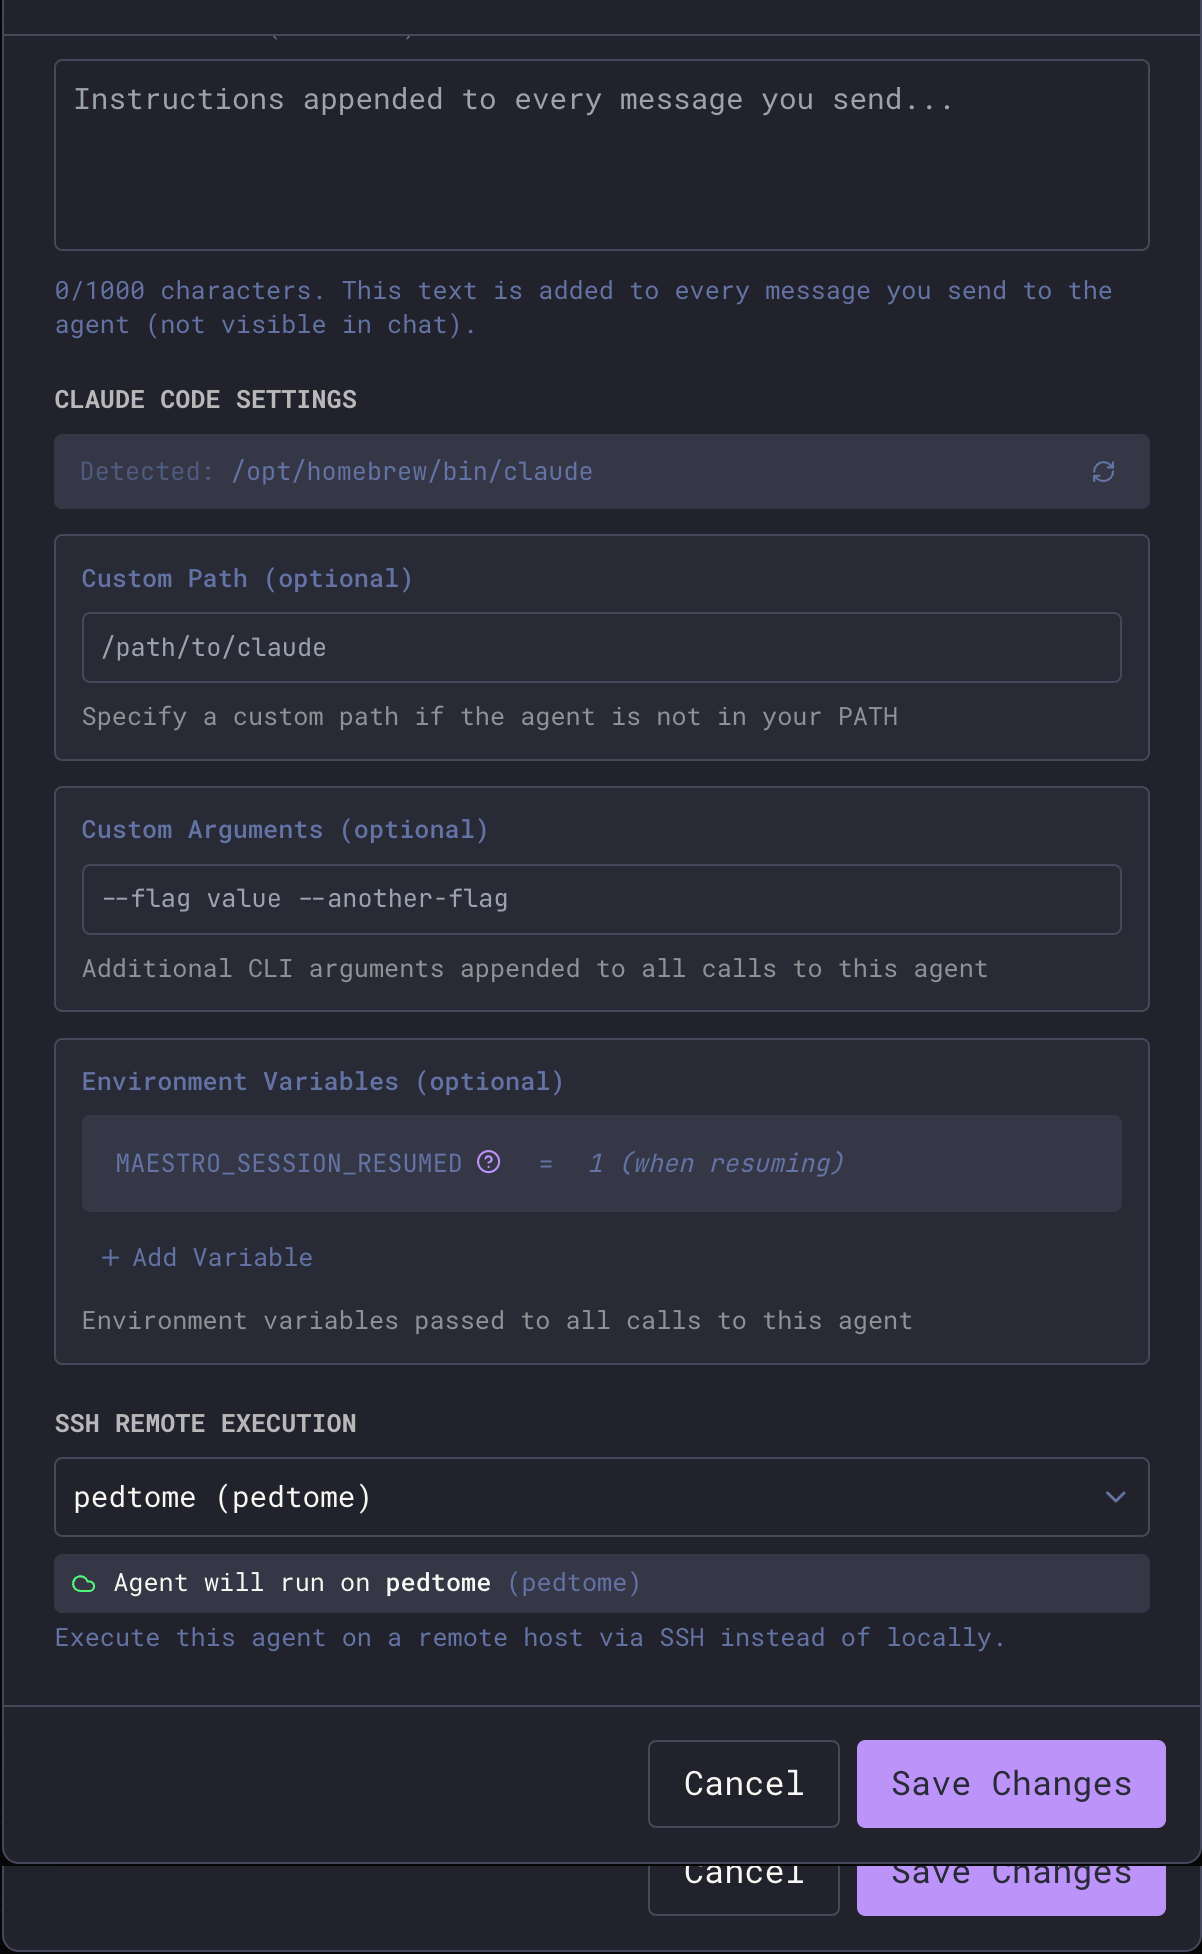
| Option | Behavior |
| --- | --- |
| **Local Execution** | Runs the agent on your local machine (default) |
| **\[Remote Name\]** | Runs the agent on the specified SSH remote host |
###
[](https://docs.runmaestro.ai/ssh-remote-execution#how-it-works-2)
How It Works
SSH remote execution is configured at the **session level**:
* When you create a new session, you choose whether it runs locally or on a specific remote
* The configuration is saved with the session and persists across restarts
* Each session maintains its own SSH setting independently
* Changing a session’s SSH remote requires editing the session configuration
[](https://docs.runmaestro.ai/ssh-remote-execution#status-visibility)
Status Visibility
-------------------------------------------------------------------------------------------
When a session is running via SSH remote, you can easily identify it: 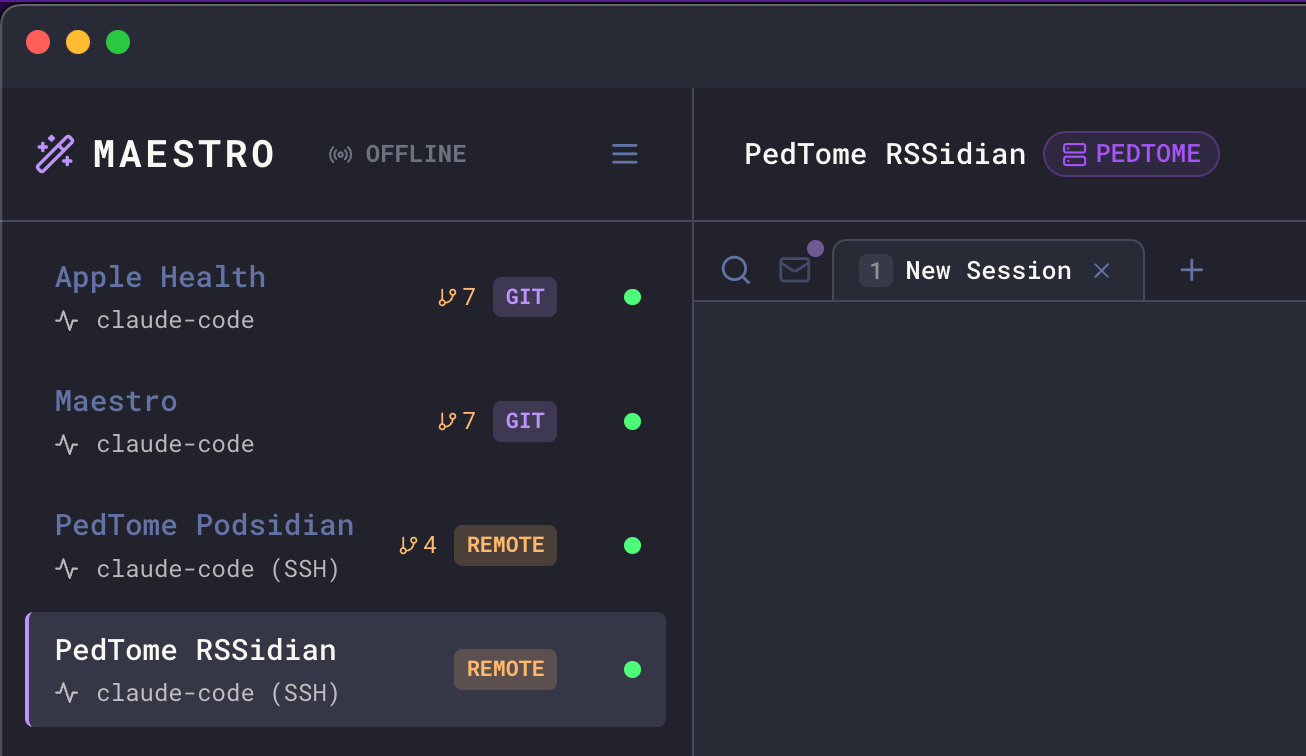
* **REMOTE pill** — Appears in the Left Bar next to the session, indicating it’s configured for remote execution
* **Host name badge** — Displayed in the Main Panel header showing which SSH host the agent is running on (e.g., “PEDTOME”)
* **Agent type indicator** — Shows “claude-code (SSH)” to clarify the execution mode
* Connection state reflects SSH connectivity
* Errors are detected and displayed with SSH-specific context
[](https://docs.runmaestro.ai/ssh-remote-execution#full-remote-capabilities)
Full Remote Capabilities
---------------------------------------------------------------------------------------------------------
Remote agents support all the features you’d expect from local agents:
###
[](https://docs.runmaestro.ai/ssh-remote-execution#remote-file-system-access)
Remote File System Access
The File Explorer works seamlessly with remote agents:
* Browse files and directories on the remote host
* Open and edit files directly
* Use `@` file mentions to reference remote files in prompts
###
[](https://docs.runmaestro.ai/ssh-remote-execution#remote-auto-run)
Remote Auto Run
Run Auto Run playbooks on remote projects:
* Auto Run documents can reference files on the remote host
* Task execution happens on the remote machine
* Progress and results stream back to Maestro in real-time
###
[](https://docs.runmaestro.ai/ssh-remote-execution#remote-git-worktrees)
Remote Git Worktrees
Create and manage git worktrees on remote repositories:
* Worktree sub-agents run on the same remote host
* Branch isolation works just like local worktrees
* PR creation connects to the remote repository
###
[](https://docs.runmaestro.ai/ssh-remote-execution#remote-command-terminal)
Remote Command Terminal
The Command Terminal executes commands on the remote host:
* Full PTY support for interactive commands
* Tab completion works with remote file paths
* Command history is preserved per-session
###
[](https://docs.runmaestro.ai/ssh-remote-execution#group-chat-with-remote-agents)
Group Chat with Remote Agents
Remote agents can participate in Group Chat alongside local agents. This enables powerful cross-machine collaboration: 
* Mix local and remote agents in the same conversation
* The moderator can be local or remote
* Each agent works in their own environment (local or remote)
* Synthesize information across different machines and codebases
This is especially useful for:
* Comparing implementations across different environments
* Coordinating changes that span multiple servers
* Getting perspectives from agents with access to different resources
[](https://docs.runmaestro.ai/ssh-remote-execution#collaborating-over-ssh)
Collaborating over SSH
-----------------------------------------------------------------------------------------------------
When multiple people (or the same person from multiple machines) work on a shared project via SSH, Maestro can synchronize history entries across all participants. This gives everyone visibility into what work has been done — regardless of which machine initiated it.
###
[](https://docs.runmaestro.ai/ssh-remote-execution#how-shared-history-works)
How Shared History Works
Each Maestro instance writes a per-hostname history file to the project’s `.maestro/history/` directory on the remote host:
project/
.maestro/
history/
history-pedbook.jsonl # entries from pedbook
history-pedopswat.jsonl # entries from pedopswat
history-stephan.jsonl # entries from stephan
* Each machine writes **only its own file** — no conflicts between writers
* When loading history, Maestro merges entries from all other hosts’ files
* Entries are deduplicated by ID and sorted by timestamp
* Remote entries appear with a **☁ Remote** pill and the originating **hostname** in the History panel
###
[](https://docs.runmaestro.ai/ssh-remote-execution#enabling-shared-history)
Enabling Shared History
Shared history is enabled per-session via the **Sync history to remote** toggle, which appears in the SSH Remote Execution dropdown when an SSH host is selected:
1. Create or edit an agent session
2. Select an SSH remote from the dropdown
3. The **Sync history to remote** checkbox appears below the status indicator (disabled by default)
4. When enabled, every history entry is written to both your local Maestro store and the remote project’s `.maestro/history/` directory
###
[](https://docs.runmaestro.ai/ssh-remote-execution#use-case-same-user-multiple-machines)
Use Case: Same User, Multiple Machines
You have Maestro on your laptop (`pedbook`) and desktop (`pedopswat`). Both machines have an agent pointed at the same project on `pedopswat`:
* **pedopswat** runs the agent locally — history writes to its local store and `.maestro/history/history-pedopswat.jsonl`
* **pedbook** runs the agent via SSH to pedopswat — history writes to its local store and `.maestro/history/history-pedbook.jsonl` on pedopswat
* Both machines see each other’s entries when loading the History panel
###
[](https://docs.runmaestro.ai/ssh-remote-execution#use-case-team-collaboration-on-a-shared-server)
Use Case: Team Collaboration on a Shared Server
Multiple team members (`pedbook`, `stephan`, `mattj`) each have Maestro installed locally and SSH into a shared VPS where the project lives. No Maestro is installed on the VPS — just the agent CLI:
* Each person’s Maestro writes to their own `history-.jsonl` on the VPS
* Each person sees entries from all other team members
* Entries display the originating hostname so you can tell who did what
###
[](https://docs.runmaestro.ai/ssh-remote-execution#entry-limits)
Entry Limits
Shared history files respect the **Maximum Log Buffer** setting (Settings → Display). Each hostname’s file retains up to this many entries (default: 5,000). When reading another host’s file, Maestro reads only the most recent entries up to your own buffer limit.
###
[](https://docs.runmaestro.ai/ssh-remote-execution#notes)
Notes
* Shared history files use JSONL format (one JSON object per line) for safe concurrent appending
* Malformed lines are skipped gracefully — a partial write won’t corrupt the file
* If the SSH connection is unavailable when reading, local history is shown without remote entries (no error displayed)
* The `.maestro/history/` directory is created automatically on first write
* Consider adding `.maestro/history/` to your `.gitignore` — history is operational data, not source code
[](https://docs.runmaestro.ai/ssh-remote-execution#troubleshooting)
Troubleshooting
---------------------------------------------------------------------------------------
###
[](https://docs.runmaestro.ai/ssh-remote-execution#authentication-errors)
Authentication Errors
| Error | Solution |
| --- | --- |
| ”Permission denied (publickey)“ | Ensure your SSH key is added to the remote’s `~/.ssh/authorized_keys` |
| ”Host key verification failed” | Add the host to known\_hosts: `ssh-keyscan hostname >> ~/.ssh/known_hosts` |
| ”Enter passphrase for key” | Use a key without a passphrase, or add it to ssh-agent: `ssh-add ~/.ssh/your_key` |
###
[](https://docs.runmaestro.ai/ssh-remote-execution#connection-errors)
Connection Errors
| Error | Solution |
| --- | --- |
| ”Connection refused” | Verify SSH server is running on the remote host |
| ”Connection timed out” | Check network connectivity and firewall rules |
| ”Could not resolve hostname” | Verify the hostname/IP is correct |
| ”No route to host” | Check network path to the remote host |
###
[](https://docs.runmaestro.ai/ssh-remote-execution#agent-errors)
Agent Errors
| Error | Solution |
| --- | --- |
| ”Command not found” | Install the AI agent on the remote host |
| ”Agent binary not found” | Ensure the agent is in the remote’s PATH |
###
[](https://docs.runmaestro.ai/ssh-remote-execution#tips)
Tips
* **Import from SSH config** — Use the dropdown when adding remotes to import from `~/.ssh/config`; saves time and keeps configuration consistent
* **Bastion hosts** — Use `ProxyJump` in your SSH config for multi-hop connections; Maestro inherits this automatically
* **Key management** — Use `ssh-agent` to avoid passphrase prompts
* **Connection multiplexing** — Maestro respects `ControlMaster`, `ControlPath`, and `ControlPersist` from your `~/.ssh/config`. This is highly recommended if you use hardware security keys (e.g., YubiKey) to avoid repeated touches per connection. Example config:
Host dev-server
ControlMaster auto
ControlPath ~/.ssh/sockets/%r@%h-%p
ControlPersist 600
Make sure the socket directory exists (`mkdir -p ~/.ssh/sockets`). Use `%h`, `%p`, and `%r` tokens in `ControlPath` to keep sockets unique per host/port/user.
* **Keep-alive** — Configure `ServerAliveInterval` in SSH config for long sessions
* **Test manually first** — Verify `ssh host 'claude --version'` works before configuring in Maestro
[](https://docs.runmaestro.ai/ssh-remote-execution#security-considerations)
Security Considerations
-------------------------------------------------------------------------------------------------------
* SSH keys should have appropriate permissions (`chmod 600`)
* Use dedicated keys for Maestro if desired
* Remote working directories should have appropriate access controls
* Environment variables may contain sensitive data; they’re passed via SSH command line
[](https://docs.runmaestro.ai/ssh-remote-execution#limitations)
Limitations
-------------------------------------------------------------------------------
* Network latency affects perceived responsiveness
* The remote host must have the agent CLI installed and configured
* Some shell initialization files (`.bashrc`, `.zshrc`) may not be fully sourced — agent commands use `$SHELL -lc` to ensure PATH availability from login profiles
Was this page helpful?
YesNo
[Remote Control](https://docs.runmaestro.ai/remote-control)
[Feedback](https://docs.runmaestro.ai/feedback)
⌘I
---
# Maestro Symphony - Maestro
[Skip to main content](https://docs.runmaestro.ai/symphony#content-area)
[Maestro home page](https://runmaestro.ai/)
Search...
⌘K
Search...
Navigation
Encore Features
Maestro Symphony
On this page
* [Prerequisites](https://docs.runmaestro.ai/symphony#prerequisites)
* [How It Works](https://docs.runmaestro.ai/symphony#how-it-works)
* [For Contributors](https://docs.runmaestro.ai/symphony#for-contributors)
* [For Repository Owners](https://docs.runmaestro.ai/symphony#for-repository-owners)
* [Opening Symphony](https://docs.runmaestro.ai/symphony#opening-symphony)
* [Browsing Projects](https://docs.runmaestro.ai/symphony#browsing-projects)
* [Projects Tab](https://docs.runmaestro.ai/symphony#projects-tab)
* [Blocked Issues](https://docs.runmaestro.ai/symphony#blocked-issues)
* [Starting a Contribution](https://docs.runmaestro.ai/symphony#starting-a-contribution)
* [Tracking Contributions](https://docs.runmaestro.ai/symphony#tracking-contributions)
* [Active Tab](https://docs.runmaestro.ai/symphony#active-tab)
* [History Tab](https://docs.runmaestro.ai/symphony#history-tab)
* [Stats Tab](https://docs.runmaestro.ai/symphony#stats-tab)
* [Session Integration](https://docs.runmaestro.ai/symphony#session-integration)
* [Creating Symphony-Ready Issues](https://docs.runmaestro.ai/symphony#creating-symphony-ready-issues)
* [Task Claiming](https://docs.runmaestro.ai/symphony#task-claiming)
* [Registering Your Project](https://docs.runmaestro.ai/symphony#registering-your-project)
* [Available Categories](https://docs.runmaestro.ai/symphony#available-categories)
* [Available Issues](https://docs.runmaestro.ai/symphony#available-issues)
Maestro Symphony is a community-driven program that connects Maestro users with open source repository maintainers seeking contributions. Think of it like distributed computing for AI-assisted development — instead of donating CPU cycles, users donate LLM tokens to advance open source.
[](https://docs.runmaestro.ai/symphony#prerequisites)
Prerequisites
-----------------------------------------------------------------------
Before starting a Symphony contribution, ensure you have:
**GitHub CLI required.** Symphony uses the [GitHub CLI (`gh`)](https://cli.github.com/)
to create draft PRs, manage contributions, and claim issues. Install it and run `gh auth login` to authenticate. Symphony will verify this before allowing you to proceed.
**Build tools required.** Symphony clones repositories and runs Auto Run documents that may compile code, run tests, and make changes. Make sure you have the project’s build tools and dependencies installed (e.g., Node.js, Python, Rust toolchain). Consider cloning the project first and verifying you can build it successfully — without the right toolchain, the contribution will likely fail.
[](https://docs.runmaestro.ai/symphony#how-it-works)
How It Works
---------------------------------------------------------------------
###
[](https://docs.runmaestro.ai/symphony#for-contributors)
For Contributors
1. **Browse available projects** directly within Maestro
2. **Select a GitHub issue** that matches your interests
3. **Create a dedicated agent session** — choose your AI provider and model
4. **Single-click contribution** — Maestro clones the repo, runs Auto Run docs, and creates a PR
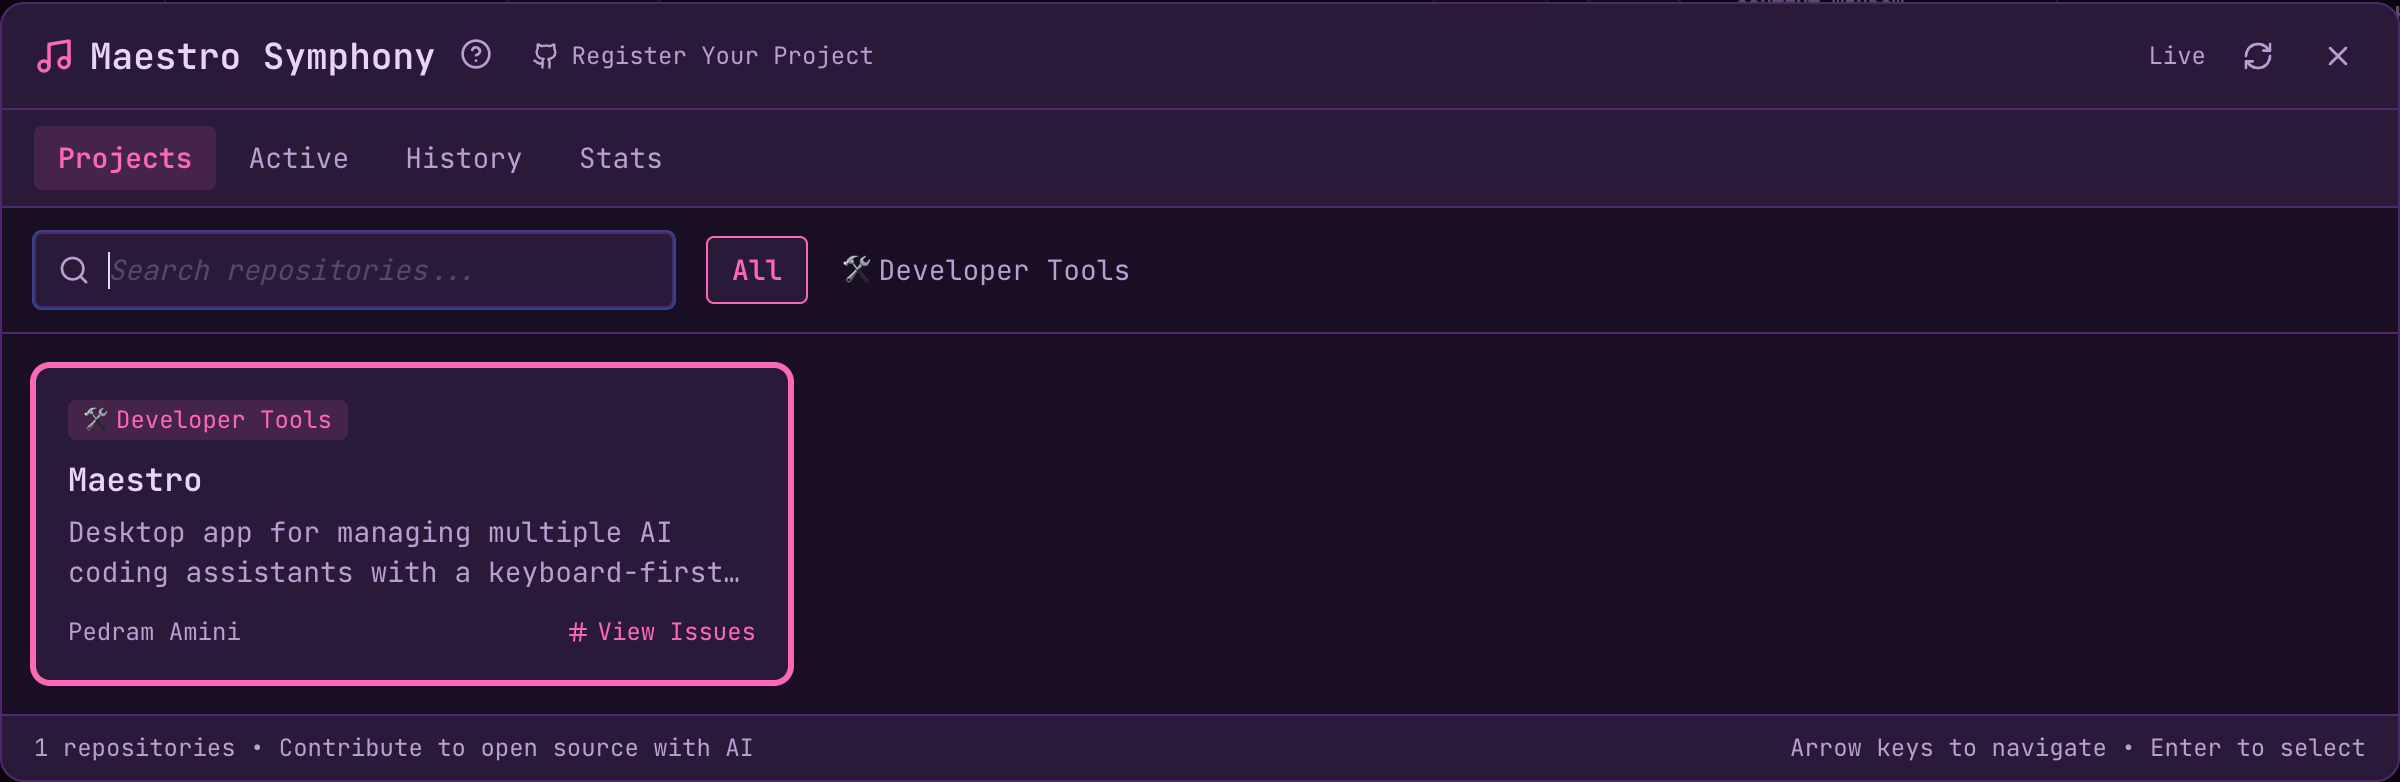
###
[](https://docs.runmaestro.ai/symphony#for-repository-owners)
For Repository Owners
1. **Define contribution opportunities** as Auto Run documents in your repository
2. **Open a GitHub issue** listing the document paths
3. **Add the `runmaestro.ai` label** to make it visible to the Maestro community
4. **Optionally add the `blocking` label** to issues with unmet prerequisites (creates dependency trees)
5. **Receive quality pull requests** generated by AI-assisted workflows
[](https://docs.runmaestro.ai/symphony#opening-symphony)
Opening Symphony
-----------------------------------------------------------------------------
| Method | Description |
| --- | --- |
| `Cmd+Shift+Y` / `Ctrl+Shift+Y` | Keyboard shortcut |
| Quick Actions → “Maestro Symphony” | Command palette (`Cmd+K`) |
| Hamburger Menu → “Maestro Symphony” | Menu item |
[](https://docs.runmaestro.ai/symphony#browsing-projects)
Browsing Projects
-------------------------------------------------------------------------------
The Symphony modal has four tabs: **Projects**, **Active**, **History**, and **Stats**.
###
[](https://docs.runmaestro.ai/symphony#projects-tab)
Projects Tab
The Projects tab shows registered open source projects in a tiled grid:
* **Category filters** — Filter by AI/ML, Developer Tools, etc.
* **Search** — Find projects by name, description, or tags
* **Project tiles** — Click to view available issues
* **Keyboard navigation** — Use arrow keys to navigate, Enter to select, `/` to focus search
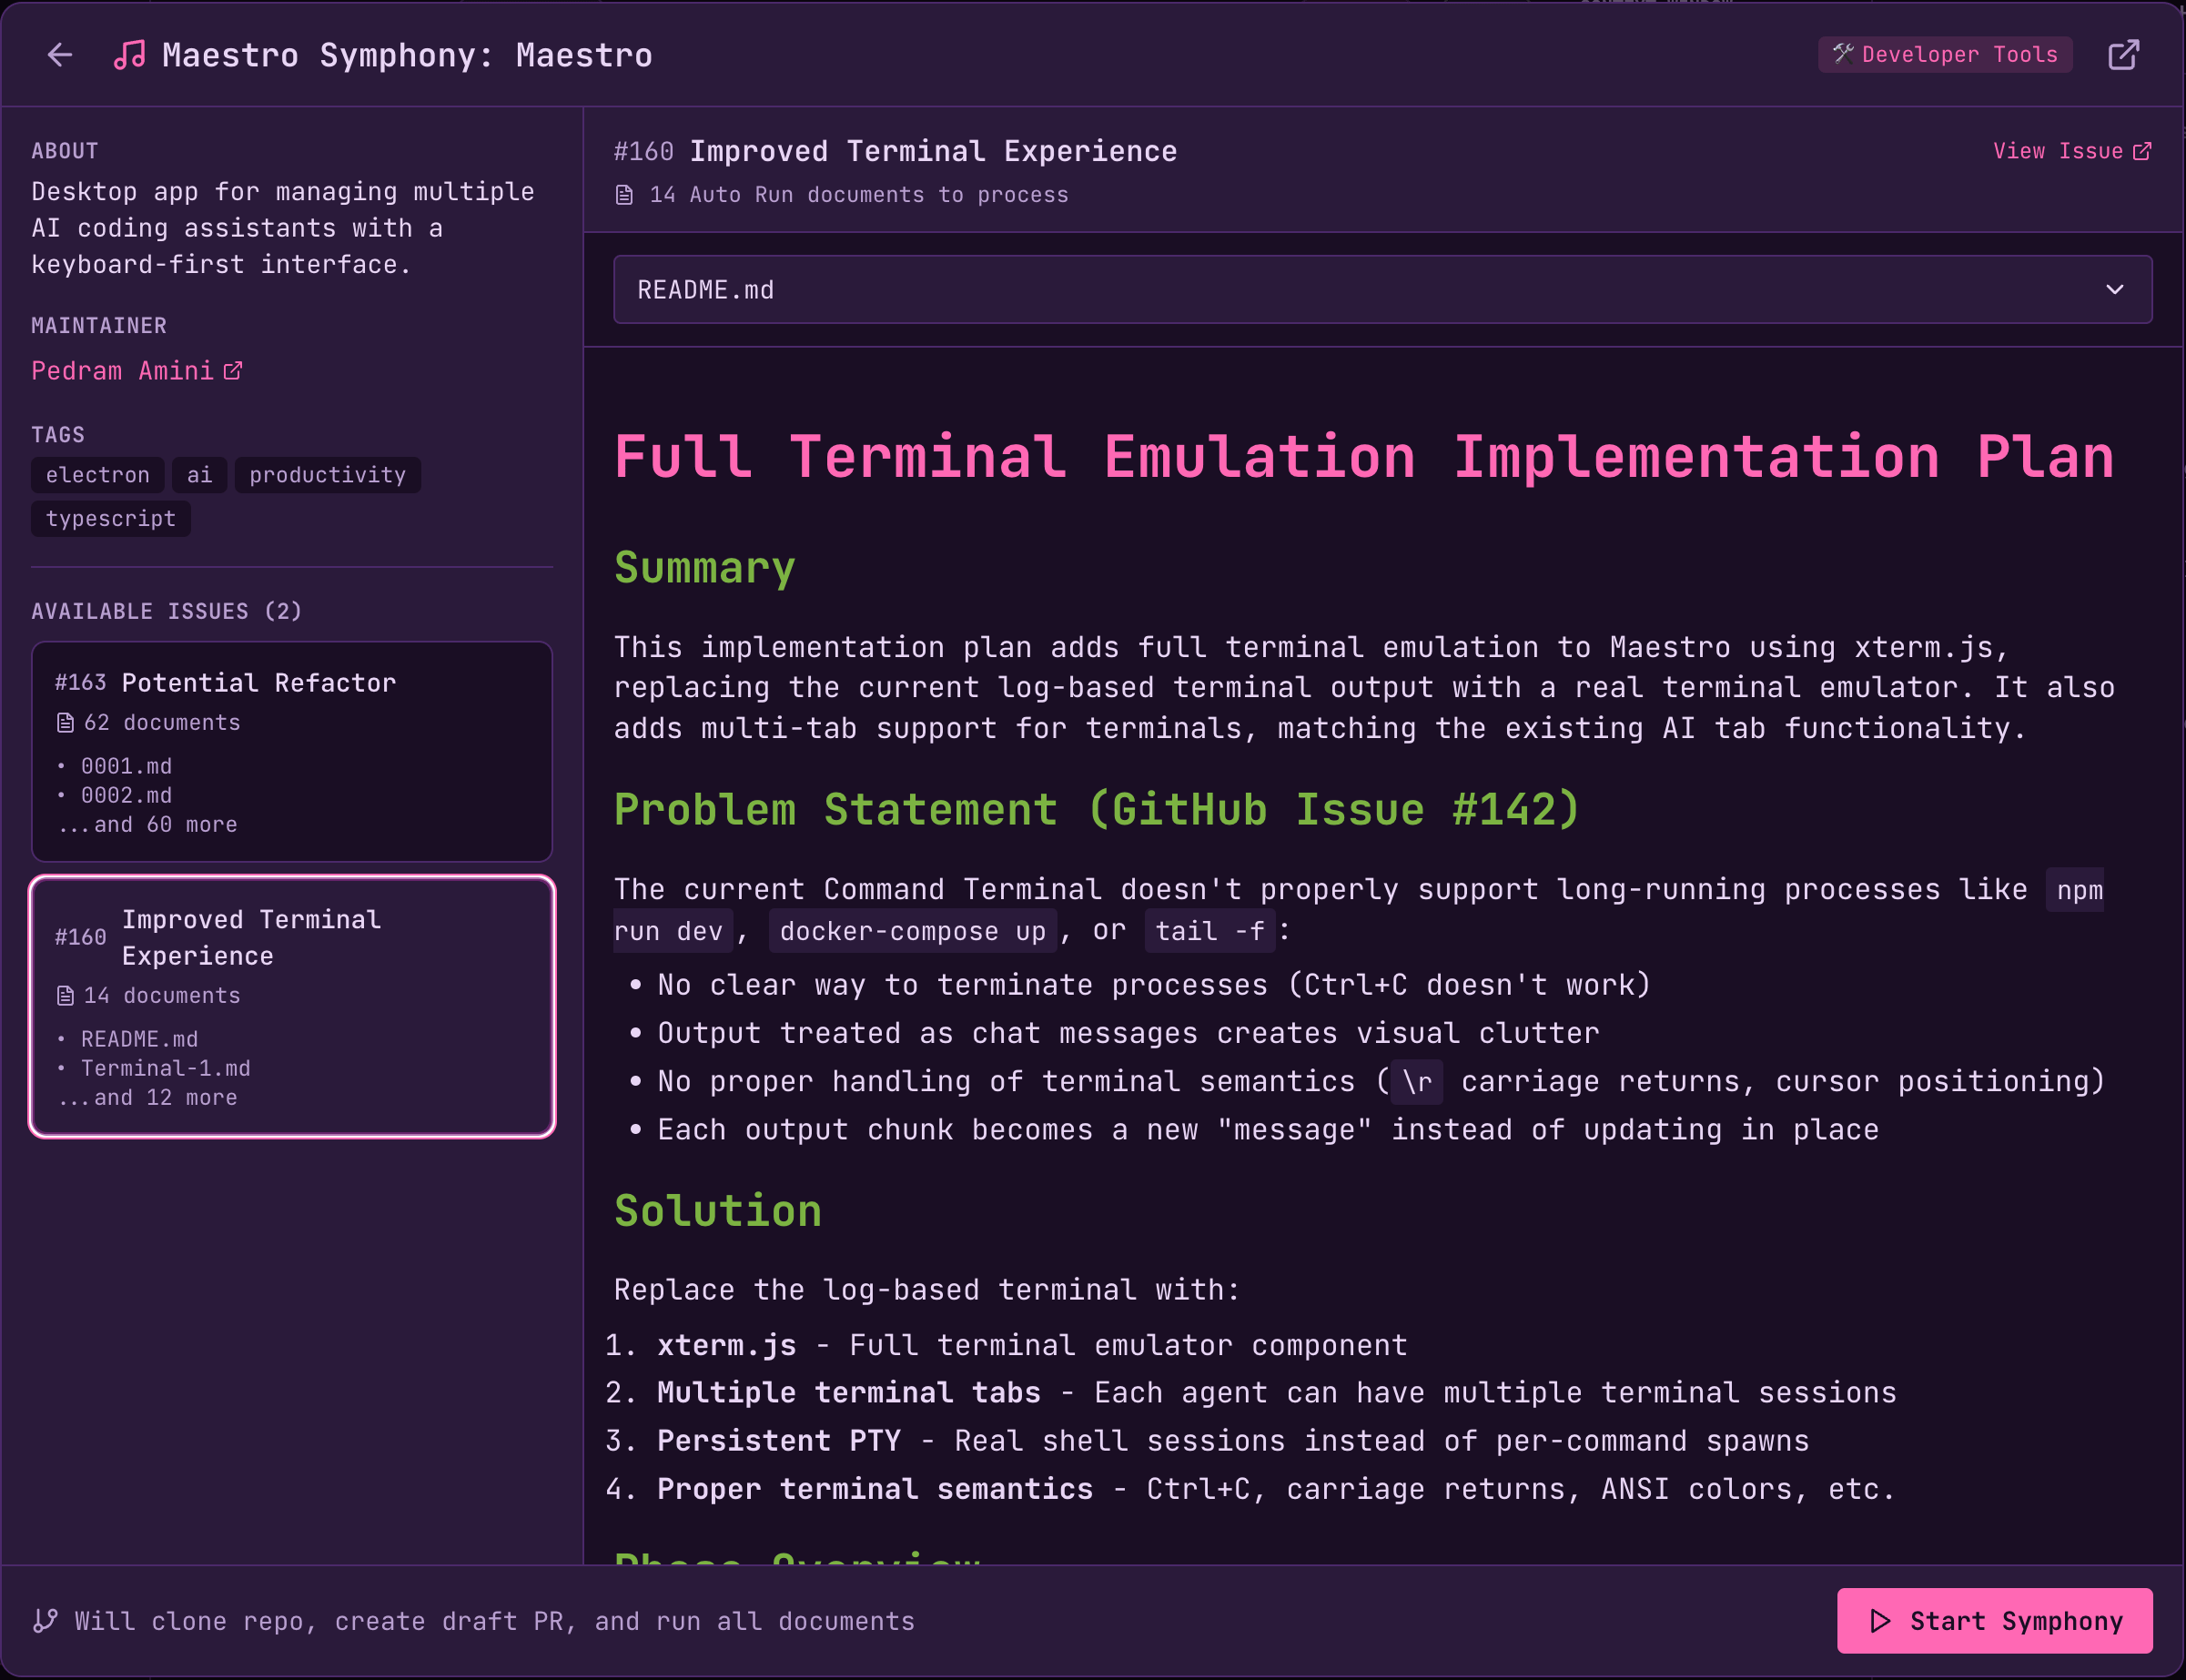 Select a repository to see its available GitHub issues. Each issue shows:
* Issue title and number
* Number of Auto Run documents to process
* Document previews with a dropdown selector (use `Cmd+Shift+[` / `Cmd+Shift+]` to cycle documents)
* Status indicator (available, in-progress with PR link, or blocked)
###
[](https://docs.runmaestro.ai/symphony#blocked-issues)
Blocked Issues
Issues with the `blocking` label appear in a separate “Blocked” section, grayed out with a lock icon. These represent work that has unmet prerequisites — the repository maintainer will remove the `blocking` label once dependencies are satisfied. Blocked issues cannot be started but are shown so contributors can see the full scope of planned work.
[](https://docs.runmaestro.ai/symphony#starting-a-contribution)
Starting a Contribution
-------------------------------------------------------------------------------------------
Click **Start Symphony** on an available issue to open the agent creation dialog: 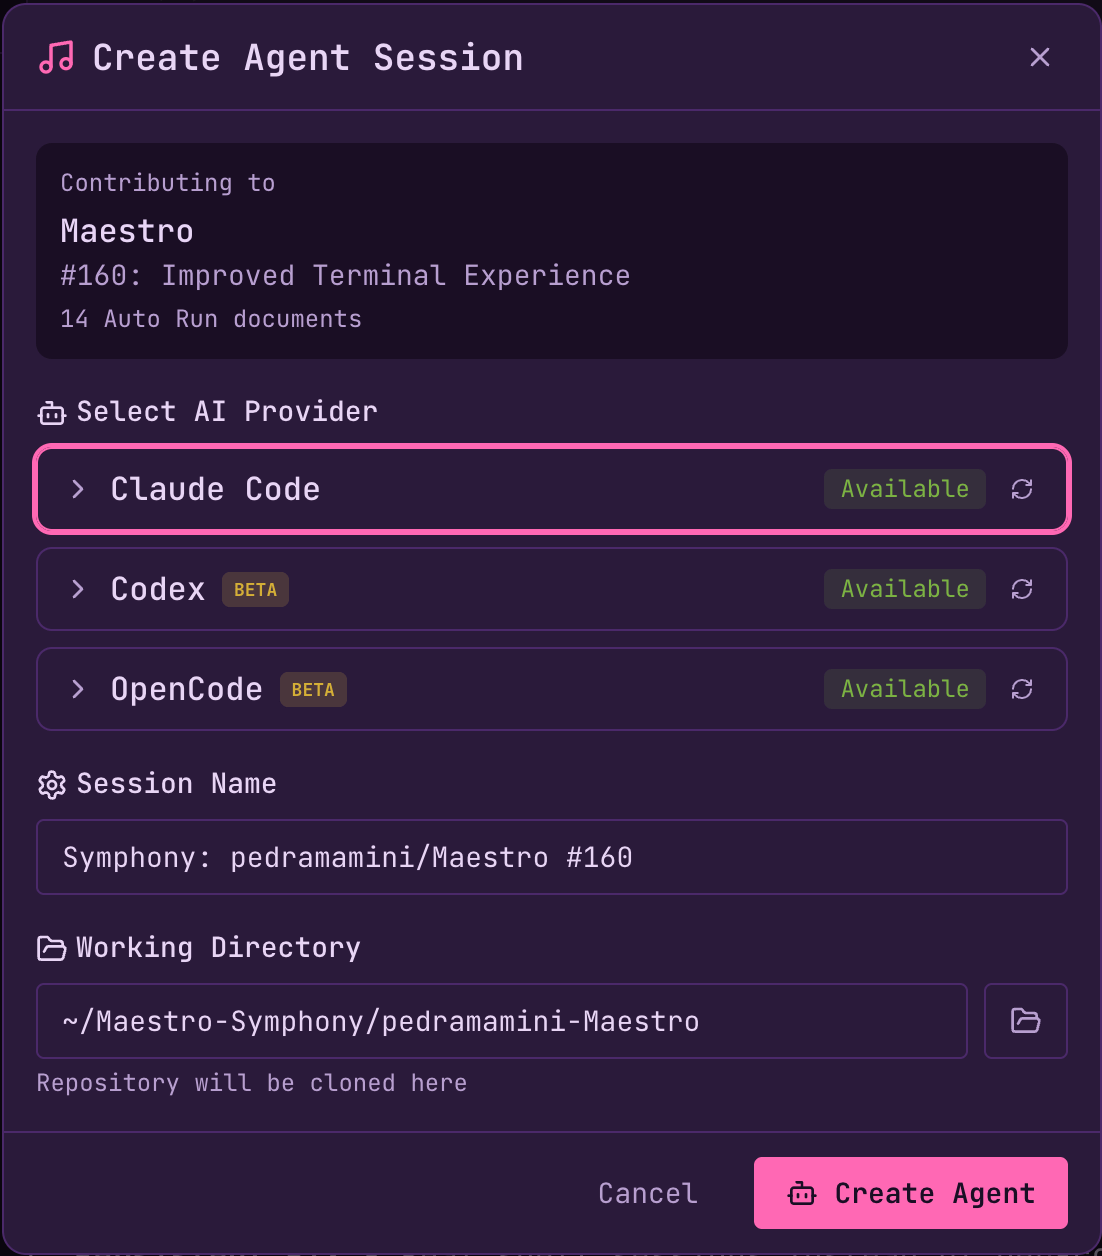 Configure your contribution:
* **AI Provider** — Choose Claude Code, Codex, OpenCode, etc.
* **Session Name** — Pre-filled as “Symphony: owner/repo #123”
* **Working Directory** — Where the repository will be cloned
Click **Create Agent** and Maestro will:
1. Clone the repository to `~/Maestro-Symphony/{owner}-{repo}/` (default location, customizable)
2. Create a new branch (`symphony/{issue-number}-{short-id}`)
3. Set up Auto Run documents (external attachments downloaded to cache, repo docs referenced in place)
4. Begin processing tasks automatically
5. Create a draft PR on first commit (claims the issue so others know it’s in progress)
[](https://docs.runmaestro.ai/symphony#tracking-contributions)
Tracking Contributions
-----------------------------------------------------------------------------------------
###
[](https://docs.runmaestro.ai/symphony#active-tab)
Active Tab
View your in-progress Symphony sessions: 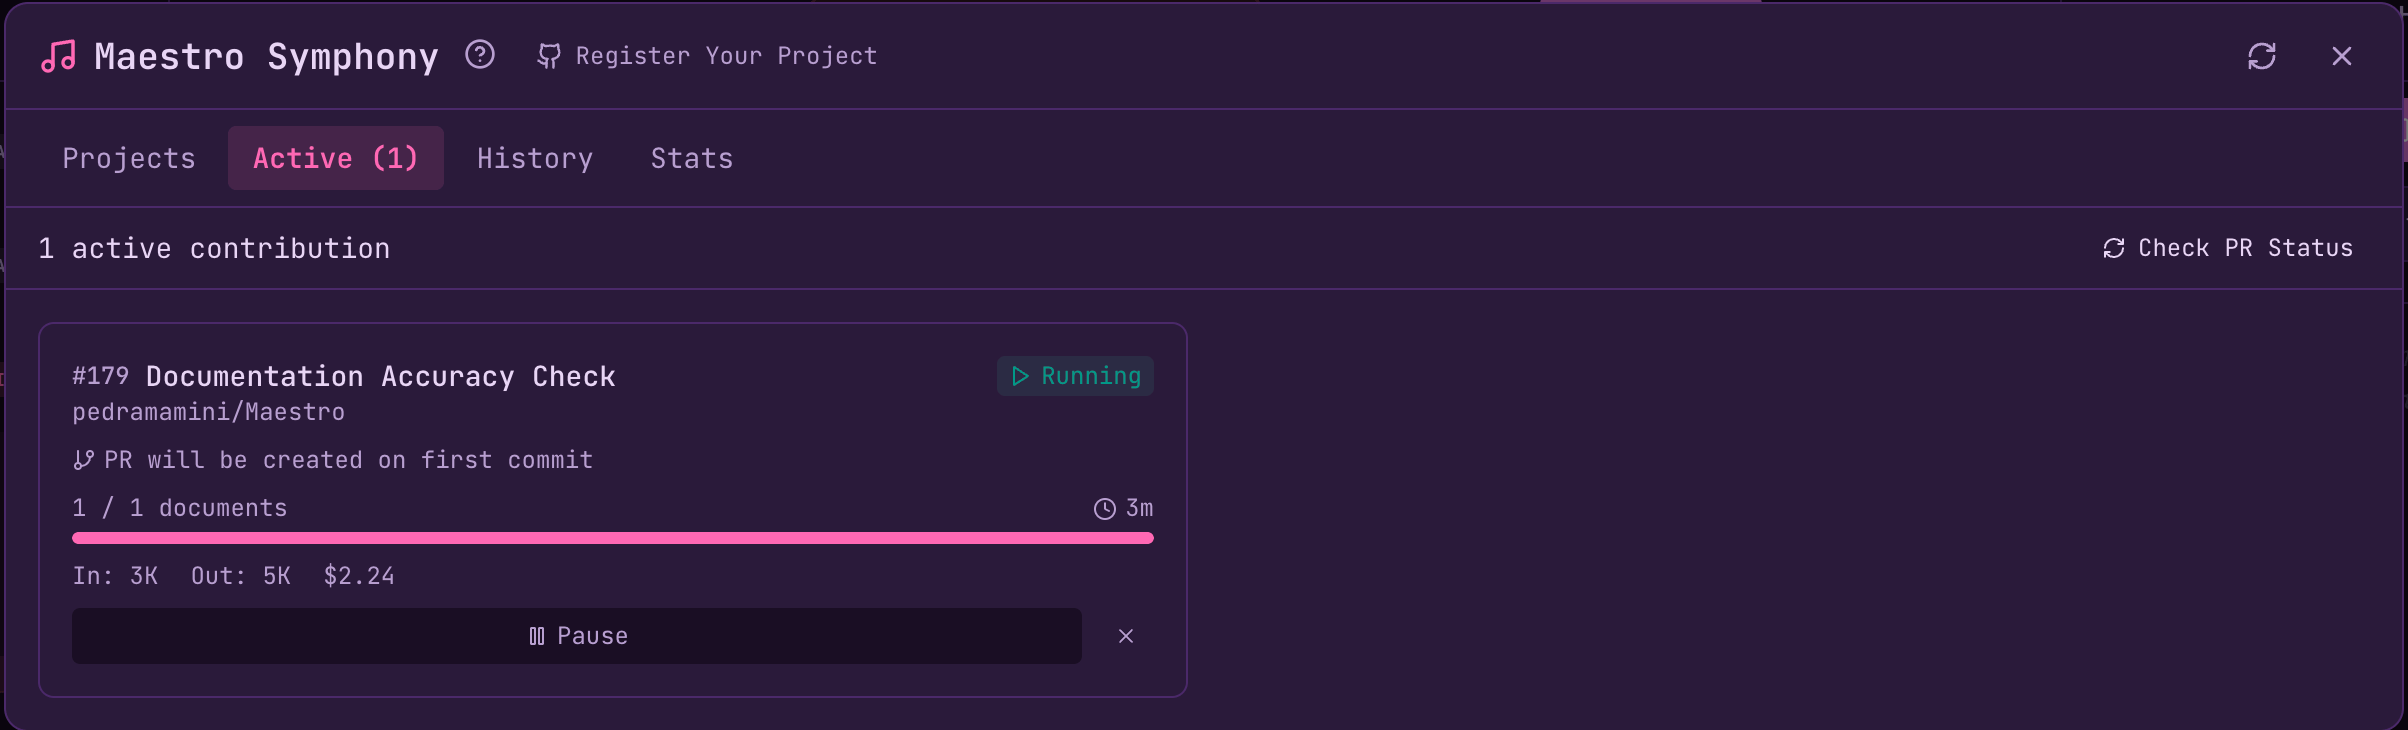 Each active contribution shows:
* **Issue title and repository** — The GitHub issue being worked on
* **Status badge** — Running, Paused, Creating PR, etc.
* **Progress bar** — Documents completed vs. total
* **Current document** — The document being processed
* **Time elapsed** — How long the contribution has been running
* **Token usage** — Input/output tokens and estimated cost
* **Draft PR link** — Once created on first commit
* **Controls** — Pause/Resume, Cancel, Finalize PR
Click **Check PR Status** to verify your draft PR on GitHub and detect merged/closed PRs.
###
[](https://docs.runmaestro.ai/symphony#history-tab)
History Tab
Review completed contributions with aggregate stats at a glance: 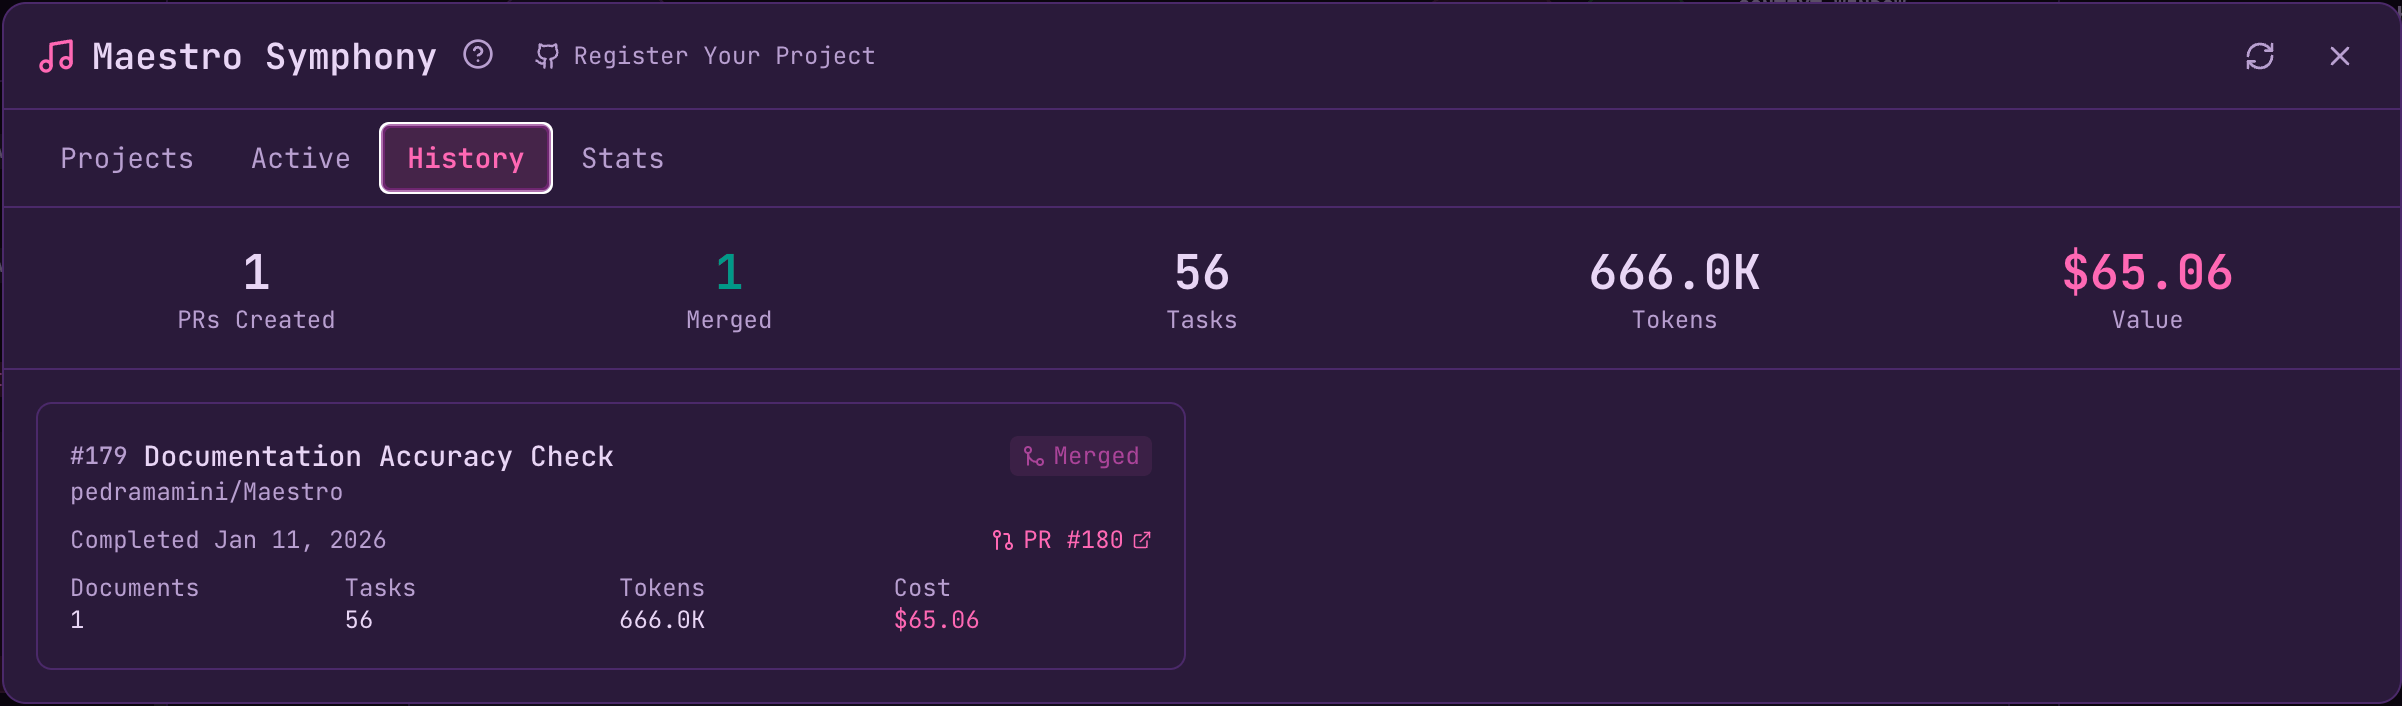 The header shows your totals: PRs created, merged count, tasks completed, tokens used, and dollar value donated. Each contribution card displays:
* **Issue and repository** — What you worked on
* **Merge status** — Whether the PR was merged
* **Completion date** — When you finished
* **PR link** — Direct link to the pull request
* **Detailed metrics** — Documents processed, tasks completed, tokens used, and cost
###
[](https://docs.runmaestro.ai/symphony#stats-tab)
Stats Tab
Track your overall impact and unlock achievements: 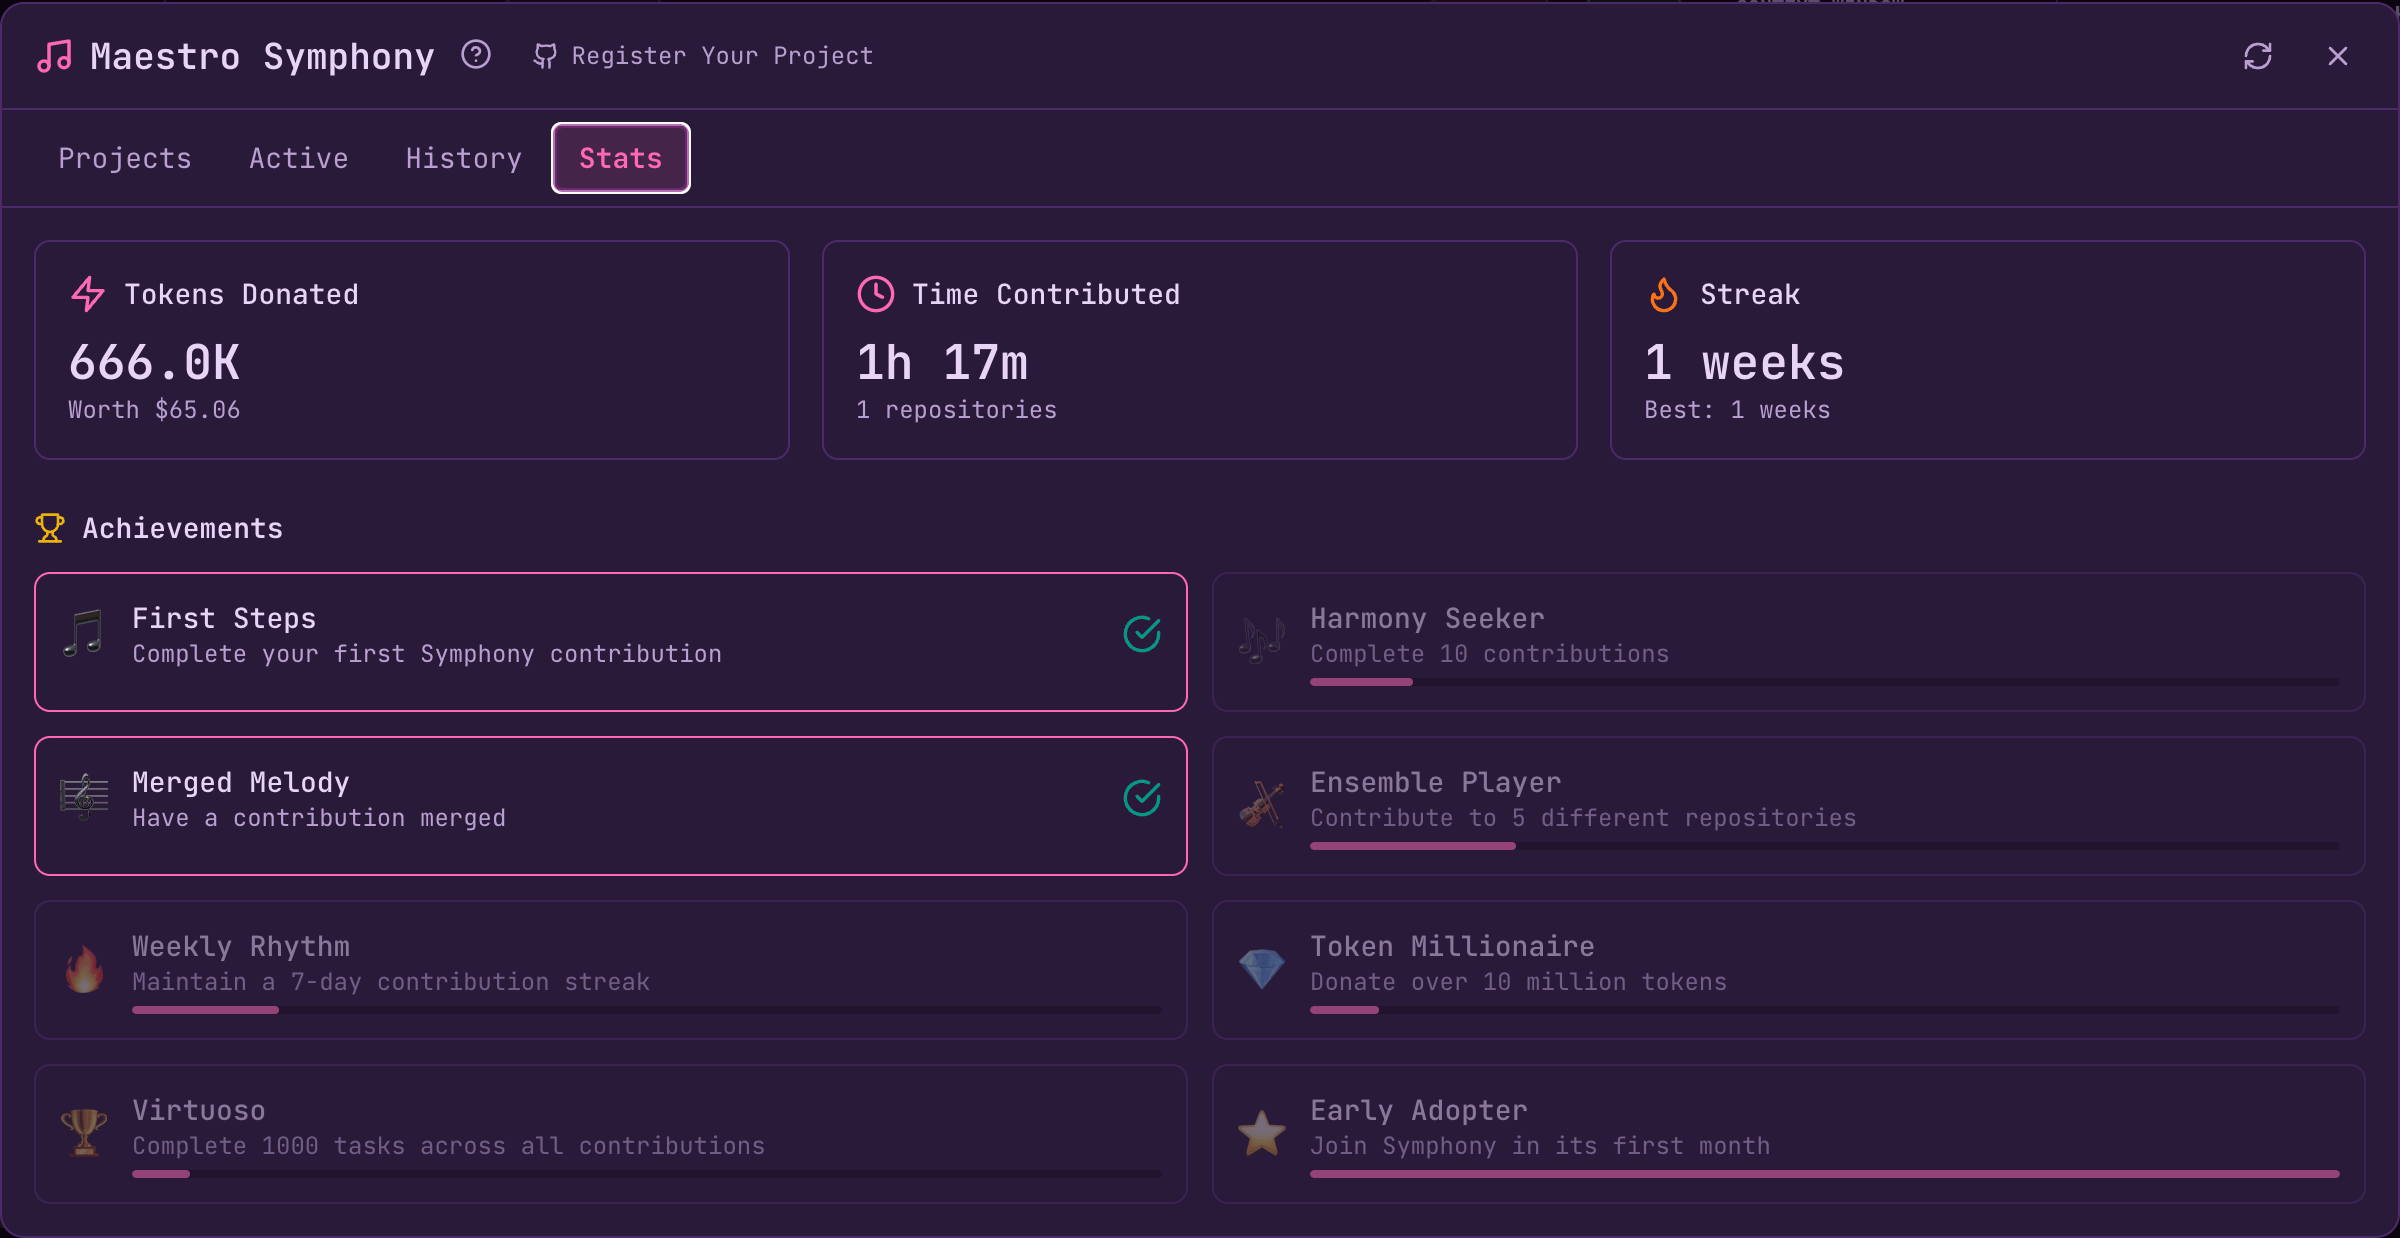 **Summary cards** show your cumulative contributions:
* **Tokens Donated** — Total tokens contributed with dollar value
* **Time Contributed** — Hours spent and repositories helped
* **Streak** — Current and best contribution streaks
**Achievements** reward milestones in your Symphony journey:
| Achievement | Requirement |
| --- | --- |
| **First Steps** | Complete your first Symphony contribution |
| **Merged Melody** | Have a contribution merged |
| **Weekly Rhythm** | Maintain a 7-day contribution streak |
| **Harmony Seeker** | Complete 10 contributions |
| **Ensemble Player** | Contribute to 5 different repositories |
| **Virtuoso** | Complete 1000 tasks across all contributions |
| **Token Millionaire** | Donate over 10 million tokens |
| **Early Adopter** | Join Symphony in its first month |
[](https://docs.runmaestro.ai/symphony#session-integration)
Session Integration
-----------------------------------------------------------------------------------
Symphony sessions appear in the Left Bar like any other session:
* Named “Symphony: owner/repo #123”
* Optionally grouped under a “Symphony” group
* Full access to AI Terminal, Command Terminal, and Auto Run controls
You can interact with Symphony sessions just like regular sessions — pause Auto Run, make manual edits, or switch to the Command Terminal for custom commands.
[](https://docs.runmaestro.ai/symphony#creating-symphony-ready-issues)
Creating Symphony-Ready Issues
---------------------------------------------------------------------------------------------------------
Repository owners create issues with the `runmaestro.ai` label:
## Add unit tests for auth module
We need comprehensive test coverage for the authentication module.
### Auto Run Documents
- `docs/symphony/auth-tests-1.md`
- `docs/symphony/auth-tests-2.md`
- `docs/symphony/auth-tests-3.md`
### Context
The auth module is at `src/auth/index.ts`. Tests should use Jest.
Each document path should point to an Auto Run-compatible markdown file with task checkboxes.
[](https://docs.runmaestro.ai/symphony#task-claiming)
Task Claiming
-----------------------------------------------------------------------
Symphony uses **deferred PR creation** to avoid GitHub’s “no commits between branches” error. When you start a contribution, Maestro sets up the branch and documents but waits until the first commit to create the draft PR:
1. **Start contribution** → Branch created locally, Auto Run begins processing
2. **First commit** → Draft PR automatically created, claims the issue
3. **Subsequent commits** → Push to the same PR
This means issues show as “in progress” once the first commit lands. The claiming mechanism:
* **No draft PR** → Task is available
* **Draft PR exists** → Task is in progress (first to commit wins)
[](https://docs.runmaestro.ai/symphony#registering-your-project)
Registering Your Project
---------------------------------------------------------------------------------------------
To add your open source project to Symphony:
1. Fork the [Maestro repository](https://github.com/RunMaestro/Maestro)
2. Add your project to `symphony-registry.json` in the root directory
3. Submit a pull request to the main Maestro repository
Your project entry should include:
{
"slug": "owner/repo",
"name": "Project Name",
"description": "Brief description",
"url": "https://github.com/owner/repo",
"category": "ai-ml",
"tags": ["tag1", "tag2"],
"maintainer": {
"name": "Your Name",
"url": "https://github.com/yourusername"
},
"isActive": true,
"featured": false,
"addedAt": "2025-01-01"
}
###
[](https://docs.runmaestro.ai/symphony#available-categories)
Available Categories
| Category | Label | Emoji |
| --- | --- | --- |
| `ai-ml` | AI & ML | 🤖 |
| `developer-tools` | Developer Tools | 🛠️ |
| `infrastructure` | Infrastructure | 🏗️ |
| `documentation` | Documentation | 📚 |
| `web` | Web | 🌐 |
| `mobile` | Mobile | 📱 |
| `data` | Data | 📊 |
| `security` | Security | 🔒 |
| `other` | Other | 📦 |
Once merged, your project will appear in the Symphony Projects tab (registry cached for 2 hours, issues cached for 5 minutes).
[](https://docs.runmaestro.ai/symphony#available-issues)
Available Issues
-----------------------------------------------------------------------------
Browse Symphony-ready issues on Maestro itself:
Maestro Symphony Issues
-----------------------
View all issues labeled `runmaestro.ai` — ready for AI-assisted contribution
* * *
**Maestro Symphony — Advancing open source, together.**
Was this page helpful?
YesNo
[Usage Dashboard](https://docs.runmaestro.ai/usage-dashboard)
[Cue Overview](https://docs.runmaestro.ai/maestro-cue)
⌘I
---