# Table of Contents
- [Ultimate Member](#ultimate-member)
- [Extensions - Ultimate Member](#extensions-ultimate-member)
- [Core Plugin - Ultimate Member](#core-plugin-ultimate-member)
- [Theme - Ultimate Member](#theme-ultimate-member)
- [FAQs - Ultimate Member](#faqs-ultimate-member)
- [For Developers - Ultimate Member](#for-developers-ultimate-member)
- [Dashboard - Ultimate Member](#dashboard-ultimate-member)
- [Email - Ultimate Member](#email-ultimate-member)
- [Deprecated - Ultimate Member](#deprecated-ultimate-member)
- [Social Login: Facebook App Setup - Ultimate Member](#social-login-facebook-app-setup-ultimate-member)
- [Google reCAPTCHA - Ultimate Member](#google-recaptcha-ultimate-member)
- [General - Ultimate Member](#general-ultimate-member)
- [WooCommerce Setup - Ultimate Member](#woocommerce-setup-ultimate-member)
- [Multisite - Ultimate Member](#multisite-ultimate-member)
- [Social Login Setup - Ultimate Member](#social-login-setup-ultimate-member)
- [Third Party Plugins - Ultimate Member](#third-party-plugins-ultimate-member)
- [bbPress Setup - Ultimate Member](#bbpress-setup-ultimate-member)
- [Updates - Ultimate Member](#updates-ultimate-member)
- [Installation - Ultimate Member](#installation-ultimate-member)
- [Verified Users Setup - Ultimate Member](#verified-users-setup-ultimate-member)
- [Profile Completeness Setup - Ultimate Member](#profile-completeness-setup-ultimate-member)
- [Settings - Ultimate Member](#settings-ultimate-member)
- [Shortcodes - Ultimate Member](#shortcodes-ultimate-member)
- [User Tags Setup - Ultimate Member](#user-tags-setup-ultimate-member)
- [Social Login: Google App Setup - Ultimate Member](#social-login-google-app-setup-ultimate-member)
- [Forms & Fields - Ultimate Member](#forms-fields-ultimate-member)
- [Online Users Setup - Ultimate Member](#online-users-setup-ultimate-member)
- [User Roles - Ultimate Member](#user-roles-ultimate-member)
- [Basic Extensions - Ultimate Member](#basic-extensions-ultimate-member)
- [Member Directories - Ultimate Member](#member-directories-ultimate-member)
- [Followers - Ultimate Member](#followers-ultimate-member)
- [Content Restriction - Ultimate Member](#content-restriction-ultimate-member)
- [ForumWP - Ultimate Member](#forumwp-ultimate-member)
- [Friends - Ultimate Member](#friends-ultimate-member)
- [Google reCAPTCHA - Ultimate Member](#google-recaptcha-ultimate-member)
- [Groups - Ultimate Member](#groups-ultimate-member)
- [JobBoardWP - Ultimate Member](#jobboardwp-ultimate-member)
- [MailChimp - Ultimate Member](#mailchimp-ultimate-member)
- [Notices - Ultimate Member](#notices-ultimate-member)
- [Online Users - Ultimate Member](#online-users-ultimate-member)
- [Private Messages - Ultimate Member](#private-messages-ultimate-member)
- [Private content - Ultimate Member](#private-content-ultimate-member)
- [Profile Completeness - Ultimate Member](#profile-completeness-ultimate-member)
- [Profile Tabs - Ultimate Member](#profile-tabs-ultimate-member)
- [Real-time Notifications - Ultimate Member](#real-time-notifications-ultimate-member)
- [Shortcodes - Ultimate Member](#shortcodes-ultimate-member)
- [Social Activity - Ultimate Member](#social-activity-ultimate-member)
- [Social Login - Ultimate Member](#social-login-ultimate-member)
- [Stripe - Ultimate Member](#stripe-ultimate-member)
- [Terms & Conditions - Ultimate Member](#terms-conditions-ultimate-member)
- [Unsplash - Ultimate Member](#unsplash-ultimate-member)
- [User Bookmarks - Ultimate Member](#user-bookmarks-ultimate-member)
- [User Locations - Ultimate Member](#user-locations-ultimate-member)
- [User Notes - Ultimate Member](#user-notes-ultimate-member)
- [User Photos - Ultimate Member](#user-photos-ultimate-member)
- [User Reviews - Ultimate Member](#user-reviews-ultimate-member)
- [User Tags - Ultimate Member](#user-tags-ultimate-member)
- [Verified Users - Ultimate Member](#verified-users-ultimate-member)
- [WooCommerce - Ultimate Member](#woocommerce-ultimate-member)
- [Zapier - Ultimate Member](#zapier-ultimate-member)
- [bbPress - Ultimate Member](#bbpress-ultimate-member)
- [myCRED - Ultimate Member](#mycred-ultimate-member)
- [Theme - Ultimate Member](#theme-ultimate-member)
- [bbPress - Ultimate Member](#bbpress-ultimate-member)
- [Footer - Ultimate Member](#footer-ultimate-member)
- [Code Examples - Ultimate Member](#code-examples-ultimate-member)
- [Social Media - Ultimate Member](#social-media-ultimate-member)
- [Developer - Ultimate Member](#developer-ultimate-member)
- [Header - Ultimate Member](#header-ultimate-member)
- [Layout - Ultimate Member](#layout-ultimate-member)
- [Ultimate Member - Shortcodes - Ultimate Member](#ultimate-member-shortcodes-ultimate-member)
- [Styles - Ultimate Member](#styles-ultimate-member)
- [How to Change Ultimate Member Profile Layout - Ultimate Member](#how-to-change-ultimate-member-profile-layout-ultimate-member)
- [How to do a plugin/theme conflict test? - Ultimate Member](#how-to-do-a-plugin-theme-conflict-test-ultimate-member)
- [Default Pages - Ultimate Member](#default-pages-ultimate-member)
- [Ultimate Member - Ultimate Member](#ultimate-member-ultimate-member)
- [Ultimate Member Profile Page - Ultimate Member](#ultimate-member-profile-page-ultimate-member)
- [WooCommerce - Ultimate Member](#woocommerce-ultimate-member)
- [How to add user profile photo/avatar & display name to my site header? - Ultimate Member](#how-to-add-user-profile-photo-avatar-display-name-to-my-site-header-ultimate-member)
- [Common Problems - Ultimate Member](#common-problems-ultimate-member)
- [Not receiving user emails or admin notifications - Ultimate Member](#not-receiving-user-emails-or-admin-notifications-ultimate-member)
- [Extensions - Ultimate Member](#extensions-ultimate-member)
- [Adding a Registration Form - Ultimate Member](#adding-a-registration-form-ultimate-member)
- [Ultimate Member - Account Page - Ultimate Member](#ultimate-member-account-page-ultimate-member)
- [WooCommerce Products Color - Ultimate Member](#woocommerce-products-color-ultimate-member)
- [User Roles Settings - Ultimate Member](#user-roles-settings-ultimate-member)
- [Photo/image uploads not working - Ultimate Member](#photo-image-uploads-not-working-ultimate-member)
- [Email Templates - Ultimate Member](#email-templates-ultimate-member)
- [How To - Ultimate Member](#how-to-ultimate-member)
- [Ultimate Member - Changing Default Color - Ultimate Member](#ultimate-member-changing-default-color-ultimate-member)
- [How to translate plugin - Ultimate Member](#how-to-translate-plugin-ultimate-member)
- [API Functions - Ultimate Member](#api-functions-ultimate-member)
- [Getting Started with Ultimate Member - Ultimate Member](#getting-started-with-ultimate-member-ultimate-member)
- [Customize Ultimate Member Login Page - Ultimate Member](#customize-ultimate-member-login-page-ultimate-member)
- [CSS - Ultimate Member](#css-ultimate-member)
- [Code Examples - Ultimate Member](#code-examples-ultimate-member)
- [Password Reset doesn't work - Ultimate Member](#password-reset-doesn-t-work-ultimate-member)
- [Restrict content on a page/post to logged in users - Ultimate Member](#restrict-content-on-a-page-post-to-logged-in-users-ultimate-member)
- [Customizing Button Color - Ultimate Member](#customizing-button-color-ultimate-member)
- [Member Directory 1.3.x - 2.0.x Settings - Ultimate Member](#member-directory-1-3-x-2-0-x-settings-ultimate-member)
- [Codex - Ultimate Member](#codex-ultimate-member)
- [Hooks - Ultimate Member](#hooks-ultimate-member)
- [Export & Import - Ultimate Member](#export-import-ultimate-member)
- [Header - Logged In - Ultimate Member](#header-logged-in-ultimate-member)
- [How to get registration/login form to show in 2/3 columns? - Ultimate Member](#how-to-get-registration-login-form-to-show-in-2-3-columns-ultimate-member)
- [How to - Ultimate Member](#how-to-ultimate-member)
- [Ultimate Member Directory - Ultimate Member](#ultimate-member-directory-ultimate-member)
- [Conditional Menus - Ultimate Member](#conditional-menus-ultimate-member)
- [How to add a navigation menu link to the edit profile page? - Ultimate Member](#how-to-add-a-navigation-menu-link-to-the-edit-profile-page-ultimate-member)
- [Unique profiles for different user roles - Ultimate Member](#unique-profiles-for-different-user-roles-ultimate-member)
- [Templates - Ultimate Member](#templates-ultimate-member)
- [How to block bot registrations - Ultimate Member](#how-to-block-bot-registrations-ultimate-member)
- [Theme Hooks - Ultimate Member](#theme-hooks-ultimate-member)
- [Add a hidden field to your register form - Ultimate Member](#add-a-hidden-field-to-your-register-form-ultimate-member)
- [Ultimate Member Dashboard - Ultimate Member](#ultimate-member-dashboard-ultimate-member)
- [Access Tab - Ultimate Member](#access-tab-ultimate-member)
- [Adding your custom profile templates - Ultimate Member](#adding-your-custom-profile-templates-ultimate-member)
- [Account Tab - Ultimate Member](#account-tab-ultimate-member)
- [um_user - Ultimate Member](#um-user-ultimate-member)
- [Advanced Tab - Ultimate Member](#advanced-tab-ultimate-member)
- [Change default Ultimate Member "blue" color using CSS - Ultimate Member](#change-default-ultimate-member-blue-color-using-css-ultimate-member)
- [Appearance Tab - Ultimate Member](#appearance-tab-ultimate-member)
- [How do I add my extra tabs to user profiles? - Ultimate Member](#how-do-i-add-my-extra-tabs-to-user-profiles-ultimate-member)
- [Content Restriction until 2.2.0 version - Ultimate Member](#content-restriction-until-2-2-0-version-ultimate-member)
- [Extending Ultimate Member Profile Menu using Hooks - Ultimate Member](#extending-ultimate-member-profile-menu-using-hooks-ultimate-member)
- [Emails Tab - Ultimate Member](#emails-tab-ultimate-member)
- [UM Hooks - Ultimate Member](#um-hooks-ultimate-member)
- [Misc Tab - Ultimate Member](#misc-tab-ultimate-member)
- [Extend Ultimate Member Account page with custom tabs/content - Ultimate Member](#extend-ultimate-member-account-page-with-custom-tabs-content-ultimate-member)
- [Get the current user profile ID - Ultimate Member](#get-the-current-user-profile-id-ultimate-member)
- [Pages Tab - Ultimate Member](#pages-tab-ultimate-member)
- [Uploads Tab - Ultimate Member](#uploads-tab-ultimate-member)
- [Template structure & Overriding templates via a theme - Ultimate Member](#template-structure-overriding-templates-via-a-theme-ultimate-member)
- [Users Tab - Ultimate Member](#users-tab-ultimate-member)
- [Plain text email default templates - Ultimate Member](#plain-text-email-default-templates-ultimate-member)
- [How to Enable Email Notification on Activation or Admin Review Upon User's Registration - Ultimate Member](#how-to-enable-email-notification-on-activation-or-admin-review-upon-user-s-registration-ultimate-member)
- [Roles Assignment Logic - Ultimate Member](#roles-assignment-logic-ultimate-member)
- [Logout - Ultimate Member](#logout-ultimate-member)
- [Sync User Data across all sites in a Multisite Network setup - Ultimate Member](#sync-user-data-across-all-sites-in-a-multisite-network-setup-ultimate-member)
- [Placeholders for email templates - Ultimate Member](#placeholders-for-email-templates-ultimate-member)
- [Ultimate Member Short Tags for SEO title and menu titles - Ultimate Member](#ultimate-member-short-tags-for-seo-title-and-menu-titles-ultimate-member)
- [Action Scheduler in Ultimate Member - Ultimate Member](#action-scheduler-in-ultimate-member-ultimate-member)
- [UM in Multisite - Ultimate Member](#um-in-multisite-ultimate-member)
- [Profile Photo Size - Ultimate Member](#profile-photo-size-ultimate-member)
- [Export Personal/User Data - Ultimate Member](#export-personal-user-data-ultimate-member)
- [Block Email address on Registration - Ultimate Member](#block-email-address-on-registration-ultimate-member)
- [Profile Cover Size - Ultimate Member](#profile-cover-size-ultimate-member)
- [Blacklist Words on Registration - Ultimate Member](#blacklist-words-on-registration-ultimate-member)
- [Versions Dependencies Map - Ultimate Member](#versions-dependencies-map-ultimate-member)
- [Uploaded Files Structure - Ultimate Member](#uploaded-files-structure-ultimate-member)
- [How to upgrade UM from version 1.3+ to 2.4+ & Common Issues - Ultimate Member](#how-to-upgrade-um-from-version-1-3-to-2-4-common-issues-ultimate-member)
- [Ultimate Member Site Health - Ultimate Member](#ultimate-member-site-health-ultimate-member)
- [Ultimate Member 2.8.7 User Management: What's New and How to Use It - Ultimate Member](#ultimate-member-2-8-7-user-management-what-s-new-and-how-to-use-it-ultimate-member)
- [NGINX Configuration Rewrite Rule for Ultimate Member - Ultimate Member](#nginx-configuration-rewrite-rule-for-ultimate-member-ultimate-member)
- [Social Login 2.3 Setup - Ultimate Member](#social-login-2-3-setup-ultimate-member)
- [Social Login: X ( formerly Twitter ) App Setup - Ultimate Member](#social-login-x-formerly-twitter-app-setup-ultimate-member)
- [CM Tooltip Glossary Pro+ - Ultimate Member](#cm-tooltip-glossary-pro-ultimate-member)
- [Install & Activate Advanced Custom Fields - Ultimate Member](#install-activate-advanced-custom-fields-ultimate-member)
- [Social Login: LinkedIn App Setup - Ultimate Member](#social-login-linkedin-app-setup-ultimate-member)
- [Upgrade 2.1.0 - Ultimate Member](#upgrade-2-1-0-ultimate-member)
- [RankMath - Allow changing of the canonical URL - Ultimate Member](#rankmath-allow-changing-of-the-canonical-url-ultimate-member)
- [Solution of : Conflict with the Registration Module of LearnDash - Ultimate Member](#solution-of-conflict-with-the-registration-module-of-learndash-ultimate-member)
- [Spam solution with WP Foro plugin - Ultimate Member](#spam-solution-with-wp-foro-plugin-ultimate-member)
- [Security Incident Update and Recommended Actions - Ultimate Member](#security-incident-update-and-recommended-actions-ultimate-member)
- [Installing the plugin from WordPress.org - Ultimate Member](#installing-the-plugin-from-wordpress-org-ultimate-member)
- [Restrict content on a page/post to specific users community role - Ultimate Member](#restrict-content-on-a-page-post-to-specific-users-community-role-ultimate-member)
- [Installing an Extension - Ultimate Member](#installing-an-extension-ultimate-member)
- [Creating Plugin Core Pages Manually - Ultimate Member](#creating-plugin-core-pages-manually-ultimate-member)
- [Common content restriction settings - Ultimate Member](#common-content-restriction-settings-ultimate-member)
- [User Tags + Member Directories 2.1.0+ - Ultimate Member](#user-tags-member-directories-2-1-0-ultimate-member)
- [Restrict content on a page/post to logged out users - Ultimate Member](#restrict-content-on-a-page-post-to-logged-out-users-ultimate-member)
- [Social Login Common Issues - Ultimate Member](#social-login-common-issues-ultimate-member)
- [Adding Existing Fields from Register Form to Profile Form - Ultimate Member](#adding-existing-fields-from-register-form-to-profile-form-ultimate-member)
- [Ultimate Member - Search Users - Ultimate Member](#ultimate-member-search-users-ultimate-member)
- [Choices Callback Feature in UM 2.1+ - Ultimate Member](#choices-callback-feature-in-um-2-1-ultimate-member)
- [Display Specific User Profile with a shortcode - Ultimate Member](#display-specific-user-profile-with-a-shortcode-ultimate-member)
- [Conditional Logic - Ultimate Member](#conditional-logic-ultimate-member)
- [Default WordPress Fields Limit - Ultimate Member](#default-wordpress-fields-limit-ultimate-member)
- [Dynamic Country-State-City Dependent Dropdown fields - Ultimate Member](#dynamic-country-state-city-dependent-dropdown-fields-ultimate-member)
- [Fields Validation - Ultimate Member](#fields-validation-ultimate-member)
- [Form Builder - Ultimate Member](#form-builder-ultimate-member)
- [Setting Passwords in Ultimate Member Registration Forms - Ultimate Member](#setting-passwords-in-ultimate-member-registration-forms-ultimate-member)
- [Field Types - Ultimate Member](#field-types-ultimate-member)
- [Field Types Setting - Ultimate Member](#field-types-setting-ultimate-member)
- [Fields Visibility - Ultimate Member](#fields-visibility-ultimate-member)
- [How to Add Fields to a Form - Ultimate Member](#how-to-add-fields-to-a-form-ultimate-member)
- [Spotify URL Field Type - Ultimate Member](#spotify-url-field-type-ultimate-member)
- [How to use User Roles - Ultimate Member](#how-to-use-user-roles-ultimate-member)
- [Block Disposable Email Domains - Ultimate Member](#block-disposable-email-domains-ultimate-member)
- [Cover Photo Uploader in Register Form - Ultimate Member](#cover-photo-uploader-in-register-form-ultimate-member)
- [Displaying Member Directories - Ultimate Member](#displaying-member-directories-ultimate-member)
- [Member Directories 2.1.0+ - Ultimate Member](#member-directories-2-1-0-ultimate-member)
- [How to set Role Priority for user roles - Ultimate Member](#how-to-set-role-priority-for-user-roles-ultimate-member)
- [Displays Country flag in Member Directory and User Profiles - Ultimate Member](#displays-country-flag-in-member-directory-and-user-profiles-ultimate-member)
- [Hiding/Showing admin bar for specific user roles - Ultimate Member](#hiding-showing-admin-bar-for-specific-user-roles-ultimate-member)
- [Creating Metatable for Member Directories - Ultimate Member](#creating-metatable-for-member-directories-ultimate-member)
- [Enable Profile Photo Uploader in Registration Forms - Ultimate Member](#enable-profile-photo-uploader-in-registration-forms-ultimate-member)
- [Auto approve a user on registration in WP Admin - Ultimate Member](#auto-approve-a-user-on-registration-in-wp-admin-ultimate-member)
- [Fields Character and Words Counter - Ultimate Member](#fields-character-and-words-counter-ultimate-member)
- [How to set up a user role that can edit other member without wp-admin access - Ultimate Member](#how-to-set-up-a-user-role-that-can-edit-other-member-without-wp-admin-access-ultimate-member)
- [Custom Post Type capabilities not showing in the WP Capabilities in User Role Settings - Ultimate Member](#custom-post-type-capabilities-not-showing-in-the-wp-capabilities-in-user-role-settings-ultimate-member)
- [Generate Dummies - Ultimate Member](#generate-dummies-ultimate-member)
- [Installation - Ultimate Member](#installation-ultimate-member)
- [Force Capitalization of Display Name - Ultimate Member](#force-capitalization-of-display-name-ultimate-member)
- [Math Captcha in Register Forms - Ultimate Member](#math-captcha-in-register-forms-ultimate-member)
- [Password Strength Estimator - Ultimate Member](#password-strength-estimator-ultimate-member)
- [Regenerate Cover & Profile Photo thumbnails - Ultimate Member](#regenerate-cover-profile-photo-thumbnails-ultimate-member)
- [Resend the Account Email Confirmation notification with WP Cronjob - Ultimate Member](#resend-the-account-email-confirmation-notification-with-wp-cronjob-ultimate-member)
- [Schedule User Deletions with WP Cronjob - Ultimate Member](#schedule-user-deletions-with-wp-cronjob-ultimate-member)
- [User Browser Detect - Ultimate Member](#user-browser-detect-ultimate-member)
- [Set Password Link for UM Email Templates - Ultimate Member](#set-password-link-for-um-email-templates-ultimate-member)
- [User Meta Shortcode - Ultimate Member](#user-meta-shortcode-ultimate-member)
- [Vcard - Ultimate Member](#vcard-ultimate-member)
- [Yoast SEO Meta tags - Ultimate Member](#yoast-seo-meta-tags-ultimate-member)
- [Followers Setup - Ultimate Member](#followers-setup-ultimate-member)
- [ForumWP Setup - Ultimate Member](#forumwp-setup-ultimate-member)
- [Restrict Gutenberg Blocks - Ultimate Member](#restrict-gutenberg-blocks-ultimate-member)
- [Followers shortcodes - Ultimate Member](#followers-shortcodes-ultimate-member)
- [Individual Post and Term content restriction settings - Ultimate Member](#individual-post-and-term-content-restriction-settings-ultimate-member)
- [Restriction content priority - Ultimate Member](#restriction-content-priority-ultimate-member)
- [Friends Setup - Ultimate Member](#friends-setup-ultimate-member)
- [Friends shortcodes - Ultimate Member](#friends-shortcodes-ultimate-member)
- [Groups setup - Ultimate Member](#groups-setup-ultimate-member)
- [Ultimate Member - JobBoardWP integration - Ultimate Member](#ultimate-member-jobboardwp-integration-ultimate-member)
- [How to debug MailChimp error - Ultimate Member](#how-to-debug-mailchimp-error-ultimate-member)
- [MailChimp Setup - Ultimate Member](#mailchimp-setup-ultimate-member)
- [MailChimp shortcodes - Ultimate Member](#mailchimp-shortcodes-ultimate-member)
- [How to split members into multiple audiences on registration - Ultimate Member](#how-to-split-members-into-multiple-audiences-on-registration-ultimate-member)
- [Enable double opt-in - Ultimate Member](#enable-double-opt-in-ultimate-member)
- [Groups shortcodes - Ultimate Member](#groups-shortcodes-ultimate-member)
- [How to sync the user role - Ultimate Member](#how-to-sync-the-user-role-ultimate-member)
- [Notices Setup - Ultimate Member](#notices-setup-ultimate-member)
- [Online Users - Profile Page & Member Directory Setup - Ultimate Member](#online-users-profile-page-member-directory-setup-ultimate-member)
- [Private content setup - Ultimate Member](#private-content-setup-ultimate-member)
- [Message Notification Icon - Ultimate Member](#message-notification-icon-ultimate-member)
- [Online Users - Sidebar Widget Set Up - Ultimate Member](#online-users-sidebar-widget-set-up-ultimate-member)
- [Profile Completeness - Hooks - Ultimate Member](#profile-completeness-hooks-ultimate-member)
- [Profile Tabs Setup - Ultimate Member](#profile-tabs-setup-ultimate-member)
- [Private Messages Setup - Ultimate Member](#private-messages-setup-ultimate-member)
- [Private Content Plugin Activation - Ultimate Member](#private-content-plugin-activation-ultimate-member)
- [Profile tab with a form inside - Ultimate Member](#profile-tab-with-a-form-inside-ultimate-member)
- [Real-time Notifications Setup - Ultimate Member](#real-time-notifications-setup-ultimate-member)
- [Profile Tab with CF7 form inside - Ultimate Member](#profile-tab-with-cf7-form-inside-ultimate-member)
- [Real-time Notifications Shortcodes - Ultimate Member](#real-time-notifications-shortcodes-ultimate-member)
- [Profile Tab with a Member Directory inside - Ultimate Member](#profile-tab-with-a-member-directory-inside-ultimate-member)
- [Social Activity Setup - Ultimate Member](#social-activity-setup-ultimate-member)
- [How to show only followed users/friends activity on the social wall - Ultimate Member](#how-to-show-only-followed-users-friends-activity-on-the-social-wall-ultimate-member)
- [Introduction to Stripe Extension - Ultimate Member](#introduction-to-stripe-extension-ultimate-member)
- [Reviews Shortcodes - Ultimate Member](#reviews-shortcodes-ultimate-member)
- [Social Login: User Role Redirection Settings - Ultimate Member](#social-login-user-role-redirection-settings-ultimate-member)
- [Terms & Conditions - Ultimate Member](#terms-conditions-ultimate-member)
- [Social Login: Authenticate on Current Window - Ultimate Member](#social-login-authenticate-on-current-window-ultimate-member)
- [Unsplash setup - Ultimate Member](#unsplash-setup-ultimate-member)
- [User Bookmarks shortcodes - Ultimate Member](#user-bookmarks-shortcodes-ultimate-member)
- [How to limit wall posts in social activity? - Ultimate Member](#how-to-limit-wall-posts-in-social-activity-ultimate-member)
- [Stripe - Setting up Webhook and Test/Public Keys - Ultimate Member](#stripe-setting-up-webhook-and-test-public-keys-ultimate-member)
- [Ultimate Member - myCred Shortcodes - Ultimate Member](#ultimate-member-mycred-shortcodes-ultimate-member)
- [Social Activity Shortcodes - Ultimate Member](#social-activity-shortcodes-ultimate-member)
- [UTM Parameters - Ultimate Member](#utm-parameters-ultimate-member)
- [User Locations - Shortcodes - Ultimate Member](#user-locations-shortcodes-ultimate-member)
- [NGINX Configuration Rewrite Rule for Ultimate Member Social Activity - Ultimate Member](#nginx-configuration-rewrite-rule-for-ultimate-member-social-activity-ultimate-member)
- [Stripe - Setting up Stripe Success, Cancel Payment, Already Subscribed,Customer Portal,Stripe Checkout URL and Embedded Checkout Pages - Ultimate Member](#stripe-setting-up-stripe-success-cancel-payment-already-subscribed-customer-portal-stripe-checkout-url-and-embedded-checkout-pages-ultimate-member)
- [Create Subscription Prices - Ultimate Member](#create-subscription-prices-ultimate-member)
- [Customizing the Font Size on the Social Activity Wall - Ultimate Member](#customizing-the-font-size-on-the-social-activity-wall-ultimate-member)
- [Social Login: X(formerly Twitter) API v2 Setup - Ultimate Member](#social-login-x-formerly-twitter-api-v2-setup-ultimate-member)
- [Stripe - Add Subscription Plans to a Registration Form - Ultimate Member](#stripe-add-subscription-plans-to-a-registration-form-ultimate-member)
- [Stripe Shortcodes - Ultimate Member](#stripe-shortcodes-ultimate-member)
- [User Notes Shortcodes - Ultimate Member](#user-notes-shortcodes-ultimate-member)
- [Social Login - Assigning Roles - Ultimate Member](#social-login-assigning-roles-ultimate-member)
- [Stripe - Test your integration - Ultimate Member](#stripe-test-your-integration-ultimate-member)
- [Stripe - Create & Test Customer Billings - Ultimate Member](#stripe-create-test-customer-billings-ultimate-member)
- [Social Login: TwitchTV App Setup - Ultimate Member](#social-login-twitchtv-app-setup-ultimate-member)
- [Social Login: Discord App Setup - Ultimate Member](#social-login-discord-app-setup-ultimate-member)
- [Social Login: Github App Setup - Ultimate Member](#social-login-github-app-setup-ultimate-member)
- [Stripe CLI Integration - Ultimate Member](#stripe-cli-integration-ultimate-member)
- [Stripe - Content Restriction - Ultimate Member](#stripe-content-restriction-ultimate-member)
- [Social Login: WordPress App Setup - Ultimate Member](#social-login-wordpress-app-setup-ultimate-member)
- [Import Existing Subscription Prices from your Stripe Account - Ultimate Member](#import-existing-subscription-prices-from-your-stripe-account-ultimate-member)
- [Social Login - List of Sync Field Options in Form Builder - Ultimate Member](#social-login-list-of-sync-field-options-in-form-builder-ultimate-member)
- [Why does Facebook login no longer works: Graph returned an error: Can't Load URL - Ultimate Member](#why-does-facebook-login-no-longer-works-graph-returned-an-error-can-t-load-url-ultimate-member)
- [Stripe’s Plans Customization in Register Forms - Ultimate Member](#stripe-s-plans-customization-in-register-forms-ultimate-member)
- [Social Login - Sync Social Register form fields with Extend option - Ultimate Member](#social-login-sync-social-register-form-fields-with-extend-option-ultimate-member)
- [Display Subscription Status, Invoices and Active Subscriptions in the Admin screen - Ultimate Member](#display-subscription-status-invoices-and-active-subscriptions-in-the-admin-screen-ultimate-member)
- [Test your integration with Stripe test clocks - Ultimate Member](#test-your-integration-with-stripe-test-clocks-ultimate-member)
- [What's new in UM Social Login 2.3: One-step Registration Process, New Social Networks, Popup Window Authentication & Profile Avatar improvements - Ultimate Member](#what-s-new-in-um-social-login-2-3-one-step-registration-process-new-social-networks-popup-window-authentication-profile-avatar-improvements-ultimate-member)
- [Social Login - Ultimate Member](#social-login-ultimate-member)
- [Stripe FAQ - How Many Subscriptions a User Can Subscribe to? - Ultimate Member](#stripe-faq-how-many-subscriptions-a-user-can-subscribe-to-ultimate-member)
- [Social Login - Ultimate Member](#social-login-ultimate-member)
- [Stripe - Ultimate Member](#stripe-ultimate-member)
- [Stripe - Ultimate Member](#stripe-ultimate-member)
- [User Bookmarks setup - Ultimate Member](#user-bookmarks-setup-ultimate-member)
- [Stripe FAQ - How to Connect a Stripe Customer account to a WordPress Account? - Ultimate Member](#stripe-faq-how-to-connect-a-stripe-customer-account-to-a-wordpress-account-ultimate-member)
- [Stripe FAQ - What Pricing Models are supported in the Stripe extension? - Ultimate Member](#stripe-faq-what-pricing-models-are-supported-in-the-stripe-extension-ultimate-member)
- [Stripe FAQ - How Do Subscriptions Handle Staging Sites and Migrations? - Ultimate Member](#stripe-faq-how-do-subscriptions-handle-staging-sites-and-migrations-ultimate-member)
- [User Notes setup - Ultimate Member](#user-notes-setup-ultimate-member)
- [User Locations Setup - Ultimate Member](#user-locations-setup-ultimate-member)
- [Stripe Beta Test - Ultimate Member](#stripe-beta-test-ultimate-member)
- [Stripe FAQ - Do Subscriptions Replace or Merge Roles? - Ultimate Member](#stripe-faq-do-subscriptions-replace-or-merge-roles-ultimate-member)
- [How to create a Google Maps API key - Ultimate Member](#how-to-create-a-google-maps-api-key-ultimate-member)
- [NGINX Configuration Rewrite Rule for Ultimate Member User Notes - Ultimate Member](#nginx-configuration-rewrite-rule-for-ultimate-member-user-notes-ultimate-member)
- [User Photos shortcodes - Ultimate Member](#user-photos-shortcodes-ultimate-member)
- [Footer Widgets - Ultimate Member](#footer-widgets-ultimate-member)
- [Customizing User's Profile Name and Description Colors - Ultimate Member](#customizing-user-s-profile-name-and-description-colors-ultimate-member)
- [Configure map in member directory to after list - Ultimate Member](#configure-map-in-member-directory-to-after-list-ultimate-member)
- [User Locations - Hooks - Ultimate Member](#user-locations-hooks-ultimate-member)
- [Changing bbPress Title Color - Ultimate Member](#changing-bbpress-title-color-ultimate-member)
- [Member Directory with User Locations map - Ultimate Member](#member-directory-with-user-locations-map-ultimate-member)
- [User Reviews Setup - Ultimate Member](#user-reviews-setup-ultimate-member)
- [User Photos setup - Ultimate Member](#user-photos-setup-ultimate-member)
- [How To Change bbPress Topic Title Font Size - Ultimate Member](#how-to-change-bbpress-topic-title-font-size-ultimate-member)
- [Extending UM Theme Header Profile Using Hooks - Ultimate Member](#extending-um-theme-header-profile-using-hooks-ultimate-member)
- [Ultimate Member - myCRED Extension - Ultimate Member](#ultimate-member-mycred-extension-ultimate-member)
- [Ultimate Member Zapier Settings Guide - Ultimate Member](#ultimate-member-zapier-settings-guide-ultimate-member)
- [Zapier Setup for Actions - Ultimate Member](#zapier-setup-for-actions-ultimate-member)
- [Adding Custom JavaScript Code - Ultimate Member](#adding-custom-javascript-code-ultimate-member)
- [WooCommerce subscription setup - Ultimate Member](#woocommerce-subscription-setup-ultimate-member)
- [Zapier Setup for Triggers - Ultimate Member](#zapier-setup-for-triggers-ultimate-member)
- [Installing a Theme - Ultimate Member](#installing-a-theme-ultimate-member)
- [UM Theme Sidebars - Ultimate Member](#um-theme-sidebars-ultimate-member)
- [Disable Page Title on ALL Pages - Ultimate Member](#disable-page-title-on-all-pages-ultimate-member)
- [Customizing Header Section - Ultimate Member](#customizing-header-section-ultimate-member)
- [bbPress Forum Header Color - Ultimate Member](#bbpress-forum-header-color-ultimate-member)
- [um_theme_header - Ultimate Member](#um-theme-header-ultimate-member)
- [Footer Bottom Bar - Ultimate Member](#footer-bottom-bar-ultimate-member)
- [um_theme_page - Ultimate Member](#um-theme-page-ultimate-member)
- [Changing bbPress Sticky Topic Color - Ultimate Member](#changing-bbpress-sticky-topic-color-ultimate-member)
- [Changing the bbPress forum Author Name Color - Ultimate Member](#changing-the-bbpress-forum-author-name-color-ultimate-member)
- [Scroll to Top - Ultimate Member](#scroll-to-top-ultimate-member)
- [Single Article - Ultimate Member](#single-article-ultimate-member)
- [um_theme_before_header - Ultimate Member](#um-theme-before-header-ultimate-member)
- [Display Social Media Icons in the Header Top Bar - Ultimate Member](#display-social-media-icons-in-the-header-top-bar-ultimate-member)
- [Post Archive - Ultimate Member](#post-archive-ultimate-member)
- [Changing Website Width - Ultimate Member](#changing-website-width-ultimate-member)
- [Customizing Topbar Color & Font - Ultimate Member](#customizing-topbar-color-font-ultimate-member)
- [um_theme_header_profile_before - Ultimate Member](#um-theme-header-profile-before-ultimate-member)
- [Customizing Form Fields Color - Ultimate Member](#customizing-form-fields-color-ultimate-member)
- [um_theme_single_post - Ultimate Member](#um-theme-single-post-ultimate-member)
- [um_theme_content_top - Ultimate Member](#um-theme-content-top-ultimate-member)
- [um_theme_before_content - Ultimate Member](#um-theme-before-content-ultimate-member)
- [um_theme_footer - Ultimate Member](#um-theme-footer-ultimate-member)
- [Setting up Header Menu - Ultimate Member](#setting-up-header-menu-ultimate-member)
- [Body Text Color & Font - Ultimate Member](#body-text-color-font-ultimate-member)
- [How To Enable Header Topbar - Ultimate Member](#how-to-enable-header-topbar-ultimate-member)
- [um_theme_header_profile_after - Ultimate Member](#um-theme-header-profile-after-ultimate-member)
- [Setting up Header Logo - Ultimate Member](#setting-up-header-logo-ultimate-member)
- [um_theme_after_header - Ultimate Member](#um-theme-after-header-ultimate-member)
- [um_theme_before_comments_title - Ultimate Member](#um-theme-before-comments-title-ultimate-member)
- [um_theme_before_comments - Ultimate Member](#um-theme-before-comments-ultimate-member)
- [um_theme_single_post_top - Ultimate Member](#um-theme-single-post-top-ultimate-member)
- [um_theme_after_comments_title - Ultimate Member](#um-theme-after-comments-title-ultimate-member)
- [Customizing Heading Text & Font - Ultimate Member](#customizing-heading-text-font-ultimate-member)
- [um_theme_after_comments - Ultimate Member](#um-theme-after-comments-ultimate-member)
- [Drop-down Settings - Ultimate Member](#drop-down-settings-ultimate-member)
- [Setting up Search Box in Header - Ultimate Member](#setting-up-search-box-in-header-ultimate-member)
- [Developer - Ultimate Member](#developer-ultimate-member)
- [Developer - Ultimate Member](#developer-ultimate-member)
- [um_theme_before_site - Ultimate Member](#um-theme-before-site-ultimate-member)
- [Header - Logged Out - Ultimate Member](#header-logged-out-ultimate-member)
- [um_theme_after_page_content - Ultimate Member](#um-theme-after-page-content-ultimate-member)
- [um_theme_single_post_before - Ultimate Member](#um-theme-single-post-before-ultimate-member)
- [Customizing Widgets Color - Ultimate Member](#customizing-widgets-color-ultimate-member)
- [UM Theme LifterLMS Support - Ultimate Member](#um-theme-lifterlms-support-ultimate-member)
- [Change Header Topbar layout - Ultimate Member](#change-header-topbar-layout-ultimate-member)
- [Header Notifications - Ultimate Member](#header-notifications-ultimate-member)
- [Meta Information Color - Ultimate Member](#meta-information-color-ultimate-member)
- [Text Link Color - Ultimate Member](#text-link-color-ultimate-member)
- [Setting up User Header Menu - Ultimate Member](#setting-up-user-header-menu-ultimate-member)
- [Extension: Private Messages - Ultimate Member](#extension-private-messages-ultimate-member)
- [Website background Color - Ultimate Member](#website-background-color-ultimate-member)
- [Header Messenger Modal - Ultimate Member](#header-messenger-modal-ultimate-member)
- [Enable Header Bottom Bar - Ultimate Member](#enable-header-bottom-bar-ultimate-member)
---
# Ultimate Member
Documentation for Ultimate Member
=================================
Search
No results found
[Core Plugin](/collection/1-core-plugin)
-----------------------------------------
[### Dashboard\
\
1 article](/category/1741-dashboard)
[### Deprecated\
\
Deprecated articles\
\
10 articles](/category/1625-deprecated)
[### Email\
\
5 articles](/category/1801-email)
[### General\
\
16 articles](/category/110-general)
[### Multisite\
\
2 articles](/category/1627-multisite)
[### Third Party Plugins\
\
5 articles](/category/1690-third-party-plugins)
[### Updates\
\
4 articles](/category/1867-updates)
[### Installation\
\
2 articles](/category/25-installation)
[### Shortcodes\
\
6 articles](/category/211-shortcodes)
[### Settings\
\
5 articles](/category/37-settings)
[### Forms & Fields\
\
16 articles](/category/84-forms-fields)
[### User Roles\
\
8 articles](/category/104-user-roles)
[### Member Directories\
\
5 articles](/category/101-member-directories)
[### Content Restriction\
\
8 articles](/category/175-content-restriction)
[Extensions](/collection/16-extensions)
----------------------------------------
[### Basic Extensions\
\
18 articles](/category/1669-basic-extensions)
[### Followers\
\
2 articles](/category/139-followers)
[### ForumWP\
\
1 article](/category/1500-forumwp)
[### Friends\
\
2 articles](/category/248-friends)
[### Google reCAPTCHA\
\
1 article](/category/73-google-recaptcha)
[### Groups\
\
2 articles](/category/1426-groups)
[### JobBoardWP\
\
1 article](/category/1573-jobboardwp)
[### MailChimp\
\
6 articles](/category/83-mailchimp)
[### Notices\
\
1 article](/category/77-notices)
[### Online Users\
\
3 articles](/category/81-online-users)
[### Private Messages\
\
2 articles](/category/136-private-messages)
[### Private content\
\
2 articles](/category/1496-private-content)
[### Profile Completeness\
\
2 articles](/category/138-profile-completeness)
[### Profile Tabs\
\
4 articles](/category/1546-profile-tabs)
[### Real-time Notifications\
\
2 articles](/category/137-real-time-notifications)
[### Shortcodes\
\
11 articles](/category/1538-shortcodes)
[### Social Activity\
\
6 articles](/category/133-social-activity)
[### Social Login\
\
21 articles](/category/19-social-login)
[### Stripe\
\
36 articles](/category/1605-stripe)
[### Terms & Conditions\
\
1 article](/category/261-terms-conditions)
[### Unsplash\
\
1 article](/category/1482-unsplash)
[### User Bookmarks\
\
2 articles](/category/1480-user-bookmarks)
[### User Locations\
\
6 articles](/category/1544-user-location)
[### User Notes\
\
3 articles](/category/1478-user-notes)
[### User Photos\
\
2 articles](/category/1467-user-photos)
[### User Reviews\
\
2 articles](/category/79-user-reviews)
[### User Tags\
\
2 articles](/category/185-user-tags)
[### Verified Users\
\
1 article](/category/135-verified-users)
[### WooCommerce\
\
3 articles](/category/130-woocommerce)
[### Zapier\
\
3 articles](/category/1731-zapier)
[### bbPress\
\
1 article](/category/75-bbpress)
[### myCRED\
\
2 articles](/category/134-mycred)
[Theme](/collection/1344-theme)
--------------------------------
[### Theme\
\
6 articles](/category/1509-theme)
[### bbPress\
\
5 articles](/category/1396-bbpress)
[### Code Examples\
\
4 articles](/category/1437-code-examples)
[### Developer\
\
25 articles](/category/1380-developer)
[### Footer\
\
3 articles](/category/1377-footer)
[### Header\
\
18 articles](/category/1348-header)
[### Layout\
\
5 articles](/category/1373-layout)
[### Social Media\
\
1 article](/category/1367-social-media)
[### Styles\
\
11 articles](/category/1365-styles)
[### Ultimate Member\
\
14 articles](/category/1387-ultimate-member)
[### WooCommerce\
\
1 article](/category/1391-woocommerce)
[FAQs](/collection/6-faqs)
---------------------------
[### Common Problems\
\
16 articles](/category/21-common-problems)
[### Extensions\
\
1 article](/category/35-extensions)
[### How To\
\
27 articles](/category/22-how-to)
[For Developers](/collection/28-for-developers)
------------------------------------------------
[### API Functions\
\
4 articles](/category/123-api-functions)
[### CSS\
\
7 articles](/category/256-css)
[### Code Examples\
\
100 articles](/category/48-code-examples)
[### Codex\
\
21 articles](/category/152-codex)
[### Hooks\
\
UM Hooks\
\
370 articles](/category/955-hooks)
[### How to\
\
How to do specific UM functions\
\
55 articles](/category/31-how-to)
[### Templates\
\
6 articles](/category/118-templates)
---
# Extensions - Ultimate Member
Most Popular Articles
=====================
* [Social Login: Facebook App Setup](/article/20-social-login-facebook-app-setup)
* [Google reCAPTCHA](/article/72-google-recaptcha)
* [WooCommerce Setup](/article/131-woocommerce-setup)
* [Social Login Setup](/article/71-social-login-setup)
* [bbPress Setup](/article/74-bbpress-setup)
* [Verified Users Setup](/article/184-verified-users-setup)
* [Profile Completeness Setup](/article/189-profile-completeness-setup)
* [User Tags Setup](/article/186-user-tags-setup)
* [Social Login: Google App Setup](/article/141-social-login-google-app-setup)
* [Online Users Setup](/article/80-online-users-setup)
No results found
---
# Core Plugin - Ultimate Member
Most Popular Articles
=====================
* [Ultimate Member - Shortcodes](/article/210-ultimate-member-shortcodes)
* [Default Pages](/article/111-default-pages)
* [Adding a Registration Form](/article/87-adding-a-registration-form)
* [User Roles Settings](/article/103-user-roles-settings)
* [Email Templates](/article/1335-email-templates)
* [Getting Started with Ultimate Member](/article/180-getting-started-with-ultimate-member)
* [Restrict content on a page/post to logged in users](/article/177-restrict-content-on-a-page-post-to-logged-in-users)
* [Member Directory 1.3.x - 2.0.x Settings](/article/102-member-directory-settings)
* [Conditional Menus](/article/132-conditional-menus)
* [Unique profiles for different user roles](/article/100-unique-profiles-for-different-user-roles)
No results found
---
# Theme - Ultimate Member
Most Popular Articles
=====================
* [How to Change Ultimate Member Profile Layout](/article/1454-change-um-profile-layout)
* [Ultimate Member Profile Page](/article/1386-ultimate-member-profile-page)
* [Ultimate Member - Account Page](/article/1408-ultimate-member-account-page)
* [WooCommerce Products Color](/article/1390-woocommerce-products-color)
* [Ultimate Member - Changing Default Color](/article/1406-ultimate-member-changing-default-color)
* [Customize Ultimate Member Login Page](/article/1484-customize-um-login-page)
* [Customizing Button Color](/article/1368-customizing-button-color)
* [Header - Logged In](/article/1353-header-logged-in)
* [Ultimate Member Directory](/article/1388-ultimate-member-directory)
* [Theme Hooks](/article/1379-theme-hooks)
No results found
---
# FAQs - Ultimate Member
Most Popular Articles
=====================
* [How to do a plugin/theme conflict test?](/article/96-how-to-do-a-plugin-theme-conflict-test)
* [How to add user profile photo/avatar & display name to my site header?](/article/24-how-to-add-user-profile-to-my-site-header)
* [Not receiving user emails or admin notifications](/article/116-not-receiving-user-emails-or-admin-notifications)
* [Photo/image uploads not working](/article/114-photo-uploads-not-working)
* [How to translate plugin](/article/1449-how-to-translate-plugin)
* [Password Reset doesn't work](/article/1518-password-reset-doesnt-work)
* [Export & Import](/article/1549-export-import)
* [How to get registration/login form to show in 2/3 columns?](/article/122-how-to-get-registration-login-form-to-show-in-2-3-columns)
* [How to add a navigation menu link to the edit profile page?](/article/187-how-to-add-a-navigation-menu-link-to-the-edit-profile-page)
* [How to block bot registrations](/article/1551-how-to-block-bot-registrations)
No results found
---
# For Developers - Ultimate Member
Most Popular Articles
=====================
* [UM Hooks](/article/1324-hooks-list)
* [Add a hidden field to your register form](/article/128-add-a-hidden-field-to-your-register-form)
* [Adding your custom profile templates](/article/120-adding-your-custom-profile-templates)
* [um\_user](/article/158-umuser)
* [Change default Ultimate Member "blue" color using CSS](/article/270-how-to-change-default-ultimate-member-blue-color-using-css)
* [How do I add my extra tabs to user profiles?](/article/69-how-do-i-add-my-extra-tabs-to-user-profiles)
* [Extending Ultimate Member Profile Menu using Hooks](/article/64-extending-ultimate-member-profile-menu-using-hooks)
* [Template structure & Overriding templates via a theme](/article/1516-templates-map)
* [Extend Ultimate Member Account page with custom tabs/content](/article/65-extend-ultimate-member-account-page-with-custom-tabs-content)
* [Get the current user profile ID](/article/34-get-the-current-user-profile-id)
No results found
---
# Dashboard - Ultimate Member
Dashboard
=========
Sort by Default Sort A-Z Sort by Popularity Sort by Last Updated
* [Ultimate Member Dashboard](/article/1742-ultimate-member-dashboard)
No results found
---
# Email - Ultimate Member
Email
=====
Sort by Default Sort A-Z Sort by Popularity Sort by Last Updated
* [Email Templates](/article/1335-email-templates)
* [Plain text email default templates](/article/1342-plain-text-email-default-templates)
* [How to Enable Email Notification on Activation or Admin Review Upon User's Registration](/article/1652-how-to-enable-email-notification-on-activation-or-admin-review-upon-users-registration)
* [Placeholders for email templates](/article/1340-placeholders-for-email-templates)
* [Action Scheduler in Ultimate Member](/article/1947-action-scheduler-in-ultimate-member)
No results found
---
# Deprecated - Ultimate Member
Deprecated
==========
Deprecated articles
Sort by Default Sort A-Z Sort by Popularity Sort by Last Updated
* [Access Tab](/article/41-access-tab)
* [Account Tab](/article/40-account-tab)
* [Advanced Tab](/article/1902-advanced-tab)
* [Appearance Tab](/article/46-appearance-tab)
* [Content Restriction until 2.2.0 version](/article/1329-content-restriction)
* [Emails Tab](/article/42-emails-tab)
* [Misc Tab](/article/45-misc-tab)
* [Pages Tab](/article/38-pages-tab)
* [Uploads Tab](/article/145-uploads-tab)
* [Users Tab](/article/39-users-tab)
No results found
---
# Social Login: Facebook App Setup - Ultimate Member
Social Login: Facebook App Setup
================================
[](javascript:window.print() "Print this article")
### Overview
This document provides instructions on properly setting up a Facebook application so that users can log in/register via Facebook on your site. You will need to purchase the [social login extension](https://ultimatemember.com/extensions/social-login/)
if you want users to log in via Facebook.
### Creating a new app
You need to create a Facebook app to allow users to log in to your site with their Facebook account. To create a new Facebook app, please do the following:
1. Go to the Facebook Developers site: [https://developers.facebook.com/](https://developers.facebook.com/)
.
2. If you are not logged in, log in to the site using your Facebook account details.
3. Once logged in, go to '**My Apps'.
**
4. Click on the '**Create App'** button. It will lead you to the app creations page.

A message will appear that there's a new way to create apps with Meta, click the ' **C****reate App'** button to continue.
### Create an App
1. On this page, in the Add use case tab, select **"Authenticate and request data from users with Facebook Login"** from the suggested use case , and then click on the '**Next'** button.

2. In the Login type tab, select **"No, I'm not building a game"** as your login type, so you will not be redirected to the gaming setup, then click the '**Next'** button to proceed.

3. Fill out the **App Name** and **App Contact Email**. Then click the **Create App** button.

**Note:** After clicking the '**Create App'** button, you may be presented with a security check.
4. Upon successful creation, a message window will appear that your app has been created. Click the '**Go to Dashboard'** button to proceed to the dashboard.

Create and Publish App
----------------------
### Customize this app
1. In the dashboard, click on the **'Customize adding a Facebook Login button'** to set up your product. 
2. Scroll down to the **Permissions** section and add **'****public\_profile'** and **'****email'** permissions by clicking on the **'Add'** button. 
3. After you have added the permissions, go to settings by clicking on the **'Go to settings'** button.

4. In the **Client OAuth Settings,** you need to enter your site's login, register, and account's social tab URIs into the field **"Valid OAuth redirect URIs."** Add the custom page URL if you use the social login shortcode on the custom page. We recommend adding additional URLs with the parameters "**return\_provider**" and "**provider**" See the example below:
* [https://www.yoursitedomain.com/](https://www.yoursitedomain.com/)
* [https://www.yoursitedomain.com/?provider=facebook](https://www.yoursitedomain.com/?provider=facebook)
* [https://www.yoursitedomain.com/?return\_provider=facebook](https://www.yoursitedomain.com/?return_provider=facebook)
* [https://www.yoursitedomain.com/login/](https://www.yoursitedomain.com/login/)
* [https://www.yoursitedomain.com/login/?provider=facebook](https://www.yoursitedomain.com/login/?provider=facebook)
* [https://www.yoursitedomain.com/login/?return\_provider=facebook](https://www.yoursitedomain.com/login/?return_provider=facebook)
* [https://www.yoursitedomain.com/register/](https://www.yoursitedomain.com/register/)
* [https://www.yoursitedomain.com/register/?provider=facebook](https://www.yoursitedomain.com/register/?provider=facebook)
* [https://www.yoursitedomain.com/register/?return\_provider=facebook](https://www.yoursitedomain.com/register/?return_provider=facebook)
* [https://www.yoursitedomain.com/account/social/](https://www.yoursitedomain.com/account/social/)
* [https://www.yoursitedomain.com/account/social/?provider=facebook](https://www.yoursitedomain.com/account/social/?provider=facebook)
* [https://www.yoursitedomain.com/account/social/?return\_provider=facebook](https://www.yoursitedomain.com/account/social/?return_provider=facebook)

5. After you have saved the changes, go back to Customize and click on **'Go to quickstart'**
6. Select the **Web platform** for your app, then add your **Site URL**, then click the **"Save"** button.

### Prepare and submit for App Review
**Note**: Additional steps may be necessary. Ensure that all required verifications and data handling questions, if applicable, are completed before submitting this application to App Review. If you do not have a Facebook business account, please follow the instructions provided here on how to create one: [https://www.facebook.com/business/help/1710077379203657](https://www.facebook.com/business/help/1710077379203657)
.
1. In the **Prepare and submit for App Review**, click on **'Review and complete testing requirements'**, it will redirect you to **Graph API Explorer**.
****
2. On the right section of the Graph API explorer add the **public\_profile** and **email.** To add a permission go to **permission** **\> User data permissions> email.**
3. Once added, click on **Generate Access Token** and **Submit** buttons,
4. Go back to your App's Dashboard, and click on **Business Verification**, it will redirect you to the verification page. This is where you can add your business account.

5. This step is necessary to obtain access to user data, commonly referred to as advanced access in certain applications. Completion of this process is restricted to individuals with full control of a Business Account. For further information on business verification, please refer to this article: [https://www.facebook.com/business/help/2058515294227817?id=180505742745347](https://www.facebook.com/business/help/2058515294227817?id=180505742745347)

6. Once, you have successfully added a verified business account. Return to the App Dashboard or from the side menu, click on **Review>Data handling questions**. It will redirect you to data handling questions where you need to answer questions about data handling.
7. To begin, select **"Answer questions about data handling,"** and a window will promptly appear. Within the **Usage Check** tab, carefully review and confirm the data usage permissions and features you have added. Utilize the checkboxes to express your confirmation and agreement, and subsequently, click on the **confirm** button to proceed.
8. Now in the **Data Handling tab**, In order to obtain access to permissions, kindly provide information regarding your data handling practices. This is a mandatory step for App Review and the subsequent launch of your app. Answer the questions and click **S****ubmit** button.
### Publish
1. Go to the **Publish** tab from the side navigation menu. Then click on the **'Go to app settings'**. 
2. You must fill in the following information: **Privacy Policy URL, Terms of Service URL, User data deletion** and you can also include an app icon to make the app appear more professional. Then click the **'Save** **changes'** button.
3. Ensure all required settings are completed and use cases are reviewed before you click on the **'Publish'** button, the app can’t be published if the requirements are incomplete.
**Note:** After clicking the 'Publish' button, you may be presented with a security check.
4. After successfully publishing your app, a confirmation message will be displayed indicating that it is now available for the public to use. To proceed to the next step, simply click the **'Done'** button.
### App ID & App secret
With your app successfully published, the next step is to integrate Facebook with Ultimate Member. To achieve this, you'll need both the **App ID** and **App Secret.**
1. In the side navigation menu, navigate to **App Settings> Basic**. Here, you'll find both the App ID and App Secret.

2. **Copy the App ID and App Secret**, then proceed to **wp-admin > Ultimate Member > Settings > Extensions > Social Login > Facebook Social Connect**. Paste the copied values into the respective fields and finalize the process by clicking the **'Save Changes'** button.
****
### Test Integration
If you enable the settings listed below, Facebook buttons will be integrated into your site's account page, registration page, and login page.

**Social Account Tab**

**Show social connect on registration form
**

**Show social connect on login forms
**

Last updated on May 31, 2024
No results found
---
# Google reCAPTCHA - Ultimate Member
Google reCAPTCHA
================
[](javascript:window.print() "Print this article")
This documentation provides comprehensive instructions on enhancing spam protection for your registration and login forms through the incorporation of the free [Google reCAPTCHA extension](https://ultimatemember.com/extensions/google-recaptcha/)
.
### Installing & activating
To seamlessly integrate the Google reCAPTCHA extension into your site, follow the step-by-step process below:
1. Download the plugin zip folder from the WordPress [plugins catalog](https://wordpress.org/plugins/um-recaptcha/)
.
2. Install the plugin by navigating to "Plugins > Add New > Upload Plugin."
3. On the upload plugin page, click the "Choose File" button and select the Google reCAPTCHA zip folder from your computer.
4. Once the file `um-recaptcha.zip` appears on the screen, initiate the installation by clicking the "Install Now" button.
5. Wait for the "Plugin Installed Successfully" message.
6. Complete the activation by clicking the "Activate Plugin" link.
### Site & Secret Keys:
Upon activation, you will be redirected to the installed plugins page with the following notice:

To enable the Google reCAPTCHA extension on your site, generate the necessary site and secret keys. If you already possess these keys, you can skip this section. If not, click the "Generate Your Site and Secret Key" button to be redirected to the official Google reCAPTCHA website.
### Generating Your Site & Secret Key:
1. Register your domain.
2. Click on [v3 Admin Console](https://www.google.com/recaptcha/admin)
and the plus sign button to create a new Google reCAPTCHA for your site or domain or simply go to this link: [https://www.google.com/recaptcha/admin/create](https://www.google.com/recaptcha/admin/create)

3. Enter a label for this application (e.g., your site name).
4. Choose the type of reCAPTCHA (v2 or v3, with v3 recommended for new applications).
5. Enter your site's domain name (without httр:// or www prefix and without a forward slash / at the end).
6. Add an additional owner if needed.
7. Accept the reCAPTCHA Terms of Service.
8. Click the "Submit" button.
9. Your application will be registered, copy your site key and secret key from the overview page. You may see these keys later in reCAPTCHA settings (under the gear icon) in the dropdown section "reCAPTCHA keys".
### __
### Settings Page:
Once you have the required keys, proceed as follows:
1. Open your site and navigate to `wp-admin > Ultimate Member > Settings > Extensions > Google reCAPTCHA`.
2. Enable the reCAPTCHA feature by checking on **"Enable Google reCAPTCHA"** checkbox.
3. Select the reCAPTCHA type specified during your application.
* **Note:** Update the keys if you **change** the reCAPTCHA type. Keys generated for reCAPTCHA v2 don't work with reCAPTCHA v3.
* **Note: If you chose reCAPTCHA v3,** **the reCAPTCHA will only appear in the form if a bot or AI submits the form.**
4. Enter your Site Key and Secret Key in the next two settings.
* **Note:** The reCAPTCHA will not display until you enter the keys. The incorrect key(s) will trigger an error on the forms where the reCAPTCHA should be.
5. Once the correct keys are entered, the reCAPTCHA will appear in your registration and login forms. Additional settings are available to toggle the reCAPTCHA feature in the Password Reset form and on default WordPress forms.
### Turn On/Off reCAPTCHA for Certain Forms:
The extension provides the flexibility to show or hide the reCAPTCHA on a performance basis. Follow these steps:
1. Edit the desired form by going to `wp-admin > Ultimate Member > Forms`.
2. Choose the desired form and click "Edit."
3. In the Google reCAPTCHA widget, toggle the feature on or off.
4. Update the form.
### Setup Complete:
Congratulations! You have successfully added the official Google reCAPTCHA to your site. For any further inquiries about this extension, feel free to ask in the Google reCAPTCHA extension forum.
Last updated on January 19, 2024
No results found
---
# General - Ultimate Member
General
=======
Sort by Default Sort A-Z Sort by Popularity Sort by Last Updated
* [Default Pages](/article/111-default-pages)
* [Getting Started with Ultimate Member](/article/180-getting-started-with-ultimate-member)
* [Conditional Menus](/article/132-conditional-menus)
* [Logout](/article/146-logout)
* [Ultimate Member Short Tags for SEO title and menu titles](/article/218-ultimate-member-short-tags-for-seo-title-and-menu-titles)
* [Profile Photo Size](/article/1542-profile-photo-size)
* [Profile Cover Size](/article/1554-profile-cover-size)
* [Export Personal/User Data](/article/1636-export-personal-user-data)
* [Block Email address on Registration](/article/1604-block-email-address-on-registration)
* [Blacklist Words on Registration](/article/1701-blacklist-words-on-registration)
* [Versions Dependencies Map](/article/1517-versions-dependencies-map)
* [Uploaded Files Structure](/article/1893-uploaded-files-structure)
* [How to upgrade UM from version 1.3+ to 2.4+ & Common Issues](/article/1739-how-to-upgrade-um-from-version-13-to-24)
* [Ultimate Member 2.8.7 User Management: What's New and How to Use It](/article/1943-guide-to-ultimate-member-managing-users-in-wordpress)
* [NGINX Configuration Rewrite Rule for Ultimate Member](/article/1934-nginx-configuration-rewrite-rule-for-ultimate-member)
* [Ultimate Member Site Health](/article/1879-ultimate-member-site-health)
No results found
---
# WooCommerce Setup - Ultimate Member
WooCommerce Setup
=================
[](javascript:window.print() "Print this article")
This document provides setup instructions and a description for the extension [Ultimate Member - WooCommerce](https://ultimatemember.com/extensions/woocommerce/)
. This extension integrates the popular e-commerce plugin [WooCommerce](https://wordpress.org/plugins/woocommerce/)
with the [Ultimate Member](https://ultimatemember.com/)
plugin.
**Notice: Support for** [**WooCommerce's High-Performance Order Storage (HPOS) Update**](https://woo.com/posts/platform-update-high-performance-order-storage-for-woocommerce/)
**.** This is to inform you that our plugin supports the recent announcement made by WooCommerce regarding the introduction of [High-Performance Order Storage (HPOS)](https://woo.com/document/high-performance-order-storage/#:~:text=With%20High%2DPerformance%20Order%20Storage%2C%20you%20get%20dedicated%20tables%20for,operations%20and%20fewer%20busy%20tables.)
on October 10, 2023. This upgrade is designed to enhance your overall shopping experience by providing faster checkout and more efficient order processing.
**Contents**
------------
* [Extension settings](#settings_extension)
* [Product settings](#product_settings)
* [Simple product settings](#simple_product)
* [Subscription product settings](#subscription_product)
* [Profile Menu settings](#settings_menu)
* [Profile tabs](#profile)
* [User Role settings](#settings_role)
* [Account tabs](#account)
Extension settings [#](#settings_extension)
--------------------------------------------
When the extension is activated, it adds the **Woocommerce** tab to the page _wp-admin > Ultimate Member > Settings > Extension_. In this tab you should see the following settings:
* **Ignore the roles update, if the user has these roles on complete/processing or refund payment** - Only applicable if you assigned a role when an order is completed/processing or refunded.
* **Assign this role to users when an order is completed/processing \*** - Automatically assign the user this role when an order's payment is completed.
* **Upgrade user role when payment is on-hold before complete or processing status** - _Optional._ Assign a role after checkout before an order's payment is completed.
* **Assign this role to users when an order is refunded \*** - Automatically assign the user this role when an order is refunded.
* **Remove previous roles when change role on complete/processing or refund payment** - Remove all previously assigned roles if "Yes".
**Warning:** Do not remove previous roles if there is no role assigned when an order is completed/processing or refunded. We recommend disabling this feature if you sell subscriptions. The roles assignment logic for subscription uses another algorithm to remove previous roles.
* **Hide billing tab from members in account page** - Enable this option If you do not want to show the billing tab from members in account page. Can be overridden by user role setting.
* **Hide shipping tab from members in account page** - Enable this option If you do not want to show the shipping tab from members in account page. Can be overridden by user role setting.
* **Show order actions** - Show Actions column in the Orders table.
* **Hide "Add to cart" button** - Enable this option If you do not want to show the "Add to cart" button for specific user roles or not logged in users.
* **Hide "Add to cart" button for** - _Optional._ Selects users for whom the "Add to cart" button is hidden.
* **Hide "Add to cart" button for selected user roles** - _Optional._ Selects user roles for whom the "Add to cart" button is hidden.
* **Disable subscriptions roles switcher** - _Optional._ Disable the "WooCommerce Subscriptions" role switcher to avoid conflicts.
**Note:** Read the article [Roles Assignment Logic](//docs.ultimatemember.com/article/1576-roles-assignment-logic)
for details.
Image - Settings on _wp-admin >_ _Ultimate Member > Settings > Extensions > Woocommerce_
__
Product settings [#](#product_settings)
----------------------------------------
The extension allows you to assign a role to a user upon purchase of a specific WooCommerce product. To do this you should go to the WooCommerce "Edit product" page and find the box "Ultimate Member" (see below).
### Simple product settings [#](#simple_product)
Select the role in the dropdown _"When this product is bought move user to this role"_ and then update the product page. The selected role will be assigned to members who will buy this product on checkout.
Image - Settings on _wp-admin > Products > Edit product_
__
### Subscription product settings [#](#subscription_product)
You'll see more settings for a product-subscription if the plugin [WooCommerce Subscriptions](https://woocommerce.com/products/woocommerce-subscriptions/)
is installed. These settings allow you to select a role for each status of the subscription. See [Subscription Status Guide](https://woocommerce.com/document/subscriptions/statuses/)
.
Image - Settings on _wp-admin > Products > Edit product_
__
The extension saves a product-subscription settings to the subscription meta on purchase and uses saved settings to change a role when subscription status is changed. Changing a product-subscription setting influences future subscriptions but doesn't influence existing subscriptions.
The extension removes a role related to the old subscription status and assigns a role related to the new subscription status if these roles differ. The extension does not remove other roles if the user has multiple roles. The extension does not remove roles added manually and roles added by third-party plugins. You can use [this code](https://gist.github.com/yuriinalivaiko/1bd14f3e4382741290ed8c183388d37f)
to patch the role assignment logic to remove all old roles.
Profile Menu settings [#](#settings_menu)
------------------------------------------
The extension adds the tab "Activity" into the profile page menu. Administrators can hide/show this tab and manage who can see this tab.
* **Purchases Tab** – Allows to enable/disable "Purchases" item in the Profile menu.
* **Who can see Purchases Tab?** – Manage access to the "Purchases" tab in the Profile menu.
* **Product Reviews Tab** – Allows to enable/disable "Product Reviews" item in the Profile menu.
* **Who can see Product Reviews Tab?** – Manage access to the "Product Reviews" tab in the Profile menu.
Image - Settings on _wp-admin >Ultimate Member > Settings > Appearance > Profile Menu_

### Profile tabs [#](#profile)
The extension adds tabs to members profiles. Administrators can hide/show this tab and manage who can see this tab using settings on _wp-admin > Ultimate Member > Settings > Appearance > Profile Menu_
**Purchases**
**Note:** The "Purchases" profile tab displays products, not orders. Look at the "My Orders" account tab to see orders.

**Product Reviews**

User Role settings [#](#settings_role)
---------------------------------------
Each user role has settings that manage what a member can see on the account page. To modify these settings, go to _wp-admin > Ultimate Member > User Roles_ and choose which user role to modify. You will be navigated to the page "Edit User Role". Scroll down to the box "WooCommerce", you'll see settings:
* Display purchases tab in profile?
* Display reviews tab in profile?
* Display billing address under account?
* Display shipping address under account?
* Display orders under account?
* Display subscriptions under account?
* Display downloads under account?
* Display payment methods under account?
Image - Settings on _wp-admin > Ultimate Member > User Roles > Edit Role_

### Account tabs [#](#account)
The extension adds tabs to the Account page. Administrators can enable or disable each tab for each user role using settings in the box "WooCommerce" on the page "Edit Role".
**Billing Address**, **Shipping Address**
****
**My Orders**
****
**Subscriptions** (optional, require the _WooCommerce Subscriptions_ plugin)

**Downloads**
**Payment methods** (optional, displayed if there are saved payment methods)

**Wishlist** (optional, require the _YITH WooCommerce Wishlist_ plugin)

Last updated on December 11, 2023
No results found
---
# Multisite - Ultimate Member
Multisite
=========
Sort by Default Sort A-Z Sort by Popularity Sort by Last Updated
* [Sync User Data across all sites in a Multisite Network setup](/article/1629-sync-user-data-across-all-sites-in-a-multisite-network-setup)
* [UM in Multisite](/article/1717-um-in-multisite)
No results found
---
# Social Login Setup - Ultimate Member
Social Login Setup
==================
[](javascript:window.print() "Print this article")
### Overview
This document provides instructions on how to set up the Social login extension so users can sign-up/login to your site via Facebook, Twitter, and LinkedIn.
**Notice:** For Social Login version 2.3+ Setup, please refer to this doc: [https://docs.ultimatemember.com/article/1531-social-login-2-3-setup](//docs.ultimatemember.com/article/1531-social-login-2-3-setup)
### App creation and setup
For social login to work correctly, you need to create an app on each social network so that your site can be linked to the app. We have created separate docs for each app setup:
> **Important changes in Social Login v1.4.1:**
> You need to update the Redirect URIs in the API/App settings. See examples below:
>
> Login Page: [https://www.ultimatemember.com/login/?provider=google](https://www.ultimatemember.com/login/?provider=google)
> or twitter, facebook, linkedin, instagram
>
> Register Page: [https://www.ultimatemember.com/register/?provider=google](https://www.ultimatemember.com/register/?provider=google)
> _or twitter, facebook, linkedin, instagram_
>
> Account: [https://www.ultimatemember.com/account/social/?provider=google](https://www.ultimatemember.com/account/social/?provider=google)
> _or twitter, facebook, linkedin, instagram_
>
>
> Since home/landing pages on some WordPress hosting sites have locked up with cache and fails to show the social overlay, we've enabled the extension to handle the form's current page URL as Callback URL instead of using the default home/landing page. This breaks the Redirect URIs restriction in the app settings that only has the home/landing page as the callback URL. Thus, it will return mismatch Redirect URIs error.
* [Facebook App Setup](//docs.ultimatemember.com/article/20-social-login-facebook-app-setup)
* [Twiter App Setup](//docs.ultimatemember.com/article/140-social-login-twitter-app-setup)
* [Linkedin App Setup](//docs.ultimatemember.com/article/142-social-login-linkedin-app-setup)
* [Google+ App Setup](//docs.ultimatemember.com/article/141-social-login-google-app-setup)
### Link apps to your site
Once you have created each app you will need to copy over the Ap ID/Key and the secret key and paste them into the social network tabs on the settings page.
### General settings
The general settings tab for the social login extension allows you to:
* Turn on/off the social tab on the account page
* Show the social login buttons by default on the default register form
* Show the social login buttons by default on the default login form
* Change the order that the social login buttons that appear on your site
### Facebook, Twitter, Google & LinkedIn settings tab
Each social network has its own tab where you can activate/deactivate that particular network. On each of these tabs, you must add the API Keys and secret keys for the social login to work.
### Show social connect on the Login form
**wp-admin> Ultimate Member> Forms> Edit Login Form
**

#### Social login shortcodes
The social login extension allows you to place social login buttons anywhere on your site using shortcodes. You can create multiple social login shortcodes so you can have a different output on your site depending on where you want to add the buttons.
#### Creating a new social login shortcode
To create a social login shortcode, click on social login in the Ultimate Member menu and click the Add new button. On the new social login page, you can decide which buttons to show and apply some styling options that will alter how the buttons appear on your site. To output the buttons on your site, you must copy the shortcode and add it to your site.

**wp-admin> Appearance> Widgets
**

### Social registration forms
When a user tries to register on your site using the social login buttons, they will be taken to the social network site to accept the app permissions, and if they accept, they will be redirected back to your site, where they will see an overlay that shows the social registration form (this form is automatically added to the forms list when you activate the plugin).
This **form is required** to collect user details (for example, Twitter does not pass over a user’s email address) so the user can complete the registration process. Once a social network account is connected to a user on your site, the user will be logged in straight away when they come back to your site (as long as they are logged in to the social network on that browser).
**Note:** To synchronize fields using the 1-step process with a specific registration form, you must enable the **"Use this form in the overlay"** option and set it to **"Yes."**

### Account page
The social login extension adds a new tab to the user account page called “social connect.” Users can connect/disconnect their social networks from their accounts on this tab.

### Profile photo import
The social login extension will import a user’s profile photo from their social network profile as the profile photo on your site. The most recently connected social network will be the photo that is used (e.g, if a user registers with Twitter, it will show their Twitter profile photo, but if on the account page they connect to Facebook, then their Facebook profile photo will become the profile photo on your site).
Last updated on January 18, 2024
No results found
---
# Third Party Plugins - Ultimate Member
Third Party Plugins
===================
Sort by Default Sort A-Z Sort by Popularity Sort by Last Updated
* [CM Tooltip Glossary Pro+](/article/1691-cm-tooltip-glossary-pro)
* [Install & Activate Advanced Custom Fields](/article/1637-install-activate-advanced-custom-fields)
* [RankMath - Allow changing of the canonical URL](/article/1709-rankmath-allow-changing-of-the-canonical-url)
* [Solution of : Conflict with the Registration Module of LearnDash](/article/1726-solution-of-conflict-with-the-registration-module-of-learndash)
* [Spam solution with WP Foro plugin](/article/1755-spam-solution-with-wp-foro-plugin)
No results found
---
# bbPress Setup - Ultimate Member
bbPress Setup
=============
[](javascript:window.print() "Print this article")
Overview
--------
This document provides instructions on how to use the [bbPress extension](https://ultimatemember.com/extensions/bbpress/)
on your site and how it integrates with Ultimate Member.
This extension requires plugins [bbPress](https://wordpress.org/plugins/bbpress/)
and [Ultimate Member](https://wordpress.org/plugins/ultimate-member/)
. You can find bbPress documentation [here](https://codex.bbpress.org/)
.
### bbPress profile
The default bbPress profile is removed with this extension, and the bbPress stats for each user are moved to the Ultimate Member profile under the profile tab called **Forums**. This tab can show four sub-tabs:
* **Topics Started**
* **Replies Created**
* **Favorites**
* **Subscriptions**

To remove the **Favorites** and **Subscriptions** sub-menu items, simply disable them in the **bbPress** settings found in **wp-admin > Settings > Forums**.

### Forums tab visibility settings
Administrators can customize who can see the **Forums** tab in user profiles based on user roles. This can be configured in **wp-admin > Ultimate Member > Settings > Appearance > Profile Menu**.
Here’s how the settings work:
* **Forums Tab**: Controls if the "Forums" tab appears in profiles. If enabled, it will be visible based on role-specific settings. If disabled, the tab won’t show in any user profile.
* **Who Can See Forums Tab?**: Determines which roles can see the **Forums** tab. Available options include:
* **Anyone**: The "Forums" tab is visible to all users, including guests (non-logged-in users).
* **Guests Only**: Only non-logged-in users (guests) can see the "Forums" tab; logged-in members cannot.
* **Members Only**: Only registered and logged-in members can access the "Forums" tab. Guests are excluded.
* **Only the Owner**: Only the forum owner (administrator) can see the "Forums" tab, no other roles are allowed.
* **Only Specific Roles**: Administrators can select specific user roles (such as moderators or editors) to view the "Forums" tab.
* **Owner and Specific Roles**: The "Forums" tab is visible to the owner and any selected user roles chosen by the administrator.

### User Roles settings
With the extensions, you can apply permissions on a user role basis. To apply permissions to a role edit the role and go to the bbPress permissions widget. In this widget you can set the following:
* **Can have forums tab**: This option allows you to disable the forums tab for certain user roles.
* **Can create new topics**:This option allows you to decide whether a user role can create new topics or not.
* **Can create new replies**: This option allows you to decide whether a user role can create new replies or not.
* **Disable new topics during these weekdays**: This option allows you to stop new topics from being created on specific days.
* **Custom message to show to user if user cannot post in the above selected days**: This option allows you to set a custom message to show to users when new topics can not be created. The notice will only show on days that are disabled.
These settings are located on **wp-admin > Ultimate Member > User Roles > Edit Role**
### Forum writing permissions
The extension allows you to apply posting restrictions to individual forums. You can restrict which user roles can create new topics or replies on a per forum basis. To apply restrictions to a forum edit the desired forum and you will see a box called “UM Permissions”. In this box, you can choose which roles can create new topics in this forum and which roles can create new replies in this forum.
**Note:** User role settings are used if you select nothing in the box "UM Permissions".
These settings are located on **wp-admin > Forums > Edit Forum**.

### Blocking access to a forum
You can use the access control widget to stop certain people/roles from even viewing the forum. To do this just turn on access control and decide who can view the forum. You can then set a redirect URL to the main forums page or any other URL or you can leave the URL field blank.
Last updated on January 31, 2025
No results found
---
# Updates - Ultimate Member
Updates
=======
Sort by Default Sort A-Z Sort by Popularity Sort by Last Updated
* [Upgrade 2.1.0](/article/1512-upgrade-2-1-0)
* [Security Incident Update and Recommended Actions](/article/1866-security-incident-update-and-recommended-actions)
* [How to upgrade UM from version 1.3+ to 2.4+ & Common Issues](/article/1739-how-to-upgrade-um-from-version-13-to-24)
* [Ultimate Member 2.8.7 User Management: What's New and How to Use It](/article/1943-guide-to-ultimate-member-managing-users-in-wordpress)
No results found
---
# Installation - Ultimate Member
Installation
============
Sort by Default Sort A-Z Sort by Popularity Sort by Last Updated
* [Installing the plugin from WordPress.org](/article/26-installing-plugin-from-wordpress-org)
* [Installing an Extension](/article/27-installing-an-extension)
No results found
---
# Verified Users Setup - Ultimate Member
Verified Users Setup
====================
[](javascript:window.print() "Print this article")
Overview
--------
This document provides a detailed walkthrough for configuring and implementing the [Verified Users](https://ultimatemember.com/extensions/verified-users/)
extension, introducing a robust user verification system on your site. This system empowers users to request verification, subject to manual verification by the site administrator.
**Contents**
------------
* [Settings](#settings)
* [Extension settings](#extensions_settings)
* [Email settings](#email_settings)
* [Content Restriction settings](#content_restriction)
* [Member Directory settings](#member_directory)
* [User Request Verification](#request_verification)
* [Manual Account Verification](#manual_verification)
* [Single user verification](#single_verification)
* [Bulk verification](#bulk_verification)
* [Automatic verification by User Role](#automatic_verification)
Settings [#](#settings)
------------------------
### Extension settings [#](#extensions_settings)
You will see the **Verified Users** tab on the page _wp-admin > Ultimate Member > Settings > Extensions_ if both the "Verified Users" and "JobBoardWP" extensions are activated. On this page, you can find the setting:
* **Only verified users can apply for jobs** - (optional) This option needs the JobBoardWP extension.
Image - Settings on _wp-admin > Ultimate Member > Settings > Extensions > Verified Users
_

### Email settings [#](#email_settings)
The extension adds these email templates:
* **Account is verified E-mail** - a template for the email notification to the user when his account is verified. Sends email notifications to users upon successful account verification.
* **Verification Request E-mail** - a template for the email notification to the admin when a user requests to have their account verified. Sends email alerts to administrators when a user initiates an account verification request.
Administrators can effortlessly customize email templates by navigating to `wp-admin > Ultimate Member > Settings > Email`. Once there, locate the specific template requiring modifications and click on the "Manage" button for editing.
Image - Settings on _wp-admin > Ultimate Member > Settings > Email.
_

Within the template settings, administrators have the flexibility to enable or disable the template, as well as change the subject or body according to their preferences. After making the desired adjustments, simply save the changes for immediate application. This streamlined process ensures quick and efficient customization of email communication to suit specific needs.

### Content Restriction Settings [#](#content_restriction)
* **Individual Post and Term Content Restriction Settings** - Enable content restriction exclusively for verified users by installing the Verified Users extension. This feature allows you to limit content visibility solely to those who have undergone the verification process. For more info go to this [link](//docs.ultimatemember.com/article/1623-post-term-restriction-content-settings#LockContent_verifiedUsers)
.
* **Restrict Block Content to Verified User** - to limit access to designated content by enabling **"Lock to verified accounts only."** This ensures exclusive information is shared only with verified users, maintaining confidentiality from others without the necessary credentials. For more info go to this [link](//docs.ultimatemember.com/article/1624-restrict-gutenberg-blocks#restrictBlockContent_verifiedUsers)
.
* **Ultimate Member Menu Settings** - When determining the visibility of a menu item, you can choose from three options: Everyone, Logged out, and Logged in users. Additionally, with the Verified Users extension activated, you gain the ability to display the menu exclusively to verified users. For more info go to this [link](//docs.ultimatemember.com/article/132-conditional-menus#verified_options)
.
### Member Directory Settings [#](#member_directory)
#### Predefined Filters
The Verified Users extension includes a predefined filter to control the visibility of users in the Member Directory. To configure this setting:
* Navigate to **wp-admin > Ultimate Member > Member Directories**.
* Edit an existing Member Directory or create a new one by clicking the "Add New" button.
* In the **General Options** section section, go to the **Only show members who have verified their profile** option and check on the checkbox to enable this filter.
* Update the settings to save changes.
This filter ensures that only users with verified profiles are displayed in the Member Directory, offering a more curated view for visitors.

#### Sorting Options
The Verified Users extension also provides sorting options to organize the display of users in the Member Directory. To configure these settings:
* Navigate to **wp-admin > Ultimate Member > Member Directories.**
* Edit an existing Member Directory or create a new one by clicking the "Add New" button.
* Scroll to the "Sorting" section.
* Select from the following options in the **Default Sort Users By** dropdown:
* **Not verified accounts first**: Lists unverified users at the top of the Member Directory.
* **Verified accounts first**: Lists verified users at the top of the Member Directory.
If you enable **custom sorting**, you can choose the field(s) to include in the sorting options, such as **Not Verified Accounts First** or **Verified Accounts First**. These sorting options allow administrators to prioritize the visibility of verified or unverified users, depending on the site's needs.

User Request Verification [#](#request_verification)
-----------------------------------------------------
Upon activation, users gain access to the **"Request Verification"** link within their profiles and accounts. This feature includes a user-initiated cancellation option.
Image - The **Request Verification** link in Profile.

Image - The **Request Verification** link in Account.

Image - The cancel request link after the user makes a verification request.

Administrators can view users who sent a verification request on the _**wp-admin > Users** page_. Click on the Status dropdown and select **Request Verification,** then click on the filter button. Administrators can either **Approve** or **Reject** the verification request when they hover over the user.
Image - The _wp-admin > Users_ page

Once the user is verified, a blue circle with a checkmark badge will appear after the user's name at the front end.
Image - A blue circle with a checkmark badge after the name in the Profile.

Image - A blue circle with a checkmark badge after the name on the profile card in the Member Directory.

Manual Account Verification [#](#manual_verification)
------------------------------------------------------
Administrators can manually verify any user from the admin page with or without a user request for verification.
### Single user verification [#](#single_verification)
Administrators can manually verify users by clicking the " **Approve verification request**" or "**Verify**" link below the user's name on the **wp-admin > Users** page under the status column.

Alternatively, you can click the **Edit** link to edit and verify a user. When you click the **Edit** link, scroll down to **Account Verification** and choose **Verified Account** on the drop-down menu. Click the **Update User** button at the bottom of the page to save changes.

After successfully verifying a user, a notification will display, stating **"User updated."** Furthermore, when hovering over the verified user, an **"Unverify"** link becomes visible. In the status column, it explicitly indicates that the user has been verified.

### Bulk verification [#](#bulk_verification)
To verify multiple users simultaneously, go to **wp-admin > Users**, check the boxes next to the usernames you want to verify, select **"Mark Account as Verified"** from the **Bulk Actions** dropdown menu, and click **Apply** to confirm the changes.
Image - How to apply bulk verification.

Automatic verification by User Role [#](#automatic_verification)
-----------------------------------------------------------------
The plugin can automatically verify users with a specific role once they register on your site. To configure this, go to _wp-admin > Ultimate Member > User Roles_ and click the role title or **edit link** to see the role settings. On the right side of the page, you will see the **"Verified Accounts"** panel. Select **Yes** in the setting **Users with this role will automatically have a verified account**.
Image - Settings on _wp-admin > Ultimate Member > User Roles > Edit a User Role
_

Last updated on January 14, 2025
No results found
---
# Profile Completeness Setup - Ultimate Member
Profile Completeness Setup
==========================
[](javascript:window.print() "Print this article")
Overview
--------
This document provides instructions on how to set up the [Profile Completeness](https://ultimatemember.com/extensions/profile-completeness/)
extension.
**Note: Profile completeness is done on a user role basis, so you will not find a tab for this extension in UM settings.**
User Roles [#](#user_roles)
----------------------------
Go to _wp-admin > Ultimate Member > User Roles > Edit Role_ and select "**Yes**" in the "**Enable profile completeness**" setting in the "**Profile Completeness**" section to enable this feature for a role.
Profile completeness options appear once the feature is enabled:
* **Enable profile completeness** - Turn on/off profile completeness features for this role.
* **Percentage (%) required for completion** - Consider the profile complete when the user completes (%) by filling profile information.
* **Setup Fields** - fields which are used to calculate the profile completeness.
* **Upgrade to role automatically when profile is completed** - If the profile is filled in more percent than set in the "Percentage (%) required for completion" option, then the role will be changed.
* **Require profile to be complete to browse the site?** - Prevent users from browsing the site if their profile is not completed.
* **Allowed pages** - _Optional._ Comma separated list of pages (use page ID), that don't depend on the "Require profile to be complete to browse the site" option.
* **Redirect no-completed user** - _Optional._ Where to redirect a user if the profile is not completed.
* **Redirect URL no-completed user** - _Optional._ Redirect a user to the custom URL if the profile is not completed.
* **Require profile to be complete to browse user profiles?** - Prevent users from browsing other profiles if their profile is not completed.
* **Require profile to be complete to leave a comment?** - Prevent users from leaving comments if their profile is not completed.
* **Enable email reminder?** - Enable the email notification reminder about a need for profile completeness.
* **Email notification period (days)** - _Optional._ A period to send the email notification reminder.
**Setup Fields**
----------------
In the **Setup Fields** section you can add and select which fields are used to calculate the completeness of a user's profile. After choosing these fields, you can configure additional options related to profile completeness. Finally, you need to click the **"Update Role"** button to save these changes once everything is configured to your liking.

Image - The **Profile Completeness** section on _wp-admin > Ultimate Member > User Roles > Edit Role._

Display the profile completeness [#](#display)
-----------------------------------------------
You can use the User Meta profile tool, widgets and shortcodes to display the profile completeness elements where you need.
**Note:** The profile completeness elements are visible to users if they have not completed their profile. The profile completeness elements are not visible to users who have already completed their profile.
### Displaying on profile [#](#display_in_profile)
You can display Profile completeness bar within the profile either by adding the field to the profile form or selecting the profile completeness bar in the user meta section of profile.

#### User Meta [#](#user_meta)
To add the profile completeness bar below the user's name, go to _Ultimate Member > Forms > Edit Form (profile)_, find the box **User Meta**. Click on the **Add New Field** button and select **Profile Completeness**. Click on Update to save changes.

### Widgets [#](#widgets)
The profile completeness extension provides two widgets:
* Ultimate Member - Complete your Profile
* Ultimate Member - Profile Progress Bar
To add the widgets, go to _wp-admin > Appearance > Widgets_, click "add block", search for a widget, drag and drop a widget to the sidebar or footer.

### Shortcodes [#](#shortcodes)
You can use the following shortcodes to display the profile completeness anywhere on your site.
* \[ultimatemember\_profile\_completeness\] - displays the profile completeness widget
* \[ultimatemember\_profile\_progress\_bar\] - displays the profile completeness bar
Display completed profiles in the members directory [#](#members_directory)
----------------------------------------------------------------------------
To set up your member directory to display profile completeness information, follow these steps:
1. **Display Completed Profiles Only**:
* Navigate to `wp-admin > Ultimate Member Member Directories > Edit Member Directory`.
* In the **"General Options"** box, use the settings **"Only show members who have completed their profile"** and **"Required completeness (%)"** to display completed profiles only.
2. **Sorting Profiles**:
* After activating the extension, you can configure the default sorting of users in the member directory by **least completed** or **most completed**.
* Go to `Ultimate Member > Member Directories > Edit Member Directory>Sorting>Default Sorts by`

3. **Display Profile Completeness Field for Admin or Author:**
* You can add the "Profile Completeness" field to be displayed to the admin or author in the extra user information section.
* Go to `Ultimate Member > Member Directories > Edit Member Directory> Profile Card section`
* Enable the **'Show extra user information below tagline?'**
* In the **'Choose field(s) to display in extra user information section'** option select **'Profile Completeness'**
4. Add Meta Filter "Profile Completeness" to the Member Directory:
* You can add a meta filter "Profile Completeness" to the member directory.
* Go to `Ultimate Member > Member Directories > Edit Member Directory>Search Options`
* Enable Filters feature
* In **Choose filter(s) meta to enable** option, select **"Profile Completeness"**
Last updated on February 29, 2024
No results found
---
# Settings - Ultimate Member
Settings
========
Sort by Default Sort A-Z Sort by Popularity Sort by Last Updated
* [Profile Photo Size](/article/1542-profile-photo-size)
* [Profile Cover Size](/article/1554-profile-cover-size)
* [Common content restriction settings](/article/1736-content-restriction)
* [Creating Plugin Core Pages Manually](/article/1903-creating-plugin-core-pages-manually)
* [Action Scheduler in Ultimate Member](/article/1947-action-scheduler-in-ultimate-member)
No results found
---
# Shortcodes - Ultimate Member
Shortcodes
==========
Sort by Default Sort A-Z Sort by Popularity Sort by Last Updated
* [Ultimate Member - Shortcodes](/article/210-ultimate-member-shortcodes)
* [Restrict content on a page/post to logged in users](/article/177-restrict-content-on-a-page-post-to-logged-in-users)
* [Restrict content on a page/post to specific users community role](/article/226-restrict-content-on-a-page-post-to-specific-users-community-role)
* [Restrict content on a page/post to logged out users](/article/176-restrict-content-on-a-page-post-to-logged-out-users)
* [Ultimate Member - Search Users](/article/1528-ultimate-member-search-users)
* [Display Specific User Profile with a shortcode](/article/1628-display-specific-profile-with-shortcode)
No results found
---
# User Tags Setup - Ultimate Member
User Tags Setup
===============
[](javascript:window.print() "Print this article")
### Overview
This document explains how to configure and use the extension [User Tags](https://ultimatemember.com/extensions/user-tags/)
. This extension allows users to associate tags with their profile and shows all users with a specific tag.
**Contents**
* [Settings](#settings)
* [Extension's settings](#settings_extension)
* [User Role settings](#settings_role)
* [Create User Tags](#user_tags)
* [Creating a parent tag](#user_tags_parent)
* [Creating a selectable tag](#user_tags_selectable)
* [Allow users to select tags in profile](#form_field)
* [User Tags in the profile](#profile)
* [Profile form fields](#profile_fields)
* [Displaying user tags in the profile header](#profile_header)
* [Limiting user tags in the profile header](#profile_header_limit)
* [User Tags in the member directory](#member_directory)
* [Shortcode](#shortcode)
* [Widget](#widget)
### Settings [#](#settings)
#### Extension's settings [#](#settings_extension)
* **User tag slug** - Determines the rewrite rule**\*** for the Member Directory page if it shows members filtered by user tag;
* **Maximum number of tags to display in user profile** - Limits the number of tags that are shown initially in the profile header;
* **Base member directory** - Select the base member directory to use its settings for displaying users with this tag.
**Note:** Once the "User tag slug" option is changed you should update WordPress rewrite rules. Go to the page \[Settings > Permalinks\] and click the "Save Changes" button. You shouldn't change anything on the page \[Settings > Permalinks\], just click a button. WordPress will update rewrite rules and a rule from the option "User tag slug" will be implemented.
Image - Settings on _wp-admin > Ultimate Member > Settings > Extensions > User Tags_.

#### User Role settings [#](#settings_role)
* **Show user tags in profile head?** - Enable/disable displaying user tags in profile header**\***;
* **Choose the user tags source to show in profile header** \- Add user tags to the profile header.
* **Can add tags?** - Allow this role to add custom user tags while editing the profile.
There is an alternative way to add user tags to the profile header. You may use the panel "User Meta" in the profile form settings page.
Image - Settings on _wp-admin > Ultimate Member > User Roles > Edit Role._

### Create User Tags [#](#user_tags)
When activated the plugin adds the **User Tags** link to the Ultimate Member submenu. Clicking this link will take you to the user tags page which is where you can create user tags.
All tags that a member can select in profile must be grouped together under a parent tag. Members can not select the parent tag in their, this tag in used for grouping.
Image - Settings on _wp-admin > Ultimate Member > User Tags._

#### Creating a parent tag [#](#user_tags_parent)
Before you can start creating user tags you need to create a parent tag. To create a parent tag e.g "Skills" do the following:
1. Enter Name e.g "Skills"
2. Enter Slug e.g "skills"
3. Parent - leave as "None"
4. Description - Leave blank
5. Click the "Add new user tag" button
#### Creating a selectable tag [#](#user_tags_selectable)
To create a selectable tag do the following:
1. Enter Name e.g "CSS"
2. Enter Slug e.g "css"
3. Parent - Select the parent tag you want the user-selectable tag to belong to e.g "Skills"
4. Description - This is an optional field and if a description has been added this description will show on the front-end of your site e.g "A cascading style sheet (CSS) is a Web page derived from multiple sources with a defined order of precedence where the definitions of any style element conflict."
5. Click the "Add new user tag" button.
Once you have created all the tags you want the user to select, it is time to add the tags to the front-end of your website.
### Allow users to select tags in profile [#](#form_field)
To allow users to associate tags with their account you need to add a user tag field to either the registration form or the profile form. In this example we will add a user tag field to the user profile form:
1. Go to _wp-admin > Ultimate Member > Forms_ and edit the profile form.
2. Click the **+** icon in the Form Builder to open up the Fields Manager modal.
3. Click the **User Tags** field type in the Fields Manager modal.
4. Fill in the field details: Title, Label, Meta Key, etc.
5. Enter a number in the "Maximum number of selections" if you want to limit the number of tags a user can select. 0 - unlimited.
6. Select the parent tag from the "Select a user tags source" dropdown (this is the parent tag).
7. Add this field to the profile form and update the profile form.
Image - User Tags field settings.

### User Tags in the profile [#](#profile)
#### Profile form fields [#](#profile_fields)
When the user enters the edit mode of their profile, the user tag field will look like this:

To select a tag, the user can click into the field which will bring up a list of the tags:

The user can also start typing characters to search for a specific tag:

Once a user has found a tag they want to add to their profile, they can click on the tag and they will show on the field (in edit-mode) as follows:

Once a user saves/updates their profile, the tags will appear on the front-end of the site:
#### Displaying user tags in the profile header [#](#profile_header)
The extension allows you to display one group of tags (one parent tag group) in the profile header area. To show user tags in the profile header you need to turn this option on by editing the user role as this option is on a per-user role basis.
1. Go to the User Roles page and edit the user role e.g Admin
2. Scroll down until you find the "User Tags" section
3. Enable the option **"Show user tags in profile head?"**
4. Update the user role.
Image - The **User Tags** settings box on _wp-admin > Ultimate Member > User Roles > Edit Role_.
There is an alternative way to add user tags to the profile header. You may use the panel "User Meta" in the profile form settings page.
Image - The **User Meta** settings box on _wp-admin > Ultimate Member > Forms > Edit Form > User Meta_.
Once you have done this, the tags for that tag group will show in the profile header:

#### Limiting user tags in the profile header [#](#profile_header_limit)
There is the option **"Maximum number of tags to display in user profile"** on the page _wp-admin > Ultimate Member > Settings > Extensions > User Tags_. This option limits the number of tags that are shown initially in the profile header, with the remaining tags only shown when "show more link" is clicked. The default number for this option is "5".

### User Tags in the member directory [#](#member_directory)
When users click on a user tag link, they will be redirected to the default member directory page where it will show all users who have selected that tag.

See the article [User Tags + Member Directories 2.1.0+](//docs.ultimatemember.com/article/1514-user-tags-member-directories-2-1-0)
for details.
### Shortcode [#](#shortcode)
The extension adds the shortcode **\[ultimatemember\_tags\]**. This shortcode displays a list of the User Tags, where each item is a link to the default member directory page with predefined filtering by chosen user tag. You may use this shortcode as any usual WordPress shortcode - just put it into the page as the shortcode block.
Image - The **\[ultimatemember\_tags\]** shortcode example.

Example:
\[ultimatemember\_tags term\_id="4" user\_field="test\_user\_tags" number="10" orderby="count" order="desc" \]
The shortcode attributes:
* **term\_id** (integer) - the ID of the term - user tag (parent) you search for. Required.
Go to _wp-admin >_ _Ultimate Member > User Tags_, hover your mouse on the user tag name and check the browser's status bar to find the **tag\_ID**.

* **user\_field** (string) - the meta key of the field you search for. Required.
To find the field meta key go to _wp-admin > Ultimate Member > Forms > Edit Form_ and edit the **User Tags** field.

* **number** (integer) - maximum number of terms to return. Required.
* **orderby** (string) - order terms by: id, name, count, slug, description. Default 'count'.
* **order** (string) - whether to order terms in ascending or descending order. Accepts 'asc' (ascending) or 'desc' (descending). Default 'desc'.
The extension adds the **Ultimate Member - User Tags** widget. This widget displays a list of the User Tags, where each item is a link to the Members page with predefined filtering by chosen user tag. You may use this widget as any usual WordPress widget - just put it into the sidebar on the page _Appearance > Widgets_.
Image - The **Ultimate Member - User Tags** widget example on _wp-admin > Appearance > Widgets_.

Image - The **Ultimate Member - User Tags** widget view example on the front end.

Last updated on January 31, 2023
No results found
---
# Social Login: Google App Setup - Ultimate Member
Social Login: Google App Setup
==============================
[](javascript:window.print() "Print this article")
Overview
--------
This document provides instructions on setting up a Google application so users can login/register via Google on your site using our [Social Login extension](https://ultimatemember.com/extensions/social-login/)
.
Enabling API & App Registration [#](#app)
------------------------------------------
To allow users to log in to your site with their Google account, you need to create a Google Cloud project and configure the OAuth. Follow steps below to create a configure your Google Cloud project.
### 1\. Sing in to continue to Google Cloud Platform [#](#singin)
Go to [https://console.cloud.google.com/](https://console.cloud.google.com/)
and sing in to enter the Google Cloud console.

### 2\. Create a project [#](#create_project)
Click the project button in the top menu and you'll see the **Select a project** pop-up. Click the **NEW PROJECT** button create a project.

Enter the **Project name** and click the **CREATE** button.

### 3\. Start to configure the OAuth consent screen [#](#start_configure)
Once a project is created, go to **APIs & Services**. Select **Credentials** from the left-side menu then click the **CONFIGURE CONSENT SCREEN** button.


Choose the **External** in the User Type options, then click the **CREATE** button.

### 4\. Edit app registration [#](#app_registration)
#### 4.1 OAuth consent screen [#](#app_registration_oauth)
Enter the **App name**, **User support email**, upload **App logo**.
Enter the **Application home page**, **Application privacy policy link**, **Application terms and service link**.
Enter your website **domain**.
Enter your contact **Email addresses**.
Continue to the next step by clicking the **SAVE AND CONTINUE** button.

#### 4.2 Scopes [#](#app_registration_scopes)
You'll be on the step **Scopes**. Click the **ADD OR REMOVE SCOPES** button to select the scopes.

Select three required API Scopes:
* .../auth/userinfo.email
* .../auth/userinfo.profile
* openid
Once selected click on the **UPDATE** button.

The selected scopes will now appear on the **Your non-sensitive scopes** section.
Continue to the next step by clicking on the **SAVE AND CONTINUE** button.

#### 4.3 Test users [#](#app_registration_testers)
You'll be on the step **Test users**. On this step you can add Test users to test the social login, or just continue to the next step by clicking the **SAVE AND CONTINUE** button.

#### 4.4 Summary [#](#app_registration_summary)
You'll be on the step **Summary** that shows you the outline of your app registration. Click the **BACK TO DASHBOARD** button.

### 5 Create credentials [#](#credentials)
Select **Credentials** from the left-side menu. Click the **CREATE CREDENTIALS** button and select the **OAuth client ID** item.

Once clicked, it'll take you to the **Create OAuth client ID** page.
Select the **Web application** option in the **Application type**. Enter a name of your OAuth 2.0 client in the **Name** field.
Enter allowed redirect URLs in the **Authorized redirect URIs** section. Enter your website Login page URL, Registration page URL, Account page Social tab URL. Add the custom page URL if you use the social login shortcode on the custom page. Each URL must contain the `provider=google` parameter.
See example:
* [https://www.yoursitedomain.com/login/?provider=google](https://www.yoursitedomain.com/login/?provider=google)
* [https://www.yoursitedomain.com/register/?provider=google](https://www.yoursitedomain.com/register/?provider=google)
* [https://www.yoursitedomain.com/account/social/?provider=google](https://www.yoursitedomain.com/account/social/?provider=google)
> **Note:** By default, URLs have the "/" symbol at the end of the path. Remove "/" before "?" if your site uses URLs without "/" at the end of the path.
Click the **CREATE** button.

### 6 Enter your keys [#](#enter_keys)
Once you click the button, the **OAuth client created** pop-up will appear and you'll see your application keys.

Copy your **Client ID** and **Client Secret** keys and paste them to the **Client ID** and **Client secret** fields under the **Google Social Connect** on the _wp-admin > Ultimate Member > Settings > Extensions > Social Login_ page on your website.
Turn on the **Social Account Tab**, **Show social connect on registration forms** and **Show social connect on login forms** settings to show the social buttons on your website. Click the **Save Changes** button.

Test [#](#test)
----------------
Test the Social Login feature at the Login and Registration pages. If you're encountering issues, please read this article: [Social Login Common Issues](//docs.ultimatemember.com/article/174-social-login-common-issues)
. Contact the support if your application and extension configured by this instruction but does not work properly.

Last updated on September 15, 2023
### Related Articles
* [Social Login: Facebook App Setup](/article/20-social-login-facebook-app-setup)
* [Social Login: LinkedIn App Setup](/article/142-social-login-linkedin-app-setup)
* [Social Login: X ( formerly Twitter ) App Setup](/article/140-social-login-twitter-app-setup)
No results found
---
# Forms & Fields - Ultimate Member
Forms & Fields
==============
Sort by Default Sort A-Z Sort by Popularity Sort by Last Updated
* [Adding a Registration Form](/article/87-adding-a-registration-form)
* [Adding Existing Fields from Register Form to Profile Form](/article/1719-adding-existing-fields-from-register-form-to-profile-form)
* [Choices Callback Feature in UM 2.1+](/article/1539-choices-callback-feature-in-um-2-1)
* [Conditional Logic](/article/89-conditional-logic)
* [Default WordPress Fields Limit](/article/1653-default-wordpress-fields-limit)
* [Dynamic Country-State-City Dependent Dropdown fields](/article/1884-custom-callback-dropdowns)
* [Field Types](/article/1878-field-types)
* [Field Types Setting](/article/1716-field-types-setting)
* [Fields Validation](/article/94-apply-custom-validation-to-a-field)
* [Fields Visibility](/article/240-fields-visibility-mode)
* [Form Builder](/article/85-form-builder)
* [How to Add Fields to a Form](/article/188-how-to-add-fields-to-a-form)
* [Install & Activate Advanced Custom Fields](/article/1637-install-activate-advanced-custom-fields)
* [Setting Passwords in Ultimate Member Registration Forms](/article/1927-setting-passwords-in-ultimate-member-register-forms)
* [Spotify URL Field Type](/article/1863-spotify-url-field-type-feature-in-um-2-6-3)
* [Unique profiles for different user roles](/article/100-unique-profiles-for-different-user-roles)
No results found
---
# Online Users Setup - Ultimate Member
Online Users Setup
==================
[](javascript:window.print() "Print this article")
### Overview
This document provides instructions on how to set up the [Online Users](https://ultimatemember.com/extensions/online-users/)
extension.
**Contents:**
* [Settings](#settings)
* [User profile](#profile)
* [User account](#account)
* [Shortcodes](#shortcodes)
* [\[ultimatemember\_online\]](#ultimatemember_online)
* [Widgets](#widget)
### Settings [#](#settings)
Once the extension is activated, it adds the Online tab to the _wp-admin > Ultimate Member > Settings > Extensions_ screen. In this tab you should see the following options:
* **Show online stats in member directory** - Enable or disable online status in the member directory.

The extension adds a green circle near the user's profile photo in the profile card in the directory if the user is online.

### User profile [#](#profile)
The extension adds a green circle next to the user’s name on their profile if the user is online.

The extension adds the **Online Status** field which allows you to display the user’s online status in the profile form section. Go to _wp-admin > Ultimate Members > Forms > Edit Form_. Click the plus "+" sign button in the **Form Builder** to add a field. The **Fields Manager** window will appear, select the **Online Status** from the predefined fields. Click on the **Update** button to save changes.


### User account [#](#account)
The extension adds an option to the **Privacy** tab on the user account page so users can decide if they want other users to know when they are online or not.

### Shortcodes [#](#shortcodes)
#### \[ultimatemember\_online\] [#](#ultimatemember_online)
This shortcode displays online members.
**The shortcode attributes:**
| | | | |
| --- | --- | --- | --- |
| Key | Type | Default | Description |
| max | integer | 11 | Maximum amount of members shown on a one screen. |
| roles | string | 'all' | Filters members by user roles. |
**Example:**
\[ultimatemember\_online max="6" roles="administrator,subscriber"\]

The extension adds the "Ultimate Member - Online Users" widget which you can add to your sidebar or footer. The widget allows you to add a title, select the maximum number of profile photos to show in the first view (default is 20). If more than 20 users are online users will have to click the text link to reveal the other users. You can select to show all user roles or only one role.
Go to _wp-admin > Appearance > Widgets_. Click on the plus sign button to add a widget, search "online", and drag the widget to sidebar. Click the Update button to save changes.

Last updated on February 29, 2024
No results found
---
# User Roles - Ultimate Member
User Roles
==========
Sort by Default Sort A-Z Sort by Popularity Sort by Last Updated
* [User Roles Settings](/article/103-user-roles-settings)
* [How to use User Roles](/article/1590-how-to-use-user-roles)
* [How to set Role Priority for user roles](/article/1494-how-to-set-role-priority-for-user-roles)
* [How to Enable Email Notification on Activation or Admin Review Upon User's Registration](/article/1652-how-to-enable-email-notification-on-activation-or-admin-review-upon-users-registration)
* [Hiding/Showing admin bar for specific user roles](/article/243-hiding-showing-admin-bar-for-specific-user-roles)
* [Auto approve a user on registration in WP Admin](/article/1650-auto-approve-a-user-on-registration-in-wp-admin)
* [Custom Post Type capabilities not showing in the WP Capabilities in User Role Settings](/article/1594-custom-post-type-capabilities-not-showing-in-the-wp-capabilities-in-user-role-settings)
* [How to set up a user role that can edit other member without wp-admin access](/article/1872-how-to-set-up-a-user-role-that-can-edit-other-member-without-wp-admin-access)
No results found
---
# Basic Extensions - Ultimate Member
Basic Extensions
================
Sort by Default Sort A-Z Sort by Popularity Sort by Last Updated
* [Block Disposable Email Domains](/article/1870-block-disposable-email-domains)
* [Cover Photo Uploader in Register Form](/article/1782-cover-photo-uploader-in-register-form)
* [Displays Country flag in Member Directory and User Profiles](/article/1672-displays-country-flag-in-member-directory-and-user-profiles)
* [Enable Profile Photo Uploader in Registration Forms](/article/1671-enable-profile-photo-uploader-in-register-and-account-forms)
* [Fields Character and Words Counter](/article/1677-fields-character-and-words-counter)
* [Force Capitalization of Display Name](/article/1783-force-capitalization-of-display-name)
* [Generate Dummies](/article/1666-generate-dummies)
* [Installation](/article/1889-installation)
* [Math Captcha in Register Forms](/article/1675-math-captcha-in-register-forms)
* [Password Strength Estimator](/article/1780-password-strength-estimator)
* [Regenerate Cover & Profile Photo thumbnails](/article/1674-regenerate-cover-profile-photo-thumbnails)
* [Resend the Account Email Confirmation notification with WP Cronjob](/article/1679-resend-the-account-email-confirmation-notification-with-wp-cronjob)
* [Schedule User Deletions with WP Cronjob](/article/1670-schedule-user-deletions-with-wp-cronjob)
* [Set Password Link for UM Email Templates](/article/1693-set-password-on-um-email-templates)
* [User Browser Detect](/article/1664-user-browser-detect)
* [User Meta Shortcode](/article/1673-user-meta-shortcode)
* [Vcard](/article/1676-vcard)
* [Yoast SEO Meta tags](/article/1668-yoast-seo-meta-tags)
No results found
---
# Member Directories - Ultimate Member
Member Directories
==================
Sort by Default Sort A-Z Sort by Popularity Sort by Last Updated
* [Member Directory 1.3.x - 2.0.x Settings](/article/102-member-directory-settings)
* [Member Directories 2.1.0+](/article/1513-member-directories-2-1-0)
* [Upgrade 2.1.0](/article/1512-upgrade-2-1-0)
* [Displaying Member Directories](/article/1723-displaying-member-directories)
* [Creating Metatable for Member Directories](/article/1541-meta-table-for-member-directories)
No results found
---
# Followers - Ultimate Member
Followers
=========
Sort by Default Sort A-Z Sort by Popularity Sort by Last Updated
* [Followers Setup](/article/231-followers-setup)
* [Followers shortcodes](/article/1622-followers-shortcodes)
No results found
---
# Content Restriction - Ultimate Member
Content Restriction
===================
Sort by Default Sort A-Z Sort by Popularity Sort by Last Updated
* [Restrict content on a page/post to logged in users](/article/177-restrict-content-on-a-page-post-to-logged-in-users)
* [Conditional Menus](/article/132-conditional-menus)
* [Restrict content on a page/post to specific users community role](/article/226-restrict-content-on-a-page-post-to-specific-users-community-role)
* [Restrict content on a page/post to logged out users](/article/176-restrict-content-on-a-page-post-to-logged-out-users)
* [Common content restriction settings](/article/1736-content-restriction)
* [Individual Post and Term content restriction settings](/article/1623-post-term-restriction-content-settings)
* [Restriction content priority](/article/1620-restriction-content)
* [Restrict Gutenberg Blocks](/article/1624-restrict-gutenberg-blocks)
No results found
---
# ForumWP - Ultimate Member
ForumWP
=======
Sort by Default Sort A-Z Sort by Popularity Sort by Last Updated
* [ForumWP Setup](/article/1501-forumwp-setup)
No results found
---
# Friends - Ultimate Member
Friends
=======
Sort by Default Sort A-Z Sort by Popularity Sort by Last Updated
* [Friends Setup](/article/249-friends-setup)
* [Friends shortcodes](/article/1520-friends-shortcodes)
No results found
---
# Google reCAPTCHA - Ultimate Member
Google reCAPTCHA
================
Sort by Default Sort A-Z Sort by Popularity Sort by Last Updated
* [Google reCAPTCHA](/article/72-google-recaptcha)
No results found
---
# Groups - Ultimate Member
Groups
======
Sort by Default Sort A-Z Sort by Popularity Sort by Last Updated
* [Groups setup](/article/1427-groups-setup)
* [Groups shortcodes](/article/1495-groups-shortcodes)
No results found
---
# JobBoardWP - Ultimate Member
JobBoardWP
==========
Sort by Default Sort A-Z Sort by Popularity Sort by Last Updated
* [Ultimate Member - JobBoardWP integration](/article/1574-ultimate-member-jobboardwp)
No results found
---
# MailChimp - Ultimate Member
MailChimp
=========
Sort by Default Sort A-Z Sort by Popularity Sort by Last Updated
* [MailChimp Setup](/article/82-mailchimp-setup)
* [How to debug MailChimp error](/article/1529-how-to-debug-mailchimp-error)
* [MailChimp shortcodes](/article/1583-mailchimp-shortcodes)
* [How to split members into multiple audiences on registration](/article/1571-how-to-split-members-into-multiple-audiences-on-registration)
* [Enable double opt-in](/article/1588-enable-double-opt-in)
* [How to sync the user role](/article/1587-how-to-sync-the-user-role)
No results found
---
# Notices - Ultimate Member
Notices
=======
Sort by Default Sort A-Z Sort by Popularity Sort by Last Updated
* [Notices Setup](/article/76-notices-setup)
No results found
---
# Online Users - Ultimate Member
Online Users
============
Sort by Default Sort A-Z Sort by Popularity Sort by Last Updated
* [Online Users Setup](/article/80-online-users-setup)
* [Online Users - Profile Page & Member Directory Setup](/article/1684-online-users---profile-page-member-directory-setup)
* [Online Users - Sidebar Widget Set Up](/article/1685-online-users-sidebar-widget-set-up)
No results found
---
# Private Messages - Ultimate Member
Private Messages
================
Sort by Default Sort A-Z Sort by Popularity Sort by Last Updated
* [Private Messages Setup](/article/234-private-messages-setup)
* [Message Notification Icon](/article/241-message-notification-icon)
No results found
---
# Private content - Ultimate Member
Private content
===============
Sort by Default Sort A-Z Sort by Popularity Sort by Last Updated
* [Private content setup](/article/1497-private-content-setup)
* [Private Content Plugin Activation](/article/1688-private-content-plugin-activation)
No results found
---
# Profile Completeness - Ultimate Member
Profile Completeness
====================
Sort by Default Sort A-Z Sort by Popularity Sort by Last Updated
* [Profile Completeness Setup](/article/189-profile-completeness-setup)
* [Profile Completeness - Hooks](/article/1729-profile-completeness-hooks)
No results found
---
# Profile Tabs - Ultimate Member
Profile Tabs
============
Sort by Default Sort A-Z Sort by Popularity Sort by Last Updated
* [Profile Tabs Setup](/article/1547-profile-tabs-setup)
* [Profile tab with a form inside](/article/1584-profile-tab-with-a-form-inside)
* [Profile Tab with CF7 form inside](/article/1577-profile-tab-with-cf7-form-inside)
* [Profile Tab with a Member Directory inside](/article/1750-profile-tab-with-a-member-directory-inside)
No results found
---
# Real-time Notifications - Ultimate Member
Real-time Notifications
=======================
Sort by Default Sort A-Z Sort by Popularity Sort by Last Updated
* [Real-time Notifications Setup](/article/232-notifications-setup)
* [Real-time Notifications Shortcodes](/article/1491-real-time-notifications-shortcodes)
No results found
---
# Shortcodes - Ultimate Member
Shortcodes
==========
Sort by Default Sort A-Z Sort by Popularity Sort by Last Updated
* [Followers shortcodes](/article/1622-followers-shortcodes)
* [Friends shortcodes](/article/1520-friends-shortcodes)
* [Groups shortcodes](/article/1495-groups-shortcodes)
* [MailChimp shortcodes](/article/1583-mailchimp-shortcodes)
* [Real-time Notifications Shortcodes](/article/1491-real-time-notifications-shortcodes)
* [Reviews Shortcodes](/article/1589-reviews-shortcodes)
* [Ultimate Member - myCred Shortcodes](/article/1877-ultimate-member-mycred-shortcodes)
* [User Bookmarks shortcodes](/article/1521-user-bookmarks-shortcodes)
* [User Locations - Shortcodes](/article/1698-user-locations-shortcodes)
* [User Meta Shortcode](/article/1673-user-meta-shortcode)
* [User Notes Shortcodes](/article/1875-user-notes-shortcodes)
No results found
---
# Social Activity - Ultimate Member
Social Activity
===============
Sort by Default Sort A-Z Sort by Popularity Sort by Last Updated
* [Social Activity Setup](/article/1553-social-activity-setup)
* [How to show only followed users/friends activity on the social wall](/article/1468-how-to-show-only-followed-users-activity)
* [How to limit wall posts in social activity?](/article/229-how-to-limit-wall-posts-in-social-activity)
* [Social Activity Shortcodes](/article/1891-social-activity-shortcodes)
* [NGINX Configuration Rewrite Rule for Ultimate Member Social Activity](/article/1933-using-the-social-activity-extension-with-nginx)
* [Customizing the Font Size on the Social Activity Wall](/article/1951-customizing-the-font-size-on-the-social-activity-wall)
No results found
---
# Social Login - Ultimate Member
Social Login
============
Sort by Default Sort A-Z Sort by Popularity Sort by Last Updated
* [Social Login: User Role Redirection Settings](/article/1940-social-login-user-role-redirection-settings)
* [Social Login: Authenticate on Current Window](/article/1938-social-login-authenticate-on-current-window)
* [Social Login 2.3 Setup](/article/1531-social-login-2-3-setup)
* [Social Login: Facebook App Setup](/article/20-social-login-facebook-app-setup)
* [UTM Parameters](/article/1910-utm-parameters)
* [Social Login Setup](/article/71-social-login-setup)
* [Social Login: X(formerly Twitter) API v2 Setup](/article/1699-social-login-twitter-api-v2-setup)
* [Social Login: X ( formerly Twitter ) App Setup](/article/140-social-login-twitter-app-setup)
* [Social Login: LinkedIn App Setup](/article/142-social-login-linkedin-app-setup)
* [Social Login - Assigning Roles](/article/223-social-login-assigning-roles)
* [Social Login: TwitchTV App Setup](/article/1760-social-login-twitchtv-app-setup)
* [Social Login: Github App Setup](/article/1532-social-login-github-app-setup)
* [Social Login: WordPress App Setup](/article/1533-social-login-wordpress-app-setup)
* [Social Login: Discord App Setup](/article/1763-social-login-discord-app-setup)
* [Social Login: Google App Setup](/article/141-social-login-google-app-setup)
* [Social Login Common Issues](/article/174-social-login-common-issues)
* [What's new in UM Social Login 2.3: One-step Registration Process, New Social Networks, Popup Window Authentication & Profile Avatar improvements](/article/1505-whats-new-um-social-login-2-3)
* [Why does Facebook login no longer works: Graph returned an error: Can't Load URL](/article/1331-why-does-facebook-login-no-longer-works)
* [Social Login - Sync Social Register form fields with Extend option](/article/1506-social-login-sync-social-register-form-fields-with-extend-option)
* [Social Login - List of Sync Field Options in Form Builder](/article/1536-social-login---list-of-sync-field-options-in-form-builder)
* [1](/category/19-social-login?sort=updatedAt)
* [2](/category/19-social-login/2?sort=updatedAt)
No results found
---
# Stripe - Ultimate Member
Stripe
======
Sort by Default Sort A-Z Sort by Popularity Sort by Last Updated
* [Introduction to Stripe Extension](/article/1606-introduction-to-ultimate-members-stripe-extension)
* [Stripe - Setting up Webhook and Test/Public Keys](/article/1607-stripe-setting-up-webhook-and-test-public-keys)
* [Stripe - Setting up Stripe Success, Cancel Payment, Already Subscribed,Customer Portal,Stripe Checkout URL and Embedded Checkout Pages](/article/1609-stripe---setting-up-stripe-success-and-cancel-payment-pages)
* [Create Subscription Prices](/article/1617-create-subscription-prices)
* [Stripe - Add Subscription Plans to a Registration Form](/article/1634-stripe---add-subscription-plans-to-a-registeration-form)
* [Stripe Shortcodes](/article/1616-stripe-shortcodes-reference)
* [Stripe - Create & Test Customer Billings](/article/1611-stripe---create-test-customer-billings)
* [Stripe - Test your integration](/article/1610-stripe---test-your-integration)
* [Stripe CLI Integration](/article/1864-stripe-cli-integration)
* [Test your integration with Stripe test clocks](/article/1803-test-your-integration-with-stripe-test-clocks)
* [Import Existing Subscription Prices from your Stripe Account](/article/1846-import-existing-subscription-prices-from-your-stripe-account)
* [Stripe - Content Restriction](/article/1805-stripe-content-restriction)
* [Stripe’s Plans Customization in Register Forms](/article/1859-stripe-s-plans-customization-in-register-forms)
* [Display Subscription Status, Invoices and Active Subscriptions in the Admin screen](/article/1865-display-subscription-status-invoices-and-active-subscriptions-in-the-admin-screen)
* [Stripe FAQ - How Do Subscriptions Handle Staging Sites and Migrations?](/article/1612-stripe-faq-how-do-subscriptions-handle-staging-sites-and-migrations)
* [Stripe FAQ - Do Subscriptions Replace or Merge Roles?](/article/1618-do-subscriptions-replace-or-merge-roles)
* [Stripe FAQ - How Many Subscriptions a User Can Subscribe to?](/article/1619-how-many-subscriptions-a-user-can-subscribe-to)
* [Stripe FAQ - How to Connect a Stripe Customer account to a WordPress Account?](/article/1626-how-to-connect-a-stripe-customer-account-to-a-wordpress-account)
* [Stripe Beta Test](/article/1876-stripe-beta-test)
* [Stripe FAQ - What Pricing Models are supported in the Stripe extension?](/article/1880-stripe-faq-what-pricing-models-are-the-supported-in-the-stripe-extension)
* [1](/category/1605-stripe?sort=custom)
* [2](/category/1605-stripe/2?sort=custom)
No results found
---
# Terms & Conditions - Ultimate Member
Terms & Conditions
==================
Sort by Default Sort A-Z Sort by Popularity Sort by Last Updated
* [Terms & Conditions](/article/260-terms-conditions)
No results found
---
# Unsplash - Ultimate Member
Unsplash
========
Sort by Default Sort A-Z Sort by Popularity Sort by Last Updated
* [Unsplash setup](/article/1483-unsplash-setup)
No results found
---
# User Bookmarks - Ultimate Member
User Bookmarks
==============
Sort by Default Sort A-Z Sort by Popularity Sort by Last Updated
* [User Bookmarks setup](/article/1481-user-bookmarks-setup)
* [User Bookmarks shortcodes](/article/1521-user-bookmarks-shortcodes)
No results found
---
# User Locations - Ultimate Member
User Locations
==============
Sort by Default Sort A-Z Sort by Popularity Sort by Last Updated
* [User Locations Setup](/article/1545-user-locations-setup)
* [How to create a Google Maps API key](/article/1575-how-to-create-a-google-maps-api-key)
* [User Locations - Shortcodes](/article/1698-user-locations-shortcodes)
* [Configure map in member directory to after list](/article/1579-configure-map-to-after-list)
* [User Locations - Hooks](/article/1728-user-locations-hooks)
* [Member Directory with User Locations map](/article/1632-member-directory-with-user-locations-map)
No results found
---
# User Notes - Ultimate Member
User Notes
==========
Sort by Default Sort A-Z Sort by Popularity Sort by Last Updated
* [User Notes setup](/article/1479-how-to-setup-user-notes-extension)
* [User Notes Shortcodes](/article/1875-user-notes-shortcodes)
* [NGINX Configuration Rewrite Rule for Ultimate Member User Notes](/article/1935-nginx-configuration-rewrite-rule-for-ultimate-member-user-notes)
No results found
---
# User Photos - Ultimate Member
User Photos
===========
Sort by Default Sort A-Z Sort by Popularity Sort by Last Updated
* [User Photos setup](/article/1466-user-photos)
* [User Photos shortcodes](/article/1522-user-photos-shortcodes)
No results found
---
# User Reviews - Ultimate Member
User Reviews
============
Sort by Default Sort A-Z Sort by Popularity Sort by Last Updated
* [User Reviews Setup](/article/78-user-reviews-setup)
* [Reviews Shortcodes](/article/1589-reviews-shortcodes)
No results found
---
# User Tags - Ultimate Member
User Tags
=========
Sort by Default Sort A-Z Sort by Popularity Sort by Last Updated
* [User Tags Setup](/article/186-user-tags-setup)
* [User Tags + Member Directories 2.1.0+](/article/1514-user-tags-member-directories-2-1-0)
No results found
---
# Verified Users - Ultimate Member
Verified Users
==============
Sort by Default Sort A-Z Sort by Popularity Sort by Last Updated
* [Verified Users Setup](/article/184-verified-users-setup)
No results found
---
# WooCommerce - Ultimate Member
WooCommerce
===========
Sort by Default Sort A-Z Sort by Popularity Sort by Last Updated
* [WooCommerce Setup](/article/131-woocommerce-setup)
* [WooCommerce subscription setup](/article/1493-how-to-change-user-role-after-subscription)
* [Roles Assignment Logic](/article/1576-roles-assignment-logic)
No results found
---
# Zapier - Ultimate Member
Zapier
======
Sort by Default Sort A-Z Sort by Popularity Sort by Last Updated
* [Ultimate Member Zapier Settings Guide](/article/1733-adding-a-new-zap)
* [Zapier Setup for Actions](/article/1735-zapier-setup-for-actions)
* [Zapier Setup for Triggers](/article/1732-zapier-setup-for-triggers)
No results found
---
# bbPress - Ultimate Member
bbPress
=======
Sort by Default Sort A-Z Sort by Popularity Sort by Last Updated
* [bbPress Setup](/article/74-bbpress-setup)
No results found
---
# myCRED - Ultimate Member
myCRED
======
Sort by Default Sort A-Z Sort by Popularity Sort by Last Updated
* [Ultimate Member - myCRED Extension](/article/221-ultimate-member-mycred-extension)
* [Ultimate Member - myCred Shortcodes](/article/1877-ultimate-member-mycred-shortcodes)
No results found
---
# Theme - Ultimate Member
Theme
=====
Sort by Default Sort A-Z Sort by Popularity Sort by Last Updated
* [How to Change Ultimate Member Profile Layout](/article/1454-change-um-profile-layout)
* [Ultimate Member - Account Page](/article/1408-ultimate-member-account-page)
* [Ultimate Member - Changing Default Color](/article/1406-ultimate-member-changing-default-color)
* [Ultimate Member Directory](/article/1388-ultimate-member-directory)
* [Customizing User's Profile Name and Description Colors](/article/1649-customizing-users-profile-name-and-description-colors)
* [Installing a Theme](/article/1633-installing-a-theme)
No results found
---
# bbPress - Ultimate Member
bbPress
=======
Sort by Default Sort A-Z Sort by Popularity Sort by Last Updated
* [How To Change bbPress Topic Title Font Size](/article/1397-bbpress-title-font-size)
* [Changing bbPress Title Color](/article/1398-changing-bbpress-title-color)
* [bbPress Forum Header Color](/article/1400-bbpress-forum-header-color)
* [Changing bbPress Sticky Topic Color](/article/1401-changing-bbpress-sticky-topic-color)
* [Changing the bbPress forum Author Name Color](/article/1399-bbpress-author-name-color)
No results found
---
# Footer - Ultimate Member
Footer
======
Sort by Default Sort A-Z Sort by Popularity Sort by Last Updated
* [Footer Widgets](/article/1382-footer-widgets)
* [Footer Bottom Bar](/article/1381-footer-bottom-bar)
* [Scroll to Top](/article/1376-scroll-to-top)
No results found
---
# Code Examples - Ultimate Member
Code Examples
=============
Sort by Default Sort A-Z Sort by Popularity Sort by Last Updated
* [Extending UM Theme Header Profile Using Hooks](/article/1436-extending-um-theme-header-profile)
* [Customizing User's Profile Name and Description Colors](/article/1649-customizing-users-profile-name-and-description-colors)
* [Disable Page Title on ALL Pages](/article/1438-disable-page-title-on-all-pages)
* [Customizing Header Section](/article/1358-customizing-header-section)
No results found
---
# Social Media - Ultimate Member
Social Media
============
Sort by Default Sort A-Z Sort by Popularity Sort by Last Updated
* [Display Social Media Icons in the Header Top Bar](/article/1366-display-social-media-icons-in-the-header-top-bar)
No results found
---
# Developer - Ultimate Member
Developer
=========
Sort by Default Sort A-Z Sort by Popularity Sort by Last Updated
* [Theme Hooks](/article/1379-theme-hooks)
* [Adding Custom JavaScript Code](/article/1393-adding-custom-javascript-code)
* [um\_theme\_header](/article/1411-umthemeheader)
* [um\_theme\_page](/article/1432-umthemepage)
* [um\_theme\_before\_header](/article/1410-umthemebeforeheader)
* [um\_theme\_header\_profile\_before](/article/1413-umthemeheaderprofilebefore)
* [um\_theme\_single\_post](/article/1421-umthemesinglepost)
* [um\_theme\_content\_top](/article/1417-umthemecontenttop)
* [um\_theme\_footer](/article/1425-umthemefooter)
* [um\_theme\_before\_content](/article/1415-umthemebeforecontent)
* [um\_theme\_header\_profile\_after](/article/1414-umthemeheaderprofileafter)
* [um\_theme\_after\_header](/article/1412-umthemeafterheader)
* [um\_theme\_before\_comments\_title](/article/1429-umthemebeforecommentstitle)
* [um\_theme\_single\_post\_top](/article/1420-umthemesingleposttop)
* [um\_theme\_before\_comments](/article/1430-umthemebeforecomments)
* [um\_theme\_after\_comments](/article/1431-umthemeaftercomments)
* [um\_theme\_after\_comments\_title](/article/1428-umthemebelowcommentstitle)
* [um\_theme\_single\_post\_before](/article/1418-umthemesinglepostbefore)
* [um\_theme\_after\_page\_content](/article/1434-umthemeafterpagecontent)
* [um\_theme\_before\_site](/article/1416-umthemebeforesite)
* [1](/category/1380-developer?sort=popularity)
* [2](/category/1380-developer/2?sort=popularity)
No results found
---
# Header - Ultimate Member
Header
======
Sort by Default Sort A-Z Sort by Popularity Sort by Last Updated
* [Header - Logged In](/article/1353-header-logged-in)
* [Display Social Media Icons in the Header Top Bar](/article/1366-display-social-media-icons-in-the-header-top-bar)
* [Customizing Topbar Color & Font](/article/1349-customizing-topbar)
* [Setting up Header Menu](/article/1352-setting-up-header-menu)
* [How To Enable Header Topbar](/article/1347-header-topbar)
* [Setting up Header Logo](/article/1351-header-logo)
* [Setting up Search Box in Header](/article/1355-header-search-box)
* [Customizing Header Section](/article/1358-customizing-header-section)
* [Header - Logged Out](/article/1354-header-logged-out)
* [Change Header Topbar layout](/article/1350-header-topbar-layout)
* [Header Notifications](/article/1472-header-notifications)
* [Setting up User Header Menu](/article/1868-setting-up-user-header-menu)
* [Header Messenger Modal](/article/1404-header-messenger)
* [Customizing Header Bottom Bar](/article/1357-customizing-header-bottom-bar)
* [Enable Header Bottom Bar](/article/1356-header-bottom-bar)
* [Header Friend Requests](/article/1471-header-friend-requests)
* [Display Recent Private Messages in Header](/article/1402-display-recent-private-messages-in-header)
* [How to Make header Sticky](/article/1455-make-header-sticky)
No results found
---
# Layout - Ultimate Member
Layout
======
Sort by Default Sort A-Z Sort by Popularity Sort by Last Updated
* [How to Change Ultimate Member Profile Layout](/article/1454-change-um-profile-layout)
* [UM Theme Sidebars](/article/1407-um-theme-sidebars)
* [Single Article](/article/1385-single-article)
* [Changing Website Width](/article/1372-changing-website-width)
* [Post Archive](/article/1384-post-archive)
No results found
---
# Ultimate Member - Shortcodes - Ultimate Member
Ultimate Member - Shortcodes
============================
[](javascript:window.print() "Print this article")
Overview
--------
Ultimate Member simplifies the integration of dynamic forms into WordPress pages and posts through the use of WordPress shortcodes. Ultimate Member boasts an array of shortcodes designed to seamlessly display different components of the plugin, including user profiles, registration forms, and more.
* [Core Plugin](#CorePlugin)
* [Pages](#pages)
* [Account](#account)
* [Password Reset](#passwordReset)
* [Login, Registration, User](#login)
* [Members](#members)
* [Restrict Content](#RestrictContent)
* [Show Content to Specific Roles](#showcontent_specificRoles)
* [Show Content for Logged-In Users](#showcontent_loggedin)
* [Show Content for Logged-Out Users](#showcontent_loggedout)
* [Search](#search)
* [Search Users](#search_users)
* [User Profile URL](#userprofile_URL)
* [Extensions](#extensions)
Core Plugin [#](#CorePlugin)
-----------------------------
### Pages[#](#pages)
#### Account: [#](#account)
The shortcode facilitating the integration of the account form is `[ultimatemember_account]`. Users can further customize their experience by showcasing specific account tabs through `[ultimatemember_account tab="tab id"]`, as exemplified by `[ultimatemember_account tab="password"]`. The tab id, representing the section displayed in the URL (e.g., /account/general), allows users to seamlessly navigate between different account tabs.

#### Password Reset: [#](#passwordReset)
For the password reset functionality, the UM plugin provides the `[ultimatemember_password]` shortcode, streamlining the process for users to reset their passwords conveniently.

#### Login, Registration, User: [#](#login)
Critical to user interaction, shortcodes for **Login**, **Registration**, and **User** pages are readily available within the WordPress admin interface under **Ultimate Member > Forms**, ensuring easy access and customization for these essential pages.

#### Members: [#](#members)
To enhance member directory functionality, administrators can incorporate shortcodes for member directories effortlessly. These specific shortcodes are conveniently located in the WordPress admin interface under **Ultimate Member > Member Directories**, providing a seamless way to manage and display member directories on the website.

### Restrict Content[#](#RestrictContent)
#### Show Content to Specific Roles:[#](#showcontent_specificRoles)
For a detailed explanation of how these shortcodes work, kindly refer to the article ["Restrict Content on a Page/Post to Specific Users' Community Role."](//docs.ultimatemember.com/article/226-restrict-content-on-a-page-post-to-specific-users-community-role)
This resource provides comprehensive insights into the functionality and usage of the mentioned shortcodes below.
`[um_show_content roles="member"] Only the member role can see this content. [/um_show_content]`
* This shortcode displays content exclusively to members.
`[um_show_content not="member"] Only non-member roles can see this content. [/um_show_content]`
* This shortcode restricts content to non-member roles.
**Note:** The role required for use in the shortcode is the **Role ID**. To ascertain the Role ID of a user, navigate to **wp-admin > Ultimate Member > User Roles.** Refer to the image below for visual guidance.

#### Show Content for Logged-In Users:[#](#showcontent_loggedin)
* `[um_loggedin] This text can only be seen by logged in users [/um_loggedin]`
* This shortcode exclusively reveals content to users who are logged in. For a detailed explanation of its functionality, please refer to this article: [Restrict Content on a Page/Post to Logged-In Users.](//docs.ultimatemember.com/article/177-restrict-content-on-a-page-post-to-logged-in-users)
#### Show Content for Logged-Out Users:[#](#showcontent_loggedout)
* `[um_loggedout] This text can only be seen by logged out users [/um_loggedout]`:
* This shortcode conceals content from logged-in users, making it accessible exclusively to those who are logged out. For a comprehensive understanding of its functionality, please consult this article [Restrict Content on a Page/Post to Logged-Out Users.](//docs.ultimatemember.com/article/176-restrict-content-on-a-page-post-to-logged-out-users)
#### Search Users:[#](#search_users)
* Integrate the search form seamlessly using `[ultimatemember_searchform]`. Ensure that the search feature in the member directory is enabled by going to **wp-admin > Ultimate Member > Member Directory > Edit a Member Directory > Search Options>Enable Search feature.**

* The image below provides an example of how the shortcode appears when added to a page.

### User Profile URL [#](#userprofile_URL)
This shortcode facilitates the retrieval of User Profile URLs. Below are examples showcasing the versatility of this new functionality:
* `[um_author_profile_link]` - This shortcode retrieves the User Profile URL of the current post author.

* `[um_author_profile_link title="Content Contributor" user_id="11"]` - This shortcode retrieves the User Profile URL for the user with ID 11, with a custom title.

* `[um_author_profile_link title="Contributor" user_id="11"]Visit Contributor Profile[/um_author_profile_link]` - This shortcode is similar to the example above, featuring an embedded anchor text that reads "Visit Contributor Profile".

* `[um_author_profile_link raw="1"]` - This shortcode generates a raw URL output, e.g., [https://ultimate-member-32669-3028774.umsites.net/user/admin/](https://ultimate-member-32669-3028774.umsites.net/user/admin/)
, but please note that the URL is not rendered as clickable.

.
* * *
### Extensions[#](#extensions)
We have compiled individual shortcode documents for each extension. The following list provides links to the respective documentation for your reference.
* [Followers Shortcodes](//docs.ultimatemember.com/article/1622-followers-shortcodes)
* [Friends Shortcodes](//docs.ultimatemember.com/article/1520-friends-shortcodes)
* [Groups Shortcodes](//docs.ultimatemember.com/article/1495-groups-shortcodes)
* [MailChimp Shortcodes](//docs.ultimatemember.com/article/1583-mailchimp-shortcodes)
* [Notices Shortcodes](//docs.ultimatemember.com/article/76-notices-setup#shortcode)
* [Online Users Shortcodes](//docs.ultimatemember.com/article/80-online-users-setup#shortcodes)
* [Private Messages Shortcodes](//docs.ultimatemember.com/article/234-private-messages-setup#shortcode)
* [Profile Completeness Shortcodes](//docs.ultimatemember.com/article/210-ultimate-member-shortcodes#profile-completeness)
* [Real-time Notifications Shortcodes](//docs.ultimatemember.com/article/1491-real-time-notifications-shortcodes)
* [Social Activity Shortcodes](//docs.ultimatemember.com/article/1891-social-activity-shortcodes)
* [Social Login Shortcodes](//docs.ultimatemember.com/article/1531-social-login-2-3-setup#shortcodes)
* [User Bookmarks Shortcodes](//docs.ultimatemember.com/article/1521-user-bookmarks-shortcodes)
* [User Locations Shortcodes](//docs.ultimatemember.com/article/1698-user-locations-shortcodes)
* [User Notes Shortcodes](//docs.ultimatemember.com/article/1875-user-notes-shortcodes)
* [User Photos Shortcodes](//docs.ultimatemember.com/article/1522-user-photos-shortcodes)
* [User Reviews Shortcodes](//docs.ultimatemember.com/article/1589-reviews-shortcodes)
* [User Tags Shortcodes](//docs.ultimatemember.com/article/186-user-tags-setup)
* [UM MyCred Shortcodes](//docs.ultimatemember.com/article/1877-ultimate-member-mycred-shortcodes)
Last updated on January 9, 2025
### Related Articles
* [Restrict content on a page/post to logged in users](/article/177-restrict-content-on-a-page-post-to-logged-in-users)
* [Restrict content on a page/post to specific users community role](/article/226-restrict-content-on-a-page-post-to-specific-users-community-role)
* [Restrict content on a page/post to logged out users](/article/176-restrict-content-on-a-page-post-to-logged-out-users)
No results found
---
# Styles - Ultimate Member
Styles
======
Sort by Default Sort A-Z Sort by Popularity Sort by Last Updated
* [Customizing Button Color](/article/1368-customizing-button-color)
* [Ultimate Member Directory](/article/1388-ultimate-member-directory)
* [Customizing Form Fields Color](/article/1364-customizing-form-fields-color)
* [Body Text Color & Font](/article/1371-body-text-color-font)
* [Customizing Heading Text & Font](/article/1370-customizing-heading-text-font)
* [Drop-down Settings](/article/1392-drop-down-settings)
* [Customizing Widgets Color](/article/1369-customizing-widgets-color)
* [UM Theme LifterLMS Support](/article/1405-lifterlms-support)
* [Meta Information Color](/article/1374-meta-information-color)
* [Text Link Color](/article/1375-text-link-color)
* [Website background Color](/article/1378-website-background-color)
No results found
---
# How to Change Ultimate Member Profile Layout - Ultimate Member
How to Change Ultimate Member Profile Layout
============================================
[](javascript:window.print() "Print this article")
If you are using [UM Theme](https://ultimatemember.com/theme/)
, you will have extra Ultimate member Profile layouts. Here are the screenshots of how these profile layouts look:


### **Creating custom profile template**
Copy the file profile.php from the plugin's directory to the child theme directory and change its name:
* Original file: /wp-content/plugins/ultimate-member/templates/profile.php
* Copied file: /wp-content/themes/um-theme-child/ultimate-member/templates/profile-2.php
Open new file and paste a comment with the template name to the first line, see example:
Change the template file and save it.
### **Changing UM Profile Layout**
Follow these steps to change the Ultimate member user profile layout:
1. Go to **Dashboard > Ultimate Member > Settings**
2. Click on the **Appearance** tab
3. Under the **Profile Default Template** dropdown\*, you will find extra options (Profile 2, Profile 3, Profile 4 & Side Menu)
4. Select the layout, then click on **Save Changes**.

> **\*Note:** The dropdown **Profile Default Template** selects a profile template for all profile forms. This setting may be overridden for a certain profile form.

Last updated on April 9, 2022
### Related Articles
* [Ultimate Member Profile Page](/article/1386-ultimate-member-profile-page)
* [Ultimate Member - Changing Default Color](/article/1406-ultimate-member-changing-default-color)
No results found
---
# How to do a plugin/theme conflict test? - Ultimate Member
How to do a plugin/theme conflict test?
=======================================
[](javascript:window.print() "Print this article")
Most of the time when you find an issue on your site with Ultimate Member, it will be caused by a plugin or theme conflict. This can range from a simple CSS styling issue to a more complex issue where another plugin/theme is stopping Ultimate Member from functioning properly.
### How to do a conflict test
1. Deactivate all non Ultimate Member plugins and switch to the latest default WordPress theme (this will ensure the site is as close to a clean install as possible).
2. Check the site to see if the issue still exists. If the issue goes away after deactivating other plugins and switching themes, then this means that either the theme or one of the plugins was conflicting with Ultimate Member. If the issue still exists then it is not a plugin or theme conflict.
3. If it turns out to be a plugin/theme conflict, then you need to activate the plugins/theme one by one until you find the plugin/theme that causes the issue to come back.
4. Once you have identified the conflict you can report the conflict to the developers of the plugin/theme and also to us.
**NOTE: We suggest that you take a full backup of your site before deactivating plugins and themes as this will give you a restore point.**
### Doing a conflict test when your site is live to the public
Because a conflict test involves deactivating plugins and switching themes, this will affect the look and functionality of your site (even if temporary). To not impact visitors to your site we strongly advise creating a clone of your site and putting the clone onto a test domain to allow for proper testing to be done.
Last updated on March 2, 2022
No results found
---
# Default Pages - Ultimate Member
Default Pages
=============
[](javascript:window.print() "Print this article")
### Default pages overview
When you activate Ultimate Member, the plugin will install six default pages required for the plugin to work correctly. The six pages are register, login, user, account, members, logout. Apart from the members' page, these pages are a core requirement of Ultimate Member and cannot be deleted from your site.
**Warning:** Do not cache pages "Account", "Login", "Password Reset", "Register", "User". Caching may cause various issues, see details [here](//docs.ultimatemember.com/article/1595-caching-problems "Caching problems")
.
### Register
The register page contains the default registration form and is the page you should direct users to so they can register on your site. The default registration form includes the following fields: username, first name, last name, email address, password (with confirm password turned on). The form has also been given a max-width of 450px.
To edit the default registration form, you need to go to the forms page in the WordPress admin.
### Login
The login page contains the default login form and is the page you should direct users to so they can log in to your site. The default login form includes the fields: username or email and password. The form has also been given a max-width of 450px. To edit the default login form, you need to go to the forms page in the WordPress admin.
### User
The user page is the page that displays each user's profile and contains the profile form. The default profile form is left blank and contains no fields. To add fields to the profile form, you need to go to the forms page in the WordPress admin.
**Important:** While creating multiple profile forms and adding the shortcodes to any page is possible, users can only view other users' profiles via this page. You must use this page as the main page for showing profiles.
Profile layout
The profile layout is adaptive. The profile photo size depends on the profile width. The profile header is aligned left (right for rtl) if the profile is wider than 500px. The profile header is centered if the profile width is 500px or less. The profile menu displays the tab icon and name if the profile is wider than 800px. It displays the tab icon without a name if the profile width is 800px or less.
The profile width is set by the "**Profile Maximum Width**" setting on _wp-admin > Ultimate Member > Settings > Appearance > Profile_. You can set a width for a certain profile form - use the "**Max. Width**" setting in the "Customize this form" section. Set preferred width in **px** or set **100%** to use all available width. The available width depends on the device screen, theme and page builder.
### Account
The account page is the page that contains the account settings for each user. You can change the settings and options for the account settings in the account tab on the settings page in the WordPress admin.
### Members
The members' page displays the default member directory, which lists all the users on your site. You can change the settings and options for the member directory by editing the default member directory in the WordPress admin.
### Logout
The logout page is the page that will trigger a logged-in user to log out of your site. This page can only be used for logging users out of your site, so it is not possible for you to add content to this page or for users to visit this page (all users will be redirected after clicking a link to go to this page).
### Password Reset
The password reset page allows users to reset their password if they forget what their password is.
**Note:** If you have encountered an issue on your site with Ultimate Member, it will be caused by a plugin or theme conflict. Go to this [article](//docs.ultimatemember.com/article/96-how-to-do-a-plugin-theme-conflict-test)
to make a conflict test.
Last updated on January 14, 2025
No results found
---
# Ultimate Member - Ultimate Member
Ultimate Member
===============
Sort by Default Sort A-Z Sort by Popularity Sort by Last Updated
* [How to Change Ultimate Member Profile Layout](/article/1454-change-um-profile-layout)
* [Ultimate Member Profile Page](/article/1386-ultimate-member-profile-page)
* [Customize Ultimate Member Login Page](/article/1484-customize-um-login-page)
* [Extension: User Tags](/article/1442-extension-user-tags)
* [Extension: UM WooCommerce](/article/1441-extension-um-woocommerce)
* [Extension: Private Messages](/article/1389-extension-private-messages)
* [Display List of Friends in Profile page](/article/1488-display-list-of-friends-in-profile-page)
* [Extension: Social Activity](/article/1443-extension-social-activity)
* [Changing UM Groups Layout](/article/1487-changing-um-groups-layout)
* [Extension: Customize Verified Icon Color](/article/1440-extension-customize-verified-icon-color)
* [Extension: User Reviews](/article/1444-extension-user-reviews)
* [Extension: Customize Groups Color](/article/1439-extension-customize-groups-color)
* [Extension: Friends](/article/1445-extension-friends)
* [Extension: Followers](/article/1446-extension-followers)
No results found
---
# Ultimate Member Profile Page - Ultimate Member
Ultimate Member Profile Page
============================
[](javascript:window.print() "Print this article")
**How To change the Ultimate Member Profile Colors**
Go to **Appearance > Customize > Ultimate Member > Profile Page**
**Profile Header**
* Profile Header Area Text Color
* Profile Header Area Background Color

**Profile Navigation**
* Profile Navigation Bar Color
* Profile Navigation Menu Color
* Profile Navigation Menu Hover Color
* Menu Background Hover Color

**Profile Page Content Colors**
* Profile Content Text Color
* Profile Meta
* Profile Content Background Color

**Profile Page Sidebar**
In UM Theme you can display widgets to Ultimate Member profile pages. Just go to **Appearance > Widgets** and add your widgets in the **Profile Sidebar** section.
* Profile Sidebar Container Color


Last updated on December 6, 2021
### Related Articles
* [How to Change Ultimate Member Profile Layout](/article/1454-change-um-profile-layout)
* [Ultimate Member - Changing Default Color](/article/1406-ultimate-member-changing-default-color)
No results found
---
# WooCommerce - Ultimate Member
WooCommerce
===========
Sort by Default Sort A-Z Sort by Popularity Sort by Last Updated
* [WooCommerce Products Color](/article/1390-woocommerce-products-color)
No results found
---
# How to add user profile photo/avatar & display name to my site header? - Ultimate Member
How to add user profile photo/avatar & display name to my site header?
======================================================================
[](javascript:window.print() "Print this article")

### Show display name on a menu item
Go to **wp-admin> Appearance> Menus> Edit Menus> Menu Structure.**
Using our short tags allows you to show a user’s name in the menu instead of the name of the page. Instead of showing the user or my profile on your site’s menu, you can instead make the user page show the logged-in user’s name (e.g John Doe). You can add the following short tags to the menu link: {first\_name} {last\_name} {username} {nickname}. To use this feature you simply add the short tags to the menu item’s navigation label like so:

### Show user profile photo in the menu
You can also show the user’s profile photo in the menu using the short tag: {user\_avatar\_small}. If you add this tag into the navigation label field the profile photo for the user will show.

**Note: You need to know how to use CSS to use the avatar in the site header due to every theme styling headers differently. Only add the avatar to the site header if you know how to adjust the position of the avatar using CSS.**
Last updated on February 28, 2022
No results found
---
# Common Problems - Ultimate Member
Common Problems
===============
Sort by Default Sort A-Z Sort by Popularity Sort by Last Updated
* [Not receiving user emails or admin notifications](/article/116-not-receiving-user-emails-or-admin-notifications)
* [Photo/image uploads not working](/article/114-photo-uploads-not-working)
* [How to translate plugin](/article/1449-how-to-translate-plugin)
* [Password Reset doesn't work](/article/1518-password-reset-doesnt-work)
* [Export & Import](/article/1549-export-import)
* [How to block bot registrations](/article/1551-how-to-block-bot-registrations)
* [Caching problems](/article/1595-caching-problems)
* [Password reset link is missing/not visible](/article/1510-password-reset-link-is-missing)
* [User Profile: Page Not Found](/article/196-user-profile-page-not-found)
* [Child pages – 404 error/page not found](/article/115-child-pages-404-error-page-not-found)
* [Password Reset Error "This is not a valid hash, or it has expired."](/article/192-password-reset-error-this-is-not-a-valid-hash-or-it-has-expired)
* [You must activate myCRED error](/article/97-you-must-activate-mycred-error)
* [How to enable debug logging](/article/1751-enable-debug-logging)
* [Imported users are not able to login](/article/1767-imported-users-are-not-able-to-login)
* [Registration Process and "Set Password" Link in Ultimate Member](/article/1920-registration-process-and-set-password-link-in-ultimate-member)
* [Resolving Visibility of Deleted Form Fields in Ultimate Member](/article/1949-resolving-visibility-of-deleted-form-fields-in-ultimate-member)
No results found
---
# Not receiving user emails or admin notifications - Ultimate Member
Not receiving user emails or admin notifications
================================================
[](javascript:window.print() "Print this article")
If you are experiencing issues with your site's users not receiving emails or if you are not receiving admin notifications, it may be due to the unreliability of the default PHP mail() function used by WordPress, or because your host/server is not properly configured to use the PHP mail() function. There are several reasons why you might not be receiving user emails or admin notifications on your WordPress site. Here are some common causes:
1. **PHP Mail Function Issues:** The default method WordPress uses to send emails, `wp_mail()` relies on the PHP `mail()` function. However, this function can be unreliable, especially on shared hosting environments or servers with strict email-sending policies.
2. **Server Configuration:** Your hosting server may not be properly configured to send emails. This could be due to firewall restrictions, email server misconfigurations, or other server-related issues.
3. **Spam Filters:** Email providers may be filtering out your emails as spam, especially if you're sending a large volume of emails or if your emails contain spam-like content.
4. **Plugin Conflicts:** Sometimes, conflicts between plugins can interfere with the email-sending process, causing emails to fail to send.
5. **DNS Configuration:** Incorrect DNS settings, such as missing or incorrect SPF (Sender Policy Framework) and DKIM (DomainKeys Identified Mail) records, can lead to emails being rejected or marked as spam.
6. **Email Queue:** If your site is sending a large number of emails, they may be getting stuck in the email queue and not being sent out promptly. Many popular WordPress sites, including Ultimate Member, do not use the PHP mail() function for handling email delivery. Instead, we recommend using third-party email delivery services for better reliability and performance. Some popular services you can consider are:
* [Postmark](https://postmarkapp.com/)
* [Brevo](https://www.brevo.com/)
* [Mailgun](https://www.mailgun.com/)
* [SendGrid](https://sendgrid.com/)
To resolve these issues, you can try the following steps:
* Ensure that UM Email Notifications are enabled by double-checking under UM > Settings > Emails.
* Use a reliable SMTP (Simple Mail Transfer Protocol) service to send emails from your WordPress site. This can improve deliverability and reliability. To connect your WordPress site to one of these services, you can use SMTP plugins. Here are some popular options:
* [WP Mail SMTP](https://wordpress.org/plugins/wp-mail-smtp/)
* [Post SMTP](https://wordpress.org/plugins/post-smtp/)
* [Easy WP SMTP](https://wordpress.org/plugins/easy-wp-smtp/)
* Check your server's email logs for any error messages or issues that may be preventing emails from being sent.
* Ensure that your DNS settings are correctly configured, including SPF and DKIM records.
* Disable any plugins that may be causing conflicts with the email-sending process.
* Contact your hosting provider for assistance if you suspect server-related issues.
Last updated on February 16, 2024
No results found
---
# Extensions - Ultimate Member
Extensions
==========
Sort by Default Sort A-Z Sort by Popularity Sort by Last Updated
* [Why does my profile picture not import/sync when I connect my account to a social network?](/article/36-why-does-my-profile-picture-not-import-sync-when-i-connect-my-account-to-a-social-network)
No results found
---
# Adding a Registration Form - Ultimate Member
Adding a Registration Form
==========================
[](javascript:window.print() "Print this article")
### Overview
In this document, we'll explore the importance of registration forms in Ultimate Member. Registration forms serve as the gateway for users to sign up and become members of your site. With Ultimate Member, you can create multiple registration forms, catering to different types of users you may have. This flexibility allows you to tailor the registration process to suit the needs of various user roles on your site. Additionally, we'll provide step-by-step instructions on how to add a registration form to your Ultimate Member-powered site.

### How to create a new registration form
To create a new registration form in Ultimate Member, navigate to your WordPress admin dashboard. From there, go to **"Ultimate Member"** and click on **"Forms****."** This action will take you to the forms page, where you can see an overview of all your existing forms. At the top of this page, locate and click the "**Add New"** button. This will redirect you to the page where you can create your new registration form.
\[wp-admin>Ultimate Member> Forms\]

### Form title
The first step to creating a new registration form is to give the form a title. The title is purely for identification purposes in the admin dashboard and will not appear anywhere on the front end of your site.

### Select form type
Below the form title, you will see the **'S****elect Form Type'** widget which is where you select the type of form you are wanting to create. The selected form type will have a blue background making it easily identifiable what type of form you are creating. Registration is the default selected form type so you won’t need to change anything here.

### Form builder
The form builder is where you will add the fields and design the layout of your registration form. If you need help or want to learn more about the form builder we have a separate document on how to use the Ultimate Member [form builder](//docs.ultimatemember.com/article/85-form-builder)
.

### What fields to include in the registration form
When creating a new registration form there are a couple of fields that you must add so that Ultimate Member can properly register the user with your WordPress site. You should add either the username field or the username/email field. These are important as WordPress requires each user to have a username. In addition to one of those two fields, you should also add the password field so the user can log in after successfully registering. For more information on setting passwords in Ultimate Member registration forms, refer to this [article.](//docs.ultimatemember.com/article/1927-setting-passwords-in-ultimate-member-register-forms)
Apart from those requirements, you are free to add any other fields to the registration form. To learn more about the field types you can add, visit this [article](//docs.ultimatemember.com/article/1878-field-types)
.
### Assign role to form
[Assigning a role to a form](//docs.ultimatemember.com/article/1590-how-to-use-user-roles#assign_role)
is easy and you can select a role by going to the customize this form widget situated on the right-hand side of the page. In this widget, you can assign a role to this form. If you have not yet created a custom role then go to **wp-admin>Ultimate Member>User Roles** to [create a new user role](//docs.ultimatemember.com/article/1590-how-to-use-user-roles#add_role)
. If you do not assign a role to this form, any users signing up using this form will automatically be assigned the default user role (member or subscriber). If you don't know what's the default role,go to **w****p-admin > Ultimate Member > Settings > Appearance > Registration Form > Registration Default Role**. You can also look for the default role in **WP-Admin > General Settings > New User Default Role.**
### Shortcode widget
Below the create widget you will see the shortcode widget. This widget contains the shortcode which you should add to the page where you want the form to appear. Make sure to paste the shortcode in the text tab and not the visual tab to avoid any styling being applied to the shortcode.

### Customize this form widget
The customize this form widget allows you to easily customize the form. In this widget, you have the following options:
1. **Assign role to form** – This option enables you to assign a role for the registration form, allowing users to sign up for your site with that specific role via the registration form. If this option set to Default, users who register will be assigned the default role, which is set in the **wp-admin>Ultimate Member>Settings> General Tab> [Users subtab](//docs.ultimatemember.com/article/39-users-tab)
\>Registration Default Role.**
2. **Template** – This option is intended for advanced users and developers and you do not need to do anything with this option.
3. **Max Width (px)**– With this option, you can set a custom max-width which will be applied on larger devices (mobile devices will have a 100% width). Make sure to enter the value _without px_ at the end e.g 450px.
4. **Alignment**– This option allows you to decide the alignment of the form on the page. You can choose to align the form to the left, center, or right. By default, the form will have center alignment.
5. **Field Icons**– With this option you can select the appearance of font icons on the form. There are three options for you to select from Show with a label(default selection), inside the text field, and turned off. Please note if you select the inside text field only certain fields will be able to show icons. All fields are able to have an icon if you select to show them next to the label and you have given the field a label.
6. **Primary button text**– With this option you can customize the text that appears inside the primary button. For registration forms the default text is “Register” but you can change this to anything you like.
7. **Show secondary button**– With this option, you can decide whether or not to show the secondary button on the registration form. By default, the secondary button is turned on. If you turn the secondary button off, you will notice that the primary button becomes centered on the form.
8. **Secondary button text**– With this option you can customize the text that appears inside the secondary button. For registration forms, the default text is “Login” but you can change this to anything you like.

Last updated on May 7, 2024
No results found
---
# Ultimate Member - Account Page - Ultimate Member
Ultimate Member - Account Page
==============================
[](javascript:window.print() "Print this article")
You can customize the colors of the [Ultimate Member](https://wordpress.org/plugins/ultimate-member/)
Account page from **Appearance > Customize > Ultimate Member > Account Page**. There you will find below options:
* Tab Color
* Tab Text Color
* Tab Icon Color
* Tab Hover Color
* Tab Text Hover Color

### Change the Account page Tab layout
You can change the Ultimate Member Account page tab layout to position the tabs to the top. Follow these steps to change the layout.
1. Go to **Appearance > Customize > Ultimate Member > Account Page

**
2. Select **Top** from **Account Tab Position** dropdown.

3. Click on **Publish** to save the changes.


Last updated on December 1, 2021
No results found
---
# WooCommerce Products Color - Ultimate Member
WooCommerce Products Color
==========================
[](javascript:window.print() "Print this article")
**Customize Product Colors**
You can customize the color of the [WooCommerce](https://wordpress.org/plugins/woocommerce/)
product section. An element like Product Title, Product Price, Add To Cart Button & Sale badge Color can be directly charged from the WordPress customizer.
Go to **Appearance > Customize > WooCommerce > WooCommerce Color** to change the WooCommerce default colors.
**WooCommerce Info Color**
1. WooCommerce Info
2. WooCommerce Message
3. WooCommerce Message Text

**Product Colors**
1. Product Title
2. Price Color
3. Star Rating Color

**On Sale Badge**
1. Sale Badge Color
2. Sale Badge Text

**Buttons Color**
1. Button Color
2. Button Text Color
3. Button Hover Color
4. Button Hover Text

Last updated on December 9, 2021
No results found
---
# User Roles Settings - Ultimate Member
User Roles Settings
===================
[](javascript:window.print() "Print this article")
Overview
--------
Ultimate Member allows you to create multiple member roles and customize the capabilities and permissions that role has, which provides great flexibility when it comes to creating your site.
Creating a new role and editing an existing role [#](#add-and-edit)
--------------------------------------------------------------------
Click the **Add New** button on the top of the page _\[Ultimate Member > User Roles\]_ to add a new user role. You'll see a form **Add New Role**. Configure role settings, then click **Create Role**.
Click the **Edit** link under the user role title to edit it. You'll see a form **Edit Role**. Change role settings you need, then click **Update Role**.
Image - Add or edit user role on _wp-admin > Ultimate Member > User Roles._

General user role settings [#](#role-settings)
-----------------------------------------------
### Role title [#](#role-title)
This is where you can enter a new role name. The plugin does not change the title of existing user roles to prevent conflicts.
Image - A new role name field.

### Role Priority [#](#role-priority)
Users may have several roles. Set different priorities for roles to avoid conflicts. The Ultimate Member plugin uses settings from the role with the highest priority for users who have multiple roles. Read [this article](//docs.ultimatemember.com/article/1494-how-to-set-role-priority-for-user-roles)
for details.
Image - The **Role Priority** setting.

### Administrative Permissions [#](#administrative-permissions)
This widget allows you to provide this role with certain administrative permissions. By default, these permissions are all turned off (apart from the default admin role).
* **Can access wp-admin?** – Turning this off will deny\* users with this role to access the admin dashboard.
* **Force hiding admin bar in frontend?** – Turn on this option if you want to hide\*\* the wp-admin bar on the site's frontend.
* **Can edit other member accounts?** – Turning this on will allow users with this role to edit the profile fields of other members on the site.
* **Can edit these user roles only** – If you don't want this user role to be able to edit all members on your site you can allow this role to edit certain member roles by selecting the desired roles.
* **Can delete other member accounts?** – Turning this on will allow users with this role to delete the accounts of other members on the site (apart from site admins).
* **Can delete these user roles only** – If you don't want this user role to be able to delete all member accounts on your site you can allow this role to delete certain member roles by selecting the desired roles.
**\* Note:** The option **Can access wp-admin?** can deny access to the admin dashboard, but can't allow access if it is blocked by the user role capabilities
**\*\* Note:** The option **Force hiding admin bar in frontend?** can hide the admin bar, but can't show the admin bar if it is blocked by the user role capabilities. Users need the capability "[edit\_posts](https://wordpress.org/support/article/roles-and-capabilities/#edit_posts)
" to see the admin bar.

### General Permissions [#](#general-permissions)
These permissions allow you to enable or disable the ability to edit profiles and delete accounts from your site. By default, these permissions are all turned off.
* **Can edit their profile?** – Turning this on will allow users to edit their profiles.
* **Can delete their account?** – Turning this on will allow users to delete their account on the Account page -> Delete account tab. The password will be required before account deletion.

### Profile Access [#](#profile-access)
This section provides the user role with different access options. By default, these permissions are all turned off (apart from the default admin role).
* **Can view other member profiles?** – Turn this option on to allow users to access other members' profiles.
* **Can view these user roles only** – Select roles that this role can view. Select nothing (deselect everything) to grant this role access to any profile.
* **Can make their profile private?** – Turn this option on to allow users with this role to make their profile private. The setting "Profile Privacy" appears on the member's account page.
* **Can view/access private profiles?** – Turn on the setting to grant this role access to any private profile.
* **Avoid indexing profiles by search engines** \- This option allows users to hide or prevent their profile pages from appearing in search engines.

### Homepage options [#](#homepage-options)
This widget allows you to decide whether this role can view your site's homepage or not. By default, this option is set to yes. If you make it no so that this role cannot view the homepage a new option will appear where you can enter a URL which is where this role will be redirected to if they try to access the homepage.

### Registration options [#](#registration-options)
This widget allows you to control what happens to users with this role when they register on your site.
* **Registration status** – This option allows you to decide the status a user has when they register on your site. You can make them auto-approved, require email activation, or need to be manually approved by the site admin. The option you select here affects what action can be taken after the registration.
* **Login user after validating the activation link?** – (optional, appears if new users require email activation) This option allows you to enable auto-login after account activation by email.
* **URL redirect after e-mail activation** – (optional, appears if new users require email activation) This option allows you to redirect users after account activation by email.
* **Action to be taken after registration** – Depending on the registration status you will be able to redirect new users to their profile, to a custom URL, or show a message on the same page.
* **Personalize the custom message** – (optional, appears if a message is shown after registration) This option allows you to enter a custom message. The default message is shown if this option is empty.
* **Set Custom Redirect URL** – (optional, appears if new users are redirected to a custom URL) This option allows you to enter an URL to redirect new users.
Image - Registration options for the logic with the auto approval.

Image - Registration options for the logic with the account activation by email.

**NOTE:** A link entered to the **Set Custom Redirect URL** setting must be safe. Using relative and internal links is recommended. You have to add a host to the **Allowed hosts for safe redirect** setting on _wp-admin > Ultimate Member > Settings > Secure_ to use external link for redirect.
### Login options [#](#login-options)
This widget allows you to control what happens to this role members when they login to the site.
* **Action to be taken after login** – The action taken after a user logins. Options: Redirect to profile, Redirect to URL, Refresh active page, Redirect to WordPress Admin.
* **Set Custom Redirect URL** – (optional, appears if the "Redirect to URL" option is chosen) This option allows you to enter an URL to redirect.
Image - Login options for the logic with custom redirect.

**NOTE:** A link entered to the **Set Custom Redirect URL** setting must be safe. Using relative and internal links is recommended. You have to add a host to the **Allowed hosts for safe redirect** setting on _wp-admin > Ultimate Member > Settings > Secure_ to use external link for redirect.
### Logout options [#](#logout-options)
This widget allows you to control what happens to this role when they log out of your site. You can set the action taken after a user logs out to either redirect them to your site's homepage or redirect them to a custom URL.

### Delete options [#](#delete-options)
This widget allows you to control what happens to a user with this role when they delete their account You can set the action that is taken after a user deletes their own account to either redirect them to your site's homepage or redirect to a custom URL.

WP Capabilities [#](#capabilities)
-----------------------------------
You may change user role capabilities for user roles, which have been created via UM. Read the article [Roles and Capabilities](https://wordpress.org/support/article/roles-and-capabilities/)
to find out more about user role capabilities.
There is no option to change capabilities for non-ultimate user roles. You may use the plugin [User Role Editor](https://wordpress.org/plugins/user-role-editor/)
to change user role capabilities for non-ultimate user roles.
Ultimate Member doesn't manage the admin menu items. The visibility of each admin menu item depends on the user role capabilities. The most important capabilities:
* **read** - required to access the site;
* **edit\_posts** - required to see the admin bar on the top of the screen;
* **edit\_posts, edit\_published\_posts, publish\_posts** - required to add/edit a post;
* **edit\_pages, edit\_published\_pages, publish\_pages** - required to add/edit a page;
* **list\_users** - required to view users;
* **edit\_users, create\_users, promote\_users** - required to add/edit a user.

Last updated on October 28, 2023
### Related Articles
* [Unique profiles for different user roles](/article/100-unique-profiles-for-different-user-roles)
* [Restrict content on a page/post to specific users community role](/article/226-restrict-content-on-a-page-post-to-specific-users-community-role)
* [How to set Role Priority for user roles](/article/1494-how-to-set-role-priority-for-user-roles)
* [Hiding/Showing admin bar for specific user roles](/article/243-hiding-showing-admin-bar-for-specific-user-roles)
No results found
---
# Photo/image uploads not working - Ultimate Member
Photo/image uploads not working
===============================
[](javascript:window.print() "Print this article")
If you are experiencing an issue with photo/image uploads not working, then you can try some of the following things to try to fix the image upload issue:
* Check if the Ultimate Member uploads folder has the correct permissions (see this [article](http://www.wpbeginner.com/wp-tutorials/how-to-fix-image-upload-issue-in-wordpress/)
). Please check permissions for your "wp-content/uploads/ultimatemember" directory. You should give "read," "write," and "execute" permissions for the owner and for the group.

* Increase the WordPress memory limit via wp-config.php file. This [article](http://www.wpbeginner.com/wp-tutorials/fix-wordpress-memory-exhausted-error-increase-php-memory/)
shows how to do this.
* Increase the maximum file upload size for individual file uploads. The \`post\_max\_size\` value should be greater than or equal to \`upload\_max\_filesize\` value. (see this [article](http://www.wpbeginner.com/wp-tutorials/how-to-increase-the-maximum-file-upload-size-in-wordpress/)
)
* Reset the uploads tab on UM settings.
* Contact your host support and ask them if your server has **GD PHP Library** installed and is working
* Make sure that '**Imagick**' and '**gd**' PHP extensions are enabled
* Make sure that access to the temporary directory for uploads is not limited by the directive [**open\_basedir**](https://www.php.net/manual/en/ini.core.php#ini.open-basedir)
* Contact your host support and ask them to disable **mod\_security**.
* Check that you are not breaking the **domain origin policy** (using www. version while WP is installed on the non www. site for example)
You can try these steps one by one, checking image uploads each time. If you are not sure how to check these different steps, you should contact your host support, who will be able to check these things for you.
Last updated on July 25, 2022
No results found
---
# Email Templates - Ultimate Member
Email Templates
===============
[](javascript:window.print() "Print this article")
Since UM2.0.x there are new handlers and place for store Email Notifications templates.
It was decided to transfer the modified email templates from the WP options to the template files because the size of the templates can be quite large. This is a fairly common practice that has its advantages. All templates are stored in one place and files can be easily edited.
So, when you edit the email template using the wp-admin screen _Ultimate Member > Settings > Email_ it is saved in a folder with your theme/child-theme (e.g. "_wp-content/themes/twentyseventeen/ultimate-member/email/welcome\_email.php_" is the path of the template "Account Welcome Email").
**Important:** Don't edit template files inside the plugin folder "_wp-content/plugins/ultimate-member/templates/email/_". You will lose these changes on UM upgrades.
**Important:** Please create the [child theme](https://developer.wordpress.org/themes/advanced-topics/child-themes/)
if you do not use your own theme. Custom templates will be lost on the theme updating if they are stored in the parent theme.
The Ultimate Member plugin automatically creates needed subfolders in the theme directory but rarely this may be blocked by the server configuration. In this case you may connect the site via FTP and create needed subfolders manually. Make the "ultimate-member" folder in the theme writable.
Image - Directory permissions for the "ultimate-member" folder.

You can translate email templates if you use the multilingual plugin [WPML](https://wpml.org/)
. Translated template files are stored in subfolders.
Image - A place of email templates in the files tree.

Last updated on March 2, 2023
### Related Articles
* [Emails Tab](/article/42-emails-tab)
* [Plain text email default templates](/article/1342-plain-text-email-default-templates)
* [Placeholders for email templates](/article/1340-placeholders-for-email-templates)
No results found
---
# How To - Ultimate Member
How To
======
Sort by Default Sort A-Z Sort by Popularity Sort by Last Updated
* [How to do a plugin/theme conflict test?](/article/96-how-to-do-a-plugin-theme-conflict-test)
* [How to add user profile photo/avatar & display name to my site header?](/article/24-how-to-add-user-profile-to-my-site-header)
* [How to translate plugin](/article/1449-how-to-translate-plugin)
* [How to get registration/login form to show in 2/3 columns?](/article/122-how-to-get-registration-login-form-to-show-in-2-3-columns)
* [How to add a navigation menu link to the edit profile page?](/article/187-how-to-add-a-navigation-menu-link-to-the-edit-profile-page)
* [How to block bot registrations](/article/1551-how-to-block-bot-registrations)
* [How to Hide the Page Title on the User Profile Page](/article/151-how-to-hide-the-page-title-on-the-user-profile-page)
* [How to allow member to write posts](/article/1540-how-to-allow-member-to-write-posts)
* [How do I turn off strong password on registration form?](/article/95-how-do-i-turn-off-strong-password-on-registration-form)
* [How to hide a page for logged out users](/article/1543-how-to-hide-a-page-for-logged-out-users)
* [How to view submitted information from registration form](/article/233-how-to-view-submitted-information-from-registration-form)
* [How to edit a user's profile page & fill out empty fields](/article/1660-how-to-edit-a-users-profile-page-fill-out-empty-fields)
* [How to add social icons to profile header?](/article/147-how-to-add-social-icons-to-profile-header)
* [How to deactivate a plugin when you are locked out of WP-Admin?](/article/244-how-to-deactivate-a-plugin-when-you-are-locked-out-of-wp-admin)
* [How to change English text in Forms](/article/1578-change-english-text-in-forms)
* [How to upload profile photo](/article/1603-how-to-upload-profile-photo)
* [How To Update Your Site](/article/201-how-to-update-your-site)
* [How to manage profile form with a huge quantity of fields](/article/1552-how-to-manage-profile-form-with-a-huge-quantity-of-fields)
* [Increasing the WordPress Memory Limit](/article/200-increasing-the-wordpress-memory-limit)
* [How to add unread message notification on site menu?](/article/245-how-to-add-unread-message-notification-on-site-menu)
* [1](/category/22-how-to?sort=popularity)
* [2](/category/22-how-to/2?sort=popularity)
No results found
---
# Ultimate Member - Changing Default Color - Ultimate Member
Ultimate Member - Changing Default Color
========================================
[](javascript:window.print() "Print this article")
In UM Theme you have the freedom to change the color of every Ultimate Member plugin element. e.g. UM Button, Primary & meta colors.
Go to **Appearance > Customize > Ultimate Member > Ultimate Member Color**


There you will find below color settings:
1. Accent Color: Change the Ultimate Member default blue color.
2. UM Meta Color: Change the meta-information color of UM plugin.

**Buttons**
1. UM Button
2. UM Button Text
3. UM Button Hover
4. UM Button Hover Text
5. UM Button Text (Alt)
6. UM Button (Alt)
7. UM Button Hover (Alt)
8. UM Button Hover Text (Alt)

Last updated on December 1, 2021
No results found
---
# How to translate plugin - Ultimate Member
How to translate plugin
=======================
[](javascript:window.print() "Print this article")
This document provides plugin translation instructions and recommendations for multilingual websites.
**Contents**
* [Translating WordPress community](#community)
* [How to install language files](#install_language)
* [How to translate using Poedit](#poedit)
* [Create or open a translation](#poedit_open)
* [Edit texts](#poedit_edit)
* [Sync](#poedit_sync)
* [How to translate using Loco Translate](#loco)
* [Create or open a translation](#loco_open)
* [Edit texts](#loco_edit)
* [Sync](#loco_sync)
* [Relocate](#loco_relocate)
* [Settings](#loco_settings)
* [How to switch language](#switch)
* [Switch website language](#switch_dashboard)
* [Language switcher for multilingual sites](#switch_frontend)
* [How to translate pages and forms](#forms-pages)
* [Pages](#pages)
* [Forms](#forms)
* [How to translate E-mail notifications](#notifications)
Translating WordPress community [#](#community)
------------------------------------------------
The basic language of the Ultimate Member plugin is English. We can't provide translation to other languages.
The core Ultimate Member plugin is translated to several languages by the [Translating WordPress](https://translate.wordpress.org/)
community. You may view available translations and download translation files here: [https://translate.wordpress.org/projects/wp-plugins/ultimate-member/](https://translate.wordpress.org/projects/wp-plugins/ultimate-member/)
. You can help translate the plugin to your language at any time. Just log in to the translation platform with [your WordPress.org account](https://login.wordpress.org/wp-login.php?redirect_to=https%3A%2F%2Ftranslate.wordpress.org%2F)
and suggest translations.
How to install language files [#](#install_language)
-----------------------------------------------------
Go to _wp-admin > Settings > General_ and use the **Site Language** setting to switch the site language, save changes. WordPress will download and install language files for the WordPress core, a theme and all free plugins. You may need to use the [Poedit](https://poedit.net/download)
program or the [Loco Translate](https://wordpress.org/plugins/loco-translate/)
plugin to create language files for the paid extensions. You can use these tools to edit existing language files.
Image - How to install or switch the site language.

How to translate using Poedit [#](#poedit)
-------------------------------------------
**Download [Poedit](https://poedit.net/download)
**
How to translate:
* Open the language translation you need from the existing PO file or open the **ultimate-member.pot** file from the _/wp-content/plugins/ultimate-member/languages/_ directory to create a new one
* Click the **Update from POT file...** item
* Edit texts
* Save PO and MO files with the locale suffix, for example: **ultimate-member-es\_ES.mo** and **ultimate-member-es\_ES.po**
* Copy PO and MO files to the directory _/wp-content/languages/plugins/_
Do the same for extensions.
### Create or open a translation [#](#poedit_open)
Image - Poedit start screen.

### Edit texts [#](#poedit_edit)
Image - Edit texts in Poedit.

### Sync [#](#poedit_sync)
Update your translation from the translation pattern (original POT file) if you can not find needed texts. Click the **Update from POT file...** item.
Image - Update from POT file. 
How to translate using Loco Translate [#](#loco)
-------------------------------------------------
**Download [Loco Translate](https://wordpress.org/plugins/loco-translate/)
**
How to translate:
* Go to _wp-admin > Loco Translate > Plugins > Ultimate Member_
* Open the language translation you need or click the **New language** button to create a new one
* Click the **Sync** button
* Edit texts
* Save changes
Do the same for extensions.
### Create or open a translation [#](#loco_open)
Image - _wp-admin > Loco Translate > Plugins > Ultimate Member_

Image - _wp-admin > Loco Translate > Plugins > Ultimate Member > New language_

**Warning:** All files inside the plugin's directory are replaced on the plugin update. We recommend storing custom translations inside the **/wp-content/languages/plugins/** directory.
### Edit texts [#](#loco_edit)
Image - _wp-admin > Loco Translate > Plugins > Ultimate Member > Edit_

### Sync [#](#loco_sync)
Update your language files from the translation pattern (original POT file) if you can not find needed texts. Click the **Sync** button.
Image - _wp-admin > Loco Translate > Plugins > Ultimate Member > Edit_

### Relocate [#](#loco_relocate)
All files inside the plugin's directory are replaced on the plugin update. That's why you should store custom translation inside the directory _/wp-content/languages/plugins/_. You can relocate existed translation.
Image - _wp-admin > Loco Translate > Plugins > Ultimate Member - Private Messages > Edit > Relocate_

### Settings [#](#loco_settings)
You should increase option " _Extracting strings: Skip PHP files larger than_" if you see a notice like "_Warning: 2 files over 100 KB have been skipped. (Largest is 141.1 KB). Check all strings are present before saving._" on sync.

Image - _wp-admin > Loco Translate > Settings_

How to switch language [#](#switch)
------------------------------------
### Switch website language [#](#switch_dashboard)
Switch default language using option "Site Language" on the page "General Settings"

### Language switcher for multilingual sites [#](#switch_frontend)
The Ultimate Member plugin doesn’t have the "language switcher" element. You have to use the multilingual plugin to make the site multilingual and add the "language switcher" to the front. A way to add language switcher depends on a multilingual plugin you use.
**WPML** - Ultimate Member plugin supports the [WPML](https://wpml.org/)
multilingual plugin functionality for pages. Follow instructions in the article "[Language Setup](https://wpml.org/documentation/getting-started-guide/language-setup/#language-switcher)
" to add the WPML language switcher.
**Polylang** - Ultimate Member plugin does not support the [Polylang](https://wordpress.org/plugins/polylang/)
multilingual plugin by default. You can install a free extension [Ultimate Member - Polylang](https://github.com/umdevelopera/um-polylang)
that integrates Ultimate Member with Polylang. Once extension is installed follow instructions in the article "[The language switcher](https://polylang.pro/doc/the-language-switcher/)
" to add the Polylang language switcher. Use the **\[um\_pll\_switcher\]** shortcode to add a language switcher in themes based on the page builders.
How to translate pages and forms [#](#forms-pages)
---------------------------------------------------
### Pages [#](#pages)
You have to create Ultimate Member pages for every language if you translate the site with the **WPML** or **Polylang** plugin.

With the **Polylang** extension you can duplicate Ultimate Member pages for all languages in one click. Go to _wp-admin > Pages_ and click the **Create Pages** button in the notice. Or click the "+" icon under the flag to duplicate and configure a page manually.

### Forms [#](#forms)
You have to create Ultimate Member forms for every language if you translate the site with the **WPML** or **Polylang** plugin. Duplicate default form for each new language, translate duplicated forms, put a proper form shortcode into translated pages.

With the **Polylang** extension you can duplicate Ultimate Member forms for all languages in one click. Go to _wp-admin > Ultimate Member > Forms_ and click the **Create Forms** button in the notice. Or click the "+" icon under the flag to duplicate and configure a form manually.

Once forms for languages are created you can open these forms and translate fields. You have to translate a **Label** for custom fields. You also can translate **Placeholder** and **Help Text** if needed.

Strings coming from **Title** and **Label** are not translatable with the "WPML String Translation" plugin.
Choices in the **Dropdown** and **Multi-Select** fields are not translatable.
How to translate E-mail notifications [#](#notifications)
----------------------------------------------------------
You can edit templates for the E-mail notifications on _wp-admin > Ultimate Member > Settings > Email_. You are able to add templates for multiple languages if you translate the site with the **WPML** or **Polylang** plugin.

Last updated on January 8, 2025
No results found
---
# API Functions - Ultimate Member
API Functions
=============
Sort by Default Sort A-Z Sort by Popularity Sort by Last Updated
* [is\_ultimatemember()](/article/126-isultimatemember)
* [um\_profile\_id()](/article/124-umprofileid)
* [um\_get\_display\_name( $user\_id )](/article/127-umgetdisplayname)
* [um\_user\_last\_login\_date( $user\_id )](/article/125-umuserlastlogindate)
No results found
---
# Getting Started with Ultimate Member - Ultimate Member
Getting Started with Ultimate Member
====================================
[](javascript:window.print() "Print this article")
### Overview
This doc is a guide for people just starting with Ultimate Member and provides a general overview of the plugin.
### Menu links in Plugin
When you install Ultimate Member you will see the following links in the menu
* [**Dashboard**](//docs.ultimatemember.com/category/1741-dashboard)
\- The dashboard page gives you an overview of information.
* [**Settings**](//docs.ultimatemember.com/category/37-settings)
- This is where you can customize various aspects of the plugin.
* [**Forms**](//docs.ultimatemember.com/category/84-forms-fields)
- Allows you to edit the default forms and create additional forms. This is where you can add custom fields to the registration form and user profiles.
* **[User Roles](//docs.ultimatemember.com/category/104-user-roles)** \- Allows you to edit the default UM roles (member & admin) and create additional UM roles
* [**Member Directories**](//docs.ultimatemember.com/category/101-member-directories)
- Allows you to create new roles and manage existing roles.
* **[Extensions](//docs.ultimatemember.com/collection/16-extensions)** \- Displays all the extensions that are available for Ultimate Member
### Default pages
When you install and activate Ultimate Member, 7 pages will be added to your pages list:
* **Account** - The account page is where users can control various aspects on their account e.g privacy, delete account etc. It includes the shortcode: \[ultimatemember\_account\]
* **Login** - This page includes the default login form shortcode and is where users can login to your site
* **Logout** - This is a blank page which does not contain a shortcode. When a user clicks on a link to the logout page they will be logged out of your website.
* **Members** - This page includes the default member directory shortcode and displays your websites users.
* **Password Reset** - This page is where users can request to reset their password if they have forgotten their password. It includes the shortcode: \[ultimatemember\_password\]
* **Register** - This page includes the default register form shortcode and is where users can login to your site
* **User** \- This page includes the default profile form shortcode and is where users can view and edit their profile.
### List of Shortcodes
Ultimate Member does not have a long list of shortcodes like other plugins. Instead Ultimate Member is mainly controlled via settings in plugin. There are only two "static" shortcodes: \[ultimatemember\_account\] and \[ultimatemember\_password\].
The other shortcodes vary as they include a unique id e.g \[ultimatemember form\_id=29944\]. This type of shortcode is used for forms and directories. To find the shortcodes for your forms or directories you can find them from within the plugin itself on the forms and member directories page.
### First steps
As every site can vary a lot, your first-steps with the plugin will vary depending on the nature of your site. However, we would recommend thinking about how many different user roles you will require on your site and creating the roles you need.
This is because many other aspects of the plugin are based on user roles e.g content restriction, conditional menus. So by understanding your user role requirements first it will make it easier setting up the rest of the plugin.
After that, you may want to edit settings in the plugin, add custom fields to your register and profile forms and add conditional logic to your nav menu e.g make register and login links show to logged out users and logout link to logged in users. This [doc](//docs.ultimatemember.com/article/132-conditional-menus)
explains how to do this.
### Learn about all the basic features in Ultimate Member
The best thing before diving straight into plugin is to read in detail about all the different basic features and functionality that are available in the plugin which you can view [here](//docs.ultimatemember.com/collection/1-the-basics)
.
Last updated on June 7, 2022
No results found
---
# Customize Ultimate Member Login Page - Ultimate Member
Customize Ultimate Member Login Page
====================================
[](javascript:window.print() "Print this article")
If you are using [UM Theme](https://ultimatemember.com/theme/)
, you can change the Color of the Ultimate Member Login page without touching any code. Follow these steps to change the Login Page element colors:
1. Go to **Appearance > Customize > Ultimate Member**
2. Then Click on **Login Page**
Where you will find below customizer options:
* **Login Page Background Image**: Set a full-page background image for UM Login page.
* **Login Page Background Color**: Set login page background color.
* **Login Page Box Color**: Set the login box container color.
* **Login Page Field Label Color**: Field label color.
* **Login Button**: Set the Login Button color.
* **Login Button Text**: Set the Login Button text color.
* **Register Button**: Set the Register Button color.
* **Register Button Text**: Set the Register Button text color.


Last updated on December 6, 2021
No results found
---
# CSS - Ultimate Member
CSS
===
Sort by Default Sort A-Z Sort by Popularity Sort by Last Updated
* [Change default Ultimate Member "blue" color using CSS](/article/270-how-to-change-default-ultimate-member-blue-color-using-css)
* [Make the account menu horizontal](/article/1592-make-the-account-menu-horizontal)
* [Make the profile menu vertical](/article/1591-make-the-profile-menu-vertical)
* [How to change the number of members per row in grid view in Member Directory](/article/1724-how-to-change-the-number-of-members-per-row-in-grid-view-in-member-directory)
* [Equal the profile card height in Member Directory](/article/1707-equal-the-profile-card-height-in-member-directory)
* [Display field value beside field label](/article/1777-display-field-value-beside-field-label)
* [Make the directory map height responsive](/article/1804-make-the-directory-map-height-responsive)
No results found
---
# Code Examples - Ultimate Member
Code Examples
=============
Sort by Default Sort A-Z Sort by Popularity Sort by Last Updated
* [Allowing Existing Users to Opt Into a New Role in Ultimate Member](/article/1954-enabling-existing-users-to-opt-into-a-new-role-while-retaining-previous-roles-in-ultimate-member)
* [Make the profile menu vertical](/article/1591-make-the-profile-menu-vertical)
* [Change default Ultimate Member "blue" color using CSS](/article/270-how-to-change-default-ultimate-member-blue-color-using-css)
* [Add an image field into the profile card in the member directory](/article/1586-add-an-image-field-into-the-profile-card-in-the-member-directory)
* [Fixing JS Templates in the Inner Content of \[um\_loggedin\] Shortcode](/article/1945-fixing-js-templates-in-the-inner-content-of-umloggedin-shortcode)
* [Extend Ultimate Member Account page with custom tabs/content](/article/65-extend-ultimate-member-account-page-with-custom-tabs-content)
* [Custom validation email and error message in registration](/article/1697-email-validation-in-registration)
* [Displaying All Field Options in the Member Directory Inlcuding Empty Fields](/article/1931-displaying-all-field-options-in-the-member-directory-inlcuding-empty-fields)
* [Automatically Send Birthday Greetings via Email to Users with Today’s Birthdays](/article/1765-send-birthday-greetings-to-accounts-with-today-s-birthdays)
* [How to add and use custom email templates](/article/1515-how-to-add-and-use-custom-email-templates)
* [How do I add my extra tabs to user profiles?](/article/69-how-do-i-add-my-extra-tabs-to-user-profiles)
* [Triggering the "Set Your Password" Link in the Welcome Email with All Import Pro Plugin](/article/1928-triggering-the-set-your-password-link-in-the-welcome-email-with-all-import-pro)
* [Display total number of members in Member Directory](/article/1706-display-total-number-of-members-in-member-directory)
* [How to display pre-defined fields in Account](/article/1770-extend-the-account-page-with-ultimate-member-pre-defined-fields)
* [How to display custom fields in Account](/article/1504-how-to-display-custom-fields-in-account)
* [Receive email notification when user updates their form](/article/1778-receive-email-notification-when-user-updates-their-form)
* [Redirect to the previous page after login](/article/1802-redirect-to-the-previous-page-after-login)
* [Redirect to the previous page after e-mail activation](/article/1887-redirect-to-the-previous-page-after-e-mail-activation)
* [Redirect to previous page after registration](/article/1756-redirect-to-previous-page-after-registration)
* [Add a hidden field to your register form](/article/128-add-a-hidden-field-to-your-register-form)
* [1](/category/48-code-examples?sort=updatedAt)
* [2](/category/48-code-examples/2?sort=updatedAt)
* [3](/category/48-code-examples/3?sort=updatedAt)
* [4](/category/48-code-examples/4?sort=updatedAt)
* [5](/category/48-code-examples/5?sort=updatedAt)
No results found
---
# Password Reset doesn't work - Ultimate Member
Password Reset doesn't work
===========================
[](javascript:window.print() "Print this article")
### Issue
Password Reset doesn't work, the error message _"Your password reset link appears to be invalid. Please request a new link below."_ is displayed.
### What is the reason
The password reset functionality may not work if your site has something that blocks or caches cookies. Ultimate Member uses cookies to provide access to the password editing form. This cookie name consists of two parts:
* first part is 'wp-resetpass-'
* second part is a hash that is unique for each user
**Example:** `wp-resetpass-42710c58447fdc917ec608b06dc0e58e:"s01fns01ln%3AnlJz7EGYOFuaGhvllhQ1"`
The plugin displays a form with fields "New Password" and "Confirm Password" if this cookie is set. The plugin displays the error message instead of the form if this cookie is not set.
### What to do
1\. Disable caching for the Password Reset page. Follow instructions in [this article](//docs.ultimatemember.com/article/1595-caching-problems#pages)
to disable a page caching in the caching plugin. Inspect the `Cache-Control` header to verify that the browser caching is disabled. Set these headers to properly disable browser caching for the page:
Cache-Control: no-cache, no-store, must-revalidate
Pragma: no-cache
Expires: 0
2\. Disable a thing that blocks cookies (it may be the security plugin or the browser add-on) or add needed cookie to the white list.
3\. Confirm with your hosting provider that there's no server cache module enabled on your server. If there's any server cache, please exclude the Password Reset page.
Last updated on August 27, 2023
### Related Articles
* [Caching problems](/article/1595-caching-problems)
* [Password reset link is missing/not visible](/article/1510-password-reset-link-is-missing)
* [Password Reset Error "This is not a valid hash, or it has expired."](/article/192-password-reset-error-this-is-not-a-valid-hash-or-it-has-expired)
No results found
---
# Restrict content on a page/post to logged in users - Ultimate Member
Restrict content on a page/post to logged in users
==================================================
[](javascript:window.print() "Print this article")
Ultimate Member provides you with the ability to restrict access to certain content on a page or post exclusively to logged-in users. This can be achieved by using shortcodes to enclose the content.
#### \[um\_loggedin\] This text can only be seen by logged-in users \[/um\_loggedin\]
###

### What logged-out users see
When using the logged-in user on-page content restriction there are two options to decide from for what logged-out users see:
**Option 1:** Logged-out users see a text box letting them know there is content on the page/post that they do not have permission to view
**Option 2:** The restricted content on the page/post is hidden and logged-out users see nothing on the page/post to indicate that there is content they cannot see
### Option 1
If you wish to use option 1 and let logged-out users know there is content on the page they do not have permission to view then you can use the following shortcode:
#### **\[um\_loggedin show\_lock="yes"\] This text can only be seen by logged-in users \[/um\_loggedin\]**
The output on the page for option 1 is for **logged-out** users:

The output on the page for option 1 is for **logged-in** users:

If you wish to customize the text that is shown to logged-out users in the text box you can add custom text to the shortcode like so:
#### \[um\_loggedin show\_lock="yes" lock\_text="Explore this exclusive content by signing in or becoming a member."\] This text can only be seen by logged-in users \[/um\_loggedin\]
###

### Option 2
If you wish to use option 2 so that logged-out users do not see that there is restricted content on the page then you can use the following shortcode:
#### \[um\_loggedin show\_lock="no"\] This text can only be seen by logged-in users \[/um\_loggedin\]
###

### Adding tags to text
One of how you can use the logged-in content restriction is to personalize your site. For example, you may want to have text on a specific page that says "Welcome back John, here is what has been happening recently". To create something like this you would use the following shortcode:
#### \[um\_loggedin\] Welcome back {first\_name}, here is what has been happening recently \[/um\_loggedin\]
As you can see in the shortcode above it has the tag `{first_name}` which will display the first name of the logged-in user viewing the page/post where the shortcode has been added. See the image below:

##### Tags
* {first\_name}
* {last\_name}
* {username}
* {nickname}
### Custom meta keys
As well as using the pre-defined tags, you can use any meta keys for custom fields you have created. To add a custom meta key to the restricted content you need to add the tag to the restricted content text e.g `{usermeta: age}`
#### \[um\_loggedin\] Community Spotlight: WellnessHubCommunity in {usermeta:country} \[/um\_loggedin\]

See also: [Fixing JS Templates in the Inner Content of \[um\_loggedin\] Shortcode](//docs.ultimatemember.com/article/1945-fixing-js-templates-in-the-inner-content-of-umloggedin-shortcode)
Last updated on October 23, 2024
### Related Articles
* [Ultimate Member - Shortcodes](/article/210-ultimate-member-shortcodes)
* [Restrict content on a page/post to specific users community role](/article/226-restrict-content-on-a-page-post-to-specific-users-community-role)
* [Restrict content on a page/post to logged out users](/article/176-restrict-content-on-a-page-post-to-logged-out-users)
* [Placeholders for email templates](/article/1340-placeholders-for-email-templates)
No results found
---
# Customizing Button Color - Ultimate Member
Customizing Button Color
========================
[](javascript:window.print() "Print this article")
**How To Change Buttons color of the website**
You can change the style and color of all Buttons globally from **Appearance > Customize > General Styles > Button**.
**Note: The customizer settings are available on UM theme only.**
Here is a brief explanation of all options:
**Button Text**
* **Button Font:** Font of the text in Button.
* **Button Font Size:** Button font size.
* **Button Font Weight:** Button font-weight.
* **Button Text Transform:** Button text case ( Normal, Uppercase, Lowercase, Capitalize)
**Button Color**
* **Button Color:** Button background color.
* **Button Text:** Button text color.
* **Button Hover Color:** Button hover background color.
* **Button Hover Text Color:** Button hover text color.
**Button Border**
* **Button Border Radius:** Button border radius.
* **Button Border:** Enable to set Button **Border Color** & **Border Width.**

Last updated on April 19, 2022
No results found
---
# Member Directory 1.3.x - 2.0.x Settings - Ultimate Member
Member Directory 1.3.x - 2.0.x Settings
=======================================
[](javascript:window.print() "Print this article")
### Overview
With Ultimate Member you can add member directories to your site. By default, Ultimate Member will install a members directory on your site on a page called members. If you do not want to have member directories on your site you can completely disable this feature from the users tab on the settings page.
### General options
This widget allows you to control the following options:
* **User roles to display** – This option allows you to select which user roles are displayed in the directory. If left blank the directory will display the profile cards of all members of your site.
* **Only show members who have uploaded a profile photo** – This option allows you to only show members who have uploaded a profile photo. If turned on any member who does not upload a profile photo will not be shown in the directory. This option is turned off by default.
* **Only show members who have uploaded a cover photo** – This option allows you to only show members who have uploaded a cover photo. If turned on any member who does not upload a cover photo will not be shown in the directory. This option is turned off by default.
* **Sort user by** – This option allows you to decide the order of how members are shown in the directory. You can sort members by new users first, old users first, display name, first name, last name, and other (custom field). By default, the directory will sort users by new users first.
### Profile card:
This widget allows you to customize the information that is displayed on the profile cards shown in the directory:
* **Enable profile photo** – This option allows you to show or hide the user profile photos on the member directory.
* **Enable cover photo** – This option allows you to show or hide the user cover photos on the member directory.
* **Show display name** – This option allows you to show or hide the user display name on the member directory.
* **Show tagline below profile name** – This option allows you to show the user meta below the user display name. This could be an important piece of information relevant to your site e.g you could show the user’s nationality below the display name.
* **Show extra user information below tagline** – This option allows you to show extra user meta below the tagline. If you select yes it will show an option show the information in a reveal section (the information is hidden until the user clicks the arrow) or show it on page load. Below this option is the user meta selector where you can choose which field(s) to add to this area of the profile card.
* **Show social connect icons** – This option allows you to social icons on the profile card which link to a user’s social media accounts. The social icons are LinkedIn to the social fields which are found in the pre-defined fields list. If a user does not enter any information in the relevant social media field then the social icon will not show e.g if a user does not enter their Twitter username in the Twitter field then the Twitter field will not show on their profile card.
### Search options
This widget allows you to control search filters on member directories:
* **Enable search feature** – This option allows you to show or hide the search filters on the member directory. If you enable the search filters several options will appear below.
* **User roles that can use search** – This option allow you to select which user roles can use the search filters. If left blank anyone can use the search filters.
* **Choose field(s) to enable in search** – This option allows you to select fields that will be shown in the search filters. Please note that not all field types are allowed in the search filters so not all of your custom fields will appear in this list.
* **Results text** – This option allows you to customize the text that is shown after a user performs a search. The tag {total\_users} will show the number of users that match the search criteria.
* **Custom text if no users were found** – This option allows you to customize the text that is shown after a user performs a search and the search returns empty (no users were matched the search criteria).
### Results & pagination
In this widget, you can decide the number of profiles to show on each page (Please note: the higher the number the longer the page will take to load) and there is also an option to limit the total number of profiles that will be shown in this directory (leave blank to show all users in the directory).
Last updated on November 19, 2021
No results found
---
# Codex - Ultimate Member
Codex
=====
Sort by Default Sort A-Z Sort by Popularity Sort by Last Updated
* [um\_user](/article/158-umuser)
* [um\_fetch\_user](/article/153-umfetchuser)
* [um\_profile\_id()](/article/124-umprofileid)
* [get\_role](/article/164-getrole)
* [approve](/article/160-approve)
* [set\_role](/article/171-setrole)
* [auto\_login](/article/161-autologin)
* [um\_get\_option](/article/154-umgetoption)
* [get\_role\_name](/article/165-getrolename)
* [delete\_meta](/article/163-deletemeta)
* [um\_reset\_user](/article/156-umresetuser)
* [pending](/article/168-pending)
* [set](/article/170-set)
* [is\_approved](/article/166-isapproved)
* [is\_private\_profile](/article/167-isprivateprofile)
* [user\_exists\_by\_id](/article/172-userexistsbyid)
* [um\_profile\_id](/article/155-umprofileid)
* [reject](/article/169-reject)
* [um\_user\_ip](/article/159-umuserip)
* [um\_reset\_user\_clean](/article/157-umresetuserclean)
* [1](/category/152-codex?sort=popularity)
* [2](/category/152-codex/2?sort=popularity)
No results found
---
# Hooks - Ultimate Member
Hooks
=====
UM Hooks
Sort by Default Sort A-Z Sort by Popularity Sort by Last Updated
* [UM Hooks](/article/1324-hooks-list)
* [um\_access\_check\_global\_settings](/article/956-umaccesscheckglobalsettings)
* [um\_access\_enable\_referer](/article/957-umaccessenablereferer)
* [um\_access\_fix\_external\_post\_content](/article/958-umaccessfixexternalpostcontent)
* [um\_access\_profile](/article/959-umaccessprofile)
* [um\_account\_content\_hook\_{$id}](/article/960-umaccountcontenthookid)
* [um\_account\_page\_default\_tabs\_hook](/article/961-umaccountpagedefaulttabshook)
* [um\_account\_page\_hidden\_fields](/article/962-umaccountpagehiddenfields)
* [um\_account\_pre\_update\_profile](/article/963-umaccountpreupdateprofile)
* [um\_account\_pre\_updating\_profile\_array](/article/964-umaccountpreupdatingprofilearray)
* [um\_account\_secure\_fields](/article/965-umaccountsecurefields)
* [um\_account\_secure\_fields\_\_enabled](/article/966-umaccountsecurefieldsenabled)
* [um\_account\_shortcode\_args\_filter](/article/967-umaccountshortcodeargsfilter)
* [um\_account\_tab\_delete\_fields](/article/968-umaccounttabdeletefields)
* [um\_account\_tab\_general\_fields](/article/969-umaccounttabgeneralfields)
* [um\_account\_tab\_password\_fields](/article/970-umaccounttabpasswordfields)
* [um\_account\_tab\_privacy\_fields](/article/971-umaccounttabprivacyfields)
* [um\_action\_user\_request\_hook](/article/972-umactionuserrequesthook)
* [um\_activate\_url](/article/973-umactivateurl)
* [um\_add\_error\_on\_form\_submit\_validation](/article/974-umadderroronformsubmitvalidation)
* [1](/category/955-hooks?sort=name)
* [2](/category/955-hooks/2?sort=name)
* [3](/category/955-hooks/3?sort=name)
* [4](/category/955-hooks/4?sort=name)
* [5](/category/955-hooks/5?sort=name)
* [6](/category/955-hooks/6?sort=name)
* [7](/category/955-hooks/7?sort=name)
* [8](/category/955-hooks/8?sort=name)
* [9](/category/955-hooks/9?sort=name)
* [10](/category/955-hooks/10?sort=name)
* [11](/category/955-hooks/11?sort=name)
* [12](/category/955-hooks/12?sort=name)
* [13](/category/955-hooks/13?sort=name)
* [14](/category/955-hooks/14?sort=name)
* [15](/category/955-hooks/15?sort=name)
* [16](/category/955-hooks/16?sort=name)
* [17](/category/955-hooks/17?sort=name)
* [18](/category/955-hooks/18?sort=name)
* [19](/category/955-hooks/19?sort=name)
No results found
---
# Export & Import - Ultimate Member
Export & Import
===============
[](javascript:window.print() "Print this article")
There is no import/export tool in the Ultimate Member plugin. You can use third-party plugins to export user's text data to CSV files.
### Plugins
Popular plugins that can import and export users in WordPress:
1. [WP Import Export Lite](https://wordpress.org/plugins/wp-import-export-lite/)
2. [Import Export WordPress Users](https://wordpress.org/plugins/users-customers-import-export-for-wp-woocommerce/)
3. [Import and export users and customers](https://wordpress.org/plugins/import-users-from-csv-with-meta/)
4. [WP All Import](https://wordpress.org/plugins/wp-all-import/)
with [Import WordPress Users](https://www.wpallimport.com/import-wordpress-users/)
for importing, [WP All Export Pro](https://www.wpallimport.com/upgrade-to-wp-all-export-pro/)
for exporting. Note that these plugins are paid.
**Notice:** Not all field types can be exported and imported. These plugins can import simple fields (text and number), but can not import complex data (array and object).
**Warning:** Don't use these plugins to transfer UM data from site to site. No plugin can transfer all UM data from site to site correctly. These data are lost: followers, friends, groups, locations, private messages, notifications, and user tags. Export and import the entire database if you need to transfer all UM data from site to site correctly.
### Export files and photos
Photos and other files can't be exported to a CSV file.
The plugin saves uploaded files and photos to a user's folder. Each user has a separate folder. The pattern for the path to the user's folder is `/wp-content/uploads/ultimatemember/{user_id}/`, where `{user_id}` is the user identification number.
You can use your FTP connection to download a user's folders from the `/wp-content/uploads/ultimatemember/` directory.
To learn more about the upload file structure of Ultimate Member, go to this [link](//docs.ultimatemember.com/article/1893-uploaded-files-structure)
.
### Approve imported users
Users imported by third-party plugins are unapproved. Unapproved users can't log in to the site. Member Directory doesn't display unapproved members for regular members.
You have to approve imported users manually. Use bulk action **Approve Membership** or bulk action **Reactivate** to approve members. The plugin will approve members and send them an email - an _Account Approved email_ for members whose current status is "Pending Review" (awaiting\_admin\_review) or an _Account Welcome email_ for others.

**Notice:** Approval is a resource-intensive process because of emails. You can disable email templates "Account Welcome Email" and "Account Approved Email" on _wp-admin > Ultimate Member > Settings > Emails_ to make a process softer.
* * *
**Related articles:**
* [How to create a staging site](//docs.ultimatemember.com/article/1638-how-to-create-a-staging-site)
* [](//docs.ultimatemember.com/article/1638-how-to-create-a-staging-site)
[Approve & Send Email Approve with New Imported Users](//docs.ultimatemember.com/article/1786-how-to-approve-send-activation-email-to-imported-users)
* [Upload Files Structure](//docs.ultimatemember.com/article/1893-uploaded-files-structure)
Last updated on January 9, 2025
No results found
---
# Header - Logged In - Ultimate Member
Header - Logged In
==================
[](javascript:window.print() "Print this article")
[UM Theme](https://ultimatemember.com/theme/)
has out-of-the-box compatibility with the [Ultimate Member](https://wordpress.org/plugins/ultimate-member/)
plugin. You can display different content based on whether a user is logged in or logged out.

What can you show if a user is logged in
1. User Avatar along with Menu
2. Private Messages
3. Real-Time Notifications
4. Add any item using Header Hooks
**Displaying User Avatar in Header**
Before proceeding make sure you have the Ultimate Member plugin installed.
1. Go to **Appearance > Customize > Header > Header – Logged In**
2. Select **Enable** from **User Avatar in Header**
3. Click on **Publish**

**Displaying User's Display Name in Header**
Before proceeding make sure you have the Ultimate Member plugin installed.
1. Go to Appearance > Customize > Header > Header – Logged In
2. Select Enable from Display Username
3. Click on Publish.

**Change the Header Profile position to left or right**
1. Go to **Appearance > Customize > Header > Header - Logged In**
2. Change the Header Profile position to either left or right from **Header Profile Position**
3. Click on **Publish** to save your changes


**If you have the Private Messages, Friends & Real-Time Notifications extension installed you can show them in your header without customizing any code.**
To change the Private message Icon Color, you can read the instructions [here](//docs.ultimatemember.com/article/1404-header-messenger)
.
To change the Notification Icon Color, you can read the instructions [here.](//docs.ultimatemember.com/article/1472-header-notifications)
To change the Friend Request Icon Color, you can read the instructions [here.](//docs.ultimatemember.com/article/1471-header-friend-requests)
Last updated on December 5, 2021
No results found
---
# How to get registration/login form to show in 2/3 columns? - Ultimate Member
How to get registration/login form to show in 2/3 columns?
==========================================================
[](javascript:window.print() "Print this article")
The Ultimate Member form builder allows you to create forms with a 1,2, or 3-column layout. On top of the fields in Form Builder, you will see tabs. These tabs indicate the layout and number of columns of your form. Click on the tab on which column layout you prefer.

If you have customized the registration, profile, or login form and made the forms have a 2 or 3-column layout, **you will need to change the** **maximum width of the forms** as the default max-width of the forms will convert the forms into a single-column layout (for mobile responsiveness reasons)

### Increase the max-width of the Profile form
To increase the max-width of the forms, you need to do the following:
1. Change the **Max. Width (px)** of the Form in Ultimate Member> Forms> Edit Profile Form> Customize this Form> Max. Width (px)
2. Go to Ultimate Member > Settings > Appearance > Profile
3. On the profile tab, find the option "Profile Maximum Width"
4. Input a px value that is higher than the default of 1000px. E.g 1500px
5. Click the "Save Changes" button at the bottom of the tab.
6. Go to the Profile page on your website and refresh the page.
7. The profile should now appear in the multi-column layout.


### Increase the max-width of the Registration form
To increase the max-width of the forms, you need to do the following:
1. Change the Max. Width (px) of the Form in Ultimate Member> Forms> Edit Registration Form> Customize this Form> Max. Width (px)
2. Go to Ultimate Member > Settings > Appearance > Registration Form
3. On the registration form tab, find the option "Registration Maximum Width"
4. Input a px value that is higher than the default of 450px. E.g 600px
5. Click the "Save Changes" button at the bottom of the tab.
6. Go to the Register page on your website and refresh the page.
7. The registration form should now appear in the multi-column layout.

 
### **Increase the max-width of the Login form**
To increase the max-width of the forms, you need to do the following:
1. Change the Max. Width (px) of the Form in Ultimate Member> Forms> Edit Login Form> Customize this Form> Max. Width (px)
2. Go to Ultimate Member > Settings > Appearance > Login Form
3. On the login form tab, find the option "Login Maximum Width"
4. Input a px value that is higher than the default of 450px. E.g 600px
5. Click the "Save Changes" button at the bottom of the tab.
6. Go to the Login page on your website and refresh the page.
7. The login form should now appear in the multi-column layout.


Last updated on November 28, 2022
No results found
---
# How to - Ultimate Member
How to
======
How to do specific UM functions
Sort by Default Sort A-Z Sort by Popularity Sort by Last Updated
* [Add a hidden field to your register form](/article/128-add-a-hidden-field-to-your-register-form)
* [How do I add my extra tabs to user profiles?](/article/69-how-do-i-add-my-extra-tabs-to-user-profiles)
* [Get the current user profile ID](/article/34-get-the-current-user-profile-id)
* [How to add and use custom email templates](/article/1515-how-to-add-and-use-custom-email-templates)
* [How to display custom fields in Account](/article/1504-how-to-display-custom-fields-in-account)
* [Redirect to the previous page after login](/article/1802-redirect-to-the-previous-page-after-login)
* [Custom validation email and error message in registration](/article/1697-email-validation-in-registration)
* [Password Reset Attempt Limit](/article/207-password-reset-attempt-limit)
* [Control the output of a textfield using UM filter hooks](/article/93-control-the-output-of-a-textfield-using-um-filter-hooks)
* [Change user community role](/article/32-change-user-community-role)
* [How to Generate a Unique Account ID](/article/1683-how-to-generate-a-unique-account-id)
* [Retrieve user IP address](/article/33-retrieve-user-ip-address)
* [All members to automatically be WP contributors when they sign up via UM](/article/92-all-members-to-automatically-be-wp-contributors-when-they-sign-up-via-um)
* [Change cover photo HTML](/article/1519-change-cover-photo-html)
* [Change community role with Gravity forms](/article/88-change-community-role-with-gravity-forms)
* [Add an image field into the profile card in the member directory](/article/1586-add-an-image-field-into-the-profile-card-in-the-member-directory)
* [How to hide "Edit Profile" from user's profile page settings](/article/1661-how-to-hide-edit-profile-from-users-profile-page-settings)
* [How to display pre-defined fields in Account](/article/1770-extend-the-account-page-with-ultimate-member-pre-defined-fields)
* [Use a single control to filter by several fields in the members directory.](/article/1582-grouped-filters-in-directory)
* [Adding the “View Profile” link in the Member Directory cards](/article/1659-adding-the-view-profile-link-the-member-directory-cards)
* [1](/category/31-how-to?sort=popularity)
* [2](/category/31-how-to/2?sort=popularity)
* [3](/category/31-how-to/3?sort=popularity)
No results found
---
# Ultimate Member Directory - Ultimate Member
Ultimate Member Directory
=========================
[](javascript:window.print() "Print this article")
**How To change the** [Member Directory](//docs.ultimatemember.com/article/102-member-directory-settings)
**Box Color**
Make sure you have the [Ultimate Member](https://wordpress.org/plugins/ultimate-member/)
plugin installed.
1. Go to **Appearance > Customize > Ultimate Member > Member Directory**
********
****
2\. Click on the color picker **Box Background Color** & **Box Text Color** to change the text and background color.
3\. Click on Publish.

Last updated on December 1, 2021
### Related Articles
* [Ultimate Member Profile Page](/article/1386-ultimate-member-profile-page)
No results found
---
# Conditional Menus - Ultimate Member
Conditional Menus
=================
[](javascript:window.print() "Print this article")
### Overview
Ultimate Member's conditional menus feature provides the flexibility to display different items based on the viewer's status, whether logged in or out and specific member roles. This guide outlines the process of applying conditions to a menu for a personalized user experience.
**Note:** If you want to set navigation menu restrictions in the Block theme then go to this article: [https://docs.ultimatemember.com/article/1624-restrict-gutenberg-blocks](//docs.ultimatemember.com/article/1624-restrict-gutenberg-blocks)
### How to apply conditions to a menu
1. Navigate to the menus page in the WordPress admin by going to `wp-admin > Appearance > Menus`
2. Add your menu items to the menu structure.

3. Once you have added your menu items to the page click on the small arrow to expand a menu item.

4. Look for the "**Ultimate Member Menu Settings"** section to add conditions.

### **Conditions Options:** Everyone, Logged Out Users or Logged In Users
You have three options to determine who can see a menu item:
* **Everyone** – Everyone is the default state for menu items which means that everyone who visits your site will see this menu item.

* **Logged out users** – If you select this option it means that this menu item will only be visible to visitors (e.g. logged out users). When someone logs into your site they will no longer see this menu item.

* **Logged in users** – Choosing this option ensures that the menu item is visible exclusively to logged-in users, remaining hidden from logged-out visitors and non-members. Upon selecting logged-in users, checkboxes will appear, displaying all user roles on your site. If you wish to display the menu link to a specific role(s), simply select the roles authorized to access the link.
* **Verified Options [#](#verified_options)
** - This feature becomes accessible upon activating the [Verified Users extension](https://ultimatemember.com/extensions/verified-users/)
. It enables you to configure the menu to be exclusively visible to verified users. 
**Notice:** Menu items that are related to the individual post can be removed from the menu items query based on Restricted Content settings. Please pay attention that the individual [Restrict Content](//docs.ultimatemember.com/article/1623-post-term-restriction-content-settings)
settings have the highest [priority](//docs.ultimatemember.com/article/1620-restriction-content)
in this case.
### Show display name on a menu item
Using our short tags allows you to show a user’s name in the menu instead of the name of the page. Instead of showing the user or my profile in your site’s menu, you can instead make the user page show the logged-in user’s name (e.g John Doe). You can add the following short tags to the menu link: **{first\_name} {last\_name} {username} {nickname}**. To use this feature you simply add the short tags to the menu item’s navigation label like so:

### Show the user profile photo in the menu
You can also show the user's profile photo in the menu using the short tag **{user\_avatar\_small}**. If you add this tag into the navigation label field the profile photo for the user will show.

**Note: You need to know how to use CSS as due to your theme's styling you will need to use CSS to make this look ok on your site. We can do nothing with this feature to make it look fine out of the box as every theme styles its headers differently.**
### Log in, register & logout pages
Many membership/community-based sites will commonly show register and login links in their site's menu for visitors and show a logout link in the menu once the user has logged in. The links should have the following setup:
* **Log in & register links** – For both of these menu items you should select the logged-out user option
* **Logout link** – For this menu item you should select the logged-in user option
Last updated on January 12, 2024
### Related Articles
* [Individual Post and Term content restriction settings](/article/1623-post-term-restriction-content-settings)
No results found
---
# How to add a navigation menu link to the edit profile page? - Ultimate Member
How to add a navigation menu link to the edit profile page?
===========================================================
[](javascript:window.print() "Print this article")
If you want to add a link to the navigation menu that takes users directly to the edit mode of their profile page, you can set it in wp-admin>dashboard>Appearance.
Here are the steps on how to add a navigation menu link to the edit profile page:
1. Go to admin dashboard > Appearance > Menus.

2. Select the menu you want to edit

3. Go to the add custom link section from the add menu items.

4. Enter the URL to the edit profile page. The URL should look like this: [http://www.domain.com/user/?profiletab=main&um\_action=edit](http://www.domain.com/user/?profiletab=main&um_action=edit)
.

5. Enter the text for the nav menu item, e.g., Edit Profile

6. Click the Add to Menu button.

7. Position the menu item on the menu structure; you can do this by dragging it.

8. Click the "Save Menu" button.

Last updated on March 3, 2022
No results found
---
# Unique profiles for different user roles - Ultimate Member
Unique profiles for different user roles
========================================
[](javascript:window.print() "Print this article")
### Overview
In this document, we will explain how to display a unique profile for every role type on your site. This is useful if you wish to show different profile fields for each role. By default, all Ultimate Member roles will see the same profile when they go to the user page.
### Step 1: Create your user roles
The first step is to actually create the user roles that are required for your site. Once you have done this head over to the forms page where you will see the three default forms that are pre-installed
**wp-admin > Ultimate Member > User Roles**

### Step 2: Create a new profile form
The second step is creating a new profile form for a specific user role. Go to _wp-admin > Ultimate Member > Forms_ and click the "Add New" button to create a new form. On the new form page select the "Profile Form" in the "Select Form Type" widget. Then add fields you need in the "Form Builder".
Once you finish building the form you should go to the "Customize this form" widget and select the "Yes" option in the "Apply custom settings to this form" dropdown. A range of settings will appear. The setting we are interested in is labelled "Make this profile role-specific". You should click on the dropdown and select the user role that you want to specify for this form. Click the Create (or Update) button to save changes.
Once the form is created and its role is specified, copy the form shortcode and add it to the User page.
**wp-admin > Ultimate Member > Forms**

**wp-admin > Ultimate Member > Forms > Edit Form**
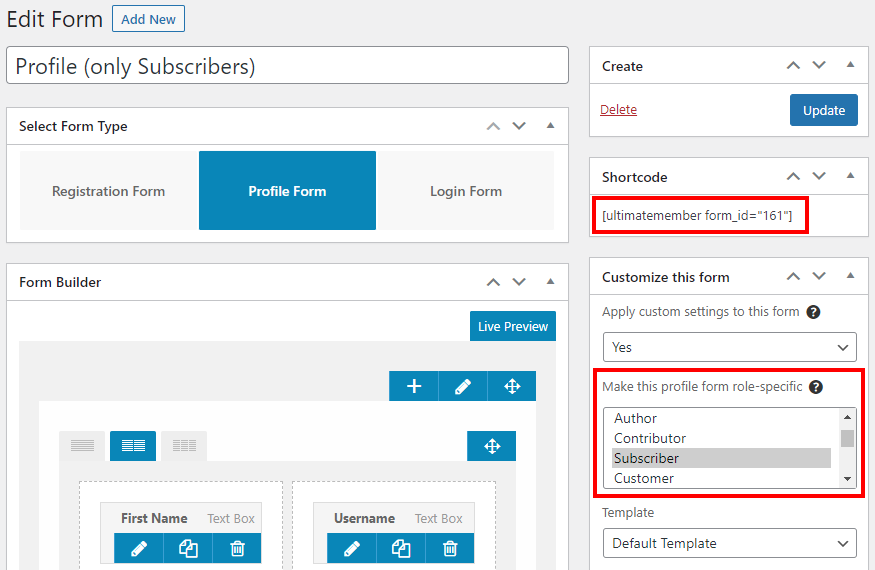
### Step 3: Add shortcode to the user page
To ensure that Ultimate Member functions correctly you must add the shortcode to the user page and not create a new page. So you want to go to the existing user page and edit it. On the user page, you will see the shortcode for the default profile form. You want to add the new shortcode to this page then update the page to save the changes. Once you have done the users with the matching role will see this profile rather than the default one. If your site has several roles you simply add every profile shortcode to the user page.
**wp-admin > Pages > Edit Page**

### Step 4: Check all user roles
To make sure that everything is still working correctly after adding the shortcode to the user page you should view a profile for each user role. If any of the user’s profiles returns a page not found error this most likely means that you have not assigned that user role to a form. So you need to make sure every role type on your site is assigned to a profile form. That’s it you should now have unique profiles for each role on your site.
Last updated on December 9, 2022
No results found
---
# Templates - Ultimate Member
Templates
=========
Sort by Default Sort A-Z Sort by Popularity Sort by Last Updated
* [Adding your custom profile templates](/article/120-adding-your-custom-profile-templates)
* [Template structure & Overriding templates via a theme](/article/1516-templates-map)
* [Using HTML in e-mail templates](/article/121-using-html-in-e-mail-templates)
* [How to add and use custom email templates](/article/1515-how-to-add-and-use-custom-email-templates)
* [Using different translation of HTML email template files](/article/251-using-different-translation-of-html-email-template-files)
* [Fixing Outdated Ultimate Member Templates](/article/1847-fixing-outdated-ultimate-member-templates)
No results found
---
# How to block bot registrations - Ultimate Member
How to block bot registrations
==============================
[](javascript:window.print() "Print this article")
There is no way to block 100% of spam, but you can block most of the bots if you follow the next recommendations:
1. [Disable caching for the registration page](#caching)
2. [Add captcha to the registration form](#captcha)
3. [Disable default WordPress registration form](#form)
4. [Disallow third-party plugins to create an account](#third-party-plugins)
5. [Approve new members after email verification](#email-verification)
6. [Block email addresses](#block_email_addresses)
7. [Use unique links](#unique-links)
8. [Use security plugins](#security-plugins)
* * *
### 1\. Disable caching for the registration page [#](#caching)
Disable caching for pages "Login", "Password Reset", "Register". Caching the authentication functionality is a security vulnerability.
Caching plugins usually have settings to disable caching on certain pages.
Some hosting providers have a built-in caching tool. Look at the server settings or ask hosting support for assistance.
### 2\. Add captcha to the registration form [#](#captcha)
Add Google reCAPTCHA to the registration form. Add Google reCAPTCHA to the social registration form if you use the extension [Ultimate Member - Social Login](https://ultimatemember.com/extensions/social-login/)
.
Install a free [Ultimate Member - reCAPTCHA](https://ultimatemember.com/extensions/google-recaptcha/)
extension to use reCAPTCHA. Follow instructions in the article [Google reCAPTCHA](//docs.ultimatemember.com/article/72-google-recaptcha)
to configure the reCAPTCHA protection in the form.
Image - Settings on _wp-admin > Ultimate Member > Forms > Edit Form (Registration)_.
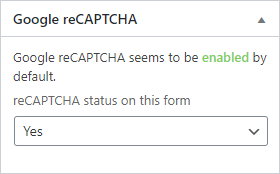
You can use the [Math Captcha](https://github.com/umdevelopera/um-math-captcha)
in addition to Google reCAPTCHA or separately.
You can use the [Friendly Captcha](https://wordpress.org/plugins/friendly-captcha/)
as an alternative for the Google reCAPTCHA.
### 3\. Disable default WordPress registration form [#](#form)
Go to _wp-admin > Settings > General_ and disable the setting "Membership - Anyone can register".
Image - General Settings.

### 4\. Disallow third-party plugins to create an account [#](#third-party-plugins)
Ultimate Member can not forbid another plugin to create an account, you have to do it manually.
For example, if WooCommerce setting **Allow customers to create an account during checkout** is checked you might encounter a bot spam issue when using WooCommerce and Woo Subscription add-on. Unchecked the boxes of the **Allow customers to create an account during checkout** and **Allow subscription customers to create an account during checkout** under **Accounts & Privacy** in Account creation to avoid the bot registration.
Image - Settings on _wp-admin > WooCommerce > Settings > Account & Privacy_.
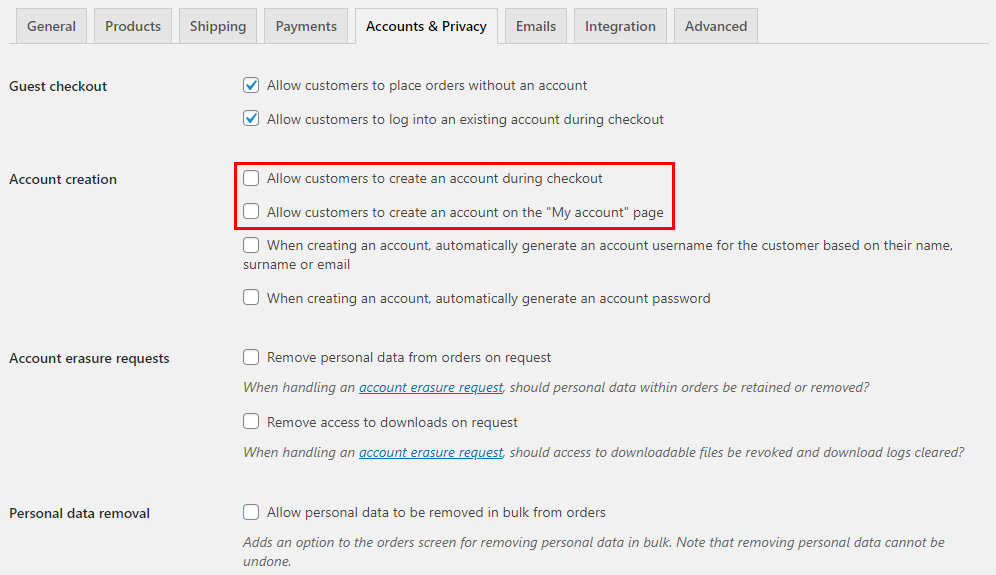
### 5\. Approve new members after email verification [#](#email-verification)
Set the user role option "Registration Status" to "Require Email Activation". In this case, a new user has to confirm the email to approve the account.
Image - Settings on _wp-admin > Ultimate Member > User Roles > Edit Role_.

### 6\. Block email addresses [#](#block_email_addresses)
Block email addresses or entire email domain if spam registrations come from a certain email address or a certain email domain. Use the **Blocked email addresses** setting on _wp-admin > Ultimate Member > Settings > Access > Other_. Follow the guide [Block Email address on Registration](//docs.ultimatemember.com/article/1604-block-email-address-on-registration)
.
### 7\. Use unique links [#](#unique-links)
Change the registration page URL from default "register" to something unique for your website.

### 8\. Use security plugins [#](#security-plugins)
Install and configure one of the security plugins, such as [Wordfence Security](https://wordpress.org/plugins/wordfence/)
, [All-In-One Security](https://wordpress.org/plugins/all-in-one-wp-security-and-firewall/)
, [Sucuri Security](https://wordpress.org/plugins/sucuri-scanner/)
or similar. Please be careful with the security settings, because too strong rules may block useful functionality.
Last updated on October 28, 2024
No results found
---
# Theme Hooks - Ultimate Member
Theme Hooks
===========
[](javascript:window.print() "Print this article")
If you have been developing or customizing WordPress themes or plugins, you have heard the term Hooks. Hooks are part of the [Event-driven Architecture](https://en.wikipedia.org/wiki/Event-driven_architecture)
pattern that WordPress follows to ensure the extensibility of the code. When a plugin or theme is written with hooks, it becomes extensible. Then it is possible for other developers to improve and extend them without ever editing the core source code.
There are 2 types of Hooks available in WordPress. These are:
* **Action Hooks**: This allows you to add extra functionality at a specific point in the processing of the page.
* **Filter Hooks**: This allows you to intercept and modify data as it is processed.
**How it Works**
Let’s see how hook works in WordPress. Let’s assume there is an action hook below single post content, titled “after\_single\_content”. Now if you want to display a simple marketing message below each of your posts, you have 3 options. You can edit all posts and add the marketing message, edit the single.php or add a simple function and adjoin this to the “after\_single\_content” hook.
Let’s see how it’s done using hook:
add\_action( 'after\_single\_content', 'custom\_mkt\_message' );
function custom\_mkt\_message() {
echo "Please checkout our new product.";
}
This is the simplicity and power of using hooks. If you insert this code in a custom function plugin, you won’t have to worry about theme or plugin updates deleting your customizations.
Here is the list of Action hooks available in UM Theme.
| | |
| --- | --- |
| **Hook** | **File** |
| [um\_theme\_before\_header](//docs.ultimatemember.com/article/1410-umthemebeforeheader) | header.php |
| [um\_theme\_header](//docs.ultimatemember.com/article/1411-umthemeheader) | header.php |
| [um\_theme\_after\_header](//docs.ultimatemember.com/article/1412-umthemeafterheader) | header.php |
| [um\_theme\_header\_profile\_before](//docs.ultimatemember.com/article/1413-umthemeheaderprofilebefore) | core-header.php |
| [um\_theme\_header\_profile\_after](//docs.ultimatemember.com/article/1414-umthemeheaderprofileafter) | core-header.php |
| [um\_theme\_before\_content](//docs.ultimatemember.com/article/1415-umthemebeforecontent) | header.php |
| [um\_theme\_before\_site](//docs.ultimatemember.com/article/1416-umthemebeforesite) | header.php |
| [um\_theme\_content\_top](//docs.ultimatemember.com/article/1417-umthemecontenttop) | header.php |
| [um\_theme\_single\_post\_before](//docs.ultimatemember.com/article/1418-umthemesinglepostbefore) | single.php |
| [um\_theme\_single\_post\_top](//docs.ultimatemember.com/article/1420-umthemesingleposttop) | content-single.php |
| [um\_theme\_single\_post](//docs.ultimatemember.com/article/1421-umthemesinglepost) | content-single.php |
| [um\_theme\_single\_post\_bottom](//docs.ultimatemember.com/article/1422-umthemesinglepostbottom) | content-single.php |
| [um\_theme\_single\_post\_after](//docs.ultimatemember.com/article/1419-umthemesinglepostafter) | single.php |
| [um\_theme\_before\_page\_content](//docs.ultimatemember.com/article/1433-umthemebeforepagecontent) | page.php |
| [um\_theme\_page](//docs.ultimatemember.com/article/1432-umthemepage) | content-page.php |
| [um\_theme\_after\_page\_content](//docs.ultimatemember.com/article/1434-umthemeafterpagecontent) | page.php |
| [um\_theme\_before\_footer](//docs.ultimatemember.com/article/1423-umthemebeforefooter) | footer.php |
| [um\_theme\_footer](//docs.ultimatemember.com/article/1425-umthemefooter) | footer.php |
| [um\_theme\_after\_footer](//docs.ultimatemember.com/article/1424-umthemeafterfooter) | footer.php |
| um\_theme\_loop\_before | content.php |
| um\_theme\_loop\_after | content.php |
| um\_theme\_content\_archive\_header | archive.php |
| [um\_theme\_before\_comments](//docs.ultimatemember.com/article/1430-umthemebeforecomments) | comments.php |
| [um\_theme\_after\_comments](//docs.ultimatemember.com/article/1431-umthemeaftercomments) | comments.php |
| [um\_theme\_before\_comments\_title](//docs.ultimatemember.com/article/1429-umthemebeforecommentstitle) | comments.php |
| [um\_theme\_after\_comments\_title](//docs.ultimatemember.com/article/1428-umthemebelowcommentstitle) | comments.php |
Last updated on December 15, 2021
No results found
---
# Add a hidden field to your register form - Ultimate Member
Add a hidden field to your register form
========================================
[](javascript:window.print() "Print this article")
Perhaps you may need to add hidden fields to your registration form. To do this you can use hooks:
* `um_after_register_fields` - this hook can add hidden fields to the registration form.
* `um_registration_set_extra_data` - this hook can save hidden field values on the registration form submit.
See a code example below. You can add a code snippet to the file _functions.php_ in the active theme directory. Skip the opening ` Ultimate Member > Dashboard** in the WordPress side menu. This page provides a comprehensive overview of key data and tools within the Ultimate Member plugin. Here's a breakdown of what you can see and manage:

1\. **Users Overview**
----------------------
This section displays key information about your users, including their various statuses (e.g., active, pending, blocked). Each status includes a count showing how many users fall into that category. It helps you quickly understand the state of user registrations and profiles on your site. Here’s what each status means:
* **Users**: This shows the total number of users currently registered on your website. It provides a glance at how many people have accounts on your site.
* **Pending Review**: This count shows the number of users who have registered but are waiting for admin approval before they can access their accounts. You can click on this status to review and approve or reject users.
* **Approved**: The number of users whose registrations have been approved by the admin and who have full access to their accounts and site features.
* **Awaiting Email Confirmation**: This displays the number of users who have registered but have not yet confirmed their email addresses. These users are often pending activation and will need to verify their email before they can complete the registration process.
* **Rejected**: The count of users whose registrations have been denied by the admin. These users cannot log in or access their accounts, and you may wish to review these profiles to understand why they were rejected.
* **Inactive**: This number represents users who have not logged in or engaged with the site for a certain period or users whose accounts have been set to inactive. Admins may wish to review these users for potential re-engagement or cleanup.
Clicking on any of these statuses will redirect you to the **Users Page**, where you can view detailed information about users in that specific status and take further action, such as approving, rejecting, or contacting them.
2\. **Upgrade's Manual Request**
--------------------------------
In this section, you can manually check for the latest updates to Ultimate Member extensions. By clicking on the "Get Latest Versions" button, the system will query the Ultimate Member servers to ensure your extensions are up-to-date. This feature is useful if you need to quickly verify you're running the latest versions or if automated updates are not functioning as expected.
3\. **User Cache**
------------------
Ultimate Member utilizes a **user cache** system to improve performance. When users update their profiles or when new users register, UM caches their data. Instead of querying the database multiple times for each user meta field (e.g., name, email, or custom fields), the plugin fetches all user data from a single cache entry. This reduces the load on your database and speeds up page loads.
However, the cache only updates under certain conditions:
* **Manual Cache Clearing**: You can manually clear the cache using the **"Clear Cache of (n) Users"** button in the User Cache section. This is useful if you're experiencing data inconsistencies or have made programmatic changes to user data.
* **Automatic Cache Update**: The cache will update automatically when a user submits a change through their profile or account form (e.g., when they edit their personal information).
* **Programmatic Cache Update**: If you are updating user data programmatically through code (e.g., using the `update_user_meta()` function to change user information), the cache is not automatically refreshed. This means the updated user information will not be reflected until the cache is manually cleared.
To clear the cache for a specific user after making programmatic changes, you must use the following code snippet: `UM()->user()->remove_cache( $user_id );`
#### 4\. **Purge Temp Files**
When users upload files via forms (such as profile pictures or document uploads), those files are first stored in a **temporary folder**. Once the form is successfully submitted, the files are moved to the appropriate user's folder. However, if the upload process is cancelled or interrupted, leftover files remain in the temp directory or folder: `content//wpuploads/ultimatemember/temp/`.
The " **Purge Temp Files"** button allows you to clean up these abandoned temporary files. This is important for maintaining server storage efficiency and ensuring your system isn't bogged down by unnecessary data. If the temp uploads directory is already clean, the **"Purge Temp Files"** button will not be displayed. Instead, you will see a message stating: **"Your temp uploads directory is clean. There is nothing to purge."**
Last updated on September 23, 2024
No results found
---
# Access Tab - Ultimate Member
Access Tab
==========
[](javascript:window.print() "Print this article")
Overview
--------
The access tab provides various settings for controlling access to your site.
Restriction Content
#### Global Site Access
By default, Ultimate Member will make your site’s access available to everyone. What this means is that every page/post on your site will be available to everyone unless you change the access rule on a particular page/post. This is the best option to use if you want to allow non-members to view your site’s content but want to restrict certain pages to members only.
The other option you have is to lock down the site and make the whole site only accessible for logged-in users. What this means is that every page/post on your site will only be available to logged-in users unless you change the access rule on a particular page/post to make a page available to everyone.
However, in using this option, it is important to create a page where non-members can sign-up/login to your site. For example, you may want to make your homepage a landing page to encourage new users to sign-up.
**Notice:** Pages **Login**, **Registration**, **Password Reset** can not be restricted. These pages are the exception.
#### Replace the restricted Post Title
This option allows setting the restricted post's title for the content that isn't accessible for the visitor or current user.
#### Restricted Access Post Title
This is the title that will be shown to users that do not have permission to view the post. It affects the individual post page, post in archive, post in a widget, post link in the nav menu titles.
#### Restricted Access Message
This message will be shown to users who do not have permission to view the content.
#### Enable the "Content Restriction" settings for the Gutenberg Blocks
This enables the admin to set the restriction settings for Gutenberg Blocks. Read more [here](//docs.ultimatemember.com/article/1624-restrict-gutenberg-blocks)
.
#### Restricted Access Block Message
This message will be shown to users who do not have permission to view the Gutenberg block.
#### Enable the "Content Restriction" settings for post types
This enables the admin to set the "Content Restriction" settings for the individual posts of the selected post types. Read more [here](//docs.ultimatemember.com/article/1623-post-term-restriction-content-settings)
.
#### Enable the "Content Restriction" settings for taxonomies
This enables the admin to set the "Content Restriction" settings for the individual terms of the selected taxonomies. Read more [here](//docs.ultimatemember.com/article/1623-post-term-restriction-content-settings)


### Other
#### Enable the Reset Password Limit?
This enables the admin to set the maximum reset limit. If the maximum limit is reached, the user will be blocked from using this.
#### Reset Password Limit
This allows you to set the maximum reset password limit.
#### Blocked email addresses
This option prevents certain email addresses from registering or signing in on your site. You can block individual email addresses or block all emails with the specific email provider by using a wildcard e.g. `*@gmail.com` Enter one email address per line to block multiple addresses. Read more [here.](//docs.ultimatemember.com/article/1604-block-email-address-on-registration)
[](//docs.ultimatemember.com/article/1604-block-email-address-on-registration)
#### Blacklist words
This option allows you to blacklist specific words to prevent anyone from using these words for their username when signing up to your site. Ultimate Member adds the following words to the blacklist by default: admin, administrator, webmaster, support, and staff. Read more [here](//docs.ultimatemember.com/article/1701-blacklist-words-on-registration?preview=62016c37025ca67522c78a43)
.

Last updated on January 9, 2025
### Related Articles
* [Common content restriction settings](/article/1736-content-restriction)
* [Block Email address on Registration](/article/1604-block-email-address-on-registration)
* [Blacklist Words on Registration](/article/1701-blacklist-words-on-registration)
No results found
---
# Adding your custom profile templates - Ultimate Member
Adding your custom profile templates
====================================
[](javascript:window.print() "Print this article")
### Description
This guide shows you how to easily add custom profile templates that will be compatible with plugin updates, you can put in the child theme. The templates you add will become selectable when you customize a profile form, login form, or register form in the **Template** dropdown.
**Warning:** We highly recommend using child-theme for public free or pro themes. Do not edit template files within the core plugin itself, as they are overwritten during the upgrade process and any customizations will be lost. We recommend using a [child-theme](https://developer.wordpress.org/themes/advanced-topics/child-themes/)
, which has no dependencies with the official themes repo, so your custom files cannot be rewritten after a theme upgrade.
### How to add a template
Create a directory `/wp-content/themes/YOUR-THEME/ultimate-member/templates/` if it does not exist. You can add your custom templates in this directory.
Each custom template has to be prefixed with the template type that you want: `login`, `profile`, `register`. For example, a custom login template can be named `login-custom1.php`, while a custom registration template can be named `register-actor.php`
You have to make the Ultimate Member recognize the template. Add a line with the template name to the top of your custom template. This lets the plugin know which template file is it (please use the same formatting) and makes it selectable in the Template selection dropdown when customizing a form.
That’s it. When you customize your forms you'll see the additional templates you created.
### How to add a profile template
1. Copy the file _/wp-content/plugins/ultimate-member/templates/profile.php_ into the directory _/wp-content/themes/YOUR-THEME/ultimate-member/templates/_
2. Rename the new file, use a name like _profile-one.php_ or _profile-mine.php_
3. Open a new file and add the comment with the template name after the PHP starting tag. See the example below. Change what you need in this template and save the file.
Ultimate Member > Settings > Appearance > Profile_
* **Template** on _wp-admin > Ultimate Member > Forms > Edit Form (profile)_
Image - The setting "Profile Default Template"

Image - The setting "Template"

Last updated on February 15, 2024
No results found
---
# Account Tab - Ultimate Member
Account Tab
===========
[](javascript:window.print() "Print this article")
Overview
--------
This tab settings control what tabs and features are shown in the members Accounts.

Settings on the screen _wp-admin > Ultimate Member > Settings > General > Account_.
Tabs [#](#tabs)
----------------
### Password Account tab [#](#password_tab)
This option allows you to enable/disable the password tab from the account page and is enabled by default. You should disable this tab if you do not want users from being able to change their passwords.

The password account tab on the account page.
### Privacy Account tab [#](#privacy_tab)
This option allows you to enable/disable the privacy tab from the account page and is enabled by default. You should disable this tab if you do not want users from being able to alter their privacy settings.

The privacy account tab on the account page.
### Notifications Account Tab [#](#notifications_tab)
This option allows you to enable/disable the Notifications account tab on the account page.

The notifications account tab on the account page.
### Delete Account tab [#](#delete_tab)
This option allows you to enable/disable the delete account tab from the account page and is enabled by default. You should disable this tab if you do not want users from being able to alter their delete their own accounts.
### Account Deletion custom text
This option allows you to change the default text that appears in the delete account tab.

The delete account tab on the account page.
### Account Deletion without password Custom Text
This option allows you to change the default text that appears in the delete account tab without the password required.
Account options [#](#account_options)
--------------------------------------
### Add first name & last name fields
This option allows you to show/hide first and last name fields from appearing on the account general tab.
### Disable First & Last Name fields
This option is for whether to allow users to change their first and last name on the account page.
### Allow users to change email
If you do not wish for users to change their email, you can use this setting to remove the email field from the account page.
### Password is required?
If you want to require users to use a password when saving their account data.

The account tab on the account page.
Privacy options [#](#privacy_options)
--------------------------------------
### Allow users to hide their profiles from directory
This option will allow users to change their visibility from the member directory on their account page. Users with the administrator role can see hidden profiles in any case. The setting is in the privacy tab on the account page.

The privacy account tab on the account page.
### Hide profiles from directory by default
This option will allow users to hide their profile from the member directory on their account page. Users with the administrator role can see hidden profiles in any case.
Last updated on January 9, 2025
No results found
---
# um_user - Ultimate Member
um\_user
========
[](javascript:window.print() "Print this article")
Description
-----------
This function can be used to get a user's specific field data or meta value. This can be user profile data or user permissions.
Usage
-----
Parameters
----------
### $data
(string) (required) The field or data you want to retrieve for user.
### $attrs
(string) (optional) Additional attribute for profile data that may need extra configuration.
Returns
-------
Returns the user data requested If found. A user must be previously set using um\_fetch\_user() to properly retrieve user data.
Examples
--------
The example below can retrieve the user's display name
The example below can retrieve the user's community role
You have to use functions [um\_fetch\_user](//docs.ultimatemember.com/article/153-umfetchuser)
() and [um\_reset\_user](//docs.ultimatemember.com/article/156-umresetuser)
() if you want to use the function um\_user() in the PHP loop.
/\*\*
\* Users loop, example
\*/
$user\_ids = array(
123,
456,
789
);
foreach ( $users\_ids as $users\_id ) {
um\_fetch\_user( $user\_id );
// Some custom code
$display\_name = um\_user('display\_name');
echo $display\_name;
// Some custom code
}
um\_reset\_user();
Last updated on April 5, 2022
### Related Articles
* [um\_fetch\_user](/article/153-umfetchuser)
* [um\_reset\_user](/article/156-umresetuser)
No results found
---
# Advanced Tab - Ultimate Member
Advanced Tab
============
[](javascript:window.print() "Print this article")
Within the Advanced tab, you'll find five distinct subtabs: General, Override Templates, Features, Security, and Developers. Each subtab offers unique configurations that you can tailor to your needs. This article aims to provide a comprehensive breakdown of the settings within each tab, elucidating their purposes and functionalities.
**Table of Contents**
* [General](#General)
* [Override Templates](#OverrideTemplates)
* [Features](#Features)
* [Security](#Security)
* [Developers](#Developers)
### General [#](#General)
This subtab offers customization options for displaying required fields, caching user profiles, and removing all plugin data on uninstallation. Each setting serves a specific purpose in enhancing the functionality and user experience of your website.
1. **Required fields' asterisk:** This setting allows you to show an asterisk (\*) next to fields marked as required in your forms. It helps users understand which fields they must fill out.
2. **Cache User Profile:** This setting controls whether user data is cached. Disabling this can be useful if you have dynamic content or need to ensure that the most up-to-date information is always displayed. When enabled, it optimizes your site's performance by creating a cache whenever profile or registration form details are updated or saved. Rather than querying the database for each field individually, UM retrieves all user data from a single cache. This enhances efficiency by reducing database queries. You can read more info here: [Ultimate Member Dashboard](//docs.ultimatemember.com/article/1742-ultimate-member-dashboard)
3. **Remove Data on Uninstall:** Enabling this setting will completely remove all Ultimate Member data when the plugin or its extensions are deleted. This is useful if you want to make sure that no traces of the plugin remain in your database after uninstallation.
### Override Templates [#](#OverrideTemplates)
This subtab provides a list of template file changes with each release. This tool allows you to review the latest templates, check their statuses, and determine if they are outdated or updated. You can read more info in the [Fixing Outdated Ultimate Member Templates](//docs.ultimatemember.com/article/1847-fixing-outdated-ultimate-member-templates)
article.
### Features [#](#Features)
The settings in this subtab allow you to start using features for improved user management, enable Gutenberg blocks for the editor, use a custom table for user metadata, and manage legacy features and content restriction pre-queries for better site performance.
1. **Gutenberg Blocks:** Enabling this setting allows you to utilize Ultimate Member blocks within the Gutenberg editor, enhancing the integration of Ultimate Member features into your content creation process. You can read more info in this article: [Restrict Gutenberg Blocks](https://ultimate-member-32696-8199847.umsites.net/wp-admin/admin.php?page=um_options&tab=advanced§ion=features)
**Note:** Some themes may have conflicts with the Gutenberg editor.
2. **Custom usermeta table:** By enabling this option, you can utilize a custom table for storing user metadata, which can lead to improved performance, especially for member directory searches. This setting optimizes the management of user data within your website. You can read more info here: [Creating Metatable for Member Directories](//docs.ultimatemember.com/article/1541-meta-table-for-member-directories)
3. **Action Scheduler:** By enabling this option, tasks are queued and processed asynchronously, which helps reduce server load by handling them at optimal times (e.g., during off-peak hours). It also provides a robust logging system, so you can track the status of each scheduled action (whether it's pending, in progress, completed, or failed). For more info, refer to this article: [Action Scheduler in Ultimate Member](//docs.ultimatemember.com/article/1947-action-scheduler-in-ultimate-member)
4. **Legacy features:** These settings are related to legacy logic or functionality, and are meant primarily for backward compatibility. They should be enabled only if necessary to maintain compatibility with older systems or configurations.
* **Restriction content pre-queries:** Enabling this option disables pre-queries for restriction content logic. It's recommended to use this option only if your site experiences significant or unnecessary queries with active restriction logic. It's not advisable for new customers or those who prefer restricted content or structure not to be detected by search robots. It may be beneficial for existing customers seeking backward compatibility, especially when displaying content instead of a 404 error is necessary.
**Warning:** Enabling this setting may revert the restriction content logic to an earlier version without the latest security enhancements.
### Security [#](#Security)
This subtab offers a comprehensive security feature designed to protect sites using the plugin from various security threats and vulnerabilities. It provides admins with tools to effectively manage and secure user accounts. To learn more about the settings of this feature, we have created a separate article for a more detailed explanation: [Security Feature](//docs.ultimatemember.com/article/1869-security-feature)
### Developers [#](#Developers)
1. **Fields:** This setting allows you to manage field settings. It likely includes options for configuring various aspects of user profile fields, such as their visibility, required status, and more.
1. **Allowed Choice Callbacks (Enter one PHP function per line)**: This setting lets you specify PHP functions that are allowed to be used as choice callback functions. This helps prevent the use of potentially risky third-party functions.
2. **REST API Version:** This setting controls the version of the REST API used by the plugin. It is recommended to use the latest version for security and compatibility reasons.
Last updated on January 9, 2025
No results found
---
# Change default Ultimate Member "blue" color using CSS - Ultimate Member
Change default Ultimate Member "blue" color using CSS
=====================================================
[](javascript:window.print() "Print this article")
Ultimate Member default blue color **#3ba1da** and hover color **#44b0ec** can be overwritten using CSS.
Since WordPress 4.7, users can add custom CSS directly from WordPress admin area on _wp-admin > Appearance > Customize > Additional CSS_. Some premium themes provide a Custom CSS section under the themes options. You can also use custom CSS plugins that allow you to store your custom CSS independently from your theme.
Here is the sample CSS which you can add to your custom CSS section and replace blue **#3ba1da** and hover **#44b0ec** colors with any color you need according to the design of your website.
/\* Link colors \*/
.um a.um-link,
.um .um-tip:hover,
.um .um-field-radio.active:not(.um-field-radio-state-disabled) i,
.um .um-field-checkbox.active:not(.um-field-radio-state-disabled) i,
.um .um-member-name a:hover,
.um .um-member-more a:hover,
.um .um-member-less a:hover,
.um .um-members-pagi a:hover,
.um .um-cover-add:hover,
.um .um-profile-subnav a.active,
.um .um-item-meta a,
.um-account-name a:hover,
.um-account-nav a.current,
.um-account-side li a.current span.um-account-icon,
.um-account-side li a.current:hover span.um-account-icon,
.um-dropdown li a:hover,
i.um-active-color,
span.um-active-color
{
color: #3ba1da !important;
}
.um a.um-link:hover,
.um a.um-link-hvr:hover {
color: #44b0ec !important;
}
/\* Button colors \*/
.um .um-field-group-head,
.picker\_\_box,
.picker\_\_nav--prev:hover,
.picker\_\_nav--next:hover,
.um .um-members-pagi span.current,
.um .um-members-pagi span.current:hover,
.um .um-profile-nav-item.active a,
.um .um-profile-nav-item.active a:hover,
.upload,
.um-modal-header,
.um-modal-btn,
.um-modal-btn.disabled,
.um-modal-btn.disabled:hover,
div.uimob800 .um-account-side li a.current,
div.uimob800 .um-account-side li a.current:hover,
.um .um-button,
.um a.um-button,
.um a.um-button.um-disabled:hover,
.um a.um-button.um-disabled:focus,
.um a.um-button.um-disabled:active,
.um input\[type=submit\].um-button,
.um input\[type=submit\].um-button:focus,
.um input\[type=submit\]:disabled:hover
{
background: #3ba1da !important;
}
.um .um-field-group-head:hover,
.picker\_\_footer,
.picker\_\_header,
.picker\_\_day--infocus:hover,
.picker\_\_day--outfocus:hover,
.picker\_\_day--highlighted:hover,
.picker--focused .picker\_\_day--highlighted,
.picker\_\_list-item:hover,
.picker\_\_list-item--highlighted:hover,
.picker--focused .picker\_\_list-item--highlighted,
.picker\_\_list-item--selected,
.picker\_\_list-item--selected:hover,
.picker--focused .picker\_\_list-item--selected,
.um .um-button:hover,
.um a.um-button:hover,
.um input\[type=submit\].um-button:hover{
background: #44b0ec !important;
}
/\* Button alt colors \*/
.um .um-button.um-alt,
.um input\[type=submit\].um-button.um-alt {
background: #eeeeee !important;
}
.um .um-button.um-alt:hover,
.um input\[type=submit\].um-button.um-alt:hover {
background: #e5e5e5 !important;
}
* * *
As an alternative you can use a free extension [Ultimate Member - Optimize and Color](https://github.com/umdevelopera/um-optimize)
to change a color. This extension can customize Ultimate Member colors.
Last updated on January 8, 2025
No results found
---
# Appearance Tab - Ultimate Member
Appearance Tab
==============
[](javascript:window.print() "Print this article")
### Overview
The **Appearance** tab contains several sub-tabs that allow you to control the look of Ultimate Member on your site.
### Profile tab [#](#profile)
The profile tab allows you to customize the appearance of the user profiles on your site. These are global options and can be overridden on a per form basis.
Image - The **Profile** settings on _wp-admin > Ultimate Member > Settings > Appearance > Profile_.

### Profile Menu tab [#](#profile_menu)
The profile menu tab allows you to turn on/off specific tabs on your profile as well as select the tab that shows by default.
Image - The **Profile Menu** settings on _wp-admin > Ultimate Member > Settings > Appearance > Profile Menu_.

### Registration Form tab [#](#registration_form)
The registration form tab allows you to customize the appearance of the registration form. These are global options and can be overridden on a per form basis.
Image - The **Registration Form** settings on _wp-admin > Ultimate Member > Settings > Appearance > Registration Form_.

### Login Form tab [#](#login_form)
The login form tab allows you to customize the appearance of the login form. These are global options and can be overridden on a per form basis.
Image - The **Login Form** settings on _wp-admin > Ultimate Member > Settings > Appearance > Login Form_.

Last updated on January 9, 2025
No results found
---
# How do I add my extra tabs to user profiles? - Ultimate Member
How do I add my extra tabs to user profiles?
============================================
[](javascript:window.print() "Print this article")
Customizing Ultimate Member profiles allows you to tailor user profiles to your specific needs. You can extend profiles with custom tabs, displaying unique content or forms. However, implementing custom tabs requires a solid understanding of coding principles. This [guide](//docs.ultimatemember.com/article/64-extending-ultimate-member-profile-menu-using-hooks)
provides code examples and instructions to help you create custom tabs for your Ultimate Member profiles.
**NOTE:** While we offer code examples and guidance, direct support for implementing customizations is not provided. For assistance, consider consulting with a developer experienced in Ultimate Member.
#### Understanding Profile Tab Hooks
Ultimate Member utilizes two hooks to manage profile tabs:
* `um_profile_tabs`: This hook is used to modify and extend the profile menu.
* `um_profile_content_{$tab_id}`: This hook is used to display content for the desired tab, where `{$tab_id}` represents the tab key in the `$tabs` array.
#### Accessing Profile Menu Settings
You can configure the visibility and privacy settings for each tab in the Profile menu by navigating to `wp-admin > Ultimate Member > Settings > Appearance > Profile Menu`.
#### Adding an Extra Tab with a Form
In the example code below, the variable `$fields_metakey` is an array containing the "Meta Key" values of fields. You can locate existing "Meta Key" values for fields or create new ones using the profile Form Builder at `wp-admin > Ultimate Member > Forms > Edit Form.`
**Example Code:
**This code adds a custom tab called **'My Custom'** to the user profile page in Ultimate Member. The tab allows users to edit their profile information.
#### Adding Multiple Extra Tabs
To add multiple tabs with custom shortcodes, ensure each tab has a unique key. You must replace the key in the array and the hook and function name for each additional tab.
**Example Code:**
Last updated on April 10, 2024
### Related Articles
* [Extending Ultimate Member Profile Menu using Hooks](/article/64-extending-ultimate-member-profile-menu-using-hooks)
No results found
---
# Content Restriction until 2.2.0 version - Ultimate Member
Content Restriction until 2.2.0 version
=======================================
[](javascript:window.print() "Print this article")
**Warning:** This article is deprecated since version 2.2.0. See the latest information [here](//docs.ultimatemember.com/article/1620-restriction-content)
.
1) First priority content restriction is individual Post "Restriction content" options. So if there is a checked post type

and content is restricted here

then this is first priority settings;
2) Every post can be assigned to any term of taxonomy (Tag, Category, or Custom Taxonomy), for the restriction term you need to do this

and this

So if the post, which hasn't individual restriction option is assigned to a restricted term - then we use this term's restriction options
3) There are archive pages at any WP sites (by category, by tag, and by custom taxonomies term....not by author and date). So the next priority for the content restriction is these pages. If the term has individual content restriction options, we use these options
4) The homepage can be restricted by this option

or separated options for every role

5) Categories pages have the next priority (only default WP Posts Category) by this option

6) Other pages in the last priority use Exclude URL restriction option

Last updated on December 13, 2021
### Related Articles
* [Restriction content priority](/article/1620-restriction-content)
No results found
---
# Extending Ultimate Member Profile Menu using Hooks - Ultimate Member
Extending Ultimate Member Profile Menu using Hooks
==================================================
[](javascript:window.print() "Print this article")
We recommend using the [Profile tabs](https://ultimatemember.com/extensions/profile-tabs/)
extension to extend the profile menu with extra tabs.
The profile menu can be extended using a custom code. See example below. The code is based on these hooks:
* `um_profile_tabs` - this hook is used to modify and extend the profile menu.
* `um_user_profile_tabs` - (optional) this hook is used to modify and extend the profile menu for the certain user.
* `um_profile_content_{$tab_id}` - this hook is used to display content for the desired tab, where `{$tab_id}` is the tab key in the `$tabs` array.
**NOTE:** We have created this code example to provide guidance and to make it easier for you to implement this code into your website. However, we are not able to provide any support when it comes to customizing the plugin. If you need help implementing this code, please hire a developer.
Last updated on March 19, 2023
### Related Articles
* [How do I add my extra tabs to user profiles?](/article/69-how-do-i-add-my-extra-tabs-to-user-profiles)
No results found
---
# Emails Tab - Ultimate Member
Emails Tab
==========
[](javascript:window.print() "Print this article")
Overview
--------
The **Emails** tab in Ultimate Member allows you to manage and customize email notifications sent to members and administrators based on specific actions taken on your site, such as user registration or account deletion. This customization ensures that all parties receive timely and relevant notifications related to user activity and site management.

### Email Notifications [#](#email_notifications)
The **Email Notifications** section lets you view and edit the different email notifications sent by Ultimate Member.
#### **How to Access Email Templates:**
1. Navigate to `wp-admin > Ultimate Member > Settings > Email`.
2. Click the **"Manage"** button next to each email template to access its settings.

#### **Email Template Settings:**
* **Enable/Disable:** This option allows you to control whether a particular email notification is sent. By enabling this setting, the selected email notification will be automatically triggered based on the relevant action. Disabling it will prevent the email from being sent.
* **Subject:** The subject field lets you customize the subject line of the email notification. You can use [placeholders](//docs.ultimatemember.com/article/1340-placeholders-for-email-templates)
such as `{site_name}` to automatically insert your website's name or other dynamic data. This gives you the flexibility to personalize the subject to align with your site's branding or tone.
* **Email Content:** You can edit the body of the email in this section, using either the **Visual** or **Text** editor.
* The **Visual** editor provides a user-friendly interface for formatting text, adding links, and including images without requiring coding knowledge.
* The **Text** editor allows you to work directly with plain text or add custom HTML for more advanced email designs.
These settings are available for every email notification type, allowing you to tailor the content, appearance, and delivery of emails sent through your website. This ensures that the emails sent to users and admins are clear, informative, and aligned with your brand.

### Default Email Notifications [#](#default_notifications)
Ultimate Member provides a set of default email notifications that keep both administrators and users informed about various actions and statuses related to user accounts. When additional Ultimate Member plugins are activated, their email notifications will also appear in these settings, expanding your options for email management.
#### **Account Welcome Email**
The Account Welcome Email is sent to users immediately after they have successfully registered on your site. This email serves as a warm introduction to new members, providing them with initial guidance and information about their accounts. It typically includes a thank you note and a brief overview of what to expect next, such as site features or next steps. For instance, the email might welcome users to your community, offer tips on getting started, and provide links to key resources.
#### **Account Activation Email**
This notification is triggered when users register on your site but need to verify their email address before their account becomes fully active. The Account Activation Email contains a verification link that users must click to confirm their email address. This step is crucial for ensuring the validity of the user’s email and preventing fraudulent registrations. The email usually instructs users to click the provided link to activate their account, and it may offer a brief explanation of why this step is necessary.
#### **Your Account is Pending Review**
If your registration process involves manual review by an administrator, this email is sent to users once they have submitted their registration form. It informs users that their account is awaiting approval and is being reviewed by an admin. The email typically includes a message that their application is under review and that they will be notified once the review is complete. This helps manage user expectations and keeps them informed about the status of their registration.
#### **Account Approved Email**
Once an administrator has reviewed and approved a user's registration, the Account Approved Email is sent to inform the user that their account is now active. This notification confirms that the user's membership has been approved and they can now fully access and use the site. The email generally includes a congratulatory note and may offer further instructions or tips for using the site, ensuring users feel welcomed and ready to engage with the platform.
#### **Account Rejected Email**
In cases where a user’s registration is not approved, the Account Rejected Email is sent to notify them of the rejection. This email explains that their registration has been declined and may provide reasons for the decision or instructions on how to address any issues. It ensures transparency in the registration process and offers users a chance to seek clarification or make necessary adjustments if they wish to reapply.
#### **Account Deactivated Email**
When an administrator deactivates a user’s account, the Account Deactivated Email is sent to inform the user of the action. This notification serves as a confirmation that their account has been temporarily or permanently suspended. The email typically includes information about why the account was deactivated and any steps the user might need to take to resolve the situation or contact support for further assistance.
#### **Account Deleted Email**
The Account Deleted Email is sent to users when they decide to delete their own accounts. This email serves as a final confirmation of the deletion and informs users that their account has been removed from the site. It may include a message expressing regret at their departure and offer options for feedback or re-registration if they wish to return in the future.
#### **Password Reset Email**
When users request a password reset, the Password Reset Email is sent to their registered email address. This email includes a link for users to follow in order to reset their password. It provides clear instructions on how to create a new password and often includes a security note to reassure users that their request is being processed securely. This email is essential for maintaining account security and user access.
#### **Password Changed Email**
After a user successfully changes their password, the Password Changed Email is sent to notify them of the update. This email confirms that their password has been changed and provides a record of the action. It typically includes a note that if the user did not initiate this change, they should contact support immediately to address any potential security issues.
#### **Account Updated Email**
Whenever users update their account information, such as their profile details or contact information, the Account Updated Email is sent to confirm the changes. This email reassures users that their updates have been successfully applied and provides a summary of the changes made. It helps users keep track of their account modifications and ensures transparency.
#### **New User Notification**
The New User Notification is sent to administrators whenever a new user registers on the site. This email helps site admins stay informed about new registrations and manage user onboarding efficiently. It often includes basic information about the new user and may prompt administrators to review the new registration or take any necessary actions.
#### **Account Needs Review Notification**
If your registration process requires manual review, the Account Needs Review Notification is sent to administrators each time a new user registers and requires approval. This email alerts admins that new registration is pending their review and may include details about the user and their registration status. It ensures that admins are promptly aware of new users needing manual approval.
#### **Account Deletion Notification**
The Account Deletion Notification is sent to administrators whenever a user deletes their account from the site. This email informs admins of the account removal and helps them keep track of user activity. It may include details about the deleted account and any related information needed for administrative purposes.
#### Security: Suspicious Account Activity
The Security: Suspicious Account Activity email notification is designed to alert administrators whenever unusual or potentially harmful actions are detected on user accounts. This email serves as a security measure to help administrators monitor and react promptly to suspicious behaviours that could indicate account misuse, unauthorized access attempts, or other security threats. This feature ensures that site administrators stay informed about potential security risks and can take appropriate action to safeguard user data and site integrity. For more details, check the [Ultimate Member Security Features](//docs.ultimatemember.com/article/1869-security-feature)
article.
### Email Sender Options [#](#sender_options)
The setting in this section determines how the sender's name and email address will appear in the outgoing emails sent by the plugin. You can configure the following email sender options:
* **Admin Email Address:** This setting allows you to specify the email addresses where administrative notifications will be sent. This includes any alerts or updates that require admin attention. You can list multiple email addresses separated by commas, ensuring that all relevant administrators receive these notifications.
* **Example:** `admin1@example.com, admin2@example.com`
* **Mail appears from:** This setting customizes the display name that appears in the "From" field of outgoing emails sent from your site. By default, this will be the name of your WordPress site. Changing this can help make your emails look more personalized or aligned with your brand.
* **Example:** If your site is called "Ultimate Member," setting this field to "Ultimate Member Team" will make your emails appear as though they come from "Ultimate Member Team."
* **Mail appears from address:** This setting customizes the email address that appears in the "From" field of outgoing emails. By default, this is the email address associated with your site's admin account. Setting this correctly helps ensure that recipients recognize the email as coming from a legitimate source associated with your site.
* **Example:** `admin@example.com` - This email address will appear in the "From" field, making it clear to recipients that the email is coming from your organization.
**Note:** It is recommended to use an email address with your website's domain name for sending emails. To improve deliverability and avoid spam filters, consider using an SMTP service for email delivery.
### Email Template [#](#email_template)
#### Content type
* **Enable HTML for Emails:** This option allows you to enable or disable HTML in your email templates. HTML enables rich formatting, allowing you to include styled text, images, colors, and other design elements in your emails. Enabling this setting is crucial if you plan to create visually appealing and branded email templates. If this option is disabled, HTML content will be displayed as plain text, which means any formatting or embedded media will not be rendered. Enabling HTML will allow you to create an email template with a company logo, colorful headings, and styled buttons, enhancing the visual appeal and effectiveness of your email communications.

Last updated on January 9, 2025
### Related Articles
* [Email Templates](/article/1335-email-templates)
* [Plain text email default templates](/article/1342-plain-text-email-default-templates)
* [How to Enable Email Notification on Activation or Admin Review Upon User's Registration](/article/1652-how-to-enable-email-notification-on-activation-or-admin-review-upon-users-registration)
* [Placeholders for email templates](/article/1340-placeholders-for-email-templates)
No results found
---
# UM Hooks - Ultimate Member
UM Hooks
========
[](javascript:window.print() "Print this article")
Actions
-------
| Hook | File(s) |
| --- | --- |
| [um\_before\_template\_part](//docs.ultimatemember.com/article/1064-umbeforetemplatepart) | includes/class-functions.php |
| [um\_after\_template\_part](//docs.ultimatemember.com/article/1027-umaftertemplatepart) | includes/class-functions.php |
| [um\_admin\_do\_action\_\_](//docs.ultimatemember.com/article/989-umadmindoaction) | includes/admin/class-admin.php |
| [um\_admin\_do\_action\_\_{$action}](//docs.ultimatemember.com/article/990-umadmindoactionaction) | includes/admin/class-admin.php |
| [um\_admin\_ajax\_modal\_content\_\_hook](//docs.ultimatemember.com/article/978-umadminajaxmodalcontenthook) | includes/admin/core/class-admin-builder.php |
| [um\_admin\_ajax\_modal\_content\_\_hook\_{$act\_id}](//docs.ultimatemember.com/article/979-umadminajaxmodalcontenthookactid) | includes/admin/core/class-admin-builder.php |
| [um\_admin\_field\_modal\_header](//docs.ultimatemember.com/article/995-umadminfieldmodalheader) | includes/admin/core/class-admin-builder.php |
| [um\_admin\_field\_modal\_footer](//docs.ultimatemember.com/article/994-umadminfieldmodalfooter) | includes/admin/core/class-admin-builder.php |
| [um\_extend\_admin\_menu](//docs.ultimatemember.com/article/1123-umextendadminmenu) | includes/admin/core/class-admin-menu.php |
| [um\_admin\_custom\_restrict\_content\_metaboxes](//docs.ultimatemember.com/article/986-umadmincustomrestrictcontentmetaboxes) | includes/admin/core/class-admin-metabox.php |
| [um\_admin\_custom\_register\_metaboxes](//docs.ultimatemember.com/article/985-umadmincustomregistermetaboxes) | includes/admin/core/class-admin-metabox.php |
| [um\_admin\_custom\_profile\_metaboxes](//docs.ultimatemember.com/article/984-umadmincustomprofilemetaboxes) | includes/admin/core/class-admin-metabox.php |
| [um\_admin\_custom\_login\_metaboxes](//docs.ultimatemember.com/article/983-umadmincustomloginmetaboxes) | includes/admin/core/class-admin-metabox.php |
| [um\_admin\_field\_edit\_hook{$attribute}](//docs.ultimatemember.com/article/993-umadminfieldedithookattribute) | includes/admin/core/class-admin-metabox.php |
| [um\_admin\_after\_main\_notices](//docs.ultimatemember.com/article/977-umadminaftermainnotices) | includes/admin/core/class-admin-notices.php |
| [um\_settings\_page\_before\_{$current\_tab}\_{$current\_subtab}\_content](//docs.ultimatemember.com/article/1262-umsettingspagebeforecurrenttabcurrentsubtabcontent) | includes/admin/core/class-admin-settings.php |
| [um\_settings\_page\_{$current\_tab}\_{$current\_subtab}\_before\_section](//docs.ultimatemember.com/article/1263-umsettingspagecurrenttabcurrentsubtabbeforesection) | includes/admin/core/class-admin-settings.php |
| [um\_settings\_before\_save](//docs.ultimatemember.com/article/1261-umsettingsbeforesave) | includes/admin/core/class-admin-settings.php |
| [um\_settings\_save](//docs.ultimatemember.com/article/1264-umsettingssave) | includes/admin/core/class-admin-settings.php |
| [um\_install\_info\_before](//docs.ultimatemember.com/article/1153-uminstallinfobefore) | includes/admin/core/class-admin-settings.php |
| [um\_install\_info\_before\_page\_config](//docs.ultimatemember.com/article/1154-uminstallinfobeforepageconfig) | includes/admin/core/class-admin-settings.php |
| [um\_install\_info\_after\_page\_config](//docs.ultimatemember.com/article/1152-uminstallinfoafterpageconfig) | includes/admin/core/class-admin-settings.php |
| [um\_install\_info\_after](//docs.ultimatemember.com/article/1151-uminstallinfoafter) | includes/admin/core/class-admin-settings.php |
| [um\_admin\_user\_action\_hook](//docs.ultimatemember.com/article/1004-umadminuseractionhook) | includes/admin/core/um-admin-actions.php |
| [um\_admin\_user\_action\_{$bulk\_action}\_hook](//docs.ultimatemember.com/article/1005-umadminuseractionbulkactionhook) | includes/admin/core/class-admin-users.php |
| [um\_admin\_custom\_hook\_{$action}](//docs.ultimatemember.com/article/982-umadmincustomhookaction) | includes/admin/core/um-admin-actions-user.php |
| [um\_admin\_user\_action\_{$subaction}\_hook](//docs.ultimatemember.com/article/1006-umadminuseractionsubactionhook) | includes/admin/core/um-admin-actions.php |
| [um\_roles\_add\_meta\_boxes](//docs.ultimatemember.com/article/1249-umrolesaddmetaboxes) | includes/admin/templates/role/role-edit.php |
| [um\_roles\_add\_meta\_boxes\_um\_role\_meta](//docs.ultimatemember.com/article/1250-umrolesaddmetaboxesumrolemeta) | includes/core/class-access.php |
| [um\_access\_check\_global\_settings](//docs.ultimatemember.com/article/956-umaccesscheckglobalsettings) | includes/core/class-access.php |
| [um\_access\_fix\_external\_post\_content](//docs.ultimatemember.com/article/958-umaccessfixexternalpostcontent) | includes/core/class-access.php |
| [um\_account\_page\_hidden\_fields](//docs.ultimatemember.com/article/962-umaccountpagehiddenfields) | templates/account.php |
| [um\_pre\_{$mode}\_shortcode](//docs.ultimatemember.com/article/1198-umpremodeshortcode) | includes/core/class-shortcodes.php |
| [um\_before\_form\_is\_loaded](//docs.ultimatemember.com/article/1060-umbeforeformisloaded) | includes/core/class-shortcodes.php |
| [um\_before\_{$mode}\_form\_is\_loaded](//docs.ultimatemember.com/article/1072-umbeforemodeformisloaded) | includes/core/class-shortcodes.php |
| [um\_submit\_account\_errors\_hook](//docs.ultimatemember.com/article/1269-umsubmitaccounterrorshook) | includes/core/class-account.php |
| [um\_submit\_account\_details](//docs.ultimatemember.com/article/1268-umsubmitaccountdetails) | includes/core/class-account.php |
| [um\_before\_account\_{$tab\_id}](//docs.ultimatemember.com/article/1056-umbeforeaccounttabid) | includes/core/class-account.php |
| [um\_after\_account\_{$tab\_id}](//docs.ultimatemember.com/article/1011-umafteraccounttabid) | includes/core/class-account.php |
| [um\_after\_account\_{$tab\_id}\_button](//docs.ultimatemember.com/article/1012-umafteraccounttabidbutton) | includes/core/class-account.php |
| [um\_after\_remove\_{$type}](//docs.ultimatemember.com/article/1025-umafterremovetype) | includes/core/class-files.php |
| [um\_before\_upload\_db\_meta](//docs.ultimatemember.com/article/1066-umbeforeuploaddbmeta) | includes/core/class-files.php |
| [um\_before\_upload\_db\_meta\_{$key}](//docs.ultimatemember.com/article/1067-umbeforeuploaddbmetakey) | includes/core/class-files.php |
| [um\_after\_upload\_db\_meta](//docs.ultimatemember.com/article/1028-umafteruploaddbmeta) | includes/core/class-files.php |
| [um\_after\_upload\_db\_meta\_{$key}](//docs.ultimatemember.com/article/1029-umafteruploaddbmetakey) | includes/core/class-files.php |
| [um\_run\_ajax\_function\_\_{$hook}](//docs.ultimatemember.com/article/1251-umrunajaxfunctionhook) | includes/core/class-form.php |
| [um\_before\_submit\_form\_post](//docs.ultimatemember.com/article/1063-umbeforesubmitformpost) | includes/core/class-form.php |
| [um\_submit\_form\_errors\_hook](//docs.ultimatemember.com/article/1273-umsubmitformerrorshook) | includes/core/class-form.php |
| [um\_submit\_form\_{$mode}](//docs.ultimatemember.com/article/1281-umsubmitformmode) | includes/core/class-form.php |
| [um\_before\_email\_template\_part](//docs.ultimatemember.com/article/1058-umbeforeemailtemplatepart) | includes/core/class-mail.php |
| [um\_after\_email\_template\_part](//docs.ultimatemember.com/article/1015-umafteremailtemplatepart) | includes/core/class-mail.php |
| [um\_before\_email\_template\_body](//docs.ultimatemember.com/article/1057-umbeforeemailtemplatebody) | includes/core/class-mail.php |
| [um\_user\_before\_query](//docs.ultimatemember.com/article/1292-umuserbeforequery) | includes/core/class-members.php |
| [um\_user\_after\_query](//docs.ultimatemember.com/article/1289-umuserafterquery) | includes/core/class-members.php |
| [um\_reset\_password\_errors\_hook](//docs.ultimatemember.com/article/1238-umresetpassworderrorshook) | includes/core/class-password.php |
| [um\_reset\_password\_process\_hook](//docs.ultimatemember.com/article/1241-umresetpasswordprocesshook) | includes/core/class-password.php |
| [um\_change\_password\_errors\_hook](//docs.ultimatemember.com/article/1077-umchangepassworderrorshook) | includes/core/class-password.php |
| [um\_change\_password\_process\_hook](//docs.ultimatemember.com/article/1080-umchangepasswordprocesshook) | includes/core/class-password.php |
| [um\_after\_email\_confirmation](//docs.ultimatemember.com/article/1014-umafteremailconfirmation) | includes/core/class-permalinks.php |
| [um\_ajax\_load\_posts\_\_{$hook}](//docs.ultimatemember.com/article/1041-umajaxloadpostshook) | includes/core/class-query.php |
| [um\_after\_member\_role\_upgrade](//docs.ultimatemember.com/article/1021-umaftermemberroleupgrade) | includes/core/class-user.php |
| [um\_api\_output\_before](//docs.ultimatemember.com/article/1050-umapioutputbefore) | includes/core/class-rest-api.php |
| [um\_api\_output\_{$format}](//docs.ultimatemember.com/article/1053-umapioutputformat) | includes/core/class-rest-api.php |
| [um\_api\_output\_after](//docs.ultimatemember.com/article/1049-umapioutputafter) | includes/core/class-rest-api.php |
| [um\_access\_profile](//docs.ultimatemember.com/article/959-umaccessprofile) | includes/core/class-rewrite.php |
| [um\_when\_role\_is\_set](//docs.ultimatemember.com/article/1318-umwhenroleisset) | includes/core/class-roles-capabilities.php |
| [um\_before\_user\_role\_is\_changed](//docs.ultimatemember.com/article/1069-umbeforeuserroleischanged) | includes/core/class-roles-capabilities.php |
| [um\_member\_role\_upgrade](//docs.ultimatemember.com/article/1172-ummemberroleupgrade) | includes/core/class-roles-capabilities.php |
| [um\_after\_user\_role\_is\_changed](//docs.ultimatemember.com/article/1034-umafteruserroleischanged) | includes/core/class-roles-capabilities.php |
| [um\_after\_user\_role\_is\_updated](//docs.ultimatemember.com/article/1035-umafteruserroleisupdated) | includes/core/class-roles-capabilities.php |
| [um\_after\_everything\_output](//docs.ultimatemember.com/article/1016-umaftereverythingoutput) | includes/core/class-shortcodes.php |
| [um\_user\_register](//docs.ultimatemember.com/article/1308-umuserregister) | includes/core/um-actions-register.php |
| [um\_before\_save\_registration\_details](//docs.ultimatemember.com/article/1062-umbeforesaveregistrationdetails) | includes/core/class-user.php |
| [um\_after\_save\_registration\_details](//docs.ultimatemember.com/article/1026-umaftersaveregistrationdetails) | includes/core/class-user.php |
| [um\_when\_status\_is\_set](//docs.ultimatemember.com/article/1319-umwhenstatusisset) | includes/core/class-user.php |
| [um\_after\_user\_status\_is\_changed\_hook](//docs.ultimatemember.com/article/1037-umafteruserstatusischangedhook) | includes/core/class-user.php |
| [um\_after\_user\_status\_is\_changed](//docs.ultimatemember.com/article/1036-umafteruserstatusischanged) | includes/core/class-user.php |
| [um\_before\_user\_hash\_is\_changed](//docs.ultimatemember.com/article/1068-umbeforeuserhashischanged) | includes/core/class-user.php |
| [um\_after\_user\_hash\_is\_changed](//docs.ultimatemember.com/article/1031-umafteruserhashischanged) | includes/core/class-user.php |
| [um\_after\_user\_is\_approved](//docs.ultimatemember.com/article/1032-umafteruserisapproved) | includes/core/class-user.php |
| [um\_after\_user\_is\_inactive](//docs.ultimatemember.com/article/1033-umafteruserisinactive) | includes/core/class-user.php |
| [um\_delete\_user\_hook](//docs.ultimatemember.com/article/1103-umdeleteuserhook) | includes/core/class-user.php |
| [um\_delete\_user](//docs.ultimatemember.com/article/1102-umdeleteuser) | includes/core/class-user.php |
| [um\_submit\_account\_{$tab}\_tab\_errors\_hook](//docs.ultimatemember.com/article/1270-umsubmitaccounttabtaberrorshook) | includes/core/um-actions-account.php |
| [um\_account\_pre\_update\_profile](//docs.ultimatemember.com/article/963-umaccountpreupdateprofile) | includes/core/um-actions-account.php |
| [um\_post\_account\_update](//docs.ultimatemember.com/article/1194-umpostaccountupdate) | includes/core/um-actions-account.php |
| [um\_after\_user\_account\_updated](//docs.ultimatemember.com/article/1030-umafteruseraccountupdated) | includes/core/um-actions-account.php |
| [um\_action\_user\_request\_hook](//docs.ultimatemember.com/article/972-umactionuserrequesthook) | includes/core/um-actions-core.php |
| [um\_submit\_form\_errors\_hook\_\_registration](//docs.ultimatemember.com/article/1278-umsubmitformerrorshookregistration) | includes/core/um-actions-form.php |
| [um\_submit\_form\_errors\_hook\_\_blockedips](//docs.ultimatemember.com/article/1276-umsubmitformerrorshookblockedips) | includes/core/um-filters-login.php |
| [um\_submit\_form\_errors\_hook\_\_blockedemails](//docs.ultimatemember.com/article/1275-umsubmitformerrorshookblockedemails) | includes/core/um-filters-login.php |
| [um\_submit\_form\_errors\_hook\_login](//docs.ultimatemember.com/article/1279-umsubmitformerrorshooklogin) | includes/core/um-actions-form.php |
| [um\_submit\_form\_errors\_hook\_logincheck](//docs.ultimatemember.com/article/1280-umsubmitformerrorshooklogincheck) | includes/core/um-actions-form.php |
| [um\_submit\_form\_errors\_hook\_](//docs.ultimatemember.com/article/1274-umsubmitformerrorshook) | includes/core/um-actions-form.php |
| [um\_submit\_form\_errors\_hook\_\_blockedwords](//docs.ultimatemember.com/article/1277-umsubmitformerrorshookblockedwords) | includes/core/um-actions-form.php |
| [um\_add\_error\_on\_form\_submit\_validation](//docs.ultimatemember.com/article/974-umadderroronformsubmitvalidation) | includes/core/um-actions-form.php |
| [um\_custom\_field\_validation\_{$custom}](//docs.ultimatemember.com/article/1096-umcustomfieldvalidationcustom) | includes/core/um-actions-form.php |
| [um\_on\_login\_before\_redirect](//docs.ultimatemember.com/article/1188-umonloginbeforeredirect) | includes/core/um-actions-login.php |
| [um\_user\_login](//docs.ultimatemember.com/article/1298-umuserlogin) | includes/core/um-actions-login.php |
| [um\_user\_login\_extra\_hook](//docs.ultimatemember.com/article/1299-umuserloginextrahook) | includes/core/um-actions-login.php |
| [um\_after\_changing\_user\_password](//docs.ultimatemember.com/article/1013-umafterchanginguserpassword) | includes/core/um-actions-password.php |
| [um\_after\_password\_reset\_fields](//docs.ultimatemember.com/article/1022-umafterpasswordresetfields) | includes/core/um-actions-password.php |
| [um\_before\_form](//docs.ultimatemember.com/article/1059-umbeforeform) | templates/register.php |
| [um\_before\_{$mode}\_fields](//docs.ultimatemember.com/article/1071-umbeforemodefields) | templates/register.php |
| [um\_main\_{$mode}\_fields](//docs.ultimatemember.com/article/1171-ummainmodefields) | templates/login.php |
| [um\_after\_form\_fields](//docs.ultimatemember.com/article/1018-umafterformfields) | templates/register.php |
| [um\_after\_{$mode}\_fields](//docs.ultimatemember.com/article/1040-umaftermodefields) | templates/register.php |
| [um\_after\_form](//docs.ultimatemember.com/article/1017-umafterform) | templates/register.php |
| [um\_user\_before\_updating\_profile](//docs.ultimatemember.com/article/1293-umuserbeforeupdatingprofile) | includes/core/um-actions-profile.php |
| [um\_user\_pre\_updating\_profile](//docs.ultimatemember.com/article/1304-umuserpreupdatingprofile) | includes/core/um-actions-profile.php |
| [um\_after\_user\_updated](//docs.ultimatemember.com/article/1038-umafteruserupdated) | includes/core/um-actions-profile.php |
| [um\_before\_user\_upload](//docs.ultimatemember.com/article/1070-umbeforeuserupload) | includes/core/um-actions-register.php |
| [um\_after\_user\_upload](//docs.ultimatemember.com/article/1039-umafteruserupload) | includes/core/um-actions-register.php |
| [um\_user\_after\_updating\_profile](//docs.ultimatemember.com/article/1290-umuserafterupdatingprofile) | includes/core/um-actions-profile.php |
| [um\_update\_profile\_full\_name](//docs.ultimatemember.com/article/1285-umupdateprofilefullname) | includes/core/um-actions-register.php |
| [um\_cover\_area\_content](//docs.ultimatemember.com/article/1090-umcoverareacontent) | includes/core/um-actions-profile.php |
| [um\_pre\_header\_editprofile](//docs.ultimatemember.com/article/1197-umpreheadereditprofile) | includes/core/um-actions-profile.php |
| [um\_after\_profile\_name\_inline](//docs.ultimatemember.com/article/1024-umafterprofilenameinline) | includes/core/um-actions-profile.php |
| [um\_after\_profile\_header\_name\_args](//docs.ultimatemember.com/article/1023-umafterprofileheadernameargs) | includes/core/um-actions-profile.php |
| [um\_after\_header\_meta](//docs.ultimatemember.com/article/1020-umafterheadermeta) | includes/core/um-actions-profile.php |
| [um\_after\_header\_info](//docs.ultimatemember.com/article/1019-umafterheaderinfo) | includes/core/um-actions-profile.php |
| [um\_user\_edit\_profile](//docs.ultimatemember.com/article/1296-umusereditprofile) | includes/core/um-actions-profile.php |
| [um\_registration\_set\_extra\_data](//docs.ultimatemember.com/article/1235-umregistrationsetextradata) | includes/core/um-actions-register.php |
| [um\_registration\_complete](//docs.ultimatemember.com/article/1234-umregistrationcomplete) | includes/core/um-actions-register.php |
| [um\_post\_registration\_{$status}\_hook](//docs.ultimatemember.com/article/1195-umpostregistrationstatushook) | includes/core/um-actions-register.php |
| [um\_registration\_after\_auto\_login](//docs.ultimatemember.com/article/1233-umregistrationafterautologin) | includes/core/um-actions-register.php |
| [um\_after\_account\_page\_load](//docs.ultimatemember.com/article/1010-umafteraccountpageload) | templates/account.php |
| [um\_logout\_after\_user\_welcome](//docs.ultimatemember.com/article/1169-umlogoutafteruserwelcome) | templates/logout.php |
| [um\_logout\_user\_links](//docs.ultimatemember.com/article/1170-umlogoutuserlinks) | templates/logout.php |
| [um\_members\_just\_after\_name](//docs.ultimatemember.com/article/1178-ummembersjustaftername) | templates/members-grid.php |
| [um\_members\_after\_user\_name](//docs.ultimatemember.com/article/1173-ummembersafterusername) | templates/members-grid.php |
| [um\_members\_directory\_search](//docs.ultimatemember.com/article/1177-ummembersdirectorysearch) | templates/members.php |
| [um\_members\_directory\_head](//docs.ultimatemember.com/article/1176-ummembersdirectoryhead) | templates/members.php |
| [um\_members\_directory\_display](//docs.ultimatemember.com/article/1174-ummembersdirectorydisplay) | templates/members.php |
| [um\_members\_directory\_footer](//docs.ultimatemember.com/article/1175-ummembersdirectoryfooter) | templates/members.php |
| [um\_change\_password\_page\_hidden\_fields](//docs.ultimatemember.com/article/1079-umchangepasswordpagehiddenfields) | templates/password-change.php |
| [um\_change\_password\_form](//docs.ultimatemember.com/article/1078-umchangepasswordform) | templates/password-change.php |
| [um\_reset\_password\_page\_hidden\_fields](//docs.ultimatemember.com/article/1240-umresetpasswordpagehiddenfields) | templates/password-reset.php |
| [um\_reset\_password\_form](//docs.ultimatemember.com/article/1239-umresetpasswordform) | templates/password-reset.php |
| [um\_profile\_before\_header](//docs.ultimatemember.com/article/1204-umprofilebeforeheader) | templates/profile.php |
| [um\_profile\_header\_cover\_area](//docs.ultimatemember.com/article/1213-umprofileheadercoverarea) | templates/profile.php |
| [um\_profile\_header](//docs.ultimatemember.com/article/1212-umprofileheader) | templates/profile.php |
| [um\_profile\_navbar](//docs.ultimatemember.com/article/1216-umprofilenavbar) | templates/profile.php |
| [um\_profile\_menu](//docs.ultimatemember.com/article/1214-umprofilemenu) | templates/profile.php |
| [um\_profile\_content\_{$nav}](//docs.ultimatemember.com/article/1206-umprofilecontentnav) | templates/profile.php |
| [um\_profile\_content\_{$nav}\_{$subnav}](//docs.ultimatemember.com/article/1207-umprofilecontentnavsubnav) | templates/profile.php |
Filters
-------
| Hook | File(s) |
| --- | --- |
| [um\_core\_pages](?hook=um_core_pages) | includes/class-config.php |
| [um\_core\_form\_meta\_all](?hook=um_core_form_meta_all) | includes/class-config.php |
| [um\_email\_notifications](?hook=um_email_notifications) | includes/class-config.php |
| [um\_default\_settings\_values](?hook=um_default_settings_values) | includes/class-config.php |
| [um\_excluded\_taxonomies](?hook=um_excluded_taxonomies) | includes/class-functions.php |
| [um\_get\_template](?hook=um_get_template) | includes/class-functions.php |
| [um\_locate\_template](?hook=um_locate_template) | includes/class-functions.php |
| [um\_call\_object\_{$class\_name}](?hook=um_call_object_{$class_name}) | includes/class-init.php |
| [um\_language\_textdomain](?hook=um_language_textdomain) | includes/class-init.php |
| [um\_language\_locale](?hook=um_language_locale) | includes/class-init.php |
| [um\_language\_file](?hook=um_language_file) | includes/class-init.php |
| [um\_clean\_user\_basename\_filter](?hook=um_clean_user_basename_filter) | includes/um-short-functions.php |
| [um\_template\_tags\_patterns\_hook](?hook=um_template_tags_patterns_hook) | includes/um-short-functions.php |
| [um\_template\_tags\_replaces\_hook](?hook=um_template_tags_replaces_hook) | includes/um-short-functions.php |
| [um\_user\_ip](?hook=um_user_ip) | includes/um-short-functions.php |
| [um\_email\_registration\_data](?hook=um_email_registration_data) | includes/um-short-functions.php |
| [um\_profile\_field\_filter\_hook\_\_](?hook=um_profile_field_filter_hook__) | includes/um-short-functions.php |
| [um\_profile\_field\_filter\_hook\_\_{$key}](?hook=um_profile_field_filter_hook__{$key}) | includes/um-short-functions.php |
| [um\_profile\_field\_filter\_hook\_\_{$type}](?hook=um_profile_field_filter_hook__{$type}) | includes/um-short-functions.php |
| [um\_get\_core\_page\_filter](?hook=um_get_core_page_filter) | includes/um-short-functions.php |
| [um\_selected\_if\_in\_query\_params](?hook=um_selected_if_in_query_params) | includes/um-short-functions.php |
| [um\_edit\_profile\_cancel\_uri](?hook=um_edit_profile_cancel_uri) | includes/um-short-functions.php |
| [um\_profile\_{$key}\_\_filter](?hook=um_profile_{$key}__filter) | includes/um-short-functions.php |
| [um\_profile\_{$key}\_empty\_\_filter](?hook=um_profile_{$key}_empty__filter) | includes/um-short-functions.php |
| [um\_filter\_avatar\_cache\_time](?hook=um_filter_avatar_cache_time) | includes/um-short-functions.php |
| [um\_get\_default\_cover\_uri\_filter](?hook=um_get_default_cover_uri_filter) | includes/um-short-functions.php |
| [um\_user\_{$data}\_case](?hook=um_user_{$data}_case) | includes/um-short-functions.php |
| [um\_user\_display\_name\_filter](?hook=um_user_display_name_filter) | includes/um-short-functions.php |
| [um\_avatar\_image\_alternate\_text](?hook=um_avatar_image_alternate_text) | includes/core/um-filters-avatars.php |
| [um\_user\_avatar\_url\_filter](?hook=um_user_avatar_url_filter) | includes/um-short-functions.php |
| [um\_user\_cover\_photo\_uri\_\_filter](?hook=um_user_cover_photo_uri__filter) | includes/um-short-functions.php |
| [um\_admin\_pre\_save\_fields\_hook](?hook=um_admin_pre_save_fields_hook) | includes/admin/core/class-admin-builder.php |
| [um\_admin\_field\_update\_error\_handling](?hook=um_admin_field_update_error_handling) | includes/admin/core/class-admin-builder.php |
| [um\_admin\_pre\_save\_field\_to\_form](?hook=um_admin_pre_save_field_to_form) | includes/admin/core/class-admin-builder.php |
| [um\_admin\_pre\_save\_field\_to\_db](?hook=um_admin_pre_save_field_to_db) | includes/admin/core/class-admin-builder.php |
| [um\_admin\_enqueue\_localize\_data](?hook=um_admin_enqueue_localize_data) | includes/admin/core/class-admin-enqueue.php |
| [um\_render\_field\_type\_{$type}](?hook=um_render_field_type_{$type}) | includes/admin/core/class-admin-forms.php |
| [um\_restrict\_content\_hide\_metabox](?hook=um_restrict_content_hide_metabox) | includes/admin/core/class-admin-metabox.php |
| [um\_admin\_category\_access\_settings\_fields](?hook=um_admin_category_access_settings_fields) | includes/admin/core/class-admin-metabox.php |
| [um\_admin\_role\_metaboxes](?hook=um_admin_role_metaboxes) | includes/admin/core/class-admin-metabox.php |
| [um\_builtin\_validation\_types\_continue\_loop](?hook=um_builtin_validation_types_continue_loop) | includes/admin/core/class-admin-metabox.php |
| [um\_settings\_structure](?hook=um_settings_structure) | includes/admin/core/class-admin-settings.php |
| [um\_settings\_section\_{$current\_tab}\_{$current\_subtab}\_content](?hook=um_settings_section_{$current_tab}_{$current_subtab}_content) | includes/admin/core/class-admin-settings.php |
| [um\_generate\_tabs\_menu\_{$page}](?hook=um_generate_tabs_menu_{$page}) | includes/admin/core/class-admin-settings.php |
| [um\_change\_settings\_before\_save](?hook=um_change_settings_before_save) | includes/admin/core/class-admin-settings.php |
| [um\_admin\_settings\_email\_section\_fields](?hook=um_admin_settings_email_section_fields) | includes/admin/core/class-admin-settings.php |
| [um\_admin\_bulk\_user\_actions\_hook](?hook=um_admin_bulk_user_actions_hook) | includes/admin/core/class-admin-users.php |
| [um\_admin\_user\_row\_actions](?hook=um_admin_user_row_actions) | includes/admin/core/class-admin-users.php |
| [um\_admin\_views\_users](?hook=um_admin_views_users) | includes/admin/core/class-admin-users.php |
| [um\_fields\_without\_metakey](?hook=um_fields_without_metakey) | includes/core/class-builtin.php |
| [um\_email\_templates\_columns](?hook=um_email_templates_columns) | includes/admin/core/list-tables/emails-list-table.php |
| [um\_admin\_access\_settings\_fields](?hook=um_admin_access_settings_fields) | includes/admin/templates/access/restrict\_content.php |
| [um\_admin\_directory\_sort\_users\_select](?hook=um_admin_directory_sort_users_select) | includes/admin/templates/directory/general.php |
| [um\_admin\_extend\_directory\_options\_general](?hook=um_admin_extend_directory_options_general) | includes/admin/templates/directory/general.php |
| [um\_admin\_custom\_search\_filters](?hook=um_admin_custom_search_filters) | includes/admin/templates/directory/search.php |
| [um\_custom\_restriction](?hook=um_custom_restriction) | includes/core/class-access.php |
| [um\_access\_enable\_referer](?hook=um_access_enable_referer) | includes/core/class-access.php |
| [um\_account\_page\_default\_tabs\_hook](?hook=um_account_page_default_tabs_hook) | includes/core/class-account.php |
| [um\_account\_shortcode\_args\_filter](?hook=um_account_shortcode_args_filter) | includes/core/class-account.php |
| [um\_account\_secure\_fields](?hook=um_account_secure_fields) | includes/core/class-account.php |
| [um\_account\_tab\_privacy\_fields](?hook=um_account_tab_privacy_fields) | includes/core/class-account.php |
| [um\_account\_tab\_delete\_fields](?hook=um_account_tab_delete_fields) | includes/core/class-account.php |
| [um\_account\_tab\_general\_fields](?hook=um_account_tab_general_fields) | includes/core/class-account.php |
| [um\_account\_tab\_password\_fields](?hook=um_account_tab_password_fields) | includes/core/class-account.php |
| [um\_account\_content\_hook\_{$id}](?hook=um_account_content_hook_{$id}) | includes/core/class-account.php |
| [um\_form\_official\_classes\_\_hook](?hook=um_form_official_classes__hook) | includes/core/class-shortcodes.php |
| [um\_core\_fields\_hook](?hook=um_core_fields_hook) | includes/core/class-builtin.php |
| [um\_profile\_privacy\_options](?hook=um_profile_privacy_options) | includes/core/class-builtin.php |
| [um\_predefined\_fields\_hook](?hook=um_predefined_fields_hook) | includes/core/class-builtin.php |
| [um\_admin\_field\_validation\_hook](?hook=um_admin_field_validation_hook) | includes/core/class-builtin.php |
| [um\_{$data}\_predefined\_field\_options](?hook=um_{$data}_predefined_field_options) | includes/core/class-builtin.php |
| [um\_cron\_disable](?hook=um_cron_disable) | includes/core/class-cron.php |
| [um\_human\_time\_diff](?hook=um_human_time_diff) | includes/core/class-date-time.php |
| [um\_core\_enqueue\_priority](?hook=um_core_enqueue_priority) | includes/core/class-enqueue.php |
| [um\_enqueue\_localize\_data](?hook=um_enqueue_localize_data) | includes/core/class-enqueue.php |
| [um\_view\_label\_{$key}](?hook=um_view_label_{$key}) | includes/core/class-fields.php |
| [um\_edit\_label\_{$key}](?hook=um_edit_label_{$key}) | includes/core/class-fields.php |
| [um\_edit\_label\_all\_fields](?hook=um_edit_label_all_fields) | includes/core/class-fields.php |
| [um\_extend\_field\_classes](?hook=um_extend_field_classes) | includes/core/class-fields.php |
| [um\_edit\_{$key}\_field\_value](?hook=um_edit_{$key}_field_value) | includes/core/class-fields.php |
| [um\_edit\_{$type}\_field\_value](?hook=um_edit_{$type}_field_value) | includes/core/class-fields.php |
| [um\_field\_default\_value](?hook=um_field_default_value) | includes/core/class-fields.php |
| [um\_field\_{$key}\_default\_value](?hook=um_field_{$key}_default_value) | includes/core/class-fields.php |
| [um\_field\_{$type}\_default\_value](?hook=um_field_{$type}_default_value) | includes/core/class-fields.php |
| [um\_is\_selected\_filter\_key](?hook=um_is_selected_filter_key) | includes/core/class-fields.php |
| [um\_is\_selected\_filter\_value](?hook=um_is_selected_filter_value) | includes/core/class-fields.php |
| [um\_is\_selected\_filter\_data](?hook=um_is_selected_filter_data) | includes/core/class-fields.php |
| [um\_get\_form\_fields](?hook=um_get_form_fields) | includes/core/class-fields.php |
| [um\_get\_field\_\_{$key}](?hook=um_get_field__{$key}) | includes/core/class-fields.php |
| [um\_field\_non\_utf8\_value](?hook=um_field_non_utf8_value) | includes/core/class-fields.php |
| [um\_hook\_for\_field\_{$type}](?hook=um_hook_for_field_{$type}) | includes/core/class-fields.php |
| [um\_edit\_field\_{$mode}\_{$type}](?hook=um_edit_field_{$mode}_{$type}) | includes/core/class-fields.php |
| [um\_form\_fields\_textarea\_settings](?hook=um_form_fields_textarea_settings) | includes/core/class-fields.php |
| [um\_custom\_dropdown\_options\_parent\_\_{$form\_key}](?hook=um_custom_dropdown_options_parent__{$form_key}) | includes/core/class-fields.php |
| [um\_custom\_dropdown\_options\_source\_\_{$form\_key}](?hook=um_custom_dropdown_options_source__{$form_key}) | includes/core/class-fields.php |
| [um\_custom\_dropdown\_options\_source\_url\_\_{$form\_key}](?hook=um_custom_dropdown_options_source_url__{$form_key}) | includes/core/class-fields.php |
| [um\_fields\_options\_enable\_pairs\_\_{$key}](?hook=um_fields_options_enable_pairs__{$key}) | includes/core/class-fields.php |
| [um\_select\_dropdown\_dynamic\_options](?hook=um_select_dropdown_dynamic_options) | includes/core/class-fields.php |
| [um\_select\_dropdown\_dynamic\_options\_{$key}](?hook=um_select_dropdown_dynamic_options_{$key}) | includes/core/class-fields.php |
| [um\_multiselect\_option\_value](?hook=um_multiselect_option_value) | includes/core/class-fields.php |
| [um\_multiselect\_options](?hook=um_multiselect_options) | includes/core/class-fields.php |
| [um\_multiselect\_options\_{$key}](?hook=um_multiselect_options_{$key}) | includes/core/class-fields.php |
| [um\_multiselect\_options\_{$type}](?hook=um_multiselect_options_{$type}) | includes/core/class-fields.php |
| [um\_radio\_field\_options](?hook=um_radio_field_options) | includes/core/class-fields.php |
| [um\_radio\_field\_options\_{$key}](?hook=um_radio_field_options_{$key}) | includes/core/class-fields.php |
| [um\_checkbox\_field\_options](?hook=um_checkbox_field_options) | includes/core/class-fields.php |
| [um\_checkbox\_field\_options\_{$key}](?hook=um_checkbox_field_options_{$key}) | includes/core/class-fields.php |
| [um\_field\_checkbox\_item\_title](?hook=um_field_checkbox_item_title) | includes/core/class-fields.php |
| [um\_{$key}\_form\_edit\_field](?hook=um_{$key}_form_edit_field) | includes/core/class-fields.php |
| [um\_view\_field](?hook=um_view_field) | includes/core/class-fields.php |
| [um\_view\_field\_value\_{$type}](?hook=um_view_field_value_{$type}) | includes/core/class-fields.php |
| [um\_{$key}\_form\_show\_field](?hook=um_{$key}_form_show_field) | includes/core/class-fields.php |
| [um\_{$type}\_form\_show\_field](?hook=um_{$type}_form_show_field) | includes/core/class-fields.php |
| [um\_view\_field\_output\_{$type}](?hook=um_view_field_output_{$type}) | includes/core/class-fields.php |
| [um\_allowed\_image\_types](?hook=um_allowed_image_types) | includes/core/class-files.php |
| [um\_allowed\_file\_types](?hook=um_allowed_file_types) | includes/core/class-files.php |
| [um\_upload\_basedir\_filter](?hook=um_upload_basedir_filter) | includes/core/class-files.php |
| [um\_upload\_baseurl\_filter](?hook=um_upload_baseurl_filter) | includes/core/class-files.php |
| [um\_custom\_image\_handle\_{$field}](?hook=um_custom_image_handle_{$field}) | includes/core/class-files.php |
| [um\_image\_handle\_global\_\_option](?hook=um_image_handle_global__option) | includes/core/class-files.php |
| [um\_image\_handle\_{$field}\_\_option](?hook=um_image_handle_{$field}__option) | includes/core/class-files.php |
| [um\_allow\_frontend\_image\_uploads](?hook=um_allow_frontend_image_uploads) | includes/core/class-files.php |
| [um\_image\_upload\_nonce](?hook=um_image_upload_nonce) | includes/lib/upload/um-image-upload.php |
| [um\_file\_upload\_nonce](?hook=um_file_upload_nonce) | includes/lib/upload/um-file-upload.php |
| [um\_upload\_file\_name](?hook=um_upload_file_name) | includes/lib/upload/um-file-upload.php |
| [um\_ajax\_select\_options\_\_debug\_mode](?hook=um_ajax_select_options__debug_mode) | includes/core/class-form.php |
| [um\_submit\_form\_error](?hook=um_submit_form_error) | includes/core/class-form.php |
| [um\_submit\_post\_form](?hook=um_submit_post_form) | includes/core/class-form.php |
| [um\_submit\_form\_data](?hook=um_submit_form_data) | includes/core/class-form.php |
| [um\_email\_templates\_path\_by\_slug](?hook=um_email_templates_path_by_slug) | includes/core/class-mail.php |
| [um\_email\_send\_subject](?hook=um_email_send_subject) | includes/core/class-mail.php |
| [um\_email\_template\_path](?hook=um_email_template_path) | includes/core/class-mail.php |
| [um\_email\_template\_html\_formatting](?hook=um_email_template_html_formatting) | includes/core/class-mail.php |
| [um\_email\_template\_body\_attrs](?hook=um_email_template_body_attrs) | includes/core/class-mail.php |
| [um\_locate\_email\_template](?hook=um_locate_email_template) | includes/core/class-mail.php |
| [um\_change\_email\_template\_file](?hook=um_change_email_template_file) | includes/core/class-mail.php |
| [um\_custom\_search\_field\_{$filter}](?hook=um_custom_search_field_{$filter}) | includes/core/class-members.php |
| [um\_search\_field\_{$filter}](?hook=um_search_field_{$filter}) | includes/core/class-members.php |
| [um\_search\_field\_type](?hook=um_search_field_type) | includes/core/class-members.php |
| [um\_search\_fields](?hook=um_search_fields) | includes/core/class-members.php |
| [um\_search\_select\_fields](?hook=um_search_select_fields) | includes/core/class-members.php |
| [um\_prepare\_user\_query\_args](?hook=um_prepare_user_query_args) | includes/core/class-members.php |
| [um\_prepare\_user\_results\_array](?hook=um_prepare_user_results_array) | includes/core/class-members.php |
| [um\_get\_option\_filter\_\_{$option\_id}](?hook=um_get_option_filter__{$option_id}) | includes/core/class-options.php |
| [um\_core\_page\_id\_filter](?hook=um_core_page_id_filter) | includes/core/class-options.php |
| [um\_reset\_password\_shortcode\_args\_filter](?hook=um_reset_password_shortcode_args_filter) | includes/core/class-password.php |
| [um\_allow\_canonical\_\_filter](?hook=um_allow_canonical__filter) | includes/core/class-permalinks.php |
| [um\_get\_current\_page\_url](?hook=um_get_current_page_url) | includes/core/class-permalinks.php |
| [um\_activate\_url](?hook=um_activate_url) | includes/core/class-permalinks.php |
| [um\_localize\_permalink\_filter](?hook=um_localize_permalink_filter) | includes/core/class-permalinks.php |
| [um\_profile\_tabs](?hook=um_profile_tabs) | includes/core/class-profile.php |
| [um\_profile\_active\_tab](?hook=um_profile_active_tab) | includes/core/class-profile.php |
| [um\_excluded\_comment\_types](?hook=um_excluded_comment_types) | includes/core/class-query.php |
| [um\_register\_allow\_nonce\_verification](?hook=um_register_allow_nonce_verification) | includes/core/class-register.php |
| [um\_api\_log\_requests](?hook=um_api_log_requests) | includes/core/class-rest-api.php |
| [um\_rest\_query\_mode](?hook=um_rest_query_mode) | includes/core/class-rest-api.php |
| [um\_api\_output\_data](?hook=um_api_output_data) | includes/core/class-rest-api.php |
| [um\_rest\_api\_get\_stats](?hook=um_rest_api_get_stats) | includes/core/class-rest-api.php |
| [um\_rest\_userdata](?hook=um_rest_userdata) | includes/core/class-rest-api.php |
| [um\_rest\_get\_auser](?hook=um_rest_get_auser) | includes/core/class-rest-api.php |
| [um\_api\_valid\_query\_modes](?hook=um_api_valid_query_modes) | includes/core/class-rest-api.php |
| [um\_api\_output\_format](?hook=um_api_output_format) | includes/core/class-rest-api.php |
| [um\_rewrite\_flush\_rewrite\_rules](?hook=um_rewrite_flush_rewrite_rules) | includes/core/class-rewrite.php |
| [um\_locate\_user\_profile\_not\_loggedin\_\_redirect](?hook=um_locate_user_profile_not_loggedin__redirect) | includes/core/class-rewrite.php |
| [um\_set\_user\_role](?hook=um_set_user_role) | includes/core/class-roles-capabilities.php |
| [um\_user\_permissions\_filter](?hook=um_user_permissions_filter) | includes/core/class-user.php |
| [um\_emoji\_base\_uri](?hook=um_emoji_base_uri) | includes/core/class-shortcodes.php |
| [um\_pre\_args\_setup](?hook=um_pre_args_setup) | includes/core/class-shortcodes.php |
| [um\_shortcode\_args\_filter](?hook=um_shortcode_args_filter) | includes/core/class-shortcodes.php |
| [um\_disable\_dynamic\_global\_css](?hook=um_disable_dynamic_global_css) | includes/core/class-shortcodes.php |
| [um\_allowed\_user\_tags\_patterns](?hook=um_allowed_user_tags_patterns) | includes/core/class-shortcodes.php |
| [um\_profile\_tag\_hook\_\_{$usermeta}](?hook=um_profile_tag_hook__{$usermeta}) | includes/core/class-shortcodes.php |
| [um\_pretty\_number\_formatting](?hook=um_pretty_number_formatting) | includes/core/class-user-posts.php |
| [um\_admin\_pending\_queue\_filter](?hook=um_admin_pending_queue_filter) | includes/core/class-user.php |
| [um\_user\_profile\_additional\_fields](?hook=um_user_profile_additional_fields) | includes/core/class-user.php |
| [um\_before\_save\_filter\_submitted](?hook=um_before_save_filter_submitted) | includes/core/class-user.php |
| [um\_admin\_user\_actions\_hook](?hook=um_admin_user_actions_hook) | includes/core/class-user.php |
| [um\_is\_private\_filter\_hook](?hook=um_is_private_filter_hook) | includes/core/class-user.php |
| [um\_before\_update\_profile](?hook=um_before_update_profile) | includes/core/class-user.php |
| [um\_validation\_safe\_username\_regex](?hook=um_validation_safe_username_regex) | includes/core/class-validation.php |
| [um\_validation\_safe\_string\_regex](?hook=um_validation_safe_string_regex) | includes/core/class-validation.php |
| [um\_secure\_account\_fields](?hook=um_secure_account_fields) | includes/core/um-actions-account.php |
| [um\_account\_pre\_updating\_profile\_array](?hook=um_account_pre_updating_profile_array) | includes/core/um-actions-account.php |
| [um\_validate\_username\_exists](?hook=um_validate_username_exists) | includes/core/um-actions-ajax.php |
| [um\_get\_custom\_field\_array](?hook=um_get_custom_field_array) | includes/core/um-actions-form.php |
| [um\_login\_form\_button\_one](?hook=um_login_form_button_one) | includes/core/um-actions-login.php |
| [um\_login\_form\_button\_two](?hook=um_login_form_button_two) | includes/core/um-actions-login.php |
| [um\_login\_form\_button\_two\_url](?hook=um_login_form_button_two_url) | includes/core/um-actions-login.php |
| [um\_frontend\_member\_search\_filters](?hook=um_frontend_member_search_filters) | includes/core/um-actions-members.php |
| [um\_browser\_url\_redirect\_to\_\_filter](?hook=um_browser_url_redirect_to__filter) | includes/core/um-actions-misc.php |
| [um\_custom\_success\_message\_handler](?hook=um_custom_success_message_handler) | includes/core/um-actions-misc.php |
| [um\_custom\_error\_message\_handler](?hook=um_custom_error_message_handler) | includes/core/um-actions-misc.php |
| [um\_profile\_can\_view\_main](?hook=um_profile_can_view_main) | includes/core/um-actions-profile.php |
| [um\_user\_pre\_updating\_profile\_array](?hook=um_user_pre_updating_profile_array) | includes/core/um-actions-profile.php |
| [um\_user\_pre\_updating\_files\_array](?hook=um_user_pre_updating_files_array) | includes/core/um-actions-register.php |
| [um\_user\_photo\_menu\_view](?hook=um_user_photo_menu_view) | includes/core/um-actions-profile.php |
| [um\_user\_photo\_menu\_edit](?hook=um_user_photo_menu_edit) | includes/core/um-actions-profile.php |
| [um\_profile\_edit\_menu\_items](?hook=um_profile_edit_menu_items) | includes/core/um-actions-profile.php |
| [um\_myprofile\_edit\_menu\_items](?hook=um_myprofile_edit_menu_items) | includes/core/um-actions-profile.php |
| [um\_user\_profile\_tabs](?hook=um_user_profile_tabs) | includes/core/um-actions-profile.php |
| [um\_profile\_menu\_link\_{$id}](?hook=um_profile_menu_link_{$id}) | includes/core/um-actions-profile.php |
| [um\_add\_user\_frontend\_submitted](?hook=um_add_user_frontend_submitted) | includes/core/um-actions-register.php |
| [um\_user\_register\_submitted\_\_email](?hook=um_user_register_submitted__email) | includes/core/um-actions-register.php |
| [um\_registration\_user\_role](?hook=um_registration_user_role) | includes/core/um-actions-register.php |
| [um\_register\_hidden\_role\_field](?hook=um_register_hidden_role_field) | includes/core/um-actions-register.php |
| [um\_register\_form\_button\_one](?hook=um_register_form_button_one) | includes/core/um-actions-register.php |
| [um\_register\_form\_button\_two](?hook=um_register_form_button_two) | includes/core/um-actions-register.php |
| [um\_register\_form\_button\_two\_url](?hook=um_register_form_button_two_url) | includes/core/um-actions-register.php |
| [um\_account\_secure\_fields\_\_enabled](?hook=um_account_secure_fields__enabled) | includes/core/um-filters-account.php |
| [um\_multisite\_upload\_sites\_directory](?hook=um_multisite_upload_sites_directory) | includes/core/um-filters-files.php |
| [um\_multisite\_upload\_directory](?hook=um_multisite_upload_directory) | includes/core/um-filters-files.php |
| [um\_query\_args\_{$field}\_\_filter](?hook=um_query_args_{$field}__filter) | includes/core/um-filters-members.php |
| [um\_query\_args\_filter](?hook=um_query_args_filter) | includes/core/um-filters-members.php |
| [um\_modify\_sortby\_parameter](?hook=um_modify_sortby_parameter) | includes/core/um-filters-members.php |
| [um\_nav\_menu\_roles\_item\_visibility](?hook=um_nav_menu_roles_item_visibility) | includes/core/um-filters-navmenu.php |
| [um\_permalink\_base\_before\_filter](?hook=um_permalink_base_before_filter) | includes/core/um-filters-user.php |
| [um\_permalink\_base\_after\_filter\_name](?hook=um_permalink_base_after_filter_name) | includes/core/um-filters-user.php |
| [um\_permalink\_base\_after\_filter\_name\_dash](?hook=um_permalink_base_after_filter_name_dash) | includes/core/um-filters-user.php |
| [um\_permalink\_base\_after\_filter\_name\_plus](?hook=um_permalink_base_after_filter_name_plus) | includes/core/um-filters-user.php |
| [um\_permalink\_base\_after\_filter](?hook=um_permalink_base_after_filter) | includes/core/um-filters-user.php |
| [um\_profile\_navbar\_classes](?hook=um_profile_navbar_classes) | templates/profile.php |
| [um\_profile\_query\_make\_posts](?hook=um_profile_query_make_posts) | templates/profile/posts.php |
Last updated on November 11, 2020
No results found
---
# Misc Tab - Ultimate Member
Misc Tab
========
[](javascript:window.print() "Print this article")
### Overview
The **Misc** tab allows you to set the title and meta description for the user’s page. This allows for the page title and meta description to change dynamically for each user on your site. This tab also contains settings that influence the plugin performance.

### Show an asterisk for required fields
This setting allows you to show asterisks after the required field labels in the form.
### User profile title
This option allows you to set the page title for the user page.
### User Profile Dynamic Meta Description
This option allows you to set the meta description for the user page.
### Disable Cache User Profile
This option allows you to disable the Ultimate Member user's cache.
### Enable Gutenberg Blocks
This option allows you to use Ultimate Member blocks in Gutenberg editor.
### REST API version
This option allows you to choose the REST API version.
### Disable pre-queries for restriction content logic (advanced)
This option allows you to remove pre-queries callbacks for [restriction content](//docs.ultimatemember.com/article/1620-restriction-content)
. It is not recommended if you are a new customer or do not want search robots to detect the restricted content or structure. It may be useful for old customers and backward compatibility when it's necessary to show content instead of 404 error.
### Enable custom table for usermeta
This option allows you to [create a custom table for user metadata](//docs.ultimatemember.com/article/1541-meta-table-for-member-directories)
to improve performance for member directory searches.
### Remove Data on Uninstall?
When this setting is turned on the Ultimate Member plugin will completely remove all data when the plugin/extension is deleted.
Last updated on January 9, 2025
No results found
---
# Extend Ultimate Member Account page with custom tabs/content - Ultimate Member
Extend Ultimate Member Account page with custom tabs/content
============================================================
[](javascript:window.print() "Print this article")
You can use these hooks to add your custom tab to the Account page:
* [um\_account\_page\_default\_tabs\_hook](//docs.ultimatemember.com/article/961-umaccountpagedefaulttabshook)
* [um\_account\_content\_hook\_{$id}](//docs.ultimatemember.com/article/960-umaccountcontenthookid)
See the code example below.
**NOTE:** We have created this code example to provide guidance and to make it easier for you to implement this code into your website. However, we are not able to provide any support when it comes to customizing the plugin. If you need help implementing this code, please hire a developer.
Last updated on August 21, 2024
### Related Articles
* [How to display custom fields in Account](/article/1504-how-to-display-custom-fields-in-account)
* [How to display pre-defined fields in Account](/article/1770-extend-the-account-page-with-ultimate-member-pre-defined-fields)
No results found
---
# Get the current user profile ID - Ultimate Member
Get the current user profile ID
===============================
[](javascript:window.print() "Print this article")
Use the following function to get the current user profile ID. Remember that this code will work only on a profile page.
$profile\_id = um\_profile\_id();
Last updated on February 14, 2020
No results found
---
# Pages Tab - Ultimate Member
Pages Tab
=========
[](javascript:window.print() "Print this article")
### Overview
The **Pages** tab allows you to assign a page to one of the core elements required for the plugin to function properly. The plugin automatically creates and configures required pages on installation. You only need to use this tab, if you accidentally deleted pages that were automatically created when the plugin was activated for the first time.
**Follow these rules when setting up pages****:**
* Pages must be unique to avoid conflicts. Do not use one page twice.
* "User page" and "Account page" can not be a child page because these pages require specific rewrite rules for URLs. Don't make other pages a child of the User or Account pages.
* "User page", "Login page", "Register page", "Members page", "Account page", and "Password Reset page" must contain proper [shortcodes](//docs.ultimatemember.com/article/210-ultimate-member-shortcodes#core-plugin)
.
**Warning:** Do not cache pages "Account", "Login", "Password Reset", "Register", or "User". Caching may cause various issues, see details [here](//docs.ultimatemember.com/article/1595-caching-problems "Caching problems")
.
Image - Settings on _wp-admin > Ultimate Member > Settings > General > Pages_

### How to recreate lost pages
If the default pages have not been generated for you or you have accidentally deleted the default pages, you can also try following the steps below:
1\. Make sure you are logged in.
2\. Paste the below URL in the browser address bar and click enter.
`https://your-site.com/wp-admin/admin.php?page=um_options&um_adm_action=install_core_pages`
\*\* replace your-site.com with your site address.
### Assigning a page
All you need to do is select an already created page on your site from the drop-down and then save the changes for that page to be assigned to the UM core element. You will have to go to that newly assigned page and add the related shortcode.
**Note:** You do not need to change any of the settings on this tab. The primary reason for this tab is if you accidentally delete any of the core pages installed by Ultimate Member
Last updated on January 9, 2025
### Related Articles
* [Ultimate Member - Shortcodes](/article/210-ultimate-member-shortcodes)
* [Default Pages](/article/111-default-pages)
No results found
---
# Uploads Tab - Ultimate Member
Uploads Tab
===========
[](javascript:window.print() "Print this article")
Overview
--------
The Uploads tab allows you to control options related to user uploads. This allows you to optimize the photos for your site.
### Profile Photo Maximum File Size (bytes)
The setting _"Profile Photo Maximum File Size"_ limits the maximum file size\* of the profile photo. The default value is 999999999.

### Cover Photo Maximum File Size (bytes)
The setting _"Cover Photo Maximum File Size"_ limits the maximum file size\* of the cover photo. The default value is 999999999.

**Note:** You have to set the maximum file size in bytes.
Examples: 100kB = 102400, 1MB = 1048576, 10MB = 10485760
### Profile photo thumbnail sizes
By default the plugin creates three thumbnails when a user uploads a profile photo (40px, 80px, 190px). These are used to improve the performance of the plugin by serving the thumbnails instead of the original image. This option allows you to change the size of the thumbnails or remove a thumbnail from being created. However, if you have not changed the default image size of the profile photo you should not need to change the settings here.

See also [Profile Photo Size](//docs.ultimatemember.com/article/1542-profile-photo-size)
.
### Cover photo thumbnail sizes
By default, the plugin creates two thumbnails when a user uploads a cover photo (300px and 600px). These are used to improve the performance of the plugin by serving the thumbnails instead of the original image. This option allows you to change the size of the thumbnails or remove a thumbnail from being created.

See also [Profile Cover Size](//docs.ultimatemember.com/article/1554-profile-cover-size)
.
### Change image orientation
The image uploader can automatically rotate images to use orientation by the camera EXIF data. Turn on the setting _"Change image orientation"_ to enable this feature.

### Image Quality
The image uploader automatically compresses JPEG images. Use the setting _"Image Quality"_ to set the quality of the compressed file. It ranges from 0 (worst quality, smaller file) to 100 (best quality, biggest file). The default value is 60. The recommended value is 90.

### Image Upload Maximum Width (px)
The setting _"Image Upload Maximum Width"_ limits the maximum width of all uploaded images. Bigger images will be re-saved with a smaller width.

### Cover Photo Minimum Width (px)
The setting _"Cover Photo Minimum Width"_ limits the minimum width of the cover photo. Smaller images won't be uploaded.

Last updated on January 9, 2025
### Related Articles
* [Profile Photo Size](/article/1542-profile-photo-size)
* [Profile Cover Size](/article/1554-profile-cover-size)
No results found
---
# Template structure & Overriding templates via a theme - Ultimate Member
Template structure & Overriding templates via a theme
=====================================================
[](javascript:window.print() "Print this article")
### Overview
Ultimate Member template files contain **your site's membership panel's markup and template structure for frontend and HTML emails**.
Template files can be found within the `ultimate-member/templates` directory.
When you open template files, you will notice they contain hooks that allow you to add/move content without needing to edit template files themselves. This method protects against upgrade issues, as the template files can be left completely untouched.
Since version 2.6.2, we have implemented a template versioning feature to help you with updating outdated templates and sync when you update with our plugins, please see this [article](//docs.ultimatemember.com/article/1847-fixing-outdated-ultimate-member-templates)
.
### How to edit files
Edit files in an **upgrade-safe way** using **overrides**. Copy the template into a directory within your theme named `/ultimate-member` keeping the file structure according to the Templates Map. The copied file will override the Ultimate Member default template file. Edit the copied file to change a layout.
**Example:** To override the member directory base template, copy the file `wp-content/plugins/ultimate-member/templates/members.php` to `wp-content/themes/{active_theme}/ultimate-member/templates/members.php` where `{active_theme}` is your active theme folder.
Use an FTP connection to copy and edit files on the site. You can set up an FTP connection through the site control panel provided by the hosting provider. You will need an FTP client on your computer. We recommend using [FileZilla Client](https://filezilla-project.org/download.php)
.
**Warning:** Do not edit template files within the core plugin itself as they are overwritten during the upgrade process and any customizations will be lost. We recommend using a [child-theme](https://developer.wordpress.org/themes/advanced-topics/child-themes/)
, which hasn't dependencies with the official themes repo, so your custom files cannot be rewritten after a theme upgrade.
**Tip:** You must maintain the folder structure of the template file when overriding the template via Theme/Child-theme.If your theme is `wp-content/themes/twenty-fourteen/` and you need to override the member directory template `/wp-content/plugins/ultimate-member/templates/members.php`, the directory should be `wp-content/themes/twenty-fourteen/ultimate-member/templates/members.php`
### Templates Map
| Plugin | Path | Template File |
| --- | --- | --- |
| Ultimate Member core | `wp-content/themes/{active_theme}/ultimate-member/` | login-to-view.php |
| members-grid.php |
| members-header.php |
| members-list.php |
| members-pagination.php |
| searchform.php |
| `wp-content/themes/{active_theme}/ultimate-member/templates/` | account.php |
| gdpr-register.php |
| login.php |
| logout.php |
| members.php |
| message.php |
| password-change.php |
| password-reset.php |
| profile.php |
| register.php |
| `wp-content/themes/{active_theme}/ultimate-member/profile/` | comments.php |
| comments-single.php |
| posts.php |
| posts-single.php |
| bbPress | `wp-content/themes/{active_theme}/ultimate-member/um-bbpress/` | favorites.php |
| replies.php |
| replies-single.php |
| subscriptions.php |
| topics.php |
| topics-single.php |
| Followers | `wp-content/themes/{active_theme}/ultimate-member/um-followers/` | email/new\_follower.php |
| followers.php |
| followers-mini.php |
| following.php |
| following-mini.php |
| Friends | `wp-content/themes/{active_theme}/ultimate-member/um-friends/` | email/new\_friend.php |
| email/new\_friend\_request.php |
| account-notifications.php |
| friends.php |
| friends-bar.php |
| friends-mini.php |
| Groups | `wp-content/themes/{active_theme}/ultimate-member/um-groups/directory/` | directory.php |
| directory\_confirm.php |
| directory\_search.php |
| directory\_tabs.php |
| `wp-content/themes/{active_theme}/ultimate-member/um-groups/discussion/html/` | new-follow.php |
| new-gform.php |
| new-gform-submission.php |
| new-group.php |
| new-post.php |
| new-product.php |
| new-topic.php |
| new-user.php |
| `wp-content/themes/{active_theme}/ultimate-member/um-groups/discussion/` | clone.php |
| comment.php |
| comment-reply.php |
| comments.php |
| likes.php |
| new.php |
| trending.php |
| user-wall.php |
| `wp-content/themes/{active_theme}/ultimate-member/um-groups/email/` | groups\_approve\_member.php |
| groups\_invite\_member.php |
| groups\_join\_request.php |
| groups\_new\_comment.php |
| groups\_new\_post.php |
| `wp-content/themes/{active_theme}/ultimate-member/um-groups/tabs/` | avatar.php |
| blocked.php |
| create.php |
| delete.php |
| discussions.php |
| invites.php |
| members.php |
| requests.php |
| single-group-tabs.php |
| `wp-content/themes/{active_theme}/ultimate-member/um-groups/` | create-group-form.php |
| groups-list.php |
| invite-list.php |
| latest\_comments.php |
| list.php |
| list-users.php |
| list-users-search-form.php |
| own.php |
| single.php |
| MailChimp | `wp-content/themes/{active_theme}/ultimate-member/um-mailchimp/` | account\_email\_newsletters.php |
| field.php |
| fieldset.php |
| fieldset\_ch.php |
| form\_subscribe.php |
| form\_unsubscribe.php |
| Private Messages | `wp-content/themes/{active_theme}/ultimate-member/um-messaging/` | email/new\_message.php |
| email/new\_message\_reminder.php |
| account\_notification.php |
| account\_privacy.php |
| button.php |
| conversation.php |
| conversations.php |
| emoji.php |
| message.php |
| myCRED | `wp-content/themes/{active_theme}/ultimate-member/um-mycred/` | account\_points.php |
| badges.php |
| rank\_bar.php |
| Notices | `wp-content/themes/{active_theme}/ultimate-member/um-notices/` | notice.php |
| shortcode.php |
| Real-Time Notifications | `wp-content/themes/{active_theme}/ultimate-member/um-notifications/` | account\_webnotifications.php |
| feed.php |
| no-notifications.php |
| notifications.php |
| notifications-list.php |
| notifications\_button.php |
| Online Users | `wp-content/themes/{active_theme}/ultimate-member/um-online/` | nobody.php |
| online.php |
| online-marker.php |
| online-text.php |
| Profile Completeness | `wp-content/themes/{active_theme}/ultimate-member/um-profile-completeness/` | completeness-bar.php |
| completeness-popup.php |
| widget.php |
| Google Recaptcha | `wp-content/themes/{active_theme}/ultimate-member/um-recaptcha/` | captcha.php |
| captcha\_v3.php |
| User Reviews | `wp-content/themes/{active_theme}/ultimate-member/um-reviews/` | email/review\_notice.php |
| member-rating.php |
| reply-add.php |
| reply-edit.php |
| reply-front-actions.php |
| reply-list.php |
| review-add.php |
| review-detail.php |
| review-edit.php |
| review-front-actions.php |
| review-list.php |
| review-my.php |
| review-none.php |
| review-overview.php |
| review-widget.php |
| Social Activity | `wp-content/themes/{active_theme}/ultimate-member/templates/activity/` | new-follow.php |
| new-gform.php |
| new-gform-submission.php |
| new-group.php |
| new-post.php |
| new-product.php |
| new-topic.php |
| new-user.php |
| `wp-content/themes/{active_theme}/ultimate-member/um-social-activity/` | clone.php |
| comment.php |
| comment-reply.php |
| comments.php |
| edit-post.php |
| likes.php |
| new.php |
| trending.php |
| user-wall.php |
| Social Login | `wp-content/themes/{active_theme}/ultimate-member/um-social-login/` | buttons.php |
| form.php |
| pre-loader-form.php |
| Stripe Account | `wp-content/themes/{active_theme}/ultimate-member/um-stripe/account/` | billings.php |
| Stripe Checkout | `wp-content/themes/{active_theme}/ultimate-member/um-stripe/checkout/` | order-details.php
payment.php |
| Stripe Form Field | `wp-content/themes/{active_theme}/ultimate-member/um-stripe/` | field-multiple.php
field-single.php |
| Terms & Conditions | `wp-content/themes/{active_theme}/ultimate-member/um-terms-conditions/` | um-terms-conditions-public-display.php |
| Unsplash | `wp-content/themes/{active_theme}/ultimate-member/um-unsplash/` | modal.php |
| photo\_attribution.php |
| User Bookmarks | `wp-content/themes/{active_theme}/ultimate-member/um-user-bookmarks/buttons/` | add.php |
| remove.php |
| `wp-content/themes/{active_theme}/ultimate-member/um-user-bookmarks/profile/edit-folder/` | form.php |
| `wp-content/themes/{active_theme}/ultimate-member/um-user-bookmarks/profile/folder-view/folder/` | folder-info.php |
| title.php |
| `wp-content/themes/{active_theme}/ultimate-member/um-user-bookmarks/profile/folder-view/` | add-folder.php |
| folder.php |
| `wp-content/themes/{active_theme}/ultimate-member/um-user-bookmarks/profile/single-folder/` | bookmark-item.php |
| dropdown.php |
| `wp-content/themes/{active_theme}/ultimate-member/um-user-bookmarks/profile/` | bookmarks.php |
| edit-folder.php |
| folder-view.php |
| single-folder.php |
| `wp-content/themes/{active_theme}/ultimate-member/um-user-bookmarks/` | modal.php |
| select-folder.php |
| User Locations | `wp-content/themes/{active_theme}/ultimate-member/um-user-locations/` | infowindow.php |
| map-shortcode.php |
| map.php |
| User Photos | `wp-content/themes/{active_theme}/ultimate-member/um-user-photos/email/` | new\_album.php |
| `wp-content/themes/{active_theme}/ultimate-member/um-user-photos/modal/` | add-album.php |
| delete-album.php |
| delete-comment.php |
| edit-album.php |
| edit-comment.php |
| edit-image.php |
| likes.php |
| modal.php |
| `wp-content/themes/{active_theme}/ultimate-member/um-user-photos/social-activity/` | new-album.php |
| `wp-content/themes/{active_theme}/ultimate-member/um-user-photos/` | album-block.php |
| album-head.php |
| caption.php |
| comment.php |
| comment-form.php |
| comments.php |
| gallery.php |
| gallery-head.php |
| photos.php |
| single-album.php |
| User Tags | `wp-content/themes/{active_theme}/ultimate-member/um-user-tags/` | tags.php |
| tags-widget.php |
| Verified Users | `wp-content/themes/{active_theme}/ultimate-member/um-verified-users/email/` | verification\_request.php |
| verified\_account.php |
| `wp-content/themes/{active_theme}/ultimate-member/um-verified-users/` | account\_info.php |
| profile\_info.php |
| verified-account.php |
| Woocommerce | `wp-content/themes/{active_theme}/ultimate-member/um-woocommerce/` | my-purchases.php |
| order-popup.php |
| orders.php |
| product-reviews.php |
| subscription.php |
Last updated on January 29, 2025
### Related Articles
* [Fixing Outdated Ultimate Member Templates](/article/1847-fixing-outdated-ultimate-member-templates)
No results found
---
# Users Tab - Ultimate Member
Users Tab
=========
[](javascript:window.print() "Print this article")
### Profile permalink base [#](#um_options_permalink_base)

This option allows you to select the profile permalink base that will appear in the URL when viewing a user's profile on your site. By default, the profile permalink will be set to show the "Username" in the URL. You can set the permalink option to be:
| Profile Permalink Base | Examples |
| --- | --- |
| Username | www.yoursite.com/user/ **ultimatemember**/ |
| First and Last Name with '.' | www.yoursite.com/user/ **john.doe/** |
| First and Last Name with '-' | www.yoursite.com/user/ **john-doe**/ |
| First and Last Name with '+' | www.yoursite.com/user/ **john+doe**/ |
| User ID | www.yoursite.com/user/ **12**/ |
| Unique hash string | www.yoursite.com/user/ **~bf18030f2a9d00170a**/ |
| Custom usermeta | www.yoursite.com/user/ **my%20permalink%20base**/ |
If you have selected custom usermeta from the Profile Permalink Base, you are required to enter the metakey of the data in the **Profile Permalink Base Custom Metakey**. The data selected should be from a required field in your site that exists for all users and the value should be unique. Otherwise, you may have an unexpected result.
If necessary, developers can generate this custom meta in force mode by using the hook `um_custom_meta_permalink_base_generate_user_slug`
### User display name [#](#um_options_display_name)

This option allows you to select the display name for users of your site. If it exists, the default setting uses the first name and last name as the display names. The display name can be one of the following:
* **Nickname** – If this option is selected users of your site will be identified by the nickname they created when registering on your site
* **Username** – If this option is selected users of your site will be identified by the username they created when registering on your site e.g johndoe
* **First name & last name** – If this option is selected users of your site will be identified by their first and last name e.g John Doe.
* **Last name & first name** – If this option is selected users of your site will be identified by their last and first name e.g Doe, John.
* **First name & first initial of last name** – If this option is selected users of your site will be identified by their first name and the first initial of their last name e.g John D.
* **First initial of first name & last name** – If this option is selected users of your site will be identified by the first initial of their first name and their last name e.g J Doe.
* **First name only** – If this option is selected users of your site will be identified by their first name only e.g John.
* **Default WP Display name** – If this option is selected users of your site will be identified by the text that they have entered into the display name field
* **Custom field(s)** – If this option is selected your users' display name will be selected from the custom field(s) they fill in when registering on your site.
### Automatically redirect author page to their profile?

This option allows you to redirect the author page to the UM profile page. The author page will commonly appear when a user clicks on the author's name on a blog post.
### Enable Members directory

This option allows you to completely disable member directories from your site. If you turn member directories off the member directories link from the Ultimate Member menu in the admin.
### Use Gravatars

This option allows you to decide whether to use Gravatars or the default Ultimate Member image for user profile photos before users upload a custom profile photo.
### Show/hide password button
This option enables and displays the toggle button next to the password fields on the UM Forms and Account page. This option is disabled by default for both existing users and new installations. When this option is enabled, the eye icon appears to the right of the password field. If the eye icon is clicked or pressed, it will display the unencrypted password.

This setting can be utilized in the following locations:
* Any password field in UM profile, registration, or login form
* Password field on the reset password page
* Password field on account > delete tab
* Password field for exporting or erasing user data
### Require a strong password?

This option allows you to require a strong password when a user resets their password using the password reset/forgot password process. You can enable or disable strong password rules common to all Ultimate Member forms. The password field on the registration form has the option to enable the force strong password. This option has no setting when changing the password on the account page.
### Password minimum length

This option allows you to set the minimum number of characters for the password. However, the password field in the UM forms has its settings to enable or disable the password minimum length. Leave this option empty or blank to use the default value of 8.
### Password maximum length

This option allows you to set the maximum number of characters for the password. However, the password field in the UM forms has settings that enable or disable the maximum length of the password. The default maximum value is 30.
### Avoid indexing profile by search engines [#](#profile_noindex)

Profiles are protected from indexing by search engines (Google, Bing, Yahoo! etc.) if this option is enabled. The plugin adds SEO meta tags to the page `` section if the profile indexing is allowed.
There are other settings that influence the profile indexing. Here is a list of related settings ranked by priority from high to low:
1. **Discourage search engines from indexing this site** in _wp-admin > Settings > Reading_. This setting influences the whole site and has the highest priority. Profiles are not indexed if this setting is turned on.
2. **Profile Privacy** in _Account > Privacy_\*. This setting influences a certain member profile. Private profiles are not indexed.
3. **Avoid indexing my profile by search engines** in _Account > Privacy_\*. This setting influences a certain member profile and is used to disable indexing for the public profile.
4. **Avoid indexing profile by search engines** in _wp-admin > Ultimate Member > User Roles > Edit Role_. This is a common setting for all members with a certain role that may be overridden by a personal account setting.
5. **Avoid indexing profile by search engines** in _wp-admin > Ultimate Member > Settings > General > Users_. This is a common setting for all members that may be overridden by the role setting and personal account setting.
**\*Note**: Settings "Profile Privacy" and "Avoid indexing my profile by search engines" are shown in _Account > Privacy_ for members who can make their profile private.
### Activation link lifetime
This option allows setting a limit in seconds on how long the activation link will exist. To have an endless limit, leave the setting empty or blank.

### Deleting user comments after deleting a user
When you delete a user and their content, the comments made by the deleted user will still remain; this is a native WordPress working logic. To remove comments from deleted users, you must enable this option.

Last updated on January 9, 2025
No results found
---
# Plain text email default templates - Ultimate Member
Plain text email default templates
==================================
[](javascript:window.print() "Print this article")
These templates cover a range of automated emails, including account activations, password resets, account updates, and notifications about user interactions, all formatted in plain text to ensure broad compatibility across email clients. Placeholders within the templates, such as `{site_name}` and `{display_name}`, are dynamically replaced with specific information relevant to each user and the site when the email is dispatched.
These email default templates serve several purposes. It provides administrators with a detailed understanding of each template's role and content, facilitating accurate configuration and customization to fit the specific needs of their site. This documentation also assists in troubleshooting by clarifying the function and operation of each template within the UM plugin, ensuring that automated communications remain effective and professional.
Additionally, this documentation serves as a guide for reverting to default settings if customizations to email notifications do not yield the desired results. By offering a clear reference to the original default templates, it allows administrators to restore standard email formats and functionality with ease, ensuring a consistent and reliable user experience. Overall, the UM Plain Text Email Default Templates documentation is essential for managing automated email processes, customizing communications, and maintaining professional standards for user engagement.
### Default Email Notification Templates
| **Email Type** | **Subject & Content** |
| --- | --- |
| **Account Welcome Email** | **Subject**: Welcome to {site\_name}!
**Content**: {site\_name}
Thank you for signing up! Your account is now active.
{action\_title}
If you have any problems, please contact us at {admin\_email}.
Thank you!
The {site\_name} Team |
| **Account Activation Email** | **Subject**: Please activate your account
**Content**: {site\_name}
Thank you for signing up!
Please click the following link to activate your account:
Activate your Account
Need help? Contact us today.
Thank you!
The {site\_name} Team |
| **Account Pending Review Email** | **Subject**: \[{site\_name}\] New user account
**Content**: {site\_name}
Thank you for signing up!
Your account has to be manually reviewed.
Please allow us some time to process your request and review your information.
Thank you!
The {site\_name} Team |
| **Account Approved Email** | **Subject**: Your account at {site\_name} is now active
**Content**:
{site\_name}
Thank you for signing up!
Your account is now approved.
Login to our site
**Account Information**
Your account email: {email}
Your account username: {username}
Set your password: {password\_reset\_link}
Thank you!
The {site\_name} Team |
| **Account Rejected Email** | **Subject**: Your account has been rejected
**Content**: {site\_name}
Your registration request has been rejected.
Please feel free to apply at a future date or contact us if you want your information to be reviewed again.
Thank you!
The {site\_name} Team |
| **Account Deactivated Email** | **Subject**: Your account has been deactivated
**Content**: {site\_name}
Your account is now deactivated.
If you want your account to be re-activated, please contact us.
Thank you!
The {site\_name} Team |
| **Account Deleted Email** | **Subject**: Your account has been deleted
**Content**: {site\_name}
Your account has been deleted.
All your personal details and any uploads have been permanently removed.
If your account has been deleted by accident, please contact us.
Thank you!
The {site\_name} Team |
| **Password Reset Email** | **Subject**: Reset your password
**Content**: {site\_name}
We received a request to reset the password for your account. If you made this request, click the link below to change your password:
Reset your password
If you didn’t make this request, ignore this email or report it to us.
Thank you!
The {site\_name} Team |
| **Password Changed Email** | **Subject**: Your {site\_name} password has been changed
**Content**: {site\_name}
You recently changed the password associated with your account.
Go to your Account
If you did not make this change and believe your account has been compromised, please contact us ASAP.
Thank you!
The {site\_name} Team |
| **Account Updated Email** | **Subject**: Your account at {site\_name} was updated
**Content**: {site\_name}
You recently updated your account.
Go to your Account
If you did not make this change and believe your account has been compromised, please contact us ASAP.
Thank you!
The {site\_name} Team |
| **New User Notification** | **Subject**: \[{site\_name}\] New user account
**Content**: {site\_name}
{display\_name} has just created an account on {site\_name}.
To view their profile click here: {user\_profile\_link}
Here is the submitted registration form:
{submitted\_registration}
Thank you!
The {site\_name} Team |
| **Account Needs Review Notification** | **Subject**: \[{site\_name}\] New user awaiting review
**Content**: {site\_name}
{display\_name} has just applied for membership to {site\_name} and is waiting to be reviewed.
To review this member, please click the following link: {user\_profile\_link} |
| **Account Deletion Notification** | **Subject**: \[{site\_name}\] Account deleted
**Content**: {site\_name}
{display\_name} has just deleted their {site\_name} account.
Thank you!
The {site\_name} Team |
| **Suspicious Activity Notification** | **Subject**: -
**Content**: {site\_name}
This is to inform you that there are suspicious activities with the following account(s):
{banned\_profile\_links}
Due to this, we have set each account(s) status to rejected or deactivated, revoked roles & destroyed the login session.
\- Sent via Ultimate Member plugin. |
### Ultimate Member Extensions Email Notifications Templates
| **Email Type** | **Subject & Content** |
| --- | --- |
| **New Follower Notification** | **Subject**: {follower} is now following you on {site\_name}!
**Content**: {site\_name}
Hi {followed}, {follower} has just followed you on {site\_name}.
View his/her profile: {follower\_profile}
Click on the following link to see your followers: {followers\_url}
Thank you!
The {site\_name} Team |
| **New Friend Request Notification** | **Subject**: {friend} wants to be friends with you on {site\_name}
**Content**: {site\_name}
Hi {receiver}, {friend} has just sent you a friend request on {site\_name}.
View their profile to accept/reject this friendship request: {friend\_profile}
Thank you!
The {site\_name} Team |
| **New Friend Notification** | **Subject**: {friend} has accepted your friend request
**Content**: {site\_name}
Hi {receiver}, You are now friends with {friend} on {site\_name}.
View their profile: {friend\_profile}
Thank you!
The {site\_name} Team |
| **New Message Notification** | **Subject**: {sender} has messaged you on {site\_name}!
**Content**: {site\_name}
Hi {recipient}, {sender} has just sent you a new private message on {site\_name}.
To view your new message(s), click the following link: {message\_history}
Thank you!
The {site\_name} Team |
| **New Message Reminder** | **Subject**: You have unread message from {sender} on {site\_name}!
**Content**: {site\_name}
Hi {recipient}, {sender} has just sent you a new private message on {site\_name}.
To view your new message(s), click the following link: {message\_history}
Thank you!
The {site\_name} Team |
| **New Review Notification** | **Subject**: You’ve got a new {rating} review!
**Content**: {site\_name}
Hi {display\_name}, You’ve received a new {rating} review from {reviewer}!
Here is the review content:
{review\_content}
{reviews\_link}
Thank you!
The {site\_name} Team |
| **New Review is Pending Notification** | **Subject**: \[{site\_name}\] New review is pending
**Content**: {site\_name}
{reviewer} has just written a review on {site\_name}
The review status is Pending.
To see and publish this review please click the following link:
{review\_admin\_link}
Here is the review content:
{review\_content}
Thank you!
The {site\_name} Team |
| **New Reply Notification** | **Subject**: \[{site\_name}\] {reply\_author} replied to {post\_title}
**Content**: {site\_name}
Hi {recipient}, {reply\_author} replied to {post\_title} on {site\_name}.
You can view the reply by clicking here: {reply\_link}
Thank you!
The {site\_name} Team |
Last updated on September 24, 2024
No results found
---
# How to Enable Email Notification on Activation or Admin Review Upon User's Registration - Ultimate Member
How to Enable Email Notification on Activation or Admin Review Upon User's Registration
=======================================================================================
[](javascript:window.print() "Print this article")
Ultimate Member provides options that require users to activate their account registration through email or put the account under admin review.
You need to assign a role using the **Registration Default Role** setting on _wp-admin > Ultimate Member > Settings> Appearance > Registration Form_. Once you have assigned a role, make sure to click the **Save Changes** button.

### Require Email Activation [#](#email_activation)
To enable the **Require Email Activation** upon registration, go to _wp-admin > Ultimate Member > User Roles > Edit Role_ (Registration Default Role) and scroll down to see the [Registration Options](//docs.ultimatemember.com/article/103-user-roles-settings#registration-options)
box.

Image - User role settings.

If you select **Require Email Activation** from the drop-down menu, you will see additional options below.
* **Registration status** – This option allows you to decide the status a user has when they register on your site. You can make them auto-approved, require email activation, or need to be manually approved by the site admin. The option you select here affects what action can be taken after the registration.
* **Login user after validating the activation link?** – (optional, appears if new users require email activation) This option allows you to enable auto-login after account activation by email.
* **URL redirect after e-mail activation** – (optional, appears if new users require email activation) This option allows you to redirect users after account activation by email.
* **Action to be taken after registration** – Depending on the registration status you will be able to redirect new users to their profile, to a custom URL, or show a message on the same page.
* **Personalize the custom message** – (optional, appears if a message is shown after registration) This option allows you to enter a custom message. The default message is shown if this option is empty.
Image - Registration options for the logic with the account activation by email.

Image - Custom message is shown after the registration.

You need to enable the **Account Activation Email** template in the _wp-admin > Ultimate Member > Settings > Email_ to let members receive the email. Click the gear icon to see the email template settings.

Image - Email template settings.

The user will receive an activation email.

The admin will receive an email that a new user has registered on your site.

### Require Admin Review [#](#admin_review)
Select **Require Admin Review** from the drop-down menu and you will see additional options below.
Image - Registration options for the logic with the admin review.

Image - Custom message shown after the registration.

The admin can review the newly registered account in _wp-admin > Users > Pending review_.

You need to enable the **Your account is pending review** and **Account Needs Review Notification** templates in the _wp-admin > Ultimate Member > Settings > Email_ to let your admins receive the email that a new account needs a review.

The administrator receives an email notification that a new user has been registered and needs a review. The email includes the submitted registration form of the new user.

Administrators can approve the reviewed user using the "Approve Membership" action in the users profile (under the cog icon) or the "Approve Membership" bulk action above the Users table in WordPress dashboard.
Last updated on November 11, 2024
### Related Articles
* [Email Templates](/article/1335-email-templates)
* [Emails Tab](/article/42-emails-tab)
* [Auto approve a user on registration in WP Admin](/article/1650-auto-approve-a-user-on-registration-in-wp-admin)
No results found
---
# Roles Assignment Logic - Ultimate Member
Roles Assignment Logic
======================
[](javascript:window.print() "Print this article")
### Overview
Since **Ultimate Member - Woocommerce 2.2.3** version there is new roles assignment logic, which is more clear and flexible with changing order statuses, refund, or payment completes.
### Global settings for orders [#](#global_settings)
The extension allows you to set different roles after order status changed to complete/refund. You could find these settings in the _wp-admin > Ultimate Member > Settings > Extensions > Woocommerce_ screen:
* **Ignore the roles update, if the user has these roles on complete/processing or refund payment** - users who have one of the selected roles will be ignored when changing the order status.
* **Assign this role to users when an order is completed/processing** - automatically add the selected role to the user when order is completed or processing (for digital/downloadable products).
* **Upgrade user role when payment is on-hold before complete or processing status** - add the selected role above to the user when the order has on-hold status. It just will set the role earlier than completed or processing status.
* **Assign this role to users when an order is refunded** - automatically add the selected role to the user when the order is refunded. Please pay attention that this option works only for fully refunded orders. It doesn't work for a partial refund.
* **Remove previous roles when change role on complete/processing or refund payment** - when "yes" allows to remove all current roles for the user and set only that roles, which are selected in the options above.
* **Disable subscriptions roles switcher** - by default, there can be a conflict between WC Subscriptions plugin options and roles assignment by Ultimate Member - Woocommerce integration for subscription products. Please leave checked to avoid the conflict.
The role data is stored in the order meta. This means that when you change the role in the setting for old purchases, the old setting will apply.

### Individual product settings [#](#product_settings)
The extension allows you to set different roles for the product buyers and remove this role after a product refund. You could find these settings in the WooCommerce Product Add/Edit screen
* **When this product is bought move the user to this role** - this role will be assigned to the user when an order with this product is completed/processing and will be removed when this product is refunded.

The extension saves a product settings on purchase and uses saved settings to change a role when the order status is changed. Changing a product setting influences future orders but doesn't influence existing orders.
### Individual product settings for subscriptions [#](#subscription_product_settings)
The extension allows you to set different roles for the subscription product buyers and remove/change this role when subscription status is changed. You could find these settings at the WooCommerce product Add/Edit screen.
* **When subscription is ACTIVATED move user to this role** - this role will be assigned to the user when the subscription's status is changed to **Active**.
* **When subscription is PENDING move user to this role** - this role will be assigned to the user when the subscription's status is changed to **Pending**.
* **When subscription is ON-HOLD move user to this role** - this role will be assigned to the user when the subscription's status is changed to **On hold**.
* **When subscription is EXPIRED move user to this role** - this role will be assigned to the user when the subscription's status is changed to **Expired**.
* **When subscription is CANCELLED move user to this role** - this role will be assigned to the user when the subscription's status is changed to **Cancelled**.
* **When subscription is PENDING-CANCEL move user to this role** - this role will be assigned to the user when the subscription's status is changed to **Pending Cancellation**.

The extension saves a product-subscription settings on purchase and uses saved settings to change a role when the subscription status is changed. Changing a product-subscription setting influences future subscriptions but doesn't influence existing subscriptions.
The extension changes the user role when subscription status is changed in this way:
* a role selected for the previous subscription status is removed;
* a role selected for the current subscription status is added;
* all other roles are kept as they are.
There are several cases when the extension doesn't change the user role:
1. if the current user role is selected in the setting _"Ignore the roles update, if the user has these roles on complete/processing or refund payment"_.
2. if the role selected for a new subscription status is the same as the current user role.
3. if the role selected for a new subscription status is the same as the role selected for the previous subscription status.
### Role priority [#](#role_priority)
The WooCommerce plugin automatically assigns a role **Customer** for any user who buys any product. So, users may have two roles - a role Customer and a role assigned by the extension. This is not an issue. Users in WordPress can have multiple roles. The Ultimate Member plugin uses settings from the user role with the highest priority. All you need is to set a greater priority for a role assigned by the extension. Go to the role settings on _wp-admin > User Roles > Edit Role_ and use the **Role Priority** setting to set a greater priority for your custom role. Read [this article](//docs.ultimatemember.com/article/1494-how-to-set-role-priority-for-user-roles)
for details.
Last updated on July 8, 2023
No results found
---
# Logout - Ultimate Member
Logout
======
[](javascript:window.print() "Print this article")
### Logout Overview
Ultimate Member makes it easy for users to log out of your site. Upon activation of the plugin, Ultimate Member will create a logout page which you will be able to see if you go to all pages in the WordPress admin.
### Adding a logout link to the navigation menu
One of the things you’ll probably want to add to your site is a logout link in your site’s menu so members can easily log out of your site. To add a logout link to your menu do the following:
* In the WordPress admin click on the menu link which can be found under appearance.
* Once you are on the menus page. Look for the page called Logout in the Pages widget, select the logout page and click the add to menu button. The logout page will now appear as a menu item in the main menu structure widget.
\[wp-admin> Appearances> Menus\]
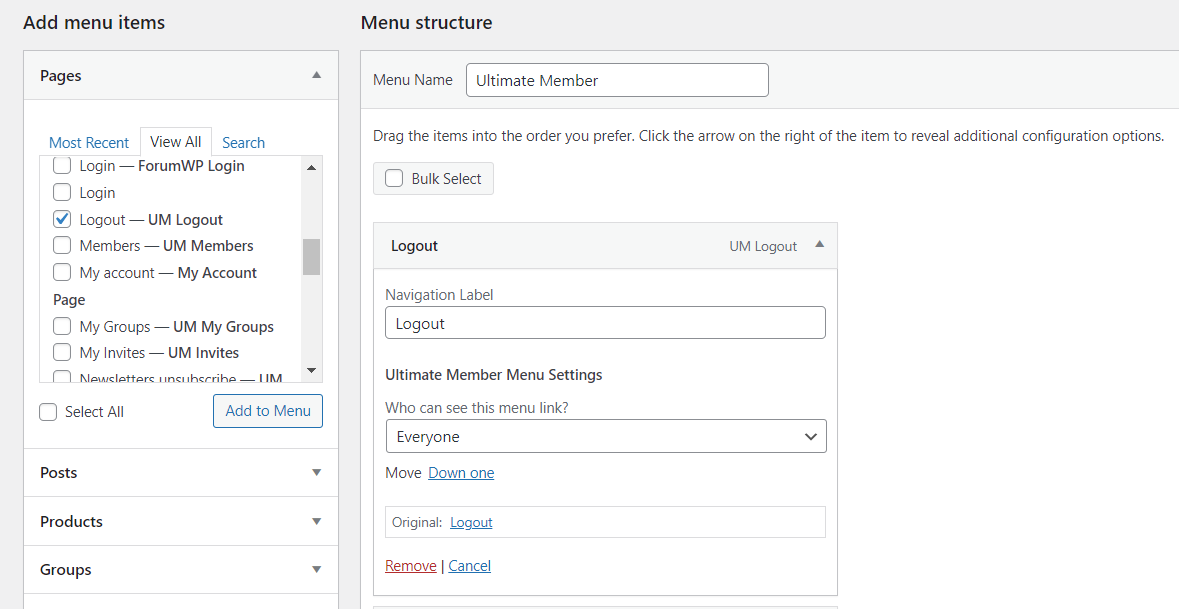
### Showing the logout menu link to logged-in users
Because it only makes sense to show the logout link to users who are logged in you are going to use the [conditional menu logic](//docs.ultimatemember.com/article/132-conditional-menus)
feature that Ultimate Member has to only show the logout link to logged-in users. To do this, click the small arrow on the right-hand side of the menu item to expand the options for this item.
Once you do this you will see a blue header with the Ultimate Member logo that says: “UltimateMember Menu Settings”. Below this where it says: “Who can see this menu link?” is where you will set the logout link to only show for logged-in users. From the three options select the “logged in users” option and then select the roles you would like to show this link to. Since all roles will need to be able to log out of your site we suggest you select all of the roles.
Once you have done this, save the menu and you will now have a logout link that only appears in the menu for logged-in users

### Adding a logout link anywhere on a page
You are not restricted from showing a logout link only in the menu. It is also possible to add a logout link anywhere on your site such as in a button. All you have to do is link the button or another element to go to the logout page e.g [http://www.yourwebsite.com/logout](http://www.yourwebsite.com/logout)
. Once a user clicks on the element with this URL they will be logged out of your site
### Redirecting users after logging out
You have two options of where to send users after they log out of your site. The first is to redirect them to your site’s homepage (default option in role settings). The second option allows you to specify a URL for where to send users. These options are set on a per role basis, so to edit these options you should go to the logout widget on the edit role page.
\[wp-admin> Ultimate Member> User Roles> Edit Role> Logout Options\]

Last updated on November 19, 2021
No results found
---
# Sync User Data across all sites in a Multisite Network setup - Ultimate Member
Sync User Data across all sites in a Multisite Network setup
============================================================
[](javascript:window.print() "Print this article")
In a Multi-site network setup, Ultimate Member syncs the user data from the Main site to Sub-sites and vice-versa. To make the synchronization work, you need to turn off the User Cache feature in WP-Admin > Ultimate Member > Settings > Misc > turn on the option "Disable Cache User Profile" in all sites.

To make the cover photo, profile photo, and file uploaders sync, you need to use the following PHP code snippet. It will change the path of the upload directory for site number 2 and use the default WP directory. You need to change the path to match your subsites' directory folder. In the example below, UM will use the **/wp-content/uploads/ultimatemember/** path instead of **/wp-content/uploads/sites/2/ultimatemember/**
To register a user to subsites via UM Register form, you need the following code:
Last updated on September 19, 2022
No results found
---
# Placeholders for email templates - Ultimate Member
Placeholders for email templates
================================
[](javascript:window.print() "Print this article")
This documentation provides a list of available placeholders you can use in the email templates. You also can use these placeholders in settings "User Profile Title" and "User Profile Dynamic Meta Description".
#### Common placeholders:
| | |
| --- | --- |
| **Placeholders** | **Descriptions** |
| {display\_name} | Displays the name of the user. |
| {first\_name} | Displays the first name of the user. |
| {last\_name} | Displays the last name of the user. |
| {username} | Displays the username of the user. |
| {gender} | Displays the gender of the user. |
| {email} | Displays the email of the user. |
| {submitted\_registration} | Displays the details of the registration form the user has submitted. |
| {admin\_email} | Displays the admin's email. |
| {site\_name} | Displays the website name. |
| {site\_url} | Displays the website's URL. |
| {account\_activation\_link} | This generates the account activation link when clicked user's account will be activated |
| {user\_account\_link} | This generates the user's account link, when clicked the user will be redirected to his account |
| {user\_profile\_link} | This generates the user's profile link, when clicked the user will be redirected to his profile. |
| {login\_url} | This generates the login URL of your site when clicked the user will be redirected to his account |
| {password} | Displays the text `Your set password` |
| {action\_url} | This generates a set password link when there are no password fields in the registration form. When clicked, it shows the Set Password form. |
| {action\_title} | This displays the text `Set your Password` when the password field is not present in a registration form. However, if the password field exists in the form, it will display `Login to your site`. |
| {usermeta:here\_any\_usermeta\_key} | Displays any value from the user meta.
Example: `{usermeta:store_location}` where `store_location` is meta key. |
#### Template-specific placeholders:
| | |
| --- | --- |
| **Placeholders** | **Description** |
| {login\_referrer} | |
| {password\_reset\_link} | This generates the link for the password reset page, when clicked, users will be redirected to the password reset page. |
| {user\_avatar\_url} | Displays the Profile Photo URL of the registered user. |
* * *
#### It is possible to create custom placeholders
Use this pair of hooks to add placeholders and their values:
* um\_template\_tags\_patterns\_hook
* um\_template\_tags\_replaces\_hook
Example:
/\*\*
\* Add short tag {user\_id}
\*/
add\_filter( 'um\_template\_tags\_patterns\_hook', 'my\_template\_tags\_patterns', 10, 1 );
add\_filter( 'um\_template\_tags\_replaces\_hook', 'my\_template\_tags\_replaces', 10, 1 );
function my\_template\_tags\_patterns( $search ) {
$search\[\] = '{user\_id}';
return $search;
}
function my\_template\_tags\_replaces( $replace ) {
$replace\[\] = um\_user( 'ID' );
return $replace;
}
* * *
It is possible to use placeholders in the shortcode [\[um\_show\_content\]](//docs.ultimatemember.com/article/226-restrict-content-on-a-page-post-to-specific-users-community-role)
. This shortcode used to display role-specific content in pages and posts. This shortcode converts common placeholders to proper values.
Example:
\[um\_show\_content roles="contributor,subscriber"\] {display\_name} \[/um\_show\_content\]
Last updated on September 23, 2024
No results found
---
# Ultimate Member Short Tags for SEO title and menu titles - Ultimate Member
Ultimate Member Short Tags for SEO title and menu titles
========================================================
[](javascript:window.print() "Print this article")
This documentation provides a list of available short tags you can use to help you with SEO title and menu titles.
Ultimate Member has a tool that adds SEO meta tags to the User page. This tool is enabled by default. You can use the "Avoid indexing profile by search engines" setting on _wp-admin > Ultimate Member > Settings > General > Users_ to disable this tool and protect profiles from indexing by search engines.
The tool uses a pattern in the "User profile title" setting to generate the **title** meta tag. The tool uses a pattern in the "User Profile Dynamic Meta Description" setting to generate the **description** meta tag. You can use short tags in these patterns.
Available short tags:
* {display\_name}
* {first\_name}
* {last\_name}
* {gender}
* {username}
* {email}
* {password}
* {site\_name}
* {site\_url}
* {admin\_email}
* {user\_avatar\_url}
Image - Screen _wp-admin > Ultimate Member > Settings > Misc._

Last updated on March 5, 2023
### Related Articles
* [Users Tab](/article/39-users-tab)
* [Misc Tab](/article/45-misc-tab)
No results found
---
# Action Scheduler in Ultimate Member - Ultimate Member
Action Scheduler in Ultimate Member
===================================
[](javascript:window.print() "Print this article")
**Version:** Introduced in Ultimate Member 2.9.0
What is Action Scheduler?
-------------------------
**Action Scheduler** is a background processing framework built for WordPress. It allows tasks (actions) to be scheduled to run at specific times or on a recurring basis without interrupting the normal functioning of the website. Developed by Automattic, it efficiently handles scheduled emails, notifications, and other automated processes, especially when dealing with high volumes of tasks.
### Key Features:
* **Scheduled Actions:** Enables tasks to be run at designated times or as soon as possible (asynchronous actions).
* **Batch Processing:** Processes large volumes of tasks efficiently in batches.
* **Traceability:** Logs all scheduled actions, providing visibility into their status (pending, in progress, completed, or failed).
How Ultimate Member Uses Action Scheduler
-----------------------------------------
In **Ultimate Member (UM)**, Action Scheduler is used to manage the scheduling and execution of system emails and other background tasks. It optimizes server load by queuing tasks to run at the most suitable times, rather than processing them immediately, which helps improve overall site performance.
### Benefits of Action Scheduler in UM:
* **Optimized Server Performance:** Tasks like email sending are scheduled to run at optimal times, reducing immediate server load.
* **Reliability:** Ensures that tasks are executed successfully, even during high-traffic periods.
* **Error Logging:** Any failed tasks are logged, making it easier to identify issues and retry the actions.
How to Enable Action Scheduler in Ultimate Member
-------------------------------------------------
By default, Action Scheduler is **disabled** in UM, and its settings may not appear if there are issues with library files or initialization. Once the administrator enables it in the UM settings, it should work as expected. To enable Action Scheduler in Ultimate Member:
1. **Navigate to UM Settings:**
* Go to the WordPress dashboard: `wp-admin > Ultimate Member > Settings`.
2. **Access the Advanced Tab:**
* Click on the **Advanced** tab, then select **Features**.
3. **Enable Action Scheduler:**
* Find the option **Action Scheduler** and check the box next to **Enable Action Scheduler**. Enabling this option ensures tasks like system emails are scheduled to run at optimal times, which helps to reduce server load.
4. **Save Changes:**
* Scroll down and click **Save Changes** to activate Action Scheduler.
What Happens When You Enable Action Scheduler?
Once enabled, certain tasks, such as system emails (e.g., registration confirmation, and password reset), will be scheduled to run at the most appropriate times. This ensures that these tasks are processed efficiently in the background, preventing unnecessary delays or strain on server resources.
How Action Scheduler Works in Ultimate Member
---------------------------------------------
Action Scheduler in UM works by queuing tasks to run at scheduled times, preventing any delays or strain on the website's performance. Here's how it works:
1. **Scheduling and Execution:**
* Tasks are queued and then processed in the background. For example, emails sent during user registration are scheduled to be sent at optimal times.
2. **Batch Processing:**
* For large tasks, the Action Scheduler processes actions in batches of 25. Once one batch is completed, the next batch is processed until all tasks are finished. This prevents overloading the server.
3. **Asynchronous Loopback Requests:**
* If there are still tasks to process after a batch is completed, additional asynchronous loopback requests are made to continue processing tasks in a new request.
4. **Housekeeping:**
* Completed or cancelled tasks that are older than one month are automatically removed. Additionally, actions that take longer than 5 minutes are considered timed-out and are marked as failed, though they can be updated to "completed" if they eventually succeed.
5. **Error Handling:**
* If any action fails, the failure is logged for troubleshooting. The administrator can view these logs and retry failed tasks.
Monitoring and Troubleshooting Scheduled Actions
------------------------------------------------
Administrators can monitor and troubleshoot scheduled actions using the **Scheduled Actions Administration Screen**. Here’s what you can do:
1. **Access the Administration Screen:**
* Go to **wp-admin>****Tools > Scheduled Actions** or **wp-admin>****WooCommerce > Status > Scheduled Actions** (if WooCommerce is installed).
2. **Track Action Status:**
* You can filter actions by their status (Pending, In Progress, Completed, Failed).
* Example: View all actions that are currently **Failed** or **In Progress**.
3. **View Log Entries:**
* View the log entries for any failed actions, providing detailed information on what went wrong.
4. **Sort and Manage Actions:**
* Sort scheduled actions by:
* Hook Name
* Scheduled Date
* Claim ID
* Group Name
* This helps manage and locate specific actions efficiently.
Advanced Configuration and Debugging
------------------------------------
Developers can manage the Action Scheduler for advanced configurations using **WP-CLI** or interact with it through its **API**. For more detailed guidance, refer to [ActionScheduler.org](https://actionscheduler.org)
### Summary
**Action Scheduler** in Ultimate Member is a powerful tool to manage and optimize background tasks. By scheduling actions such as email sending and notifications to run at optimal times, it reduces the server load and ensures reliable task execution. With features like batch processing, error logging, and traceability, it’s an invaluable tool for administrators and developers to maintain the smooth operation of their sites.
Last updated on November 18, 2024
No results found
---
# UM in Multisite - Ultimate Member
UM in Multisite
===============
[](javascript:window.print() "Print this article")
> This article describes the features of using the Ultimate Member plugin on a WordPress multisite installation.
Installation and activation
---------------------------
Plugins are installed for the entire network. There are two ways of plugin activation: network activation and single-site activation. Use network activation for the core plugin Ultimate Member. Use single-site activation for extensions.
Image - Network Activation

Image - Single-site activation

Pages and forms
---------------
You have to create the required pages (User, Account, Registration, Login, Password Reset, Logout, Member Directory) for each site.
Image - Create pages

The plugin creates pages and forms for each site. You may configure different fields, captions and styles for different sites.
Image - Different pages and forms

Authorization
-------------
WordPress uses a common authorization for all sites in the network. Once users are registered on any site, their login credentials may be used to log in to other network sites. You don't need to register users on other network sites.
You will see an error message in the registration form if you try to register a user with the same **Username** or **E-mail Address** again.
Profile and data syncing
------------------------
Users can view their profiles on any site. Users can edit their profiles on the site they used for registration. Administrators can manually add a role for a certain site for existing network users to let them edit their profiles on that site.
Image - Add existing user

Changes in profile will be synced across all sites, except images (cover photo, profile photo, etc.) that are individual for each site.
Image - Profiles

### Patch for common uploads
You may use the extension [Ultimate Member - Multisite](https://github.com/umdevelopera/um-multisite)
to change the registration and uploading logic on multisite. This extension automatically adds a user's role for all sites on registration (this allows users edit their profiles on any site) and makes uploads (cover photo, profile photo, etc.) common for all sites in the network.
Last updated on November 16, 2023
### Related Articles
* [Sync User Data across all sites in a Multisite Network setup](/article/1629-sync-user-data-across-all-sites-in-a-multisite-network-setup)
No results found
---
# Profile Photo Size - Ultimate Member
Profile Photo Size
==================
[](javascript:window.print() "Print this article")
The profile photo uploader creates several thumbnails (smaller images) and compresses images (only for JPEG images).
Use setting "Profile Photo Thumbnail Sizes (px)" to set thumbnails sizes for profile photos. Default thumbnails sizes:
* 40px - small image (used for messages, etc.)
* 80px - medium image (used for activity wall, groups, etc.)
* 190px - main image (used for account, profile, members, etc.)
Screen _wp-admin > Ultimate Member > Settings > General > Uploads_
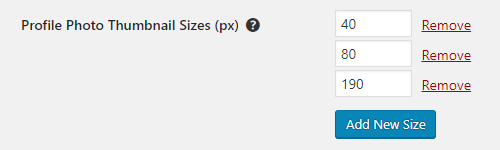
Use setting "Image Quality" to compress JPEG images. Worst quality - smaller file, best quality - bigger file. The range is from 0 to 100. Default quality is 60.
Screen _wp-admin > Ultimate Member > Settings > General > Uploads_

Use setting "Profile Photo Size" to select profile photo size for the Profile page.
Screen _wp-admin > Ultimate Member > Settings > Appearance > Profile_

Setting "Profile Photo Size" may be overridden for the certain profile form, use setting "Profile Photo Size" in the panel "Customize this form".
Screen _wp-admin > Ultimate Member > Forms > Edit Form (Profile) > Customize this form_

Last updated on November 20, 2024
### Related Articles
* [Uploads Tab](/article/145-uploads-tab)
* [Profile Cover Size](/article/1554-profile-cover-size)
No results found
---
# Export Personal/User Data - Ultimate Member
Export Personal/User Data
=========================
[](javascript:window.print() "Print this article")
**For Users**
Ultimate member allows users to download their personal or user data for compliance with General Data Protection Regulation (GDPR).
To download your personal/user data, go to **Account Form > Privacy Tab**.

Once you click on the Privacy tab, it will show you a form, and you can easily find the **download your data** section.

You can request a file for your data by entering your password in the password field and clicking the request data button.

After you click the request data button, this message will appear.

Check your email, and you will receive this message with the confirmation link.

Once you click the link, it will take you to this message, which means you have successfully confirmed your request.

When your request has been approved or completed, you will receive a new email together with the download link of your data.

Just by clicking the link, your personal/user data will automatically download in a .zip file.

You can also download your personal/user data from the **Account Form > Privacy Tab** and click the **Download Personal Data,** and it will automatically download in a .zip file.

**For Admins**
Ultimate members allow site owners to export users' personal or data to comply with local laws and regulations.
When a user requests his personal/user data, you will receive a confirmation email asking for their user data privacy. In the message, you will see a. Click it to view and manage the data privacy requests.

The link will take you to the **Admin Menu > Tools > Export Personal Data Page.**

From the Export Personal Data Page, you will find the Export Personal Data Page Table.
In this table, you will see all the requests sent made by the users. Within the table, you will see the column headers **Requester, Status, Requested, Next Steps.**
The **Requester** Column lists the requesters or users' emails who sent requests for their personal/user data.
When you hover your mouse on the requester's email, it will show you **Download Personal Data** and **Complete Request**.

When you choose to Download Personal Data, the file will start to download.

Once downloaded, a notification message will appear.

It will be in a .zip file.

If you choose the **Complete Request**, it will instantly change the status of the request as completed.

The **Status** column shows the list of the status of the requests.

The **Requested** column is the list of when the request was made by the.
The **Next Steps** column provides you with the steps or actions you can do for the requests.

When you click the **Send Export Link**, It will show you that it is sending an email. Allow this process to load for a few seconds as the data is compressing.

Once done, the export link will automatically send an email to the user or requester. You will know that it was successful when the following message appears "user's personal data export link was sent."

The Export Personal Data table also provides bulk actions options for easy management of the requests.

When you wish to resend confirmation requests to multiple users, select the **Resend Confirmation Requests** Option and select the requesters you want to resend the confirmation with by checking the checkbox. Do forget to click the **Apply** button.

Once done, you'll see that the status has changed to pending, and it is waiting for confirmation.

If you want to mark the requests as completed, select the option **Mark requests as completed**. Select the requesters you wish to complete by checking the check box. Don't forget to click the **Apply** button. Once done, you will see that the status changed to completed.

To delete multiple requests, select the option **Delete requests**. Select the requesters you want to delete by checking the checkbox. Don't forget to click the **Apply** button.

Last updated on March 14, 2023
No results found
---
# Block Email address on Registration - Ultimate Member
Block Email address on Registration
===================================
[](javascript:window.print() "Print this article")
Ultimate Member allows blocking email addresses on registration, which is one of the ways to keep your site safe from malicious users.
To block an email address, go to **WP Admin > Ultimate Member > Settings > Access > Other > see “Blocked Email Addresses”
**

You must separate each email address **by a new line** or **enter one email per line**to block multiple addresses. See the sample below:
When a user tries to register with a blocked email address, a message will appear that the email address has been blocked.


#### Block entire domain
The setting also allows blocking all emails with the specific email provider e.g. `*@gmail.com`
The example image above shows that email addresses with the domain "@goldinbox.net" are blocked, so when a user registers with that domain, the user will not be able to register on your site. A message will appear that your site does not accept registrations from that domain.


When a user registers an email with letters in mixed cases, the user will still not be able to register with the email used. A message will appear the email address is blocked.


You can also use the code below to make any upper case characters in the registration email address into lower case. So it can be compared to your "Blocked Email Addresses" in lower case characters.
Last updated on April 12, 2023
### Related Articles
* [Access Tab](/article/41-access-tab)
No results found
---
# Profile Cover Size - Ultimate Member
Profile Cover Size
==================
[](javascript:window.print() "Print this article")
The cover photo uploader creates several thumbnails (smaller images) and compresses images (only for JPEG images).
Use setting "Cover Photo Thumbnail Sizes (px)" to set thumbnails sizes for cover photos. Default thumbnails sizes:
* 300px
* 600px
Screen _wp-admin > Ultimate Member > Settings > General > Uploads_

Use setting "Image Quality" to compress JPEG images. Worst quality - smaller file, best quality - bigger file. The range is from 0 to 100. Default quality is 60. Recommended quality is 90.
Screen _wp-admin > Ultimate Member > Settings > General > Uploads_

Use the "Profile Cover Size" setting to select cover photo size for the Profile page. Use the "Profile Cover Ratio" setting to select cover photo proportions for the Profile page.
Screen _wp-admin > Ultimate Member > Settings > Appearance > Profile_

"Profile Cover Size" and "Profile Cover Ratio" may be overridden for the certain profile form. Use individual form settings "Cover Photo Size" and "Cover photo ratio" in the "Customize this form" panel.
Screen _wp-admin > Ultimate Member > Forms > Edit Form (Profile)_, the "Customize this form" panel.

Last updated on June 5, 2023
### Related Articles
* [Uploads Tab](/article/145-uploads-tab)
* [Profile Photo Size](/article/1542-profile-photo-size)
No results found
---
# Blacklist Words on Registration - Ultimate Member
Blacklist Words on Registration
===============================
[](javascript:window.print() "Print this article")
Blacklisting words will help identify undesirable content and block it from entering the system or your site. This setting prevents users from creating malicious usernames and avoids fraud.
To add a blacklist word, go to **WP Admin > Ultimate Member > Settings > Access > Other > see “****Blacklist Words .
**

The default blacklist words are admin, administrator, webmaster, support, and staff. You need to separate each word **by a new line or enter one word per line.** See the sample below:

When a user tries to create a username and register with a blacklisted word, the user will not register, and a message will appear that the word used is not allowed.

If a user creates a username with letters in mixed cases, the user will still not register with the blocked username. A message will appear that the username entered is incorrect.

You can also use the code below to validate blacklisted words in lower case.
Last updated on August 17, 2022
### Related Articles
* [Access Tab](/article/41-access-tab)
No results found
---
# Versions Dependencies Map - Ultimate Member
Versions Dependencies Map
=========================
[](javascript:window.print() "Print this article")
| Plugin | Versions |
| --- | --- |
| Ultimate Member | 2.1.0 |
| UM: bbPress | 2.0.7 |
| UM: Followers | 2.1.6 |
| UM: ForumWP | 2.0.1 |
| UM: Friends | 2.1.4 |
| UM: Groups | 2.1.7 |
| UM: Instagram | 2.0.5 |
| UM: MailChimp | 2.2.0 |
| UM: Private Messages | 2.2.5 |
| UM: myCRED | 2.1.6 |
| UM: Notices | 2.0.5 |
| UM: Real-Time Notifications | 2.1.3 |
| UM: Online Users | 2.1.1 |
| UM: Private Content | 2.0.5 |
| UM: Profile Completeness | 2.1.2 |
| UM: Google reCAPTCHA | 2.1.2 |
| UM: User Reviews | 2.1.5 |
| UM: Social Activity | 2.2.0 |
| UM: Social Login | 2.2.0 |
| UM: Terms&Conditions | 2.1.1 |
| UM: Unsplash | 2.0.2 |
| UM: User Bookmarks | 2.0.2 |
| UM: User Photos | 2.0.4 |
| UM: User Tags | 2.1.0 |
| UM: Verified Users | 2.0.5 |
| UM: Woocommerce | 2.1.9 |
Last updated on December 13, 2021
No results found
---
# Uploaded Files Structure - Ultimate Member
Uploaded Files Structure
========================
[](javascript:window.print() "Print this article")
Overview
--------
This document describes how the Ultimate Member plugin uploads and stores images and other files.
Upload Process
---------------
The plugin adopts a structured approach for handling file uploads. Initially, files and images are directed to a temporary folder at `/wp-content/uploads/ultimatemember/temp/`. Following form submission, the uploaded files seamlessly move to the respective member's folder.
### Member's Folder Structure:
Every member on the Ultimate Member platform is allocated a dedicated folder at `/wp-content/uploads/ultimatemember/{user_id}/`, where **{user\_id}** is the unique user identification number. Within this folder, specific data types are organized.
#### Contents of the Member's Folder:
The member's folder categorizes data into sections:
* **Cover Photos and Thumbnails:** This section stores original cover photos and their corresponding thumbnails.
* **Profile Photos and Thumbnails:** Both profile photos and their thumbnails are organized within this section.
* **Images from the "Image Upload" Field:** Images uploaded through the "Image Upload" field type are prefixed with `'stream_photo_'` or easy identification.
* **Files from the "File Upload" Field:** Files from the "File Upload" field type are labeled with the `'file_'` prefix.
**Note:** The plugin renames the uploaded cover photo and profile photo files but keeps the original file extension: gif, jpg, jpeg, or png.
#### Example:
Consider the following example showcasing the structure of a member's folder:

This systematic approach ensures that each member's files are organized within their designated space on the Ultimate Member plugin.
* * *
#### **Related Articles:**
* [Export & Import](//docs.ultimatemember.com/article/1549-export-import)
* [Regenerate Cover & Profile Photo thumbnails](//docs.ultimatemember.com/article/1674-regenerate-cover-profile-photo-thumbnails)
Last updated on January 16, 2024
No results found
---
# How to upgrade UM from version 1.3+ to 2.4+ & Common Issues - Ultimate Member
How to upgrade UM from version 1.3+ to 2.4+ & Common Issues
===========================================================
[](javascript:window.print() "Print this article")
**Notice: We strongly recommend you make a full backup of your site before upgrading to version 2.4+.**
#### **Common Issues:**
In general, this process goes without problems, but special cases happen. There can be several problems that may arise when upgrading the packages:
* You might encounter an issue because of your current theme. We suggest you change your theme to the default WordPress theme, such as the Twentytwenty theme, before the upgrade process in Ultimate Member.
* We also recommend deactivating all plugins except Ultimate Member to avoid conflict issues with the other plugins before upgrading.
* JS or server errors (memory full, request frequency, etc.) If there were some custom parts of the code, our update scripts would have an unexpected result. There is a JS variable that allows you to set request throttling between update packages:
var um\_request\_throttle = 15000;
_File path from plugins\\ultimatemember\\includes\\admin\\core\\class-admin-upgrade.php_
The variable can be changed in case of frequent requests, but **we don't recommend manually making these upgrades**.
#### How to upgrade:
To install or update the plugin version, go to wp-admin>Plugins>Scroll down to Ultimate Member and click on the **update now.** You can also check the version details by clicking on the **View version 2.4.0 details.**

Once you click the update now, it will show that the plugin is updating, wait for a few seconds.

A message will appear once it is updated.

Immediately after the update, you will see a message in the admin panel. You can click the " **Upgrade"** in Ultimate Member below the Dashboard or the **"Visit Upgrade Page"** button.

It will take you to the upgrade page. You need to click on the **Run** button to start the update process.

The update will start to process.

If the process were successful, you would see a page with the message: **"Ultimate Member 2.4.0 Successfully Upgraded"**

Last updated on November 25, 2023
No results found
---
# Ultimate Member Site Health - Ultimate Member
Ultimate Member Site Health
===========================
[](javascript:window.print() "Print this article")
Overview
--------
Businesses and organizations of varying sizes are progressively storing personal data on electronic devices or websites and conducting their operations through them. Ensuring the security of this information and securing it from potential threats is crucial for your business's reputation and its daily transactions. Your site can be susceptible to the influence of these hackers, also known as cyberattackers, as they pose a threat to anyone.
Therefore, it is crucial to regularly monitor the health of your website. Ultimate Member has introduced dedicated sections within WordPress Site Health, allowing you to examine and access comprehensive information regarding the configuration of Ultimate Member on your WordPress site. You can find the Ultimate Member Section in **wp-admin>Tools>Site Health> Info.**
**Note: Site Health Info is important because it enables Ultimate Member Support to investigate any issues you encounter on your site and provide assistance in resolving them effectively.**

Ultimate Member Sections
------------------------
* * *
### Ultimate Member
From the info tab, scroll down to look for Ultimate Member. Click on the dropdown arrow to view all the debug information for your Ultimate Member installation and all the settings configuration of the UM core plugin such as the following:
| | |
| --- | --- |
| * General Settings
* Access Settings
* Email Settings
* Appearance Settings
* UM Pages | * Misc Settings
* Install Info
* Override Templates
* Secure Settings |
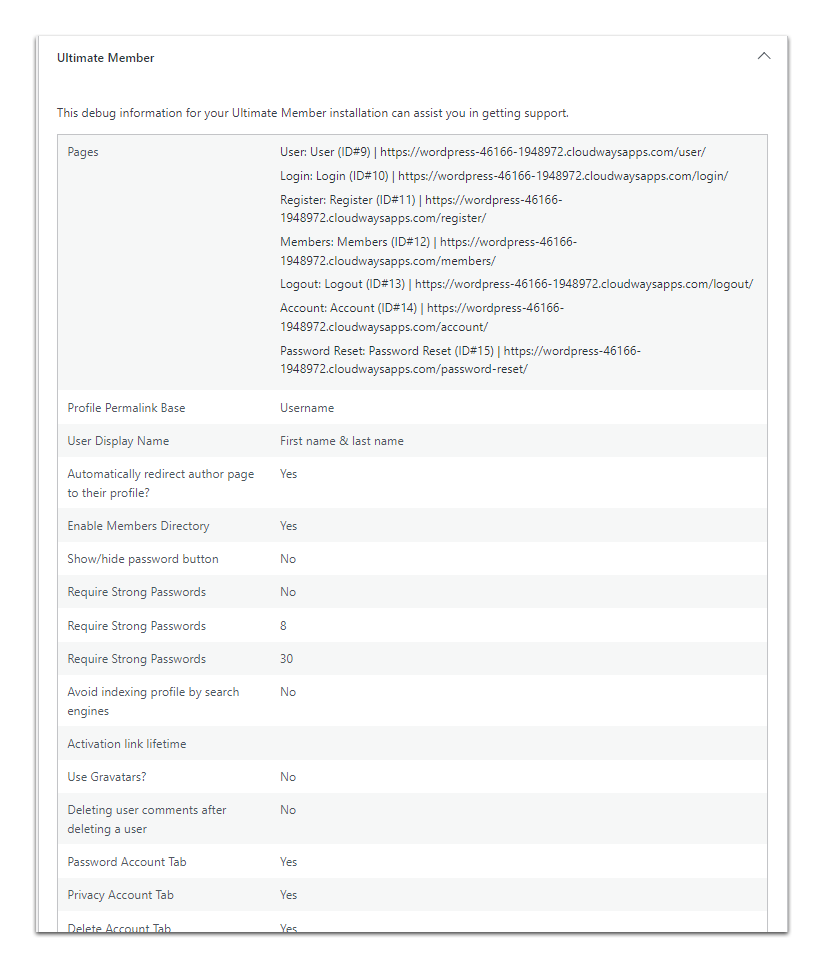
### User Roles
This section displays and debug the information of Ultimate Member user roles. Select the user role you want to examine, and then expand the dropdown to access its configuration settings, which may include:
| | |
| --- | --- |
| * Administrative Permissions Setting
* General Permissions Setting
* Profile Access Setting
* Homepage Option Setting
* Registration Options Setting | * Login Options Setting
* Logout Options Setting
* Delete Options Setting
* WP Capabilities Setting |

### Ultimate Member Forms
This section displays the debug information of Ultimate Member forms and it's form IDs.

Under this section, you'll find the default forms and custom forms you have created. Click on the dropdown button to display all the debug information of your default or custom form.

The possible settings and configurations that you can review are listed below:
| | | |
| --- | --- | --- |
| **Registration Form Settings** | **Profile Form Settings** | **Login Form Settings** |
| * Form Shortcode
* Form Type
* Customize this form
* Field Settings
* Privacy Policy | * Form Shortcode
* Form Type
* Customize this form
* Field Settings
* User Meta | * Form Shortcode
* Form Type
* Customize this form
* Options Setting |
###

### Ultimate Member Directories
In this section, you can view the debug information for your Ultimate Member directories and their respective IDs. Both default and custom member directories can be found in this section. To access all the debug information, simply click on the dropdown.
Below, you will find a list of Member Directories settings and possible configurations that you can examine:
* Member Directory Shortcode
* General Option Settings
* Sorting Settings
* Profile Card Settings
* Search Options
* Result & Pagination Settings
* Styling: General Settings

The information you get from the Ultimate Member Section in Site Health can be valuable when you need help from your web host or developer in case you encounter any issues. This enables you to promptly identify problems or detect any potentially hazardous activities on your website, allowing you to take swift action to enhance its security in case of any suspicious activity. In case you come across any issues, you can navigate to the Status tab to explore suggested solutions.
Last updated on October 11, 2023
No results found
---
# Ultimate Member 2.8.7 User Management: What's New and How to Use It - Ultimate Member
Ultimate Member 2.8.7 User Management: What's New and How to Use It
===================================================================
[](javascript:window.print() "Print this article")
**Overview**
In version 2.8.7, Ultimate Member introduced several enhancements to its user management system. This documentation will guide you through the changes and provide steps to manage users efficiently using the latest version.
Ultimate Member’s user management feature allows site administrators to manage user accounts, set statuses, and perform bulk actions directly from the WordPress admin panel. With version 2.8.7, key areas such as filtering user statuses and performing actions on individual users have been streamlined for a better experience.
This guide will cover:
1. [**What's New in Ultimate Member 2.8.7**](#whatsnew)
2. [**Comparing Old and New Workflows**](#comparing)
3. [**Managing User Statuses**](#managing)
4. [**Performing Quick Actions**](#performing)
5. [**Using Bulk Actions**](#usingbulk)
6. **[UM Actions in User Profile](#umactions)
**
7. [**Additional Actions for Verified Users, User Reviews & Mailchimp Extensions**](#additional)
8. [**Best Practices**](#best)
* * *
**1\. What's New in Ultimate Member 2.8.7?** [#](#whatsnew)
------------------------------------------------------------
The latest update focuses on simplifying the user management interface and improving usability. Here are the major changes:
* **Status Tabs Moved to Dropdown**: Instead of individual tabs for each user status (Approved, Pending Review, etc.), all statuses have been grouped into a single dropdown for cleaner navigation. This dropdown allows administrators to easily filter users by the selected status.
* **Quick Actions for User Management**: Actions such as "Resend Activation Email" and "Reject" are now accessible directly from the user list, without needing to dig through dropdown menus.
* **Bulk Actions Merged**: The old **UM Actions** dropdown has been integrated into the WordPress native **Bulk Actions** menu, combining all actions into one unified interface.
* **User Profile Gear Icon**: Administrators can now perform actions directly from a user’s profile by clicking the **gear icon** in the user list. The available actions depend on the user's status.
These changes allow admins to manage users more effectively with fewer clicks and less clutter.
* * *
**2\. Comparing Old and New Workflows**[#](#comparing)
-------------------------------------------------------
The new version reduces clutter and makes both individual and bulk actions faster and more intuitive to access. To help you transition to the new workflow in version 2.8.7, here’s a quick comparison between how things worked in previous versions and how they work now:
| Feature | Previous Version (Pre-2.8.7) | New Version (2.8.7) |
| --- | --- | --- |
| **User Statuses** | Statuses are displayed as separate tabs.
 | Moved to a single **All Statuses** dropdown. |
| **UM Actions** | Separate **UM Actions** dropdown for bulk actions.
 | Integrated into WordPress **Bulk Actions** menu. Unified for easier use.
 |
| **Quick Actions** | No quick links in the Status column; actions were buried in dropdowns.
 | Quick-action links for UM actions or tasks like **Resend Activation Email, Reject, Deactivate** and more.
 |
| **UM Actions in Profile** | Actions were not accessible from user profiles. | The gear icon in the user's profile shows relevant actions for each user. |
* * *
**3\. Managing User Statuses**[#](#managing)
---------------------------------------------
In previous versions of Ultimate Member, different user statuses were shown as separate tabs (e.g., **All**, **Approved**, **Pending Review**, **Inactive**). This layout could become overwhelming when numerous statuses and roles were displayed together, as illustrated in the image below:

### **New in Version 2.8.7: Status Dropdown**
Now, all user statuses have been consolidated into a single dropdown menu labelled **"All Statuses"**. This dropdown allows you to filter users by their status quickly, without taking up unnecessary screen space.

### **How to Filter Users by Status**:
1. Go to **WP Admin > Users** in the WordPress admin sidebar.
2. Look for the **All Statuses** dropdown above the user table.
3. Click the dropdown and choose the status you want to filter by:
1. **All Statuses:** Displays all user accounts, regardless of their current status, allowing administrators to view and manage every registered user efficiently.
2. **Approved:** Indicates that a user's account has been verified and granted access to the site, allowing them to utilize all member features.
3. **Pending administrator review:** Represents users whose registrations are awaiting approval by an administrator, requiring review before access is granted.
4. **Waiting email confirmation:** Refers to users who have registered but have not yet confirmed their email address, restricting their access until verification is completed.
5. **Membership inactive:** Signifies that a user’s account is temporarily deactivated, preventing them from logging in or accessing site features until reactivated.
6. **Membership rejected:** Indicates that a user's registration request has been denied by an administrator, preventing them from accessing the site.
4. After selecting the status, click on the **"Filter"** button, and the user list will automatically update to display only users with the selected status, making it easier to filter and manage users based on their account state.
**Screenshot Example:**

This streamlined filtering method makes it easier to locate users in specific states without excessive navigation.
* * *
**4\. Performing Quick Actions**[#](#performing)
-------------------------------------------------
A new feature in version 2.8.7 is the ability to perform **Quick Actions** directly from the user list. This means you no longer need to navigate through bulk action menus for common tasks like resending an activation email or rejecting a user’s registration.
### **Default Quick Actions Links**:
* **Approve:** This action allows administrators to change a user's status from Pending or Rejected to Approved. It signifies that the user's registration or application has been successfully verified and accepted, granting them full access to the site’s features and content.
* **Put as Pending**: This action reverts a user’s status back to Pending for further review. It is useful for situations where additional verification or action is required before granting full access.
* **Send Activation Email:** This action triggers the sending of an activation email to users who have registered but have not yet verified their email address. It is an essential tool for facilitating user engagement and ensuring that members complete their registration process. By sending this activation email, you can prompt users to confirm their email address, allowing them to access all features of your website.
* **Resend Activation Email**: This action sends an activation email again to users who have not yet verified their email address. It is helpful in reminding users to complete their registration process.
* **Reject**: This action immediately rejects a user's registration or application. It is typically used when a user does not meet the required criteria or if there are issues with their registration.
* **Deactivate**: This action temporarily deactivates the user, changing their status to Inactive. While deactivated, the user will not be able to log in or access any site features.
* **Reactivate:** This action changes a user's status from Inactive back to Approved. It restores the user's account access and privileges, allowing them to log in and utilize the site’s features again. Reactivation is commonly used for users whose accounts were previously deactivated for inactivity or administrative reasons.
The available Quick Actions for each user depend on their current status. Ultimate Member 2.8.7 introduces tailored quick actions for different user states, enabling faster decision-making and easier management.
### Quick Action Links Based on User Status:
| | |
| --- | --- |
| **Status** | **Quick Action Links** |
| Approved | Put as Pending, Send Activation Email, Reject, Deactivate |
| Rejected | Approve, Put as Pending, Send Activation Email, Deactivate |
| Pending Administrator Review | Approve, Reject, Send Activation Email, Deactivate |
| Membership Inactive | Reactivate, Put as Pending, Send Activation Email |
| Waiting email confirmation | Approve, Put as Pending, Resend Activation Email, Deactivate |
Each of these actions is available directly from the Status column in the user list, making it quick and convenient to manage users without switching between multiple menus.
### **How to Use Quick Actions**:
1. Navigate to the **Users** in the WordPress admin dashboard.
2. Hover your cursor to a user.
3. In the **Status** column, you'll see options for each user based on their current status.
4. Click the desired action link. In the example used below, we selected **"Put as pending"**
5. The selected action will be applied immediately, without the need for confirmation through additional menus. A notification will also appear above the table to indicate the action taken. However, for rejecting or deactivating a user, a confirmation window will pop up, allowing you to either proceed with the action or cancel it.
**Screenshots Example:
**


This change reduces the number of steps needed to manage users, saving time when you have many user accounts to handle.
* * *
**5\. Using Bulk Actions**[#](#usingbulk)
------------------------------------------
Bulk actions are essential when managing a large number of users. In previous versions of Ultimate Member, the **Ultimate Member Actions(UM Actions)** dropdown, is separated from WordPress’s built-in **Bulk Actions** dropdown menu.

### **New in Version 2.8.7: Unified Bulk Actions Menu**
The **UM Actions** dropdown has now been merged with the native **Bulk Actions** dropdown, combining all actions into a single, simplified menu. The integration of UM Actions into WordPress's built-in Bulk Actions dropdown menu streamlines the user management interface, making it more intuitive and efficient for administrators. This consolidation reduces clutter and speeds up action execution, allowing bulk operations on user accounts with fewer clicks. The familiar WordPress layout eases navigation for new users, minimizes training time, and enhances workflow by enabling quick switching between actions. Overall, these improvements lead to more efficient user management and a better experience for both administrators and site users.

### **WordPress Bulk Actions:**
* **Delete:** Permanently remove the selected user(s) from your site.
* **Send Password Reset:** Send an email with a password reset link to the selected user(s).
### **Ultimate Member Actions**:
* **Approve Membership:** Grants full access by approving the user’s membership.
* **Reject Membership:** Denies membership, preventing the user from accessing member-only content.
* **Put as Pending Review:** Marks the user’s status as pending for further review.
* **Resend Activation E-mail:** Sends a new account activation email to the user.
* **Deactivate:** Temporarily disables the user’s account.
* **Reactivate:** Restores access by reactivating a deactivated account.
### **How to Perform Bulk Actions**:
1. In the **Users** section, check the boxes next to the usernames to which you want to apply bulk actions.

2. At the top or bottom of the user list, open the **Bulk Actions** dropdown.
3. Select the action you wish to apply.

4. Click the **Apply** button to perform the action on all selected users.

5. Once applied, a notification will appear indicating the number of users affected by the action, and the user’s status will update immediately. 
#### Use Case: Bulk Approving Users
Bulk actions are particularly useful when managing users with different statuses. For example, if you have three users selected:
* **1 user is already approved**
* **2 users are pending admin review**
If you select all three users and choose **Bulk Approve**, only the two users with a pending review status will be approved. The user already approved will retain their status without any additional hooks or actions running under the hood, as their status has not changed. This ensures that no unnecessary actions are performed on users whose status does not require modification, making bulk actions both efficient and precise.
* * *
5\. UM Actions in User Profile [#](#umactions)
-----------------------------------------------
Administrators can manage user accounts more efficiently by performing actions directly from the user's profile. By clicking the gear icon next to a user’s name in the user list, a set of actions tailored to the user's current status is displayed. This allows for tasks such as approving, rejecting, or deactivating users without leaving the user's profile, streamlining the user management process.
#### **Pre-Version vs. New Version**
In **previous versions** of Ultimate Member, user action options were limited, with some tasks requiring multiple steps in wp-admin > Users, involving navigation between different pages. For example, actions like Resending Activation Emails or Rejecting Membership were separate from the user profile and often required several clicks to complete.

In **version 2.8.7**, the process has been improved by centralizing user actions into a single gear icon in the user's profile. This update significantly reduces the number of clicks needed to perform tasks such as approving, rejecting, or resending activation emails. The menu now consolidates actions directly into the user's profile, saving time for administrators.

| | |
| --- | --- |
| **Previous Version Settings** | **New Version Settings (2.8.7)** |
| * Put as Pending Review
* Deactivate this Account
* Delete this User
* Login as this User
* Edit Profile
* Block Reviews
* Cancel | * Put as Pending Review
* _Send Activation Email (new)_
* _Reject Membership (new)_
* Deactivate this Account
* Delete this User
* Login as this User
* Edit Profile
* Cancel |
These improvements make it easier for administrators to quickly manage users based on their current status without navigating through multiple menus.
#### **Security Considerations**
For security reasons, administrators cannot perform actions on their own accounts. This measure ensures that no accidental or malicious actions can be taken that might affect admin privileges or access, maintaining a high level of security for administrative accounts.
#### **Status in Member Directory and User Profile**
From the **Member Directory lists**, administrators can easily view the status of each user, allowing them to quickly identify whether a user is active, pending review, approved, or deactivated. This clear visibility into user statuses helps administrators efficiently manage memberships and take necessary actions, such as approving, rejecting, or reactivating accounts, without needing to navigate to each profile to check the status. By having this information readily accessible, the Member Directory becomes a powerful tool for streamlining user management and ensuring a smooth, organized workflow for site administrators.

When administrators view the user’s profile, they can see a special status label, such as **Pending Approval**, or **Membership approval**, which is only visible to them. This label helps admins quickly assess the user’s current standing and registration status, allowing for more efficient decision-making without needing to delve into multiple sections.


* * *
6\. Additional Actions for User Reviews, Verified Users & Mailchimp Extensions [#](#additional)
------------------------------------------------------------------------------------------------
If [**Verified Users**](https://ultimatemember.com/extensions/verified-users/)
, **[User Reviews](https://ultimatemember.com/extensions/user-reviews/)
,** and [**MailChimp**](https://ultimatemember.com/extensions/mailchimp/)
extensions are activated on your site, additional quick actions will be available in the Status column, providing further management options tailored to your needs.
#### Verified Users
In **wp-admin> Users,** the **Status** column shows whether a user is verified or unverified. You can quickly update the user's status by clicking the quick action link in this column. This link allows you to easily verify or unverified a user without needing to navigate to another page or access a dropdown menu with additional options, making user management faster and more efficient
Administrators can also perform a **quick action** to block a user's review directly from their profile page. This feature provides a convenient way to manage individual users without navigating through multiple menus. With just a few clicks, an admin can prevent a user from leaving further reviews, ensuring swift action is taken when necessary. This quick-access functionality enhances overall user management by allowing administrators to address review concerns immediately while reviewing a user’s profile.

You can also filter users by status, allowing you to view users who are **Verified**, **Unverified**, or have **Requested Verification**. This feature helps streamline the management of user accounts by letting you quickly locate users based on their verification status.
You can also perform bulk actions in **WP Admin > Users**, making it easier to manage multiple accounts at once. Bulk actions include:
* **Approve Verification Requests**: Accepts and confirms user requests for verification.
* **Reject Verification Requests**: Denies user requests for verification.
* **Mark Accounts as Verified**: Updates user accounts to indicate they are verified.
* **Mark Accounts as Unverified**: Changes user accounts back to an unverified status.
These options help you efficiently manage user verification statuses without handling each account individually

#### **User Reviews**
When the **User Reviews extension** is activated, additional options for **Bulk Actions** and **Quick Actions** in wp-admin>Users become available, enhancing your control over user reviews. Administrators can now block or unblock individual user reviews directly from the status column using the quick action feature. This makes it easy to manage reviews on a case-by-case basis.
Administrators can also perform a **quick action** to block a user's review directly from their profile page. This feature provides a convenient way to manage individual users without navigating through multiple menus. With just a few clicks, an admin can prevent a user from leaving further reviews, ensuring swift action is taken when necessary. This quick-access functionality enhances overall user management by allowing administrators to address review concerns immediately while reviewing a user’s profile.
Additionally, the **Bulk Action** feature allows you to block or unblock reviews for multiple users at once, streamlining the process when dealing with large numbers of reviews. These added functionalities provide greater flexibility and efficiency, ensuring that administrators can maintain the quality and appropriateness of user reviews across the site with minimal effort.

Additionally, you can filter the user list by **review status** to display only users whose reviews are either allowed or blocked. This filtering option simplifies the process of managing user reviews by letting administrators quickly identify which users have active reviews and which have been restricted. It enables faster, more targeted actions, helping to maintain control over the content being posted on the site and ensuring reviews align with the site's standards.

### MailChimp
When the MailChimp extension is activated, you'll find an additional dropdown menu for **MailChimp Bulk Actions** in the user management area. This menu allows you to perform bulk operations on user subscriptions efficiently. You’ll also see dedicated buttons for **Subscribe** and **Unsubscribe**, enabling you to easily manage your users' email preferences directly from the WordPress dashboard.
With these features, you can streamline your email marketing efforts by quickly adding or removing multiple users from your MailChimp lists without having to navigate away from the user management interface. This integration enhances your ability to engage with users while ensuring that your email lists are up to date with the correct subscriptions.
* * *
**7\. Best Practices for Managing Users** [#](#best)
-----------------------------------------------------
With the updated interface, managing your users is faster and more intuitive. Here are some best practices to ensure you get the most out of Ultimate Member’s user management features:
* **Use the Status Dropdown**: Instead of searching through various tabs, use the **All Statuses** dropdown to filter and find users quickly.
* **Leverage Quick Actions**: For tasks like resending emails or rejecting individual users, or needing to do a single action use the new quick action links to speed up your workflow.
* **Apply Bulk Actions**: If you manage a large user base, applying actions to multiple users at once via the **Bulk Actions** dropdown can save considerable time.
* **Regularly Review Inactive Users**: To maintain a clean user database, regularly filter for inactive users and either deactivate or delete them using bulk actions.
* * *
**Related Articles:**
* [Addressing User Concerns: Navigating Changes in Ultimate Member 2.8.7](//docs.ultimatemember.com/article/1946-addressing-user-concerns-navigating-changes-in-ultimate-member-2-8-7)
Last updated on October 15, 2024
No results found
---
# NGINX Configuration Rewrite Rule for Ultimate Member - Ultimate Member
NGINX Configuration Rewrite Rule for Ultimate Member
====================================================
[](javascript:window.print() "Print this article")
Overview
--------
A rewrite rule, a directive within web server configuration files, serves to alter or adjust the requested URL prior to server processing. Frequently utilized for URL rewriting, this technique enables websites to display clean, user-friendly URLs while internally directing them to varied locations or formats.
In the context of the Ultimate Member (UM) plugin, a rewrite rule becomes essential for facilitating file or photo downloads. When users initiate downloads, the URL structure may not be directly interpretable by the UM core. Consequently, the rewrite rule transforms the URL into a format comprehensible to the UM core, ensuring correct processing of download actions. The absence of this rule may lead to download errors or incomplete file/photo retrievals through UM. Integration of this rule into NGINX configuration guarantees proper handling and processing of UM download requests by the UM core.
Purpose
-------
When using the Ultimate Member (UM) plugin with NGINX as the web server, a rewrite rule is required to properly handle the download of files or photos. This rule ensures that download requests are correctly processed by the UM core.
Why is the Rewrite Rule Needed?
-------------------------------
NGINX uses a different configuration syntax than Apache, the more commonly used web server. Unlike Apache, which can interpret .htaccess files to handle URL rewrites, NGINX requires explicit rewrite rules in its configuration to achieve the same effect. Therefore, when using UM with NGINX, a rewrite rule must be included in the NGINX configuration to translate URLs for UM downloads into a format that UM can understand and process.
Rewrite Rule
------------
rewrite ^/um-download/(\[^/\]+)/(\[^/\]+)/(\[^/\]+)/(\[^/\]+)/?$ /index.php?um\_action=download&um\_form=$1&um\_field=$2&um\_user=$3&um\_verify=$4 last;
#### Explanation
* `^/um-download/([^/]+)/([^/]+)/([^/]+)/([^/]+)/?$`: This part of the rule matches the URL pattern for downloading files or photos in UM. It captures four groups: `$1`, `$2`, `$3`, and `$4`.
* `/index.php?um_action=download&um_form=$1&um_field=$2&um_user=$3&um_verify=$4`: This part of the rule rewrites the URL to the appropriate format for UM to handle the download action. It includes the captured groups from the URL pattern as parameters (`um_form`, `um_field`, `um_user`, `um_verify`).
#### Example
* Original URL: `http://example.com/um-download/form_id/field_id/user_id/verify_key`
* Rewritten URL: `http://example.com/index.php?um_action=download&um_form=form_id&um_field=field_id&um_user=user_id&um_verify=verify_key`
#### Notes
* This rule should be placed in the NGINX configuration file within the appropriate server block or location block.
* Ensure that the path to the `index.php` file matches the actual path on your server.
* * *
##### Related Articles:
* [NGINX Configuration Rewrite Rule for Ultimate Member User Notes](//docs.ultimatemember.com/article/1935-nginx-configuration-rewrite-rule-for-ultimate-member-user-notes)
* [NGINX Configuration Rewrite Rule for Ultimate Member Social Activity](//docs.ultimatemember.com/article/1933-using-the-social-activity-extension-with-nginx)
Last updated on May 17, 2024
No results found
---
# Social Login 2.3 Setup - Ultimate Member
Social Login 2.3 Setup
======================
[](javascript:window.print() "Print this article")
Overview
--------
This document provides instructions on how to set up the Social login extension so users can sign-up/login to your site via Social Accounts and how to enable the error logs:
* [General Settings](#general_settings)
* [Shortcodes](#shortcodes)
* [Social Registration Forms](#forms)
* [Profile Data Import](#import)
* [Account Page](#account)
* [Error Debugging](#error-debugging)
App creation and setup [#](#create_application)
------------------------------------------------
For social login to work correctly, you need to create an app on each social network so your site can be linked to the app. We have created separate docs for each app setup:
* [Facebook](//docs.ultimatemember.com/article/20-social-login-facebook-app-setup)
* [Google](//docs.ultimatemember.com/article/141-social-login-google-app-setup)
* [X (formerly Twitter)](//docs.ultimatemember.com/article/140-social-login-twitter-app-setup)
* [Instagram](//docs.ultimatemember.com/article/1363-social-login-instagram-app-setup-with-instagram-basic-display-ap)
* [LinkedIn](//docs.ultimatemember.com/article/142-social-login-linkedin-app-setup)
* [GitHub](//docs.ultimatemember.com/article/1532-social-login-github-app-setup)
* [WordPress.com](//docs.ultimatemember.com/article/1533-social-login-wordpress-app-setup)
* [Discord ( v2.3.15+ )](//docs.ultimatemember.com/article/1763-social-login-discord-app-setup)
* [TwitchTV( v2.3.15+ )](//docs.ultimatemember.com/article/1760-social-login-twitchtv-app-setup)
### Link apps to your site
Once you have created each app, you will need to copy over the App ID/Key and the secret key and paste them into the social network tabs on the settings page.
General settings [#](#general_settings)
----------------------------------------
The general settings tab for the social login extension allows you to:
* Turn on/off the social tab on the account page
* Show the social login buttons by default on the default register form
* Show the social login buttons by default on the default login form
* Enable or disable authentication on the current window
### Social Networks Settings
Each social network has a setting that can activate/deactivate that particular network. Once the setting is turned on you'll see fields where you must add API Keys for the social login to work.
Shortcodes [#](#shortcodes)
----------------------------
The social login extension allows you to place social login buttons anywhere on your site using shortcodes. You can create multiple social login shortcodes for a different output on your site depending on where you want to add the buttons.
The general settings for each shortcode allow you to:
* Assign a specific role to a user on registration via Social Login
* Show Social Buttons to logged-in users only
* Keep users logged in
* Choose the integration type for the Social buttons: Login only, Register only, or Both ( default ).
* Add the social login shortcode on a custom page for users to log and configure the user role settings and set the redirection after the login to a custom URL. The redirection won't work because the social login shortcode is for dynamic pages only. It will only reload the current page where the shortcode is added.
### Creating a New Social Login Shortcode
The steps for creating a new social login shortcode involve accessing the social login settings, adding a new social login option, configuring which social media buttons to display and their styling, and then copying and adding the generated shortcode to your site to enable social media logins.
1. **Navigate to Social Login Settings:**
* In your WordPress admin dashboard, go to `wp-admin > Ultimate Member > Social Login`.
2. **Add a New Shortcode:**
* Click on the **"Add New"** button.
3. **Configure the Social Login options:**
* In the Add New Social Login Shortcode page, you can decide which buttons to show and adjust these settings as needed to customize the appearance and behaviour of the social login buttons on your site:
* **Provider Settings:** Enable or disable specific social login providers.
* **General Settings:** Configure role assignment, visibility for logged-in users, and sign-in persistence.
* **Integration Type:** Select the integration type for the social buttons.
* **Button Appearance:** Adjust icon, label, font size, icon size, button style, width, and padding.
* **Container Appearance:** Set max width, margin, and padding for the container.
4. **Insert the Shortcode:**
* Copy the generated shortcode.
* Paste the shortcode into the desired location on your site for example a page or a widget.
To find the shortcode, you need to edit or add a social login shortcode:
* Go to wp-admin > Ultimate Member > Social Login> Edit existing shortcode or add new shortcode.

To add the shortcode to widgets:
* Go to wp-admin > Appearance > Widgets

### Social Registration Forms [#](#forms)
[](#forms)
When a user tries to register on your site using the social login buttons, they will be taken to the social network site to accept the app permissions. If they accept, they will be redirected back to your site, where they will see an overlay displaying the **Social Registration** form.
This form is needed to collect and add required user details (for example, X (formerly Twitter) does not provide a user's email address) so the user can complete the registration process. Once a social network account is connected to a user on your site, the user will be logged in immediately upon returning to your site, as long as they are logged in to the social network on that browser.
The **Social Registration** form is automatically added to the forms list when you activate the plugin. You can edit this form in wp-admin > Ultimate Member > Forms.
There are two ways to process data from social network apps to register a user on your site: a **one-step process** or a **two-step process**.
| | |
| --- | --- |
| 
Two-step process | 
One-step process |
### Two-Step Process
There are instances where users can check the fields that will be submitted to your site during the registration process - The two-step process enables users to check the details and allows them to edit the form or add extra fields to fill out before submitting the **Social Registration** form.
### One-Step Process
You can choose this process if you want to register a user automatically without showing the **Social Registration** form fields on the overlay. This allows users to register and then login automatically upon successful registration.
When one of the Social Networks does not pass a user's email address or Email Address has already been used on the site, there are 4 options to choose from which you can use to continue the Registration process:
* Link Accounts & Login immediately
* Link Accounts & Redirect to Login Page
* Allow new account creation with a generated Email Address
* Do not link accounts & prevent account creation
There's also an option to show a Splash Screen to display pre-loading content or an Image loader on the overlay during the registration process.
**Note**: To synchronize fields using the 1-step process with a specific registration form, you must enable the **"Use this form in the overlay"** option and set it to **"Yes."**
In the one-step process of social login with Ultimate Member, users are registered and logged in automatically without having to set a password during the registration process. This approach is designed to streamline the user experience and make it easier for users to sign up and access the site quickly.
**Here's how it works:**
1. **Social Login Initiation:** When a user chooses to log in with a social account (e.g., Facebook, Google) on your site, Ultimate Member's one-step process kicks in.
2. **Authentication and Registration:** The user is redirected to the chosen social network's login page, where they authenticate their account. Once authenticated, the social network provides necessary user information to Ultimate Member.
3. **Automatic Registration:** Ultimate Member automatically registers the user on your WordPress site using the information provided by the social network. This registration process includes creating a new user account in the WordPress database.
4. **Immediate Login:** After registration is successful, Ultimate Member automatically logs the user in to their newly created account. This means the user can access the site's features and content without the need to log in again manually.
5. **Password Setting:** Since [no password is set](//docs.ultimatemember.com/article/1927-setting-passwords-in-ultimate-member-register-forms)
during the registration process, users are prompted to set a password after registration. This is typically done through a link provided in the Welcome Email. This email with a [placeholder](//docs.ultimatemember.com/article/1340-placeholders-for-email-templates)
is a notification sent to users, typically after registration, that contains a dynamic placeholder tag like `{action_url}`. This placeholder tag is crucial when no password field is present during registration, such as in a one-step social login process. The `{action_url}` placeholder generates a link in the email that allows users to set their password. Users can click on this link to be redirected to a page where they can securely set their password, ensuring a smooth registration process and access to their account.
#### Benefits of One-Step Process:
* **Simplified Registration:** Users can sign up quickly and easily without the need to fill out a lengthy registration form.
* **Instant Access**: Users can access the site immediately after registration, enhancing the overall user experience.
Profile data import [#](#import)
---------------------------------
**Sync Register form Fields from Social Network fields** ( since version 2.3 )
Social Login adds a field option in the form builder that synchronizes the specific data from the Social Networks to populate the field value on the Registration process. Please note that not all Social Networks return the same data e.g. Instagram doesn't pass an Email Address, but Facebook returns it with Email Permissions in the Facebook application.

Please see the [List of Sync Field options](//docs.ultimatemember.com/article/1536-social-login---list-of-sync-field-options-in-form-builder)
and [Sync Field with extended options](//docs.ultimatemember.com/article/1506-social-login-sync-social-register-form-fields-with-extend-option)
.
### Profile photo import
The social login extension will import a user's profile photo from their social network profile as the profile photo on your site. The most recently connected social network will be the photo used (e.g., if a user registers with X, it will show their X profile photo, but if on the account page they connect to Facebook, then their Facebook profile photo will become the profile photo on your site).
Account page [#](#account)
---------------------------
The social login extension adds a new tab to the user account page called **"Social Connect."** Users can connect or disconnect their social networks from their accounts on this tab

Error Debugging [#](#error-debugging)
--------------------------------------
Error debugging is finding, analyzing, and fixing errors in a software application. By enabling debug logging, developers can see detailed error messages and logs, which helps in identifying the root cause of issues and improving the overall functionality of the social login feature.
Debug logging helps developers identify and fix errors by capturing detailed information during the social authorization process. Here's how to enable it:
* Go to _wp-admin > UM > Settings > Extensions > Social Login_ and see "**Enable Debug Logging"**
* Click on the check box to enable it, then click on the highlighted link to view the error logs.

Last updated on May 31, 2024
No results found
---
# Social Login: X ( formerly Twitter ) App Setup - Ultimate Member
Social Login: X ( formerly Twitter ) App Setup
==============================================
[](javascript:window.print() "Print this article")
### Overview
**Warning: This article has been deprecated since version 2.7.0.**
This document provides instructions on properly setting up an X(formerly Twitter) application so that users can log in/register via X on your site. You will need to purchase the [social login extension](https://ultimatemember.com/extensions/social-login/)
if you want users to log in via X.
**NOTE: The setup for Twitter App version 2 is in this [article](//docs.ultimatemember.com/article/1699-social-login-setup-for-twitter-api-v2)
.**
### Creating a new app
To allow users to log in to your site with their X account, you need to create a Twitter app. To create a new Twitter app, please do the following:
* Go to the Twitter App developer portal: [https://developer.twitter.com/en/portal/projects-and-app](https://developer.twitter.com/en/portal/projects-and-apps)
.
For first-timers, you must verify your Twitter account. Twitter will ask you how you intend to use the Twitter developer platform. You must submit a standard application for access to the Twitter developer platform.
* Click the "**Overview**" in the left side menu.
* Under the "**Standalone Apps**" click on the **"+ Create App**" button.

* Enter the name of your App and click the **N****ext** button.

* Once the App is created, copy the **API Key** and **API** **Secret Key.
**
* Add the keys in the **Social Login.** Go to **Ultimate Member > Settings> Extensions > Social Login> X Social Connect.**
* Go Back to the Twitter Developer Portal [https://developer.twitter.com/en/portal/projects-and-apps](https://developer.twitter.com/en/portal/projects-and-apps)
.
* Under the **Projects & Apps** menu, see the "**Standalone apps**" menu and click on your Twitter App's Name.

* **Now, add your URLs to the callback URLs in the Twitter App settings under "Authentication Settings."
**
First, Edit the Authentication Settings > Enable the options **"Enable 3-legged OAuth"** and **"Request email address from users."
**
Under the " **Edit the Authentication Settings**," Go to **the Callback URLs** section and then add your Redirect URIs. See the example below:
* [https://yoursiteURL/login/](https://yoursiteurl/login/)
e.g., [https://ultimatemember.com/login/](https://ultimatemember.com/login/)
* [https://yoursiteURL/register/](https://yoursiteurl/register/)
e.g., [https://ultimatemember.com/register/](https://ultimatemember.com/register/)
* [https://yoursiteURL/account/social/](https://yoursiteurl/account/social/)
e.g., [https://ultimatemember.com/account/social/](https://ultimatemember.com/account/social/)

**\* Don't forget to add URLs for other required fields such as Website URL, Terms of Service, and Privacy Policy**

**\* Once you've filled out all the required fields, hit save, and your Social Login for X should be good to test.**
**\* You can also add your logo and organizational details on this page if you like.**


Last updated on December 12, 2023
### Related Articles
* [Social Login: X(formerly Twitter) API v2 Setup](/article/1699-social-login-twitter-api-v2-setup)
No results found
---
# CM Tooltip Glossary Pro+ - Ultimate Member
CM Tooltip Glossary Pro+
========================
[](javascript:window.print() "Print this article")
Overview
--------
CM Tooltip Glossary Pro+ is a plugin created by CreativeMinds. This document will provide the compatible shortcode you can use in Ultimate Member - Member Directory while the CM Tooltip Glossary Pro+ plugin is activated.
UM - Member Directory shortcodes use JS templates that aren't compatible with Glossary parsers. You can use the shortcode:
\[glossary\_exclude\]some content\[/glossary\_exclude\]
The shortcode will help exclude content for the parser and preserve the inline scripts.
**Note** The PHP function that the third-party plugin author use for updating the content doesn't work well with inline scripts and custom HTML attributes.
Last updated on October 18, 2023
No results found
---
# Install & Activate Advanced Custom Fields - Ultimate Member
Install & Activate Advanced Custom Fields
=========================================
[](javascript:window.print() "Print this article")
Overview
--------
Ultimate Member has the ability to add meta fields and it has form builders for the front-end. However, Ultimate Member doesn't have custom field builders for the _wp-admin > Users > Profile_ screen. You need a third-party plugin to add fields to the _wp-admin > Users > Profile_ screen. We recommend the [Advanced Custom Fields](https://wordpress.org/plugins/advanced-custom-fields/)
plugin that can add fields compatible with the Ultimate Member form fields.
Install the Advanced Custom Fields plugin
-----------------------------------------
To install the **Advanced Custom Fields**, go to _wp-admin > Plugins > Add New_ and search for the **Advanced Custom Fields** plugin, then click the **Install Now** button.

Once installed, the button will change. Click the **Activate** button. After clicking the **Activate** it will take you to your plugins.

Now the plugin is installed and activated.

Advanced Custom Fields Setup
----------------------------
### Adding a Field Group
To add a new field group, go to _wp-admin > Custom Fields_ menu and click the **Add New** button.
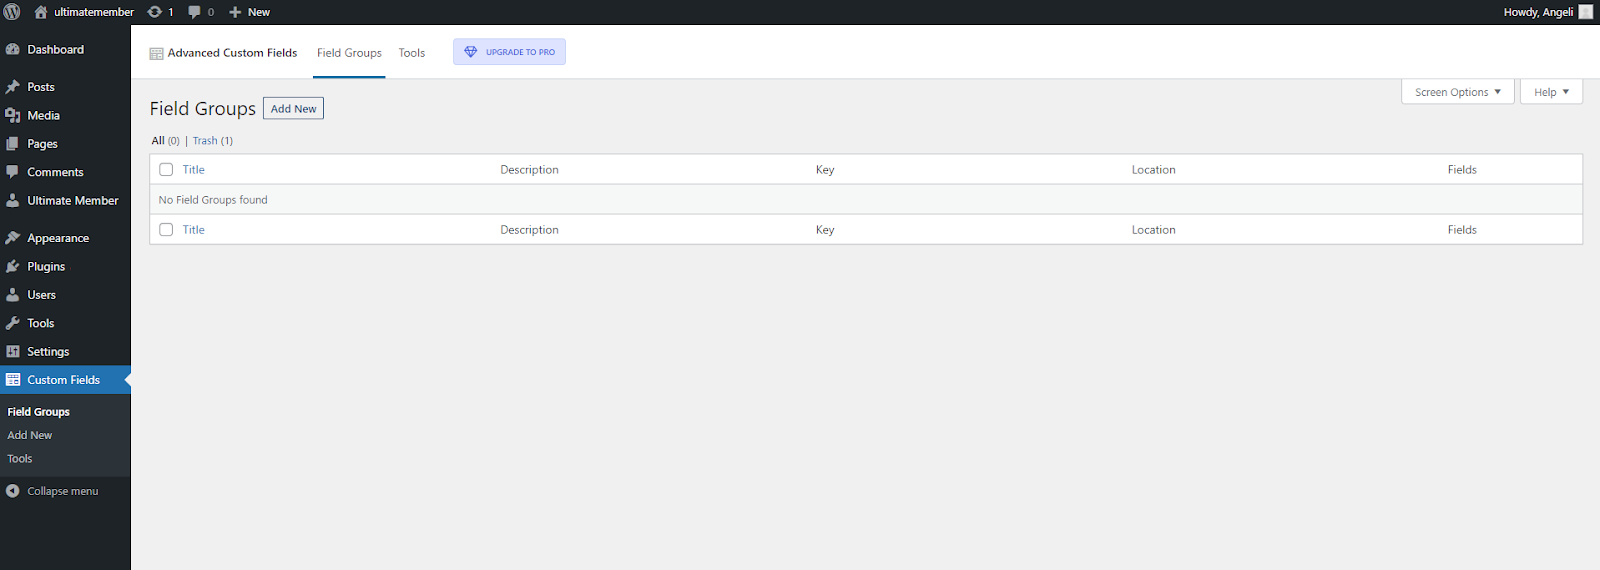
In the **Add New Field Group**, you can set up new Field Group. Enter a title for the Field Group. In this example we used "Billing Address" as the title.

### Adding fields
You can add multiple fields under the title. Click the **\+ Add Field** button to create a field. Setup your field by filling out the following:

The supported field types in Advanced Custom Fields that you can sync with UM fields: **Text field, Text Area, Checkbox, Select/Drop Down, Radio Field, URL Field** and **Email Fields.**
**Note:** _Field Name_ in the ACF field should match the _Meta Key_ in the UM form field.
Image - **Field Name** in the ACF field settings.
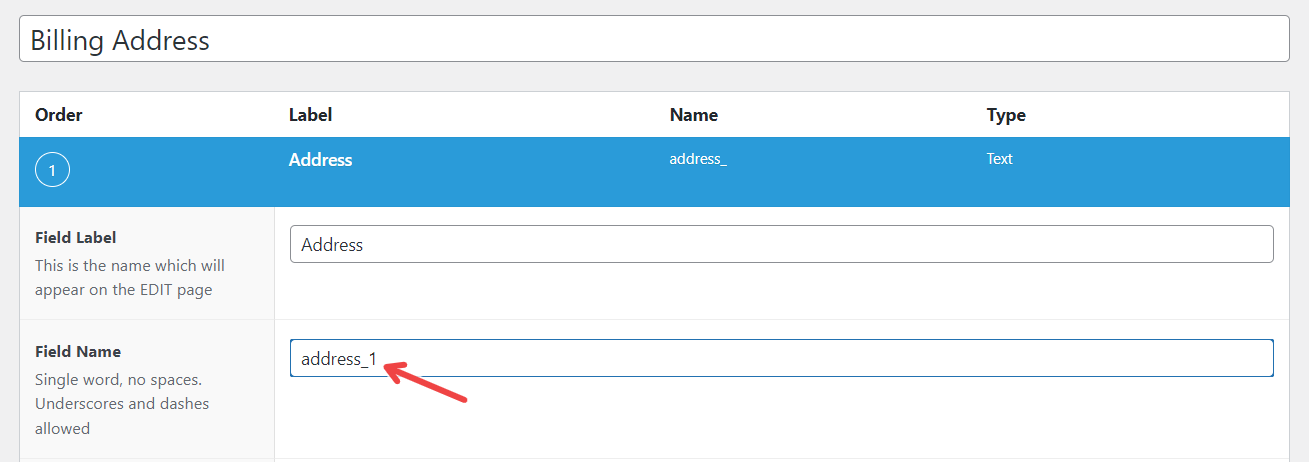
Image - **Meta Key** in the Ultimate Member form field settings.
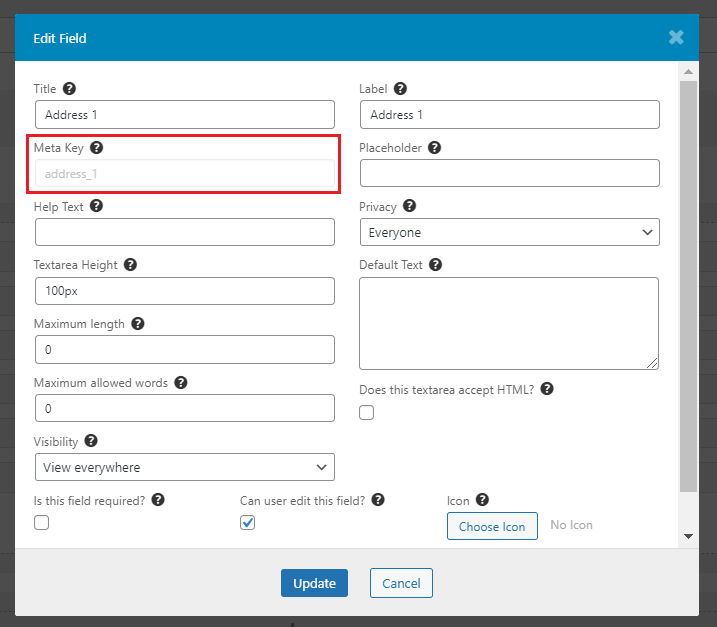
### Set up the Field Group location
Below your fields, you'll find the **Location**. You can create a set of rules to determine which edit screens will use these advanced custom fields.
**Note:** Location rules must show this field group if the User Form is equal to all.
Once you have finished setting up your fields, don't forget to publish/save them.

The created fields will now appear in the _wp-admin > Users > Profile_ screen.

Testing
-------
Test that your fields are syncing with UM User Profile and Admin User Profile. Go to _wp-admin > Users > Profile_ and update the information in the field group you have made, then click the **Update Profile** button.

Check the user's profile on your site. If the user's information has been updated with the same information you have entered in _wp-admin > Users > Profile_, then it means that it is working well.

Examples
--------
Updated example for ACF version 6.2.2 and UM version 2.7.0
Image - ACF to UM. Adding fields.

Image - ACF to UM. Testing a view and syncing.

Last updated on November 15, 2023
No results found
---
# Social Login: LinkedIn App Setup - Ultimate Member
Social Login: LinkedIn App Setup
================================
[](javascript:window.print() "Print this article")
### Overview
This document provides instructions on correctly setting up a LinkedIn application so that users can log in/register via LinkedIn on your site. You will need to purchase our [social login extension](https://ultimatemember.com/extensions/social-login/)
if you want users to log in via LinkedIn.
**Notice:** LinkedIn API is now offering a way for your app to authenticate members using OpenID Connect. The old LinkedIn API for Login has been deprecated. With this update, the feature **"Sign In with LinkedIn using OpenID Connect"** should be enabled in your LinkedIn App settings under the Product tab. To use the old LinkedIn API connection(3-legged OAuth Flow), please use the code snippet below:
add\_filter( 'um\_social\_login\_linkedin\_\_config', 'um\_social\_login\_linkedin\_backward\_compatibility\_\_config' );
function um\_social\_login\_linkedin\_backward\_compatibility\_\_config( $config ) {
$config\['provider'\] = 'LinkedIn';
$config\['scope'\] = array( 'r\_liteprofile', 'r\_emailaddress' ); // Add 'w\_member\_social' in the array if you have the permission to use it.
return $config;
}
### Creating a new app
You need to create a LinkedIn app to allow users to log in to your site with their LinkedIn accounts. To create a new LinkedIn app, please do the following:
* Go to the LinkedIn developer site: [https://developer.linkedin.com/](https://developer.linkedin.com/)
.
* Click the “Create App” button on the banner.
* To correctly create the application, please fill in the application sections, which are explained below.
### Create an app
* **Application Name –** Enter a name for your application.
* **Company name –** Select an existing company or choose a New Company. If you select the new company, you will be asked to enter a company name.
* **Description –** Enter a name for your application.
* **Business Email –** Enter your email address.
* **Legal terms** - Read the terms of service and check the box to confirm that you have read and agree to the terms.

### Products
Once you have clicked on the **Create app** button, you'll be redirected to the Products tab.

Scroll down the product list until you find **Sign In with LinkedIn using OpenID** **Connect** and click the **Request Access** button.

Read the terms; if you agree with the terms, click on the checkbox and proceed by clicking on the **Request Access** button.

### **Auth**
Go to the Auth tab and add Redirect URLs.

### OAuth 2.0 settings
In the redirects URLs, you just need to enter your site's login, register, and account's social tab URLs with **/?provider=linkedin** in the end e.g.:
[http://www.mydomain.com/login/?provider=linkedin](http://www.mydomain.com/)
[http://www.mydomain.com/register/?provider=linkedin](http://www.mydomain.com/)
[http://www.mydomain.com/account/social/?provider=linkedin](http://www.mydomain.com/)

### **Scopes**
The **OAuth 2.0 scopes** will appear a few seconds after you have added and updated the redirect URLs in OAuth 2.0 Settings.

### Application details
If the app is successfully created, you will see the following details. You will need to copy the **API Key** and **Secret Key** and add them to the **Ultimate member > Settings > Extensions > Social Login > LinkedIn Social Connect.**


Last updated on November 7, 2023
No results found
---
# Upgrade 2.1.0 - Ultimate Member
Upgrade 2.1.0
=============
[](javascript:window.print() "Print this article")
Please make a full backup of your site before upgrading to version 2.1.0.
Ultimate Member v.2.1.0 supports a new type of member directories. Immediately after the update, you will see a message in the admin panel. We need to make changes to the database to correctly use the old Member Directories with the new logic.

Start the update process with the button:

If the process was successful, you will see a page with the message

**Warning:** If you use cache plugins or caching is configured on your server, please clear the cache. Using cached data can cause issues.
**Warning:** If you used custom templates for member directories (templates/members.php file), please update them using the new template in the plugin as the base. Using old template files can cause issues.
We recommend that you immediately pay attention to Member Directories settings. Please make sure your old Member Directories are left with the same settings. Visually, your old grid Member Directories should not change.
The database update addresses the following meta-fields:
1) Role (Dropdown) and Role (Radio) filter fields in the "Choose field(s) to enable in search" setting are merged to the “Role” option for "Choose filter(s) meta to enable" setting
2) All your created Member Directories will have 1 “Grid” view installed and it will be installed by default. If you need to add the “List” view, you could change the [settings](//docs.ultimatemember.com/article/1513-member-directories-2-1-0)
3) If your search was active and the fields to search were selected, then all text filters will change to a single general search string, dropdown filters will remain filters. The list of roles that could use the search will be duplicated into the list of roles that can use the filter.
4) The default filter settings are changed to support the new UX to add them.
5) If you use the [Private Messages](https://ultimatemember.com/extensions/private-messages/)
extension, the option “Show Messages Button” has been changed for the correct logic to “Hide Messages Button”, the value after the update will be the opposite (1 = 0, 0 = 1);
6) If you use the [User Tags](https://ultimatemember.com/extensions/user-tags/)
extension, then after updating the Base Member Directory option will be installed (more information about user tags integration with member directories [here](//docs.ultimatemember.com/article/1514-user-tags-member-directories-2-1-0)
). We analyze the content of the default page as Members Page in UM-> Settings-> General. The shortcode located on it will be used by default to display users by a specific tag.
If you have any questions or problems after the update, please contact support immediately to resolve the problems.
Last updated on December 12, 2023
No results found
---
# RankMath - Allow changing of the canonical URL - Ultimate Member
RankMath - Allow changing of the canonical URL
==============================================
[](javascript:window.print() "Print this article")
If you have activated the Third Party Plugin - RankMath you might encounter a compatibility issue with the Ultimate Member user profile URL for canonical and open graph URL tags of RankMath. The code below will fix the compatibility issue:
Last updated on August 5, 2022
No results found
---
# Solution of : Conflict with the Registration Module of LearnDash - Ultimate Member
Solution of : Conflict with the Registration Module of LearnDash
================================================================
[](javascript:window.print() "Print this article")
LearnDash is a WordPress learning management system, and if you're using it while Ultimate Member is activated, you might encounter a conflict with the registration module of LearnDash.
Adding the following code below in the child theme's functions.php will help you solve the issue:
remove\_action( 'login\_form\_register', 'um\_form\_register\_redirect', 10 );
Last updated on April 12, 2022
No results found
---
# Spam solution with WP Foro plugin - Ultimate Member
Spam solution with WP Foro plugin
=================================
[](javascript:window.print() "Print this article")
This article will provide the solution to a spam issue when the wpForo plugin is activated while using Ultimate Member. If you're experiencing having unusual fake users or bot registrations, you need to **disable the wpForo Registration**.
#### **Do the following steps below to disable the wpForo Registration:**
* **Go to Dashboard > Forums > Settings > Feature Tab**

* **Disable the following options:**
* Enable User Registration - Disabling this option won’t let users register through the wpForo Register form

* Replace Registration Page URL to Forum Registration Page URL

* Replace Login Page URL to Forum Login Page URL
****
* Replace Reset Password Page URL to Forum Reset Password Page URL
****
* **Go to Dashboard > Forums > Settings > Members Tab**
* Check the **Custom Authorization URLs** field, and set the Login/Reg/Reset Password urls to Ultimate Member ones.

Last updated on March 14, 2023
No results found
---
# Security Incident Update and Recommended Actions - Ultimate Member
Security Incident Update and Recommended Actions
================================================
[](javascript:window.print() "Print this article")
**WPScan has confirmed that the vulnerability issue has been resolved in Ultimate Member Version 2.6.7. More information about this confirmation can be found at** [https://blog.wpscan.com/hacking-campaign-actively-exploiting-ultimate-member-plugin/.](https://blog.wpscan.com/hacking-campaign-actively-exploiting-ultimate-member-plugin/)
**To our Ultimate Member users,**
We have written this document to provide you with some additional information of the security vulnerabilities that were recently disclosed to us.
Firstly, we want to say sorry for these vulnerabilities in our plugin’s code and to any website that has been impacted and the worry this may have caused by learning of the vulnerabilities.
As soon as we were made aware that security vulnerabilities had been discovered in the plugin, we immediately began updating the code to patch the vulnerabilities.
We have released several updates since the disclosure as we worked through the vulnerabilities, and we want to say a big thank you to the team at WPScan for providing assistance and guidance with this after they got in touch to disclose the vulnerabilities.
Below is an overview of the events around this vulnerability as well as emphasizing additional security measures that we're implementing.
**Overview**
We received communication about a "A privilege escalation vulnerability" in the plugin on the 26th of June. We immediately started investigating and undertaking some internal testing whilst awaiting more details.
After receiving more details regarding the ability of attackers being able to use the 'wp\_capabiliti\\\\es' key we released **version 2.6.4,** which included a fix for that, and we also removed the extract() function from the admin-side of Ultimate Member plugin.
After this release, the WPScan team got in touch to let us know that attackers can still use the wp\_caPabilitiEs' key (metakey in the WP database is not case-sensitive). We released 2.6.5 to fix this and also removed the extract() function from the front-end of the plugin.
After this release, further communication with the WPScan team and the creation of this core trac ticket [https://core.trac.wordpress.org/ticket/58679#ticket](https://core.trac.wordpress.org/ticket/58679#ticket)
we decided to change the submission handlers in the plugin
Marc Montpas (Automattic) wrote:
To be more clear, I'm not sure it can 100% be fixed without forbidding UTF-8 characters altogether, or, better, implementing an allowlist validation routine pattern to restrict form fields only to a set of known legitimate, rather than potential malicious metas.
The problem is the "utf8mb4\_unicode\_ci" collation WordPress uses has a bunch of other character equivalence quirks like the ones I submitted earlier. For example, another one that could bypass your latest fix are Unicode free-standing underscores, whose encoding follows the letter that needs to be underscored, instead of having one for each character in existence:
user\_login-29=hackuser19&user\_password-29=P@ssw0rd%21&wP\_capa%cc%b2bilities-29\[administrator\]=1&confirm\_user\_password-29=P@ssw0rd%21&first\_name-29=Igor&form\_id=29&um\_request=&\_wpnonce=a918042906&\_wp\_http\_referer=%2fregister%2f
There are hundreds of other side-cases like this, and as far as I know, WordPress does not have a function to "normalize" them all in a way that wouldn't cause other side-effects.
**Version 2.6.6** was released, which included hotfixes that had been detected after removing the extract function.
**Version 2.6.7** has been released on the 1st of July to patch the security vulnerability. 2.6.7 introduces whitelisting for metakeys which we store while sending forms. 2.6.7 also separates form settings data and submitted data and operates them in 2 different variables
**3rd Party modifications**
The release of 2.6.7 includes some significant changes to how forms submissions are handled. This may cause 3rd-party modifications to stop working. For Third-party developers, please update your customizations to support the new changes in the latest version. If you have a question or want to report a problem, please create a topic on the [forum](https://wordpress.org/support/plugin/ultimate-member/)
or get in touch via our website. You may find the recent changes with the Ultimate Member [hooks in this site](https://ultimatemember.github.io/ultimatemember/hooks/index.html)
.
**Additional actions to take for your website and users**
As an additional security measure, we will shortly be releasing a feature within the plugin to enable the website admin to reset passwords for all users. The reason for this is a site using our plugin may have been hacked or injected with malware that sniffs login inputs, because this vulnerability issue is prone to these attacks, we recommend to reset passwords after updating with a security patch. This is to ensure the best protection for your website user’s passwords.
In the meantime, whilst we finalize testing on this new feature, we recommend that you follow the steps below to add additional security measures to your site.
* **Review & Delete Unknown Administrator accounts** - The latest security vulnerability issue allows attackers to inject an administrator account to a WordPress site with Ultimate Member plugin prior to version 2.6.7. We recommend that you review all site administrators and delete those unknown accounts.
* **Reset All User Passwords (including your own admin account password)** - We recommend that you reset all user passwords and have users set a new password via the reset password mechanism. We will be introducing a feature in the plugin to enable this shortly.
* **Install & Active Security Plugins** - We recommend that you install Security plugins such as [WPScan](https://wordpress.org/plugins/wpscan/)
or [WordFence](https://wordpress.org/plugins/wordfence/)
to help your site detect suspicious activities. You may also try this plugin to help protect against XSS injections.
* **SSL Protection** - Ensure that your site runs on SSL certificates. SSL certificates will protect the sensitive data transmitted from and to your website. You can ask your hosting provider to assist you with setting up SSL on your server.
* **Daily Site Files & Database Backup** - It's one of the best practices to create daily backups of your site in case anything happens, you can restore your site to a stable version.
* **Send Advisories to your site members/customers about the incident** - We recommend that you inform your customers or site members about this incident and provide instructions on how to reset their passwords on your site. It's best to ask them to use a different password—not the same as their old password.
**W****hat’s next?**
We are awaiting feedback from WPScan on the version 2.6.7 release and are continuing to evaluate our plugin for other potential security vulnerabilities. We are also going to be evaluating all our extensions for increased security measures.
**Thank you**
We would like to apologize again for the stress and inconvenience this may have caused you and say thank you to everyone for your patience and understanding whilst we are working away on patching these issues. We are very lucky to have such a loyal user base of users with over 200,000 websites using our plugin, and ensuring the plugin is safe and secure to use is of the utmost importance to us. We have learned a lot from this recent security vulnerability disclosure and will be working hard to ensure the security of our plugin moving forward.
Last updated on July 10, 2023
No results found
---
# Installing the plugin from WordPress.org - Ultimate Member
Installing the plugin from WordPress.org
========================================
[](javascript:window.print() "Print this article")
Installing Ultimate Member is the same as installing any other WordPress plugin. Go to your WordPress “Plugins” page, from within WordPress admin dashboard, and do the following:
1. Enter “Ultimate Member” into the search field and click “Search Plugins” or hit Enter.
2. Select “Ultimate Member and click either “Details” or “Install Now”.
3. Once Ultimate Member has been installed, click “Activate” to activate the plugin.
Ultimate Member is now activated and you should see the welcome screen.
Last updated on November 19, 2021
No results found
---
# Restrict content on a page/post to specific users community role - Ultimate Member
Restrict content on a page/post to specific users community role
================================================================
[](javascript:window.print() "Print this article")
With Ultimate Member, it is possible to exercise complete control over the visibility of content for specific user community roles. This is accomplished by encapsulating the content with the shortcode provided below:
\[um\_show\_content roles="member"\] This text can only be seen by users who have role "member" \[/um\_show\_content\]
It is essential to note that this feature offers a comprehensive solution for managing user community roles. The shortcode can be used to restrict access to specific content, making it invisible to certain user groups. This functionality provides an effective way to manage user permissions and ensure that only authorized individuals have access to sensitive information.
Ensure that the **Role ID** is utilized in the `roles` and `not` attributes for optimal performance. The Role ID is located in the Ultimate Member User Roles table, which can be found in the wp-admin>Ultimate Member> User Roles> Role ID.

### Show content to specific roles
\[um\_show\_content roles="member"\] \[/um\_show\_content\]
To add multiple target roles, simply separate each role with a comma ' **,**'.
\[um\_show\_content roles="subscriber,um\_moderator,um\_content-creator"\] \[/um\_show\_content\]
#### Example:
It's possible to restrict access to certain content based on the user role by adding the role IDs in the shortcode. This means that only users whose role IDs are **INCLUDED** in the shortcode will be able to view the content. The purpose of this feature is to ensure that the content is visible only to a specific group of users with particular roles, as defined by the shortcode. Therefore, it's crucial to select the appropriate role IDs while using the shortcode to control access to the content.

### Hide content from specific roles
\[um\_show\_content not="member"\] \[/um\_show\_content\]
To add multiple target roles, simply separate each role with a comma ' **,**'.
\[um\_show\_content not="subscriber,member"\] \[/um\_show\_content\]
#### Example:
The shortcode allows admins to restrict access to content by specifying the user role IDs. Content covered by the shortcode will be hidden or inaccessible to the specified user roles, allowing only **NON-INCLUDED** role IDs in the shortcode to view it. It's important to choose the correct IDs to regulate access.

### Adding tags to text
[Common placeholders (tags)](//docs.ultimatemember.com/article/1340-placeholders-for-email-templates)
can be used inside the shortcode. The shortcode then converts these to their proper values.
\[um\_show\_content roles="contributor,subscriber"\] {display\_name} \[/um\_show\_content\]
#### What the specific roles see:
The content that is restricted on the page/post is hidden from other community roles. They won't see any indication that there is content they cannot access.

Last updated on April 22, 2024
### Related Articles
* [Ultimate Member - Shortcodes](/article/210-ultimate-member-shortcodes)
* [Restrict content on a page/post to logged in users](/article/177-restrict-content-on-a-page-post-to-logged-in-users)
* [Restrict content on a page/post to logged out users](/article/176-restrict-content-on-a-page-post-to-logged-out-users)
* [Placeholders for email templates](/article/1340-placeholders-for-email-templates)
No results found
---
# Installing an Extension - Ultimate Member
Installing an Extension
=======================
[](javascript:window.print() "Print this article")
To make use of any of our Ultimate Member Extensions, you need to ensure that the Ultimate Member core plugin is active and then install and activate the extensions. The process is similar to installing a regular plugin.
Downloading Extensions
----------------------
1. You can download available extensions through your account on our website. Visit [https://ultimatemember.com/](https://ultimatemember.com/)
, click the **"Sign In"** button, and log in using the email you used during checkout.

2. Once logged in, you'll be redirected to your [Account page](https://ultimatemember.com/account/)
.
1. For **individual extension purchases**, download the extension from the **"File Downloads"** tab. 
2. For **extension pass purchases**, access the downloads page via the **"Purchases"** tab and click **"View Details and Downloads."**After clicking, you'll be redirected to the purchase confirmation page. Under the Pages section, click on the **"Downloads"** link to proceed to the **"My Downloads"** Page.
### Installing Downloaded Extensions
1. To install downloaded extensions, navigate to your WordPress dashboard, then go to **Plugins > Add New.**
2. Look for the **"Upload Plugin"** button. Click it, then click **"Choose File"** to select the ZIP file of your downloaded extension from your computer.

3. After selecting the file, click **"Install Now"**. Once the installation is complete, click **"Activate Plugin"**.

4. You should see a message confirming the activation. To verify, scroll down to the installed extension. If you see a **"Deactivate"** link, it means the plugin is activated.
### Entering Your License Key
1. A license key is necessary for receiving updates. Obtain your License Key from your account on [ultimatemember.com](https://ultimatemember.com/account/)
.
2. Enter this key on the page **wp-admin > Ultimate Member > Settings > Licenses** or click the Licenses page link from the notice.

For detailed instructions, refer to our article on [**How to activate a license key**](//docs.ultimatemember.com/article/1766-how-to-activate-license-key)
.
Last updated on April 10, 2024
### Related Articles
* [Installing the plugin from WordPress.org](/article/26-installing-plugin-from-wordpress-org)
No results found
---
# Creating Plugin Core Pages Manually - Ultimate Member
Creating Plugin Core Pages Manually
===================================
[](javascript:window.print() "Print this article")
This article presents a detailed, step-by-step guide on manually creating core pages. Normally, these pages are automatically generated when you click the **"Create Pages"** button in the notice after installing and activating the Ultimate Member core plugin, as described in this [article](//docs.ultimatemember.com/article/111-default-pages)
. Before proceeding to create the six default pages, it's advisable to review the following articles:
* [Default Pages](//docs.ultimatemember.com/article/111-default-pages)
* [Pages Tab](//docs.ultimatemember.com/article/38-pages-tab)
* [Core Pages Shortcodes](//docs.ultimatemember.com/article/210-ultimate-member-shortcodes#pages)
If the button fails to generate the pages and you decide to create them manually, follow the steps below:
1. **Register Page**
* Go to wp-admin > Pages and click on the **'Add New Page'** button.
* Add the page title **'Register'**.
* In the content area, [add or paste the default registration form shortcode](//docs.ultimatemember.com/article/210-ultimate-member-shortcodes#login)
. You can locate the shortcode for the **default registration form** in the shortcode column within wp-admin > Ultimate Member > Forms.
* Click the **'Publish'** button to save the page.
2. **Login Page**
* Go to wp-admin > Pages and click on the **'Add New Page'** button.
* Add the page title **'Login'.**
* In the content area, add the [default login form shortcode](//docs.ultimatemember.com/article/210-ultimate-member-shortcodes#login)
. You can locate the shortcode for the **default login form** in the shortcode column within wp-admin > Ultimate Member > Forms.
* Click the **'Publish'** button to save the page.
3. **User Page**
* Go to wp-admin > Pages and click on the **'Add New Page'** button.
* Add the page title **'User'.**
* In the content area, add the [default profile form shortcode](//docs.ultimatemember.com/article/210-ultimate-member-shortcodes#login)
. You can locate the shortcode for the **default profile form** in the shortcode column within wp-admin > Ultimate Member > Forms.
* Click the **'Publish'** button to save the page.
4. **Account Page**
* Go to wp-admin > Pages and click on the **'Add New Page'** button.
* Add the page title **'Account'.**
* In the content area, add the [account form shortcode](//docs.ultimatemember.com/article/210-ultimate-member-shortcodes#account)
:`[ultimatemember_account]`.
* Click the **'Publish'** button to save the page.
5. **Members Page**
* Go to wp-admin > Pages and click on the **'Add New Page'** button.
* Add the page title **'Members'**.
* In the content area, add the [default member directory shortcode](//docs.ultimatemember.com/article/210-ultimate-member-shortcodes#members)
. You can locate the shortcode for the **default member directory** in the shortcode column within wp-admin > Ultimate Member > Member Directories.
* Click the **'Publish'** button to save the page.
6. **Logout Page**
* Go to wp-admin > Pages and click on the **'Add New Page'** button.
* Add the page title **'Logout'**.
* Click the **'Publish'** button to save the page.

7. **Password Reset**
* Go to wp-admin > Pages and click on the **'Add New Page'** button.
* Add the page title **'Password Reset'.**
* In the content area, add the [password reset shortcode](//docs.ultimatemember.com/article/210-ultimate-member-shortcodes#passwordReset)
: `[ultimatemember_password]`
* Click the **'Publish'** button to save the page.
After manually creating all the necessary core pages, the final step is crucial. You must assign them in **WP Admin > UM > Settings > General** **\> Pages**. Select the created page on your site from the drop-down menu and save the changes for that page to be assigned to the UM core element. Then, save the settings by clicking on the **'Save changes'** button.

Last updated on February 15, 2024
No results found
---
# Common content restriction settings - Ultimate Member
Common content restriction settings
===================================
[](javascript:window.print() "Print this article")
Overview
--------
Ultimate Member's **Content Restriction** allows you to manage site visibility for everyone or logged-in users globally, customize per-page or per-post access rules, and define specific restrictions and redirect behaviors for both logged-in and logged-out users, including the option to lock the homepage for certain user roles. This guide details the configurations to control access to the site and pages, which can be located at **wp-admin > Ultimate Member > Settings > Access > Restriction Content.**
Global Site Access
------------------
The Global Site Access feature provides that let you the flexibility to define the accessibility of your entire site with two primary options:

* ### Site accessible to Everyone:
* This is the **default Global Site Access setting**, allowing everyone, including non-members or users, to view all pages and posts on your site.
* Use this option to permit non-members to access your site's content while restricting certain pages to members only.
* The illustration below demonstrates that everyone, including logged-out users, can view the Members Page. 
In this example, an attempt was made to restrict only the Member Page, while the global access is set to **"Site accessible to Everyone."** As a result, the Member Page becomes restricted while other pages remain accessible to everyone.
* ### Site accessible to Logged in users:
**Note: Pages such as Login, Registration, and Password Reset cannot be restricted and are exceptions.**
* Choosing this option limits access to logged-in users only. Every page or post on your site will be available solely to users who are logged in unless you change the access rule on a particular page or post to make a page available to everyone.
* If this option is selected, additional settings will be available:
* **Custom Redirect URL**: Redirects logged-out users attempting to access restricted content to the specified URL.
* **Exclude the following URLs**: Excludes specified URLs from content restrictions, allowing them to be accessible to everyone.
* **Allow Homepage to be accessible**: Grants access to the homepage for everyone if enabled.
* **Allow Category pages to be accessible**: Permits access to category pages for everyone if enabled.
However, it's crucial to create a designated page for non-members or logged-out users to sign up or log in when using this option. For instance, you may consider making your homepage a landing page to encourage new users to sign up. If a logged-out user attempts to access a restricted page, they will be redirected to the homepage or landing page. In the example below, we set the custom redirect URL to the login page URL. So, when a logged-out user visits a restricted page (e.g., Members page), they are redirected to the login page.

Replace the restricted post title
---------------------------------
This option allows setting the restricted post's title for the content that isn't accessible to the visitor or current user.
* ### Restricted Access Post Title
This is the title shown to users who do not have permission to view the post. It affects the individual post page, archive post in a widget, or post link in the nav menu titles. The default title is " **Restricted content**"

Restricted Access Message[#](#global)
--------------------------------------
This message will be shown to users who do not have permission to view the content, this will be the global default message. It can be edited visually or as HTML text.

### Enable the "Content Restriction" settings for the Gutenberg Blocks
This enables the admin to set the restriction settings for Gutenberg Blocks. If enabled,the admin can enable or disable content restrictions for the Gutenberg blocks in each post.

* ### Restricted Access Block Message
This message will be shown to users who do not have permission to view the Gutenberg block.

* If the admin has selected **Show global default message** under the Restriction action in edit post/page > Block settings, the restricted access block message is displayed to logged-out users.

How it looks in the front end: 
* Logged-out users are not able to access or view the restricted Gutenberg block if the admin has selected **'Hide block'** under the Restriction action.

How it looks in the front end:

### Enable the "Content Restriction" settings for post types
This enables the "Content Restriction" feature for the individual posts of the selected post types.

* If enabled, the admin can enable or disable content restriction of a post while editing, and they can also choose who can access the post with the following options: **Everyone, Logged out users, Logged in users**. Individual post-restriction settings are described [here](//docs.ultimatemember.com/article/1623-post-term-restriction-content-settings)
.
### Enable the "Content Restriction" settings for taxonomies
This enables the "Content Restriction" feature for the individual terms of the selected taxonomies.

* If enabled, the admin can manage content restriction of a taxonomy while editing. Individual taxonomy restriction settings are described [here](//docs.ultimatemember.com/article/1623-post-term-restriction-content-settings)
.
Last updated on January 5, 2024
### Related Articles
* [Access Tab](/article/41-access-tab)
* [Individual Post and Term content restriction settings](/article/1623-post-term-restriction-content-settings)
* [Restriction content priority](/article/1620-restriction-content)
No results found
---
# User Tags + Member Directories 2.1.0+ - Ultimate Member
User Tags + Member Directories 2.1.0+
=====================================
[](javascript:window.print() "Print this article")
There are two options to customize links for the displaying users by the tag and general organic search by the user tag in member directories.
Settings:
* **User Tag slug** - this option allows you to set the user tags' taxonomy slug, which is used in rewrite rules.
* **Base member directory** - this option allows you to select what member directory is used for the displaying users by the tag at the page

A tag link structure: `{members-page-url}/{user-tag-slug}/{term-slug}/?tag_field={user-tag-field-key}` where `{user-tag-slug}` is the **User Tag slug** setting.
A tag link example: `https://site.local/members/user-tag/blogging/?tag_field=interests` where `user-tag` is the **User Tag slug** value.
User tags shown in profile are links that navigate to the member directory with predefined filtering by chosen user tag.

Last updated on March 18, 2023
### Related Articles
* [User Tags Setup](/article/186-user-tags-setup)
No results found
---
# Restrict content on a page/post to logged out users - Ultimate Member
Restrict content on a page/post to logged out users
===================================================
[](javascript:window.print() "Print this article")
With Ultimate Member you can make certain content on a page/post only viewable to **logged-out** users. To do this you need to wrap the content in the following shortcodes:
\[um\_loggedout\] This text can only be seen by logged out users \[/um\_loggedout\]
#### Sample Usage:

#### What logged-out users see:

Last updated on January 5, 2024
### Related Articles
* [Ultimate Member - Shortcodes](/article/210-ultimate-member-shortcodes)
* [Restrict content on a page/post to logged in users](/article/177-restrict-content-on-a-page-post-to-logged-in-users)
* [Restrict content on a page/post to specific users community role](/article/226-restrict-content-on-a-page-post-to-specific-users-community-role)
No results found
---
# Social Login Common Issues - Ultimate Member
Social Login Common Issues
==========================
[](javascript:window.print() "Print this article")
**Version 2.3+**
The Social Login extension uses 1-step and 2-step processes for the first time registrations. When a user clicks on a social network button to register they will be redirected to the social network site to confirm permissions and then return back to your website's previous page URL as Redirect a URI of your apps where a social overlay should show which includes the social registration form( for 2-step process ) so users can complete the registration.
**1\. Social Overlay/Fields not showing up**
If you do not see the overlay or fields on it when you are returned to your site and instead just see a white overlay page, please go to your registration form **WP-admin > Ultimate Member > Forms > Your registration form** and turn ON "**Use this form in the overlay**" this will show your form in the overlay.

**2\. Getting Redirect URI Mismatch Errors**
If you're getting an SDK/API error or Mismatch Redirect URI errors, please read the common issues and solutions below:
a .Your hosting provider has a \`register\_globals\` that's turned on. Please ask your hosting provider to turn it off. Once the hosting provider has confirmed this is off, please check the issue again.
b. API callback and site URL settings doesn't match the current site domain and its protocol ( http or https ). Also, check if your site URL returns www or non-www that could cause mismatch Redirect URIs set in your Apps.
c. You entered Invalid API credentials in the Ultimate Member social connects settings.
d. There's a Javascript error that's affecting the overlay script. Please check the browser's console to check for any errors from the theme and other plugins.
e. There's a caching plugin or varnish/memcache installed on your host. We recommend to exclude those pages where Social Login buttons are added. Also, try clearing the cache/memcache after your install the Social Login extension and pages.
f. Check for broken links or images that causing a 404 page. It duplicates the authentication request that causes 'state' doesn't match.
g. Your theme/plugin has incompatibility issues with Social Login's Sessions. We recommend that you do a [theme/plugin conflict test](//docs.ultimatemember.com/article/96-how-to-do-a-plugin-theme-conflict-test)
.
**3\. Unable to Request App Access Permissions**
If users are getting the message **"We were unable to request application access permissions."** on app authentication, there's a possible cache issue with your site/server. If you have a Varnish Cache or Cache plugin installed on your site/server, please try excluding the following cookie from the cache: **PHPSESSID**
**4\. Looping Register Form on submission after Request Application Access Permissions**
* If you're using the One-Step Process option, you need to remove the following fields from the Register Form:
* ReCaptcha
* Terms & Conditions / Privacy Policy
* Password Fields
* Fields should be synced with the SSO fields in the field settings: 
Last updated on June 14, 2023
No results found
---
# Adding Existing Fields from Register Form to Profile Form - Ultimate Member
Adding Existing Fields from Register Form to Profile Form
=========================================================
[](javascript:window.print() "Print this article")
When users enter information in the Registration form during the sign-up process, it is essential to ensure that this data can be seamlessly displayed and edited in the Profile form. To achieve this, you must include the same fields in both forms.
**Important Note:** Ultimate Member does not automatically add fields to the `wp-admin > Users > Profile` screen.
### Example Implementation
In the example below, we will integrate the predefined fields _**First Name**_ and _**Last Name**_, along with a custom field titled _**Position**_, into both the Registration and Profile forms. This approach can be extended to other fields as needed.
1. **Fields in the Registration Form:**
* [Add the predefined fields](//docs.ultimatemember.com/article/188-how-to-add-fields-to-a-form)
_First Name_, _Last Name_, and the custom field _Position_ to the Registration form.
* During registration, users will enter their first name, last name, and work position. This information will be securely saved after their registration.
2. **Fields in the Profile Form:**
* To display this information in the Profile form, navigate to `wp-admin > Ultimate Member > Forms`, and edit the Profile form.
* Add the _First Name_ and _Last Name_ fields in the Form Builder section.
* For any custom fields you have created, locate them in the **"Custom Fields"** section within the Fields Manager.
3. **Final Steps:**
* After adding the necessary fields, click the **Update** button to save your changes.
* The user's first name, last name, and work position will now be displayed in their profile. If the fields are configured as editable, users can modify this information directly in their profiles by clicking on the gear icon and selecting **Edit Profile**.
### Common Issues When Adding Fields
**Issue:** You may encounter the following error message when trying to add or create a field:
* _"Your meta key already exists in your fields list."
_
**Resolution:** These messages indicate that the meta key you are attempting to use already exists in the system. To resolve this:
* **Check the Fields Manager:** Navigate to _Form Builder > Add a field "+" > Custom Field_. Hover over the custom fields to view their meta keys. If the field and its meta key already exist, consider using a predefined field from the modal instead of creating a duplicate.
* **Modify Your Custom Field's Meta Key:** If you must create a new custom field, ensure that its meta key is unique. This will prevent conflicts and allow for proper data integration.

### Conclusion
By effectively utilizing both predefined and custom fields, you can enhance the user experience on your site and ensure data consistency across forms. Always keep track of existing meta keys to avoid duplication errors, and refer to the provided documentation for specific use cases and advanced configurations.
Last updated on October 1, 2024
### Related Articles
* [How to Add Fields to a Form](/article/188-how-to-add-fields-to-a-form)
* [Form Builder](/article/85-form-builder)
No results found
---
# Ultimate Member - Search Users - Ultimate Member
Ultimate Member - Search Users
==============================
[](javascript:window.print() "Print this article")
### Overview
**Search Users** shortcode provides instant search results in the member directory as you type in its search field. By default, this shortcode is used by **Ultimate Member - Search** widget.

Use this shortcode anywhere on your site to allow customers to find the users via the general search field.
\[ultimatemember\_searchform /\]
Image - How to add the **\[ultimatemember\_searchform /\]** shortcode to a page.

You should see a simple block with an input and the "Search" button (icon) on the front. Type a keyword and click the "Search" button. The site will redirect you to the Members page and show users who have a keyword in their data.
Image - A view of the **\[ultimatemember\_searchform/\]** shortcode on the page.

The searching form is hidden if the Members page is disabled or the searching feature is disabled. Turn on the **Enable Members Directory** setting on _wp-admin > Ultimate Member > Settings > General > Users_ and turn on the **Enable Search feature** setting on _wp-admin > Ultimate Member > Member Directories > Edit Member Directory_ to enable the search form.
**Warning:** Make sure that you have installed the Members page [here](//docs.ultimatemember.com/article/111-default-pages)
and there is a shortcode for the member directory, which has the general search bar. More information about member directory settings is [here](//docs.ultimatemember.com/article/1513-member-directories-2-1-0#search)
.
**Note:** If there is more than 1 shortcode with the active search bar on the members' directory page, a search will be performed for all shortcodes that have a general search bar display setting.
Last updated on December 1, 2022
### Related Articles
* [Ultimate Member - Shortcodes](/article/210-ultimate-member-shortcodes)
* [Restrict content on a page/post to logged in users](/article/177-restrict-content-on-a-page-post-to-logged-in-users)
* [Restrict content on a page/post to specific users community role](/article/226-restrict-content-on-a-page-post-to-specific-users-community-role)
* [Restrict content on a page/post to logged out users](/article/176-restrict-content-on-a-page-post-to-logged-out-users)
No results found
---
# Choices Callback Feature in UM 2.1+ - Ultimate Member
Choices Callback Feature in UM 2.1+
===================================
[](javascript:window.print() "Print this article")
### Overview
This document provides information on how to set up the **Choices Callback** feature to make a specific dropdown field and the **Parent Option** feature to display different array of options depending on the user choice in the parent field.
> This article is actual for the Ultimate Member 2.1 and next versions. See this [article](//docs.ultimatemember.com/article/1486-how-to-use-choices-callback)
> for older versions.
### Custom function
The **Choices Callback** value is a name of your custom function that returns an array of options for the field. Array keys are used as option names and array values are used as option titles. You can add your custom functions to the _functions.php_ file in the theme directory.
### Examples
#### Example 1 - Make a specific dropdown field
Add the custom function `custom_country_choices_callback` to the _functions.php_ file. Add a custom dropdown field **Country** to your form and paste the function name "custom\_country\_choices\_callback" to the field's **Choices Callback** setting.
function custom\_country\_choices\_callback() {
// choices array.
$options = array(
"FR" => "France",
"ES" => "Spain",
"IT" => "Italy",
);
return array\_unique( $options );
}
Image - The custom **Country** field settings.

#### Example 2 - Make a specific dropdown field that displays different options depending on the parent field
Add the custom function `custom_city_choices_callback` to the _functions.php_ file. Add a custom dropdown field **City** to your form and paste the function name "custom\_city\_choices\_callback" to the field's **Choices Callback** setting. Select the **Country** field in the **Parent Option** setting to link these fields.
Here is a function that you can use to get cities for France (FR) and Spain (ES). If you select any of these countries in the **Country** field, cities will be show up as options in the **City** field.
function custom\_city\_choices\_callback() {
// choices array.
$all\_options = array(
"FR" => array(
"Paris" => "Paris",
"Marseille" => "Marseille",
"Lyon" => "Lyon"
),
"ES" => array(
"Madrid" => "Madrid",
"Barcelona" => "Barcelona"
),
);
// get values from the parent field, sent via the AJAX post.
$parent = empty( $\_POST\['parent\_option'\] ) ? '' : sanitize\_text\_field( $\_POST\['parent\_option'\] );
$options = ( $parent && array\_key\_exists( $parent, $all\_options ) ) ? $all\_options\[ $parent \] : array();
return array\_unique( $options );
}
Image - The custom **City** field settings.

Image - Two specific dropdown fields where the **City** field options depend on the choice in the **Country** field.

#### Example 3 - Four related dropdown fields linked using the Parent Option setting
This example is too big for an article, see the code and screenshots on [GitHubGist](https://gist.github.com/yuriinalivaiko/0a804d322f7ff19fc2594a1e029ae8e7)
.
Last updated on December 6, 2024
### Related Articles
* [How to use choices callback feature](/article/1486-how-to-use-choices-callback)
* [Dynamic Country-State-City Dependent Dropdown fields](/article/1884-custom-callback-dropdowns)
No results found
---
# Display Specific User Profile with a shortcode - Ultimate Member
Display Specific User Profile with a shortcode
==============================================
[](javascript:window.print() "Print this article")
If you want to display a specific profile with the Profile Form on a page, you can use the following code snippets:
Sample Usage:
**\[um\_embed\_profile user\_id="123" form\_id="3"\]**
**user\_id** - This attribute is a user ID
**form\_id** - This attribute is a Profile Form ID
Last updated on December 13, 2021
No results found
---
# Conditional Logic - Ultimate Member
Conditional Logic
=================
[](javascript:window.print() "Print this article")
Overview
--------
Ultimate Member provides conditional logic within the form builder which allows you to configure your registration, login, or profile form to show or hide fields based on user selections. Conditional logic can be applied to a field when creating a new field or editing an existing or pre-defined field.
Adding conditional logic to a field [#](#adding_conditions)
------------------------------------------------------------
To add conditional logic to a field you need to open up an individual field’s options by adding a new field from the field modal or clicking the edit icon to edit an existing field. Near the bottom of the field modal, you will see text that says: “Add conditional fields support”. Clicking on this text will open the conditional logic options.

### Adding a condition [#](#condition)
Thick the "+" icon to add one more condition. Each condition is a line with inputs: Action, Field selection, Operator, Value.
#### Action [#](#condition_action)
The basic idea with conditional logic is that you show or hide a field based on the user’s selection of another field. If you select the **show**, the field will only appear on the form once the conditions are met. If you select **hide**, the field will disappear from the field once the conditions are met.
#### Field selection [#](#condition_switcher)
The second input required for conditional logic is to select the field which will trigger the conditional logic to show/hide. Click the dropdown and select the name of the field from the list. Only fields that have been added to the form are shown in this dropdown.
**Warning:** Conditional logic is strictly hierarchical. Cross dependencies are not allowed. This means that you can make field B depend on field A or field A depend on field B. But if you make field B depend on field A and field A depend on field B, it will cause an error.
#### Operator [#](#condition_operator)
The third input required for conditional logic is to select the operator that will trigger the conditional logic. There are several operators to choose from:
* **Empty** – this field will show/hide if the selected field is empty (e.g. has no user input)
* **Not Empty** – this field will show/hide if the selected field is not empty (e.g. the field has user input)
* **Equals to** – this field will show/hide if the selected field is equal to the text or number you set in the value input (e.g if you set the value input to be London and the user selects London from the country list then the field will show/hide)
* **Not equals** – this field will show/hide if the selected field is not equal to the text or number you set in the value input (e.g if you set the value input to be London and the user selects New York from the country list then the field will show/hide)
* **Greater than** – this field will show/hide if the selected field is greater than the number you set in the value input (e.g has no user input)
* **Less than** – this field will show/hide if the selected field is greater than the number you set in the value input (e.g has no user input)
* **contains** – this field will show/hide if the selected field contains the text or number you set in the value input. This operator should be used if the selected field type is _"Checkbox", "Dropdown", "Multi-Select" or "Radio"_ - these field types save data as an array.
#### Value [#](#condition_value)
The final input required for conditional logic is to set the value. This involves entering the text or number that will trigger the field to show/hide. Below is what you can enter into the value input for each operator type:
* **Empty** – this operator requires no value input and should be left with the default 0
* **Not Empty** – this operator requires no value input and should be left with the default 0
* **Equals to** – the value may be either text or number. If entering text make sure the text matches exactly with what the user selects (e.g if the user selects Male from the gender field make sure you set the value as Male and not male).
* **Not equals** – the value may be either text or number. If entering text make sure the text matches exactly with the what the user selects (e.g if the user selects Male from the gender field make sure you set the value as Male and not male).
* **Greater than** – this operator requires that the value be a number, not text.
* **Less than** – this operator requires that the value be a number, not text.
* **contains** – the value must be the same as one of the choices in the field-switcher. For example, your field-switcher contains choices "first item", "second item", "third item". You should use one of these values. Values "first", "item" or "first item second item" would not work.
### Adding multiple conditions [#](#multiple_conditions)
It is possible to add more than one condition to each field. You are able to add up to five conditions per field. This means you have more flexibility over what conditions will make a field show/hide on the form.
Conditional fields don't use "AND" or "OR" logic. Conditional logic is based on form actions. The related field will be changed (shown or hidden) when the value of the field-switcher is changed. That's why we recommend using the combination "single switcher - multiple related fields" and don't recommend using combination "multiple switchers - single related field".
You should add several rules to the related field's conditional logic if you want to show related fields for several choices of the field-switcher.

### Exceptions [#](#exceptions)
#### Roles [#](#exceptions_roles)
You may use conditional logic with the field types "Roles (Dropdown)" and "Roles (Radio)". In this case, you should use these settings to manage conditional fields:
* Action - "show"
* Field - select the field-switcher;
* Operator - "contains";
* Value - the **Role ID** of the user role in the field-switcher. Look at the table on _wp-admin > Ultimate Member > User Roles_ to find proper **Role ID**.

#### User Tags [#](#exceptions_user_tags)
You may use conditional logic with the field type "User Tags". In this case, you should use these settings to manage conditional fields:
* Action - "show"
* Field - select the field-switcher;
* Operator - "contains";
* Value - the ID number of the target tag in the field-switcher.

Last updated on January 6, 2025
No results found
---
# Default WordPress Fields Limit - Ultimate Member
Default WordPress Fields Limit
==============================
[](javascript:window.print() "Print this article")
Ultimate Member allows you to add or create custom fields that you can add to your forms, but you need to consider the default field limits based on the WordPress database. If you input data that is over the limit, it will not be saved.
The following are the default field character limits:
* **user\_login** - this field accepts **60** characters.
* **user\_pass** - this field is encrypted that accepts **255** characters.
* **user\_nicename** - this field is used for the friendly URL of the user's page and it accepts **50** characters.
* **user\_email** - this field is for the user's email it accepts **100** characters.
* **user\_url** \- this field is where you can input the user's URL. It accepts **100** characters.
* **display\_name** - this field is for the user's display name, it accepts **250** characters.
Data that have longer characters than the fields limit above, you can create another field with another meta key in the field settings under form builder.

Last updated on January 8, 2022
No results found
---
# Dynamic Country-State-City Dependent Dropdown fields - Ultimate Member
Dynamic Country-State-City Dependent Dropdown fields
====================================================
[](javascript:window.print() "Print this article")
This document provides the code necessary to populate custom callback dropdowns for Country, State, and City fields. We recommend reading this [article](//docs.ultimatemember.com/article/1539-choices-callback-feature-in-um-2-1)
thoroughly to understand the choices callback feature in detail. For implementing dynamic, dependent dropdowns for these fields, you can use the **Country State City Dropdown (Pro)** plugin. This third-party plugin integrates seamlessly with Ultimate Member forms, enabling auto-population of options based on user selections and facilitating a smooth setup with the callback functions below.
To begin, you should add the provided code snippet located at the end of this article to your theme's functions.php file or utilize the Code Snippets plugin.
#### **Custom Country Dropdown Field Settings**
In your **custom country** dropdown field setting, paste in the **Choices Callback** option the function name `um_customcb_populate_countries` into the field's **"Choices Callback"** setting.

#### **Custom State Dropdown Field Settings**
In your **custom state** dropdown field setting, paste in the **Choices Callback** option the function name `um_customcb_populate_states` into the field's **"Choices Callback"** setting. Select the **country** field in the **Parent Option** setting to link these fields.

#### Custom City Dropdown Field Settings
In your **custom city** dropdown field setting, paste in the Choices Callback option the function name `um_customcb_populate_city` into the field's **"Choices Callback"** setting. Select the **state** field in the Parent Option setting to link these fields.

**WARNING:** We have created this code example to provide guidance and to make it easier for you to implement this code into your website. However, we are not able to provide any support when it comes to customizing the plugin. If you need help implementing this code, please hire a developer.
**Note:** You can add the code snippet to your theme's functions.php file or use the Code Snippets plugin.
Last updated on November 4, 2024
### Related Articles
* [Choices Callback Feature in UM 2.1+](/article/1539-choices-callback-feature-in-um-2-1)
No results found
---
# Fields Validation - Ultimate Member
Fields Validation
=================
[](javascript:window.print() "Print this article")
There are several ways to validate a field value:
1. Select a predefined validation option in the field setting **Validate**.
2. Select the **Custom Validation** option in the **Validate** setting, then type a keyword for the custom validation hook in the **Custom Action** setting. Attach your custom validation function to the hook `um_custom_field_validation_{custom_action}`, where `{custom_action}` is a keyword in the **Custom Action** setting.
3. Attach your custom validation function to the hook `um_submit_form_errors_hook_`.
Note: You can add your custom PHP code to the _functions.php_ file in the active theme directory.
Validation options
------------------
A list of predefined validation rules:
* Alphabetic value only
* Google URL
* VK URL
* Alpha-numeric value
* English letters only
* Facebook URL
* Instagram URL
* LinkedIn URL
* Lowercase only
* Numeric value only
* Phone Number
* Skype ID
* SoundCloud Profile
* Twitter URL
* E-mail( Not Unique )
* Unique E-mail
* Unique Metakey value
* Unique Username
* Unique Username/E-mail
* Website URL
* YouTube Profile
* Telegram URL
* Discord ID
* **Custom Validation**
Image - Field settings, predefined validation options.

Custom Validation option
------------------------
You can select the **Custom Validation** option in the **Validate** setting and add your custom validation function to the _functions.php_ file in the active theme directory. Attach your custom validation function to the hook `um_custom_field_validation_{custom_action}`, where `{custom_action}` is a keyword in the **Custom Action** setting.
Image - Field settings.

Code example - Custom validation function attached to the custom action hook.
function um\_custom\_validate\_mobile\_number( $key, $array, $args ) {
if ( isset( $args\[$key\] ) && !preg\_match('/^\[6-9\]\\d{9}$/', $args\[$key\]) ) {
UM()->form()->add\_error( $key, \_\_( 'Please enter valid Mobile Number.', 'ultimate-member' ) );
}
}
add\_action( 'um\_custom\_field\_validation\_mobile\_number', 'um\_custom\_validate\_mobile\_number', 30, 3 );
Image - Error message in the form.

Hook um\_submit\_form\_errors\_hook\_
-------------------------------------
You can use the `um_submit_form_errors_hook_` hook to apply custom validations and rules for any fields and stop forms from being submitted until the conditions are met.
In the example below we check that the username field does not have the word "admin".
Code example - Custom validation function attached to the hook.
function um\_custom\_validate\_username( $args ) {
if ( isset( $args\['user\_login'\] ) && strstr( $args\['user\_login'\], 'admin' ) ) {
UM()->form()->add\_error( 'user\_login', 'Your username must not contain the word admin.' );
}
}
add\_action('um\_submit\_form\_errors\_hook\_','um\_custom\_validate\_username', 999, 1);
Custom Validating with two fields
---------------------------------
Examples below will help you validate and compare two fields. We use "user\_login" & "nickname" as examples. The user will get an error message if the values in both fields are the same.
### Example with the Custom Validation option
Image - Field settings

Code example - Custom validation function attached to the custom action hook.
function um\_custom\_validate\_username\_nickname( $key, $array, $args ) {
if ( isset( $args\[$key\] ) && isset( $args\['user\_login'\] ) && $args\[$key\] == $args\['user\_login'\] ) {
UM()->form()->add\_error( $key, \_\_( 'Your username and nickname can not be equal.', 'ultimate-member' ) );
}
}
add\_action( 'um\_custom\_field\_validation\_username\_nickname', 'um\_custom\_validate\_username\_nickname', 30, 3 );
Image - Error message in the form.

### Example with the hook um\_submit\_form\_errors\_hook\_
Code example - Custom validation function attached to the hook.
function um\_custom\_validate\_username\_nickname( $args ) {
if ( isset( $args\['user\_login'\] ) && isset( $args\['nickname'\] ) && $args\['user\_login'\] == $args\['nickname'\] ) {
UM()->form()->add\_error( 'user\_login', 'Your username and nickname can not be equal.' );
}
}
add\_action('um\_submit\_form\_errors\_hook\_', 'um\_custom\_validate\_username\_nickname', 999, 1);
Image - Error message in the form.

Last updated on November 15, 2023
No results found
---
# Form Builder - Ultimate Member
Form Builder
============
[](javascript:window.print() "Print this article")
### Overview
Ultimate Member comes with a robust and flexible drag-and-drop form builder used to create the registration, login, and profile forms. With the form builder, you can easily customize the look and layout of the forms and add unlimited fields.
### Form elements
The form builder contains several elements you can use to build your forms. These include master rows, sub rows, columns, field groups, fields, separators, dividers, spacing, and text blocks.
### Master rows
Master rows are the outermost containers of the form, and it is in the master rows that you can add sub rows. The form builder, by default, will contain one master row with one sub row inside of it. It is possible to add, delete and rearrange the order of master rows in the form.
* **Adding a master row**– To add a new master row to a form, you need to go to the bottom of the form builder and click the plus icon (see below for what to look for). There is no limit to the number of master rows you can add to the form.

* **Deleting a master row**– To delete a master row to a form, you need to go to the blue buttons at the top right of the master row and look for the button with a trash can. This is the button that will delete the master row and **all the content** contained within the row. Please note it is not possible to delete the first master row on the form (The delete button will not show for the first master row).

* **Editing a master row**– To edit a master row on the form, you need to go to the blue buttons at the top right of the master row and click the button with a pencil. Clicking the button will open the edit master row modal, where you can customize the styling and output of the row. This modal makes it very easy to apply custom CSS to this row, and you can also give the row a heading (This is useful if you want to separate your profile into distinct sections).

This article will provide you step by step instructions on [**How to add fields to a form**](//docs.ultimatemember.com/article/188-how-to-add-fields-to-a-form)
.
Last updated on June 27, 2022
No results found
---
# Setting Passwords in Ultimate Member Registration Forms - Ultimate Member
Setting Passwords in Ultimate Member Registration Forms
=======================================================
[](javascript:window.print() "Print this article")
In Ultimate Member, when setting up registration forms, the presence or absence of a password field can impact the user registration process, especially when using social login or direct subscribe URLs in conjunction with the Social Login or Stripe extensions. Here's how to manage the password field and ensure users can set their password appropriately.
#### Registration Form with Password Field
1. **Default Behavior:** When a password field exists in the register form, it allows users to add or set a password in your registration form upon registration. This field is essential for users to create an account and log in to your website securely. The `{action_url}` placeholder in the Welcome Email template will direct users to the login page URL. This is because users are expected to have set their password during registration.
2. **Password Set by Users:** Users are prompted to set their password during registration, ensuring they can log in using their chosen credentials.
#### Registration Form without Password Field
1. **Placeholder Tags**: If the register form does not include a password field, the `{action_url}` placeholder tag must be used in the Welcome Email template. This allows users to set their password after registration.
2. **Social Login and Stripe:** In scenarios involving Social Login or Stripe direct subscribe URLs, the `{action_url}` placeholder tag plays a crucial role in allowing users to set their password.
**Note:** This only applies if the Social Login configurations utilize either the **one-step process** or **the 2-step process**. However, it applies only when the password field is not included on the overlay interface. See the sample image below: 
3. **Handling Password Setting:** The absence of a password field can prevent users from setting their password during registration. Therefore, including the `{action_url}` placeholder tag in the Welcome Email template ensures they can set their password after registration.
The presence or absence of a password field in the register form impacts how users set their password. When no password field exists, use the `{action_url}` placeholder tag in the Welcome Email template allows users to set their password after registration, ensuring a seamless registration process.
Last updated on May 7, 2024
No results found
---
# Field Types - Ultimate Member
Field Types
===========
[](javascript:window.print() "Print this article")
Ultimate Member offers a variety of field types. Explore these UM field types in this article and design user-friendly forms that are easy for your users to fill out and complete.

| Field Types | Description | |
| --- | --- | --- |
| ##### Text Box | This field allows you to add a standard single-line text box to your forms where users can enter custom text.
 | |
| ##### Telephone Box | This field allows you to enter numbers in phone number format and save the value in phone number format. You may enter a phone number in its entirety, including the area code, exchange, and extension.
 | |
| ##### Number | This field allows you to enter numbers; however, letters and most symbols are not permitted. Only numeric values are allowed.
 |
| ##### Textarea | This field allows you to add a multi-line text area to your forms where users can enter custom text. Text area settings will enable you to: specify the height of the text area; limit the number of characters a user can enter into the text area; limit the number of words a user can enter into the text area and turn on/off, allowing HTML to be entered into the text area.
 |
| ##### Dropdown | This field allows you to add a dropdown field to your forms, letting users select a single option from a list of choices. Each choice should be entered once per line in the choices area.
 |
| ##### Multi-select | This field allows you to add a multi-select field to your forms, letting users select multiple options from a list of choices. You should enter each choice one per line in the choices area. With this field, you can specify the minimum and/or maximum number of selections a user can select when completing this field.
 |
| ##### Radio | This field allows you to add a radio field to your forms, letting users select one option from a range of options. You should enter each choice one per line in the choices area.
 |
| **Checkbox** | This field allows you to add a checkbox field to your forms, letting users select multiple options from a range of options. You should enter each choice one per line in the choices area. With this field, you can specify the maximum number of selections a user can select when completing this field.
 |
| **URL** | This field allows you to add a URL field to your forms, letting users enter a website URL. URL specific settings allow you to: decide the link's target (Open in new window or same window); Set the SEO rule for the link (follow or no-follow) and allow you to enter URL alt text that will show on the profile form instead of showing the URL (e.g. [My Website](http://www.mywebsite.com/)
instead of [http://www.mywebsite.com](http://www.mywebsite.com)
).
 |
| **Password** | This field allows you to add a password field to your forms, letting users enter a password. Password specific settings allow you to: specify the minimum and maximum amount of characters the password must have; force a strong password (strong password must contain at least one lowercase, one uppercase, and one number) and allow you to add a confirm password field so that users must enter the password twice in register form only.
 |
| **Image upload** | This field allows you to add an image upload field to your forms, letting users upload an image. Image upload specific settings allow you to select which image file types are allowed to be uploaded (e.g., png, jpg, etc.); set a maximum image file size; decide if cropping should be allowed or not and determine whether the cropping ratio is 1:1 or user-defined and customize the text that appears in the image modal before selecting the image.
 |
| **File upload** | This field allows you to add a file upload field to your forms, letting users upload a file. File upload specific settings allow you to: select which file types are allowed to be uploaded (e.g., doc, pdf, txt); set a maximum file upload size, and customize the text that appears in the file modal before selecting the file.
 |
| **Date picker** | This field allows you to add a date picker field to your forms, letting users select a date. Date picker specific settings will enable you to: select a date range (fixed number of years or specific date range); set the number of years that a user can pick from; select how the date range is applied (equal years before and after the current date, past years only or future years only); choose a date format (e.g., 3 Feb 2015 or Feb 3, 2015); decide on a displayed date format (full date or year only) and disable specific days of the week from being selected.
 |
| **Time picker** | This field allows you to add a time picker field to your forms, letting users select a time in the day. Time picker specific settings will enable you to: select a time format (e.g., 12hr or 24hr) and allow you to choose a time interval (default is 60 minutes).
 |
| **Rating** | This field allows you to add a star rating field to your forms, letting users select a star rating. Rating specific settings will enable you to: decide between a five or 10-star rating and set a default rating (leave blank to have no default star rating).
 |
| **Content Block** | This field allows you to add content to your form, such as custom text. This content cannot be edited by a user but enables you to add information to your forms.
 |
| **Shortcode** | This field allows you to add a shortcode to your form.
 |
| **Spacing** | This field allows you to add spacing to your forms (default spacing is 20px). This field is specifically designed to help you customize the look of your forms.
 |
| **Divider** | This field allows you to add dividers to your forms. This can be used to separate your forms into distinct sections. Divider specific settings allow you to: set the thickness of the divider (default 4px); select the style (solid, dotted, dashed, double); choose a color for your divider, and add text to the divider.
 |
| ##### Google Map | This field allows you to add and display the Google map in the profile form.
 |
| ##### YouTube Video | This field allows you to add a YouTube link to display the YouTube video and users can play the video on their profile. It also supports YouTube Shorts links.
 |
| ##### Vimeo Video | This field allows you to add and play the Vimeo video to your profile by adding the Vimeo video link to the field.
 |
| ##### SoundCloud Track | This field allows you to add and play the SoundCloud Track to your profile by adding the SoundCloud link to the field.
 |
| ##### Spotify URL | This field allows you to add the Spotify song, album, or artist's link to display the soundtrack, playlist, or album to your profile and be able to play previews. You can read more about this field type [here](//docs.ultimatemember.com/article/1863-spotify-url-field-type-feature-in-um-2-6-3)
.
 |
| ##### oEmbed | This field type has interactive components for embedding videos, photos, audio, and other content from the [embed providers that are supported](https://developer.wordpress.org/reference/hooks/oembed_providers/)
.
  | |
Last updated on November 11, 2023
No results found
---
# Field Types Setting - Ultimate Member
Field Types Setting
===================
[](javascript:window.print() "Print this article")
Overview
--------
This article will provide instructions and information about the [field type](//docs.ultimatemember.com/article/86-field-types)
settings. When setting up a new field or editing a field, you can set certain things like field title, privacy, etc. The common settings of a field are the following:
* **Title** \- This will be the title of your field in the backend for reference. This will not appear on your site.

* **Label** \- This is the label of your field. Text entered in this label settings will appear on your site. If you do not want a label above your field, leave the Label setting field blank.

* **Meta Key** \- This setting must store info entered in the field in the database. The meta key should be unique. It can only be written in lower case. Use underscore ( \_ ) to separate words. e.g country\_list, job\_title.
You can't change or edit the meta key of an existing field or when you have selected predefined fields. Meta keys cannot be duplicated. You need to create a new field if you require a new meta key.

* **Placeholder** - The text entered in this setting will be the text that appears within your field on your site.


* **Help Text** \- This setting will provide helpful instructions to your users. The text entered in the help text settings will appear when a user hovers on the field tooltip icon.

* **Privacy** \- This setting allows you to select who can view the field on your site. Admin can view all fields regardless of the option set here. You can choose the options below when you click on the dropdown menu:
* **Everyone** \- This option makes your field public; everyone can view the field.
* **Member** - If this option is selected, only members of your site can view the field.
* **Only visible to profile owner and users who can edit other member accounts** - If this option is selected, only the owner and editors can view the field.
* **Only visible to profile owner and specific roles -** If this option is selected, the owner and the chosen roles can only view the field.
* **Only specific member roles -** If this option is selected, the roles specified in the settings will be the ones who can only view the field.

* **Default Value** \- This option allows you to prefill a field with a default value before the user enters a value in a field. If you want to have no default value, leave the setting blank.

* **Validate -** You can select from this option if you require a field to have a unique validation.
* **Visibility -** This setting will allow you to select where the field should appear. To know more about the field's visibility, you can read the Fields Visibility Mode documentation [here](//docs.ultimatemember.com/article/240-fields-visibility-mode)
.

* **Is this field required? -** Check the box in this setting if you require a user to fill in the field before processing the form.

* **Can user edit this field? -** Check the box in this setting if you want to allow users to edit the field. Admin can edit all fields regardless of the option set here.

* **Icon -** You can choose from 1283 available icons in this setting to display on your site. You can leave this setting blank if you prefer not to display an icon.

* **Add conditional fields support -** You can show or hide the field in this setting using conditional logic based on a specific field's value or condition. To know more about conditional logic, you can read the document [here](//docs.ultimatemember.com/article/89-conditional-logic)
.

Some fields may include additional settings, it will be discussed below:
### Text box field settings
* **Minimum & Maximum length** - You can set the minimum or a maximum number of characters that can be input in the field. To disable these settings, leave it blank or empty.
### Number field settings
* **Minimum & Maximum number** - You can set the minimum or a maximum number that can be input in the field.

### Textarea field settings
* **Textarea Height** \- You can set the height of the textarea in this setting. The default is 100 pixels.
* **Maximum length** \- You can set the maximum number of characters input into the field. To disable these settings, leave it blank or empty.
* **Maximum allowed words -**You can set the maximum number of words that can be input in the field. To disable these settings, leave it blank or empty.
* **Default Text** \- Set the text default text to be displayed in the field.
* **Does this textarea accept HTML?** \- You can enable or disable the HTML tags for this field.

### Dropdown field settings
* **Choices Callback** \- To retrieve choices, you need to add a callback source in this setting.
* **Edit Choices** \- You can set the available choices here for the users. You need to enter the options per line.
* **Parent option -** You can populate the option depending on the parent option selected.

### Multi-select field settings
* **Minimum & Maximum number of selections -** Set the minimum or the maximum number of selections a user can pick.
* **Edit Choices -** You can enter the choices users can select in this setting.
* **Choices Callback** \- To retrieve choices, you need to add a callback source in this setting.

### Radio field settings
* **Edit Choices** \- You can enter the choices users can select in this setting.

### Checkbox field settings
* **Maximum number of selections** - You can set the minimum or the maximum number of selections a user can pick.
* **Edit Choices** \- You can enter the choices that users can select in this setting.
### URL field settings
* **Link Target** \- Choose between opening the link in a new or on the same window.
* **SEO Follow** - Choose between follow or no-follow the link by a search engine.
* **URL Alt Text** \- Change the URL link into a Text link.
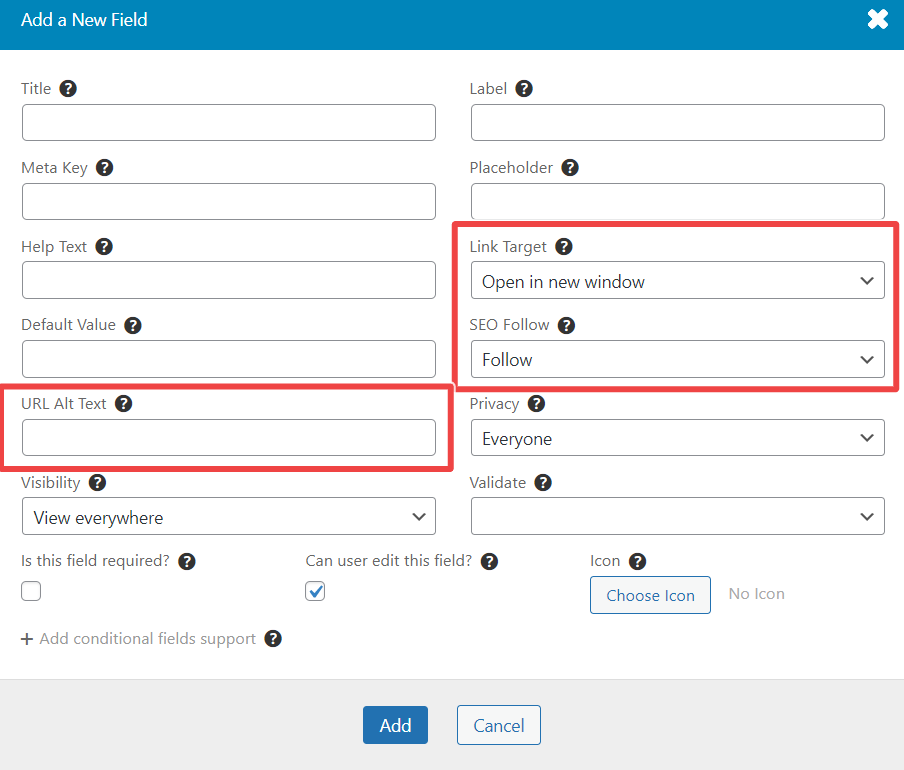
### Password field settings
* **Minimum & Maximum length -** Set the minimum or a maximum number of characters to be inputted in this field.
* **Force strong password?** \- This setting is only applicable in the register form. If enabled, users will be forced to enter a strong password consisting of at least one lower case letter, one upper case letter, and a number.
* **Automatically add a confirm password field -** If enabled, a confirmed password field will be added below the password field. This setting only applies in the register form.
* **Confirm password field label** \- Set the label above the confirm password field, leave the field empty to use the default label.

### Image Upload field settings
* **Allowed Image Types** - You can select what image type users can upload in this field. Choose from PNG, JPEG, JPG, & GIF. To select multiple image types, you can press ctrl or command and click on your preferred image types or click and drag the image types.
* **Maximum size in bytes** \- You can set the maximum size of the image a user can upload in this field. Leave this setting empty to have unlimited size.
* **Crop Feature** - You can enable or disable the crop feature of the image upload and define the ratio. When you click from the drop the menu of the Crop Feature setting, you can select from the following:
* **Turn Off** \- This is the default setting of the crop feature. It means that the crop feature is disabled.
* **Crop and force 1:1 ratio** - When selected, the user is forced to crop the image in a 1:1 ratio.
* **Crop and for user-defined ratio** \-The user is forced to crop the image accordingly when selected.
* **Upload Box Text -** Text entered in this setting will be the headline that will appear in the upload box for this field.
* **Additional Instructions Text**\- Text entered in this setting will appear below the headline. This is for further instructions.
* **Upload Box Text (Button) -** Text entered in this setting will appear in the button. e.g., upload

### File Upload Settings
* **Allowed File Types** \- You can select the file types your users can upload in this field. You can choose PDF, Text, CSV, DOC, DOCX, ODT, ODS, XLS, XLSX, ZIP, RAR, MP3, JPG, JPEG, PNG, GIF, EPS, PSD, TIF & TIFF. To select multiple file types, you can press Ctrl or Command and click on your preferred file types or click and drag the file types.
Note: Use a hook [um\_allowed\_file\_types](//docs.ultimatemember.com/article/1045-umallowedfiletypes)
if you need to extend allowed file types.
* **Maximum size in bytes** \- You can set the maximum size of the file a user can upload in this field. Leave this setting empty to have unlimited size.
* **Upload Box Text -** Text entered in this setting will be the headline that will appear in the upload box for this field.
* **Additional Instructions Text**\- Text entered in this setting will appear below the headline. This is for other instructions.
* **Upload Box Text (Button)** \- Text entered in this setting will appear in the button. e.g., upload

### Date picker field settings
* **Set Date Range -** You can set the date range by:
* Fixed Number of Years - If selected, you can set the number of years the user can pick. The default to last is 50 years. 
* Specific Date Range - If selected, you can manually set the minimum and maximum date/day range.

* **Date User-Friendly Format -** You can select in this option which format of the date you want to display on your site.
* **Use custom Date Format -** You can customize the date format in this option. This will [override](https://www.php.net/manual/en/function.date.php)
the "Date User-Friendly Format" option.
* **Displayed Date Format -** This option allows you to show full dates or show years only.
* **Disable specific weekdays -** This option allows you to disable particular weekdays from the date picker.
### Time picker field settings
* **Time Format -** You can choose the displayed time format for this field.
* **Default Time -** Select the default time. You may use all PHP-compatible date formats.
* **Time Intervals (in minutes) -** Set the minutes interval between each time in the time picker.

### Rating field settings
* **Rating System -** This option allows you to choose from a 5-stars or 10-stars rating system.
* **Default Rating -** You can set the number of stars for a prefilled rating field.

### Content Block field settings
* **Content Editor** - This allows you to edit your content.
### Shortcode field settings
* **Enter Shortcode** \- Add the shortcodes in this option to display the shortcodes in the field.

### Spacing field settings
* **Spacing -** allows you to set the spacing in px on your form. The required spacing is 20px.

### Divider field settings
* **Thickness (in pixels)** \- This option allows you to set the thickness or width of the divider in pixels.
* **Optional Text** \- You can include an optional text with the divider.
* **Style -** Select the style of your divider. The options are Solid, dotted, dashed, doubled.
* **Color -** This allows you to select a color of the divider.
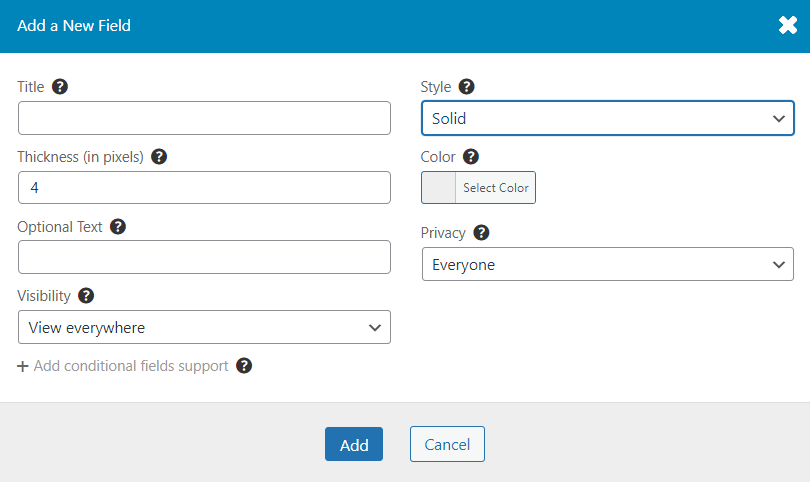
Last updated on October 28, 2022
### Related Articles
* [How to Add Fields to a Form](/article/188-how-to-add-fields-to-a-form)
No results found
---
# Fields Visibility - Ultimate Member
Fields Visibility
=================
[](javascript:window.print() "Print this article")
Overview
--------
You can manage the visibility of fields in a form. Use the field settings **Visibility**, **Privacy** to hide the field for specific modes or specific members. Use [conditional logic](//docs.ultimatemember.com/article/89-conditional-logic)
to hide/show the field depending on the other field value.
### Visibility options
* **Edit mode only** - field is shown when users are editing profile on the front end. This is only applicable if the user is allowed to edit this field.
* **View mode only** - field is hidden when users are editing profile. This is the default mode when a user is not allowed to edit the field.
* **View Everywhere** - field is shown in both modes.
### Privacy options
* **Everyone** - the field is visible to everyone.
* **Members** - the field is visible to logged in users.
* **Only visible to profile owner and users who can edit other member accounts**
* **Only visible to profile owner and specific roles**\*
* **Only specific member roles**\*
The setting **Select member roles** appears if the **Only visible to profile owner and specific roles** or **Only specific member roles** option is chosen. In this setting you can choose roles that can view the field.
**Warning:** Fields that may be hidden by Visibility, Privacy or conditional rules must be optional (not required).

How to change the visibility of fields
--------------------------------------
To edit the visibility of a field, navigate to the _wp-admin > Ultimate Member > Forms > Edit a Form_. Click on the edit button of the field you want to edit.

Once the edit button is clicked, a pop-up window will appear and you can now edit or update the Visibility and Privacy of the field.

Last updated on November 4, 2023
No results found
---
# How to Add Fields to a Form - Ultimate Member
How to Add Fields to a Form
===========================
[](javascript:window.print() "Print this article")
Overview
--------
Ultimate Member provides a flexible way to enhance your registration and profile forms by allowing you to add both predefined and custom fields.
* **Predefined Fields:** These are default fields that are already available in the Ultimate Member system. The platform recognizes them and can be easily included in your forms without any additional setup.
* **Custom Fields:** These fields are created by you to meet specific requirements that are not covered by the predefined options. You can design custom fields tailored to your users’ needs.
### Important Notes
* **Profile Screen Limitation:** Ultimate Member does not automatically add any fields to the **wp-admin > Users > Profile** screen. This means any changes made in Ultimate Member forms do not reflect in the standard WordPress user profile area.
* **Adding Existing Fields:** If you want to include existing fields from the registration form to the profile form, please refer to the article on [Adding Existing Fields from Register Form to Profile Form](//docs.ultimatemember.com/article/1719-adding-existing-fields-from-register-form-to-profile-form)
for detailed instructions.
### Steps to Add Fields to a Form
To add fields to a registration or profile form in Ultimate Member, follow these steps:
1. **Navigate to Forms:**
* In your WordPress dashboard, go to **Ultimate Member > Forms**.
* Hover over the registration or profile form you want to edit, then click the **Edit** link.
2. **Open the Field Modal:**
* Click the **'+'** button in the Form Builder to open the Fields Manager.
3. **Choose a Field Type:**
* In the fields manager, you can either:
* **Select a predefined field**: These are fields already available within the system. Once selected, they will automatically appear in your form.
**Example:**
If you select the **"First Name"** field from the **"Predefined Fields,"** it is instantly added to the form builder since it is a recognized, built-in field in Ultimate Member.

* **Set up a new field**: This option allows you to create a custom field tailored to your specific needs.
**Example:**
If you choose the **"Number"** field from the **Set Up New Field** section, the **"Add a new field"** window will open, allowing you to configure the field's options as needed. Once you've finished setting it up, the custom field will be added to the form builder and the **Custom Fields** list in the Fields Manager.
4. **Save the Form:**
* After adding all your desired fields, click the **Update** button to save your changes.

### Common Issues
A common issue users may encounter when adding or creating fields is getting an error message stating: "Your meta key already exists in your fields list." ****
### ****Resolution****
This message appears when you attempt to create a new custom field with a meta key that already exists in the system. To resolve this, you should ensure that the meta key you're trying to use is unique. **Check in the Fields Manager** (Form Builder > add a field "+" > Custom Field). Hover your cursor over the custom field to see its meta key. If the field and its meta key already exist, consider using the predefined field from the modal or modify your custom field's meta key to make it unique
****
### **Conclusion**
By utilizing predefined and custom fields, you can tailor the user experience on your site to better meet your community's needs. Make sure to keep track of existing meta keys to avoid duplication errors.
Last updated on October 1, 2024
### Related Articles
* [Form Builder](/article/85-form-builder)
* [Adding Existing Fields from Register Form to Profile Form](/article/1719-adding-existing-fields-from-register-form-to-profile-form)
No results found
---
# Spotify URL Field Type - Ultimate Member
Spotify URL Field Type
======================
[](javascript:window.print() "Print this article")
#### Overview
This article provides information about the added field type **i****ntroduced in version 2.6.3** which is the **Spotify URL.**

This field applies to similar Spotify URL patterns:
* **Song Link** (e.g.[https://open.spotify.com/track/5YciOakY5dB5dULkiLdCaf?si=26860dc0a5b54654](https://open.spotify.com/track/5YciOakY5dB5dULkiLdCaf?si=26860dc0a5b54654)
)
* **Album Link** (e.g.[https://open.spotify.com/album/4mMan8IGNJUhZ6du15ki5T?si=rOYtN4mjSQ-utBOlFOFaZw](https://open.spotify.com/album/4mMan8IGNJUhZ6du15ki5T?si=rOYtN4mjSQ-utBOlFOFaZw)
)
* **Artist Link** (e.g. [https://open.spotify.com/artist/2DaxqgrOhkeH0fpeiQq2f4?si=JFwzsIi6S06Q2qKNlqvqNA](https://open.spotify.com/artist/2DaxqgrOhkeH0fpeiQq2f4?si=JFwzsIi6S06Q2qKNlqvqNA)
)
The user will be able to view and edit the Spotify field in **User's profile > Edit Profile** once you have added the Spotify URL field and updated the profile form in **wp-admin>Ultimate Member> Forms>Edit or Add Profile Form.** This [article](//docs.ultimatemember.com/article/188-how-to-add-fields-to-a-form)
will teach you how to add a field to a form.

**Note: The Spotify Field will only appear in the user's profile once they have added a link and updated their profile.**
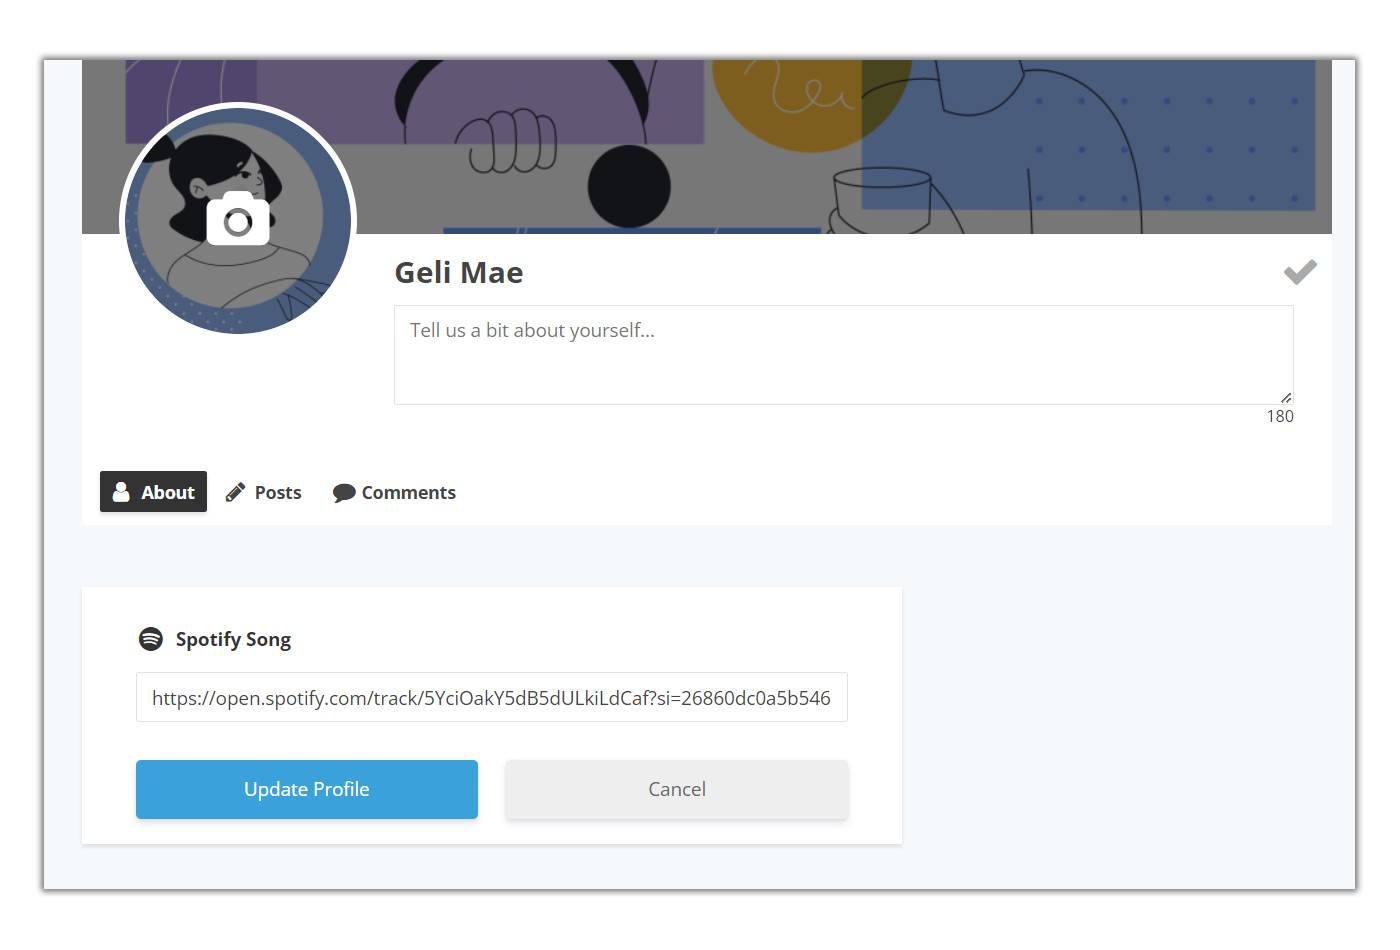
#### Example 1 - Song Link
The user will be able to see the song's iframe and play a preview of the song on their profile page after adding a song link in the Spotify URL field and updating their profile.

#### Example 2 - Album Link
The user will be able to see the album's iframe and play a preview of the songs listed in the album on their profile page after adding an album link in the Spotify URL field and updating their profile.

#### Example 3 - Artist Link
The user will see the artist's iframe, which has a list of the artist's tracks. They may listen to a preview of the artist's songs on their profile page after adding the artist's link in the Spotify URL field and updating their profile.

Last updated on June 15, 2023
No results found
---
# How to use User Roles - Ultimate Member
How to use User Roles
=====================
[](javascript:window.print() "Print this article")
WordPress uses "user roles" to manage such things as users access, privacy, privileges, etc. Ultimate Member extends this functionality to limit profile access.
Please read the article [User Roles Settings](//docs.ultimatemember.com/article/103-user-roles-settings)
first to get to know about role settings.
**Contents:**
* [How to Add, Edit or Remove user role](#add_role)
* [Assign user role](#assign_role)
* [A role for a new user](#default_role)
* [Change users role manually](#change_role_manually)
* [Change user role on purchase](#change_role_auto)
* [Configure role fields](#fields)
* [Add role-specific content](#role-specific_content)
* [Shortcode restriction](#shortcode_restriction)
* [Gutenberg Blocks restriction](#blocks_restriction)
* [Make profile role-specific](#role-specific-profile)
* [Members Directory role settings](#members_directory)
* [Limit profile access by role](#profile_access)
* [User role settings](#role_settings)
* [Role Priority](#role_priority)
* [Grant access to the admin dashboard to a custom role](#admin_access)
How to Add, Edit or Remove user role [#](#add_role)
----------------------------------------------------
Click the **Add New** button on the top of the page _\[Ultimate Member > User Roles\]_ to add a new user role. You'll see a form **Add New Role**. Configure role settings, then click **Create Role**.
Click the **Edit** link under the user role title to edit it. You'll see a form **Edit Role**. Change role settings you need, then click **Update Role**.
Select the role and use the bulk action **Delete** to remove user roles created via Ultimate member. This bulk action doesn’t remove user roles created via third-party plugins.
Image - Add or edit user role.

Image - Delete UM Custom Role.

Assign user role [#](#assign_role)
-----------------------------------
### A role for a new user [#](#default_role)
Each user has one or several roles. WordPress assigns a role when creating a user. There are several settings that may influence the user role assigned to a new user. Part of these settings work in the registration form only, and part of them works in the checkout form only.
Registration flow:
1. The setting **"New User Default Role"** on _wp-admin > Settings > General_ is a native WordPress setting for new users. This setting is used if there are no other settings.
2. The setting **"Registration Default Role"** on _wp-admin > Ultimate Member > Settings > Appearance > Registration Form_ is a common setting for all UM registration forms. It has a higher priority than the setting "New User Default Role" but works only in UM registration forms.
3. The setting **"Assign role to form"** on _wp-admin > Ultimate Member > Forms > Edit Form > Customize this form_ is a setting for a certain registration form. It has higher priority than settings "New User Default Role" and "Registration Default Role" but works for a certain UM registration form.
**Note:** The site can have multiple registration forms.
Checkout flow (for WooCommerce only):
1. WooCommerce always assigns the role "Customer" on checkout.
2. The setting **"Assign this role to users when an order is completed/processing"** on _wp-admin > Ultimate Member > Settings > Extensions > WooCommerce_ may be used to assign an additional user role on checkout. [Details](//docs.ultimatemember.com/article/131-woocommerce-setup#settings_extension)
**Note:** Users in WordPress can have multiple roles.
3. The setting **"When this product is bought move user to this role"** on the page _wp-admin > Products > All Products > Edit Product_ has a higher priority than the setting "Assign this role to users when an order is completed/processing" but works for a certain product. [Details](//docs.ultimatemember.com/article/131-woocommerce-setup#product_settings)
### Change users role manually [#](#change_role_manually)
Administrators can use the bulk action **"Change role to..."** on _wp-admin > Users > All Users_ to change the user role manually.
Image - How to set the user role manually.

### Change user role on purchase [#](#change_role_auto)
Our extension "Ultimate Member - WooCommerce" can change or add a user role automatically when the user purchases a product or subscription.
Read the article [WooCommerce Setup](//docs.ultimatemember.com/article/131-woocommerce-setup)
to get know how to configure this extension.
Configure role fields [#](#fields)
-----------------------------------
You can use field types **"Roles (Dropdown)"** and **"Roles (Radio)"** to set the user role in the registration form or change it in the profile form. But not all roles are available. Role fields may contain user roles created by Ultimate Member and predefined role Subscriber. User roles created by third-party plugins are excluded to avoid conflicts. Predefined roles with high access levels (such as Administrator or Editor) are excluded to avoid security vulnerability.
You have to create a role using the button **"Add New"** on _wp-admin > Ultimate Member > User Roles_, then add this role to the list of "Edit Choices" in the field settings.
Image - Configure role field choices.

Add role-specific content [#](#role-specific_content)
------------------------------------------------------
### Shortcode restriction [#](#shortcode_restriction)
You can show or hide special content to the specific user roles. Wrap the content with the shortcode `[um_show_content]`.
See also [Restrict content on a page/post to specific users community role](//docs.ultimatemember.com/article/226-restrict-content-on-a-page-post-to-specific-users-community-role)
.
**Example:** Show content to specific roles.
\[um\_show\_content roles="member"\] \[/um\_show\_content\]
**Example:** Hide content from specific roles.
\[um\_show\_content not="member"\] \[/um\_show\_content\]
You can add multiple target roles, just use ',' e.g. `[um_show_content roles="member,candidates,pets"]`
### Gutenberg Blocks restriction [#](#blocks_restriction)
You can show or hide a Gutenberg Block to the specific user roles. Use settings in the box **"Ultimate Member: Content Restriction"** for the block.
Turn on the **Enable the "Content Restriction" settings for the Gutenberg Blocks** setting on _wp-admin > Ultimate Member > Settings > Access > Content Restriction_ to enable this feature if disabled.
See also [Restrict Gutenberg Blocks](//docs.ultimatemember.com/article/1624-restrict-gutenberg-blocks)
.
**Example:** Show a block to specific roles.

Make profile role-specific [#](#role-specific-profile)
-------------------------------------------------------
**Note:** This feature should be used if you need several different profile forms. Don't use this feature if you need a single common profile form, as is the default.
You can customize profiles for user roles. Create multiple role-specific profile forms with different sets of fields and settings and add them to the **User** page. The plugin will display profile form depending on the profile owner user role and profile form setting **"Make this profile form role-specific"**.
Use the setting **"Make this profile form role-specific"** in the box **"Customize this form"** to make a profile role-specific. This setting is a multi-select. Select user roles whose profiles should use this profile form. Plugin displays profile form for all users if this setting is blank.
See also [Unique profiles for different user roles](//docs.ultimatemember.com/article/100-unique-profiles-for-different-user-roles)
.
**Example:** Use the first profile form for the subscriber's profile and use the second profile form for other profiles.
Image - Make profile form role-specific for a single role.

Image - Make profile form role-specific for multiple roles.

Image - User page with two role-specific profile forms.

Members Directory role settings [#](#members_directory)
--------------------------------------------------------
You can create several member directories with different settings. Each member directory has a unique shortcode that you can paste to the page to display. You can get the shortcode, change settings or create a new member directory on the page _wp-admin > Ultimate Member > Member Directories_.
Use the setting **"User Roles to Display"** to select what user roles this member directory should display. See [Member Directories 2.1.0+](//docs.ultimatemember.com/article/1513-member-directories-2-1-0)
.
Image - Limit members' directory by roles.

Limit profile access by role [#](#profile_access)
--------------------------------------------------
### User role settings [#](#role_settings)
Use user role settings **"Can view other member profiles?"** and **"Can view these user roles only"** on _wp-admin > Ultimate Member > User Roles > Edit Role_ to manage profiles visibility. Turn on the **"Can view other member profiles?"** setting to allow members with this user role to view other members profiles. Leave the **"Can view these user roles only"** setting blank to allow members with this user role to view any profiles.
Image - Limit profile access by roles.

### Role Priority [#](#role_priority)
WordPress users may have several roles. Ultimate Member uses settings from the role with the highest priority. Read the article [How to set Role Priority for user roles](//docs.ultimatemember.com/article/1494-how-to-set-role-priority-for-user-roles)
for details.
Image - Role Priority.

Grant access to the admin dashboard to a custom role [#](#admin_access)
------------------------------------------------------------------------
Turn on the role setting **"Can access wp-admin"** to allow access to the admin dashboard for specific roles.
The role setting **"Force hiding admin bar in frontend"** can be used to hide the admin bar for specific roles. It's better to turn off this setting for roles which can access _wp-admin_.

WordPress uses capabilities to limit access to the admin dashboard. Verify that your custom admin role has these capabilities:
* **read** - required to access the site.
* **edit\_posts** - required to access _wp-admin_.

Users may need additional capabilities to access specific screens of the admin dashboard. See [User Roles Settings](//docs.ultimatemember.com/article/103-user-roles-settings#capabilities)
.
Last updated on January 27, 2025
### Related Articles
* [User Roles Settings](/article/103-user-roles-settings)
* [How to set Role Priority for user roles](/article/1494-how-to-set-role-priority-for-user-roles)
* [Hiding/Showing admin bar for specific user roles](/article/243-hiding-showing-admin-bar-for-specific-user-roles)
* [How to set up a user role that can edit other member without wp-admin access](/article/1872-how-to-set-up-a-user-role-that-can-edit-other-member-without-wp-admin-access)
No results found
---
# Block Disposable Email Domains - Ultimate Member
Block Disposable Email Domains
==============================
[](javascript:window.print() "Print this article")
### Overview
Disposable Email Domains are temporary in the sense that they may expire or self-destruct. This plugin will help you update your Block Email Address option to detect spam or disposable email domains in the Ultimate Member's Register Forms, allowing you to prevent Spam Registration. For the installation and setup guide, go [here.](//docs.ultimatemember.com/article/1889-installation)
### Block Disposable Email Domains
Once activated, this will update the list of blocked email domains in **Ultimate Member > Settings > Access > Other > Blocked Disposable Email Domains**. The extension updates the list daily if there's a new disposable email domain to block. This merges with the Blocked Emails option, so you can add your Email address and Domains using the existing option.

Last updated on November 9, 2023
No results found
---
# Cover Photo Uploader in Register Form - Ultimate Member
Cover Photo Uploader in Register Form
=====================================
[](javascript:window.print() "Print this article")
### Overview
This plugin empowers users to personalize their profiles from the outset by enabling cover photo uploads directly within the Register Form. Activating this extension enhances the user registration experience, providing a seamless way for individuals to add a distinctive cover photo during the initial sign-up process. Elevate user engagement and profile customization on your platform with the Add Cover Photo to Register Form plugin.
### Setting Up Cover Photo Upload in Register Form
Ensure the plugin is activated, then follow these steps to integrate cover photo upload functionality in the Register Form:
1. Go to wp-admin > Ultimate Member > Forms > Edit Registration Form.
2. Click the "+" sign button in the Form Builder to add a new field.
3. In the Field Manager, select **"Cover Photo"** under the predefined fields.

4. After adding the "Cover Photo" field, click **"Update"** to save changes.

5. Visit your site's registration form to verify the cover photo uploader functionality.
* Users can select a photo from their folder by clicking the **"Upload"** button.

* The selected photo can be cropped.
* Users have the option to change the photo before finalizing registration.
6. Upon successful registration, the uploaded cover photo is automatically displayed when the user views or visits their profile.

Last updated on December 1, 2023
No results found
---
# Displaying Member Directories - Ultimate Member
Displaying Member Directories
=============================
[](javascript:window.print() "Print this article")
### Overview
By default, Ultimate Member installs a members directory on your site on a page called members. You need to enable the default feature in **wp-admin>****Ultimate Member> Settings> General> Users> Enable Members Directory.
**

If you want to create another Member Directory on a new page and display it on your site, you need to do the following steps below:
### 1\. Adding a New Member Directory
Go to wp-admin>Ultimate Member> Member Directories, then click on the **Add New** button.

Please type the name of your new member directory and set it according to your preference. To learn more about the settings of Member Directories, go to this [article](//docs.ultimatemember.com/article/1513-member-directories-2-1-0)
. Once you're done with the settings, click on the create button to save and copy the shortcode of your new member directory.

### 2\. Creating a New Page
As mentioned above, Ultimate Member automatically creates a page for the member directory named **Members**. You can create multiple member directories on the member page by adding the shortcodes to the page. However, if you want to create a separate page for your new member directory, go to wp-admin>Pages. Click on the **Add New** button to create a new page.
Set the name of your new page and select the shortcode block to **paste the shortcode** of your new Member Directory. You can set the visibility or put restrictions on your page and make sure to check the settings before publishing it.
### 
3\. Displaying the Member Directory
When your page has been published, it will be added to the Pages. To display your member directory on your site menu, go to wp-admin>Appearance> Menus. Select the menu where you want to add the new member directory. Under the **Add menu items,** go to the **Pages** section and select your new page by clicking on the check box and clicking the **Add to Menu** button to add the page in the **menu structure**.
You can organize the items by dragging them into the order you prefer. Set who can see the menu on your site by clicking on the dropdown. Once you're done with the settings, click on the **Save Menu** button to save the changes.


Go to your site and check if you have successfully displayed your new member directory.

Last updated on October 3, 2022
No results found
---
# Member Directories 2.1.0+ - Ultimate Member
Member Directories 2.1.0+
=========================
[](javascript:window.print() "Print this article")
This article describes member directory settings. You can use the existing member directory or create a new one on _wp-admin > Ultimate Member > Member Directories_.
**Contents**
* [General Options](#general)
* [Sorting Options](#sorting)
* [Profile Card](#card)
* [Search Options](#search)
* [Results & Pagination](#results)
### General Options [#](#general)
**View type(s)** \- this option allows you to select view types of the Member Directory. There are able Grid and List views. If you select more than 1 view type, there will be displayed the change layout button at the member directory front-end.

**Default view type** - this option allows you to select the default view type from already selected view type(s).
**User roles to display** – this option allows you to select which user roles are displayed in the directory. If left blank the directory will display the profile cards of all members of your site.
**Only show members who have uploaded a profile photo** – this option allows you to only show members who have uploaded a profile photo. If turned on any member who does not upload a profile photo will not be shown in the directory. This option is turned off by default.
**Only show members who have uploaded a cover photo** – this option allows you to only show members who have uploaded a cover photo. If turned on any member who does not upload a cover photo will not be shown in the directory. This option is turned off by default.
**Only show specific users (Enter one username per line)** - this option allows you to show only selected members by username.
**Exclude specific users (Enter one username per line)** - this option allows you to exclude only selected members by username.
**Only show members who have completed their profile** - this option allows you to show only members who completed their profile with the **Required completeness (%)** option value. The last one is visible when the "Only show members who have completed their profile" option is enabled. These options are integrated by the [Profile Completeness](https://ultimatemember.com/extensions/profile-completeness/)
extension.
**Only show members who have verified their profile** - this option allows you to only show members who verified their profile. This option is integrated by the [Verified Users](https://ultimatemember.com/extensions/verified-users/)
extension.

### Sorting Options [#](#sorting)
**Default sort users by** - this option allows you to decide the order of how members are shown in the directory.
You can sort members by:
| Plugin | Fields |
| --- | --- |
| Ultimate Member | New users first. Is used by default |
| Old users first |
| Display name |
| First name |
| Last login |
| Last name |
| Other (Custom Field). Allows you to insert field key to the option "Meta key" and "Label of custom sort" below |
| Random |
| Username |
| Nickname |
| Ultimate Member - Followers | Most followed |
| Least followed |
| Ultimate Member - Friends | Most friends |
| Least friends |
| Ultimate Member - myCRED | Most points |
| Least points |
| Ultimate Member - Profile Completeness | Most completed |
| Least completed |
| Ultimate Member - User Reviews | Highest rated first |
| Lowest rated first |
| Ultimate Member - Verified Users | Verified accounts first |
| Not verified accounts first |
**Enable custom sorting** - this option allows you to show the dropdown with sorting options, which are selected in the "Choose fields to enable in sorting" option.

**Choose fields to enable in sorting** - this option allows you to select the fields for the member directory sorting. If you select the "Other (Custom Field)." option, please fill in the fields "Meta Key" and "Label" below.
**Note**: The value of the "Default sort users by" option will be added to the list on the front end if it is not selected here. If the total number of unique sorting options for a directory is 1 or less, the sorting field will be hidden on the front end. And users will be sorted by default sort value.
### Profile Card [#](#card)
| Setting | Description |
| --- | --- |
| Enable Profile Photo | This option allows you to show or hide the user profile photos on the member directory. |
| Enable Cover Photo | This option allows you to show or hide the user's cover photos on the member directory. _Note: There isn’t a cover photo in the "List" layout._ |
| Show Display Name | This option allows you to show or hide the user display name on the member directory. |
| Hide Followers Stats | Integrated by the Followers extension. If unchecked, get from Ultimate Member > Settings > Extensions > Followers > Show followers stats in the member directory. |
| Hide Follow Button | Integrated by the Followers extension. If unchecked, get from Ultimate Member > Settings > Extensions > Followers > Show follow button in the member directory. |
| Hide Rating Stats | Integrated by the User Reviews extension. If unchecked, get from Ultimate Member > Settings > Extensions > Reviews > Show user rating in the members directory. |
| Hide myCRED Badges | Integrated by the myCRED extension. If unchecked, gets from Ultimate Member > Settings > Extensions > myCRED > Show user badges in Member Directories? |
| Hide Friends Stats | Integrated by the Friends extension. If unchecked, get from Ultimate Member > Settings > Extensions > Friends > Show friends stats in the member directory. |
| Hide Friend Button | Integrated by the Friends extension. If unchecked, get from Ultimate Member > Settings > Extensions > Friends > Show friend button in the member directory. |
| Hide Online Stats | Integrated by the Online extension. If unchecked, get from Ultimate Member > Settings > Extensions > Online > Show online stats in the member directory. |
| Hide Message Button in Directory? | Integrated by the Private Messages extension. If unchecked, get from Ultimate Member > Settings > Extensions > Private Messaging > Show messages button in the member directory. |
| Show Tagline Below Profile Name | This option allows you to show the user meta below the user display name. This could be an important piece of information relevant to your site e.g. you could show the user’s nationality below the display name. Below this option is the user meta "Choose field(s) to display in tagline" |
| Show Extra User Information Below Tagline? | This option allows you to show extra user meta below the tagline. If you select yes it will show the option "Enable reveal section transition by default" Show the information in a reveal section (the information is hidden until the user clicks the arrow) or show it on page load. Below this option is the user meta selector "Choose field(s) to display in reveal section" where you can choose which field(s) to add to this area of the profile card. |
| Show Social Connect Icons | This option allows you to social icons on the profile card which link to a user’s social media accounts. The social icons are LinkedIn to the social fields which are found in the pre-defined fields list. If a user does not enter any information in the relevant social media field then the social icon will not show e.g if a user does not enter their Twitter username in the Twitter field then the Twitter field will not show on their profile card. |
**Enable Search feature** - This option allows you to show or hide the general search line on the member directory. If you enable the search "User Roles that can use search" option will appear below.
Ultimate Member uses for searching all Ultimate Member custom metadata, created via _Ultimate Member > Forms > Fields_ screen and WP native fields like `username`, `user_email`, `display_name`, `first_name`, `last_name`, `user_nicename`.
**User Roles that can use search** - This option allows you to select which user roles can use the general search line. If left blank anyone can use the search line.

**Exclude fields from search** \- This option allows you to choose specific fields to exclude from the search function, including all other fields in the search. This can help refine search results by excluding certain information from the search results.
_Example:_ If you select "Email" and "Phone Number" in the "Exclude fields from search" setting, the search function will exclude matches in the "Email" and "Phone Number" fields from the search results, including all other fields in the search.
_Scenario:_ Imagine you have a database of customer records with fields for "First Name," "Last Name," "Email," and "Phone Number." If you select "Email" and "Phone Number" in the "Exclude fields from search" setting, any search queries will only consider the "First Name" and "Last Name" fields.
_Outcome:_ So, if a user searches for "John" and "John" is in the "First Name" field for a user, that user will appear in the search results. However, if "John" is in the "Email" or "Phone Number" fields, that user will not appear in the search results, even though their name matches the search query.
**Fields to search by** - This option allows you to choose specific fields to include in the search function, excluding all other fields from the search. This can help refine search results to only include relevant information.
_Example:_ If you select "First Name" and "Last Name" in the "Fields to search by" setting, the search function will only look for matches in the "First Name" and "Last Name" fields, excluding all other fields from the search.
_Scenario:_ Imagine you have a database of customer records with fields for "First Name," "Last Name," "Email," and "Phone Number." If you select "First Name" and "Last Name" in the "Fields to search by" setting, the search function will only consider these two fields for matching search queries.
_Outcome:_ So, if a user searches for "John Doe," the search function will only look for matches in the "First Name" and "Last Name" fields. If there is a customer named "John Doe" in your database, they will appear in the search results. However, if "John Doe" is in the "Email" or "Phone Number" fields but not in the "First Name" or "Last Name" fields, that customer will not appear in the search results because the search is only considering the "First Name" and "Last Name" fields for matches.
**Enable Filters feature** - This option allows you to show or hide the filters on the member directory. If you enable the filters "User Roles that can use filters" and "Choose filter(s) meta to enable" options will appear below.
**User Roles that can use filters** - This option allows you to select which user roles can use the filters. If left blank anyone can use the filters.

**Choose filter(s) meta to enable** - This option allows you to select fields that will be shown in the filters section. The filters section can be expanded by default via the **Expand the filter bar by default** option below. Please note that not all field types are allowed in the search filters, so not all of your custom fields will appear in this list.
There are 4 filter types by default in Ultimate Member core and extensions: Dropdown, Slider range, Date range, and Time range.
The values available in the filters (Dropdown options, Slider range limits, Date range period) depend on the members' data. Therefore, a dropdown option is shown if there are members who have selected this option in their profiles. The option is hidden if no one has selected this option in their profile.
Table - Supported filter fields and their types.
| Field | Type |
| --- | --- |
| _Ultimate Member Core predefined fields_ | |
| Country | Dropdown |
| Gender | Dropdown |
| Languages | Dropdown |
| Roles\* | Dropdown |
| Age(Birth Date field) | Slider range |
| Last Login | Date range |
| User Registered | Date range |
| _Ultimate Member Core custom fields_ | |
| Timepickers | Time range |
| Datepickers | Date range |
| Rating fields | Slider range |
| Checkboxes | Dropdown |
| Radio buttons | Dropdown |
| Selects/Multiselects | Dropdown |
| _UM: myCRED_ | |
| Rank | Dropdown |
| Balance | Slider range |
| _UM: Online_ | |
| Online Status | Dropdown |
| _UM: Profile Completeness_ | |
| Completeness | Slider range |
| _UM: User Reviews_ | |
| User Rating | Slider range |
| _UM: Woocommerce_ | |
| Billing Country | Dropdown |
| Shipping Country | Dropdown |
| Total Orders | Slider range |
| Total Spent | Slider range |
| _UM: User Tags_ | |
| User Tags custom field | Dropdown |
**Note:** The **Role** is a reserved word to determine if the field is a role field.
Image - Filters in the member directory

**Admin filtering** - this option allows you to select the predefined filters that display users on the page's first loading. All fields available for front-end filtering are available here. Particular attention should be paid to the fact that if a field for a predefined filter is selected, and then filtered by it using the “Choose filter(s) meta to enable” fields, then the “Choose filter (s) meta to enable” fields will be more priority.
### Results & Pagination [#](#results)
**Show results only after search/filtration** - you can decide how to display members in the directory. On page loading or after the searching/filtration.
**Maximum number of profiles, Number of profiles per page, Number of profiles per page (for Mobiles & Tablets)** \- you can decide the number of profiles to show on each page (Please note: the higher the number the longer the page will take to load) and there is also an option to limit the total number of profiles that will be shown in this directory (leave blank to show all users in the directory).
**Results Text** - This option allows you to customize the text that is shown after a user performs a search. The tag `{total_users}` will show the number of users that match the search criteria. The same but for single result **Single Result Text** option.
**Custom text if no users were found** - This option allows you to customize the text that is shown after a user performs a search and the search returns empty (no users were matched the search criteria).
Last updated on April 15, 2024
No results found
---
# How to set Role Priority for user roles - Ultimate Member
How to set Role Priority for user roles
=======================================
[](javascript:window.print() "Print this article")
### Role Priority
Users may have multiple roles. In this case, the Ultimate Member plugin uses settings from the role with the highest priority. Settings from the first role are used if roles have equal priority. Role priority is a number and a bigger number gives a higher priority. The default user role priority is 0.
Recommended priorities for roles:
* Participant (bbp\_participant) => 5
* Moderator (bbp\_moderator) => 10
* Keymaster (bbp\_keymaster) => 15
* Customer (customer) => 30
* Subscriber (subscriber) => 35
* **Your custom roles => 40**
* Contributor (contributor) => 50
* Author (author) => 55
* Shop manager (shop\_manager) => 70
* Editor (editor) => 75
* Administrator (administrator) => 90
You can set user **Role Priority** in the "Publish" box on _wp-admin > Ultimate Member > User Roles > Edit Role._

**Example:**
When you have 2 user roles "Subscriber" (subscriber) and "Participant" (bbp\_participant), one should be the primary role. If we want the "Subscriber" to be used as the primary user role, we can add the higher priority number to it. The primary user role makes the login and register process follow its role settings. It also influences profile access and permissions to use various accounts, member directories, and profile features.
Last updated on February 15, 2024
### Related Articles
* [User Roles Settings](/article/103-user-roles-settings)
* [Restrict content on a page/post to specific users community role](/article/226-restrict-content-on-a-page-post-to-specific-users-community-role)
* [Hiding/Showing admin bar for specific user roles](/article/243-hiding-showing-admin-bar-for-specific-user-roles)
No results found
---
# Displays Country flag in Member Directory and User Profiles - Ultimate Member
Displays Country flag in Member Directory and User Profiles
===========================================================
[](javascript:window.print() "Print this article")
Overview
--------
This plugin provides a straightforward solution to enhance user profiles and the member directory by incorporating the display of country flags. Once activated, users' respective country flags become visible in both the member directory and individual user profiles. This simple yet effective feature adds a personalized touch to user information, fostering a more engaging and visually enriched community experience. Elevate the representation of user locations on your platform with the Country Flag Display plugin.
### Setting Up the Field
1. Navigate to wp-admin > Ultimate Member > Forms > **Edit Profile Form**.
2. Click the **"+"** sign button in the form builder to access the fields manager.

3. Select the pre-defined field **"Country."**
4. Click **"Update"** to save the changes.

### Member Directory Settings
1. Go to wp-admin > Ultimate Member > Member Directories > Edit a Member Directory > **Profile Card**.
2. In the Profile Card section, find the **"Show extra user information below tagline?"** and enable it to display additional settings.
3. In **"Choose field(s) to display in extra user information",** click the **"Add New Custom Field"** button and select **"Country"** from the drop-down menu.
4. Click **"Update"** to save changes.
### Country Flag Display
The country flag will be visible in both the user's profile and the member directory once the user has selected their country. This plugin offers a simple yet impactful way to showcase user locations within your community.

Last updated on December 1, 2023
No results found
---
# Hiding/Showing admin bar for specific user roles - Ultimate Member
Hiding/Showing admin bar for specific user roles
================================================
[](javascript:window.print() "Print this article")
If you need to hide or show the admin bar to a user role, please navigate to the admin dashboard and go to **Ultimate Member > User roles > Edit a user role >** **"Force hiding admin bar in frontend?".**

Last updated on November 25, 2021
No results found
---
# Creating Metatable for Member Directories - Ultimate Member
Creating Metatable for Member Directories
=========================================
[](javascript:window.print() "Print this article")
Ultimate Member, starting from version 2.1.3, offers the ability to create and utilize a custom database table, enhancing the performance of member directories. If you're encountering speed issues with your member directory or are using multiple filters that could potentially slow down your website, we recommend enabling this feature.
The new database table contains essential user data for searching, filtering, and sorting, significantly improving member directory performance, which is particularly beneficial for large and heavily loaded databases.
To create the custom table, follow these steps:
1. **Backup:** Create a full backup of your website and database through your hosting provider's control panel.
2. **Enable Feature:** Go to wp-admin > Ultimate Member > Settings > Advanced > Features, then check the "Enable custom table for usermeta" checkbox.

3. **Run Update:** Click the **"Run"** button and wait for the upgrade process to complete.

This process updates the database table `{$table_prefix}um_metadata`, which was created when the plugin was activated, and copies all user data into this table. The data in this custom table is a duplicate of the data stored in the default database tables `{$table_prefix}users` and `{$table_prefix}usermeta`. The plugin automatically updates the data in this custom table whenever the data in the default tables is updated.
If you notice any issues with searching and filtering in the member directory, you can manually update this custom table. Simply turn off the feature, save the changes, then turn the feature back on and run the update process again.
Last updated on March 15, 2024
No results found
---
# Enable Profile Photo Uploader in Registration Forms - Ultimate Member
Enable Profile Photo Uploader in Registration Forms
===================================================
[](javascript:window.print() "Print this article")
**Note:** This feature was previously available for both the **Account** and **Registration** forms. However, starting with **version 2.9.0**, uploading a profile or cover photo is now only possible during the **registration process**. Uploading photos from the **Account** page is **no longer supported** due to security improvements in the file/image upload system.
* * *
### Overview
This plugin provides seamless integration for users to upload their profile photos directly within the **Registration Form**. With an easy setup, this feature enhances the registration process by allowing users to personalize their profiles right from the start. Upon installation and activation, users can conveniently upload their profile pictures, contributing to a more engaging and visually appealing experience. For detailed instructions on installing the plugin, please refer to the [Basic](//docs.ultimatemember.com/article/1889-installation)
[Extensions Installation Guide](//docs.ultimatemember.com/article/1889-installation)
.
* * *
### Security Update (Version 2.9.0)
A security update introduced in version 2.9.0 improves the safety of file and image uploads. As a result, the ability to upload or change profile and cover photos has been affected:
* **Account Page:** Due to security improvements in the file/image upload system, uploading a profile or cover photo is no longer supported from the Account page.
* **Registration Page:** Users can still upload or change their profile photo during the **registration process**.
* * *
### Setting Up Profile Photo Upload in the Registration Form
Follow these steps to integrate the profile photo upload functionality into the Registration Form after activating the plugin:
1. Navigate to `wp-admin > Ultimate Member > Forms > Edit Registration Form`.

2. Click the **"+"** button to add a new field in the **UM Form Builder**.

3. In the **Fields Manager** window, select **"Profile Photo"** from the predefined fields.

4. After adding the **"Profile Photo"** field, click the **"Update"** button to save the changes.

With this setup, users will be able to upload their profile photos seamlessly during registration, creating a more personalized and visually enriched profile.

* * *
**Note:** If you encounter any issues, please refer to [this article](#)
for further assistance.
Last updated on December 2, 2024
No results found
---
# Auto approve a user on registration in WP Admin - Ultimate Member
Auto approve a user on registration in WP Admin
===============================================
[](javascript:window.print() "Print this article")
Ultimate Member provides an option to control the action of the role when a new user registers on your site. To see the option go to **Ultimate Member > User Roles> Edit Role> Registration Options**


You need to use a custom code to approve users created by admins using the wp-admin interface automatically.
The sample code below will not require email approval, admin review, or put an account on pending status.
Last updated on March 18, 2023
### Related Articles
* [How to Enable Email Notification on Activation or Admin Review Upon User's Registration](/article/1652-how-to-enable-email-notification-on-activation-or-admin-review-upon-users-registration)
No results found
---
# Fields Character and Words Counter - Ultimate Member
Fields Character and Words Counter
==================================
[](javascript:window.print() "Print this article")
Overview
--------
The Fields Character and Words Counter plugin is a valuable addition to your Ultimate Member setup, enhancing user interactions by providing real-time character and word count functionality. Upon activation, this plugin allows effortless integration of character and word counters within the textbox and textarea fields of both the Profile and Register forms. With user-friendly configuration options, administrators can tailor the counters to suit their specific requirements. This real-time feedback not only aids users in adhering to character and word limits but also contributes to an improved overall user experience. By following the simple setup instructions, this plugin ensures seamless integration, offering a polished and informative interaction for users engaging with text fields on your website.
### Setting Character and Word Counter
Upon installing and activating the plugin, follow these steps to configure minimum and maximum characters or words for specific fields:
1. Navigate to wp-admin > Ultimate Member > Forms > Edit Form.
2. Click the "Edit" button for the desired field.

3. In the field manager, set the Minimum or Maximum Characters or Words by inputting the desired number in the text field. Click Update after editing the field.

4. To disable these limits, leave the text field empty or blank.
5. Click the **"Update**" button on the form to save the changes.
With these settings, users will now encounter character or word counters on their profile or registration pages, providing real-time feedback and improving their interaction with the respective fields.

Last updated on December 1, 2023
No results found
---
# How to set up a user role that can edit other member without wp-admin access - Ultimate Member
How to set up a user role that can edit other member without wp-admin access
============================================================================
[](javascript:window.print() "Print this article")
This article describes how to create a user role that can edit specific user roles without access to the wp-admin area. This may be useful if you need a person whose role is to review and approve new members.
* * *
Go to _wp-admin > Ultimate Member > User Roles_ and click the **Add New** button to create a new user role.
Set needed permissions:
* **Can access wp-admin?** - turn OFF
* **Force hiding adminbar in frontend?** - turn ON
* **Can edit other member accounts?** - turn ON
* **Can edit these user roles only** - select roles that this person can edit, exclude important roles.
* **Can delete other member accounts?** - turn ON if you want to allow this role to delete members.
* **Can delete these user roles only** - select roles that this person can delete, exclude important roles.
* **Can view other member profiles?** - turn ON

Set needed capabilities:
* **edit\_users**
* **read**

Click the **Update Role** button to save changes.
* * *
Assign this user role to a person who has to review and approve new members.
A person with this role will see members who are waiting for approval in the members directory and can view their profiles. This person will see the gear icon that opens the profile actions menu in other member profiles.
Available actions:
* **Approve Membership**
* **Reject Membership**
* **Deactivate this account**
* **Delete this user** (if the "Can delete other member accounts?" permission is turned on)
* **Edit Profile**

Last updated on January 17, 2025
### Related Articles
* [User Roles Settings](/article/103-user-roles-settings)
* [How to use User Roles](/article/1590-how-to-use-user-roles)
No results found
---
# Custom Post Type capabilities not showing in the WP Capabilities in User Role Settings - Ultimate Member
Custom Post Type capabilities not showing in the WP Capabilities in User Role Settings
======================================================================================
[](javascript:window.print() "Print this article")
Your CPT or Custom Post Type doesn't show in the UM WP Capabilities because there are no capabilities added to it.
1\. Please install this User Role Editor plugin: [https://wordpress.org/plugins/user-role-editor/](https://wordpress.org/plugins/user-role-editor/)
2\. Once activated, please go to WP Admin > Users > User Role Editor.
3\. Look for your custom post type. In my example, my CPT is called "Community Pantries"

4\. Now, assign the capabilities to your CPT and then click on "Update".
5\. Go to UM User Roles > WP Capabilities. Look for your post type capabilities e.g. \`edit\_pantry\_post\` and \`edit\_published\_pantry\_post\`

Last updated on March 15, 2023
No results found
---
# Generate Dummies - Ultimate Member
Generate Dummies
================
[](javascript:window.print() "Print this article")
Overview
--------
The Generate Dummies plugin offers a convenient solution for users looking to streamline the testing and development process. With this plugin, users can easily generate simulated or dummy accounts within the Ultimate Member framework. This tool is especially useful for testing and development purposes, allowing website administrators and developers to generate dummy accounts systematically. By simulating user interactions, the plugin assists in evaluating and fine-tuning the functionality of the Ultimate Member plugin before deploying it to a live audience. This feature-rich extension simplifies the testing process, ensuring a smoother and more reliable user experience.
### Generate Dummies Tab
Upon activating the plugin, a new tab, **"Generate Dummies,"** is added to the Ultimate Member Menu. Navigate to **wp-admin > Ultimate Member > Generate Dummies.
**

### Settings
Customize dummy accounts in the Generate Dummies Settings:
* **How many dummies?:** Set the number of dummies you want to generate.
* **Available Nationalities:** Choose from various nationalities for the generated dummies.
* (AU, BR, CA, CH, DE, DK, ES, FI, FR, GB, IE, IR, NL, NZ, TR, US)
* **Gender:** Specify the gender of the dummies (male, female, or both).
* **Generate Random Colored Cover Photos:** Enable dummies' profiles to have randomly colored cover photos.
* **Notification:** Disable email notifications to admins when dummies are generated.
* **Account Email Pattern:** Set email patterns for dummy accounts.
* **Account Passwords:** Set passwords for dummy accounts.
After configuring settings, click **"Start Generating Dummies"** to create them. Use **"Remove Generated Dummies"** to clear generated dummies.

### Clear User Cache
Go to **wp-admin > Ultimate Member > Dashboard > User Cache.** You need to clear the user cache to refresh data; this is needed if the generated dummies' profiles and cover photos do not appear. Once you click the clear cache button, a confirmation message will indicate that the cache has been removed.


Check the generated dummies in **wp-admin > Users**. Hover over a dummy user and click **"View Profile"** to see the dummy account's profile.


Last updated on December 1, 2023
No results found
---
# Installation - Ultimate Member
Installation
============
[](javascript:window.print() "Print this article")
This article serves as a guide for installing the basic extension, offering step-by-step instructions to ensure a smooth installation process.
1. Download the latest version of the Extended plugin from this [GitHub repository](https://github.com/ultimatemember/Extended/releases)
2. Extract the zip file to your local computer.
3. There are two ways to use the extended plugin:
* **Individual extensions:** You can use individual extensions or plugins in the /Extended/src/ directory, and upload them to your site.
* For example, If you only need the Browser Detect plugin:
* Click on the **Individual-Extensions.zip** to download the extensions.
* After downloading, extract the file. The resulting extraction forms a folder named "**assets**," containing separate zip files for each basic extension.

* Upload it to your site by selecting only the um-browser-detect zip and once the plugin is uploaded and activated, it will automatically enable all features & functionalities related to the plugin/extension.
* **Whole Extended plugin:** Upload the whole Extended plugin zip file to your site and enable each extension on the Extended settings.
* Once you activate the plugin, it will add the "**UM Extended"** tab to the WP Side navigation menu.
* Clicking the "UM Extended" tab will display all the Ultimate Member Basic Extensions. You have the option to enable and activate all the extensions by clicking the **"Enable All Active"** toggle switch button.
* If you only require a specific basic extension, click the name of your preferred basic extension. It will take you to its activation page, where you can click the **"Activate"** button.

Last updated on January 3, 2024
No results found
---
# Force Capitalization of Display Name - Ultimate Member
Force Capitalization of Display Name
====================================
[](javascript:window.print() "Print this article")
### Overview
This plugin addresses the common issue of inconsistent text or letter formatting in user display names. Users often forget to adhere to proper cases, leading to variations in lowercase, uppercase, proper case, or mixed case letters. To enforce uniformity, this plugin globally mandates the capitalization of display names, even accounting for special prepositions. By doing so, it ensures a standardized and professional appearance across user profiles, enhancing the overall presentation of names on your platform.
### Mixed-Case Display Name Example
Consider the scenario where a user registers with a first name written in mixed-case letters. The mixed-case representation of the user's first name will be mirrored across various sections, including the profile form, account form, and member directory. This can lead to inconsistencies in the display of user information.


### Automated Capitalization
Upon activation, the Force Capitalize Display Names Plugin seamlessly automates the capitalization process for all display names within the UM Profile Form, Account Form, and Member Directory. This automated functionality ensures a uniform and polished presentation of user names across these key sections of the platform. Users no longer need to manually adjust their display names, as the plugin takes care of capitalization, maintaining consistency and enhancing the overall aesthetic appeal of user information on the website.

### Supports special prepositions
* Some use cases:
| Original | ucwords(strtolower($str) | UM Capitalize($str) |
| --- | --- | --- |
| jOÃO DA SILVA | João Da Silva | João da Silva |
| eduardo dall'agnoll | Eduardo Dall'agnoll | Eduardo Dall'Agnoll |
| Papa joão xxiii | Papa João Xxiii | Papa João XXIII |
| Google s/a | Google S/a | Google S/A |
| paul mccartney | Paul Mccartney | Paul McCartney |
| nome da empresa ltda | Nome Da Empresa Ltda | Nome da Empresa LTDA |
| nome da empresa me | Nome Da Empresa Me | Nome da Empresa ME |
| Mr. o'donnel | Mr. O'donnel | Mr. O'Donnel |
#### Performance
By default, this plugin capitalizes the UM Display Name on page load. If you are experiencing performance issues, you can disable this with the following code snippet:
add\_filter("um\_extended\_capitalize\_name\_forced","\_\_return\_false");
If the above code is added, this capitalizes the first name, last name, and display name on the profile/account update. It also works when you create or update the account via WP Admin > Users.
#### Display Name Column
This plugin adds an extra column to the WP Users List as the default Name has no filter hook to force the capitalization. If you want to disable this, use the following code snippets:
remove\_filter( 'manage\_users\_custom\_column', 'um\_extended\_capitalize\_column\_content', 10, 3 );
remove\_filter( 'manage\_users\_columns', 'um\_extended\_add\_display\_name\_column', 1 );
#### Extend
**Word Splitters**
* Filter Hook: `um_extended_capitlize_name__word_splitter`
* Default values: `' ', '-', "O’", "L’", "D’", 'St.', 'Mc', "Dall'", "l’", "d’", "a’", "o’"`
**Lowercase Exceptions**
* Filter Hook: `um_extended_capitlize_name__lowercase_exceptions`
* Default values: `'the', 'van', 'den', 'von', 'und', 'der', 'da', 'of', 'and', "d’", 'das', 'do', 'dos', 'e', 'el`
**Lowercase Exceptions**
* Filter Hook: `um_extended_capitlize_name__uppercase_exceptions`
* Default values: `'III', 'IV', 'VI', 'VII', 'VIII', 'IX', 'ME', 'EIRELI', 'EPP', 'S/A', 'S.A', 'LTDA'`
Last updated on December 1, 2023
No results found
---
# Math Captcha in Register Forms - Ultimate Member
Math Captcha in Register Forms
==============================
[](javascript:window.print() "Print this article")
Overview
--------
Math Captcha serves as a robust solution to authenticate human users on websites by employing simple math problems. This plugin provides a versatile and effective means of verifying user identity. The integration and customization options empower site administrators to strike the ideal balance between security and user experience.This document provides an overview of the activation, functionality, and customization of Math Captcha on your site.
#### Activation and Testing:
Upon activation, Math Captcha seamlessly integrates into the site's registration process, providing a barrier against automated bot infiltration. To verify its functionality, navigate to the registration page for a real-time assessment

### Customization-Adjusting Math Challenge Text Field Width:
For those seeking a tailored user interface, customization of the Math Challenge text field width is achievable through CSS coding. The following code snippet illustrates this adjustment:

Last updated on December 1, 2023
No results found
---
# Password Strength Estimator - Ultimate Member
Password Strength Estimator
===========================
[](javascript:window.print() "Print this article")
### Overview
The UM Password Strength Estimator plugin is built upon the foundation of the " [zxcvbn](https://github.com/dropbox/zxcvbn)
" GitHub repository, accessible at [https://github.com/dropbox/zxcvbn](https://github.com/dropbox/zxcvbn)
. Utilizing the capabilities of "zxcvbn," this plugin is designed to accurately assess and visually indicate the strength of user passwords. By integrating this feature into the Ultimate Member framework, the plugin enhances security measures by offering real-time insights into the strength of passwords chosen by users during registration, password changes, and password resets.

**Note:** Please refer to this [installation guide](//docs.ultimatemember.com/article/1889-installation)
for detailed instructions.
### Integration and activation
* Upon installation and activation, the plugin seamlessly integrates into key password fields:
* Register Form password field.
* New password field in the Account > change password tab.
* Reset Password field.
### Password Strength Indicators
#### Three crucial indicators provide insights into password strength:
1. **Score:**
* Indicates password strength on a scale from Worst to Strong (Worst, Bad, Weak, Good, and Strong).
* To hide the score, utilize the provided filter: `add_filter("um_pass_strength_show_score","__return_false");`.
2. **Warning**:
* Displays warnings based on the password's weakness.
* Can be disabled using the filter: `add_filter("um_pass_strength_show_warning","__return_false");`.
3. **Suggestions**:
* Offers suggestions based on password input complexity.
* To disable it, use the filter: `add_filter("um_pass_strength_show_suggestions","__return_false");`.
**Note**: Suggestions and warnings depend on the complexity and weakness of the user-inputted password.
### Visual Representation

This plugin enhances password security awareness by providing users with valuable feedback on the strength of their chosen passwords, contributing to a more secure and informed user experience.
Last updated on June 24, 2024
No results found
---
# Regenerate Cover & Profile Photo thumbnails - Ultimate Member
Regenerate Cover & Profile Photo thumbnails
===========================================
[](javascript:window.print() "Print this article")
Overview
--------
The Ultimate Member Regenerate Thumbnails plugin simplifies the process of regenerating profile photos and cover photos by utilizing the original uploaded image files. UM retains the original cover/photo image and employs it to generate thumbnails, providing a practical solution for situations where custom image sizes are needed. This is particularly useful when creating a personalized profile or member directory template that requires diverse image dimensions, offering flexibility and ease in adapting your site to specific design requirements. For the installation guide, go to this [article](//docs.ultimatemember.com/article/1889-installation)
.
Upon activation of the plugin, you'll find a convenient addition to the Ultimate Member menu tab—the **"Regenerate Thumbnails"** option. This streamlined accessibility allows users to initiate thumbnail regeneration directly from the Ultimate Member menu.

### For thumbnail customization, navigate to:
1. **Thumbnail Size Settings**:
* Location: WP-Admin > Ultimate Member > Settings > General > Uploads
* Configure the default thumbnail sizes.
2. **Regenerate Thumbnail Settings:**
* Location: wp-admin > Ultimate Member > Regenerate Thumbnails
* Adjust:
* **Width****:** Set the width of the photo thumbnail.
* **Height:** Set the height of the photo thumbnail.
* **Image Quality:** Set the image quality.
* Click the **"Regenerate Profile Photo Thumbnails"** button to resize profile photos or **"Regenerate Cover Photo Thumbnails"** button for cover photos.

3. **After Regeneration**:
* The file location of the regenerated thumbnail will appear.
* Easily copy and paste it into your file explorer for quick access.
Last updated on December 18, 2023
### Related Articles
* [Installation](/article/1889-installation)
No results found
---
# Resend the Account Email Confirmation notification with WP Cronjob - Ultimate Member
Resend the Account Email Confirmation notification with WP Cronjob
==================================================================
[](javascript:window.print() "Print this article")
Overview
--------
This plugin simplifies user account management by enabling the **resending of account email confirmation** **notifications** **using WP Cronjob**, specifically designed to address scenarios where activation links have expired. With this feature, you ensure that users have a reliable way to confirm their accounts even after the initial activation link has timed out, contributing to a smoother and more user-friendly registration process on your WordPress site.
Setup
-----
1. Activate the plugin.
2. Set the **Activation link lifetime**:
1. Go to wp-admin > Ultimate Member > Settings > General > Users.
2. Look for the "Activation link lifetime" field.
3. Input the desired expiration time in seconds for user activation links. Alternatively, leave the field empty for a non-expiring activation link.
3. Save the changes.
By completing these steps, you customize the activation link lifetime, tailoring it to your specific preferences and ensuring a secure and user-friendly activation process on your WordPress site.

Filter Hook
-----------
When the plugin is activated, it will automatically send an email confirmation and the default time to trigger for resending the email is daily or 24 hours. You can customize or change the WP Cronjob schedule to trigger the resending of email confirmation notifications by using the code below:
* default: `daily`. Enum: `daily`,`hourly`,`twicedaily`,`weekly`
add\_filter("um\_cron\_resend\_activation\_link\_recurrence","um\_cron\_resend\_activation\_link\_recurrence");
function um\_cron\_resend\_activation\_link\_recurrence( $recurrence ){
return "hourly";
}
**Note: We recommend creating a child theme for customization. You can paste it into y****our child-theme’s functions.php or use the “Code Snippets” plugin.**
Last updated on December 1, 2023
No results found
---
# Schedule User Deletions with WP Cronjob - Ultimate Member
Schedule User Deletions with WP Cronjob
=======================================
[](javascript:window.print() "Print this article")
Overview
--------
Empower your WordPress site management with the Ultimate Member plugin:
* Scheduled User Deletions: Automate user deletions using WP Cronjob.
* Flexible Scheduling: Set your own schedule for user deletions.
* Filter Hooks: Manage user statuses with customizable filter hooks.
With this plugin, you gain the ability to schedule user deletions using WP Cronjob. Once activated, you have the flexibility to set the schedule for when user deletions will take place. Additionally, the plugin provides filter hooks to manage the status of users, offering a customizable and efficient solution for user management on your WordPress site.
Available filter hooks:
-----------------------
* `um_cron_delete_users_after` - default: `5 days ago midnight`. See [WP\_User\_Query](https://developer.wordpress.org/reference/classes/wp_user_query/#date-parameters)
[](https://developer.wordpress.org/reference/classes/wp_query/#date-parameters)
* `um_cron_delete_users_status` - default: `awaiting_email_confirmation`. Enum: `approved`, `awaiting_admin_review`, `awaiting_email_confirmation`, `inactive`, `rejected`.
* `um_cron_delete_users_recurrence` - default: `daily`. Enum: `daily`,`hourly`,`twicedaily`,`weekly`
Last updated on November 28, 2023
No results found
---
# User Browser Detect - Ultimate Member
User Browser Detect
===================
[](javascript:window.print() "Print this article")
Overview
--------
The User Browser Detects extension efficiently identifies and captures essential user information, including IP addresses, operating systems, and browsers. This functionality provides valuable insights into the user's online environment, aiding in a more informed and personalized user experience.
Setup
-----
1. Navigate to wp-admin > Ultimate Member > Forms > Edit Registration Form.
2. Click on the plus '+' sign button to add a new field.
3. In the Field Manager, select the following predefined fields:
1. User IP Address
2. User Operating System
3. User Web Browser
By incorporating these predefined fields, you empower your form to capture essential information such as the user's IP address, operating system, and web browser, providing valuable insights for a more comprehensive user profile.

After adding the fields, ensure to click on the **"Update"** button. This action saves the changes and ensures that the new fields are integrated into your registration form.

After a user registers on your site, the browser's header information will be recorded. To access and view this data, follow these steps:
1. Go to WP Admin > Users.
2. Hover your mouse over the specific user for whom you want to view browser information.
3. Click on **"Info"**
This will provide you with detailed insights into the user's browser information, allowing you to access and review the recorded data effortlessly

Upon accessing the **"Review Registration Details"** window, you'll have visibility into crucial user information. Here, you can seamlessly observe and analyze the user's IP Address, Operating System, and Web Browser, providing you with a comprehensive overview of their registration details. This added layer of information enhances your understanding of user interactions on your site.

Last updated on December 1, 2023
No results found
---
# Set Password Link for UM Email Templates - Ultimate Member
Set Password Link for UM Email Templates
========================================
[](javascript:window.print() "Print this article")
Overview
--------
[](//docs.ultimatemember.com/article/1663-download-installation-of-the-basic-extensions)
This plugin simplifies the password setup process for users by allowing them to set their passwords through email activation after registration. It seamlessly generates a link within email templates, enabling users to effortlessly complete the setup at their convenience.For the installation guide, please refer to this [article](//docs.ultimatemember.com/article/1889-installation)
.
### Setup
1. Add the following shortcode to generate a "Set Password" link within UM Email Templates:
{set\_password\_link}
3. Go to wp-admin > Ultimate Member > Settings > Email > Account Activation Email. Click on the gear icon to edit the Account Activation Email template.

4. Enable the Account Activation Email and then insert the shortcode into the Message Body - Text and customize the email template as needed. Don't forget to click the "Save Changes" button. 
5. After a user registers on your site, they will receive a "Set Password" email. When they click the "Set your password" button, they will be redirected to the password reset page on your site, where they can set and save their new password.

#### Related Articles:
* [Password Reset doesn't work](//docs.ultimatemember.com/article/1518-password-reset-doesnt-work)
* [Custom redirection after Reset Password](//docs.ultimatemember.com/article/1694-validate-username-in-email-password-reset-link)
Last updated on February 28, 2024
No results found
---
# User Meta Shortcode - Ultimate Member
User Meta Shortcode
===================
[](javascript:window.print() "Print this article")
Overview
--------
The **User Meta Shortcode** plugin allows you to easily display user metadata in your posts or pages using shortcodes. It simplifies showcasing personalized user information, creating a more engaging experience on your site without needing to write complex code.
**Note:** This plugin is **not part of the core Ultimate Member (UM) plugin**. It is a separate extension that must be installed independently. For installation instructions, refer to the following link: [Installation Guide](//docs.ultimatemember.com/article/1889-installation)
.
Short Code
----------
`[um_user user_id="" meta_key="" ]`
* **meta\_key -** This key is used to store and retrieve the field's value in the WordPress database. It's like a unique identifier for that specific piece of information. You can find it in the field settings in UM form builder in wp-admin>UM>Forms>Edit Form>Edit a field.

* **user\_id -** This attribute is a user ID. The `user_id` is a reference to the unique identifier assigned to each user in the WordPress database. You can see it in wp-admin>Users>Hover only on user edit> check the browser's status.

#### Sample usage in a page
`[um_user user_id="4" meta_key="first_name" ]`
Check out the image below to see how the shortcode seamlessly integrates into the WP pages block editor. This visual guide makes it clear and simple to incorporate shortcodes, allowing you to effortlessly enhance your page with the desired user meta data.


Last updated on October 15, 2024
No results found
---
# Vcard - Ultimate Member
Vcard
=====
[](javascript:window.print() "Print this article")
Overview
--------
With this extension, users can conveniently generate a VCard upon registering and after updating their profile. The process is made hassle-free as they can easily download the VCard.vcf file, ensuring that their contact information is readily available in a universally compatible format. This seamless integration not only simplifies the user experience but also provides a practical solution for sharing and storing contact details. Say goodbye to manual data entry and hello to efficiency with the automatic VCard generation feature.
**Note: The VCard file must be generated by updating the User Profile. Until this update, there is no VCard file available.**
**Download:** In UM [Extended 2.0.3](https://github.com/ultimatemember/Extended/releases)
under the Assets, click on the Source code(zip) to download the zip file.
Setup
-----
After activating the plugin, you must add the predefined field to the Profile Form. Edit the profile form by going to **wp-admin>Ultimate Member>Forms>Edit Profile Form**. To add a field, click the plus **"+"** sign button in the form builder

Select **VCard** in the predefined fields from the fields manager and click the **Update** button to save changes


When a user registers or saves their profile, a **VCard.vcf** file is generated, and a VCard icon is shown in their profile allowing users to download the file. The VCard or.vcf file may be imported into the Contacts Application on **Mac OS**, **Google Contacts**, and **Outlook on Windows OS**.
The VCard field will appear or will be generated on the user's profile **only when the user edits and updates** their profile.

The sample image below is the downloaded Vcard from the site and imported in Google Contacts

### Action hook
You can use the action hook `um_vcard_before_save` to add extra fields to the VCard. See the example below:
add\_action('um\_vcard\_before\_save','um\_vcard\_add\_nickname', 10, 2 );
function um\_vcard\_add\_nickname( $vcard\_obj, $user\_id ){
$vcard\_obj->add( new Nickname( um\_user('nickname' ) ) );
}
Last updated on December 1, 2023
No results found
---
# Yoast SEO Meta tags - Ultimate Member
Yoast SEO Meta tags
===================
[](javascript:window.print() "Print this article")
Overview
--------
The Yoast SEO plugin is handy as it includes Open Graph meta tags in user profiles. This feature is designed for social media site web crawlers, ensuring that shared content looks good and follows SEO best practices. It's a straightforward addition that helps improve how user profiles appear on various social media platforms.
### The example generated meta tags in the wp\_head:
The image below is an example of the tags working on the Facebook post

Last updated on December 1, 2023
No results found
---
# Followers Setup - Ultimate Member
Followers Setup
===============
[](javascript:window.print() "Print this article")
### Overview
This document provides instructions on our [Followers](https://ultimatemember.com/extensions/followers/)
extension setup.
**Contents**
* [Settings](#settings)
* [Extension's settings](#settings_common)
* [User Role settings](#settings_role)
* [Member Directories settings](#settings_directory)
* [User profile](#profile)
* [User account](#account)
* [Privacy](#account_privacy)
* [Notifications](#account_notifications)
Settings [#](#settings)
------------------------
### Extension's settings [#](#settings_common)
Once you activate the extension, you will see the tab "Followers" on the page \[Ultimate Member > Settings > Extensions\]. On this page, you can find these settings:
* **Show followers stats in member directory** - If turned off, guests will not be able to see the followers stat in the member directory.
* **Show follow button in member directory** - If turned on, the follow button of a user will show on the member directory.
* **Allow Administrators to follow users** - Displays Follow buttons in profiles & member directory
\[Ultimate Member > Settings > Extensions > Followers\]

### User Role settings [#](#settings_role)
This extension also allows you to set which roles a user role can only follow. Go to the page \[wp-admin > Ultimate Member > User Roles\] and choose the user role to modify settings on a specific role. You will be navigated to the page "Edit Role". On this page scroll down to the box "Followers":
* **Can follow others?** - Enable the following feature for this role.
* **Can follow these user roles only** - Limit user roles that this role can follow.
\[Ultimate Member > User Roles > Edit Role\]

### Member Directories settings [#](#settings_directory)
The extension adds buttons "Follow" and followers counter into the profile cards in the members' directory. There are settings that allow hiding these elements:
* **Hide followers stats**
* **Hide follow button**
Go to the page \[Ultimate Member > Member Directories\] and choose the directory to modify these settings. You will be navigated to the page "Edit Member Directory". On this page scroll down to the box "Profile Card".
Image - Settings on \[Ultimate Member > Member Directories > Edit Member Directory\]

Image - Profile card in the member directory

User Profile [#](#profile)
---------------------------
The extension adds these elements into the user's profile:
* Followers counter and Following counter
* Button Follow (or Following, Unfollow)
* Followers list (click Followers counter to see a list)
* Following list (click Following counter to see a list)
Image - Followers list in profile

User account [#](#account)
---------------------------
### Privacy [#](#account_privacy)
Users are given the additional options to set their profile privacy, activity wall, and private messages to people they follow or their followers.

### Notifications [#](#account_notifications)
Users can turn on or off email notifications for new followers directly on their accounts when the Notifications extension is also integrated on your site.

Last updated on February 18, 2022
No results found
---
# ForumWP Setup - Ultimate Member
ForumWP Setup
=============
[](javascript:window.print() "Print this article")
Overview
--------
This detailed guide will walk you through setting up and using the [ForumWP extension](https://ultimatemember.com/extensions/forumwp/)
with **Ultimate Member**, explaining all the features, user roles, permissions, and the new **ForumWP Notifications** feature. This integration allows you to seamlessly connect [ForumWP](https://forumwpplugin.com/)
with Ultimate Member, offering an enhanced experience for managing users and forum interactions.
* * *
### **1\. ForumWP Extension Setup and Features**
The **ForumWP extension** integrates the ForumWP plugin with **Ultimate Member**, allowing for a seamless user experience. Once activated, the **ForumWP extension** adds a new **"Forums"** tab in the WordPress menu, making it easier to manage forum content and settings directly from the WordPress dashboard.

* * *
### **2\. ForumWP Profile Integration with Ultimate Member**
One of the key features of the **ForumWP extension** is the integration of ForumWP statistics directly into the **Ultimate Member profile**. The default ForumWP profile is replaced with a **Forums** tab that contains important user statistics such as topics, replies, and interactions like bookmarks and likes
#### **How to Configure the Forums Tab**
1. Navigate to: **Ultimate Member > Settings > Appearance > Profile Menu > Forums Tab**.

2. Here, you can customize the visibility of the Forums tab and configure how users will interact with the forum content directly from their profiles.
The **Forums tab** can display the following sub-tabs.
* **Topics**: Displays the number of topics the user has created.
* **Replies**: Shows the number of replies the user has posted in forums.
* **Likes**: Shows the topics or replies that the user has liked.
* **Bookmarks**: Displays any topics or replies the user has bookmarked.
* **Subscriptions**: Shows the user's subscriptions to topics or forums.
**Important:** The **Likes**, **Bookmarks**, and **Subscriptions** options will only appear if these features are activated within **ForumWP settings**.
#### **Activating Modules in ForumWP**
1. To enable Likes, Bookmarks, and Subscriptions, go to **Forums > Settings > Modules**.
2. Toggle the options to activate these features.

Users can also manage their forum subscriptions (unsubscribe) and likes (unlike topics/replies) directly from their **Ultimate Member profile**.
**Pro Features**: Some advanced features (like Likes, Bookmarks, and Subscriptions) require the **ForumWP Pro plugin**.
* * *
### **3\. Managing User Roles and Permissions in ForumWP**
The **ForumWP extension** gives you the flexibility to manage which users can access certain forums, post topics, and reply to existing topics, based on their roles. This is particularly useful for restricting content and controlling access to specific forums.
#### **Configuring Permissions for User Roles**
1. Go to **wp-admin > Ultimate Member > User Roles**.
2. Click on **Edit Role** for the role you want to configure.

3. Scroll down to the **ForumWP Permissions** section to manage the role's forum permissions.

#### **Available Permissions**
* **Disable forums tab**: This option hides the **Forums tab** from users with the selected role. This is useful if you want to hide forum content from certain user roles.
* **Disable create new topics**: Prevent users in this role from creating new topics in forums.
* **Disable create new replies**: Restrict users from replying to existing topics.
You can also configure permissions on a **per-forum basis**, allowing you to control who can create new topics and replies in specific forums.
* * *
### **4\. Forum Writing Permissions and Access Control**
The **ForumWP extension** enables granular control over forum participation by allowing you to specify which roles can write or view content in specific forums.
#### **Restricting Forum and Topic Access**
1. Go to **Forums > Select Your Desired Forum** and click **Edit**.

2. On the editing screen, look for the **UM Permissions** widget.

3. From here, you can specify or select:
* Which user roles can create new topics in this forum.
* Which user roles can post replies in this forum.
#### **Access Control for Forums**
To block access to a forum for certain roles:
1. Use the **Access Control** widget.
2. Activate the **Access Control** feature for forums and topic CPTs.
3. Configure which roles can view the forum and topics within it. You can even redirect unauthorized users to a custom URL (such as the main forums page or another URL).

* * *
### **5\. ForumWP Notifications in Ultimate Member**
The **ForumWP Notifications** feature allows users to manage their forum-related notifications directly from their **Ultimate Member account**, giving them control over which activities trigger email notifications (e.g., new replies, new topics, subscriptions).
#### **Managing ForumWP Notifications**
ForumWP notifications are now integrated with **Ultimate Member's** existing notifications system. Users can control what forum activities they want to be notified about through the **Notifications** tab in their Ultimate Member account.
#### To configure notifications:
1. Navigate to **User Profile > Account Settings > Notifications,** **or** click the **Gear Icon** on the user profile page and go to **My Account > Notifications.**
2. Under the **Notifications tab**, users can **Enable or Disable Notifications.** Choose whether to receive email notifications for the following forum-related activities:

**ForumWP**
* **Enable notification for mentions**: Get notified when another user mentions you in a topic or reply.
**Subscriptions module of ForumWP-Pro**
* **New Topic**: Get notified when a new topic is posted in the forums.
* **New Reply**: Choose to receive notifications when someone replies to a topic you are participating in.
**Post moderation module of ForumWP-Pro**
* **Topic has been approved**: Get notified when a new pending topic has been approved.
* **Topic has been declined**: Get notified when a new pending topic has been declined.
* **Reply has been approved**: Get notified when a new pending reply has been approved.
* **Reply has been declined**: Get notified when a new pending reply has been declined.
* * *
### **6\. Conclusion**
The **ForumWP extension** provides powerful features for managing forum interactions and user roles within **Ultimate Member**. Integrating forum statistics, permissions, and notifications, it enhances the user experience for both admins and members. The ability to manage and restrict access to forums, control forum writing permissions, and send notifications makes this integration ideal for community-driven sites and membership-based forums.
With the added **ForumWP Notifications** feature, users can now fully customize their notification preferences for forum activities directly within the **Ultimate Member** account, ensuring they never miss important updates.
**Important**: To use advanced features like **Likes**, **Bookmarks**, and **Subscriptions**, you will need the **ForumWP Pro plugin**.
Last updated on November 19, 2024
No results found
---
# Restrict Gutenberg Blocks - Ultimate Member
Restrict Gutenberg Blocks
=========================
[](javascript:window.print() "Print this article")
Overview
--------
Ultimate Member offers a customizable visibility feature for blocks that can be accessed through the settings below. This feature is based on the restriction blocks logic, which can be enabled by navigating to the "Content Restriction" settings located in **wp-admin > Ultimate Member > Settings > Access >Restriction Content >** **Enable the "Content Restriction" settings for the Gutenberg Blocks**.

By configuring these settings, you can have better control over your content and restrict access to specific blocks as per your requirements. The feature facilitates the creation of a more personalized user experience, which can be a valuable asset for businesses or communities seeking to optimize their online presence.

#### Restrict Access?
This enables the admin to set restriction settings for the selected block.
#### Who can access this block?
* **Everyone** – Everyone is the default state for block and this means that everyone who visits your site will see this block content.

* **Logged out users** – If you select this option, this block content will only be visible to visitors (e.g., logged-out users). When someone logs into your site they will no longer see this block content.

* **Logged in users** – If you select this option it means that this block content will only be visible to logged-in users. Visitors and non-members will not see this block content. Once the **"Logged in users"** option is selected, you will see the **"What roles can access this block?"** setting which shows all roles on your site. If you want to show block content to a certain role(s) then you can select the roles that will be able to see the block content.

#### Restriction action
Make this action if the block is restricted according to the conditions:
* **Hide block** – It means that the block is invisible.

* **Show global default message** – This means that visitors can see the global default message instead of the block content.

* **Show custom message** – It means that visitors can see the custom message instead of the block content. Once the **"Show custom message"** option is selected, you will see the **"Custom restricted access message"** setting which allows you to type the custom message.

* * *
#### Restrict Block Content to Verified User[#](#restrictBlockContent_verifiedUsers)
When you activate the [**Verified Users extension**](https://ultimatemember.com/extensions/verified-users/)
, you gain access to an additional feature that allows you to control the visibility of your content. By enabling the **"Lock to verified accounts only"** option, you can limit access to certain parts of your content to only those users who have been verified. This is useful if you want to share sensitive or exclusive information with a select group of people while keeping it hidden from others who may not have the necessary credentials.


* * *
#### Themes Navigation Menu Gutenberg Restriction Settings
##### Non-Block Themes:
Non-block themes are built using the traditional or classic editor in WordPress. In these themes, content creation follows a linear approach without the use of individual blocks. Instead, users compose content more straightforwardly, and the design and layout are achieved through custom page templates and theme-specific options. This method is familiar to users accustomed to the earlier versions of WordPress. (e.g. WP Twenty Twenty-One theme). For the restriction of the navigation menus for non-block themes, go to this [link](//docs.ultimatemember.com/article/132-conditional-menus)
.
**Block Themes:**
On the other hand, block themes embrace the newer WordPress block editor (Gutenberg). This editor introduces a modular approach to content creation, allowing users to build pages or posts using individual blocks. Each block represents a specific content element, providing greater flexibility and customization options. Block themes structure designs based on these blocks, resulting in a more dynamic and visually appealing layout. (e.g. WP Twenty Twenty-Four theme).
#### Ultimate Member Feature for Block Themes:
This feature enables you to customize access to navigation menus based on specific criteria, affording administrators precise control, particularly within the framework of block themes. Even in the context of the more straightforward content creation structure of block themes, Ultimate Member allows site administrators to carefully regulate the visibility and access permissions of navigation menus. This ensures a smooth user experience and effective access control within the WordPress environment, tailored specifically for non-block themes. To restrict your Navigation Menu Gutenberg Blocks, do the following steps below:
* Once you've activated a block theme, navigate to `wp-admin` > `Appearance` > `Editor`. 
* Locate the navigation menu on the side panel in the **Block** tab and scroll down to the Ultimate Member: Content Restriction Section. Enable the "**Restrict Access?**" option.
* Configure your settings based on your preferences. Each available options are thoroughly described in the preceding section of this article.
* If the [Verified Users](https://ultimatemember.com/extensions/verified-users/)
extension is active, an additional option will be visible. You can lock the navigation menu block, allowing access exclusively to verified users by enabling the "**Lock to verified accounts only**" option. This option becomes accessible when you select **"Logged in users"** from the **"Who can access this block"** settings.
* Click on the **Save** button, to save your configurations.

Last updated on January 16, 2024
### Related Articles
* [Access Tab](/article/41-access-tab)
No results found
---
# Followers shortcodes - Ultimate Member
Followers shortcodes
====================
[](javascript:window.print() "Print this article")
Overview
--------
This document provides instructions on how to use shortcodes of the extension [Followers](https://ultimatemember.com/extensions/followers/)
.
Ultimate Member uses WordPress shortcodes to allow users to perform certain actions as well as display forms and templates. You may use shortcodes in the posts(page) content and text widgets.
**Contents**
* [\[ultimatemember\_followers\]](#ultimatemember_followers)
- Shows followers of the user
* [\[ultimatemember\_following\]](#ultimatemember_following)
- Shows members that the user follows
* [\[ultimatemember\_followers\_bar\]](#ultimatemember_followers_bar)
- Shows a follow bar with the total number of followers and following members of a specific user
Shortcodes
----------
#### \[ultimatemember\_followers\] [#](#ultimatemember_followers)
This shortcode shows followers of the user.
**Attributes**
| | | | |
| --- | --- | --- | --- |
| _Key_ | _Type_ | _Default_ | _Description_ |
| user\_id | integer | Current profile ID (on profile page)
or current user ID
or 0 (for guests) | The ID of the user. Should not be zero |
| style | string | default | **avatars** - show lists with avatars
**default** - show lists with avatars and follow bars |
| max | integer | 0 | Number of followers to display.
**0** - show all followers |
**Example** - Avatars style
`[ultimatemember_followers user_id="123" style="avatars" max="11" ]`

**Example** - Default style
`[ultimatemember_followers user_id="123" style="default" max="11" ]`
####

#### \[ultimatemember\_following\] [#](#ultimatemember_following)
This shortcode shows members that the user follows.
**Attributes**
| | | | |
| --- | --- | --- | --- |
| _Key_ | _Type_ | _Default_ | _Description_ |
| user\_id | integer | Current profile ID (on profile page)
or current user ID
or 0 (for guests) | The ID of the user. Should not be zero |
| style | string | default | **avatars** - show lists with avatars
**default** - show lists with avatars and follow bars |
| max | integer | 0 | Number of followers to display.
**0** - show all followers |
**Example** - Avatars style
`[ultimatemember_following user_id="123" style="avatars" max="11" ]`
####

#### \[ultimatemember\_followers\_bar\] [#](#ultimatemember_followers_bar)
This shortcode shows a follow bar with the total number of followers and following members of a specific user.
**Attributes**
| | | | |
| --- | --- | --- | --- |
| _Key_ | _Type_ | _Default_ | _Description_ |
| user\_id | integer | Current profile ID (on profile page)
or current user ID
or 0 (for guests) | The ID of the user. Should not be zero |
**Example**
`[ultimatemember_followers_bar user_id="123" ]`

Last updated on January 16, 2024
### Related Articles
* [Followers Setup](/article/231-followers-setup)
No results found
---
# Individual Post and Term content restriction settings - Ultimate Member
Individual Post and Term content restriction settings
=====================================================
[](javascript:window.print() "Print this article")
Overview
--------
Ultimate Member allows administrators to control post and term access. You can easily customize restrictions for individual posts and terms, specifying access permissions, verification options, and actions for restricted content. Enhance security with 404 error displays and choose actions for users without access. The Individual Post and Term content restriction settings provide the ability to customize access for posts (including pages and other post types) and terms (categories, tags, and other term types).
Enable Individual Content Restriction Settings for Post and Term Types
----------------------------------------------------------------------
* ### For Post Type:
1. Navigate to **wp-admin > Ultimate Member > Settings > Access > Content Restriction>Enable the "Content Restriction" settings for post types**.
2. Activate this feature for a specific post type by checking the 'Content Restriction' checkbox for post types. See the image below:
3. 
After enabling, **Ultimate Member: Content Restriction** will be added under the content in the page or post settings. Refer to the image below for an example, found at **wp-admin > Post > add/edit a post.**
* ### For Term Type:
1. Navigate to **wp-admin > Ultimate Member > Settings > Access > Content Restriction>Enable the "Content Restriction" settings for taxonomies.**
2. Activate this feature for a specific term type by checking the 'Content Restriction' checkbox for term types. See the image below:

3. After enabling, **Ultimate Member: Content Restriction** will be added under the category or term content settings. Refer to the image below for an example, found at **wp-admin > Post > Categories>add/edit a category**.
* * *
Individual content restriction settings for posts and terms
-----------------------------------------------------------
1. #### Restrict access to this post? / Restrict access to this term and its posts?
This enables the admin to set restriction settings for the individual post or term.
**Note:** Please note that **individual post settings have the highest priority**. This means when you've checked the "Restrict access to this post?" checkbox, the settings of the terms of this post are ignored.
2. #### Who can access this post? / Who can access this term and its posts?
* **Everyone** – Everyone is the default state for post/term which means that everyone who visits your site will see this post. It's data, comments, etc.
* **Logged out users** – If you select this option, it means that this post/term will only be visible to visitors (e.g logged out users). When someone logs into your site they will no longer see this post/term.
* **Logged in users** – If you select this option, it means that this post/term will only be visible to logged-in users. Visitors and non-members will not see this block content.
* **Select which roles can access this post/Select which roles can access this term and its posts** -If you choose the **'Logged in users'** option, you'll find the 'Select which roles can access this post/Select which roles can access this term and its posts' setting, displaying all roles on your site. To specify which role(s) can view the post or term, simply select the desired roles.
4. #### Would you like to display a 404 page for users who do not have access to this page? / Would you like to display a 404 page for users who do not have access to this term on the term's archive page and terms' posts single pages?
* **Enabling this option is recommended**. It hides the archive pages of restricted posts and terms, as well as all posts related to those terms, by excluding them from the WP Query. This is the safest and most effective method to conceal or hide posts and their comments from all requests, RSS feeds, and other site elements. Notably, this setting does not impact the restricted term archive page, as it remains hidden by default when the term is restricted (refer to the 'Restrict access to this term and its posts?' option)
* **If checked or enabled:** When a post or term is restricted, it will not appear in the adjacent post links. If a user attempts to access the restricted post or term via a link it will lead to a 404 error, indicating that the page is not found. See the example below: Another example below illustrates that the blog post titled 'Discovering Hidden Gems in Nature' becomes hidden when added in a page:

* **If unchecked or disabled**: The 'What happens when users without access try to view the post?' or 'What happens when users without access try to view the term's post?' settings become active, allowing you to configure the desired behavior. You can choose to either redirect the user to a specific or custom page or display the Restricted Access Message based on your configuration.
5. #### What happens when users without access try to view the post? / What happens when users without access try to view the term's post?
* There is the ability to select actions if the post/term isn't removed from the query. Make this action if the post/terms is restricted according to the conditions:
* **Show access restricted message** – This option allows visitors to see a restricted message instead of the post content. When you select 'Show access restricted message,' you will encounter the 'Restricted access message type' setting. This setting enables you to choose the type of restricted message, either [Global](//docs.ultimatemember.com/article/1736-content-restriction#global)
or Custom. If you choose 'Custom message,' you will then see the 'Custom restricted access message' setting, allowing you to type a custom message.
The example below is configured to display the access restricted message with the global default message: 
* **Redirect user** – This means visitors will be redirected from the single post page instead of viewing it. When a user attempts to access a restricted post, they will be automatically redirected. After selecting the 'Redirect user' option, you'll encounter the 'Where should users be redirected to?' setting. Here, you can choose either the 'Login page' or opt for a 'Custom URL' redirect. If 'Custom URL' is selected, the 'Redirect URL' setting will appear, allowing you to specify the URL where the visitor will be redirected.
The example below is configured to redirect user to a login page: 
### Additional Settings if verified extension or plugin is activated:
1. #### Lock content to verified accounts only?[#](#LockContent_verifiedUsers)
It is possible to show the content only for verified users if the [Verified Users](https://ultimatemember.com/extensions/verified-users/)
extension is installed.

Workarounds
-----------
By default, the restricted post if isn't hidden in the query has a pre-defined restricted data array.
* **$post->post\_title** - replace by the **"Restricted Access Post Title"** setting value.
* **$post->post\_content** - replace by the **"Restricted Access Message"** setting value. (Custom individual for post or term. Or a global restricted message from Ultimate Member > Settings > Access tab)
* **$post->post\_excerpt** - replace by empty string to avoid displaying restricted content in the archive.
If you need to customize the WP\_Post object of the restricted post. Please use the sample from this [Gist](https://gist.github.com/nikitasinelnikov/6b56b639f8b40104180b484e4a07bd66)
.
Last updated on January 10, 2024
### Related Articles
* [Common content restriction settings](/article/1736-content-restriction)
* [Restriction content priority](/article/1620-restriction-content)
No results found
---
# Restriction content priority - Ultimate Member
Restriction content priority
============================
[](javascript:window.print() "Print this article")
**Notice:** This article is actual since version 2.2.0. See the article for the version lower than 2.2.0 [here](//docs.ultimatemember.com/article/1329-content-restriction)
.
**Restore old business logic to avoid 404 errors:** If you need to rollback restriction content logic for your current Ultimate Member version (>= 2.2.3) please use this option "Ultimate Member > Settings > Misc > Disable pre-queries for restriction content logic (advanced)". Then 404 error displaying will be replaced by the Hide from queries option and removing the post only from results (not a query). The old restriction logic is described [here](//docs.ultimatemember.com/article/1329-content-restriction)
. **Not recommended if you are a new customer or do not want search robots to detect the restricted content or its structure.**Individual Post and Term content restriction settings
### 1\. Individual Post (Page) Content Restriction Option - First Priority
To restrict access to a specific post or page, you should first check the "Access" settings and choose the post type you want to restrict. The individual post or page "Content Restriction" options should be configured next to ensure the desired level of restriction is achieved. It is important to note that the individual post or page "Content Restriction" options take priority over any other settings in this regard.
Image - Enable the "Content Restriction" settings for post types.

Image - Individual post (page) "Content Restriction" options.

### 2. Individual Term of Taxonomy Content Restriction Option - Second Priority
It is possible to assign each post to different categories, tags, or custom taxonomies. To limit access to all posts assigned to a particular term, it is necessary to select the term type in the "Access" settings and then configure the restriction in the individual term's (tag, category) content restriction options. This action should be given priority as the second step when setting up restrictions.
Image - Enable the "Content Restriction" settings for term types.

Image - Individual term (tag, category) content restriction options.

Then if the post, which **doesn't have an individual restriction option** is assigned to a restricted term - then we use this term's restriction options.
### Global Site Access - Third Priority
A whole site\* can be restricted by the setting "Global Site Access," which is the third priority.
**Notice:** Pages **Login**, **Registration**, and **Password Reset** can not be restricted. These pages are the exception.
The homepage can be restricted by the common option "Allow Homepage to be accessible"

or the individual option "Can view default homepage?" for each user role.

### 4\. Categories Pages - Fourth Priority
Category pages have the next priority (only default WP Posts Category) by this option.

### 5. Exclude the following URLs - Fifth Priority
Other pages in the last restriction priority use the "Exclude the following URLs" option.

Last updated on January 9, 2024
### Related Articles
* [Access Tab](/article/41-access-tab)
* [Content Restriction until 2.2.0 version](/article/1329-content-restriction)
* [Individual Post and Term content restriction settings](/article/1623-post-term-restriction-content-settings)
No results found
---
# Friends Setup - Ultimate Member
Friends Setup
=============
[](javascript:window.print() "Print this article")
### Overview
Friends extension allows users to send, accept and reject friend requests which add more user interaction on your site. This document provides instructions on how to set up a [Friends extension](https://ultimatemember.com/extensions/friends/)
.
**Contents**
* [Installing an Extension](#installing)
* [Settings](#settings)
* [Extension settings](#settings_extension)
* [Profile Menu settings](#settings_menu)
* [Email settings](#settings_email)
* [Notifications settings](#settings_notifications)
* [User Role settings](#settings_role)
* [Directory settings](#directory)
* [User profile](#features)
* [User account](#account)
* [Privacy](#account_privacy)
* [Notifications](#account_notifications)
* [Web notifications](#account_webnotifications)
* * *
### Installing an Extension [#](#installing)
You can download the extension via your account on our website. If you have made an individual extension purchase you can download the extension via the download tab on your [account](https://ultimatemember.com/account/)
page or if you have purchased the pass you can download the extensions via the [downloads](https://ultimatemember.com/downloads/)
page. Once the extension is downloaded you should install and activate it using the WordPress plugin installer on _wp-admin > Plugins_. Read the article [Installing an Extension](//docs.ultimatemember.com/article/27-installing-an-extension)
for details.
### Settings [#](#settings)
#### Extension settings [#](#settings_extension)
Once you activate the extension, you will see the Friends tab in _wp-admin > Ultimate Member > Settings > Extensions_. On this page, you can find the following options:
* **Show friends stats in member directory** - Turn on/off friend stats in the member directory
* **Show friend button in member directory** - Turn on/off friend button in the member directory
Image - Settings on _wp-admin > Ultimate Member > Settings > Extensions > Friends._

Image - Friend button in member directory.

#### Profile Menu settings [#](#settings_menu)
The extension adds settings to the page _wp-admin > Ultimate Member > Settings > Appearance > Profile Menu._ These settings allow you to manage the "Friends" item in the profile menu:
* **Friends Tab** – Allows enabling/disabling the "Friends" item in the Profile menu.
* **Who can see Friends Tab?** – Manage access to the "Friends" tab in the Profile menu.
Image - Settings on _wp-admin > Ultimate Member > Settings > Appearance > Profile Menu._

#### Email settings [#](#settings_email)
The extension adds these email templates:
* **New Friend Request Notification** - Send a notification to user when they receive a new friend request.
* **New Friend Notification** - Send a notification to user when a friend request get approved.
Administrators can edit email templates: enable, disable, change subject or body. Go to _wp-admin > Ultimate Member > Settings > Email_, find the needed email template and click the button "Edit" (gear icon). You'll see email template settings. Change what you want and save changes.
Image - Settings on _wp-admin > Ultimate Member > Settings > Email._

#### Notifications settings [#](#settings_notifications)
The extension [Friends](https://ultimatemember.com/extensions/friends/)
is compatible with the extension [Real-time Notifications](https://ultimatemember.com/extensions/real-time-notifications/)
. You can enable/disable and edit friends notifications on the page _wp-admin > Ultimate Member > Settings > Extensions > Notifications_.
* **User get a new friend request** - Turn on/off and customize "New Friend Request Notification" - this sends a notification to a user when a new friend request is received.
* **User get a new friend** - Turn on/off and customize "New Friend Notification" - this sends a notification to a user when a friend request gets approved.
Image - Settings on _wp-admin > Ultimate Member > Settings > Extensions > Notifications_.

### User Role settings [#](#settings_role)
The extension adds a widget to the user role page, so you can give each user role unique permissions:
* **Can friend others?** - Turns on/off friends feature for this user role.
* **Can friend these user roles only** - _Optional._ This setting allows you to select which user roles can become a friend. All roles are allowed if blank.
* **Friends limit** \- _Optional._ The maximum number of friends. Unlimited if 0.
Image - Settings on _wp-admin > Ultimate Member > User Roles > Edit User Role._

### Directory settings [#](#directory)
The extension can display friends stats and friend button in the members card into the members directory. You can enable these features by turning on settings **Show friends stats in member directory** and **Show friend button in member directory** on _wp-admin > Ultimate Member > Settings > Extensions > Friends._ These settings are global and influence all member directories. Use these directory settings if you need to disable friends stats or friend button for a desired member directory:
* Hide friends stats
* Hide friend button
Image - Settings on _wp-admin > Ultimate Member > Member Directories > Edit Member Directory._

### User profile [#](#features)
Members can use buttons **Add Friend**, **Respond to Friend Request**, **Cancel Friend Request**, **Unfriend** in the other member profile. The button displayed in the profile depends on the current relationship between you and the profile owner. The button is placed inside the cover photo area.
Image - The **Add Friend** button in the other member profile.

Members can also use the same buttons in the member directory.
Image - Various buttons in the member directory.
 
 
Members can view and manage their friends in the profile tab **Friends** that contains three subtabs: **My Friends, Friend Requests, Friend Requests Sent.**
Members can remove other members from their friends list. Сlick the **Unfriend** button near the name of the member in the **My Friends** subtab.
Members can reject friendship requests. Сlick the **Delete Request** button near the name of the member in the **Friend Requests** subtab.
Image - The **Friends** tab in profile.

### User account [#](#account)
#### Privacy [#](#account_privacy)
Users are given the option to choose "Friends only" for settings **Profile Privacy** and **Private Messages**.
Image - Privacy options on _Account > Privacy._

#### Notifications [#](#account_notifications)
Users are given the option to be notified by email when they get a new friend request.
Image - Email notification options on _Account > Notifications._

#### Web notifications [#](#account_webnotifications)
Members can turn on or off each real-time notification in their accounts if the extension [Real-time Notifications](https://ultimatemember.com/extensions/real-time-notifications/)
is also integrated on the site.
Image - Real-time notification options on _Account > Web notifications._

Image - Real-time notification example.

Last updated on July 5, 2023
### Related Articles
* [Friends shortcodes](/article/1520-friends-shortcodes)
No results found
---
# Friends shortcodes - Ultimate Member
Friends shortcodes
==================
[](javascript:window.print() "Print this article")
Overview
--------
This document provides instructions on how to use shortcodes of the extension [Friends](https://ultimatemember.com/extensions/friends/)
.
Ultimate Member uses WordPress shortcodes to allow users to perform certain actions as well as display forms and templates. You may use shortcodes in the posts(page) content and text widgets.
**Contents**
[\[ultimatemember\_friends\]](#ultimatemember_friends)
- Show friends list
[\[ultimatemember\_friends\_bar\]](#ultimatemember_friends_bar)
- Show friends counter
[\[ultimatemember\_friends\_online\]](#ultimatemember_friends_online)
- Show friends, who are online
[\[ultimatemember\_friend\_reqs\]](#ultimatemember_friend_reqs)
- Show members, who invited this member to be a friend
[\[ultimatemember\_friend\_reqs\_sent\]](#ultimatemember_friend_reqs_sent)
- Show members, this member invited to be a friend
Shortcodes
----------
#### \[ultimatemember\_friends\] [#](#ultimatemember_friends)
This shortcode shows the friends list.
**Attributes**
| | | | |
| --- | --- | --- | --- |
| _Key_ | _Type_ | _Default_ | _Description_ |
| user\_id | integer | Current profile ID (on profile page)
or current user ID | The user ID. |
| style | string | default | **avatars** - show lists with avatars
**default** - show lists with avatars and friend bars |
| max | integer | 11 | Number of friends to display.
**0** - show all friends |
**Example** - Display your friends.
`[ultimatemember_friends]`

**Example** - Display friends list of another member or a specific user.
`[ultimatemember_friends user_id="3263"]`

**Example** - Display other member friends list in (avatars style)
`[ultimatemember_friends user_id="3263" style="avatars"]`
#### \[ultimatemember\_friends\_bar\] [#](#ultimatemember_friends_bar)
This shortcode shows friends counter.
**Attributes**
| | | | |
| --- | --- | --- | --- |
| _Key_ | _Type_ | _Default_ | _Description_ |
| user\_id | integer | Current profile ID | The user ID. |
**Example** - Display friends counter.
`[ultimatemember_friends_bar]`

#### \[ultimatemember\_friends\_online\] [#](#ultimatemember_friends_online)
This shortcode lets you see which of your friends are currently online. It displays list of online friends. You need to install and activate the [online users extension](https://ultimatemember.com/extensions/online-users/)
for this feature to work.
**Attributes**
| | | | |
| --- | --- | --- | --- |
| _Key_ | _Type_ | _Default_ | _Description_ |
| user\_id | integer | Current profile ID (on profile page)
or current user ID | The user ID. |
| style | string | default | **avatars** - show lists with avatars
**default** - show lists with avatars and friend bars |
| max | integer | 12 | Number of friends to display.
**0** - show all friends |
**Example** - Display friends, who are online.
`[ultimatemember_friends_online]`
#### \[ultimatemember\_friend\_reqs\] [#](#ultimatemember_friend_reqs)
This shortcode displays a list of members or users who have invited you or sent friend requests.
**Attributes**
| | | | |
| --- | --- | --- | --- |
| _Key_ | _Type_ | _Default_ | _Description_ |
| user\_id | integer | Current profile ID (on profile page)
or current user ID | The user ID. |
| style | string | default | **avatars** - show lists with avatars
**default** - show lists with avatars and member bars |
| max | integer | 999 | Number of members to display. |
**Example** - Display members, who invited you to be a friend.
`[ultimatemember_friend_reqs]`
#### \[ultimatemember\_friend\_reqs\_sent\] [#](#ultimatemember_friend_reqs_sent)
This shortcode show a list of members or users to whom you have sent friend requests.
**Attributes**
| | | | |
| --- | --- | --- | --- |
| _Key_ | _Type_ | _Default_ | _Description_ |
| user\_id | integer | Current profile ID (on profile page)
or current user ID | The user ID. |
| style | string | default | **avatars** - show lists with avatars
**default** - show lists with avatars and member bars |
| max | integer | 999 | Number of members to display. |
**Example** - Display members or users, you have sent friend request to.
`[ultimatemember_friend_reqs_sent]`

Last updated on January 19, 2024
### Related Articles
* [Friends Setup](/article/249-friends-setup)
No results found
---
# Groups setup - Ultimate Member
Groups setup
============
[](javascript:window.print() "Print this article")
Overview
--------
Groups extension allows users to create and join groups around shared topics, interests, etc., and increase user interaction on your site. This document provides instructions on how to setup [Groups extension](https://ultimatemember.com/extensions/groups)
.
**Contents**
* [Settings](#settings)
* [Extensions settings](#settings_common)
* [Profile Menu settings](#settings_menu)
* [Pages settings](#settings_pages)
* [User Role settings](#user_role_settings)
* [Manage groups](#manage_groups)
* [Add a new group](#group_new)
* [A group settings](#group)
* [Settings section](#group_settings)
* [Invites settings section](#group_invites_settings)
* [Add new members section](#group_new-member)
* [Manage members section](#group_members)
* [Group page on the frontend](#frontend)
* [Notifications](#notifications)
* [Email notifications](#email_notifications)
* [Real-time notifications](#realtime_notifications)
Settings [#](#settings)
------------------------
### Extensions settings [#](#settings_common)
[](#settings_common)
Once you activate the extension, you will see the **Groups** tab on the page _wp-admin > Ultimate Member > Settings > Extensions_. On this page, you can find the following options:
* Edit Groups slug, Category slug & Tag
* Turn on/off group avatars "Show group avatars"
* Setup the number of displayed posts for the mobile/desktop view
* Setup comments order
* Setup number of initial comments/replies to display per post
Image - Settings on _wp-admin > Ultimate Member > Settings > Extensions > Groups_

### Profile Menu settings [#](#settings_menu)
The extension adds settings to the page _wp-admin > Ultimate Member > Settings > Appearance > Profile Menu_. These settings allow you to manage the "Groups" item in the profile menu:
* **Groups Tab** – Allows enabling/disabling the "Groups" item in the Profile menu.
* **Who can see Groups Tab?** – Manage access to the "Groups" tab in the Profile menu

### Pages settings [#](#settings_pages)
The extension adds settings to the page _wp-admin > Ultimate Member > Settings > General > Pages_. These settings allow you to manage required pages:
* **Groups** - Displays all public and private groups
* **My Groups** - Displays current user groups
* **Create New Group** - Displays a form to create a group

Page **Groups** contains the [\[ultimatemember\_groups\]](//docs.ultimatemember.com/article/1495-groups-shortcodes#ultimatemember_groups)
shortcode that shows a list of groups. Members can use this page to search a group, see a group info, join a group.

Page **My Groups** contains the [\[ultimatemember\_my\_groups\]](//docs.ultimatemember.com/article/1495-groups-shortcodes#ultimatemember_my_groups)
shortcode that shows a list of groups, which current member has joined.

Page **Create New Group** contains the [\[ultimatemember\_group\_new\]](//docs.ultimatemember.com/article/1495-groups-shortcodes#ultimatemember_group_new)
shortcode that gives members the opportunity to create a group. The user, who created the group, is the first group member and the group "Administrator".

The extension creates pages automatically. You can recreate pages manually if they were lost in _wp-admin > Pages_. Once pages are created, you should configure them using options on _wp-admin > Ultimate Member > Settings > General > Pages_.

User Role settings [#](#user_role_settings)
--------------------------------------------
The extension adds the **Groups** section to the user role settings. Go to _wp-admin > Ultimate Member > User Roles_, choose the user role and scroll down to see this section. You'll see these settings:
* **Turn off creation group?** - turn on this setting to deny creating groups for this role.
Image - The **Groups** section in the user role settings.

Manage groups [#](#manage_groups)
----------------------------------
The extension adds the **Groups** section to the WordPress admin menu where you can view existing groups, add a new group or edit group settings.
You can view and manage group categories on _wp-admin > Groups > Group Categories_.
You can view and manage group tags on _wp-admin > Groups > Group Tags_.
Image - The **Groups** section in the WordPress admin menu and Groups table.

### Add a new group [#](#group_new)
Click the **Add New Group** button above the Groups table to add a new group. Configure a group settings and click the **Add Group** button.
### A group settings [#](#group)
Group settings are divided into 4 main widgets: **Settings**, **Invites settings**, **Add New Members**, **Manage Members**.

#### Settings section [#](#group_settings)
* **Privacy** - set privacy settings for your group. Options:
* **Public** - Any site member can join this group. Group content and discussions are visible to any site member.
* **Public for Role** - Members with specific role(s) can join this group. Group content and discussions are visible to members with specific role(s).
* **Private** - Only members who request membership and are accepted can join the group. Group content and discussions are visible to members of the group.
* **Hidden** - Only members who are invited can join the group. Group content and discussions are visible to members of the group. This group is not listed in the groups' directory or search results.
* **Role list** - (optional, appears if "Public for Role" is chosen in the Privacy) limit access by user role.
* **Post Moderation** - enable/disable post moderation by admins or group moderators.

#### Invites settings section [#](#group_invites_settings)
* **Enable Invites feature** - enable/disable invites for the group.
* **Who can invite members to the group?** - select who can invite new group members. Options.
* All Group Members
* Group Administrators & Moderators only
* Group Administrators only
* **Enable Invites search** - enable/disable searching tool.
* **Enable Invites filters** - enable/disable filtering tool.
* **Choose field(s) to enable in search** - select fields for filtering if "Enable Invites filters" is enabled.

How it looks like on the group page:

#### Add new members section [#](#group_new-member)
You can add new members to the group by searching for registered users and clicking on the "Add member" button.
Step 1 - Search a member

Step 2 - Add a member

#### Manage members section [#](#group_members)
Manage members section allows you to manage group members:
* Change member status - Hover over the status of the member to select the following status from the drop-down menu: Pending Admin Review, Pending Member Review, Approved, Rejected, and Blocked
* Assign/change member role - Hover over the group role of the member to select the following group role from the drop-down menu: Administrator, Moderator, Member and Banned.
* Send invite or expel members from the group

Group page on the frontend [#](#frontend)
------------------------------------------
On the group page on the frontend 3 main sections are available:
* **Discussions** tab represents the main group discussion feed
* **Members** tab displays all group members
* **Send invites** tab can be used to send invites to other members
Image - A group page example.

Admin users or group moderators can access group settings on the frontend by clicking the "gear" icon on the upper right side of the group page. All group settings can be changed on the frontend by group admins or moderators.
Image - A group frontend settings example.

Notifications [#](#notifications)
----------------------------------
The extension has email notifications and real-time\* notifications.
**Note:** Real-time notifications require the extension [Ultimate Member - Real-time Notifications](https://ultimatemember.com/extensions/real-time-notifications/)
.
### Email notifications [#](#email_notifications)
Email templates:
* **Groups - Approve Member Email** - Send the user an email when the user is approved to a group
* **Groups - Join Request Email** - Send the user an email when the user has requested to join their group
* **Groups - Invite Member Email** - Send the user an email when the user has been invited to join a group
* **Groups - New post** - Send the user an email when someone posts on the group wall
* **Groups - New comment** - Send the user an email when someone comments on the group wall
The Administrator can edit email templates: enable, disable, change subject or body. Go to _wp-admin > Ultimate Member > Settings > Email_, find the needed email template, and click the button "Edit" (gear icon). You'll see email template settings. Change what you want and save changes.
Image - Screen _wp-admin > Ultimate Member > Settings > Email_.__

Each member can enable or disable email notifications **Groups - New post** and **Groups - New comment** using settings on the page _Account > Notifications_. These settings are disabled by default.

### Real-time notifications [#](#realtime_notifications)
Real-time templates:
* **Groups - Approve Member** - When my group requests have been approved
* **Groups - Join Request** - When a user requested to join their group
* **Groups - Invite Member** - When a member has been invited to join a group
* **Groups - Change Group Role** - When my group roles have been changed
Image - Real-time notification example.

Each member can enable or disable real-time notifications using settings on the page _Account > Web notifications_.

Last updated on January 15, 2024
### Related Articles
* [Groups shortcodes](/article/1495-groups-shortcodes)
No results found
---
# Ultimate Member - JobBoardWP integration - Ultimate Member
Ultimate Member - JobBoardWP integration
========================================
[](javascript:window.print() "Print this article")
### Overview
[Ultimate Member - JobBoardWP](https://ultimatemember.com/extensions/jobboardwp/)
integration is an easy-to-use and lightweight plugin that enables you to add integration between job board functionality and user profiles to your website. This document provides instructions on integrating JobBoardWP with Ultimate Member using the JobBoardWP integration extension.
> **Note**: You have to install and activate plugins JobBoardWP and Ultimate Member - JobBoardWP for the extension to work.
#### **Contents
* [Settings](#settings)
* [User Role Settings](#userrolesettings)
* [Profile Menu Settings](#profilemenusettings)
* [Social Activity Settings](#socialactivitysettings)
* [Private Messaging Settings](#privatemessagingsettings)
* [User Bookmarks Settings](#userbookmarkssettings)
* [Pages Settings](#pagessettings)
* [Configure Notifications](#configurenotifsettings)
* [Real-Time Notification](#realtimenotif)
* [Verified User Settings](#verifiedusersettings)
**
### Settings [#](#settings)
Main extension's settings are placed at the page \[Ultimate Member > Settings > Extensions >JobBoardWP\]
* Account Tab - Show or hide an account tab that shows the jobs dashboard.

The extension adds a tab to the account page for users with employer roles. By clicking on the ellipsis " **...**" symbol, you can edit, delete, mark as filled, continue submitting, and submit the jobs again from the account tab.

### User Roles settings[#](#settings)
You can enable or disable job tabs in the user's profile. User's posted jobs are displayed in the job tabs.
\[Ultimate Member > User Roles > Edit Role and see the JobBoardWP section\]

### Profile Menu settings[#](#profilemenusettings)
The extension adds settings to the page \[Ultimate Member > Settings > Appearance > Profile Menu\]. These settings allow you to manage the "Jobs Tab" in the profile menu:
* Jobs Tab – Allows enabling/disabling the "Jobs Tab" in the Profile menu.
* Who can see Jobs Tab? – Manage access to the "Jobs Tab" in the Profile menu.


### Social Activity settings[#](#socialactivitysettings)
You can enable or disable activity posts regarding jobs in wp-admin>Ultimate Member> Extension> Social Activity


_Note: Social Activity settings require the extension "[Ultimate Member - Social Activity](https://ultimatemember.com/extensions/social-activity/)
."_
### Private Messaging settings[#](#privatemessagingsettings)
Enable or disable the message button in an individual job post to directly message the job author in wp-admin> Ultimate Member> Settings> Extension> Private Messaging.


_Note: This setting requires the extension "[Ultimate Member - Private Messages](https://ultimatemember.com/extensions/private-messages/)
."_
### User Bookmarks settings[#](#userbookmarkssettings)
Users can individually bookmark a job, to enable it go to wp-admin> Ultimate Member> Settings> User Bookmarks> Enable bookmark. Select the "Jobs" from the scroll options.


Once the user bookmarked a job, they will view it in the bookmarks tab in their profile.


You can also enable bookmarks on each page select the "Pages" from the scroll options.
_Note: These settings require the extension "[Ultimate Member - User Bookmarks](https://ultimatemember.com/extensions/user-bookmarks/)
."_
### Pages settings[#](#pagessettings)
Once you install the JobBoardWP integration extension, you can edit the Jobs, Jobs Dashboard, and Post Job pages in **\[wp-admin> Pages> Edit Page\]**

These page settings allow users to enable or disable content restriction and UM User Bookmarks. Click on the checkbox to enable the settings.


### Configure notifications[#](#configurenotifsettings)
The UM- JobBoardWP integration has a real-time\* notifications.
_Note: Real-time notifications require the extension "_ [Ultimate Member - Real-time Notifications](https://ultimatemember.com/extensions/real-time-notifications/)
."
**\[wp-admin> Ultimate Member> Settings> Extensions> Notifications\]**

### Real-time notifications[#](#realtimenotif)
* 'Your job is approved' - When your job post requests have been approved.
* 'Your job is expired' - When your job posts have expired.
Each member can enable or disable real-time notifications using settings on the page \[Account > Web notifications\]

### Verified User Settings[#](#verifiedusersettings)
If you only want verified users can apply in job posts, you can enable the settings in wp-admin>Ultimate Member>Settings> Extensions>Verified user.
Only the verified user can see the **Apply for job** button when the setting is enabled.

_Note: Verified User settings require the extension "_ [Ultimate Member - Verified Users](https://ultimatemember.com/extensions/verified-users/)
."
Last updated on March 14, 2023
No results found
---
# How to debug MailChimp error - Ultimate Member
How to debug MailChimp error
============================
[](javascript:window.print() "Print this article")
Overview
--------
This document provides instructions on how to detect and debug errors that may appear when a member subscribes to the MailChimp audience using the [MailChimp extension](https://ultimatemember.com/extensions/mailchimp/)
. Please read the [MailChimp Setup](//docs.ultimatemember.com/article/82-mailchimp-setup)
first.
**Contents**
* [Debugging](#debugging)
* [Update plugins](#debug_step_010)
* [Enable requests log](#debug_step_020)
* [Verify fields merge settings](#debug_step_030)
* [Test manual update](#debug_step_040)
* [Investigate the Requests log](#debug_step_060)
* [Common MailChimp errors](#errors)
* [Invalid Resource - Your merge fields were invalid](#Your-merge-fields-were-invalid)
* [Forgotten Email Not Subscribed](#Forgotten-Email-Not-Subscribed)
* [Member In Compliance State](#Member-In-Compliance-State)
Debugging [#](#debugging)
--------------------------
#### Update plugins [#](#debug_step_010)
Update the "Ultimate Member" and "Ultimate Member - MailChimp" plugins to the latest version. You can update plugins automatically or update it manually from the archive.
Image - How to update plugin automatically

Follow instructions in the [documentation](https://wordpress.org/support/article/managing-plugins/#upload-via-wordpress-admin)
to update the plugin manually from the .zip archive.
#### Enable requests log [#](#debug_step_020)
The extension may save information about external API requests. Turn on the **Enable requests log** setting on _wp-admin > Ultimate Member > Settings > Extensions > MailChimp_ to enable this feature.
Image - How to enable the **Requests log**.

#### Verify fields merge settings [#](#debug_step_030)
The request to add/update a contact fails if fields data are wrong or incomplete. Follow recommendations in [Field type restrictions](//docs.ultimatemember.com/article/82-mailchimp-setup#field_rules)
to avoid problems.
Go to _wp-admin > Ultimate Member > MailChimp > Edit MailChimp connection_ and verify that:
* All required audience fields are merged with equal required fields in the registration form.
* The **address** audience field is not used or address data collected in the registration form are complete.
* The **drop down** and **radio buttons** audience fields are merged with proper form fields with exactly the same options (choices).
The **Merge User Meta** widget has several tools that help you to configure fields relationship and avoid mistakes:
* required fields marked by the **!** icon
* additional information about field type and choices may be seen under the **?** icon
* a **warning** appears under the field if the field merged wrong. Hover over the **?** icon to see details.
Image - The **Merge User Meta** widget in the connection settings.

Image - A warning in the **Merge User Meta** widget.

#### Test manual update [#](#debug_step_040)
Try to update a contact using the "Email Newsletters" tool in the account tab Notifications. Error message appears in if the update fails for some reason. Look at the **Requests log** to see error details.
Image - Error message in the account tab Notifications.

#### Investigate the Requests log [#](#debug_step_060)
The extension may save requests to the MailChimp server. You can overview the **Requests log** on the extension's settings page. Use the log to debug MailChimp API errors. Requests with errors have the red ERROR label. You should see the error detail after the ERROR label.
Image - An error detail in the **Requests log** on _wp-admin > Ultimate Member > Settings > Extensions > MailChimp_.

Common MailChimp errors [#](#errors)
-------------------------------------
### Invalid Resource - Your merge fields were invalid. [#](#Your-merge-fields-were-invalid)
This error appears if data sent for merge fields are incorrect or there is no value for the required field.
### Forgotten Email Not Subscribed [#](#Forgotten-Email-Not-Subscribed)
MailChimp does not allow re-subscribe permanently deleted contacts by API. That's why we don't recommend using the "Permanently delete" action on account removal. You should go to your MailChimp account and add this contact manually.
### Member In Compliance State [#](#Member-In-Compliance-State)
MailChimp adds an email address to the ignore list if a member uses the link "unsubscribe from this list" in the email footer.
Image - The unsubscribe link

This email address can't be resubscribed via API. You should see an error message if you try to add this contact using the "Email Newsletters" tool in the account tab Notifications. We can't influence this from the site. A member can resubscribe by clicking the button "Subscribe" in the email "You are now unsubscribed" that MailChimp sends after the contact is unsubscribed.
Image - The email "You are now unsubscribed"

Last updated on March 16, 2023
### Related Articles
* [MailChimp Setup](/article/82-mailchimp-setup)
No results found
---
# MailChimp Setup - Ultimate Member
MailChimp Setup
===============
[](javascript:window.print() "Print this article")
Overview
--------
This document provides instructions on how to integrate MailChimp with Ultimate Member using the [MailChimp extension](https://ultimatemember.com/extensions/mailchimp/)
.
The extension adds contacts to your MailChimp audience when users register on your website. Once you have contacts with data you can start segmenting your audience and create automations or campaigns. Read MailChimp documentation about [segmenting](https://mailchimp.com/help/getting-started-with-segments/)
, [automation](https://mailchimp.com/help/create-customer-journey/)
and [campaigns](https://mailchimp.com/help/getting-started-with-campaigns/)
if you're new to MailChimp.
**Contents**
* [Getting started](#getting-started)
* [Get the MailChimp API Key](#api_key)
* [Create an audience](#create_audience)
* [Configure settings](#settings)
* [Extension settings](#extra_settings)
* [Requests log](#requests_log)
* [User Role settings](#role_settings)
* [Create a connection](#connection)
* [Create a connection with the audience](#add_audience)
* [General connection settings](#connection_settings)
* [Configure fields](#fields)
* [Audience fields](#audience_fields)
* [Merge User Meta widget](#merge_user_meta)
* [Field type restrictions](#field_rules)
* [Configure behavior on registration](#registration_form)
* [Account features](#manage_newsletters)
* [Manual syncing](#syncing)
* [Sync from the dashboard widget](#dashboard_widget)
* [Bulk subscribe for newsletters from the Users table](#users_table_bulk_subscribe)
Getting started [#](#getting-started)
--------------------------------------
Main steps to configure the extension:
1. Go to [MailChimp](https://mailchimp.com/)
and create an account.
2. Create a MailChimp audience.
3. Copy MailChimp API key.
4. Go to your site and install the [MailChimp extension](https://ultimatemember.com/extensions/mailchimp/)
.
5. Go to _wp-admin > Ultimate Member > Settings > Extensions > MailChimp_ and paste your MailChimp API key into the field "MailChimp API Key". Save changes.
6. Go to _wp-admin > Ultimate Member > MailChimp_ and create a connection with the audience. Configure the connection.
7. Go to _wp-admin > Ultimate Member > Forms > Edit Form (register)_ and add the MailChimp field to the registration form if needed.
Get the MailChimp API Key [#](#api_key)
----------------------------------------
Follow these steps to create your MailChimp account and [get your MailChimp API key](https://mailchimp.com/help/about-api-keys/)
:
* Go to the [MailChimp website](http://mailchimp.com/)
and [create an account](https://login.mailchimp.com/signup/)
or [login](https://login.mailchimp.com/)
if you already have an account.
* Click the user icon to open the user menu then click the **Account and billing** item.
* On the account page click the **Extras** menu item then click the **API keys** subitem.
* Scroll down to the **Your API Keys** section and click the **Create A Key** button.
* Enter the **API Key Name** and click the **Generate Key** button.
* Copy your API key and click the **Done** button.
Once you have an API key, go to your website and paste it into the **MailChimp API Key** setting on _wp-admin > Ultimate Member > Settings > Extensions > MailChimp._
Image - MailChimp user menu. 
Image - **Overview** screen, the "API Keys" menu item.Image - **Extras** screen, the **Your API Keys** section.
Image - **Name New API Key** screen.
Image - **Copy New API Key** screen.
Image - The **MailChimp API Key** setting on _wp-admin > Ultimate Member > Settings > Extensions > MailChimp_.

Create an audience [#](#create_audience)
-----------------------------------------
For the integration between MailChimp and Ultimate Member, you need to [create a MailChimp audience](https://mailchimp.com/help/create-audience/)
. Please do the following:
* Click the "Audience" item in the MailChimp menu.
* On the audiences page click the "Create audience" button. MailChimp allows you to create the first audience for free. The "Create audience" button is hidden if you reached a limit of audiences allowed for your plan.
* On the create audience page fill in all the details and click save.
* You new audience will be created.
| General audience settings | **Description** |
| --- | --- |
| **Audience name** | Required |
| **Audience ID** | Generated automatically |
| **Enable double opt-in** | Optional. [See details here](//docs.ultimatemember.com/article/1588-enable-double-opt-in) |
| **Enable reCAPTCHA** | Not used by the API |
| **Default From name** | Recommended |
| **Default From email address** | Recommended |
| **Default Email subject** | Recommended |
Image - **Audience name and campaign defaults** screen, the audience settings.
Configure settings [#](#settings)
----------------------------------
### Extension settings [#](#extra_settings)
Once you activate the extension, you will see the **MailChimp** tab on the page _wp-admin > Ultimate Member > Settings > Extensions_. On this tab, you can find these settings:
| Setting | Description |
| --- | --- |
| MailChimp API Key | This field requires you to input the API Key copied from your MailChimp account. The **MailChimp API key** allows **Ultimate Member** to integrate seamlessly with **WordPress**, syncing your user data with your MailChimp audiences. This integration helps automate email marketing and user management directly within your WordPress site. |
| Account delete action | Specifies what action to take when a user account is deleted. Choose from the following options:
* **Do nothing**: the contact with the audience will not be changed.
* **Move to archive:** the contact in the audience will be archived.
* **Permanently delete:** the contact will be removed from the audience forever.
* **Unsubscribe member:** the contact in the audience will be marked as "Unsubscribed". _Recommended._
Actions "Move to archive", "Permanently delete", and "Unsubscribe member" stop mailing.
**Warning:** The "Permanently delete" action removes a contact from the audience forever. Permanently deleted users cannot be resubscribed. Don't use this if you're not sure. |
| Account unapprove action | (Optional) [See details here](//docs.ultimatemember.com/article/1588-enable-double-opt-in)
. Specifies what action to take when an account's status is unapproved or deactivated. |
| Groups and Tags view | Defines how to display **Groups** and **Tags** in the user profile field. You can choose from the following display options:
* **Checkboxes**: Displays groups and tags as checkboxes, allowing the user to select multiple options at once.
* **Multi-Select**: Allows for selecting multiple options, but displayed as a dropdown list instead of checkboxes. |
| Enable language field | Allows members to select their preferred language for receiving newsletters. When enabled, an additional option **Default language** will appear. |
| Default language | You can select the default language from the dropdown list, with **English** as the default option. This ensures members receive newsletters in their preferred language. |
| Enable requests cache | Improves performance by caching MailChimp API requests, reducing the need for repeated calls to the API. This setting must be enabled to access the **Cache timeout** option. |
| Cache timeout, s | (Optional) Specifies how long cached API requests should be stored, in seconds. The default value is **600 seconds** (10 minutes). A longer timeout reduces API calls but may delay updates to MailChimp data. |
| Enable requests log | Saves detailed information about all requests and responses sent to the MailChimp API. This feature is useful for configuring and debugging the extension. Enabling this option reveals additional settings: **Log all responses** and **Requests log**. |
| Log all responses | (Optional) Logs responses for all API requests, including successful ones. Note that responses for failed requests are always logged by default. |
| Requests log | (Optional) Displays the saved log of API requests and responses. The log includes filtering and search functionality to find specific entries. You can also clear or refresh the log as needed. |
| Blocked Email Addresses | Specify a list of email addresses and domains that you want to block from being added to the audience. Add each email or domain on a new line. Addresses listed here cannot be added to the audience, and existing contacts will be unsubscribed during the next update if automatic sync is enabled. To block an entire domain, use a wildcard format such as `*@domain.com`. |

#### Requests log [#](#requests_log)
The requests log appears if the **Enable requests log** setting is turned on. It displays the time, status, method, request path, arguments, and referrer for each request to the MailChimp API. The extension stores a response for failed requests by default. If the **Log all responses** setting is turned on, the extension stores a response for all requests.
You can find the error details in the **RESPONSE** data. This information helps to configure and debug the extension.
You can also filter and search the requests log using the following dropdown options:
* **All requests**: View all recorded requests.
* **Only requests with error**: View only the requests that encountered an error.
* **Only requests to add or update**: View requests related to adding or updating records.
Additionally, you can view important requests for a specific user by clicking **View log** in the **MailChimp** column under **wp-admin > Users**.
### User Role settings [#](#role_settings)
The extension adds settings to manage what members can edit from their accounts. Go to _wp-admin > Ultimate Member > User Roles_ and choose the user role to modify. You will see the "Edit Role" page. Scroll down to the "MailChimp" section:
* **Can manage groups?**
* **Can manage tags?**
* **Can create tags?**
Image - Settings on _wp-admin > Ultimate Member > User Roles > Edit Role._
Create a connection [#](#connection)
-------------------------------------
### Create a connection with the audience [#](#add_audience)
Follow these steps to create a connection with the audience:
* Go to _wp-admin > Ultimate Member > MailChimp_ and click the **Add New** button.
* Set the title.
* Select the MailChimp audience in the **Choose an audience** dropdown.
* Click the **Create** button.
Image - The **MailChimp connections** table on _wp-admin > Ultimate Member > MailChimp._
Image - The **Choose an audience** dropdown on _wp-admin > Ultimate Member > MailChimp > Add New._
### General connection settings [#](#connection_settings)
| **Setting** | **Description** |
| --- | --- |
| Mailing audience ID | Show MailChimp audience ID. |
| Enable this connection | Turn on or off this connection globally. |
| Enable double opt-in | Send contacts an opt-in confirmation email when they subscribe to your audience. This setting can enable the [double opt-in](//docs.ultimatemember.com/article/1588-enable-double-opt-in)
feature if it isn't enabled in the audience settings. This setting is inactive if the [double opt-in](//docs.ultimatemember.com/article/1588-enable-double-opt-in)
feature is enabled in the audience settings. |
| Who can subscribe to this audience | Select which roles can subscribe to the audience. Members who cannot subscribe to the audience won't see this audience in their accounts. |
| Automatically sync contacts | Syncs a contact on registration, profile update, or role change. |
| Default interests | _Optional._ Shown if the audience has groups. Defines group interests to automatically add a new member to these groups if the "Automatically sync contacts" option is enabled. Each group has a separate setting to select group interests. |
| Default interests for existing contacts | How to apply default interests when updating existing contacts. |
| Default tags | _Optional._ Shown if the audience has tags. Defines tags to automatically add these tags to a new member if the "Automatically sync contacts" option is enabled. |
| Default tags for existing contacts | How to apply default tags when updating existing contacts. |
| Marketing Permission | _Optional._ Shown if the audience setting "Enable GDPR fields" is enabled. |
**\* Note:** The extension adds new members to the audience after the email confirmation if the option "double opt-in" is enabled.
**\*\* Note:** The extension adds new members to the audience after approval if the option "Automatically sync contacts" is enabled and their user role is selected in the option "Who can subscribe to this audience". The extension does not add new members before approval. The extension does not add new members if their role is not selected.
Image - The **Setup audience** section on _wp-admin > Ultimate Member > MailChimp > Edit MailChimp connection._
__
### Configure fields [#](#fields)
Once you set up the connection and updated the page the **Merge User Meta** section will appear. This widget syncs form fields with audience fields.
#### Audience fields [#](#audience_fields)
The audience should be set up in a specific way to get user data from the site. You have to create audience fields first. Do the following:
* Go to audiences and select the desired audience.
* Go to _Audience > Settings > Audience fields and \*|MERGE|\* tags._
* You will notice that the form includes Email Address, First Name and Last Name. You can use these fields.
* Click the **Add A Field** button to add more fields. Select a field type and configure field's settings.
* Save Changes.
Image - **Audience fields and \*|MERGE|\* tags** screen, the audience fields.
#### Merge User Meta widget [#](#merge_user_meta)
Once you create the needed audience fields go back to the connection and refresh the page. You'll see the widget **Merge User Meta**, which syncs form fields with the audience fields. In this widget, audience fields are shown on the left and form fields are shown on the right. You should set relationships between audience fields and form fields created on your site. Click the **Update** button to save changes.
Pay attention to the required fields and choices for the "radio buttons" and "drop-down" field types. Synchronization would fail if one of the required fields is empty. Synchronization may fail if the values of the "radio buttons" or "drop-down" field type doesn't match.
The widget has tools that help you to configure field relationships and avoid mistakes:
* required fields marked by the **icon (!)**
* information about field type and choices may be seen under the **icon (?)**
* a **warning** appears under the field if the configuration is wrong
Image - The **Merge User Meta** section on _wp-admin > Ultimate Member > MailChimp > Edit MailChimp connection._
#### Field type restrictions [#](#field_rules)
The **address** field in MailChimp is a complex field that consists of several subfields. You have to fill all required subfields or disable address field. Rules for address subfields:
| | | | |
| --- | --- | --- | --- |
| _Subfield_ | _Required_ | _Recommendation_ | _Example_ |
| Street Address | Yes | Must be merged with the required text field in the registration form | 20 W 34th St |
| Address line 2 | No | Should be merged with the optional text field in the registration form | next floor |
| City | Yes | Must be merged with the required text field in the registration form | New York |
| State/Prov/Region | Depends on country | It is empty or text if there are no states in the country. It is a code of the state if the country has states. | NY |
| Postal/Zip | Yes | Must be merged with the required text field in the registration form | 10001 |
| Country | Yes | Must be merged with the required dropdown field that contains country codes | US |
MailChimp does not support **multi-select** field types. However, multi-select form fields can be synced with **text** fields, where selected options are combined into a single string, with each option separated by a comma. For example, a "Sports" field with multiple selections could be synced as "Football, Basketball, Tennis."
To target specific contacts for a mailing campaign, MailChimp uses the "Segment" feature. You can create a segment by filtering based on the values stored in the text field containing multiple options. Simply use the **"contains"** rule to match the desired values.
Image - The **Segment builder** with the **contains** rule.
The **dropdown** and **radio button** fields in MailChimp can be synced with corresponding UM form fields (Dropdown and Radio) if the form field choices match the options in the audience field. However, we do not recommend using these field types, as synchronization can break if an option is added or removed on one side but not the other. It’s better to sync Dropdown and Radio UM form fields with a **text audience field**.
To simplify [role syncing](//docs.ultimatemember.com/article/1587-how-to-sync-the-user-role)
, we've added two virtual **role** fields that can be synced with a **text** field in the audience:
* **Role slug**: Returns the role ID (e.g., "super\_editor").
* **Role title**: Returns the role title (e.g., "Super Editor").
Configure behavior on registration [#](#registration_form)
-----------------------------------------------------------
There are two ways to handle members on registration:
* **Auto** - Members are added to the audience after registration and approval if the **Automatically sync contacts** setting is enabled and their user role is selected in the **Who can subscribe to this audience** setting. A field in the registration form is non needed to use Auto mode.
* **Manual** - Add the **MailChimp** field to the registration form to allow members to sign up for newsletters manually. This field is visible in the registration form if the user role assigned on registration is selected in the **Who can subscribe to this audience** setting.
**Note:** There is no way to combine auto and manual modes together. Manual mode has a higher priority. The extension uses data from the MailChimp field if the field exists in the registration form ignoring default interests and tags.
Follow these steps to add a field to the registration form:
* Go to _wp-admin > Ultimate Member > Forms > Edit Form (Register)._
* Click the "+" icon to add the new field.
* Select the **MailChimp** field.
* Set the **title and label,** then select the **connection** from the dropdown.
* Enable additional options if you need them:
* **Checked by default** - The checkbox appears checked.
* **Manage groups** - Additional field to select groups appears below the checkbox. Default groups are used if disabled.
* **Manage tags**: An additional field to select tags appears below the checkbox. Default tags are used if disabled.
* **Manage language**: If enabled, this option allows users to select and manage their preferred language from their account form.
* **Checkbox label**: This setting allows you to customize the label text for the MailChimp checkbox field. You can modify the default label to better suit your form's needs or provide more specific instructions for users.
* Click the **Update** button to save changes. The field should appear in the form.
Image - The MailChimp field in the Form Builder on _wp-admin > Ultimate Member > Forms > Edit Form._
Image - The MailChimp field options on _wp-admin > Ultimate Member > Forms > Edit Form > Edit Field_.
### Account features [#](#manage_newsletters)
Members can manage their newsletters in the account tab Notifications. Members can subscribe or unsubscribe, and manage groups and tags (optional, depends on the role settings).
Image - The **Email Newsletters** section on _Account > Notifications.
_
An error message appears if the update fails for some reason. Follow the instructions in the article [How to debug MailChimp error](//docs.ultimatemember.com/article/1529-how-to-debug-mailchimp-error)
to fix a problem.
Image - Error message on _Account > Notifications._
Manual syncing [#](#syncing)
-----------------------------
### Sync from the dashboard widget [#](#dashboard_widget)
The plugin adds the MailChimp widget to the Ultimate Member dashboard. This widget displays statistical information and provides tools for manual bulk syncing:
#### Bulk Subscribe or Unsubscribe
This tool is used to select existing site users (by role and status) and manually subscribe (add) them to the audience or unsubscribe them. Users who were previously added to the audience will have their data updated. You can also use this tool to add or remove contacts.
**Steps:**
1. Select role and/or status and click the **"Scan now"** button. The tool searches for members matching the criteria and proceeds to the next step if members are found.
2. Select the audience and click **"Subscribe"** or **"Unsubscribe"**.
#### Update Audience Contacts
The **Update Audience Contacts** tool updates contact data (fields) in the selected audience.
* This tool does not add new contacts.
* It shows detailed results for each updated contact, including error details if a contact update fails.
Use this tool to ensure existing contact fields are up-to-date.
#### Import Users from MailChimp
This tool allows you to import users directly from your MailChimp account into your Ultimate Member site. It includes the following options:
| **Option** | **Description** |
| --- | --- |
| **Select Connection** | Choose a specific MailChimp audience to import contacts from, ensuring the correct subscribers are added or updated. |
| **Import Only "Subscribed" Contacts** | Restrict the import to MailChimp contacts with a "subscribed" status to maintain a clean and relevant user base. |
| **Update Existing Users** | Synchronize and update data for users already present on your site based on MailChimp information. |
| **Create New Users** | Add new users to your site using data from MailChimp subscribers. |
| **Run Import** | Execute the import process to sync MailChimp contacts with your site users. |
Image - The MailChimp widget on _wp-admin > Ultimate Member > Dashboard._
### Bulk subscribe for newsletters from the Users table [#](#users_table_bulk_subscribe)
The plugin adds tools for bulk Subscribe or Unsubscribe to the Users table. These tools work like bulk actions. Select the users you want to update, select a connection, and click a button.
Image - Bulk Subscribe on _wp-admin > Users_.
Last updated on January 31, 2025
### Related Articles
* [MailChimp shortcodes](/article/1583-mailchimp-shortcodes)
* [Enable double opt-in](/article/1588-enable-double-opt-in)
* [How to sync the user role](/article/1587-how-to-sync-the-user-role)
No results found
---
# MailChimp shortcodes - Ultimate Member
MailChimp shortcodes
====================
[](javascript:window.print() "Print this article")
Overview
--------
This document provides instructions on how to use shortcodes of the [MailChimp extension](https://ultimatemember.com/extensions/mailchimp/)
.
Ultimate Member uses WordPress shortcodes to allow users to perform certain actions as well as display forms and templates. You may use shortcodes in the posts(page) content and text widgets.
**Contents**
* [\[ultimatemember\_mailchimp\_subscribe\]](#ultimatemember_mailchimp_subscribe)
- Show subscribe form
* [\[ultimatemember\_mailchimp\_unsubscribe\]](#ultimatemember_mailchimp_unsubscribe)
- Show unsubscribe form
Shortcodes
----------
#### \[ultimatemember\_mailchimp\_subscribe\] [#](#ultimatemember_mailchimp_subscribe)
This shortcode used to subscribe users and guests. The shortcode renders a form on the screen. Once the form is submitted the user will be added to the audience with the status “pending”. The user has to confirm the subscription by following the instructions in the email that MailChimp automatically sends to new contacts with the status “pending”.
**Attributes:**
| | | | |
| --- | --- | --- | --- |
| _Key_ | _Type_ | _Default_ | _Description_ |
| id | integer, string | All active connections | The ID of connection, see _wp-admin > Ultimate Member > MailChimp_.
You can list several connections separated by comma. |
| fields | string | 'user\_email' | The list of fields (metakey) separated by comma. The field 'user\_email' is required. Other required fields added automatically. |
| messages | string | '' | Custom text shown before the form |
| groups | integer | 0 | Show groups select or not |
| tags | integer | 0 | Show tags select or not |
| autofill | integer | 1 | Autofill form fields with the current user data. |
| show\_checkboxes | integer | 1 | Show audience checkboxes or use hidden inputs. Hidden inputs can’t be turned off. Groups and tags can’t be used without checkboxes. |
| show\_label | integer | 1 | Show field labels or not |
| show\_placeholder | integer | 1 | Show field placeholders or not |
| show\_language | bool | Option value 'Enable language field' | Show language select or not |
**Example** - Subscribe form (full).
`[ultimatemember_mailchimp_subscribe id="34" groups="1" tags="1" show_checkboxes="1" show_label="1" show_placeholder="1",show_language="1"]`

**Example** - Subscribe form (compact).
`[ultimatemember_mailchimp_subscribe id="34" show_checkboxes="0" show_label="0"]`
#### 
#### \[ultimatemember\_mailchimp\_unsubscribe\] [#](#ultimatemember_mailchimp_unsubscribe)
This shortcode is used to unsubscribe users and guests. The shortcode renders a form on the screen. Once the form is submitted the extension sends the email “MailChimp - Newsletters unsubscribe”. The user has to confirm the unsubscription by clicking a link in the email.
**Attributes:**
| | | | |
| --- | --- | --- | --- |
| _Key_ | _Type_ | _Default_ | _Description_ |
| id | integer, string | All active connections | The ID of connection, see _wp-admin > Ultimate Member > MailChimp_.
You can list several connections separated by comma. |
| messages | string | '' | Custom text shown before the form |
| autofill | integer | 1 | Autofill form fields with the current user data. |
| show\_checkboxes | integer | 1 | Show audience checkboxes or use hidden inputs. Hidden inputs can’t be turned off. |
| show\_label | integer | 1 | Show field labels or not |
| show\_placeholder | integer | 1 | Show field placeholders or not |
**Example** - Unsubscribe form (full).
`[ultimatemember_mailchimp_unsubscribe]`

**Example** - Unsubscribe form (compact).
`[ultimatemember_mailchimp_unsubscribe show_checkboxes="0" show_label="0"]`

Last updated on January 27, 2025
### Related Articles
* [MailChimp Setup](/article/82-mailchimp-setup)
No results found
---
# How to split members into multiple audiences on registration - Ultimate Member
How to split members into multiple audiences on registration
============================================================
[](javascript:window.print() "Print this article")
This article explains how to configure registration forms and MailChimp audience connections to add new members into different audiences depending on their role or choice.
Please read the article [MailChimp Setup](//docs.ultimatemember.com/article/82-mailchimp-setup)
first to get know basic information about extension [Ultimate Member - MailChimp](https://ultimatemember.com/extensions/mailchimp/)
.
There are two ways to manage newsletter subscriptions on registration:
* Automatic audience signup requires user role to be selected on registration;
* Manual audience signup requires special checkboxes in the registration form.
Automatic audience signup
-------------------------
The simplest way to split your members is to make the registration role-specific and use roles to manage subscribers. Follow these steps:
1) Go to the page \[wp-admin > Ultimate Member > User Roles\] and create user roles. You may use existing UM user roles and role "Subscriber."

2) Go to the page \[wp-admin > Ultimate Member > MailChimp\] and create audience connections. You may use a single connection for several roles or individual connections for each role. Select the needed role(s) in the setting "Who can subscribe to this audience." Enable the option "Automatically sync contacts."

Configure additional settings - groups, tags, fields in the widget **Merge User Meta.**
3) Check up connections on the page \[wp-admin > Ultimate Member > MailChimp\]. You should see recently added connections.
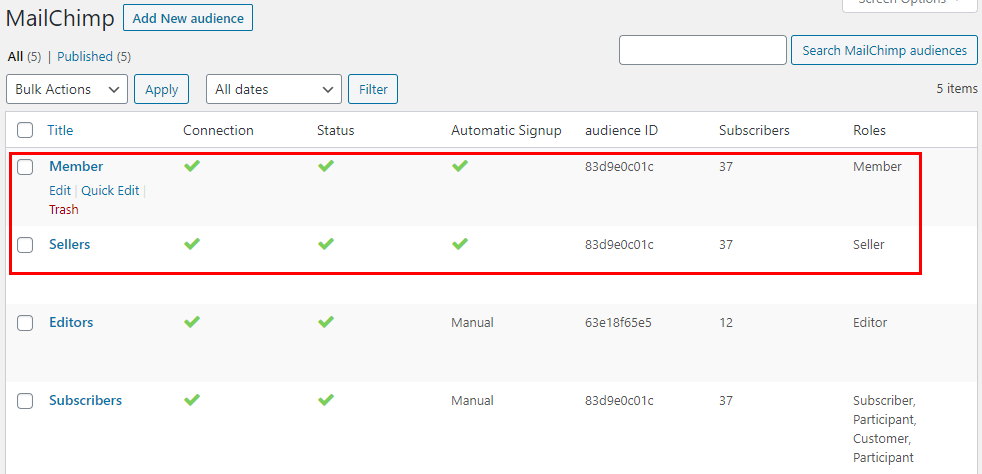
4) Add the field "Roles" to the registration form.
**Note:** This step is optional. Alternatively, you can create multiple registration forms.

Test registration form. You should see a role field.

Manual audience signup
----------------------
You may allow your members to choose to subscribe to newsletters in the registration form. Follow these steps:
1) Go to the page \[wp-admin > Ultimate Member > MailChimp\] and create audience connections. You may use a single connection for several roles or individual connections for each role. Select the needed role(s) in the setting "Who can subscribe to this audience." Disable the option "Automatically sync contacts."

Configure additional settings - groups, tags, fields in the widget Merge User Meta.
2) Check up connections on the page \[wp-admin > Ultimate Member > MailChimp\]. You should see recently added connections.
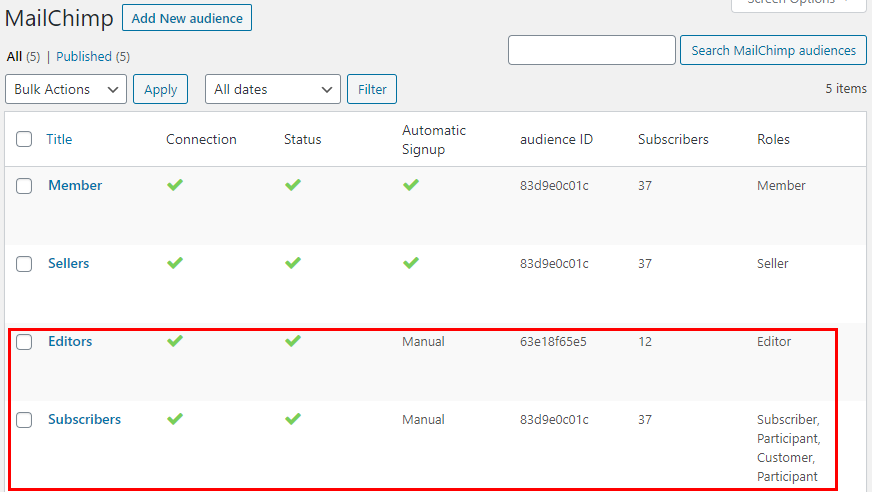
3) Add the field "MailChimp" to the registration form. Add a field for each manual connection.

Test the registration form. You should see a checkbox for each added field, "MailChimp."
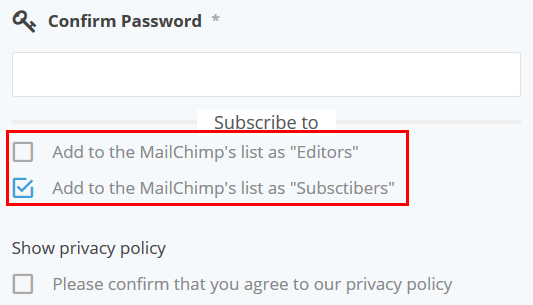
Last updated on January 4, 2022
### Related Articles
* [MailChimp Setup](/article/82-mailchimp-setup)
No results found
---
# Enable double opt-in - Ultimate Member
Enable double opt-in
====================
[](javascript:window.print() "Print this article")
This article explains how to configure the "double opt-in" feature.
### MailChimp settings
MailChimp audience has the option "Enable double opt-in". Enable this option if you want to send contacts an opt-in confirmation email before subscribe them to the audience.
You also should set options: "Default From name", "Default From email address", "Default Email subject". MailChimp uses these data in the confirmation email.
Image - Audience settings, Audience name and defaults.

### Ultimate Member settings
Ultimate Member has the option "Enable double opt-in" that can enable the "double opt-in" feature for a certain connection if it is not enabled in the audience settings.
**Note:** this option has lower priority then the setting "Enable double opt-in" in the audience settings.
Image - The connection settings on _wp-admin > Ultimate Member > MailChimp > Edit_.

#### Member approval
The extension adds a contact to the audience after the member's approval. The extension doesn't add new members if their status is pending admin or email verification until these members will be approved. This depends on the "Registration Status" role setting.
Image - User role settings on _wp-admin > Ultimate Member > User Roles > Edit_

The extension adds a contact immediately if the "Auto Approve" option is chosen.
Members should visit their mailbox and click the "Activate your Account" button in the email to approve their accounts if the "Require Email Activation" option is chosen.
Image - Account Activation email example.
Administrators should manually approve new members if the "Require Admin Review" option is chosen.
Once the member is approved the extension adds a contact and MailChimp sends the opt-in confirmation email.
Image - Opt-in confirmation email example.

* * *
Related articles:
[About Double Opt-In](https://mailchimp.com/help/about-double-opt-in/)
[Single Opt-In vs. Double Opt-In](https://mailchimp.com/help/single-opt-in-vs-double-opt-in/)
Last updated on November 25, 2024
### Related Articles
* [MailChimp Setup](/article/82-mailchimp-setup)
No results found
---
# Groups shortcodes - Ultimate Member
Groups shortcodes
=================
[](javascript:window.print() "Print this article")
Overview
--------
This document provides instructions on how to use shortcodes of the extension [Groups](https://ultimatemember.com/extensions/groups/)
.
Ultimate Member uses WordPress shortcodes to allow users to perform certain actions as well as display forms and templates. You may use shortcodes in the posts(page) content and text widgets.
**Contents**
[\[ultimatemember\_groups\]](#ultimatemember_groups)
- Show "Groups" page
[\[ultimatemember\_my\_groups\]](#ultimatemember_my_groups)
- Show current user groups
[\[ultimatemember\_groups\_profile\_list\]](#ultimatemember_groups_profile_list)
- Show profile user groups
[\[ultimatemember\_group\_single\]](#ultimatemember_group_single)
- Show single group page
[\[ultimatemember\_group\_discussion\_activity\]](#ultimatemember_group_discussion_activity)
- Show Discussion
[\[ultimatemember\_group\_discussion\_wall\]](#ultimatemember_group_discussion_wall)
- Show Discussion Wall
[\[ultimatemember\_group\_invite\_list\]](#ultimatemember_group_invite_list)
- Show group Invite List
[\[ultimatemember\_group\_members\]](#ultimatemember_group_members)
- Show a list of the group members
[\[ultimatemember\_group\_new\]](#ultimatemember_group_new)
- Show a form to create or edit group
[\[ultimatemember\_group\_comments\]](#ultimatemember_group_comments)
- Show a block, that contains posts with the latest comments
Shortcodes
----------
#### \[ultimatemember\_groups\] [#](#ultimatemember_groups)
This shortcode shows all groups with a search and filters. This is the default content for the **Groups** page.
**Attributes**
| | | | |
| --- | --- | --- | --- |
| _Key_ | _Type_ | _Default_ | _Description_ |
| avatar\_size | string | 'default' | Group image size. |
| category | integer | 0 | You can get the the category ID from the URL of the page "Edit Group Category". It is the parameter "tag\_ID". |
| groups\_per\_page | integer | 10 | A number of posts displayed and loaded at once on the desktop device. |
| groups\_per\_page\_mobile | integer | 10 | A number of posts displayed and loaded at once on the mobile device. |
| privacy | string | 'all' | Restrict posts to show. |
| show\_actions | bool | 1 | Turn on/off actions menu. |
| show\_author | bool | 0 | Turn on/off an author. |
| show\_pagination | bool | 1 | Turn on/off pagination. |
| show\_search\_form | bool | 1 | Turn on/off searching. |
| show\_search\_categories | bool | 1 | Turn on/off searching by a category. |
| show\_search\_tags | bool | 1 | Turn on/off searching by a tag. |
| show\_total\_groups\_count | bool | 1 | Turn on/off a counter. |
| show\_with\_greater\_than | integer | 0 | |
| show\_with\_less\_than | integer | 0 | |
| sort | string | 'newest\_groups' | Sorting. Options: 'date\_asc', 'date\_desc', 'title\_asc', 'title\_desc', 'members\_asc', 'members\_desc', 'activity\_asc', 'activity\_desc'. |
**Example** - Display groups for a particular category.
`[ultimatemember_groups category="55" show_search_categories="0"]`
**Example** - Display all groups.
`[ultimatemember_groups]`

#### \[ultimatemember\_my\_groups\] [#](#ultimatemember_my_groups)
This shortcode shows groups a current user joined. This is the default content for the **My Groups** page.
**Attributes**
| | | | |
| --- | --- | --- | --- |
| _Key_ | _Type_ | _Default_ | _Description_ |
| avatar\_size | string | 'default' | Group image size. |
| category | integer | 0 | You can get the the category ID from the URL of the page "Edit Group Category". It is the parameter "tag\_ID". |
| groups\_per\_page | integer | 10 | A number of posts displayed and loaded at once on the desktop device. |
| groups\_per\_page\_mobile | integer | 10 | A number of posts displayed and loaded at once on the mobile device. |
| own\_groups | integer | 1 | Show only own groups. |
| privacy | string | 'all' | Restrict posts to show. |
| show\_actions | bool | 1 | Turn on/off actions menu. |
| show\_pagination | bool | 1 | Turn on/off pagination. |
| show\_search\_form | bool | 1 | Turn on/off searching. |
| show\_search\_categories | bool | 1 | Turn on/off searching by a category. |
| show\_search\_tags | bool | 1 | Turn on/off searching by a tag. |
| show\_total\_groups\_count | bool | 1 | Turn on/off a counter. |
| show\_with\_greater\_than | integer | 0 | |
| show\_with\_less\_than | integer | 0 | |
| sort | string | 'newest\_groups' | Sorting. Options: 'date\_asc', 'date\_desc', 'title\_asc', 'title\_desc', 'members\_asc', 'members\_desc', 'activity\_asc', 'activity\_desc'. |
**Example** - Display your groups.
`[ultimatemember_my_groups]`

#### \[ultimatemember\_groups\_profile\_list\] [#](#ultimatemember_groups_profile_list)
This shortcode shows groups a current user joined or invited. This is the default content for the **Groups** profile tab.
**Attributes**
| | | | |
| --- | --- | --- | --- |
| _Key_ | _Type_ | _Default_ | _Description_ |
| avatar\_size | string | 'default' | Group image size. |
| category | integer | 0 | You can get the the category ID from the URL of the page "Edit Group Category". It is the parameter "tag\_ID". |
| groups\_per\_page | integer | 10 | A number of posts displayed and loaded at once on the desktop device. |
| groups\_per\_page\_mobile | integer | 10 | A number of posts displayed and loaded at once on the mobile device. |
| own\_groups | string | '' | Show only own groups. |
| privacy | string | 'all' | Restrict posts to show. |
| show\_actions | bool | 1 | Turn on/off actions menu. |
| show\_pagination | bool | 1 | Turn on/off pagination. |
| show\_search\_form | bool | 1 | Turn on/off searching. |
| show\_search\_categories | bool | 1 | Turn on/off searching by a category. |
| show\_search\_tags | bool | 1 | Turn on/off searching by a tag. |
| show\_total\_groups\_count | bool | 0 | Turn on/off a counter. |
| show\_with\_greater\_than | integer | 0 | |
| show\_with\_less\_than | integer | 0 | |
| sort | string | 'newest\_groups' | Sorting. Options: 'date\_asc', 'date\_desc', 'title\_asc', 'title\_desc', 'members\_asc', 'members\_desc', 'activity\_asc', 'activity\_desc'. |
**Example** - Display your groups and groups you are invited to.
`[ultimatemember_groups_profile_list]`

#### \[ultimatemember\_group\_single\] [#](#ultimatemember_group_single)
This shortcode shows a single group page. This is the default content for the **Group** page.
**Attributes**
| | | | |
| --- | --- | --- | --- |
| _Key_ | _Type_ | _Default_ | _Description_ |
| group\_id | integer | current group ID OR 0 | The group ID |
| avatar\_size | string | '' | Group image size. |
| show\_actions | bool | 1 | Turn on/off actions menu. |
| show\_author | bool | 1 | Turn on/off an author. |
**Example** - Display a group.
`[ultimatemember_group_single group_id="309"]`

#### \[ultimatemember\_group\_discussion\_activity\] [#](#ultimatemember_group_discussion_activity)
This shortcode shows a single group discussion - posts and comments.
**Attributes**
| | | | |
| --- | --- | --- | --- |
| _Key_ | _Type_ | _Default_ | _Description_ |
| group\_id | integer | current group ID OR 0 | The group ID |
| user\_id | integer | current user ID | The user ID |
| hashtag | string | 'hashtag' request parameter or empty | The hashtag |
| wall\_post | integer | 'group\_post' request parameter or empty | The post ID |
| template | string | 'activity' | |
| mode | string | 'activity' | |
| form\_id | string | 'um\_group\_id' | |
| user\_wall | integer | 0 | |
**Example** - Display a group discussion.
`[ultimatemember_group_discussion_activity group_id="309"]`

#### \[ultimatemember\_group\_discussion\_wall\] [#](#ultimatemember_group_discussion_wall)
This shortcode shows a group discussion wall - posts and comments.
**Attributes**
| | | | |
| --- | --- | --- | --- |
| _Key_ | _Type_ | _Default_ | _Description_ |
| group\_id | integer | current group ID OR 0 | The group ID |
| user\_id | integer | current user ID | The user ID |
| hashtag | string | 'hashtag' request parameter or empty | The hashtag |
| wall\_post | integer | 'group\_post' request parameter or empty | The post ID |
| user\_wall | integer | 1 | |
**Example** - Display a group discussion.
`[ultimatemember_group_discussion_wall group_id="309"]`

#### \[ultimatemember\_group\_invite\_list\] [#](ultimatemember_group_invite_list)
This shortcode shows a single group invites list.
**Attributes**
| | | | |
| --- | --- | --- | --- |
| _Key_ | _Type_ | _Default_ | _Description_ |
| group\_id | integer | current group ID OR 0 | The group ID |
**Example** - Display a group invites list.
`[ultimatemember_group_invite_list group_id="309"]`

#### \[ultimatemember\_group\_members\] [#](#ultimatemember_group_members)
This shortcode shows a single group members list.
**Attributes**
| | | | |
| --- | --- | --- | --- |
| _Key_ | _Type_ | _Default_ | _Description_ |
| group\_id | integer | 0 | The group ID |
**Example** - Display a group members.
`[ultimatemember_group_members group_id="309"]`

#### \[ultimatemember\_group\_new\] [#](#ultimatemember_group_new)
This shortcode shows a form to create a group. This is the default content for the **Create Group** page.
**Example** - Display the Create Group form.
`[ultimatemember_group_new]`

#### \[ultimatemember\_group\_comments\] [#](#ultimatemember_group_comments)
This shortcode shows a block that contains posts with the latest comments.
**Attributes**
| | | | |
| --- | --- | --- | --- |
| _Key_ | _Type_ | _Default_ | _Description_ |
| numberposts | integer | 5 | A number of posts to display |
| order | string | 'DESC' | Sorting. Options: 'ASC', 'DESC'. |
| orderby | string | \`c\`.\`comment\_date\` | A database column to sort by. |
**Example** - Display posts with the latest comments.
`[ultimatemember_group_comments]`

Last updated on July 15, 2023
### Related Articles
* [Groups setup](/article/1427-groups-setup)
No results found
---
# How to sync the user role - Ultimate Member
How to sync the user role
=========================
[](javascript:window.print() "Print this article")
This article explains how to add information about user role to the audience contacts.
**Problem**
There are difficulties in syncing role fields with the audience field:
* Field types "Roles (Dropdown)" and "Roles (Radio)" can work with user roles created by Ultimate Member (these roles have prefix "um\_" in the role ID) and predefined role "Subscriber". Any other role will be skipped.
* Field types "Roles (Dropdown)" and "Roles (Radio)" are arrays. Syncing may not work if options in the form field don't match options in the audience field.
**Solution**
We added two virtual fields to make role syncing easier. These fields can be synced with a simple text field in the audience:
* Role slug - returns the role ID. Example: "super\_editor"
* Role title - returns the role title. Example: "Super Editor"
We recommend you create a text field for the role in the audience and use the tool "Merge User Meta" to link this audience field with the site field "Role title".
**Examples**
Image 1 - Audience fields

Image 2 - The tool "Merge User Meta"

Last updated on November 17, 2021
### Related Articles
* [MailChimp Setup](/article/82-mailchimp-setup)
No results found
---
# Notices Setup - Ultimate Member
Notices Setup
=============
[](javascript:window.print() "Print this article")
Overview
--------
This document provides instructions on how to set up the [Notices](https://ultimatemember.com/extensions/notices/)
extension and add notices to your site using this extension. These conditional notices may be used to alert users to important information or let them know about promotions or new features.
**Contents**
* [Installing an Extension](#installing)
* [Settings](#settings)
* [Creating a notice](#create_notice)
* [Options](#options)
* [Footer rules](#footer_rules)
* [Styling](#styling)
* [Call to action](#cta)
* [Shortcode](#shortcode)
* [Cookies & Flush](#flush)
### Installing an Extension [#](#installing)
You can download the extension via your account on our website. If you have made an individual extension purchase you can download the extension via the download tab on your [account](https://ultimatemember.com/account/)
page or if you have purchased the pass you can download the extensions via the [downloads](https://ultimatemember.com/downloads/)
page. Once the extension is downloaded you should install and activate it using the WordPress plugin installer on _wp-admin > Plugins_. Read the article [Installing an Extension](//docs.ultimatemember.com/article/27-installing-an-extension)
for details.
### Settings [#](#settings)
Once you activate the extension, you will see the **Notices** tab in _wp-admin > Ultimate Member > Settings > Extensions_.
On this page, you'll find the "Notice Position in Footer" option that sets the position of footer notices. You can select to show footer notices on the left or right. This is a global option and applies to all notices.

### Creating a notice [#](#create_notice)
Navigate to **_wp-admin > Ultimate Member > Notices_** to see existing notices.
Click the **"Add New Notice"** button to create a new notice. Give the notice a title and enter the text you want to show in the notice.
Image - The new notice title and text on _wp-admin > Ultimate Member > Notices > Add New Notice
_

**Note:** Make sure to fill the content field. Empty notice content is not valid, the post will not be published but saved as a draft.

Once the title and text are entered, you can customize the conditions to display and view a notice using the settings below:
#### Options [#](#options)
* **Allow this notice to appear in footer** – All notices have to appear in the footer by default. If you turn this option off, the notice will not appear in the footer, and you will need to use the shortcode to add it to your site.
* **Display this notice to logged out users** – This option allows you to decide whether or not logged-out users can see the notice.
* **Display this notice to logged in users** – This option allows you to decide whether or not logged-in users can see the notice.
* **Show only to certain user(s)** – _Optional._ This option allows you to choose specific user/s from a multi select drop-down list of user IDs or usernames to display the notice to.
* **Which user roles can see this notice** – _Optional._This option allows you to decide which user roles can see the notice. This option becomes hidden if you choose a specific user from the "Show only to certain user(s)" selection.
* **Show If the user did not** – _Optional._This option allows you to show the notice to logged-in users whose profiles don't contain required information. Choices: "Uploaded a profile photo," "Uploaded a cover photo", "Other" (you must paste the _meta\_key_ for the field you need into the option below). Select "--" (default) to disable this condition.
* **Show If the user did not fill that metakey** –This option becomes accessible when you choose **"Other"** from the **"Show If the user did not"** option. It enables you to display the notice to users who have not completed a specific field. You are required to fill this option with the corresponding metakey.
**Note:** The option "_Show If the user did not fill that meta key_" is required if the option "_Show If the user did not_" is set to "Other."
#### Footer rules [#](#footer_rules)
* **Show everywhere on website** – This option allows you to display the footer notice across your entire website. If enabled, other footer rules options are hidden.
* **Show on specific URLs only** – This option allows you to only show the footer notice on specific URLs. If enabled, it hides the other footer rules options below; however, the "Extra allowed URLs (one per line)" field remains visible, allowing you to paste URLs into its text area (1 URL per line).
* **Show on Homepage** – This option allows you to decide whether or not the notice is shown on your site's homepage.
* **Show on Posts** – This option allows you to decide whether or not to show the notice on posts.
* **Show on Pages** –This option allows you to decide whether or not to show the notice on pages. If you want to show the notice to only a specific page, disable this option and add the page URL in the Extra allowed URLs option.
* **Show on Custom Post Types** – This option allows you to decide whether or not to show the notice on custom post types. This option becomes accessible or appears only when a plugin with a custom post type is activated.
* **Choose Post Types\*** – This option appears only if Show on Custom Post Types is enabled. You're required to select from this option; it displays the selection list of the custom post types available.
* **Extra allowed URLs one per line** – This options allow you add URLs of the other specific pages you want to show the notice. (1 URL per line)
**Note:** If "Show on Homepage" is disabled, but you've entered your **homepage URL** in the text area field of the "Extra allowed URLs (one per line)" option, _**the notice should be visible.**_

#### Styling [#](#styling)
The styling section allows you to customize the appearance of the notice, including colors, size, and adding an icon to the notice.

#### CTA (Call to action) [#](#cta)
* **Enable Call to Action button** – If you want to show a button in the notice, you can turn it on with this option. If turned on, you'll see additional options to customize a button:
* Button Text
* Button URL
* Button Background Color
* Button Text Color

### Shortcode [#](#shortcode)
Every notice comes with its shortcode, which you can use to show the notice anywhere on your site. Notices can appear as both a footer notice and a shortcode notice, or you can turn on the footer notice so that the notice is only used as a shortcode. If you have a notice as both a shortcode and a footer notice, the footer notice will not appear on the same page where the shortcode is added (this is to stop the same notice from appearing twice on the same page).
**Example:**
`[ultimatemember_notice id="123"]`
###

Cookies & Flush [#](#flush)
To stop the notices appearing to users after they have closed the notice, the extension will remember using cookies for logged-out users and the user id for logged-in users. Each notice can be flushed, which means that the notice will appear again for logged-in users who closed the notice. However, the flush function only works for logged-in users. For logged-out users to see the notice again, they must delete their cookies.
Last updated on October 11, 2023
No results found
---
# Online Users - Profile Page & Member Directory Setup - Ultimate Member
Online Users - Profile Page & Member Directory Setup
====================================================
[](javascript:window.print() "Print this article")
Overview
--------
This document provides instructions for setting up the Online Users plugin on the user's profile page and Member Directory using Ultimate Member. This extension enables the display of a user's online status and last login information on their profile page, along with a green circle indicator next to their name to signify their online status. Users can also enable or disable their online status using this extension.
### Setup in Profile Page
1. Navigate to `wp-admin > Ultimate Member > Forms > Add or Edit a Profile Form`.

2. Click on the **plus "+" sign** button to add a new field to the form builder.

3. In the Fields Manager window, select **"Online Status"** from the predefined fields.

4. Navigate to the **User Meta** section and add a new field by clicking the **"Add New Field"** button. From the drop-down menu, select **"Online Status."**
5. Cick on the **"Update"** or **"Save Changes"** button to save the changes to the profile form.

6. You can now see the green circle next to the user's profile name and the online status in field indicating their online status, on the profile page. 
### Privacy Setup
Users can manage their online status privacy settings from the privacy tab on their account page.

### Setup in Member Directory
1. To configure the display options for online status in the member directory, navigate to `wp-admin > Ultimate Member > Settings > Extensions > Online`.
2. To enable the display of online status in the member directory, check the box labeled **"Show online stats in member directory."**
3. After checking the box, save the changes to apply the settings.

4. You can now observe a green circle adjacent to the user's profile photo within their profile card in the Member Directory, signifying their online status.
Last updated on February 23, 2024
No results found
---
# Private content setup - Ultimate Member
Private content setup
=====================
[](javascript:window.print() "Print this article")
Overview
--------
This document provides instructions on how to set up the [Private content extension](https://ultimatemember.com/extensions/private-content/)
. This extension provides logged-in users with content that only they can access and view. Private content can be added by the website admins. Members can see their private content in the profile tab "Private Content".
> **Note:** This extension displays unique content for each member. We recommend using the extension "[Ultimate Member - Profile tabs](https://ultimatemember.com/extensions/profile-tabs/)
> " to create a profile tab that displays common content for all members.
**Contents**
* [Settings](#settings)
* [Extension's settings](#settings_extension)
* [Profile Menu settings](#settings_menu)
* [How to add private content](#add_content)
* [Add private content for user](#add_content_user)
* [Add private content for user role](#add_content_user_role)
* [View private content](#view_content)
* [Shortcode](#shortcode)
Settings [#](#settings)
------------------------
### Extension's settings [#](#settings_extension)
Once you activate the Private content extension, you will see the tab "Private content" on _wp-admin > Ultimate Member > Settings > Extensions_. On this page, you can find the following settings:
* **Generate pages** - this option generates a private content posts for all existing users.
When you click on the "Generate pages for existing users" button, a message below appears that it was generated successfully.

* **Generate pages for user roles** - this option generates a private content posts for all existing user roles. A role-specific private content is displayed to all users who have a specific role.
* **Private Content Tab Title** - change the tab's title in the profile menu. The default Tab title is Private Content.
* **Private Content Tab Icon** - change the tab's icon in the profile menu.
* **Private Content Tab Order** - choose the order in which content is displayed - "User private content first" or "Role private content first". If the user has multiple roles - the order will be determined by role priority.
* **Predefined content template** - Use this setting to create similar private content for all users. This template is used as a pattern in the Private Content editor. The extension does not apply the predefined content template automatically. The administrator has to edit and save the content for every user manually.
The content added in the setting "Predefined content template" auto-fills the content editor on the **Edit Private Content** page for each user for whom no individual private content has been created yet. See image in the [Add private content](#add_content)
section.

Image - Settings on _wp-admin > Ultimate Member > Settings > Extensions > Private Content_.

### Profile Menu settings [#](#settings_menu)
The extension adds a setting to the page _Ultimate Member > Settings > Appearance > Profile Menu_. This setting allows you to manage the "Private Content" item in the profile menu:
* **Private Content Tab** – Allows enabling/disabling the "Private Content" item in the Profile menu.

> **Note:** The profile tab "Private Content" is visible for the profile owner and administrators. Other members can't see this tab. The tab is hidden if there is no content for the current member. _The content is unique for each member._
How to add private content [#](#add_content)
---------------------------------------------
### Add private content for user [#](#add_content_user)
This content is unique and is displayed to one user. Administrators can add private content to any user. Go to _wp-admin > Users > All Users_ and click the **Private Content** link displayed under the user name on hover.
Image - The **Users** table.

The **Private Content** link will redirect you to the **Edit Private Content** page where you can add and edit users' private content. The private content page supports the standard WordPress editor and can be used for media or text. Click the **Update** button to save changes.
Image - The **Edit Private Content** page.

Image - The **Edit Private Content** page filled with the predefined content.

### Add private content for user role [#](#add_content_user_role)
This content is displayed to all users who have a specific role. Administrators can add private content to any user role. Go to _wp-admin > Ultimate Member > User Roles_ and click the **Private Content** link displayed under the user role name on hover.
Image - The **User Roles** table.

The **Private Content** link will navigate you to the **Edit Private Content** page where you can add and edit private content. The private content page supports the standard WordPress editor and can be used for media or text. Click the **Update** button to save changes.
Image - The **Edit Private Content** page.

View private content [#](#view_content)
----------------------------------------
Go to the site and log in as the user for whom the private content was created. Check that the private content tab is displayed with the title and added private content.

Shortcode [#](#shortcode)
--------------------------
#### \[um\_private\_content\]
This shortcode can display private content anywhere you want.
Image - How to add shortcode to the page content.

Last updated on September 23, 2023
### Related Articles
* [Profile Tabs Setup](/article/1547-profile-tabs-setup)
No results found
---
# Message Notification Icon - Ultimate Member
Message Notification Icon
=========================
[](javascript:window.print() "Print this article")
Private messages extension has its own unread message system where you can add {new\_messages} tag to a nav menu item which will then show the number of unread messages in the nav menu.
Go to **wp-admin> Appearance> Menus**
1. Select a menu to edit or you can create a new menu.

2. Select the **Custom Links** from the Add Menu Items.
3. Copy the URL of the private messages tab in the user's profile page and remove the part of the URL where the username is. Then, paste it into the **Custom Links URL.** Click the **Add to Menu** button.

4. In the navigation label, change the menu item to **Messages {new\_messages}.** You can also customize who can see the menu
****
5. Click on the **Save Menu** button to update your menu.

Last updated on March 14, 2023
No results found
---
# Online Users - Sidebar Widget Set Up - Ultimate Member
Online Users - Sidebar Widget Set Up
====================================
[](javascript:window.print() "Print this article")
Overview
--------
The plugin allows you to add an online users widget in a sidebar or/and footer. This document will provide instructions on how to set up the Online Users extension in Sidebar Widget or footer.
**Setup
**
------------
Go to **wp-admin> Appearance> Widgets> Profile Sidebar.** Click on the plus"+" button icon to add a block. Search for the ultimate member - online users and click on it to select.

Once the um - online users widget is selected you can now set the **Title** and the maximum number of users in the first view. You have an option to show all user roles or select to show one role only.

When the setup is done, click on the **update** button to save the changes.

Last updated on January 27, 2022
### Related Articles
* [Online Users Setup](/article/80-online-users-setup)
* [Online Users - Profile Page & Member Directory Setup](/article/1684-online-users---profile-page-member-directory-setup)
No results found
---
# Profile Completeness - Hooks - Ultimate Member
Profile Completeness - Hooks
============================
[](javascript:window.print() "Print this article")
Developers can use these hooks yo customize the [Profile Completeness](https://ultimatemember.com/extensions/profile-completeness/)
extension.
* Use a hook **um\_profile\_completeness\_complete\_profile\_redirect** to customize redirection after the profile is completed in the widget _"Ultimate Member - Complete your Profile"_.
* * *
See examples below. You can add a code snippet to the _functions.php_ file in the active theme directory. Skip the opening _php_ tag.
**Example 01** [#](#example01)
- Customize redirection after the profile is completed
Last updated on November 18, 2022
### Related Articles
* [Profile Completeness Setup](/article/189-profile-completeness-setup)
No results found
---
# Profile Tabs Setup - Ultimate Member
Profile Tabs Setup
==================
[](javascript:window.print() "Print this article")
This document provides instructions on how to configure and use the extension [Profile tabs](https://ultimatemember.com/extensions/profile-tabs/)
that adds custom tabs to the profile.
Installing & activating [#](#installing)
-----------------------------------------
To add the Profile Tabs extension to your site please do the following:
1. Download the plugin zip folder from [here](https://ultimatemember.com/extensions/profile-tabs/)
.
2. Install the plugin by uploading it to your site by going to _wp-admin > Plugins > Add new > Upload plugin_.
3. On the upload plugin page click on the “choose file” button and select the Profile Tabs zip folder from your computer.
4. Once the file **um-profile-tabs.zip** appears on the screen click the “Install now” button to install the plugin.
5. Wait until the “Plugin installed successfully” message appears.
6. Click the “Activate plugin” link to complete the activation.
Custom profile tabs[#](#custom-profile-tabs)
---------------------------------------------
### Profile Tabs list [#](#profile-tabs-list)
Navigate to the page _wp-admin > Ultimate Member > Profile Tabs_ to see existing custom profile tabs.
Image - The **Profile Tabs** table

### Create custom profile tab [#](#create-custom-tab)
Click the **Add New** button on _wp-admin > Ultimate Member > Profile Tabs_ to create a new profile tab.
#### Profile tab settings [#](#profile-tab-settings)
When creating or editing tabs, you have the opportunity to change the following settings:

* **Title** - Set the title of the custom tab (profile menu item).
* **Content** - Set the content of the custom tab. You can put here text, HTML, and shortcodes (except account shortcode).
* **Display Settings:**
* **Show on these roles profiles** - Select user roles, in whose profiles you want to display the tab. If empty, the tab is visible for all roles in their profiles.
* **Show on these profiles forms** - Select the profile forms in which you want to display the tab. If empty, the tab is visible for all profiles.
* **Customize this tab:**
* **Icon** - Allows you to change the tab icon.
* **Link type** - Allows you to set an external link for the profile tab. There are two types of tab links:
* **Internal with a slug** (classic case)
* **External with a link** with `target="_blank"` attribute and **Remote Link** option to specify the external link.
* **Slug** \- Allows you to customize the internal profile tab slug.
* **Pre-defined content:**
* **Custom Profile Form** - This allows you to display additional profile forms in the tab.
#### Slug [#](#slug)
The **Slug** setting defines what you'll see in the `profiletab` parameter of the tab URL.

#### Custom Profile Form [#](#embed-form)
The **Custom Profile Form** setting can be used to embed additional profile form to the tab. See also [Profile tab with a form inside](//docs.ultimatemember.com/article/1584-profile-tab-with-a-form-inside)
.
Image - How to create profile tab with embedded additional form.

#### Profile Tab Content [#](#placeholders)
You can use placeholders to show dynamic content at the User Profile custom tab.
* **{profile\_id}** - User Profile ID
* **{first\_name}** - First Name
* **{last\_name}** - Last Name
* **{user\_email}** - User Email
* **{display\_name}** - Display Name
Customize tabs visibility, display order, titles [#](#profile-menu)
--------------------------------------------------------------------
The extension adds visibility settings for custom profile tabs and the **Profile Tabs Order** tool to the screen _wp-admin > Ultimate Member > Settings > Appearance > Profile Menu._
You can customize the custom tabs visibility. You can set the custom tab as the default tab.
You can use the **Profile Tabs Order** tool to edit the tabs display order and change predefined profile tabs titles. Custom profile tabs titles are defined by the **Title** field in the tab settings and can't be changed.
Image - Settings on the screen _wp-admin > Ultimate Member > Settings > Appearance > Profile Menu_

The **Profile Tabs Order** tool overrides predefined tab titles. This may be undesirable when using multilingual. Use a code snippet below to disable this feature and use titles from language files. Just add this code to the _functions.php_ file in the active theme.
if ( defined( 'um\_profile\_tabs\_version' ) ) {
remove\_filter( 'um\_user\_profile\_tabs', array( UM()->Profile\_Tabs()->profile(), 'profile\_tabs\_titles' ), 9999999 );
}
Last updated on January 23, 2024
### Related Articles
* [Profile tab with a form inside](/article/1584-profile-tab-with-a-form-inside)
* [Profile Tab with CF7 form inside](/article/1577-profile-tab-with-cf7-form-inside)
No results found
---
# Private Messages Setup - Ultimate Member
Private Messages Setup
======================
[](javascript:window.print() "Print this article")
This document provides instructions on how to set up the [Private Messages](https://ultimatemember.com/extensions/private-messages/)
extension. This extension adds a private messaging system to your site and allow users to privately message each other.
**Contents**
* [Settings](#settings)
* [Extension's settings](#settings_common)
* [Profile Menu settings](#settings_menu)
* [User Role settings](#user_role)
* [Member Directories](#settings_directory)
* [User profile](#profile)
* [User account](#account)
* [Privacy](#account_privacy)
* [Notifications](#account_notifications)
* [Web notifications](#account_web_notifications)
* [Shortcodes and menu patterns](#shortcode)
* [\[ultimatemember\_message\_button\]](#ultimatemember_message_button)
* [\[ultimatemember\_message\_count\]](#ultimatemember_message_count)
* [\[ultimatemember\_messages\]](#ultimatemember_messages)
Settings [#](#settings)
------------------------
### Extension's settings [#](#settings_common)
When the extension Private Messages is activated, it adds the **Private Messaging** tab to the page _wp-admin >_ _Ultimate Member > Settings > Extensions_. In this tab you should see the following options:
* **Show messages button in member directory -** Enable/disable buttons "Message" on the Members page. Note: "Message" buttons can be disabled for a certain directory using the "Hide message button in the directory" option.
* **Show unread messages first -** Show conversation with unread messages first.
* **Hide a "Download Chats History" link** \- Enable/disable the download history in the messages profile tab.
* **Message character limit** **-** You can set the maximum number of characters allowed in each conversation reply.
* **Block users from sending/receiving messages -** You can add user IDs that cannot send or received messages on the site. Use a comma to separate the list.
* **Primary color -** You can also select the color of the message box outline, links, and send message button.
* **How often do you want the AJAX refresh conversation (in seconds) -** timeout for checking new messages. Too small value may slow down the site.
* **Send email notifications if user did not login for -** You can set the last log-in time period to send email notifications about new messages if the user's last login time exceeds that period.
* **Send email notifications If user didn't read message for \[n\] hours** - Send email notifications about the unread messages if the user didn't read it during that period.
* **Send email notifications not more then \[m\] times** - Email notifications about unread messages will be sent every \[n\] hour but no more than \[m\] times.
* **Enable encryption** - Encrypts messages in the database. This feature requires the [Sodium](https://www.php.net/manual/en/book.sodium.php)
PHP extension to be installed. The default key is a hash from the NONCE\_KEY constant. Use the UM\_MESSAGING\_KEY constant to define a custom 256-bit key.
* **Show messages button in individual job post** \- (optional, appears if the [JobBoardWP](https://ultimatemember.com/extensions/jobboardwp/)
extension is installed) When enabled, the user can message the job author.
Image - Settings on _wp-admin > Ultimate Member > Settings > Extensions > Private Messaging_.

### Profile Menu settings [#](#settings_menu)
The extension adds settings to the page _wp-admin > Ultimate Member > Settings > Appearance > Profile Menu_.
* **Messages Tab** – Allows enabling/disabling the "Messages" item in the profile menu.
**Note:** only profile owners and administrators can see the "Messages" item in the Profile menu.
### User Role settings [#](#user_role)
The extension adds a widget to the user role page, so you can give each user role unique permissions. To modify settings on a specific role, go to _wp-admin > Ultimate Member > User Roles_ and choose the user role to modify. You will be navigated to the page "Edit Role". On this page scroll down to the Private Messages options:
* **Enable Messaging feature?** - Enable or disable a messaging feature for this role.
* **Can start conversations?** - Allow users to start a conversation with other users.
* **Can start conversations with** \- Allow users to start conversations with everyone or specific user roles.
* **Can start conversations with selected user roles** - When a specific user role is selected, you can select which role the user can start a conversation with.
* **Can read private messages?** - Allow users to read private messages from other users.
* **Can reply private messages?** - Allow users to reply to other users.
* **Can reply private messages to** - Allow users to reply to everyone or specific user roles.
* **Can reply private messages to selected user roles** - When a specific user role is selected, you can select which role the user can reply to.
* **Maximum number of messages they can send** - Limit the maximum number of messages a user can send.
Image - Settings on _wp-admin > Ultimate Member > User Roles > Edit Role_.

Member Directories [#](#settings_directory)
--------------------------------------------
The extension can add the "Message" button to each member card in the members directory. There are two settings that controls these buttons:
* **Show messages button in member directory** on _wp-admin > Ultimate Member > Settings > Extensions > Private Messaging_. This setting can enable/disable buttons "Message" for all member directories.
* **Hide message button in the directory** on _wp-admin > Ultimate Member > Member Directories > Edit Member Directory_, in the **Profile Card** section. This setting can disable buttons "Message" for the certain directory.
**Note:** The "Message" button may be hidden by user role settings if current user can not start conversation with the target user or if the target user can not read private messages.
Image - Buttons "Message" in the members directory.

User profile [#](#profile)
---------------------------
The extension adds these elements to profiles:
* "Message" button on other members Profile pages.
* "Messages" menu item and the tab.
Users can start a new conversation by clicking the "Message" button in the other user profile header or in the profile card shown in the member directory. Once the message button is clicked, a pop-up appears where users can easily exchange texts, links and emojis.
Image - The "Message" button in the other member profile header.

Image - The messaging pop-up.

**Note:** The "Message" button is shown for guests and logged-in members with proper settings. The button is hidden if:
- current user is a recipient;
- current user or recipient is blocked by the setting "Block users from sending/receiving messages";
- current user is blocked by recipient or recipient is blocked by the current user;
- the messaging feature is blocked by the setting "Who can send me private messages?" in the recipient's account;
- the messaging feature is disabled for the current user role or for the recipient user role;
- the recipient user role can't read private messages;
Image - The "Messages" tab in profile.

Users that are active are marked with a green dot next to their name to indicate that they are online. This optional feature requires the [Online Users](https://ultimatemember.com/extensions/online-users/)
extension.
User account [#](#account)
---------------------------
### Privacy [#](#account_privacy)
Users can use the "Who can send me private messages?" setting in the account **Privacy** tab to control who can send them private messages. Pre-defined options: "Everyone", "Nobody". If the [Followers](https://ultimatemember.com/extensions/followers/)
extension is activated, users are given additional options "Only people I follow" and "Followers". If the [Friends](https://ultimatemember.com/extensions/friends/)
extension is activated, users are given additional option "Friends".
Image - The account **Privacy** tab.

Users can block someone in messages by clicking on the "Block user" icon. They can review blocked users and unblock them in the **Blocked Users** section in the account **Privacy** tab. Just click the **Unblock** button under the name of the member.
Image - The **Blocked Users** section in the account **Privacy** tab.
 
### Notifications [#](#account_notifications)
The extension has two email templates:
* **New Message Notification** - notification sent to users when they receive new private messages;
* **New Message Reminder** - notification sent to users when they have unread private messages.
The extension sends the **New Message Notification** email immediately if:
* the first message is added in a new conversation;
* the second (or next) message is added in the existing conversation and the recipient did not login for the period selected by the setting _"Send email notifications If user did not login for"_.
The extension sends the **New Message Reminder** email periodically with timeout selected by the setting _"Send email notifications If user didn't read message for \[n\] hours"_ several times. The maximum number of reminders depends on "Send email notifications not more than _\[m\] times"_. The extension stops sending reminder email once the recipient read the message.
Administrators can edit email templates: enable, disable, change subject or body. Go to _wp-admin > Ultimate Member > Settings > Email_, find the needed email template, and click the "Edit" button (gear icon). You'll see email template settings. Change what you want and save changes.
Image - Settings on _wp-admin > Ultimate Member > Settings > Email._

Users can turn on/off receiving email notifications using settings in the account **Notifications** tab:
* **Someone sends me a private message** - turn on/off receiving the **New Message Notification** email.
* **I have an unread message** - turn on/off receiving the **New Message Reminder** email.
Image - The account **Notifications** tab.

### Web notifications [#](#account_web_notifications)
If the [Real-time Notifications](https://ultimatemember.com/extensions/real-time-notifications/)
extension is activated, the user can control if they want to receive real-time notifications for new messages in their account settings. Users can turn on/off receiving a notification for new conversations using the "When someone sends a private message to me" setting in the account **Web notifications** tab.
Image - The account **Web notifications** tab.

Shortcodes and menu patterns [#](#shortcode)
[](#shortcode)
------------------------------------------------------------
You can use the **{new\_messages}** menu pattern to display an amount of unread messages in your menu. Read the instructions [here](//docs.ultimatemember.com/article/241-message-notification-icon)
.
The extension adds these shortcodes:
* [\[ultimatemember\_message\_button\]](#ultimatemember_message_button)
- Show the message button of a specific user.
* [\[ultimatemember\_message\_count\]](#ultimatemember_message_count)
- Show the total unread messages of a specific user.
* [\[ultimatemember\_messages\]](#ultimatemember_messages)
- Show the message box of a specific user.
You can paste these shortcodes to the post (page) content and to the text or shortcode widget.
#### \[ultimatemember\_message\_button\] [#](#ultimatemember_message_button)
This shortcode is used to display a message button of a specific user.
Example:
\[ultimatemember\_message\_button user\_id="123"\]
The shortcode attributes:
* **user\_id** (integer) - the identification number of the user - recipient. Required. Default value: the post author ID (if post or page) or 0.
#### \[ultimatemember\_message\_count\] [#](#ultimatemember_message_count)
This shortcode is used to display a total amount of unread messages of a specific user.
Example:
\[ultimatemember\_message\_count user\_id="123"\]
The shortcode attributes:
* **user\_id** (integer) - the identification number of the user. Required. Default value: current user ID.
#### \[ultimatemember\_messages\] [#](#ultimatemember_messages)
This shortcode is used to display a message box of a specific user.
Example:
\[ultimatemember\_messages user\_id="123"\]
The shortcode attributes:
* **user\_id** (integer) - the identification number of the user - recipient. Required. Default value: current user ID.
Last updated on July 5, 2023
No results found
---
# Private Content Plugin Activation - Ultimate Member
Private Content Plugin Activation
=================================
[](javascript:window.print() "Print this article")
Overview
--------
This document will provide instructions on how to activate the Private Content plugin. For the plugin to work correctly, you must first activate **Ultimate Member.**
To activate the private content plugin, do the following steps below:
1. Go to the site and log in as admin.

2. Go to **WP-Admin > Plugins > Scroll down to the extension "Ultimate Member - Private Content"**. Click the **Activate** below the plugin's name.
3. The plugin is displayed as activated, and the link "Deactivate" is displayed under the extension's name.

4. At the top of the Plugins page, there is a notice that the plugin is activated. 
If you have activated the private content plugin, but the Ultimate Member is **deactivated**, the notice in the image below will appear on top of the plugin page.
Once the plugin is activated, the "Licenses" tab has been added to the Ultimate Member core settings.
**WP-Admin > Ultimate Member > Settings > Licenses**

When you go to **WP-Admin > UM > Settings > Extensions> Private Content**, the "Private Content" tab is displayed in the Ultimate Member core settings.

Last updated on March 14, 2023
No results found
---
# Profile tab with a form inside - Ultimate Member
Profile tab with a form inside
==============================
[](javascript:window.print() "Print this article")
This article describes a way to create a custom profile tab with a form using the [Ultimate Member - Profile tabs](https://ultimatemember.com/extensions/profile-tabs/)
extension. Read the [Profile Tabs Setup](//docs.ultimatemember.com/article/1547-profile-tabs-setup)
article to get know more about this extension.
#### The way to add additional tab with a form:
* Go to _wp-admin > Ultimate Member > Forms_ and click the **Add New** button to create a form.
* Select the **Profile Form** type, add fields to the Form Builder, type the form title, and click the **Create** button.
* Go to **wp-admin > Ultimate Member > Profile Tabs** and click the **Add New** button to create a tab.
* Select the newly created profile form in the **Custom Profile Form** dropdown, select the parent (main) profile form, select the tab icon, type the tab title, and click the **Publish** button.
#### Screenshots:
Image 1 - Add a form.

Image 2 - Configure a form.

Image 3 - Add or Edit a tab.

Image 4 - Configure a tab.

Image 5 - Example of the custom tab with embedded additional profile form.

Last updated on December 6, 2023
### Related Articles
* [Profile Tabs Setup](/article/1547-profile-tabs-setup)
No results found
---
# Real-time Notifications Setup - Ultimate Member
Real-time Notifications Setup
=============================
[](javascript:window.print() "Print this article")
Overview
--------
This document provides instructions on how to setup and use the [Real-time Notifications](https://ultimatemember.com/extensions/real-time-notifications/)
extension. This extension allows users to receive updates and notifications directly on the website as they happen.
**Contents**
* [Settings](#settings)
* [Extension settings](#settings_extension)
* [Pages settings](#settings_pages)
* [User features](#features)
* [Notification button](#button)
* [Switch notifications ON/OFF](#switch)
* [For developers](#developers)
Settings [#](#settings)
------------------------
### Extension settings [#](#settings_extension)
Once you activate the extension, you will see the **Notifications** tab on the page _wp-admin > Ultimate Member > Settings > Extensions_. On this page you can find the following options:
* **Enable real-time instant notification** - It is recommended to turn this setting off if your server is getting some load.
* **How often do you want the ajax notifier to check for new notifications? (in seconds)** - Set a period of the notifications update. We don't recommend setting a very short period to avoid site overload.
* **Where should the notification icon appear?** - Select a place where the notification icon should be displayed.
* **Always display the notification icon** - If turned off, the icon will only show when there's a new notification.
* **Notification sound** - Play a sound when a new notification appears. It may not work in Chrome due to Autoplay Policy.
* **Account Tab**
* **Turn on/off notifications and edit the notification templates:**
* Role upgrade
* New comment reply
* New user comment
* New guest comment
* User view profile
* Guest view profile
* User awarded points for action
* User deducted points for action
* User receives points from another person
* New user review
* User get a new private message
* User get followed by a person
* User get a new friend request
* User get a new friend
* User get a new wall post
* User get a new wall comment
* User get a new post like
* User get a new mention
* User account is verified
* Groups - Approve Member
* Groups - Join Request
* Groups - Invite Member
* Groups - Change Group Role
* Groups - New post
* Groups - New comment
* Your job is approved
* Your job is expired
* User mention you in forum
* User leaves a reply to topic
* User creates a topic in forum
### Pages settings [#](#settings_pages)
Once you install the extension, it creates the **Notifications page**. This page contains the [\[ultimatemember\_notifications\]](//docs.ultimatemember.com/article/1491-real-time-notifications-shortcodes#ultimatemember_notifications)
shortcode that shows a list of notifications for the current user.
You can make this page manually if it is lost. Once the page is created, you should configure it using the setting "Notifications page" on _wp-admin > Ultimate Member > Settings > General > Pages_.
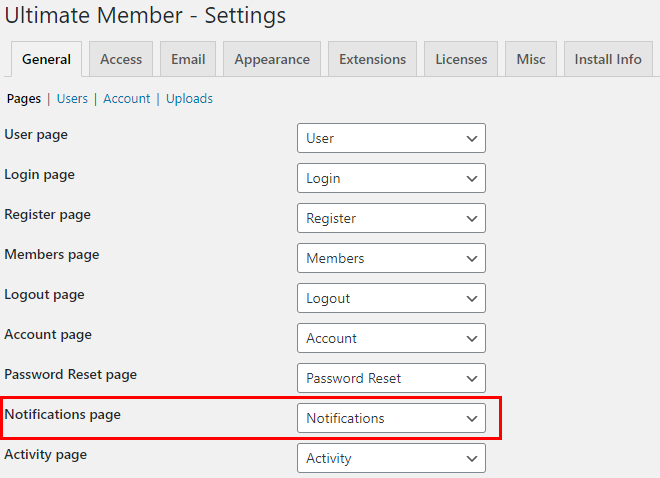
User features [#](#features)
-----------------------------
### Notification button [#](#button)
A red circle will appear on the notifications button with a number inside when a user receives a notification. This number indicates how many new notifications are received. Users can view new and past notifications via the notifications button/popup or by going to the notifications page.
Image - The notifications button

The theme "UM Theme" moves the button to the site's header. The red dot with the counter is visible only when there are new notifications.
Image - The notifications button in the theme "UM Theme"

The extension provides options to view all and unread notifications. User can also load more notifications in the notification popup. When the ellipsis " **...**" icon is clicked, users can choose what action to make, they can choose to **See all notifications**, **Mark all notifications as read**, **Clear all the notifications** and they can go to the **Notifications settings**.

Each notification has an ellipsis " **...**". The button lets the user mark the notification as read, remove the notification or disable the type of notification. The notification will be marked as read-only after the "Mark as read" action is clicked or after visiting the notification URL.
###

### Switch notifications ON/OFF [#](#switch)
If the **Account Tab** setting is turned on, users can control what notifications they want to receive from the tab **Web Notifications** tab in their account page. These include core notifications as well as installed extension notifications (e.g. User Reviews and myCrRED).
Image - The **Account Tab** setting on _wp-admin > Ultimate Member > Settings > Extension > Notifications_.

Image - The **Web Notifications** account tab.

For developers [#](#developers)
--------------------------------
### Add your custom notification
Look for an example here: [Using notifications API to add custom notifications](//docs.ultimatemember.com/article/53-using-notifications-api-to-add-custom-notifications)
#### Hide the default notification button in the footer
Add the CSS code snippet below to the _style.css_ file in the [child theme](https://developer.wordpress.org/themes/advanced-topics/child-themes/)
. This code hides the default notification button but doesn't affect the related notification feed, so you can use a custom notification button.
body > .um-notification-b {
display: none !important;
}
#### Disable the default notification button in the footer
Add the PHP code snippet below to the _functions.php_ file in the [child theme](https://developer.wordpress.org/themes/advanced-topics/child-themes/)
. This code disables both the notification button and related notification feed.
add\_action( 'init', function() {
remove\_action( 'wp\_footer', 'um\_notification\_show\_feed', 99999999999 );
} );
Last updated on October 28, 2024
### Related Articles
* [Real-time Notifications Shortcodes](/article/1491-real-time-notifications-shortcodes)
No results found
---
# Profile Tab with CF7 form inside - Ultimate Member
Profile Tab with CF7 form inside
================================
[](javascript:window.print() "Print this article")
### Overview
You could integrate the Contact Form 7 (CF7) contact form with the Ultimate Member profile tab and display a contact form on the user's profile page.
### Contact Form 7 plugin installation
You need to install the Contact Form 7 plugin on your website and make the [installation](https://wordpress.org/plugins/contact-form-7/#installation)
steps. More details can be at the Contact Form 7 [website](https://contactform7.com/)
.
### Contact profile tab
So when you have the ready-to-use contact form please paste the form's shortcode to the profile tab content

\[wp-admin>Profile Tabs> Add or Edit a Profile Tab\]

On the user's profile, you'll find this profile tab with the contact form. Data will be sent to the user's email address, who owns the profile by default.

**Note:** You may use the code snippet below if you want to disable sending emails to profile owners and use the default CF7 recipient. You can add this code to the file _functions.php_ in the theme folder.
if ( function\_exists( 'UM' ) && defined( 'um\_profile\_tabs\_version' ) ) {
remove\_filter( 'wpcf7\_mail\_components', \[ UM()->Profile\_Tabs()->profile(), 'change\_email\_to\_profile\_owner\_email' \], 10 );
}
Last updated on August 30, 2023
No results found
---
# Real-time Notifications Shortcodes - Ultimate Member
Real-time Notifications Shortcodes
==================================
[](javascript:window.print() "Print this article")
Overview
--------
This document provides instructions on how to use shortcodes and patterns of the [Real-time Notifications](https://ultimatemember.com/extensions/real-time-notifications/)
extension.
Ultimate Member uses WordPress shortcodes to allow users to perform certain actions as well as display forms and templates. You may use shortcodes in the posts(page) content and text widgets.
**Contents**
* [\[ultimatemember\_notifications\]](#ultimatemember_notifications)
- Show a list of notifications for current user
* [\[ultimatemember\_notifications\_button\]](#ultimatemember_notifications_button)
- Show button that open/close "Notifications" sidebar
* [\[ultimatemember\_notification\_count\]](#ultimatemember_notification_count)
- Show a number of unread notifications
* [{um\_notifications\_button}](#um_notifications_button)
- Show button that open/close "Notifications" sidebar
Shortcodes
----------
_You may use shortcodes in the posts(page) content and text widgets_.
#### \[ultimatemember\_notifications\] [#](#ultimatemember_notifications)
Usage: Show a list of notifications for current user
Attributes: none
#### \[ultimatemember\_notifications\_button\] [#](#ultimatemember_notifications_button)
Usage: Show button that open/close "Notifications" sidebar
Default attributes:
* static => 1, // button position is fixed (0) or static (1)
* hide\_if\_no\_unread => 1, // show button always (0) or hide if there are no unread notifications (1)
#### \[ultimatemember\_notification\_count\] [#](#ultimatemember_notification_count)
Usage: Show a number of unread notifications
Attributes: none
Menu patterns
-------------
_You may use patterns in the menu title_
#### {um\_notifications\_button} [#](#um_notifications_button)
Usage: Show button that open/close "Notifications" sidebar
### Example

Last updated on September 21, 2020
### Related Articles
* [Real-time Notifications Setup](/article/232-notifications-setup)
No results found
---
# Profile Tab with a Member Directory inside - Ultimate Member
Profile Tab with a Member Directory inside
==========================================
[](javascript:window.print() "Print this article")
Member directory allows users to find each other with ease. If you want to integrate the Member Directory within the user's profile, you can create a custom profile tab using the " [Ultimate Member - Profile tabs](https://ultimatemember.com/extensions/profile-tabs/)
" extension. You can check the article to learn more about [Profile Tabs Setup](//docs.ultimatemember.com/article/1547-profile-tabs-setup)
.
Follow the instructions below to add an additional tab with a member directory inside the form:
* Go to \[wp-admin> Ultimate Member> Member Directories\] and copy the shortcode of your member directory.

* Go to the page \[wp-admin > Ultimate Member > Profile Tabs\] and click the button **"Add New"** or edit your existing profile tab.
* Paste the member directory shortcode into the profile tab content, and make sure the custom profile form is set to **No form** under pre-defined content. Click the Publish button or Update button to save.
* Go to the user's profile and click on the profile tab you've created. The shortcode you've added will display the member's directory.

Last updated on September 6, 2023
No results found
---
# Social Activity Setup - Ultimate Member
Social Activity Setup
=====================
[](javascript:window.print() "Print this article")
Overview
--------
This document explains how to configure and use the extension [Social Activity](https://ultimatemember.com/extensions/social-activity/)
. This extension allows members to interact with each other by adding an activity system to your site where members can create posts on their wall and see what other members are up to on your site.
**Contents**
* [Settings](#settings)
* [Extension's settings](#settings_extension)
* [Profile Menu settings](#settings_menu)
* [User Role settings](#settings_role)
* [Shortcode](#shortcode)
* [](#shortcode)
[\[ultimatemember\_wall\]](#ultimatemember_wall)
* [\[ultimatemember\_activity\]](#ultimatemember_activity)
* [Manage wall posts](#manage_activity_posts)
* [Admin side](#admin_activity_posts)
* [Front end side](#front_activity_posts)
* [Configure notifications](#notifications)
* [User Account](#account)
* [Privacy](#account_privacy)
* [Web notifications](#account_notifications)
Settings [#](#settings)
------------------------
### Extension's settings [#](#settings_extension)
Once the extension is activated, you will see the tab "Social Activity" on _wp-admin > Ultimate Member > Settings > Extensions_. You can manage extension's settings:
* **Number of wall posts on desktop** - Limits the number of posts displayed and loaded at once on the desktop device.
* **Maximum number of faces** - Limits the number of displayed members who liked the post.
* **Number of wall posts on mobile** - Limits the number of posts displayed and loaded at once on the mobile device.
* **Number of initial comments/replies to display per post**
* **Number of comments/replies to get when user load more**
* **Comments order**
* **How many words appear before wall post is truncated?** - Limits the length of the post extract shown in the activity wall.
* **Allow users to set their activity wall privacy through account page?**
* **Trending Hashtags Days**
* **Require user to login to view activity walls?** - Guests can't see the activity wall if this setting is enabled.
* **Text to display If user needs to login to interact in a post**
* **Active Color**
* **Enable integration with followers to convert user names to user profile links automatically (mention users)?** - Optional. Require the extension "[Followers](https://ultimatemember.com/extensions/followers/)
".
* **Show only followed users activity in the social wall** - Optional. Require the extension "[Followers](https://ultimatemember.com/extensions/followers/)
".
* **Enable integration with friends to convert user names to user profile links automatically (mention users)?** - Optional. Require the extension "[Friends](https://ultimatemember.com/extensions/friends/)
".
* **Show only friends activity in the social wall** - Optional. Require the extension "[Friends](https://ultimatemember.com/extensions/friends/)
".
* **Enable "New user" in activity**
* **Enable "New blog post" in activity**
* **Enable "New product" in activity**
* **Enable "New Gravity Form" in activity**
* **Enable "New Gravity Form Answer" in activity**
* **Enable "New follow" in activity**
* **Enable "New note" in activity
**
* **Enable "Account Verification" in activity**
* **Enable "New forum topic" in activity
**
* **Enable "New topic reply" in activity
**
* **Enable "New job" in activity**
* **Enable "Job is filled" in activity
**
Image - Settings on _wp-admin > Ultimate Member > Settings > Extensions > Social Activity_


### Profile Menu settings [#](#settings_menu)
The extension adds the tab "Activity" into the profile page menu. Administrators can hide/show this tab and manage who can see this tab.
* **Activity Tab** – Allows to enable/disable "Activity" item in the Profile menu.
* **Who can see Activity Tab**? – Manage access to the "Activity" tab in the Profile menu.
Image - Profile menu settings on _wp-admin > Ultimate Member > Settings > Appearance > Profile Menu_

### User Role settings [#](#settings_role)
Each user role has settings for the extension. Administrators can edit user role settings on _wp-admin > Ultimate Member > User Roles > Edit Role_.
Image - User role settings on _wp-admin > Ultimate Member > User Roles > Edit Role_

Shortcode [#](#shortcode)
--------------------------
#### \[ultimatemember\_wall\] [#](#ultimatemember_wall)
This shortcode displays a wall with posts and activities of a specific member.
The shortcode attributes:
* user\_id (integer) - The identification number of the user. Defaults to current profile ID.
* loading (string) - The method for loading posts: "sync" loads posts along with the browser page, while "async" initiates a separate AJAX request after the browser page has loaded. Defaults to "async".
* user\_wall (bool) - Deprecated.
* wall\_post (integer) - Deprecated.
Examples:
\[ultimatemember\_wall user\_id="123"\]
\[ultimatemember\_wall user\_id="123" loading="sync" \]
#### \[ultimatemember\_activity\] [#](#ultimatemember_activity)
This shortcode displays a wall with all public posts and activities of members.
The shortcode attributes:
* hashtag (string) - Filter wall posts by Hashtag. Optional. Note that the form for a new post will not be displayed when using a hashtag.
* loading (string) - The method for loading posts: "sync" loads posts along with the browser page, while "async" initiates a separate AJAX request after the browser page has loaded. Defaults to "async".
* wall\_post (integer) - Show specific post in activity. Optional.
* form\_id ( string ) - Deprecated. Defaults to 'um\_activity\_id'.
* mode (string) - Deprecated. Defaults to 'activity'.
* template (string) - Deprecated. Defaults to 'activity'.
* user\_id (integer) - Deprecated. Defaults to current user ID.
* user\_wall (bool) - Deprecated. Defaults to 0.
Examples:
\[ultimatemember\_activity\]
\[ultimatemember\_activity hashtag="#mypost" loading="sync" wall\_post="3" \]
See also the [Social Activity Shortcodes](//docs.ultimatemember.com/article/1891-social-activity-shortcodes)
article.
Manage wall posts [#](#manage_activity_posts)
----------------------------------------------
### Admin side [#](#admin_activity_posts)
Administrators can see and manage social activity posts on _wp-admin > Ultimate Member > Social Activity_. Administrators can delete any post, edit posts content, comments and hashtags.
Image - Activity wall posts on _wp-admin > Ultimate Member > Social Activity_

Administrators can overview reported (flagged) posts and decide what to do with these posts: delete or approve.
Image - Activity wall post actions on _wp-admin > Ultimate Member > Social Activity > Flagged_

### Front end side [#](#front_activity_posts)
The post author can delete and edit the post on the wall. The comment author can delete and edit the comment on the wall. The reply author can delete and edit the reply on the wall. Administrators can delete and edit posts, comments, and replies.
Image - The Activity wall

Configure notifications [#](#notifications)
--------------------------------------------
The extension can't send email notifications but can send real-time notifications\*. The Administrator can turn OFF/ON each notification and edit notifications templates on _wp-admin > Ultimate Member > Settings > Extensions > Notifications_
**Note:** Real-time notifications require the extension [Ultimate Member - Real-time Notifications](https://ultimatemember.com/extensions/real-time-notifications/)
.
**Existing real-time notifications:**
* User get a new wall post - When someone publishes a post on my wall
* User get a new wall comment - When someone comments on your post
* User get a new post like - When someone likes your post
* User get a new mention - When someone mentions me
Image - Real-time notifications templates on _wp-admin > Ultimate Member > Settings > Extensions > Notifications_

User Account [#](#account)
---------------------------
### Privacy [#](#account_privacy)
Members can use the **Who can see your activity wall?** setting in the "Privacy" account tab to make their posts private.
Available options:
* Public - everyone can see the author's posts.
* Members - logged in members can see the author's posts.
* Only me - only the post author can see it.
* Followers - the author and followers can see posts.
* People I follow - the author and followed members can see posts.
Options "Followers" and "People I follow" appear if the [Followers](https://ultimatemember.com/extensions/followers/)
extension is installed.

### Web notifications [#](#account_notifications)
Members can turn on or off each real-time notification in their accounts if the Notifications extension is also integrated on the site.
Image - Real-time notification options _Account > Web notifications_.

Last updated on December 2, 2024
### Related Articles
* [How to show only followed users/friends activity on the social wall](/article/1468-how-to-show-only-followed-users-activity)
* [How to limit wall posts in social activity?](/article/229-how-to-limit-wall-posts-in-social-activity)
* [Customizing the Font Size on the Social Activity Wall](/article/1951-customizing-the-font-size-on-the-social-activity-wall)
No results found
---
# How to show only followed users/friends activity on the social wall - Ultimate Member
How to show only followed users/friends activity on the social wall
===================================================================
[](javascript:window.print() "Print this article")
Using our [Followers](https://ultimatemember.com/extensions/followers/)
and [Friends](https://ultimatemember.com/extensions/friends/)
extensions it is possible to show only friends or followed users activity on the social wall.
You can enable this feature in Ultimate member -> Settings -> Extensions -> Social Activity tab:

* Show only followed users activity in the social wall
* Show only friends activity in the social wall

Last updated on March 16, 2023
No results found
---
# Introduction to Stripe Extension - Ultimate Member
Introduction to Stripe Extension
================================
[](javascript:window.print() "Print this article")
Stripe has become one of the popular choices for online businesses looking to accept payments and manage financial transactions. Stripe's services are designed to make it easy for businesses to handle payments, subscriptions, and other financial operations. It has no setup fees, no monthly fees, and no hidden costs. Hundreds of thousands of businesses—from startups to Fortune 500 companies—rely on Stripe’s software tools to accept payments and expand globally securely.
Stripe is available to businesses in [40+ countries](https://stripe.com/global)
. With Stripe, you can accept all major debit and credit cards from customers in every country in 135+ currencies, as well as Apple Pay, Google Pay, and other [local payment methods](https://stripe.com/en-US/payments/payment-methods-guide#payment-method-fact-sheets)
, such as Alipay, iDeal, or SEPA Direct Debit.
Ultimate Member: Stripe extension is developed to allow you to integrate Stripe Checkout Page and Customer Billing features on your site. Here are the main features of the UM Stripe extension:
* **Embedded Checkout Support** allows you to host the Stripe Checkout form on your site. By enabling this setting, you can now host the Stripe Checkout form directly on your website, providing a seamless checkout experience for your customers. No more redirections to Stripe-hosted pages! With Embedded Checkout Support, your customers can complete their transactions without ever leaving your website.
* **Checkout & Customer Billing Pages** allow users to pay, subscribe, and manage plans on your site.
* **Restrict Contents by Stripe Plans and Prices** allows you to restrict content (shortcodes, posts, pages, tags, and taxonomies) by Stripe plans or prices.
* **Update a user's role by Stripe subscription statuses via Webhook**
* **Support Payment Link for Checkout** allows you to display the icons of the supported payment methods using the button setting features.
The following guides aim to teach you how to get started, explaining the available features and options.
**Documentation Contents**
==========================
* [Setting up Webhook and Test/Public Keys](//docs.ultimatemember.com/article/1607-stripe-setting-up-webhook-and-test-public-keys)
* [Setting up Stripe Success, Cancel Payment, and Already Subscribed Pages](//docs.ultimatemember.com/article/1609-stripe---setting-up-stripe-success-and-cancel-payment-pages)
* [Create Subscription Prices](//docs.ultimatemember.com/article/1617-create-subscription-prices)
* [UM Stripe Plan Settings](//docs.ultimatemember.com/article/1892-stripe-plan-settings)
* [Shortcodes & Subscription Events](//docs.ultimatemember.com/article/1616-stripe-shortcodes-reference)
* [Add Subscription Plans to a Register Form](//docs.ultimatemember.com/article/1634-stripe---add-subscription-plans-to-a-registeration-form)
* [Create & Test Customer Billings](//docs.ultimatemember.com/article/1611-stripe---create-test-customer-billings)
* [Test your integration](//docs.ultimatemember.com/article/1610-stripe---test-your-integration)
* [Test your integration with Stripe test clocks](//docs.ultimatemember.com/article/1803-test-your-integration-with-stripe-test-clocks)
* [Stripe CLI Integration](//docs.ultimatemember.com/article/1864-stripe-cli-integration)
* [Import Existing Subscription Prices from your Stripe Account](//docs.ultimatemember.com/article/1846-import-existing-subscription-prices-from-your-stripe-account)
* [Stripe - Content Restriction](//docs.ultimatemember.com/article/1805-stripe-content-restriction)
* [Stripe’s Plans Customization in Register Forms](//docs.ultimatemember.com/article/1859-stripe-s-plans-customization-in-register-forms)
* [Display Subscription Status, Invoices, and Active Subscriptions in the Admin screen](//docs.ultimatemember.com/article/1865-display-subscription-status-invoices-and-active-subscriptions-in-the-admin-screen)
* [Stripe Settings](//docs.ultimatemember.com/article/1886-stripe-settings)
* [Stripe - Support Payment Link for Checkout](//docs.ultimatemember.com/article/1885-stripe-support-payment-link-for-checkout)
* [Pricing Model-Customer Chooses Price](//docs.ultimatemember.com/article/1888-pricing-model-customer-chooses-price)
* [Stripe Parameters](//docs.ultimatemember.com/article/1899-stripe-placeholders-attribute)
* [Subscription Limit: One Subscription Per Email Address](//docs.ultimatemember.com/article/1898-subscription-limit-one-subscription-per-email-address)
* [Enable Payment Method](//docs.ultimatemember.com/article/1901-enable-payment-method)
* [How to Create Stripe Pages Manually?](//docs.ultimatemember.com/article/1900-how-to-create-stripe-pages-manually)
* [Enable Users to Switch Stripe Plans or Prices](//docs.ultimatemember.com/article/1929-enabling-customers-to-switch-plans-via-stripe-portal)
* [Stripe Conditional Fields Visibility](//docs.ultimatemember.com/article/1932-stripe-conditional-fields-visibility)
* [Stripe Subscription Cancellation](//docs.ultimatemember.com/article/1941-stripe-subscription-cancellation)
### **Frequently Asked Questions:**
* [What Pricing Models are supported in the Stripe extension?](//docs.ultimatemember.com/article/1880-stripe-faq-what-pricing-models-are-the-supported-in-the-stripe-extension)
* [How Do Subscriptions Handle Staging Sites and Migrations?](//docs.ultimatemember.com/article/1612-stripe-faq-how-do-subscriptions-handle-staging-sites-and-migrations)
* [Do Subscriptions Replace or Merge Roles?](//docs.ultimatemember.com/article/1618-do-subscriptions-replace-or-merge-roles)
* [How Many Subscriptions a User Can Subscribe to?](//docs.ultimatemember.com/article/1619-how-many-subscriptions-a-user-can-subscribe-to)
* [How to Connect a Stripe Customer account to a WordPress Account?](//docs.ultimatemember.com/article/1626-how-to-connect-a-stripe-customer-account-to-a-wordpress-account)
* [Stripe Extension Common Issues](//docs.ultimatemember.com/article/1942-stripe-extension-common-issues)
[](//docs.ultimatemember.com/article/1626-how-to-connect-a-stripe-customer-account-to-a-wordpress-account)
Last updated on August 30, 2024
No results found
---
# Reviews Shortcodes - Ultimate Member
Reviews Shortcodes
==================
[](javascript:window.print() "Print this article")
Overview
--------
This document provides instructions on how to use shortcodes and patterns of the extension [User Reviews](https://ultimatemember.com/extensions/user-reviews/)
.
The reviews shortcode is used to display User ratings. The reviews shortcode can be used anywhere within WordPress where shortcodes are supported. For most users, this will primarily be within the content of a WordPress post or page.
**Contents**
[\[ultimatemember\_most\_rated\]](#ultimatemember_most_rated)
- Display most rated reviews
[\[ultimatemember\_top\_rated\]](#ultimatemember_top_rated)
- Display top rated reviews
[\[ultimatemember\_lowest\_rated\]](#ultimatemember_lowest_rated)
Display lowest rated reviews
Shortcodes
----------
#### \[ultimatemember\_most\_rated\] [#](#ultimatemember_most_rated)
This shortcode displays most rated reviews.
Default attributes:
* 'roles' => 0, // the role slug or 'all'
* 'number' => 5 // the number of shown reviews
Example:
\[ultimatemember\_most\_rated number="3"\]
####

#### \[ultimatemember\_top\_rated\] [#](#ultimatemember_top_rated)
This shortcode display top rated reviews.
Default attributes:
* 'roles' => 0, // the role slug or 'all'
* 'number' => 5 // the number of shown reviews
Example:
\[ultimatemember\_top\_rated number="3" \]
####

#### \[ultimatemember\_lowest\_rated\] [#](#ultimatemember_lowest_rated)
This shortcode display lowest rated reviews.
Default attributes:
* 'roles' => 0, // the role slug or 'all'
* 'number' => 5 // the number of shown reviews
Example:
\[ultimatemember\_lowest\_rated number="3"\]

Last updated on March 5, 2021
### Related Articles
* [User Reviews Setup](/article/78-user-reviews-setup)
No results found
---
# Social Login: User Role Redirection Settings - Ultimate Member
Social Login: User Role Redirection Settings
============================================
[](javascript:window.print() "Print this article")
Overview
--------
This document provides detailed instructions on the newly implemented shortcode option for the Ultimate Member Social Login plugin that allows user role-based redirection settings. This feature ensures that users are redirected to specific pages based on their roles upon using social login.
Feature Description
-------------------
This option has been added to the Social Login shortcode settings to handle user redirection based on the user role settings defined in Ultimate Member. When enabled, users will be redirected to the specified page for their role instead of returning to the page where the shortcode was used.
Steps to Implement the New Shortcode Option
-------------------------------------------
### Step 1: Update the Plugin
Ensure you have the latest Ultimate Member plugin and Social Login extension version installed.
### Step 2: Add the Shortcode
Add the Social Login shortcode to the desired page:
1. Go to **wp-admin> Ultimate Member> Social Login> Add or Edit an existing Social Login Shortcode**.

2. Go to the General Settings of your social login shortcode and enable the option **"Implement Role Redirection Options."** By default, when a user logs in using the Social Login shortcode, they are redirected back to the page where the shortcode was used. However, if this option is checked, the Register or Login settings specified in the Assigned [User Role settings](//docs.ultimatemember.com/article/103-user-roles-settings#registration-options)
will be applied instead.

3. In the shortcode section, copy the shortcode of the social login.

4. Navigate to the page where you want to implement the Social Login shortcode, go to **wp-admin> Pages> add or edit a page**.

5. To add the following shortcode, paste it on the page. Then update or publish the page to save the changes.

### Step 3: Configure User Role Redirection Settings
Configure the redirection settings for each user role in Ultimate Member:
1. Go to **WP Admin > Ultimate Member > User Roles**.
2. Select and edit the user role you want to configure.

3. In the user role settings, navigate to Registration Options or Login Options. Here, you can customize the redirection settings according to your preference by configuring the **"Action to be taken after registration"** and **"Action to be taken after login"** options.

### Step 4: Test the Implementation
Test the functionality to ensure that users are redirected correctly based on their roles:
1. Log in or Register to your site using a social account.

2. Verify that the user is redirected to the specified page or URL for their role.

The new shortcode option for applying user role redirection settings enhances the flexibility of the Ultimate Member plugin by allowing role-based redirection. This ensures a more personalized user experience based on their roles within the website.
Last updated on June 18, 2024
No results found
---
# Terms & Conditions - Ultimate Member
Terms & Conditions
==================
[](javascript:window.print() "Print this article")
### Overview
The UM-Terms & Conditions extension empowers the registration form by making terms & conditions fields a mandatory or required step during submission. This extension allows you to reset the member's agreement to the terms and conditions based on user roles and send agreement email notifications via the Ultimate Member dashboard within the "Terms and Conditions" section. Furthermore, it provides an option to customize the agreement notification using a new email template.
Users can conveniently access and agree to the updated terms and conditions on their account page, with the added functionality of hiding the account tab once the agreement is confirmed.
### Forms
The Terms & Conditions setting for the Registration form is located in **wp-admin>Ultimate Member > Forms > Edit Registration>Terms & Conditions.**
* **Enable on this form** \- This option allows you to enable or disable terms & conditions in the registration form. Select **Yes** from the dropdown to enable.
* **Content** \- This option allows you to select your T&C content from the dropdown selection.
* To add content or an option in this selection you must create a page, add and publish your T&C content in wp-admin>Pages>Add New.
* Once you click on publish, go back to Ultimate Member > Forms > Edit Registration > Terms & Conditions, then select the content from the drop-down menu.
These other options allow you to edit or customize the text of your T&C:
* **Toggle Show text**
* **Toggle Hide text**
* **Checkbox agreement description**
* **Error Text**

### Settings
Once the plugin is activated, its setting is added in **wp-admin> Ultimate Member> Settings> Extensions> Terms & Conditions**.
* **Terms & Conditions account tab** - This option allows you to enable or disable a terms & conditions tab in the user's account page. If enabled, you'll see the other options below.
* **Hide the tab after agreement** \- This option, if enabled, will hide the terms & conditions tab in the user's account page after the user agrees to the terms.
* **Content** - This option allows you to select which page or content you want to display in the terms & conditions tab on the user's account page.
* **Toggle Show Text** \- This option allows you to edit the text of the Toggle Show text in the terms & conditions tab in the user's account page.
* **Toggle Hide Text** \- This option allows you to edit the text of the Toggle Hide text in the terms & conditions tab in the user's account page.
* **Checkbox agreement description** - This option allows you to edit the Checkbox agreement description in the terms & conditions tab in the user's account page.
* **Error Text** \- This option allows you to edit the error text in the terms & conditions tab in the user's account page.

### Terms & Conditions Tab
When the **"Terms & Conditions account tab"** setting is enabled, users will have the convenience of accessing, reviewing, and agreeing to the terms & conditions directly from this tab on their account page.

If the **Hide the tab after agreement** option is enabled, the Terms & Conditions tab and its content will become hidden once the user accepts and confirms the agreement.

After confirmation, the following notification will be displayed:
* If the user **agrees or checks the box** and clicks the confirm button, they will see this notification: **"You have confirmed terms and conditions."**
* If the user **does not agree or leaves the box unchecked** and clicks the confirm button, they will see the error text notification. The default error text is: **"You must agree to our terms and conditions."**
### Reset Agreement
If you've modified and updated your terms & conditions, this functionality enables you to reset the agreement that your users previously accepted and notify them of these changes via email. To reset the agreement, go to **wp-admin>Ultimate Member> Dashboard> Terms & Conditions box.** In the Terms & Conditions section, you'll see the following options:
* **Reset agreement:** In this option, you can select which user role you want to reset the agreement with. By default, all roles are selected. Once you click on the **"Reset"** button, the terms & conditions tab will appear again in the user's account page with the updated terms & conditions content.
These notifications will appear after the reset button is clicked:
* If there are users that have agreed on the previous terms & conditions: **Information about Terms & Conditions agreement removed for 1 member.**
* If there are no users who have agreed to the previous terms & conditions: **There are no members who match criteria.**
* **Send agreement notification:** In this option, you can select which user role you want to send the email notifications to. This tool is intended for users who have not yet accepted and confirmed your terms and conditions.
* For this function to work, you must enable the **Email - Terms & Conditions - Agreement request** in wp-admin> Ultimate Member>Settings>Email>Terms & Conditions - Agreement request. It sends the default email template discussed below.
* This notification will appear after the send emails button is clicked: **DONE. Email has been sent to 1 member.**

### Agreement email notification
Enabling this email setting is essential for the proper functioning of the **Send agreement notification**. The default email template requires the **"Terms & Conditions account tab"** to be enabled in **wp-admin > Ultimate Member > Settings > Extensions > Terms & Conditions.** This is necessary because the default email template notification contains a redirect URL to the Account page, where users can review and accept the complete terms and conditions.
Go to **wp-admin> Ultimate Member>Settings>Email>Terms & Conditions - Agreement request** to enable this email notification or if you want to modify the default email template.

Last updated on October 11, 2023
No results found
---
# Social Login: Authenticate on Current Window - Ultimate Member
Social Login: Authenticate on Current Window
============================================
[](javascript:window.print() "Print this article")
Overview
========
The Ultimate Member Social Login extension now includes an option to authenticate users on the current window. This is particularly useful for resolving compatibility issues with certain browsers, such as Firefox, that may have trouble with child windows.
Steps to Enable the New Option
------------------------------
1. **Download and Install the Latest Version**
* Upload, install and activate the latest version of UM Social Login on your WordPress site. You can do this by navigating to **WP Admin > Plugins > Add New > Upload Plugin.**
2. **Activate the New Option**
* Go to your WordPress Admin dashboard.
* Navigate to **Ultimate Member > Settings > Extensions > Social Login**.
* Locate the option labelled **"Authenticate on the current window."**
* Check the box to enable this option.
* Click the **"Save Changes"** button to apply the new settings.

Testing the New Option
----------------------
1. **Clear Browser and Site Cache**
* Ensure you clear your browser cache to remove any stored data that might interfere with the new settings.
* Clear your site cache as well to make sure all the new changes are applied correctly.
2. **Test Social Login on Multiple Browsers**
* Perform tests using various browsers (Firefox, Chrome, Safari) to ensure that the authentication process works seamlessly across all of them.
* Pay particular attention to Firefox to confirm that the issue with the child window is resolved.
Troubleshooting
---------------
* If the authentication still redirects to a blank page or loops back, ensure that no other plugins conflict with the Social Login extension.
* Temporarily disable other plugins and test again to rule out conflicts.
* Ensure that your site's cache and cookies are fully cleared.
Conclusion
----------
This new feature aims to improve the user experience by resolving compatibility issues with certain browsers. By enabling authentication on the current window, users can have a more seamless registration and login process using social accounts.
Last updated on June 18, 2024
No results found
---
# Unsplash setup - Ultimate Member
Unsplash setup
==============
[](javascript:window.print() "Print this article")
### Overview
This document provides instructions on setting up the Ultimate member [Unsplash extension](#)
so users can set beautiful profile cover images directly from [Unsplash](https://unsplash.com/)
.
##### Go to WP Plugins and activate UM Unsplash extension.
Unsplash key and app name are supplied from the Ultimate member server. You will only need to **add a valid** **UM Unsplash extension or extension pass license.**
You have to copy your **UM Unsplash Extension License Key** and add it to the Ultimate member > Settings > Licenses> Unsplash License Key field and click the " **Activate**" button.
_Note: If you have an expired or invalid license, the server will not return the app name or key._
### Settings
Once the plugin is activated, **Unsplash tab** is added in \[Ultimate Member > Settings > Extensions\].

* **No. of photos to display** - set the number of images to display in the user profile cover photo.
* **Default keyword** \-the default word searched in the cover photo.
### Selecting Image from Unsplash
Now your users can set beautiful images from the Unsplash image database as a profile cover image.
Click the " **+**" icon button and select from Unsplash.

Choose your preferred cover photo and click on **apply** button.


Last updated on February 14, 2022
No results found
---
# User Bookmarks shortcodes - Ultimate Member
User Bookmarks shortcodes
=========================
[](javascript:window.print() "Print this article")
Overview
--------
This document provides instructions on how to use shortcodes and patterns of the extension [User Bookmarks](https://ultimatemember.com/extensions/user-bookmarks/)
.
Ultimate Member uses WordPress shortcodes to allow users to perform certain actions as well as display forms and templates. You may use shortcodes in the posts(page) content and text widgets.
Shortcodes
----------
* [\[um\_bookmarks\_button\]](#um_bookmarks_button)
* [\[um\_user\_bookmarks\]](#um_user_bookmarks)
* [\[um\_user\_bookmarks\_all\]](#um_user_bookmarks_all)
### \[um\_bookmarks\_button\] [#](#um_bookmarks_button)
This shortcode displays the "Bookmark" button or the "Remove bookmark" button on the singular post or for the specified post ID in the argument.
**Attributes**
| | | | |
| --- | --- | --- | --- |
| _Key_ | _Type_ | _Default_ | _Description_ |
| post\_id | integer | Current post ID | The post/page ID. |
**Example** - Display bookmark button.
`[um_bookmarks_button]`
**PHP example**
`echo do_shortcode( '[um_bookmarks_button post_id="' . get_the_ID() . '"]' );`

### \[um\_user\_bookmarks\] [#](#um_user_bookmarks)
This shortcode displays the "Bookmarks" block content with folders (if they are enabled) except for the bookmarked User Profiles.
**Attributes**
| | | | |
| --- | --- | --- | --- |
| _Key_ | _Type_ | _Default_ | _Description_ |
| user\_id | integer | Current user ID | The user ID. |
**Example** - Display bookmark folders.
`[um_user_bookmarks]`
**PHP example**
`echo do_shortcode( '[um_user_bookmarks user_id="' . get_current_user_id() . '"]' );`

### \[um\_user\_bookmarks\_all\] [#](#um_user_bookmarks_all)
This shortcode displays all user bookmarks without folders except for the bookmarked User Profiles. If no user id is entered or the user id is empty, it will display all of the current user's bookmarks except the bookmarked users' profiles.
**Attributes**
| | | | |
| --- | --- | --- | --- |
| _Key_ | _Type_ | _Default_ | _Description_ |
| user\_id | integer | Current user ID | The user ID. |
**Example** - Displays all user bookmarks.
`[um_user_bookmarks_all]`
**PHP example**
`echo do_shortcode( '[um_user_bookmarks_all user_id="' . get_current_user_id() . '"]' );`

Last updated on December 6, 2023
### Related Articles
* [User Bookmarks setup](/article/1481-user-bookmarks-setup)
No results found
---
# How to limit wall posts in social activity? - Ultimate Member
How to limit wall posts in social activity?
===========================================
[](javascript:window.print() "Print this article")
By default, the number of wall posts displayed in the social activity section is 6 on desktop and 5 on mobile. However, Ultimate Member’s Social Activity extension allows you to easily limit wall posts to be displayed. To change the number of wall posts in social activity, go to **Ultimate Member > Settings > Extension > Social Activity** and set the number of wall posts then click on Save changes at the bottom of the page**.**

Last updated on June 6, 2018
No results found
---
# Stripe - Setting up Webhook and Test/Public Keys - Ultimate Member
Stripe - Setting up Webhook and Test/Public Keys
================================================
[](javascript:window.print() "Print this article")
To get started, first, you must set up the integration by adding your Stripe keys and generating the Webhook URL.
### Test/Publish Keys
You can retrieve the Test/Publishable Key and Secret Key from the > [Stripe Dashboard](https://dashboard.stripe.com/)
> Developers > API Keys. Copy the keys and add them within the Stripe plugin settings ( Ultimate Member > Settings > Extensions > Stripe )
> **Note:** We recommend that you use a **Restricted Key** for live sites and a **Secret Key** for local or staging sites for testing purposes. More details can be found in this [article](https://stripe.com/docs/keys#limit-access)
> .
>
> * **Restricted Key** for live sites
> * **Test Publishable Key** for the sandbox mode
> * **Live Publishable Key** for live mode
Restricted Key Settings
-----------------------
We recommend using the restricted key instead of the standard secret key because the restricted key offers greater security than the secret key. To set your Restricted Key, navigate to **Stripe Dashboard >Developers >Api Key >Restricted Key** and click the **+Edit** or **+Create Restricted Key** button.

Enter a key name look for the resource types listed below in the API Keys and configure the necessary API permissions:
| | | |
| --- | --- | --- |
| **Resource Type** | **Permissions** | **Resources** |
| Customers | Write | Core resources |
| Tokens | Write | Core/Issuing resources |
| Checkout Sessions | Write | Checkout resources |
| Credit notes | Read | Billing resources |
| Customer Portal | Write | Billing resources |
| Prices | Read | Billing resources |
| Subscriptions | Read | Billing resources |
| Webhook Endpoints | Write | Webhook resources |
Once you're done setting up the restricted key, click the **"Create Key"** button, at the bottom right to save your settings.

Webhook
-------
Stripe uses webhooks to communicate with your site. It provides information such as the status of the payment or subscription and is used to update the user's role based on subscription events from Stripe's side of things. This also updates the price and product details on your site when you change them on your stripe.com account.
When you check/uncheck the **"Sandbox/Test Mode"**, you will notice the fields' labels are changing. When **checked**, the fields will be in test mode, if it is unchecked it means that it is in live mode.

In the Stripe settings, you'll find a webhook endpoint ready for you to copy and paste into your Stripe.com account. When you connect with Stripe, it automatically generates the Webhook URL based on the current domain of your site and adds the event hooks to the Webhook settings on your Stripe account. More details are listed below:
* Head to **U****ltimate Member > Settings > Extensions> Stripe**. Beside the Webhook Endpoints section is where you can copy your Webhook endpoint URL or when you have added the API Keys, Press on the **"Connect with stripe"** button, and your Webhook endpoint will be added instantly to your Stripe account settings.

* When you try to click on the **"Connect with Stripe"** button, it should validate the **Publishable key** and **Live Restricted or Secret Key**. It will show an error message when they are invalid.

* If the connection is successful, the **"Disconnect Stripe Account"** and **"Import Prices from your Stripe Account"** buttons should appear.
* If you are trying to connect with Stripe and have installed the Stripe extension on your localhost or own computer while using a local domain, you may encounter an error (as shown in the image below). To receive the payload or events from Stripe.com events transactions, your site's Webhook URL must be publicly accessible. It's important to note that even if you encounter this webhook creation error, you can still import pricing locally.

* Afterward, navigate to your Stripe Dashboard, go to **'Developers',** and access the [Webhook Settings](https://dashboard.stripe.com/test/webhooks)
. Ensure that the webhook URL has been added to the webhook endpoint. Please keep in mind that there might be a delay before it appears, so it's best to wait a few seconds or try to reload the Stripe page.

* To view the events, click the webhook endpoint URL. When you click on the Connect with Stripe button from the previous step above, it auto-generates the following event hooks(17):
* charge.expired
* charge.failed
* charge.pending
* charge.refunded
* charge.succeeded
* checkout.session.completed
* checkout.session.expired
* customer.created
* customer.deleted
* customer.subscription.updated
* customer.subscription.created
* customer.subscription.deleted
* customer.subscription.pending\_update\_expired
* customer.subscription.updated
* payment\_intent.payment\_failed
* price.deleted
* price.updated
* product.updated
* If you encounter an error on the site, the webhook may trigger retries after an hour. If you need an immediate trigger, click the "Resend" button in the webhook settings by accessing the webhook URL through Stripe Dashboard>Developers>Webhooks>Hosted Endpoints>Webhook URL.

* Depending on which you set up first, you can repeat this process for your live Webhook Secret or vice versa.
### Need Help? Encountering Issues?
If you encounter any issues with setting up your Stripe integration, such as problems with restricted keys, webhook failures, or permission errors, we recommend checking out our **Stripe Extension Common Issues** document. This resource provides detailed troubleshooting steps and solutions for common problems. You can access the **Stripe Extension Common Issues** document [here](//docs.ultimatemember.com/article/1942-stripe-extension-common-issues)
.
**NEXT: [Setting up Stripe Success and Cancel Payment Pages](../article/1609-stripe---setting-up-stripe-success-and-cancel-payment-pages)
**
Last updated on August 30, 2024
No results found
---
# Ultimate Member - myCred Shortcodes - Ultimate Member
Ultimate Member - myCred Shortcodes
===================================
[](javascript:window.print() "Print this article")
This article describes how you can utilize the Ultimate Members myCred extension's shortcode. The UM myCred shortcodes allow you to display all of the current user's earned badges and levels.
Shortcodes
==========
* * *
1\. \[ultimatemember\_user\_badges user\_id="{int}"\]
-----------------------------------------------------
This shortcode is for displaying all badges earned by the user ID.

* * *
2\. \[ultimatemember\_all\_badges user\_id="{int}"\]
-----------------------------------------------------
This shortcode displays on the website the current user's all earned badges and their levels, and it additionally includes an indicator or mark that the badges are 'Earned'.
* user\_id = current logged-in user ID by default.

Last updated on October 11, 2023
No results found
---
# Social Activity Shortcodes - Ultimate Member
Social Activity Shortcodes
==========================
[](javascript:window.print() "Print this article")
Overview
--------
Ultimate Member offers shortcodes for enhancing social interaction and activity tracking on your WordPress site. The Social Activity Shortcodes provide flexible options for displaying user wall posts, site-wide activities, and trending hashtags. Let's explore each shortcode's key features and use cases.
**Shortcodes**
--------------
* * *
### **\[ultimatemember\_wall\]**
The `[ultimatemember_wall]` shortcode is designed for the user profile page, exclusively showcasing a user's wall posts. It does not display single posts or hashtags directly; instead, the hashtag link leads to the predefined Activity page. Additionally, the shortcode supports the display of the user's wall form.
| | | |
| --- | --- | --- |
| **Parameters (Attributes)** | **Type** | **Description** |
| **user\_id** | integer | Displays the wall of the selected user. It can be empty. **Default:** the requested profile ID or the current user ID on pages other than the Profile |
| **loading** | "sync\|async" | Specifies how the first page of the activity wall is loaded.
**Default:** async = AJAX
`async` initiating a separate AJAX request after the browser page has loaded.
`sync` loads it together with the browser page. |
#### Sample Usage:
\[ultimatemember\_wall user\_id=”123” data-loading="async" /\]

---------------------------------------------------------------------------------------------------------------------------------
**\[ultimatemember\_activity\]**
--------------------------------
The `[ultimatemember_activity]` shortcode offers a comprehensive view of site-wide activities. Users can filter by hashtag or a specific wall post. This shortcode is ideal for creating an Activity page on your site. It includes hashtags and, as a separate feature, internally utilizes the `[ultimatemember_activity_single_post]` shortcode callback via `$_GET['wall_post']`.
| | | |
| --- | --- | --- |
| **Parameters ( attributes )** | **Type** | **Description** |
| **wall\_post** | integer | Activity post ID, primarily for backward compatibility. **By default**, it uses the `$_GET` attribute for flexibility. |
| **hashtag
** | string | Hashtag name with or without #. Allows filtering by the hashtag. |
| **loading** | 'sync\|async' | Determines how the activity wall is loaded 'sync' loads it together with the browser page, while 'async' initiates a separate AJAX request after the browser page has loaded. **Default**: async = AJAX |
| | | |
| **Internal Attributes** | **Type** | **Description** |
| **template="activity"** | string | activity template name |
| **mode="activity"** | string | mode name append in the element’s class |
| **form\_id="um\_activity\_id"
** | string | form id append in the element id |
You can use the above attributes if you want to display the site's activity wall on the custom page or filter it by the hashtag.
#### Sample Usage:
\[ultimatemember\_activity /\] - site-wide activity

\[ultimatemember\_activity hashtag="#ultimatemmembertalks"\] - site-wide activity filtered by hashtag;

\[ultimatemember\_activity\_single\_post\]
-------------------------------------------
The `[ultimatemember_activity_single_post]` shortcode is specifically for displaying a single wall post on a custom page.
| | | |
| --- | --- | --- |
| **Required Attribute** | **Type** | **Description** |
| '**wall\_post' => '{int}'** | Activity post ID | Required for displaying a single activity post on a custom page. |
##### 
####
* * *
Trending Hashtags
-----------------
### \[ultimatemember\_trending\_hashtags\]
Shows the trending hashtags that the users used in their wall posts.
| | | |
| --- | --- | --- |
| **Parameters (attributes)** | **Type** | **Description** |
| **trending\_days** | integer | the number of days the hashtags trend |
| **number** | string | number of hashtags to trend in days |
#### Sample Usage:
\[ultimatemember\_trending\_hashtags trending\_days=”7” number=”10” \]

Last updated on January 4, 2024
No results found
---
# UTM Parameters - Ultimate Member
UTM Parameters
==============
[](javascript:window.print() "Print this article")
UTM parameters, or Urchin Tracking Module parameters, are a set of five URL parameters used in online marketing to track the effectiveness of campaigns across different traffic sources and publishing platforms. Originally developed by Urchin, a web statistics analysis program acquired by Google in 2005, these parameters are now commonly used with Google Analytics.
UTM parameters help marketers identify the sources and campaigns that drive website traffic. By appending these parameters to URLs, marketers can track user behavior and campaign performance in their analytics tools.
Marketers use UTM parameters to differentiate between different marketing campaigns and traffic sources. They can create custom URLs with UTM parameters using tools like the Google Analytics Campaign URL Builder. These custom URLs are then used in marketing materials such as emails, social media posts, and ads.
UTM parameters allow marketers to track various metrics in their analytics tools, such as the number of clicks, conversions, and revenue generated by each campaign. This data helps marketers understand which campaigns are most effective and where they should focus their efforts.
**Note: The UM hidden type fields' meta keys should match the UTM keys for this to work.**
**UTM Parameters:**
* **utm\_source:** Identifies the source of the traffic, such as a search engine or website.
* **utm\_medium:** Identifies the medium of the traffic, such as organic search or paid advertising.
* **utm\_campaign:** Identifies the specific campaign that the traffic is associated with.
* **utm\_content:** Identifies the specific content or ad variant the user clicked on.
* **utm\_term:** Identifies the keywords associated with paid search campaigns.
**Example URL with UTM Parameters:**
* https://www.example.com/page?utm\_source=facebook&utm\_medium=cpc&utm\_campaign=spring\_sale&utm\_content=ad\_variant\_A&utm\_term=running\_shoes
**Explanation:**
* **utm\_source:** Indicates that the traffic source is Facebook.
* **utm\_medium:** Specifies that the medium of the traffic is CPC (Cost Per Click), indicating paid advertising.
* **utm\_campaign:** Identifies the campaign as "spring\_sale," indicating it is related to a spring sale promotion.
* **utm\_content:** Specifies the content or variant of the ad as "ad\_variant\_A."
* **utm\_term:** Indicates the keyword associated with the ad as "running\_shoes."
**Usage:**
* This URL is used in a Facebook ad campaign promoting a spring sale for running shoes. Marketers can track the performance of this specific ad variant and campaign by analyzing the data collected through these UTM parameters in their analytics tools.
The code snippet below is used to populate UTM values in the Ultimate Member Register forms, both for manual and social register forms:
add\_action( 'init', 'um\_sso\_populate\_utm\_fields\_session', 1 );
function um\_sso\_populate\_utm\_fields\_session() {
if( isset( $\_REQUEST\['utm\_content'\] ) ) {
$\_SESSION\['um\_sso\_utm\_session'\]\[ 'utm\_content' \] = esc\_attr( $\_REQUEST\['utm\_content'\] );
}
if( isset( $\_REQUEST\['utm\_source'\] ) ) {
$\_SESSION\['um\_sso\_utm\_session'\]\[ 'utm\_source' \] = esc\_attr( $\_REQUEST\['utm\_source'\] );
}
if( isset( $\_REQUEST\['utm\_campaign'\] ) ) {
$\_SESSION\['um\_sso\_utm\_session'\]\[ 'utm\_campaign' \] = esc\_attr( $\_REQUEST\['utm\_campaign'\] );
}
if( isset( $\_REQUEST\['url\_parameters'\] ) ) {
$\_SESSION\['um\_sso\_utm\_session'\]\[ 'url\_parameters' \] = esc\_attr( $\_REQUEST\['url\_parameters'\] );
}
}
add\_action( 'um\_before\_register\_fields', 'um\_sso\_utm\_fields\_populate' );
function um\_sso\_utm\_fields\_populate( ) {
$\_SESSION\['um\_social\_profile'\]\[ 'utm\_content' \] = $\_SESSION\['um\_sso\_utm\_session'\]\[ 'utm\_content' \];
$\_SESSION\['um\_social\_profile'\]\[ 'utm\_source' \] = $\_SESSION\['um\_sso\_utm\_session'\]\[ 'utm\_source' \];
$\_SESSION\['um\_social\_profile'\]\[ 'utm\_campaign' \] = $\_SESSION\['um\_sso\_utm\_session'\]\[ 'utm\_campaign' \];
$\_SESSION\['um\_social\_profile'\]\[ 'url\_parameters' \] = $\_SESSION\['um\_sso\_utm\_session'\]\[ 'url\_parameters' \];
}
**Functionality:**
The code snippet uses sessions to store UTM parameters (utm\_content, utm\_source, utm\_campaign, url\_parameters) from the request. It populates these UTM parameters into the `$_SESSION['um_social_profile']` array, which populates the UTM hidden fields in the register forms.
This code snippet can be added to the functions.php file of your theme or in the code snippet plugin. It allows Ultimate Member to capture UTM parameters from URLs and populate them in the registration forms, aiding in tracking user traffic sources.
Last updated on February 28, 2024
No results found
---
# User Locations - Shortcodes - Ultimate Member
User Locations - Shortcodes
===========================
[](javascript:window.print() "Print this article")
Overview
--------
This document provides instructions on how to use the shortcode of the extension [User Locations](https://ultimatemember.com/extensions/user-locations/)
.
Ultimate Member uses WordPress shortcodes to allow users to perform specific actions and display forms and templates. You may use shortcodes in the posts(page) content and text widgets.
Shortcodes
----------
### \[um\_user\_locations\_map\] [#](#um_user_locations_map)
This shortcode shows the location of members on a map.
**Attributes**
| | | | |
| --- | --- | --- | --- |
| _Key_ | _Type_ | _Default_ | _Description_ |
| field | string | The first existing location field | **Meta Key** of the related location field. |
| lat | float | 0 | The latitude coordinate. From -90 to 90. |
| lng | float | 0 | The longitude coordinate. From -180 to 180. |
| zoom | integer | 12 | The value of the zoom parameter. From 0 to 12. |
| height | integer | 300 | The vertical measurement of the map in px. |
| marker\_type | string | avatar | The marker or the pin used on the map:
**avatar** - the user profile photo
**сlassic** - classic red pin
**role** - icon from user role settings
Leave blank to use the avatar marker. |
**Example** - Display a map.
`[um_user_locations_map field="um-home-location" lat="51" lng="15" zoom="4" height="500" marker_type="classic"]`

Last updated on July 15, 2023
No results found
---
# NGINX Configuration Rewrite Rule for Ultimate Member Social Activity - Ultimate Member
NGINX Configuration Rewrite Rule for Ultimate Member Social Activity
====================================================================
[](javascript:window.print() "Print this article")
#### Overview
When hosting your website with NGINX, it's essential to manually add rewrite rules to the NGINX configuration to ensure the proper functionality of Ultimate Member. This ensures that features like the Social Activity extension and custom rewrite rules for Group activity images work correctly.
#### Adding Rewrite Rules
To configure NGINX rewrite rules for Ultimate Member, add the following rewrite rule to your NGINX configuration:
rewrite ^/um-activity-download/(\[^/\]+)/(\[^/\]+)/(\[^/\]+)/\\d{1,10}\\.(gif|png|jpeg|jpg)$ /index.php?um\_action=um-activity-download&um\_post=$1&um\_author=$2&um\_verify=$3 last;
#### Purpose of the Rewrite Rule
This rewrite rule ensures that requests to the specified URL pattern are correctly redirected to the Ultimate Member endpoint. This enables features like the Social Activity extension to function smoothly. Custom rewrite rules may also be necessary based on your site's specific needs.
#### Example
* Original URL: `http://example.com/um-activity-download/post_id/author_id/verify_key/image.jpg`
* Rewritten URL: `http://example.com/index.php?um_action=um-activity-download&um_post=post_id&um_author=author_id&um_verify=verify_key`
#### Notes
* Ensure that the path to the `index.php` file matches the actual path on your server.
* Additional custom rewrite rules may be required depending on your site's setup and requirements.
By configuring NGINX rewrite rules for Ultimate Member, you can ensure that your website functions smoothly and provides users with a seamless experience.
* * *
##### Related articles:
* [NGINX Configuration Rewrite Rule for Ultimate Member User Notes](//docs.ultimatemember.com/article/1935-nginx-configuration-rewrite-rule-for-ultimate-member-user-notes)
* [NGINX Configuration Rewrite Rule for Ultimate Member](//docs.ultimatemember.com/article/1934-nginx-configuration-rewrite-rule-for-ultimate-member)
Last updated on May 17, 2024
No results found
---
# Stripe - Setting up Stripe Success, Cancel Payment, Already Subscribed,Customer Portal,Stripe Checkout URL and Embedded Checkout Pages - Ultimate Member
Stripe - Setting up Stripe Success, Cancel Payment, Already Subscribed,Customer Portal,Stripe Checkout URL and Embedded Checkout Pages
======================================================================================================================================
[](javascript:window.print() "Print this article")
Once you have installed the Stripe extension on your WordPress website, a notification will appear at the top of your wp-admin page. This notification will indicate which pages need to be created. To create the required pages, click the **"Create Pages"** button. Once you have completed this step, the Stripe Pages, including the **Success, Cancel, Already Subscribed, Stripe Checkout URL,** and **Customer Portal pages,** will automatically be assigned to the page settings.
**Note:** If the 'Create Pages' button does not automatically generate the pages, you can create them manually. Refer to this article for guidance: [How to Create Stripe Pages Manually](//docs.ultimatemember.com/article/1900-how-to-create-stripe-pages-manually)

Go to `wp-admin > Pages` to check if the pages are successfully created.

### Redirect Pages During the Subscription Process
When a user attempts to subscribe and is redirected to the Stripe Checkout page, there are three pages the user will be redirected to:
1. **Payment Successful Page**
The user will be redirected to this page when the payment is successful, and completed, or the subscription starts trialling. The default content of this page is a [shortcode](//docs.ultimatemember.com/article/1616-stripe-shortcodes-reference)
that displays the user's order details. For members who subscribe to a plan via the Register form, you must set the [Success page URL](//docs.ultimatemember.com/article/1634-stripe---add-subscription-plans-to-a-registeration-form)
in the `User Role settings > Register options`.

2. **Payment Canceled Page**
The user will be redirected to this page when they click on the logo of your store or the back button on the Stripe Checkout Page.

3. **Already Subscribed Page**
This page is a landing page when a user tries to subscribe with a direct Subscribe URL but they are already subscribed. They will be redirected to this page. The default content of this page is a message indicating that the user already has a subscription and a [shortcode](//docs.ultimatemember.com/article/1616-stripe-shortcodes-reference)
that displays a customer portal button linking to the Stripe customer portal site.

4. **Stripe Checkout URL**
This page is designated for the checkout URL that is created or generated after you've created or imported pricing information for a specific plan.
5. **Customer Portal**
This is a dedicated page created specifically for the direct customer portal URL, appearing as "yoursite.com/customer-portal/". If a logged-in user attempts to access the page or its URL without actually accessing the page, they will be automatically redirected to the Stripe customer portal site. For more information, read [this article](//docs.ultimatemember.com/article/1894-how-to-access-the-stripe-customer-portal-from-the-website)
.
To set the Success, Canceled, Already Subscribed, Stripe Checkout URL Page, and Customer Portal pages, go to `WP Admin > Ultimate Member > Settings > General > Pages.`

### Additional Pages
The **Stripe Embedded Checkout (Payment Checkout Page)** and **Stripe Cancellation Page** are additional pages you may need to set up depending on your requirements. These options are _**not**_ _**enabled by default**_, so you will need to manually enable them through the Ultimate Member plugin settings in wp-admin > Ultimate Member > Settings > Extensions > Stripe. By configuring these pages, you can enhance the checkout process and manage subscription cancellations more effectively, thereby improving the overall user experience on your website.
#### Stripe Embedded Checkout (Payment Checkout Page)
By enabling the **'Stripe Embedded Checkout'** feature within the [Stripe settings](//docs.ultimatemember.com/article/1886-stripe-settings)
, when you click the **'Create pages'** button, it will automatically generate the **'Payment Checkout page'**. This specialized page is crafted to streamline the transaction process for users, facilitating quick and effortless purchases. Alternatively, if you prefer embedding the checkout form directly onto your website, you have the option to enable this setting. Doing so empowers users to finalize their purchases seamlessly without the need to navigate away from your site.
The image below illustrates the embedded checkout on a WordPress site when the "Stripe Embedded Checkout" option is enabled.

#### Stripe Cancellation Page
The Stripe Cancellation Page confirms the successful cancellation of subscriptions, providing users with clear confirmation and any necessary follow-up information. This page is customizable to enhance user experience and ensure customers understand their cancellation has been processed. By default, the Stripe Cancellation Page is not generated. To enable this page:
1. Go to `wp-admin > Ultimate Member > Settings > Extensions > Stripe`.
2. Enable the option "Stripe Cancellation Page".
3. Save or update the settings.
After enabling the Stripe Cancellation Page, a notification will reappear at the top of your wp-admin page. Click on the **"Create Pages"** button again so that the cancellation page is generated. For a more detailed setup of Stripe Subscription Cancellation, refer to this article: [Stripe Subscription Cancellation](//docs.ultimatemember.com/article/1941-stripe-subscription-cancellation)
.

**Note:** If these pages are created manually, don't forget to set them in `WP Admin > Ultimate Member > Settings > General > Pages`.
* * *
**NEXT: [Create Subscription Prices](//docs.ultimatemember.com/article/1617-create-subscription-prices)
**
Last updated on August 7, 2024
No results found
---
# Create Subscription Prices - Ultimate Member
Create Subscription Prices
==========================
[](javascript:window.print() "Print this article")
### **Overview**
Stripe allows you to create subscription prices for your subscription shortcode. This way, you can create multiple subscribe buttons with different prices or Stripe Plan options in the Register form.
If you have existing subscription prices, you can simply [import them from the stripe settings](//docs.ultimatemember.com/article/1846-import-existing-subscription-prices-from-your-stripe-account)
but if you have not created any prices yet, do the following steps below:
**Note:** If you are seeking information about the pricing models supported by the Stripe extension, please consult our Stripe FAQ article titled ["What Pricing Models are supported in the Stripe extension?"](//docs.ultimatemember.com/article/1880-stripe-faq-what-pricing-models-are-the-supported-in-the-stripe-extension)
This article provides details on the various pricing models that can be utilized with the Stripe extension.
1. To create a new subscription/product price, go to [https://dashboard.stripe.com/](https://dashboard.stripe.com/)
and on the side menu, click on the '**+More'** tab and click on **Product Catalog** under Manage your products
2. On the Product Catalog page, Click the " + **Add product**" button to display the form. 
3. Add the **"Name**", "**Description(optional)**" and "**Image(optional)** of your product**.**
4. In the Price Information, the UM Stripe module supports **Recurring Prices** and **One-time** **Prices** as the Pricing Models
5. Suppose you have selected Recurring as your pricing model. In that case, you can choose the following **Billing Period** from the drop-down menu: **Daily, Weekly, Monthly, Every 3 months,** **Every 6 months,** **Yearly,** & **Custom.**
6. Create multiple pricing options per product by clicking the **'+Add another price'** button.

7. For an alternative pricing structure, you have the flexibility to choose the **'One-time'** option. This empowers your users to decide between recurring or one-time payments for their purchases or subscriptions.
8. After saving the product, proceed to [import prices from your Stripe Account](//docs.ultimatemember.com/article/1846-import-existing-subscription-prices-from-your-stripe-account)
by navigating to **wp-admin > Ultimate Member > Settings > Extensions > Stripe. **
9. Once the import process is complete, the newly created prices will appear in the Stripe Plans form at **WP-Admin > Ultimate Member > Stripe Plans**. Simply hover your mouse over the desired Stripe Plan and click on **'Edit'.
**
10. You'll find the product type and associated price you established with Stripe listed under **Subscription Price**. These details are locked to prevent any conflicts.
11. The corresponding ' **one-time'** price configured in Stripe will be showcased in the Subscription Price field.
**EXT: [SHORTCODE REFERENCE](//docs.ultimatemember.com/article/1616-stripe-shortcodes-reference)
**
Last updated on June 3, 2024
### Related Articles
* [UM Stripe Plan Settings](/article/1892-stripe-plan-settings)
No results found
---
# Customizing the Font Size on the Social Activity Wall - Ultimate Member
Customizing the Font Size on the Social Activity Wall
=====================================================
[](javascript:window.print() "Print this article")
The **Social Activity** extension for Ultimate Member provides a dynamic and interactive way to engage your users. However, by default, the font sizes in the activity wall may feel too small for some users or specific designs. This article will guide you through enlarging the font sizes in the activity wall to improve readability while aligning with the original setup instructions found in the Social Activity Setup article.
* * *
### Why Adjust Font Sizes?
Customizing the font size allows you to:
* Enhance readability for all users, including those with visual impairments.
* Improve the overall aesthetics of your site.
* Match the font sizes to your site's design language.
* * *
### Default Font Sizes in the Activity Wall
Here are some of the key elements in the activity wall and their default font sizes:
| **Element** | **Default Font Size** |
| --- | --- |
| Activity Header Text | 12px |
| Activity Icon Text | 15px |
| Comment Box Text | 13px |
| Post Title | 14px |
| Post Excerpt | 12px |
| Buttons (e.g., Like, Comment) | 12px |
* * *
### Steps to Enlarge the Font Size
### How to Use
1. **Add the `um-activity-font-size.css` file to your child theme directory**
* **Copy the CSS code below** and paste it into a file named `um-activity-font-size.css` in your child theme directory.
* The CSS code modifies the font size of various elements within the activity wall of the **Social Activity** extension for the Ultimate Member plugin. It increases the font size for the activity title, icons, text, and more.
2. **Add the PHP code to your child theme’s `functions.php` file**
* **Copy the PHP code below** and paste it into the `functions.php` file in your child theme directory.
* The PHP code registers and enqueues the custom CSS file (`um-activity-font-size.css`) to your WordPress site. By adding this, the font size changes will be applied to the activity wall whenever the `um_activity` the plugin is active.
* * *
This setup ensures that your activity wall font size is adjusted according to your preferences, providing users with a more readable and customized experience.
Last updated on January 14, 2025
### Related Articles
* [Social Activity Setup](/article/1553-social-activity-setup)
No results found
---
# Social Login: X(formerly Twitter) API v2 Setup - Ultimate Member
Social Login: X(formerly Twitter) API v2 Setup
==============================================
[](javascript:window.print() "Print this article")
Overview
--------
This document will provide instructions on how to set up an X(formerly Twitter) application API version 2, so users can register or log in via X on your site. You need to purchase and activate [social login extension](https://ultimatemember.com/extensions/social-login/)
for this setup to work.
Creating a Project
------------------
You need to create a project first before you create a new app. Do the following steps below to create a project:
* Go to the Twitter App developer portal: [https://developer.twitter.com/en/portal/projects-and-app](https://developer.twitter.com/en/portal/projects-and-apps)
.
* In the left side menu, below Projects & Apps, click on **Overview.**
* Under the **Elevated Section,** click the "**\+ Add Project**" button to add a new project.

* Set the name of your project and click on the **Next** button.

* Select how you intend to use the Twitter developer platform from the drop-down menu, and then click on the **Next** button.
* Type and describe your project in the text area. Click on the **Next** button.
Creating a new app
------------------
To create a new Twitter app, you need to do the following steps below:
* Enter a name for your app. Click the **Next** button.

* In the Keys & Tokens tab you need to copy the **API key & API key secret** and paste it in the Social Login.

* Go to **Ultimate Member > Settings> Extensions > Social Login> X Social Connect**. Paste the **API Key** in the **Consumer Key** field and the **API Secret Key** in the **Consumer Secret** field, and click on the **Save Changes** button to update.

### Setup App
* You can continue by clicking the **"A****pp settings"** button or you can go back to the Twitter Developer Portal [https://developer.twitter.com/en/portal/projects-and-apps](https://developer.twitter.com/en/portal/projects-and-apps)

* Under the Projects & Apps menu, go to the project you have created and click on your Twitter App's Name.
* In the User authentication settings, click on the **"Set up"** button to open the user authentication settings.

* To enable OAuth 2.0, first, you must select from the three permissions under **App permissions** to enable OAuth 1.0a Authentication and select your app type.

* Now, add your URLs to the callback URLs in the **App info**.
Add your Redirect URIs. See the example below:
* [https://yoursiteURL/login/](https://yoursiteURL/login/)
e.g., [https://ultimatemember.com/login/](https://ultimatemember.com/login/)
* [](https://ultimatemember.com/login/)
[https://yoursiteURL/register/](https://yoursiteURL/register/)
e.g., [https://ultimatemember.com/register/](https://ultimatemember.com/register/)
* [https://yoursiteURL/account/social/](https://yoursiteURL/account/social/)
e.g., [https://ultimatemember.com/account/social/](https://ultimatemember.com/account/social/)
* Don't forget to add URLs for other required fields such as Website URL, Terms of Service, and Privacy Policy. Click the **Save** button when done.

You can now test and check if the X Login or Register Button Appears in the Login form or Register Form, make sure that the **Show Social Connect login forms or registration forms** are enabled in the Social login settings from wp-admin>Ultimate Member> Settings> Extension> Social login.


Last updated on December 12, 2023
### Related Articles
* [Social Login: X ( formerly Twitter ) App Setup](/article/140-social-login-twitter-app-setup)
No results found
---
# Stripe - Add Subscription Plans to a Registration Form - Ultimate Member
Stripe - Add Subscription Plans to a Registration Form
======================================================
[](javascript:window.print() "Print this article")
Before adding a Stripe plan to a registration form, ensure that you've read and set up the required details in the following documentation articles:
* [Setting up Webhook and Test/Public Keys](//docs.ultimatemember.com/article/1607-stripe-setting-up-webhook-and-test-public-keys)
* [Setting up Stripe Success and Cancel Payment Pages](//docs.ultimatemember.com/article/1609-stripe---setting-up-stripe-success-and-cancel-payment-pages)
* [Create Subscription Prices](//docs.ultimatemember.com/article/1617-create-subscription-prices)
### Add Stripe subscription plan to a registration form
To add a Stripe subscription plan to a registration form, do the following steps:
* Go to **wp-admin > Ultimate Member > Forms > Edit/Add a Registration form.** Click on the " **plus(****+)** " icon to show the Fields Manager where you can select which necessary fields to include in your registration form.
**Note:** When there's no Password field in the Register forms, the [placeholder](//docs.ultimatemember.com/article/1340-placeholders-for-email-templates)
tag `{action_url}` must be used or added to your ['account welcome email'](//docs.ultimatemember.com/article/42-emails-tab#email_templates)
to allow users to set their password. Similarly, when using the direct subscribe URL or the Payment Links with Stripe, this placeholder tag can also be used in the Welcome Email templates.

* Click **"Stripe Plans"** in the Predefined Fields section of the Fields Manager. You may also add a predefined field called **"Stripe Billing Email"** if you want to add an option where this email field’s value will be used as the billing email for the Stripe Account.
* Edit the '**Stripe Plans'** field by clicking the **'****Pencil icon.'**
* There are **three (3) stripe plan types** available for displaying the field in a registration form:
1. **Stripe Plan ( Hidden )** \- The Stripe Plan is hidden in the Register form. Once the form is submitted, the plan will be assigned to the user and redirected to the Stripe checkout page.
2. **Single Plan ( Visible )** - Displays a single plan as a radio field.
3. **Multiple Plan Options** \- Displays multiple plan options as radio fields.
* The title and subscription prices are from the product created on Stripe.com. The Stripe Prices dropdown field is populated by the subscription plans created in WP-Admin > Ultimate Member > Stripe Plans or the imported Stripe plans. The optional Default Value should be the Subscription Plan ID created in WP-Admin > Ultimate Member > Stripe Plans.
* Once the field settings and the registration form are saved, add the Register form shortcode to a page to display it. Visit the Register page on your site. The subscription plans field in the front end should look like the image below.

> **NOTE:** When a user tries to register with their selected plan, they will be redirected to the Stripe Checkout external page to pay the subscription price. Users will be logged in automatically on the site before redirecting them to the Stripe Checkout external page. If the user is successfully subscribed, they will be redirected back to the site on the [Payment Successful page](//docs.ultimatemember.com/article/1609-stripe-setting-up-stripe-success-and-failed-payment-pages)
> and If they didn't subscribe to a plan, they will be linked back to the site on the [Cancel page](//docs.ultimatemember.com/article/1609-stripe-setting-up-stripe-success-and-failed-payment-pages)
> .
### Redirect Users to the Payment Successful Page Upon a Successful Subscription
To redirect your users to the Payment Successful page, **you must add the URL of the Payment Successful page with the required parameter** to the Registration Options of your user role. Here are the steps to set up the redirection to the Payment Successful page:
1. Go to wp-admin>Pages>Edit **Payment successful — UM Payment successful** page.

2. On the page settings>Summary, you can find the page URL, copy it, and save it for later.

3. Go to wp-admin>Ultimate Member> User Roles> Edit a user role> Scroll down to **Registration Options**.
4. Set the **'Action to be taken after registration'** option to **'Redirect to URL'**
5. The 'Set Custom Redirect URL' setting will become available. In the field provided, paste the payment successful page URL and add the required parameter:
`?umm_stripe_sid=UM_STRIPE_CHECKOUT_SID` (e.g. [domain.com/payment-successful/?umm\_stripe\_sid=UM\_STRIPE\_CHECKOUT\_SID](http://domain.com/payment-successful/?umm_stripe_sid={CHECKOUT_SESSION_ID})
).

**Note:** UM Stripe requires adding an extra parameter to the payment successful page URL. This is to prevent subscribers or members from seeing a blank page. Make sure that this [parameter](//docs.ultimatemember.com/article/1899-stripe-placeholders-attribute)
is included in the URL.
6. Update the role and test the redirection to confirm that it is working correctly.

Last updated on June 3, 2024
No results found
---
# Stripe Shortcodes - Ultimate Member
Stripe Shortcodes
=================
[](javascript:window.print() "Print this article")
Shortcodes in plugins serve to dynamically display content, extend functionality, customize features, integrate with other plugins or themes, and simplify complex tasks by allowing users to easily insert specific plugin features into their website content with minimal coding knowledge. As such, here are the Stripe shortcodes to simplify the integration of Stripe into your site.
Stripe Customer Portal Shortcode
--------------------------------
Customers need to have the ability to manage their subscription plans. This shortcode creates a button that redirects customers to the external page of the Stripe Customer Portal to manage subscriptions. A user must be logged in for the redirection to work.
\[ultimatemember\_stripe\_customer\_portal\]

* * *
Stripe Order Details Shortcode
------------------------------
This shortcode displays the order details, billing information, and subscription status for the customer. It allows them to review the information they've provided. The order details will be displayed only when the user has completed the Stripe checkout process from the Stripe checkout page.
\[ultimatemember\_stripe\_checkout\_order\_details\]

* * *
Stripe Checkout Shortcode
-------------------------
Customers need a way to subscribe to your site and access restricted pages and content based on the role assigned to them. With the Stripe module's shortcode, you can create Subscribe buttons so that customers can select them and proceed to the Stripe Checkout page for payment, and then assign roles based on the Subscription events.
The following example shortcode generates a button for customers to check out and subscribe. A user must be logged in for the redirection to work.
\[ultimatemember\_stripe\_checkout label="Annual VIP Membership – $ 299.99/year" id="38"\]

####
* * *
Stripe Show Content Shortcode
-----------------------------
Shortcodes to Display Active and Inactive Subscription Content or Messages
The shortcodes below allow you to display specific content or messages for users with active and inactive subscriptions:
\[ultimatemember\_stripe\_show\_content\] content \[/ultimatemember\_stripe\_show\_content\]
The default of this shortcode displays the content within the shortcode to users with an active subscription.


It's important to note that if UM Content Restrictions are not enabled, it's recommended to use these shortcodes. This ensures a seamless and effective display of content based on the specified plans or prices.If you want to display or show specific content for active and inactive users in a single post or page, you need to add the following attributes in the shortcode:
#### For active subscription
Add this attribute `show_for="active"` in the shortcode as shown in the example below to show the content for active users.
\[ultimatemember\_stripe\_show\_content show\_for="active"\]
Hello active Members
\[/ultimatemember\_stripe\_show\_content\]
#### For inactivate subscription
Add this attribute `show_for="inactive"` in the shortcode as shown in the example below to show the content for the inactive users.
\[ultimatemember\_stripe\_show\_content show\_for="inactive"\]
Hello inactive Members
\[/ultimatemember\_stripe\_show\_content\]
**Sample Usage:**

When utilizing the provided shortcode above, you can enhance its functionality by integrating it with attributes **Prices** and **Plans**, separating them with a comma. In instances where both plans and prices are configured, the content will be visible only if a member possesses any of the plans or prices specified in the attributes.
\[ultimatemember\_stripe\_show\_content show\_for="active" plans="123,456,789" prices="165"\]
Hello Active Members by Plans/Prices
\[/ultimatemember\_stripe\_show\_content\]
**Sample Usage:
**

If you have enabled **Restrict Access by Stripe Plans** and **Active Subscription only** in the **Ultimate Member: Content Restriction**, it's recommended to add the `template=1` attribute in the show content shortcode.

This shortcode can also be integrated into PHP code, such as within a template or widget.
\[ultimatemember\_stripe\_show\_content template=1\] content \[/ultimatemember\_stripe\_show\_content\]

When the attribute is used, the filter to be applied is the **'Active Subscription only'**. If you have not selected any plans or prices from the **'Select Stripe Plans/Prices to allow access to this post'** option, the content is displayed and become accessible for users with active subscription. While users with inactive subscription might see any of the following messages. These notices or messages are intended exclusively for use with UM Content Restrictions > Restrict Access by Stripe Plans> Active Subscription only.
1. "Your current subscription plan does not provide access to this {post type/taxonomy name}. Please upgrade or subscribe to a different plan to view this `{post type/taxonomy name}`"
2. "Your current subscription plan is not allowed to access this {post type/taxonomy name}. Please upgrade or subscribe to a different plan to view this `{post type/taxonomy name}`."
`{post type/taxonomy name}` will be replaced automatically. If an archive page is restricted, it will be replaced with "Please upgrade or subscribe to a different plan to view this category " etc.

If you've chosen a Stripe plan or prices from the **'Select Stripe Plans/Prices to allow access to this post'** option, only users who have subscribed to the plan or purchased the prices will be able to view the content. The logic operates on an OR basis, meaning if a plan is not selected but prices are, users who have purchased the price will still have access to the content, and vice versa.
#### List of shortcode attributes:
| | |
| --- | --- |
| **Attributes** | **Description & Example** |
| **label** | This attribute is required and is displayed on a page. e.g. label = **"CAD 3.00 / month"** |
| **id** | The Stripe Plan ID has been generated in wp-admin > Ultimate Member > Stripe Plans > Add or Edit a Plan. When you create a Stripe plan, the shortcode will be displayed in the Stripe plan settings.  |
| **type** | * **button** - Shows a button element
* **link** \- Shows anchor HTML element
* **url** - Shows a URL string
**Note:** When a user is already subscribed to a plan, this text will show:
You're already subscribed
To modify the text, you can use this filter hook:
add\_filter("umm\_stripe\_already\_subscribed\_text", function( $text ) {
return esc\_attr( "You're subscribed to a plan!" );
});
?> |
| **class** | Add custom classes to the button or anchor element.
`[ultimatemember_stripe_customer_portal type="link" label="customer portal"]` |
| **plans** | This attribute is added in the shortcode \[ultimatemember\_stripe\_show\_content\] to determine the display of specific content or messages tailored to users with either an active or inactive subscription, depending on the specified **plan**. |
| **prices** | This attribute is added in the shortcode \[ultimatemember\_stripe\_show\_content\] to determine the display of specific content or messages tailored to users with either an active or inactive subscription, depending on the specified **prices**. |
| **payment\_method\_types
** | This attribute overrides the payment method type on the Stripe checkout page.
* Default value( when the attribute is not added to the shortcode): `card`
* This can have multiple attribute values separated by a comma. e.g. `card,alipay,grab` |
#### A list of valid payment method types includes:
| | | | | |
| --- | --- | --- | --- | --- |
| acss\_debit | affirm | afterpay\_clearpay | atdpay | au\_becs\_debit |
| bacs\_debit | bancontact | btdk | boleto | card |
| card\_present | cashapp | eps | fpx | giropay |
| grabpay | ideal | klarna | konbini | tdnk |
| oxxo | p24 | paynow | pix | promptpay |
| sepa\_debit | sofort | us\_bank\_account | wechat\_pay | zip |
> **Note:** Each payment method type has to be enabled and configured in the Stripe [**payment method settings.**](https://dashboard.stripe.com/settings/payment_methods)
* * *
**NEXT: [Test Your Integration](//docs.ultimatemember.com/article/1610-stripe---test-your-integration)
**
Last updated on April 17, 2024
No results found
---
# User Notes Shortcodes - Ultimate Member
User Notes Shortcodes
=====================
[](javascript:window.print() "Print this article")
### Overview
This article describes how to utilize the shortcode in the extension User Notes. The user notes shortcodes display the add note form as well as the notes created by the current login user.
Shortcodes
----------
* * *
### **\[um\_user\_notes\_add\]**
A form to add a new note is displayed by this shortcode.
### 
* * *
\[um\_user\_notes\_view\]
This shortcode displays notes created by the currently logged-in user. If the `user_id` is not specified, a list of public notes from all users is displayed for guests.
**Attributes**
| | | | |
| --- | --- | --- | --- |
| _Key_ | _Type_ | _Default_ | _Description_ |
| user\_id | integer | Current profile ID (on profile page)
or current logged-in user ID | The user ID. |
| | | | |
### 
* * *
### \[um\_user\_notes\_single\_view note\_id=”{int}”\]
This shortcode displays a specific note. You can find the Note ID in the notes grid on the user profile tab. Note IDs are only visible to the administrator. They are not visible to the notes author or any other users. Only administrators have the access required to view Note IDs, ensuring that these IDs remain secure and are only used for administrative purposes.
**Attributes**
| | | | |
| --- | --- | --- | --- |
| _Key_ | _Type_ | _Default_ | _Description_ |
| note\_id | integer | note ID on the user profile tab Notes in view notes subtab | The specific note ID. |

**Sample usage:
**


Last updated on May 22, 2024
No results found
---
# Social Login - Assigning Roles - Ultimate Member
Social Login - Assigning Roles
==============================
[](javascript:window.print() "Print this article")
The Social Login extension allows you to add social login buttons anywhere on your site and choose which roles to assign to the buttons. There are two ways to show social connect on login forms:
1\. You can turn on Social Connect button for default setup.
2\. Create multiple social login shortcodes so you can have different output on your site depending on where you want to add the buttons.
1\. If the social connect button is turned on for each provider ( Facebook, Instagram,X (formerly Twitter), Linkedin etc. ), it will automatically show the social login buttons in Login and Registration pages by default. To turn on Social login button, please navigate to **UM > Settings > Extensions > Social login**.
Please read the [Social Login Setup](//docs.ultimatemember.com/article/71-social-login-setup)
to get the app details.

When a user registers, the form on overlay will use a role based from global default role set in **Ultimate Member > Settings > Appearance > Registration form > Registration Default Role** that will be assigned to the user on successful registration.
2\. The other way is using **Social Login Shortcodes**. You can put shortcode anywhere on the page or you can add a content block field in Login/Registration form where you can add the social login shortcode. To create a Social Login Shortcode, go to **Ultimate Member > Settings > Social Login> Add New
**

This allows you to choose which role will be assigned to the user that will authenticate with the Social Login buttons generated from the shortcode.
Last updated on September 15, 2023
No results found
---
# Stripe - Test your integration - Ultimate Member
Stripe - Test your integration
==============================
[](javascript:window.print() "Print this article")
Sandbox/Test Mode allows you to process subscriptions and simulate different payment responses using [Stripe.com Test Cards](https://stripe.com/docs/testing#cards)
. Toggle the Sandbox/Test Mode checkbox and ensure the API Keys are listed in the **Ultimate Member > Settings > Extensions > Stripe**. After that, click the Subscription button or add a Stripe Subscription Plan field to a Register form to redirect you to the Stripe Checkout page and then add the test card details.
To test the integration, ensure that you've read and set the required details in the following documentation before you proceed:
* [Setting up Webhook and Test/Public Keys](//docs.ultimatemember.com/article/1607-stripe-setting-up-webhook-and-test-public-keys)
* [Setting up Stripe Success and Cancel Payment Pages](//docs.ultimatemember.com/article/1609-stripe---setting-up-stripe-success-and-cancel-payment-pages)
* [Create Subscription Prices](//docs.ultimatemember.com/article/1617-create-subscription-prices)
* [Shortcodes & Subscription Events](//docs.ultimatemember.com/article/1616-stripe-shortcodes-reference)
* [Add Subscription Plans to a Register Form](//docs.ultimatemember.com/article/1634-stripe---add-subscription-plans-to-a-registeration-form)
* [Create & Test Customer Billings](//docs.ultimatemember.com/article/1611-stripe---create-test-customer-billings)
> **Note:** Use the Stripe CLI to simulate Stripe events in your local environment. You must add the parameter /?umm-stripe-webhook=true in the localhost URL, e.g., [http://localhost:4242/?umm-stripe-webhook=true](http://localhost:4242/?umm-stripe-webhook=true)
> as your local webhook URL.
>
> _To learn more about the Stripe CLI, please see this doc article:_ [https://docs.ultimatemember.com/article/1864-stripe-cli-integration](//docs.ultimatemember.com/article/1864-stripe-cli-integration)
> **Recommendation:** Stripe has a Test Clock feature where you can simulate the Stripe events by advancing time. Please see this article: [https://docs.ultimatemember.com/article/1803-test-your-integration-with-stripe-test-clocks](//docs.ultimatemember.com/article/1803-test-your-integration-with-stripe-test-clocks)
**Warning: When testing, please use a subscriber account instead of an administrator account. When you use an administrator account, it won't remove the roles assigned to it, and this is to prevent you from being locked out as an admin.**
### Testing the Subscription Statuses and Assigning Roles
1. Using your Admin account, add a new user with a subscriber role.
2. Open the **WP Admin > Users** page with your Admin account and see the Role column. _Keep this browser window open during testing._
3. Add the [Stripe shortcode](//docs.ultimatemember.com/article/1616-stripe-shortcodes-reference)
to a Page or the Stripe Plan predefined field to a Register form.
4. Using a different browser, log in to the site using the subscriber account you've created.

5. Then go to the subscription page where you've setup your products or subscription, click on the Stripe button to proceed to the checkout page. A user must be logged in for the redirection to work when using the Stripe button.

6. Use the Test Credit Cards from [Stripe.com Test Cards](https://stripe.com/docs/testing#cards)
to pay the subscription plan. For testing, you can use this Credit Card Number **4242 4242 4242 4242**. For the Year and Month, use **4/42; for** the CCV, use **424**.

7. When the payment processing is successful with the test account, you can go to the other browser with the Admin account and then check in the **WP Admin > Users** and see if the test subscriber's role and status have changed. The user role you've set in your Stripe Plan Subscription settings should be assigned to this user.

8. Now to test if **pause** and **resume** roles are getting assigned to the test subscriber account, go to the other browser and use the subscriber account and then go to the [Customer Billing](//docs.ultimatemember.com/article/1611-stripe---create-test-customer-billings)
page and click on the button to proceed to the Stripe Customer Billing/Portal page. Click the **"Cancel Plan"** button.

9. Choose **"Pause Subscription"** then click the **"Pause plan"** button. Using the Admin account, check in **WP Admin > Users** if the role has changed. Ensure that the **"pause"** attribute has a role for it to work.


**Note:** We created the roles in wp-admin>Ultimate Member>User Roles to demonstrate the integration; the subscription status in the Role column is not the actual status but a role.
10. On the same subscriber's Stripe Customer Portal, click on **"Resume Plan."** Again, check if the test account's user role has changed in the **WP Admin > Users. **
11. In the subscriber's account go Customer Billing Portal page>Manage Billings>Click the **"Cancel"** button to test the **"Cancel Plan"** role. From the billing page,select "**Cancel Subscription"** and click on the **"Cancel plan"** button. Check in **wp-admin>Users** if the role has changed.

12. To the the **"Trialing"** and **"Past Due"** status and roles,use the user's account and subscribe to a plan with Free Trial. In the example below, Premium Plan has 3 days trial. So the test subscriber account will subscribe to the Premium plan using this Credit Card Number **4000 0000 0000 3220.** For the Year and Month, use **3/24; for** the CCV, use **232\.** After clicking the **"Start trial"** button a popup 3D secure will show. Click the **"Complete"** button to continue.****
13. Check in the **wp-admin>Users** if the role and status has changed to '**Trialing**.'
14. Then go to [https://dashboard.stripe.com/test/customers](https://dashboard.stripe.com/test/customers)
, look for the test subscriber and click on it. You'll be redirected to the customer's overview. In '**Subscriptions,'** click the pencil icon to **"Update subscription."**
Scroll down to the Subscription schedule, then change the **Free Trial days** value to **0.** Click on the "**Update subscription"** button.
15.  A 3D secure popup window will appear. To continue, click the **"Update subscription"** button.< After the update, check if the role and status changed to **"Past due"** in **wp-admin>Users. **
> ****Note: When the trial period ends, it will automatically set the subscription status to "active." Ensure that the "active" attribute has a role assigned to it so that the subscriber's role will be changed.****
Last updated on June 4, 2024
No results found
---
# Stripe - Create & Test Customer Billings - Ultimate Member
Stripe - Create & Test Customer Billings
========================================
[](javascript:window.print() "Print this article")
Stripe provides a **Customer Billing Portal** page that you can integrate into your site using a shortcode to display a button or link for customers to manage their plans and view their billing history. For the redirection to work, the user must be logged in.
\[ultimatemember\_stripe\_customer\_portal\]

The Ultimate Member Stripe extension creates an account using the customer's email address. This will allow Stripe to generate a Customer Billing Portal. When you add the shortcode to the page, the URL will become the Return URL of the Customer Billing Portal for users to return to your site. Learn how to add the shortcode to a page in this [article.](//docs.ultimatemember.com/article/1894-how-to-access-the-stripe-customer-portal-from-the-website)
To manage the Customer Billing Portal's appearance, features, and functionalities, please visit [https://dashboard.stripe.com/test/settings/billing/portal](https://dashboard.stripe.com/test/settings/billing/portal)
.
**NEXT: [Test Your Integration](//docs.ultimatemember.com/article/1610-stripe---test-your-integration)
**
Last updated on June 3, 2024
No results found
---
# Social Login: TwitchTV App Setup - Ultimate Member
Social Login: TwitchTV App Setup
================================
[](javascript:window.print() "Print this article")
### Overview
You can let your user login or register via TwitchTV on your site using the Ultimate Member [social login extension](https://ultimatemember.com/extensions/social-login/)
. This document will be your guide on how to set up TwitchTV App on your site.
#### Creating a new app
You need to create a TwitchTV app to allow users to log in to your site with their TwitchTV account. Do the following to create a new app:
1. Go to TwitchTV Developers site: [https://dev.twitch.tv/login](https://dev.twitch.tv/login)
2. Login to TwitchTV, and make sure that your Two-Factor Authentication is enabled. A user must have a two-factor auth enabled to be able to register the application.

3. Once logged in, you will be redirected to your console. Click on **Applications** or **Register Your Application**

5. In the Developer Applications, click on the **"+ Register Your Application"** button.
6. To register your application, you need to type the **application name**, the **OAuth Redirect URLs,** and **Select Category
**
* In the **OAuth Redirect URLs,** you need to enter your site's login, register, and account's social tab URLs into the field, for example:
* [https://www.exampledomain.com/login/?provider=twitchtv](https://www.exampledomain.com/login/?provider=twitchtv)
* [https://www.exampledomain.com/register/?provider=twitchtv](https://www.exampledomain.com/register/?provider=twitchtv)
* [https://www.exampledomain.com/account/social/?provider=twitchtv](https://www.exampledomain.com/account/social/?provider=twitchtv)
* Select **Website Integration** from the dropdown menu of the **Category**
* Once you're done setting up your app registration, click the **"Create"** button

fghi
7. When the app is registered, it will be displayed below the Developer Applications. Click on the **"Manage"** button

8. Copy the **Client ID** and **Client Secret.** You need to click the "New Secret" button if no Client Secret is shown.

9. Go to **Ultimate Member > Settings > Extensions > Social Login > TwitchTV Social Connect** and paste the **Client ID** & **Client Secret** in the fields. Don't forget to click the **"Save Changes"** button below to save.
Your users can now connect, log in, or register their TwitchTV account to your site.


Last updated on September 15, 2023
No results found
---
# Social Login: Discord App Setup - Ultimate Member
Social Login: Discord App Setup
===============================
[](javascript:window.print() "Print this article")
### Overview
This document provides instructions on how to properly set up a Discord application so that users can connect via Discord on your site. You will need to purchase the [social login extension](https://ultimatemember.com/extensions/social-login/)
if you want users to log in or register via Discord.
### Creating a new app
You need to create a Discord app to allow users to log in to your site with their Discord account. To create a new app, please do the following:
1. Go to the Discord developer site and log in: [https://discord.com/developers/applications](https://discord.com/developers/applications)

2. [](https://discord.com/developers/applications)
Once logged in, you will be redirected to Developer Portal> Applications, then click on the **"New Application**" button.

3. Enter the name of your app and click the **"Create"** button

4. Enter the details of your application, and don't forget to save changes.

5. Go to **Settings>** **OAuth2,** add a single Callback/Redirect URL( See screenshot below ):
* [https://yoursiteURL/login/?provider=discord e.g. https://ultimatemember.com/login/?provider=discord](https://yoursiteURL/login/?provider=github)

6. Then copy the **Client ID** and **Client Secret.** You must click the "**Reset Secret**" button if no Client Secret is shown.

7. Go to **Ultimate Member > Settings > Extensions > Social Login >Discord Social Connect.**
* **Paste the Client ID and the Client Secret ID** in the Discord Social Connect fields. Don't forget to save changes.


Last updated on September 15, 2023
No results found
---
# Social Login: Github App Setup - Ultimate Member
Social Login: Github App Setup
==============================
[](javascript:window.print() "Print this article")
### Overview
This document provides instructions on properly setting up a GitHub application so users can log in/register via Github on your site. You will need to purchase the [social login extension](https://ultimatemember.com/extensions/social-login/)
if you want users to log in via GitHub.
### Creating a new app
You need to create a GitHub app to allow users to log in to your site with their GitHub account. To create a new GitHub app, please do the following:
1. Go to the GitHub application management site: [https://github.com/settings/applications/new](https://github.com/settings/applications/new)
2. For first-timers, you must register a new application, click the button, and fill in the required information.
_**Enter the details for the application.
**_

3\. Do not forget to add a single Callback/Redirect URL( See screenshot below ):
* [https://yoursiteURL/login/?provider=github](https://yoursiteurl/login/?provider=github)
e.g. [https://ultimatemember.com/login/?provider=github](https://ultimatemember.com/login/?provider=github)

4\. Read and agree to the Developer Guidelines and click the “ **Register Application**” button
5\. Go to **Settings> Developer Settings> OAuth Apps** and click on your App.

### Client ID & Secret
On this page, you will find the Client ID (API key) and Client Secret (API secret). If no Client Secret is shown, you need to click the **Generate a new client secret** button.

You need to copy both **Client ID** and **Client secrets** and add them to your site on the Github tab on UM settings page.

Go to **Ultimate Member > Settings > Extensions > Social Login > Github Social Connect.**

Last updated on September 15, 2023
No results found
---
# Stripe CLI Integration - Ultimate Member
Stripe CLI Integration
======================
[](javascript:window.print() "Print this article")
### Overview
This article provides instructions on how to integrate the Stripe CLI to test our Ultimate Member Stripe extension on your local computer. The integration will help ensure that your webhook endpoint is working properly before going live.
### Setup
* **[Install Stripe CLI](https://stripe.com/docs/stripe-cli)** and log in to authenticate your account.
* Check if the pairing code matches the Stripe CLI login command. 
* When the verification is successful, the account ID will appear in the command. 
#### 1\. Forward events to a local webhook endpoint
* To send all Stripe events in test mode to your local webhook endpoint, use the `--forward-to` flag. Use the `--skip-verify` flag to disable HTTPS certificate verification.
* **Command Line:** **stripe listen --forward-to "localhost:8000/?umm-stripe-webhook=true"**
* **Output:**`Ready! Your webhook signing secret is '{{WEBHOOK_SIGNING_SECRET}}' (^C to quit)`

* Copy the Webhook secret and add it in the /wp-config.php file before the "That's all" code comment:
define( 'UM\_STRIPE\_DEV\_LOCAL', 'whsec\_5741b47f3f9faabd935713136e08a47e3f6e7d3b78e501787e9891838d2' );
/\* That's all, stop editing! Happy publishing. \*/
/\*\* Absolute path to the WordPress directory. \*/
if ( ! defined( 'ABSPATH' ) ) {
define( 'ABSPATH', \_\_DIR\_\_ . '/' );
}
When the aforementioned constant is defined or added to that file, the following message appears in **wp-admin>Ultimate Member>Settings>Extensions>Stripe**:

* **Optional:** To forward specific events in a comma-separated list, use the `--events` flag
* **Command Line:**
`stripe listen --events payment_intent.created,customer.created,payment_intent.succeeded,charge.succeeded,checkout.session.completed,charge.failed --forward-to localhost:8000/?umm-stripe-webhook=true`
* **Optional:** Use the `--load-from-webhooks-api` and `--forward-to` flags if you've already registered your endpoint on Stripe.
* **Command Line:** `stripe listen --load-from-webhooks-api --forward-to localhost:5000`
With this command, events are sent to your public webhook endpoint on Stripe-registered and will be forwarded to your local webhook endpoint. The path is appended to your local webhook endpoint in the `--forward-to` the path once the path has been loaded, parsed and its registered events have been taken into account. Use the `WEBHOOK_SIGNING_SECRET` from the initial output of the `listen` commands when validating webhook signatures.
2. Trigger events to test your webhooks integration
* To simulate the event that happens after a client payment is successful for the [Create a session API](https://stripe.com/docs/api/checkout/sessions/create)
in the [Prebuilt Checkout page](https://stripe.com/docs/checkout/quickstart)
, run the `stripe trigger checkout.session.completed` command.
* Command Line: `stripe trigger checkout.session.completed`
Last updated on April 17, 2024
No results found
---
# Stripe - Content Restriction - Ultimate Member
Stripe - Content Restriction
============================
[](javascript:window.print() "Print this article")
The Stripe Content Restriction feature settings enable you to manage user access to posts, pages, tags, and taxonomies in the following ways:
### Restrict Access by Stripe Plans
The UM Stripe Plans settings are designed to attach a Stripe Price to role settings and automatically switch users’ roles based on the subscription status of a customer. This is to maintain the capability to restrict content by Stripe Plan and WP roles with UM Content Restriction settings for Pages, Posts, Taxes, and Categories. This feature is particularly beneficial as many plugins and the WP core rely on WP roles for feature and functionality restrictions, making it an ideal solution for compatibility.
### Restrict Access by Stripe Prices
UM Stripe Prices allow you to restrict content by multiple Stripe Prices, covering various membership levels. This includes granting access to dedicated content for users subscribed to or purchasing specific Stripe Prices.
To implement these features and settings, enable "Content Restriction" for post types and taxonomies in **wp-admin > Ultimate Member > Settings > Access > Restriction Content.
**
**Restrict Post**
1. Go to **wp-admin> Posts** and add a new post, or edit an existing post.
2. Enable " **Restrict access to this post?**" under Ultimate Member: Content Restriction.
3. Select **“Logged in users”** in the option “Who can see this post?”, the Stripe restrictions will only show when you select logged-in users.
4. Enable the **"Restrict Access by Stripe Plans"**
5. The **"Select Stripe Plans to allow access to this post"** feature enables you to choose which **Stripe plans** provide access to a post for users who have either subscribed to or purchased the selected Stripe plan.
6. The **"Select Stripe Prices to allow access to this post"** feature enables you to choose from the dropdown list of **Stripe Prices**, thereby allowing access to the post for users who have subscribed to or purchased the corresponding product with the selected stripe prices.
7. "**Can users subscribed to this plan view the content if they do not have the correct permission?"** - This option allows you to select whether a subscriber can view the content or not.

### Example
In the image provided below, the selectedStripe plan is the Basic Plan, priced at $9.99/month. Only users subscribed to this specific plan will have access to view the associated post. For your convenience, you can select multiple plans simultaneously by holding down the **Ctrl** or **Cmd** keys and clicking on the desired prices in the Stripe plan list.

By default, Ultimate Member offers content restriction based on user roles. With the integration of the Stripe extension, you gain the capability to restrict content using either Stripe Plans, User Roles, or a combination of both. This feature empowers you to override the selected user roles in the restriction settings by prioritizing Stripe Plans.
For instance, consider a scenario where a logged-in user holds the role **"Member"** but attempts to access a post/page restricted to users with the role **"Subscriber."** In such cases, the user would typically be denied access. However, if the "Member" user has subscribed to a specific Stripe Plan, you can surpass the user role restrictions by specifying certain Stripe Plans in the restriction settings. Simply select **"Yes, as long as a user is subscribed to this plan/price, they can view the content regardless of their user role"** in the option "Can users subscribed to this plan view the content if they do not have the correct role permission?"
Furthermore, if you have opted to utilize Stripe prices from the " **Select Stripe Prices to allow access to this post"** option, users or subscribers who have purchased the selected Stripe price will gain access to the post, regardless of their subscribed Stripe plan and assigned role.
### Custom Post Type
To seamlessly integrate additional plugins that introduce custom post types with the Stripe-Content Restriction feature, follow these steps:
1. Navigate to wp-admin > Ultimate Member > Settings > Access > Restriction Content .
2. Enable the settings for your custom post types or taxonomies to activate the integration.
* This ensures that content restriction capabilities extend to the specific custom post types or taxonomies introduced by other plugins, providing comprehensive control over access within your site.
#### Example
In the following example, we've installed and activated the WooCommerce plugin. The WooCommerce custom post types and taxonomies are visible in the sections labeled:
* "Enable the 'Content Restriction' setting for post types."
* "Enable the 'Content Restriction' settings for taxonomies."
Make sure to tick the checkboxes to activate these settings; UM Content Restriction won't be visible unless these are enabled.

For custom post types, follow these additional steps:
1. Go to your Custom Post/Product/Page and either edit an existing one or add a new one.
2. Enable **"Restrict access to this post?"** under "Ultimate Member: Content Restriction."
3. Select **"Logged-in users"** in the option "Who can see this post?"
4. Enable **"Restrict Access by Stripe Plans."**
5. Choose the relevant Stripe Plans from **"Select Stripe Plans to allow access to this post."**
6. Optionally, select Stripe Prices from **"Select Stripe Prices to allow access to this post"** if you want to grant access based on purchased prices.
7. Specify permissions in **"Can users subscribed to this plan view the content if they do not have the correct permission?"
**
### **Restrict Page**
* Go to wp-admin> Pages
* Add a new page or edit an existing page
* Enable **"Restrict access to this post?"** under Ultimate Member: Content Restriction
* Select **“Logged-in users” i**n the option “Who can see this post?”
* Scroll down and enable **"Restrict Access by Stripe Plans"**
* Select **Stripe Plans** in **"Select Stripe Plans to allow access to this post"**
* Select **Stripe Prices** from **"Select Stripe Prices to allow access to this post"** if you want to allow users to access page based on purchased prices
* Select permission in **"Can user subscribed to this plan view the content if they do not have the correct permission?"**
### Restrict Post Tag
1. Go to wp-admin> Posts>Tags
2. Add a new tag or edit an existing tag
3. Enable **"Restrict access to this post?"** under Ultimate Member: Content Restriction
4. Select **“Logged-in users”** in the option “Who can see this post?”
5. Scroll down and enable **"Restrict Access by Stripe Plans"**
6. Select Stripe Plans in **"Select Stripe Plans to allow access to this post"**
7. Select Stripe Prices from **"Select Stripe Prices to allow access to this post"** if you want to allow users to access page based on purchased prices
8. Select a permission in **"Can user subscribed to this plan view the content if they do not have the correct permission? "**

Last updated on April 17, 2024
No results found
---
# Social Login: WordPress App Setup - Ultimate Member
Social Login: WordPress App Setup
=================================
[](javascript:window.print() "Print this article")
### Overview
This document provides instructions on properly setting up a WordPress application so that users can log in/register via WordPress on your site. You will need to purchase the [social login extension](https://ultimatemember.com/extensions/social-login/)
if you want users to log in via WordPress.
### Creating a new app
You need to create a WordPress app to allow users to log in to your site with their WordPress accounts. To create a new WordPress app, please do the following:
1. Go to the WordPress application management site: [http://developer.wordpress.com/apps/](http://developer.wordpress.com/apps/)
.
2. Click the "**Create New Application**" button.

3. Enter the details for the application.
4\. Do not forget to add Callback/Redirect URLs( See screenshot below ):
* [https://yoursiteURL/login/?provider=wordpress](https://yoursiteURL/login/?provider=wordpress)
, e.g., [https://ultimatemember.com/login/?provider=wordpress](https://ultimatemember.com/login/?provider=wordpress)
,
* [https://yoursiteURL/register/?provider=wordpress](https://yoursiteurl/register/?provider=wordpress)
,e.g., [](https://ultimatemember.com/register/)
[https://ultimatemember.com/register/?provider=wordpress](https://ultimatemember.com/register/?provider=wordpress)
,
* [https://yoursiteURL/account/social/?provider=wordpress](https://yoursiteurl/account/social/?provider=wordpress)
, e.g., [https://ultimatemember.com/account/social/?provider=wordpress](https://ultimatemember.com/account/social/?provider=wordpress)

5\. Read and agree to the Developer Guidelines and click the " **Create**" button.

6. After the app was created. You will see a notification.

Go to **My Applications>Your App (e.g My Social Login App.)** You will see the following section on the bottom page.
### Client ID & Secret
On this page, you will find the **Client Key (API key)** and **Client Secret (API secret)**. You need to copy both of these and add them to your site on the WordPress tab on UM settings page.

###
Go to Ultimate Member > Settings > Extensions > Social Login > WordPress Social Connect . Paste the Client ID & Client Secret in the text fields under WordPress Social Connect and click the "Save Changes" button.


Last updated on September 15, 2023
No results found
---
# Import Existing Subscription Prices from your Stripe Account - Ultimate Member
Import Existing Subscription Prices from your Stripe Account
============================================================
[](javascript:window.print() "Print this article")
To save you time, Ultimate Member added a feature where you can simply import the created or existing subscription prices from your Stripe account. When you import the prices, it adds a role to each status automatically. The default role in each subscription status is the role that is set in **WP Admin > Settings > General > New User Default Role**. Ensure that you have read the [Stripe - Setting up Webhook and Test/Public Keys article](//docs.ultimatemember.com/article/1607-stripe-setting-up-webhook-and-test-public-keys)
before you proceed with the steps below.
The following steps will guide you on how to import your existing subscription prices from your Stripe account:
* Go to **wp-admin>Ultimate Member> Settings> Extensions>Stripe.**
* Click the **"Import Prices from your Stripe Account"** button.

* Once the import is done, It will display all the existing subscription prices you have created in Stripe. 
* When you import prices from the Stripe.com account, it should create Stripe Plans automatically and be ready to use. Go to **wp-admin> Ultimate Member> Stripe Plans**. You can see here the following:
* **Plan ID** - You can use this to set the Stripe field's default selected plan in the Register form via the Form Builder
* **Type** - This column displays whether the plan is a one-time or recurring subscription.
* **Price** - This column displays the price of the subscription plan.
* **Mode** - This column displays the mode in which your prices were imported. The Sandbox displays orange icons indicating that prices were created or imported in Test Mode.
* When you try to edit the Stripe Plan, you will also notice that the **Stripe Type/Mode** and **Stripe Price** are **locked**. This is done to avoid interfering with the Site's and Stripe.com's subscriptions.

* You can still create your Stripe Plans manually in **UM > Stripe Plans > Add New.** For more info, read this [article.](//docs.ultimatemember.com/article/1617-create-subscription-prices)
Last updated on April 17, 2024
No results found
---
# Social Login - List of Sync Field Options in Form Builder - Ultimate Member
Social Login - List of Sync Field Options in Form Builder
=========================================================
[](javascript:window.print() "Print this article")
**Basic Profile Info**
On User Authentication, when a user has successfully authenticated via a social network, the plugin pulls the user data from the social network to the site and sync with register form fields.
**Data Members:**
| Field Name | Type | Short description |
| --- | --- | --- |
| identifier | String | The Unique user’s ID on the connected provider. Can be an integer for some providers, Email, URL, etc. |
| profileURL | String | URL link to a profile page on the IDp website |
| webSiteURL | String | User website, blog, web page, |
| photoURL | String | URL link to user photo or avatar |
| displayName | String | User dispalyName provided by the IDp or a concatenation of first and last name. |
| description | String | A short about\_me |
| firstName | String | User’s first name |
| lastName | String | User’s last name |
| gender | String | User’s gender. Values are ‘female’, ‘male’ or NULL |
| language | String | User’s language |
| age | Integer | User’s age, note that we don’t calculate it. We return it as it is. |
| birthDay | Integer | The day in the month in which the person was born. |
| birthMonth | Integer | The month in which the person was born. |
| birthYear | Integer | The year in which the person was born. |
| email | String | User email. Not all of IDp grant access to the user email |
| emailVerified | String | Verified user email. Note: not all of IDp grant access to verified user email. |
| phone | String | User’s phone number |
| address | String | User’s address |
| country | String | User’s country |
| region | String | User’s state or region |
| city | String | User’s city |
| zip | Integer | Postal code or zip code. |
| extend | Array | An extra data is related to the user (e.g followers). |
Last updated on December 12, 2021
No results found
---
# Why does Facebook login no longer works: Graph returned an error: Can't Load URL - Ultimate Member
Why does Facebook login no longer works: Graph returned an error: Can't Load URL
================================================================================
[](javascript:window.print() "Print this article")
Starting from March 2018, Facebook API developers turned the "Use Strict Mode for Redirect URIs" option On by default. So to make the UM Social Login extension compatible, put additional URI without the "/?provider=facebook" from the redirect URIs e.g. "https://www.ultimatemember.com/login/" and keep the existing ones.
This means that you should have these redirect URIs in the "Valid OAuth redirect URIs section"
https://your-site-url/login/
https://your-site-url/login/?provider=facebook
https://your-site-url/register/
https://your-site-url/register/?provider=facebook
https://your-site-url/account/social/
https://your-site-url/account/social/?provider=facebook
Last updated on December 13, 2021
No results found
---
# Stripe’s Plans Customization in Register Forms - Ultimate Member
Stripe’s Plans Customization in Register Forms
==============================================
[](javascript:window.print() "Print this article")
Customize the Stripe Plans displayed in Registration Forms by using the CSS selectors provided below. Add the code to the current theme's styles.css file or use Customize Settings if the theme supports it. We recommend that you use the UM theme for the best results.
### For Multiple plans:
/\* Plan Item \*/
.um .um-stripe-field-multiple\_visible .um-stripe-plan-item {
border-radius: 10px;
border: 1px solid #D0D5DD;
padding: 10px;
color: #475476;
margin-bottom: 15px;
}
/\* separator of checkbox and text \*/
.um .um-stripe-field-multiple\_visible .um-stripe-plan-item
.um-stripe-col {
display: inline-block;
vertical-align: top;
}
/\* product name \*/
.um .um-stripe-field-multiple\_visible .um-stripe-plan-item
.um-stripe-product-name { }
/\* product price \*/
.um .um-stripe-field-multiple\_visible .um-stripe-plan-item
.um-stripe-price-title {
margin-left: 5px
}
/\* product description \*/
.um .um-stripe-field-multiple\_visible .um-stripe-plan-item
.um-stripe-product-desc{
font-size: 12px;
}
/\* active/selected item \*/
.um .um-stripe-field-multiple\_visible .um-stripe-plan-item.selected {
background: #f9fafb;
border: 1px solid #475476;
}

### **For Single Plan:**
/\* Plan Item \*/
.um .um-stripe-field-single\_visible .um-stripe-plan-item {
color: #475476;
}
/\* separator of checkbox and text \*/
.um .um-stripe-field-single\_visible .um-stripe-plan-item
.um-stripe-col { }
/\* product name \*/
.um .um-stripe-field-single\_visible .um-stripe-plan-item
.um-stripe-product-name { }
/\* product price \*/
.um .um-stripe-field-single\_visible .um-stripe-plan-item
.um-stripe-price-title {
font-weight: bold;
margin-top: 10px;
display: block;
}
/\* product description \*/
.um .um-stripe-field-single\_visible .um-stripe-plan-item
.um-stripe-product-desc{
font-size: 14px;
}
### Additional CSS selectors for the price/amount format:
/\* Currency \*/
.um-stripe-plan-item .um-stripe-price-title .um-stripe-price-currency{
color: red;
}
/\* Amount \*/
.um-stripe-plan-item .um-stripe-price-title .um-stripe-price-amount{
color: blue;
}
/\* Every\*/
.um-stripe-plan-item .um-stripe-price-title .um-stripe-price-every{
color: green;
}
/\* Duration\*/
.um-stripe-plan-item .um-stripe-price-title .um-stripe-price-duration{
color: indigo;
}
/\* Slash Symbol\*/
.um-stripe-plan-item .um-stripe-price-title .um-stripe-price-sep{ }
**Note: The CSS selector for the word "every" will not appear on the other plans**

Last updated on April 17, 2024
No results found
---
# Social Login - Sync Social Register form fields with Extend option - Ultimate Member
Social Login - Sync Social Register form fields with Extend option
==================================================================
[](javascript:window.print() "Print this article")
####
To see the full list of Sync Field options, please see this [documentation](//docs.ultimatemember.com/article/1536-social-login---list-of-sync-field-options-in-form-builder)
.

#### Sync register fields with custom data on the social authentication process
Modify the field value on the social authentication process before the final submission with the filter hook below:
#### **Filter Hook:** um\_social\_profile\_\_custom\_data\_{$field\_meta\_key}
\- $sso\_value string default value
- $profile object response object from Social Network API callback
- $form\_id integer current Social Form ID
- $fields array field settings
**Example:**
/\*\*
\* Modify followers count before submission
\*/
add\_filter("um\_social\_profile\_\_custom\_data\_followers\_status","um\_sso\_field\_value\_followers\_status", 10, 4 );
function um\_sso\_field\_value\_followers\_status( $sso\_value, $profile, $form\_id, $fields ){
$sso\_value = $profile->data\['followed\_by'\] + 5000;
return $sso\_value;
}
Last updated on December 12, 2021
No results found
---
# Display Subscription Status, Invoices and Active Subscriptions in the Admin screen - Ultimate Member
Display Subscription Status, Invoices and Active Subscriptions in the Admin screen
==================================================================================
[](javascript:window.print() "Print this article")
The Stripe Extension has features that display subscription status, invoices, and active subscriptions on the admin screen. This article will explain how to use the features.
#### Display Subscription Status
When you have successfully set up your Stripe Extension, go to **wp-admin > Users**. Here you'll see the following subscription statuses for your users:
| | |
| --- | --- |
| **Active** | displays when the user's subscription is active |
| **Inactive** | displays when the user's subscription is inactive |
| **Trialing** | displays when the user's subscription is trialing |
| **Canceled** | displays when the user's subscription is canceled |
| **Revoked** | displays when the user's subscription has been revoked after assigning the Stripe customer to another WP account |
| **Unpaid** | displays when the user's subscription is unpaid |
| **Past Due** | displays when the user's subscription is past due |
| **Paused** | displays when the user's subscription is paused |
The " **View on Stripe"** link under each status opens a new tab to your customer's Stripe overview page

#### Invoices and Active Subscriptions
When you edit a user with an **active subscription status** in **wp-admin > Users**, you'll be able to see the user's or customer's subscriptions and invoices table under the **Ultimate Member Stripe** section.

The invoice table will only display the most recent invoices, not all. You need to click the **"Manage on Stripe"** link, which will open a new tab to the customer overview on Stripe.com.

**Note: You may test or create a simulation of how the statuses change when testing your integration with Stripe test clocks. See** [https://docs.ultimatemember.com/article/1803-test-your-integration-with-stripe-test-clocks](//docs.ultimatemember.com/article/1803-test-your-integration-with-stripe-test-clocks)
**for more information.**
Last updated on April 17, 2024
### Related Articles
* [Test your integration with Stripe test clocks](/article/1803-test-your-integration-with-stripe-test-clocks)
* [Stripe - Test your integration](/article/1610-stripe---test-your-integration)
No results found
---
# Test your integration with Stripe test clocks - Ultimate Member
Test your integration with Stripe test clocks
=============================================
[](javascript:window.print() "Print this article")
Ultimate Member Stripe extension integrates the stripe checkout page, and customer billing features, allowing users to pay, subscribe, and manage plans. Once you set up this extension, you must test its integrity.
Before testing your integration, make sure you've read and set the required details in the following documentation before you proceed:
* [Setting up Webhook and Test/Public Keys](//docs.ultimatemember.com/article/1607-stripe-setting-up-webhook-and-test-public-keys)
* [Setting up Stripe Success and Cancel Payment Pages](//docs.ultimatemember.com/article/1609-stripe---setting-up-stripe-success-and-cancel-payment-pages)
* [Create Subscription Prices](//docs.ultimatemember.com/article/1617-create-subscription-prices)
* [Shortcodes & Subscription Events](//docs.ultimatemember.com/article/1616-stripe-shortcodes-reference)
* [Add Subscription Plans to a Register Form](//docs.ultimatemember.com/article/1634-stripe---add-subscription-plans-to-a-registeration-form)
* [Create & Test Customer Billings](//docs.ultimatemember.com/article/1611-stripe---create-test-customer-billings)
> **Note:** Use the Stripe CLI to simulate Stripe events in your local environment. You must add the parameter **/?umm-stripe-webhook=true** in the localhost URL e.g. **[http://localhost:4242/?umm-stripe-webhook=true](http://localhost:4242/?umm-stripe-webhook=true)
> ** as your local webhook URL.
>
> To learn more about the Stripe CLI, please see this doc article: [https://docs.ultimatemember.com/article/1864-stripe-cli-integration](//docs.ultimatemember.com/article/1864-stripe-cli-integration)
The **Stripe Test Clocks** is one of the easiest ways to test your Billing integration. It helps to simulate test cases of your billing resources like subscriptions. With the Stripe test clock, you can advance the time in test mode to avoid waiting for a few days, weeks, or even a year to check and test the integration of your billings. For more details about Stripe test clocks and how to use them, you can go to this link: [https://stripe.com/docs/billing/testing/test-clocks](https://stripe.com/docs/billing/testing/test-clocks)
To see if the integration is working we suggest you create roles in **wp-admin> Ultimate Member> User Roles** so you can set in **wp-admin>Ultimate Member> Stripe Plans> Edit a plan** and see what happens when a subscription is active, unpaid, paused, past due, cancelled or trialling.

### Testing Integration with Stripe Test Clocks
To effectively test your integration with Stripe Test Clocks, follow the steps outlined below:
#### 1\. Setup Test Environment
* Go to your [Stripe Dashboard](https://dashboard.stripe.com/test/dashboard)
and set it to test mode.
#### **2\. Create a Test Clock**
* Go to the **'Billing'** tab and click on the '**Quick actions'** button**.**
* Click on the '**Create simulation'**

* It will redirect you to the Subscription page > [Test Clocks tab.](https://dashboard.stripe.com/test/billing/subscriptions/test-clocks)
Click the **'+New simulation'** button.****
* Set a simulation name and the starting date and time of your simulation. Then click on the **'Create'** button, you may be presented with a security check when you click the button.
* Once created, copy the **Test Clock ID** in the upper right corner.

#### 3\. Configure Ultimate Member Settings
* Go to **wp-admin>Ultimate Member> Settings> Extension>Stripe**
* Enable **Sandbox/Test Mode** setting.
* Enable the Test Clock and paste the **Test Clock ID** in the field. This will create a Stripe customer for the Test clock
* Click the '**Save Changes'** button

#### **4\. Setup your Testing Simulation**
* Create a user in **wp-admin > Users**. After creating the user, you can verify that the user is in Test Clock mode in the Subscription status.
* Go back to the **Stripe Dashboard > Subscription > Test clocks**. Choose the test clocks simulation you created earlier by clicking on it.

* Find the customer or user you created in wp-admin > Users in the Clock Objects section. Confirm and ensure that the customer email matches the one registered on your site.

**Note: When creating a customer in wp-admin>Users, the customer will only appear in test clocks if the Test Clocks option is enabled and the test clock ID is entered in wp-admin>Ultimate Member>Settings>Extensions>Stripe. Therefore, it is important to enable these settings before creating a user.**
#### 5\. Execute Test Cases
Before you proceed with this test, please ensure you have read [How to use test clocks](https://stripe.com/docs/billing/testing/test-clocks#how-to-use-test-clocks)
.
* ##### **Trial & Subscription**
* Follow the steps above on how to create a customer then login to your site in another browser using the logins of the customer you've created.
* Then go to the page where you added the subscription plans and select or click the subscribed button that links to the Stripe Plan you've set up with a free trial.
* Enter the payment details. For testing, you can use this Credit Card Number **4242 4242 4242 4242**. For the Year and Month, use **4/42**; for the CCV, use **424**. Then click on the '**Start trial'** button. Once the subscription is successful, you'll get redirected to the Stripe success page of your site.
* Now go to your **Stripe Dashboard>Billing> Subscription> Test clocks>** Select your test clocks simulation and click on the user with the trial subscription.

* You'll see in the customer's overview that the subscription is on trial, and then in the **invoices** section, you'll see that an **invoice of $0.00** is generated due to the free trial.
* Go to **wp-admin>Users** and check if the role and the status have changed to Trialing. 
* ##### Pause & Resume
* Pause
* Switch to the other browser where you have a user account with a trial subscription. If you're currently on the payment success page, you can click on the Customer Portal button. 
* If you're not on the payment success page anymore, navigate to the page [where you added the Customer Portal shortcode](//docs.ultimatemember.com/article/1894-how-to-access-the-stripe-customer-portal-from-the-website)
. Once you're on that page, click the ["Manage billing"](//docs.ultimatemember.com/article/1611-stripe---create-test-customer-billings)
button to manage your billing. This button will automatically redirect you to the Stripe Customer Billing/Portal page. 
* Click on the **Cancel Plan** button. You'll be redirected to **Billing>Cancel or Pause**. Under the current plan, select **Pause Subscription**, and click the **Pause Plan** button.

* Take notice that in this example, the Plan Subscription will automatically renew after **one month;** therefore, we'll test it using the test clock.
* Go to Stripe Dashboard> Billings> >Subscription>Test Clocks> Select your test clocks simulation> click on the customer with a **paused plan.** You'll see in the customer's **Overview> Subscriptions** that the collection is paused.
* Go to **wp-admin>Users** and check if the role and status have changed.
* ##### Resume
* On the customer's page in Stripe, you will find a banner at the top with an **'Advance Time'** button. Simply click on this button.

* As we mentioned earlier, the resume time of the subscription paused plan is after 1 month, so we'll advance the time to a month. The clock time date is **January 28, 2024,** so we'll advance it to **February 28, 2024,** or you can select **"+1 month"** from the shortcut. Once you've selected the date, click on the **Advance** button.
* The clock time has advanced and the customer subscription plan has now resumed, you can see it in the customer's subscription overview. The subscription becomes active because the plan has been resumed. You can see in the Payments and Invoices that the payment for the 1st month was **canceled** and **void** because the subscription plan was **paused**.
* Go to **wp-admin> Users** and check if the role and status have changed. The subscription status has been active again.
* **Canceled**
* To test the cancel integration, log in to your site in another browser using the customer's account with an **active subscription,** then go to the page where you've added the **Customer Billing Portal** shortcode and click on the **Manage billing** button.
* Click on the **Cancel Plan** button. You'll be redirected to **Billing>Cancel or Pause**. Under the current plan, select the **Cancel subscription,** then click the **Cancel plan** button.

* In the customer's **Overview> Subscriptions and** Payments the subscription is **canceled**.

* Go to wp-admin>Users and check if the role and status have changed.
* ##### Past Due
* Log in to your site in another browser using the customer's account you've created in **wp-admin>Users**. Then go to the page where you added the subscription plans. Subscribe to the plan with a free trial using these payment details: Credit Card Number **4000 0000 0000 3220**, expiring **3/24**, and CCV **232**. 
* A 3D secure popup window will appear. To continue, click the **"Complete"** button.
* Once the Subscription Trial is Active, go to Stripe dashboard>Customers> click on the **customer with an active trial subscription.** You will see in the customer's overview>subscriptions that the subscription status is in **Trial mode** and will end on **March 2.**
* Click on the **'****Advance time'** button and set the clock to the day after the end date of the trial. In this example, we have set the time to **March** **3**. Click the **'Advance '** button after setting up the date and time.
* Once the clock time has been advanced, the payment failed, the customer was not charged because the card is declined, so the status will be **Past Due.**
* You can check in **wp-admin> Users** if the role and status have changed.
* **Unpaid**
* If all retries scheduled for the customer's subscription payment have failed instead of **canceled subscription status**, you can change the settings and turn it into an **unpaid subscription status**.
* Go to: [https://dashboard.stripe.com/settings/billing/automatic](https://dashboard.stripe.com/settings/billing/automatic)
. In the settings, scroll to **Manage failed payments> Subscription status > If all retries for a payment fail > Mark the subscription unpaid.** Click the save button.****
* Log in to your site in another browser using a test customer's account you've created in **wp-admin>Users**. Then go to the page where you've added the subscription plans and subscribe to a plan with a free trial using these payment details: **Credit Card Number:** **4000000000000341, exp: 3/24 CCV: 232
**
* In Stripe Dashboard, Go to the **Customers tab> Click on the customer with an active trial subscription**.
* You will see that the subscription status is in Trial mode and will end on **March 6.** Click on the **'Advance time'** button and set the clock to the day after the end date of the trial.
* In this example, we have set the date to **March 7, 2023**. The subscription is now **Past due** because of the failed payment, so the invoice shows that it's retrying.
* The charge retry schedule will be displayed if you hover your mouse over the **Retrying** notice
* You'll get the **Unpaid subscription** status **after 3 to 7 retries of failed payment charges**. To test, keep advancing the time after the scheduled invoice date. The images below show the events for which we advanced the time and date multiple times and got the unpaid subscription status when we advanced the time/date to **April 10,** a month after the scheduled invoice**(March 7)**
* If you scroll down to the **'Recent Activity'** section, you'll find here the multiple failed payments.
* In the **Events and Logs** tab, you can also see in the **Events** the failed attempts of payments.
* You can check in **wp-admin>Users** if the role and status have changed.
Last updated on August 7, 2024
No results found
---
# What's new in UM Social Login 2.3: One-step Registration Process, New Social Networks, Popup Window Authentication & Profile Avatar improvements - Ultimate Member
What's new in UM Social Login 2.3: One-step Registration Process, New Social Networks, Popup Window Authentication & Profile Avatar improvements
================================================================================================================================================
[](javascript:window.print() "Print this article")
Since our last minor release in July, we’ve been working on a variety of improvements to Social Login:
* One-step process for users registering via social networks.
* Social Shortcode's integration type settings
* Sync Social Registration form fields
* Opens a new browser window to authenticate Social Network's applications.
* Redesigned Social Network avatars selection to change profile photo in Profile form.
* Added Github, WordPress.com, and 20+ social network providers.
Ultimate Member 2.3 is a minor release, meaning **it should be fully backward compatible with all Social Login releases since 2.0**. However, it’s still considered best practice and recommended, to backup before updating.
Here are some more details about what’s new in 2.3

### One-step process
The 2-step process is still available as a default option for backward compatibility.
Additional options are added in the Register form builder to allow the One-step process in the Social Overlay.
In previous versions, when the first time you try to log in or register via a social network, you will be automatically connected and logged in with the site account that matches your email address in a social network account.
In version 2.3, we have added an option to have the ability to choose the registration process when emails are matched.
* Link Accounts & Login users Automatically
\- This is the default process since version 2.0.
* Link Accounts & Redirect users to Login Page
* Allow new account creation with a generated email address
\- A new email address will be generated on the registration form process.
Example format: **nobody@yoursitedomain.com**.
\- You can modify the email prefixes with the following filter hooks:
**\+ um\_sso\_generate\_email\_address**
- $email\_prefix
- $predicted\_user\_id
- $site\_url
**\+ "um\_sso\_generate\_email\_domain"**
- $site\_url
* Do not link Accounts & Prevent from account creation
- Users will not be able to register or login via the social networks when both email addresses are matched and their social network email is not linked to the site. This will require users to manually log in to connect their Social Network via the Account Page.
**Splash Screen**
Version 2.3 has the ability to show a content block in Social Overlay as Splash Screen with an Image Loader for a few seconds. This can be disabled in the Social Register Form settings to keep the users redirected to the next page or process immediately.

### **Social Buttons Shortcode - Integration Type**
We have improved the social button shortcode to restrict the social integration process. The new options are Login & Register ( default ), Login only & Register only.

### **Sync Social Registration form fields with Social Network's API response data**
Assign Social Network fields to Social Register fields to synchronize the values on Registration.

#### **Basic Profile Info**
On User Authentication, when a user has successfully authenticated via a social network, the plugin pulls the user data from the social network to the site and sync with register form fields.
**Data Members:**
| Field Name | Type | Short description |
| --- | --- | --- |
| identifier | String | The Unique user’s ID on the connected provider. Can be an integer for some providers, Email, URL, etc. |
| profileURL | String | URL link to a profile page on the IDp website |
| webSiteURL | String | User website, blog, web page, |
| photoURL | String | URL link to user photo or avatar |
| displayName | String | User dispalyName provided by the IDp or a concatenation of first and last name. |
| description | String | A short about\_me |
| firstName | String | User’s first name |
| lastName | String | User’s last name |
| gender | String | User’s gender. Values are ‘female’, ‘male’ or NULL |
| language | String | User’s language |
| age | Integer | User’s age, note that we don’t calculate it. We return it as it is. |
| birthDay | Integer | The day in the month in which the person was born. |
| birthMonth | Integer | The month in which the person was born. |
| birthYear | Integer | The year in which the person was born. |
| email | String | User email. Not all of IDp grant access to the user email |
| emailVerified | String | Verified user email. Note: not all of IDp grant access to verified user email. |
| phone | String | User’s phone number |
| address | String | User’s address |
| country | String | User’s country |
| region | String | User’s state or region |
| city | String | User’s city |
| zip | Integer | Postal code or zip code. |
| extend | Array | An extra data is related to the user (e.g followers). |
> If you want to use the extend option, please read the documentation in the link: [Social Login - Extend Options](//docs.ultimatemember.com/article/1506-social-login-sync-social-register-form-fields-with-extend-option)
### Opens a new browser window to authenticate Social Network's applications.
Log in, register, or connect to a Social Network site via an Account page or any page that has Social Login buttons.
We have improved the Social Network authentication process for requesting user application permission via a child window browser.
Like how other plugins such as NextEnd Social Login and other popular Single Sign-On plugins for WordPress implemented the same authentication process via a child window, this allows users to register/login/connect their Social Network accounts without leaving the current page. 
### Redesigned Social Network avatars selection to change profile photo in Profile form
Preview each Social Network avatar in Profile Photo when you hover on it. Just click/tap on the avatar to save the avatar as a profile photo.

### Additional Social Networks: Github, WordPress.com, and 20+ more networks.
We have added Github and WordPress.com to the supported Social Networks in 2.3. We haven't enabled the settings for other Social Networks that are ready for usage since the latter networks have been requested by many customers.
> If you want to enable other Social Networks, please see the doc to [enable Social Login settings for hidden Social Networks](//docs.ultimatemember.com/article/1508-social-login-enable-hidden-social-network-settings)
> .
Here's a list of supported social network providers and their specifications:
| Adapter Unique Name | Specs | Has 2.3 Settings | Authentication & Basic Profile | | | |
| --- | --- | --- | --- | --- | --- | --- |
| Amazon | OAuth2 | No | Yes |
| AOLOpenID | OpenID | No | Yes |
| Authentiq | OAuth2 | No | Yes |
| BitBucket | OAuth2 | No | Yes |
| Blizzard | OAuth2 | No | Yes |
| Discord | OAuth2 | No | Yes |
| Disqus | OAuth2 | No | Yes |
| Dribbble | OAuth2 | No | Yes |
| **Facebook** | **OAuth2** | **Yes** | **Yes** | | |
| Foursquare | OAuth2 | No | Yes | |
| **GitHub** | **OAuth2** | **Yes** | **Yes** |
| GitLab | OAuth2 | No | Yes |
| **Google** | **OAuth2** | **Yes** | **Yes** | |
| **Instagram** | **OAuth2** | **Yes** | **Yes** |
| **LinkedIn** | **OAuth2** | **Yes** | **Yes** | |
| MicrosoftGraph | OAuth2 | No | Yes | |
| OpenID | OpenID | No | Yes |
| Paypal | OpenID | No | Yes |
| PaypalOpenID | OpenID | No | Yes |
| Reddit | OAuth2 | No | Yes |
| Spotify | OAuth2 | No | Yes |
| StackExchange | OAuth2 | No | Yes |
| StackExchangeOpenID | OpenID | No | Yes |
| Steam | Hybrid | No | Yes |
| SteemConnect | OAuth2 | No | Yes |
| Tumblr | OAuth1 | No | Yes | | |
| TwitchTV | OAuth2 | No | Yes |
| **Twitter** | **OAuth1** | **Yes** | **Yes** | | | |
| WeChat | OAuth2 | No | Yes |
| WindowsLive | OAuth2 | No | Yes | |
| **WordPress** | **OAuth2** | **Yes** | **Yes** |
| Yahoo | OAuth2 | No | Yes |
| YahooOpenID | OpenID | No | Yes |
For a more complete list of new things, [see the changelog at the bottom page](https://ultimatemember.com/roadmap/)
.
Last updated on November 16, 2022
No results found
---
# Social Login - Ultimate Member
Social Login
============
Sort by Default Sort A-Z Sort by Popularity Sort by Last Updated
* [Social Login: User Role Redirection Settings](/article/1940-social-login-user-role-redirection-settings)
* [Social Login: Authenticate on Current Window](/article/1938-social-login-authenticate-on-current-window)
* [Social Login 2.3 Setup](/article/1531-social-login-2-3-setup)
* [Social Login: Facebook App Setup](/article/20-social-login-facebook-app-setup)
* [UTM Parameters](/article/1910-utm-parameters)
* [Social Login Setup](/article/71-social-login-setup)
* [Social Login: X(formerly Twitter) API v2 Setup](/article/1699-social-login-twitter-api-v2-setup)
* [Social Login: X ( formerly Twitter ) App Setup](/article/140-social-login-twitter-app-setup)
* [Social Login: LinkedIn App Setup](/article/142-social-login-linkedin-app-setup)
* [Social Login - Assigning Roles](/article/223-social-login-assigning-roles)
* [Social Login: TwitchTV App Setup](/article/1760-social-login-twitchtv-app-setup)
* [Social Login: Github App Setup](/article/1532-social-login-github-app-setup)
* [Social Login: WordPress App Setup](/article/1533-social-login-wordpress-app-setup)
* [Social Login: Discord App Setup](/article/1763-social-login-discord-app-setup)
* [Social Login: Google App Setup](/article/141-social-login-google-app-setup)
* [Social Login Common Issues](/article/174-social-login-common-issues)
* [What's new in UM Social Login 2.3: One-step Registration Process, New Social Networks, Popup Window Authentication & Profile Avatar improvements](/article/1505-whats-new-um-social-login-2-3)
* [Why does Facebook login no longer works: Graph returned an error: Can't Load URL](/article/1331-why-does-facebook-login-no-longer-works)
* [Social Login - Sync Social Register form fields with Extend option](/article/1506-social-login-sync-social-register-form-fields-with-extend-option)
* [Social Login - List of Sync Field Options in Form Builder](/article/1536-social-login---list-of-sync-field-options-in-form-builder)
* [1](/category/19-social-login?sort=updatedAt)
* [2](/category/19-social-login/2?sort=updatedAt)
No results found
---
# Stripe FAQ - How Many Subscriptions a User Can Subscribe to? - Ultimate Member
Stripe FAQ - How Many Subscriptions a User Can Subscribe to?
============================================================
[](javascript:window.print() "Print this article")
A customer or user can only subscribe to a single one-time or subscription plan. You may add multiple subscriptions to a customer via **S****tripe > Customer > Subscriptions**, but this will mess up the role assignment of users on your site. Currently, the UM Stripe Extension limits the subscription to one email per subscription and requires the use of a unique and valid email address for each subscription. Read the [Subscription Limit: One Subscription Per Email Address](//docs.ultimatemember.com/article/1898-subscription-limit-one-subscription-per-email-address)
Last updated on June 4, 2024
No results found
---
# Social Login - Ultimate Member
Social Login
============
Sort by Default Sort A-Z Sort by Popularity Sort by Last Updated
* [How to troubleshoot Facebook: SDK returned an error](/article/1498-how-to-troubleshoot-facebook-sdk-returned-an-error)
* [1](/category/19-social-login?sort=updatedAt)
* [2](/category/19-social-login/2?sort=updatedAt)
No results found
---
# Stripe - Ultimate Member
Stripe
======
Sort by Default Sort A-Z Sort by Popularity Sort by Last Updated
* [Introduction to Stripe Extension](/article/1606-introduction-to-ultimate-members-stripe-extension)
* [Stripe - Setting up Webhook and Test/Public Keys](/article/1607-stripe-setting-up-webhook-and-test-public-keys)
* [Stripe - Setting up Stripe Success, Cancel Payment, Already Subscribed,Customer Portal,Stripe Checkout URL and Embedded Checkout Pages](/article/1609-stripe---setting-up-stripe-success-and-cancel-payment-pages)
* [Create Subscription Prices](/article/1617-create-subscription-prices)
* [Stripe - Add Subscription Plans to a Registration Form](/article/1634-stripe---add-subscription-plans-to-a-registeration-form)
* [Stripe Shortcodes](/article/1616-stripe-shortcodes-reference)
* [Stripe - Create & Test Customer Billings](/article/1611-stripe---create-test-customer-billings)
* [Stripe - Test your integration](/article/1610-stripe---test-your-integration)
* [Stripe CLI Integration](/article/1864-stripe-cli-integration)
* [Test your integration with Stripe test clocks](/article/1803-test-your-integration-with-stripe-test-clocks)
* [Import Existing Subscription Prices from your Stripe Account](/article/1846-import-existing-subscription-prices-from-your-stripe-account)
* [Stripe - Content Restriction](/article/1805-stripe-content-restriction)
* [Stripe’s Plans Customization in Register Forms](/article/1859-stripe-s-plans-customization-in-register-forms)
* [Display Subscription Status, Invoices and Active Subscriptions in the Admin screen](/article/1865-display-subscription-status-invoices-and-active-subscriptions-in-the-admin-screen)
* [Stripe FAQ - How Do Subscriptions Handle Staging Sites and Migrations?](/article/1612-stripe-faq-how-do-subscriptions-handle-staging-sites-and-migrations)
* [Stripe FAQ - Do Subscriptions Replace or Merge Roles?](/article/1618-do-subscriptions-replace-or-merge-roles)
* [Stripe FAQ - How Many Subscriptions a User Can Subscribe to?](/article/1619-how-many-subscriptions-a-user-can-subscribe-to)
* [Stripe FAQ - How to Connect a Stripe Customer account to a WordPress Account?](/article/1626-how-to-connect-a-stripe-customer-account-to-a-wordpress-account)
* [Stripe Beta Test](/article/1876-stripe-beta-test)
* [Stripe FAQ - What Pricing Models are supported in the Stripe extension?](/article/1880-stripe-faq-what-pricing-models-are-the-supported-in-the-stripe-extension)
* [1](/category/1605-stripe?sort=custom)
* [2](/category/1605-stripe/2?sort=custom)
No results found
---
# Stripe - Ultimate Member
Stripe
======
Sort by Default Sort A-Z Sort by Popularity Sort by Last Updated
* [Stripe - Support Payment Link for Checkout](/article/1885-stripe-support-payment-link-for-checkout)
* [Stripe Settings](/article/1886-stripe-settings)
* [Pricing Model-Customer Chooses Price](/article/1888-pricing-model-customer-chooses-price)
* [UM Stripe Plan Settings](/article/1892-stripe-plan-settings)
* [How to Access the Stripe Customer Portal from the Website?](/article/1894-how-to-access-the-stripe-customer-portal-from-the-website)
* [Restricted by Active Subscription](/article/1895-restricted-by-active-subscription)
* [Stripe Subscription Events](/article/1896-stripe-subscription-events)
* [Subscription Limit: One Subscription Per Email Address](/article/1898-subscription-limit-one-subscription-per-email-address)
* [Stripe Parameters](/article/1899-stripe-placeholders-attribute)
* [How to Create Stripe Pages Manually?](/article/1900-how-to-create-stripe-pages-manually)
* [Enable Payment Method](/article/1901-enable-payment-method)
* [Enable Users to Switch Stripe Plan or Prices](/article/1929-enabling-customers-to-switch-plans-via-stripe-portal)
* [Stripe Conditional Fields Visibility](/article/1932-stripe-conditional-fields-visibility)
* [Stripe Subscription Cancellation](/article/1941-stripe-subscription-cancellation)
* [Stripe Extension Common Issues](/article/1942-stripe-extension-common-issues)
* [Stripe - Change Payment Collection Method](/article/1944-stripe-extension-account-billing-tab)
* [1](/category/1605-stripe?sort=custom)
* [2](/category/1605-stripe/2?sort=custom)
No results found
---
# User Bookmarks setup - Ultimate Member
User Bookmarks setup
====================
[](javascript:window.print() "Print this article")
The User Bookmarks extension allows users to bookmark posts, pages, media, and other post types for quick access from the User page. This document provides instructions on how to set up and use the [User Bookmarks extension](https://ultimatemember.com/extensions/user-bookmarks/)
.
### Settings Page
Once you activate the User Bookmarks extension, you will see the **User Bookmarks** tab in _wp-admin > Ultimate Member > Settings > Extensions_. On this page, you can find the following options:
* **Bookmark icon position** - choose the position of the bookmark icon on the page.
* **Enable bookmark** - choose where the bookmark icon will appear.
* **Enable bookmark on archive pages** - allow bookmarking in categories.
* **Enable bookmark on profile pages** \- allow you to bookmark the user profiles. (Disabled by default)
* **Profile folders text (Plural)** - (optional, appears if the bookmark on profile pages is enabled) folder text plural form.
* **Profile folder text (Singular)** - (optional, appears if the bookmark on the profile page is enabled) folder text singular form.
* **Add bookmark button text** - set the text of the bookmark icon.
* **Remove bookmark button text** - set the photo thumbnail size.
* **Disable folder system for Bookmarks** - turn this on to use the user bookmarks functionality without folders.
* **Folders text (Plural)** – (optional, appears if the folder system is enabled) folder text plural form.
* **Folder text (Singular)** – (optional, appears if the folder system is enabled) folder text singular form.
* **Bookmarked Icon (css class)** - a class of the bookmarked icon.
* **Regular Icon (css class)** - a class of the regular icon.
* **Using Page Builder** - show post excerpt without applying shortcodes if not checked.
* **Create default folder** – (optional, appears if the folder system is enabled) automatically creates the first bookmarks folder for a new member.
* **Default folder name** – (optional, appears if the default folder is enabled) a name for the automatically created bookmarks folder.
Image - The **User Bookmarks** settings on _wp-admin > Ultimate Member > Settings > Extensions > User Bookmarks.
_

### Creating bookmarks
The user bookmarks extension adds the "Bookmarks" tab to the user profile page.

The bookmarks tab allows users to create folders for bookmarks and arrange bookmarks to folders. To bookmark a post/page or any other custom post type users should click on the bookmark icon at the bottom of the page.

### Bookmark on Profile Pages
Enable the bookmark on profile pages in _wp-admin > Ultimate Member > Settings > Extensions > User Bookmarks.
_

Go to the user's profile page and click on the bookmark button.
Bookmarked users will be added in the sub tab **Users**(Profile>Bookmarks tab> Users).
### Accessing bookmarks
All bookmarked pages/posts, custom post types or users can be found in the **"Bookmarks"** tab on the User profile.

### Shortcodes
You can use these shortcodes if the **User Bookmarks** extension is installed:
* **\[um\_bookmarks\_button\]** - this shortcode displays the "Bookmark" button or the "Remove bookmark" button.
* **\[um\_user\_bookmarks\]** - this shortcode displays the Bookmarks block content.
* **\[um\_user\_bookmarks\_all\]** - this shortcode displays all user bookmarks without folders. Except for the bookmarked User Profile bookmarks.
You can see shortcode examples [here](//docs.ultimatemember.com/article/1521-user-bookmarks-shortcodes)
.
Last updated on October 11, 2023
No results found
---
# Stripe FAQ - How to Connect a Stripe Customer account to a WordPress Account? - Ultimate Member
Stripe FAQ - How to Connect a Stripe Customer account to a WordPress Account?
=============================================================================
[](javascript:window.print() "Print this article")
1\. To connect the Stripe Customer to a WordPress account, go to [https://dashboard.stripe.com/test/customers](https://dashboard.stripe.com/test/customers)
2\. When you create a Stripe Customer account, the email address should match the user's email address created on the WordPress site. If **janedoe@ultimatemember.com** is registered on your WordPress site, you should add her email address in the **Customers > Add Customer > Account email.**
> **Note:** Ultimate Member - Stripe extension automatically generates a Stripe customer account when subscribing to a plan/price or viewing the external Stripe Customer Billing page
> **Note:** When a WordPress account is already linked to a Stripe Customer, it won't be linked to the new Stripe Customer with the same account email when you create in the Stripe.com Customer form. You can change the Stripe Customer that is linked to the WordPress account by editing the profile in WP Admin > Users > Edit a Profile > see "Stripe Customers".
Last updated on April 17, 2024
No results found
---
# Stripe FAQ - What Pricing Models are supported in the Stripe extension? - Ultimate Member
Stripe FAQ - What Pricing Models are supported in the Stripe extension?
=======================================================================
[](javascript:window.print() "Print this article")
The initial version supports a Flat-rate pricing model( One-time payment and recurring) for one-level membership. We are working on a feature that can support Per-Seat and usage-based pricing models together with the extension's Usage Records API. For more details, you can check our development roadmap in [the link](https://ultimate-member-roadmaps.notion.site/54b8d1929df44079a7c0ccdc14ab6220?v=400225114a5349b4aaf958d02bc08a5f&pvs=4)
.
Last updated on April 17, 2024
No results found
---
# Stripe FAQ - How Do Subscriptions Handle Staging Sites and Migrations? - Ultimate Member
Stripe FAQ - How Do Subscriptions Handle Staging Sites and Migrations?
======================================================================
[](javascript:window.print() "Print this article")
When working on Staging Sites and planning on migrating to another site or live site, you need to check the following:
1. The Stripe Webhook should match the URL of your live or staging site( see [Webhook Settings](//docs.ultimatemember.com/article/1607-stripe-setting-up-webhook-and-test-public-keys)
). You can check the Webhook URL in **Ultimate** **Member > Settings > Extensions > Stripe.**
2. Stripe Pages should be generated or **[created in WP-Admin Pages](//docs.ultimatemember.com/article/1900-how-to-create-stripe-pages-manually)** and assigned in **Ultimate Member > Settings > General Pages
**
3. Stripe API Keys should be set in **Ultimate Member > Settings > Extensions > Stripe**.
4. Stripe Plans are built with a Custom Post Type ( umm\_stripe ), which means that this can be imported with popular import posts/pages plugins.
Last updated on April 17, 2024
No results found
---
# User Notes setup - Ultimate Member
User Notes setup
================
[](javascript:window.print() "Print this article")
### Overview
The user Notes extension allows users to create notes on their profiles. This document provides instructions on setting up and using the [User Notes](https://ultimatemember.com/extensions/user-notes/)
extension.
### Settings Page
Once you activate the User Notes extension, you will see the User Notes tab in **Ultimate Member > Settings > Extensions.** On this page, you can find the following options:
* **Notes per page** - choose the number of notes per page.
* **Thumbnail image size** - the size of the thumbnail image in pixels.
* **Excerpt length** - excerpt length.
* **Read more text** - change the text of the "Read more" button.
* **Load more text** - change the text of the "Load more" button.
* **Enable download notes** - users can download their notes in the \*.pdf format,
* **Enable print notes** \- if enabled, users can directly print the note by clicking the print button
* Additional options if download or print notes are enabled:
* **Download button title**
* **Print button title
**
* **Enable print/download notes for non-logged in users
**
* **Save/print buttons position**
* **Set button type**

Adding a new note
-----------------
The User Notes extension will add the Notes tab on the user profile where users can add notes to their profile.

Adding a new note can be done by clicking on the ' **Add note**' button. Users have the option to upload an image for the note, set a note title, and add text within the Add note dialog.


Also, it is possible to set the note's privacy and status (Published or Draft). Draft notes are visible only for the note's author. And you could select these privacy options:
* **Only me** \- your note, visible only to you.
* **Everyone** \- a public note visible to all users/guests.
* If the 'Followers extension' is activated:
* **Only people I follow** - the note becomes visible only to the users whom you follow.
* **Followers** - the note becomes visible to all of your followers.
* **Friends** - a note visible to you and your friends.
User notes can be edited or deleted in the **"Read More"** modal window.


* * *
#### User Roles Settings
The user notes feature is initially enabled for all user roles on your website by default. However, you have the option to disable it for specific roles. Additionally, on the User Role settings in wp-admin>Ultimate Member> User Roles> edit a user role, you can customize whether the download or print feature is enabled or disabled for each user role.


####
* * *
#### Profile Tab Settings
Also, it is possible to set the "Notes" profile tab settings in Ultimate Member > Settings > Appearance > Profile Menu.

Last updated on December 11, 2023
No results found
---
# User Locations Setup - Ultimate Member
User Locations Setup
====================
[](javascript:window.print() "Print this article")
### Overview
[User Locations](https://ultimatemember.com/extensions/user-locations/)
is an extension of Ultimate Member that allows users to add location data to their profiles, which can then be displayed on a map in the member directories. Admins can customize the map settings and add icons for different user roles to enhance the map's visual representation. The extension integrates with Google Maps API to provide accurate and interactive maps for users. With User Locations, you can create a dynamic and engaging user experience by visualizing the geographic distribution of your members.This document provides instructions on how to configure the display of location fields in the user profile and map in the member directories using this extension.
**Contents**
* [Installing](#installing)
* [Google Maps API keys](#api_keys)
* [Generating your Google Maps API key](#generate_api_keys)
* [Getting your existent Google Maps API key](#getting_api_keys)
* [Required APIs](#required_apis)
* [Settings page](#settings)
* [Adding User Location fields to the form](#form_field)
* [Enabling Distance Field Sorting in Member Directory Settings](#enable_distance)
* [Setting User Role Icons for Map Markers](#role_icons)
* [Adding Map to the Member Directory](#directory)
### Installing [#](#installing)
You can download the extension via your account on our website. If you have made an individual extension purchase, you can download the extension via the download tab on your [account](https://ultimatemember.com/account/)
page, or if you have purchased the pass, you can download the extensions via the [downloads](https://ultimatemember.com/downloads/)
page. Once the extension is downloaded, you should install and activate it using the WordPress plugin installer on _wp-admin > Plugins_. You can read the article [Installing an Extension](//docs.ultimatemember.com/article/27-installing-an-extension)
for details.
### Google Maps API keys [#](#api_keys)
After activating the plugin, you'll be redirected to the installed plugins page, where you'll encounter an important notice.To enable the User Location extension on your site, you'll need to generate a Google Maps API key. If you don't already have one, simply click the " **Generate your API key**" button, which will take you to the official Google Maps API website.

For the User Location extension to work on your site, you need to generate a Google Maps API key. If you already have the key, you can skip the next section. If you do not already have your Google Maps API key, click the Generate your API key button, and you will be taken to the official Google Maps API website.
Google Maps JavaScript API is a part of Google Maps Platform in Google Cloud Platform, so you need to be registered at [Google Cloud Platform](https://cloud.google.com/)
.
Follow instructions below to create a project and get your API Keys or read the article [How to create a Google Maps API key](//docs.ultimatemember.com/article/1575-how-to-create-a-google-maps-api-key)
for details.
#### Generating your Google Maps API key [#](#generate_api_keys)
If you are a new user, click the **Get Started** button and go through the registration process. For the extension to work correctly, you need to restrict and protect your API key. Choose **'API restriction'** as the restriction type, then select the following APIs: **Maps, Places,** and **Geocoding**, click the "Restrict key" button as illustrated in the screenshots below:


#### Getting your existent Google Maps API key [#](#getting_api_keys)
If you have already created a project and enabled the **Maps JavaScript API**, you can copy the key by clicking the **SHOW KEY** link in the **API keys** table on the **Credentials** page.


#### Required APIs [#](#required_apis)
To ensure the extension functions properly, you must enable the following APIs:
1. **Maps JavaScript API**
2. **Places API**
3. **Geocoding API**
Here's how to enable these APIs:
1. Go to the [Google Cloud Console](https://console.cloud.google.com/)
and select your project.
2. Click on **"APIs & Services"** in the side menu, then click on **"Library"**
3. On the Map section, click on **"VIEW ALL"** to see all Maps APIs.
4. For each of the APIs mentioned above, click on them and then click the **"ENABLE"** button.

5. You'll know the API is enabled when you see a green circle with a check and the message **"API Enabled."**
### Settings page [#](#settings)
Once you have your API key go to the _wp-admin > Ultimate Member > Setting > Extensions > User Location_ section, enter your API key to the setting **Google Maps Javascript API Key,** and click the **Save Changes** button.
Once you have successfully entered the correct key, the Google Map can be added to forms (Registration/Profile) and member directories. Please note that Google Maps will only show once you enter the API key. If you enter the wrong key, you will see an error appear on the forms or member directories where Google Maps should be.
Settings below are the key used to customize the map view. These settings will be applied for User Location fields in forms:
* **Google Maps Javascript API Key:** This setting is used to authenticate requests to Google Maps JavaScript API. It allows the plugin to use Google Maps services, such as displaying maps and geocoding addresses. You need to obtain an API key from the Google Cloud Platform and enter it here for the plugin to access these services.
* **Use site's locale as language for Google Maps:** When enabled, this setting will use the current language/locale set for your WordPress site to display Google Maps. This means that if your site is in a language other than English, Google Maps will be displayed in that language as well, if supported by Google Maps. If disabled, Google Maps will use the default language settings.
* **Map height****:** Set map height in px. Default 400.
* **Starting map zoom level:** Pick a starting zoom level for the map. From 0 to 12.
* **Starting address latitude****:** Pick a starting position for the map. From -90 to 90.
* **Starting address longitude****:** Pick a starting position for the map. From -180 to 180.

### Adding User Location & Distance fields to the form [#](#form_field)
To enable members to provide their location data during registration or in their profiles, you can add the **'User Location'** and **'Distance'** fields to the registration and/or profile form. Each field type serves a specific purpose:
1. **User Location Field:** This field allows users to specify their location using Google Maps autocomplete. You could add one or multiple custom fields with the User Location type. Each field must have an unique meta key.
**Note:** The field meta key you specify is the base prefix. The User Location is a complex field type that stores data in four usermeta: `{metakey}`, `{metakey}_lat`, `{metakey}_lng`, `{metakey}_url`.
2. **Distance Field:** This field allows users to specify the maximum distance they are willing to travel from their location. This field complements the User Location field and can help in scenarios where location-based searches or filters are used.
The image below shows the User Location and Distance fields in the form Fields Manager.

The **User Location field** layout enables users to either use Google's autocomplete feature to find their location or manually place a marker on the map.The image below is an example of the User Location field view in the form.

### Enabling Distance Field Sorting in Member Directory Settings[#](#enable_distance)
After adding the 'Distance' field to your forms, you can configure the member directory settings to sort and display the location information based on the distance, enhancing user profiles with geographical data. After integrating the 'Distance' field into your forms, you can configure the member directory settings to enable custom sorting based on location information. This allows you to choose the 'Distance' field to include in the sorting options, providing users with a tailored experience when browsing the directory.
To enable the distance field sorting option, navigate to **wp-admin > Ultimate Member > Member Directory > Edit a member directory > Sorting Options**. Enable custom sorting and choose the **Distance** field from the drop-down menu from 'Choose field(s) to enable in sorting' option.

Once set up, user will have the option to sort the member results by distance.

### Setting User Role Icons for Map Markers[#](#role_icons)
Admins can assign an icon to a user role, which will appear on the map for members with that role.Here's how to do it:
1. Go to **wp-admin > Ultimate Member > User Roles > Edit Role.**
2. In the **"User Locations"** section, **Role icon** option, click on the **'Select'** button to upload or select a user role icon.
3. Then update or save the user role settings
4. You can then set this User role marker in the directory member settings in the "User Locations" section - "Marker type" setting..

### Adding Map to the Member Directory [#](#directory)
You can add a map to the member directory. The map uses members location data from the "User Location" field to display their location and can filter members in the member directory by their location.
**Note:** For more information and a detailed guide on adding the map to the member directory, please refer to this article: [Member Directory with User Locations map](//docs.ultimatemember.com/article/1632-member-directory-with-user-locations-map)
Once you have successfully entered your **Google Maps Javascript API Key** you'll see the **User Location** box in the member directory settings. Turn on the **Show Map** setting and select a field used to display markers and filter members in the **Show this user location field at the map** setting. Use additional settings to configure a starting map view and filtering algorithm.
The member directory location and map settings:
* **Show nearest users when search results are empty** - (optional, appears if the Search feature is enabled) The feature that focuses a map if nobody is found.
* **Show Map** - Turn it on to display a map.
* **Show this user location field at the map** - This option is used to select user location markers that will be displayed on the map.
* **Map height** - This option is used to customize a map height on a screen. The size is set in pixels.
* **Starting map zoom level** - This option is used to select the default map zoom.
* **Starting address latitude** - This option is used to select the default latitude of the map center.
* **Starting address longitude** - This option is used to select the default longitude of the map center.
* **Enable user location search field** - This option is used to enable searching and filtering features. Additional search field is shown below the map if the location search is enabled.
* **Choose a type of searching** - (optional, appears if user location search is enabled) This option is used to select a searching and filtering algorithm. Options: "Search by visible bounds", "Search by radius".
* **Nearby members searching radius** - (optional, appears if the "Search by radius" algorithm is selected) Set a distance from the target location for getting nearby members.
* **Distance unit of measurement** - (optional, appears if the "Search by radius" algorithm is selected) Set a unit to measure a distance.
* **Choose field(s) to display in marker's infowindow** - This option is used to select what information to show in the marker's info window.
* **Marker type** - This option is used to select a type of marker that displays members location on the map. You can select from the following options:
* **Avatar marker:** Displays a marker on the map using the user's avatar image.
* **User Roles marker:** Displays a marker on the map using a custom icon associated with the user's role.
* **Classic Google marker:** Displays a standard Google Maps marker on the map.
**NOTE:** The "Search by radius" algorithm requires the "Enable custom table for usermeta" setting on wp-admin > Ultimate Member > Settings > Advanced > Features to be enabled. Follow instructions [here](//docs.ultimatemember.com/article/1541-meta-table-for-member-directories)
.
Image - The **User Location** settings box on _wp-admin > Ultimate Member > Member Directories > Edit Member Directory.
_
**Examples**
This is a map on a member directory for showing users' locations and filtering users by the visible map's bounds.

#### Pagination
The member directory map displays markers for found members on the current page. Found members are divided into pages. The map displays markers for members who are in the current page only. You can switch a directory page using links in the pagination area under the profile cards area.

Last updated on September 9, 2024
### Related Articles
* [How to create a Google Maps API key](/article/1575-how-to-create-a-google-maps-api-key)
No results found
---
# Stripe Beta Test - Ultimate Member
Stripe Beta Test
================
[](javascript:window.print() "Print this article")
Stripe beta testing is only available to customers who have purchased or subscribed to the [Ultimate Member Theme Pass or Extension Pass](https://ultimatemember.com/pricing/)
.
To begin Stripe beta testing, follow the steps below:
1. Go to [ultimatemember.com](http://ultimatemember.com/)
and sign in to your account.

2. Head to **File Downloads > Stripe Extension**
3. Download the Stripe Extension File, then upload and [install](https://ultimatemember.github.io/docs-v3/um-stripe/article/27-installing-an-extension)
it to your website.
> To submit/report an issue or feedback, please use our [support ticket page](http://ultimatemember.com/support/ticket/)
> .
Last updated on April 17, 2024
No results found
---
# Stripe FAQ - Do Subscriptions Replace or Merge Roles? - Ultimate Member
Stripe FAQ - Do Subscriptions Replace or Merge Roles?
=====================================================
[](javascript:window.print() "Print this article")
When a subscription status changes in the Stripe Plan, it typically assigns a new role to a user in addition to their existing role. However, if you prefer to change roles instead of combining them, you can enable an option to do so. To enable this option, navigate to **WP-Admin > Ultimate Member > Settings > Extensions > Stripe**, and enable the **"Replace existing roles when a subscription status changes"** setting.
By default, when the status of a Stripe subscription changes, the extension combines the new role with any existing roles. This means that users will have both their old and new roles. If you enable the **"Replace existing roles when a subscription status changes****"** option, it will remove the existing roles and assign only the new role when a subscription status changes.

> **Note:** This will replace all roles when "replace existing roles" is enabled/checked. If you're using an Administrator account, the role will not change. It's best to use a subscriber account as a test account.
Last updated on April 17, 2024
No results found
---
# How to create a Google Maps API key - Ultimate Member
How to create a Google Maps API key
===================================
[](javascript:window.print() "Print this article")
### Overview
This document provides instructions on how to create a Google Maps API key to use it in the extension _"[User Location](https://ultimatemember.com/extensions/user-locations/)
"_.
### Registration
Google Maps JavaScript API is a part of [Google Maps Platform](https://cloud.google.com/maps-platform)
, so you need to be registered at Google Cloud Platform. If you are a new user, click the button "Get Started" and go through the registration process.

### Google Maps API key
Once you are registered you should create a project, enable APIs and get your API key.
#### Step 01 - Create a project.
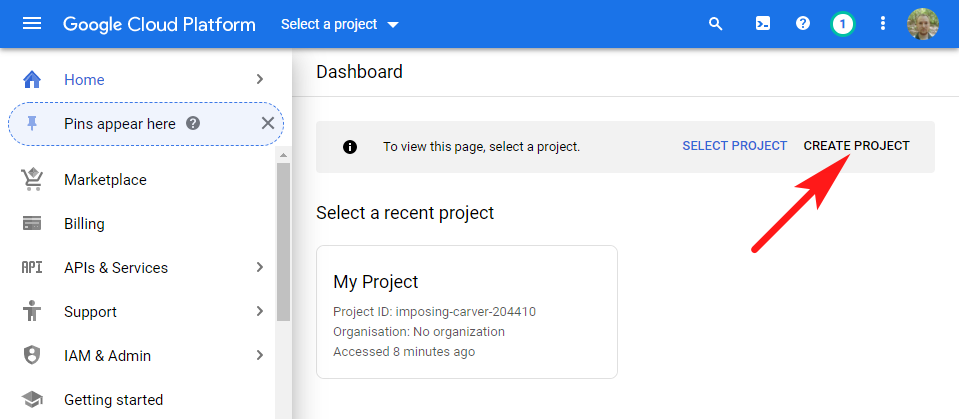
#### Step 02 - Enable Google Maps APIs.
The extension User Location need to use these APIs to work correctly:
* Maps JavaScript API
* Places API
* Geocoding API
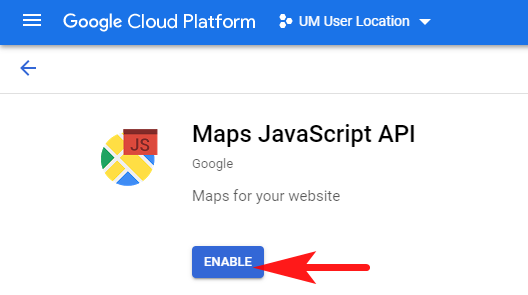

#### Step 03 - Generate API key.

#### Step 04 - Restrict and get the API key.


### Usage and Billing
The Maps JavaScript API uses a pay-as-you-go pricing model, see [pricing and limits](https://developers.google.com/maps/documentation/javascript/usage-and-billing#pricing-for-product)
. Along with the overall Google Terms of Use, there are [usage limits](https://developers.google.com/maps/documentation/javascript/usage-and-billing#other-usage-limits)
specific to the Maps JavaScript API. [Manage your costs and usage](https://developers.google.com/maps/documentation/javascript/usage-and-billing#set-caps)
with tools available in the Google Cloud Console.
**Reminder:** To use the Maps JavaScript API, you must [enable billing](https://console.cloud.google.com/project/_/billing/enable?utm_source=Docs_BillingNudge)
and include an [API key](https://developers.google.com/maps/documentation/javascript/get-api-key)
or OAuth token with all API or SDK requests.
Last updated on March 11, 2024
### Related Articles
* [User Locations Setup](/article/1545-user-locations-setup)
No results found
---
# NGINX Configuration Rewrite Rule for Ultimate Member User Notes - Ultimate Member
NGINX Configuration Rewrite Rule for Ultimate Member User Notes
===============================================================
[](javascript:window.print() "Print this article")
Overview
--------
When using the Ultimate Member (UM) plugin with NGINX as the web server, a rewrite rule is required to handle the download of user notes. This rule ensures that download requests for user notes are correctly processed by the UM core.
Purpose
-------
The following NGINX rewrite rule is used to handle the download of user notes in the Ultimate Member (UM) plugin.
Rewrite Rule
------------
rewrite ^/um-user-notes-download/(\[^/\]+)/(\[^/\]+)/(\[^/\]+)/?$ /index.php?um\_action=um-user-notes-download&um\_verify=$1&um\_note\_id=$2 last;
#### Explanation
* `^/um-user-notes-download/([^/]+)/([^/]+)/([^/]+)/?$`: This part of the rule matches the URL pattern for downloading user notes in Ultimate Member. It captures two groups: `$1` for `um_verify` and `$2` for `um_note_id`.
* `/index.php?um_action=um-user-notes-download&um_verify=$1&um_note_id=$2`: This part of the rule rewrites the URL to the appropriate format for Ultimate Member to handle the download action. It includes the captured groups from the URL pattern as parameters (`um_verify` and `um_note_id`).
#### Example
* Original URL: `http://example.com/um-user-notes-download/verify_key/note_id`
* Rewritten URL: `http://example.com/index.php?um_action=um-user-notes-download&um_verify=verify_key&um_note_id=note_id`
#### Notes
* This rule should be placed in the NGINX configuration file within the appropriate server block or location block.
* Ensure that the path to the `index.php` file matches the actual path on your server.
* * *
**Related articles:**
* [NGINX Configuration Rewrite Rule for Ultimate Member](//docs.ultimatemember.com/article/1934-nginx-configuration-rewrite-rule-for-ultimate-member)
* [NGINX Configuration Rewrite Rule for Ultimate Member Social Activity](//docs.ultimatemember.com/article/1933-using-the-social-activity-extension-with-nginx)
Last updated on May 17, 2024
No results found
---
# User Photos shortcodes - Ultimate Member
User Photos shortcodes
======================
[](javascript:window.print() "Print this article")
Overview
--------
This document provides instructions on how to use shortcodes of the extension [User Photos](https://ultimatemember.com/extensions/user-photos/)
.
Ultimate Member uses WordPress shortcodes to allow users to perform certain actions as well as display forms and templates. You may use shortcodes in the posts(page) content and text widgets.
Shortcodes
----------
[\[ultimatemember\_albums\]](#ultimatemember_albums)
- Show all albums of all members
[\[ultimatemember\_gallery\]](#ultimatemember_gallery)
- Show member's block "Albums"
[\[ultimatemember\_gallery\_photos\]](#ultimatemember_gallery_photos)
- Show member's block "Photos"
### \[ultimatemember\_albums\] [#](#ultimatemember_albums)
This shortcode shows all albums of all members.
**Attributes**
| | | | |
| --- | --- | --- | --- |
| _Key_ | _Type_ | _Default_ | _Description_ |
| column | integer | 2 | A number of columns in the grid. Accepts 1, 2, 3, 4. |
| page | integer | 1 | Default screen (influence on pagination). |
| per\_page | integer | 12 | A quantity of albums in one screen. |
**Example** - Display 6 albums in 3 columns.
`[ultimatemember_albums column="3" per_page="6"]`

How to [change template](//docs.ultimatemember.com/article/1516-templates-map)
: copy file _/wp-content/plugins/um-user-photos/templates/albums.php_ to _/wp-content/themes/YOUR\_THEME/ultimate-member/um-user-photos/albums.php_ and edit new file if you want to change this template.
### \[ultimatemember\_gallery\] [#](#ultimatemember_gallery)
This shortcode shows member's albums. This is the content of the **Albums** subtab in the **Photos** profile tab.
**Attributes**
| | | | |
| --- | --- | --- | --- |
| _Key_ | _Type_ | _Default_ | _Description_ |
| user\_id | integer | Current profile ID (on profile page) or current user ID | The user ID. |
**Example** - Display current user albums.
`[ultimatemember_gallery]`

How to [change template](//docs.ultimatemember.com/article/1516-templates-map)
: copy file _/wp-content/plugins/um-user-photos/templates/gallery.php_ to _/wp-content/themes/YOUR\_THEME/ultimate-member/um-user-photos/gallery.php_ and edit new file if you want to change this template.
### \[ultimatemember\_gallery\_photos\] [#](#ultimatemember_gallery_photos)
This shortcode shows member's photos. This is the content of the **Photos** subtab in the **Photos** profile tab.
**Attributes**
| | | | |
| --- | --- | --- | --- |
| _Key_ | _Type_ | _Default_ | _Description_ |
| user\_id | integer | Current profile ID (on profile page) or current user ID | The user ID. |
**Example** - Display current user photos.
`[ultimatemember_gallery_photos]`

How to [change template](//docs.ultimatemember.com/article/1516-templates-map)
: copy file _/wp-content/plugins/um-user-photos/templates/photos.php_ to _/wp-content/themes/YOUR\_THEME/ultimate-member/um-user-photos/photos.php_ and and edit new file if you want to change this template.
Last updated on December 4, 2023
### Related Articles
* [User Photos setup](/article/1466-user-photos)
No results found
---
# Footer Widgets - Ultimate Member
Footer Widgets
==============
[](javascript:window.print() "Print this article")
**How To Change the Footer Widget Column**
In UM theme you can display your footer widgets in _1, 2, 3, or 4 columns_. Follow these steps to change the footer widget column.
1. Go to **Appearance > Customize > Footer > Footer Widgets
**
2. Select your desired column from the **Footer Widgets Column** dropdown.

3. Click on **Publish** to save the changes.

**How To Change the Footer Widget Color**
To change the color of the footer widget section, go to **Appearance > Customize > Footer Widgets**. Using the below options you can change the color of every footer widget element.
* **Footer Widget Background**: Changes the color of the widget background.
* **Footer Widget Text**: Changes widget text color.
* **Footer Widget Link**: Changes widget link color.
* **Footer Widget Link Hover**: Changes widget link hover color.

**How To Align The Footer Widget Text**
1. Go to **Appearance > Customize > Footer > Footer Widgets**
2. Select your desired text alignment (Left, Center, Right) from the **Widget Text Alignment** dropdown.
3. Click on Publish after making the changes.

Last updated on December 2, 2021
### Related Articles
* [Footer Bottom Bar](/article/1381-footer-bottom-bar)
* [Scroll to Top](/article/1376-scroll-to-top)
No results found
---
# Customizing User's Profile Name and Description Colors - Ultimate Member
Customizing User's Profile Name and Description Colors
======================================================
[](javascript:window.print() "Print this article")
To customize and change the color of the user's profile name and description, go to **Appearance > Customize > Additional CSS** and insert the code below in the CSS editor. If you're using a different theme, you can put it in theme styles CSS files.
Click on Publish to update.

Last updated on January 5, 2022
No results found
---
# Configure map in member directory to after list - Ultimate Member
Configure map in member directory to after list
===============================================
[](javascript:window.print() "Print this article")
You can display the map below the member directory list/grid. To do this, you just need to paste the snippet below into your theme/child-theme functions.php file
Last updated on November 2, 2020
No results found
---
# User Locations - Hooks - Ultimate Member
User Locations - Hooks
======================
[](javascript:window.print() "Print this article")
The view and controls of the map may be customized with these hooks:
* Use hook **um\_user\_locations\_marker\_data** to change the map marker.
* Use hook **um\_user\_locations\_map\_args\_init** to customize the map on the Members page.
* Use hook **um\_user\_locations\_map\_field\_args\_init** to customize the map on the Profile page.
* Use hook **um\_member\_directory\_disable\_clustering** to disable clustering.
See examples below.
* * *
You can add a code snippet to the _functions.php_ file in the active theme directory. Skip the opening ` Customize > bbPress**
2. Click on **bbPress Colors**
3. Click on **Title Color** picker to change the color.
4. Click on **Publish** to save your changes.
**Note:** This document is intended for theme customization and not for the bbPress extension.
Last updated on September 29, 2023
No results found
---
# Member Directory with User Locations map - Ultimate Member
Member Directory with User Locations map
========================================
[](javascript:window.print() "Print this article")
This article describes how to configure and use the Google Map and User Location filter in the Member Directory.
**Related articles:** [Member Directories 2.1.0+](//docs.ultimatemember.com/article/1513-member-directories-2-1-0)
, [User Locations Setup](//docs.ultimatemember.com/article/1545-user-locations-setup)
**Versions:** [Ultimate Member](https://wordpress.org/plugins/ultimate-member/)
since 2.6.8, [Ultimate Member - User Locations](https://ultimatemember.com/extensions/user-locations/)
since 1.1.0.
**Contents**
* [Adding Map to the Member Directory](#directory-settings)
* [Settings](#settings)
* [Focus the map on certain region or country](#recommended-values)
* [A map in the Member Directory](#directory)
* [Examples](#examples)
* [Pagination](#pagination)
* [Results Text](#results-text)
* [For developers](#for_developers)
* [Marker Clustering](#clustering)
* [Map height](#map_height)
* [Hide a map](#hide_map)
* * *
Adding Map to the Member Directory [#](#directory-settings)
------------------------------------------------------------
You can add a map to the member directory and show members' locations with markers on the map. The map may be used to filter searching results and display only those members whose location match certain criteria - map bounds or distance.
### Settings [#](#settings)
A box "User Location" appears in the member directory settings once the extension [User Locations](https://ultimatemember.com/extensions/user-locations/)
is activated and Google Maps API key is successfully entered in the extension's settings.
The directory User Location settings:
* **Show nearest users when search results are empty** - Enable this feature if you want to autofocus the map to the nearest member if there are no members whose location matches the current map.
* **Show Map** - Turn on to display the map in the directory.
* **Show this user location field at the map** - Select the User Location field that is used to display markers on the map and filter members by their location.
* **Map height** - Set a map height on a screen. The size is set in pixels.
* **Starting map zoom level** - Set the default map zoom. From 0 to 12.
* **Starting address latitude** - Set the default latitude of the map center. From -90 to 90.
* **Starting address longitude** - Set the default longitude of the map center. From -180 to 180.
* **Enable user location search field** - Enable user location filter for searching in directory.
* **Choose a type of searching** - Select an algorithm of location filter: _Search by visible bounds_ or _Search by radius_.
* **Nearby members searching radius** - Set the distance. Optional, appears if the _Choose a type of searching_ is set to _Search by radius_.
* **Distance unit of measurement** - Select the unit of the radius. Optional, appears if the _Choose a type of searching_ is set to _Search by radius_.
* **Choose field(s) to display in marker's infowindow** - Select information that is shown in the marker's info window.
* **Marker type** - Select markers' type: _Avatar marker_, _User role marker_ or _Classic Google marker_.
Image - The directory "User Location" settings

### Focus the map on certain region or country [#](#recommended-values)
Table - Recommended values to focus the map on certain region or country on mobile
| | | | | |
| --- | --- | --- | --- | --- |
| **Region or country** | **Map height** | **Starting map zoom level** | **Starting address latitude** | **Starting address longitude** |
| Europe | 350 | 3 | 51 | 15 |
| USA | 300 | 3 | 39 | \-96 |
| Japan | 300 | 4 | 39 | 135 |
| China | 330 | 3 | 38 | 106 |
| India | 370 | 4 | 22 | 83 |
| Brazil | 330 | 3 | \-12 | \-53 |
| South Africa | 280 | 4 | \-27 | 25 |
| Australia | 320 | 3 | \-24 | 135 |
A map in the Member Directory [#](#directory)
----------------------------------------------
### Examples [#](#examples)
This is a map on a member directory for showing users locations.

This is a map on a member directory for showing users locations and filtering users by the visible map's bounds.

### Pagination [#](#pagination)
The member directory is divided into pages. The map displays markers for members who are in the current page. List pages using links under profile cards to see the next group of members and map markers that match their locations.
You can change a number of profiles displayed per page. Use settings **Number of profiles per page** and **Number of profiles per page (for Mobiles & Tablets)** in the box "Results & Pagination".
Image - The directory "Results & Pagination" settings (per page)

### Results Text [#](#results-text)
We recommend changing settings **Results Text** and **Single Result Text** if you enable filtering by user location. Customers may not understand that the map influences searching.
Image - The directory "Results & Pagination" settings (Results Text)

Image - Results Text in the directory with active user location filter.

For developers [#](#for_developers)
------------------------------------
### Marker Clustering [#](#clustering)
Google Maps can combine markers of close proximity into clusters, and simplify the display of markers on the map. You can use `um_member_directory_disable_clustering` hook to disable this feature. See code example in the article [User Locations - Hooks](//docs.ultimatemember.com/article/1728-user-locations-hooks#example04)
.
### Map height [#](#map_height)
You can use custom CSS code to change the map height. See code example in the article [Make the directory map height responsive](//docs.ultimatemember.com/article/1804-make-the-directory-map-height-responsive)
.
### Hide a map [#](#hide_map)
You can use custom CSS code to hide the map in the directory if you need a location search field but don't want to display a map.
/\* Hide (make invisible) a map in the directory \*/
.um-member-directory-map {
position: absolute;
visibility: hidden;
z-index: -1;
}
Last updated on January 23, 2025
### Related Articles
* [User Locations Setup](/article/1545-user-locations-setup)
* [User Locations - Hooks](/article/1728-user-locations-hooks)
No results found
---
# User Reviews Setup - Ultimate Member
User Reviews Setup
==================
[](javascript:window.print() "Print this article")
### Overview
User reviews extension adds a 5 star user rating and review system to the site, so users can rate/review each other. This document provides instructions on how to set up a [User Reviews](https://ultimatemember.com/extensions/user-reviews/)
.
**Contents**
* [Settings](#settings)
* [Extension's settings](#settings_extension)
* [Profile Menu settings](#settings_menu)
* [Email settings](#settings_email)
* [Member Directory settings](#settings_memberdirectory)
* [User Role permissions](#settings_role)
* [Manage reviews](#manage_reviews)
* [Display user rating](#usermeta)
* [How to add User Rating into the profile header](#profile_header)
* [How to add User Rating into the profile form](#profile_form)
* [How to remove User Rating from the member cards in the Members Directory](#member_directory)
* [Shortcodes](#shortcodes)
* [Extra settings for developers](#settings_extra)
* [User interface](#interface)
* [Read reviews](#read_reviews)
* [Leave a review](#leave_review)
Settings [#](#settings)
------------------------
### Extension's settings [#](#settings_extension)
Once the extension is activated, you will see a **Reviews** tab on _wp-admin > Ultimate Member > Settings > Extensions_. In this tab, you can find the following options:
* **Show user rating in members directory** – If turned on the user rating (stats) is shown in member directories.
* **Review date format** – Choose the format to display the date of the review.
* **Who can flag reviews** – Choose who can flag reviews.
* **Enable review reply** – Enable/disable the reply functionality.
Image - Settings on _wp-admin > Ultimate Member > Settings > Extensions > Reviews.
_

### Profile Menu settings [#](#settings_menu)
The extension adds settings to the page _wp-admin > Ultimate Member > Settings > Appearance > Profile Menu._ These settings allow you to manage the **Reviews** item in the profile menu:
* **Reviews Tab** – Allows enabling/disable "Reviews" item in the profile menu.
* **Who can see Reviews Tab?** – Manage access to the "Reviews" tab in the profile menu.
Image - Settings on _wp-admin > Ultimate Member > Settings > Appearance > Profile Menu.
_

### Email settings [#](#settings_email)
The extension adds these email templates:
* **New Review** - This setting enables an email notification to be sent to a user when someone writes a new review for them.
* **New Review is Pending** - This setting enables an email notification to be sent to the site admin when a review is written by someone but its status is set to "Pending", meaning it needs approval before being displayed publicly.
* **New Reply** - Sends an email notification to the reviewer when the user replies to the review they received, keeping them informed of any responses to their feedback.
* **Review is reported** \- This setting allows you to turn on or off the email notification for flagged reviews.
When enabled, administrators will receive an email notification whenever a user flags a review, indicating that the review may require your attention or moderation. This can help you stay informed about potentially inappropriate or problematic content on your site.
Administrators can edit email templates: enable, disable, change subject or body. Go to _wp-admin > Ultimate Member > Settings > Email_, find the needed email template and click the button **"Manage"** button. You'll see email template settings. Change what you want and save changes.
Image - Settings on _wp-admin > Ultimate Member > Settings > Email.
_

-----------------------------------------------------------------------------------------------------------------------------
Member Directory Settings [#](#settings_memberdirectory)
---------------------------------------------------------
This extension enhances the sorting options available in Ultimate Member's Member Directories settings. After activating the extension, you can configure the sorting of users in the member directory based on their ratings in wp-admin > Ultimate Member > Member Directories > Edit Member Directory> Sorting section>Default sort users by. The sorting options include:
* **Highest rated first:** This setting arranges users in the member directory so that those with the highest ratings appear at the top of the list. This can help highlight users who are highly regarded by others.
* **Lowest rated first:** Conversely, this setting arranges users so that those with the lowest ratings appear at the top. This can be useful for identifying users who may need improvement or attention.
These sorting options provide more flexibility in how you display and organize users in your member directory, allowing you to showcase top-rated users or address any issues with lower-rated users more effectively.

### User Role permissions [#](#settings_role)
The extension adds a widget to the user role page so you can give each user role unique review/rating permissions
* **Can have user reviews tab?** – If turned off user reviews will be disabled for this role.
* **Can review other members?** – This option allows you to select if a role can review other members.
* **Can review these roles only** – If a user role can review other members you can decide if the role can only review certain roles.
* **Automatically publish reviews from this role?** – If turned off, reviews from this role will be pending admin review and not published automatically.
* **Can edit/remove their own reviews?** – If turned off users with this role will not be able to delete their own reviews that they have left for other users.
* **Can edit/remove other reviews?** – If turned on users with this role will be able to delete user reviews.
Image - Role permissions on _wp-admin > Ultimate Member > User Roles > Edit User Role.
_

Manage reviews [#](#manage_reviews)
------------------------------------
The extension adds an item **User Reviews** to the submenu _wp-admin > Ultimate Member_. This link will take you to the **User Reviews** page which lists all (approved, flagged, pending) user reviews. Administrators can edit all user reviews and change the review from approved to pending or vice versa.
Image - User Reviews on _wp-admin > Ultimate Member > User Reviews.
_

Display user rating [#](#usermeta)
-----------------------------------
The extension includes the field **User Rating**. With this field you can display users rating in their profile header or anywhere else where the field can be added.
### How to add User Rating into the profile header [#](#profile_header)
Go to _wp-admin > Ultimate Member > Forms > Edit Form_ (profile) and add the **User Rating** field to the **User Meta** box.
Image - The box **User Meta** on _wp-admin > Ultimate Member > Forms > Edit Form.
_

### How to add User Rating into the profile form [#](#profile_form)
Go to _wp-admin > Ultimate Member > Forms > Add or Edit Form_ (profile) and click the "**+**" button, then click **User Rating** in the **Fields Manager**. The field **User Rating** will be added to the form area


Image - User Rating is shown in the profile header and in the profile form.

### How to remove User Rating from the member cards in the Member Directory [#](#member_directory)
The extension shows user rating in the member directories if the setting **Show user rating in members directory** is turned on.
Image - User Rating is shown in profile cards in the member directory.

You can disable user rating for a certain member directory. Go to _wp-admin > Ultimate Member > Member Directories > Edit Member Directory_ and turn on the setting **Hide rating stars** in the **Profile Card** box, then click the **Update** button
Shortcodes [#](#shortcodes)
The extension adds these shortcodes:
* **\[ultimatemember\_top\_rated\]** - Display top rated reviews.
* **\[ultimatemember\_most\_rated\]** - Display most rated reviews.
* **\[ultimatemember\_lowest\_rated\]** - Display lowest rated reviews.
Read the article [Reviews Shortcodes](//docs.ultimatemember.com/article/1589-reviews-shortcodes)
for details.
Extra settings for developers [#](#settings_extra)
---------------------------------------------------
By default, each member can write a review to another member once. You may use the code below to allow multiple reviews:
add\_filter( 'um\_reviews\_allow\_multiple\_reviews', '\_\_return\_true' );
You can add custom code to the end of the file functions.php in the active theme directory (recommended using the child theme). The [functions.php](https://developer.wordpress.org/themes/advanced-topics/child-themes/#using-functions-php)
is an important theme file, so each theme created for WordPress contains this file.
* * *
User interface [#](#interface)
-------------------------------
### Read reviews [#](#read_reviews)
Members can view and manage their profile reviews in the profile tab **Reviews**. This tab displays two sections for the profile owner:
* a user rating overview,
* a list of user reviews.
Image - The **Reviews** tab in profile.

### Leave a review [#](#leave_review)
Members can not leave a review in their own profiles. A member should go to another member profile and look at the profile tab **Reviews** to leave a review. This tab displays three sections for the profile visitor:
* a user rating overview,
* a form to add a review,
* a list of user reviews.
Click the **Write a review for this user** in the form section to show a form.

Select rating (click a star), enter subject and review, then click the **Submit Review** button.

Last updated on February 27, 2024
### Related Articles
* [Reviews Shortcodes](/article/1589-reviews-shortcodes)
No results found
---
# User Photos setup - Ultimate Member
User Photos setup
=================
[](javascript:window.print() "Print this article")
**Overview**
------------
The User Photos extension empowers users to upload photos to their profiles and craft visually appealing albums. This document serves as a guide for setting up the [User Photos](https://ultimatemember.com/extensions/user-photos/)
extension.
**Contents**
------------
1. [Installing](#installing)
2. [Settings](#settings)
* [Extension settings](#extension)
* [Profile Menu settings](#profilemenu)
* [Email Settings](#email)
* [User Role settings](#userrole)
3. [Account Features](#accountfeatures)
4. [Profile Features](#profilefeatures)
* [Adding a New Album](#addalbum)
* [Editing or deleting an Album](#editalbum)
* [Viewing Albums and Photos](#viewalbum)
Installing [#](#installing)
----------------------------
You can download the extension by accessing your account on our website. If you've made an individual extension purchase, download it from the "Download" tab on your [account](https://ultimatemember.com/account/)
page. Alternatively, if you've obtained a pass, retrieve the extensions from the dedicated [downloads](https://ultimatemember.com/downloads/)
page. After downloading, proceed to install and activate it using the WordPress plugin installer located at **wp-admin > Plugins**. Refer to the ["Installing an Extension"](//docs.ultimatemember.com/article/27-installing-an-extension)
article for more detailed instructions.
Settings [#](#settings)
------------------------
### Extension settings [#](#extension)
Upon activation, locate the User Photos tab in **wp-admin > Ultimate Member > Settings > Extensions>User Photos**. Options include:
* **Album columns** - choose the number of album columns.
* **Photo columns** - choose the number of photo columns.
* **Photo rows** - choose the number of photo rows.
* **Album photos limit** \- set the number limit of photos in an album.
* **Album Cover size** - set the album cover size.
* **Photo thumbnail size** - set the photo thumbnail size.
* **Disable cover photo** - the album cover field will be hidden.
* **Disable title** - the title field will be hidden.
* **Disable comment & like feature** - comments and likes will be hidden.

### Profile Menu settings [#](#profilemenu)
The extension adds settings to wp-admin > Ultimate Member > Settings > Appearance > Profile Menu. Manage the "Photos" tab in the profile menu, including enabling/disabling and access control:
* **Photos Tab** – Allows enabling/disabling the "Photos" item in the Profile menu.
* **Who can see Photos Tab?** – Manage access to the "Photos" tab in the Profile menu.

### Email Settings [#](#email)
The extension adds these email templates:
* **User Photos - New album has been created** – Send a notification to admin when user creates an album.
* **User Photos - Album has been deleted** – Send a notification to admin when user deletes an album.
* **User Photos - Album has been updated** – Send a notification to admin when user updates an album.
Administrators can edit templates in wp-admin > Ultimate Member > Settings > Email. They can enable, disable, or change the subject or body. Find the needed email template, and click the button "Edit" (gear icon). You'll see email template settings. Change what you want and save changes

### User Role settings [#](#userrole)
The extension adds a widget to the user role page, so you can give each user role unique permissions:
* **Enable photos feature?** - Turns on/off photos feature for this user role. Disabled by default.
* **The number of photos that the user can add** \- _Optional._ The maximum number of uploaded photos per user. 0 for unlimited upload.
To activate the photo feature for a particular role, navigate to wp-admin > Ultimate Member > User Roles. Select and edit the desired role, then enable the "Enable photos to feature?" setting in the User Photos section. Additionally, you can specify the photo uploading limits for the role by adjusting the "The number of photos that the user can add" setting.

* * *
Account Features [#](#accountfeatures)
-----------------------------------------------------------------------------------------------------------------------------------------------------------------------------
The extension adds the **My Photos tab** to the user account, allowing users to download photos and delete all albums and photos.

* * *
Profile Features[#](#profilefeatures)
--------------------------------------
#### Adding New Album[#](#addalbum)
Users can create albums and upload photos in the Photos tab on their profile. Click **\+ New album**, add a title, and upload a cover image. Add photos by clicking **\+ Select photos.**

Users also have the ability to choose with whom they share their albums or photos, as they can set the privacy settings for their albums. If the Ultimate Member [Friends](https://ultimatemember.com/extensions/friends/)
or [Followers](https://ultimatemember.com/extensions/followers/)
extension is activated, additional options for photo album privacy will become available.
* **Everyone**: The album and photos are public, visible to everyone.
* **Only me**: Only the uploader and admin can view and access the album and photos.
* **Only people I follow**: Only the uploader, admin, and users followed by the uploader can see and access the album and photos.
* **Followers:** All of the uploader's followers, including the admin, can view and access the album and photos.
* **F****riends:** Only the uploader's friends, including the admin, can see the album and photos.

#### Editing/Deleting Album[#](#editalbum)
Basic options for editing or deleting albums can be accessed through the **'gear icon'** settings. You can edit the album title, cover, and content. Additionally, there is a confirmation feature in the album deletion process, ensuring users can proceed with confidence and prevent any unintended removals.


#### Viewing Albums and Photos[#](#viewalbum)
Album details and individual photos are displayed in the **"Albums"** and **"Photos"** subtabs.

Last updated on September 29, 2024
### Related Articles
* [User Photos shortcodes](/article/1522-user-photos-shortcodes)
No results found
---
# How To Change bbPress Topic Title Font Size - Ultimate Member
How To Change bbPress Topic Title Font Size
===========================================
[](javascript:window.print() "Print this article")
Follow these steps to change the [bbPress](https://wordpress.org/plugins/bbpress/)
topic title font size:
1. Go to **Appearance > Customize > bbPress**
2. Click on **bbPress Color**
3. Write your desired font size in **Title Font Size** field.
4. Click on **Publish** to save your changes.
**Note:** This document is intended for theme customization and not for the bbPress extension.
Last updated on September 29, 2023
No results found
---
# Extending UM Theme Header Profile Using Hooks - Ultimate Member
Extending UM Theme Header Profile Using Hooks
=============================================
[](javascript:window.print() "Print this article")
We created UM Theme so that you don’t have to spend any extra time building and designing a Community website using Ultimate Member plugin. In UM Theme, you will be able to display the profile of logged in user in the header. Just like popular social media websites like Facebook or Instagram. But some of you may want to customize that to include some personalized text that speaks your voice. Well, keeping that in mind we have created the theme so that it can be easily customizable. But How do you do that without altering the core code and keeping the code secure from future updates. In this tutorial we will see how to display user last login time on top of the Header profile section.
We will be using the hook
um\_theme\_header\_profile\_before
to add this extra content. You can get the full list of [UM Theme hooks](//docs.ultimatemember.com/article/1379-theme-hooks)
from here.
';
echo "Last Login : ";
echo um\_user\_last\_login( get\_current\_user\_id() );
echo '';
}
?>
How it will look on the front end:

**NOTE: We have created this code example to provide guidance and to make it easier for you to implement this code into your website. However, we are not able to provide any support when it comes to customizing the theme. If you need help implementing this code, please hire a developer.**
Last updated on July 7, 2020
No results found
---
# Ultimate Member - myCRED Extension - Ultimate Member
Ultimate Member - myCRED Extension
==================================
[](javascript:window.print() "Print this article")
### Overview
**myCRED** is an adaptive points management system that lets you award/charge your users for interacting with your WordPress-powered website. This document provides instructions on how to integrate **myCRED** with **Ultimate Member** using the [myCRED](https://ultimatemember.com/extensions/mycred/)
extension.
**Note:** You have to install and activate plugins [myCRED](https://wordpress.org/plugins/mycred/)
and [Ultimate Member](https://wordpress.org/plugins/ultimate-member/)
before activating the extension.
**Contents**
* [Settings](#settings)
* [Transferring Points](#transferring)
* [Referral Link](#referral)
* [Show Badges in Profile header](#badges)
* [User Ranking](#ranking)
* [Display Balance, Progress, or Rank in Profile header](#profile_header)
* [Limit the number of rewards/charges on specific action](#hooks)
* [Notifications](#notifications)
* [Email Notices](#email_notifications)
* [Member Directory Settings](#member_directory)
* [Profile Menu Settings](#profile_menu)
### Settings [#](#settings)
Main extension's settings are placed on the page _wp-admin > Ultimate Member > Settings > Extensions > myCRED_
* **Account Tab** - Show or hide an account tab "My Points" that shows the user's balance
* **Show user affiliate link in account page** - Show or hide My Referral Link in the Account page. _Note: Requires the "Points for referrals" hook to be enabled._
* **Choose point types to show in account page** - Select what point types you want to see and manage in the "My points tab." You should choose at least one point type.
* **Width/height of badge in pixels** - Badges appearing in the profile tab
* **Show user badges in profile header?**
* **Show user badges in Member Directories?**

### Transferring Points [#](#transferring)
Go to _wp-admin > Ultimate Member > User Roles > Edit Role_ and find the "myCRED" section. Turn on the **Can transfer points to other members?** setting to enable point transfer.

You'll see the **Transfer Balance** section in the **My Points** account tab.

Use the **Choose point types to show in account page** setting on _wp-admin > Ultimate Member > Settings > Extensions > myCRED_ to choose point types you wish to display in Account and transfer.

### Referral Link [#](#referral)
**My Referral Link** is shown in the **My Points** account tab if the "Points for referrals" hook is enabled. You can manage hooks on _wp-admin > Points > Hooks_. Add the **Points for referrals** hook to "Active Hooks".


The referral link can be shown or hidden by configuring the "Show user affiliate link in account page" setting on _wp-admin > Ultimate Member > Settings > Extensions > myCRED_.

Once the setting is enabled, you'll see the **My Referral Link** link in the **My Points** account tab.

### Show Badges in User Header [#](#badges)
myCRED has the add-on named **Badges** that gives your users badges on their interaction on your website. Go to _wp-admin > myCred > Add-ons_ to activated the **Badges** add-on.

Once the add-on is activated, you can create or add new Badges on _wp-admin > myCred > Badges_.

The badges can be displayed in user profile headers. To enable this feature, go to _wp-admin > Ultimate Member > Settings > Extensions > myCRED_ and turn on the **Show user badges in profile header?** setting.

Example:

### User Ranking [#](#ranking)
myCRED also offers users ranking based on their total accumulated or their current balance. To reward your users with total or current points-based ranks, you need to activate the **Ranks** add-on via the admin page _wp-admin > myCred > Add-ons_.

Once the add-on is activated, navigate to the _wp-admin > Points > Settings_ page and click on the **Ranks** title in the list. Set what features you want to enable for each rank. Click on "Update Settings" to save changes.

To specify the minimum and maximum points to reach a specific rank and upload the rank logo, go to the page _wp-admin > Points > Ranks_. Click the **Edit** link under the particular rank you want to modify.

### Display Balance, Progress, or Rank in Profile header [#](#profile_header)
The extension adds field types **myCRED Progress** and **myCRED Rank**. These fields can be added to the profile form, profile header, and member's card.
To display rank, progress, or balance on the profile field, you need to select **myCRED Rank**, **myCRED Progress**, or **myCRED Balance** in the "User Meta" widget on the page _wp-admin > Ultimate Member > Forms > Edit Form_.

Example:

### Limit the number of rewards/charges on specific action [#](#hooks)
You can manage which particular actions are rewarded or charged by adding the hook on the admin page _wp-admin > Points > Hooks_. Once a specific hook is added, you can limit the points to be rewarded or charged in total, per week, month, or year, or there is no limit at all.

### Notifications [#](#notifications)
The add-on named **Notifications** displays pop-up notifications to inform the users when they have earned/spent, or lost points on your website. To activate this add-on, please navigate to the admin page _wp-admin > myCred > Add-ons_.

To customize the notification styling and template, go to the page _wp-admin > myCred > General Settings > Notifications_. You can also set the number of days a user's notification is saved before being automatically deleted or the "Transient Lifespan" and the duration of the notification after being shown to the user.

The users are notified, showing the amount they gained or lost on their page.

### Email Notifications [#](#email_notifications)
Aside from Notification pop-ups, myCRED also offers you an email confirmation when a user pays using points or when they gain or lose points. To add this to your website, you need to activate the **Email Notifications** add-on via the page _wp-admin > myCred > Add-ons_.

Once the add-on is activated, the **Email Notifications** option is appears in _wp-admin > myCred_. This is where you can add new notices. For instructions on establishing a new email notification, see the article [Creating Notifications](https://codex.mycred.me/chapter-iii/email-notice/creating-emails/)
.

Go to _wp-admin > myCred > Email Notifications_ and click the "Add New" button. Configure the notification (see an example below). Don't forget to click the "Update" or "Publish" to save changes.

### Member Directories Setting [#](#member_directory)
After activating the Ultimate Member - myCRED Extension, you can configure the sorting of users in the member directory by their myCRED points. This allows you to showcase users with the least or most points at the top of the directory.
#### Sorting Options
You can choose between two sorting options:
* **Least Points:** This option will display users with the lowest myCRED points at the top of the directory.
* **Most Points:** This option will display users with the highest myCRED points at the top of the directory.
To configure the sorting options:
1. Go to _wp-admin > Ultimate Member > Member Directories_.
2. Click on "Edit" for the member directory you want to configure.
3. In the Sorting section, select your preferred sorting option from the dropdown menu.
4. Save your changes.

#### Profile Card Options
##### Hide myCRED Badges Checkbox
You can also choose to hide myCRED badges in the member directory by enabling the **Hide myCRED badges** checkbox. This allows you to control the visibility of myCRED badges in the directory.

##### Display myCRED Badges/Balance/Progress/Rank Fields
In the Profile Card section of the member directory settings, you can add myCRED badges, balance, progress, and rank fields to be displayed in the **extra user information section** of the directory. This allows you to showcase additional myCRED information about users in the directory.

#### Search Options
##### Add myCRED Balance/Rank Meta Filter
You can also add the myCRED balance and rank meta filter to the member directory, allowing users to filter the directory based on myCRED balance and rank. In the **Choose filter(s) meta to enable** setting you can select "myCRED Balance" and "myCRED Rank".

### Profile Menu Settings [#](#profile_menu)
The extension adds the "Badges" tab to the profile page menu. Admins can hide/show this tab and set who can see this tab.

To configure the profile menu settings:
1. Go to _wp-admin > Ultimate Member > Settings > Appearance > Profile Menu_.
2. Toggle the "Badges Tab" setting to hide or show the badges tab in the profile menu.
3. Set the visibility of the tab based on user roles.

Last updated on January 2, 2025
No results found
---
# Ultimate Member Zapier Settings Guide - Ultimate Member
Ultimate Member Zapier Settings Guide
=====================================
[](javascript:window.print() "Print this article")
Overview
--------
The Ultimate Member (UM) Zapier extension offers powerful automation capabilities, allowing you to streamline processes and enhance the functionality of your membership site. By integrating UM with Zapier, you can create Zaps that trigger actions based on events within UM or Zapier, saving you time and effort.
Zaps Page
---------
Once you have installed and activated the Ultimate Member (UM) Zapier extension, a new "Zapier" menu will appear under the Ultimate Member side navigation. This menu takes you to the Zaps page, where you can add, edit, delete, and view a list of your Zaps.

### Zap's Table Overview

You'll find a table listing for all your configured Zaps on the Zaps page. Here is a description of the elements you can find in this table:
1. **Header Section:**
* **Add New Zap**: A button to create a new Zap.
* Filters:
1. **All (n):** Displays all Zaps regardless of their status or type. For example, If there are 4 Zaps in total, clicking on this filter will show all 4 Zaps.
2. **Trigger (n):** Displays only the Zaps that are configured as Triggers. For example: If there are 2 Zap that are set up to trigger actions, clicking on this filter will show that specific Trigger Zap.
3. **Action (n):** Displays only the Zaps that are configured as Actions. For example: If there are 2 Zap that perform actions based on triggers, clicking on this filter will show that specific Action Zap.
* **Search Zaps:** A search bar to find specific Zaps.
* **Select bulk action:** Dropdown to perform bulk actions on selected Zaps. You can choose to delete, stop, run, or draft selected items.
2. **List Table:**
* **Checkbox:** This provides options to select all or multiple Zaps on the list.
* **Name:** The name of the Zap, with options to sort ascending or descending.Identifies the specific Zap. For example, "New User Registered" indicates this Zap is triggered when a new user registers.
* **Type**: Indicates whether the Zap is a Trigger (initiates an action) or an Action (performs a task).
* **Status:** The current status of the Zap (e.g., Running, Paused, Stopped, Draft).
* **Last Delivery Status:** The status of the last delivery attempt.The result of the most recent attempt to execute the Zap (e.g., Success, Failed, Waiting for Request).
* **Last Delivery Date:** The date and time of the last delivery attempt.
* **Date Created**: The date and time when the Zap was created.
This table provides a comprehensive overview of all your Zaps, their statuses, and relevant timestamps, helping you manage and troubleshoot your automation workflows efficiently.
Adding a Zap
------------
To create or add a new Zap, Follow these steps:
1. Navigate to wp-admin > Ultimate Member > Zapier.
2. On the Zaps page, locate and click the **"Add New Zap"** button.

3. Once clicked, you'll be able to configure the settings below. The available options may vary based on the type selected (Trigger or Action.)
**Configuring Settings**
------------------------
These settings allow you to customize the behaviour of your Zap and specify how data is transferred between Ultimate Member and Zapier, enabling you to automate workflows and streamline processes. Here's a breakdown of the settings:
| | |
| --- | --- |
| **Settings** | **Descriptions** |
| **Title** | This allows you to give your Zap a descriptive title for easy identification. This title is for your reference and won't affect the Zap's functionality. Choose a clear and descriptive title that helps you remember the purpose or function of the Zap. |
| **Type** | This setting determines the nature of the Zap, dictating how it responds to events:
* **Trigger:** Opt for this type to activate the Zap based on events occurring within Ultimate Member. When specified events happen in Ultimate Member, such as a new user registration or profile update, data is sent to Zapier to trigger actions in connected apps.
* **Action:** Select this type to trigger the Zap based on events within Zapier itself. When an event occurs in Zapier, such as a new email arriving or a file being uploaded, actions can be taken within Ultimate Member or other connected apps. |
| **Status** | This setting allows you to control the current state of your Zap. You can choose from the following options:
* **Running:** Select this option to enable the trigger or action. When the trigger or action is running, it will actively listen for the specified event in Ultimate Member and initiate the Zap when the event occurs.
* **Draft:** Choose this option if you're still configuring your trigger or action and want to save your progress without activating it. In draft mode, the trigger or action is not active and will not initiate the Zap.
* **Paused:** Use this option to temporarily stop the trigger or action from running. When a trigger or action is paused, it will not respond to the specified event in Ultimate Member, and the Zap will not be initiated until the status is changed back to "Running." |
| **Zap Webhook URL** | This option is only available for the **"Trigger Type"** Zap, where the Zap is initiated based on events within Ultimate Member. This field is where you need to enter the webhook URL from Zap's settings on zapier.com.
A webhook is a way for one application to send real-time data to another application. In this context, the webhook URL is unique and provided by Zapier for your Zap, which allows Ultimate Member to send data to Zapier when a specified event occurs. |
| **Trigger** | This option is only available when the " **Trigger type"** is selected. It specifies the specific event in UM that triggers the Zap.These are the Ultimate Member triggers that push data to your Zapier Webhook:
* **When a new user registers:** This trigger fires when a new user completes the registration process on your Ultimate Member site. It allows you to automate tasks such as sending welcome emails, updating CRM systems, or adding the user to a mailing list.
* **When a user logged-in:** This trigger activates each time a user logs into your Ultimate Member site. It can be used to track login activity, send login notifications, or update the last login information in a database.
* **When a user deletes their account:** This trigger occurs when a user deletes their account from your Ultimate Member site. It allows you to perform actions such as removing the user from associated services, sending account deletion confirmations, or updating records.
* **When a user updates their profile:** This trigger is initiated when a user makes changes to their profile information on your Ultimate Member site. It can be used to sync profile updates across different platforms, send update notifications, or log changes for auditing purposes.
* **When an admin approves an account that's pending admin review:** This trigger fires when an administrator approves a user account that was previously pending. It allows you to automate tasks such as sending approval notifications, updating user status in external systems, or granting access to restricted content.
* **When a user activates their account via email:** This trigger activates when a user successfully verifies their email address and activates their account through the email verification link. It can be used to send welcome messages, grant access to member-only areas, or update user status in connected applications. |
| **UM Zapier Trigger** | These triggers originate **from Zapier** and are only available when the **"Action type"** is selected in your Zap. They allow actions in Zapier to update data on your Ultimate Member website. Currently, **Ultimate Member app in Zapier** provides three triggers:
* **Register a User**: This Zapier trigger registers a new user on your Ultimate Member website when an event, such as a new row being added in a connected app (e.g., Google Sheets), occurs.
* **Delete a User**: This Zapier trigger deletes a user from your Ultimate Member website when activated by an event in your connected app.
* **Update a User**: This Zapier trigger updates a user's profile on your Ultimate Member website when a row in your connected app is modified.
Since these triggers are initiated from Zapier, ensure that the events in your connected app (like Google Sheets) are properly configured to register, delete, or update a user on your Ultimate Member site. |
| **Roles** | This option is only available for **"Trigger Type"** Zap. This setting allows you to specify which user roles should trigger an action when registering. This setting ensures that only users with the selected roles will have their registration data pushed to Zapier. By default, all roles are deselected. Unless you choose specific roles, the action will trigger for any user role upon registration, pushing their data to Zapier. If no roles are selected, the system will push data for any newly registered user to Zapier. However, if specific roles are selected, only users with those roles will have their data pushed to Zapier upon registration.
To select multiple roles, press ctrl or cmd and click the roles you want to select. |
| **Fields** | This setting allows you to define or select the data fields from Ultimate Member that will be sent to Zapier. The available fields depend on whether you are configuring a "Trigger Type" or "Action Type" Zap.
* **For Trigger Type Zap:** You can choose from lists of the data fields from Ultimate Member that can be sent to Zapier. These fields will be included in the webhook request that is sent to Zapier when the specified event occurs in Ultimate Member. This allows you to send specific user information or other data to Zapier for further processing.
**Note:** Whenever you modify your form’s field settings in Ultimate Member, such as adding or removing fields, you’ll need to re-sync your changes with Zapier to ensure that the correct fields are being sent.
* **For Action Type Zap:** You add fields that will be added to the Zap actions to be populated by a Zapier App trigger. These fields define the data that will be sent from Zapier to Ultimate Member to perform specific actions, such as updating a user's profile or adding a user to a group.
**Note:** Whenever you modify your form’s field settings in Ultimate Member, you’ll need to re-sync your changes with Zapier. To do this, go to Zapier.com, edit the Ultimate Member Zap's action, navigate to "Setup Action," and click "Refresh fields" to ensure that the correct fields are available for mapping in your Zap. |
| **Send Data to Zapier button** | This button is specifically designed for Trigger Type Zaps and appears when this type is selected. Its function is to update the connection between your Ultimate Member form and Zapier, ensuring that any changes made to your field settings are reflected in the data sent to Zapier.
When you make modifications to the field settings in your Ultimate Member form, such as adding or removing fields, it's essential to use the "Send Data to Zapier" button to synchronize these changes with your Zap. This action ensures that the correct fields are available for mapping in your Zap, enabling seamless data transfer between Ultimate Member and Zapier.
By clicking this button, you maintain the integrity of your data flow, ensuring that the information sent from Ultimate Member to Zapier is accurate and up-to-date based on your form's current configuration. |
**Settings for Trigger Type Zap:
**

**Settings for Action Type Zap:**

Last updated on November 27, 2024
No results found
---
# Zapier Setup for Actions - Ultimate Member
Zapier Setup for Actions
========================
[](javascript:window.print() "Print this article")
Overview
--------
Ultimate Member's Zapier integration automates user creation and data updates across applications. Using Zapier Actions, workflows can be configured to execute tasks automatically when certain events are triggered. This guide walks through integrating Google Sheets with Ultimate Member, enabling streamlined user data management.
### Accessing the Ultimate Member Private App on Zapier
Ultimate Member is currently utilizing the following invite link to provide access to our private member app. The app is in the final stages of ensuring full compliance with guidelines. Once it has been reviewed and approved, it will be publicly available and searchable via the App Directory, eliminating the need for an invite link.
To request access to the private app, please use the following invite link: [https://zapier.com/developer/public-invite/156191/af7184f5fb916911bea403d3bf387dd1/](https://zapier.com/developer/public-invite/156191/af7184f5fb916911bea403d3bf387dd1/)
### What are Zapier Actions?
Zapier Actions are automated tasks triggered by specific events, using API calls to push or retrieve data from customizable fields. For example, an action could register a new user or update existing user data in Ultimate Member based on details from Google Sheets.
The setup described transfers data from an external app (e.g., Google Sheets) to Ultimate Member on your WordPress site, enabling data from the external app to create or update user profiles in Ultimate Member.
### Setting Up Google Sheets
1. **Create a New Sheet**
Go to [Google Sheets](https://spreadsheets.google.com)
, and create a blank sheet named "Import Users."
2. **Define Headers and Sample Data
**
* Add headers in the first row: `first_name`, `last_name`,`birth_date`,`user_email`
* Enter sample data in the following rows: e.g., `John`, `Doe`,`December 8, 1996`,`johndoe@um.net`

3. **Save** and proceed to your WordPress Site.
### Configuring Actions in Ultimate Member
#### To integrate Ultimate Member with Zapier, you'll need to configure specific actions that will automate the process of creating or updating user profiles. For more in-depth information on setting up Zaps, please refer to this [article](//docs.ultimatemember.com/category/1731-zapier)
.
#### What Are Field Groups in Ultimate Member?
Field Groups are collections of custom fields used to store and manage user information, such as first\_name, last\_name, or birth\_date. These fields facilitate mapping data during integrations between Ultimate Member and external applications like Zapier.
For more details about Zap settings, refer to this [article](//docs.ultimatemember.com/category/1731-zapier)
.
1. **Create a Field Group in Ultimate Member**
* Go to **WP Admin > Ultimate Member > Zaps**.
* Click **“Add New Zap”** and name it, e.g., **“Import User Details.”**
* Select **"Action"** as your type then set the status to **“Running.”**
* Choose **"Register a user"** as your UM Zapier trigger and add the fields to be populated by the trigger, such as `first_name`, `last_name`, `birth_date`
* Click the **“Create”** button to save the setup.
### Setting Up Triggers and Actions in Zapier
#### Step 1: Create a Trigger in Zapier
1. **Login and Create a New Zap**
* Log in to [Zapier](https://zapier.com)
.
* On the dashboard, click **“+ Create”** and select **“Zaps.”** Then click on the **"+Create Zap"** button.

* Name the Zap and click on “**Trigger”** then select **“Google Sheets”** as your event app. 
2. **Setup the Trigger Event**
Once you've selected Google Sheets as your event app, set the details from the Setup tab within the step details panel on the right side.
* In the Trigger event field, choose the event **“New or Updated Spreadsheet Row.”** This will initiate the Zap whenever a new or updated row appears in your Google Sheet.
* In the Account option, sign in to your Google account and allow Zapier access to your Sheets. Connect your account to the Google Sheets by clicking the **"Sign in"** or **"+Create new account"** button. 
* It will redirect you to the authentication page where you must sign in to your Google account and authenticate the app.
* The **"Allow"** button process allows Zapier to access your Google Account securely. Zapier must use your Google services, like Drive and Sheets, for automation. It ensures secure authentication without revealing your password and gives you control over access.
* Once connected, click on the **Continue** button to proceed Configure tab.
3. **Configure Spreadsheet, Worksheet & Trigger Column**
* Choose the specific Google Spreadsheet (e.g., “Import Users”) and the worksheet you’ll use for the trigger.
* By default, the trigger column is set to "any\_column," which means the Zap will be triggered by any changes to a row. You can select a specific column as the trigger, so the Zap only activates when there’s a change in that particular column. To reset it to the default setting, leave the field blank by clicking **Clear Selection**.
**Note:** The Zap will trigger for all new rows, even if the trigger column is empty. To prevent the Zap from continuing with empty rows, add a **Filter** step to ensure it only proceeds if there’s data in the trigger column.
4. **Test**
* After configuring the settings, click **Continue** to move to the **Test** tab. Here, you can test your trigger by clicking the **Test Trigger** button. This will display data from your spreadsheet, allowing Zapier to map the data accurately.
* If the trigger test is successful, you’re ready to proceed to the action setup by clicking the **"Continue with selected record"** button.
#### Step 2: Configure the Action in Ultimate Member
1. Search for and select **Ultimate Member (1.0.0)** from the list of apps.

2. In the **Setup** tab within the step details panel on the right, select the desired event under the **Action Event** option. For this example, we have chosen **Register User**. Ultimate Member currently provides three action events to choose from:
* **Register User**: Registers a user to the website.
* **Delete User**: Finds a user account by email or username and deletes it, with an option to confirm deletion if the account isn’t found.
* **Search & Update Users**: Finds a user by email address or username and update the user's details.
* After selecting an action event, continue to the **Account** option, where you can manage all connected accounts. **Ultimate Member (1.0.0) i**s a verified Zapier partner, ensuring secure encryption of your credentials. From here, click the **Select** button to choose an existing account or **\+ Connect a new account** to add a new one.
* Clicking "**\+ Connect a new account"** will open a new tab to the authentication page, where you’ll enter your **Website URL**, **username**, and **application password**. Confirm by clicking the "**Yes, continue to Ultimate Member (1.0.0)"** button to complete the connection.
> **Note**: Use the Application Password generated in _wp-admin > Users > Edit a user > Application Passwords_ for this authentication process.

* Confirm your account connection and click the **Continue** button to move to the Configure tab.

3. In the **Configure** tab, complete the following fields:
* **Email Address or Username (required)**: The Zapier module will search for a user by email or username on your site. If the account exists, it won’t create a new one. Set **Update When The Account Exists** to **Yes** to update the existing account.
* **Update When The Account Exists (required)**:
* **Yes**: Updates user data if the account already exists.
* **No (default)**: No data will be updated if the account exists.
* **UM Field Group**: Choose the field group you created in _WP Admin > Ultimate Member > Zaps_. Once selected, additional fields from the group will appear below.
* **Account Role**: Set the user’s default role upon registration.
* **Account Status**: Set the default account status upon registration.
After configuring these options, click **Continue** to move to the **Test** tab.
4. In the Test tab, view the Data In list, which displays the data to be created when a new user registers.
1. Click **Test Step** to view the **Data Out** list, showing the details of the newly registered user based on input from your Google Sheet.

2. Check in _wp-admin > Users_ to confirm the user has been created or registered successfully.
If successful, click **Publish** to activate your Zap, save your changes, and enable synchronization between Google Sheets and Ultimate Member for future entries.
Last updated on December 9, 2024
No results found
---
# Adding Custom JavaScript Code - Ultimate Member
Adding Custom JavaScript Code
=============================
[](javascript:window.print() "Print this article")
In UM Theme, there are four fields where you can add your custom JavaScript or jQuery. You can found them in **Appearance > Customize > Code**. This feature is very useful for adding [Google Analytics tracking](https://support.google.com/analytics/answer/1008080?hl=en)
code, Google Tag Manager or adding Facebook Marketing Pixel.
Here are the 4 options to add JavaScript:
1. **JavaScript Code**: JavaScript entered in the box below will be rendered within _