# Table of Contents
- [REST API Overview - OneSignal](#rest-api-overview-onesignal)
- [2-step authentication - OneSignal](#2-step-authentication-onesignal)
- [Abandoned cart example - OneSignal](#abandoned-cart-example-onesignal)
- [AI message composer - OneSignal](#ai-message-composer-onesignal)
- [Aliases - OneSignal](#aliases-onesignal)
- [A/B Testing - OneSignal](#a-b-testing-onesignal)
- [Tags - OneSignal](#tags-onesignal)
- [Abandoned cart dynamic content - OneSignal](#abandoned-cart-dynamic-content-onesignal)
- [Action buttons for push notifications - OneSignal](#action-buttons-for-push-notifications-onesignal)
- [Analytics overview - OneSignal](#analytics-overview-onesignal)
- [Android notification categories - OneSignal](#android-notification-categories-onesignal)
- [Adobe Audience Manager - OneSignal](#adobe-audience-manager-onesignal)
- [iOS: App Clip Support - OneSignal](#ios-app-clip-support-onesignal)
- [Apple App Privacy Requirements - OneSignal](#apple-app-privacy-requirements-onesignal)
- [Apps, orgs, & accounts - OneSignal](#apps-orgs-accounts-onesignal)
- [Amazon Athena - OneSignal](#amazon-athena-onesignal)
- [Disabled Apps & Orgs - OneSignal](#disabled-apps-orgs-onesignal)
- [Start Live Activity - OneSignal](#start-live-activity-onesignal)
- [View templates - OneSignal](#view-templates-onesignal)
- [View user identity - OneSignal](#view-user-identity-onesignal)
- [Edit tags with external user id - OneSignal](#edit-tags-with-external-user-id-onesignal)
- [Transfer Subscription - OneSignal](#transfer-subscription-onesignal)
- [View API keys - OneSignal](#view-api-keys-onesignal)
- [Edit player - OneSignal](#edit-player-onesignal)
- [Android 13 Push Notification Developer Update Guide - OneSignal](#android-13-push-notification-developer-update-guide-onesignal)
- [Delete API key - OneSignal](#delete-api-key-onesignal)
- [Zapier - OneSignal](#zapier-onesignal)
- [Update API key - OneSignal](#update-api-key-onesignal)
- [Delete segment - OneSignal](#delete-segment-onesignal)
- [Page Not Found](#page-not-found)
- [View user identity (by subscription) - OneSignal](#view-user-identity-by-subscription-onesignal)
- [View players - OneSignal](#view-players-onesignal)
- [View an app - OneSignal](#view-an-app-onesignal)
- [View template - OneSignal](#view-template-onesignal)
- [Delete template - OneSignal](#delete-template-onesignal)
- [Rotate API key - OneSignal](#rotate-api-key-onesignal)
- [Remove alias - OneSignal](#remove-alias-onesignal)
- [Page Not Found](#page-not-found)
- [Update an app - OneSignal](#update-an-app-onesignal)
- [v3-4 SDK Email SDK Methods - OneSignal](#v3-4-sdk-email-sdk-methods-onesignal)
- [View player - OneSignal](#view-player-onesignal)
- [Delete player record - OneSignal](#delete-player-record-onesignal)
- [v3-4 SDK SDK Notification Event Handlers - OneSignal](#v3-4-sdk-sdk-notification-event-handlers-onesignal)
- [View segments - OneSignal](#view-segments-onesignal)
- [v4 Android Mobile Service Extensions - OneSignal](#v4-android-mobile-service-extensions-onesignal)
- [v3-4 SDK SMS SDK Methods - OneSignal](#v3-4-sdk-sms-sdk-methods-onesignal)
- [v3-4 SDK In-App Message SDK Methods - OneSignal](#v3-4-sdk-in-app-message-sdk-methods-onesignal)
- [v3-4 SDK Web SDK Methods - OneSignal](#v3-4-sdk-web-sdk-methods-onesignal)
- [Page Not Found](#page-not-found)
---
# REST API Overview - OneSignal
[OneSignal home page](https://documentation.onesignal.com/)
Search...
⌘K
Search...
Navigation
Using the REST APIs
REST API Overview
[Home](https://documentation.onesignal.com/docs/home)
[User Guides](https://documentation.onesignal.com/docs/quickstart-guide)
[Developer Guides](https://documentation.onesignal.com/docs/developers)
[Tutorials](https://documentation.onesignal.com/docs/tutorials)
[API Reference](https://documentation.onesignal.com/reference/rest-api-overview)
[Release Notes](https://documentation.onesignal.com/release-notes/changelog)
On this page
* [Requirements](https://documentation.onesignal.com/reference/rest-api-overview#requirements)
* [Platform-specific network requirements](https://documentation.onesignal.com/reference/rest-api-overview#platform-specific-network-requirements)
* [FCM (Google Android and Chrome push)](https://documentation.onesignal.com/reference/rest-api-overview#fcm-google-android-and-chrome-push)
* [APNs (Apple iOS, iPadOS, Safari push)](https://documentation.onesignal.com/reference/rest-api-overview#apns-apple-ios%2C-ipados%2C-safari-push)
* [Core API capabilities](https://documentation.onesignal.com/reference/rest-api-overview#core-api-capabilities)
* [Send messages](https://documentation.onesignal.com/reference/rest-api-overview#send-messages)
* [Supported features](https://documentation.onesignal.com/reference/rest-api-overview#supported-features)
* [Manage templates](https://documentation.onesignal.com/reference/rest-api-overview#manage-templates)
* [Manage users and subscriptions](https://documentation.onesignal.com/reference/rest-api-overview#manage-users-and-subscriptions)
* [Manage segments](https://documentation.onesignal.com/reference/rest-api-overview#manage-segments)
* [Export data](https://documentation.onesignal.com/reference/rest-api-overview#export-data)
* [Manage apps & keys](https://documentation.onesignal.com/reference/rest-api-overview#manage-apps-%26-keys)
* [Reliability and delivery](https://documentation.onesignal.com/reference/rest-api-overview#reliability-and-delivery)
* [Rate limits](https://documentation.onesignal.com/reference/rest-api-overview#rate-limits)
* [Retries](https://documentation.onesignal.com/reference/rest-api-overview#retries)
* [Idempotent requests](https://documentation.onesignal.com/reference/rest-api-overview#idempotent-requests)
* [FAQ](https://documentation.onesignal.com/reference/rest-api-overview#faq)
* [What is the timeout for API responses?](https://documentation.onesignal.com/reference/rest-api-overview#what-is-the-timeout-for-api-responses%3F)
* [Do I need to download or renew certificates to call the OneSignal API?](https://documentation.onesignal.com/reference/rest-api-overview#do-i-need-to-download-or-renew-certificates-to-call-the-onesignal-api%3F)
Our REST API follows the [REST Architecture](https://en.wikipedia.org/wiki/Representational_state_transfer)
and provides programmatic access to core messaging and user features. Use the API to send push notifications, emails, and SMS, manage users, subscriptions, and segments, export data, and configure apps.
* * *
[](https://documentation.onesignal.com/reference/rest-api-overview#requirements)
Requirements
-------------------------------------------------------------------------------------------------
**General**
* **HTTPS Required**: All API requests must use HTTPS with **TLS 1.2 or higher**, on port `443`.
* **Network Access**: Firewalls or proxies must allow **outbound traffic** to `https://api.onesignal.com` on port `443`.
* **DNS TTL**: Clients must respect OneSignal’s DNS **TTL of 300 seconds** to avoid stale IP resolution.
**Incoming Traffic to OneSignal (API & SDK Requests)** All incoming API traffic—whether from your backend, our SDKs, or the dashboard—passes through **Cloudflare**, which serves as our global edge network.
* You may see Cloudflare IP addresses in logs.
* These IPs are managed by Cloudflare and may change over time.
* If you maintain a strict firewall and need to allow outbound traffic to OneSignal, use Cloudflare’s official IP ranges:
[https://www.cloudflare.com/ips/](https://www.cloudflare.com/ips/)
We do not recommend whitelisting specific Cloudflare IPs, as they may change without notice.
**Outgoing Traffic from OneSignal (Webhooks & Event Streams)** For features where OneSignal sends HTTP requests to your servers (e.g., webhooks or event streams), these originate from our infrastructure on Google Cloud Platform (GCP) in the `europe-west4` region (Groningen, Netherlands).
* To allow inbound traffic from OneSignal, consult GCP’s maintained list of IP ranges:
[https://www.gstatic.com/ipranges/cloud.json](https://www.gstatic.com/ipranges/cloud.json)
_(You can filter by the `europe-west4` region.)_
We support [IP Allowlisting](https://documentation.onesignal.com/docs/keys-and-ids)
with REST API keys.
* * *
###
[](https://documentation.onesignal.com/reference/rest-api-overview#platform-specific-network-requirements)
Platform-specific network requirements
####
[](https://documentation.onesignal.com/reference/rest-api-overview#fcm-google-android-and-chrome-push)
FCM (Google Android and Chrome push)
* Required ports: `5228`, `443`, `5229`, and `5230`
* No IP allow-listing needed
* More info: [Firebase Cloud Messaging (FCM)](https://firebase.google.com/docs/cloud-messaging/concept-options#messaging-ports-and-your-firewall)
####
[](https://documentation.onesignal.com/reference/rest-api-overview#apns-apple-ios%2C-ipados%2C-safari-push)
APNs (Apple iOS, iPadOS, Safari push)
* Required ports: `5223`, `443`, and `2197`
* Recommended servers:
* Sandbox: `api.sandbox.push.apple.com:443`
* Production: `api.push.apple.com:443`
* IP range: `17.0.0.0/8`
* More info:
* [Apple Support](https://support.apple.com/en-us/102266)
* [APNs Developer Docs](https://developer.apple.com/documentation/usernotifications/sending-notification-requests-to-apns?language=objc)
* * *
[](https://documentation.onesignal.com/reference/rest-api-overview#core-api-capabilities)
Core API capabilities
-------------------------------------------------------------------------------------------------------------------
###
[](https://documentation.onesignal.com/reference/rest-api-overview#send-messages)
Send messages
See our [Create Message guide](https://documentation.onesignal.com/reference/create-message)
to get started. Programmatically send:
[Push Notifications\
------------------\
\
Send push notifications to apps and websites.](https://documentation.onesignal.com/reference/push-notification)
[Email\
-----\
\
Send transactional and promotional emails.](https://documentation.onesignal.com/reference/email)
[SMS\
---\
\
Send SMS or MMS messages globally.](https://documentation.onesignal.com/reference/sms)
[Live Activities\
---------------\
\
Send Live Activity updates to iOS devices.](https://documentation.onesignal.com/reference/start-live-activity)
####
[](https://documentation.onesignal.com/reference/rest-api-overview#supported-features)
Supported features
Below are common supported features for each platform. See our overview docs for each platform’s supported features:
* [Push overview](https://documentation.onesignal.com/docs/push)
* [Email overview](https://documentation.onesignal.com/docs/email-messaging)
* [SMS overview](https://documentation.onesignal.com/docs/sms-messaging)
* [Live Activities overview](https://documentation.onesignal.com/docs/live-activities)
[Message Personalization\
-----------------------\
\
Add dynamic content to personalize messages for each user.](https://documentation.onesignal.com/docs/message-personalization)
[Multi-Language Messaging\
------------------------\
\
Send push notifications in multiple languages.](https://documentation.onesignal.com/docs/multi-language-messaging)
[Throttling\
----------\
\
Control push notification delivery speed.](https://documentation.onesignal.com/docs/throttling)
[Frequency Capping\
-----------------\
\
Limit the number of push notifications per user.](https://documentation.onesignal.com/docs/frequency-capping)
[Data & background notifications\
-------------------------------\
\
Send data-only notifications for background tasks.](https://documentation.onesignal.com/docs/data-notifications)
* * *
###
[](https://documentation.onesignal.com/reference/rest-api-overview#manage-templates)
Manage templates
[Templates](https://documentation.onesignal.com/docs/templates)
are reusable push, email, and SMS messages that simplify development and improve consistency.
[Create template\
---------------\
\
Create a reusable template.](https://documentation.onesignal.com/reference/create-template)
[Update template\
---------------\
\
Update a template.](https://documentation.onesignal.com/reference/update-template)
[View templates\
--------------\
\
View all templates.](https://documentation.onesignal.com/reference/view-templates)
[Delete template\
---------------\
\
Delete a template.](https://documentation.onesignal.com/reference/delete-template)
* * *
###
[](https://documentation.onesignal.com/reference/rest-api-overview#manage-users-and-subscriptions)
Manage users and subscriptions
See our [Users](https://documentation.onesignal.com/docs/users)
and [Subscriptions](https://documentation.onesignal.com/docs/subscriptions)
guides for more details.
[Create user\
-----------\
\
Create a user with optional aliases and subscriptions.](https://documentation.onesignal.com/reference/create-user)
[View user\
---------\
\
View user details.](https://documentation.onesignal.com/reference/view-user)
[Update user\
-----------\
\
Update a user.](https://documentation.onesignal.com/reference/update-user)
[Delete user\
-----------\
\
Delete a user.](https://documentation.onesignal.com/reference/delete-user)
###
[](https://documentation.onesignal.com/reference/rest-api-overview#manage-segments)
Manage segments
[Segments](https://documentation.onesignal.com/docs/segmentation)
help group users by filters.
[Create Segments\
---------------\
\
Create a segment.](https://documentation.onesignal.com/reference/create-segments)
[Delete Segments\
---------------\
\
Delete a segment.](https://documentation.onesignal.com/reference/delete-segments)
You can also target users dynamically using [filters](https://documentation.onesignal.com/reference/create-message#filters)
without creating persistent segments.
* * *
###
[](https://documentation.onesignal.com/reference/rest-api-overview#export-data)
Export data
For analytics breakdowns, see [Analytics overview](https://documentation.onesignal.com/docs/analytics-overview)
.
[Export CSV of subscriptions\
---------------------------\
\
Export all user and subscription data.](https://documentation.onesignal.com/reference/csv-export)
[Export CSV of events\
--------------------\
\
Export events like sent, received, and clicked.](https://documentation.onesignal.com/reference/export-csv-of-events)
[View messages\
-------------\
\
View message details and analytics.](https://documentation.onesignal.com/reference/view-messages)
[View message\
------------\
\
View individual message details.](https://documentation.onesignal.com/reference/view-message)
* * *
###
[](https://documentation.onesignal.com/reference/rest-api-overview#manage-apps-%26-keys)
Manage apps & keys
OneSignal allows you to group platforms (mobile apps, websites) under a single App ID. See [Apps, orgs, & accounts](https://documentation.onesignal.com/docs/apps-organizations)
.
[Create an app\
-------------\
\
Create an app.](https://documentation.onesignal.com/reference/create-an-app)
[Update an app\
-------------\
\
Update an app.](https://documentation.onesignal.com/reference/update-an-app)
[View single app\
---------------\
\
View a single app.](https://documentation.onesignal.com/reference/view-an-app)
[View multiple apps\
------------------\
\
View all apps.](https://documentation.onesignal.com/reference/view-apps)
**API key management** See [Keys & IDs](https://documentation.onesignal.com/docs/keys-and-ids)
for more details.
[Create API key\
--------------\
\
Create an API key.](https://documentation.onesignal.com/reference/create-api-key)
[View API keys\
-------------\
\
View all API keys.](https://documentation.onesignal.com/reference/view-api-keys)
[Delete API key\
--------------\
\
Delete an API key.](https://documentation.onesignal.com/reference/delete-api-key)
[Update API key\
--------------\
\
Update an API key.](https://documentation.onesignal.com/reference/update-api-key)
* * *
[](https://documentation.onesignal.com/reference/rest-api-overview#reliability-and-delivery)
Reliability and delivery
-------------------------------------------------------------------------------------------------------------------------
###
[](https://documentation.onesignal.com/reference/rest-api-overview#rate-limits)
Rate limits
All API endpoints are subject to rate limits. Limits vary by endpoint and request type. Refer to the [Rate Limits reference](https://documentation.onesignal.com/reference/rate-limits)
for full details.
Rate limits are returned via response headers. Be sure to implement exponential backoff retry logic based on `Retry-After`.
###
[](https://documentation.onesignal.com/reference/rest-api-overview#retries)
Retries
If a request fails due to a temporary server error (HTTP 5xx) or a rate limit (HTTP 429), you should retry the request using an exponential backoff strategy. For rate limits, always wait the amount of time specified in the `Retry-After` header before retrying.
* **HTTP 429 (Too Many Requests)**:
* Wait for the duration specified in the Retry-After header before retrying.
* Use the `idempotency_key` to prevent sending duplicate messages when retrying.
* **HTTP 5xx (Server Errors)**:
* Retry the request using exponential backoff (e.g., start with 60 seconds and increase the wait time after each failure).
* Do not retry HTTP 4xx errors (such as 400, 401, or 403) unless you have fixed the underlying issue in your request, as these indicate a problem with your request rather than a temporary server issue.
* If you do not get a response from our API within 100 seconds, you can retry the request. We recommend using an `idempotency_key` to prevent sending duplicate messages when retrying.
###
[](https://documentation.onesignal.com/reference/rest-api-overview#idempotent-requests)
Idempotent requests
Use the `idempotency_key` header to prevent duplicate messages when retrying failed requests.
* Available for: [Create Message](https://documentation.onesignal.com/reference/create-message)
* Format: Up to 64 alphanumeric characters
* Duration: Idempotency keys are cached for 24 hours
See the [Idempotent Notification Requests guide](https://documentation.onesignal.com/reference/idempotent-notification-requests)
for implementation tips.
* * *
[](https://documentation.onesignal.com/reference/rest-api-overview#faq)
FAQ
-------------------------------------------------------------------------------
###
[](https://documentation.onesignal.com/reference/rest-api-overview#what-is-the-timeout-for-api-responses%3F)
What is the timeout for API responses?
* Default: **100 seconds**
* If you’re unsure whether a request completed, use an `idempotency_key` to safely retry.
###
[](https://documentation.onesignal.com/reference/rest-api-overview#do-i-need-to-download-or-renew-certificates-to-call-the-onesignal-api%3F)
Do I need to download or renew certificates to call the OneSignal API?
No, you do not need to manually download or renew certificates to call the OneSignal API. Our API uses HTTPS with a publicly trusted TLS certificate managed by Cloudflare. These edge certificates are renewed automatically by Cloudflare and trusted by all major browsers, operating systems, and runtimes. No extra action is needed unless your environment has special trust or pinning rules. **Why you might be seeing frequent certificate changes** If your network or middleware is configured to pin a specific leaf certificate (the one shown during the TLS handshake), you will see it expire and rotate every few months. This is normal — Cloudflare rotates these certificates for security. Most clients trust the public root and intermediate Certificate Authorities (CAs) instead, which avoids any impact when the leaf cert changes. **Recommended approach**
* **Best practice**: Trust the root and intermediate CAs in the chain instead of the rotating leaf certificate. This allows certificate rotation without breaking your connection.
* **If you must pin a certificate**: Pin the public key (SPKI) of the CA or use a backup key set, not the exact leaf certificate.
**Workaround: Fetching the current certificate** If your process requires the active leaf certificate, you can retrieve it directly from our API endpoint:
Copy
SERVERNAME=api.onesignal.com
echo -n | openssl s_client -connect $SERVERNAME:443 | sed -ne '/-BEGIN CERTIFICATE-/,/-END CERTIFICATE-/p' > /tmp/${SERVERNAME}_current.pem
To retrieve the full certificate chain, add the `-showcerts` flag to `openssl s_client` and capture all certificates printed. **More information** Cloudflare’s documentation explains how their SSL/TLS certificates work and why they rotate:
* [Cloudflare SSL/TLS documentation](https://developers.cloudflare.com/ssl/get-started/)
* [Cloudflare Edge Certificates documentation](https://developers.cloudflare.com/ssl/edge-certificates/)
* * *
[Rate limits](https://documentation.onesignal.com/reference/rate-limits)
Assistant
Responses are generated using AI and may contain mistakes.
---
# 2-step authentication - OneSignal
[OneSignal home page](https://documentation.onesignal.com/)
Search...
⌘K
Search...
Navigation
Authentication
2-step authentication
[Home](https://documentation.onesignal.com/docs/home)
[User Guides](https://documentation.onesignal.com/docs/quickstart-guide)
[Developer Guides](https://documentation.onesignal.com/docs/developers)
[Tutorials](https://documentation.onesignal.com/docs/tutorials)
[API Reference](https://documentation.onesignal.com/reference/rest-api-overview)
[Release Notes](https://documentation.onesignal.com/release-notes/changelog)
On this page
* [Overview](https://documentation.onesignal.com/docs/2-step-authentication#overview)
* [Setup](https://documentation.onesignal.com/docs/2-step-authentication#setup)
* [Download an authenticator app](https://documentation.onesignal.com/docs/2-step-authentication#download-an-authenticator-app)
* [Enable 2-step authentication](https://documentation.onesignal.com/docs/2-step-authentication#enable-2-step-authentication)
* [Set up your Authenticator App](https://documentation.onesignal.com/docs/2-step-authentication#set-up-your-authenticator-app)
* [Recovery codes](https://documentation.onesignal.com/docs/2-step-authentication#recovery-codes)
* [Enforce 2FA for all team members](https://documentation.onesignal.com/docs/2-step-authentication#enforce-2fa-for-all-team-members)
* [Disable or reconfigure 2FA](https://documentation.onesignal.com/docs/2-step-authentication#disable-or-reconfigure-2fa)
* [Troubleshooting & FAQ](https://documentation.onesignal.com/docs/2-step-authentication#troubleshooting-%26-faq)
* [I lost my recovery codes](https://documentation.onesignal.com/docs/2-step-authentication#i-lost-my-recovery-codes)
* [Why can’t I log in or see “Failed to configure OTP”?](https://documentation.onesignal.com/docs/2-step-authentication#why-can%E2%80%99t-i-log-in-or-see-%E2%80%9Cfailed-to-configure-otp%E2%80%9D%3F)
* [I forgot my password](https://documentation.onesignal.com/docs/2-step-authentication#i-forgot-my-password)
* [Can I use OAuth with 2FA?](https://documentation.onesignal.com/docs/2-step-authentication#can-i-use-oauth-with-2fa%3F)
* [Which authenticator apps are supported?](https://documentation.onesignal.com/docs/2-step-authentication#which-authenticator-apps-are-supported%3F)
* [Does OneSignal support Okta?](https://documentation.onesignal.com/docs/2-step-authentication#does-onesignal-support-okta%3F)
* [What do the login method icons mean?](https://documentation.onesignal.com/docs/2-step-authentication#what-do-the-login-method-icons-mean%3F)
[](https://documentation.onesignal.com/docs/2-step-authentication#overview)
Overview
----------------------------------------------------------------------------------------
Add a critical layer of security to your OneSignal dashboard by verifying your identity through an authenticator app. Once enabled, logging into OneSignal will require a time-sensitive 6-digit code from the app.
* * *
[](https://documentation.onesignal.com/docs/2-step-authentication#setup)
Setup
----------------------------------------------------------------------------------
###
[](https://documentation.onesignal.com/docs/2-step-authentication#download-an-authenticator-app)
Download an authenticator app
Install one of the following authenticator apps on your mobile device:
* **Google Authenticator** (recommended): [Android](https://play.google.com/store/apps/details?id=com.google.android.apps.authenticator2)
| [iOS](https://apps.apple.com/us/app/google-authenticator/id388497605)
* **Microsoft Authenticator**: [Android](https://play.google.com/store/apps/details?id=com.azure.authenticator)
| [iOS](https://apps.apple.com/us/app/microsoft-authenticator/id983156458)
* **Authy**: [authy.com](https://authy.com/download/)
###
[](https://documentation.onesignal.com/docs/2-step-authentication#enable-2-step-authentication)
Enable 2-step authentication
1
Sign in to your OneSignal account
If you already have 2FA enabled and are locked out, see [I lost my recovery codes](https://documentation.onesignal.com/docs/2-step-authentication#i-lost-my-recovery-codes)
.
2
Go to Account Management
Navigate to [Account Management](https://dashboard.onesignal.com/profile)
or click **your email drop-down > Manage Account**.
3
Enable or reconfigure 2-step authentication
Scroll to the **2-Step Authentication** section and click **Enable** (or **Reconfigure** if already set up).
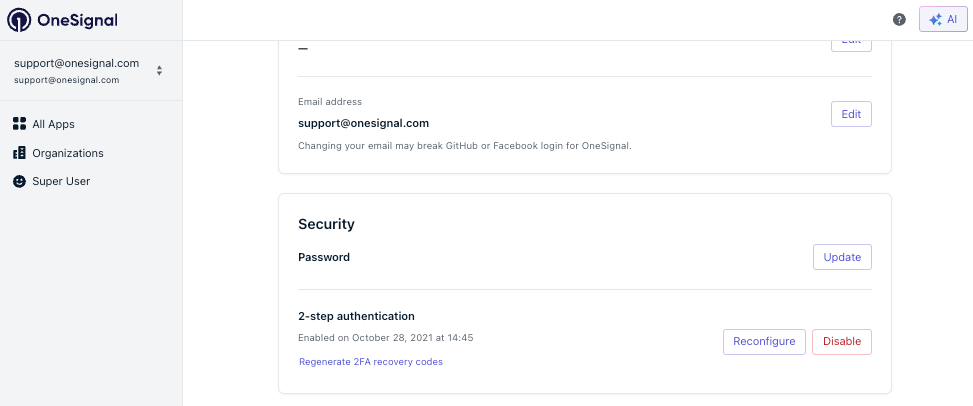
Enable 2-Step Authentication
###
[](https://documentation.onesignal.com/docs/2-step-authentication#set-up-your-authenticator-app)
Set up your Authenticator App
1
Scan QR code or enter key manually
On the “Enable 2-Step Authentication” setup screen, scan the QR code using your authenticator app or manually enter the **Secret Key**.
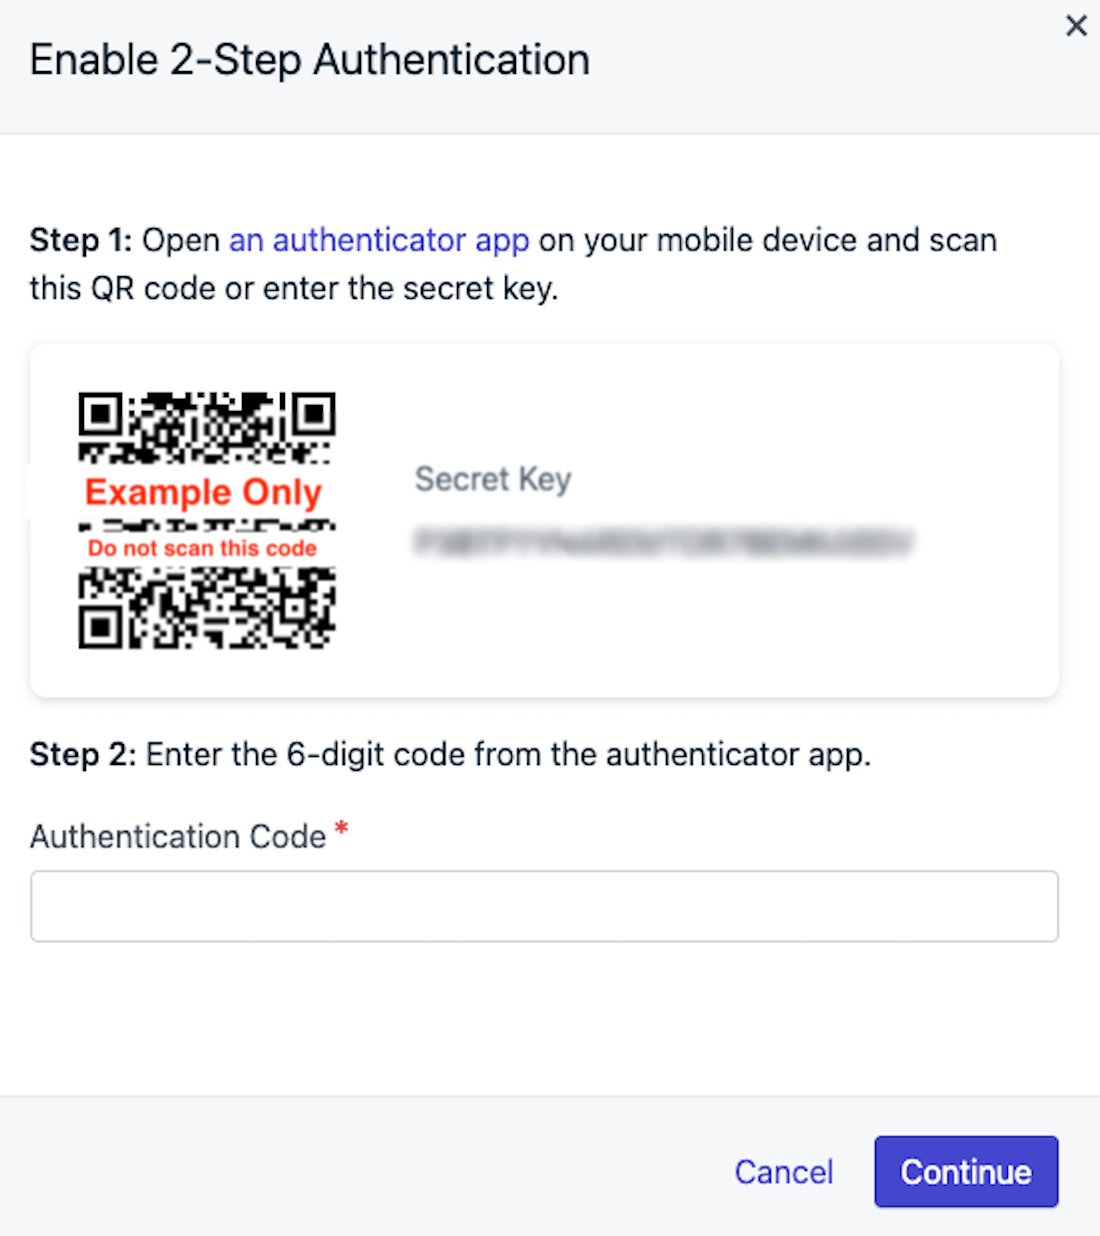
Reconfigure 2-Step Authentication
If entering manually, tap **Add Account**, choose “Enter a setup key”, and name it something memorable like `OneSignal_[your_email]`.
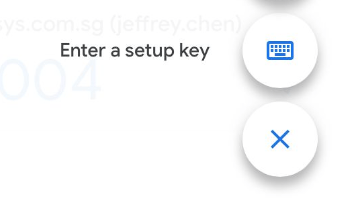
Reconfigure 2-Step Authentication
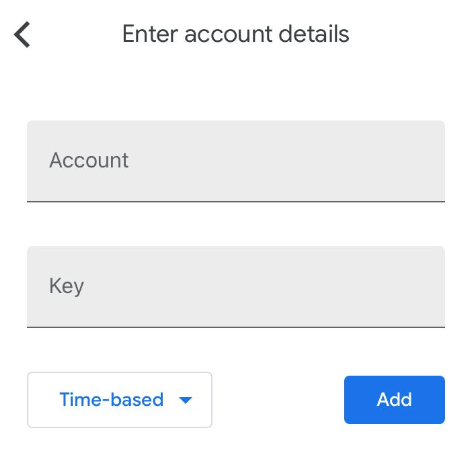
Reconfigure 2-Step Authentication
The app will now generate a 6-digit code every 30 seconds.
2
Login with auth code
* In OneSignal, enter the current 6-digit code from your auth app.
* If the code fails, wait 30 seconds and try the next one.
* If the code still fails, check that you entered the key correctly and try again.
* * *
[](https://documentation.onesignal.com/docs/2-step-authentication#recovery-codes)
Recovery codes
----------------------------------------------------------------------------------------------------
After successful setup, OneSignal will display **10 recovery codes**. These codes can be used to access your account if you lose access to your authenticator app.
Recovery codes are shown **once only**. Save or download them securely. If lost, generate a new set via your account settings to invalidate the previous ones.
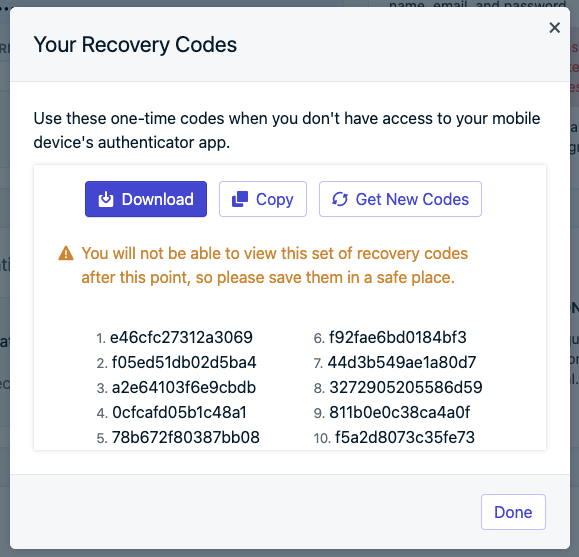
Download your recovery codes!
* * *
[](https://documentation.onesignal.com/docs/2-step-authentication#enforce-2fa-for-all-team-members)
Enforce 2FA for all team members
----------------------------------------------------------------------------------------------------------------------------------------
To enforce 2-step authentication across your organization:
1
You must be an Organization Admin.
See [Team members](https://documentation.onesignal.com/docs/manage-team-members)
for details.
2
Navigate to your Organization.

Navigate to your Organization
3
Under Team Members > Security, click Enable.

Organization-wide enforcement of 2FA
4
Select Require 2-Step Authentication for all users, then click Continue.
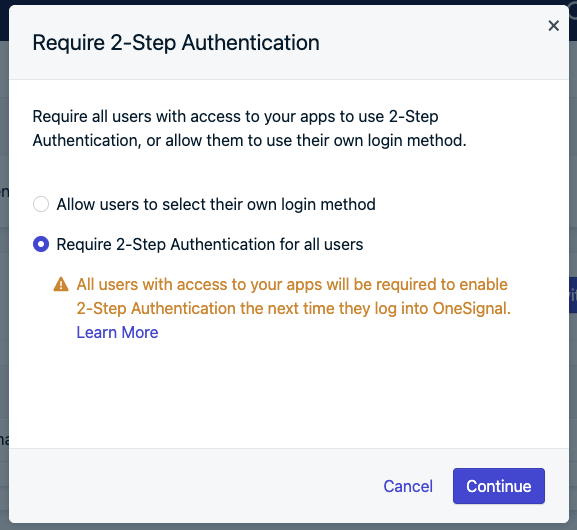
Require 2-Step Authentication for all users of your apps.
Future invitations to the organization or apps will require users to set up 2FA before accessing.
* * *
[](https://documentation.onesignal.com/docs/2-step-authentication#disable-or-reconfigure-2fa)
Disable or reconfigure 2FA
----------------------------------------------------------------------------------------------------------------------------
You may not disable 2FA if your organization requires it. Contact your Organization Admin or OneSignal Support if needed.
Follow the steps to [Enable 2-step authentication](https://documentation.onesignal.com/docs/2-step-authentication#enable-2-step-authentication)
and if enabled, you will have the option to disable or reconfigure.
* * *
[](https://documentation.onesignal.com/docs/2-step-authentication#troubleshooting-%26-faq)
Troubleshooting & FAQ
--------------------------------------------------------------------------------------------------------------------
###
[](https://documentation.onesignal.com/docs/2-step-authentication#i-lost-my-recovery-codes)
I lost my recovery codes
Email [support@onesignal.com](mailto:support@onesignal.com)
and cc one of your team members that can verify you. If you don’t have any other team members with access to the OneSignal app, our Support Team will assist with other options.
###
[](https://documentation.onesignal.com/docs/2-step-authentication#why-can%E2%80%99t-i-log-in-or-see-%E2%80%9Cfailed-to-configure-otp%E2%80%9D%3F)
Why can’t I log in or see “Failed to configure OTP”?
Try:
* Waiting for the next 30-second code cycle
* Disabling browser extensions (AdBlock, CORS)
* Whitelisting `*.onesignal.com`
* Disabling Opera’s “Block Trackers”
* Hard refresh
* Trying another browser
Still having issues? Email `support@onesignal.com` and cc a team member that can verify you.
###
[](https://documentation.onesignal.com/docs/2-step-authentication#i-forgot-my-password)
I forgot my password
[Reset your password](https://dashboard.onesignal.com/password-reset)
###
[](https://documentation.onesignal.com/docs/2-step-authentication#can-i-use-oauth-with-2fa%3F)
Can I use OAuth with 2FA?
Yes, follow the same setup flow after logging in via OAuth
###
[](https://documentation.onesignal.com/docs/2-step-authentication#which-authenticator-apps-are-supported%3F)
Which authenticator apps are supported?
Any TOTP-compatible app (Authy, Google Authenticator, Microsoft Authenticator, etc.).
###
[](https://documentation.onesignal.com/docs/2-step-authentication#does-onesignal-support-okta%3F)
Does OneSignal support Okta?
Yes. See [OneSignal on Okta](https://www.okta.com/integrations/onesignal/)
and [Okta SWA setup guide](https://help.okta.com/en/prod/Content/Topics/Apps/Apps_Overview_of_Managing_Apps_and_SSO.htm)
.
###
[](https://documentation.onesignal.com/docs/2-step-authentication#what-do-the-login-method-icons-mean%3F)
What do the login method icons mean?
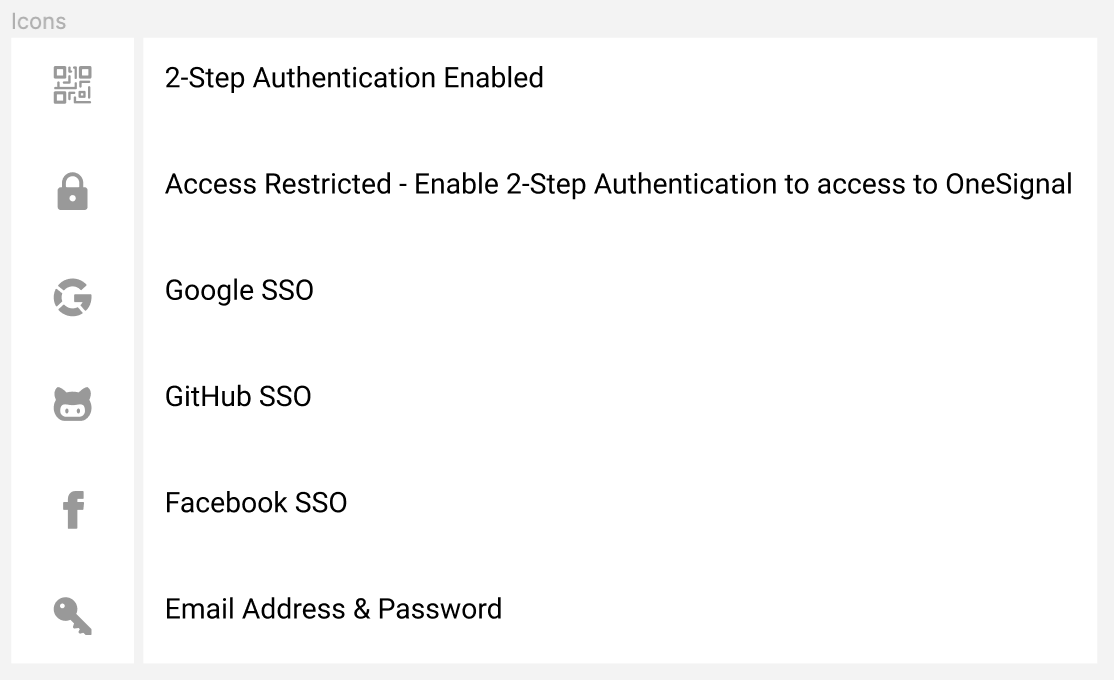
Login method icon definitions.
* * *
[Handling Personal Data](https://documentation.onesignal.com/docs/handling-personal-data)
[Single Sign-On (SSO)](https://documentation.onesignal.com/docs/sso)
Assistant
Responses are generated using AI and may contain mistakes.
---
# Abandoned cart example - OneSignal
[OneSignal home page](https://documentation.onesignal.com/)
Search...
⌘K
Search...
Navigation
📈 Increase Engagement & Retention
Abandoned cart example
[Home](https://documentation.onesignal.com/docs/home)
[User Guides](https://documentation.onesignal.com/docs/quickstart-guide)
[Developer Guides](https://documentation.onesignal.com/docs/developers)
[Tutorials](https://documentation.onesignal.com/docs/tutorials)
[API Reference](https://documentation.onesignal.com/reference/rest-api-overview)
[Release Notes](https://documentation.onesignal.com/release-notes/changelog)
On this page
* [Overview](https://documentation.onesignal.com/docs/abandoned-cart#overview)
[MuteSix Increased Revenue by 182% with Abandoned Cart Notifications](https://onesignal.com/case-studies/mutesix-x-inspire-uplift-case-study)
.[Princeton Review 400% increase in conversions Case Study](https://onesignal.com/case-studies/princeton-review)
[Evino Increases Revenue 12% Case Study](https://onesignal.com/case-studies/evino-case-study)
.
[](https://documentation.onesignal.com/docs/abandoned-cart#overview)
Overview
---------------------------------------------------------------------------------
Reminding users about items left in their shopping carts is one of the most effective ways to drive conversions and recover lost revenue. When implemented properly, abandoned cart campaigns deliver proven results as shown in our [Case Studies](https://onesignal.com/case-studies)
. This step-by-step guide shows how to implement abandoned cart notifications with example code for two scenarios:
1. Using OneSignal’s powerful tagging and segmentation tools in a segment-based Journey.
2. Using OneSignal’s comprehensive new [Custom Events](https://documentation.onesignal.com/docs/custom-events)
features and two simple event-triggered Journeys.
If you already have an abandoned cart solution setup, you can use our [Data Feeds](https://documentation.onesignal.com/docs/data-feeds)
to sync cart data directly into your OneSignal messages.
* Using Tags and Segments
* Using Custom Events
[](https://documentation.onesignal.com/docs/abandoned-cart#setup)
Setup
---------------------------------------------------------------------------
###
[](https://documentation.onesignal.com/docs/abandoned-cart#1-track-cart-activity-with-tags)
1\. Track cart activity with tags
Use tags to track when users add items to their cart. These tags can include product name, image, and a timestamp:
* `cart_update`: Unix timestamp of when the cart was updated
* `product_name`: Human-readable product name for personalization
* `product_image`: Direct URL to product image for visual engagement
Here’s a basic example to tag items added to a cart:
Copy
let productName = "Name of the Product"; // Replace with the name of item
let productImageURL = "https://yoursiteurl.com/image-file.jpg"; // Replace with the url to the image
// Use this example method when user adds item to cart
async function addTagsUponCartUpdate(productName, productImageURL) {
await OneSignalDeferred.push(async function (OneSignal) {
let timestamp = Math.floor(Date.now() / 1000);
await OneSignal.User.addTags({
cart_update: timestamp,
product_name: productName,
product_image: productImageURL,
});
// Call getTags after adding tags
const tags = await OneSignal.User.getTags();
console.log(tags);
});
}
// Call the function, or attach to add to cart button
addTagsUponCartUpdate(productName, productImageURL);
If users check out or remove items, be sure to remove the tags to avoid false positives.**Remove tags when purchase is complete:**
Copy
//Removes the cart tags, call when user purchases or removes items from cart
async function removeCartTags() {
await OneSignalDeferred.push(async function (OneSignal) {
let timestamp = Math.floor(Date.now() / 1000);
await OneSignal.User.addTags({
cart_update: "",
product_name: "",
product_image: "",
});
// Call getTags after removing tags
const tags = await OneSignal.User.getTags();
console.log(tags);
});
}
If the user leaves your site without checking out (abandoning their cart), you now have enough information to target them with a personalized abandoned cart notification.
* * *
###
[](https://documentation.onesignal.com/docs/abandoned-cart#2-create-abandoned-cart-segment)
2\. Create abandoned cart segment
Once the tagging setup is complete we’ll need to target these users and send them messages after some time has passed. In your OneSignal Dashboard, go to **Audience** > **Segments**.[Segments](https://documentation.onesignal.com/docs/segmentation)
allow for grouping subscriptions based on the data collected: 1 - if they have items in the cart and 2 - how long it has been since those items were left in the cart.
* With Last Session Filter
* With Time Operators
This segment will include users that have items in their cart and have left the site or mobile app over 1 hour ago. The user adds an item to the cart, then leaves the app or site, 1 hour later they will be in this segment.
1. Select the “User Tag” filter
2. Set `cart_update` to “exists”
3. Select “Add Filter” to create an “AND” relationship.
4. Select “Last Session” filter and set “greater than” `1`.
5. Select “Add Filter” again and set another “Last Session” filter to “less than” `24`. (the user will leave the segment after 24 hours).
6. Name the Segment **Abandoned Cart 1 Hour** (not required but helpful to remember).

Abandoned cart segment example
As users add/remove items from their cart and leave/return to the site, they will automatically move in and out of this segment.You can always come back into this segment later if you want to change the time frame from 1 hour to a higher timeframe.Segments can be duplicated to create more and setup different time frames if you want to send different messages after longer timeframes as well.
###
[](https://documentation.onesignal.com/docs/abandoned-cart#3-create-abandoned-cart-message)
3\. Create abandoned cart message
This is where we can use some creativity! If your site/app has certain phrases, language, or emojis you like, then use it! All that is great for brand recognition, get users to click, and getting them to checkout.Also, using the `product_name` and `product_image` tags, we can include this data within the message for [Message Personalization](https://documentation.onesignal.com/docs/message-personalization)
.For example, we can say: “Hey Cool Cat 😸 ! Your new Yellow Cat Water Dish is waiting for you!”. And include the picture of the item in the message.In the OneSignal Dashboard, go to **Messages** > **Templates** and select “New Push Template”.[Templates](https://documentation.onesignal.com/docs/templates)
are a way to create reusable message and monitor how many times they have been sent and clicked.
1. Name the Template: **Abandoned Cart 1 Hour** or whatever you named the Segment.
2. Add your Title, example: `Hey Cool Cat 😸 !`
3. Add your Message, example: `Your new {{product_name | default: "item"}} is waiting for you!`
* here `{{product_name | default: "item"}}` will be replaced by whatever value is set for that tag. If no tag is set than “item” will be used.
4. Set the Image to be: `{{product_image}}`
* here `{{product_image}}` will be replaced with the URL of the image to the product. **If tag value is not a direct link to the image, then it will not show.**
5. Set the Launch URL to be the URL of your checkout page
* here if the checkout page is unique per user, we would need to either link to the cart page (if not unique) or use more tag substitution. For example, if your checkout page is: `https://yoursite.com/username/checkout` we need to tag the user with a `user_name` tag so their username can be replaced if we use: `https://yoursite.com/{{user_name}}/checkout`

Abandoned cart message example
**Important:** you can use any language in these fields (does not have to be English) and if you want to add more than 1 language, just select “Add Languages” to put your own translation for the message.
6. Under the preview, click “Send Test Message” to test out how it looks!
7. When done press “Save” at the bottom.
Now that our reusable template is setup, we can return to the **Messages** > **Templates** page to keep an eye on how many times this has been sent and opened.You can create as many templates as you want and across all the different channels you want to send from.
###
[](https://documentation.onesignal.com/docs/abandoned-cart#4-setup-abandoned-cart-journey)
4\. Setup abandoned cart journey
Navigate to **Journeys > New Journey**.
####
[](https://documentation.onesignal.com/docs/abandoned-cart#journey-settings)
Journey settings
1. Name the Journey: `Abandoned Cart` or anything you like to recognize what this Journey does.
2. Entry Rules: Include Segment **Abandoned Cart 1 Hour** segment.
3. Exit Rules: Check **Exit when a user no longer matches the audience conditions**.
4. Re-entry Rules: Select **Yes, after a certain amount of time** and set to `1` Day.

Journey settings example
5. Press **Save**.
####
[](https://documentation.onesignal.com/docs/abandoned-cart#journey-steps)
Journey steps
Currently users that enter the segment will then start flowing through the Journey. If they leave the segment, they will leave the Journey and can’t re-enter until 1 day has passed.
1. Add a **Push Notification** message step, select the **Abandoned Cart 1 Hour** template and **Save**.

Journey steps example
2. Add a **Wait** step, select `1` **Week** and **Save**.
3. Select **Save & Close**.
Your users will be sent the personalized Abandoned Cart template once per 8 days ( 1 week wait node + 1 day re-entry rule) until they either update their car or check out.
You have successfully finished the minimum Abandoned Cart setup! You can now create more templates, add more Journey steps, messages, and update as needed!When ready just press **Set Live**.
###
[](https://documentation.onesignal.com/docs/abandoned-cart#5-optional-setup-abandoned-cart-performance-tracking)
5\. Optional setup abandoned cart performance tracking
Once abandoned cart message are set up, you can track how well it performs by going to [Templates](https://documentation.onesignal.com/docs/templates)
and looking at the open and click rates.If you have a Paid OneSignal Account, you can also use [Outcomes](https://documentation.onesignal.com/docs/custom-outcomes)
to track actual revenue brought in.When the customer finishes payment, upon selection of the “Submit Payment” button call the following method.
javascript
Copy
//Example to get the price and total items in cart
// replace ".checkout-price-total" with the class name the element containing the cart's total price
const checkoutPriceTotal = document.querySelector(".checkout-price-total").innerText;
// optional replace ".checkout-items-total" with the class name the element containing the total items in cart to be purchased
const checkoutItemsTotal = document.querySelector(".checkout-items-total").innerText;
//Call this method in the click event for the final button to submit payment
function updateOSOnCartPurchase(checkoutPriceTotal, checkoutItemsTotal) {
let purchasePriceTotal = parseFloat(checkoutPriceTotal);
let purchasedItemCount = parseInt(checkoutItemsTotal);
OneSignalDeferred.push(function (OneSignal) {
OneSignal.sendOutcome("Purchase", purchasePriceTotal);
OneSignal.sendOutcome("Purchased Item Count", purchasedItemCount);
});
}
//example of adding this method to the "submit-payment" button
const submitPurchaseButton = document.querySelector(".submit-payment");
if (submitPurchaseButton) {
submitPurchaseButton.addEventListener("click", () => {
updateOSOnCartPurchase(checkoutPriceTotal, checkoutItemsTotal);
});
}
* `OneSignal.sendOutcome("Purchase", purchasePriceTotal);` - will send OneSignal the total purchase amount and accumulate that revenue for all purchases made by all customers that clicked a push or received a push within a specific timeframe (influenced) and made the purchase.
* `OneSignal.sendOutcome("Purchased Item Count", purchasedItemCount);` - will send OneSignal the total amount of items purchased associated with the customer that directly clicked the push to make a purchase or made the purchase “influenced” by a push.
You are now an OneSignal expert! You achieved an in-depth implementation of OneSignal’s offering and are ready to do more! Continue adding more best practices outlined in our [Use Cases](https://documentation.onesignal.com/docs/tutorials)
or follow the links below to go into more depth on these individual features.
Need help?Chat with our Support team or email `support@onesignal.com`Please include:
* Details of the issue you’re experiencing and steps to reproduce if available
* Your OneSignal App ID
* The External ID or Subscription ID if applicable
* The URL to the message you tested in the OneSignal Dashboard if applicable
* Any relevant [logs or error messages](https://documentation.onesignal.com/docs/capturing-a-debug-log)
We’re happy to help!
* * *
[News and media industry](https://documentation.onesignal.com/docs/news-and-media-industry)
[Abandoned cart dynamic content](https://documentation.onesignal.com/docs/abandoned-cart-content)
Assistant
Responses are generated using AI and may contain mistakes.
---
# AI message composer - OneSignal
[OneSignal home page](https://documentation.onesignal.com/)
Search...
⌘K
Search...
Navigation
Features
AI message composer
[Home](https://documentation.onesignal.com/docs/home)
[User Guides](https://documentation.onesignal.com/docs/quickstart-guide)
[Developer Guides](https://documentation.onesignal.com/docs/developers)
[Tutorials](https://documentation.onesignal.com/docs/tutorials)
[API Reference](https://documentation.onesignal.com/reference/rest-api-overview)
[Release Notes](https://documentation.onesignal.com/release-notes/changelog)
On this page
* [Creating a New Push Notification with AI](https://documentation.onesignal.com/docs/ai-message-composer#creating-a-new-push-notification-with-ai)
* [Editing an Existing Push Notification with AI](https://documentation.onesignal.com/docs/ai-message-composer#editing-an-existing-push-notification-with-ai)
The OneSignal **AI Message Composer** helps you quickly generate and fine-tune push notification content using a simple prompt. It’s designed to help you strike the right tone and messaging for your audience—whether you’re starting from scratch or optimizing an existing message. With just one prompt, the AI can generate a complete push notification or enhance your current text. You can continue refining your message by selecting predefined tone styles or entering additional instructions to get closer to your desired output.
[](https://documentation.onesignal.com/docs/ai-message-composer#creating-a-new-push-notification-with-ai)
Creating a New Push Notification with AI
------------------------------------------------------------------------------------------------------------------------------------------------------
1
Create a new push notification
In the OneSignal dashboard, click **”+ Create”**, select **“Push”**, then choose **“AI-generated Push”**.
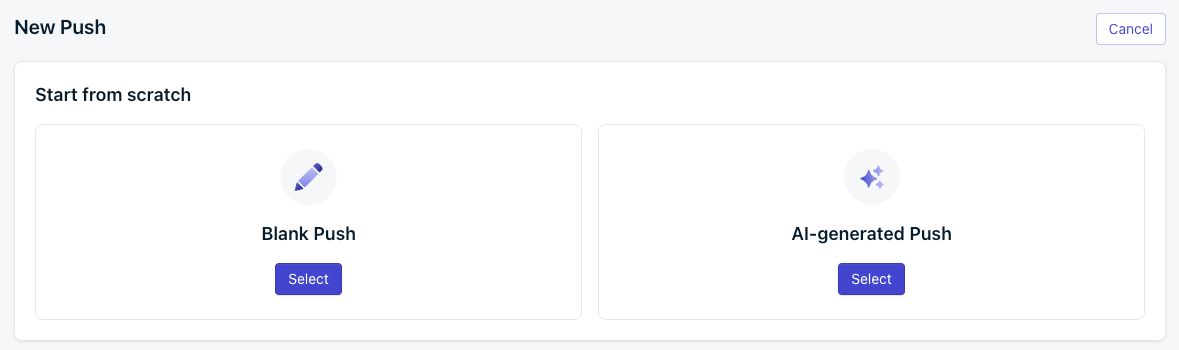
Image showing 'AI-generated Push' option
2
Describe your message
Enter a description of what you want to say, or choose from the predefined prompt suggestions. Then click **“Generate”** to create the initial message.
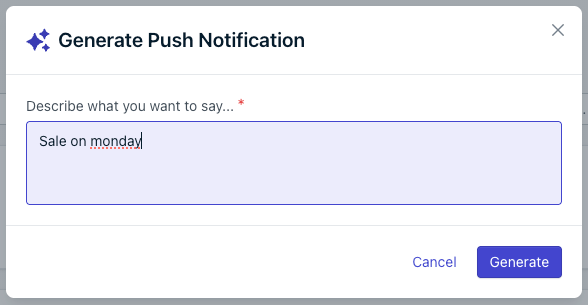
Image showing AI input box
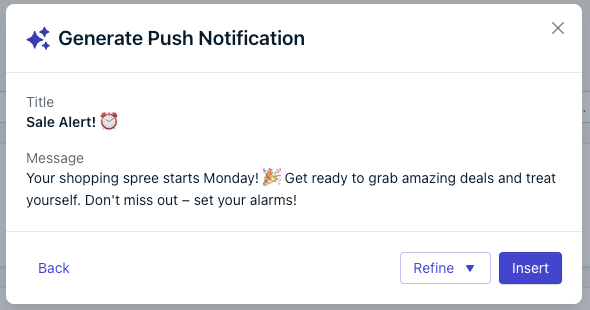
Image showing AI-generated message
3
Refine your message
To adjust tone or content, click **“Refine”**. You can choose from preset tonal options or select **“Writing Assistant”** to enter a custom prompt for further refinements.
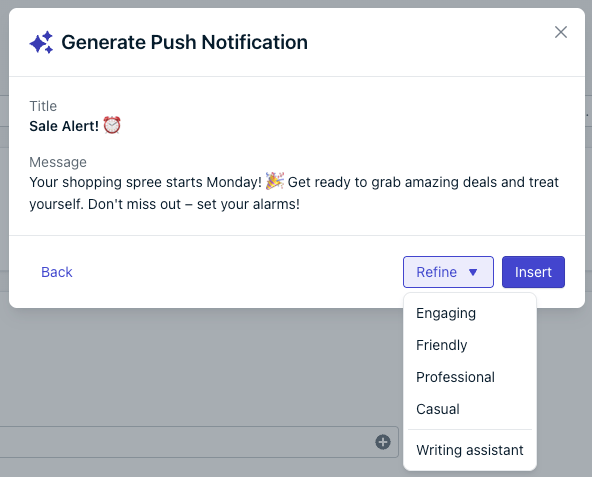
Image showing AI composer refine option
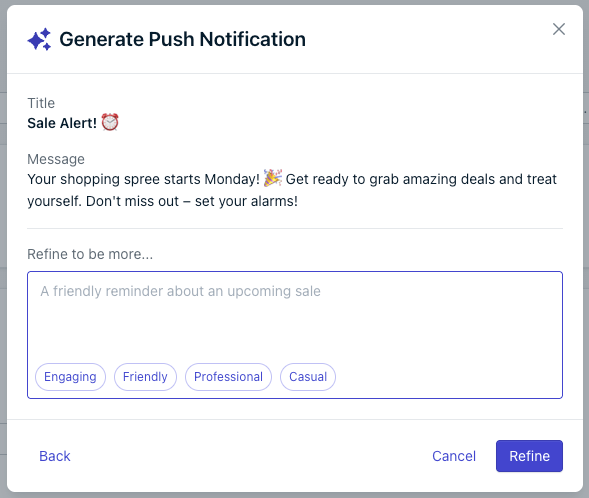
Image showing AI composer writing assistant option
4
Insert your message
Once you’re satisfied with the message or ready to make final manual edits, click **“Insert”** to add the AI-generated content to your notification.
5
Finalize and send
Add any additional content or adjust settings as needed. Then complete the usual steps to send your push notification.
[](https://documentation.onesignal.com/docs/ai-message-composer#editing-an-existing-push-notification-with-ai)
Editing an Existing Push Notification with AI
----------------------------------------------------------------------------------------------------------------------------------------------------------------
While editing an existing push, begin typing in the **Title** or **Message** field. This will reveal the option to refine your message using the AI composer.
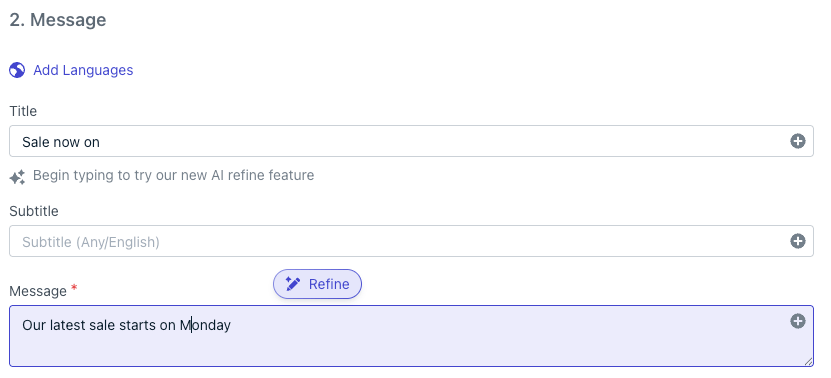
Image showing AI editor refine option
Need help?Chat with our Support team or email `support@onesignal.com`Please include:
* Details of the issue you’re experiencing and steps to reproduce if available
* Your OneSignal App ID
* The External ID or Subscription ID if applicable
* The URL to the message you tested in the OneSignal Dashboard if applicable
* Any relevant [logs or error messages](https://documentation.onesignal.com/docs/capturing-a-debug-log)
We’re happy to help!
[A/B Testing](https://documentation.onesignal.com/docs/ab-testing)
[Multi-language messaging](https://documentation.onesignal.com/docs/multi-language-messaging)
Assistant
Responses are generated using AI and may contain mistakes.
---
# Aliases - OneSignal
[OneSignal home page](https://documentation.onesignal.com/)
Search...
⌘K
Search...
Navigation
Users
Aliases
[Home](https://documentation.onesignal.com/docs/home)
[User Guides](https://documentation.onesignal.com/docs/quickstart-guide)
[Developer Guides](https://documentation.onesignal.com/docs/developers)
[Tutorials](https://documentation.onesignal.com/docs/tutorials)
[API Reference](https://documentation.onesignal.com/reference/rest-api-overview)
[Release Notes](https://documentation.onesignal.com/release-notes/changelog)
On this page
* [What is a custom alias?](https://documentation.onesignal.com/docs/aliases#what-is-a-custom-alias%3F)
* [Why use aliases?](https://documentation.onesignal.com/docs/aliases#why-use-aliases%3F)
* [How to Set Aliases](https://documentation.onesignal.com/docs/aliases#how-to-set-aliases)
* [Using the SDK](https://documentation.onesignal.com/docs/aliases#using-the-sdk)
* [Using the REST API](https://documentation.onesignal.com/docs/aliases#using-the-rest-api)
* [Best practices](https://documentation.onesignal.com/docs/aliases#best-practices)
Custom aliases allow you to assign custom key-value identifiers to users in OneSignal, enabling cross-platform user tracking and identification using your own internal IDs.
**Important**: You must set an [External ID](https://documentation.onesignal.com/docs/users)
**before** using custom aliases.OneSignal uses a unique `onesignal_id` to identify users. This ID only stays consistent across [Subscriptions](https://documentation.onesignal.com/docs/subscriptions)
if they have the same `external_id`.Custom aliases **do not** link Subscriptions together—they rely on the `external_id` to work correctly. Without it, aliases won’t associate with the same user across devices or platforms.
* * *
[](https://documentation.onesignal.com/docs/aliases#what-is-a-custom-alias%3F)
What is a custom alias?
----------------------------------------------------------------------------------------------------------
A custom alias is a `key : value` pair where:
* The `alias_label` (key) is a consistent, static identifier across all users (e.g., `facebook_id`, `firebase_id`, `crm_user_id`).
* The `alias_id` (value) is the specific user’s ID for that label (e.g., `facebook_id: 3453443`, `firebase_id: test3555`).
This allows you to link OneSignal user records to identifiers from your other platforms or databases.
* * *
[](https://documentation.onesignal.com/docs/aliases#why-use-aliases%3F)
Why use aliases?
--------------------------------------------------------------------------------------------
1. Identify users across multiple platforms and databases.
2. Send targeted transactional messages using the [Create Message REST API](https://documentation.onesignal.com/reference/create-message)
.
3. Fetch, update, or delete users via the User REST APIs.
* * *
[](https://documentation.onesignal.com/docs/aliases#how-to-set-aliases)
How to Set Aliases
----------------------------------------------------------------------------------------------
You can set aliases either using the OneSignal SDK or via the REST API.
###
[](https://documentation.onesignal.com/docs/aliases#using-the-sdk)
Using the SDK
Follow these steps in your app:
1. Set the External ID Call `OneSignal.login(externalId)` to associate the user record.
2. Set custom aliases Use `OneSignal.User.addAlias(label, id)` to add a single alias, or `OneSignal.User.addAliases({ label1: id1, label2: id2 })` to set multiple.
3. Logout (optional) Use `OneSignal.logout()` to remove the external ID and any associated aliases for that device or session.
**Example**:
Copy
OneSignal.login("user_123");
OneSignal.User.addAliases({
facebook_id: "3453443",
firebase_id: "test3555"
});
// Later, when the user logs out
OneSignal.logout();
* * *
###
[](https://documentation.onesignal.com/docs/aliases#using-the-rest-api)
Using the REST API
To set custom aliases via the API, use the [Create Alias](https://documentation.onesignal.com/reference/create-alias)
endpoint. This method is typically used in backend systems for server-side user management. **Example Request**:
Copy
POST /aliases
{
"subscription_id": "abc123",
"aliases": {
"facebook_id": "3453443",
"crm_user_id": "XYZ789"
}
}
* * *
[](https://documentation.onesignal.com/docs/aliases#best-practices)
Best practices
--------------------------------------------------------------------------------------
* Always set the `external_id` before assigning any aliases.
* Use stable, descriptive labels (e.g., `crm_user_id`, `legacy_user_id`) to avoid confusion across teams.
* Avoid using sensitive information such as email addresses or phone numbers as alias values.
* Use `logout()` to clean up aliases on device sign-out or user switch events.
* * *
Custom aliases tutorial complete! Next steps:
* Review our [Users](https://documentation.onesignal.com/docs/users)
and [Subscriptions](https://documentation.onesignal.com/docs/subscriptions)
documentation if you have not already.
* Explore our [REST API](https://documentation.onesignal.com/reference/create-alias)
documentation for more details on using aliases via the API.
* Set up [Integrations](https://documentation.onesignal.com/docs/integrations)
to sync user data across systems.
* * *
[Users](https://documentation.onesignal.com/docs/users)
[Delete users](https://documentation.onesignal.com/docs/delete-users)
Assistant
Responses are generated using AI and may contain mistakes.
---
# A/B Testing - OneSignal
[OneSignal home page](https://documentation.onesignal.com/)
Search...
⌘K
Search...
Navigation
Features
A/B Testing
[Home](https://documentation.onesignal.com/docs/home)
[User Guides](https://documentation.onesignal.com/docs/quickstart-guide)
[Developer Guides](https://documentation.onesignal.com/docs/developers)
[Tutorials](https://documentation.onesignal.com/docs/tutorials)
[API Reference](https://documentation.onesignal.com/reference/rest-api-overview)
[Release Notes](https://documentation.onesignal.com/release-notes/changelog)
On this page
* [Plan availability](https://documentation.onesignal.com/docs/ab-testing#plan-availability)
* [How A/B Testing works](https://documentation.onesignal.com/docs/ab-testing#how-a%2Fb-testing-works)
* [Select a Winner](https://documentation.onesignal.com/docs/ab-testing#select-a-winner)
* [Platform-specific instructions](https://documentation.onesignal.com/docs/ab-testing#platform-specific-instructions)
* [Best practices for A/B Testing](https://documentation.onesignal.com/docs/ab-testing#best-practices-for-a%2Fb-testing)
* [Understand benchmarks](https://documentation.onesignal.com/docs/ab-testing#understand-benchmarks)
* [Set a goal and hypothesis](https://documentation.onesignal.com/docs/ab-testing#set-a-goal-and-hypothesis)
* [Change one variable at a time](https://documentation.onesignal.com/docs/ab-testing#change-one-variable-at-a-time)
* [Use controls](https://documentation.onesignal.com/docs/ab-testing#use-controls)
* [Test simultaneously](https://documentation.onesignal.com/docs/ab-testing#test-simultaneously)
* [Continue testing](https://documentation.onesignal.com/docs/ab-testing#continue-testing)
* [FAQ](https://documentation.onesignal.com/docs/ab-testing#faq)
* [Can I A/B test different segments?](https://documentation.onesignal.com/docs/ab-testing#can-i-a%2Fb-test-different-segments%3F)
* [Can I automatically select a winner?](https://documentation.onesignal.com/docs/ab-testing#can-i-automatically-select-a-winner%3F)
A/B Testing helps you optimize messages by testing up to **10 variants** and evaluating performance based on metrics like open rates and click-through rates. This allows you to improve user engagement and make data-driven messaging decisions. Marketers focused on Lifecycle and Growth can use insights from A/B tests to make impactful improvements that align with broader business goals. Whether you’re testing push notifications or emails, A/B testing allows you to experiment with different designs, copy, calls-to-action (CTAs), and more. For example, test whether:
* A push with an image outperforms text-only
* A CTA like “Claim Offer” works better than “Get Started”
* A short subject line gets more opens than a longer one
* * *
[](https://documentation.onesignal.com/docs/ab-testing#plan-availability)
Plan availability
-----------------------------------------------------------------------------------------------
* **Pro & Enterprise Plans**: Up to **10 variants**
* **Free & Growth Plans**: **2 variants**
[Compare Plans](https://onesignal.com/pricing)
* * *
[](https://documentation.onesignal.com/docs/ab-testing#how-a%2Fb-testing-works)
How A/B Testing works
---------------------------------------------------------------------------------------------------------
A/B testing is only available when sending through the dashboard. It is not available with the API.To create A/B tests with Journeys, use [Journey Split Branches](https://documentation.onesignal.com/docs/journeys-overview#split-branches)
.
When creating [push](https://documentation.onesignal.com/docs/push)
and [email](https://documentation.onesignal.com/docs/email-messaging)
campaigns through the dashboard, click the **A/B Test** button and **Add Variant** to create additional tests. Your Audience (included and excluded segments) will be all the users eligible for the campaign. After you create the variants, you can select a portion of your audience to receive randomized variants i.e. 25% means 25% of the segment(s) selected will randomly receive one of the variants. A message with 2 variants (A & B) targeting 25% will have 12.5% of the audience get variant A and another 12.5% get variant B. A message with 10 variants (A-J) targeting 25% will have 2.5% of the users get each variant.
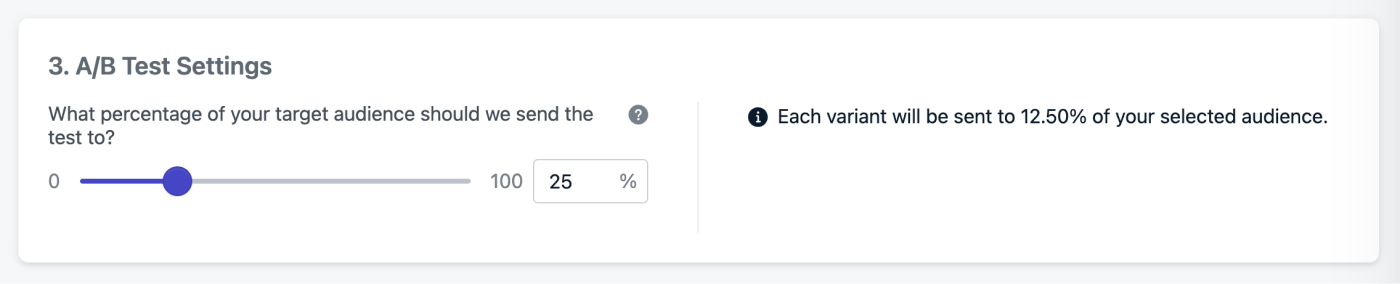
Image showing percentage scaler for variants.
By default, 25% of your audience receives the A/B test. For valid results, each variant must receive enough users. The more variants you use, the larger your test group must be.If you set 100%, the message will be sent evenly to all users in the audience and eliminates the ability to send the “winner” to remaining users.
[](https://documentation.onesignal.com/docs/ab-testing#select-a-winner)
Select a Winner
-------------------------------------------------------------------------------------------
Messages that are sent as A/B tests will be marked as such under the **Messages Tab**. Click into the report for each test to see the full report or view the variant-specific reports. We provide some statistics for you to view the performance and choose a winner. The below screenshot describes how to view different stats and select a winning variant. We will then send the winner variant to all the remaining members of your target audience.
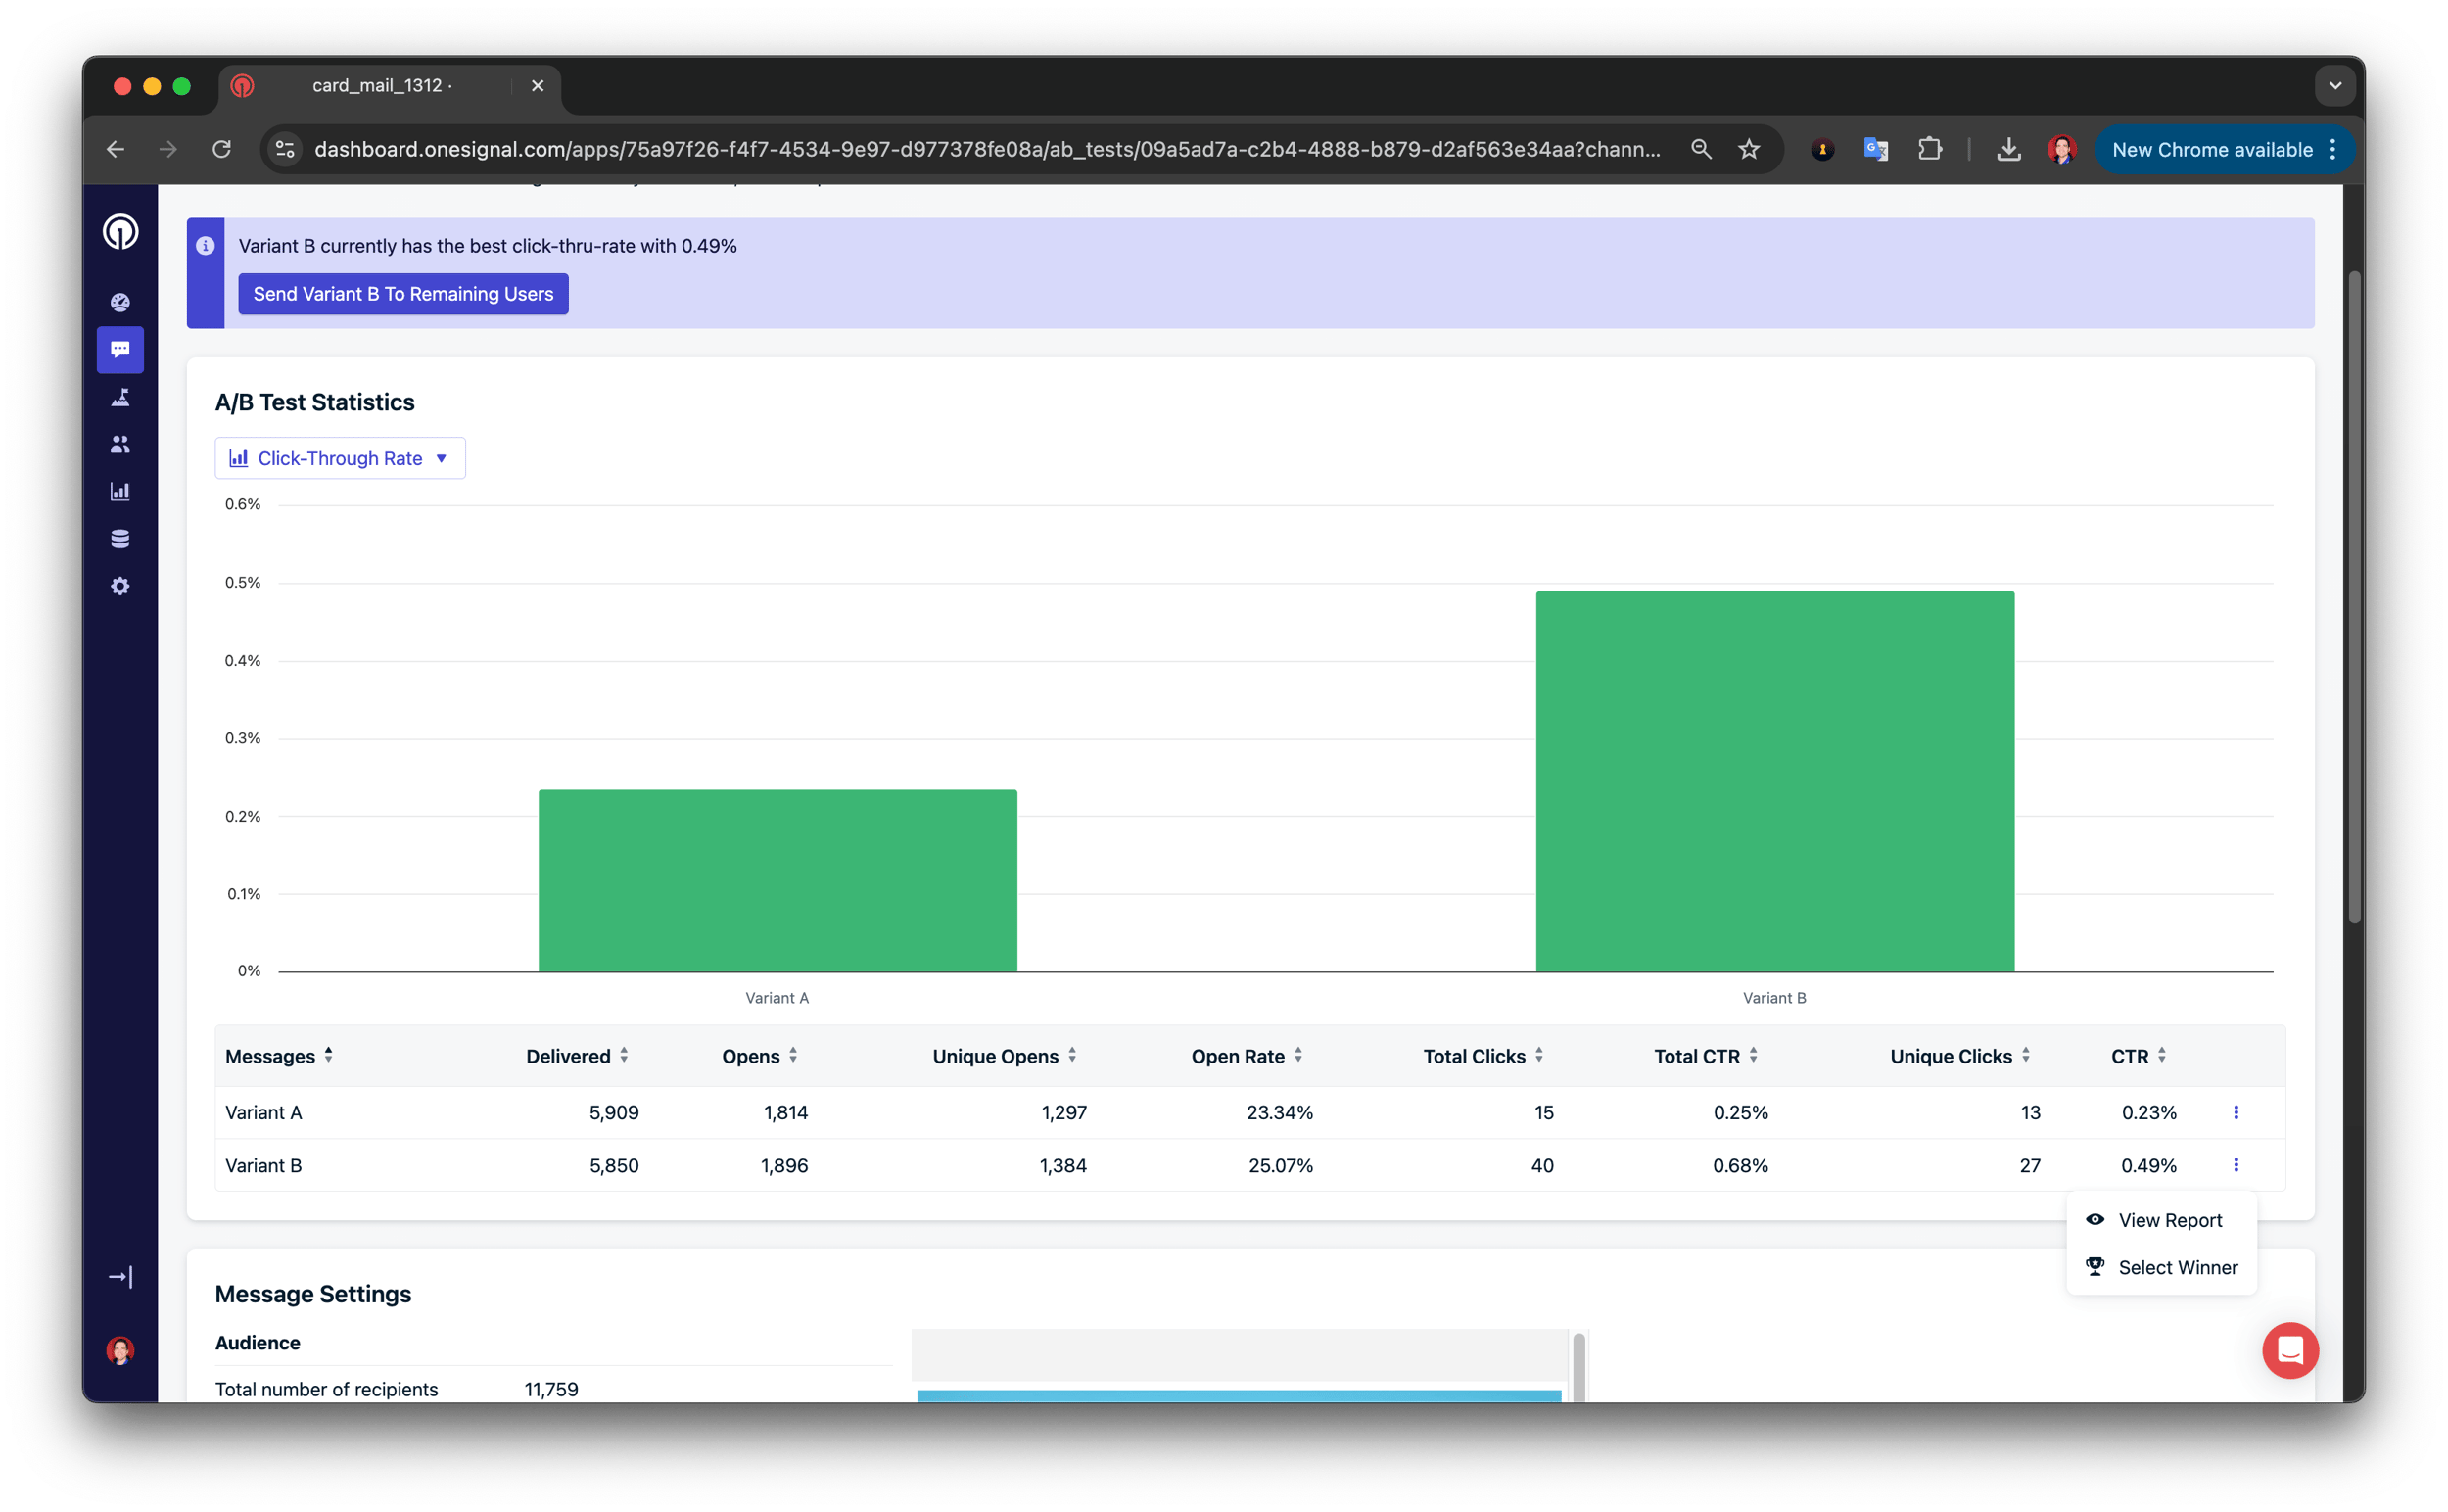
Image showing the ability to select a winner from the A/B Test Report.
* * *
[](https://documentation.onesignal.com/docs/ab-testing#platform-specific-instructions)
Platform-specific instructions
-------------------------------------------------------------------------------------------------------------------------
* Push A/B Testing
* Email A/B Testing
###
[](https://documentation.onesignal.com/docs/ab-testing#create-a-push-a%2Fb-test)
Create a Push A/B Test
1. Go to **Messages > Push > New Push**
2. Name your message (e.g., “Push AB Test - CTA Button”)
3. Select your segment(s)
4. Click the **A/B Test** button

Image showing A/B Test Button
5. Add variants
* Click **Add Variant** to duplicate and edit each new version.
* Only change **one variable** at a time for meaningful insights.

Image showing how to add more variants
6. A/B Test settings
Select the percentage of your target audience that should receive each variant. See [How A/B Testing works](https://documentation.onesignal.com/docs/ab-testing#how-a%2Fb-testing-works)
for more details.The percentage is applied to the total audience, evenly distributed across each variant. Examples:
* 25% of a message with 2 variants will sent 12.5% to each variant.
* 25% of a message with 10 variants will sent 2.5% to each variant.
* 50% of a message with 2 variants will sent 25% to each variant.
* 50% of a message with 3 variants will sent 16.67% to each variant.
* 100% of a message with 2 variants will sent 50% to each variant.
* 100% of a message with 4 variants will sent 25% to each variant.
Any percentage other than 100% will allow you to select a winner.
7. Review results
View results under **Messages > Push > A/B Tests Tab**. Click any test to view variant-specific reports.
8. [Select a Winner](https://documentation.onesignal.com/docs/ab-testing#select-a-winner)
Use performance metrics to manually select a winner.
* * *
[](https://documentation.onesignal.com/docs/ab-testing#best-practices-for-a%2Fb-testing)
Best practices for A/B Testing
---------------------------------------------------------------------------------------------------------------------------
###
[](https://documentation.onesignal.com/docs/ab-testing#understand-benchmarks)
Understand benchmarks
Review past performance data so you can evaluate test success meaningfully.
###
[](https://documentation.onesignal.com/docs/ab-testing#set-a-goal-and-hypothesis)
Set a goal and hypothesis
Clearly define what you’re testing and what success looks like.
###
[](https://documentation.onesignal.com/docs/ab-testing#change-one-variable-at-a-time)
Change one variable at a time
Control your experiment by isolating variables like:
* Subject lines
* Layouts
* CTA copy
* Length of copy
* Images
* Offers
* Emojis
* Colors
* Fonts
* Icons
* GIFs
###
[](https://documentation.onesignal.com/docs/ab-testing#use-controls)
Use controls
Include your “usual” version as a baseline for measuring improvements. Create control groups by tagging users randomly and exclude that segment. You can [Export user data](https://documentation.onesignal.com/docs/exporting-data)
and create a segment from the CSV [import](https://documentation.onesignal.com/docs/import)
.
###
[](https://documentation.onesignal.com/docs/ab-testing#test-simultaneously)
Test simultaneously
Send all variants at the same time to avoid timing bias.
###
[](https://documentation.onesignal.com/docs/ab-testing#continue-testing)
Continue testing
Iterate based on results to continuously optimize message performance.
* * *
[](https://documentation.onesignal.com/docs/ab-testing#faq)
FAQ
-------------------------------------------------------------------
###
[](https://documentation.onesignal.com/docs/ab-testing#can-i-a%2Fb-test-different-segments%3F)
Can I A/B test different segments?
Not within the standard message form. However, you can test different segments using [Journeys](https://documentation.onesignal.com/docs/journeys-overview)
with **Split Branches** and **Yes/No Branches**.
###
[](https://documentation.onesignal.com/docs/ab-testing#can-i-automatically-select-a-winner%3F)
Can I automatically select a winner?
Not yet. You must manually choose the winning variant or use 100% to send all variants.
* * *
You’re done! You can now test different variants of your messages and select a winner.
Need help?Chat with our Support team or email `support@onesignal.com`Please include:
* Details of the issue you’re experiencing and steps to reproduce if available
* Your OneSignal App ID
* The External ID or Subscription ID if applicable
* The URL to the message you tested in the OneSignal Dashboard if applicable
* Any relevant [logs or error messages](https://documentation.onesignal.com/docs/capturing-a-debug-log)
We’re happy to help!
* * *
[Live Activities](https://documentation.onesignal.com/docs/live-activities)
[AI message composer](https://documentation.onesignal.com/docs/ai-message-composer)
Assistant
Responses are generated using AI and may contain mistakes.
---
# Tags - OneSignal
[OneSignal home page](https://documentation.onesignal.com/)
Search...
⌘K
Search...
Navigation
Tags
Tags
[Home](https://documentation.onesignal.com/docs/home)
[User Guides](https://documentation.onesignal.com/docs/quickstart-guide)
[Developer Guides](https://documentation.onesignal.com/docs/developers)
[Tutorials](https://documentation.onesignal.com/docs/tutorials)
[API Reference](https://documentation.onesignal.com/reference/rest-api-overview)
[Release Notes](https://documentation.onesignal.com/release-notes/changelog)
On this page
* [Data tag value formatting rules](https://documentation.onesignal.com/docs/add-user-data-tags#data-tag-value-formatting-rules)
* [Restricted keywords](https://documentation.onesignal.com/docs/add-user-data-tags#restricted-keywords)
* [Tags vs Custom Events](https://documentation.onesignal.com/docs/add-user-data-tags#tags-vs-custom-events)
* [Recommended tag strategies](https://documentation.onesignal.com/docs/add-user-data-tags#recommended-tag-strategies)
* [Event-based behavior tags](https://documentation.onesignal.com/docs/add-user-data-tags#event-based-behavior-tags)
* [Game activity tags](https://documentation.onesignal.com/docs/add-user-data-tags#game-activity-tags)
* [Account status tags](https://documentation.onesignal.com/docs/add-user-data-tags#account-status-tags)
* [Personalization tags](https://documentation.onesignal.com/docs/add-user-data-tags#personalization-tags)
* [Location & demographic tags](https://documentation.onesignal.com/docs/add-user-data-tags#location-%26-demographic-tags)
* [How to add, update, and remove Tags](https://documentation.onesignal.com/docs/add-user-data-tags#how-to-add%2C-update%2C-and-remove-tags)
* [FAQ](https://documentation.onesignal.com/docs/add-user-data-tags#faq)
* [How many tags can I set per user?](https://documentation.onesignal.com/docs/add-user-data-tags#how-many-tags-can-i-set-per-user%3F)
* [What happens to my tags if I exceed plan limits?](https://documentation.onesignal.com/docs/add-user-data-tags#what-happens-to-my-tags-if-i-exceed-plan-limits%3F)
* [Where can I check tag usage?](https://documentation.onesignal.com/docs/add-user-data-tags#where-can-i-check-tag-usage%3F)
* [How do I reduce tag usage?](https://documentation.onesignal.com/docs/add-user-data-tags#how-do-i-reduce-tag-usage%3F)
Data Tags are key-value pairs that let you store custom properties and track user behavior in OneSignal. They enable powerful segmentation and personalization. Use tags to:
* Store user traits like `subscription_tier` or `name`
* Track behaviors like `purchases`, `clicks`, or `levels`
* Segment users for messages and Journeys
* Personalize message content
* * *
[](https://documentation.onesignal.com/docs/add-user-data-tags#data-tag-value-formatting-rules)
Data tag value formatting rules
-----------------------------------------------------------------------------------------------------------------------------------
All Tag values must be **strings**. You can still store numbers, timestamps, and boolean-like values—just stringify them!
| Value Type | Format Example | Notes |
| --- | --- | --- |
| String Label | `"free"`, `"VIP"` | For user types, privileges, statuses |
| Number | `"42"`, `"3.14"` | Enables numeric filters (`greater than`, `less than`) |
| Timestamp | `"1685400000"` | Unix timestamp (in seconds). Use with [Time Operators](https://documentation.onesignal.com/docs/time-operators) |
| Boolean | `"true"` / `"false"`, `"1"` / `"0"` | Use `"1"`/`"0"` to reduce payload size |
**Not supported:** Arrays, objects, nested values, or JSON blobs. If you need to store complex data, use [Custom Events](https://documentation.onesignal.com/docs/custom-events)
.
###
[](https://documentation.onesignal.com/docs/add-user-data-tags#restricted-keywords)
Restricted keywords
The following keywords are restricted and should not be used as tag keys because they are used internally for message personalization: `message`, `notification`, `subscription`, `user`, `template`, `app`, `org`, `dynamic_content`, `data_feed`, `journey`, `custom_data` See [Message Personalization](https://documentation.onesignal.com/docs/message-personalization)
for more details.
###
[](https://documentation.onesignal.com/docs/add-user-data-tags#tags-vs-custom-events)
Tags vs Custom Events
[Tags](https://documentation.onesignal.com/docs/add-user-data-tags)
and [Custom Events](https://documentation.onesignal.com/docs/custom-events)
are both ways to add data to your users. However, there are some key differences:
| Feature | Tags | Custom Events |
| --- | --- | --- |
| Data usage | Segmentation and personalization | Trigger Journeys without a Segment, Wait Until steps, personalization directly within Journeys |
| Data retention | Lifetime | 30+ days ([lifetime storage is available](https://documentation.onesignal.com/docs/billing-faq#custom-events)
) |
| Data format | Key-value strings or numbers | JSON |
| Data source | OneSignal SDK, API, or integrations (limited) | OneSignal SDK, API, or integrations |
| Data access | Segmentation and message personalization | Journeys and Journey-message-template personalization, Segmentation (Coming soon) |
The key distinction between Tags and Custom Events is in their depth and use cases. Tags are properties of a user, such as Name, Account Status, or Location. Events are thing that the user has done, such as Purchasing an Item, Completing a Level, or Inviting a Friend. Both tags and events can be used for segmentation and personalization. In practice, you will likely use both:
* Tags for user properties that are static and don’t change often
* Custom Events for real-time scenarios, complex segmentation, and more sophisticated journey workflows
* * *
[](https://documentation.onesignal.com/docs/add-user-data-tags#recommended-tag-strategies)
Recommended tag strategies
-------------------------------------------------------------------------------------------------------------------------
Data Tags should represent information you want to **use in messages or audience segmentation**. They’re not meant to store full user profiles or logs—use your backend database for that. **Tutorials:**
[Abandoned cart setup\
--------------------\
\
Recover lost sales with abandoned cart reminders.](https://documentation.onesignal.com/docs/abandoned-cart)
[Abandoned cart dynamic content\
------------------------------\
\
Personalize your abandoned cart messages with dynamic content.](https://documentation.onesignal.com/docs/abandoned-cart-content)
###
[](https://documentation.onesignal.com/docs/add-user-data-tags#event-based-behavior-tags)
Event-based behavior tags
Track user actions with tags. Great for triggering Journeys, follow-ups, or reminders.
| Key | Value Example | Description |
| --- | --- | --- |
| `cart_update` | `"1685400000"` | Last time user added something to cart. Use [Time Operators](https://documentation.onesignal.com/docs/time-operators)
. |
| `last_order` | `"1684100000"` | Last completed purchase timestamp |
| `amount_spent` | `"100"` | Total spent—stringified number, no currency symbol |
| `social_share` | `"2"` | Count of social shares or referrals |
| `tutorial_status` | `"step2"` or `"completed"` | Tutorial progress—use readable or numbered string values |
###
[](https://documentation.onesignal.com/docs/add-user-data-tags#game-activity-tags)
Game activity tags
Used by games to personalize based on user performance.
| Key | Value Example | Description |
| --- | --- | --- |
| `points` | `"1250"` | Experience or game points |
| `level` | `"8"` | Current game level |
| `high_score` | `"3000"` | Highest score achieved |
###
[](https://documentation.onesignal.com/docs/add-user-data-tags#account-status-tags)
Account status tags
Use these to target users by account tier or change in status.
| Key | Value Example | Description |
| --- | --- | --- |
| `user_type` | `"free"`, `"premium"` | Subscription or access tier |
| `has_downgraded` | `"1"` or `"1685400000"` | Boolean or timestamp of downgrade |
| `user_privileges` | `"admin"`, `"guest"` | Role-based segmentation |
Use **External ID** to identify individual users. Do **not** use tags for this purpose. See [External ID](https://documentation.onesignal.com/docs/users#external-id)
and [Aliases](https://documentation.onesignal.com/docs/aliases)
.
###
[](https://documentation.onesignal.com/docs/add-user-data-tags#personalization-tags)
Personalization tags
Great for name-based message customization using [Variable Substitution](https://documentation.onesignal.com/docs/message-personalization)
.
| Key | Value Example | Description |
| --- | --- | --- |
| `first_name` | `"Jon"` | First name |
| `last_name` | `"Smith"` | Last name |
| `user_name` | `"PokeCatcher22"` | Display or screen name |
###
[](https://documentation.onesignal.com/docs/add-user-data-tags#location-%26-demographic-tags)
Location & demographic tags
Segment users by region or age.
| Key | Value Example | Description |
| --- | --- | --- |
| `region` | `"New York"` | Metro area, optionally use [ISO 3166-2](https://en.wikipedia.org/wiki/ISO_3166-2) |
| `postcode` | `"94105"` | Zip or postal code |
| `location` | `"Downtown LA"` | Custom string location |
| `birthdate` | `"915148800"` | Unix timestamp in seconds (birth date) |
| `birth_year` | `"1998"` | Four-digit birth year |
| `age_range` | `"18-35"` | Useful for general audience segmentation |
[](https://documentation.onesignal.com/docs/add-user-data-tags#how-to-add%2C-update%2C-and-remove-tags)
How to add, update, and remove Tags
-----------------------------------------------------------------------------------------------------------------------------------------------
You can manage Tags using any of the methods below, depending on your use case and technical setup:
SDK Methods (Recommended)
-------------------------
Set tags in real time from your app or website as users perform actions.
* → [Mobile SDK Reference](https://documentation.onesignal.com/docs/mobile-sdk-reference#data-tags)
* → [Web SDK Reference](https://documentation.onesignal.com/docs/web-sdk-reference#data-tags)
[REST API\
--------\
\
Add, update, or remove tags server-side using our REST API.](https://documentation.onesignal.com/reference/update-user)
[Journeys\
--------\
\
Automatically apply tags as users move through Journey steps.](https://documentation.onesignal.com/docs/journeys-overview)
[CSV Import\
----------\
\
Bulk update user tags by uploading a CSV with `external_id` or `subscription_id`.](https://documentation.onesignal.com/docs/import)
[Web Category Prompts\
--------------------\
\
Prompt users to self-select interests, which are stored as tags.](https://documentation.onesignal.com/docs/permission-requests)
[In-App Messages\
---------------\
\
Collect or update tags based on in-app message click actions.](https://documentation.onesignal.com/docs/in-app-messages-setup)
Manual Entry
------------
Directly edit tags from the OneSignal Dashboard.
* Go to **Audience > Users > User Profile > Tags**
[Third-Party Integrations\
------------------------\
\
Some integrations support syncing tags automatically.\
\
* Segment, HubSpot, Mixpanel, and others](https://documentation.onesignal.com/docs/integrations)
* * *
[](https://documentation.onesignal.com/docs/add-user-data-tags#faq)
FAQ
---------------------------------------------------------------------------
###
[](https://documentation.onesignal.com/docs/add-user-data-tags#how-many-tags-can-i-set-per-user%3F)
How many tags can I set per user?
Depends on your plan. See your [plan limits](https://onesignal.com/pricing)
or [contact sales](https://onesignal.com/contact)
to increase your quota.
###
[](https://documentation.onesignal.com/docs/add-user-data-tags#what-happens-to-my-tags-if-i-exceed-plan-limits%3F)
What happens to my tags if I exceed plan limits?
There is no limit to the number of tags available within a OneSignal app. The limit applies to how many tags can be set on each individual user at a single time. You **can’t add or update** tags for users who are at or above their limit. You must delete tags first, then send a second request to add new ones. Tags already set will persist. Example: Your plan limit = 20 tags/user.
* User has 19 tags:
* ✅ Add 1 new tag = success
* ❌ Add 2+ new tags = failure
* User has 20 tags:
* ❌ Add any new tag = failure
* ✅ Update 1+ existing tag = success
###
[](https://documentation.onesignal.com/docs/add-user-data-tags#where-can-i-check-tag-usage%3F)
Where can I check tag usage?
* Dashboard: **Audience > Users > Tags column**
* [Export users](https://documentation.onesignal.com/docs/exporting-data)
for a complete view
###
[](https://documentation.onesignal.com/docs/add-user-data-tags#how-do-i-reduce-tag-usage%3F)
How do I reduce tag usage?
* Remove tags using SDK or API
* Use [CSV Import](https://documentation.onesignal.com/docs/import)
to bulk delete
* Use fewer, more reusable tags (e.g., `status:active`)
Need help?Chat with our Support team or email `support@onesignal.com`Please include:
* Details of the issue you’re experiencing and steps to reproduce if available
* Your OneSignal App ID
* The External ID or Subscription ID if applicable
* The URL to the message you tested in the OneSignal Dashboard if applicable
* Any relevant [logs or error messages](https://documentation.onesignal.com/docs/capturing-a-debug-log)
We’re happy to help!
* * *
[Custom events](https://documentation.onesignal.com/docs/custom-events)
[Tags: Time Operators](https://documentation.onesignal.com/docs/time-operators)
Assistant
Responses are generated using AI and may contain mistakes.
---
# Abandoned cart dynamic content - OneSignal
[OneSignal home page](https://documentation.onesignal.com/)
Search...
⌘K
Search...
Navigation
📈 Increase Engagement & Retention
Abandoned cart dynamic content
[Home](https://documentation.onesignal.com/docs/home)
[User Guides](https://documentation.onesignal.com/docs/quickstart-guide)
[Developer Guides](https://documentation.onesignal.com/docs/developers)
[Tutorials](https://documentation.onesignal.com/docs/tutorials)
[API Reference](https://documentation.onesignal.com/reference/rest-api-overview)
[Release Notes](https://documentation.onesignal.com/release-notes/changelog)
On this page
* [Overview](https://documentation.onesignal.com/docs/abandoned-cart-content#overview)
* [Setup examples](https://documentation.onesignal.com/docs/abandoned-cart-content#setup-examples)
[](https://documentation.onesignal.com/docs/abandoned-cart-content#overview)
Overview
-----------------------------------------------------------------------------------------
This guide walks through multiple ways to power **abandoned cart reminders** in OneSignal. You’ll learn how to sync cart data and personalize emails or push notifications when users leave items behind. You can power abandoned cart templates with:
1. [API `custom_data`](https://documentation.onesignal.com/reference/create-message)
— pass cart details inline with your message request.
2. [Tags](https://documentation.onesignal.com/docs/add-user-data-tags)
— store key-value pairs to personalize messages.
3. [Custom Events (Early Access)](https://documentation.onesignal.com/docs/custom-events)
— trigger Journeys from user events like `cart_updated`.
4. [Data Feeds](https://documentation.onesignal.com/docs/data-feeds)
— pull real-time cart data directly from your API at message send time.
Each approach supports Liquid personalization and works with both Email and Push templates.
* * *
[](https://documentation.onesignal.com/docs/abandoned-cart-content#setup-examples)
Setup examples
-----------------------------------------------------------------------------------------------------
* API: custom\_data
* Tags
* Custom Events
* Data Feeds
Use the [Create Message API](https://documentation.onesignal.com/reference/create-message)
with the `custom_data` property to inject cart data stored on your server. Best for **server-side controlled cart data**.**Example `custom_data` payload:**
JSON
Copy
{
"custom_data": {
"cart_url": "https://yourdomain.com/cart",
"cart": [\
{\
"cartImageURL": "https://i.imgur.com/ssPCfbC.png",\
"cartProductName": "24 Pack of Acorns",\
"cartQuantity": "1",\
"cartPrice": "$12.99"\
},\
{\
"cartImageURL": "https://i.imgur.com/8QWTfV4.png",\
"cartProductName": "Fancy Sweater",\
"cartQuantity": "1",\
"cartPrice": "$9.99"\
}\
]
}
}
###
[](https://documentation.onesignal.com/docs/abandoned-cart-content#abandoned-cart-email-template)
Abandoned cart email template
This email template example demonstrates how to display the `cart` items [Using Liquid Syntax](https://documentation.onesignal.com/docs/using-liquid-syntax)
:
* Total number of items in the cart
* Items in the user’s cart including:
* Product image
* Product name
* Product quantity
* Product price
* Link to the customer’s personalized cart URL
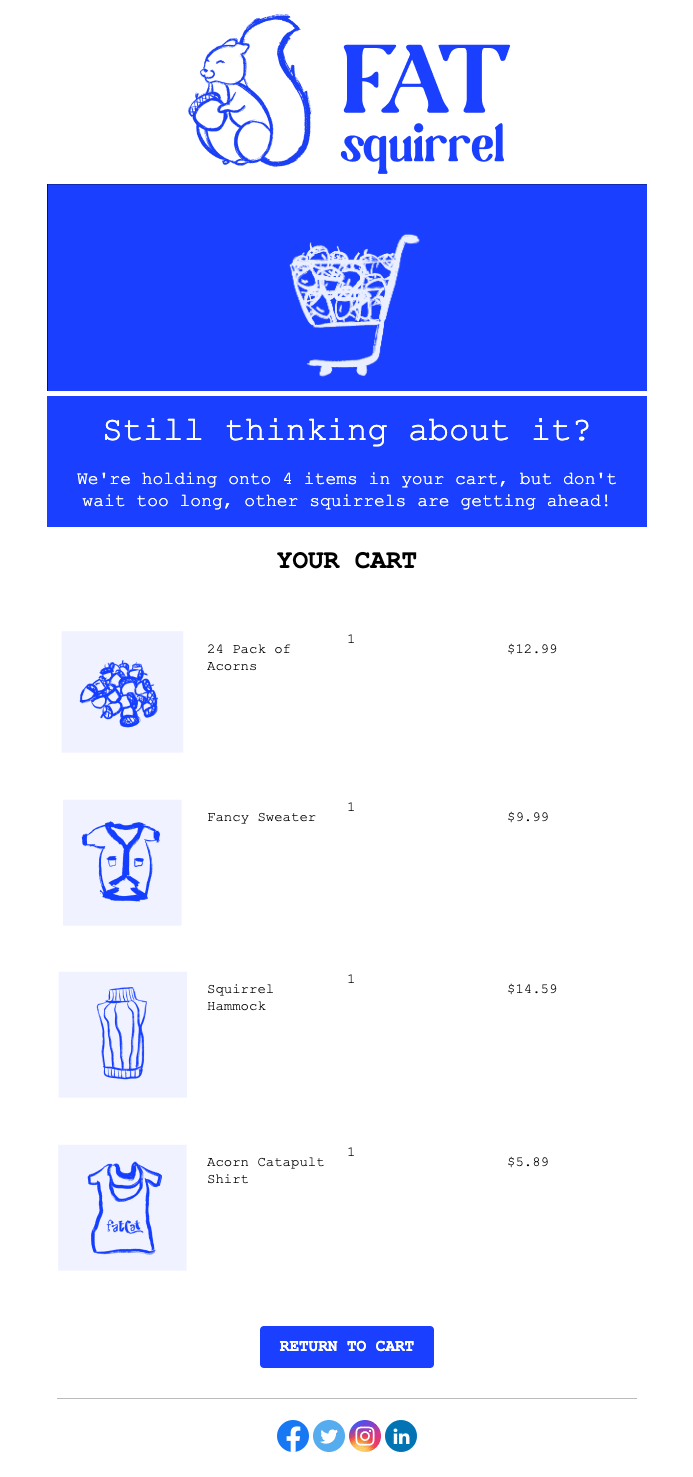
Abandoned cart email template example
###
[](https://documentation.onesignal.com/docs/abandoned-cart-content#email-template-setup)
Email template setup
1
Create a new email template
Navigate to **Messages > Templates > New Email Template**.
2
Use the Drag & Drop Editor
3
Create a 5 rows with the following:
* Rows 1, 2, and 4 have 1 column with a **Text** block.
* Row 3 has has 4 columns with: **HTML** block | **Text** block | **Text** block | **Text** block
* Row 5 has 1 column with a **Button** block

Abandoned cart email template setup
###
[](https://documentation.onesignal.com/docs/abandoned-cart-content#display-item-count-in-email)
Display item count in email
Using Liquid syntax, show the number of products using the `size` property. Within your template row 1 **Text** block, set your copy as desired.Example:
Copy
We're holding onto {{message.custom_data.cart.size}} items in your cart, but don't wait too long, other squirrels are getting ahead!
###
[](https://documentation.onesignal.com/docs/abandoned-cart-content#display-items-in-email)
Display items in email
Use a Liquid [for-loop](https://documentation.onesignal.com/docs/using-liquid-syntax#for-loops)
to iterate over your `custom_data` cart array.Within template row 2 **Text** block, set: `{% for product in message.custom_data.cart %}` which starts the for-loop.Row 3 with the 4 columns will have the following in the 1st column’s **HTML** block:
Copy
 The **Text** blocks of the 2nd, 3rd, and 4th columns will have the text:
* `{{product.cartProductName}}`
* `{{product.cartQuantity}}`
* `{{product.cartPrice}}`
Row 5 **Text** block, set: `{% endfor %}`The for-loop checks each `product` in the `cart` array we pass into `custom_data` and displays the value for each product in the columns.

Abandoned cart email template example to show items
####
[](https://documentation.onesignal.com/docs/abandoned-cart-content#add-a-custom-cart-url-in-email)
Add a custom cart URL in email
This is optional and only needed if your carts are custom to a specific URL per customer.There are several ways to setup the cart URL. In this example we pass in the full URL to the cart within the `custom_data`: `"cart_url": "https://yourdomain.com/cart"`See [Dynamic URLs](https://documentation.onesignal.com/docs/links#dynamic-urls)
for more details.In the **Button** block > Content Properties > Action > Url, set `{{message.custom_data.cart_url}}`

Abandoned cart email template example for custom URL
###
[](https://documentation.onesignal.com/docs/abandoned-cart-content#finalize-the-email-template)
Finalize the email template
See [Design Emails with Drag and Drop](https://documentation.onesignal.com/docs/design-emails-with-drag-and-drop)
for more details on customizing the template.
When ready, you can use the `template_id` within your [Create message](https://documentation.onesignal.com/reference/create-message)
API requests with `custom_data` property.
###
[](https://documentation.onesignal.com/docs/abandoned-cart-content#abandoned-cart-push-template)
Abandoned Cart Push template
This push template example will demonstrate how to display an item in the user’s cart including its image and name. It also displays how many items total are in the cart and links to the customer’s personalized cart URL.
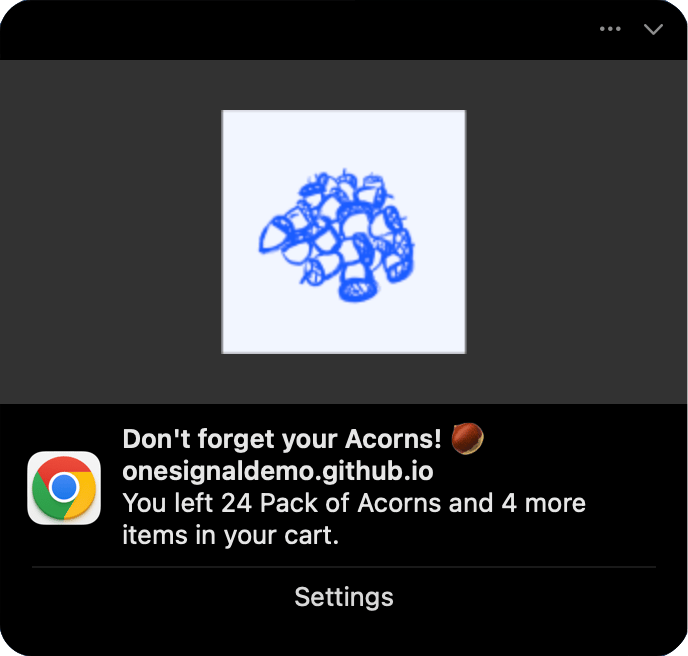
Abandoned cart push template example
###
[](https://documentation.onesignal.com/docs/abandoned-cart-content#push-template-setup)
Push Template Setup
Push notifications can only be sent with a limited amount of data. Instead of listing all items in the cart, we want to display the first item and mention how many total items there are.Navigate to **Messages > Templates > New Push Template**
####
[](https://documentation.onesignal.com/docs/abandoned-cart-content#display-item-and-item-count-in-push)
Display item and item count in push
Liquid syntax provides [if statements](https://documentation.onesignal.com/docs/using-liquid-syntax)
we can use to change what the message says depending on how many items in the `cart` array of your `custom_data` object.In the template **Message** field, add the following copy:
Copy
{% assign cart = message.custom_data.cart %}
{% assign item_count = cart.size | plus: 0 %}
{% if item_count == 1 %}
You left {{cart.first.cartProductName}} in your cart.
{% endif %}
{% if item_count == 2 %}
You left {{cart.first.cartProductName}} and {{item_count | minus: 1}} more item in your cart.
{% endif %}
{% if item_count > 2 %}
You left {{cart.first.cartProductName}} and {{item_count | minus: 1}} more items in your cart.
{% endif %}
In this example, we first assign the variable `cart` to be the `custom_data.cart`, then assign the variable `item_count` to be the `cart.size`, and, if that count is equal to 1, 2 or more than 2, display different content.Due to the cart possibly having more than 1 item, we use the `first` property to get the first item in the cart.We use the `minus` feature to reduce the total cart items count by 1 since we mention it already.
####
[](https://documentation.onesignal.com/docs/abandoned-cart-content#display-item-image-in-push)
Display item image in push
In the template **Image** field, add the Image URL property with the liquid syntax. If the image doesn’t exist, then no image will show. You can set a `default` image as well. Example:
Copy
{{message.custom_data.cart.first.cartImageURL | default: "https://i.imgur.com/ssPCfbC.png"}}
####
[](https://documentation.onesignal.com/docs/abandoned-cart-content#add-a-custom-cart-url-in-push)
Add a custom cart URL in push
In the template **Launch URL** field, add the cart URL property with the liquid syntax. If the cart doesn’t exist, then the push will direct to the home page of the site or app.Note on Launch URL within Templates: setting `https://` or some other schema in the format `x://` is required. If you set this within the data, you can use the `remove` feature of liquid syntax as follows:
* `https://{{message.custom_data.cart_url | remove: "https://"}}`
###
[](https://documentation.onesignal.com/docs/abandoned-cart-content#update-the-push-template-and-send-the-message)
Update the push template and send the message
See [Sending Messages](https://documentation.onesignal.com/docs/push)
for more details on options provided within push templates.
When ready, you can use the `template_id` within your [Create message](https://documentation.onesignal.com/reference/create-message)
API requests with `custom_data` property.
Need help?Chat with our Support team or email `support@onesignal.com`Please include:
* Details of the issue you’re experiencing and steps to reproduce if available
* Your OneSignal App ID
* The External ID or Subscription ID if applicable
* The URL to the message you tested in the OneSignal Dashboard if applicable
* Any relevant [logs or error messages](https://documentation.onesignal.com/docs/capturing-a-debug-log)
We’re happy to help!
* * *
[Abandoned cart example](https://documentation.onesignal.com/docs/abandoned-cart)
[Create activity feed](https://documentation.onesignal.com/docs/create-an-activity-feed)
Assistant
Responses are generated using AI and may contain mistakes.
---
# Action buttons for push notifications - OneSignal
[OneSignal home page](https://documentation.onesignal.com/)
Search...
⌘K
Search...
Navigation
Push features
Action buttons for push notifications
[Home](https://documentation.onesignal.com/docs/home)
[User Guides](https://documentation.onesignal.com/docs/quickstart-guide)
[Developer Guides](https://documentation.onesignal.com/docs/developers)
[Tutorials](https://documentation.onesignal.com/docs/tutorials)
[API Reference](https://documentation.onesignal.com/reference/rest-api-overview)
[Release Notes](https://documentation.onesignal.com/release-notes/changelog)
On this page
* [Add action buttons](https://documentation.onesignal.com/docs/action-buttons#add-action-buttons)
* [Dashboard & template setup](https://documentation.onesignal.com/docs/action-buttons#dashboard-%26-template-setup)
* [API setup](https://documentation.onesignal.com/docs/action-buttons#api-setup)
* [Action button properties](https://documentation.onesignal.com/docs/action-buttons#action-button-properties)
* [Action button icons](https://documentation.onesignal.com/docs/action-buttons#action-button-icons)
* [Handle action button clicks](https://documentation.onesignal.com/docs/action-buttons#handle-action-button-clicks)
* [Default behavior (Open App/Site, Then Handle)](https://documentation.onesignal.com/docs/action-buttons#default-behavior-open-app%2Fsite%2C-then-handle)
* [Prevent app launch from action button clicks](https://documentation.onesignal.com/docs/action-buttons#prevent-app-launch-from-action-button-clicks)
* [Supported platforms & limits](https://documentation.onesignal.com/docs/action-buttons#supported-platforms-%26-limits)
* [Troubleshooting](https://documentation.onesignal.com/docs/action-buttons#troubleshooting)
* [Buttons don’t show up](https://documentation.onesignal.com/docs/action-buttons#buttons-don%E2%80%99t-show-up)
* [Clicking a button doesn’t open the browser on mobile web](https://documentation.onesignal.com/docs/action-buttons#clicking-a-button-doesn%E2%80%99t-open-the-browser-on-mobile-web)
* [Icons don’t appear](https://documentation.onesignal.com/docs/action-buttons#icons-don%E2%80%99t-appear)
* [Why is there a close action button?](https://documentation.onesignal.com/docs/action-buttons#why-is-there-a-close-action-button%3F)
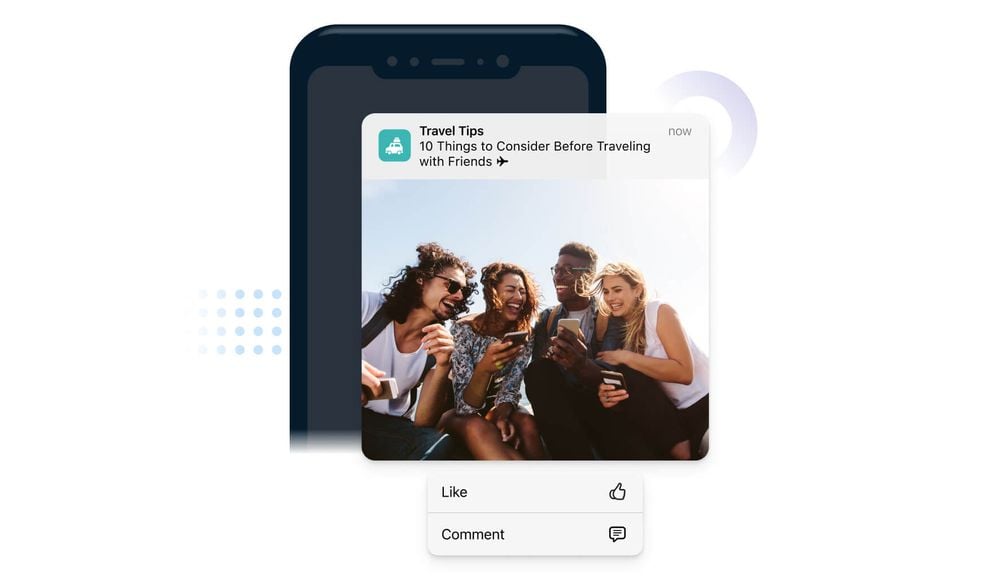
Image showing action buttons in iOS
This guide applies only to push notifications. For in-app messages, see [In-App Messages: How to add Click Actions](https://documentation.onesignal.com/docs/iam-click-actions)
.
Action Buttons let you add multiple, labeled actions to a single push notification, so users can respond without opening your app or site first. Depending on the operating system and device, users reveal buttons by expanding the notification (long press, swipe + View, or an expand affordance).
* * *
[](https://documentation.onesignal.com/docs/action-buttons#add-action-buttons)
Add action buttons
-----------------------------------------------------------------------------------------------------
You can configure Action Buttons in [Templates](https://documentation.onesignal.com/docs/templates)
, directly when composing a message in the dashboard, or via the [API](https://documentation.onesignal.com/reference/push-notification)
.
###
[](https://documentation.onesignal.com/docs/action-buttons#dashboard-%26-template-setup)
Dashboard & template setup
When creating a push, open **Advanced Options > Action Buttons**.
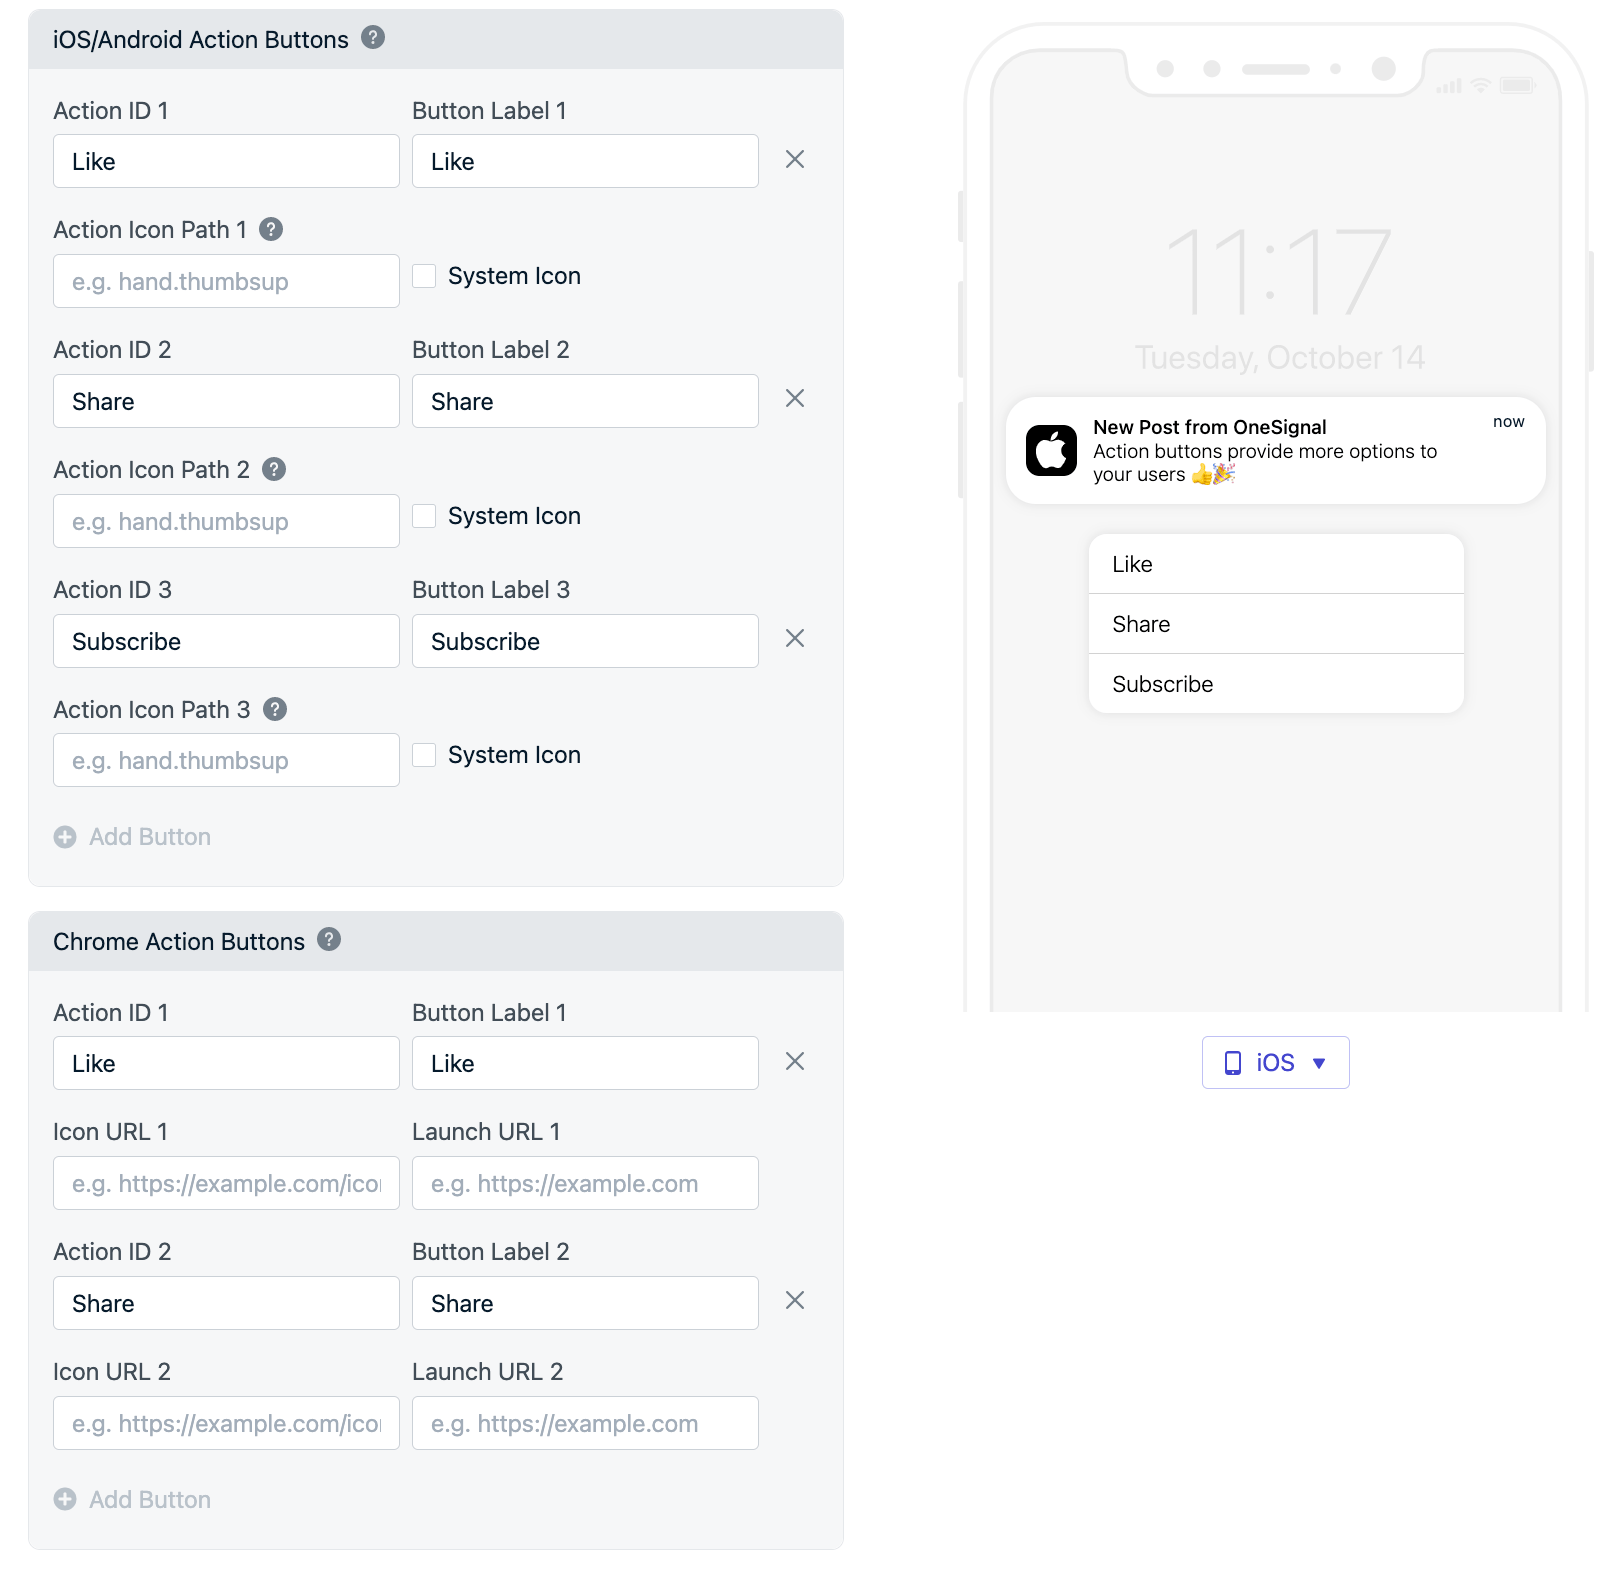
Image showing action buttons to be added for iOS and Android
###
[](https://documentation.onesignal.com/docs/action-buttons#api-setup)
API setup
* **Mobile Apps**: Use the `buttons` parameter. Pass an array of up to 3 objects with `id`, `text`, and `icon`.
* **Web (Chrome)**: Use `web_buttons`, passing up to 2 objects with `id`, `text`, `icon`, and `url`.
* * *
[](https://documentation.onesignal.com/docs/action-buttons#action-button-properties)
Action button properties
-----------------------------------------------------------------------------------------------------------------
* **Action ID**: A unique identifier for the specific button action. The ID of the clicked button is passed to you so you can identify which button was clicked. (e.g. ‘accept-button’)
* Must be unique per button.
* Available in the OSNotification Payload and can be accessed within the SDK Notification Opened Event Handler.
* API: `id` property
* **Label**: The text the button should display to your users. (e.g. ‘Accept’)
* API: `text` property
* **Icon**: Optional icon displayed with the button label. Not available on all platforms and operating systems. See FAQ below for details.
* Mobile apps must include the button within its image resources. See Action Button Icons below for details.
* Websites can use a valid publicly reachable URL to an icon. Keep this small because it’s downloaded on every notification display. (e.g. `http://site.com/icon.png`)
* API: `icon` property
* **Button URL**: The URL to open when the notification is clicked. Pass `'do_not_open'` to prevent opening any URL. (e.g. ‘do\_not\_open’)
* Web only
* API: `url` property
###
[](https://documentation.onesignal.com/docs/action-buttons#action-button-icons)
Action button icons
* iOS supports action button icons for iOS 15+
* Android stopped supporting action button icons for [Android N (AKA 7)](https://android-developers.googleblog.com/2016/06/notifications-in-android-n.html)
* * *
[](https://documentation.onesignal.com/docs/action-buttons#handle-action-button-clicks)
Handle action button clicks
-----------------------------------------------------------------------------------------------------------------------
When a user taps a button, OneSignal delivers the Action ID to your app/site. You can either use the default behavior (open your app/site) or override it.
###
[](https://documentation.onesignal.com/docs/action-buttons#default-behavior-open-app%2Fsite%2C-then-handle)
Default behavior (Open App/Site, Then Handle)
1. The app/site opens (or is focused on web).
2. Your click/open listener receives the event with the Action ID. (See [mobile SDK reference](https://documentation.onesignal.com/docs/mobile-sdk-reference#addclicklistener-push)
or [web SDK reference](https://documentation.onesignal.com/docs/web-sdk-reference#addeventlistener-notifications)
for click listener details.)
###
[](https://documentation.onesignal.com/docs/action-buttons#prevent-app-launch-from-action-button-clicks)
Prevent app launch from action button clicks
* **Android:** Follow [Android SDK setup > Disable default open behavior](https://documentation.onesignal.com/docs/android-sdk-setup#disable-default-open-behavior)
. This lets you intercept clicks in a [Service Extensions](https://documentation.onesignal.com/docs/service-extensions)
and run custom logic (e.g. call an API) without opening the app.
* **iOS:** Include an `ios_category` on the notification to associate actions via the [UNNotificationCategory Object](https://developer.apple.com/documentation/usernotifications/unnotificationcategory)
. See Apple’s [Declaring Your Actionable Notification Types](https://developer.apple.com/documentation/usernotifications/declaring_your_actionable_notification_types)
for more details.
* **Web (Chrome):** Use the `_osp=do_not_open` magic string to prevent opening any URL. This is supported on Chrome and Firefox, but not supported for the Safari web browser.
* * *
[](https://documentation.onesignal.com/docs/action-buttons#supported-platforms-%26-limits)
Supported platforms & limits
---------------------------------------------------------------------------------------------------------------------------
| Platform | Buttons Supported | Notes |
| --- | --- | --- |
| iOS | Up to 4 | Icons on iOS 15+. Requires categories for background handling. |
| Android / Amazon / Huawei | Up to 3 | No button icons from Android 7+. |
| Web – Chrome | Up to 2 | Buttons and icons supported. `_osp=do_not_open` supported. |
| Web – Firefox | No buttons | `_osp=do_not_open` works for the launch URL only. |
| Web – Safari | No buttons | `_osp=do_not_open` not supported. Provide a real URL. |
Users often need to **expand** the notification to see buttons (e.g., long press on iOS, swipe + **View** on some Android OEMs).
* * *
[](https://documentation.onesignal.com/docs/action-buttons#troubleshooting)
Troubleshooting
-----------------------------------------------------------------------------------------------
###
[](https://documentation.onesignal.com/docs/action-buttons#buttons-don%E2%80%99t-show-up)
Buttons don’t show up
* Expand the notification (long press, swipe + View, or expand).
* Verify you added Action ID and Label for each button.
* Check platform limits (e.g., only 2 buttons on Chrome).
###
[](https://documentation.onesignal.com/docs/action-buttons#clicking-a-button-doesn%E2%80%99t-open-the-browser-on-mobile-web)
Clicking a button doesn’t open the browser on mobile web
If the browser is in the background or fully closed, most mobile browsers (including Chrome) will not come to the foreground or open the URL, even though click events still trigger in the service worker. This is intentional browser behavior to prevent background apps from interrupting the user.
* Most mobile browsers won’t foreground themselves from a background service worker. Clicks still fire in the worker, but the tab doesn’t open. This is intentional.
* Ensure the launch URL and the button URL are exactly identical (including trailing slashes) if you expect the tab to be focused instead of opening a new one.
###
[](https://documentation.onesignal.com/docs/action-buttons#icons-don%E2%80%99t-appear)
Icons don’t appear
* iOS must be 15+ for button icons.
* Android 7+ does not render action button icons.
* On web, confirm the icon URL is publicly accessible and small (fast to download).
###
[](https://documentation.onesignal.com/docs/action-buttons#why-is-there-a-close-action-button%3F)
Why is there a close action button?
By default web push notifications on Windows 10 include the Close button. However, if you add your own action button, then this close button is removed. So, in either case the notification will remain on-screen till the user interacts with it. This is designed by Google to give the users the chance to interact with the notification.
Need help?Chat with our Support team or email `support@onesignal.com`Please include:
* Details of the issue you’re experiencing and steps to reproduce if available
* Your OneSignal App ID
* The External ID or Subscription ID if applicable
* The URL to the message you tested in the OneSignal Dashboard if applicable
* Any relevant [logs or error messages](https://documentation.onesignal.com/docs/capturing-a-debug-log)
We’re happy to help!
* * *
[Badges](https://documentation.onesignal.com/docs/badges)
[Push frequency capping](https://documentation.onesignal.com/docs/frequency-capping)
Assistant
Responses are generated using AI and may contain mistakes.
---
# Analytics overview - OneSignal
[OneSignal home page](https://documentation.onesignal.com/)
Search...
⌘K
Search...
Navigation
Analytics
Analytics overview
[Home](https://documentation.onesignal.com/docs/home)
[User Guides](https://documentation.onesignal.com/docs/quickstart-guide)
[Developer Guides](https://documentation.onesignal.com/docs/developers)
[Tutorials](https://documentation.onesignal.com/docs/tutorials)
[API Reference](https://documentation.onesignal.com/reference/rest-api-overview)
[Release Notes](https://documentation.onesignal.com/release-notes/changelog)
On this page
* [Overview](https://documentation.onesignal.com/docs/analytics-overview#overview)
* [Engagement trends](https://documentation.onesignal.com/docs/analytics-overview#engagement-trends)
* [Message reports](https://documentation.onesignal.com/docs/analytics-overview#message-reports)
* [Subscription trends](https://documentation.onesignal.com/docs/analytics-overview#subscription-trends)
* [Outcomes](https://documentation.onesignal.com/docs/analytics-overview#outcomes)
* [Outcome attribution](https://documentation.onesignal.com/docs/analytics-overview#outcome-attribution)
* [Influenced attribution](https://documentation.onesignal.com/docs/analytics-overview#influenced-attribution)
* [FAQ](https://documentation.onesignal.com/docs/analytics-overview#faq)
* [How long is message data retained?](https://documentation.onesignal.com/docs/analytics-overview#how-long-is-message-data-retained%3F)
* [How to aggregate data across multiple messages?](https://documentation.onesignal.com/docs/analytics-overview#how-to-aggregate-data-across-multiple-messages%3F)
[](https://documentation.onesignal.com/docs/analytics-overview#overview)
Overview
-------------------------------------------------------------------------------------
OneSignal offers multiple ways to measure message performance, track user actions, and export behavioral data. This guide provides a central overview of all available analytics tools, charts, and exports—so you can understand what data is available and how it’s structured. Jump to common advanced analytics features:
[Event Streams\
-------------\
\
Get message events like sent, opened, clicked, and more to your chosen destination.](https://documentation.onesignal.com/docs/event-streams)
[Journey analytics\
-----------------\
\
Track the performance of users and messages sent via Journeys.](https://documentation.onesignal.com/docs/journeys-analytics)
[Template analytics\
------------------\
\
Group transactional and/or campaign-based messages under a single Template to aggregate analytics.](https://documentation.onesignal.com/docs/template-analytics)
[Custom outcomes\
---------------\
\
Track outcomes that happened after a user dirctly clicked a push or influenced by a push.](https://documentation.onesignal.com/docs/custom-outcomes)
[Confirmed delivery for push\
---------------------------\
\
Confirmed delivery tracks each individual device/user that has received your push sent from OneSignal.](https://documentation.onesignal.com/docs/confirmed-delivery)
[Exporting data\
--------------\
\
Export message and user data to a CSV file.](https://documentation.onesignal.com/docs/exporting-data)
* * *
[](https://documentation.onesignal.com/docs/analytics-overview#engagement-trends)
Engagement trends
-------------------------------------------------------------------------------------------------------
The OneSignal Dashboard includes both high-level charts and detailed message reports for real-time and historical insights into user message effectiveness. Use [Engagement trends](https://documentation.onesignal.com/docs/engagement-analytics)
to track your message events over time.
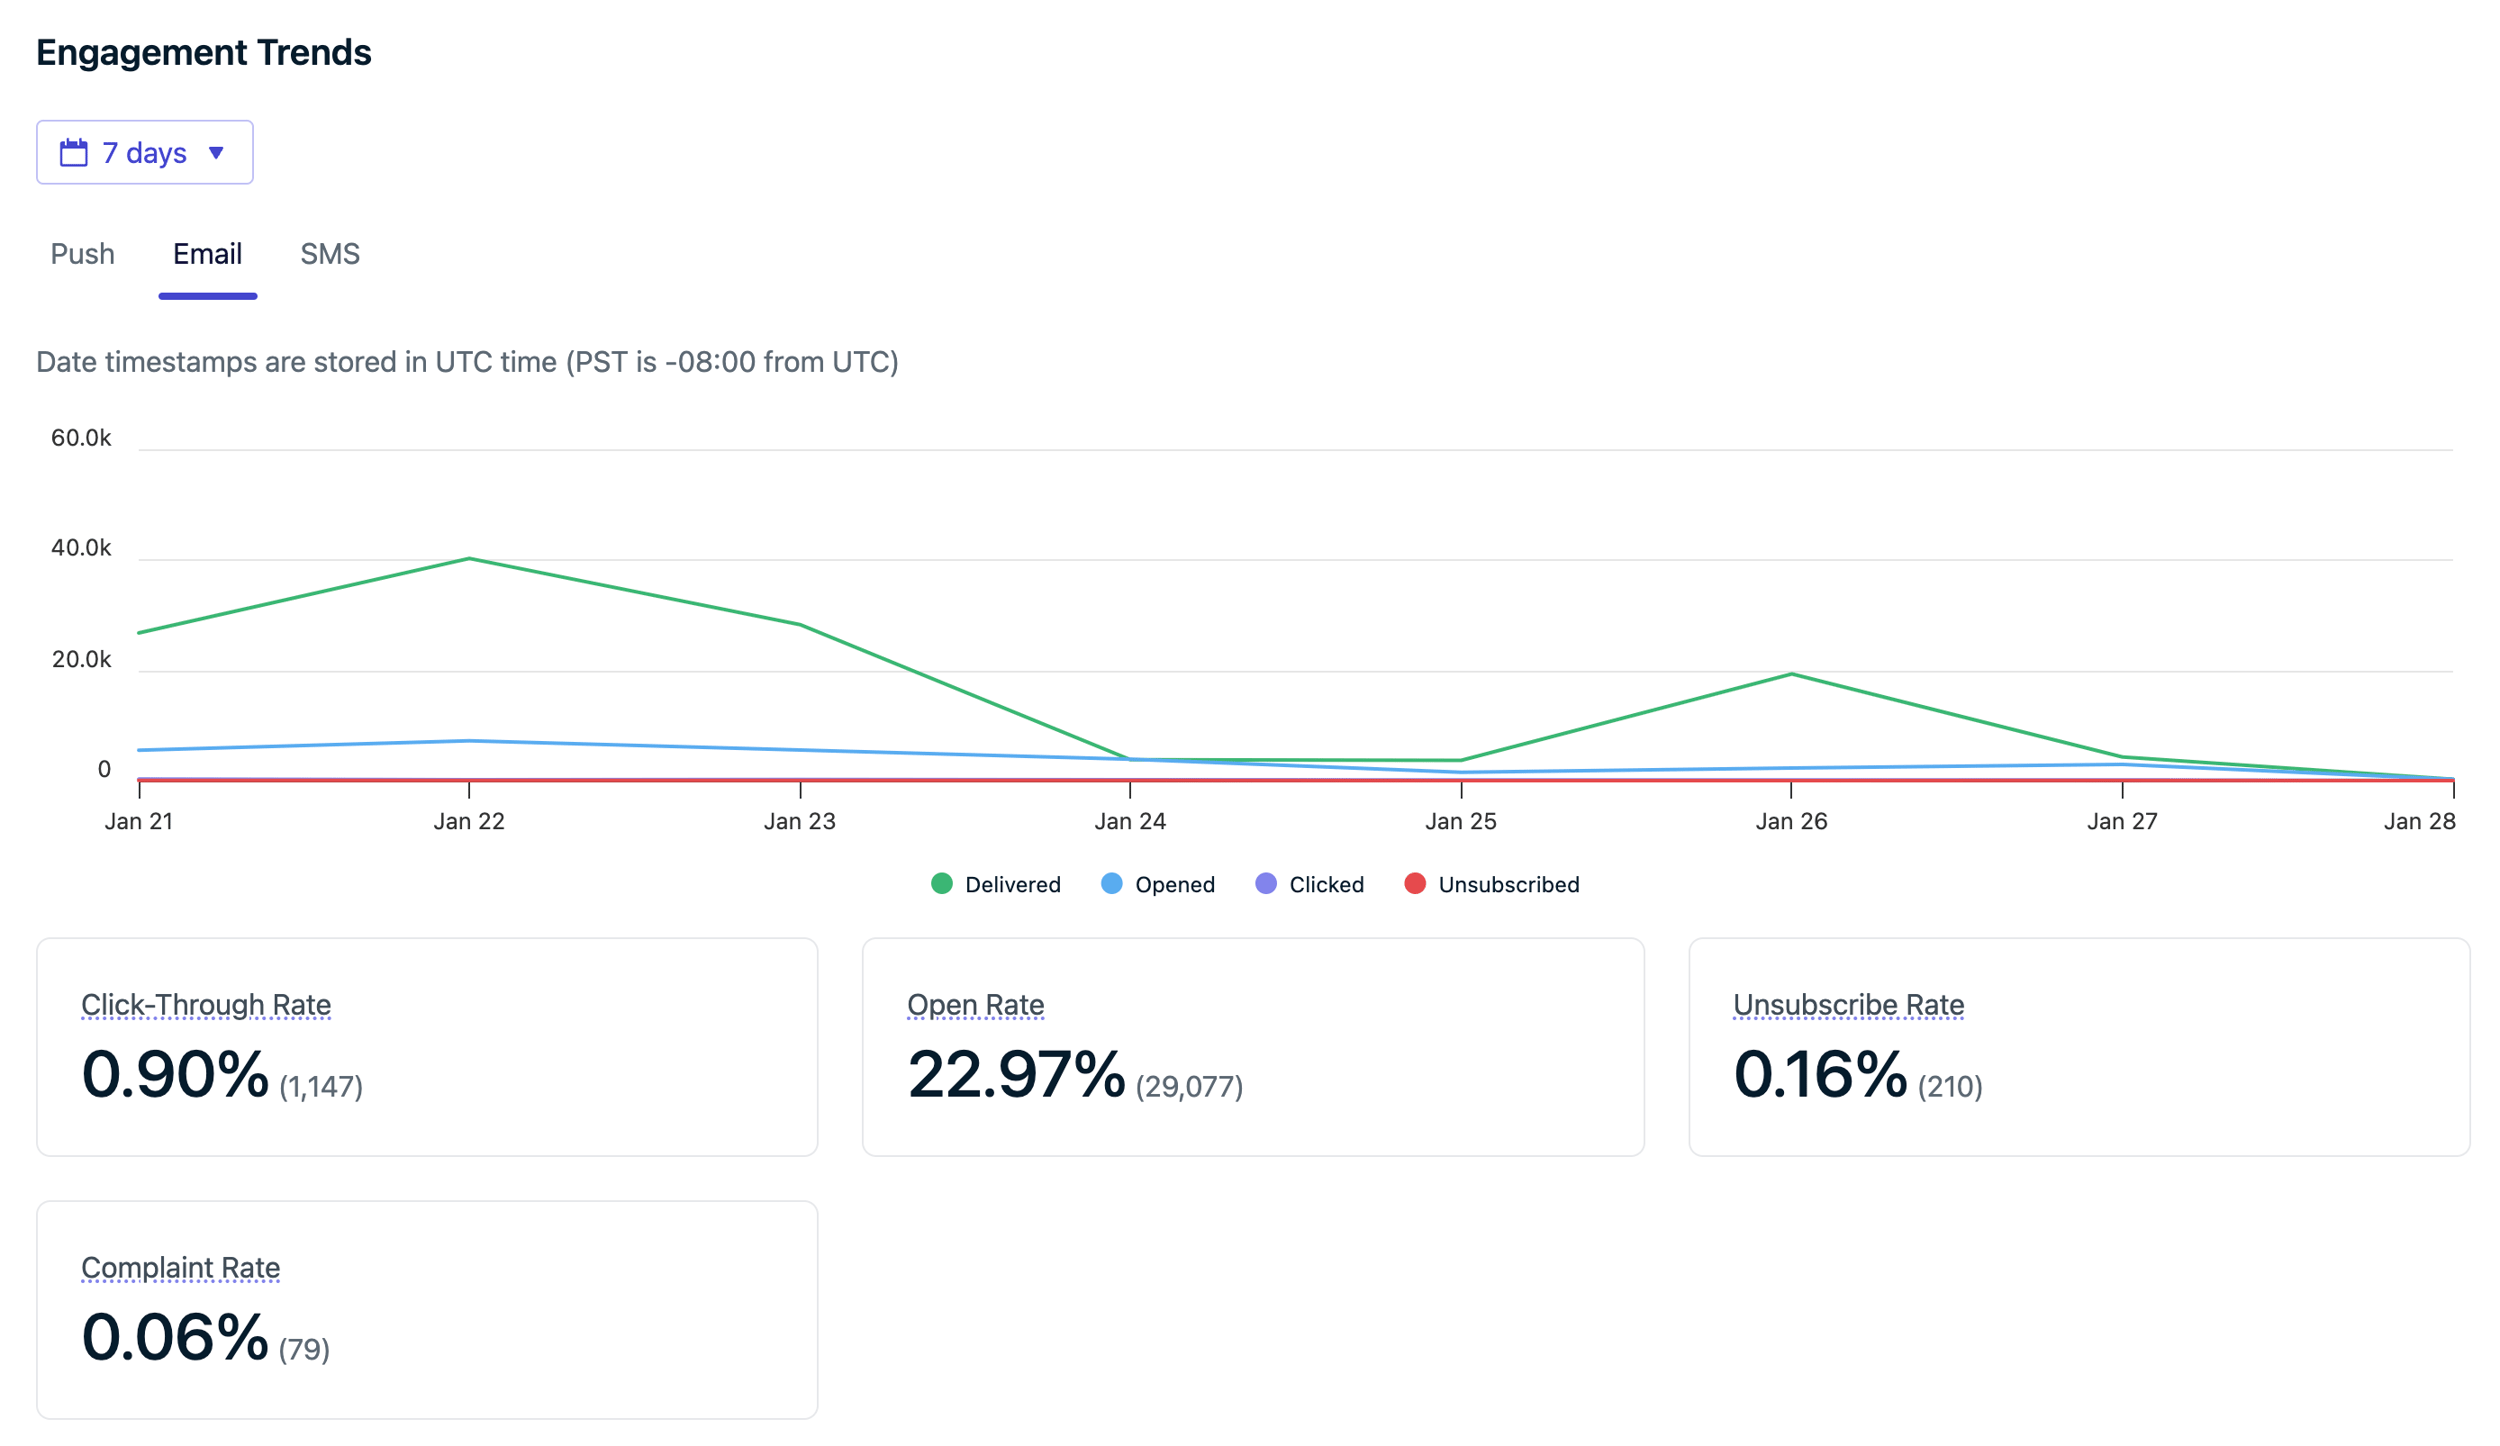
Engagement Trends chart on Dashboard
###
[](https://documentation.onesignal.com/docs/analytics-overview#message-reports)
Message reports
For specific message reports, click into the message from the dashboard or use the [View message API](https://documentation.onesignal.com/reference/view-message)
. For journeys or transactional messages you want to send at different times, you can use [Templates](https://documentation.onesignal.com/docs/templates)
to aggregate analytics.
[Push message reports\
--------------------\
\
View detailed analytics for each message sent when clicking into the message from the dashboard.](https://documentation.onesignal.com/docs/push-notification-message-reports)
[In-app message reports\
----------------------\
\
View detailed analytics for each message sent when clicking into the message from the dashboard.](https://documentation.onesignal.com/docs/in-app-message-reports)
[Email message reports\
---------------------\
\
View detailed analytics for each message sent when clicking into the message from the dashboard.](https://documentation.onesignal.com/docs/email-message-reports)
[SMS message reports\
-------------------\
\
View detailed analytics for each message sent when clicking into the message from the dashboard.](https://documentation.onesignal.com/docs/sms-message-reports)
* * *
[](https://documentation.onesignal.com/docs/analytics-overview#subscription-trends)
Subscription trends
-----------------------------------------------------------------------------------------------------------
Track newly subscribed and unsubscribed [Subscriptions](https://documentation.onesignal.com/docs/subscriptions)
by channel, including historical trends over time.
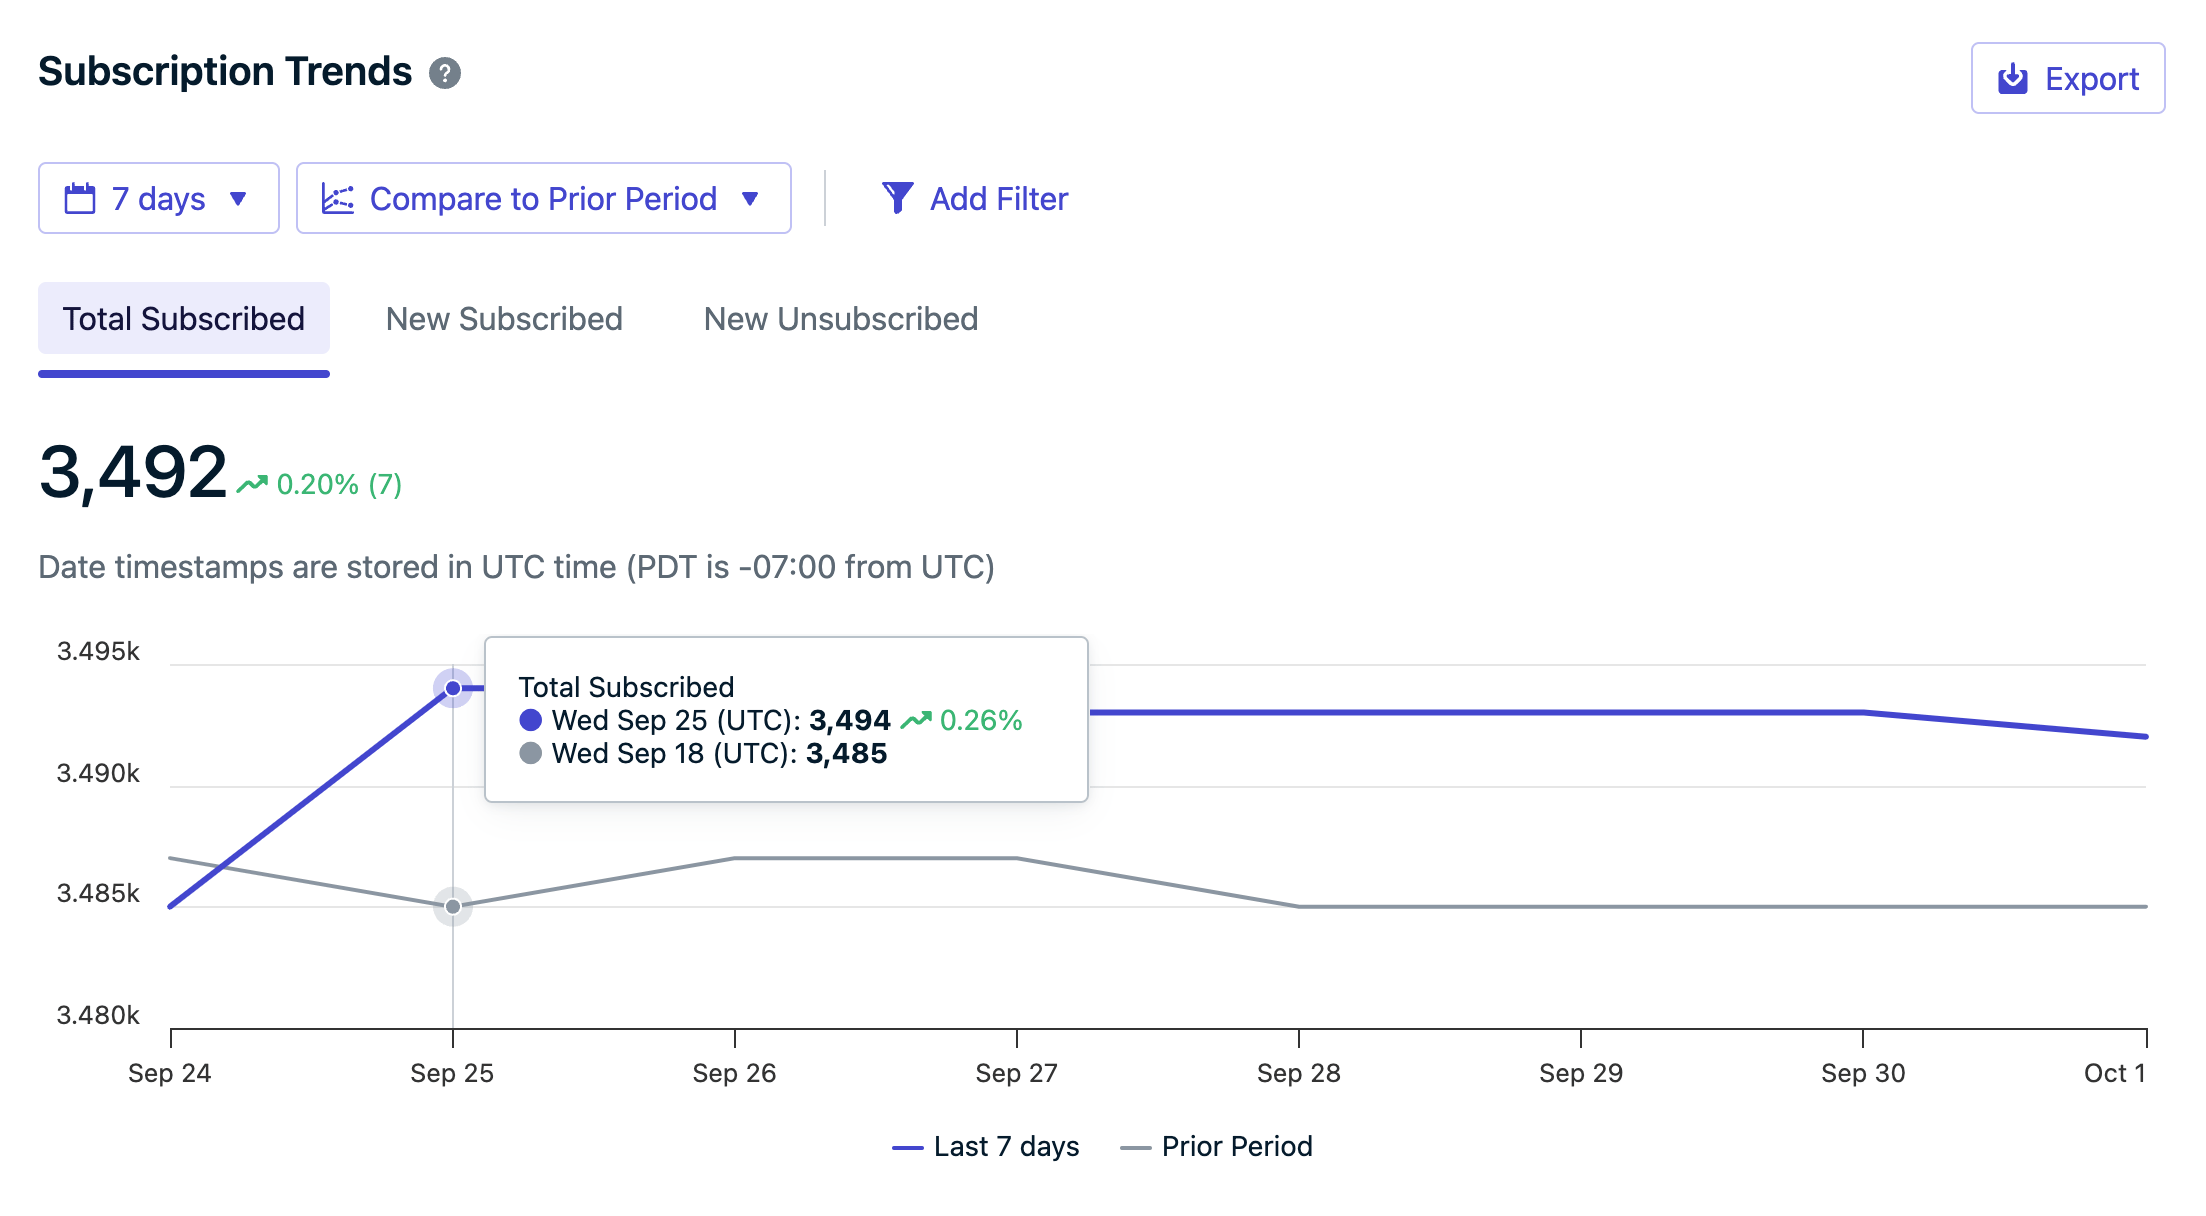
Subscription Trends chart on Dashboard
| Metric | Description |
| --- | --- |
| **Total Subscribed** | Total number of subscribed Subscriptions. Counts will fluctuate as users unsubscribe from your messages, uninstall your app, or get deleted. |
| **New Subscribes** | Count of new subscribed Subscriptions in the selected period. |
| **New Unsubscribes** | Count of unsubscribed Subscriptions during the selected period (e.g. due to uninstalls or opting out). |
[Subscriptions\
-------------\
\
Subscriptions are for the specific messaging channel the user has opted into. Learn how Subscriptions are created and marked as subscribed or unsubscribed.](https://documentation.onesignal.com/docs/subscriptions)
[Users\
-----\
\
Users can have multiple Subscriptions and are identified by their external ID.](https://documentation.onesignal.com/docs/users)
* * *
[](https://documentation.onesignal.com/docs/analytics-overview#outcomes)
Outcomes
-------------------------------------------------------------------------------------
Outcomes measure what happens after sending a message. This includes if users are receiving and interacting with them, but can be expanded to track [Custom Outcomes](https://documentation.onesignal.com/docs/custom-outcomes)
like purchases, shares, likes, and any other actions you want to track.
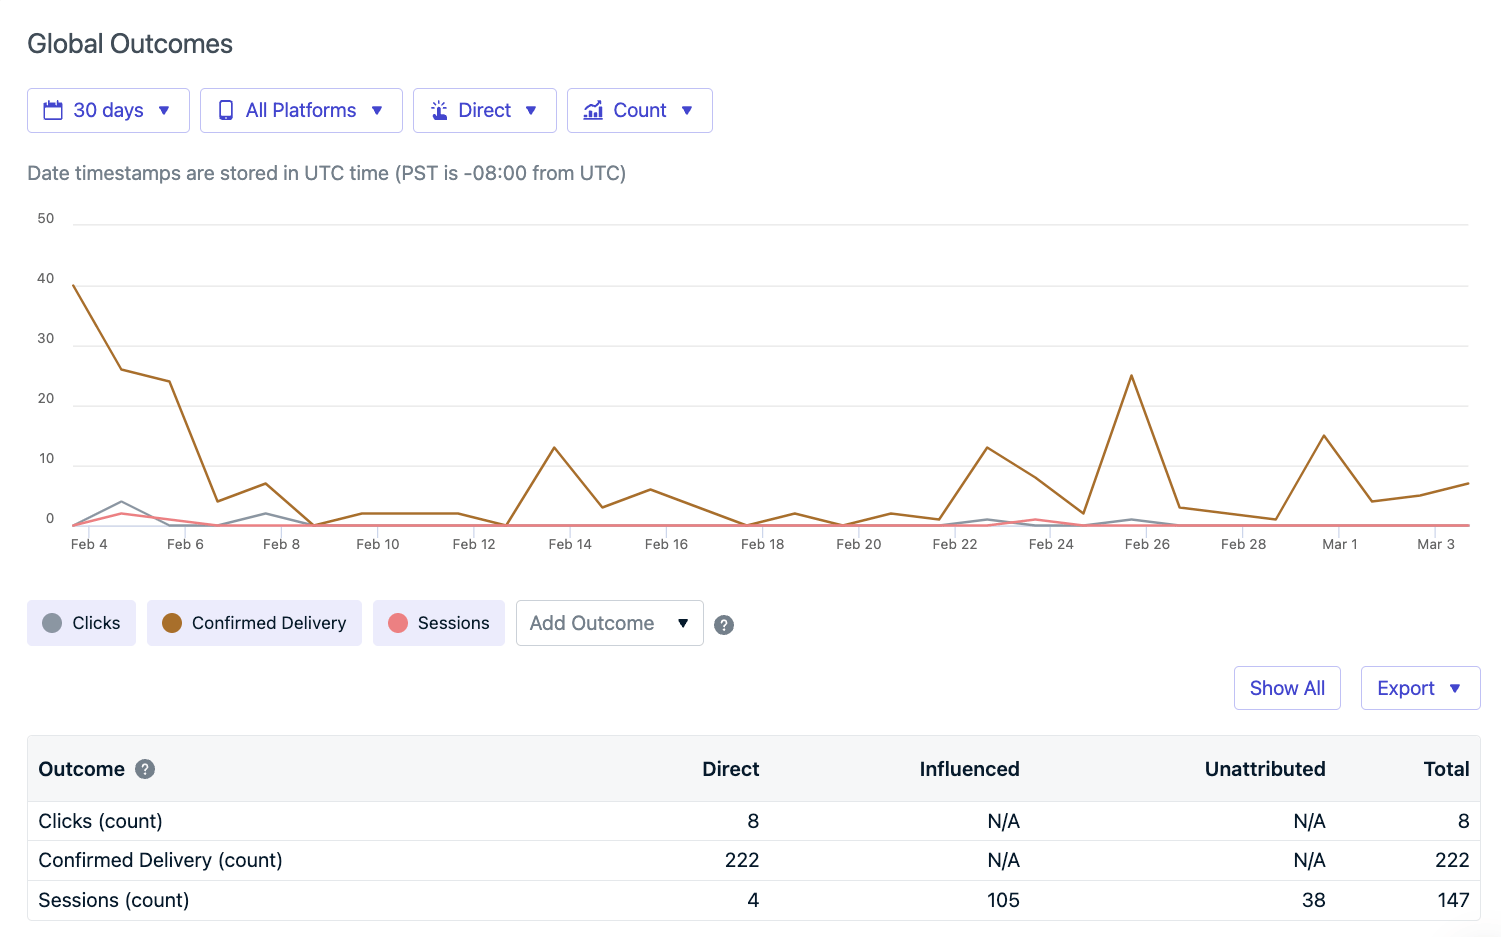
The Global Outcomes Chart on the dashboard.
###
[](https://documentation.onesignal.com/docs/analytics-overview#outcome-attribution)
Outcome attribution
Outcomes can be attributed to a message in one of three ways:
| Attribution | When it applies |
| --- | --- |
| **Direct** | The user clicked the in-app message block, email link, or push notification which launched a new session (app was closed >30s), and triggered the outcome. |
| **Influenced** | The user did **not** click a push notification, but opened the app within the influence window (default: 24 hours) and triggered the outcome. Applies to the 10 most recent push notifications. |
| **Unattributed** | The outcome occurred outside of any attribution window or click. Not linked to a specific message. |
####
[](https://documentation.onesignal.com/docs/analytics-overview#influenced-attribution)
Influenced attribution
How Influenced Outcomes work:
* Configure the Influenced time period under **Settings > Push & In-App > Influenced Opens** (changes take effect per-device on the next new session).
* As push notifications are sent, if the user doesn’t click it, but opens the app and triggers our Outcomes SDK methods, they will be considered “influenced”.
* This attribution is credited to up to 10 messages sent within the Influence time period.
* Example: If your Influenced time period is 24 hours, you send 15 messages that day, and the user doesn’t click any of them, but opens the app and performs the action that calls our Outcomes SDK methods, the most recent 10 messages will be considered “influencing the Outcome”.
* * *
[](https://documentation.onesignal.com/docs/analytics-overview#faq)
FAQ
---------------------------------------------------------------------------
###
[](https://documentation.onesignal.com/docs/analytics-overview#how-long-is-message-data-retained%3F)
How long is message data retained?
| Message Type | Retention Period |
| --- | --- |
| Dashboard-sent messages | Lifetime of the app |
| API-sent messages | 30 days |
| Audience activity CSV | 30 days |
| Journeys messages | See [Journeys analytics](https://documentation.onesignal.com/docs/journeys-analytics) |
###
[](https://documentation.onesignal.com/docs/analytics-overview#how-to-aggregate-data-across-multiple-messages%3F)
How to aggregate data across multiple messages?
When sending messages via Journeys or the API, you will notice that each message sent or request made has a unique message ID. The message ID is how we track the message in our system. If there is no message ID, then there was no message created. While you can use the [View Message API](https://documentation.onesignal.com/reference/view-message)
to get the stats for each individual message and aggregate the data yourself, this can be cumbersome and time-consuming. Instead, use our [Template Analytics](https://documentation.onesignal.com/docs/template-analytics)
and we will aggregate the data for all messages sent under that template. For Journeys, see [Journeys analytics](https://documentation.onesignal.com/docs/journeys-analytics)
for more information.
* * *
[Import](https://documentation.onesignal.com/docs/import)
[Template analytics](https://documentation.onesignal.com/docs/template-analytics)
Assistant
Responses are generated using AI and may contain mistakes.
---
# Android notification categories - OneSignal
[OneSignal home page](https://documentation.onesignal.com/)
Search...
⌘K
Search...
Navigation
Mobile push
Android notification categories
[Home](https://documentation.onesignal.com/docs/home)
[User Guides](https://documentation.onesignal.com/docs/quickstart-guide)
[Developer Guides](https://documentation.onesignal.com/docs/developers)
[Tutorials](https://documentation.onesignal.com/docs/tutorials)
[API Reference](https://documentation.onesignal.com/reference/rest-api-overview)
[Release Notes](https://documentation.onesignal.com/release-notes/changelog)
On this page
* [Default notification categories](https://documentation.onesignal.com/docs/android-notification-categories#default-notification-categories)
* [Miscellaneous](https://documentation.onesignal.com/docs/android-notification-categories#miscellaneous)
* [Restored](https://documentation.onesignal.com/docs/android-notification-categories#restored)
* [Huawei-specific behavior](https://documentation.onesignal.com/docs/android-notification-categories#huawei-specific-behavior)
* [Create Android notification categories in OneSignal](https://documentation.onesignal.com/docs/android-notification-categories#create-android-notification-categories-in-onesignal)
* [Name](https://documentation.onesignal.com/docs/android-notification-categories#name)
* [Description](https://documentation.onesignal.com/docs/android-notification-categories#description)
* [Importance](https://documentation.onesignal.com/docs/android-notification-categories#importance)
* [Sound](https://documentation.onesignal.com/docs/android-notification-categories#sound)
* [Vibration](https://documentation.onesignal.com/docs/android-notification-categories#vibration)
* [LED Color](https://documentation.onesignal.com/docs/android-notification-categories#led-color)
* [Badges](https://documentation.onesignal.com/docs/android-notification-categories#badges)
* [Lockscreen visibility](https://documentation.onesignal.com/docs/android-notification-categories#lockscreen-visibility)
* [Updating categories](https://documentation.onesignal.com/docs/android-notification-categories#updating-categories)
* [Deleting categories](https://documentation.onesignal.com/docs/android-notification-categories#deleting-categories)
* [Using categories in notifications](https://documentation.onesignal.com/docs/android-notification-categories#using-categories-in-notifications)
* [In OneSignal Dashboard](https://documentation.onesignal.com/docs/android-notification-categories#in-onesignal-dashboard)
* [Using the REST API](https://documentation.onesignal.com/docs/android-notification-categories#using-the-rest-api)
* [FAQ](https://documentation.onesignal.com/docs/android-notification-categories#faq)
* [Why isn’t my Android category working?](https://documentation.onesignal.com/docs/android-notification-categories#why-isn%E2%80%99t-my-android-category-working%3F)
* [Can categories play sounds in Do Not Disturb (DND) mode?](https://documentation.onesignal.com/docs/android-notification-categories#can-categories-play-sounds-in-do-not-disturb-dnd-mode%3F)
* [Can I localize category names or descriptions?](https://documentation.onesignal.com/docs/android-notification-categories#can-i-localize-category-names-or-descriptions%3F)
Android notification categories (aka notification channels) were introduced in Android 8.0 (Oreo) to give users greater control over how they receive notifications from your app. Each category defines its own settings such as sound, vibration, badge behavior, and lock screen visibility. OneSignal makes it easy to create and manage these categories directly from the dashboard. Alternatively, you can define them programmatically in your app.
OneSignal’s Android notification categories work for Google Android, Huawei Android, and Amazon FireOS.
To programmatically define categories, see [Android’s guide to creating notification channels](https://developer.android.com/develop/ui/views/notifications/channels)
.
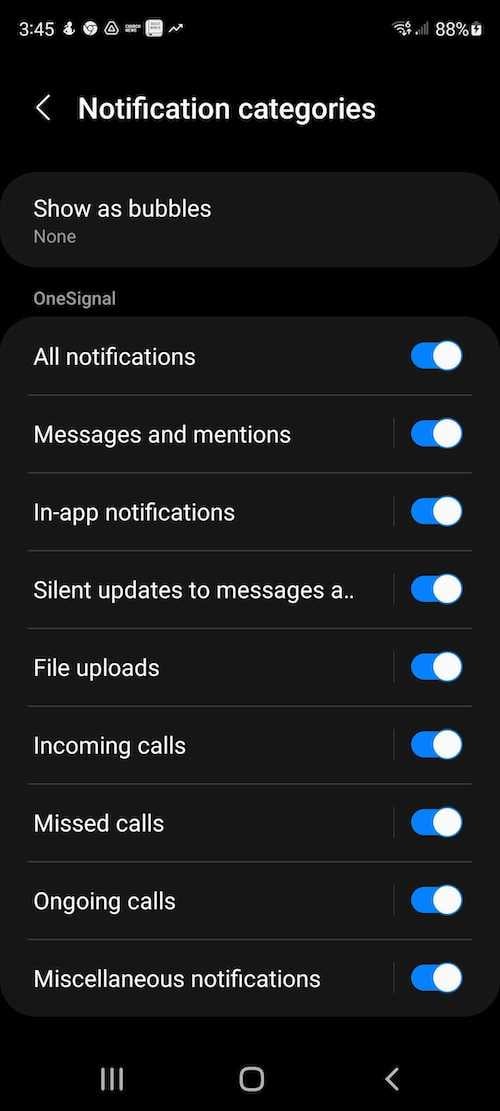
Example of an app's notification categories on the device
* * *
[](https://documentation.onesignal.com/docs/android-notification-categories#default-notification-categories)
Default notification categories
------------------------------------------------------------------------------------------------------------------------------------------------
OneSignal automatically creates two default categories:
###
[](https://documentation.onesignal.com/docs/android-notification-categories#miscellaneous)
Miscellaneous
Used when no category is set.
* **Importance:** High
* **Sound:** Default
* **Vibration:** Default
* **Badges:** Enabled
* **Lockscreen:** Private
###
[](https://documentation.onesignal.com/docs/android-notification-categories#restored)
Restored
Used when the app is force-quit and reopened, restoring previous notifications that were cleared.
* **Importance:** Low
* **Sound:** Off
* **Vibration:** Off
* **Badges:** Disabled
* **Lockscreen:** Private
If you always send push notifications with a custom category, the “Miscellaneous” channel won’t appear on user devices. The “Restored” channel will always appear to handle restored notifications after force-closing.
####
[](https://documentation.onesignal.com/docs/android-notification-categories#huawei-specific-behavior)
Huawei-specific behavior
On Huawei devices, OneSignal does **not** set a default category. If you don’t include one, Huawei will apply **High** importance by default.
* * *
[](https://documentation.onesignal.com/docs/android-notification-categories#create-android-notification-categories-in-onesignal)
Create Android notification categories in OneSignal
----------------------------------------------------------------------------------------------------------------------------------------------------------------------------------------
1. Go to **Settings > Push & In-App > Android Notification Channels** in the OneSignal Dashboard.
2. Click **Add Group** to organize your categories (e.g., “News Updates”, “Social Activity”).
3. Click **Add Channel** within the group to create a new category.

Where to add Android categories in OneSignal
You’ll be asked to define the following:
###
[](https://documentation.onesignal.com/docs/android-notification-categories#name)
Name
_User-visible._ Keep it clear and descriptive.
###
[](https://documentation.onesignal.com/docs/android-notification-categories#description)
Description
_User-visible._ Briefly explain the type of notifications this category will handle.
###
[](https://documentation.onesignal.com/docs/android-notification-categories#importance)
Importance
Controls how visible and interruptive the notification is:
* **Low:** Silent, no alerts
* **Medium:** No sound/vibration, minimal visual interruption
* **High:** Plays sound or vibrates, no screen pop-up
* **Urgent:** Plays sound and displays a full-screen alert
###
[](https://documentation.onesignal.com/docs/android-notification-categories#sound)
Sound
* **Off:** No sound
* **Default:** Device’s default notification tone
* **Custom:** Upload and reference a custom sound (no file extension). Example: `alert_beep` (not `alert_beep.wav`) See [Notification Sounds](https://documentation.onesignal.com/docs/notification-sounds)
for setup instructions.
###
[](https://documentation.onesignal.com/docs/android-notification-categories#vibration)
Vibration
* **Off:** No vibration
* **Default:** Uses device’s vibration pattern
* **Custom:** Define your own using a pattern (in ms). Example: `0, 300, 500, 300` → Wait 0ms, vibrate 300ms, pause 500ms, vibrate 300ms.
###
[](https://documentation.onesignal.com/docs/android-notification-categories#led-color)
LED Color
Some Android devices support LED indicators:
* **Off:** No LED
* **Default:** Device default
* **Custom:** ARGB hex value (e.g., `FF0000FF` for blue)
###
[](https://documentation.onesignal.com/docs/android-notification-categories#badges)
Badges
Shows badge count on app icon:
* **Enabled:** Badge is shown
* **Disabled:** No badge displayed
###
[](https://documentation.onesignal.com/docs/android-notification-categories#lockscreen-visibility)
Lockscreen visibility
* **Public:** Full content shown
* **Private:** Only app name, hides content
* **Secret:** No notification visible on lock screen
Once your category is created, you can use it in your notifications.
* * *
[](https://documentation.onesignal.com/docs/android-notification-categories#updating-categories)
Updating categories
------------------------------------------------------------------------------------------------------------------------
After a device receives a notification from a category, Android locks that category’s behavior. **Changes to importance, sound, vibration, or other settings will not apply retroactively**. **Options**:
* **To update behavior:** Create a new category.
* **To test changes:** Clear app data or uninstall and reinstall the app.
You can update:
* Channel name
* Channel group name
These will update in Android’s notification settings when the next notification is received using that updated channel.
* * *
[](https://documentation.onesignal.com/docs/android-notification-categories#deleting-categories)
Deleting categories
------------------------------------------------------------------------------------------------------------------------
To remove a deleted category from the user’s device:
1. Delete the category from the OneSignal dashboard.
2. Ensure all notifications are cleared from the Notification Center.
3. Have the user:
* Put the app in the background for 60+ seconds
* Open it again (triggers SDK sync)
The SDK will re-sync and remove the deleted category from Android settings.
* * *
[](https://documentation.onesignal.com/docs/android-notification-categories#using-categories-in-notifications)
Using categories in notifications
----------------------------------------------------------------------------------------------------------------------------------------------------
###
[](https://documentation.onesignal.com/docs/android-notification-categories#in-onesignal-dashboard)
In OneSignal Dashboard
* Go to **Android Platform Settings** in your message composer.
* Select your **Category** under “Category”.
* Sound, Lockscreen, and LED settings will be pulled from the category and hidden in the UI.
###
[](https://documentation.onesignal.com/docs/android-notification-categories#using-the-rest-api)
Using the REST API
Use the `android_channel_id` in the [Create message](https://documentation.onesignal.com/reference/create-message)
API request.
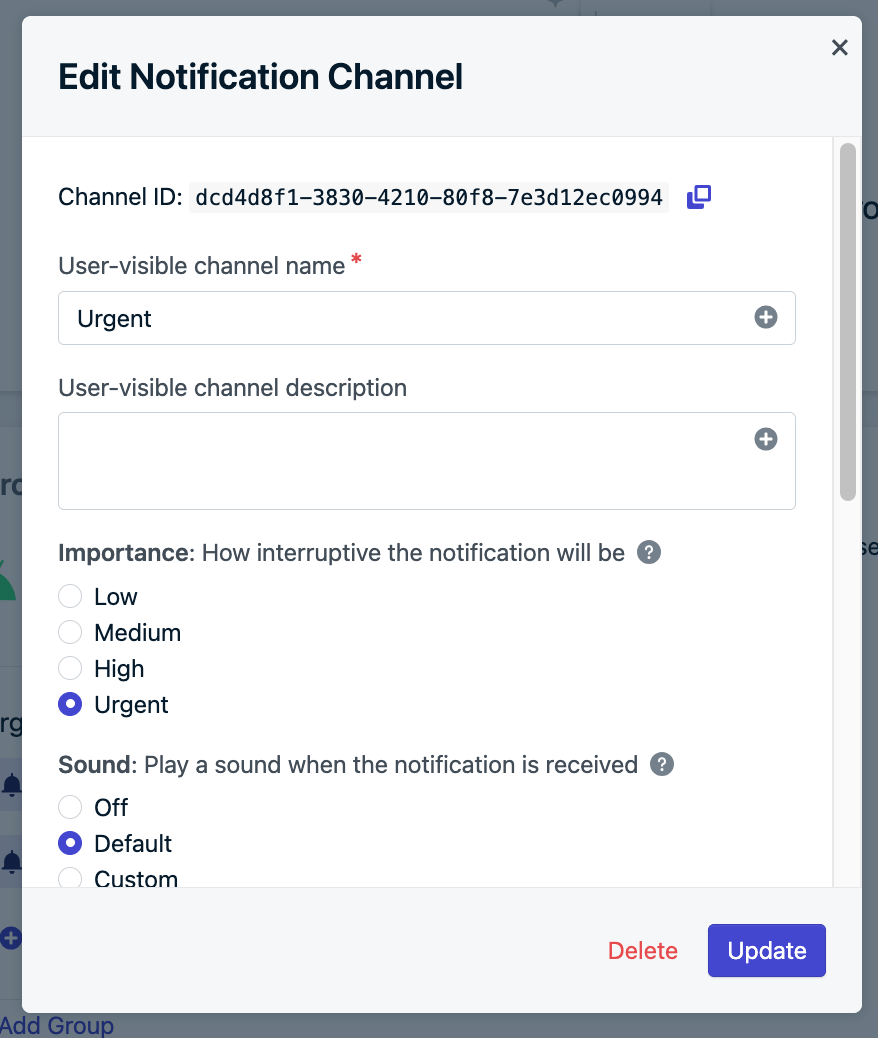
Find the Channel ID in the Android Category setup screen
If using your own Android-defined channels, use `existing_android_channel_id` instead.
* * *
[](https://documentation.onesignal.com/docs/android-notification-categories#faq)
FAQ
----------------------------------------------------------------------------------------
###
[](https://documentation.onesignal.com/docs/android-notification-categories#why-isn%E2%80%99t-my-android-category-working%3F)
Why isn’t my Android category working?
1. **Incorrect initialization:** Make sure OneSignal is initialized in the `Application` class, not an `Activity`. See [Android SDK Setup](https://documentation.onesignal.com/docs/android-sdk-setup#section-2-add-required-code)
.
2. **Outdated category:** If you changed a category after sending a push, Android may not apply those changes. Create a new category instead.
###
[](https://documentation.onesignal.com/docs/android-notification-categories#can-categories-play-sounds-in-do-not-disturb-dnd-mode%3F)
Can categories play sounds in Do Not Disturb (DND) mode?
No. OneSignal does not set `setBypassDnd` on categories. To override DND, create your own channel programmatically and enable this setting. See [setBypassDnd](https://developer.android.com/reference/android/app/NotificationChannel#setBypassDnd(boolean))
.
###
[](https://documentation.onesignal.com/docs/android-notification-categories#can-i-localize-category-names-or-descriptions%3F)
Can I localize category names or descriptions?
No. OneSignal does not support multiple languages for categories. To support localization, define your own Android channels and reference them via `existing_android_channel_id` in your push API requests.
* * *
[iOS provisional push notifications](https://documentation.onesignal.com/docs/ios-provisional-push-notifications)
[Data & background notifications](https://documentation.onesignal.com/docs/data-notifications)
Assistant
Responses are generated using AI and may contain mistakes.
---
# Adobe Audience Manager - OneSignal
[OneSignal home page](https://documentation.onesignal.com/)
Search...
⌘K
Search...
Navigation
OneSignal as destination
Adobe Audience Manager
[Home](https://documentation.onesignal.com/docs/home)
[User Guides](https://documentation.onesignal.com/docs/quickstart-guide)
[Developer Guides](https://documentation.onesignal.com/docs/developers)
[Tutorials](https://documentation.onesignal.com/docs/tutorials)
[API Reference](https://documentation.onesignal.com/reference/rest-api-overview)
[Release Notes](https://documentation.onesignal.com/release-notes/changelog)
On this page
* [Capabilities](https://documentation.onesignal.com/docs/adobe-audience-manager#capabilities)
* [Requirements](https://documentation.onesignal.com/docs/adobe-audience-manager#requirements)
* [Setup](https://documentation.onesignal.com/docs/adobe-audience-manager#setup)
* [Connection parameters](https://documentation.onesignal.com/docs/adobe-audience-manager#connection-parameters)
* [Set up with Adobe](https://documentation.onesignal.com/docs/adobe-audience-manager#set-up-with-adobe)
* [Optional: Configure segment friendly names](https://documentation.onesignal.com/docs/adobe-audience-manager#optional%3A-configure-segment-friendly-names)
Integrating Adobe Audience Manager with OneSignal allows you to bring powerful audience segmentation from Adobe into OneSignal’s customer engagement platform. This enables personalized, behavior-based messaging that increases user retention and monetization.
[](https://documentation.onesignal.com/docs/adobe-audience-manager#capabilities)
Capabilities
-------------------------------------------------------------------------------------------------
OneSignal and Adobe Audience Manager integration supports:
* **Real-time segment sync**: Automatically import segments from Adobe Audience Manager into OneSignal.
* **Cross-channel targeting**: Use imported segments to send push notifications, emails, SMS, and in-app messages via OneSignal.
* **ECID-based user matching**: Ensure users in OneSignal align with Adobe identities for accurate targeting.
* * *
[](https://documentation.onesignal.com/docs/adobe-audience-manager#requirements)
Requirements
-------------------------------------------------------------------------------------------------
* A [paid OneSignal account](https://onesignal.com/pricing)
.
* Users must be matched using Adobe’s Marketing Cloud ID (MID or ECID).
* Ensure the `external_id` field in OneSignal is set to the Adobe ECID.
* If you prefer to use a different identifier, contact OneSignal Support.
* * *
[](https://documentation.onesignal.com/docs/adobe-audience-manager#setup)
Setup
-----------------------------------------------------------------------------------
###
[](https://documentation.onesignal.com/docs/adobe-audience-manager#connection-parameters)
Connection parameters
You’ll need the Client ID to configure the Adobe Destination:
* Go to your OneSignal Dashboard.
* Navigate to: **Data > Integrations > Adobe**.
* Copy the Client ID displayed there.
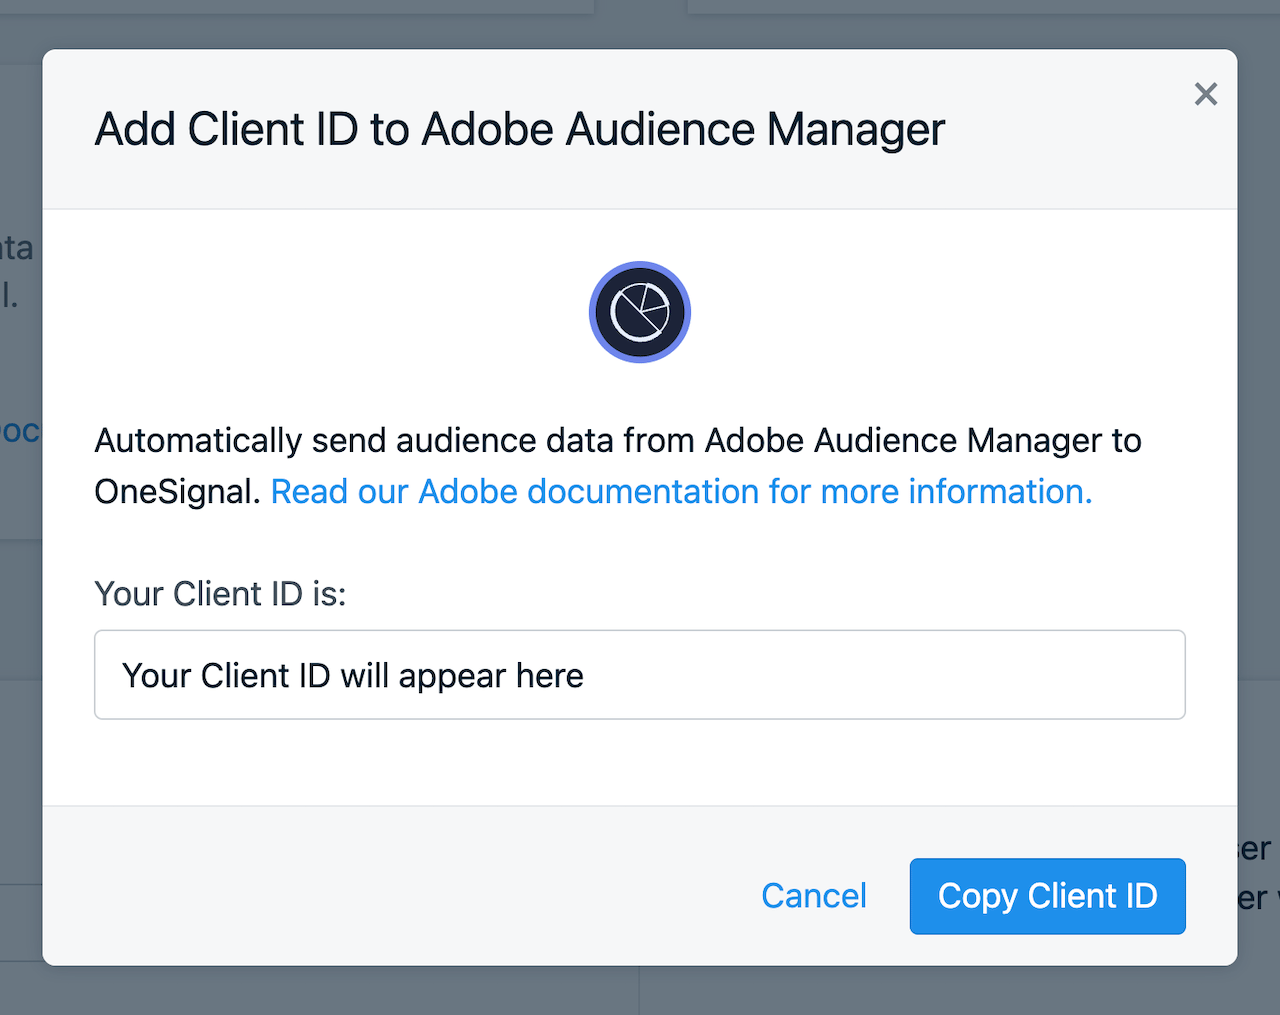
Navigate to your Organization
###
[](https://documentation.onesignal.com/docs/adobe-audience-manager#set-up-with-adobe)
Set up with Adobe
Contact your Adobe representative (Adobe consultant or CustomerCare) who will review the integration request and will work with you to activate the OneSignal Destination. You’ll need to provide the following information to the Adobe representative:
* the Client ID
Once the Adobe representative has set up the OneSignal Destination, the segments should start flowing to OneSignal.
###
[](https://documentation.onesignal.com/docs/adobe-audience-manager#optional%3A-configure-segment-friendly-names)
Optional: Configure segment friendly names
By default, each segment synced between OneSignal and Adobe Audience Manager will be identified with a numeric Adobe Audience Manager Segment ID. If you’d like to instead use a “friendly” name to identify the Segment within the OneSignal Dashboard, please follow these steps:
1. Log in to Adobe Audience Manager
2. Follow the path to Audience Data > Segments
3. Select all the segments you wish to add to the OneSignal destination
4. Click “Add To Destination”
5. Select the Destination
6. Click Add To Selected Destination
7. Enter the friendly name for each Segment in the “Destination Value” fields
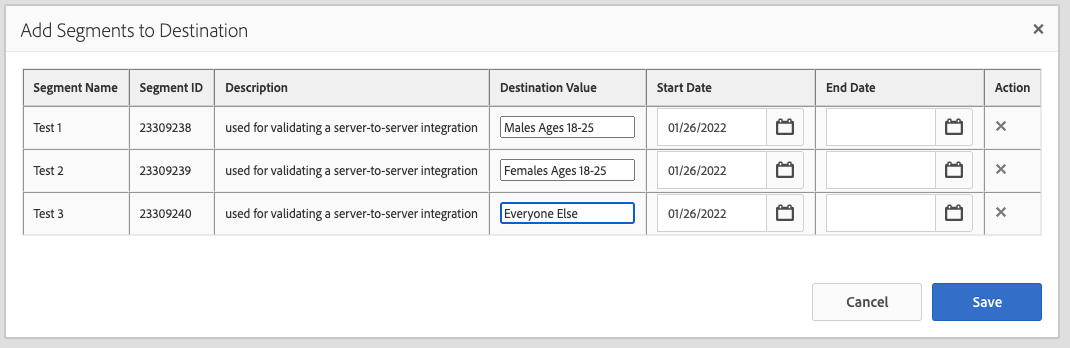
Map friendly names in Adobe Audience Manager
8. Click Save
9. The Segment “friendly” name has now been mapped to the Segment and the destination
* * *
Need help?Chat with our Support team or email `support@onesignal.com`Please include:
* Details of the issue you’re experiencing and steps to reproduce if available
* Your OneSignal App ID
* The External ID or Subscription ID if applicable
* The URL to the message you tested in the OneSignal Dashboard if applicable
* Any relevant [logs or error messages](https://documentation.onesignal.com/docs/capturing-a-debug-log)
We’re happy to help!
* * *
[Segment (Twilio)](https://documentation.onesignal.com/docs/segment-onesignal-integration)
[AlloyDB](https://documentation.onesignal.com/docs/alloydb)
Assistant
Responses are generated using AI and may contain mistakes.
---
# iOS: App Clip Support - OneSignal
[OneSignal home page](https://documentation.onesignal.com/)
Search...
⌘K
Search...
Navigation
Mobile SDK reference
iOS: App Clip Support
[Home](https://documentation.onesignal.com/docs/home)
[User Guides](https://documentation.onesignal.com/docs/quickstart-guide)
[Developer Guides](https://documentation.onesignal.com/docs/developers)
[Tutorials](https://documentation.onesignal.com/docs/tutorials)
[API Reference](https://documentation.onesignal.com/reference/rest-api-overview)
[Release Notes](https://documentation.onesignal.com/release-notes/changelog)
On this page
* [OneSignal support for App Clips](https://documentation.onesignal.com/docs/app-clip-support#onesignal-support-for-app-clips)
* [Setup](https://documentation.onesignal.com/docs/app-clip-support#setup)
* [1\. Create a new app for your App Clip](https://documentation.onesignal.com/docs/app-clip-support#1-create-a-new-app-for-your-app-clip)
* [2\. Set up OneSignal in your App Clip](https://documentation.onesignal.com/docs/app-clip-support#2-set-up-onesignal-in-your-app-clip)
* [3\. Enable ephemeral push permission](https://documentation.onesignal.com/docs/app-clip-support#3-enable-ephemeral-push-permission)
* [4\. Support advanced App Clip experiences](https://documentation.onesignal.com/docs/app-clip-support#4-support-advanced-app-clip-experiences)
* [App Clip limitations](https://documentation.onesignal.com/docs/app-clip-support#app-clip-limitations)
[](https://documentation.onesignal.com/docs/app-clip-support#onesignal-support-for-app-clips)
OneSignal support for App Clips
---------------------------------------------------------------------------------------------------------------------------------
OneSignal supports sending push notifications to iOS App Clips. Since App Clips have a separate bundle identifier, they require their own push configuration. Follow the steps below to properly configure your App Clip with OneSignal and understand current limitations.
* * *
[](https://documentation.onesignal.com/docs/app-clip-support#setup)
Setup
-----------------------------------------------------------------------------
###
[](https://documentation.onesignal.com/docs/app-clip-support#1-create-a-new-app-for-your-app-clip)
1\. Create a new app for your App Clip
You must create a separate app in the OneSignal Dashboard for your App Clip. This is because:
* App Clips use a different bundle identifier from the main app.
* Apple requires a distinct APNs certificate or Key for each unique bundle ID.
Make sure your App Clip bundle ID has its own APNs authentication configured in Apple Developer Console and linked in OneSignal.
###
[](https://documentation.onesignal.com/docs/app-clip-support#2-set-up-onesignal-in-your-app-clip)
2\. Set up OneSignal in your App Clip
Follow the standard OneSignal [iOS SDK setup guide](https://documentation.onesignal.com/docs/ios-sdk-setup)
, but skip the Notification Service Extension step:
* ✅ Do: Add the OneSignal SDK to your App Clip target.
* ❌ Skip: Notification Service Extension — App Clips do not support this capability.
###
[](https://documentation.onesignal.com/docs/app-clip-support#3-enable-ephemeral-push-permission)
3\. Enable ephemeral push permission
Add the following to your App Clip’s `Info.plist` to automatically enable 8-hour push notification permissions when the App Clip is opened:
Copy
NSAppClip
NSAppClipRequestEphemeralUserNotification

Ephemeral push notification Info.plist setting
This ephemeral permission expires after 8 hours unless the user disables it earlier. You can also request indefinite push permission upon launch, similar to full apps. Refer to [Apple’s documentation](https://developer.apple.com/documentation/appclip/enabling-notifications-in-app-clips)
for full guidance.
###
[](https://documentation.onesignal.com/docs/app-clip-support#4-support-advanced-app-clip-experiences)
4\. Support advanced App Clip experiences
To target specific App Clip experiences with notifications:
1. In the OneSignal Dashboard, open **Settings > iOS platform configuration**.
2. Add a value to the **Target-Content-ID** field. This should be the experience URL you configured in App Store Connect.
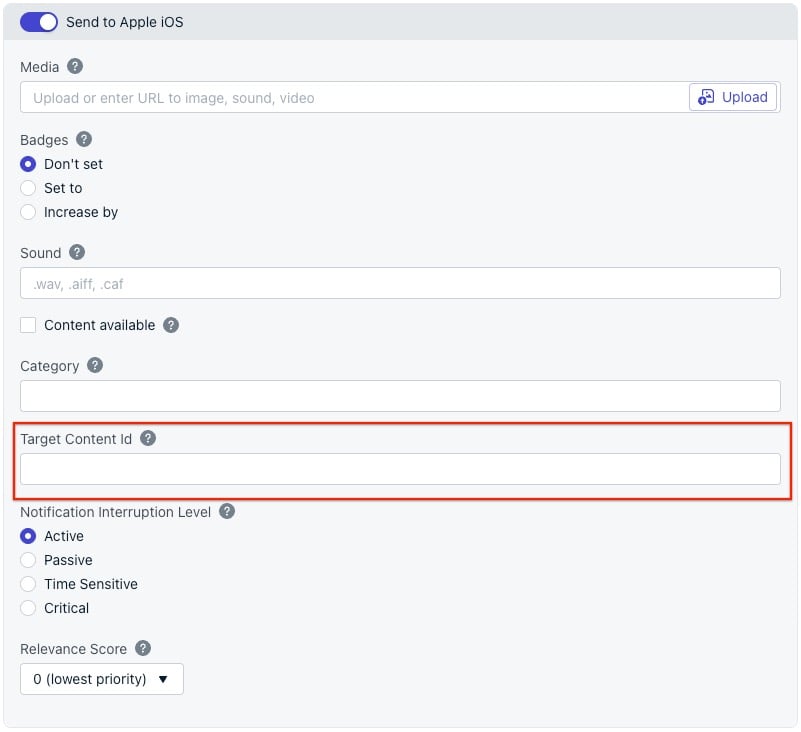
Targeting a specific App Clip experience via Target-Content-ID
Learn more in Apple’s guide to [Creating an App Clip](https://developer.apple.com/documentation/app_clips/creating_an_app_clip)
, which covers Associated Domains and Target-Content-ID usage.
* * *
[](https://documentation.onesignal.com/docs/app-clip-support#app-clip-limitations)
App Clip limitations
-----------------------------------------------------------------------------------------------------------
Due to iOS platform restrictions, the following limitations apply to App Clips:
* Ephemeral permission duration: Only lasts 8 hours. To send notifications beyond this, request full push permission.
* No Notification Service Extension support:
* ❌ No rich media (images, videos, etc.)
* ❌ No custom action buttons (only predefined categories allowed)
* Location access is limited:
* App Clips cannot request Always location access.
* They can request When In Use, which expires at 4:00 a.m. the next day.
* * *
[OSNotification payload](https://documentation.onesignal.com/docs/osnotification-payload)
[Update mobile SDKs](https://documentation.onesignal.com/docs/update-mobile-sdk)
Assistant
Responses are generated using AI and may contain mistakes.
---
# Apple App Privacy Requirements - OneSignal
[OneSignal home page](https://documentation.onesignal.com/)
Search...
⌘K
Search...
Navigation
Data privacy & regulatory compliance
Apple App Privacy Requirements
[Home](https://documentation.onesignal.com/docs/home)
[User Guides](https://documentation.onesignal.com/docs/quickstart-guide)
[Developer Guides](https://documentation.onesignal.com/docs/developers)
[Tutorials](https://documentation.onesignal.com/docs/tutorials)
[API Reference](https://documentation.onesignal.com/reference/rest-api-overview)
[Release Notes](https://documentation.onesignal.com/release-notes/changelog)
On this page
* [Data types and their relevance to OneSignal](https://documentation.onesignal.com/docs/apple-app-privacy-requirements#data-types-and-their-relevance-to-onesignal)
* [Required data disclosures in App Store Connect](https://documentation.onesignal.com/docs/apple-app-privacy-requirements#required-data-disclosures-in-app-store-connect)
* [Type: Purchases](https://documentation.onesignal.com/docs/apple-app-privacy-requirements#type%3A-purchases)
* [Purchase History](https://documentation.onesignal.com/docs/apple-app-privacy-requirements#purchase-history)
* [Linked to user identity?](https://documentation.onesignal.com/docs/apple-app-privacy-requirements#linked-to-user-identity%3F)
* [Used for tracking?](https://documentation.onesignal.com/docs/apple-app-privacy-requirements#used-for-tracking%3F)
* [Type: Usage Data – Product Interaction](https://documentation.onesignal.com/docs/apple-app-privacy-requirements#type%3A-usage-data-%E2%80%93-product-interaction)
* [Product Interaction](https://documentation.onesignal.com/docs/apple-app-privacy-requirements#product-interaction)
* [Linked to user identity?](https://documentation.onesignal.com/docs/apple-app-privacy-requirements#linked-to-user-identity%3F-2)
* [Used for tracking?](https://documentation.onesignal.com/docs/apple-app-privacy-requirements#used-for-tracking%3F-2)
* [Final review](https://documentation.onesignal.com/docs/apple-app-privacy-requirements#final-review)
* [Ongoing compliance](https://documentation.onesignal.com/docs/apple-app-privacy-requirements#ongoing-compliance)
Starting December 8, 2020, Apple requires a [privacy disclosure for all new apps and app updates](https://developer.apple.com/app-store/app-privacy-details)
. You must complete the privacy questionnaire in the App Privacy section of [App Store Connect](https://appstoreconnect.apple.com/)
. Apple’s official instructions are [available here](https://help.apple.com/app-store-connect/#/dev1b4647c5b)
. As OneSignal is a third-party service, it is your responsibility to accurately disclose what data you collect and how it’s used through OneSignal. By default, OneSignal collects select **in-app purchase data (Consumable)** and **usage data** such as session activity and notification clicks. If you collect additional information via **Data Tags**, **Outcomes**, or **custom integrations**, you must disclose that as well.
[](https://documentation.onesignal.com/docs/apple-app-privacy-requirements#data-types-and-their-relevance-to-onesignal)
Data types and their relevance to OneSignal
-----------------------------------------------------------------------------------------------------------------------------------------------------------------------
Use the following table to determine which data types you must disclose when using OneSignal: ✅ = Required when using OneSignal 💡 = May be required, depending on configuration ❌ = Not required when using OneSignal
| Data Type | Required? |
| --- | --- |
| **Contact Info** | 💡 If you collect personal identifiers (e.g., name, email) using Data Tags or Outcomes |
| **Health & Fitness** | 💡 If you collect health data via custom tags or Outcomes |
| **Financial Info** | 💡 If you collect financial data through tags or Outcomes |
| **Location** | 💡 Only if your app requests and collects location data, and sends it to OneSignal |
| **Sensitive Info** | 💡 If you collect sensitive user data (e.g., race, politics, biometrics) via tags or Outcomes |
| **Contacts** | 💡 If you upload address books or contacts via Data Tags |
| **User Content** | 💡 If you collect user-generated content through OneSignal |
| **Browsing History** | ❌ Not collected |
| **Search History** | ❌ Not collected |
| **Identifiers** | ✅ OneSignal assigns a unique OneSignal ID for each user (not linked to identity by default).
The **Text** blocks of the 2nd, 3rd, and 4th columns will have the text:
* `{{product.cartProductName}}`
* `{{product.cartQuantity}}`
* `{{product.cartPrice}}`
Row 5 **Text** block, set: `{% endfor %}`The for-loop checks each `product` in the `cart` array we pass into `custom_data` and displays the value for each product in the columns.

Abandoned cart email template example to show items
####
[](https://documentation.onesignal.com/docs/abandoned-cart-content#add-a-custom-cart-url-in-email)
Add a custom cart URL in email
This is optional and only needed if your carts are custom to a specific URL per customer.There are several ways to setup the cart URL. In this example we pass in the full URL to the cart within the `custom_data`: `"cart_url": "https://yourdomain.com/cart"`See [Dynamic URLs](https://documentation.onesignal.com/docs/links#dynamic-urls)
for more details.In the **Button** block > Content Properties > Action > Url, set `{{message.custom_data.cart_url}}`

Abandoned cart email template example for custom URL
###
[](https://documentation.onesignal.com/docs/abandoned-cart-content#finalize-the-email-template)
Finalize the email template
See [Design Emails with Drag and Drop](https://documentation.onesignal.com/docs/design-emails-with-drag-and-drop)
for more details on customizing the template.
When ready, you can use the `template_id` within your [Create message](https://documentation.onesignal.com/reference/create-message)
API requests with `custom_data` property.
###
[](https://documentation.onesignal.com/docs/abandoned-cart-content#abandoned-cart-push-template)
Abandoned Cart Push template
This push template example will demonstrate how to display an item in the user’s cart including its image and name. It also displays how many items total are in the cart and links to the customer’s personalized cart URL.

Abandoned cart push template example
###
[](https://documentation.onesignal.com/docs/abandoned-cart-content#push-template-setup)
Push Template Setup
Push notifications can only be sent with a limited amount of data. Instead of listing all items in the cart, we want to display the first item and mention how many total items there are.Navigate to **Messages > Templates > New Push Template**
####
[](https://documentation.onesignal.com/docs/abandoned-cart-content#display-item-and-item-count-in-push)
Display item and item count in push
Liquid syntax provides [if statements](https://documentation.onesignal.com/docs/using-liquid-syntax)
we can use to change what the message says depending on how many items in the `cart` array of your `custom_data` object.In the template **Message** field, add the following copy:
Copy
{% assign cart = message.custom_data.cart %}
{% assign item_count = cart.size | plus: 0 %}
{% if item_count == 1 %}
You left {{cart.first.cartProductName}} in your cart.
{% endif %}
{% if item_count == 2 %}
You left {{cart.first.cartProductName}} and {{item_count | minus: 1}} more item in your cart.
{% endif %}
{% if item_count > 2 %}
You left {{cart.first.cartProductName}} and {{item_count | minus: 1}} more items in your cart.
{% endif %}
In this example, we first assign the variable `cart` to be the `custom_data.cart`, then assign the variable `item_count` to be the `cart.size`, and, if that count is equal to 1, 2 or more than 2, display different content.Due to the cart possibly having more than 1 item, we use the `first` property to get the first item in the cart.We use the `minus` feature to reduce the total cart items count by 1 since we mention it already.
####
[](https://documentation.onesignal.com/docs/abandoned-cart-content#display-item-image-in-push)
Display item image in push
In the template **Image** field, add the Image URL property with the liquid syntax. If the image doesn’t exist, then no image will show. You can set a `default` image as well. Example:
Copy
{{message.custom_data.cart.first.cartImageURL | default: "https://i.imgur.com/ssPCfbC.png"}}
####
[](https://documentation.onesignal.com/docs/abandoned-cart-content#add-a-custom-cart-url-in-push)
Add a custom cart URL in push
In the template **Launch URL** field, add the cart URL property with the liquid syntax. If the cart doesn’t exist, then the push will direct to the home page of the site or app.Note on Launch URL within Templates: setting `https://` or some other schema in the format `x://` is required. If you set this within the data, you can use the `remove` feature of liquid syntax as follows:
* `https://{{message.custom_data.cart_url | remove: "https://"}}`
###
[](https://documentation.onesignal.com/docs/abandoned-cart-content#update-the-push-template-and-send-the-message)
Update the push template and send the message
See [Sending Messages](https://documentation.onesignal.com/docs/push)
for more details on options provided within push templates.
When ready, you can use the `template_id` within your [Create message](https://documentation.onesignal.com/reference/create-message)
API requests with `custom_data` property.
Need help?Chat with our Support team or email `support@onesignal.com`Please include:
* Details of the issue you’re experiencing and steps to reproduce if available
* Your OneSignal App ID
* The External ID or Subscription ID if applicable
* The URL to the message you tested in the OneSignal Dashboard if applicable
* Any relevant [logs or error messages](https://documentation.onesignal.com/docs/capturing-a-debug-log)
We’re happy to help!
* * *
[Abandoned cart example](https://documentation.onesignal.com/docs/abandoned-cart)
[Create activity feed](https://documentation.onesignal.com/docs/create-an-activity-feed)
Assistant
Responses are generated using AI and may contain mistakes.
---
# Action buttons for push notifications - OneSignal
[OneSignal home page](https://documentation.onesignal.com/)
Search...
⌘K
Search...
Navigation
Push features
Action buttons for push notifications
[Home](https://documentation.onesignal.com/docs/home)
[User Guides](https://documentation.onesignal.com/docs/quickstart-guide)
[Developer Guides](https://documentation.onesignal.com/docs/developers)
[Tutorials](https://documentation.onesignal.com/docs/tutorials)
[API Reference](https://documentation.onesignal.com/reference/rest-api-overview)
[Release Notes](https://documentation.onesignal.com/release-notes/changelog)
On this page
* [Add action buttons](https://documentation.onesignal.com/docs/action-buttons#add-action-buttons)
* [Dashboard & template setup](https://documentation.onesignal.com/docs/action-buttons#dashboard-%26-template-setup)
* [API setup](https://documentation.onesignal.com/docs/action-buttons#api-setup)
* [Action button properties](https://documentation.onesignal.com/docs/action-buttons#action-button-properties)
* [Action button icons](https://documentation.onesignal.com/docs/action-buttons#action-button-icons)
* [Handle action button clicks](https://documentation.onesignal.com/docs/action-buttons#handle-action-button-clicks)
* [Default behavior (Open App/Site, Then Handle)](https://documentation.onesignal.com/docs/action-buttons#default-behavior-open-app%2Fsite%2C-then-handle)
* [Prevent app launch from action button clicks](https://documentation.onesignal.com/docs/action-buttons#prevent-app-launch-from-action-button-clicks)
* [Supported platforms & limits](https://documentation.onesignal.com/docs/action-buttons#supported-platforms-%26-limits)
* [Troubleshooting](https://documentation.onesignal.com/docs/action-buttons#troubleshooting)
* [Buttons don’t show up](https://documentation.onesignal.com/docs/action-buttons#buttons-don%E2%80%99t-show-up)
* [Clicking a button doesn’t open the browser on mobile web](https://documentation.onesignal.com/docs/action-buttons#clicking-a-button-doesn%E2%80%99t-open-the-browser-on-mobile-web)
* [Icons don’t appear](https://documentation.onesignal.com/docs/action-buttons#icons-don%E2%80%99t-appear)
* [Why is there a close action button?](https://documentation.onesignal.com/docs/action-buttons#why-is-there-a-close-action-button%3F)

Image showing action buttons in iOS
This guide applies only to push notifications. For in-app messages, see [In-App Messages: How to add Click Actions](https://documentation.onesignal.com/docs/iam-click-actions)
.
Action Buttons let you add multiple, labeled actions to a single push notification, so users can respond without opening your app or site first. Depending on the operating system and device, users reveal buttons by expanding the notification (long press, swipe + View, or an expand affordance).
* * *
[](https://documentation.onesignal.com/docs/action-buttons#add-action-buttons)
Add action buttons
-----------------------------------------------------------------------------------------------------
You can configure Action Buttons in [Templates](https://documentation.onesignal.com/docs/templates)
, directly when composing a message in the dashboard, or via the [API](https://documentation.onesignal.com/reference/push-notification)
.
###
[](https://documentation.onesignal.com/docs/action-buttons#dashboard-%26-template-setup)
Dashboard & template setup
When creating a push, open **Advanced Options > Action Buttons**.

Image showing action buttons to be added for iOS and Android
###
[](https://documentation.onesignal.com/docs/action-buttons#api-setup)
API setup
* **Mobile Apps**: Use the `buttons` parameter. Pass an array of up to 3 objects with `id`, `text`, and `icon`.
* **Web (Chrome)**: Use `web_buttons`, passing up to 2 objects with `id`, `text`, `icon`, and `url`.
* * *
[](https://documentation.onesignal.com/docs/action-buttons#action-button-properties)
Action button properties
-----------------------------------------------------------------------------------------------------------------
* **Action ID**: A unique identifier for the specific button action. The ID of the clicked button is passed to you so you can identify which button was clicked. (e.g. ‘accept-button’)
* Must be unique per button.
* Available in the OSNotification Payload and can be accessed within the SDK Notification Opened Event Handler.
* API: `id` property
* **Label**: The text the button should display to your users. (e.g. ‘Accept’)
* API: `text` property
* **Icon**: Optional icon displayed with the button label. Not available on all platforms and operating systems. See FAQ below for details.
* Mobile apps must include the button within its image resources. See Action Button Icons below for details.
* Websites can use a valid publicly reachable URL to an icon. Keep this small because it’s downloaded on every notification display. (e.g. `http://site.com/icon.png`)
* API: `icon` property
* **Button URL**: The URL to open when the notification is clicked. Pass `'do_not_open'` to prevent opening any URL. (e.g. ‘do\_not\_open’)
* Web only
* API: `url` property
###
[](https://documentation.onesignal.com/docs/action-buttons#action-button-icons)
Action button icons
* iOS supports action button icons for iOS 15+
* Android stopped supporting action button icons for [Android N (AKA 7)](https://android-developers.googleblog.com/2016/06/notifications-in-android-n.html)
* * *
[](https://documentation.onesignal.com/docs/action-buttons#handle-action-button-clicks)
Handle action button clicks
-----------------------------------------------------------------------------------------------------------------------
When a user taps a button, OneSignal delivers the Action ID to your app/site. You can either use the default behavior (open your app/site) or override it.
###
[](https://documentation.onesignal.com/docs/action-buttons#default-behavior-open-app%2Fsite%2C-then-handle)
Default behavior (Open App/Site, Then Handle)
1. The app/site opens (or is focused on web).
2. Your click/open listener receives the event with the Action ID. (See [mobile SDK reference](https://documentation.onesignal.com/docs/mobile-sdk-reference#addclicklistener-push)
or [web SDK reference](https://documentation.onesignal.com/docs/web-sdk-reference#addeventlistener-notifications)
for click listener details.)
###
[](https://documentation.onesignal.com/docs/action-buttons#prevent-app-launch-from-action-button-clicks)
Prevent app launch from action button clicks
* **Android:** Follow [Android SDK setup > Disable default open behavior](https://documentation.onesignal.com/docs/android-sdk-setup#disable-default-open-behavior)
. This lets you intercept clicks in a [Service Extensions](https://documentation.onesignal.com/docs/service-extensions)
and run custom logic (e.g. call an API) without opening the app.
* **iOS:** Include an `ios_category` on the notification to associate actions via the [UNNotificationCategory Object](https://developer.apple.com/documentation/usernotifications/unnotificationcategory)
. See Apple’s [Declaring Your Actionable Notification Types](https://developer.apple.com/documentation/usernotifications/declaring_your_actionable_notification_types)
for more details.
* **Web (Chrome):** Use the `_osp=do_not_open` magic string to prevent opening any URL. This is supported on Chrome and Firefox, but not supported for the Safari web browser.
* * *
[](https://documentation.onesignal.com/docs/action-buttons#supported-platforms-%26-limits)
Supported platforms & limits
---------------------------------------------------------------------------------------------------------------------------
| Platform | Buttons Supported | Notes |
| --- | --- | --- |
| iOS | Up to 4 | Icons on iOS 15+. Requires categories for background handling. |
| Android / Amazon / Huawei | Up to 3 | No button icons from Android 7+. |
| Web – Chrome | Up to 2 | Buttons and icons supported. `_osp=do_not_open` supported. |
| Web – Firefox | No buttons | `_osp=do_not_open` works for the launch URL only. |
| Web – Safari | No buttons | `_osp=do_not_open` not supported. Provide a real URL. |
Users often need to **expand** the notification to see buttons (e.g., long press on iOS, swipe + **View** on some Android OEMs).
* * *
[](https://documentation.onesignal.com/docs/action-buttons#troubleshooting)
Troubleshooting
-----------------------------------------------------------------------------------------------
###
[](https://documentation.onesignal.com/docs/action-buttons#buttons-don%E2%80%99t-show-up)
Buttons don’t show up
* Expand the notification (long press, swipe + View, or expand).
* Verify you added Action ID and Label for each button.
* Check platform limits (e.g., only 2 buttons on Chrome).
###
[](https://documentation.onesignal.com/docs/action-buttons#clicking-a-button-doesn%E2%80%99t-open-the-browser-on-mobile-web)
Clicking a button doesn’t open the browser on mobile web
If the browser is in the background or fully closed, most mobile browsers (including Chrome) will not come to the foreground or open the URL, even though click events still trigger in the service worker. This is intentional browser behavior to prevent background apps from interrupting the user.
* Most mobile browsers won’t foreground themselves from a background service worker. Clicks still fire in the worker, but the tab doesn’t open. This is intentional.
* Ensure the launch URL and the button URL are exactly identical (including trailing slashes) if you expect the tab to be focused instead of opening a new one.
###
[](https://documentation.onesignal.com/docs/action-buttons#icons-don%E2%80%99t-appear)
Icons don’t appear
* iOS must be 15+ for button icons.
* Android 7+ does not render action button icons.
* On web, confirm the icon URL is publicly accessible and small (fast to download).
###
[](https://documentation.onesignal.com/docs/action-buttons#why-is-there-a-close-action-button%3F)
Why is there a close action button?
By default web push notifications on Windows 10 include the Close button. However, if you add your own action button, then this close button is removed. So, in either case the notification will remain on-screen till the user interacts with it. This is designed by Google to give the users the chance to interact with the notification.
Need help?Chat with our Support team or email `support@onesignal.com`Please include:
* Details of the issue you’re experiencing and steps to reproduce if available
* Your OneSignal App ID
* The External ID or Subscription ID if applicable
* The URL to the message you tested in the OneSignal Dashboard if applicable
* Any relevant [logs or error messages](https://documentation.onesignal.com/docs/capturing-a-debug-log)
We’re happy to help!
* * *
[Badges](https://documentation.onesignal.com/docs/badges)
[Push frequency capping](https://documentation.onesignal.com/docs/frequency-capping)
Assistant
Responses are generated using AI and may contain mistakes.
---
# Analytics overview - OneSignal
[OneSignal home page](https://documentation.onesignal.com/)
Search...
⌘K
Search...
Navigation
Analytics
Analytics overview
[Home](https://documentation.onesignal.com/docs/home)
[User Guides](https://documentation.onesignal.com/docs/quickstart-guide)
[Developer Guides](https://documentation.onesignal.com/docs/developers)
[Tutorials](https://documentation.onesignal.com/docs/tutorials)
[API Reference](https://documentation.onesignal.com/reference/rest-api-overview)
[Release Notes](https://documentation.onesignal.com/release-notes/changelog)
On this page
* [Overview](https://documentation.onesignal.com/docs/analytics-overview#overview)
* [Engagement trends](https://documentation.onesignal.com/docs/analytics-overview#engagement-trends)
* [Message reports](https://documentation.onesignal.com/docs/analytics-overview#message-reports)
* [Subscription trends](https://documentation.onesignal.com/docs/analytics-overview#subscription-trends)
* [Outcomes](https://documentation.onesignal.com/docs/analytics-overview#outcomes)
* [Outcome attribution](https://documentation.onesignal.com/docs/analytics-overview#outcome-attribution)
* [Influenced attribution](https://documentation.onesignal.com/docs/analytics-overview#influenced-attribution)
* [FAQ](https://documentation.onesignal.com/docs/analytics-overview#faq)
* [How long is message data retained?](https://documentation.onesignal.com/docs/analytics-overview#how-long-is-message-data-retained%3F)
* [How to aggregate data across multiple messages?](https://documentation.onesignal.com/docs/analytics-overview#how-to-aggregate-data-across-multiple-messages%3F)
[](https://documentation.onesignal.com/docs/analytics-overview#overview)
Overview
-------------------------------------------------------------------------------------
OneSignal offers multiple ways to measure message performance, track user actions, and export behavioral data. This guide provides a central overview of all available analytics tools, charts, and exports—so you can understand what data is available and how it’s structured. Jump to common advanced analytics features:
[Event Streams\
-------------\
\
Get message events like sent, opened, clicked, and more to your chosen destination.](https://documentation.onesignal.com/docs/event-streams)
[Journey analytics\
-----------------\
\
Track the performance of users and messages sent via Journeys.](https://documentation.onesignal.com/docs/journeys-analytics)
[Template analytics\
------------------\
\
Group transactional and/or campaign-based messages under a single Template to aggregate analytics.](https://documentation.onesignal.com/docs/template-analytics)
[Custom outcomes\
---------------\
\
Track outcomes that happened after a user dirctly clicked a push or influenced by a push.](https://documentation.onesignal.com/docs/custom-outcomes)
[Confirmed delivery for push\
---------------------------\
\
Confirmed delivery tracks each individual device/user that has received your push sent from OneSignal.](https://documentation.onesignal.com/docs/confirmed-delivery)
[Exporting data\
--------------\
\
Export message and user data to a CSV file.](https://documentation.onesignal.com/docs/exporting-data)
* * *
[](https://documentation.onesignal.com/docs/analytics-overview#engagement-trends)
Engagement trends
-------------------------------------------------------------------------------------------------------
The OneSignal Dashboard includes both high-level charts and detailed message reports for real-time and historical insights into user message effectiveness. Use [Engagement trends](https://documentation.onesignal.com/docs/engagement-analytics)
to track your message events over time.

Engagement Trends chart on Dashboard
###
[](https://documentation.onesignal.com/docs/analytics-overview#message-reports)
Message reports
For specific message reports, click into the message from the dashboard or use the [View message API](https://documentation.onesignal.com/reference/view-message)
. For journeys or transactional messages you want to send at different times, you can use [Templates](https://documentation.onesignal.com/docs/templates)
to aggregate analytics.
[Push message reports\
--------------------\
\
View detailed analytics for each message sent when clicking into the message from the dashboard.](https://documentation.onesignal.com/docs/push-notification-message-reports)
[In-app message reports\
----------------------\
\
View detailed analytics for each message sent when clicking into the message from the dashboard.](https://documentation.onesignal.com/docs/in-app-message-reports)
[Email message reports\
---------------------\
\
View detailed analytics for each message sent when clicking into the message from the dashboard.](https://documentation.onesignal.com/docs/email-message-reports)
[SMS message reports\
-------------------\
\
View detailed analytics for each message sent when clicking into the message from the dashboard.](https://documentation.onesignal.com/docs/sms-message-reports)
* * *
[](https://documentation.onesignal.com/docs/analytics-overview#subscription-trends)
Subscription trends
-----------------------------------------------------------------------------------------------------------
Track newly subscribed and unsubscribed [Subscriptions](https://documentation.onesignal.com/docs/subscriptions)
by channel, including historical trends over time.

Subscription Trends chart on Dashboard
| Metric | Description |
| --- | --- |
| **Total Subscribed** | Total number of subscribed Subscriptions. Counts will fluctuate as users unsubscribe from your messages, uninstall your app, or get deleted. |
| **New Subscribes** | Count of new subscribed Subscriptions in the selected period. |
| **New Unsubscribes** | Count of unsubscribed Subscriptions during the selected period (e.g. due to uninstalls or opting out). |
[Subscriptions\
-------------\
\
Subscriptions are for the specific messaging channel the user has opted into. Learn how Subscriptions are created and marked as subscribed or unsubscribed.](https://documentation.onesignal.com/docs/subscriptions)
[Users\
-----\
\
Users can have multiple Subscriptions and are identified by their external ID.](https://documentation.onesignal.com/docs/users)
* * *
[](https://documentation.onesignal.com/docs/analytics-overview#outcomes)
Outcomes
-------------------------------------------------------------------------------------
Outcomes measure what happens after sending a message. This includes if users are receiving and interacting with them, but can be expanded to track [Custom Outcomes](https://documentation.onesignal.com/docs/custom-outcomes)
like purchases, shares, likes, and any other actions you want to track.

The Global Outcomes Chart on the dashboard.
###
[](https://documentation.onesignal.com/docs/analytics-overview#outcome-attribution)
Outcome attribution
Outcomes can be attributed to a message in one of three ways:
| Attribution | When it applies |
| --- | --- |
| **Direct** | The user clicked the in-app message block, email link, or push notification which launched a new session (app was closed >30s), and triggered the outcome. |
| **Influenced** | The user did **not** click a push notification, but opened the app within the influence window (default: 24 hours) and triggered the outcome. Applies to the 10 most recent push notifications. |
| **Unattributed** | The outcome occurred outside of any attribution window or click. Not linked to a specific message. |
####
[](https://documentation.onesignal.com/docs/analytics-overview#influenced-attribution)
Influenced attribution
How Influenced Outcomes work:
* Configure the Influenced time period under **Settings > Push & In-App > Influenced Opens** (changes take effect per-device on the next new session).
* As push notifications are sent, if the user doesn’t click it, but opens the app and triggers our Outcomes SDK methods, they will be considered “influenced”.
* This attribution is credited to up to 10 messages sent within the Influence time period.
* Example: If your Influenced time period is 24 hours, you send 15 messages that day, and the user doesn’t click any of them, but opens the app and performs the action that calls our Outcomes SDK methods, the most recent 10 messages will be considered “influencing the Outcome”.
* * *
[](https://documentation.onesignal.com/docs/analytics-overview#faq)
FAQ
---------------------------------------------------------------------------
###
[](https://documentation.onesignal.com/docs/analytics-overview#how-long-is-message-data-retained%3F)
How long is message data retained?
| Message Type | Retention Period |
| --- | --- |
| Dashboard-sent messages | Lifetime of the app |
| API-sent messages | 30 days |
| Audience activity CSV | 30 days |
| Journeys messages | See [Journeys analytics](https://documentation.onesignal.com/docs/journeys-analytics) |
###
[](https://documentation.onesignal.com/docs/analytics-overview#how-to-aggregate-data-across-multiple-messages%3F)
How to aggregate data across multiple messages?
When sending messages via Journeys or the API, you will notice that each message sent or request made has a unique message ID. The message ID is how we track the message in our system. If there is no message ID, then there was no message created. While you can use the [View Message API](https://documentation.onesignal.com/reference/view-message)
to get the stats for each individual message and aggregate the data yourself, this can be cumbersome and time-consuming. Instead, use our [Template Analytics](https://documentation.onesignal.com/docs/template-analytics)
and we will aggregate the data for all messages sent under that template. For Journeys, see [Journeys analytics](https://documentation.onesignal.com/docs/journeys-analytics)
for more information.
* * *
[Import](https://documentation.onesignal.com/docs/import)
[Template analytics](https://documentation.onesignal.com/docs/template-analytics)
Assistant
Responses are generated using AI and may contain mistakes.
---
# Android notification categories - OneSignal
[OneSignal home page](https://documentation.onesignal.com/)
Search...
⌘K
Search...
Navigation
Mobile push
Android notification categories
[Home](https://documentation.onesignal.com/docs/home)
[User Guides](https://documentation.onesignal.com/docs/quickstart-guide)
[Developer Guides](https://documentation.onesignal.com/docs/developers)
[Tutorials](https://documentation.onesignal.com/docs/tutorials)
[API Reference](https://documentation.onesignal.com/reference/rest-api-overview)
[Release Notes](https://documentation.onesignal.com/release-notes/changelog)
On this page
* [Default notification categories](https://documentation.onesignal.com/docs/android-notification-categories#default-notification-categories)
* [Miscellaneous](https://documentation.onesignal.com/docs/android-notification-categories#miscellaneous)
* [Restored](https://documentation.onesignal.com/docs/android-notification-categories#restored)
* [Huawei-specific behavior](https://documentation.onesignal.com/docs/android-notification-categories#huawei-specific-behavior)
* [Create Android notification categories in OneSignal](https://documentation.onesignal.com/docs/android-notification-categories#create-android-notification-categories-in-onesignal)
* [Name](https://documentation.onesignal.com/docs/android-notification-categories#name)
* [Description](https://documentation.onesignal.com/docs/android-notification-categories#description)
* [Importance](https://documentation.onesignal.com/docs/android-notification-categories#importance)
* [Sound](https://documentation.onesignal.com/docs/android-notification-categories#sound)
* [Vibration](https://documentation.onesignal.com/docs/android-notification-categories#vibration)
* [LED Color](https://documentation.onesignal.com/docs/android-notification-categories#led-color)
* [Badges](https://documentation.onesignal.com/docs/android-notification-categories#badges)
* [Lockscreen visibility](https://documentation.onesignal.com/docs/android-notification-categories#lockscreen-visibility)
* [Updating categories](https://documentation.onesignal.com/docs/android-notification-categories#updating-categories)
* [Deleting categories](https://documentation.onesignal.com/docs/android-notification-categories#deleting-categories)
* [Using categories in notifications](https://documentation.onesignal.com/docs/android-notification-categories#using-categories-in-notifications)
* [In OneSignal Dashboard](https://documentation.onesignal.com/docs/android-notification-categories#in-onesignal-dashboard)
* [Using the REST API](https://documentation.onesignal.com/docs/android-notification-categories#using-the-rest-api)
* [FAQ](https://documentation.onesignal.com/docs/android-notification-categories#faq)
* [Why isn’t my Android category working?](https://documentation.onesignal.com/docs/android-notification-categories#why-isn%E2%80%99t-my-android-category-working%3F)
* [Can categories play sounds in Do Not Disturb (DND) mode?](https://documentation.onesignal.com/docs/android-notification-categories#can-categories-play-sounds-in-do-not-disturb-dnd-mode%3F)
* [Can I localize category names or descriptions?](https://documentation.onesignal.com/docs/android-notification-categories#can-i-localize-category-names-or-descriptions%3F)
Android notification categories (aka notification channels) were introduced in Android 8.0 (Oreo) to give users greater control over how they receive notifications from your app. Each category defines its own settings such as sound, vibration, badge behavior, and lock screen visibility. OneSignal makes it easy to create and manage these categories directly from the dashboard. Alternatively, you can define them programmatically in your app.
OneSignal’s Android notification categories work for Google Android, Huawei Android, and Amazon FireOS.
To programmatically define categories, see [Android’s guide to creating notification channels](https://developer.android.com/develop/ui/views/notifications/channels)
.

Example of an app's notification categories on the device
* * *
[](https://documentation.onesignal.com/docs/android-notification-categories#default-notification-categories)
Default notification categories
------------------------------------------------------------------------------------------------------------------------------------------------
OneSignal automatically creates two default categories:
###
[](https://documentation.onesignal.com/docs/android-notification-categories#miscellaneous)
Miscellaneous
Used when no category is set.
* **Importance:** High
* **Sound:** Default
* **Vibration:** Default
* **Badges:** Enabled
* **Lockscreen:** Private
###
[](https://documentation.onesignal.com/docs/android-notification-categories#restored)
Restored
Used when the app is force-quit and reopened, restoring previous notifications that were cleared.
* **Importance:** Low
* **Sound:** Off
* **Vibration:** Off
* **Badges:** Disabled
* **Lockscreen:** Private
If you always send push notifications with a custom category, the “Miscellaneous” channel won’t appear on user devices. The “Restored” channel will always appear to handle restored notifications after force-closing.
####
[](https://documentation.onesignal.com/docs/android-notification-categories#huawei-specific-behavior)
Huawei-specific behavior
On Huawei devices, OneSignal does **not** set a default category. If you don’t include one, Huawei will apply **High** importance by default.
* * *
[](https://documentation.onesignal.com/docs/android-notification-categories#create-android-notification-categories-in-onesignal)
Create Android notification categories in OneSignal
----------------------------------------------------------------------------------------------------------------------------------------------------------------------------------------
1. Go to **Settings > Push & In-App > Android Notification Channels** in the OneSignal Dashboard.
2. Click **Add Group** to organize your categories (e.g., “News Updates”, “Social Activity”).
3. Click **Add Channel** within the group to create a new category.

Where to add Android categories in OneSignal
You’ll be asked to define the following:
###
[](https://documentation.onesignal.com/docs/android-notification-categories#name)
Name
_User-visible._ Keep it clear and descriptive.
###
[](https://documentation.onesignal.com/docs/android-notification-categories#description)
Description
_User-visible._ Briefly explain the type of notifications this category will handle.
###
[](https://documentation.onesignal.com/docs/android-notification-categories#importance)
Importance
Controls how visible and interruptive the notification is:
* **Low:** Silent, no alerts
* **Medium:** No sound/vibration, minimal visual interruption
* **High:** Plays sound or vibrates, no screen pop-up
* **Urgent:** Plays sound and displays a full-screen alert
###
[](https://documentation.onesignal.com/docs/android-notification-categories#sound)
Sound
* **Off:** No sound
* **Default:** Device’s default notification tone
* **Custom:** Upload and reference a custom sound (no file extension). Example: `alert_beep` (not `alert_beep.wav`) See [Notification Sounds](https://documentation.onesignal.com/docs/notification-sounds)
for setup instructions.
###
[](https://documentation.onesignal.com/docs/android-notification-categories#vibration)
Vibration
* **Off:** No vibration
* **Default:** Uses device’s vibration pattern
* **Custom:** Define your own using a pattern (in ms). Example: `0, 300, 500, 300` → Wait 0ms, vibrate 300ms, pause 500ms, vibrate 300ms.
###
[](https://documentation.onesignal.com/docs/android-notification-categories#led-color)
LED Color
Some Android devices support LED indicators:
* **Off:** No LED
* **Default:** Device default
* **Custom:** ARGB hex value (e.g., `FF0000FF` for blue)
###
[](https://documentation.onesignal.com/docs/android-notification-categories#badges)
Badges
Shows badge count on app icon:
* **Enabled:** Badge is shown
* **Disabled:** No badge displayed
###
[](https://documentation.onesignal.com/docs/android-notification-categories#lockscreen-visibility)
Lockscreen visibility
* **Public:** Full content shown
* **Private:** Only app name, hides content
* **Secret:** No notification visible on lock screen
Once your category is created, you can use it in your notifications.
* * *
[](https://documentation.onesignal.com/docs/android-notification-categories#updating-categories)
Updating categories
------------------------------------------------------------------------------------------------------------------------
After a device receives a notification from a category, Android locks that category’s behavior. **Changes to importance, sound, vibration, or other settings will not apply retroactively**. **Options**:
* **To update behavior:** Create a new category.
* **To test changes:** Clear app data or uninstall and reinstall the app.
You can update:
* Channel name
* Channel group name
These will update in Android’s notification settings when the next notification is received using that updated channel.
* * *
[](https://documentation.onesignal.com/docs/android-notification-categories#deleting-categories)
Deleting categories
------------------------------------------------------------------------------------------------------------------------
To remove a deleted category from the user’s device:
1. Delete the category from the OneSignal dashboard.
2. Ensure all notifications are cleared from the Notification Center.
3. Have the user:
* Put the app in the background for 60+ seconds
* Open it again (triggers SDK sync)
The SDK will re-sync and remove the deleted category from Android settings.
* * *
[](https://documentation.onesignal.com/docs/android-notification-categories#using-categories-in-notifications)
Using categories in notifications
----------------------------------------------------------------------------------------------------------------------------------------------------
###
[](https://documentation.onesignal.com/docs/android-notification-categories#in-onesignal-dashboard)
In OneSignal Dashboard
* Go to **Android Platform Settings** in your message composer.
* Select your **Category** under “Category”.
* Sound, Lockscreen, and LED settings will be pulled from the category and hidden in the UI.
###
[](https://documentation.onesignal.com/docs/android-notification-categories#using-the-rest-api)
Using the REST API
Use the `android_channel_id` in the [Create message](https://documentation.onesignal.com/reference/create-message)
API request.

Find the Channel ID in the Android Category setup screen
If using your own Android-defined channels, use `existing_android_channel_id` instead.
* * *
[](https://documentation.onesignal.com/docs/android-notification-categories#faq)
FAQ
----------------------------------------------------------------------------------------
###
[](https://documentation.onesignal.com/docs/android-notification-categories#why-isn%E2%80%99t-my-android-category-working%3F)
Why isn’t my Android category working?
1. **Incorrect initialization:** Make sure OneSignal is initialized in the `Application` class, not an `Activity`. See [Android SDK Setup](https://documentation.onesignal.com/docs/android-sdk-setup#section-2-add-required-code)
.
2. **Outdated category:** If you changed a category after sending a push, Android may not apply those changes. Create a new category instead.
###
[](https://documentation.onesignal.com/docs/android-notification-categories#can-categories-play-sounds-in-do-not-disturb-dnd-mode%3F)
Can categories play sounds in Do Not Disturb (DND) mode?
No. OneSignal does not set `setBypassDnd` on categories. To override DND, create your own channel programmatically and enable this setting. See [setBypassDnd](https://developer.android.com/reference/android/app/NotificationChannel#setBypassDnd(boolean))
.
###
[](https://documentation.onesignal.com/docs/android-notification-categories#can-i-localize-category-names-or-descriptions%3F)
Can I localize category names or descriptions?
No. OneSignal does not support multiple languages for categories. To support localization, define your own Android channels and reference them via `existing_android_channel_id` in your push API requests.
* * *
[iOS provisional push notifications](https://documentation.onesignal.com/docs/ios-provisional-push-notifications)
[Data & background notifications](https://documentation.onesignal.com/docs/data-notifications)
Assistant
Responses are generated using AI and may contain mistakes.
---
# Adobe Audience Manager - OneSignal
[OneSignal home page](https://documentation.onesignal.com/)
Search...
⌘K
Search...
Navigation
OneSignal as destination
Adobe Audience Manager
[Home](https://documentation.onesignal.com/docs/home)
[User Guides](https://documentation.onesignal.com/docs/quickstart-guide)
[Developer Guides](https://documentation.onesignal.com/docs/developers)
[Tutorials](https://documentation.onesignal.com/docs/tutorials)
[API Reference](https://documentation.onesignal.com/reference/rest-api-overview)
[Release Notes](https://documentation.onesignal.com/release-notes/changelog)
On this page
* [Capabilities](https://documentation.onesignal.com/docs/adobe-audience-manager#capabilities)
* [Requirements](https://documentation.onesignal.com/docs/adobe-audience-manager#requirements)
* [Setup](https://documentation.onesignal.com/docs/adobe-audience-manager#setup)
* [Connection parameters](https://documentation.onesignal.com/docs/adobe-audience-manager#connection-parameters)
* [Set up with Adobe](https://documentation.onesignal.com/docs/adobe-audience-manager#set-up-with-adobe)
* [Optional: Configure segment friendly names](https://documentation.onesignal.com/docs/adobe-audience-manager#optional%3A-configure-segment-friendly-names)
Integrating Adobe Audience Manager with OneSignal allows you to bring powerful audience segmentation from Adobe into OneSignal’s customer engagement platform. This enables personalized, behavior-based messaging that increases user retention and monetization.
[](https://documentation.onesignal.com/docs/adobe-audience-manager#capabilities)
Capabilities
-------------------------------------------------------------------------------------------------
OneSignal and Adobe Audience Manager integration supports:
* **Real-time segment sync**: Automatically import segments from Adobe Audience Manager into OneSignal.
* **Cross-channel targeting**: Use imported segments to send push notifications, emails, SMS, and in-app messages via OneSignal.
* **ECID-based user matching**: Ensure users in OneSignal align with Adobe identities for accurate targeting.
* * *
[](https://documentation.onesignal.com/docs/adobe-audience-manager#requirements)
Requirements
-------------------------------------------------------------------------------------------------
* A [paid OneSignal account](https://onesignal.com/pricing)
.
* Users must be matched using Adobe’s Marketing Cloud ID (MID or ECID).
* Ensure the `external_id` field in OneSignal is set to the Adobe ECID.
* If you prefer to use a different identifier, contact OneSignal Support.
* * *
[](https://documentation.onesignal.com/docs/adobe-audience-manager#setup)
Setup
-----------------------------------------------------------------------------------
###
[](https://documentation.onesignal.com/docs/adobe-audience-manager#connection-parameters)
Connection parameters
You’ll need the Client ID to configure the Adobe Destination:
* Go to your OneSignal Dashboard.
* Navigate to: **Data > Integrations > Adobe**.
* Copy the Client ID displayed there.

Navigate to your Organization
###
[](https://documentation.onesignal.com/docs/adobe-audience-manager#set-up-with-adobe)
Set up with Adobe
Contact your Adobe representative (Adobe consultant or CustomerCare) who will review the integration request and will work with you to activate the OneSignal Destination. You’ll need to provide the following information to the Adobe representative:
* the Client ID
Once the Adobe representative has set up the OneSignal Destination, the segments should start flowing to OneSignal.
###
[](https://documentation.onesignal.com/docs/adobe-audience-manager#optional%3A-configure-segment-friendly-names)
Optional: Configure segment friendly names
By default, each segment synced between OneSignal and Adobe Audience Manager will be identified with a numeric Adobe Audience Manager Segment ID. If you’d like to instead use a “friendly” name to identify the Segment within the OneSignal Dashboard, please follow these steps:
1. Log in to Adobe Audience Manager
2. Follow the path to Audience Data > Segments
3. Select all the segments you wish to add to the OneSignal destination
4. Click “Add To Destination”
5. Select the Destination
6. Click Add To Selected Destination
7. Enter the friendly name for each Segment in the “Destination Value” fields

Map friendly names in Adobe Audience Manager
8. Click Save
9. The Segment “friendly” name has now been mapped to the Segment and the destination
* * *
Need help?Chat with our Support team or email `support@onesignal.com`Please include:
* Details of the issue you’re experiencing and steps to reproduce if available
* Your OneSignal App ID
* The External ID or Subscription ID if applicable
* The URL to the message you tested in the OneSignal Dashboard if applicable
* Any relevant [logs or error messages](https://documentation.onesignal.com/docs/capturing-a-debug-log)
We’re happy to help!
* * *
[Segment (Twilio)](https://documentation.onesignal.com/docs/segment-onesignal-integration)
[AlloyDB](https://documentation.onesignal.com/docs/alloydb)
Assistant
Responses are generated using AI and may contain mistakes.
---
# iOS: App Clip Support - OneSignal
[OneSignal home page](https://documentation.onesignal.com/)
Search...
⌘K
Search...
Navigation
Mobile SDK reference
iOS: App Clip Support
[Home](https://documentation.onesignal.com/docs/home)
[User Guides](https://documentation.onesignal.com/docs/quickstart-guide)
[Developer Guides](https://documentation.onesignal.com/docs/developers)
[Tutorials](https://documentation.onesignal.com/docs/tutorials)
[API Reference](https://documentation.onesignal.com/reference/rest-api-overview)
[Release Notes](https://documentation.onesignal.com/release-notes/changelog)
On this page
* [OneSignal support for App Clips](https://documentation.onesignal.com/docs/app-clip-support#onesignal-support-for-app-clips)
* [Setup](https://documentation.onesignal.com/docs/app-clip-support#setup)
* [1\. Create a new app for your App Clip](https://documentation.onesignal.com/docs/app-clip-support#1-create-a-new-app-for-your-app-clip)
* [2\. Set up OneSignal in your App Clip](https://documentation.onesignal.com/docs/app-clip-support#2-set-up-onesignal-in-your-app-clip)
* [3\. Enable ephemeral push permission](https://documentation.onesignal.com/docs/app-clip-support#3-enable-ephemeral-push-permission)
* [4\. Support advanced App Clip experiences](https://documentation.onesignal.com/docs/app-clip-support#4-support-advanced-app-clip-experiences)
* [App Clip limitations](https://documentation.onesignal.com/docs/app-clip-support#app-clip-limitations)
[](https://documentation.onesignal.com/docs/app-clip-support#onesignal-support-for-app-clips)
OneSignal support for App Clips
---------------------------------------------------------------------------------------------------------------------------------
OneSignal supports sending push notifications to iOS App Clips. Since App Clips have a separate bundle identifier, they require their own push configuration. Follow the steps below to properly configure your App Clip with OneSignal and understand current limitations.
* * *
[](https://documentation.onesignal.com/docs/app-clip-support#setup)
Setup
-----------------------------------------------------------------------------
###
[](https://documentation.onesignal.com/docs/app-clip-support#1-create-a-new-app-for-your-app-clip)
1\. Create a new app for your App Clip
You must create a separate app in the OneSignal Dashboard for your App Clip. This is because:
* App Clips use a different bundle identifier from the main app.
* Apple requires a distinct APNs certificate or Key for each unique bundle ID.
Make sure your App Clip bundle ID has its own APNs authentication configured in Apple Developer Console and linked in OneSignal.
###
[](https://documentation.onesignal.com/docs/app-clip-support#2-set-up-onesignal-in-your-app-clip)
2\. Set up OneSignal in your App Clip
Follow the standard OneSignal [iOS SDK setup guide](https://documentation.onesignal.com/docs/ios-sdk-setup)
, but skip the Notification Service Extension step:
* ✅ Do: Add the OneSignal SDK to your App Clip target.
* ❌ Skip: Notification Service Extension — App Clips do not support this capability.
###
[](https://documentation.onesignal.com/docs/app-clip-support#3-enable-ephemeral-push-permission)
3\. Enable ephemeral push permission
Add the following to your App Clip’s `Info.plist` to automatically enable 8-hour push notification permissions when the App Clip is opened:
Copy
NSAppClip
NSAppClipRequestEphemeralUserNotification

Ephemeral push notification Info.plist setting
This ephemeral permission expires after 8 hours unless the user disables it earlier. You can also request indefinite push permission upon launch, similar to full apps. Refer to [Apple’s documentation](https://developer.apple.com/documentation/appclip/enabling-notifications-in-app-clips)
for full guidance.
###
[](https://documentation.onesignal.com/docs/app-clip-support#4-support-advanced-app-clip-experiences)
4\. Support advanced App Clip experiences
To target specific App Clip experiences with notifications:
1. In the OneSignal Dashboard, open **Settings > iOS platform configuration**.
2. Add a value to the **Target-Content-ID** field. This should be the experience URL you configured in App Store Connect.

Targeting a specific App Clip experience via Target-Content-ID
Learn more in Apple’s guide to [Creating an App Clip](https://developer.apple.com/documentation/app_clips/creating_an_app_clip)
, which covers Associated Domains and Target-Content-ID usage.
* * *
[](https://documentation.onesignal.com/docs/app-clip-support#app-clip-limitations)
App Clip limitations
-----------------------------------------------------------------------------------------------------------
Due to iOS platform restrictions, the following limitations apply to App Clips:
* Ephemeral permission duration: Only lasts 8 hours. To send notifications beyond this, request full push permission.
* No Notification Service Extension support:
* ❌ No rich media (images, videos, etc.)
* ❌ No custom action buttons (only predefined categories allowed)
* Location access is limited:
* App Clips cannot request Always location access.
* They can request When In Use, which expires at 4:00 a.m. the next day.
* * *
[OSNotification payload](https://documentation.onesignal.com/docs/osnotification-payload)
[Update mobile SDKs](https://documentation.onesignal.com/docs/update-mobile-sdk)
Assistant
Responses are generated using AI and may contain mistakes.
---
# Apple App Privacy Requirements - OneSignal
[OneSignal home page](https://documentation.onesignal.com/)
Search...
⌘K
Search...
Navigation
Data privacy & regulatory compliance
Apple App Privacy Requirements
[Home](https://documentation.onesignal.com/docs/home)
[User Guides](https://documentation.onesignal.com/docs/quickstart-guide)
[Developer Guides](https://documentation.onesignal.com/docs/developers)
[Tutorials](https://documentation.onesignal.com/docs/tutorials)
[API Reference](https://documentation.onesignal.com/reference/rest-api-overview)
[Release Notes](https://documentation.onesignal.com/release-notes/changelog)
On this page
* [Data types and their relevance to OneSignal](https://documentation.onesignal.com/docs/apple-app-privacy-requirements#data-types-and-their-relevance-to-onesignal)
* [Required data disclosures in App Store Connect](https://documentation.onesignal.com/docs/apple-app-privacy-requirements#required-data-disclosures-in-app-store-connect)
* [Type: Purchases](https://documentation.onesignal.com/docs/apple-app-privacy-requirements#type%3A-purchases)
* [Purchase History](https://documentation.onesignal.com/docs/apple-app-privacy-requirements#purchase-history)
* [Linked to user identity?](https://documentation.onesignal.com/docs/apple-app-privacy-requirements#linked-to-user-identity%3F)
* [Used for tracking?](https://documentation.onesignal.com/docs/apple-app-privacy-requirements#used-for-tracking%3F)
* [Type: Usage Data – Product Interaction](https://documentation.onesignal.com/docs/apple-app-privacy-requirements#type%3A-usage-data-%E2%80%93-product-interaction)
* [Product Interaction](https://documentation.onesignal.com/docs/apple-app-privacy-requirements#product-interaction)
* [Linked to user identity?](https://documentation.onesignal.com/docs/apple-app-privacy-requirements#linked-to-user-identity%3F-2)
* [Used for tracking?](https://documentation.onesignal.com/docs/apple-app-privacy-requirements#used-for-tracking%3F-2)
* [Final review](https://documentation.onesignal.com/docs/apple-app-privacy-requirements#final-review)
* [Ongoing compliance](https://documentation.onesignal.com/docs/apple-app-privacy-requirements#ongoing-compliance)
Starting December 8, 2020, Apple requires a [privacy disclosure for all new apps and app updates](https://developer.apple.com/app-store/app-privacy-details)
. You must complete the privacy questionnaire in the App Privacy section of [App Store Connect](https://appstoreconnect.apple.com/)
. Apple’s official instructions are [available here](https://help.apple.com/app-store-connect/#/dev1b4647c5b)
. As OneSignal is a third-party service, it is your responsibility to accurately disclose what data you collect and how it’s used through OneSignal. By default, OneSignal collects select **in-app purchase data (Consumable)** and **usage data** such as session activity and notification clicks. If you collect additional information via **Data Tags**, **Outcomes**, or **custom integrations**, you must disclose that as well.
[](https://documentation.onesignal.com/docs/apple-app-privacy-requirements#data-types-and-their-relevance-to-onesignal)
Data types and their relevance to OneSignal
-----------------------------------------------------------------------------------------------------------------------------------------------------------------------
Use the following table to determine which data types you must disclose when using OneSignal: ✅ = Required when using OneSignal 💡 = May be required, depending on configuration ❌ = Not required when using OneSignal
| Data Type | Required? |
| --- | --- |
| **Contact Info** | 💡 If you collect personal identifiers (e.g., name, email) using Data Tags or Outcomes |
| **Health & Fitness** | 💡 If you collect health data via custom tags or Outcomes |
| **Financial Info** | 💡 If you collect financial data through tags or Outcomes |
| **Location** | 💡 Only if your app requests and collects location data, and sends it to OneSignal |
| **Sensitive Info** | 💡 If you collect sensitive user data (e.g., race, politics, biometrics) via tags or Outcomes |
| **Contacts** | 💡 If you upload address books or contacts via Data Tags |
| **User Content** | 💡 If you collect user-generated content through OneSignal |
| **Browsing History** | ❌ Not collected |
| **Search History** | ❌ Not collected |
| **Identifiers** | ✅ OneSignal assigns a unique OneSignal ID for each user (not linked to identity by default).
💡 If you link other IDs (e.g., email, alias), disclosure requirements may change. |
| **Purchases** | ✅ Consumable in-app purchase events are collected |
| **Usage Data** | ✅ Session counts, durations, and notification interactions are collected |
| **Diagnostics** | 💡 OneSignal does not collect crash or energy logs, but does collect metadata like device type, OS, network state, etc. |
[](https://documentation.onesignal.com/docs/apple-app-privacy-requirements#required-data-disclosures-in-app-store-connect)
Required data disclosures in App Store Connect
-----------------------------------------------------------------------------------------------------------------------------------------------------------------------------
###
[](https://documentation.onesignal.com/docs/apple-app-privacy-requirements#type%3A-purchases)
Type: Purchases
If your app includes in-app purchases, you must report collection of **‘Purchases’** data.

Select Purchases data type
####
[](https://documentation.onesignal.com/docs/apple-app-privacy-requirements#purchase-history)
Purchase History
Mark ‘Analytics’ as a minimum. This enables OneSignal to provide dashboard features like Segments and Outcomes.
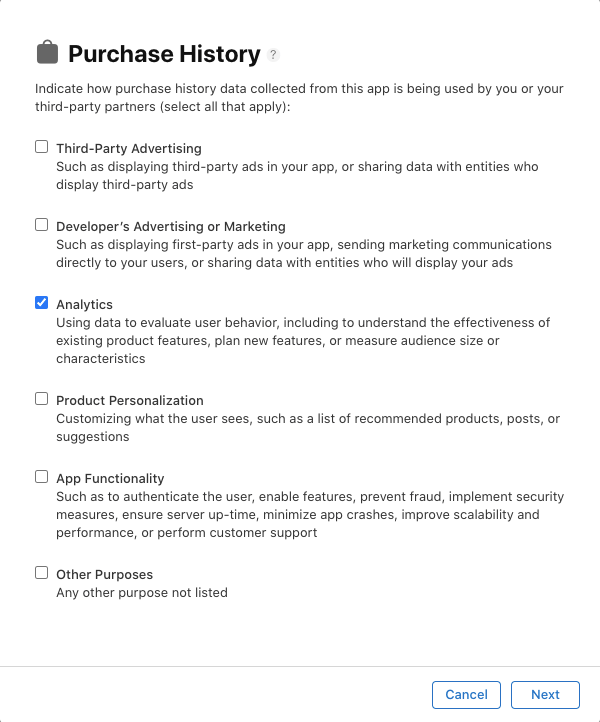
Select usage purpose for Purchases
If you use OneSignal for other purposes (e.g., personalization or app functionality), be sure to select those as well.
####
[](https://documentation.onesignal.com/docs/apple-app-privacy-requirements#linked-to-user-identity%3F)
Linked to user identity?
If you’re only using OneSignal’s anonymous IDs and don’t associate them with identifiable users, you can select **‘No’**. If you link user data (e.g., email or name) via your backend or third-party tools, select **‘Yes’**.
Indicate if purchase history is linked to user identity
####
[](https://documentation.onesignal.com/docs/apple-app-privacy-requirements#used-for-tracking%3F)
Used for tracking?
OneSignal does not track users across other apps. Select ‘No’ unless you use third-party tools or integrations that perform tracking.
Indicate if purchase data is used for tracking
After saving, you should see a summary like:
Privacy summary showing Purchases
###
[](https://documentation.onesignal.com/docs/apple-app-privacy-requirements#type%3A-usage-data-%E2%80%93-product-interaction)
Type: Usage Data – Product Interaction
You must disclose collection of **‘Product Interaction’** under **Usage Data**.
Select Product Interaction data type
####
[](https://documentation.onesignal.com/docs/apple-app-privacy-requirements#product-interaction)
Product Interaction
Select **‘Analytics’** to reflect how OneSignal uses this data in Segments and Outcomes.
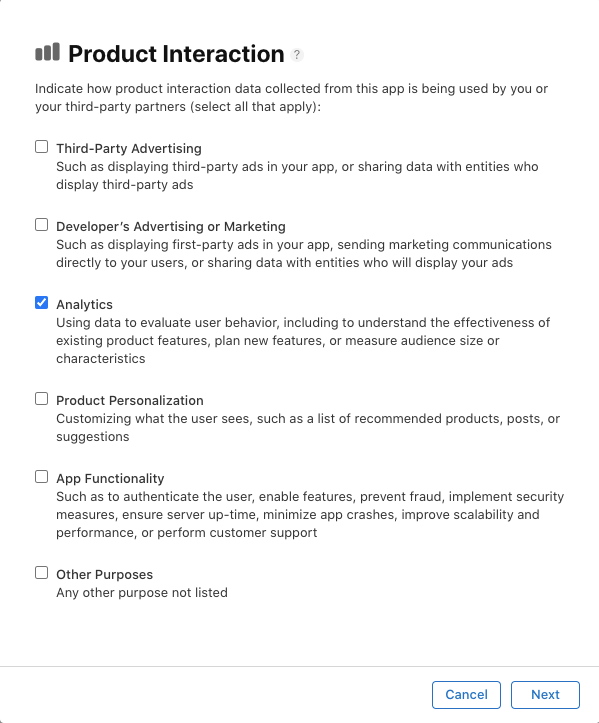
Select usage purpose for Product Interaction
If you use this data for other purposes, such as app functionality or personalization, include those as well.
####
[](https://documentation.onesignal.com/docs/apple-app-privacy-requirements#linked-to-user-identity%3F-2)
Linked to user identity?
Same guidance as with Purchases — if anonymous, select ‘No’. If linked via user ID or contact info, select ‘Yes’.
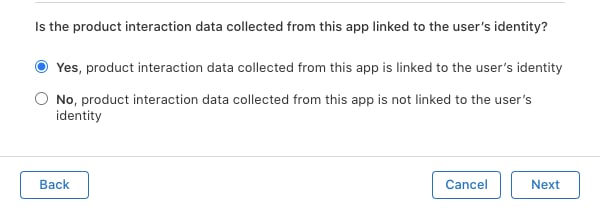
Indicate if product interaction is linked to user identity
####
[](https://documentation.onesignal.com/docs/apple-app-privacy-requirements#used-for-tracking%3F-2)
Used for tracking?
OneSignal does not use this data for tracking across apps. Select ‘No’ unless other SDKs or integrations do.
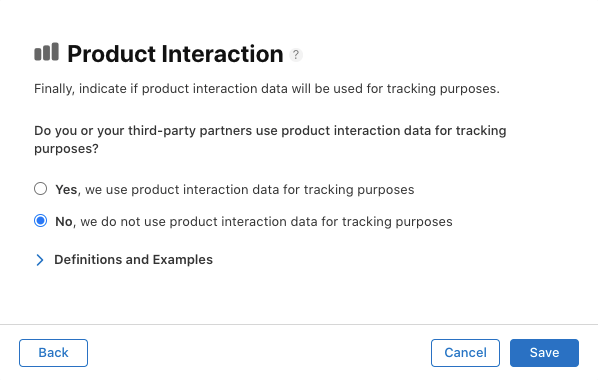
Indicate if product interaction data is used for tracking
You should then see this summary:
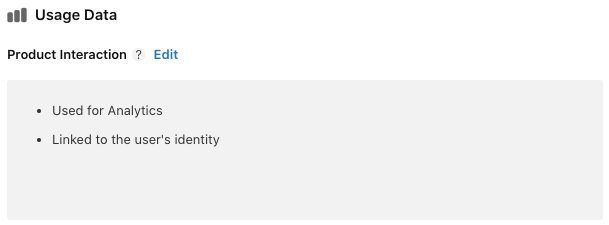
Privacy summary showing Product Interaction
###
[](https://documentation.onesignal.com/docs/apple-app-privacy-requirements#final-review)
Final review
After completing all sections, Apple will show a preview of your app’s privacy disclosure. If you correctly selected Purchases and Usage Data, it should resemble the following:
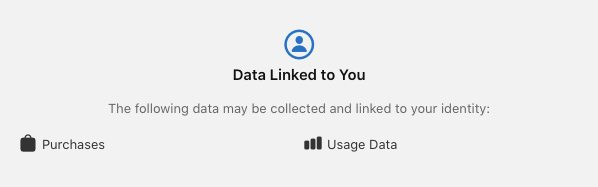
Final privacy details summary in App Store Connect
[](https://documentation.onesignal.com/docs/apple-app-privacy-requirements#ongoing-compliance)
Ongoing compliance
---------------------------------------------------------------------------------------------------------------------
If your data collection practices change — for example, if you add new tags, link identifiers, or update your SDK version — return to App Store Connect and update your disclosures accordingly.
* * *
[SMS Regulatory Compliance](https://documentation.onesignal.com/docs/sms-regulatory-compliance)
[Google Play Data Safety Requirements](https://documentation.onesignal.com/docs/google-play-data-safety-requirements)
Assistant
Responses are generated using AI and may contain mistakes.
---
# Apps, orgs, & accounts - OneSignal
[OneSignal home page](https://documentation.onesignal.com/)
Search...
⌘K
Search...
Navigation
OneSignal dashboard
Apps, orgs, & accounts
[Home](https://documentation.onesignal.com/docs/home)
[User Guides](https://documentation.onesignal.com/docs/quickstart-guide)
[Developer Guides](https://documentation.onesignal.com/docs/developers)
[Tutorials](https://documentation.onesignal.com/docs/tutorials)
[API Reference](https://documentation.onesignal.com/reference/rest-api-overview)
[Release Notes](https://documentation.onesignal.com/release-notes/changelog)
On this page
* [OneSignal account structure](https://documentation.onesignal.com/docs/apps-organizations#onesignal-account-structure)
* [Apps vs. Organizations](https://documentation.onesignal.com/docs/apps-organizations#apps-vs-organizations)
* [Access levels and roles](https://documentation.onesignal.com/docs/apps-organizations#access-levels-and-roles)
* [App-level access](https://documentation.onesignal.com/docs/apps-organizations#app-level-access)
* [Organization-level access](https://documentation.onesignal.com/docs/apps-organizations#organization-level-access)
* [User roles](https://documentation.onesignal.com/docs/apps-organizations#user-roles)
* [Managing your user account](https://documentation.onesignal.com/docs/apps-organizations#managing-your-user-account)
* [Reset password or email](https://documentation.onesignal.com/docs/apps-organizations#reset-password-or-email)
* [Delete your OneSignal account](https://documentation.onesignal.com/docs/apps-organizations#delete-your-onesignal-account)
* [Manage apps](https://documentation.onesignal.com/docs/apps-organizations#manage-apps)
* [Manage organizations](https://documentation.onesignal.com/docs/apps-organizations#manage-organizations)
* [Add or move apps between organizations](https://documentation.onesignal.com/docs/apps-organizations#add-or-move-apps-between-organizations)
* [FAQ](https://documentation.onesignal.com/docs/apps-organizations#faq)
* [Why do I see limitations on a paid plan?](https://documentation.onesignal.com/docs/apps-organizations#why-do-i-see-limitations-on-a-paid-plan%3F)
* [What are the best practices for agencies?](https://documentation.onesignal.com/docs/apps-organizations#what-are-the-best-practices-for-agencies%3F)
When you sign up at [OneSignal.com](https://onesignal.com/)
, a user account is created and tied to your email address. With your account, you can create, manage, or be invited to multiple **Apps** and **Organizations**.
If your company already has a OneSignal App or Organization, email the account admin to request an invite. Share the [Manage Team Members](https://documentation.onesignal.com/docs/manage-team-members)
guide to help them give you access faster 😉.
* * *
[](https://documentation.onesignal.com/docs/apps-organizations#onesignal-account-structure)
OneSignal account structure
---------------------------------------------------------------------------------------------------------------------------
###
[](https://documentation.onesignal.com/docs/apps-organizations#apps-vs-organizations)
Apps vs. Organizations
* A **OneSignal App** holds user and messaging data for a single project, across all platforms (web, iOS, Android, email, etc.). Each app exists within a single Organization.
* A **OneSignal Organization** is a container for managing multiple apps, billing, and team permissions.
You can have:
* Unlimited apps (free to create)
* Multiple organizations (free or paid)
* Apps for separate environments (e.g., dev, staging, production)
* Different access levels per app or organization
* * *
[](https://documentation.onesignal.com/docs/apps-organizations#access-levels-and-roles)
Access levels and roles
-------------------------------------------------------------------------------------------------------------------
OneSignal supports two levels of access:
###
[](https://documentation.onesignal.com/docs/apps-organizations#app-level-access)
App-level access
* Access to only the specific app(s) a user is invited to.
* Cannot view billing or upgrade plan settings.
###
[](https://documentation.onesignal.com/docs/apps-organizations#organization-level-access)
Organization-level access
* Access to all apps within the organization.
* Only **Admin** roles can manage billing and upgrades.
###
[](https://documentation.onesignal.com/docs/apps-organizations#user-roles)
User roles
Access can be further scoped by roles:
| Role | Description |
| --- | --- |
| Admin | Full access, including settings, billing, and user management. |
| Editor | Can create and send messages but cannot manage settings or billing. |
| Viewer | Read-only access for analyzing performance and message stats. |
For more details, see [Manage Team Members](https://documentation.onesignal.com/docs/manage-team-members)
.
* * *
[](https://documentation.onesignal.com/docs/apps-organizations#managing-your-user-account)
Managing your user account
-------------------------------------------------------------------------------------------------------------------------
###
[](https://documentation.onesignal.com/docs/apps-organizations#reset-password-or-email)
Reset password or email
1. Navigate to [Account Management](https://dashboard.onesignal.com/profile)
or click **your email drop-down > Manage Account**.
2. Add your:
* New Password and Confirm Password.
* New Email.
3. Click **Submit**.

Reset account password
###
[](https://documentation.onesignal.com/docs/apps-organizations#delete-your-onesignal-account)
Delete your OneSignal account
Deleting your user account only removes your email from OneSignal. It does not delete apps or downgrade paid plans. Be sure to [Downgrade your plan](https://documentation.onesignal.com/docs/billing-faq)
if needed.
To delete:
1. Navigate to [Account Management](https://dashboard.onesignal.com/profile)
or click **your email drop-down > Manage Account**.
2. Scroll down to **Delete Account**
3. If you don’t have the option to delete your account, contact `ar@onesignal.com`.
* * *
[](https://documentation.onesignal.com/docs/apps-organizations#manage-apps)
Manage apps
-------------------------------------------------------------------------------------------
* **Create an app**:
* Log in at onesignal.com and click **New App/Website**.
* Or use the [Create an App API](https://documentation.onesignal.com/reference/create-an-app)
* **Rename an app**:
* From the dashboard **All Apps** page, click **Options > Rename** next to the app.
* Or use the [Update an App API](https://documentation.onesignal.com/reference/update-an-app)
* **Find App ID**:
* See [Keys & IDs](https://documentation.onesignal.com/docs/keys-and-ids)
.
* **Delete an app**:
* You can delete apps within Free organizations and under 5,000 total subscriptions from the **All Apps** page via **Options > Delete**.
* For larger apps, contact `support@onesignal.com`.
* * *
[](https://documentation.onesignal.com/docs/apps-organizations#manage-organizations)
Manage organizations
-------------------------------------------------------------------------------------------------------------
* **Create an organization**:
* Visit the **Organizations** page or click **New Organization** in the dashboard (no paid plan required to create).
* Or use the [Create an App API](https://documentation.onesignal.com/reference/create-an-app)
* **Rename an organization**:
* In **Organizations**, click **Options > Rename** next to the org.
* **Find Org ID**:
* It’s the UUID in the URL when selecting your organization. Example: `https://dashboard.onesignal.com/organizations/THE_ORG_ID/apps`
* **Delete an organization**:
* Go to **Organizations**, click **Options > Remove**.
* You must move the apps out of the organization before deleting it.
* If you need assistance, contact `support@onesignal.com`.
###
[](https://documentation.onesignal.com/docs/apps-organizations#add-or-move-apps-between-organizations)
Add or move apps between organizations
* **Add app to organization**:
* Go to **Organizations > select your Organization > Move Apps Into Organization**.
* Select your apps and click **Move Apps**.
* You need:
* Admin access to the Organization
* Admin access to the App
* The apps to be in a Free Organization.
If you need assistance, email `support@onesignal.com` with:
* The App ID(s) you want to move
* The Org ID to move them to.
* You must contact Support from an email with Admin access to the Apps and Organization.
* * *
[](https://documentation.onesignal.com/docs/apps-organizations#faq)
FAQ
---------------------------------------------------------------------------
###
[](https://documentation.onesignal.com/docs/apps-organizations#why-do-i-see-limitations-on-a-paid-plan%3F)
Why do I see limitations on a paid plan?
Your app might not be assigned to the correct paid Organization. Follow [Add or move apps between organizations](https://documentation.onesignal.com/docs/apps-organizations#add-or-move-apps-between-organizations)
to add your app to the paid org. If you need assistance, email `support@onesignal.com` with:
* The App ID(s) you want to move
* The Org ID to move them to.
* You must contact Support from an email with Admin access to the Apps and Organization.
###
[](https://documentation.onesignal.com/docs/apps-organizations#what-are-the-best-practices-for-agencies%3F)
What are the best practices for agencies?
Agencies can manage client apps using one of two approaches:
1. **Centralized billing** Use a single Organization to manage and pay for all client apps.
2. **Client-managed billing** Each client sets up their own Organization and handles their own billing.
You can mix paid and free apps by assigning them to the appropriate Organization. Need help? [Contact our Sales Team](https://onesignal.com/contact)
.
* * *
[Quickstart guide](https://documentation.onesignal.com/docs/quickstart-guide)
[Team Members](https://documentation.onesignal.com/docs/manage-team-members)
Assistant
Responses are generated using AI and may contain mistakes.
---
# Amazon Athena - OneSignal
[OneSignal home page](https://documentation.onesignal.com/)
Search...
⌘K
Search...
Navigation
OneSignal as destination
Amazon Athena
[Home](https://documentation.onesignal.com/docs/home)
[User Guides](https://documentation.onesignal.com/docs/quickstart-guide)
[Developer Guides](https://documentation.onesignal.com/docs/developers)
[Tutorials](https://documentation.onesignal.com/docs/tutorials)
[API Reference](https://documentation.onesignal.com/reference/rest-api-overview)
[Release Notes](https://documentation.onesignal.com/release-notes/changelog)
On this page
* [Overview](https://documentation.onesignal.com/docs/amazon-athena#overview)
* [Requirements](https://documentation.onesignal.com/docs/amazon-athena#requirements)
* [Amazon Athena](https://documentation.onesignal.com/docs/amazon-athena#amazon-athena)
* [Setup](https://documentation.onesignal.com/docs/amazon-athena#setup)
* [Configure AWS permissions](https://documentation.onesignal.com/docs/amazon-athena#configure-aws-permissions)
* [Configure OneSignal Athena connection](https://documentation.onesignal.com/docs/amazon-athena#configure-onesignal-athena-connection)
* [Alternative: Role-based access](https://documentation.onesignal.com/docs/amazon-athena#alternative%3A-role-based-access)
* [Event Data Mapping](https://documentation.onesignal.com/docs/amazon-athena#event-data-mapping)
* [Event data mapping](https://documentation.onesignal.com/docs/amazon-athena#event-data-mapping-2)
* [Limitations](https://documentation.onesignal.com/docs/amazon-athena#limitations)
* [FAQ](https://documentation.onesignal.com/docs/amazon-athena#faq)
* [What happens if my Athena queries fail?](https://documentation.onesignal.com/docs/amazon-athena#what-happens-if-my-athena-queries-fail%3F)
* [How often does OneSignal sync events?](https://documentation.onesignal.com/docs/amazon-athena#how-often-does-onesignal-sync-events%3F)
* [Need help?](https://documentation.onesignal.com/docs/amazon-athena#need-help%3F)
[](https://documentation.onesignal.com/docs/amazon-athena#overview)
Overview
--------------------------------------------------------------------------------
The OneSignal + Amazon Athena integration enables automatic syncing of custom events from your Athena data lake directly to OneSignal’s Custom Events API. This allows you to trigger automated Journeys and personalized messaging campaigns based on real user behavior stored in your AWS data infrastructure. You can sync events like purchases, product views, subscription changes, or any custom user actions to automatically trigger onboarding sequences, re-engagement campaigns, transactional messages, and targeted promotions across push notifications, email, in-app messages, and SMS.
* * *
[](https://documentation.onesignal.com/docs/amazon-athena#requirements)
Requirements
----------------------------------------------------------------------------------------
* Access to Custom Events (currently in beta)
* [Updated Account Plan](https://onesignal.com/pricing)
(not available on free apps).
###
[](https://documentation.onesignal.com/docs/amazon-athena#amazon-athena)
Amazon Athena
* **AWS Account** with Athena access
* **Athena Workgroup** configured (default: “primary”)
* **S3 Query Results Bucket** for Athena query outputs
* **IAM Permissions** for Athena, S3, and AWS Glue access
* **Event data** stored in S3 and cataloged in AWS Glue
* * *
[](https://documentation.onesignal.com/docs/amazon-athena#setup)
Setup
--------------------------------------------------------------------------
###
[](https://documentation.onesignal.com/docs/amazon-athena#configure-aws-permissions)
Configure AWS permissions
OneSignal needs specific permissions to query your event data through Athena. Create an IAM policy with the following permissions:
1
Create IAM policy
Create an IAM policy that includes these permissions:
Copy
{
"Version": "2012-10-17",
"Statement": [\
{\
"Effect": "Allow",\
"Action": [\
"athena:StartQueryExecution",\
"athena:GetQueryExecution",\
"athena:GetQueryResultsStream",\
"athena:GetQueryResults",\
"athena:CreatePreparedStatement",\
"athena:DeletePreparedStatement",\
"glue:GetTable",\
"glue:GetTables",\
"glue:GetDatabase",\
"glue:GetDatabases",\
"s3:PutObject",\
"s3:GetObject",\
"s3:ListBucket",\
"s3:GetBucketLocation"\
],\
"Resource": [\
"arn:aws:glue:::table//*",\
"arn:aws:glue:::database/",\
"arn:aws:glue:::catalog",\
"arn:aws:athena:::workgroup/",\
"arn:aws:s3:::",\
"arn:aws:s3:::/*",\
"arn:aws:s3:::",\
"arn:aws:s3:::/*"\
]\
}\
]
}
Replace the placeholders with your actual AWS region, account ID, database name, workgroup, and bucket names.
2
Create IAM user or role
Create an IAM user for OneSignal and attach the policy created above, or prepare to use role-based access.
3
Note connection details
Collect the following information:
* **AWS Access Key ID** and **Secret Access Key** (if using IAM user)
* **S3 Query Results Bucket** URL
* **AWS Region**
* **Athena Workgroup** (default: “primary”)
###
[](https://documentation.onesignal.com/docs/amazon-athena#configure-onesignal-athena-connection)
Configure OneSignal Athena connection
1
Navigate to integrations
In OneSignal, go to **Data > Integrations** and click **Add Integration**.
2
Select Amazon Athena
Choose **Amazon Athena** from the list of available integrations.
3
Enter connection details
Provide your Athena connection information:
* **AWS Access Key ID**: Your IAM user access key
* **AWS Secret Access Key**: Your IAM user secret key
* **AWS Region**: Your Athena region
* **S3 Query Results Bucket**: URL for query outputs
* **Athena Workgroup**: Your workgroup name
4
Test the connection
Click **Test Connection** to verify OneSignal can access your Athena instance and execute queries.
###
[](https://documentation.onesignal.com/docs/amazon-athena#alternative%3A-role-based-access)
Alternative: Role-based access
For enhanced security, you can use IAM roles instead of access keys:
1
Enable role-based access
In the Athena connection settings, check **Use Role** and leave the access keys blank.
2
Create IAM role
In the AWS Console, create an IAM role with:
* **Trusted Entity**: Another AWS Account
* **Account ID**: `341876425553` (OneSignal’s AWS account)
* **External ID**: The ID shown in OneSignal (appears after initial connection attempt)
* **Permissions**: The IAM policy created above
3
Complete the connection
Enter the Role ARN in OneSignal and test the connection.
* * *
[](https://documentation.onesignal.com/docs/amazon-athena#event-data-mapping)
Event Data Mapping
----------------------------------------------------------------------------------------------------
Once connected, you’ll need to map your Athena tables to OneSignal custom event fields:
1
Select event tables
Choose the tables or views containing your event data that you want to sync to OneSignal.
2
Map required event fields
Map the required fields for custom events:
* **Event Name**: Column containing the event type (e.g., “purchase”, “signup”)
* **User Identifier**: External User ID, Email, or Phone Number column
* **Event Timestamp**: When the event occurred (optional)
3
Map event payload data
Map additional columns to event payload properties:
* Custom event properties (product\_id, price, category, etc.)
* Contextual data (source, campaign, etc.)
* Behavioral metrics (value, quantity, etc.)
4
Configure sync settings
Set your event processing frequency and delivery preferences.
* * *
###
[](https://documentation.onesignal.com/docs/amazon-athena#event-data-mapping-2)
Event data mapping
Map your to OneSignal’s custom events format:
| OneSignal Field | Description | Required | |
| --- | --- | --- | --- |
| `name` | `event_name` | Event identifier | Yes |
| `external_id` | `user_id` | User identifier | Yes |
| `timestamp` | `event_timestamp` | When event occurred | No |
| `properties` | `event_data` | No | |
* * *
[](https://documentation.onesignal.com/docs/amazon-athena#limitations)
Limitations
--------------------------------------------------------------------------------------
* **Query Performance**: Athena charges per query and data scanned - optimize your event tables
* **S3 Dependencies**: Requires properly configured S3 buckets and Glue catalog
* **Data Freshness**: Event sync frequency depends on how often your S3 data is updated
* * *
[](https://documentation.onesignal.com/docs/amazon-athena#faq)
FAQ
----------------------------------------------------------------------
###
[](https://documentation.onesignal.com/docs/amazon-athena#what-happens-if-my-athena-queries-fail%3F)
What happens if my Athena queries fail?
OneSignal will log query errors and retry failed queries. Check your IAM permissions and S3 bucket access if you encounter persistent failures.
###
[](https://documentation.onesignal.com/docs/amazon-athena#how-often-does-onesignal-sync-events%3F)
How often does OneSignal sync events?
OneSignal checks for new events based on your configured sync frequency, with a minimum interval of 15 minutes.
* * *
[](https://documentation.onesignal.com/docs/amazon-athena#need-help%3F)
Need help?
--------------------------------------------------------------------------------------
Contact our support team at `support@onesignal.com` or use the in-app chat for assistance with your Athena integration setup.
[AlloyDB](https://documentation.onesignal.com/docs/alloydb)
[Amazon S3](https://documentation.onesignal.com/docs/s3)
Assistant
Responses are generated using AI and may contain mistakes.
---
# Disabled Apps & Orgs - OneSignal
[OneSignal home page](https://documentation.onesignal.com/)
Search...
⌘K
Search...
Navigation
OneSignal dashboard
Disabled Apps & Orgs
[Home](https://documentation.onesignal.com/docs/home)
[User Guides](https://documentation.onesignal.com/docs/quickstart-guide)
[Developer Guides](https://documentation.onesignal.com/docs/developers)
[Tutorials](https://documentation.onesignal.com/docs/tutorials)
[API Reference](https://documentation.onesignal.com/reference/rest-api-overview)
[Release Notes](https://documentation.onesignal.com/release-notes/changelog)
On this page
* [Overview](https://documentation.onesignal.com/docs/disabled-apps#overview)
* [Common reasons for being disabled](https://documentation.onesignal.com/docs/disabled-apps#common-reasons-for-being-disabled)
* [API rate limits](https://documentation.onesignal.com/docs/disabled-apps#api-rate-limits)
* [Overdue invoice](https://documentation.onesignal.com/docs/disabled-apps#overdue-invoice)
* [Email violations](https://documentation.onesignal.com/docs/disabled-apps#email-violations)
* [Where to go next](https://documentation.onesignal.com/docs/disabled-apps#where-to-go-next)
[](https://documentation.onesignal.com/docs/disabled-apps#overview)
Overview
--------------------------------------------------------------------------------
This guide explains why your OneSignal app or organization may be disabled and how to resolve these issues.
* To manually disable your app, see [Disabling your OneSignal App](https://documentation.onesignal.com/docs/keys-and-ids#disabling-your-app)
.
* To downgrade your organization to a free plan, refer to the [Billing FAQ](https://documentation.onesignal.com/docs/billing-faq#downgrading-paid-plans-to-free)
.
When an app is disabled:
* You cannot send messages, delete data, or export data.
When an organization is disabled:
* All apps within the organization are also disabled.
* Apps cannot be removed from the organization.
[](https://documentation.onesignal.com/docs/disabled-apps#common-reasons-for-being-disabled)
Common reasons for being disabled
----------------------------------------------------------------------------------------------------------------------------------
###
[](https://documentation.onesignal.com/docs/disabled-apps#api-rate-limits)
API rate limits
OneSignal enforces generous API rate limits to ensure responsible messaging practices. A key restriction is:
> You cannot send more than **10x your subscriber count in messages within a 15-minute window**.
**Example**: If you have 1,000 subscribers, you may send up to 10,000 messages within 15 minutes. **What happens**: If this threshold is exceeded:
* Your app will be **automatically disabled**.
* You can **re-enable it in the dashboard**.
If you repeatedly exceed this limit, contact [support@onesignal.com](mailto:support@onesignal.com)
with justification for needing a higher limit. See our [Rate Limits guide](https://documentation.onesignal.com/reference/rate-limits)
for more details.
###
[](https://documentation.onesignal.com/docs/disabled-apps#overdue-invoice)
Overdue invoice
If you’re on a paid plan and fail to:
* Cancel your plan,
* Or pay an outstanding invoice,
Your app will be disabled **two weeks** after the invoice date. **Resolution**:
* Make the outstanding payment to restore access.
* If you can’t access billing, contact your **organization admin** or email [support@onesignal.com](mailto:support@onesignal.com)
.
More info: [Billing FAQ](https://documentation.onesignal.com/docs/billing-faq)
###
[](https://documentation.onesignal.com/docs/disabled-apps#email-violations)
Email violations
Your app may be disabled for email sends if you violate the [Acceptable Use Policy](https://onesignal.com/aup)
, especially by:
* Generating excessive bounce rates
* Causing high user complaint rates
**Next steps**:
1. Review and improve your email practices using [How to Lower Email Bounce and Complaint Rates](https://documentation.onesignal.com/docs/email-deliverability)
.
2. When ready, contact [support@onesignal.com](mailto:support@onesignal.com)
with:
* Actions taken to reduce bounces/complaints
* Your email use case(s)
* Your disabled **OneSignal App ID**
[](https://documentation.onesignal.com/docs/disabled-apps#where-to-go-next)
Where to go next
------------------------------------------------------------------------------------------------
If you’re unsure why your app or organization was disabled or need further help, email [support@onesignal.com](mailto:support@onesignal.com)
with:
* A detailed explanation of what happened prior to the disablement
* The OneSignal **App ID**, found under [Keys & IDs](https://documentation.onesignal.com/docs/keys-and-ids)
We’ll assist you as soon as possible.
* * *
* * *
[Usage & billing](https://documentation.onesignal.com/docs/billing-faq)
[Migrating to OneSignal](https://documentation.onesignal.com/docs/migrating-to-onesignal)
Assistant
Responses are generated using AI and may contain mistakes.
---
# Start Live Activity - OneSignal
[OneSignal home page](https://documentation.onesignal.com/)
Search...
⌘K
Search...
Navigation
Live Activities
Start Live Activity
[Home](https://documentation.onesignal.com/docs/home)
[User Guides](https://documentation.onesignal.com/docs/quickstart-guide)
[Developer Guides](https://documentation.onesignal.com/docs/developers)
[Tutorials](https://documentation.onesignal.com/docs/tutorials)
[API Reference](https://documentation.onesignal.com/reference/rest-api-overview)
[Release Notes](https://documentation.onesignal.com/release-notes/changelog)
Start Live Activity
cURL
Copy
curl --request POST \
--url https://api.onesignal.com/apps/{app_id}/activities/activity/{activity_type} \
--header 'Authorization: ' \
--header 'Content-Type: application/json' \
--data '{
"include_aliases": {
"external_id": [\
""\
]
},
"include_subscription_ids": [\
""\
],
"included_segments": [\
""\
],
"excluded_segments": [\
""\
],
"filters": [\
{\
"field": "first_session",\
"key": "",\
"relation": ">",\
"value": "1"\
}\
],
"event": "start",
"activity_id": "",
"event_attributes": {},
"event_updates": {},
"name": "",
"contents": {
"en": ""
},
"headings": {
"en": ""
},
"stale_date": 123,
"priority": 5,
"ios_relevance_score": 123,
"idempotency_key": ""
}'
201
400
Copy
{
"notification_id": ""
}
POST
/
apps
/
{app\_id}
/
activities
/
activity
/
{activity\_type}
Try it
Start Live Activity
cURL
Copy
curl --request POST \
--url https://api.onesignal.com/apps/{app_id}/activities/activity/{activity_type} \
--header 'Authorization: ' \
--header 'Content-Type: application/json' \
--data '{
"include_aliases": {
"external_id": [\
""\
]
},
"include_subscription_ids": [\
""\
],
"included_segments": [\
""\
],
"excluded_segments": [\
""\
],
"filters": [\
{\
"field": "first_session",\
"key": "",\
"relation": ">",\
"value": "1"\
}\
],
"event": "start",
"activity_id": "",
"event_attributes": {},
"event_updates": {},
"name": "",
"contents": {
"en": ""
},
"headings": {
"en": ""
},
"stale_date": 123,
"priority": 5,
"ios_relevance_score": 123,
"idempotency_key": ""
}'
201
400
Copy
{
"notification_id": ""
}
[](https://documentation.onesignal.com/reference/start-live-activity#overview)
Overview
-------------------------------------------------------------------------------------------
Remotely start an iOS Live Activity using OneSignal’s REST API. Live Activities provide real-time updates directly on the lock screen and Dynamic Island (on supported devices), enhancing user engagement with ongoing events like sports games, deliveries, or countdowns.
* * *
[](https://documentation.onesignal.com/reference/start-live-activity#how-to-use-this-api)
How to use this API
-----------------------------------------------------------------------------------------------------------------
1. Define a Live Activity in your app. See [Live Activities developer setup](https://documentation.onesignal.com/docs/live-activities-developer-setup)
to get started.
2. Use the `activity_type` parameter to specify the type of the Live Activity UI to use.
3. Select your target audience to receive the Live Activity. Target all or individual users.
4. Generate a unique `activity_id` to track and manage your Live Activity.
5. Use the `event_attributes` parameter to initialize the Live Activity with static data.
6. Use the `event_updates` parameter to update the Live Activity with dynamic content.
###
[](https://documentation.onesignal.com/reference/start-live-activity#select-your-target-audience)
Select your target audience
Before sending a message, you need to determine who should receive it. OneSignal offers three targeting options:
1. **Aliases & Subscription IDs**: Send messages to specific users using unique identifiers such as External ID (recommended), OneSignal ID, custom alias, or subscription ID.
2. **Segments**: Target predefined user groups based on attributes and behavior.
3. **Filters**: Create custom targeting rules using user properties, such as tags, location, or activity.
You can only use one targeting method per message. For example, you cannot combine alias-based targeting with filters in the same request.See [Select your target audience](https://documentation.onesignal.com/reference/create-message#select-your-target-audience)
for more information.
###
[](https://documentation.onesignal.com/reference/start-live-activity#set-a-unique-activity-id)
Set a unique `activity_id`
* Set a unique `activity_id` to track and manage the Live Activity. This value is crucial for maintaining a consistent reference to the Live Activity across different devices and sessions. Consider using a UUID, CUID, or NanoID for this parameter.
* Ensure that the `activity_id` is unique and consistently used for each Live Activity to avoid conflicts and ensure accurate tracking.
Example
Copy
{
"activity_id": "217aae2b-42ee-4097-bc3f-b7a6e9d15b9b",
...
}
See [Live Activities developer setup](https://documentation.onesignal.com/docs/live-activities-developer-setup)
guide for more information.
###
[](https://documentation.onesignal.com/reference/start-live-activity#set-event-attributes-to-initialize-the-live-activity)
Set `event_attributes` to initialize the Live Activity
Set default/static data to display in the Live Activity upon start.
Example
Copy
{
"event_attributes": {
"awayTeam": "Away Team Name",
"homeTeam": "Home Team Name"
}
}
###
[](https://documentation.onesignal.com/reference/start-live-activity#set-event-updates-for-dynamic-content)
Set `event_updates` for dynamic content
The content used to update a running Live Activity. The object must conform to the `ContentState` interface defined within your app’s Live Activity. See [Live Activities developer setup](https://documentation.onesignal.com/docs/live-activities-developer-setup)
. Ensure that the `event_updates` object matches the [`ContentState`](https://developer.apple.com/documentation/activitykit/activityattributes/contentstate#)
interface exactly as defined in your Live Activity implementation. Inconsistencies can cause Live Activities to fail to display.
Example
Copy
{
"event_updates": {
"quarter": 1,
"homeScore": 70,
"awayScore": 78,
"inTimeout": false
}
}
* * *
#### Headers
[](https://documentation.onesignal.com/reference/start-live-activity#parameter-authorization)
Authorization
string
default:Key YOUR\_APP\_API\_KEY
required
Your App API key with prefix `Key`. See [Keys & IDs](https://documentation.onesignal.com/docs/keys-and-ids)
.
#### Path Parameters
[](https://documentation.onesignal.com/reference/start-live-activity#parameter-app-id)
app\_id
string
required
Your OneSignal App ID in UUID v4 format. See [Keys & IDs](https://documentation.onesignal.com/docs/keys-and-ids)
.
[](https://documentation.onesignal.com/reference/start-live-activity#parameter-activity-type)
activity\_type
string
required
The name of the Live Activity defined in your app. This should match the `your-nameAttributes` struct used in your app code. See [Live Activities developer setup](https://documentation.onesignal.com/docs/live-activities-developer-setup)
. Example: If your app defines a Live Activity as `OneSignalWidgetAttributes`, then `activity_type` should be `OneSignalWidgetAttributes`.
#### Body
application/json
[](https://documentation.onesignal.com/reference/start-live-activity#body-event)
event
enum
default:start
required
The action to perform on the Live Activity. This request only supports `start`.
Available options:
`start`
[](https://documentation.onesignal.com/reference/start-live-activity#body-activity-id)
activity\_id
string
required
An identifier you set when starting the Live Activity to uniquely identify it and associated devices with the event. Save this value because it is required for the [Update Live Activity](https://documentation.onesignal.com/reference/update-live-activity)
API. Consider using a UUID, CUID, or NanoID for this parameter.
[](https://documentation.onesignal.com/reference/start-live-activity#body-event-attributes)
event\_attributes
object
required
The static data to initialize the Live Activity. See [Live Activities developer setup](https://documentation.onesignal.com/docs/live-activities-developer-setup)
.
[](https://documentation.onesignal.com/reference/start-live-activity#body-event-updates)
event\_updates
object
required
The content used to update a running Live Activity. The object must conform to the `ContentState` interface defined within your app's Live Activity. See [Live Activities developer setup](https://documentation.onesignal.com/docs/live-activities-developer-setup)
.
[](https://documentation.onesignal.com/reference/start-live-activity#body-name)
name
string
required
An internal name you set to help organize and track messages. Not shown to recipients. Maximum 128 characters.
[](https://documentation.onesignal.com/reference/start-live-activity#body-contents)
contents
object
required
The push message body with [language-specific values](https://documentation.onesignal.com/docs/multi-language-messaging#supported-languages)
.
Show child attributes
[](https://documentation.onesignal.com/reference/start-live-activity#body-headings)
headings
object
required
The push title with [language-specific values](https://documentation.onesignal.com/docs/multi-language-messaging#supported-languages)
.
Show child attributes
[](https://documentation.onesignal.com/reference/start-live-activity#body-include-aliases)
include\_aliases
object
Target up to 20,000 users by their `external_id`, `onesignal_id`, or your own custom alias. Use with `target_channel` to control the delivery channel. Not compatible with any other targeting parameters like `filters`, `include_subscription_ids`, `included_segments`, or `excluded_segments`. See [Sending messages with the OneSignal API](https://documentation.onesignal.com/reference/create-message#include-aliases)
.
Show child attributes
[](https://documentation.onesignal.com/reference/start-live-activity#body-include-subscription-ids)
include\_subscription\_ids
string\[\]
Target users' specific [subscriptions](https://documentation.onesignal.com/docs/subscriptions)
by ID. Include up to 20,000 `subscription_id` per API call. Not compatible with any other targeting parameters like `filters`, `include_aliases`, `included_segments`, or `excluded_segments`. See [Sending messages with the OneSignal API](https://documentation.onesignal.com/reference/create-message)
.
[](https://documentation.onesignal.com/reference/start-live-activity#body-included-segments)
included\_segments
string\[\]
Target predefined [Segments](https://documentation.onesignal.com/docs/segmentation)
. Users that are in multiple segments will only be sent the message once. Can be combined with `excluded_segments`. Not compatible with any other targeting parameters like `filters`, `include_aliases`, or `include_subscription_ids`. See [Sending messages with the OneSignal API](https://documentation.onesignal.com/reference/create-message)
.
[](https://documentation.onesignal.com/reference/start-live-activity#body-excluded-segments)
excluded\_segments
string\[\]
Exclude users in predefined [Segments](https://documentation.onesignal.com/docs/segmentation)
. Overrides membership in any segment specified in the `included_segments`. Not compatible with any other targeting parameters like `filters`, `include_aliases`, or `include_subscription_ids`. See [Sending messages with the OneSignal API](https://documentation.onesignal.com/reference/create-message)
.
[](https://documentation.onesignal.com/reference/start-live-activity#body-filters)
filters
object\[\]
Dynamically target users based on properties like tags, activity, or location using flexible AND/OR logic. Limited to 200 total entries, including fields and `OR` operators. Not compatible with other targeting parameters like `include_aliases`, `include_subscription_ids`, `included_segments`, or `excluded_segments`. See [Sending messages with the OneSignal API](https://documentation.onesignal.com/reference/create-message#filters)
.
Show child attributes
[](https://documentation.onesignal.com/reference/start-live-activity#body-stale-date)
stale\_date
integer
A Unix timestamp (in seconds) that indicates the date the Live Activity is considered outdated. Once this time is reached, the system updates the Live Activity to [`ActivityState.stale`](https://developer.apple.com/documentation/activitykit/activitystate/stale)
at which point you can update the Live Activity to indicate that its content is out of date.
[](https://documentation.onesignal.com/reference/start-live-activity#body-priority)
priority
enum
Set the priority based on the urgency of the message. `10` - High priority. `5` - Normal priority. Apple allows a certain budget of High priority updates per hour. Exceeding the budget may throttle your messages. Apple recommends choosing a mix of priority `5` and `10` to prevent throttling. If your app needs more frequent updates, use `NSSupportsLiveActivitiesFrequentUpdates` entry as directed in [Apple's Developer Docs](https://developer.apple.com/documentation/activitykit/starting-and-updating-live-activities-with-activitykit-push-notifications#Determine-the-update-frequency)
.
Available options:
`5`,
`10`
[](https://documentation.onesignal.com/reference/start-live-activity#body-ios-relevance-score)
ios\_relevance\_score
number
A value between `0` and `1`. If you start more than one Live Activity for your app, the Live Activity with the highest relevance score appears in the Dynamic Island. If Live Activities have the same relevance score, the system displays the Live Activity that started first. Additionally, the Relevance Score determines the order of your Live Activities on the Lock Screen.
[](https://documentation.onesignal.com/reference/start-live-activity#body-idempotency-key)
idempotency\_key
string
A unique identifier used to prevent duplicate messages from repeat API calls. See [Idempotent notification requests](https://documentation.onesignal.com/reference/idempotent-notification-requests)
. Must be a v3 or v4 UUID. Valid for 30 days. Previously called `external_id`.
#### Response
201
application/json
201
[](https://documentation.onesignal.com/reference/start-live-activity#response-notification-id)
notification\_id
string
The ID of the Live Activity that was created in UUID v4 format.
[Message history](https://documentation.onesignal.com/reference/message-history)
[Update Live Activity](https://documentation.onesignal.com/reference/update-live-activity-api)
Assistant
Responses are generated using AI and may contain mistakes.
---
# View templates - OneSignal
[OneSignal home page](https://documentation.onesignal.com/)
Search...
⌘K
Search...
Navigation
Templates
View templates
[Home](https://documentation.onesignal.com/docs/home)
[User Guides](https://documentation.onesignal.com/docs/quickstart-guide)
[Developer Guides](https://documentation.onesignal.com/docs/developers)
[Tutorials](https://documentation.onesignal.com/docs/tutorials)
[API Reference](https://documentation.onesignal.com/reference/rest-api-overview)
[Release Notes](https://documentation.onesignal.com/release-notes/changelog)
View templates
cURL
Copy
curl --request GET \
--url 'https://api.onesignal.com/templates?app_id={app_id}&limit={limit}&offset={offset}' \
--header 'Authorization: ' \
--header 'Content-Type: '
200
Result
Copy
"{\n \"limit\": 50,\n \"offset\": 0,\n \"templates\": [\n {\n \"id\": \"9e778dd4-6453-40d7-888d-9d9f327b9b66\",\n \"name\": \"OneSignal Push: New Feature Announcement (Template)\",\n \"created_at\": \"2021-07-23T18:02:23.956Z\",\n \"updated_at\": \"2021-07-23T18:02:23.956Z\"\n },\n {\n \"id\": \"806b4356-67af-4d33-8133-75e502f6d3b7\",\n \"name\": \"OneSignal Push: User Action Notification (Template)\",\n \"created_at\": \"2021-07-23T18:02:23.963Z\",\n \"updated_at\": \"2021-07-23T18:02:23.963Z\"\n },\n {\n \"id\": \"172f55b5-df07-49ae-8a8d-67037679487f\",\n \"name\": \"OneSignal Push: Rating (Template)\",\n \"created_at\": \"2021-07-23T18:02:23.984Z\",\n \"updated_at\": \"2021-07-23T18:02:23.984Z\"\n }\n ],\n \"total_count\": 3\n}"
GET
/
templates?app\_id=
{app\_id}
&limit=
{limit}
&offset=
{offset}
Try it
View templates
cURL
Copy
curl --request GET \
--url 'https://api.onesignal.com/templates?app_id={app_id}&limit={limit}&offset={offset}' \
--header 'Authorization: ' \
--header 'Content-Type: '
200
Result
Copy
"{\n \"limit\": 50,\n \"offset\": 0,\n \"templates\": [\n {\n \"id\": \"9e778dd4-6453-40d7-888d-9d9f327b9b66\",\n \"name\": \"OneSignal Push: New Feature Announcement (Template)\",\n \"created_at\": \"2021-07-23T18:02:23.956Z\",\n \"updated_at\": \"2021-07-23T18:02:23.956Z\"\n },\n {\n \"id\": \"806b4356-67af-4d33-8133-75e502f6d3b7\",\n \"name\": \"OneSignal Push: User Action Notification (Template)\",\n \"created_at\": \"2021-07-23T18:02:23.963Z\",\n \"updated_at\": \"2021-07-23T18:02:23.963Z\"\n },\n {\n \"id\": \"172f55b5-df07-49ae-8a8d-67037679487f\",\n \"name\": \"OneSignal Push: Rating (Template)\",\n \"created_at\": \"2021-07-23T18:02:23.984Z\",\n \"updated_at\": \"2021-07-23T18:02:23.984Z\"\n }\n ],\n \"total_count\": 3\n}"
[](https://documentation.onesignal.com/reference/view-templates#overview)
Overview
--------------------------------------------------------------------------------------
Use this endpoint to retrieve a list of message templates associated with a specific OneSignal app. The response provides summary information only:
* `template_id`
* `name`
* `created_at`
* `updated_at`
This endpoint does **not** return full template content such as message bodies, channel properties, or delivery configuration. For detailed template data, use the [View Template](https://documentation.onesignal.com/reference/view-template)
endpoint.
* * *
[](https://documentation.onesignal.com/reference/view-templates#how-to-use-this-api)
How to Use This API
------------------------------------------------------------------------------------------------------------
###
[](https://documentation.onesignal.com/reference/view-templates#required-parameters)
Required Parameters
* **`app_id`** (query param): The OneSignal App ID whose templates you want to retrieve.
###
[](https://documentation.onesignal.com/reference/view-templates#optional-parameters)
Optional Parameters
* **`limit`** (query param): Number of templates to return (default: `50`, maximum: `50`).
* **`offset`** (query param): Number of templates to skip. Use for pagination.
###
[](https://documentation.onesignal.com/reference/view-templates#pagination-example)
Pagination Example
If your app has 125 templates and you’re using the default limit of 50:
1. First request (first 50 templates):
`GET /templates?app_id={app_id}&offset=0`
2. Second request (next 50 templates):
`GET /templates?app_id={app_id}&offset=50`
3. Third request (final 25 templates):
`GET /templates?app_id={app_id}&offset=100`
Repeat the request while adjusting the `offset` until you’ve retrieved all templates.
* * *
#### Headers
[](https://documentation.onesignal.com/reference/view-templates#parameter-authorization)
Authorization
string
default:Key YOUR\_APP\_API\_KEY
required
Your App API key with prefix `Key`. See [Keys & IDs](https://documentation.onesignal.com/docs/keys-and-ids)
.
[](https://documentation.onesignal.com/reference/view-templates#parameter-content-type)
Content-Type
string
default:application/json; charset=utf-8
required
#### Query Parameters
[](https://documentation.onesignal.com/reference/view-templates#parameter-app-id)
app\_id
string
default:YOUR\_APP\_ID
required
Your OneSignal App ID in UUID v4 format. See [Keys & IDs](https://documentation.onesignal.com/docs/keys-and-ids)
.
[](https://documentation.onesignal.com/reference/view-templates#parameter-limit)
limit
integer
default:50
The maximum number of templates returned per request. The default (if omitted) and maximum is 50 templates per request.
[](https://documentation.onesignal.com/reference/view-templates#parameter-offset)
offset
integer
default:0
The pagination or "starting point" of the templates to be returned. Setting it to 0 with a limit of 50 will retrieve the first 50 templates. Increasing the offset by 50 will return the next set of templates, and so on.
[](https://documentation.onesignal.com/reference/view-templates#parameter-channel)
channel
enum
Filter the fetched templates by the delivery channel. Available options are: `push`, `email`, and `SMS`.
Available options:
`push`,
`email`,
`sms`
#### Response
200
application/json
200
[](https://documentation.onesignal.com/reference/view-templates#response-limit)
limit
integer
default:0
Example:
`50`
[](https://documentation.onesignal.com/reference/view-templates#response-offset)
offset
integer
default:0
Example:
`0`
[](https://documentation.onesignal.com/reference/view-templates#response-templates)
templates
object\[\]
Show child attributes
[](https://documentation.onesignal.com/reference/view-templates#response-total-count)
total\_count
integer
default:0
Example:
`3`
[Update template](https://documentation.onesignal.com/reference/update-template)
[View template](https://documentation.onesignal.com/reference/view-template)
Assistant
Responses are generated using AI and may contain mistakes.
---
# View user identity - OneSignal
[OneSignal home page](https://documentation.onesignal.com/)
Search...
⌘K
Search...
Navigation
Users
View user identity
[Home](https://documentation.onesignal.com/docs/home)
[User Guides](https://documentation.onesignal.com/docs/quickstart-guide)
[Developer Guides](https://documentation.onesignal.com/docs/developers)
[Tutorials](https://documentation.onesignal.com/docs/tutorials)
[API Reference](https://documentation.onesignal.com/reference/rest-api-overview)
[Release Notes](https://documentation.onesignal.com/release-notes/changelog)
View user identity
cURL
Copy
curl --request GET \
--url https://api.onesignal.com/apps/{app_id}/users/by/{alias_label}/{alias_id}/identity \
--header 'Authorization: '
200
400
404
429
Copy
{
"identity": {
"onesignal_id": "OneSignal-ID-in-UUID-v4-format",
"external_id": "the-users-external-id"
}
}
GET
/
apps
/
{app\_id}
/
users
/
by
/
{alias\_label}
/
{alias\_id}
/
identity
Try it
View user identity
cURL
Copy
curl --request GET \
--url https://api.onesignal.com/apps/{app_id}/users/by/{alias_label}/{alias_id}/identity \
--header 'Authorization: '
200
400
404
429
Copy
{
"identity": {
"onesignal_id": "OneSignal-ID-in-UUID-v4-format",
"external_id": "the-users-external-id"
}
}
[](https://documentation.onesignal.com/reference/fetch-aliases#overview)
Overview
-------------------------------------------------------------------------------------
Use this API when you want to retrieve the complete identity object for a user, which includes all aliases tied to that user. It is ideal for cases where you know one alias and want to discover others—especially helpful for user mapping, debugging, or linking systems. This endpoint is similar to the [View user](https://documentation.onesignal.com/reference/view-user)
API but only returns the `identity` object—not subscriptions or properties.
If you only know a subscription\_id, use View user identity (by subscription) instead.
For more context on user identity and aliasing:
* [Users](https://documentation.onesignal.com/docs/users)
* [Aliases](https://documentation.onesignal.com/docs/aliases)
* * *
[](https://documentation.onesignal.com/reference/fetch-aliases#how-to-use-this-api)
How to use this API
-----------------------------------------------------------------------------------------------------------
To identify the user, use:
* `alias_label` – the type of alias you’re using to find the user (e.g. `external_id`, `onesignal_id`, or a custom alias)
* `alias_id` – the actual value of that alias
Common usage patterns: Using `external_id` (recommended):
* `alias_label`: `external_id`
* `alias_id`: your user ID (e.g., user-123)
Using `onesignal_id`:
* `alias_label`: `onesignal_id`
* `alias_id`: the OneSignal-assigned unique ID
Using a custom alias:
* Define your own alias label (e.g. `shopify_customer_id`) and its value
We strongly recommend setting and using the `external_id` as your primary user identifier for portability and simplicity across your systems.
* * *
#### Headers
[](https://documentation.onesignal.com/reference/fetch-aliases#parameter-authorization)
Authorization
string
default:Key YOUR\_APP\_API\_KEY
required
Your App API key with prefix `Key`. See [Keys & IDs](https://documentation.onesignal.com/docs/keys-and-ids)
.
#### Path Parameters
[](https://documentation.onesignal.com/reference/fetch-aliases#parameter-app-id)
app\_id
string
required
Your OneSignal App ID in UUID v4 format. See [Keys & IDs](https://documentation.onesignal.com/docs/keys-and-ids)
.
[](https://documentation.onesignal.com/reference/fetch-aliases#parameter-alias-label)
alias\_label
string
required
The alias name or key to locate the user. Most commonly set as `external_id` but can be the `onesignal_id` or a [custom alias](https://documentation.onesignal.com/docs/aliases)
.
[](https://documentation.onesignal.com/reference/fetch-aliases#parameter-alias-id)
alias\_id
string
required
The specific identifier for the given alias to identify the user.
#### Response
200
application/json
200
[](https://documentation.onesignal.com/reference/fetch-aliases#response-identity)
identity
object
Show child attributes
[Delete user](https://documentation.onesignal.com/reference/delete-user)
[View user identity (by subscription)](https://documentation.onesignal.com/reference/fetch-identity-by-subscription)
Assistant
Responses are generated using AI and may contain mistakes.
---
# Edit tags with external user id - OneSignal
[OneSignal home page](https://documentation.onesignal.com/)
Search...
⌘K
Search...
Navigation
Deprecated
Edit tags with external user id
[Home](https://documentation.onesignal.com/docs/home)
[User Guides](https://documentation.onesignal.com/docs/quickstart-guide)
[Developer Guides](https://documentation.onesignal.com/docs/developers)
[Tutorials](https://documentation.onesignal.com/docs/tutorials)
[API Reference](https://documentation.onesignal.com/reference/rest-api-overview)
[Release Notes](https://documentation.onesignal.com/release-notes/changelog)
On this page
* [Path Parameters](https://documentation.onesignal.com/reference/edit-tags-with-external-user-id#path-parameters)
* [Headers](https://documentation.onesignal.com/reference/edit-tags-with-external-user-id#headers)
* [Request Body Parameters](https://documentation.onesignal.com/reference/edit-tags-with-external-user-id#request-body-parameters)
* [Example Request](https://documentation.onesignal.com/reference/edit-tags-with-external-user-id#example-request)
* [Response](https://documentation.onesignal.com/reference/edit-tags-with-external-user-id#response)
* [Errors](https://documentation.onesignal.com/reference/edit-tags-with-external-user-id#errors)
Update a player’s (Subscription’s) information using the External ID.
This is a Legacy API. Use [Update User](https://documentation.onesignal.com/reference/update-user)
or [Update Subscription](https://documentation.onesignal.com/reference/update-subscription)
instead.
* * *
[](https://documentation.onesignal.com/reference/edit-tags-with-external-user-id#path-parameters)
Path Parameters
---------------------------------------------------------------------------------------------------------------------
| Parameter | Type | Required | Description |
| --- | --- | --- | --- |
| `app_id` | string | Yes | Your OneSignal App ID. |
| `external_user_id` | string | Yes | The user’s External ID. |
* * *
[](https://documentation.onesignal.com/reference/edit-tags-with-external-user-id#headers)
Headers
-----------------------------------------------------------------------------------------------------
| Header | Value | Required | Description |
| --- | --- | --- | --- |
| `Authorization` | `Basic YOUR_LEGACY_REST_API_KEY` | Yes | Your Legacy OneSignal API key. |
| `Content-Type` | `application/json` | Yes | The content type of the request. |
* * *
[](https://documentation.onesignal.com/reference/edit-tags-with-external-user-id#request-body-parameters)
Request Body Parameters
-------------------------------------------------------------------------------------------------------------------------------------
| Field | Type | Required | Description |
| --- | --- | --- | --- |
| `tags` | object | Yes | Key-value pairs to set or update. |
* To **delete a tag**, set its value to an empty string (`""`).
* Existing tags with the same keys will be **overwritten**.
* * *
[](https://documentation.onesignal.com/reference/edit-tags-with-external-user-id#example-request)
Example Request
---------------------------------------------------------------------------------------------------------------------
Copy
PATCH /api/v1/apps/your_app_id/users/user123 HTTP/1.1
Host: onesignal.com
Authorization: Basic YOUR_LEGACY_REST_API_KEY
Content-Type: application/json
{
"tags": {
"plan": "premium",
"logged_in": "true",
"referral": ""
}
}
* * *
[](https://documentation.onesignal.com/reference/edit-tags-with-external-user-id#response)
Response
-------------------------------------------------------------------------------------------------------
Copy
{
"success": true
}
* * *
[](https://documentation.onesignal.com/reference/edit-tags-with-external-user-id#errors)
Errors
---------------------------------------------------------------------------------------------------
* 400 Bad Request – Invalid request or payload.
* 401 Unauthorized – Invalid or missing keys.
* 403 Forbidden – Access denied due to insufficient permissions.
* 404 Not Found – No players found for given `external_user_id`.
* * *
[Edit player](https://documentation.onesignal.com/reference/edit-device)
[Delete player record](https://documentation.onesignal.com/reference/delete-user-record)
Assistant
Responses are generated using AI and may contain mistakes.
---
# Transfer Subscription - OneSignal
[OneSignal home page](https://documentation.onesignal.com/)
Search...
⌘K
Search...
Navigation
Subscriptions
Transfer Subscription
[Home](https://documentation.onesignal.com/docs/home)
[User Guides](https://documentation.onesignal.com/docs/quickstart-guide)
[Developer Guides](https://documentation.onesignal.com/docs/developers)
[Tutorials](https://documentation.onesignal.com/docs/tutorials)
[API Reference](https://documentation.onesignal.com/reference/rest-api-overview)
[Release Notes](https://documentation.onesignal.com/release-notes/changelog)
Transfer subscription
cURL
Copy
curl --request PATCH \
--url https://api.onesignal.com/apps/{app_id}/subscriptions/{subscription_id}/owner \
--header 'Content-Type: application/json' \
--data '{
"identity": {
"external_id": "test_external_id",
"onesignal_id": ""
}
}'
200
400
403
404
429
Copy
"{\n \"identity\": {\n \"external_id\": \"the-external-id-transferred-to\",\n \"onesignal_id\": \"the-onesignal-id-transferred-to\"\n }\n}"
PATCH
/
apps
/
{app\_id}
/
subscriptions
/
{subscription\_id}
/
owner
Try it
Transfer subscription
cURL
Copy
curl --request PATCH \
--url https://api.onesignal.com/apps/{app_id}/subscriptions/{subscription_id}/owner \
--header 'Content-Type: application/json' \
--data '{
"identity": {
"external_id": "test_external_id",
"onesignal_id": ""
}
}'
200
400
403
404
429
Copy
"{\n \"identity\": {\n \"external_id\": \"the-external-id-transferred-to\",\n \"onesignal_id\": \"the-onesignal-id-transferred-to\"\n }\n}"
[](https://documentation.onesignal.com/reference/transfer-subscription#overview)
Overview
---------------------------------------------------------------------------------------------
Use this API to transfer a Subscription from one user to another within the same OneSignal app. It is highly recommended to use our web and mobile SDKs to set and update the External ID with the `login` method instead of this API. Your app or website may continue to be setting the wrong External ID. Make sure to only use this API if you are setting the same External ID within your app or website. This is typically used when:
* You want to reassign an existing push, email, or SMS Subscription to a new or updated user.
* You have changed how you’re identifying users (e.g., migrating from anonymous to known users).
* Subscriptions **cannot be transferred across different OneSignal apps**.
* For email and SMS Subscriptions, you can instead create new ones using [Create User](https://documentation.onesignal.com/reference/create-user)
.
* For push Subscriptions, platform limitations may apply—see [Subscriptions](https://documentation.onesignal.com/docs/subscriptions#importing-push-subscriptions)
for details.
* * *
[](https://documentation.onesignal.com/reference/transfer-subscription#how-to-use-this-api)
How to Use This API
-------------------------------------------------------------------------------------------------------------------
###
[](https://documentation.onesignal.com/reference/transfer-subscription#required-path-parameter%3A-subscription-id)
Required Path Parameter: `subscription_id`
You must know the `subscription_id` of the subscription to be transferred. This is a unique UUID assigned by OneSignal.
###
[](https://documentation.onesignal.com/reference/transfer-subscription#required-body-parameter%3A-identity-object)
Required Body Parameter: `identity` (object)
This specifies the user the subscription should be moved to. Only **one alias** should be used per request. You can identify the target user using one of:
* `external_id` (recommended)
* `onesignal_id`
* A [custom alias](https://documentation.onesignal.com/docs/aliases)
* * *
#### Path Parameters
[](https://documentation.onesignal.com/reference/transfer-subscription#parameter-app-id)
app\_id
string
required
Your OneSignal App ID in UUID v4 format. See [Keys & IDs](https://documentation.onesignal.com/docs/keys-and-ids)
.
[](https://documentation.onesignal.com/reference/transfer-subscription#parameter-subscription-id)
subscription\_id
string
required
The unique Subscription ID in UUID v4 format to transfer to the new user.
#### Body
application/json
[](https://documentation.onesignal.com/reference/transfer-subscription#body-identity)
identity
object
Identifies the user that this subscription is moved to. Must contain exactly one alias.
Show child attributes
#### Response
200
application/json
200
[](https://documentation.onesignal.com/reference/transfer-subscription#response-identity)
identity
object
Show child attributes
[Delete Subscription](https://documentation.onesignal.com/reference/delete-subscription)
[Unsubscribe email with token](https://documentation.onesignal.com/reference/unsubscribe-with-token)
Assistant
Responses are generated using AI and may contain mistakes.
---
# View API keys - OneSignal
[OneSignal home page](https://documentation.onesignal.com/)
Search...
⌘K
Search...
Navigation
Configuration
View API keys
[Home](https://documentation.onesignal.com/docs/home)
[User Guides](https://documentation.onesignal.com/docs/quickstart-guide)
[Developer Guides](https://documentation.onesignal.com/docs/developers)
[Tutorials](https://documentation.onesignal.com/docs/tutorials)
[API Reference](https://documentation.onesignal.com/reference/rest-api-overview)
[Release Notes](https://documentation.onesignal.com/release-notes/changelog)
View API keys
cURL
Copy
curl --request GET \
--url https://api.onesignal.com/apps/{app_id}/auth/tokens \
--header 'Authorization: ' \
--header 'Content-Type: '
200
400
Copy
{
"tokens": [\
{\
"token_id": "",\
"updated_at": "",\
"created_at": "",\
"name": "",\
"ip_allowlist_mode": "disabled",\
"ip_allowlist": [\
""\
]\
}\
]
}
GET
/
apps
/
{app\_id}
/
auth
/
tokens
Try it
View API keys
cURL
Copy
curl --request GET \
--url https://api.onesignal.com/apps/{app_id}/auth/tokens \
--header 'Authorization: ' \
--header 'Content-Type: '
200
400
Copy
{
"tokens": [\
{\
"token_id": "",\
"updated_at": "",\
"created_at": "",\
"name": "",\
"ip_allowlist_mode": "disabled",\
"ip_allowlist": [\
""\
]\
}\
]
}
[](https://documentation.onesignal.com/reference/view-api-keys#overview)
Overview
-------------------------------------------------------------------------------------
This API is helpful for auditing and managing the API keys (Rich Authentication Tokens) associated with an app. It returns metadata for each token, including:
* Token name and ID
* IP allow list mode and associated CIDR ranges (if any)
* Creation and last updated timestamps
For background on different OneSignal API keys, see [Keys & IDs](https://documentation.onesignal.com/docs/keys-and-ids)
.
* * *
[](https://documentation.onesignal.com/reference/view-api-keys#how-to-use-this-api)
How to use this API
-----------------------------------------------------------------------------------------------------------
Use your [Organization API Key](https://documentation.onesignal.com/docs/keys-and-ids#organization-api-key)
, to authenticate. This key is **different** from the standard REST API key.
* * *
#### Headers
[](https://documentation.onesignal.com/reference/view-api-keys#parameter-content-type)
Content-Type
string
default:application/json
required
[](https://documentation.onesignal.com/reference/view-api-keys#parameter-authorization)
Authorization
string
default:Key YOUR\_ORGANIZATION\_API\_KEY
required
Your Organization API key with prefix `Key`. See [Keys & IDs](https://documentation.onesignal.com/docs/keys-and-ids)
.
#### Path Parameters
[](https://documentation.onesignal.com/reference/view-api-keys#parameter-app-id)
app\_id
string
default:YOUR\_APP\_ID
required
Your OneSignal App ID in UUID v4 format. See [Keys & IDs](https://documentation.onesignal.com/docs/keys-and-ids)
.
#### Response
200
application/json
200
[](https://documentation.onesignal.com/reference/view-api-keys#response-tokens)
tokens
object\[\]
Show child attributes
[Update an app](https://documentation.onesignal.com/reference/update-an-app)
[Create API key](https://documentation.onesignal.com/reference/create-api-key)
Assistant
Responses are generated using AI and may contain mistakes.
---
# Edit player - OneSignal
[OneSignal home page](https://documentation.onesignal.com/)
Search...
⌘K
Search...
Navigation
Deprecated
Edit player
[Home](https://documentation.onesignal.com/docs/home)
[User Guides](https://documentation.onesignal.com/docs/quickstart-guide)
[Developer Guides](https://documentation.onesignal.com/docs/developers)
[Tutorials](https://documentation.onesignal.com/docs/tutorials)
[API Reference](https://documentation.onesignal.com/reference/rest-api-overview)
[Release Notes](https://documentation.onesignal.com/release-notes/changelog)
On this page
* [Path Parameters](https://documentation.onesignal.com/reference/edit-device#path-parameters)
* [Headers](https://documentation.onesignal.com/reference/edit-device#headers)
* [Request Body Parameters](https://documentation.onesignal.com/reference/edit-device#request-body-parameters)
* [Example Request](https://documentation.onesignal.com/reference/edit-device#example-request)
* [Response](https://documentation.onesignal.com/reference/edit-device#response)
* [Errors](https://documentation.onesignal.com/reference/edit-device#errors)
Update a player’s (Subscription’s) information using the Subscription ID.
This is a Legacy API. Use [Update User](https://documentation.onesignal.com/reference/update-user)
or [Update Subscription](https://documentation.onesignal.com/reference/update-subscription)
instead.
* * *
[](https://documentation.onesignal.com/reference/edit-device#path-parameters)
Path Parameters
-------------------------------------------------------------------------------------------------
| Parameter | Type | Required | Description |
| --- | --- | --- | --- |
| `player_id` | string | Yes | The OneSignal Subscription ID. |
* * *
[](https://documentation.onesignal.com/reference/edit-device#headers)
Headers
---------------------------------------------------------------------------------
| Header | Value | Required | Description |
| --- | --- | --- | --- |
| `Authorization` | `Basic YOUR_LEGACY_REST_API_KEY` | Yes | Your OneSignal Legacy REST API Key. |
| `Content-Type` | `application/json` | Yes | The content type of the request. |
* * *
[](https://documentation.onesignal.com/reference/edit-device#request-body-parameters)
Request Body Parameters
-----------------------------------------------------------------------------------------------------------------
| Field | Type | Required | Description |
| --- | --- | --- | --- |
| `app_id` | string | Yes | Your OneSignal App ID. |
| `identifier` | string | No | Push token, email, or phone number. |
| `language` | string | No | Language code (e.g., “en”). |
| `timezone` | integer | No | Time zone offset in seconds. |
| `game_version` | string | No | App version. |
| `device_model` | string | No | Device model (e.g., “iPhone12,1”). |
| `device_os` | string | No | OS version (e.g., “14.5”). |
| `ad_id` | string | No | Advertising ID. |
| `sdk` | string | No | OneSignal SDK version. |
| `tags` | object | No | Custom key-value pairs. |
| `external_user_id` | string | No | Your internal user ID. |
| `notification_types` | integer | No | 1 = subscribed, -2 = unsubscribed, 0 = no permission, etc. |
| `email_auth_hash` | string | No | Required to update email identifiers securely. |
| `sms_auth_hash` | string | No | Required to update SMS identifiers securely. |
> Only include fields you want to change. Fields left out will not be modified.
* * *
[](https://documentation.onesignal.com/reference/edit-device#example-request)
Example Request
-------------------------------------------------------------------------------------------------
Copy
PUT /api/v1/players/player_id_string HTTP/1.1
Host: onesignal.com
Authorization: Basic YOUR_REST_API_KEY
Content-Type: application/json
{
"app_id": "your_app_id",
"external_user_id": "user123",
"tags": {
"level": "20",
"subscription": "active"
},
"language": "fr",
"timezone": 3600,
"device_os": "16.0"
}
* * *
[](https://documentation.onesignal.com/reference/edit-device#response)
Response
-----------------------------------------------------------------------------------
Copy
{
"success": true
}
* * *
[](https://documentation.onesignal.com/reference/edit-device#errors)
Errors
-------------------------------------------------------------------------------
* 400 Bad Request – Missing or invalid fields.
* 401 Unauthorized – Invalid or missing API key.
* 403 Forbidden – Access denied.
* 404 Not Found – Device with player\_id not found.
* * *
[Add a player](https://documentation.onesignal.com/reference/add-a-device)
[Edit tags with external user id](https://documentation.onesignal.com/reference/edit-tags-with-external-user-id)
Assistant
Responses are generated using AI and may contain mistakes.
---
# Android 13 Push Notification Developer Update Guide - OneSignal
[OneSignal home page](https://documentation.onesignal.com/)
Search...
⌘K
Search...
Navigation
Android 13 Push Notification Developer Update Guide
[Home](https://documentation.onesignal.com/docs/home)
[User Guides](https://documentation.onesignal.com/docs/quickstart-guide)
[Developer Guides](https://documentation.onesignal.com/docs/developers)
[Tutorials](https://documentation.onesignal.com/docs/tutorials)
[API Reference](https://documentation.onesignal.com/reference/rest-api-overview)
[Release Notes](https://documentation.onesignal.com/release-notes/changelog)
On this page
* [Overview of Android 13 push subscription changes](https://documentation.onesignal.com/release-notes/android-13-push-notification-developer-update-guide#overview-of-android-13-push-subscription-changes)
* [Understanding Android 13 push permission behaviors](https://documentation.onesignal.com/release-notes/android-13-push-notification-developer-update-guide#understanding-android-13-push-permission-behaviors)
* [Allow](https://documentation.onesignal.com/release-notes/android-13-push-notification-developer-update-guide#allow)
* [Don’t Allow](https://documentation.onesignal.com/release-notes/android-13-push-notification-developer-update-guide#don%E2%80%99t-allow)
* [Ignored](https://documentation.onesignal.com/release-notes/android-13-push-notification-developer-update-guide#ignored)
* [How to prompt for push permission](https://documentation.onesignal.com/release-notes/android-13-push-notification-developer-update-guide#how-to-prompt-for-push-permission)
* [Updating Your App for Android 13](https://documentation.onesignal.com/release-notes/android-13-push-notification-developer-update-guide#updating-your-app-for-android-13)
* [Step 1. Update Your OneSignal SDK](https://documentation.onesignal.com/release-notes/android-13-push-notification-developer-update-guide#step-1-update-your-onesignal-sdk)
* [Step 2. Update project settings to target Android 13](https://documentation.onesignal.com/release-notes/android-13-push-notification-developer-update-guide#step-2-update-project-settings-to-target-android-13)
* [Step 3. Add Notification Permission Prompt](https://documentation.onesignal.com/release-notes/android-13-push-notification-developer-update-guide#step-3-add-notification-permission-prompt)
[](https://documentation.onesignal.com/release-notes/android-13-push-notification-developer-update-guide#overview-of-android-13-push-subscription-changes)
Overview of Android 13 push subscription changes
---------------------------------------------------------------------------------------------------------------------------------------------------------------------------------------------------------------
Android 13 introduces a runtime notification permission, meaning users must opt in to receive push notifications. Apps targeting Android 13 must explicitly prompt for permission at a time of their choosing, or the system will display the permission prompt automatically on first launch—often resulting in lower opt-in rates. To implement an ideal experience:
* Update to the latest version of the [OneSignal SDK v4.8.1+](https://github.com/OneSignal/OneSignal-Android-SDK/releases)
* Target Android API level 33+
* (Optional) Use an in-app message with a push permission prompt to explain value before requesting permission
If you don’t take action, Android 13 will show the permission prompt automatically on first app open—an interruptive and less effective moment.
* * *
[](https://documentation.onesignal.com/release-notes/android-13-push-notification-developer-update-guide#understanding-android-13-push-permission-behaviors)
Understanding Android 13 push permission behaviors
-------------------------------------------------------------------------------------------------------------------------------------------------------------------------------------------------------------------
Android 13 permission behavior depends on the OS version, app target SDK, and how the user interacts with the system prompt:
###
[](https://documentation.onesignal.com/release-notes/android-13-push-notification-developer-update-guide#allow)
Allow
* **Upgraded devices**: Users who previously granted push permission on Android 12 or lower are grandfathered in.
* **New installs on Android 13**: Default to “don’t allow”. You must prompt them explicitly.
* **Apps targeting Android 13**: Gain full control over when to prompt.
* **Apps targeting Android 12 or lower**: System will auto-show the prompt on first launch after install/update.
###
[](https://documentation.onesignal.com/release-notes/android-13-push-notification-developer-update-guide#don%E2%80%99t-allow)
Don’t Allow
* If the user selects “Don’t Allow”, you cannot send them notifications.
* They won’t be prompted again unless:
* They reinstall the app, or
* You update your app to target Android 13 and prompt them explicitly.
###
[](https://documentation.onesignal.com/release-notes/android-13-push-notification-developer-update-guide#ignored)
Ignored
* If the user dismisses the dialog without choosing, the permission remains in the default denied state.
* * *
[](https://documentation.onesignal.com/release-notes/android-13-push-notification-developer-update-guide#how-to-prompt-for-push-permission)
How to prompt for push permission
---------------------------------------------------------------------------------------------------------------------------------------------------------------------------------
Use in-app messages to create a better opt-in experience or our SDK directly to trigger the prompt. See our [Prompt for Push Permissions](https://documentation.onesignal.com/docs/prompt-for-push-permissions)
guide for details.
* * *
[](https://documentation.onesignal.com/release-notes/android-13-push-notification-developer-update-guide#updating-your-app-for-android-13)
Updating Your App for Android 13
-------------------------------------------------------------------------------------------------------------------------------------------------------------------------------
###
[](https://documentation.onesignal.com/release-notes/android-13-push-notification-developer-update-guide#step-1-update-your-onesignal-sdk)
Step 1. Update Your OneSignal SDK
We recommend updating to the [latest version of our SDK](https://github.com/OneSignal/OneSignal-Android-SDK/releases)
.
###
[](https://documentation.onesignal.com/release-notes/android-13-push-notification-developer-update-guide#step-2-update-project-settings-to-target-android-13)
Step 2. Update project settings to target Android 13
Validate that your app is configured to target Android API level 33 or newer, and follow one of the sections below for the type of project you have. **Android Native** Validate your compile and target SDK version is at least version 33
app/build.gradle
Copy
android {
compileSdkVersion "33"
defaultConfig {
targetSdkVersion "33"
}
}
See Google’s [Set up the Android 13 SDK](https://developer.android.com/about/versions/13/setup-sdk)
for more details if you have a different project configuration. **Unity** Use Unity 2021.3.0f1 or newer. Add Android 13 as a custom dependency to the Unity Editor’s Android SDK Tools. See Unity’s [Customizing dependencies](https://docs.unity3d.com/2022.2/Documentation/Manual/android-sdksetup.html)
guide. Set the Target API Level to API level 33 in the Android Player Settings. See Unity’s [Setting the Android SDK Target API](https://docs.unity3d.com/2022.2/Documentation/Manual/android-sdksetup.html)
guide. **Flutter** Validate your compile and target SDK version is at least version 33.
android/app/build.gradle
Copy
android {
compileSdkVersion 33
defaultConfig {
targetSdkVersion 33
}
}
**React Native** Validate your compile and target SDK version is at least version 33.
android/app/build.gradle
Copy
android {
compileSdkVersion 33
...
defaultConfig {
...
targetSdkVersion 33
}
}
**Cordova / Ionic** Requirements:
* Ionic Capacitor v2 or higher
* Or Cordova Android Platform 9.1.0 or higher
Validate your target SDK version is at least version 33.
app/build.gradle
Copy
android {
compileSdkVersion 33
...
defaultConfig {
...
targetSdkVersion 33
}
}
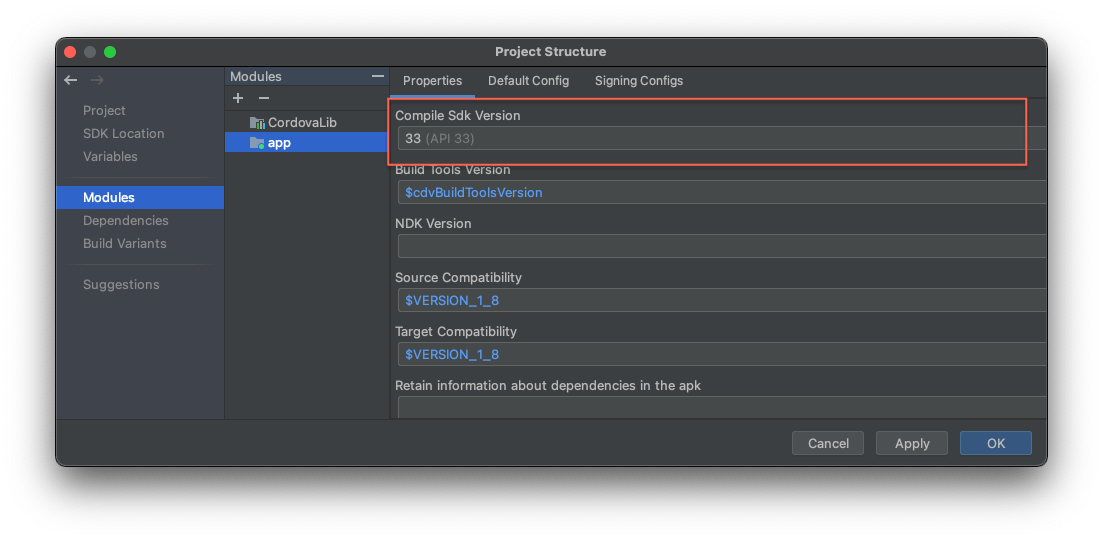
Set the Compile Sdk Version to 33
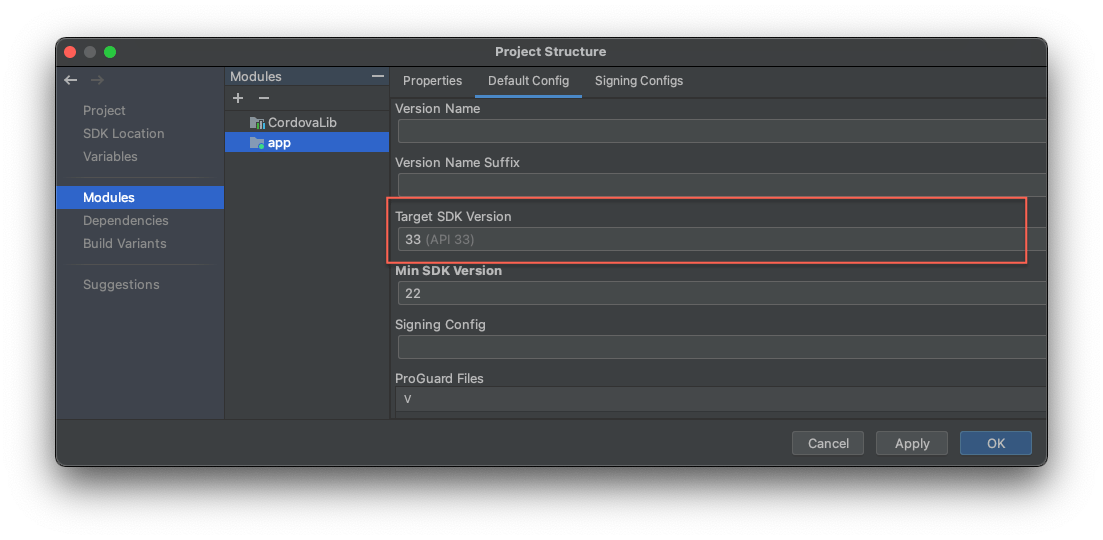
In Default Config, set the Target SDK Version to 33.
###
[](https://documentation.onesignal.com/release-notes/android-13-push-notification-developer-update-guide#step-3-add-notification-permission-prompt)
Step 3. Add Notification Permission Prompt
See our [Prompt for Push Permissions](https://documentation.onesignal.com/docs/prompt-for-push-permissions)
guide for details.
You are now ready to prompt your Android users for push notification permissions!
* * *
Assistant
Responses are generated using AI and may contain mistakes.
---
# Delete API key - OneSignal
[OneSignal home page](https://documentation.onesignal.com/)
Search...
⌘K
Search...
Navigation
Configuration
Delete API key
[Home](https://documentation.onesignal.com/docs/home)
[User Guides](https://documentation.onesignal.com/docs/quickstart-guide)
[Developer Guides](https://documentation.onesignal.com/docs/developers)
[Tutorials](https://documentation.onesignal.com/docs/tutorials)
[API Reference](https://documentation.onesignal.com/reference/rest-api-overview)
[Release Notes](https://documentation.onesignal.com/release-notes/changelog)
Delete API key
cURL
Copy
curl --request DELETE \
--url https://api.onesignal.com/apps/{app_id}/auth/tokens/{token_id} \
--header 'Authorization: ' \
--header 'Content-Type: '
200
400
Copy
"{}"
DELETE
/
apps
/
{app\_id}
/
auth
/
tokens
/
{token\_id}
Try it
Delete API key
cURL
Copy
curl --request DELETE \
--url https://api.onesignal.com/apps/{app_id}/auth/tokens/{token_id} \
--header 'Authorization: ' \
--header 'Content-Type: '
200
400
Copy
"{}"
[](https://documentation.onesignal.com/reference/delete-api-key#overview)
Overview
--------------------------------------------------------------------------------------
Use this API to delete a specific App API Key (Rich Authentication Token) for a single OneSignal.
For background on different OneSignal API keys, see [Keys & IDs](https://documentation.onesignal.com/docs/keys-and-ids)
.
* * *
[](https://documentation.onesignal.com/reference/delete-api-key#how-to-use-this-api)
How to use this API
------------------------------------------------------------------------------------------------------------
Using your Organization API key (available in [Organizations > Keys & IDs](https://documentation.onesignal.com/docs/keys-and-ids#organization-api-key)
) you can delete an app token associated with a given app. The `token_id` is a OneSignal-generated ID specific for the API key. This is not the API key itself. It is returned when creating an API key with [Create API key](https://documentation.onesignal.com/reference/create-api-key)
. It can be found in the OneSignal dashboard and in the response body of the [View API keys](https://documentation.onesignal.com/reference/view-api-keys)
request.
* * *
#### Headers
[](https://documentation.onesignal.com/reference/delete-api-key#parameter-content-type)
Content-Type
string
default:application/json
required
[](https://documentation.onesignal.com/reference/delete-api-key#parameter-authorization)
Authorization
string
default:Key YOUR\_ORGANIZATION\_API\_KEY
required
Your Organization API key with prefix `Key`. See [Keys & IDs](https://documentation.onesignal.com/docs/keys-and-ids)
.
#### Path Parameters
[](https://documentation.onesignal.com/reference/delete-api-key#parameter-app-id)
app\_id
string
default:YOUR\_APP\_ID
required
Your OneSignal App ID in UUID v4 format. See [Keys & IDs](https://documentation.onesignal.com/docs/keys-and-ids)
.
[](https://documentation.onesignal.com/reference/delete-api-key#parameter-token-id)
token\_id
string
required
The OneSignal-generated ID specific to the API key. This is not the API key itself. It is returned when creating an API key with [Create API key](https://documentation.onesignal.com/reference/create-api-key)
. It can be found in the OneSignal dashboard and in the response body of the [View API keys](https://documentation.onesignal.com/reference/view-api-keys)
request.
#### Response
200
application/json
200
The response is of type `object`.
[Create API key](https://documentation.onesignal.com/reference/create-api-key)
[Update API key](https://documentation.onesignal.com/reference/update-api-key)
Assistant
Responses are generated using AI and may contain mistakes.
---
# Zapier - OneSignal
[OneSignal home page](https://documentation.onesignal.com/)
Search...
⌘K
Search...
Navigation
Zapier
[Home](https://documentation.onesignal.com/docs/home)
[User Guides](https://documentation.onesignal.com/docs/quickstart-guide)
[Developer Guides](https://documentation.onesignal.com/docs/developers)
[Tutorials](https://documentation.onesignal.com/docs/tutorials)
[API Reference](https://documentation.onesignal.com/reference/rest-api-overview)
[Release Notes](https://documentation.onesignal.com/release-notes/changelog)
On this page
* [Trigger a scheduled recurring notification](https://documentation.onesignal.com/docs/zapier#trigger-a-scheduled-recurring-notification)
* [FAQ](https://documentation.onesignal.com/docs/zapier#faq)
* [Can I add a template to a Zap?](https://documentation.onesignal.com/docs/zapier#can-i-add-a-template-to-a-zap%3F)
* [Can I override the template if I add other data to the fields in my Zap?](https://documentation.onesignal.com/docs/zapier#can-i-override-the-template-if-i-add-other-data-to-the-fields-in-my-zap%3F)
* [How do I set timezone and intelligent delivery options in Zapier?](https://documentation.onesignal.com/docs/zapier#how-do-i-set-timezone-and-intelligent-delivery-options-in-zapier%3F)
OneSignal integrates with [Zapier](https://zapier.com/zapbook/onesignal/)
to automate manual tasks like sending out notifications or sharing sent notifications with the team—without any code. Connect OneSignal to 3,000+ other apps with workflows called Zaps and you can fire off notifications when you tweet, post on your blog, add a row to your spreadsheet, and more. You can create automations from scratch on [Zapier](https://zapier.com/zapbook/onesignal/)
, or try one of these examples to get started right now:
[](https://documentation.onesignal.com/docs/zapier#trigger-a-scheduled-recurring-notification)
Trigger a scheduled recurring notification
---------------------------------------------------------------------------------------------------------------------------------------------
1
Select the Zap trigger
This example uses the Schedule by Zapier trigger. Select how often you would like to send this message.
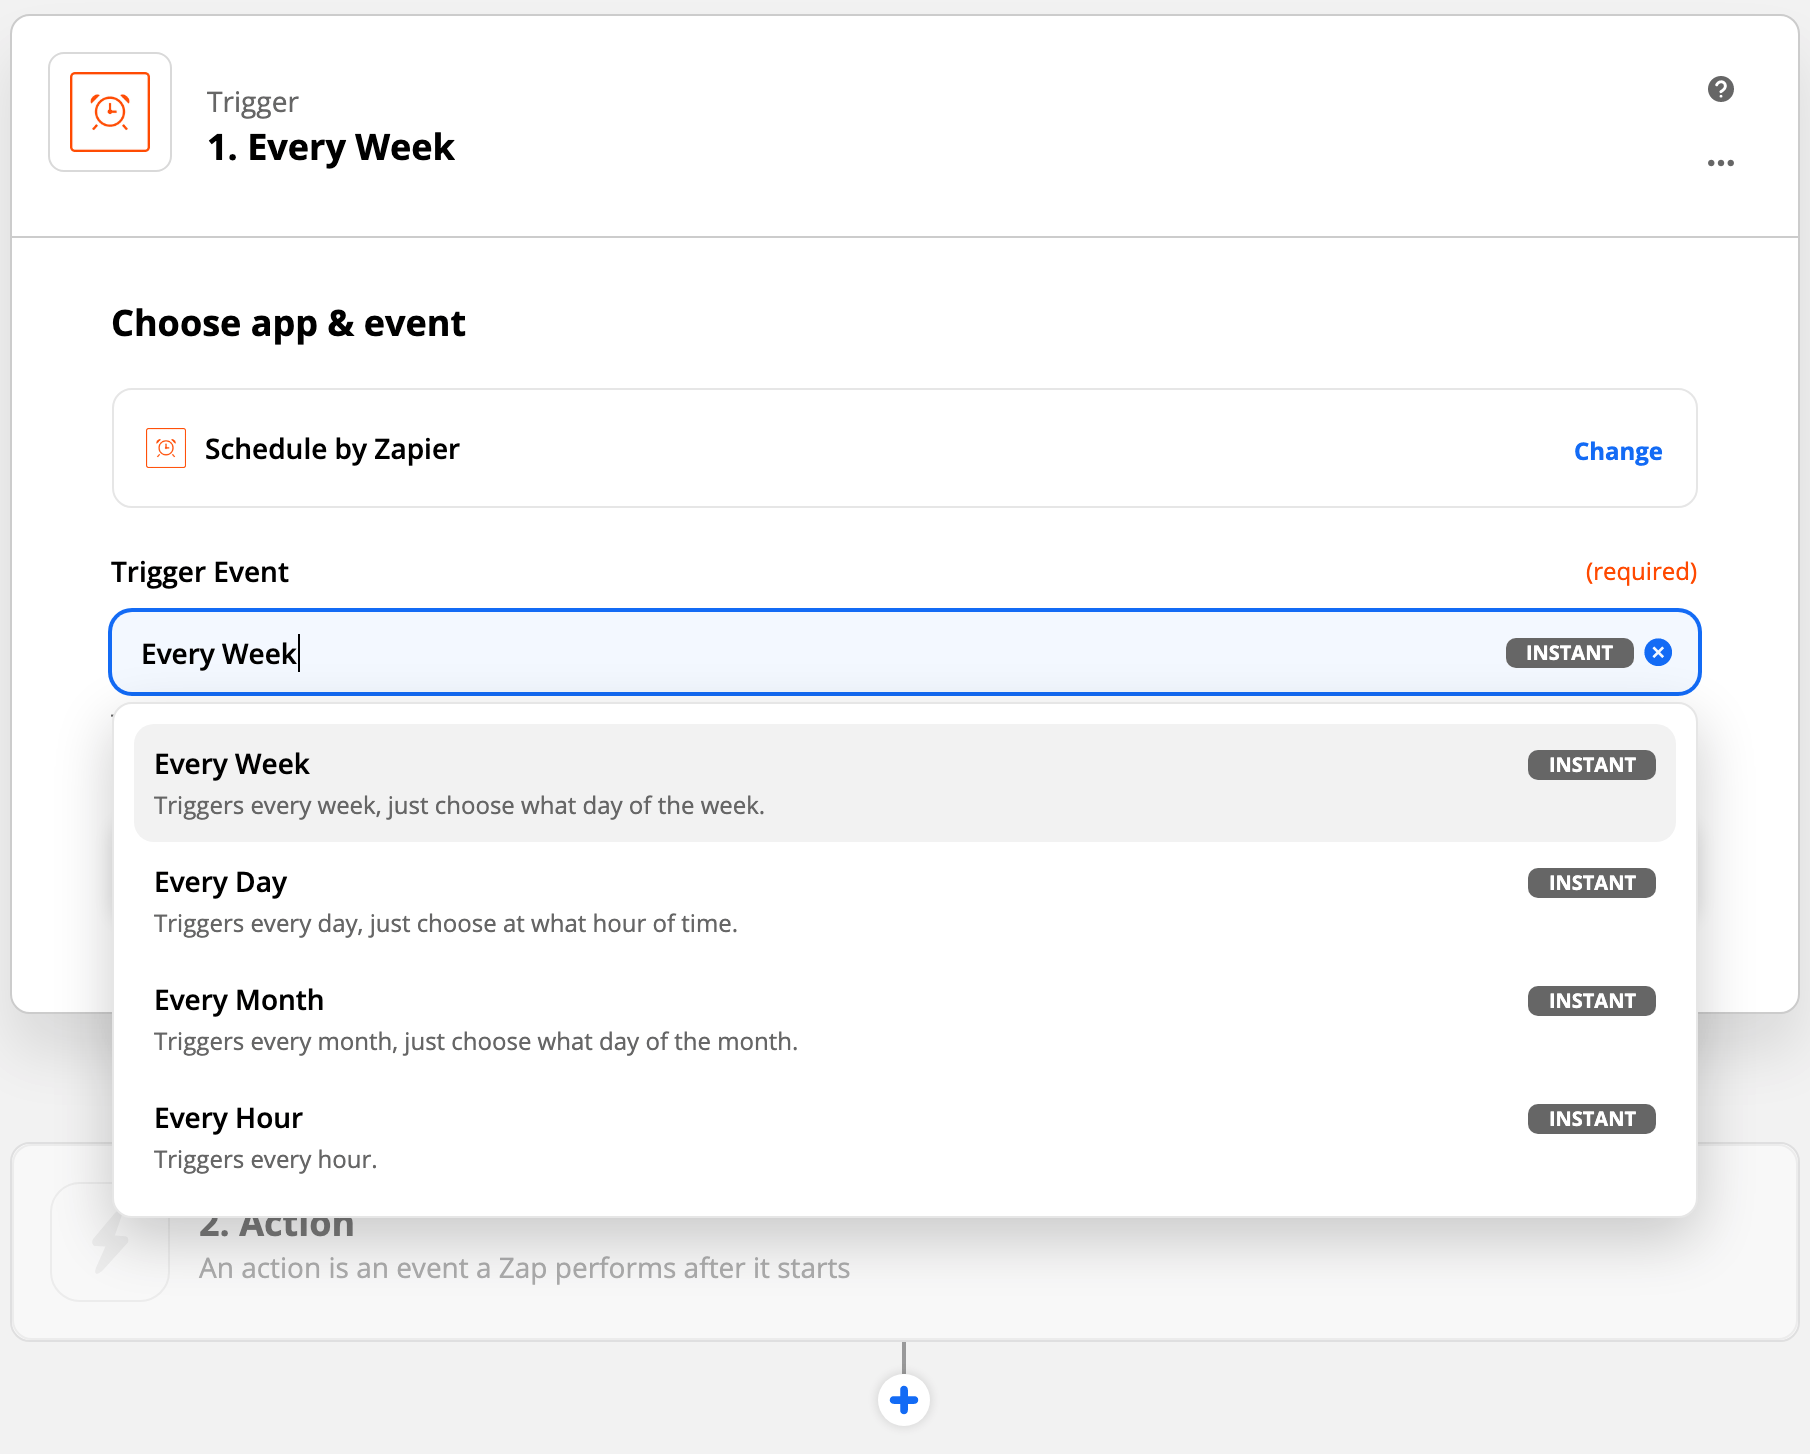
Select the Zap trigger
2
Select the trigger options
The Schedule by Zapier trigger allows setting “Day Of the Week” and “Time of Day”.
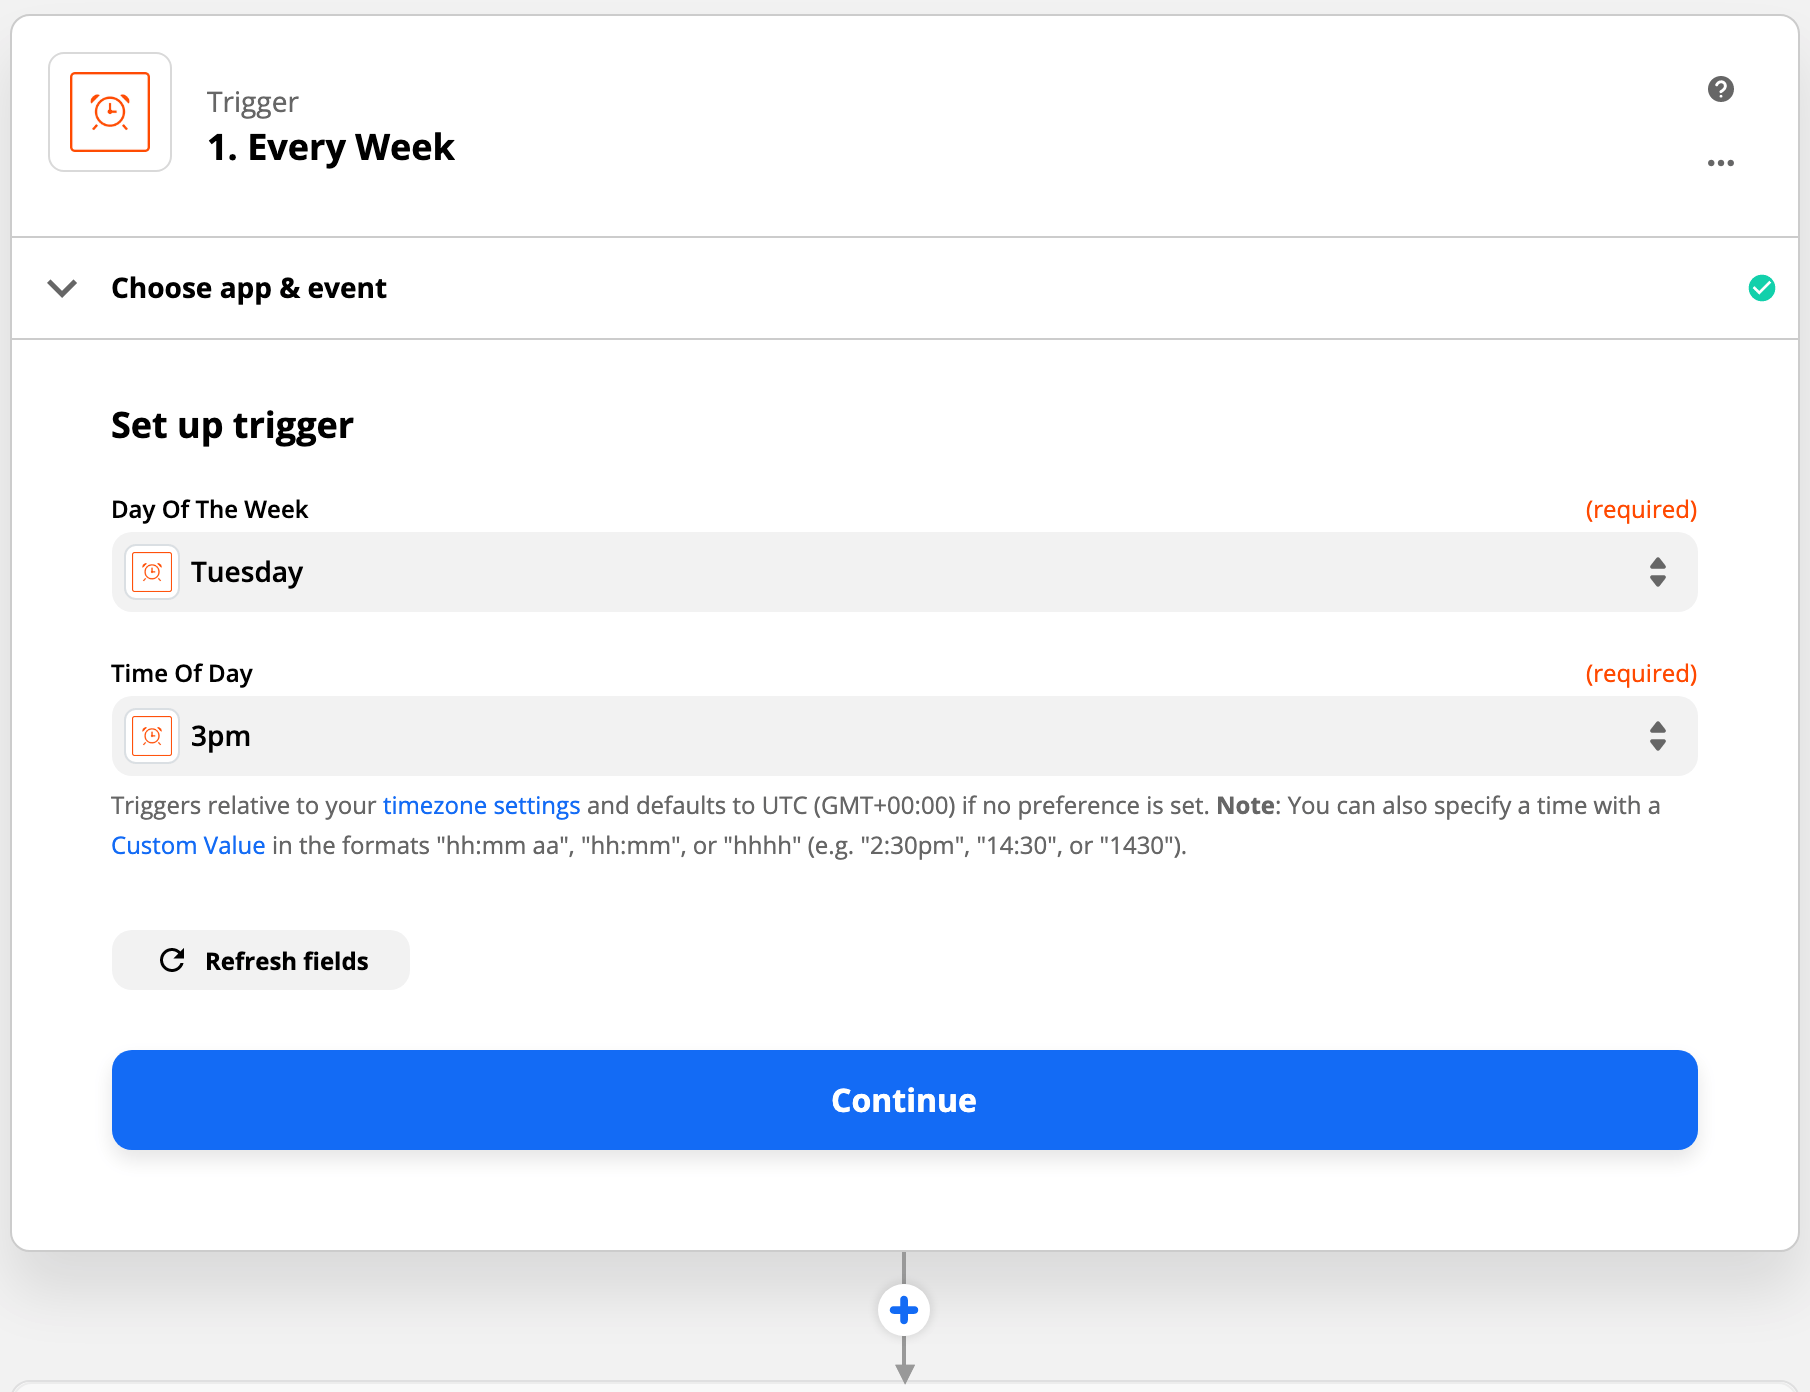
Set trigger options
3
Select the OneSignal action
You get the choice to do two types of notifications:
| Action event | Description |
| --- | --- |
| Send push notification | Limited/Easier Push Data: Message, Title, Launch URL, Send Time |
| Send advanced push notification | All push notification options available. |
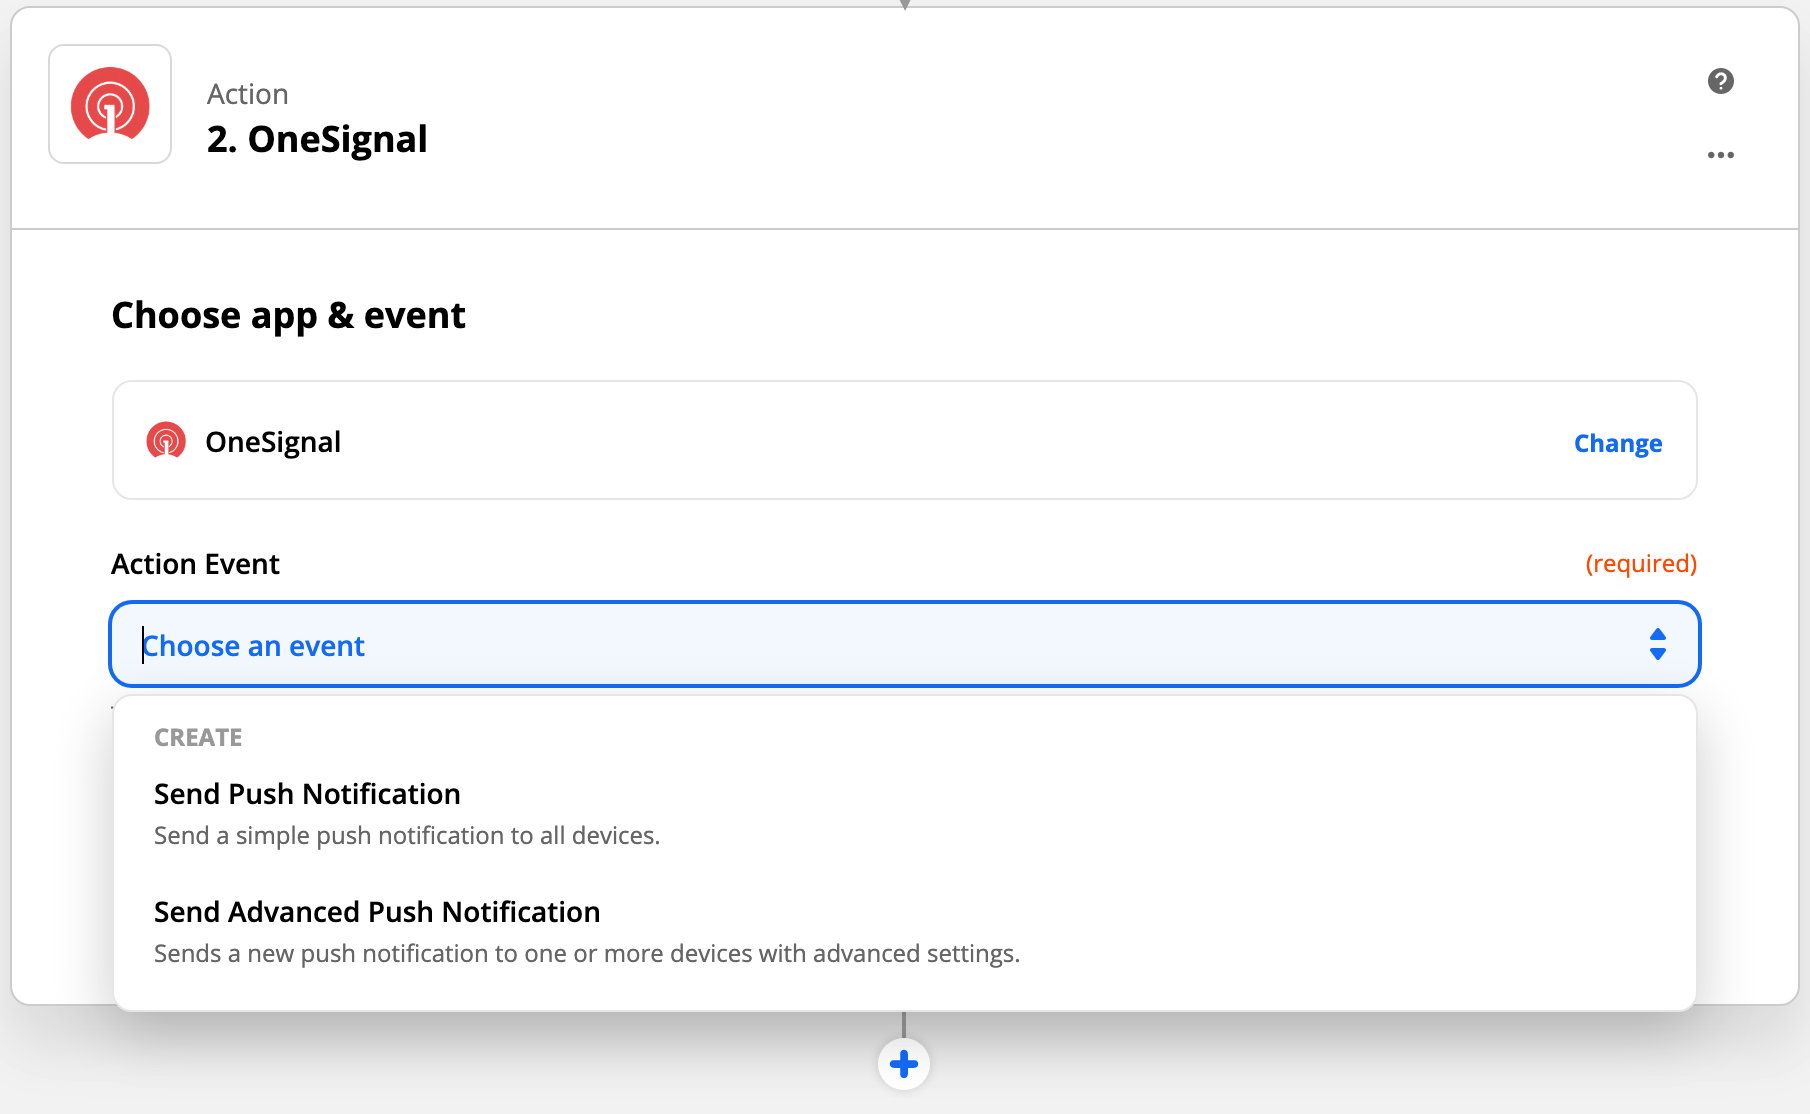
Choose OneSignal action
4
Select your OneSignal account
Select **Connect a new account** if you have not done so.You will need your [OneSignal App ID and REST API Key](https://documentation.onesignal.com/docs/keys-and-ids)
.
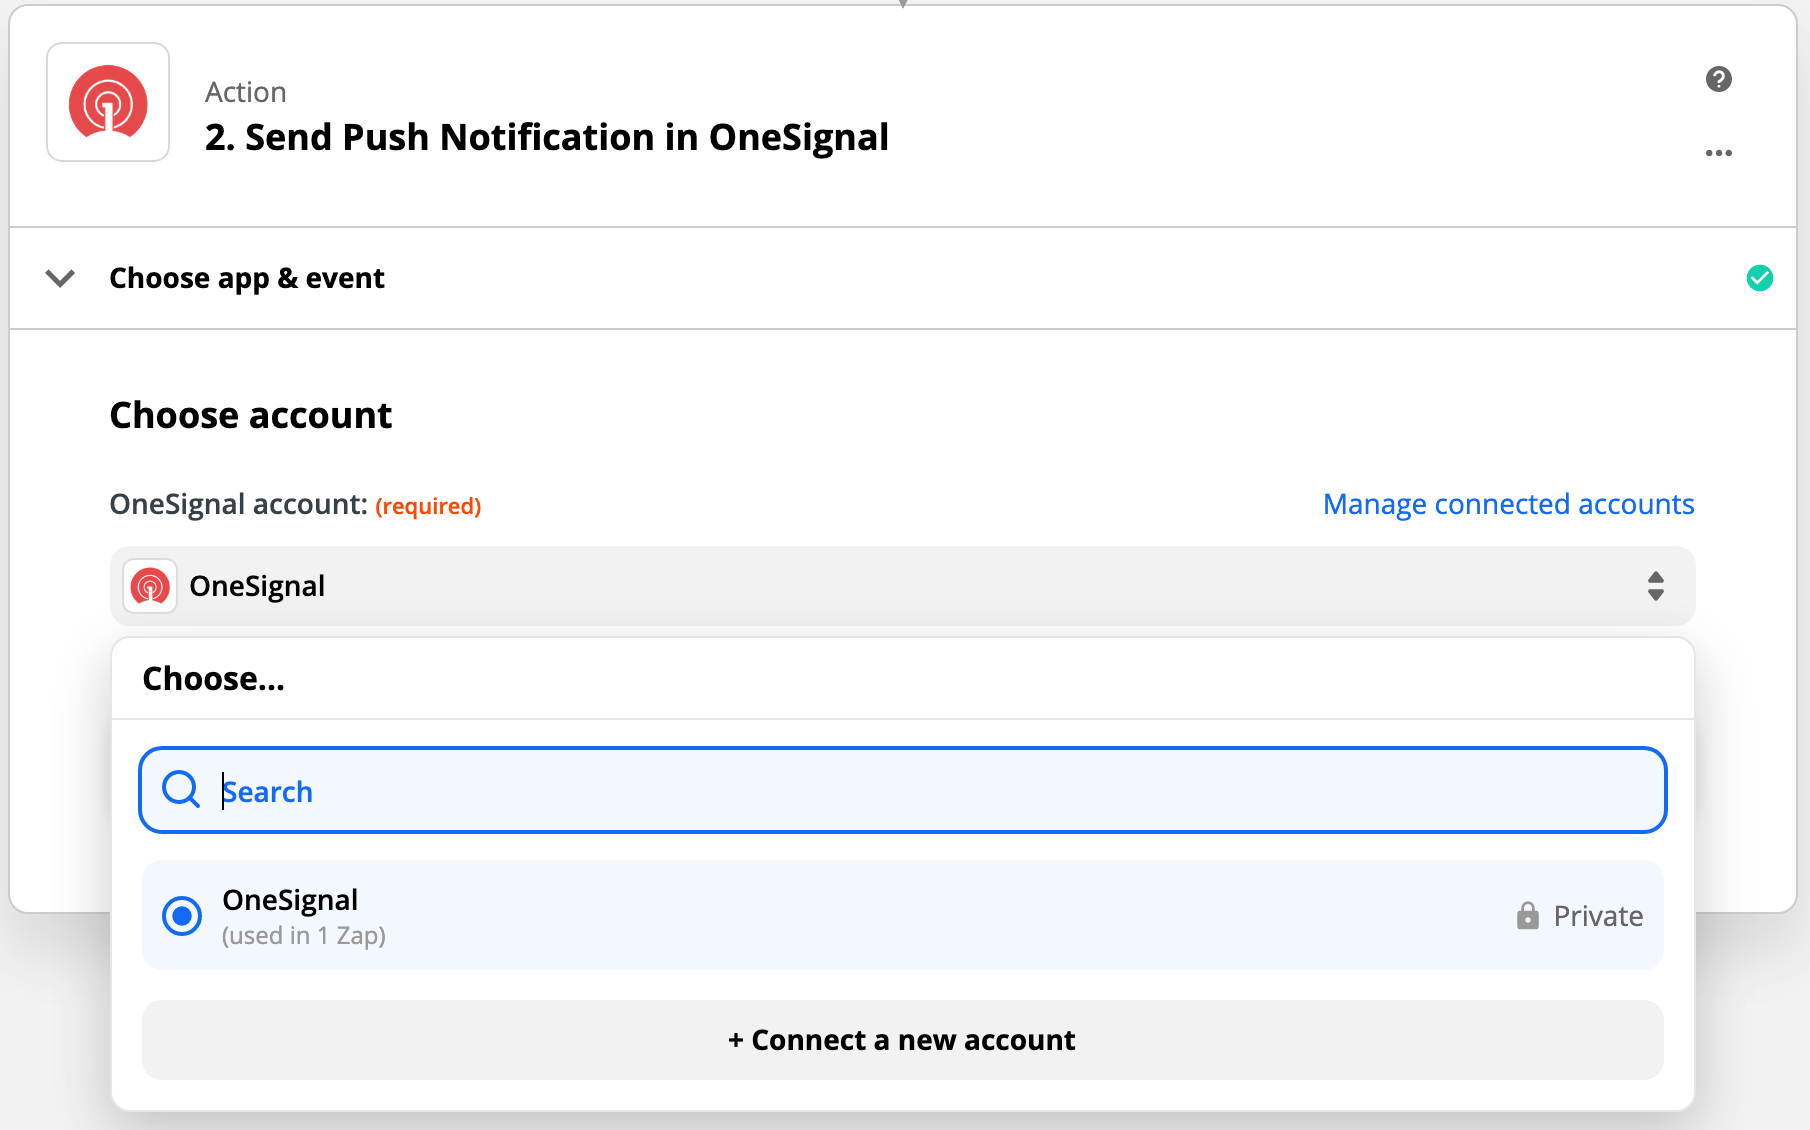
Connect OneSignal account
5
Set up OneSignal notification
There are a lot of settings depending on the push type selected. Details on all of them in [Sending Push Messages](https://documentation.onesignal.com/docs/push)
.
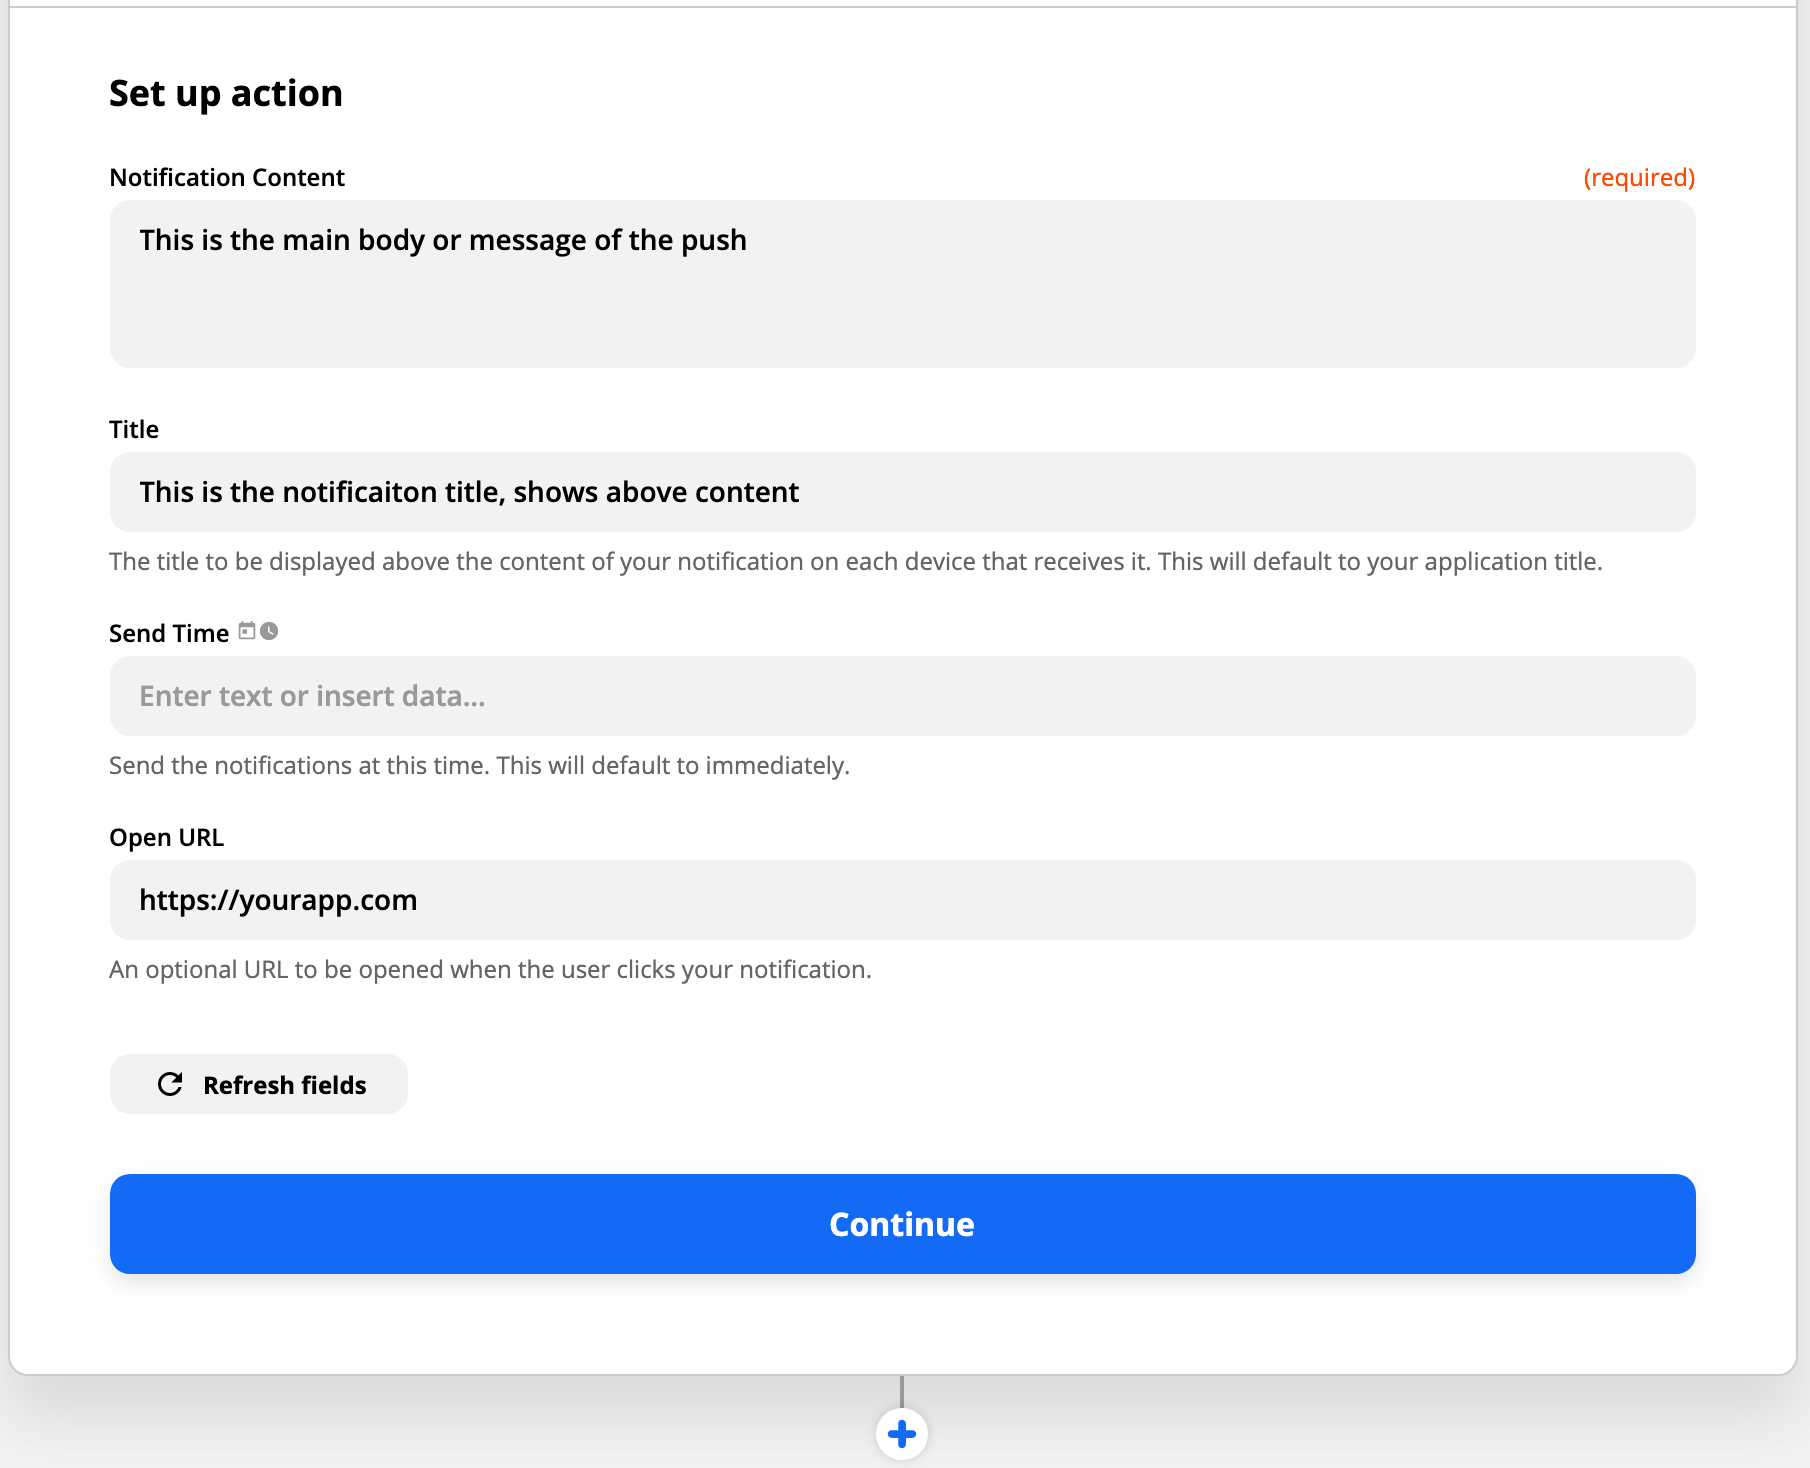
Set up notification
6
Test the message
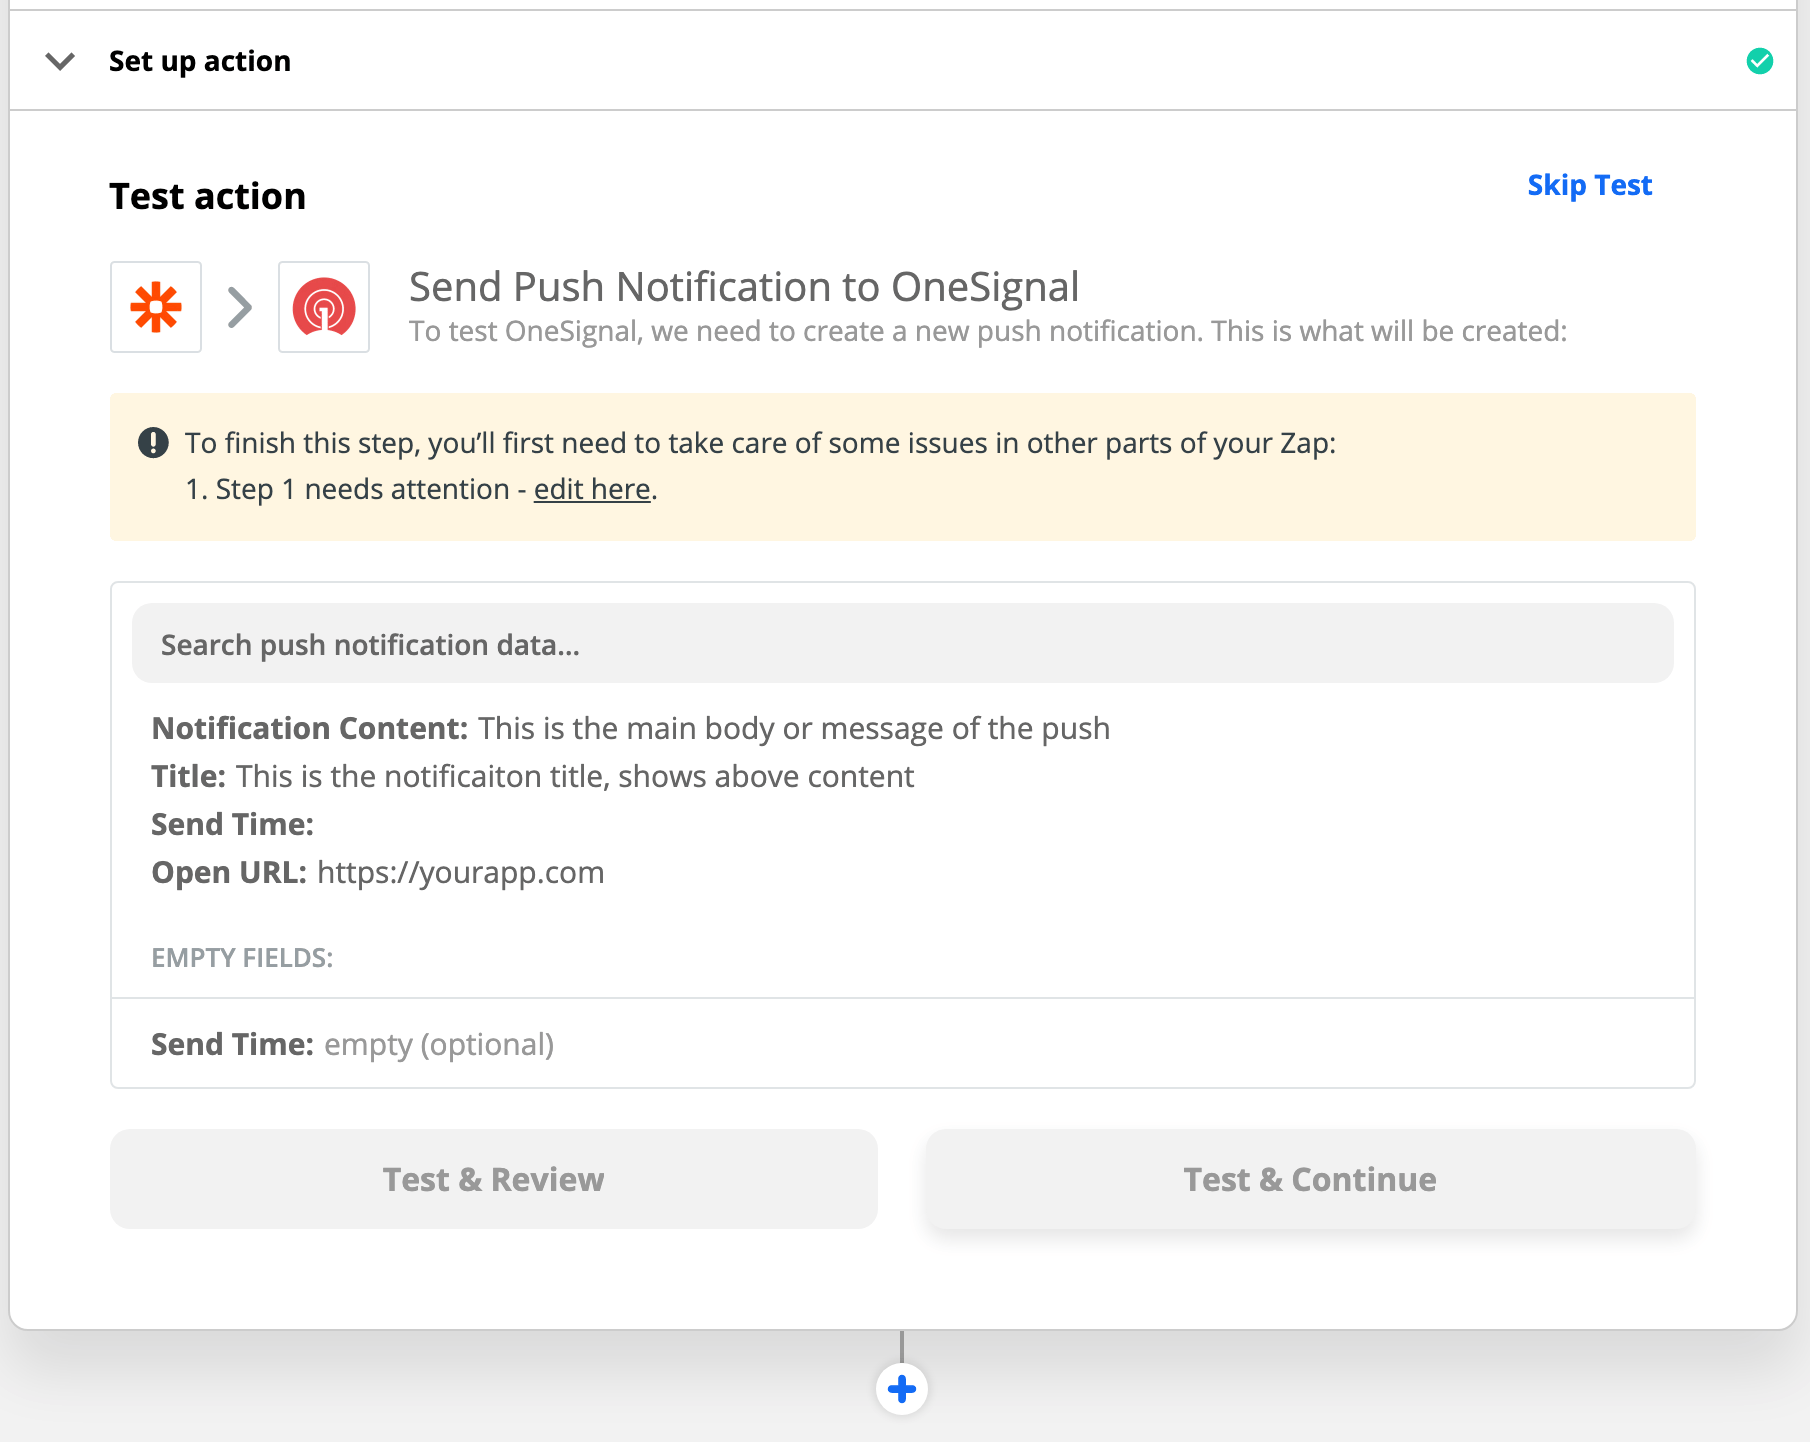
Test the message
You can add more zaps as you need!
* * *
[](https://documentation.onesignal.com/docs/zapier#faq)
FAQ
---------------------------------------------------------------
###
[](https://documentation.onesignal.com/docs/zapier#can-i-add-a-template-to-a-zap%3F)
Can I add a template to a Zap?
Yes you can! First create a template in your OneSignal dashboard. See our [Templates](https://documentation.onesignal.com/docs/templates)
section for more details on templates. Inside Zapier on your OneSignal action, under “Send push notification” choose “Send advanced push notification”. Continue to the “Set up template” step and find the “Template ID” section. You can find the Template ID inside your OneSignal.com dashboard > Templates > Click the template you want to use and the ID is the last set of numbers after the last / in the URL. For example: When you are viewing your template, your URL will look like this: `https://onesignal.com/apps/3beb3078-e0f1-4629-af17-fde833b9f716/templates/589b29b0-e107-4c6b-a60d-951416eb3b9a` In this case, the Template ID is: `589b29b0-e107-4c6b-a60d-951416eb3b9a`
###
[](https://documentation.onesignal.com/docs/zapier#can-i-override-the-template-if-i-add-other-data-to-the-fields-in-my-zap%3F)
Can I override the template if I add other data to the fields in my Zap?
Yes you will. All data that you enter into the Zap will override any data you added to your template. So if you added a message to your template and to your Zap, the Zap message will override the template message, meaning you will not see the message on your template.
###
[](https://documentation.onesignal.com/docs/zapier#how-do-i-set-timezone-and-intelligent-delivery-options-in-zapier%3F)
How do I set timezone and intelligent delivery options in Zapier?
First make sure you selected “Send advanced push notification” on Step 2 above. Then on the “Edit template” section of Zapier, find “Scheduling per-user delay option”.
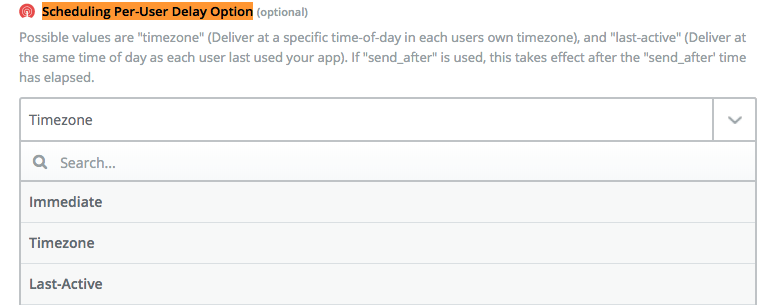
Scheduling per-user delay option
* Immediate means at the time you specify to everyone
* Timezone will only send during each device’s timezone
* Last-active is the same as [Intelligent Delivery](https://documentation.onesignal.com/docs/push)
* * *
Assistant
Responses are generated using AI and may contain mistakes.
---
# Update API key - OneSignal
[OneSignal home page](https://documentation.onesignal.com/)
Search...
⌘K
Search...
Navigation
Configuration
Update API key
[Home](https://documentation.onesignal.com/docs/home)
[User Guides](https://documentation.onesignal.com/docs/quickstart-guide)
[Developer Guides](https://documentation.onesignal.com/docs/developers)
[Tutorials](https://documentation.onesignal.com/docs/tutorials)
[API Reference](https://documentation.onesignal.com/reference/rest-api-overview)
[Release Notes](https://documentation.onesignal.com/release-notes/changelog)
Update API key
cURL
Copy
curl --request PATCH \
--url https://api.onesignal.com/apps/{app_id}/auth/tokens/{token_id} \
--header 'Authorization: ' \
--header 'Content-Type: ' \
--data '{
"name": "",
"ip_allowlist_mode": "disabled",
"ip_allowlist": [\
""\
]
}'
200
400
Copy
"{}"
PATCH
/
apps
/
{app\_id}
/
auth
/
tokens
/
{token\_id}
Try it
Update API key
cURL
Copy
curl --request PATCH \
--url https://api.onesignal.com/apps/{app_id}/auth/tokens/{token_id} \
--header 'Authorization: ' \
--header 'Content-Type: ' \
--data '{
"name": "",
"ip_allowlist_mode": "disabled",
"ip_allowlist": [\
""\
]
}'
200
400
Copy
"{}"
[](https://documentation.onesignal.com/reference/update-api-key#overview)
Overview
--------------------------------------------------------------------------------------
Use this API to update the properties of a specific **Rich Authentication Token** (App API Key) for a OneSignal app. You can change the name, IP allowlist mode, or the list of allowed IPs. This is helpful for adjusting access rules without needing to recreate the key.
For background on different OneSignal API keys, see [Keys & IDs](https://documentation.onesignal.com/docs/keys-and-ids)
.
* * *
[](https://documentation.onesignal.com/reference/update-api-key#how-to-use-this-api)
How to use this API
------------------------------------------------------------------------------------------------------------
Using your Organization API key (available in [Organizations > Keys & IDs](https://documentation.onesignal.com/docs/keys-and-ids#organization-api-key)
) you can update an app token associated with a given app. The `token_id` is a OneSignal-generated ID specific for the API key. This is not the API key itself. It is returned when creating an API key with [Create API key](https://documentation.onesignal.com/reference/create-api-key)
. It can be found in the OneSignal dashboard and in the response body of the [View API keys](https://documentation.onesignal.com/reference/view-api-keys)
request.
* * *
#### Headers
[](https://documentation.onesignal.com/reference/update-api-key#parameter-content-type)
Content-Type
string
default:application/json
required
[](https://documentation.onesignal.com/reference/update-api-key#parameter-authorization)
Authorization
string
default:Key YOUR\_ORGANIZATION\_API\_KEY
required
Your Organization's API key found in [Organizations > Keys & IDs](https://documentation.onesignal.com/docs/keys-and-ids)
.
#### Path Parameters
[](https://documentation.onesignal.com/reference/update-api-key#parameter-app-id)
app\_id
string
default:YOUR\_APP\_ID
required
Your OneSignal App ID in UUID v4 format. See [Keys & IDs](https://documentation.onesignal.com/docs/keys-and-ids)
.
[](https://documentation.onesignal.com/reference/update-api-key#parameter-token-id)
token\_id
string
required
The OneSignal-generated ID specific to the API key. This is not the API key itself. It is returned when creating an API key with [Create API key](https://documentation.onesignal.com/reference/create-api-key)
. It can be found in the OneSignal dashboard and in the response body of the [View API keys](https://documentation.onesignal.com/reference/view-api-keys)
request.
#### Body
application/json
[](https://documentation.onesignal.com/reference/update-api-key#body-name)
name
string
An internal name you set to help organize and track API keys (Rich Authentication Tokens). Maximum 128 characters.
[](https://documentation.onesignal.com/reference/update-api-key#body-ip-allowlist-mode)
ip\_allowlist\_mode
enum
Defaults to `disabled`, can be set to `explicit`. If set to `explicit`, a list of network addresses in the form of CIDRs has to be specified in the `ip_allowlist` parameter.
Available options:
`disabled`,
`explicit`
[](https://documentation.onesignal.com/reference/update-api-key#body-ip-allowlist)
ip\_allowlist
string\[\]
An array of allowed networks in CIDRs notation. Only IPs in those ranges will be permitted to use the API key.
#### Response
200
application/json
200
The response is of type `object`.
[Delete API key](https://documentation.onesignal.com/reference/delete-api-key)
[Rotate API key](https://documentation.onesignal.com/reference/rotate-api-key)
Assistant
Responses are generated using AI and may contain mistakes.
---
# Delete segment - OneSignal
[OneSignal home page](https://documentation.onesignal.com/)
Search...
⌘K
Search...
Navigation
Segments
Delete segment
[Home](https://documentation.onesignal.com/docs/home)
[User Guides](https://documentation.onesignal.com/docs/quickstart-guide)
[Developer Guides](https://documentation.onesignal.com/docs/developers)
[Tutorials](https://documentation.onesignal.com/docs/tutorials)
[API Reference](https://documentation.onesignal.com/reference/rest-api-overview)
[Release Notes](https://documentation.onesignal.com/release-notes/changelog)
Delete segment
cURL
Copy
curl --request DELETE \
--url https://api.onesignal.com/apps/{app_id}/segments/{segment_id} \
--header 'Authorization: '
200
400
404
429
Copy
"{\n \"success\": true\n}"
DELETE
/
apps
/
{app\_id}
/
segments
/
{segment\_id}
Try it
Delete segment
cURL
Copy
curl --request DELETE \
--url https://api.onesignal.com/apps/{app_id}/segments/{segment_id} \
--header 'Authorization: '
200
400
404
429
Copy
"{\n \"success\": true\n}"
[](https://documentation.onesignal.com/reference/delete-segments#overview)
Overview
---------------------------------------------------------------------------------------
The Delete segment method is used when you want to programmatically delete a segment from within the OneSignal Dashboard UI.
Once a segment is deleted, it cannot be recovered. You will need to create a new segment with the same filters.
* * *
[](https://documentation.onesignal.com/reference/delete-segments#how-to-use-this-api)
How to use this API
-------------------------------------------------------------------------------------------------------------
You can pass in the `segment_id` dictating which segment from our dashboard will be deleted. The `segment_id` can be found using the [View segments](https://documentation.onesignal.com/reference/view-segments)
API or in the URL of the segment when viewing it in the dashboard as shown below:
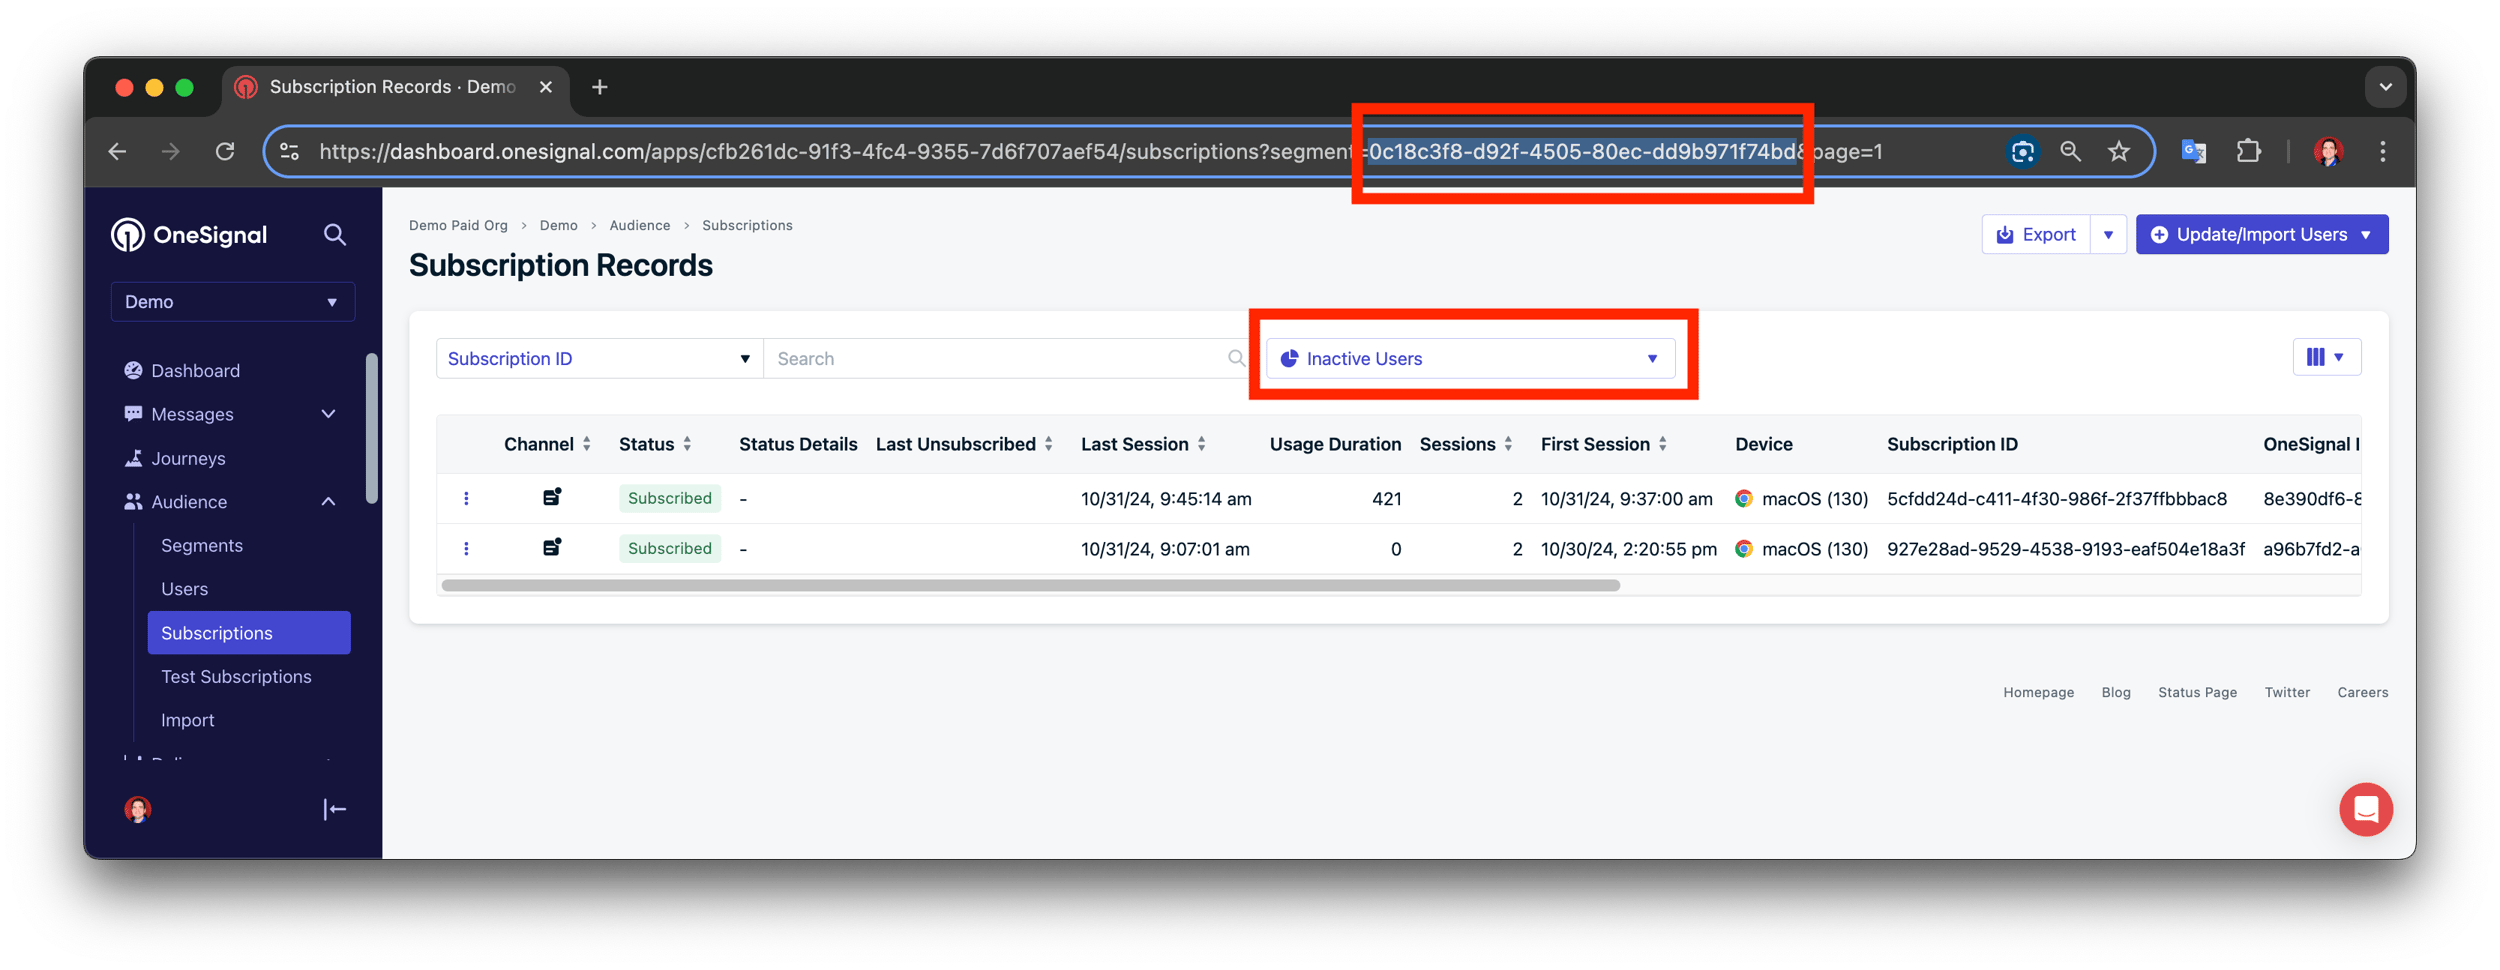
Example shows segment ID
* * *
#### Headers
[](https://documentation.onesignal.com/reference/delete-segments#parameter-authorization)
Authorization
string
default:Key YOUR\_APP\_API\_KEY
required
Your App API key with prefix `Key`. See [Keys & IDs](https://documentation.onesignal.com/docs/keys-and-ids)
.
#### Path Parameters
[](https://documentation.onesignal.com/reference/delete-segments#parameter-app-id)
app\_id
string
default:YOUR\_APP\_ID
required
Your OneSignal App ID in UUID v4 format. See [Keys & IDs](https://documentation.onesignal.com/docs/keys-and-ids)
.
[](https://documentation.onesignal.com/reference/delete-segments#parameter-segment-id)
segment\_id
string
default:YOUR\_SEGMENT\_ID
required
The `segment_id` can be found in the URL of the segment when viewing it in the dashboard.
#### Response
200
application/json
200
[](https://documentation.onesignal.com/reference/delete-segments#response-success)
success
boolean
default:true
Example:
`true`
[Create segment](https://documentation.onesignal.com/reference/create-segments)
[View apps](https://documentation.onesignal.com/reference/view-apps)
Assistant
Responses are generated using AI and may contain mistakes.
---
# Page Not Found
[OneSignal home page](https://documentation.onesignal.com/)
Search...
⌘K
Search...
Navigation
Page Not Found
[Home](https://documentation.onesignal.com/docs/home)
[User Guides](https://documentation.onesignal.com/docs/quickstart-guide)
[Developer Guides](https://documentation.onesignal.com/docs/developers)
[Tutorials](https://documentation.onesignal.com/docs/tutorials)
[API Reference](https://documentation.onesignal.com/reference/rest-api-overview)
[Release Notes](https://documentation.onesignal.com/release-notes/changelog)
404
Page Not Found
==============
We couldn't find the page you were looking for. Maybe you were looking for?
[Disabled Apps & Orgs](https://documentation.onesignal.com/docs/disabled-apps#)
[Apps, orgs, & accounts](https://documentation.onesignal.com/docs/apps-organizations#apps-orgs-and-accounts)
[Keys & IDs](https://documentation.onesignal.com/docs/keys-and-ids#organization-api-key)
Assistant
Responses are generated using AI and may contain mistakes.
---
# View user identity (by subscription) - OneSignal
[OneSignal home page](https://documentation.onesignal.com/)
Search...
⌘K
Search...
Navigation
Users
View user identity (by subscription)
[Home](https://documentation.onesignal.com/docs/home)
[User Guides](https://documentation.onesignal.com/docs/quickstart-guide)
[Developer Guides](https://documentation.onesignal.com/docs/developers)
[Tutorials](https://documentation.onesignal.com/docs/tutorials)
[API Reference](https://documentation.onesignal.com/reference/rest-api-overview)
[Release Notes](https://documentation.onesignal.com/release-notes/changelog)
View user identity (by subscription)
cURL
Copy
curl --request GET \
--url https://api.onesignal.com/apps/{app_id}/subscriptions/{subscription_id}/user/identity
200
400
404
429
Copy
{
"identity": {
"onesignal_id": "OneSignal-ID-in-UUID-v4-format",
"external_id": "the-users-external-id",
"custom_alias_label": "the-users-custom-alias-id"
}
}
GET
/
apps
/
{app\_id}
/
subscriptions
/
{subscription\_id}
/
user
/
identity
Try it
View user identity (by subscription)
cURL
Copy
curl --request GET \
--url https://api.onesignal.com/apps/{app_id}/subscriptions/{subscription_id}/user/identity
200
400
404
429
Copy
{
"identity": {
"onesignal_id": "OneSignal-ID-in-UUID-v4-format",
"external_id": "the-users-external-id",
"custom_alias_label": "the-users-custom-alias-id"
}
}
[](https://documentation.onesignal.com/reference/fetch-identity-by-subscription#overview)
Overview
------------------------------------------------------------------------------------------------------
Use this API when you want to find the full identity (all aliases) of a user, starting from a known `subscription_id`. This is helpful for debugging, reverse lookups, or support use cases where only a subscription record is available.
Unlike the [View user identity](https://documentation.onesignal.com/reference/fetch-aliases)
API which starts with an alias (e.g., `external_id`), this endpoint works when only a subscription ID is known.
See [Subscriptions](https://documentation.onesignal.com/docs/subscriptions)
for background on how subscriptions relate to users.
* * *
[](https://documentation.onesignal.com/reference/fetch-identity-by-subscription#how-to-use-this-api)
How to use this API
----------------------------------------------------------------------------------------------------------------------------
To use this endpoint, you must provide:
* `subscription_id` – A UUID generated by OneSignal when a device or channel (e.g., push, email, SMS) is registered.
`subscription_id` values are immutable and cannot be changed. Make sure you are using the correct value, as they are unique to each app and platform.
Once a valid `subscription_id` is provided, the API will return the user’s identity object, which includes all associated aliases like `external_id`, `onesignal_id`, and any custom aliases.
* * *
#### Path Parameters
[](https://documentation.onesignal.com/reference/fetch-identity-by-subscription#parameter-app-id)
app\_id
string
required
Your OneSignal App ID in UUID v4 format. See [Keys & IDs](https://documentation.onesignal.com/docs/keys-and-ids)
.
[](https://documentation.onesignal.com/reference/fetch-identity-by-subscription#parameter-subscription-id)
subscription\_id
string
required
The unique Subscription ID in UUID v4 format generated by OneSignal. See [Subscriptions](https://documentation.onesignal.com/docs/subscriptions)
.
#### Response
200
application/json
200
[](https://documentation.onesignal.com/reference/fetch-identity-by-subscription#response-identity)
identity
object
Show child attributes
[View user identity](https://documentation.onesignal.com/reference/fetch-aliases)
[Create or update alias](https://documentation.onesignal.com/reference/create-alias)
Assistant
Responses are generated using AI and may contain mistakes.
---
# View players - OneSignal
[OneSignal home page](https://documentation.onesignal.com/)
Search...
⌘K
Search...
Navigation
Deprecated
View players
[Home](https://documentation.onesignal.com/docs/home)
[User Guides](https://documentation.onesignal.com/docs/quickstart-guide)
[Developer Guides](https://documentation.onesignal.com/docs/developers)
[Tutorials](https://documentation.onesignal.com/docs/tutorials)
[API Reference](https://documentation.onesignal.com/reference/rest-api-overview)
[Release Notes](https://documentation.onesignal.com/release-notes/changelog)
On this page
* [Query Parameters](https://documentation.onesignal.com/reference/view-devices#query-parameters)
* [Headers](https://documentation.onesignal.com/reference/view-devices#headers)
* [Example Request](https://documentation.onesignal.com/reference/view-devices#example-request)
* [Example Response](https://documentation.onesignal.com/reference/view-devices#example-response)
* [Response Fields](https://documentation.onesignal.com/reference/view-devices#response-fields)
* [Errors](https://documentation.onesignal.com/reference/view-devices#errors)
Retrieve up to 80,000 player records (Subscriptions) registered to a specific OneSignal app.
This is a Legacy API. Use [View User](https://documentation.onesignal.com/reference/view-user)
or [CSV Export API](https://documentation.onesignal.com/reference/csv-export)
instead.
* * *
[](https://documentation.onesignal.com/reference/view-devices#query-parameters)
Query Parameters
----------------------------------------------------------------------------------------------------
| Parameter | Type | Required | Description |
| --- | --- | --- | --- |
| `app_id` | string | Yes | Your OneSignal App ID. |
| `limit` | int | No | Number of entries to return (max 300, default is 300). |
| `offset` | int | No | Result offset for pagination. |
* * *
[](https://documentation.onesignal.com/reference/view-devices#headers)
Headers
----------------------------------------------------------------------------------
| Header | Value | Required | Description |
| --- | --- | --- | --- |
| `Authorization` | `Basic YOUR_LEGACY_REST_API_KEY` | Yes | Your OneSignal Legacy REST API Key. |
* * *
[](https://documentation.onesignal.com/reference/view-devices#example-request)
Example Request
--------------------------------------------------------------------------------------------------
Copy
GET /api/v1/players?app_id=your_app_id&limit=100&offset=0 HTTP/1.1
Host: onesignal.com
Authorization: Basic YOUR_LEGACY_REST_API_KEY
* * *
[](https://documentation.onesignal.com/reference/view-devices#example-response)
Example Response
----------------------------------------------------------------------------------------------------
Copy
{
"total_count": 6,
"offset": 0,
"limit": 300,
"players": [\
{\
"id": "player_id_1",\
"identifier": "push_token_or_email",\
"session_count": 3,\
"language": "en",\
"timezone": -28800,\
"game_version": "1.0",\
"device_os": "15.0",\
"device_type": 1,\
"tags": {\
"level": "15",\
"user_type": "free"\
},\
"last_active": 1625253300,\
"created_at": 1625249800,\
"invalid_identifier": false,\
"external_user_id": "user123"\
}\
]
}
###
[](https://documentation.onesignal.com/reference/view-devices#response-fields)
Response Fields
| Field | Type | Description |
| --- | --- | --- |
| `total_count` | integer | Total number of devices for the app. |
| `offset` | integer | Current pagination offset. |
| `limit` | integer | Number of devices returned in this response. |
| `players` | array | List of device objects. |
| `players[].id` | string | Unique OneSignal player ID. |
| `players[].identifier` | string | Push token, email, or phone number. |
| `players[].tags` | object | Custom tags set on the device. |
| `players[].external_user_id` | string | Your internal user ID. |
* * *
[](https://documentation.onesignal.com/reference/view-devices#errors)
Errors
--------------------------------------------------------------------------------
* 400 Bad Request – Invalid query parameters.
* 401 Unauthorized – Invalid or missing API key.
* 403 Forbidden – Access not allowed for this app or key.
* * *
[View outcomes](https://documentation.onesignal.com/reference/view-outcomes)
[View player](https://documentation.onesignal.com/reference/view-device)
Assistant
Responses are generated using AI and may contain mistakes.
---
# View an app - OneSignal
[OneSignal home page](https://documentation.onesignal.com/)
Search...
⌘K
Search...
Navigation
Configuration
View an app
[Home](https://documentation.onesignal.com/docs/home)
[User Guides](https://documentation.onesignal.com/docs/quickstart-guide)
[Developer Guides](https://documentation.onesignal.com/docs/developers)
[Tutorials](https://documentation.onesignal.com/docs/tutorials)
[API Reference](https://documentation.onesignal.com/reference/rest-api-overview)
[Release Notes](https://documentation.onesignal.com/release-notes/changelog)
View an app
cURL
Copy
curl --request GET \
--url https://api.onesignal.com/apps/{app_id} \
--header 'Authorization: ' \
--header 'Content-Type: '
200
Copy
{
"id": "",
"name": "",
"players": 123,
"messageable_players": 123,
"created_at": "",
"updated_at": "",
"organization_id": ""
}
GET
/
apps
/
{app\_id}
Try it
View an app
cURL
Copy
curl --request GET \
--url https://api.onesignal.com/apps/{app_id} \
--header 'Authorization: ' \
--header 'Content-Type: '
200
Copy
{
"id": "",
"name": "",
"players": 123,
"messageable_players": 123,
"created_at": "",
"updated_at": "",
"organization_id": ""
}
[](https://documentation.onesignal.com/reference/view-an-app#overview)
Overview
-----------------------------------------------------------------------------------
Use this API to retrieve metadata for a single OneSignal app associated with your account. This includes app names, App ID, Subscription counts, and timestamps, making it easy to programmatically manage or audit your applications.
This API does not return the app’s API keys. To manage API keys, use the [Create API Key](https://documentation.onesignal.com/reference/create-api-key)
, [Rotate API Key](https://documentation.onesignal.com/reference/rotate-api-key)
, and [Delete API Key](https://documentation.onesignal.com/reference/delete-api-key)
APIs.
* * *
[](https://documentation.onesignal.com/reference/view-an-app#how-to-use-this-api)
How to use this API
---------------------------------------------------------------------------------------------------------
To retrieve your app, send a `GET` request to the `/apps` endpoint using your **Organization API Key**. This key can be found in your OneSignal dashboard under [Organization > Keys & IDs](https://documentation.onesignal.com/docs/keys-and-ids#organization-api-key)
.
* * *
#### Headers
[](https://documentation.onesignal.com/reference/view-an-app#parameter-content-type)
Content-Type
string
default:application/json
required
[](https://documentation.onesignal.com/reference/view-an-app#parameter-authorization)
Authorization
string
default:Key YOUR\_ORGANIZATION\_API\_KEY
required
Your Organization API key with prefix `Key`. See [Keys & IDs](https://documentation.onesignal.com/docs/keys-and-ids)
.
#### Path Parameters
[](https://documentation.onesignal.com/reference/view-an-app#parameter-app-id)
app\_id
string
required
Your OneSignal App ID in UUID v4 format. See [Keys & IDs](https://documentation.onesignal.com/docs/keys-and-ids)
.
#### Response
200 - application/json
200
[](https://documentation.onesignal.com/reference/view-an-app#response-id)
id
string
The OneSignal App ID in UUID v4 format.
[](https://documentation.onesignal.com/reference/view-an-app#response-name)
name
string
An internal name you set to help organize and track Apps. Maximum 128 characters.
[](https://documentation.onesignal.com/reference/view-an-app#response-players)
players
integer
The total number of Subscriptions in the app.
[](https://documentation.onesignal.com/reference/view-an-app#response-messageable-players)
messageable\_players
integer
The number of Subscriptions eligible to receive messages in the app.
[](https://documentation.onesignal.com/reference/view-an-app#response-created-at)
created\_at
string
The date and time the app was created.
[](https://documentation.onesignal.com/reference/view-an-app#response-updated-at)
updated\_at
string
The date and time the app was last updated.
[](https://documentation.onesignal.com/reference/view-an-app#response-organization-id)
organization\_id
string
The Organization ID in which the app was created.
[View apps](https://documentation.onesignal.com/reference/view-apps)
[Create an app](https://documentation.onesignal.com/reference/create-an-app)
Assistant
Responses are generated using AI and may contain mistakes.
---
# View template - OneSignal
[OneSignal home page](https://documentation.onesignal.com/)
Search...
⌘K
Search...
Navigation
Templates
View template
[Home](https://documentation.onesignal.com/docs/home)
[User Guides](https://documentation.onesignal.com/docs/quickstart-guide)
[Developer Guides](https://documentation.onesignal.com/docs/developers)
[Tutorials](https://documentation.onesignal.com/docs/tutorials)
[API Reference](https://documentation.onesignal.com/reference/rest-api-overview)
[Release Notes](https://documentation.onesignal.com/release-notes/changelog)
View template
cURL
Copy
curl --request GET \
--url 'https://api.onesignal.com/templates/{template_id}?app_id={app_id}' \
--header 'Authorization: ' \
--header 'Content-Type: '
200
400
404
429
Copy
{
"id": "Template-ID-in-UUID-v4-format",
"name": "",
"channel": "push",
"created_at": "2023-07-20T19:16:55Z",
"updated_at": "2023-07-20T19:16:55Z",
"content": {
"isAndroid": true,
"isIos": true,
"isMacOSX": true,
"isAdm": true,
"isWP_WNS": true,
"isChromeWeb": true,
"isSafari": true,
"isFirefox": true,
"isEdge": true,
"headings": {
"en": ""
},
"contents": {
"en": ""
},
"global_image": "",
"url": "https://example.com",
"isEmail": true,
"email_body": "",
"email_subject": "",
"email_preheader": "",
"email_from_address": "",
"email_from_name": "",
"isSMS": true,
"sms_from": "",
"sms_media_urls": "",
"email_reply_to_address": "",
"disable_email_click_tracking": ""
}
}
GET
/
templates
/
{template\_id}
?app\_id=
{app\_id}
Try it
View template
cURL
Copy
curl --request GET \
--url 'https://api.onesignal.com/templates/{template_id}?app_id={app_id}' \
--header 'Authorization: ' \
--header 'Content-Type: '
200
400
404
429
Copy
{
"id": "Template-ID-in-UUID-v4-format",
"name": "",
"channel": "push",
"created_at": "2023-07-20T19:16:55Z",
"updated_at": "2023-07-20T19:16:55Z",
"content": {
"isAndroid": true,
"isIos": true,
"isMacOSX": true,
"isAdm": true,
"isWP_WNS": true,
"isChromeWeb": true,
"isSafari": true,
"isFirefox": true,
"isEdge": true,
"headings": {
"en": ""
},
"contents": {
"en": ""
},
"global_image": "",
"url": "https://example.com",
"isEmail": true,
"email_body": "",
"email_subject": "",
"email_preheader": "",
"email_from_address": "",
"email_from_name": "",
"isSMS": true,
"sms_from": "",
"sms_media_urls": "",
"email_reply_to_address": "",
"disable_email_click_tracking": ""
}
}
[](https://documentation.onesignal.com/reference/view-template#overview)
Overview
-------------------------------------------------------------------------------------
This endpoint returns metadata and content for a single template, including:
* Template body/content
* Target delivery channel (e.g., push, email, SMS)
* Creation and last updated timestamps
This is useful for inspecting existing templates before using or updating them.
See [Templates](https://documentation.onesignal.com/docs/templates)
for more information.
* * *
[](https://documentation.onesignal.com/reference/view-template#how-to-use-this-api)
How to use this API
-----------------------------------------------------------------------------------------------------------
Required parameters:
* `app_id` (query param): Your OneSignal App ID.
* `template_id` (path param): The unique ID of the template.
###
[](https://documentation.onesignal.com/reference/view-template#template-id)
Template ID
Each template has a unique OneSignal-generated `template_id` (UUID v4). You can find it:
* Using the [View Templates API](https://documentation.onesignal.com/reference/view-templates)
* In the OneSignal Dashboard under **Messages > Templates > Options > Copy Template ID**
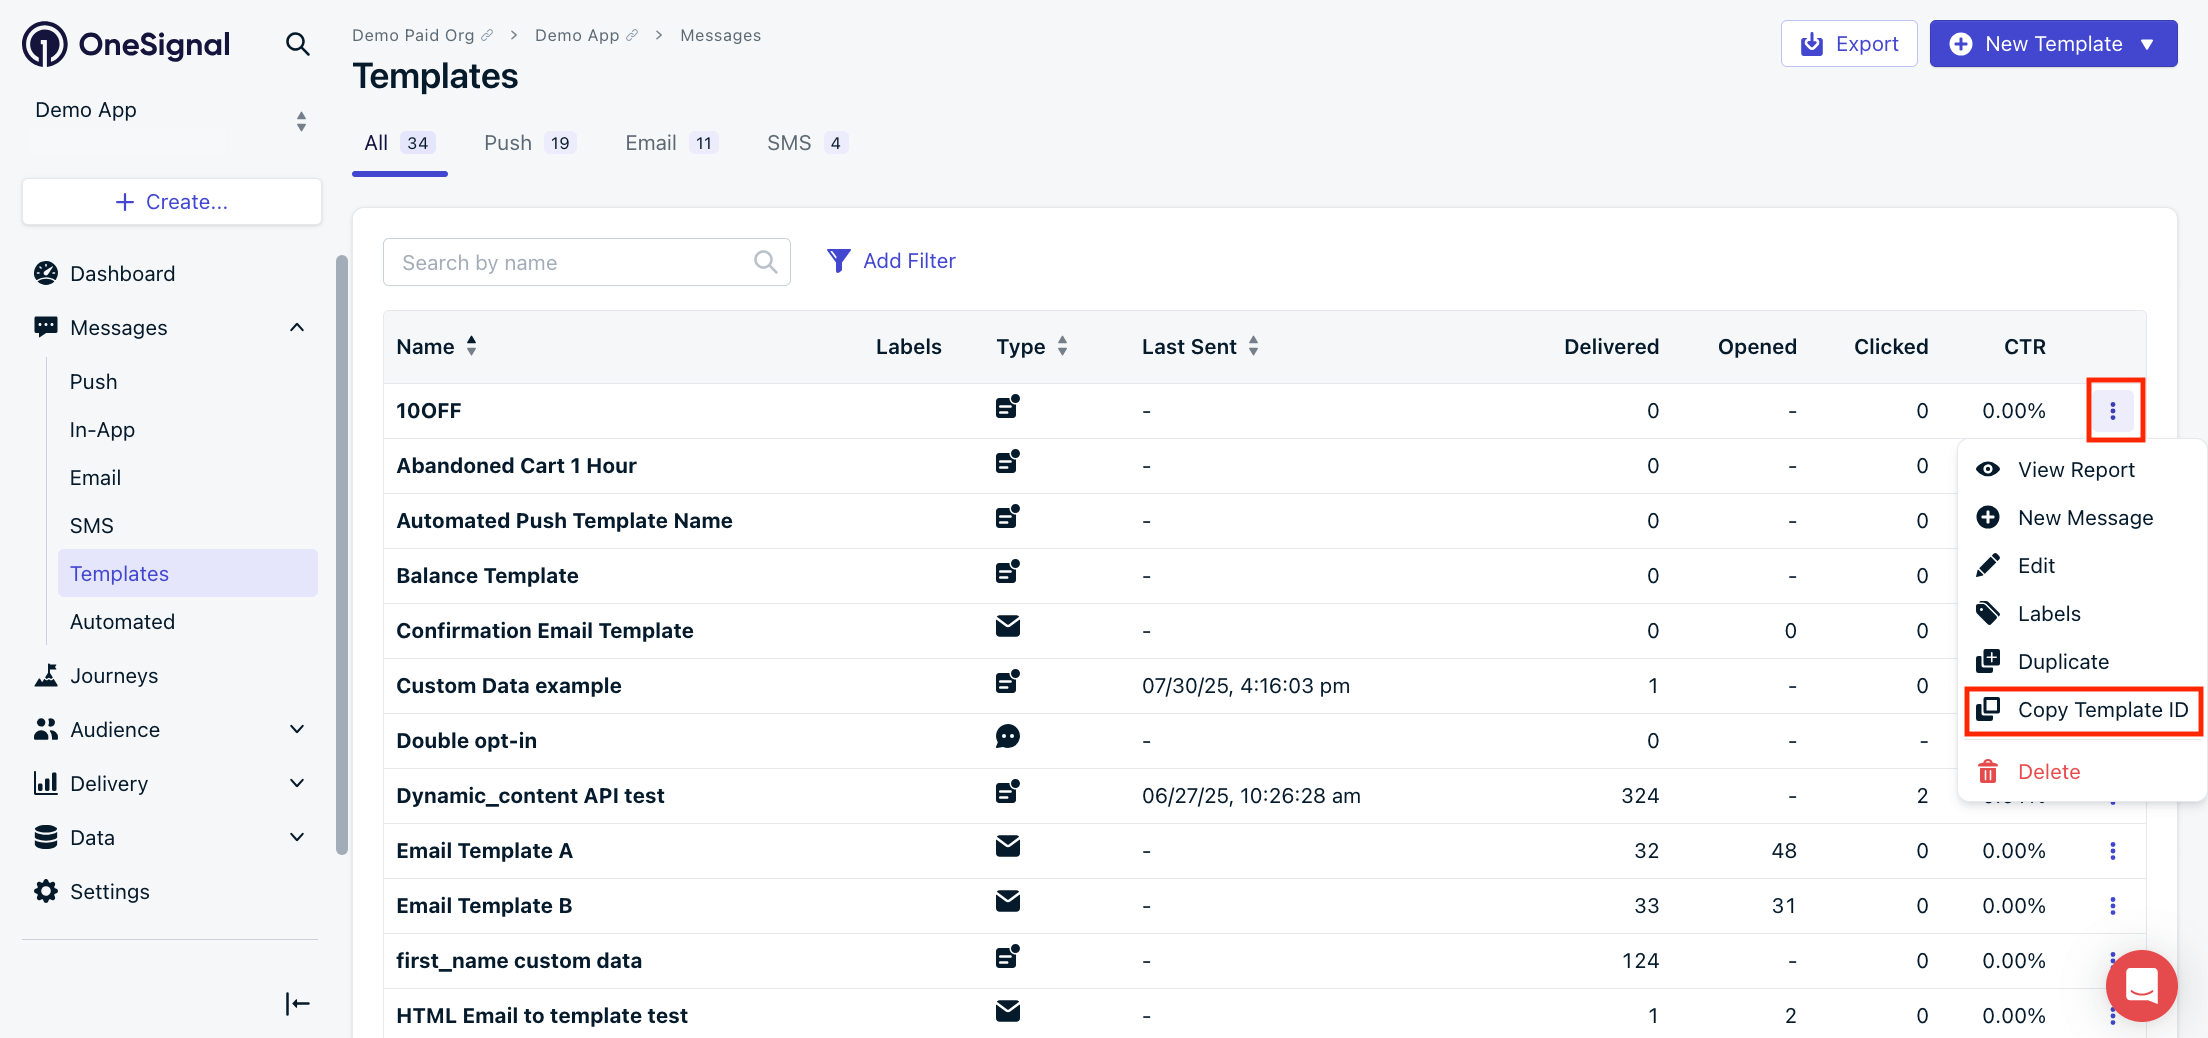
Copy Template ID
* * *
#### Headers
[](https://documentation.onesignal.com/reference/view-template#parameter-authorization)
Authorization
string
default:Key YOUR\_APP\_API\_KEY
required
Your App API key with prefix `Key`. See [Keys & IDs](https://documentation.onesignal.com/docs/keys-and-ids)
.
[](https://documentation.onesignal.com/reference/view-template#parameter-content-type)
Content-Type
string
default:application/json; charset=utf-8
required
#### Path Parameters
[](https://documentation.onesignal.com/reference/view-template#parameter-template-id)
template\_id
string
default:YOUR\_TEMPLATE\_ID
required
The template ID in UUID v4 format. See [Templates](https://documentation.onesignal.com/docs/templates)
.
#### Query Parameters
[](https://documentation.onesignal.com/reference/view-template#parameter-app-id)
app\_id
string
default:YOUR\_APP\_ID
required
Your OneSignal App ID in UUID v4 format. See [Keys & IDs](https://documentation.onesignal.com/docs/keys-and-ids)
.
#### Response
200
application/json
200
* 200 OK - Push
* 200 OK - Email
[](https://documentation.onesignal.com/reference/view-template#response-id)
id
string
The template ID in UUID v4 format.
Example:
`"Template-ID-in-UUID-v4-format"`
[](https://documentation.onesignal.com/reference/view-template#response-name)
name
string
An internal name you set to help organize and track Templates. Maximum 128 characters.
[](https://documentation.onesignal.com/reference/view-template#response-channel)
channel
string
Options are: `push`, `email`, and `SMS`.
Example:
`"push"`
[](https://documentation.onesignal.com/reference/view-template#response-created-at)
created\_at
string
The date and time the template was created in ISO 8601 format.
Example:
`"2023-07-20T19:16:55Z"`
[](https://documentation.onesignal.com/reference/view-template#response-updated-at)
updated\_at
string
The date and time the template was last updated in ISO 8601 format.
Example:
`"2023-07-20T19:16:55Z"`
[](https://documentation.onesignal.com/reference/view-template#response-content)
content
object
The template content.
Show child attributes
[View templates](https://documentation.onesignal.com/reference/view-templates)
[Delete template](https://documentation.onesignal.com/reference/delete-template)
Assistant
Responses are generated using AI and may contain mistakes.
---
# Delete template - OneSignal
[OneSignal home page](https://documentation.onesignal.com/)
Search...
⌘K
Search...
Navigation
Templates
Delete template
[Home](https://documentation.onesignal.com/docs/home)
[User Guides](https://documentation.onesignal.com/docs/quickstart-guide)
[Developer Guides](https://documentation.onesignal.com/docs/developers)
[Tutorials](https://documentation.onesignal.com/docs/tutorials)
[API Reference](https://documentation.onesignal.com/reference/rest-api-overview)
[Release Notes](https://documentation.onesignal.com/release-notes/changelog)
Delete template
cURL
Copy
curl --request DELETE \
--url 'https://api.onesignal.com/templates/{template_id}?app_id={app_id}' \
--header 'Authorization: '
200
400
404
429
Copy
{
"success": true
}
DELETE
/
templates
/
{template\_id}
?app\_id=
{app\_id}
Try it
Delete template
cURL
Copy
curl --request DELETE \
--url 'https://api.onesignal.com/templates/{template_id}?app_id={app_id}' \
--header 'Authorization: '
200
400
404
429
Copy
{
"success": true
}
[](https://documentation.onesignal.com/reference/delete-template#overview)
Overview
---------------------------------------------------------------------------------------
This endpoint allows you to delete a single template associated with your OneSignal app. Deletion is **immediate and irreversible**.
If the template is currently used in a Journey, it cannot be deleted until that Journey has been deleted.
* * *
[](https://documentation.onesignal.com/reference/delete-template#how-to-use-this-api)
How to use this API
-------------------------------------------------------------------------------------------------------------
Required Parameters
* `template_id` (path param): The OneSignal-generated UUID of the template to delete.
* `app_id` (query param): Your OneSignal App ID.
###
[](https://documentation.onesignal.com/reference/delete-template#where-to-find-template-id)
Where to Find `template_id`
Each template has a unique OneSignal-generated `template_id` (UUID v4). You can find it:
* Using the [View Templates API](https://documentation.onesignal.com/reference/view-templates)
* In the OneSignal Dashboard under **Messages > Templates > Options > Copy Template ID**

Copy Template ID
* * *
#### Headers
[](https://documentation.onesignal.com/reference/delete-template#parameter-authorization)
Authorization
string
default:Key YOUR\_APP\_API\_KEY
required
Your App's API key found in [Settings > Keys & IDs](https://documentation.onesignal.com/docs/keys-and-ids)
.
#### Path Parameters
[](https://documentation.onesignal.com/reference/delete-template#parameter-template-id)
template\_id
string
default:YOUR\_TEMPLATE\_ID
required
The template ID in UUID v4 format. See [Templates](https://documentation.onesignal.com/docs/templates)
.
#### Query Parameters
[](https://documentation.onesignal.com/reference/delete-template#parameter-app-id)
app\_id
string
default:YOUR\_APP\_ID
required
Your OneSignal App ID in UUID v4 format. See [Keys & IDs](https://documentation.onesignal.com/docs/keys-and-ids)
.
#### Response
200
application/json
200
[](https://documentation.onesignal.com/reference/delete-template#response-success)
success
boolean
Example:
`true`
[View template](https://documentation.onesignal.com/reference/view-template)
[Copy template to another app](https://documentation.onesignal.com/reference/copy-template-to-another-app)
Assistant
Responses are generated using AI and may contain mistakes.
---
# Rotate API key - OneSignal
[OneSignal home page](https://documentation.onesignal.com/)
Search...
⌘K
Search...
Navigation
Configuration
Rotate API key
[Home](https://documentation.onesignal.com/docs/home)
[User Guides](https://documentation.onesignal.com/docs/quickstart-guide)
[Developer Guides](https://documentation.onesignal.com/docs/developers)
[Tutorials](https://documentation.onesignal.com/docs/tutorials)
[API Reference](https://documentation.onesignal.com/reference/rest-api-overview)
[Release Notes](https://documentation.onesignal.com/release-notes/changelog)
Rotate API key
cURL
Copy
curl --request POST \
--url https://api.onesignal.com/apps/{app_id}/auth/tokens/{token_id}/rotate \
--header 'Authorization: ' \
--header 'Content-Type: '
200
400
Copy
{
"formatted_token": ""
}
POST
/
apps
/
{app\_id}
/
auth
/
tokens
/
{token\_id}
/
rotate
Try it
Rotate API key
cURL
Copy
curl --request POST \
--url https://api.onesignal.com/apps/{app_id}/auth/tokens/{token_id}/rotate \
--header 'Authorization: ' \
--header 'Content-Type: '
200
400
Copy
{
"formatted_token": ""
}
[](https://documentation.onesignal.com/reference/rotate-api-key#overview)
Overview
--------------------------------------------------------------------------------------
Use this API to rotate a **Rich Authentication Token** (App API Key) for a specific OneSignal app. Rotating a key revokes the current token and generates a new one under the same configuration—ideal when a token is lost or compromised but you don’t want to recreate and reconfigure it from scratch.
For background on different OneSignal API keys, see [Keys & IDs](https://documentation.onesignal.com/docs/keys-and-ids)
.
* * *
[](https://documentation.onesignal.com/reference/rotate-api-key#how-to-use-this-api)
How to use this API
------------------------------------------------------------------------------------------------------------
Using your Organization API key (available in [Organizations > Keys & IDs](https://documentation.onesignal.com/docs/keys-and-ids#organization-api-key)
) you can rotate an app token associated with a given app. The `token_id` is a OneSignal-generated ID specific for the API key. This is not the API key itself. It is returned when creating an API key with [Create API key](https://documentation.onesignal.com/reference/create-api-key)
. It can be found in the OneSignal dashboard and in the response body of the [View API keys](https://documentation.onesignal.com/reference/view-api-keys)
request.
* * *
#### Headers
[](https://documentation.onesignal.com/reference/rotate-api-key#parameter-content-type)
Content-Type
string
default:application/json
required
[](https://documentation.onesignal.com/reference/rotate-api-key#parameter-authorization)
Authorization
string
default:Key YOUR\_ORGANIZATION\_API\_KEY
required
Your Organization API key with prefix `Key`. See [Keys & IDs](https://documentation.onesignal.com/docs/keys-and-ids)
.
#### Path Parameters
[](https://documentation.onesignal.com/reference/rotate-api-key#parameter-app-id)
app\_id
string
default:YOUR\_APP\_ID
required
Your OneSignal App ID in UUID v4 format. See [Keys & IDs](https://documentation.onesignal.com/docs/keys-and-ids)
.
[](https://documentation.onesignal.com/reference/rotate-api-key#parameter-token-id)
token\_id
string
required
The OneSignal-generated ID specific to the API key. This is not the API key itself. It is returned when creating an API key with [Create API key](https://documentation.onesignal.com/reference/create-api-key)
. It can be found in the OneSignal dashboard and in the response body of the [View API keys](https://documentation.onesignal.com/reference/view-api-keys)
request.
#### Response
200
application/json
200
[](https://documentation.onesignal.com/reference/rotate-api-key#response-formatted-token)
formatted\_token
string
The Rich Authentication Token (REST API Key). It is shown only once and won’t be stored in OneSignal. Keep it secret and secure, as it can’t be retrieved later.
[Update API key](https://documentation.onesignal.com/reference/update-api-key)
[Export subscriptions CSV](https://documentation.onesignal.com/reference/csv-export)
Assistant
Responses are generated using AI and may contain mistakes.
---
# Remove alias - OneSignal
[OneSignal home page](https://documentation.onesignal.com/)
Search...
⌘K
Search...
Navigation
Users
Remove alias
[Home](https://documentation.onesignal.com/docs/home)
[User Guides](https://documentation.onesignal.com/docs/quickstart-guide)
[Developer Guides](https://documentation.onesignal.com/docs/developers)
[Tutorials](https://documentation.onesignal.com/docs/tutorials)
[API Reference](https://documentation.onesignal.com/reference/rest-api-overview)
[Release Notes](https://documentation.onesignal.com/release-notes/changelog)
Delete alias
cURL
Copy
curl --request DELETE \
--url https://api.onesignal.com/apps/{app_id}/users/by/{alias_label}/{alias_id}/identity/{alias_label_to_delete}
200
400
404
429
Copy
{
"identity": {
"onesignal_id": "OneSignal-ID-in-UUID-v4-format"
}
}
DELETE
/
apps
/
{app\_id}
/
users
/
by
/
{alias\_label}
/
{alias\_id}
/
identity
/
{alias\_label\_to\_delete}
Try it
Delete alias
cURL
Copy
curl --request DELETE \
--url https://api.onesignal.com/apps/{app_id}/users/by/{alias_label}/{alias_id}/identity/{alias_label_to_delete}
200
400
404
429
Copy
{
"identity": {
"onesignal_id": "OneSignal-ID-in-UUID-v4-format"
}
}
[](https://documentation.onesignal.com/reference/delete-alias#overview)
Overview
------------------------------------------------------------------------------------
Use this API to remove a specific alias from a user’s identity object without deleting the user. This operation only affects user identity labels—subscriptions and the core user record remain intact. To delete a user entirely, including all associated aliases and subscriptions, see the [Delete user](https://documentation.onesignal.com/reference/delete-user)
API.
* * *
[](https://documentation.onesignal.com/reference/delete-alias#how-to-use-this-api)
How to use this API
----------------------------------------------------------------------------------------------------------
To remove an alias from a user:
1. Identify the user via a known alias by specifying:
* `alias_label` – the type of alias (e.g., email, external\_id)
* `alias_id` – the unique identifier for that alias
2. Specify the alias to remove using:
* `alias_label_to_delete` – the label of the alias to be deleted
The `alias_label_to_delete` can be the same as the `alias_label` used to identify the user.
3. This action is performed synchronously—the alias is deleted immediately after the request is processed.
The `onesignal_id` alias cannot be deleted. Only secondary aliases (like email, external\_id, etc.) are removable.
For a full explanation of identity management, see [Users](https://documentation.onesignal.com/docs/users)
and [Aliases](https://documentation.onesignal.com/docs/aliases)
.
* * *
[](https://documentation.onesignal.com/reference/delete-alias#faq)
FAQ
--------------------------------------------------------------------------
###
[](https://documentation.onesignal.com/reference/delete-alias#can-i-delete-the-same-alias-that-i-used-to-look-up-the-user%3F)
Can I delete the same alias that I used to look up the user?
Yes. This is a common scenario—especially if an alias was set incorrectly and needs to be removed. Just be sure to include that alias both as the identifier and as alias\_label\_to\_delete. If you want to delete the entire user and all associated data, use the [Delete user](https://documentation.onesignal.com/reference/delete-user)
API.
###
[](https://documentation.onesignal.com/reference/delete-alias#what-happens-if-i-delete-all-aliases-associated-with-the-user%3F)
What happens if I delete all aliases associated with the user?
A user will always retain at least one alias, the onesignal\_id. Even if you remove all other aliases, the user and their subscriptions remain linked to the onesignal\_id.
* * *
#### Path Parameters
[](https://documentation.onesignal.com/reference/delete-alias#parameter-app-id)
app\_id
string
required
Your OneSignal App ID in UUID v4 format. See [Keys & IDs](https://documentation.onesignal.com/docs/keys-and-ids)
.
[](https://documentation.onesignal.com/reference/delete-alias#parameter-alias-label)
alias\_label
string
default:external\_id
required
The alias name or key to locate the user. Most commonly set as `external_id` but can be the `onesignal_id` or a [custom alias](https://documentation.onesignal.com/docs/aliases)
.
[](https://documentation.onesignal.com/reference/delete-alias#parameter-alias-id)
alias\_id
string
required
The specific identifier for the given alias to identify the user.
[](https://documentation.onesignal.com/reference/delete-alias#parameter-alias-label-to-delete)
alias\_label\_to\_delete
string
required
The name of the alias to remove.
#### Response
200
application/json
200
[](https://documentation.onesignal.com/reference/delete-alias#response-identity)
identity
object
Show child attributes
[Create alias (by subscription)](https://documentation.onesignal.com/reference/create-alias-by-subscription)
[Create Subscription by alias](https://documentation.onesignal.com/reference/create-subscription)
Assistant
Responses are generated using AI and may contain mistakes.
---
# Page Not Found
[OneSignal home page](https://documentation.onesignal.com/)
Search...
⌘K
Search...
Navigation
Page Not Found
[Home](https://documentation.onesignal.com/docs/home)
[User Guides](https://documentation.onesignal.com/docs/quickstart-guide)
[Developer Guides](https://documentation.onesignal.com/docs/developers)
[Tutorials](https://documentation.onesignal.com/docs/tutorials)
[API Reference](https://documentation.onesignal.com/reference/rest-api-overview)
[Release Notes](https://documentation.onesignal.com/release-notes/changelog)
404
Page Not Found
==============
We couldn't find the page you were looking for. Maybe you were looking for?
[Email template forwarding](https://documentation.onesignal.com/docs/email-template-forwarding#)
[Templates](https://documentation.onesignal.com/docs/templates#templates)
[Create template](https://documentation.onesignal.com/reference/create-template#)
Assistant
Responses are generated using AI and may contain mistakes.
---
# Update an app - OneSignal
[OneSignal home page](https://documentation.onesignal.com/)
Search...
⌘K
Search...
Navigation
Configuration
Update an app
[Home](https://documentation.onesignal.com/docs/home)
[User Guides](https://documentation.onesignal.com/docs/quickstart-guide)
[Developer Guides](https://documentation.onesignal.com/docs/developers)
[Tutorials](https://documentation.onesignal.com/docs/tutorials)
[API Reference](https://documentation.onesignal.com/reference/rest-api-overview)
[Release Notes](https://documentation.onesignal.com/release-notes/changelog)
Update an app
cURL
Copy
curl --request PUT \
--url https://api.onesignal.com/apps/{app_id} \
--header 'Authorization: ' \
--header 'Content-Type: ' \
--data '{
"name": "NAME_OF_NEW_APP",
"organization_id": "YOUR_ORG_ID",
"chrome_web_origin": "",
"site_name": "SITE_NAME",
"safari_site_origin": "",
"chrome_web_default_notification_icon": "",
"safari_icon_256_256": "",
"safari_apns_p12": "",
"safari_apns_p12_password": "",
"fcm_v1_service_account_json": "",
"apns_p8": "",
"apns_env": "",
"apns_key_id": "",
"apns_team_id": "",
"apns_bundle_id": "",
"apns_p12": "",
"apns_p12_password": "",
"additional_data_is_root_payload": false
}'
200
Copy
{
"id": "",
"name": "",
"players": 123,
"messageable_players": 123,
"created_at": "",
"updated_at": "",
"organization_id": ""
}
PUT
/
apps
/
{app\_id}
Try it
Update an app
cURL
Copy
curl --request PUT \
--url https://api.onesignal.com/apps/{app_id} \
--header 'Authorization: ' \
--header 'Content-Type: ' \
--data '{
"name": "NAME_OF_NEW_APP",
"organization_id": "YOUR_ORG_ID",
"chrome_web_origin": "",
"site_name": "SITE_NAME",
"safari_site_origin": "",
"chrome_web_default_notification_icon": "",
"safari_icon_256_256": "",
"safari_apns_p12": "",
"safari_apns_p12_password": "",
"fcm_v1_service_account_json": "",
"apns_p8": "",
"apns_env": "",
"apns_key_id": "",
"apns_team_id": "",
"apns_bundle_id": "",
"apns_p12": "",
"apns_p12_password": "",
"additional_data_is_root_payload": false
}'
200
Copy
{
"id": "",
"name": "",
"players": 123,
"messageable_players": 123,
"created_at": "",
"updated_at": "",
"organization_id": ""
}
[](https://documentation.onesignal.com/reference/update-an-app#overview)
Overview
-------------------------------------------------------------------------------------
Use this API to programmatically update an existing OneSignal app. This is useful when managing multiple apps or organizations, and avoids needing to manually use the OneSignal Dashboard. You can create an app under an existing organization or generate a new one. Push platform configurations for Web, Android, and iOS can be defined during app creation, though **Email** and **SMS** must be set up manually via the [OneSignal Dashboard](https://documentation.onesignal.com/docs/channel-setup)
.
For an overview of how apps and organizations work in OneSignal, see [Apps & Organizations](https://documentation.onesignal.com/docs/apps-organizations)
.
* * *
[](https://documentation.onesignal.com/reference/update-an-app#how-to-use-this-api)
How to use this API
-----------------------------------------------------------------------------------------------------------
Use your [Organization API Key](https://documentation.onesignal.com/docs/keys-and-ids#organization-api-key)
, to authenticate. This key is **different** from the standard REST API key. The Organization API key must be assocated with the `organization_id` in the request body.
* * *
###
[](https://documentation.onesignal.com/reference/update-an-app#web-push-configuration)
Web push configuration
The following parameters are **required** for web push setup:
* `site_name`
* `chrome_web_origin`
* `safari_site_origin`
* `safari_apns_p12`: Empty string OR your Base64 encoded p12 certificate for Safari Push Notifications.
* `safari_apns_p12_password`: Empty string OR Password for your `safari_apns_p12` file if set.
URLs must use `https://` and match your site’s [origin](https://developer.mozilla.org/en-US/docs/Glossary/Origin)
.
`safari_apns_p12` and `safari_apns_p12_password` are required for `safari_site_origin` to be set. If you do not have your own Safari p12 certificate, they should be included with blank values.If you use your own p12 certificate, you must update it every year. If you need help Base64 encoding your p12 certificate, you can use the following site: [https://www.base64encode.org](https://www.base64encode.org/)
**Recommended parameters**:
* `chrome_web_default_notification_icon`: URL of a `256x256px` PNG for Chrome.
* `safari_icon_256_256`: URL of a `256x256px` PNG for Safari.
* * *
###
[](https://documentation.onesignal.com/reference/update-an-app#android-mobile-push-configuration)
Android mobile push configuration
The following parameter is **required** for Android push notifications. See [Android: Firebase Credentials](https://documentation.onesignal.com/docs/android-firebase-credentials)
.
* `fcm_v1_service_account_json`
If you change your FCM Service Account JSON file to a different Firebase project, your Android Subscriptions tied to the current project will become invalid. They will not be able to receive push notifications until they open your app again with this new FCM Service Account JSON file.
If you need help Base64 encoding your FCM Service Account JSON file, you can use the following site: [https://www.base64encode.org](https://www.base64encode.org/)
* * *
###
[](https://documentation.onesignal.com/reference/update-an-app#ios-mobile-push-configuration)
iOS mobile push configuration
iOS mobile push can be configured using either a p8 or a p12 authentication.
If you need help Base64 encoding your p8 key or p12 certificate, you can use the following site: [https://www.base64encode.org](https://www.base64encode.org/)
The following parameters are **required** if using [p8 Token-based connection to APNS](https://documentation.onesignal.com/docs/ios-p8-token-based-connection-to-apns)
. **You will likely never need to update these parameters if set correctly during app creation**:
* `apns_key_id`
* `apns_team_id`
* `apns_bundle_id`
* `apns_p8`
The following parameters are **required** if using [p12 APNS Authentication](https://documentation.onesignal.com/docs/ios-p12-generate-certificates)
. **These must be updated every year which is why we recommend using p8 authentication**:
* `apns_p12`
* `apns_p12_password`
**Optional parameters** :
* `additional_data_as_root_payload`: If set to `true`, the `data` paramater in your push notification payload will be added to the root payload of the notification. Helpful for customizations that require access to the data outside of our [OSNotification payload `additionalData` property](https://documentation.onesignal.com/docs/osnotification-payload)
.
* * *
#### Headers
[](https://documentation.onesignal.com/reference/update-an-app#parameter-content-type)
Content-Type
string
default:application/json
required
[](https://documentation.onesignal.com/reference/update-an-app#parameter-authorization)
Authorization
string
default:Key YOUR\_ORGANIZATION\_API\_KEY
required
Your Organization API key with prefix `Key`. See [Keys & IDs](https://documentation.onesignal.com/docs/keys-and-ids)
.
#### Path Parameters
[](https://documentation.onesignal.com/reference/update-an-app#parameter-app-id)
app\_id
string
default:YOUR\_APP\_ID
required
Your OneSignal App ID in UUID v4 format. See [Keys & IDs](https://documentation.onesignal.com/docs/keys-and-ids)
.
#### Body
application/json
[](https://documentation.onesignal.com/reference/update-an-app#body-name)
name
string
default:NAME\_OF\_NEW\_APP
An internal name you set to help organize and track Apps. Maximum 128 characters.
[](https://documentation.onesignal.com/reference/update-an-app#body-organization-id)
organization\_id
string
default:YOUR\_ORG\_ID
The [Organization ID](https://documentation.onesignal.com/docs/keys-and-ids#organization-id)
that the app will be associated with.
[](https://documentation.onesignal.com/reference/update-an-app#body-chrome-web-origin)
chrome\_web\_origin
string
The HTTPS [origin](https://developer.mozilla.org/en-US/docs/Glossary/Origin)
URL for your website. Required for web push notifications.
[](https://documentation.onesignal.com/reference/update-an-app#body-site-name)
site\_name
string
default:SITE\_NAME
The name of your website. Used for web push notification titles when omitted from the notification payload. Required for web push notifications.
[](https://documentation.onesignal.com/reference/update-an-app#body-safari-site-origin)
safari\_site\_origin
string
The HTTPS [origin](https://developer.mozilla.org/en-US/docs/Glossary/Origin)
URL for your website. Required for web push notifications for Safari and should be the same as `chrome_web_origin`.
[](https://documentation.onesignal.com/reference/update-an-app#body-chrome-web-default-notification-icon)
chrome\_web\_default\_notification\_icon
string
The full `https` URL to your default icon resource. The icon should be a `256x256px` PNG.
[](https://documentation.onesignal.com/reference/update-an-app#body-safari-icon-256-256)
safari\_icon\_256\_256
string
The full `https` URL to your default icon resource. The icon should be a `256x256px` PNG.
[](https://documentation.onesignal.com/reference/update-an-app#body-safari-apns-p12)
safari\_apns\_p12
string
A Base64 encoded p12 certificate for Safari Push Notifications. If omitted, we will assign one to your app for you.
[](https://documentation.onesignal.com/reference/update-an-app#body-safari-apns-p12-password)
safari\_apns\_p12\_password
string
The password for the `safari_apns_p12` file if applicable.
[](https://documentation.onesignal.com/reference/update-an-app#body-fcm-v1-service-account-json)
fcm\_v1\_service\_account\_json
string
Your FCM Service Account JSON file converted to base64 format. See [Android: Firebase Credentials](https://documentation.onesignal.com/docs/android-firebase-credentials)
. Required for Android mobile push notifications.
[](https://documentation.onesignal.com/reference/update-an-app#body-apns-p8)
apns\_p8
string
A Base64 encoded p8 file for iOS mobile Push Notifications. Omit if using `apns_p12`. See [p8 Token-based connection to APNS](https://documentation.onesignal.com/docs/ios-p8-token-based-connection-to-apns)
.
[](https://documentation.onesignal.com/reference/update-an-app#body-apns-env)
apns\_env
string
The [APS Environment Entitlement](https://developer.apple.com/documentation/bundleresources/entitlements/aps-environment)
to specify whether this is a `production` or `development` environment. Defaults to `production`. Use with `apns_p8`.
[](https://documentation.onesignal.com/reference/update-an-app#body-apns-key-id)
apns\_key\_id
string
The APNS Key ID. Use with `apns_p8`. See [p8 Token-based connection to APNS](https://documentation.onesignal.com/docs/ios-p8-token-based-connection-to-apns)
.
[](https://documentation.onesignal.com/reference/update-an-app#body-apns-team-id)
apns\_team\_id
string
The APNS Team ID. Use with `apns_p8`. See [p8 Token-based connection to APNS](https://documentation.onesignal.com/docs/ios-p8-token-based-connection-to-apns)
.
[](https://documentation.onesignal.com/reference/update-an-app#body-apns-bundle-id)
apns\_bundle\_id
string
The Bundle ID for your app. Use with `apns_p8`. See [p8 Token-based connection to APNS](https://documentation.onesignal.com/docs/ios-p8-token-based-connection-to-apns)
.
[](https://documentation.onesignal.com/reference/update-an-app#body-apns-p12)
apns\_p12
string
A Base64 encoded p12 certificate for iOS mobile push notifications. Omit if using `apns_p8`. See [p12 APNS Authentication](https://documentation.onesignal.com/docs/ios-p12-generate-certificates)
.
[](https://documentation.onesignal.com/reference/update-an-app#body-apns-p12-password)
apns\_p12\_password
string
The password for the `apns_p12` file if applicable.
[](https://documentation.onesignal.com/reference/update-an-app#body-additional-data-is-root-payload)
additional\_data\_is\_root\_payload
boolean
default:false
If set to `true`, the `data` paramater in your push notification payload will be added to the root payload of the notification. Helpful for customizations that require access to the data outside of our [OSNotification payload `additionalData` property](https://documentation.onesignal.com/docs/osnotification-payload)
.
#### Response
200 - application/json
200
[](https://documentation.onesignal.com/reference/update-an-app#response-id)
id
string
The OneSignal App ID in UUID v4 format.
[](https://documentation.onesignal.com/reference/update-an-app#response-name)
name
string
An internal name you set to help organize and track Apps. Maximum 128 characters.
[](https://documentation.onesignal.com/reference/update-an-app#response-players)
players
integer
The total number of Subscriptions in the app.
[](https://documentation.onesignal.com/reference/update-an-app#response-messageable-players)
messageable\_players
integer
The number of Subscriptions eligible to receive messages in the app.
[](https://documentation.onesignal.com/reference/update-an-app#response-created-at)
created\_at
string
The date and time the app was created.
[](https://documentation.onesignal.com/reference/update-an-app#response-updated-at)
updated\_at
string
The date and time the app was last updated.
[](https://documentation.onesignal.com/reference/update-an-app#response-organization-id)
organization\_id
string
The Organization ID in which the app was created.
[Create an app](https://documentation.onesignal.com/reference/create-an-app)
[View API keys](https://documentation.onesignal.com/reference/view-api-keys)
Assistant
Responses are generated using AI and may contain mistakes.
---
# v3-4 SDK Email SDK Methods - OneSignal
[OneSignal home page](https://documentation.onesignal.com/)
Search...
⌘K
Search...
Navigation
v3-4 Client SDK reference
v3-4 SDK Email SDK Methods
[Home](https://documentation.onesignal.com/docs/home)
[User Guides](https://documentation.onesignal.com/docs/quickstart-guide)
[Developer Guides](https://documentation.onesignal.com/docs/developers)
[Tutorials](https://documentation.onesignal.com/docs/tutorials)
[API Reference](https://documentation.onesignal.com/reference/rest-api-overview)
[Release Notes](https://documentation.onesignal.com/release-notes/changelog)
On this page
* [Setting the Users Email](https://documentation.onesignal.com/v9.0/docs/email-sdk-methods#setting-the-users-email)
* [setEmail Method](https://documentation.onesignal.com/v9.0/docs/email-sdk-methods#setemail-method)
* [Logout Email](https://documentation.onesignal.com/v9.0/docs/email-sdk-methods#logout-email)
* [logoutEmail Method](https://documentation.onesignal.com/v9.0/docs/email-sdk-methods#logoutemail-method)
* [Listening for subscription changes](https://documentation.onesignal.com/v9.0/docs/email-sdk-methods#listening-for-subscription-changes)
* [getEmailId Method](https://documentation.onesignal.com/v9.0/docs/email-sdk-methods#getemailid-method)
The methods below require the OneSignal SDK versions 3 & 4.It is recommended to upgrade to our latest version 5 SDKs for User Model APIs.See [Update to User Model](https://documentation.onesignal.com/docs/user-model-migration-guide)
for migration steps.
If you have not done so, we always recommend updating the OneSignal SDK to the latest version to get access to the latest features:
* [Web Push Quickstart](https://documentation.onesignal.com/docs/web-push-setup)
* [Mobile Push Quickstart](https://documentation.onesignal.com/docs/mobile-sdk-setup)
Email and Push subscribers will have separate OneSignal Subscription IDs (user records). This is to manage the case where a user opts-out of one you can still send messages to the other. Email records cannot get push notifications and push records cannot get emails.
If there are networking issues, functions may take 30+ seconds to return. In the code examples below we provide callbacks to track when these return.Make sure to keep functions from blocking the user interface, otherwise your app may appear unresponsive to the user.
[](https://documentation.onesignal.com/v9.0/docs/email-sdk-methods#setting-the-users-email)
Setting the Users Email
=======================================================================================================================
[](https://documentation.onesignal.com/v9.0/docs/email-sdk-methods#setemail-method)
`setEmail` Method
---------------------------------------------------------------------------------------------------------
Allows you to set the user’s email address with the OneSignal SDK. We offer several overloaded versions of this method. It is best to call this when the user provides their email. If `setEmail` called previously and the user changes their email, calling`setEmail` again will update that record with the new email address.
Web (js)
Java
Swift
Objective-C
Unity (C#)
React Native
Flutter
Cordova/Ionic
Xamarin
Copy
OneSignal.push(function() {
OneSignal.setEmail("[email protected]")
.then(function(emailId) {
// Callback called when email have finished sending
console.log("emailId: ", emailId);
});
});
If you have a backend server, we strongly recommend using [Identity Verification](https://documentation.onesignal.com/v9.0/docs/identity-verification)
with your users. Your backend can generate an _**email authentication token**_ and send it to your app or website.
**Recommendation**: call [`setExternalUserId`](https://documentation.onesignal.com/docs/users)
again within the `setEmail` callback to link the records together.
[](https://documentation.onesignal.com/v9.0/docs/email-sdk-methods#logout-email)
Logout Email
=================================================================================================
[](https://documentation.onesignal.com/v9.0/docs/email-sdk-methods#logoutemail-method)
`logoutEmail` Method
---------------------------------------------------------------------------------------------------------------
If your app or website implements logout functionality, you can call `logoutEmail` to dissociate the email from the device:
Web (js)
Java
Swift
objectivec
Unity (C#)
React Native
Flutter
Cordova/Ionic
Xamarin
Copy
OneSignal.push(function() {
OneSignal.logoutEmail();
});
[](https://documentation.onesignal.com/v9.0/docs/email-sdk-methods#listening-for-subscription-changes)
Listening for subscription changes
=============================================================================================================================================
Tracks changes to email subscriptions (for example, if the user sets their email, or logs out). In order to subscribe to email subscription changes, you can implement the following:
| Event Object Property | Type |
| --- | --- |
| `email` | `string` |
Java
Swift
objectivec
Unity (C#)
React Native
Flutter
Cordova/Ionic
Xamarin
Unity(C#)
javascript
Copy
OneSignal.addEmailSubscriptionObserver(subscriptionObserver);
//Now, whenever the email subscription changes, this method will be called:
OSEmailSubscriptionObserver subscriptionObserver = new OSEmailSubscriptionObserver() {
@Override
public void onOSEmailSubscriptionChanged(OSEmailSubscriptionStateChanges stateChanges) {
}
};
[](https://documentation.onesignal.com/v9.0/docs/email-sdk-methods#getemailid-method)
`getEmailId` Method
-------------------------------------------------------------------------------------------------------------
**Web only** - Returns a `Promise` that resolves to the stored OneSignal Subscription ID of the Email Record if one is set using the `setEmail` method. Otherwise the Promise resolves to `null`. If the user isn’t already subscribed, this function will resolve to `null` immediately. Once created, the Email Record Subscription ID will not change. If the user unsubscribes from web push, for example by clearing their browser data, you should call `setEmail` with the same email as before to maintain the same Email Record Subscription ID and tie it to the new Push Subscription ID. Callback function sets the first parameter to the stored Email Record’s OneSignal Subscription ID if one is set, otherwise the first parameter is set to null.
Web (js)
Unity(C#)
Copy
OneSignal.push(function() {
OneSignal.getEmailId(function(emailId) {
console.log("OneSignal Email ID:", emailId);
// (Output) OneSignal Email ID: 270a35cd-4dda-4b3f-b04e-41d7463a2316
});
});
// Both examples are valid
OneSignal.push(function() {
OneSignal.getEmailId().then(function(emailId) {
console.log("OneSignal Email ID:", emailId);
// (Output) OneSignal Email ID: 270a35cd-4dda-4b3f-b04e-41d7463a2316
});
});
* * *
[v3-4 SDK SMS SDK Methods](https://documentation.onesignal.com/v9.0/docs/sms-sdk-methods)
[v3-4 SDK Capturing a Debug Log](https://documentation.onesignal.com/v9.0/docs/capturing-a-debug-log)
Assistant
Responses are generated using AI and may contain mistakes.
---
# View player - OneSignal
[OneSignal home page](https://documentation.onesignal.com/)
Search...
⌘K
Search...
Navigation
Deprecated
View player
[Home](https://documentation.onesignal.com/docs/home)
[User Guides](https://documentation.onesignal.com/docs/quickstart-guide)
[Developer Guides](https://documentation.onesignal.com/docs/developers)
[Tutorials](https://documentation.onesignal.com/docs/tutorials)
[API Reference](https://documentation.onesignal.com/reference/rest-api-overview)
[Release Notes](https://documentation.onesignal.com/release-notes/changelog)
On this page
* [Path Parameters](https://documentation.onesignal.com/reference/view-device#path-parameters)
* [Query Parameters](https://documentation.onesignal.com/reference/view-device#query-parameters)
* [Headers](https://documentation.onesignal.com/reference/view-device#headers)
* [Example Request](https://documentation.onesignal.com/reference/view-device#example-request)
* [Example Response](https://documentation.onesignal.com/reference/view-device#example-response)
* [Response Fields](https://documentation.onesignal.com/reference/view-device#response-fields)
* [Errors](https://documentation.onesignal.com/reference/view-device#errors)
Retrieve a single player record (Subscription) data registered to a specific OneSignal app.
This is a Legacy API. Use [View User](https://documentation.onesignal.com/reference/view-user)
or [CSV Export API](https://documentation.onesignal.com/reference/csv-export)
instead.
* * *
[](https://documentation.onesignal.com/reference/view-device#path-parameters)
Path Parameters
-------------------------------------------------------------------------------------------------
| Parameter | Type | Required | Description |
| --- | --- | --- | --- |
| `player_id` | string | Yes | The OneSignal ID of the device. |
* * *
[](https://documentation.onesignal.com/reference/view-device#query-parameters)
Query Parameters
---------------------------------------------------------------------------------------------------
| Parameter | Type | Required | Description |
| --- | --- | --- | --- |
| `app_id` | string | Yes | Your OneSignal App ID. |
* * *
[](https://documentation.onesignal.com/reference/view-device#headers)
Headers
---------------------------------------------------------------------------------
| Header | Value | Required | Description |
| --- | --- | --- | --- |
| `Authorization` | `Basic YOUR_LEGACY_REST_API_KEY` | Yes | Your OneSignal LegacyREST API Key. |
* * *
[](https://documentation.onesignal.com/reference/view-device#example-request)
Example Request
-------------------------------------------------------------------------------------------------
Copy
GET /api/v1/players/player_id_string?app_id=your_app_id HTTP/1.1
Host: onesignal.com
Authorization: Basic YOUR_LEGACY_REST_API_KEY
* * *
[](https://documentation.onesignal.com/reference/view-device#example-response)
Example Response
---------------------------------------------------------------------------------------------------
Copy
"id": "player_id_string",
"identifier": "push_token_or_email",
"session_count": 5,
"language": "en",
"timezone": -28800,
"game_version": "1.0",
"device_os": "14.4",
"device_type": 1,
"tags": {
"level": "10",
"user_type": "free"
},
"last_active": 1625253300,
"created_at": 1625249800,
"invalid_identifier": false,
"external_user_id": "user123"
}
###
[](https://documentation.onesignal.com/reference/view-device#response-fields)
Response Fields
| Field | Type | Description |
| --- | --- | --- |
| `id` | string | OneSignal player ID. |
| `identifier` | string | Push token, email, or phone number. |
| `session_count` | integer | Number of sessions associated with this device. |
| `language` | string | Language set on the device (e.g., “en”). |
| `timezone` | integer | Time zone offset in seconds. |
| `game_version` | string | Version of your app the device is running. |
| `device_os` | string | Operating system version. |
| `device_type` | integer | Numeric code for platform (0 = iOS, 1 = Android, etc.). |
| `tags` | object | Custom tags set on the device. |
| `last_active` | timestamp | Last time the user was active (Unix timestamp). |
| `created_at` | timestamp | When the device record was created. |
| `invalid_identifier` | boolean | Whether the push token or identifier is invalid. |
| `external_user_id` | string | Your internal user ID mapped to this device. |
* * *
[](https://documentation.onesignal.com/reference/view-device#errors)
Errors
-------------------------------------------------------------------------------
* 400 Bad Request – Missing or invalid parameters.
* 401 Unauthorized – Invalid or missing API key.
* 403 Forbidden – Access denied for this app or resource.
* 404 Not Found – The specified player\_id does not exist.
* * *
[View players](https://documentation.onesignal.com/reference/view-devices)
[Add a player](https://documentation.onesignal.com/reference/add-a-device)
Assistant
Responses are generated using AI and may contain mistakes.
---
# Delete player record - OneSignal
[OneSignal home page](https://documentation.onesignal.com/)
Search...
⌘K
Search...
Navigation
Deprecated
Delete player record
[Home](https://documentation.onesignal.com/docs/home)
[User Guides](https://documentation.onesignal.com/docs/quickstart-guide)
[Developer Guides](https://documentation.onesignal.com/docs/developers)
[Tutorials](https://documentation.onesignal.com/docs/tutorials)
[API Reference](https://documentation.onesignal.com/reference/rest-api-overview)
[Release Notes](https://documentation.onesignal.com/release-notes/changelog)
On this page
* [Path Parameters](https://documentation.onesignal.com/reference/delete-user-record#path-parameters)
* [Headers](https://documentation.onesignal.com/reference/delete-user-record#headers)
* [Example Request](https://documentation.onesignal.com/reference/delete-user-record#example-request)
* [Example Response](https://documentation.onesignal.com/reference/delete-user-record#example-response)
Delete a player (aka Subscription).
This is a Legacy API. Use [Delete User](https://documentation.onesignal.com/reference/delete-user)
or [Delete Subscription](https://documentation.onesignal.com/reference/delete-subscription)
instead.
* * *
[](https://documentation.onesignal.com/reference/delete-user-record#path-parameters)
Path Parameters
--------------------------------------------------------------------------------------------------------
| Parameter | Type | Required | Description |
| --- | --- | --- | --- |
| `app_id` | string | Yes | Your OneSignal App ID. |
| `player_id` | string | Yes | The Subscription ID to delete. |
* * *
[](https://documentation.onesignal.com/reference/delete-user-record#headers)
Headers
----------------------------------------------------------------------------------------
| Header | Value | Required | Description |
| --- | --- | --- | --- |
| `Authorization` | `Basic YOUR_LEGACY_REST_API_KEY` | Yes | Your Legacy OneSignal API key. |
| `Content-Type` | `application/json` | Yes | The content type of the request. |
* * *
[](https://documentation.onesignal.com/reference/delete-user-record#example-request)
Example Request
--------------------------------------------------------------------------------------------------------
Copy
DELETE /api/v1/apps/your_app_id/users/user123 HTTP/1.1
Host: onesignal.com
Authorization: Basic YOUR_LEGACY_REST_API_KEY
Content-Type: application/json
* * *
[](https://documentation.onesignal.com/reference/delete-user-record#example-response)
Example Response
----------------------------------------------------------------------------------------------------------
Copy
{
"success": true
}
The Subscription will be deleted from the OneSignal database.
* * *
[Edit tags with external user id](https://documentation.onesignal.com/reference/edit-tags-with-external-user-id)
[Server SDK Reference](https://documentation.onesignal.com/docs/server-sdk-reference)
Assistant
Responses are generated using AI and may contain mistakes.
---
# v3-4 SDK SDK Notification Event Handlers - OneSignal
[OneSignal home page](https://documentation.onesignal.com/)
Search...
⌘K
Search...
Navigation
v3-4 Client SDK reference
v3-4 SDK SDK Notification Event Handlers
[Home](https://documentation.onesignal.com/docs/home)
[User Guides](https://documentation.onesignal.com/docs/quickstart-guide)
[Developer Guides](https://documentation.onesignal.com/docs/developers)
[Tutorials](https://documentation.onesignal.com/docs/tutorials)
[API Reference](https://documentation.onesignal.com/reference/rest-api-overview)
[Release Notes](https://documentation.onesignal.com/release-notes/changelog)
On this page
* [Foreground Notification Received Event](https://documentation.onesignal.com/v9.0/docs/sdk-notification-event-handlers#foreground-notification-received-event)
* [setNotificationWillShowInForegroundHandler Method](https://documentation.onesignal.com/v9.0/docs/sdk-notification-event-handlers#setnotificationwillshowinforegroundhandler-method)
* [OSNotificationReceivedEvent methods:](https://documentation.onesignal.com/v9.0/docs/sdk-notification-event-handlers#osnotificationreceivedevent-methods%3A)
* [Notification Opened Event](https://documentation.onesignal.com/v9.0/docs/sdk-notification-event-handlers#notification-opened-event)
* [setNotificationOpenedHandler Method](https://documentation.onesignal.com/v9.0/docs/sdk-notification-event-handlers#setnotificationopenedhandler-method)
* [OSNotification Class](https://documentation.onesignal.com/v9.0/docs/sdk-notification-event-handlers#osnotification-class)
* [OSNotificationAction Class](https://documentation.onesignal.com/v9.0/docs/sdk-notification-event-handlers#osnotificationaction-class)
* [Background Notification Received Event](https://documentation.onesignal.com/v9.0/docs/sdk-notification-event-handlers#background-notification-received-event)
* [Android Background Notification Received Event](https://documentation.onesignal.com/v9.0/docs/sdk-notification-event-handlers#android-background-notification-received-event)
* [iOS Background Notification Received Event](https://documentation.onesignal.com/v9.0/docs/sdk-notification-event-handlers#ios-background-notification-received-event)
* [application(\_:didReceiveRemoteNotification:fetchCompletionHandler:) method](https://documentation.onesignal.com/v9.0/docs/sdk-notification-event-handlers#application-%3Adidreceiveremotenotification%3Afetchcompletionhandler%3A-method)
The methods below require the OneSignal SDK versions 3 & 4.It is recommended to upgrade to our latest version 5 SDKs for User Model APIs.See [Update to User Model](https://documentation.onesignal.com/docs/user-model-migration-guide)
for migration steps.
| Notification Events | Details |
| --- | --- |
| [**Foreground Notification Received Event**](https://documentation.onesignal.com/v9.0/docs/sdk-notification-event-handlers#foreground-notification-received-event) | OneSignal SDK `setNotificationWillShowInForegroundHandler` method runs before displaying a notification while the app is in focus. Use this handler to decide if the notification should show or not. |
| [**Notification Opened Event**](https://documentation.onesignal.com/v9.0/docs/sdk-notification-event-handlers#notification-opened-event) | OneSignal SDK `setNotificationOpenedHandler` method runs upon opening the app after a notification is clicked. |
| [**Background Notification Received Event**](https://documentation.onesignal.com/v9.0/docs/sdk-notification-event-handlers#background-notification-received-event) | Native Methods that run while a notification is received while app is in the background. These methods require using Native Code like Java/Kotlin or Swift/Objective-C. |
| **Force-quit Notification Received Event** | **iOS** - Force-quit state is when the app has been “swiped away” and not running in the foreground or background. Apple still keeps an open connection to your app but requires the [Service Extensions](https://documentation.onesignal.com/docs/service-extensions)
for notification data detection. **Android** - Force-quit generally happens manually through the App Settings and prevents any communication to your app. Further, some OEMs will put your app into this force-quit state when swiping the app away. See [Notifications Not Shown](https://documentation.onesignal.com/docs/notifications-show-successful-but-are-not-being-shown)
for more details. |
[](https://documentation.onesignal.com/v9.0/docs/sdk-notification-event-handlers#foreground-notification-received-event)
Foreground Notification Received Event
===================================================================================================================================================================
[](https://documentation.onesignal.com/v9.0/docs/sdk-notification-event-handlers#setnotificationwillshowinforegroundhandler-method)
`setNotificationWillShowInForegroundHandler` Method
-------------------------------------------------------------------------------------------------------------------------------------------------------------------------------------------
Runs before displaying a notification while the app is in focus. Use this handler to read notification data and change it or decide if the notification _**should**_ show or not. Call `setNotificationWillShowInForegroundHandler` before you set `OneSignal.setNotificationOpenedHandler`. Note: this runs _**after**_ the [Notification Service Extension](https://documentation.onesignal.com/docs/service-extensions)
which can be used to modify the notification before showing it.
| Platform | Parameter | Type |
| --- | --- | --- |
| Android | `OSNotificationWillShowInForegroundHandler` | Callback |
| iOS | `OSNotificationWillShowInForegroundBlock` | Block |
java
Swift
objectivec
React Native
Flutter
Cordova/Ionic
Unity(C#)
Copy
OneSignal.setNotificationWillShowInForegroundHandler(new NotificationWillShowInForegroundHandler() {
@Override
void notificationWillShowInForeground(OSNotificationReceivedEvent notificationReceivedEvent) {
OSNotification notification = notificationReceivedEvent.getNotification();
// Get custom additional data you sent with the notification
JSONObject data = notification.getAdditionalData();
if (/* some condition */ ) {
// Complete with a notification means it will show
notificationReceivedEvent.complete(notification);
}
else {
// Complete with null means don't show a notification
notificationReceivedEvent.complete(null);
}
}
});
###
[](https://documentation.onesignal.com/v9.0/docs/sdk-notification-event-handlers#osnotificationreceivedevent-methods%3A)
`OSNotificationReceivedEvent` methods:
| Type | Field | Description |
| --- | --- | --- |
| `void` (Android)`OSNotificationDisplayResponse` (iOS) | `complete()``completion()` (iOS Native) | **Required:** Method controlling notification completion from the handler. If this is not called at the end of the `notificationWillShowInForeground` implementation, a runnable will fire after a 25 second timer and complete automatically. **Parameter:** - Display: pass the OSNotification object - Omit: pass null to omit displaying |
| `OSNotification` | `getNotification()``notification` (iOS Native) | _Method_ The notification the device received. See [OSNotification](https://documentation.onesignal.com/v9.0/docs/sdk-notification-event-handlers#osnotification-class)
for more details. |
[](https://documentation.onesignal.com/v9.0/docs/sdk-notification-event-handlers#notification-opened-event)
Notification Opened Event
=========================================================================================================================================
[](https://documentation.onesignal.com/v9.0/docs/sdk-notification-event-handlers#setnotificationopenedhandler-method)
`setNotificationOpenedHandler` Method
---------------------------------------------------------------------------------------------------------------------------------------------------------------
This method takes a `OSNotificationOpenedHandler` callback that itself accepts a parameter `result` of type `OSNotificationOpenedResult`.
| Platform | Parameter | Type |
| --- | --- | --- |
| Android | `OSNotificationOpenedHandler` | Callback |
| iOS | `OSNotificationOpenedBlock` | Block |
java
Swift
objectivec
React Native
Flutter
Cordova/Ionic
Unity(C#)
Copy
OneSignal.setNotificationOpenedHandler(
new OneSignal.OSNotificationOpenedHandler() {
@Override
public void notificationOpened(OSNotificationOpenedResult result) {
String actionId = result.getAction().getActionId();
String type = result.getAction().getType(); // "ActionTaken" | "Opened"
String title = result.getNotification().getTitle();
}
});
**`OSNotificationOpenResult` fields:**
| Type | Method/Property | Description |
| --- | --- | --- |
| [`OSNotification`](https://documentation.onesignal.com/v9.0/docs/sdk-notification-event-handlers#osnotification-payload#osnotification-class) | `getNotification()` (Android)`notification` (iOS) | The notification the user received. See [`OSNotification`](https://documentation.onesignal.com/v9.0/docs/sdk-notification-event-handlers#osnotification-payload#osnotification-class)
for the full list of properties. |
| [`OSNotificationAction`](https://documentation.onesignal.com/v9.0/docs/sdk-notification-event-handlers#osnotification-payload#osnotificationaction-class) | `getAction()` (Android)`action` (iOS) | The action the user took on the notification. String - **`getActionId()`** Enum - **`getType()`** [(“Opened”, “ActionTaken”)](https://documentation.onesignal.com/v9.0/docs/sdk-notification-event-handlers#osnotification-payload#osnotificationaction-class) |
[](https://documentation.onesignal.com/v9.0/docs/sdk-notification-event-handlers#osnotification-class)
`OSNotification` Class
=================================================================================================================================
The `OSNotification` class is composed of all **getters**. The class combines the original `OSNotification` with data previously on the `OSNotificationPayload` class into a single large `OSNotification` class. More details in [OSNotification Payload](https://documentation.onesignal.com/docs/osnotification-payload)
.
[](https://documentation.onesignal.com/v9.0/docs/sdk-notification-event-handlers#osnotificationaction-class)
`OSNotificationAction` Class
=============================================================================================================================================
The action the user took on the notification. More details in [OSNotification Payload](https://documentation.onesignal.com/docs/osnotification-payload)
.
* * *
[](https://documentation.onesignal.com/v9.0/docs/sdk-notification-event-handlers#background-notification-received-event)
Background Notification Received Event
===================================================================================================================================================================
[](https://documentation.onesignal.com/v9.0/docs/sdk-notification-event-handlers#android-background-notification-received-event)
Android Background Notification Received Event
-----------------------------------------------------------------------------------------------------------------------------------------------------------------------------------
Requires native code. See [Android Notification Service Extension](https://documentation.onesignal.com/docs/service-extensions#android-notification-service-extension)
for more details.
[](https://documentation.onesignal.com/v9.0/docs/sdk-notification-event-handlers#ios-background-notification-received-event)
iOS Background Notification Received Event
---------------------------------------------------------------------------------------------------------------------------------------------------------------------------
####
[](https://documentation.onesignal.com/v9.0/docs/sdk-notification-event-handlers#application-%3Adidreceiveremotenotification%3Afetchcompletionhandler%3A-method)
`application(_:didReceiveRemoteNotification:fetchCompletionHandler:)` method
Apple provides this method to indicate a notification was received when your app is running in the foreground or background. This method allows data to be fetched while the app is running in the background. See details and discussion for requirements in [Apple’s Developer Documentation](https://developer.apple.com/documentation/uikit/uiapplicationdelegate/1623013-application)
. If your app is force-quite, this method will not run and requires the [Service Extensions](https://documentation.onesignal.com/docs/service-extensions)
for detection. You must have background mode enabled and send the push with `content_available` in the [iOS Message Settings](https://documentation.onesignal.com/docs/push#ios-options)
for method to be called while app is in background.
Swift
Copy
func application(_ application: UIApplication, didReceiveRemoteNotification userInfo: [AnyHashable : Any], fetchCompletionHandler completionHandler: @escaping (UIBackgroundFetchResult) -> Void) {
print("iOS Native didReceiveRemoteNotification: ", userInfo.debugDescription)
if let customOSPayload = userInfo["custom"] as? NSDictionary {
if let additionalData = customOSPayload["a"] as? NSDictionary {
print("additionalData: ", additionalData)
if let foo = additionalData["foo"] {
print("foo: ", foo)
}
}
if let notificationId = customOSPayload["i"] {
print("notificationId: ", notificationId)
}
if let launchUrl = customOSPayload["u"] {
print("launchUrl: ", launchUrl)
}
}
if let aps = userInfo["aps"] as? NSDictionary {
if let alert = aps["alert"] as? NSDictionary {
if let messageBody = alert["body"] {
print("messageBody: ", messageBody)
}
if let messageTitle = alert["title"] {
print("messageTitle: ", messageTitle)
}
}
}
// This block gets called when the user reacts to a notification received
let timeInterval = Int(NSDate().timeIntervalSince1970)
OneSignal.sendTags(["last_push_received": timeInterval])
print("badge number: ", UIApplication.shared.applicationIconBadgeNumber.description)
}
* * *
[v3-4 Client SDK Reference](https://documentation.onesignal.com/v9.0/docs/sdk-reference)
[v4 Android Mobile Service Extensions](https://documentation.onesignal.com/v9.0/docs/service-extensions)
Assistant
Responses are generated using AI and may contain mistakes.
---
# View segments - OneSignal
[OneSignal home page](https://documentation.onesignal.com/)
Search...
⌘K
Search...
Navigation
Segments
View segments
[Home](https://documentation.onesignal.com/docs/home)
[User Guides](https://documentation.onesignal.com/docs/quickstart-guide)
[Developer Guides](https://documentation.onesignal.com/docs/developers)
[Tutorials](https://documentation.onesignal.com/docs/tutorials)
[API Reference](https://documentation.onesignal.com/reference/rest-api-overview)
[Release Notes](https://documentation.onesignal.com/release-notes/changelog)
View segments
cURL
Copy
curl --request GET \
--url https://api.onesignal.com/apps/{app_id}/segments \
--header 'Authorization: '
200
400
429
Copy
"{\n \"total_count\": 1,\n \"offset\": 0,\n \"limit\": 300,\n \"segments\": [\n {\n \"id\": \"4414c404-56a3-11ed-9b6a-0242ac120002\",\n \"name\": \"Subscribed Users\",\n \"created_at\": \"2022-07-23T13:44:10.324Z\",\n \"updated_at\": \"2022-09-18T11:33:02.451Z\",\n \"app_id\": \"65c10914-56a3-11ed-9b6a-0242ac120002\",\n \"read_only\": false,\n \"is_active\": true\n }\n ]\n}"
GET
/
apps
/
{app\_id}
/
segments
Try it
View segments
cURL
Copy
curl --request GET \
--url https://api.onesignal.com/apps/{app_id}/segments \
--header 'Authorization: '
200
400
429
Copy
"{\n \"total_count\": 1,\n \"offset\": 0,\n \"limit\": 300,\n \"segments\": [\n {\n \"id\": \"4414c404-56a3-11ed-9b6a-0242ac120002\",\n \"name\": \"Subscribed Users\",\n \"created_at\": \"2022-07-23T13:44:10.324Z\",\n \"updated_at\": \"2022-09-18T11:33:02.451Z\",\n \"app_id\": \"65c10914-56a3-11ed-9b6a-0242ac120002\",\n \"read_only\": false,\n \"is_active\": true\n }\n ]\n}"
[](https://documentation.onesignal.com/reference/view-segments#overview)
Overview
-------------------------------------------------------------------------------------
Retrieve a list of segments associated with a specific OneSignal app. This is helpful when you want to access segment metadata programmatically instead of using the OneSignal Dashboard UI.
This endpoint only retrieves existing segment metadata. It does not provide the segment filters or user data.
* * *
#### Headers
[](https://documentation.onesignal.com/reference/view-segments#parameter-authorization)
Authorization
string
default:Key YOUR\_APP\_API\_KEY
required
Your App API key with prefix `Key`. See [Keys & IDs](https://documentation.onesignal.com/docs/keys-and-ids)
.
#### Path Parameters
[](https://documentation.onesignal.com/reference/view-segments#parameter-app-id)
app\_id
string
default:YOUR\_APP\_ID
required
Your OneSignal App ID in UUID v4 format. See [Keys & IDs](https://documentation.onesignal.com/docs/keys-and-ids)
.
#### Query Parameters
[](https://documentation.onesignal.com/reference/view-segments#parameter-offset)
offset
integer
default:0
The index to start returning segments from. Defaults to `0`. Segments are sorted by their creation date (`created_at`) in ascending order.
[](https://documentation.onesignal.com/reference/view-segments#parameter-limit)
limit
integer
default:300
The maximum number of segments to return. Default/Max: `300`. Ideal for controlling data volume in large-scale applications.
#### Response
200
application/json
200
[](https://documentation.onesignal.com/reference/view-segments#response-total-count)
total\_count
integer
The total number of segments available for the app.
[](https://documentation.onesignal.com/reference/view-segments#response-offset)
offset
integer
Value set in the `offset` query parameter.
[](https://documentation.onesignal.com/reference/view-segments#response-limit)
limit
integer
Value set in the `limit` query parameter.
[](https://documentation.onesignal.com/reference/view-segments#response-segments)
segments
object\[\]
Show child attributes
[Copy template to another app](https://documentation.onesignal.com/reference/copy-template-to-another-app)
[Create segment](https://documentation.onesignal.com/reference/create-segments)
Assistant
Responses are generated using AI and may contain mistakes.
---
# v4 Android Mobile Service Extensions - OneSignal
[OneSignal home page](https://documentation.onesignal.com/)
Search...
⌘K
Search...
Navigation
v3-4 Client SDK reference
v4 Android Mobile Service Extensions
[Home](https://documentation.onesignal.com/docs/home)
[User Guides](https://documentation.onesignal.com/docs/quickstart-guide)
[Developer Guides](https://documentation.onesignal.com/docs/developers)
[Tutorials](https://documentation.onesignal.com/docs/tutorials)
[API Reference](https://documentation.onesignal.com/reference/rest-api-overview)
[Release Notes](https://documentation.onesignal.com/release-notes/changelog)
On this page
* [Step 1. Create a class for the Service Extension](https://documentation.onesignal.com/v9.0/docs/service-extensions#step-1-create-a-class-for-the-service-extension)
* [Step 2. Add the following to your AndroidManifest.xml.](https://documentation.onesignal.com/v9.0/docs/service-extensions#step-2-add-the-following-to-your-androidmanifest-xml)
This guide is for the v4 Android SDK. We recommend upgrading to our latest v5 User Model SDKs. See [Mobile SDKs API Migration Guides](https://documentation.onesignal.com/docs/user-model-migration-guide)
to upgrade the OneSignal SDK.
Add the below Notification Extension Code if you want to do one of the following:
* Receive data in the background with or without displaying a notification.
* Override specific notification settings depending on client side app logic such as custom accent color, vibration pattern, or other any other `NotificationCompat` options available. See [Android’s documentation on the NotificationCompat options.](https://developer.android.com/reference/androidx/core/app/NotificationCompat)
🚧 Requires writing Native Android code & Upgraded SDK.Must be using OneSignal SDK Versions:
* Android 4.0.0 - 4.9.9
* React Native 4.0.0 - 4.9.9
* Flutter 3.0.0 - 3.9.9
* Cordova/Ionic 3.0.0 - 3.9.9
* Unity 3.0.0 - 3.9.9
* Xamarin 4.0.0 - 4.9.9
[](https://documentation.onesignal.com/v9.0/docs/service-extensions#step-1-create-a-class-for-the-service-extension)
Step 1. Create a class for the Service Extension
-------------------------------------------------------------------------------------------------------------------------------------------------------------------------
Create a class that extends `OSRemoteNotificationReceivedHandler` and implement the `remoteNotificationReceived` method. The method `remoteNotificationReceived` parameters are `context` of type `Context` and `notificationReceivedEvent` of type `OSNotificationReceivedEvent`.
Copy
package your.package.name
import android.content.Context;
import android.util.Log;
import org.json.JSONObject;
import com.onesignal.OSNotification;
import com.onesignal.OSMutableNotification;
import com.onesignal.OSNotificationReceivedEvent;
import com.onesignal.OneSignal.OSRemoteNotificationReceivedHandler;
@SuppressWarnings("unused")
public class NotificationServiceExtension implements OSRemoteNotificationReceivedHandler {
@Override
public void remoteNotificationReceived(Context context, OSNotificationReceivedEvent notificationReceivedEvent) {
OSNotification notification = notificationReceivedEvent.getNotification();
// Example of modifying the notification's accent color
OSMutableNotification mutableNotification = notification.mutableCopy();
mutableNotification.setExtender(builder -> {
// Sets the accent color to Green on Android 5+ devices.
// Accent color controls icon and action buttons on Android 5+. Accent color does not change app title on Android 10+
builder.setColor(new BigInteger("FF00FF00", 16).intValue());
// Sets the notification Title to Red
Spannable spannableTitle = new SpannableString(notification.getTitle());
spannableTitle.setSpan(new ForegroundColorSpan(Color.RED),0,notification.getTitle().length(),0);
builder.setContentTitle(spannableTitle);
// Sets the notification Body to Blue
Spannable spannableBody = new SpannableString(notification.getBody());
spannableBody.setSpan(new ForegroundColorSpan(Color.BLUE),0,notification.getBody().length(),0);
builder.setContentText(spannableBody);
//Force remove push from Notification Center after 30 seconds
builder.setTimeoutAfter(30000);
return builder;
});
JSONObject data = notification.getAdditionalData();
Log.i("OneSignalExample", "Received Notification Data: " + data);
// If complete isn't called within a time period of 25 seconds, OneSignal internal logic will show the original notification
// To omit displaying a notification, pass `null` to complete()
// This will also prevent the notification received (confirmed delivery) event and click events on the push notification if handled differently.
notificationReceivedEvent.complete(mutableNotification);
}
}
[](https://documentation.onesignal.com/v9.0/docs/service-extensions#step-2-add-the-following-to-your-androidmanifest-xml)
Step 2. Add the following to your `AndroidManifest.xml`.
--------------------------------------------------------------------------------------------------------------------------------------------------------------------------------------
Add OneSignal class name and your class value as `meta-data` within the `AndroidManifest.xml` file under the application tag. Ignore any “unused” warnings.
Copy
[v3-4 SDK SDK Notification Event Handlers](https://documentation.onesignal.com/v9.0/docs/sdk-notification-event-handlers)
[v3-4 SDK In-App Message SDK Methods](https://documentation.onesignal.com/v9.0/docs/iam-sdk-methods)
Assistant
Responses are generated using AI and may contain mistakes.
---
# v3-4 SDK SMS SDK Methods - OneSignal
[OneSignal home page](https://documentation.onesignal.com/)
Search...
⌘K
Search...
Navigation
v3-4 Client SDK reference
v3-4 SDK SMS SDK Methods
[Home](https://documentation.onesignal.com/docs/home)
[User Guides](https://documentation.onesignal.com/docs/quickstart-guide)
[Developer Guides](https://documentation.onesignal.com/docs/developers)
[Tutorials](https://documentation.onesignal.com/docs/tutorials)
[API Reference](https://documentation.onesignal.com/reference/rest-api-overview)
[Release Notes](https://documentation.onesignal.com/release-notes/changelog)
On this page
* [Setting the User’s SMS Number](https://documentation.onesignal.com/v9.0/docs/sms-sdk-methods#setting-the-user%E2%80%99s-sms-number)
* [setSMSNumber Method](https://documentation.onesignal.com/v9.0/docs/sms-sdk-methods#setsmsnumber-method)
* [Logout Number](https://documentation.onesignal.com/v9.0/docs/sms-sdk-methods#logout-number)
* [logoutSMSNumber Method](https://documentation.onesignal.com/v9.0/docs/sms-sdk-methods#logoutsmsnumber-method)
* [Listening for subscription changes](https://documentation.onesignal.com/v9.0/docs/sms-sdk-methods#listening-for-subscription-changes)
* [getSMSId Method](https://documentation.onesignal.com/v9.0/docs/sms-sdk-methods#getsmsid-method)
The methods below require the OneSignal SDK versions 3 & 4.It is recommended to upgrade to our latest version 5 SDKs for User Model APIs.See [Update to User Model](https://documentation.onesignal.com/docs/user-model-migration-guide)
for migration steps.
If you have not done so, we always recommend updating the OneSignal SDK to the latest version to get access to the latest features:
* [Web Push Quickstart](https://documentation.onesignal.com/docs/web-push-setup)
* [Mobile Push Quickstart](https://documentation.onesignal.com/docs/mobile-sdk-setup)
SMS and Push subscribers will have separate OneSignal Subscription IDs (user records). This is to manage the case where a user opts-out of one you can still send messages to the other.
If there are networking issues, functions may take 30+ seconds to return. In the code examples below we provide callbacks to track when these return.Make sure to keep functions from blocking the user interface, otherwise your app may appear unresponsive to the user.
[](https://documentation.onesignal.com/v9.0/docs/sms-sdk-methods#setting-the-user%E2%80%99s-sms-number)
Setting the User’s SMS Number
=========================================================================================================================================
[](https://documentation.onesignal.com/v9.0/docs/sms-sdk-methods#setsmsnumber-method)
`setSMSNumber` Method
---------------------------------------------------------------------------------------------------------------
The `setSMSNumber` method allows you to set the user’s SMS number with the OneSignal SDK. [We offer several overloaded versions of this method.](https://documentation.onesignal.com/v9.0/docs/sdk-reference#sms)
Web-JavaScript
java
kotlin
Swift
objectivec
React Native
Flutter
Cordova/Ionic
Unity(C#)
Copy
OneSignal.push(function() {
OneSignal.setSMSNumber("+11234567890");
});
If you have a backend server, we strongly recommend using [Identity Verification](https://documentation.onesignal.com/v9.0/docs/identity-verification)
with your users. Your backend can generate an _**SMS authentication token**_ and send it to your app or website. Note that the SMS number is required to be in the E.164 format. Please see our [SMS Troubleshooting](https://documentation.onesignal.com/docs/sms-faq)
guide for more details.
[](https://documentation.onesignal.com/v9.0/docs/sms-sdk-methods#logout-number)
Logout Number
=================================================================================================
[](https://documentation.onesignal.com/v9.0/docs/sms-sdk-methods#logoutsmsnumber-method)
`logoutSMSNumber` Method
---------------------------------------------------------------------------------------------------------------------
If your app or website implements logout functionality, you can call `logoutSMSNumber` to dissociate the SMS from the device:
Web-JavaScript
java
Swift
objectivec
React Native
Flutter
Cordova/Ionic
Unity(C#)
Copy
OneSignal.push(function() {
OneSignal.logoutSMS();
});
[](https://documentation.onesignal.com/v9.0/docs/sms-sdk-methods#listening-for-subscription-changes)
Listening for subscription changes
===========================================================================================================================================
The SMS Subscription Observer tracks changes to SMS subscriptions (ie. the user sets their SMS number or logs out). In order to subscribe to SMS subscription changes you can implement the following:
| Event Object Property | Type |
| --- | --- |
| `sms` | `string` e.g: “+12149874829” |
java
objectivec
Swift
React Native
Flutter
Unity(C#)
javascript
Copy
OneSignal.addSMSSubscriptionObserver(stateChanges -> {
// Work with state changes
});
Now, whenever the sms subscription changes, this method will be called:
java
objectivec
Swift
Copy
OSSMSSubscriptionObserver subscriptionObserver = new OSSMSSubscriptionObserver() {
@Override
public void public void onSMSSubscriptionChanged(OSSMSSubscriptionStateChanges stateChanges) {
}
};
[](https://documentation.onesignal.com/v9.0/docs/sms-sdk-methods#getsmsid-method)
`getSMSId` Method
-------------------------------------------------------------------------------------------------------
Get the OneSignal Subscription ID associated with the SMS Phone Number Record.
Web-JavaScript
Unity(C#)
Copy
OneSignal.push(function() {
OneSignal.getSMSId();
});
* * *
[v3-4 SDK Web SDK Methods](https://documentation.onesignal.com/v9.0/docs/web-push-sdk)
[v3-4 SDK Email SDK Methods](https://documentation.onesignal.com/v9.0/docs/email-sdk-methods)
Assistant
Responses are generated using AI and may contain mistakes.
---
# v3-4 SDK In-App Message SDK Methods - OneSignal
[OneSignal home page](https://documentation.onesignal.com/)
Search...
⌘K
Search...
Navigation
v3-4 Client SDK reference
v3-4 SDK In-App Message SDK Methods
[Home](https://documentation.onesignal.com/docs/home)
[User Guides](https://documentation.onesignal.com/docs/quickstart-guide)
[Developer Guides](https://documentation.onesignal.com/docs/developers)
[Tutorials](https://documentation.onesignal.com/docs/tutorials)
[API Reference](https://documentation.onesignal.com/reference/rest-api-overview)
[Release Notes](https://documentation.onesignal.com/release-notes/changelog)
On this page
* [In-App Triggers](https://documentation.onesignal.com/v9.0/docs/iam-sdk-methods#in-app-triggers)
* [addTrigger Method](https://documentation.onesignal.com/v9.0/docs/iam-sdk-methods#addtrigger-method)
* [addTriggers Method](https://documentation.onesignal.com/v9.0/docs/iam-sdk-methods#addtriggers-method)
* [removeTriggerForKey Method](https://documentation.onesignal.com/v9.0/docs/iam-sdk-methods#removetriggerforkey-method)
* [removeTriggersForKeys Method](https://documentation.onesignal.com/v9.0/docs/iam-sdk-methods#removetriggersforkeys-method)
* [getTriggerValueForKey Method](https://documentation.onesignal.com/v9.0/docs/iam-sdk-methods#gettriggervalueforkey-method)
* [Prevent In-App From Showing Temporarily](https://documentation.onesignal.com/v9.0/docs/iam-sdk-methods#prevent-in-app-from-showing-temporarily)
* [pauseInAppMessages Method](https://documentation.onesignal.com/v9.0/docs/iam-sdk-methods#pauseinappmessages-method)
* [In-App Message Click Handler](https://documentation.onesignal.com/v9.0/docs/iam-sdk-methods#in-app-message-click-handler)
* [setInAppMessageClickHandler Method](https://documentation.onesignal.com/v9.0/docs/iam-sdk-methods#setinappmessageclickhandler-method)
* [In-App Message Click HandlerUse to process an In-App Message the user just tapped on.](https://documentation.onesignal.com/v9.0/docs/iam-sdk-methods#in-app-message-click-handleruse-to-process-an-in-app-message-the-user-just-tapped-on)
* [OSInAppMessageAction Class](https://documentation.onesignal.com/v9.0/docs/iam-sdk-methods#osinappmessageaction-class)
* [In-App Message Lifecycle Handler](https://documentation.onesignal.com/v9.0/docs/iam-sdk-methods#in-app-message-lifecycle-handler)
* [setInAppMessageLifecycleHandler Method](https://documentation.onesignal.com/v9.0/docs/iam-sdk-methods#setinappmessagelifecyclehandler-method)
* [OSInAppMessage ClassIdentifiable details of an In-App Message.](https://documentation.onesignal.com/v9.0/docs/iam-sdk-methods#osinappmessage-classidentifiable-details-of-an-in-app-message)
The methods below require the OneSignal SDK versions 3 & 4.It is recommended to upgrade to our latest version 5 SDKs for User Model APIs.See [Update to User Model](https://documentation.onesignal.com/docs/user-model-migration-guide)
for migration steps.
[](https://documentation.onesignal.com/v9.0/docs/iam-sdk-methods#in-app-triggers)
In-App Triggers
=====================================================================================================
Triggers are events that you fire to show In-App Messages within your app. They are created within the OneSignal Dashboard.Every time you add or remove a trigger with the below methods, the OneSignal SDK will evaluate if an In-App Message should be shown based on the conditions set on it when it was created in the OneSignal Dashboard. Triggers are reset each time your app is closed, so make sure to set them again when starting your app if you need any of them to be persistent.
[](https://documentation.onesignal.com/v9.0/docs/iam-sdk-methods#addtrigger-method)
`addTrigger` Method
-----------------------------------------------------------------------------------------------------------
Add a trigger. May show an In-App Message if its trigger conditions were met.
| Parameter | Type | Description |
| --- | --- | --- |
| `key` | String, NSString | Key for the trigger. |
| `value` | Object, id_(String or number recommended)_ | Value for the trigger. Object passed in will be converted to a string. |
java
Swift
objectivec
Unity (C#)
React Native
Flutter
Cordova/Ionic
Xamarin
Corona
Web-JavaScript
Copy
OneSignal.addTrigger("level", 5);
[](https://documentation.onesignal.com/v9.0/docs/iam-sdk-methods#addtriggers-method)
`addTriggers` Method
-------------------------------------------------------------------------------------------------------------
Add a map of triggers. May show an In-App Message if its trigger conditions were met.
| Parameter | Type | Description |
| --- | --- | --- |
| `triggers` | Map, NSDictionary | Allows you to set multiple trigger key/value pairs simultaneously. |
java
Swift
objectivec
Unity (C#)
React Native
Flutter
Cordova/Ionic
Xamarin
Corona
Web-JavaScript
Copy
HashMap testTriggers = new HashMap<>();
testTriggers.put("test1", "value1");
testTriggers.put("test2", "value2");
OneSignal.addTriggers(testTriggers);
[](https://documentation.onesignal.com/v9.0/docs/iam-sdk-methods#removetriggerforkey-method)
`removeTriggerForKey` Method
-----------------------------------------------------------------------------------------------------------------------------
Removes a single trigger for the given key. May show an In-App Message if its trigger conditions were met.
| Parameter | Type | Description |
| --- | --- | --- |
| `key` | String, NSString | Key for trigger to remove. |
java
Swift
objectivec
Unity (C#)
React Native
Flutter
Cordova/Ionic
Xamarin
Corona
Web-JavaScript
Copy
OneSignal.removeTriggerForKey("level");
[](https://documentation.onesignal.com/v9.0/docs/iam-sdk-methods#removetriggersforkeys-method)
`removeTriggersForKeys` Method
---------------------------------------------------------------------------------------------------------------------------------
Removes a list of triggers based on a collection of keys. May show an In-App Message if its trigger conditions were met.
Unity(C#)
Copy
OneSignal.Default.RemoveTriggers(new[] { "trigger4", "trigger5" });
| Parameter | Type | Description |
| --- | --- | --- |
| `keys` | Collection | Removes a collection of triggers from their keys. |
[](https://documentation.onesignal.com/v9.0/docs/iam-sdk-methods#gettriggervalueforkey-method)
`getTriggerValueForKey` Method
---------------------------------------------------------------------------------------------------------------------------------
Gets a trigger value for a provided trigger key.
| Parameter | Type | Description |
| --- | --- | --- |
| `key` | String, NSString | Returns a single trigger value for the given key, if it exists, otherwise returns `null` or `nil` in iOS. |
| Return Type | Description |
| --- | --- |
| Object (Android) id (iOS) String (Unity) | Value if added with `addTrigger`, or `null`/`nil` (iOS) if never set. |
java
Swift
objectivec
Unity (C#)
React Native
Flutter
Cordova/Ionic
Xamarin
Corona
Web-JavaScript
Copy
Object triggerValue;
triggerValue = OneSignal.getTriggerValueForKey("level");
[](https://documentation.onesignal.com/v9.0/docs/iam-sdk-methods#prevent-in-app-from-showing-temporarily)
Prevent In-App From Showing Temporarily
=====================================================================================================================================================
[](https://documentation.onesignal.com/v9.0/docs/iam-sdk-methods#pauseinappmessages-method)
`pauseInAppMessages` Method
---------------------------------------------------------------------------------------------------------------------------
Allows you to temporarily pause all In-App Messages. You may want to do this while the user is engaged in an activity that you don’t want a message to interrupt (such as watching a video).
Unity(C#)
Copy
OneSignal.Default.InAppMessagesArePaused = true;
| Parameter | Type | Description |
| --- | --- | --- |
| `pause` | Boolean | To pause, set `true`. To resume, set `false`. |
[](https://documentation.onesignal.com/v9.0/docs/iam-sdk-methods#in-app-message-click-handler)
In-App Message Click Handler
===============================================================================================================================
[](https://documentation.onesignal.com/v9.0/docs/iam-sdk-methods#setinappmessageclickhandler-method)
`setInAppMessageClickHandler` Method
---------------------------------------------------------------------------------------------------------------------------------------------
Sets an In-App Message opened handler. The instance will be called when an In-App Message action is tapped on.
| Parameter | Type | Description |
| --- | --- | --- |
| `handler` | `OSInAppMessageClickHandler` (Android)`OSInAppMessageClickBlock` (iOS) | Instance to a class implementing this interference. |
###
[](https://documentation.onesignal.com/v9.0/docs/iam-sdk-methods#in-app-message-click-handleruse-to-process-an-in-app-message-the-user-just-tapped-on)
In-App Message Click HandlerUse to process an In-App Message the user just tapped on.
| Parameter | Type | Description |
| --- | --- | --- |
| `result` | `OSInAppMessageAction` | Details about the In-App Message action element (button or image) that was tapped on. |
java
Swift
objectivec
Unity (C#)
React Native
Flutter
Cordova/Ionic
Xamarin
Copy
OneSignal.setInAppMessageClickHandler(new OneSignal.OSInAppMessageClickHandler() {
@Override
public void inAppMessageClicked(OSInAppMessageAction result) {
OneSignal.onesignalLog(OneSignal.LOG_LEVEL.VERBOSE, "getClickUrl: " + result.getClickUrl());
OneSignal.onesignalLog(OneSignal.LOG_LEVEL.VERBOSE, "getClickName: " + result.getClickName());
OneSignal.onesignalLog(OneSignal.LOG_LEVEL.VERBOSE, "getUrlTarget: " + String.valueOf(result.getUrlTarget()));
OneSignal.onesignalLog(OneSignal.LOG_LEVEL.VERBOSE, "getOutcomes: " + String.valueOf(result.getOutcomes()));
OneSignal.onesignalLog(OneSignal.LOG_LEVEL.VERBOSE, "getPrompts: " + String.valueOf(result.getPrompts()));
OneSignal.onesignalLog(OneSignal.LOG_LEVEL.VERBOSE, "doesCloseMessage: " + String.valueOf(result.doesCloseMessage()));
}
});
[](https://documentation.onesignal.com/v9.0/docs/iam-sdk-methods#osinappmessageaction-class)
`OSInAppMessageAction` Class
-----------------------------------------------------------------------------------------------------------------------------
Details about the In-App Message action element (button or image) that was tapped on.
| Type | Method/Property | Description |
| --- | --- | --- |
| `String``NSString` | `getClickName()``clickName``click_name` | An optional click name defined for the action element.`null` or `nil` (iOS) if not set |
| `String``NSURL` | `getClickUrl()``clickUrl``click_url` | An optional URL that opens when the action takes place.`null` or `nil` (iOS) if not set. |
| `boolean``BOOL` | `isFirstClick()``firstClick``first_click` | `true` if this is the first time the user has pressed any action on the In-App Message. |
| `boolean``BOOL` | `doesCloseMessage()``closesMessage``closes_message` | `true` = the In-App Message will animate off the screen. `false` = the In-App Message will stay on screen until the user dismisses it. |
| `List``NSArray` | `getOutcomes()``outcomes` | Outcome for action. _Mainly useful for debugging_ |
| `List``OSInAppMessagePrompt` | `getPrompts()``prompts` | Permission prompts. _Mainly useful for debugging_ |
| `OSInAppMessageTag` | `getTags()``tags` | Tags for action. _Mainly useful for debugging_ |
| `OSInAppMessageActionUrlType` | `getUrlTarget()``urlTarget``url_target` | Determines where the URL is opened, ie. _Mainly useful for debugging_ |
[](https://documentation.onesignal.com/v9.0/docs/iam-sdk-methods#in-app-message-lifecycle-handler)
In-App Message Lifecycle Handler
=======================================================================================================================================
Requires iOS SDK version 3.7.0+ Requires Android SDK version 4.6.0+ The In-App Message Lifecycle Handler gives insight into the display lifecycle of In-App Messages. The Lifecycle Handler has four lifecycle methods that you can override in order to run code at particular times in this process.
[](https://documentation.onesignal.com/v9.0/docs/iam-sdk-methods#setinappmessagelifecyclehandler-method)
`setInAppMessageLifecycleHandler` Method
-----------------------------------------------------------------------------------------------------------------------------------------------------
Sets an In-App Message lifecycle handler.
| Parameter | Type | Description |
| --- | --- | --- |
| `handler` (Android)`delegate` (iOS) | `OSInAppMessageLifecycleHandler` | Instance of a class implementing this abstract class/protocol. |
The `OSInAppMessageLifecycleHandler` Class/Protocol includes the following optional methods.
| Method | Details |
| --- | --- |
| `onWillDisplayInAppMessage(OSInAppMessage message)` | This method will be called after the In-App Message content has been loaded, but before it has been displayed. If the content load fails, this method will not be called. |
| `onDidDisplayInAppMessage(OSInAppMessage message)` | This method will be called after the In-App Message is displayed on screen. |
| `onWillDismissInAppMessage(OSInAppMessage message)` | This method will be called when an an event to dismiss the In-App Message is fired. This method is also called for auto-dismissed In-App Messages. |
| `onDidDismissInAppMessage(OSInAppMessage message)` | This method will be called when the In-App Message is completely dismissed from the screen. |
java
objectivec
Swift
Unity (C#)
Copy
OneSignal.setInAppMessageLifecycleHandler(
new OSInAppMessageLifecycleHandler() {
// Add one or more of the following optional lifecycle methods
@Override
public void onWillDisplayInAppMessage(OSInAppMessage message) {
OneSignal.onesignalLog(OneSignal.LOG_LEVEL.VERBOSE, "OSInAppMessageLifecycleHandler: onWillDisplay Message: " + message.getMessageId());
}
@Override
public void onDidDisplayInAppMessage(OSInAppMessage message) {
OneSignal.onesignalLog(OneSignal.LOG_LEVEL.VERBOSE, "OSInAppMessageLifecycleHandler: onDidDisplay Message: " + message.getMessageId();
}
@Override
public void onWillDismissInAppMessage(OSInAppMessage message) {
OneSignal.onesignalLog(OneSignal.LOG_LEVEL.VERBOSE, "OSInAppMessageLifecycleHandler: onWillDismiss Message: " + message.getMessageId());
}
@Override
public void onDidDismissInAppMessage(OSInAppMessage message) {
OneSignal.onesignalLog(OneSignal.LOG_LEVEL.VERBOSE, "OSInAppMessageLifecycleHandler: onDidDismiss Message: " + message.getMessageId());
}
});
[](https://documentation.onesignal.com/v9.0/docs/iam-sdk-methods#osinappmessage-classidentifiable-details-of-an-in-app-message)
`OSInAppMessage` ClassIdentifiable details of an In-App Message.
----------------------------------------------------------------------------------------------------------------------------------------------------------------------------------------------------
| Type | Method/Property | Description |
| --- | --- | --- |
| `String``NSString` | `getMessageId()``messageId` | The generated ID of the In-App Message. |
* * *
[v4 Android Mobile Service Extensions](https://documentation.onesignal.com/v9.0/docs/service-extensions)
[v3-4 SDK Web SDK Methods](https://documentation.onesignal.com/v9.0/docs/web-push-sdk)
Assistant
Responses are generated using AI and may contain mistakes.
---
# v3-4 SDK Web SDK Methods - OneSignal
[OneSignal home page](https://documentation.onesignal.com/)
Search...
⌘K
Search...
Navigation
v3-4 Client SDK reference
v3-4 SDK Web SDK Methods
[Home](https://documentation.onesignal.com/docs/home)
[User Guides](https://documentation.onesignal.com/docs/quickstart-guide)
[Developer Guides](https://documentation.onesignal.com/docs/developers)
[Tutorials](https://documentation.onesignal.com/docs/tutorials)
[API Reference](https://documentation.onesignal.com/reference/rest-api-overview)
[Release Notes](https://documentation.onesignal.com/release-notes/changelog)
On this page
* [Initialization](https://documentation.onesignal.com/v9.0/docs/web-push-sdk#initialization)
* [Loading SDK Asynchronously](https://documentation.onesignal.com/v9.0/docs/web-push-sdk#loading-sdk-asynchronously)
* [init](https://documentation.onesignal.com/v9.0/docs/web-push-sdk#init)
* [Init promptOptions parameters](https://documentation.onesignal.com/v9.0/docs/web-push-sdk#init-promptoptions-parameters)
* [Init welcomeNotification parameters](https://documentation.onesignal.com/v9.0/docs/web-push-sdk#init-welcomenotification-parameters)
* [Init notifyButton parameters](https://documentation.onesignal.com/v9.0/docs/web-push-sdk#init-notifybutton-parameters)
* [Non-HTTPS subdomainName Parameter](https://documentation.onesignal.com/v9.0/docs/web-push-sdk#non-https-subdomainname-parameter)
* [setDefaultNotificationUrl Method](https://documentation.onesignal.com/v9.0/docs/web-push-sdk#setdefaultnotificationurl-method)
* [setDefaultTitle Method](https://documentation.onesignal.com/v9.0/docs/web-push-sdk#setdefaulttitle-method)
* [provideUserConsent Method](https://documentation.onesignal.com/v9.0/docs/web-push-sdk#provideuserconsent-method)
* [Registering Push](https://documentation.onesignal.com/v9.0/docs/web-push-sdk#registering-push)
* [showNativePrompt Method](https://documentation.onesignal.com/v9.0/docs/web-push-sdk#shownativeprompt-method)
* [HTTP Setup](https://documentation.onesignal.com/v9.0/docs/web-push-sdk#http-setup)
* [HTTPS Setup](https://documentation.onesignal.com/v9.0/docs/web-push-sdk#https-setup)
* [registerForPushNotifications Method](https://documentation.onesignal.com/v9.0/docs/web-push-sdk#registerforpushnotifications-method)
* [permissionPromptDisplay Event](https://documentation.onesignal.com/v9.0/docs/web-push-sdk#permissionpromptdisplay-event)
* [showSlidedownPrompt Method](https://documentation.onesignal.com/v9.0/docs/web-push-sdk#showslidedownprompt-method)
* [showCategorySlidedown Method](https://documentation.onesignal.com/v9.0/docs/web-push-sdk#showcategoryslidedown-method)
* [getNotificationPermission Event](https://documentation.onesignal.com/v9.0/docs/web-push-sdk#getnotificationpermission-event)
* [isPushNotificationsSupported Method](https://documentation.onesignal.com/v9.0/docs/web-push-sdk#ispushnotificationssupported-method)
* [isPushNotificationsEnabled Method](https://documentation.onesignal.com/v9.0/docs/web-push-sdk#ispushnotificationsenabled-method)
* [subscriptionChange Event](https://documentation.onesignal.com/v9.0/docs/web-push-sdk#subscriptionchange-event)
* [Callback Event Parameters](https://documentation.onesignal.com/v9.0/docs/web-push-sdk#callback-event-parameters)
* [Analytics](https://documentation.onesignal.com/v9.0/docs/web-push-sdk#analytics)
* [notificationPermissionChange Event](https://documentation.onesignal.com/v9.0/docs/web-push-sdk#notificationpermissionchange-event)
* [Callback Event Parameters](https://documentation.onesignal.com/v9.0/docs/web-push-sdk#callback-event-parameters-2)
* [Slide Prompt Events](https://documentation.onesignal.com/v9.0/docs/web-push-sdk#slide-prompt-events)
* [customPromptClick Event](https://documentation.onesignal.com/v9.0/docs/web-push-sdk#custompromptclick-event)
* [Callback Event Parameters](https://documentation.onesignal.com/v9.0/docs/web-push-sdk#callback-event-parameters-3)
* [User IDs](https://documentation.onesignal.com/v9.0/docs/web-push-sdk#user-ids)
* [getUserId Method](https://documentation.onesignal.com/v9.0/docs/web-push-sdk#getuserid-method)
* [External User Ids](https://documentation.onesignal.com/v9.0/docs/web-push-sdk#external-user-ids)
* [Tags](https://documentation.onesignal.com/v9.0/docs/web-push-sdk#tags)
* [Push Notifications](https://documentation.onesignal.com/v9.0/docs/web-push-sdk#push-notifications)
* [Create Notification](https://documentation.onesignal.com/v9.0/docs/web-push-sdk#create-notification)
* [sendSelfNotification Method](https://documentation.onesignal.com/v9.0/docs/web-push-sdk#sendselfnotification-method)
* [setSubscription Method](https://documentation.onesignal.com/v9.0/docs/web-push-sdk#setsubscription-method)
* [Receiving Notifications](https://documentation.onesignal.com/v9.0/docs/web-push-sdk#receiving-notifications)
* [notificationDisplay Event](https://documentation.onesignal.com/v9.0/docs/web-push-sdk#notificationdisplay-event)
* [Callback Event Parameters](https://documentation.onesignal.com/v9.0/docs/web-push-sdk#callback-event-parameters-4)
* [notificationDismiss Event](https://documentation.onesignal.com/v9.0/docs/web-push-sdk#notificationdismiss-event)
* [Callback Event Parameters](https://documentation.onesignal.com/v9.0/docs/web-push-sdk#callback-event-parameters-5)
* [addListenerForNotificationOpened Event](https://documentation.onesignal.com/v9.0/docs/web-push-sdk#addlistenerfornotificationopened-event)
* [Email](https://documentation.onesignal.com/v9.0/docs/web-push-sdk#email)
* [SMS](https://documentation.onesignal.com/v9.0/docs/web-push-sdk#sms)
The methods below require the OneSignal SDK version 15.It is recommended to upgrade to our latest version 16 SDK for User Model APIs.See [Update to User Model](https://documentation.onesignal.com/docs/user-model-migration-guide)
for migration steps.
[](https://documentation.onesignal.com/v9.0/docs/web-push-sdk#initialization)
Initialization
================================================================================================
###
[](https://documentation.onesignal.com/v9.0/docs/web-push-sdk#loading-sdk-asynchronously)
Loading SDK Asynchronously
**Javascript flag Recommended** OneSignal recommends loading `OneSignalSDK.js` with the `async` flag so your page load times don’t increase. To use it, place the following code _before_ calling any other OneSignal functions.
html
Copy
Our API functions can be called asynchronously using either:
1. `OneSignal.push(["functionName", param1, param2]);`
2. `OneSignal.push(function() { OneSignal.functionName(param1, param2); });`
Option 2 must be used for functions that return a value like `isPushNotificationsSupported`. Option 2 also lets you call as many OneSignal functions as you need inside the passed-in function block.
[](https://documentation.onesignal.com/v9.0/docs/web-push-sdk#init)
`init`
------------------------------------------------------------------------------
Call this from each page of your site to initialize OneSignal.
* Do not call this method twice. Doing so results in an error.
* This call is required before any other function can be used.
Init JSON `options` are as follows:
| Parameter | Type | Description |
| --- | --- | --- |
| `appId` | String | **Required:** Your OneSignal app id found on the settings page at onesignal.com. |
| `subdomainName` | String | **Required on HTTP ONLY:** This must match the label you entered in Site Settings. |
| `requiresUserPrivacyConsent` | Boolean | Allows you to delay the initialization of the SDK until the user provides privacy consent. The SDK will not be fully initialized until the [provideUserConsent](https://documentation.onesignal.com/v9.0/docs/web-push-sdk#provideuserconsent-method)
function is called. |
| `promptOptions` | JSON | Localize the HTTP popup prompt. [See below details](https://documentation.onesignal.com/v9.0/docs/web-push-sdk#init-promptoptions-parameters)
. |
| `welcomeNotification` | JSON | Customize or disable the welcome notification sent to new site visitors. [See below details](https://documentation.onesignal.com/v9.0/docs/web-push-sdk#init-welcomenotification-parameters)
. |
| `notifyButton` | JSON | Enable and customize the notifyButton. [See below details](https://documentation.onesignal.com/v9.0/docs/web-push-sdk#init-notifybutton-parameters)
. |
| `persistNotification` | Boolean | Chrome (non-mobile) - `true`: persists notification, `false`: disappears after some time. See our [Notification Persistence Section](https://documentation.onesignal.com/docs/web-push-options#notification-persistence)
for more info. Firefox and Safari - notifications automatically dismiss after some time and this parameter does not control that. |
| `webhooks` | JSON | See our [Webhooks page](https://documentation.onesignal.com/docs/webhooks)
for the nested options. |
| `autoResubscribe` | Boolean | **Recommended, HTTPS ONLY** - Automatically resubscribes users when they clear browser cache or migrating to OneSignal. This is set in the OneSignal dashboard during setup but if set again during initialization, will override dashboard config. |
| `autoRegister` | Boolean | **Not Recommended:** Shows Native Browser Prompt immediately. We do not recommend using because it creates a poor user experience. _Should be removed from code._ |
| `notificationClickHandlerMatch` | String | Default: If the launch URL of the notification matches exactly to a tab already open it will be focused. `"origin"`\- If the launch URL of the notification matches any tab already open to your domain it will be focused. See [addListenerForNotificationOpened](https://documentation.onesignal.com/v9.0/docs/web-push-sdk#addlistenerfornotificationopened)
documentation for more details. |
| `notificationClickHandlerAction` | String | `"navigate"` Default: Automatically navigate to the launchURL on opening the notification. `"focus"` - Only apply if `notificationClickHandlerMatch` is set to `"origin"`. Only focuses an existing tab if the launch URL matches the domain instead of navigating. See [addListenerForNotificationOpened](https://documentation.onesignal.com/v9.0/docs/web-push-sdk#addlistenerfornotificationopened)
documentation for more details. |
| `path` | String | **Special Case on HTTPS ONLY:** Absolute path to OneSignal SDK web worker files. You only need to set this parameter if you do not want the files at the root of your site. |
[](https://documentation.onesignal.com/v9.0/docs/web-push-sdk#init-promptoptions-parameters)
Init `promptOptions` parameters
--------------------------------------------------------------------------------------------------------------------------------
Pass in these optional parameters within `promptOptions` when initializing to localize the prompts to your custom text and language. All entries are limited in length. Foreign characters accepted. Each parameter is optional, and its default is used when it is not included.
| Parameter | Type | Description |
| --- | --- | --- |
| `actionMessage` | String | Text that says ‘wants to show notifications’ by default. Limited to 90 characters. |
| `exampleNotificationTitleDesktop` | String | Text that says ‘This is an example notification’. Displays on non-mobile devices. Only one line is allowed. |
| `exampleNotificationMessageDesktop` | String | Text that says ‘Notifications will appear on your desktop’. Displays on non-mobile devices. Only one line is allowed. |
| `exampleNotificationTitleMobile` | String | Text that says ‘This is an example notification’. Displays on mobile devices with limited screen width. Only one line is allowed. |
| `exampleNotificationMessageMobile` | String | Text that says ‘Notifications will appear on your device’. Displays on mobile devices with limited screen width. Only one line is allowed. |
| `exampleNotificationCaption` | String | Text that says ‘(you can unsubscribe anytime)’. |
| `acceptButton` - [Slide Prompt](https://documentation.onesignal.com/docs/permission-requests)
`acceptButtonText` - [HTTP PopUp Prompt](https://documentation.onesignal.com/docs/permission-requests) | String | Customize the “Continue” text. Limited to 15 characters. |
| `cancelButton` - [Slide Prompt](https://documentation.onesignal.com/docs/permission-requests)
`cancelButtonText` - [HTTP PopUp Prompt](https://documentation.onesignal.com/docs/permission-requests) | String | Customize the “Cancel” text. Limited to 15 characters. |
| `showCredit` | Boolean | Set to false to hide the OneSignal logo. |
[](https://documentation.onesignal.com/v9.0/docs/web-push-sdk#init-welcomenotification-parameters)
Init `welcomeNotification` parameters
--------------------------------------------------------------------------------------------------------------------------------------------
Pass in these optional parameters within `welcomeNotification` when initializing to customize or disable the welcome notification sent to new site visitors. Any person visiting your site for their first time, or an existing user who has completely cleared their cache is considered a new site visitor.
| Parameter | Type | Description |
| --- | --- | --- |
| `disable` | Boolean | Disables sending a welcome notification to new site visitors. If you want to disable welcome notifications, this is the only option you need. |
| `title` | String | The welcome notification’s title. You can localize this to your own language. If not set, or left blank, the site’s title will be used. Set to one space ’ ’ to clear the title, although this is not recommended. |
| `message` | String | **Required:** The welcome notification’s message. You can localize this to your own language. A message is required. If left blank or set to blank, the default of ‘Thanks for subscribing!’ will be used. |
| `url` | URL | An optional URL to open after the user clicks the welcome notification. By default, clicking the welcome notification does not open any link. This is recommended because the user has just visited your site and subscribed. |
[](https://documentation.onesignal.com/v9.0/docs/web-push-sdk#init-notifybutton-parameters)
Init `notifyButton` parameters
------------------------------------------------------------------------------------------------------------------------------
Pass in these optional parameters within `notifyButton` when initializing to enable and customize the Subscription Bell (formerly known as the notify button). All parameters below are optional. If not set, they will be replaced with their defaults.
| Parameter | Type | Description |
| --- | --- | --- |
| `enable` | Boolean | Enable the Subscription Bell. The Subscription Bell is otherwise disabled by default. |
| `displayPredicate` | Function | A function you define that returns `true` to show the Subscription Bell, or `false` to hide it. You can also return a `Promise` that resolves to `true` or `false` for awaiting asynchronous operations. Typically used the hide the Subscription Bell after the user is subscribed. This function _is not_ re-evaluated on every state change; this function is only evaluated once when the Subscription Bell begins to show. See [Hiding the Subscription Bell](https://documentation.onesignal.com/docs/permission-requests)
for an example. |
| `size` | String | One of ‘small’, ‘medium’, or ‘large’. The Subscription Bell will initially appear at one of these sizes, and then shrink down to size ‘small’ after the user subscribes. |
| `position` | String | Either ‘bottom-left’ or ‘bottom-right’. The Subscription Bell will be fixed at this location on your page. |
| `offset` | JSON | Specify CSS-valid pixel offsets using bottom, left, and right. |
| `prenotify` | Boolean | If true, the Subscription Bell will display an icon that there is 1 unread message. When hovering over the Subscription Bell, the user will see custom text set by `message.prenotify`. |
| `showCredit` | Boolean | Set `false` to hide the ‘Powered by OneSignal’ text in the Subscription Bell dialog popup. |
| `text` | JSON | Customize the Subscription Bell text. See the example code below to know what to change. |
The following is a basic template of how you would call `init()`.
javascript
Copy
// OneSignal is defined as an array here and uses push calls to support OneSignalSDK.js being loaded async.
var OneSignal = OneSignal || [];
OneSignal.push(["init", {\
appId: "YOUR_APP_ID",\
// Your other init settings\
}]);
//Another way to initialize OneSignal
window.OneSignal = window.OneSignal || [];
OneSignal.push(function() {
OneSignal.init({
appId: "YOUR_APP_ID",
// Your other init settings
});
});
###
[](https://documentation.onesignal.com/v9.0/docs/web-push-sdk#non-https-subdomainname-parameter)
Non-HTTPS `subdomainName` Parameter
Non-HTTPS pages require the subdomainName parameter within the label set within the OneSignal Web configuration.
The following is a basic template of a custom setup using the subDomainName parameter.
javascript
Copy
OneSignal.push(["init", {\
appId: "YOUR_APP_ID",\
// Your other init settings\
subdomainName: "YOUR_SUBDOMAIN_NAME_HERE"\
}]);
###
[](https://documentation.onesignal.com/v9.0/docs/web-push-sdk#setdefaultnotificationurl-method)
`setDefaultNotificationUrl` Method
Pass in the full URL of the default page you want to open when a notification is clicked. When creating a notification, any URL you specify will take precedence and override the default URL. However if no URL is specified, this default URL specified by this call will open instead. If no default URL is specified at all, the notification opens to the root of your site by default. Safari - This function is not available. Instead, the default notification icon URL is the Site URL you set in your Safari settings.
| Parameter | Type | Description |
| --- | --- | --- |
| `url` | String | page url to open from notifications |
javascript
Copy
OneSignal.push(function() {
/* These examples are all valid */
OneSignal.setDefaultNotificationUrl("https://example.com");
OneSignal.setDefaultNotificationUrl("https://example.com/subresource/resource");
OneSignal.setDefaultNotificationUrl("http://subdomain.example.com:8080/a/b");
});
###
[](https://documentation.onesignal.com/v9.0/docs/web-push-sdk#setdefaulttitle-method)
`setDefaultTitle` Method
Sets the default title to display on notifications. If a notification is created with a title, the specified title always overrides this default title. A notification’s title defaults to the title of the page the user last visited. If your page titles vary between pages, this inconsistency can be undesirable. Call this to standardize page titles across notifications, as long as a notification title isn’t specified.
| Parameter | Type | Description |
| --- | --- | --- |
| `title` | String | String to set as a default title on notifications |
javascript
Copy
OneSignal.push(function() {
OneSignal.setDefaultTitle("My Title");
});
[](https://documentation.onesignal.com/v9.0/docs/web-push-sdk#provideuserconsent-method)
`provideUserConsent` Method
------------------------------------------------------------------------------------------------------------------------
If your website is set to require the user’s privacy consent or some action before they can subscribe to push, add [`requiresUserPrivacyConsent: true` property in the OneSignal init call](https://documentation.onesignal.com/v9.0/docs/web-push-sdk#init)
. This will stop our SDK from initializing until you call `provideUserConsent(true)`. You can also revoke consent by setting `provideUserConsent(false)`. This will prevent further collection of user data. To delete the user’s current data see [Delete User Data](https://documentation.onesignal.com/docs/delete-users)
.
javascript
Copy
function userTappedProvideConsentButton() {
// Will initialize the SDK and register for push notifications
OneSignal.push(function() {
OneSignal.provideUserConsent(true);
});
}
[](https://documentation.onesignal.com/v9.0/docs/web-push-sdk#registering-push)
Registering Push
====================================================================================================
[](https://documentation.onesignal.com/v9.0/docs/web-push-sdk#shownativeprompt-method)
`showNativePrompt` Method
--------------------------------------------------------------------------------------------------------------------
####
[](https://documentation.onesignal.com/v9.0/docs/web-push-sdk#http-setup)
HTTP Setup
Opens a popup window to `mylabel.os.tc/subscribe` to prompt the user to subscribe to push notifications. Call this in response to a user action like a button or link that was just clicked, otherwise the browser’s popup blocker will prevent the popup from opening.
####
[](https://documentation.onesignal.com/v9.0/docs/web-push-sdk#https-setup)
HTTPS Setup
You may call this at any time to show the prompt for push notifications. If notification permissions have already been granted, nothing will happen.
showNativePrompt
registerForPushNotifications
Copy
OneSignal.push(function() {
OneSignal.showNativePrompt();
});
###
[](https://documentation.onesignal.com/v9.0/docs/web-push-sdk#registerforpushnotifications-method)
`registerForPushNotifications` Method
See [showNativePrompt](https://documentation.onesignal.com/v9.0/docs/web-push-sdk#shownativeprompt)
.
[](https://documentation.onesignal.com/v9.0/docs/web-push-sdk#permissionpromptdisplay-event)
`permissionPromptDisplay` Event
--------------------------------------------------------------------------------------------------------------------------------
Event occurs when the browser’s native permission request has just been shown.
javascript
Copy
OneSignal.push(function() {
OneSignal.on('permissionPromptDisplay', function () {
console.log("The prompt displayed");
});
});
[](https://documentation.onesignal.com/v9.0/docs/web-push-sdk#showslidedownprompt-method)
`showSlidedownPrompt` Method
--------------------------------------------------------------------------------------------------------------------------
Shows the OneSignal Slide Prompt for HTTP and HTTPS sites. This slides down from the top (or up from the bottom on mobile). Please see [Slide Prompt](https://documentation.onesignal.com/docs/permission-requests)
for more details. _Note: This does not replace the Native Browser Prompt required for subscription._
showSlidedownPrompt
showHttpPrompt
Copy
OneSignal.push(function() {
OneSignal.showSlidedownPrompt();
});
**Prompting behavior if declined** If declined, future calls will be ignored for 3 days with [additional backoff on another decline](https://documentation.onesignal.com/docs/permission-requests)
. _Note: If you need to override this back off behavior to prompt the user again you can do so by passing `{force: true}`. To provide a good user experience however ONLY do this from an action taken on your site to avoid unexpected prompts._
[](https://documentation.onesignal.com/v9.0/docs/web-push-sdk#showcategoryslidedown-method)
`showCategorySlidedown` Method
------------------------------------------------------------------------------------------------------------------------------
Shows the OneSignal Category Slidedown for HTTP and HTTPS sites. This slides down from the top (or up from the bottom on mobile). Please see [Category Slidedown](https://documentation.onesignal.com/docs/permission-requests)
for more details. _Note: This does not replace the Native Browser Prompt required for subscription._
showCategorySlidedown
Copy
OneSignal.push(function() {
OneSignal.showCategorySlidedown();
});
**Prompting behavior if declined** (see [showSlidedownPrompt](https://documentation.onesignal.com/v9.0/docs/web-push-sdk#showslidedownprompt)
)
[](https://documentation.onesignal.com/v9.0/docs/web-push-sdk#getnotificationpermission-event)
`getNotificationPermission` Event
------------------------------------------------------------------------------------------------------------------------------------
Returns a Promise that resolves to the browser’s current notification permission as ‘default’, ‘granted’, or ‘denied’. You can use this to detect whether the user has allowed notifications, blocked notifications, or has not chosen either setting.
| Parameter | Type | Description |
| --- | --- | --- |
| `callback` | function | A callback function that will be called when the browser’s current notification permission has been obtained, with one of ‘default’, ‘granted’, or ‘denied’. |
javascript
Copy
OneSignal.push(["getNotificationPermission", function(permission) {\
console.log("Site Notification Permission:", permission);\
// (Output) Site Notification Permission: default\
}]);
[](https://documentation.onesignal.com/v9.0/docs/web-push-sdk#ispushnotificationssupported-method)
`isPushNotificationsSupported` Method
--------------------------------------------------------------------------------------------------------------------------------------------
Returns true if the current browser environment viewing the page supports push notifications. Almost all of the API calls on this page internally call this method first before continuing; this check is therefore optional but you may call it if you wish to display a custom message to the user. This method is synchronous and returns immediately.
javascript
Copy
OneSignal.push(function() {
/* These examples are all valid */
var isPushSupported = OneSignal.isPushNotificationsSupported();
if (isPushSupported) {
// Push notifications are supported
} else {
// Push notifications are not supported
}
});
[](https://documentation.onesignal.com/v9.0/docs/web-push-sdk#ispushnotificationsenabled-method)
`isPushNotificationsEnabled` Method
----------------------------------------------------------------------------------------------------------------------------------------
**HTTPS Only** Returns a `Promise` that resolves to `true` if the user has already accepted push notifications and successfully registered with Google’s FCM server and OneSignal’s server (i.e. the user is able to receive notifications). If you used `OneSignal.setSubscription()` or unsubscribed using the [Bell Prompt](https://documentation.onesignal.com/docs/permission-requests)
or [Custom Link prompt](https://documentation.onesignal.com/docs/permission-requests)
after the user successfully subscribes through the browser, `isPushNotificationsEnabled` will show whatever value you set for `setSubscription`. If you’re deleting your user entry on our online dashboard for testing, the SDK will not sync with our dashboard and so this method will still return `true` (because you are still subscribed to the site’s notifications). Follow [Clearing your cache and resetting push permissions](https://documentation.onesignal.com/docs/troubleshooting-web-push)
to reset the browser data.
| Parameter | Type | Description |
| --- | --- | --- |
| `isPushNotificationsEnabledCallBack` | Function | Callback to be fired when the check completes. The first parameter of the callback is a boolean value indicating whether the user can receive notifications. |
javascript
Copy
OneSignal.push(function() {
OneSignal.isPushNotificationsEnabled(function(isEnabled) {
if (isEnabled)
console.log("Push notifications are enabled!");
else
console.log("Push notifications are not enabled yet.");
});
});
// Another option
OneSignal.push(function() {
OneSignal.isPushNotificationsEnabled().then(function(isEnabled) {
if (isEnabled)
console.log("Push notifications are enabled!");
else
console.log("Push notifications are not enabled yet.");
});
});
[](https://documentation.onesignal.com/v9.0/docs/web-push-sdk#subscriptionchange-event)
`subscriptionChange` Event
----------------------------------------------------------------------------------------------------------------------
Event occurs when the user’s subscription state changes between unsubscribed and subscribed. Chrome and Firefox - the user’s subscription is `true` when:
* Your site is granted notification permissions
* Your site visitor’s web storage database containing OneSignal-related data is intact
* You have not manually opted out the user from receiving notifications
* The Subscription Bell ‘Subscribe’ and ‘Unsubscribe’ button opts users in and out without affecting their other subscription parameters
* `OneSignal.setSubscription()` is used to opt the user in and out
* Your site visitor has an installed background web worker used to display notifications
Safari - only the first three are required for a valid subscription. Use this event to find out when the user has successfully subscribed. The parameter will be set to true to represent a new subscribed state. A user is no longer subscribed if:
* The user changes notification permissions
* The icon next to the URL in the address bar can be clicked to modify site permissions
* Chrome and Firefox notifications come with a button on the notification to block site notifications
* The user clears their browser data (clearing cookies will not effect subscription)
* Another background web worker overwrites our web worker
This event _is not related_ to `OneSignal.setSubscription()`, which is used to temporarily opt-out the user from receiving notifications by setting a flag on our system so that notifications are not delivered to the user. To detect changes when using the `OneSignal.setSubscription()` flag, you would use the `OneSignal.isPushNotificationsEnabled()` method but this will not get called until the page is refreshed.
###
[](https://documentation.onesignal.com/v9.0/docs/web-push-sdk#callback-event-parameters)
Callback Event Parameters
| Parameter | Type | Description |
| --- | --- | --- |
| `subscribed` | Boolean | Set to `true` if the user is currently subscribed; otherwise set to `false`. |
javascript
Copy
OneSignal.push(function() {
// Occurs when the user's subscription changes to a new value.
OneSignal.on('subscriptionChange', function (isSubscribed) {
console.log("The user's subscription state is now:", isSubscribed);
});
// This event can be listened to via the `on()` or `once()` listener.
});
[](https://documentation.onesignal.com/v9.0/docs/web-push-sdk#analytics)
Analytics
======================================================================================
[](https://documentation.onesignal.com/v9.0/docs/web-push-sdk#notificationpermissionchange-event)
`notificationPermissionChange` Event
------------------------------------------------------------------------------------------------------------------------------------------
 Event occurs when the user clicks Allow or Block or dismisses the browser’s native permission request.
###
[](https://documentation.onesignal.com/v9.0/docs/web-push-sdk#callback-event-parameters-2)
Callback Event Parameters
| Parameter | Type | Description |
| --- | --- | --- |
| event | Hash | A JavaScript object with a `to` property. If `to` is `"granted"`, the user has allowed notifications. If `to` is `"denied"`, the user has blocked notifications. If `to` is `"default"`, the user has clicked the ‘X’ button to dismiss the prompt. |
javascript
Copy
OneSignal.push(function() {
OneSignal.on('notificationPermissionChange', function(permissionChange) {
var currentPermission = permissionChange.to;
console.log('New permission state:', currentPermission);
});
// This event can be listened to via the on() or once() listener
});
[](https://documentation.onesignal.com/v9.0/docs/web-push-sdk#slide-prompt-events)
Slide Prompt Events
----------------------------------------------------------------------------------------------------------
`popoverShown` - Slide Prompt has just animated into view and is being shown to the user. `popoverAllowClick` - The “Continue” button on the Slide Prompt was clicked. `popoverCancelClick` - The “No Thanks” button on the Slide Prompt was clicked. `popoverClosed` - The Slide Prompt was just closed.
javascript
Copy
OneSignal.push(function() {
OneSignal.on('popoverShown', function() {
console.log('Slide Prompt Shown');
});
});
[](https://documentation.onesignal.com/v9.0/docs/web-push-sdk#custompromptclick-event)
`customPromptClick` Event
--------------------------------------------------------------------------------------------------------------------
Event occurs when the user clicks “No Thanks” or “Continue” on our HTTP Pop-Up Prompt (not the browser’s permission request). Our web SDK shows different permission messages and requests, and this event is best used _only with_ the [HTTP Pop-Up Prompt](https://documentation.onesignal.com/docs/permission-requests)
.
###
[](https://documentation.onesignal.com/v9.0/docs/web-push-sdk#callback-event-parameters-3)
Callback Event Parameters
| Parameter | Type | Description |
| --- | --- | --- |
| event | Hash | A JavaScript object with a `result` property. - If `result` is `denied`, the user clicked _No Thanks_ on the HTTP Pop-Up Prompt. Popup window closes after this. - If `result` is `granted`, the user clicked _Continue_ on the HTTP Pop-Up Prompt. |
Note: If you are using the [Slide Prompt](https://documentation.onesignal.com/docs/permission-requests)
, you will always see this event fire with `granted`, since our SDK will automatically click _Continue_ on the popup window for the user. You should therefore ignore this event if you are using the Slide Prompt.
javascript
Copy
OneSignal.push(function() {
OneSignal.on('customPromptClick', function(promptClickResult) {
var promptClickResult = permissionChange.result;
console.log('HTTP Pop-Up Prompt click result:', promptClickResult);
});
// This event can be listened to via the on() or once() listener
});
[](https://documentation.onesignal.com/v9.0/docs/web-push-sdk#user-ids)
User IDs
====================================================================================
[](https://documentation.onesignal.com/v9.0/docs/web-push-sdk#getuserid-method)
`getUserId` Method
------------------------------------------------------------------------------------------------------
Returns a `Promise` that resolves to the stored OneSignal subscription ID of the Push Record if one is set, otherwise the Promise resolves to `null`. If the user isn’t already subscribed, this function will resolve to `null` immediately. If you’re getting the subscription ID after the user subscribes, call this within the `subscriptionChange` event, and check that `subscriptionChange` is `true`. If you’re getting the subscription ID on page load, check that the user is subscribed to notifications (e.g. `isPushNotificationsEnabled()`). For custom implementations involving our REST API, associate this OneSignal subscription ID with your data. Once created, the subscription ID will not change. If the user unsubscribes from web push, for example by clearing their browser data, and resubscribes, a new subscription ID will be created and a new entry will be stored on your app’s users list. The old entry will be unsubscribed and not be automatically deleted.
| Parameter | Type | Description |
| --- | --- | --- |
| `callback` | function | A callback function which sets the first parameter to the stored Push Record’s OneSignal subscription ID if one is set, otherwise the first parameter is set to null. |
javascript
Copy
OneSignal.push(function() {
/* These examples are all valid */
OneSignal.getUserId(function(userId) {
console.log("OneSignal User ID:", userId);
// (Output) OneSignal User ID: 270a35cd-4dda-4b3f-b04e-41d7463a2316
});
});
//Another example:
OneSignal.push(function() {
OneSignal.getUserId().then(function(userId) {
console.log("OneSignal User ID:", userId);
// (Output) OneSignal User ID: 270a35cd-4dda-4b3f-b04e-41d7463a2316
});
});
[](https://documentation.onesignal.com/v9.0/docs/web-push-sdk#external-user-ids)
External User Ids
------------------------------------------------------------------------------------------------------
OneSignal creates and stores device & channel level data under a unique OneSignal Id called the `subscription_id`. A single user can have multiple `subscription_id` records based on how many devices, email addresses, and phone numbers they use to interact with your app/site. You can combine `subscription_id` records in OneSignal under a unique User Id called the `external_id`. See the [External User Ids](https://documentation.onesignal.com/docs/users)
guide for more details. If you have a backend server, we strongly recommend using [Identity Verification](https://documentation.onesignal.com/v9.0/docs/identity-verification)
with your users. Your backend can generate an _**identifier authentication token**_ and send it to your site.
* * *
[](https://documentation.onesignal.com/v9.0/docs/web-push-sdk#tags)
Tags
============================================================================
Data Tags are custom `key : value` pairs of string or number data you set on users based on events or user data of your choosing. See [Data Tags Overview](https://documentation.onesignal.com/docs/add-user-data-tags)
for more details on what tags are used for. See [Data Tag Implementation](https://documentation.onesignal.com/docs/add-user-data-tags)
for SDK Method details.
* * *
[](https://documentation.onesignal.com/v9.0/docs/web-push-sdk#push-notifications)
Push Notifications
========================================================================================================
[](https://documentation.onesignal.com/v9.0/docs/web-push-sdk#create-notification)
Create Notification
----------------------------------------------------------------------------------------------------------
To send notifications to users, we recommend using the [Create notification](https://documentation.onesignal.com/reference/create-message)
REST API docs, or Messages Dashboard because the Web Push API is run client-side, it does not have the ability to programmatically send to multiple users at once, or users that are not currently on your website.
[](https://documentation.onesignal.com/v9.0/docs/web-push-sdk#sendselfnotification-method)
`sendSelfNotification` Method
----------------------------------------------------------------------------------------------------------------------------
This does not send to all users. Please see our [Create notification](https://documentation.onesignal.com/reference/create-message)
REST API for sending notifications. This function is primarily for your own internal testing.
Sends a push notification to the current user on the webpage. This is a simplified utility function to send a test message to yourself or a quick message to the user. It does not support any targeting options.
| Parameter | Type | Description |
| --- | --- | --- |
| `title` | String | The notification’s title. Currently defaults to “OneSignal Test Message” if not set. Use a ” ” single space to get around this. Multiple languages are not supported; write the text in the language the current user should receive it in. |
| `message` | String | The notification’s body content. Required. Multiple languages are not supported; write the text in the language the current user should receive it in. |
| `url` | String | The URL to launch when the notification is clicked. [Use a special URL to prevent any URL from launching](https://documentation.onesignal.com/docs/action-buttons#how-can-i-prevent-the-action-button-from-opening-any-url)
. Defaults to this special URL if none is set. |
| `icon` | String | The URL to use for the notification icon. |
| `data` | Hash | Additional data to pass for the notification. |
| `buttons` | Array of Hash | See [Action Buttons](https://documentation.onesignal.com/docs/action-buttons)
. |
javascript
Copy
OneSignal.sendSelfNotification(
/* Title (defaults if unset) */
"OneSignal Web Push Notification",
/* Message (defaults if unset) */
"Action buttons increase the ways your users can interact with your notification.",
/* URL (defaults if unset) */
'https://example.com/?_osp=do_not_open',
/* Icon */
'https://onesignal.com/images/notification_logo.png',
{
/* Additional data hash */
notificationType: 'news-feature'
},
[{ /* Buttons */\
/* Choose any unique identifier for your button. The ID of the clicked button is passed to you so you can identify which button is clicked */\
id: 'like-button',\
/* The text the button should display. Supports emojis. */\
text: 'Like',\
/* A valid publicly reachable URL to an icon. Keep this small because it's downloaded on each notification display. */\
icon: 'http://i.imgur.com/N8SN8ZS.png',\
/* The URL to open when this action button is clicked. See the sections below for special URLs that prevent opening any window. */\
url: 'https://example.com/?_osp=do_not_open'\
},\
{\
id: 'read-more-button',\
text: 'Read more',\
icon: 'http://i.imgur.com/MIxJp1L.png',\
url: 'https://example.com/?_osp=do_not_open'\
}]
);
[](https://documentation.onesignal.com/v9.0/docs/web-push-sdk#setsubscription-method)
`setSubscription` Method
------------------------------------------------------------------------------------------------------------------
Only available if user opted-in to notifications through native prompt. Meant for a profile settings option and not to subscribe users automatically.
This function is not for use with sites that implement the Subscription Bell, as this function may override user preferences.
This function is for sites that wish to have more granular control of which users receive notifications, such as when implementing notification preference pages. This function lets a site mute or unmute notifications for the current user. This event is not related to actually prompting the user to subscribe. The user must already be subscribed for this function to have any effect. Set to `false` to temporarily “mute” notifications from going to the user. If you previously set this to false, you can set it to `true` to “un-mute” notifications so that the user receives them again.
| Parameter | Type | Description |
| --- | --- | --- |
| `unmute` | Boolean | `true` un-mutes any subscribed user`false` mutes any subscribed user |
Returns a promise that resolves after temporarily opting the user out of receiving notifications by setting a flag on our system so that notifications are not delivered to the user.
javascript
Copy
// Either option works:
OneSignal.setSubscription(false);
//or
OneSignal.push(["setSubscription", false]);
[](https://documentation.onesignal.com/v9.0/docs/web-push-sdk#receiving-notifications)
Receiving Notifications
==================================================================================================================
[](https://documentation.onesignal.com/v9.0/docs/web-push-sdk#notificationdisplay-event)
`notificationDisplay` Event
------------------------------------------------------------------------------------------------------------------------
**Note**: Not supported on Safari and requires HTTPS website. Event occurs after a notification is visibly displayed on the user’s screen. This event is fired on your page. If multiple browser tabs are open to your site, this event will be fired on _all_ pages on which OneSignal is active.
###
[](https://documentation.onesignal.com/v9.0/docs/web-push-sdk#callback-event-parameters-4)
Callback Event Parameters
`event` is a JavaScript object hash containing:
| Parameter | Type | Description |
| --- | --- | --- |
| `id` | UUID | The OneSignal notification ID of the notification that was just displayed. |
| `heading` | String | The notification’s title. |
| `content` | String | The notification’s body message, not including the title. |
| `data` | Hash | Custom additional data you send along with the notification. If you did not send any data, this field will not exist and be `undefined`. |
| `url` | String | The URL that will be opened if the user clicks on the notification. |
| `icon` | String | The URL to the icon used for the notification. This is fetched every time the notification is displayed. |
The `notificationDisplay` event is only emitted on sites using HTTPS and not available for Safari. Depending on the notification, more fields (e.g. action buttons) can be included in the callback parameter.
javascript
Copy
OneSignal.push(function() {
OneSignal.on('notificationDisplay', function(event) {
console.warn('OneSignal notification displayed:', event);
});
//This event can be listened to via the `on()` or `once()` listener
});
[](https://documentation.onesignal.com/v9.0/docs/web-push-sdk#notificationdismiss-event)
`notificationDismiss` Event
------------------------------------------------------------------------------------------------------------------------
**Note**: Not supported on Safari and requires HTTPS website. This event occurs when:
* A user purposely dismisses the notification without clicking the notification body or action buttons
* On Chrome on Android, a user dismisses all web push notifications (this event will be fired for each web push notification we show)
* A notification expires on its own and disappears
**Note:** This event _does not occur_ if a user clicks on the notification body or one of the action buttons. That is considered a notification click (please see the `addListenerForNotificationOpened` method). This event is fired on your page. If multiple browser tabs are open to your site, this event will be fired on _all_ pages on which OneSignal is active.
###
[](https://documentation.onesignal.com/v9.0/docs/web-push-sdk#callback-event-parameters-5)
Callback Event Parameters
`event` is a JavaScript object hash containing:
| Parameter | Type | Description |
| --- | --- | --- |
| `id` | UUID | The OneSignal notification ID of the notification that was just displayed. |
| `heading` | String | The notification’s title. |
| `content` | String | The notification’s body message, not including the title. |
| `data` | Hash | Custom additional data you send along with the notification. If you did not send any data, this field will not exist and be `undefined`. |
| `url` | String | The URL that will be opened if the user clicks on the notification. |
| `icon` | String | The URL to the icon used for the notification. This is fetched every time the notification is displayed. |
Note: Depending on the notification, more fields (e.g. action buttons) can be included in the callback parameter.
javascript
Copy
OneSignal.push(function() {
OneSignal.on('notificationDismiss', function(event) {
console.warn('OneSignal notification dismissed:', event);
});
//This event can be listened to via the `on()` or `once()` listener
});
[](https://documentation.onesignal.com/v9.0/docs/web-push-sdk#addlistenerfornotificationopened-event)
`addListenerForNotificationOpened` Event
--------------------------------------------------------------------------------------------------------------------------------------------------
**Note**: Not supported on Safari. **Note: This event occurs once only**. If you would this to occur _continuously_ every time a notification is clicked, please call this method again after your callback fires. Use this function to:
* Listen for future clicked notifications
* Check for notifications clicked in the last 5 minutes
Your callback will execute when the notification’s body/title or action buttons are clicked. The spec below describes:
* **The default behavior** **Events only fire if your URL matches the notification’s opening URL _exactly_; the event will be available on the newly opened tab (and only that opened tab) to the notification’s opening URL.** See the special flags `notificationClickHandlerMatch: origin` and `notificationClickHandlerAction: focus` for different use cases.
* A special init flag `notificationClickHandlerMatch: 'origin'` If you have an existing tab of your site open, and the clicked notification is also to your site, the existing tab will be used.
* A special init flag `notificationClickHandlerAction: 'focus'` Instead of navigating the target tab to the notification’s URL, the tab will be focused. You can perform navigation manually or choose not to navigate.
These two optional flags must be placed in the root of your OneSignal initialization options. They will be stored (or removed if missing) on each page load as OneSignal parses the available init options. **HTTPS Sites**
* **Default Behavior (no special flags)**
* If no existing site tabs are open, a new tab is opened. You may call `addListenerForNotificationOpened()` to get the details of the notification you just clicked.
* If one or more tabs to your site is open:
* And the clicked notification shares the same URL as one of your site’s tab, the existing tab is focused. Call `addListenerForNotificationOpened()` to get the clicked notification’s details, or if you installed a callback listener your callback will be invoked.
* And the clicked notification’s URL is different, a new tab is opened. You may call `addListenerForNotificationOpened()` to get the details of the notification you just clicked.
* Using init option `notificationClickHandlerMatch: 'origin'`
* If no existing site tabs are open, the behavior is the same as the default (see above).
* If one or more tabs to your site is open:
* And the clicked notification shares the same URL as one of your site’s tab, the behavior is the same as the default (see above).
* And the clicked notification’s URL is different, the most recently opened tab of your site is focused and navigated to the notification’s URL. Call `addListenerForNotificationOpened()` on the newly navigated tab to get the clicked notification’s details.
* Using init option `notificationClickHandlerAction: 'focus'`
* If no existing site tabs are open, the behavior is the same as the default (see above).
* Any other case: The most recently opened tab of your site is focused only (not navigated away). Call `addListenerForNotificationOpened()` to get the clicked notification’s details, or if you installed a callback listener your callback will be invoked.
Does not work when using `sendSelfNotification()` testing method. **HTTP Integrations** Mostly identical to HTTPS sites above, with the following exceptions: Due to limitations on HTTP sites:
* If multiple stale tabs are open to your site, a clicked notification sharing an identical URL to an existing tab may not focus the tab and may instead open a new tab.
* When using `notificationClickHandlerMatch: 'origin'`, if multiple stale tabs are open to your site, a different tab than the matching tab may be focused.
| Parameter | Type | Description |
| --- | --- | --- |
| `id` | String | The OneSignal notification ID of the notification that was just clicked. |
| `heading` | String | Title set on the notification. |
| `content` | String | The message text the user seen in the notification. |
| `icon` | String | Icon set on the notification. |
| `url` | String | The URL that this notification opened. |
| `data` | Hash | Custom additional data you send along with the notification. If you did not send any data, this field will not exist and be `undefined`. |
| `action` | String | Describes whether the notification body was clicked or one of the action buttons (if present) was clicked. An empty string means the notification body was clicked, otherwise the string is set to the action button ID. |
javascript
Copy
OneSignal.push(["addListenerForNotificationOpened", function(data) {\
console.log("Received NotificationOpened:");\
console.log(data);\
}]);
javascript
Copy
/* Do NOT call init twice */
OneSignal.push(["init", {\
/* Your other init settings ... */\
notificationClickHandlerMatch: 'exact', /* See above documentation: 'origin' relaxes tab matching requirements, 'exact' is default */\
notificationClickHandlerAction: 'navigate', /* See above documentation: 'focus' does not navigate the targeted tab, 'navigate' is default */\
/* ... */\
}]);
* * *
[](https://documentation.onesignal.com/v9.0/docs/web-push-sdk#email)
Email
==============================================================================
OneSignal’s Mobile and Web SDKs provide methods for collecting emails, logging out emails, and tracking email subscription changes. See the [Email SDK Methods](https://documentation.onesignal.com/v9.0/docs/email-sdk-methods)
guide for more details. If you have a backend server, we strongly recommend using [Identity Verification](https://documentation.onesignal.com/v9.0/docs/identity-verification)
with your users. Your backend can generate an _**Email authentication token**_ and send it to your app.
* * *
[](https://documentation.onesignal.com/v9.0/docs/web-push-sdk#sms)
SMS
==========================================================================
OneSignal’s Mobile and Web SDKs provide methods for collecting phone numbers, logging out phone numbers, and tracking sms subscription changes. See the [SMS SDK Methods](https://documentation.onesignal.com/v9.0/docs/sms-sdk-methods)
guide for more details. If you have a backend server, we strongly recommend using [Identity Verification](https://documentation.onesignal.com/v9.0/docs/identity-verification)
with your users. Your backend can generate an _**SMS authentication token**_ and send it to your app.
* * *
[v3-4 SDK In-App Message SDK Methods](https://documentation.onesignal.com/v9.0/docs/iam-sdk-methods)
[v3-4 SDK SMS SDK Methods](https://documentation.onesignal.com/v9.0/docs/sms-sdk-methods)
Assistant
Responses are generated using AI and may contain mistakes.
---
# Page Not Found
[OneSignal home page](https://documentation.onesignal.com/)
Search...
⌘K
Search...
Navigation
Page Not Found
[Home](https://documentation.onesignal.com/docs/home)
[User Guides](https://documentation.onesignal.com/docs/quickstart-guide)
[Developer Guides](https://documentation.onesignal.com/docs/developers)
[Tutorials](https://documentation.onesignal.com/docs/tutorials)
[API Reference](https://documentation.onesignal.com/reference/rest-api-overview)
[Release Notes](https://documentation.onesignal.com/release-notes/changelog)
404
Page Not Found
==============
We couldn't find the page you were looking for. Maybe you were looking for?
[Update Live Activity](https://documentation.onesignal.com/reference/update-live-activity-api#)
[Live Activities](https://documentation.onesignal.com/docs/live-activities#live-activities)
[Live Activities developer setup](https://documentation.onesignal.com/docs/live-activities-developer-setup#live-activities-developer-setup)
Assistant
Responses are generated using AI and may contain mistakes.
---