# Table of Contents
- [Introduction](#introduction)
- [Quick Start](#quick-start)
- [Events](#events)
- [Entities](#entities)
- [Sounds](#sounds)
- [Frequently Asked Questions](#frequently-asked-questions)
- [PR Guidelines](#pr-guidelines)
- [Writing Guides](#writing-guides)
- [Contributing](#contributing)
- [Developer Q&A Technical Insights](#developer-q-a-technical-insights)
- [Prefabs](#prefabs)
- [Learning to Learn](#learning-to-learn)
- [Publishing Your Mod](#publishing-your-mod)
- [Server Code Insights](#server-code-insights)
- [Entity Component System](#entity-component-system)
- [CurseForge](#curseforge)
- [Modtale](#modtale)
- [Server-First Development](#server-first-development)
- [The Hytale Client](#the-hytale-client)
- [Creative](#creative)
- [Hytale ECS Basics](#hytale-ecs-basics)
- [Java Modding (Server Plugins)](#java-modding-server-plugins-)
- [Inputs](#inputs)
- [UI Customization](#ui-customization)
- [Visual Scripting](#visual-scripting)
- [Data Assets](#data-assets)
- [Modelling & Texturing / Art Assets](#modelling-texturing-art-assets)
- [Creating Commands](#creating-commands)
- [Browsing the server.jar code](#browsing-the-server-jar-code)
- [Permission Management](#permission-management)
- [Inventory Management](#inventory-management)
- [Packets: Client-to-Server Reference](#packets-client-to-server-reference)
- [Playing Sounds](#playing-sounds)
- [Player Input and Keybind Guide](#player-input-and-keybind-guide)
- [Customizing Camera Controls](#customizing-camera-controls)
- [03 - Control Flow If Statements](#03-control-flow-if-statements)
- [Teleporting the player](#teleporting-the-player)
- [Sending notifications](#sending-notifications)
- [Creating custom blocks](#creating-custom-blocks)
- [Setting Up Your Development Environment](#setting-up-your-development-environment)
- [00 - Introduction to Java](#00-introduction-to-java)
- [04 - Control Flow Loops](#04-control-flow-loops)
- [01 - Variables & Data Types](#01-variables-data-types)
- [Spawning Entities](#spawning-entities)
- [Custom UI](#custom-ui)
- [Creating Events](#creating-events)
- [World Generation System](#world-generation-system)
- [02 - Operators and Expressions](#02-operators-and-expressions)
- [Formatting the chat](#formatting-the-chat)
- [Title Holograms](#title-holograms)
- [05 - Arrays](#05-arrays)
- [08 - Encapsulation and Access Modifiers](#08-encapsulation-and-access-modifiers)
- [06 - Methods (Functions)](#06-methods-functions-)
- [07 - Introduction to Object-Oriented Programming](#07-introduction-to-object-oriented-programming)
- [11 - HashMap and Key-Value Storage](#11-hashmap-and-key-value-storage)
- [10 - ArrayList and Collections](#10-arraylist-and-collections)
- [12 - Exception Handling](#12-exception-handling)
- [13 - Inheritance](#13-inheritance)
- [09 - Working with Strings](#09-working-with-strings)
---
# Introduction
Introduction
============
Necessary knowledge for modding Hytale.
Hytale is a voxel-based sandbox RPG game by **Hypixel Studios**, as described on the [Hytale website](https://hytale.com/)
:
> Set out on an adventure built for both creation and play. Hytale blends the freedom of a sandbox with the momentum of an RPG: explore a procedurally generated world full of dungeons, secrets, and a variety of creatures, then shape it block by block.
Hytale has been built from the ground up with modding and user-generated content in mind. The goal of **Hytale Modding** is to provide an excellent resource such that anybody is able to mod Hytale for themselves, regardless of skill level or specialization.
It is important to note that modding Hytale is not restricted to programming plugins. Programming, visual scripting, texturing, 3D modelling, modifying assets, etc. are all modding.
In Hytale, anyone can be a modder.
[Edit on GitHub](https://github.com/HytaleModding/site/blob/main/content/docs/en/index.mdx)
[Quick Start\
\
Setting up a standard Hytale project.](https://hytalemodding.dev/en/docs/quick-start)
---
# Quick Start
Quick Start
===========
Setting up a standard Hytale project.
Welcome to the Hytale modding documentation! Here you'll find everything you need to know about creating your own mods for Hytale.
* [Java Basics](https://hytalemodding.dev/en/docs/guides/java-basics/00-introduction)
* [Setting up your dev environment](https://hytalemodding.dev/en/docs/guides/plugin/setting-up-env)
* [Entity Component System (ECS)](https://hytalemodding.dev/en/docs/guides/ecs)
* [Publishing your mod](https://hytalemodding.dev/en/docs/guides/publishing)
[Edit on GitHub](https://github.com/HytaleModding/site/blob/main/content/docs/en/quick-start.mdx)
[Introduction\
\
Necessary knowledge for modding Hytale.](https://hytalemodding.dev/en/docs)
[Frequently Asked Questions\
\
Frequently Asked Questions about Hytale modding.](https://hytalemodding.dev/en/docs/established-information/faq)
---
# Events
Events
======
List of all events in Hytale
[IEvent](https://hytalemodding.dev/en/docs/server/events#ievent)
-----------------------------------------------------------------
* AddPlayerToWorldEvent
* AllNPCsLoadedEvent
* AllWorldsLoadedEvent
* AssetMonitorEvent
* AssetStoreMonitorEvent
* CommonAssetMonitorEvent
* AssetPackRegisterEvent
* AssetPackUnregisterEvent
* AssetStoreEvent
* RegisterAssetStoreEvent
* RemoveAssetStoreEvent
* AssetsEvent
* GenerateAssetsEvent
* LoadedAssetsEvent
* RemovedAssetsEvent
* BootEvent
* ChunkEvent
* ChunkPreLoadProcessEvent
* DrainPlayerFromWorldEvent
* EditorClientEvent
* AssetEditorActivateButtonEvent
* AssetEditorAssetCreatedEvent
* AssetEditorClientDisconnectEvent
* AssetEditorSelectAssetEvent
* AssetEditorUpdateWeatherPreviewLockEvent
* EntityEvent
* EntityRemoveEvent
* LivingEntityInventoryChangeEvent
* GenerateDefaultLanguageEvent
* GenerateSchemaEvent
* GenerateServerStateEvent
* ItemContainerChangeEvent
* ~LivingEntityUseBlockEvent~ DEPRECATED
* LoadAssetEvent
* LoadedNPCEvent
* MessagesUpdated
* PlayerConnectEvent
* PlayerEvent
* ~PlayerCraftEvent~ DEPRECATED
* ~PlayerInteractEvent~ DEPRECATED
* PlayerMouseButtonEvent
* PlayerMouseMotionEvent
* PlayerReadyEvent
* RemovePlayerFromWorldEvent
* PlayerRefEvent
* PlayerDisconnectEvent
* PlayerSetupConnectEvent
* PlayerSetupDisconnectEvent
* PluginEvent
* PluginSetupEvent
* ~PrepareUniverseEvent~ DEPRECATED
* ShutdownEvent
* SingleplayerRequestAccessEvent
* TreasureChestOpeningEvent
* WindowCloseEvent
* WorldEvent
* AddWorldEvent
* RemoveWorldEvent
* StartWorldEvent
* WorldPathChangedEvent
[IAsyncEvent](https://hytalemodding.dev/en/docs/server/events#iasyncevent)
---------------------------------------------------------------------------
* AssetEditorFetchAutoCompleteDataEvent
* AssetEditorRequestDataSetEvent
* PlayerChatEvent
* SendCommonAssetsEvent
[EcsEvent](https://hytalemodding.dev/en/docs/server/events#ecsevent)
---------------------------------------------------------------------
* CancellableEcsEvent
* BreakBlockEvent
* ChangeGameModeEvent
* ChunkSaveEvent
* ChunkUnloadEvent
* CraftRecipeEvent
* Post
* Pre
* Damage
* DamageBlockEvent
* DropItemEvent
* Drop
* PlayerRequest
* InteractivelyPickupItemEvent
* PlaceBlockEvent
* PrefabPasteEvent
* SwitchActiveSlotEvent
* DiscoverInstanceEvent
* Display
* DiscoverZoneEvent
* Display
* MoonPhaseChangeEvent
* UseBlockEvent
* Post
* Pre
[Edit on GitHub](https://github.com/HytaleModding/site/blob/main/content/docs/en/server/events.mdx)
[Entities\
\
List of all Entities in Hytale](https://hytalemodding.dev/en/docs/server/entities)
[Sounds\
\
List of all Sounds in Hytale](https://hytalemodding.dev/en/docs/server/sounds)
---
# Entities
Entities
========
List of all Entities in Hytale
This page contains a list of all Entities available to be used as a key in the AssetMap.
* Antelope
* Archaeopteryx
* Armadillo
* Arrow\_Crossbow\_Signature
* Arrow\_Crude
* Arrow\_Fire
* Arrow\_Frost
* Arrow\_Iron
* Arrow\_Ricochet
* Arrow\_Ricochet\_Signature
* Arrow\_Shortbow\_Signature
* Arrow\_Vamp
* Arrow\_Vamp\_Signature
* Axe\_Bone
* Axe\_Stone\_Trork
* Bat
* Bat\_Ice
* Bear\_Grizzly
* Bear\_Polar
* Bison
* Bison\_Calf
* Bluebird
* Bluegill
* Boar
* Boar\_Piglet
* Boat
* Bomb
* Bomb\_Fire\_Goblin
* Bomb\_Fire\_Goblin\_Dud
* Bomb\_Large\_Fire\_Goblin
* Bomb\_Popberry
* Bomb\_Potion\_Poison
* Boy\_Trail
* Bramblekin
* Bramblekin\_Shaman
* Bullet\_Blunderbuss
* Bunny
* Cactee
* Cactee\_Spike
* Calf
* Camel
* Camel\_Calf
* Cat
* Catfish
* Chick
* Chick\_Desert
* Chicken
* Chicken\_Desert
* Chicken\_Undead
* Clownfish
* Corgi
* Cow
* Cow\_Undead
* Crab
* Crawler\_Void
* Crocodile
* Crossbow\_Turret
* Crossbow\_Turret\_Item\_Projectile
* Crow
* Dagger\_Adamantite
* Dagger\_Bone
* Dagger\_Bronze
* Dagger\_Bronze\_Ancient
* Dagger\_Cobalt
* Dagger\_Copper
* Dagger\_Crude
* Dagger\_Doomed
* Dagger\_Fang\_Doomed
* Dagger\_Iron
* Dagger\_Mithril
* Dagger\_Onyxium
* Dagger\_Stone\_Trork
* Dagger\_Thorium
* Debug
* Deer\_Doe
* Deployable\_Fire\_Trap
* Deployable\_Fire\_Trap\_Preview
* Dog
* Dragon\_Fire
* Dragon\_Frost
* Dragon\_Void
* Duck
* Eel\_Moray
* Egg
* Emberwulf
* Eye\_Void
* Eye\_Void\_Blast
* Fen\_Stalker
* Feran
* Feran\_Burrower
* Feran\_Civilian
* Feran\_Cub
* Feran\_Longtooth
* Feran\_Sharptooth
* Feran\_Windwalker
* Feran\_Windwalker\_Wind\_Burst
* Feran\_Windwalker\_Wind\_Vortex
* Finch\_Green
* Fireball
* Flamingo
* Fox
* Frog\_Blue
* Frog\_Green
* Frog\_Orange
* Frostgill
* Gecko
* Ghoul
* Goat
* Goat\_Kid
* Goblin
* Goblin\_Boss
* Goblin\_Duke
* Goblin\_Duke\_Large
* Goblin\_Hermit
* Goblin\_Lobber
* Goblin\_Miner
* Goblin\_Ogre
* Goblin\_Scrapper
* Goblin\_Thief
* Golem\_Crystal\_Earth
* Golem\_Crystal\_Flame
* Golem\_Crystal\_Frost
* Golem\_Crystal\_Sand
* Golem\_Crystal\_Thunder
* Golem\_Firesteel
* Golem\_Guardian\_Void
* Grooble
* Hatworm
* Hawk
* Healing\_Totem
* Healing\_Totem\_Projectile
* Hedera
* Horse
* Horse\_Foal
* Horse\_Skeleton
* Horse\_Skeleton\_Armored
* Hound\_Bleached
* Hyena
* Ice\_Ball
* Ice\_Bolt
* Ingredient\_Poop
* Jellyfish\_Blue
* Jellyfish\_Cyan
* Jellyfish\_Green
* Jellyfish\_Man\_Of\_War
* Jellyfish\_Red
* Jellyfish\_Yellow
* Klops
* Klops\_Gentleman
* Klops\_Merchant
* Klops\_Miner
* Kunai
* Kweebec\_Rootling
* Kweebec\_Sapling
* Kweebec\_Sapling\_Brown
* Kweebec\_Sapling\_Christmas\_Blue
* Kweebec\_Sapling\_Christmas\_Green
* Kweebec\_Sapling\_Christmas\_Pink
* Kweebec\_Sapling\_Green
* Kweebec\_Sapling\_HardHat
* Kweebec\_Sapling\_Orange
* Kweebec\_Sapling\_Pink
* Kweebec\_Sapling\_Razorleaf
* Kweebec\_Sapling\_Red
* Kweebec\_Sapling\_Treesinger
* Kweebec\_Sapling\_Yellow
* Kweebec\_Seedling
* Kweebec\_Sproutling
* Kweebec\_Sproutling\_Blue
* Kweebec\_Sproutling\_Lime
* Lamb
* Larva\_Silk
* Larva\_Void
* Leopard\_Snow
* Lizard\_Sand
* Lobster
* Mannequin
* Meerkat
* Minecart
* Minnow
* Model\_Bee\_Swarm
* Model\_Deer\_Stag
* Molerat
* Moose\_Bull
* Moose\_Cow
* Mosshorn
* Mosshorn\_Plain
* Mouflon
* Mouflon\_Lamb
* Mouse
* Mushee
* NPC\_Elf
* NPC\_Path\_Marker
* NPC\_Santa
* NPC\_Sound\_Shoe
* NPC\_Spawn\_Marker
* Necromancer\_Void
* Objective\_Location\_Marker
* Outlander
* Outlander\_Berserker
* Outlander\_Brute
* Outlander\_Cultist
* Outlander\_Hunter
* Outlander\_Marauder
* Outlander\_Peon
* Outlander\_Priest
* Outlander\_Sorcerer
* Outlander\_Stalker
* Owl\_Brown
* Owl\_Snow
* Parrot
* Penguin
* Pig
* Pig\_Undead
* Pig\_Wild
* Pigeon
* Piglet
* Piglet\_Wild
* Pike
* Piranha
* Piranha\_Black
* Player
* PlayerTestModel\_G
* PlayerTestModel\_V
* Projectile
* Pterodactyl
* Pufferfish
* Rabbit
* Ram
* Ram\_Lamb
* Raptor\_Cave
* Rat
* Raven
* Reindeer\_Christmas
* Rex\_Cave
* Rubble\_Aqua
* Rubble\_Basalt
* Rubble\_Calcite
* Rubble\_Default
* Rubble\_Ice
* Rubble\_Marble
* Rubble\_Quartzite
* Rubble\_Sandstone
* Rubble\_Sandstone\_Red
* Rubble\_Sandstone\_White
* Rubble\_Shale
* Rubble\_Slate
* Rubble\_Stone
* Rubble\_Stone\_Mossy
* Rubble\_Volcanic
* Salmon
* Saurian
* Saurian\_Hunter
* Saurian\_Rogue
* Saurian\_Warrior
* Scarak\_Broodmother
* Scarak\_Broodmother\_Young
* Scarak\_Defender
* Scarak\_Fighter
* Scarak\_Fighter\_Royal\_Guard
* Scarak\_Louse
* Scarak\_Seeker
* Scarak\_Seeker\_Spitball
* Scorpion
* Shadow\_Knight
* Shark\_Hammerhead
* Sheep
* Shellfish\_Lava
* Showcase\_Cobalt\_Gear
* Showcase\_Copper\_Gear
* Showcase\_Iron\_Gear
* Showcase\_Iron\_TargetDummy\_1
* Showcase\_Mannequin\_Heal
* Showcase\_Mannequin\_Inv\_Portal
* Showcase\_Mannequin\_Inv\_Sphere
* Showcase\_Mannequin\_Lightning
* Showcase\_Mannequin\_Sitting
* Showcase\_Onyxium\_Gear
* Showcase\_Prisma\_Gear
* Showcase\_Skeleton\_Assasin
* Showcase\_Skeleton\_Dead
* Showcase\_Skeleton\_Guard
* Showcase\_Skeleton\_Tank
* Showcase\_Wooden\_Gear
* Skeleton
* Skeleton\_Archer
* Skeleton\_Archmage
* Skeleton\_Burnt\_Alchemist
* Skeleton\_Burnt\_Archer
* Skeleton\_Burnt\_Gunner
* Skeleton\_Burnt\_Knight
* Skeleton\_Burnt\_Lancer
* Skeleton\_Burnt\_Praetorian
* Skeleton\_Burnt\_Soldier
* Skeleton\_Burnt\_Wizard
* Skeleton\_Fighter
* Skeleton\_Frost\_Archer
* Skeleton\_Frost\_Archmage
* Skeleton\_Frost\_Fighter
* Skeleton\_Frost\_Knight
* Skeleton\_Frost\_Mage
* Skeleton\_Frost\_Ranger
* Skeleton\_Frost\_Scout
* Skeleton\_Frost\_Soldier
* Skeleton\_Incandescent\_Fighter
* Skeleton\_Incandescent\_Footman
* Skeleton\_Incandescent\_Head
* Skeleton\_Incandescent\_Mage
* Skeleton\_Knight
* Skeleton\_Mage
* Skeleton\_Mage\_Corruption\_Orb
* Skeleton\_Pirate\_Captain
* Skeleton\_Pirate\_Gunner
* Skeleton\_Pirate\_Striker
* Skeleton\_Ranger
* Skeleton\_Sand\_Archer
* Skeleton\_Sand\_Archmage
* Skeleton\_Sand\_Assassin
* Skeleton\_Sand\_Guard
* Skeleton\_Sand\_Mage
* Skeleton\_Sand\_Ranger
* Skeleton\_Sand\_Scout
* Skeleton\_Sand\_Soldier
* Skeleton\_Scout
* Skeleton\_Soldier
* Skrill
* Skrill\_Chick
* Slothian
* Slothian\_Elder
* Slothian\_Kid
* Slothian\_Monk
* Slothian\_Scout
* Slothian\_Villager
* Slothian\_Warrior
* Slowness\_Totem
* Slowness\_Totem\_Projectile
* Slug\_Magma
* Snail\_Frost
* Snail\_Magma
* Snake\_Cobra
* Snake\_Marsh
* Snake\_Rattle
* Snapdragon
* Snapjaw
* Spark\_Living
* Sparrow
* Spawn\_Void
* Spear\_Adamantite
* Spear\_Adamantite\_Saurian
* Spear\_Bone
* Spear\_Bronze
* Spear\_Cobalt
* Spear\_Copper
* Spear\_Crude
* Spear\_Double\_Incandescent
* Spear\_Iron
* Spear\_Leaf
* Spear\_Mithril
* Spear\_Onyxium
* Spear\_Scrap
* Spear\_Stone\_Trork
* Spear\_Thorium
* Spear\_Tribal
* Spectre\_Void
* Spider
* Spider\_Cave
* Spirit\_Ember
* Spirit\_Frost
* Spirit\_Root
* Spirit\_Thunder
* Squirrel
* Swarm\_Bees
* Sword\_Charged\_Test
* Tang\_Blue
* Tang\_Chevron
* Tang\_Lemon\_Peel
* Tang\_Sailfin
* Tank
* Temple\_Mithril\_Guard
* Test\_Platform
* Tetrabird
* Tiger\_Sabertooth
* Toad\_Rhino
* Toad\_Rhino\_Magma
* Tornado
* Tortoise
* Trash
* Trillodon
* Trilobite
* Trilobite\_Black
* Trork
* Trork\_Brawler
* Trork\_Chieftain
* Trork\_Christmas
* Trork\_Doctor\_Witch
* Trork\_Guard
* Trork\_Hunter
* Trork\_Mauler
* Trork\_Sentry
* Trork\_Shaman
* Trork\_Warrior
* Trout\_Rainbow
* Tuluk
* Tuluk\_Fisherman
* Turkey
* Turkey\_Chick
* Vulture
* Warp
* Warrior\_Quest
* Warthog
* Warthog\_Piglet
* Werewolf
* Whale\_Humpback
* Wolf\_Black
* Wolf\_Outlander\_Priest
* Wolf\_Outlander\_Sorcerer
* Wolf\_Trork\_Hunter
* Wolf\_Trork\_Shaman
* Wolf\_White
* Woodpecker
* Wraith
* Wraith\_Lantern
* Wurmling\_Frost
* Yeti
* Zombie
* Zombie\_Aberrant
* Zombie\_Aberrant\_Big
* Zombie\_Aberrant\_Small
* Zombie\_Burnt
* Zombie\_Frost
* Zombie\_Sand
* Zombie\_Werewolf
[Edit on GitHub](https://github.com/HytaleModding/site/blob/main/content/docs/en/server/entities.mdx)
[Hytale ECS Basics\
\
In this guide you will learn about the basics of Hytale's powerful ECS system as well as create your own component, a system, and work together with other systems to create gameplay logic.](https://hytalemodding.dev/en/docs/guides/ecs/hytale-ecs)
[Events\
\
List of all events in Hytale](https://hytalemodding.dev/en/docs/server/events)
---
# Sounds
Sounds
======
List of all Sounds in Hytale
This page contains a list of all Sounds available to be used as a key in the AssetMap.
* SFX\_Alchemy\_Bench\_Close
* SFX\_Alchemy\_Bench\_Craft
* SFX\_Alchemy\_Bench\_Open
* SFX\_Antelope\_Alerted
* SFX\_Antelope\_Death
* SFX\_Antelope\_Hurt
* SFX\_Antelope\_Run
* SFX\_Antelope\_Walk
* SFX\_Arcane\_Workbench\_Close\_Local
* SFX\_Arcane\_Workbench\_Craft
* SFX\_Arcane\_Workbench\_Open\_Local
* SFX\_Armour\_Bench\_Close
* SFX\_Armour\_Bench\_Craft
* SFX\_Armour\_Bench\_Open
* SFX\_Arrow\_Fire\_Hit
* SFX\_Arrow\_Fire\_Miss
* SFX\_Arrow\_Frost\_Hit
* SFX\_Arrow\_Frost\_Miss
* SFX\_Arrow\_FullCharge\_Hit
* SFX\_Arrow\_FullCharge\_Miss
* SFX\_Arrow\_HalfCharge\_Hit
* SFX\_Arrow\_HalfCharge\_Miss
* SFX\_Arrow\_NoCharge\_Hit
* SFX\_Arrow\_NoCharge\_Miss
* SFX\_Arrow\_Whistle
* SFX\_Attn\_Loud
* SFX\_Attn\_Moderate
* SFX\_Attn\_Quiet
* SFX\_Attn\_VeryLoud
* SFX\_Attn\_VeryQuiet
* SFX\_Avatar\_Powers\_Disable
* SFX\_Avatar\_Powers\_Disable\_Local
* SFX\_Avatar\_Powers\_Enable
* SFX\_Avatar\_Powers\_Enable\_Local
* SFX\_Axe\_Crude\_Impact
* SFX\_Axe\_Crude\_Swing
* SFX\_Axe\_Iron\_Impact
* SFX\_Axe\_Iron\_Swing
* SFX\_Axe\_Special\_Impact
* SFX\_Axe\_Special\_Swing
* SFX\_Axe\_Stone\_Trork\_Hit
* SFX\_Axe\_Stone\_Trork\_Miss
* SFX\_Bat\_Alerted
* SFX\_Bat\_Death
* SFX\_Bat\_Hurt
* SFX\_Battleaxe\_T1\_Block\_Impact
* SFX\_Battleaxe\_T1\_Impact
* SFX\_Battleaxe\_T1\_Launch
* SFX\_Battleaxe\_T1\_Launch\_Local
* SFX\_Battleaxe\_T1\_Raise
* SFX\_Battleaxe\_T1\_Raise\_Local
* SFX\_Battleaxe\_T1\_Shove
* SFX\_Battleaxe\_T1\_Shove\_Local
* SFX\_Battleaxe\_T1\_Swing
* SFX\_Battleaxe\_T1\_Swing\_Charged
* SFX\_Battleaxe\_T1\_Swing\_Charged\_Local
* SFX\_Battleaxe\_T1\_Swing\_Down\_Local
* SFX\_Battleaxe\_T1\_Swing\_LR\_Local
* SFX\_Battleaxe\_T1\_Swing\_RL\_Local
* SFX\_Battleaxe\_T2\_Impact
* SFX\_Battleaxe\_T2\_Raise
* SFX\_Battleaxe\_T2\_Raise\_Local
* SFX\_Battleaxe\_T2\_Signature\_End
* SFX\_Battleaxe\_T2\_Signature\_End\_Local
* SFX\_Battleaxe\_T2\_Signature\_Swing
* SFX\_Battleaxe\_T2\_Signature\_Swing\_Local
* SFX\_Battleaxe\_T2\_Swing
* SFX\_Battleaxe\_T2\_Swing\_Charged
* SFX\_Battleaxe\_T2\_Swing\_Charged\_Local
* SFX\_Battleaxe\_T2\_Swing\_Down\_Local
* SFX\_Battleaxe\_T2\_Swing\_LR\_Local
* SFX\_Battleaxe\_T2\_Swing\_RL\_Local
* SFX\_Bear\_Grizzly\_Alerted
* SFX\_Bear\_Grizzly\_Attack
* SFX\_Bear\_Grizzly\_Death
* SFX\_Bear\_Grizzly\_Hurt
* SFX\_Bear\_Grizzly\_Run
* SFX\_Bear\_Grizzly\_Sleep
* SFX\_Bear\_Walk
* SFX\_Bench\_Placeholder
* SFX\_Bison\_Alerted
* SFX\_Bison\_Death
* SFX\_Bison\_Hurt
* SFX\_Bison\_Idle
* SFX\_Bison\_Run
* SFX\_Bison\_Walk
* SFX\_Blunderbuss\_Bullet\_WhizBy
* SFX\_Blunderbuss\_Fire
* SFX\_Blunderbuss\_Fire\_Local
* SFX\_Blunderbuss\_Hit
* SFX\_Blunderbuss\_Load
* SFX\_Blunderbuss\_Load\_Local
* SFX\_Blunderbuss\_Miss
* SFX\_Blunderbuss\_No\_Ammo
* SFX\_Boar\_Alerted
* SFX\_Boar\_Death
* SFX\_Boar\_Hurt
* SFX\_Boar\_Run
* SFX\_Boar\_Sleep
* SFX\_Boar\_Walk
* SFX\_Bomb\_Fire\_Goblin\_Bounce
* SFX\_Bomb\_Fire\_Goblin\_Death
* SFX\_Bomb\_Fire\_Goblin\_Hit
* SFX\_Bomb\_Fire\_Goblin\_Miss
* SFX\_Bomb\_Fuse
* SFX\_Bone\_Break
* SFX\_Bone\_Build
* SFX\_Bone\_Hit
* SFX\_Bone\_Land
* SFX\_Bone\_Walk
* SFX\_Bow\_No\_Ammo
* SFX\_Bow\_T1\_Block\_Impact
* SFX\_Bow\_T1\_Draw
* SFX\_Bow\_T1\_Draw\_Local
* SFX\_Bow\_T1\_Raise
* SFX\_Bow\_T1\_Raise\_Local
* SFX\_Bow\_T1\_Shoot
* SFX\_Bow\_T1\_Shoot\_Local
* SFX\_Bow\_T1\_Swing
* SFX\_Bow\_T1\_Swing\_Local
* SFX\_Bow\_T2\_Draw
* SFX\_Bow\_T2\_Draw\_Local
* SFX\_Bow\_T2\_Shoot
* SFX\_Bow\_T2\_Shoot\_Local
* SFX\_Bow\_T2\_Signature\_Loop
* SFX\_Bow\_T2\_Signature\_Loop\_Local
* SFX\_Bow\_T2\_Signature\_Nock
* SFX\_Bow\_T2\_Signature\_Nock\_Local
* SFX\_Bow\_T2\_Signature\_Shoot
* SFX\_Bow\_T2\_Signature\_Shoot\_Local
* SFX\_Bramble\_MoveIn
* SFX\_Branch\_Break
* SFX\_Branch\_Build
* SFX\_Branch\_Hit
* SFX\_Branch\_Land
* SFX\_Branch\_Walk
* SFX\_Brazier\_Break
* SFX\_Brazier\_Build
* SFX\_Bunny\_Alerted
* SFX\_Bunny\_Death
* SFX\_Bunny\_Hurt
* SFX\_Bush\_Break
* SFX\_Bush\_Hit
* SFX\_Bush\_MoveIn
* SFX\_Cactus\_Break
* SFX\_Cactus\_Hit
* SFX\_Cactus\_Large\_Hit
* SFX\_Cactus\_Small\_Break
* SFX\_Cactus\_Small\_Hit
* SFX\_Calf\_Hurt
* SFX\_Calf\_Run
* SFX\_Calf\_Walk
* SFX\_Camel\_Alerted
* SFX\_Camel\_Death
* SFX\_Camel\_Hurt
* SFX\_Camel\_Laydown
* SFX\_Camel\_Run
* SFX\_Camel\_Sleep
* SFX\_Camel\_Wake
* SFX\_Camel\_Walk
* SFX\_Campfire\_Break
* SFX\_Campfire\_Build
* SFX\_Campfire\_Close\_Local
* SFX\_Campfire\_Default\_Loop
* SFX\_Campfire\_Open\_Local
* SFX\_Campfire\_Processing
* SFX\_Campfire\_Processing\_End
* SFX\_Campfire\_Processing\_Failed
* SFX\_Candle\_Default\_Loop
* SFX\_Candle\_Off
* SFX\_Capture\_Crate\_Capture\_Fail\_Local
* SFX\_Capture\_Crate\_Capture\_Succeed
* SFX\_Capture\_Crate\_Capture\_Succeed\_Local
* SFX\_Capture\_Crate\_Spawn\_Fail\_Local
* SFX\_Capture\_Crate\_Spawn\_Succeed
* SFX\_Cauldron\_Bubbling
* SFX\_Cauldron\_Bubbling\_Small
* SFX\_Chest\_Legendary\_Close\_Player
* SFX\_Chest\_Legendary\_FirstOpen\_Player
* SFX\_Chest\_Legendary\_Loop
* SFX\_Chest\_Legendary\_Open
* SFX\_Chest\_Wooden\_Close
* SFX\_Chest\_Wooden\_Open
* SFX\_Chest\_Wooden\_Open\_Player
* SFX\_Chick\_Alerted
* SFX\_Chick\_Death
* SFX\_Chick\_Hurt
* SFX\_Chicken\_Alerted
* SFX\_Chicken\_Death
* SFX\_Chicken\_Flee
* SFX\_Chicken\_Hurt
* SFX\_Chicken\_Run
* SFX\_Chicken\_Walk
* SFX\_Clay\_Pot\_Large\_Break
* SFX\_Clay\_Pot\_Large\_Build
* SFX\_Clay\_Pot\_Large\_Hit
* SFX\_Clay\_Pot\_Large\_Walk
* SFX\_Clay\_Pot\_Small\_Break
* SFX\_Clay\_Pot\_Small\_Build
* SFX\_Clay\_Pot\_Small\_Hit
* SFX\_Clay\_Pot\_Small\_Walk
* SFX\_Cloth\_Break
* SFX\_Cloth\_Build
* SFX\_Cloth\_Hit
* SFX\_Cloth\_Land
* SFX\_Cloth\_Walk
* SFX\_Club\_Meat\_Impact
* SFX\_Club\_Meat\_Swing
* SFX\_Club\_Special\_Impact
* SFX\_Club\_Special\_Swing
* SFX\_Club\_Steel\_Impact
* SFX\_Club\_Steel\_Swing
* SFX\_Club\_Wood\_Impact
* SFX\_Club\_Wood\_Swing
* SFX\_Cocoon\_Active
* SFX\_Cocoon\_Break
* SFX\_Cocoon\_Build
* SFX\_Cocoon\_Hit
* SFX\_Cocoon\_Walk
* SFX\_Coins\_Land
* SFX\_Coins\_Walk
* SFX\_Consume\_Bread
* SFX\_Consume\_Bread\_Local
* SFX\_Cow\_Alerted
* SFX\_Cow\_Death
* SFX\_Cow\_Hurt
* SFX\_Cow\_Idle
* SFX\_Cow\_Run
* SFX\_Cow\_Sleep
* SFX\_Cow\_Walk
* SFX\_Crawler\_Void\_Alerted
* SFX\_Crawler\_Void\_Alerted\_02
* SFX\_Crawler\_Void\_Death
* SFX\_Crawler\_Void\_Despawn
* SFX\_Crawler\_Void\_Hurt
* SFX\_Crawler\_Void\_Run
* SFX\_Crawler\_Void\_Sleep
* SFX\_Crawler\_Void\_Spawn
* SFX\_Crawler\_Void\_Spawn\_02
* SFX\_Crawler\_Void\_Walk
* SFX\_Creative\_Play\_Add\_Mask
* SFX\_Creative\_Play\_Brush\_Erase
* SFX\_Creative\_Play\_Brush\_Mode
* SFX\_Creative\_Play\_Brush\_Paint\_Base
* SFX\_Creative\_Play\_Brush\_Paint\_Idle\_Layer
* SFX\_Creative\_Play\_Brush\_Paint\_Move\_Layer
* SFX\_Creative\_Play\_Brush\_Shape
* SFX\_Creative\_Play\_Brush\_Stamp
* SFX\_Creative\_Play\_Error
* SFX\_Creative\_Play\_Eyedropper\_Select
* SFX\_Creative\_Play\_Paste
* SFX\_Creative\_Play\_Selection\_Drag
* SFX\_Creative\_Play\_Selection\_Place
* SFX\_Creative\_Play\_Selection\_Scale
* SFX\_Creative\_Play\_Selection\_Widget
* SFX\_Creative\_Play\_Set\_Mask
* SFX\_Crocodile\_Alerted
* SFX\_Crocodile\_Death
* SFX\_Crocodile\_Hurt
* SFX\_Crops\_Grow
* SFX\_Crops\_Grow\_Stage\_Complete
* SFX\_Crow\_Death
* SFX\_Crow\_Hurt
* SFX\_Crystal\_Break
* SFX\_Crystal\_Build
* SFX\_Crystal\_Hit
* SFX\_Crystal\_Walk
* SFX\_Daggers\_T1\_Guard
* SFX\_Daggers\_T1\_Guard\_Local
* SFX\_Daggers\_T1\_Pounce
* SFX\_Daggers\_T1\_Pounce\_Local
* SFX\_Daggers\_T1\_Slash\_Impact
* SFX\_Daggers\_T1\_Stab\_Double\_Impact
* SFX\_Daggers\_T1\_Stab\_Impact
* SFX\_Daggers\_T1\_Stab\_Left\_Local
* SFX\_Daggers\_T1\_Stab\_Retreat
* SFX\_Daggers\_T1\_Stab\_Retreat\_Local
* SFX\_Daggers\_T1\_Stab\_Right\_Local
* SFX\_Daggers\_T1\_Swing
* SFX\_Daggers\_T1\_Swing\_Double
* SFX\_Daggers\_T1\_Swing\_Double\_Local
* SFX\_Daggers\_T1\_Swing\_LR\_Local
* SFX\_Daggers\_T1\_Swing\_RL\_Local
* SFX\_Daggers\_T2\_Guard
* SFX\_Daggers\_T2\_Guard\_Local
* SFX\_Daggers\_T2\_Signature\_P1
* SFX\_Daggers\_T2\_Signature\_P1\_Local
* SFX\_Daggers\_T2\_Signature\_P2
* SFX\_Daggers\_T2\_Signature\_P2\_Local
* SFX\_Daggers\_T2\_Signature\_P3
* SFX\_Daggers\_T2\_Signature\_P3\_Local
* SFX\_Daggers\_T2\_Slash\_Impact
* SFX\_Daggers\_T2\_Stab\_Double\_Impact
* SFX\_Daggers\_T2\_Stab\_Impact
* SFX\_Daggers\_T2\_Stab\_Left\_Local
* SFX\_Daggers\_T2\_Stab\_Retreat
* SFX\_Daggers\_T2\_Stab\_Retreat\_Local
* SFX\_Daggers\_T2\_Stab\_Right\_Local
* SFX\_Daggers\_T2\_Swing
* SFX\_Daggers\_T2\_Swing\_Double
* SFX\_Daggers\_T2\_Swing\_Double\_Local
* SFX\_Daggers\_T2\_Swing\_LR\_Local
* SFX\_Daggers\_T2\_Swing\_RL\_Local
* SFX\_Deer\_Doe\_Alerted
* SFX\_Deer\_Doe\_Death
* SFX\_Deer\_Doe\_Hurt
* SFX\_Deer\_Doe\_Run
* SFX\_Deer\_Doe\_Sleep
* SFX\_Deer\_Stag\_Alerted
* SFX\_Deer\_Stag\_Death
* SFX\_Deer\_Stag\_Hurt
* SFX\_Deer\_Stag\_Roar
* SFX\_Deer\_Stag\_Run
* SFX\_Deer\_Stag\_Sleep
* SFX\_Deer\_Walk
* SFX\_Default\_Break
* SFX\_Default\_Build
* SFX\_Default\_Clone
* SFX\_Default\_Harvest
* SFX\_Default\_Walk
* SFX\_Deployable\_Totem\_Heal\_Despawn
* SFX\_Deployable\_Totem\_Heal\_Effect\_Local
* SFX\_Deployable\_Totem\_Heal\_Spawn
* SFX\_Deployable\_Totem\_Slowing\_Despawn
* SFX\_Deployable\_Totem\_Slowing\_Effect\_Local
* SFX\_Deployable\_Totem\_Slowing\_Spawn
* SFX\_Dirt\_Break
* SFX\_Dirt\_Build
* SFX\_Dirt\_Clone
* SFX\_Dirt\_Hit
* SFX\_Dirt\_Land
* SFX\_Dirt\_Walk
* SFX\_Discovery\_Z1\_Medium
* SFX\_Discovery\_Z1\_Short
* SFX\_Discovery\_Z2\_Medium
* SFX\_Discovery\_Z2\_Short
* SFX\_Discovery\_Z3\_Medium
* SFX\_Discovery\_Z3\_Short
* SFX\_Discovery\_Z4\_Medium
* SFX\_Discovery\_Z4\_Short
* SFX\_Divine\_Respawn
* SFX\_Door\_Ancient\_Close
* SFX\_Door\_Ancient\_Open
* SFX\_Door\_Crude\_Close
* SFX\_Door\_Crude\_Open
* SFX\_Door\_Desert\_Close
* SFX\_Door\_Desert\_Open
* SFX\_Door\_Jungle\_Close
* SFX\_Door\_Jungle\_Open
* SFX\_Door\_Lumberjack\_Close
* SFX\_Door\_Lumberjack\_Open
* SFX\_Door\_Temple\_Dark\_Close
* SFX\_Door\_Temple\_Dark\_Open
* SFX\_Door\_Temple\_Light\_Close
* SFX\_Door\_Temple\_Light\_Open
* SFX\_Door\_Wooden\_Close
* SFX\_Door\_Wooden\_Open
* SFX\_Drag\_Armor\_Cloth
* SFX\_Drag\_Armor\_Heavy
* SFX\_Drag\_Armor\_Leather
* SFX\_Drag\_Blocks\_Gravel
* SFX\_Drag\_Blocks\_Soft
* SFX\_Drag\_Blocks\_Splatty
* SFX\_Drag\_Blocks\_Stone
* SFX\_Drag\_Blocks\_Wood
* SFX\_Drag\_Item\_Default
* SFX\_Drag\_Items\_Bones
* SFX\_Drag\_Items\_Chest
* SFX\_Drag\_Items\_Clay
* SFX\_Drag\_Items\_Cloth
* SFX\_Drag\_Items\_Foliage
* SFX\_Drag\_Items\_Gadget
* SFX\_Drag\_Items\_Gems
* SFX\_Drag\_Items\_Ingots
* SFX\_Drag\_Items\_Leather
* SFX\_Drag\_Items\_Metal
* SFX\_Drag\_Items\_Paper
* SFX\_Drag\_Items\_Potion
* SFX\_Drag\_Items\_Seeds
* SFX\_Drag\_Items\_Shells
* SFX\_Drag\_Items\_Splatty
* SFX\_Drag\_Weapon\_Blade\_Small
* SFX\_Drag\_Weapon\_Blunt\_Large
* SFX\_Drag\_Weapons\_Arrows
* SFX\_Drag\_Weapons\_Blade\_Large
* SFX\_Drag\_Weapons\_Blunt\_Small
* SFX\_Drag\_Weapons\_Books
* SFX\_Drag\_Weapons\_Shield\_Metal
* SFX\_Drag\_Weapons\_Shield\_Wood
* SFX\_Drag\_Weapons\_Stone\_Large
* SFX\_Drag\_Weapons\_Stone\_Small
* SFX\_Drag\_Weapons\_Wand
* SFX\_Drag\_Weapons\_Wood
* SFX\_Dragon\_Sleep
* SFX\_Drop\_Armor\_Cloth
* SFX\_Drop\_Armor\_Heavy
* SFX\_Drop\_Armor\_Leather
* SFX\_Drop\_Blocks\_Gravel
* SFX\_Drop\_Blocks\_Soft
* SFX\_Drop\_Blocks\_Splatty
* SFX\_Drop\_Blocks\_Stone
* SFX\_Drop\_Blocks\_Wood
* SFX\_Drop\_Item\_Default
* SFX\_Drop\_Items\_Bones
* SFX\_Drop\_Items\_Chest
* SFX\_Drop\_Items\_Clay
* SFX\_Drop\_Items\_Cloth
* SFX\_Drop\_Items\_Foliage
* SFX\_Drop\_Items\_Gadget
* SFX\_Drop\_Items\_Gems
* SFX\_Drop\_Items\_Ingots
* SFX\_Drop\_Items\_Leather
* SFX\_Drop\_Items\_Metal
* SFX\_Drop\_Items\_Paper
* SFX\_Drop\_Items\_Potion
* SFX\_Drop\_Items\_Seeds
* SFX\_Drop\_Items\_Shells
* SFX\_Drop\_Items\_Splatty
* SFX\_Drop\_Weapon\_Blade\_Small
* SFX\_Drop\_Weapon\_Blunt\_Large
* SFX\_Drop\_Weapons\_Arrows
* SFX\_Drop\_Weapons\_Blade\_Large
* SFX\_Drop\_Weapons\_Blunt\_Small
* SFX\_Drop\_Weapons\_Books
* SFX\_Drop\_Weapons\_Shield\_Metal
* SFX\_Drop\_Weapons\_Shield\_Wood
* SFX\_Drop\_Weapons\_Stone\_Large
* SFX\_Drop\_Weapons\_Stone\_Small
* SFX\_Drop\_Weapons\_Wand
* SFX\_Drop\_Weapons\_Wood
* SFX\_Duck\_Alerted
* SFX\_Duck\_Death
* SFX\_Duck\_Hurt
* SFX\_Duck\_Run
* SFX\_Effect\_Burn\_Local
* SFX\_Effect\_Burn\_World
* SFX\_Effect\_Poison\_Local
* SFX\_Effect\_Poison\_World
* SFX\_Egg\_Hit
* SFX\_Egg\_Miss
* SFX\_Eggsac\_Active
* SFX\_Emberwulf\_Alerted
* SFX\_Emberwulf\_Attack\_Bite
* SFX\_Emberwulf\_Death
* SFX\_Emberwulf\_Hurt
* SFX\_Emberwulf\_Run
* SFX\_Emberwulf\_Sleep
* SFX\_Emberwulf\_Walk
* SFX\_Emit\_Forgotten\_Whispers
* SFX\_Emit\_Lake\_Water
* SFX\_Emit\_Temple\_Wisps
* SFX\_Emit\_Tree\_Creak
* SFX\_Emit\_Wind\_Grass
* SFX\_Emit\_Wind\_Gusts
* SFX\_Env\_Emit\_Fluid\_Lava
* SFX\_Env\_Emit\_Fluid\_Water
* SFX\_Env\_Emit\_Fluid\_Water\_Far
* SFX\_Env\_Emit\_Geyzer
* SFX\_Eye\_Void\_Alerted
* SFX\_Eye\_Void\_Attack\_Blast
* SFX\_Eye\_Void\_Attack\_Summon
* SFX\_Eye\_Void\_Death
* SFX\_Eye\_Void\_Fly\_Movement
* SFX\_Eye\_Void\_Hurt
* SFX\_Eye\_Void\_Idle
* SFX\_Fen\_Stalker\_Alerted
* SFX\_Fen\_Stalker\_Attack\_Swing
* SFX\_Fen\_Stalker\_Attack\_Swipe
* SFX\_Fen\_Stalker\_Death
* SFX\_Fen\_Stalker\_Eat
* SFX\_Fen\_Stalker\_Eat\_Finish
* SFX\_Fen\_Stalker\_Greet
* SFX\_Fen\_Stalker\_Hurt
* SFX\_Fen\_Stalker\_Run
* SFX\_Fen\_Stalker\_Scared
* SFX\_Fen\_Stalker\_Seek
* SFX\_Fen\_Stalker\_Sniff
* SFX\_Feran\_Death
* SFX\_Fern\_Break
* SFX\_Fern\_MoveIn
* SFX\_Fireball\_Bounce
* SFX\_Fireball\_Death
* SFX\_Fireball\_Miss
* SFX\_Fish\_Death
* SFX\_Fish\_Flee
* SFX\_Fish\_Hurt
* SFX\_Flail\_Charge
* SFX\_Flail\_Charge\_Local
* SFX\_Flail\_Swing
* SFX\_Flail\_Swing\_Left\_Local
* SFX\_Flail\_Swing\_Right\_Local
* SFX\_Flame\_Break
* SFX\_Flame\_Build
* SFX\_Flame\_Default\_Loop
* SFX\_Flamingo\_Alerted
* SFX\_Flamingo\_Death
* SFX\_Flamingo\_Fly
* SFX\_Flamingo\_Hurt
* SFX\_Forgotten\_Temple\_Emit\_Birds
* SFX\_Forgotten\_Temple\_Emit\_Birds\_Interior
* SFX\_Fox\_Alerted
* SFX\_Fox\_Death
* SFX\_Fox\_Hurt
* SFX\_Fox\_Run
* SFX\_Fox\_Sleep
* SFX\_Frog\_Alerted
* SFX\_Frog\_Croak
* SFX\_Frog\_Death
* SFX\_Frog\_Hurt
* SFX\_Frog\_Idle
* SFX\_Frog\_Run
* SFX\_Furnace\_Bench\_Close
* SFX\_Furnace\_Bench\_Open
* SFX\_Furnace\_Bench\_Processing
* SFX\_Furnace\_Bench\_Processing\_Complete
* SFX\_Furnace\_Bench\_Processing\_End
* SFX\_Furnace\_Bench\_Processing\_Failed
* SFX\_Gecko\_Alerted
* SFX\_Gecko\_Death
* SFX\_Gecko\_Hurt
* SFX\_Gem\_Break
* SFX\_Gem\_Emit\_Loop
* SFX\_Generic\_Crafting\_Failed
* SFX\_Glass\_Break
* SFX\_Global\_Weather\_Thunder
* SFX\_Goat\_Run
* SFX\_Goat\_Walk
* SFX\_Goblin\_Alerted
* SFX\_Goblin\_Death
* SFX\_Goblin\_Hurt
* SFX\_Goblin\_Lobber\_Bomb\_Bounce
* SFX\_Goblin\_Lobber\_Bomb\_Death
* SFX\_Goblin\_Lobber\_Bomb\_Hit
* SFX\_Goblin\_Lobber\_Bomb\_Miss
* SFX\_Goblin\_Run
* SFX\_Goblin\_Search
* SFX\_Golem\_Earth\_Alerted
* SFX\_Golem\_Earth\_Death
* SFX\_Golem\_Earth\_Hurt
* SFX\_Golem\_Earth\_Laydown
* SFX\_Golem\_Earth\_Slam
* SFX\_Golem\_Earth\_Slam\_Impact
* SFX\_Golem\_Earth\_Spin
* SFX\_Golem\_Earth\_Stomp
* SFX\_Golem\_Earth\_Stomp\_Impact
* SFX\_Golem\_Earth\_Swing
* SFX\_Golem\_Earth\_Swing\_Impact
* SFX\_Golem\_Earth\_Wake
* SFX\_Golem\_Firesteel\_Alerted\_01
* SFX\_Golem\_Firesteel\_Alerted\_02
* SFX\_Golem\_Firesteel\_Death
* SFX\_Golem\_Firesteel\_Laydown
* SFX\_Golem\_Firesteel\_Wake
* SFX\_Golem\_Frost\_Alerted
* SFX\_Golem\_Frost\_Death
* SFX\_Golem\_Frost\_Hurt
* SFX\_Golem\_Frost\_Laydown
* SFX\_Golem\_Frost\_Slam
* SFX\_Golem\_Frost\_Slam\_Impact
* SFX\_Golem\_Frost\_Spin
* SFX\_Golem\_Frost\_Stomp
* SFX\_Golem\_Frost\_Swing
* SFX\_Golem\_Frost\_Swing\_Impact
* SFX\_Golem\_Frost\_Wake
* SFX\_Golem\_Sand\_Alerted
* SFX\_Golem\_Sand\_Death
* SFX\_Golem\_Sand\_Hurt
* SFX\_Golem\_Sand\_Laydown
* SFX\_Golem\_Sand\_Slam
* SFX\_Golem\_Sand\_Slam\_Impact
* SFX\_Golem\_Sand\_Spin
* SFX\_Golem\_Sand\_Stomp
* SFX\_Golem\_Sand\_Stomp\_Impact
* SFX\_Golem\_Sand\_Swing
* SFX\_Golem\_Sand\_Swing\_Impact
* SFX\_Golem\_Sand\_Wake
* SFX\_Grass\_Break
* SFX\_Grass\_Build
* SFX\_Grass\_Hit
* SFX\_Grass\_Land
* SFX\_Grass\_Walk
* SFX\_Gravel\_Break
* SFX\_Gravel\_Build
* SFX\_Gravel\_Hit
* SFX\_Gravel\_Land
* SFX\_Gravel\_Walk
* SFX\_GunPvP\_Assault\_Rifle\_Bullet\_Death
* SFX\_GunPvP\_Grenade\_Frag\_Bounce
* SFX\_GunPvP\_Grenade\_Frag\_Death
* SFX\_GunPvP\_Grenade\_Frag\_Hit
* SFX\_GunPvP\_Grenade\_Frag\_Miss
* SFX\_GunPvP\_Handgun\_Bullet\_Death
* SFX\_Gun\_Fire
* SFX\_Hand\_Crossbow\_T1\_Block\_Impact
* SFX\_Hand\_Crossbow\_T1\_Raise
* SFX\_Hand\_Crossbow\_T1\_Raise\_Local
* SFX\_Hand\_Crossbow\_T1\_Shove
* SFX\_Hand\_Crossbow\_T1\_Shove\_Local
* SFX\_Hand\_Crossbow\_T2\_Load
* SFX\_Hand\_Crossbow\_T2\_Load\_Local
* SFX\_Hand\_Crossbow\_T2\_Reload\_Start
* SFX\_Hand\_Crossbow\_T2\_Reload\_Start\_Local
* SFX\_Handgun\_Fire
* SFX\_Handgun\_Fire\_Local
* SFX\_Hatchet\_T1\_Swing\_RL\_Local
* SFX\_Hatchet\_T2\_Impact\_Nice
* SFX\_Health\_Potion\_High\_Drink
* SFX\_Health\_Potion\_High\_Drink\_Local
* SFX\_Health\_Potion\_Low\_Drink
* SFX\_Health\_Potion\_Low\_Drink\_Local
* SFX\_Hedera\_Scream
* SFX\_Hoe\_T1\_Swing\_Down\_Local
* SFX\_Hoe\_T1\_Till
* SFX\_Horse\_Alerted
* SFX\_Horse\_Death
* SFX\_Horse\_Hurt
* SFX\_Horse\_Idle
* SFX\_Horse\_Sleep
* SFX\_Horse\_Wake
* SFX\_Hyena\_Alerted
* SFX\_Hyena\_Death
* SFX\_Hyena\_Hurt
* SFX\_Hyena\_Idle
* SFX\_Ice\_Ball\_Death
* SFX\_Ice\_Bolt\_Death
* SFX\_Ice\_Break
* SFX\_Ice\_Build
* SFX\_Ice\_Hit
* SFX\_Ice\_Item\_Impact
* SFX\_Ice\_Item\_Swing
* SFX\_Ice\_Land
* SFX\_Ice\_Walk
* SFX\_Incorrect\_Tool
* SFX\_Item\_Break
* SFX\_Item\_Repair
* SFX\_Klops\_Alerted
* SFX\_Klops\_Death
* SFX\_Klops\_Hurt
* SFX\_Klops\_Idle
* SFX\_Klops\_Run
* SFX\_Kweebec\_Plushie\_Impact
* SFX\_Lamb\_Alerted
* SFX\_Lamb\_Death
* SFX\_Lamb\_Hurt
* SFX\_Larva\_Alerted
* SFX\_Larva\_Death
* SFX\_Larva\_Despawn
* SFX\_Larva\_Hurt
* SFX\_Larva\_Spawn
* SFX\_LeavesGround\_Break
* SFX\_LeavesGround\_Hit
* SFX\_LeavesGround\_Land
* SFX\_LeavesGround\_Walk
* SFX\_Leaves\_Break
* SFX\_Leaves\_Hit
* SFX\_Leaves\_Walk
* SFX\_Leopard\_Snow\_Alerted
* SFX\_Leopard\_Snow\_Death
* SFX\_Leopard\_Snow\_Hurt
* SFX\_Leopard\_Snow\_Run
* SFX\_Light\_Melee\_T1\_Block
* SFX\_Light\_Melee\_T1\_Guard\_Hit
* SFX\_Light\_Melee\_T1\_Impact
* SFX\_Light\_Melee\_T1\_Lunge
* SFX\_Light\_Melee\_T1\_Lunge\_Charge
* SFX\_Light\_Melee\_T1\_Shove
* SFX\_Light\_Melee\_T1\_Swing
* SFX\_Light\_Melee\_T2\_Block
* SFX\_Light\_Melee\_T2\_Guard\_Break
* SFX\_Light\_Melee\_T2\_Guard\_Hit
* SFX\_Light\_Melee\_T2\_Lunge
* SFX\_Light\_Melee\_T2\_Lunge\_Charge
* SFX\_Light\_Melee\_T2\_Swing
* SFX\_Longsword\_Special\_Impact
* SFX\_Longsword\_Special\_Swing
* SFX\_Longsword\_Steel\_Charged\_Swing
* SFX\_Longsword\_Steel\_Impact
* SFX\_Longsword\_Steel\_Swing
* SFX\_Lumbermill\_Bench\_Close
* SFX\_Lumbermill\_Bench\_Open
* SFX\_Lumbermill\_Bench\_Processing
* SFX\_Mace\_T1\_Block\_Impact
* SFX\_Mace\_T1\_Impact
* SFX\_Mace\_T1\_Raise
* SFX\_Mace\_T1\_Raise\_Local
* SFX\_Mace\_T1\_Shove
* SFX\_Mace\_T1\_Shove\_Local
* SFX\_Mace\_T1\_Swing
* SFX\_Mace\_T1\_Swing\_Charged
* SFX\_Mace\_T1\_Swing\_Charged\_LR\_Local
* SFX\_Mace\_T1\_Swing\_Charged\_RL\_Local
* SFX\_Mace\_T1\_Swing\_Charged\_Up\_Local
* SFX\_Mace\_T1\_Swing\_LR\_Local
* SFX\_Mace\_T1\_Swing\_RL\_Local
* SFX\_Mace\_T1\_Swing\_Up\_Local
* SFX\_Mace\_T2\_Impact
* SFX\_Mace\_T2\_Raise
* SFX\_Mace\_T2\_Raise\_Local
* SFX\_Mace\_T2\_Signature\_Impact
* SFX\_Mace\_T2\_Signature\_Impact\_Local
* SFX\_Mace\_T2\_Signature\_Launch
* SFX\_Mace\_T2\_Signature\_Launch\_Local
* SFX\_Mace\_T2\_Swing
* SFX\_Mace\_T2\_Swing\_Charged
* SFX\_Mace\_T2\_Swing\_Charged\_LR\_Local
* SFX\_Mace\_T2\_Swing\_Charged\_RL\_Local
* SFX\_Mace\_T2\_Swing\_Charged\_Up\_Local
* SFX\_Mace\_T2\_Swing\_LR\_Local
* SFX\_Mace\_T2\_Swing\_RL\_Local
* SFX\_Mace\_T2\_Swing\_Up\_Local
* SFX\_Meerkat\_Alerted
* SFX\_Meerkat\_Death
* SFX\_Meerkat\_Hurt
* SFX\_Meerkat\_Idle
* SFX\_Memories\_Unlock\_Local
* SFX\_Metal\_Break
* SFX\_Metal\_Build
* SFX\_Metal\_Hit
* SFX\_Metal\_Land
* SFX\_Metal\_Walk
* SFX\_Moose\_Bull\_Alerted
* SFX\_Mouse\_Alerted
* SFX\_Mouse\_Death
* SFX\_Mouse\_Flee
* SFX\_Mouse\_Hurt
* SFX\_Mouse\_Run
* SFX\_Mouse\_Sleep
* SFX\_Mud\_Break
* SFX\_Mud\_Build
* SFX\_Mud\_Hit
* SFX\_Mud\_Land
* SFX\_Mud\_Walk
* SFX\_Mug\_Fill
* SFX\_Mug\_Fill\_Local
* SFX\_Mushroom\_Break
* SFX\_Mushroom\_Harvest
* SFX\_Music\_Ducking\_2db
* SFX\_NPC\_Unarmed\_Impact
* SFX\_NPC\_Unarmed\_Swing
* SFX\_Ore\_Break
* SFX\_Ore\_Hit
* SFX\_Outlander\_Hunter\_Arrow\_Hit
* SFX\_Outlander\_Hunter\_Arrow\_Miss
* SFX\_Outlander\_Hurt
* SFX\_Owl\_Alerted
* SFX\_Owl\_Death
* SFX\_Owl\_Hurt
* SFX\_Pickaxe\_T1\_Swing\_Down\_Local
* SFX\_Pickaxe\_T2\_Impact\_Nice
* SFX\_Pig\_Alerted
* SFX\_Pig\_Death
* SFX\_Pig\_Hurt
* SFX\_Pig\_Run
* SFX\_Pig\_Walk
* SFX\_Pigeon\_Death
* SFX\_Pigeon\_Hurt
* SFX\_Piglet\_Alerted
* SFX\_Piglet\_Death
* SFX\_Piglet\_Hurt
* SFX\_Piglet\_Run
* SFX\_Pistol\_Fire
* SFX\_Plant\_Break
* SFX\_Plant\_Hit
* SFX\_Plant\_MoveIn
* SFX\_Player\_Climb\_Down
* SFX\_Player\_Climb\_Side
* SFX\_Player\_Climb\_Up
* SFX\_Player\_Craft\_Item\_Inventory
* SFX\_Player\_Death
* SFX\_Player\_Death\_Drown
* SFX\_Player\_Death\_Fall
* SFX\_Player\_Drop\_Item
* SFX\_Player\_Fall
* SFX\_Player\_Glide\_Motion
* SFX\_Player\_Glide\_Stationary
* SFX\_Player\_Grab\_Item
* SFX\_Player\_Hurt
* SFX\_Player\_Hurt\_Burn
* SFX\_Player\_Hurt\_Drowning
* SFX\_Player\_Hurt\_Fall
* SFX\_Player\_Jump
* SFX\_Player\_Mantle
* SFX\_Player\_Pickup\_Item
* SFX\_Player\_Roll
* SFX\_Player\_Slide
* SFX\_Player\_Swim
* SFX\_Player\_Swim\_Fast
* SFX\_Player\_Swim\_Jump
* SFX\_Player\_Unarmed\_Swing\_Left
* SFX\_Player\_Unarmed\_Swing\_Right
* SFX\_Plushie\_Break
* SFX\_Plushie\_Build
* SFX\_Poop\_Bounce
* SFX\_Poop\_Break
* SFX\_Poop\_Hit
* SFX\_Poop\_Walk
* SFX\_Portal\_Neutral
* SFX\_Portal\_Neutral\_Open
* SFX\_Portal\_Neutral\_Teleport\_Local
* SFX\_Portal\_Void
* SFX\_Potion\_Drink\_Success
* SFX\_Processing\_Placeholder
* SFX\_Projectile\_Poop\_Hit
* SFX\_Rabbit\_Alerted
* SFX\_Rabbit\_Death
* SFX\_Rabbit\_Hurt
* SFX\_Rabbit\_Run
* SFX\_Rabbit\_Sleep
* SFX\_Ram\_Alerted
* SFX\_Ram\_Death
* SFX\_Ram\_Hurt
* SFX\_Ram\_Run
* SFX\_Ram\_Sleep
* SFX\_Raptor\_Cave\_Alerted
* SFX\_Raptor\_Cave\_Idle
* SFX\_Rat\_Death
* SFX\_Rat\_Hurt
* SFX\_Raven\_Alerted
* SFX\_Raven\_Death
* SFX\_Raven\_Flee
* SFX\_Raven\_Hurt
* SFX\_Reeds\_MoveIn
* SFX\_Rifle\_Fire
* SFX\_Rifle\_Fire\_Local
* SFX\_Rope\_Break
* SFX\_Rope\_Build
* SFX\_Rope\_Land
* SFX\_Rope\_Walk
* SFX\_Rotate\_Pitch\_Default
* SFX\_Rotate\_Roll\_Default
* SFX\_Rotate\_Yaw\_Default
* SFX\_Rubble\_Bounce
* SFX\_Rubble\_Hit
* SFX\_Sand\_Break
* SFX\_Sand\_Build
* SFX\_Sand\_Hit
* SFX\_Sand\_Land
* SFX\_Sand\_Walk
* SFX\_Scarak\_Fighter\_Alerted
* SFX\_Scarak\_Fighter\_Death
* SFX\_Scarak\_Fighter\_Hurt
* SFX\_Scarak\_Seeker\_Alerted
* SFX\_Scarak\_Seeker\_Death
* SFX\_Scarak\_Seeker\_Hurt
* SFX\_Scarak\_Seeker\_Spitball\_Death
* SFX\_Scarak\_Spitball\_Fire
* SFX\_Scorpion\_Alerted
* SFX\_Scorpion\_Death
* SFX\_Scorpion\_Run
* SFX\_Scorpion\_Threaten
* SFX\_Seeds\_Place
* SFX\_Shark\_Death
* SFX\_Shark\_Dive
* SFX\_Shark\_Hurt
* SFX\_Shark\_Swim
* SFX\_Shears\_Activate
* SFX\_Sheep\_Alerted
* SFX\_Sheep\_Death
* SFX\_Sheep\_Hurt
* SFX\_Sheep\_Run
* SFX\_Sheep\_Sheared
* SFX\_Sheep\_Walk
* SFX\_Shield\_T1\_Break
* SFX\_Shield\_T1\_Impact
* SFX\_Shield\_T1\_Raise
* SFX\_Shield\_T1\_Raise\_Local
* SFX\_Shield\_T1\_Swing
* SFX\_Shield\_T1\_Swing\_Local
* SFX\_Shield\_T2\_Impact
* SFX\_Shield\_T2\_Raise
* SFX\_Shield\_T2\_Raise\_Local
* SFX\_Shield\_T2\_Swing
* SFX\_Shield\_T2\_Swing\_Local
* SFX\_Shovel\_T1\_Swing\_RL\_Local
* SFX\_Shovel\_T2\_Impact\_Nice
* SFX\_Skeleton\_Alerted
* SFX\_Skeleton\_Death\_1
* SFX\_Skeleton\_Death\_2
* SFX\_Skeleton\_Death\_3
* SFX\_Skeleton\_Death\_4
* SFX\_Skeleton\_Despawn\_1
* SFX\_Skeleton\_Despawn\_2
* SFX\_Skeleton\_Hurt
* SFX\_Skeleton\_Mage\_Spellbook\_Charge
* SFX\_Skeleton\_Mage\_Spellbook\_Impact
* SFX\_Skeleton\_Praetorian\_Alerted
* SFX\_Skeleton\_Praetorian\_Death\_1
* SFX\_Skeleton\_Praetorian\_Death\_2
* SFX\_Skeleton\_Praetorian\_Death\_3
* SFX\_Skeleton\_Praetorian\_Death\_4
* SFX\_Skeleton\_Praetorian\_Despawn\_1
* SFX\_Skeleton\_Praetorian\_Despawn\_2
* SFX\_Skeleton\_Praetorian\_Hurt
* SFX\_Skeleton\_Praetorian\_Run
* SFX\_Skeleton\_Praetorian\_Search\_2
* SFX\_Skeleton\_Praetorian\_Spawn\_1
* SFX\_Skeleton\_Praetorian\_Walk
* SFX\_Skeleton\_Run
* SFX\_Skeleton\_Search\_2
* SFX\_Skeleton\_Spawn\_1
* SFX\_Skeleton\_Spawn\_2
* SFX\_Skeleton\_Walk
* SFX\_Snake\_Alerted
* SFX\_Snake\_Death
* SFX\_Snake\_Hurt
* SFX\_Snake\_Idle
* SFX\_Snow\_Break
* SFX\_Snow\_Build
* SFX\_Snow\_Hit
* SFX\_Snow\_Land
* SFX\_Snow\_Walk
* SFX\_Soft\_Break
* SFX\_Soft\_Build
* SFX\_Soft\_Hit
* SFX\_Soft\_Land
* SFX\_Soft\_Walk
* SFX\_Spark\_Living\_Alerted
* SFX\_Spark\_Living\_Death
* SFX\_Sparrow\_Alerted
* SFX\_Sparrow\_Death
* SFX\_Sparrow\_Hurt
* SFX\_Sparrow\_Idle
* SFX\_Spawn\_Void\_Alerted
* SFX\_Spawn\_Void\_Attack
* SFX\_Spawn\_Void\_Death
* SFX\_Spawn\_Void\_Hurt
* SFX\_Spawn\_Void\_Run
* SFX\_Spear\_Impact
* SFX\_Spear\_Lunge
* SFX\_Spear\_Lunge\_Local
* SFX\_Spear\_Miss
* SFX\_Spear\_Projectile\_Impact
* SFX\_Spear\_Throw
* SFX\_Spear\_Throw\_Charge
* SFX\_Spear\_Throw\_Charge\_Local
* SFX\_Spear\_Throw\_Local
* SFX\_Spider\_Alerted
* SFX\_Spider\_Death
* SFX\_Spider\_Run
* SFX\_Spirit\_Root\_Alerted
* SFX\_Spirit\_Root\_Death\_01
* SFX\_Spirit\_Root\_Death\_02
* SFX\_Spirit\_Root\_Hurt
* SFX\_Spirit\_Root\_Spawn
* SFX\_Squirrel\_Alerted
* SFX\_Squirrel\_Death
* SFX\_Squirrel\_Hurt
* SFX\_Squirrel\_Run
* SFX\_Staff\_Charged\_Loop
* SFX\_Staff\_Fire\_Shoot
* SFX\_Staff\_Flame\_Consume\_Charge\_1
* SFX\_Staff\_Flame\_Consume\_Charge\_1\_Local
* SFX\_Staff\_Flame\_Consume\_Charge\_2
* SFX\_Staff\_Flame\_Consume\_Charge\_2\_Local
* SFX\_Staff\_Flame\_Consume\_Charge\_3
* SFX\_Staff\_Flame\_Consume\_Charge\_3\_Local
* SFX\_Staff\_Flame\_Consume\_Charge\_4
* SFX\_Staff\_Flame\_Consume\_Charge\_4\_Local
* SFX\_Staff\_Flame\_Fireball\_Impact
* SFX\_Staff\_Flame\_Fireball\_Launch
* SFX\_Staff\_Flame\_Fireball\_Launch\_Local
* SFX\_Staff\_Flame\_Flamethrower
* SFX\_Staff\_Flame\_Flamethrower\_End
* SFX\_Staff\_Flame\_Flamethrower\_End\_Local
* SFX\_Staff\_Flame\_Flamethrower\_Impact
* SFX\_Staff\_Flame\_Flamethrower\_Local
* SFX\_Staff\_Flame\_Trap\_Deploy
* SFX\_Staff\_Flame\_Trap\_Despawn
* SFX\_Staff\_Flame\_Trap\_Loop
* SFX\_Staff\_Ice\_Shoot
* SFX\_Stamina\_Potion\_Success
* SFX\_Sticks\_Break
* SFX\_Stone\_Break
* SFX\_Stone\_Build
* SFX\_Stone\_Coffin\_Open\_Close
* SFX\_Stone\_Harvest
* SFX\_Stone\_Hit
* SFX\_Stone\_Land
* SFX\_Stone\_Walk
* SFX\_Sword\_T1\_Block\_Local
* SFX\_Sword\_T1\_Lunge\_Charge\_Local
* SFX\_Sword\_T1\_Lunge\_Local
* SFX\_Sword\_T1\_Shove\_Local
* SFX\_Sword\_T1\_Swing\_Down\_Local
* SFX\_Sword\_T1\_Swing\_LR\_Local
* SFX\_Sword\_T1\_Swing\_RL\_Local
* SFX\_Sword\_T2\_Block\_Local
* SFX\_Sword\_T2\_Impact
* SFX\_Sword\_T2\_Lunge\_Charge\_Local
* SFX\_Sword\_T2\_Lunge\_Local
* SFX\_Sword\_T2\_Signature\_Part\_1
* SFX\_Sword\_T2\_Signature\_Part\_1\_Local
* SFX\_Sword\_T2\_Signature\_Part\_2
* SFX\_Sword\_T2\_Signature\_Part\_2\_Local
* SFX\_Sword\_T2\_Swing\_Down\_Local
* SFX\_Sword\_T2\_Swing\_LR\_Local
* SFX\_Sword\_T2\_Swing\_RL\_Local
* SFX\_T1\_Impact\_Blunt
* SFX\_Tall\_Grass\_MoveIn
* SFX\_Test\_Blip\_A
* SFX\_Test\_Blip\_B
* SFX\_Test\_Blip\_C
* SFX\_Tetrabird\_Alerted
* SFX\_Tetrabird\_Death
* SFX\_Tetrabird\_Flee
* SFX\_Tetrabird\_Hurt
* SFX\_Tetrabird\_Run
* SFX\_Tiger\_Sabertooth\_Alerted
* SFX\_Tiger\_Sabertooth\_Death
* SFX\_Tiger\_Sabertooth\_Hurt
* SFX\_Tiger\_Sabertooth\_Run
* SFX\_Toad\_Rhino\_Alerted
* SFX\_Toad\_Rhino\_Death
* SFX\_Toad\_Rhino\_Hurt
* SFX\_Toad\_Rhino\_Magma\_Alerted
* SFX\_Toad\_Rhino\_Magma\_Death
* SFX\_Toad\_Rhino\_Magma\_Hurt
* SFX\_Toad\_Rhino\_Magma\_Run
* SFX\_Toad\_Rhino\_Magma\_Tongue\_Impact
* SFX\_Toad\_Rhino\_Magma\_Tongue\_Whoosh
* SFX\_Toad\_Rhino\_Run
* SFX\_Toad\_Rhino\_Tongue\_Impact
* SFX\_Toad\_Rhino\_Tongue\_Whoosh
* SFX\_Tombstone\_Break
* SFX\_Tool\_T1\_Swing
* SFX\_Tool\_Watering\_Can\_Water
* SFX\_Torch\_Break
* SFX\_Torch\_Build
* SFX\_Torch\_Default\_Loop
* SFX\_Torch\_Impact
* SFX\_Torch\_Off
* SFX\_Torch\_On\_Loop
* SFX\_Torch\_Swing
* SFX\_Torch\_Swing\_Left\_Local
* SFX\_Torch\_Swing\_Right\_Local
* SFX\_Tornado
* SFX\_Trashpile\_Land
* SFX\_Trashpile\_Walk
* SFX\_Trork\_Alerted
* SFX\_Trork\_Chieftain\_Alerted
* SFX\_Trork\_Chieftain\_Death
* SFX\_Trork\_Chieftain\_Hurt
* SFX\_Trork\_Chieftain\_Run
* SFX\_Trork\_Chieftain\_Search
* SFX\_Trork\_Death
* SFX\_Trork\_Exertion
* SFX\_Trork\_Hurt\_01
* SFX\_Trork\_Hurt\_02
* SFX\_Trork\_Run
* SFX\_Trork\_Search
* SFX\_Trork\_Sleep
* SFX\_Trork\_Throwing\_Axe
* SFX\_Unarmed\_Impact
* SFX\_Unarmed\_Swing
* SFX\_Unbreakable\_Block
* SFX\_Vulture\_Alerted
* SFX\_Vulture\_Death
* SFX\_Vulture\_Flee
* SFX\_Vulture\_Hurt
* SFX\_Wand\_Fire\_Shoot
* SFX\_Wand\_Ice\_Shoot
* SFX\_Warthog\_Alerted
* SFX\_Warthog\_Death
* SFX\_Warthog\_Hurt
* SFX\_Warthog\_Piglet\_Alerted
* SFX\_Warthog\_Piglet\_Death
* SFX\_Warthog\_Piglet\_Hurt
* SFX\_Warthog\_Piglet\_Run
* SFX\_Warthog\_Run
* SFX\_Warthog\_Sleep
* SFX\_Warthog\_Walk
* SFX\_Water\_MoveIn
* SFX\_Water\_MoveOut
* SFX\_Weapon\_Bench\_Close
* SFX\_Weapon\_Bench\_Craft
* SFX\_Weapon\_Bench\_Open
* SFX\_Weapon\_Charge\_Swing
* SFX\_Web\_MoveIn
* SFX\_Window\_Break
* SFX\_Window\_Stone\_Break
* SFX\_Wisp\_Lamp\_Loop
* SFX\_Wolf\_Alerted
* SFX\_Wolf\_Death
* SFX\_Wolf\_Hurt
* SFX\_Wolf\_Run
* SFX\_Wolf\_Sleep
* SFX\_Wood\_Break
* SFX\_Wood\_Build
* SFX\_Wood\_Hit
* SFX\_Wood\_Land
* SFX\_Wood\_Walk
* SFX\_Woodpecker\_Death
* SFX\_Woodpecker\_Hurt
* SFX\_Workbench\_Close
* SFX\_Workbench\_Craft
* SFX\_Workbench\_Open
* SFX\_Workbench\_Upgrade\_Complete\_Default
* SFX\_Workbench\_Upgrade\_Start\_Default
* SFX\_Yeti\_Alerted
* SFX\_Z1\_Emit\_Forest\_Autumn\_Day\_Birds
* SFX\_Z1\_Emit\_Forest\_Autumn\_Day\_Insects
* SFX\_Z1\_Emit\_Forest\_Autumn\_Day\_Wind
* SFX\_Z1\_Emit\_Forest\_Azure\_Day\_Insects
* SFX\_Z1\_Emit\_Forest\_Azure\_Day\_Wind
* SFX\_Z1\_Emit\_Forest\_Gen\_Day\_Birds
* SFX\_Z1\_Emit\_Forest\_Gen\_Day\_Insects
* SFX\_Z1\_Emit\_Forest\_Gen\_Day\_Winds
* SFX\_Z1\_Emit\_Forest\_Moss\_Day\_Birds
* SFX\_Z1\_Emit\_Forest\_Moss\_Day\_Insects
* SFX\_Z1\_Emit\_Forest\_Moss\_Day\_Wind
* SFX\_Z1\_Emit\_Forest\_Night\_Birds
* SFX\_Z1\_Emit\_Forest\_Night\_Insects
* SFX\_Z1\_Emit\_Forest\_Night\_Wind
* SFX\_Z1\_Emit\_Kweebec\_Village\_Wind
* SFX\_Z1\_Emit\_Mountain\_Day\_Birds
* SFX\_Z1\_Emit\_Plains\_Gen\_Day\_Birds
* SFX\_Z1\_Emit\_Plains\_Gen\_Day\_Insects
* SFX\_Z1\_Emit\_Plains\_Gen\_Day\_Wind
* SFX\_Z1\_Emit\_Plains\_Gen\_Night\_Birds
* SFX\_Z1\_Emit\_Plains\_Gen\_Night\_Insects
* SFX\_Z1\_Emit\_Plains\_Gen\_Night\_Wind
* SFX\_Z1\_Emit\_Shore\_Day\_Birds
* SFX\_Z1\_Emit\_Shore\_Waves
* SFX\_Z1\_Emit\_Shore\_Wind
* SFX\_Z1\_Emit\_Swamp\_Day\_Birds
* SFX\_Z1\_Emit\_Swamp\_Day\_Frogs
* SFX\_Z1\_Emit\_Swamp\_Day\_Insects
* SFX\_Z1\_Emit\_Swamp\_Day\_Wind
* SFX\_Z1\_Emit\_Swamp\_Night\_Frogs
* SFX\_Z1\_Emit\_Trork\_Camp
* SFX\_Z1\_Shore\_Day\_Birds
* SFX\_Z3\_Emit\_Cave\_Ice\_Crackle
* SFX\_Z3\_Emit\_Cave\_Ice\_Rumble
* SFX\_Z3\_Emit\_Cave\_Ice\_Stress
* SFX\_Z3\_Emit\_Cave\_Snow\_Crackle
* SFX\_Z3\_Emit\_Cave\_Snow\_Melt
* SFX\_Z3\_Emit\_Hedera\_FX
* SFX\_Z3\_Emit\_Hedera\_PlantRustle
* SFX\_Z3\_Emit\_Tree\_Creak
* SFX\_Z3\_Emit\_Wind\_Leaves
* SFX\_Z3\_Emit\_Wind\_Leaves\_Stereo
* SFX\_Z3\_Forest\_Day\_Birds
* SFX\_Z3\_Forest\_Day\_General
* SFX\_Z3\_Forest\_Night\_Birds
* SFX\_Zombie\_Alerted
* SFX\_Zombie\_Attack\_Bite
* SFX\_Zombie\_Attack\_Swing
* SFX\_Zombie\_Death
* SFX\_Zombie\_Despawn
* SFX\_Zombie\_Hurt
* SFX\_Zombie\_Pursuit
* SFX\_Zombie\_ScratchBack
* SFX\_Zombie\_Spawn
[Edit on GitHub](https://github.com/HytaleModding/site/blob/main/content/docs/en/server/sounds.mdx)
[Events\
\
List of all events in Hytale](https://hytalemodding.dev/en/docs/server/events)
[Publishing Your Mod\
\
Learn how to publish your mod to the community.](https://hytalemodding.dev/en/docs/publishing)
---
# Frequently Asked Questions
Established Information
Frequently Asked Questions
==========================
Frequently Asked Questions about Hytale modding.
On this page, we'll answer some of your Frequently Asked Questions.
[1\. Can the client be modded?](https://hytalemodding.dev/en/docs/established-information/faq#1-can-the-client-be-modded)
--------------------------------------------------------------------------------------------------------------------------
No, the client is not able to be modded, although the Client will not have control over how the game and the UI looks.
The server decides the visuals, more like the "Resource Packs" available in Minecraft. The server decides what mods are used
[2\. What Network Protocol will be used?](https://hytalemodding.dev/en/docs/established-information/faq#2-what-network-protocol-will-be-used)
----------------------------------------------------------------------------------------------------------------------------------------------
Hytale will use the QUIC transport protocol.
For context, the two main Internet protocols are UDP and TCP.
* UDP is connectionless, fast, fire-and-forget packets but has less reliability as packets can be lost.
* TCP is connection-based, slower than UDP, can guarantee packet delivery with much more reliability. Both are pretty fast in modern times, games can run fine on both (but generally prefer UDP).
QUIC is a **hybrid protocol** that builds off UDP to get the same speed benefits, but adds some layers of reliability like TCP. Essentially, a solid choice for game development that blends speed and reliability.
[3\. What are Transfer Packets?](https://hytalemodding.dev/en/docs/established-information/faq#3-what-are-transfer-packets)
----------------------------------------------------------------------------------------------------------------------------
Transfer packets in Hytale are small data payloads _(4kb)_ that allow players to move from one server to another while carrying information. They are not equivalent to something like BungeeCord or Velocity and are primarily intended for smaller servers.
Unlike BungeeCord, they do not manage network-wide features such as global plugins. Implementing DDOS protection would also be incredibly hard for smaller networks by using transfer packets.
Transfer packets work quite well in scenarios such as small server networks or hubs where players will hop between servers without the loss of progress. For example, a player might finish a dungeon on one server and then move to a lobby or different game mode with their inventory and stats intact. This lessens server costs and enables the developers to put more effort into gameplay improvement rather than complicated network setups.
[4\. Will Hytale support dedicated servers?](https://hytalemodding.dev/en/docs/established-information/faq#4-will-hytale-support-dedicated-servers)
----------------------------------------------------------------------------------------------------------------------------------------------------
Yes, Hytale will support dedicated servers. This allows server owners to host their own Hytale servers on their own hardware or through third-party hosting services.
Dedicated servers provide more control over server settings, mods, and performance compared to using official hosting solutions.
[5\. Will Hytale support modding on consoles?](https://hytalemodding.dev/en/docs/established-information/faq#5-will-hytale-support-modding-on-consoles)
--------------------------------------------------------------------------------------------------------------------------------------------------------
As of now, Hytale modding is primarily focused on PC platforms.
[Edit on GitHub](https://github.com/HytaleModding/site/blob/main/content/docs/en/established-information/faq.mdx)
[Quick Start\
\
Setting up a standard Hytale project.](https://hytalemodding.dev/en/docs/quick-start)
[Developer Q&A Technical Insights\
\
Comprehensive summary of technical insights from Hytale developers covering architecture, modding, gameplay systems, and development philosophy.](https://hytalemodding.dev/en/docs/established-information/developer-qa-insights)
### On this page
[1\. Can the client be modded?](https://hytalemodding.dev/en/docs/established-information/faq#1-can-the-client-be-modded)
[2\. What Network Protocol will be used?](https://hytalemodding.dev/en/docs/established-information/faq#2-what-network-protocol-will-be-used)
[3\. What are Transfer Packets?](https://hytalemodding.dev/en/docs/established-information/faq#3-what-are-transfer-packets)
[4\. Will Hytale support dedicated servers?](https://hytalemodding.dev/en/docs/established-information/faq#4-will-hytale-support-dedicated-servers)
[5\. Will Hytale support modding on consoles?](https://hytalemodding.dev/en/docs/established-information/faq#5-will-hytale-support-modding-on-consoles)
---
# PR Guidelines
[Contributing](https://hytalemodding.dev/en/docs/contributing)
PR Guidelines
=============
Guidelines that reviewers and contributors should follow when submitting and reviewing pull requests.
[Pull Request Guidelines](https://hytalemodding.dev/en/docs/contributing/pr-guidelines#pull-request-guidelines)
================================================================================================================
To ensure a smooth and efficient review process, both contributors and reviewers should adhere to the following guidelines when submitting and reviewing pull requests (PRs).
[For Contributors](https://hytalemodding.dev/en/docs/contributing/pr-guidelines#for-contributors)
--------------------------------------------------------------------------------------------------
1. **Descriptive Titles and Descriptions**
* Use clear and concise titles that summarize the changes.
* Provide detailed descriptions of what the PR does, why the changes are necessary, and any relevant context.
2. **Link to Issues**
* In your PR title, add `GH-ISSUE-NUMBER` to link the PR to the relevant issue. This is required for all PRs.
3. **Small, Focused Changes**
* Aim to keep PRs small and focused on a single issue or feature. This makes it easier for reviewers to understand and provide feedback.
4. **Code Quality**
* Ensure your code follows the project's coding standards and best practices.
* Include comments where necessary to explain complex logic.
5. **Testing**
* Test your changes thoroughly before submitting the PR.
* If applicable, include unit tests or integration tests to verify your changes.
6. **Documentation**
* Update or add documentation as needed to reflect your changes.
7. **Commit Messages**
* Use clear and descriptive commit messages that follow the [conventional commits](https://www.conventionalcommits.org/en/v1.0.0/)
format.
8. **Check for Conflicts**
* Before submitting your PR, ensure that your branch is up to date with the base branch to minimize merge conflicts.
[For Reviewers](https://hytalemodding.dev/en/docs/contributing/pr-guidelines#for-reviewers)
--------------------------------------------------------------------------------------------
* You are supposed to review PRs thoroughly, and request changes if needed.
* Provide constructive feedback and suggestions for improvement.
* Verify that the changes meet the project's coding standards and best practices.
* Deploy the PR using the dokploy integration to ensure the changes work as expected.
* Ensure that documentation is updated as necessary.
* Approve the PR only when you are satisfied with the changes and all checks have passed.
[Edit on GitHub](https://github.com/HytaleModding/site/blob/main/content/docs/en/contributing/pr-guidelines.mdx)
[Contributing\
\
Previous Page](https://hytalemodding.dev/en/docs/contributing)
[Writing Guides\
\
Next Page](https://hytalemodding.dev/en/docs/contributing/writing-guides)
### On this page
[Pull Request Guidelines](https://hytalemodding.dev/en/docs/contributing/pr-guidelines#pull-request-guidelines)
[For Contributors](https://hytalemodding.dev/en/docs/contributing/pr-guidelines#for-contributors)
[For Reviewers](https://hytalemodding.dev/en/docs/contributing/pr-guidelines#for-reviewers)
---
# Writing Guides
[Contributing](https://hytalemodding.dev/en/docs/contributing)
Writing Guides
==============
[Creating a guide file](https://hytalemodding.dev/en/docs/contributing/writing-guides#creating-a-guide-file)
-------------------------------------------------------------------------------------------------------------
To start writing a guide, you need to create a file with extension `.mdx`. You need to create this file inside the `/content/docs/en` directory, now it depends in which section you want to make the guide, so you can decide which folder you should put it in after that.
Suppose I want to make a java basics guide, I'd put it in `/content/docs/en/guides/java-basics`. You'll have to do some digging to find out where you want to place it.
Info
If there's already a guide in the section you want to write about, you can just press on the "Edit On GitHub" button on our website and it'll take you to the folder, now you can write in the same folder to have your guide appear in the same section.
[Frontmatter](https://hytalemodding.dev/en/docs/contributing/writing-guides#frontmatter)
-----------------------------------------------------------------------------------------
Frontmatter is the metadata of your guide, it tells our website how to display your guide. This needs to be at the very top of the file, which starts with `---` and ends with `---`.
Here's an example:
---
title: "Java Basics"
description: "Learn the basics of Java programming."
authors:
- name: "Your Name"
url: "https://yourwebsite.com"
---
Now as you can see, it's pretty self explanatory, you just need to fill in the details for your specific guide. If you don't have a URL you want to link yourself to, just don't write that whole line. Additionally, the authors section is optional, so if you don't want to add it, you can just leave it out although we encourage you to do so and credit yourself.
The indentation in the frontmatter is important, so make sure to keep it consistent with the example.
[Content Structure](https://hytalemodding.dev/en/docs/contributing/writing-guides#content-structure)
-----------------------------------------------------------------------------------------------------
You should structure the content of your guide in a clear and organized manner. Here are some tips on how to do that:
* **Introduction:** Start with an overview of the topic and what the reader can expect to learn.
* **Prerequisites:** List any prerequisites or prior knowledge the reader should have before diving into the guide.
* **Step-by-Step Instructions:** Break down the content into clear, actionable steps. Use headings and subheadings to organize the information.
* **Code Examples:** Include code snippets to illustrate key points. Make sure to explain each example thoroughly.
* **Conclusion:** Summarize the main points and encourage the reader to explore further or try out what they've learned.
Now if you're writing a really big section, you should split this into multiple pages so that it's easier for the reader to digest the information. No one wants to read a big wall of text all at once!
When we write guides, we should also think of how people will consume them, and many people prefer to skim content rather than read it in detail. This is why it's better to split information into multiple pages, so it looks like a smaller amount of information to the reader. Also, consider using bullet points, numbered lists, and other formatting techniques to make the content more scannable.
[Formatting](https://hytalemodding.dev/en/docs/contributing/writing-guides#formatting)
---------------------------------------------------------------------------------------
We use [Markdown](https://www.markdownguide.org/)
for formatting our guides. Here are some key points to keep in mind:
* Use headings (`#`, `##`, `###`) to organize your content.
* Use bullet points and numbered lists for clarity.
* Use code blocks (\`\`\`) for code snippets.
* Use links to reference other guides or external resources.
This is the same type of formatting you'll see on most documentation websites, and also social media platforms like Discord.
You can also make a Callout to highlight important information or tips. Use the following syntax:
This is a callout message.
Info
This is a callout message.
You can change the color of the callout by adding a `type` attribute. For example:
This is an info callout.
Available types are: `info`, `warning`, `error`, and `success`.
[Conclusion](https://hytalemodding.dev/en/docs/contributing/writing-guides#conclusion)
---------------------------------------------------------------------------------------
That's all! You are now a master at writing guides. Just remember, do not think you need to be perfect with your English, write the guide the way you will explain the topic to someone, and don't hesitate to ask for feedback or help if you need it.
Happy writing!
[Edit on GitHub](https://github.com/HytaleModding/site/blob/main/content/docs/en/contributing/writing-guides.mdx)
[PR Guidelines\
\
Guidelines that reviewers and contributors should follow when submitting and reviewing pull requests.](https://hytalemodding.dev/en/docs/contributing/pr-guidelines)
### On this page
[Creating a guide file](https://hytalemodding.dev/en/docs/contributing/writing-guides#creating-a-guide-file)
[Frontmatter](https://hytalemodding.dev/en/docs/contributing/writing-guides#frontmatter)
[Content Structure](https://hytalemodding.dev/en/docs/contributing/writing-guides#content-structure)
[Formatting](https://hytalemodding.dev/en/docs/contributing/writing-guides#formatting)
[Conclusion](https://hytalemodding.dev/en/docs/contributing/writing-guides#conclusion)
---
# Contributing
Contributing
============
[Contributing to HytaleModding](https://hytalemodding.dev/en/docs/contributing#contributing-to-hytalemodding)
==============================================================================================================
We welcome contributions from the community to help improve and expand the HytaleModding documentation. Whether you're fixing typos, adding new tutorials, or providing code examples, your contributions are valuable!
[How to Contribute](https://hytalemodding.dev/en/docs/contributing#how-to-contribute)
--------------------------------------------------------------------------------------
### [Reporting Issues](https://hytalemodding.dev/en/docs/contributing#reporting-issues)
If you've found a issue with the documentation, please report it by opening a new issue on our [GitHub repository](https://github.com/HytaleModding/site/issues)
.
If you can work on this issue yourself, you can ask to be assigned to it and submit a PR.
### [Submitting Pull Requests](https://hytalemodding.dev/en/docs/contributing#submitting-pull-requests)
1. Fork the repository on GitHub.
2. Clone your fork to your local machine.
3. Create a new branch for your changes.
git checkout -b my-feature-branch
4. Make your changes and commit them with clear messages. We follow [conventional commits](https://www.conventionalcommits.org/en/v1.0.0/)
, your PR will not be accepted if your commit messages do not follow this convention.
git commit -m "Add feature X to documentation"
5. Push your changes to your fork.
git push origin my-feature-branch
6. Open a Pull Request on the original repository, describing your changes and why they should be merged.
[Edit on GitHub](https://github.com/HytaleModding/site/blob/main/content/docs/en/contributing/index.mdx)
[CurseForge\
\
Learn how to publish your mod to CurseForge](https://hytalemodding.dev/en/docs/publishing/curseforge)
[PR Guidelines\
\
Guidelines that reviewers and contributors should follow when submitting and reviewing pull requests.](https://hytalemodding.dev/en/docs/contributing/pr-guidelines)
### On this page
[Contributing to HytaleModding](https://hytalemodding.dev/en/docs/contributing#contributing-to-hytalemodding)
[How to Contribute](https://hytalemodding.dev/en/docs/contributing#how-to-contribute)
[Reporting Issues](https://hytalemodding.dev/en/docs/contributing#reporting-issues)
[Submitting Pull Requests](https://hytalemodding.dev/en/docs/contributing#submitting-pull-requests)
---
# Developer Q&A Technical Insights
Established Information
Developer Q&A Technical Insights
================================
Comprehensive summary of technical insights from Hytale developers covering architecture, modding, gameplay systems, and development philosophy.
[Developer Q&A Technical Insights](https://hytalemodding.dev/en/docs/established-information/developer-qa-insights#developer-qa-technical-insights)
====================================================================================================================================================
This extensive Q&A session with Hytale developers reveals critical technical details about the game's architecture, modding philosophy, gameplay systems, and development approach.
[Technical Architecture](https://hytalemodding.dev/en/docs/established-information/developer-qa-insights#technical-architecture)
---------------------------------------------------------------------------------------------------------------------------------
### [Network & Infrastructure](https://hytalemodding.dev/en/docs/established-information/developer-qa-insights#network--infrastructure)
* **Protocol**: Uses QUIC (reliable UDP with unreliable channels) instead of TCP
* **Server Compatibility**: Runs on any platform supporting Java 25
* **Connection Method**: Direct IP initially, server discovery planned post-launch
* **Data Layer**: Current custom serialization format will be replaced post-launch
* **Performance**: Multi-core support - each world has main thread + parallel execution
* **Rendering**: OpenGL 3.3 for Mac compatibility, potential future Vulkan/Metal migration
* **Tick Model**: Base server tick rate is 30 TPS by default; can be changed using server plugins.
### [Security & Distribution](https://hytalemodding.dev/en/docs/established-information/developer-qa-insights#security--distribution)
* **No Client-Side Code Execution**: Prevents remote code execution exploits
* **Downloads Limited To**: Configuration files and assets only
* **Mod Distribution**: Community platforms (CurseForge, Modrinth), no immediate in-game marketplace
* **Server Hosting**: Available day 1, no business agreements required (just EULA/TOS)
[Modding Capabilities](https://hytalemodding.dev/en/docs/established-information/developer-qa-insights#modding-capabilities)
-----------------------------------------------------------------------------------------------------------------------------
### [Server-Side Power](https://hytalemodding.dev/en/docs/established-information/developer-qa-insights#server-side-power)
* **Full Java Access**: Database connections, web requests, any Java functionality
* **Custom Libraries**: Can create Lua scripting, ML frameworks, or any Java library
* **Server Modification**: Shared source code allows heavy server modifications
* **Hot Reload**: Supported for most asset types
* **Documentation**: Public GitBook planned, though initially sparse
### [Content Creation (No Code Required)](https://hytalemodding.dev/en/docs/established-information/developer-qa-insights#content-creation-no-code-required)
* **World Generation**: Custom biomes and maps without Java
* **NPCs & Items**: JSON-based configuration
* **Crafting Recipes**: Data-driven system
* **Visual Scripting**: Replaces command blocks, fully sandboxed
* **Prefab System**: Sophisticated building blocks with in-game editor
### [Advanced Modding](https://hytalemodding.dev/en/docs/established-information/developer-qa-insights#advanced-modding)
* **Combat System**: Data-driven interaction system for attack chains and abilities
* **Sub-Hitboxes**: Support for complex boss mechanics (needs improvement)
* **Status Effects**: Buff/debuff system with custom effects and stats
* **Custom UI**: NoesisGUI transition enables powerful interface customization
* **Block Physics**: Selective system (trees fall, but placed blocks don't)
[Gameplay Systems](https://hytalemodding.dev/en/docs/established-information/developer-qa-insights#gameplay-systems)
---------------------------------------------------------------------------------------------------------------------
### [Core Mechanics](https://hytalemodding.dev/en/docs/established-information/developer-qa-insights#core-mechanics)
* **Stamina System**: No hunger by default (can be modded in)
* **Gravity**: Selective block physics - trees collapse, buildings can float
* **Lighting**: Major overhaul to fix model/voxel inconsistencies
* **World Height**: Currently limited, may change with voxel storage updates
* **Automation**: No redstone equivalent at launch (moddable)
### [Player Systems](https://hytalemodding.dev/en/docs/established-information/developer-qa-insights#player-systems)
* **Character Models**: Humans by default, changeable in creative mode
* **Multiplayer Avatars**: Server-controlled (no custom models in multiplayer)
* **Skins**: Full customization possible ("mod yourself into a potato")
* **Shapeshifting**: Transformation potions exist for fun/modding
### [World & NPCs](https://hytalemodding.dev/en/docs/established-information/developer-qa-insights#world--npcs)
* **Faction System**: Living world with dynamic NPC interactions
* **Village Systems**: Planned dynamic villages with relationships and behaviors
* **Chunk Loading**: Entities unload when out of all players' render distance
* **Seeds**: Shareable world generation seeds supported
[Development Philosophy](https://hytalemodding.dev/en/docs/established-information/developer-qa-insights#development-philosophy)
---------------------------------------------------------------------------------------------------------------------------------
### [Release Strategy](https://hytalemodding.dev/en/docs/established-information/developer-qa-insights#release-strategy)
* **Base Game Priority**: Adventure mode is primary focus, modding architecture supports it
* **Tech Debt**: Acknowledged as necessary for release, commitment to improvement
* **Update Frequency**: Very frequent updates planned, especially post-launch
* **Version Policy**: Always latest version, but servers can run modified versions
### [Community Focus](https://hytalemodding.dev/en/docs/established-information/developer-qa-insights#community-focus)
* **Creator Support**: Development bounties planned for community contributors
* **Tutorials**: Official modding tutorials planned with partners
* **Feedback Integration**: Strong commitment to community-driven improvements
* **Accessibility**: Designed for lower-end hardware, reasonable system requirements
### [Tools & Documentation](https://hytalemodding.dev/en/docs/established-information/developer-qa-insights#tools--documentation)
* **Blockbench Integration**: Replaces custom "Hytale Model Maker"
* **Machinima Tools**: Full cinematic creation capabilities
* **Creative Tools**: Major reveal planned for building/creation features
* **Source Access**: Server code will be unobfuscated with developer comments
[Platform Support](https://hytalemodding.dev/en/docs/established-information/developer-qa-insights#platform-support)
---------------------------------------------------------------------------------------------------------------------
* **Current**: Windows (primary)
* **Planned**: Mac/Linux support actively in development
* **VR**: Not feasible in near future
* **Performance**: Uncapped framerate, designed for accessibility
* **Offline Play**: Single-player works without internet connection
[Monetization & Legal](https://hytalemodding.dev/en/docs/established-information/developer-qa-insights#monetization--legal)
----------------------------------------------------------------------------------------------------------------------------
* **No Pay-to-Win**: Firm commitment against P2W mechanics
* **Cosmetics Only**: Low-price cosmetic packs to support infrastructure
* **Server EULA**: Terms being finalized for server monetization policies
* **QUIC Blocking**: Acknowledged issue in some regions, no alternative protocol
[Current Limitations](https://hytalemodding.dev/en/docs/established-information/developer-qa-insights#current-limitations)
---------------------------------------------------------------------------------------------------------------------------
* **Custom Shaders**: Not supported until sandboxing solution found
* **UI/Input Limitations**: Being expanded but currently restricted
* **Documentation**: Sparse initially, will improve over time
* **Client Mods**: No client-side code execution for security
* **Nameplates**: Currently limited customization
This comprehensive technical foundation positions Hytale as a secure, extensible platform that empowers creators while maintaining performance, accessibility, and a commitment to continuous improvement.
[Edit on GitHub](https://github.com/HytaleModding/site/blob/main/content/docs/en/established-information/developer-qa-insights.mdx)
[Frequently Asked Questions\
\
Frequently Asked Questions about Hytale modding.](https://hytalemodding.dev/en/docs/established-information/faq)
[Server Code Insights\
\
Slikey shared some insights about server code on 12/15/2025. This document covers key points and takeaways from that discussion.](https://hytalemodding.dev/en/docs/established-information/server-plugin-insights)
### On this page
[Developer Q&A Technical Insights](https://hytalemodding.dev/en/docs/established-information/developer-qa-insights#developer-qa-technical-insights)
[Technical Architecture](https://hytalemodding.dev/en/docs/established-information/developer-qa-insights#technical-architecture)
[Network & Infrastructure](https://hytalemodding.dev/en/docs/established-information/developer-qa-insights#network--infrastructure)
[Security & Distribution](https://hytalemodding.dev/en/docs/established-information/developer-qa-insights#security--distribution)
[Modding Capabilities](https://hytalemodding.dev/en/docs/established-information/developer-qa-insights#modding-capabilities)
[Server-Side Power](https://hytalemodding.dev/en/docs/established-information/developer-qa-insights#server-side-power)
[Content Creation (No Code Required)](https://hytalemodding.dev/en/docs/established-information/developer-qa-insights#content-creation-no-code-required)
[Advanced Modding](https://hytalemodding.dev/en/docs/established-information/developer-qa-insights#advanced-modding)
[Gameplay Systems](https://hytalemodding.dev/en/docs/established-information/developer-qa-insights#gameplay-systems)
[Core Mechanics](https://hytalemodding.dev/en/docs/established-information/developer-qa-insights#core-mechanics)
[Player Systems](https://hytalemodding.dev/en/docs/established-information/developer-qa-insights#player-systems)
[World & NPCs](https://hytalemodding.dev/en/docs/established-information/developer-qa-insights#world--npcs)
[Development Philosophy](https://hytalemodding.dev/en/docs/established-information/developer-qa-insights#development-philosophy)
[Release Strategy](https://hytalemodding.dev/en/docs/established-information/developer-qa-insights#release-strategy)
[Community Focus](https://hytalemodding.dev/en/docs/established-information/developer-qa-insights#community-focus)
[Tools & Documentation](https://hytalemodding.dev/en/docs/established-information/developer-qa-insights#tools--documentation)
[Platform Support](https://hytalemodding.dev/en/docs/established-information/developer-qa-insights#platform-support)
[Monetization & Legal](https://hytalemodding.dev/en/docs/established-information/developer-qa-insights#monetization--legal)
[Current Limitations](https://hytalemodding.dev/en/docs/established-information/developer-qa-insights#current-limitations)
---
# Prefabs
Prefabs
=======
Documentation about Prefabs in Hytale.
[Introduction](https://hytalemodding.dev/en/docs/guides/prefabs#introduction)
==============================================================================
Prefabs are Hytale's way of creating reusable structures.
There are a few fundamental concepts to understand about prefabs:
* Users interact with prefabs via a prefab editing world.
* Prefabs the physical structures in the game world, and are saved as JSON files.
[How to Create a Prefab](https://hytalemodding.dev/en/docs/guides/prefabs#how-to-create-a-prefab)
--------------------------------------------------------------------------------------------------
Be sure to check the Known Issues section at the end of this guide if you encounter any problems.
1. `/editprefab new ` to create a new prefab editing world: `/editprefab new my_prefab_world`
* Note that `my_prefab` is the name of the _world_, not the prefab itself. Worlds can contain multiple prefabs.
2. Build whatever you want in the prefab editing world.
3. Use the selection brush to select the area you want to save as a prefab.
4. `/prefab save` to save the structure as a prefab.
5. `/editprefab exit` to exit the prefab editing world.
6. Using the Paste brush, press 'e' on your keyboard to select the prefab you just created. It will be in the "server" dropdown, which can be selected from the top right of the menu.
* You can also select it with `/prefab list` and selecting the prefab you just created.
There is a lot more that you can do with prefabs; this is just the basic flow. Keep reading for more information.
[Commands](https://hytalemodding.dev/en/docs/guides/prefabs#commands)
----------------------------------------------------------------------
There are two main commands for prefabs, `/prefab` and `/editprefab`.
This list does not cover the various options for each command. You can use the `--help` flag at the end of any command to see the available options, e.g. `/prefab save --help`, or use `/help` in game and find the `prefab` and `editprefab` commands.
### [`/prefab`](https://hytalemodding.dev/en/docs/guides/prefabs#prefab)
This command allows the user to interact with an existing prefab's file.
Subcommands:
* `save`
* Saves the prefab to the file system.
* `load`
* Loads the prefab into the game.
* `delete`
* Deletes the prefab from the file system.
* `list`
* Lists all prefabs in the file system.
### [`/editprefab`](https://hytalemodding.dev/en/docs/guides/prefabs#editprefab)
The `/editprefab` command is used to create or edit the physical structure in the game the prefab is holding.
Subcommands:
* `exit`
* Exits the current prefab editing world.
* `load`
* Creates a new prefab editing world to paste an existing prefab into.
* `new`
* Creates a new prefab editing world to create a new prefab from scratch.
* `select`
* Selects the area of the prefab the user is looking at (within 200 blocks).
* `save`
* Saves the current prefab using the existing area, or the currently selected area.
* `saveui`
* Opens the save UI for the current world, allowing the user to interact with all prefabs that are in the world.
* `kill`
* Despawn all entities in the currently selected prefab.
* `saveas`
* Save the selected prefab into a new file.
* `setbox`
* Set the bounding box of the currently selected prefab.
* `info`
* General information about the currently selected prefab.
* `tp`
* Opens the teleport UI to teleport to a prefab in the current editing world.
* `modified`
* Lists all modified prefabs with unsaved changes in the current editing world.
[Known Issues](https://hytalemodding.dev/en/docs/guides/prefabs#known-issues)
==============================================================================
* After saving edits to an existing prefab, the prefab does not reflect the changes in the game.
* Workaround: exit and re-enter the world.
* When pasting a prefab, the prefab is not always shown accurately.
* Workaround: hit 't' on your keyboard to toggle the material being shown; usually at least one view is accurate.
* `/prefab delete` errors with `Assert not in thread`.
Written by Ben Cressman
[Edit on GitHub](https://github.com/HytaleModding/site/blob/main/content/docs/en/guides/prefabs.mdx)
[13 - Inheritance\
\
Learn how to create class hierarchies and reuse code effectively.](https://hytalemodding.dev/en/docs/guides/java-basics/13-inheritance)
[Entity Component System\
\
A basic introduction into ECS (Entity Component System)](https://hytalemodding.dev/en/docs/guides/ecs)
### On this page
[Introduction](https://hytalemodding.dev/en/docs/guides/prefabs#introduction)
[How to Create a Prefab](https://hytalemodding.dev/en/docs/guides/prefabs#how-to-create-a-prefab)
[Commands](https://hytalemodding.dev/en/docs/guides/prefabs#commands)
[`/prefab`](https://hytalemodding.dev/en/docs/guides/prefabs#prefab)
[`/editprefab`](https://hytalemodding.dev/en/docs/guides/prefabs#editprefab)
[Known Issues](https://hytalemodding.dev/en/docs/guides/prefabs#known-issues)
---
# Learning to Learn
Learning to Learn
=================
A guide to help you become a better learner and adapt to new information effectively.
[Why learn to code? We have visual scripting!](https://hytalemodding.dev/en/docs/guides/learning-to-learn#why-learn-to-code-we-have-visual-scripting)
------------------------------------------------------------------------------------------------------------------------------------------------------
Yes we do, and honestly you should try that out. Visual scripting is a great addition to Hytale and we know it'll be powerful, but nothing beats the ability of being able to read and write Java code, with the ability to build even more powerful mods and plugins.
Visual Scripting vs Coding
Visual scripting is great for beginners and for simple tasks, but coding allows for more complex and efficient solutions. Learning to code opens up a wider range of possibilities for modding Hytale.
We will have guides on visual scripting when Hytale releases from Day 1.
[Should everyone trying to mod Hytale learn how to code?](https://hytalemodding.dev/en/docs/guides/learning-to-learn#should-everyone-trying-to-mod-hytale-learn-how-to-code)
-----------------------------------------------------------------------------------------------------------------------------------------------------------------------------
No one should feel like they HAVE to learn to code to make stuff in Hytale. Simon and his team have validated this time and time again with their strives in graph editors and visual scripting. You can change mob behavior, world generation, etc. all with just these tools.
But if you're looking to build more complex things (from utilities to entirely custom server software) that could be used by large scale server networks and big names, you'll want to learn how to code. And that's where this guide comes in...
[Okay, I'm interested. What's to come?](https://hytalemodding.dev/en/docs/guides/learning-to-learn#okay-im-interested-whats-to-come)
-------------------------------------------------------------------------------------------------------------------------------------
Over the course of these next several lessons you'll learn the basics of coding, how to read documentation, and how to find resources to help you learn more on your own.
The guides themselves will take a very big "bird's-eye view" approach to things and provide links to resources to do the actual coding. This is done because, quite frankly, enough resources exist on how to learn this stuff, it's just the act of finding the right stuff on Google that can be hard. Learning to be able to code without guidance is the goal. The Hytale Modding community is always there to help you, but to become a truly well rounded developer, you'll have to pick up a lot of this stuff just by reading from resources.
Finding Resources
We have created a small Java Basics series to help you get started with the language itself, but beyond that, you'll be expected to find your own resources to learn more. We recommend sites like [w3schools](https://www.w3schools.com/java/)
and [GeeksforGeeks](https://www.geeksforgeeks.org/java/)
as great starting points.
Our goal is to teach you how to Mod Hytale, and that will always be our goal. This is the reason we can't teach you everything about Java or programming in general. Instead, we want to give you the tools to be able to learn on your own, so you can continue to grow as a developer even after you've completed our guides.
[Any closing thoughts?](https://hytalemodding.dev/en/docs/guides/learning-to-learn#any-closing-thoughts)
---------------------------------------------------------------------------------------------------------
Remember, learning to code is hard. You will trip and fall, but you will be able to get back up. Stay resilient, believe you can make cool stuff, and I promise you success will come. Happy coding!
[Edit on GitHub](https://github.com/HytaleModding/site/blob/main/content/docs/en/guides/learning-to-learn.mdx)
[Creative\
\
Information regarding the creative mode in Hytale.](https://hytalemodding.dev/en/docs/established-information/gameplay/creative)
[Setting Up Your Development Environment\
\
Learn how to set up your development environment for modding Hytale.](https://hytalemodding.dev/en/docs/guides/plugin/setting-up-env)
### On this page
[Why learn to code? We have visual scripting!](https://hytalemodding.dev/en/docs/guides/learning-to-learn#why-learn-to-code-we-have-visual-scripting)
[Should everyone trying to mod Hytale learn how to code?](https://hytalemodding.dev/en/docs/guides/learning-to-learn#should-everyone-trying-to-mod-hytale-learn-how-to-code)
[Okay, I'm interested. What's to come?](https://hytalemodding.dev/en/docs/guides/learning-to-learn#okay-im-interested-whats-to-come)
[Any closing thoughts?](https://hytalemodding.dev/en/docs/guides/learning-to-learn#any-closing-thoughts)
---
# Publishing Your Mod
Publishing Your Mod
===================
Learn how to publish your mod to the community.
Now that you've created your mod, it's time to share it with the world! There are many marketplaces that allow you to publish your mod, such as Modtale, CurseForge, etc.
We have compiled guides to publish for each marketplace, so you can easily get your mod out there and into the hands of players, no matter the marketplace they use.
* [Publishing on Modtale](https://hytalemodding.dev/en/docs/publishing/modtale)
* [Publishing on CurseForge](https://hytalemodding.dev/en/docs/publishing/curseforge)
Info
If you run a marketplace, please reach out to us via our email `neil@hytalemodding.dev` to get your marketplace listed in our documentation.
[Edit on GitHub](https://github.com/HytaleModding/site/blob/main/content/docs/en/publishing/index.mdx)
[Sounds\
\
List of all Sounds in Hytale](https://hytalemodding.dev/en/docs/server/sounds)
[Modtale\
\
Complete guide to publishing and managing your Hytale mods on Modtale.](https://hytalemodding.dev/en/docs/publishing/modtale)
---
# Server Code Insights
Established Information
Server Code Insights
====================
Slikey shared some insights about server code on 12/15/2025. This document covers key points and takeaways from that discussion.
Note
The following information is based on insights shared by Technical Director Slikey on December 15, 2025 on the Hytale Discord Server. It provides an overview of the server code architecture and plugin capabilities.
Majority of this document is just straight quotes from Slikey with minimal commentary. It is more over to preserve the information shared rather than reword it.
[Server Source Code](https://hytalemodding.dev/en/docs/established-information/server-plugin-insights#server-source-code)
==========================================================================================================================
The server will be released as shared source - we will have the source code with no obfuscation and all their comments.
### [License](https://hytalemodding.dev/en/docs/established-information/server-plugin-insights#license)
The license permits usage for any **hytale related** things, so as long as you dont use the server / source to make your own game or sell their algorithms.
[Permission system](https://hytalemodding.dev/en/docs/established-information/server-plugin-insights#permission-system)
========================================================================================================================
After being asked in the Hytale Modding server, Lead Architect Zero has replied:
It's quite basic, so don't expect much but yes we do have a permissions system built in. It also support implementing your own backend. Ex. if you wanted to store it in a database.
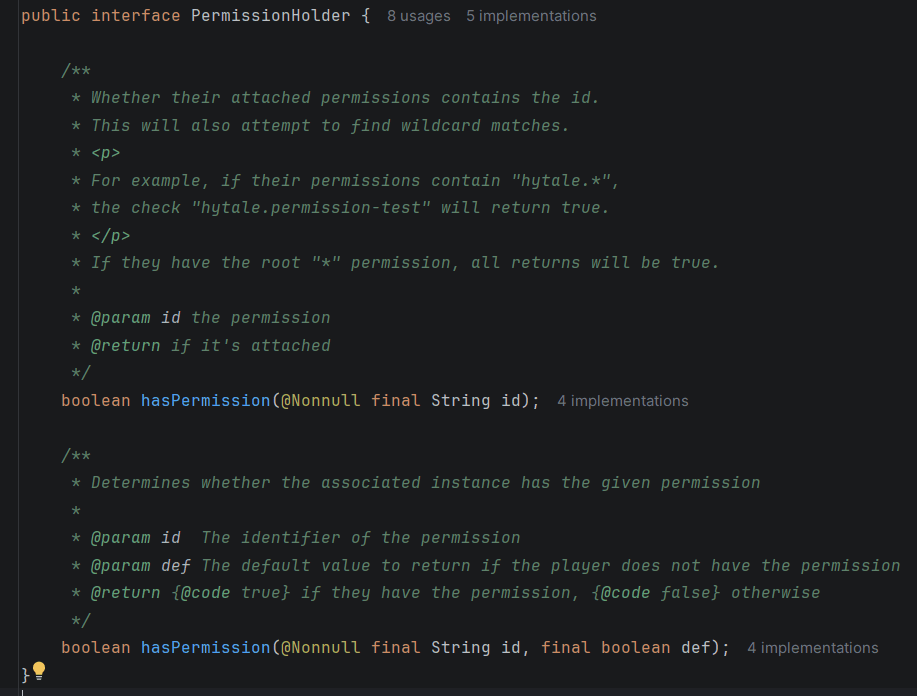
[World Gen Implementation](https://hytalemodding.dev/en/docs/established-information/server-plugin-insights#world-gen-implementation)
======================================================================================================================================
The following block of text is directly from Lead Architect Zero:
You can totally implement a custom world gen in a plugin super easy. So if you want a totally different config or logic for generating terrain you can add that into a plugin and then configure a world to use that, We have some stuff load prefabs and there is existing code in the current world generators that could possibly be reused but no APIs specifically for the details of the generation itself.
public interface IWorldGenProvider {
BuilderCodecMapCodec CODEC = new BuilderCodecMapCodec<>("Type", true);
IWorldGen getGenerator() throws WorldGenLoadException;
}
public interface IWorldGen {
@Nullable
WorldGenTimingsCollector getTimings();
CompletableFuture generate(int seed, long index, int x, int z, LongPredicate stillNeeded);
@Deprecated
Transform[] getSpawnPoints(int seed);
@Nonnull
default ISpawnProvider getDefaultSpawnProvider(int seed) {
return new FitToHeightMapSpawnProvider(new IndividualSpawnProvider(getSpawnPoints(seed)));
}
default void shutdown() {}
}
[Server Code Snippets](https://hytalemodding.dev/en/docs/established-information/server-plugin-insights#server-code-snippets)
==============================================================================================================================
Some code snippets from a plugin they made were also shared. The following snippets are directly quoted from Technical Director Slikey:
[BlockSpawner Plugin](https://hytalemodding.dev/en/docs/established-information/server-plugin-insights#blockspawner-plugin)
----------------------------------------------------------------------------------------------------------------------------
Alright, I'll drop some code snippets here for a simple plugin called "BlockSpawner" which will turn into a "random" block when put into the world based on the configured rules
There is more code here in general but it shows the Asset System and the plugin layout. You can see that the asset system defines "Codecs" which are used to serialize and deserialize data. Using these codecs we can generate schemas. Let's say you connect to a server and open the asset editor: the server will send those schemas - so every single asset type defined server side, even you own, now become part of the asset editor on the client - no need to do anything, you just get to enjoy the editor UI for making your assets that you defined
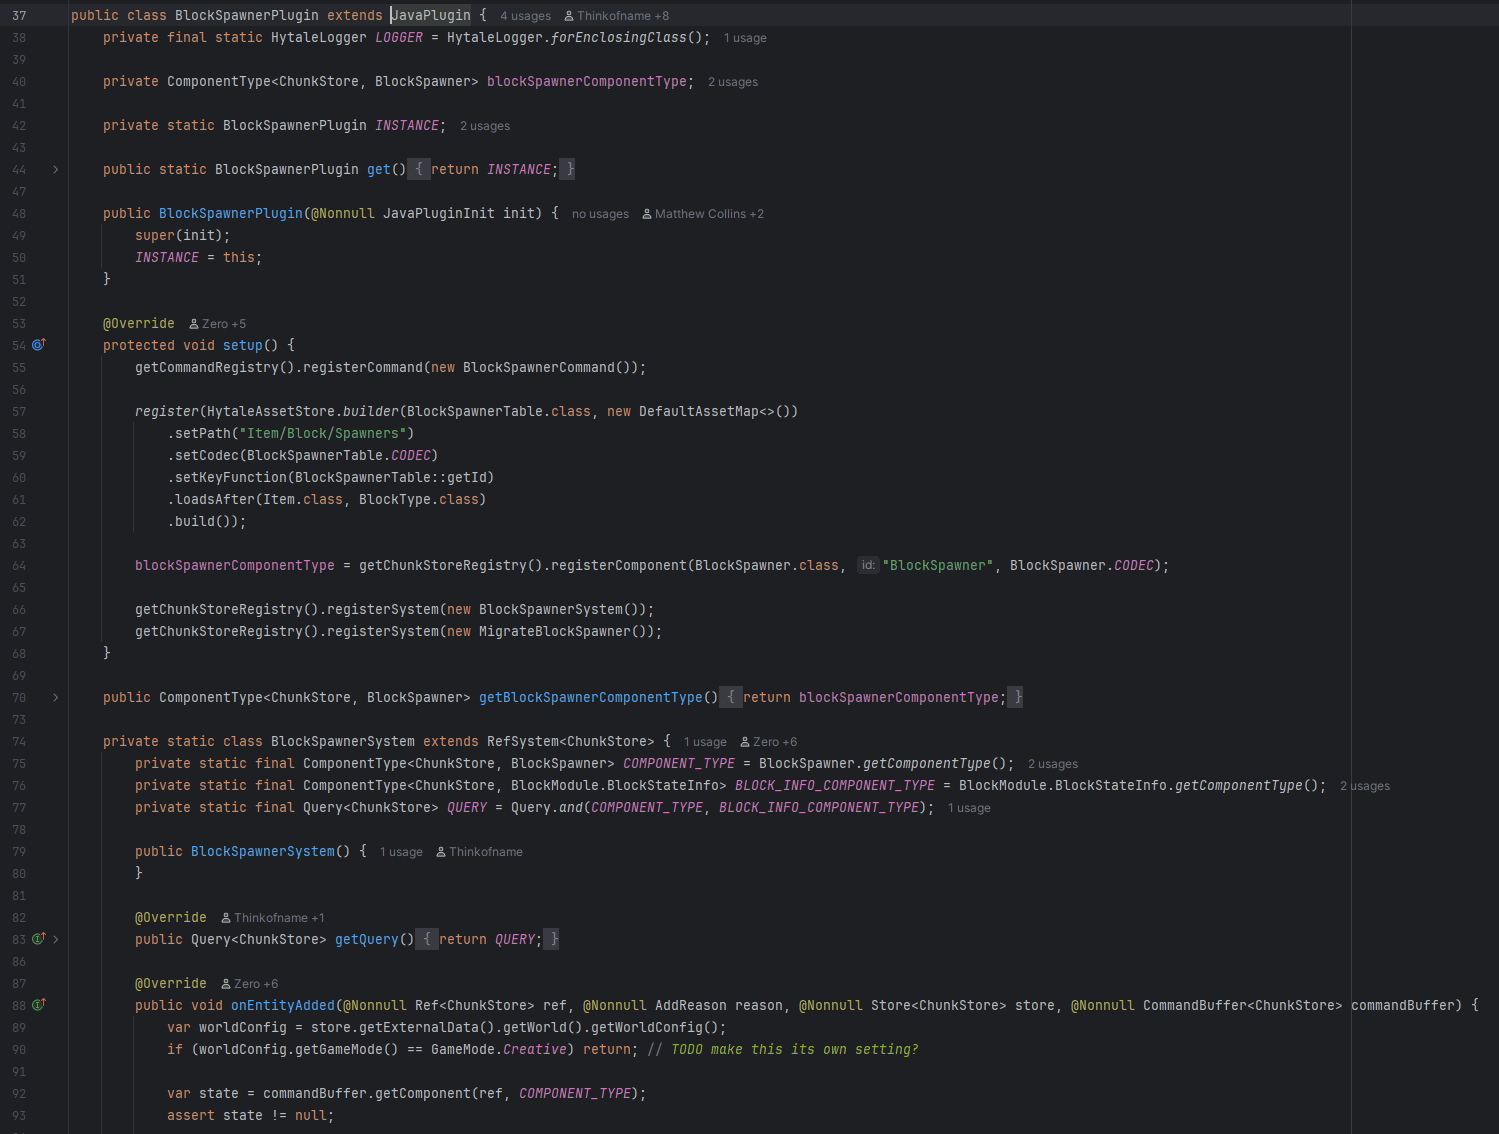 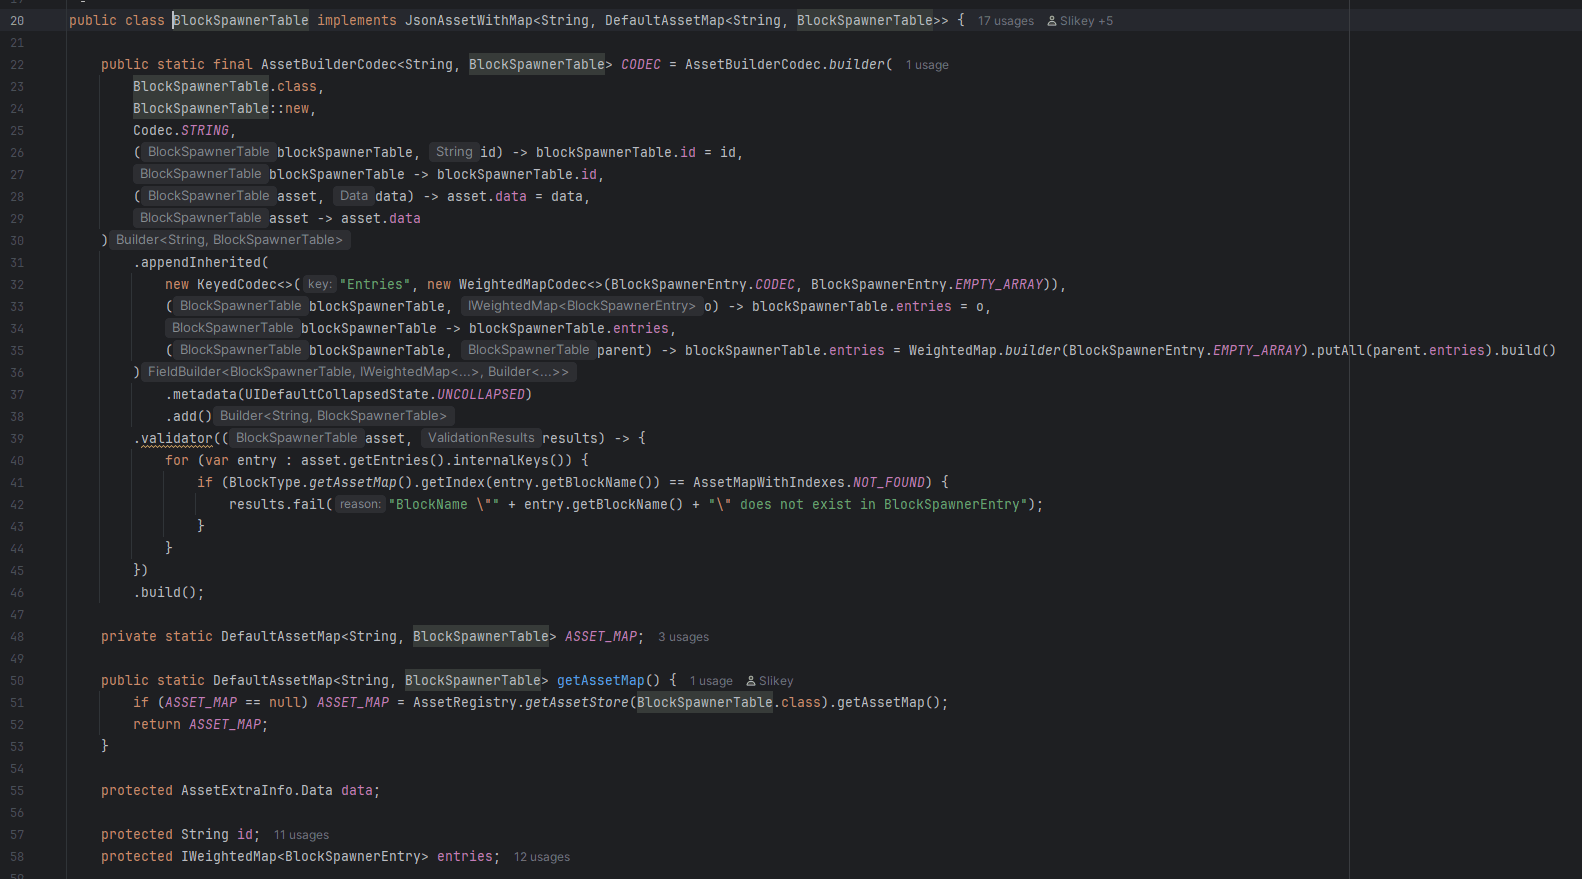 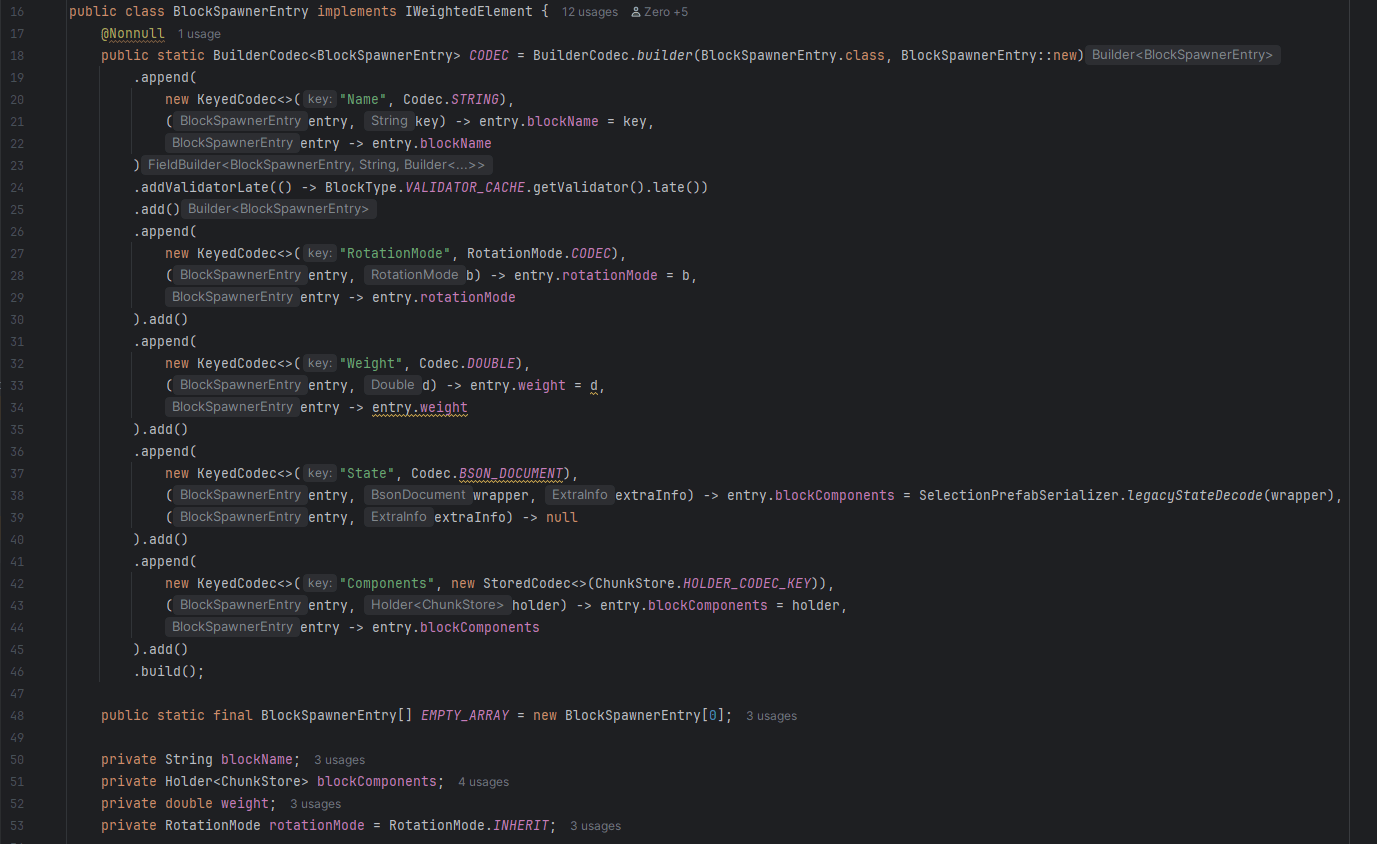 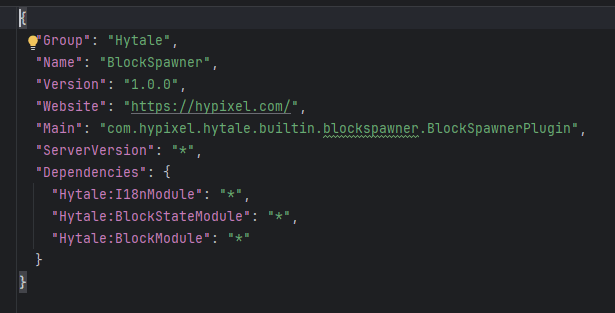
> i guess this part also shows a bit how we use constants to store some language keys - Slikey (in reference to the image below)
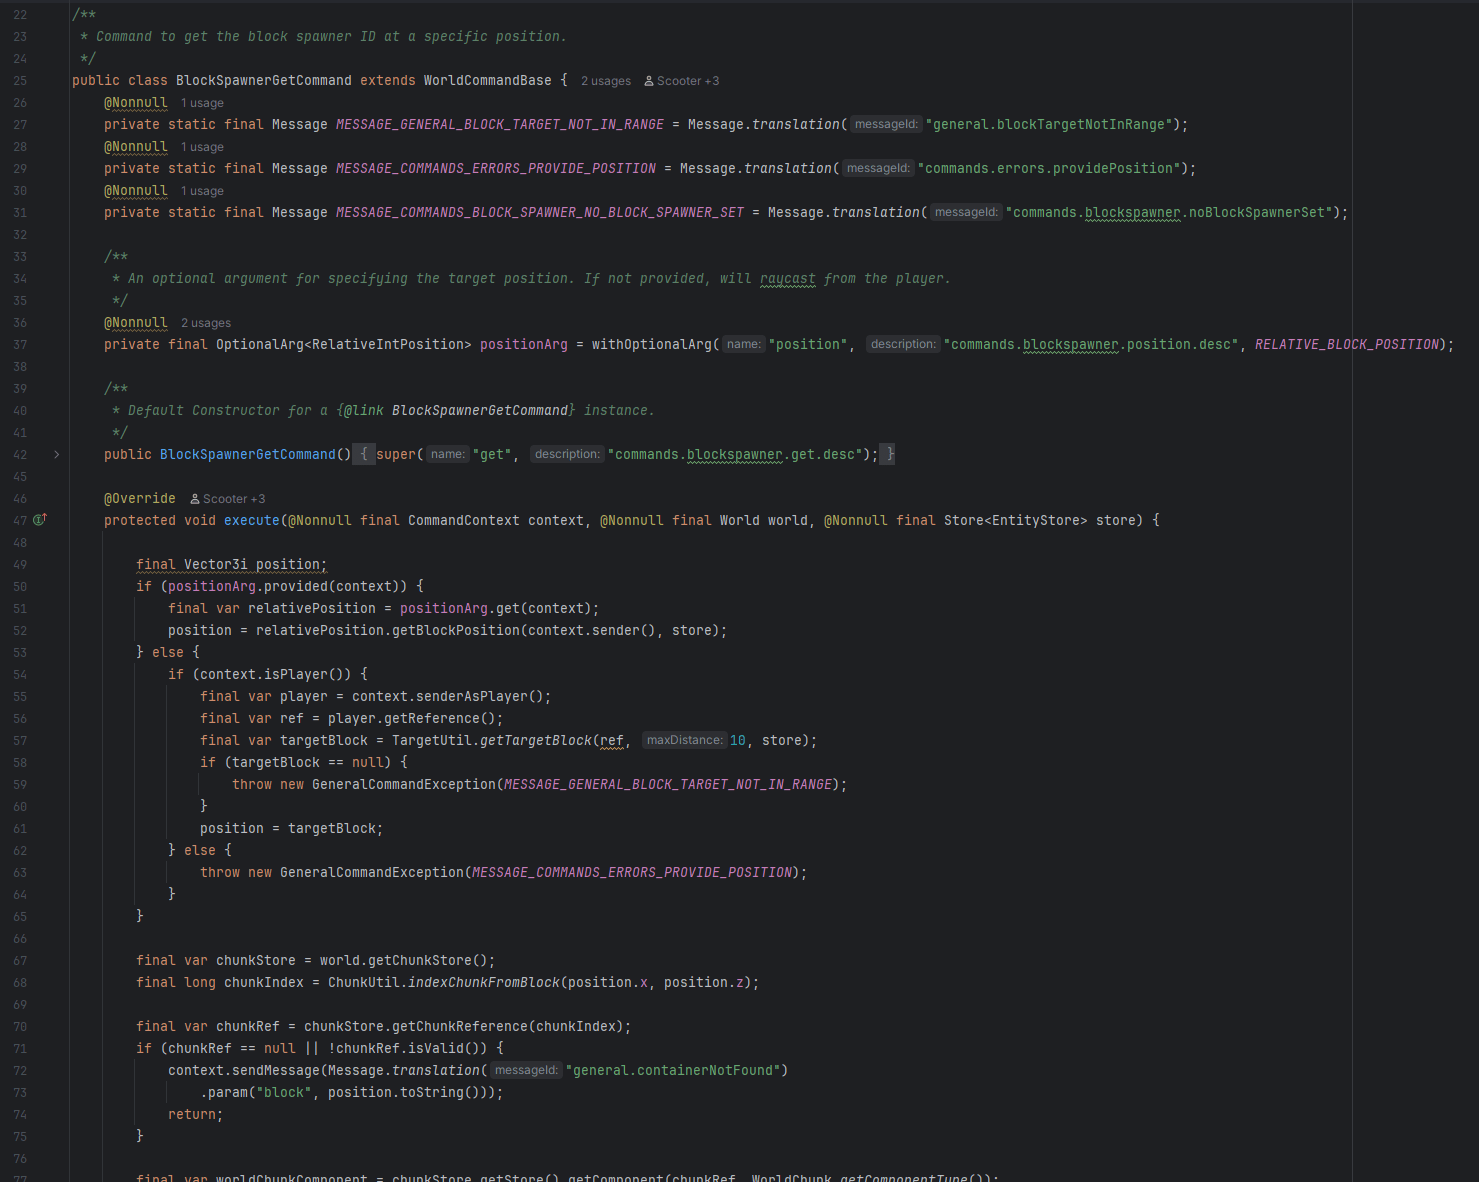
> you can completely customize the chunk storage provider, we for example made one that is just empty where it doesnt load any chunks from disk you could add an MySQLChunkStorageProvider and it could read the data from a database and the same goes for worldgen, you can simply implement this interface to generate a world generator - slikey
 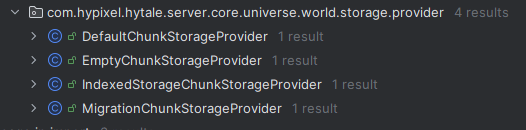 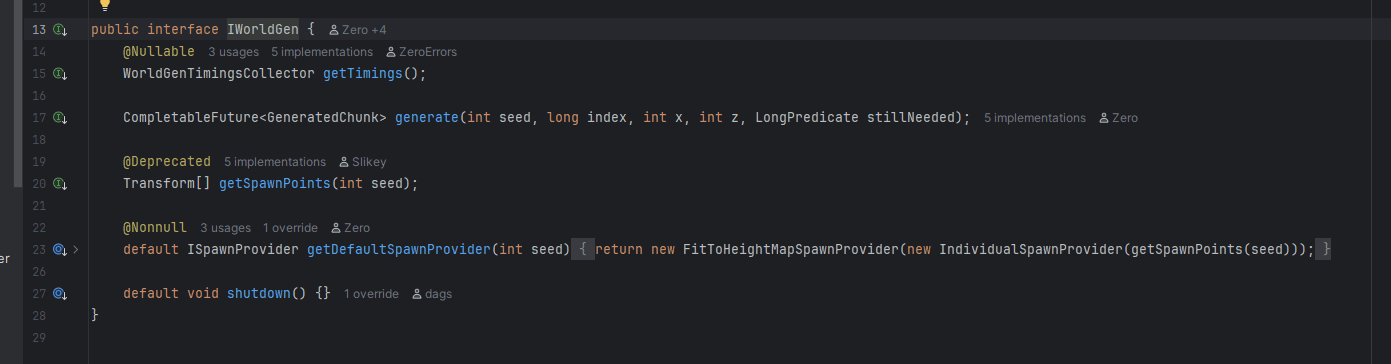
> i mean here are all the weapons defined, you tell me, obviously you will discover limitations but i think there is plenty of room to make changes - this stuff is actually hard though, there is a lot of QoL to have happen here
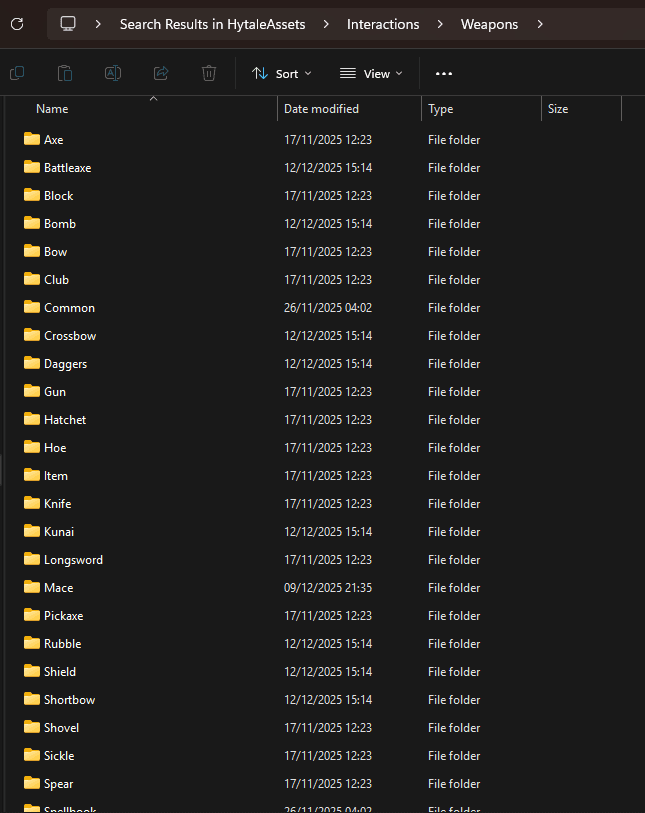
[Edit on GitHub](https://github.com/HytaleModding/site/blob/main/content/docs/en/established-information/server-plugin-insights.mdx)
[Developer Q&A Technical Insights\
\
Comprehensive summary of technical insights from Hytale developers covering architecture, modding, gameplay systems, and development philosophy.](https://hytalemodding.dev/en/docs/established-information/developer-qa-insights)
[Server-First Development\
\
Information regarding what Server-First Development means, and more.](https://hytalemodding.dev/en/docs/established-information/server/server-first-dev)
### On this page
[Server Source Code](https://hytalemodding.dev/en/docs/established-information/server-plugin-insights#server-source-code)
[License](https://hytalemodding.dev/en/docs/established-information/server-plugin-insights#license)
[Permission system](https://hytalemodding.dev/en/docs/established-information/server-plugin-insights#permission-system)
[World Gen Implementation](https://hytalemodding.dev/en/docs/established-information/server-plugin-insights#world-gen-implementation)
[Server Code Snippets](https://hytalemodding.dev/en/docs/established-information/server-plugin-insights#server-code-snippets)
[BlockSpawner Plugin](https://hytalemodding.dev/en/docs/established-information/server-plugin-insights#blockspawner-plugin)
---
# Entity Component System
Entity Component System
=======================
A basic introduction into ECS (Entity Component System)
Warning
This guide requires basic understanding of OOP concepts such as inheritance.
Please make sure you have a good understading of these concepts before reading this guide.
Info
This guide is currently only on the theory of ECS and will not have code examples.
Code examples are intentionally omitted to avoid confusion about how Hytale’s ECS may be implemented.
[Introduction](https://hytalemodding.dev/en/docs/guides/ecs#introduction)
==========================================================================
An Entity Component System otherwise known as ECS is a design pattern in game development.
ECS is made up of Entities, which reference Components and Systems that operates on Entities.
It also focuses on composition over inheritance, eliminating rigid hierarchy, helps separate behavior and data and makes reusability easier.
[Composition Over Inheritance](https://hytalemodding.dev/en/docs/guides/ecs#composition-over-inheritance)
==========================================================================================================
Before getting into understanding what ECS is made of, lets understand what is the ECS philosophy.
We can describe composition as "has X" and inheritance as "is X". When we inherite a class in Java, we inherite all of its attribues and methods. While in composotion we can choose for each object what it refrence and what systems will work on it.
[Entities, Components and Systems](https://hytalemodding.dev/en/docs/guides/ecs#entities-components-and-systems)
=================================================================================================================
[Entities](https://hytalemodding.dev/en/docs/guides/ecs#entities)
------------------------------------------------------------------
An Entity is just a unique identifier.
* It contains no data.
* It contains no logic
Think of entities as nouns that can be described using components
[Components](https://hytalemodding.dev/en/docs/guides/ecs#components)
----------------------------------------------------------------------
Components are just plain data containers.
* They store only data
* They contain no behavior or logic
* They describe traits or aspects of an entity
Examples of components:
* A 'Position' component that stores X, Y and Z coordinates
* A 'Velocity' component that stores the speed along the each axis
* A 'Health' component that stores the current health of the entity
Think of components as adjectives that describe an entity
[Systems](https://hytalemodding.dev/en/docs/guides/ecs#systems)
----------------------------------------------------------------
Systems contains the logic for your game (or in this case, a mod).
* It Operates on all entities that have a specific set of components
* It Does not store entity data itself
* It Applies behavior by reading and modifying component data
For example:
* A "WinConditionSystem" may process every Entity that contains the components "Position" and "Velocity"
* If an entity reaches the position `(0, 0, 0)`, the system will trigger a "You Won!" message.
[Edit on GitHub](https://github.com/HytaleModding/site/blob/main/content/docs/en/guides/ecs/index.mdx)
[Prefabs\
\
Documentation about Prefabs in Hytale.](https://hytalemodding.dev/en/docs/guides/prefabs)
[Hytale ECS Basics\
\
In this guide you will learn about the basics of Hytale's powerful ECS system as well as create your own component, a system, and work together with other systems to create gameplay logic.](https://hytalemodding.dev/en/docs/guides/ecs/hytale-ecs)
### On this page
[Introduction](https://hytalemodding.dev/en/docs/guides/ecs#introduction)
[Composition Over Inheritance](https://hytalemodding.dev/en/docs/guides/ecs#composition-over-inheritance)
[Entities, Components and Systems](https://hytalemodding.dev/en/docs/guides/ecs#entities-components-and-systems)
[Entities](https://hytalemodding.dev/en/docs/guides/ecs#entities)
[Components](https://hytalemodding.dev/en/docs/guides/ecs#components)
[Systems](https://hytalemodding.dev/en/docs/guides/ecs#systems)
---
# CurseForge
[Publishing Your Mod](https://hytalemodding.dev/en/docs/publishing)
CurseForge
==========
Learn how to publish your mod to CurseForge
CurseForge is a mod hosting platform, allowing you to share your Hytale mods and creations with players via our website and app.
[1\. Create CurseForge Account](https://hytalemodding.dev/en/docs/publishing/curseforge#1-create-curseforge-account)
---------------------------------------------------------------------------------------------------------------------
First, [visit our sign-in page](https://curseforge.com/api/v1/auth/login?returnUrl=https://www.curseforge.com/)
and either log in to an existing account or click “Create an account”.
This can be done using any Google, Discord, GitHub or Twitch account.
[2\. Create a Project](https://hytalemodding.dev/en/docs/publishing/curseforge#2-create-a-project)
---------------------------------------------------------------------------------------------------
Now that you're logged in, you can visit our Author Console and navigate to the Projects tab, then click “Create a Project”, either in the sidebar or at the top of the page.
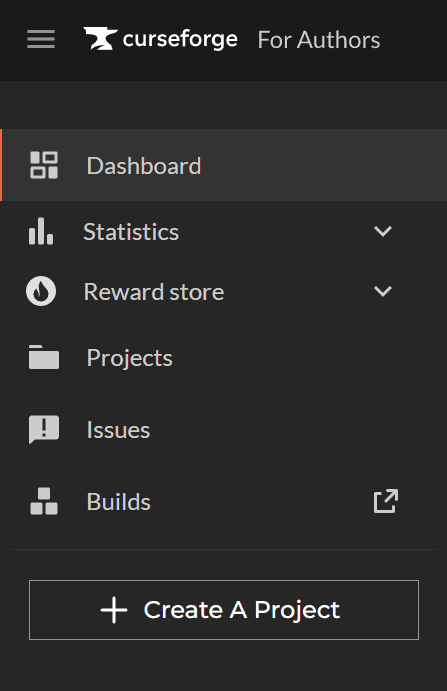
This will then take you to the [project creation](https://authors.curseforge.com/#/projects/create/choose-game)
flow. First, select your game (in this case, Hytale) for and the page will be updated with new fields waiting for your inputs. Please see our
[Moderation Policies](https://support.curseforge.com/en/support/solutions/articles/9000197279-moderation-policies#:~:text=General%20CurseForge%20Moderation%20Policies,-Policy&text=The%20description%20can%20include%20descriptive,the%20game%22%20is%20not%20enough)
articles for more information about what is and isn't allowed when creating a new project. Below are the fields along with their descriptions:
* **Name:** This is the title of your project. It should be unique to your project. If the name is already taken, it will be rejected.
* **Summary:** This is a short blurb about the mod that will show up in the project listings
* **Description:** This is the longer explanation of what your mod does/adds. Make sure you clearly elaborate on your project. We will reject your project if the description is not grammatically correct or if it does not sufficiently describe the project you are creating. This can be edited later. Note: All titles and descriptions must be in English.
* **Project License:** This is a drop-down field that contains the most common licenses used in modding games. Research the license type you want to use, including its pros and cons. You can also choose to use a Custom License at the bottom of the dropdown list and enter any text you want.
* **Class:** This is the root category for your project. Ensure you select the correct one, as it may impact supported file types and app support in CurseForge.
* For Hytale, there are four types of Class:
* Mods
* This is the class that contains both Asset Packs and Plugins, and you should upload either here.
* Worlds
* Prefabs
* Bootstrap
* This is the class that contains all Early Plugins.
* **Main Category:** This is the primary category into which your project will be sorted.
* **Additional categories:** You can add up to 4 of these. Your project will also show up in lists where people are searching for these types of mods. Be careful, though, if you just add categories that have nothing to do with your mod, we may send it back to you for changes.
* **Logo Image:** A unique icon to identify your project by.
[3\. Upload a File](https://hytalemodding.dev/en/docs/publishing/curseforge#3-upload-a-file)
---------------------------------------------------------------------------------------------
Once you've set up your project and filled in the above information, you now need to upload a file to your project for it to enter the moderation queue. To do this, visit the “Files” tab in your Author Console page.
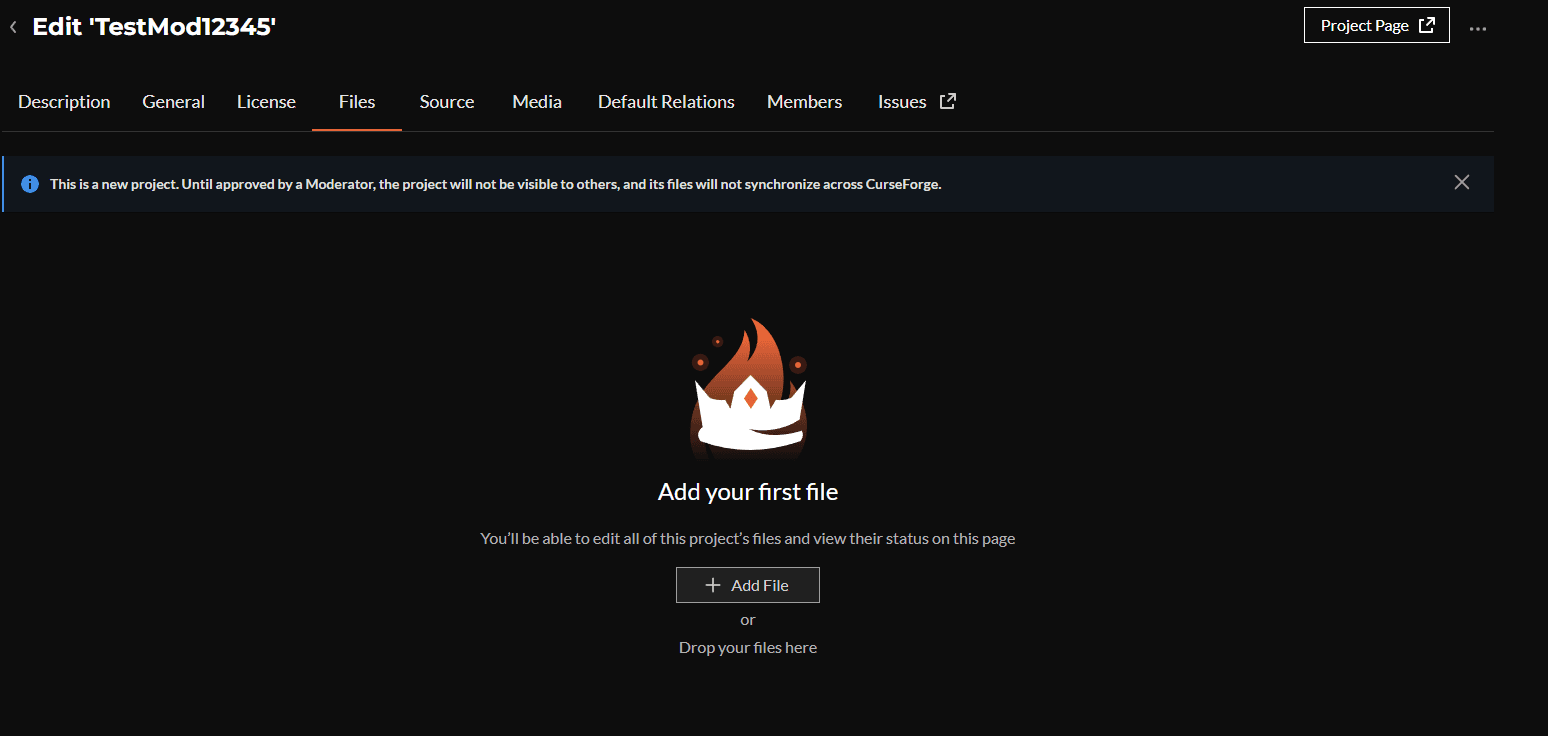
Then, click on “Add File” and upload your mod's file, entering any additional information or meta you wish to include regarding this file.
The file format will depend on the class you select.
### [For Plugins](https://hytalemodding.dev/en/docs/publishing/curseforge#for-plugins)
If you're uploading a plugin for Hytale, please make sure you select the "Mods" class and upload your file as a jar file.
### [For Packs](https://hytalemodding.dev/en/docs/publishing/curseforge#for-packs)
If you're uploading a Pack for Hytale, please make sure you select the "Mods" class and upload your file as a ZIP file
### [For Worlds](https://hytalemodding.dev/en/docs/publishing/curseforge#for-worlds)
If you're uploading a World for Hytale, make sure you upload it to the "Worlds" class and upload your file as a ZIP file.
**Once you've uploaded your file, it will be sent for our moderation team to review, and once approved, it will be live for all players on CurseForge!**
[4\. Additional Resources & Guides](https://hytalemodding.dev/en/docs/publishing/curseforge#4-additional-resources--guides)
----------------------------------------------------------------------------------------------------------------------------
You can refer to the following resources for guides on how to create a project page, using the upload API, and creating the best project page:
* How to Pass Moderation Review: [https://blog.curseforge.com/how-to-pass-moderation-review-on-curseforge-2/](https://blog.curseforge.com/how-to-pass-moderation-review-on-curseforge-2/)
* Creating and Submitting a Project: [https://support.curseforge.com/en/support/solutions/articles/9000197241-creating-and-submitting-a-project](https://support.curseforge.com/en/support/solutions/articles/9000197241-creating-and-submitting-a-project)
* How to Create the Best Project Page: [https://blog.curseforge.com/how-to-create-the-best-project-page/](https://blog.curseforge.com/how-to-create-the-best-project-page/)
* Our Mod Approval Process: [https://blog.curseforge.com/our-mod-approval-process/](https://blog.curseforge.com/our-mod-approval-process/)
[Edit on GitHub](https://github.com/HytaleModding/site/blob/main/content/docs/en/publishing/curseforge.mdx)
[Modtale\
\
Complete guide to publishing and managing your Hytale mods on Modtale.](https://hytalemodding.dev/en/docs/publishing/modtale)
[Contributing\
\
Next Page](https://hytalemodding.dev/en/docs/contributing)
### On this page
[1\. Create CurseForge Account](https://hytalemodding.dev/en/docs/publishing/curseforge#1-create-curseforge-account)
[2\. Create a Project](https://hytalemodding.dev/en/docs/publishing/curseforge#2-create-a-project)
[3\. Upload a File](https://hytalemodding.dev/en/docs/publishing/curseforge#3-upload-a-file)
[For Plugins](https://hytalemodding.dev/en/docs/publishing/curseforge#for-plugins)
[For Packs](https://hytalemodding.dev/en/docs/publishing/curseforge#for-packs)
[For Worlds](https://hytalemodding.dev/en/docs/publishing/curseforge#for-worlds)
[4\. Additional Resources & Guides](https://hytalemodding.dev/en/docs/publishing/curseforge#4-additional-resources--guides)
---
# Modtale
[Publishing Your Mod](https://hytalemodding.dev/en/docs/publishing)
Modtale
=======
Complete guide to publishing and managing your Hytale mods on Modtale.
[Publishing Your Mod on Modtale](https://hytalemodding.dev/en/docs/publishing/modtale#publishing-your-mod-on-modtale)
======================================================================================================================
[Modtale](https://modtale.net/)
is the Hytale Community Repository for discovering mods, asset packs, worlds, and modpacks.
This guide will walk you through the complete process of publishing your mod.
[Prerequisites](https://hytalemodding.dev/en/docs/publishing/modtale#prerequisites)
------------------------------------------------------------------------------------
Before you start, make sure you have:
* A compiled `.jar` file of your plugin, or `.zip` of your asset pack
* A description of your mod's features
We also recommended:
* High-quality screenshots or images of your mod in action
* A clear logo or icon (recommended size: 512x512px)
* Any dependencies or requirements documented
[Step-by-Step Publishing Process](https://hytalemodding.dev/en/docs/publishing/modtale#step-by-step-publishing-process)
------------------------------------------------------------------------------------------------------------------------
### [1\. Account Setup](https://hytalemodding.dev/en/docs/publishing/modtale#1-account-setup)
Sign in to [Modtale](https://modtale.net/)
using your preferred method. If you don't have an account, create one first.
### [2\. Start Creating](https://hytalemodding.dev/en/docs/publishing/modtale#2-start-creating)
Click on the **"Create"** button in the navigation bar or go directly to the [upload page](https://modtale.net/upload)
.
### [3\. Choose Content Type](https://hytalemodding.dev/en/docs/publishing/modtale#3-choose-content-type)
Select the appropriate content type for your submission:
* **Server Plugins** - For Hytale server-side plugins and modifications
* **Data Assets** - For custom data packs, loot tables, and other data-driven content
* **Art Assets** - For texture packs, models, and other artistic content
* **Worlds** - For custom Hytale worlds
* **Modpacks** - For curated collections of mods and assets
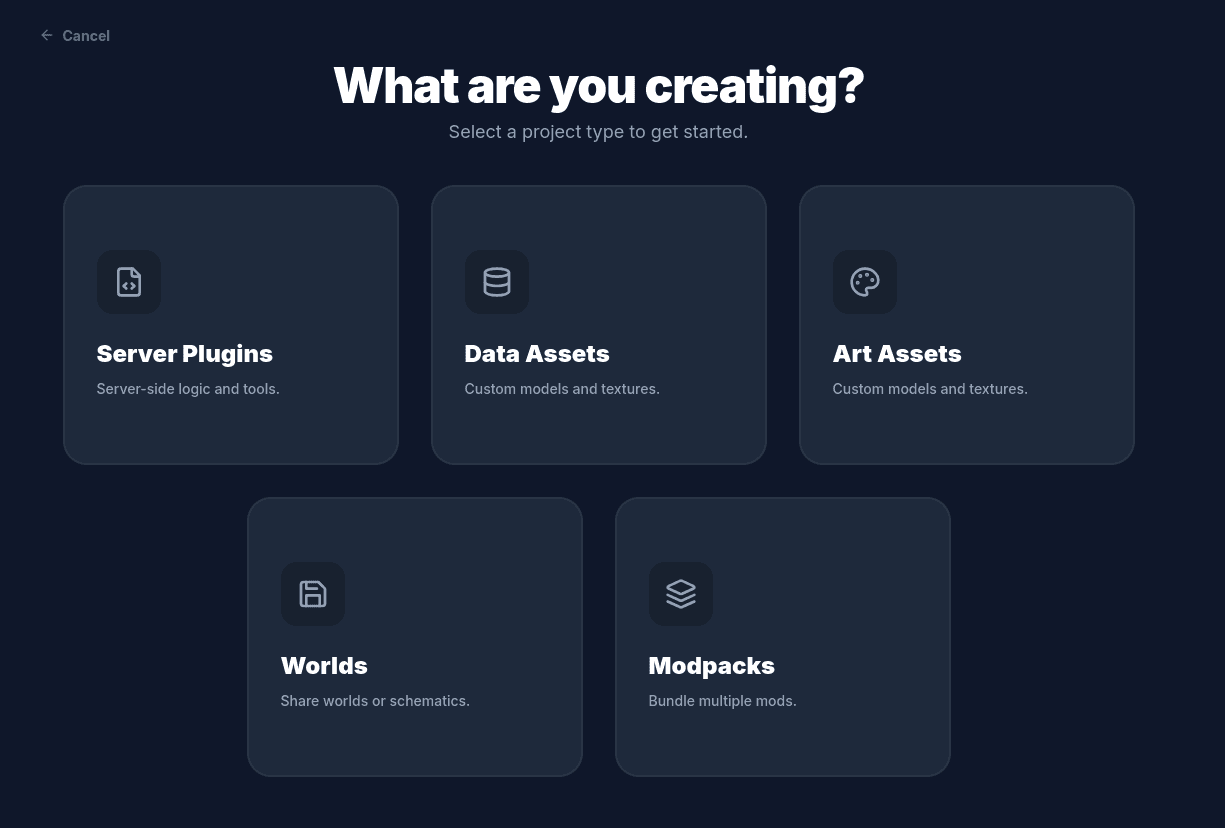
### [4\. Basic Information](https://hytalemodding.dev/en/docs/publishing/modtale#4-basic-information)
Fill in the essential details:
* **Name**: Choose a clear, descriptive name for your mod
* **Summary**: Write a brief description (1-2 sentences, 250 char max) that explains what your mod does
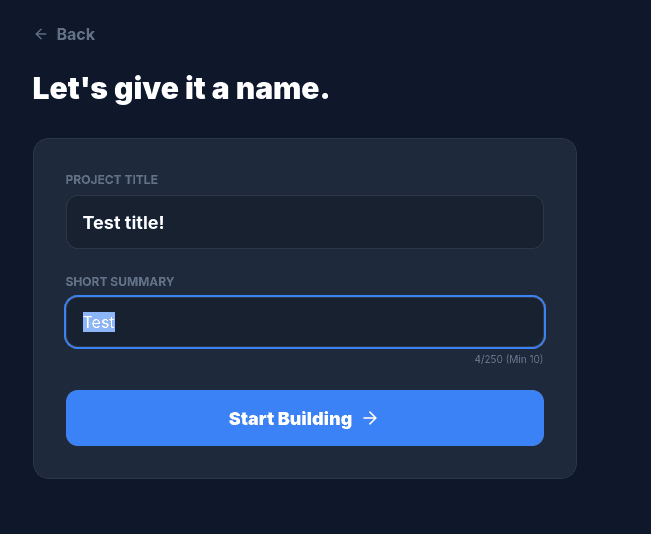
### [5\. Project Configuration](https://hytalemodding.dev/en/docs/publishing/modtale#5-project-configuration)
Now you're on your project's management page. Here you can:
#### [Upload Files](https://hytalemodding.dev/en/docs/publishing/modtale#upload-files)
Navigate to the **"Files"** tab and upload your `.jar` or `.zip` file:
* Drag and drop your file or use the upload button
* Add version notes describing changes and new features
* Mark release type (Release, Beta, Alpha)
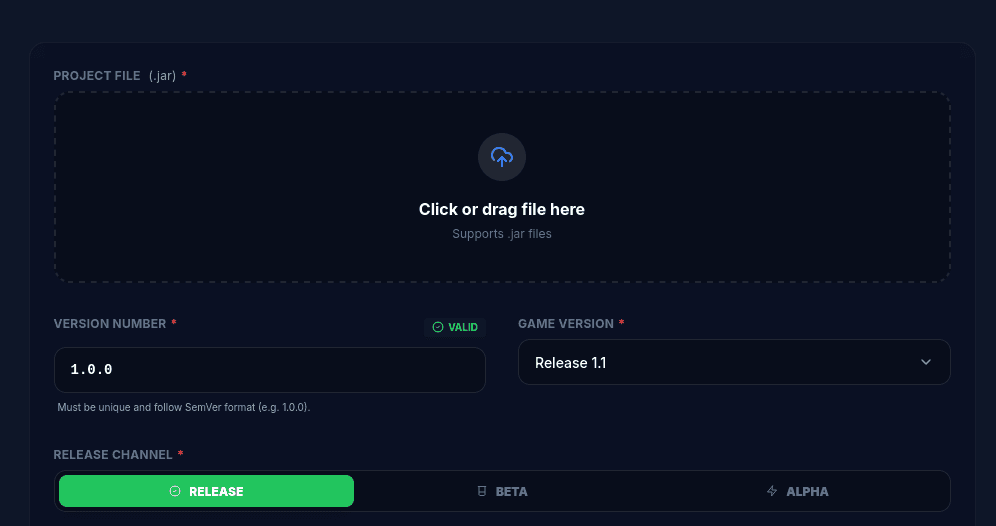
#### [Customize Your Project](https://hytalemodding.dev/en/docs/publishing/modtale#customize-your-project)
* **Logo**: Upload a high-quality logo (512x512 recommended)
* **Banner**: Upload a banner for your page (1920x640 recommended)
* **Screenshots**: Add multiple screenshots showing your mod in action
* **Description**: Write a comprehensive description using Markdown formatting
* **Links**: Add links to your source code, Discord server, or documentation
* **Tags**: Add relevant tags to help users find your mod
* **License**: Indicate what license your mod uses from a selection of common licenses, or use a custom license
[Best Practices](https://hytalemodding.dev/en/docs/publishing/modtale#best-practices)
--------------------------------------------------------------------------------------
### [Documentation](https://hytalemodding.dev/en/docs/publishing/modtale#documentation)
Info
Always include comprehensive documentation in your mod description. Users should understand what your mod does, how to use it, and any special requirements.
### [Version Notes](https://hytalemodding.dev/en/docs/publishing/modtale#version-notes)
When uploading new versions:
* You must adhere to SemVer
* Clearly document all changes and new features
* Include bug fixes and known issues
* Mention any breaking changes or migration steps
* List new dependencies or requirement changes
### [Visual Appeal](https://hytalemodding.dev/en/docs/publishing/modtale#visual-appeal)
* Use high-quality screenshots that showcase your mod's features in the gallery
* Create an eye-catching logo that represents your mod
* Consider adding a banner image for your project page
### [Community Engagement](https://hytalemodding.dev/en/docs/publishing/modtale#community-engagement)
* Respond to comments and feedback promptly
* Consider creating a Discord server for community support
* Regularly update your mod based on user feedback
[After Publishing](https://hytalemodding.dev/en/docs/publishing/modtale#after-publishing)
------------------------------------------------------------------------------------------
### [Automated updates](https://hytalemodding.dev/en/docs/publishing/modtale#automated-updates)
* You can configure your project to automatically upload new versions using Github Actions, Gradle, Maven, or Go. See examples [here](https://github.com/Modtale/modtale-example)
### [Monitoring Your Project](https://hytalemodding.dev/en/docs/publishing/modtale#monitoring-your-project)
* Check the analytics to see download statistics
* Monitor comments and reviews
* Keep track of bug reports and feature requests
### [Marketing Your Mod](https://hytalemodding.dev/en/docs/publishing/modtale#marketing-your-mod)
* Share your mod on relevant Hytale communities
* Create showcase videos or tutorials
* Engage with other modders and creators
Warning
Remember to keep your mod updated for new Hytale versions and maintain compatibility with Hytale's modding framework to maximize your audience reach.
[Getting Help](https://hytalemodding.dev/en/docs/publishing/modtale#getting-help)
----------------------------------------------------------------------------------
If you encounter any issues during the publishing process:
* Join their Discord community for support
* Contact the Modtale team directly through their support channels
[Edit on GitHub](https://github.com/HytaleModding/site/blob/main/content/docs/en/publishing/modtale.mdx)
[Publishing Your Mod\
\
Learn how to publish your mod to the community.](https://hytalemodding.dev/en/docs/publishing)
[CurseForge\
\
Learn how to publish your mod to CurseForge](https://hytalemodding.dev/en/docs/publishing/curseforge)
### On this page
[Publishing Your Mod on Modtale](https://hytalemodding.dev/en/docs/publishing/modtale#publishing-your-mod-on-modtale)
[Prerequisites](https://hytalemodding.dev/en/docs/publishing/modtale#prerequisites)
[Step-by-Step Publishing Process](https://hytalemodding.dev/en/docs/publishing/modtale#step-by-step-publishing-process)
[1\. Account Setup](https://hytalemodding.dev/en/docs/publishing/modtale#1-account-setup)
[2\. Start Creating](https://hytalemodding.dev/en/docs/publishing/modtale#2-start-creating)
[3\. Choose Content Type](https://hytalemodding.dev/en/docs/publishing/modtale#3-choose-content-type)
[4\. Basic Information](https://hytalemodding.dev/en/docs/publishing/modtale#4-basic-information)
[5\. Project Configuration](https://hytalemodding.dev/en/docs/publishing/modtale#5-project-configuration)
[Upload Files](https://hytalemodding.dev/en/docs/publishing/modtale#upload-files)
[Customize Your Project](https://hytalemodding.dev/en/docs/publishing/modtale#customize-your-project)
[Best Practices](https://hytalemodding.dev/en/docs/publishing/modtale#best-practices)
[Documentation](https://hytalemodding.dev/en/docs/publishing/modtale#documentation)
[Version Notes](https://hytalemodding.dev/en/docs/publishing/modtale#version-notes)
[Visual Appeal](https://hytalemodding.dev/en/docs/publishing/modtale#visual-appeal)
[Community Engagement](https://hytalemodding.dev/en/docs/publishing/modtale#community-engagement)
[After Publishing](https://hytalemodding.dev/en/docs/publishing/modtale#after-publishing)
[Automated updates](https://hytalemodding.dev/en/docs/publishing/modtale#automated-updates)
[Monitoring Your Project](https://hytalemodding.dev/en/docs/publishing/modtale#monitoring-your-project)
[Marketing Your Mod](https://hytalemodding.dev/en/docs/publishing/modtale#marketing-your-mod)
[Getting Help](https://hytalemodding.dev/en/docs/publishing/modtale#getting-help)
---
# Server-First Development
Established InformationServer
Server-First Development
========================
Information regarding what Server-First Development means, and more.
Hytale is being developed with a "server-first" approach. This means that the server is considered the authoritative source of game state and logic, while the client primarily handles rendering and user input.
[What does "Server-First" mean?](https://hytalemodding.dev/en/docs/established-information/server/server-first-dev#what-does-server-first-mean)
------------------------------------------------------------------------------------------------------------------------------------------------
In a server-first architecture, the server is responsible for managing the game world, enforcing rules, and processing player actions. The client connects to the server to receive updates about the game state and to send player inputs. This approach helps ensure consistency and fairness in multiplayer environments, as the server has control over the game logic.
[Benefits of Server-First Development](https://hytalemodding.dev/en/docs/established-information/server/server-first-dev#benefits-of-server-first-development)
---------------------------------------------------------------------------------------------------------------------------------------------------------------
* **Consistency**: Since the server is the authoritative source, all players experience the same game state, reducing discrepancies and cheating.
* **Scalability**: Server-first architectures can be more easily scaled to accommodate large numbers of players, as the server can manage resources and distribute load effectively.
* **Security**: By centralizing game logic on the server, it becomes more difficult for players to manipulate the game state unfairly.
* **Easier Updates**: Updates and changes can be made on the server side without requiring players to download new client versions.
* **Only One Version**: There won't be a version selector for the Hytale Client, meaning that server owners do not need to support multiple versions and can rely on everyone being on the latest client. This will help both server owners and modders.
[Implications for Modding](https://hytalemodding.dev/en/docs/established-information/server/server-first-dev#implications-for-modding)
---------------------------------------------------------------------------------------------------------------------------------------
Modders will primarily interact with the server-side components of Hytale. This means that mods will often focus on altering game logic, rules, and behaviors that are managed by the server. Client-side modifications are not allowed (as of the information given right now).
Overall, the server-first approach in Hytale aims to create a robust and fair multiplayer experience while providing modders with powerful tools to customize and enhance the game.
[Conclusion](https://hytalemodding.dev/en/docs/established-information/server/server-first-dev#conclusion)
-----------------------------------------------------------------------------------------------------------
The server-first development model is a key aspect of Hytale's architecture, ensuring a consistent and secure multiplayer experience. Modders should focus on server-side modifications to fully leverage the capabilities of this approach and create engaging content for players.
[Edit on GitHub](https://github.com/HytaleModding/site/blob/main/content/docs/en/established-information/server/server-first-dev.mdx)
[Server Code Insights\
\
Slikey shared some insights about server code on 12/15/2025. This document covers key points and takeaways from that discussion.](https://hytalemodding.dev/en/docs/established-information/server-plugin-insights)
[Modelling & Texturing / Art Assets\
\
Information about 3D Modelling, Texturing and Art Assets in Hytale.](https://hytalemodding.dev/en/docs/established-information/server/content-categories/art-assets)
### On this page
[What does "Server-First" mean?](https://hytalemodding.dev/en/docs/established-information/server/server-first-dev#what-does-server-first-mean)
[Benefits of Server-First Development](https://hytalemodding.dev/en/docs/established-information/server/server-first-dev#benefits-of-server-first-development)
[Implications for Modding](https://hytalemodding.dev/en/docs/established-information/server/server-first-dev#implications-for-modding)
[Conclusion](https://hytalemodding.dev/en/docs/established-information/server/server-first-dev#conclusion)
---
# The Hytale Client
Established Information
The Hytale Client
=================
Information regarding the Hytale client.
Info
The client is written in C#, compiled to machine code before distribution, and not moddable. Single-player runs on a local server. All mods must go through the server API.
[No Client-Side Mods](https://hytalemodding.dev/en/docs/established-information/client#no-client-side-mods)
============================================================================================================
There is no client-side modding.
> We don't intend to support any client mods - Slikey
[Why?](https://hytalemodding.dev/en/docs/established-information/client#why)
-----------------------------------------------------------------------------
1. No need to download externally.
* Hytale wants to "avoid a fragmented ecosystem where every server requires a different modded client".
2. Client security.
* Running `.jar` files from third-party sites on the client can easily introduce malware.
> \[We don't want to expose players\] to the security and safety risks that exist on some other modding platform.
3. Client stability.
* Hytale may move to other platforms on which client modding is impossible, so they're locking it down early to set the right direction early.
> We believe that the results that people get in other block games using client mods can be easily achieved using our server-sided modding. In other block games you have to install a client mod in order to get new blocks, NPCs, UI, etc.Hytale does all of that just by listening to the server. The server will basically "mod" the client temporarily in a really safe way to add and modify your gameplay experience. You could make your very own version of Orbis, using none of our models, music, world generation, combat or anything. You have control and you can rip it all out without ever touching the client. Think about how Roblox works.. You never change your App. You just click on an experience you want and you get all you need without modding your installation itself. - Slikey
[Client Mods are Not Needed](https://hytalemodding.dev/en/docs/established-information/client#client-mods-are-not-needed)
--------------------------------------------------------------------------------------------------------------------------
The typical use cases for client mods are:
* Cosmetic changes (resource packs, shaders, capes, etc.): servers own visuals, not the client.
* Performance: the base game will offer necessary performance controls.
* Accessibility: the base game will be accessible on its own.
* User Interface: servers own UI, not the client.
### [Client-Side Prediction](https://hytalemodding.dev/en/docs/established-information/client#client-side-prediction)
Hytale uses data-driven client-side prediction to mitigate lag, as all interactions take place on the server and are relayed back to the client. This is already present for some systems but currently limited, though further integration is planned for the future. It's also planned to work with the visual scripting system in the future for further optimization.
[Client-Side Execution](https://hytalemodding.dev/en/docs/established-information/client#client-side-execution)
----------------------------------------------------------------------------------------------------------------
The team is exploring allowing execution of code by the client (which is distinct from modding the client; this is code sent from the server), though this is not guaranteed.
[Models](https://hytalemodding.dev/en/docs/established-information/client#models)
==================================================================================
The client and assets pipeline accepts `.blockymodel`, a custom format for Hytale. The official Blockbench plugin will allow you to export to this format.
[Client Technical Details](https://hytalemodding.dev/en/docs/established-information/client#client-technical-details)
======================================================================================================================
There will only ever be one current, supported version of the client.
> Java version will be kept updated by us and right now we are on the latest version (Java 25) The game version will not be selectable to avoid the version jungle we experienced on our hypixel server network. We simply want to make sure that multiplayer networks can rely on players having the latest version of the game to not have to support 15+ versions of the client. - Slikey
The client is multithreaded.
[GUI](https://hytalemodding.dev/en/docs/established-information/client#gui)
----------------------------------------------------------------------------
The GUI is built from C# bindings using Noesis.
[Build System](https://hytalemodding.dev/en/docs/established-information/client#build-system)
----------------------------------------------------------------------------------------------
Hytale uses NativeAOT ("Ahead of Time") to build the client, which compiles C# to machine code for distribution. This means that, without reverse-engineering the machine code, mods will have to go through the server API.
[Other Information](https://hytalemodding.dev/en/docs/established-information/client#other-information)
========================================================================================================
The client has its own versioning and protocol to interact with servers.
[Edit on GitHub](https://github.com/HytaleModding/site/blob/main/content/docs/en/established-information/client/index.mdx)
[UI Customization\
\
Information about UI customization in Hytale.](https://hytalemodding.dev/en/docs/established-information/server/interface/ui-customization)
[Creative\
\
Information regarding the creative mode in Hytale.](https://hytalemodding.dev/en/docs/established-information/gameplay/creative)
### On this page
[No Client-Side Mods](https://hytalemodding.dev/en/docs/established-information/client#no-client-side-mods)
[Why?](https://hytalemodding.dev/en/docs/established-information/client#why)
[Client Mods are Not Needed](https://hytalemodding.dev/en/docs/established-information/client#client-mods-are-not-needed)
[Client-Side Prediction](https://hytalemodding.dev/en/docs/established-information/client#client-side-prediction)
[Client-Side Execution](https://hytalemodding.dev/en/docs/established-information/client#client-side-execution)
[Models](https://hytalemodding.dev/en/docs/established-information/client#models)
[Client Technical Details](https://hytalemodding.dev/en/docs/established-information/client#client-technical-details)
[GUI](https://hytalemodding.dev/en/docs/established-information/client#gui)
[Build System](https://hytalemodding.dev/en/docs/established-information/client#build-system)
[Other Information](https://hytalemodding.dev/en/docs/established-information/client#other-information)
---
# Creative
Established InformationGameplay
Creative
========
Information regarding the creative mode in Hytale.
[Creative Mode](https://hytalemodding.dev/en/docs/established-information/gameplay/creative#creative-mode)
===========================================================================================================
Creative mode in Hytale is a sandbox mode that allows players to edit the world freely.
[World Editing Tools](https://hytalemodding.dev/en/docs/established-information/gameplay/creative#world-editing-tools)
-----------------------------------------------------------------------------------------------------------------------
Creative mode includes a variety of tools to help players edit the world. It includes undo functionality for edits.
Note that the below sections were unnamed in the video demo of the tools.
* * *
### [Laser Pointer](https://hytalemodding.dev/en/docs/established-information/gameplay/creative#laser-pointer)
Displays a ray from the player's camera in the direction the player is looking.
#### [Settings](https://hytalemodding.dev/en/docs/established-information/gameplay/creative#settings)
* Duration (Integer Slider): Description unknown as of December 2025.
* Laser Color (Hex Color Code): Description unknown as of December 2025.
### [Sculpt Brush Tool](https://hytalemodding.dev/en/docs/established-information/gameplay/creative#sculpt-brush-tool)
Allows the user to raise and lower the terrain to more accurately sculpt and blend shapes. Supports most features of the Paint Brush.
### [Line Brush Tool](https://hytalemodding.dev/en/docs/established-information/gameplay/creative#line-brush-tool)
Unknown as of December 2025.
### [Selection Tool](https://hytalemodding.dev/en/docs/established-information/gameplay/creative#selection-tool)
Allows the user to select and edit regions of the world by transforming selections of blocks or a prefab via position, rotation, and extrusion.
#### [Settings](https://hytalemodding.dev/en/docs/established-information/gameplay/creative#settings-1)
* Mode (Combo Box: Set, Wall, Fill, Replace): Description unknown as of December 2025.
* Material (Integer Slider): Description unknown as of December 2025.
* Weight (Integer Slider): Description unknown as of December 2025.
* Pitch (Integer): Description unknown as of December 2025.
### [Ruler](https://hytalemodding.dev/en/docs/established-information/gameplay/creative#ruler)
Allows the user to measure distances between multiple points in 3D space, with support for multiple measurement lines and editing of measured points.
### [Layer Brush Tool](https://hytalemodding.dev/en/docs/established-information/gameplay/creative#layer-brush-tool)
Unknown as of December 2025.
### [Paste Tool](https://hytalemodding.dev/en/docs/established-information/gameplay/creative#paste-tool)
Allows the user to paste a copied selection of blocks or a prefab at the point at which the player is looking. The paste is relative to the selection's anchor point. If the selection is a prefab, the anchor point may be set in the Prefab Editor. It is unknown if the selection's anchor may be set otherwise.
### [Flood Brush Tool](https://hytalemodding.dev/en/docs/established-information/gameplay/creative#flood-brush-tool)
Unknown as of December 2025.
### [Paint Brush Tool](https://hytalemodding.dev/en/docs/established-information/gameplay/creative#paint-brush-tool)
Brushes are used to make large changes to the world from far away.
#### [General Abilities](https://hytalemodding.dev/en/docs/established-information/gameplay/creative#general-abilities)
* Place Shapes and Prefabs
* Replace Blocks
* Create Axis Locks and Masks
#### [Settings](https://hytalemodding.dev/en/docs/established-information/gameplay/creative#settings-2)
* Material
* Width (Integer Slider): Description unknown as of December 2025.
* Height (Integer Slider): Description unknown as of December 2025.
* Shape (Combo Box: Cube, Sphere, Cylinder, Cone, Inverted Cone, Pyramid, Inverted Pyramid, Cuboid Grid): Description unknown as of December 2025.
* Origin (Combo Box: Center, Bottom, Top): Description unknown as of December 2025.
* Mirror Axis (Combo Box: None, Unknown other options): Description unknown as of December 2025.
* Wall Thickness (Integer Slider): Description unknown as of December 2025.
* Density (Integer Slider): Description unknown as of December 2025.
#### [Presets:](https://hytalemodding.dev/en/docs/established-information/gameplay/creative#presets)
* Boulder: Creates a boulder at the point at which the player is looking.
* Grassy Path: Transforms the terrain into a grass path at the point at which the player is looking.
* Rubble: Generate rubble at the point at which the player is looking.
* Tentacle: TBD
* Lava Cracks: Transforms the terrain into a lava crack at the point at which the player is looking.
* Hot Springs: TBD
* Ruins: Generates a ruin at the point at which the player is looking.
* Ruin Roofs: Generates a ruin with a roof at the point at which the player is looking.
* Grass: TBD
* Mountain: Places consecutive chunks of terrain to form a mountain at the point at which the player is looking.
* Ruins: TBD
* * *
### [Entity Grabber Tool](https://hytalemodding.dev/en/docs/established-information/gameplay/creative#entity-grabber-tool)
Unknown as of December 2025.
### [Noise Brush Tool](https://hytalemodding.dev/en/docs/established-information/gameplay/creative#noise-brush-tool)
Unknown as of December 2025.
### [Scatter Brush Tool](https://hytalemodding.dev/en/docs/established-information/gameplay/creative#scatter-brush-tool)
Unknown as of December 2025.
### [Extrude Brush Tool](https://hytalemodding.dev/en/docs/established-information/gameplay/creative#extrude-brush-tool)
Unknown as of December 2025.
### [Prefab Selector Tool](https://hytalemodding.dev/en/docs/established-information/gameplay/creative#prefab-selector-tool)
Allows the user to select a prefab when inside the Prefab Editor. May be used with the copy command.
### [Smooth Brush Tool](https://hytalemodding.dev/en/docs/established-information/gameplay/creative#smooth-brush-tool)
Unknown as of December 2025.
### [Hitbox Tool](https://hytalemodding.dev/en/docs/established-information/gameplay/creative#hitbox-tool)
Unknown as of December 2025.
### [Set Anchor Tool](https://hytalemodding.dev/en/docs/established-information/gameplay/creative#set-anchor-tool)
Allows the user to set an anchor point for a prefab when inside the Prefab Editor.
### [Tint Brush Tool](https://hytalemodding.dev/en/docs/established-information/gameplay/creative#tint-brush-tool)
Unknown as of December 2025.
* * *
[Creative Mode Quick Settings](https://hytalemodding.dev/en/docs/established-information/gameplay/creative#creative-mode-quick-settings)
-----------------------------------------------------------------------------------------------------------------------------------------
Note that these are WIP and subject to change. **Not all settings and functionality are currently known**.
* Tool Reach Distance (Integer Slider): Description unknown as of December 2025.
* Tool Delay Minimum (Integer Slider): Description unknown as of December 2025.
* Brush Opacity (Integer Slider): Description unknown as of December 2025.
* Selection Opacity (Integer Slider): Description unknown as of December 2025.
* Selection Panel Opacity (Integer Slider): Description unknown as of December 2025.
* Enable Brush Shape Rendering (Toggle): Description unknown as of December 2025.
* Display Legend (Toggle): Description unknown as of December 2025.
* Show Tool Notifications (Toggle): Description unknown as of December 2025.
* Default Laser Pointer (Hex Color Code): Description unknown as of December 2025.
* Enable Brush Spacing (Toggle): Description unknown as of December 2025.
* Spacing Between Br? (Integer Slider): Description unknown as of December 2025.
* Flight Intertia (Integer Slider): Description unknown as of December 2025.
* Flight Mode (Combo Box: Hover, Directional): Description unknown as of December 2025.
* No Clip (Toggle): Description unknown as of December 2025.
* Air Placement (Toggle): Description unknown as of December 2025.
[Content Creation Tools](https://hytalemodding.dev/en/docs/established-information/gameplay/creative#content-creation-tools)
-----------------------------------------------------------------------------------------------------------------------------
Hytale includes a variety of built-in content creation tools to help players create and edit content.
### [Asset Editor](https://hytalemodding.dev/en/docs/established-information/gameplay/creative#asset-editor)
Unknown as of December 2025.
### [Model Editor](https://hytalemodding.dev/en/docs/established-information/gameplay/creative#model-editor)
Unknown as of December 2025.
### [Asset Node Editor](https://hytalemodding.dev/en/docs/established-information/gameplay/creative#asset-node-editor)
Unknown as of December 2025.
### [World Tools](https://hytalemodding.dev/en/docs/established-information/gameplay/creative#world-tools)
These are tools that allow the user to directly edit the current world.
#### [Prefab Editor](https://hytalemodding.dev/en/docs/established-information/gameplay/creative#prefab-editor)
Allows the user to create or edit prefabs in a separate space.
##### [Settings](https://hytalemodding.dev/en/docs/established-information/gameplay/creative#settings-3)
* Saved configs (Unknown type; presumably a file)
* Root Dir (Unknown type; presumably a folder)
* Prefab Paths or Folders (Unknown type; presumably a list of paths or folders)
* Recursively Search for Prefabs (Toggle)
* Spawn Entities and NPCs (Toggle)
* Desired Y Level to Paste (Integer)
* Blocks Between Prefabs (Integer)
* WorldGen Type (Combo Box: Flat, Unknown other options): Description unknown as of December 2025.
* (Flat WorldGen Only) Num Air Blocks Below Prefabs (Integer): Description unknown as of December 2025.
* Axis to Paste On (Combo Box: X, Unknown other options): Description unknown as of December 2025.
* Alignment Method (Combo Box: By Anchor, Unknown other options): Description unknown as of December 2025.
#### [Prefab List](https://hytalemodding.dev/en/docs/established-information/gameplay/creative#prefab-list)
* Lists all user created prefabs and allows the user to load a prefab into the Paste tool.
* User can pick from server, assets, or worldgen prefabs.
#### [Spawn NPC](https://hytalemodding.dev/en/docs/established-information/gameplay/creative#spawn-npc)
Unknown as of December 2025.
#### [Spawn Particle](https://hytalemodding.dev/en/docs/established-information/gameplay/creative#spawn-particle)
Unknown as of December 2025.
#### [Change Player Model](https://hytalemodding.dev/en/docs/established-information/gameplay/creative#change-player-model)
* Allows the player to change their model with an adjustable scale.
#### [Tint Chunk](https://hytalemodding.dev/en/docs/established-information/gameplay/creative#tint-chunk)
Unknown as of December 2025.
#### [Instances](https://hytalemodding.dev/en/docs/established-information/gameplay/creative#instances)
Unknown as of December 2025.
### [Builder Tools](https://hytalemodding.dev/en/docs/established-information/gameplay/creative#builder-tools)
Unknown as of December 2025.
### [Machinima](https://hytalemodding.dev/en/docs/established-information/gameplay/creative#machinima)
Machinima is a built-in sequence editor, allowing the user to create and edit sequences of actions to be played back in game. It includes a built-in interactive keyframe editor.
The speed of playback can be adjusted via commands.
The user may add actors for the sequence to control.
* Reference
* Camera
* Entity
* Item
* Player
[Commands](https://hytalemodding.dev/en/docs/established-information/gameplay/creative#commands)
-------------------------------------------------------------------------------------------------
Commands are entered into the world's chat console and begin with a forward slash `/`.
* `set `: allows the user to set the blocks in a selection to the specified block.
* `inventory clear`: allows the user to clear their inventory.
[Edit on GitHub](https://github.com/HytaleModding/site/blob/main/content/docs/en/established-information/gameplay/creative.mdx)
[The Hytale Client\
\
Information regarding the Hytale client.](https://hytalemodding.dev/en/docs/established-information/client)
[Learning to Learn\
\
A guide to help you become a better learner and adapt to new information effectively.](https://hytalemodding.dev/en/docs/guides/learning-to-learn)
### On this page
[Creative Mode](https://hytalemodding.dev/en/docs/established-information/gameplay/creative#creative-mode)
[World Editing Tools](https://hytalemodding.dev/en/docs/established-information/gameplay/creative#world-editing-tools)
[Laser Pointer](https://hytalemodding.dev/en/docs/established-information/gameplay/creative#laser-pointer)
[Settings](https://hytalemodding.dev/en/docs/established-information/gameplay/creative#settings)
[Sculpt Brush Tool](https://hytalemodding.dev/en/docs/established-information/gameplay/creative#sculpt-brush-tool)
[Line Brush Tool](https://hytalemodding.dev/en/docs/established-information/gameplay/creative#line-brush-tool)
[Selection Tool](https://hytalemodding.dev/en/docs/established-information/gameplay/creative#selection-tool)
[Settings](https://hytalemodding.dev/en/docs/established-information/gameplay/creative#settings-1)
[Ruler](https://hytalemodding.dev/en/docs/established-information/gameplay/creative#ruler)
[Layer Brush Tool](https://hytalemodding.dev/en/docs/established-information/gameplay/creative#layer-brush-tool)
[Paste Tool](https://hytalemodding.dev/en/docs/established-information/gameplay/creative#paste-tool)
[Flood Brush Tool](https://hytalemodding.dev/en/docs/established-information/gameplay/creative#flood-brush-tool)
[Paint Brush Tool](https://hytalemodding.dev/en/docs/established-information/gameplay/creative#paint-brush-tool)
[General Abilities](https://hytalemodding.dev/en/docs/established-information/gameplay/creative#general-abilities)
[Settings](https://hytalemodding.dev/en/docs/established-information/gameplay/creative#settings-2)
[Presets:](https://hytalemodding.dev/en/docs/established-information/gameplay/creative#presets)
[Entity Grabber Tool](https://hytalemodding.dev/en/docs/established-information/gameplay/creative#entity-grabber-tool)
[Noise Brush Tool](https://hytalemodding.dev/en/docs/established-information/gameplay/creative#noise-brush-tool)
[Scatter Brush Tool](https://hytalemodding.dev/en/docs/established-information/gameplay/creative#scatter-brush-tool)
[Extrude Brush Tool](https://hytalemodding.dev/en/docs/established-information/gameplay/creative#extrude-brush-tool)
[Prefab Selector Tool](https://hytalemodding.dev/en/docs/established-information/gameplay/creative#prefab-selector-tool)
[Smooth Brush Tool](https://hytalemodding.dev/en/docs/established-information/gameplay/creative#smooth-brush-tool)
[Hitbox Tool](https://hytalemodding.dev/en/docs/established-information/gameplay/creative#hitbox-tool)
[Set Anchor Tool](https://hytalemodding.dev/en/docs/established-information/gameplay/creative#set-anchor-tool)
[Tint Brush Tool](https://hytalemodding.dev/en/docs/established-information/gameplay/creative#tint-brush-tool)
[Creative Mode Quick Settings](https://hytalemodding.dev/en/docs/established-information/gameplay/creative#creative-mode-quick-settings)
[Content Creation Tools](https://hytalemodding.dev/en/docs/established-information/gameplay/creative#content-creation-tools)
[Asset Editor](https://hytalemodding.dev/en/docs/established-information/gameplay/creative#asset-editor)
[Model Editor](https://hytalemodding.dev/en/docs/established-information/gameplay/creative#model-editor)
[Asset Node Editor](https://hytalemodding.dev/en/docs/established-information/gameplay/creative#asset-node-editor)
[World Tools](https://hytalemodding.dev/en/docs/established-information/gameplay/creative#world-tools)
[Prefab Editor](https://hytalemodding.dev/en/docs/established-information/gameplay/creative#prefab-editor)
[Settings](https://hytalemodding.dev/en/docs/established-information/gameplay/creative#settings-3)
[Prefab List](https://hytalemodding.dev/en/docs/established-information/gameplay/creative#prefab-list)
[Spawn NPC](https://hytalemodding.dev/en/docs/established-information/gameplay/creative#spawn-npc)
[Spawn Particle](https://hytalemodding.dev/en/docs/established-information/gameplay/creative#spawn-particle)
[Change Player Model](https://hytalemodding.dev/en/docs/established-information/gameplay/creative#change-player-model)
[Tint Chunk](https://hytalemodding.dev/en/docs/established-information/gameplay/creative#tint-chunk)
[Instances](https://hytalemodding.dev/en/docs/established-information/gameplay/creative#instances)
[Builder Tools](https://hytalemodding.dev/en/docs/established-information/gameplay/creative#builder-tools)
[Machinima](https://hytalemodding.dev/en/docs/established-information/gameplay/creative#machinima)
[Commands](https://hytalemodding.dev/en/docs/established-information/gameplay/creative#commands)
---
# Hytale ECS Basics
[Entity Component System](https://hytalemodding.dev/en/docs/guides/ecs)
Hytale ECS Basics
=================
In this guide you will learn about the basics of Hytale's powerful ECS system as well as create your own component, a system, and work together with other systems to create gameplay logic.
[Store](https://hytalemodding.dev/en/docs/guides/ecs/hytale-ecs#store)
-----------------------------------------------------------------------
The `Store` class is the core of Hytale's ECS system, it's responsible for storing entities, if you ever need to access an entity, you need access to the store. It utilises a concept called Archetypes where data is grouped together in chunks. For example if we have 100 Trorks, they will be chunked together along with their components so that they're closely packed together and faster to retrieve.
[EntityStore](https://hytalemodding.dev/en/docs/guides/ecs/hytale-ecs#entitystore)
-----------------------------------------------------------------------------------
When looking through Hytale's server code you will find that `Store` will be of type `EntityStore`. This name can be misleading as it might suggest that it's a `Store` for entities. But didn't we just say that the base `Store` already stores entities? The `EntityStore` class implements `WorldProvider` meaning that `EntityStore` is responsible for accessing entities in a specific Hytale `World`. It maintains internal maps `entitiesByUuid` and `networkIdToRef`, allowing you to find a specific entity by its persistent ID or its networking ID.
Every Entity has a `UUIDComponent` as well as a `NetworkId` which are used by the `EntityStore` to lookup entities inside of the `Store`.
[Ref (Reference)](https://hytalemodding.dev/en/docs/guides/ecs/hytale-ecs#ref-reference)
-----------------------------------------------------------------------------------------
For those familiar with languages like C++, you probably already can guess what this class is purely by the name of it. However, a Ref is a safe "handle" or pointer to an entity. You should **NEVER** store a direct reference to an entity object, you use a Ref instead. It tracks whether an entity is still alive. If you call `validate()` on a Ref for an entity that has been deleted, it throws an exception.
[Player Components](https://hytalemodding.dev/en/docs/guides/ecs/hytale-ecs#player-components)
-----------------------------------------------------------------------------------------------
In Hytale, a "Player" is not just one object. It is a single entity composed of multiple specialized components. Understanding the difference between `Player` and `PlayerRef` is crucial for modding.
### [PlayerRef](https://hytalemodding.dev/en/docs/guides/ecs/hytale-ecs#playerref)
Despite its name, PlayerRef is a Component, not a handle. It represents the player's connection and identity. It's a special component which stays active as long as the player is connected to the server, even if the player switches worlds. The key data that it stores are the player's username, UUID, language as well as the packet handler.
### [Player](https://hytalemodding.dev/en/docs/guides/ecs/hytale-ecs#player)
The `Player` component represents the player's physical presence. It only exists when the player is actually spawned in a world. Providing access to gameplay specific data, this component differs per world.
To interact with an entity, you use the `Store` to retrieve its components via their `ComponentType`. Because Hytale uses a decoupled system, you don't call `entity.getHealth()`. Instead, you ask the `Store` for the health data associated with that entity's `Ref`.
@Override
protected void execute(@Nonnull CommandContext commandContext, @Nonnull Store store,
@Nonnull Ref ref, @Nonnull PlayerRef playerRef, @Nonnull World world) {
Player player = store.getComponent(ref, Player.getComponentType());
UUIDComponent component = store.getComponent(ref, UUIDComponent.getComponentType());
TransformComponent transform = store.getComponent(ref, TransformComponent.getComponentType());
player.sendMessage(Message.raw("UUIDComponent : " + component.getUuid()));
player.sendMessage(Message.raw("Transform : " + transform.getPosition()));
}
In here we use the `Store` to access the `Player` component using the `Ref`. We can do the same for other components like the `UUIDComponent` or the `TransformComponent` to retrieve the entity Transform containing the position and rotation.
[Components](https://hytalemodding.dev/en/docs/guides/ecs/hytale-ecs#components)
---------------------------------------------------------------------------------
Components are pure data containers. They hold state but contain no logic. In Hytale, components must implement `Component` and provide a clone method for the ECS to copy them when needed.
public class PoisonComponent implements Component {
private float damagePerTick;
private float tickInterval;
private int remainingTicks;
private float elapsedTime;
public PoisonComponent() {
this(5f, 1.0f, 10);
}
public PoisonComponent(float damagePerTick, float tickInterval, int totalTicks) {
this.damagePerTick = damagePerTick;
this.tickInterval = tickInterval;
this.remainingTicks = totalTicks;
this.elapsedTime = 0f;
}
public PoisonComponent(PoisonComponent other) {
this.damagePerTick = other.damagePerTick;
this.tickInterval = other.tickInterval;
this.remainingTicks = other.remainingTicks;
this.elapsedTime = other.elapsedTime;
}
@Nullable
@Override
public Component clone() {
return new PoisonComponent(this);
}
public float getDamagePerTick() {
return damagePerTick;
}
public float getTickInterval() {
return tickInterval;
}
public int getRemainingTicks() {
return remainingTicks;
}
public float getElapsedTime() {
return elapsedTime;
}
public void addElapsedTime(float dt) {
this.elapsedTime += dt;
}
public void resetElapsedTime() {
this.elapsedTime = 0f;
}
public void decrementRemainingTicks() {
this.remainingTicks--;
}
public boolean isExpired() {
return this.remainingTicks <= 0;
}
}
The default constructor is required for the registration factory. The copy constructor is used by `clone()` which the ECS calls internally when it needs to duplicate component data.
[Systems](https://hytalemodding.dev/en/docs/guides/ecs/hytale-ecs#systems)
---------------------------------------------------------------------------
Systems are where the logic lives. While components are pure data containers, systems operate on entities that match specific component queries. The ECS scheduler runs systems each tick, passing in only the entities that have the components the system cares about.
### [EntityTickingSystem](https://hytalemodding.dev/en/docs/guides/ecs/hytale-ecs#entitytickingsystem)
The most common system type. It runs every tick and processes each entity matching its query individually.
public class PoisonSystem extends EntityTickingSystem {
private final ComponentType poisonComponentType;
public PoisonSystem(ComponentType poisonComponentType) {
this.poisonComponentType = poisonComponentType;
}
@Override
public void tick(float dt, int index, @Nonnull ArchetypeChunk archetypeChunk,
@Nonnull Store store, @Nonnull CommandBuffer commandBuffer) {
PoisonComponent poison = archetypeChunk.getComponent(index, poisonComponentType);
Ref ref = archetypeChunk.getReferenceTo(index);
poison.addElapsedTime(dt);
if (poison.getElapsedTime() >= poison.getTickInterval()) {
poison.resetElapsedTime();
Damage damage = new Damage(Damage.NULL_SOURCE, DamageCause.OUT_OF_WORLD, poison.getDamagePerTick());
DamageSystems.executeDamage(ref, commandBuffer, damage);
poison.decrementRemainingTicks();
}
if (poison.isExpired()) {
commandBuffer.removeComponent(ref, poisonComponentType);
}
}
@Nullable
@Override
public SystemGroup getGroup() {
return DamageModule.get().getGatherDamageGroup();
}
@Nonnull
@Override
public Query getQuery() {
return Query.and(this.poisonComponentType);
}
}
The `tick` method receives `dt` which is delta time since the last tick. This lets you accumulate time for interval-based logic rather than counting ticks. The `ArchetypeChunk` gives you access to the entity's components via the index, and `getReferenceTo` returns the `Ref` you need for issuing commands.
### [TickingSystem](https://hytalemodding.dev/en/docs/guides/ecs/hytale-ecs#tickingsystem)
Runs once per tick globally, not per-entity. Use this for world-wide updates or logic that doesn't target specific entities.
public class GlobalUpdateSystem extends TickingSystem {
@Override
public void tick(float dt, int index, Store store) {
World world = store.getExternalData().getWorld();
}
}
### [DelayedEntitySystem](https://hytalemodding.dev/en/docs/guides/ecs/hytale-ecs#delayedentitysystem)
Like `EntityTickingSystem` but with a built-in delay. The constructor takes a float representing seconds between executions.
public class HealthRegenSystem extends DelayedEntitySystem {
public HealthRegenSystem() {
super(1.0f);
}
@Override
public void tick(float dt, int index, @Nonnull ArchetypeChunk archetypeChunk,
@Nonnull Store store, @Nonnull CommandBuffer commandBuffer) {
// Runs every 1 second per matching entity
}
@Nonnull
@Override
public Query getQuery() {
return Query.and(Player.getComponentType());
}
}
[Queries](https://hytalemodding.dev/en/docs/guides/ecs/hytale-ecs#queries)
---------------------------------------------------------------------------
Queries filter which entities a system processes. The ECS only passes entities to your system's `tick` method if they have all the components specified in the query.
// Single component - any entity with PoisonComponent
Query.and(poisonComponentType)
// Multiple components - entities with both
Query.and(poisonComponentType, Player.getComponentType())
// Exclusion - players that aren't dead
Query.and(Player.getComponentType(), Query.not(DeathComponent.getComponentType()))
[CommandBuffer](https://hytalemodding.dev/en/docs/guides/ecs/hytale-ecs#commandbuffer)
---------------------------------------------------------------------------------------
The `CommandBuffer` queues changes to entities. Use it instead of modifying the store directly to ensure thread safety and proper ordering. You'll use it to add components, remove components, and execute damage.
commandBuffer.addComponent(ref, componentType, new MyComponent());
commandBuffer.removeComponent(ref, componentType);
MyComponent comp = commandBuffer.getComponent(ref, componentType);
[SystemGroups and Dependencies](https://hytalemodding.dev/en/docs/guides/ecs/hytale-ecs#systemgroups-and-dependencies)
-----------------------------------------------------------------------------------------------------------------------
Systems can declare which group they belong to and what dependencies they have. This controls execution order which is critical for systems that interact.
@Nullable
@Override
public SystemGroup getGroup() {
return DamageModule.get().getGatherDamageGroup();
}
For more complex ordering you can override `getDependencies`:
@Nonnull
public Set> getDependencies() {
return Set.of(
new SystemGroupDependency(Order.AFTER, DamageModule.get().getFilterDamageGroup()),
new SystemDependency(Order.BEFORE, PlayerSystems.ProcessPlayerInput.class)
);
}
The damage system is a good example of why ordering matters. Hytale's damage pipeline has four stages: GatherDamageGroup collects damage sources, FilterDamageGroup applies reductions and cancellations, then damage is applied to health, and finally InspectDamageGroup handles side effects like particles and sounds. If these ran in the wrong order you'd play death animations before the entity dies or apply armor reduction after health is already subtracted.
[Registering Components and Systems](https://hytalemodding.dev/en/docs/guides/ecs/hytale-ecs#registering-components-and-systems)
---------------------------------------------------------------------------------------------------------------------------------
Components and systems must be registered during plugin setup. The `EntityStoreRegistry` handles this.
public final class ExamplePlugin extends JavaPlugin {
private static ExamplePlugin instance;
private ComponentType poisonComponent;
public ExamplePlugin(@Nonnull JavaPluginInit init) {
super(init);
instance = this;
}
@Override
protected void setup() {
this.getCommandRegistry().registerCommand(new ExampleCommand());
this.getEventRegistry().registerGlobal(PlayerReadyEvent.class, ExampleEvent::onPlayerReady);
this.getEventRegistry().registerGlobal(PlayerChatEvent.class, ChatFormatter::onPlayerChat);
this.poisonComponent = this.getEntityStoreRegistry()
.registerComponent(PoisonComponent.class, PoisonComponent::new);
this.getEntityStoreRegistry().registerSystem(new PoisonSystem(this.poisonComponent));
}
public ComponentType getPoisonComponentType() {
return poisonComponent;
}
public static ExamplePlugin get() {
return instance;
}
}
The `registerComponent` method returns a `ComponentType` which acts as a key for accessing that component type throughout your plugin. Store it as a field and pass it to any systems that need it. The second argument is a factory for creating default instances.
[Practical Example: Poison System](https://hytalemodding.dev/en/docs/guides/ecs/hytale-ecs#practical-example-poison-system)
----------------------------------------------------------------------------------------------------------------------------
Putting it all together, here's a complete poison effect. When applied to any entity, it deals damage at a set interval until it expires and removes itself.
package scot.oskar.hytaletemplate.components;
import com.hypixel.hytale.component.Component;
import com.hypixel.hytale.server.core.universe.world.storage.EntityStore;
import javax.annotation.Nullable;
public class PoisonComponent implements Component {
private float damagePerTick;
private float tickInterval;
private int remainingTicks;
private float elapsedTime;
public PoisonComponent() {
this(5f, 1.0f, 10);
}
public PoisonComponent(float damagePerTick, float tickInterval, int totalTicks) {
this.damagePerTick = damagePerTick;
this.tickInterval = tickInterval;
this.remainingTicks = totalTicks;
this.elapsedTime = 0f;
}
public PoisonComponent(PoisonComponent other) {
this.damagePerTick = other.damagePerTick;
this.tickInterval = other.tickInterval;
this.remainingTicks = other.remainingTicks;
this.elapsedTime = other.elapsedTime;
}
@Nullable
@Override
public Component clone() {
return new PoisonComponent(this);
}
public float getDamagePerTick() {
return damagePerTick;
}
public float getTickInterval() {
return tickInterval;
}
public int getRemainingTicks() {
return remainingTicks;
}
public float getElapsedTime() {
return elapsedTime;
}
public void addElapsedTime(float dt) {
this.elapsedTime += dt;
}
public void resetElapsedTime() {
this.elapsedTime = 0f;
}
public void decrementRemainingTicks() {
this.remainingTicks--;
}
public boolean isExpired() {
return this.remainingTicks <= 0;
}
}
package scot.oskar.hytaletemplate.systems;
import com.hypixel.hytale.component.ArchetypeChunk;
import com.hypixel.hytale.component.CommandBuffer;
import com.hypixel.hytale.component.ComponentType;
import com.hypixel.hytale.component.Ref;
import com.hypixel.hytale.component.Store;
import com.hypixel.hytale.component.SystemGroup;
import com.hypixel.hytale.component.query.Query;
import com.hypixel.hytale.component.system.tick.EntityTickingSystem;
import com.hypixel.hytale.server.core.modules.entity.damage.Damage;
import com.hypixel.hytale.server.core.modules.entity.damage.DamageCause;
import com.hypixel.hytale.server.core.modules.entity.damage.DamageModule;
import com.hypixel.hytale.server.core.modules.entity.damage.DamageSystems;
import com.hypixel.hytale.server.core.universe.world.storage.EntityStore;
import javax.annotation.Nonnull;
import javax.annotation.Nullable;
import scot.oskar.hytaletemplate.components.PoisonComponent;
public class PoisonSystem extends EntityTickingSystem {
private final ComponentType poisonComponentType;
public PoisonSystem(ComponentType poisonComponentType) {
this.poisonComponentType = poisonComponentType;
}
@Override
public void tick(float dt, int index, @Nonnull ArchetypeChunk archetypeChunk,
@Nonnull Store store, @Nonnull CommandBuffer commandBuffer) {
PoisonComponent poison = archetypeChunk.getComponent(index, poisonComponentType);
Ref ref = archetypeChunk.getReferenceTo(index);
poison.addElapsedTime(dt);
if (poison.getElapsedTime() >= poison.getTickInterval()) {
poison.resetElapsedTime();
Damage damage = new Damage(Damage.NULL_SOURCE, DamageCause.OUT_OF_WORLD, poison.getDamagePerTick());
DamageSystems.executeDamage(ref, commandBuffer, damage);
poison.decrementRemainingTicks();
}
if (poison.isExpired()) {
commandBuffer.removeComponent(ref, poisonComponentType);
}
}
@Nullable
@Override
public SystemGroup getGroup() {
return DamageModule.get().getGatherDamageGroup();
}
@Nonnull
@Override
public Query getQuery() {
return Query.and(this.poisonComponentType);
}
}
package scot.oskar.hytaletemplate.commands;
public class ExampleCommand extends AbstractPlayerCommand {
public ExampleCommand() {
super("test", "Super test command!");
}
@Override
protected void execute(@Nonnull CommandContext commandContext, @Nonnull Store store,
@Nonnull Ref ref, @Nonnull PlayerRef playerRef, @Nonnull World world) {
Player player = store.getComponent(ref, Player.getComponentType());
PoisonComponent poison = new PoisonComponent(3f, 0.5f, 8);
store.addComponent(ref, ExamplePlugin.get().getPoisonComponentType(), poison);
player.sendMessage(Message.raw("You have been poisoned!").color(Color.GREEN).bold(true));
}
}
package scot.oskar.hytaletemplate;
public final class ExamplePlugin extends JavaPlugin {
private static ExamplePlugin instance;
private ComponentType poisonComponent;
public ExamplePlugin(@Nonnull JavaPluginInit init) {
super(init);
instance = this;
}
@Override
protected void setup() {
this.getCommandRegistry().registerCommand(new ExampleCommand());
this.getEventRegistry().registerGlobal(PlayerReadyEvent.class, ExampleEvent::onPlayerReady);
this.getEventRegistry().registerGlobal(PlayerChatEvent.class, ChatFormatter::onPlayerChat);
this.poisonComponent = this.getEntityStoreRegistry()
.registerComponent(PoisonComponent.class, PoisonComponent::new);
this.getEntityStoreRegistry().registerSystem(new PoisonSystem(this.poisonComponent));
}
public ComponentType getPoisonComponentType() {
return poisonComponent;
}
public static ExamplePlugin get() {
return instance;
}
}
The query uses only `poisonComponentType` which means the system will process any entity with a `PoisonComponent`, not just players. This makes it flexible for poisoning NPCs, mobs, or any living entity. The system places itself in the `GatherDamageGroup` so the damage it creates flows through the full damage pipeline including armor reduction and invulnerability checks.
To be continued.
Written by oskarscot
[Edit on GitHub](https://github.com/HytaleModding/site/blob/main/content/docs/en/guides/ecs/hytale-ecs.mdx)
[Entity Component System\
\
A basic introduction into ECS (Entity Component System)](https://hytalemodding.dev/en/docs/guides/ecs)
[Entities\
\
List of all Entities in Hytale](https://hytalemodding.dev/en/docs/server/entities)
### On this page
[Store](https://hytalemodding.dev/en/docs/guides/ecs/hytale-ecs#store)
[EntityStore](https://hytalemodding.dev/en/docs/guides/ecs/hytale-ecs#entitystore)
[Ref (Reference)](https://hytalemodding.dev/en/docs/guides/ecs/hytale-ecs#ref-reference)
[Player Components](https://hytalemodding.dev/en/docs/guides/ecs/hytale-ecs#player-components)
[PlayerRef](https://hytalemodding.dev/en/docs/guides/ecs/hytale-ecs#playerref)
[Player](https://hytalemodding.dev/en/docs/guides/ecs/hytale-ecs#player)
[Components](https://hytalemodding.dev/en/docs/guides/ecs/hytale-ecs#components)
[Systems](https://hytalemodding.dev/en/docs/guides/ecs/hytale-ecs#systems)
[EntityTickingSystem](https://hytalemodding.dev/en/docs/guides/ecs/hytale-ecs#entitytickingsystem)
[TickingSystem](https://hytalemodding.dev/en/docs/guides/ecs/hytale-ecs#tickingsystem)
[DelayedEntitySystem](https://hytalemodding.dev/en/docs/guides/ecs/hytale-ecs#delayedentitysystem)
[Queries](https://hytalemodding.dev/en/docs/guides/ecs/hytale-ecs#queries)
[CommandBuffer](https://hytalemodding.dev/en/docs/guides/ecs/hytale-ecs#commandbuffer)
[SystemGroups and Dependencies](https://hytalemodding.dev/en/docs/guides/ecs/hytale-ecs#systemgroups-and-dependencies)
[Registering Components and Systems](https://hytalemodding.dev/en/docs/guides/ecs/hytale-ecs#registering-components-and-systems)
[Practical Example: Poison System](https://hytalemodding.dev/en/docs/guides/ecs/hytale-ecs#practical-example-poison-system)
---
# Java Modding (Server Plugins)
Established InformationServerContent Categories
Java Modding (Server Plugins)
=============================
An introduction to what we know of Hytale's Java-based modding system as of writing this article.
Hytale's modding capabilities include a Java-based modding system that allows modders to create custom behaviors, interactions, and game mechanics. While the full details of this system are not publicly documented as the game is still in development and not released, we can summarize what is currently known about it.
### [Important Details of Modding in Hytale](https://hytalemodding.dev/en/docs/established-information/server/content-categories/plugin#important-details-of-modding-in-hytale)
Hytale's modding goes on server side and not client side, meaning that mods/plugins are hosted on the server and players connect to these modded servers to experience the custom content without needing to install anything on their end. This approach ensures a consistent experience for all players on a modded server.
### [Overview of Java-Based Modding](https://hytalemodding.dev/en/docs/established-information/server/content-categories/plugin#overview-of-java-based-modding)
The server-side modding system in Hytale is based on Java, making the server plugins JAR files.
We're guessing this is done so that Minecraft modders can easily transition to Hytale modding, as Minecraft modding is also primarily Java-based. This allows modders familiar with Java to leverage their existing knowledge when creating mods for Hytale.
#### [Singleplayer Concerns](https://hytalemodding.dev/en/docs/established-information/server/content-categories/plugin#singleplayer-concerns)
Despite the name, server plugins can also be used in singleplayer mode. Hytale's singleplayer mode runs a local server instance, allowing players to use server plugins even when playing alone. This means that mods created as server plugins can enhance the singleplayer experience as well.
### [Mixin System](https://hytalemodding.dev/en/docs/established-information/server/content-categories/plugin#mixin-system)
Mixins were used in Minecraft modding to directly modify the game’s code, even able to overwrite or redirect logic and values. An extremely powerful but somewhat brittle system which depends on the source code/game version staying pretty much the same.
We have no official information on Mixins in Hytale. Despite that, we have reason to believe they will not need to be supported for the following reasons:
1. For a properly designed game, 95% of Mixin use cases can be solved with a good API instead. In fact, many Minecraft modding APIs simply mixin to provide the API so the developers using those APIs don’t have to write the mixin themselves.
* This is typically replacing hardcoded values and overwriting hardcoded behaviors.
* Hytale should ideally make these both API or data-driven.
2. APIs can also be much more resilient than the game version. We can have a separate API version system which means the same code will not need to be modified across multiple updates until the API changes in a breaking way.
[Edit on GitHub](https://github.com/HytaleModding/site/blob/main/content/docs/en/established-information/server/content-categories/plugin.mdx)
[Data Assets\
\
Information about data assets in Hytale and how they drive gameplay behavior and content creation.](https://hytalemodding.dev/en/docs/established-information/server/content-categories/data-assets)
[Visual Scripting\
\
An introduction to what we know of Hytale's visual scripting system as of writing this.](https://hytalemodding.dev/en/docs/established-information/server/content-categories/visual-scripting)
### On this page
[Important Details of Modding in Hytale](https://hytalemodding.dev/en/docs/established-information/server/content-categories/plugin#important-details-of-modding-in-hytale)
[Overview of Java-Based Modding](https://hytalemodding.dev/en/docs/established-information/server/content-categories/plugin#overview-of-java-based-modding)
[Singleplayer Concerns](https://hytalemodding.dev/en/docs/established-information/server/content-categories/plugin#singleplayer-concerns)
[Mixin System](https://hytalemodding.dev/en/docs/established-information/server/content-categories/plugin#mixin-system)
---
# Inputs
Established InformationServerInterface
Inputs
======
Information about input methods supported in Hytale.
Hytale is designed to support a variety of input methods to accommodate different player preferences and platforms.
[Interaction System](https://hytalemodding.dev/en/docs/established-information/server/interface/inputs#interaction-system)
---------------------------------------------------------------------------------------------------------------------------
Hytale features a robust interaction system that allows plugins to customize how keybinds are interpreted and what actions they trigger. This system is data-driven, enabling modders to create complex interactions through assets.
Modders can define custom keybinds for various actions, such as using abilities or interacting with objects in the game world. The interaction system is designed to be powerful, though it may require some effort to manage the complexity of the assets involved.
> You can use your own interactions to use keybinds for whatever you want. Interaction system is very powerful but we still need to work on its usability as the assets can become quite complex and hard to handle
\- [slikey](https://discord.com/channels/523059903812599811/1428794280868184064/1441291391065129103)
[Edit on GitHub](https://github.com/HytaleModding/site/blob/main/content/docs/en/established-information/server/interface/inputs.mdx)
[Visual Scripting\
\
An introduction to what we know of Hytale's visual scripting system as of writing this.](https://hytalemodding.dev/en/docs/established-information/server/content-categories/visual-scripting)
[UI Customization\
\
Information about UI customization in Hytale.](https://hytalemodding.dev/en/docs/established-information/server/interface/ui-customization)
### On this page
[Interaction System](https://hytalemodding.dev/en/docs/established-information/server/interface/inputs#interaction-system)
---
# UI Customization
Established InformationServerInterface
UI Customization
================
Information about UI customization in Hytale.
UI can be customized via **server-side** modding. Many of the UI pages shown to players are available to be modified by server owners through mods.
[UI Customization in Hytale](https://hytalemodding.dev/en/docs/established-information/server/interface/ui-customization#ui-customization-in-hytale)
-----------------------------------------------------------------------------------------------------------------------------------------------------
Hytale provides extensive UI customization capabilities through server-side modding, allowing server owners to modify many of the UI pages that players interact with.
### [Control Flow](https://hytalemodding.dev/en/docs/established-information/server/interface/ui-customization#control-flow)
The UI system in Hytale follows a specific control flow pattern:
1. Server sends UI data to the client
2. Client renders the UI
3. User interacts with the UI (e.g., pressing a button)
4. Client sends the interaction event to the server
5. Server executes the callback logic for the event
This architecture means:
* The client is responsible for rendering UI and sending user interactions to the server
* The server handles all the actual logic behind user interactions
Possible Performance Implications
Because the server processes all UI logic, there is an inherent latency impact on UI responsiveness. Button clicks and other interactions must travel to the server before taking effect, meaning network ping directly affects UI responsiveness.
Additionally, since client-side modding is not supported, no modded values persist on the client.
### [UI Layout Assets](https://hytalemodding.dev/en/docs/established-information/server/interface/ui-customization#ui-layout-assets)
Hytale's UI customization system works through the following structure:
* **UI Layout**: Sent to the client as an asset
* **UI Behavior**: Defined in Java code
* **Custom Layouts**: Enables creation of bespoke UI layouts rather than repurposing existing ones (unlike inventory menu modifications in Minecraft)
### [UI Framework Implementations](https://hytalemodding.dev/en/docs/established-information/server/interface/ui-customization#ui-framework-implementations)
Hytale currently supports multiple UI implementations, with plans to consolidate on NoesisGUI:
#### [Legacy Implementation](https://hytalemodding.dev/en/docs/established-information/server/interface/ui-customization#legacy-implementation)
* Serves as an example of server modding capabilities
* Uses a combination of in-game elements, UI Markup Assets, and Java mod code
* Utilizes a legacy custom markup language
* Will be deprecated in favor of NoesisGUI
#### [NoesisGUI (Primary Framework)](https://hytalemodding.dev/en/docs/established-information/server/interface/ui-customization#noesisgui-primary-framework)
* Uses XAML Markup Language for UI definition
* Supports multiple languages for internationalization
* Runs on C# bindings on the client side (not C++)
* Represents the future direction of Hytale's UI system
#### [Third Framework](https://hytalemodding.dev/en/docs/established-information/server/interface/ui-customization#third-framework)
* Currently being phased out
* Will be replaced by NoesisGUI as part of the consolidation effort
### [Performance Considerations](https://hytalemodding.dev/en/docs/established-information/server/interface/ui-customization#performance-considerations)
Due to the server-side nature of UI processing, there are inherent performance characteristics to consider:
* **Latency Impact**: Button clicks and UI interactions must travel to the server before taking effect, meaning network ping directly affects UI responsiveness
* **No Client Persistence**: Since client-side modding is not supported, no modded values persist on the client
* **Optimized Architecture**: Hytale's system is designed to minimize latency through efficient communication protocols and optimized server performance, ensuring smooth interactions despite server-side processing requirements
The architecture prioritizes security and consistency by centralizing UI logic on the server while maintaining responsive user experiences
[Edit on GitHub](https://github.com/HytaleModding/site/blob/main/content/docs/en/established-information/server/interface/ui-customization.mdx)
[Inputs\
\
Information about input methods supported in Hytale.](https://hytalemodding.dev/en/docs/established-information/server/interface/inputs)
[The Hytale Client\
\
Information regarding the Hytale client.](https://hytalemodding.dev/en/docs/established-information/client)
### On this page
[UI Customization in Hytale](https://hytalemodding.dev/en/docs/established-information/server/interface/ui-customization#ui-customization-in-hytale)
[Control Flow](https://hytalemodding.dev/en/docs/established-information/server/interface/ui-customization#control-flow)
[UI Layout Assets](https://hytalemodding.dev/en/docs/established-information/server/interface/ui-customization#ui-layout-assets)
[UI Framework Implementations](https://hytalemodding.dev/en/docs/established-information/server/interface/ui-customization#ui-framework-implementations)
[Legacy Implementation](https://hytalemodding.dev/en/docs/established-information/server/interface/ui-customization#legacy-implementation)
[NoesisGUI (Primary Framework)](https://hytalemodding.dev/en/docs/established-information/server/interface/ui-customization#noesisgui-primary-framework)
[Third Framework](https://hytalemodding.dev/en/docs/established-information/server/interface/ui-customization#third-framework)
[Performance Considerations](https://hytalemodding.dev/en/docs/established-information/server/interface/ui-customization#performance-considerations)
---
# Visual Scripting
Established InformationServerContent Categories
Visual Scripting
================
An introduction to what we know of Hytale's visual scripting system as of writing this.
[Visual Scripting](https://hytalemodding.dev/en/docs/established-information/server/content-categories/visual-scripting#visual-scripting)
==========================================================================================================================================
Hytale plans to support Visual Scripting as a method to make advanced logic and control flow accessible to a wider audience. This system will not be available at launch, but should be available shortly after launch.
[Overview](https://hytalemodding.dev/en/docs/established-information/server/content-categories/visual-scripting#overview)
--------------------------------------------------------------------------------------------------------------------------
Visual Scripting in Hytale is designed to function similarly to Blueprints in Unreal Engine. It allows designers to create complex behaviors through a visual interface that matches how they think about game logic, without needing to write code directly.
### [Key Features](https://hytalemodding.dev/en/docs/established-information/server/content-categories/visual-scripting#key-features)
* **Subset of Java functionality**: Visual Scripting can do a subset of what is possible with Java plugins
* **Designer-friendly**: "Designers are empowered through a visual language that matches how they think about behaviors"
* **Programmer extensible**: Programmers can extend and optimize the system by adding new visual nodes and performance-sensitive implementations
* **Safe sharing environment**: Provides a sandboxed, safe environment for sharing logic between modders
[Advantages Over Traditional Coding](https://hytalemodding.dev/en/docs/established-information/server/content-categories/visual-scripting#advantages-over-traditional-coding)
------------------------------------------------------------------------------------------------------------------------------------------------------------------------------
Visual Scripting makes writing custom logic more accessible by removing common hurdles found when developing in Java:
* **No complex environment setup**: No need to worry about installing the right tools or configuring development environments
* **Syntax-free development**: Removes the need to learn and remember programming syntax
* **Safer sharing**: Malware in visual scripting should be virtually impossible
* **More inclusive**: Lowers the barrier to entry for non-programmers
[Relationship with Java](https://hytalemodding.dev/en/docs/established-information/server/content-categories/visual-scripting#relationship-with-java)
------------------------------------------------------------------------------------------------------------------------------------------------------
Visual Scripting and Java plugins are designed to work in tandem:
* **Java extends Visual Scripting**: Programmers can create new visual nodes using Java
* **Performance optimization**: While Visual Scripting may not be as optimized as Java directly, programmers can implement performance-critical logic in Java and expose it as visual nodes
* **Best of both worlds**: Allows the majority of logic to remain in the accessible Visual Scripting environment while keeping expensive operations optimized
Hytale strongly recommends Visual Scripting since it is both more accessible and safer to share and download. However, staying purely in Java will still work for those who prefer it.
[3D Visual Scripting](https://hytalemodding.dev/en/docs/established-information/server/content-categories/visual-scripting#3d-visual-scripting)
------------------------------------------------------------------------------------------------------------------------------------------------
One of Hytale's unique features is bringing visual scripting directly into the 3D world:
* **In-world editing**: Link levers, doors, spawners, triggers, and other elements directly inside the game
* **Adventure map creation**: Excellent for building adventure maps and encounters without leaving Hytale
* **Similar to DOOM SnapMap**: Provides a familiar workflow for those who have used similar systems
* **Fully integrated**: Works seamlessly with the asset and scripting stack
[No Text-Based Scripting](https://hytalemodding.dev/en/docs/established-information/server/content-categories/visual-scripting#no-text-based-scripting)
--------------------------------------------------------------------------------------------------------------------------------------------------------
Hytale has made a deliberate decision not to include text-based scripting languages. Their reasoning:
* **False compromise**: Text-based scripting is often introduced to "help non-programmers" but still requires learning programming concepts
* **Complexity increase**: Programmers end up juggling two languages where one is less powerful
* **Still requires syntax**: Designers still need to learn syntax and programming concepts
* **Less inclusive**: Doesn't truly solve the accessibility problem
* **Fragmentation**: Avoids "fragmenting logic across multiple 'half-languages'"
Instead, Hytale believes visual scripting is a better approach that truly makes game logic accessible to a wider audience while maintaining the power and flexibility needed
[Edit on GitHub](https://github.com/HytaleModding/site/blob/main/content/docs/en/established-information/server/content-categories/visual-scripting.mdx)
[Java Modding (Server Plugins)\
\
An introduction to what we know of Hytale's Java-based modding system as of writing this article.](https://hytalemodding.dev/en/docs/established-information/server/content-categories/plugin)
[Inputs\
\
Information about input methods supported in Hytale.](https://hytalemodding.dev/en/docs/established-information/server/interface/inputs)
### On this page
[Visual Scripting](https://hytalemodding.dev/en/docs/established-information/server/content-categories/visual-scripting#visual-scripting)
[Overview](https://hytalemodding.dev/en/docs/established-information/server/content-categories/visual-scripting#overview)
[Key Features](https://hytalemodding.dev/en/docs/established-information/server/content-categories/visual-scripting#key-features)
[Advantages Over Traditional Coding](https://hytalemodding.dev/en/docs/established-information/server/content-categories/visual-scripting#advantages-over-traditional-coding)
[Relationship with Java](https://hytalemodding.dev/en/docs/established-information/server/content-categories/visual-scripting#relationship-with-java)
[3D Visual Scripting](https://hytalemodding.dev/en/docs/established-information/server/content-categories/visual-scripting#3d-visual-scripting)
[No Text-Based Scripting](https://hytalemodding.dev/en/docs/established-information/server/content-categories/visual-scripting#no-text-based-scripting)
---
# Data Assets
Established InformationServerContent Categories
Data Assets
===========
Information about data assets in Hytale and how they drive gameplay behavior and content creation.
[Data Assets](https://hytalemodding.dev/en/docs/established-information/server/content-categories/data-assets#data-assets)
===========================================================================================================================
Data Assets are JSON files which drive gameplay behavior and core content in Hytale. They provide a powerful, data-driven approach to creating and modifying game elements without needing to write code.
[What Are Data Assets?](https://hytalemodding.dev/en/docs/established-information/server/content-categories/data-assets#what-are-data-assets)
----------------------------------------------------------------------------------------------------------------------------------------------
Data Assets allow you to create or modify fundamental game elements through JSON configuration files:
* **Blocks**: Define new block types and their properties
* **Items**: Create custom items with unique behaviors
* **NPCs**: Configure non-player characters and their AI
* **World generation**: Control how the world is generated
* **Loot tables**: Define what items drop from various sources
[Comparison to Minecraft](https://hytalemodding.dev/en/docs/established-information/server/content-categories/data-assets#comparison-to-minecraft)
---------------------------------------------------------------------------------------------------------------------------------------------------
Data Assets are analogous to Minecraft's data pack JSON files, but with significantly broader scope. While Minecraft's data packs are somewhat limited, Hytale's data-driven architecture means that core game elements like blocks, items, and NPCs can all be modified through JSON files.
This expanded data-driven approach gives modders much more power to customize the game without needing to dive into complex programming.
[Development Tools](https://hytalemodding.dev/en/docs/established-information/server/content-categories/data-assets#development-tools)
---------------------------------------------------------------------------------------------------------------------------------------
Recognizing that JSON editing can be tedious and error-prone when done by hand, Hytale plans to provide multiple tools to make working with Data Assets more accessible:
### [Node Editor](https://hytalemodding.dev/en/docs/established-information/server/content-categories/data-assets#node-editor)
Hytale is developing a "Node Editor" to make Data Asset management more user-friendly:
* **Visual interface**: Provides a graphical way to work with data relationships
* **Customization focus**: Particularly helpful for customizing NPCs, interactions, and world generation
* **Integrated workflow**: Works directly within the Hytale Asset Editor for a unified creator suite
* **Accessibility**: Makes complex data relationships easier to understand and modify
### [Additional Tools](https://hytalemodding.dev/en/docs/established-information/server/content-categories/data-assets#additional-tools)
Beyond the Node Editor, Hytale plans to support:
* **Visual JSON generators**: Graphical interfaces for creating JSON without writing syntax
* **Form-based editors**: Structured forms that generate the appropriate JSON automatically
* **Multiple workflow options**: Different tools for different comfort levels and use cases
[Power and Simplicity](https://hytalemodding.dev/en/docs/established-information/server/content-categories/data-assets#power-and-simplicity)
---------------------------------------------------------------------------------------------------------------------------------------------
The effectiveness of Data Assets is demonstrated by their simplicity. For example, making raptors rideable in Hytale reportedly requires only 4 lines of JSON configuration - showcasing how powerful yet accessible the system is designed to be.
This balance between power and accessibility is central to Hytale's modding philosophy: providing professional-grade tools that don't require programming expertise to use effectively.
[Integration with Other Systems](https://hytalemodding.dev/en/docs/established-information/server/content-categories/data-assets#integration-with-other-systems)
-----------------------------------------------------------------------------------------------------------------------------------------------------------------
Data Assets work seamlessly with Hytale's other development approaches:
* **Visual Scripting**: Can reference and manipulate data defined in Data Assets
* **Java plugins**: Can read from and modify Data Assets for more complex behaviors
* **Asset Editor**: Provides a unified interface for managing both visual assets and their data configurations
This integration ensures that Data Assets aren't isolated configuration files, but rather a core part of Hytale's comprehensive development environment.
[Edit on GitHub](https://github.com/HytaleModding/site/blob/main/content/docs/en/established-information/server/content-categories/data-assets.mdx)
[Modelling & Texturing / Art Assets\
\
Information about 3D Modelling, Texturing and Art Assets in Hytale.](https://hytalemodding.dev/en/docs/established-information/server/content-categories/art-assets)
[Java Modding (Server Plugins)\
\
An introduction to what we know of Hytale's Java-based modding system as of writing this article.](https://hytalemodding.dev/en/docs/established-information/server/content-categories/plugin)
### On this page
[Data Assets](https://hytalemodding.dev/en/docs/established-information/server/content-categories/data-assets#data-assets)
[What Are Data Assets?](https://hytalemodding.dev/en/docs/established-information/server/content-categories/data-assets#what-are-data-assets)
[Comparison to Minecraft](https://hytalemodding.dev/en/docs/established-information/server/content-categories/data-assets#comparison-to-minecraft)
[Development Tools](https://hytalemodding.dev/en/docs/established-information/server/content-categories/data-assets#development-tools)
[Node Editor](https://hytalemodding.dev/en/docs/established-information/server/content-categories/data-assets#node-editor)
[Additional Tools](https://hytalemodding.dev/en/docs/established-information/server/content-categories/data-assets#additional-tools)
[Power and Simplicity](https://hytalemodding.dev/en/docs/established-information/server/content-categories/data-assets#power-and-simplicity)
[Integration with Other Systems](https://hytalemodding.dev/en/docs/established-information/server/content-categories/data-assets#integration-with-other-systems)
---
# Modelling & Texturing / Art Assets
Established InformationServerContent Categories
Modelling & Texturing / Art Assets
==================================
Information about 3D Modelling, Texturing and Art Assets in Hytale.
[Modelling / Texture Art](https://hytalemodding.dev/en/docs/established-information/server/content-categories/art-assets#modelling--texture-art)
=================================================================================================================================================
Hytale provides comprehensive support for 3D modeling and texture art creation, with specialized tools and workflows designed to maintain the game's distinctive visual style while empowering creators.
[Current Mod Tooling](https://hytalemodding.dev/en/docs/established-information/server/content-categories/art-assets#current-mod-tooling)
------------------------------------------------------------------------------------------------------------------------------------------
### [Blockbench](https://hytalemodding.dev/en/docs/established-information/server/content-categories/art-assets#blockbench)
Hytale uses **Blockbench** as the primary tool for 3D modeling and animation:
* **Official support**: Used for "creating Hytale models, textures, and animations"
* **Special plugin**: Hytale will have a dedicated Blockbench plugin, to be released ASAP
* **Direct compatibility**: The plugin allows creators to "create Hytale-compatible models, textures, and animations directly in Blockbench"
* **Replaces legacy tools**: Fully replaces the old Hytale Model Maker to better support established creative workflows in the community
* **Safety features**: Only allows you to add things compatible with the engine, so no need to worry about breaking anything
[Model Constraints](https://hytalemodding.dev/en/docs/established-information/server/content-categories/art-assets#model-constraints)
--------------------------------------------------------------------------------------------------------------------------------------
### [Geometry Types](https://hytalemodding.dev/en/docs/established-information/server/content-categories/art-assets#geometry-types)
The vast majority of models in Hytale are constrained to specific geometric primitives:
**3D Elements**:
* Blocks
* Cuboids
* Boxes
**2D Elements**:
* Quads
* Rectangles
* Planes (composed of 2 triangles)
### [Design Philosophy](https://hytalemodding.dev/en/docs/established-information/server/content-categories/art-assets#design-philosophy)
These constraints serve multiple purposes:
* **Performance optimization**: Ensures efficient rendering and game performance
* **Consistent art style**: Maintains Hytale's distinctive visual aesthetic
* **Seamless integration**: Makes mods feel more cohesive with the base game
[Pixel Density Standards](https://hytalemodding.dev/en/docs/established-information/server/content-categories/art-assets#pixel-density-standards)
--------------------------------------------------------------------------------------------------------------------------------------------------
Hytale uses different pixel densities for different types of content:
### [Standard Densities](https://hytalemodding.dev/en/docs/established-information/server/content-categories/art-assets#standard-densities)
* **Blocks**: 32px density
* **Player models**: 64px density
* **Mobs**: Likely also 64px density
* **Player equipment**: 64px density (weapons, cosmetics, armor, etc.)
### [Flexibility](https://hytalemodding.dev/en/docs/established-information/server/content-categories/art-assets#flexibility)
* **Wrong density handling**: Using incorrect density may cause assets to appear at the wrong size, but will not cause import failures
* **No strict restrictions**: Pixel ratio, rotation, and scaling are not restricted
* **Forgiving system**: The tools are designed to be flexible while maintaining compatibility
[Hytale Asset Editor](https://hytalemodding.dev/en/docs/established-information/server/content-categories/art-assets#hytale-asset-editor)
------------------------------------------------------------------------------------------------------------------------------------------
### [In-Game Editor](https://hytalemodding.dev/en/docs/established-information/server/content-categories/art-assets#in-game-editor)
The Asset Editor is a comprehensive tool that will ship with the game:
* **Ships with game**: Available to all players from launch
* **External tool requirement**: Does not support image editing, you must use external tools for texture creation
* **Data asset editing**: Primary editor for working with Data Assets
* **Expanding capabilities**: Currently supports most features, though has limitations around NPCs, worldgen, and interactions that will expand over time
### [Particle Creation](https://hytalemodding.dev/en/docs/established-information/server/content-categories/art-assets#particle-creation)
The Asset Editor includes robust particle creation tools:
* **In-game creation**: Particles are created directly in-game using the Asset Editor
* **Industry standard**: Particle logic is robust and similar to Unity/Unreal particle systems
* **Event-driven**: Particles can be spawned on events or interactions (like opening doors)
* **Entity attachment**: Can attach particles to entities with specific attachment points
* **Dynamic movement**: Supports particles moving with their anchor points
* **Time delays**: Supports time-based particle effects and delays
[Materials](https://hytalemodding.dev/en/docs/established-information/server/content-categories/art-assets#materials)
----------------------------------------------------------------------------------------------------------------------
### [Optimization Focus](https://hytalemodding.dev/en/docs/established-information/server/content-categories/art-assets#optimization-focus)
Hytale takes a different approach to materials compared to other engines:
* **Pre-optimized**: Materials are very optimized and artists cannot create custom materials
* **Performance priority**: This constraint ensures consistent performance across all content
* **Curated system**: Maintains visual consistency while maximizing efficiency
[Best Practices](https://hytalemodding.dev/en/docs/established-information/server/content-categories/art-assets#best-practices)
--------------------------------------------------------------------------------------------------------------------------------
### [Asset Optimization](https://hytalemodding.dev/en/docs/established-information/server/content-categories/art-assets#asset-optimization)
Key considerations from Hytale's development team:
* **Mindful resource usage**: Be conscious of how many blocks/quads you use and texture file sizes
* **Avoid bloat**: Goal is to prevent unnecessary asset bloat that could impact performance
* **Efficiency focus**: Balance visual quality with technical constraints
### [Future Documentation](https://hytalemodding.dev/en/docs/established-information/server/content-categories/art-assets#future-documentation)
* **Best practice guide**: A comprehensive "best practice" guide for art and modeling will be released at some point
* **Flexible boundaries**: Most creative goals can be achieved without breaking anything in the system
* **Community-driven workflows**: Tools are designed to support established creative workflows in the modding community
[Integration with Development Pipeline](https://hytalemodding.dev/en/docs/established-information/server/content-categories/art-assets#integration-with-development-pipeline)
------------------------------------------------------------------------------------------------------------------------------------------------------------------------------
The modeling and texture art workflow integrates seamlessly with Hytale's broader development ecosystem:
* **Asset Editor compatibility**: Models created in Blockbench work directly with the Hytale Asset Editor
* **Data Asset integration**: 3D models can be configured and customized through Data Assets
* **Visual Scripting support**: Models can be controlled and animated through Visual Scripting
* **Java plugin extensibility**: Advanced model behaviors can be implemented through Java plugins
* **Particle integration**: Models can have particles attached at specific points for enhanced visual effects
This integrated approach ensures that 3D modeling and texture art aren't isolated creative processes, but core components of Hytale's comprehensive development environment.
[Edit on GitHub](https://github.com/HytaleModding/site/blob/main/content/docs/en/established-information/server/content-categories/art-assets.mdx)
[Server-First Development\
\
Information regarding what Server-First Development means, and more.](https://hytalemodding.dev/en/docs/established-information/server/server-first-dev)
[Data Assets\
\
Information about data assets in Hytale and how they drive gameplay behavior and content creation.](https://hytalemodding.dev/en/docs/established-information/server/content-categories/data-assets)
### On this page
[Modelling / Texture Art](https://hytalemodding.dev/en/docs/established-information/server/content-categories/art-assets#modelling--texture-art)
[Current Mod Tooling](https://hytalemodding.dev/en/docs/established-information/server/content-categories/art-assets#current-mod-tooling)
[Blockbench](https://hytalemodding.dev/en/docs/established-information/server/content-categories/art-assets#blockbench)
[Model Constraints](https://hytalemodding.dev/en/docs/established-information/server/content-categories/art-assets#model-constraints)
[Geometry Types](https://hytalemodding.dev/en/docs/established-information/server/content-categories/art-assets#geometry-types)
[Design Philosophy](https://hytalemodding.dev/en/docs/established-information/server/content-categories/art-assets#design-philosophy)
[Pixel Density Standards](https://hytalemodding.dev/en/docs/established-information/server/content-categories/art-assets#pixel-density-standards)
[Standard Densities](https://hytalemodding.dev/en/docs/established-information/server/content-categories/art-assets#standard-densities)
[Flexibility](https://hytalemodding.dev/en/docs/established-information/server/content-categories/art-assets#flexibility)
[Hytale Asset Editor](https://hytalemodding.dev/en/docs/established-information/server/content-categories/art-assets#hytale-asset-editor)
[In-Game Editor](https://hytalemodding.dev/en/docs/established-information/server/content-categories/art-assets#in-game-editor)
[Particle Creation](https://hytalemodding.dev/en/docs/established-information/server/content-categories/art-assets#particle-creation)
[Materials](https://hytalemodding.dev/en/docs/established-information/server/content-categories/art-assets#materials)
[Optimization Focus](https://hytalemodding.dev/en/docs/established-information/server/content-categories/art-assets#optimization-focus)
[Best Practices](https://hytalemodding.dev/en/docs/established-information/server/content-categories/art-assets#best-practices)
[Asset Optimization](https://hytalemodding.dev/en/docs/established-information/server/content-categories/art-assets#asset-optimization)
[Future Documentation](https://hytalemodding.dev/en/docs/established-information/server/content-categories/art-assets#future-documentation)
[Integration with Development Pipeline](https://hytalemodding.dev/en/docs/established-information/server/content-categories/art-assets#integration-with-development-pipeline)
---
# Creating Commands
Server Plugins
Creating Commands
=================
Learn how to create custom commands for your Hytale mod.
In this guide, you will learn how to create custom commands for your Hytale mod.
[The `AbstractPlayerCommand` Class](https://hytalemodding.dev/en/docs/guides/plugin/creating-commands#the-abstractplayercommand-class)
---------------------------------------------------------------------------------------------------------------------------------------
To create a command, you can extend the `AbstractPlayerCommand` class. You need to provide a constructor that calls the `BaseCommand` constructor with the command name, description, and whether the command requires confirmation (--confirm while running the command).
You can override the `execute` function to implement the command's behavior. It gives you access to the CommandContext which is always a player in this case, the EntityStore, the Reference store, the player reference as well as the World in which the command is being executed. It's important to know that `AbstractPlayerCommand` extends `AbstractAsyncCommand` meaning that commands do not execute on the main server thread.
You can use the `Store` along with the `Ref` to access all entity components like the `Player` component, `UUIDComponent` or `TransformComponent`.
public class ExampleCommand extends AbstractPlayerCommand {
public ExampleCommand() {
super("test", "Super test command!");
}
@Override
protected void execute(@Nonnull CommandContext commandContext, @Nonnull Store store, @Nonnull Ref ref, @Nonnull PlayerRef playerRef, @Nonnull World world) {
Player player = store.getComponent(ref, Player.getComponentType()); // also a component
UUIDComponent component = store.getComponent(ref, UUIDComponent.getComponentType());
TransformComponent transform = store.getComponent(ref, TransformComponent.getComponentType());
player.sendMessage(Message.raw("Player#getUuid() : " + player.getUuid())); // returns UUID from UUIDComponent
player.sendMessage(Message.raw("UUIDComponent : " + component.getUuid()));
player.sendMessage(Message.raw("equal : " + player.getUuid().equals(component.getUuid()))); // they're both the same
player.sendMessage(Message.raw("Transform : " + transform.getPosition()));
}
}
[Registering the Command](https://hytalemodding.dev/en/docs/guides/plugin/creating-commands#registering-the-command)
---------------------------------------------------------------------------------------------------------------------
For any command
public class MyPlugin extends JavaPlugin {
@Override
public void setup() {
this.getCommandRegistry().registerCommand(new ExampleCommand());
}
}
Written by Neil Revin, oskarscot
[Edit on GitHub](https://github.com/HytaleModding/site/blob/main/content/docs/en/guides/plugin/creating-commands.mdx)
[Browsing the server.jar code\
\
Learn how to patch the server.jar and browse the source code.](https://hytalemodding.dev/en/docs/guides/plugin/browsing-serverjar)
[Creating Events\
\
Learn how to create custom events for your Hytale mod.](https://hytalemodding.dev/en/docs/guides/plugin/creating-events)
### On this page
[The `AbstractPlayerCommand` Class](https://hytalemodding.dev/en/docs/guides/plugin/creating-commands#the-abstractplayercommand-class)
[Registering the Command](https://hytalemodding.dev/en/docs/guides/plugin/creating-commands#registering-the-command)
---
# Browsing the server.jar code
Server Plugins
Browsing the server.jar code
============================
Learn how to patch the server.jar and browse the source code.
The ~patcher~ allows you to more easily prepare an environment for exploring the Hytale Server without publishing the decompiled code.
[Setup](https://hytalemodding.dev/en/docs/guides/plugin/browsing-serverjar#setup)
----------------------------------------------------------------------------------
* Clone the patcher `git clone https://github.com/HytaleModding/patcher.git`, and enter the directory. `cd patcher`
* Create a Python virtual environment in the `.venv` folder. The command for this varies by platform but it is probably one of these:
* `python -m venv .venv`
* `python3 -m venv .venv` (Linux)
* `py -3.13 -m venv .venv` (Windows)
In the last one, specifying the version is recommended if you have multiple Pythons installed.
* Activate the virtual environment:
* Windows: `".venv\Scripts\activate"` (including the quotes)
* Linux/Mac: `source .venv/bin/activate`
* From now on, you are running python commands from inside the venv, hence you must use `python` instead of `py` or `python3` to invoke python.
* Inside the venv, you have to install the dependencies
* `pip install -r requirements.txt`
* Install these dependencies and ensure they are on PATH:
* `git`
* `java` you need JDK 25 or newer
* `jar` (comes with JDK inside the bin folder)
* `mvn`
[Usage](https://hytalemodding.dev/en/docs/guides/plugin/browsing-serverjar#usage)
----------------------------------------------------------------------------------
Put your HytaleServer.jar in the same root directory of this repo or specify an environment variable `HYTALESERVER_JAR_PATH` with the path to your HytaleServer.jar
Then run this:
python run.py setup
It will
* copy the HytaleServer.jar into `work/download`
* (on Windows) fix `META-INF/license` name collision
* decompile it using Fernflower and save the output to `work/decompile`
* set up a Maven project in `hytale-server` with the decompiled code
You can then open the `hytale-server` folder in your favorite IDE and begin exploring the code. For _IntelliJ IDEA_, you must first set up the SDK. After opening the project (you can open the `pom.xml` file, IDEA will prompt you to open the entire project) press Ctrl+Alt+Shift+S and under _Project_ configure SDK and Language level to _25_.
If IDEA does not offer an option to run the main file, right-click the `src` folder -> Mark Directory As -> Sources Root then reload the maven project:
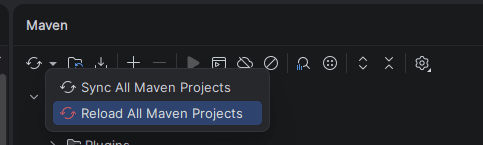
It is located in the "m" icon on the right side:
If you don't see it, enable it under View -> Tool Windows -> Maven.
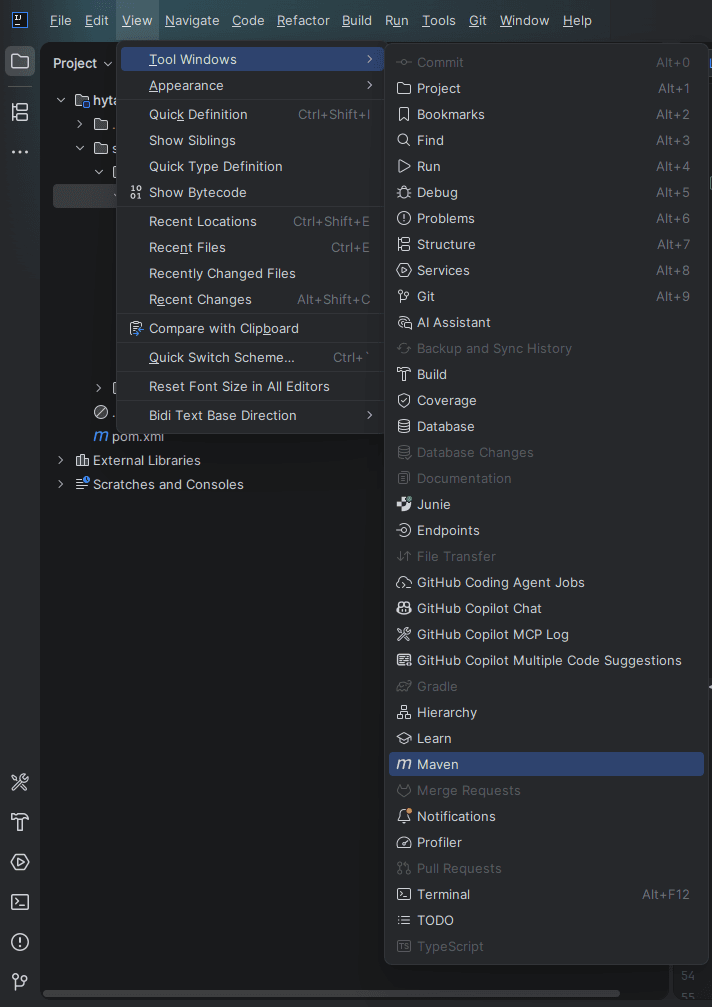
This decompiled code is likely broken. But it is somewhat usable for exploration. Try Ctrl+Shift+F and search PacketAdapters
[Edit on GitHub](https://github.com/HytaleModding/site/blob/main/content/docs/en/guides/plugin/browsing-serverjar.mdx)
[Setting Up Your Development Environment\
\
Learn how to set up your development environment for modding Hytale.](https://hytalemodding.dev/en/docs/guides/plugin/setting-up-env)
[Creating Commands\
\
Learn how to create custom commands for your Hytale mod.](https://hytalemodding.dev/en/docs/guides/plugin/creating-commands)
### On this page
[Setup](https://hytalemodding.dev/en/docs/guides/plugin/browsing-serverjar#setup)
[Usage](https://hytalemodding.dev/en/docs/guides/plugin/browsing-serverjar#usage)
---
# Permission Management
Server Plugins
Permission Management
=====================
Learn how to manage permission nodes and groups in your Hytale plugin.
In this guide, you'll learn how to manage permission nodes and groups in your Hytale plugin.
[The `PermissionsModule` class](https://hytalemodding.dev/en/docs/guides/plugin/permission-management#the-permissionsmodule-class)
-----------------------------------------------------------------------------------------------------------------------------------
The `PermissionsModule` class is responsible for managing permission nodes and groups in your plugin. It provides methods to check, grant and revoke permissions and groups for players. It allows the following operations
* Add permissions to user
* Remove permissions from user
* Add permissions to group (this also creates the group if it doesn't exist)
* Remove permissions from group
* Add user to group
* Remove user from group
* List all groups for a user
* Check if a user has a permission (it checks both user and group permissions for the given player UUID)
With this class you cannot:
* List all defined groups
* Remove a group
### [Adding Permission Nodes](https://hytalemodding.dev/en/docs/guides/plugin/permission-management#adding-permission-nodes)
You need a `Set` containing all the permission nodes you want to add, these are added on top of the already existing permission nodes the user may have, it is not a replacement.
Set permissions = new HashSet<>();
PermissionsModule perms = PermissionsModule.get();
perms.addUserPermission(playerUUID, permissions);
### [Removing Permission Nodes](https://hytalemodding.dev/en/docs/guides/plugin/permission-management#removing-permission-nodes)
Same as above, we just use the `removeUserPermission` method instead to remove permission nodes.
Set permissions = new HashSet<>();
PermissionsModule perms = PermissionsModule.get();
perms.removeUserPermission(playerUUID, permissions);
### [Add permissions to group](https://hytalemodding.dev/en/docs/guides/plugin/permission-management#add-permissions-to-group)
String groupName = "testGroup";
Set permissions = new HashSet<>();
PermissionsModule perms = PermissionsModule.get();
perms.addGroupPermission(groupName, permissions);
### [Remove permissions from group](https://hytalemodding.dev/en/docs/guides/plugin/permission-management#remove-permissions-from-group)
String groupName = "testGroup";
Set permissions = new HashSet<>();
PermissionsModule perms = PermissionsModule.get();
perms.removeGroupPermission(groupName, permissions);
### [Add user to group](https://hytalemodding.dev/en/docs/guides/plugin/permission-management#add-user-to-group)
String groupName = "testGroup";
Set permissions = new HashSet<>();
PermissionsModule perms = PermissionsModule.get();
perms.addUserToGroup(playerUUID, groupName);
### [Remove user from group](https://hytalemodding.dev/en/docs/guides/plugin/permission-management#remove-user-from-group)
String groupName = "testGroup";
Set permissions = new HashSet<>();
PermissionsModule perms = PermissionsModule.get();
perms.removeUserFromGroup(playerUUID, groupName);
### [List all groups for a user](https://hytalemodding.dev/en/docs/guides/plugin/permission-management#list-all-groups-for-a-user)
PermissionsModule perms = PermissionsModule.get();
perms.getGroupsForUser(playerUUID);
### [Check Permission Nodes](https://hytalemodding.dev/en/docs/guides/plugin/permission-management#check-permission-nodes)
To check if a player has a specific permission node, you can use the `hasPermission` method.
boolean hasPermission = PermissionsModule.hasPermission(playerUUID, "permission.node");
### [Additional: Defining your own storage provider for permissions and groups](https://hytalemodding.dev/en/docs/guides/plugin/permission-management#additional-defining-your-own-storage-provider-for-permissions-and-groups)
Apparently we could implement our own storage provider for permissions and groups as file storage is not very reliable.
First we need to define a provider class that implements PermissionProvider:
public class DatabasePermissionProvider implements PermissionProvider
Then we just implement the required methods using a database implementation. To force our plugin to use this new provider we just need to add to the provider list our fresh DatabasePermissionProvider.
perms.getProviders().addFirst(new DatabasePermissionProvider());
Written by Neil Revin, Bird, Craw
[Edit on GitHub](https://github.com/HytaleModding/site/blob/main/content/docs/en/guides/plugin/permission-management.mdx)
[Inventory Management\
\
Learn how to manage player inventories in your Hytale mod.](https://hytalemodding.dev/en/docs/guides/plugin/inventory-management)
[Player Input and Keybind Guide\
\
How to handle player input.](https://hytalemodding.dev/en/docs/guides/plugin/player-input-guide)
### On this page
[The `PermissionsModule` class](https://hytalemodding.dev/en/docs/guides/plugin/permission-management#the-permissionsmodule-class)
[Adding Permission Nodes](https://hytalemodding.dev/en/docs/guides/plugin/permission-management#adding-permission-nodes)
[Removing Permission Nodes](https://hytalemodding.dev/en/docs/guides/plugin/permission-management#removing-permission-nodes)
[Add permissions to group](https://hytalemodding.dev/en/docs/guides/plugin/permission-management#add-permissions-to-group)
[Remove permissions from group](https://hytalemodding.dev/en/docs/guides/plugin/permission-management#remove-permissions-from-group)
[Add user to group](https://hytalemodding.dev/en/docs/guides/plugin/permission-management#add-user-to-group)
[Remove user from group](https://hytalemodding.dev/en/docs/guides/plugin/permission-management#remove-user-from-group)
[List all groups for a user](https://hytalemodding.dev/en/docs/guides/plugin/permission-management#list-all-groups-for-a-user)
[Check Permission Nodes](https://hytalemodding.dev/en/docs/guides/plugin/permission-management#check-permission-nodes)
[Additional: Defining your own storage provider for permissions and groups](https://hytalemodding.dev/en/docs/guides/plugin/permission-management#additional-defining-your-own-storage-provider-for-permissions-and-groups)
---
# Inventory Management
Server Plugins
Inventory Management
====================
Learn how to manage player inventories in your Hytale mod.
In this guide, you'll learn how to manage player inventories in your Hytale mod.
[Accessing the Player Inventory](https://hytalemodding.dev/en/docs/guides/plugin/inventory-management#accessing-the-player-inventory)
--------------------------------------------------------------------------------------------------------------------------------------
To access the Inventory of a `Player`, you can use the `getInventory()` method which returns the `Inventory` object.
Inventory inventory = player.getInventory();
[Opening Inventories](https://hytalemodding.dev/en/docs/guides/plugin/inventory-management#opening-inventories)
----------------------------------------------------------------------------------------------------------------
You can open different types of inventories, these inventories are known as "Pages". You can also add custom pages, this will be covered in a guide later on.
You can use the `Page` enum to reference existing inventories, currently the following pages are available:
* `Page.None`
* `Page.Bench`
* `Page.Inventory`
* `Page.ToolsSettings`
* `Page.Map`
* `Page.MachinimaEditor`
* `Page.ContentCreation`
* `Page.Custom`
PageManager pageManager = player.getPageManager();
Store store = player.getWorld().getEntityStore().getStore();
pageManager.setPage(player.getReference(), store, Page.Inventory);
[`ItemStack` Class](https://hytalemodding.dev/en/docs/guides/plugin/inventory-management#itemstack-class)
----------------------------------------------------------------------------------------------------------
You can create and manipulate items in a player's inventory using the `ItemStack` class. This class represents a stack of items, and provides methods for managing the quantity and type of items in the stack.
### [Creating an ItemStack](https://hytalemodding.dev/en/docs/guides/plugin/inventory-management#creating-an-itemstack)
To create an `ItemStack`, you need to specify the material type and the quantity of items in the stack.
ItemStack item = new ItemStack("Stone");
ItemStack withQuantity = new ItemStack("Stone", 64);
#### [Adding custom metadata](https://hytalemodding.dev/en/docs/guides/plugin/inventory-management#adding-custom-metadata)
You can also add custom metadata to a `ItemStack` by passing a `BsonDocument` when creating it.
BsonDocument metadata = new BsonDocument();
metadata.append("customData", new BsonString("value"));
ItemStack item = new ItemStack("Stone", 64, metadata);
### [Setting a durability](https://hytalemodding.dev/en/docs/guides/plugin/inventory-management#setting-a-durability)
ItemStack stackWithDurability = new ItemStack(
"DiamondSword", // itemId
1, // quantity
100.0, // durability
100.0, // maxDurability
metadata // metadata (optional)
);
[Getting the `ItemContainer`](https://hytalemodding.dev/en/docs/guides/plugin/inventory-management#getting-the-itemcontainer)
------------------------------------------------------------------------------------------------------------------------------
The `Inventory` class provides methods to get multiple `ItemContainer` objects, like:
* `.getStorage()`
* `.getArmor()`
* `.getBackpack()`
* `.getHotbar()`
* `.getUtility()`
There are also combined methods like:
* `.getCombinedEverything()`
* `.getCombinedArmorHotbarStorage()`
* `.getCombinedBackpackStorageHotbar()`
* `.getCombinedHotbarFirst()`
* `.getCombinedStorageFirst()`
* `.getCombinedArmorHotbarUtilityStorage()`
* `.getCombinedHotbarUtilityConsumableStorage()`
[Adding `ItemStack` objects to the Inventory](https://hytalemodding.dev/en/docs/guides/plugin/inventory-management#adding-itemstack-objects-to-the-inventory)
--------------------------------------------------------------------------------------------------------------------------------------------------------------
To add an `ItemStack` to a player's inventory, you can use the `addItemStack()` method of the `Inventory` class.
Inventory inventory = player.getInventory();
inventory.addItemStack(item);
Or you can specify a certain slot to add it to:
inventory.addItemStackToSlot((short) 4, stack)
[Removing `ItemStack` objects from the Inventory](https://hytalemodding.dev/en/docs/guides/plugin/inventory-management#removing-itemstack-objects-from-the-inventory)
----------------------------------------------------------------------------------------------------------------------------------------------------------------------
To remove an `ItemStack` from a player's inventory, you can use the `removeItemStack()` method of the `Inventory` class.
Inventory inventory = player.getInventory();
inventory.removeItemStack(item);
Or you can specify a certain slot to remove it from:
inventory.removeItemStackFromSlot((short) 4);
Written by Neil Revin
[Edit on GitHub](https://github.com/HytaleModding/site/blob/main/content/docs/en/guides/plugin/inventory-management.mdx)
[Customizing Camera Controls\
\
Intro to custom camera modding.](https://hytalemodding.dev/en/docs/guides/plugin/customizing-camera-controls)
[Permission Management\
\
Learn how to manage permission nodes and groups in your Hytale plugin.](https://hytalemodding.dev/en/docs/guides/plugin/permission-management)
### On this page
[Accessing the Player Inventory](https://hytalemodding.dev/en/docs/guides/plugin/inventory-management#accessing-the-player-inventory)
[Opening Inventories](https://hytalemodding.dev/en/docs/guides/plugin/inventory-management#opening-inventories)
[`ItemStack` Class](https://hytalemodding.dev/en/docs/guides/plugin/inventory-management#itemstack-class)
[Creating an ItemStack](https://hytalemodding.dev/en/docs/guides/plugin/inventory-management#creating-an-itemstack)
[Adding custom metadata](https://hytalemodding.dev/en/docs/guides/plugin/inventory-management#adding-custom-metadata)
[Setting a durability](https://hytalemodding.dev/en/docs/guides/plugin/inventory-management#setting-a-durability)
[Getting the `ItemContainer`](https://hytalemodding.dev/en/docs/guides/plugin/inventory-management#getting-the-itemcontainer)
[Adding `ItemStack` objects to the Inventory](https://hytalemodding.dev/en/docs/guides/plugin/inventory-management#adding-itemstack-objects-to-the-inventory)
[Removing `ItemStack` objects from the Inventory](https://hytalemodding.dev/en/docs/guides/plugin/inventory-management#removing-itemstack-objects-from-the-inventory)
---
# Packets: Client-to-Server Reference
Server Plugins
Packets: Client-to-Server Reference
===================================
Complete reference for every packet the client can send to the server.
Please see [Listening to Packets Guide](https://forum.hytalemodding.dev/d/17-listening-to-packets)
for further details
Packet are found in the decompiled server source: `"decompiled/sources/com/hypixel/hytale/protocol/packets"`
* * *
[Player Packets](https://hytalemodding.dev/en/docs/guides/plugin/client-inputs-reference#player-packets)
---------------------------------------------------------------------------------------------------------
Packets sent by the client for player actions, movement, and state updates.
| Packet Name | ID | Fields |
| --- | --- | --- |
| `SetClientId` | 100 | `clientId` |
| `SetGameMode` | 101 | `gameMode` |
| `SetMovementStates` | 102 | `movementStates` |
| `SetBlockPlacementOverride` | 103 | `enabled` |
| `JoinWorld` | 104 | `clearWorld`, `fadeInOut`, `worldUuid` |
| `ClientReady` | 105 | `readyForChunks`, `readyForGameplay` |
| `LoadHotbar` | 106 | `inventoryRow` |
| `SaveHotbar` | 107 | `inventoryRow` |
| `ClientMovement` | 108 | `movementStates`, `relativePosition`, `absolutePosition`, `bodyOrientation`, `lookOrientation`, `teleportAck`, `wishMovement`, `velocity`, `mountedTo`, `riderMovementStates` |
| `ClientTeleport` | 109 | `teleportId`, `modelTransform`, `resetVelocity` |
| `UpdateMovementSettings` | 110 | `movementSettings` |
| `MouseInteraction` | 111 | `clientTimestamp`, `activeSlot`, `itemInHandId`, `screenPoint`, `mouseButton`, `mouseMotion`, `worldInteraction` |
| `DamageInfo` | 112 | `damageSourcePosition`, `damageAmount`, `damageCause` |
| `ReticleEvent` | 113 | `eventIndex` |
| `DisplayDebug` | 114 | `shape`, `matrix`, `color`, `time`, `fade`, `frustumProjection` |
| `ClearDebugShapes` | 115 | _(none)_ |
| `SyncPlayerPreferences` | 116 | `showEntityMarkers`, `armorItemsPreferredPickupLocation`, `weaponAndToolItemsPreferredPickupLocation`, `usableItemsItemsPreferredPickupLocation`, `solidBlockItemsPreferredPickupLocation`, `miscItemsPreferredPickupLocation`, `allowNPCDetection`, `respondToHit` |
| `ClientPlaceBlock` | 117 | `position`, `rotation`, `placedBlockId` |
| `UpdateMemoriesFeatureStatus` | 118 | `isFeatureUnlocked` |
| `RemoveMapMarker` | 119 | `markerId` |
[Inventory Packets](https://hytalemodding.dev/en/docs/guides/plugin/client-inputs-reference#inventory-packets)
---------------------------------------------------------------------------------------------------------------
Packets sent by the client for inventory management and item manipulation.
| Packet Name | ID | Fields |
| --- | --- | --- |
| `UpdatePlayerInventory` | 170 | `storage`, `armor`, `hotbar`, `utility`, `builderMaterial`, `tools`, `backpack`, `sortType` |
| `SetCreativeItem` | 171 | `inventorySectionId`, `slotId`, `item`, `override` |
| `DropCreativeItem` | 172 | `item` |
| `SmartGiveCreativeItem` | 173 | `item`, `moveType` |
| `DropItemStack` | 174 | `inventorySectionId`, `slotId`, `quantity` |
| `MoveItemStack` | 175 | `fromSectionId`, `fromSlotId`, `quantity`, `toSectionId`, `toSlotId` |
| `SmartMoveItemStack` | 176 | `fromSectionId`, `fromSlotId`, `quantity`, `moveType` |
| `SetActiveSlot` | 177 | `inventorySectionId`, `activeSlot` |
| `SwitchHotbarBlockSet` | 178 | `itemId` |
| `InventoryAction` | 179 | `inventorySectionId`, `inventoryActionType`, `actionData` |
[Window Packets](https://hytalemodding.dev/en/docs/guides/plugin/client-inputs-reference#window-packets)
---------------------------------------------------------------------------------------------------------
Packets sent by the client for UI window interactions.
| Packet Name | ID | Fields |
| --- | --- | --- |
| `OpenWindow` | 200 | `id`, `windowType`, `windowData`, `inventory`, `extraResources` |
| `UpdateWindow` | 201 | `id`, `windowData`, `inventory`, `extraResources` |
| `CloseWindow` | 202 | `id` |
| `SendWindowAction` | 203 | `id`, `action` |
| `ClientOpenWindow` | 204 | `type` |
[Other Client Packets](https://hytalemodding.dev/en/docs/guides/plugin/client-inputs-reference#other-client-packets)
---------------------------------------------------------------------------------------------------------------------
Additional client-to-server packets.
| Packet Name | ID | Fields |
| --- | --- | --- |
| `ClientReferral` | 18 | `hostTo`, `data` |
| `SetUpdateRate` | 29 | `updatesPerSecond` |
| `SetTimeDilation` | 30 | `timeDilation` |
| `SetChunk` | 131 | `x`, `y`, `z`, `localLight`, `globalLight`, `data` |
| `SetChunkHeightmap` | 132 | `x`, `z`, `heightmap` |
| `SetChunkTintmap` | 133 | `x`, `z`, `tintmap` |
| `SetChunkEnvironments` | 134 | `x`, `z`, `environments` |
| `SetFluids` | 136 | `x`, `y`, `z`, `data` |
| `SetPaused` | 158 | `paused` |
| `SetEntitySeed` | 160 | `entitySeed` |
| `SetPage` | 216 | `page`, `canCloseThroughInteraction` |
| `SetServerAccess` | 252 | `access`, `password` |
| `SetMachinimaActorModel` | 261 | `model`, `sceneName`, `actorName` |
| `SetServerCamera` | 280 | `clientCameraView`, `isLocked`, `cameraSettings` |
| `SetFlyCameraMode` | 283 | `entering` |
| `SyncInteractionChains` | 290 | `updates` |
_From Hytale Server build `2026.01.13-dcad8778f`_
Written by [Vibe Theory & musava](https://discord.com/users/145420279294722048)
[Edit on GitHub](https://github.com/HytaleModding/site/blob/main/content/docs/en/guides/plugin/client-inputs-reference.mdx)
[Formatting the chat\
\
Learn how to format the chat using the PlayerChatEvent](https://hytalemodding.dev/en/docs/guides/plugin/chat-formatting)
[Creating custom blocks\
\
Learn how to create custom blocks for your Hytale mod.](https://hytalemodding.dev/en/docs/guides/plugin/creating-block)
### On this page
[Player Packets](https://hytalemodding.dev/en/docs/guides/plugin/client-inputs-reference#player-packets)
[Inventory Packets](https://hytalemodding.dev/en/docs/guides/plugin/client-inputs-reference#inventory-packets)
[Window Packets](https://hytalemodding.dev/en/docs/guides/plugin/client-inputs-reference#window-packets)
[Other Client Packets](https://hytalemodding.dev/en/docs/guides/plugin/client-inputs-reference#other-client-packets)
---
# Playing Sounds
Server Plugins
Playing Sounds
==============
Learn how to Play Sounds with your Hytale Plugin
In this guide, you will learn how to play sounds to a player.
[Sound Indexes](https://hytalemodding.dev/en/docs/guides/plugin/playing-sounds#sound-indexes)
----------------------------------------------------------------------------------------------
We currently have a lot of Sounds available to be used as a key in the AssetMap, [click here](https://hytalemodding.dev/en/docs/server/sounds)
to see the full list of available sounds.
You can use the `getAssetMap()` method from the `SoundEvent` class to get the index of a specified sound:
int index = SoundEvent.getAssetMap().getIndex("SFX_Cactus_Large_Hit");
[The Transform Component](https://hytalemodding.dev/en/docs/guides/plugin/playing-sounds#the-transform-component)
------------------------------------------------------------------------------------------------------------------
The `TransformComponent` is the component that tells Hytale where to play the sound. You can get this in multiple ways.
1. Getting the Transform Component from the `Player` object
TransformComponent transform = store.getComponent(context.senderAsPlayerRef(), EntityModule.get().getTransformComponentType());
2. Generating a new TransformComponent (although this is not recommended, as if your player is not close enough they won't hear the sound)
Vector3d vector3d = new Vector3d(0, 0, 0); // position
Vector3f vector3f = new Vector3f(0, 0, 0); // rotation
TransformComponent transform = new TransformComponent(vector3d, vector3f);
### [PlayerRef](https://hytalemodding.dev/en/docs/guides/plugin/playing-sounds#playerref)
You need a Player Reference, which is a instance of `Ref`. If you have the `Player` object, you can use the `getReference()` method to get a Player Reference
### [World](https://hytalemodding.dev/en/docs/guides/plugin/playing-sounds#world)
You need a World reference, as the sound needs to be played inside the `execute()` method from the `World` class.
### [SoundCategory](https://hytalemodding.dev/en/docs/guides/plugin/playing-sounds#soundcategory)
There is a `SoundCategory` enum that defines different sound categories, such as `Music`, `Ambient`, `SFX` and `UI`. You can use these categories to specify the type of sound you are playing.
[Playing Sounds](https://hytalemodding.dev/en/docs/guides/plugin/playing-sounds#playing-sounds)
------------------------------------------------------------------------------------------------
You can use the `SoundUtil` class to play sounds, using the `playSoundEvent3dToPlayer` method.
int index = SoundEvent.getAssetMap().getIndex("SFX_Cactus_Large_Hit");
World world = player.getWorld();
EntityStore store = world.getEntityStore();
Ref playerRef = player.getReference();
world.execute(() -> {
TransformComponent transform = store.getStore().getComponent(playerRef, EntityModule.get().getTransformComponentType());
SoundUtil.playSoundEvent3dToPlayer(playerRef, index, SoundCategory.UI, transform.getPosition(), store.getStore());
});
Written by Neil Revin
[Edit on GitHub](https://github.com/HytaleModding/site/blob/main/content/docs/en/guides/plugin/playing-sounds.mdx)
[Player Input and Keybind Guide\
\
How to handle player input.](https://hytalemodding.dev/en/docs/guides/plugin/player-input-guide)
[Sending notifications\
\
Learn how to send notifications (similar to item pickup) with your Hytale Plugin](https://hytalemodding.dev/en/docs/guides/plugin/send-notifications)
### On this page
[Sound Indexes](https://hytalemodding.dev/en/docs/guides/plugin/playing-sounds#sound-indexes)
[The Transform Component](https://hytalemodding.dev/en/docs/guides/plugin/playing-sounds#the-transform-component)
[PlayerRef](https://hytalemodding.dev/en/docs/guides/plugin/playing-sounds#playerref)
[World](https://hytalemodding.dev/en/docs/guides/plugin/playing-sounds#world)
[SoundCategory](https://hytalemodding.dev/en/docs/guides/plugin/playing-sounds#soundcategory)
[Playing Sounds](https://hytalemodding.dev/en/docs/guides/plugin/playing-sounds#playing-sounds)
---
# Player Input and Keybind Guide
Server Plugins
Player Input and Keybind Guide
==============================
How to handle player input.
[The Basics](https://hytalemodding.dev/en/docs/guides/plugin/player-input-guide#the-basics)
--------------------------------------------------------------------------------------------
Hytale Servers **do not receive raw keyboard input.** Instead, clients send `packets` of Interaction types:
* **Mouse events** - clicks with target info
* **Movement states** - 22 boolean flags (walking, jumping, etc.)
* **Interaction types** - what action the player is performing
* * *
[Keybind Limitations](https://hytalemodding.dev/en/docs/guides/plugin/player-input-guide#keybind-limitations)
--------------------------------------------------------------------------------------------------------------
Due to the use of `packets` not key inputs, you cannot assign your custom Fireball spell to X.
_There is a workaround addressed below, but first let's understand the baseline:_
**You CANNOT:**
* Add new keybinds (keyboard mapping is client-side)
* Remap existing keys
* Add more than 3 ability slots
**You CAN:**
* Intercept `packets` and hijack their purpose
* Use 3 built-in ability slots (`Ability1`, `Ability2`, `Ability3`)
* Make abilities item-dependent (wand = fireball, sword = slash)
* Detect hold vs tap, double-click, toggle (via timing)
* Full mouse control (all 5 buttons, press/release, drag)
### [Fixed Input Slots](https://hytalemodding.dev/en/docs/guides/plugin/player-input-guide#fixed-input-slots)
| Action | Default Key | Server Receives | Notes |
| --- | --- | --- | --- |
| Left Mouse | LMB | `InteractionType.Primary` | Attack/break |
| Right Mouse | RMB | `InteractionType.Secondary` | Use/place |
| Weapon Ability | Q | `InteractionType.Ability1` | Active - weapon special |
| Ability Slot 2 | — | `InteractionType.Ability2` | Unused placeholder |
| Ability Slot 3 | — | `InteractionType.Ability3` | Unused placeholder |
| Interact | E | `InteractionType.Use` | Interact with world |
| Pick Block | MMB | `InteractionType.Pick` | Copy block type |
| Dodge | — | `InteractionType.Dodge` | Dodge roll mechanic |
**Note:** Only `Ability1` (Q key) is actively used for weapon abilities. `Ability2` and `Ability3` exist in the enum but have no default keybinds and nothing in the codebase references them: they appear to be reserved for future use.
These are the only keyboard actions the server sees.
* * *
[Intercepting Packets](https://hytalemodding.dev/en/docs/guides/plugin/player-input-guide#intercepting-packets)
----------------------------------------------------------------------------------------------------------------
This is the work around to Custom Player Keybinds. By intercepting the input packets you can redirect the event trigger to your own class. There is a **major caveat with this strategy:** This will override the default Key Mapping unless you otherwise redirect it.
See [Client Input Reference](https://hytalemodding.dev/en/docs/guides/plugin/client-inputs-reference)
for a comprehensive list of all client-to-server packets.
For instance, intercepting Q to use for custom Fireball spell = Hytale Weapon Abilities becoming unusable.
This is because you aren't intercepting Q, but rather `InteractionType.Ability1`. You would need to redirect a different packet into those recreated abilities in your own mod (this will also of course hijack another packet). The Client Input Reference above shows all packets. _Pro Tip: Builder tools when not in creative are a great starting point._
### [Example: Builder Tools -> Combat Abilities](https://hytalemodding.dev/en/docs/guides/plugin/player-input-guide#example-builder-tools---combat-abilities)
This is one of the better systems to capture, as it intercepts packets not even used during standard play.
// 1. Grant permission on join (in PlayerReadyEvent handler)
PermissionsModule.get().addUserPermission(
playerRef.getUuid(),
Set.of("hytale.editor.builderTools")
);
// 2. Intercept in packet handler
void handleBuilderToolAction(BuilderToolGeneralAction packet, PlayerRef playerRef) {
Ref ref = playerRef.getReference();
if (ref == null) return;
Store store = ref.getStore();
Player playerComponent = (Player) store.getComponent(ref, Player.getComponentType());
if (playerComponent.getGameMode() != GameMode.Creative) {
// Hijack for abilities
switch (packet.action) {
case ActivateToolMode -> castFireball(playerRef); // B pressed
case DeactivateToolMode -> endFireball(playerRef); // B released
case HistoryUndo -> castRewind(playerRef); // Ctrl+Z
case HistoryRedo -> castHaste(playerRef); // Ctrl+Y
case SelectionCopy -> castClone(playerRef); // Ctrl+C
}
return; // Don't run actual builder tool logic
}
// Creative players get normal behavior
super.handleBuilderToolAction(packet, playerRef);
}
You can do this with anything, so a custom keybind for UI, gameplay, etc.
**Critical Note:** If the player changes keybinds you won't know, so your guides have to reference Default Hytale Controls. Also if they change key binds due to your mod (disliking Ctrl+C as an ability for example) the setting follows them, and may impact their experience outside of your ecosystem. Important to consider while choosing packets.
* * *
[Mouse Inputs](https://hytalemodding.dev/en/docs/guides/plugin/player-input-guide#mouse-inputs)
------------------------------------------------------------------------------------------------
Some useful info about mouse inputs
### [Listening to Mouse Clicks](https://hytalemodding.dev/en/docs/guides/plugin/player-input-guide#listening-to-mouse-clicks)
@Override
protected void setup() {
getEventRegistry().register(PlayerMouseButtonEvent.class, event -> {
MouseButtonEvent mouse = event.getMouseButton();
if (mouse.mouseButtonType == MouseButtonType.Left
&& mouse.state == MouseButtonState.Pressed) {
// Left click!
Entity target = event.getTargetEntity();
Vector3i block = event.getTargetBlock();
}
// Cancel the click
// event.setCancelled(true);
});
}
* * *
### [Mouse Button Types](https://hytalemodding.dev/en/docs/guides/plugin/player-input-guide#mouse-button-types)
MouseButtonType.Left // Primary click
MouseButtonType.Right // Secondary click
MouseButtonType.Middle // Scroll wheel click
MouseButtonType.X1 // Side button 1
MouseButtonType.X2 // Side button 2
MouseButtonState.Pressed // Button down
MouseButtonState.Released // Button up
* * *
### [What You Get From Mouse Events](https://hytalemodding.dev/en/docs/guides/plugin/player-input-guide#what-you-get-from-mouse-events)
| Property | Type | Description |
| --- | --- | --- |
| `getMouseButton()` | MouseButtonEvent | Button type, state, click count |
| `getTargetEntity()` | Entity | Entity under cursor (or null) |
| `getTargetBlock()` | Vector3i | Block position under cursor |
| `getItemInHand()` | Item | Currently held item |
| `getScreenPoint()` | Vector2f | Cursor screen position |
| `getPlayer()` | Player | The player who clicked |
**Double-click detection:**
if (mouse.clicks >= 2) {
// Double-clicked!
}
### [Imports](https://hytalemodding.dev/en/docs/guides/plugin/player-input-guide#imports)
import com.hypixel.hytale.protocol.MouseButtonType;
import com.hypixel.hytale.protocol.MouseButtonState;
import com.hypixel.hytale.protocol.MouseButtonEvent;
import com.hypixel.hytale.protocol.InteractionType;
import com.hypixel.hytale.server.core.event.events.player.PlayerMouseButtonEvent;
import com.hypixel.hytale.server.core.event.events.player.PlayerMouseMotionEvent;
* * *
### [Available Player Events](https://hytalemodding.dev/en/docs/guides/plugin/player-input-guide#available-player-events)
All player events that can be registered via `getEventRegistry()`:
| Event | Description |
| --- | --- |
| `PlayerConnectEvent` | Player connecting to server |
| `PlayerDisconnectEvent` | Player disconnecting |
| `PlayerSetupConnectEvent` | Connection setup phase |
| `PlayerSetupDisconnectEvent` | Disconnect setup phase |
| `PlayerReadyEvent` | Player fully loaded and ready |
| `PlayerChatEvent` | Chat message sent |
| `PlayerInteractEvent` | Interaction with world/entities |
| `PlayerMouseButtonEvent` | Mouse button press/release |
| `PlayerMouseMotionEvent` | Mouse movement |
| `PlayerCraftEvent` | Item crafted |
| `AddPlayerToWorldEvent` | Player added to a world |
| `DrainPlayerFromWorldEvent` | Player removed from world |
* * *
[Tips](https://hytalemodding.dev/en/docs/guides/plugin/player-input-guide#tips)
--------------------------------------------------------------------------------
* **1 ability slot active**: Only `Ability1` (Q) is currently used - make it item-dependent
* **Cancel events**: Use `event.setCancelled(true)` to block the action
* **Movement states**: Check these in systems for continuous monitoring
* **Double-click**: Check `mouse.clicks >= 2`
* **Hold vs tap**: Track press/release timing yourself
* **Target info**: Events include what block/entity the player was targeting
* **No move event**: Poll `TransformComponent` or check `MovementStates` instead
* * *
_From Hytale Server build `2026.01.13-dcad8778f`_
Written by [Vibe Theory](https://discord.com/users/145420279294722048)
[Edit on GitHub](https://github.com/HytaleModding/site/blob/main/content/docs/en/guides/plugin/player-input-guide.mdx)
[Permission Management\
\
Learn how to manage permission nodes and groups in your Hytale plugin.](https://hytalemodding.dev/en/docs/guides/plugin/permission-management)
[Playing Sounds\
\
Learn how to Play Sounds with your Hytale Plugin](https://hytalemodding.dev/en/docs/guides/plugin/playing-sounds)
### On this page
[The Basics](https://hytalemodding.dev/en/docs/guides/plugin/player-input-guide#the-basics)
[Keybind Limitations](https://hytalemodding.dev/en/docs/guides/plugin/player-input-guide#keybind-limitations)
[Fixed Input Slots](https://hytalemodding.dev/en/docs/guides/plugin/player-input-guide#fixed-input-slots)
[Intercepting Packets](https://hytalemodding.dev/en/docs/guides/plugin/player-input-guide#intercepting-packets)
[Example: Builder Tools -> Combat Abilities](https://hytalemodding.dev/en/docs/guides/plugin/player-input-guide#example-builder-tools---combat-abilities)
[](https://hytalemodding.dev/en/docs/guides/plugin/player-input-guide#)
[Mouse Inputs](https://hytalemodding.dev/en/docs/guides/plugin/player-input-guide#mouse-inputs)
[Listening to Mouse Clicks](https://hytalemodding.dev/en/docs/guides/plugin/player-input-guide#listening-to-mouse-clicks)
[Mouse Button Types](https://hytalemodding.dev/en/docs/guides/plugin/player-input-guide#mouse-button-types)
[What You Get From Mouse Events](https://hytalemodding.dev/en/docs/guides/plugin/player-input-guide#what-you-get-from-mouse-events)
[Imports](https://hytalemodding.dev/en/docs/guides/plugin/player-input-guide#imports)
[Available Player Events](https://hytalemodding.dev/en/docs/guides/plugin/player-input-guide#available-player-events)
[Tips](https://hytalemodding.dev/en/docs/guides/plugin/player-input-guide#tips)
---
# Customizing Camera Controls
Server Plugins
Customizing Camera Controls
===========================
Intro to custom camera modding.
[The Basics](https://hytalemodding.dev/en/docs/guides/plugin/customizing-camera-controls#the-basics)
-----------------------------------------------------------------------------------------------------
Hytale provides great camera customizability! Heres the essentials to get started.
Camera is controlled by sending a `SetServerCamera` packet with `ServerCameraSettings`:
ServerCameraSettings settings = new ServerCameraSettings();
settings.distance = 10.0f; // Zoom distance from player
settings.isFirstPerson = false; // Third-person mode
settings.positionLerpSpeed = 0.2f; // Smooth camera follow
playerRef.getPacketHandler().writeNoCache(
new SetServerCamera(ClientCameraView.Custom, true, settings)
);
This gives you a simple third-person camera. The presets below show more complete configurations.
**Reset to default:**
playerRef.getPacketHandler().writeNoCache(
new SetServerCamera(ClientCameraView.Custom, false, null)
);
* * *
[Camera Presets](https://hytalemodding.dev/en/docs/guides/plugin/customizing-camera-controls#camera-presets)
-------------------------------------------------------------------------------------------------------------
### [Top-Down (RTS/ARPG Style)](https://hytalemodding.dev/en/docs/guides/plugin/customizing-camera-controls#top-down-rtsarpg-style)
_Source: `com.hypixel.hytale.server.core.command.commands.player.camera.PlayerCameraTopdownCommand`_
ServerCameraSettings settings = new ServerCameraSettings();
settings.positionLerpSpeed = 0.2f;
settings.rotationLerpSpeed = 0.2f;
settings.distance = 20.0f;
settings.displayCursor = true;
settings.isFirstPerson = false;
settings.movementForceRotationType = MovementForceRotationType.Custom;
// Align movement with camera yaw (horizontal rotation only)
settings.movementForceRotation = new Direction(-0.7853981634f, 0.0f, 0.0f); // 45° left
settings.eyeOffset = true;
settings.positionDistanceOffsetType = PositionDistanceOffsetType.DistanceOffset;
settings.rotationType = RotationType.Custom;
settings.rotation = new Direction(0.0f, -1.5707964f, 0.0f); // Look straight down
settings.mouseInputType = MouseInputType.LookAtPlane;
settings.planeNormal = new Vector3f(0.0f, 1.0f, 0.0f); // Ground plane
### [Side-Scroller (2D Platformer Style)](https://hytalemodding.dev/en/docs/guides/plugin/customizing-camera-controls#side-scroller-2d-platformer-style)
_Source: `com.hypixel.hytale.server.core.command.commands.player.camera.PlayerCameraSideScrollerCommand`_
ServerCameraSettings settings = new ServerCameraSettings();
settings.positionLerpSpeed = 0.2f;
settings.rotationLerpSpeed = 0.2f;
settings.distance = 15.0f;
settings.displayCursor = true;
settings.isFirstPerson = false;
settings.movementForceRotationType = MovementForceRotationType.Custom;
settings.movementMultiplier = new Vector3f(1.0f, 1.0f, 0.0f); // Lock Z-axis
settings.eyeOffset = true;
settings.positionDistanceOffsetType = PositionDistanceOffsetType.DistanceOffset;
settings.rotationType = RotationType.Custom;
settings.mouseInputType = MouseInputType.LookAtPlane;
settings.planeNormal = new Vector3f(0.0f, 0.0f, 1.0f); // Side plane
[Common Settings Explained](https://hytalemodding.dev/en/docs/guides/plugin/customizing-camera-controls#common-settings-explained)
-----------------------------------------------------------------------------------------------------------------------------------
### [Position & Rotation](https://hytalemodding.dev/en/docs/guides/plugin/customizing-camera-controls#position--rotation)
* **`positionLerpSpeed`** (0.0-1.0): How smoothly the camera follows the player. Lower = smoother but slower response.
* **`rotationLerpSpeed`** (0.0-1.0): How smoothly the camera rotates. Lower = smoother but slower response.
* **`distance`**: Camera distance from player. Higher = zoomed out more.
* **`rotation`**: Camera angle as `Direction(yaw, pitch, roll)` in radians.
* **`rotationType`**: How rotation is calculated. `RotationType.Custom` uses your `rotation` value.
### [Movement Alignment](https://hytalemodding.dev/en/docs/guides/plugin/customizing-camera-controls#movement-alignment)
* **`movementForceRotationType`**:
* `MovementForceRotationType.AttachedToHead` = movement follows where player looks
* `MovementForceRotationType.Custom` = use `movementForceRotation` value
* **`movementForceRotation`**: When using `Custom`, this sets the direction for W/S movement. Match yaw with camera but keep pitch at 0.
### [Input & Display](https://hytalemodding.dev/en/docs/guides/plugin/customizing-camera-controls#input--display)
* **`displayCursor`**: Show/hide mouse cursor.
* **`mouseInputType`**:
* `MouseInputType.LookAtPlane` = mouse moves cursor on a plane (good for top-down)
* `MouseInputType.LookAtTarget` = mouse rotates camera
* **`planeNormal`**: For `LookAtPlane`, defines which plane the mouse moves on. `(0,1,0)` = ground plane.
### [Advanced](https://hytalemodding.dev/en/docs/guides/plugin/customizing-camera-controls#advanced)
* **`positionDistanceOffsetType`**:
* `DistanceOffset` = simple distance offset
* `DistanceOffsetRaycast` = prevents camera clipping through walls
* **`eyeOffset`**: Offset camera from player's eye position.
* **`movementMultiplier`**: Scale movement on each axis. `(1,1,0)` = lock Z-axis for 2D movement.
* * *
[Imports](https://hytalemodding.dev/en/docs/guides/plugin/customizing-camera-controls#imports)
-----------------------------------------------------------------------------------------------
import com.hypixel.hytale.protocol.ClientCameraView;
import com.hypixel.hytale.protocol.Direction;
import com.hypixel.hytale.protocol.MouseInputType;
import com.hypixel.hytale.protocol.MovementForceRotationType;
import com.hypixel.hytale.protocol.PositionDistanceOffsetType;
import com.hypixel.hytale.protocol.RotationType;
import com.hypixel.hytale.protocol.ServerCameraSettings;
import com.hypixel.hytale.protocol.Vector3f;
import com.hypixel.hytale.protocol.packets.camera.SetServerCamera;
* * *
[Tips](https://hytalemodding.dev/en/docs/guides/plugin/customizing-camera-controls#tips)
-----------------------------------------------------------------------------------------
* **Zoom:** Adjust `distance` (higher = further out)
* **Smoothness:** `positionLerpSpeed` and `rotationLerpSpeed` control how quickly the camera catches up to its target
* **Wall clipping:** Use `PositionDistanceOffsetType.DistanceOffsetRaycast`
* **Lock camera:** Set `isLocked = true` in the packet to prevent player changes
* **2D movement:** Set `movementMultiplier` to zero out an axis
* **Isometric cameras:** Always set `movementForceRotation` to match camera yaw for proper movement alignment
* **Angle calculations:** Use `Math.toRadians(degrees)` or `degrees * Math.PI / 180.0` to convert degrees to radians
* * *
_From Hytale Server build `2026.01.13-dcad8778f`_
Written by [Vibe Theory](https://discord.com/users/145420279294722048)
[Edit on GitHub](https://github.com/HytaleModding/site/blob/main/content/docs/en/guides/plugin/customizing-camera-controls.mdx)
[Creating custom blocks\
\
Learn how to create custom blocks for your Hytale mod.](https://hytalemodding.dev/en/docs/guides/plugin/creating-block)
[Inventory Management\
\
Learn how to manage player inventories in your Hytale mod.](https://hytalemodding.dev/en/docs/guides/plugin/inventory-management)
### On this page
[The Basics](https://hytalemodding.dev/en/docs/guides/plugin/customizing-camera-controls#the-basics)
[Camera Presets](https://hytalemodding.dev/en/docs/guides/plugin/customizing-camera-controls#camera-presets)
[Top-Down (RTS/ARPG Style)](https://hytalemodding.dev/en/docs/guides/plugin/customizing-camera-controls#top-down-rtsarpg-style)
[Side-Scroller (2D Platformer Style)](https://hytalemodding.dev/en/docs/guides/plugin/customizing-camera-controls#side-scroller-2d-platformer-style)
[Common Settings Explained](https://hytalemodding.dev/en/docs/guides/plugin/customizing-camera-controls#common-settings-explained)
[Position & Rotation](https://hytalemodding.dev/en/docs/guides/plugin/customizing-camera-controls#position--rotation)
[Movement Alignment](https://hytalemodding.dev/en/docs/guides/plugin/customizing-camera-controls#movement-alignment)
[Input & Display](https://hytalemodding.dev/en/docs/guides/plugin/customizing-camera-controls#input--display)
[Advanced](https://hytalemodding.dev/en/docs/guides/plugin/customizing-camera-controls#advanced)
[Imports](https://hytalemodding.dev/en/docs/guides/plugin/customizing-camera-controls#imports)
[Tips](https://hytalemodding.dev/en/docs/guides/plugin/customizing-camera-controls#tips)
---
# 03 - Control Flow If Statements
Java Basics
03 - Control Flow If Statements
===============================
Learn how to control the flow of your Java programs using if statements.
Programs need to make decisions. If statements let your code choose different paths based on conditions.
[Basic If Statement](https://hytalemodding.dev/en/docs/guides/java-basics/03-control-flow-if#basic-if-statement)
-----------------------------------------------------------------------------------------------------------------
The simplest form checks one condition;
int health = 20;
if (health > 10) {
System.out.println("You are healthy!");
}
### [Structure](https://hytalemodding.dev/en/docs/guides/java-basics/03-control-flow-if#structure)
if (condition) {
// code to execute if condition is true
}
[If-Else Statements](https://hytalemodding.dev/en/docs/guides/java-basics/03-control-flow-if#if-else-statements)
-----------------------------------------------------------------------------------------------------------------
Choose between two paths:
int health = 5;
if (health > 10) {
System.out.println("You are healthy!");
} else {
System.out.println("You need healing!");
}
[If-Else Else-If Chain](https://hytalemodding.dev/en/docs/guides/java-basics/03-control-flow-if#if-else-else-if-chain)
-----------------------------------------------------------------------------------------------------------------------
Check multiple conditions in sequence:
int health = 7;
if (health > 15) {
System.out.println("You are in great shape!");
} else if (health > 5) {
System.out.println("You are okay.");
} else {
System.out.println("You need healing!");
}
[Nested If Statements](https://hytalemodding.dev/en/docs/guides/java-basics/03-control-flow-if#nested-if-statements)
---------------------------------------------------------------------------------------------------------------------
You can place if statements inside other if statements:
int health = 12;
if (health > 10) {
if (health > 15) {
System.out.println("You are in great shape!");
} else {
System.out.println("You are healthy!");
}
} else {
System.out.println("You need healing!");
}
[Compound Conditions](https://hytalemodding.dev/en/docs/guides/java-basics/03-control-flow-if#compound-conditions)
-------------------------------------------------------------------------------------------------------------------
You can combine multiple conditions using logical operators:
// AND - both must be true
int health = 12;
boolean hasPotion = true;
if (health > 10 && hasPotion) {
System.out.println("You are healthy and have a potion!");
} else if (health > 10) {
System.out.println("You are healthy but need a potion!");
} else {
System.out.println("You need healing!");
}
// OR - at least one must be true
int health = 8;
boolean hasPotion = false;
if (health > 10 || hasPotion) {
System.out.println("You are either healthy or have a potion!");
} else {
System.out.println("You need healing and a potion!");
}
// NOT - reverses the condition
int health = 8;
if (!(health > 10)) {
System.out.println("You need healing!");
} else {
System.out.println("You are healthy!");
}
[Ternary Operator](https://hytalemodding.dev/en/docs/guides/java-basics/03-control-flow-if#ternary-operator)
-------------------------------------------------------------------------------------------------------------
A compact way to assign values:
int health = 12;
String status = (health > 10) ? "Healthy" : "Needs Healing";
### [Syntax](https://hytalemodding.dev/en/docs/guides/java-basics/03-control-flow-if#syntax)
variable = (condition) ? valueIfTrue : valueIfFalse;
[Edit on GitHub](https://github.com/HytaleModding/site/blob/main/content/docs/en/guides/java-basics/03-control-flow-if.mdx)
[02 - Operators and Expressions\
\
An introduction to operators and expressions in Java programming.](https://hytalemodding.dev/en/docs/guides/java-basics/02-operators)
[04 - Control Flow Loops\
\
Learn how to repeat code efficiently using loops in Java](https://hytalemodding.dev/en/docs/guides/java-basics/04-control-flow-loops)
### On this page
[Basic If Statement](https://hytalemodding.dev/en/docs/guides/java-basics/03-control-flow-if#basic-if-statement)
[Structure](https://hytalemodding.dev/en/docs/guides/java-basics/03-control-flow-if#structure)
[If-Else Statements](https://hytalemodding.dev/en/docs/guides/java-basics/03-control-flow-if#if-else-statements)
[If-Else Else-If Chain](https://hytalemodding.dev/en/docs/guides/java-basics/03-control-flow-if#if-else-else-if-chain)
[Nested If Statements](https://hytalemodding.dev/en/docs/guides/java-basics/03-control-flow-if#nested-if-statements)
[Compound Conditions](https://hytalemodding.dev/en/docs/guides/java-basics/03-control-flow-if#compound-conditions)
[Ternary Operator](https://hytalemodding.dev/en/docs/guides/java-basics/03-control-flow-if#ternary-operator)
[Syntax](https://hytalemodding.dev/en/docs/guides/java-basics/03-control-flow-if#syntax)
---
# Teleporting the player
Server Plugins
Teleporting the player
======================
Learn how to teleport the player.
To teleport players in Hytale, you will need to get a `World` object so we can safely run the teleport on the world thread. The world thread manages all entity updates, so modifying entities off-thread can crash the server or cause inconsistent state. Next, we get the entity store and make a `Teleport` object. We add a `Teleport` component to the player’s entity reference in the entity store. This triggers the teleportation logic for that player.
public static void teleportPlayer(Player player, int x, int y, int z) {
World world = player.getWorld();
if (world == null) return;
world.execute(() -> {
if (player.getReference() == null) return;
Store store = player.getReference().getStore();
Teleport teleport = new Teleport(new Transform(x ,y, z));
store.addComponent(player.getReference(), Teleport.getComponentType(), teleport);
});
}
[Edit on GitHub](https://github.com/HytaleModding/site/blob/main/content/docs/en/guides/plugin/teleporting-players.mdx)
[Spawning Entities\
\
Learn how to spawn Entities in Hytale](https://hytalemodding.dev/en/docs/guides/plugin/spawning-entities)
[Title Holograms\
\
Learn how to create title holograms.](https://hytalemodding.dev/en/docs/guides/plugin/text-hologram)
---
# Sending notifications
Server Plugins
Sending notifications
=====================
Learn how to send notifications (similar to item pickup) with your Hytale Plugin
[Overview](https://hytalemodding.dev/en/docs/guides/plugin/send-notifications#overview)
----------------------------------------------------------------------------------------
In this guide, you will learn how to send notifications to players, similar to the notification received when picking up an item from the ground.
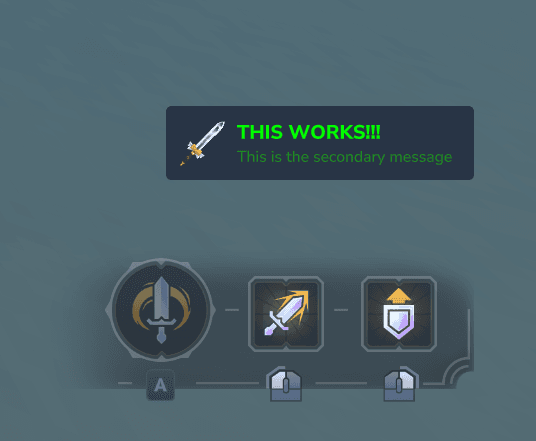
[Structure of a Notification](https://hytalemodding.dev/en/docs/guides/plugin/send-notifications#structure-of-a-notification)
------------------------------------------------------------------------------------------------------------------------------
A notification consists of three main components:
1. **Primary Message**: The main `Message` displayed in the notification.
2. **Secondary Message**: Additional `Message`, displayed below the primary message.
3. **Icon**: An item icon that visually represents the notification, shown on the left side.
[Sending Notifications](https://hytalemodding.dev/en/docs/guides/plugin/send-notifications#sending-notifications)
------------------------------------------------------------------------------------------------------------------
You can use the `NotificationUtil` class to send notifications to players. You will need access to the `PacketHandler` of the player, which can be obtained from the `PlayerRef` using the `getPacketHandler()` method (in this example, we get the `PlayerRef` from the `Universe` using the player's UUID).
public static void onPlayerReady(PlayerReadyEvent event) {
var player = event.getPlayer();
var playerRef = Universe.get().getPlayer(player.getUuid());
var packetHandler = playerRef.getPacketHandler();
var primaryMessage = Message.raw("THIS WORKS!!!").color("#00FF00");
var secondaryMessage = Message.raw("This is the secondary message").color("#228B22");
var icon = new ItemStack("Weapon_Sword_Mithril", 1).toPacket();
NotificationUtil.sendNotification(
packetHandler,
primaryMessage,
secondaryMessage,
(ItemWithAllMetadata) icon);
}
Written by BeerBag
[Edit on GitHub](https://github.com/HytaleModding/site/blob/main/content/docs/en/guides/plugin/send-notifications.mdx)
[Playing Sounds\
\
Learn how to Play Sounds with your Hytale Plugin](https://hytalemodding.dev/en/docs/guides/plugin/playing-sounds)
[Spawning Entities\
\
Learn how to spawn Entities in Hytale](https://hytalemodding.dev/en/docs/guides/plugin/spawning-entities)
### On this page
[Overview](https://hytalemodding.dev/en/docs/guides/plugin/send-notifications#overview)
[Structure of a Notification](https://hytalemodding.dev/en/docs/guides/plugin/send-notifications#structure-of-a-notification)
[Sending Notifications](https://hytalemodding.dev/en/docs/guides/plugin/send-notifications#sending-notifications)
---
# Creating custom blocks
Server Plugins
Creating custom blocks
======================
Learn how to create custom blocks for your Hytale mod.
Creating custom blocks requires enabling asset packs and organizing your files properly.
[Setup](https://hytalemodding.dev/en/docs/guides/plugin/creating-block#setup)
------------------------------------------------------------------------------
1. Enable asset packs in `manifest.json` by setting `IncludesAssetPack` to `true`
2. Create the following folder structure:
resources
Server
Item
Items
Languages
en-US
Common
Icons
Blocks
my\_new\_block
model.blockymodel
BlockTextures
texture.png
3. Add translations in `Server/Languages/en-US/items.lang`:
my_new_block.name = My New Block
my_new_block.description = My Description
[Basic Cube Block](https://hytalemodding.dev/en/docs/guides/plugin/creating-block#basic-cube-block)
----------------------------------------------------------------------------------------------------
Create `Server/Item/Items/my_new_block.json`:
{
"TranslationProperties": {
"Name": "items.my_new_block.name",
"Description": "items.my_new_block.description"
},
"Id": "My_New_Block",
"MaxStack": 100,
"Icon": "Icons/ItemsGenerated/my_new_block.png",
"Categories": [\
"Blocks.Rocks"\
],
"PlayerAnimationsId": "Block",
"Set": "Rock_Stone",
"BlockType": {
"Material": "Solid",
"DrawType": "Cube",
"Group": "Stone",
"Flags": {},
"Gathering": {
"Breaking": {
"GatherType": "Rocks",
"ItemId": "my_new_block"
}
},
"BlockParticleSetId": "Stone",
"Textures": [\
{\
"All": "BlockTextures/my_new_block.png"\
}\
],
"ParticleColor": "#aeae8c",
"BlockSoundSetId": "Stone",
"BlockBreakingDecalId": "Breaking_Decals_Rock"
},
"ResourceTypes": [\
{\
"Id": "Rock"\
}\
]
}
Ensure all referenced files exist in their respective folders, and the paths are correct.
Written by Flo\_12344
[Edit on GitHub](https://github.com/HytaleModding/site/blob/main/content/docs/en/guides/plugin/creating-block.mdx)
[Packets: Client-to-Server Reference\
\
Complete reference for every packet the client can send to the server.](https://hytalemodding.dev/en/docs/guides/plugin/client-inputs-reference)
[Customizing Camera Controls\
\
Intro to custom camera modding.](https://hytalemodding.dev/en/docs/guides/plugin/customizing-camera-controls)
### On this page
[Setup](https://hytalemodding.dev/en/docs/guides/plugin/creating-block#setup)
[Basic Cube Block](https://hytalemodding.dev/en/docs/guides/plugin/creating-block#basic-cube-block)
---
# Setting Up Your Development Environment
Server Plugins
Setting Up Your Development Environment
=======================================
Learn how to set up your development environment for modding Hytale.
This guide will walk you through setting up a complete development environment for Hytale modding, including all necessary tools and dependencies.
[Prerequisites](https://hytalemodding.dev/en/docs/guides/plugin/setting-up-env#prerequisites)
----------------------------------------------------------------------------------------------
Before we begin, make sure you have:
* A computer running Windows 10/11, macOS, or Linux
* At least 8GB of RAM
* 10GB of free disk space
* Administrative privileges on your system
[Required Software](https://hytalemodding.dev/en/docs/guides/plugin/setting-up-env#required-software)
------------------------------------------------------------------------------------------------------
### [1\. Java Development Kit (JDK)](https://hytalemodding.dev/en/docs/guides/plugin/setting-up-env#1-java-development-kit-jdk)
Hytale modding requires Java 25 or later. We recommend using OpenJDK.
#### [Windows](https://hytalemodding.dev/en/docs/guides/plugin/setting-up-env#windows)
1. Download OpenJDK 25 from [Adoptium](https://adoptium.net/)
2. Run the installer with default settings
3. Verify installation by opening Command Prompt and running:
java -version
#### [macOS](https://hytalemodding.dev/en/docs/guides/plugin/setting-up-env#macos)
# Using Homebrew
brew install openjdk@25
#### [Linux (Ubuntu/Debian)](https://hytalemodding.dev/en/docs/guides/plugin/setting-up-env#linux-ubuntudebian)
sudo apt update
sudo apt install openjdk-25-jdk
### [2\. Integrated Development Environment (IDE)](https://hytalemodding.dev/en/docs/guides/plugin/setting-up-env#2-integrated-development-environment-ide)
We recommend IntelliJ IDEA Community Edition for Hytale modding.
1. Download from [JetBrains website](https://www.jetbrains.com/idea/download/)
2. Install with default settings
3. Launch and complete the initial setup wizard
### [3\. Maven](https://hytalemodding.dev/en/docs/guides/plugin/setting-up-env#3-maven)
1. Visit the official website: [https://maven.apache.org/download.cgi](https://maven.apache.org/download.cgi)
2. Download this file: `apache-maven-3.9.12-bin.zip` (Binary zip archive)
3. Unzip it
4. Add the `apache-maven-3.9.12/bin/` folder to your PATH
You can now try the command `mvn -version` to verify Maven is installed correctly. Make sure to do this in a fresh new terminal instead of one you had opened from before!
[Setting Up Your Workspace](https://hytalemodding.dev/en/docs/guides/plugin/setting-up-env#setting-up-your-workspace)
----------------------------------------------------------------------------------------------------------------------
### [1\. Clone the Plugin Template](https://hytalemodding.dev/en/docs/guides/plugin/setting-up-env#1-clone-the-plugin-template)
Instead of creating an empty directory, we'll use the official Hytale plugin template:
# Clone the template repository
git clone https://github.com/HytaleModding/plugin-template.git MyFirstMod
cd MyFirstMod
### [2\. Open in IntelliJ IDEA](https://hytalemodding.dev/en/docs/guides/plugin/setting-up-env#2-open-in-intellij-idea)
1. Open IntelliJ IDEA
2. Click "Open" and navigate to your `MyFirstMod` directory
3. IntelliJ will automatically detect it as a Maven project
4. Wait for the project to index and dependencies to download
### [3\. Add HytaleServer.jar Dependency](https://hytalemodding.dev/en/docs/guides/plugin/setting-up-env#3-add-hytaleserverjar-dependency)
Before you can start modding, you need to add the HytaleServer.jar file as a dependency:
1. **Download HytaleServer.jar** using the [Hytale Downloader](https://support.hytale.com/hc/en-us/articles/45326769420827-Hytale-Server-Manual)
2. **Add to IntelliJ IDEA**:
* Click on **"File"** at the top left
* Go to **"Project Structure"**
* Go to **"Libraries"**
* Click on the **\+ icon**
* Select the **HytaleServer.jar** you downloaded
### [4\. Add the HytaleServer to your Artifacts](https://hytalemodding.dev/en/docs/guides/plugin/setting-up-env#4-add-the-hytaleserver-to-your-artifacts)
Warning
This is a temporary workaround until Hypixel provides an official Maven repository for HytaleServer.jar
Run this command in your console
mvn install:install-file -Dfile=[ROUTE TO HytaleServer.jar] -DgroupId=com.hypixel.hytale -DartifactId=HytaleServer-parent -Dversion=1.0-SNAPSHOT -Dpackaging=jar
Replace `[ROUTE TO HytaleServer.jar]` with the actual path to the `HytaleServer.jar` file on your system.
[Next Steps](https://hytalemodding.dev/en/docs/guides/plugin/setting-up-env#next-steps)
----------------------------------------------------------------------------------------
Now that you have your development environment set up with the plugin template:
1. **Customize the template** - Edit the `pom.xml` and `manifest.json` file to change your mod's name and details
2. **Explore the code structure** - Familiarize yourself with the template's organization
3. **Start modding** - Begin writing your first Hytale plugin!
Learn how to:
* [Create Commands](https://hytalemodding.dev/en/docs/guides/plugin/creating-commands)
* [Create Events](https://hytalemodding.dev/en/docs/guides/plugin/creating-events)
and more! Explore the documentation to learn about all available features and best practices.
Written by Neil Revin
[Edit on GitHub](https://github.com/HytaleModding/site/blob/main/content/docs/en/guides/plugin/setting-up-env.mdx)
[Learning to Learn\
\
A guide to help you become a better learner and adapt to new information effectively.](https://hytalemodding.dev/en/docs/guides/learning-to-learn)
[Browsing the server.jar code\
\
Learn how to patch the server.jar and browse the source code.](https://hytalemodding.dev/en/docs/guides/plugin/browsing-serverjar)
### On this page
[Prerequisites](https://hytalemodding.dev/en/docs/guides/plugin/setting-up-env#prerequisites)
[Required Software](https://hytalemodding.dev/en/docs/guides/plugin/setting-up-env#required-software)
[1\. Java Development Kit (JDK)](https://hytalemodding.dev/en/docs/guides/plugin/setting-up-env#1-java-development-kit-jdk)
[Windows](https://hytalemodding.dev/en/docs/guides/plugin/setting-up-env#windows)
[macOS](https://hytalemodding.dev/en/docs/guides/plugin/setting-up-env#macos)
[Linux (Ubuntu/Debian)](https://hytalemodding.dev/en/docs/guides/plugin/setting-up-env#linux-ubuntudebian)
[2\. Integrated Development Environment (IDE)](https://hytalemodding.dev/en/docs/guides/plugin/setting-up-env#2-integrated-development-environment-ide)
[3\. Maven](https://hytalemodding.dev/en/docs/guides/plugin/setting-up-env#3-maven)
[Setting Up Your Workspace](https://hytalemodding.dev/en/docs/guides/plugin/setting-up-env#setting-up-your-workspace)
[1\. Clone the Plugin Template](https://hytalemodding.dev/en/docs/guides/plugin/setting-up-env#1-clone-the-plugin-template)
[2\. Open in IntelliJ IDEA](https://hytalemodding.dev/en/docs/guides/plugin/setting-up-env#2-open-in-intellij-idea)
[3\. Add HytaleServer.jar Dependency](https://hytalemodding.dev/en/docs/guides/plugin/setting-up-env#3-add-hytaleserverjar-dependency)
[4\. Add the HytaleServer to your Artifacts](https://hytalemodding.dev/en/docs/guides/plugin/setting-up-env#4-add-the-hytaleserver-to-your-artifacts)
[Next Steps](https://hytalemodding.dev/en/docs/guides/plugin/setting-up-env#next-steps)
---
# 00 - Introduction to Java
Java Basics
00 - Introduction to Java
=========================
A beginner's guide to understanding the fundamentals of Java programming for Hytale modding.
Welcome to your journey into Java Programming! This guide is designed to introduce you into the basics of java.
[What is Java?](https://hytalemodding.dev/en/docs/guides/java-basics/00-introduction#what-is-java)
---------------------------------------------------------------------------------------------------
Java is a powerful, object-oriented programming language created in 1995. It's one of the most popular programming languages in the world and is used for everything from mobile apps to enterprise software. Most importantly for us, it's the language Hytale uses for it's servers & modding API.
[What You'll Learn](https://hytalemodding.dev/en/docs/guides/java-basics/00-introduction#what-youll-learn)
-----------------------------------------------------------------------------------------------------------
This guide is structured to take you step-by-step through:
1. Java Syntax and Basics
2. Control Flow
3. Object-Oriented Programming
We will then focus on only Hytale-specific concepts. (tbd)
[Setting up your Environment](https://hytalemodding.dev/en/docs/guides/java-basics/00-introduction#setting-up-your-environment)
--------------------------------------------------------------------------------------------------------------------------------
Before we dive into programming, you'll need some essentials, you need to install:
### [Java Development Kit (JDK)](https://hytalemodding.dev/en/docs/guides/java-basics/00-introduction#java-development-kit-jdk)
Downlaod and install JDK 25 or above from the [official Oracle website](https://www.oracle.com/java/technologies/javase-jdk25-downloads.html)
or use an open-source alternative like [AdoptOpenJDK](https://adoptopenjdk.net/)
.
### [Intergrated Development Environment (IDE)](https://hytalemodding.dev/en/docs/guides/java-basics/00-introduction#intergrated-development-environment-ide)
An IDE is a software application that provides comprehensive facilities to programmers for software development. Popular choices for Java include:
* [IntelliJ IDEA](https://www.jetbrains.com/idea/)
* [Eclipse](https://www.eclipse.org/)
[How to Use This Guide](https://hytalemodding.dev/en/docs/guides/java-basics/00-introduction#how-to-use-this-guide)
--------------------------------------------------------------------------------------------------------------------
1. Read each article in order - Concepts build on each other
2. Type out the examples - Don't copy-paste; typing helps you learn
3. Experiment - Modify examples to see what happens
4. Practice - Each article includes exercises
5. Be patient - Programming is a skill that takes time to develop
[The Modding Mindset](https://hytalemodding.dev/en/docs/guides/java-basics/00-introduction#the-modding-mindset)
----------------------------------------------------------------------------------------------------------------
Modding is creative problem-solving. You'll be:
* Adding new blocks, items, and creatures to Hytale
* Changing game mechanics to create unique experiences
* Building systems that interact with the game world
* Sharing your creations with the community
[Edit on GitHub](https://github.com/HytaleModding/site/blob/main/content/docs/en/guides/java-basics/00-introduction.mdx)
[World Generation System\
\
Learn how to create custom world generation features for your Hytale mod.](https://hytalemodding.dev/en/docs/guides/plugin/world-gen)
[01 - Variables & Data Types\
\
An introduction to variables and data types in Java programming.](https://hytalemodding.dev/en/docs/guides/java-basics/01-variables)
### On this page
[What is Java?](https://hytalemodding.dev/en/docs/guides/java-basics/00-introduction#what-is-java)
[What You'll Learn](https://hytalemodding.dev/en/docs/guides/java-basics/00-introduction#what-youll-learn)
[Setting up your Environment](https://hytalemodding.dev/en/docs/guides/java-basics/00-introduction#setting-up-your-environment)
[Java Development Kit (JDK)](https://hytalemodding.dev/en/docs/guides/java-basics/00-introduction#java-development-kit-jdk)
[Intergrated Development Environment (IDE)](https://hytalemodding.dev/en/docs/guides/java-basics/00-introduction#intergrated-development-environment-ide)
[How to Use This Guide](https://hytalemodding.dev/en/docs/guides/java-basics/00-introduction#how-to-use-this-guide)
[The Modding Mindset](https://hytalemodding.dev/en/docs/guides/java-basics/00-introduction#the-modding-mindset)
---
# 04 - Control Flow Loops
Java Basics
04 - Control Flow Loops
=======================
Learn how to repeat code efficiently using loops in Java
Loops let you repeat code without writing it over and over. They're essential for processing collections, generating worlds, and updating game objects.
[While Loop](https://hytalemodding.dev/en/docs/guides/java-basics/04-control-flow-loops#while-loop)
----------------------------------------------------------------------------------------------------
Repeats code while a condition is true:
Code
Output
int countdown = 5;
while (countdown > 0) {
System.out.println(countdown);
countdown--;
}
System.out.println("Blast off!");
### [Structure](https://hytalemodding.dev/en/docs/guides/java-basics/04-control-flow-loops#structure)
while (condition) {
// code to repeat
}
Infinite Loops
Always make sure your loop condition will eventually become false, or your program will run forever!
Bad Example
Good Example
int x = 0;
while (x < 10) {
System.out.println("Stuck!");
// Forgot to increase x!
}
[Do-While Loop](https://hytalemodding.dev/en/docs/guides/java-basics/04-control-flow-loops#do-while-loop)
----------------------------------------------------------------------------------------------------------
Like a while loop, but always runs at least once:
int health = 0;
do {
System.out.println("Attempting respawn...");
health = 100;
} while (health <= 0);
[For Loop](https://hytalemodding.dev/en/docs/guides/java-basics/04-control-flow-loops#for-loop)
------------------------------------------------------------------------------------------------
Best when you know how many times to repeat:
Code
Output
for (int i = 1; i <= 5; i++) {
System.out.println("Level " + i);
}
### [Structure](https://hytalemodding.dev/en/docs/guides/java-basics/04-control-flow-loops#structure-1)
for (initialization; condition; update) {
// code to repeat
}
For Loop Parts
for (int i = 0; i < 10; i++) {
// ^ ^ ^
// Start Stop Step
}
* **Initialization**: int i = 0 - Runs once at the start
* **Condition**: i < 10 - Checked before each loop
* **Update**: i++ - Runs after each loop
[Break Statement](https://hytalemodding.dev/en/docs/guides/java-basics/04-control-flow-loops#break-statement)
--------------------------------------------------------------------------------------------------------------
You can exit a loop early with `break`:
for (int i = 1; i <= 10; i++) {
if (i == 6) {
break; // Exit loop when i is 6
}
System.out.println(i);
}
[Continue Statement](https://hytalemodding.dev/en/docs/guides/java-basics/04-control-flow-loops#continue-statement)
--------------------------------------------------------------------------------------------------------------------
Skip to the next iteration with `continue`:
for (int i = 1; i <= 10; i++) {
if (i % 2 == 0) {
continue; // Skip even numbers
}
System.out.println(i); // Prints only odd numbers
}
[Nested Loops](https://hytalemodding.dev/en/docs/guides/java-basics/04-control-flow-loops#nested-loops)
--------------------------------------------------------------------------------------------------------
You can put loops inside other loops:
for (int i = 1; i <= 3; i++) {
for (int j = 1; j <= 2; j++) {
System.out.println("i: " + i + ", j: " + j);
}
}
Nested Loop Performance
Be careful with nested loops! They can slow down your mod significantly.
// This runs 1,000,000 times!
for (int i = 0; i < 1000; i++) {
for (int j = 0; j < 1000; j++) {
// Code here
}
}
Try to avoid deeply nested loops when processing large amounts of data.
[Edit on GitHub](https://github.com/HytaleModding/site/blob/main/content/docs/en/guides/java-basics/04-control-flow-loops.mdx)
[03 - Control Flow If Statements\
\
Learn how to control the flow of your Java programs using if statements.](https://hytalemodding.dev/en/docs/guides/java-basics/03-control-flow-if)
[05 - Arrays\
\
Learn how to store and manage collections of data using arrays.](https://hytalemodding.dev/en/docs/guides/java-basics/05-arrays)
### On this page
[While Loop](https://hytalemodding.dev/en/docs/guides/java-basics/04-control-flow-loops#while-loop)
[Structure](https://hytalemodding.dev/en/docs/guides/java-basics/04-control-flow-loops#structure)
[Do-While Loop](https://hytalemodding.dev/en/docs/guides/java-basics/04-control-flow-loops#do-while-loop)
[For Loop](https://hytalemodding.dev/en/docs/guides/java-basics/04-control-flow-loops#for-loop)
[Structure](https://hytalemodding.dev/en/docs/guides/java-basics/04-control-flow-loops#structure-1)
[Break Statement](https://hytalemodding.dev/en/docs/guides/java-basics/04-control-flow-loops#break-statement)
[Continue Statement](https://hytalemodding.dev/en/docs/guides/java-basics/04-control-flow-loops#continue-statement)
[Nested Loops](https://hytalemodding.dev/en/docs/guides/java-basics/04-control-flow-loops#nested-loops)
---
# 01 - Variables & Data Types
Java Basics
01 - Variables & Data Types
===========================
An introduction to variables and data types in Java programming.
Variables are containers that store data in your program. Think of them as labeled boxes where you can put different types of information.
[What is a Variable?](https://hytalemodding.dev/en/docs/guides/java-basics/01-variables#what-is-a-variable)
------------------------------------------------------------------------------------------------------------
A variable has three key components:
1. **Type**: What kind of data it holds (e.g., integer, string, boolean)
2. **Name**: The label you use to refer to the variable
3. **Value**: The data it contains
[Declaring/Creating Variables](https://hytalemodding.dev/en/docs/guides/java-basics/01-variables#declaringcreating-variables)
------------------------------------------------------------------------------------------------------------------------------
In Java, you must declare a variable before using it, like you'd need a box before putting something in it. The syntax is:
int age; // A declaration
age = 18; // An assignment
int age = 18; // Declaration and assignment in one line, also considered an initialization
[Primitive Data Types](https://hytalemodding.dev/en/docs/guides/java-basics/01-variables#primitive-data-types)
---------------------------------------------------------------------------------------------------------------
You might wonder what "int" means. It's a primitive data type in Java. Java has 8 primitive data types. Here are the most important ones for modding:
| Data Type | Description | Example |
| --- | --- | --- |
| int | Integer (whole numbers) | `int score = 100;` |
| double | Decimal numbers | `double pi = 3.14;` |
| boolean | True or false values | `boolean isActive = true;` |
| char | Single character | `char grade = 'A';` |
| String | Sequence of characters (text) | `String name = "Hytale";` |
[Type Conversion](https://hytalemodding.dev/en/docs/guides/java-basics/01-variables#type-conversion)
-----------------------------------------------------------------------------------------------------
Sometimes you might not want a variable to stay the same type. You can convert between types:
### [Automatic](https://hytalemodding.dev/en/docs/guides/java-basics/01-variables#automatic)
int num = 10;
double decimalNum = num; // 10.0 - works automatically
### [Manual (Casting)](https://hytalemodding.dev/en/docs/guides/java-basics/01-variables#manual-casting)
double decimalNum = 9.78;
int num = (int) decimalNum; // 9 - decimals are dropped
[Constants](https://hytalemodding.dev/en/docs/guides/java-basics/01-variables#constants)
-----------------------------------------------------------------------------------------
If you want a variable that shouldn't change, use the `final` keyword:
final double PI = 3.14159;
**Convention**: Constants use ALL\_CAPS\_WITH\_UNDERSCORES.
[Practice](https://hytalemodding.dev/en/docs/guides/java-basics/01-variables#practice)
---------------------------------------------------------------------------------------
It's best to practice what you just learnt - don't look above now and try to do this yourself. If you get stuck, look back up!
1. Declare an integer variable named `lives` and set it to 3.
2. Declare a double variable named `gravity` and set it to 9.81.
3. Declare a boolean variable named `isGameOver` and set it to false.
4. Convert the `lives` variable to a double and store it in a new variable named `livesAsDouble`.
5. Declare a constant named `MAX_LEVEL` and set it to 100.
Great! You've learned about variables and data types in Java. Now we're going to learn about operators and expressions in the next lesson.
[Edit on GitHub](https://github.com/HytaleModding/site/blob/main/content/docs/en/guides/java-basics/01-variables.mdx)
[00 - Introduction to Java\
\
A beginner's guide to understanding the fundamentals of Java programming for Hytale modding.](https://hytalemodding.dev/en/docs/guides/java-basics/00-introduction)
[02 - Operators and Expressions\
\
An introduction to operators and expressions in Java programming.](https://hytalemodding.dev/en/docs/guides/java-basics/02-operators)
### On this page
[What is a Variable?](https://hytalemodding.dev/en/docs/guides/java-basics/01-variables#what-is-a-variable)
[Declaring/Creating Variables](https://hytalemodding.dev/en/docs/guides/java-basics/01-variables#declaringcreating-variables)
[Primitive Data Types](https://hytalemodding.dev/en/docs/guides/java-basics/01-variables#primitive-data-types)
[Type Conversion](https://hytalemodding.dev/en/docs/guides/java-basics/01-variables#type-conversion)
[Automatic](https://hytalemodding.dev/en/docs/guides/java-basics/01-variables#automatic)
[Manual (Casting)](https://hytalemodding.dev/en/docs/guides/java-basics/01-variables#manual-casting)
[Constants](https://hytalemodding.dev/en/docs/guides/java-basics/01-variables#constants)
[Practice](https://hytalemodding.dev/en/docs/guides/java-basics/01-variables#practice)
---
# Spawning Entities
Server Plugins
Spawning Entities
=================
Learn how to spawn Entities in Hytale
In this guide, you will learn how to spawn entities in Hytale. It is **highly recommended** to familiarize yourself with the Entity Component System (ECS) before proceeding with this guide. You can find the ECS guide [here](https://hytalemodding.dev/en/docs/guides/plugin/ecs)
.
[Getting the World Object](https://hytalemodding.dev/en/docs/guides/plugin/spawning-entities#getting-the-world-object)
-----------------------------------------------------------------------------------------------------------------------
You need to first get the `World` object before proceeding with spawning entities. You can get this object in a few ways:
### [Using the `Player` Object](https://hytalemodding.dev/en/docs/guides/plugin/spawning-entities#using-the-player-object)
You can use the `Player` object to get the `World` object by calling the `getWorld()` method on the `Player` instance.
World world = player.getWorld();
### [Using the `Universe` Class](https://hytalemodding.dev/en/docs/guides/plugin/spawning-entities#using-the-universe-class)
You can use the `Universe` class to get the `World` object by calling the `getWorld(string UUID)` method on the `Universe` instance.
World world = Universe.get().getWorld("your-world-uuid");
Once you have the world object, you need to get a instance of `Store`, you can do so by:
Store store = world.getEntityStore().getStore();
[Creating Entities](https://hytalemodding.dev/en/docs/guides/plugin/spawning-entities#creating-entities)
---------------------------------------------------------------------------------------------------------
Once you have the `EntityStore` instance, you can start to create a entity and give it components. Entities are just instances of `Holder` with several components attached to them.
Warning
To interact with the `World` instance, some methods require you to run the code inside the world's execution context. The logic under the hood enqueues each task to be executed in the world's thread. To do this, you can use the `world.execute()` method.
In our case, we will be using the `world.execute()` method to spawn the entity in the world. For convenience, in this guide we will be putting all the code below inside the lambda function, but it's not required.
world.execute(() -> {
// run all the code below in this context
})
Let's start by creating a blank holder:
Holder holder = EntityStore.REGISTRY.newHolder();
[Getting a Model](https://hytalemodding.dev/en/docs/guides/plugin/spawning-entities#getting-a-model)
-----------------------------------------------------------------------------------------------------
You now need a model for your Entity. You can find a list of all entities [here](https://hytalemodding.dev/en/docs/server/entities)
, we're going to use the Minecart entity for this example:
ModelAsset modelAsset = ModelAsset.getAssetMap().getAsset("Minecart");
Model model = Model.createScaledModel(modelAsset, 1.0f);
### [The Transform Component](https://hytalemodding.dev/en/docs/guides/plugin/spawning-entities#the-transform-component)
The `TransformComponent` is the component that tells Hytale where to place your entity, what it's location is. You can get this in multiple ways.
1. Getting the Transform Component from the player - note that this requires fetching the player's EntityStore reference first.
TransformComponent transform = store.getComponent(playerRef.getReference(), EntityModule.get().getTransformComponentType());
2. Generating a new TransformComponent
Vector3d vector3d = new Vector3d(0, 0, 0); // position
Vector3f vector3f = new Vector3f(0, 0, 0); // rotation
TransformComponent transform = new TransformComponent(vector3d, vector3f);
[Adding Components to our Entity](https://hytalemodding.dev/en/docs/guides/plugin/spawning-entities#adding-components-to-our-entity)
-------------------------------------------------------------------------------------------------------------------------------------
Now we need to add all the components we made above to our entity, here's all the components we need to add one by one:
holder.addComponent(TransformComponent.getComponentType(), new TransformComponent(vector3d, new Vector3f(0, 0, 0)));
holder.addComponent(PersistentModel.getComponentType(), new PersistentModel(model.toReference()));
holder.addComponent(ModelComponent.getComponentType(), new ModelComponent(model));
holder.addComponent(BoundingBox.getComponentType(), new BoundingBox(model.getBoundingBox()));
holder.addComponent(NetworkId.getComponentType(), new NetworkId(store.getExternalData().takeNextNetworkId()));
holder.addComponent(Interactions.getComponentType(), new Interactions()); // you need to add interactions here if you want your entity to be interactable
### [Ensuring Hytale's Components are present](https://hytalemodding.dev/en/docs/guides/plugin/spawning-entities#ensuring-hytales-components-are-present)
These act as "configuration" or "default" components that Hytale expects to be present on all entities.
holder.ensureComponent(UUIDComponent.getComponentType());
holder.ensureComponent(Interactable.getComponentType()); // if you want your entity to be interactable
[Spawning the Entity](https://hytalemodding.dev/en/docs/guides/plugin/spawning-entities#spawning-the-entity)
-------------------------------------------------------------------------------------------------------------
Finally, we can add the entity to the world by calling the `addEntity` method on the `EntityStore` instance:
Warning
As a reminder, a part of the logic is to enqueue the entity spawn task inside the world in its thread. Because of this, this part **needs** to be run inside `world.execute()` method.
store.addEntity(holder, AddReason.SPAWN);
Written by Neil Revin
[Edit on GitHub](https://github.com/HytaleModding/site/blob/main/content/docs/en/guides/plugin/spawning-entities.mdx)
[Sending notifications\
\
Learn how to send notifications (similar to item pickup) with your Hytale Plugin](https://hytalemodding.dev/en/docs/guides/plugin/send-notifications)
[Teleporting the player\
\
Learn how to teleport the player.](https://hytalemodding.dev/en/docs/guides/plugin/teleporting-players)
### On this page
[Getting the World Object](https://hytalemodding.dev/en/docs/guides/plugin/spawning-entities#getting-the-world-object)
[Using the `Player` Object](https://hytalemodding.dev/en/docs/guides/plugin/spawning-entities#using-the-player-object)
[Using the `Universe` Class](https://hytalemodding.dev/en/docs/guides/plugin/spawning-entities#using-the-universe-class)
[Creating Entities](https://hytalemodding.dev/en/docs/guides/plugin/spawning-entities#creating-entities)
[Getting a Model](https://hytalemodding.dev/en/docs/guides/plugin/spawning-entities#getting-a-model)
[The Transform Component](https://hytalemodding.dev/en/docs/guides/plugin/spawning-entities#the-transform-component)
[Adding Components to our Entity](https://hytalemodding.dev/en/docs/guides/plugin/spawning-entities#adding-components-to-our-entity)
[Ensuring Hytale's Components are present](https://hytalemodding.dev/en/docs/guides/plugin/spawning-entities#ensuring-hytales-components-are-present)
[Spawning the Entity](https://hytalemodding.dev/en/docs/guides/plugin/spawning-entities#spawning-the-entity)
---
# Custom UI
Server Plugins
Custom UI
=========
Learn how to show custom UI to the player
[Important Information](https://hytalemodding.dev/en/docs/guides/plugin/ui#important-information)
--------------------------------------------------------------------------------------------------
* All .ui files must be included in your plugin resources folder, specifically they should be in resources/Common/UI/Custom
* Ensure your manifest.json contains `"IncludesAssetPack": true`
* The Hytale client has a "Diagnostic Mode" setting under General, this will give more detailed error messages.
[Useful Resources](https://hytalemodding.dev/en/docs/guides/plugin/ui#useful-resources)
----------------------------------------------------------------------------------------
Video Tutorials:
* CustomUIHud Tutorial: [https://www.youtube.com/watch?v=u4pGShklEKs](https://www.youtube.com/watch?v=u4pGShklEKs)
* InteractiveCustomUIPage Tutorial: [https://www.youtube.com/watch?v=NOFWQt9wEbk](https://www.youtube.com/watch?v=NOFWQt9wEbk)
Examples:
* Simple InteractiveCustomUIPage Example: [https://github.com/underscore95/Hytale-Sandbox-Plugin/tree/ui-pages](https://github.com/underscore95/Hytale-Sandbox-Plugin/tree/ui-pages)
* Complicated InteractiveCustomUIPage Example: [https://github.com/Buuz135/AdminUI/tree/main](https://github.com/Buuz135/AdminUI/tree/main)
[.ui files](https://hytalemodding.dev/en/docs/guides/plugin/ui#ui-files)
-------------------------------------------------------------------------
Hytale currently uses .ui files to render UI, these are currently deprecated and Hytale is planning to move to NoesisGUI. The transition has not happened yet and .ui files are the only way to render UI.
UI is defined using a .ui file which functions similarly to HTML and CSS.
### [UI Elements](https://hytalemodding.dev/en/docs/guides/plugin/ui#ui-elements)
A .ui file contains a tree of UI elements, declaring a UI element uses the following syntax:
Group {
TextField #MyInput {
Style: $Common.@DefaultInputFieldStyle;
Background: $Common.@InputBoxBackground;
Anchor: (Top: 10, Width: 200, Height: 50);
}
}
`TextField` and `Group` are the types of UI elements.
* A text field is an input where the user can enter text.
* A group is an empty UI element, similar to a div in HTML.
`#MyInput` is the ID of the TextField UI element, this is required for Java code to access the element later.
### [Variables](https://hytalemodding.dev/en/docs/guides/plugin/ui#variables)
You can define variables using the following syntax:
@MyTex = PatchStyle(TexturePath: "MyBackground.png");
### [Textures](https://hytalemodding.dev/en/docs/guides/plugin/ui#textures)
Textures can be loaded using
PatchStyle(TexturePath: "MyBackground.png");
The path is relative to the .ui file. Your textures must be included in your resource folder.
If applying a texture as the background of a UI element, you do not need to match size, the texture will automatically be stretched.
### [Including other .ui files](https://hytalemodding.dev/en/docs/guides/plugin/ui#including-other-ui-files)
You can include other .ui files using `$Common = "Common.ui";`, this allows you to access variables like so: `Style: $Common.@DefaultInputFieldStyle;`
[HUDs](https://hytalemodding.dev/en/docs/guides/plugin/ui#huds)
----------------------------------------------------------------
A HUD is an element of UI that stays on the screen all the time, for example the players hot bar or health bar. It cannot be interacted with.
### [CustomUIHud](https://hytalemodding.dev/en/docs/guides/plugin/ui#customuihud)
Create a Java class that extends `CustomUIHud` and overrides the `build` function.
The `build` function has a `UICommandBuilder` parameter, this allows you to add .ui files to the HUD.
uiCommandBuilder.append("MyUI.ui"); // This file must be located at resources/Common/UI/Custom/MyUI.ui
### [Showing & Hiding UI](https://hytalemodding.dev/en/docs/guides/plugin/ui#showing--hiding-ui)
You can get the HudManager using `Player#getHudManager`.
* Use `HudManager#setCustomHud` to show UI.
* Use `HudManager#hideHudComponent` to hide UI.
* [https://www.curseforge.com/hytale/mods/multiplehud](https://www.curseforge.com/hytale/mods/multiplehud)
allows showing multiple custom HUDs
[UI Pages](https://hytalemodding.dev/en/docs/guides/plugin/ui#ui-pages)
------------------------------------------------------------------------
Pages are another type of UI, these prevent the player from interacting with the game and unlock the players mouse. Some examples of pages include: Crafting menu, pause menu
### [CustomUIPage](https://hytalemodding.dev/en/docs/guides/plugin/ui#customuipage)
If you do not need user input, you can make a class extending CustomUIPage, this is very similar to CustomUIHud.
### [InteractiveCustomUIPage](https://hytalemodding.dev/en/docs/guides/plugin/ui#interactivecustomuipage)
You must extend InteractiveCustomUIPage to receive events and user input.
The following UI is used for the below code:
$Common = "Common.ui";
@MyTex = PatchStyle(TexturePath: "MyBackground.png");
Group {
LayoutMode: Center;
Group #MyPanel {
Background: @MyTex;
Anchor: (Width: 800, Height: 1000);
LayoutMode: Top;
Label #MyLabel {
Style: (FontSize: 32, Alignment: Center);
Anchor: (Top: 50);
Text: "MyText";
Padding: (Full: 10);
}
TextField #MyInput {
Style: $Common.@DefaultInputFieldStyle;
Background: $Common.@InputBoxBackground;
Anchor: (Top: 10, Width: 200, Height: 50);
Padding: (Full: 10);
}
}
}
InteractiveCustomUIPage takes a generic argument, this is a class containing any UI data you want the client to send to the server.
public static class Data {
public static final BuilderCodec CODEC = BuilderCodec.builder(Data.class, Data::new)
.append(new KeyedCodec<>("@MyInput", Codec.STRING), (data, value) -> data.value = value, data -> data.value).add()
.build();
private String value; // Value of the TextField input
}
InteractiveCustomUIPage constructor takes a PlayerRef, CustomPageLifetime, and `BuilderCodec`.
* PlayerRef is the player you want to show UI to.
* CustomPageLifetime is an enum controlling if the player can close the UI or not
`BuilderCodec` tells the server how to create the Data object from the JSON the client sends. Example value in the Data class above.
This passes the Class and a lambda function that constructs the Data object, the server uses this to deserialize the JSON.:
BuilderCodec.builder(Data.class, Data::new)
This provides a setter and getter lambda function to the field that should contain whatever @MyInput is set to:
.append(new KeyedCodec<>("@MyInput", Codec.STRING), (data, value) -> data.value = value, data -> data.value).add()
The following build method is used:
@Override
public void build(@Nonnull Ref ref, @Nonnull UICommandBuilder uiCommandBuilder, @Nonnull UIEventBuilder uiEventBuilder, @Nonnull Store store) {
uiCommandBuilder.append("MyUI.ui");
uiEventBuilder.addEventBinding(CustomUIEventBindingType.ValueChanged, "#MyInput", EventData.of("@MyInput", "#MyInput.Value"), false);
}
This says we are listening for whenever the value of #MyInput changes:
CustomUIEventBindingType.ValueChanged, "#MyInput"
You may be wondering where `@MyInput` in the codec previously came from, it is defined here. This creates the codec value `@MyInput` and maps it to `#MyInput.Value`:
EventData.of("@MyInput", "#MyInput.Value")
The following `handleDataEvent` will be overridden, take care to override the one that has a `Data` parameter rather than `String raw` (this is the raw json).
@Override
public void handleDataEvent(@Nonnull Ref ref, @Nonnull Store store, Data data) {
super.handleDataEvent(ref, store, data);
System.out.println("EVENT: " + data.value);
sendUpdate();
}
You must always either switch to a new UI or call `sendUpdate();` otherwise the Hytale client will display "Loading..." forever and prevent the user from interacting with your UI. This will be familiar if you have ever made commands in a Discord bot, where you have to acknowledge interactions.
### [Opening UI pages](https://hytalemodding.dev/en/docs/guides/plugin/ui#opening-ui-pages)
player.getPageManager().openCustomPage(ref, store, MyUI(playerRef));
[Dynamically Updating UI](https://hytalemodding.dev/en/docs/guides/plugin/ui#dynamically-updating-ui)
------------------------------------------------------------------------------------------------------
In many cases you want to update your UI at run time.
Here is an example of updating a Label's (with id MyLabel) text content, this method should be added to your UI Java class:
public void updateText(String newText) {
UICommandBuilder uiCommandBuilder = new UICommandBuilder();
uiCommandBuilder.set("#MyLabel.TextSpans", Message.raw(newText));
update(false, uiCommandBuilder); // false = don't clear existing UI
}
## Common Issues
### Failed to apply custom ui hud commands
This means your .ui file has something wrong with it.
### Could not find document XXXXX for Custom UI Append command
This means your .ui file wasn't in the location your Java code said it was, double check that your path is correct.
Written by [underscore95](https://github.com/underscore95)
[Edit on GitHub](https://github.com/HytaleModding/site/blob/main/content/docs/en/guides/plugin/ui.mdx)
[Title Holograms\
\
Learn how to create title holograms.](https://hytalemodding.dev/en/docs/guides/plugin/text-hologram)
[World Generation System\
\
Learn how to create custom world generation features for your Hytale mod.](https://hytalemodding.dev/en/docs/guides/plugin/world-gen)
### On this page
[Important Information](https://hytalemodding.dev/en/docs/guides/plugin/ui#important-information)
[Useful Resources](https://hytalemodding.dev/en/docs/guides/plugin/ui#useful-resources)
[.ui files](https://hytalemodding.dev/en/docs/guides/plugin/ui#ui-files)
[UI Elements](https://hytalemodding.dev/en/docs/guides/plugin/ui#ui-elements)
[Variables](https://hytalemodding.dev/en/docs/guides/plugin/ui#variables)
[Textures](https://hytalemodding.dev/en/docs/guides/plugin/ui#textures)
[Including other .ui files](https://hytalemodding.dev/en/docs/guides/plugin/ui#including-other-ui-files)
[HUDs](https://hytalemodding.dev/en/docs/guides/plugin/ui#huds)
[CustomUIHud](https://hytalemodding.dev/en/docs/guides/plugin/ui#customuihud)
[Showing & Hiding UI](https://hytalemodding.dev/en/docs/guides/plugin/ui#showing--hiding-ui)
[UI Pages](https://hytalemodding.dev/en/docs/guides/plugin/ui#ui-pages)
[CustomUIPage](https://hytalemodding.dev/en/docs/guides/plugin/ui#customuipage)
[InteractiveCustomUIPage](https://hytalemodding.dev/en/docs/guides/plugin/ui#interactivecustomuipage)
[Opening UI pages](https://hytalemodding.dev/en/docs/guides/plugin/ui#opening-ui-pages)
[Dynamically Updating UI](https://hytalemodding.dev/en/docs/guides/plugin/ui#dynamically-updating-ui)
---
# Creating Events
Server Plugins
Creating Events
===============
Learn how to create custom events for your Hytale mod.
[Event Class](https://hytalemodding.dev/en/docs/guides/plugin/creating-events#event-class)
-------------------------------------------------------------------------------------------
You can import a Event class and create a function with the Event as a argument. [Click here](https://hytalemodding.dev/en/docs/server/events)
to look at all available events.
Example plugin when a player is ready (joins a server):
public class ExampleEvent {
public static void onPlayerReady(PlayerReadyEvent event) {
Player player = event.getPlayer();
player.sendMessage(Message.raw("Welcome " + player.getDisplayName()));
}
}
[Registering the Event](https://hytalemodding.dev/en/docs/guides/plugin/creating-events#registering-the-event)
---------------------------------------------------------------------------------------------------------------
You need to register all events you make in the Main plugin class, usually in the `setup` function.
public class MyPlugin extends JavaPlugin {
@Override
public void setup() {
this.getEventRegistry().registerGlobal(PlayerReadyEvent.class, ExampleEvent::onPlayerReady);
}
}
[ESC Event Classes](https://hytalemodding.dev/en/docs/guides/plugin/creating-events#esc-event-classes)
-------------------------------------------------------------------------------------------------------
For events that fall under the [ESC Events](https://hytalemodding.dev/en/docs/server/events#ecsevent)
list you will need to instead create and register an entity event system. An example is included below that will cancel the crafting of a recipe if it uses fibre as an input.
class ExampleCancelCraft extends EntityEventSystem {
public ExampleCancelCraft() {
super(CraftRecipeEvent.Pre.class);
}
@Override
public void handle(int index,
@NonNullDecl ArchetypeChunk archetypeChunk,
@NonNullDecl Store store,
@NonNullDecl CommandBuffer commandBuffer,
@NonNullDecl CraftRecipeEvent.Pre craftRecipeEvent) {
CraftingRecipe recipe = craftRecipeEvent.getCraftedRecipe();
if (recipe.getInput() != null) {
for (MaterialQuantity mq : recipe.getInput()) {
if (Objects.equals(mq.getItemId(), "Ingredient_Fibre")) {
craftRecipeEvent.setCancelled(true);
break;
}
}
}
}
@Override
public Query getQuery() {
return Archetype.empty();
}
}
[Registering ESC Events](https://hytalemodding.dev/en/docs/guides/plugin/creating-events#registering-esc-events)
-----------------------------------------------------------------------------------------------------------------
You will need to register the system in your plugin:
public class MyPlugin extends JavaPlugin {
@Override
public void setup() {
this.getEntityStoreRegistry().registerSystem(new ExampleCancelCraft());
}
}
Written by Neil Revin, EllieAU
[Edit on GitHub](https://github.com/HytaleModding/site/blob/main/content/docs/en/guides/plugin/creating-events.mdx)
[Creating Commands\
\
Learn how to create custom commands for your Hytale mod.](https://hytalemodding.dev/en/docs/guides/plugin/creating-commands)
[Formatting the chat\
\
Learn how to format the chat using the PlayerChatEvent](https://hytalemodding.dev/en/docs/guides/plugin/chat-formatting)
### On this page
[Event Class](https://hytalemodding.dev/en/docs/guides/plugin/creating-events#event-class)
[Registering the Event](https://hytalemodding.dev/en/docs/guides/plugin/creating-events#registering-the-event)
[ESC Event Classes](https://hytalemodding.dev/en/docs/guides/plugin/creating-events#esc-event-classes)
[Registering ESC Events](https://hytalemodding.dev/en/docs/guides/plugin/creating-events#registering-esc-events)
---
# World Generation System
Server Plugins
World Generation System
=======================
Learn how to create custom world generation features for your Hytale mod.
[Overview](https://hytalemodding.dev/en/docs/guides/plugin/world-gen#overview)
===============================================================================
This section covers Hytale's procedural world generation systems that creates environments, biomes, and structures dynamically as players explore the world.
Hytale’s world generation is organized into three interconnected systems:
* **Zones** - Large-scale regions that define overall world structure
* **Biomes** - Terrain characteristics and environmental properties within zones
* **Caves** - Underground structures and networks generated within zones
These systems work together to create a rich, varied world with smooth transitions and coherent regional themes.
[Getting Started](https://hytalemodding.dev/en/docs/guides/plugin/world-gen#getting-started)
---------------------------------------------------------------------------------------------
1. Zone System - Large regions
2. Biome System - Terrain and environment within zones
3. Cave System - Underground structures and networks within zones
[Implementation Details](https://hytalemodding.dev/en/docs/guides/plugin/world-gen#implementation-details)
-----------------------------------------------------------------------------------------------------------
### [Zone Lookup and Generation](https://hytalemodding.dev/en/docs/guides/plugin/world-gen#zone-lookup-and-generation)
// Get zone at position
ZonePatternGenerator zoneGen = /* world generator */;
ZoneGeneratorResult zoneResult = zoneGen.generate(seed, x, z);
Zone zone = zoneResult.getZone();
// Get biome within zone
BiomePatternGenerator biomeGen = zone.biomePatternGenerator();
Biome biome = biomeGen.generateBiomeAt(zoneResult, seed, x, z);
// Check for caves in zone
CaveGenerator caveGen = zone.caveGenerator();
if (caveGen != null) {
CaveType[] caveTypes = caveGen.getCaveTypes();
// Generate caves as needed
}
### [Creating a Custom Zone](https://hytalemodding.dev/en/docs/guides/plugin/world-gen#creating-a-custom-zone)
// Configure zone discovery
ZoneDiscoveryConfig discovery = new ZoneDiscoveryConfig(
true, // Show notification
"Custom Zone", // Display name
"zone.forest.discover", // Sound event
"icons/forest.png", // Icon
true, // Major zone
5.0f, 2.0f, 1.5f // Duration, fade in, fade out
);
// Create biome pattern
IPointGenerator biomePoints;
IWeightedMap tileBiomes;
CustomBiome[] customBiomes;
BiomePatternGenerator biomeGen = new BiomePatternGenerator(
biomePoints,
tileBiomes,
customBiomes
);
// Create cave configuration
CaveType[] caveTypes; // cave definitions
CaveGenerator caveGen = new CaveGenerator(caveTypes);
// Assemble the zone
Zone customZone = new Zone(
100, // Unique ID
"new_custom_zone", // Internal name
discovery, // Discovery config
caveGen, // Cave generator
biomeGen, // Biome pattern
uniquePrefabs // Unique structures
);
[System Integration](https://hytalemodding.dev/en/docs/guides/plugin/world-gen#system-integration)
---------------------------------------------------------------------------------------------------
### [Zone & Biome Integration](https://hytalemodding.dev/en/docs/guides/plugin/world-gen#zone--biome-integration)
Each zone defines its own biome pattern:
Zone zone = zoneGen.generate(seed, x, z).getZone();
BiomePatternGenerator biomeGen = zone.biomePatternGenerator();
Biome biome = biomeGen.generateBiomeAt(zoneResult, seed, x, z);
### [Zone & Cave Integration](https://hytalemodding.dev/en/docs/guides/plugin/world-gen#zone--cave-integration)
Eacdh zone defines it's own cave patterns:
Zone zone = /* ... */;
CaveGenerator caveGen = zone.caveGenerator();
if (caveGen != null) {
// This zone has caves
CaveType[] types = caveGen.getCaveTypes();
}
### [Biome & Cave Integration](https://hytalemodding.dev/en/docs/guides/plugin/world-gen#biome--cave-integration)
Caves use biome masks for placement control:
// Cave type with biome restrictions
Int2FlagsCondition biomeMask = caveType.getBiomeMask();
int biomeId = biome.getId();
int flags = biomeMask.eval(biomeId);
// Check if cave can generate in this biome
if (CaveBiomeMaskFlags.canGenerate(flags)) {
// Generate cave
}
### [Border Transitions](https://hytalemodding.dev/en/docs/guides/plugin/world-gen#border-transitions)
All systems respect zone boundaries:
ZoneGeneratorResult result = zoneGen.generate(seed, x, z);
double borderDistance = result.getBorderDistance();
// Fade custom biomes near borders
if (borderDistance < customBiome.getFadeContainer().getMaskFadeSum()) {
double factor = customBiome.getFadeContainer().getMaskFactor(result);
// Apply fading
}
Written by Neil Revin
[Edit on GitHub](https://github.com/HytaleModding/site/blob/main/content/docs/en/guides/plugin/world-gen.mdx)
[Custom UI\
\
Learn how to show custom UI to the player](https://hytalemodding.dev/en/docs/guides/plugin/ui)
[00 - Introduction to Java\
\
A beginner's guide to understanding the fundamentals of Java programming for Hytale modding.](https://hytalemodding.dev/en/docs/guides/java-basics/00-introduction)
### On this page
[Overview](https://hytalemodding.dev/en/docs/guides/plugin/world-gen#overview)
[Getting Started](https://hytalemodding.dev/en/docs/guides/plugin/world-gen#getting-started)
[Implementation Details](https://hytalemodding.dev/en/docs/guides/plugin/world-gen#implementation-details)
[Zone Lookup and Generation](https://hytalemodding.dev/en/docs/guides/plugin/world-gen#zone-lookup-and-generation)
[Creating a Custom Zone](https://hytalemodding.dev/en/docs/guides/plugin/world-gen#creating-a-custom-zone)
[System Integration](https://hytalemodding.dev/en/docs/guides/plugin/world-gen#system-integration)
[Zone & Biome Integration](https://hytalemodding.dev/en/docs/guides/plugin/world-gen#zone--biome-integration)
[Zone & Cave Integration](https://hytalemodding.dev/en/docs/guides/plugin/world-gen#zone--cave-integration)
[Biome & Cave Integration](https://hytalemodding.dev/en/docs/guides/plugin/world-gen#biome--cave-integration)
[Border Transitions](https://hytalemodding.dev/en/docs/guides/plugin/world-gen#border-transitions)
---
# 02 - Operators and Expressions
Java Basics
02 - Operators and Expressions
==============================
An introduction to operators and expressions in Java programming.
Operators are symbols that perform operations on variables and values. They're the verbs of programming - they make things happen!
[Arithmetic Operators](https://hytalemodding.dev/en/docs/guides/java-basics/02-operators#arithmetic-operators)
---------------------------------------------------------------------------------------------------------------
Used for mathematical calculations:
int a = 10;
int b = 5;
int sum = a + b; // Addition: 15
int difference = a - b; // Subtraction: 5
int product = a * b; // Multiplication: 50
int quotient = a / b; // Division: 2
int remainder = a % b; // Modulus (remainder): 0
Division Note
When dividing integers, Java performs integer division, which means it discards any decimal part. For example, `7 / 2` would result in `3`, not `3.5`.
int x = 7 / 2; // 3 (not 3.5!) - Integer division
double y = 7.0 / 2; // 3.5 - At least one double gives double result
double z = (double) 7 / 2; // 3.5 - Casting works too
### [Modulus (%) - The remainder Operator](https://hytalemodding.dev/en/docs/guides/java-basics/02-operators#modulus----the-remainder-operator)
The modulus operator returns the remainder of a division operation:
int remainder = 10 % 3; // 1 (because 10 divided by 3 is 3 with a remainder of 1)
[Compound Assignment Operators](https://hytalemodding.dev/en/docs/guides/java-basics/02-operators#compound-assignment-operators)
---------------------------------------------------------------------------------------------------------------------------------
These operators combine an arithmetic operation with assignment:
int a = 10;
a = a + 5; // The old way
a += 5; // a = a + 5
a -= 3; // a = a - 3
a *= 2; // a = a * 2
a /= 4; // a = a / 4
a %= 3; // a = a % 3
[Increment and Decrement Operators](https://hytalemodding.dev/en/docs/guides/java-basics/02-operators#increment-and-decrement-operators)
-----------------------------------------------------------------------------------------------------------------------------------------
Used to increase or decrease a variable's value by 1:
int a = 5;
a++; // Increment: a becomes 6
a--; // Decrement: a becomes 5 again
Prefix vs Postfix
int a = 5;
int b = a++; // b is 5, a is now 6
int c = ++a; // a is 7, c is now 7
[Comparison Operators](https://hytalemodding.dev/en/docs/guides/java-basics/02-operators#comparison-operators)
---------------------------------------------------------------------------------------------------------------
Used to compare two values, returning a boolean result (`true` or `false`):
int a = 10;
int b = 5;
a == b // false - Equal to
a != b // true - Not equal to
a > b // true - Greater than
a < b // false - Less than
a >= b // true - Greater than or equal to
a <= b // false - Less than or equal to
[Logical Operators](https://hytalemodding.dev/en/docs/guides/java-basics/02-operators#logical-operators)
---------------------------------------------------------------------------------------------------------
Used to combine multiple boolean expressions:
boolean x = true;
boolean y = false;
x && y // false - Logical AND
x || y // true - Logical OR
!x // false - Logical NOT
### [Combining Logical Operators](https://hytalemodding.dev/en/docs/guides/java-basics/02-operators#combining-logical-operators)
boolean result = (a > b) && (b < 10); // true if both conditions are true
[String Concatenation](https://hytalemodding.dev/en/docs/guides/java-basics/02-operators#string-concatenation)
---------------------------------------------------------------------------------------------------------------
The `+` operator can also be used to concatenate (join) strings:
String greeting = "Hello, " + "world!"; // "Hello, world!"
String name = "Alice";
String greetingWithName = "Hello, " + name + "!"; // "Hello, Alice!"
[Operator Precedence](https://hytalemodding.dev/en/docs/guides/java-basics/02-operators#operator-precedence)
-------------------------------------------------------------------------------------------------------------
Operator Precendence means which operator gets evaluated first in an line of code. Think of it like BODMAS/PEMDAS in math!
int result = 10 + 5 * 2; // result is 20, not 30
[Edit on GitHub](https://github.com/HytaleModding/site/blob/main/content/docs/en/guides/java-basics/02-operators.mdx)
[01 - Variables & Data Types\
\
An introduction to variables and data types in Java programming.](https://hytalemodding.dev/en/docs/guides/java-basics/01-variables)
[03 - Control Flow If Statements\
\
Learn how to control the flow of your Java programs using if statements.](https://hytalemodding.dev/en/docs/guides/java-basics/03-control-flow-if)
### On this page
[Arithmetic Operators](https://hytalemodding.dev/en/docs/guides/java-basics/02-operators#arithmetic-operators)
[Modulus (%) - The remainder Operator](https://hytalemodding.dev/en/docs/guides/java-basics/02-operators#modulus----the-remainder-operator)
[Compound Assignment Operators](https://hytalemodding.dev/en/docs/guides/java-basics/02-operators#compound-assignment-operators)
[Increment and Decrement Operators](https://hytalemodding.dev/en/docs/guides/java-basics/02-operators#increment-and-decrement-operators)
[Comparison Operators](https://hytalemodding.dev/en/docs/guides/java-basics/02-operators#comparison-operators)
[Logical Operators](https://hytalemodding.dev/en/docs/guides/java-basics/02-operators#logical-operators)
[Combining Logical Operators](https://hytalemodding.dev/en/docs/guides/java-basics/02-operators#combining-logical-operators)
[String Concatenation](https://hytalemodding.dev/en/docs/guides/java-basics/02-operators#string-concatenation)
[Operator Precedence](https://hytalemodding.dev/en/docs/guides/java-basics/02-operators#operator-precedence)
---
# Formatting the chat
Server Plugins
Formatting the chat
===================
Learn how to format the chat using the PlayerChatEvent
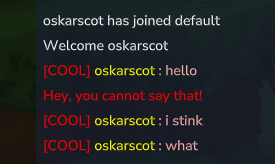
The chat uses the PlayerChatEvent, it contains the formatter, the PlayerRef for the sender, the content as well as a list of targets (it's safe to assume the targets is the list of players who can see the chat message) You can cancel this event as well as modify the content and the formatter.
public class ChatFormatter {
public static void onPlayerChat(PlayerChatEvent event) {
PlayerRef sender = event.getSender();
if(event.getContent().equalsIgnoreCase("poo")) {
event.setCancelled(true);
sender.sendMessage(Message.raw("Hey, you cannot say that!").color(Color.RED));
}
if(event.getContent().equalsIgnoreCase("you stink")) {
event.setContent("i stink");
}
event.setFormatter((playerRed, message) ->
Message.join(
Message.raw("[COOL] ").color(Color.RED),
Message.raw(sender.getUsername()).color(Color.YELLOW),
Message.raw(" : " + message).color(Color.PINK)
));
}
}
The formatter is the following interface:
public interface Formatter {
@Nonnull
Message format(@Nonnull PlayerRef playerRef, @Nonnull String message);
}
}
Written by oskarscot
[Edit on GitHub](https://github.com/HytaleModding/site/blob/main/content/docs/en/guides/plugin/chat-formatting.mdx)
[Creating Events\
\
Learn how to create custom events for your Hytale mod.](https://hytalemodding.dev/en/docs/guides/plugin/creating-events)
[Packets: Client-to-Server Reference\
\
Complete reference for every packet the client can send to the server.](https://hytalemodding.dev/en/docs/guides/plugin/client-inputs-reference)
---
# Title Holograms
Server Plugins
Title Holograms
===============
Learn how to create title holograms.
[Overview](https://hytalemodding.dev/en/docs/guides/plugin/text-hologram#overview)
===================================================================================
In this guide, you'll learn how to create a **title hologram** using an entity nameplate.
[Steps](https://hytalemodding.dev/en/docs/guides/plugin/text-hologram#steps)
-----------------------------------------------------------------------------
1. Open and equip the **Entity Grabber Tool**.
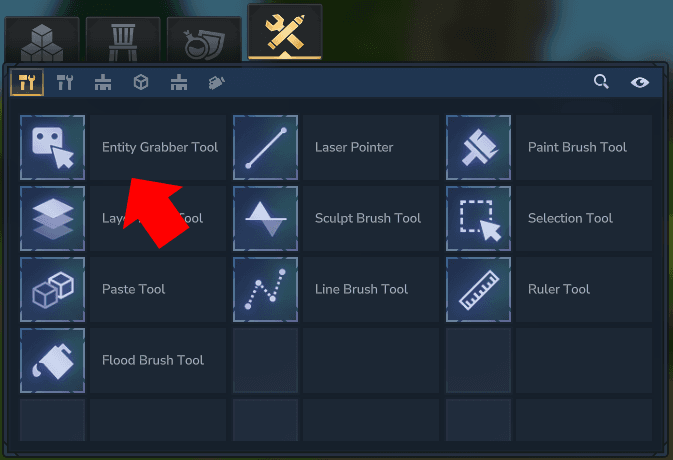
Info
This tool will be used later to **adjust the position of the nameplate**, so it’s useful to keep it equipped throughout the process.
* * *
2. Spawn a **small entity** (for example, rubble or a similar object), then **scale it down** to lowest possible value.
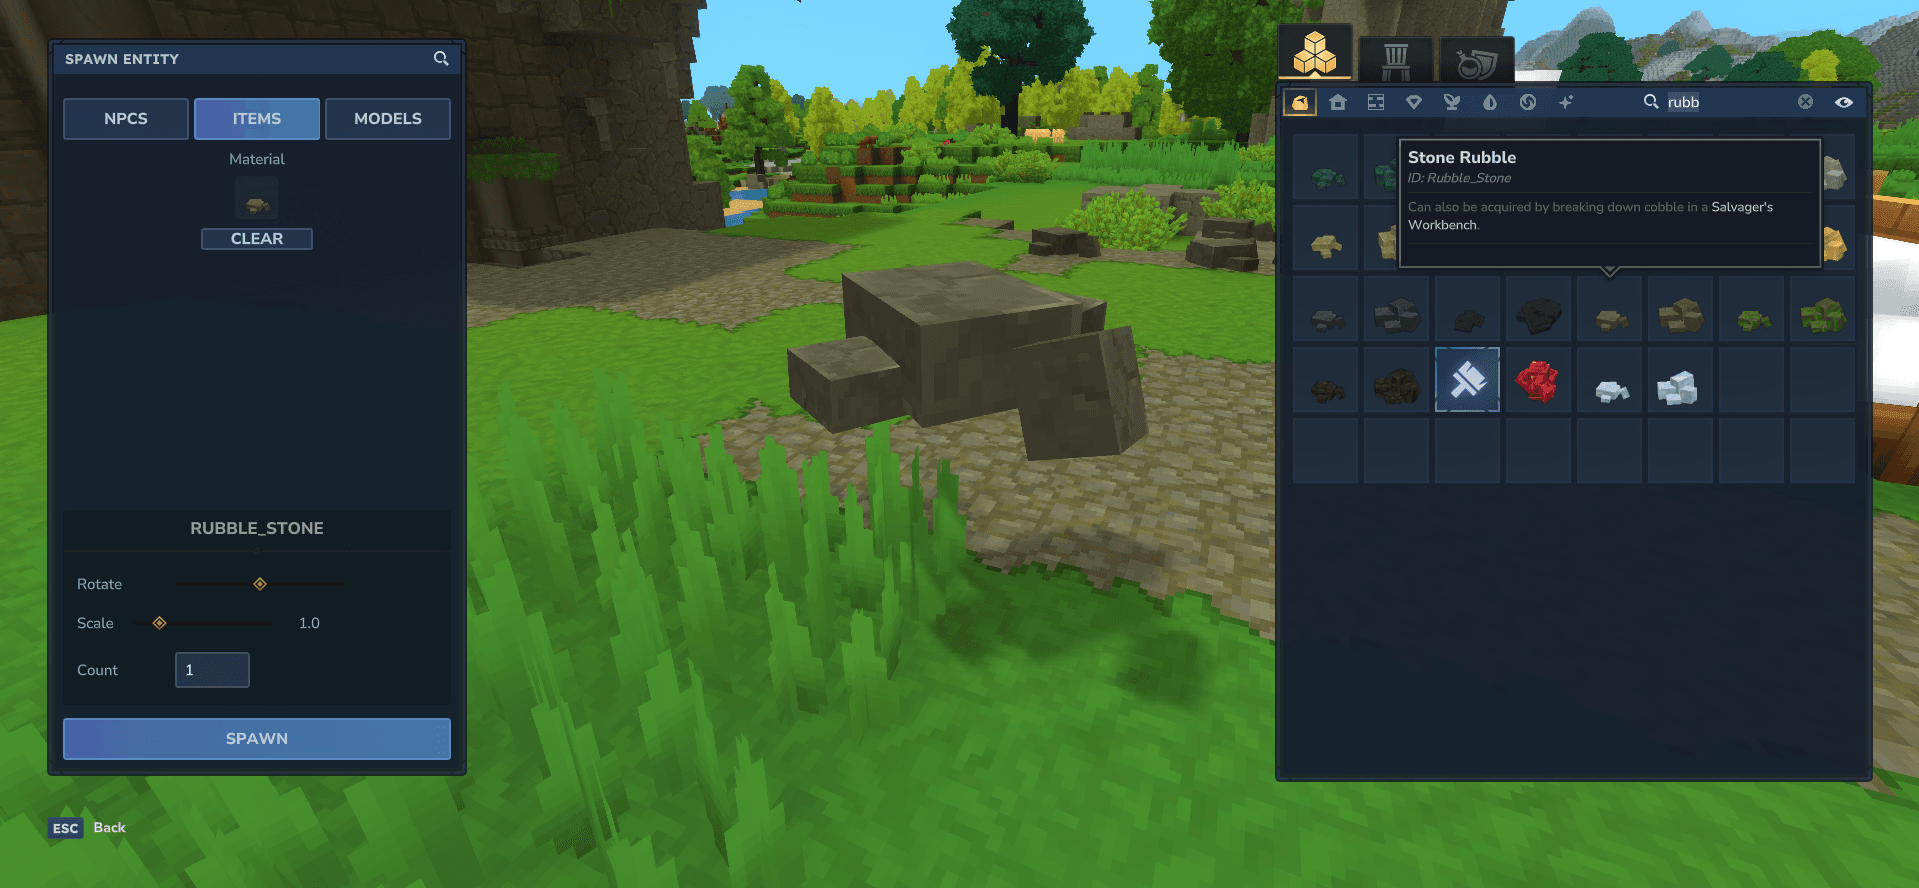
* * *
3. Hover over the entity you just spawned and run the following command:
/entity nameplate "Text Here"
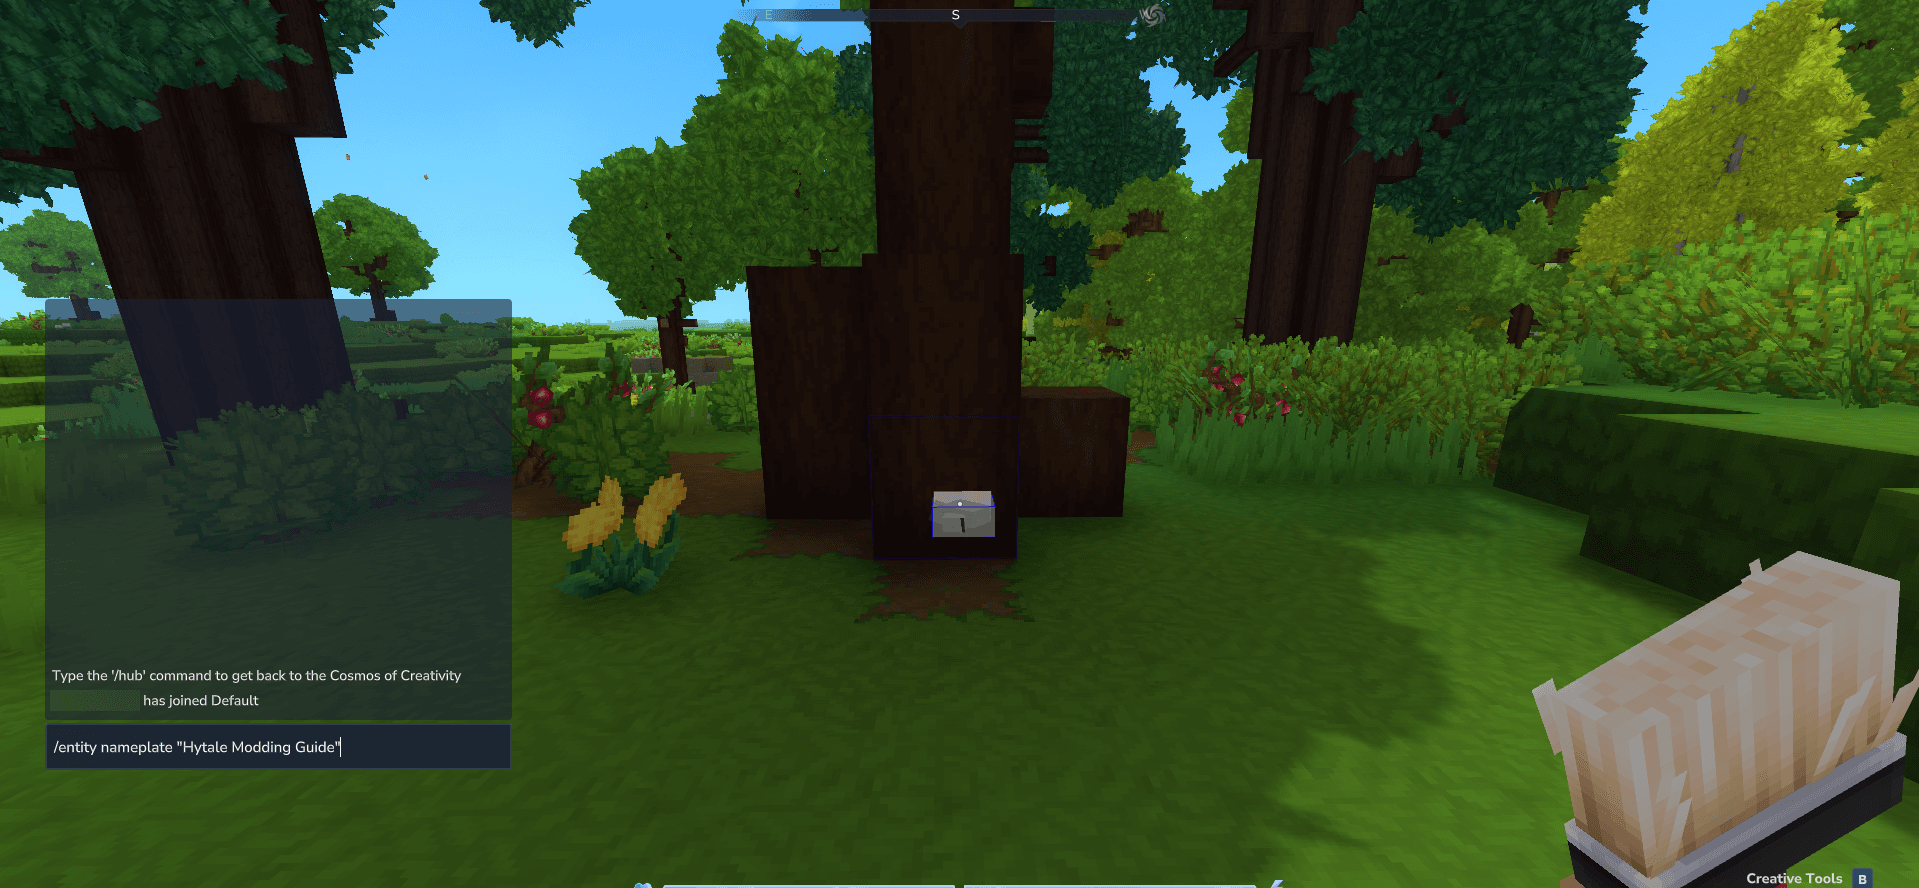
* * *
Your title hologram should now be visible in the world, floating where the entity is placed.
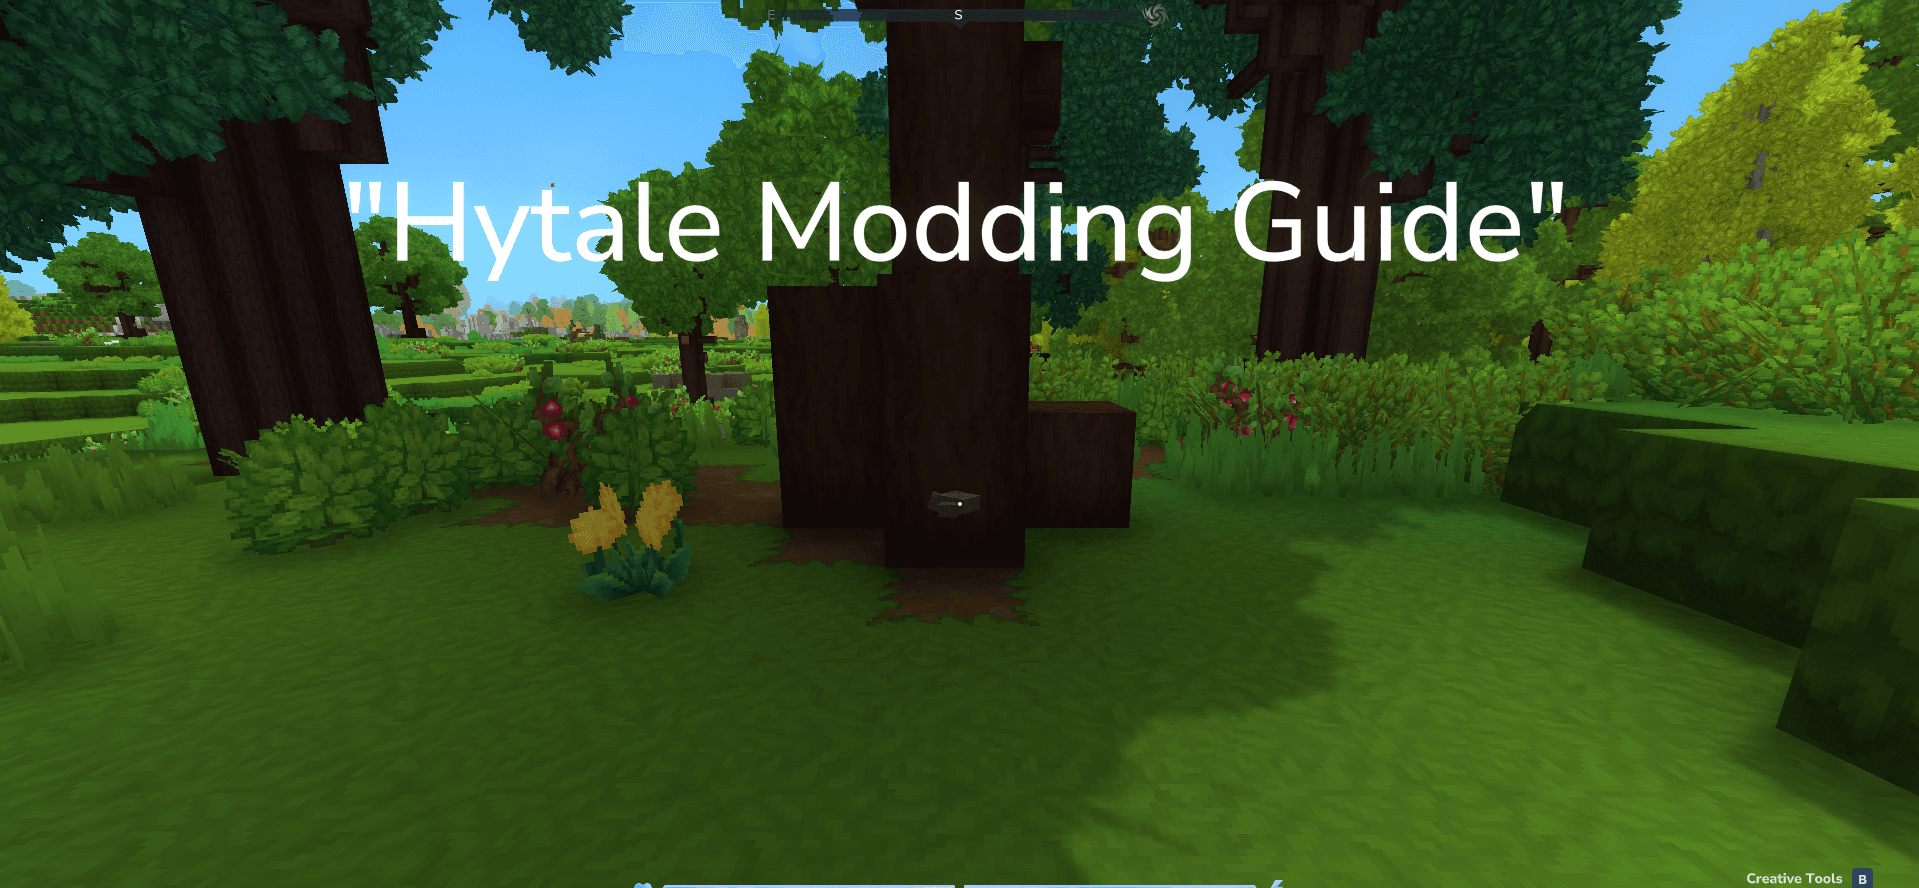
* * *
[Bonus Section - Creating Title Holograms With Code](https://hytalemodding.dev/en/docs/guides/plugin/text-hologram#bonus-section---creating-title-holograms-with-code)
-----------------------------------------------------------------------------------------------------------------------------------------------------------------------
This section shows how to create the same title hologram using a **server plugin command** instead of in-game tools.
The example below creates a command called `/titlehologram` that spawns an invisible entity with a floating nameplate at the player’s location.
package org.example.plugin;
import com.hypixel.hytale.component.Holder;
import com.hypixel.hytale.math.vector.Transform;
import com.hypixel.hytale.server.core.command.system.CommandContext;
import com.hypixel.hytale.server.core.command.system.basecommands.CommandBase;
import com.hypixel.hytale.server.core.entity.UUIDComponent;
import com.hypixel.hytale.server.core.entity.entities.ProjectileComponent;
import com.hypixel.hytale.server.core.entity.nameplate.Nameplate;
import com.hypixel.hytale.server.core.modules.entity.component.Intangible;
import com.hypixel.hytale.server.core.modules.entity.component.TransformComponent;
import com.hypixel.hytale.server.core.modules.entity.tracker.NetworkId;
import com.hypixel.hytale.server.core.universe.PlayerRef;
import com.hypixel.hytale.server.core.universe.Universe;
import com.hypixel.hytale.server.core.universe.world.World;
import com.hypixel.hytale.server.core.universe.world.storage.EntityStore;
import javax.annotation.Nonnull;
import java.util.UUID;
public class TitleHologramCommand extends CommandBase {
public TitleHologramCommand() {
super("TitleHologram", "Create a title hologram.");
}
@Override
protected void executeSync(@Nonnull CommandContext ctx) {
UUID playerUUID = ctx.sender().getUuid();
PlayerRef playerRef = Universe.get().getPlayer(playerUUID);
World world = Universe.get().getWorld(playerRef.getWorldUuid());
Transform playerTransform = playerRef.getTransform();
world.execute(() -> {
Holder holder = EntityStore.REGISTRY.newHolder();
ProjectileComponent projectileComponent = new ProjectileComponent("Projectile");
holder.putComponent(ProjectileComponent.getComponentType(), projectileComponent);
holder.putComponent(TransformComponent.getComponentType(), new TransformComponent(playerTransform.getPosition().clone(), playerTransform.getRotation().clone()));
holder.ensureComponent(UUIDComponent.getComponentType());
holder.ensureComponent(Intangible.getComponentType());
if (projectileComponent.getProjectile() == null) {
projectileComponent.initialize();
if (projectileComponent.getProjectile() == null) {
return;
}
}
holder.addComponent(NetworkId.getComponentType(), new NetworkId(world.getEntityStore().getStore().getExternalData().takeNextNetworkId()));
holder.addComponent(Nameplate.getComponentType(), new Nameplate("Testing Holograms"));
world.getEntityStore().getStore().addEntity(holder, com.hypixel.hytale.component.AddReason.SPAWN);
});
}
}
* * *
### [1\. Getting the Player and World](https://hytalemodding.dev/en/docs/guides/plugin/text-hologram#1-getting-the-player-and-world)
UUID playerUUID = ctx.sender().getUuid();
PlayerRef playerRef = Universe.get().getPlayer(playerUUID);
World world = Universe.get().getWorld(playerRef.getWorldUuid());
Transform playerTransform = playerRef.getTransform();
This retrieves:
| Value | Purpose |
| --- | --- |
| `playerUUID` | The unique ID of the command sender |
| `playerRef` | A server-side reference to the player |
| `world` | The world the player is currently in |
| `playerTransform` | The player’s position and rotation |
This allows the hologram to be spawned **exactly where the player is standing**.
* * *
### [2\. Spawning on the World Thread](https://hytalemodding.dev/en/docs/guides/plugin/text-hologram#2-spawning-on-the-world-thread)
world.execute(() -> {
All entity operations must run on the world thread. Everything inside this block executes safely on the correct game thread.
* * *
### [3\. Creating the Entity](https://hytalemodding.dev/en/docs/guides/plugin/text-hologram#3-creating-the-entity)
Holder holder = EntityStore.REGISTRY.newHolder();
ProjectileComponent projectileComponent = new ProjectileComponent("Projectile");
The projectile is only used as a **valid entity shell**. It will never move or behave like a real projectile.
* * *
### [4\. Setting Position & Components](https://hytalemodding.dev/en/docs/guides/plugin/text-hologram#4-setting-position--components)
holder.putComponent(ProjectileComponent.getComponentType(), projectileComponent);
holder.putComponent(TransformComponent.getComponentType(), new TransformComponent(playerTransform.getPosition().clone(), playerTransform.getRotation().clone()));
holder.ensureComponent(UUIDComponent.getComponentType());
holder.ensureComponent(Intangible.getComponentType());
This builds an invisible, stationary entity at the player’s position.
| Component | Purpose |
| --- | --- |
| `ProjectileComponent` | Provides a valid entity shell |
| `TransformComponent` | Sets the entity’s position and rotation |
| `UUIDComponent` | Gives the entity a unique identity |
| `Intangible` | Makes the entity non-collidable and unselectable |
The hologram will appear exactly at the player’s position and cannot be interacted with physically.
* * *
### [5\. Initializing the Projectile](https://hytalemodding.dev/en/docs/guides/plugin/text-hologram#5-initializing-the-projectile)
if (projectileComponent.getProjectile() == null) {
projectileComponent.initialize();
if (projectileComponent.getProjectile() == null) {
return;
}
}
This ensures the projectile entity is fully created. If initialization fails, the hologram will not spawn.
* * *
### [6\. Setting Network & Nameplate Components](https://hytalemodding.dev/en/docs/guides/plugin/text-hologram#6-setting-network--nameplate-components)
holder.addComponent(
NetworkId.getComponentType(),
new NetworkId(
world.getEntityStore()
.getStore()
.getExternalData()
.takeNextNetworkId()
)
);
holder.addComponent(
Nameplate.getComponentType(),
new Nameplate("Testing Holograms")
);
These final components make the hologram visible and give it its text.
| Component | Purpose |
| --- | --- |
| `NetworkId` | Allows the entity to be synced |
| `Nameplate` | The actual hologram text |
* * *
### [7\. Spawning the Entity](https://hytalemodding.dev/en/docs/guides/plugin/text-hologram#7-spawning-the-entity)
world.getEntityStore()
.getStore()
.addEntity(holder, com.hypixel.hytale.component.AddReason.SPAWN);
This inserts the hologram entity into the world, making it active and visible.
* * *
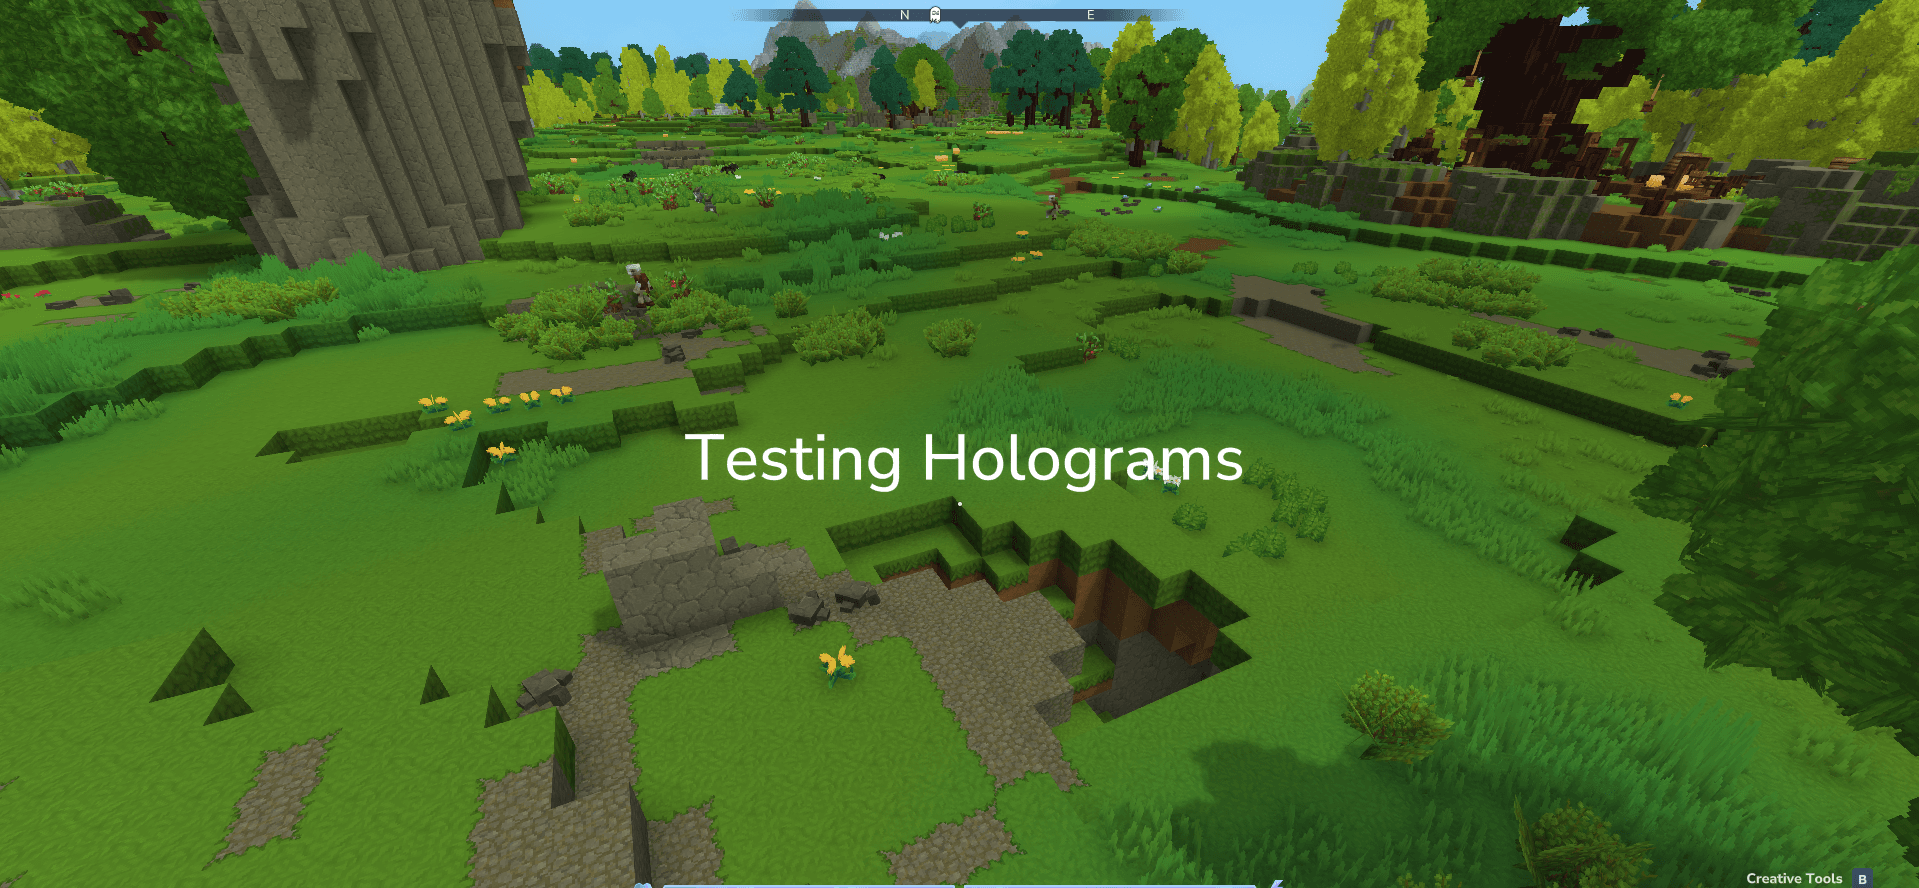
Written by Bird
[Edit on GitHub](https://github.com/HytaleModding/site/blob/main/content/docs/en/guides/plugin/text-hologram.mdx)
[Teleporting the player\
\
Learn how to teleport the player.](https://hytalemodding.dev/en/docs/guides/plugin/teleporting-players)
[Custom UI\
\
Learn how to show custom UI to the player](https://hytalemodding.dev/en/docs/guides/plugin/ui)
### On this page
[Overview](https://hytalemodding.dev/en/docs/guides/plugin/text-hologram#overview)
[Steps](https://hytalemodding.dev/en/docs/guides/plugin/text-hologram#steps)
[Bonus Section - Creating Title Holograms With Code](https://hytalemodding.dev/en/docs/guides/plugin/text-hologram#bonus-section---creating-title-holograms-with-code)
[1\. Getting the Player and World](https://hytalemodding.dev/en/docs/guides/plugin/text-hologram#1-getting-the-player-and-world)
[2\. Spawning on the World Thread](https://hytalemodding.dev/en/docs/guides/plugin/text-hologram#2-spawning-on-the-world-thread)
[3\. Creating the Entity](https://hytalemodding.dev/en/docs/guides/plugin/text-hologram#3-creating-the-entity)
[4\. Setting Position & Components](https://hytalemodding.dev/en/docs/guides/plugin/text-hologram#4-setting-position--components)
[5\. Initializing the Projectile](https://hytalemodding.dev/en/docs/guides/plugin/text-hologram#5-initializing-the-projectile)
[6\. Setting Network & Nameplate Components](https://hytalemodding.dev/en/docs/guides/plugin/text-hologram#6-setting-network--nameplate-components)
[7\. Spawning the Entity](https://hytalemodding.dev/en/docs/guides/plugin/text-hologram#7-spawning-the-entity)
---
# 05 - Arrays
Java Basics
05 - Arrays
===========
Learn how to store and manage collections of data using arrays.
Arrays let you store multiple values of the same type in a single variable. Think of an array as a row of boxes, each holding one item.
[Creating Arrays](https://hytalemodding.dev/en/docs/guides/java-basics/05-arrays#creating-arrays)
--------------------------------------------------------------------------------------------------
### [Method 1: Declare and Initialize Separately](https://hytalemodding.dev/en/docs/guides/java-basics/05-arrays#method-1-declare-and-initialize-separately)
int[] numbers; // Declare
numbers = new int[5]; // Create array with 5 spaces
### [Method 2: All at Once](https://hytalemodding.dev/en/docs/guides/java-basics/05-arrays#method-2-all-at-once)
int[] numbers = new int[5];
### [Method 3: With Initial Values](https://hytalemodding.dev/en/docs/guides/java-basics/05-arrays#method-3-with-initial-values)
int[] numbers = {10, 20, 30, 40, 50};
Array Size
Once you create an array, its size is **fixed**. You can't add or remove elements later!
int[] inventory = new int[9]; // Always has exactly 9 slots
[Accessing Array Elements](https://hytalemodding.dev/en/docs/guides/java-basics/05-arrays#accessing-array-elements)
--------------------------------------------------------------------------------------------------------------------
Arrays use **index** numbers starting from **0**:
String[] players = {"Alice", "Bob", "Charlie"};
System.out.println(players[0]); // "Alice"
System.out.println(players[1]); // "Bob"
System.out.println(players[2]); // "Charlie"
### [Visual Representation](https://hytalemodding.dev/en/docs/guides/java-basics/05-arrays#visual-representation)
| Index | 0 | 1 | 2 |
| --- | --- | --- | --- |
| Value | "Alice" | "Bob" | "Charlie" |
[Modifying Array Values](https://hytalemodding.dev/en/docs/guides/java-basics/05-arrays#modifying-array-values)
----------------------------------------------------------------------------------------------------------------
int[] health = {100, 80, 90};
health[1] = 60; // Change Bob's health to 60
System.out.println(health[0]); // 100
System.out.println(health[1]); // 60
System.out.println(health[2]); // 90
[Array Length](https://hytalemodding.dev/en/docs/guides/java-basics/05-arrays#array-length)
--------------------------------------------------------------------------------------------
Use `.length` to get the size of an array:
int[] scores = {45, 67, 89, 92, 55};
System.out.println(scores.length); // 5
Length is Not a Method
Notice there are no parentheses! It's `array.length`, not `array.length()`.
[Looping Through Arrays](https://hytalemodding.dev/en/docs/guides/java-basics/05-arrays#looping-through-arrays)
----------------------------------------------------------------------------------------------------------------
### [Using For Loop](https://hytalemodding.dev/en/docs/guides/java-basics/05-arrays#using-for-loop)
String[] items = {"Sword", "Shield", "Potion"};
for (int i = 0; i < items.length; i++) {
System.out.println(items[i]);
}
### [Using Enhanced For Loop (For-Each)](https://hytalemodding.dev/en/docs/guides/java-basics/05-arrays#using-enhanced-for-loop-for-each)
String[] items = {"Sword", "Shield", "Potion"};
for (String item : items) {
System.out.println(item);
}
Enhanced For Loop
The enhanced for loop is simpler and safer, but you can't modify the array or know the current index.
// When you need the index
for (int i = 0; i < items.length; i++) {
System.out.println(i + ": " + items[i]);
}
// When you just need the values
for (String item : items) {
System.out.println(item);
}
[Multidimensional Arrays](https://hytalemodding.dev/en/docs/guides/java-basics/05-arrays#multidimensional-arrays)
------------------------------------------------------------------------------------------------------------------
Arrays can hold other arrays, creating a grid:
int[][] grid = {
{1, 2, 3},
{4, 5, 6},
{7, 8, 9}
};
System.out.println(grid[0][0]); // 1
System.out.println(grid[1][2]); // 6
System.out.println(grid[2][1]); // 8
### [Visual Representation](https://hytalemodding.dev/en/docs/guides/java-basics/05-arrays#visual-representation-1)
| | 0 | 1 | 2 |
| --- | --- | --- | --- |
| **0** | 1 | 2 | 3 |
| **1** | 4 | 5 | 6 |
| **2** | 7 | 8 | 9 |
### [Looping Through 2D Arrays](https://hytalemodding.dev/en/docs/guides/java-basics/05-arrays#looping-through-2d-arrays)
Code
Output
int[][] grid = {
{1, 2, 3},
{4, 5, 6}
};
for (int row = 0; row < grid.length; row++) {
for (int col = 0; col < grid[row].length; col++) {
System.out.print(grid[row][col] + " ");
}
System.out.println();
}
[Practical Examples](https://hytalemodding.dev/en/docs/guides/java-basics/05-arrays#practical-examples)
--------------------------------------------------------------------------------------------------------
### [Player Inventory System](https://hytalemodding.dev/en/docs/guides/java-basics/05-arrays#player-inventory-system)
String[] inventory = new String[9]; // 9 hotbar slots
// Add items
inventory[0] = "Diamond Sword";
inventory[1] = "Shield";
inventory[8] = "Food";
// Display inventory
for (int i = 0; i < inventory.length; i++) {
if (inventory[i] != null) {
System.out.println("Slot " + i + ": " + inventory[i]);
} else {
System.out.println("Slot " + i + ": Empty");
}
}
### [Find Highest Score](https://hytalemodding.dev/en/docs/guides/java-basics/05-arrays#find-highest-score)
int[] scores = {45, 92, 67, 88, 55, 71};
int highest = scores[0];
for (int i = 1; i < scores.length; i++) {
if (scores[i] > highest) {
highest = scores[i];
}
}
System.out.println("Highest score: " + highest);
### [Calculate Average](https://hytalemodding.dev/en/docs/guides/java-basics/05-arrays#calculate-average)
double[] temperatures = {23.5, 25.0, 22.8, 24.3, 26.1};
double sum = 0;
for (double temp : temperatures) {
sum += temp;
}
double average = sum / temperatures.length;
System.out.println("Average temperature: " + average);
### [Block Grid (2D Array)](https://hytalemodding.dev/en/docs/guides/java-basics/05-arrays#block-grid-2d-array)
String[][] terrain = new String[5][5];
// Fill with grass
for (int x = 0; x < 5; x++) {
for (int z = 0; z < 5; z++) {
terrain[x][z] = "grass";
}
}
// Place some stone
terrain[2][2] = "stone";
terrain[1][3] = "stone";
// Display grid
for (int x = 0; x < terrain.length; x++) {
for (int z = 0; z < terrain[x].length; z++) {
System.out.print(terrain[x][z] + " ");
}
System.out.println();
}
[Common Array Operations](https://hytalemodding.dev/en/docs/guides/java-basics/05-arrays#common-array-operations)
------------------------------------------------------------------------------------------------------------------
### [Copy an Array](https://hytalemodding.dev/en/docs/guides/java-basics/05-arrays#copy-an-array)
int[] original = {1, 2, 3, 4, 5};
int[] copy = original.clone();
// Or manually
int[] copy2 = new int[original.length];
for (int i = 0; i < original.length; i++) {
copy2[i] = original[i];
}
### [Search for a Value](https://hytalemodding.dev/en/docs/guides/java-basics/05-arrays#search-for-a-value)
String[] items = {"Sword", "Shield", "Potion", "Bow"};
String target = "Potion";
int foundIndex = -1;
for (int i = 0; i < items.length; i++) {
if (items[i].equals(target)) {
foundIndex = i;
break;
}
}
if (foundIndex != -1) {
System.out.println("Found at index: " + foundIndex);
} else {
System.out.println("Not found");
}
### [Count Occurrences](https://hytalemodding.dev/en/docs/guides/java-basics/05-arrays#count-occurrences)
String[] blocks = {"stone", "dirt", "stone", "grass", "stone"};
String searchFor = "stone";
int count = 0;
for (String block : blocks) {
if (block.equals(searchFor)) {
count++;
}
}
System.out.println(searchFor + " appears " + count + " times");
[Array Limitations](https://hytalemodding.dev/en/docs/guides/java-basics/05-arrays#array-limitations)
------------------------------------------------------------------------------------------------------
Fixed Size
Arrays can't grow or shrink. If you need flexibility, you'll learn about `ArrayList` later!
int[] numbers = new int[5];
// Can't add a 6th element!
// If you need more space, create a new array
int[] bigger = new int[10];
for (int i = 0; i < numbers.length; i++) {
bigger[i] = numbers[i];
}
[Edit on GitHub](https://github.com/HytaleModding/site/blob/main/content/docs/en/guides/java-basics/05-arrays.mdx)
[04 - Control Flow Loops\
\
Learn how to repeat code efficiently using loops in Java](https://hytalemodding.dev/en/docs/guides/java-basics/04-control-flow-loops)
[06 - Methods (Functions)\
\
Learn how to organize and reuse code with methods.](https://hytalemodding.dev/en/docs/guides/java-basics/06-methods-functions)
### On this page
[Creating Arrays](https://hytalemodding.dev/en/docs/guides/java-basics/05-arrays#creating-arrays)
[Method 1: Declare and Initialize Separately](https://hytalemodding.dev/en/docs/guides/java-basics/05-arrays#method-1-declare-and-initialize-separately)
[Method 2: All at Once](https://hytalemodding.dev/en/docs/guides/java-basics/05-arrays#method-2-all-at-once)
[Method 3: With Initial Values](https://hytalemodding.dev/en/docs/guides/java-basics/05-arrays#method-3-with-initial-values)
[Accessing Array Elements](https://hytalemodding.dev/en/docs/guides/java-basics/05-arrays#accessing-array-elements)
[Visual Representation](https://hytalemodding.dev/en/docs/guides/java-basics/05-arrays#visual-representation)
[Modifying Array Values](https://hytalemodding.dev/en/docs/guides/java-basics/05-arrays#modifying-array-values)
[Array Length](https://hytalemodding.dev/en/docs/guides/java-basics/05-arrays#array-length)
[Looping Through Arrays](https://hytalemodding.dev/en/docs/guides/java-basics/05-arrays#looping-through-arrays)
[Using For Loop](https://hytalemodding.dev/en/docs/guides/java-basics/05-arrays#using-for-loop)
[Using Enhanced For Loop (For-Each)](https://hytalemodding.dev/en/docs/guides/java-basics/05-arrays#using-enhanced-for-loop-for-each)
[Multidimensional Arrays](https://hytalemodding.dev/en/docs/guides/java-basics/05-arrays#multidimensional-arrays)
[Visual Representation](https://hytalemodding.dev/en/docs/guides/java-basics/05-arrays#visual-representation-1)
[Looping Through 2D Arrays](https://hytalemodding.dev/en/docs/guides/java-basics/05-arrays#looping-through-2d-arrays)
[Practical Examples](https://hytalemodding.dev/en/docs/guides/java-basics/05-arrays#practical-examples)
[Player Inventory System](https://hytalemodding.dev/en/docs/guides/java-basics/05-arrays#player-inventory-system)
[Find Highest Score](https://hytalemodding.dev/en/docs/guides/java-basics/05-arrays#find-highest-score)
[Calculate Average](https://hytalemodding.dev/en/docs/guides/java-basics/05-arrays#calculate-average)
[Block Grid (2D Array)](https://hytalemodding.dev/en/docs/guides/java-basics/05-arrays#block-grid-2d-array)
[Common Array Operations](https://hytalemodding.dev/en/docs/guides/java-basics/05-arrays#common-array-operations)
[Copy an Array](https://hytalemodding.dev/en/docs/guides/java-basics/05-arrays#copy-an-array)
[Search for a Value](https://hytalemodding.dev/en/docs/guides/java-basics/05-arrays#search-for-a-value)
[Count Occurrences](https://hytalemodding.dev/en/docs/guides/java-basics/05-arrays#count-occurrences)
[Array Limitations](https://hytalemodding.dev/en/docs/guides/java-basics/05-arrays#array-limitations)
---
# 08 - Encapsulation and Access Modifiers
Java Basics
08 - Encapsulation and Access Modifiers
=======================================
Learn how to protect and control access to your class data.
Encapsulation is about hiding the internal details of a class and controlling how its data is accessed and modified. This prevents bugs and makes your code more maintainable.
[The Problem Without Encapsulation](https://hytalemodding.dev/en/docs/guides/java-basics/08-access-modifiers#the-problem-without-encapsulation)
------------------------------------------------------------------------------------------------------------------------------------------------
public class Player {
public String name;
public int health;
public int maxHealth;
}
public class Main {
public static void main(String[] args) {
Player player = new Player();
player.health = 100;
player.maxHealth = 100;
// Oops! Someone can break the rules
player.health = 500; // Health over maximum!
player.health = -50; // Negative health!
player.name = ""; // Empty name!
}
}
Without protection, anyone can set invalid values!
[Access Modifiers](https://hytalemodding.dev/en/docs/guides/java-basics/08-access-modifiers#access-modifiers)
--------------------------------------------------------------------------------------------------------------
Java has keywords that control who can access your class members:
| Modifier | Class | Package | Subclass | World |
| --- | --- | --- | --- | --- |
| `public` | ✓ | ✓ | ✓ | ✓ |
| `protected` | ✓ | ✓ | ✓ | ✗ |
| (none) | ✓ | ✓ | ✗ | ✗ |
| `private` | ✓ | ✗ | ✗ | ✗ |
**For now, focus on:**
* `public` - Anyone can access
* `private` - Only this class can access
[Making Properties Private](https://hytalemodding.dev/en/docs/guides/java-basics/08-access-modifiers#making-properties-private)
--------------------------------------------------------------------------------------------------------------------------------
public class Player {
private String name;
private int health;
private int maxHealth;
public Player(String name, int maxHealth) {
this.name = name;
this.health = maxHealth;
this.maxHealth = maxHealth;
}
}
Now you can't access properties directly:
Player player = new Player("Alice", 100);
player.health = 500; // ❌ Error! health is private
[Getters and Setters](https://hytalemodding.dev/en/docs/guides/java-basics/08-access-modifiers#getters-and-setters)
--------------------------------------------------------------------------------------------------------------------
To access private properties, create **getter** and **setter** methods:
public class Player {
private String name;
private int health;
private int maxHealth;
public Player(String name, int maxHealth) {
this.name = name;
this.health = maxHealth;
this.maxHealth = maxHealth;
}
// Getter - returns the value
public int getHealth() {
return health;
}
// Setter - sets the value with validation
public void setHealth(int health) {
if (health < 0) {
this.health = 0;
} else if (health > maxHealth) {
this.health = maxHealth;
} else {
this.health = health;
}
}
public String getName() {
return name;
}
public int getMaxHealth() {
return maxHealth;
}
}
Now you can safely interact with the object:
Player player = new Player("Alice", 100);
player.setHealth(150); // Automatically capped at 100
System.out.println(player.getHealth()); // 100
player.setHealth(-20); // Automatically set to 0
System.out.println(player.getHealth()); // 0
Getter and Setter Naming
Follow Java naming conventions:
* **Getter**: `get` + property name (capitalized)
* **Setter**: `set` + property name (capitalized)
* **Boolean**: `is` + property name (capitalized)
private int health;
public int getHealth() { }
public void setHealth(int health) { }
private boolean alive;
public boolean isAlive() { }
public void setAlive(boolean alive) { }
private String name;
public String getName() { }
public void setName(String name) { }
[Benefits of Encapsulation](https://hytalemodding.dev/en/docs/guides/java-basics/08-access-modifiers#benefits-of-encapsulation)
--------------------------------------------------------------------------------------------------------------------------------
### [1\. Validation](https://hytalemodding.dev/en/docs/guides/java-basics/08-access-modifiers#1-validation)
public class Item {
private int durability;
private int maxDurability;
public void setDurability(int durability) {
if (durability < 0) {
this.durability = 0;
} else if (durability > maxDurability) {
this.durability = maxDurability;
} else {
this.durability = durability;
}
}
public boolean isBroken() {
return durability <= 0;
}
}
### [2\. Read-Only Properties](https://hytalemodding.dev/en/docs/guides/java-basics/08-access-modifiers#2-read-only-properties)
Sometimes you don't want a setter:
public class Monster {
private String id; // Should never change
private int health;
public Monster(String id, int health) {
this.id = id;
this.health = health;
}
// Getter only - no setter!
public String getId() {
return id;
}
public int getHealth() {
return health;
}
public void setHealth(int health) {
this.health = health;
}
}
### [3\. Computed Properties](https://hytalemodding.dev/en/docs/guides/java-basics/08-access-modifiers#3-computed-properties)
Getters don't have to return a field directly:
public class Player {
private int health;
private int maxHealth;
public int getHealth() {
return health;
}
// Computed property
public double getHealthPercentage() {
return (health * 100.0) / maxHealth;
}
// Computed property
public boolean isLowHealth() {
return getHealthPercentage() < 25;
}
}
[Practical Examples](https://hytalemodding.dev/en/docs/guides/java-basics/08-access-modifiers#practical-examples)
------------------------------------------------------------------------------------------------------------------
### [Item with Durability](https://hytalemodding.dev/en/docs/guides/java-basics/08-access-modifiers#item-with-durability)
public class Tool {
private String name;
private int durability;
private int maxDurability;
private boolean broken;
public Tool(String name, int maxDurability) {
this.name = name;
this.durability = maxDurability;
this.maxDurability = maxDurability;
this.broken = false;
}
public void use() {
if (broken) {
System.out.println(name + " is broken!");
return;
}
durability--;
System.out.println(name + " used. Durability: " + durability);
if (durability <= 0) {
broken = true;
System.out.println(name + " broke!");
}
}
public void repair() {
durability = maxDurability;
broken = false;
System.out.println(name + " repaired!");
}
// Getters
public String getName() {
return name;
}
public int getDurability() {
return durability;
}
public boolean isBroken() {
return broken;
}
public double getDurabilityPercentage() {
return (durability * 100.0) / maxDurability;
}
}
### [Bank Account Example](https://hytalemodding.dev/en/docs/guides/java-basics/08-access-modifiers#bank-account-example)
public class PlayerWallet {
private int gold;
private int silver;
public PlayerWallet() {
this.gold = 0;
this.silver = 0;
}
public void addGold(int amount) {
if (amount > 0) {
gold += amount;
System.out.println("Added " + amount + " gold");
}
}
public boolean spendGold(int amount) {
if (amount > gold) {
System.out.println("Not enough gold!");
return false;
}
gold -= amount;
System.out.println("Spent " + amount + " gold");
return true;
}
public int getGold() {
return gold;
}
public int getTotalValue() {
// 1 gold = 100 silver
return gold * 100 + silver;
}
}
### [Protected Block System](https://hytalemodding.dev/en/docs/guides/java-basics/08-access-modifiers#protected-block-system)
public class ProtectedBlock {
private int x, y, z;
private String type;
private String owner;
private boolean locked;
public ProtectedBlock(int x, int y, int z, String type, String owner) {
this.x = x;
this.y = y;
this.z = z;
this.type = type;
this.owner = owner;
this.locked = true;
}
public boolean canBreak(String playerName) {
if (!locked) {
return true;
}
return playerName.equals(owner);
}
public void unlock(String playerName) {
if (playerName.equals(owner)) {
locked = false;
System.out.println("Block unlocked");
} else {
System.out.println("You don't own this block!");
}
}
// Getters only - position and owner shouldn't change
public int getX() {
return x;
}
public int getY() {
return y;
}
public int getZ() {
return z;
}
public String getOwner() {
return owner;
}
public boolean isLocked() {
return locked;
}
}
[When to Use Private vs Public](https://hytalemodding.dev/en/docs/guides/java-basics/08-access-modifiers#when-to-use-private-vs-public)
----------------------------------------------------------------------------------------------------------------------------------------
General Rules
**Make it private by default!** Only make things public if they need to be accessed from outside.
**Private:**
* Internal data (health, position, inventory)
* Helper methods used only within the class
* Anything that needs validation
**Public:**
* Methods that define the class's behavior
* Constructor
* Methods other classes need to call
public class Example {
// Private - internal data
private int internalCounter;
private String secretKey;
// Public - part of the interface
public void doSomething() {
// Uses private helper method
validateData();
}
// Private - internal helper
private void validateData() {
// ...
}
}
[The `final` Keyword](https://hytalemodding.dev/en/docs/guides/java-basics/08-access-modifiers#the-final-keyword)
------------------------------------------------------------------------------------------------------------------
`final` means a variable can't be changed after it's set:
public class Player {
private final String id; // Can't change after creation
private String name; // Can change
private int health; // Can change
public Player(String id, String name) {
this.id = id;
this.name = name;
}
public String getId() {
return id;
}
// No setId() - it's final!
public String getName() {
return name;
}
public void setName(String name) {
this.name = name;
}
}
[The `static` Keyword](https://hytalemodding.dev/en/docs/guides/java-basics/08-access-modifiers#the-static-keyword)
--------------------------------------------------------------------------------------------------------------------
### [Static Members](https://hytalemodding.dev/en/docs/guides/java-basics/08-access-modifiers#static-members)
A class can define two kinds of members:
* **Instance members** — owned by each object (each instance has its own copy).
* **Static members** — owned by the class (one shared copy for the entire type).
Put simply: instance members belong to objects; static members belong to the class itself and are shared by all objects of that type.
#### [Declaration](https://hytalemodding.dev/en/docs/guides/java-basics/08-access-modifiers#declaration)
/* (access modifier) */ static ... memberName;
#### [Example](https://hytalemodding.dev/en/docs/guides/java-basics/08-access-modifiers#example)
class Data {
public int x; // Instanced member
public static int y = 1000; // Static member
// Instanced member:
// can access to both static and non-static members
public void foo() {
x = 100; // OK - same as this.x = 100;
y = 100; // OK - same as Data.y = 200;
}
// Static member:
// cannot access to non-static variables
public static void bar() {
x = 100; // Error: non-static variable x cannot be renference from a static context
y = 100; // OK
}
}
#### [Accessing static members](https://hytalemodding.dev/en/docs/guides/java-basics/08-access-modifiers#accessing-static-members)
Data data = new Data();
data.x = 1000; // OK
data.y = 1000; // OK-ish - not really suggested; it's better to use Data.y
Data.y = 1000; // OK - best practice
Data.x = 1000; // Error: cannot access instanced variables in a static context
### [Static Fields](https://hytalemodding.dev/en/docs/guides/java-basics/08-access-modifiers#static-fields)
A static field represents a data member owned by the class type rather then the object. Static fields are also stored in a specific memory location that's been shared between all the object instances that are created.
It is declared as following:
/* (access modifier) (optional) */ static /* final/volatile (optional) */ fieldName;
Let's take the same Data class example and add this constructor:
public Data() {
y++; // remember that's the same as Data.y++;
}
// Every instance of Data will have a private copy of the instanced member x
// However it will point to the same location in memory for the member y
Data d1 = new Data(); // y = 1001
d1.x = 5;
Data d2 = new Data(); // y = 1002
d2.x = 25;
Data d3 = new Data(); // y = 1003
// ... and so on
### [Static Methods](https://hytalemodding.dev/en/docs/guides/java-basics/08-access-modifiers#static-methods)
Static methods essentially represent a function member of a certain class type
From the Data class remember the function (instanced method) `foo` and (static method) `bar`
One can access those methods via:
Data d1 = new Data();
d1.foo(); // Instanced method: Accessible ONLY by an object
Data.bar(); // Static method: accessible without an object
### [Static Initializer](https://hytalemodding.dev/en/docs/guides/java-basics/08-access-modifiers#static-initializer)
Use a _static initializer_ block to run initialization logic when the class is first loaded:
class OtherData {
private static int a = 12;
private static int b;
private static String msg;
static {
msg = "Initialization..."
System.out.println(msg);
b = 4;
// ... complex initialization that can't be done in a single expression
}
}
[Practice Exercises](https://hytalemodding.dev/en/docs/guides/java-basics/08-access-modifiers#practice-exercises)
------------------------------------------------------------------------------------------------------------------
1. **Create a `BankAccount` Class**:
* Private properties: accountNumber, balance
* Constructor to set account number
* Methods: deposit(), withdraw(), getBalance()
* Validation: can't withdraw more than balance
* Account number should be read-only
2. **Create a `Door` Class**:
* Private properties: isLocked, keyCode
* Constructor to set the key code
* Methods: lock(), unlock(String code), isLocked()
* unlock() only works with correct code
* Code should be private (don't expose it!)
3. **Create a `PlayerStats` Class**:
* Private properties: strength, defense, speed
* Constructor to set all stats
* Getters for all stats
* Method: getPowerLevel() that returns strength + defense + speed
* Stats can't be negative or over 100
4. **Refactor a Class**: Take one of your classes from the previous lesson and add proper encapsulation:
* Make all properties private
* Add appropriate getters and setters
* Add validation where needed
[Edit on GitHub](https://github.com/HytaleModding/site/blob/main/content/docs/en/guides/java-basics/08-access-modifiers.mdx)
[07 - Introduction to Object-Oriented Programming\
\
Learn the fundamentals of classes and objects in Java.](https://hytalemodding.dev/en/docs/guides/java-basics/07-introduction-oop)
[09 - Working with Strings\
\
Master text manipulation and string operations in Java.](https://hytalemodding.dev/en/docs/guides/java-basics/09-string)
### On this page
[The Problem Without Encapsulation](https://hytalemodding.dev/en/docs/guides/java-basics/08-access-modifiers#the-problem-without-encapsulation)
[Access Modifiers](https://hytalemodding.dev/en/docs/guides/java-basics/08-access-modifiers#access-modifiers)
[Making Properties Private](https://hytalemodding.dev/en/docs/guides/java-basics/08-access-modifiers#making-properties-private)
[Getters and Setters](https://hytalemodding.dev/en/docs/guides/java-basics/08-access-modifiers#getters-and-setters)
[Benefits of Encapsulation](https://hytalemodding.dev/en/docs/guides/java-basics/08-access-modifiers#benefits-of-encapsulation)
[1\. Validation](https://hytalemodding.dev/en/docs/guides/java-basics/08-access-modifiers#1-validation)
[2\. Read-Only Properties](https://hytalemodding.dev/en/docs/guides/java-basics/08-access-modifiers#2-read-only-properties)
[3\. Computed Properties](https://hytalemodding.dev/en/docs/guides/java-basics/08-access-modifiers#3-computed-properties)
[Practical Examples](https://hytalemodding.dev/en/docs/guides/java-basics/08-access-modifiers#practical-examples)
[Item with Durability](https://hytalemodding.dev/en/docs/guides/java-basics/08-access-modifiers#item-with-durability)
[Bank Account Example](https://hytalemodding.dev/en/docs/guides/java-basics/08-access-modifiers#bank-account-example)
[Protected Block System](https://hytalemodding.dev/en/docs/guides/java-basics/08-access-modifiers#protected-block-system)
[When to Use Private vs Public](https://hytalemodding.dev/en/docs/guides/java-basics/08-access-modifiers#when-to-use-private-vs-public)
[The `final` Keyword](https://hytalemodding.dev/en/docs/guides/java-basics/08-access-modifiers#the-final-keyword)
[The `static` Keyword](https://hytalemodding.dev/en/docs/guides/java-basics/08-access-modifiers#the-static-keyword)
[Static Members](https://hytalemodding.dev/en/docs/guides/java-basics/08-access-modifiers#static-members)
[Declaration](https://hytalemodding.dev/en/docs/guides/java-basics/08-access-modifiers#declaration)
[Example](https://hytalemodding.dev/en/docs/guides/java-basics/08-access-modifiers#example)
[Accessing static members](https://hytalemodding.dev/en/docs/guides/java-basics/08-access-modifiers#accessing-static-members)
[Static Fields](https://hytalemodding.dev/en/docs/guides/java-basics/08-access-modifiers#static-fields)
[Static Methods](https://hytalemodding.dev/en/docs/guides/java-basics/08-access-modifiers#static-methods)
[Static Initializer](https://hytalemodding.dev/en/docs/guides/java-basics/08-access-modifiers#static-initializer)
[Practice Exercises](https://hytalemodding.dev/en/docs/guides/java-basics/08-access-modifiers#practice-exercises)
---
# 06 - Methods (Functions)
Java Basics
06 - Methods (Functions)
========================
Learn how to organize and reuse code with methods.
Methods are reusable blocks of code that perform specific tasks. They help you avoid repeating code and make your programs easier to understand.
[What is a Method?](https://hytalemodding.dev/en/docs/guides/java-basics/06-methods-functions#what-is-a-method)
----------------------------------------------------------------------------------------------------------------
Think of a method as a recipe. You define it once, then use it whenever you need it.
Code
Output
public class Game {
public static void main(String[] args) {
greet(); // Call the method
greet(); // Call it again!
}
// Method definition
public static void greet() {
System.out.println("Welcome to Hytale!");
}
}
[Method Structure](https://hytalemodding.dev/en/docs/guides/java-basics/06-methods-functions#method-structure)
---------------------------------------------------------------------------------------------------------------
public static void methodName() {
// ^ ^ ^ ^ ^
// | | | | |
// access static return name parameters
// modifier type
// Code goes here
}
We'll learn what `public` and `static` mean later. For now, just use them.
[Methods with Parameters](https://hytalemodding.dev/en/docs/guides/java-basics/06-methods-functions#methods-with-parameters)
-----------------------------------------------------------------------------------------------------------------------------
Parameters let you pass data into methods:
public static void greetPlayer(String name) {
System.out.println("Hello, " + name + "!");
}
public static void main(String[] args) {
greetPlayer("Alice"); // Hello, Alice!
greetPlayer("Bob"); // Hello, Bob!
}
### [Multiple Parameters](https://hytalemodding.dev/en/docs/guides/java-basics/06-methods-functions#multiple-parameters)
public static void dealDamage(String target, int damage) {
System.out.println(target + " takes " + damage + " damage!");
}
public static void main(String[] args) {
dealDamage("Zombie", 20); // Zombie takes 20 damage!
dealDamage("Skeleton", 15); // Skeleton takes 15 damage!
}
Parameter Order Matters
When calling a method, arguments must match the parameter order:
public static void createItem(String name, int quantity, double price) {
// ...
}
// Correct
createItem("Sword", 1, 50.0);
// Wrong - Order matters!
createItem(1, "Sword", 50.0); // Error!
[Methods with Return Values](https://hytalemodding.dev/en/docs/guides/java-basics/06-methods-functions#methods-with-return-values)
-----------------------------------------------------------------------------------------------------------------------------------
Methods can send data back using `return`:
public static int add(int a, int b) {
int sum = a + b;
return sum;
}
public static void main(String[] args) {
int result = add(5, 3);
System.out.println(result); // 8
}
The return type must match what you return:
* `void` - Returns nothing
* `int` - Returns an integer
* `double` - Returns a decimal
* `boolean` - Returns true/false
* `String` - Returns text
public static String getItemName() {
return "Diamond Sword";
}
public static boolean isPlayerAlive(int health) {
return health > 0;
}
public static double calculateDamage(int attack, double multiplier) {
return attack * multiplier;
}
Return Stops Execution
Once a method hits `return`, it immediately exits. Code after `return` won't run!
public static int getValue() {
return 10;
System.out.println("This never runs!"); // Unreachable code!
}
[Practical Examples](https://hytalemodding.dev/en/docs/guides/java-basics/06-methods-functions#practical-examples)
-------------------------------------------------------------------------------------------------------------------
### [Health System](https://hytalemodding.dev/en/docs/guides/java-basics/06-methods-functions#health-system)
Code
Output
public static void displayHealth(String name, int health, int maxHealth) {
double percentage = (health * 100.0) / maxHealth;
System.out.println(name + ": " + health + "/" + maxHealth +
" (" + percentage + "%)");
}
public static void main(String[] args) {
displayHealth("Player", 75, 100);
displayHealth("Boss", 450, 500);
}
### [Damage Calculator](https://hytalemodding.dev/en/docs/guides/java-basics/06-methods-functions#damage-calculator)
Code
public static int calculateDamage(int baseAttack, int weaponDamage, boolean isCritical) {
int totalDamage = baseAttack + weaponDamage;
if (isCritical) {
totalDamage *= 2;
}
return totalDamage;
}
public static void main(String[] args) {
int damage1 = calculateDamage(10, 15, false); // 25
int damage2 = calculateDamage(10, 15, true); // 50
System.out.println("Normal hit: " + damage1);
System.out.println("Critical hit: " + damage2);
}
### [Level Requirements](https://hytalemodding.dev/en/docs/guides/java-basics/06-methods-functions#level-requirements)
Code
public static int getXPForLevel(int level) {
return level * 100;
}
public static boolean canLevelUp(int currentXP, int currentLevel) {
int required = getXPForLevel(currentLevel + 1);
return currentXP >= required;
}
public static void main(String[] args) {
int playerXP = 450;
int playerLevel = 4;
if (canLevelUp(playerXP, playerLevel)) {
System.out.println("You can level up!");
} else {
int needed = getXPForLevel(playerLevel + 1) - playerXP;
System.out.println("Need " + needed + " more XP");
}
}
### [Distance Calculator](https://hytalemodding.dev/en/docs/guides/java-basics/06-methods-functions#distance-calculator)
Code
public static double calculateDistance(int x1, int y1, int x2, int y2) {
int dx = x2 - x1;
int dy = y2 - y1;
return Math.sqrt(dx * dx + dy * dy);
}
public static boolean isInRange(int x1, int y1, int x2, int y2, double range) {
double distance = calculateDistance(x1, y1, x2, y2);
return distance <= range;
}
public static void main(String[] args) {
// Check if enemy is in attack range
if (isInRange(0, 0, 5, 5, 10.0)) {
System.out.println("Target in range!");
}
}
[Method Overloading](https://hytalemodding.dev/en/docs/guides/java-basics/06-methods-functions#method-overloading)
-------------------------------------------------------------------------------------------------------------------
You can have multiple methods with the same name but different parameters:
public static void displayMessage(String message) {
System.out.println(message);
}
public static void displayMessage(String message, int times) {
for (int i = 0; i < times; i++) {
System.out.println(message);
}
}
public static void main(String[] args) {
displayMessage("Hello"); // Calls first version
displayMessage("Hello", 3); // Calls second version
}
Method Overloading Rules
Methods are considered different if they have:
* Different number of parameters
* Different types of parameters
* Different order of parameters
public static void test(int a) { }
public static void test(int a, int b) { } // Different count
public static void test(double a) { } // Different type
public static void test(String a, int b) { } // Different types
public static void test(int a, String b) { } // Different order
// Wrong - Only return type is different
public static int test(int a) { }
[Common Patterns in Hytale Modding](https://hytalemodding.dev/en/docs/guides/java-basics/06-methods-functions#common-patterns-in-hytale-modding)
-------------------------------------------------------------------------------------------------------------------------------------------------
### [Item Creation](https://hytalemodding.dev/en/docs/guides/java-basics/06-methods-functions#item-creation)
public static Item createItem(String name, int durability) {
Item item = new Item();
item.setName(name);
item.setDurability(durability);
return item;
}
public static Item createSword() {
return createItem("Sword", 100);
}
public static Item createPickaxe() {
return createItem("Pickaxe", 150);
}
### [Block Placement Validation](https://hytalemodding.dev/en/docs/guides/java-basics/06-methods-functions#block-placement-validation)
public static boolean canPlaceBlock(int x, int y, int z) {
// Check if position is valid
if (y < 0 || y > 255) {
return false;
}
// Check if block already exists
if (isBlockAt(x, y, z)) {
return false;
}
return true;
}
public static void placeBlock(int x, int y, int z, String type) {
if (canPlaceBlock(x, y, z)) {
// Place the block
System.out.println("Placed " + type + " at (" + x + ", " + y + ", " + z + ")");
} else {
System.out.println("Cannot place block there!");
}
}
### [Player State Checks](https://hytalemodding.dev/en/docs/guides/java-basics/06-methods-functions#player-state-checks)
public static boolean isLowHealth(int health, int maxHealth) {
return (health * 100.0 / maxHealth) < 25;
}
public static String getHealthStatus(int health, int maxHealth) {
double percentage = (health * 100.0) / maxHealth;
if (percentage >= 75) {
return "Healthy";
} else if (percentage >= 50) {
return "Injured";
} else if (percentage >= 25) {
return "Critical";
} else {
return "Near Death";
}
}
[Best Practices](https://hytalemodding.dev/en/docs/guides/java-basics/06-methods-functions#best-practices)
-----------------------------------------------------------------------------------------------------------
Method Naming
Use descriptive verb-based names that explain what the method does:
// Good
public static void calculateDamage() { }
public static boolean isPlayerAlive() { }
public static String getItemName() { }
public static void displayInventory() { }
// Bad
public static void dmg() { } // Too short
public static void method1() { } // Not descriptive
public static void stuff() { } // Too vague
[Practice Exercises](https://hytalemodding.dev/en/docs/guides/java-basics/06-methods-functions#practice-exercises)
-------------------------------------------------------------------------------------------------------------------
1. **Temperature Converter**: Write methods to convert:
* Celsius to Fahrenheit: `(C × 9/5) + 32`
* Fahrenheit to Celsius: `(F - 32) × 5/9`
2. **Circle Calculator**: Create methods that calculate:
* Area: `π × radius²`
* Circumference: `2 × π × radius`
* Use `Math.PI` for π
3. **Item Durability**: Write these methods:
* `damageItem(int current, int damage)` - returns new durability
* `isBroken(int durability)` - returns true if durability is less than or equal to 0
* `repairItem(int current, int max)` - returns max durability
4. **Password Validator**: Create a method that checks if a password is valid:
* At least 8 characters long
* Contains at least one number
* Returns true if valid, false otherwise
[Common Mistakes](https://hytalemodding.dev/en/docs/guides/java-basics/06-methods-functions#common-mistakes)
-------------------------------------------------------------------------------------------------------------
// Wrong - Forgetting return statement
public static int getValue() {
int x = 10;
// Forgot to return!
} !
// Correct
public static int getValue() {
int x = 10;
return x;
}
// Wrong - Wrong return type
public static int getText() {
return "Hello"; // Error! Should return int, not String
}
// Correct
public static String getText() {
return "Hello";
}
// Wrong - Not calling the method
public static void main(String[] args) {
greet; // Error! Missing ()
}
// Correct
public static void main(String[] args) {
greet();
}
* * *
[Edit on GitHub](https://github.com/HytaleModding/site/blob/main/content/docs/en/guides/java-basics/06-methods-functions.mdx)
[05 - Arrays\
\
Learn how to store and manage collections of data using arrays.](https://hytalemodding.dev/en/docs/guides/java-basics/05-arrays)
[07 - Introduction to Object-Oriented Programming\
\
Learn the fundamentals of classes and objects in Java.](https://hytalemodding.dev/en/docs/guides/java-basics/07-introduction-oop)
### On this page
[What is a Method?](https://hytalemodding.dev/en/docs/guides/java-basics/06-methods-functions#what-is-a-method)
[Method Structure](https://hytalemodding.dev/en/docs/guides/java-basics/06-methods-functions#method-structure)
[Methods with Parameters](https://hytalemodding.dev/en/docs/guides/java-basics/06-methods-functions#methods-with-parameters)
[Multiple Parameters](https://hytalemodding.dev/en/docs/guides/java-basics/06-methods-functions#multiple-parameters)
[Methods with Return Values](https://hytalemodding.dev/en/docs/guides/java-basics/06-methods-functions#methods-with-return-values)
[Practical Examples](https://hytalemodding.dev/en/docs/guides/java-basics/06-methods-functions#practical-examples)
[Health System](https://hytalemodding.dev/en/docs/guides/java-basics/06-methods-functions#health-system)
[Damage Calculator](https://hytalemodding.dev/en/docs/guides/java-basics/06-methods-functions#damage-calculator)
[Level Requirements](https://hytalemodding.dev/en/docs/guides/java-basics/06-methods-functions#level-requirements)
[Distance Calculator](https://hytalemodding.dev/en/docs/guides/java-basics/06-methods-functions#distance-calculator)
[Method Overloading](https://hytalemodding.dev/en/docs/guides/java-basics/06-methods-functions#method-overloading)
[Common Patterns in Hytale Modding](https://hytalemodding.dev/en/docs/guides/java-basics/06-methods-functions#common-patterns-in-hytale-modding)
[Item Creation](https://hytalemodding.dev/en/docs/guides/java-basics/06-methods-functions#item-creation)
[Block Placement Validation](https://hytalemodding.dev/en/docs/guides/java-basics/06-methods-functions#block-placement-validation)
[Player State Checks](https://hytalemodding.dev/en/docs/guides/java-basics/06-methods-functions#player-state-checks)
[Best Practices](https://hytalemodding.dev/en/docs/guides/java-basics/06-methods-functions#best-practices)
[Practice Exercises](https://hytalemodding.dev/en/docs/guides/java-basics/06-methods-functions#practice-exercises)
[Common Mistakes](https://hytalemodding.dev/en/docs/guides/java-basics/06-methods-functions#common-mistakes)
---
# 07 - Introduction to Object-Oriented Programming
Java Basics
07 - Introduction to Object-Oriented Programming
================================================
Learn the fundamentals of classes and objects in Java.
Object-Oriented Programming (OOP) is the foundation of Java and Hytale modding. Instead of just having variables and methods floating around, we organize them into **classes** and **objects**.
[What is a Class?](https://hytalemodding.dev/en/docs/guides/java-basics/07-introduction-oop#what-is-a-class)
-------------------------------------------------------------------------------------------------------------
A class is a blueprint for creating objects. Think of it like a recipe or a template.
public class Player {
// Properties (data)
String name;
int health;
int level;
// Behavior (methods)
public void takeDamage(int damage) {
health -= damage;
System.out.println(name + " took " + damage + " damage!");
}
}
[What is an Object?](https://hytalemodding.dev/en/docs/guides/java-basics/07-introduction-oop#what-is-an-object)
-----------------------------------------------------------------------------------------------------------------
An object is an instance created from a class. If a class is a blueprint, an object is the actual thing built from that blueprint.
public class Main {
public static void main(String[] args) {
// Create objects from the Player class
Player player1 = new Player();
player1.name = "Alice";
player1.health = 100;
player1.level = 5;
Player player2 = new Player();
player2.name = "Bob";
player2.health = 80;
player2.level = 3;
// Use the objects
player1.takeDamage(20); // Alice took 20 damage!
player2.takeDamage(15); // Bob took 15 damage!
}
}
Class vs Object
**Class** = Blueprint (the idea of a player) **Object** = Actual thing (Alice, Bob, specific players)
One class can create many objects, just like one recipe can make many cakes!
[Creating a Simple Class](https://hytalemodding.dev/en/docs/guides/java-basics/07-introduction-oop#creating-a-simple-class)
----------------------------------------------------------------------------------------------------------------------------
Let's create a `Sword` class for Hytale:
public class Sword {
// Properties
String name;
int damage;
int durability;
// Method to use the sword
public void attack(String target) {
System.out.println("Attacking " + target + " for " + damage + " damage!");
durability -= 1;
if (durability <= 0) {
System.out.println(name + " broke!");
}
}
// Method to display info
public void displayInfo() {
System.out.println("Weapon: " + name);
System.out.println("Damage: " + damage);
System.out.println("Durability: " + durability);
}
}
Using the class:
public class Main {
public static void main(String[] args) {
Sword sword = new Sword();
sword.name = "Iron Sword";
sword.damage = 15;
sword.durability = 3;
sword.displayInfo();
sword.attack("Zombie");
sword.attack("Skeleton");
sword.attack("Spider"); // This will break the sword
}
}
[Constructors](https://hytalemodding.dev/en/docs/guides/java-basics/07-introduction-oop#constructors)
------------------------------------------------------------------------------------------------------
Instead of setting properties one by one, use a **constructor** to initialize objects:
public class Sword {
String name;
int damage;
int durability;
// Constructor
public Sword(String weaponName, int weaponDamage, int weaponDurability) {
name = weaponName;
damage = weaponDamage;
durability = weaponDurability;
}
public void attack(String target) {
System.out.println("Attacking " + target + " for " + damage + " damage!");
durability--;
}
}
Now creating swords is easier:
public class Main {
public static void main(String[] args) {
// Much cleaner!
Sword ironSword = new Sword("Iron Sword", 15, 100);
Sword diamondSword = new Sword("Diamond Sword", 25, 200);
ironSword.attack("Zombie");
diamondSword.attack("Boss");
}
}
Constructor Rules
* Same name as the class
* No return type (not even `void`)
* Called automatically when you use `new`
* Can have multiple constructors (overloading)
public class Item {
String name;
int value;
// Constructor with all parameters
public Item(String name, int value) {
this.name = name;
this.value = value;
}
// Constructor with just name
public Item(String name) {
this.name = name;
this.value = 0; // Default value
}
}
[The `this` Keyword](https://hytalemodding.dev/en/docs/guides/java-basics/07-introduction-oop#the-this-keyword)
----------------------------------------------------------------------------------------------------------------
`this` refers to the current object. Use it to clarify when parameter names match property names:
public class Player {
String name;
int health;
public Player(String name, int health) {
this.name = name; // this.name = the property
this.health = health; // name = the parameter
}
}
Without `this`, Java gets confused:
public Player(String name, int health) {
name = name; // ❌ Which name? Ambiguous!
health = health; // ❌ Which health? Ambiguous!
}
[Practical Examples](https://hytalemodding.dev/en/docs/guides/java-basics/07-introduction-oop#practical-examples)
------------------------------------------------------------------------------------------------------------------
### [Item Class](https://hytalemodding.dev/en/docs/guides/java-basics/07-introduction-oop#item-class)
public class Item {
String name;
String type;
int quantity;
double weight;
public Item(String name, String type, int quantity, double weight) {
this.name = name;
this.type = type;
this.quantity = quantity;
this.weight = weight;
}
public void use() {
if (quantity > 0) {
quantity--;
System.out.println("Used " + name + ". Remaining: " + quantity);
} else {
System.out.println("No more " + name + " left!");
}
}
public double getTotalWeight() {
return weight * quantity;
}
}
public class Main {
public static void main(String[] args) {
Item potion = new Item("Health Potion", "Consumable", 5, 0.5);
potion.use(); // Used Health Potion. Remaining: 4
System.out.println("Total weight: " + potion.getTotalWeight()); // 2.0
}
}
### [Monster Class](https://hytalemodding.dev/en/docs/guides/java-basics/07-introduction-oop#monster-class)
public class Monster {
String name;
int health;
int attack;
boolean isHostile;
public Monster(String name, int health, int attack, boolean isHostile) {
this.name = name;
this.health = health;
this.attack = attack;
this.isHostile = isHostile;
}
public void takeDamage(int damage) {
health -= damage;
System.out.println(name + " took " + damage + " damage!");
if (health <= 0) {
System.out.println(name + " was defeated!");
} else {
System.out.println(name + " has " + health + " health left.");
}
}
public int attackPlayer() {
if (isHostile && health > 0) {
System.out.println(name + " attacks for " + attack + " damage!");
return attack;
}
return 0;
}
public boolean isAlive() {
return health > 0;
}
}
public class Main {
public static void main(String[] args) {
Monster zombie = new Monster("Zombie", 50, 10, true);
Monster chicken = new Monster("Chicken", 10, 0, false);
zombie.takeDamage(20); // Zombie took 20 damage!
int damage = zombie.attackPlayer(); // Zombie attacks for 10 damage!
if (zombie.isAlive()) {
System.out.println("Monster is still alive!");
}
}
}
### [Block Class](https://hytalemodding.dev/en/docs/guides/java-basics/07-introduction-oop#block-class)
public class Block {
String type;
int x, y, z;
boolean isSolid;
int hardness;
public Block(String type, int x, int y, int z, boolean isSolid, int hardness) {
this.type = type;
this.x = x;
this.y = y;
this.z = z;
this.isSolid = isSolid;
this.hardness = hardness;
}
public void breakBlock() {
System.out.println("Breaking " + type + " block at (" + x + ", " + y + ", " + z + ")");
System.out.println("Hardness: " + hardness);
}
public String getPosition() {
return "(" + x + ", " + y + ", " + z + ")";
}
public boolean canWalkThrough() {
return !isSolid;
}
}
[Access Modifiers (Preview)](https://hytalemodding.dev/en/docs/guides/java-basics/07-introduction-oop#access-modifiers-preview)
--------------------------------------------------------------------------------------------------------------------------------
You've seen `public` - it means "anyone can access this". We'll learn more about access control later, but here's a preview:
public class Example {
public String publicVar; // Anyone can access
private String privateVar; // Only this class can access
/* (no modifier) */ String defaultVar; // Package access
}
For now, use `public` for everything. We'll learn when to use `private` in the next article.
Why Use Classes?
Classes help you:
* **Organize** related data and methods together
* **Reuse** code easily (create many objects from one class)
* **Model** real-world things (players, items, monsters)
* **Maintain** code (changes in one place affect all objects)
Without classes, managing 100 players would require 100 separate variables for each property. With classes, it's just 100 Player objects!
[Practice Exercises](https://hytalemodding.dev/en/docs/guides/java-basics/07-introduction-oop#practice-exercises)
------------------------------------------------------------------------------------------------------------------
1. **Create a `Potion` Class**:
* Properties: name, healAmount, uses
* Constructor to set all properties
* Method `drink()` that heals and decreases uses
* Method `isEmpty()` that returns true if uses less than or equal to 0
2. **Create a `Chest` Class**:
* Properties: isLocked, itemCount, capacity
* Constructor
* Method `addItem()` that checks capacity
* Method `unlock()` that sets isLocked to false
* Method `isFull()` that checks if itemCount >= capacity
3. **Create a `Villager` Class**:
* Properties: name, profession, tradeCount
* Constructor
* Method `greet()` that prints a greeting
* Method `trade()` that increases tradeCount
* Method `getInfo()` that displays all properties
4. **Create Multiple Objects**: Using any class you made, create 3 different objects and test all their methods.
[Edit on GitHub](https://github.com/HytaleModding/site/blob/main/content/docs/en/guides/java-basics/07-introduction-oop.mdx)
[06 - Methods (Functions)\
\
Learn how to organize and reuse code with methods.](https://hytalemodding.dev/en/docs/guides/java-basics/06-methods-functions)
[08 - Encapsulation and Access Modifiers\
\
Learn how to protect and control access to your class data.](https://hytalemodding.dev/en/docs/guides/java-basics/08-access-modifiers)
### On this page
[What is a Class?](https://hytalemodding.dev/en/docs/guides/java-basics/07-introduction-oop#what-is-a-class)
[What is an Object?](https://hytalemodding.dev/en/docs/guides/java-basics/07-introduction-oop#what-is-an-object)
[Creating a Simple Class](https://hytalemodding.dev/en/docs/guides/java-basics/07-introduction-oop#creating-a-simple-class)
[Constructors](https://hytalemodding.dev/en/docs/guides/java-basics/07-introduction-oop#constructors)
[The `this` Keyword](https://hytalemodding.dev/en/docs/guides/java-basics/07-introduction-oop#the-this-keyword)
[Practical Examples](https://hytalemodding.dev/en/docs/guides/java-basics/07-introduction-oop#practical-examples)
[Item Class](https://hytalemodding.dev/en/docs/guides/java-basics/07-introduction-oop#item-class)
[Monster Class](https://hytalemodding.dev/en/docs/guides/java-basics/07-introduction-oop#monster-class)
[Block Class](https://hytalemodding.dev/en/docs/guides/java-basics/07-introduction-oop#block-class)
[Access Modifiers (Preview)](https://hytalemodding.dev/en/docs/guides/java-basics/07-introduction-oop#access-modifiers-preview)
[Practice Exercises](https://hytalemodding.dev/en/docs/guides/java-basics/07-introduction-oop#practice-exercises)
---
# 11 - HashMap and Key-Value Storage
Java Basics
11 - HashMap and Key-Value Storage
==================================
Learn to store and retrieve data using key-value pairs.
A `HashMap` stores data in key-value pairs, like a real-world dictionary. You look up a word (key) to find its definition (value). This is perfect for player data, item properties, and configuration settings.
[HashMap Basics](https://hytalemodding.dev/en/docs/guides/java-basics/11-hashmaps#hashmap-basics)
--------------------------------------------------------------------------------------------------
import java.util.HashMap;
public class Main {
public static void main(String[] args) {
// Create a HashMap (String keys, Integer values)
HashMap playerLevels = new HashMap<>();
// Add key-value pairs
playerLevels.put("Alice", 10);
playerLevels.put("Bob", 15);
playerLevels.put("Charlie", 8);
// Get a value by key
int aliceLevel = playerLevels.get("Alice"); // 10
System.out.println("Alice is level " + aliceLevel);
}
}
HashMap vs ArrayList
| **HashMap** | **ArrayList** |
| --- | --- |
| Unordered | Ordered by index (0, 1, 2...) |
| Access by key (can be any type) | Access by position |
| Good for looking up values | Good for lists of items |
| Each key is unique | Can have duplicates |
// ArrayList - access by number
ArrayList players = new ArrayList<>();
players.add("Alice");
String player = players.get(0); // Get first player
// HashMap - access by name
HashMap levels = new HashMap<>();
levels.put("Alice", 10);
int level = levels.get("Alice"); // Get Alice's level
[Common HashMap Methods](https://hytalemodding.dev/en/docs/guides/java-basics/11-hashmaps#common-hashmap-methods)
------------------------------------------------------------------------------------------------------------------
### [Adding and Updating](https://hytalemodding.dev/en/docs/guides/java-basics/11-hashmaps#adding-and-updating)
HashMap scores = new HashMap<>();
scores.put("Alice", 100); // Add new entry
scores.put("Bob", 150);
scores.put("Alice", 200); // Update existing (Alice now 200)
### [Getting Values](https://hytalemodding.dev/en/docs/guides/java-basics/11-hashmaps#getting-values)
HashMap scores = new HashMap<>();
scores.put("Alice", 100);
int score = scores.get("Alice"); // 100
Integer missing = scores.get("Dave"); // null (doesn't exist)
// Get with default value
int score2 = scores.getOrDefault("Dave", 0); // 0 (returns default)
### [Checking for Keys/Values](https://hytalemodding.dev/en/docs/guides/java-basics/11-hashmaps#checking-for-keysvalues)
HashMap scores = new HashMap<>();
scores.put("Alice", 100);
boolean hasAlice = scores.containsKey("Alice"); // true
boolean hasDave = scores.containsKey("Dave"); // false
boolean has100 = scores.containsValue(100); // true
boolean has200 = scores.containsValue(200); // false
### [Removing Entries](https://hytalemodding.dev/en/docs/guides/java-basics/11-hashmaps#removing-entries)
HashMap scores = new HashMap<>();
scores.put("Alice", 100);
scores.put("Bob", 150);
scores.remove("Alice"); // Remove by key
System.out.println(scores); // {Bob=150}
scores.clear(); // Remove everything
System.out.println(scores); // {}
### [Size and Empty Check](https://hytalemodding.dev/en/docs/guides/java-basics/11-hashmaps#size-and-empty-check)
HashMap scores = new HashMap<>();
scores.put("Alice", 100);
int size = scores.size(); // 1
boolean empty = scores.isEmpty(); // false
[Looping Through HashMap](https://hytalemodding.dev/en/docs/guides/java-basics/11-hashmaps#looping-through-hashmap)
--------------------------------------------------------------------------------------------------------------------
### [Loop Through Keys](https://hytalemodding.dev/en/docs/guides/java-basics/11-hashmaps#loop-through-keys)
HashMap scores = new HashMap<>();
scores.put("Alice", 100);
scores.put("Bob", 150);
scores.put("Charlie", 75);
for (String name : scores.keySet()) {
System.out.println(name);
}
// Output: Alice, Bob, Charlie (order may vary)
### [Loop Through Values](https://hytalemodding.dev/en/docs/guides/java-basics/11-hashmaps#loop-through-values)
for (Integer score : scores.values()) {
System.out.println(score);
}
// Output: 100, 150, 75 (order may vary)
### [Loop Through Both Keys and Values](https://hytalemodding.dev/en/docs/guides/java-basics/11-hashmaps#loop-through-both-keys-and-values)
for (String name : scores.keySet()) {
int score = scores.get(name);
System.out.println(name + ": " + score);
}
// Or using entrySet (more efficient)
for (var entry : scores.entrySet()) {
String name = entry.getKey();
int score = entry.getValue();
System.out.println(name + ": " + score);
}
HashMap Order
HashMap does **not** maintain insertion order! If you need order, use `LinkedHashMap`:
import java.util.LinkedHashMap;
LinkedHashMap orderedScores = new LinkedHashMap<>();
orderedScores.put("Alice", 100);
orderedScores.put("Bob", 150);
orderedScores.put("Charlie", 75);
// Will print in insertion order
for (String name : orderedScores.keySet()) {
System.out.println(name);
}
// Output: Alice, Bob, Charlie (guaranteed order)
[Practical Examples](https://hytalemodding.dev/en/docs/guides/java-basics/11-hashmaps#practical-examples)
----------------------------------------------------------------------------------------------------------
### [Player Statistics System](https://hytalemodding.dev/en/docs/guides/java-basics/11-hashmaps#player-statistics-system)
import java.util.HashMap;
public class PlayerStats {
private HashMap stats;
public PlayerStats() {
this.stats = new HashMap<>();
// Initialize default stats
stats.put("health", 100);
stats.put("mana", 50);
stats.put("strength", 10);
stats.put("defense", 5);
stats.put("speed", 8);
}
public int getStat(String statName) {
return stats.getOrDefault(statName, 0);
}
public void setStat(String statName, int value) {
stats.put(statName, value);
}
public void modifyStat(String statName, int amount) {
int current = getStat(statName);
stats.put(statName, current + amount);
}
public void displayStats() {
System.out.println("=== Player Stats ===");
for (var entry : stats.entrySet()) {
System.out.println(entry.getKey() + ": " + entry.getValue());
}
}
}
// Usage
public class Main {
public static void main(String[] args) {
PlayerStats stats = new PlayerStats();
stats.displayStats();
stats.modifyStat("strength", 5);
stats.modifyStat("health", -20);
System.out.println("\nAfter modifications:");
stats.displayStats();
}
}
### [Item Properties Database](https://hytalemodding.dev/en/docs/guides/java-basics/11-hashmaps#item-properties-database)
import java.util.HashMap;
public class ItemDatabase {
private HashMap> items;
public ItemDatabase() {
this.items = new HashMap<>();
}
public void addItem(String itemName) {
HashMap properties = new HashMap<>();
properties.put("damage", 0);
properties.put("durability", 100);
properties.put("rarity", "Common");
properties.put("stackable", true);
items.put(itemName, properties);
}
public void setProperty(String itemName, String property, Object value) {
if (items.containsKey(itemName)) {
items.get(itemName).put(property, value);
}
}
public Object getProperty(String itemName, String property) {
if (items.containsKey(itemName)) {
return items.get(itemName).get(property);
}
return null;
}
public void displayItem(String itemName) {
if (!items.containsKey(itemName)) {
System.out.println("Item not found!");
return;
}
System.out.println("=== " + itemName + " ===");
HashMap props = items.get(itemName);
for (var entry : props.entrySet()) {
System.out.println(entry.getKey() + ": " + entry.getValue());
}
}
}
// Usage
public class Main {
public static void main(String[] args) {
ItemDatabase db = new ItemDatabase();
db.addItem("Iron Sword");
db.setProperty("Iron Sword", "damage", 15);
db.setProperty("Iron Sword", "rarity", "Uncommon");
db.displayItem("Iron Sword");
}
}
### [Configuration Manager](https://hytalemodding.dev/en/docs/guides/java-basics/11-hashmaps#configuration-manager)
import java.util.HashMap;
public class GameConfig {
private HashMap settings;
public GameConfig() {
this.settings = new HashMap<>();
loadDefaults();
}
private void loadDefaults() {
settings.put("difficulty", "normal");
settings.put("musicVolume", "50");
settings.put("sfxVolume", "50");
settings.put("renderDistance", "10");
settings.put("showFPS", "false");
}
public String getSetting(String key) {
return settings.getOrDefault(key, "");
}
public void setSetting(String key, String value) {
settings.put(key, value);
System.out.println("Set " + key + " to " + value);
}
public int getIntSetting(String key) {
String value = getSetting(key);
try {
return Integer.parseInt(value);
} catch (NumberFormatException e) {
return 0;
}
}
public boolean getBooleanSetting(String key) {
return "true".equalsIgnoreCase(getSetting(key));
}
public void displaySettings() {
System.out.println("=== Game Settings ===");
for (var entry : settings.entrySet()) {
System.out.println(entry.getKey() + " = " + entry.getValue());
}
}
}
### [Player Inventory with Quantities](https://hytalemodding.dev/en/docs/guides/java-basics/11-hashmaps#player-inventory-with-quantities)
import java.util.HashMap;
public class Inventory {
private HashMap items;
private int maxSlots;
public Inventory(int maxSlots) {
this.items = new HashMap<>();
this.maxSlots = maxSlots;
}
public boolean addItem(String itemName, int quantity) {
if (items.size() >= maxSlots && !items.containsKey(itemName)) {
System.out.println("Inventory full!");
return false;
}
int current = items.getOrDefault(itemName, 0);
items.put(itemName, current + quantity);
System.out.println("Added " + quantity + "x " + itemName);
return true;
}
public boolean removeItem(String itemName, int quantity) {
if (!items.containsKey(itemName)) {
System.out.println("Don't have that item!");
return false;
}
int current = items.get(itemName);
if (current < quantity) {
System.out.println("Not enough " + itemName);
return false;
}
if (current == quantity) {
items.remove(itemName);
} else {
items.put(itemName, current - quantity);
}
System.out.println("Removed " + quantity + "x " + itemName);
return true;
}
public int getQuantity(String itemName) {
return items.getOrDefault(itemName, 0);
}
public boolean hasItem(String itemName) {
return items.containsKey(itemName);
}
public void displayInventory() {
System.out.println("\n=== Inventory (" + items.size() + "/" + maxSlots + " slots) ===");
if (items.isEmpty()) {
System.out.println("Empty");
} else {
for (var entry : items.entrySet()) {
System.out.println(entry.getKey() + " x" + entry.getValue());
}
}
}
}
// Usage
public class Main {
public static void main(String[] args) {
Inventory inv = new Inventory(10);
inv.addItem("Wood", 64);
inv.addItem("Stone", 32);
inv.addItem("Wood", 20); // Adds to existing
inv.displayInventory();
inv.removeItem("Wood", 50);
inv.displayInventory();
}
}
### [Cooldown Manager](https://hytalemodding.dev/en/docs/guides/java-basics/11-hashmaps#cooldown-manager)
import java.util.HashMap;
public class CooldownManager {
private HashMap cooldowns;
public CooldownManager() {
this.cooldowns = new HashMap<>();
}
public void startCooldown(String ability, long durationMs) {
long endTime = System.currentTimeMillis() + durationMs;
cooldowns.put(ability, endTime);
System.out.println(ability + " on cooldown for " + (durationMs / 1000) + " seconds");
}
public boolean isOnCooldown(String ability) {
if (!cooldowns.containsKey(ability)) {
return false;
}
long endTime = cooldowns.get(ability);
long now = System.currentTimeMillis();
if (now >= endTime) {
cooldowns.remove(ability);
return false;
}
return true;
}
public long getRemainingTime(String ability) {
if (!isOnCooldown(ability)) {
return 0;
}
long endTime = cooldowns.get(ability);
long now = System.currentTimeMillis();
return (endTime - now) / 1000; // Return seconds
}
public boolean useAbility(String ability, long cooldownSeconds) {
if (isOnCooldown(ability)) {
long remaining = getRemainingTime(ability);
System.out.println(ability + " is on cooldown (" + remaining + "s remaining)");
return false;
}
System.out.println("Used " + ability + "!");
startCooldown(ability, cooldownSeconds * 1000);
return true;
}
}
[HashMap with Custom Objects](https://hytalemodding.dev/en/docs/guides/java-basics/11-hashmaps#hashmap-with-custom-objects)
----------------------------------------------------------------------------------------------------------------------------
Store your own classes as values:
public class Player {
private String name;
private int level;
private int health;
public Player(String name, int level) {
this.name = name;
this.level = level;
this.health = 100;
}
// Getters and setters...
@Override
public String toString() {
return name + " (Lv. " + level + ", HP: " + health + ")";
}
}
public class Main {
public static void main(String[] args) {
HashMap players = new HashMap<>();
players.put("player1", new Player("Alice", 10));
players.put("player2", new Player("Bob", 15));
// Get and use player
Player alice = players.get("player1");
System.out.println(alice);
}
}
[Nested HashMaps](https://hytalemodding.dev/en/docs/guides/java-basics/11-hashmaps#nested-hashmaps)
----------------------------------------------------------------------------------------------------
HashMaps can contain other HashMaps:
// Store multiple properties per player
HashMap> playerData = new HashMap<>();
// Add player with stats
HashMap aliceStats = new HashMap<>();
aliceStats.put("level", 10);
aliceStats.put("health", 100);
aliceStats.put("mana", 50);
playerData.put("Alice", aliceStats);
// Access nested data
int aliceLevel = playerData.get("Alice").get("level");
System.out.println("Alice's level: " + aliceLevel);
[Practice Exercises](https://hytalemodding.dev/en/docs/guides/java-basics/11-hashmaps#practice-exercises)
----------------------------------------------------------------------------------------------------------
1. **Phone Book**: Create a phone book that stores names and phone numbers. Add methods to:
* Add contact
* Find number by name
* Delete contact
* Display all contacts
2. **Grade Manager**: Store student names and grades. Create methods to:
* Add student with grade
* Update grade
* Calculate class average
* Find highest grade
3. **Word Counter**: Write a program that counts how many times each word appears in a sentence using a HashMap.
4. **Item Shop**: Create a shop where items have names and prices. Add methods to:
* Add item with price
* Get item price
* Apply discount to all items
* Display all items and prices
* * *
[Edit on GitHub](https://github.com/HytaleModding/site/blob/main/content/docs/en/guides/java-basics/11-hashmaps.mdx)
[10 - ArrayList and Collections\
\
Learn to use flexible, resizable collections in Java.](https://hytalemodding.dev/en/docs/guides/java-basics/10-arraylist)
[12 - Exception Handling\
\
Learn how to handle errors gracefully in your Java programs.](https://hytalemodding.dev/en/docs/guides/java-basics/12-exception-handling)
### On this page
[HashMap Basics](https://hytalemodding.dev/en/docs/guides/java-basics/11-hashmaps#hashmap-basics)
[Common HashMap Methods](https://hytalemodding.dev/en/docs/guides/java-basics/11-hashmaps#common-hashmap-methods)
[Adding and Updating](https://hytalemodding.dev/en/docs/guides/java-basics/11-hashmaps#adding-and-updating)
[Getting Values](https://hytalemodding.dev/en/docs/guides/java-basics/11-hashmaps#getting-values)
[Checking for Keys/Values](https://hytalemodding.dev/en/docs/guides/java-basics/11-hashmaps#checking-for-keysvalues)
[Removing Entries](https://hytalemodding.dev/en/docs/guides/java-basics/11-hashmaps#removing-entries)
[Size and Empty Check](https://hytalemodding.dev/en/docs/guides/java-basics/11-hashmaps#size-and-empty-check)
[Looping Through HashMap](https://hytalemodding.dev/en/docs/guides/java-basics/11-hashmaps#looping-through-hashmap)
[Loop Through Keys](https://hytalemodding.dev/en/docs/guides/java-basics/11-hashmaps#loop-through-keys)
[Loop Through Values](https://hytalemodding.dev/en/docs/guides/java-basics/11-hashmaps#loop-through-values)
[Loop Through Both Keys and Values](https://hytalemodding.dev/en/docs/guides/java-basics/11-hashmaps#loop-through-both-keys-and-values)
[Practical Examples](https://hytalemodding.dev/en/docs/guides/java-basics/11-hashmaps#practical-examples)
[Player Statistics System](https://hytalemodding.dev/en/docs/guides/java-basics/11-hashmaps#player-statistics-system)
[Item Properties Database](https://hytalemodding.dev/en/docs/guides/java-basics/11-hashmaps#item-properties-database)
[Configuration Manager](https://hytalemodding.dev/en/docs/guides/java-basics/11-hashmaps#configuration-manager)
[Player Inventory with Quantities](https://hytalemodding.dev/en/docs/guides/java-basics/11-hashmaps#player-inventory-with-quantities)
[Cooldown Manager](https://hytalemodding.dev/en/docs/guides/java-basics/11-hashmaps#cooldown-manager)
[HashMap with Custom Objects](https://hytalemodding.dev/en/docs/guides/java-basics/11-hashmaps#hashmap-with-custom-objects)
[Nested HashMaps](https://hytalemodding.dev/en/docs/guides/java-basics/11-hashmaps#nested-hashmaps)
[Practice Exercises](https://hytalemodding.dev/en/docs/guides/java-basics/11-hashmaps#practice-exercises)
---
# 10 - ArrayList and Collections
Java Basics
10 - ArrayList and Collections
==============================
Learn to use flexible, resizable collections in Java.
Arrays have a fixed size, but what if you need to add or remove elements? That's where `ArrayList` comes in - a resizable collection that grows and shrinks automatically.
[ArrayList Basics](https://hytalemodding.dev/en/docs/guides/java-basics/10-arraylist#arraylist-basics)
-------------------------------------------------------------------------------------------------------
import java.util.ArrayList;
public class Main {
public static void main(String[] args) {
// Create an ArrayList of Strings
ArrayList players = new ArrayList<>();
// Add elements
players.add("Alice");
players.add("Bob");
players.add("Charlie");
System.out.println(players); // [Alice, Bob, Charlie]
}
}
ArrayList vs Array
| **Array** | **ArrayList** |
| --- | --- |
| Fixed size | Resizable (grows/shrinks) |
| Can hold primitives (int, double, etc.) | Can only hold objects (Integer, Double, String, etc.) |
| Faster access | More features (add, remove, etc.) |
| `int[] numbers = new int[10];` | `ArrayList numbers = new ArrayList<>();` |
[Creating ArrayLists](https://hytalemodding.dev/en/docs/guides/java-basics/10-arraylist#creating-arraylists)
-------------------------------------------------------------------------------------------------------------
import java.util.ArrayList;
// Empty ArrayList
ArrayList items = new ArrayList<>();
// With initial values (Java 9+)
ArrayList colors = new ArrayList<>(List.of("Red", "Green", "Blue"));
// Different types
ArrayList numbers = new ArrayList<>();
ArrayList prices = new ArrayList<>();
ArrayList flags = new ArrayList<>();
Primitives in ArrayList
You can't use primitives directly. Use their wrapper classes:
// Wrong
ArrayList numbers = new ArrayList<>();
// Correct - Use wrapper class
ArrayList numbers = new ArrayList<>();
Wrapper classes:
* `int` → `Integer`
* `double` → `Double`
* `boolean` → `Boolean`
* `char` → `Character`
[Common ArrayList Methods](https://hytalemodding.dev/en/docs/guides/java-basics/10-arraylist#common-arraylist-methods)
-----------------------------------------------------------------------------------------------------------------------
### [Adding Elements](https://hytalemodding.dev/en/docs/guides/java-basics/10-arraylist#adding-elements)
ArrayList items = new ArrayList<>();
items.add("Sword"); // Add to end
items.add("Shield");
items.add(0, "Helmet"); // Add at specific index
System.out.println(items); // [Helmet, Sword, Shield]
### [Accessing Elements](https://hytalemodding.dev/en/docs/guides/java-basics/10-arraylist#accessing-elements)
ArrayList items = new ArrayList<>();
items.add("Sword");
items.add("Shield");
String first = items.get(0); // "Sword"
String second = items.get(1); // "Shield"
int size = items.size(); // 2
### [Removing Elements](https://hytalemodding.dev/en/docs/guides/java-basics/10-arraylist#removing-elements)
ArrayList items = new ArrayList<>();
items.add("Sword");
items.add("Shield");
items.add("Potion");
items.remove(1); // Remove by index (Shield)
items.remove("Potion"); // Remove by value
System.out.println(items); // [Sword]
### [Checking Contents](https://hytalemodding.dev/en/docs/guides/java-basics/10-arraylist#checking-contents)
ArrayList items = new ArrayList<>();
items.add("Sword");
items.add("Shield");
boolean hasSword = items.contains("Sword"); // true
boolean hasAxe = items.contains("Axe"); // false
boolean isEmpty = items.isEmpty(); // false
int size = items.size(); // 2
### [Modifying Elements](https://hytalemodding.dev/en/docs/guides/java-basics/10-arraylist#modifying-elements)
ArrayList items = new ArrayList<>();
items.add("Wooden Sword");
items.set(0, "Iron Sword"); // Replace at index 0
System.out.println(items); // [Iron Sword]
### [Clearing All Elements](https://hytalemodding.dev/en/docs/guides/java-basics/10-arraylist#clearing-all-elements)
ArrayList items = new ArrayList<>();
items.add("Sword");
items.add("Shield");
items.clear(); // Remove everything
System.out.println(items); // []
[Looping Through ArrayList](https://hytalemodding.dev/en/docs/guides/java-basics/10-arraylist#looping-through-arraylist)
-------------------------------------------------------------------------------------------------------------------------
### [Using For Loop](https://hytalemodding.dev/en/docs/guides/java-basics/10-arraylist#using-for-loop)
ArrayList players = new ArrayList<>();
players.add("Alice");
players.add("Bob");
players.add("Charlie");
for (int i = 0; i < players.size(); i++) {
System.out.println(players.get(i));
}
### [Using Enhanced For Loop](https://hytalemodding.dev/en/docs/guides/java-basics/10-arraylist#using-enhanced-for-loop)
for (String player : players) {
System.out.println(player);
}
### [Using forEach (Java 8+)](https://hytalemodding.dev/en/docs/guides/java-basics/10-arraylist#using-foreach-java-8)
players.forEach(player -> System.out.println(player));
[Practical Examples](https://hytalemodding.dev/en/docs/guides/java-basics/10-arraylist#practical-examples)
-----------------------------------------------------------------------------------------------------------
### [Player Inventory System](https://hytalemodding.dev/en/docs/guides/java-basics/10-arraylist#player-inventory-system)
import java.util.ArrayList;
public class Inventory {
private ArrayList items;
private int maxSize;
public Inventory(int maxSize) {
this.items = new ArrayList<>();
this.maxSize = maxSize;
}
public boolean addItem(String item) {
if (items.size() >= maxSize) {
System.out.println("Inventory full!");
return false;
}
items.add(item);
System.out.println("Added: " + item);
return true;
}
public boolean removeItem(String item) {
if (items.remove(item)) {
System.out.println("Removed: " + item);
return true;
}
System.out.println("Item not found!");
return false;
}
public void displayInventory() {
System.out.println("=== Inventory (" + items.size() + "/" + maxSize + ") ===");
for (int i = 0; i < items.size(); i++) {
System.out.println((i + 1) + ". " + items.get(i));
}
}
public int getItemCount() {
return items.size();
}
public boolean isFull() {
return items.size() >= maxSize;
}
}
// Usage
public class Main {
public static void main(String[] args) {
Inventory inv = new Inventory(5);
inv.addItem("Sword");
inv.addItem("Shield");
inv.addItem("Potion");
inv.displayInventory();
inv.removeItem("Shield");
inv.displayInventory();
}
}
### [Quest System](https://hytalemodding.dev/en/docs/guides/java-basics/10-arraylist#quest-system)
import java.util.ArrayList;
public class QuestManager {
private ArrayList activeQuests;
private ArrayList completedQuests;
public QuestManager() {
this.activeQuests = new ArrayList<>();
this.completedQuests = new ArrayList<>();
}
public void startQuest(String questName) {
if (!activeQuests.contains(questName)) {
activeQuests.add(questName);
System.out.println("Quest started: " + questName);
} else {
System.out.println("Quest already active!");
}
}
public void completeQuest(String questName) {
if (activeQuests.remove(questName)) {
completedQuests.add(questName);
System.out.println("Quest completed: " + questName);
} else {
System.out.println("Quest not found in active quests!");
}
}
public void displayQuests() {
System.out.println("\n=== Active Quests ===");
if (activeQuests.isEmpty()) {
System.out.println("No active quests");
} else {
for (String quest : activeQuests) {
System.out.println("- " + quest);
}
}
System.out.println("\n=== Completed Quests ===");
if (completedQuests.isEmpty()) {
System.out.println("No completed quests");
} else {
for (String quest : completedQuests) {
System.out.println("" + quest);
}
}
}
public int getTotalCompleted() {
return completedQuests.size();
}
}
### [Leaderboard System](https://hytalemodding.dev/en/docs/guides/java-basics/10-arraylist#leaderboard-system)
import java.util.ArrayList;
import java.util.Collections;
public class Leaderboard {
private ArrayList scores;
private ArrayList players;
public Leaderboard() {
this.scores = new ArrayList<>();
this.players = new ArrayList<>();
}
public void addScore(String player, int score) {
players.add(player);
scores.add(score);
System.out.println(player + " scored " + score + " points!");
}
public void displayTop(int count) {
System.out.println("\n=== Top " + count + " Players ===");
// Create copies to sort
ArrayList sortedScores = new ArrayList<>(scores);
ArrayList sortedPlayers = new ArrayList<>(players);
// Bubble sort (simple for learning)
for (int i = 0; i < sortedScores.size() - 1; i++) {
for (int j = 0; j < sortedScores.size() - i - 1; j++) {
if (sortedScores.get(j) < sortedScores.get(j + 1)) {
// Swap scores
int tempScore = sortedScores.get(j);
sortedScores.set(j, sortedScores.get(j + 1));
sortedScores.set(j + 1, tempScore);
// Swap players
String tempPlayer = sortedPlayers.get(j);
sortedPlayers.set(j, sortedPlayers.get(j + 1));
sortedPlayers.set(j + 1, tempPlayer);
}
}
}
// Display top scores
int limit = Math.min(count, sortedScores.size());
for (int i = 0; i < limit; i++) {
System.out.println((i + 1) + ". " + sortedPlayers.get(i) +
" - " + sortedScores.get(i) + " points");
}
}
}
### [Online Players Tracker](https://hytalemodding.dev/en/docs/guides/java-basics/10-arraylist#online-players-tracker)
import java.util.ArrayList;
public class OnlinePlayersTracker {
private ArrayList onlinePlayers;
public OnlinePlayersTracker() {
this.onlinePlayers = new ArrayList<>();
}
public void playerJoin(String playerName) {
if (!onlinePlayers.contains(playerName)) {
onlinePlayers.add(playerName);
broadcast(playerName + " joined the game");
updatePlayerCount();
}
}
public void playerLeave(String playerName) {
if (onlinePlayers.remove(playerName)) {
broadcast(playerName + " left the game");
updatePlayerCount();
}
}
public boolean isOnline(String playerName) {
return onlinePlayers.contains(playerName);
}
public int getPlayerCount() {
return onlinePlayers.size();
}
public void listPlayers() {
System.out.println("\n=== Online Players (" + getPlayerCount() + ") ===");
for (String player : onlinePlayers) {
System.out.println("• " + player);
}
}
private void broadcast(String message) {
System.out.println("[Server] " + message);
}
private void updatePlayerCount() {
System.out.println("Players online: " + getPlayerCount());
}
}
[ArrayList of Custom Objects](https://hytalemodding.dev/en/docs/guides/java-basics/10-arraylist#arraylist-of-custom-objects)
-----------------------------------------------------------------------------------------------------------------------------
You can store your own classes in ArrayLists:
public class Player {
private String name;
private int level;
public Player(String name, int level) {
this.name = name;
this.level = level;
}
public String getName() {
return name;
}
public int getLevel() {
return level;
}
@Override
public String toString() {
return name + " (Lv. " + level + ")";
}
}
public class Main {
public static void main(String[] args) {
ArrayList players = new ArrayList<>();
players.add(new Player("Alice", 10));
players.add(new Player("Bob", 15));
players.add(new Player("Charlie", 8));
// Display all players
for (Player player : players) {
System.out.println(player);
}
// Find player by name
for (Player player : players) {
if (player.getName().equals("Bob")) {
System.out.println("Found: " + player);
}
}
}
}
[Useful ArrayList Operations](https://hytalemodding.dev/en/docs/guides/java-basics/10-arraylist#useful-arraylist-operations)
-----------------------------------------------------------------------------------------------------------------------------
### [Convert to Array](https://hytalemodding.dev/en/docs/guides/java-basics/10-arraylist#convert-to-array)
ArrayList list = new ArrayList<>();
list.add("A");
list.add("B");
String[] array = list.toArray(new String[0]);
### [Convert Array to ArrayList](https://hytalemodding.dev/en/docs/guides/java-basics/10-arraylist#convert-array-to-arraylist)
String[] array = {"A", "B", "C"};
ArrayList list = new ArrayList<>(Arrays.asList(array));
### [Copy an ArrayList](https://hytalemodding.dev/en/docs/guides/java-basics/10-arraylist#copy-an-arraylist)
ArrayList original = new ArrayList<>();
original.add("A");
original.add("B");
// Shallow copy
ArrayList copy = new ArrayList<>(original);
### [Find Index of Element](https://hytalemodding.dev/en/docs/guides/java-basics/10-arraylist#find-index-of-element)
ArrayList items = new ArrayList<>();
items.add("Sword");
items.add("Shield");
int index = items.indexOf("Shield"); // 1
int notFound = items.indexOf("Axe"); // -1
[Practice Exercises](https://hytalemodding.dev/en/docs/guides/java-basics/10-arraylist#practice-exercises)
-----------------------------------------------------------------------------------------------------------
1. **Shopping Cart**: Create a shopping cart system:
* Add items
* Remove items
* Calculate total items
* Clear cart
2. **Friend List**: Create a friend management system:
* Add friend
* Remove friend
* Check if someone is a friend
* Display all friends
3. **Todo List**: Build a todo list:
* Add task
* Mark task as complete (move to completed list)
* Display active tasks
* Display completed tasks
4. **High Scores**: Create a high score system:
* Add scores
* Display top 5 scores in order
* Remove lowest score if more than 10 scores exist
* * *
[Edit on GitHub](https://github.com/HytaleModding/site/blob/main/content/docs/en/guides/java-basics/10-arraylist.mdx)
[09 - Working with Strings\
\
Master text manipulation and string operations in Java.](https://hytalemodding.dev/en/docs/guides/java-basics/09-string)
[11 - HashMap and Key-Value Storage\
\
Learn to store and retrieve data using key-value pairs.](https://hytalemodding.dev/en/docs/guides/java-basics/11-hashmaps)
### On this page
[ArrayList Basics](https://hytalemodding.dev/en/docs/guides/java-basics/10-arraylist#arraylist-basics)
[Creating ArrayLists](https://hytalemodding.dev/en/docs/guides/java-basics/10-arraylist#creating-arraylists)
[Common ArrayList Methods](https://hytalemodding.dev/en/docs/guides/java-basics/10-arraylist#common-arraylist-methods)
[Adding Elements](https://hytalemodding.dev/en/docs/guides/java-basics/10-arraylist#adding-elements)
[Accessing Elements](https://hytalemodding.dev/en/docs/guides/java-basics/10-arraylist#accessing-elements)
[Removing Elements](https://hytalemodding.dev/en/docs/guides/java-basics/10-arraylist#removing-elements)
[Checking Contents](https://hytalemodding.dev/en/docs/guides/java-basics/10-arraylist#checking-contents)
[Modifying Elements](https://hytalemodding.dev/en/docs/guides/java-basics/10-arraylist#modifying-elements)
[Clearing All Elements](https://hytalemodding.dev/en/docs/guides/java-basics/10-arraylist#clearing-all-elements)
[Looping Through ArrayList](https://hytalemodding.dev/en/docs/guides/java-basics/10-arraylist#looping-through-arraylist)
[Using For Loop](https://hytalemodding.dev/en/docs/guides/java-basics/10-arraylist#using-for-loop)
[Using Enhanced For Loop](https://hytalemodding.dev/en/docs/guides/java-basics/10-arraylist#using-enhanced-for-loop)
[Using forEach (Java 8+)](https://hytalemodding.dev/en/docs/guides/java-basics/10-arraylist#using-foreach-java-8)
[Practical Examples](https://hytalemodding.dev/en/docs/guides/java-basics/10-arraylist#practical-examples)
[Player Inventory System](https://hytalemodding.dev/en/docs/guides/java-basics/10-arraylist#player-inventory-system)
[Quest System](https://hytalemodding.dev/en/docs/guides/java-basics/10-arraylist#quest-system)
[Leaderboard System](https://hytalemodding.dev/en/docs/guides/java-basics/10-arraylist#leaderboard-system)
[Online Players Tracker](https://hytalemodding.dev/en/docs/guides/java-basics/10-arraylist#online-players-tracker)
[ArrayList of Custom Objects](https://hytalemodding.dev/en/docs/guides/java-basics/10-arraylist#arraylist-of-custom-objects)
[Useful ArrayList Operations](https://hytalemodding.dev/en/docs/guides/java-basics/10-arraylist#useful-arraylist-operations)
[Convert to Array](https://hytalemodding.dev/en/docs/guides/java-basics/10-arraylist#convert-to-array)
[Convert Array to ArrayList](https://hytalemodding.dev/en/docs/guides/java-basics/10-arraylist#convert-array-to-arraylist)
[Copy an ArrayList](https://hytalemodding.dev/en/docs/guides/java-basics/10-arraylist#copy-an-arraylist)
[Find Index of Element](https://hytalemodding.dev/en/docs/guides/java-basics/10-arraylist#find-index-of-element)
[Practice Exercises](https://hytalemodding.dev/en/docs/guides/java-basics/10-arraylist#practice-exercises)
---
# 12 - Exception Handling
Java Basics
12 - Exception Handling
=======================
Learn how to handle errors gracefully in your Java programs.
Exceptions are errors that occur while your program is running. Instead of crashing, you can "catch" these errors and handle them gracefully.
[What is an Exception?](https://hytalemodding.dev/en/docs/guides/java-basics/12-exception-handling#what-is-an-exception)
-------------------------------------------------------------------------------------------------------------------------
An exception is an event that disrupts the normal flow of your program:
String text = null;
System.out.println(text.length()); // NullPointerException - crashes!
Without handling, this crashes your mod and breaks the game!
[Try-Catch Blocks](https://hytalemodding.dev/en/docs/guides/java-basics/12-exception-handling#try-catch-blocks)
----------------------------------------------------------------------------------------------------------------
Use `try-catch` to handle exceptions:
try {
// Code that might throw an exception
String text = null;
System.out.println(text.length());
} catch (NullPointerException e) {
// Code to handle the error
System.out.println("Error: text was null!");
}
System.out.println("Program continues...");
How Try-Catch Works
1. Code in `try` block runs normally
2. If an exception occurs, execution jumps to `catch` block
3. After `catch` block, program continues normally
4. If no exception occurs, `catch` block is skipped
try {
// Try to do something risky
int result = 10 / 0; // Division by zero!
} catch (ArithmeticException e) {
// Handle the error
System.out.println("Can't divide by zero!");
}
// Program keeps running
[Common Exception Types](https://hytalemodding.dev/en/docs/guides/java-basics/12-exception-handling#common-exception-types)
----------------------------------------------------------------------------------------------------------------------------
### [NullPointerException](https://hytalemodding.dev/en/docs/guides/java-basics/12-exception-handling#nullpointerexception)
Accessing methods/properties on null objects:
String name = null;
try {
int length = name.length();
} catch (NullPointerException e) {
System.out.println("Name is null!");
}
### [ArrayIndexOutOfBoundsException](https://hytalemodding.dev/en/docs/guides/java-basics/12-exception-handling#arrayindexoutofboundsexception)
Accessing invalid array index:
int[] numbers = {1, 2, 3};
try {
int value = numbers[10]; // Index 10 doesn't exist!
} catch (ArrayIndexOutOfBoundsException e) {
System.out.println("Invalid array index!");
}
### [NumberFormatException](https://hytalemodding.dev/en/docs/guides/java-basics/12-exception-handling#numberformatexception)
Converting invalid strings to numbers:
try {
int number = Integer.parseInt("abc"); // Not a number!
} catch (NumberFormatException e) {
System.out.println("Invalid number format!");
}
### [ArithmeticException](https://hytalemodding.dev/en/docs/guides/java-basics/12-exception-handling#arithmeticexception)
Math errors like division by zero:
try {
int result = 10 / 0;
} catch (ArithmeticException e) {
System.out.println("Math error!");
}
[Multiple Catch Blocks](https://hytalemodding.dev/en/docs/guides/java-basics/12-exception-handling#multiple-catch-blocks)
--------------------------------------------------------------------------------------------------------------------------
Handle different exceptions differently:
String input = "abc";
try {
int number = Integer.parseInt(input);
int result = 100 / number;
System.out.println(result);
} catch (NumberFormatException e) {
System.out.println("Invalid number!");
} catch (ArithmeticException e) {
System.out.println("Cannot divide by zero!");
}
[Catching Multiple Exception Types](https://hytalemodding.dev/en/docs/guides/java-basics/12-exception-handling#catching-multiple-exception-types)
--------------------------------------------------------------------------------------------------------------------------------------------------
Catch multiple exceptions in one block:
try {
// Some risky code
} catch (NumberFormatException | ArithmeticException e) {
System.out.println("Math-related error occurred!");
}
[The Finally Block](https://hytalemodding.dev/en/docs/guides/java-basics/12-exception-handling#the-finally-block)
------------------------------------------------------------------------------------------------------------------
Code that **always** runs, whether exception occurs or not:
try {
System.out.println("Opening file...");
// Code that might fail
} catch (Exception e) {
System.out.println("Error: " + e.getMessage());
} finally {
System.out.println("Closing file...");
// This ALWAYS runs - good for cleanup
}
When to Use Finally
Use `finally` for cleanup tasks that must always happen:
* Closing files
* Releasing resources
* Saving data
* Logging
FileReader file = null;
try {
file = new FileReader("data.txt");
// Read file
} catch (Exception e) {
System.out.println("Error reading file");
} finally {
if (file != null) {
file.close(); // Always close the file!
}
}
[Getting Exception Information](https://hytalemodding.dev/en/docs/guides/java-basics/12-exception-handling#getting-exception-information)
------------------------------------------------------------------------------------------------------------------------------------------
The exception object contains useful information:
try {
int result = Integer.parseInt("xyz");
} catch (NumberFormatException e) {
System.out.println("Message: " + e.getMessage());
System.out.println("Type: " + e.getClass().getName());
e.printStackTrace(); // Print full error details
}
[Practical Examples](https://hytalemodding.dev/en/docs/guides/java-basics/12-exception-handling#practical-examples)
--------------------------------------------------------------------------------------------------------------------
### [Safe Player Input](https://hytalemodding.dev/en/docs/guides/java-basics/12-exception-handling#safe-player-input)
import java.util.Scanner;
public class PlayerInput {
public static int getPlayerChoice(Scanner scanner) {
while (true) {
try {
System.out.print("Enter choice (1-5): ");
String input = scanner.nextLine();
int choice = Integer.parseInt(input);
if (choice < 1 || choice > 5) {
System.out.println("Please enter a number between 1 and 5");
continue;
}
return choice;
} catch (NumberFormatException e) {
System.out.println("Invalid input! Please enter a number.");
}
}
}
public static void main(String[] args) {
Scanner scanner = new Scanner(System.in);
int choice = getPlayerChoice(scanner);
System.out.println("You chose: " + choice);
}
}
### [Safe Item Durability Update](https://hytalemodding.dev/en/docs/guides/java-basics/12-exception-handling#safe-item-durability-update)
public class Item {
private String name;
private int durability;
private int maxDurability;
public Item(String name, int maxDurability) {
this.name = name;
this.durability = maxDurability;
this.maxDurability = maxDurability;
}
public void damage(int amount) {
try {
if (amount < 0) {
throw new IllegalArgumentException("Damage cannot be negative!");
}
durability -= amount;
if (durability < 0) {
durability = 0;
}
System.out.println(name + " durability: " + durability + "/" + maxDurability);
if (durability == 0) {
System.out.println(name + " broke!");
}
} catch (IllegalArgumentException e) {
System.out.println("Error: " + e.getMessage());
}
}
}
### [Safe Config Loading](https://hytalemodding.dev/en/docs/guides/java-basics/12-exception-handling#safe-config-loading)
import java.util.HashMap;
public class ConfigLoader {
private HashMap settings;
public ConfigLoader() {
this.settings = new HashMap<>();
loadDefaults();
}
private void loadDefaults() {
settings.put("maxPlayers", "10");
settings.put("difficulty", "normal");
settings.put("pvpEnabled", "true");
}
public int getIntSetting(String key, int defaultValue) {
try {
String value = settings.get(key);
if (value == null) {
return defaultValue;
}
return Integer.parseInt(value);
} catch (NumberFormatException e) {
System.out.println("Invalid number for " + key + ", using default");
return defaultValue;
}
}
public boolean getBooleanSetting(String key, boolean defaultValue) {
try {
String value = settings.get(key);
if (value == null) {
return defaultValue;
}
return Boolean.parseBoolean(value);
} catch (Exception e) {
System.out.println("Invalid boolean for " + key + ", using default");
return defaultValue;
}
}
public void setSetting(String key, String value) {
if (key == null || value == null) {
System.out.println("Key and value cannot be null!");
return;
}
settings.put(key, value);
}
}
### [Safe Array Access](https://hytalemodding.dev/en/docs/guides/java-basics/12-exception-handling#safe-array-access)
public class Inventory {
private String[] items;
public Inventory(int size) {
this.items = new String[size];
}
public boolean setItem(int slot, String item) {
try {
if (slot < 0 || slot >= items.length) {
throw new ArrayIndexOutOfBoundsException("Invalid slot: " + slot);
}
items[slot] = item;
System.out.println("Placed " + item + " in slot " + slot);
return true;
} catch (ArrayIndexOutOfBoundsException e) {
System.out.println("Error: " + e.getMessage());
return false;
}
}
public String getItem(int slot) {
try {
return items[slot];
} catch (ArrayIndexOutOfBoundsException e) {
System.out.println("Invalid slot: " + slot);
return null;
}
}
}
### [Command Parser with Error Handling](https://hytalemodding.dev/en/docs/guides/java-basics/12-exception-handling#command-parser-with-error-handling)
public class CommandParser {
public static void parseCommand(String command) {
try {
if (command == null || command.trim().isEmpty()) {
throw new IllegalArgumentException("Command cannot be empty!");
}
String[] parts = command.split(" ");
if (parts.length < 2) {
throw new IllegalArgumentException("Invalid command format!");
}
String action = parts[0];
String target = parts[1];
switch (action) {
case "give":
if (parts.length < 4) {
throw new IllegalArgumentException("Usage: give - ");
}
String item = parts[2];
int amount = Integer.parseInt(parts[3]);
if (amount <= 0) {
throw new IllegalArgumentException("Amount must be positive!");
}
System.out.println("Giving " + amount + " " + item + " to " + target);
break;
case "tp":
if (parts.length < 5) {
throw new IllegalArgumentException("Usage: tp ");
}
int x = Integer.parseInt(parts[2]);
int y = Integer.parseInt(parts[3]);
int z = Integer.parseInt(parts[4]);
System.out.println("Teleporting " + target + " to " + x + ", " + y + ", " + z);
break;
default:
throw new IllegalArgumentException("Unknown command: " + action);
}
} catch (NumberFormatException e) {
System.out.println("Error: Invalid number in command!");
} catch (IllegalArgumentException e) {
System.out.println("Error: " + e.getMessage());
} catch (Exception e) {
System.out.println("Unexpected error: " + e.getMessage());
}
}
public static void main(String[] args) {
parseCommand("give Steve diamond 5");
parseCommand("give Steve sword abc"); // Invalid number
parseCommand("tp Alice 10 64 20");
parseCommand("unknown command"); // Unknown command
}
}
[Throwing Exceptions](https://hytalemodding.dev/en/docs/guides/java-basics/12-exception-handling#throwing-exceptions)
----------------------------------------------------------------------------------------------------------------------
You can throw your own exceptions:
public class Player {
private int health;
public void setHealth(int health) {
if (health < 0) {
throw new IllegalArgumentException("Health cannot be negative!");
}
if (health > 100) {
throw new IllegalArgumentException("Health cannot exceed 100!");
}
this.health = health;
}
}
When to Throw Exceptions
Throw exceptions when:
* Method receives invalid input
* Operation cannot be completed
* Preconditions are not met
* Something unexpected happens
public void damagePlayer(int damage) {
if (damage < 0) {
throw new IllegalArgumentException("Damage must be positive!");
}
// Apply damage
}
public Item getItem(int slot) {
if (slot < 0 || slot >= inventory.length) {
throw new IndexOutOfBoundsException("Invalid inventory slot!");
}
return inventory[slot];
}
[Checked vs Unchecked Exceptions](https://hytalemodding.dev/en/docs/guides/java-basics/12-exception-handling#checked-vs-unchecked-exceptions)
----------------------------------------------------------------------------------------------------------------------------------------------
Exception Types
**Unchecked Exceptions** (RuntimeException):
* Don't need to be caught
* Usually programming errors
* Examples: NullPointerException, ArrayIndexOutOfBoundsException
**Checked Exceptions**:
* Must be caught or declared
* Usually external errors (files, network)
* Examples: IOException, FileNotFoundException
// Unchecked - no need to catch
int result = 10 / 0; // ArithmeticException
// Checked - must catch or declare
try {
FileReader file = new FileReader("data.txt"); // IOException
} catch (IOException e) {
// Handle error
}
[Practice Exercises](https://hytalemodding.dev/en/docs/guides/java-basics/12-exception-handling#practice-exercises)
--------------------------------------------------------------------------------------------------------------------
1. **Safe Division Calculator**: Create a method that divides two numbers. Handle division by zero and invalid input gracefully.
2. **Player Level Setter**: Create a method that sets player level (1-100). Throw an exception if invalid, and handle it in main.
3. **Safe Array Access**: Create a method that safely accesses array elements. Return null if index is invalid instead of crashing.
4. **Config Parser**: Read a config string like "maxPlayers=10" and parse it. Handle invalid formats gracefully.
5. **File Name Validator**: Create a method that checks if a filename is valid (no special characters, not empty). Throw exceptions for invalid names.
[Edit on GitHub](https://github.com/HytaleModding/site/blob/main/content/docs/en/guides/java-basics/12-exception-handling.mdx)
[11 - HashMap and Key-Value Storage\
\
Learn to store and retrieve data using key-value pairs.](https://hytalemodding.dev/en/docs/guides/java-basics/11-hashmaps)
[13 - Inheritance\
\
Learn how to create class hierarchies and reuse code effectively.](https://hytalemodding.dev/en/docs/guides/java-basics/13-inheritance)
### On this page
[What is an Exception?](https://hytalemodding.dev/en/docs/guides/java-basics/12-exception-handling#what-is-an-exception)
[Try-Catch Blocks](https://hytalemodding.dev/en/docs/guides/java-basics/12-exception-handling#try-catch-blocks)
[Common Exception Types](https://hytalemodding.dev/en/docs/guides/java-basics/12-exception-handling#common-exception-types)
[NullPointerException](https://hytalemodding.dev/en/docs/guides/java-basics/12-exception-handling#nullpointerexception)
[ArrayIndexOutOfBoundsException](https://hytalemodding.dev/en/docs/guides/java-basics/12-exception-handling#arrayindexoutofboundsexception)
[NumberFormatException](https://hytalemodding.dev/en/docs/guides/java-basics/12-exception-handling#numberformatexception)
[ArithmeticException](https://hytalemodding.dev/en/docs/guides/java-basics/12-exception-handling#arithmeticexception)
[Multiple Catch Blocks](https://hytalemodding.dev/en/docs/guides/java-basics/12-exception-handling#multiple-catch-blocks)
[Catching Multiple Exception Types](https://hytalemodding.dev/en/docs/guides/java-basics/12-exception-handling#catching-multiple-exception-types)
[The Finally Block](https://hytalemodding.dev/en/docs/guides/java-basics/12-exception-handling#the-finally-block)
[Getting Exception Information](https://hytalemodding.dev/en/docs/guides/java-basics/12-exception-handling#getting-exception-information)
[Practical Examples](https://hytalemodding.dev/en/docs/guides/java-basics/12-exception-handling#practical-examples)
[Safe Player Input](https://hytalemodding.dev/en/docs/guides/java-basics/12-exception-handling#safe-player-input)
[Safe Item Durability Update](https://hytalemodding.dev/en/docs/guides/java-basics/12-exception-handling#safe-item-durability-update)
[Safe Config Loading](https://hytalemodding.dev/en/docs/guides/java-basics/12-exception-handling#safe-config-loading)
[Safe Array Access](https://hytalemodding.dev/en/docs/guides/java-basics/12-exception-handling#safe-array-access)
[Command Parser with Error Handling](https://hytalemodding.dev/en/docs/guides/java-basics/12-exception-handling#command-parser-with-error-handling)
[Throwing Exceptions](https://hytalemodding.dev/en/docs/guides/java-basics/12-exception-handling#throwing-exceptions)
[Checked vs Unchecked Exceptions](https://hytalemodding.dev/en/docs/guides/java-basics/12-exception-handling#checked-vs-unchecked-exceptions)
[Practice Exercises](https://hytalemodding.dev/en/docs/guides/java-basics/12-exception-handling#practice-exercises)
---
# 13 - Inheritance
Java Basics
13 - Inheritance
================
Learn how to create class hierarchies and reuse code effectively.
Inheritance lets you create new classes based on existing ones. The new class inherits all the properties and methods of the parent class, and can add its own or modify inherited ones.
[What is Inheritance?](https://hytalemodding.dev/en/docs/guides/java-basics/13-inheritance#what-is-inheritance)
----------------------------------------------------------------------------------------------------------------
Think of inheritance like a family tree. A child inherits traits from their parent, but can also have their own unique traits.
// Parent class (superclass)
public class Entity {
protected String name;
protected int health;
public Entity(String name, int health) {
this.name = name;
this.health = health;
}
public void takeDamage(int damage) {
health -= damage;
System.out.println(name + " took " + damage + " damage!");
}
}
// Child class (subclass)
public class Player extends Entity {
private int level;
public Player(String name, int health, int level) {
super(name, health); // Call parent constructor
this.level = level;
}
public void levelUp() {
level++;
System.out.println(name + " leveled up to " + level + "!");
}
}
Inheritance Terminology
* **Superclass/Parent**: The class being inherited from (Entity)
* **Subclass/Child**: The class inheriting (Player)
* **extends**: Keyword to inherit from a class
* **super**: Keyword to access parent class members
public class Monster extends Entity {
// Monster IS-A Entity
// Monster inherits from Entity
// Entity is the parent, Monster is the child
}
[The extends Keyword](https://hytalemodding.dev/en/docs/guides/java-basics/13-inheritance#the-extends-keyword)
---------------------------------------------------------------------------------------------------------------
Use `extends` to inherit from a class:
public class Animal {
protected String name;
public void makeSound() {
System.out.println(name + " makes a sound");
}
}
public class Dog extends Animal {
public void wagTail() {
System.out.println(name + " wags tail");
}
}
public class Main {
public static void main(String[] args) {
Dog dog = new Dog();
dog.name = "Buddy";
dog.makeSound(); // Inherited from Animal
dog.wagTail(); // Dog's own method
}
}
[The super Keyword](https://hytalemodding.dev/en/docs/guides/java-basics/13-inheritance#the-super-keyword)
-----------------------------------------------------------------------------------------------------------
`super` refers to the parent class:
### [Calling Parent Constructor](https://hytalemodding.dev/en/docs/guides/java-basics/13-inheritance#calling-parent-constructor)
public class Entity {
protected String name;
public Entity(String name) {
this.name = name;
}
}
public class Player extends Entity {
private int level;
public Player(String name, int level) {
super(name); // Call parent constructor FIRST
this.level = level;
}
}
Constructor Rules
* `super()` must be the **first** statement in child constructor
* If you don't call `super()`, Java automatically calls the no-argument parent constructor
* If parent has no no-argument constructor, you MUST call `super()` with arguments
// Wrong - super() not first
public Player(String name, int level) {
this.level = level;
super(name); // Error!
}
// Correct
public Player(String name, int level) {
super(name); // First statement
this.level = level;
}
### [Calling Parent Methods](https://hytalemodding.dev/en/docs/guides/java-basics/13-inheritance#calling-parent-methods)
public class Entity {
protected int health;
public void takeDamage(int damage) {
health -= damage;
System.out.println("Entity took damage!");
}
}
public class Player extends Entity {
@Override
public void takeDamage(int damage) {
super.takeDamage(damage); // Call parent version
if (health < 20) {
System.out.println("Warning: Low health!");
}
}
}
[Method Overriding](https://hytalemodding.dev/en/docs/guides/java-basics/13-inheritance#method-overriding)
-----------------------------------------------------------------------------------------------------------
Child classes can replace parent methods:
public class Entity {
public void attack() {
System.out.println("Entity attacks!");
}
}
public class Player extends Entity {
@Override // Good practice to use this annotation
public void attack() {
System.out.println("Player swings sword!");
}
}
public class Monster extends Entity {
@Override
public void attack() {
System.out.println("Monster bites!");
}
}
public class Main {
public static void main(String[] args) {
Player player = new Player();
Monster monster = new Monster();
player.attack(); // "Player swings sword!"
monster.attack(); // "Monster bites!"
}
}
@Override Annotation
Always use `@Override` when overriding methods:
* Helps catch typos (if method doesn't exist in parent, you get an error)
* Makes code clearer
* Good documentation
// Without @Override - typo not caught
public void attac() { // Typo! Creates new method instead
// ...
}
// With @Override - error caught immediately
@Override
public void attac() { // Error: method doesn't exist in parent
// ...
}
[Access Modifiers in Inheritance](https://hytalemodding.dev/en/docs/guides/java-basics/13-inheritance#access-modifiers-in-inheritance)
---------------------------------------------------------------------------------------------------------------------------------------
* `public` - Accessible everywhere
* `protected` - Accessible in class and subclasses
* `private` - Only in the class (not inherited)
public class Parent {
public int publicVar; // Child can access
protected int protectedVar; // Child can access
private int privateVar; // Child CANNOT access
private void privateMethod() {
// Child cannot call this
}
protected void protectedMethod() {
// Child can call this
}
}
public class Child extends Parent {
public void test() {
publicVar = 10; // OK
protectedVar = 20; // OK
privateVar = 30; // Error!
protectedMethod(); // OK
privateMethod(); // Error!
}
}
[Practical Examples](https://hytalemodding.dev/en/docs/guides/java-basics/13-inheritance#practical-examples)
-------------------------------------------------------------------------------------------------------------
### [Game Entity Hierarchy](https://hytalemodding.dev/en/docs/guides/java-basics/13-inheritance#game-entity-hierarchy)
// Base class for all entities
public class Entity {
protected String name;
protected int health;
protected int maxHealth;
protected double x, y, z;
public Entity(String name, int maxHealth) {
this.name = name;
this.health = maxHealth;
this.maxHealth = maxHealth;
}
public void takeDamage(int damage) {
health -= damage;
if (health < 0) health = 0;
System.out.println(name + " took " + damage + " damage. Health: " + health);
}
public boolean isAlive() {
return health > 0;
}
public void moveTo(double x, double y, double z) {
this.x = x;
this.y = y;
this.z = z;
System.out.println(name + " moved to (" + x + ", " + y + ", " + z + ")");
}
}
// Player extends Entity
public class Player extends Entity {
private int level;
private int experience;
private int mana;
public Player(String name) {
super(name, 100);
this.level = 1;
this.experience = 0;
this.mana = 50;
}
public void gainExperience(int amount) {
experience += amount;
System.out.println("Gained " + amount + " XP");
if (experience >= level * 100) {
levelUp();
}
}
private void levelUp() {
level++;
maxHealth += 10;
health = maxHealth;
mana += 5;
System.out.println("Level up! Now level " + level);
}
@Override
public void takeDamage(int damage) {
super.takeDamage(damage);
if (health < maxHealth * 0.25) {
System.out.println("⚠ WARNING: Low health!");
}
}
}
// Monster extends Entity
public class Monster extends Entity {
private int attackPower;
private String type;
public Monster(String name, int health, int attackPower, String type) {
super(name, health);
this.attackPower = attackPower;
this.type = type;
}
public int attack() {
System.out.println(name + " attacks!");
return attackPower;
}
@Override
public void takeDamage(int damage) {
super.takeDamage(damage);
if (!isAlive()) {
System.out.println(name + " was defeated!");
}
}
}
// Boss extends Monster (multi-level inheritance)
public class Boss extends Monster {
private int phase;
public Boss(String name, int health, int attackPower) {
super(name, health, attackPower, "Boss");
this.phase = 1;
}
@Override
public void takeDamage(int damage) {
super.takeDamage(damage);
// Change phase at 50% health
if (phase == 1 && health < maxHealth / 2) {
phase = 2;
System.out.println(name + " enters PHASE 2!");
}
}
@Override
public int attack() {
int damage = super.attack();
if (phase == 2) {
damage *= 2;
System.out.println("ENRAGED ATTACK!");
}
return damage;
}
}
### [Item Hierarchy](https://hytalemodding.dev/en/docs/guides/java-basics/13-inheritance#item-hierarchy)
// Base Item class
public class Item {
protected String name;
protected int value;
protected double weight;
public Item(String name, int value, double weight) {
this.name = name;
this.value = value;
this.weight = weight;
}
public void use() {
System.out.println("Using " + name);
}
public String getInfo() {
return name + " ($" + value + ", " + weight + " kg)";
}
}
// Weapon extends Item
public class Weapon extends Item {
private int damage;
private int durability;
public Weapon(String name, int value, double weight, int damage, int durability) {
super(name, value, weight);
this.damage = damage;
this.durability = durability;
}
@Override
public void use() {
if (durability > 0) {
System.out.println("Attacking with " + name + " for " + damage + " damage!");
durability--;
} else {
System.out.println(name + " is broken!");
}
}
@Override
public String getInfo() {
return super.getInfo() + ", Damage: " + damage + ", Durability: " + durability;
}
}
// Consumable extends Item
public class Consumable extends Item {
private int healAmount;
private int uses;
public Consumable(String name, int value, double weight, int healAmount, int uses) {
super(name, value, weight);
this.healAmount = healAmount;
this.uses = uses;
}
@Override
public void use() {
if (uses > 0) {
System.out.println("Used " + name + ", restored " + healAmount + " health!");
uses--;
} else {
System.out.println("No " + name + " left!");
}
}
@Override
public String getInfo() {
return super.getInfo() + ", Heals: " + healAmount + ", Uses: " + uses;
}
}
// Armor extends Item
public class Armor extends Item {
private int defense;
private String slot;
public Armor(String name, int value, double weight, int defense, String slot) {
super(name, value, weight);
this.defense = defense;
this.slot = slot;
}
@Override
public void use() {
System.out.println("Equipped " + name + " (+" + defense + " defense)");
}
@Override
public String getInfo() {
return super.getInfo() + ", Defense: " + defense + ", Slot: " + slot;
}
}
[Polymorphism](https://hytalemodding.dev/en/docs/guides/java-basics/13-inheritance#polymorphism)
-------------------------------------------------------------------------------------------------
Child objects can be treated as parent objects:
Entity entity1 = new Player("Alice");
Entity entity2 = new Monster("Goblin", 50, 10, "Hostile");
Entity entity3 = new Boss("Dragon", 500, 50);
// All can use Entity methods
entity1.takeDamage(10);
entity2.takeDamage(10);
entity3.takeDamage(10);
// Array of different types
Entity[] entities = {
new Player("Bob"),
new Monster("Zombie", 30, 8, "Hostile"),
new Monster("Spider", 20, 5, "Hostile")
};
// Process all entities the same way
for (Entity entity : entities) {
entity.takeDamage(5);
}
Polymorphism Benefits
Polymorphism lets you write code that works with parent types but handles child types correctly:
public void damageEntity(Entity entity, int damage) {
entity.takeDamage(damage);
// Works for Player, Monster, Boss, etc.
// Each uses their own version of takeDamage()
}
// Can call with any Entity type
damageEntity(new Player("Alice"), 10);
damageEntity(new Monster("Goblin", 50, 10, "Hostile"), 10);
damageEntity(new Boss("Dragon", 500, 50), 10);
[The Object Class](https://hytalemodding.dev/en/docs/guides/java-basics/13-inheritance#the-object-class)
---------------------------------------------------------------------------------------------------------
All classes in Java automatically inherit from `Object`:
public class MyClass {
// Automatically extends Object
// Has methods like toString(), equals(), etc.
}
Common Object methods to override:
public class Player {
private String name;
private int level;
@Override
public String toString() {
return "Player: " + name + " (Lv. " + level + ")";
}
@Override
public boolean equals(Object obj) {
if (obj instanceof Player) {
Player other = (Player) obj;
return this.name.equals(other.name);
}
return false;
}
}
[Final Classes and Methods](https://hytalemodding.dev/en/docs/guides/java-basics/13-inheritance#final-classes-and-methods)
---------------------------------------------------------------------------------------------------------------------------
`final` prevents inheritance or overriding:
// Final class - cannot be extended
public final class SpecialItem {
// No class can extend this
}
// Final method - cannot be overridden
public class Entity {
public final void printName() {
System.out.println(name);
}
}
public class Player extends Entity {
@Override
public void printName() { // Error! Method is final
// Cannot override
}
}
[Common Mistakes](https://hytalemodding.dev/en/docs/guides/java-basics/13-inheritance#common-mistakes)
-------------------------------------------------------------------------------------------------------
// Wrong - Forgetting super()
public class Player extends Entity {
public Player(String name) {
// Error! Entity has no no-arg constructor
}
}
// Correct
public class Player extends Entity {
public Player(String name) {
super(name, 100); // Call parent constructor
}
}
// Wrong - Accessing private members
public class Child extends Parent {
public void test() {
privateVar = 10; // Error! private is not inherited
}
}
// Correct - Use protected
public class Parent {
protected int protectedVar; // Child can access
}
// Wrong - Multiple inheritance (not allowed in Java)
public class Child extends Parent1, Parent2 { // Error!
}
// Correct - Single inheritance only
public class Child extends Parent {
}
[Practice Exercises](https://hytalemodding.dev/en/docs/guides/java-basics/13-inheritance#practice-exercises)
-------------------------------------------------------------------------------------------------------------
1. **Vehicle Hierarchy**: Create a `Vehicle` class with properties like speed and fuel. Create `Car` and `Motorcycle` subclasses with their own unique features.
2. **Shape Calculator**: Create a `Shape` class with a `calculateArea()` method. Create `Circle`, `Rectangle`, and `Triangle` subclasses that override this method.
3. **RPG Characters**: Create a `Character` class. Extend it to make `Warrior`, `Mage`, and `Archer` classes with unique abilities.
4. **Animal Sounds**: Create an `Animal` class with a `makeSound()` method. Create various animal subclasses that override this method.
[Edit on GitHub](https://github.com/HytaleModding/site/blob/main/content/docs/en/guides/java-basics/13-inheritance.mdx)
[12 - Exception Handling\
\
Learn how to handle errors gracefully in your Java programs.](https://hytalemodding.dev/en/docs/guides/java-basics/12-exception-handling)
[Prefabs\
\
Documentation about Prefabs in Hytale.](https://hytalemodding.dev/en/docs/guides/prefabs)
### On this page
[What is Inheritance?](https://hytalemodding.dev/en/docs/guides/java-basics/13-inheritance#what-is-inheritance)
[The extends Keyword](https://hytalemodding.dev/en/docs/guides/java-basics/13-inheritance#the-extends-keyword)
[The super Keyword](https://hytalemodding.dev/en/docs/guides/java-basics/13-inheritance#the-super-keyword)
[Calling Parent Constructor](https://hytalemodding.dev/en/docs/guides/java-basics/13-inheritance#calling-parent-constructor)
[Calling Parent Methods](https://hytalemodding.dev/en/docs/guides/java-basics/13-inheritance#calling-parent-methods)
[Method Overriding](https://hytalemodding.dev/en/docs/guides/java-basics/13-inheritance#method-overriding)
[Access Modifiers in Inheritance](https://hytalemodding.dev/en/docs/guides/java-basics/13-inheritance#access-modifiers-in-inheritance)
[Practical Examples](https://hytalemodding.dev/en/docs/guides/java-basics/13-inheritance#practical-examples)
[Game Entity Hierarchy](https://hytalemodding.dev/en/docs/guides/java-basics/13-inheritance#game-entity-hierarchy)
[Item Hierarchy](https://hytalemodding.dev/en/docs/guides/java-basics/13-inheritance#item-hierarchy)
[Polymorphism](https://hytalemodding.dev/en/docs/guides/java-basics/13-inheritance#polymorphism)
[The Object Class](https://hytalemodding.dev/en/docs/guides/java-basics/13-inheritance#the-object-class)
[Final Classes and Methods](https://hytalemodding.dev/en/docs/guides/java-basics/13-inheritance#final-classes-and-methods)
[Common Mistakes](https://hytalemodding.dev/en/docs/guides/java-basics/13-inheritance#common-mistakes)
[Practice Exercises](https://hytalemodding.dev/en/docs/guides/java-basics/13-inheritance#practice-exercises)
---
# 09 - Working with Strings
Java Basics
09 - Working with Strings
=========================
Master text manipulation and string operations in Java.
Strings are one of the most commonly used types in Java. They're essential for handling player names, chat messages, item descriptions, and like everything you see.
[String Basics](https://hytalemodding.dev/en/docs/guides/java-basics/09-string#string-basics)
----------------------------------------------------------------------------------------------
Strings are objects that store text:
String name = "Simon";
String message = "Welcome to Hytale!";
String empty = "";
Strings are Immutable
Once created, a String **cannot be changed**. Methods that seem to modify a string actually create a new one!
String text = "Hello";
text.toUpperCase(); // Creates "HELLO" but doesn't save it
System.out.println(text); // Still "Hello"
String upper = text.toUpperCase(); // ✓ Save the result
System.out.println(upper); // "HELLO"
[String Methods](https://hytalemodding.dev/en/docs/guides/java-basics/09-string#string-methods)
------------------------------------------------------------------------------------------------
### [Length](https://hytalemodding.dev/en/docs/guides/java-basics/09-string#length)
String name = "Alice";
int length = name.length();
System.out.println(length); // 5
### [Changing Case](https://hytalemodding.dev/en/docs/guides/java-basics/09-string#changing-case)
String text = "Hello World";
String upper = text.toUpperCase(); // "HELLO WORLD"
String lower = text.toLowerCase(); // "hello world"
### [Checking Contents](https://hytalemodding.dev/en/docs/guides/java-basics/09-string#checking-contents)
String message = "Welcome to Hytale";
boolean hasHytale = message.contains("Hytale"); // true
boolean hasMinecraft = message.contains("Minecraft"); // false
boolean starts = message.startsWith("Welcome"); // true
boolean ends = message.endsWith("Hytale"); // true
### [Extracting Parts](https://hytalemodding.dev/en/docs/guides/java-basics/09-string#extracting-parts)
String text = "Hello World";
char first = text.charAt(0); // 'H'
char last = text.charAt(10); // 'd'
String sub1 = text.substring(0, 5); // "Hello"
String sub2 = text.substring(6); // "World"
Substring Indices
`substring(start, end)` includes `start` but excludes `end`:
String text = "Hytale";
// 012345 (indices)
text.substring(0, 2); // "Hy" (indices 0 and 1)
text.substring(2, 6); // "tale" (indices 2, 3, 4, 5)
text.substring(2); // "tale" (from 2 to end)
### [Replacing Text](https://hytalemodding.dev/en/docs/guides/java-basics/09-string#replacing-text)
String text = "I love Minecraft";
String replaced = text.replace("Minecraft", "Hytale");
System.out.println(replaced); // "I love Hytale"
String noSpaces = "Hello World".replace(" ", "");
System.out.println(noSpaces); // "HelloWorld"
### [Trimming Whitespace](https://hytalemodding.dev/en/docs/guides/java-basics/09-string#trimming-whitespace)
String messy = " Hello World ";
String clean = messy.trim();
System.out.println(clean); // "Hello World" (no spaces at ends)
### [Splitting Strings](https://hytalemodding.dev/en/docs/guides/java-basics/09-string#splitting-strings)
String command = "give player sword 5";
String[] parts = command.split(" ");
System.out.println(parts[0]); // "give"
System.out.println(parts[1]); // "player"
System.out.println(parts[2]); // "sword"
System.out.println(parts[3]); // "5"
[String Comparison](https://hytalemodding.dev/en/docs/guides/java-basics/09-string#string-comparison)
------------------------------------------------------------------------------------------------------
Never Use == for Strings
Always use `.equals()` to compare string contents!
String name1 = "Steve";
String name2 = "Steve";
// Wrong - Compares object references
if (name1 == name2) {
System.out.println("Same");
}
// Correct - Compares actual text
if (name1.equals(name2)) {
System.out.println("Same");
}
// Ignore case when comparing
if (name1.equalsIgnoreCase("steve")) {
System.out.println("Same (ignoring case)");
}
### [Comparing Order](https://hytalemodding.dev/en/docs/guides/java-basics/09-string#comparing-order)
String a = "Apple";
String b = "Banana";
int result = a.compareTo(b);
// result < 0 if a comes before b
// result == 0 if a equals b
// result > 0 if a comes after b
if (a.compareTo(b) < 0) {
System.out.println(a + " comes before " + b);
}
[String Concatenation](https://hytalemodding.dev/en/docs/guides/java-basics/09-string#string-concatenation)
------------------------------------------------------------------------------------------------------------
### [Using + Operator](https://hytalemodding.dev/en/docs/guides/java-basics/09-string#using--operator)
String first = "Hello";
String second = "World";
String combined = first + " " + second; // "Hello World"
int score = 100;
String message = "Score: " + score; // "Score: 100"
### [Using concat()](https://hytalemodding.dev/en/docs/guides/java-basics/09-string#using-concat)
String result = "Hello".concat(" World"); // "Hello World"
### [Building Long Strings](https://hytalemodding.dev/en/docs/guides/java-basics/09-string#building-long-strings)
For many concatenations, use `StringBuilder`:
StringBuilder builder = new StringBuilder();
builder.append("Player: ");
builder.append("Alice");
builder.append(", Level: ");
builder.append(10);
builder.append(", Health: ");
builder.append(100);
String result = builder.toString();
System.out.println(result);
// "Player: Alice, Level: 10, Health: 100"
Why StringBuilder?
Regular concatenation creates many temporary strings:
// Inefficient - Creates many temporary strings
String result = "";
for (int i = 0; i < 1000; i++) {
result = result + i; // Creates 1000 temporary strings!
}
// Efficient - StringBuilder is mutable
StringBuilder sb = new StringBuilder();
for (int i = 0; i < 1000; i++) {
sb.append(i); // Modifies one object
}
String result = sb.toString();
Use `StringBuilder` when building strings in loops!
[Practical Examples](https://hytalemodding.dev/en/docs/guides/java-basics/09-string#practical-examples)
--------------------------------------------------------------------------------------------------------
### [Parse Player Command](https://hytalemodding.dev/en/docs/guides/java-basics/09-string#parse-player-command)
public class CommandParser {
public static void parseCommand(String command) {
// "/give Steve diamond_sword 1"
String[] parts = command.split(" ");
String action = parts[0].replace("/", ""); // "give"
String player = parts[1]; // "Steve"
String item = parts[2]; // "diamond_sword"
int amount = Integer.parseInt(parts[3]); // 1
System.out.println("Action: " + action);
System.out.println("Player: " + player);
System.out.println("Item: " + item);
System.out.println("Amount: " + amount);
}
public static void main(String[] args) {
parseCommand("/give Steve diamond_sword 1");
}
}
### [Format Player Display Name](https://hytalemodding.dev/en/docs/guides/java-basics/09-string#format-player-display-name)
public class PlayerFormatter {
public static String formatName(String name, int level, String rank) {
StringBuilder formatted = new StringBuilder();
if (rank != null && !rank.isEmpty()) {
formatted.append("[").append(rank).append("] ");
}
formatted.append(name);
formatted.append(" (Lv. ").append(level).append(")");
return formatted.toString();
}
public static void main(String[] args) {
String display1 = formatName("Alice", 10, "VIP");
System.out.println(display1); // "[VIP] Alice (Lv. 10)"
String display2 = formatName("Bob", 5, null);
System.out.println(display2); // "Bob (Lv. 5)"
}
}
### [Validate Username](https://hytalemodding.dev/en/docs/guides/java-basics/09-string#validate-username)
public class UsernameValidator {
public static boolean isValid(String username) {
// Rules: 3-16 characters, letters and numbers only
if (username == null || username.isEmpty()) {
return false;
}
username = username.trim();
if (username.length() < 3 || username.length() > 16) {
return false;
}
for (int i = 0; i < username.length(); i++) {
char c = username.charAt(i);
if (!Character.isLetterOrDigit(c)) {
return false;
}
}
return true;
}
public static void main(String[] args) {
System.out.println(isValid("Steve")); // true
System.out.println(isValid("Player_123")); // false (has underscore)
System.out.println(isValid("ab")); // false (too short)
System.out.println(isValid("")); // false (empty)
}
}
### [Item Description Builder](https://hytalemodding.dev/en/docs/guides/java-basics/09-string#item-description-builder)
public class ItemDescription {
public static String buildDescription(String name, String rarity,
int damage, int durability) {
StringBuilder desc = new StringBuilder();
// Title with rarity color code
desc.append(getRarityColor(rarity));
desc.append(name);
desc.append("\n");
// Stats
desc.append("Damage: ").append(damage).append("\n");
desc.append("Durability: ").append(durability).append("/");
desc.append(durability).append("\n");
desc.append("Rarity: ").append(rarity);
return desc.toString();
}
private static String getRarityColor(String rarity) {
switch (rarity.toLowerCase()) {
case "legendary": return "§6"; // Gold
case "epic": return "§5"; // Purple
case "rare": return "§9"; // Blue
case "common": return "§f"; // White
default: return "§7"; // Gray
}
}
public static void main(String[] args) {
String desc = buildDescription("Excalibur", "Legendary", 50, 1000);
System.out.println(desc);
}
}
### [Chat Message Filter](https://hytalemodding.dev/en/docs/guides/java-basics/09-string#chat-message-filter)
public class ChatFilter {
private static String[] bannedWords = {"badword1", "badword2"};
public static String filterMessage(String message) {
String filtered = message.toLowerCase();
for (String word : bannedWords) {
if (filtered.contains(word)) {
String replacement = "*".repeat(word.length());
filtered = filtered.replace(word, replacement);
}
}
return filtered;
}
public static void main(String[] args) {
String message = "This is a badword1 test";
String clean = filterMessage(message);
System.out.println(clean); // "this is a ******** test"
}
}
[String Formatting](https://hytalemodding.dev/en/docs/guides/java-basics/09-string#string-formatting)
------------------------------------------------------------------------------------------------------
### [Using String.format()](https://hytalemodding.dev/en/docs/guides/java-basics/09-string#using-stringformat)
String name = "Alice";
int level = 10;
double health = 85.5;
String formatted = String.format("%s is level %d with %.1f%% health",
name, level, health);
System.out.println(formatted);
// "Alice is level 10 with 85.5% health"
Format Specifiers
Common format codes:
* `%s` - String
* `%d` - Integer
* `%f` - Floating point
* `%.2f` - Float with 2 decimal places
* `%n` - New line (platform independent)
String.format("Name: %s", "Steve"); // "Name: Steve"
String.format("Level: %d", 10); // "Level: 10"
String.format("Health: %.1f", 85.5); // "Health: 85.5"
String.format("Position: (%d, %d, %d)",
10, 64, -5); // "Position: (10, 64, -5)"
[Common String Operations](https://hytalemodding.dev/en/docs/guides/java-basics/09-string#common-string-operations)
--------------------------------------------------------------------------------------------------------------------
### [Check if String is Empty](https://hytalemodding.dev/en/docs/guides/java-basics/09-string#check-if-string-is-empty)
String text = "";
// Check for empty or null
if (text == null || text.isEmpty()) {
System.out.println("Empty!");
}
// Check for empty, null, or whitespace only
if (text == null || text.trim().isEmpty()) {
System.out.println("Empty or whitespace!");
}
### [Count Occurrences](https://hytalemodding.dev/en/docs/guides/java-basics/09-string#count-occurrences)
public static int countOccurrences(String text, String target) {
int count = 0;
int index = 0;
while ((index = text.indexOf(target, index)) != -1) {
count++;
index += target.length();
}
return count;
}
// Usage
int count = countOccurrences("hello hello world", "hello");
System.out.println(count); // 2
### [Reverse a String](https://hytalemodding.dev/en/docs/guides/java-basics/09-string#reverse-a-string)
public static String reverse(String text) {
StringBuilder sb = new StringBuilder(text);
return sb.reverse().toString();
}
// Usage
String reversed = reverse("Hello");
System.out.println(reversed); // "olleH"
### [Check if Palindrome](https://hytalemodding.dev/en/docs/guides/java-basics/09-string#check-if-palindrome)
public static boolean isPalindrome(String text) {
String cleaned = text.toLowerCase().replaceAll("[^a-z0-9]", "");
String reversed = new StringBuilder(cleaned).reverse().toString();
return cleaned.equals(reversed);
}
// Usage
System.out.println(isPalindrome("racecar")); // true
System.out.println(isPalindrome("hello")); // false
[Practice Exercises](https://hytalemodding.dev/en/docs/guides/java-basics/09-string#practice-exercises)
--------------------------------------------------------------------------------------------------------
1. **Username Checker**: Write a method that checks if a username:
* Is between 3 and 16 characters
* Contains only letters, numbers, and underscores
* Doesn't start with a number
* Returns true if valid, false otherwise
2. **Command Parser**: Parse this command format: `/teleport x y z`
* Extract the coordinates
* Convert them to integers
* Return an array of the three values
3. **Chat Formatter**: Create a method that formats chat messages:
* Input: player name, rank, message
* Output: `"[RANK] PlayerName: message"`
* If no rank, just show `"PlayerName: message"`
4. **Word Counter**: Count how many words are in a sentence (words are separated by spaces)
5. **Title Case**: Convert a string to title case:
* Input: `"hello world"`
* Output: `"Hello World"`
[Edit on GitHub](https://github.com/HytaleModding/site/blob/main/content/docs/en/guides/java-basics/09-string.mdx)
[08 - Encapsulation and Access Modifiers\
\
Learn how to protect and control access to your class data.](https://hytalemodding.dev/en/docs/guides/java-basics/08-access-modifiers)
[10 - ArrayList and Collections\
\
Learn to use flexible, resizable collections in Java.](https://hytalemodding.dev/en/docs/guides/java-basics/10-arraylist)
### On this page
[String Basics](https://hytalemodding.dev/en/docs/guides/java-basics/09-string#string-basics)
[String Methods](https://hytalemodding.dev/en/docs/guides/java-basics/09-string#string-methods)
[Length](https://hytalemodding.dev/en/docs/guides/java-basics/09-string#length)
[Changing Case](https://hytalemodding.dev/en/docs/guides/java-basics/09-string#changing-case)
[Checking Contents](https://hytalemodding.dev/en/docs/guides/java-basics/09-string#checking-contents)
[Extracting Parts](https://hytalemodding.dev/en/docs/guides/java-basics/09-string#extracting-parts)
[Replacing Text](https://hytalemodding.dev/en/docs/guides/java-basics/09-string#replacing-text)
[Trimming Whitespace](https://hytalemodding.dev/en/docs/guides/java-basics/09-string#trimming-whitespace)
[Splitting Strings](https://hytalemodding.dev/en/docs/guides/java-basics/09-string#splitting-strings)
[String Comparison](https://hytalemodding.dev/en/docs/guides/java-basics/09-string#string-comparison)
[Comparing Order](https://hytalemodding.dev/en/docs/guides/java-basics/09-string#comparing-order)
[String Concatenation](https://hytalemodding.dev/en/docs/guides/java-basics/09-string#string-concatenation)
[Using + Operator](https://hytalemodding.dev/en/docs/guides/java-basics/09-string#using--operator)
[Using concat()](https://hytalemodding.dev/en/docs/guides/java-basics/09-string#using-concat)
[Building Long Strings](https://hytalemodding.dev/en/docs/guides/java-basics/09-string#building-long-strings)
[Practical Examples](https://hytalemodding.dev/en/docs/guides/java-basics/09-string#practical-examples)
[Parse Player Command](https://hytalemodding.dev/en/docs/guides/java-basics/09-string#parse-player-command)
[Format Player Display Name](https://hytalemodding.dev/en/docs/guides/java-basics/09-string#format-player-display-name)
[Validate Username](https://hytalemodding.dev/en/docs/guides/java-basics/09-string#validate-username)
[Item Description Builder](https://hytalemodding.dev/en/docs/guides/java-basics/09-string#item-description-builder)
[Chat Message Filter](https://hytalemodding.dev/en/docs/guides/java-basics/09-string#chat-message-filter)
[String Formatting](https://hytalemodding.dev/en/docs/guides/java-basics/09-string#string-formatting)
[Using String.format()](https://hytalemodding.dev/en/docs/guides/java-basics/09-string#using-stringformat)
[Common String Operations](https://hytalemodding.dev/en/docs/guides/java-basics/09-string#common-string-operations)
[Check if String is Empty](https://hytalemodding.dev/en/docs/guides/java-basics/09-string#check-if-string-is-empty)
[Count Occurrences](https://hytalemodding.dev/en/docs/guides/java-basics/09-string#count-occurrences)
[Reverse a String](https://hytalemodding.dev/en/docs/guides/java-basics/09-string#reverse-a-string)
[Check if Palindrome](https://hytalemodding.dev/en/docs/guides/java-basics/09-string#check-if-palindrome)
[Practice Exercises](https://hytalemodding.dev/en/docs/guides/java-basics/09-string#practice-exercises)
---