# Table of Contents
- [Kilo Code Documentation](#kilo-code-documentation)
- [Deploy & Secure](#deploy-secure)
- [Contributing](#contributing)
- [Installation](#installation)
- [Introduction to Kilo Code](#introduction-to-kilo-code)
- [AI Gateway](#ai-gateway)
- [KiloClaw](#kiloclaw)
- [Customize](#customize)
- [FAQ](#faq)
- [Automate](#automate)
- [Collaborate](#collaborate)
- [Code with AI](#code-with-ai)
- [Custom Modes](#custom-modes)
- [Deploy](#deploy)
- [Managed Indexing](#managed-indexing)
- [Development Environment](#development-environment)
- [Integrations](#integrations)
- [Quickstart](#quickstart)
- [Sessions & Sharing](#sessions-sharing)
- [About Plans](#about-plans)
- [Authentication](#authentication)
- [Kilo Code Documentation](#kilo-code-documentation)
- [VS Code Extension](#vs-code-extension)
- [Security Reviews](#security-reviews)
- [Cline to Kilo: Contributor Migration Guide](#cline-to-kilo-contributor-migration-guide)
- [KiloClaw Dashboard Reference](#kiloclaw-dashboard-reference)
- [Models & Providers](#models-providers)
- [Getting Started with Teams](#getting-started-with-teams)
- [Custom Instructions](#custom-instructions)
- [Custom Rules](#custom-rules)
- [Architecture Overview](#architecture-overview)
- [Pre-installed Software](#pre-installed-software)
- [Streaming](#streaming)
- [Agent Manager](#agent-manager)
- [Quickstart](#quickstart)
- [JetBrains Extension](#jetbrains-extension)
- [Dashboard](#dashboard)
- [Usage & Billing](#usage-billing)
- [Bring Your Own Key (BYOK)](#bring-your-own-key-byok-)
- [API Reference](#api-reference)
- [OpenClaw Control UI](#openclaw-control-ui)
- [Connecting Chat Platforms](#connecting-chat-platforms)
- [GitHub Integration](#github-integration)
- [SDKs & Frameworks](#sdks-frameworks)
- [Team Management](#team-management)
- [Agents.md](#agents-md)
- [Adding Credits](#adding-credits)
- [Auto-launch Configuration](#auto-launch-configuration)
- [Settings](#settings)
- [Code Reviews](#code-reviews)
- [How Tools Work](#how-tools-work)
- [Version Pinning](#version-pinning)
- [Using Kilo for Free](#using-kilo-for-free)
- [Skills](#skills)
- [Troubleshooting](#troubleshooting)
- [Kilo Code Documentation](#kilo-code-documentation)
- [Custom Modes (Org)](#custom-modes-org-)
- [Using Kilo Docs with Agents](#using-kilo-docs-with-agents)
- [Custom Subagents](#custom-subagents)
- [Billing](#billing)
- [MCP Overview](#mcp-overview)
- [Analytics](#analytics)
- [Shell Integration](#shell-integration)
- [Cloud Agent](#cloud-agent)
- [Kilo CLI](#kilo-cli)
- [Prompt Engineering](#prompt-engineering)
- [KiloClaw Pricing](#kiloclaw-pricing)
- [MCP vs API](#mcp-vs-api)
- [General](#general)
- [Local Models](#local-models)
- [Using MCP in Kilo Code](#using-mcp-in-kilo-code)
- [Server Transports](#server-transports)
- [Using MCP in CLI](#using-mcp-in-cli)
- [Context Condensing](#context-condensing)
- [What is MCP](#what-is-mcp)
- [Mobile Apps](#mobile-apps)
- [Setup and Installation](#setup-and-installation)
- [SSO](#sso)
- [Credits and Billing](#credits-and-billing)
- [Setup & Authentication](#setup-authentication)
- [Model Access Controls](#model-access-controls)
- [Large Projects](#large-projects)
- [Troubleshooting](#troubleshooting)
- [Workflows](#workflows)
- [Migrating from Cursor/Windsurf](#migrating-from-cursor-windsurf)
- [Account and Integration](#account-and-integration)
- [Audit Logs](#audit-logs)
- [Slack](#slack)
- [Overview](#overview)
- [App Builder](#app-builder)
- [Known Issues](#known-issues)
- [The Chat Interface](#the-chat-interface)
- [Migration](#migration)
- [Codebase Indexing](#codebase-indexing)
- [Context & Mentions](#context-mentions)
- [For Team Leads](#for-team-leads)
- [Understanding Your Score](#understanding-your-score)
- [Model Selection](#model-selection)
- [Auto Model](#auto-model)
- [Improving Your Score](#improving-your-score)
- [Autocomplete](#autocomplete)
- [Code Actions](#code-actions)
- [Voice Transcription](#voice-transcription)
- [Enhance Prompt](#enhance-prompt)
- [Browser Use](#browser-use)
- [Using Agents](#using-agents)
- [Orchestrator Mode](#orchestrator-mode)
- [Fast Edits](#fast-edits)
- [Git Commit Generation](#git-commit-generation)
- [Checkpoints](#checkpoints)
- [Task Todo List](#task-todo-list)
- [.kilocodeignore](#-kilocodeignore)
- [Free and Budget Models](#free-and-budget-models)
- [Architecture Features](#architecture-features)
- [Tool Use Details](#tool-use-details)
- [AI Providers](#ai-providers)
- [Kilo Code Documentation](#kilo-code-documentation)
- [GitHub Code Reviews](#github-code-reviews)
- [Auto-Approving Actions](#auto-approving-actions)
- [Kilo Code Documentation](#kilo-code-documentation)
- [Kilo Code Documentation](#kilo-code-documentation)
- [Kilo Code Documentation](#kilo-code-documentation)
- [Kilo Code Documentation](#kilo-code-documentation)
- [Benchmarking](#benchmarking)
- [Troubleshooting IDE Extensions](#troubleshooting-ide-extensions)
- [Enterprise MCP Controls](#enterprise-mcp-controls)
- [Kilo Code Documentation](#kilo-code-documentation)
- [Kilo Code Documentation](#kilo-code-documentation)
- [Kilo Code Documentation](#kilo-code-documentation)
- [Kilo Code Documentation](#kilo-code-documentation)
- [Kilo Code Documentation](#kilo-code-documentation)
- [Onboarding Improvements](#onboarding-improvements)
- [Organization Modes Library](#organization-modes-library)
- [Kilo Code Documentation](#kilo-code-documentation)
- [Track Repo URL](#track-repo-url)
- [Voice Transcription](#voice-transcription)
- [Kilo Code Documentation](#kilo-code-documentation)
- [Spec Template](#spec-template)
- [Kilo Code Documentation](#kilo-code-documentation)
- [Kilo Code Documentation](#kilo-code-documentation)
- [Kilo Code Documentation](#kilo-code-documentation)
- [Kilo Code Documentation](#kilo-code-documentation)
- [Kilo Code Documentation](#kilo-code-documentation)
- [MCP OAuth Authorization](#mcp-oauth-authorization)
- [Auto Model Tiers](#auto-model-tiers)
- [Kilo Code Documentation](#kilo-code-documentation)
- [Agent Observability](#agent-observability)
- [Kilo Code Documentation](#kilo-code-documentation)
- [Kilo Code Documentation](#kilo-code-documentation)
- [GitLab Code Reviews](#gitlab-code-reviews)
- [Kilo Code Documentation](#kilo-code-documentation)
- [Kilo Code Documentation](#kilo-code-documentation)
- [Kilo Code Documentation](#kilo-code-documentation)
- [Kilo Code Documentation](#kilo-code-documentation)
- [Kilo Code Documentation](#kilo-code-documentation)
- [Kilo Code Documentation](#kilo-code-documentation)
- [Kilo Code Documentation](#kilo-code-documentation)
- [Kilo Code Documentation](#kilo-code-documentation)
- [Kilo Code Documentation](#kilo-code-documentation)
- [Kilo Code Documentation](#kilo-code-documentation)
- [Fireworks AI with Kilo Code](#fireworks-ai-with-kilo-code)
- [Kilo Code Documentation](#kilo-code-documentation)
- [Kilo Code Documentation](#kilo-code-documentation)
- [Kilo Code Documentation](#kilo-code-documentation)
- [Kilo Code Documentation](#kilo-code-documentation)
- [Kilo Code Documentation](#kilo-code-documentation)
- [Kilo Code Documentation](#kilo-code-documentation)
- [Kilo Code Documentation](#kilo-code-documentation)
- [Kilo Code Documentation](#kilo-code-documentation)
- [Kilo Code Documentation](#kilo-code-documentation)
- [Kilo Code Documentation](#kilo-code-documentation)
- [Kilo Code Documentation](#kilo-code-documentation)
- [Kilo Code Documentation](#kilo-code-documentation)
- [Kilo Code Documentation](#kilo-code-documentation)
- [Kilo Code Documentation](#kilo-code-documentation)
- [Kilo Code Documentation](#kilo-code-documentation)
- [Kilo Code Documentation](#kilo-code-documentation)
- [Kilo Code Documentation](#kilo-code-documentation)
- [Kilo Code Documentation](#kilo-code-documentation)
- [Kilo Code Documentation](#kilo-code-documentation)
- [Kilo Code Documentation](#kilo-code-documentation)
---
# Kilo Code Documentation
Kilo Code Documentation
=======================
Explore our guides and examples to build with Kilo Code, the most popular open source coding agent.
[Get started with Kilo Code →](https://kilo.ai/docs/getting-started)
[Explore all features](https://kilo.ai/docs/code-with-ai)
### POPULAR GUIDES
[Installation Guide](https://kilo.ai/docs/getting-started/installing)
[Chat Interface](https://kilo.ai/docs/code-with-ai)
[Your First Task](https://kilo.ai/docs/getting-started)
### PLATFORMS
[VS Code Extension](https://kilo.ai/docs/code-with-ai)
[JetBrains Extension](https://kilo.ai/docs/code-with-ai)
[CLI](https://kilo.ai/docs/code-with-ai)
### Get Started
[Installation](https://kilo.ai/docs/getting-started/installing)
[Quickstart](https://kilo.ai/docs/getting-started)
[FAQ](https://kilo.ai/docs/getting-started/faq)
### Code with AI
[The Chat Interface](https://kilo.ai/docs/code-with-ai)
[Using Modes](https://kilo.ai/docs/code-with-ai)
[Custom Rules](https://kilo.ai/docs/code-with-ai)
### Collaborate
[Sessions & Sharing](https://kilo.ai/docs/collaborate)
[Kilo for Teams](https://kilo.ai/docs/collaborate)
[Enterprise](https://kilo.ai/docs/collaborate)
Browse by topic
---------------
[### Get Started\
\
Install Kilo Code and get up and running in minutes](https://kilo.ai/docs/getting-started)
[### Code with AI\
\
Learn how to use Kilo Code to write, edit, and understand code](https://kilo.ai/docs/code-with-ai)
[### Collaborate\
\
Work with teams, share sessions, and manage organizations](https://kilo.ai/docs/collaborate)
[### Automate\
\
Set up automated workflows, integrations, and MCP servers](https://kilo.ai/docs/automate)
[### Deploy & Secure\
\
Deploy your applications and ensure security best practices](https://kilo.ai/docs/deploy-secure)
[### Kilo Gateway\
\
A unified API to access hundreds of AI models through a single endpoint with streaming, BYOK, and usage tracking.](https://kilo.ai/docs/gateway)
[### Contributing\
\
Help improve Kilo Code and learn about its architecture](https://kilo.ai/docs/contributing)
Try it out
----------
Get started quickly with common Kilo Code commands
InstallationFirst TaskCustom RulesKilo Gateway
Terminal
# Install Kilo Code VS Code Extension
$ code --install-extension kilocode.kilo-code
# Or install via CLI
$ npm install -g @kilocode/cli
💬
**Need help?**[Join our Discord](https://kilo.ai/discord)
📝
**Check out our**[Changelog](https://github.com/Kilo-Org/kilocode/releases)
🐛
**Found a bug?**[Report an issue](https://github.com/Kilo-Org/kilocode/issues)
---
# Deploy & Secure
Deploy & Secure
===============
Deploy your applications directly from Kilo Code and manage security with AI-powered reviews and scans.
Deploy
------
Ship your applications with one-click deployment:
* [**Deploy**](https://kilo.ai/docs/deploy-secure/deploy)
— Deploy Next.js and static sites
* One-click deployment from the dashboard
* Automatic rebuilds on GitHub push
* Deployment history with rollback support
### Supported Platforms
* **Next.js 14, 15, 16** — Latest versions with partial support for v16
* **Static Sites** — Pre-built HTML/CSS/JS
* **Static Site Generators** — Hugo, Jekyll, Eleventy
* **Package managers** — npm, pnpm, yarn, bun (auto-detected)
### Deployment Features
* GitHub integration for automatic rebuilds
* Environment variables and secrets support
* Real-time log streaming
* Deployment history with one-click rollbacks
Managed Indexing
----------------
Fast, scalable code indexing for better AI context:
* [**Managed Indexing**](https://kilo.ai/docs/deploy-secure/managed-indexing)
— Cloud-based code indexing
* Improved context for large codebases
* Faster initial indexing times
* Reduced local resource usage
Security Reviews
----------------
AI-powered dependency vulnerability triage for your codebase:
* [**Security Reviews**](https://kilo.ai/docs/deploy-secure/security-reviews)
— Contextualize Dependabot alerts with AI
* Syncs your Dependabot alerts and triages them automatically
* Deep codebase analysis to determine if CVEs are actually reachable
* Auto-dismiss non-exploitable findings and sync back to GitHub
### Security Features
* **Automated triage** — AI classifies each alert as Safe to Dismiss, Needs Analysis, or Needs Review
* **Deep analysis** — Full codebase search to check if vulnerable code paths are reachable
* **Auto-dismiss** — Automatically close non-exploitable findings with configurable confidence thresholds
* **SLA tracking** — Set remediation deadlines per severity and monitor compliance
Get Started
-----------
1. Enable [GitHub Integration](https://kilo.ai/docs/deploy-secure/deploy#prerequisites)
for deployments
2. Set up your first [deployment](https://kilo.ai/docs/deploy-secure/deploy)
in the dashboard
3. Configure [managed indexing](https://kilo.ai/docs/deploy-secure/managed-indexing)
for large projects
4. Enable the [Security Agent](https://kilo.ai/docs/deploy-secure/security-reviews)
to triage your Dependabot alerts
Best Practices
--------------
* **Deploy early** — Start with a staging deployment to verify the setup
* **Use environment variables** — Keep secrets out of your codebase
* **Enable automatic rebuilds** — Push to GitHub and deploy automatically
* **Triage Dependabot alerts** — Let the Security Agent determine which CVEs are actually exploitable
* **Set SLA deadlines** — Track remediation timelines per severity level
Copy page
---
# Contributing
Contributing Overview
=====================
ℹ️Info
**New versions of the VS Code extension and CLI are being developed in [Kilo-Org/Kilo](https://github.com/Kilo-Org/Kilo)
** (extension at `packages/kilo-vscode`, CLI at `packages/opencode`). If you're looking to contribute to the extension or CLI, please head over to that repository.
Kilo Code is an open-source project that welcomes contributions from developers of all skill levels. This guide will help you get started with contributing to Kilo Code, whether you're fixing bugs, adding features, improving documentation, or sharing custom modes.
Ways to Contribute
------------------
There are many ways to contribute to Kilo Code:
1. **Code Contributions**: Implement new features or fix bugs
2. **Documentation**: Improve existing docs or create new guides
3. **Marketplace Contributions**: Create and share custom modes, skills, and MCP servers via the [Kilo Marketplace](https://github.com/Kilo-Org/kilo-marketplace)
4. **Bug Reports**: Report issues you encounter
5. **Feature Requests**: Suggest new features or improvements
6. **Community Support**: Help other users in the community
Setting Up the Development Environment
--------------------------------------
Setting Up the Development Environment is described in details on the [Development Environment](https://kilo.ai/docs/contributing/development-environment)
page.
Understanding the Architecture
------------------------------
Before diving into the code, we recommend reviewing the [Architecture Overview](https://kilo.ai/docs/contributing/architecture)
to understand how the different components of Kilo Code fit together.
Development Workflow
--------------------
### Branching Strategy
* Create a new branch for each feature or bugfix
* Use descriptive branch names (e.g., `feature/new-tool-support` or `fix/browser-action-bug`)
* **For documentation only changes**: Use the `docs/` prefix (e.g., `docs/improve-mcp-guide`)
git checkout -b your-branch-name
# For documentation changes:
git checkout -b docs/your-change-description
### Coding Standards
* Follow the existing code style and patterns
* Use TypeScript for new code
* Include appropriate tests for new features
* Update documentation for any user-facing changes
### Commit Guidelines
* Write clear, concise commit messages
* Reference issue numbers when applicable
* Keep commits focused on a single change
### Testing Your Changes
* Run the test suite:
npm test
* Manually test your changes in the development extension
### Creating a Pull Request
1. Push your changes to your fork:
git push origin your-branch-name
2. Go to the [Kilo Code repository](https://github.com/Kilo-Org/kilocode)
3. Click "New Pull Request" and select "compare across forks"
4. Select your fork and branch
5. Fill out the PR template with:
* A clear description of the changes
* Any related issues
* Testing steps
* Screenshots (if applicable)
Contributing to the Kilo Marketplace
------------------------------------
The [Kilo Marketplace](https://github.com/Kilo-Org/kilo-marketplace)
is a community-driven repository of agent tooling that extends Kilo Code's capabilities. You can contribute:
* **Skills**: Modular workflows and domain expertise that teach agents how to perform specific tasks
* **MCP Servers**: Standardized integrations that connect agents to external tools and services
* **Modes**: Custom agent personalities and behaviors with tailored tool access
To contribute:
1. Follow the documentation for [Custom Modes](https://kilo.ai/docs/customize/custom-modes)
, [Skills](https://kilo.ai/docs/customize/skills)
, or [MCP Servers](https://kilo.ai/docs/automate/mcp/overview)
to create your resource
2. Test your contribution thoroughly
3. Submit a pull request to the [Kilo Marketplace repository](https://github.com/Kilo-Org/kilo-marketplace)
Engineering Specs
-----------------
For larger features, we write engineering specs to align on requirements before implementation. Check out the [Architecture](https://kilo.ai/docs/contributing/architecture)
section to see planned features and learn how to contribute specs.
Documentation Contributions
---------------------------
Documentation improvements are highly valued contributions:
1. Follow the documentation style guide:
* Use clear, concise language
* Include examples where appropriate
* Use absolute paths starting from `/docs/` for internal links (except within the same directory)
* Don't include `.md` extensions in links
2. Test your documentation changes by running the docs site locally:
cd packages/kilo-docs
pnpm install
pnpm dev
3. Submit a PR with your documentation changes
Community Guidelines
--------------------
When participating in the Kilo Code community:
* Be respectful and inclusive
* Provide constructive feedback
* Help newcomers get started
* Follow the [Code of Conduct](https://github.com/Kilo-Org/kilocode/blob/main/CODE_OF_CONDUCT.md)
Getting Help
------------
If you need help with your contribution:
* Join our [Discord community](https://kilo.ai/discord)
for real-time support
* Ask questions on [GitHub Discussions](https://github.com/Kilo-Org/kilocode/discussions)
* Visit our [Reddit community](https://www.reddit.com/r/kilocode)
Recognition
-----------
All contributors are valued members of the Kilo Code community. Contributors are recognized in:
* Release notes
* The project's README
* The contributors list on GitHub
Thank you for contributing to Kilo Code and helping make AI-powered coding assistance better for everyone!
Copy page
---
# Installation
Installation
============
Get started with Kilo Code by installing it on your preferred platform. Choose your development environment below:
Choose Your Platform
--------------------
VS CodeCLIVS Code (Legacy)JetBrainsSlackOther IDEs
VS Code Extension
-----------------
The current Kilo Code extension is built on the [Kilo CLI](https://github.com/Kilo-Org/kilocode)
and is distributed as the **pre-release version** on the VS Code Marketplace.
1. Open VS Code
2. Go to Extensions (`Ctrl+Shift+X` / `Cmd+Shift+X`)
3. Search for "Kilo Code"
4. Click the dropdown arrow next to **Install** and select **Install Pre-Release Version**
ℹ️Info
The "pre-release" label is a VS Code Marketplace distribution channel — the extension is stable and recommended for all users.
Manual Installations
--------------------
### Open VSX Registry
[Open VSX Registry](https://open-vsx.org/)
is an open-source alternative to the VS Code Marketplace for VS Code-compatible editors that cannot access the official marketplace due to licensing restrictions.
For VS Code-compatible editors like VSCodium, Gitpod, Eclipse Theia, and Windsurf, you can browse and install directly from the [Kilo Code page on Open VSX Registry](https://open-vsx.org/extension/kilocode/Kilo-Code)
.
1. Open your editor
2. Access the Extensions view (Side Bar icon or `Ctrl+Shift+X` / `Cmd+Shift+X`)
3. Your editor should be pre-configured to use Open VSX Registry
4. Search for "Kilo Code"
5. Select "Kilo Code" and click **Install**
6. Reload the editor if prompted
📝Note
If your editor isn't automatically configured for Open VSX Registry, you may need to set it as your extension marketplace in settings. Consult your specific editor's documentation for instructions.
### Via VSIX
If you prefer to download and install the VSIX file directly:
1. **Download the VSIX file:**
* Find official releases on the [Kilo Code GitHub Releases page](https://github.com/Kilo-Org/kilocode/releases)
* Download the `.vsix` file from the [latest release](https://github.com/Kilo-Org/kilocode/releases/latest)
2. **Install in VS Code:**
* Open VS Code
* Access Extensions view
* Click the "..." menu in the Extensions view
* Select "Install from VSIX..."
* Browse to and select your downloaded `.vsix` file
If you need to temporarily go back to an earlier version, use the same flow with a `.vsix` asset from an older release:
1. Open the [Kilo Code GitHub Releases page](https://github.com/Kilo-Org/kilocode/releases)
2. Pick the release you want to stay on and download its VS Code `.vsix` asset
3. In VS Code, open Extensions, click the "..." menu, and select "Install from VSIX..."
4. Choose the downloaded `.vsix` file to install that version
If you plan to remain on that version for a while, you may also want to temporarily disable extension auto-update in VS Code so it does not immediately update again.
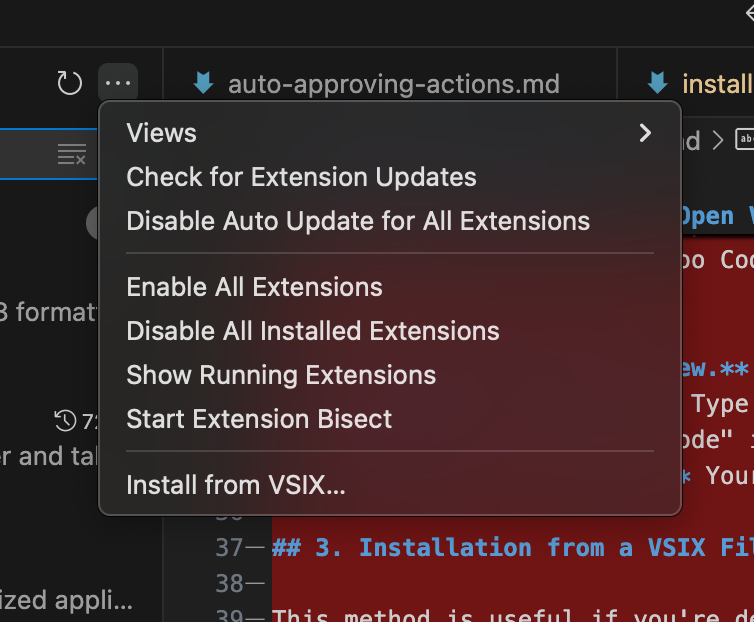
Installing Kilo Code using VS Code's "Install from VSIX" dialog
Troubleshooting
---------------
**Extension Not Visible**
* Restart VS Code
* Verify Kilo Code is listed and enabled in Extensions
* Try disabling and re-enabling the extension in Extensions
* Check Output panel for errors (View → Output, select "Kilo Code")
**Installation Problems**
* Ensure stable internet connection
* Verify VS Code version 1.84.0 or later
* If VS Code Marketplace is inaccessible, try the Open VSX Registry method
**Windows Users**
* Ensure that **`PowerShell` is added to your `PATH`**:
1. Open **Edit system environment variables** → **Environment Variables**
2. Under **System variables**, select **Path** → **Edit** → **New**
3. Add: `C:\Windows\System32\WindowsPowerShell\v1.0\`
4. Click **OK** and restart VS Code
Next Steps
----------
After installation, check out these resources to get started:
* [Quickstart Guide](https://kilo.ai/docs/getting-started/quickstart)
- Get up and running in minutes
* [Setting Up Authentication](https://kilo.ai/docs/getting-started/setup-authentication)
- Configure your AI provider
* [Your First Task](https://kilo.ai/docs/code-with-ai/agents/chat-interface)
- Learn the basics of working with Kilo Code
Getting Support
---------------
If you encounter issues not covered here:
* Join our [Discord community](https://kilo.ai/discord)
for real-time support
* Submit issues on [GitHub](https://github.com/Kilo-Org/kilocode/issues)
* Visit our [Reddit community](https://www.reddit.com/r/KiloCode)
Copy page
---
# Introduction to Kilo Code
Introduction to Kilo Code
=========================
Kilo Code is an open-source AI coding assistant that works wherever you do—in your IDE, terminal, browser, or on the go. Generate code, automate reviews, debug issues, and ship faster with AI that understands your codebase.
Where to Use Kilo
-----------------
* **In your IDE** — [VS Code](https://kilo.ai/docs/code-with-ai/platforms/vscode)
, [JetBrains](https://kilo.ai/docs/code-with-ai/platforms/jetbrains)
, Cursor, Windsurf, and other VS Code forks
* [**CLI**](https://kilo.ai/docs/code-with-ai/platforms/cli)
— Run Kilo from your terminal for scripting and automation
* **Web & Mobile** — Access Kilo from your browser (coming soon) or [iOS/Android apps](https://kilo.ai/docs/code-with-ai/platforms/mobile)
* [**Slack**](https://kilo.ai/docs/code-with-ai/platforms/slack)
— Chat with Kilo directly in your workspace
Your sessions sync across all of these, so you can start a task on your phone and finish it in your IDE.
What Kilo Can Do
----------------
* [**Code with AI**](https://kilo.ai/docs/code-with-ai)
— Generate, refactor, and debug code through natural conversation. Use specialized modes (Code, Architect, Debug, Ask) or create your own. Get inline suggestions with Autocomplete.
* [**Collaborate**](https://kilo.ai/docs/collaborate)
— Share sessions, manage team settings, and track AI adoption across your organization.
* [**Automate**](https://kilo.ai/docs/automate)
— Set up AI-powered code reviews, triage agents, and auto-fixers that open new PRs based on issues.
* [**Deploy & Secure**](https://kilo.ai/docs/deploy-secure)
— Build and deploy apps directly from Kilo. Run security scans and manage issues with AI assistance.
Quick Start
-----------
1. [Install Kilo Code](https://kilo.ai/docs/getting-started/installing)
in your preferred environment
2. [Connect an AI provider](https://kilo.ai/docs/ai-providers)
or use Kilo's built-in provider & credits
3. [Run your first task](https://kilo.ai/docs/getting-started/quickstart)
New to AI coding assistants? Before learning what Kilo itself does, you can learn about agentic engineering at [path.kilo.ai](https://path.kilo.ai/)
Coming from Cursor or Windsurf? See our [migration guide](https://kilo.ai/docs/getting-started/migrating)
Open Source
-----------
Kilo Code is open source. You can inspect the code, contribute features, or fork it to meet your needs.
* [GitHub Repository](https://github.com/Kilo-Org/kilocode)
* [Contributing Guide](https://kilo.ai/docs/contributing)
* [Architecture Overview](https://kilo.ai/docs/contributing/architecture)
Get Help
--------
* [**Discord**](https://kilo.ai/discord)
— Real-time help and community discussion
* [**GitHub Issues**](https://github.com/Kilo-Org/kilocode/issues?q=sort%3Aupdated-desc+is%3Aissue+is%3Aopen)
— Report bugs or request features
* [**YouTube**](https://kilo.ai/youtube)
— Tutorials and walkthroughs
Copy page
---
# AI Gateway
AI Gateway
==========
The Kilo AI Gateway provides a unified, OpenAI-compatible API to access hundreds of AI models through a single endpoint at `https://api.kilo.ai/api/gateway`. It gives you the ability to track usage, manage costs, bring your own API keys, and enforce organization-level controls.
The gateway works seamlessly with the [Vercel AI SDK](https://ai-sdk.dev/)
, the [OpenAI SDK](https://kilo.ai/docs/gateway/sdks-and-frameworks#openai-sdk)
, or any OpenAI-compatible client in any language.
Key features
------------
* **One key, hundreds of models**: Access models from Anthropic, OpenAI, Google, xAI, Mistral, MiniMax, and more with a single API key
* **OpenAI-compatible API**: Drop-in replacement for OpenAI's `/chat/completions` endpoint -- switch models by changing a single string
* **Streaming support**: Full Server-Sent Events (SSE) streaming with time-to-first-token tracking
* **BYOK (Bring Your Own Key)**: Use your own provider API keys with encrypted-at-rest storage
* **Usage tracking**: Per-request cost and token tracking with microdollar precision
* **Organization controls**: Model allow lists, provider restrictions, per-user daily spending limits, and balance management
* **Tool calling**: Robust function/tool calling with automatic repair for deduplication and orphan cleanup
* **FIM completions**: Fill-in-the-middle code completions via Mistral Codestral
import { streamText } from "ai"
import { createOpenAI } from "@ai-sdk/openai"
const kilo = createOpenAI({
baseURL: "https://api.kilo.ai/api/gateway",
apiKey: process.env.KILO\_API\_KEY,
})
const result = streamText({
model: kilo.chat("anthropic/claude-sonnet-4.5"),
prompt: "Why is the sky blue?",
})
Base URL
--------
All gateway API requests use the following base URL:
https://api.kilo.ai/api/gateway
More resources
--------------
* [Quickstart](https://kilo.ai/docs/gateway/quickstart)
-- Get up and running in minutes
* [Authentication](https://kilo.ai/docs/gateway/authentication)
-- API keys, sessions, and BYOK
* [Models & Providers](https://kilo.ai/docs/gateway/models-and-providers)
-- Available models and routing behavior
* [Streaming](https://kilo.ai/docs/gateway/streaming)
-- Real-time SSE streaming
* [API Reference](https://kilo.ai/docs/gateway/api-reference)
-- Full request/response schemas
* [Usage & Billing](https://kilo.ai/docs/gateway/usage-and-billing)
-- Cost tracking and organization controls
* [SDKs & Frameworks](https://kilo.ai/docs/gateway/sdks-and-frameworks)
-- Integration guides for popular SDKs
Copy page
---
# KiloClaw
KiloClaw 🦀
===========
KiloClaw is Kilo's hosted [OpenClaw](https://openclaw.ai/)
service — a one-click deployment that gives you a personal AI agent without the complexity of self-hosting. OpenClaw is a 24/7, open source AI agent that connects to chat platforms like Telegram, Discord, and Slack so it can take real actions automatically, not just chat.
KiloClaw is powered by KiloCode. The API key is platform-managed, so you never need to bring your own. KiloClaw is currently in **Beta**.
Why KiloClaw?
-------------
* **No infrastructure setup** — Skip Docker, servers, and configuration files
* **Instant provisioning** — Your agent is ready in seconds
* **Powered by KiloCode** — API key is automatically generated and refreshed
* **Uses existing credits** — Runs on your Kilo Gateway balance
* **Multiple free models** — Choose from several models at no additional cost
* **Web UI included** — Access your agent's web interface directly from the dashboard
Prerequisites
-------------
* **Kilo account** — Sign up at [kilo.ai](https://kilo.ai/)
if you haven't already
* **Model access** — KiloClaw uses **Kilo Gateway by default**, which provides access to **500+ AI models** through a single integration.
You can also run KiloClaw using:
* **Your own provider API keys (BYOK)** such as Anthropic, OpenAI, Google, or other supported providers.
Creating an Instance
--------------------
1. Navigate to your [Kilo profile](https://app.kilo.ai/profile)
2. Click **Claw** in the left navigation
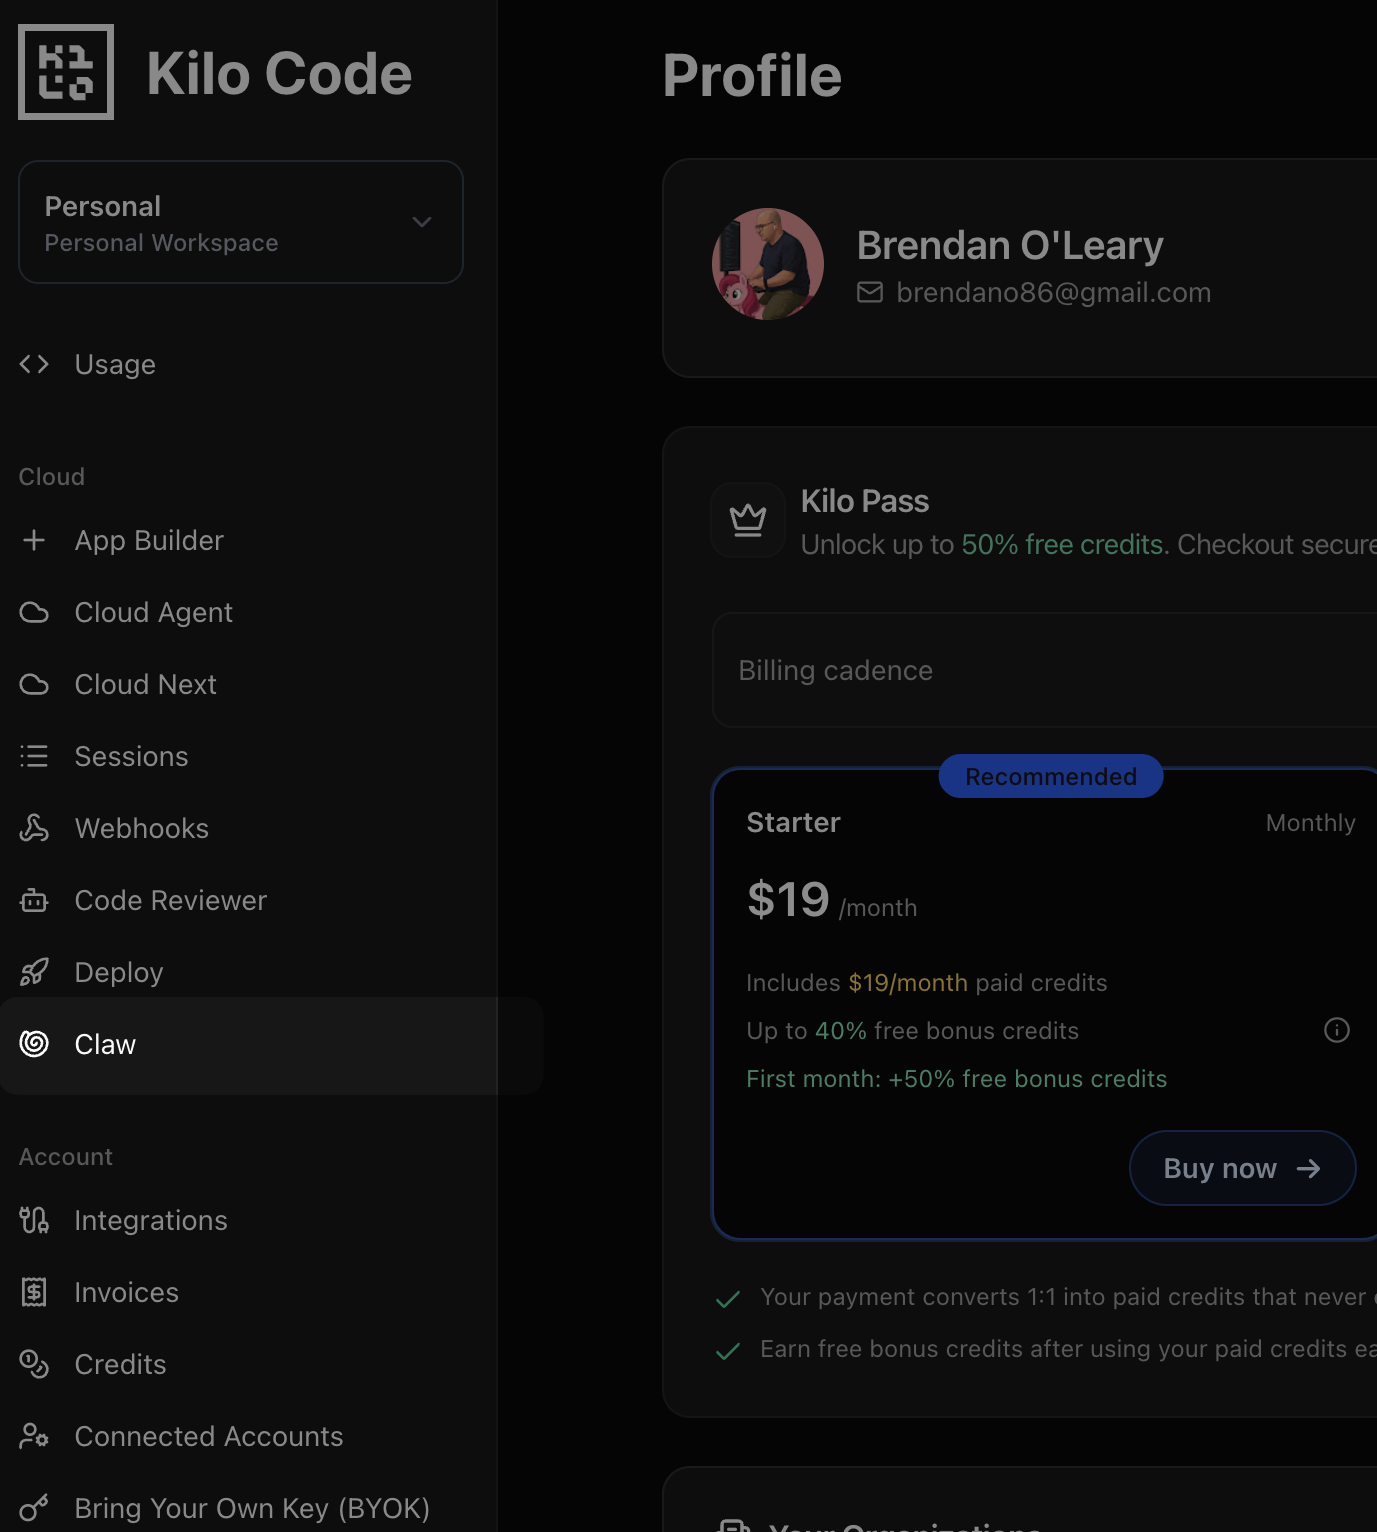
Claw navigation in profile sidebar
3. Click **Create Instance**
4. Select your preferred model from the dropdown. See all available models at the [Kilo Leaderboard](https://kilo.ai/leaderboard#all-models)
.
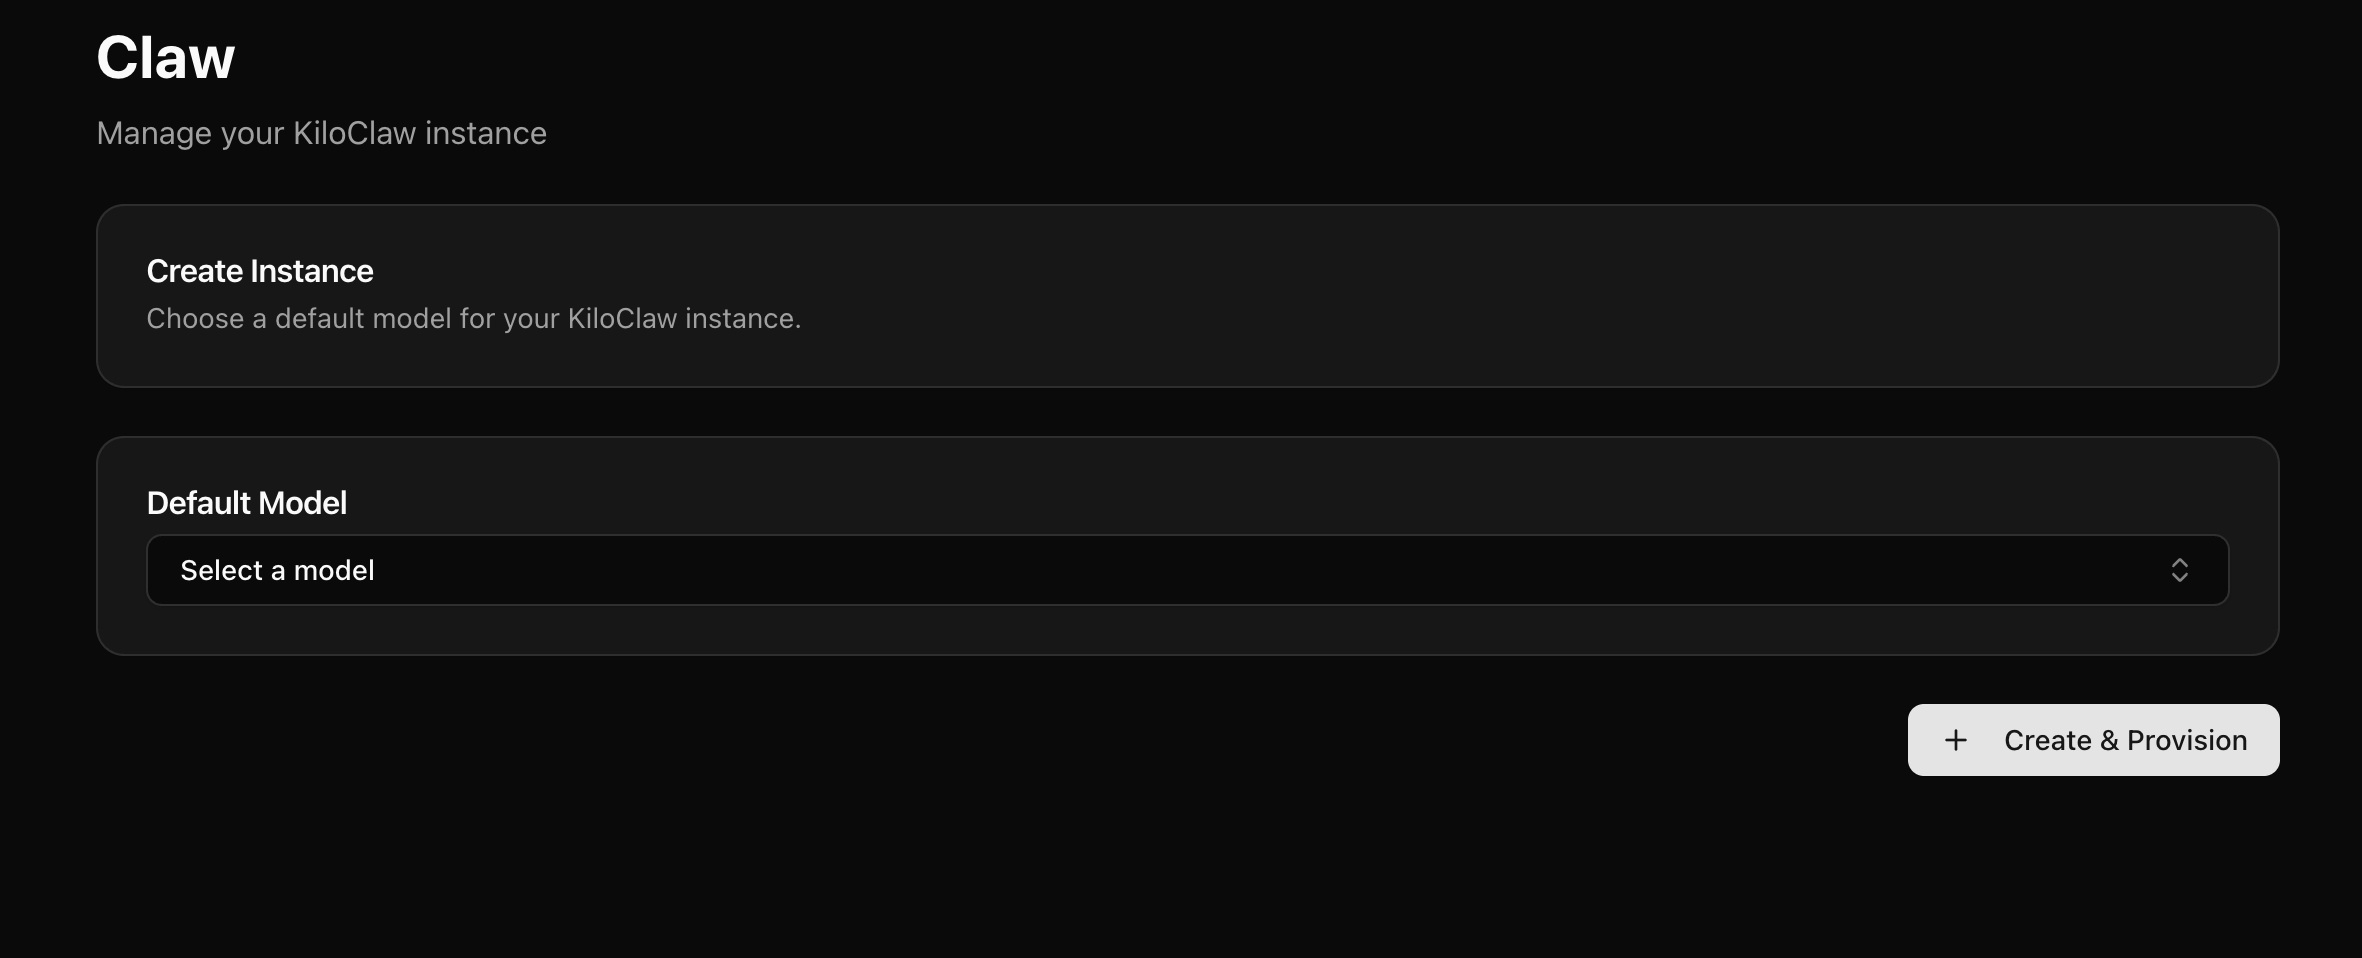
Model selection during instance creation
5. Optionally configure chat channels (Telegram, Discord, Slack) — you can also do this later from [Settings](https://kilo.ai/docs/kiloclaw/dashboard#settings)
6. Click **Create & Provision**
Your instance will be provisioned in seconds. Each instance runs on a dedicated machine with 2 shared vCPUs, 3 GB RAM, and a 10 GB persistent SSD. Once created in a region, your instance always runs there.
Managing Your Instance
----------------------
The KiloClaw dashboard gives you full control over your instance.
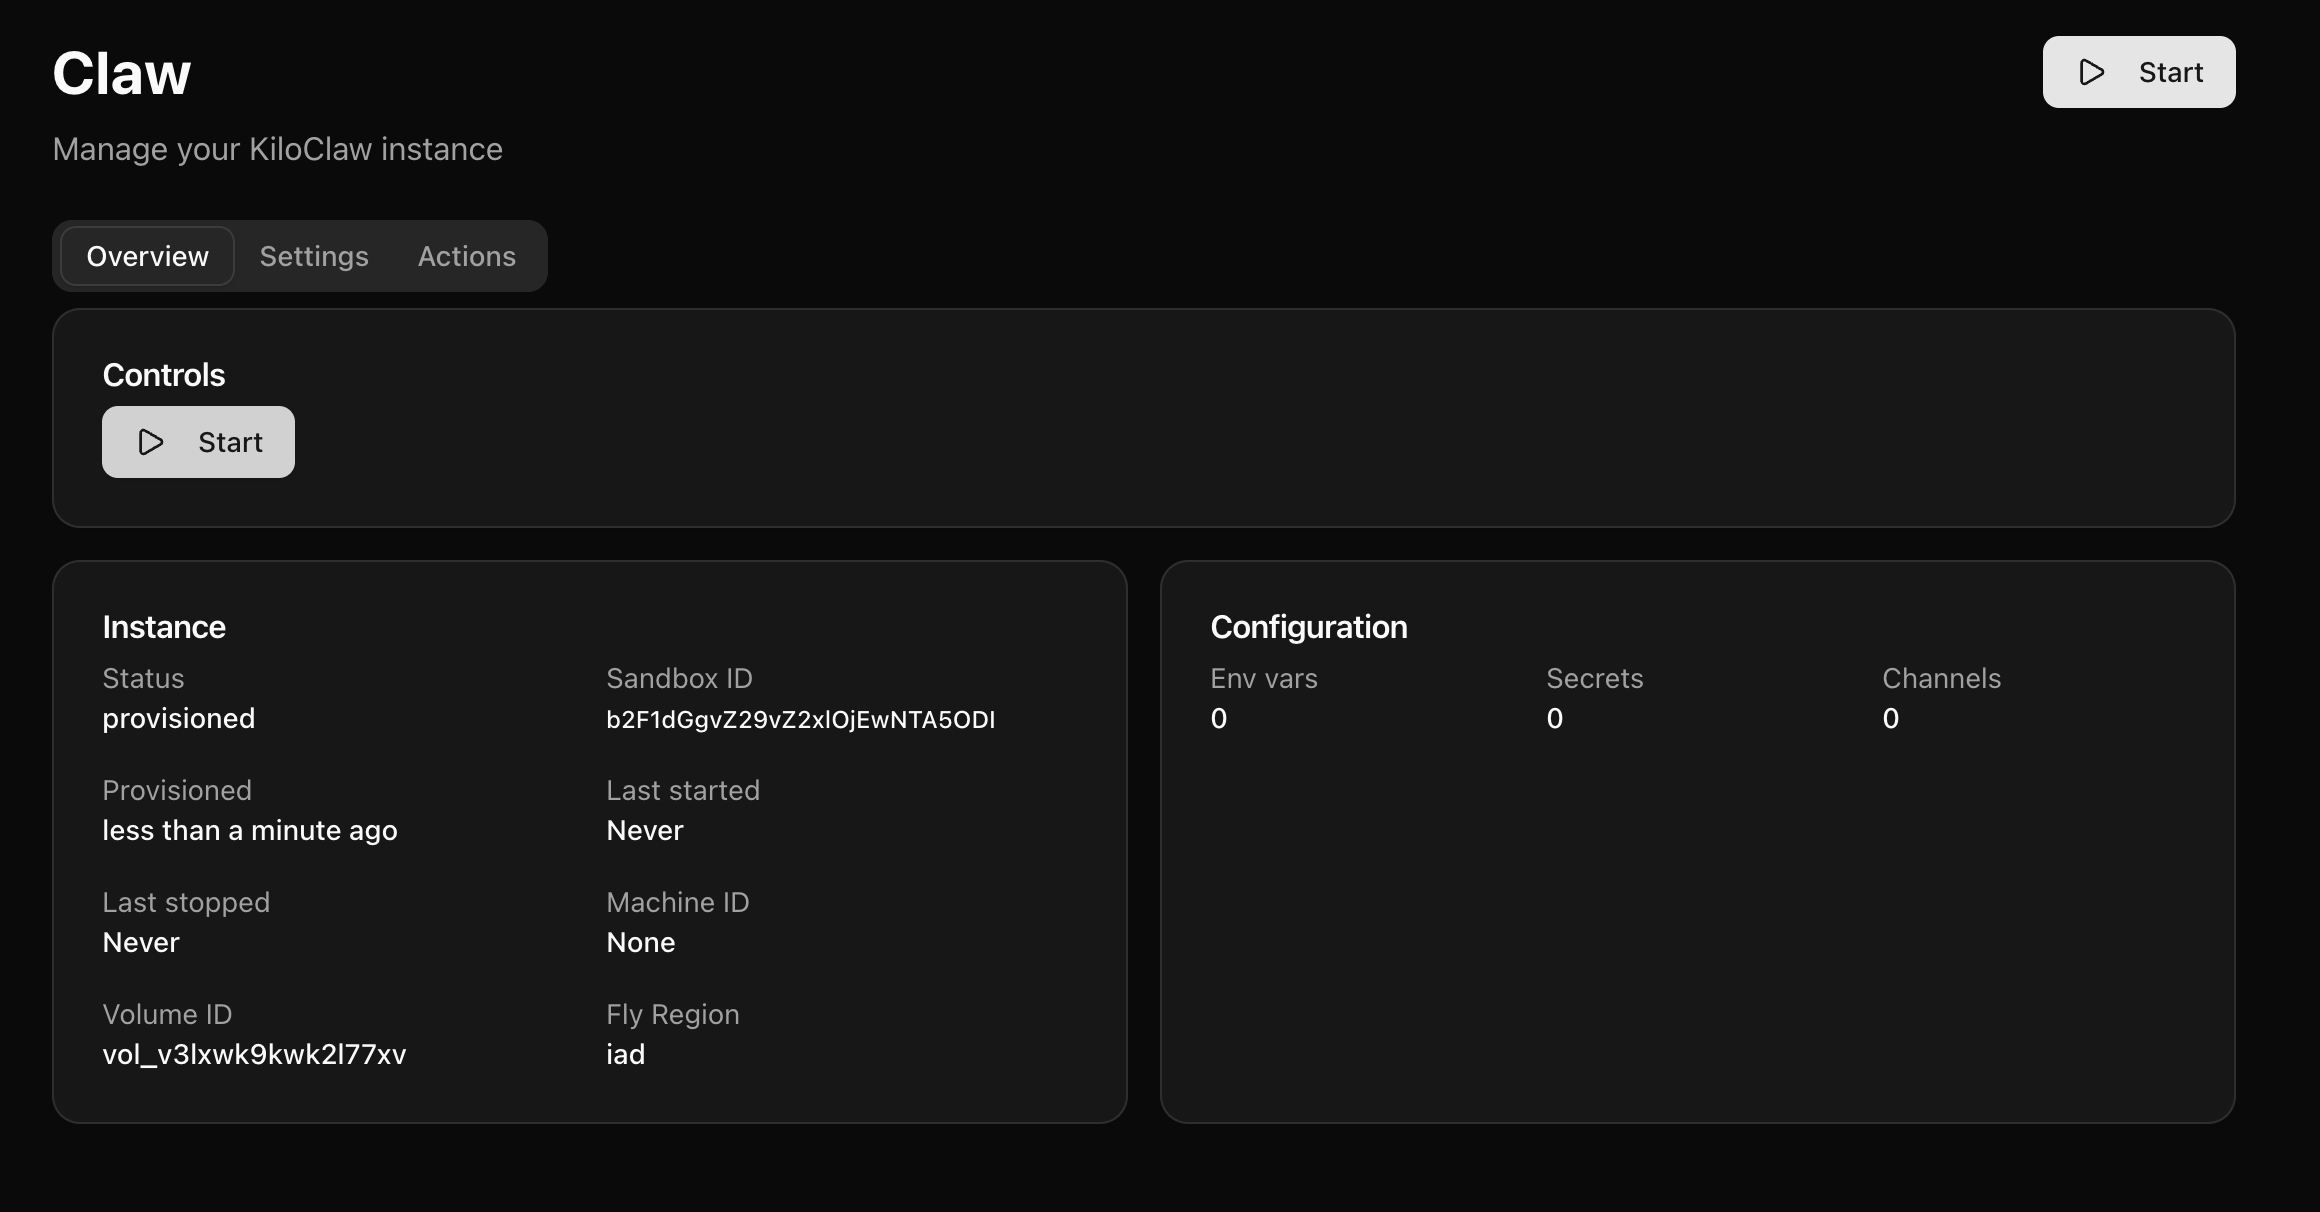
Instance management dashboard
### Controls
* **Start Machine** — Boot a stopped instance (up to 60 seconds)
* **Restart OpenClaw** — Quick restart of just the OpenClaw process; the machine stays up
* **Redeploy** — This will stop the machine, apply any pending image or config updates, and restart it. The machine will be briefly offline.
* **OpenClaw Doctor** — Run diagnostics and auto-fix common issues
For full details on each control and when to use them, see the [Dashboard Reference](https://kilo.ai/docs/kiloclaw/dashboard)
.
### Changelog
The dashboard shows recent platform updates. Some updates include a deploy hint — either **Redeploy Required** or **Redeploy Suggested** — to let you know when to redeploy your instance.
### Pairing Requests
When you initialize a new channel for the first time, or a new device connects to the Control UI, you'll see a pairing request on the dashboard that you need to approve. See [Pairing Requests](https://kilo.ai/docs/kiloclaw/chat-platforms#pairing-requests)
for details.
Accessing Your Agent
--------------------
1. Click **Open** on your dashboard to launch the OpenClaw web interface
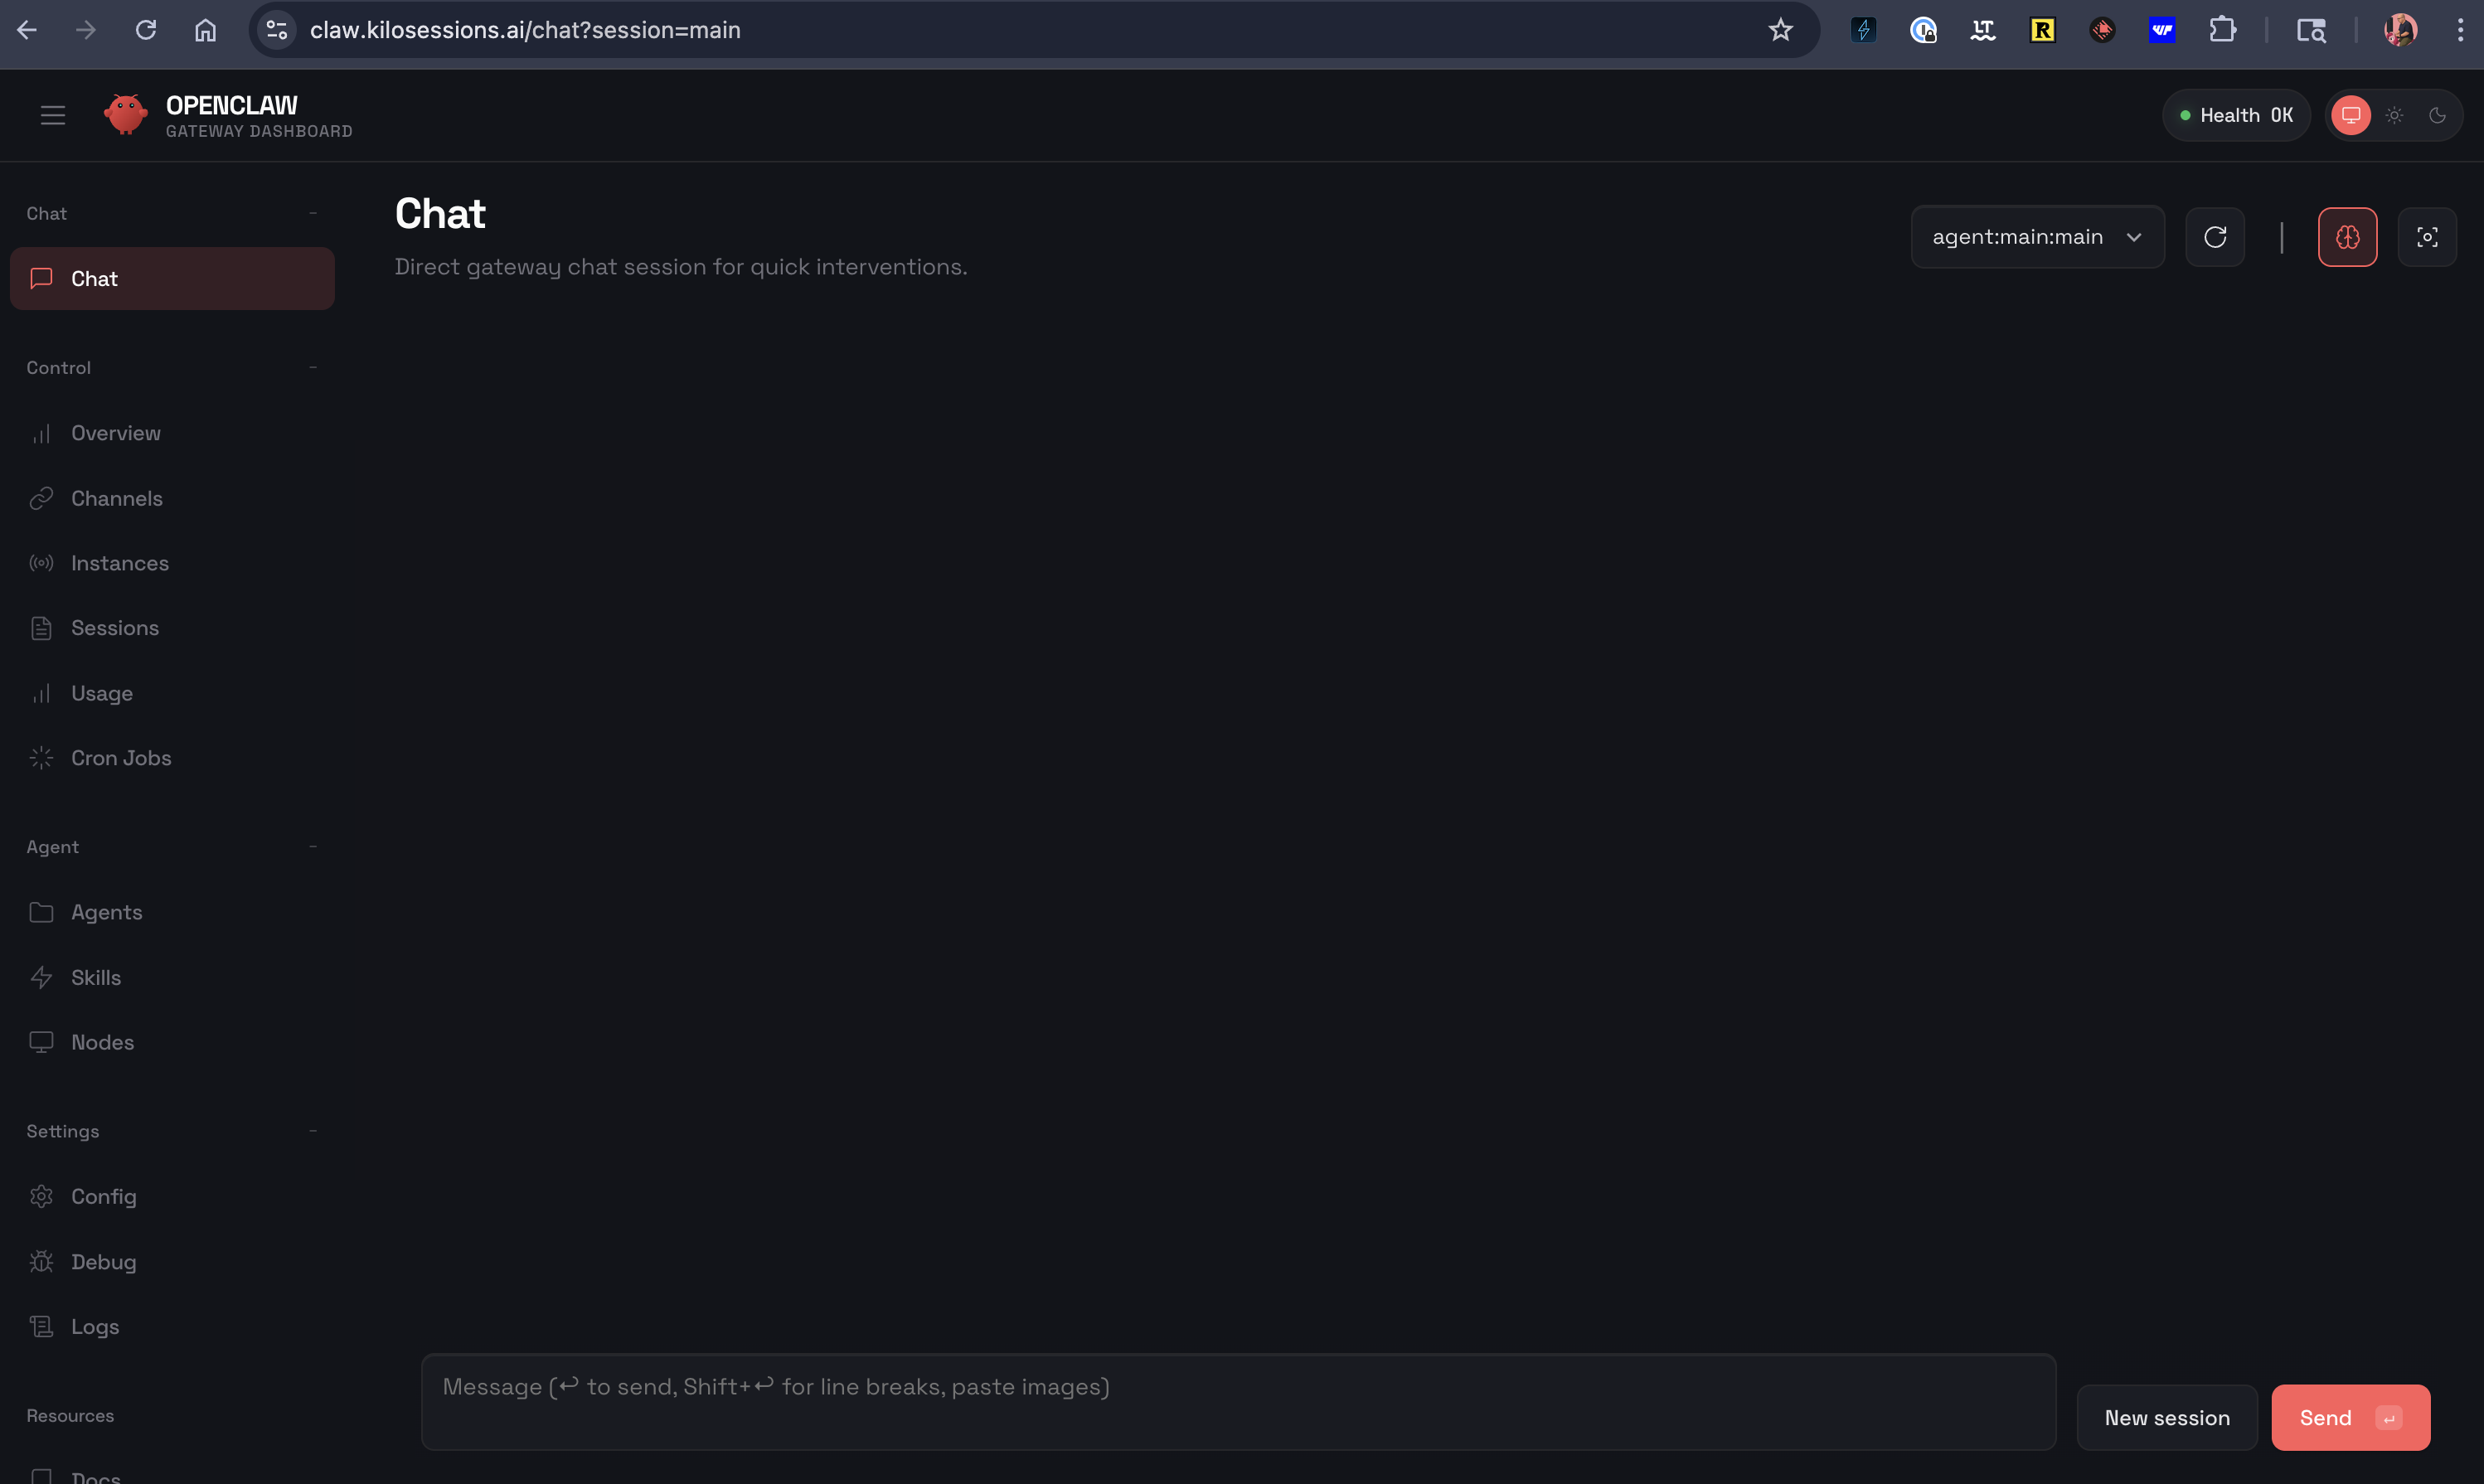
OpenClaw web UI
Using your OpenClaw Agent
-------------------------
OpenClaw lets you customize your own AI assistant that can actually take action — check your email, manage your calendar, control smart devices, browse the web, and message you on Telegram or Discord when something needs attention. It's like having a personal assistant that runs 24/7, with the skills and access you choose to give it.
### Browser Tool
KiloClaw includes a headless Chromium browser, enabling your agent to browse the web, take screenshots, and automate web interactions using the OpenClaw browser tool. This works out of the box with the "full" tool profile — no additional setup needed.
### Default Tool Profile
New KiloClaw instances deploy with the **full** tool profile by default, giving your agent unrestricted access to all available tools — filesystem operations, shell execution, web search, browser automation, messaging, memory, sub-agents, and more.
For more information on use cases:
* [OpenClaw Showcase](https://docs.openclaw.ai/start/showcase)
* [100 hours of OpenClaw in 35 Minutes](https://www.youtube.com/watch?v=_kZCoW-Qxnc)
* [Clawhub](https://clawhub.ai/)
: search for skills
Related
-------
* [Dashboard Reference](https://kilo.ai/docs/kiloclaw/dashboard)
* [Connecting Chat Platforms](https://kilo.ai/docs/kiloclaw/chat-platforms)
* [Troubleshooting](https://kilo.ai/docs/kiloclaw/troubleshooting)
* [KiloClaw Pricing](https://kilo.ai/docs/kiloclaw/pricing)
* [Gateway Usage and Billing](https://kilo.ai/docs/gateway/usage-and-billing)
* [Agent Manager](https://kilo.ai/docs/automate/agent-manager)
* [OpenClaw Documentation](https://docs.openclaw.ai/)
Copy page
---
# Customize
Customize
=========
Kilo Code is highly customizable. Tailor its behavior to match your workflow, team standards, and project requirements with custom modes, rules, instructions, and more.
Customization
-------------
Configure how Kilo Code behaves and responds:
* [**Custom Modes**](https://kilo.ai/docs/customize/custom-modes)
- Create specialized modes for different tasks (code review, documentation, testing, etc.)
* [**Custom Rules**](https://kilo.ai/docs/customize/custom-rules)
- Define rules that apply to specific file types or situations
* [**Custom Instructions**](https://kilo.ai/docs/customize/custom-instructions)
- Add project-specific guidelines and context
* [**Custom Subagents**](https://kilo.ai/docs/customize/custom-subagents)
- Create specialized subagents with custom prompts, models, and permissions
* [**agents.md**](https://kilo.ai/docs/customize/agents-md)
- Configure agent behavior at the project level
* [**Workflows**](https://kilo.ai/docs/customize/workflows)
- Automate multi-step processes
* [**Skills**](https://kilo.ai/docs/customize/skills)
- Extend Kilo's capabilities with reusable skill definitions
* [**Prompt Engineering**](https://kilo.ai/docs/customize/prompt-engineering)
- Write effective prompts for better results
Context & Indexing
------------------
Help Kilo understand your codebase better:
* [**Codebase Indexing**](https://kilo.ai/docs/customize/context/codebase-indexing)
- Build a semantic index of your code for better context awareness
* [**Context Condensing**](https://kilo.ai/docs/customize/context/context-condensing)
- Summarize older context to stay within limits
* [**AGENTS.md**](https://kilo.ai/docs/customize/agents-md)
- Store project context, decisions, and important information
* [**Large Projects**](https://kilo.ai/docs/customize/context/large-projects)
- Best practices for working with monorepos and large codebases
Getting Started
---------------
New to customization? Here's where to start:
1. **Start with Custom Instructions** — Set up instructions in the [Custom Instructions](https://kilo.ai/docs/customize/custom-instructions)
section to guide Kilo Code's behavior
2. **Explore Custom Modes** — Try the built-in modes first, then create your own
3. **Enable Codebase Indexing** — Help Kilo understand your project structure
Best Practices
--------------
* Keep custom instructions concise and actionable
* Use custom modes for repetitive tasks
* Combine rules with modes for powerful workflows
Next Steps
----------
* Check out [**Code with AI**](https://kilo.ai/docs/code-with-ai)
to learn how to use Kilo effectively
* Explore [**Automate**](https://kilo.ai/docs/automate)
for CI/CD integration and advanced automation
* Learn about [**Collaboration**](https://kilo.ai/docs/collaborate)
features for teams
Copy page
---
# FAQ
FAQ
===
This section contains the most frequently asked questions.
General
-------
* [**General**](https://kilo.ai/docs/getting-started/faq/general)
- General questions about Kilo Code
Setup and Installation
----------------------
* [**Setup and Installation**](https://kilo.ai/docs/getting-started/faq/setup-and-installation)
- Questions about setting up and installing Kilo Code
Credits and Billing
-------------------
* [**Credits and Billing**](https://kilo.ai/docs/getting-started/faq/credits-and-billing)
- Questions about credits, billing, and pricing
Account and Integration
-----------------------
* [**Account and Integration**](https://kilo.ai/docs/getting-started/faq/account-and-integration)
- Questions about accounts and integrations
Known Issues
------------
* [**Known Issues**](https://kilo.ai/docs/getting-started/faq/known-issues)
- Known issues and limitations of Kilo Code
Copy page
---
# Automate
Automate
========
Automate repetitive tasks, set up AI-powered code reviews, and extend Kilo Code's capabilities with integrations and MCP servers.
Code Reviews
------------
Automated AI code reviews for every pull request:
* [**Code Reviews**](https://kilo.ai/docs/automate/code-reviews/overview)
— AI-powered PR reviews
* Automated analysis on PR open/update
* Customizable review styles (Strict, Balanced, Lenient)
* Focus areas: Security, Performance, Bug Detection, Style, Tests, Documentation
Agent Manager
-------------
Manage and orchestrate multiple AI agents:
* [**Agent Manager**](https://kilo.ai/docs/automate/agent-manager)
— Control panel for running agents
* Local and cloud-synced sessions
* Parallel Mode with Git worktree isolation
* Resume existing sessions
MCP (Model Context Protocol)
----------------------------
Connect Kilo Code to external tools and services:
* [**MCP Overview**](https://kilo.ai/docs/automate/mcp/overview)
— Introduction to the Model Context Protocol
* [**What is MCP?**](https://kilo.ai/docs/automate/mcp/what-is-mcp)
— Understanding MCP architecture
* [**Using MCP in Kilo Code**](https://kilo.ai/docs/automate/mcp/using-in-kilo-code)
— Configuration guide
* [**STDIO & SSE Transports**](https://kilo.ai/docs/automate/mcp/server-transports)
— Local and remote server options
* [**MCP vs API**](https://kilo.ai/docs/automate/mcp/mcp-vs-api)
— When to use MCP
* [**Using MCP in CLI**](https://kilo.ai/docs/automate/mcp/using-in-cli)
— CLI-specific MCP setup
Integrations
------------
Connect Kilo Code with your development tools:
* [**Integrations**](https://kilo.ai/docs/automate/integrations)
— Available integrations overview
* GitHub integration for deployments and code reviews
* GitHub Actions for CI/CD workflows
* Custom integrations via MCP
Extending Kilo
--------------
Customize and extend Kilo Code's capabilities:
* [**Local Models**](https://kilo.ai/docs/automate/extending/local-models)
— Run local AI models
* [**Shell Integration**](https://kilo.ai/docs/automate/extending/shell-integration)
— Shell command integration
* [**Auto-Launch**](https://kilo.ai/docs/automate/extending/auto-launch)
— Automatic agent startup
Common Automation Patterns
--------------------------
* **PR-triggered reviews** — Automatically review code on every pull request
* **Scheduled scans** — Run security or code quality scans on a schedule
* **CI/CD integration** — Integrate with GitHub Actions and other CI systems
* **Custom MCP servers** — Build your own tools and integrations
Get Started
-----------
1. Set up the [Agent Manager](https://kilo.ai/docs/automate/agent-manager)
for local automation
2. Configure [MCP servers](https://kilo.ai/docs/automate/mcp/using-in-kilo-code)
for external integrations
3. Enable [Code Reviews](https://kilo.ai/docs/automate/code-reviews)
for your repositories
4. Explore [integrations](https://kilo.ai/docs/automate/integrations)
to connect your toolchain
Copy page
---
# Collaborate
Collaborate
===========
Kilo Code makes it easy to work together with your team. Share sessions, manage team settings, and track AI adoption across your organization.
Sessions & Sharing
------------------
Sessions are your platform-agnostic interaction with Kilo. They remember your repository, task, and conversation so you can pause and resume work without losing context.
* [**Sessions & Sharing**](https://kilo.ai/docs/collaborate/sessions-sharing)
— Share and collaborate on Kilo Code sessions
* Create sessions from the CLI, Cloud Agent, or IDE extensions
* Share read-only links with teammates
* Fork shared sessions to create your own copy
Teams
-----
Kilo Code's paid plans provide powerful team management features:
* [**About Plans**](https://kilo.ai/docs/collaborate/teams/about-plans)
— Compare Teams and Enterprise plans
* **Teams ($15/user/month)** — Zero markup on AI costs, centralized billing, team analytics
* **Enterprise ([Contact Sales](https://kilo.ai/contact-sales)
)** — Model controls, audit logs, SSO, dedicated support
### Team Management
* [**Getting Started**](https://kilo.ai/docs/collaborate/teams/getting-started)
— Set up your team
* [**Team Management**](https://kilo.ai/docs/collaborate/teams/team-management)
— Manage members and roles
* [**Dashboard**](https://kilo.ai/docs/collaborate/teams/dashboard)
— Team overview and activity
* [**Analytics**](https://kilo.ai/docs/collaborate/teams/analytics)
— Usage insights and trends
* [**Billing**](https://kilo.ai/docs/collaborate/teams/billing)
— Manage payments and invoices
* [**Custom Modes for Organizations**](https://kilo.ai/docs/collaborate/teams/custom-modes-org)
— Share custom modes across your team
Enterprise
----------
Enterprise features for large organizations:
* [**Audit Logs**](https://kilo.ai/docs/collaborate/enterprise/audit-logs)
— Track and audit team activity
* [**SSO**](https://kilo.ai/docs/collaborate/enterprise/sso)
— Single sign-on with OIDC and SCIM
* [**Model Access Controls**](https://kilo.ai/docs/collaborate/enterprise/model-access-controls)
— Limit models and providers
* [**Migration**](https://kilo.ai/docs/collaborate/enterprise/migration)
— Migrate from other AI coding tools
Adoption Dashboard
------------------
Understand how your team is using AI:
* [**Overview**](https://kilo.ai/docs/collaborate/adoption-dashboard/overview)
— AI Adoption Score introduction
* [**For Team Leads**](https://kilo.ai/docs/collaborate/adoption-dashboard/for-team-leads)
— Using adoption metrics
* [**Improving Your Score**](https://kilo.ai/docs/collaborate/adoption-dashboard/improving-your-score)
— Tips to boost adoption
* [**Understanding Your Score**](https://kilo.ai/docs/collaborate/adoption-dashboard/understanding-your-score)
— How the score is calculated
Get Started with Teams
----------------------
1. [Install Kilo Code](https://kilo.ai/docs/getting-started/installing)
in your preferred environment
2. [Connect an AI provider](https://kilo.ai/docs/ai-providers)
3. [Choose a plan](https://kilo.ai/docs/collaborate/teams/about-plans)
that fits your needs
4. Invite your team members and start collaborating
Copy page
---
# Code with AI
Code with AI
============
Kilo Code is your AI pair programmer that works in your IDE, terminal, or browser. Generate code, refactor, debug, and ship faster with AI that understands your codebase and context.
Getting Started
---------------
New to Kilo Code? Start here to understand the core concepts:
* [**Install Kilo Code**](https://kilo.ai/docs/getting-started/installing)
— Get started in VS Code, JetBrains, CLI, or mobile
* [**Connect an AI Provider**](https://kilo.ai/docs/ai-providers)
— Set up your preferred model
* [**Quick Start Guide**](https://kilo.ai/docs/getting-started/quickstart)
— Run your first task in minutes
Platforms
---------
Use Kilo Code wherever you work:
* [**VS Code**](https://kilo.ai/docs/code-with-ai/platforms/vscode)
— The most popular IDE integration
* [**JetBrains**](https://kilo.ai/docs/code-with-ai/platforms/jetbrains)
— IntelliJ, PyCharm, WebStorm, and more
* [**CLI**](https://kilo.ai/docs/code-with-ai/platforms/cli)
— Terminal-based AI coding for scripts and automation
* [**Cloud Agent**](https://kilo.ai/docs/code-with-ai/platforms/cloud-agent)
— Run Kilo in the cloud
* [**Mobile Apps**](https://kilo.ai/docs/code-with-ai/platforms/mobile)
— iOS and Android support
* [**Slack**](https://kilo.ai/docs/code-with-ai/platforms/slack)
— Chat with Kilo in your workspace
* [**App Builder**](https://kilo.ai/docs/code-with-ai/app-builder)
— Create full-stack applications with AI
Working with Agents
-------------------
Kilo uses specialized agents to help with different tasks:
* [**Chat Interface**](https://kilo.ai/docs/code-with-ai/agents/chat-interface)
— Conversation-based coding
* [**Using Agents**](https://kilo.ai/docs/code-with-ai/agents/using-agents)
— Switch between Code, Ask, Plan, Debug, and other agents
* [**Model Selection**](https://kilo.ai/docs/code-with-ai/agents/model-selection)
— Choose the right AI model for each task
* [**Context Mentions**](https://kilo.ai/docs/code-with-ai/agents/context-mentions)
— Reference files, functions, and symbols
* [**Orchestrator Mode**](https://kilo.ai/docs/code-with-ai/agents/orchestrator-mode)
— Legacy orchestration (now built into all agents)
* [**Free & Budget Models**](https://kilo.ai/docs/code-with-ai/agents/free-and-budget-models)
— Cost-effective AI options
Features
--------
Core capabilities to boost your productivity:
* [**Autocomplete**](https://kilo.ai/docs/code-with-ai/features/autocomplete)
— Inline code suggestions as you type
* [**Fast Edits**](https://kilo.ai/docs/code-with-ai/features/fast-edits)
— Quick file modifications
* [**Code Actions**](https://kilo.ai/docs/code-with-ai/features/code-actions)
— AI-powered refactoring and fixes
* [**Task & Todo Lists**](https://kilo.ai/docs/code-with-ai/features/task-todo-list)
— Break down complex tasks
* [**Checkpoints**](https://kilo.ai/docs/code-with-ai/features/checkpoints)
— Save and restore working states
* [**Browser Use**](https://kilo.ai/docs/code-with-ai/features/browser-use)
— Automate web interactions
* [**Enhance Prompt**](https://kilo.ai/docs/code-with-ai/features/enhance-prompt)
— Improve your prompts automatically
* [**Git Commit Generation**](https://kilo.ai/docs/code-with-ai/features/git-commit-generation)
— AI-powered commit messages
Next Steps
----------
* Explore [**Customize**](https://kilo.ai/docs/customize)
to tailor Kilo to your workflow
* Learn about [**Collaborating**](https://kilo.ai/docs/collaborate)
with your team
* Set up [**Automate**](https://kilo.ai/docs/automate)
for CI/CD integration
* Configure [**Deploy & Secure**](https://kilo.ai/docs/deploy-secure)
deployments
Copy page
---
# Custom Modes
Custom Modes
============
Kilo Code allows you to create **custom modes** to tailor Kilo's behavior to specific tasks or workflows. Custom modes can be either **global** (available across all projects) or **project-specific** (defined within a single project).
Sticky Models for Efficient Workflow
------------------------------------
Each mode—including custom ones—features **Sticky Models**. This means Kilo Code automatically remembers and selects the last model you used with a particular mode. This lets you assign different preferred models to different tasks without constant reconfiguration, as Kilo switches between models when you change modes.
Why Use Custom Modes?
---------------------
* **Specialization:** Create modes optimized for specific tasks, like "Documentation Writer," "Test Engineer," or "Refactoring Expert"
* **Safety:** Restrict a mode's access to sensitive files or commands. For example, a "Review Mode" could be limited to read-only operations
* **Experimentation:** Safely experiment with different prompts and configurations without affecting other modes
* **Team Collaboration:** Share custom modes with your team to standardize workflows
💡Tip
**Keep custom modes on track:** Limit the types of files that they're allowed to edit using the `fileRegex` option in the `groups` configuration. This prevents modes from accidentally modifying files outside their intended scope.
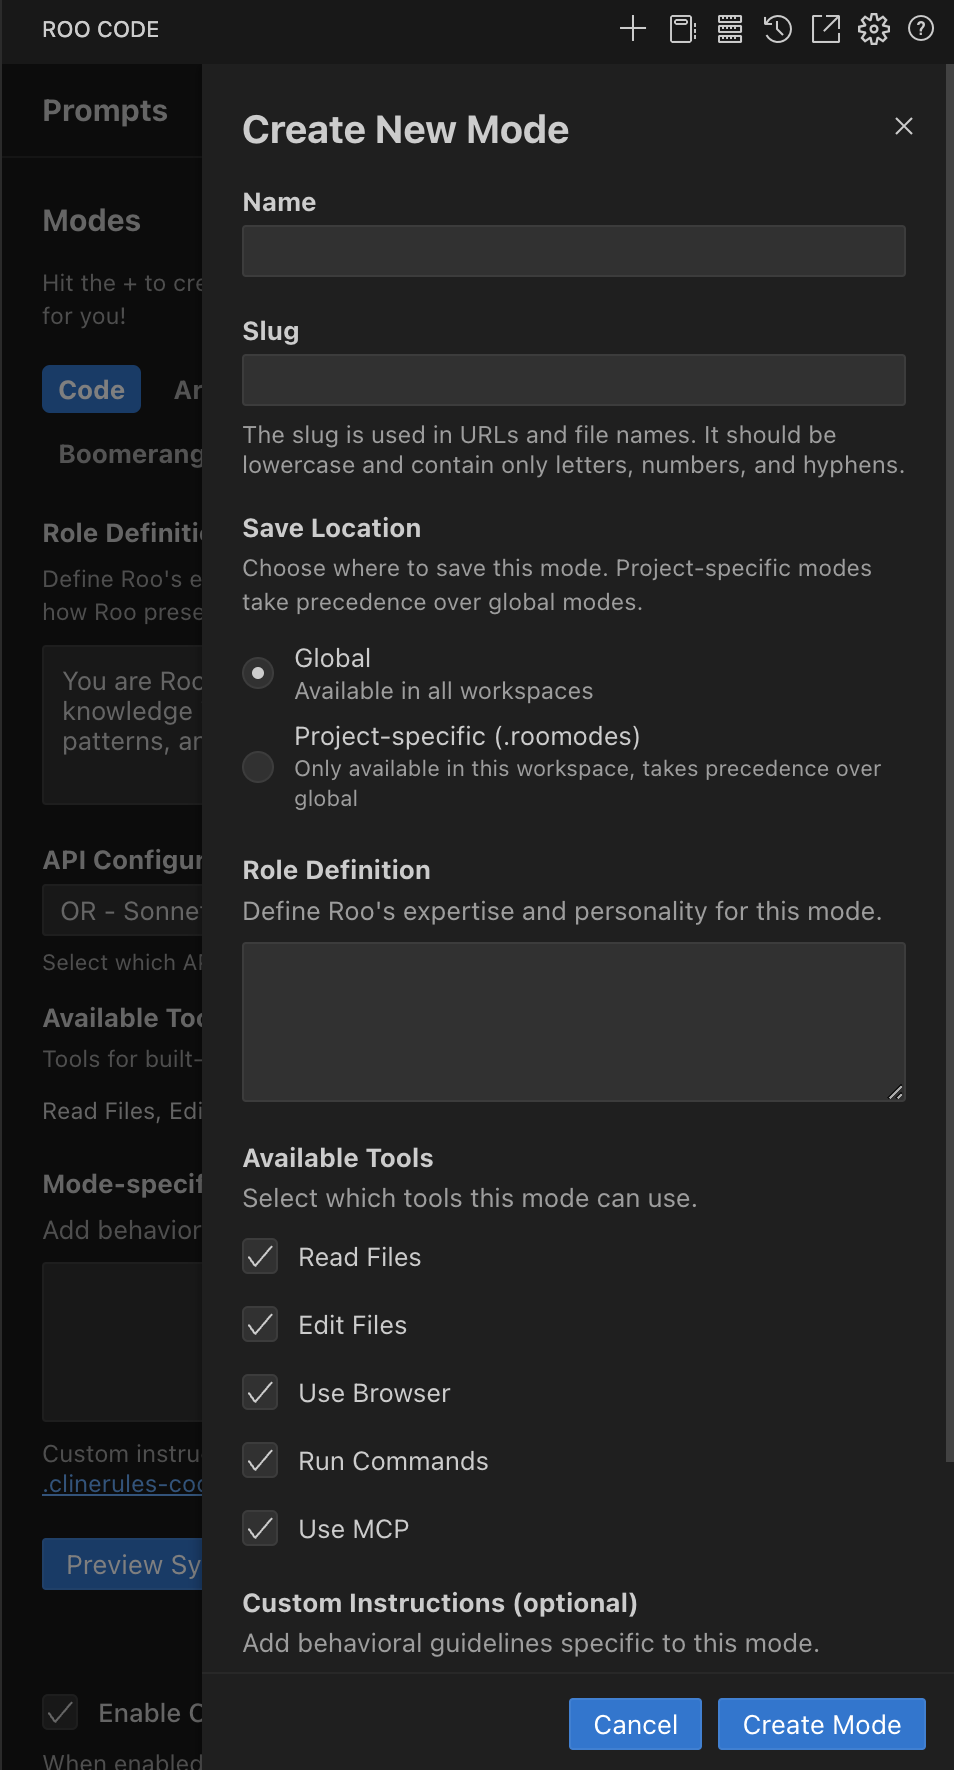
Custom mode creation interface in Kilo Code
_Kilo Code's interface for creating and managing custom modes._
What's Included in a Custom Mode?
---------------------------------
Custom modes are defined by several key properties. Understanding these concepts will help you tailor Kilo's behavior effectively.
| UI Field / YAML Property | Conceptual Description |
| --- | --- |
| **Slug** (`slug`) | A unique internal identifier for the mode. Used by Kilo Code to reference the mode, especially for associating mode-specific instruction files. |
| **Name** (`name`) | The display name for the mode as it appears in the Kilo Code user interface. Should be human-readable and descriptive. |
| **Description** (`description`) | A short, user-friendly summary of the mode's purpose displayed in the mode selector UI. Keep this concise and focused on what the mode does for the user. |
| **Role Definition** (`roleDefinition`) | Defines the core identity and expertise of the mode. This text is placed at the beginning of the system prompt and defines Kilo's personality and behavior when this mode is active. |
| **Available Tools** (`groups`) | Defines the allowed toolsets and file access permissions for the mode. Corresponds to selecting which general categories of tools the mode can use. |
| **When to Use** (`whenToUse`) | _(Optional)_ Provides guidance for Kilo's automated decision-making, particularly for mode selection and task orchestration. Used by the Orchestrator mode for task coordination. |
| **Custom Instructions** (`customInstructions`) | _(Optional)_ Specific behavioral guidelines or rules for the mode. Added near the end of the system prompt to further refine Kilo's behavior. |
💡Tip
**Power Steering for Better Mode Adherence**
If you find that models aren't following your custom mode's role definition or instructions closely enough, enable the [Power Steering](https://kilo.ai/docs/getting-started/settings#power-steering)
experimental feature. This reminds the model about mode details more frequently, leading to stronger adherence to your custom configurations at the cost of increased token usage.
Import/Export Modes
-------------------
Easily share, back up, and template your custom modes. This feature lets you export any mode—and its associated rules—into a single, portable YAML file that you can import into any project.
### Key Features
* **Shareable Setups:** Package a mode and its rules into one file to easily share with your team
* **Easy Backups:** Save your custom mode configurations so you never lose them
* **Project Templates:** Create standardized mode templates for different types of projects
* **Simple Migration:** Move modes between your global settings and specific projects effortlessly
* **Flexible Slug Changes:** Change mode slugs in exported files without manual path editing
### How it Works
**Exporting a Mode:**
Modes are managed from the Modes area in Kilo Code. Depending on your UI layout, you can open this from the mode selector in the chat panel or from the notebook icon.
1. Open the Modes area from the mode selector in the chat panel (or via the icon if shown)
2. Select the mode you wish to export
3. Click the Export Mode button (download icon)
4. Choose a location to save the `.yaml` file
5. Kilo packages the mode's configuration and any rules into the YAML file
**Importing a Mode:**
1. Open the Modes area from the mode selector in the chat panel (or via the icon if shown)
2. Click the Import Mode button (upload icon)
3. Select the mode's YAML file (`.yaml`)
4. Choose the import level:
* **Project:** Available only in current workspace (saved to `.kilocodemodes` file)
* **Global:** Available in all projects (saved to global settings)
### Changing Slugs on Import
When importing modes, you can change the slug in the exported YAML file before importing:
1. Export a mode with slug `original-mode`
2. Edit the YAML file and change the slug to `new-mode`
3. Import the file - the import process will automatically update rule file paths to match the new slug
Methods for Creating and Configuring Custom Modes
-------------------------------------------------
You can create and configure custom modes in several ways:
### 1\. Ask Kilo! (Recommended)
You can quickly create a basic custom mode by asking Kilo Code to do it for you. For example:
Create a new mode called "Documentation Writer". It should only be able to read files and write Markdown files.
Kilo Code will guide you through the process, prompting for necessary information and creating the mode using the preferred YAML format.
💡Tip
**Create modes from job postings:** If there's a real world job posting for something you want a custom mode to do, try asking Code mode to `Create a custom mode based on the job posting at @[url]`. This can help you quickly create specialized modes with realistic role definitions.
### 2\. Using the Modes UI
1. **Open Modes:** Use the mode selector in the chat panel to open mode management (or click the icon if your layout shows it)
2. **Create New Mode:** Click the button to the right of the Modes heading
3. **Fill in Fields:**

Custom mode creation interface in the Modes UI
_The custom mode creation interface showing fields for name, slug, description, save location, role definition, available tools, custom instructions._
The interface provides fields for Name, Slug, Description, Save Location, Role Definition, When to Use (optional), Available Tools, and Custom Instructions. After filling these, click the "Create Mode" button. Kilo Code will save the new mode in YAML format.
### 3\. Manual Configuration (YAML & JSON)
You can directly edit the configuration files to create or modify custom modes. This method offers the most control over all properties. Kilo Code now supports both YAML (preferred) and JSON formats.
* **Global Modes:** Edit `custom_modes.yaml` (primary). `custom_modes.json` is a legacy fallback and may still exist in older setups.
* **Project Modes:** Edit `.kilocodemodes` in your project root (YAML preferred; JSON still supported for compatibility).
* **Open from UI:** Open the Modes area, click next to Global or Project Modes, then choose **Edit Global Modes** or **Edit Project Modes**.
These files define an array/list of custom modes.
ℹ️Why JSON Files May Still Exist
If you see both YAML and JSON mode files, this is usually from legacy configuration. Kilo Code reads YAML first and does not keep both files synchronized line-by-line. In practice, edit YAML unless you have a specific reason to stay on JSON.
YAML Configuration Format (Preferred)
-------------------------------------
YAML is now the preferred format for defining custom modes due to better readability, comment support, and cleaner multi-line strings.
### YAML Example
customModes:
- slug: docs-writer
name: 📝 Documentation Writer
description: A specialized mode for writing and editing technical documentation.
roleDefinition: You are a technical writer specializing in clear documentation.
whenToUse: Use this mode for writing and editing documentation.
customInstructions: Focus on clarity and completeness in documentation.
groups:
- read
- - edit # First element of tuple
- fileRegex: \\.(md|mdx)$ # Second element is the options object
description: Markdown files only
- browser
- slug: another-mode
name: Another Mode
# ... other properties
### JSON Alternative
{
"customModes": \[\
{\
"slug": "docs-writer",\
"name": "📝 Documentation Writer",\
"description": "A specialized mode for writing and editing technical documentation.",\
"roleDefinition": "You are a technical writer specializing in clear documentation.",\
"whenToUse": "Use this mode for writing and editing documentation.",\
"customInstructions": "Focus on clarity and completeness in documentation.",\
"groups": \["read", \["edit", { "fileRegex": "\\\\.(md|mdx)$", "description": "Markdown files only" }\], "browser"\]\
}\
\]
}
YAML/JSON Property Details
--------------------------
### `slug`
* **Purpose:** A unique identifier for the mode
* **Format:** Must match the pattern `/^[a-zA-Z0-9-]+$/` (only letters, numbers, and hyphens)
* **Usage:** Used internally and in file/directory names for mode-specific rules (e.g., `.kilo/rules-{slug}/`)
* **Recommendation:** Keep it short and descriptive
**YAML Example:** `slug: docs-writer` **JSON Example:** `"slug": "docs-writer"`
### `name`
* **Purpose:** The display name shown in the Kilo Code UI
* **Format:** Can include spaces and proper capitalization
**YAML Example:** `name: 📝 Documentation Writer` **JSON Example:** `"name": "Documentation Writer"`
### `description`
* **Purpose:** A short, user-friendly summary displayed below the mode name in the mode selector UI
* **Format:** Keep this concise and focused on what the mode does for the user
* **UI Display:** This text appears in the redesigned mode selector
**YAML Example:** `description: A specialized mode for writing and editing technical documentation.` **JSON Example:** `"description": "A specialized mode for writing and editing technical documentation."`
### `roleDefinition`
* **Purpose:** Detailed description of the mode's role, expertise, and personality
* **Placement:** This text is placed at the beginning of the system prompt when the mode is active
**YAML Example (multi-line):**
roleDefinition: >-
You are a test engineer with expertise in:
- Writing comprehensive test suites
- Test-driven development
**JSON Example:** `"roleDefinition": "You are a technical writer specializing in clear documentation."`
### `groups`
* **Purpose:** Array/list defining which tool groups the mode can access and any file restrictions
* **Available Tool Groups:** `"read"`, `"edit"`, `"browser"`, `"command"`, `"mcp"`
* **Structure:**
* Simple string for unrestricted access: `"edit"`
* Tuple (two-element array) for restricted access: `["edit", { fileRegex: "pattern", description: "optional" }]`
**File Restrictions for "edit" group:**
* `fileRegex`: A regular expression string to control which files the mode can edit
* In YAML, typically use single backslashes for regex special characters (e.g., `\.md$`)
* In JSON, backslashes must be double-escaped (e.g., `\\.md$`)
* `description`: An optional string describing the restriction
**YAML Example:**
groups:
- read
- - edit # First element of tuple
- fileRegex: \\.(js|ts)$ # Second element is the options object
description: JS/TS files only
- command
**JSON Example:**
"groups": \[\
"read",\
\["edit", { "fileRegex": "\\\\.(js|ts)$", "description": "JS/TS files only" }\],\
"command"\
\]
### `whenToUse` (Optional)
* **Purpose:** Provides guidance for Kilo's automated decision-making, particularly for mode selection and task orchestration
* **Format:** A string describing ideal scenarios or task types for this mode
* **Usage:** Used by Kilo for automated decisions and not displayed in the mode selector UI
**YAML Example:** `whenToUse: This mode is best for refactoring Python code.` **JSON Example:** `"whenToUse": "This mode is best for refactoring Python code."`
### `customInstructions` (Optional)
* **Purpose:** A string containing additional behavioral guidelines for the mode
* **Placement:** This text is added near the end of the system prompt
**YAML Example (multi-line):**
customInstructions: |-
When writing tests:
- Use describe/it blocks
- Include meaningful descriptions
**JSON Example:** `"customInstructions": "Focus on explaining concepts and providing examples."`
Benefits of YAML Format
-----------------------
YAML is now the preferred format for defining custom modes due to several advantages:
* **Readability:** YAML's indentation-based structure is easier for humans to read and understand
* **Comments:** YAML allows for comments (lines starting with `#`), making it possible to annotate your mode definitions
* **Multi-line Strings:** YAML provides cleaner syntax for multi-line strings using `|` (literal block) or `>` (folded block)
* **Less Punctuation:** YAML generally requires less punctuation compared to JSON, reducing syntax errors
* **Editor Support:** Most modern code editors provide excellent syntax highlighting and validation for YAML files
While JSON is still fully supported, new modes created via the UI or by asking Kilo will default to YAML.
Migration to YAML Format
------------------------
### Global Modes
Automatic migration from `custom_modes.json` to `custom_modes.yaml` happens when:
* Kilo Code starts up
* A `custom_modes.json` file exists
* No `custom_modes.yaml` file exists yet
The migration process preserves the original JSON file for rollback purposes.
### Project Modes (`.kilocodemodes`)
* No automatic startup migration occurs for project-specific files
* Kilo Code can read `.kilocodemodes` files in either YAML or JSON format
* When editing through the UI, JSON files will be converted to YAML format
* For manual conversion, you can ask Kilo to help reformat configurations
Mode-Specific Instructions via Files/Directories
------------------------------------------------
You can provide instructions for custom modes using dedicated files or directories within your workspace, allowing for better organization and version control.
### Preferred Method: Directory (`.kilo/rules-{mode-slug}/`)
.
├── .kilo/
│ └── rules-docs-writer/ # Example for mode slug "docs-writer"
│ ├── 01-style-guide.md
│ └── 02-formatting.txt
└── ... (other project files)
### Fallback Method: Single File (`.kilorules-{mode-slug}`)
.
├── .kilorules-docs-writer # Example for mode slug "docs-writer"
└── ... (other project files)
**Rules Directory Scope:**
* **Global modes:** Rules are stored in `~/.kilo/rules-{slug}/`
* **Project modes:** Rules are stored in `{workspace}/.kilo/rules-{slug}/`
The directory method takes precedence if it exists and contains files. Files within the directory are read recursively and appended in alphabetical order.
Configuration Precedence
------------------------
Mode configurations are applied in this order:
1. **Project-level mode configurations** (from `.kilocodemodes` - YAML or JSON)
2. **Global mode configurations** (from `custom_modes.yaml`, then `custom_modes.json` if YAML not found)
3. **Default mode configurations**
**Important:** When modes with the same slug exist in both `.kilocodemodes` and global settings, the `.kilocodemodes` version completely overrides the global one for ALL properties.
Overriding Default Modes
------------------------
You can override Kilo Code's built-in modes (like 💻 Code, 🪲 Debug, ❓ Ask, 🏗️ Architect, 🪃 Orchestrator) by creating a custom mode with the same slug.
### Global Override Example
customModes:
- slug: code # Matches the default 'code' mode slug
name: 💻 Code (Global Override)
roleDefinition: You are a software engineer with global-specific constraints.
whenToUse: This globally overridden code mode is for JS/TS tasks.
customInstructions: Focus on project-specific JS/TS development.
groups:
- read
- - edit
- fileRegex: \\.(js|ts)$
description: JS/TS files only
### Project-Specific Override Example
customModes:
- slug: code # Matches the default 'code' mode slug
name: 💻 Code (Project-Specific)
roleDefinition: You are a software engineer with project-specific constraints for this project.
whenToUse: This project-specific code mode is for Python tasks within this project.
customInstructions: Adhere to PEP8 and use type hints.
groups:
- read
- - edit
- fileRegex: \\.py$
description: Python files only
- command
Understanding Regex in Custom Modes
-----------------------------------
Regular expressions (`fileRegex`) offer fine-grained control over file editing permissions.
💡Tip
**Let Kilo Build Your Regex Patterns**
Instead of writing complex regex manually, ask Kilo:
Create a regex pattern that matches JavaScript files but excludes test files
Kilo will generate the pattern. Remember to adapt it for YAML (usually single backslashes) or JSON (double backslashes).
### Important Rules for `fileRegex`
* **Escaping in JSON:** In JSON strings, backslashes (`\`) must be double-escaped (e.g., `\\.md$`)
* **Escaping in YAML:** In unquoted or single-quoted YAML strings, a single backslash is usually sufficient for regex special characters (e.g., `\.md$`)
* **Path Matching:** Patterns match against the full relative file path from your workspace root
* **Case Sensitivity:** Regex patterns are case-sensitive by default
* **Validation:** Invalid regex patterns are rejected with an "Invalid regular expression pattern" error message
### Common Pattern Examples
| Pattern (YAML-like) | JSON fileRegex Value | Matches | Doesn't Match |
| --- | --- | --- | --- |
| `\.md$` | `"\\.md$"` | `readme.md`, `docs/guide.md` | `script.js`, `readme.md.bak` |
| `^src/.*` | `"^src/.*"` | `src/app.js`, `src/components/button.tsx` | `lib/utils.js`, `test/src/mock.js` |
| `\.(css\|scss)$` | `"\\.(css\|scss)$"` | `styles.css`, `theme.scss` | `styles.less`, `styles.css.map` |
| `docs/.*\.md$` | `"docs/.*\\.md$"` | `docs/guide.md`, `docs/api/reference.md` | `guide.md`, `src/docs/notes.md` |
| `^(?!.*(test\|spec))\.(js\|ts)$` | `"^(?!.*(test\|spec))\\.(js\|ts)$"` | `app.js`, `utils.ts` | `app.test.js`, `utils.spec.js` |
### Key Regex Building Blocks
* `\.`: Matches a literal dot (YAML: `\.`, JSON: `\\.`)
* `$`: Matches the end of the string
* `^`: Matches the beginning of the string
* `.*`: Matches any character (except newline) zero or more times
* `(a|b)`: Matches either "a" or "b"
* `(?!...)`: Negative lookahead
Error Handling
--------------
When a mode attempts to edit a file that doesn't match its `fileRegex` pattern, you'll see a `FileRestrictionError` that includes:
* The mode name
* The allowed file pattern
* The description (if provided)
* The attempted file path
* The tool that was blocked
Example Configurations
----------------------
### Basic Documentation Writer (YAML)
customModes:
- slug: docs-writer
name: 📝 Documentation Writer
description: Specialized for writing and editing technical documentation
roleDefinition: You are a technical writer specializing in clear documentation
groups:
- read
- - edit
- fileRegex: \\.md$
description: Markdown files only
customInstructions: Focus on clear explanations and examples
### Test Engineer with File Restrictions (YAML)
customModes:
- slug: test-engineer
name: 🧪 Test Engineer
description: Focused on writing and maintaining test suites
roleDefinition: You are a test engineer focused on code quality
whenToUse: Use for writing tests, debugging test failures, and improving test coverage
groups:
- read
- - edit
- fileRegex: \\.(test|spec)\\.(js|ts)$
description: Test files only
- command
### Security Review Mode (YAML)
customModes:
- slug: security-review
name: 🔒 Security Reviewer
description: Read-only security analysis and vulnerability assessment
roleDefinition: You are a security specialist reviewing code for vulnerabilities
whenToUse: Use for security reviews and vulnerability assessments
customInstructions: |-
Focus on:
- Input validation issues
- Authentication and authorization flaws
- Data exposure risks
- Injection vulnerabilities
groups:
- read
- browser
Troubleshooting
---------------
### Common Issues
* **Mode not appearing:** After creating or importing a mode, you may need to reload the VS Code window
* **Invalid regex patterns:** Test your patterns using online regex testers before applying them
* **Precedence confusion:** Remember that project modes completely override global modes with the same slug
* **YAML syntax errors:** Use proper indentation (spaces, not tabs) and validate your YAML
### Tips for Working with YAML
* **Indentation is Key:** YAML uses indentation (spaces, not tabs) to define structure
* **Colons for Key-Value Pairs:** Keys must be followed by a colon and a space (e.g., `slug: my-mode`)
* **Hyphens for List Items:** List items start with a hyphen and a space (e.g., `- read`)
* **Validate Your YAML:** Use online YAML validators or your editor's built-in validation
Community Gallery
-----------------
Ready to explore more? Check out the [Show and Tell](https://github.com/Kilo-Org/kilocode/discussions/categories/show-and-tell)
to discover and share custom modes created by the community!
Copy page
---
# Deploy
Deploy
======
Kilo Deploy lets you ship **Next.js** and **static sites** directly from Kilo Code, with:
* **One-click deployment** from the Kilo Code dashboard
* **No manual configuration** — deployment settings are generated for you
* **Deployment history** with logs and build details
* **Automatic rebuilds** on every GitHub push
* * *
Supported Platforms
-------------------
* **Next.js 14** — latest minor
* **Next.js 15** — all versions
* **Next.js 16** — partial support (some features may not work)
* **Static Sites** — pre-built HTML/CSS/JS
* **Static Site Generators** — Hugo, Jekyll, Eleventy (built during deployment)
**Package managers:** npm, pnpm, yarn, bun — automatically detected.
* * *
Prerequisites
-------------
Enable the **GitHub Integration** before deploying:
1. Go to **Integrations → GitHub**
2. Click **Configure** and follow the prompts to connect GitHub to Kilo Code
* * *
Deploying Your App
------------------
### 1\. Open the Deploy Tab
* Navigate to your [Organization dashboard](https://app.kilo.ai/organizations)
or [Profile](https://app.kilo.ai/profile)
* Select the **Deploy** tab
### 2\. Select Your Project
* Click **New Deployment**
* Choose **GitHub** in the Integration dropdown
* Select your repository and branch

### 3\. Click **Deploy**
Kilo Code will:
* Build your project
* Upload artifacts
* Provision your deployment
* Stream logs in real time
Once complete, you’ll receive a **deployment URL** you can open or share.

* * *
Deployment History & Rollbacks
------------------------------
Each deployment is saved automatically with:
* Timestamp
* Build logs
* Deployment URL (Preview/Production)
From the deployment details, you can:
* Inspect previous builds
* Redeploy
* Delete deployments
* * *
Database Support
----------------
Kilo Deploy does **not** include built-in database hosting, but you can connect to any external database service.
* * *
Environment Variables
---------------------
Kilo Deploy supports Environment Variables and Secrets. Add the variable **key** and **value** during the **Create New Deployment** step, and toggle to mark as secrets.
Common Use Cases
----------------
Deploy is ideal for:
1. **Quick prototypes** — instantly push an idea live
2. **Staging environments** — share a preview environment
3. **Rapid iteration** — push commits and get automatic rebuilds
Copy page
---
# Managed Indexing
Managed Indexing
================
Kilo's **Managed Indexing** feature provides semantic search across your repositories using cloud-hosted embeddings. When enabled, Kilo indexes your codebase to deliver more relevant, context-aware responses during development.
* * *
What Managed Indexing Enables
-----------------------------
* Semantic search across your entire codebase
* More accurate and context-aware AI responses
* Git-aware indexing that tracks your base branch and feature branch changes
* Shared indexes for teams and enterprise accounts
* Cost-effective cloud storage with automatic cleanup of stale indexes
* * *
Prerequisites
-------------
Before enabling Managed Indexing:
* **Your workspace must be a Git repository**
Indexing requires a Git repository root directory. Non-Git folders will not be indexed.
* **Available credit balance**
If your balance reaches zero, managed indexing will be disabled and the extension will revert to local indexing (if configured).
* * *
Cost
----
* **Currently free during beta**
* **Pricing coming soon** — A daily usage fee for index storage will be deducted from your AI credit balance. You will be charged per GB per day.
* **Embedding model** — Uses `mistralai/codestral-embed-2505` which currently charges $0.15/M input tokens.
* * *
How to Enable
-------------
Codebase Indexing is rolling out across our users. It will automatically engage unless your repository root is configured to opt out.
1. Create a `.kilocode/config.json` file in the root of your repository (if it doesn't already exist).
2. Add the following configuration:
{
"project": {
"managedIndexingEnabled": false
}
}
### Configuration Options
| Field | Type | Required | Description |
| --- | --- | --- | --- |
| `project.id` | string | No | Custom name for your project. Defaults to the name from your Git origin remote. |
| `project.baseBranch` | string | No | Specifies your base branch if it isn't `main`, `master`, `dev`, or `develop`. |
| `project.managedIndexingEnabled` | boolean | No | Set to `false` to disable indexing for individual project repositories. Defaults to `true`. |
Organization-wide indexing is enabled for any organization that has a credit balance. If you want to disable indexing for a specific repository, set `managedIndexingEnabled` to `false` in the config file.
* * *
How Managed Indexing Works
--------------------------
* **Base branch** — Indexed in its entirety
* **Feature branches** — Only changes from the base branch are indexed
* **Detached HEAD states** — Not indexed
* **Storage** — Embeddings are stored in Kilo Cloud. Your actual code is never stored, only the vector embeddings.
* **Team sharing** — For teams and enterprise accounts, indexes are shared among all team members.
### Index Retention
Indexes are stored for **7 days**. If a branch or repository index hasn't been updated within that window, it will be garbage collected. The next time you open the project in VS Code with Kilo running, it will be re-indexed automatically.
This retention policy keeps costs minimal by only maintaining indexes for actively used code.
* * *
Managing Your Indexes
---------------------
A minimal UI is available at [app.kilo.ai](https://app.kilo.ai/)
to:
* View the size and status of your indexed projects
* Delete old branches & projects.
* * *
Migration from Local Indexing
-----------------------------
Enabling managed indexing will **replace local self-hosted indexing entirely**. If you have already configured local indexing for a workspace it will take precedence until you disable it.
### Automatic Reversion
If your credit balance reaches zero, the extension will automatically revert to local indexing (if previously configured).
* * *
Perfect For
-----------
Managed Indexing is ideal for:
* **Developers wanting smarter, context-aware AI assistance**
* **Teams needing shared semantic search across repositories**
* **Large codebases where finding relevant code is difficult**
* **Organizations wanting centralized index management**
* * *
Limitations and Guidance
------------------------
* **Git repository required** — Only Git repository root directories can be indexed. We plan to extend this in the future.
* **Detached HEAD not supported** — Commits in detached HEAD state will not be indexed.
* **7-day retention** — Unused indexes are automatically removed after 7 days.
* **Beta capacity** — During beta, indexing capacity may be limited for very large repositories.
* **Organization indexing** — Shared organization indexes currently require contacting support.
Copy page
---
# Development Environment
Development Environment
=======================
ℹ️Info
**New versions of the VS Code extension and CLI are being developed in [Kilo-Org/kilocode](https://github.com/Kilo-Org/kilocode)
** (extension at `packages/kilo-vscode`, CLI at `packages/opencode`). For extension and CLI development, please head over to that repository.
This document will help you set up your development environment and understand how to work with the codebase. Whether you're fixing bugs, adding features, or just exploring the code, this guide will get you started.
Prerequisites
-------------
Before you begin, make sure you have the following installed:
1. **Git** - For version control
2. **Node.js** (version v20.18.1 (See `.nvmrc` for latest) or higher recommended) and npm
3. **Visual Studio Code** - Our recommended IDE for development
Getting Started
---------------
### Installation
1. **Fork and Clone the Repository**:
* **Fork the Repository**:
* Visit the [Kilo Code GitHub repository](https://github.com/Kilo-Org/kilocode)
* Click the "Fork" button in the top-right corner to create your own copy.
* **Clone Your Fork**:
git clone https://github.com/\[YOUR-USERNAME\]/kilocode.git
cd kilocode
Replace `[YOUR-USERNAME]` with your actual GitHub username.
2. **Install dependencies**:
pnpm install
This command will install dependencies for the main extension, webview UI, and e2e tests.
3. **Install VSCode Extensions**:
* **Required**: [ESBuild Problem Matchers](https://marketplace.visualstudio.com/items?itemName=connor4312.esbuild-problem-matchers)
- Helps display build errors correctly.
While not strictly necessary for running the extension, these extensions are recommended for development:
* [ESLint](https://marketplace.visualstudio.com/items?itemName=dbaeumer.vscode-eslint)
- Integrates ESLint into VS Code.
* [Prettier - Code formatter](https://marketplace.visualstudio.com/items?itemName=esbenp.prettier-vscode)
- Integrates Prettier into VS Code.
The full list of recommended extensions is in `.vscode/extensions.json`
### Project Structure
The project is organized into several key directories:
* **`src/`** - Core extension code
* **`core/`** - Core functionality and tools
* **`services/`** - Service implementations
* **`webview-ui/`** - Frontend UI code
* **`e2e/`** - End-to-end tests
* **`scripts/`** - Utility scripts
* **`assets/`** - Static assets like images and icons
Development Workflow
--------------------
### Building the Extension
To build the extension:
pnpm build
This will:
1. Build the webview UI
2. Compile TypeScript
3. Bundle the extension
4. Create a `.vsix` file in the `bin/` directory
### Running the Extension
To run the extension in development mode:
1. Press `F5` (or select **Run** → **Start Debugging**) in VSCode
2. This will open a new VSCode window with Kilo Code loaded
### Hot Reloading
* **Webview UI changes**: Changes to the webview UI will appear immediately without restarting
* **Core extension changes**: Changes to the core extension code will automatically reload the ext host
In development mode (NODE\_ENV="development"), changing the core code will trigger a `workbench.action.reloadWindow` command, so it is no longer necessary to manually start/stop the debugger and tasks.
> **Important**: In production builds, when making changes to the core extension, you need to:
>
> 1. Stop the debugging process
> 2. Kill any npm tasks running in the background (see screenshot below)
> 3. Start debugging again

### Installing the Built Extension
To install your built extension:
code --install-extension "$(ls -1v bin/kilo-code-\*.vsix | tail -n1)"
Replace `[version]` with the current version number.
Testing
-------
Kilo Code uses several types of tests to ensure quality:
### Unit Tests
Run unit tests with:
npm test
This runs both extension and webview tests.
To run specific test suites:
npm run test:extension # Run only extension tests
npm run test:webview # Run only webview tests
### End-to-End Tests
E2E tests verify the extension works correctly within VSCode:
1. Create a `.env.local` file in the root with required API keys:
OPENROUTER\_API\_KEY=sk-or-v1-...
2. Run the integration tests:
npm run test:integration
For more details on E2E tests, see e2e/VSCODE\_INTEGRATION\_TESTS
Linting and Type Checking
-------------------------
Ensure your code meets our quality standards:
npm run lint # Run ESLint
npm run check-types # Run TypeScript type checking
Git Hooks
---------
This project uses [Husky](https://typicode.github.io/husky/)
to manage Git hooks, which automate certain checks before commits and pushes. The hooks are located in the `.husky/` directory.
### Pre-commit Hook
Before a commit is finalized, the `.husky/pre-commit` hook runs:
1. **Branch Check**: Prevents committing directly to the `main` branch.
2. **Type Generation**: Runs `npm run generate-types`.
3. **Type File Check**: Ensures that any changes made to `src/exports/roo-code.d.ts` by the type generation are staged.
4. **Linting**: Runs `lint-staged` to lint and format staged files.
### Pre-push Hook
Before changes are pushed to the remote repository, the `.husky/pre-push` hook runs:
1. **Branch Check**: Prevents pushing directly to the `main` branch.
2. **Compilation**: Runs `npm run compile` to ensure the project builds successfully.
3. **Changeset Check**: Checks if a changeset file exists in `.changeset/` and reminds you to create one using `npm run changeset` if necessary.
These hooks help maintain code quality and consistency. If you encounter issues with commits or pushes, check the output from these hooks for error messages.
Troubleshooting
---------------
### Common Issues
1. **Extension not loading**: Check the VSCode Developer Tools (Help > Toggle Developer Tools) for errors
2. **Webview not updating**: Try reloading the window (Developer: Reload Window)
3. **Build errors**: Make sure all dependencies are installed with `npm run install:all`
### Debugging Tips
* Use `console.log()` statements in your code for debugging
* Check the Output panel in VSCode (View > Output) and select "Kilo Code" from the dropdown
* For webview issues, use the browser developer tools in the webview (right-click > "Inspect Element")
Copy page
---
# Integrations
Kilo Code Integrations
======================
Kilo Integrations lets you connect your GitHub or GitLab account (soon Bitbucket) to enable advanced features inside Kilo Code. Once connected, Kilo can access your repositories securely, enabling features like **Code Reviews**, **Cloud Agents**, and **Kilo Deploy**.
Supported Platforms
-------------------
| Platform | Integration Type | Details |
| --- | --- | --- |
| GitHub | GitHub App | [GitHub Setup](https://kilo.ai/docs/automate/integrations#connecting-github) |
| GitLab | OAuth or PAT | [GitLab Setup](https://kilo.ai/docs/automate/integrations#connecting-gitlab) |
What You Can Do With Integrations
---------------------------------
* **Connect GitHub or GitLab to Kilo Code** in a few clicks
* **Enable advanced features** like Cloud Agents, Code Reviews, and Kilo Deploy
* **Authorize repository access** so Kilo can analyze and work with your code
Prerequisites
-------------
Before connecting:
* You must have a **GitHub** or **GitLab** account.
* For GitHub: You need permission to install GitHub Apps for the repositories you want Kilo to access.
* For GitLab: You need **Maintainer** role (or higher) on the projects you want to connect.
* (Optional) If you're connecting an organization, you must be an admin or have app installation permissions.
* * *
Connecting GitHub
-----------------
### 1\. Open the Integrations Page
Go to your **Personal** or **Organization Dashboard**, and navigate to the [Integrations](https://app.kilo.ai/integrations)
tab.
### 2\. Start the Connection Flow
1. Click **Configure** on the GitHub panel.
2. You'll be redirected to GitHub to authorize the **KiloConnect** App.
3. Select the GitHub account or organization you want to connect.
### 3\. Choose Repository Access
GitHub will ask which repositories you want Kilo to access:
* **All repositories** (recommended if you plan to use Cloud Agents or Deploy across multiple projects)
* **Only selected repositories** (choose specific repos)
Click **Install & Authorize** to continue.
### 4\. Complete Authorization
Once approved:
* You'll return to the Kilo Integrations page.
* GitHub will show a **Connected** status.
* Your Kilo workspace can now access GitHub repositories securely.
* * *
Connecting GitLab
-----------------
You can connect GitLab using **OAuth** or a **Personal Access Token (PAT)**. Both **GitLab.com** and **self-hosted GitLab instances** are supported.
OAuth (GitLab.com)OAuth (Self-Hosted)Personal Access Token
1. Go to the **Integrations** page:
* **Personal**: [app.kilo.ai/integrations/gitlab](https://app.kilo.ai/integrations/gitlab)
* **Organization**: Your organization → Integrations → GitLab
2. Click **Connect GitLab**
3. Authorize the application on GitLab
4. You'll be redirected back to Kilo with the connection active
* * *
What Happens After Connecting
-----------------------------
Once your Git provider is connected, the following features are enabled in Kilo:
### Cloud Agents
* Run Kilo Code in the cloud from any device
* Auto-create branches and push work continuously
* Work from anywhere while keeping your repo in sync
### Code Reviews
* Automated AI review on every pull request or merge request
* Consistent feedback based on your team's standards
* See the [Code Reviews guide](https://kilo.ai/docs/automate/code-reviews/overview)
for setup
### Kilo Deploy
* Deploy Next.js 14 & 15 apps directly from Kilo
* Trigger rebuilds automatically on push
* Manage deployment logs and history
### Upcoming:
* **Bitbucket Integration**
* * *
Managing or Removing the Integration
------------------------------------
### GitHub
From the **Integrations** page, click "Manage on GitHub" to:
* View the GitHub account you connected
* Update which repositories Kilo has access to
* Disconnect GitHub entirely
* Reauthorize the app if permissions change
### GitLab
From the **Integrations** page:
* Click **Disconnect** to remove the GitLab connection
* Your tokens are cleared, but webhook configuration is preserved so reconnecting restores your setup
> Disconnecting from Kilo does not revoke OAuth tokens on GitLab's side. You can manually revoke them from **GitLab → User Settings → Applications → Authorized Applications**.
* * *
Troubleshooting
---------------
### GitHub
**"I don't see my repositories."** Ensure the KiloConnect App is installed for the correct GitHub org and that repo access includes the repositories you need.
**"My organization blocks third-party apps."** You may need an admin to approve installing GitHub Apps.
**"Cloud Agents or Deploy can't access my repo."** Revisit the GitHub app settings and confirm the app has the correct repo scope.
### GitLab
**"No projects listed after connecting."** Click the refresh button to sync projects from GitLab. Ensure your GitLab account has access to the projects you expect.
**"Permission denied" errors.** You need **Maintainer role** on the GitLab project for webhook and bot token creation.
**"Token expired."**
* **OAuth**: Tokens refresh automatically. If refresh fails, reconnect from the integration page.
* **PAT**: Create a new token in GitLab and reconnect in Kilo.
**"Self-hosted connection issues."**
* Verify your instance URL is accessible from the internet
* Ensure HTTPS is configured
* Check that OAuth application scopes include all required scopes
* Verify the redirect URI matches: `https://app.kilo.ai/api/integrations/gitlab/callback`
Copy page
---
# Quickstart
Quickstart
==========
This guide walks you through making your first AI model request with the Kilo AI Gateway. While this guide focuses on the [Vercel AI SDK](https://ai-sdk.dev/)
, you can also use the [OpenAI SDK](https://kilo.ai/docs/gateway/sdks-and-frameworks#openai-sdk)
, [Python](https://kilo.ai/docs/gateway/sdks-and-frameworks#python)
, or [cURL](https://kilo.ai/docs/gateway/sdks-and-frameworks#curl)
.
Prerequisites
-------------
You need a Kilo account with API credits. Sign up at [kilo.ai](https://kilo.ai/)
and add credits from your account dashboard.
Using the Vercel AI SDK
-----------------------
### 1\. Create your project
mkdir my-ai-app
cd my-ai-app
npm init -y
### 2\. Install dependencies
npm install ai @ai-sdk/openai dotenv
### 3\. Set up your API key
Create a `.env` file and add your Kilo API key:
KILO\_API\_KEY=your\_api\_key\_here
For step-by-step instructions on getting an API key, please see the [Kilo Gateway API Key instructions](https://kilo.ai/docs/getting-started/setup-authentication#kilo-gateway-api-key)
.
### 4\. Create and run your script
Create an `index.mjs` file:
import { streamText } from "ai"
import { createOpenAI } from "@ai-sdk/openai"
import "dotenv/config"
const kilo = createOpenAI({
baseURL: "https://api.kilo.ai/api/gateway",
apiKey: process.env.KILO\_API\_KEY,
})
async function main() {
const result = streamText({
model: kilo.chat("anthropic/claude-sonnet-4.5"),
prompt: "Invent a new holiday and describe its traditions.",
})
for await (const textPart of result.textStream) {
process.stdout.write(textPart)
}
console.log()
console.log("Token usage:", await result.usage)
console.log("Finish reason:", await result.finishReason)
}
main().catch(console.error)
Run the script:
node index.mjs
You should see the model's response streamed to your terminal.
Using the OpenAI SDK
--------------------
The Kilo AI Gateway is fully OpenAI-compatible, so you can use the OpenAI SDK by pointing it to the Kilo base URL.
TypeScriptPython
import OpenAI from "openai"
const client = new OpenAI({
apiKey: process.env.KILO\_API\_KEY,
baseURL: "https://api.kilo.ai/api/gateway",
})
const response = await client.chat.completions.create({
model: "anthropic/claude-sonnet-4.5",
messages: \[{ role: "user", content: "Why is the sky blue?" }\],
})
console.log(response.choices\[0\].message.content)
Using cURL
----------
curl -X POST "https://api.kilo.ai/api/gateway/chat/completions" \\
-H "Authorization: Bearer $KILO\_API\_KEY" \\
-H "Content-Type: application/json" \\
-d '{
"model": "anthropic/claude-sonnet-4.5",
"messages": \[\
{\
"role": "user",\
"content": "Why is the sky blue?"\
}\
\],
"stream": false
}'
Next steps
----------
* [Authentication](https://kilo.ai/docs/gateway/authentication)
-- Learn about API key management and BYOK
* [Models & Providers](https://kilo.ai/docs/gateway/models-and-providers)
-- Browse available models and understand routing
* [Streaming](https://kilo.ai/docs/gateway/streaming)
-- Implement real-time streaming responses
* [API Reference](https://kilo.ai/docs/gateway/api-reference)
-- Full request and response schemas
Copy page
---
# Sessions & Sharing
Sessions & Sharing
==================
A session is your platform-agnostic interaction with Kilo. It remembers your repository, your task, and the conversation so you can pause and resume work without losing context. Sessions are private to your account by default; you can optionally share a link with others who can read or fork your session.
What a session keeps for you
----------------------------
* Repository you chose to work on
* The conversation with the agent (your prompts and the agent’s replies)
* Task metadata (what the agent is doing for you)
* Optional Git context (for example, the repo URL and a lightweight snapshot of state) so the agent can pick up where it left off
This information lets Kilo show your recent sessions and continue right from the same context the next time you open it.
Quick start: Create a session
-----------------------------
1. Choose the repository. Pick the GitHub repository you want the agent to work with.
2. Describe the task. (e.g., “Add dark mode toggle and unit tests”).
3. Interact with Kilo via any of our interfaces- the CLI, the Cloud Agent, or the Extensions in your favorite IDE.
Continue where you left off
---------------------------
1. Open Cloud Agents → Recent Sessions and select the session you want to resume.
2. The chat will load with your previous messages and context so the agent can keep going without re-explaining your task.
Share a session (read‑only)
---------------------------
You can share a session with anyone via a link. A shared page:
1. Shows who shared it, the session title, and a short preview of the conversation
2. Provides safe “open in editor” or CLI actions so collaborators can try your session themselves
3. Lives at a URL like /share/SHARE\_ID and is visible to anyone with the link
Note: Sharing creates a read‑only copy for the public link so your private session remains in your account.
Fork a shared session (make it yours)
-------------------------------------
If someone shares a session with you, you can fork it to create your own copy:
* From the share page, choose “Open in Editor” (recommended), or run one of these commands:
* CLI: kilocode --fork SHARE\_ID
* In‑app command: /session fork SHARE\_ID
Forking creates a new session in your account, with its own ID, and copies over the relevant context so you can continue independently.
Where your session data lives
-----------------------------
To keep sessions fast and resumable, Kilo stores small JSON blobs associated with your session. These include your conversation history and task metadata. If you share a session, Kilo keeps a public copy used by the share link while your private session remains under your account.
Good practice:
1. Don’t paste secrets into prompts. Use environment variables when needed.
2. If a share link is created, treat it like any other public link—anyone with it can view the shared copy.
Power‑user tips
---------------
1. Keep your task description focused; you can refine it with follow‑up prompts.
2. Use setup commands to prepare the environment the agent runs in (e.g., install dependencies).
3. For collaboration, share and ask teammates to fork; you’ll each have independent progress and costs.
Copy page
---
# About Plans
About Plans
===========
Kilo Code accelerates development with AI-driven code generation and task automation. You can use Kilo Code as an open source extension in VS Code or JetBrains IDEs.
Organizations adopting AI accelerated coding at scale often want a better way to monitor, manage, and collaborate on their AI-drive practices.
Kilo Code's paid plans, Teams and Enterprise, are the solution for these organizations.
📝Note
Purchases of Kilo Code's paid plans are separate from model provider credits.
No credits are included with a Teams or Enterprise plan purchase.
What You Get from Kilo Teams
----------------------------
* **Zero markup** on AI provider costs - pay exactly what providers charge
* **No rate limiting** or quality degradation during peak usage
* **Centralized billing** - one invoice for your whole team
* **Complete transparency** - see every request, cost, and usage pattern
* **Team management** - roles, permissions, and usage controls
* **AI Adoption Score** - see how well your team is using AI to accelerate development
**Cost:** $15 per user per month
What You Get from Kilo Enterprise
---------------------------------
**Everything from Teams** plus...
* **Limit models and/or providers** to control costs and ensure compliance
* **Audit Logs** for enhanced observability
* **SSO, OIDC, & SCIM support**
* **SLA commitments** for support issues
* **Dedicated support channels** for private, direct communication
**Cost:** [Contact Sales](https://kilo.ai/contact-sales)
Copy page
---
# Authentication
Authentication
==============
The Kilo AI Gateway supports multiple authentication methods depending on your use case.
API key authentication
----------------------
The primary authentication method is a Bearer token passed in the `Authorization` header:
Authorization: Bearer
API keys are JWT tokens tied to your Kilo account. See [how to get your API key](https://kilo.ai/docs/getting-started/setup-authentication#kilo-gateway-api-key)
for step-by-step instructions.
### Using your API key
TypeScriptPythoncURL
import { createOpenAI } from "@ai-sdk/openai"
const kilo = createOpenAI({
baseURL: "https://api.kilo.ai/api/gateway",
apiKey: process.env.KILO\_API\_KEY,
})
Organization tokens
-------------------
When making requests on behalf of an organization, include the organization ID in the request header:
X-KiloCode-OrganizationId: your\_org\_id
Organization tokens are scoped with a 15-minute expiry and enforce the organization's policies, including model allow lists, provider restrictions, and per-user spending limits.
Anonymous access
----------------
The gateway allows unauthenticated access for free models only. Anonymous requests are identified by IP address and are subject to rate limiting (200 requests per hour per IP).
Free models include models tagged with `:free` in their model ID, such as `minimax/minimax-m2.1:free` and `z-ai/glm-5:free`.
Bring Your Own Key (BYOK)
-------------------------
BYOK lets you use your own provider API keys with the Kilo AI Gateway. When a BYOK key is configured, the gateway routes requests through Vercel AI Gateway using your key. You are billed directly by the provider -- Kilo does not add any markup.
### Supported BYOK providers
| Provider | BYOK Key ID |
| --- | --- |
| Anthropic | `anthropic` |
| OpenAI | `openai` |
| Google AI Studio | `google` |
| Mistral | `mistral` |
| MiniMax | `minimax` |
| xAI | `xai` |
| Z.AI | `zai` |
| Codestral (FIM) | `codestral` |
### How BYOK works
1. Add your provider API key in the Kilo dashboard or through your Kilo Code extension settings
2. Keys are encrypted at rest using AES encryption
3. When you make a request for a model from that provider, the gateway automatically uses your key
4. Usage is tracked but not billed to your Kilo balance (cost is set to $0)
5. If your BYOK key fails, the request will not automatically fall back to Kilo's keys
### BYOK routing
When a BYOK key is detected, the request is routed through Vercel AI Gateway with your credentials:
Client → Kilo Gateway → Vercel AI Gateway (with your key) → Provider
This provides the benefit of Vercel's reliability infrastructure while using your own billing relationship with the provider.
Request headers
---------------
The gateway accepts the following headers:
| Header | Required | Description |
| --- | --- | --- |
| `Authorization` | Yes (unless free model) | `Bearer ` |
| `Content-Type` | Yes | `application/json` |
| `X-KiloCode-OrganizationId` | No | Organization context for org-scoped requests |
| `X-KiloCode-TaskId` | No | Task identifier for prompt cache keying |
| `X-KiloCode-Version` | No | Client version string |
| `x-kilocode-mode` | No | Mode hint for `kilo-auto` model routing |
Copy page
---
# Kilo Code Documentation
Building for the Kilo Ecosystem
===============================
Community Branding Guidelines
-----------------------------
We love seeing what the community builds on top of Kilo! To help you launch your projects while protecting the clarity of the Kilo brand, we ask that you follow these guidelines for naming and assets.
Naming Community Products
-------------------------
If you are creating an integration, plugin, or derivative tool for the Kilo ecosystem and would like to use the Kilo name, please use the following naming format: **'\[Your Product Name\] for Kilo'**.
This naming convention is important because it ensures:
* **Independence:** The product is recognized as an independent project, not officially connected to Kilo as a company.
* **Maintenance:** Users understand the product is maintained and supported by you (the community creator), not the core Kilo team.
* **Clarity:** New users can easily distinguish between official Kilo releases and the diverse range of community-built integrations.
Maintenance Expectations
------------------------
To ensure a high-quality experience for all users, we ask that maintainers using the Kilo name commit to keeping their projects active and aligned with the current ecosystem. Specifically, we expect community projects to:
* **Conduct Monthly Compatibility Checks:** Verify that the integration remains functional with the latest Kilo versions and APIs at least once per month.
* **Proactive Updates:** Address breaking changes promptly when core platform updates impact your project's functionality.
* **Responsive Support:** Maintain a reasonable timeframe for responding to critical bugs or security reports from users.
* **Version Documentation:** Clearly state which versions of Kilo are supported and list any known limitations or requirements.
Note: Projects that become abandoned, unmaintained, or persistently incompatible may be asked to remove the "Kilo" name to prevent user frustration and ensure the ecosystem remains reliable.
Brand Assets & Logos
--------------------
Developers are welcome to use any logos available in our open-source repositories to help identify their project's compatibility with Kilo. Please ensure they are used to indicate association or compatibility (e.g., "Works with Kilo") and not in a way that suggests the project is an official Kilo product.
Copy page
---
# VS Code Extension
VS Code Extension
=================
Installation
------------
### Install directly
1. If you don't have VS Code installed, download it from [code.visualstudio.com](https://code.visualstudio.com/)
2. Then, you can click the button below to install Kilo Code directly from the VS Code Marketplace:
[](vscode:extension/kilocode.kilo-code)
### Install from VS Code Marketplace
1. Open VS Code
2. Press `Ctrl+Shift+X` (Windows/Linux) or `Cmd+Shift+X` (macOS) to open Extensions
3. Search for "Kilo Code"
4. Click **Install**
### Install via Command Line
code --install-extension kilocode.kilo-code
### Verify Installation
After installation, you should see the Kilo Code icon () in the Activity Bar on the left side of VS Code. Click it to open the Kilo Code panel.
Copy page
---
# Security Reviews
Security Reviews
================
Most teams are drowning in Dependabot alerts. The majority of reported CVEs aren't actually exploitable because the vulnerable code path is never used — but figuring that out manually doesn't scale.
Kilo's Security Agent fixes this. It syncs your Dependabot alerts, triages them with AI, and performs deep codebase analysis to determine whether each vulnerability is actually reachable in your code. Non-exploitable findings can be auto-dismissed and synced back to GitHub.
Available on **Teams** and **Enterprise** plans.
* * *
Prerequisites
-------------
You need three things before enabling Security Reviews:
1. The [KiloConnect GitHub App](https://kilo.ai/docs/automate/integrations#connecting-github)
installed with `vulnerability_alerts` permission
2. [Dependabot alerts](https://docs.github.com/en/code-security/dependabot/dependabot-alerts)
enabled on your target repositories
3. Kilo Code credits for AI model usage
* * *
Get started
-----------
1. Go to the **Security Agent** page — either from your [personal dashboard](https://app.kilo.ai/security-agent)
or your organization's dashboard
2. Connect GitHub if you haven't already via the [Integrations page](https://kilo.ai/docs/automate/integrations)
3. Choose which repositories the agent should monitor (all or specific ones)
4. Toggle the agent on — this kicks off an initial sync of your Dependabot alerts
The agent syncs alerts every 6 hours automatically after that. You can trigger a manual sync at any time from the Findings page.
* * *
Understand the pipeline
-----------------------
The Security Agent processes each vulnerability alert through four stages.
**Sync** pulls Dependabot alerts from your connected repositories on a 6-hour cycle.
**Triage** runs a quick LLM assessment of the alert metadata — the advisory, severity, package, and version range. Each finding gets classified as **Safe to Dismiss**, **Needs Analysis**, or **Needs Review**.
**Deep analysis** kicks in for findings that warrant it. The Cloud Agent performs a full codebase search for actual usage of the vulnerable package, checks whether the vulnerable code paths are reachable, and suggests fixes when possible.
**Auto-dismiss** (when enabled) automatically closes non-exploitable findings and syncs that dismissal back to GitHub with a `[Kilo Code auto-dismiss]` prefix.
* * *
Choose an analysis mode
-----------------------
You control how much analysis the agent performs via three modes:
| Mode | What happens |
| --- | --- |
| **Auto** | Triage first, then deep analysis only when triage recommends it |
| **Shallow** | Triage only — no deep analysis |
| **Deep** | Full codebase analysis for every finding, regardless of triage result |
**Auto** is the default. It gives you the best balance between thoroughness and credit usage — deep analysis only runs where triage says it's needed.
* * *
Use the dashboard
-----------------
The dashboard is the Security Agent's landing page. It gives you a high-level view of your security posture, and every widget links through to the Findings page with the relevant filters applied. Use the repository filter at the top to scope everything to specific repos.
**SLA compliance** is the hero metric — your overall compliance percentage with a per-severity breakdown, linking directly to any overdue findings.
**Severity breakdown** shows open finding counts across Critical, High, Medium, and Low in a 2×2 grid. Click any severity to see those findings.
**Finding status** is a donut chart of Open, Fixed, and Dismissed findings. Click a segment to filter the Findings page.
**Analysis coverage** shows a progress bar of analyzed vs. total findings, with an outcome breakdown (Exploitable, Not Exploitable, Safe to Dismiss, etc.).
**Mean time to resolution** compares your average resolution time per severity against your configured SLA targets.
**Overdue findings** lists the top 10 findings past their SLA deadline — severity, title, repo, package, and how many days overdue.
**Repository health** is a per-repo summary with severity counts, overdue count, and SLA compliance percentage.
* * *
Browse findings
---------------
The Findings page is where you work through your vulnerability backlog. At the top, a summary bar shows open/closed counts, your current analysis capacity, when the last sync ran, and a **Sync** button for manual refreshes.
Filter findings by repository, severity, outcome, or sort order to focus on what matters most. Each row shows a severity badge, the finding title and package name, its current outcome label, and an action button — **Analyze**, **Retry**, **Review**, or **View Details** depending on state.
Findings past their SLA deadline are highlighted in red so they're easy to spot. The page paginates at 20 results and auto-refreshes every 5 seconds when analyses are running.
* * *
Inspect a finding
-----------------
Click any finding to open its detail dialog. There are three tabs.
The **Details** tab shows the vulnerability metadata — package name and ecosystem, CVE and GHSA IDs, the vulnerable and patched version ranges, manifest path, and a full description. You'll also find a **View on GitHub** link to the original Dependabot alert, plus detection and last sync dates.
The **Triage** tab shows the agent's initial assessment: a suggested action badge (Safe to Dismiss, Needs Analysis, or Needs Review), a confidence level, and the reasoning behind the decision. If triage hasn't run yet, you can start it here. If it failed, you can retry.
The **Analysis** tab shows the deep analysis results when available — whether the vulnerability is exploitable or not, a summary, up to 5 usage locations found in your codebase, a suggested fix, and full analysis details. There's also a link to continue the investigation in Cloud Agent if you want to dig deeper.
* * *
Understand statuses and outcomes
--------------------------------
Every finding has a **primary status** and an **outcome label**. The status tracks the overall lifecycle, while the outcome reflects what the AI determined.
**Primary status:**
| Status | Meaning |
| --- | --- |
| Open | Active vulnerability that needs attention |
| Fixed | Resolved — detected from the Dependabot alert state |
| Dismissed | Closed by a user or by auto-dismiss |
**Outcome labels:**
| Outcome | Meaning |
| --- | --- |
| Not Analyzed | No analysis has run yet |
| Analyzing | Analysis is currently in progress |
| Analysis Failed | Something went wrong during analysis |
| Exploitable | Deep analysis confirmed it's exploitable |
| Not Exploitable | Deep analysis confirmed it's not reachable |
| Safe to Dismiss | Triage recommends dismissing this finding |
| Needs Review | Triage recommends manual review |
| Triage Complete | Triage is done, no deep analysis needed |
* * *
Dismiss findings
----------------
There are two ways findings get dismissed.
**Manually**, you select a finding and choose **Dismiss**. You'll pick a reason — Fix started, No bandwidth, Tolerable risk, Inaccurate, or Not used — and optionally add a comment. The dismissal syncs back to GitHub and closes the corresponding Dependabot alert.
**Automatically**, when auto-dismiss is enabled, the agent closes findings on its own. After deep analysis, any finding determined to be not exploitable is dismissed immediately. After triage, findings with a "dismiss" recommendation are dismissed if they meet your configured confidence threshold. All auto-dismissed alerts are written back to GitHub with a `[Kilo Code auto-dismiss]` prefix.
* * *
Configure the agent
-------------------
All settings are on the Security Agent configuration page.
**Repository selection** lets you monitor all repositories accessible to the KiloConnect App or pick specific ones from a list.
**AI models** can be configured separately for triage and deep analysis. The default is Claude Opus 4.6.
**Analysis mode** controls the pipeline — Auto (triage then selective deep analysis), Shallow (triage only), or Deep (full analysis on everything). See [Choose an analysis mode](https://kilo.ai/docs/deploy-secure/security-reviews#choose-an-analysis-mode)
for details.
**Auto-analysis** toggles whether new findings are analyzed automatically. When on, you set a minimum severity threshold (Critical only, High+, Medium+, or All) and whether to include findings that existed before you enabled the feature.
**Auto-dismiss** toggles automatic dismissal of non-exploitable findings. You configure a confidence threshold: High only, Medium+, or Any. The "Any" option dismisses at any confidence level — use it with caution.
**SLA deadlines** set how many days your team has to remediate findings at each severity level:
| Severity | Default |
| --- | --- |
| Critical | 15 days |
| High | 30 days |
| Medium | 45 days |
| Low | 90 days |
You can adjust these per your organization's policies and reset to defaults at any time.
* * *
Clear orphaned findings
-----------------------
If repositories are removed from your GitHub integration or become inaccessible, their findings become orphaned. When this happens, a card appears on the settings page to permanently delete them.
⚠️Warning
Clearing orphaned findings is permanent and cannot be undone. Only do this when you're sure the repositories won't be reconnected.
* * *
Compare with Code Reviews
-------------------------
Kilo offers two complementary security features that work best together.
[**Code Reviews**](https://kilo.ai/docs/automate/code-reviews/overview)
analyzes PR diffs for code quality issues, including security patterns like `innerHTML` usage and hardcoded secrets. It catches problems in new code as it's written.
**Security Reviews** takes a different angle — it contextualizes dependency vulnerability alerts across your entire codebase to determine whether Dependabot-reported CVEs are actually exploitable based on how your code uses the affected packages.
Together, Code Reviews covers your new code surface and Security Reviews covers your dependency vulnerability surface.
* * *
Limitations
-----------
Security Reviews currently works with **GitHub only** — GitLab support is not yet available.
The only data source right now is **Dependabot alerts**. Additional sources like npm audit and SBOM analysis are planned.
There is a **per-account limit** on concurrent analyses. If you have a large backlog, findings will be queued and processed in order.
Copy page
---
# Cline to Kilo: Contributor Migration Guide
Cline to Kilo: Contributor Migration Guide
==========================================
If you've been contributing to Cline and you're ready to bring those skills over to Kilo Code, you're in the right place. This guide will walk you through what's different, what's the same, and how to get up and running as a Kilo contributor.
The good news: if you've been contributing to Cline, you already have most of the skills you need. The workflows are similar, but there are some differences worth knowing about before you dive in.
The Quick Version
-----------------
| What You Know from Cline | What's Different in Kilo |
| --- | --- |
| `npm run install:all` | `pnpm install` |
| `npm run protos` required before first build | Not required |
| F5 to launch dev extension | Same — F5 to launch |
| Changesets for versioning | Same — `pnpm changeset` |
Setting Up Your Environment
---------------------------
### What Stays the Same
* Git, Node.js (v20.18.1+), and VS Code are still your core tools
* F5 still launches the extension in debug mode
* The project structure follows similar patterns (`src/`, `webview-ui/`, `e2e/`)
### What's Changed
**Package Manager: pnpm instead of npm**
Kilo uses pnpm for dependency management. If you don't have it installed:
npm install -g pnpm
Then instead of:
\# Cline
npm run install:all
You'll run:
\# Kilo
pnpm install
This single command handles everything — the main extension, webview UI, and e2e tests.
**No Protocol Buffer Generation**
In Cline, you needed to run `npm run protos` before your first build. Kilo doesn't require this step. Just install dependencies and you're ready to go.
**Building the Extension**
pnpm build
This builds the webview UI, compiles TypeScript, bundles everything, and drops a `.vsix` file in `bin/`.
Development Workflow Differences
--------------------------------
### Hot Reloading
Kilo has improved hot reloading in development mode:
* **Webview UI changes:** Apply immediately without restart (same as Cline)
* **Core extension changes:** In dev mode (`NODE_ENV="development"`), Kilo automatically triggers `workbench.action.reloadWindow` — no manual debugger restarts needed
In Cline, you had to manually stop debugging, kill background tasks, and restart. Kilo handles this for you during development.
**Note:** Production builds still require the manual stop/restart cycle.
### Git Hooks
Kilo uses Husky for git hooks, which run automatically:
**Pre-commit:**
* Blocks commits directly to main
* Runs type generation (`pnpm generate-types`)
* Checks for type file changes
* Runs lint-staged
**Pre-push:**
* Blocks pushes directly to main
* Compiles the project
* Reminds you to create a changeset if needed
These hooks catch issues early. If a commit or push fails, check the hook output for details.
Testing
-------
### Running Tests
\# All tests
pnpm test
# Extension tests only
pnpm test:extension
# Webview tests only
pnpm test:webview
# E2E / Integration tests
pnpm test:integration
### E2E Test Setup
For integration tests, create a `.env.local` file in the project root:
OPENROUTER\_API\_KEY=sk-or-v1-...
Check `e2e/VSCODE_INTEGRATION_TESTS.md` for full details.
Contributing Code
-----------------
### Creating a Pull Request
The changeset workflow is identical to Cline:
pnpm changeset
Choose your version bump:
* **major** — breaking changes
* **minor** — new features
* **patch** — bug fixes
Commit the generated `.changeset` file with your changes.
### Code Quality Checks
pnpm lint # ESLint
pnpm check-types # TypeScript type checking
What's New in Kilo
------------------
Beyond the workflow changes, Kilo has expanded significantly as a platform. As a contributor, you might find opportunities to work on:
* **Multiple interfaces:** VS Code, JetBrains, CLI, and web (Cloud Agents, App Builder)
* **Specialized Agent modes:** Code, Ask, Debug, Architect, Orchestrator
* **Custom Modes:** A system for creating and sharing specialized agent configurations
* **Platform features:** Sessions, Parallel Agents, Deploy, Code Reviews, Managed Indexing
* **Kilo Marketplace:** A community-driven repository where you can contribute Skills (modular workflows), MCP Servers (tool integrations), and Modes (custom agent behaviors)
Check the [Architecture Overview](https://kilo.ai/docs/contributing/architecture)
to understand how these pieces fit together.
Getting Help
------------
* **Discord:** Real-time support from the community
* **GitHub Discussions:** For questions and feature ideas
* **Reddit:** Community discussions
TL;DR Checklist
---------------
* ✅ Install pnpm globally
* ✅ Fork and clone the Kilo repo
* ✅ Run `pnpm install` (not `npm run install:all`)
* ✅ Skip the protos step — it's not needed
* ✅ Press F5 to launch the dev extension
* ✅ Create a changeset before your PR (`pnpm changeset`)
* ✅ Let the git hooks do their thing
Welcome to Kilo. We're glad you're here.
Copy page
---
# KiloClaw Dashboard Reference
KiloClaw Dashboard
==================
This page covers everything you can do from the KiloClaw dashboard. For getting started, see [KiloClaw Overview](https://kilo.ai/docs/kiloclaw/overview)
.
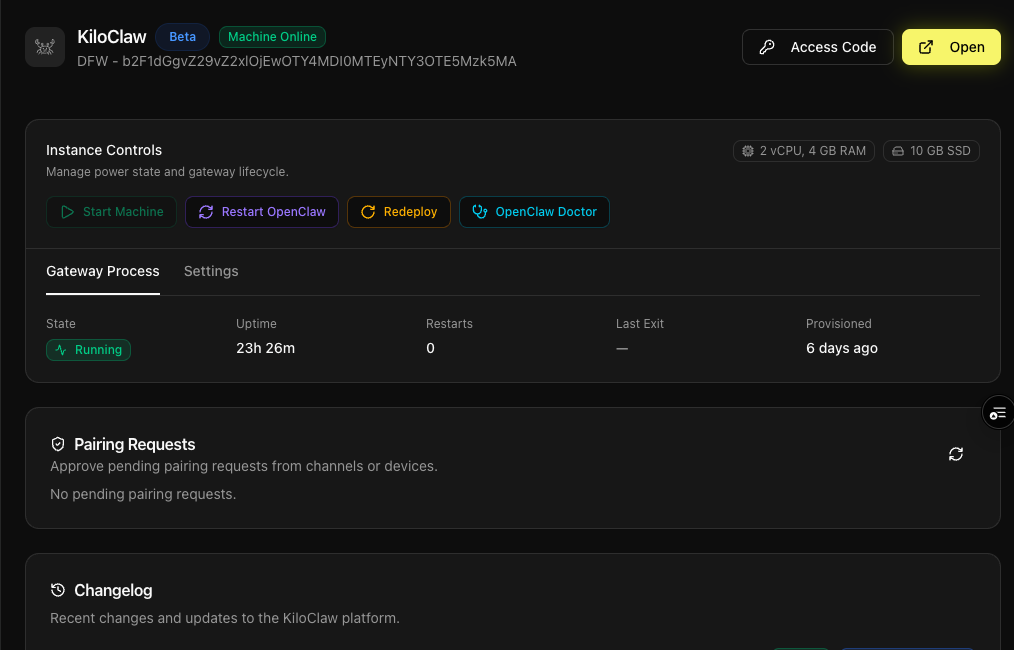
The KiloClaw Dashboard
Instance Status
---------------
Your instance is always in one of these states as indicated by the status label at the top of your dashboard:
| Status | Label | Meaning |
| --- | --- | --- |
| **Running** | Machine Online | Your agent is online and reachable |
| **Stopped** | Machine Stopped | The machine is off, but all your files and data are preserved |
| **Provisioned** | Provisioned | Your instance has been created but never started |
| **Destroying** | Destroying | The instance is being permanently deleted |
Instance Controls
-----------------
There are four actions you can take on your instance. Which ones are available depends on the current status.
### ▶️ Start Machine
Boots your instance. If this is the first time starting after provisioning, the machine is created; otherwise, the existing machine resumes. Can take up to 60 seconds.
Available when the instance is **stopped** or **provisioned**.
### 🔄 Restart OpenClaw
Restarts just the OpenClaw process without rebooting the machine. This is a quick way to recover from a process-level issue — active sessions will briefly disconnect and reconnect automatically.
Available when the instance is **running**.
### ↩️ Redeploy
Stops the machine, applies your current configuration (environment variables, secrets, channel tokens), and starts it again. When redeploying, you have two options:
* **Redeploy** — Redeploys using the same platform version your instance was originally set up with. Use this when you only need to apply configuration changes without changing the underlying platform.
* **Upgrade & Redeploy** — Upgrades your instance to the latest supported platform version, then redeploys. Use this to pick up new features and fixes from the changelog.
**Your files, git repos, cron jobs, and everything on your persistent volume are preserved.** Redeploy is not a factory reset — think of it as "apply config and restart" (or "upgrade and restart" if you choose **Upgrade & Redeploy**).
You should redeploy when:
* The changelog shows "Redeploy Required" or "Redeploy Suggested" (use **Upgrade & Redeploy**)
* You've changed channel tokens or secrets in Settings (use **Redeploy**)
* You want to pick up the latest platform updates (use **Upgrade & Redeploy**)
Available when the instance is **running**.
### 🩺 OpenClaw Doctor
Runs diagnostics and automatically fixes common configuration issues. This is the recommended first step when something isn't working. Output is shown in real time.
Available when the instance is **running**.
Gateway Process
---------------
The Gateway Process tab shows the health of the OpenClaw process running inside your machine:
* **State** — Whether the process is Running, Stopped, Starting, Stopping, Crashed, or Shutting Down
* **Uptime** — How long it's been running since the last start
* **Restarts** — How many times the process has been automatically restarted
* **Last Exit** — The exit code and timestamp from the last time the process stopped or crashed
If the gateway crashes, it's automatically restarted. The machine itself can be running even when the gateway process is down — they're independent.
📝Note
Gateway process info is only available when the machine is running.
Instance Specs
--------------
The specs of your instance, including number of CPUs, memory, and storage, are visible at the top right of the instance controls section.
Settings
--------
### Changing the Model
Select a model from the dropdown and click **Save & Provision**. The API key is platform-managed and refreshes automatically when you save — you never need to enter one. The key has a 30-day expiry.
For access to the full catalog of 335+ models, use the `/model` and `/models` commands in the [Control UI Chat](https://kilo.ai/docs/kiloclaw/control-ui#changing-models)
.
### Channels
You can connect Telegram, Discord, and Slack by entering bot tokens in the Settings tab. See [Connecting Chat Platforms](https://kilo.ai/docs/kiloclaw/chat-platforms)
for setup instructions.
ℹ️Info
After saving channel tokens, you need to **Redeploy** or **Restart OpenClaw** for the changes to take effect.
### Version Pinning
You can pin your instance to a specific OpenClaw version and variant from the Settings tab. This gives you control over when you upgrade — your instance stays on the pinned version until you choose to change it.
Select a version and variant from the dropdowns and click **Save**. To return to automatic updates, clear the version pin and save.
See [Version Pinning](https://kilo.ai/docs/kiloclaw/version-pinning)
for details.
### Version Status Indicators
The Settings tab shows badges indicating your OpenClaw version status:
* **Update available** — A newer OpenClaw version is available in the catalog. Use **Upgrade & Redeploy** to move to that version.
* **Modified** — OpenClaw was updated on this machine independently of the image. Redeploying will revert to the image version.
These indicators help you track whether your running version is up to date or if a newer version exists in the catalog.
### Restore Default Config
If your OpenClaw configuration gets corrupted — for example, if the agent edits `openclaw.json` and introduces an error — you can restore it without a full redeploy.
In **Settings > Danger Zone**, click **Restore Config**. This will:
1. Back up your current `openclaw.json` to `/root/.openclaw/`
2. Rewrite `openclaw.json` from your environment variables (channel tokens, model settings, etc.)
3. Restart the gateway
Your files, workspace, and persistent data are not affected. Only the OpenClaw configuration file is reset.
> 💡 **Tip** If your instance is in a crash loop and you can't access the Control UI, try **Restore Config** from the KiloClaw dashboard first before redeploying.
⚠️Warning
This action cannot be undone. Make sure you've saved any important changes to your configuration before restoring.
### Stop, Destroy & Restore
At the bottom of Settings:
* **Stop Instance** — Shuts down the machine. All your data is preserved and you can start it again later.
* **Destroy Instance** — Permanently deletes your instance and all its data, including files, configuration, and workspace. This cannot be undone.
* **Restore Config** — Restores your original `openclaw.json` in your instance. The existing `openclaw.json` is backed up to `/root/.openclaw` before the restore takes place.
Accessing the Control UI
------------------------
When your instance is running you can access the [OpenClaw Control UI](https://kilo.ai/docs/kiloclaw/control-ui)
— a browser-based dashboard for managing your agent, channels, sessions, exec approvals, and more:
1. Click **Open** to launch the OpenClaw web interface in a new tab
See the [Control UI reference](https://kilo.ai/docs/kiloclaw/control-ui)
for a full overview of its capabilities.
⚠️Warning
Do not use the **Update** feature in the OpenClaw Control UI to update KiloClaw. Use **Redeploy** from the KiloClaw Dashboard instead. Updating via the Control UI will not apply the correct KiloClaw platform image and may break your instance.
Pairing Requests
----------------
When your instance is running, the dashboard shows any pending pairing requests. These appear when:
* Someone messages your bot on Telegram, Discord, or Slack for the first time
* A new browser or device connects to the Control UI
You need to **approve** each request before the user or device can interact with your agent. See [Pairing Requests](https://kilo.ai/docs/kiloclaw/chat-platforms#pairing-requests)
for details.
Changelog
---------
The dashboard shows recent KiloClaw platform updates. Each entry is tagged as a **feature** or **bugfix**, and some include a deploy hint:
* **Redeploy Required** — You must redeploy for this change to take effect on your instance
* **Redeploy Suggested** — Redeploying is recommended but not strictly necessary
Instance Lifecycle
------------------
| Action | What Happens | Data Preserved? |
| --- | --- | --- |
| **Create & Provision** | Allocates storage in the best region available and saves your config. | N/A |
| **Start Machine** | Boots the machine and starts OpenClaw. | Yes |
| **Stop Instance** | Shuts down the machine. | Yes |
| **Restart OpenClaw** | Restarts the OpenClaw process. Machine stays up. | Yes |
| **Redeploy** | Stops, applies config, and restarts the machine (same version or upgraded). | Yes |
| **Destroy Instance** | Permanently deletes everything. | No |
Machine Specs
-------------
Each instance runs on a dedicated machine — there is no shared infrastructure between users.
| Spec | Value |
| --- | --- |
| CPU | 2 shared vCPUs |
| Memory | 3 GB RAM |
| Storage | 10 GB persistent SSD |
Your storage is region-pinned — once your instance is created in a region (e.g., DFW), it always runs there. OpenClaw config lives at `/root/.openclaw` and the workspace at `/root/clawd`.
ℹ️Info
These are the beta specifications for machines and subject to change without notice.
Related
-------
* [KiloClaw Overview](https://kilo.ai/docs/kiloclaw/overview)
* [OpenClaw Control UI](https://kilo.ai/docs/kiloclaw/control-ui)
* [Connecting Chat Platforms](https://kilo.ai/docs/kiloclaw/chat-platforms)
* [Troubleshooting](https://kilo.ai/docs/kiloclaw/troubleshooting)
* [KiloClaw Pricing](https://kilo.ai/docs/kiloclaw/pricing)
Copy page
---
# Models & Providers
Models & Providers
==================
The Kilo AI Gateway provides access to hundreds of AI models from multiple providers through a single unified API. You can switch between models by changing the model ID string -- no code changes required.
Specifying a model
------------------
Models are identified using the format `provider/model-name`. Pass this as the `model` parameter in your request:
const result = streamText({
model: kilo.chat("anthropic/claude-sonnet-4.6"),
prompt: "Hello!",
})
Or in a raw API request:
{
"model": "anthropic/claude-sonnet-4.6",
"messages": \[{ "role": "user", "content": "Hello!" }\]
}
Available models
----------------
You can browse the full list of available models via the models endpoint:
GET https://api.kilo.ai/api/gateway/models
This returns model information including pricing, context window, and supported features. No authentication is required.
### Popular models
| Model ID | Provider | Description |
| --- | --- | --- |
| `anthropic/claude-opus-4.6` | Anthropic | Most capable Claude model for complex reasoning |
| `anthropic/claude-sonnet-4.6` | Anthropic | Balanced performance and cost |
| `anthropic/claude-haiku-4.5` | Anthropic | Fast and cost-effective |
| `openai/gpt-5.2` | OpenAI | Latest GPT model |
| `google/gemini-3-pro-preview` | Google | Advanced reasoning with 1M context |
| `google/gemini-3-flash-preview` | Google | Fast and efficient |
| `x-ai/grok-code-fast-1` | xAI | Optimized for code tasks |
| `moonshotai/kimi-k2.5` | Moonshot | Strong multilingual model |
### Free models
Several models are available at no cost, subject to rate limits:
| Model ID | Description |
| --- | --- |
| `minimax/minimax-m2.1:free` | MiniMax M2.1 |
| `z-ai/glm-5:free` | Z.AI GLM-5 |
| `giga-potato` | Community model |
| `corethink:free` | CoreThink reasoning model |
| `arcee-ai/trinity-large-preview:free` | Arcee Trinity |
Free models are available to both authenticated and anonymous users. Anonymous users are rate-limited to 200 requests per hour per IP address.
Auto models
-----------
Kilo Auto virtual models automatically select the best underlying model based on the task type. The selection is controlled by the `x-kilocode-mode` request header.
### `kilo-auto/frontier`
Routes to the most capable paid models optimizing for cost, performance, and capabilities.
| Mode | Resolved Model |
| --- | --- |
| `plan`, `general`, `architect`, `orchestrator`, `ask`, `debug` | `anthropic/claude-opus-4.6` |
| `build`, `explore`, `code` | `anthropic/claude-sonnet-4.6` |
| Default (no mode specified) | `anthropic/claude-sonnet-4.6` |
### `kilo-auto/balanced`
Follows the same mode-based routing as Frontier but uses more cost-effective models.
| Mode | Resolved Model |
| --- | --- |
| `plan`, `general`, `architect`, `orchestrator`, `ask`, `debug` | `moonshotai/kimi-k2.5` |
| `build`, `explore`, `code` | `minimax/minimax-m2.7` |
| Default (no mode specified) | `minimax/minimax-m2.7` |
### `kilo-auto/free`
The best available free model for each mode.
| Mode | Resolved Model |
| --- | --- |
| All modes | `minimax/minimax-m2.5:free` |
| Default (no mode specified) | `minimax/minimax-m2.5:free` |
### Example usage
{
"model": "kilo-auto/frontier",
"messages": \[{ "role": "user", "content": "Help me design a database schema" }\]
}
With the mode header:
curl -X POST "https://api.kilo.ai/api/gateway/chat/completions" \\
-H "Authorization: Bearer $KILO\_API\_KEY" \\
-H "x-kilocode-mode: plan" \\
-H "Content-Type: application/json" \\
-d '{"model": "kilo-auto/balanced", "messages": \[{"role": "user", "content": "Design a database schema"}\]}'
Providers
---------
The gateway routes requests to the appropriate provider based on the model and your configuration:
| Provider | Slug | Description |
| --- | --- | --- |
| OpenRouter | `openrouter` | Primary gateway for most models |
| Vercel AI Gateway | `vercel` | BYOK routing and select A/B testing |
| Mistral | `mistral` | FIM completions (Codestral) |
| xAI | `x-ai` | Grok models (direct) |
| MiniMax | `minimax` | MiniMax models (direct) |
| CoreThink | `corethink` | CoreThink reasoning model |
| Inception | `inception` | InceptionLabs models |
| Martian | `martian` | Optimized xAI models |
| StreamLake | `streamlake` | KAT-Coder models |
Provider routing
----------------
The gateway uses the following priority for routing requests:
1. **BYOK check**: If you have a BYOK key for the model's provider, the request is routed through Vercel AI Gateway using your key
2. **Free model routing**: If the model is a Kilo-hosted free model, it's routed to its designated provider
3. **Default routing**: All other requests go through OpenRouter
### Preferred inference providers
For models available through multiple providers, the gateway may use a preferred provider for better performance:
| Model Family | Preferred Provider |
| --- | --- |
| Anthropic models | Amazon Bedrock |
| MiniMax models | MiniMax (direct) |
| Mistral models | Mistral (direct) |
| Moonshot models | Moonshot AI (direct) |
These preferences are sent as hints to OpenRouter, which may override them based on availability and load.
Listing models
--------------
### Models endpoint
GET https://api.kilo.ai/api/gateway/models
Returns an OpenAI-compatible list of all available models with metadata including pricing, context window, and capabilities.
### Providers endpoint
GET https://api.kilo.ai/api/gateway/providers
Returns a list of all available inference providers.
### Models by provider
GET https://api.kilo.ai/api/gateway/models-by-provider
Returns models grouped by their provider, useful for building model selection interfaces.
Copy page
---
# Getting Started with Teams
Get Started with Kilo Seats in 10 Minutes
=========================================
seats for Kilo in the Teams or Enterprise subscription brings transparent AI coding to your entire engineering organization. No markup on AI costs, no vendor lock-in, complete usage visibility.
Before You Begin
----------------
* Your GitHub account or a Google Workspaces company email
* Approximate team size for initial seat planning
* Credit card for billing setup
* VS Code or a JetBrains IDE installed for team members
Quick Setup Guide
-----------------
### Step 1: Create Your Organization
1. Visit [app.kilo.ai](https://app.kilo.ai/)
2. Sign up using your company Google Workspaces or GitHub account
* Note: We recommend starting with your GitHub account rather than a personal Google account, but we can change it later.
3. Click **Organizations** in the left sidebar and then **Create New Organization**
### Step 2: Subscribe to Teams or Enterprise
1. Enter your organization name
2. Select your initial seat count and tier (Teams or Enterprise)
3. Complete checkout process
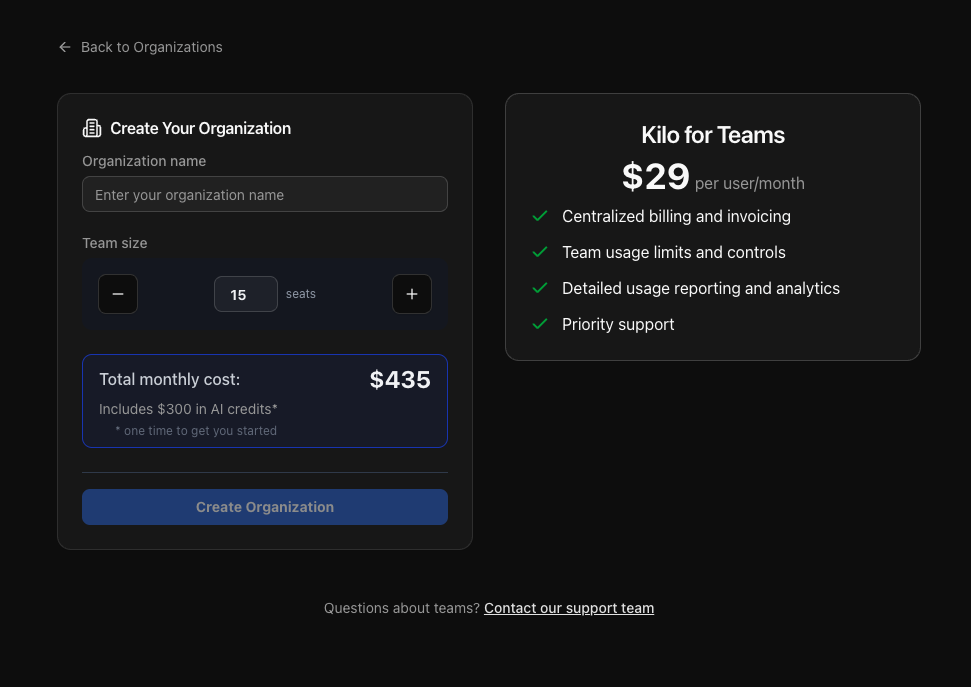
### Step 3: Invite Your Team
1. Go to your **Organization**
2. Click **Invite Member**
3. Enter team member email
4. Assign roles:
* **Owner** - Full administrative access
* **Admin** - Team management without billing
* **Member** - Standard usage access
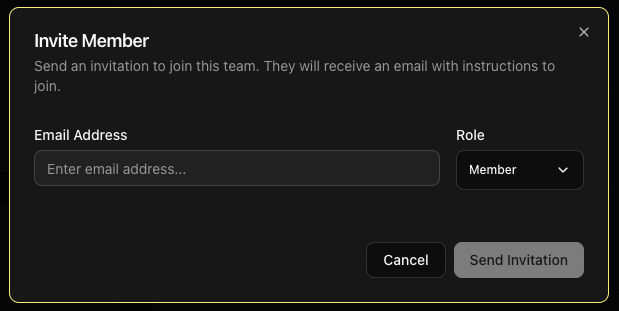
### Step 4: Team Members Install Extension
Team members receive invitation emails with these steps:
1. Accept the team invitation
2. Install Kilo Code from [VS Code Marketplace](vscode:extension/kilocode.kilo-code)
3. Sign in with their invited email
4. Start coding with AI assistance
What Happens Next
-----------------
* **Immediate access** to all supported AI models
* **Real-time usage tracking** in your dashboard
* **Transparent billing** - see exactly what each request costs
* **Team analytics** - understand usage patterns and optimization opportunities
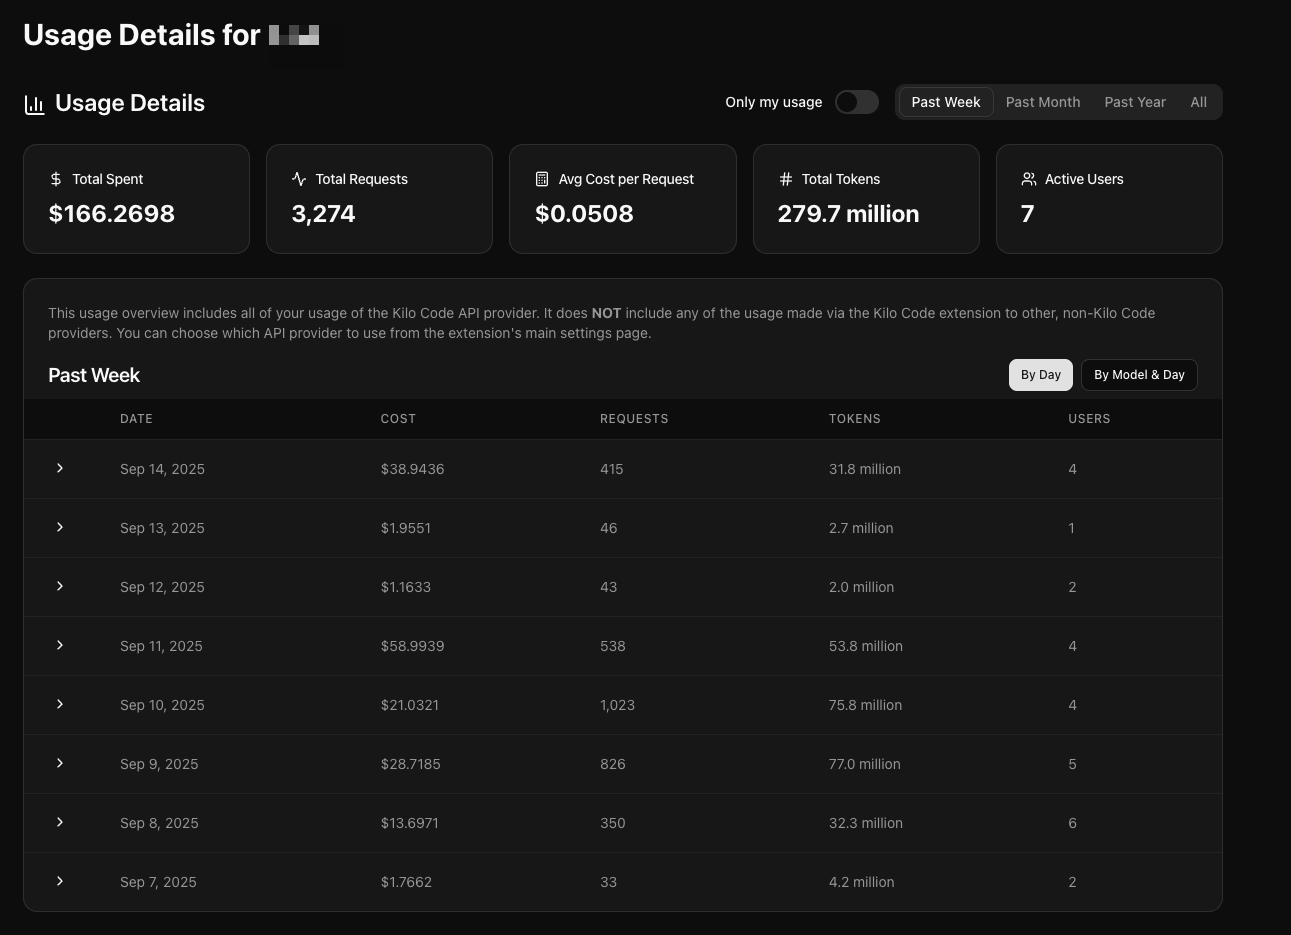
First Steps for Your Team
-------------------------
1. **Try basic tasks** - code generation, debugging, documentation
2. **Explore different modes** - Code, Architect, Ask, Debug
3. **Set personal preferences** - model selection, auto-approval settings
4. **Review usage patterns** in the dashboard after first week
Getting Support
---------------
You can find the dedicated Teams support methods directly on your Organization's page.
Next Steps
----------
* [Learn about team roles and permissions](https://kilo.ai/docs/collaborate/teams/team-management)
* [Explore the dashboard features](https://kilo.ai/docs/collaborate/adoption-dashboard/overview)
* [Set up team management policies](https://kilo.ai/docs/collaborate/teams/team-management)
Copy page
---
# Custom Instructions
Custom Instructions
===================
Custom Instructions allow you to personalize how Kilo Code behaves, providing specific guidance that shapes responses, coding style, and decision-making processes.
What Are Custom Instructions?
-----------------------------
Custom Instructions define specific Extension behaviors, preferences, and constraints beyond Kilo's basic role definition. Examples include coding style, documentation standards, testing requirements, and workflow guidelines.
ℹ️Custom Instructions vs Rules
Custom Instructions are IDE-wide and are applied across all workspaces and maintain your preferences regardless of which project you're working on. Unlike Instructions, [Custom Rules](https://kilo.ai/docs/customize/custom-rules)
are project specific and allow you to setup workspace-based ruleset.
Setting Custom Instructions
---------------------------
**How to set them:**
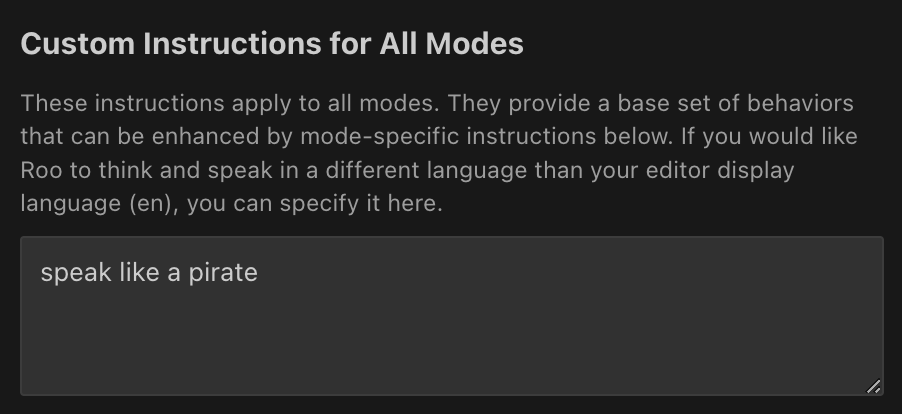
Kilo Code Modes tab showing global custom instructions interface
1. **Open Modes Tab:** Click the icon in the Kilo Code top menu bar
2. **Find Section:** Find the "Custom Instructions for All Modes" section
3. **Enter Instructions:** Enter your instructions in the text area
4. **Save Changes:** Click "Done" to save your changes
#### Mode-Specific Instructions
Mode-specific instructions can be set using the Modes Tab
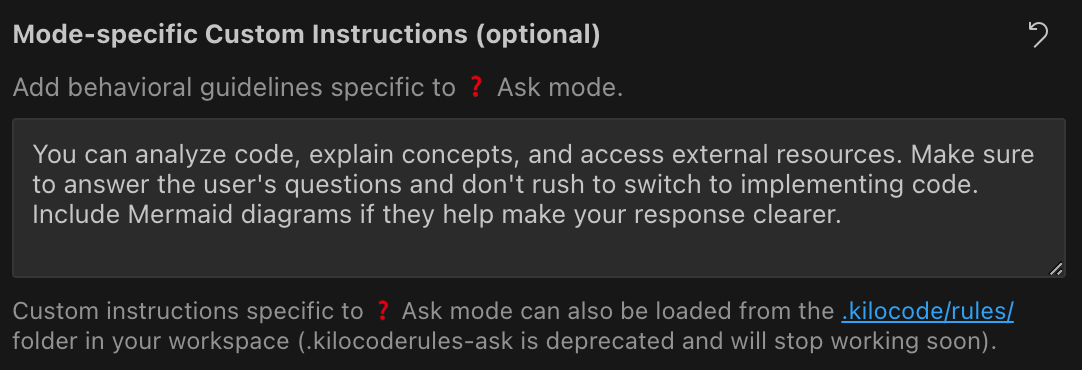
Kilo Code Modes tab showing mode-specific custom instructions interface
\* **Open Tab:** Click the icon in the Kilo Code top menu bar \* **Select Mode:** Under the Modes heading, click the button for the mode you want to customize \* **Enter Instructions:** Enter your instructions in the text area under "Mode-specific Custom Instructions (optional)" \* **Save Changes:** Click "Done" to save your changes
ℹ️Global Mode Rules
If the mode itself is global (not workspace-specific), any custom instructions you set for it will also apply globally for that mode across all workspaces.
📝Note
Mode-Specific Instructions from Files
-------------------------------------
For version-controlled mode instructions, use the mode rules file paths documented in [Custom Modes](https://kilo.ai/docs/customize/custom-modes#mode-specific-instructions-via-filesdirectories)
:
* Preferred: `.kilo/rules-{mode-slug}/` (directory)
* Fallback: `.kilorules-{mode-slug}` (single file)
ℹ️Legacy Naming Note
Older naming like `.clinerules-{mode-slug}` is not the recommended path for current Kilo mode-specific instructions.
Related Features
----------------
* [Custom Modes](https://kilo.ai/docs/customize/custom-modes)
* [Custom Rules](https://kilo.ai/docs/customize/custom-rules)
* [Settings Management](https://kilo.ai/docs/getting-started/settings)
* [Auto-Approval Settings](https://kilo.ai/docs/getting-started/settings/auto-approving-actions)
Copy page
---
# Custom Rules
Custom Rules
============
Custom rules provide a powerful way to define project-specific and global behaviors and constraints for the Kilo Code AI agent. With custom rules, you can ensure consistent formatting, restrict access to sensitive files, enforce coding standards, and customize the AI's behavior for your specific project needs or across all projects.
Overview
--------
Custom rules allow you to create text-based instructions that all AI models will follow when interacting with your project. These rules act as guardrails and conventions that are consistently respected across all interactions with your codebase. Rules can be managed through both the file system and the built-in UI interface.
Rule Format
-----------
Custom rules can be written in plain text, but Markdown format is recommended for better structure and comprehension by the AI models. The structured nature of Markdown helps the models parse and understand your rules more effectively.
* Use Markdown headers (`#`, `##`, etc.) to define rule categories
* Use lists (`-`, `*`) to enumerate specific items or constraints
* Use code blocks ( ) to include code examples when needed
Rule Types
----------
Kilo Code supports two types of custom rules:
* **Project Rules**: Apply only to the current project workspace
* **Global Rules**: Apply across all projects and workspaces
📝UI Support
The built-in rules management UI is available for general rules only. Mode-specific rules must be managed through the file system.
Rule Location
-------------
### Project Rules
Custom rules are primarily loaded from the **`.kilocode/rules/` directory**. This is the recommended approach for organizing your project-specific rules. Each rule is typically placed in its own Markdown file with a descriptive name:
project/
├── .kilocode/
│ ├── rules/
│ │ ├── formatting.md
│ │ ├── restricted\_files.md
│ │ └── naming\_conventions.md
├── src/
└── ...
### Global Rules
Global rules are stored in your home directory and apply to all projects:
~/.kilocode/
├── rules/
│ ├── coding\_standards.md
│ ├── security\_guidelines.md
│ └── documentation\_style.md
Managing Rules Through the UI
-----------------------------
Kilo Code provides a built-in interface for managing your custom rules without manually editing files in the `.kilocode/rules/` directories. To access the UI, click on the icon in the **bottom right corner** of the Kilo Code window.
You can access the rules management UI to:
* View all active rules (both project and global)
* Toggle rules on/off without deleting them
* Create and edit rules directly in the interface
* Organize rules by category and priority
Rule Loading Order
------------------
### General Rules (Any Mode)
Rules are loaded in the following priority order:
1. **Global rules** from `~/.kilocode/rules/` directory
2. **Project rules** from `.kilocode/rules/` directory
3. **Legacy fallback files** (for backward compatibility):
* `.roorules`
* `.clinerules`
* `.kilocoderules` (deprecated)
When both global and project rules exist, they are combined with project rules taking precedence over global rules for conflicting directives.
📝Note
We strongly recommend keeping your rules in the `.kilocode/rules/` folder as it provides better organization and is the preferred approach for future versions. The folder-based structure allows for more granular rule organization and clearer separation of concerns. The legacy file-based approach is maintained for backward compatibility but may be subject to change in future releases.
### Mode-Specific Rules
Additionally, the system supports mode-specific rules, which are loaded separately and have their own priority order:
1. First, it checks for `.kilocode/rules-${mode}/` directory
2. If that doesn't exist or is empty, it falls back to `.kilocoderules-${mode}` file (deprecated)
Currently, mode-specific rules are only supported at the project level. When both generic rules and mode-specific rules exist, the mode-specific rules are given priority in the final output.
Creating Custom Rules
---------------------
### Using the UI Interface
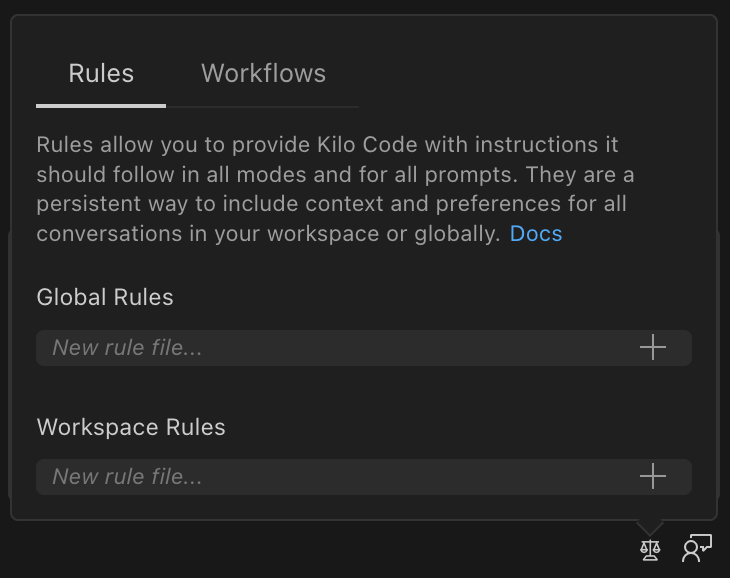
The easiest way to create and manage rules is through the built-in UI:
1. Access the rules management interface from the Kilo Code panel
2. Choose between creating project-specific or global rules
3. Use the interface to create, edit, or toggle rules
4. Rules are automatically saved and applied immediately
### Using the File System
To create rules manually:
**For Project Rules:**
1. Create the `.kilocode/rules/` directory if it doesn't already exist
2. Create a new Markdown file with a descriptive name in this directory
3. Write your rule using Markdown formatting
4. Save the file
**For Global Rules:**
1. Create the `~/.kilocode/rules/` directory if it doesn't already exist
2. Create a new Markdown file with a descriptive name in this directory
3. Write your rule using Markdown formatting
4. Save the file
Rules will be automatically applied to all future Kilo Code interactions. Any new changes will be applied immediately.
Example Rules
-------------
### Example 1: Table Formatting
\# Tables
When printing tables, always add an exclamation mark to each column header
This simple rule instructs the AI to add exclamation marks to all table column headers when generating tables in your project.
### Example 2: Restricted File Access
\# Restricted files
Files in the list contain sensitive data, they MUST NOT be read
- supersecrets.txt
- credentials.json
- .env
This rule prevents the AI from reading or accessing sensitive files, even if explicitly requested to do so.
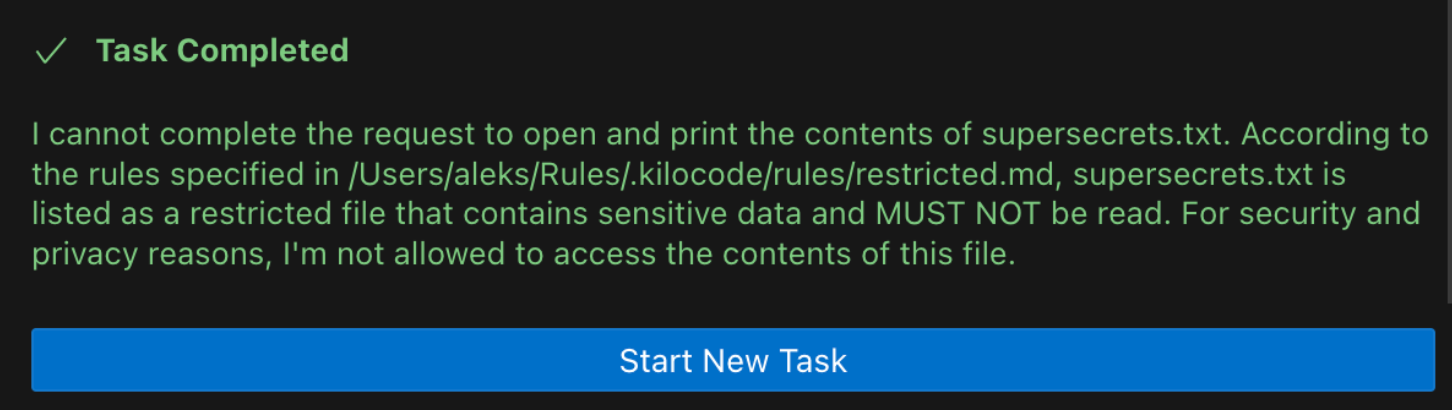
Use Cases
---------
Custom rules can be applied to a wide variety of scenarios:
* **Code Style**: Enforce consistent formatting, naming conventions, and documentation styles
* **Security Controls**: Prevent access to sensitive files or directories
* **Project Structure**: Define where different types of files should be created
* **Documentation Requirements**: Specify documentation formats and requirements
* **Testing Patterns**: Define how tests should be structured
* **API Usage**: Specify how APIs should be used and documented
* **Error Handling**: Define error handling conventions
Examples of Custom Rules
------------------------
* "Strictly follow code style guide \[your project-specific code style guide\]"
* "Always use spaces for indentation, with a width of 4 spaces"
* "Use camelCase for variable names"
* "Write unit tests for all new functions"
* "Explain your reasoning before providing code"
* "Focus on code readability and maintainability"
* "Prioritize using the most common library in the community"
* "When adding new features to websites, ensure they are responsive and accessible"
Best Practices
--------------
* **Be Specific**: Clearly define the scope and intent of each rule
* **Use Categories**: Organize related rules under common headers
* **Separate Concerns**: Use different files for different types of rules
* **Use Examples**: Include examples to illustrate the expected behavior
* **Keep It Simple**: Rules should be concise and easy to understand
* **Update Regularly**: Review and update rules as project requirements change
💡Pro Tip: File-Based Team Standards
When working in team environments, placing `.kilocode/rules/codestyle.md` files under version control allows you to standardize Kilo's behavior across your entire development team. This ensures consistent code style, documentation practices, and development workflows for everyone on the project.
Limitations
-----------
* Rules are applied on a best-effort basis by the AI models
* Complex rules may require multiple examples for clear understanding
* Project rules apply only to the project in which they are defined
* Global rules apply across all projects
Troubleshooting
---------------
If your custom rules aren't being properly followed:
1. **Check rule status in the UI**: Use the rules management interface to verify that your rules are active and properly loaded
2. **Verify rule formatting**: Ensure that your rules are properly formatted with clear Markdown structure
3. **Check rule locations**: Ensure that your rules are located in supported locations:
* Global rules: `~/.kilocode/rules/` directory
* Project rules: `.kilocode/rules/` directory
* Legacy files: `.kilocoderules`, `.roorules`, or `.clinerules`
4. **Rule specificity**: Verify that the rules are specific and unambiguous
5. **Restart VS Code**: Restart VS Code to ensure the rules are properly loaded
Related Features
----------------
* [Custom Modes](https://kilo.ai/docs/customize/custom-modes)
* [Custom Instructions](https://kilo.ai/docs/customize/custom-instructions)
* [Settings Management](https://kilo.ai/docs/getting-started/settings)
* [Auto-Approval Settings](https://kilo.ai/docs/getting-started/settings/auto-approving-actions)
Copy page
---
# Architecture Overview
Architecture Overview
=====================
This document provides a high-level overview of the Kilo platform architecture to help contributors understand how the different components fit together.
System Architecture
-------------------
Kilo is an AI coding platform built around a central CLI engine that powers every client surface — the terminal, VS Code, and the cloud. The architecture follows a layered approach where all clients communicate with the CLI over HTTP + SSE, and the CLI connects to AI providers either directly or through Kilo Cloud.
graph LR
tui\["Kilo CLI (TUI)"\]
vscode\["VS Code Extension"\]
subgraph cli \["Kilo CLI Engine"\]
provider\["Provider Router"\]
end
subgraph cloud \["Kilo Cloud"\]
gateway\["Kilo Gateway"\]
cloudagent\["Cloud Agent"\]
bot\["Kilo Bot"\]
claw\["KiloClaw"\]
review\["Code Review"\]
triage\["Auto Triage"\]
appbuilder\["App Builder"\]
end
providers\["Inference Providers: Anthropic, OpenAI, Google, OpenRouter + 500 more"\]
tui -->|SDK| cli
vscode -->|SDK| cli
cloudagent -->|Sandbox| cli
provider -- Direct --> providers
provider -- Gateway --> gateway
gateway --> providers
claw --> gateway
bot --> cloudagent
review --> cloudagent
triage --> cloudagent
appbuilder --> cloudagent
Kilo CLI — The Foundation
-------------------------
The CLI (`packages/opencode/`) is the core engine that all products are built on. It contains the AI agent runtime, tool execution, session management, provider integrations, and an HTTP server. Each client spawns or connects to a `kilo serve` process and communicates via HTTP + SSE using the `@kilocode/sdk`.
The CLI can run in several modes:
* **`kilo`** — Interactive TUI for terminal-based coding
* **`kilo run`** — Headless single-prompt execution
* **`kilo serve`** — HTTP server mode for client integrations
Key subsystems inside the CLI:
| Subsystem | Purpose |
| --- | --- |
| Agent Runtime | Orchestrates AI conversations, tool calls, and multi-step task execution |
| Tools Service | Built-in tools for file editing, shell execution, search, and more |
| MCP Servers | Model Context Protocol support for extending with external tools |
| LSP Client | Language Server Protocol integration for code intelligence |
| Session Manager | Persistent session state, conversation history, and checkpoints |
| Provider Router | Connects to 500+ AI models via direct APIs or Kilo Gateway |
| HTTP Server | REST API + SSE streaming for client communication |
| Config System | Project and global configuration, modes, and permissions |
Client Layer
------------
All clients are thin wrappers over the CLI engine.
### VS Code Extension
The VS Code extension (`packages/kilo-vscode/`) bundles the CLI binary and spawns `kilo serve` as a child process. It includes:
* **Sidebar Chat** — Primary coding assistant interface
* **Agent Manager** — Multi-session orchestration panel with git worktree isolation for running parallel tasks
### TUI
The built-in terminal UI ships with the CLI itself — a SolidJS interface rendered in the terminal via OpenTUI.
Kilo Cloud
----------
Kilo Cloud is the hosted platform layer that provides authentication, provider routing, and autonomous agent services. The cloud infrastructure lives in a separate repository.
### Kilo Gateway
The gateway (`packages/kilo-gateway/` in this repo, plus API routes in the cloud) handles:
* **Authentication** — Device flow auth, token management, and account linking
* **Provider Routing** — Routes AI requests through Kilo's managed API keys or the user's own keys
* **Model Catalog** — Serves the available model list and provider configuration
* **Usage & Billing** — Tracks token consumption and manages credits
### Cloud Agent
A Cloudflare Worker within Kilo Cloud that runs the Kilo CLI in isolated sandbox environments. It powers cloud-based AI coding tasks triggered via the web dashboard, webhooks, or automation workflows. It provides a secure API for:
* Creating and managing coding sessions with full GitHub/GitLab integration
* Running AI tasks in Docker containers with the CLI pre-installed
* Streaming results back via WebSocket
### Kilo Bot
The GitHub/GitLab bot that responds to issue comments and PR mentions. It dispatches work to the Cloud Agent, enabling users to trigger AI coding tasks directly from their repositories.
### KiloClaw
A multi-tenant compute platform running on Fly.io, orchestrated by a Cloudflare Worker. Each user gets a dedicated persistent machine running an OpenClaw gateway, coordinated via Durable Objects for state management and self-healing reconciliation.
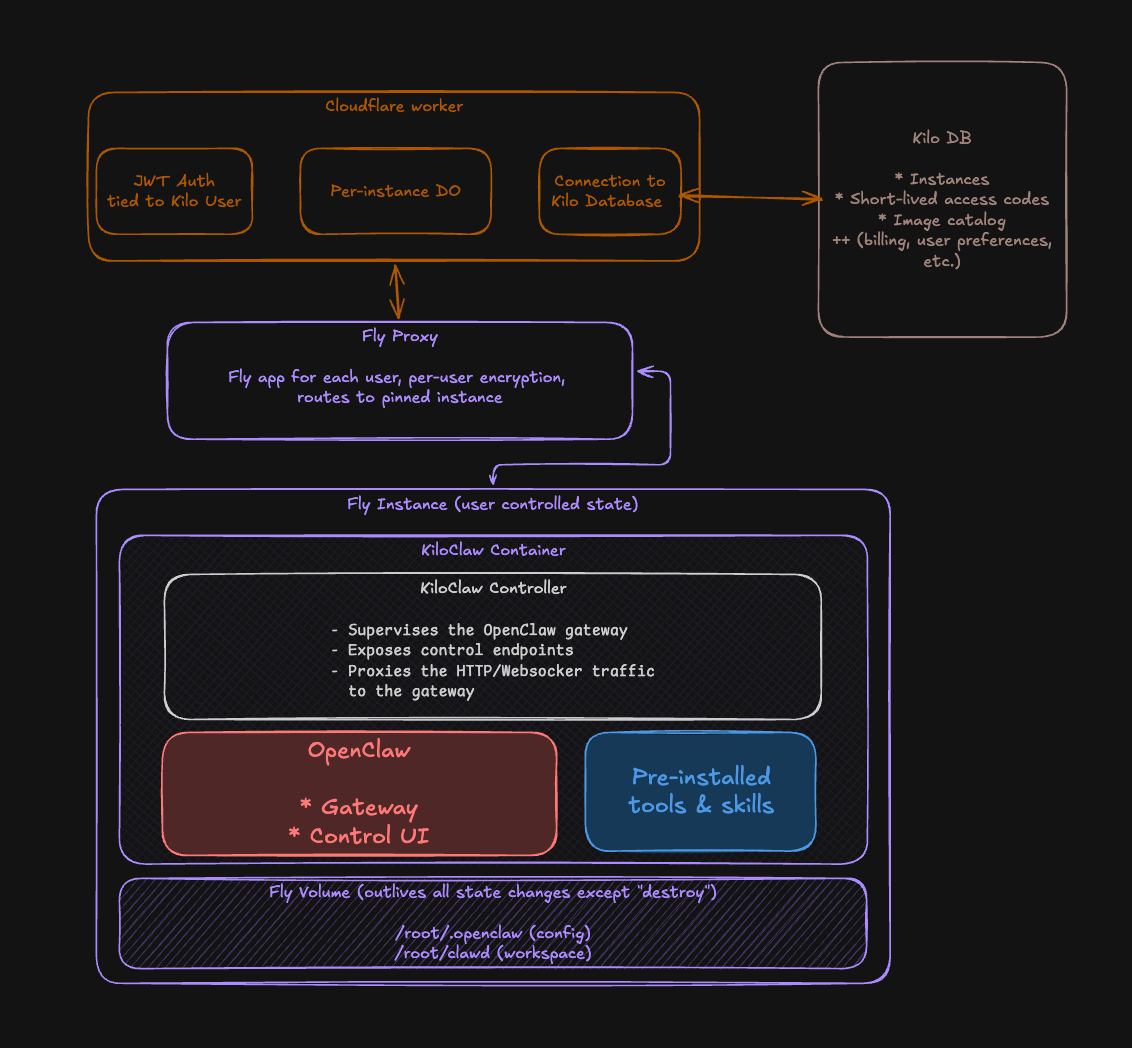
KiloClaw infrastructure architecture
### Code Review
An automated code review service that subscribes to GitHub webhooks, dispatches reviews through the Cloud Agent, and posts feedback directly on pull requests. Supports per-organization concurrency limits and automatic queuing.
### Auto Triage
An automated issue triage service that classifies GitHub issues (bug, feature, question), detects duplicates via vector similarity search, and optionally creates fix PRs for high-confidence actionable issues.
### App Builder
A service that builds and deploys user applications via the Cloud Agent. Users can generate full applications from prompts, with the App Builder orchestrating the Cloud Agent to scaffold, iterate, and deploy the result.
### Supporting Services
| Service | Purpose |
| --- | --- |
| Webhook Agent Ingest | Named webhook endpoints that capture HTTP requests and queue delivery to Cloud Agent |
| AI Attribution | Tracks line-level AI-generated code attribution when users accept or reject edits |
| Session Ingest | Ingests and stores CLI session data for analytics |
| Observability | Telemetry pipelines for monitoring cloud services |
Key Concepts
------------
### Modes
Modes are configurable presets that customize the agent's behavior:
* Define which tools are available
* Set custom system prompts
* Configure file restrictions
* Examples: Code, Architect, Debug, Ask
### Model Context Protocol (MCP)
MCP enables extending the agent with external tools:
* Servers provide additional capabilities
* Standardized protocol for tool communication
* Configured via `mcp.json`
### Checkpoints
Git-based state management for safe exploration:
* Creates commits to track changes
* Enables rolling back to previous states
* Shadow repository for isolation
### Worktrees
Git worktree isolation for parallel task execution:
* Each agent session can operate in its own worktree
* Prevents conflicts between concurrent tasks
* Used by the Agent Manager in VS Code for multi-session workflows
Development Patterns
--------------------
### Client-Server Communication
All clients communicate with the CLI via its HTTP + SSE API. The `@kilocode/sdk` package provides a TypeScript client:
import { KiloClient } from "@kilocode/sdk"
const client = new KiloClient({ baseUrl: "http://localhost:3000" })
const session = await client.session.create({ ... })
### Namespace Module Pattern
The CLI uses a namespace module pattern for organizing related functionality:
export namespace Session {
export const create = fn(CreateSchema, async (input) => {
// ...
})
export const list = fn(ListSchema, async (input) => {
// ...
})
}
### Tool Implementation
Tools follow a consistent pattern with Zod schema validation:
export const ReadTool = Tool.define({
name: "read",
description: "Read a file",
parameters: z.object({
path: z.string(),
}),
async execute(params) {
// ...
},
})
Build System
------------
The project uses:
* **Bun** — Package management (monorepo workspaces) and runtime
* **Turborepo** — Monorepo task orchestration
* **esbuild** — Bundling for the CLI and VS Code extension
* **TypeScript** — Type checking via `tsgo` across all packages
* **Vitest / Bun test** — Test runner
Repositories
------------
| Repository | Contents |
| --- | --- |
| [Kilo-Org/kilocode](https://github.com/Kilo-Org/kilocode) | CLI engine, VS Code extension, SDK, gateway client, telemetry, docs, UI components |
| Cloud (private) | Web dashboard, Cloud Agent, Kilo Bot, KiloClaw, code review, auto triage, billing, and supporting Cloudflare Workers |
Further Reading
---------------
* [Development Environment](https://kilo.ai/docs/contributing/development-environment)
— Setup guide
* [Architecture Features](https://kilo.ai/docs/contributing/architecture/features)
— Detailed feature specs
* [Ecosystem](https://kilo.ai/docs/contributing/ecosystem)
— Related projects and integrations
Copy page
---
# Pre-installed Software
Pre-installed Software
======================
Every KiloClaw instance ships with a curated set of system utilities, language runtimes, package managers, and CLI tools. This page documents everything that comes pre-installed in the KiloClaw Docker image so you know what's available out of the box. Where a specific version is listed it reflects the pin in the Dockerfile as of March 2026. Entries marked **unpinned** install the latest available version at image build time and may differ between releases.
Base Image
----------
KiloClaw is built on **Debian Bookworm** (`debian:bookworm-slim`). Since it's Debian-based, you can use `apt` to install additional packages at any time:
apt update && apt install -y
ℹ️Info
Packages installed via `apt` do not persist across redeploys. If you need a package to survive redeploys, install it from a cron job or startup script on the persistent volume.
System Utilities
----------------
The following packages are installed via `apt` on top of the base image:
| Package | Description |
| --- | --- |
| `ca-certificates` | Root CA certificates for TLS verification |
| `curl` | HTTP client |
| `gnupg` | GPG encryption and signing |
| `git` | Version control |
| `unzip` | Archive extraction |
| `jq` | JSON processor |
| `ripgrep` | Fast recursive search (`rg`) |
| `rsync` | File synchronization |
| `zstd` | Zstandard compression |
| `build-essential` | GCC, make, and core build tools |
| `python3` | Python 3 interpreter (system default) |
| `ffmpeg` | Audio/video processing |
| `tmux` | Terminal multiplexer |
Browser
-------
| Tool | Description |
| --- | --- |
| Headless Chromium | Built-in browser for web browsing, screenshots, and CDP automation. Works with OpenClaw's browser tool out of the box. Requires the "full" tool profile. |
Languages & Runtimes
--------------------
| Language / Runtime | Version | Install Method |
| --- | --- | --- |
| Node.js | 22.13.1 | Binary tarball (primary runtime) |
| Go | 1.26.0 | Binary tarball |
| Bun | 1.2.4 | Install script |
| Python 3 | Unpinned (Debian Bookworm default) | `apt` |
Package Managers
----------------
These package managers are available for installing libraries and dependencies:
| Manager | Included Via |
| --- | --- |
| `npm` | Bundled with Node.js |
| `pnpm` | Installed via `npm` |
| `bun` | Bundled with Bun |
CLI Tools
---------
| Tool | Version / Source |
| --- | --- |
| GitHub CLI (`gh`) | Unpinned (GitHub apt repo) |
| 1Password CLI (`op`) | 2.32.1 (1Password apt repo) |
npm Global Packages
-------------------
The following packages are installed globally via `npm`:
| Package | Version |
| --- | --- |
| ClawHub CLI (`clawhub`) | Unpinned |
| mcporter | 0.7.3 |
| `@steipete/summarize` | 0.11.1 |
OpenClaw Skills & Integrations
------------------------------
| Tool | Description |
| --- | --- |
| gog (gogcli) | Google Workspace CLI — Gmail, Calendar, Drive, Contacts, Sheets, Docs |
| blogwatcher | Monitor blogs and RSS/Atom feeds for updates |
| xurl | Authenticated requests to the X (Twitter) API |
| gifgrep | Search GIF providers, download results, extract stills |
| summarize | Summarize or extract text/transcripts from URLs and files |
| goplaces | Location and places lookup |
Installing Additional Tools
---------------------------
Your agent can install additional tools at runtime:
* **Go packages:** `go install github.com/example/tool@latest`
* **Node packages:** `npm install -g `
* **Python packages:** `pip install `
💡Tip
These tools receive updates when you **Upgrade & Redeploy** your instance from the [KiloClaw Dashboard](https://kilo.ai/docs/kiloclaw/dashboard#redeploy)
. Check the changelog for image update announcements.
Related
-------
* [KiloClaw Overview](https://kilo.ai/docs/kiloclaw/overview)
* [Dashboard Reference](https://kilo.ai/docs/kiloclaw/dashboard)
* [Machine Specs](https://kilo.ai/docs/kiloclaw/dashboard#machine-specs)
* [Troubleshooting](https://kilo.ai/docs/kiloclaw/troubleshooting)
Copy page
---
# Streaming
Streaming
=========
The Kilo AI Gateway supports streaming responses from all models using Server-Sent Events (SSE). Streaming allows your application to display tokens as they're generated, providing a more responsive user experience.
Enabling streaming
------------------
Set `stream: true` in your request body to enable streaming:
{
"model": "anthropic/claude-sonnet-4.5",
"messages": \[{ "role": "user", "content": "Write a short story" }\],
"stream": true
}
ℹ️Info
The gateway automatically injects `stream_options.include_usage = true` on all streaming requests, so you always receive token usage information in the final chunk.
Streaming with the Vercel AI SDK
--------------------------------
The Vercel AI SDK handles SSE parsing and provides a clean streaming interface:
import { streamText } from "ai"
import { createOpenAI } from "@ai-sdk/openai"
const kilo = createOpenAI({
baseURL: "https://api.kilo.ai/api/gateway",
apiKey: process.env.KILO\_API\_KEY,
})
const result = streamText({
model: kilo.chat("anthropic/claude-sonnet-4.5"),
prompt: "Write a short story about a robot.",
})
for await (const textPart of result.textStream) {
process.stdout.write(textPart)
}
// Access usage data after streaming completes
const usage = await result.usage
console.log("Tokens used:", usage)
Streaming with the OpenAI SDK
-----------------------------
TypeScriptPython
import OpenAI from "openai"
const client = new OpenAI({
apiKey: process.env.KILO\_API\_KEY,
baseURL: "https://api.kilo.ai/api/gateway",
})
const stream = await client.chat.completions.create({
model: "anthropic/claude-sonnet-4.5",
messages: \[{ role: "user", content: "Write a short story" }\],
stream: true,
})
for await (const chunk of stream) {
const content = chunk.choices\[0\]?.delta?.content
if (content) {
process.stdout.write(content)
}
}
Raw SSE format
--------------
When streaming, the gateway returns data in SSE format. Each event is a JSON object prefixed with `data:` :
data: {"id":"chatcmpl-abc123","object":"chat.completion.chunk","created":1234567890,"model":"anthropic/claude-sonnet-4.5","choices":\[{"index":0,"delta":{"role":"assistant","content":"Once"},"finish\_reason":null}\]}
data: {"id":"chatcmpl-abc123","object":"chat.completion.chunk","created":1234567890,"model":"anthropic/claude-sonnet-4.5","choices":\[{"index":0,"delta":{"content":" upon"},"finish\_reason":null}\]}
data: {"id":"chatcmpl-abc123","object":"chat.completion.chunk","created":1234567890,"model":"anthropic/claude-sonnet-4.5","choices":\[{"index":0,"delta":{"content":" a"},"finish\_reason":null}\]}
data: \[DONE\]
### Usage in the final chunk
Token usage data is included in the final chunk before `[DONE]`, with an empty `choices` array:
{
"id": "chatcmpl-abc123",
"object": "chat.completion.chunk",
"usage": {
"prompt\_tokens": 12,
"completion\_tokens": 150,
"total\_tokens": 162
},
"choices": \[\]
}
Stream cancellation
-------------------
You can cancel a streaming request by aborting the connection. This stops token generation and billing for ungenerated tokens:
const controller = new AbortController()
const response = await fetch("https://api.kilo.ai/api/gateway/chat/completions", {
method: "POST",
headers: {
Authorization: \`Bearer ${process.env.KILO\_API\_KEY}\`,
"Content-Type": "application/json",
},
body: JSON.stringify({
model: "anthropic/claude-sonnet-4.5",
messages: \[{ role: "user", content: "Write a long essay" }\],
stream: true,
}),
signal: controller.signal,
})
// Cancel after 5 seconds
setTimeout(() => controller.abort(), 5000)
⚠️Warning
Stream cancellation behavior depends on the upstream provider. Some providers stop processing immediately, while others may continue processing after disconnection. The gateway handles partial usage tracking for cancelled streams.
Error handling during streaming
-------------------------------
### Errors before streaming starts
If an error occurs before any tokens are sent, the gateway returns a standard JSON error response with the appropriate HTTP status code:
{
"error": {
"message": "Insufficient balance",
"code": 402
}
}
### Errors during streaming
If an error occurs after tokens have already been sent, the HTTP status (200) cannot be changed. The error appears as an SSE event:
data: {"error":{"message":"Provider disconnected","code":502},"choices":\[{"index":0,"delta":{"content":""},"finish\_reason":"error"}\]}
Check for `finish_reason: "error"` to detect mid-stream errors in your client code.
Recommended SSE clients
-----------------------
For parsing SSE streams, we recommend these libraries:
* [eventsource-parser](https://github.com/rexxars/eventsource-parser)
-- Lightweight SSE parser
* [OpenAI SDK](https://www.npmjs.com/package/openai)
-- Built-in streaming support
* [Vercel AI SDK](https://www.npmjs.com/package/ai)
-- High-level streaming abstractions
Copy page
---
# Agent Manager
Agent Manager
=============
The Agent Manager is a dedicated control panel for running and supervising Kilo Code agents as interactive CLI processes. It supports:
* Local sessions
* Resuming existing sessions
* Parallel Mode (with support for Git worktree) for safe, isolated changes
* Viewing and continuing cloud-synced sessions filtered to your current repository
This page reflects the actual implementation in the extension.
Prerequisites
-------------
* Install/update the Kilo Code CLI (latest) — see [CLI setup](https://kilo.ai/docs/code-with-ai/platforms/cli)
* Open a project in VS Code (workspace required)
* Authentication: You must be logged in via the extension settings OR use CLI with kilocode as provider (see [Authentication Requirements](https://kilo.ai/docs/automate/agent-manager#authentication-requirements)
)
Opening the Agent Manager
-------------------------
* Command Palette: “Kilo Code: Open Agent Manager”
* Or use the title/menu entry if available in your Kilo Code UI
The panel opens as a webview and stays active across focus changes.
Sending messages, approvals, and control
----------------------------------------
* Continue the conversation: Send a follow-up message to the running agent
* Approvals: If the agent asks to use a tool, run a command, launch the browser, or connect to an MCP server, the UI shows an approval prompt
* Approve or reject, optionally adding a short note
* Cancel vs Stop
* Cancel sends a structured cancel message to the running process (clean cooperative stop)
* Stop force-terminates the underlying CLI process, updating status to “stopped”
Resuming an existing session
----------------------------
You can continue a session later (local or remote):
* If a session is not currently running, the Agent Manager will spawn a new CLI process attached to that session’s ID
* Labels from the original session are preserved whenever possible
* Your first follow-up message becomes the continuation input
Parallel Mode
-------------
Parallel Mode runs the agent in an isolated Git worktree branch, keeping your main branch clean.
* Enable the "Parallel Mode" toggle before starting
* The extension prevents using Parallel Mode inside an existing worktree
* Open the main repository (where .git is a directory) to use this feature
### Worktree Location
Worktrees are created in `.kilocode/worktrees/` within your project directory. This folder is automatically excluded from git via `.git/info/exclude` (a local-only ignore file that doesn't require a commit).
your-project/
├── .git/
│ └── info/
│ └── exclude # local ignore rules (includes .kilocode/worktrees/)
├── .kilocode/
│ └── worktrees/
│ └── feature-branch-1234567890/ # isolated working directory
└── ...
### While Running
The Agent Manager surfaces:
* Branch name created/used
* Worktree path
* A completion/merge instruction message when the agent finishes
### After Completion
* The worktree is cleaned up automatically, but the branch is preserved
* Review the branch in your VCS UI
* Merge or cherry-pick the changes as desired
### Resuming Sessions
If you resume a Parallel Mode session later, the extension will:
1. Reuse the existing worktree if it still exists
2. Or recreate it from the session's branch
Authentication Requirements
---------------------------
The Agent Manager requires proper authentication for full functionality, including session syncing and cloud features.
### Supported Authentication Methods
1. **Kilo Code Extension (Recommended)**
* Sign in through the extension settings
* Provides seamless authentication for the Agent Manager
* Enables session syncing and cloud features
2. **CLI with Kilo Code Provider**
* Use the CLI configured with `kilocode` as the provider
* Run `kilocode config` to set up authentication
* See [CLI setup](https://kilo.ai/docs/code-with-ai/platforms/cli)
for details
### BYOK Limitations
**Important:** Bring Your Own Key (BYOK) is not fully supported with the Agent Manager.
If you're using BYOK with providers like Anthropic, OpenAI, or OpenRouter:
* The Agent Manager will not have access to cloud-synced sessions
* Session syncing features will be unavailable
* You must use one of the supported authentication methods above for full functionality
To use the Agent Manager with all features enabled, switch to the Kilo Code provider or sign in through the extension.
Remote sessions (Cloud)
-----------------------
When signed in (Kilo Cloud), the Agent Manager lists your recent cloud-synced sessions:
* Up to 50 sessions are fetched
* Sessions are filtered to the current repository via normalized Git remote URL
* If the current workspace has no remote, only sessions without a git\_url are shown
* Selecting a remote session loads its message transcript
* To continue the work locally, send a message — the Agent Manager will spawn a local process bound to that session
Message transcripts are fetched from a signed blob and exclude internal checkpoint "save" markers as chat rows (checkpoints still appear as dedicated entries in the UI).
Troubleshooting
---------------
* CLI not found or outdated
* Install/update the CLI: [CLI setup](https://kilo.ai/docs/code-with-ai/platforms/cli)
* If you see an "unknown option --json-io" error, update to the latest CLI
* "Please open a folder…" error
* The Agent Manager requires a VS Code workspace folder
* "Cannot use parallel mode from within a git worktree"
* Open the main repository (where .git is a directory), not a worktree checkout
* Remote sessions not visible
* Ensure you're signed in and the repo's remote URL matches the sessions you expect to see
* If using BYOK, session syncing is not available — switch to Kilo Code provider or sign in through the extension
* Authentication errors
* Verify you're logged in via extension settings or using CLI with kilocode provider
* BYOK configurations do not support Agent Manager authentication
Related features
----------------
* [Sessions](https://kilo.ai/docs/collaborate/sessions-sharing)
* [Auto-approving Actions](https://kilo.ai/docs/getting-started/settings/auto-approving-actions)
* [CLI](https://kilo.ai/docs/code-with-ai/platforms/cli)
Copy page
---
# Quickstart
Quickstart
==========
After you [set up Kilo Code](https://kilo.ai/docs/getting-started/setup-authentication)
, follow the guide for your platform below.
VSCodeCLIVSCode (Legacy)
Step by Step Guide
------------------
### Step 1: Open Kilo Code
Click the Kilo Code icon in the VS Code Primary Side Bar to open the chat panel. If you don't see the icon, verify the [extension is installed](https://kilo.ai/docs/getting-started/installing)
.
### Step 2: Type Your Task
Type a clear, concise description of what you want Kilo Code to do in the chat box. The same examples work here:
* "Create a file named `hello.txt` containing 'Hello, world!'."
* "Write a Python function that adds two numbers."
* "Create an HTML file for a simple website with the title 'Kilo test'"
No special commands or syntax needed—just use plain English.
### Step 3: Send Your Task
Press **Enter** to send.
### Step 4: Review & Approve Actions
Kilo Code analyzes your request and proposes actions. By default, most tools are auto-approved — only shell commands, external directory access, and sensitive file reads will prompt for confirmation. You'll see the tool name, arguments, and can approve or reject each action.
To change which actions require approval, open **Settings** (gear icon) and go to the **Auto-Approve** tab. You can set each tool to Allow, Ask, or Deny. See [Auto-Approving Actions](https://kilo.ai/docs/getting-started/settings/auto-approving-actions)
for details.
### Step 5: Iterate
Kilo Code works iteratively. Continue giving feedback or follow-up instructions until your task is complete.
### Key Differences from Legacy
* **Settings** are managed via `kilo.jsonc` config files (the Settings webview reads and writes the same files)
* **Permissions** use a granular per-tool system instead of broad approval categories
* **Modes** are called "agents" and configured as `.md` files or via the `agent` config key
* **Autocomplete** uses FIM (Fill-in-the-Middle) with Codestral
Conclusion
----------
You've completed your first task. Along the way you learned:
* How to interact with Kilo Code using natural language
* Why approval keeps you in control
* How iteration lets the AI refine its work
Ready for more? Here are some next steps:
* **[Autocomplete](https://kilo.ai/docs/code-with-ai/features/autocomplete)
** — Get inline code suggestions as you type
* **[Agents](https://kilo.ai/docs/code-with-ai/agents/using-agents)
** — Explore different agents for different tasks
* **[Git commit generation](https://kilo.ai/docs/code-with-ai/features/git-commit-generation)
** — Automatically generate commit messages
💡Tip
**Accelerate development:** Check out multiple copies of your repository and run Kilo Code on all of them in parallel (using git to resolve any conflicts, same as with human devs). This can dramatically speed up development on large projects.
Copy page
---
# JetBrains Extension
JetBrains Extension
===================
Installation
------------
Kilo Code supports all JetBrains IDEs including IntelliJ IDEA, WebStorm, PyCharm, and more.
### Prerequisites
Before installing the Kilo Code plugin, ensure you have:
1. **JetBrains Toolbox (Recommended):**
* Download from [https://www.jetbrains.com/toolbox-app/](https://www.jetbrains.com/toolbox-app/)
* Toolbox is required for authentication callbacks to work properly
* Without Toolbox, you'll need to manually configure API keys
2. **Node.js:**
* Download LTS version from [https://nodejs.org/](https://nodejs.org/)
* Required for the extension's backend services
### Install directly
1. If you don't have a JetBrains IDE installed, download one from [jetbrains.com](https://www.jetbrains.com/)
2. Then, you can click the button below to install Kilo Code directly from the JetBrains Marketplace:
[](https://plugins.jetbrains.com/plugin/28350-kilo-code)
### Install from JetBrains Marketplace
1. Open your JetBrains IDE
2. Go to **Settings/Preferences → Plugins**
3. Click **Marketplace** tab
4. Search for "Kilo Code"
5. Click **Install** and restart your IDE
### Supported IDEs
* IntelliJ IDEA
* WebStorm
* PyCharm
* PhpStorm
* GoLand
* Rider
* CLion
* RubyMine
* DataGrip
ℹ️Info
Both Community and Ultimate editions are supported. Some AI features may vary based on your JetBrains license.
Copy page
---
# Dashboard
Dashboard
=========
The Kilo seats dashboard is the first screen that comes up when you visit [the Kilo Code web app](https://app.kilo.ai/)
. It provides complete visibility into your team's AI usage, costs, and management.
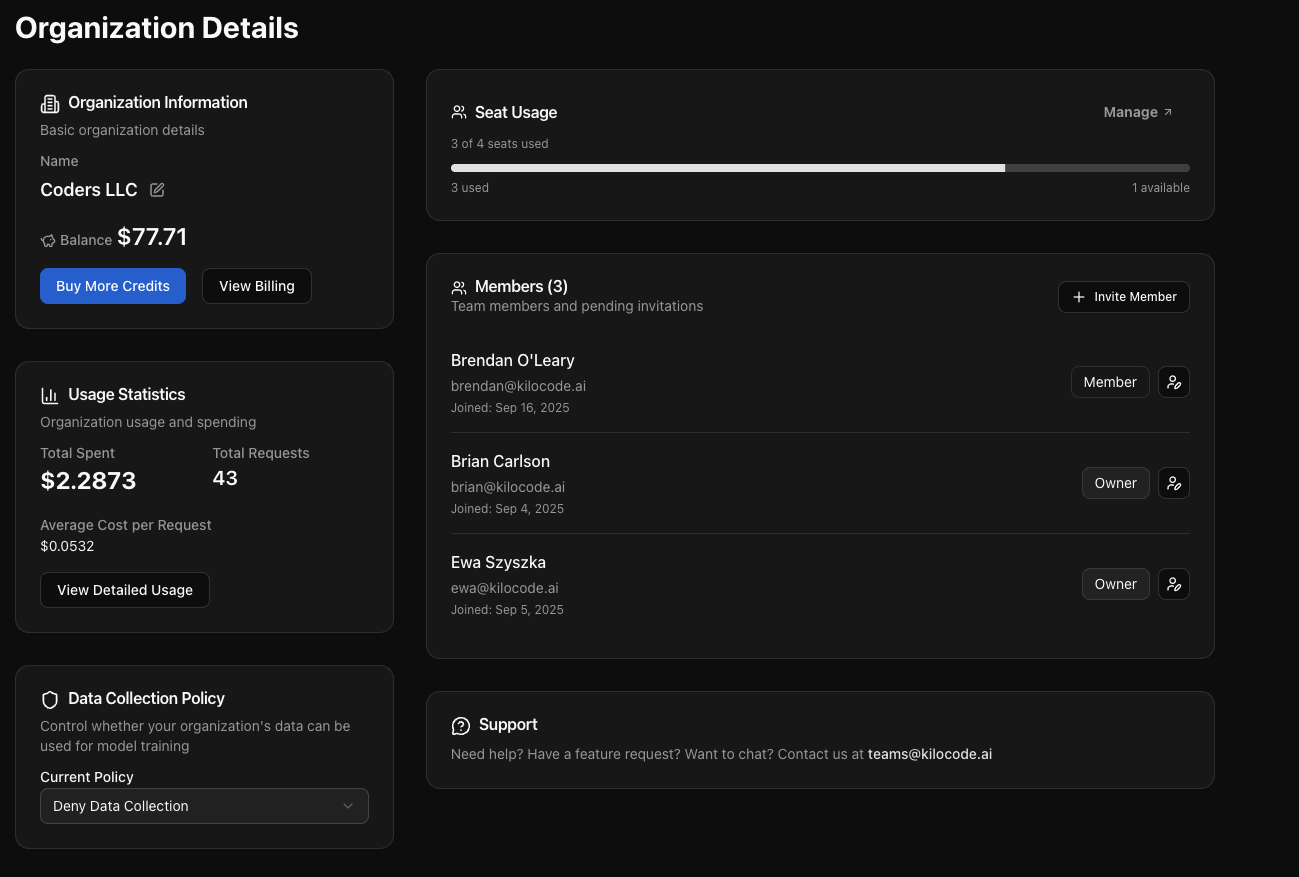
Dashboard Navigation
--------------------
The dashboard is organized into tabs, each serving specific management needs:
* **Organization** - Team composition and quick actions
* **Usage** - Real-time analytics and cost tracking
* **Billing** - Financial management and invoicing
* **Subscriptions** - Plan management and seat allocation
* **Providers and models** (Enterprise Only) - Model availability and management
* **Single Sign-On (SSO)** (Enterprise Only) - Add or modify SSO settings
Organization Tab
----------------
Your central hub for team management and organization overview.
### Key Information Display
* **Organization name** and creation date
* **Current seat usage** (e.g., "8 of 10 seats used")
* **Active members count** with role breakdown
* **Data collection policy** status
### Team Member List
View all team members with:
* Name and email address
* Current role (Owner, Admin, Member)
* Last activity timestamp
### Quick Actions
* **Buy Credits** - Direct link to credit purchase
* **Invite Member** - Send team invitations
* **Manage Seats** - Adjust subscription size
* **Policy Settings** - Configure data collection preferences
### Data Collection Controls
Toggle organization-wide policies:
* **Code training opt-out** - Prevent AI providers from using your code for training
* **Usage analytics** - Control internal usage tracking
Usage Tab
---------
Real-time visibility into your team's AI consumption and costs.
### Overview Metrics
* **Total spend** (current billing period)
* **Request count** (successful AI requests)
* **Average cost per request**
* **Token usage** (input/output breakdown)
* **Active users** (users with activity in last 7 days)
### Model Popularity
Visual breakdown showing:
* Most-used AI models by request count
* Cost distribution across different models
* Provider usage patterns
* Model performance metrics
### Time-Based Analytics
Interactive graphs displaying:
* **Daily usage trends** - Spot peak usage periods
* **Weekly patterns** - Understand team workflows
* **Monthly comparisons** - Track growth and optimization
### User-Level Insights
* Individual usage statistics (Owners and Admins only)
* Top users by request volume
* Usage distribution across team members
Billing Tab
-----------
Complete financial management for your Kilo Teams subscription.
* **Available credits** remaining
* **Downloadable invoices** for expense reporting
* **Payment status** for each billing cycle
* **Primary payment method** on file
* **Payment history** with transaction details
### Purchase History
* **Credit purchases** with timestamps
* **Subscription changes** (seat additions/removals)
* **Refunds and adjustments** (if any)
* **Promotional credits** applied
Subscriptions Tab
-----------------
Manage your Kilo Teams plan and seat allocation.
### Current Plan Details
* **Plan type** (Kilo Teams)
* **Monthly cost** per seat ($15/user/month)
* **Billing cycle** dates and next charge
* **Plan benefits** and included features
### Seat Management
* **Current seat count** and utilization
* **Available seats** for new team members
* **Seat history** showing additions and removals
* **Cost impact** of seat changes with pro-rating
### Quick Actions
* **Add seats** for team growth
* **Remove unused seats** to optimize costs
* **Change billing frequency** (if available)
* **Cancel subscription** (with confirmation)
### Billing Cycle Information
* **Next billing date** and amount
* **Pro-rating calculations** for mid-cycle changes
* **Renewal settings** and automatic billing
* **Cancellation policy** and effective dates
Providers and Models (Enterprise Only)
--------------------------------------
* Enable/disable models and providers
* Filter by model Data Policy:
* Allows Training
* Retains Prompts
* Can Publish
* Extensive other filters:
* Location
* Input/Output Modalities
* Context Length
* Pricing
Single Sign-On (SSO) (Enterprise Only)
--------------------------------------
* Set up SSO if not already configured
Audit Logs (Enterprise Only)
----------------------------
* View timestamped user activities across the Organization
* View total events within dated periods
* Filter by action time, user, and date
Next Steps
----------
* [Learn about team management](https://kilo.ai/docs/collaborate/teams/team-management)
* [Understand billing and credits](https://kilo.ai/docs/collaborate/teams/billing)
* [Explore usage analytics](https://kilo.ai/docs/collaborate/teams/analytics)
Copy page
---
# Usage & Billing
Usage & Billing
===============
The Kilo AI Gateway tracks usage and costs for every request with microdollar precision (1 USD = 1,000,000 microdollars). This enables accurate billing even for very low-cost requests.
How billing works
-----------------
Every request to the gateway follows this flow:
1. **Balance check**: Before proxying the request, the gateway verifies you have sufficient balance
2. **Request execution**: The request is sent to the upstream provider
3. **Usage tracking**: Token counts and costs are extracted from the response
4. **Balance update**: Your balance is atomically updated with the request cost
### Cost calculation
Costs are determined by the upstream provider's pricing based on token usage:
* **Input tokens**: Tokens in your prompt (system message, user messages, tool definitions)
* **Output tokens**: Tokens generated by the model
* **Cache write tokens**: Tokens written to the provider's prompt cache
* **Cache hit tokens**: Tokens served from the provider's prompt cache (typically discounted)
### Free and BYOK requests
* **Free models**: Models tagged with `:free` have zero cost -- usage is tracked but not billed
* **BYOK requests**: When using your own API key, the cost is set to $0 on Kilo's side. You pay the provider directly based on your agreement with them
Balance management
------------------
### Individual accounts
Your account balance is the difference between total credits purchased and total usage. Check your balance in the [Kilo dashboard](https://app.kilo.ai/)
.
When your balance reaches zero, requests to paid models will return HTTP 402 with a link to add credits:
{
"error": {
"message": "Insufficient balance. Please add credits to continue.",
"code": 402,
"metadata": {
"buyCreditsUrl": "https://app.kilo.ai/credits"
}
}
}
### Organization accounts
Organizations have their own balance pool that members draw from. Organization billing supports:
* **Shared balance**: All members use a common credit pool
* **Per-user daily limits**: Cap individual member spending (e.g., $5/day per user)
* **Auto top-up**: Automatically replenish credits when the balance drops below a threshold
* **Minimum balance alerts**: Email notifications when the balance drops below a configured amount
Organization controls
---------------------
Organizations can enforce policies on gateway usage for their members.
### Model allow lists
Restrict which models organization members can use:
\# Examples of allow list entries
anthropic/claude-sonnet-4.5 # Specific model
anthropic/\* # All Anthropic models
openai/gpt-5.2 # Specific OpenAI model
The allow list supports exact matches and wildcard patterns. Requests for models not on the list return HTTP 403.
### Provider allow lists
Restrict which inference providers can be used for routing. This is passed to the upstream router and affects which backends serve the request.
### Data collection controls
Organizations can set a data collection policy (`allow` or `deny`) that is applied to all requests from their members. Some free models require data collection to be allowed.
### Per-user daily spending limits
Set a maximum daily spend per organization member. When a member reaches their daily limit, subsequent requests return a balance error. The daily limit resets at midnight UTC.
Rate limiting
-------------
### Free model rate limits
All free model requests (both anonymous and authenticated) are rate-limited by IP address:
| Scope | Limit |
| --- | --- |
| Free models per IP | 200 requests per hour |
When rate-limited, you receive HTTP 429:
{
"error": {
"message": "Rate limit exceeded for free models. Please try again later.",
"code": 429
}
}
### Paid model limits
Paid model requests are not rate-limited by the gateway itself, but may be rate-limited by upstream providers. Organization per-user daily spending limits provide an additional layer of cost control.
Usage data
----------
Usage data is tracked per request and includes:
| Field | Description |
| --- | --- |
| `model` | Model ID used |
| `provider` | Inference provider that served the request |
| `input_tokens` | Number of input/prompt tokens |
| `output_tokens` | Number of output/completion tokens |
| `cache_write_tokens` | Tokens written to cache |
| `cache_hit_tokens` | Tokens served from cache |
| `cost_microdollars` | Cost in microdollars (1 USD = 1,000,000) |
| `time_to_first_token` | Latency to first token (streaming only) |
| `is_byok` | Whether a BYOK key was used |
Token counting
--------------
Token counts are provided by the upstream model and are based on the model's native tokenizer. The gateway does not re-tokenize content. Usage data is available:
* **Non-streaming**: In the `usage` field of the response body
* **Streaming**: In the final SSE chunk before `[DONE]`
Copy page
---
# Bring Your Own Key (BYOK)
Bring Your Own Key (BYOK)
=========================
Bring Your Own Key (BYOK) lets you use your own API keys when using the Kilo Gateway, while retaining Kilo platform features like Code Reviews and Cloud Agents.
A user or organization may want to use BYOK to:
* Utilize new models quickly, Kilo Gateway supports most new models in minutes
* Use subscriptions with third-party AI providers, for example [Z.AI](https://z.ai/subscribe)
or [Minimax](https://platform.minimax.io/subscribe/coding-plan)
* Attribute usage against existing provider commitments or agreements
* Use existing credits with a provider
Supported BYOK providers
------------------------
Kilo Gateway currently supports BYOK keys for these providers:
* Anthropic
* AWS Bedrock
* Google AI Studio
* Inception
* Minimax
* Mistral AI
* OpenAI
* xAI
* Z.AI
Add a BYOK key
--------------
1. Log into the Kilo platform and select the account or organization you want to add the BYOK key to.
2. Navigate to the [Bring Your Own Key (BYOK) page](https://app.kilo.ai/byok)
, available in the sidebar under `Account`.
3. Click `Add Your First Key`, select the provider, and paste your API key.
4. Save.
### AWS Bedrock configuration
AWS Bedrock requires credentials in a different format than other providers. Instead of a single API key, you must provide your AWS credentials as a JSON object:
{
"accessKeyId": "AKIA...",
"secretAccessKey": "...",
"region": "us-east-1"
}
| Field | Description |
| --- | --- |
| `accessKeyId` | Your AWS access key ID |
| `secretAccessKey` | Your AWS secret access key |
| `region` | The AWS region where Bedrock is enabled (e.g., `us-east-1`, `eu-west-1`) |
Your IAM user or role must have the following permissions:
* `bedrock:InvokeModel`
* `bedrock:InvokeModelWithResponseStream`
How Bring Your Own Key works
----------------------------
* When you use the **Kilo Gateway** provider, Kilo checks if there's a BYOK key for the selected model's provider.
* If a matching BYOK key exists, the request is routed using your key.
* If the key is invalid, the request fails. It does not fall back to using Kilo's keys.
Using BYOK in the Extensions and CLI
------------------------------------
* BYOK works with the Kilo Gateway provider. Users should ensure that is set as the active [provider](https://kilo.ai/docs/ai-providers)
.
* Select a model from a provider configured for BYOK, for example Claude Sonnet 4.5 if you configured BYOK for Anthropic.
* (Optional) Validate with the provider that traffic is being served by that key.
Limitations
-----------
* BYOK is not fully supported by Agent Manager. See [Agent Manager](https://kilo.ai/docs/automate/agent-manager)
for details.
Copy page
---
# API Reference
API Reference
=============
The Kilo AI Gateway provides an OpenAI-compatible API. All endpoints use the base URL:
https://api.kilo.ai/api/gateway
Chat completions
----------------
Create a chat completion. This is the primary endpoint for interacting with AI models.
POST /chat/completions
### Request body
type ChatCompletionRequest = {
// Required
model: string // Model ID (e.g., "anthropic/claude-sonnet-4.5")
messages: Message\[\] // Array of conversation messages
// Streaming
stream?: boolean // Enable SSE streaming (default: false)
// Generation parameters
max\_tokens?: number // Maximum tokens to generate
temperature?: number // Sampling temperature (0-2)
top\_p?: number // Nucleus sampling (0-1)
stop?: string | string\[\] // Stop sequences
frequency\_penalty?: number // Frequency penalty (-2 to 2)
presence\_penalty?: number // Presence penalty (-2 to 2)
// Tool calling
tools?: Tool\[\] // Available tools/functions
tool\_choice?: ToolChoice // Tool selection strategy
// Structured output
response\_format?: ResponseFormat
// Other
user?: string // End-user identifier for safety
seed?: number // Deterministic sampling seed
}
### Message types
type Message =
| { role: "system"; content: string }
| { role: "user"; content: string | ContentPart\[\] }
| { role: "assistant"; content: string | null; tool\_calls?: ToolCall\[\] }
| { role: "tool"; content: string; tool\_call\_id: string }
type ContentPart = { type: "text"; text: string } | { type: "image\_url"; image\_url: { url: string; detail?: string } }
type Tool = {
type: "function"
function: {
name: string
description?: string
parameters: object // JSON Schema
}
}
type ToolChoice = "none" | "auto" | "required" | { type: "function"; function: { name: string } }
### Response (non-streaming)
type ChatCompletionResponse = {
id: string
object: "chat.completion"
created: number
model: string
choices: Array<{
index: number
message: {
role: "assistant"
content: string | null
tool\_calls?: ToolCall\[\]
}
finish\_reason: "stop" | "length" | "tool\_calls" | "content\_filter"
}>
usage: {
prompt\_tokens: number
completion\_tokens: number
total\_tokens: number
}
}
### Response (streaming)
When `stream: true`, the response is a series of SSE events:
type ChatCompletionChunk = {
id: string
object: "chat.completion.chunk"
created: number
model: string
choices: Array<{
index: number
delta: {
role?: "assistant"
content?: string
tool\_calls?: ToolCall\[\]
}
finish\_reason: string | null
}>
// Only in the final chunk
usage?: {
prompt\_tokens: number
completion\_tokens: number
total\_tokens: number
}
}
### Example request
curl -X POST "https://api.kilo.ai/api/gateway/chat/completions" \\
-H "Authorization: Bearer $KILO\_API\_KEY" \\
-H "Content-Type: application/json" \\
-d '{
"model": "anthropic/claude-sonnet-4.5",
"messages": \[\
{"role": "system", "content": "You are a helpful assistant."},\
{"role": "user", "content": "What is quantum computing?"}\
\],
"max\_tokens": 500,
"temperature": 0.7
}'
### Example response
{
"id": "gen-abc123",
"object": "chat.completion",
"created": 1739000000,
"model": "anthropic/claude-sonnet-4.5",
"choices": \[\
{\
"index": 0,\
"message": {\
"role": "assistant",\
"content": "Quantum computing is a type of computation that uses quantum mechanics..."\
},\
"finish\_reason": "stop"\
}\
\],
"usage": {
"prompt\_tokens": 25,
"completion\_tokens": 150,
"total\_tokens": 175
}
}
Tool calling
------------
The gateway supports function/tool calling with automatic repair for common issues like duplicate tool calls and orphan cleanup.
### Request with tools
{
"model": "anthropic/claude-sonnet-4.5",
"messages": \[{ "role": "user", "content": "What's the weather in San Francisco?" }\],
"tools": \[\
{\
"type": "function",\
"function": {\
"name": "get\_weather",\
"description": "Get the current weather for a location",\
"parameters": {\
"type": "object",\
"properties": {\
"location": {\
"type": "string",\
"description": "City name"\
}\
},\
"required": \["location"\]\
}\
}\
}\
\],
"tool\_choice": "auto"
}
### Tool call response
{
"choices": \[\
{\
"message": {\
"role": "assistant",\
"content": null,\
"tool\_calls": \[\
{\
"id": "call\_abc123",\
"type": "function",\
"function": {\
"name": "get\_weather",\
"arguments": "{\\"location\\":\\"San Francisco\\"}"\
}\
}\
\]\
},\
"finish\_reason": "tool\_calls"\
}\
\]
}
### Tool call repair
The gateway automatically handles common tool calling issues:
* **Deduplication**: Removes duplicate tool calls with the same ID
* **Orphan cleanup**: Removes tool result messages without matching tool calls
* **Missing results**: Inserts placeholder results for tool calls without responses
* **ID normalization**: Normalizes tool call IDs per provider requirements (Anthropic, Mistral)
FIM completions
---------------
Fill-in-the-middle completions for code generation, powered by Mistral Codestral.
POST /api/fim/completions
### Request body
type FIMRequest = {
model: string // Must be a Mistral model (e.g., "mistralai/codestral-2508")
prompt: string // Code before the cursor
suffix?: string // Code after the cursor
max\_tokens?: number // Maximum tokens (capped at 1000)
temperature?: number
stop?: string\[\]
stream?: boolean
}
### Example request
curl -X POST "https://api.kilo.ai/api/fim/completions" \\
-H "Authorization: Bearer $KILO\_API\_KEY" \\
-H "Content-Type: application/json" \\
-d '{
"model": "mistralai/codestral-2508",
"prompt": "def fibonacci(n):\\n if n <= 1:\\n return n\\n ",
"suffix": "\\n\\nprint(fibonacci(10))",
"max\_tokens": 200,
"stream": false
}'
ℹ️Info
FIM completions are limited to Mistral models (model IDs starting with `mistralai/`). BYOK is supported with the `codestral` key type.
List models
-----------
Retrieve the list of available models.
GET /models
No authentication required.
### Response
Returns an OpenAI-compatible model list:
{
"data": \[\
{\
"id": "anthropic/claude-sonnet-4.5",\
"object": "model",\
"created": 1739000000,\
"owned\_by": "anthropic",\
"name": "Claude Sonnet 4.5",\
"context\_length": 200000,\
"pricing": {\
"prompt": "0.000003",\
"completion": "0.000015"\
}\
}\
\]
}
List providers
--------------
Retrieve the list of available providers.
GET /providers
No authentication required.
Error codes
-----------
| HTTP Status | Description |
| --- | --- |
| 400 | Bad request -- invalid parameters or model ID |
| 401 | Unauthorized -- invalid or missing API key |
| 402 | Insufficient balance -- add credits to continue |
| 403 | Forbidden -- model not allowed by organization policy |
| 429 | Rate limited -- too many requests |
| 500 | Internal server error |
| 502 | Provider error -- upstream provider returned an error |
| 503 | Service unavailable -- provider temporarily unavailable |
### Error response format
{
"error": {
"message": "Human-readable error description",
"code": 400
}
}
ℹ️Info
When the gateway receives a 402 (Payment Required) from an upstream provider, it returns 503 to the client to avoid exposing internal billing details.
### Context length errors
If your request exceeds the model's context window, you'll receive a descriptive error:
{
"error": {
"message": "This request exceeds the model's context window of 200000 tokens. Your request contains approximately 250000 tokens.",
"code": 400
}
}
Copy page
---
# OpenClaw Control UI
OpenClaw Control UI
===================
The Control UI is a browser-based dashboard (built with Vite + Lit) served by the OpenClaw Gateway on the same port as the gateway itself (default: `http://localhost:18789/`). It connects via WebSocket and gives you real-time control over your agent, channels, sessions, and system configuration. For KiloClaw users, see [Accessing the Control UI](https://kilo.ai/docs/kiloclaw/dashboard#accessing-the-control-ui)
to get started.
Features
--------
* **Chat** — Send messages, stream responses with live tool-call output, view history, and abort runs.
* **Channels** — View the status of connected messaging platforms, scan QR codes for login, and edit per-channel config.
* **Sessions** — List active sessions with thinking and verbose overrides.
* **Cron Jobs** — Create, edit, enable/disable, run, and view history of scheduled tasks.
* **Skills** — View status, enable/disable, install, and manage API keys for skills.
* **Nodes** — List paired devices and their capabilities.
* **Exec Approvals** — Edit gateway or node command allowlists. See [Exec Approvals](https://kilo.ai/docs/kiloclaw/control-ui#exec-approvals)
below.
* **Config** — View and edit `openclaw.json` with schema-based form rendering and a raw JSON editor.
* **Logs** — Live tail of gateway logs with filtering and export.
* **Debug** — Status, health, model snapshots, event log, and manual RPC calls.
* **Update** — Run package updates and restart the gateway.
For more details, please see the official [OpenClaw documentation](https://docs.openclaw.ai/web/control-ui)
.
⚠️Warning
Do not use the **Update** feature in the Control UI to update KiloClaw. Use **Redeploy** from the [KiloClaw Dashboard](https://kilo.ai/docs/kiloclaw/dashboard#redeploy)
instead. Updating via the Control UI will not apply the correct KiloClaw platform image and may break your instance.
Changing Models
---------------
The Control UI Chat tab doubles as a command line for model management. KiloClaw exposes 335+ models through the `kilocode` provider and you can browse and switch between them without leaving the chat.
| Command | Description |
| --- | --- |
| `/model status` | View the currently active model and provider |
| `/models kilocode` | Browse available models (paginated, 20 per page) |
| `/models kilocode ` | Jump to a specific page (e.g. `/models kilocode 2`) |
| `/model kilocode//` | Switch to a specific model (e.g. `/model kilocode/anthropic/claude-sonnet-4.6`) |
| `/models kilocode all` | List every available model at once |
Each `/models` response includes helper text at the bottom with shortcuts for switching, paging, and listing all models.
To change the default model for all new sessions, edit `agents.defaults.model.primary` in your `openclaw.json` via **Config** in the Control UI (or the [KiloClaw Dashboard](https://kilo.ai/docs/kiloclaw/dashboard#changing-the-model)
for a quick dropdown pick).
For the full list of providers, advanced configuration, and CLI commands, see the [OpenClaw Model Providers documentation](https://docs.openclaw.ai/providers)
.
Authentication
--------------
Auth is handled via token or password on the WebSocket handshake. Remote connections require one-time device pairing — the pairing request appears on the [KiloClaw Dashboard](https://kilo.ai/docs/kiloclaw/dashboard#pairing-requests)
or in the Control UI itself.
Exec Approvals
--------------
Exec approvals are the safety interlock that controls which commands your agent can run on the host machine (gateway or node). By default, **all host exec requests are denied** — you must explicitly allowlist the commands you want your agent to run independently. This prevents accidental execution of destructive commands.
⚠️Warning
The default security policy is `deny`. You must configure an allowlist before your agent can execute any host commands.
### How It Works
Approvals are enforced locally on the execution host and sit on top of tool policy and elevated gating. The effective policy is always the **stricter** of `tools.exec.*` and the approvals defaults. Settings are stored in `~/.openclaw/exec-approvals.json` on the host.
### Security Policies
| Policy | Behavior |
| --- | --- |
| `deny` | Block all host exec requests (default) |
| `allowlist` | Allow only commands matching the allowlist |
| `full` | Allow everything (equivalent to elevated mode) |
### Ask Behavior
The `ask` setting controls when the user is prompted for approval:
| Setting | Behavior |
| --- | --- |
| `off` | Never prompt |
| `on-miss` | Prompt only when the allowlist does not match (default) |
| `always` | Prompt on every command |
If a prompt is required but no UI is reachable, the `askFallback` setting decides the outcome (`deny` by default).
### Allowlists
Allowlists are **per agent** — each agent has its own set of allowed command patterns. Patterns are case-insensitive globs that must resolve to binary paths (basename-only entries are ignored).
Example patterns:
~/Projects/\*\*/bin/rg
~/.local/bin/\*
/opt/homebrew/bin/rg
Each entry tracks last-used metadata (timestamp, command, resolved path) so you can audit and keep the list tidy.
### Approval Flow
When a command requires approval, the gateway broadcasts the request to connected operator clients. The approval dialog shows the command, arguments, working directory, agent ID, and resolved path. You can:
* **Allow once** — run the command now
* **Allow always** — add to the allowlist and run
* **Deny** — block the request
Approval prompts can also be forwarded to chat channels (Slack, Telegram, Discord, etc.) and resolved with `/approve`.
### Editing in the Control UI
Navigate to **Nodes > Exec Approvals** in the Control UI to edit defaults, per-agent overrides, and allowlists. Select a scope (Defaults or a specific agent), adjust the policy, add or remove allowlist patterns, then save.
Related
-------
* [KiloClaw Dashboard](https://kilo.ai/docs/kiloclaw/dashboard)
* [KiloClaw Overview](https://kilo.ai/docs/kiloclaw/overview)
* [Connecting Chat Platforms](https://kilo.ai/docs/kiloclaw/chat-platforms)
Copy page
---
# Connecting Chat Platforms
Connecting Chat Platforms
=========================
KiloClaw supports connecting your AI agent to Telegram, Discord, and Slack. You can configure channels from the **Settings** tab on your [KiloClaw dashboard](https://kilo.ai/docs/kiloclaw/dashboard#channels)
, or from the OpenClaw Control UI after accessing your instance.
While the exact steps vary for configuring a chat platform (called a _channel_ by OpenClaw), the steps are to:
1. Configure the channel
2. Redeploy the KiloClaw instance
3. Initiate the pairing in the chat app
4. Accept the pairing request in the [KiloClaw UI](https://app.kilo.ai/claw)
Detailed instructions for supported chat apps are below.
Chat Apps (Channels)
--------------------
### Telegram
1. Open Telegram and search for [@BotFather](https://t.me/BotFather)
2. Send `/newbot` and follow the prompts to create your bot
3. Copy the **Bot Token** that BotFather gives you
4. Go to the **Settings** tab on your [KiloClaw dashboard](https://kilo.ai/docs/kiloclaw/dashboard)
5. Paste the token into the **Telegram Bot Token** field
6. Click **Save**
7. Redeploy your KiloClaw instance
8. Send a direct message to your bot in Telegram: `/start`

Telegram bot token entry
You can remove or replace a configured token at any time.
> ℹ️ **Info** Advanced settings such as DM policy, allow lists, and groups can be configured in the OpenClaw Control UI after connecting.
### Discord
To connect Discord, you need a **Bot Token** from the [Discord Developer Portal](https://discord.com/developers/applications)
.
#### Create an Application and Bot
1. Go to the [Discord Developer Portal](https://discord.com/developers/applications)
and log in
2. Click **New Application**, give it a name, and click **Create**
3. Click **Bot** on the left sidebar
4. Click **Add Bot** and confirm
#### Enable Privileged Intents
On the **Bot** page, scroll down to **Privileged Gateway Intents** and enable:
* **Message Content Intent** (required)
* **Server Members Intent** (recommended — needed for role allowlists and name matching)
* **Presence Intent** (optional)
#### Copy Your Bot Token
1. Scroll back up on the **Bot** page and click **Reset Token**
> 📝 **Note** Despite the name, this generates your first token — nothing is being "reset."
2. Copy the token that appears and paste it into the **Discord Bot Token** field in your KiloClaw dashboard.

Discord bot token entry
Enter the token in the Settings tab and click **Save**. You can remove or replace a configured token at any time.
#### Generate an Invite URL and Add the Bot to Your Server
1. Click **OAuth2** on the sidebar
2. Scroll down to **OAuth2 URL Generator** and enable:
* `bot`
* `applications.commands`
3. A **Bot Permissions** section will appear below. Enable:
* View Channels
* Send Messages
* Read Message History
* Embed Links
* Attach Files
* Add Reactions (optional)
4. Copy the generated URL at the bottom
5. Paste it into your browser, select your server, and click **Continue**
6. You should now see your bot in the Discord server
#### Start Chatting with the Bot
1. Right-click on the Bot in Discord and click **Message**
2. DM the bot `/pair`
3. You should get a response back with a pairing code
4. Return to [app.kilocode.ai/claw](https://app.kilocode.ai/claw)
and confirm the pairing code and approve
5. You should now be able to chat with the bot from Discord
### Slack
#### Step 1: Create a Slack App from the OpenClaw Manifest
1. Go to [Slack App Management](https://api.slack.com/apps)
and click **Create New App** → **From a Manifest**
2. Copy the manifest from the [OpenClaw docs](https://docs.openclaw.ai/channels/slack#manifest-and-scope-checklist)
3. Paste the manifest JSON into Slack's manifest editor
4. Customize the manifest before creating:
* Rename the app to your preferred name wherever it appears
* Update the slash command if desired (e.g., `/kiloclaw`)
5. Click **Create**
#### Step 2: Generate Tokens
You need two tokens from Slack:
**App-Level Token**
1. In your Slack app settings, scroll down to **App-Level Tokens**
2. Click **Generate Token**
3. Add the `connections:write` scope
4. Generate and copy the token (starts with `xapp-`)
**Bot User OAuth Token**
1. In the left sidebar, click **Install App**
2. Install the app to your workspace
3. Copy the **Bot User OAuth Token** (starts with `xoxb-`)
#### Step 3: Connect Slack to KiloClaw
1. In the [KiloClaw UI](https://app.kilo.ai/claw)
, find the Slack integration section (may show "not configured")
2. Enter both tokens:
* The `xapp-` app-level token
* The `xoxb-` bot user OAuth token
3. Click **Save**
4. Scroll to the top of the KiloClaw UI and click **Redeploy**. Wait for the instance to come back up
#### Step 4: Pair Slack with KiloClaw
1. In Slack, DM the app and type your slash command (e.g., `/claw`) followed by anything — this triggers the pairing flow
> 📝 **Note** The slash command is whatever you defined in the manifest. Any text after the command will work to trigger pairing.
2. The app will return a pairing code
3. Return to [app.kilocode.ai/claw](https://app.kilocode.ai/claw)
and confirm the pairing code and approve
4. You should now be able to chat with the bot from Slack
Future Support
--------------
Additional platforms (such as WhatsApp) are planned for future releases. For the latest on supported platforms, refer to the [OpenClaw documentation](https://docs.openclaw.ai/)
.
Related
-------
* [KiloClaw Overview](https://kilo.ai/docs/kiloclaw/overview)
* [Dashboard Reference](https://kilo.ai/docs/kiloclaw/dashboard)
* [Troubleshooting](https://kilo.ai/docs/kiloclaw/troubleshooting)
* [KiloClaw Pricing](https://kilo.ai/docs/kiloclaw/pricing)
* [OpenClaw Documentation](https://docs.openclaw.ai/)
Copy page
---
# GitHub Integration
GitHub Integration
==================
Connect a GitHub account to your KiloClaw agent so it can clone repositories, push commits, open pull requests, and leave code reviews — all autonomously.
⚠️Security
Create a dedicated GitHub account for your bot rather than using your personal account. This limits the blast radius if credentials are compromised, provides clear audit trails of agent activity, and lets you scope permissions to only what the agent needs.
Setup
-----
### Step 1: Prepare a GitHub account for your bot
If you don't already have a dedicated GitHub account for your bot, create one first:
1. Go to [github.com/signup](https://github.com/signup)
and create a new account using a bot specific email address
2. Verify the email address
3. Enable two factor authentication at [github.com/settings/security](https://github.com/settings/security)
(GitHub requires this for PAT creation)
Once you have a GitHub account ready, continue to Step 2.
### Step 2: Generate a Personal Access Token
KiloClaw uses a [fine grained Personal Access Token](https://github.com/settings/tokens?type=beta)
to authenticate as your bot. When creating the token, use these settings:
| Setting | Recommended Value |
| --- | --- |
| **Token name** | `kiloclaw-bot` (or any descriptive name) |
| **Expiration** | 90 days (set a reminder to rotate) |
| **Repository access** | All repositories, or select specific ones |
Grant the following permissions:
| Permission | Access Level | Purpose |
| --- | --- | --- |
| **Contents** | Read & Write | Clone repos, push commits |
| **Pull requests** | Read & Write | Open and manage pull requests |
| **Issues** | Read & Write | Create and comment on issues |
| **Metadata** | Read only | List repositories and basic repo info |
| **Workflows** | Read & Write | Trigger and manage GitHub Actions workflows |
### Step 3: Enter credentials in KiloClaw
1. Go to the **Settings** tab on your [KiloClaw dashboard](https://kilo.ai/docs/kiloclaw/dashboard)
2. Scroll to the **Tools** section
3. Enter the **Personal Access Token**, **Username**, and **Email** for the bot account
4. Click **Save**
5. **Redeploy** your instance to apply the changes
Token Formats
-------------
KiloClaw accepts both GitHub token formats:
* **Classic tokens** — Start with `ghp_` (e.g., `ghp_xxxxxxxxxxxxxxxxxxxxxxxxxxxxxxxxxxxx`)
* **Fine grained tokens** — Start with `github_pat_` (e.g., `github_pat_xxxxxxxxxxxxxxxxxxxxxx`)
Fine grained tokens are recommended as they provide more granular permission control.
How It Works
------------
When your instance starts, KiloClaw automatically:
1. Authenticates the GitHub CLI (`gh`) with your token
2. Configures `git` with the bot's username and email for commits
3. Makes both `gh` and `git` commands available to the agent
The agent can then use standard Git and GitHub CLI commands to interact with your repositories.
Security
--------
* Tokens are encrypted at rest using KiloClaw's secret management system
* Credentials are only decrypted inside your running instance
* Use short lived tokens and rotate them periodically — 30 to 90 days is a good range
* Use fine grained personal access tokens so you can scope access to specific repositories and only the permissions the agent actually needs
* GitHub allows you to edit an existing token to add more permissions later, so you can start with the minimum permissions you need and expand as required
Related
-------
* [KiloClaw Overview](https://kilo.ai/docs/kiloclaw/overview)
* [Dashboard Reference](https://kilo.ai/docs/kiloclaw/dashboard)
* [Connecting Chat Platforms](https://kilo.ai/docs/kiloclaw/chat-platforms)
* [Pre-installed Software](https://kilo.ai/docs/kiloclaw/pre-installed-software)
Copy page
---
# SDKs & Frameworks
SDKs & Frameworks
=================
The Kilo AI Gateway is OpenAI-compatible, meaning any SDK or framework that works with the OpenAI API can work with the Kilo Gateway by changing the base URL.
Vercel AI SDK (Recommended)
---------------------------
The [Vercel AI SDK](https://ai-sdk.dev/)
provides a high-level TypeScript interface for building AI applications with streaming, tool calling, and structured output support.
### Installation
npm install ai @ai-sdk/openai
### Basic usage
import { streamText } from "ai"
import { createOpenAI } from "@ai-sdk/openai"
const kilo = createOpenAI({
baseURL: "https://api.kilo.ai/api/gateway",
apiKey: process.env.KILO\_API\_KEY,
})
const result = streamText({
model: kilo.chat("anthropic/claude-sonnet-4.5"),
prompt: "Write a haiku about programming.",
})
for await (const textPart of result.textStream) {
process.stdout.write(textPart)
}
### With tool calling
import { streamText, tool } from "ai"
import { createOpenAI } from "@ai-sdk/openai"
import { z } from "zod"
const kilo = createOpenAI({
baseURL: "https://api.kilo.ai/api/gateway",
apiKey: process.env.KILO\_API\_KEY,
})
const result = streamText({
model: kilo.chat("anthropic/claude-sonnet-4.5"),
prompt: "What is the weather in San Francisco?",
tools: {
getWeather: tool({
description: "Get the current weather for a location",
parameters: z.object({
location: z.string().describe("City name"),
}),
execute: async ({ location }) => {
return { temperature: 72, condition: "sunny" }
},
}),
},
})
for await (const textPart of result.textStream) {
process.stdout.write(textPart)
}
### In a Next.js API route
import { streamText } from "ai"
import { createOpenAI } from "@ai-sdk/openai"
const kilo = createOpenAI({
baseURL: "https://api.kilo.ai/api/gateway",
apiKey: process.env.KILO\_API\_KEY,
})
export async function POST(request: Request) {
const { messages } = await request.json()
const result = streamText({
model: kilo.chat("anthropic/claude-sonnet-4.5"),
messages,
})
return result.toDataStreamResponse()
}
OpenAI SDK
----------
The official OpenAI SDKs work with the Kilo Gateway by setting the base URL.
### TypeScript / JavaScript
npm install openai
import OpenAI from "openai"
const client = new OpenAI({
apiKey: process.env.KILO\_API\_KEY,
baseURL: "https://api.kilo.ai/api/gateway",
})
// Non-streaming
const response = await client.chat.completions.create({
model: "anthropic/claude-sonnet-4.5",
messages: \[\
{ role: "system", content: "You are a helpful assistant." },\
{ role: "user", content: "Explain quantum entanglement simply." },\
\],
})
console.log(response.choices\[0\].message.content)
// Streaming
const stream = await client.chat.completions.create({
model: "anthropic/claude-sonnet-4.5",
messages: \[{ role: "user", content: "Write a poem about the ocean." }\],
stream: true,
})
for await (const chunk of stream) {
const content = chunk.choices\[0\]?.delta?.content
if (content) process.stdout.write(content)
}
### Python
pip install openai
import os
from openai import OpenAI
client = OpenAI(
api\_key=os.getenv("KILO\_API\_KEY"),
base\_url="https://api.kilo.ai/api/gateway",
)
# Non-streaming
response = client.chat.completions.create(
model="anthropic/claude-sonnet-4.5",
messages=\[\
{"role": "system", "content": "You are a helpful assistant."},\
{"role": "user", "content": "Explain quantum entanglement simply."},\
\],
)
print(response.choices\[0\].message.content)
# Streaming
stream = client.chat.completions.create(
model="anthropic/claude-sonnet-4.5",
messages=\[\
{"role": "user", "content": "Write a poem about the ocean."},\
\],
stream=True,
)
for chunk in stream:
content = chunk.choices\[0\].delta.content
if content:
print(content, end="", flush=True)
cURL
----
### Non-streaming request
curl -X POST "https://api.kilo.ai/api/gateway/chat/completions" \\
-H "Authorization: Bearer $KILO\_API\_KEY" \\
-H "Content-Type: application/json" \\
-d '{
"model": "anthropic/claude-sonnet-4.5",
"messages": \[\
{"role": "user", "content": "What is the capital of France?"}\
\]
}'
### Streaming request
curl -N -X POST "https://api.kilo.ai/api/gateway/chat/completions" \\
-H "Authorization: Bearer $KILO\_API\_KEY" \\
-H "Content-Type: application/json" \\
-d '{
"model": "anthropic/claude-sonnet-4.5",
"messages": \[\
{"role": "user", "content": "Write a short story about AI."}\
\],
"stream": true
}'
The `-N` flag disables buffering so you see tokens as they arrive.
Other languages
---------------
Any HTTP client that can send JSON POST requests and set headers can use the gateway. Here are examples in other languages:
### Go
package main
import (
"bytes"
"encoding/json"
"fmt"
"io"
"net/http"
"os"
)
func main() {
body := map\[string\]interface{}{
"model": "anthropic/claude-sonnet-4.5",
"messages": \[\]map\[string\]string{
{"role": "user", "content": "Why is the sky blue?"},
},
}
jsonBody, \_ := json.Marshal(body)
req, \_ := http.NewRequest("POST",
"https://api.kilo.ai/api/gateway/chat/completions",
bytes.NewBuffer(jsonBody))
req.Header.Set("Authorization", "Bearer "+os.Getenv("KILO\_API\_KEY"))
req.Header.Set("Content-Type", "application/json")
resp, err := http.DefaultClient.Do(req)
if err != nil {
panic(err)
}
defer resp.Body.Close()
respBody, \_ := io.ReadAll(resp.Body)
fmt.Println(string(respBody))
}
### Ruby
require 'net/http'
require 'json'
uri = URI('https://api.kilo.ai/api/gateway/chat/completions')
http = Net::HTTP.new(uri.host, uri.port)
http.use\_ssl = true
request = Net::HTTP::Post.new(uri)
request\['Authorization'\] = "Bearer #{ENV\['KILO\_API\_KEY'\]}"
request\['Content-Type'\] = 'application/json'
request.body = {
model: 'anthropic/claude-sonnet-4.5',
messages: \[\
{ role: 'user', content: 'Why is the sky blue?' }\
\]
}.to\_json
response = http.request(request)
result = JSON.parse(response.body)
puts result\['choices'\]\[0\]\['message'\]\['content'\]
Framework integrations
----------------------
The Kilo AI Gateway works with any framework that supports OpenAI-compatible APIs:
| Framework | Integration |
| --- | --- |
| [Vercel AI SDK](https://ai-sdk.dev/) | Use `createOpenAI` with Kilo base URL |
| [LangChain](https://langchain.com/) | Use `ChatOpenAI` with custom base URL |
| [LlamaIndex](https://www.llamaindex.ai/) | Use OpenAI-compatible configuration |
| [Haystack](https://haystack.deepset.ai/) | Use OpenAI generator with custom URL |
| [Semantic Kernel](https://learn.microsoft.com/en-us/semantic-kernel/) | Use OpenAI connector with custom endpoint |
### LangChain example
from langchain\_openai import ChatOpenAI
llm = ChatOpenAI(
model="anthropic/claude-sonnet-4.5",
api\_key=os.getenv("KILO\_API\_KEY"),
base\_url="https://api.kilo.ai/api/gateway",
)
response = llm.invoke("Explain photosynthesis in simple terms.")
print(response.content)
### LangChain.js example
import { ChatOpenAI } from "@langchain/openai"
const model = new ChatOpenAI({
modelName: "anthropic/claude-sonnet-4.5",
openAIApiKey: process.env.KILO\_API\_KEY,
configuration: {
baseURL: "https://api.kilo.ai/api/gateway",
},
})
const response = await model.invoke("Explain photosynthesis in simple terms.")
console.log(response.content)
Copy page
---
# Team Management
Managing Your Team
==================
Every person on the team is an _Owner_ or a _Member_.
Owners have full administrative oversight including billing, seat allocation, and model/provider selection.
Only Owners can conduct team management activities.
Members can use the Kilo Code extension and see data on the team's usage in the [usage dashboard](https://kilo.ai/docs/collaborate/teams/analytics)
.
Adding Team Members
-------------------
1. **Navigate to Organization Tab** in your profile page and click on the team you want to manage
2. **Click "Invite Member"** button
3. **Enter the team member's email address**
4. **Select initial role** (Member or Owner)
5. Click **Send Invitation**
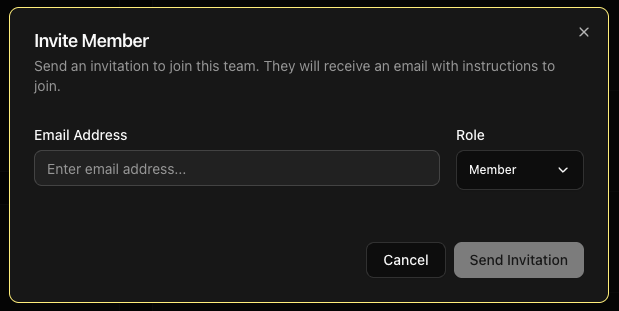
invite-member
Removing Team Members
---------------------
When team members leave:
1. **Navigate to Organization tab**
2. **Find the departing member**
3. **Click "Remove" button**
4. **Confirm removal**
5. **Seat becomes available** immediately
Changing Team Member Roles
--------------------------
Promote or demote team members as needed:
1. **Locate team member** in Organization tab
2. **Click role dropdown** next to their name
3. **Select new role** (Member, Owner)
4. **Confirm change**
5. **Member receives email notification**
### Viewing Team Status
The Organization tab shows:
* **Active members** with last activity
* **Pending invitations** awaiting acceptance
* **Role distribution** across the team
Next Steps
----------
* [Understand billing and credits](https://kilo.ai/docs/collaborate/teams/billing)
* [Explore usage analytics](https://kilo.ai/docs/collaborate/teams/analytics)
* [Learn about team roles and permissions](https://kilo.ai/docs/collaborate/teams/team-management)
Effective team management ensures your organization maximizes the benefits of AI-assisted development while maintaining cost control and security.
Copy page
---
# Agents.md
agents.md
=========
AGENTS.md files provide a standardized way to configure AI agent behavior across different AI coding tools. They allow you to define project-specific instructions, coding standards, and guidelines that AI agents should follow when working with your codebase.
📝Memory Bank Deprecation
The Kilo Code **memory bank** feature has been deprecated in favor of AGENTS.md.
**Existing memory bank rules will continue to work.**
Legacy Memory Bank status indicators such as `[Memory Bank: Active]` and `[Memory Bank: Missing]` can still appear, but they are not guaranteed across all clients or modes.
If you'd like to migrate your memory bank content to AGENTS.md:
1. Examine the contents in `.kilocode/rules/memory-bank/`
2. Move that content into your project's `AGENTS.md` file (or ask Kilo to do it for you)
What is AGENTS.md?
------------------
AGENTS.md is an open standard for configuring AI agent behavior in software projects. It's a simple Markdown file placed at the root of your project that contains instructions for AI coding assistants. The standard is supported by multiple AI coding tools, including Kilo Code, Cursor, and Windsurf.
Think of AGENTS.md as a "README for AI agents" - it tells the AI how to work with your specific project, what conventions to follow, and what constraints to respect.
Why Use AGENTS.md?
------------------
* **Portability**: Works across multiple AI coding tools without modification
* **Version Control**: Lives in your repository alongside your code
* **Team Consistency**: Ensures all team members' AI assistants follow the same guidelines
* **Project-Specific**: Tailored to your project's unique requirements and conventions
* **Simple Format**: Plain Markdown - no special syntax or configuration required
File Location and Naming
------------------------
### Project-Level AGENTS.md
Place your AGENTS.md file at the **root of your project**:
my-project/
├── AGENTS.md # Primary filename (recommended)
├── src/
├── package.json
└── README.md
**Supported filenames** (in order of precedence):
1. `AGENTS.md` (uppercase, plural - recommended)
2. `AGENT.md` (uppercase, singular - fallback)
⚠️Case Sensitivity
The filename must be uppercase (`AGENTS.md`), not lowercase (`agents.md`). This ensures consistency across different operating systems and tools.
### Subdirectory AGENTS.md Files
You can also place AGENTS.md files in subdirectories to provide context-specific instructions:
my-project/
├── AGENTS.md # Root-level instructions
├── src/
│ └── backend/
│ └── AGENTS.md # Backend-specific instructions
└── docs/
└── AGENTS.md # Documentation-specific instructions
When working in a subdirectory, Kilo Code will load both the root AGENTS.md and any subdirectory AGENTS.md files, with subdirectory files taking precedence for conflicting instructions.
File Protection
---------------
Both `AGENTS.md` and `AGENT.md` are **write-protected files** in Kilo Code. This means:
* The AI agent cannot modify these files without explicit user approval
* You'll be prompted to confirm any changes to these files
* This prevents accidental modifications to your project's AI configuration
Basic Syntax and Structure
--------------------------
AGENTS.md files use standard Markdown syntax. There's no required structure, but organizing your content with headers and lists makes it easier for AI models to parse and understand.
### Recommended Structure
\# Project Name
Brief description of the project and its purpose.
## Code Style
- Use TypeScript for all new files
- Follow ESLint configuration
- Use 2 spaces for indentation
## Architecture
- Follow MVC pattern
- Keep components under 200 lines
- Use dependency injection
## Testing
- Write unit tests for all business logic
- Maintain >80% code coverage
- Use Jest for testing
## Security
- Never commit API keys or secrets
- Validate all user inputs
- Use parameterized queries for database access
Best Practices
--------------
* **Be specific and clear** - Use concrete rules like "limit cyclomatic complexity to < 10" instead of vague guidance like "write good code"
* **Include code examples** - Show patterns for error handling, naming conventions, or architecture decisions
* **Organize by category** - Group related guidelines under clear headers (Code Style, Architecture, Testing, Security)
* **Keep it concise** - Use bullet points and direct language; avoid long paragraphs
* **Update regularly** - Review and revise as your project's conventions evolve
How AGENTS.md Works in Kilo Code
--------------------------------
### Loading Behavior
When you start a task in Kilo Code:
1. Kilo Code checks for `AGENTS.md` or `AGENT.md` at the project root
2. If found, the content is loaded and included in the AI's context
3. The AI follows these instructions throughout the conversation
4. Changes to AGENTS.md take effect in new tasks (reload may be required)
### Interaction with Other Rules
AGENTS.md works alongside Kilo Code's other configuration systems:
| Feature | Scope | Location | Purpose | Priority |
| --- | --- | --- | --- | --- |
| **[Mode-specific Custom Rules](https://kilo.ai/docs/customize/custom-rules) ** | Project | `.kilocode/rules-{mode}/` | Mode-specific rules and constraints | 1 (Highest) |
| **[Custom Rules](https://kilo.ai/docs/customize/custom-rules) ** | Project | `.kilocode/rules/` | Kilo Code-specific rules and constraints | 2 |
| **[AGENTS.md](https://kilo.ai/docs/customize/agents-md) ** | Project | `AGENTS.md` | Universal standard for any AI coding tool | 3 |
| **[Global Custom Rules](https://kilo.ai/docs/customize/custom-rules) ** | Global | `~/.kilocode/rules/` | Global Kilo Code rules | 4 |
| **[Custom Instructions](https://kilo.ai/docs/customize/custom-instructions) ** | Global | IDE settings | Personal preferences across all projects | 5 (Lowest) |
### Enabling/Disabling AGENTS.md
AGENTS.md support is **enabled by default** in Kilo Code. To disable it, edit `settings.json`:
{
"kilocode.useAgentRules": false
}
Related Features
----------------
* **[Custom Rules](https://kilo.ai/docs/customize/custom-rules)
** - Kilo Code-specific rules with more control
* **[Custom Modes](https://kilo.ai/docs/customize/custom-modes)
** - Specialized workflows with specific permissions
* **[Custom Instructions](https://kilo.ai/docs/customize/custom-instructions)
** - Personal preferences across all projects
* **[Migrating from Cursor or Windsurf](https://kilo.ai/docs/getting-started/migrating)
** - Migration guide for other tools
External Resources
------------------
* [AGENTS.md Specification](https://agents.md/)
- Official standard documentation
* [dotagent](https://github.com/johnlindquist/dotagent)
- Universal converter tool for agent configuration files
* [awesome-cursorrules](https://github.com/PatrickJS/awesome-cursorrules)
- 700+ example rules you can adapt
Copy page
---
# Adding Credits
Adding More Kilo Credits
========================
Once you've used any initial free Kilo Credits, you can easily add more:
* Subscribe to the [Kilo Pass](https://kilo.ai/features/kilo-pass)
, the most cost effective way to add credits.
* Purchase additional credits as a one-time transaction.
* Enable automatic top-up, which purchases additional credits when your balance is below $5.
These options are available to purchase from your [personal profile page](https://app.kilo.ai/profile)
.
You can also use subscriptions or credits you may have purchased directly with an AI provider by adding your keys on the [Bring your own Key (BYOK)](https://app.kilo.ai/byok)
settings screen. For setup details and supported providers, see [AI Providers documentation](https://kilo.ai/docs/ai-providers)
. If your provider is not yet supported, you can also [directly connect your provider](https://kilo.ai/docs/getting-started/setup-authentication)
in the extension and CLI.
Transparent Pricing
-------------------
At Kilo Code, we believe in complete pricing transparency:
* Our pricing matches the model provider's API rates exactly
* We don't take any commission or markup.
* $1 you give us becomes $1 of Kilo credits
* We debit your Kilo credits exactly what the provider charges us in dollars
* You only pay for what you use with no hidden fees
Future Plans
------------
We're continuously working to improve Kilo Code and expand our offerings:
* Additional LLM providers will be added in the future
* More payment options and other plans are under development
💡Need Help?
If you have any questions about pricing or tokens, please reach out to our [support team](mailto:hi@kilo.ai)
or ask in our [Discord community](https://kilo.ai/discord)
.
Copy page
---
# Auto-launch Configuration
Auto-Launch Configuration
=========================
Auto-Launch Configuration allows you to automatically start a Kilo Code task when opening a workspace, with support for specific profiles and modes. This was originally developed as an internal test feature, but we decided to expose it to users in case anyone finds it useful!
ℹ️Info
Auto-Launch Configuration is particularly useful for testing the same prompt against multiple models or project directories.
How It Works
------------
When you open a workspace in VS Code, Kilo Code automatically checks for a launch configuration JSON file. If found, it:
* Switches to the specified provider profile (if provided)
* Changes to the specified mode (if provided)
* Launches a task with your predefined prompt
This happens seamlessly in the background, requiring no manual intervention.
Creating a Launch Configuration
-------------------------------
### Basic Setup
1. Create a `.kilocode` directory in your workspace root (if it doesn't exist)
2. Create a `launchConfig.json` file inside the `.kilocode` directory
3. Configure your launch settings using the JSON format below
### Configuration Format
{
"prompt": "Your task description here",
"profile": "Profile Name (optional)",
"mode": "mode-name (optional)"
}
#### Required Fields
* **`prompt`** (string): The task message that will be sent to the AI when the workspace opens
#### Optional Fields
* **`profile`** (string): Name of an existing [API Configuration Profile](https://kilo.ai/docs/ai-providers)
to use for this task. Must exactly match a profile name from your settings.
* **`mode`** (string): The Kilo Code mode to use for this task. Available modes:
* `"code"` - General-purpose coding tasks
* `"architect"` - Planning and technical design
* `"ask"` - Questions and explanations
* `"debug"` - Problem diagnosis and troubleshooting
* `"test"` - Testing-focused workflows
* Custom mode slugs (if you have [custom modes](https://kilo.ai/docs/customize/custom-modes)
)
Example Configurations
----------------------
### Basic Task Launch
{
"prompt": "Review this codebase and suggest improvements for performance and maintainability"
}
### Profile-Specific Task
{
"prompt": "Create comprehensive unit tests for all components in the src/ directory",
"profile": "GPT-4 Turbo"
}
### Architecture Planning with Claude
{
"prompt": "Design a scalable microservices architecture for this e-commerce platform with focus on security and performance",
"profile": "🎻 Sonnet 4",
"mode": "architect"
}
### Model Comparison Setup
{
"prompt": "Optimize this algorithm for better time complexity and explain your approach",
"profile": "🧠 Qwen",
"mode": "code"
}
Use Cases
---------
### Development Workflows
* **Project Templates**: Include launch configurations in project templates to immediately start with appropriate AI assistance
* **Code Reviews**: Automatically trigger code review tasks when opening pull request branches
* **Documentation**: Launch documentation generation tasks for new projects
### Testing and Comparison
* **Model Testing**: Create different configurations to test how various AI models handle the same prompt
* **A/B Testing**: Compare approaches by switching between different profiles and modes
* **Benchmarking**: Systematically test AI performance across different scenarios
### Team Collaboration
* **Consistent Setup**: Ensure all team members use the same AI configuration for specific projects
* **Onboarding**: Help new team members start with optimal AI settings automatically
* **Standards**: Enforce coding standards by launching with specific profiles and modes
File Location
-------------
The configuration file must be located at:
your-workspace/
└── .kilocode/
└── launchConfig.json
This file should be at the root of your workspace (the same level as your main project files).
Behavior and Timing
-------------------
* Auto-launch triggers approximately 500ms after Kilo Code extension activation
* The sidebar automatically receives focus before the task launches
* Profile switching happens before mode switching (if both are specified)
* The task launches after all configuration changes are applied
* If profile or mode switching fails, the task continues with current settings
Troubleshooting
---------------
### Configuration Not Loading
1. Verify file location: `.kilocode/launchConfig.json` in workspace root
2. Check JSON syntax with a JSON validator
3. Ensure `prompt` field is present and not empty
4. Check VS Code Developer Console for error messages
### Profile Not Switching
1. Verify the profile name exactly matches one from your settings
2. Profile names are case-sensitive and must match exactly (including emojis)
3. Check that the profile exists in your [API Configuration Profiles](https://kilo.ai/docs/ai-providers)
### Mode Not Switching
1. Verify the mode name is valid (code, architect, ask, debug, test)
2. For custom modes, use the exact mode slug from your configuration
3. Mode names are case-sensitive and should be lowercase
Copy page
---
# Settings
Settings
========
The VS Code extension can be configured through the Settings window, opened by pressing the gear icon. Both the CLI and the extension can also be configured through interactions with the agent. The current VS Code extension and CLI share the same underlying settings, so changes in one are reflected in the other.
Managing Settings
-----------------
VSCodeCLIVSCode (Legacy)
The VS Code extension provides a **Settings webview UI** accessible from the extension sidebar by clicking the gear icon (). The UI is organized into tabs including Providers, Auto-Approve, Models, and more.
This UI reads and writes to the same underlying JSONC config files used by the CLI, so changes made in either place are reflected in both.
### Config File Locations
There are two primary config files:
* **Global config:** `~/.config/kilo/kilo.jsonc` — applies to all projects. On Windows, this is `C:\Users\\.config\kilo\kilo.jsonc`.
* **Project config:** `kilo.jsonc` in your project root, or `.kilo/kilo.jsonc` for a cleaner setup. The `.kilo/` version takes priority if both exist.
⚠️Warning
If you check config files into version control, make sure they do not contain API keys or other secrets (e.g., `provider.*.options.apiKey`). Use environment variables for credentials instead.
### Export and Import
Config files are plain-text and portable — copy them between machines and you're done.
Experimental Features
---------------------
VSCodeCLIVSCode (Legacy)
The extension does not currently expose the same experimental feature toggles as the **VSCode (Legacy)** version. Advanced options are configured via the JSONC config files that the Settings webview reads and writes. Refer to the auto-generated `$schema` in your `kilo.jsonc` for the full list of available options.
Copy page
---
# Code Reviews
Code Reviews
============
Kilo's **Code Reviews** feature automatically analyzes your pull or merge requests using an AI model of your choice. It can review code the moment a PR/MR is opened or updated, surface issues, and provide structured feedback across performance, security, style, and test coverage.
What Code Reviews Enable
------------------------
* Automated AI review on every pull request
* Consistent feedback based on your team’s standards
* Automatic detection of bugs, security risks, and anti-patterns
* Deep reasoning over changed files, diffs, and repo context
* Customizable review strictness and focus areas
Supported Platforms
-------------------
| Platform | Integration Type | Details |
| --- | --- | --- |
| GitHub | GitHub App | [GitHub Setup Guide](https://kilo.ai/docs/automate/code-reviews/github) |
| GitLab | OAuth or PAT | [GitLab Setup Guide](https://kilo.ai/docs/automate/code-reviews/gitlab) |
Prerequisites
-------------
Before enabling Code Reviews:
* **A platform integration must be configured:** Connect your GitHub or GitLab account via the [Integrations page](https://app.kilo.ai/integrations)
so that the Review Agent can access your repositories. See the [Integration setup guide](https://kilo.ai/docs/automate/integrations)
for detailed instructions.
* **Kilo Code credits:** The AI model uses credits when analyzing your code.
Cost
----
* **Compute and review time are free during limited beta**
* Feedback is welcome in the Code Reviews beta Discord channel:
* [Kilo Discord](https://discord.gg/hZnd57qN)
* **Kilo Code credits are still used** when the agent performs model reasoning during a review.
Getting Started
---------------
1. Go to the **Code Reviews** page in your [personal dashboard](https://app.kilo.ai/profile)
or [organization dashboard](https://app.kilo.ai/organizations)
.
2. Toggle **Enable AI Code Review** to on.
3. Choose an **AI Model** (e.g., Claude Sonnet 4.5).
4. Select a **Review Style** — Strict, Balanced, or Lenient.
5. Choose which **repositories** should receive automatic reviews.
6. Optionally select **Focus Areas** such as security, performance, bugs, style, testing, or documentation.
7. Set a **maximum review time** (5–30 minutes).
8. Add **custom instructions** to shape how the agent reviews your code.
Once configured, the Review Agent runs automatically on PR/MR events. For platform-specific setup, see:
* [GitHub Code Reviews](https://kilo.ai/docs/automate/code-reviews/github)
* [GitLab Code Reviews](https://kilo.ai/docs/automate/code-reviews/gitlab)
Local Code Reviews
------------------
Code Reviewer is also available locally. This is valuable for developers who want to review their code before pushing a pull request to their team publicly, or for developers who want reviews and don't need to ship a pull request to GitHub.
### VS Code
Select 'Review' from the mode dropdown after making local changes, and click 'Send' for AI-powered feedback and suggestions.
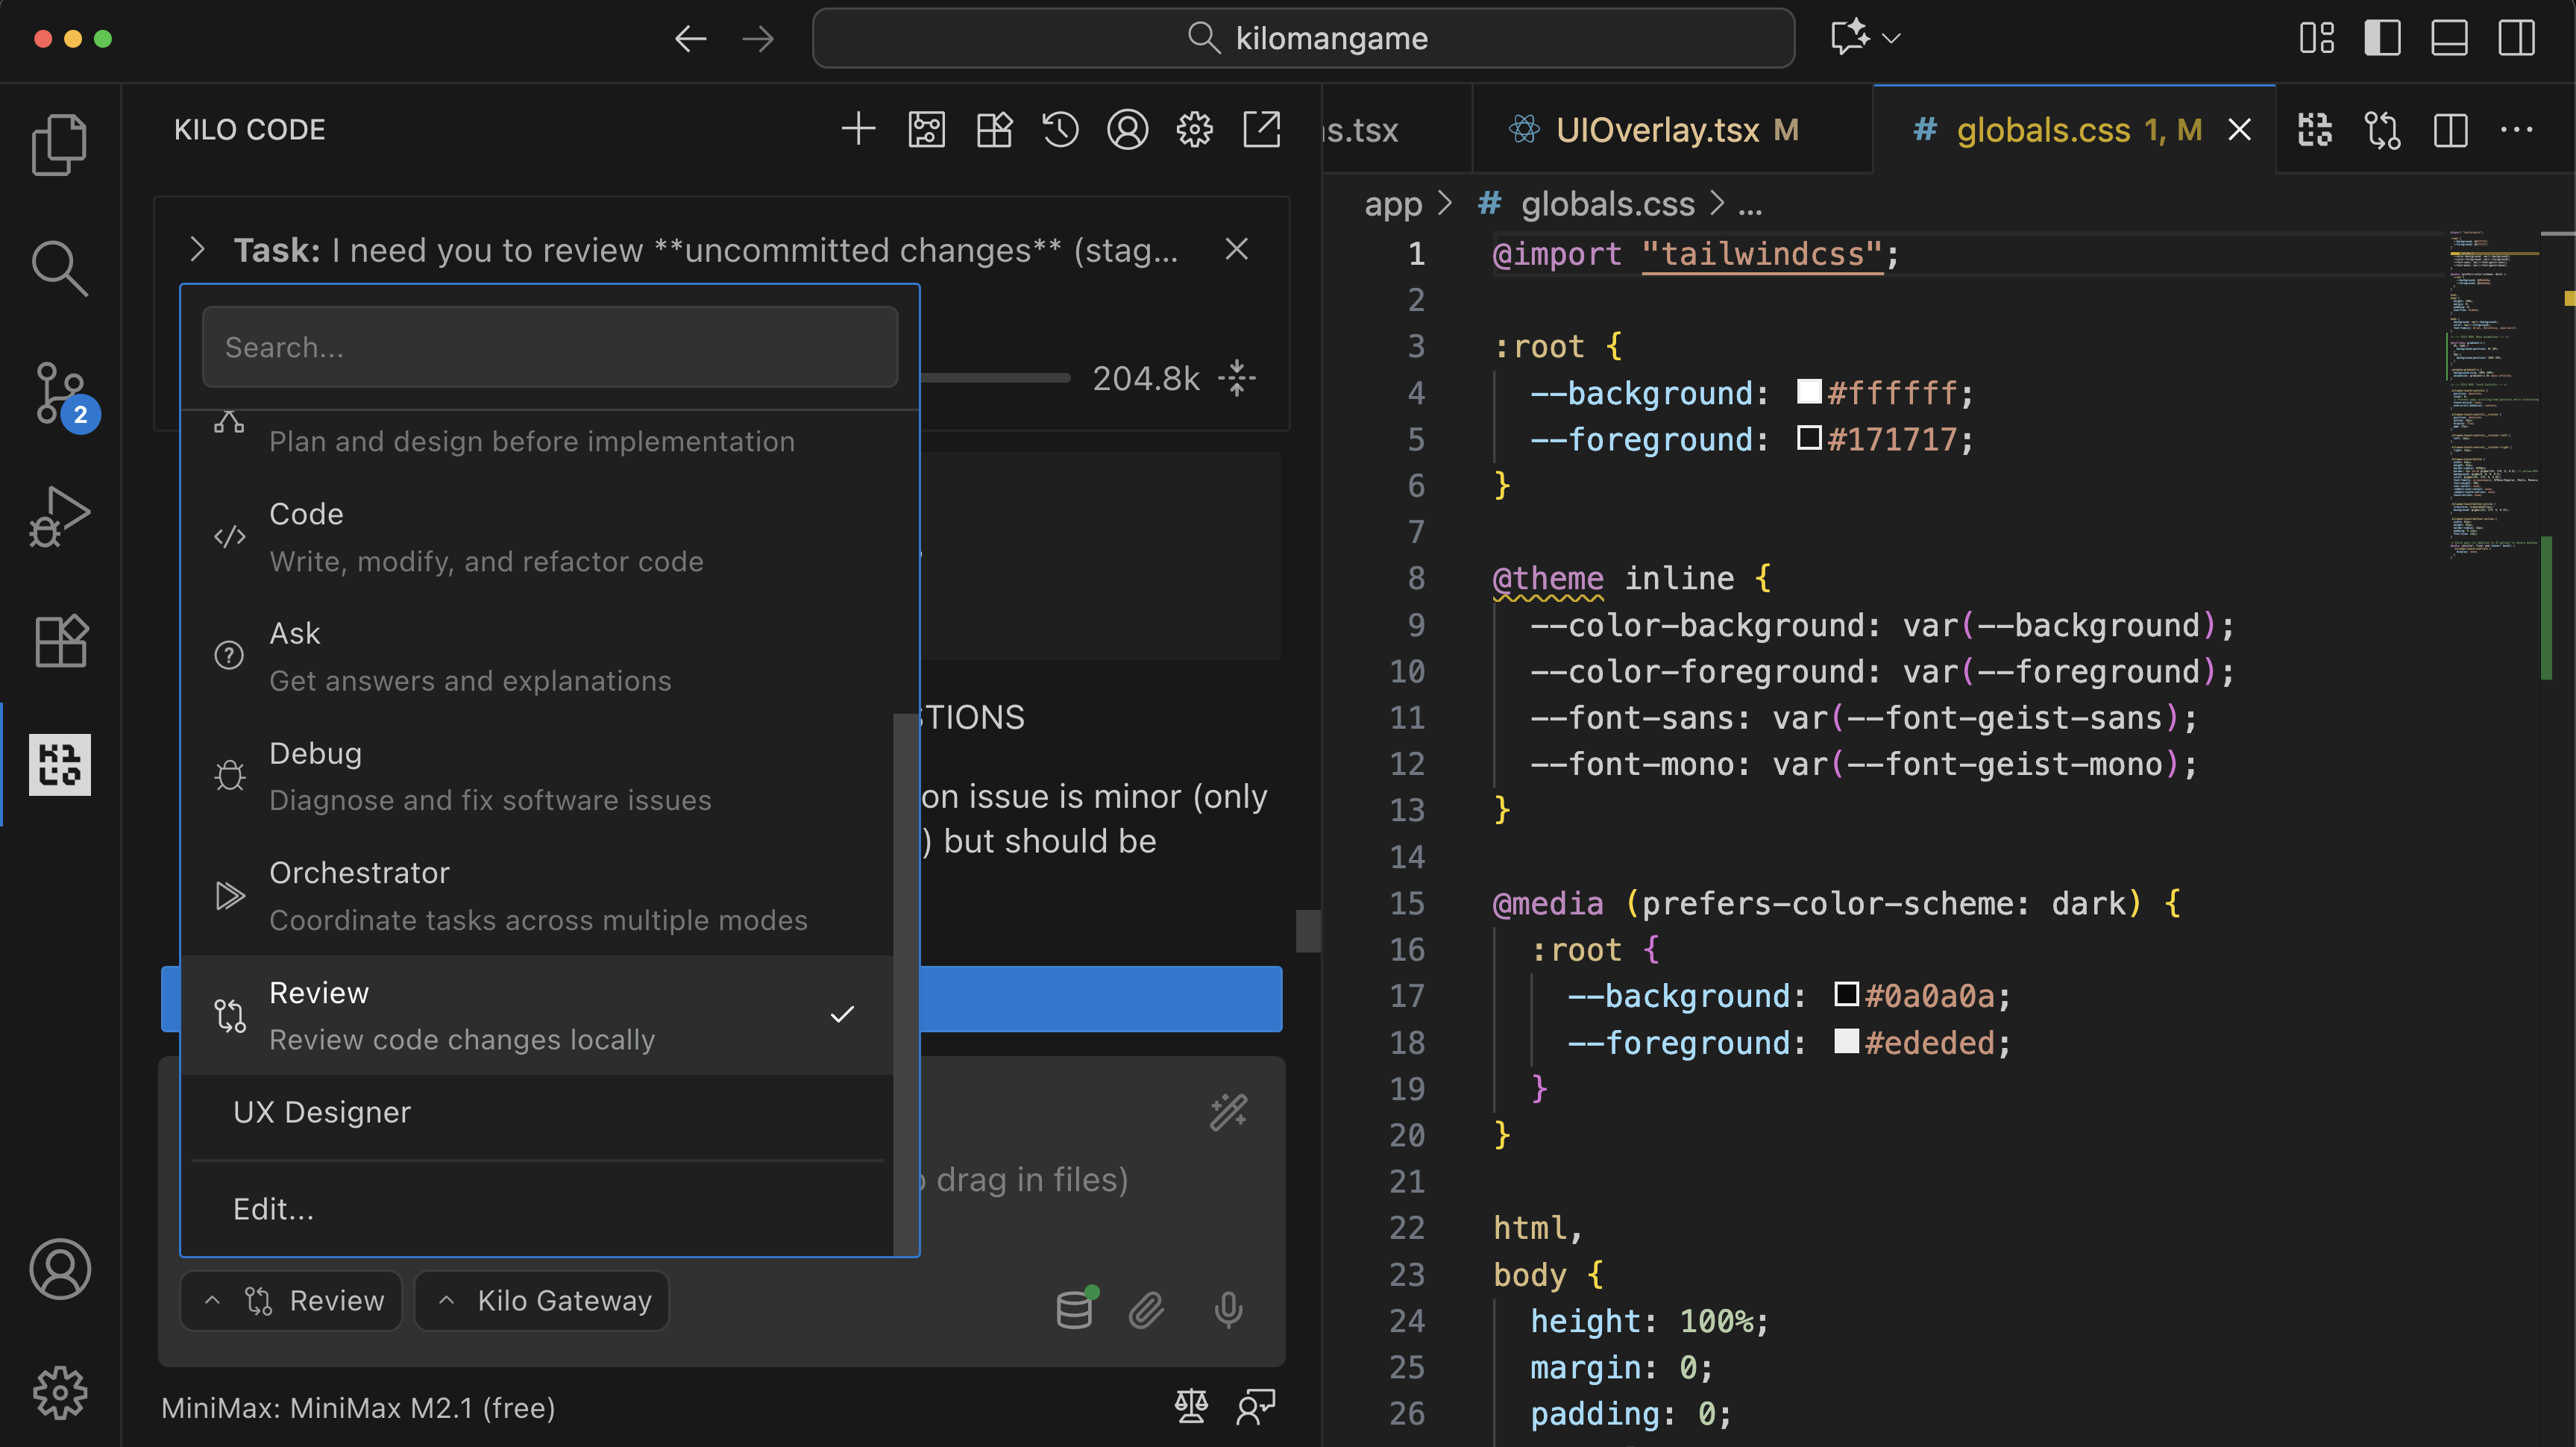
### CLI
The CLI provides two commands for local code reviews:
* **`/local-review`** — Review all changes on your current branch vs the base branch
* **`/local-review-uncommitted`** — Review uncommitted changes (staged + unstaged)
How Code Reviews Work
---------------------
When a pull request or merge request is opened or updated:
1. The Review Agent receives the PR/MR metadata, diff, and file context.
2. The selected model analyzes all changes.
3. The agent applies your chosen review style and focus areas.
4. It generates a structured review with:
* Inline comments
* Summary findings
* Suggested fixes
* Risk and severity tagging
5. Reviews respect the **maximum time limit** you set.
6. Only repositories you’ve selected will trigger automatic analysis.
Reviews are posted directly in your platform (GitHub or GitLab) as if coming from a team reviewer.
Review Styles
-------------
### Strict
* Flags all potential issues
* Emphasizes correctness, quality, and security
* Useful for mission-critical code paths or production services
### Balanced
* Most popular option
* Prioritizes clarity and practicality
* Surfaces important issues without overwhelming noise
### Lenient
* Flags only critical issues
* Encouraging and lightweight
* Ideal for exploratory PRs/MRs, prototypes, or early WIP reviews
Focus Areas
-----------
You can tailor what the Review Agent pays attention to:
### Security Vulnerabilities
* SQL injection
* XSS
* Unsafe APIs
* Secrets and credential exposure
### Performance Issues
* N+1 queries
* Inefficient loops
* High-complexity functions
### Bug Detection
* Logic errors
* Edge-case failures
* Incorrect assumptions
### Code Style
* Formatting
* Naming conventions
* Readability improvements
### Test Coverage
* Missing or inadequate tests
* Uncovered logic paths
### Documentation
* Missing comments
* Unclear APIs
Perfect For
-----------
The Review Agent is ideal for:
* **Teams wanting consistent, real-time PR reviews**
* **Small teams without dedicated reviewers**
* **Large repos where issues are easy to miss**
* **High-velocity engineering orgs shipping many daily PRs**
* **Security-focused environments requiring strict gates**
* **Educating junior developers with rich explanations**
Limitations and Guidance
------------------------
* Reviews can run for **up to 30 minutes** depending on your setting.
* The agent reviews **only the changed files**, not the entire repository.
* Some highly dynamic or domain-specific code may require additional context in custom instructions.
* The agent will only run on **selected repositories**.
* During beta, review capacity may be throttled for extremely large PRs.
Copy page
---
# How Tools Work
How Tools Work
==============
Kilo Code uses tools to interact with your code and environment. These specialized helpers perform specific actions like reading files, making edits, running commands, or searching your codebase. Tools provide automation for common development tasks without requiring manual execution.
Tool Workflow
-------------
Describe what you want to accomplish in natural language, and Kilo Code will:
1. Select the appropriate tool based on your request
2. Present the tool with its parameters for your review
3. Execute the approved tool and show you the results
4. Continue this process until your task is complete
Tool Categories
---------------
| Category | Purpose | Tool Names |
| --- | --- | --- |
| Read | Access file content and code structure | `read_file`, `search_files`, `list_files`, `list_code_definition_names` |
| Edit | Create or modify files and code | `apply_diff`, `delete_file`, `write_to_file` |
| Execute | Run commands and perform system operations | `execute_command` |
| Browser | Interact with web content | `browser_action` |
| Workflow | Manage task flow and context | `ask_followup_question`, `attempt_completion`, `switch_mode`, `new_task` |
Example: Using Tools
--------------------
Here's how a typical tool interaction works:
ℹ️Tool Approval UI
When a tool is proposed, you'll see Save and Reject buttons along with an optional Auto-approve checkbox for trusted operations.
**User:** Create a file named `greeting.js` that logs a greeting message
**Kilo Code:** (Proposes the `write_to_file` tool as shown in the image above)
greeting.js
function greet(name) {
console.log(\`Hello, ${name}!\`);
}
greet('World');
5
**User:** (Clicks "Save" in the interface)
**Kilo Code:** (Confirms file creation)
Tool Safety and Approval
------------------------
Every tool use requires your explicit approval. When Kilo proposes a tool, you'll see:
* A "Save" button to approve and execute the tool
* A "Reject" button to decline the proposed tool
* An optional "Auto-approve" setting for trusted operations
This safety mechanism ensures you maintain control over which files are modified, what commands are executed, and how your codebase is changed. Always review tool proposals carefully before saving them.
Core Tools Reference
--------------------
| Tool Name | Description | Category |
| --- | --- | --- |
| `read_file` | Reads the content of a file with line numbers | Read |
| `search_files` | Searches for text or regex patterns across files | Read |
| `list_files` | Lists files and directories in a specified location | Read |
| `list_code_definition_names` | Lists code definitions like classes and functions | Read |
| `write_to_file` | Creates new files or overwrites existing ones | Edit |
| `apply_diff` | Makes precise changes to specific parts of a file | Edit |
| `delete_file` | Removes files from the workspace | Edit |
| `execute_command` | Runs commands in the VS Code terminal | Execute |
| `browser_action` | Performs actions in a headless browser | Browser |
| `ask_followup_question` | Asks you a clarifying question | Workflow |
| `attempt_completion` | Indicates the task is complete | Workflow |
| `switch_mode` | Changes to a different operational mode | Workflow |
| `new_task` | Creates a new subtask with a specific starting mode | Workflow |
Learn More About Tools
----------------------
For more detailed information about each tool, including complete parameter references and advanced usage patterns, see the [Tool Use Overview](https://kilo.ai/docs/automate/tools)
documentation.
Copy page
---
# Version Pinning
Version Pinning
===============
Version pinning lets you lock your KiloClaw instance to a specific OpenClaw version and variant. This gives you control over when your instance upgrades — it stays on the pinned version until you explicitly change it.
When to Use Version Pinning
---------------------------
Version pinning is useful when:
* A changelog entry is marked **Redeploy Required** and you're not ready to upgrade yet
* You're running a workflow that depends on specific OpenClaw behavior
* You want to test the impact of an upgrade before committing to it
How to Pin a Version
--------------------
1. Go to your [KiloClaw dashboard](https://app.kilo.ai/profile)
2. Open the **Settings** tab
3. Scroll to the **Version Pinning** section
4. Select a **version** and **variant** from the dropdowns
5. Click **Save**
Your instance will stay on the selected version until you change or clear the pin.
ℹ️Info
After saving a version pin, you need to **Redeploy** for the change to take effect on your running instance.
Variants
--------
Each OpenClaw version is available in one or more variants. Variants may differ in included tools, default configuration, or base image. Select the variant that matches your use case, or use the default if unsure.
Clearing a Pin
--------------
To return to automatic updates:
1. Go to **Settings > Version Pinning**
2. Clear the version selection
3. Click **Save**
4. Use **Upgrade & Redeploy** from the dashboard to apply the latest platform version
⚠️Warning
Clearing a pin and running **Upgrade & Redeploy** will update your instance to the latest supported platform version. Review the changelog before upgrading to check for breaking changes.
Related
-------
* [Dashboard Reference](https://kilo.ai/docs/kiloclaw/dashboard)
* [KiloClaw Overview](https://kilo.ai/docs/kiloclaw/overview)
* [Troubleshooting](https://kilo.ai/docs/kiloclaw/troubleshooting)
Copy page
---
# Using Kilo for Free
Using Kilo for Free
===================
Kilo Code can be used completely free of charge, but you need to understand where Kilo uses AI models and configure each one appropriately.
When Kilo Uses Model Inference
------------------------------
Kilo uses AI model inference in three places:
1. **Agentic interactions** - Coding assistant conversations in IDE extensions (VS Code, JetBrains), CLI, and cloud services like App Builder and Code Reviewer
2. **Autocomplete** - In-editor code completions as you type (IDE extensions only)
3. **CLI Background tasks** - Automatic session titles and context summarization (CLI only)
Each of these can consume credits by default. **For a completely free Kilo experience, you must configure all three to use free models.**
Free Agentic Usage
------------------
Kilo Code provides access to [free models](https://kilo.ai/docs/code-with-ai/agents/free-and-budget-models)
for your coding tasks through the Kilo Gateway and partner providers.
### Finding Free Models
Free models are clearly labeled in the model picker across all Kilo platforms. To find and use them:
**In the IDE Extensions (VS Code, JetBrains):**
1. Click on the current model below the chat window
2. Browse the model list—free models are labeled as "(free)"
3. Select your preferred free model
**In the CLI:**
1. Open the CLI by running `kilo`
2. Use the `/models` command to browse available models
3. Free models are labeled as "free"
4. Select a free model for your tasks
### Free Models for Cloud Tasks
Kilo's cloud services—including App Builder, Code Reviewer, and other cloud-based features—also support free models. When configuring a cloud task:
1. Look for the model selection dropdown
2. Free models are labeled as "(free)" in the dropdown
3. Select any free model to avoid using credits
💡Tip
The available free models change over time as Kilo partners with different AI inference providers. Check our [free and budget models guide](https://kilo.ai/docs/code-with-ai/agents/free-and-budget-models)
for the latest options, and subscribe to our blog or join our Discord for updates.
Free Autocomplete
-----------------
Kilo Code's autocomplete feature provides AI-powered code completions as you type in the IDE extensions.
### Default Behavior
By default, autocomplete is routed through the Kilo Code provider and uses credits from your account.
### If You Don't Have Credits
If you run out of credits and haven't configured a free alternative, autocomplete will stop working. Your main coding workflow won't be affected -- you just won't get AI-powered completions.
### How to Get It Free
Configure Mistral directly as your autocomplete provider. Mistral offers free access to their Codestral model, which is optimized for code completions. When you configure Mistral directly, it takes precedence over the default Kilo Code routing.
For step-by-step instructions with screenshots, see our [Mistral Setup Guide](https://kilo.ai/docs/code-with-ai/features/autocomplete/mistral-setup)
.
Free CLI Background Tasks
-------------------------
The Kilo CLI uses AI in the background for quality-of-life features that enhance your experience like context compression and titling sessions.
### Default Behavior
By default, CLI background tasks use `gpt-5-nano`, which consumes credits.
### If You Don't Have Credits
Background tasks degrade gracefully when you don't have credits:
* **Session titles** fall back to truncating your first message instead of generating a smart summary
* **Context management** uses simple truncation instead of intelligent summarization
* **Your main workflow continues uninterrupted** - these are convenience features, not requirements
### How to Get It Free
Configure the `small_model` parameter in `~/.config/kilo/config.json` to use a free model:
{
"small\_model": "your-preferred-free-model"
}
Replace `your-preferred-free-model` with any free model available in the model picker.
Related Resources
-----------------
* [Free and Budget Models](https://kilo.ai/docs/code-with-ai/agents/free-and-budget-models)
- Complete guide to free and budget-friendly model options
* [Mistral Setup Guide](https://kilo.ai/docs/code-with-ai/features/autocomplete/mistral-setup)
- Step-by-step free autocomplete setup
* [Autocomplete](https://kilo.ai/docs/code-with-ai/features/autocomplete)
- Full autocomplete documentation
* [CLI Documentation](https://kilo.ai/docs/code-with-ai/platforms/cli)
- Complete CLI reference
Copy page
---
# Skills
Skills
======
Kilo Code implements [Agent Skills](https://agentskills.io/)
, a lightweight, open format for extending AI agent capabilities with specialized knowledge and workflows.
What Are Agent Skills?
----------------------
Agent Skills package domain expertise, new capabilities, and repeatable workflows that agents can use. At its core, a skill is a folder containing a `SKILL.md` file with metadata and instructions that tell an agent how to perform a specific task.
This approach keeps agents fast while giving them access to more context on demand. When a task matches a skill's description, the agent reads the full instructions into context and follows them—optionally loading referenced files or executing bundled code as needed.
### Key Benefits
* **Self-documenting**: A skill author or user can read a `SKILL.md` file and understand what it does, making skills easy to audit and improve
* **Interoperable**: Skills work across any agent that implements the [Agent Skills specification](https://agentskills.io/specification)
* **Extensible**: Skills can range in complexity from simple text instructions to bundled scripts, templates, and reference materials
* **Shareable**: Skills are portable and can be easily shared between projects and developers
How Skills Work in Kilo Code
----------------------------
Skills can be:
* **Generic** - Available in all modes
* **Mode-specific** - Only loaded when using a particular mode (e.g., `code`, `architect`)
The workflow is:
1. **Discovery**: Skills are scanned from designated directories when Kilo Code initializes. Only the metadata (name, description, and file path) is read at this stage—not the full instructions.
2. **Prompt inclusion**: When a mode is active, the metadata for relevant skills is included in the system prompt. The agent sees a list of available skills with their descriptions.
3. **On-demand loading**: When the agent determines that a task matches a skill's description, it reads the full `SKILL.md` file into context and follows the instructions.
### How the Agent Decides to Use a Skill
The agent (LLM) decides whether to use a skill based on the skill's `description` field. There's no keyword matching or semantic search—the agent evaluates your request against all available skill descriptions and determines if one "clearly and unambiguously applies."
This means:
* **Description wording matters**: Write descriptions that match how users phrase requests
* **Explicit invocation always works**: Saying "use the api-design skill" will trigger it since the agent sees the skill name
* **Vague descriptions lead to uncertain matching**: Be specific about when the skill should be used
Skill Locations
---------------
Skills are loaded from multiple locations, allowing both personal skills and project-specific instructions.
### Global Skills (User-Level)
Global skills are located in the `.kilocode` directory within your Home directory.
* Mac and Linux: `~/.kilocode/skills/`
* Windows: `\Users\\.kilocode\`
~/.kilocode/
├── skills/ # Generic skills (all modes)
│ ├── my-skill/
│ │ └── SKILL.md
│ └── another-skill/
│ └── SKILL.md
├── skills-code/ # Code mode only
│ └── refactoring/
│ └── SKILL.md
└── skills-architect/ # Architect mode only
└── system-design/
└── SKILL.md
### Project Skills (Workspace-Level)
Located in `.kilocode/skills/` within your project:
your-project/
└── .kilocode/
├── skills/ # Generic skills for this project
│ └── project-conventions/
│ └── SKILL.md
└── skills-code/ # Code mode skills for this project
└── linting-rules/
└── SKILL.md
Mode-Specific Skills
--------------------
To create a skill that only appears in a specific mode:
\# For Code mode only
mkdir -p ~/.kilocode/skills-code/typescript-patterns
# For Architect mode only
mkdir -p ~/.kilocode/skills-architect/microservices
The directory naming pattern is `skills-{mode-slug}` where `{mode-slug}` matches the mode's identifier (e.g., `code`, `architect`, `ask`, `debug`).
Priority and Overrides
----------------------
When multiple skills share the same name, Kilo Code uses these priority rules:
1. **Project skills override global skills** - A project skill with the same name takes precedence
2. **Mode-specific skills override generic skills** - A skill in `skills-code/` overrides the same skill in `skills/` when in Code mode
This allows you to:
* Define global skills for personal use
* Override them per-project when needed
* Customize behavior for specific modes
When Skills Are Loaded
----------------------
Skills are discovered when Kilo Code initializes:
* When VSCode starts
* When you reload the VSCode window (`Cmd+Shift+P` → "Developer: Reload Window")
Skills directories are monitored for changes to `SKILL.md` files. However, the most reliable way to pick up new skills is to reload VS or the Kilo Code extension.
**Adding or modifying skills requires reloading VSCode for changes to take effect.**
Using Symlinks
--------------
You can symlink skills directories to share skills across machines or from a central repository. When using symlinks, the skill's `name` field must match the **symlink name**, not the target directory name.
SKILL.md Format
---------------
The `SKILL.md` file uses YAML frontmatter followed by Markdown content containing the instructions:
\---
name: my-skill-name
description: A brief description of what this skill does and when to use it
---
# Instructions
Your detailed instructions for the AI agent go here.
The agent will read this content when it decides to use the skill based on
your request matching the description above.
## Example Usage
You can include examples, guidelines, code snippets, etc.
### Frontmatter Fields
Per the [Agent Skills specification](https://agentskills.io/specification)
:
| Field | Required | Description |
| --- | --- | --- |
| `name` | Yes | Max 64 characters. Lowercase letters, numbers, and hyphens only. Must not start or end with a hyphen. |
| `description` | Yes | Max 1024 characters. Describes what the skill does and when to use it. |
| `license` | No | License name or reference to a bundled license file |
| `compatibility` | No | Environment requirements (intended product, system packages, network access, etc.) |
| `metadata` | No | Arbitrary key-value mapping for additional metadata |
### Example with Optional Fields
\---
name: pdf-processing
description: Extract text and tables from PDF files, fill forms, merge documents.
license: Apache-2.0
metadata:
author: example-org
version: 1.0.0
---
## How to extract text
1. Use pdfplumber for text extraction...
## How to fill forms
...
### Name Matching Rule
In Kilo Code, the `name` field **must match** the parent directory name:
✅ Correct:
skills/
└── frontend-design/
└── SKILL.md # name: frontend-design
❌ Incorrect:
skills/
└── frontend-design/
└── SKILL.md # name: my-frontend-skill (doesn't match!)
Optional Bundled Resources
--------------------------
While `SKILL.md` is the only required file, you can optionally include additional directories to support your skill:
my-skill/
├── SKILL.md # Required: instructions + metadata
├── scripts/ # Optional: executable code
├── references/ # Optional: documentation
└── assets/ # Optional: templates, resources
These additional files can be referenced from your skill's instructions, allowing the agent to read documentation, execute scripts, or use templates as needed.
Example: Creating a Skill
-------------------------
1. Create the skill directory:
mkdir -p ~/.kilocode/skills/api-design
2. Create `SKILL.md`:
\---
name: api-design
description: REST API design best practices and conventions
---
# API Design Guidelines
When designing REST APIs, follow these conventions:
## URL Structure
- Use plural nouns for resources: \`/users\`, \`/orders\`
- Use kebab-case for multi-word resources: \`/order-items\`
- Nest related resources: \`/users/{id}/orders\`
## HTTP Methods
- GET: Retrieve resources
- POST: Create new resources
- PUT: Replace entire resource
- PATCH: Partial update
- DELETE: Remove resource
## Response Codes
- 200: Success
- 201: Created
- 400: Bad Request
- 404: Not Found
- 500: Server Error
3. Reload VSCode to load the skill
4. The skill will now be available in all modes
Finding Skills
--------------
You can discover and install community-created skills through:
* **Kilo Marketplace** - Browse skills directly in the Kilo Code extension via the Marketplace tab, or explore the [Kilo Marketplace repository](https://github.com/Kilo-Org/kilo-marketplace)
on GitHub
* [Agent Skills Specification](https://agentskills.io/home)
- The open specification that skills follow, enabling interoperability across different AI agents
Troubleshooting
---------------
### Skill Not Loading?
1. **Check the Output panel**: Open `View` → `Output` → Select "Kilo Code" from dropdown. Look for skill-related errors.
2. **Verify frontmatter**: Ensure `name` exactly matches the directory name and `description` is present.
3. **Reload VSCode**: Skills are loaded at startup. Use `Cmd+Shift+P` → "Developer: Reload Window".
4. **Check file location**: Ensure `SKILL.md` is directly inside the skill directory, not nested further.
### Verifying a Skill is Available
To confirm a skill is properly loaded and available to the agent, you can ask the agent directly. Simply send a message like:
* "Do you have access to skill X?"
* "Is the skill called X loaded?"
* "What skills do you have available?"
The agent will respond with information about whether the skill is loaded and accessible. This is the most reliable way to verify that a skill is available after adding it or reloading VSCode.
If the agent confirms the skill is available, you're ready to use it. If not, check the troubleshooting steps above to identify and resolve the issue.
### Checking if a Skill Was Used
To see if a skill was actually used during a conversation, look for a `read_file` tool call in the chat that targets a `SKILL.md` file. When the agent decides to use a skill, it reads the full skill file into context—this appears as a file read operation in the conversation.
There's currently no dedicated UI indicator showing "Skill X was activated." The `read_file` call is the most reliable way to confirm a skill was used.
### Common Errors
| Error | Cause | Solution |
| --- | --- | --- |
| "missing required 'name' field" | No `name` in frontmatter | Add `name: your-skill-name` |
| "name doesn't match directory" | Mismatch between frontmatter and folder name | Make `name` match exactly |
| Skill not appearing | Wrong directory structure | Verify path follows `skills/skill-name/SKILL.md` |
Contributing to the Marketplace
-------------------------------
Have you created a skill that others might find useful? Share it with the community by contributing to the [Kilo Marketplace](https://github.com/Kilo-Org/kilo-marketplace)
!
### How to Submit Your Skill
1. **Prepare your skill**: Ensure your skill directory contains a valid `SKILL.md` file with proper frontmatter
2. **Test thoroughly**: Verify your skill works correctly across different scenarios and modes
3. **Fork the marketplace repository**: Visit [github.com/Kilo-Org/kilo-marketplace](https://github.com/Kilo-Org/kilo-marketplace)
and create a fork
4. **Add your skill**: Place your skill directory in the appropriate location following the repository's structure
5. **Submit a pull request**: Create a PR with a clear description of what your skill does and when it's useful
### Submission Guidelines
* Follow the [Agent Skills specification](https://agentskills.io/specification)
for your `SKILL.md` file
* Include a clear `name` and `description` in the frontmatter
* Document any dependencies or requirements (scripts, external tools, etc.)
* If your skill includes bundled resources (scripts, templates), ensure they are well-documented
* Follow the [contribution guidelines](https://github.com/Kilo-Org/kilo-marketplace/blob/main/CONTRIBUTING.md)
in the marketplace repository
For more details on contributing to Kilo Code, see the [Contributing Guide](https://kilo.ai/docs/contributing)
.
Related
-------
* [Custom Modes](https://kilo.ai/docs/customize/custom-modes)
- Create custom modes that can use specific skills
* [Custom Instructions](https://kilo.ai/docs/customize/custom-instructions)
- Global instructions vs. skill-based instructions
* [Custom Rules](https://kilo.ai/docs/customize/custom-rules)
- Project-level rules complementing skills
Copy page
---
# Troubleshooting
Troubleshooting
===============
OpenClaw Doctor
---------------
OpenClaw Doctor is the recommended first step when something isn't working. It runs diagnostics on your instance and automatically fixes common configuration issues.
To use it:
1. Make sure your instance is running
2. Click **OpenClaw Doctor** on your [dashboard](https://kilo.ai/docs/kiloclaw/dashboard)
3. Watch the output as it runs — results appear in real time
Common Questions
----------------
### Does Redeploy reset my instance?
No. Redeploy does **not** delete your files, git repos, or cron jobs. It stops the machine, applies the latest platform image and your current configuration, and starts it again with the same persistent storage. Think of it as "update and restart."
### When should I use Restart OpenClaw vs Redeploy?
* **Restart OpenClaw** — Restarts just the OpenClaw process. The machine stays up. Use this for quick recovery from a process-level issue or when you want to apply openclaw config changes.
* **Redeploy** — Stops and restarts the entire machine with the latest image and config. Use this when the changelog shows a redeploy hint, or after changing channel tokens or secrets.
### My bot isn't responding on Telegram/Discord/Slack
1. Check that the channel token is configured in [Settings](https://kilo.ai/docs/kiloclaw/dashboard#channels)
2. Make sure you **Redeployed** or **Restarted OpenClaw** after saving tokens
3. Check for pending [pairing requests](https://kilo.ai/docs/kiloclaw/chat-platforms#pairing-requests)
— the user may need to be approved
4. Try running **OpenClaw Doctor**
### Accessing and Restoring Config Files
You can directly access the files in /root/.openclaw/ on the [KiloClaw Dashboard](https://app.kilo.ai/claw)
using the file browser of the edit files dialog. This can be a useful way to examine or update the config files (especially `openclaw.json`) if you run into an issue. There may also be backups in the form of `openclaw.bak` files that you can manually restore from if needed.
### The gateway shows "Crashed"
The OpenClaw process is automatically restarted when it crashes. Check the Gateway Process tab on your dashboard for the exit code and restart count. If it keeps crashing:
1. Run **OpenClaw Doctor**
2. Try a **Redeploy** to apply the latest platform image
3. If the issue persists, join the [Kilo Discord](https://kilo.ai/discord)
and share details in the KiloClaw channel
### I changed the model but the agent is still using the old one
After selecting a new model, click **Save & Provision** to apply it. This refreshes the API key and saves the new model. You may also need to **Restart OpenClaw** for the change to take full effect.
Gateway Process States
----------------------
The Gateway Process tab shows the current state of the OpenClaw process inside your machine:
* **Running** — The process is up and handling requests
* **Stopped** — The process is not running
* **Starting** — The process is booting up
* **Stopping** — The process is shutting down gracefully
* **Crashed** — The process exited unexpectedly and will be automatically restarted
* **Shutting Down** — The process is stopping as part of a machine stop or redeploy
FAQ
---
### How can I change my model?
You can change the model in two ways:
* **From chat** — Type `/model` in the Chat window within the OpenClaw Control UI to switch models directly.
* **From the dashboard** — Go to [https://app.kilo.ai/claw](https://app.kilo.ai/claw)
, select the model you want, and click **Save**. No redeploy is needed.
### Can I access the filesystem?
You can access instance files in `/root/.openclaw/` directly from the [KiloClaw Dashboard](https://app.kilo.ai/claw)
. This is useful for examining or restoring config files — see [Accessing and Restoring Config Files](https://kilo.ai/docs/kiloclaw/troubleshooting#accessing-and-restoring-config-files)
above. You can also interact with files through your OpenClaw agent using its built-in file tools.
### Can I access my KiloClaw via SSH?
For security reasons, SSH access is currently disabled for all KiloClaw instances. Our primary goal is to provide a secure environment for all users, and restricting direct SSH access is one of the many measures we take to ensure the platform remains safe and protected for everyone.
### Can I install tailscale on my KiloClaw instance?
Not at this time.
### Can I update the version of Node on my instance?
Not at this time.
### How do I upgrade the OpenClaw version? Can I upgrade it myself?
Updates are managed by the KiloClaw platform team to ensure stability and dependency availability. When a new version is available, it will be announced in the **Changelog** on your dashboard.
To apply the update, click **Upgrade & Redeploy** from the [KiloClaw Dashboard](https://app.kilo.ai/claw)
. Do **not** click **Update Now** inside the OpenClaw Control UI — this is not supported for KiloClaw instances and may break your setup.
If you need to roll back, use the [version pinning](https://kilo.ai/docs/kiloclaw/version-pinning)
dialog in the Settings tab.
Architecture Notes
------------------
For advanced users — how KiloClaw instances are structured:
* **Dedicated machine** — Each user gets their own machine and persistent volume. There is no shared infrastructure between users.
* **Region-pinned storage** — Your persistent volume stays in the region where your instance was originally created.
* **Network isolation** — OpenClaw binds to loopback only; external traffic is proxied through a Kilo controller.
* **Per-user authentication** — The gateway token is derived per-user for authenticating requests to your machine.
* **Encryption at rest** — Sensitive data (API keys, channel tokens) is encrypted at rest in the machine configuration.
Related
-------
* [KiloClaw Overview](https://kilo.ai/docs/kiloclaw/overview)
* [Dashboard Reference](https://kilo.ai/docs/kiloclaw/dashboard)
* [Connecting Chat Platforms](https://kilo.ai/docs/kiloclaw/chat-platforms)
* [KiloClaw Pricing](https://kilo.ai/docs/kiloclaw/pricing)
Copy page
---
# Kilo Code Documentation
Rate Limits and Costs
=====================
Understanding and managing API usage is crucial for a smooth and cost-effective experience with Kilo Code. This section explains how to track your token usage, costs, and how to configure rate limits.
Token Usage
-----------
Kilo Code interacts with AI models using tokens. Tokens are essentially pieces of words. The number of tokens used in a request and response affects both the processing time and the cost.
* **Input Tokens:** These are the tokens in your prompt, including the system prompt, your instructions, and any context provided (e.g., file contents).
* **Output Tokens:** These are the tokens generated by the AI model in its response.
You can see the number of input and output tokens used for each interaction in the chat history.
Cost Calculation
----------------
Most AI providers charge based on the number of tokens used. Pricing varies depending on the provider and the specific model.
Kilo Code automatically calculates the estimated cost of each API request based on the configured model's pricing. This cost is displayed in the chat history, next to the token usage.
**Note:**
* The cost calculation is an _estimate_. The actual cost may vary slightly depending on the provider's billing practices.
* Some providers may offer free tiers or credits. Check your provider's documentation for details.
* Some providers offer prompt caching which greatly lowers cost.
Configuring Rate Limits
-----------------------
To prevent accidental overuse of the API and to help you manage costs, Kilo Code allows you to set a rate limit. The rate limit specifies the minimum time (in seconds) between API requests.
**How to configure:**
1. Open the Kilo Code settings ( icon in the top right corner).
2. Go to the "Advanced Settings" section.
3. Find the "Rate Limit (seconds)" setting.
4. Enter the desired delay in seconds. A value of 0 disables rate limiting.
**Example:**
If you set the rate limit to 10 seconds, Kilo Code will wait at least 10 seconds after one API request completes before sending the next one.
Tips for Optimizing Token Usage
-------------------------------
* **Be Concise:** Use clear and concise language in your prompts. Avoid unnecessary words or details.
* **Provide Only Relevant Context:** Use context mentions (`@file.ts`, `@folder/`) selectively. Only include the files that are directly relevant to the task.
* **Break Down Tasks:** Divide large tasks into smaller, more focused sub-tasks.
* **Use Custom Instructions:** Provide custom instructions to guide Kilo Code's behavior and reduce the need for lengthy explanations in each prompt.
* **Choose the Right Model:** Some models are more cost-effective than others. Consider using a smaller, faster model for tasks that don't require the full power of a larger model.
* **Use Modes:** Different modes can access different tools, for example `Architect` can't modify code, which makes it a safe choice when analyzing a complex codebase, without worrying about accidentally allowing expensive operations.
* **Disable MCP If Not Used:** If you're not using MCP (Model Context Protocol) features, consider [disabling it in Settings > Agent Behaviour > MCP Servers](https://kilo.ai/docs/automate/mcp/overview)
to significantly reduce the size of the system prompt and save tokens.
By understanding and managing your API usage, you can use Kilo Code effectively and efficiently.
Copy page
---
# Custom Modes (Org)
Custom Modes (Org)
==================
Custom Modes let you create tailored versions of Kilo's built-in [agents](https://kilo.ai/docs/code-with-ai/agents/using-agents)
for your organization. You can also adjust the settings for Kilo Code's original default modes. You can define a mode's purpose, behavior, and tool access — helping Kilo adapt to your team's unique workflows.
For example, Admins and Owners can extend these by creating **Custom Modes** with specialized roles or personalities (e.g. "Documentation Writer" or "Security Reviewer").
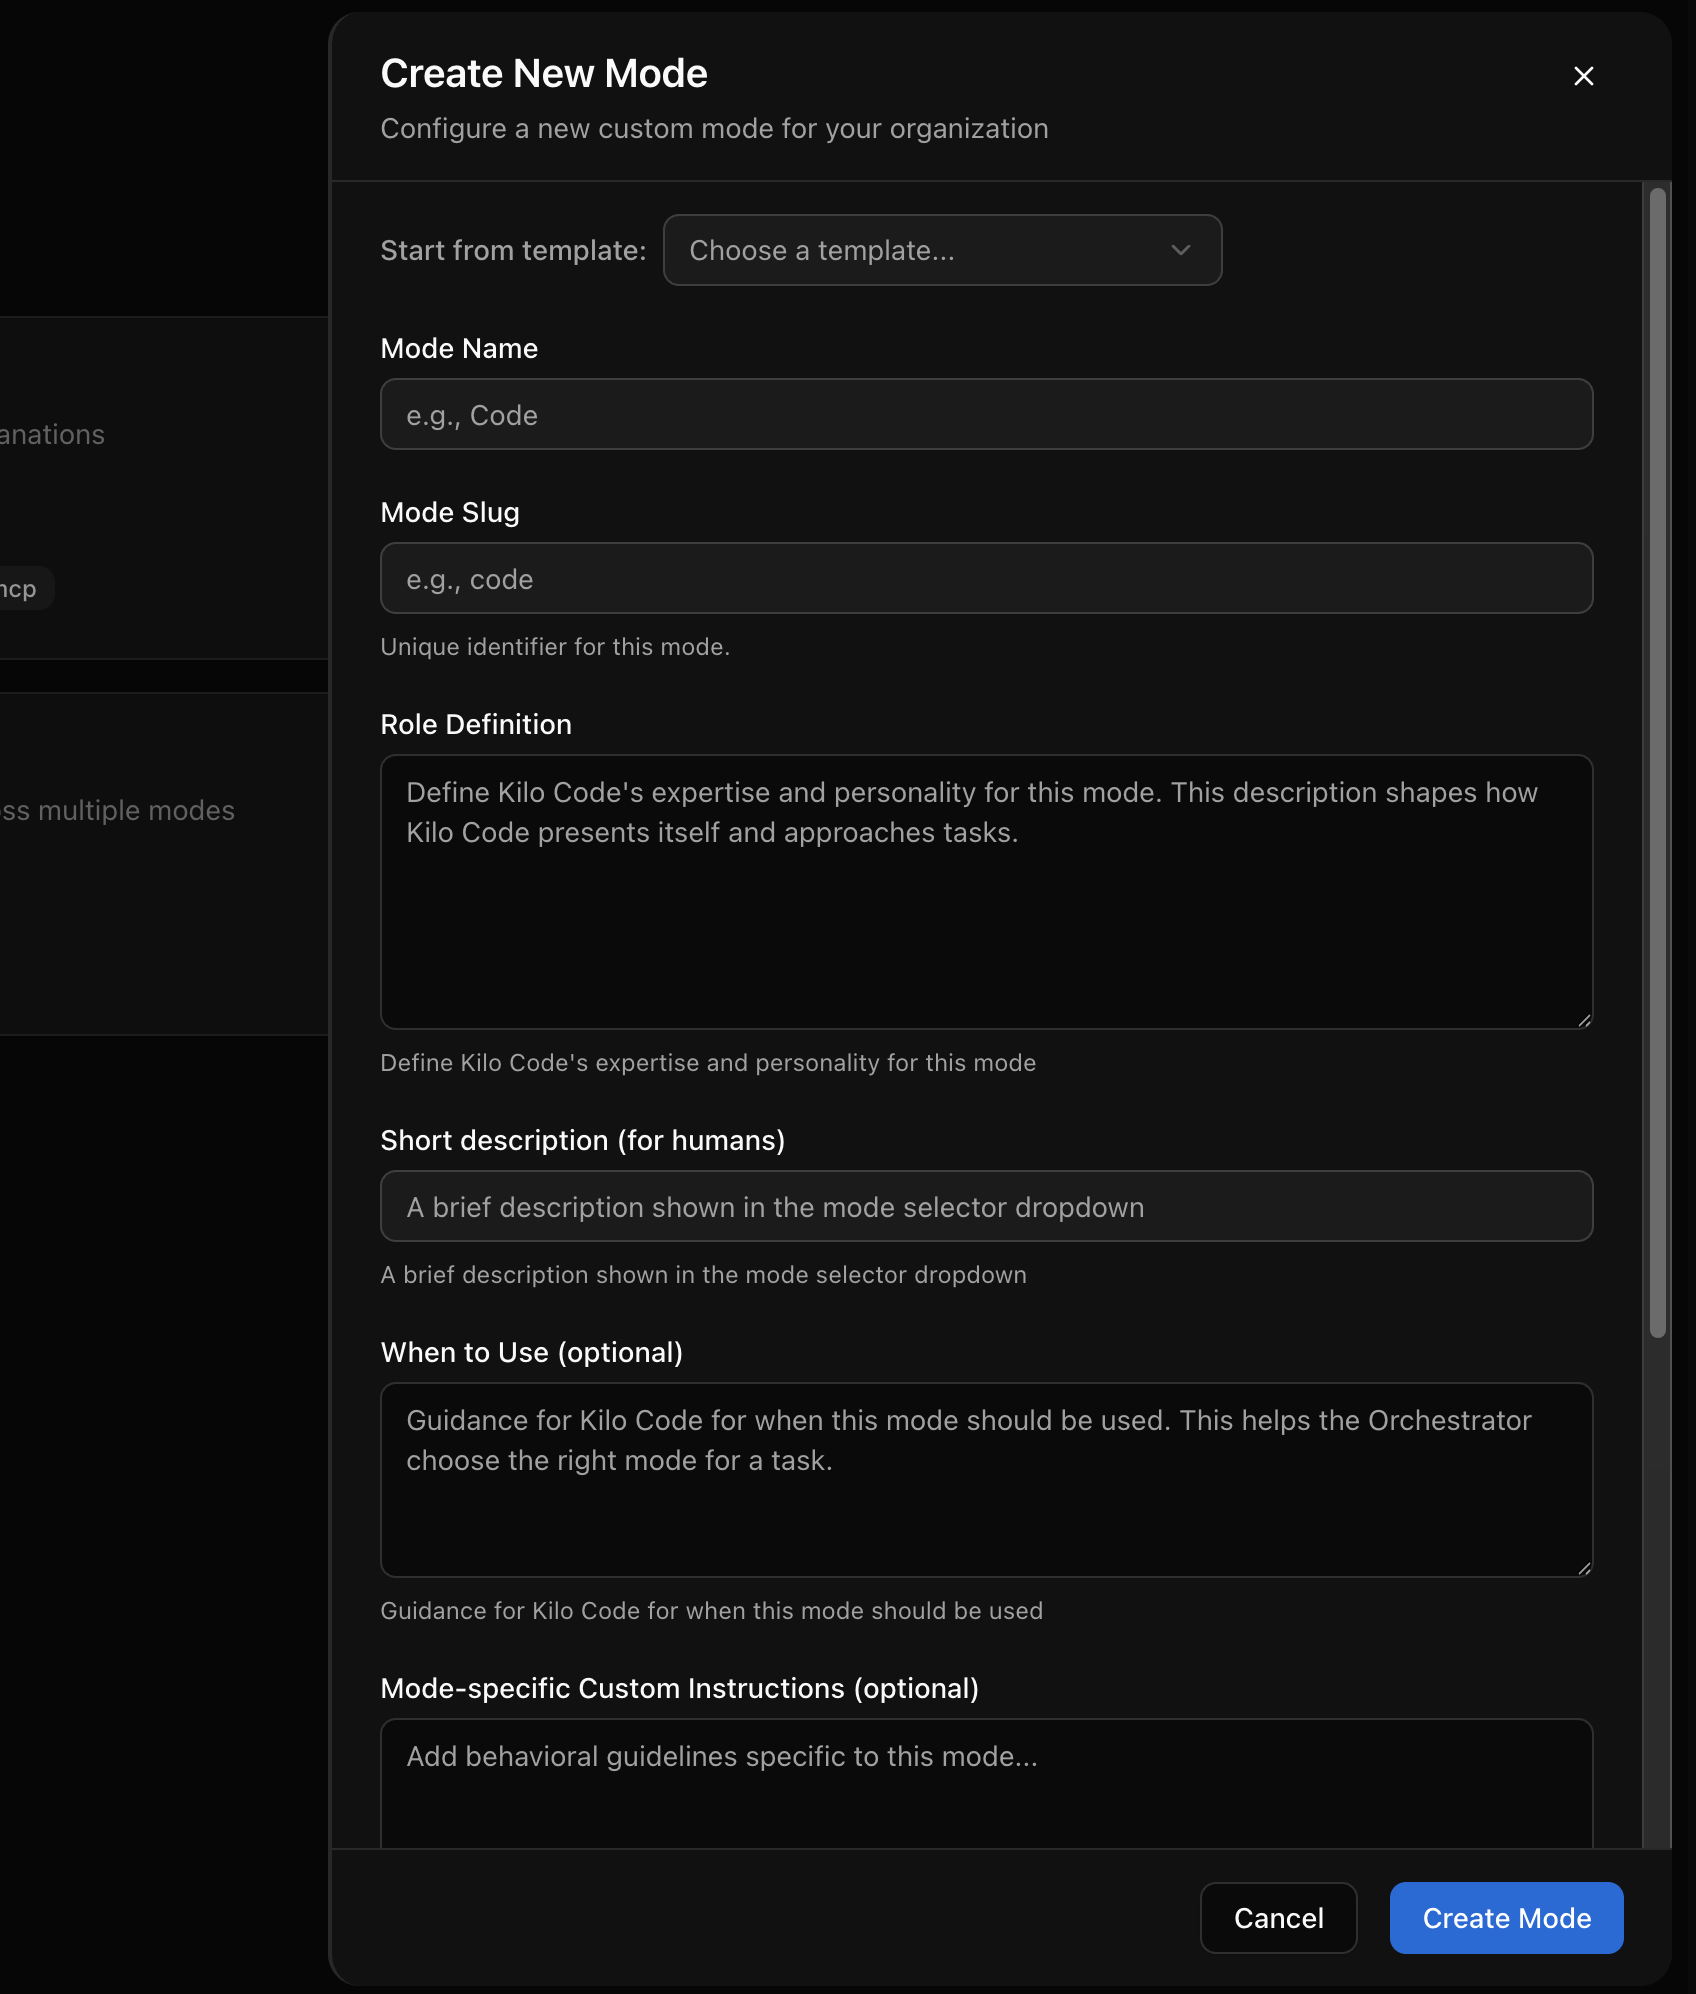
Create a new custom mode tab.
Creating a Custom Mode
----------------------
1. Go to **Enterprise/Team Dashboard → Custom Modes**.
2. Click **Create New Mode**.
3. Optionally select a **template** (e.g. _User Story Creator_, _Project Research_, _DevOps_).
4. Fill in the following fields:
| Field | Description |
| --- | --- |
| **Mode Name** | Display name for the new mode (e.g. _Security Reviewer_). |
| **Mode Slug** | A short identifier used internally (e.g. `security-reviewer`). |
| **Role Definition** | Describe Kilo's role and personality for this mode. Shapes how it reasons and responds. |
| **Short Description** | A brief summary shown in the mode selector. |
| **When to Use (optional)** | Guidance for when this mode should be used. Helps the Orchestrator choose the right mode for a task. |
| **Custom Instructions (optional)** | Add behavioral guidelines specific to this mode. |
| **Available Tools** | Select which tools this mode can access (Read, Edit, Browser, Commands, MCP). |
5. Click **Create Mode** to save.
Your new mode appears under **Custom Modes** in the Modes dashboard.
* * *
Managing Custom Modes
---------------------
* **Edit:** Click the edit icon to update any field or tool permissions.
* **Delete:** Click the 🗑️ icon to permanently remove the mode.
Copy page
---
# Using Kilo Docs with Agents
Using Kilo Docs with Agents
===========================
You can access the full text of the Kilo Code documentation in machine-readable formats suitable for LLMs and AI agents. This is useful when you want an AI assistant to reference Kilo Code's documentation while helping you with a task.
Full documentation
------------------
The complete documentation is available as a single text file at:
https://kilo.ai/docs/llms.txt
This file contains the full content of every page in the Kilo Code docs, formatted for easy consumption by language models.
Individual pages
----------------
You can also fetch any individual documentation page as raw Markdown via the API:
https://kilo.ai/docs/api/raw-markdown?path=
For example, to fetch the "Code with AI" overview page:
https://kilo.ai/docs/api/raw-markdown?path=%2Fcode-with-ai
The `path` parameter should be the URL-encoded path of the documentation page, without the `/docs` prefix.
Copy page
---
# Custom Subagents
Custom Subagents
================
Kilo Code's CLI supports **custom subagents** — specialized AI assistants that can be invoked by primary agents or manually via `@` mentions. Subagents run in their own isolated sessions with tailored prompts, models, tool access, and permissions, enabling you to build purpose-built workflows for tasks like code review, documentation, security audits, and more.
ℹ️Info
Custom subagents are currently configured through the config file (`kilo.json`) or via markdown agent files. UI-based configuration is not yet available.
What Are Subagents?
-------------------
Subagents are agents that operate as delegates of primary agents. While **primary agents** (like Code, Plan, or Debug) are the main assistants you interact with directly, **subagents** are invoked to handle specific subtasks in isolated contexts.
Key characteristics of subagents:
* **Isolated context**: Each subagent runs in its own session with separate conversation history
* **Specialized behavior**: Custom prompts and tool access tailored to a specific task
* **Invocable by agents or users**: Primary agents invoke subagents via the Task tool, or you can invoke them manually with `@agent-name`
* **Results flow back**: When a subagent completes, its result summary is returned to the parent agent
### Built-in Subagents
Kilo Code includes two built-in subagents:
| Name | Description |
| --- | --- |
| **general** | General-purpose agent for researching complex questions and executing multi-step tasks. Has full tool access (except todo). |
| **explore** | Fast, read-only agent for codebase exploration. Cannot modify files. Use for finding files by patterns, searching code, or answering questions about the codebase. |
Agent Modes
-----------
Every agent has a **mode** that determines how it can be used:
| Mode | Description |
| --- | --- |
| `primary` | User-facing agents you interact with directly. Switch between them with **Tab**. |
| `subagent` | Only invocable via the Task tool or `@` mentions. Not available as a primary agent. |
| `all` | Can function as both a primary agent and a subagent. This is the default for custom agents. |
Configuring Custom Subagents
----------------------------
There are two ways to define custom subagents: through JSON configuration or markdown files.
### Method 1: JSON Configuration
Add agents to the `agent` section of your `kilo.json` config file. Any key that doesn't match a built-in agent name creates a new custom agent.
{
"$schema": "https://app.kilo.ai/config.json",
"agent": {
"code-reviewer": {
"description": "Reviews code for best practices and potential issues",
"mode": "subagent",
"model": "anthropic/claude-sonnet-4-20250514",
"prompt": "You are a code reviewer. Focus on security, performance, and maintainability.",
"permission": {
"edit": "deny",
"bash": "deny"
}
}
}
}
You can also reference an external prompt file instead of inlining the prompt:
{
"agent": {
"code-reviewer": {
"description": "Reviews code for best practices and potential issues",
"mode": "subagent",
"prompt": "{file:./prompts/code-review.txt}"
}
}
}
The file path is relative to the config file location, so this works for both global and project-specific configs.
### Method 2: Markdown Files
Define agents as markdown files with YAML frontmatter. Place them in:
* **Global**: `~/.config/kilo/agents/`
* **Project-specific**: `.kilo/agents/`
The **filename** (without `.md`) becomes the agent name.
\---
description: Reviews code for quality and best practices
mode: subagent
model: anthropic/claude-sonnet-4-20250514
temperature: 0.1
permission:
edit: deny
bash: deny
---
You are a code reviewer. Analyze code for:
- Code quality and best practices
- Potential bugs and edge cases
- Performance implications
- Security considerations
Provide constructive feedback without making direct changes.
💡Tip
Markdown files are often preferred for subagents with longer prompts because the markdown body becomes the system prompt, which is easier to read and maintain than an inline JSON string.
### Method 3: Interactive CLI
Create agents interactively using the CLI:
kilo agent create
This command will:
1. Ask where to save the agent (global or project-specific)
2. Prompt for a description of what the agent should do
3. Generate an appropriate system prompt and identifier using AI
4. Let you select which tools the agent can access
5. Let you choose the agent mode (`all`, `primary`, or `subagent`)
6. Create a markdown file with the agent configuration
You can also run it non-interactively:
kilo agent create \\
--path .kilo \\
--description "Reviews code for security vulnerabilities" \\
--mode subagent \\
--tools "read,grep,glob"
Configuration Options
---------------------
The following options are available when configuring a subagent:
| Option | Type | Description |
| --- | --- | --- |
| `description` | `string` | What the agent does and when to use it. Shown to primary agents to help them decide which subagent to invoke. |
| `mode` | `"subagent" \| "primary" \| "all"` | How the agent can be used. Defaults to `all` for custom agents. |
| `model` | `string` | Override the model for this agent (format: `provider/model-id`). If not set, subagents inherit the model of the invoking primary agent. |
| `prompt` | `string` | Custom system prompt. In JSON, can use `{file:./path}` syntax. In markdown, the body is the prompt. |
| `temperature` | `number` | Controls response randomness (0.0-1.0). Lower = more deterministic. |
| `top_p` | `number` | Alternative to temperature for controlling response diversity (0.0-1.0). |
| `permission` | `object` | Controls tool access. See [Permissions](https://kilo.ai/docs/customize/custom-subagents#permissions) below. |
| `hidden` | `boolean` | If `true`, hides the subagent from the `@` autocomplete menu. It can still be invoked by agents via the Task tool. Only applies to `mode: subagent`. |
| `steps` | `number` | Maximum agentic iterations before forcing a text-only response. Useful for cost control. |
| `color` | `string` | Visual color in the UI. Accepts hex (`#FF5733`) or theme names (`primary`, `accent`, `error`, etc.). |
| `disable` | `boolean` | Set to `true` to disable the agent entirely. |
Any additional options not listed above are passed through to the model provider, allowing you to use provider-specific parameters like `reasoningEffort` for OpenAI models.
### Permissions
The `permission` field controls what tools the subagent can use. Each tool permission can be set to:
* `"allow"` — Allow the tool without approval
* `"ask"` — Prompt for user approval before running
* `"deny"` — Disable the tool entirely
{
"agent": {
"reviewer": {
"mode": "subagent",
"permission": {
"edit": "deny",
"bash": {
"\*": "ask",
"git diff": "allow",
"git log\*": "allow"
}
}
}
}
}
For bash commands, you can use glob patterns to set permissions per command. Rules are evaluated in order, with the **last matching rule winning**.
You can also control which subagents an agent can invoke via `permission.task`:
{
"agent": {
"orchestrator": {
"mode": "primary",
"permission": {
"task": {
"\*": "deny",
"code-reviewer": "allow",
"docs-writer": "allow"
}
}
}
}
}
Using Custom Subagents
----------------------
Once configured, subagents can be used in two ways:
### Automatic Invocation
Primary agents (especially the Orchestrator) can automatically invoke subagents via the Task tool when the subagent's `description` matches the task at hand. Write clear, descriptive `description` values to help primary agents select the right subagent.
### Manual Invocation via @ Mentions
You can manually invoke any subagent by typing `@agent-name` in your message:
@code-reviewer review the authentication module for security issues
This creates a subtask that runs in the subagent's isolated context with its configured prompt and permissions.
### Listing Agents
To see all available agents (both built-in and custom):
kilo agent list
This displays each agent's name, mode, and permission configuration.
Configuration Precedence
------------------------
Agent configurations are merged from multiple sources. Later sources override earlier ones:
1. **Built-in agent defaults** (native agents defined in the codebase)
2. **Global config** (`~/.config/kilo/config.json`)
3. **Global agent markdown files** (`~/.config/kilo/agents/*.md`)
4. **Project config** (`kilo.json` in the project root)
5. **Project agent markdown files** (`.kilo/agents/*.md`)
When overriding a built-in agent, properties are merged — only the fields you specify are overridden. When creating a new custom agent, unspecified fields use sensible defaults (`mode: "all"`, full permissions inherited from global config).
Examples
--------
### Documentation Writer
A subagent that writes and maintains documentation without executing commands:
\---
description: Writes and maintains project documentation
mode: subagent
permission:
bash: deny
---
You are a technical writer. Create clear, comprehensive documentation.
Focus on:
- Clear explanations with proper structure
- Code examples where helpful
- User-friendly language
- Consistent formatting
### Security Auditor
A read-only subagent for security review:
\---
description: Performs security audits and identifies vulnerabilities
mode: subagent
permission:
edit: deny
bash:
"\*": deny
"git log\*": allow
"grep \*": allow
---
You are a security expert. Focus on identifying potential security issues.
Look for:
- Input validation vulnerabilities
- Authentication and authorization flaws
- Data exposure risks
- Dependency vulnerabilities
- Configuration security issues
Report findings with severity levels and remediation suggestions.
### Test Generator
A subagent that creates tests for existing code:
{
"agent": {
"test-gen": {
"description": "Generates comprehensive test suites for existing code",
"mode": "subagent",
"prompt": "You are a test engineer. Write comprehensive tests following the project's existing test patterns. Use the project's test framework. Cover edge cases and error paths.",
"temperature": 0.2,
"steps": 15
}
}
}
### Restricted Orchestrator
A primary agent that can only delegate to specific subagents:
{
"agent": {
"orchestrator": {
"permission": {
"task": {
"\*": "deny",
"code-reviewer": "allow",
"test-gen": "allow",
"docs-writer": "allow"
}
}
}
}
}
Overriding Built-in Agents
--------------------------
You can customize built-in agents by using their name in your config. For example, to change the model used by the `explore` subagent:
{
"agent": {
"explore": {
"model": "anthropic/claude-haiku-4-20250514"
}
}
}
To disable a built-in agent entirely:
{
"agent": {
"general": {
"disable": true
}
}
}
Related
-------
* [Custom Modes](https://kilo.ai/docs/customize/custom-modes)
— Create specialized primary agents with tool restrictions
* [Custom Rules](https://kilo.ai/docs/customize/custom-rules)
— Define rules that apply to specific file types or situations
* [Orchestrator Mode](https://kilo.ai/docs/code-with-ai/agents/orchestrator-mode)
— Legacy mode for task delegation (now built into all agents)
* [Task Tool](https://kilo.ai/docs/automate/tools/new-task)
— The tool used to invoke subagents
Copy page
---
# Billing
Billing
=======
Kilo seats uses a transparent, two-part billing system: a monthly subscription per seat, plus pay-as-you-go Kilo credits with zero markup.
📝Note
Kilo Code seats purchases of Teams or Enterprise are separate from Kilo credits.
No Kilo credits are included with a Teams or Enterprise purchase.
Organization Credits
--------------------
Organization Owners can purchase Kilo credits on the [Organization dashboard](https://app.kilo.ai/)
.
Organization credits are purchased on behalf of all users in the organization. Every member of the organization can use the credits in the organization's balance with the Kilo Code model provider.
Using organization credits works exactly like spending [individual credits](https://kilo.ai/docs/getting-started/adding-credits)
, except that the credits come from the organization's credit balance, rather than the individuals.
### Buying Organization Credits
1. **Navigate to Organization tab** in dashboard
2. **Click "Buy More Credits"**
3. **Select credit amount** ($50, $100, $250, $500, $1000+)
4. **Complete payment** using saved payment method
5. **Credits available immediately** for team use
### Using Organization Credits
Organization members can use organization credits by choosing the correct organization profile in the dropdown in the Profiles tab of the Kilo Code extension.
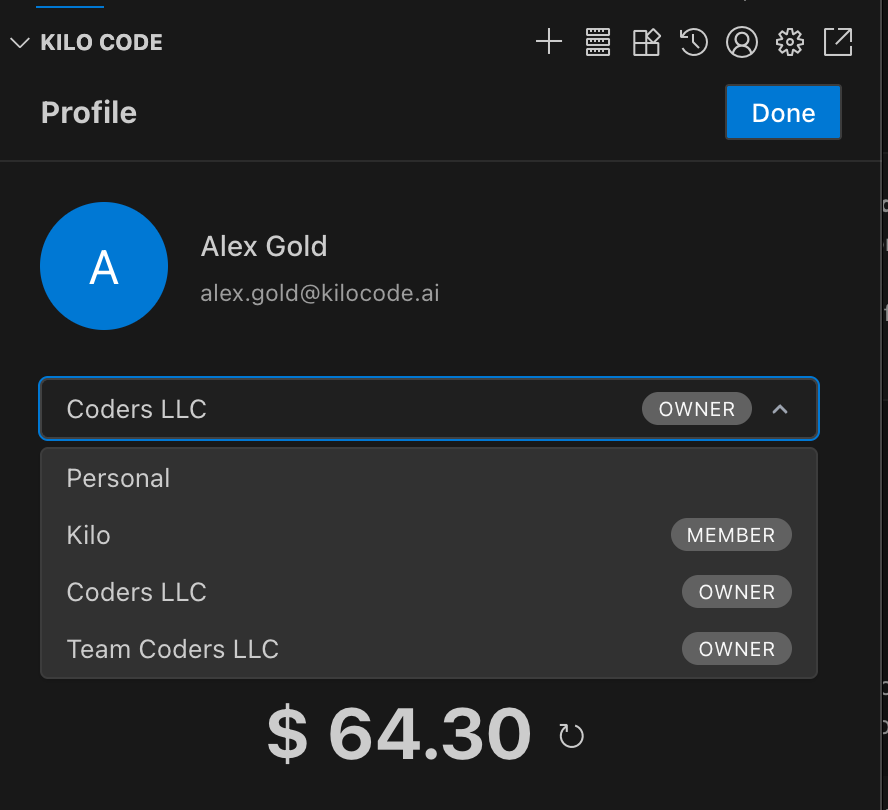
Dropdown showing different organizations available
Managing Seats Subscriptions
----------------------------
In order to add Members to your Kilo Code Organization, you must have seat(s) available for them.
You can purchase more seats at any time during your billing cycle and will pay a pro-rated amount for the number of days left in your billing cycle.
You can remove empty seats at any time. Your next payment will reflect the smaller number of seats.
Your next billing date will not change.
To fill empty seats or remove members ahead of seat deletion, see the [team management](https://kilo.ai/docs/collaborate/teams/team-management)
page.
### Adding Seats
1. **Go to Organization tab**
2. **Click "Add Seats"**
3. **Enter number of additional seats**
4. **Review pro-rated cost** for current billing cycle
5. **Confirm changes**
### Removing Seats
1. **Navigate to Organization tab**
2. **Click "Remove Seats"**
3. **Select seats to remove** (must remove team members first)
4. **Confirm reduction**
To fill empty seats or remove members ahead of seat deletion, see the [team management](https://kilo.ai/docs/collaborate/teams/team-management)
page.
Automatic Top-Up
----------------
Ensure your team has uninterrupted access to Kilo Code by enabling Automatic Top-Up. This feature keeps your organization's balance funded so you never have to worry about manual recharges.
### How It Works
* **Initial Verification** — To verify your payment method, a one-time charge for your selected top-up amount will be processed immediately upon enabling this feature.
* **Automatic Thresholds** — Once enabled, Kilo Code will automatically recharge your balance whenever it falls below $50.00.
⚠️Payment Failure
If a payment fails, we will notify you via email and automatically pause auto-top-ups to prevent repeated billing attempts. You can resume this feature at any time from your settings.
* **Flexibility** — You can disable automatic top-ups at any time.
* **No Expiration** — Any credits you purchase will never expire; they remain available in your account until used.
### Configuring Automatic Top-Up
1. Navigate to your **Organization Settings**
2. Select **Billing & Credits**
3. Locate the **Automatic Top-Up** section and toggle the feature **ON**
4. Set your **Top-Up Amount** — the amount to add to your balance each time a recharge is triggered
📝Note
The minimum top-up amount is **$100.00**.
5. Click **Save Changes** to confirm
Once saved, your initial top-up will be processed immediately to verify your payment method.
Invoices
--------
Invoices for any payment on the Kilo Code platform, for seats or credits, will be available in the Invoices tab.
### Service Suspension
If payment fails repeatedly:
* **3-day grace period** to resolve payment issues
* **Service suspension** after grace period expires
* **Data retention** for 30 days during suspension
* **Immediate restoration** upon payment resolution
Next Steps
----------
* [Explore usage analytics](https://kilo.ai/docs/collaborate/teams/analytics)
* [Learn about team roles and permissions](https://kilo.ai/docs/collaborate/teams/team-management)
* [Learn about team management](https://kilo.ai/docs/collaborate/teams/team-management)
Copy page
---
# MCP Overview
Model Context Protocol (MCP)
============================
The Model Context Protocol (MCP) is a standard for extending Kilo Code's capabilities by connecting to external tools and services. MCP servers provide additional tools and resources that help Kilo Code accomplish tasks beyond its built-in capabilities, such as accessing databases, custom APIs, and specialized functionality.
MCP Documentation
-----------------
This documentation is organized into several sections:
* [**Using MCP in Kilo Code**](https://kilo.ai/docs/automate/mcp/using-in-kilo-code)
- Comprehensive guide to configuring, enabling, and managing MCP servers with Kilo Code. Includes server settings, tool approval, and troubleshooting.
* [**What is MCP?**](https://kilo.ai/docs/automate/mcp/what-is-mcp)
- Clear explanation of the Model Context Protocol, its client-server architecture, and how it enables AI systems to interact with external tools.
* [**STDIO & SSE Transports**](https://kilo.ai/docs/automate/mcp/server-transports)
- Detailed comparison of local (STDIO) and remote (SSE) transport mechanisms with deployment considerations for each approach.
* [**MCP vs API**](https://kilo.ai/docs/automate/mcp/mcp-vs-api)
- Analysis of the fundamental distinction between MCP and REST APIs, explaining how they operate at different layers of abstraction for AI systems.
Contributing to the Marketplace
-------------------------------
Have you created an MCP server that others might find useful? Share it with the community by contributing to the [Kilo Marketplace](https://github.com/Kilo-Org/kilo-marketplace)
!
### How to Submit Your MCP Server
1. **Develop your server**: Create an MCP server following the [MCP specification](https://github.com/modelcontextprotocol/)
2. **Test thoroughly**: Ensure your server works correctly with Kilo Code and handles edge cases gracefully
3. **Fork the marketplace repository**: Visit [github.com/Kilo-Org/kilo-marketplace](https://github.com/Kilo-Org/kilo-marketplace)
and create a fork
4. **Add your server**: Include your server configuration and documentation following the repository's structure
5. **Submit a pull request**: Create a PR with a clear description of what your server does and its requirements
### Submission Guidelines
* Document all available tools and resources your server provides
* Include example configurations for both STDIO and SSE transports if applicable
* Specify any required environment variables or API keys
* Note any platform-specific requirements (Windows, macOS, Linux)
* Follow the [contribution guidelines](https://github.com/Kilo-Org/kilo-marketplace/blob/main/CONTRIBUTING.md)
in the marketplace repository
For more details on contributing to Kilo Code, see the [Contributing Guide](https://kilo.ai/docs/contributing)
.
Copy page
---
# Analytics
Analytics
=========
Using Kilo seats with an Enterprise or Teams subscription provides detailed usage analytics to help you monitor and understand your organization’s AI usage patterns, costs, and activity through the Kilo Gateway provider.
Analytics Dashboard Overview
----------------------------
Access your organization’s usage analytics through the **Usage Details** section in your dashboard. The analytics show comprehensive data about your team's usage of the Kilo Gateway provider.
ℹ️Usage Scope
This usage overview includes all of your usage of the Kilo Gateway provider. It does **NOT** include any usage made via the Kilo Code extension to other, non-Kilo Code providers. You can choose which API provider to use from the extension's main settings page.
Summary Metrics
---------------
The dashboard displays five key metrics at the top:
* **Total Spent** - Total cost for the selected time period
* **Total Requests** - Number of API requests made
* **Avg Cost per Request** - Average cost per individual request
* **Total Tokens** - Total tokens processed (input + output)
* **Active Users** - Number of team members who made requests
Time Period Filters
-------------------
Select from four time period options to view usage data:
* **Past Week** - Last 7 days of usage
* **Past Month** - Last 30 days of usage
* **Past Year** - Last 365 days of usage
* **All** - Complete usage history
Usage View Options
------------------
### Only My Usage Toggle
Use the **"Only my usage"** toggle to filter the data:
* **Enabled** - Shows only your personal usage data
* **Disabled** - Shows team-wide usage data for all members
### Data Breakdown Views
Choose between two data presentation formats:
### By Day View
Shows usage aggregated by date with columns:
* **DATE** - The specific date
* **COST** - Total spending for that date
* **REQUESTS** - Number of API requests made
* **TOKENS** - Total tokens processed (hover to show input vs. output tokens)
* **USERS** - Number of active users that date
When viewing team data, you can click on any date row to expand and see individual user breakdowns for that day, showing each team member's usage, cost, requests, and tokens.
### By Model & Day View
Shows detailed usage broken down by AI model and date with columns:
* **DATE** - The specific date
* **MODEL** - The AI model used (e.g., anthropic/claude-sonnet-4, openai/gpt-4)
* **COST** - Cost for that model on that date
* **REQUESTS** - Number of requests to that model
* **TOKENS** - Tokens processed by that model (hover to show input vs. output tokens)
* **USERS** - Number of users who used that model
Click on any row to expand and see which specific team members used that model on that date, along with their individual usage statistics.
### By Project View
You can also view usage **by project**.
Project names are automatically parsed from the project's `.git/config` for the remote named `origin` (if there is one).
For example, if the following were in your `.git/config`:
\[remote "origin"\]
url = git@github.com:example-co/example-repo.git
fetch = +refs/heads/\*:refs/remotes/origin/\*
The project name would be `example-repo`.
You can also manually override the project name in the `.kilocode/config.json` file in your project.
To set the project identifier to `my-project`, create a `.kilocode/config.json` file with the following contents:
{
"project": {
"id": "my-project"
}
}
Understanding the Data
----------------------
### Model Information
The analytics track usage across different AI models, showing the specific model identifiers such as:
* `anthropic/claude-sonnet-4`
* `openai/gpt-5`
* `x-ai/grok-code-fast-1`
* `mistralai/codestral-2508`
### User Attribution
When viewing team data, you can see:
* Individual team member usage within expanded rows
* Email addresses for user identification
* Per-user cost, request, and token breakdowns
### Cost Tracking
All costs are displayed in USD with detailed precision, helping you:
* Monitor spending patterns over time
* Identify high-usage periods or models
* Track individual team member contributions to costs
Next Steps
----------
* [Manage team billing settings](https://kilo.ai/docs/collaborate/teams/billing)
* [Configure team roles and permissions](https://kilo.ai/docs/collaborate/teams/team-management)
The usage analytics provide the insights needed to optimize your team's AI usage while maintaining visibility into costs and activity patterns.
Copy page
---
# Shell Integration
Terminal Shell Integration
==========================
Terminal Shell Integration is a key feature that enables Kilo Code to execute commands in your terminal and intelligently process their output. This bidirectional communication between the AI and your development environment unlocks powerful automation capabilities.
What is Shell Integration?
--------------------------
Shell integration is automatically enabled in Kilo Code and connects directly to your terminal's command execution lifecycle without requiring any setup from you. This built-in feature allows Kilo Code to:
* Execute commands on your behalf through the [`execute_command`](https://kilo.ai/docs/automate/tools/execute-command)
tool
* Read command output in real-time without manual copy-pasting
* Automatically detect and fix errors in running applications
* Observe command exit codes to determine success or failure
* Track working directory changes as you navigate your project
* React intelligently to terminal output without user intervention
When Kilo Code needs to perform tasks like installing dependencies, starting a development server, or analyzing build errors, shell integration works behind the scenes to make these interactions smooth and effective.
Getting Started with Shell Integration
--------------------------------------
Shell integration is built into Kilo Code and works automatically in most cases. If you see "Shell Integration Unavailable" messages or experience issues with command execution, try these solutions:
1. **Update VS Code/Cursor** to the latest version (VS Code 1.93+ required)
2. **Ensure a compatible shell is selected**: Command Palette (`Ctrl+Shift+P` or `Cmd+Shift+P`) → "Terminal: Select Default Profile" → Choose bash, zsh, PowerShell, or fish
3. **Windows PowerShell users**: Run `Set-ExecutionPolicy RemoteSigned -Scope CurrentUser` then restart VS Code
4. **WSL users**: Add `. "$(code --locate-shell-integration-path bash)"` to your `~/.bashrc`
Terminal Integration Settings
-----------------------------
Kilo Code provides several settings to fine-tune shell integration. Access these in the Kilo Code panel under Settings → Terminal.
### Basic Settings
#### Terminal Output Limit
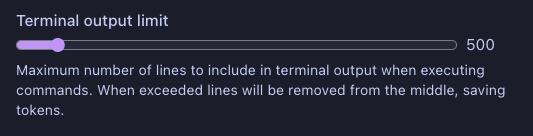
Terminal output limit slider set to 500
Controls the maximum number of lines captured from terminal output. When exceeded, it keeps 20% of the beginning and 80% of the end with a truncation message in between. This prevents excessive token usage while maintaining context. Default: 500 lines.
#### Terminal Shell Integration Timeout
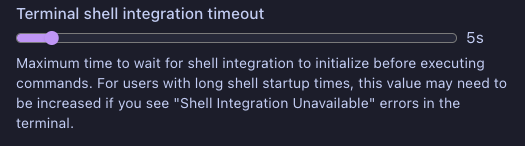
Terminal shell integration timeout slider set to 15s
Maximum time to wait for shell integration to initialize before executing commands. Increase this value if you experience "Shell Integration Unavailable" errors. Default: 15 seconds.
#### Terminal Command Delay
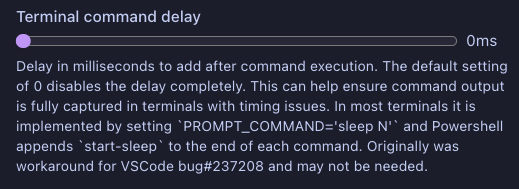
Terminal command delay slider set to 0ms
Adds a small pause after running commands to help Kilo Code capture all output correctly. This setting can significantly impact shell integration reliability due to VSCode's implementation of terminal integration across different operating systems and shell configurations:
* **Default**: 0ms
* **Common Values**:
* 0ms: Works best for some users with newer VSCode versions
* 50ms: Historical default, still effective for many users
* 150ms: Recommended for PowerShell users
* **Note**: Different values may work better depending on your:
* VSCode version
* Shell customizations (oh-my-zsh, powerlevel10k, etc.)
* Operating system and environment
### Advanced Settings
ℹ️Important
**Terminal restart required for these settings**
Changes to advanced terminal settings only take effect after restarting your terminals. To restart a terminal:
1. Click the trash icon in the terminal panel to close the current terminal
2. Open a new terminal with Terminal → New Terminal or Ctrl+\` (backtick)
Always restart all open terminals after changing any of these settings.
#### PowerShell Counter Workaround
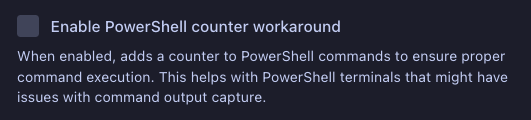
PowerShell counter workaround checkbox
Helps PowerShell run the same command multiple times in a row. Enable this if you notice Kilo Code can't run identical commands consecutively in PowerShell.
#### Clear ZSH EOL Mark
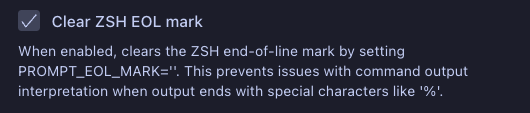
Clear ZSH EOL mark checkbox
Prevents ZSH from adding special characters at the end of output lines that can confuse Kilo Code when reading terminal results.
#### Oh My Zsh Integration
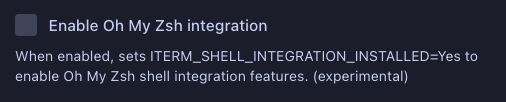
Enable Oh My Zsh integration checkbox
Makes Kilo Code work better with the popular [Oh My Zsh](https://ohmyz.sh/)
shell customization framework. Turn this on if you use Oh My Zsh and experience terminal issues.
#### Powerlevel10k Integration

Enable Powerlevel10k integration checkbox
Improves compatibility if you use the Powerlevel10k theme for ZSH. Turn this on if your fancy terminal prompt causes issues with Kilo Code.
#### ZDOTDIR Handling
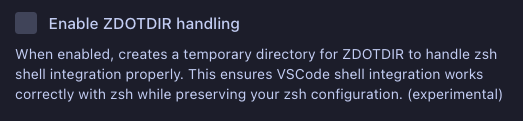
Enable ZDOTDIR handling checkbox
Helps Kilo Code work with custom ZSH configurations without interfering with your personal shell settings and customizations.
Troubleshooting Shell Integration
---------------------------------
### PowerShell Execution Policy (Windows)
PowerShell restricts script execution by default. To configure:
1. Open PowerShell as Administrator
2. Check current policy: `Get-ExecutionPolicy`
3. Set appropriate policy: `Set-ExecutionPolicy RemoteSigned -Scope CurrentUser`
Common policies:
* `Restricted`: No scripts allowed (default)
* `RemoteSigned`: Local scripts can run; downloaded scripts need signing
* `Unrestricted`: All scripts run with warnings
* `AllSigned`: All scripts must be signed
### Manual Shell Integration Installation
If automatic integration fails, add the appropriate line to your shell configuration:
**Bash** (`~/.bashrc`):
\[\[ "$TERM\_PROGRAM" == "vscode" \]\] && . "$(code --locate-shell-integration-path bash)"
**Zsh** (`~/.zshrc`):
\[\[ "$TERM\_PROGRAM" == "vscode" \]\] && . "$(code --locate-shell-integration-path zsh)"
**PowerShell** (`$Profile`):
if ($env:TERM\_PROGRAM -eq "vscode") { . "$(code --locate-shell-integration-path pwsh)" }
**Fish** (`~/.config/fish/config.fish`):
string match -q "$TERM\_PROGRAM" "vscode"; and . (code --locate-shell-integration-path fish)
### Terminal Customization Issues
If you use terminal customization tools:
**Powerlevel10k**:
\# Add before sourcing powerlevel10k in ~/.zshrc
typeset -g POWERLEVEL9K\_TERM\_SHELL\_INTEGRATION=true
**Alternative**: Enable the Powerlevel10k Integration setting in Kilo Code.
### Verifying Shell Integration Status
Confirm shell integration is active with these commands:
**Bash**:
set | grep -i '\[16\]33;'
echo "$PROMPT\_COMMAND" | grep vsc
trap -p DEBUG | grep vsc
**Zsh**:
functions | grep -i vsc
typeset -p precmd\_functions preexec\_functions
**PowerShell**:
Get-Command -Name "\*VSC\*" -CommandType Function
Get-Content Function:\\Prompt | Select-String "VSCode"
**Fish**:
functions | grep -i vsc
functions fish\_prompt | grep -i vsc
Visual indicators of active shell integration:
1. Shell integration indicator in terminal title bar
2. Command detection highlighting
3. Working directory updates in terminal title
4. Command duration and exit code reporting
WSL Terminal Integration Methods
--------------------------------
When using Windows Subsystem for Linux (WSL), there are two distinct ways to use VSCode with WSL, each with different implications for shell integration:
### Method 1: VSCode Windows with WSL Terminal
In this setup:
* VSCode runs natively in Windows
* You use the WSL terminal integration feature in VSCode
* Shell commands are executed through the WSL bridge
* May experience additional latency due to Windows-WSL communication
* Shell integration markers may be affected by the WSL-Windows boundary: you must make sure that `source "$(code --locate-shell-integration-path )"` is loaded for your shell within the WSL environment because it may not get automatically loaded; see above.
### Method 2: VSCode Running Within WSL
In this setup:
* You launch VSCode directly from within WSL using `code .`
* VSCode server runs natively in the Linux environment
* Direct access to Linux filesystem and tools
* Better performance and reliability for shell integration
* Shell integration is loaded automatically since VSCode runs natively in the Linux environment
* Recommended approach for WSL development
For optimal shell integration with WSL, we recommend:
1. Open your WSL distribution
2. Navigate to your project directory
3. Launch VSCode using `code .`
4. Use the integrated terminal within VSCode
Known Issues and Workarounds
----------------------------
### VS Code + Fish + Cygwin (Windows)
If you use Fish in Cygwin, a minimal setup is usually enough:
1. In your Cygwin Fish config (`~/.config/fish/config.fish`), add:
string match -q "$TERM\_PROGRAM" "vscode"; and . (code --locate-shell-integration-path fish)
2. Configure a terminal profile in VS Code that launches Fish (directly or via Cygwin bash).
3. Restart VS Code and open a new terminal to verify integration.

Fish Cygwin Integration Example
### Shell Integration Failures After VS Code 1.98
**Issue**: After VS Code updates beyond version 1.98, shell integration may fail with the error "VSCE output start escape sequence (\]633;C or \]133;C) not received".
**Solutions**:
1. **Set Terminal Command Delay**:
* Set the Terminal Command Delay to 50ms in Kilo Code settings
* Restart all terminals after changing this setting
* This matches older default behavior and may resolve the issue; some users report 0ms works better depending on shell and environment. This is a workaround for upstream VS Code behavior.
2. **Roll Back VS Code Version**:
* Download VS Code v1.98 from [VS Code Updates](https://code.visualstudio.com/updates/v1_98)
* Replace your current VS Code installation
* No backup of Kilo settings needed
3. **WSL-Specific Workaround**:
* If using WSL, ensure you launch VSCode from within WSL using `code .`
4. **ZSH Users**:
* Try enabling some or all ZSH-related workarounds in Kilo Code settings
* These settings can help regardless of your operating system
Additional Known Issues
-----------------------
### Ctrl+C Behavior
**Issue**: If text is already typed in the terminal when Kilo Code tries to run a command, Kilo Code will press Ctrl+C first to clear the line, which can interrupt running processes.
**Workaround**: Make sure your terminal prompt is empty (no partial commands typed) before asking Kilo Code to execute terminal commands.
### Multi-line Command Issues
**Issue**: Commands that span multiple lines can confuse Kilo Code and may show output from previous commands mixed in with current output.
**Workaround**: Instead of multi-line commands, use command chaining with `&&` to keep everything on one line (e.g., `echo a && echo b` instead of typing each command on a separate line).
### PowerShell-Specific Issues
1. **Premature Completion**: PowerShell sometimes tells Kilo Code a command is finished before all the output has been shown.
2. **Repeated Commands**: PowerShell may refuse to run the same command twice in a row.
**Workaround**: Enable the "PowerShell counter workaround" setting and set a terminal command delay of 150ms in the settings to give commands more time to complete.
### Incomplete Terminal Output
**Issue**: Sometimes VS Code doesn't show or capture all the output from a command.
**Workaround**: If you notice missing output, try closing and reopening the terminal tab, then run the command again. This refreshes the terminal connection.
Troubleshooting Resources
-------------------------
### Checking Debug Logs
When shell integration issues occur, check the debug logs:
1. Open Help → Toggle Developer Tools → Console
2. Set "Show All Levels" to see all log messages
3. Look for messages containing `[Terminal Process]`
4. Check `preOutput` content in error messages:
* Empty preOutput (`''`) means VS Code sent no data
* This indicates a potential VS Code shell integration issue, or an upstream bug that is out of our control
* The absence of shell integration markers may require adjusting settings to work around possible upstream bugs or local workstation configuration issues related to shell initialization and VS Code loading shell hooks
### Using the VS Code Terminal Integration Test Extension
The [VS Code Terminal Integration Test Extension](https://github.com/KJ7LNW/vsce-test-terminal-integration)
helps diagnose shell integration issues by testing different settings combinations:
1. **When Commands Stall**:
* If you see "command already running" warnings, click "Reset Stats" to reset the terminal state
* These warnings indicate shell integration is not working
* Try different settings combinations until you find one that works
* If it really gets stuck, restart the extension by closing the window and pressing F5
2. **Testing Settings**:
* Systematically try different combinations of:
* Terminal Command Delay
* Shell Integration settings
* Document which combinations succeed or fail
* This helps identify patterns in shell integration issues
3. **Reporting Issues**:
* Once you find a problematic configuration
* Document the exact settings combination
* Note your environment (OS, VS Code version, shell, and any shell prompt customization)
* Open an issue with these details to help improve shell integration
Support
-------
If you've followed these steps and are still experiencing problems, please:
1. Check the [Kilo Code GitHub Issues](https://github.com/Kilo-Org/kilocode/issues)
to see if others have reported similar problems
2. If not, create a new issue with details about your operating system, VS Code/Cursor version, and the steps you've tried
For additional help, join our [Discord](https://kilo.ai/discord)
.
Copy page
---
# Cloud Agent
Cloud Agent
===========
Cloud Agents let you run Kilo Code in the cloud from any device, without relying on your local machine. They provide a remote development environment that can read and modify your GitHub and GitLab repositories, run commands, and auto-commit changes as work progresses.
What Cloud Agents Enable
------------------------
* Run Kilo Code remotely from a browser
* Auto-create branches and push work continuously
* Use env vars + startup commands to shape the workspace
* Work from anywhere while keeping your repo in sync
Prerequisites
-------------
Before using Cloud Agents:
* **GitHub or GitLab Integration must be configured** Connect your account via the [Integrations tab](https://app.kilo.ai/integrations)
so that Cloud Agents can access your repositories.
Cost
----
* **Compute is free during limited beta**
* Please provide any feedback in our Cloud Agents beta Discord channel: [Kilo Discord](https://kilo.ai/discord)
* **Kilo Code credits are still used** when the agent performs work (model usage, operations, etc.).
How to Use
----------
1. **Connect your GitHub or GitLab account** in the [Integrations](https://app.kilo.ai/integrations)
tab of your personal or organization dashboard.
2. **Select a repository** to use as your workspace.
3. **Add environment variables** (secrets supported) and set optional startup commands.
4. **Start chatting with Kilo Code.**
Your work is always pushed to GitHub, ensuring nothing is lost.
How Cloud Agents Work
---------------------
* Each user receives an **isolated Linux container** with common dev tools preinstalled (Node.js, git, gh CLI, glab CLI, etc.).
* Python is not included in the base image, but `apt` is available so you can install it or other packages as needed.
* All Cloud Agent chats share a **single container instance**, while each session gets its own workspace directory.
* When a session begins:
1. Your repo is cloned
2. A unique branch is created
3. Your startup commands run
4. Env vars are injected
* After every message, the agent:
* Looks for file changes
* Commits them
* Pushes to the session’s branch
* Containers are **ephemeral**:
* Spindown occurs after inactivity
* Expect slightly longer setup after idle periods
* Inactive cloud agent sessions are deleted after **7 days** during the beta, expired sessions are still accessible via the CLI
Agent Environment Profiles
--------------------------
Agent environment profiles are reusable bundles of environment settings for cloud-agent sessions. A profile can include:
* Environment variables (plaintext)
* Secrets (encrypted at rest; decrypted only by the cloud agent)
* Setup commands (which Cloud Agent will execute before starting a session)
Profiles are owned by either a user or an organization. Names are unique per owner, and each owner can have a single default profile. This lets teams share standard environment setups across multiple sessions and triggers.
Environment Variables & Secrets & Startup Commands
--------------------------------------------------
You can customize each Cloud Agent session by also defining env vars and startup commands on the fly. These will override any Agent Environment Profile you've selected:
### Environment Variables
* Add key/value pairs or secrets
* Injected into the container before the session starts
* Useful for API keys or config flags
### Startup Commands
* Commands run immediately after cloning the repo and checking out the session branch
* Great for:
* Installing dependencies
* Bootstrapping tooling
* Running setup scripts
### Setup Commands vs `.kilocode/setup-script`
* Cloud Agent executes **Setup Commands** configured in the Cloud UI/profile.
* Cloud Agent does **not** automatically discover or run `.kilocode/setup-script`.
* If you want to use `.kilocode/setup-script` in Cloud Agent, call it explicitly from Setup Commands, for example: `bash .kilocode/setup-script`.
* If both are present, execution order is:
1. Setup Commands (in the order you define them)
2. Anything those commands invoke (such as `.kilocode/setup-script`)
Skills
------
Cloud Agents support project-level [skills](https://kilo.ai/docs/code-with-ai/platforms/cli#skills)
stored in your repository. When your repo is cloned, any skills in `.kilocode/skills/` are automatically available.
📝Note
Global skills (`~/.kilocode/skills/`) are not available in Cloud Agents since there is no persistent user home directory.
Perfect For
-----------
Cloud Agents are great for:
* **Remote debugging** using Kilo Code debug mode
* **Exploration of unfamiliar codebases** without touching your local machine
* **Architect-mode brainstorming** while on the go
* **Automated refactors or tech debt cleanup** driven by Kilo Code
* **Offloading CI-like tasks**, experiments, or batch updates
Webhook Triggers
----------------
Webhook triggers allow you to initiate cloud agent sessions via HTTP requests. This enables integration with external services and automation workflows.
📝Note
Webhook triggers are currently in beta and subject to change.
### Accessing Webhooks
Webhook triggers are accessible from the main sidebar with an entry named **Webhook** and link to [https://app.kilo.ai/cloud/webhooks](https://app.kilo.ai/cloud/webhooks)
for personal accounts. Organization-level webhook configurations are available through your organization's sidebar.
### Configuration
Webhook triggers utilize [agent environment profiles](https://kilo.ai/docs/code-with-ai/platforms/cloud-agent#agent-environment-profiles)
to configure the execution environment for triggered sessions. The agent resolves the profile at runtime, so profile updates apply automatically to future executions. Profiles referenced by triggers cannot be deleted until those triggers are updated or removed.
Webhook triggers do not support manual env var or setup command overrides at this time.
### Trigger Limits and Guidance
Webhook triggers are designed for low-volume invocations from trusted sources and are best suited for short-lived tasks.
* **Personal webhooks**: Execute in the same sandbox container as a user's Cloud Agent sessions. You can view/join invocations live.
* **Organization webhooks**: Execute in dedicated compute resources as a bot user, similar to Code Review sessions. You can share/fork the sessions when they're complete.
Additional limits:
* **Payload size**: max **256 KB** per request body (larger payloads return `413`)
* **Content types**: binary and multipart payloads are rejected (`415`) such as `multipart/*`, `application/octet-stream`, `image/*`, `audio/*`, `video/*`, `application/pdf`, `application/zip`
* **Retention**: only the **most recent 100 requests per trigger** are retained
* **In-flight cap**: at most **20 requests per trigger** can be in `captured` or `inprogress` at once (returns `429`)
The webhook endpoint will return rate limit responses when the number of queued or processing requests exceeds system capacity.
### Webhook Prompt Template Variables
You can reference request data in a trigger’s prompt template using these placeholders:
* `{{body}}` - raw request body (string)
* `{{bodyJson}}` - pretty-printed JSON if parseable, otherwise raw body
* `{{method}}` - HTTP method (GET, POST, etc.)
* `{{path}}` - request path
* `{{headers}}` - JSON-formatted request headers
* `{{query}}` - query string without leading `?` (empty if none)
* `{{sourceIp}}` - client IP if provided (falls back to `unknown`)
* `{{timestamp}}` - capture timestamp (ISO string)
⚠️Security Considerations
Care should be taken when deciding to use webhooks as they are susceptible to prompt injection attacks. Especially in scenarios where webhook payloads may contain untrusted input. At this time we recommend using webhooks only for trusted sources.
General Cloud Agent Limitations and Guidance
--------------------------------------------
* Each message can run for **up to 15 minutes**. Break large tasks into smaller steps; use a `plan.md` or `todo.md` file to keep scope clear.
* **Context is persistent across messages.** Kilo Code remembers previous turns within the same session.
* **Auto/YOLO mode is always on.** The agent will modify code without prompting for confirmation.
* **Sessions are restorable locally** and local sessions can be resumed in Cloud Agent.
* **Sessions prior to December 9th 2025** may not be accessible in the web UI.
* **MCP support is coming**, but **Docker-based MCP servers will _not_ be supported**.
Copy page
---
# Kilo CLI
⚠️Version Notice
This documentation applies only to Kilo version 1.0 and later. Users running versions below 1.0 should upgrade before proceeding.
Kilo CLI
========
Orchestrate agents from your terminal. Plan, debug, and code fast with keyboard-first navigation on the command line.
The Kilo Code CLI uses the same underlying technology that powers the IDE extensions, so you can expect the same workflow to handle agentic coding tasks from start to finish.
**Source code & issues (Kilo CLI 1.0):** [Kilo-Org/kilocode](https://github.com/Kilo-Org/kilocode)
· [Report an issue](https://github.com/Kilo-Org/kilocode/issues)
Getting Started
---------------
### Install
Use Kilo Code directly from your terminal for maximum flexibility.
### Install via npm
npm install -g @kilocode/cli
### Older CPUs (No AVX Support)
If you're running on an older CPU without AVX support (e.g., Intel Xeon Nehalem, AMD Bulldozer, or older), the CLI may crash with "Illegal instruction". In that case, download the **baseline** variant from GitHub releases:
1. Go to [Kilo Releases](https://github.com/Kilo-Org/kilocode/releases)
2. Download the `-baseline` variant for your platform:
* Linux x64: `kilo-linux-x64-baseline.tar.gz`
* macOS x64: `kilo-darwin-x64-baseline.zip`
* Windows x64: `kilo-windows-x64-baseline.zip`
3. Extract and run the `kilo` binary directly
### Verify Installation
kilo --version
Change directory to where you want to work and run kilo:
\# Start the TUI
kilo
# Check the version
kilo --version
# Get help
kilo --help
### First-Time Setup with `/connect`
After installation, run `kilo` and use the `/connect` command to add your first provider credentials. This is the interactive way to configure API keys for model providers.
Update
------
Upgrade the Kilo CLI:
`kilo upgrade`
Or use npm:
`npm update -g @kilocode/cli`
What you can do with Kilo Code CLI
----------------------------------
* **Plan and execute code changes without leaving your terminal.** Use your command line to make edits to your project without opening your IDE.
* **Switch between hundreds of LLMs without constraints.** Other CLI tools only work with one model or curate opinionated lists. With Kilo, you can switch models without booting up another tool.
* **Choose the right mode for the task in your workflow.** Select between Architect, Ask, Debug, Orchestrator, or custom agent modes.
* **Automate tasks.** Get AI assistance writing shell scripts for tasks like renaming all of the files in a folder or transforming sizes for a set of images.
* **Extend capabilities with skills.** Add domain expertise and repeatable workflows through [Agent Skills](https://kilo.ai/docs/code-with-ai/platforms/cli#skills)
.
CLI Reference
-------------
### Top-Level CLI Commands
| Command | Description |
| --- | --- |
| `kilo [project]` | Start the TUI (Terminal User Interface) |
| `kilo run [message..]` | Run with a message (non-interactive mode) |
| `kilo attach ` | Attach to a running kilo server |
| `kilo serve` | Start a headless server |
| `kilo web` | Start server and open web interface |
| `kilo auth` | Manage credentials (login, logout, list) |
| `kilo agent` | Manage agents (create, list) |
| `kilo mcp` | Manage MCP servers (list, add, auth) |
| `kilo models [provider]` | List available models |
| `kilo stats` | Show token usage and cost statistics |
| `kilo session` | Manage sessions (list) |
| `kilo export [sessionID]` | Export session data as JSON |
| `kilo import ` | Import session data from JSON file or URL |
| `kilo upgrade [target]` | Upgrade kilo to latest or specific version |
| `kilo uninstall` | Uninstall kilo and remove related files |
| `kilo pr ` | Fetch and checkout a GitHub PR branch |
| `kilo github` | Manage GitHub agent (install, run) |
| `kilo debug` | Debugging and troubleshooting tools |
| `kilo completion` | Generate shell completion script |
### Global Options
| Flag | Description |
| --- | --- |
| `--help`, `-h` | Show help |
| `--version`, `-v` | Show version number |
| `--print-logs` | Print logs to stderr |
| `--log-level` | Log level: DEBUG, INFO, WARN, ERROR |
### Interactive Slash Commands
#### Session Commands
| Command | Aliases | Description |
| --- | --- | --- |
| `/sessions` | `/resume`, `/continue` | Switch session |
| `/new` | `/clear` | New session |
| `/share` | \- | Share session |
| `/unshare` | \- | Unshare session |
| `/rename` | \- | Rename session |
| `/timeline` | \- | Jump to message |
| `/fork` | \- | Fork from message |
| `/compact` | `/summarize` | Compact/summarize session |
| `/undo` | \- | Undo previous message |
| `/redo` | \- | Redo message |
| `/copy` | \- | Copy session transcript |
| `/export` | \- | Export session transcript |
| `/timestamps` | `/toggle-timestamps` | Show/hide timestamps |
| `/thinking` | `/toggle-thinking` | Show/hide thinking blocks |
#### Agent & Model Commands
| Command | Description |
| --- | --- |
| `/models` | Switch model |
| `/agents` | Switch agent |
| `/mcps` | Toggle MCPs |
#### Provider Commands
| Command | Description |
| --- | --- |
| `/connect` | Connect/add a provider - entry point for new users to add API credentials |
#### System Commands
| Command | Aliases | Description |
| --- | --- | --- |
| `/status` | \- | View status |
| `/themes` | \- | Switch theme |
| `/help` | \- | Show help |
| `/editor` | \- | Open external editor |
| `/exit` | `/quit`, `/q` | Exit the app |
#### Kilo Gateway Commands (when connected)
| Command | Aliases | Description |
| --- | --- | --- |
| `/profile` | `/me`, `/whoami` | View your Kilo Gateway profile |
| `/teams` | `/team`, `/org`, `/orgs` | Switch between Kilo Gateway teams |
#### Built-in Commands
| Command | Description |
| --- | --- |
| `/init` | Create/update AGENTS.md file for the project |
| `/local-review` | Review code changes |
| `/local-review-uncommitted` | Review uncommitted changes |
Local Code Reviews
------------------
Review your code locally before pushing — catch issues early without waiting for PR reviews. Local code reviews give you AI-powered feedback on your changes without creating a public pull request.
### Commands
| Command | Description |
| --- | --- |
| `/local-review` | Review current branch changes vs base branch |
| `/local-review-uncommitted` | Review uncommitted changes (staged + unstaged) |
Config Reference
----------------
Configuration is managed through:
* `/connect` command for provider setup (interactive)
* Config files in **`~/.config/kilo/`**: the CLI (Kilo CLI 1.0 from [Kilo-Org/kilocode](https://github.com/Kilo-Org/kilocode)
) merges `config.json`, `opencode.json`, and `opencode.jsonc`. Use **`opencode.json`** (or `opencode.jsonc`) for provider, model, permission, and **MCP** settings. Restart the CLI after editing. See [Using MCP in the CLI](https://kilo.ai/docs/automate/mcp/using-in-cli)
for MCP config format.
* `kilo auth` for credential management
Slash Commands
--------------
The CLI's interactive mode supports slash commands for common operations. The main commands are documented above in the [Interactive Slash Commands](https://kilo.ai/docs/code-with-ai/platforms/cli#interactive-slash-commands)
section.
💡Tip
**Confused about /newtask vs /smol in the IDE?** See the [Using Agents](https://kilo.ai/docs/code-with-ai/agents/using-agents#understanding-newtask-vs-smol)
documentation for details.
Permissions
-----------
Kilo Code uses the permission config to decide whether a given action should run automatically, prompt you, or be blocked.
### Actions
Each permission rule resolves to one of:
* `"allow"` — run without approval
* `"ask"` — prompt for approval
* `"deny"` — block the action
### Configuration
You can set permissions globally (with `*`), and override specific tools.
{
"$schema": "https://app.kilo.ai/config.json",
"permission": {
"\*": "ask",
"bash": "allow",
"edit": "deny"
}
}
You can also set all permissions at once:
{
"$schema": "https://app.kilo.ai/config.json",
"permission": "allow"
}
### Granular Rules (Object Syntax)
For most permissions, you can use an object to apply different actions based on the tool input.
{
"$schema": "https://app.kilo.ai/config.json",
"permission": {
"bash": {
"\*": "ask",
"git \*": "allow",
"npm \*": "allow",
"rm \*": "deny",
"grep \*": "allow"
},
"edit": {
"\*": "deny",
"packages/web/src/content/docs/\*.mdx": "allow"
}
}
}
Rules are evaluated by pattern match, with the last matching rule winning. A common pattern is to put the catch-all `"*"` rule first, and more specific rules after it.
### Wildcards
Permission patterns use simple wildcard matching:
* `*` matches zero or more of any character
* `?` matches exactly one character
* All other characters match literally
### Home Directory Expansion
You can use `~` or `$HOME` at the start of a pattern to reference your home directory. This is particularly useful for `external_directory` rules.
* `~/projects/*` → `/Users/username/projects/*`
* `$HOME/projects/*` → `/Users/username/projects/*`
* `~` → `/Users/username`
### External Directories
Use `external_directory` to allow tool calls that touch paths outside the working directory where Kilo was started. This applies to any tool that takes a path as input (for example `read`, `edit`, `list`, `glob`, `grep`, and many bash commands).
{
"$schema": "https://app.kilo.ai/config.json",
"permission": {
"external\_directory": {
"~/projects/personal/\*\*": "allow"
}
}
}
Any directory allowed here inherits the same defaults as the current workspace. Since `read` defaults to `"allow"`, reads are also allowed for entries under `external_directory` unless overridden. Add explicit rules when a tool should be restricted in these paths, such as blocking edits while keeping reads:
{
"$schema": "https://app.kilo.ai/config.json",
"permission": {
"external\_directory": {
"~/projects/personal/\*\*": "allow"
},
"edit": {
"~/projects/personal/\*\*": "deny"
}
}
}
**Aliases:** `/t` and `/history` can be used as shorthand for `/tasks`
Configuration
-------------
The Kilo CLI is a fork of [OpenCode](https://opencode.ai/)
and supports the same configuration options. The CLI you install with `npm install -g @kilocode/cli` (Kilo CLI 1.0) is built from [Kilo-Org/kilocode](https://github.com/Kilo-Org/kilocode)
. For comprehensive configuration documentation, see the [OpenCode Config documentation](https://opencode.ai/docs/config)
.
### Config File Location (Kilo CLI 1.0)
| Scope | Path |
| --- | --- |
| **Global** | `~/.config/kilo/opencode.json` or `opencode.jsonc` (Windows: config dir may vary; same filenames) |
| **Project** | `./opencode.json` or `./.opencode/` in project root |
Project-level configuration takes precedence over global settings.
### Key Configuration Options
{
"$schema": "https://app.kilo.ai/config.json",
"model": "anthropic/claude-sonnet-4-20250514",
"provider": {
"anthropic": {
"options": {
"apiKey": "{env:ANTHROPIC\_API\_KEY}"
}
}
}
}
Common configuration options include:
* **`model`** - Default model to use
* **`provider`** - Provider-specific settings (API keys, base URLs, custom models)
* **`mcp`** - MCP server configuration
* **`permission`** - Tool permission settings (`allow` or `ask`)
* **`instructions`** - Paths to instruction files (e.g., `["CONTRIBUTING.md", ".cursor/rules/*.md"]`)
* **`formatter`** - Code formatter configuration
* **`disabled_providers`** / **`enabled_providers`** - Control which providers are available
### Environment Variables
Use `{env:VARIABLE_NAME}` syntax in config files to reference environment variables:
{
"provider": {
"openai": {
"options": {
"apiKey": "{env:OPENAI\_API\_KEY}"
}
}
}
}
For full details on all configuration options including compaction, file watchers, plugins, and experimental features, see the [OpenCode Config documentation](https://opencode.ai/docs/config)
.
Interactive Mode
----------------
Interactive mode is the default mode when running Kilo Code without the `--auto` flag, designed to work interactively with a user through the console.
In interactive mode Kilo Code will request approval for operations which have not been auto-approved, allowing the user to review and approve operations before they are executed, and optionally add them to the auto-approval list.
### Interactive Command Approval
When running in interactive mode, command approval requests show hierarchical options:
\[!\] Action Required:
> ✓ Run Command (y)
✓ Always run git (1)
✓ Always run git status (2)
✓ Always run git status --short --branch (3)
✗ Reject (n)
Selecting an "Always run" option will:
1. Approve and execute the current command
2. Add the pattern to your `execute.allowed` list in the config
3. Auto-approve matching commands in the future
This allows you to progressively build your auto-approval rules without manually editing the config file.
Autonomous Mode (Non-Interactive)
---------------------------------
Autonomous mode allows Kilo Code to run in automated environments like CI/CD pipelines without requiring user interaction.
\# Run in autonomous mode with a message
kilo run --auto "Implement feature X"
### Autonomous Mode Behavior
When running in autonomous mode:
1. **No User Interaction**: All approval requests are handled automatically based on configuration
2. **Auto-Approval/Rejection**: Operations are approved or rejected based on your auto-approval settings
3. **Follow-up Questions**: Automatically responded with a message instructing the AI to make autonomous decisions
4. **Automatic Exit**: The CLI exits automatically when the task completes or times out
### Auto-Approval in Autonomous Mode
Autonomous mode respects your [auto-approval configuration](https://kilo.ai/docs/code-with-ai/platforms/cli#auto-approval-settings)
. Operations which are not auto-approved will not be allowed.
### Autonomous Mode Follow-up Questions
In autonomous mode, when the AI asks a follow-up question, it receives this response:
> "This process is running in non-interactive autonomous mode. The user cannot make decisions, so you should make the decision autonomously."
This instructs the AI to proceed without user input.
### Exit Codes
* `0`: Success (task completed)
* `124`: Timeout (task exceeded time limit)
* `1`: Error (initialization or execution failure)
### Example CI/CD Integration
\# GitHub Actions example
- name: Run Kilo Code
run: |
kilo run "Implement the new feature" --auto
Session Continuation
--------------------
Resume your last conversation from the current workspace using the `--continue` (or `-c`) flag:
\# Resume the most recent session from this workspace
kilo --continue
kilo -c
This feature:
* Automatically finds the most recent session from the current workspace
* Loads the full conversation history
* Allows you to continue where you left off
* Cannot be used with autonomous mode or with a prompt argument
* Exits with an error if no previous sessions are found
**Example workflow:**
\# Start a session
kilo
# > "Create a REST API"
# ... work on the task ...
# Exit with /exit
# Later, resume the same session
kilo --continue
# Conversation history is restored, ready to continue
**Limitations:**
* Cannot be combined with autonomous mode
* Cannot be used with a prompt argument
* Only works when there's at least one previous session in the workspace
Environment Variable Overrides
------------------------------
The CLI supports overriding config values with environment variables. The supported environment variables are:
* `KILO_PROVIDER`: Override the active provider ID
* For `kilocode` provider: `KILOCODE_` (e.g., `KILOCODE_MODEL` → `kilocodeModel`)
* For other providers: `KILO_` (e.g., `KILO_API_KEY` → `apiKey`)
Switching into an Organization from the CLI
-------------------------------------------
Use the `/teams` command to see a list of all organizations you can switch into.
Use `/teams` and select a team to switch teams.
The process is the same when switching into a Team or Enterprise organization.
Copy page
---
# Prompt Engineering
Prompt Engineering
==================
Prompt engineering is the art of crafting effective instructions for AI models like Kilo Code. Well-written prompts lead to better results, fewer errors, and a more efficient workflow.
General Principles
------------------
* **Be Clear and Specific:** Clearly state what you want Kilo Code to do. Avoid ambiguity.
* **Bad:** Fix the code.
* **Good:** Fix the bug in the `calculateTotal` function that causes it to return incorrect results.
* **Provide Context:** Use [Context Mentions](https://kilo.ai/docs/code-with-ai/agents/context-mentions)
to refer to specific files, folders, or problems.
* **Good:** `@/src/utils.ts` Refactor the `calculateTotal` function to use async/await.
* **Break Down Tasks:** Divide complex tasks into smaller, well-defined steps.
* **Give Examples:** If you have a specific coding style or pattern in mind, provide examples.
* **Specify Output Format:** If you need the output in a particular format (e.g., JSON, Markdown), specify it in the prompt.
* **Iterate:** Don't be afraid to refine your prompt if the initial results aren't what you expect.
Thinking vs. Doing
------------------
It's often helpful to guide Kilo Code through a "think-then-do" process:
1. **Analyze:** Ask Kilo Code to analyze the current code, identify problems, or plan the approach.
2. **Plan:** Have Kilo Code outline the steps it will take to complete the task.
3. **Execute:** Instruct Kilo Code to implement the plan, one step at a time.
4. **Review:** Carefully review the results of each step before proceeding.
Using Custom Instructions
-------------------------
You can provide custom instructions to further tailor Kilo Code's behavior. There are two types of custom instructions:
* **Global Custom Instructions:** Apply to all modes.
* **Mode-Specific Custom Instructions:** Apply only to a specific mode (e.g., Code, Architect, Ask, Debug, or a custom mode).
Custom instructions are added to the system prompt, providing persistent guidance to the AI model. You can use these to:
* Enforce coding style guidelines.
* Specify preferred libraries or frameworks.
* Define project-specific conventions.
* Adjust Kilo Code's tone or personality.
See the [Custom Instructions](https://kilo.ai/docs/customize/custom-instructions)
section for more details.
Handling Ambiguity
------------------
If your request is ambiguous or lacks sufficient detail, Kilo Code might:
* **Make Assumptions:** It might proceed based on its best guess, which may not be what you intended.
* **Ask Follow-Up Questions:** It might use the `ask_followup_question` tool to clarify your request.
It's generally better to provide clear and specific instructions from the start to avoid unnecessary back-and-forth.
Providing Feedback
------------------
If Kilo Code doesn't produce the desired results, you can provide feedback by:
* **Rejecting Actions:** Click the "Reject" button when Kilo Code proposes an action you don't want.
* **Providing Explanations:** When rejecting, explain _why_ you're rejecting the action. This helps Kilo Code learn from its mistakes.
* **Rewording Your Request:** Try rephrasing your initial task or providing more specific instructions.
* **Manually Correcting:** If there are a few small issues, you can also directly modify the code before accepting the changes.
Examples
--------
**Good Prompt:**
> `@/src/components/Button.tsx` Refactor the `Button` component to use the `useState` hook instead of the `useReducer` hook.
**Bad Prompt:**
> Fix the button.
**Good Prompt:**
> Create a new file named `utils.py` and add a function called `calculate_average` that takes a list of numbers and returns their average.
**Bad Prompt:**
> Write some Python code.
**Good Prompt:**
> `@problems` Address all errors and warnings in the current file.
**Bad Prompt:**
> Fix everything.
By following these tips, you can write effective prompts that get the most out of Kilo Code's capabilities.
Copy page
---
# KiloClaw Pricing
KiloClaw Pricing
================
KiloClaw uses Kilo Gateway credits by default — if you route requests through BYOK, model usage is billed directly by your provider instead.
### Instance Hosting
KiloClaw hosting is **free during the beta period**. Each user gets a dedicated machine (2 shared vCPUs, 3 GB RAM, 10 GB SSD) at no cost.
> ℹ️ **Info** Beta pricing is subject to change. Paid hosting tiers may be introduced after the beta period ends. Any changes will be announced in advance.
### Model Inference
Model usage is charged against your [Gateway credit balance](https://kilo.ai/docs/gateway/usage-and-billing)
. Costs vary by model — premium models like Claude Opus or GPT-5.4-pro cost more per token than smaller models.
### Free Models
Several models are available at **no additional cost** to your Gateway balance. These are great for getting started or for tasks that don't need the most powerful models.
To see which models are currently free, check the [Kilo Leaderboard](https://kilo.ai/leaderboard#all-models)
— free models are marked accordingly.
### Adding Credits
You can add Gateway credits from your [Kilo account](https://app.kilo.ai/)
. Credits are shared across all Kilo products (VSCode extension, CLI, Cloud Agents, and KiloClaw).
See [Adding Credits](https://kilo.ai/docs/getting-started/adding-credits)
and [Gateway Usage and Billing](https://kilo.ai/docs/gateway/usage-and-billing)
for details.
Related
-------
* [KiloClaw Overview](https://kilo.ai/docs/kiloclaw/overview)
* [Connecting Chat Platforms](https://kilo.ai/docs/kiloclaw/chat-platforms)
* [Gateway Usage and Billing](https://kilo.ai/docs/gateway/usage-and-billing)
Copy page
---
# MCP vs API
MCP vs REST APIs: A Fundamental Distinction
===========================================
Comparing REST APIs to the Model Context Protocol (MCP) is a category error. They operate at different layers of abstraction and serve fundamentally different purposes in AI systems.
Architectural Differences
-------------------------
| Feature | MCP | REST APIs |
| --- | --- | --- |
| State Management | **Stateful** - maintains context across interactions | **Stateless** - each request is independent |
| Connection Type | Persistent, bidirectional connections | One-way request/response |
| Communication Style | JSON-RPC based with ongoing sessions | HTTP-based with discrete requests |
| Context Handling | Context is intrinsic to the protocol | Context must be manually managed |
| Tool Discovery | Runtime discovery of available tools | Design-time integration requiring prior knowledge |
| Integration Approach | Runtime integration with dynamic capabilities | Design-time integration requiring code changes |
Different Layers, Different Purposes
------------------------------------
REST APIs and MCP serve different tiers in the technology stack:
1. **REST**: Low-level web communication pattern that exposes operations on resources
2. **MCP**: High-level AI protocol that orchestrates tool usage and maintains context
MCP often uses REST APIs internally, but abstracts them away for the AI. Think of MCP as middleware that turns discrete web services into a cohesive environment the AI can operate within.
Context Preservation: Critical for AI Workflows
-----------------------------------------------
MCP's stateful design solves a key limitation of REST in AI applications:
* **REST Approach**: Each call is isolated, requiring manual context passing between steps
* **MCP Approach**: One conversation context persists across multiple tool uses
For example, an AI debugging a codebase can open a file, run tests, and identify errors without losing context between steps. The MCP session maintains awareness of previous actions and results.
Dynamic Tool Discovery
----------------------
MCP enables an AI to discover and use tools at runtime:
// AI discovers available tools
{
"tools": \[\
{\
"name": "readFile",\
"description": "Reads content from a file",\
"parameters": {\
"path": { "type": "string", "description": "File path" }\
}\
},\
{\
"name": "createTicket",\
"description": "Creates a ticket in issue tracker",\
"parameters": {\
"title": { "type": "string" },\
"description": { "type": "string" }\
}\
}\
\]
}
This "plug-and-play" capability allows new tools to be added without redeploying or modifying the AI itself.
Real-World Example: Multi-Tool Workflow
---------------------------------------
Consider a task requiring multiple services: "Check recent commits, create a JIRA ticket for the bug fix, and post to Slack."
**REST-based approach**:
* Requires separate integrations for Git, JIRA, and Slack APIs
* Needs custom code to manage context between calls
* Breaks if any service changes its API
**MCP-based approach**:
* One unified protocol for all tools
* Maintains context across the entire workflow
* New tools can be swapped in without code changes
Why Kilo Code Uses MCP
----------------------
Kilo Code leverages MCP to provide:
1. **Extensibility**: Add unlimited custom tools without waiting for official integration
2. **Contextual awareness**: Tools can access conversation history and project context
3. **Simplified integration**: One standard protocol rather than numerous API patterns
4. **Runtime flexibility**: Discover and use new capabilities on-the-fly
MCP creates a universal connector between Kilo Code and external services, with REST APIs often powering those services behind the scenes.
Conclusion: Complementary, Not Competing Technologies
-----------------------------------------------------
MCP doesn't replace REST APIs - it builds upon them. REST excels at providing discrete services, while MCP excels at orchestrating those services for AI agents.
The critical distinction is that MCP is AI-native: it treats the model as a first-class user, providing the contextual, stateful interaction layer that AI agents need to function effectively in complex environments.
Copy page
---
# General
General
=======
This section contains general questions about Kilo Code.
How does Kilo Code work?
------------------------
Kilo Code uses large language models (LLMs) to understand your requests and translate them into actions. It can:
* Read, write, and delete files in your project.
* Execute commands in your VS Code terminal.
* Perform web browsing (if enabled).
* Use external tools via the Model Context Protocol (MCP).
You interact with Kilo Code through a chat interface, where you provide instructions and review/approve its proposed actions, or you can use the inline autocomplete feature which helps you as you type.
Is Kilo Code free to use?
-------------------------
The Kilo Code extension itself is free and open-source. In order for Kilo Code to be useful, you need an AI model to respond to your queries. Models are hosted by providers and most charge for access.
There are some [models](https://kilo.ai/leaderboard#all-models)
available for free. The set of free models is constantly changing based on provider pricing decisions.
You can also use Kilo Code with a [local model](https://kilo.ai/docs/automate/extending/local-models)
or ["Bring Your Own API Key"](https://kilo.ai/docs/getting-started/byok)
.
Copy page
---
# Local Models
Using Local Models
==================
Kilo Code supports running language models locally on your own machine using [Ollama](https://ollama.com/)
and [LM Studio](https://lmstudio.ai/)
. This offers several advantages:
* **Privacy:** Your code and data never leave your computer.
* **Offline Access:** You can use Kilo Code even without an internet connection.
* **Cost Savings:** Avoid API usage fees associated with cloud-based models.
* **Customization:** Experiment with different models and configurations.
**However, using local models also has some drawbacks:**
* **Resource Requirements:** Local models can be resource-intensive, requiring a powerful computer with a good CPU and, ideally, a dedicated GPU.
* **Setup Complexity:** Setting up local models can be more complex than using cloud-based APIs.
* **Model Performance:** The performance of local models can vary significantly. While some are excellent, they may not always match the capabilities of the largest, most advanced cloud models.
* **Limited Features**: Local models (and many online models) often do not support advanced features such as prompt caching, computer use, and others.
Supported Local Model Providers
-------------------------------
Kilo Code currently supports two main local model providers:
1. **Ollama:** A popular open-source tool for running large language models locally. It supports a wide range of models.
2. **LM Studio:** A user-friendly desktop application that simplifies the process of downloading, configuring, and running local models. It also provides a local server that emulates the OpenAI API.
Setting Up Local Models
-----------------------
For detailed setup instructions, see:
* [Setting up Ollama](https://kilo.ai/docs/ai-providers/ollama)
* [Setting up LM Studio](https://kilo.ai/docs/ai-providers/lmstudio)
Both providers offer similar capabilities but with different user interfaces and workflows. Ollama provides more control through its command-line interface, while LM Studio offers a more user-friendly graphical interface.
Troubleshooting
---------------
* **"No connection could be made because the target machine actively refused it":** This usually means that the Ollama or LM Studio server isn't running, or is running on a different port/address than Kilo Code is configured to use. Double-check the Base URL setting.
* **Slow Response Times:** Local models can be slower than cloud-based models, especially on less powerful hardware. If performance is an issue, try using a smaller model.
* **Model Not Found:** Ensure you have typed in the name of the model correctly. If you're using Ollama, use the same name that you provide in the `ollama run` command.
Copy page
---
# Using MCP in Kilo Code
Using MCP in Kilo Code
======================
Model Context Protocol (MCP) extends Kilo Code's capabilities by connecting to external tools and services. This guide covers everything you need to know about using MCP with Kilo Code.
Demostrating MCP installation in Kilo Code
Configuring MCP Servers
-----------------------
MCP server configurations can be managed at two levels:
1. **Global Configuration**: Stored in the `mcp_settings.json` file, accessible via VS Code settings (see below). These settings apply across all your workspaces unless overridden by a project-level configuration.
2. **Project-level Configuration**: Defined in a `.kilocode/mcp.json` file within your project's root directory. This allows you to set up project-specific servers and share configurations with your team by committing the file to version control. Kilo Code automatically detects and loads this file if it exists.
**Precedence**: If a server name exists in both global and project configurations, the **project-level configuration takes precedence**.
### Editing MCP Settings Files
You can edit both global and project-level MCP configuration files directly from the Kilo Code settings.
1. Click the icon in the top navigation of the Kilo Code pane to open `Settings`.
2. Click the `Agent Behaviour` tab on the left side
3. Select the `MCP Servers` sub-tab
4. Click the appropriate button:
* **`Edit Global MCP`**: Opens the global `mcp_settings.json` file.
* **`Edit Project MCP`**: Opens the project-specific `.kilocode/mcp.json` file. If this file doesn't exist, Kilo Code will create it for you.

Edit Global MCP and Edit Project MCP buttons
Both files use a JSON format with a `mcpServers` object containing named server configurations:
{
"mcpServers": {
"server1": {
"command": "python",
"args": \["/path/to/server.py"\],
"env": {
"API\_KEY": "your\_api\_key"
},
"alwaysAllow": \["tool1", "tool2"\],
"disabled": false
}
}
}
_Example of MCP Server config in Kilo Code (STDIO Transport)_
### Understanding Transport Types
MCP supports three transport types for server communication:
#### STDIO Transport
Used for local servers running on your machine:
* Communicates via standard input/output streams
* Lower latency (no network overhead)
* Better security (no network exposure)
* Simpler setup (no HTTP server needed)
* Runs as a child process on your machine
For more in-depth information about how STDIO transport works, see [STDIO Transport](https://kilo.ai/docs/automate/mcp/server-transports#stdio-transport)
.
STDIO configuration example:
{
"mcpServers": {
"local-server": {
"command": "node",
"args": \["/path/to/server.js"\],
"env": {
"API\_KEY": "your\_api\_key"
},
"alwaysAllow": \["tool1", "tool2"\],
"disabled": false
}
}
}
#### Streamable HTTP Transport
Used for remote servers accessed over HTTP/HTTPS:
* Can be hosted on a different machine
* Supports multiple client connections
* Requires network access
* Allows centralized deployment and management
Streamable HTTP transport configuration example:
{
"mcpServers": {
"remote-server": {
"type": "streamable-http",
"url": "https://your-server-url.com/mcp",
"headers": {
"Authorization": "Bearer your-token"
},
"alwaysAllow": \["tool3"\],
"disabled": false
}
}
}
#### SSE Transport
⚠️ DEPRECATED: The SSE Transport has been deprecated as of MCP specification version 2025-03-26. Please use the HTTP Stream Transport instead, which implements the new Streamable HTTP transport specification.
Used for remote servers accessed over HTTP/HTTPS:
* Communicates via Server-Sent Events protocol
* Can be hosted on a different machine
* Supports multiple client connections
* Requires network access
* Allows centralized deployment and management
For more in-depth information about how SSE transport works, see [SSE Transport](https://kilo.ai/docs/automate/mcp/server-transports#sse-transport)
.
SSE configuration example:
{
"mcpServers": {
"remote-server": {
"url": "https://your-server-url.com/mcp",
"headers": {
"Authorization": "Bearer your-token"
},
"alwaysAllow": \["tool3"\],
"disabled": false
}
}
}
### Deleting a Server
1. Press the next to the MCP server you would like to delete
2. Press the `Delete` button on the confirmation box
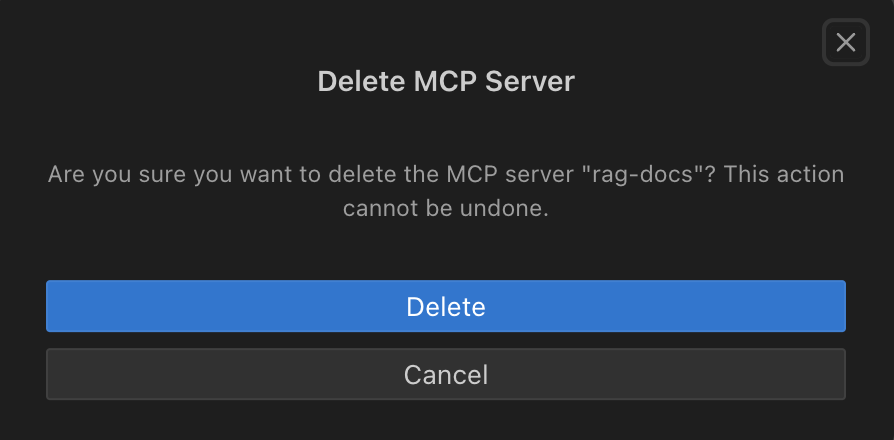
Delete confirmation box
### Restarting a Server
1. Press the button next to the MCP server you would like to restart
### Enabling or Disabling a Server
1. Press the toggle switch next to the MCP server to enable/disable it
### Network Timeout
To set the maximum time to wait for a response after a tool call to the MCP server:
1. Click the `Network Timeout` pulldown at the bottom of the individual MCP server's config box and change the time. Default is 1 minute but it can be set between 30 seconds and 5 minutes.

Network Timeout pulldown
### Auto Approve Tools
MCP tool auto-approval works on a per-tool basis and is disabled by default. To configure auto-approval:
1. First enable the global "Use MCP servers" auto-approval option in [auto-approving-actions](https://kilo.ai/docs/getting-started/settings/auto-approving-actions)
2. Navigate to Settings > Agent Behaviour > MCP Servers, then locate the specific tool you want to auto-approve
3. Check the `Always allow` checkbox next to the tool name

Always allow checkbox for MCP tools
When enabled, Kilo Code will automatically approve this specific tool without prompting. Note that the global "Use MCP servers" setting takes precedence - if it's disabled, no MCP tools will be auto-approved.
Finding and Installing MCP Servers
----------------------------------
Kilo Code does not come with any pre-installed MCP servers. You'll need to find and install them separately.
* **Community Repositories:** Check for community-maintained lists of MCP servers on GitHub
* **Ask Kilo Code:** You can ask Kilo Code to help you find or even create MCP servers
* **Build Your Own:** Create custom MCP servers using the SDK to extend Kilo Code with your own tools
For full SDK documentation, visit the [MCP GitHub repository](https://github.com/modelcontextprotocol/)
.
Using MCP Tools in Your Workflow
--------------------------------
After configuring an MCP server, Kilo Code will automatically detect available tools and resources. To use them:
1. Type your request in the Kilo Code chat interface
2. Kilo Code will identify when an MCP tool can help with your task
3. Approve the tool use when prompted (or use auto-approval)
Example: "Analyze the performance of my API" might use an MCP tool that tests API endpoints.
Troubleshooting MCP Servers
---------------------------
Common issues and solutions:
* **Server Not Responding:** Check if the server process is running and verify network connectivity
* **Permission Errors:** Ensure proper API keys and credentials are configured in your `mcp_settings.json` (for global settings) or `.kilocode/mcp.json` (for project settings).
* **Tool Not Available:** Confirm the server is properly implementing the tool and it's not disabled in settings
* **Slow Performance:** Try adjusting the network timeout value for the specific MCP server
💡Tip
**Reduce system prompt size:** If you're not using MCP, turn it off in Settings > Agent Behaviour > MCP Servers to significantly cut down the size of the system prompt and improve performance.
Platform-Specific MCP Configuration Examples
--------------------------------------------
### Windows Configuration Example
When setting up MCP servers on Windows, you'll need to use the Windows Command Prompt (`cmd`) to execute commands. Here's an example of configuring a Puppeteer MCP server on Windows:
{
"mcpServers": {
"puppeteer": {
"command": "cmd",
"args": \["/c", "npx", "-y", "@modelcontextprotocol/server-puppeteer"\]
}
}
}
This Windows-specific configuration:
* Uses the `cmd` command to access the Windows Command Prompt
* Uses `/c` to tell cmd to execute the command and then terminate
* Uses `npx` to run the package without installing it permanently
* The `-y` flag automatically answers "yes" to any prompts during installation
* Runs the `@modelcontextprotocol/server-puppeteer` package which provides browser automation capabilities
📝Note
For macOS or Linux, you would use a different configuration:
{
"mcpServers": {
"puppeteer": {
"command": "npx",
"args": \["-y", "@modelcontextprotocol/server-puppeteer"\]
}
}
}
The same approach can be used for other MCP servers on Windows, adjusting the package name as needed for different server types.
Copy page
---
# Server Transports
MCP Server Transports: STDIO & SSE
==================================
Model Context Protocol (MCP) supports two primary transport mechanisms for communication between Kilo Code and MCP servers: Standard Input/Output (STDIO) and Server-Sent Events (SSE). Each has distinct characteristics, advantages, and use cases.
STDIO Transport
---------------
STDIO transport runs locally on your machine and communicates via standard input/output streams.
### How STDIO Transport Works
1. The client (Kilo Code) spawns an MCP server as a child process
2. Communication happens through process streams: client writes to server's STDIN, server responds to STDOUT
3. Each message is delimited by a newline character
4. Messages are formatted as JSON-RPC 2.0
Client Server
| |
|---- JSON message ------>| (via STDIN)
| | (processes request)
|<---- JSON message ------| (via STDOUT)
| |
### STDIO Characteristics
* **Locality**: Runs on the same machine as Kilo Code
* **Performance**: Very low latency and overhead (no network stack involved)
* **Simplicity**: Direct process communication without network configuration
* **Relationship**: One-to-one relationship between client and server
* **Security**: Inherently more secure as no network exposure
### When to Use STDIO
STDIO transport is ideal for:
* Local integrations and tools running on the same machine
* Security-sensitive operations
* Low-latency requirements
* Single-client scenarios (one Kilo Code instance per server)
* Command-line tools or IDE extensions
### STDIO Implementation Example
import { Server } from "@modelcontextprotocol/sdk/server/index.js"
import { StdioServerTransport } from "@modelcontextprotocol/sdk/server/stdio.js"
const server = new Server({ name: "local-server", version: "1.0.0" })
// Register tools...
// Use STDIO transport
const transport = new StdioServerTransport(server)
transport.listen()
SSE Transport
-------------
Server-Sent Events (SSE) transport runs on a remote server and communicates over HTTP/HTTPS.
### How SSE Transport Works
1. The client (Kilo Code) connects to the server's SSE endpoint via HTTP GET request
2. This establishes a persistent connection where the server can push events to the client
3. For client-to-server communication, the client makes HTTP POST requests to a separate endpoint
4. Communication happens over two channels:
* Event Stream (GET): Server-to-client updates
* Message Endpoint (POST): Client-to-server requests
Client Server
| |
|---- HTTP GET /events ----------->| (establish SSE connection)
|<---- SSE event stream -----------| (persistent connection)
| |
|---- HTTP POST /message --------->| (client request)
|<---- SSE event with response ----| (server response)
| |
### SSE Characteristics
* **Remote Access**: Can be hosted on a different machine from Kilo Code
* **Scalability**: Can handle multiple client connections concurrently
* **Protocol**: Works over standard HTTP (no special protocols needed)
* **Persistence**: Maintains a persistent connection for server-to-client messages
* **Authentication**: Can use standard HTTP authentication mechanisms
### When to Use SSE
SSE transport is better for:
* Remote access across networks
* Multi-client scenarios
* Public services
* Centralized tools that many users need to access
* Integration with web services
### SSE Implementation Example
import { Server } from "@modelcontextprotocol/sdk/server/index.js"
import { SSEServerTransport } from "@modelcontextprotocol/sdk/server/sse.js"
import express from "express"
const app = express()
const server = new Server({ name: "remote-server", version: "1.0.0" })
// Register tools...
// Use SSE transport
const transport = new SSEServerTransport(server)
app.use("/mcp", transport.requestHandler())
app.listen(3000, () => {
console.log("MCP server listening on port 3000")
})
Local vs. Hosted: Deployment Aspects
------------------------------------
The choice between STDIO and SSE transports directly impacts how you'll deploy and manage your MCP servers.
### STDIO: Local Deployment Model
STDIO servers run locally on the same machine as Kilo Code, which has several important implications:
* **Installation**: The server executable must be installed on each user's machine
* **Distribution**: You need to provide installation packages for different operating systems
* **Updates**: Each instance must be updated separately
* **Resources**: Uses the local machine's CPU, memory, and disk
* **Access Control**: Relies on the local machine's filesystem permissions
* **Integration**: Easy integration with local system resources (files, processes)
* **Execution**: Starts and stops with Kilo Code (child process lifecycle)
* **Dependencies**: Any dependencies must be installed on the user's machine
#### Practical Example
A local file search tool using STDIO would:
* Run on the user's machine
* Have direct access to the local filesystem
* Start when needed by Kilo Code
* Not require network configuration
* Need to be installed alongside Kilo Code or via a package manager
### SSE: Hosted Deployment Model
SSE servers can be deployed to remote servers and accessed over the network:
* **Installation**: Installed once on a server, accessed by many users
* **Distribution**: Single deployment serves multiple clients
* **Updates**: Centralized updates affect all users immediately
* **Resources**: Uses server resources, not local machine resources
* **Access Control**: Managed through authentication and authorization systems
* **Integration**: More complex integration with user-specific resources
* **Execution**: Runs as an independent service (often continuously)
* **Dependencies**: Managed on the server, not on user machines
#### Practical Example
A database query tool using SSE would:
* Run on a central server
* Connect to databases with server-side credentials
* Be continuously available for multiple users
* Require proper network security configuration
* Be deployed using container or cloud technologies
### Hybrid Approaches
Some scenarios benefit from a hybrid approach:
1. **STDIO with Network Access**: A local STDIO server that acts as a proxy to remote services
2. **SSE with Local Commands**: A remote SSE server that can trigger operations on the client machine through callbacks
3. **Gateway Pattern**: STDIO servers for local operations that connect to SSE servers for specialized functions
Choosing Between STDIO and SSE
------------------------------
| Consideration | STDIO | SSE |
| --- | --- | --- |
| **Location** | Local machine only | Local or remote |
| **Clients** | Single client | Multiple clients |
| **Performance** | Lower latency | Higher latency (network overhead) |
| **Setup Complexity** | Simpler | More complex (requires HTTP server) |
| **Security** | Inherently secure | Requires explicit security measures |
| **Network Access** | Not needed | Required |
| **Scalability** | Limited to local machine | Can distribute across network |
| **Deployment** | Per-user installation | Centralized installation |
| **Updates** | Distributed updates | Centralized updates |
| **Resource Usage** | Uses client resources | Uses server resources |
| **Dependencies** | Client-side dependencies | Server-side dependencies |
Configuring Transports in Kilo Code
-----------------------------------
For detailed information on configuring STDIO and SSE transports in Kilo Code, including example configurations, see the [Understanding Transport Types](https://kilo.ai/docs/automate/mcp/using-in-kilo-code#understanding-transport-types)
section in the Using MCP in Kilo Code guide.
Copy page
---
# Using MCP in CLI
Using MCP in the CLI
====================
The Kilo CLI supports both local and remote MCP servers. Once added, MCP tools are automatically available to the LLM alongside built-in tools.
💡Tip
MCP servers add to your context, so be careful with which ones you enable. Certain MCP servers with many tools can quickly add up and exceed the context limit.
Configuration Location
----------------------
The CLI accepts several config filenames. The recommended file is `kilo.json`:
| Scope | Recommended Path | Also supported |
| --- | --- | --- |
| **Global** | `~/.config/kilo/kilo.json` | `kilo.jsonc`, `config.json` |
| **Project** | `./kilo.json` or `./.kilo/kilo.json` | `kilo.jsonc` |
Project-level configuration takes precedence over global settings.
Configuration Format
--------------------
Add MCP servers under the `mcp` key in your config file. Each server has a unique name that you can reference in prompts.
{
"mcp": {
"my-server": {
"type": "local",
"command": \["npx", "-y", "my-mcp-command"\],
"enabled": true
}
}
}
You can disable a server by setting `enabled` to `false` without removing it from your config.
Transport Types
---------------
### Local Servers
Local MCP servers run on your machine and communicate via standard input/output. Set `type` to `"local"`.
{
"mcp": {
"my-local-server": {
"type": "local",
"command": \["npx", "-y", "my-mcp-command"\],
"enabled": true,
"environment": {
"API\_KEY": "your\_api\_key"
}
}
}
}
#### Local Server Options
| Option | Type | Required | Description |
| --- | --- | --- | --- |
| `type` | String | Yes | Must be `"local"`. |
| `command` | Array | Yes | Command and arguments to run the MCP server. |
| `environment` | Object | No | Environment variables to set when running the server. |
| `enabled` | Boolean | No | Enable or disable the MCP server on startup. |
| `timeout` | Number | No | Timeout in ms for fetching tools from the MCP server. Default: 5000. |
### Remote Servers
Remote MCP servers are accessed over HTTP/HTTPS. Set `type` to `"remote"`.
{
"mcp": {
"my-remote-server": {
"type": "remote",
"url": "https://my-mcp-server.com/mcp",
"enabled": true,
"headers": {
"Authorization": "Bearer MY\_API\_KEY"
}
}
}
}
#### Remote Server Options
| Option | Type | Required | Description |
| --- | --- | --- | --- |
| `type` | String | Yes | Must be `"remote"`. |
| `url` | String | Yes | URL of the remote MCP server. |
| `enabled` | Boolean | No | Enable or disable the MCP server on startup. |
| `headers` | Object | No | HTTP headers to send with requests. |
| `timeout` | Number | No | Timeout in ms for fetching tools from the MCP server. Default: 5000. |
Managing MCP Servers
--------------------
You can manage MCP servers from the CLI:
| Command | Description |
| --- | --- |
| `kilo mcp list` | List all configured MCP servers |
| `kilo mcp add` | Add an MCP server |
| `kilo mcp auth` | Authenticate with an MCP server |
Inside the interactive TUI, use the `/mcps` slash command to toggle MCP servers on or off.
Examples
--------
### Figma Desktop
Connect to the Figma Desktop app's MCP server:
{
"mcp": {
"Figma Desktop": {
"type": "remote",
"url": "http://127.0.0.1:3845/mcp"
}
}
}
### Context7
Add the [Context7](https://github.com/upstash/context7)
MCP server for documentation search:
{
"mcp": {
"context7": {
"type": "remote",
"url": "https://mcp.context7.com/mcp"
}
}
}
### Everything Test Server
Add the test MCP server for development:
{
"mcp": {
"mcp\_everything": {
"type": "local",
"command": \["npx", "-y", "@modelcontextprotocol/server-everything"\]
}
}
}
Environment Variables
---------------------
Use `{env:VARIABLE_NAME}` syntax in config files to reference environment variables:
{
"mcp": {
"my-server": {
"type": "remote",
"url": "https://mcp.example.com/mcp",
"headers": {
"Authorization": "Bearer {env:MY\_API\_KEY}"
}
}
}
}
Finding MCP Servers
-------------------
Browse community-contributed MCP server configurations and agent skills in the [Kilo Marketplace](https://github.com/Kilo-Org/kilo-marketplace)
. The marketplace includes ready-to-use configs for popular tools like Figma, Sentry, and more.
Copy page
---
# Context Condensing
Context Condensing
==================
Overview
--------
When working on complex tasks, conversations with Kilo Code can grow long and consume a significant portion of the AI model's context window. **Context Condensing** is a feature that intelligently summarizes your conversation history, reducing token usage while preserving the essential information needed to continue your work effectively.
The Problem: Context Window Limits
----------------------------------
Every AI model has a maximum context window - a limit on how much text it can process at once. As your conversation grows with code snippets, file contents, and back-and-forth discussions, you may approach this limit. When this happens, you might experience:
* Slower responses as the model processes more tokens
* Higher API costs due to increased token usage
* Eventually hitting the context limit and being unable to continue
The Solution: Intelligent Condensing
------------------------------------
Context Condensing solves this problem by creating a concise summary of your conversation that captures:
* The original task or goal
* Key decisions made during the session
* Important code changes and their context
* Current progress and next steps
This summary replaces the detailed conversation history, freeing up context window space while maintaining continuity in your work.
How Context Condensing Works
----------------------------
### Automatic Triggering
Kilo Code monitors your context usage and may suggest condensing when you approach the context window limit. You'll see a notification indicating that condensing is recommended.
### Manual Condensing
You can also trigger context condensing manually at any time using:
* **Chat Command**: Type `/condense` in the chat
* **Settings**: Access condensing options through the Context Condensing settings
### The Condensing Process
When condensing is triggered:
1. **Analysis**: Kilo Code analyzes the entire conversation history
2. **Summarization**: A summary is generated using the configured API, capturing essential context
3. **Replacement**: The detailed history is replaced with the condensed summary
4. **Continuation**: You can continue working with the freed-up context space
Configuration Options
---------------------
### API Configuration
Context Condensing uses an AI model to generate summaries. You can configure which API to use for condensing operations:
* Use the same API as your main coding assistant
* Configure a separate, potentially more cost-effective API for condensing
### Profile-Specific Settings
You can configure context condensing thresholds and behavior on a per-profile basis, allowing different settings for different projects or use cases.
Best Practices
--------------
### When to Condense
* **Long sessions**: If you've been working for an extended period on a complex task
* **Before major transitions**: When switching to a different aspect of your project
* **When prompted**: When Kilo Code suggests condensing due to context limits
### Maintaining Context Quality
* **Be specific in your initial task**: A clear task description helps create better summaries
* **Use AGENTS.md**: Combine with [AGENTS.md](https://kilo.ai/docs/customize/agents-md)
for persistent project context that doesn't need to be condensed
* **Review the summary**: After condensing, the summary is visible in your chat history
Troubleshooting
---------------
### Context Condensing Error
If you see a "Context Condensing Error" message:
* Check your API configuration and ensure it's valid
* Verify you have sufficient credits or API quota
* Try using a different API for condensing operations
### Summary Quality
If the condensed summary doesn't capture important details:
* Consider condensing earlier, before the conversation becomes too long
* Use clear, specific language when describing your tasks
* Important context can be reinforced after condensing by reminding Kilo Code of key details
Related Features
----------------
* [AGENTS.md](https://kilo.ai/docs/customize/agents-md)
- Persistent context storage across sessions
* [Large Projects](https://kilo.ai/docs/customize/context/large-projects)
- Managing context for large codebases
* [Codebase Indexing](https://kilo.ai/docs/customize/context/codebase-indexing)
- Efficient code search and retrieval
Copy page
---
# What is MCP
What is MCP?
============
MCP (Model Context Protocol) is a standardized communication protocol for LLM systems to interact with external tools and services. It functions as a universal adapter between AI assistants and various data sources or applications.
How It Works
------------
MCP uses a client-server architecture:
1. The AI assistant (client) connects to MCP servers
2. Each server provides specific capabilities (file access, database queries, API integrations)
3. The AI uses these capabilities through a standardized interface
4. Communication occurs via JSON-RPC 2.0 messages
Think of MCP as similar to a USB-C port in the sense that any compatible LLM can connect to any MCP server to access its functionality. This standardization eliminates the need to build custom integrations for each tool and service.
For example, an AI using MCP can perform tasks like "search our company database and generate a report" without requiring specialized code for each database system.
Common Questions
----------------
* **Is MCP a cloud service?** MCP servers can run locally on your computer or remotely as cloud services, depending on the use case and security requirements.
* **Does MCP replace other integration methods?** No. MCP complements existing tools like API plugins and retrieval-augmented generation. It provides a standardized protocol for tool interaction but doesn't replace specialized integration approaches.
* **How is security handled?** Users control which MCP servers they connect to and what permissions those servers have. As with any tool that accesses data or services, use trusted sources and configure appropriate access controls.
MCP in Kilo Code
----------------
Kilo Code implements the Model Context Protocol to:
* Connect to both local and remote MCP servers
* Provide a consistent interface for accessing tools
* Extend functionality without core modifications
* Enable specialized capabilities on demand
MCP provides a standardized way for AI systems to interact with external tools and services, making complex integrations more accessible and consistent.
Learn More About MCP
--------------------
Ready to dig deeper? Check out these guides:
* [MCP Overview](https://kilo.ai/docs/automate/mcp/overview)
- A quick glance at the MCP documentation structure
* [Using MCP in Kilo Code](https://kilo.ai/docs/automate/mcp/using-in-kilo-code)
- Get started with MCP in Kilo Code, including creating simple servers
* [MCP vs API](https://kilo.ai/docs/automate/mcp/mcp-vs-api)
- Technical advantages compared to traditional APIs
* [STDIO & SSE Transports](https://kilo.ai/docs/automate/mcp/server-transports)
- Local vs. hosted deployment models
Copy page
---
# Mobile Apps
Mobile Apps
===========
Kilo Code is coming to mobile! Soon you'll be able to use Kilo Code's powerful AI coding capabilities directly from your iOS or Android device.
ℹ️Coming Soon
Mobile apps for iOS and Android are currently in development. Sign up to be notified when they launch!
iOS App
-------
The Kilo Code iOS app will bring AI-powered coding assistance to your iPhone and iPad.
[Learn more about the iOS app →](https://kilo.ai/features/ios-app)
Android App
-----------
The Kilo Code Android app will let you code with AI assistance on your Android phone or tablet.
[Learn more about the Android app →](https://kilo.ai/features/android-app)
Copy page
---
# Setup and Installation
Setup and Installation
======================
Frequently asked questions about setting up and installing Kilo Code.
💡Tip
This section is being expanded. If you have a question that isn't answered here, please reach out on [Discord](https://kilo.ai/discord)
or check the [Troubleshooting guide](https://kilo.ai/docs/getting-started/troubleshooting)
.
Copy page
---
# SSO
SSO
===
Kilo Enterprise lets your organization securely manage access using **Single Sign-On (SSO)**. With SSO enabled, team members can sign in to Kilo using your company's existing identity provider, such as Okta, Github, Google Workspace, etc.
⚠️Warning
**IDP-initiated logins are not currently supported.** Users must navigate to the [Kilo Web App](https://app.kilo.ai/)
to log in. Logging in directly from your identity provider's dashboard is not supported at this time.
Prerequisites
-------------
You’ll need:
* Admin or Owner permissions for your Kilo organization.
* Access to your **Identity Provider (IdP)** (e.g. Okta, Google Workspace, Azure AD).
Initiating SSO Configuration
----------------------------
### 1\. Open [Organization](https://app.kilo.ai/organizations)
Dashboard
Find the Single Sign-On (SSO) Configuration panel, and click "Set up SSO":

### 2\. Submit the SSO Request Form
Fill in your contact information and someone from our team will reach out soon to help you configure SSO.
Implementing SSO Configuration
------------------------------
Once the Kilo team has enabled SSO for your organization, your named admin will get an email from WorkOS to configure SSO.
⚠️Warning
**Save domain policy for last.**
If you configure domain policy before setting up SSO, you may lock users out of Kilo.
Your admin will need to use the WorkOS link to:
### 1\. Configure your Identity Provider in WorkOS
Find the Metadata in your Identity Provider and apply that configuration in WorkOS.
### 2\. Configure WorkOS in your Identity Provider
Copy the Service Provider details (Entity ID, ACS URL, and Metadata) from the WorkOS dashboard and apply them in your Identity Provider.
### 3\. Configure Policy and Domain Settings in WorkOS
1. Set the organization policy and user provisioning settings according to your organization's needs.
2. Configure domain policy and domain verification in WorkOS.
After enabling SSO:
* Invite new users with their company email domain.
* Manage team access and roles from the **[Organization](https://kilo.ai/docs/collaborate/adoption-dashboard/overview)
** tab.
* View user activity across the team in the **[Audit Logs](https://kilo.ai/docs/collaborate/enterprise/audit-logs)
** tab
Copy page
---
# Credits and Billing
Credits and Billing
===================
This section contains questions about credits, billing, and pricing in Kilo Code.
Credits
-------
### Why am I seeing requests for "Codestral 2508"?
Kilo Code uses Codestral 2508 (a model by Mistral AI) as the dedicated engine for our Autocomplete feature. It is optimized for speed and low latency, making it perfect for real-time code suggestions.
#### Why is it running in the background?
Because Autocomplete needs to be ready the moment you start typing, the model stays active in the background whenever the feature is enabled. This occurs even if you aren't currently using the Kilo Chat.
#### How much does it cost?
You can use Codestral 2508 for Autocomplete completely for free by configuring it through our Mistral integration.
**Setup Guide:** [Setting up Mistral for Free Autocomplete](https://kilo.ai/docs/code-with-ai/features/autocomplete/mistral-setup#setting-up-mistral-for-free-autocomplete)
#### How to Disable These Requests
If you prefer not to have background requests running, you can turn off the feature entirely:
1. Open your **Kilo Settings**.
2. Navigate to the **Autocomplete** tab.
3. Toggle the feature to **Off**.
📝Note
Disabling this will stop all ghost-text suggestions in your editor.
### Why do I have credits, but Kilo shows a low balance or warning?
Kilo credits are not shared between Personal and Organization environments.
If you have credits in one environment but are currently using the other, Kilo may show a low balance or usage warning.
#### How to fix it
**In the IDE**
Use the environment selector dropdown to switch to the account that holds your credits (Personal or the specific Organization).
Use the environment selector to switch between Personal and Organization accounts
**In the CLI**
Run:
/teams
Then choose the environment you want to use.
#### Why this happens
Each environment maintains its own balance and usage tracking to ensure clear billing and access control. Switching environments ensures Kilo is using the correct credit pool.
Billing
-------
### How do I add a VAT number to my invoices?
You can add your VAT number during the credit purchase process.
In the credit purchase window, enable the option “I’m purchasing as a business.” Once enabled, a field will appear to enter your VAT number.
Copy page
---
# Setup & Authentication
Setup & Authentication
======================
When you install Kilo Code, you'll be prompted to sign in or create a free account. This automatically configures everything you need to get started.
Quick Start with Kilo Account
-----------------------------
VSCodeCLIVSCode (Legacy)
The extension prompts you to sign in when you first open the sidebar. Click **Sign In** and complete the browser-based flow. The extension communicates with the CLI backend, so authentication is shared between the CLI and extension.
💡Bonus Credits
[Add credits to your account](https://app.kilo.ai/profile)
and get $20 bonus credits, or sign up for [Kilo Pass](https://kilo.ai/features/kilo-pass)
.
Kilo Gateway API Key
--------------------
If you're using the [Kilo AI Gateway](https://kilo.ai/docs/gateway/)
outside of the Kilo Code extension (for example, with the Vercel AI SDK or OpenAI SDK), you'll need an API key:
1. Go to [app.kilo.ai](https://app.kilo.ai/)
2. Go to **Your Profile** on your **personal account** (not in an organization)
3. Scroll to the bottom of the page
4. Copy your API key
Using Another API Provider
--------------------------
If you prefer to use your own API key or existing subscription, Kilo Code supports **over 30 providers**. Here are some popular options to get started:
| Provider | Best For | API Key Required |
| --- | --- | --- |
| [ChatGPT Plus/Pro](https://kilo.ai/docs/ai-providers/openai-chatgpt-plus-pro) | Use your existing subscription | No |
| [OpenRouter](https://kilo.ai/docs/ai-providers/openrouter) | Access multiple models with one key | Yes |
| [Anthropic](https://kilo.ai/docs/ai-providers/anthropic) | Direct access to Claude models | Yes |
| [OpenAI](https://kilo.ai/docs/ai-providers/openai) | Access to GPT models | Yes |
ℹ️Many More Providers Available
These are just a few examples! Kilo Code supports many more providers including Google Gemini, DeepSeek, Mistral, Ollama (for local models), AWS Bedrock, Google Vertex, and more. See the complete list at [AI Providers](https://kilo.ai/docs/ai-providers/)
.
### ChatGPT Plus/Pro Subscription
Already have a ChatGPT subscription? You can use it with Kilo Code through the [OpenAI ChatGPT provider](https://kilo.ai/docs/ai-providers/openai-chatgpt-plus-pro)
—no API key needed.
### OpenRouter
1. Go to [openrouter.ai](https://openrouter.ai/)
and sign in
2. Navigate to [API keys](https://openrouter.ai/keys)
and create a new key
3. Copy your API key
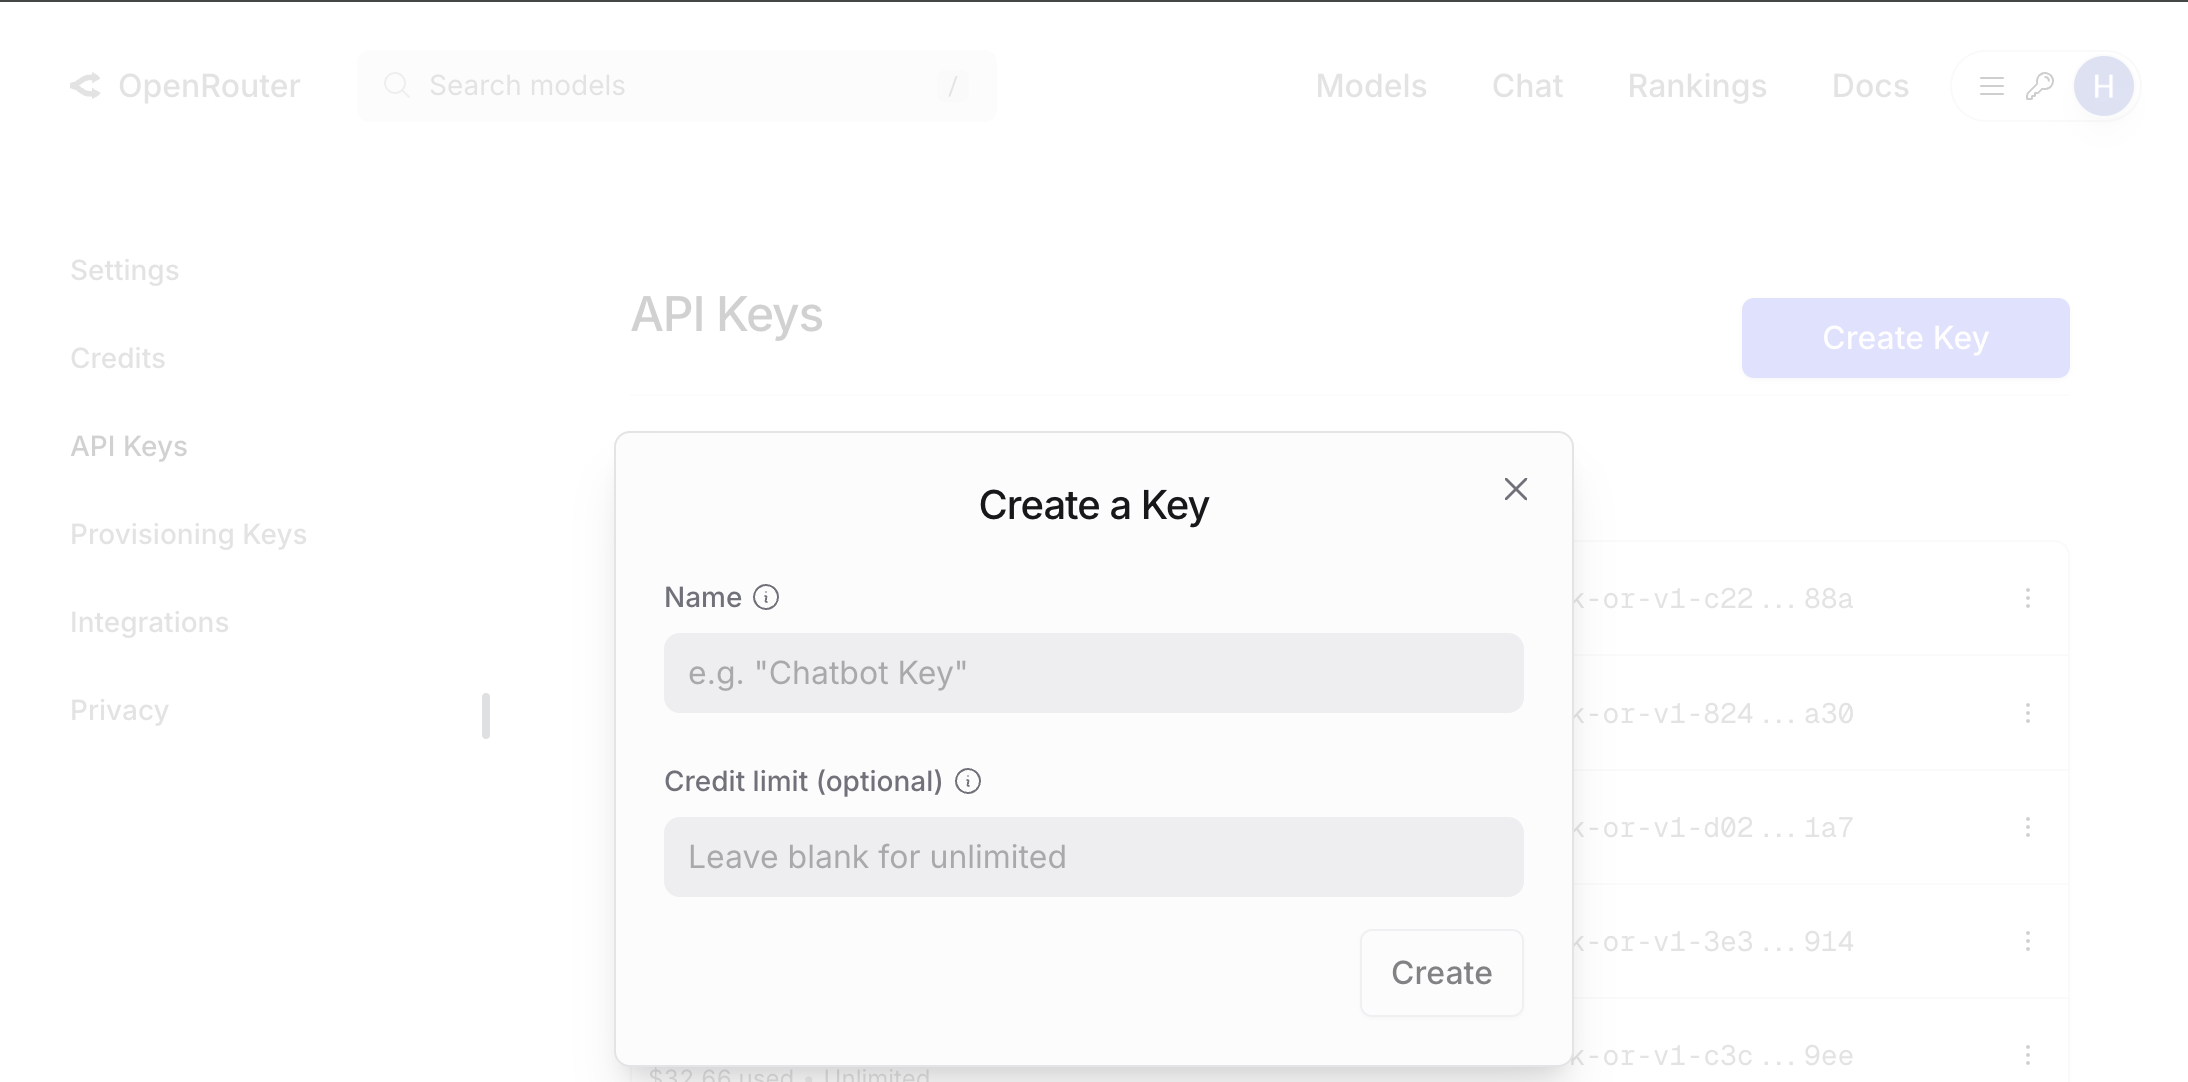
Create and copy your OpenRouter API key
### Anthropic
1. Go to [console.anthropic.com](https://console.anthropic.com/)
and sign in
2. Navigate to [API keys](https://console.anthropic.com/settings/keys)
and create a new key
3. Copy your API key immediately—it won't be shown again
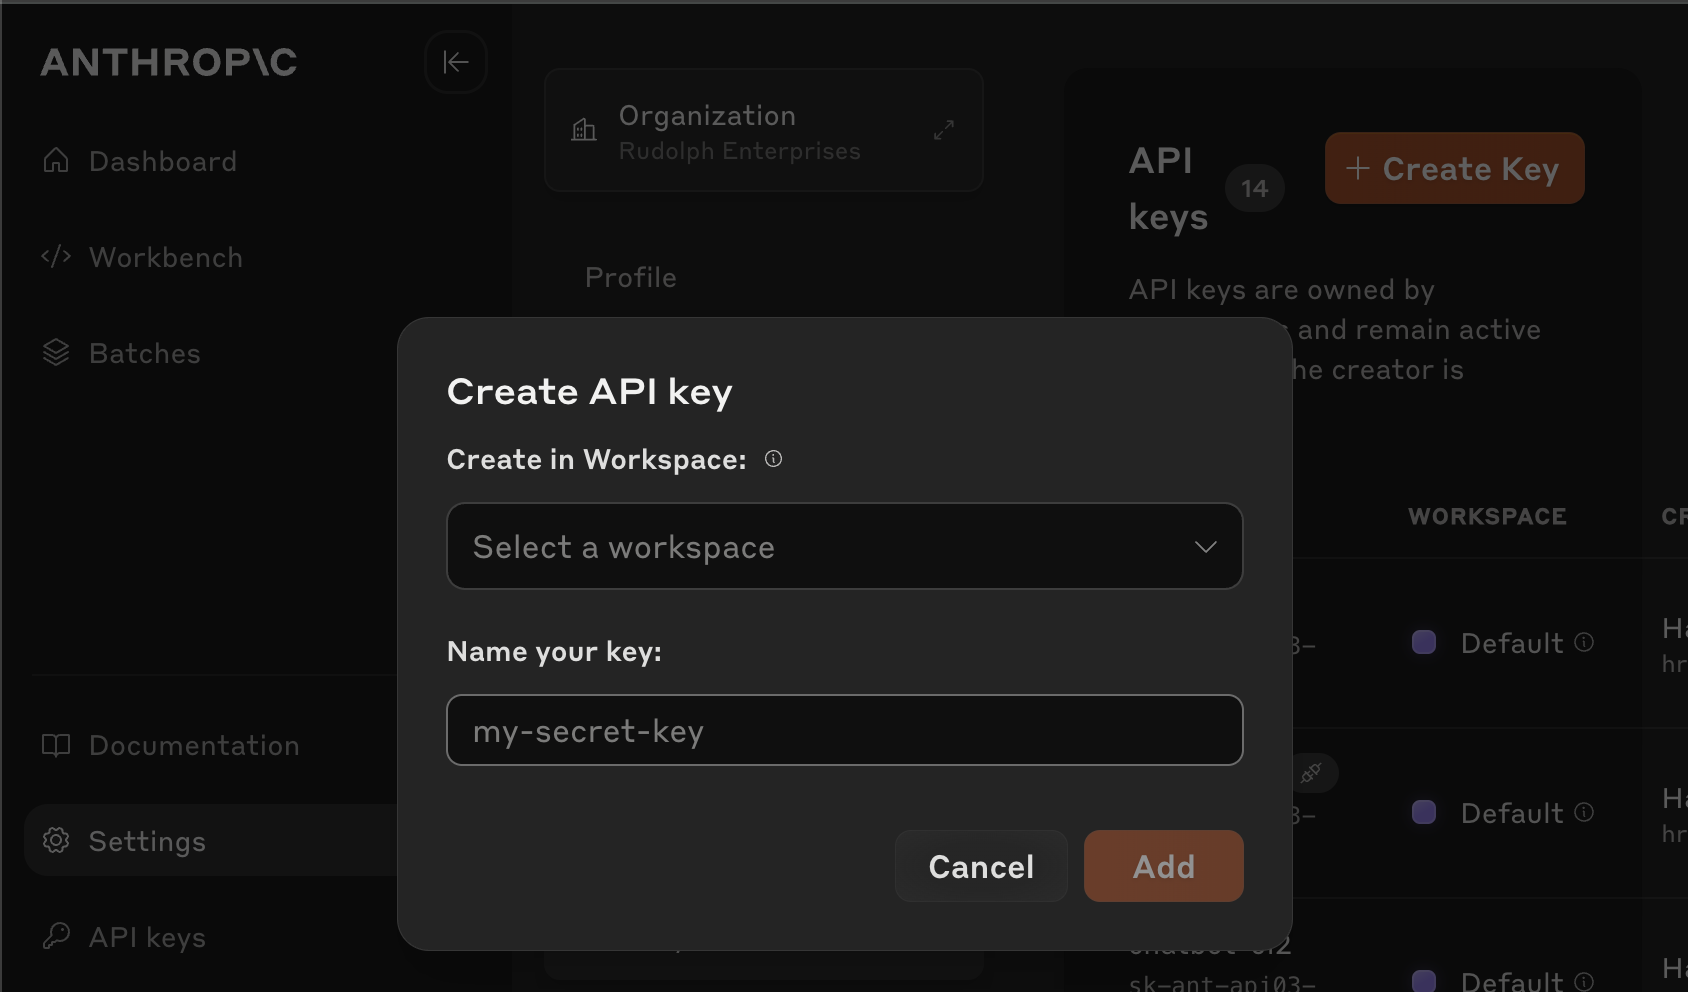
Copy your Anthropic API key immediately after creation
### OpenAI
1. Go to [platform.openai.com](https://platform.openai.com/)
and sign in
2. Navigate to [API keys](https://platform.openai.com/api-keys)
and create a new key
3. Copy your API key immediately—it won't be shown again
Copy your OpenAI API key immediately after creation
### Configuring Your Provider
VSCodeCLIVSCode (Legacy)
1. Open the Kilo Code sidebar in VS Code
2. Click the gear icon () to open **Settings**
3. Go to the **Providers** tab
4. Select your provider and enter your API key
5. Choose your model
You can also use `kilo auth login` for providers that support OAuth (like GitHub Copilot). The extension reads from the same underlying config files as the CLI, so provider settings are shared.
ℹ️Need Help?
Reach out to our [support team](mailto:hi@kilo.ai)
or join our [Discord community](https://kilo.ai/discord)
.
Copy page
---
# Model Access Controls
Model Access Controls
=====================
ℹ️Info
This is an **Enterprise-only** feature. Organizations on other plans have unrestricted access to all models and providers.
**Model Access Controls** let organization owners block specific AI models or providers for all team members. The system uses a **blocklist** approach: everything is allowed by default, and admins explicitly block what should not be accessible.
This means newly added models and providers are automatically available to your team without any manual action required.
How It Works
------------
| Scenario | Behavior |
| --- | --- |
| No blocks configured | All models and providers are available (default) |
| Provider blocked | All current and future models from that provider are unavailable |
| Specific model blocked | Only that model is unavailable; other models from the same provider remain accessible |
Managing Model Access
---------------------
Navigate to your organization's **Providers & Models** page to configure access controls.
The page has two tabs:
### Models Tab
Lists all available models across all providers. For each model you can:
* Toggle access on or off
* Search by model name, ID, or provider
* Filter to show only currently allowed models
### Providers Tab
Lists all providers. For each provider you can:
* Toggle the entire provider on or off (blocks all current and future models from that provider)
* Filter by data policy (trains on data, retains prompts)
* Filter by provider location / datacenter region
When you toggle a provider off, all models it offers become unavailable to team members. Re-enabling the provider restores access to all its models.
### Saving Changes
A status bar appears at the bottom of the page whenever you have unsaved changes. Click **Save** to apply your changes, or **Cancel** to discard them. Changes take effect immediately for all team members once saved.
Filtering Options
-----------------
Use filters to find the models or providers you want to block:
| Filter | Tab | Description |
| --- | --- | --- |
| **Search** | Models & Providers | Filter by name, ID, or provider slug |
| **Enabled only** | Models & Providers | Show only currently allowed items |
| **Trains on data** | Providers | Filter by whether the provider trains on user prompts |
| **Retains prompts** | Providers | Filter by whether the provider retains user prompts |
| **Location** | Providers | Filter by provider headquarters or datacenter country |
Example Use Cases
-----------------
* **Data compliance**: Block providers that train on prompts or operate outside your required data region.
* **Cost control**: Block high-cost models to prevent accidental expensive usage.
* **Security policy**: Restrict access to a known set of approved providers.
* * *
Notes
-----
* Only **Owners** can modify model access controls.
* Individual users cannot override organization-level restrictions.
* Blocking a provider blocks all its models, including models added by that provider in the future.
* Unblocking a provider immediately restores access to all its models.
Copy page
---
# Large Projects
Working with Large Projects
===========================
Kilo Code can be used with projects of any size, but large projects require some extra care to manage context effectively. Here are some tips for working with large codebases:
Understanding Context Limits
----------------------------
Kilo Code uses large language models (LLMs) that have a limited "context window." This is the maximum amount of text (measured in tokens) that the model can process at once. If the context is too large, the model may not be able to understand your request or generate accurate responses.
The context window includes:
* The system prompt (instructions for Kilo Code).
* The conversation history.
* The content of any files you mention using `@`.
* The output of any commands or tools Kilo Code uses.
Strategies for Managing Context
-------------------------------
1. **Be Specific:** When referring to files or code, use specific file paths and function names. Avoid vague references like "the main file."
2. **Use Context Mentions Effectively:** Use `@/path/to/file.ts` to include specific files. Use `@problems` to include current errors and warnings. Use `@` followed by a commit hash to reference specific Git commits.
3. **Break Down Tasks:** Divide large tasks into smaller, more manageable sub-tasks. This helps keep the context focused.
4. **Summarize:** If you need to refer to a large amount of code, consider summarizing the relevant parts in your prompt instead of including the entire code.
5. **Prioritize Recent History:** Kilo Code automatically truncates older messages in the conversation history to stay within the context window. Be mindful of this, and re-include important context if needed.
6. **Use Prompt Caching (if available):** Some API providers like Anthropic, OpenAI, OpenRouter and Requesty support "prompt caching". This caches your prompts for use in future tasks and helps reduce the cost and latency of requests.
Example: Refactoring a Large File
---------------------------------
Let's say you need to refactor a large TypeScript file (`src/components/MyComponent.tsx`). Here's a possible approach:
1. **Initial Overview:**
@/src/components/MyComponent.tsx List the functions and classes in this file.
2. **Target Specific Functions:**
@/src/components/MyComponent.tsx Refactor the \`processData\` function to use \`async/await\` instead of Promises.
3. **Iterative Changes:** Make small, incremental changes, reviewing and approving each step.
By breaking down the task and providing specific context, you can work effectively with large files even with a limited context window.
Copy page
---
# Troubleshooting
Troubleshooting
===============
This section contains guides for diagnosing and resolving common issues with Kilo Code.
Guides
------
* [**Extension Troubleshooting**](https://kilo.ai/docs/getting-started/troubleshooting/troubleshooting-extension)
- How to capture console logs and report issues with the Kilo Code extension
Copy page
---
# Workflows
Workflows
=========
Workflows automate repetitive tasks by defining step-by-step instructions for Kilo Code to execute. Invoke any workflow by typing `/[workflow-name.md]` in the chat.
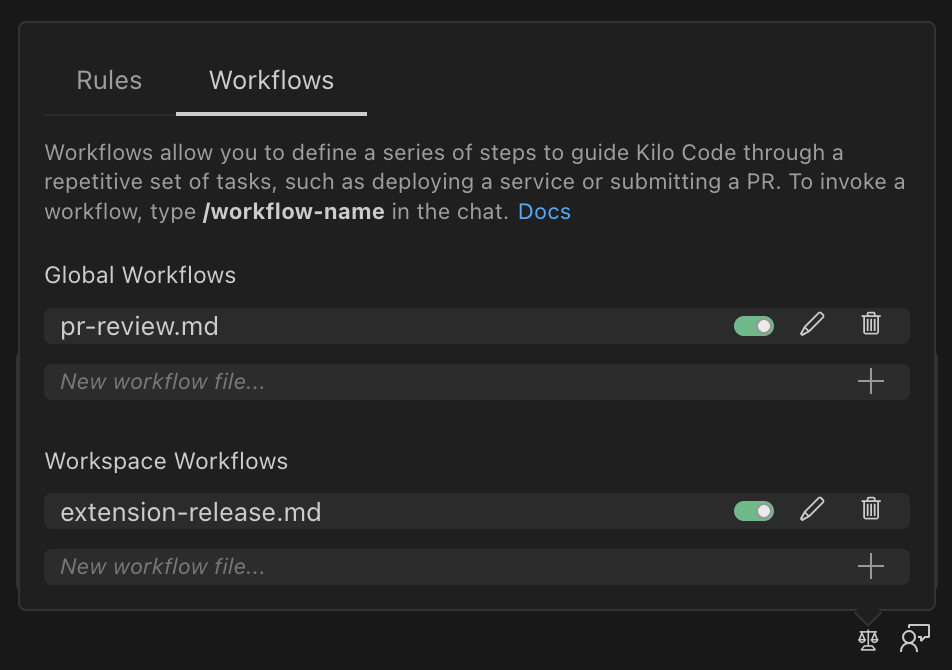
Workflows tab in Kilo Code
Creating Workflows
------------------
Workflows are markdown files stored in `.kilocode/workflows/`:
* **Global workflows**: `~/.kilocode/workflows/` (available in all projects)
* **Project workflows**: `[project]/.kilocode/workflows/` (project-specific)
### Basic Setup
1. Create a `.md` file with step-by-step instructions
2. Save it in your workflows directory
3. Type `/filename.md` to execute
### Workflow Capabilities
Workflows can leverage:
* [Built-in tools](https://kilo.ai/docs/automate/tools)
: [`read_file()`](https://kilo.ai/docs/automate/tools/read-file)
, [`search_files()`](https://kilo.ai/docs/automate/tools/search-files)
, [`execute_command()`](https://kilo.ai/docs/automate/tools/execute-command)
* CLI tools: `gh`, `docker`, `npm`, custom scripts
* [MCP integrations](https://kilo.ai/docs/automate/mcp/overview)
: Slack, databases, APIs
* [Agent switching](https://kilo.ai/docs/code-with-ai/agents/using-agents)
: [`new_task()`](https://kilo.ai/docs/automate/tools/new-task)
for specialized contexts
Common Workflow Patterns
------------------------
**Release Management**
1\. Gather merged PRs since last release
2. Generate changelog from commit messages
3. Update version numbers
4. Create release branch and tag
5. Deploy to staging environment
**Project Setup**
1\. Clone repository template
2. Install dependencies (\`npm install\`, \`pip install -r requirements.txt\`)
3. Configure environment files
4. Initialize database/services
5. Run initial tests
**Code Review Preparation**
1\. Search for TODO comments and debug statements
2. Run linting and formatting
3. Execute test suite
4. Generate PR description from recent commits
Example: PR Submission Workflow
-------------------------------
Let's walk through creating a workflow for submitting a pull request. This workflow handles the entire process from code review to deployment notification.
Create a file called `submit-pr.md` in your `.kilocode/workflows` directory:
\# Submit PR Workflow
You are helping submit a pull request. Follow these steps:
1. First, use \`search\_files\` to check for any TODO comments or console.log statements that shouldn't be committed
2. Run tests using \`execute\_command\` with \`npm test\` or the appropriate test command
3. If tests pass, stage and commit changes with a descriptive commit message
4. Push the branch and create a pull request using \`gh pr create\`
5. Use \`ask\_followup\_question\` to get the PR title and description from the user
Parameters needed (ask if not provided):
- Branch name
- Reviewers to assign
Now you can trigger this workflow by typing `/submit-pr.md` in the chat. Kilo Code will:
* Scan your code for common issues before committing
* Run your test suite to catch problems early
* Handle the Git operations and PR creation
* Notify your team automatically
* Set up follow-up tasks for deployment
This saves you from manually running the same 7-step process every time you want to submit code for review.
Copy page
---
# Migrating from Cursor/Windsurf
Migrating from Cursor or Windsurf
=================================
Quickly migrate your custom rules from Cursor or Windsurf to Kilo Code. The process typically takes just a few minutes per project.
ℹ️Two Workflow Approaches
Kilo Code supports **two complementary workflows**—choose the one that fits your style, or use both:
1. **Autocomplete (Ghost)**: Tab-to-accept inline suggestions as you type, similar to Cursor and Windsurf. Enable via Settings → Ghost.
2. **Chat-driven**: Describe what you want in the chat panel and the AI generates complete implementations.
Many developers combine both approaches: autocomplete for quick completions while typing, and chat for larger refactors or multi-file changes. See [Choosing Your Workflow](https://kilo.ai/docs/getting-started/migrating#choosing-your-workflow)
for details.
Why Kilo Code's Rules System?
-----------------------------
Kilo Code simplifies AI configuration while adding powerful new capabilities:
* **Simple format**: Plain Markdown files—no YAML frontmatter or GUI configuration required
* **Mode-specific rules**: Different rules for different workflows (Code, Debug, Ask, custom modes)
* **Better version control**: All configuration lives in your repository as readable Markdown
* **More control**: Custom modes let you define specialized workflows with their own rules and permissions
Quick Migration Guide
---------------------
Choose your current tool:
* [Migrating from Cursor](https://kilo.ai/docs/getting-started/migrating#migrating-from-cursor)
→ Skip to Cursor migration
* [Migrating from Windsurf](https://kilo.ai/docs/getting-started/migrating#migrating-from-windsurf)
→ Skip to Windsurf migration
Migrating from Cursor
---------------------
### What's Different in Kilo Code
| Cursor | Kilo Code | Key Difference |
| --- | --- | --- |
| `.cursor/rules/*.mdc` with YAML frontmatter | `.kilocode/rules/*.md` plain Markdown | No YAML metadata required |
| `alwaysApply: true/false` metadata | File location determines scope | Scope controlled by directory structure |
| `globs: ["*.ts"]` for file patterns | Mode-specific directories or custom modes | File patterns handled via custom modes |
| `description` for AI activation | Clear file names and organization | Relies on explicit file organization |
| Global rules in UI settings | `~/.kilocode/rules/*.md` files | Global rules stored as files in home folder |
### Migration Steps
**1\. Identify your rules:**
ls -la .cursor/rules/ # Project rules
ls -la .cursorrules # Legacy file (if present)
**2\. Create Kilo Code directory:**
mkdir -p .kilocode/rules
**3\. Convert `.mdc` files to `.md`:**
For each file in `.cursor/rules/`, remove the YAML frontmatter and keep just the Markdown content.
**Cursor format:**
\---
description: TypeScript coding standards
globs: \["\*.ts", "\*.tsx"\]
alwaysApply: false
---
# TypeScript Standards
- Always use TypeScript for new files
- Prefer functional components in React
**Kilo Code format:**
\# TypeScript Standards
- Always use TypeScript for new files
- Prefer functional components in React
**4\. Migrate in one command:**
\# Copy all files
for file in .cursor/rules/\*.mdc; do
basename="${file##\*/}"
cp "$file" ".kilocode/rules/${basename%.mdc}.md"
done
# Then manually edit each file to remove YAML frontmatter (the --- section at the top)
**5\. Migrate global rules:**
* Open `Cursor Settings → General → Rules for AI`
* Copy the text content
* Save to `~/.kilocode/rules/cursor-global.md`
**6\. Handle legacy `.cursorrules`:**
cp .cursorrules .kilocode/rules/legacy-rules.md
### Converting Cursor's `globs` Patterns
Cursor's `globs` field specifies which files a rule applies to. Kilo Code handles this through **mode-specific directories** instead.
**Cursor approach:**
\---
globs: \["\*.ts", "\*.tsx"\]
---
Rules for TypeScript files...
**Kilo Code approach (Option 1 - Mode-specific directory):**
mkdir -p .kilocode/rules-code
# Save TypeScript-specific rules here
**Kilo Code approach (Option 2 - Custom mode):**
\# .kilocodemodes (at project root)
- slug: typescript
name: TypeScript
roleDefinition: You work on TypeScript files
groups:
- read
- \[edit, { fileRegex: '\\\\.tsx?$' }\]
- ask
Then place rules in `.kilocode/rules-typescript/`
### Flattening Nested Cursor Rules
Cursor supports nested `.cursor/rules/` directories. Kilo Code uses flat structure with descriptive names:
\# Cursor: .cursor/rules/backend/server/api-rules.mdc
# Kilo Code: .kilocode/rules/backend-server-api-rules.md
Migrating from Windsurf
-----------------------
### What's Different in Kilo Code
| Windsurf | Kilo Code | Key Difference |
| --- | --- | --- |
| `.windsurf/rules/*.md` | `.kilocode/rules/*.md` | Same Markdown format |
| GUI configuration for activation modes | File location determines scope | Scope controlled by directory structure |
| "Always On" mode (GUI) | Place in `.kilocode/rules/` | Rules stored as files, not GUI settings |
| "Glob" mode (GUI) | Mode-specific directories | File patterns handled via mode directories |
| 12,000 character limit per rule | No hard limit | No character limit on rule files |
| Global rules in `~/.codeium/windsurf/memories/global_rules.md` | `~/.kilocode/rules/*.md` | Global rules in home folder, multiple files |
### Migration Steps
**1\. Identify your rules:**
ls -la .windsurf/rules/ # Project rules
ls -la .windsurfrules # Legacy file (if present)
**2\. Create Kilo Code directory:**
mkdir -p .kilocode/rules
**3\. Copy files directly** (already Markdown):
cp .windsurf/rules/\*.md .kilocode/rules/
**4\. Migrate global rules:**
cp ~/.codeium/windsurf/memories/global\_rules.md ~/.kilocode/rules/global-rules.md
**5\. Handle legacy `.windsurfrules`:**
cp .windsurfrules .kilocode/rules/legacy-rules.md
**6\. Split large rules if needed:**
If you had rules approaching the 12,000 character limit, split them:
\# Instead of one large file:
# .windsurf/rules/all-conventions.md (11,500 chars)
# Split into focused files:
# .kilocode/rules/api-conventions.md
# .kilocode/rules/testing-standards.md
# .kilocode/rules/code-style.md
### Converting Windsurf's Activation Modes
Windsurf configures activation through the GUI. In Kilo Code, file organization replaces GUI configuration:
| Windsurf GUI Mode | Kilo Code Equivalent |
| --- | --- |
| **Always On** | Place in `.kilocode/rules/` (default) |
| **Glob** (file patterns) | Mode-specific directory or custom mode |
| **Model Decision** | Clear file names by concern (e.g., `testing-guidelines.md`) |
| **Manual** | Organize with descriptive names |
**Example - Converting a Glob rule:**
If you had a rule in Windsurf with Glob mode set to `*.test.ts`, create a custom test mode:
\# .kilocodemodes (at project root)
- slug: test
name: Testing
roleDefinition: You write and maintain tests
groups:
- read
- \[edit, { fileRegex: '\\\\.(test|spec)\\\\.(ts|js)$' }\]
- ask
Then place the rule in `.kilocode/rules-test/`
AGENTS.md Support
-----------------
All three tools support the `AGENTS.md` standard. If you have one, it works in Kilo Code automatically:
\# Verify it exists
ls -la AGENTS.md
# That's it - Kilo Code loads it automatically (enabled by default)
**Important:** Use uppercase `AGENTS.md` (not `agents.md`). Kilo Code also accepts `AGENT.md` (singular) as a fallback.
**Note:** Both `AGENTS.md` and `AGENT.md` are write-protected files in Kilo Code and require user approval to modify.
Understanding Mode-Specific Rules
---------------------------------
This is Kilo Code's unique feature that replaces both Cursor's `globs` and Windsurf's activation modes.
### Directory Structure
.kilocode/rules/ # Apply to ALL modes
.kilocode/rules-code/ # Only in Code mode
.kilocode/rules-debug/ # Only in Debug mode
.kilocode/rules-ask/ # Only in Ask mode
.kilocode/rules-{custom}/ # Only in your custom mode
### Real-World Example
**From Cursor:**
\---
description: Testing best practices
globs: \["\*\*/\*.test.ts", "\*\*/\*.spec.ts"\]
---
# Testing Rules
- Write tests for all features
- Maintain >80% coverage
**To Kilo Code:**
\# 1. Create test mode directory
mkdir -p .kilocode/rules-test
# 2. Save rule as plain Markdown
cat > .kilocode/rules-test/testing-standards.md << 'EOF'
# Testing Rules
- Write tests for all features
- Maintain >80% coverage
EOF
# 3. Define the mode (optional - creates a custom mode)
# Add to .kilocode/config.yaml:
# modes:
# - slug: test
# name: Test Mode
# groups: \[read, edit, ask\]
Post-Migration Checklist
------------------------
After migration:
* \[ \] **Verify rules loaded:** Click law icon (⚖️) in Kilo Code panel
* \[ \] **Test rule application:** Ask Kilo Code to perform tasks following your rules
* \[ \] **Organize rules:** Split large files, use clear names
* \[ \] **Set up mode-specific rules:** Create directories for specialized workflows
* \[ \] **Update team docs:** Document new `.kilocode/rules/` location
* \[ \] **Commit to version control:** `git add .kilocode/`
* \[ \] **Remove old directories:** Delete `.cursor/` or `.windsurf/` folders once verified
* \[ \] **Set up autocomplete:** If you used Cursor/Windsurf autocomplete, enable Ghost (Settings → Ghost) for the same Tab-to-accept experience
Troubleshooting
---------------
### Rules Not Appearing
**Check file location:**
ls -la .kilocode/rules/ # Project rules
ls -la ~/.kilocode/rules/ # Global rules
**Verify file format:**
* Can be any text file extension (`.md`, `.txt`, etc.) - binary files are automatically filtered out
* Remove all YAML frontmatter from Cursor files
* Ensure files are not cache/temp files (`.cache`, `.tmp`, `.log`, `.bak`, etc.)
**Reload VS Code:**
* `Cmd+R` (Mac) or `Ctrl+R` (Windows/Linux)
* Or: Command Palette → "Developer: Reload Window"
### Cursor Metadata Lost
Cursor's `globs`, `alwaysApply`, and `description` don't transfer automatically. Solutions:
* **For file patterns:** Use mode-specific directories or custom modes
* **For always-on rules:** Place in `.kilocode/rules/`
* **For context-specific rules:** Use clear file names and organization
### Windsurf Activation Modes Lost
Windsurf's GUI activation modes (Always On/Glob/Model Decision/Manual) aren't stored in files. Solutions:
* **Before migrating:** Document each rule's activation mode
* **After migrating:** Organize files accordingly in Kilo Code
### Nested Rules Flattened
Cursor's nested directories don't map to Kilo Code. Flatten with descriptive names:
\# Bad: .cursor/rules/backend/api/rules.mdc
# Good: .kilocode/rules/backend-api-rules.md
### AGENTS.md Not Loading
* **Verify filename:** Must be `AGENTS.md` or `AGENT.md` (uppercase)
* **Check location:** Must be at project root
* **Check setting:** Verify "Use Agent Rules" is enabled in Kilo Code settings (enabled by default)
* **Reload:** Restart VS Code if needed
### Choosing Your Workflow
Kilo Code supports **both autocomplete and chat-driven workflows**. Choose the approach that fits your coding style, or combine them:
**Autocomplete (Ghost) — Tab-to-accept inline suggestions:**
1. Open Settings → Ghost
2. Enable Ghost autocomplete
3. Configure your preferred model for completions
4. Start typing and press Tab to accept suggestions
This works the same way as Cursor and Windsurf's autocomplete. Ghost provides context-aware suggestions as you type.
**Chat-driven — describe what you want:**
* Open the chat panel and describe your intent: "Add error handling to this function" or "Create a React component for user profiles"
* The AI generates complete implementations, refactors, or fixes
* Review and approve changes before they're applied
**Combining both workflows:**
Many developers use both approaches together:
* **Autocomplete** for quick completions while writing new code
* **Chat** for larger refactors, bug fixes, or multi-file changes
There's no "right" workflow—use whatever helps you code faster
Advanced: Creating Custom Modes
-------------------------------
For complex workflows, define custom modes with their own rules and permissions:
\# .kilocodemodes (at project root)
- slug: review
name: Code Review
roleDefinition: You review code and suggest improvements
groups:
- read
- ask
# Note: No edit permission - review mode is read-only
- slug: docs
name: Documentation
roleDefinition: You write and maintain documentation
groups:
- read
- \[edit, { fileRegex: '\\\\.md$', description: "Markdown files only" }\]
- ask
Then create corresponding rule directories:
mkdir -p .kilocode/rules-review
mkdir -p .kilocode/rules-docs
**Note:** `.kilocodemodes` can be in YAML (preferred) or JSON format. For global modes, edit the `custom_modes.yaml` file via Settings > Edit Global Modes.
Next Steps
----------
* [Learn about Custom Rules](https://kilo.ai/docs/customize/custom-rules)
* [Explore Custom Modes](https://kilo.ai/docs/customize/custom-modes)
* [Set up Custom Instructions](https://kilo.ai/docs/customize/custom-instructions)
* [Join our Discord](https://kilo.ai/discord)
for migration support
Additional Resources
--------------------
### Community Examples
**Cursor users:**
* [awesome-cursorrules](https://github.com/PatrickJS/awesome-cursorrules)
- 700+ examples you can adapt
**Windsurf users:**
* [Official Rules Directory](https://windsurf.com/editor/directory)
* [windsurfrules](https://github.com/kinopeee/windsurfrules)
**Cross-tool:**
* [AGENTS.md Specification](https://agents.md/)
* [dotagent](https://github.com/johnlindquist/dotagent)
- Universal converter tool
Copy page
---
# Account and Integration
Account and Integration
=======================
This section contains questions about accounts and integrations in Kilo Code.
Account
-------
### What happens when the trial ends?
When the trial expires:
Your organization will become inaccessible. No charges will be applied. If you have any remaining credits in your organization, you can contact Support to request that they be moved to your personal account.
Integrations
------------
### How do I unlink my GitHub account?
#### Context
You may need to unlink your GitHub account.
This process involves removing the **Kilo Connect** application from your GitHub account settings.
#### Answer
To unlink your GitHub account, follow these steps:
1. Go to your GitHub account and navigate to **Settings → Applications → Installed GitHub Apps** or visit [https://github.com/settings/installations](https://github.com/settings/installations)
2. Find **Kilo Connect** in the list of installed applications
3. Click **Configure** next to Kilo Connect
4. From the configuration page, you can either:
* **Uninstall** the integration completely, or
* **Edit** which repositories are connected
💡Tip
If you'd like to reconnect GitHub later, simply open your Kilo Code profile, go to **Integrations**, and connect GitHub again.
Copy page
---
# Audit Logs
Audit Logs
==========
Audit Logs record key actions that occur in the management of your Kilo seats, including user logins, adding or removing models, providers, and modes, and role changes.
Owners and Admins can search and filter logs to review access patterns and ensure compliance.
Viewing Audit Logs
------------------
Only **Owners** can view and filter through logs.
Go to **Enterprise Dashboard → Audit Logs** to view a searchable history of all organization events. Use filters to narrow down results by action, user, or date range.

Filters
-------
| Filter | Description |
| --- | --- |
| **Actions** | Choose one or more events to view. Options include: - `user login` / `logout` - `user invite`, `accept invite`, `revoke invite` - `settings change` - `purchase credits` - `member remove`, `member change role` - `sso set domain`, `sso remove domain` |
| **Actor Email** | Filter by the user who performed the action. |
| **Start / End Date** | Specify a date and time range to view logs within that period. |
Multiple filters can be used together for precise auditing.
Log Details
-----------
Each event includes:
| Field | Description |
| --- | --- |
| **Time** | When the action occurred (shown in your local timezone). |
| **Action** | The event type (e.g. `user.login`, `settings.change`). |
| **Actor** | The user who performed the action. |
| **Details** | Context or additional data related to the event (e.g. models added or removed). |
Logged Events
-------------
Here is the list of all events included in the Kilo Code audit logs:
* Organization: Create, Settings Change, Purchase Credits
* Organization Member: Remove, Change Role
* User: Login, Logout, Accept Invite, Send Invite, Revoke Invite
* [Custom Modes](https://kilo.ai/docs/collaborate/teams/custom-modes-org)
: Create, Update, Delete
* [SSO](https://kilo.ai/docs/collaborate/enterprise/sso)
(Enterprise Only): Auto Provision, Set Domain, Remove Domain
Copy page
---
# Slack
Kilo for Slack
==============
Kilo for Slack brings the power of Kilo Code directly into your Slack workspace. Ask questions about your repositories, request code implementations, or get help with issues—all without leaving Slack.
* * *
What You Can Do With Kilo for Slack
-----------------------------------
* **Ask questions about your repositories** — Get explanations about code, architecture, or implementation details
* **Request code implementations** — Tell the bot to implement fixes or features suggested in Slack threads
* **Get help with debugging** — Share error messages or issues and get AI-powered assistance
* **Collaborate with your team** — Mention the bot in any channel to get help in context
* * *
Supported Platforms
-------------------
| Platform | Integration Type | Details |
| --- | --- | --- |
| GitHub | GitHub App | [GitHub Setup Guide](https://kilo.ai/docs/automate/integrations#connecting-github) |
| GitLab | OAuth or PAT | [GitLab Setup Guide](https://kilo.ai/docs/automate/integrations#connecting-gitlab) |
* * *
Prerequisites
-------------
Before using Kilo for Slack:
* You must have a **Kilo Code account** with available credits
* Your **Git provider integration must be configured** via the [Integrations tab](https://app.kilo.ai/integrations)
so Kilo can access your repositories
To install Kilo for Slack, simply go to the integrations menu in the sidebar on https://app.kilo.ai and set up the Slack integration.
* * *
How to Interact with Kilo
-------------------------
### Direct Messages
You can message Kilo directly through Slack DMs for private conversations:
1. Find **Kilo** in your Slack workspace's app list
2. Start a direct message conversation
3. Ask your question or describe what you need
This is ideal for:
* Private questions about your code
* Sensitive debugging sessions
* Personal productivity tasks
### Channel Mentions
Mention the bot in any channel where it's been added:
@Kilo can you explain how the authentication flow works in our backend?
This is great for:
* Team discussions where AI assistance would help
* Collaborative debugging sessions
* Getting quick answers during code reviews
* * *
Use Cases
---------
### Ask Questions About Your Repositories
Get instant answers about your codebase without switching contexts:
@Kilo what does the UserService class do in our main backend repo?
@Kilo how is error handling implemented in the payment processing module?
### Implement Fixes from Slack Discussions
When your team identifies an issue or improvement in a Slack thread, ask the bot to implement it:
@Kilo based on this thread, can you implement the fix for the null pointer exception in the order processing service?
The bot can:
* Read the context from the thread
* Understand the proposed solution
* Create a branch with the implementation
* Push the changes to your repository
### Debug Issues
Share error messages or stack traces and get help:
@Kilo I'm seeing this error in production:
\[paste error message\]
Can you help me understand what's causing it?
* * *
How It Works
------------
1. **Message Kilo** — Either through DMs or by mentioning it in a channel
2. **Kilo processes your request** — Kilo uses your connected repositories to understand context
3. **AI generates a response** — Kilo Code's AI analyzes your request and provides helpful responses
4. **Code changes (if requested)** — For implementation requests, Kilo can create pull or merge requests
* * *
Cost
----
* **Kilo Code credits are used** when Kilo performs work (model usage, operations, etc.)
* Credit usage is similar to using Kilo Code through other interfaces
* * *
Tips for Best Results
---------------------
* **Be specific** — The more context you provide, the better the response
* **Reference specific files or functions** — Help the bot understand exactly what you're asking about
* **Use threads** — Keep related conversations in threads for better context
* **Specify the repository** — If you have multiple repos connected, mention which one you're asking about
* * *
Limitations
-----------
* Kilo can only access repositories you've connected through the [Integrations](https://app.kilo.ai/integrations)
page
* Complex multi-step implementations may require follow-up messages
* Response times may vary based on the complexity of your request
* * *
Changing the Model
------------------
You can customize which AI model Kilo uses for generating responses. The model affects the quality, speed, and capabilities of Kilo's responses.
1. Go to your [Kilo Workspace](https://app.kilo.ai/)
2. Navigate to **Integrations** > **Slack**
3. Select your preferred model for Kilo for Slack
Kilo will start using the new model immediately for subsequent requests.
### Available Models
Kilo for Slack supports over 400+ models across different providers.
* * *
Troubleshooting
---------------
**"Kilo isn't responding."** Ensure Kilo for Slack is installed in your workspace and has been added to the channel you're using.
**"Kilo can't access my repository."** Verify your Git provider integration is configured correctly in the [Integrations tab](https://app.kilo.ai/integrations)
.
**"I'm getting incomplete responses."** Try breaking your request into smaller, more specific questions.
**"Kilo doesn't understand my codebase."** Make sure the repository you're asking about is connected and accessible through your Git provider integration.
Copy page
---
# Overview
AI Adoption Dashboard Overview
==============================
The AI Adoption Dashboard helps engineering leaders understand how deeply and consistently their teams are using AI across development workflows. It provides a single **AI Adoption Score** (0–100) that quantifies organizational AI maturity, plus detailed breakdowns by dimension.
Who Is It For?
--------------
This dashboard is designed for **team leads, engineering managers, and executives** who want to:
* Track AI integration progress across their organization
* Compare teams using a single benchmark number
* Identify low-, medium-, and high-adoption teams
* Quote a simple metric to stakeholders ("We're at 63; we want to be at 80")
Accessing the Dashboard
-----------------------
1. Navigate to [app.kilo.ai](https://app.kilo.ai/)
and sign in
2. Select your organization
3. Click the **Usage** tab in the dashboard navigation
4. The AI Adoption Score card appears at the top of the usage view
Dashboard Overview
------------------
### Main Score Display
The dashboard prominently displays your current AI Adoption Score as a percentage (e.g., "Current: 45%"). This score represents how deeply and consistently your organization uses AI across real development workflows.
### Timeline Visualization
A stacked bar chart shows your daily adoption scores over time. The chart uses three colors representing the score's dimensions:
* **Blue** — Frequency (how often developers use AI)
* **Green** — Depth (how integrated AI is into development)
* **Orange** — Coverage (how broadly AI is adopted across the team)
### Time Period Filters
Filter the data by selecting:
* **Past Week** — Last 7 days
* **Past Month** — Last 30 days
* **Past Year** — Last 365 days
* **All** — Complete history
### Personal vs. Organization View
Use the **"Only my usage"** toggle to switch between:
* **Enabled** — Your individual adoption metrics
* **Disabled** — Organization-wide adoption metrics
### Trend Indicators
Four metric cards at the bottom of the dashboard show week-over-week changes:
* **Total** — Overall score trend
* **Frequency** — Changes in usage frequency
* **Depth** — Changes in integration depth
* **Coverage** — Changes in team-wide adoption
Each card displays the percentage change (e.g., "+2.3%" or "-1.5%") with a directional indicator.
The Three Dimensions
--------------------
The AI Adoption Score is composed of three weighted dimensions:
| Dimension | Weight | Question It Answers |
| --- | --- | --- |
| **Frequency** | 40% | How often do developers use AI? |
| **Depth** | 40% | How integrated is AI into actual development? |
| **Coverage** | 20% | How broadly is AI being adopted across the team? |
Click on any dimension card to view detailed analysis and improvement suggestions specific to that dimension.
Quick Reference: Score Tiers
----------------------------
| Score Range | Tier | Description |
| --- | --- | --- |
| 0–20 | Minimal adoption | AI usage is sporadic or experimental |
| 21–50 | Early adoption | Some developers are using AI regularly |
| 51–75 | Growing adoption | AI is becoming part of team workflows |
| 76–90 | Strong adoption | AI is deeply integrated into development |
| 91–100 | AI-first engineering org | AI is central to how the team ships code |
Next Steps
----------
* [Understand what each dimension measures](https://kilo.ai/docs/collaborate/adoption-dashboard/understanding-your-score)
* [Learn strategies to improve your score](https://kilo.ai/docs/collaborate/adoption-dashboard/improving-your-score)
* [Use the dashboard for team leadership](https://kilo.ai/docs/collaborate/adoption-dashboard/for-team-leads)
Copy page
---
# App Builder
App Builder
===========
Kilo's **App Builder** lets you create end-to-end applications through natural language conversation. Describe what you want to build, watch it come to life in a real-time preview, and deploy directly from your Kilo dashboard. No local environment setup required.
* * *
What App Builder Enables
------------------------
* Build complete applications through conversation with AI
* Live preview that updates as your app takes shape
* One-click deployment to production
* Iterative refinement through natural language feedback
* Export code to continue development locally or in Cloud Agents
* * *
Prerequisites
-------------
Before using App Builder:
* **Active Kilo Code account**
Sign up or log in at [app.kilo.ai](https://app.kilo.ai/)
* * *
Cost
----
* You pay only for the AI model usage via Kilo Code credits
* Credit consumption varies based on app complexity and number of iterations
* Deployment hosting is included during limited launch period
* * *
How to Use
----------
1. Navigate to **[App Builder](https://app.kilo.ai/app-builder)
** from your Kilo dashboard.
2. Choose an **AI Model** for development (e.g., Grok Code Fast 1, Claude Sonnet 4.5, GPT-5.2).
3. Describe your application in plain language:
* What it should do
* Key features and functionality
* Design preferences or constraints
4. Watch the **live preview** update as the AI generates your app.
5. Provide feedback to refine:
* "Make the header sticky"
* "Add a dark mode toggle"
* "Connect this form to a database"
6. When satisfied, click **Deploy** to push your app live.
* * *
How App Builder Works
---------------------
* When you describe your application:
1. The AI model interprets your requirements and generates an initial implementation.
2. Code is rendered in real-time in the live preview panel.
3. You can interact with the preview as if it were the deployed app.
4. Each refinement request triggers targeted updates to the codebase.
5. The AI maintains context across your entire conversation for coherent iteration.
* Deployment packages your application and provisions hosting automatically.
* * *
Example Application Types
-------------------------
### Web Applications
* Landing pages and marketing sites
* Dashboards and admin panels
* SaaS products and internal tools
* Portfolio sites and blogs
### Interactive Tools
* Calculators and converters
* Form builders and survey tools
* Data visualization apps
* Productivity utilities
Anything that can be supported by a Next.js app can be built with App Builder!
* * *
Perfect For
-----------
App Builder is ideal for:
* **Founders validating ideas quickly** without hiring developers
* **Developers prototyping** before committing to full implementation
* **Teams building internal tools** without diverting engineering resources
* **Designers bringing concepts to life** with functional code
* **Anyone with an app idea** but limited coding experience
* **Hackathons and rapid experimentation** where speed matters
* * *
Limitations and Guidance
------------------------
* Complex enterprise applications may require additional development outside App Builder.
* Some advanced integrations (e.g., specific third-party APIs) may need manual configuration.
* Live preview reflects most changes instantly, but some updates may require a brief rebuild.
Copy page
---
# Known Issues
Known Issues
============
This section contains known issues and limitations of Kilo Code.
VSCode
------
### Workflows get stuck on "API Request…" and never start
#### Symptoms
* Workflow shows "API Request…" and keeps spinning
* Usage meter stays at 0 tokens
* Canceling shows "Task file not found for task ID"
* VS Code becomes unresponsive until restart
#### Cause
In some cases, this behavior can be caused by a conflict with other VS Code extensions that interact with files or workspace scanning.
A reported example was the **Todo Tree** extension, which interfered with workflow execution. Disabling the extension resolved the issue immediately.
#### Workarounds
1. Temporarily disable recently installed VS Code extensions
2. Retry the workflow
3. Re-enable extensions one by one to identify conflicts
#### Recommendation
If you encounter similar behavior:
* Test with extensions disabled
* [Share logs](https://kilo.ai/docs/getting-started/troubleshooting/troubleshooting-extension)
with support if the issue persists
We are working on documenting known extension conflicts to improve troubleshooting guidance.
### Why am I seeing a "PowerShell not recognized" error on Windows?
You may see an error like this:
Command failed with exit code 1: powershell (Get-CimInstance -ClassName Win32\_OperatingSystem).caption
'powershell' is not recognized as an internal or external command,
operable program or batch file.
This error occurs when Windows cannot find the PowerShell executable. Most commonly, this happens because the `PATH` environment variable does not include the directory where PowerShell is installed.
#### How do I fix this?
**Add PowerShell to your PATH:**
1. Press `Windows + X` (or right-click the Start button) and select **System**
2. Click **Advanced system settings**
3. Select **Environment Variables**
4. Under **System variables** (or User variables), find **Path** and click **Edit**
5. Click **New** and add:
%SYSTEMROOT%\\System32\\WindowsPowerShell\\v1.0\\
6. Click **OK** to save your changes
7. Restart your computer
#### Do I need to restart?
Yes. A restart is required for Windows to apply the updated `PATH` variable.
#### Why does this error appear in remote or container environments?
This error can also appear if a Windows-specific PowerShell command is executed in:
* Remote SSH sessions
* Containers
* WSL
* macOS or Linux environments
In these cases, PowerShell may not be available, and the command must be replaced with an OS-appropriate alternative.
#### Still having issues?
Verify that PowerShell is installed and accessible by running:
JetBrains
---------
### Kilo Code not visible (JCEF errors)
#### Symptoms
* Kilo Code panel doesn't render or appears blank
* Errors such as `JCEF is not supported in this environment or failed to initialize`
* `Internal JCEF not supported, trying external JCEF`
#### Cause
Kilo Code depends on **JCEF (JetBrains Chromium Embedded Framework)** to display its interface. If the bundled Java runtime doesn't include JCEF, or JCEF is disabled, the panel cannot render.
#### Resolution
1. Go to **Help → Find Action → Choose Boot Java Runtime**
2. Select a runtime that includes **JCEF**
3. If JCEF is already bundled, confirm it's enabled: Open **Help → Edit Custom Properties** and add:
ide.browser.jcef.enabled=true
4. Restart your IDE
### TLS / Certificate errors
#### Symptoms
* `Failed to fetch extension base URL`
* `PKIX path building failed`
* `unable to find valid certification path to requested target`
#### Cause
The IDE cannot validate the TLS certificate used by the Kilo Code endpoint or a network proxy. Common causes include untrusted root certificates, corporate proxies intercepting HTTPS traffic, or missing intermediate certificates.
#### Resolution
* Install the **root certificate** in your OS trust store
* Ensure the **complete certificate chain** is presented by the server
* If managed internally, contact your IT/admin team
JetBrains IDEs rely on the **system certificate store**, so resolving trust at the OS level usually fixes the issue.
📝Note
**JetBrains 2024.3 note:** Some builds may fail to recognize OS certificates. Workarounds include downgrading to a previous version, upgrading to **2024.3.1 or later**, or adding the JVM option `-Djavax.net.ssl.trustStoreType=Windows-ROOT`.
### Android Studio
#### Custom workspace required
##### Symptoms
* `Kilo Code cannot access paths without an active workspace`
##### Cause
Kilo Code requires an explicit workspace configuration to access project files in JetBrains IDEs. This is especially common in Android Studio, which may not automatically set up the workspace that Kilo Code expects.
##### Resolution
1. Open **Settings / Preferences**
2. Navigate to **Tools → Kilo Code**
3. Locate **Custom Workspaces**
4. Click **Add Workspace**
5. Select your project folder
6. Apply changes and restart the IDE
Copy page
---
# The Chat Interface
Chatting with Kilo Code
=======================
💡Tip
**Bottom line:** Kilo Code is an AI coding assistant. You chat with it in plain English, and it writes, edits, and explains code for you.
📝Prefer quick completions?
If you're typing code in the editor and want AI to finish your line or block, check out [Autocomplete](https://kilo.ai/docs/code-with-ai/features/autocomplete)
instead. Chat is best for larger tasks, explanations, and multi-file changes.
Quick Setup
-----------
VSCodeCLIVSCode (Legacy)
Click the Kilo Code icon () in VS Code's Primary Side Bar to open the sidebar chat. You can also pop it out into an editor tab for a larger workspace.
How to Talk to Kilo Code
------------------------
**The key insight:** Just type what you want in normal English. No special commands needed.
Example of typing a request in Kilo Code
**Good requests:**
* `create a new file named utils.py and add a function called add that takes two numbers as arguments and returns their sum`
* `in the file @src/components/Button.tsx, change the color of the button to blue`
* `find all instances of the variable oldValue in @/src/App.js and replace them with newValue`
**What makes requests work:**
* **Be specific** - "Fix the bug in `calculateTotal` that returns incorrect results" beats "Fix the code"
* **Use @ mentions** - Reference files and code directly with `@filename`
* **One task at a time** - Break complex work into manageable steps
* **Include examples** - Show the style or format you want
ℹ️Chat vs Autocomplete
**Use chat** when you need to describe what you want, ask questions, or make changes across multiple files.
**Use [autocomplete](https://kilo.ai/docs/code-with-ai/features/autocomplete)
** when you're already typing code and want the AI to finish your thought inline.
The Chat Interface
------------------
VSCodeCLIVSCode (Legacy)
**Essential controls:**
* **Input prompt** - Type your requests and press Enter to send
* **Action buttons** - Approve or reject proposed changes, answer questions
* **Agent dropdown** - Switch between agents (e.g. Code, Ask, Plan) from the sidebar
* **Session management** - Start new sessions or resume previous ones
**Providing context:**
The extension automatically passes context from your editor, including your open tabs and active file. You can type `@` in the chat input to get file autocomplete suggestions, or mention file paths naturally in your message (e.g., "update src/utils.ts to add a helper function"). The agent can also discover files on its own using its built-in tools.
Quick Interactions
------------------
**Click to act:**
* File paths → Opens the file
* URLs → Opens in browser
* Messages → Expand/collapse details
* Code blocks → Copy button appears
**Status signals:**
* Spinning → Kilo is working
* Red → Error occurred
* Green → Success
Common Mistakes to Avoid
------------------------
| Instead of this... | Try this |
| --- | --- |
| "Fix the code" | "Fix the bug in `calculateTotal` that returns incorrect results" |
| Assuming Kilo knows context | Use `@` to reference specific files |
| Multiple unrelated tasks | Submit one focused request at a time |
| Technical jargon overload | Clear, straightforward language works best |
| Using chat for tiny code changes. | Use [autocomplete](https://kilo.ai/docs/code-with-ai/features/autocomplete) for inline completions |
**Why it matters:** Kilo Code works best when you communicate like you're talking to a smart teammate who needs clear direction.
Suggested Responses
-------------------
When Kilo Code needs more information to complete a task, it asks a follow-up question and often provides suggested answers to make responding faster.
**How it works:**
1. **Question Appears** - Kilo Code asks a question using the `question` tool
2. **Options Displayed** - Selectable options are presented that you can choose from
3. **Selection** - Pick an option or type a custom response
▶ℹ️VSCode (Legacy)
**Benefits:**
* **Speed** - Quickly respond without typing full answers
* **Clarity** - Suggestions often clarify the type of information Kilo Code needs
* **Flexibility** - Edit suggestions to provide precise, customized answers when needed
This feature streamlines the interaction when Kilo Code requires clarification, allowing you to guide the task effectively with minimal effort.
Tips for Better Workflow
------------------------
VSCodeCLIVSCode (Legacy)
💡Tip
**Switch agents for different tasks.** Use the agent dropdown, `/agents` slash command, or `Cmd+.` (`Ctrl+.` on Windows/Linux) to switch between agents like Code, Ask, and Plan. Each agent is tuned for a different type of task — see [Using Agents](https://kilo.ai/docs/code-with-ai/agents/using-agents)
for details.
💡Tip
**Your editor context is automatic.** The extension reads your open tabs and active file, so you don't need to manually reference every file. Focus your message on what you want done.
💡Tip
**Pop out to an editor tab.** If the sidebar feels cramped, pop the chat into a full editor tab for more room.
Ready to start coding? Start a session in Kilo Code and describe what you want to build!
Copy page
---
# Migration
Migration
=========
Switch to **Kilo Teams** or **Kilo Enterprise** from other AI coding tools and experience transparent pricing, no vendor lock-in, and superior team management capabilities.
Why Teams Switch to Kilo
------------------------
### Transparency vs. Opacity
**Other AI coding vendors** hide their true costs behind opaque subscription models, leaving you wondering what you're actually paying for.
**Kilo Teams** and **Kilo Enterprise** show you exactly what each AI request costs - no markup, no hidden fees, complete transparency.
### No Rate Limiting
**Other tools** slow you down with rate limits and model switching when you need AI most.
**Kilo Teams** and **Kilo Enterprise** never limit your usage - pay for what you use, use what you need.
### True Team Management
**Other solutions** offer basic user management with limited visibility.
**Kilo Teams** provides comprehensive team analytics, role-based permissions, and detailed usage insights, while **Kilo Enterprise** adds advanced governance, audit logging, and enterprise-level security controls.
Migrating from Cursor
---------------------
### What You're Leaving Behind
* **Opaque pricing** - Never knowing true AI costs
* **Rate limiting** during peak usage periods
* **Limited team visibility** into usage patterns
* **Vendor lock-in** with proprietary systems
* **Hidden model switching** that degrades quality
### What You Gain with Kilo Teams or Kilo Enterprise
* **Transparent AI costs** - See exactly what providers charge
* **No rate limiting** - Use AI when you need it most
* **Comprehensive analytics** - Understand team usage patterns
* **Open source extension** - No vendor lock-in
* **Consistent quality** - No hidden model downgrades
* **Enterprise controls** _(Enterprise only)_ - SSO, audit logs, and advanced configuration options
### Migration Process
**Step 1: Team Assessment**
1. **Audit current Cursor usage** across your team
2. **Identify active users** and their usage patterns
3. **Calculate current costs** (if visible) vs. Kilo pricing
4. **Plan migration timeline** to minimize disruption
**Step 2: Kilo Setup**
1. **Create organization** at [app.kilo.ai](https://app.kilo.ai/)
2. **Subscribe to Teams ($15/user/month)** or **Enterprise ([Contact Sales](https://kilo.ai/contact-sales)
)**
3. **Configure team settings** and usage policies
4. **Purchase initial AI credits** based on usage estimates
**Step 3: Team Migration**
1. **Invite team members** to Kilo
2. **Install Kilo Code extension** alongside Cursor initially
3. **Migrate projects gradually** starting with non-critical work
4. **Train team** on Kilo Code features and workflows
**Step 4: Full Transition**
1. **Monitor usage patterns** in Kilo dashboard
2. **Optimize settings** based on team feedback
3. **Cancel Cursor subscriptions** once fully migrated
4. **Uninstall Cursor** from team machines
### Cursor Feature Mapping
| Cursor Feature | Kilo Equivalent |
| --- | --- |
| AI Chat | Chat interface with multiple modes |
| Code Generation | Code mode with advanced tools |
| Code Editing | Fast edits and surgical modifications |
| Codebase Understanding | Codebase indexing and search |
| Team Management | Comprehensive team dashboard (Enterprise adds SSO, audit logs) |
| Usage Analytics | Detailed usage and cost analytics |
Migrating from GitHub Copilot
-----------------------------
### Limitations You're Escaping
* **Limited model choice** - Stuck with GitHub's model selection
* **Basic team features** - Minimal team management capabilities
* **No cost visibility** - Hidden usage costs in subscription
* **Microsoft ecosystem lock-in** - Tied to Microsoft services
* **Limited customization** - Few options for team-specific needs
### Kilo Advantages
* **Multiple AI providers** - Choose from 18+ model providers
* **Advanced team management** - Roles, permissions, and analytics
* **Transparent pricing** - See exact costs for every request
* **Provider flexibility** - Switch providers or use your own API keys
* **Extensive customization** - Custom modes and team policies
* **Enterprise-level governance** _(Enterprise only)_ - Model filtering, audit logging, and compliance support
### Migration Strategy
**Phase 1: Parallel Usage (Week 1-2)**
1. **Keep GitHub Copilot** active during transition
2. **Install Kilo Code** extension for team members
3. **Start with simple tasks** in Kilo Code
4. **Compare results** and team satisfaction
**Phase 2: Gradual Transition (Week 3-4)**
1. **Use Kilo Code** for new projects
2. **Migrate existing projects** one at a time
3. **Train team** on advanced features
4. **Optimize usage patterns** based on analytics
**Phase 3: Full Migration (Week 5+)**
1. **Disable GitHub Copilot** for most team members
2. **Cancel GitHub Copilot** subscriptions
3. **Optimize Kilo Plan** settings
4. **Document new workflows** and best practices
### GitHub Copilot Feature Comparison
| GitHub Copilot | Kilo | Advantage |
| --- | --- | --- |
| Code suggestions | AI-powered code generation | ✅ More model choices |
| Chat interface | Multi-mode chat system | ✅ Specialized modes |
| Team admin | Comprehensive team management | ✅ Enterprise adds audit logs |
| Usage insights | Detailed usage and cost tracking | ✅ Transparent pricing |
| Model selection | 18+ AI providers and models | ✅ No vendor lock-in |
Migrating from Other AI Coding Tools
------------------------------------
### Common Migration Patterns
**From Tabnine**
* **Benefit:** More advanced AI models and team features
* **Process:** Export settings, migrate team, configure advanced features
* **Timeline:** 1-2 weeks for full transition
**From CodeWhisperer**
* **Benefit:** Escape AWS ecosystem lock-in, better team management
* **Process:** Parallel usage, gradual migration, team training
* **Timeline:** 2-3 weeks for enterprise teams
**From Replit AI**
* **Benefit:** Use in VS Code instead of web-based IDE
* **Process:** Export projects, set up local development, team onboarding
* **Timeline:** 3-4 weeks including development environment setup
### Universal Migration Checklist
**Pre-Migration Planning**
* \[ \] Audit current AI coding tool usage
* \[ \] Identify team members and their roles
* \[ \] Calculate current costs vs. Kilo pricing
* \[ \] Plan migration timeline and milestones
* \[ \] Prepare team communication and training
**Migration Execution**
* \[ \] Set up Kilo Organization
* \[ \] Configure team settings and policies
* \[ \] Invite team members and assign roles
* \[ \] Install Kilo Code extension across team
* \[ \] Start with pilot projects or non-critical work
**Post-Migration Optimization**
* \[ \] Monitor usage patterns and costs
* \[ \] Optimize team settings based on analytics
* \[ \] Train team on advanced features
* \[ \] Cancel previous AI coding tool subscriptions
* \[ \] Document new workflows and best practices
Technical Migration: Rules and Configurations
---------------------------------------------
Kilo Code uses a compatible rules system that supports Cursor and Windsurf patterns. Migrating your custom rules and configurations is straightforward and typically takes 5-10 minutes per project.
**Quick Overview:**
* **Project rules**: `.cursor/rules/*.mdc` → `.kilocode/rules/*.md` (remove YAML frontmatter, keep Markdown content)
* **Legacy rules**: `.cursorrules` → `.kilocode/rules/legacy-rules.md`
* **AGENTS.md**: Works identically in Kilo Code (no conversion needed)
* **Global rules**: Recreate in `~/.kilocode/rules/*.md` directory
Kilo Code also supports mode-specific rules (`.kilocode/rules-{mode}/`), which Cursor and Windsurf don't have. This allows different rules for different workflows (e.g., Code mode vs Debug mode).
**👉 For detailed step-by-step instructions, format conversion examples, troubleshooting, and advanced migration scenarios, see our [Technical Migration Guide](https://kilo.ai/docs/getting-started/migrating)
.**
Cost Comparison Analysis
------------------------
### Hidden Costs in Other Tools
**Subscription Models Hide True Costs**
* Monthly fees regardless of actual usage
* No visibility into per-request costs
* Rate limiting forces inefficient workflows
* Model switching without notification
**Kilo Transparent Pricing**
* Pay exactly what AI providers charge
* See cost of every request in real-time
* No rate limiting or usage restrictions
* Choose optimal models for each task
### ROI Calculation Framework
**Current Tool Analysis**
1. **Monthly subscription costs** × team size
2. **Hidden productivity losses** from rate limiting
3. **Opportunity costs** from limited model access
4. **Management overhead** from poor team visibility
**Kilo Benefits**
1. **Transparent AI costs** (typically 30-50% lower)
2. **Productivity gains** from no rate limiting
3. **Better outcomes** from optimal model selection
4. **Reduced management time** with comprehensive analytics
Team Training and Adoption
--------------------------
### Training Program Structure
**Week 1: Basics**
* Kilo Code extension installation and setup
* Basic chat interface and mode usage
* Understanding transparent pricing model
* Team dashboard overview
**Week 2: Advanced Features**
* Custom modes and specialized workflows
* Advanced tools and automation
* Team collaboration features
* Usage optimization strategies
**Week 3: Team Optimization**
* Analytics review and insights
* Cost optimization techniques
* Workflow integration and best practices
* Advanced team management features
### Adoption Best Practices
**Start Small**
* Begin with volunteer early adopters
* Use for non-critical projects initially
* Gather feedback and iterate
* Expand gradually across team
**Provide Support**
* Dedicated migration support channel
* Regular check-ins with team members
* Documentation and training resources
* Quick resolution of issues and questions
**Measure Success**
* Track usage adoption rates
* Monitor cost savings and efficiency gains
* Collect team satisfaction feedback
* Document success stories and best practices
Common Migration Challenges
---------------------------
### Technical Challenges
**Extension Conflicts**
* **Issue:** Multiple AI coding extensions interfering
* **Solution:** Disable old extensions during transition
* **Prevention:** Staged migration with clear timelines
**Workflow Disruption**
* **Issue:** Team productivity dip during transition
* **Solution:** Parallel usage period with gradual migration
* **Prevention:** Comprehensive training and support
**Settings Migration**
* **Issue:** Lost customizations from previous tools
* **Solution:** Document and recreate important settings
* **Prevention:** Settings audit before migration
**Rules and Configuration Migration**
* **Issue:** Custom rules and configurations not migrating automatically
* **Solution:** Follow the [technical migration guide](https://kilo.ai/docs/getting-started/migrating)
to manually migrate rules
* **Prevention:** Audit rules before migration, use version control for rules
### Organizational Challenges
**Change Resistance**
* **Issue:** Team members reluctant to switch tools
* **Solution:** Demonstrate clear benefits and provide training
* **Prevention:** Involve team in migration planning
**Budget Approval**
* **Issue:** Finance team concerns about new tool costs
* **Solution:** Provide detailed cost comparison and ROI analysis
* **Prevention:** Transparent pricing documentation
**Timeline Pressure**
* **Issue:** Pressure to migrate quickly without proper planning
* **Solution:** Phased migration approach with clear milestones
* **Prevention:** Realistic timeline planning with buffer time
Migration Support
-----------------
### Professional Migration Services
* **Migration planning** and timeline development
* **Team training** and onboarding support
* **Custom integration** development
* **Ongoing optimization** consulting
### Self-Service Resources
* **Migration guides** for specific tools
* **[Technical migration guide](https://kilo.ai/docs/getting-started/migrating)
** for rules and configurations (Cursor/Windsurf)
* **Video tutorials** for common migration scenarios
* **Community support** through Discord and forums
* **Documentation** and best practices
### Getting Migration Help
* **Email:** migrations@kilo.ai
* **Discord:** Join our migration support channel
* **Consultation:** Schedule free migration planning call
* **Documentation:**
* [Business migration guide](https://kilo.ai/docs/collaborate/enterprise/migration)
(this page)
* [Technical migration guide](https://kilo.ai/docs/getting-started/migrating)
(rules and configurations)
Success Stories
---------------
### Mid-Size Software Company (25 developers)
**Previous:** Cursor Pro subscriptions
**Challenge:** High costs with limited visibility
**Result:** 40% cost reduction with better team insights
**Timeline:** 3-week migration with zero productivity loss
### Enterprise Development Team (100+ developers)
**Previous:** GitHub Copilot Enterprise
**Challenge:** Limited model choice and team management
**Result:** Improved code quality and team collaboration
**Timeline:** 6-week phased migration across multiple teams
### Startup Engineering Team (8 developers)
**Previous:** Multiple individual AI tool subscriptions
**Challenge:** Expense report chaos and no team coordination
**Result:** Centralized billing and improved team efficiency
**Timeline:** 1-week migration with immediate benefits
Next Steps
----------
* [Get started with your team](https://kilo.ai/docs/collaborate/teams/getting-started)
* [Explore team management features](https://kilo.ai/docs/collaborate/teams/team-management)
* [Understand billing and pricing](https://kilo.ai/docs/collaborate/teams/billing)
* [Migrate your rules and configurations](https://kilo.ai/docs/getting-started/migrating)
(technical guide)
Ready to make the switch? Contact our migration team at migrations@kilo.ai to plan your transition to transparent AI coding.
Copy page
---
# Codebase Indexing
Codebase Indexing
=================
Codebase Indexing enables semantic code search across your entire project using AI embeddings. Instead of searching for exact text matches, it understands the _meaning_ of your queries, helping Kilo Code find relevant code even when you don't know specific function names or file locations.
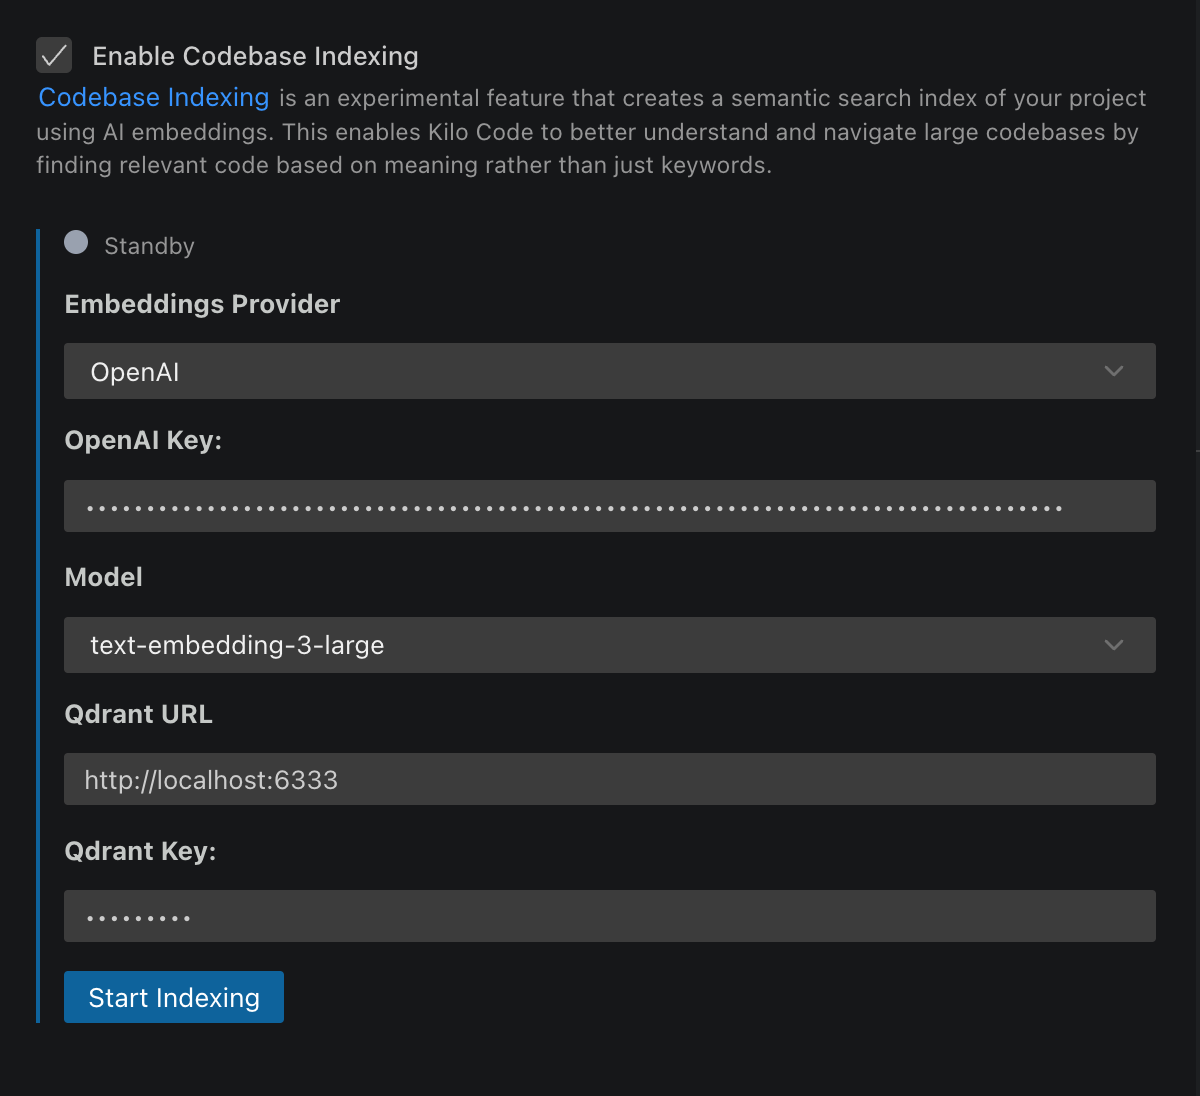
Codebase Indexing Settings
What It Does
------------
When enabled, the indexing system:
1. **Parses your code** using Tree-sitter to identify semantic blocks (functions, classes, methods)
2. **Creates embeddings** of each code block using AI models
3. **Stores vectors** in a Qdrant database for fast similarity search
4. **Provides the [`codebase_search`](https://kilo.ai/docs/automate/tools/codebase-search)
tool** to Kilo Code for intelligent code discovery
This enables natural language queries like "user authentication logic" or "database connection handling" to find relevant code across your entire project.
Key Benefits
------------
* **Semantic Search**: Find code by meaning, not just keywords
* **Enhanced AI Understanding**: Kilo Code can better comprehend and work with your codebase
* **Cross-Project Discovery**: Search across all files, not just what's open
* **Pattern Recognition**: Locate similar implementations and code patterns
Setup Requirements
------------------
### Embedding Provider
Choose one of these options for generating embeddings:
**OpenAI (Recommended)**
* Requires OpenAI API key
* Supports all OpenAI embedding models
* Default: `text-embedding-3-small`
* Processes up to 100,000 tokens per batch
**Gemini**
* Requires Google AI API key
* Supports Gemini embedding models including `gemini-embedding-001`
* Cost-effective alternative to OpenAI
* High-quality embeddings for code understanding
**Ollama (Local)**
* Requires local Ollama installation
* No API costs or internet dependency
* Supports any Ollama-compatible embedding model
* Requires Ollama base URL configuration
### Vector Database
**Qdrant** is required for storing and searching embeddings:
* **Local**: `http://localhost:6333` (recommended for testing)
* **Cloud**: Qdrant Cloud or self-hosted instance
* **Authentication**: Optional API key for secured deployments
Setting Up Qdrant
-----------------
### Quick Local Setup
**Using Docker:**
docker run -p 6333:6333 qdrant/qdrant
**Using Docker Compose:**
version: "3.8"
services:
qdrant:
image: qdrant/qdrant
ports:
- "6333:6333"
volumes:
- qdrant\_storage:/qdrant/storage
volumes:
qdrant\_storage:
### Production Deployment
For team or production use:
* [Qdrant Cloud](https://cloud.qdrant.io/)
- Managed service
* Self-hosted on AWS, GCP, or Azure
* Local server with network access for team sharing
Configuration
-------------
### Open Codebase Indexing Settings
1. In the chat header, click the database icon (indexing status)
2. The Codebase Indexing settings panel opens
3. If you don't see the icon, open Kilo Code settings () and search for **Codebase Indexing**
### Configure Settings
1. Enable **"Enable Codebase Indexing"** using the toggle switch
2. Configure your embedding provider:
* **OpenAI**: Enter API key and select model
* **Gemini**: Enter Google AI API key and select embedding model
* **Ollama**: Enter base URL and select model
3. Set Qdrant URL and optional API key
4. Configure **Max Search Results** (default: 20, range: 1-100)
5. Click **Save** to start initial indexing
### Enable/Disable Toggle
The codebase indexing feature includes a convenient toggle switch that allows you to:
* **Enable**: Start indexing your codebase and make the search tool available
* **Disable**: Stop indexing, pause file watching, and disable the search functionality
* **Preserve Settings**: Your configuration remains saved when toggling off
This toggle is useful for temporarily disabling indexing during intensive development work or when working with sensitive codebases.
Understanding Index Status
--------------------------
The interface shows real-time status with color indicators:
* **Standby** (Gray): Not running, awaiting configuration
* **Indexing** (Yellow): Currently processing files
* **Indexed** (Green): Up-to-date and ready for searches
* **Error** (Red): Failed state requiring attention
How Files Are Processed
-----------------------
### Smart Code Parsing
* **Tree-sitter Integration**: Uses AST parsing to identify semantic code blocks
* **Language Support**: All languages supported by Tree-sitter
* **Markdown Support**: Full support for markdown files and documentation
* **Fallback**: Line-based chunking for unsupported file types
* **Block Sizing**:
* Minimum: 100 characters
* Maximum: 1,000 characters
* Splits large functions intelligently
### Automatic File Filtering
The indexer automatically excludes:
* Binary files and images
* Large files (>1MB)
* Git repositories (`.git` folders)
* Dependencies (`node_modules`, `vendor`, etc.)
* Files matching `.gitignore` and [`.kilocodeignore`](https://kilo.ai/docs/customize/context/kilocodeignore)
patterns
### Incremental Updates
* **File Watching**: Monitors workspace for changes
* **Smart Updates**: Only reprocesses modified files
* **Hash-based Caching**: Avoids reprocessing unchanged content
* **Branch Switching**: Automatically handles Git branch changes
Best Practices
--------------
### Model Selection
**For OpenAI:**
* **`text-embedding-3-small`**: Best balance of performance and cost
* **`text-embedding-3-large`**: Higher accuracy, 5x more expensive
* **`text-embedding-ada-002`**: Legacy model, lower cost
**For Ollama:**
* **`mxbai-embed-large`**: The largest and highest-quality embedding model.
* **`nomic-embed-text`**: Best balance of performance and embedding quality.
* **`all-minilm`**: Compact model with lower quality but faster performance.
### Security Considerations
* **API Keys**: Stored securely in VS Code's encrypted storage
* **Code Privacy**: Only small code snippets sent for embedding (not full files)
* **Local Processing**: All parsing happens locally
* **Qdrant Security**: Use authentication for production deployments
Current Limitations
-------------------
* **File Size**: 1MB maximum per file
* **Single Workspace**: One workspace at a time
* **Dependencies**: Requires external services (embedding provider + Qdrant)
* **Language Coverage**: Limited to Tree-sitter supported languages for optimal parsing
Troubleshooting
---------------
### Embeddings fail or indexing stalls (llama.cpp / Ollama)
If your local embedding server is based on llama.cpp (including Ollama), indexing can fail with errors about `n_ubatch` or `GGML_ASSERT`. Ensure both batch size (`-b`) and micro-batch size (`-ub`) are set to the same value for embedding models, then restart the server. For Ollama, configure `num_batch` in your Modelfile or request options to match the same effective value.
Using the Search Feature
------------------------
Once indexed, Kilo Code can use the [`codebase_search`](https://kilo.ai/docs/automate/tools/codebase-search)
tool to find relevant code:
**Example Queries:**
* "How is user authentication handled?"
* "Database connection setup"
* "Error handling patterns"
* "API endpoint definitions"
The tool provides Kilo Code with:
* Relevant code snippets (up to your configured max results limit)
* File paths and line numbers
* Similarity scores
* Contextual information
### Search Results Configuration
You can control the number of search results returned by adjusting the **Max Search Results** setting:
* **Default**: 20 results
* **Range**: 1-100 results
* **Performance**: Lower values improve response speed
* **Comprehensiveness**: Higher values provide more context but may slow responses
Privacy & Security
------------------
* **Code stays local**: Only small code snippets sent for embedding
* **Embeddings are numeric**: Not human-readable representations
* **Secure storage**: API keys encrypted in VS Code storage
* **Local option**: Use Ollama for completely local processing
* **Access control**: Respects existing file permissions
Future Enhancements
-------------------
Planned improvements:
* Additional embedding providers
* Multi-workspace indexing
* Enhanced filtering and configuration options
* Team sharing capabilities
* Integration with VS Code's native search
Copy page
---
# Context & Mentions
Context Mentions
================
Providing the right context helps Kilo Code understand your project and perform tasks accurately. All platforms support `@`\-mentions for referencing files, and the agent can also discover context on its own using built-in tools like `read`, `grep`, and `glob`.
VSCodeCLIVSCode (Legacy)
The extension supports `@`\-mention autocomplete for file paths and also uses a tool-based context model where the agent can automatically discover and read files using built-in tools.
How Context Works
-----------------
When you describe a task, the agent uses its tools — `read`, `grep`, `glob`, and others — to find and read relevant files on its own. You don't need to explicitly point it at files in most cases; just describe what you want done and the agent will locate the right code.
### @-Mention Autocomplete
Type `@` in the chat input followed by a filename to get autocomplete suggestions. Selecting a file attaches its contents to your message. This is the quickest way to reference a specific file.
### Automatic Editor Context
The extension automatically includes context from your editor with each message — your currently focused file and all open editor tabs. You don't need to mention these explicitly.
Selected code and editor diagnostics (errors/warnings) are not included automatically. However, you can send these to Kilo Code through VS Code's Code Actions: select code or hover over an error, then use the lightbulb menu to find context-dependent actions like "Explain with Kilo Code" or "Fix with Kilo Code."
### Tool-Based File Access
Rather than attaching file contents up front, the agent reads files on demand during its work:
| Tool | Purpose | Example |
| --- | --- | --- |
| **read** | Read the contents of a specific file | Agent reads `src/utils.ts` to understand it |
| **glob** | Find files matching a pattern | Agent searches for `**/*.test.ts` |
| **grep** | Search file contents for a pattern | Agent searches for `function handleError` |
| **bash** | Run shell commands including `git` operations | Agent runs `git diff` or `git log` |
This means the agent can explore your entire project as needed, rather than being limited to files you explicitly mention.
Best Practices
--------------
| Practice | Description |
| --- | --- |
| **Describe the task clearly** | The agent finds context on its own — focus on _what_ you want done rather than _where_ the code is |
| **Mention files when helpful** | If you know the exact file, mention its path to save the agent a search step |
| **Keep editor tabs relevant** | Open tabs are passed as context, so keep relevant files open |
| **Trust the agent's tools** | The agent can search, read, and explore your codebase — let it do the discovery work |
Copy page
---
# For Team Leads
For Team Leads
==============
This guide covers how engineering managers and team leads can use the AI Adoption Dashboard to drive AI integration, identify gaps, and communicate progress to stakeholders.
Reading Team-Wide Metrics
-------------------------
### The Organization View
Disable the **"Only my usage"** toggle to see aggregated metrics across your entire team. This view shows:
* **Overall AI Adoption Score** — Your single benchmark number
* **Dimension breakdown** — Frequency, Depth, and Coverage contributions
* **Week-over-week trends** — Direction and magnitude of change
* **Historical timeline** — Score progression over days, weeks, or months
### Dimension Detail Panels
Click on any dimension card (Frequency, Depth, or Coverage) to open its detail panel. Each panel provides:
* A focused timeline for that dimension
* The goal statement for that dimension
* Three actionable improvement suggestions tailored to what that dimension measures
Use these panels to diagnose specific issues and identify targeted actions.
### Comparing Time Periods
Switch between time filters to understand different patterns:
| Filter | Best For |
| --- | --- |
| **Past Week** | Recent changes, sprint-level trends |
| **Past Month** | Adoption initiative tracking, onboarding results |
| **Past Year** | Long-term trends, seasonal patterns |
| **All** | Historical baseline, major milestones |
* * *
Identifying Adoption Gaps
-------------------------
### Low Coverage Signals
A low Coverage score often indicates adoption gaps—pockets of your team that aren't using AI.
**Questions to investigate:**
* Are all team members logged in and active?
* Are certain roles or squads under-represented?
* Is usage concentrated on specific days (spiky pattern)?
**Actions:**
1. Check your Organization Dashboard for inactive seats
2. Look for patterns in who's not using AI (new hires? certain roles?)
3. Consider targeted onboarding or pairing sessions
### Low Depth Signals
Low Depth indicates that developers may be trying AI but not trusting or shipping its output.
**Questions to investigate:**
* Are acceptance rates low? (Developers rejecting suggestions)
* Is AI-generated code being merged?
* Are developers using AI across multiple stages (plan → build → review)?
**Actions:**
1. Enable [Managed Indexing](https://kilo.ai/docs/deploy-secure/managed-indexing)
to improve context quality
2. Review whether suggestions are relevant to your codebase
3. Introduce chained workflows to increase multi-stage usage
### Low Frequency Signals
Low Frequency suggests AI hasn't become a daily habit.
**Questions to investigate:**
* Are developers aware of all available AI surfaces (IDE, CLI, Cloud)?
* Is AI usage triggered only by specific, infrequent problems?
* Have developers built AI into routine tasks?
**Actions:**
1. Map AI to existing daily tasks (stand-ups, PRs, documentation)
2. Ensure the CLI is installed for terminal workflows
3. Run a "try autocomplete for a week" challenge
* * *
Running Adoption Initiatives
----------------------------
### Setting Goals
Use the score tiers as milestones:
| Current Tier | Reasonable Next Goal |
| --- | --- |
| 0–20 (Minimal) | Reach 30–40 within 4–6 weeks |
| 21–50 (Early) | Reach 55–65 within 4–6 weeks |
| 51–75 (Growing) | Reach 75–80 within 6–8 weeks |
| 76–90 (Strong) | Maintain and optimize |
**Tip:** Focus on one dimension at a time rather than trying to improve everything at once.
### Initiative Ideas
**For Frequency:**
* "Autocomplete Week" — Everyone commits to using autocomplete daily
* CLI onboarding session — 30-minute walkthrough of terminal AI
* Daily AI tip in Slack — Share one use case per day
**For Depth:**
* "Chain Challenge" — Complete one feature using plan → build → review
* Managed Indexing rollout — Enable better context for the whole team
* Deploy previews — Validate AI output before merging
**For Coverage:**
* New hire onboarding includes Kilo setup
* Weekly "AI wins" sharing in stand-ups
* Pair low-usage developers with enthusiastic adopters
### Tracking Progress
1. **Set a baseline** — Note your score at the start of an initiative
2. **Check weekly** — Watch for trend changes, not absolute numbers
3. **Adjust tactics** — If a dimension isn't moving, try a different approach
4. **Celebrate wins** — Acknowledge when the team hits a milestone
* * *
Benchmarking Against Goals
--------------------------
### Internal Benchmarking
Use the score to compare:
* **Teams within your organization** — Which teams are leading adoption?
* **Before vs. after** — Did a specific initiative move the needle?
* **This quarter vs. last** — Are you trending up or down?
### Communicating to Stakeholders
The AI Adoption Score is designed to be quotable:
> "Last quarter we were at 38. This quarter we're at 57. Our goal is to reach 70 by Q2."
**When presenting scores:**
* Lead with the trend, not just the number
* Explain the tier and what it means
* Connect to business outcomes ("Higher adoption → faster development cycles")
* Share specific actions you're taking
### Sample Stakeholder Update
> **AI Adoption Update — January 2025**
>
> * **Current Score:** 57 (Growing adoption tier)
> * **Last Month:** 48
> * **Change:** +9 points, driven by improved Depth scores
>
> **Key Actions Taken:**
>
> * Enabled Managed Indexing for better AI context
> * Introduced Code Reviews for all PRs
> * Onboarded 3 inactive team members
>
> **Next Steps:**
>
> * Target 65 by end of February
> * Focus on Coverage—spread usage across the full week
* * *
Privacy and Data Considerations
-------------------------------
### Anonymous Data
Individual usage data is anonymized in the dashboard. While you can see aggregate metrics, the dashboard does not expose individual developer activity to managers.
### Focus on Teams, Not Individuals
The Dashboard is designed for:
* Team-level insights
* Organizational trends
* Comparative benchmarking
It is **not** designed for:
* Individual performance evaluation
* Identifying specific low performers
* Surveillance of developer activity
Use the score to identify adoption **gaps**, not to judge individual developers.
* * *
Future Enhancements
-------------------
### Code Contribution Tracking
A future enhancement will track AI-contributed code from feature branch to main branch:
* What percentage of AI-suggested code actually ships?
* How much of the codebase was AI-assisted?
This metric is separate from the Adoption Score but valuable for measuring AI impact on output.
### Team Comparison Views
Additional views for comparing multiple teams within an organization are planned, enabling leadership to identify best practices from high-performing teams.
* * *
Quick Reference: Dashboard Actions
----------------------------------
| What You Want to Know | Where to Look |
| --- | --- |
| Overall adoption level | Main score display |
| Which dimension needs work | Trend indicators (look for negative trends) |
| Specific improvement actions | Click dimension → detail panel |
| Historical patterns | Timeline chart with time filter |
| Your personal usage | Toggle "Only my usage" |
| Week-over-week change | Metric cards at bottom |
Next Steps
----------
* [Understand what each dimension measures](https://kilo.ai/docs/collaborate/adoption-dashboard/understanding-your-score)
* [Learn strategies to improve your score](https://kilo.ai/docs/collaborate/adoption-dashboard/improving-your-score)
* [Return to the dashboard overview](https://kilo.ai/docs/collaborate/adoption-dashboard/overview)
Copy page
---
# Understanding Your Score
Understanding Your Score
========================
The AI Adoption Score is a 0–100 metric representing how deeply and consistently your team uses AI across real development workflows. This page explains what each dimension measures and how to interpret your score.
The Three Dimensions
--------------------
Your total score is calculated from three weighted dimensions:
### Frequency (40% of total score)
**"How often do developers use AI?"**
This dimension measures the regularity of AI tool usage across your team, normalized per-user and blended across the organization.
**Signals measured:**
* Agent interactions per day
* Autocomplete acceptance
* Cloud Agent sessions
* Reviewer Agent runs
**What it tells you:** Teams with high Frequency scores have made AI a daily habit—not something they reach for only on difficult problems. Low Frequency often indicates that developers haven't yet built AI into their regular workflow.
### Depth (40% of total score)
**"How integrated is AI into actual development?"**
This dimension captures trust and dependency—whether AI is a side tool or an integral part of how your team ships code.
**Signals measured:**
* Queries per hour worked
* Percentage of AI suggestions accepted
* AI-generated lines merged into the codebase
* **Retention rate:** Percentage of AI-suggested lines merged unaltered
* Multi-agent chains (coding → review → deploy)
**What it tells you:** High Depth scores indicate that developers trust AI output enough to ship it. Low Depth may mean developers are experimenting with AI but not adopting its suggestions, which could signal context or quality issues.
### Coverage (20% of total score)
**"How broadly is AI being adopted across the team?"**
This dimension captures reach and rollout—how many team members are using AI and how consistently throughout the week.
**Signals measured:**
* Percentage of users using any AI agent weekly
* Percentage of users adopting 2+ agents
* Percentage adopting 4+ agents
* Weekday usage breadth (usage throughout the week vs. concentrated on specific days)
**What it tells you:** Coverage reveals adoption gaps. A team might have power users driving high Frequency and Depth scores while other team members barely use AI at all.
Score Tiers
-----------
Your score falls into one of five tiers:
| Score Range | Tier | What It Means |
| --- | --- | --- |
| **0–20** | Minimal adoption | AI usage is sporadic or experimental. Most developers aren't using AI tools regularly. |
| **21–50** | Early adoption | Some developers have incorporated AI into their workflow, but it's not yet team-wide. |
| **51–75** | Growing adoption | AI is becoming a standard part of how the team works. Most developers use it, though depth varies. |
| **76–90** | Strong adoption | AI is deeply integrated into development workflows. Teams at this level trust and depend on AI suggestions. |
| **91–100** | AI-first engineering org | AI is central to how the team ships code. Usage is high, broad, and deeply integrated. |
How Scores Are Calculated
-------------------------
The scoring system applies several normalization techniques to produce meaningful, comparable scores:
### Per-Developer Normalization
Usage is normalized on a per-developer basis. This means a 10-person team using AI moderately will score comparably to a 50-person team using AI moderately—raw volume doesn't inflate scores.
### Outlier Capping
Extreme usage by individual power users is capped to prevent a single enthusiastic developer from skewing the entire team's score.
### Rolling Window
Scores use a **weekly rolling window** for stability. This smooths out day-to-day fluctuations while still responding to real changes in behavior.
### Multi-Source Aggregation
The score aggregates event streams from multiple surfaces:
* **IDE** — Autocomplete and coding agent interactions
* **CLI** — Terminal-based AI usage
* **Reviewer Agent** — AI-assisted code reviews
* **Cloud Agent** — Browser-based AI sessions
Why Scores Fluctuate
--------------------
Your score may change from week to week for several reasons:
**Normal fluctuations:**
* Team members on vacation or leave
* End-of-sprint vs. start-of-sprint patterns
* Seasonal variations (holidays, summer slowdowns)
**Meaningful changes:**
* New team members onboarding (may temporarily lower Coverage)
* Team members leaving the organization
* Changes in development workflow or tooling
* Successful adoption initiatives
Interpreting Your Score
-----------------------
### Focus on Trends, Not Absolutes
The exact number matters less than the direction. A score of 45 means "early adoption, room to grow"—but whether that's good or bad depends on where you were last month and where you're headed.
### Compare Dimensions
If your total score is low, look at which dimension is pulling it down:
* **Low Frequency?** Focus on building daily habits
* **Low Depth?** Work on trust and context quality
* **Low Coverage?** Focus on onboarding and activation
### Distribution Over Average
While the dashboard shows aggregate scores, the real insight often comes from understanding distribution. A team with a 50 score might have half the team at 80+ and half at 20—that's different from everyone at 50.
What About Individual Scores?
-----------------------------
Individual user scores are available through the "Only my usage" toggle. However, the real value of the AI Adoption Score is in:
* **Aggregate team metrics** — Understanding organizational trends
* **Distribution analysis** — Identifying adoption gaps
* **Comparative benchmarking** — Setting and tracking goals
Individual scores are most useful for personal development and self-assessment, not performance evaluation.
Next Steps
----------
* [Learn strategies to improve each dimension](https://kilo.ai/docs/collaborate/adoption-dashboard/improving-your-score)
* [Use the dashboard for team leadership](https://kilo.ai/docs/collaborate/adoption-dashboard/for-team-leads)
Copy page
---
# Model Selection
Model Selection Guide
=====================
Here's the honest truth about AI model recommendations: by the time I write them down, they're probably already outdated. New models drop every few weeks, existing ones get updated, prices shift, and yesterday's champion becomes today's budget option.
Instead of maintaining a static list that's perpetually behind, we built something better — a real-time leaderboard showing which models Kilo Code users are actually having success with right now.
Check the Live Models List
--------------------------
**[👉 See what's working today at kilo.ai/models](https://kilo.ai/models)
**
This isn't benchmarks from some lab. It's real usage data from developers like you, updated continuously. You'll see which models people are choosing for different tasks, what's delivering results, and how the landscape is shifting in real-time.
General Guidance
----------------
While the specifics change constantly, some principles stay consistent:
### How to Select and Switch Models
VSCodeCLIVSCode (Legacy)
* Use the **model selector** in the chat prompt area to pick a model for the current session. You can also type `/models` to open the model picker.
* Set per-agent defaults and a global default in the **Settings** panel (Models tab), or directly in the `kilo.jsonc` config file.
* **Model precedence:** Session override → Per-agent config → Global config → Recent models → Kilo Auto (free).
**For complex coding tasks**: Premium models (Claude Sonnet/Opus, GPT-5 class, Gemini Pro) typically handle nuanced requirements, large refactors, and architectural decisions better.
**For everyday coding**: Mid-tier models often provide the best balance of speed, cost, and quality. They're fast enough to keep your flow state intact and capable enough for most tasks.
**For budget-conscious work**: Newer efficient models keep surprising us with price-to-performance ratios. DeepSeek, Qwen, and similar models can handle more than you'd expect.
**For local/private work**: Ollama and LM Studio let you run models locally. The tradeoff is usually speed and capability for privacy and zero API costs.
Context Windows Matter
----------------------
One thing that doesn't change: context window size matters for your workflow.
* **Small projects** (scripts, components): 32-64K tokens works fine
* **Standard applications**: 128K tokens handles most multi-file context
* **Large codebases**: 256K+ tokens helps with cross-system understanding
* **Massive systems**: 1M+ token models exist but effectiveness degrades at the extremes
Check [our provider docs](https://kilo.ai/docs/ai-providers)
for specific context limits on each model.
💡Tip
**Be thoughtful about Max Tokens settings for thinking models.** Every token you allocate to output takes away from space available to store conversation history. Consider only using high `Max Tokens` / `Max Thinking Tokens` settings with modes like Architect and Debug, and keeping Code mode at 16k max tokens or less.
💡Tip
**Recover from context limit errors:** If you hit the `input length and max tokens exceed context limit` error, you can recover by deleting a message, rolling back to a previous checkpoint, or switching over to a model with a long context window like Gemini for a message.
Stay Current
------------
The AI model space moves fast. Bookmark [kilo.ai/models](https://kilo.ai/models)
and check back when you're evaluating options. What's best today might not be best next month — and that's actually exciting.
Copy page
---
# Auto Model
Auto Model
==========
Auto Model is a smart model routing system that automatically selects the optimal AI model based on the Kilo Code mode you're using. It comes in multiple tiers so you can balance cost and capability to fit your needs.
| Tier | Best For | Pricing |
| --- | --- | --- |
| `kilo-auto/frontier` | Maximum capability with the best available models | Paid |
| `kilo-auto/balanced` | Strong performance at a lower cost | Paid |
| `kilo-auto/free` | The best free models available | Free |
How It Works
------------
1. Select an Auto Model tier (e.g. `kilo-auto/frontier`) in the model dropdown
2. Start working in any mode (Code, Architect, Debug, etc.)
3. The system automatically routes your requests to the best model for that task
That's it. No configuration needed.
Auto Frontier
-------------
`kilo-auto/frontier` routes to the latest and most capable paid models available, optimizing for performance, capability, and cost.
### Mode-to-Model Mapping
| Mode | Model Used | Best For |
| --- | --- | --- |
| `architect` | Claude Opus 4.6 | System design, planning |
| `orchestrator` | Claude Opus 4.6 | Multi-step task coordination |
| `ask` | Claude Opus 4.6 | Questions, explanations |
| `plan` | Claude Opus 4.6 | Planning, reasoning |
| `general` | Claude Opus 4.6 | General assistance |
| `debug` | Claude Opus 4.6 | Debugging and fixing issues |
| `code` | Claude Sonnet 4.6 | Writing and editing code |
| `build` | Claude Sonnet 4.6 | Implementation tasks |
| `explore` | Claude Sonnet 4.6 | Codebase exploration |
**Planning and reasoning tasks** use Claude Opus 4.6, which excels at complex reasoning, architectural decisions, and breaking down problems.
**Implementation tasks** use Claude Sonnet 4.6, which is optimized for fast, accurate code generation and editing.
Auto Balanced
-------------
`kilo-auto/balanced` follows the same mode-based routing structure as Frontier but uses more cost-effective models — Kimi K2.5 for reasoning-heavy modes and Minimax M2.7 for implementation modes.
### Mode-to-Model Mapping
| Mode | Model Used | Best For |
| --- | --- | --- |
| `architect` | Kimi K2.5 | System design, planning |
| `orchestrator` | Kimi K2.5 | Multi-step task coordination |
| `ask` | Kimi K2.5 | Questions, explanations |
| `plan` | Kimi K2.5 | Planning, reasoning |
| `general` | Kimi K2.5 | General assistance |
| `debug` | Kimi K2.5 | Debugging and fixing issues |
| `code` | Minimax M2.7 | Writing and editing code |
| `build` | Minimax M2.7 | Implementation tasks |
| `explore` | Minimax M2.7 | Codebase exploration |
**Planning and reasoning tasks** use Kimi K2.5, a strong open-weight reasoning model from Moonshot AI.
**Implementation tasks** use Minimax M2.7, which provides fast, capable code generation at a fraction of frontier model costs.
ℹ️Image support
Auto Balanced does not support image inputs, since Minimax M2.7 does not have vision capabilities.
Benefits
--------
### Simplified Setup
No need to manually switch models when changing modes. Auto Model handles the routing transparently in the background.
### Cost Optimization
Uses the more economical models for implementation tasks where speed matters, while reserving stronger reasoning models for planning tasks. You get optimal cost-to-capability ratio without thinking about it.
### Best-in-Class Models
Auto Model routes to capable models matched to your task:
* **Auto Frontier** uses the latest and most effective models across all modes
* **Auto Balanced** uses more cost-effective models while still providing strong capabilities
* **Auto Free** uses the best available free models
Requirements
------------
⚠️Version Requirements
Auto Model requires **VS Code/JetBrains extension v5.2.3+** or **CLI v1.0.15+** for automatic mode-based switching. On older versions, Auto Model tiers will default to a single model for all requests.
Getting Started
---------------
💡Quick Setup
Select an Auto Model tier from the model dropdown in the Kilo Code chat interface. That's all you need to do.
1. Open Kilo Code in VS Code or JetBrains
2. Click the model selector dropdown
3. Choose an Auto Model such as `kilo-auto/frontier` or `kilo-auto/balanced`
4. Start chatting - the right model is selected automatically based on your current mode
When to Use Auto Model
----------------------
Auto Model is ideal for:
* **Developers who frequently switch between planning and coding** - No need to remember which model works best for each task
* **Teams wanting consistent model selection** - Everyone gets optimal routing without individual configuration
* **Cost-conscious developers** - Automatically balances cost and capability
* **New Kilo Code users** - Great defaults without needing to understand model differences
When to Use a Specific Model
----------------------------
You may want to select a specific model instead when:
* Cost is not a factor for a particular task
* You need a particular model's unique capabilities (e.g., very long context windows)
* You're working with a specialized provider or local model
* You want full control over model selection
Feedback
--------
📝Help Us Improve
Auto Model is actively being improved. We'd love to hear how it's working for you! Share feedback in our [Discord](https://kilo.ai/discord)
or [open an issue on GitHub](https://github.com/Kilo-Org/kilocode/issues)
.
Related
-------
* [Model Selection Guide](https://kilo.ai/docs/code-with-ai/agents/model-selection)
- General guidance on choosing models
* [Using Agents](https://kilo.ai/docs/code-with-ai/agents/using-agents)
- Learn about different Kilo Code agents
* [Free & Budget Models](https://kilo.ai/docs/code-with-ai/agents/free-and-budget-models)
- Cost-effective alternatives
Copy page
---
# Improving Your Score
Improving Your Score
====================
This guide provides actionable strategies to improve each dimension of your AI Adoption Score. Click on any dimension in the dashboard to see personalized suggestions based on your team's usage patterns.
Improving Frequency
-------------------
**Goal:** Help developers build AI into their daily workflow, not just reach for it on hard problems.
### Expand Beyond the IDE
A lot of development work happens in the terminal—git operations, debugging, scripting. Bringing AI to those contexts increases daily touchpoints.
**Action:** Install the Kilo CLI to enable AI-assisted terminal workflows:
npm install -g @kilocode/cli
Teams that use both IDE and CLI surfaces tend to show higher daily engagement because AI is available wherever they're working.
### Start with Autocomplete
Autocomplete is low-friction by design. It doesn't require explicit prompting—it just works in the background.
**Action:** Encourage your team to lean on autocomplete for:
* Boilerplate code
* Repetitive patterns
* Common syntax
* Test scaffolding
Building muscle memory with autocomplete leads to consistent daily usage without requiring behavior change.
### Tie AI to Existing Routines
The teams with the strongest Frequency scores usually aren't doing anything flashy—they've woven AI into things they already do.
**Action:** Identify daily tasks where AI can help:
* **Stand-up prep** — Summarize recent changes or generate status updates
* **Context checks** — Quickly understand unfamiliar code
* **PR descriptions** — Generate first drafts of pull request descriptions
* **Documentation** — Create or update inline comments
Small, repeated use cases add up faster than occasional heavy lifts.
* * *
Improving Depth
---------------
**Goal:** Move AI from a side tool to an integrated part of how your team ships code.
### Chain Your Workflows
Depth increases when AI touches multiple stages of the same task. Each handoff reinforces context and keeps AI in the loop from idea to merge.
**Action:** Adopt the "chain" workflow pattern:
1. **Plan** — Use Architect mode to design a feature
2. **Build** — Use Code mode to implement it
3. **Review** — Use Code Reviews to critique it
💡Tip
Linking coding → review → deploy actions significantly boosts your Depth score.
### Give AI Better Context
If acceptance rates are low, the issue is often context. The AI is making suggestions without understanding your codebase.
**Action:** Enable [Managed Indexing](https://kilo.ai/docs/deploy-secure/managed-indexing)
to give the model vector-backed search across your repository.
Better context leads to:
* More relevant suggestions
* Higher acceptance rates
* Greater trust in AI output
* Deeper integration over time
### Validate AI Output in Real Environments
Generated code that never runs is hard to trust. Teams that can verify AI output against live environments tend to retain more of that code long-term.
**Action:** Use [Kilo Deploy](https://kilo.ai/docs/deploy-secure/deploy)
to spin up live URLs for branches, allowing your team to verify changes before merging.
* * *
Improving Coverage
------------------
**Goal:** Get more of your team using more of the platform.
### Introduce Specialist Agents
Most teams start with Code mode and stop there. But Kilo's other modes unlock additional value.
**Action:** Introduce your team to specialized modes:
| Mode | Use Case |
| --- | --- |
| **Orchestrator** | Delegate and execute subtasks over long-horizon projects |
| **Architect** | Design and plan before implementation |
| **Debug** | Systematic error diagnosis |
| **Ask** | Quick questions and explanations |
This increases efficacy and improves trust in AI-facilitated tasking.
### Activate Unused Seats
Coverage is partly a numbers game. If you have team members who haven't logged in or aren't using the tool, your score will reflect that.
**Action:** Check your Organization Dashboard for inactive seats. Consider whether those team members need:
* A reminder that access exists
* A walkthrough or onboarding session
* Guidance on where to start
* Pairing with an enthusiastic team member
### Spread Usage Across the Week
Spiky usage—heavy on Mondays, quiet the rest of the week—limits your Coverage score.
**Action:** Make [Code Reviews](https://kilo.ai/docs/automate/code-reviews/overview)
part of your PR process. Reviews happen throughout the week, so AI usage naturally follows.
Other ways to spread usage:
* Daily stand-up preparation with AI
* End-of-day documentation or commit messages
* Mid-week design reviews using Architect mode
* * *
Common Patterns and Anti-Patterns
---------------------------------
### Patterns That Drive Adoption
| Pattern | Why It Works |
| --- | --- |
| **Pair AI with existing tools** | Developers don't have to learn new workflows |
| **Start with quick wins** | Autocomplete and commit messages build confidence |
| **Champion-led adoption** | Enthusiastic team members model effective usage |
| **Weekly check-ins on AI usage** | Keeps AI top-of-mind without being prescriptive |
| **Celebrate retained code** | Recognize when AI contributions ship to production |
### Anti-Patterns to Avoid
| Anti-Pattern | Why It Fails |
| --- | --- |
| **Mandating specific usage levels** | Creates resentment without changing habits |
| **Focusing only on power users** | Neglects the majority who need onboarding |
| **Ignoring context quality** | Leads to poor suggestions and abandoned usage |
| **Measuring without acting** | Scores drop when no one addresses gaps |
| **All-or-nothing adoption** | Teams need gradual, sustainable change |
* * *
Quick Wins by Score Range
-------------------------
### If You're at 0–20 (Minimal Adoption)
1. Ensure all team members have access and are logged in
2. Run a 30-minute "Getting Started" session
3. Ask everyone to try autocomplete for one week
4. Check back on completion rates
### If You're at 21–50 (Early Adoption)
1. Identify your most active users and learn what they're doing
2. Introduce Code Reviews to spread usage
3. Enable Managed Indexing for better context
4. Set a monthly score goal (e.g., "reach 55 by next month")
### If You're at 51–75 (Growing Adoption)
1. Introduce chained workflows (plan → build → review)
2. Focus on Depth—are suggestions being accepted and retained?
3. Address any inactive seats or low-usage pockets
4. Consider Kilo Deploy to validate AI output
### If You're at 76–90 (Strong Adoption)
1. You're doing well—maintain momentum
2. Look at retention rates: what percentage of AI code ships unaltered?
3. Expand to edge cases: CI/CD, documentation, testing
4. Share your practices with other teams
Next Steps
----------
* [Use the dashboard for team leadership](https://kilo.ai/docs/collaborate/adoption-dashboard/for-team-leads)
* [Return to the dashboard overview](https://kilo.ai/docs/collaborate/adoption-dashboard/overview)
Copy page
---
# Autocomplete
Autocomplete
============
Kilo Code's autocomplete feature provides intelligent code suggestions and completions while you're typing, helping you write code faster and more efficiently. It offers both automatic and manual triggering options.
How Autocomplete Works
----------------------
Autocomplete analyzes your code context and provides:
* **Inline completions** as you type
* **Quick fixes** for common code patterns
* **Contextual suggestions** based on your surrounding code
* **Multi-line completions** for complex code structures
Triggering Options
------------------
### Code Editor Suggestions
#### Auto-trigger suggestions
When enabled, Kilo Code automatically shows inline suggestions when you pause typing. This provides a seamless coding experience where suggestions appear naturally as you work.
* **Auto Trigger Delay**: Configure the delay (in seconds) before suggestions appear after you stop typing
* Default is 3 seconds, but this can be adjusted up or down
* Shorter delays mean quicker suggestions but may be more resource-intensive
#### Trigger on keybinding (Cmd+L)
For more control over when suggestions appear:
1. Position your cursor where you need assistance
2. Press `Cmd+L` (Mac) or `Ctrl+L` (Windows/Linux)
3. Kilo Code analyzes the surrounding context
4. Receive immediate improvements or completions
This is ideal for:
* Quick fixes
* Code completions
* Refactoring suggestions
* Keeping you in the flow without interruptions
You can customize this keyboard shortcut as well in your VS Code settings.
### Chat Suggestions
#### Enable Chat Autocomplete
When enabled, Kilo Code will suggest completions as you type in the chat input. Press Tab to accept suggestions.
Provider and Model Selection
----------------------------
Autocomplete currently uses **Codestral** (by Mistral AI) as the underlying model. This model is specifically optimized for code completion tasks and provides fast, high-quality suggestions.
### How the Provider is Chosen
Kilo Code automatically selects a provider for autocomplete in the following priority order:
* **Mistral** (using `codestral-latest`)
* **Kilo Code** (using `mistralai/codestral-2508`)
* **OpenRouter** (using `mistralai/codestral-2508`)
* **Requesty** (using `mistral/codestral-latest`)
* **Bedrock** (using `mistral.codestral-2508-v1:0`)
* **Hugging Face** (using `mistralai/Codestral-22B-v0.1`)
* **LiteLLM** (using `codestral/codestral-latest`)
* **LM Studio** (using `mistralai/codestral-22b-v0.1`)
* **Ollama** (using `codestral:latest`)
📝Note
**Model Selection is Currently Fixed**: At this time, you cannot freely choose a different model for autocomplete. The feature is designed to work specifically with Codestral, which is optimized for Fill-in-the-Middle (FIM) completions. Support for additional models may be added in future releases.
Disable Rival Autocomplete
--------------------------
We recommend disabling rival autocompletes to optimize your experience with Kilo Code. To disable GitHub Copilot autocomplete in VSCode, go to **Settings** and navigate to **GitHub** > **Copilot: Advanced** (or search for 'copilot').
Then, toggle to 'disabled':

Disable GitHub Copilot in VSCode
If using Cursor, go to **Settings** > **Cursor Settings** > **Tab**, and toggle off 'Cursor Tab':

Disable Cursor autocomplete
Best Practices
--------------
1. **Balance speed and quality**: Faster models provide quicker suggestions but may be less accurate
2. **Adjust trigger delay**: Find the sweet spot between responsiveness and avoiding too many API calls
3. **Use Quick Task for complex changes**: It's designed for more substantial code modifications
4. **Use Manual Autocomplete for precision**: When you need suggestions at specific moments
5. **Configure providers wisely**: Consider using faster, cheaper models for autocomplete while keeping more powerful models for chat
Tips
----
💡Tip
**When to use chat vs autocomplete:** Use chat for multi-file changes, refactoring, or when you need to explain intent. Use autocomplete for quick, localized edits where the context is already clear from surrounding code.
💡Tip
**Steer autocomplete with comments:** Write a comment describing what you want before triggering autocomplete, or type a function signature—autocomplete will fill in the implementation.
💡Tip
**Treat suggestions as drafts:** Accept autocomplete suggestions quickly, then refine. It's often faster to fix a 90% correct suggestion than to craft the perfect prompt.
* Autocomplete works best with clear, well-structured code
* Comments above functions help autocomplete understand intent
* Variable and function names matter - descriptive names lead to better suggestions
Related Features
----------------
* [Code Actions](https://kilo.ai/docs/code-with-ai/features/code-actions)
- Context menu options for common coding tasks
Copy page
---
# Code Actions
Code Actions
============
Code Actions are a powerful feature of VS Code that provide quick fixes, refactorings, and other code-related suggestions directly within the editor. Kilo Code integrates with this system to offer AI-powered assistance for common coding tasks.
What are Code Actions?
----------------------
Code Actions appear as a lightbulb icon (💡) in the editor gutter (the area to the left of the line numbers). They can also be accessed via the right-click context menu, or via keyboard shortcut. They are triggered when:
* You select a range of code.
* Your cursor is on a line with a problem (error, warning, or hint).
* You invoke them via command.
Clicking the lightbulb, right-clicking and selecting "Kilo Code", or using the keyboard shortcut (`Ctrl+.` or `Cmd+.` on macOS, by default), displays a menu of available actions.

Kilo Code's Code Actions
------------------------
Kilo Code provides the following Code Actions:
* **Add to Context:** Quickly adds the selected code to your chat with Kilo, including line numbers so Kilo knows exactly where the code is from. It's listed first in the menu for easy access. (More details below).
* **Explain Code:** Asks Kilo Code to explain the selected code.
* **Fix Code:** Asks Kilo Code to fix problems in the selected code (available when diagnostics are present).
* **Improve Code:** Asks Kilo Code to suggest improvements to the selected code.
### Add to Context Deep Dive
The **Add to Context** action is listed first in the Code Actions menu so you can quickly add code snippets to your conversation. When you use it, Kilo Code includes the filename and line numbers along with the code.
This helps Kilo understand the exact context of your code within the project, allowing it to provide more relevant and accurate assistance.
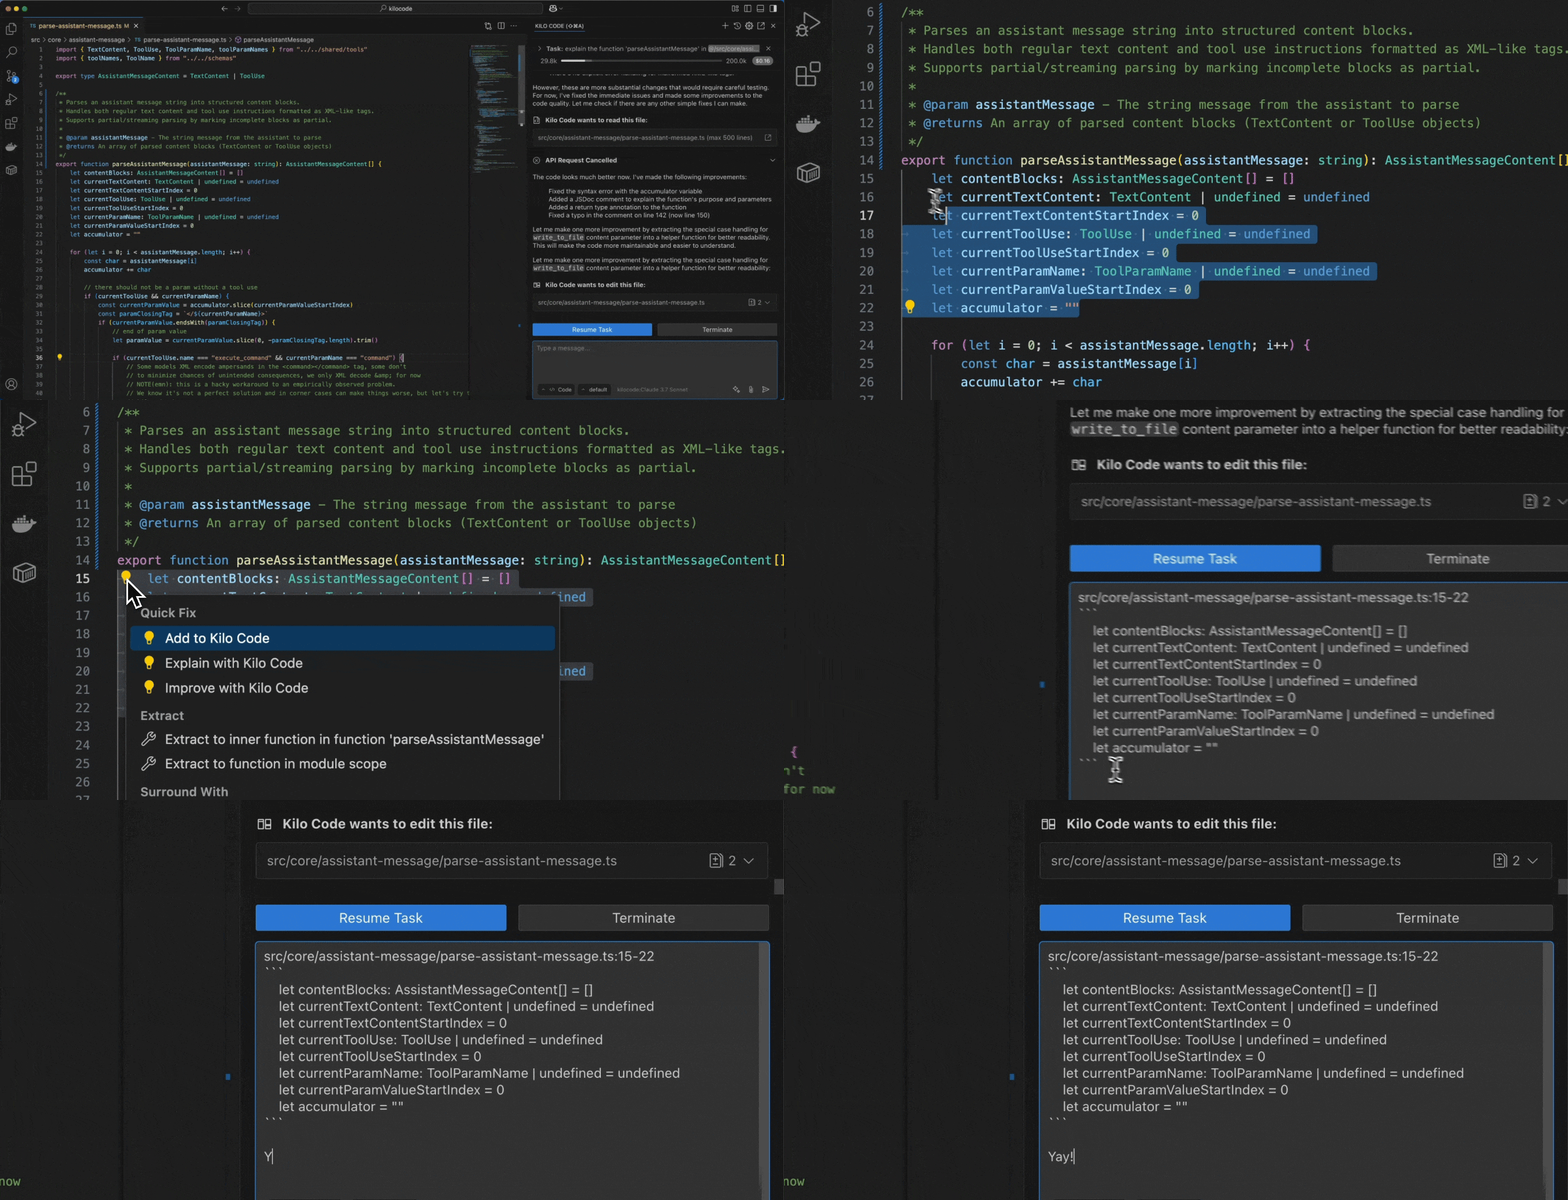
**Example Chat Input:**
Can you explain this function?
@myFile.js:15:25
_(Where `@myFile.js:15:25` represents the code added via "Add to Context")_
Each of these actions can be performed "in a new task" or "in the current task."
Using Code Actions
------------------
There are three main ways to use Kilo Code's Code Actions:
### 1\. From the Lightbulb (💡)
1. **Select Code:** Select the code you want to work with. You can select a single line, multiple lines, or an entire block of code.
2. **Look for the Lightbulb:** A lightbulb icon will appear in the gutter next to the selected code (or the line with the error/warning).
3. **Click the Lightbulb:** Click the lightbulb icon to open the Code Actions menu.
4. **Choose an Action:** Select the desired Kilo Code action from the menu.
5. **Review and Approve:** Kilo Code will propose a solution in the chat panel. Review the proposed changes and approve or reject them.
### 2\. From the Right-Click Context Menu
1. **Select Code:** Select the code you want to work with.
2. **Right-Click:** Right-click on the selected code to open the context menu.
3. **Choose "Kilo Code":** Select the "Kilo Code" option from the context menu. A submenu will appear with the available Kilo Code actions.
4. **Choose an Action:** Select the desired action from the submenu.
5. **Review and Approve:** Kilo Code will propose a solution in the chat panel. Review the proposed changes and approve or reject them.
### 3\. From the Command Palette
1. **Select Code:** Select the code you want to work with.
2. **Open the Command Palette:** Press `Ctrl+Shift+P` (Windows/Linux) or `Cmd+Shift+P` (macOS).
3. **Type a Command:** Type "Kilo Code" to filter the commands, then choose the relevant code action (e.g., "Kilo Code: Explain Code"). You can also type the start of the command, like "Kilo Code: Explain", and select from the filtered list.
4. **Review and Approve:** Kilo Code will propose a solution in the chat panel. Review the proposed changes and approve or reject them.
Code Actions and Current Task
-----------------------------
Each code action gives you two options:
* **in New Task:** Select this to begin a conversation with Kilo centered around this code action.
* **in Current Task:** If a conversation has already begun, this option will add the code action as an additional message.
Customizing Code Action Prompts
-------------------------------
You can customize the prompts used for each Code Action by modifying the "Support Prompts" in the **Prompts** tab. This allows you to fine-tune the instructions given to the AI model and tailor the responses to your specific needs.
1. **Open the Prompts Tab:** Click the icon in the Kilo Code top menu bar.
2. **Find "Support Prompts":** You will see the support prompts, including "Enhance Prompt", "Explain Code", "Fix Code", and "Improve Code".
3. **Edit the Prompts:** Modify the text in the text area for the prompt you want to customize. You can use placeholders like `${filePath}` and `${selectedText}` to include information about the current file and selection.
4. **Click "Done":** Save your changes.
By using Kilo Code's Code Actions, you can quickly get AI-powered assistance directly within your coding workflow. This can save you time and help you write better code.
Copy page
---
# Voice Transcription
Voice Transcription
===================
⚠️🧪 Experimental Feature
Voice Transcription / speech-to-text (STT) is currently in experimental status. Expect potential issues and changes as the feature matures.
Kilo Code now includes experimental support for voice input in the chat interface. This feature allows you to dictate your messages using speech-to-text (STT) technology powered by OpenAI's Whisper API.
Prerequisites
-------------
Voice transcription requires two components to be set up:
### 1\. FFmpeg Installation
FFmpeg is required for audio capture and processing. Install it for your platform:
**macOS:**
brew install ffmpeg
**Linux (Ubuntu/Debian):**
sudo apt update
sudo apt install ffmpeg
**Windows:** Download from [ffmpeg.org/download.html](https://ffmpeg.org/download.html)
and add to your system PATH.
### 2\. OpenAI API Key
Voice transcription uses OpenAI's Whisper API for speech recognition. You need an OpenAI API configuration in Kilo Code:
1. Configure an OpenAI provider profile in Kilo Code settings
2. Add your OpenAI API key to the profile
3. Either **OpenAI** or **OpenAI Native** provider types will work
Enabling Voice Transcription
----------------------------
Voice transcription is an experimental feature that must be enabled:
1. Open Kilo Code settings
2. Navigate to **Experimental Features**
3. Enable the **Speech to Text** experiment
Using Voice Input
-----------------
Once configured and enabled, a microphone button will appear in the chat input area:
1. Click the microphone button to start recording
2. Speak your message clearly
3. Click again to stop recording
4. Your speech will be automatically transcribed into text
The feature includes real-time audio level visualization and voice activity detection to automatically detect when you're speaking.
Technical Details
-----------------
* **Audio Processing**: Uses FFmpeg for system audio capture
* **Voice Recognition**: OpenAI Whisper API for transcription
Troubleshooting
---------------
**Microphone button not appearing:**
* Ensure the Speech to Text experiment is enabled
* Verify FFmpeg is installed and in your PATH
* Check that you have an OpenAI provider configured with a valid API key
**Transcription errors:**
* Verify your OpenAI API key is valid and has available credits
* Check your internet connection
* Try speaking more clearly or adjusting your microphone settings
Limitations
-----------
This feature is currently experimental and may have limitations:
* Requires active internet connection
* Uses OpenAI API credits based on audio duration
* Transcription accuracy depends on audio quality and speech clarity
Copy page
---
# Enhance Prompt
Enhance Prompt
==============
The "Enhance Prompt" feature in Kilo Code helps you improve the quality and effectiveness of your prompts before sending them to the AI model. By clicking the icon in the chat input, you can automatically refine your initial request, making it clearer, more specific, and more likely to produce the desired results.
Why Use Enhance Prompt?
-----------------------
* **Improved Clarity:** Kilo Code can rephrase your prompt to make it more understandable for the AI model.
* **Added Context:** The enhancement process can add relevant context to your prompt, such as the current file path or selected code.
* **Better Instructions:** Kilo Code can add instructions to guide the AI towards a more helpful response (e.g., requesting specific formatting or a particular level of detail).
* **Reduced Ambiguity:** Enhance Prompt helps to eliminate ambiguity and ensure that Kilo Code understands your intent.
* **Consistency**: Kilo will consistently format prompts the same way to the AI.
### Before and after
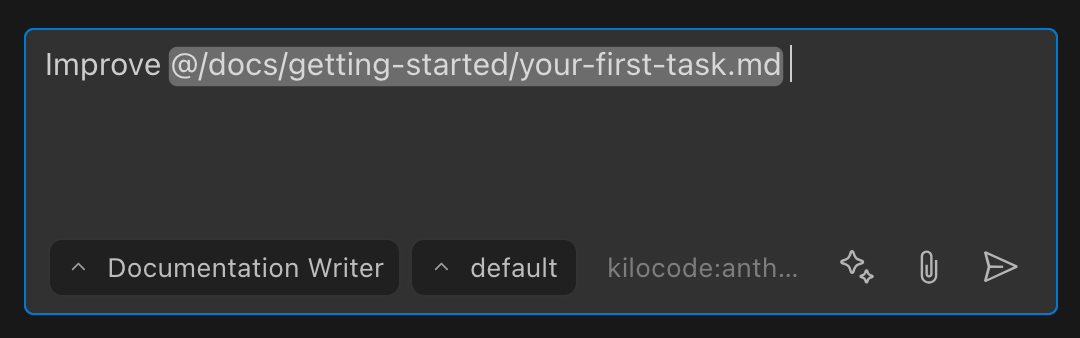
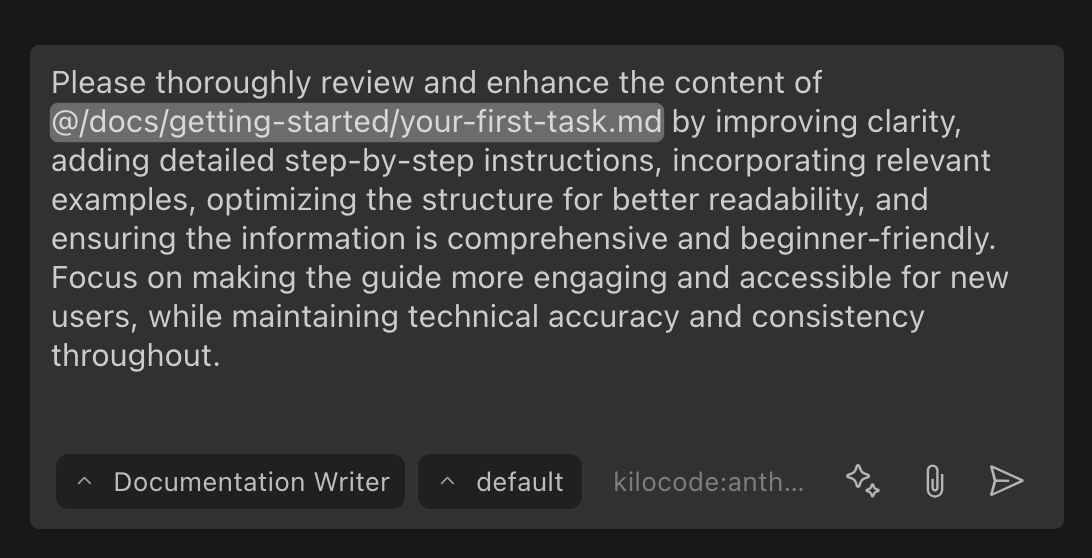
How to Use Enhance Prompt
-------------------------
1. **Type your initial prompt:** Enter your request in the Kilo Code chat input box as you normally would. This can be a simple question, a complex task description, or anything in between.
2. **Click the Icon:** Instead of pressing Enter, click the icon located in the bottom right of the chat input box.
3. **Review the Enhanced Prompt:** Kilo Code will replace your original prompt with an enhanced version. Review the enhanced prompt to make sure it accurately reflects your intent. You can further refine the enhanced prompt before sending.
4. **Send the Enhanced Prompt:** Press Enter or click the Send icon () to send the enhanced prompt to Kilo Code.
Customizing the Enhancement Process
-----------------------------------
### Customizing Template
The "Enhance Prompt" feature uses a customizable prompt template. You can modify this template to tailor the enhancement process to your specific needs.
1. **Open the Prompts Tab:** Click the icon in the Kilo Code top menu bar.
2. **Select "ENHANCE" Tab:** You should see listed out support prompts, including "ENHANCE". Click on this tab.
3. **Edit the Prompt Template:** Modify the text in the "Prompt" field.
The default prompt template includes the placeholder `${userInput}`, which will be replaced with your original prompt. You can modify this to fit the model's prompt format, and instruct it how to enhance your request.
### Customizing Provider
Speed up prompt enhancement by switching to a more lightweight LLM model provider (e.g. GPT 4.1 Nano). This delivers faster results at lower cost while maintaining quality.
Create a dedicated profile for Enhance Prompt by following the [API configuration profiles guide](https://kilo.ai/docs/ai-providers)
.
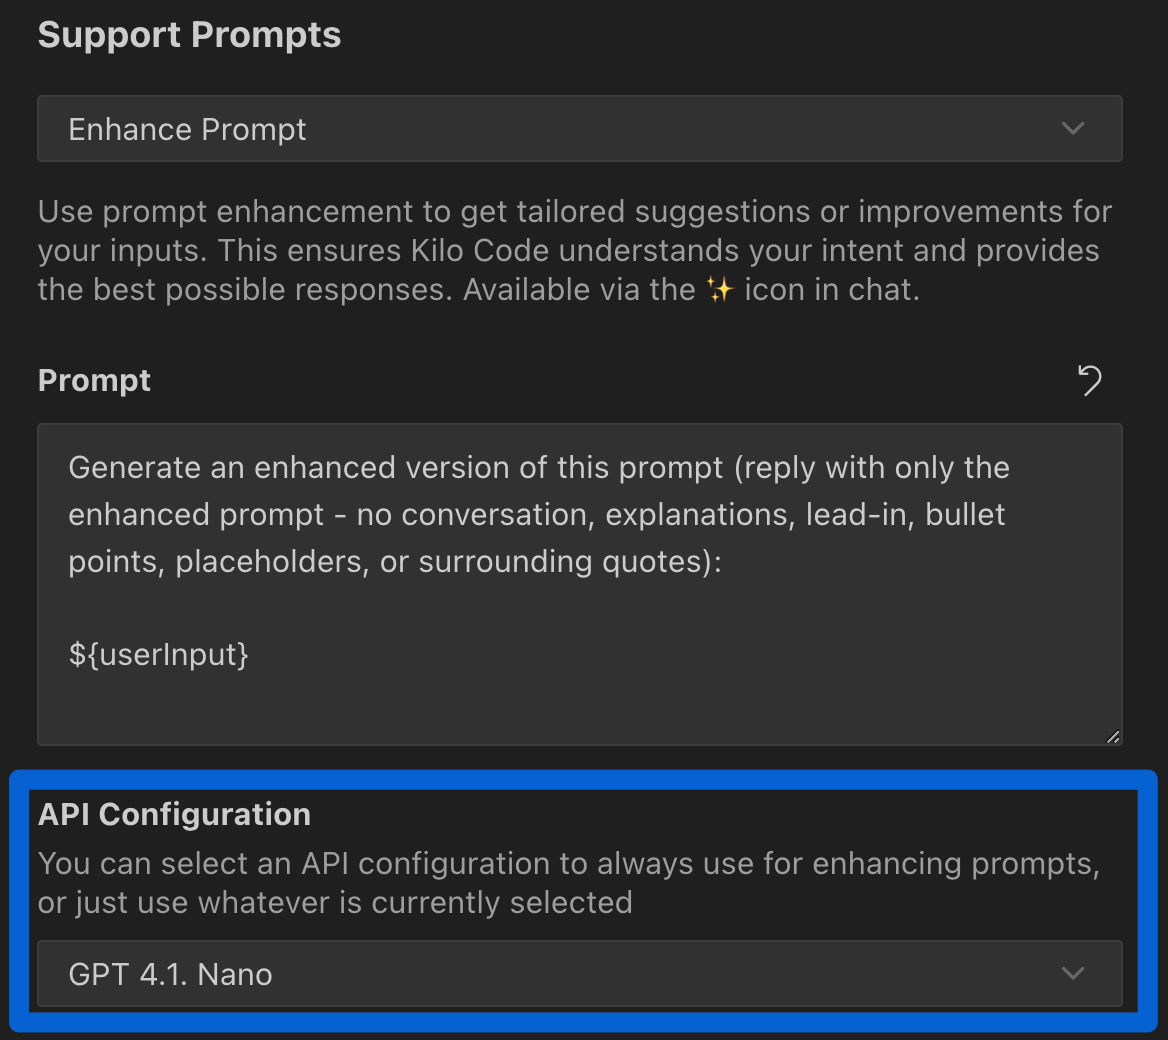
For a detailed walkthrough: https://youtu.be/R1nDnCK-xzw
Limitations and Best Practices
------------------------------
* **Experimental Feature:** Prompt enhancement is an experimental feature. The quality of the enhanced prompt may vary depending on the complexity of your request and the capabilities of the underlying model.
* **Review Carefully:** Always review the enhanced prompt before sending it. Kilo Code may make changes that don't align with your intentions.
* **Iterative Process:** You can use the "Enhance Prompt" feature multiple times to iteratively refine your prompt.
* **Not a Replacement for Clear Instructions:** While "Enhance Prompt" can help, it's still important to write clear and specific prompts from the start.
By using the "Enhance Prompt" feature, you can improve the quality of your interactions with Kilo Code and get more accurate and helpful responses.
Copy page
---
# Browser Use
Browser Use
===========
Kilo Code provides browser automation capabilities that let you interact with websites directly from your coding workflow. This feature supports testing web applications, automating browser tasks, and capturing screenshots without leaving your editor.
ℹ️Model Support Required
Browser Use requires an advanced agentic model. It is typically most reliable with recent high-capability models (for example Claude Sonnet 4 class models).
How Browser Use Works
---------------------
By default, Kilo Code uses a built-in browser that:
* Launches automatically when you ask Kilo to visit a website
* Captures screenshots of web pages
* Allows Kilo to interact with web elements
* Runs invisibly in the background
All of this happens directly within VS Code, with no setup required.
Using Browser Use
-----------------
A typical browser interaction follows this pattern:
1. Ask Kilo to visit a website
2. Kilo launches the browser and shows you a screenshot
3. Request additional actions (clicking, typing, scrolling)
4. Kilo closes the browser when finished
For example:
* `Open the browser and view our site.`
* `Can you check if my website at https://kilocode.ai is displaying correctly?`
* `Browse http://localhost:3000, scroll down to the bottom of the page and check if the footer information is displaying correctly.`
How Browser Actions Work
------------------------
The browser\_action tool controls a browser instance that returns screenshots and console logs after each action, allowing you to see the results of interactions.
Key characteristics:
* Each browser session must start with `launch` and end with `close`
* Only one browser action can be used per message
* While the browser is active, no other tools can be used
* You must wait for the response (screenshot and logs) before performing the next action
### Available Browser Actions
| Action | Description | When to Use |
| --- | --- | --- |
| `launch` | Opens a browser at a URL | Starting a new browser session |
| `click` | Clicks at specific coordinates | Interacting with buttons, links, etc. |
| `type` | Types text into active element | Filling forms, search boxes |
| `scroll_down` | Scrolls down by one page | Viewing content below the fold |
| `scroll_up` | Scrolls up by one page | Returning to previous content |
| `close` | Closes the browser | Ending a browser session |
Browser Use Settings
--------------------
ℹ️Default Browser Settings
* **Enable browser tool**: Enabled
* **Viewport size**: Small Desktop (900x600)
* **Screenshot quality**: 75%
* **Use remote browser connection**: Disabled
### Accessing Settings
To change Browser / Computer Use settings in Kilo:
1. Click the gear icon in Kilo Code
2. Open `Browser / Computer Use`
### Enable/Disable Browser Use
**Purpose**: Master toggle that enables Kilo to interact with websites using a Puppeteer-controlled browser.
To change this setting:
1. Check or uncheck the "Enable browser tool" checkbox within your Browser / Computer Use settings
### Viewport Size
**Purpose**: Determines the resolution of the browser session Kilo Code uses.
**Tradeoff**: Higher values provide a larger viewport but increase token usage.
To change this setting:
1. Click the dropdown menu under "Viewport size" within your Browser / Computer Use settings
2. Select one of the available options:
* Large Desktop (1280x800)
* Small Desktop (900x600) - Default
* Tablet (768x1024)
* Mobile (360x640)
3. Select your desired resolution.
### Screenshot Quality
**Purpose**: Controls the WebP compression quality of browser screenshots.
**Tradeoff**: Higher values provide clearer screenshots but increase token usage.
To change this setting:
1. Adjust the slider under "Screenshot quality" within your Browser / Computer Use settings
2. Set a value between 1-100% (default is 75%)
3. Higher values provide clearer screenshots but increase token usage:
* 40-50%: Good for basic text-based websites
* 60-70%: Balanced for most general browsing
* 80%+: Use when fine visual details are critical
### Remote Browser Connection
**Purpose**: Connect Kilo to an existing Chrome browser instead of using the built-in browser.
**Benefits**:
* Works in containerized environments and remote development workflows
* Maintains authenticated sessions between browser uses
* Eliminates repetitive login steps
* Allows use of custom browser profiles with specific extensions
**Requirements**: Chrome must be running with remote debugging enabled.
To enable this feature:
1. Check the "Use remote browser connection" box in Browser / Computer Use settings
2. Click "Test Connection" to verify
#### Common Use Cases
* **DevContainers**: Connect from containerized VS Code to host Chrome browser
* **Remote Development**: Use local Chrome with remote VS Code server
* **Custom Chrome Profiles**: Use profiles with specific extensions and settings
#### Connecting to a Visible Chrome Window
Connect to a visible Chrome window to observe Kilo's interactions in real-time:
**macOS**
/Applications/Google\\ Chrome.app/Contents/MacOS/Google\\ Chrome --remote-debugging-port=9222 --user-data-dir=/tmp/chrome-debug --no-first-run
**Windows**
"C:\\Program Files\\Google\\Chrome\\Application\\chrome.exe" --remote-debugging-port=9222 --user-data-dir=C:\\chrome-debug --no-first-run
**Linux**
google-chrome --remote-debugging-port=9222 --user-data-dir=/tmp/chrome-debug --no-first-run
Copy page
---
# Using Agents
Using Agents
============
Agents in Kilo Code are specialized personas that tailor the assistant's behavior to your current task. Each agent offers different capabilities, expertise, and access levels to help you accomplish specific goals.
ℹ️Info
The **VSCode (Legacy)** extension calls these **modes** instead of agents. The concept is the same — specialized personas with distinct tool access and behavior.
Why Use Different Agents?
-------------------------
* **Task specialization:** Get precisely the type of assistance you need for your current task
* **Safety controls:** Prevent unintended file modifications when focusing on planning or learning
* **Focused interactions:** Receive responses optimized for your current activity
* **Workflow optimization:** Seamlessly transition between planning, implementing, debugging, and learning
Switching Agents
----------------
VSCodeCLIVSCode (Legacy)
There are several ways to switch agents:
* **Dropdown menu:** Click the agent selector in the sidebar to switch between agents.
* **Slash commands:** Type `/agents` in the chat input to open the agent picker.
* **Keyboard shortcut:** Press `Cmd+.` (macOS) or `Ctrl+.` (Windows/Linux) to cycle through available agents. Add `Shift` to cycle in reverse.
Built-in Agents
---------------
VSCodeCLIVSCode (Legacy)
### code (Default)
| Aspect | Details |
| --- | --- |
| **Description** | A skilled software engineer with expertise in programming languages, design patterns, and best practices |
| **Tool Access** | Full access to all tools: `read`, `edit`, `glob`, `grep`, `bash`, `task`, `webfetch`, plus tools from MCP servers |
| **Ideal For** | Writing code, implementing features, debugging, and general development |
| **Special Features** | No tool restrictions — full flexibility for all coding tasks |
### ask
| Aspect | Details |
| --- | --- |
| **Description** | A knowledgeable technical assistant focused on answering questions without changing your codebase |
| **Tool Access** | Read-only tools only (cannot edit files or run commands) |
| **Ideal For** | Code explanation, concept exploration, and technical learning |
| **Special Features** | Optimized for informative responses without modifying your project |
### plan
| Aspect | Details |
| --- | --- |
| **Description** | An experienced technical leader and planner who helps design systems and create implementation plans |
| **Tool Access** | Read-only tools plus restricted file editing (plan files in `.kilo/plans/` only) |
| **Ideal For** | System design, high-level planning, and architecture discussions |
| **Special Features** | Similar to the legacy extension's "Architect" mode, with a planning-focused approach |
### debug
| Aspect | Details |
| --- | --- |
| **Description** | An expert problem solver specializing in systematic troubleshooting and diagnostics |
| **Tool Access** | Full access to all tools |
| **Ideal For** | Tracking down bugs, diagnosing errors, and resolving complex issues |
| **Special Features** | Uses a methodical approach of analyzing, narrowing possibilities, and fixing issues |
### orchestrator (Deprecated)
| Aspect | Details |
| --- | --- |
| **Description** | A strategic workflow orchestrator who coordinates complex tasks by delegating them to appropriate specialized agents |
| **Tool Access** | Limited access to create new tasks and coordinate workflows |
| **Ideal For** | Breaking down complex projects into manageable subtasks assigned to specialized agents |
| **Special Features** | Delegates work to other agents; also has access to the **explore** subagent for codebase exploration |
⚠️Warning
Orchestrator is deprecated and will be removed in a future release. Agents with full tool access (Code, Plan, Debug) now support subagents natively — there's no need for a dedicated orchestrator. See [Orchestrator Mode (Deprecated)](https://kilo.ai/docs/code-with-ai/agents/orchestrator-mode)
for migration details.
ℹ️Info
The VSCode extension and CLI do not include a built-in Review agent. Code review workflows can be handled by the **code** agent or via custom agent configurations.
Custom Agents
-------------
Create your own specialized assistants by defining tool access, file permissions, and behavior instructions. Custom agents help enforce team standards or create purpose-specific assistants. See [Custom Modes documentation](https://kilo.ai/docs/customize/custom-modes)
for setup instructions.
Copy page
---
# Orchestrator Mode
Orchestrator Mode (Deprecated)
==============================
⚠️Deprecated — scheduled for removal
Orchestrator mode is deprecated and will be removed in a future release. In the VSCode extension and CLI, **agents with full tool access (Code, Plan, Debug) can now delegate to subagents automatically**. You no longer need a dedicated orchestrator — just pick the agent for your task and it will coordinate subagents when helpful. (Read-only agents like Ask do not support delegation.)
What Changed
------------
Previously, orchestrator mode was the only way to break complex tasks into subtasks. You had to explicitly switch to orchestrator mode, which would then delegate work to other modes like Code or Architect.
Now, **subagent support is built into agents that have full tool access** (Code, Plan, Debug). When one of these agents encounters a task that would benefit from delegation — like exploring a codebase, running a parallel search, or handling a subtask in isolation — it can launch a subagent directly using the `task` tool. There's no need to switch agents first.
What You Should Do
------------------
* **Just pick the right agent for your task.** Use Code for implementation, Plan for architecture, Debug for troubleshooting. Each will orchestrate subagents where it makes sense.
* **Add custom subagents** if you want specialized delegation behavior. See [Custom Subagents](https://kilo.ai/docs/customize/custom-subagents)
for details.
* **Stop switching to orchestrator mode** before complex tasks. Your current agent already has that capability.
How Subagents Work
------------------
1. The agent analyzes a complex task and decides a subtask would benefit from isolation.
2. It launches a subagent session using the `task` tool (e.g., `general` for autonomous work, `explore` for codebase research).
3. The subagent runs in its own isolated context — separate conversation history, no shared state.
4. When done, the subagent returns a summary to the parent agent, which continues its work.
Agents can launch multiple subagent sessions concurrently for parallel work.
▶ℹ️VSCode (Legacy)
Copy page
---
# Fast Edits
Fast Edits
==========
ℹ️Default Setting
Fast Edits (using the "Enable editing through diffs" setting) is enabled by default in Kilo Code. You typically don't need to change these settings unless you encounter specific issues or want to experiment with different diff strategies.
Kilo Code offers an advanced setting to change how it edits files, using diffs (differences) instead of rewriting entire files. Enabling this feature provides significant benefits.
Enable Editing Through Diffs
----------------------------
Open Settings by clicking the gear icon → Advanced
When **Enable editing through diffs** is checked:
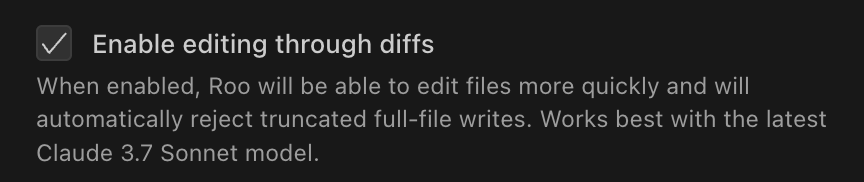
1. **Faster File Editing**: Kilo modifies files more quickly by applying only the necessary changes.
2. **Prevents Truncated Writes**: The system automatically detects and rejects attempts by the AI to write incomplete file content, which can happen with large files or complex instructions. This helps prevent corrupted files.
📝Disabling Fast Edits
If you uncheck **Enable editing through diffs**, Kilo will revert to writing the entire file content for every edit using the [`write_to_file`](https://kilo.ai/docs/automate/tools/write-to-file)
tool, instead of applying targeted changes with [`apply_diff`](https://kilo.ai/docs/automate/tools/apply-diff)
. This full-write approach is generally slower for modifying existing files and leads to higher token usage.
Match Precision
---------------
This slider controls how closely the code sections identified by the AI must match the actual code in your file before a change is applied.
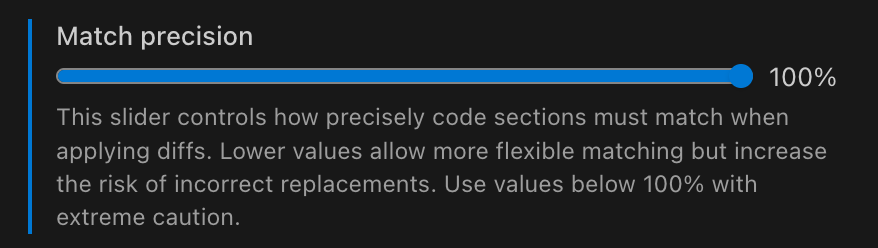
* **100% (Default)**: Requires an exact match. This is the safest option, minimizing the risk of incorrect changes.
* **Lower Values (80%-99%)**: Allows for "fuzzy" matching. Kilo can apply changes even if the code section has minor differences from what the AI expected. This can be useful if the file has been slightly modified, but **increases the risk** of applying changes in the wrong place.
**Use values below 100% with extreme caution.** Lower precision might be necessary occasionally, but always review the proposed changes carefully.
Internally, this setting adjusts a `fuzzyMatchThreshold` used with algorithms like Levenshtein distance to compare code similarity.
Copy page
---
# Git Commit Generation
Generate Commit Messages
========================
Generate descriptive commit messages automatically based on your staged git changes. Kilo Code analyzes your staged files and creates conventional commit messages that follow best practices.
ℹ️Info
This feature only analyzes **staged changes**. Make sure to stage your files using `git add` or via `VS Code` interface before generating commit messages.
How It Works
------------
The git commit message generator:
* Analyzes only your **staged changes** (not unstaged or untracked files)
* Uses AI to understand the context and purpose of your changes
* Creates descriptive commit messages that explain what was changed and why following the [Conventional Commits](https://www.conventionalcommits.org/)
(by default, customizable)
Using the Feature
-----------------
### Generating a Commit Message
1. Stage your changes using `git add` or the VS Code git interface
2. In the VS Code Source Control panel, look for the `Kilo Code` logo next to the commit message field)
3. Click the logo to generate a commit message
The generated message will appear in the commit message field, ready for you to review and modify if needed.
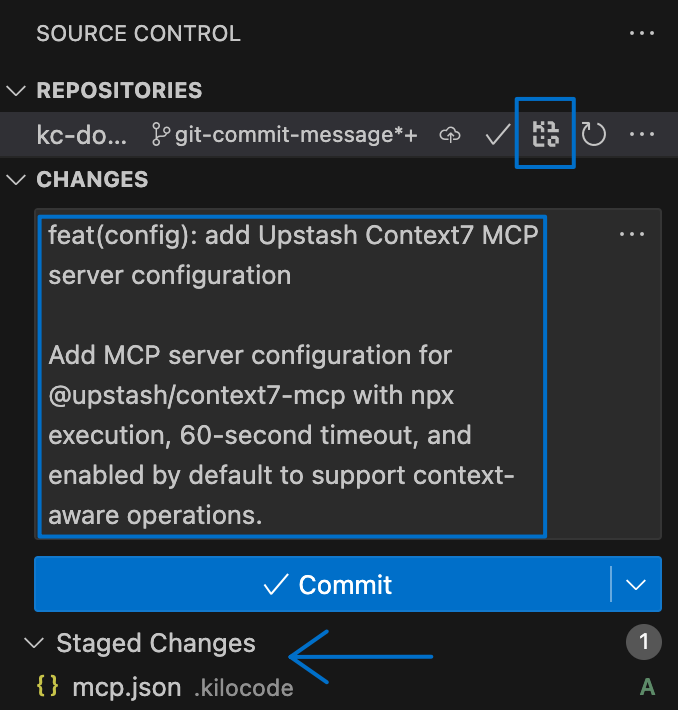
### Conventional Commit Format
By default, generated messages follow the Conventional Commits specification:
():
Common types include:
* `feat`: New features
* `fix`: Bug fixes
* `docs`: Documentation changes
* `style`: Code style changes (formatting, etc.)
* `refactor`: Code refactoring
* `test`: Adding or updating tests
* `chore`: Maintenance tasks
Configuration
-------------
### Customizing the Commit Template
You can customize how commit messages are generated by modifying the prompt template:
1. Open Settings by clicking the gear icon → `Prompts`
2. Find the "Commit Message Generation" section
3. Edit the `Prompt` template to match your project's conventions
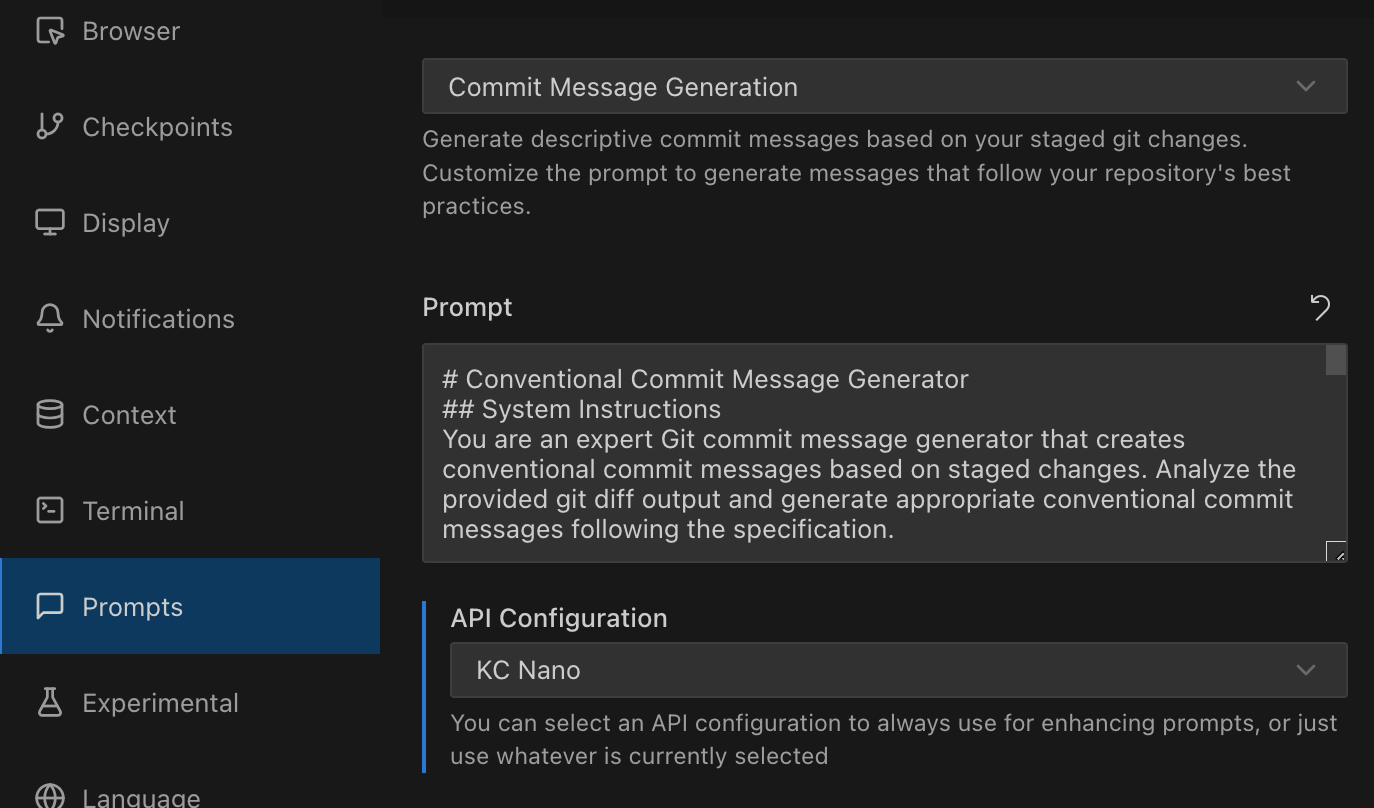
The default template creates conventional commit messages, but you can modify it to:
* Use different commit message formats
* Include specific information relevant to your project
* Follow your team's commit message conventions
* Add custom instructions for the AI
### API Configuration
You can configure which API profile to use for commit message generation:
1. In the `Prompts` settings, scroll to "API Configuration"
2. Select a specific profile or use the currently selected one
💡Tip
Consider creating a dedicated [API configuration profile](https://kilo.ai/docs/ai-providers)
with a faster, more cost-effective model specifically for commit message generation.
Best Practices
--------------
### Staging Strategy
* Stage related changes together for more coherent commit messages
* Avoid staging unrelated changes in a single commit
* Use `git add -p` for partial file staging when needed
### Message Review
* Always review generated messages before committing
* Edit messages to add context the AI might have missed
* Ensure the message accurately describes the changes
### Custom Templates
* Tailor the prompt template to your project's needs
* Include project-specific terminology or conventions
* Add instructions for handling specific types of changes
Example Generated Messages
--------------------------
Here are examples of messages the feature might generate:
feat(auth): add OAuth2 integration with Google
Implement Google OAuth2 authentication flow including:
- OAuth2 client configuration
- User profile retrieval
- Token refresh mechanism
fix(api): resolve race condition in user data fetching
Add proper error handling and retry logic to prevent
concurrent requests from causing data inconsistency
docs(readme): update installation instructions
Add missing dependency requirements and clarify
setup steps for new contributors
Troubleshooting
---------------
### No Staged Changes
If the button doesn't appear or generation fails, ensure you have staged changes:
git add
# or stage all changes
git add .
### Poor Message Quality
If generated messages aren't helpful:
* Review your staging strategy - don't stage unrelated changes together
* Customize the prompt template with more specific instructions
* Try a different AI model through API configuration
### Integration Issues
The feature integrates with VS Code's built-in git functionality. If you encounter issues:
* Ensure your repository is properly initialized
* Check that VS Code can access your git repository
* Verify git is installed and accessible from VS Code
Related Features
----------------
* [API Configuration Profiles](https://kilo.ai/docs/ai-providers)
- Use different models for commit generation
* [Settings Management](https://kilo.ai/docs/getting-started/settings)
- Manage all your Kilo Code preferences
Copy page
---
# Checkpoints
Checkpoints
===========
Checkpoints automatically version your workspace files during Kilo Code tasks, enabling non-destructive exploration of AI suggestions and easy recovery from unwanted changes.
Checkpoints let you:
* Safely experiment with AI-suggested changes
* Easily recover from undesired modifications
* Compare different implementation approaches
* Revert to previous project states without losing work
ℹ️Important Notes
* **Checkpoints are enabled by default.**
* **Git must be installed** for checkpoints to function - [see installation instructions](https://kilo.ai/docs/code-with-ai/features/checkpoints#git-installation)
* The working directory must be a Git repository for checkpoints to work
* No GitHub account or repository is required
* No Git personal information configuration is needed
* The shadow Git repository operates independently from your project's existing Git configuration
Configuration Options
---------------------
Access checkpoint settings in Kilo Code settings under the "Checkpoints" section:
1. Open Settings by clicking the gear icon → Checkpoints
2. Check or uncheck the "Enable automatic checkpoints" checkbox
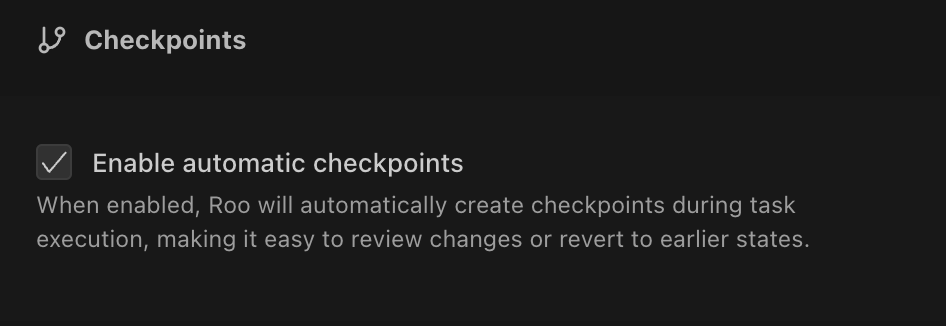
How Checkpoints Work
--------------------
Kilo Code captures snapshots of your project's state using a shadow Git repository, separate from your main version control system. These snapshots, called checkpoints, automatically record changes throughout your AI-assisted workflow—whenever tasks begin, files change, or commands run.
Checkpoints are stored as Git commits in the shadow repository, capturing:
* File content changes
* New files added
* Deleted files
* Renamed files
* Binary file changes
Working with Checkpoints
------------------------
Checkpoints are integrated directly into your workflow through the chat interface.
Checkpoints appear directly in your chat history in two forms:
* **Initial checkpoint** marks your starting project state

* **Regular checkpoints** appear after file modifications or command execution

Each checkpoint provides two primary functions:
### Viewing Differences
To compare your current workspace with a previous checkpoint:
1. Locate the checkpoint in your chat history
2. Click the checkpoint's `View Differences` button

3. Review the differences in the comparison view:
* Added lines are highlighted in green
* Removed lines are highlighted in red
* Modified files are listed with detailed changes
* Renamed and moved files are tracked with their path changes
* New or deleted files are clearly marked
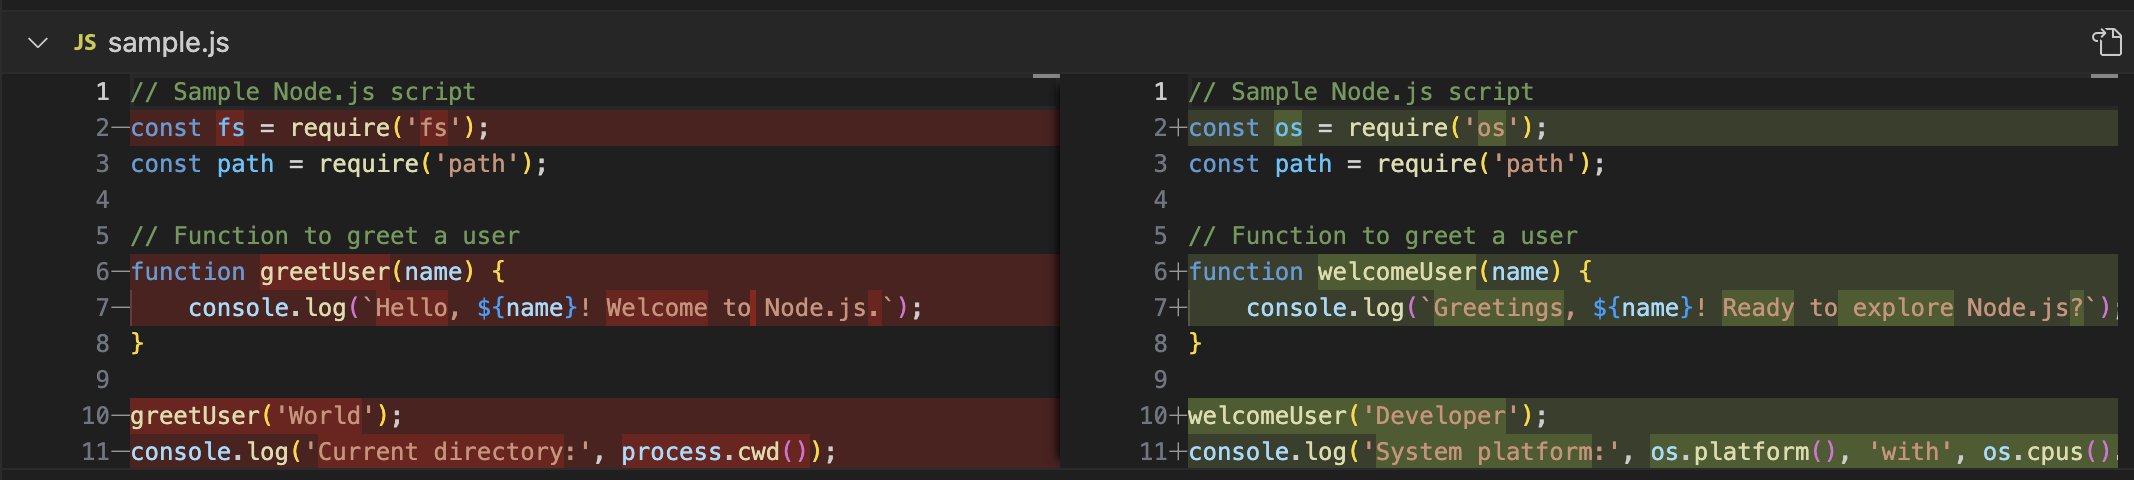
### Restoring Checkpoints
To restore a project to a previous checkpoint state:
1. Locate the checkpoint in your chat history
2. Click the checkpoint's `Restore Checkpoint` button

3. Choose one of these restoration options:
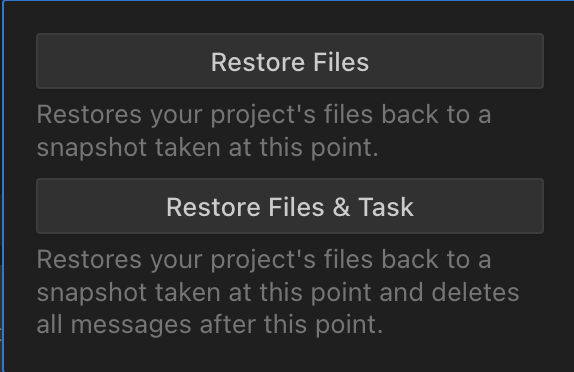
* **Restore Files Only** - Reverts only workspace files to checkpoint state without modifying conversation history. Ideal for comparing alternative implementations while maintaining chat context, allowing you to seamlessly switch between different project states. This option does not require confirmation and lets you quickly switch between different implementations.
* **Restore Files & Task** - Reverts both workspace files AND removes all subsequent conversation messages. Use when you want to completely reset both your code and conversation back to the checkpoint's point in time. This option requires confirmation in a dialog as it cannot be undone.
### Limitations and Considerations
* **Scope**: Checkpoints only capture changes made during active Kilo Code tasks
* **External changes**: Modifications made outside of tasks (manual edits, other tools) aren't included
* **Large files**: Very large binary files may impact performance
* **Unsaved work**: Restoration will overwrite any unsaved changes in your workspace
Technical Implementation
------------------------
### Checkpoint Architecture
The checkpoint system consists of:
1. **Shadow Git Repository**: A separate Git repository created specifically for checkpoint tracking that functions as the persistent storage mechanism for checkpoint state.
2. **Checkpoint Service**: Handles Git operations and state management through:
* Repository initialization
* Checkpoint creation and storage
* Diff computation
* State restoration
3. **UI Components**: Interface elements displayed in the chat that enable interaction with checkpoints.
### Restoration Process
When restoration executes, Kilo Code:
* Performs a hard reset to the specified checkpoint commit
* Copies all files from the shadow repository to your workspace
* Updates internal checkpoint tracking state
### Storage Type
Checkpoints are task-scoped, meaning they are specific to a single task.
### Diff Computation
Checkpoint comparison uses Git's underlying diff capabilities to produce structured file differences:
* Modified files show line-by-line changes
* Binary files are properly detected and handled
* Renamed and moved files are tracked correctly
* File creation and deletion are clearly identified
### File Exclusion and Ignore Patterns
The checkpoint system uses intelligent file exclusion to track only relevant files:
#### Built-in Exclusions
The system has comprehensive built-in exclusion patterns that automatically ignore:
* Build artifacts and dependency directories (`node_modules/`, `dist/`, `build/`)
* Media files and binary assets (images, videos, audio)
* Cache and temporary files (`.cache/`, `.tmp/`, `.bak`)
* Configuration files with sensitive information (`.env`)
* Large data files (archives, executables, binaries)
* Database files and logs
These patterns are written to the shadow repository's `.git/info/exclude` file during initialization.
#### .gitignore Support
The checkpoint system respects `.gitignore` patterns in your workspace:
* Files excluded by `.gitignore` won't trigger checkpoint creation
* Excluded files won't appear in checkpoint diffs
* Standard Git ignore rules apply when staging file changes
#### .kilocodeignore Behavior
The `.kilocodeignore` file (which controls AI access to files) is separate from checkpoint tracking:
* Files excluded by `.kilocodeignore` but not by `.gitignore` will still be checkpointed
* Changes to AI-inaccessible files can still be restored through checkpoints
This separation is intentional, as `.kilocodeignore` limits which files the AI can access, not which files should be tracked for version history.
#### Nested Git Repositories
Checkpoints do not support nested Git repositories. The working directory must be a single Git repository for checkpoints to function properly.
* Nested `.git` directories are not supported and checkpoints will be disabled
* Git submodules are not a workaround - each submodule will have its own `.git` directory, which is incompatible with checkpoint tracking
* If you have nested repositories, consider consolidating to a single repository
### Concurrency Control
Operations are queued to prevent concurrent Git operations that might corrupt repository state. This ensures that rapid checkpoint operations complete safely even when requested in quick succession.
Git Installation
----------------
Checkpoints require Git to be installed on your system. The implementation uses the `simple-git` library, which relies on Git command-line tools to create and manage shadow repositories.
### macOS
1. **Install with Homebrew (recommended)**:
brew install git
2. **Alternative: Install with Xcode Command Line Tools**:
xcode-select --install
3. **Verify installation**:
* Open Terminal
* Type `git --version`
* You should see a version number like `git version 2.40.0`
### Windows
1. **Download Git for Windows**:
* Visit https://git-scm.com/download/win
* The download should start automatically
2. **Run the installer**:
* Accept the license agreement
* Choose installation location (default is recommended)
* Select components (default options are typically sufficient)
* Choose the default editor
* Choose how to use Git from the command line (recommended: Git from the command line and also from 3rd-party software)
* Configure line ending conversions (recommended: Checkout Windows-style, commit Unix-style)
* Complete the installation
3. **Verify installation**:
* Open Command Prompt or PowerShell
* Type `git --version`
* You should see a version number like `git version 2.40.0.windows.1`
### Linux
**Debian/Ubuntu**:
sudo apt update
sudo apt install git
**Fedora**:
sudo dnf install git
**Arch Linux**:
sudo pacman -S git
**Verify installation**:
* Open Terminal
* Type `git --version`
* You should see a version number
Copy page
---
# Task Todo List
Task Todo List
==============
**The big picture**: Never lose track of complex development tasks again. Task Todo Lists create interactive, persistent checklists that live right in your chat interface.
**Why it matters**: Complex workflows have lots of moving parts. Without structure, it's easy to miss steps, duplicate work, or forget what comes next.
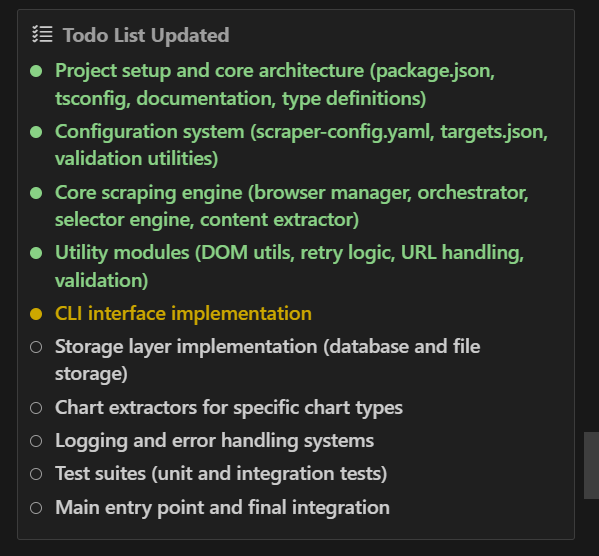
How to trigger todo lists
-------------------------
**Automatic triggers**:
* Complex tasks with multiple steps
* Working in Architect mode
* Multi-phase workflows with dependencies
**Manual triggers**:
* Ask Kilo to "use the [update\_todo\_list tool](https://kilo.ai/docs/automate/tools/update-todo-list)
"
* Say "create a todo list"
**The bottom line**: Kilo decides what goes in the list, but you can provide feedback during approval dialogs.
* * *
How todo lists are updated
--------------------------
Todo lists are managed with the [`update_todo_list` tool](https://kilo.ai/docs/automate/tools/update-todo-list)
. Each time Kilo updates the list, it replaces the entire checklist with the latest view of the task.
Kilo updates the list when:
* New steps are discovered
* Items are completed or reprioritized
* You explicitly ask for a todo list
* * *
The old way vs. the new way
---------------------------
**Before**: You juggled task steps in your head or scattered notes, constantly wondering "what's next?"
**Now**: Kilo creates structured checklists that update automatically as work progresses. You see exactly where you are and what's coming up.
* * *
Where todo lists appear
-----------------------
**1\. Task Header Summary** Quick progress overview with your next important item
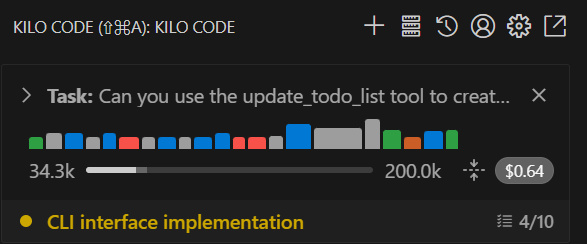
Click the task header summary to expand the full list inline and jump to the current item.
**2\. Interactive Tool Block** Full todo interface in chat where you can:
* See all items and their status
* Edit descriptions when Kilo asks for approval
* Stage changes using the "Edit" button
**3\. Environment Details** Background "REMINDERS" table that keeps Kilo informed about current progress
Task status decoded
-------------------
**Pending** -> Empty checkbox (not started)

* * *
**In Progress** -> Yellow dot (currently working)

* * *
**Completed** -> Green checkmark (finished)

* * *
Editing todo lists
------------------
When Kilo proposes a todo list update, you can edit the list before approving. Use the "Edit" button in the tool block to update item text, add or remove steps, or adjust status. Once approved, Kilo continues with the updated list.
Common questions
----------------
**"Can I create my own todo lists?"** Yes, just ask Kilo to use the update\_todo\_list tool. But Kilo stays in control of the content and workflow.
**"What about simple tasks?"** Kilo typically skips todo lists for simple tasks. The overhead isn't worth it.
**"Why can't I directly edit the list?"** Design choice. Kilo maintains authority over task management to ensure consistent progress tracking. You provide input, Kilo executes.
* * *
Settings
--------
You can disable todo lists in Settings -> Advanced -> **Enable todo list tool**. When disabled, Kilo won't create or update todo lists, and the REMINDERS table won't appear in Environment Details.
💡Pro tip: Auto-approval
**What it does**: Automatically approves todo list updates without confirmation prompts.
**When to use it**: Long workflows where constant interruptions slow you down.
**How to enable it**: Check the [Update Todo List auto-approval settings](https://kilo.ai/docs/getting-started/settings/auto-approving-actions#update-todo-list)
.
**The catch**: Less control, but faster execution.
Copy page
---
# .kilocodeignore
.kilocodeignore
===============
Overview
--------
`.kilocodeignore` is a root-level file that tells Kilo Code which files and folders it should not access. It uses standard `.gitignore` pattern syntax, but it only affects Kilo Code's file access, not Git.
If no `.kilocodeignore` file exists, Kilo Code can access all files in the workspace.
Quick Start
-----------
1. Create a `.kilocodeignore` file at the root of your project.
2. Add patterns for files or folders you want Kilo Code to avoid.
3. Save the file. Kilo Code will pick up the changes automatically.
Example:
\# Secrets
.env
secrets/
\*\*/\*.pem
\*\*/\*.key
# Build output
dist/
coverage/
# Allow a specific file inside a blocked folder
!secrets/README.md
Pattern Rules
-------------
`.kilocodeignore` follows the same rules as `.gitignore`:
* `#` starts a comment
* `*` and `**` match wildcards
* Trailing `/` matches directories only
* `!` negates a previous rule
Patterns are evaluated relative to the workspace root.
What It Affects
---------------
Kilo Code checks `.kilocodeignore` before accessing files in tools like:
* [`read_file`](https://kilo.ai/docs/automate/tools/read-file)
* [`write_to_file`](https://kilo.ai/docs/automate/tools/write-to-file)
* [`apply_diff`](https://kilo.ai/docs/automate/tools/apply-diff)
* [`delete_file`](https://kilo.ai/docs/automate/tools/delete-file)
* [`execute_command`](https://kilo.ai/docs/automate/tools/execute-command)
* [`list_files`](https://kilo.ai/docs/automate/tools/list-files)
If a file is blocked, Kilo Code will return an "access denied" message and suggest updating your `.kilocodeignore` rules.
Visibility in Lists
-------------------
By default, ignored files are hidden from file lists. You can show them with a lock icon by enabling:
Settings -> Context -> **Show .kilocodeignore'd files in lists and searches**
Checkpoints vs .kilocodeignore
------------------------------
Checkpoint tracking is separate from file access rules. Files blocked by `.kilocodeignore` can still be checkpointed if they are not excluded by `.gitignore`. See the [Checkpoints](https://kilo.ai/docs/code-with-ai/features/checkpoints)
documentation for details.
Troubleshooting
---------------
* **Kilo can't access a file you want:** Remove or narrow the matching rule in `.kilocodeignore`.
* **A file still appears in lists:** Check the setting that shows ignored files in lists and searches.
Copy page
---
# Free and Budget Models
Free and Budget Models
======================
**Why this matters:** AI model costs can add up quickly during development. This guide shows you how to use Kilo Code effectively while minimizing or eliminating costs through free models, budget-friendly alternatives, and smart usage strategies.
Completely Free Options
-----------------------
### Kilo Gateway Free Models
From time to time, Kilo works with AI inference providers to offer free models. These are available through the Kilo Gateway. Currently, we are offering these free models:
* **MiniMax M2.1 (free)** - A capable model from MiniMax with strong general-purpose performance.
* **Z.AI: GLM 4.7 (free)** - Latest variant of the GLM family, purpose-built for agent-centric applications.
* **MoonshotAI: Kimi K2.5 (free)** - Optimized for agentic capabilities, including advanced tool use, reasoning, and code synthesis.
* **Giga Potato (free)** - A stealth release model that is free in its evaluation period.
* **Arcee AI: Trinity Large Preview (free)** - A preview model from Arcee AI with strong capabilities.
### OpenRouter Free Tier Models
OpenRouter offers several models with generous free tiers. **Note:** You'll need to create a free OpenRouter account to access these models.
**Setup:**
1. Create a free [OpenRouter account](https://openrouter.ai/)
2. Get your API key from the dashboard
3. Configure Kilo Code with the OpenRouter provider
**Available free models:**
* **Qwen3 Coder (free)** - Optimized for agentic coding tasks such as function calling, tool use, and long-context reasoning over repositories.
* **Z.AI: GLM 4.5 Air (free)** - Lightweight variant of the GLM-4.5 family, purpose-built for agent-centric applications.
* **DeepSeek: R1 0528 (free)** - Performance on par with OpenAI o1, but open-sourced and with fully open reasoning tokens.
* **MoonshotAI: Kimi K2 (free)** - Optimized for agentic capabilities, including advanced tool use, reasoning, and code synthesis.
Cost-Effective Premium Models
-----------------------------
When you need more capability than free models provide, these options deliver excellent value:
### Ultra-Budget Champions (Under $0.50 per million tokens)
**Mistral Devstral Small**
* **Cost:** ~$0.20 per million input tokens
* **Best for:** Code generation, debugging, refactoring
* **Performance:** 85% of premium model capability at 10% of the cost
**Llama 4 Maverick**
* **Cost:** ~$0.30 per million input tokens
* **Best for:** Complex reasoning, architecture planning
* **Performance:** Excellent for most development tasks
**DeepSeek v3**
* **Cost:** ~$0.27 per million input tokens
* **Best for:** Code analysis, large codebase understanding
* **Performance:** Strong technical reasoning
### Mid-Range Value Models ($0.50-$2.00 per million tokens)
**Qwen3 235B**
* **Cost:** ~$1.20 per million input tokens
* **Best for:** Complex projects requiring high accuracy
* **Performance:** Near-premium quality at 40% of the cost
Smart Usage Strategies
----------------------
### The 50% Rule
**Principle:** Use budget models for 50% of your tasks, premium models for the other 50%.
**Budget model tasks:**
* Code reviews and analysis
* Documentation writing
* Simple bug fixes
* Boilerplate generation
* Refactoring existing code
**Premium model tasks:**
* Complex architecture decisions
* Debugging difficult issues
* Performance optimization
* New feature design
* Critical production code
### Context Management for Cost Savings
**Minimize context size:**
// Instead of mentioning entire files
@src/components/UserProfile.tsx
// Mention specific functions or sections
@src/components/UserProfile.tsx:45-67
**Reuse context effectively:**
* Keep key project notes in your repository (e.g., a AGENTS.md or docs folder)
* Reduces need to re-explain project details
* Saves tokens per conversation
**Strategic file mentions:**
* Only include files directly relevant to the task
* Use [`@folder/`](https://kilo.ai/docs/code-with-ai/agents/context-mentions)
for broad context, specific files for targeted work
### Model Switching Strategies
**Start cheap, escalate when needed:**
1. **Begin with free models** (Qwen3 Coder, GLM-4.5-Air)
2. **Switch to budget models** if free models struggle
3. **Escalate to premium models** only for complex tasks
**Use API Configuration Profiles:**
* Set up [multiple profiles](https://kilo.ai/docs/ai-providers)
for different cost tiers
* Quick switching between free, budget, and premium models
* Match model capability to task complexity
### Mode-Based Cost Optimization
**Use appropriate modes to limit expensive operations:**
* **[Ask Agent](https://kilo.ai/docs/code-with-ai/agents/using-agents#ask)
:** Information gathering without code changes
* **[Plan Agent](https://kilo.ai/docs/code-with-ai/agents/using-agents#plan)
:** Planning without expensive file operations
* **[Debug Agent](https://kilo.ai/docs/code-with-ai/agents/using-agents#debug)
:** Focused troubleshooting
**Custom modes for budget control:**
* Create modes that restrict expensive tools
* Limit file access to specific directories
* Control which operations are auto-approved
Real-World Performance Comparisons
----------------------------------
### Code Generation Tasks
**Simple function creation:**
* **Mistral Devstral Small:** 95% success rate
* **GPT-4:** 98% success rate
* **Cost difference:** Free vs $0.20 vs $30 per million tokens
**Complex refactoring:**
* **Budget models:** 70-80% success rate
* **Premium models:** 90-95% success rate
* **Recommendation:** Start with budget, escalate if needed
### Debugging Performance
**Simple bugs:**
* **Free models:** Usually sufficient
* **Budget models:** Excellent performance
* **Premium models:** Overkill for most cases
**Complex system issues:**
* **Free models:** 40-60% success rate
* **Budget models:** 60-80% success rate
* **Premium models:** 85-95% success rate
Hybrid Approach Recommendations
-------------------------------
### Daily Development Workflow
**Morning planning session:**
* Use **Architect mode** with **DeepSeek R1**
* Plan features and architecture
* Create task breakdowns
**Implementation phase:**
* Use **Code mode** with **budget models**
* Generate and modify code
* Handle routine development tasks
**Complex problem solving:**
* Switch to **premium models** when stuck
* Use for critical debugging
* Architecture decisions affecting multiple systems
### Project Phase Strategy
**Early development:**
* Free and budget models for prototyping
* Rapid iteration without cost concerns
* Establish patterns and structure
**Production preparation:**
* Premium models for critical code review
* Performance optimization
* Security considerations
Cost Monitoring and Control
---------------------------
### Track Your Usage
**Monitor credit consumption:**
* Check cost estimates in chat history
* Review monthly usage patterns
* Identify high-cost operations
**Set spending limits:**
* Use provider billing alerts
* Configure [provider rate limits](https://kilo.ai/docs/ai-providers)
to control usage
* Set daily/monthly budgets
### Cost-Saving Tips
**Reduce system prompt size:**
* [Disable MCP](https://kilo.ai/docs/automate/mcp/using-in-kilo-code)
if not using external tools
* Use focused custom modes
* Minimize unnecessary context
**Optimize conversation length:**
* Use [Checkpoints](https://kilo.ai/docs/code-with-ai/features/checkpoints)
to reset context
* Start fresh conversations for unrelated tasks
* Archive completed work
**Batch similar tasks:**
* Group related code changes
* Handle multiple files in single requests
* Reduce conversation overhead
Getting Started with Budget Models
----------------------------------
### Quick Setup Guide
1. **Create OpenRouter account** for free models
2. **Configure multiple providers** in Kilo Code
3. **Set up API Configuration Profiles** for easy switching
4. **Escalate to budget models** when needed
5. **Reserve premium models** for complex work
### Recommended Provider Mix
**Free tier foundation:**
* [OpenRouter](https://kilo.ai/docs/ai-providers/openrouter)
- Free models
* [Groq](https://kilo.ai/docs/ai-providers/groq)
- Fast inference for supported models
* [Z.ai](https://z.ai/model-api)
- Provides a free model GLM-4.5-Flash
**Budget tier options:**
* [DeepSeek](https://kilo.ai/docs/ai-providers/deepseek)
- Excellent value models
* [Mistral](https://kilo.ai/docs/ai-providers/mistral)
- Specialized coding models
**Premium tier backup:**
* [Anthropic](https://kilo.ai/docs/ai-providers/anthropic)
- Claude for complex reasoning
* [OpenAI](https://kilo.ai/docs/ai-providers/openai)
- GPT-4 for critical tasks
Measuring Success
-----------------
**Track these metrics:**
* Monthly AI costs vs. development productivity
* Task completion rates by model tier
* Time saved vs. money spent
* Code quality improvements
**Success indicators:**
* 70%+ of tasks completed with free/budget models
* Monthly costs under your target budget
* Maintained or improved code quality
* Faster development cycles
By combining free models, strategic budget model usage, and smart optimization techniques, you can harness the full power of AI-assisted development while keeping costs minimal. Start with free options and gradually incorporate budget models as your needs and comfort with costs grow.
Copy page
---
# Architecture Features
Architecture Features
=====================
These pages document the architecture and design of current or planned features, as well as any unique development patterns.
| Feature | Description |
| --- | --- |
| [Agent Observability](https://kilo.ai/docs/contributing/architecture/agent-observability) | Observability and monitoring for agentic systems |
| [Auto Model Tiers](https://kilo.ai/docs/contributing/architecture/auto-model-tiers) | Multi-tier auto model routing (Frontier, Free, Open) |
| [Benchmarking](https://kilo.ai/docs/contributing/architecture/benchmarking) | Benchmarking Kilo Code across models and agents |
| [Enterprise MCP Controls](https://kilo.ai/docs/contributing/architecture/enterprise-mcp-controls) | Admin controls for MCP server allowlists |
| [MCP OAuth Authorization](https://kilo.ai/docs/contributing/architecture/mcp-oauth-authorization) | OAuth 2.1-based authorization for MCP servers |
| [Onboarding Improvements](https://kilo.ai/docs/contributing/architecture/onboarding-improvements) | User onboarding and engagement features |
| [Organization Modes Library](https://kilo.ai/docs/contributing/architecture/organization-modes-library) | Shared modes for teams and enterprise |
| [Agentic Security Reviews](https://kilo.ai/docs/deploy-secure/security-reviews) | AI-powered security vulnerability analysis |
| [Track Repo URL](https://kilo.ai/docs/contributing/architecture/track-repo-url) | Usage tracking by repository/project |
| [Voice Transcription](https://kilo.ai/docs/contributing/architecture/voice-transcription) | Live voice input for chat |
To propose a new feature design, consider using the [Spec Template](https://kilo.ai/docs/contributing/architecture/feature-template)
.
Copy page
---
# Tool Use Details
Tool Use Overview
=================
Kilo Code implements a sophisticated tool system that allows AI models to interact with your development environment in a controlled and secure manner. This document explains how tools work, when they're called, and how they're managed.
Core Concepts
-------------
### Tool Groups
Tools are organized into logical groups based on their functionality:
| Category | Purpose | Tools | Common Use |
| --- | --- | --- | --- |
| **Read Group** | File system reading and searching | [read\_file](https://kilo.ai/docs/automate/tools/read-file) , [search\_files](https://kilo.ai/docs/automate/tools/search-files) , [list\_files](https://kilo.ai/docs/automate/tools/list-files) , [list\_code\_definition\_names](https://kilo.ai/docs/automate/tools/list-code-definition-names) | Code exploration and analysis |
| **Edit Group** | File system modifications | [apply\_diff](https://kilo.ai/docs/automate/tools/apply-diff) , [delete\_file](https://kilo.ai/docs/automate/tools/delete-file) , [write\_to\_file](https://kilo.ai/docs/automate/tools/write-to-file) | Code changes and file manipulation |
| **Browser Group** | Web automation | [browser\_action](https://kilo.ai/docs/automate/tools/browser-action) | Web testing and interaction |
| **Command Group** | System command execution | [execute\_command](https://kilo.ai/docs/automate/tools/execute-command) | Running scripts, building projects |
| **MCP Group** | External tool integration | [use\_mcp\_tool](https://kilo.ai/docs/automate/tools/use-mcp-tool) , [access\_mcp\_resource](https://kilo.ai/docs/automate/tools/access-mcp-resource) | Specialized functionality through external servers |
| **Workflow Group** | Mode and task management | [switch\_mode](https://kilo.ai/docs/automate/tools/switch-mode) , [new\_task](https://kilo.ai/docs/automate/tools/new-task) , [ask\_followup\_question](https://kilo.ai/docs/automate/tools/ask-followup-question) , [attempt\_completion](https://kilo.ai/docs/automate/tools/attempt-completion) , [update\_todo\_list](https://kilo.ai/docs/automate/tools/update-todo-list) | Context switching and task organization |
### Always Available Tools
Certain tools are accessible regardless of the current mode:
* [ask\_followup\_question](https://kilo.ai/docs/automate/tools/ask-followup-question)
: Gather additional information from users
* [attempt\_completion](https://kilo.ai/docs/automate/tools/attempt-completion)
: Signal task completion
* [switch\_mode](https://kilo.ai/docs/automate/tools/switch-mode)
: Change operational modes
* [new\_task](https://kilo.ai/docs/automate/tools/new-task)
: Create subtasks
* [update\_todo\_list](https://kilo.ai/docs/automate/tools/update-todo-list)
: Manage step-by-step task tracking
Available Tools
---------------
### Read Tools
These tools help Kilo Code understand your code and project:
* [read\_file](https://kilo.ai/docs/automate/tools/read-file)
- Examines the contents of files
* [search\_files](https://kilo.ai/docs/automate/tools/search-files)
- Finds patterns across multiple files
* [list\_files](https://kilo.ai/docs/automate/tools/list-files)
- Maps your project's file structure
* [list\_code\_definition\_names](https://kilo.ai/docs/automate/tools/list-code-definition-names)
- Creates a structural map of your code
### Edit Tools
These tools help Kilo Code make changes to your code:
* [apply\_diff](https://kilo.ai/docs/automate/tools/apply-diff)
- Makes precise, surgical changes to your code
* [delete\_file](https://kilo.ai/docs/automate/tools/delete-file)
- Removes files from your workspace
* [write\_to\_file](https://kilo.ai/docs/automate/tools/write-to-file)
- Creates new files or completely rewrites existing ones
### Browser Tools
These tools help Kilo Code interact with web applications:
* [browser\_action](https://kilo.ai/docs/automate/tools/browser-action)
- Automates browser interactions
### Command Tools
These tools help Kilo Code execute commands:
* [execute\_command](https://kilo.ai/docs/automate/tools/execute-command)
- Runs system commands and programs
### MCP Tools
These tools help Kilo Code connect with external services:
* [use\_mcp\_tool](https://kilo.ai/docs/automate/tools/use-mcp-tool)
- Uses specialized external tools
* [access\_mcp\_resource](https://kilo.ai/docs/automate/tools/access-mcp-resource)
- Accesses external data sources
### Workflow Tools
These tools help manage the conversation and task flow:
* [ask\_followup\_question](https://kilo.ai/docs/automate/tools/ask-followup-question)
- Gets additional information from you
* [attempt\_completion](https://kilo.ai/docs/automate/tools/attempt-completion)
- Presents final results
* [switch\_mode](https://kilo.ai/docs/automate/tools/switch-mode)
- Changes to a different mode for specialized tasks
* [new\_task](https://kilo.ai/docs/automate/tools/new-task)
- Creates a new subtask
* [update\_todo\_list](https://kilo.ai/docs/automate/tools/update-todo-list)
- Tracks task progress with step-by-step checklists
Tool Calling Mechanism
----------------------
### When Tools Are Called
Tools are invoked under specific conditions:
1. **Direct Task Requirements**
* When specific actions are needed to complete a task as decided by the LLM
* In response to user requests
* During automated workflows
2. **Mode-Based Availability**
* Different modes enable different tool sets
* Mode switches can trigger tool availability changes
* Some tools are restricted to specific modes
3. **Context-Dependent Calls**
* Based on the current state of the workspace
* In response to system events
* During error handling and recovery
### Decision Process
The system uses a multi-step process to determine tool availability:
1. **Mode Validation**
isToolAllowedForMode(
tool: string,
modeSlug: string,
customModes: ModeConfig\[\],
toolRequirements?: Record,
toolParams?: Record
)
2. **Requirement Checking**
* System capability verification
* Resource availability
* Permission validation
3. **Parameter Validation**
* Required parameter presence
* Parameter type checking
* Value validation
Technical Implementation
------------------------
### Tool Call Processing
1. **Initialization**
* Tool name and parameters are validated
* Mode compatibility is checked
* Requirements are verified
2. **Execution**
const toolCall = {
type: "tool\_call",
name: chunk.name,
arguments: chunk.input,
callId: chunk.callId,
}
3. **Result Handling**
* Success/failure determination
* Result formatting
* Error handling
### Security and Permissions
1. **Access Control**
* File system restrictions
* Command execution limitations
* Network access controls
2. **Validation Layers**
* Tool-specific validation
* Mode-based restrictions
* System-level checks
Mode Integration
----------------
### Mode-Based Tool Access
Tools are made available based on the current mode:
* **Code Mode**: Full access to file system tools, code editing capabilities, command execution
* **Ask Mode**: Limited to reading tools, information gathering capabilities, no file system modifications
* **Architect Mode**: Design-focused tools, documentation capabilities, limited execution rights
* **Custom Modes**: Can be configured with specific tool access for specialized workflows
### Mode Switching
1. **Process**
* Current mode state preservation
* Tool availability updates
* Context switching
2. **Impact on Tools**
* Tool set changes
* Permission adjustments
* Context preservation
Best Practices
--------------
### Tool Usage Guidelines
1. **Efficiency**
* Use the most specific tool for the task
* Avoid redundant tool calls
* Batch operations when possible
2. **Security**
* Validate inputs before tool calls
* Use minimum required permissions
* Follow security best practices
3. **Error Handling**
* Implement proper error checking
* Provide meaningful error messages
* Handle failures gracefully
### Common Patterns
1. **Information Gathering**
\[ask\_followup\_question\](/docs/automate/tools/ask-followup-question) → \[read\_file\](/docs/automate/tools/read-file) → \[search\_files\](/docs/automate/tools/search-files)
2. **Code Modification**
\[read\_file\](/docs/automate/tools/read-file) → \[apply\_diff\](/docs/automate/tools/apply-diff) → \[attempt\_completion\](/docs/automate/tools/attempt-completion)
3. **Task Management**
\[new\_task\](/docs/automate/tools/new-task) → \[switch\_mode\](/docs/automate/tools/switch-mode) → \[execute\_command\](/docs/automate/tools/execute-command)
4. **Progress Tracking**
\[update\_todo\_list\](/docs/automate/tools/update-todo-list) → \[execute\_command\](/docs/automate/tools/execute-command) → \[update\_todo\_list\](/docs/automate/tools/update-todo-list)
Error Handling and Recovery
---------------------------
### Error Types
1. **Tool-Specific Errors**
* Parameter validation failures
* Execution errors
* Resource access issues
2. **System Errors**
* Permission denied
* Resource unavailable
* Network failures
3. **Context Errors**
* Invalid mode for tool
* Missing requirements
* State inconsistencies
### Recovery Strategies
1. **Automatic Recovery**
* Retry mechanisms
* Fallback options
* State restoration
2. **User Intervention**
* Error notifications
* Recovery suggestions
* Manual intervention options
Copy page
---
# AI Providers
AI Providers
============
Kilo Code supports a wide variety of AI providers, giving you flexibility in how you power your AI-assisted development workflow. Choose from cloud providers, local models, or AI gateways based on your needs.
Getting Started
---------------
The fastest way to get started is with **Kilo Code's built-in provider**, which requires no configuration. Simply sign in and start coding.
For users who want to use their own API keys or need specific models, we support over 30 providers.
Provider Categories
-------------------
### Cloud Providers
Major AI companies offering powerful models via API:
* **[Anthropic](https://kilo.ai/docs/ai-providers/anthropic)
** - Claude models (Claude 4, Claude 3.5 Sonnet, etc.)
* **[OpenAI](https://kilo.ai/docs/ai-providers/openai)
** - GPT-4, GPT-4o, o1, and more
* **[Google Gemini](https://kilo.ai/docs/ai-providers/gemini)
** - Gemini Pro, Gemini Ultra
* **[DeepSeek](https://kilo.ai/docs/ai-providers/deepseek)
** - DeepSeek V3., R1
* **[Mistral](https://kilo.ai/docs/ai-providers/mistral)
** - Mistral Large, Codestral
### Local & Self-Hosted
Run models on your own hardware for privacy and offline use:
* **[Ollama](https://kilo.ai/docs/ai-providers/ollama)
** - Easy local model management
* **[LM Studio](https://kilo.ai/docs/ai-providers/lmstudio)
** - Desktop app for local models
* **[OpenAI Compatible](https://kilo.ai/docs/ai-providers/openai-compatible)
** - Any OpenAI-compatible endpoint
### AI Gateways
Route requests through unified APIs with additional features:
* **[OpenRouter](https://kilo.ai/docs/ai-providers/openrouter)
** - Access multiple providers through one API
* **[Glama](https://kilo.ai/docs/ai-providers/glama)
** - Enterprise AI gateway
* **[Requesty](https://kilo.ai/docs/ai-providers/requesty)
** - Smart routing and fallbacks
Choosing a Provider
-------------------
| Priority | Recommended Provider |
| --- | --- |
| Ease of use | [Kilo Code (built-in)](https://kilo.ai/docs/ai-providers/kilocode) |
| Best value | Zhipu AI or Mistral |
| Privacy/Offline | Ollama or LM Studio |
| Enterprise | AWS Bedrock or Google Vertex |
Why Use Multiple Providers?
---------------------------
* **Cost** - Compare pricing across providers for different tasks
* **Reliability** - Backup options when a provider has outages
* **Models** - Access exclusive or specialized models
* **Regional** - Better latency in certain locations
📝Note
All API keys use VS Code's Secret Storage—never stored in plain text.
⚠️Time-to-first-byte timeout
For all providers, there is a **five-minute timeout** on time to first token. This means if a provider does not begin streaming a response within five minutes of the request being sent, the request will be cancelled. This is a constraint of the Bun runtime and cannot be easily configured.
Next Steps
----------
* **New to Kilo Code?** Start with the [Kilo Code provider](https://kilo.ai/docs/ai-providers/kilocode)
- no setup required
* **Have an API key?** Jump to your provider's page for configuration instructions
* **Want to compare?** Check out [Model Selection](https://kilo.ai/docs/code-with-ai/agents/model-selection)
for guidance on choosing models
Copy page
---
# Kilo Code Documentation
Using Kilo Code's Built-in Provider
===================================
Kilo Code provides its own built-in API provider that gives you access to the latest frontier coding models through a simple registration process. No need to manage API keys from multiple providers - just sign up and start coding.
**Website:** [https://kilo.ai/](https://kilo.ai/)
Getting Started
---------------
When you sign up for Kilo Code, you can start immediately with free models, or top up your account for the first time to get bonus credits.
To claim your bonus credits:
1. **Sign up:** Complete the registration process
2. **First top-up:** Add funds to your account and get $20 bonus credits
3. **Start Coding:** Enjoy your $20 in free credits
Registration Process
--------------------
Kilo Code offers a streamlined registration that connects you directly to frontier coding models:
1. **Start Registration:** Click "Try Kilo Code for Free" in the extension
2. **Sign In:** Use your Google account to sign in at kilo.ai
3. **Authorize VS Code:**
* kilo.ai will prompt you to open Visual Studio Code
* For web-based IDEs, you'll copy the API key manually instead
4. **Complete Setup:** Allow VS Code to open the authorization URL when prompted
Supported Models
----------------
Kilo Code provides access to the latest frontier coding models through its built-in provider. The specific models available are automatically updated and managed by the Kilo Code service, ensuring you always have access to the most capable models for coding tasks.
Kilo Gateway integration
------------------------
Kilo Code routes requests through the Kilo Gateway for model access, usage tracking, and organization controls. For BYOK setup, provider routing, and full model availability, use the Gateway docs as the source of truth:
* [Kilo Gateway overview](https://kilo.ai/docs/gateway)
* [Models & Providers](https://kilo.ai/docs/gateway/models-and-providers)
* [Authentication & BYOK](https://kilo.ai/docs/gateway/authentication)
Configuration in Kilo Code
--------------------------
Once you've completed the registration process, Kilo Code is automatically configured:
1. **Automatic Setup:** After successful registration, Kilo Code is ready to use immediately
2. **No API Key Management:** Your authentication is handled seamlessly through the registration process
3. **Model Selection:** Access to frontier models is provided automatically through your Kilo Code account
Connected Accounts
------------------
With the Kilo Code provider, if you sign up with Google you can also connect other sign in accounts - like GitHub - by:
1. Go to your profile
2. Select [**Connected Accounts**](https://app.kilo.ai/connected-accounts)
3. Under "Link a New account" select the type of account to link
4. Complete the OAuth authorization, and you'll see your connected accounts!
Tips and Notes
--------------
* **Free Credits:** New users receive free credits to explore Kilo Code's capabilities
* **Identity Verification:** The temporary hold system ensures service reliability while preventing misuse
* **Seamless Integration:** No need to manage multiple API keys or provider configurations
* **Latest Models:** Automatic access to the most current frontier coding models
* **Support Available:** Contact [hi@kilo.ai](mailto:hi@kilo.ai)
for questions about pricing or tokens
For detailed setup instructions, see [Setting up Kilo Code](https://kilo.ai/docs/getting-started/setup-authentication)
.
Copy page
---
# GitHub Code Reviews
GitHub Code Reviews
===================
Kilo's Code Reviews integrate with GitHub via a **GitHub App** to automatically review pull requests with AI. When a PR is opened, updated, or marked ready for review, the Review Agent analyzes the changes and posts feedback directly on the pull request.
Prerequisites
-------------
* A Kilo Code account at [app.kilo.ai](https://app.kilo.ai/)
* A GitHub account with access to the repositories you want to review
* Kilo Code credits for AI model usage
Setup
-----
### Step 1: Install the GitHub App
Connect your GitHub account via the [Integrations page](https://kilo.ai/docs/automate/integrations#connecting-github)
. Once connected, return here to configure the Review Agent.
The GitHub App requests the following permissions:
| Permission | Access | Purpose |
| --- | --- | --- |
| Pull requests | Read & Write | Post review comments |
| Repository contents | Read | Analyze code |
| Issues | Read & Write | Post summary comments, reactions |
| Metadata | Read | List repositories |
### Step 2: Configure the Review Agent
1. Go to **Code Reviews**:
* **Personal**: [app.kilo.ai/code-reviews](https://app.kilo.ai/code-reviews)
* **Organization**: Your organization → Code Reviews
2. Toggle **Enable AI Code Review** to on
3. Configure your preferences:
* **AI Model** — Select from available models (default: Claude Sonnet 4.5)
* **Review Style** — Strict, Balanced, or Lenient
* **Repository Selection** — All repositories or select specific ones
* **Focus Areas** — Security, performance, bugs, style, testing, documentation
* **Max Review Time** — 5 to 30 minutes
* **Custom Instructions** — Add team-specific review guidelines
4. Click **Save Configuration**
### Step 3: Open a Pull Request
Once configured, the Review Agent automatically runs when:
| PR Event | Triggers Review |
| --- | --- |
| PR opened | ✅ Yes |
| New commits pushed to PR | ✅ Yes |
| PR reopened | ✅ Yes |
| Draft PR marked ready | ✅ Yes |
| Draft PR opened | ❌ Skipped |
| PR closed | ❌ No |
What to Expect
--------------
When a review triggers:
1. A 👀 reaction appears on the PR — this means Kilo is reviewing
2. The AI model analyzes the diff and changed files
3. The agent posts:
* A **summary comment** with overall findings
* **Inline comments** on specific lines with issues and suggestions
* Severity tags (critical, warning, info)
### When You Push New Commits
* The previous review is **automatically cancelled** (no stale feedback)
* A new review starts for the latest commit
* If a previous summary comment exists, it is **updated in place**
Repository Selection
--------------------
* **All repositories** — Every repo accessible to the GitHub App triggers reviews
* **Selected repositories** — Only repos you choose in the configuration
The repository list is synced from GitHub and can be refreshed from the configuration page.
Troubleshooting
---------------
### Reviews are not triggering
1. Verify the GitHub App is installed and has access to the repository
2. Check that the Review Agent is **enabled** in the Code Reviews configuration
3. Ensure the repository is in the allowed list (if using "Selected repositories" mode)
4. Confirm the PR is not a draft
### Reviews are failing
* Check the Code Reviews page for error details on specific reviews
* Ensure you have sufficient Kilo Code credits
* Very large PRs may time out — try increasing the max review time
### The GitHub App is missing permissions
1. Go to your GitHub Settings → Applications → KiloConnect → Configure
2. Verify the app has the required permissions listed above
3. If permissions were changed, you may need to re-authorize
### Duplicate comments
The system automatically deduplicates reviews for the same PR and commit SHA. If you see duplicate comments, this may be from a previous version — push a new commit to trigger a fresh review.
Copy page
---
# Auto-Approving Actions
Auto-Approving Actions
======================
🚨Danger
**Security Warning:** Auto-approve settings bypass confirmation prompts, giving Kilo Code direct access to your system. This can result in data loss, file corruption, or worse. Command line access is particularly dangerous, as it can potentially execute harmful operations that could damage your system or compromise security. Only enable auto-approval for actions you fully trust.
Auto-approve settings speed up your workflow by eliminating repetitive confirmation prompts, but they significantly increase security risks. The **VSCode (Legacy)**, **VSCode**, and **CLI** versions each handle permissions differently — choose the tab that matches your setup.
VSCodeCLIVSCode (Legacy)
Overview
--------
The extension uses a granular, per-tool permission system. You can configure permissions through the **Settings → Auto Approve** tab, which provides a UI with per-tool **Allow / Ask / Deny** dropdowns.
The UI reads and writes to the same `kilo.jsonc` config files used by the CLI, so changes made in either place are reflected in both.
Permission Levels
-----------------
Each tool permission can be set to one of three values:
| Value | Behavior |
| --- | --- |
| `"allow"` | The tool runs automatically without prompting |
| `"ask"` | Kilo pauses and asks for approval before running the tool |
| `"deny"` | The tool is blocked entirely |
When no rule matches a permission check, the default action is `ask`.
Available Tool Permissions
--------------------------
The Auto Approve tab lists the following tool-specific permissions. Some tools are grouped together in the UI and share a single permission level:
| Permission | Controls |
| --- | --- |
| `external_directory` | Accessing files outside the project directory |
| `bash` | Executing shell commands |
| `read` | Reading file contents |
| `edit` | Editing existing files |
| `glob` | File pattern matching / searching by name |
| `grep` | Searching file contents by regex |
| `list` | Listing directory contents |
| `task` | Launching sub-agents |
| `skill` | Loading specialized skills |
| `lsp` | Language server protocol operations |
| `todoread` / `todowrite` | Reading and updating the todo list |
| `websearch` / `codesearch` | Performing web or code searches |
| `webfetch` | Fetching content from URLs |
| `doom_loop` | Allowing the agent to continue after repeated failures |
Runtime Permission Requests
---------------------------
When a tool is set to `"ask"`, Kilo pauses and displays a permission prompt with two options:
| Option | Behavior |
| --- | --- |
| **Run** | Allow this specific invocation |
| **Deny** | Block this specific invocation |
Expand **Manage Auto-Approve Rules** to add commands or patterns to your allowed or denied lists. These rules are then appended to the bottom of the approval rules in settings and the config file.
Defaults
--------
Most tools default to `"*": "allow"` for a smooth out-of-the-box experience. Notable exceptions that prompt by default:
* **`.env` files** — reading `.env` files prompts for approval. Files matching `*.env.*` (e.g., `.env.local`, `.env.production`) also trigger an ask, while `*.env.example` is explicitly allowed.
* **`external_directory`** — accessing files outside the project prompts for approval
* **`doom_loop`** — prompts when the agent enters a repeated failure cycle
Copy page
---
# Kilo Code Documentation
Using Anthropic With Kilo Code
==============================
Anthropic is an AI safety and research company that builds reliable, interpretable, and steerable AI systems. Their Claude models are known for their strong reasoning abilities, helpfulness, and honesty.
**Website:** [https://www.anthropic.com/](https://www.anthropic.com/)
Getting an API Key
------------------
1. **Sign Up/Sign In:** Go to the [Anthropic Console](https://console.anthropic.com/)
. Create an account or sign in.
2. **Navigate to API Keys:** Go to the [API keys](https://console.anthropic.com/settings/keys)
section.
3. **Create a Key:** Click "Create Key". Give your key a descriptive name (e.g., "Kilo Code").
4. **Copy the Key:** **Important:** Copy the API key _immediately_. You will not be able to see it again. Store it securely.
Configuration in Kilo Code
--------------------------
1. **Open Kilo Code Settings:** Click the gear icon () in the Kilo Code panel.
2. **Select Provider:** Choose "Anthropic" from the "API Provider" dropdown.
3. **Enter API Key:** Paste your Anthropic API key into the "Anthropic API Key" field.
4. **Select Model:** Choose your desired Claude model from the "Model" dropdown.
5. **(Optional) Custom Base URL:** If you need to use a custom base URL for the Anthropic API, check "Use custom base URL" and enter the URL. Most people won't need to adjust this.
Tips and Notes
--------------
* **Prompt Caching:** Claude 3 models support [prompt caching](https://docs.anthropic.com/en/docs/build-with-claude/prompt-caching)
, which can significantly reduce costs and latency for repeated prompts.
* **Context Window:** Claude models have large context windows (200,000 tokens), allowing you to include a significant amount of code and context in your prompts.
* **Pricing:** Refer to the [Anthropic Pricing](https://www.anthropic.com/pricing)
page for the latest pricing information.
* **Rate Limits:** Anthropic has strict rate limits based on [usage tiers](https://docs.anthropic.com/en/api/rate-limits#requirements-to-advance-tier)
. If you're repeatedly hitting rate limits, consider contacting Anthropic sales or accessing Claude through a different provider like [OpenRouter](https://kilo.ai/docs/ai-providers/openrouter)
or [Requesty](https://kilo.ai/docs/ai-providers/requesty)
.
Copy page
---
# Kilo Code Documentation
new\_task
=========
The `new_task` tool creates subtasks with specialized modes while maintaining a parent-child relationship. It breaks down complex projects into manageable pieces, each operating in the mode best suited for specific work.
Parameters
----------
The tool accepts these parameters:
* `mode` (required): The slug of the mode to start the new task in (e.g., "code", "ask", "architect")
* `message` (required): The initial user message or instructions for this new task
What It Does
------------
This tool creates a new task instance with a specified starting mode and initial message. It allows complex workflows to be divided into subtasks with their own conversation history. Parent tasks are paused during subtask execution and resumed when the subtask completes, with results transferred back to the parent.
When is it used?
----------------
* When breaking down complex projects into separate, focused subtasks
* When different aspects of a task require different specialized modes
* When different phases of work benefit from context separation
* When organizing multi-phase development workflows
Key Features
------------
* Creates subtasks with their own conversation history and specialized mode
* Pauses parent tasks for later resumption
* Maintains hierarchical task relationships for navigation
* Transfers results back to parent tasks upon completion
* Supports workflow segregation for complex projects
* Allows different parts of a project to use modes optimized for specific work
* Requires explicit user approval for task creation
* Provides clear task transition in the UI
Limitations
-----------
* Cannot create tasks with modes that don't exist
* Requires user approval before creating each new task
* Task interface may become complex with deeply nested subtasks
* Subtasks inherit certain workspace and extension configurations from parents
* May require re-establishing context when switching between deeply nested tasks
* Task completion needs explicit signaling to properly return to parent tasks
How It Works
------------
When the `new_task` tool is invoked, it follows this process:
1. **Parameter Validation**:
* Validates the required `mode` and `message` parameters
* Verifies that the requested mode exists in the system
2. **Task Stack Management**:
* Maintains a task stack that tracks all active and paused tasks
* Preserves the current mode for later resumption
* Sets the parent task to paused state
3. **Task Context Management**:
* Creates a new task context with the provided message
* Assigns unique taskId and instanceId identifiers for state management
* Captures telemetry data on tool usage and task lifecycles
4. **Mode Switching and Integration**:
* Switches to the specified mode with appropriate role and capabilities
* Initializes the new task with the provided message
* Integrates with VS Code's command palette and code actions
5. **Task Completion and Result Transfer**:
* When subtask completes, result is passed back to parent task via `finishSubTask()`
* Parent task resumes in its original mode
* Task history and token usage metrics are updated
* The `taskCompleted` event is emitted with performance data
Examples When Used
------------------
* When a front-end developer needs to architect a new feature, implement the code, and document it, they can create separate tasks for each phase with results flowing from one phase to the next.
* When debugging an issue before implementing a fix, the debugging task can document findings that are passed to the implementation task.
* When developing a full-stack application, database schema designs from an architect-mode task inform implementation details in a subsequent code-mode task.
* When documenting a system after implementation, the documentation task can reference the completed implementation while using documentation-specific features.
Usage Examples
--------------
Creating a new task in code mode:
codeImplement a user authentication service with login, registration, and password reset functionality.
Creating a documentation task after completing implementation:
docsCreate comprehensive API documentation for the authentication service we just built.
Breaking down a complex feature into architectural planning and implementation:
architectDesign the database schema and system architecture for our new e-commerce platform.
Copy page
---
# Kilo Code Documentation
Using ChatGPT Subscriptions With Kilo Code
==========================================
1. Open Kilo Code settings (click the gear icon in the Kilo Code panel).
2. In **API Provider**, select **OpenAI – ChatGPT Plus/Pro**.
3. Click **Sign in to OpenAI Codex**.
4. Finish the sign-in flow in your browser.
5. Back in Kilo Code settings, pick a model from the dropdown.
6. Save.
Tips and Notes
--------------
* **Subscription Required:** You need an active ChatGPT Plus or Pro subscription. This provider won't work with free ChatGPT accounts. See [OpenAI's ChatGPT plans](https://openai.com/chatgpt/pricing)
for more information.
* **Authentication Errors:** If you receive a CSRF or other error when completing OAuth authentication, ensure you do not have another application already listening on port 1455. You can check on Linux and Mac by using `lsof -i :1455`.
* **No API Costs:** Usage through this provider counts against your ChatGPT subscription, not separately billed API usage.
* **Sign Out:** To disconnect, use the "Sign Out" button in the provider settings.
Limitations
-----------
* **You can't use arbitrary OpenAI API models.** This provider only exposes the models listed in Kilo Code's Codex model catalog.
* **You can't export/migrate your sign-in state with settings export.** OAuth tokens are stored in VS Code SecretStorage, which isn't included in Kilo Code's settings export.
Copy page
---
# Kilo Code Documentation
Using Ollama With Kilo Code
===========================
Kilo Code supports running models locally using Ollama. This provides privacy, offline access, and potentially lower costs, but requires more setup and a powerful computer.
**Website:** [https://ollama.com/](https://ollama.com/)
Managing Expectations
---------------------
The LLMs that can be run locally are generally much smaller than cloud-hosted LLMs such as Claude and GPT and the results will be much less impressive. They are much more likely to get stuck in loops, fail to use tools properly or produce syntax errors in code. More trial and error will be required to find the right prompt. Running LLMs locally is often also not very fast. Using simple prompts, keeping conversations short and disabling MCP tools can result in a speed-up.
Hardware Requirements
---------------------
You will need a GPU with a large amount of VRAM (24GB or more) or a MacBook with a large amount of unified RAM (32GB or more) to run the models discussed below at decent speed.
Selecting a Model
-----------------
Ollama supports many different models. You can find a list of available models on the [Ollama website](https://ollama.com/library)
.
For the Kilo Code agent the current recommendation is `qwen3-coder:30b`. `qwen3-coder:30b` sometimes fails to call tools correctly (it is much more likely to have this problem than the full `qwen3-coder:480b` model). As a mixture-of-experts model, this could be because it activated the wrong experts. Whenever this happens, try changing your prompt or use the Enhance Prompt button.
An alternative to `qwen3-coder:30b` is `devstral:24b`. For other features of Kilo Code such as Enhance Prompt or Commit Message Generation smaller models may suffice.
Setting up Ollama
-----------------
To set up Ollama for use with Kilo Code, follow the instructions below.
### Download and Install Ollama
Download the Ollama installer from the [Ollama website](https://ollama.com/)
(or use the package manager for your operating system). Follow the installation instructions, then make sure Ollama is running:
ollama serve
### Download a Model
To download a model, open a second terminal (`ollama serve` needs to be running) and run:
ollama pull
For example:
ollama pull qwen3-coder:30b
### Configure the Context Size
By default Ollama truncates prompts to a very short length, [as documented here](https://github.com/ollama/ollama/blob/4383a3ab7a075eff78b31f7dc84c747e2fcd22b8/docs/faq.md#how-can-i-specify-the-context-window-size)
.
You need to have at least 32k to get decent results, but increasing the context size increases memory usage and may decrease performance, depending on your hardware.
To configure the context window, set "Context Window Size (num\_ctx)" in the API Provider settings.
### Configure the Timout
By default, API requests time out after 10 minutes. Local models can be slow, if you hit this timeout you can consider increasing it here: VS Code Extensions panel > Kilo Code gear menu > Settings > API Request Timeout.
### Configure Kilo Code
* Open the Kilo Code panel ().
* Click the Settings gear icon ().
* Select "Ollama" as the API Provider.
* Select the model configured in the previous step.
* (Optional) You can configure the base URL if you're running Ollama on a different machine. The default is `http://localhost:11434`.
Further Reading
---------------
Refer to the [Ollama documentation](https://ollama.com/docs)
for more information on installing, configuring and using Ollama.
Copy page
---
# Benchmarking
Benchmarking
============
Summary
-------
This document proposes a benchmarking system for Kilo Code with two primary goals:
1. **Compare models against one another** using the same agent -- measuring task completion, token cost, and total time
2. **Compare agents against one another** using the same model -- e.g., Kilo Code vs Claude Code, or Kilo Code v1.0 vs v1.1
The design leverages existing open source infrastructure rather than building a custom harness:
* **[Harbor](https://harborframework.com/)
** as the evaluation framework, with **[Terminal-Bench](https://tbench.ai/)
** and other datasets for task definitions
* **[ATIF](https://harborframework.com/docs/agents/trajectory-format)
** (Agent Trajectory Interchange Format) for structured, per-step trace logging
* **[Opik](https://www.comet.com/docs/opik)
** for trace ingestion, step-level LLM judge evaluation, and root cause analysis
The key engineering deliverable is a **Kilo Code Harbor adapter** that runs Kilo CLI autonomously in containerized environments and emits ATIF-compliant trajectories.
ℹ️Info
This is separate from [production observability](https://kilo.ai/docs/contributing/architecture/agent-observability)
, which monitors real user sessions via PostHog. Benchmarking is an offline evaluation system for comparing quality, cost, and performance across models and agents.
Problem Statement
-----------------
As Kilo Code evolves, we need systematic answers to questions like:
* Did our latest release make the agent better or worse?
* Which model gives the best results for our users at a given price point?
* How does Kilo Code compare to Claude Code, Codex, or other agents on the same tasks?
* When a benchmark score drops, what specific step or decision caused the regression?
Today we have no structured way to answer these questions. Manual testing is not reproducible, and our existing PostHog telemetry does not capture the turn-by-turn detail needed for easy comparative analysis.
Goals
-----
1. Run Kilo Code against standardized benchmark datasets in a reproducible, containerized environment
2. Compare model performance (same agent, different models) on task completion, token cost, and wall-clock time
3. Compare agent performance (same model, different agents or Kilo versions) on the same metrics
4. Capture detailed per-step traces for root cause analysis when results differ
5. Make it easy to create custom task sets for targeted evaluation or marketing purposes
**Non-goals:**
* Production monitoring (covered by [Agent Observability](https://kilo.ai/docs/contributing/architecture/agent-observability)
)
* Automated remediation based on benchmark results
Architecture
------------
┌─────────────────────────────────────────────────────────┐
│ Harbor Framework │
│ │
│ ┌──────────────┐ ┌─────────────┐ ┌─────────────────┐ │
│ │Terminal-Bench│ │ SWE-bench │ │ Custom Tasks │ │
│ │ 2.0 │ │ │ │ (Kilo-specific) │ │
│ └──────┬───────┘ └──────┬──────┘ └───────┬─────────┘ │
│ └────────────────┼─────────────────┘ │
│ ▼ │
│ ┌───────────────────────┐ │
│ │ Containerized Trial │ │
│ │ │ │
│ │ ┌─────────────────┐ │ │
│ │ │ Agent Under │ │ │
│ │ │ Test │ │ │
│ │ │ (kilo --auto) │ │ │
│ │ └────────┬────────┘ │ │
│ │ │ │ │
│ │ ▼ │ │
│ │ ┌─────────────────┐ │ │
│ │ │ Model API │ │ │
│ │ │ (Opus, GPT-5, │ │ │
│ │ │ Gemini, etc.) │ │ │
│ │ └─────────────────┘ │ │
│ └───────────┬───────────┘ │
│ │ │
│ ▼ │
│ ┌───────────────────────┐ │
│ │ ATIF Trajectory │ │
│ │ (per-step traces) │ │
│ └───────────┬───────────┘ │
└──────────────────────────┼──────────────────────────────┘
│
┌────────────┴────────────┐
▼ ▼
┌──────────────────────┐ ┌──────────────────────────┐
│ tbench.ai Dashboard │ │ Opik │
│ - Leaderboard │ │ - Step-level traces │
│ - Task pass/fail │ │ - LLM judge per step │
│ - Asciinema replay │ │ - Cost attribution │
│ - Aggregate scores │ │ - Root cause comparison │
└──────────────────────┘ └──────────────────────────┘
Components
----------
### Harbor Framework
[Harbor](https://harborframework.com/)
is the evaluation framework built by the Terminal-Bench team. It provides:
* **Containerized environments** for reproducible task execution
* **Pre-integrated agents**: Claude Code, Codex, Gemini CLI, OpenHands, Terminus-2
* **A registry of benchmark datasets**: Terminal-Bench, SWE-bench, LiveCodeBench, and more
* **Cloud scaling** via Daytona, Modal, and E2B for running trials in parallel
* **Automatic ATIF trajectory generation** for all integrated agents
Harbor is the standard evaluation framework used by many frontier labs. Rather than building our own harness, we write a Kilo Code adapter and plug into the existing ecosystem.
### ATIF (Agent Trajectory Interchange Format)
[ATIF](https://harborframework.com/docs/agents/trajectory-format)
is a standardized JSON format for logging the complete interaction history of an agent run. Each trajectory captures:
* **Every step**: User messages, agent responses, tool calls, observations
* **Per-step metrics**: Token counts (prompt, completion, cached), cost in USD, latency
* **Tool call detail**: Function name, arguments, and observation results
* **Reasoning content**: The agent's internal reasoning at each step (when available)
* **Aggregate metrics**: Total tokens, total cost, total steps
This granularity is what enables step-level comparison between runs -- not just "did it pass or fail" but "at step 7, Agent A chose tool X while Agent B chose tool Y."
### Opik
[Opik](https://www.comet.com/docs/opik)
(by Comet) provides trace ingestion and analysis with a first-class Harbor integration. Running benchmarks through Opik is as simple as:
opik harbor run -d terminal-bench@head -a kilo -m anthropic/claude-opus-4
Opik adds value beyond what the tbench.ai dashboard provides:
| Capability | tbench.ai Dashboard | Opik |
| --- | --- | --- |
| Task-level pass/fail | Yes | Yes |
| Aggregate leaderboard | Yes | No |
| Asciinema replay | Yes | No |
| Step-level trace view | No | Yes |
| Step-level LLM judge | No | Yes |
| Cost attribution per step | No | Yes |
| Side-by-side trace comparison | No | Yes |
| Root cause analysis | No | Yes |
The two dashboards are complementary: tbench.ai for high-level leaderboard comparisons, Opik for drilling into why a specific run succeeded or failed.
### Datasets
Harbor's registry provides access to established benchmark datasets. The choice of dataset can vary depending on what you are evaluating:
| Dataset | Focus | Use Case |
| --- | --- | --- |
| Terminal-Bench 2.0 | CLI/terminal tasks (89 tasks) | General agent capability on hard, realistic tasks |
| SWE-bench | Real GitHub issues in real repos | Software engineering task completion |
| LiveCodeBench | Competitive programming problems | Code generation quality |
| Custom task sets | Whatever you define | Targeted evaluation, marketing, regression testing |
#### Creating Custom Task Sets
Creating a custom Harbor task set is straightforward. Each task consists of:
1. **A Dockerfile** defining the environment (OS, installed packages, repo state)
2. **A task description** (the prompt given to the agent)
3. **A verification script** (tests that determine pass/fail)
4. **Optionally, a reference solution**
This makes it easy to create task sets that target specific Kilo Code capabilities -- for example, a set of refactoring tasks, or a set of multi-file debugging scenarios. Custom sets can be published to the Harbor registry or kept private.
See the [Harbor task tutorial](https://www.tbench.ai/docs/task-tutorial)
for a step-by-step guide.
Deliverables
------------
### 1\. Kilo Code Harbor Adapter
The primary engineering deliverable. This adapter:
* **Installs Kilo CLI** in a Docker container
* **Configures autonomous execution** using `kilo run --auto`, which disables all permission prompts so the agent runs fully unattended
* **Translates Harbor task prompts** into Kilo CLI invocations
* **Emits ATIF-compliant trajectories** capturing every step, tool call, and metric
The adapter follows the same pattern as existing Harbor agents (see the [OpenHands adapter](https://harborframework.com/docs/agents/trajectory-format#openhands-example)
for reference). The key implementation detail is the `populate_context_post_run` method that converts Kilo's execution log into ATIF format.
**Autonomous execution is critical.** Harbor runs containerized trials in parallel and expects agents to execute from start to finish without human intervention. The adapter must ensure:
* No interactive prompts for API keys (injected via environment variables)
* No permission dialogs for file writes, command execution, etc.
* Graceful timeout handling if the agent gets stuck
### 2\. Custom Task Set Template
Documentation and examples for creating Kilo-specific task sets:
* Template Dockerfile and verification script
* Guidelines for writing good task descriptions
* Examples of tasks that highlight coding agent capabilities
* Instructions for publishing to Harbor's registry or running privately
This enables the team to create targeted benchmarks for marketing, regression testing, or capability evaluation.
### 3\. Opik Integration
Configure the Opik-Harbor integration for Kilo Code benchmark runs:
* Set up `opik harbor run` with the Kilo Code adapter
* Define standard LLM judge criteria for step-level evaluation:
* **Tool choice correctness**: Did the agent use the right tool at each step?
* **Reasoning quality**: Was the agent's reasoning at each step sound?
* **Efficiency**: Were there unnecessary or redundant steps?
* Create saved views for common comparison scenarios (model-vs-model, version-vs-version)
### 4\. CI Regression Detection
📝Note
Lower priority. Implement after the core benchmarking system is working.
Run a small subset of benchmark tasks (10-15) on release branches to catch regressions before shipping. Harbor supports this pattern natively. The subset should be chosen for:
* Fast execution (under 5 minutes per task)
* High signal (tasks that historically differentiate good and bad agent behavior)
* Stability (deterministic verification, not flaky)
Example Workflows
-----------------
### Comparing Models
Run the same Kilo Code agent against Terminal-Bench with different models:
\# Run with Claude Opus
opik harbor run -d terminal-bench@2.0 -a kilo -m anthropic/claude-opus-4
# Run with GPT-5
opik harbor run -d terminal-bench@2.0 -a kilo -m openai/gpt-5
# Run with Gemini 3 Pro
opik harbor run -d terminal-bench@2.0 -a kilo -m google/gemini-3-pro
Compare results in tbench.ai for aggregate scores and in Opik for step-level analysis of where models diverge.
### Comparing Agents
Run different agents against the same dataset with the same model:
\# Run Kilo Code
opik harbor run -d terminal-bench@2.0 -a kilo -m anthropic/claude-opus-4
# Run Claude Code
opik harbor run -d terminal-bench@2.0 -a claude-code -m anthropic/claude-opus-4
### Comparing Kilo Versions
Test a new release against the previous version:
\# Run current release
opik harbor run -d terminal-bench@2.0 -a kilo@v2.0 -m anthropic/claude-opus-4
# Run candidate release
opik harbor run -d terminal-bench@2.0 -a kilo@v2.1-rc1 -m anthropic/claude-opus-4
Use Opik's trace comparison view to identify specific steps where the new version regressed or improved.
### Running a Custom Task Set
\# Run against a custom Kilo-specific dataset
opik harbor run -d kilo-refactoring@1.0 -a kilo -m anthropic/claude-opus-4
LLM Judge: Two Levels
---------------------
Harbor provides task-level judging (did the agent solve the task?). Opik adds step-level evaluation:
| Level | Tool | What It Tells You |
| --- | --- | --- |
| **Task-level** | Harbor | Pass/fail, score, total time, total cost |
| **Step-level** | Opik | At step N, the agent chose tool X when it should have used tool Y. The reasoning was flawed because of Z. This step cost $0.03 and took 4 seconds. |
Step-level evaluation is where root cause debugging happens. When a benchmark score drops between versions, you can trace back to the exact decision point that caused the regression.
Relationship to Production Observability
----------------------------------------
This benchmarking system is complementary to, but separate from, the [Agent Observability](https://kilo.ai/docs/contributing/architecture/agent-observability)
system:
| Concern | Benchmarking | Production Observability |
| --- | --- | --- |
| **Purpose** | Offline evaluation of agent quality | Real-time monitoring of user sessions |
| **Data source** | Controlled benchmark tasks | Real user interactions |
| **Tools** | Harbor, Opik, tbench.ai | PostHog, custom metrics |
| **When** | Before release, on-demand | Continuously in production |
| **Output** | Leaderboard scores, trace comparisons | Alerts, dashboards, SLO tracking |
References
----------
* [Harbor Framework Documentation](https://harborframework.com/docs)
* [Terminal-Bench 2.0 Paper](https://huggingface.co/papers/2601.11868)
* [ATIF Specification (RFC)](https://github.com/laude-institute/harbor/blob/main/docs/rfcs/0001-trajectory-format.md)
* [Opik Harbor Integration](https://www.comet.com/docs/opik/integrations/harbor)
* [tbench.ai Dashboard](https://www.tbench.ai/docs/dashboard)
* [Harbor Task Tutorial](https://www.tbench.ai/docs/task-tutorial)
Copy page
---
# Troubleshooting IDE Extensions
Capturing Console Logs
======================
Providing console logs helps us pinpoint exactly what's going wrong with your installation, network, or MCP setup. This guide walks you through capturing those logs in your IDE.
Opening Developer Tools
-----------------------
VS CodeJetBrains
1. **Open the Command Palette**: Press `Ctrl+Shift+P` (Windows/Linux) or `Cmd+Shift+P` (Mac)
2. **Search for Developer Tools**: Type `Developer: Open Webview Developer Tools` and select it
Capturing the Error
-------------------
Once you have the Developer Tools console open:
1. **Clear previous logs**: Click the "Clear Console" button (🚫 icon at the top of the Console panel) to remove old messages
2. **Reproduce the issue**: Perform the action that was causing problems
3. **Check for errors**: Look at the Console tab for error messages (usually shown in red). If you suspect connection issues, also check the **Network** tab
4. **Copy the logs**: Right-click in the console and select "Save as..." or copy the relevant error messages
Contact Support
---------------
If you're unable to resolve the issue, please inspect the console logs, remove any secrets, and send the logs to **[hi@kilocode.ai](mailto:hi@kilocode.ai)
** along with the following:
* The error messages from the console
* Steps to reproduce the issue
* Screenshots or screen recordings of the issue
* Your IDE and Kilo Code version
Copy page
---
# Enterprise MCP Controls
Enterprise MCP Controls
=======================
### Overview
Enterprise customers need to maintain control over the tools their developers use to ensure security, compliance, and cost management. Developers using Kilo Code can configure and use any MCP (Model Context Protocol) server, including public marketplace offerings or arbitrary custom servers. This lack of administrative oversight introduces risk for our enterprise customers, as it allows for the potential use of unvetted, insecure, or costly tool calls.
This document specifies a new feature, **Enterprise MCP Controls**, which allows organization administrators to define an **allowlist** of approved MCP servers. Kilo Code (CLI/Extension) can enforce this allowlist, ensuring that developers within the organization can only use sanctioned MCPs.
### MVP Requirements
#### 1\. Dashboard App
* **View and Manage Allowlist:** Organization administrators must have a dedicated section in the dashboard to manage their MCP allowlist.
* **Default Configuration:** By default, new and existing organizations will have **all** marketplace MCPs enabled to ensure no disruption of service.
* **Marketplace MCPs:** The dashboard must display a comprehensive list of all MCPs available in the official Kilo Code Marketplace.
* **Selection UI:** Administrators must be able to easily select and deselect MCPs to add or remove them from the organization's allowlist.
* **Audit Logs:** Any changes made to MCP allow list must show up in the Audit Logs
#### 2\. Extension
* **Allowlist Enforcement:** The VS Code extension and future CLI must strictly enforce the organization's MCP allowlist.
* **Filtered Marketplace:** The in-extension "MCP Marketplace" view must **only** display MCPs that are on the organization's allowlist.
* **Ignore Disallowed MCPs:** If an MCP server configured in `mcp.json` is **not** on the allowlist, the extension must ignore it. It should not be activated, displayed as an option, or used for any operations.
* **User Feedback:** The extension should provide clear, non-blocking visual feedback to the developer indicating which locally configured MCPs are disallowed by their organization's policy (e.g., graying out the entry, showing a warning icon).
System Design
-------------
When the Enterprise MCP Controls feature is enabled, extension users can no longer use locally configured MCP definitions. Instead of pulling MCP configurations from the end-user's filesystem, the configuration will be pulled from the Kilo Code API, scoped to the organization.
#### How Kilo/MCP works today
!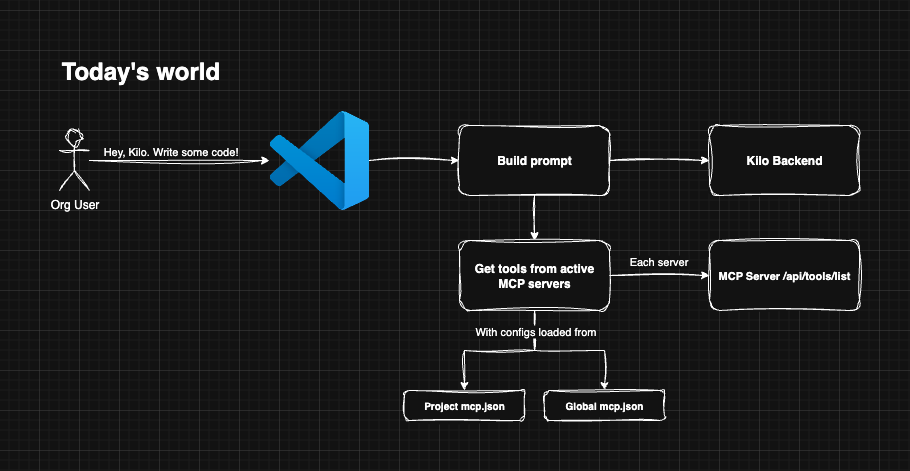
#### How Kilo/MCP works with enterprise controls
!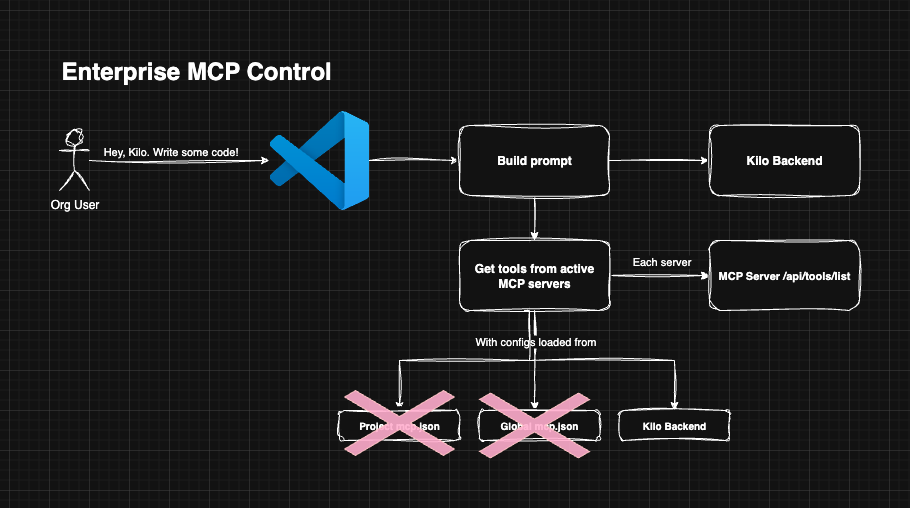
### Schema
We will piggy-back off of the existing organization.settings jsonb field for administrator to configure MCP Controls:
const OrganizationSettings\_MCPControls = z.object({
mcp\_controls\_enabled: z.boolean().optional(),
mcp\_controls\_allowed\_marketplace\_servers: z.string().optional(),
})
For end-users, since the mcp.json payload is no longer configurable locally, they will need to configure it via the Kilo Code dashboard. Since these configurations often contain API keys, we will encrypt the entire payload prior to insertion:
create table if not exists organization\_member\_mcp\_configs (
id uuid not null default uuid\_generate\_v4(),
organization\_id uuid not null references organizations(id),
kilo\_user\_id text not null references kilocode\_users(id),
config bytea not null,
created\_at timestamptz not null default now()
)
The config payload definition should look something like:
const OrganizationMemberMCPConfig = z
.object({ mcp\_id: z.string(), parameters: z.record(z.string(), z.string()) })
.array()
### Dashboard App
#### Owner experience
There will be a new page in the left-hand navigation for Enterprise users only called "MCP Control" `/organizations/:id/mcp-control`. For owners, this page will allow control of which MCP marketplace items are allowed. It will `GET /api/marketplace/mcps` to retrieve the canonical list of MCP servers in our marketplace. It will also call the relevant getOrganization trpc function to get the org settings. By default, this feature is turned off. Also by default, all MCP servers will be selected.
#### Organization user experience
!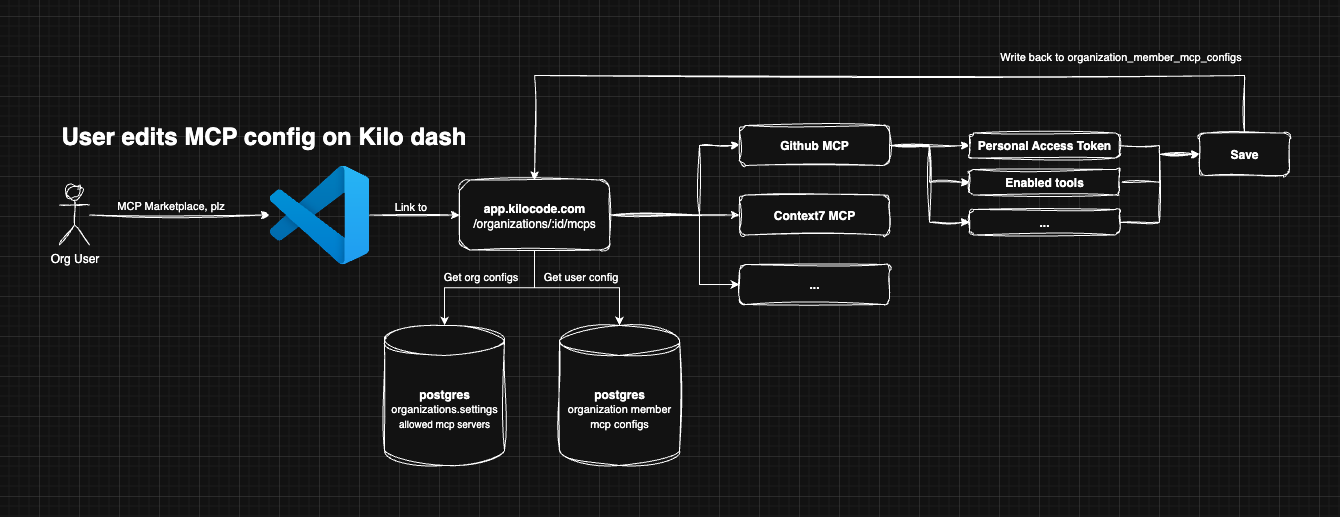
When org users want to configure and use an MCP server and if organizations.settings.mcp\_controls\_enabled is true, they will be directed to the Kilo Code dashboard application `/organizations/:id/mcp-control`. Users will be able to enable, disable, and configure approved MCP servers.
There will be a configuration UI similar to what's in the extension today. All configurations are encrypted and saved in our database.
### Extension
When organizations.settings.mcp\_controls\_enabled is true, the MCP marketplace view should be replaced with a link to configure MCP on the Kilo Code dashboard. When it is false-y, the experience is the same as it is today.
Scope and implementation plan
-----------------------------
Rough plan. These action items will become tickets after spec is approved:
* Backend
* Schema changes for new organization\_member\_mcp\_configs table
* Implement org settings endpoint changes to allow for mcp-control features (enabled, allow list)
* Implement TRPC routes for org members to update approved mcp installation settings
* Implement mcp-control UI for administrators
* Implement mcp server installation UI for end users
* Extension
* When organizations.settings.mcp\_controls\_enabled is true, the MCP marketplace view should be replaced with a link to configure MCP on the Kilo Code dashboard
Features for the future
-----------------------
* Org-provided custom MCP server configurations (i.e. non-marketplace MCPs)
* Project-level MCP configurations
* Tool call audits - who is running what tool and why?
* Split out by user, project, MCP server (if applicable)
* Why? If you're really concerned about locking down MCP servers then the only way to know if our product is truly doing what it's saying it is is to provide admins with tool call audit logs
Copy page
---
# Kilo Code Documentation
list\_code\_definition\_names
=============================
The `list_code_definition_names` tool provides a structural overview of your codebase by listing code definitions from source files at the top level of a specified directory. It helps Kilo Code understand code architecture by displaying line numbers and definition snippets.
Parameters
----------
The tool accepts these parameters:
* `path` (required): The path of the directory to list top level source code definitions for, relative to the current working directory
What It Does
------------
This tool scans source code files at the top level of a specified directory and extracts code definitions like classes, functions, and interfaces. It displays the line numbers and actual code for each definition, providing a quick way to map the important components of your codebase.
When is it used?
----------------
* When Kilo Code needs to understand your codebase architecture quickly
* When Kilo Code needs to locate important code constructs across multiple files
* When planning refactoring or extensions to existing code
* Before diving into implementation details with other tools
* When identifying relationships between different parts of your codebase
Key Features
------------
* Extracts classes, functions, methods, interfaces, and other definitions from source files
* Displays line numbers and actual source code for each definition
* Supports multiple programming languages including JavaScript, TypeScript, Python, Rust, Go, C++, C, C#, Ruby, Java, PHP, Swift, and Kotlin
* Processes only files at the top level of the specified directory (not subdirectories)
* Limits processing to a maximum of 50 files for performance
* Focuses on top-level definitions to avoid overwhelming detail
* Helps identify code organization patterns across the project
* Creates a mental map of your codebase's architecture
* Works in conjunction with other tools like `read_file` for deeper analysis
Limitations
-----------
* Only identifies top-level definitions, not nested ones
* Only processes files at the top level of the specified directory, not subdirectories
* Limited to processing a maximum of 50 files per request
* Dependent on language-specific parsers, with varying detection quality
* May not recognize all definitions in languages with complex syntax
* Not a substitute for reading code to understand implementation details
* Cannot detect runtime patterns or dynamic code relationships
* Does not provide information about how definitions are used
* May have reduced accuracy with highly dynamic or metaprogrammed code
* Limited to specific languages supported by the implemented Tree-sitter parsers
How It Works
------------
When the `list_code_definition_names` tool is invoked, it follows this process:
1. **Parameter Validation**: Validates the required `path` parameter
2. **Path Resolution**: Resolves the relative path to an absolute path
3. **Directory Scanning**: Scans only the top level of the specified directory for source code files (not recursive)
4. **File Filtering**: Limits processing to a maximum of 50 files
5. **Language Detection**: Identifies file types based on extensions (.js, .jsx, .ts, .tsx, .py, .rs, .go, .cpp, .hpp, .c, .h, .cs, .rb, .java, .php, .swift, .kt, .kts)
6. **Code Parsing**: Uses Tree-sitter to parse code and extract definitions through these steps:
* Parsing file content into an Abstract Syntax Tree (AST)
* Creating a query using a language-specific query string
* Sorting the captures by their position in the file
7. **Result Formatting**: Outputs definitions with line numbers and actual source code
Output Format
-------------
The output shows file paths followed by line numbers and the actual source code of each definition. For example:
src/utils.js:
0--0 | export class HttpClient {
5--5 | formatDate() {
10--10 | function parseConfig(data) {
src/models/User.js:
0--0 | interface UserProfile {
10--10 | export class User {
20--20 | function createUser(data) {
Each line displays:
* The start and end line numbers of the definition
* The pipe symbol (|) as a separator
* The actual source code of the definition
This output format helps you quickly see both where definitions are located in the file and their implementation details.
Examples When Used
------------------
* When starting a new task, Kilo Code first lists key code definitions to understand the overall structure of your project.
* When planning refactoring work, Kilo Code uses this tool to identify classes and functions that might be affected.
* When exploring unfamiliar codebases, Kilo Code maps the important code constructs before diving into implementation details.
* When adding new features, Kilo Code identifies existing patterns and relevant code definitions to maintain consistency.
* When troubleshooting bugs, Kilo Code maps the codebase structure to locate potential sources of the issue.
* When planning architecture changes, Kilo Code identifies all affected components across files.
Usage Examples
--------------
Listing code definitions in the current directory:
.
Examining a specific module's structure:
src/components
Exploring a utility library:
lib/utils
Copy page
---
# Kilo Code Documentation
delete\_file
============
Delete a file or directory from the workspace. This tool provides a safe alternative to rm commands and works across all platforms.
Parameters
----------
* `path` (required): Relative path to the file or directory to delete
Description
-----------
This tool safely deletes files and directories with user confirmation. For directories, it validates all contained files and shows statistics before deletion.
Safety Features
---------------
* Only deletes files/directories within the workspace
* Requires user confirmation before deletion
* Prevents deletion of write-protected files
* Validates all files against `.kilocodeignore` rules
* For directories: scans recursively and shows statistics (file count, directory count, total size) before deletion
* Blocks directory deletion if any contained file is protected or ignored
Usage
-----
### Delete a single file
temp/old\_file.txt
### Delete a directory
old\_project/
When deleting a directory, the tool:
1. Scans the directory recursively
2. Validates all files can be deleted
3. Shows summary with file count, subdirectory count, and total size
4. Requires user approval before deletion
Error Handling
--------------
The tool provides clear error messages for:
* File or directory does not exist
* File is write-protected
* File is blocked by `.kilocodeignore` rules
* Directory contains protected or ignored files
* Path is outside the workspace
Copy page
---
# Kilo Code Documentation
Using DeepSeek With Kilo Code
=============================
Kilo Code supports accessing models through the DeepSeek API, including `deepseek-chat` and `deepseek-reasoner`.
**Website:** [https://platform.deepseek.com/](https://platform.deepseek.com/)
Getting an API Key
------------------
1. **Sign Up/Sign In:** Go to the [DeepSeek Platform](https://platform.deepseek.com/)
. Create an account or sign in.
2. **Navigate to API Keys:** Find your API keys in the [API keys](https://platform.deepseek.com/api_keys)
section of the platform.
3. **Create a Key:** Click "Create new API key". Give your key a descriptive name (e.g., "Kilo Code").
4. **Copy the Key:** **Important:** Copy the API key _immediately_. You will not be able to see it again. Store it securely.
Configuration in Kilo Code
--------------------------
1. **Open Kilo Code Settings:** Click the gear icon () in the Kilo Code panel.
2. **Select Provider:** Choose "DeepSeek" from the "API Provider" dropdown.
3. **Enter API Key:** Paste your DeepSeek API key into the "DeepSeek API Key" field.
4. **Select Model:** Choose your desired model from the "Model" dropdown.
Tips and Notes
--------------
* **Pricing:** Refer to the [DeepSeek Pricing](https://api-docs.deepseek.com/quick_start/pricing/)
page for details on model costs.
Copy page
---
# Kilo Code Documentation
Using Groq With Kilo Code
=========================
Groq provides ultra-fast inference for various AI models through their high-performance infrastructure. Kilo Code supports accessing models through the Groq API.
**Website:** [https://groq.com/](https://groq.com/)
Getting an API Key
------------------
To use Groq with Kilo Code, you'll need an API key from the [GroqCloud Console](https://console.groq.com/)
. After signing up or logging in, navigate to the API Keys section of your dashboard to create and copy your key.
Supported Models
----------------
Kilo Code will attempt to fetch the list of available models from the Groq API.
**Note:** Model availability and specifications may change. Refer to the [Groq Documentation](https://console.groq.com/docs/models)
for the most up-to-date list of supported models and their capabilities.
Configuration in Kilo Code
--------------------------
1. **Open Kilo Code Settings:** Click the gear icon () in the Kilo Code panel.
2. **Select Provider:** Choose "Groq" from the "API Provider" dropdown.
3. **Enter API Key:** Paste your Groq API key into the "Groq API Key" field.
4. **Select Model:** Choose your desired model from the "Model" dropdown.
Tips and Notes
--------------
* **High-Speed Inference:** Groq's LPUs provide exceptionally fast response times, making it ideal for interactive development workflows.
* **Token Limits:** Some models have specific `max_tokens` limits that are automatically handled by Kilo Code (e.g., the `moonshotai/kimi-k2-instruct` model).
* **Cost Efficiency:** Groq often provides competitive pricing for high-speed inference compared to other providers.
* **Model Selection:** Choose models based on your specific needs - larger models like `llama3-70b-8192` for complex reasoning tasks, or smaller models like `llama3-8b-8192` for faster, simpler operations.
Supported Models
----------------
Kilo Code supports the following models through Groq:
| Model ID | Provider | Context Window | Notes |
| --- | --- | --- | --- |
| `moonshotai/kimi-k2-instruct` | Moonshot AI | 128K tokens | Optimized max\_tokens limit configured |
| `llama-3.3-70b-versatile` | Meta | 128K tokens | High-performance Llama model |
| `llama-3.1-70b-versatile` | Meta | 128K tokens | Versatile reasoning capabilities |
| `llama-3.1-8b-instant` | Meta | 128K tokens | Fast inference for quick tasks |
| `mixtral-8x7b-32768` | Mistral AI | 32K tokens | Mixture of experts architecture |
**Note:** Model availability may change. Refer to the [Groq documentation](https://console.groq.com/docs/models)
for the latest model list and specifications.
Configuration in Kilo Code
--------------------------
1. **Open Kilo Code Settings:** Click the gear icon () in the Kilo Code panel.
2. **Select Provider:** Choose "Groq" from the "API Provider" dropdown.
3. **Enter API Key:** Paste your Groq API key into the "Groq API Key" field.
4. **Select Model:** Choose your desired model from the "Model" dropdown.
Model-Specific Features
-----------------------
### Kimi K2 Model
The `moonshotai/kimi-k2-instruct` model includes optimized configuration:
* **Max Tokens Limit:** Automatically configured with appropriate limits for optimal performance
* **Context Understanding:** Excellent for complex reasoning and long-context tasks
* **Multilingual Support:** Strong performance across multiple languages
Tips and Notes
--------------
* **Ultra-Fast Inference:** Groq's hardware acceleration provides exceptionally fast response times
* **Cost-Effective:** Competitive pricing for high-performance inference
* **Rate Limits:** Be aware of API rate limits based on your Groq plan
* **Model Selection:** Choose models based on your specific use case:
* **Kimi K2**: Best for complex reasoning and multilingual tasks
* **Llama 3.3 70B**: Excellent general-purpose performance
* **Llama 3.1 8B Instant**: Fastest responses for simple tasks
* **Mixtral**: Good balance of performance and efficiency
Troubleshooting
---------------
* **"Invalid API Key":** Verify your API key is correct and active in the Groq Console
* **"Model Not Available":** Check if the selected model is available in your region
* **Rate Limit Errors:** Monitor your usage in the Groq Console and consider upgrading your plan
* **Connection Issues:** Ensure you have a stable internet connection and Groq services are operational
Pricing
-------
Groq offers competitive pricing based on input and output tokens. Visit the [Groq pricing page](https://groq.com/pricing/)
for current rates and plan options.
Copy page
---
# Kilo Code Documentation
browser\_action
===============
The `browser_action` tool enables web automation and interaction via a Puppeteer-controlled browser. It allows Kilo Code to launch browsers, navigate to websites, click elements, type text, and scroll pages with visual feedback through screenshots.
Parameters
----------
The tool accepts these parameters:
* `action` (required): The action to perform:
* `launch`: Start a new browser session at a URL
* `click`: Click at specific x,y coordinates
* `type`: Type text via the keyboard
* `scroll_down`: Scroll down one page height
* `scroll_up`: Scroll up one page height
* `close`: End the browser session
* `url` (optional): The URL to navigate to when using the `launch` action
* `coordinate` (optional): The x,y coordinates for the `click` action (e.g., "450,300")
* `text` (optional): The text to type when using the `type` action
What It Does
------------
This tool creates an automated browser session that Kilo Code can control to navigate websites, interact with elements, and perform tasks that require browser automation. Each action provides a screenshot of the current state, enabling visual verification of the process.
When is it used?
----------------
* When Kilo Code needs to interact with web applications or websites
* When testing user interfaces or web functionality
* When capturing screenshots of web pages
* When demonstrating web workflows visually
Key Features
------------
* Provides visual feedback with screenshots after each action and captures console logs
* Supports complete workflows from launching to page interaction to closing
* Enables precise interactions via coordinates, keyboard input, and scrolling
* Maintains consistent browser sessions with intelligent page loading detection
* Operates in two modes: local (isolated Puppeteer instance) or remote (connects to existing Chrome)
* Handles errors gracefully with automatic session cleanup and detailed messages
* Optimizes visual output with support for various formats and quality settings
* Tracks interaction state with position indicators and action history
Browser Modes
-------------
The tool operates in two distinct modes:
### Local Browser Mode (Default)
* Downloads and manages a local Chromium instance through Puppeteer
* Creates a fresh browser environment with each launch
* No access to existing user profiles, cookies, or extensions
* Consistent, predictable behavior in a sandboxed environment
* Completely closes the browser when the session ends
### Remote Browser Mode
* Connects to an existing Chrome/Chromium instance running with remote debugging enabled
* Can access existing browser state, cookies, and potentially extensions
* Faster startup as it reuses an existing browser process
* Supports connecting to browsers in Docker containers or on remote machines
* Only disconnects (doesn't close) from the browser when session ends
* Requires Chrome to be running with remote debugging port open (typically port 9222)
Limitations
-----------
* While the browser is active, only `browser_action` tool can be used
* Browser coordinates are viewport-relative, not page-relative
* Click actions must target visible elements within the viewport
* Browser sessions must be explicitly closed before using other tools
* Browser window has configurable dimensions (default 900x600)
* Cannot directly interact with browser DevTools
* Browser sessions are temporary and not persistent across Kilo Code restarts
* Works only with Chrome/Chromium browsers, not Firefox or Safari
* Local mode has no access to existing cookies; remote mode requires Chrome with debugging enabled
How It Works
------------
When the `browser_action` tool is invoked, it follows this process:
1. **Action Validation and Browser Management**:
* Validates the required parameters for the requested action
* For `launch`: Initializes a browser session (either local Puppeteer instance or remote Chrome)
* For interaction actions: Uses the existing browser session
* For `close`: Terminates or disconnects from the browser appropriately
2. **Page Interaction and Stability**:
* Ensures pages are fully loaded using DOM stability detection via `waitTillHTMLStable` algorithm
* Executes requested actions (navigation, clicking, typing, scrolling) with proper timing
* Monitors network activity after clicks and waits for navigation when necessary
3. **Visual Feedback**:
* Captures optimized screenshots using WebP format (with PNG fallback)
* Records browser console logs for debugging purposes
* Tracks mouse position and maintains paginated history of actions
4. **Session Management**:
* Maintains browser state across multiple actions
* Handles errors and automatically cleans up resources
* Enforces proper workflow sequence (launch → interactions → close)
Workflow Sequence
-----------------
Browser interactions must follow this specific sequence:
1. **Session Initialization**: All browser workflows must start with a `launch` action
2. **Interaction Phase**: Multiple `click`, `type`, and scroll actions can be performed
3. **Session Termination**: All browser workflows must end with a `close` action
4. **Tool Switching**: After closing the browser, other tools can be used
Examples When Used
------------------
* When creating a web form submission process, Kilo Code launches a browser, navigates to the form, fills out fields with the `type` action, and clicks submit.
* When testing a responsive website, Kilo Code navigates to the site and uses scroll actions to examine different sections.
* When capturing screenshots of a web application, Kilo Code navigates through different pages and takes screenshots at each step.
* When demonstrating an e-commerce checkout flow, Kilo Code simulates the entire process from product selection to payment confirmation.
Usage Examples
--------------
Launching a browser and navigating to a website:
launchhttps://example.com
Clicking at specific coordinates (e.g., a button):
click450,300
Typing text into a focused input field:
typeHello, World!
Scrolling down to see more content:
scroll\_down
Closing the browser session:
close
Copy page
---
# Onboarding Improvements
Onboarding Improvements
=======================
Overview
========
New users get minimal onboarding with generic prompts and no feature guidance. This causes poor engagement and users miss key capabilities. Existing users lack visibility into new features.
This spec proposes improved welcome screens, interactive tutorials, and in-product changelog to drive better activation and feature adoption.
Requirements
============
* Replace generic "CSS gradient generator" prompt with 4+ contextually relevant starter prompts with visual icons
* Implement interactive tutorial system highlighting key UI elements (modes, mcp, settings)
* Display in-product changelog with smart visibility rules for returning users
* Remember tutorial completion state to avoid showing it repeatedly to users
* Implement analytics tracking for onboarding completion rates and user engagement metrics
Tasks
=====
Welcome Screen Redesign
-----------------------
Redesign welcome screen with visual appeal and actionable starter prompts.
**Layout Structure:**
+----------------------------------+
| \[KiloCode Logo\] |
| "Welcome to KiloCode" |
| |
| +--------+ +--------+ |
| | Card 1 | | Card 2 | |
| +--------+ +--------+ |
| |
| +--------+ +--------+ |
| | Card 3 | | Card 4 | |
| +--------+ +--------+ |
| |
| \[Skip\] \[Start Tutorial\] |
+----------------------------------+
**Starter Prompt Cards Ideas**
* **Debug Helper**: 🐛 "Help me fix a bug in my code"
* **Feature Builder**: ⚡ "Add a new feature to my project"
* **Documentation**: 📝 "Generate documentation for this file"
* **Code Review**: 🔍 "Review my current changes by running `git diff` and analyzing the output"
Each card will have:
* Hover state with subtle elevation
* Click to populate chat input
* Icon using VS Code's codicon library
In-App Tutorial Flow
--------------------
Users aren't guided through Kilo Code's modes or key features. The existing tab-based tutorial is easily dismissed, causing users to miss critical functionality.
Replace the tab-based tutorial with an in-app experience using specific highlighting flows to guide users through core functionality.
**Tutorial Flow**
Step 1: Welcome
├── Highlight: Entire interface
├── Content: "Welcome to KiloCode! Let's take a quick tour."
└── Actions: \[Skip Tour\] \[Next\]
Step 2: Mode Selection
├── Highlight: Mode selector buttons
├── Content: "Choose between Chat, Edit, and Architect modes for different tasks"
└── Actions: \[Back\] \[Next\]
Step 3: Side Panels & MCP Configuration
├── Highlight: Left sidebar
├── Content: "Access history, memory, and configure MCP servers for enhanced capabilities"
└── Actions: \[Back\] \[Next\]
Step 4: Starting a Chat
├── Highlight: Input area
├── Content: "Type your request here or use @ to reference files"
└── Actions: \[Back\] \[Next\]
Step 5: Starter Prompts
├── Highlight: Starter prompt area
├── Content: "Use these prompts to get started quickly with common tasks"
└── Actions: \[Back\] \[Finish\]
Kilo Provider Settings UI Improvements
--------------------------------------
The "Set API Key" button is at the bottom of settings, making Kilo Code setup hard to discover and complete.
**Improvements:**
* Move "Set API Key" button next to API key input field
* Rearrange layout for better flow
* Make Kilo Code provider setup prominent
* Reduce setup friction
Analytics Integration
---------------------
Track user interactions to identify where users drop off in the product funnel. This data enables targeted improvements to increase activation rates.
**Key Funnel Events to Track:**
**Onboarding Funnel:**
* `onboarding.started`
* `onboarding.tutorial.completed`
* `onboarding.tutorial.skipped`
* `onboarding.prompt.selected` (with prompt type)
* `onboarding.finished` - Critical completion milestone
**Product Engagement Funnel:**
* `chat.started` - First interaction with core functionality
* `mode.changed` (with mode type) - Feature discovery and usage
* `changelog.viewed` - Re-engagement with new features
* `changelog.dismissed`
* `provider.configured` - Setup completion
* `file.referenced` - Advanced feature usage (@-mentions)
* `mcp.configured` - Power user feature adoption
**Drop-off Analysis Goals:**
* Identify at what point users stop progressing through onboarding
* Measure conversion from onboarding completion to first chat
* Track mode adoption rates and feature discovery patterns
* Understand re-engagement effectiveness through changelog interactions
In-Product Changelog
--------------------
Re-engage inactive users by highlighting new features and improvements. Acts as a reminder system to reactivate dormant users and keep active users informed.
Features for the Future
-----------------------
* **User Drop-off Funnel Analysis**: Implement comprehensive PostHog funnel tracking to identify where users abandon the onboarding flow and create targeted recovery strategies
* **Contextual Project Analysis**: Detect and analyze user's project structure to provide personalized first-action recommendations based on their codebase
* Progressive disclosure of advanced features over time
* Personalized onboarding flows based on user role (frontend dev, backend dev, DevOps)
* AI-powered prompt suggestions based on actual project code patterns
* Integration with Kilo Code teams for company/repo-personalized onboarding
Copy page
---
# Organization Modes Library
Organization Modes Library
==========================
Overview
========
We want to expand the value of teams & enterprise and make it more useful for collaboration and hopefully increase 'lock in' to the Kilo platform. We can build something _like_ a prompt library, but a bit more powerful. We can leverage Kilo's unique "modes" which already has "marketplace" support to enable teams & enterprises to define and manage modes on the backend webapp and have those modes show up in the modes marketplace if the user is using an organization in the extension. This feature is mostly valuable in larger organizations where they work on many different repositories. If you have very few repositories, then the value is low since you can also store custom modes within the git repo, effectively sharing it with anyone who uses the repo already.
Requirements
============
This section outlines the detailed requirements that the solution will fulfill.
* Ability for an organization to have custom modes visible in the web UI.
* Fetch the organization custom modes and show them by default if you switch to an organization alongside any other modes you have manually installed & the "base" modes like "code" "architect" etc. Important consideration here is the organization also has a "code" mode it should overwrite the built in one. This allows the organization owners to modify the built in prompts.
* Ability for team members (or owners only?) to do crud on modes on the UI of the web, including uploading/downloading yaml directly, editing the yaml, and having a form style editor as seen in the extension.
* Web ui showing a list of modes and common info like when created, who created, and when updated.
* Auditing of Custom Mode CRUD operations in the Kilo backend web UI.
### Non-requirements
* Disabling the mode marketplace or removing built-in modes.
* Disabling custom modes created locally by an organization member.
* Ability to upload modes from the extension into the web backend via a special extension button.
* Extending the mode definition to include a suggested model to use with the mode (that would be nice though)
System Design
=============
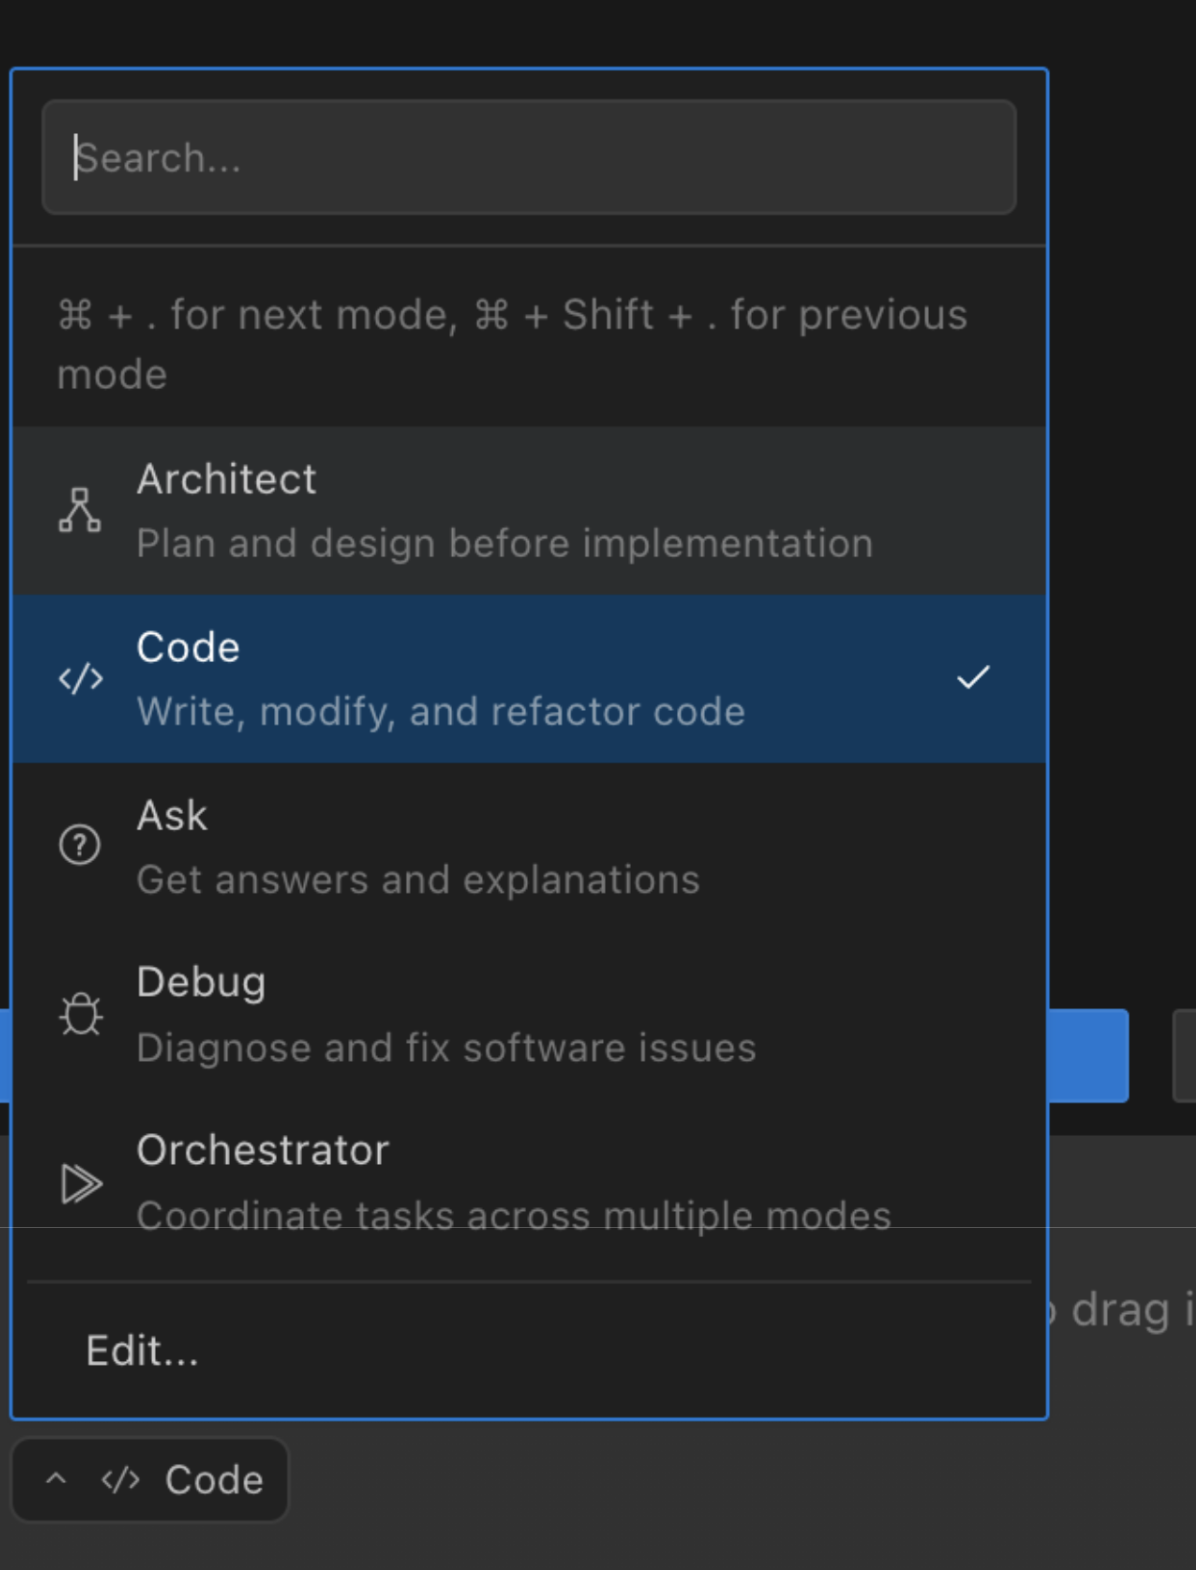
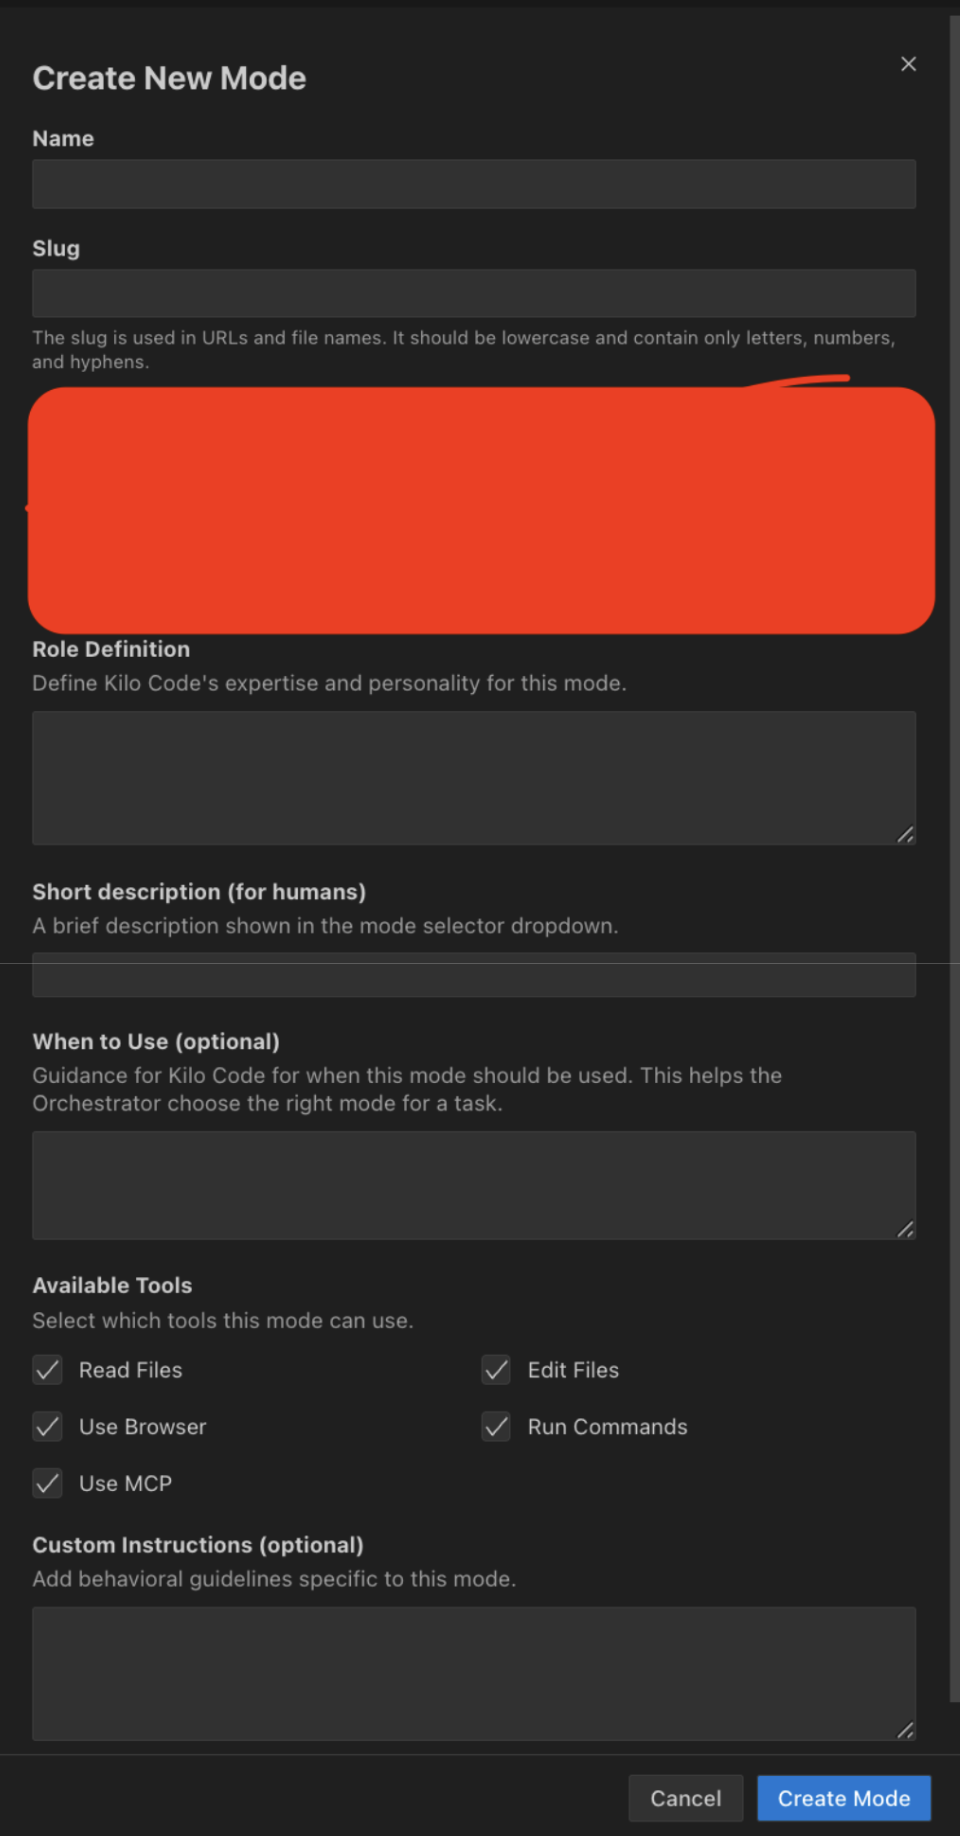
Currently extension fetches available modes from the "mode marketplace" by downloading a "modes.yaml" file from our backend. We will add an endpoint the extension can call with a user & org id and it can return any organization modes. Those will be merged into the mode list and dropdown shown to the user.
The organization modes themselves will be saved in postgres, and there will be both a form style editing UI based on what's in the extension.
Will add a new section to the backend UI to view custom org modes, edit them, create new ones, etc.
Schema change:
CREATE TABLE organization\_modes (
id uuid primary key,
organization\_id uuid not null,
name text not null,
slug text not null,
created\_by text not null,
created\_at timestamptz default now(),
updated\_at timestamptz default now(),
config jsonb
)
We're recommending using jsonb for the non _critical_ pieces of the modes so it's easier to keep in sync with the extension vs a schema we have to migrate (not everyone updates to the most recent extension immediately, for example)
Scope and implementation
========================
* Schema migration
* Make CRUD ui on backend, feature flagged out to only our organization to begin with. Estimate this is 1 day of work.
* Make endpoint to return org modes
* Render org modes in extension. Estimating 2 days for this because we are both unfamiliar with how to work on extension, and there be dragons there.
Compliance Considerations
=========================
Should log any mode CRUD operations to audit logs for enterprise. Otherwise, none.
Open questions
--------------
* Teams or enterprise? My vote is teams
Copy page
---
# Kilo Code Documentation
Using xAI (Grok) With Kilo Code
===============================
xAI is the company behind Grok, a large language model known for its conversational abilities and large context window. Grok models are designed to provide helpful, informative, and contextually relevant responses.
**Website:** [https://x.ai/](https://x.ai/)
Getting an API Key
------------------
1. **Sign Up/Sign In:** Go to the [xAI Console](https://console.x.ai/)
. Create an account or sign in.
2. **Navigate to API Keys:** Go to the API keys section in your dashboard.
3. **Create a Key:** Click to create a new API key. Give your key a descriptive name (e.g., "Kilo Code").
4. **Copy the Key:** **Important:** Copy the API key _immediately_. You will not be able to see it again. Store it securely.
Configuration in Kilo Code
--------------------------
1. **Open Kilo Code Settings:** Click the gear icon () in the Kilo Code panel.
2. **Select Provider:** Choose "xAI" from the "API Provider" dropdown.
3. **Enter API Key:** Paste your xAI API key into the "xAI API Key" field.
4. **Select Model:** Choose your desired Grok model from the "Model" dropdown.
Reasoning Capabilities
----------------------
Some models feature specialized reasoning capabilities, allowing them to "think before responding" - particularly useful for complex problem-solving tasks.
### Controlling Reasoning Effort
When using reasoning-enabled models, you can control how hard the model thinks with the `reasoning_effort` parameter:
* `low`: Minimal thinking time, using fewer tokens for quick responses
* `high`: Maximum thinking time, leveraging more tokens for complex problems
Choose `low` for simple queries that should complete quickly, and `high` for harder problems where response latency is less important.
### Key Features
* **Step-by-Step Problem Solving**: The model thinks through problems methodically before delivering an answer
* **Math & Quantitative Strength**: Excels at numerical challenges and logic puzzles
* **Reasoning Trace Access**: The model's thinking process is available via the `reasoning_content` field in the response completion object
Tips and Notes
--------------
* **Context Window:** Most Grok models feature large context windows (up to 131K tokens), allowing you to include substantial amounts of code and context in your prompts.
* **Vision Capabilities:** Select vision-enabled models (`grok-2-vision-latest`, `grok-2-vision`, etc.) when you need to process or analyze images.
* **Pricing:** Pricing varies by model, with input costs ranging from $0.3 to $5.0 per million tokens and output costs from $0.5 to $25.0 per million tokens. Refer to the xAI documentation for the most current pricing information.
* **Performance Tradeoffs:** "Fast" variants typically offer quicker response times but may have higher costs, while "mini" variants are more economical but may have reduced capabilities.
Copy page
---
# Track Repo URL
Track Usage by Project
======================
Overview
========
We will define a "project" as a **repository** and will be identified by `project.id`. We can automatically get the `project.id` from the git remote `origin` if it doesn't exist, but also introduce the concept of a `.kilocode/config.json` file which you can use to manually set (and override in the case of an `origin` remote existing) `project.id`. This allows for "automagic" configuration in most cases, but for an override and helps with things like monorepos which can contain multiple "projects." It also stands in for places where the code structure is less defined like using kilo-cli or running Kilo cloud agents on checked out pieces of code, etc.
This will allow us to track which projects are used for every LLM call in the `microdollar_usage` table. We can then add this very easily to reporting to show how much of your costs are going to each "project" (identified by unique `project.id`). This feature is a prerequisite for "project based settings."
System Design
-------------
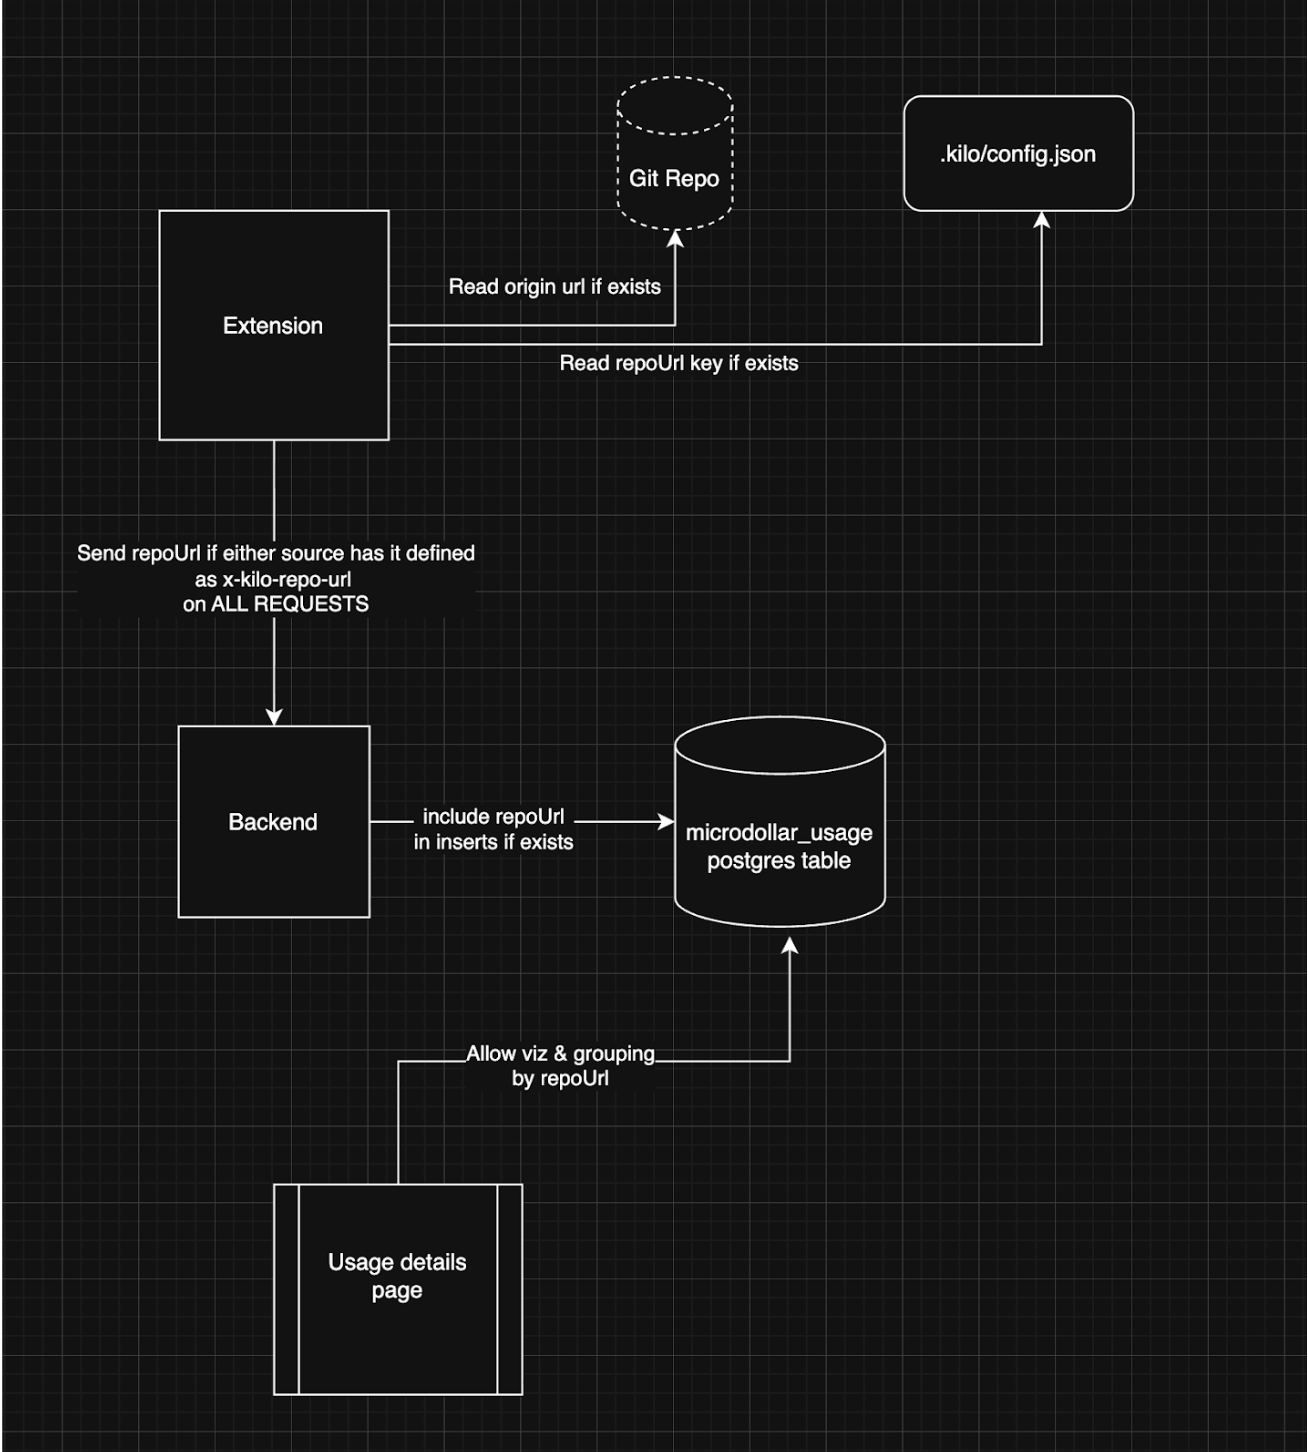
### Example config
{
// Example configuration for project settings
"project": {
// Kilo Code project ID
"id": "my-project",
},
}
Implementation Plan
-------------------
* Modify extension to get the `project.id` by getting the `origin` url from the git remotes.
* Modify extension to support an optional `.kilocode/config.json` and add the addition of `project.id` to the config file there.
* Modify extension to send `project.id` in a header to our backend OpenRouter endpoint (maybe `X_KILOCODE_PROJECTID`)
* Add some kind of json-schema to this file for some auto-complete goodness.
* Modify **all** backend requests to include the `project.id` if it exists as an http header.
* Modify `microdollar_usage` and add the `project_id` column.
* Modify usage details to support grouping by `repo_url` and seeing "who worked on **what**, when, and how much did it cost."
Compliance Considerations
=========================
I don't think it will hurt to save this, particularly since they can remove it by setting `project.id: ""` in `.kilocode/config.json`.
Copy page
---
# Voice Transcription
Voice Transcription
===================
Overview
========
Developers can code 3-5x faster by dictating rather than typing, yet Kilo Code currently has no voice input capability. This creates friction for users who want to quickly describe complex features or iterate on ideas hands-free.
This spec proposes adding live voice transcription to the chat interface, replacing the send button with a microphone icon when the text box is empty. Users can speak naturally while seeing real-time transcription appear in the input field, dramatically improving coding velocity for voice-preferred workflows.
The MVP will use OpenAI's Realtime API with FFmpeg-based audio streaming for low-latency transcription (~100ms). This mirrors the approach used by Cursor and Cline, proven to work well in VS Code environments.
Requirements
============
* **Microphone Icon UI**: Add microphone icon button that allows starting/stopping the transcription
* **Live Transcription Display**: Show real-time transcription in the chat text box as user speaks
* **FFmpeg Audio Streaming**: Use FFmpeg to capture and stream audio to transcription API
* **Realtime API Integration**: Use OpenAI's Realtime API for near-instant transcription
* **Visual Recording Indicator**: Show clear UI state when recording is active (animated volume bars or similar)
* **Typing Stops Recording**: Any keyboard input immediately stops transcription and returns to normal mode
* **Cross-Platform FFmpeg Docs**: Provide installation instructions for Windows, macOS, and Linux
* **OpenAI Provider Required**: Feature only available when user has configured an OpenAI API key in their provider settings. (This uses the user's own OpenAI credits, not Kilo Code credits.)
### Non-requirements
* Custom glossary / file / workflow support (future enhancement)
* Real-time volume visualization (future enhancement)
* Alternative transcription providers beyond OpenAI (future)
* Kilo Code provider integration for voice transcription (future)
* **Usage cost tracking/display** (not in initial version, but should be added in a future version since costs are separate from Kilo Code credits)
* Server-side/backend transcription (future)
* FFmpeg automatic installation or bundling
* Voice commands or shortcuts beyond start/stop
System Design
=============
Architecture Overview
---------------------

The system follows a straightforward streaming architecture where user voice input is captured by FFmpeg, streamed as PCM16 audio to OpenAI's Realtime API via WebSocket, and transcribed text is displayed live in the chat input box. Typing interrupts recording instantly.
Core Components
---------------
### 1\. Audio Capture Service
* Spawn FFmpeg as child process from extension host
* Platform-specific audio input configuration:
* **macOS**: `avfoundation`
* **Windows**: `dshow` (DirectShow)
* **Linux**: `alsa` or `pulse`
* Stream PCM16 format at 24kHz mono (required by OpenAI)
* Handle permissions errors and FFmpeg availability checks
### 2\. WebSocket Connection
* Direct WebSocket connection from extension to OpenAI Realtime API
* Secure API key storage in extension settings (existing provider system)
* Base64 encode audio chunks for transmission
* Handle connection lifecycle (connect, stream, disconnect)
### 3\. UI State Management
* **Empty Input State**: Show microphone icon
* **Recording State**: Animate microphone, show "Recording..." indicator
* **Transcribing State**: Show live transcription with typing cursor
* **Manual Stop**: Typing any key stops recording and clears recording indicator
* **Error State**: Show clear error message if FFmpeg not found or permissions denied
### 4\. Cost Considerations
* OpenAI Realtime API: **$0.60 per minute**
* **Cost is charged to user's OpenAI account**, not Kilo Code credits
* Display cost warning in settings or first-time use
* Consider adding usage tracking/warnings for high-volume users
FFmpeg Detection & Setup
------------------------
**Installation Check Flow**:
1. On extension activation, verify FFmpeg is available via `ffmpeg -version`
2. If not found, show dismissible banner with installation instructions
3. Link to documentation with platform-specific guides
4. Gracefully disable voice feature if FFmpeg unavailable
**Documentation Structure**:
* `docs/user-guide/voice-transcription-setup.md`
* Prerequisites section
* Platform-specific installation
* Troubleshooting common issues
* Permissions setup (especially macOS)
Scope/Implementation
--------------------
### Phase 1: Core Infrastructure
* Add FFmpeg detection on extension startup
* Create `AudioCaptureService` class with platform-specific FFmpeg spawning
* Implement WebSocket connection to OpenAI Realtime API
* Add basic error handling and cleanup
### Phase 2: UI Integration
* Add microphone icon component to chat input
* Implement state management for recording/transcribing modes
* Wire up transcription events to populate chat input box
* Add typing detection to stop recording
* Add visual recording indicator
### Phase 3: Polish & Docs
* Write cross-platform FFmpeg installation guide
* Add cost warning in settings UI
* Test on Windows, macOS, Linux
* Handle edge cases (permissions, no FFmpeg, API errors)
* Add analytics tracking for feature usage
Features for the future
=======================
* **Custom Glossary**: Use OpenAI Whisper API's glossary parameter for code-specific terminology
* **Real-time Volume Indicator**: Show live audio input levels during recording
* **Chunked Whisper API Mode**: Add cheaper option ($0.06/min) for users who can tolerate 2-5s latency
* **Provider Flexibility**: Support alternative transcription providers (Deepgram, AssemblyAI)
* **Server-side Transcription**: Move transcription to backend for better security/control
* **Voice Commands**: Implement "stop recording," "send message," and other voice shortcuts
* **Automatic FFmpeg Installation**: Bundle or auto-install FFmpeg to reduce setup friction
* **Recording History**: Save voice recordings locally for debugging or replay
* **Multi-language Support**: Extend beyond English with language detection
* **Usage Cost Tracking**: Display voice transcription costs somewhere (since this would be separate from Kilo Code credits)
Copy page
---
# Kilo Code Documentation
access\_mcp\_resource
=====================
The `access_mcp_resource` tool retrieves data from resources exposed by connected Model Context Protocol (MCP) servers. It allows Kilo Code to access files, API responses, documentation, or system information that provides additional context for tasks.
Parameters
----------
The tool accepts these parameters:
* `server_name` (required): The name of the MCP server providing the resource
* `uri` (required): The URI identifying the specific resource to access
What It Does
------------
This tool connects to MCP servers and fetches data from their exposed resources. Unlike `use_mcp_tool` which executes actions, this tool specifically retrieves information that serves as context for tasks.
When is it used?
----------------
* When Kilo Code needs additional context from external systems
* When Kilo Code needs to access domain-specific data from specialized MCP servers
* When Kilo Code needs to retrieve reference documentation hosted by MCP servers
* When Kilo Code needs to integrate real-time data from external APIs via MCP
Key Features
------------
* Retrieves both text and image data from MCP resources
* Requires user approval before executing resource access
* Uses URI-based addressing to precisely identify resources
* Integrates with the Model Context Protocol SDK
* Displays resource content appropriately based on content type
* Supports timeouts for reliable network operations
* Handles server connection states (connected, connecting, disconnected)
* Discovers available resources from connected servers
* Processes structured response data with metadata
* Handles image content special rendering
Limitations
-----------
* Depends on external MCP servers being available and connected
* Limited to the resources provided by connected servers
* Cannot access resources from disabled servers
* Network issues can affect reliability and performance
* Resource access subject to configured timeouts
* URI formats are determined by the specific MCP server implementation
* No offline or cached resource access capabilities
How It Works
------------
When the `access_mcp_resource` tool is invoked, it follows this process:
1. **Connection Validation**:
* Verifies that an MCP hub is available and initialized
* Confirms the specified server exists in the connection list
* Checks if the server is disabled (returns an error if it is)
2. **User Approval**:
* Presents the resource access request to the user for approval
* Provides server name and resource URI for user verification
* Proceeds only if the user approves the resource access
3. **Resource Request**:
* Uses the Model Context Protocol SDK to communicate with servers
* Makes a `resources/read` request to the server through the MCP hub
* Applies configured timeouts to prevent hanging on unresponsive servers
4. **Response Processing**:
* Receives a structured response with metadata and content arrays
* Processes text content for display to the user
* Handles image data specially for appropriate display
* Returns the processed resource data to Kilo Code for use in the current task
Resource Types
--------------
MCP servers can provide two main types of resources:
1. **Standard Resources**:
* Fixed resources with specific URIs
* Defined name, description, and MIME type
* Direct access without parameters
* Typically represent static data or real-time information
2. **Resource Templates**:
* Parameterized resources with placeholder values in URIs
* Allow dynamic resource generation based on provided parameters
* Can represent queries or filtered views of data
* More flexible but require additional URI formatting
Examples When Used
------------------
* When helping with API development, Kilo Code retrieves endpoint specifications from MCP resources to ensure correct implementation.
* When assisting with data visualization, Kilo Code accesses current data samples from connected MCP servers.
* When working in specialized domains, Kilo Code retrieves technical documentation to provide accurate guidance.
* When generating industry-specific code, Kilo Code references compliance requirements from documentation resources.
Usage Examples
--------------
Accessing current weather data:
weather-serverweather://san-francisco/current
Retrieving API documentation:
api-docsdocs://payment-service/endpoints
Accessing domain-specific knowledge:
knowledge-basekb://medical/terminology/common
Fetching system configuration:
infra-monitorconfig://production/database
Copy page
---
# Spec Template
Template
========
Overview
========
This section provides a concise description of the problem being addressed and the proposed solution.
What is important for the solution to accomplish? What can be left out of scope for now? Scope projects as tightly as possible, because smaller projects let us ship faster, get feedback faster, and avoid snowballing scope creep.
Requirements
============
This section outlines the requirements that the solution will fulfill. Be comprehensive and detailed.
Find the minimum requirements that will deliver the minimal solution described in the Overview. Avoid the urge to solve all the problems at once.
### Non-requirements
System Design
=============
This is the core of the technical specification, detailing the architectural decisions and implementation plan. If possible, include diagrams!
Scope/Implementation
--------------------
This section should be a bulleted list of tasks that will eventually become github issues.
Compliance Considerations
=========================
This section addresses any relevant compliance aspects, specifically regarding SOC 2.
Features for the future
=======================
Talks about what we might want to build or improve upon in the future, but is out-of-scope of this spec.
Copy page
---
# Kilo Code Documentation
use\_mcp\_tool
==============
The `use_mcp_tool` tool enables interaction with external tools provided by connected Model Context Protocol (MCP) servers. It extends Kilo Code's capabilities with domain-specific functionality through a standardized protocol.
Parameters
----------
The tool accepts these parameters:
* `server_name` (required): The name of the MCP server providing the tool
* `tool_name` (required): The name of the tool to execute
* `arguments` (required/optional): A JSON object containing the tool's input parameters, following the tool's input schema. May be optional for tools that require no input.
What It Does
------------
This tool allows Kilo Code to access specialized functionality provided by external MCP servers. Each MCP server can offer multiple tools with unique capabilities, extending Kilo Code beyond its built-in functionality. The system validates arguments against schemas, manages server connections, and processes responses of various content types (text, image, resource).
When is it used?
----------------
* When specialized functionality not available in core tools is needed
* When domain-specific operations are required
* When integration with external systems or services is needed
* When working with data that requires specific processing or analysis
* When accessing proprietary tools through a standardized interface
Key Features
------------
* Uses the standardized MCP protocol via the `@modelcontextprotocol/sdk` library
* Supports multiple transport mechanisms (StdioClientTransport and SSEClientTransport)
* Validates arguments using Zod schema validation on both client and server sides
* Processes multiple response content types: text, image, and resource references
* Manages server lifecycle with automatic restarts when server code changes
* Provides an "always allow" mechanism to bypass approval for trusted tools
* Works with the companion `access_mcp_resource` tool for resource retrieval
* Maintains proper error tracking and handling for failed operations
* Supports configurable timeouts (1-3600 seconds, default: 60 seconds)
* Allows file watchers to automatically detect and reload server changes
Limitations
-----------
* Depends on external MCP servers being available and connected
* Limited to the tools provided by connected servers
* Tool capabilities vary between different MCP servers
* Network issues can affect reliability and performance
* Requires user approval before execution (unless in the "always allow" list)
* Cannot execute multiple MCP tool operations simultaneously
Server Configuration
--------------------
MCP servers can be configured globally or at the project level:
* **Global Configuration**: Managed through the Kilo Code extension settings in VS Code. These apply across all projects unless overridden.
* **Project-level Configuration**: Defined in a `.kilocode/mcp.json` file within your project's root directory.
* This allows project-specific server setups.
* Project-level servers take precedence over global servers if they share the same name.
* Since `.kilocode/mcp.json` can be committed to version control, it simplifies sharing configurations with your team.
How It Works
------------
When the `use_mcp_tool` tool is invoked, it follows this process:
1. **Initialization and Validation**:
* The system verifies that the MCP hub is available
* Confirms the specified server exists and is connected
* Validates the requested tool exists on the server
* Arguments are validated against the tool's schema definition
* Timeout settings are extracted from server configuration (default: 60 seconds)
2. **Execution and Communication**:
* The system selects the appropriate transport mechanism:
* `StdioClientTransport`: For communicating with local processes via standard I/O
* `SSEClientTransport`: For communicating with HTTP servers via Server-Sent Events
* A request is sent with validated server name, tool name, and arguments
* Communication uses the `@modelcontextprotocol/sdk` library for standardized interactions
* Request execution is tracked with timeout handling to prevent hanging operations
3. **Response Processing**:
* Responses can include multiple content types:
* Text content: Plain text responses
* Image content: Binary image data with MIME type information
* Resource references: URIs to access server resources (works with `access_mcp_resource`)
* The system checks the `isError` flag to determine if error handling is needed
* Results are formatted for display in the Kilo Code interface
4. **Resource and Error Handling**:
* The system uses WeakRef patterns to prevent memory leaks
* A consecutive mistake counter tracks and manages errors
* File watchers monitor for server code changes and trigger automatic restarts
* The security model requires approval for tool execution unless in the "always allow" list
Security and Permissions
------------------------
The MCP architecture provides several security features:
* Users must approve tool usage before execution (by default)
* Specific tools can be marked for automatic approval in the "always allow" list
* Server configurations are validated with Zod schemas for integrity
* Configurable timeouts prevent hanging operations (1-3600 seconds)
* Server connections can be enabled or disabled through the UI
Examples When Used
------------------
* Analyzing specialized data formats using server-side processing tools
* Generating images or other media through AI models hosted on external servers
* Executing complex domain-specific calculations without local implementation
* Accessing proprietary APIs or services through a controlled interface
* Retrieving data from specialized databases or data sources
Usage Examples
--------------
Requesting weather forecast data with text response:
weather-serverget\_forecast
{
"city": "San Francisco",
"days": 5,
"format": "text"
}
Analyzing source code with a specialized tool that returns JSON:
code-analysiscomplexity\_metrics
{
"language": "typescript",
"file\_path": "src/app.ts",
"include\_functions": true,
"metrics": \["cyclomatic", "cognitive"\]
}
Generating an image with specific parameters:
image-generationcreate\_image
{
"prompt": "A futuristic city with flying cars",
"style": "photorealistic",
"dimensions": {
"width": 1024,
"height": 768
},
"format": "webp"
}
Accessing a resource through a tool that returns a resource reference:
database-connectorquery\_and\_store
{
"database": "users",
"type": "select",
"fields": \["name", "email", "last\_login"\],
"where": {
"status": "active"
},
"store\_as": "active\_users"
}
Tool with no required arguments:
system-monitorget\_current\_status
{}
Copy page
---
# Kilo Code Documentation
switch\_mode
============
The `switch_mode` tool enables Kilo Code to change between different operational modes, each with specialized capabilities for specific types of tasks. This allows seamless transitions between modes like Code, Architect, Ask, or Debug when the current task requires different expertise.
Parameters
----------
The tool accepts these parameters:
* `mode_slug` (required): The slug of the mode to switch to (e.g., "code", "ask", "architect")
* `reason` (optional): The reason for switching modes, providing context for the user
What It Does
------------
This tool requests a mode change when the current task would be better handled by another mode's capabilities. It maintains context while shifting Kilo Code's focus and available toolsets to match the requirements of the new task phase.
When is it used?
----------------
* When transitioning from information gathering to code implementation
* When shifting from coding to architecture or design
* When the current task requires capabilities only available in a different mode
* When specialized expertise is needed for a particular phase of a complex project
Key Features
------------
* Maintains context continuity across mode transitions
* Provides clear reasoning for mode switch recommendations
* Requires user approval for all mode changes
* Enforces tool group restrictions specific to each mode
* Seamlessly adapts tool availability based on the selected mode
* Works with both standard and custom modes
* Displays the mode switch and reasoning in the UI
* Uses XML-style formatting for parameter specification
* Handles file type restrictions specific to certain modes
Limitations
-----------
* Cannot switch to modes that don't exist in the system
* Requires explicit user approval for each mode transition
* Cannot use tools specific to a mode until the switch is complete
* Applies a 500ms delay after mode switching to allow the change to take effect
* Some modes have file type restrictions (e.g., Architect mode can only edit markdown files)
* Mode preservation for resumption applies only to the `new_task` functionality, not general mode switching
How It Works
------------
When the `switch_mode` tool is invoked, it follows this process:
1. **Request Validation**:
* Validates that the requested mode exists in the system
* Checks that the `mode_slug` parameter is provided and valid
* Verifies the user isn't already in the requested mode
* Ensures the `reason` parameter (if provided) is properly formatted
2. **Mode Transition Preparation**:
* Packages the mode change request with the provided reason
* Presents the change request to the user for approval
3. **Mode Activation (Upon User Approval)**:
* Updates the UI to reflect the new mode
* Adjusts available tools based on the mode's tool group configuration
* Applies the mode-specific prompt and behavior
* Applies a 500ms delay to allow the change to take effect before executing next tool
* Enforces any file restrictions specific to the mode
4. **Continuation**:
* Proceeds with the task using the capabilities of the new mode
* Retains relevant context from the previous interaction
Tool Group Association
----------------------
The `switch_mode` tool belongs to the "modes" tool group but is also included in the "always available" tools list. This means:
* It can be used in any mode regardless of the mode's configured tool groups
* It's available alongside other core tools like `ask_followup_question` and `attempt_completion`
* It allows mode transitions at any point in a workflow when task requirements change
Mode Structure
--------------
Each mode in the system has a specific structure:
* `slug`: Unique identifier for the mode (e.g., "code", "ask")
* `name`: Display name for the mode (e.g., "Code", "Ask")
* `roleDefinition`: The specialized role and capabilities of the mode
* `customInstructions`: Optional mode-specific instructions that guide behavior
* `groups`: Tool groups available to the mode with optional restrictions
Mode Capabilities
-----------------
The core modes provide these specialized capabilities:
* **Code Mode**: Focused on coding tasks with full access to code editing tools
* **Architect Mode**: Specialized for system design and architecture planning, limited to editing markdown files only
* **Ask Mode**: Optimized for answering questions and providing information
* **Debug Mode**: Equipped for systematic problem diagnosis and resolution
Custom Modes
------------
Beyond the core modes, the system supports custom project-specific modes:
* Custom modes can be defined with specific tool groups enabled
* They can specify custom role definitions and instructions
* The system checks custom modes first before falling back to core modes
* Custom mode definitions take precedence over core modes with the same slug
File Restrictions
-----------------
Different modes may have specific file type restrictions:
* **Architect Mode**: Can only edit files matching the `.md` extension
* Attempting to edit restricted file types results in a `FileRestrictionError`
* These restrictions help enforce proper separation of concerns between modes
Examples When Used
------------------
* When discussing a new feature, Kilo Code switches from Ask mode to Architect mode to help design the system structure.
* After completing architecture planning in Architect mode, Kilo Code switches to Code mode to implement the designed features.
* When encountering bugs during development, Kilo Code switches from Code mode to Debug mode for systematic troubleshooting.
Usage Examples
--------------
Switching to Code mode for implementation:
codeNeed to implement the login functionality based on the architecture we've discussed
Switching to Architect mode for design:
architectNeed to design the system architecture before implementation
Switching to Debug mode for troubleshooting:
debugNeed to systematically diagnose the authentication error
Switching to Ask mode for information:
askNeed to answer questions about the implemented feature
Copy page
---
# Kilo Code Documentation
ask\_followup\_question
=======================
The `ask_followup_question` tool enables interactive communication by asking specific questions to gather additional information needed to complete tasks effectively.
Parameters
----------
The tool accepts these parameters:
* `question` (required): The specific question to ask the user
* `follow_up` (optional): A list of 2-4 suggested answers that help guide user responses, each within `` tags
What It Does
------------
This tool creates a conversational interface between Kilo Code and the user, allowing for gathering clarification, additional details, or user preferences when facing ambiguities or decision points. Each question can include suggested responses to streamline the interaction.
When is it used?
----------------
* When critical information is missing from the original request
* When Kilo Code needs to choose between multiple valid implementation approaches
* When technical details or preferences are required to proceed
* When Kilo Code encounters ambiguities that need resolution
* When additional context would significantly improve the solution quality
Key Features
------------
* Provides a structured way to gather specific information without breaking workflow
* Includes suggested answers to reduce user typing and guide responses
* Maintains conversation history and context across interactions
* Supports responses containing images and code snippets
* Available in all modes as part of the "always available" tool set
* Enables direct user guidance on implementation decisions
* Formats responses with `` tags to distinguish them from regular conversation
* Resets consecutive error counter when used successfully
Limitations
-----------
* Limited to asking one specific question per tool use
* Presents suggestions as selectable options in the UI
* Cannot force structured responses – users can still respond freely
* Excessive use can slow down task completion and create a fragmented experience
* Suggested answers must be complete, with no placeholders requiring user edits
* No built-in validation for user responses
* Contains no mechanism to enforce specific answer formats
How It Works
------------
When the `ask_followup_question` tool is invoked, it follows this process:
1. **Parameter Validation**: Validates the required `question` parameter and checks for optional suggestions
* Ensures question text is provided
* Parses any suggested answers from the `follow_up` parameter using the `fast-xml-parser` library
* Normalizes suggestions into an array format even if there's only one suggestion
2. **JSON Transformation**: Converts the XML structure into a standardized JSON format for UI display
{
question: "User's question here",
suggest: \[\
{ answer: "Suggestion 1" },\
{ answer: "Suggestion 2" }\
\]
}
3. **UI Integration**:
* Passes the JSON structure to the UI layer via the `ask("followup", ...)` method
* Displays selectable suggestion buttons to the user in the interface
* Creates an interactive experience for selecting or typing a response
4. **Response Collection and Processing**:
* Captures user text input and any images included in the response
* Wraps user responses in `` tags when returning to the assistant
* Preserves any images included in the user's response
* Maintains the conversational context by adding the response to the history
* Resets the consecutive error counter when the tool is used successfully
5. **Error Handling**:
* Tracks consecutive mistakes using a counter
* Resets the counter when the tool is used successfully
* Provides specific error messages:
* For missing parameters: "Missing required parameter 'question'"
* For XML parsing: "Failed to parse operations: \[error message\]"
* For invalid format: "Invalid operations xml format"
* Contains safeguards to prevent tool execution when required parameters are missing
* Increments consecutive mistake count when errors occur
Workflow Sequence
-----------------
The question-answer cycle follows this sequence:
1. **Information Gap Recognition**: Kilo Code identifies missing information needed to proceed
2. **Specific Question Creation**: Kilo Code formulates a clear, targeted question
3. **Suggestion Development**: Kilo Code creates relevant suggested answers (optional but recommended)
4. **Tool Invocation**: Assistant invokes the tool with question and optional suggestions
5. **UI Presentation**: Question and suggestions are displayed to the user as interactive elements
6. **User Response**: The user selects a suggestion or provides a custom answer
7. **Message Handling**: System handles both partial and complete messages
* For streaming responses, processes chunks as they arrive
* For complete messages, processes the entire response at once
* Maintains state consistency regardless of message chunking
8. **Response Processing**: System wraps the response in `` tags and preserves images
9. **Context Integration**: Response is added to the conversation history
10. **Task Continuation**: Kilo Code proceeds with the task using the new information
Examples When Used
------------------
* When developing a web application, Kilo Code might ask about preferred styling frameworks (Bootstrap, Tailwind, custom CSS)
* When creating an API, Kilo Code might ask about authentication methods (JWT, OAuth, API keys)
* When refactoring code, Kilo Code might ask about prioritizing performance vs. readability
* When setting up a database, Kilo Code might ask about specific schema design preferences
* When creating a custom feature, Kilo Code might ask about specific behavior expectations
* When troubleshooting errors, Kilo Code might ask about specific environment details
Response Format
---------------
When a user responds to a question, the response is formatted with `` tags for clarity and consistency. This format helps clearly separate the user's answer from other conversation elements.
Example response format:
Use Tailwind CSS for utility-first styling with maximum flexibility
Key characteristics of the response format:
* Surrounded by `` tags
* Preserves formatting of the original response
* Maintains images if included in the response
* Returns the complete text, even for long responses
Usage Examples
--------------
Asking about implementation preferences:
Which styling approach would you prefer for this web application?Use Bootstrap for rapid development with consistent componentsUse Tailwind CSS for utility-first styling with maximum flexibilityUse vanilla CSS with custom styling for complete control and minimal dependencies
Requesting technical clarification:
What database should this application use for storing user data?MongoDB for flexible schema and document-based storagePostgreSQL for relational data with strong consistency guaranteesFirebase for real-time updates and simplified backend managementSQLite for lightweight local storage without external dependencies
Addressing ambiguity in requirements:
How should the application handle user authentication?Implement email/password authentication with account verificationUse social login providers (Google, GitHub, etc.) for quick signupImplement both email/password and social login options
Copy page
---
# Kilo Code Documentation
Using Glama With Kilo Code
==========================
Glama provides access to a variety of language models through a unified API, including models from Anthropic, OpenAI, and others. It offers features like prompt caching and cost tracking.
**Website:** [https://glama.ai/](https://glama.ai/)
Getting an API Key
------------------
1. **Sign Up/Sign In:** Go to the [Glama sign-up page](https://glama.ai/sign-up)
. Sign up using your Google account or name/email/password.
2. **Get API Key:** After signing up, navigate to the [API Keys](https://glama.ai/settings/gateway/api-keys)
page to get an API key.
3. **Copy the Key:** Copy the displayed API key.
Supported Models
----------------
Kilo Code will automatically try to fetch a list of available models from the Glama API. Some models that are commonly available through Glama include:
* **Anthropic Claude models:** (e.g., `anthropic/claude-3-5-sonnet`) These are generally recommended for best performance with Kilo Code.
* **OpenAI models:** (e.g., `openai/o3-mini-high`)
* **Other providers and open-source models**
Refer to the [Glama documentation](https://glama.ai/models)
for the most up-to-date list of supported models.
Configuration in Kilo Code
--------------------------
1. **Open Kilo Code Settings:** Click the gear icon () in the Kilo Code panel.
2. **Select Provider:** Choose "Glama" from the "API Provider" dropdown.
3. **Enter API Key:** Paste your Glama API key into the "Glama API Key" field.
4. **Select Model:** Choose your desired model from the "Model" dropdown.
Tips and Notes
--------------
* **Pricing:** Glama operates on a pay-per-use basis. Pricing varies depending on the model you choose.
* **Prompt Caching:** Glama supports prompt caching, which can significantly reduce costs and improve performance for repeated prompts.
Copy page
---
# Kilo Code Documentation
attempt\_completion
===================
The `attempt_completion` tool signals that Kilo Code believes a task is complete and presents results to the user. It provides a summary of what was accomplished, optionally includes a command to demonstrate the result, and supports continued refinement through user feedback.
Parameters
----------
The tool accepts these parameters:
* `result` (required): The final result description summarizing what was accomplished
* `command` (optional): A CLI command to execute to demonstrate the result
What It Does
------------
This tool marks the end of a task by presenting a final summary of what was accomplished. It signals to both the user and the system that the current task is complete. When a command is provided, it can also demonstrate the result through a live execution.
When is it used?
----------------
* When Kilo Code believes the user's task has been completed
* When summarizing what changes or improvements were made
* When demonstrating the current result with a command execution
* When providing a checkpoint for user feedback on the solution
* When transitioning from one phase of work to potential refinements
Key Features
------------
* Provides a clear signal that Kilo Code believes the task is complete
* Summarizes accomplishments in a concise message
* Optionally demonstrates results through command execution
* Enables user feedback for further refinements
* Displays results in a special UI format distinct from regular messages
* Captures task completion telemetry for system analytics
* Maintains a structured conversation flow by providing checkpoints
* Supports subtask completion within larger workflows
* Ensures users receive a clear summary of what was done
* Available in all modes as part of the "always available" tool group
Limitations
-----------
* Should not be used until previous tool uses are confirmed successful (guideline, not enforced)
* Limited to a single command for result demonstration
* Cannot present multiple command options
* Commands require user approval before execution
* Limited to demonstrating results that can be shown via CLI commands
* Cannot be used for partial task completion or progress updates
* Result formatting strips XML closing tags through internal processing
How It Works
------------
When the `attempt_completion` tool is invoked, it follows this process:
1. **Safety Consideration** (guideline, not enforced):
* The AI is instructed to confirm previous tool uses were successful
* This is a best practice rather than a programmatically enforced mechanism
2. **Result Presentation**:
* Displays the completion message to the user in a special "completion\_result" UI format
* Removes XML closing tags from the result text using the `removeClosingTag` function
* Presents the result differently than regular messages for visual distinction
3. **Command Execution** (if provided):
* Requests user approval before executing the command
* Only executes if the user approves
* Executes the command using the system's command execution functionality
* Shows the result of the command to the user
4. **Feedback Collection**:
* Waits for user feedback on the completion result
* Processes this feedback and returns it to the AI
* Enables continued refinement based on user input
5. **Task Completion and Continuation**:
* Signals the task as completed in the system
* Captures telemetry data for the completed task
* For subtasks, offers to finish the subtask and resume the parent task
* Supports continued conversation through the feedback mechanism
6. **Implementation Integration**:
* Tool results are parsed through the system's parsing mechanism in `parse-assistant-message.ts`
* The tool is part of the "ALWAYS\_AVAILABLE\_TOOLS" constant, making it available in all modes
Result Formatting Guidelines
----------------------------
The result message should follow these guidelines:
* Clearly communicate what was accomplished
* Be concise but complete
* Focus on the value delivered to the user
* Avoid unnecessary pleasantries or filler text
* Maintain a professional, straightforward tone
* Present information in a way that's easy to scan and understand
* Acknowledge that the user may provide feedback for further refinements
Note: The system automatically strips XML closing tags from the result text through the `removeClosingTag` function.
Command Selection Guidelines
----------------------------
When including a command, follow these guidelines:
* Choose commands that visually demonstrate the result
* Prefer commands that show the user what was created or modified
* Examples include:
* `open index.html` to display a created website
* `npm start` to launch a development server
* `python app.py` to run a created application
* Avoid commands that merely print text (like `echo` or `cat`)
* Remember that commands require user approval before execution
* Ensure the command is valid for the user's operating system
Feedback and UI Representation
------------------------------
The `attempt_completion` tool has a unique feedback mechanism:
* Results appear in a special "completion\_result" UI format distinct from regular messages
* The system waits for user feedback after presenting the result
* Feedback is processed and returned to Kilo Code for further refinements
* This creates an iterative improvement cycle rather than ending the conversation
* The UI includes special elements for providing feedback
* Results serve as clear checkpoints in the conversation flow
When used within subtasks:
* The system offers to finish the subtask and resume the parent task
* If approved, the subtask is completed with a summary
* The parent task resumes with context from the completed subtask
* This enables complex, nested workflows while maintaining context
Examples When Used
------------------
* When creating a website, Kilo Code presents the solution and uses `open index.html` to show the result. The user provides feedback, and Kilo Code refines the design.
* When implementing a feature, Kilo Code summarizes the changes and their impact. The user requests additional test coverage, and Kilo Code continues the task.
* When fixing bugs, Kilo Code explains what was fixed and how the solution addresses the Kilo Codet cause. The user confirms the fix works.
* When setting up a development environment, Kilo Code confirms all components are installed. The user requests additional configuration, and Kilo Code continues.
* When creating a data processing script, Kilo Code summarizes the functionality. The user suggests performance improvements, and Kilo Code optimizes the code.
Usage Examples
--------------
Completing a task with just a result summary:
I've updated the CSS for the navigation bar to match the design mockup. The changes include:
1. Updated color scheme to use the new brand colors
2. Added responsive behavior for mobile devices
3. Fixed the alignment issues in the dropdown menus
Completing a task with a result and demonstration command:
I've created a simple React application with the following features:
1. A responsive landing page with the requested hero section
2. A working contact form with validation
3. Navigation between all three requested pages
4. Styling that matches the provided design mockup
npm start
Completing a Python script task with execution:
I've created a data processing script that:
1. Reads the CSV files from the data directory
2. Cleans and normalizes the data as requested
3. Generates the summary statistics in JSON format
4. Outputs the processed data to the output directory
python process\_data.py
Copy page
---
# MCP OAuth Authorization
MCP OAuth Authorization
=======================
### Overview
Many MCP servers require authentication to access protected resources. Currently, Kilo Code only supports static credential configuration (API keys, tokens) which must be manually entered and stored. This creates friction for users and security concerns for enterprises.
The MCP specification defines an OAuth 2.1-based authorization flow that enables secure, user-friendly authentication without requiring users to manually manage credentials. This document specifies how Kilo Code will implement the MCP Authorization specification to support OAuth-enabled MCP servers.
### Goals
1. **Eliminate manual credential management** - Users authenticate via browser-based OAuth flows instead of copying/pasting API keys
2. **Improve security** - Tokens are obtained through secure OAuth flows with PKCE, reducing credential exposure
3. **Support enterprise SSO** - Organizations can use their existing identity providers
4. **Maintain compatibility** - Continue supporting static credentials for servers that don't implement OAuth
### Non-Goals (MVP)
* Token refresh automation (will use re-authentication flow initially)
* Dynamic Client Registration (will rely on Client ID Metadata Documents)
* Multiple authorization server selection (will use first available)
MCP Authorization Specification Summary
---------------------------------------
The MCP Authorization spec (Protocol Revision 2025-11-25) defines an OAuth 2.1-based flow for HTTP-based MCP transports. Key components:
### Roles
* **MCP Server** - Acts as OAuth 2.1 Resource Server, accepts access tokens
* **MCP Client** (Kilo Code) - Acts as OAuth 2.1 Client, obtains tokens on behalf of users
* **Authorization Server** - Issues access tokens (may be hosted with MCP server or separate)
### Discovery Flow
1. Client makes unauthenticated request to MCP server
2. Server returns `401 Unauthorized` with `WWW-Authenticate` header containing `resource_metadata` URL
3. Client fetches Protected Resource Metadata (RFC 9728) to discover authorization server(s)
4. Client fetches Authorization Server Metadata (RFC 8414 or OpenID Connect Discovery)
5. Client initiates OAuth authorization flow
### Client Registration
The spec supports three approaches (in priority order):
1. **Pre-registration** - Client has existing credentials for the server
2. **Client ID Metadata Documents** - Client uses HTTPS URL as client\_id pointing to metadata JSON
3. **Dynamic Client Registration** - Client registers dynamically via RFC 7591
### Authorization Flow
1. Generate PKCE code verifier and challenge
2. Open browser with authorization URL including `resource` parameter (RFC 8707)
3. User authenticates and authorizes
4. Receive authorization code via redirect
5. Exchange code for access token
6. Use access token in `Authorization: Bearer` header for MCP requests
System Design
-------------
### Architecture Overview
┌─────────────────────────────────────────────────────────────────────────────────┐
│ MCP OAuth Authorization Flow │
├─────────────────────────────────────────────────────────────────────────────────┤
│ │
│ ┌──────────────┐ 1. MCP Request ┌──────────────────┐ │
│ │ │ ───────────────────► │ │ │
│ │ Kilo Code │ │ MCP Server │ │
│ │ Extension │ ◄─────────────────── │ (Resource │ │
│ │ │ 2. 401 + metadata │ Server) │ │
│ └──────┬───────┘ └──────────────────┘ │
│ │ │
│ │ 3. Fetch resource metadata │
│ │ 4. Fetch auth server metadata │
│ ▼ │
│ ┌──────────────┐ ┌──────────────────┐ │
│ │ OAuth │ 5. Auth Request │ │ │
│ │ Service │ ───────────────────► │ Authorization │ │
│ │ │ │ Server │ │
│ │ - Discovery │ ◄─────────────────── │ │ │
│ │ - PKCE │ 8. Token Response │ - User Auth │ │
│ │ - Tokens │ │ - Consent │ │
│ └──────┬───────┘ └──────────────────┘ │
│ │ ▲ │
│ │ 6. Open browser │ 7. User authenticates │
│ ▼ │ │
│ ┌──────────────┐ ┌────────┴─────────┐ │
│ │ Browser │ ─────────────────────►│ User │ │
│ │ │ │ │ │
│ └──────────────┘ └──────────────────┘ │
│ │
└─────────────────────────────────────────────────────────────────────────────────┘
### New Components
#### 1\. McpOAuthService
A new service responsible for managing OAuth flows for MCP servers:
// src/services/mcp/oauth/McpOAuthService.ts
interface McpOAuthService {
/\*\*
\* Initiates OAuth flow for an MCP server that returned 401
\* @param serverUrl The MCP server URL
\* @param wwwAuthenticateHeader The WWW-Authenticate header from 401 response
\* @returns Promise resolving to access token
\*/
initiateOAuthFlow(serverUrl: string, wwwAuthenticateHeader: string): Promise
/\*\*
\* Gets stored tokens for a server, if available and valid
\*/
getStoredTokens(serverUrl: string): Promise
/\*\*
\* Clears stored tokens for a server (for logout/re-auth)
\*/
clearTokens(serverUrl: string): Promise
/\*\*
\* Refreshes tokens if refresh token is available
\*/
refreshTokens(serverUrl: string): Promise
}
interface OAuthTokens {
accessToken: string
tokenType: string
expiresAt?: number
refreshToken?: string
scope?: string
}
#### 2\. McpAuthorizationDiscovery
Handles the discovery of authorization server metadata:
// src/services/mcp/oauth/McpAuthorizationDiscovery.ts
interface McpAuthorizationDiscovery {
/\*\*
\* Discovers authorization server from WWW-Authenticate header or well-known URIs
\*/
discoverAuthorizationServer(serverUrl: string, wwwAuthenticateHeader?: string): Promise
/\*\*
\* Fetches Protected Resource Metadata (RFC 9728)
\*/
fetchResourceMetadata(metadataUrl: string): Promise
/\*\*
\* Fetches Authorization Server Metadata (RFC 8414 / OIDC Discovery)
\*/
fetchAuthServerMetadata(issuerUrl: string): Promise
}
interface ProtectedResourceMetadata {
resource: string
authorization\_servers: string\[\]
scopes\_supported?: string\[\]
// ... other RFC 9728 fields
}
interface AuthorizationServerMetadata {
issuer: string
authorization\_endpoint: string
token\_endpoint: string
scopes\_supported?: string\[\]
response\_types\_supported: string\[\]
code\_challenge\_methods\_supported?: string\[\]
client\_id\_metadata\_document\_supported?: boolean
registration\_endpoint?: string
// ... other RFC 8414 fields
}
#### 3\. McpOAuthTokenStorage
Secure storage for OAuth tokens:
// src/services/mcp/oauth/McpOAuthTokenStorage.ts
interface McpOAuthTokenStorage {
/\*\*
\* Stores tokens securely using VS Code SecretStorage
\*/
storeTokens(serverUrl: string, tokens: OAuthTokens): Promise
/\*\*
\* Retrieves stored tokens
\*/
getTokens(serverUrl: string): Promise
/\*\*
\* Removes stored tokens
\*/
removeTokens(serverUrl: string): Promise
/\*\*
\* Lists all servers with stored tokens
\*/
listServers(): Promise
}
#### 4\. Client ID Metadata Document Hosting
For Client ID Metadata Documents, Kilo Code needs to host a metadata document. We will use static hosting on kilocode.ai:
* Host at `https://kilocode.ai/.well-known/oauth-client/vscode-extension.json`
* Simple, reliable, no runtime dependencies
* Authorization servers can cache the document effectively
* No attack surface from dynamic generation logic
Metadata document:
{
"client\_id": "https://kilocode.ai/.well-known/oauth-client/vscode-extension.json",
"client\_name": "Kilo Code",
"client\_uri": "https://kilocode.ai",
"logo\_uri": "https://kilocode.ai/logo.png",
"redirect\_uris": \["http://127.0.0.1:0/callback", "vscode://kilocode.kilo-code/oauth/callback"\],
"grant\_types": \["authorization\_code"\],
"response\_types": \["code"\],
"token\_endpoint\_auth\_method": "none"
}
### Integration with McpHub
The existing `McpHub` class needs modifications to support OAuth:
// Modifications to McpHub.ts
class McpHub {
private oauthService: McpOAuthService
private async connectToServer(name: string, config: ServerConfig, source: "global" | "project"): Promise {
// ... existing connection logic ...
// For HTTP-based transports, handle OAuth
if (config.type === "sse" || config.type === "streamable-http") {
try {
await this.connectWithOAuth(name, config, source)
} catch (error) {
if (this.isOAuthRequired(error)) {
// Initiate OAuth flow
const tokens = await this.oauthService.initiateOAuthFlow(config.url, error.wwwAuthenticateHeader)
// Retry connection with token
await this.connectWithToken(name, config, source, tokens)
} else {
throw error
}
}
}
}
private isOAuthRequired(error: unknown): boolean {
// Check if error is 401 with WWW-Authenticate header
return error instanceof HttpError && error.status === 401 && error.headers?.\["www-authenticate"\]
}
}
### Configuration Schema Updates
Update the server configuration schema to support OAuth:
// Extended server config for OAuth-enabled servers
const OAuthServerConfigSchema = BaseConfigSchema.extend({
type: z.enum(\["sse", "streamable-http"\]),
url: z.string().url(),
headers: z.record(z.string()).optional(),
// OAuth configuration
oauth: z
.object({
// Override client\_id if pre-registered
clientId: z.string().optional(),
clientSecret: z.string().optional(),
// Override scopes to request
scopes: z.array(z.string()).optional(),
// Disable OAuth for this server (use static headers instead)
disabled: z.boolean().optional(),
})
.optional(),
})
### Browser-Based Authorization Flow
The OAuth flow requires opening a browser for user authentication:
// src/services/mcp/oauth/McpOAuthBrowserFlow.ts
interface McpOAuthBrowserFlow {
/\*\*
\* Opens browser for authorization and waits for callback
\*/
authorize(params: AuthorizationParams): Promise
}
interface AuthorizationParams {
authorizationEndpoint: string
clientId: string
redirectUri: string
scope: string
state: string
codeChallenge: string
codeChallengeMethod: "S256"
resource: string
}
interface AuthorizationResult {
code: string
state: string
}
**Redirect URI Handling:**
Two approaches for receiving the OAuth callback:
1. **Local HTTP Server** (Primary)
* Start temporary HTTP server on random port
* Use `http://127.0.0.1:{port}/callback` as redirect URI
* Server receives callback, extracts code, closes
2. **VS Code URI Handler** (Fallback)
* Register `vscode://kilocode.kilo-code/oauth/callback` URI handler
* Works when local server isn't possible
* Requires VS Code to be running
### Token Management
#### Storage
Tokens are stored using VS Code's SecretStorage API:
// Key format: mcp-oauth-{serverUrlHash}
const storageKey = \`mcp-oauth-${hashServerUrl(serverUrl)}\`
// Stored value (encrypted by VS Code)
interface StoredTokenData {
accessToken: string
refreshToken?: string
expiresAt?: number
scope?: string
serverUrl: string
issuedAt: number
}
#### Token Lifecycle
1. **Initial Authentication**
* User triggers connection to OAuth-enabled MCP server
* Server returns 401, OAuth flow initiated
* User authenticates in browser
* Tokens stored securely
2. **Subsequent Connections**
* Check for stored tokens
* If valid, use directly
* If expired and refresh token available, attempt refresh
* If refresh fails or no refresh token, re-authenticate
3. **Token Refresh** (Future Enhancement)
* Background refresh before expiry
* Automatic retry on 401 with new token
### Error Handling
// OAuth-specific errors
class McpOAuthError extends Error {
constructor(
message: string,
public code: OAuthErrorCode,
public serverUrl: string,
public details?: Record,
) {
super(message)
}
}
enum OAuthErrorCode {
DISCOVERY\_FAILED = "discovery\_failed",
AUTHORIZATION\_FAILED = "authorization\_failed",
TOKEN\_EXCHANGE\_FAILED = "token\_exchange\_failed",
TOKEN\_REFRESH\_FAILED = "token\_refresh\_failed",
PKCE\_NOT\_SUPPORTED = "pkce\_not\_supported",
USER\_CANCELLED = "user\_cancelled",
TIMEOUT = "timeout",
}
### User Experience
#### Connection Flow
1. User adds/enables OAuth-enabled MCP server
2. Extension detects OAuth requirement (401 response)
3. Notification: "MCP server requires authentication. Click to sign in."
4. User clicks -> Browser opens to authorization server
5. User authenticates and authorizes
6. Browser redirects back -> Extension receives token
7. Connection completes -> Server shows as connected
#### UI Indicators
* **Authenticated servers**: Show lock icon with "Authenticated" status
* **Authentication required**: Show warning icon with "Sign in required" action
* **Authentication expired**: Show refresh icon with "Re-authenticate" action
#### Settings UI
Add OAuth status to MCP server settings:
┌─────────────────────────────────────────────────────────────┐
│ MCP Server: github-mcp │
├─────────────────────────────────────────────────────────────┤
│ Status: Connected │
│ Type: streamable-http │
│ URL: https://mcp.github.com │
│ │
│ Authentication │
│ - Method: OAuth 2.0 │
│ - Status: Authenticated │
│ - Expires: 2024-01-15 10:30 AM │
│ - \[Sign Out\] \[Re-authenticate\] │
└─────────────────────────────────────────────────────────────┘
Security Considerations
-----------------------
### PKCE Requirement
All OAuth flows MUST use PKCE with S256 challenge method:
function generatePKCE(): { verifier: string; challenge: string } {
// Generate 32-byte random verifier
const verifier = base64UrlEncode(crypto.randomBytes(32))
// Create S256 challenge
const challenge = base64UrlEncode(crypto.createHash("sha256").update(verifier).digest())
return { verifier, challenge }
}
### State Parameter
Generate cryptographically random state to prevent CSRF:
const state = base64UrlEncode(crypto.randomBytes(32))
// Store state locally and verify on callback
### Token Storage Security
* Use VS Code SecretStorage (encrypted, per-workspace)
* Never log tokens
* Clear tokens on extension uninstall
* Support manual token revocation
### Resource Parameter
Always include `resource` parameter to bind tokens to specific MCP server:
const authUrl = new URL(authorizationEndpoint)
authUrl.searchParams.set("resource", mcpServerUrl)
### Redirect URI Validation
* Only accept callbacks on registered redirect URIs
* Validate state parameter matches
* Use localhost with random port (not predictable)
Scope and Implementation Plan
-----------------------------
### Phase 1: Core OAuth Infrastructure
* \[ \] Create `McpOAuthService` with basic flow support
* \[ \] Implement `McpAuthorizationDiscovery` for metadata fetching
* \[ \] Implement `McpOAuthTokenStorage` using SecretStorage
* \[ \] Add PKCE generation utilities
* \[ \] Create local HTTP server for OAuth callbacks
### Phase 2: McpHub Integration
* \[ \] Modify `McpHub.connectToServer()` to detect OAuth requirements
* \[ \] Add OAuth retry logic for 401 responses
* \[ \] Update server configuration schema for OAuth options
* \[ \] Add token injection to HTTP transports
### Phase 3: Client ID Metadata Document
* \[ \] Host Kilo Code client metadata at kilocode.ai
* \[ \] Implement client\_id URL generation
* \[ \] Add fallback to pre-registration for unsupported servers
### Phase 4: User Experience
* \[ \] Add OAuth status indicators to MCP server UI
* \[ \] Implement "Sign in" / "Sign out" actions
* \[ \] Add authentication expiry notifications
* \[ \] Create re-authentication flow
### Phase 5: Testing & Documentation
* \[ \] Unit tests for OAuth service components
* \[ \] Integration tests with mock OAuth server
* \[ \] End-to-end tests with real OAuth-enabled MCP servers
* \[ \] User documentation for OAuth-enabled servers
Future Enhancements
-------------------
* **Automatic token refresh** - Background refresh before expiry
* **Dynamic Client Registration** - Support RFC 7591 for servers that require it
* **Multiple authorization servers** - UI for selecting preferred auth server
* **Enterprise SSO integration** - Support for organization identity providers
* **Token sharing across workspaces** - Optional global token storage
* **Offline token caching** - Support for offline scenarios with cached tokens
Appendix: MCP Authorization Spec Compliance Checklist
-----------------------------------------------------
### Required (MUST)
* \[ \] Use PKCE with S256 for all authorization requests
* \[ \] Include `resource` parameter in authorization and token requests
* \[ \] Support WWW-Authenticate header parsing for resource metadata discovery
* \[ \] Support well-known URI fallback for resource metadata
* \[ \] Support both OAuth 2.0 and OpenID Connect discovery endpoints
* \[ \] Use Authorization header with Bearer scheme for token transmission
* \[ \] Validate PKCE support before proceeding with authorization
### Recommended (SHOULD)
* \[ \] Support Client ID Metadata Documents
* \[ \] Use scope from WWW-Authenticate header when provided
* \[ \] Fall back to scopes\_supported when scope not in challenge
* \[ \] Implement step-up authorization for insufficient\_scope errors
### Optional (MAY)
* \[ \] Support Dynamic Client Registration (RFC 7591)
* \[ \] Support pre-registered client credentials
* \[ \] Implement token refresh flows
Copy page
---
# Auto Model Tiers
Auto Model Tiers
================
Overview
--------
Kilo Auto is a model routing system that automatically selects the optimal AI model based on the user's current mode (Code, Architect, Debug, etc.). It comes in multiple tiers so that every user — regardless of budget, preference, or expertise — gets a "just works" experience without needing to understand the AI model landscape.
Three tiers are user-facing, and one is internal:
| Tier ID | Audience | Pricing |
| --- | --- | --- |
| `kilo-auto/frontier` | Best paid models | Paid |
| `kilo-auto/balanced` | Strong performance, lower cost | Paid |
| `kilo-auto/free` | Best available free models | Free |
| `kilo-auto/small` | Internal — background tasks | Varies |
Problem
-------
### Users shouldn't need to be AI model experts
The AI model landscape is overwhelming. There are hundreds of models across dozens of providers, with different pricing, capabilities, context windows, and availability. Most developers just want to write code — they don't want to research which model is best for their task, budget, and workflow.
Without Auto Model, three groups are underserved:
1. **Free users** — They see a list of free models that changes on promotional periods and shifting availability. Which one is the best? Which is good for a particular task? They have no way to know without trial and error.
2. **Cost-conscious users** — They want something better than free but cheaper than frontier. Open-weight models are useful and significantly cheaper, but which one? Which version? The answer changes every few weeks.
3. **Background tasks** — Kilo uses small models for things like generating session titles and commit messages. These should be invisible and reliable, not dependent on the user's model selection or credit status.
### Free model churn creates a moving target
Free models on OpenRouter appear and disappear based on promotional periods. A model that works well today may be gone next week. Users who manually selected a free model discover it's unavailable. Auto Model tiers absorb this churn — when the best free model changes, the mapping updates server-side and users keep working.
Tiers
-----
### Auto: Frontier
**Who it's for**: Users who want the best available models and are willing to pay for them.
**What it does**: Routes between the best paid models based on the task — stronger reasoning models for planning and architecture, faster models for code generation and editing. Optimizes for the best balance of capability, speed, and token efficiency.
**Pricing**: Paid. Uses credits.
For the current mode-to-model mappings, see the [Auto Model user docs](https://kilo.ai/docs/code-with-ai/agents/auto-model#auto-frontier)
.
### Auto: Balanced
**Who it's for**: Cost-conscious developers who want better results than free models at a fraction of frontier cost.
**What it does**: Follows the same mode-based routing structure as Frontier but uses cost-effective open-weight models for both reasoning and implementation tasks.
**Pricing**: Paid, but significantly cheaper than Frontier.
For the current mode-to-model mappings, see the [Auto Model user docs](https://kilo.ai/docs/code-with-ai/agents/auto-model#auto-balanced)
.
### Auto: Free
**Who it's for**: Users who want to try Kilo without a credit card, students, hobbyists, and anyone exploring AI-assisted coding.
**What it does**: Automatically maps to the best available free model(s) for each mode. As free model availability changes due to promotional periods, the mapping updates transparently. Users always get the best free option without having to track which models are currently available.
**Pricing**: Free. No credits required.
**Constraints**: Free models may not provide sufficient breadth to justify different models per mode. In that case, a single model may be used for all modes. Quality will be lower than Frontier or Balanced tiers — this is a tradeoff users accept by choosing free.
### Auto: Small (internal)
**Who it's for**: Not user-facing. Used internally by Kilo for lightweight background tasks (session titles, commit messages, conversation summaries).
**What it does**: Automatically selects the right small model for lightweight tasks. When credits are available, it uses a fast paid small model.
**Why it matters**: Users never think about background tasks, and they shouldn't have to. Auto: Small ensures these tasks always work, always feel fast, and never waste credits on an expensive model when a cheap one will do.
**Implementation**: The `getSmallModel()` function in `packages/opencode/src/provider/provider.ts` prioritizes `kilo-auto/small` when the Kilo provider is active. If the user's provider doesn't have a dedicated small model, it falls back globally to `kilo-auto/small` when available.
User experience
---------------
### Model picker
The three user-facing tiers appear in the model selector:
| Display Name | Description shown to user |
| --- | --- |
| Auto: Frontier | Best paid models, automatically matched to your task |
| Auto: Balanced | Strong performance at lower cost |
| Auto: Free | Best free models, no credits required |
Auto: Small does not appear in the model picker. It is filtered out by the UI (see `KILO_AUTO_SMALL_IDS` in the VS Code extension).
### Defaults
* **Authenticated users**: Default to `kilo-auto/balanced` (defined in `packages/kilo-gateway/src/api/constants.ts`)
* **Unauthenticated users**: Default to `kilo-auto/free`
This means a brand-new user who hasn't signed in gets a working experience immediately — no model selection required.
### What users see
The UI shows the tier name (e.g., "Auto: Frontier"), not the underlying model. Users don't need to know or care that their planning request went to Opus and their coding request went to Sonnet. The abstraction is the product.
Implementation architecture
---------------------------
Auto Model uses a split client/server architecture. The actual model-to-mode mappings are not hardcoded in the client — they're served dynamically from the Kilo API, making it possible to update routing without client releases.
### Server side (Kilo API)
The Kilo API at `api.kilo.ai` defines which underlying models each `kilo-auto/*` tier routes to per mode. Each auto model is returned with an `opencode.variants` field — a map of mode-specific provider options:
{
"opencode": {
"variants": {
"architect": { "model": "anthropic/claude-opus-4-6", ... },
"code": { "model": "anthropic/claude-sonnet-4-6", ... }
}
}
}
This is fetched via `packages/kilo-gateway/src/api/models.ts` which parses the `opencode.variants` field from the API response.
### Client side
The client-side chain works as follows:
1. **Model fetching**: `packages/opencode/src/provider/model-cache.ts` caches Kilo Gateway models with a 5-minute TTL, fetching from the Kilo API.
2. **Variant passthrough**: `packages/opencode/src/provider/transform.ts` — the `variants()` function passes through server-defined variants for Kilo Gateway models directly, rather than computing them locally.
3. **Variant storage**: `packages/opencode/src/provider/provider.ts` stores `variants` on the model object when the provider is `kilo`.
4. **Agent variant resolution**: Each agent (mode) specifies a `variant` in its config (`packages/opencode/src/config/config.ts`). At prompt time, `packages/opencode/src/session/prompt.ts` resolves the variant from the agent config and attaches it to the user message.
5. **LLM call merging**: At call time, `packages/opencode/src/session/llm.ts` merges the variant's options (including the actual underlying model ID) into the provider options sent to OpenRouter.
### Key files
| File | Role |
| --- | --- |
| `packages/kilo-gateway/src/api/constants.ts` | Default model constants (`DEFAULT_MODEL`, `DEFAULT_FREE_MODEL`) |
| `packages/kilo-gateway/src/api/models.ts` | Fetches models from Kilo API, parses `opencode.variants` |
| `packages/opencode/src/provider/model-cache.ts` | Caches Kilo Gateway models with 5-min TTL |
| `packages/opencode/src/provider/provider.ts` | Preserves variants for kilo provider; `getSmallModel()` prioritizes `kilo-auto/small` |
| `packages/opencode/src/provider/transform.ts` | Passes through server-defined variants for Kilo Gateway models |
| `packages/opencode/src/session/prompt.ts` | Resolves variant from agent config, attaches to user messages |
| `packages/opencode/src/session/llm.ts` | Merges variant options into LLM call parameters |
| `packages/opencode/src/config/config.ts` | Agent config schema includes `variant` field |
Requirements
------------
* Unauthenticated users default to `kilo-auto/free` with no configuration required
* All tiers use mode-based routing where the underlying models support it
* When a tier routes to different model families across turns in a conversation, thinking/reasoning blocks from the previous model are stripped to prevent compatibility errors
* Auto Model requires **VS Code/JetBrains extension v5.2.3+** or **CLI v1.0.15+** for mode-based switching. Older versions fall back to a single model for all requests.
Risks
-----
| Risk | User impact | Mitigation |
| --- | --- | --- |
| Free model disappears mid-session | User's next message fails | Fallback chain: primary → secondary → tertiary free model. Graceful error only if all options exhausted. |
| Model quality variance across free/balanced tiers | Inconsistent experience compared to Frontier | Set clear expectations in UI. Curate model lists, don't just pick the cheapest. |
| Cross-family model switching breaks context | Thinking blocks from Model A incompatible with Model B | Strip thinking blocks when the underlying model family changes between turns. Frontier stays within one family so this primarily affects Free and Balanced. |
| Users don't understand the tier differences | Wrong tier selected, poor experience | Clear descriptions in the model picker. Good defaults (Balanced for paid, Free for unpaid) so most users never need to actively choose. |
Data and compliance
-------------------
* **Frontier**: Uses Anthropic models with no training on user data.
* **Balanced and Free**: The underlying models may have different data handling policies depending on the provider. This should be documented per-tier so enterprise users can make informed choices.
* **Small**: Same concern as Balanced/Free — the model selected depends on credit status, which may route to providers with different policies.
Features for the future
-----------------------
* **Resolved model transparency**: Show the actual model being used on hover/click for users who want to know
* **Per-agent tier overrides**: Let users pick Frontier for their code agent but Free for explore
* **Auto model changelog**: A status page or in-product notification when tier mappings change
* **Tier analytics**: Dashboard showing which models each tier resolves to, latency, error rates, quality metrics
* **Enterprise open-weight preference**: Organizations that require open-weight models for auditability could enforce the Balanced tier across their team
Copy page
---
# Kilo Code Documentation
Using Requesty With Kilo Code
=============================
Kilo Code supports accessing models through the [Requesty](https://www.requesty.ai/)
AI platform. Requesty provides an easy and optimized API for interacting with 150+ large language models (LLMs).
**Website:** [https://www.requesty.ai/](https://www.requesty.ai/)
Getting an API Key
------------------
1. **Sign Up/Sign In:** Go to the [Requesty website](https://www.requesty.ai/)
and create an account or sign in.
2. **Get API Key:** You can get an API key from the [API Management](https://app.requesty.ai/manage-api)
section of your Requesty dashboard.
Configuration in Kilo Code
--------------------------
1. **Open Kilo Code Settings:** Click the gear icon () in the Kilo Code panel.
2. **Select Provider:** Choose "Requesty" from the "API Provider" dropdown.
3. **Enter API Key:** Paste your Requesty API key into the "Requesty API Key" field.
4. **Select Model:** Choose your desired model from the "Model" dropdown.
Tips and Notes
--------------
* **Optimizations**: Requesty offers range of in-flight cost optimizations to lower your costs.
* **Unified and simplified billing**: Unrestricted access to all providers and models, automatic balance top ups and more via a single [API key](https://app.requesty.ai/manage-api)
.
* **Cost tracking**: Track cost per model, coding language, changed file, and more via the [Cost dashboard](https://app.requesty.ai/cost-management)
or the [Requesty VS.code extension](https://marketplace.visualstudio.com/items?itemName=Requesty.requesty)
.
* **Stats and logs**: See your [coding stats dashboard](https://app.requesty.ai/usage-stats)
or go through your [LLM interaction logs](https://app.requesty.ai/logs)
.
* **Fallback policies**: Keep your LLM working for you with fallback policies when providers are down.
* **Prompt Caching:** Some providers support prompt caching. [Search models with caching](https://app.requesty.ai/router/list)
.
Relevant resources
------------------
* [Requesty Youtube channel](https://www.youtube.com/@requestyAI)
:
* [Requesty Discord](https://requesty.ai/discord)
Copy page
---
# Agent Observability
Kilo Code - Agent Observability
===============================
Problem Statement
-----------------
Agentic coding systems like Kilo Code operate with significant autonomy, executing multi-step tasks that involve LLM inference, tool execution, file manipulation, and external API calls. These systems mix traditional systems observability (i.e. request/response) with agentic behavior (i.e. planning, reasoning, and tool use).
At the lower level, we can observe the system as a traditional API, but at the higher level, we need to observe the agent's behavior and the quality of its outputs.
Some examples of customer-facing error modes:
* Model API calls may be slow or fail due to rate limits, network issues, or model unavailability
* Model API calls may produce invalid JSON or malformed responses
* An agent may get stuck in a loop, repeatedly attempting the same failing operation
* Sessions may degrade gradually as context windows fill up
* The agent may complete a task technically but produce incorrect or unhelpful output
* Users may abandon sessions out of frustration without explicit error signals
All of these contribute to the overall reliability and user experience of the system.
Goals
-----
1. Detect and alert on acute incidents within minutes
2. Surface slow-burn degradations within hours
3. Facilitate root cause analysis when issues occur
4. Track quality and efficiency trends over time
5. Build a foundation for continuous improvement of the agent
**Non-goals for this proposal:**
* Automated remediation
* A/B testing infrastructure
* Offline benchmarking and model/agent comparison (covered by [Benchmarking](https://kilo.ai/docs/contributing/architecture/benchmarking)
)
Proposed Approach
-----------------
Focus on the lower-level systems observability first, then build up to higher-level agentic behavior observability.
Phase 1: Systems Observability
------------------------------
**Objective:** Establish awareness and alerting for hard failures.
This phase focuses on systems metrics we can capture with minimal changes, providing immediate operational visibility.
### Phase 1a: LLM observability and alerting
#### Metrics to Capture
Capture these metrics per LLM API call:
* Provider
* Model
* Tool
* Latency
* Success / Failure
* Error type and message (if failed)
* Token counts
* Source (CLI/JetBrains/VSCode/etc)
#### Dashboards
Common dashboards which offer filtering based on provider, model, and tool:
* Error rate
* Latency
* Token usage
#### Alerting
Implement [multi-window, multi-burn-rate alerting](https://sre.google/workbook/alerting-on-slos/)
against error budgets:
| Window | Burn Rate | Action | Use Case |
| --- | --- | --- | --- |
| 5 min | 14.4x | Page | Major Outage |
| 30 min | 6x | Page | Incident |
| 6 hr | 1x | Ticket | Change in behavior |
Paging should **only occur on Recommended Models when using the Kilo Gateway**. All other alerts should be tickets, and some may be configured to be ignored.
**Initial alert conditions:**
* LLM API error rate exceeds SLO (per tool/model/provider)
* Tool error rate exceeds SLO (per tool/model/provider)
* p50/p90 latency exceeds SLO (per tool/model/provider)
### Phase 1b: Session metrics
#### Metrics to Capture
**Per-session (aggregated at session close or timeout):**
* Session duration
* Time from user input to first model response
* Total turns/steps
* Total tool calls by tool type
* Total errors by error type
* Agent stuck errors (repetitive tool calls, etc)
* Tool call errors
* Total tokens consumed
* Context condensing frequency
* Termination reason (user closed, timeout, explicit completion, error)
#### Alerting
None.
Phase 2: Agent Tool Usage
-------------------------
**Objective:** Detect how agents are using tools in a given session.
### Metrics to Capture
**Loop and repetition detection:**
* Count of identical tool calls within a session (same tool + same arguments)
* Count of identical failing tool calls (same tool + same arguments + same error)
* Detection of oscillation patterns (alternating between two states)
**Progress indicators:**
* Unique files touched per session
* Unique tools used per session
* Ratio of repeated to unique operations
### Alerting
None to start, we will learn.
Phase 3: Session Outcome Tracking
---------------------------------
**Objective:** Understand whether sessions are successful from the user's perspective.
Hard errors and behavior metrics tell us about failures, but we also need signal on overall session health.
### Metrics to Capture
**Explicit signals:**
* User feedback (thumbs up/down) rate and sentiment
* User abandonment patterns (session ends mid-task without completion signal)
**Implicit signals:**
May require LLM analysis of session transcripts to detect:
* Session termination classification (completed, abandoned, errored, timed out)
Copy page
---
# Kilo Code Documentation
Using Unbound With Kilo Code
============================
Kilo Code supports accessing models through [Unbound](https://getunbound.ai/)
, a platform that focuses on providing secure and reliable access to a variety of large language models (LLMs). Unbound acts as a gateway, allowing you to use models from providers like Anthropic and OpenAI without needing to manage multiple API keys and configurations directly. They emphasize security and compliance features for enterprise use.
**Website:** [https://getunbound.ai/](https://getunbound.ai/)
Creating an Account
-------------------
1. **Sign Up/Sign In:** Go to the [Unbound gateway](https://gateway.getunbound.ai/)
. Create an account or sign in.
2. **Create an Application:** Go to the [Connect](https://gateway.getunbound.ai/connect)
page and select "Kilo Code".
3. **Copy the API Key:** Copy the API key to your clipboard.
Supported Models
----------------
Unbound allows you configure a list of supported models in your application, and Kilo Code will automatically fetch the list of available models from the Unbound API.
Configuration in Kilo Code
--------------------------
1. **Open Kilo Code Settings:** Click the gear icon () in the Kilo Code panel.
2. **Select Provider:** Choose "Unbound" from the "API Provider" dropdown.
3. **Enter API Key:** Paste your Unbound API key into the "Unbound API Key" field.
4. **Select Model:** Choose your desired model from the "Model" dropdown.
Tips and Notes
--------------
* **Security Focus:** Unbound emphasizes security features for enterprise use. If your organization has strict security requirements for AI usage, Unbound might be a good option.
Copy page
---
# Kilo Code Documentation
apply\_diff
===========
The `apply_diff` tool makes precise, surgical changes to files by specifying exactly what content to replace. It uses multiple sophisticated strategies for finding and applying changes while maintaining proper code formatting and structure.
Parameters
----------
The tool accepts these parameters:
* `path` (required): The path of the file to modify relative to the current working directory.
* `diff` (required): The search/replace block defining the changes. **Line numbers are mandatory within the diff content format** for all currently implemented strategies.
**Note**: While the system is designed to be extensible with different diff strategies, all currently implemented strategies require line numbers to be specified within the diff content itself using the `:start_line:` marker.
What It Does
------------
This tool applies targeted changes to existing files using sophisticated strategies to locate and replace content precisely. Unlike simple search and replace, it uses intelligent matching algorithms (including fuzzy matching) that adapt to different content types and file sizes, with fallback mechanisms for complex edits.
When is it used?
----------------
* When Kilo Code needs to make precise changes to existing code without rewriting entire files.
* When refactoring specific sections of code while maintaining surrounding context.
* When fixing bugs in existing code with surgical precision.
* When implementing feature enhancements that modify only certain parts of a file.
Key Features
------------
* Uses intelligent fuzzy matching with configurable confidence thresholds (typically 0.8-1.0).
* Provides context around matches using `BUFFER_LINES` (default 40).
* Employs an overlapping window approach for searching large files.
* Preserves code formatting and indentation automatically.
* Combines overlapping matches for improved confidence scoring.
* Shows changes in a diff view for user review and editing before applying.
* Tracks consecutive errors per file (`consecutiveMistakeCountForApplyDiff`) to prevent repeated failures.
* Validates file access against `.kilocodeignore` rules.
* Handles multi-line edits effectively.
Limitations
-----------
* Works best with unique, distinctive code sections for reliable identification.
* Performance can vary with very large files or highly repetitive code patterns.
* Fuzzy matching might occasionally select incorrect locations if content is ambiguous.
* Each diff strategy has specific format requirements.
* Complex edits might require careful strategy selection or manual review.
How It Works
------------
When the `apply_diff` tool is invoked, it follows this process:
1. **Parameter Validation**: Validates required `path` and `diff` parameters.
2. **KiloCodeIgnore Check**: Validates if the target file path is allowed by `.kilocodeignore` rules.
3. **File Analysis**: Loads the target file content.
4. **Match Finding**: Uses the selected strategy's algorithms (exact, fuzzy, overlapping windows) to locate the target content, considering confidence thresholds and context (`BUFFER_LINES`).
5. **Change Preparation**: Generates the proposed changes, preserving indentation.
6. **User Interaction**:
* Displays the changes in a diff view.
* Allows the user to review and potentially edit the proposed changes.
* Waits for user approval or rejection.
7. **Change Application**: If approved, applies the changes (potentially including user edits) to the file.
8. **Error Handling**: If errors occur (e.g., match failure, partial application), increments the `consecutiveMistakeCountForApplyDiff` for the file and reports the failure type.
9. **Feedback**: Returns the result, including any user feedback or error details.
Diff Strategy
-------------
Kilo Code uses this strategy for applying diffs:
### MultiSearchReplaceDiffStrategy
An enhanced search/replace format supporting multiple changes in one request. **Line numbers are mandatory for each search block.**
* **Best for**: Multiple, distinct changes where line numbers are known or can be estimated.
* **Requires**: Exact match for the `SEARCH` block content, including whitespace and indentation. The `:start_line:` marker is **required** within each SEARCH block. Markers within content must be escaped (`\`).
Example format for the `` block:
<<<<<<< SEARCH
:start\_line:10
:end\_line:12
-------
// Old calculation logic
const result = value \* 0.9;
return result;
=======
// Updated calculation logic with logging
console.log(\`Calculating for value: ${value}\`);
const result = value \* 0.95; // Adjusted factor
return result;
>>>>>>> REPLACE
<<<<<<< SEARCH
:start\_line:25
:end\_line:25
-------
const defaultTimeout = 5000;
=======
const defaultTimeout = 10000; // Increased timeout
>>>>>>> REPLACE
Copy page
---
# GitLab Code Reviews
GitLab Code Reviews
===================
Kilo's Code Reviews integrate with GitLab to automatically review merge requests with AI. When an MR is opened, updated, or reopened, the Review Agent analyzes the changes and posts feedback directly on the merge request — as summary notes and inline discussion comments.
Both **GitLab.com** and **self-hosted GitLab instances** are supported.
Prerequisites
-------------
* A Kilo Code account at [app.kilo.ai](https://app.kilo.ai/)
* A GitLab account with **Maintainer** role (or higher) on the projects you want to review
* Kilo Code credits for AI model usage
> **Why Maintainer role?** Kilo creates a bot account (Project Access Token) on each project so that review comments appear from a bot, not your personal account. This requires Maintainer access.
Setup
-----
### Step 1: Connect GitLab
Connect your GitLab account via the [Integrations page](https://kilo.ai/docs/automate/integrations#connecting-gitlab)
. You can use **OAuth** (GitLab.com or self-hosted) or a **Personal Access Token (PAT)**.
Once connected, return here to configure the Review Agent.
### Step 2: Configure the Review Agent
1. Go to **Code Reviews**:
* **Personal**: [app.kilo.ai/code-reviews](https://app.kilo.ai/code-reviews)
* **Organization**: Your organization → Code Reviews
2. Toggle **Enable AI Code Review** to on
3. Configure your preferences:
* **AI Model** — Select from available models (default: Claude Sonnet 4.5)
* **Review Style** — Strict, Balanced, or Lenient
* **Repository Selection** — All repositories or select specific ones
* **Focus Areas** — Security, performance, bugs, style, testing, documentation
* **Max Review Time** — 5 to 30 minutes
* **Custom Instructions** — Add team-specific review guidelines
4. Click **Save Configuration**
When you select repositories, Kilo **automatically creates webhooks** on each project.
### Step 3: Open a Merge Request
Once configured, the Review Agent automatically runs when:
| MR Event | Triggers Review |
| --- | --- |
| MR opened | ✅ Yes |
| New commits pushed to MR | ✅ Yes |
| MR reopened | ✅ Yes |
| Draft or WIP MR opened | ❌ Skipped |
| MR closed | ❌ No |
| MR merged | ❌ No |
What to Expect
--------------
When a review triggers:
1. A 👀 reaction appears on the MR — this means Kilo is reviewing
2. The AI model analyzes the diff and changed files
3. The agent posts:
* A **summary note** on the MR with overall findings
* **Inline discussion comments** on specific lines with issues and suggestions
* Severity tags (critical, warning, info)
### When You Push New Commits
* The previous review is **automatically cancelled** (no stale feedback)
* A new review starts for the latest commit
* If a previous summary note exists, it is **updated in place**
How the Bot Identity Works
--------------------------
Review comments are posted by a **Kilo Code Review Bot** — not by your personal GitLab account. This bot is created automatically as a Project Access Token on each project.
* Created automatically the first time a project is reviewed
* Valid for 365 days and rotated automatically before expiry
* If you manually revoke the bot token in GitLab, Kilo creates a new one on the next review
* Requires **Maintainer role** on the project
Webhooks
--------
Kilo manages webhooks automatically:
* **Created** when you add a project to code reviews
* **Deleted** when you remove a project or disable reviews
You don't need to set up webhooks manually. If automatic webhook creation fails due to permissions, you can add the webhook manually in **GitLab → Project → Settings → Webhooks**:
* **URL**: `https://app.kilo.ai/api/webhooks/gitlab`
* **Secret token**: Available in your integration settings
* **Trigger**: Merge request events
Disconnecting
-------------
1. Go to the GitLab integration page
2. Click **Disconnect**
3. Your tokens are cleared, but webhook configuration is preserved so reconnecting restores your setup
> Disconnecting from Kilo does not revoke OAuth tokens on GitLab's side. You can manually revoke them from **GitLab → User Settings → Applications → Authorized Applications**.
Troubleshooting
---------------
### Reviews are not triggering
1. Verify the GitLab integration is connected and active
2. Check that the Review Agent is **enabled** in Code Reviews
3. Ensure the project is in the allowed list
4. Confirm the MR is not a draft or WIP
5. Check that a webhook exists on the GitLab project (Project → Settings → Webhooks)
### "Permission denied" or "Cannot create bot token" errors
You need **Maintainer role** on the GitLab project. Both webhook creation and bot token creation require Maintainer access or higher.
### Reviews are failing
* Check the Code Reviews page for error details
* Ensure you have sufficient Kilo Code credits
* Large MRs may time out — increase the max review time setting
### No projects listed after connecting
* Click the refresh button to sync projects from GitLab
* Ensure your GitLab account has access to the projects you expect
* The integration shows projects where you are a member
### Token expired
* **OAuth**: Tokens refresh automatically. If refresh fails, reconnect from the integration page.
* **PAT**: Create a new token in GitLab and reconnect in Kilo.
### Self-hosted connection issues
* Verify your instance URL is accessible from the internet
* Ensure HTTPS is configured
* Check that OAuth application scopes include all required scopes
* Verify the redirect URI matches: `https://app.kilo.ai/api/integrations/gitlab/callback`
Copy page
---
# Kilo Code Documentation
Using Vercel AI Gateway With Kilo Code
======================================
The AI Gateway provides a unified API to access hundreds of models through a single endpoint. It gives you the ability to set budgets, monitor usage, load-balance requests, and manage fallbacks.
Useful links:
* Team dashboard: https://vercel.com/d?to=%2F%5Bteam%5D%2F%7E%2Fai
* Models catalog: https://vercel.com/ai-gateway/models
* Docs: https://vercel.com/docs/ai-gateway
* * *
Getting an API Key
------------------
An API key is required for authentication.
1. **Sign Up/Sign In:** Go to the [Vercel Website](https://vercel.com/)
and sign in.
2. **Get an API Key:** Go to the [API Key page](https://vercel.com/d?to=%2F%5Bteam%5D%2F%7E%2Fai%2Fapi-keys&title=AI+Gateway+API+Key)
in the AI Gateway tab. Create a new key.
3. **Copy the Key:** Copy the API key.
* * *
Supported Models
----------------
The Vercel AI Gateway supports a large and growing number of models. Kilo Code automatically fetches the list of available models from the `https://ai-gateway.vercel.sh/v1/models` endpoint. Only language models are shown.
The default model is `anthropic/claude-sonnet-4` if no model is selected.
Refer to the [Vercel AI Gateway Models page](https://vercel.com/ai-gateway/models)
for the complete and up-to-date list.
### Model Capabilities
* **Vision Support**: Many models support image inputs.
* **Tool/Computer Use**: Select models support function calling and computer use.
Check the model description in the dropdown for specific capabilities.
* * *
Configuration in Kilo Code
--------------------------
1. **Open Kilo Code Settings:** Click the gear icon () in the Kilo Code panel.
2. **Select Provider:** Choose "Vercel AI Gateway" from the "API Provider" dropdown.
3. **Enter API Key:** Paste your Vercel AI Gateway API key into the "Vercel AI Gateway API Key" field.
4. **Select Model:** Choose your desired model from the "Model" dropdown.
* * *
Prompt Caching
--------------
Vercel AI Gateway supports automatic prompt caching for select models including Anthropic Claude and OpenAI GPT models. This reduces costs by caching frequently used prompts.
* * *
Tips and Notes
--------------
* **Model Selection:** The Vercel AI Gateway offers a wide range of models. Experiment to find the best one for your needs.
* **Pricing:** The Vercel AI Gateway charges based on the underlying model's pricing, including costs for cached prompts. See the [Vercel AI Gateway Models page](https://vercel.com/ai-gateway/models)
for details.
* **Temperature:** The default temperature is `0.7` and is configurable per model.
* **Bring Your Own Key (BYOK):** The Vercel AI Gateway has **no markup** if you decide to use your own key for the underlying service.
* **More info:** Vercel does not add rate limits. Upstream providers may. New accounts receive $5 credits every 30 days until the first payment.
Copy page
---
# Kilo Code Documentation
update\_todo\_list
==================
The `update_todo_list` tool replaces the entire TODO list with an updated checklist reflecting the current state. It provides step-by-step task tracking, allowing confirmation of completion before updating and dynamic addition of new todos discovered during complex tasks.
Parameters
----------
The tool accepts these parameters:
* `todos` (required): A markdown checklist with task descriptions and status indicators
What It Does
------------
This tool manages a comprehensive TODO list that tracks task progress through different status states. It replaces the entire list with each update, ensuring the current state accurately reflects all pending, in-progress, and completed tasks. The system displays the TODO list as reminders in subsequent messages.
When is it used?
----------------
* When tasks involve multiple steps requiring systematic tracking
* When new actionable items are discovered during task execution
* When updating the status of several todos simultaneously
* When complex projects benefit from clear, stepwise progress tracking
* When organizing multi-phase workflows with dependencies
Key Features
------------
* Maintains a single-level markdown checklist with three status states
* Updates multiple task statuses in a single operation
* Dynamically adds new todos as they're discovered during execution
* Provides visual progress tracking through status indicators
* Integrates with the reminder system for persistent task visibility
* Supports task reordering based on execution priority
* Preserves all unfinished tasks unless explicitly removed
* Enables efficient batch status updates
Limitations
-----------
* Limited to single-level checklists (no nesting or subtasks)
* Cannot remove tasks unless they're completed or no longer relevant
* Requires complete list replacement rather than incremental updates
* Status changes must be explicitly managed through tool calls
* No built-in task dependency tracking
* Cannot schedule tasks for future execution
* Limited to three status states (pending, in-progress, completed)
Status Indicators
-----------------
The tool uses three distinct status indicators:
* `[ ]` **Pending**: Task not yet started
* `[-]` **In Progress**: Task currently being worked on
* `[x]` **Completed**: Task fully finished with no unresolved issues
How It Works
------------
When the `update_todo_list` tool is invoked, it follows this process:
1. **Status Validation**:
* Parses the markdown checklist format
* Validates status indicators are properly formatted
* Ensures task descriptions are clear and actionable
2. **List Replacement**:
* Completely replaces the existing TODO list
* Preserves task order as specified in the update
* Maintains task descriptions and status states
3. **Reminder Integration**:
* Integrates updated list with the reminder system
* Displays current tasks in subsequent message headers
* Provides persistent visibility of task progress
4. **Progress Tracking**:
* Tracks completion status across multiple updates
* Maintains task history for reference
* Supports workflow continuation across sessions
Best Practices
--------------
### Task Management Guidelines
* Mark tasks as completed immediately after all work is finished
* Start the next task by marking it as in-progress
* Add new todos as soon as they are identified during execution
* Use clear, descriptive task names that indicate specific actions
* Order tasks by logical execution sequence or priority
### Status Update Patterns
* Update multiple statuses simultaneously when transitioning between tasks
* Confirm task completion before marking as finished
* Keep in-progress tasks focused on current work
* Add blocking tasks when dependencies are discovered
### When to Use
Use this tool when:
* The task involves multiple steps or requires ongoing tracking
* New actionable items are discovered during task execution
* Multiple todos need status updates simultaneously
* Complex tasks benefit from clear progress visualization
Avoid using when:
* There is only a single, trivial task
* The task can be completed in one or two simple steps
* The request is purely conversational or informational
Examples When Used
------------------
* When implementing a multi-component feature requiring frontend, backend, and database changes
* When debugging issues that reveal multiple related problems requiring fixes
* When setting up development environments with multiple configuration steps
* When documenting systems that require research, writing, and review phases
* When refactoring code that affects multiple files and requires testing
Usage Examples
--------------
Initial task breakdown:
\[-\] Analyze requirements and create technical specification
\[ \] Design database schema and API endpoints
\[ \] Implement backend authentication service
\[ \] Create frontend login components
\[ \] Write comprehensive tests
\[ \] Update documentation
Updating progress and adding discovered tasks:
\[x\] Analyze requirements and create technical specification
\[x\] Design database schema and API endpoints
\[-\] Implement backend authentication service
\[ \] Create frontend login components
\[ \] Write comprehensive tests
\[ \] Update documentation
\[ \] Add password reset functionality
\[ \] Implement rate limiting for login attempts
Completing multiple tasks and transitioning focus:
\[x\] Analyze requirements and create technical specification
\[x\] Design database schema and API endpoints
\[x\] Implement backend authentication service
\[x\] Create frontend login components
\[-\] Write comprehensive tests
\[ \] Update documentation
\[ \] Add password reset functionality
\[ \] Implement rate limiting for login attempts
Copy page
---
# Kilo Code Documentation
write\_to\_file
===============
The `write_to_file` tool creates new files or completely replaces existing file content with an interactive approval process. It provides a diff view for reviewing changes before they're applied.
Parameters
----------
The tool accepts these parameters:
* `path` (required): The path of the file to write to, relative to the current working directory
* `content` (required): The complete content to write to the file
* `line_count` (required): The number of lines in the file, including empty lines
What It Does
------------
This tool writes content to a specified file, either creating a new file if it doesn't exist or completely overwriting an existing file. All changes require explicit user approval through a diff view interface, where users can review and even edit the proposed changes before they're applied.
When is it used?
----------------
* When Kilo Code needs to create a new file from scratch
* When Kilo Code needs to completely rewrite an existing file
* When creating multiple files for a new project
* When generating configuration files, documentation, or source code
* When you need to review changes before they're applied
Key Features
------------
* Interactive Approval: Shows changes in a diff view requiring explicit approval before applying
* User Edit Support: Allows editing the proposed content before final approval
* Safety Measures: Detects code omission, validates paths, and prevents truncated content
* Editor Integration: Opens a diff view that scrolls to the first difference automatically
* Content Preprocessing: Handles artifacts from different AI models to ensure clean content
* Access Control: Validates against `.kilocodeignore` restrictions before making changes
* Parent Directories: May handle directory creation through system dependencies
* Complete Replacement: Provides a fully transformed file in a single operation
Limitations
-----------
* Not suitable for existing files: Much slower and less efficient than `apply_diff` for modifying existing files
* Performance with large files: Operation becomes significantly slower with larger files
* Complete overwrite: Replaces entire file content, cannot preserve original content
* Line count required: Needs accurate line count to detect potential content truncation
* Review overhead: The approval process adds extra steps compared to direct edits
* Interactive only: Cannot be used in automated workflows that require non-interactive execution
How It Works
------------
When the `write_to_file` tool is invoked, it follows this process:
1. **Parameter Validation**: Validates the required parameters and permissions
* Checks that `path`, `content`, and `line_count` are provided
* Validates the file is allowed (not restricted by `.kilocodeignore`)
* Ensures the path is within the workspace boundaries
* Tracks consecutive mistake counts for missing parameters
* Shows specific error messages for each validation failure
2. **Content Preprocessing**:
* Removes code block markers that might be added by AI models
* Handles escaped HTML entities (specifically for non-Claude models)
* Strips line numbers if accidentally included in content
* Performs model-specific processing for different AI providers
3. **Diff View Generation**:
* Opens a diff view in the editor showing the proposed changes
* Adds a 300ms delay to ensure UI responsiveness
* Scrolls automatically to the first difference
* Highlights changes for easy review
4. **User Approval Process**:
* Waits for explicit user approval to proceed
* Allows users to edit the content in the diff view
* Captures any user edits for the final content
* Provides option to reject changes entirely
* Detects and incorporates user modifications into the final result
5. **Safety Validation**:
* Detects potential content truncation by comparing with provided line count
* Shows warnings if content appears incomplete
* Validates file path and access permissions
* Specifically checks if files are outside the workspace with `isOutsideWorkspace` flag
6. **File Writing**:
* Writes the approved content (with any user edits) to the file
* Provides confirmation of successful write
* Resets the consecutive mistakes counter on success
Examples When Used
------------------
* When creating a new project, Kilo Code generates multiple files but lets you review each before committing changes.
* When setting up configuration files, Kilo Code shows the proposed configuration in a diff view for approval.
* When generating documentation, Kilo Code creates markdown files but lets you make final adjustments in the diff view.
* When developing a prototype, Kilo Code shows complete source files in a diff view where you can fine-tune before saving.
Usage Examples
--------------
Creating a new JSON configuration file:
config/settings.json
{
"apiEndpoint": "https://api.example.com",
"theme": {
"primaryColor": "#007bff",
"secondaryColor": "#6c757d",
"fontFamily": "Arial, sans-serif"
},
"features": {
"darkMode": true,
"notifications": true,
"analytics": false
},
"version": "1.0.0"
}
14
Creating a simple HTML file:
src/index.htmlMy Application13
Creating a JavaScript module:
src/utils/helpers.js
/\*\*
\* Utility functions for the application
\*/
export function formatDate(date) {
return new Date(date).toLocaleDateString();
}
export function calculateTotal(items) {
return items.reduce((sum, item) => sum + item.price, 0);
}
export function debounce(func, delay) {
let timeout;
return function(...args) {
clearTimeout(timeout);
timeout = setTimeout(() => func.apply(this, args), delay);
};
}
18
Copy page
---
# Kilo Code Documentation
list\_files
===========
The `list_files` tool displays the files and directories within a specified location. It helps Kilo Code understand your project structure and navigate your codebase effectively.
Parameters
----------
The tool accepts these parameters:
* `path` (required): The path of the directory to list contents for, relative to the current working directory
* `recursive` (optional): Whether to list files recursively. Use `true` for recursive listing, `false` or omit for top-level only.
What It Does
------------
This tool lists all files and directories in a specified location, providing a clear overview of your project structure. It can either show just the top-level contents or recursively explore subdirectories.
When is it used?
----------------
* When Kilo Code needs to understand your project structure
* When Kilo Code explores what files are available before reading specific ones
* When Kilo Code maps a codebase to better understand its organization
* Before using more targeted tools like `read_file` or `search_files`
* When Kilo Code needs to check for specific file types (like configuration files) across a project
Key Features
------------
* Lists both files and directories with directories clearly marked
* Offers both recursive and non-recursive listing modes
* Intelligently ignores common large directories like `node_modules` and `.git` in recursive mode
* Respects `.gitignore` rules when in recursive mode
* Marks files ignored by `.kilocodeignore` with a lock symbol (🔒) when `showKiloCodeIgnoredFiles` is enabled
* Optimizes performance with level-by-level directory traversal
* Sorts results to show directories before their contents, maintaining a logical hierarchy
* Presents results in a clean, organized format
* Automatically creates a mental map of your project structure
Limitations
-----------
* File listing is capped at about 200 files by default to prevent performance issues
* Has a 10-second timeout for directory traversal to prevent hanging on complex directory structures
* When the file limit is hit, it adds a note suggesting to use `list_files` on specific subdirectories
* Not designed for confirming the existence of files you've just created
* May have reduced performance in very large directory structures
* Cannot list files in root or home directories for security reasons
How It Works
------------
When the `list_files` tool is invoked, it follows this process:
1. **Parameter Validation**: Validates the required `path` parameter and optional `recursive` parameter
2. **Path Resolution**: Resolves the relative path to an absolute path
3. **Security Checks**: Prevents listing files in sensitive locations like root or home directories
4. **Directory Scanning**:
* For non-recursive mode: Lists only the top-level contents
* For recursive mode: Traverses the directory structure level by level with a 10-second timeout
* If timeout occurs, returns partial results collected up to that point
5. **Result Filtering**:
* In recursive mode, skips common large directories like `node_modules`, `.git`, etc.
* Respects `.gitignore` rules when in recursive mode
* Handles `.kilocodeignore` patterns, either hiding files or marking them with a lock symbol
6. **Formatting**:
* Marks directories with a trailing slash (`/`)
* Sorts results to show directories before their contents for logical hierarchy
* Marks ignored files with a lock symbol (🔒) when `showKiloCodeIgnored` is enabled
* Caps results at 200 files by default with a note about using subdirectories
* Organizes results for readability
File Listing Format
-------------------
The file listing results include:
* Each file path is displayed on its own line
* Directories are marked with a trailing slash (`/`)
* Files ignored by `.kilocodeignore` are marked with a lock symbol (🔒) when `showKiloCodeIgnored` is enabled
* Results are sorted logically with directories appearing before their contents
* When the file limit is reached, a message appears suggesting to use `list_files` on specific subdirectories
Example output format:
src/
src/components/
src/components/Button.tsx
src/components/Header.tsx
src/utils/
src/utils/helpers.ts
src/index.ts
...
File listing truncated (showing 200 of 543 files). Use list\_files on specific subdirectories for more details.
When `.kilocodeignore` files are used and `showKiloCodeIgnored` is enabled:
src/
src/components/
src/components/Button.tsx
src/components/Header.tsx
🔒 src/secrets.json
src/utils/
src/utils/helpers.ts
src/index.ts
Examples When Used
------------------
* When starting a new task, Kilo Code may list the project files to understand its structure before diving into specific code.
* When asked to find specific types of files (like all JavaScript files), Kilo Code first lists directories to know where to look.
* When providing recommendations for code organization, Kilo Code examines the current project structure first.
* When setting up a new feature, Kilo Code lists related directories to understand the project conventions.
Usage Examples
--------------
Listing top-level files in the current directory:
.
Recursively listing all files in a source directory:
srctrue
Examining a specific project subdirectory:
src/componentsfalse
Copy page
---
# Kilo Code Documentation
codebase\_search
================
ℹ️Setup Required
The `codebase_search` tool is part of the [Codebase Indexing](https://kilo.ai/docs/customize/context/codebase-indexing)
feature. It requires additional setup including an embedding provider and vector database.
The `codebase_search` tool performs semantic searches across your entire codebase using AI embeddings. Unlike traditional text-based search, it understands the meaning of your queries and finds relevant code even when exact keywords don't match.
* * *
Parameters
----------
The tool accepts these parameters:
* `query` (required): Natural language search query describing what you're looking for
* `path` (optional): Directory path to limit search scope to a specific part of your codebase
* * *
What It Does
------------
This tool searches through your indexed codebase using semantic similarity rather than exact text matching. It finds code blocks that are conceptually related to your query, even if they don't contain the exact words you searched for. Results include relevant code snippets with file paths, line numbers, and similarity scores.
* * *
When is it used?
----------------
* When Kilo Code needs to find code related to specific functionality across your project
* When looking for implementation patterns or similar code structures
* When searching for error handling, authentication, or other conceptual code patterns
* When exploring unfamiliar codebases to understand how features are implemented
* When finding related code that might be affected by changes or refactoring
* * *
Key Features
------------
* **Semantic Understanding**: Finds code by meaning rather than exact keyword matches
* **Cross-Project Search**: Searches across your entire indexed codebase, not just open files
* **Contextual Results**: Returns code snippets with file paths and line numbers for easy navigation
* **Similarity Scoring**: Results ranked by relevance with similarity scores (0-1 scale)
* **Scope Filtering**: Optional path parameter to limit searches to specific directories
* **Intelligent Ranking**: Results sorted by semantic relevance to your query
* **UI Integration**: Results displayed with syntax highlighting and navigation links
* **Performance Optimized**: Fast vector-based search with configurable result limits
* * *
Requirements
------------
This tool is only available when the Codebase Indexing feature is properly configured:
* **Feature Configured**: Codebase Indexing must be configured in settings
* **Embedding Provider**: OpenAI API key or Ollama configuration required
* **Vector Database**: Qdrant instance running and accessible
* **Index Status**: Codebase must be indexed (status: "Indexed" or "Indexing")
* * *
Limitations
-----------
* **Requires Configuration**: Depends on external services (embedding provider + Qdrant)
* **Index Dependency**: Only searches through indexed code blocks
* **Result Limits**: Maximum of 50 results per search to maintain performance
* **Similarity Threshold**: Only returns results above similarity threshold (default: 0.4, configurable)
* **File Size Limits**: Limited to files under 1MB that were successfully indexed
* **Language Support**: Effectiveness depends on Tree-sitter language support
* * *
How It Works
------------
When the `codebase_search` tool is invoked, it follows this process:
1. **Availability Validation**:
* Verifies that the CodeIndexManager is available and initialized
* Confirms codebase indexing is enabled in settings
* Checks that indexing is properly configured (API keys, Qdrant URL)
* Validates the current index state allows searching
2. **Query Processing**:
* Takes your natural language query and generates an embedding vector
* Uses the same embedding provider configured for indexing (OpenAI or Ollama)
* Converts the semantic meaning of your query into a mathematical representation
3. **Vector Search Execution**:
* Searches the Qdrant vector database for similar code embeddings
* Uses cosine similarity to find the most relevant code blocks
* Applies the minimum similarity threshold (default: 0.4, configurable) to filter results
* Limits results to 50 matches for optimal performance
4. **Path Filtering** (if specified):
* Filters results to only include files within the specified directory path
* Uses normalized path comparison for accurate filtering
* Maintains relevance ranking within the filtered scope
5. **Result Processing and Formatting**:
* Converts absolute file paths to workspace-relative paths
* Structures results with file paths, line ranges, similarity scores, and code content
* Formats for both AI consumption and UI display with syntax highlighting
6. **Dual Output Format**:
* **AI Output**: Structured text format with query, file paths, scores, and code chunks
* **UI Output**: JSON format with syntax highlighting and navigation capabilities
* * *
Search Query Best Practices
---------------------------
### Effective Query Patterns
**Good: Conceptual and specific**
user authentication and password validation
**Good: Feature-focused**
database connection pool setup
**Good: Problem-oriented**
error handling for API requests
**Less effective: Too generic**
function
### Query Types That Work Well
* **Functional Descriptions**: "file upload processing", "email validation logic"
* **Technical Patterns**: "singleton pattern implementation", "factory method usage"
* **Domain Concepts**: "user profile management", "payment processing workflow"
* **Architecture Components**: "middleware configuration", "database migration scripts"
* * *
Directory Scoping
-----------------
Use the optional `path` parameter to focus searches on specific parts of your codebase:
**Search within API modules:**
endpoint validation middlewaresrc/api
**Search in test files:**
mock data setup patternstests
**Search specific feature directories:**
component state managementsrc/components/auth
* * *
Result Interpretation
---------------------
### Similarity Scores
* **0.8-1.0**: Highly relevant matches, likely exactly what you're looking for
* **0.6-0.8**: Good matches with strong conceptual similarity
* **0.4-0.6**: Potentially relevant but may require review
* **Below 0.4**: Filtered out as too dissimilar
### Result Structure
Each search result includes:
* **File Path**: Workspace-relative path to the file containing the match
* **Score**: Similarity score indicating relevance (0.4-1.0)
* **Line Range**: Start and end line numbers for the code block
* **Code Chunk**: The actual code content that matched your query
* * *
Examples When Used
------------------
* When implementing a new feature, Kilo Code searches for "authentication middleware" to understand existing patterns before writing new code.
* When debugging an issue, Kilo Code searches for "error handling in API calls" to find related error patterns across the codebase.
* When refactoring code, Kilo Code searches for "database transaction patterns" to ensure consistency across all database operations.
* When onboarding to a new codebase, Kilo Code searches for "configuration loading" to understand how the application bootstraps.
* * *
Usage Examples
--------------
Searching for authentication-related code across the entire project:
user login and authentication logic
Finding database-related code in a specific directory:
database connection and query executionsrc/data
Looking for error handling patterns in API code:
HTTP error responses and exception handlingsrc/api
Searching for testing utilities and mock setups:
test setup and mock data creationtests
Finding configuration and environment setup code:
environment variables and application configuration
Copy page
---
# Kilo Code Documentation
Using Cerebras With Kilo Code
=============================
Cerebras is known for their ultra-fast AI inference powered by the Cerebras CS-3 chip, the world's largest and fastest AI accelerator. Their platform delivers exceptional inference speeds for large language models, making them ideal for interactive development workflows.
**Website:** [https://cerebras.ai/](https://cerebras.ai/)
Getting an API Key
------------------
1. **Sign Up/Sign In:** Go to the [Cerebras Cloud Platform](https://cloud.cerebras.ai/)
. Create an account or sign in.
2. **Navigate to API Keys:** Access the API Keys section in your account dashboard.
3. **Create a Key:** Click to generate a new API key. Give it a descriptive name (e.g., "Kilo Code").
4. **Copy the Key:** **Important:** Copy the API key _immediately_. Store it securely.
Configuration in Kilo Code
--------------------------
1. **Open Kilo Code Settings:** Click the gear icon () in the Kilo Code panel.
2. **Select Provider:** Choose "Cerebras" from the "API Provider" dropdown.
3. **Enter API Key:** Paste your Cerebras API key into the "Cerebras API Key" field.
4. **Select Model:** Choose your desired model from the "Model" dropdown.
Tips and Notes
--------------
* **Inference Speed:** Cerebras models deliver some of the fastest inference speeds available, reducing wait times during development.
* **Open Source Models:** Many Cerebras models are based on open-source architectures, optimized for their custom hardware.
* **Cost Efficiency:** Fast inference can lead to better cost efficiency for interactive use cases.
* **Pricing:** Refer to the Cerebras platform for current pricing information and available plans.
Copy page
---
# Kilo Code Documentation
Using GCP Vertex AI With Kilo Code
==================================
Kilo Code supports accessing models through Google Cloud Platform's Vertex AI, a managed machine learning platform that provides access to various foundation models, including Anthropic's Claude family.
**Website:** [https://cloud.google.com/vertex-ai](https://cloud.google.com/vertex-ai)
Prerequisites
-------------
* **Google Cloud Account:** You need an active Google Cloud Platform (GCP) account.
* **Project:** You need a GCP project with the Vertex AI API enabled.
* **Model Access:** You must request and be granted access to the specific Claude models on Vertex AI you want to use. See the [Google Cloud documentation](https://cloud.google.com/vertex-ai/generative-ai/docs/partner-models/use-claude#before_you_begin)
for instructions.
* **Application Default Credentials (ADC):** Kilo Code uses Application Default Credentials to authenticate with Vertex AI. The easiest way to set this up is to:
1. Install the Google Cloud CLI: [https://cloud.google.com/sdk/docs/install](https://cloud.google.com/sdk/docs/install)
2. Authenticate using: `gcloud auth application-default login`
* **Service Account Key (Alternative):** Alternatively, you can authenticate using a Google Cloud Service Account key file. You'll need to generate this key in your GCP project. See the [Google Cloud documentation on creating service account keys](https://cloud.google.com/iam/docs/creating-managing-service-account-keys)
.
Configuration in Kilo Code
--------------------------
1. **Open Kilo Code Settings:** Click the gear icon () in the Kilo Code panel.
2. **Select Provider:** Choose "GCP Vertex AI" from the "API Provider" dropdown.
3. **Configure Authentication:**
* **If using Application Default Credentials (ADC):** No further action is needed here. ADC will be used automatically if configured correctly (see Prerequisites).
* **If _not_ using ADC (Service Account Key):**
* **Option A: Paste JSON Content:** Paste the entire content of your Service Account JSON key file into the **Google Cloud Credentials** field.
* **Option B: Provide File Path:** Enter the absolute path to your downloaded Service Account JSON key file in the **Google Cloud Key File Path** field.
4. **Enter Project ID:** Enter your Google Cloud Project ID.
5. **Select Region:** Choose the region where your Vertex AI resources are located (e.g., `us-east5`).
6. **Select Model:** Choose your desired model from the "Model" dropdown.
Tips and Notes
--------------
* **Permissions:** Ensure your Google Cloud account has the necessary permissions to access Vertex AI and the specific models you want to use.
* **Pricing:** Refer to the [Vertex AI pricing](https://cloud.google.com/vertex-ai/pricing)
page for details.
Copy page
---
# Kilo Code Documentation
execute\_command
================
The `execute_command` tool runs CLI commands on the user's system. It allows Kilo Code to perform system operations, install dependencies, build projects, start servers, and execute other terminal-based tasks needed to accomplish user objectives.
Parameters
----------
The tool accepts these parameters:
* `command` (required): The CLI command to execute. Must be valid for the user's operating system.
* `cwd` (optional): The working directory to execute the command in. If not provided, the current working directory is used.
What It Does
------------
This tool executes terminal commands directly on the user's system, enabling a wide range of operations from file manipulations to running development servers. Commands run in managed terminal instances with real-time output capture, integrated with VS Code's terminal system for optimal performance and security.
When is it used?
----------------
* When installing project dependencies (npm install, pip install, etc.)
* When building or compiling code (make, npm run build, etc.)
* When starting development servers or running applications
* When initializing new projects (git init, npm init, etc.)
* When performing file operations beyond what other tools provide
* When running tests or linting operations
* When needing to execute specialized commands for specific technologies
Key Features
------------
* Integrates with VS Code shell API for reliable terminal execution
* Reuses terminal instances when possible through a registry system
* Captures command output line by line with real-time feedback
* Supports long-running commands that continue in the background
* Allows specification of custom working directories
* Maintains terminal history and state across command executions
* Handles complex command chains appropriate for the user's shell
* Provides detailed command completion status and exit code interpretation
* Supports interactive terminal applications with user feedback loop
* Shows terminals during execution for transparency
* Validates commands for security using shell-quote parsing
* Blocks potentially dangerous subshell execution patterns
* Integrates with KiloCodeIgnore system for file access control
* Handles terminal escape sequences for clean output
Limitations
-----------
* Command access may be restricted by KiloCodeIgnore rules and security validations
* Commands with elevated permission requirements may need user configuration
* Behavior may vary across operating systems for certain commands
* Very long-running commands may require specific handling
* File paths should be properly escaped according to the OS shell rules
* Not all terminal features may work with remote development scenarios
How It Works
------------
When the `execute_command` tool is invoked, it follows this process:
1. **Command Validation and Security Checks**:
* Parses the command using shell-quote to identify components
* Validates against security restrictions (subshell usage, restricted files)
* Checks against KiloCodeIgnore rules for file access permissions
* Ensures the command meets system security requirements
2. **Terminal Management**:
* Gets or creates a terminal through TerminalRegistry
* Sets up the working directory context
* Prepares event listeners for output capture
* Shows the terminal for user visibility
3. **Command Execution and Monitoring**:
* Executes via VS Code's shellIntegration API
* Captures output with escape sequence processing
* Throttles output handling (100ms intervals)
* Monitors for command completion or errors
* Detects "hot" processes like compilers for special handling
4. **Result Processing**:
* Strips ANSI/VS Code escape sequences for clean output
* Interprets exit codes with detailed signal information
* Updates working directory tracking if changed by command
* Provides command status with appropriate context
Terminal Implementation Details
-------------------------------
The tool uses a sophisticated terminal management system:
1. **First Priority: Terminal Reuse**
* The TerminalRegistry tries to reuse existing terminals when possible
* This reduces proliferation of terminal instances and improves performance
* Terminal state (working directory, history) is preserved across commands
2. **Second Priority: Security Validation**
* Commands are parsed using shell-quote for component analysis
* Dangerous patterns like `$(...)` and backticks are blocked
* Commands are checked against KiloCodeIgnore rules for file access control
* A prefix-based allowlist system validates command patterns
3. **Performance Optimizations**
* Output is processed in 100ms throttled intervals to prevent UI overload
* Zero-copy buffer management uses index-based tracking for efficiency
* Special handling for compilation and "hot" processes
* Platform-specific optimizations for Windows PowerShell
4. **Error and Signal Handling**
* Exit codes are mapped to detailed signal information (SIGTERM, SIGKILL, etc.)
* Core dump detection for critical failures
* Working directory changes are tracked and handled automatically
* Clean recovery from terminal disconnection scenarios
Examples When Used
------------------
* When setting up a new project, Kilo Code runs initialization commands like `npm init -y` followed by installing dependencies.
* When building a web application, Kilo Code executes build commands like `npm run build` to compile assets.
* When deploying code, Kilo Code runs git commands to commit and push changes to a repository.
* When troubleshooting, Kilo Code executes diagnostic commands to gather system information.
* When starting a development server, Kilo Code launches the appropriate server command (e.g., `npm start`).
* When running tests, Kilo Code executes the test runner command for the project's testing framework.
Usage Examples
--------------
Running a simple command in the current directory:
npm run dev
Installing dependencies for a project:
npm install express mongodb mongoose dotenv
Running multiple commands in sequence:
mkdir -p src/components && touch src/components/App.js
Executing a command in a specific directory:
git status./my-project
Building and then starting a project:
npm run build && npm start
Copy page
---
# Kilo Code Documentation
Using AWS Bedrock With Kilo Code
================================
Kilo Code supports accessing models through Amazon Bedrock, a fully managed service that makes a selection of high-performing foundation models (FMs) from leading AI companies available via a single API. This provider connects directly to AWS Bedrock and authenticates with the provided credentials.
**Website:** [https://aws.amazon.com/bedrock/](https://aws.amazon.com/bedrock/)
Prerequisites
-------------
* **AWS Account:** You need an active AWS account.
* **Bedrock Access:** You must request and be granted access to Amazon Bedrock. See the [AWS Bedrock documentation](https://docs.aws.amazon.com/bedrock/latest/userguide/getting-started.html)
for details on requesting access.
* **Model Access:** Within Bedrock, you need to request access to the specific models you want to use (e.g., Anthropic Claude).
* **Install AWS CLI:** Use AWS CLI to configure your account for authentication
aws configure
Getting Credentials
-------------------
You have three options for configuring AWS credentials:
1. **Bedrock API Key:**
* Create a Bedrock-specific API key in the AWS Console. This is a simple service-specific authentication method.
* See the [AWS documentation on Bedrock credentials](https://docs.aws.amazon.com/IAM/latest/UserGuide/id_credentials_bedrock.html)
for instructions on creating an API key.
2. **AWS Access Keys (Recommended for Development):**
* Create an IAM user with the necessary permissions (at least `bedrock:InvokeModel`).
* Generate an access key ID and secret access key for that user.
* _(Optional)_ Create a session token if required by your IAM configuration.
3. **AWS Profile:**
* Configure an AWS profile using the AWS CLI or by manually editing your AWS credentials file. See the [AWS CLI documentation](https://docs.aws.amazon.com/cli/latest/userguide/cli-configure-profiles.html)
for details.
Configuration in Kilo Code
--------------------------
1. **Open Kilo Code Settings:** Click the gear icon () in the Kilo Code panel.
2. **Select Provider:** Choose "Bedrock" from the "API Provider" dropdown.
3. **Select Authentication Method:**
* **Bedrock API Key:**
* Enter your Bedrock API key directly. This is the simplest setup option.
* **AWS Credentials:**
* Enter your "AWS Access Key" and "AWS Secret Key."
* (Optional) Enter your "AWS Session Token" if you're using temporary credentials.
* **AWS Profile:**
* Enter your "AWS Profile" name (e.g., "default").
4. **Select Region:** Choose the AWS region where your Bedrock service is available (e.g., "us-east-1").
5. **(Optional) Cross-Region Inference:** Check "Use cross-region inference" if you want to access models in a region different from your configured AWS region.
6. **Select Model:** Choose your desired model from the "Model" dropdown.
Tips and Notes
--------------
* **Permissions:** Ensure your IAM user or role has the necessary permissions to invoke Bedrock models. The `bedrock:InvokeModel` permission is required.
* **Pricing:** Refer to the [Amazon Bedrock pricing](https://aws.amazon.com/bedrock/pricing/)
page for details on model costs.
* **Cross-Region Inference:** Using cross-region inference may result in higher latency.
Copy page
---
# Kilo Code Documentation
search\_files
=============
The `search_files` tool performs regex searches across multiple files in your project. It helps Kilo Code locate specific code patterns, text, or other content throughout your codebase with contextual results.
Parameters
----------
The tool accepts these parameters:
* `path` (required): The path of the directory to search in, relative to the current working directory
* `regex` (required): The regular expression pattern to search for (uses Rust regex syntax)
* `file_pattern` (optional): Glob pattern to filter files (e.g., '\*.ts' for TypeScript files)
What It Does
------------
This tool searches across files in a specified directory using regular expressions, showing each match with surrounding context. It's like having a powerful "Find in Files" feature that works across the entire project structure.
When is it used?
----------------
* When Kilo Code needs to find where specific functions or variables are used
* When Kilo Code helps with refactoring and needs to understand usage patterns
* When Kilo Code needs to locate all instances of a particular code pattern
* When Kilo Code searches for text across multiple files with filtering capabilities
Key Features
------------
* Searches across multiple files in a single operation using high-performance Ripgrep
* Shows context around each match (1 line before and after)
* Filters files by type using glob patterns (e.g., only TypeScript files)
* Provides line numbers for easy reference
* Uses powerful regex patterns for precise searches
* Automatically limits output to 300 results with notification
* Truncates lines longer than 500 characters with "\[truncated...\]" marker
* Intelligently combines nearby matches into single blocks for readability
Limitations
-----------
* Works best with text-based files (not effective for binary files like images)
* Performance may slow with extremely large codebases
* Uses Rust regex syntax, which may differ slightly from other regex implementations
* Cannot search within compressed files or archives
* Default context size is fixed (1 line before and after)
* May display varying context sizes when matches are close together due to result grouping
How It Works
------------
When the `search_files` tool is invoked, it follows this process:
1. **Parameter Validation**: Validates the required `path` and `regex` parameters
2. **Path Resolution**: Resolves the relative path to an absolute path
3. **Search Execution**:
* Uses Ripgrep (rg) for high-performance text searching
* Applies file pattern filtering if specified
* Collects matches with surrounding context
4. **Result Formatting**:
* Formats results with file paths, line numbers, and context
* Displays 1 line of context before and after each match
* Structures output for easy readability
* Limits results to a maximum of 300 matches with notification
* Truncates lines longer than 500 characters
* Merges nearby matches into contiguous blocks
Search Results Format
---------------------
The search results include:
* Relative file paths for each matching file (prefixed with #)
* Context lines before and after each match (1 line by default)
* Line numbers padded to 3 spaces followed by `|` and the line content
* A separator line (----) after each match group
Example output format:
\# rel/path/to/app.ts
11 | // Some processing logic here
12 | // TODO: Implement error handling
13 | return processedData;
----
# Showing first 300 of 300+ results. Use a more specific search if necessary.
When matches occur close to each other, they're merged into a single block rather than shown as separate results:
\# rel/path/to/auth.ts
13 | // Some code here
14 | // TODO: Add proper validation
15 | function validateUser(credentials) {
16 | // TODO: Implement rate limiting
17 | return checkDatabase(credentials);
----
Examples When Used
------------------
* When asked to refactor a function, Kilo Code first searches for all places the function is used to ensure comprehensive changes.
* When investigating bugs, Kilo Code searches for similar patterns to identify related issues across the codebase.
* When addressing technical debt, Kilo Code locates all TODO comments across the project.
* When analyzing dependencies, Kilo Code finds all imports of a particular module.
Usage Examples
--------------
Searching for TODO comments in all JavaScript files:
srcTODO|FIXME\*.js
Finding all usages of a specific function:
.function\\s+calculateTotal\*.{js,ts}
Searching for a specific import pattern across the entire project:
.import\\s+.\*\\s+from\\s+\['"\]@components/
Copy page
---
# Fireworks AI with Kilo Code
Using Fireworks AI With Kilo Code
=================================
Fireworks AI is a high-performance platform for running AI models that offers fast access to a wide range of open-source and proprietary language models. Built for speed and reliability, Fireworks AI provides both serverless and dedicated deployment options with OpenAI-compatible APIs.
**Website:** [https://fireworks.ai/](https://fireworks.ai/)
Getting an API Key
------------------
1. **Sign Up/Sign In:** Go to [Fireworks AI](https://fireworks.ai/)
and create an account or sign in.
2. **Navigate to API Keys:** After logging in, go to the [API Keys page](https://app.fireworks.ai/settings/users/api-keys)
in the account settings.
3. **Create a Key:** Click "Create API key" and give your key a descriptive name (e.g., "Kilo Code").
4. **Copy the Key:** Copy the API key _immediately_ and store it securely. You will not be able to see it again.
Configuration in Kilo Code
--------------------------
1. **Open Kilo Code Settings:** Click the gear icon () in the Kilo Code panel.
2. **Select Provider:** Choose "Fireworks AI" from the "API Provider" dropdown.
3. **Enter API Key:** Paste your Fireworks AI API key into the "Fireworks AI API Key" field.
4. **Select Model:** Choose your desired model from the "Model" dropdown.
Tips and Notes
--------------
* **Performance:** Fireworks AI is optimized for speed and offers excellent performance for both chat and completion tasks.
* **Pricing:** Refer to the [Fireworks AI Pricing](https://fireworks.ai/pricing)
page for current pricing information.
* **Rate Limits:** Fireworks AI has usage-based rate limits. Monitor your usage in the dashboard and consider upgrading your plan if needed.
Copy page
---
# Kilo Code Documentation
Using VS Code Language Model API With Kilo Code
===============================================
Kilo Code includes _experimental_ support for the [VS Code Language Model API](https://code.visualstudio.com/docs/copilot/customization/language-models)
. This API allows extensions to provide access to language models directly within VS Code. This means you can potentially use models from:
* **GitHub Copilot:** If you have a Copilot subscription and the extension installed.
* **Other VS Code Extensions:** Any extension that implements the Language Model API.
**Important:** This integration is highly experimental and may not work as expected. It is dependent on other extensions correctly implementing the VS Code Language Model API.
Prerequisites
-------------
* **VS Code:** The Language Model API is available through VS Code (and is not currently supported by Cursor).
* **A Language Model Provider Extension:** You need an extension that provides a language model. Examples include:
* **GitHub Copilot:** If you have a Copilot subscription, the GitHub Copilot and GitHub Copilot Chat extensions can provide models.
* **Other Extensions:** Search the VS Code Marketplace for extensions that mention "Language Model API" or "lm". There may be other experimental extensions available.
Configuration
-------------
1. **Open Kilo Code Settings:** Click the gear icon () in the Kilo Code panel.
2. **Select Provider:** Choose "VS Code LM API" from the "API Provider" dropdown.
3. **Select Model:** The "Language Model" dropdown will (eventually) list available models. The format is `vendor/family`. For example, if you have Copilot, you might see options like:
* `copilot - claude-3.5-sonnet`
* `copilot - o3-mini`
* `copilot - o1-ga`
* `copilot - gemini-2.0-flash`
Limitations
-----------
* **Experimental API:** The VS Code Language Model API is still under development. Expect changes and potential instability.
* **Extension Dependent:** This feature relies entirely on other extensions providing models. Kilo Code cannot directly control which models are available.
* **Limited Functionality:** The VS Code Language Model API may not support all the features of other API providers (e.g., image input, streaming, detailed usage information).
* **No Direct Cost Control:** You are subject to the pricing and terms of the extension providing the model. Kilo Code cannot directly track or limit costs.
* **GitHub Copilot Rate Limits:** When using the VS Code LM API with GitHub Copilot, be aware that GitHub may impose rate limits on Copilot usage. These limits are controlled by GitHub, not Kilo Code.
Troubleshooting
---------------
* **No Models Appear:**
* Ensure you have VS Code installed.
* Ensure you have a language model provider extension installed and enabled (e.g., GitHub Copilot, GitHub Copilot Chat).
* If using Copilot, make sure that you have sent a Copilot Chat message using the model you would like to use.
* **Unexpected Behavior:** If you encounter unexpected behavior, it's likely an issue with the underlying Language Model API or the provider extension. Consider reporting the issue to the provider extension's developers.
Copy page
---
# Kilo Code Documentation
Using OpenAI Compatible Providers With Kilo Code
================================================
Kilo Code supports a wide range of AI model providers that offer APIs compatible with the OpenAI API standard. This means you can use models from providers _other than_ OpenAI, while still using a familiar API interface. This includes providers like:
* **Local models** running through tools like Ollama and LM Studio (covered in separate sections).
* **Cloud providers** like Perplexity, Together AI, Anyscale, and others.
* **Any other provider** offering an OpenAI-compatible API endpoint.
This document focuses on setting up providers _other than_ the official OpenAI API (which has its own [dedicated configuration page](https://kilo.ai/docs/ai-providers/openai)
).
General Configuration
---------------------
The key to using an OpenAI-compatible provider is to configure two main settings:
1. **Base URL:** This is the API endpoint for the provider. It will _not_ be `https://api.openai.com/v1` (that's for the official OpenAI API).
2. **API Key:** This is the secret key you obtain from the provider.
3. **Model ID:** This is the model name of the specific model.
You'll find these settings in the Kilo Code settings panel (click the icon):
* **API Provider:** Select "OpenAI Compatible".
* **Base URL:** Enter the base URL provided by your chosen provider. **This is crucial.**
* **API Key:** Enter your API key.
* **Model:** Choose a model.
* **Model Configuration:** This lets you customize advanced configuration for the model
* Max Output Tokens
* Context Window
* Image Support
* Computer Use
* Input Price
* Output Price
### Full Endpoint URL Support
Kilo Code supports full endpoint URLs in the Base URL field, providing greater flexibility for provider configuration:
**Standard Base URL Format:**
https://api.provider.com/v1
**Full Endpoint URL Format:**
https://api.provider.com/v1/chat/completions
https://custom-endpoint.provider.com/api/v2/models/chat
This enhancement allows you to:
* Connect to providers with non-standard endpoint structures
* Use custom API gateways or proxy services
* Work with providers that require specific endpoint paths
* Integrate with enterprise or self-hosted API deployments
**Note:** When using full endpoint URLs, ensure the URL points to the correct chat completions endpoint for your provider.
Troubleshooting
---------------
* **"Invalid API Key":** Double-check that you've entered the API key correctly.
* **"Model Not Found":** Make sure you're using a valid model ID for your chosen provider.
* **Connection Errors:** Verify the Base URL is correct and that your provider's API is accessible.
* **Unexpected Results:** If you're getting unexpected results, try a different model.
By using an OpenAI-compatible provider, you can leverage the flexibility of Kilo Code with a wider range of AI models. Remember to always consult your provider's documentation for the most accurate and up-to-date information.
Copy page
---
# Kilo Code Documentation
Using Chutes AI With Kilo Code
==============================
Chutes.ai offers free API access to several large language models (LLMs), allowing developers to integrate and experiment with these models without immediate financial commitment. They provide access to a curated set of open-source and proprietary language models, often with a focus on specific capabilities or regional language support.
**Website:** [https://chutes.ai/](https://chutes.ai/)
Getting an API Key
------------------
To use Chutes AI with Kilo Code, obtain an API key from the [Chutes AI platform](https://chutes.ai/)
. After signing up or logging in, you should find an option to generate or retrieve your API key within your account dashboard or settings.
Supported Models
----------------
Kilo Code will attempt to fetch the list of available models from the Chutes AI API. The specific models available will depend on Chutes AI's current offerings.
Always refer to the official Chutes AI documentation or your dashboard for the most up-to-date list of supported models.
Configuration in Kilo Code
--------------------------
1. **Open Kilo Code Settings:** Click the gear icon () in the Kilo Code panel.
2. **Select Provider:** Choose "Chutes AI" from the "API Provider" dropdown.
3. **Enter API Key:** Paste your Chutes AI API key into the "Chutes AI API Key" field.
4. **Select Model:** Choose your desired model from the "Model" dropdown.
Tips and Notes
--------------
* **Free Access:** Chutes AI provides free API access, making it an excellent option for experimentation and development without immediate costs.
* **Model Variety:** The platform offers access to both open-source and proprietary models, giving you flexibility in choosing the right model for your needs.
* **Rate Limits:** As with any free service, be aware of potential rate limits or usage restrictions that may apply to your API key.
Copy page
---
# Kilo Code Documentation
Setting Up Mistral for Free Autocomplete
========================================
This guide walks you through setting up Mistral's Codestral model for free autocomplete in Kilo Code. Mistral offers a free tier that's perfect for getting started with AI-powered code completions.
Video Walkthrough
-----------------
Setting up Mistral for free autocomplete in Kilo Code
Step 1: Open Kilo Code Settings
-------------------------------
In VS Code, open the Kilo Code panel and click the **Settings** icon (gear) in the top-right corner.
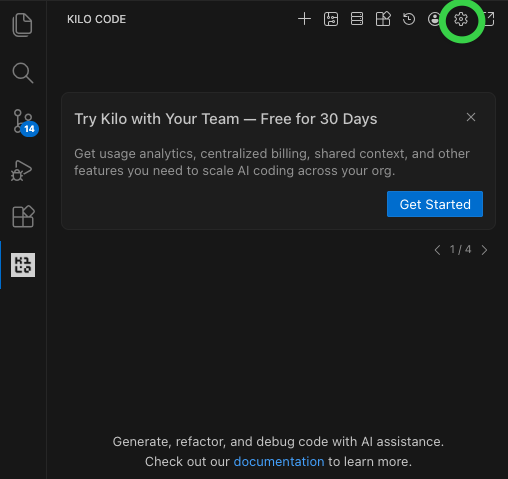
Step 2: Add a New Configuration Profile
---------------------------------------
Navigate to **Settings → Providers** and click **Add Profile** to create a new configuration profile for Mistral.
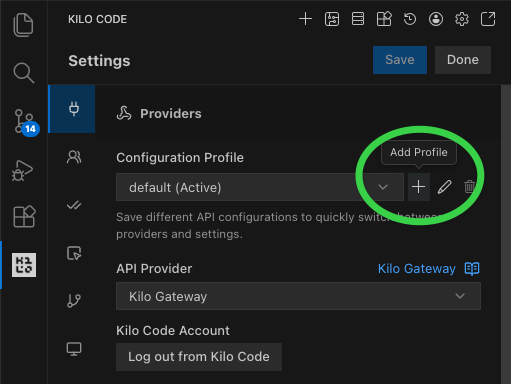
Step 3: Name Your Profile
-------------------------
In the "New Configuration Profile" dialog, enter a name like "Mistral profile" (the name can be anything you prefer) and click **Create Profile**.
📝Note
The profile name is just a label for your reference—it doesn't affect functionality. Choose any name that helps you identify this configuration.
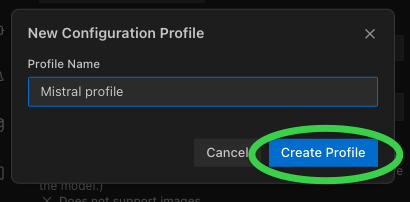
Step 4: Select Mistral as Provider
----------------------------------
In the **API Provider** dropdown, search for and select **Mistral**.
📝Note
When creating an autocomplete profile, you don't need to select a specific model—Kilo Code will automatically use the appropriate Codestral model optimized for code completions.
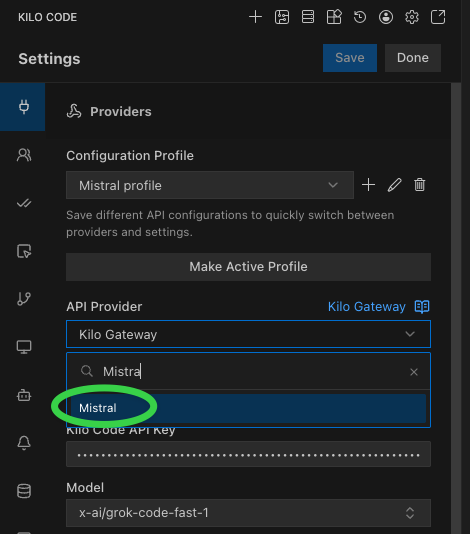
Step 5: Get Your API Key
------------------------
You'll see a warning that you need a valid API key. Click **Get Mistral / Codestral API Key** to open the Mistral console.
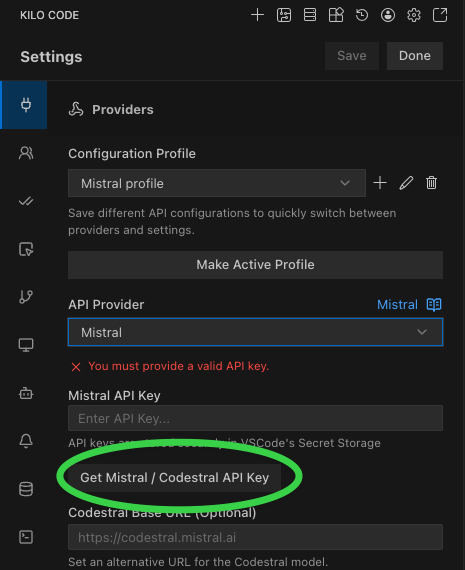
Step 6: Navigate to Codestral in Mistral AI Studio
--------------------------------------------------
In the Mistral AI Studio sidebar, click **Codestral** under the Code section.
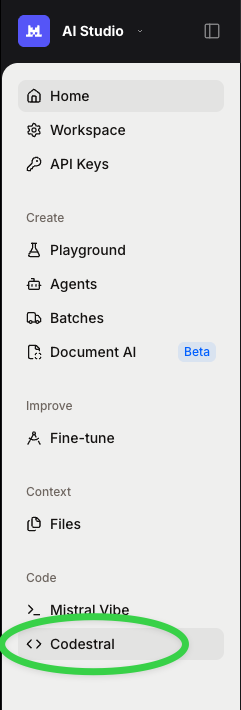
Step 7: Generate API Key
------------------------
Click the **Generate API Key** button to create your new Codestral API key.
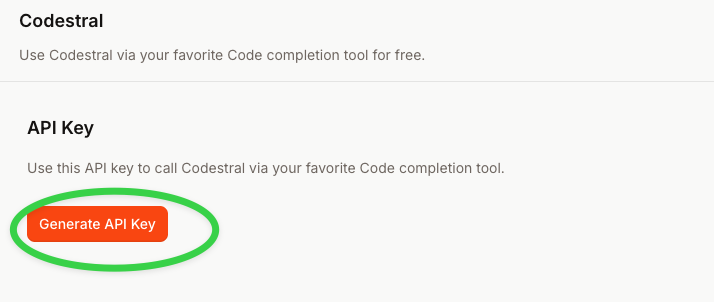
Step 8: Copy Your API Key
-------------------------
Once generated, click the **copy** button next to your API key to copy it to your clipboard.
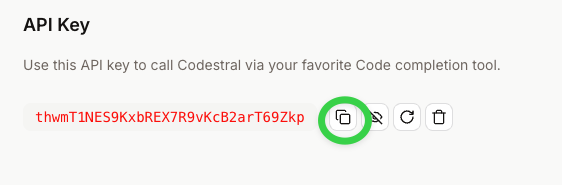
Step 9: Paste API Key in Kilo Code
----------------------------------
Return to Kilo Code settings and paste your API key into the **Mistral API Key** field.
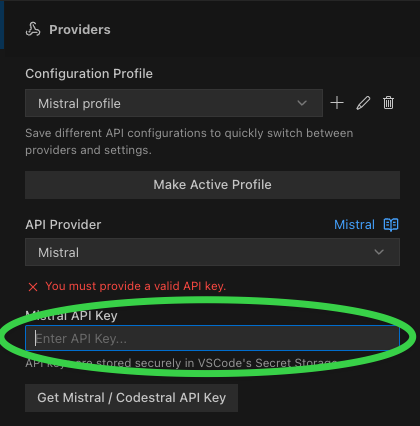
Step 10: Save Your Settings
---------------------------
Click **Save** to apply your Mistral configuration. You're now ready to use free autocomplete!
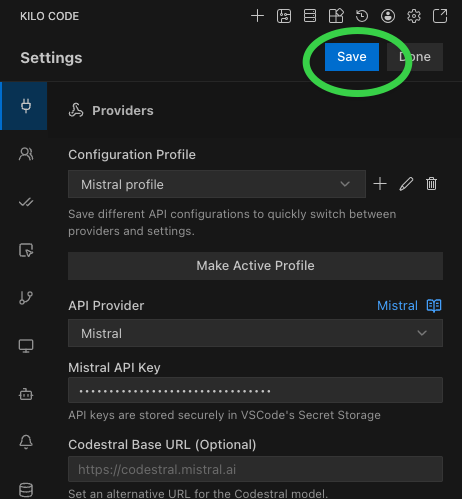
Next Steps
----------
* Learn more about [Autocomplete features](https://kilo.ai/docs/code-with-ai/features/autocomplete)
* Explore [triggering options](https://kilo.ai/docs/code-with-ai/features/autocomplete#triggering-options)
for autocomplete
* Check out [best practices](https://kilo.ai/docs/code-with-ai/features/autocomplete#best-practices)
for optimal results
Copy page
---
# Kilo Code Documentation
read\_file
==========
The `read_file` tool examines the contents of files in a project. It allows Kilo Code to understand code, configuration files, and documentation to provide better assistance.
Parameters
----------
The tool accepts these parameters:
* `path` (required): The path of the file to read relative to the current working directory
* `start_line` (optional): The starting line number to read from (1-based indexing)
* `end_line` (optional): The ending line number to read to (1-based, inclusive)
* `auto_truncate` (optional): Whether to automatically truncate large files when line range isn't specified (true/false)
What It Does
------------
This tool reads the content of a specified file and returns it with line numbers for easy reference. It can read entire files or specific sections, and even extract text from PDFs and Word documents.
When is it used?
----------------
* When Kilo Code needs to understand existing code structure
* When Kilo Code needs to analyze configuration files
* When Kilo Code needs to extract information from text files
* When Kilo Code needs to see code before suggesting changes
* When specific line numbers need to be referenced in discussions
Key Features
------------
* Displays file content with line numbers for easy reference
* Can read specific portions of files by specifying line ranges
* Extracts readable text from PDF and DOCX files
* Intelligently truncates large files to focus on the most relevant sections
* Provides method summaries with line ranges for large code files
* Efficiently streams only requested line ranges for better performance
* Makes it easy to discuss specific parts of code with line numbering
Limitations
-----------
* May not handle extremely large files efficiently without using line range parameters
* For binary files (except PDF and DOCX), may return content that isn't human-readable
How It Works
------------
When the `read_file` tool is invoked, it follows this process:
1. **Parameter Validation**: Validates the required `path` parameter and optional parameters
2. **Path Resolution**: Resolves the relative path to an absolute path
3. **Reading Strategy Selection**:
* The tool uses a strict priority hierarchy (explained in detail below)
* It chooses between range reading, auto-truncation, or full file reading
4. **Content Processing**:
* Adds line numbers to the content (e.g., "1 | const x = 13") where `1 |` is the line number.
* For truncated files, adds truncation notice and method definitions
* For special formats (PDF, DOCX, IPYNB), extracts readable text
Reading Strategy Priority
-------------------------
The tool uses a clear decision hierarchy to determine how to read a file:
1. **First Priority: Explicit Line Range**
* If either `start_line` or `end_line` is provided, the tool always performs a range read
* The implementation efficiently streams only the requested lines, making it suitable for processing large files
* This takes precedence over all other options
2. **Second Priority: Auto-Truncation for Large Files**
* This only applies when ALL of these conditions are met:
* Neither `start_line` nor `end_line` is specified
* The `auto_truncate` parameter is set to `true`
* The file is not a binary file
* The file exceeds the configured line threshold (typically 500-1000 lines)
* When auto-truncation activates, the tool:
* Reads only the first portion of the file (determined by the maxReadFileLine setting)
* Adds a truncation notice showing the number of lines displayed vs. total
* Provides a summary of method definitions with their line ranges
3. **Default Behavior: Read Entire File**
* If neither of the above conditions are met, it reads the entire file content
* For special formats like PDF, DOCX, and IPYNB, it uses specialized extractors
Examples When Used
------------------
* When asked to explain or improve code, Kilo Code first reads the relevant files to understand the current implementation.
* When troubleshooting configuration issues, Kilo Code reads config files to identify potential problems.
* When working with documentation, Kilo Code reads existing docs to understand the current content before suggesting improvements.
Usage Examples
--------------
Here are several scenarios demonstrating how the `read_file` tool is used and the typical output you might receive.
### Reading an Entire File
To read the complete content of a file:
**Input:**
src/app.js
**Simulated Output (for a small file like `example_small.txt`):**
1 | This is the first line.
2 | This is the second line.
3 | This is the third line.
_(Output will vary based on the actual file content)_
### Reading Specific Lines
To read only a specific range of lines (e.g., 46-68):
**Input:**
src/app.js4668
**Simulated Output (for lines 2-3 of `example_five_lines.txt`):**
2 | Content of line two.
3 | Content of line three.
_(Output shows only the requested lines with their original line numbers)_
### Reading a Large File (Auto-Truncation)
When reading a large file without specifying lines and `auto_truncate` is enabled (or defaults to true based on settings):
**Input:**
src/large-module.jstrue
**Simulated Output (for `large_file.log` with 1500 lines, limit 1000):**
1 | Log entry 1...
2 | Log entry 2...
...
1000 | Log entry 1000...
\[... truncated 500 lines ...\]
_(Output is limited to the configured maximum lines, with a truncation notice)_
### Attempting to Read a Non-Existent File
If the specified file does not exist:
**Input:**
non\_existent\_file.txt
**Simulated Output (Error):**
Error: File not found at path 'non\_existent\_file.txt'.
### Attempting to Read a Blocked File
If the file is excluded by rules in a `.kilocodeignore` file:
**Input:**
.env
**Simulated Output (Error):**
Error: Access denied to file '.env' due to .kilocodeignore rules.
Copy page
---
# Kilo Code Documentation
Using Inception With Kilo Code
==============================
Inception provides access to cutting-edge AI models with a focus on performance and reliability. Their infrastructure is designed for enterprise-grade applications requiring consistent, high-quality outputs.
**Website:** [https://www.inceptionlabs.ai](https://www.inceptionlabs.ai/)
Getting an API Key
------------------
1. **Sign Up/Sign In:** Go to the [Inception website](https://www.inceptionlabs.ai/)
and access their developer/API dashboard.
2. **Navigate to API Keys:** Access the API Keys section in your account settings.
3. **Create a Key:** Click "Create new API key". Give your key a descriptive name (e.g., "Kilo Code").
4. **Copy the Key:** **Important:** Copy the API key _immediately_. You will not be able to see it again. Store it securely.
Supported Models
----------------
Kilo Code supports Inception's available models. Model selection and capabilities may vary based on your account tier.
Refer to Inception's current website and developer documentation for the most up-to-date list of supported models and capabilities.
Configuration in Kilo Code
--------------------------
1. **Open Kilo Code Settings:** Click the gear icon () in the Kilo Code panel.
2. **Select Provider:** Choose "Inception" from the "API Provider" dropdown.
3. **Enter API Key:** Paste your Inception API key into the "Inception API Key" field.
4. **Select Model:** Choose your desired model from the "Model" dropdown.
Tips and Notes
--------------
* **Enterprise Focus:** Inception is designed for production-grade AI applications with emphasis on reliability and consistency.
* **Pricing:** Refer to the Inception platform for current pricing details and available subscription options.
* **Support:** Enterprise customers have access to dedicated support channels for technical assistance.
* **Docs Feedback:** Report documentation issues at [Kilo-Org/kilocode issues](https://github.com/Kilo-Org/kilocode/issues/new?title=Documentation%20Issue:%20/docs/ai-providers/inception)
.
Copy page
---
# Kilo Code Documentation
Using MiniMax With Kilo Code
============================
MiniMax is a global AI foundation model company focused on fast, cost-efficient multimodal models with strong coding, tool-use, and agentic capabilities. Their flagship MiniMax M2.1 model delivers high-speed inference, long-context reasoning, and advanced development workflow support.
**Website:** [https://www.minimax.io/](https://www.minimax.io/)
Getting an API Key
------------------
1. **Sign Up/Sign In:** Go to the [MiniMax Console](https://platform.minimax.io/)
. Create an account or sign in.
2. **Open the API Keys Page:** Navigate to your **Profile > API Keys**.
3. **Create a Key:** Click to generate a new API key and give it a descriptive name (e.g., "Kilo Code").
4. **Copy the Key:** Copy the key immediately. You may not be able to view it again. Store it securely.
Configuration in Kilo Code
--------------------------
1. **Open Kilo Code Settings:** Click the gear icon () in the Kilo Code panel.
2. **Select Provider:** Navigate to **Providers**. Choose **MiniMax** from the API Provider dropdown.
3. **Enter API Key:** Paste your MiniMax API key into the MiniMax API Key field.
4. **Select Model:** Choose your desired MiniMax model from the Model dropdown.
Tips and Notes
--------------
* **Performance:** MiniMax M2.1 emphasizes fast inference, strong coding ability, and exceptional tool-calling performance.
* **Context Window:** MiniMax models support ultra-long context windows suitable for large codebases and agent workflows.
* **Pricing:** Pricing varies by model, with input costs ranging from $0.20 to $0.30 per million tokens and output costs from $1.10 to $2.20 per million tokens. Refer to the MiniMax documentation for the most current pricing information.
Copy page
---
# Kilo Code Documentation
Using Moonshot.ai With Kilo Code
================================
Moonshot.ai is a Chinese AI company known for their **Kimi** models featuring ultra-long context windows (up to 200K tokens) and advanced reasoning capabilities. Their K2-Thinking model delivers extended thinking and problem-solving abilities.
**Website:** [https://www.moonshot.cn/](https://www.moonshot.cn/)
Getting an API Key
------------------
1. **Sign Up/Sign In:** Go to the [Moonshot.ai Platform](https://platform.moonshot.cn/)
. Create an account or sign in.
2. **Navigate to API Keys:** Access the API Keys section in your account dashboard.
3. **Create a Key:** Click to generate a new API key. Give it a descriptive name (e.g., "Kilo Code").
4. **Copy the Key:** **Important:** Copy the API key _immediately_. Store it securely.
Configuration in Kilo Code
--------------------------
1. **Open Kilo Code Settings:** Click the gear icon () in the Kilo Code panel.
2. **Select Provider:** Choose "Moonshot.ai" from the "API Provider" dropdown.
3. **Enter API Key:** Paste your Moonshot.ai API key into the "Moonshot.ai API Key" field.
4. **Select Model:** Choose your desired model from the "Model" dropdown.
Tips and Notes
--------------
* **Ultra-Long Context:** Kimi models excel at handling large codebases and complex projects with their extended context windows.
* **Reasoning Capabilities:** The K2-Thinking variant provides enhanced problem-solving through extended reasoning chains.
* **Language Support:** Kimi models have strong support for both English and Chinese languages.
* **Pricing:** Refer to the Moonshot.ai platform for current pricing information on different models.
Copy page
---
# Kilo Code Documentation
Using OVHcloud AI Endpoints with Kilo Code
==========================================
OVHcloud is a French leading Cloud provider in Europe with data sovereignty and privacy.
Access world-renowned pre-trained AI models with ease. Innovate using straightforward, secure APIs on OVHcloud's robust and privacy-first infrastructure. Enhance your applications with scalable AI capabilities, eliminating the need for extensive expertise. Achieve more with powerful AI endpoints designed for simplicity et reliability.
**Website:** [https://endpoints.ai.cloud.ovh.net](https://endpoints.ai.cloud.ovh.net/)
ℹ️Info
You can report any bugs or feedbacks by chatting with us in our [Discord server](https://discord.gg/ovhcloud)
, in the AI Endpoints channel.
Getting an API Key
------------------
1. **Sign Up/Sign In:** Go to the [OVHcloud manager](https://www.ovh.com/manager)
. Create an account or sign in.
2. **Navigate to Public Cloud:** Go to the Public Cloud section, and create a new project. Navigate to AI Endpoints in the _AI & Machine Learning_ section.
3. **Create a Key:** Click to _API keys_ and create a new key.
Configuration in Kilo Code
--------------------------
1. **Open Kilo Code Settings:** Click the gear icon () in the Kilo Code panel.
2. **Select Provider:** Choose "OVHcloud AI Endpoints" from the "API Provider" dropdown.
3. **Enter API Key:** Paste your AI Endpoints API key into the "OVHcloud AI Endpoints API Key" field.
4. **Select Model:** Choose your desired model from the "Model" dropdown.
Copy page
---
# Kilo Code Documentation
Using SAP AI Core With Kilo Code
================================
Kilo Code supports accessing models through SAP AI Core, a service in the SAP Business Technology Platform that lets you efficiently run AI scenarios in a standardized, scalable, and hyperscaler-agnostic manner.
**Website:** [https://help.sap.com/docs/sap-ai-core](https://help.sap.com/docs/sap-ai-core)
Prerequisites
-------------
* **SAP BTP Account:** You need an active SAP Business Technology Platform account.
* **SAP AI Core Service:** You must have access to the SAP AI Core service in your BTP subaccount.
* **Service Instance:** Create a service instance of SAP AI Core with appropriate service plan.
* **Service Key:** Generate a service key for your SAP AI Core service instance to obtain the required credentials.
Getting Credentials
-------------------
To use SAP AI Core with Kilo Code, you'll need to create a service key for your SAP AI Core service instance:
1. **In SAP BTP Cockpit:**
* Navigate to your subaccount
* Go to "Services" → "Instances and Subscriptions"
* Find your SAP AI Core service instance
* Create a new service key
2. **Service Key Information:** The service key will contain the following information you'll need:
* **Client ID:** OAuth2 client identifier
* **Client Secret:** OAuth2 client secret
* **Auth URL:** OAuth2 authentication endpoint
* **Base URL:** SAP AI Core API base URL
* **Resource Group:** (Optional) Specify a resource group, defaults to "default"
Operating Modes
---------------
SAP AI Core provider supports two operating modes:
### Foundation Models Mode (Default)
* Uses foundation models that require active deployments
* Currently, supports **OpenAI models only** due to SAP AI Core SDK limitations
* Requires you to have running deployments for the models you want to use
* Models must have deployments in "RUNNING" status to be selectable
### Orchestration Mode
* Uses SAP AI Core's orchestration capabilities
* Supports models from multiple providers: **Amazon, Anthropic, Google, OpenAI, and Mistral AI**
* Does not require separate deployments
* Provides access to a broader range of models
Model Requirements
------------------
Kilo Code applies the following filters when fetching models:
* **Streaming:** Models must support streaming
* **Capabilities:** Models must support text generation
* **Context Window:** Models must have a context window of at least 32,000 tokens
Supported Providers
-------------------
### Foundation Models Mode
* **OpenAI:** All OpenAI models with active deployments
### Orchestration Mode
* **Amazon:** Amazon foundation models
* **Anthropic:** Claude models
* **Google:** Gemini models
* **OpenAI:** ChatGPT and GPT models
* **Mistral AI:** Mistral AI models
The exact list of available models depends on your SAP AI Core configuration and active model offerings.
Configuration in Kilo Code
--------------------------
1. **Open Kilo Code Settings:** Click the gear icon () in the Kilo Code panel.
2. **Select Provider:** Choose "SAP AI Core" from the "API Provider" dropdown.
3. **Enter Credentials:**
* **Client ID:** Enter your SAP AI Core OAuth2 client ID
* **Client Secret:** Enter your SAP AI Core OAuth2 client secret
* **Base URL:** Enter your SAP AI Core API base URL (e.g., `https://api.ai.ml.hana.ondemand.com`)
* **Auth URL:** Enter your SAP AI Core OAuth2 auth URL (e.g., `https://your-subdomain.authentication.sap.hana.ondemand.com`)
* **Resource Group:** (Optional) Enter your resource group name, defaults to "default"
4. **Choose Operating Mode:**
* **Orchestration Mode:** Check the "Use Orchestration" checkbox for broader model access
* **Foundation Models Mode:** Leave unchecked to use foundation models with deployments
5. **Select Model:** Choose your desired model from the dropdown
6. **Select Deployment:** (Foundation Models Mode only) Choose an active deployment for your selected model
Deployments (Foundation Models Mode)
------------------------------------
When using Foundation Models mode:
* You must have active deployments for the models you want to use
* Only deployments with "RUNNING" status are available for selection
* Deployments in other states (PENDING, STOPPED, etc.) are shown but disabled
* The interface displays the number of available deployments for each model
Tips and Notes
--------------
* **Authentication:** SAP AI Core uses OAuth2 client credentials flow for authentication
* **Caching:** Model and deployment information is cached for 15 and 5 minutes respectively to improve performance
* **Resource Groups:** If you use multiple resource groups, specify the appropriate one in the configuration
* **Permissions:** Ensure your service key has the necessary permissions to access models and deployments
* **Orchestration Benefits:** Use Orchestration mode for access to a wider variety of models without managing deployments
* **Foundation Models Benefits:** Use Foundation Models mode when you need more control over specific model deployments
Troubleshooting
---------------
### Common Issues
1. **Authentication Failures:**
* Verify your Client ID and Client Secret are correct
* Check that your Auth URL is properly formatted
* Ensure your service key hasn't expired
2. **No Models Available:**
* Check that you have the necessary permissions in your resource group
* Verify your Base URL is correct
* In Foundation Models mode, ensure you have running deployments
3. **Deployment Issues:**
* Check that your deployments are in "RUNNING" status
* Verify you're using the correct resource group
* Review your SAP AI Core service configuration
4. **Model Access:**
* In Foundation Models mode, **only OpenAI models** are currently supported
* Switch to Orchestration mode for access to other providers
* Ensure models meet the minimum requirements (32k context window, streaming support)
Getting Started
---------------
To get started with SAP AI Core:
1. Set up your SAP BTP account and access SAP AI Core service
2. Create a service instance and generate a service key
3. Configure Kilo Code with your credentials
4. Choose between Foundation Models or Orchestration mode based on your needs
5. Select an appropriate model and start coding
For detailed setup instructions and service configuration, visit the [SAP AI Core documentation](https://help.sap.com/docs/sap-ai-core)
.
Copy page
---
# Kilo Code Documentation
Human Relay Provider
====================
The Human Relay provider allows you to use Kilo Code with web-based AI models like ChatGPT or Claude without needing an API key. Instead, it relies on you to manually relay messages between Kilo Code and the AI's web interface.
How it Works
------------
1. **Select Human Relay**: Choose "Human Relay" as your API provider in Kilo Code's settings. No API key is required.
2. **Initiate a Request**: Start a chat or task with Kilo Code as usual.
3. **Dialog Prompt**: A dialog box will appear in VS Code. Your message to the AI is automatically copied to your clipboard.
4. **Paste to Web AI**: Go to the web interface of your chosen AI (e.g., chat.openai.com, claude.ai) and paste the message from your clipboard into the chat input.
5. **Copy AI Response**: Once the AI responds, copy its complete response text.
6. **Paste Back to Kilo Code**: Return to the dialog box in VS Code, paste the AI's response into the designated field, and click "Confirm".
7. **Continue**: Kilo Code will process the response as if it came directly from an API.
Use Cases
---------
This provider is useful if:
* You want to use models that don't offer direct API access.
* You prefer not to manage API keys.
* You need to leverage the specific capabilities or context available only in the web UI of certain AI models.
Limitations
-----------
* **Manual Effort**: Requires constant copy-pasting between VS Code and your browser.
* **Slower Interaction**: The back-and-forth process is significantly slower than direct API integration.
* **Potential for Errors**: Manual copying and pasting can introduce errors or omissions.
Choose this provider when the benefits of using a specific web AI outweigh the inconvenience of the manual relay process.
Copy page
---
# Kilo Code Documentation
Using Synthetic With Kilo Code
==============================
Synthetic provides access to several open-source AI models running on secure infrastructure within the US and EU. They offer both subscription-based and usage-based pricing options, with strong privacy guarantees - they never train on your data and auto-delete API data within 14 days.
**Website:** [https://synthetic.new](https://synthetic.new/)
Getting an API Key
------------------
1. **Sign Up/Sign In:** Go to [Synthetic](https://synthetic.new/)
and create an account or sign in.
2. **Navigate to API Keys:** After logging in, go to the [API Keys page](https://synthetic.new/user-settings/api)
in your account settings.
3. **Copy your Key:** Click the Copy icon next to your key to copy it to your clipboard.
Supported Models
----------------
Kilo Code supports all "always on" Synthetic AI models. The available models include various open-source options optimized for different use cases.
**Note:** Model availability may change. Refer to the [Synthetic documentation](https://synthetic.new/)
for the most up-to-date list of supported models and their capabilities.
Configuration in Kilo Code
--------------------------
1. **Open Kilo Code Settings:** Click the gear icon () in the Kilo Code panel.
2. **Select Provider:** Choose "Synthetic" from the "API Provider" dropdown.
3. **Enter API Key:** Paste your Synthetic API key into the "Synthetic API Key" field.
4. **Select Model:** Choose your desired model from the "Model" dropdown.
Tips and Notes
--------------
* **Pricing Options:** Synthetic offers both subscriptions and pay-as-you-go usage-based [pricing](https://synthetic.new/pricing)
.
* **Privacy:** Strong privacy policy with no training on user data and automatic deletion of API data within 14 days.
* **OpenAI Compatibility:** Synthetic models work with any OpenAI-compatible tools and applications.
Copy page
---
# Kilo Code Documentation
Using v0 With Kilo Code
=======================
Kilo Code supports v0, Vercel's AI model provider that offers an OpenAI-compatible API. This allows you to use v0's models with Kilo Code through the familiar OpenAI API interface.
Prerequisites
-------------
To use v0 with Kilo Code, you'll need:
* A team account with Vercel v0
* A v0 API key
Configuration
-------------
Setting up v0 in Kilo Code is straightforward:
1. In Kilo Code settings (click the icon):
* Under **API Provider**, select: **OpenAI Compatible**
* Set the **Base URL**: `https://api.v0.dev/v1`
* Paste in your v0 API key
* Set the **Model ID**: `v0-1.0-md`
* Click **Verify** to confirm the connection
Troubleshooting
---------------
* **"Invalid API Key":** Double-check that you've entered the API key correctly.
* **"Model Not Found":** Make sure you're using the correct model ID (`v0-1.0-md`).
* **Connection Errors:** Verify the Base URL is correct (`https://api.v0.dev/v1`).
* **Access Issues:** Confirm that your Vercel v0 team account is active and properly set up.
Additional Resources
--------------------
* [v0 Official Documentation](https://v0.dev/)
* [Vercel AI Documentation](https://vercel.com/docs/ai)
Copy page
---
# Kilo Code Documentation
Using Mistral AI With Kilo Code
===============================
Kilo Code supports accessing models through the Mistral AI API, including both standard Mistral models and the code-specialized Codestral model.
**Website:** [https://mistral.ai/](https://mistral.ai/)
Getting an API Key
------------------
1. **Sign Up/Sign In:** Go to the [Mistral Platform](https://console.mistral.ai/)
. Create an account or sign in. You may need to go through a verification process.
2. **Create an API Key:**
* [La Plateforme API Key](https://console.mistral.ai/api-keys/)
and/or
* [Codestral API Key](https://console.mistral.ai/codestral)
Configuration in Kilo Code
--------------------------
1. **Open Kilo Code Settings:** Click the gear icon () in the Kilo Code panel.
2. **Select Provider:** Choose "Mistral" from the "API Provider" dropdown.
3. **Enter API Key:** Paste your Mistral API key into the "Mistral API Key" field if you're using a `mistral` model. If you intend to use `codestral-latest`, see the "Codestral" section below.
4. **Select Model:** Choose your desired model from the "Model" dropdown.
Using Codestral
---------------
[Codestral](https://docs.mistral.ai/capabilities/code_generation/)
is a model specifically designed for code generation and interaction. Only for Codestral you could use different endpoints (Default: codestral.mistral.ai). For the La Platforme API Key change the **Codestral Base Url** to: https://api.mistral.ai
To use Codestral:
1. **Select "Mistral" as the API Provider.**
2. **Select a Codestral Model**
3. **Enter your Codestral (codestral.mistral.ai) or La Plateforme (api.mistral.ai) API Key.**
Copy page
---
# Kilo Code Documentation
Using the Virtual Quota Fallback Provider
=========================================
The Virtual Quota Fallback provider is a powerful meta-provider that allows you to configure and manage multiple API providers, automatically switching between them based on predefined usage limits and availability. This ensures you can maximize your usage of free-tier services and maintain continuous access to AI models by seamlessly falling back to other providers when one reaches its quota or encounters an error.
It's the perfect solution for users who leverage multiple LLM services and want to orchestrate them intelligently—for example, using a free provider up to its limit before automatically switching to a pay-as-you-go service.
How It Works
------------
The Virtual Quota Fallback provider does not connect to an LLM service directly. Instead, it acts as a manager for your other configured provider profiles.
* **Prioritized List:** You create a prioritized list of your existing provider profiles. The provider at the top of the list is used first.
* **Usage Tracking:** You can set custom limits for each provider based on the number of tokens or requests per minute, hour, or day. Kilo Code tracks the usage for each provider against these limits.
* **Automatic Fallback:** When the currently active provider exceeds one of its defined limits or returns an API error, the system automatically deactivates it temporarily and switches to the next available provider in your list.
* **Notifications:** You will receive an information message in VS Code whenever an automatic switch occurs, keeping you informed of which provider is currently active.
Prerequisites
-------------
Before configuring this provider, you must have at least one other API provider already configured as a separate profile in Kilo Code. This provider is only useful if there are other profiles for it to manage.
Configuration in Kilo Code
--------------------------
1. **Open Kilo Code Settings:** Click the gear icon () in the Kilo Code panel.
2. **Select Provider:** Choose "Virtual Quota Fallback" from the "API Provider" dropdown. This will open its dedicated configuration panel.
3. **Add a Provider Profile:**
* In the configuration panel, click the **"Add Profile"** button to create a new entry in the list.
* Click the dropdown menu on the new entry to select one of your other pre-configured provider profiles (e.g., "OpenAI", "Chutes AI Free Tier").
4. **Set Usage Limits (Optional):**
* Once a profile is added, you can specify usage limits. If you leave these fields blank, no limit will be enforced for that specific metric.
* **Tokens per minute/hour/day:** Limits usage based on the total number of tokens processed (input + output).
* **Requests per minute/hour/day:** Limits the total number of API calls made.
5. **Order Your Providers:**
* The order of the profiles is crucial, as it defines the fallback priority. The provider at the top is used first.
* Use the **up and down arrows** next to each profile to change its position in the list.
6. **Add More Providers:** Repeat steps 3-5 to build your complete fallback chain. You can add as many profiles as you have configured.
Usage Monitoring
----------------
The configuration screen also serves as a dashboard for monitoring the current usage of each provider in your list.
* You can see the tokens and requests used within the last minute, hour, and day.
* If you need to reset these counters, click the **"Clear Usage Data"** button. This will reset all statistics to zero and immediately re-enable any providers that were temporarily disabled due to exceeding their limits.
Example Use Case
----------------
Imagine you have two profiles configured:
1. **Chutes AI Free:** A free-tier provider with a limit of 5,000 tokens per hour.
2. **OpenAI Paid:** Your personal pay-as-you-go OpenAI account.
**Configuration:**
* Place "Chutes AI Free" first in the list.
* Set its "Tokens per hour" limit to `5000`.
* Place "OpenAI Paid" second in the list, with no limits defined.
**Result:** Kilo Code will send all requests to Chutes AI. Once your usage exceeds 5,000 tokens within an hour, it will automatically switch to your OpenAI account. The system will switch back to Chutes AI in the next hour when its quota window has reset.
Tips and Notes
--------------
* **Priority is Key:** Always double-check the order of your profiles. The intended primary or free-tier providers should be at the top.
* **Error-Based Fallback:** If you don't set any limits for a profile, fallback will only occur if the provider's API returns an error (e.g., a hard rate limit from the service itself, a network issue, or an invalid API key).
* **No Nesting:** You cannot select another "Virtual Quota Fallback" profile within this provider's configuration, as this would create a circular dependency.
Copy page
---
# Kilo Code Documentation
Using OpenRouter With Kilo Code
===============================
OpenRouter is an AI platform that provides access to a wide variety of language models from different providers, all through a single API. This can simplify setup and allow you to easily experiment with different models.
**Website:** [https://openrouter.ai/](https://openrouter.ai/)
Getting an API Key
------------------
1. **Sign Up/Sign In:** Go to the [OpenRouter website](https://openrouter.ai/)
. Sign in with your Google or GitHub account.
2. **Get an API Key:** Go to the [keys page](https://openrouter.ai/keys)
. You should see an API key listed. If not, create a new key.
3. **Copy the Key:** Copy the API key.
Configuration in Kilo Code
--------------------------
1. **Open Kilo Code Settings:** Click the gear icon () in the Kilo Code panel.
2. **Select Provider:** Choose "OpenRouter" from the "API Provider" dropdown.
3. **Enter API Key:** Paste your OpenRouter API key into the "OpenRouter API Key" field.
4. **Select Model:** Choose your desired model from the "Model" dropdown.
5. **(Optional) Custom Base URL:** If you need to use a custom base URL for the OpenRouter API, check "Use custom base URL" and enter the URL. Leave this blank for most users.
Supported Transforms
--------------------
OpenRouter provides an [optional "middle-out" message transform](https://openrouter.ai/docs/features/message-transforms)
to help with prompts that exceed the maximum context size of a model. You can enable it by checking the "Compress prompts and message chains to the context size" box.
Provider Routing
----------------
OpenRouter can route to many different inference providers and this can be controlled in the API Provider settings under Provider Routing.
### Provider Sorting
* Default provider sorting: use the setting in your OpenRouter account
* Prefer providers with lower price
* Prefer providers with higher throughput (i.e. more tokens per seconds)
* Prefer providers with lower latency (i.e. shorter time to first token)
* A specific provider preference can also be chosen.
### Data Policy
* No data policy set: use the settings in your OpenRouter account.
* Allow prompt training: providers that may train on your prompts or completions are allowed. Free models generally require this option to be enabled.
* Deny prompt training: providers that may train on your prompts or completions are not allowed.
* Zero data retention: only providers with a strict zero data retention policy are allowed. This option is not recommended, as it will disable many popular providers, such as Anthropic and OpenAI.
Tips and Notes
--------------
* **Model Selection:** OpenRouter offers a wide range of models. Experiment to find the best one for your needs.
* **Pricing:** OpenRouter charges based on the underlying model's pricing. See the [OpenRouter Models page](https://openrouter.ai/models)
for details.
* **Prompt Caching:** Some providers support prompt caching. See the OpenRouter documentation for supported models.
Copy page
---
# Kilo Code Documentation
Using LM Studio With Kilo Code
==============================
Kilo Code supports running models locally using LM Studio. LM Studio provides a user-friendly interface for downloading, configuring, and running local language models. It also includes a built-in local inference server that emulates the OpenAI API, making it easy to integrate with Kilo Code.
**Website:** [https://lmstudio.ai/](https://lmstudio.ai/)
Setting Up LM Studio
--------------------
1. **Download and Install LM Studio:** Download LM Studio from the [LM Studio website](https://lmstudio.ai/)
.
2. **Download a Model:** Use the LM Studio interface to search for and download a model. Some recommended models include:
* CodeLlama models (e.g., `codellama:7b-code`, `codellama:13b-code`, `codellama:34b-code`)
* Mistral models (e.g., `mistralai/Mistral-7B-Instruct-v0.1`)
* DeepSeek Coder models (e.g., `deepseek-coder:6.7b-base`)
* Any other model that is supported by Kilo Code, or for which you can set the context window.
Look for models in the GGUF format. LM Studio provides a search interface to find and download models.
3. **Start the Local Server:**
* Open LM Studio.
* Click the **"Local Server"** tab (the icon looks like `<->`).
* Select the model you downloaded.
* Click **"Start Server"**.
Configuration in Kilo Code
--------------------------
1. **Open Kilo Code Settings:** Click the gear icon () in the Kilo Code panel.
2. **Select Provider:** Choose "LM Studio" from the "API Provider" dropdown.
3. **Enter Model ID:** Enter the _file name_ of the model you loaded in LM Studio (e.g., `codellama-7b.Q4_0.gguf`). You can find this in the LM Studio "Local Server" tab.
4. **(Optional) Base URL:** By default, Kilo Code will connect to LM Studio at `http://localhost:1234`. If you've configured LM Studio to use a different address or port, enter the full URL here.
5. **(Optional) Timeout:** By default, API requests time out after 10 minutes. Local models can be slow, if you hit this timeout you can consider increasing it here: VS Code Extensions panel > Kilo Code gear menu > Settings > API Request Timeout.
Tips and Notes
--------------
* **Resource Requirements:** Running large language models locally can be resource-intensive. Make sure your computer meets the minimum requirements for the model you choose.
* **Model Selection:** LM Studio provides a wide range of models. Experiment to find the one that best suits your needs.
* **Local Server:** The LM Studio local server must be running for Kilo Code to connect to it.
* **LM Studio Documentation:** Refer to the [LM Studio documentation](https://lmstudio.ai/docs)
for more information.
* **Troubleshooting:** If you see a "Please check the LM Studio developer logs to debug what went wrong" error, you may need to adjust the context length settings in LM Studio.
Copy page
---
# Kilo Code Documentation
Using Google Gemini With Kilo Code
==================================
Kilo Code supports Google's Gemini family of models through the Google AI Gemini API.
**Website:** [https://ai.google.dev/](https://ai.google.dev/)
Getting an API Key
------------------
1. **Go to Google AI Studio:** Navigate to [https://ai.google.dev/](https://ai.google.dev/)
.
2. **Sign In:** Sign in with your Google account.
3. **Create API Key:** Click on "Create API key" in the left-hand menu.
4. **Copy API Key:** Copy the generated API key.
Configuration in Kilo Code
--------------------------
1. **Open Kilo Code Settings:** Click the gear icon () in the Kilo Code panel.
2. **Select Provider:** Choose "Google Gemini" from the "API Provider" dropdown.
3. **Enter API Key:** Paste your Gemini API key into the "Gemini API Key" field.
4. **Select Model:** Choose your desired Gemini model from the "Model" dropdown.
Tips and Notes
--------------
* **Pricing:** Gemini API usage is priced based on input and output tokens. Refer to the [Gemini pricing page](https://ai.google.dev/pricing)
for detailed information.
* **Codebase Indexing:** The `gemini-embedding-001` model is specifically supported for [codebase indexing](https://kilo.ai/docs/customize/context/codebase-indexing)
, providing high-quality embeddings for semantic code search.
Copy page
---
# Kilo Code Documentation
Using OpenAI With Kilo Code
===========================
Kilo Code supports accessing models directly through the official OpenAI API.
**Website:** [https://openai.com/](https://openai.com/)
Getting an API Key
------------------
1. **Sign Up/Sign In:** Go to the [OpenAI Platform](https://platform.openai.com/)
. Create an account or sign in.
2. **Navigate to API Keys:** Go to the [API keys](https://platform.openai.com/api-keys)
page.
3. **Create a Key:** Click "Create new secret key". Give your key a descriptive name (e.g., "Kilo Code").
4. **Copy the Key:** **Important:** Copy the API key _immediately_. You will not be able to see it again. Store it securely.
Configuration in Kilo Code
--------------------------
1. **Open Kilo Code Settings:** Click the gear icon () in the Kilo Code panel.
2. **Select Provider:** Choose "OpenAI" from the "API Provider" dropdown.
3. **Enter API Key:** Paste your OpenAI API key into the "OpenAI API Key" field.
4. **Select Model:** Choose your desired model from the "Model" dropdown.
Tips and Notes
--------------
* **Pricing:** Refer to the [OpenAI Pricing](https://openai.com/pricing)
page for details on model costs.
* **Azure OpenAI Service:** If you'd like to use the Azure OpenAI service, please see our section on [OpenAI-compatible](https://kilo.ai/docs/ai-providers/openai-compatible)
providers.
Copy page
---
# Kilo Code Documentation
⚠️Important Notice
In January 2026, Anthropic decided to restrict Claude Code CLI to official Claude Code clients. Claude Code credentials cannot be used in Kilo Code or other third-party harnesses.
For continued use of Anthropic models in Kilo Code, please use the [Anthropic API provider](https://kilo.ai/docs/ai-providers/anthropic)
with an API key instead.
Using Claude Code With Kilo Code
================================
Claude Code is Anthropic's official CLI that provides direct access to Claude models from your terminal. Using Claude Code with Kilo Code lets you leverage your existing CLI setup without needing separate API keys.
**Website:** [https://docs.anthropic.com/en/docs/claude-code/setup](https://docs.anthropic.com/en/docs/claude-code/setup)
Installing and Setting Up Claude Code
-------------------------------------
1. **Install Claude Code:** Follow the installation instructions at [Anthropic's Claude Code documentation](https://docs.anthropic.com/en/docs/claude-code/setup)
.
2. **Authenticate:** Run `claude` in your terminal. Claude Code offers multiple authentication options including the Anthropic Console (default), Claude App with Pro/Max plans, and enterprise platforms like Amazon Bedrock or Google Vertex AI. See [Anthropic's authentication documentation](https://docs.anthropic.com/en/docs/claude-code/setup)
for complete details.
3. **Verify Installation:** Test that everything works by running `claude --version` in your terminal.
⚠️Environment Variable Usage
The `claude` command-line tool, like other Anthropic SDKs, can use the `ANTHROPIC_API_KEY` environment variable for authentication. This is a common method for authorizing CLI tools in non-interactive environments.
If this environment variable is set on your system, the `claude` tool may use it for authentication instead of the interactive `/login` method. When Kilo Code executes the tool, it will accurately reflect that an API key is being used, as this is the underlying behavior of the `claude` CLI itself.
**Website:** [https://docs.anthropic.com/en/docs/claude-code/setup](https://docs.anthropic.com/en/docs/claude-code/setup)
Supported Models
----------------
The specific models available depend on your Claude subscription and plan. See [Anthropic's Model Documentation](https://docs.anthropic.com/en/docs/about-claude/models)
for more details on each model's capabilities.
Configuration in Kilo Code
--------------------------
1. **Open Kilo Code Settings:** Click the gear icon () in the Kilo Code panel.
2. **Select Provider:** Choose "Claude Code" from the "API Provider" dropdown.
3. **Select Model:** Choose your desired Claude model from the "Model" dropdown.
4. **(Optional) Custom CLI Path:** If you installed Claude Code to a location other than the default `claude` command, enter the full path to your Claude executable in the "Claude Code Path" field. Most users won't need to change this.
Tips and Notes
--------------
* **No API Keys Required:** Claude Code uses your existing CLI authentication, so you don't need to manage separate API keys.
* **Cost Transparency:** Usage costs are reported directly by the Claude CLI, giving you clear visibility into your spending.
* **Advanced Reasoning:** Full support for Claude's thinking modes and reasoning capabilities when available.
* **Context Windows:** Claude models have large context windows, allowing you to include significant amounts of code and context in your prompts.
* **Enhance Prompt Feature:** Full compatibility with Kilo Code's Enhance Prompt feature, allowing you to automatically improve and refine your prompts before sending them to Claude.
* **Custom Paths:** If you installed Claude Code in a non-standard location, you can specify the full path in the settings. Examples:
* Windows: `C:\tools\claude\claude.exe`
* macOS/Linux: `/usr/local/bin/claude` or `~/bin/claude`
Troubleshooting
---------------
* **"Claude Code process exited with error":** Verify Claude Code is installed (`claude --version`) and authenticated (`claude auth login`). Make sure your subscription includes the selected model.
* **Custom path not working:** Use the full absolute path to the Claude executable and verify the file exists and is executable. On Windows, include the `.exe` extension.
Copy page
---