# Table of Contents
- [Mergin Maps Documentation | Mergin Maps](#mergin-maps-documentation-mergin-maps)
- [Background Maps | Mergin Maps](#background-maps-mergin-maps)
- [Attributes Form Layout | Mergin Maps](#attributes-form-layout-mergin-maps)
- [Mergin Maps Documentation | Mergin Maps](#mergin-maps-documentation-mergin-maps)
- [How to Create a New Project | Mergin Maps](#how-to-create-a-new-project-mergin-maps)
- [How to Stake Out Points | Mergin Maps](#how-to-stake-out-points-mergin-maps)
- [QGIS Project Preparation | Mergin Maps](#qgis-project-preparation-mergin-maps)
- [External GPS | Mergin Maps](#external-gps-mergin-maps)
- [PostgreSQL DB Sync | Mergin Maps](#postgresql-db-sync-mergin-maps)
- [Projections | Mergin Maps](#projections-mergin-maps)
- [Python API Client | Mergin Maps](#python-api-client-mergin-maps)
- [Media Sync | Mergin Maps](#media-sync-mergin-maps)
- [Subscriptions and Invoicing | Mergin Maps](#subscriptions-and-invoicing-mergin-maps)
- [Workspaces | Mergin Maps](#workspaces-mergin-maps)
- [Capturing Your First Field Data | Mergin Maps](#capturing-your-first-field-data-mergin-maps)
- [Opening Surveyed Data on Your Computer | Mergin Maps](#opening-surveyed-data-on-your-computer-mergin-maps)
- [Creating a Project in QGIS | Mergin Maps](#creating-a-project-in-qgis-mergin-maps)
- [Working Collaboratively | Mergin Maps](#working-collaboratively-mergin-maps)
- [Using Mergin Maps Mobile App | Mergin Maps](#using-mergin-maps-mobile-app-mergin-maps)
- [How to Install Mergin Maps Mobile App | Mergin Maps](#how-to-install-mergin-maps-mobile-app-mergin-maps)
- [Further Project Customisation | Mergin Maps](#further-project-customisation-mergin-maps)
- [How to Sign Up to Mergin Maps | Mergin Maps](#how-to-sign-up-to-mergin-maps-mergin-maps)
- [How to Install QGIS | Mergin Maps](#how-to-install-qgis-mergin-maps)
- [Mergin Maps Project | Mergin Maps](#mergin-maps-project-mergin-maps)
- [Work Packages | Mergin Maps](#work-packages-mergin-maps)
- [Single Sign-On (SSO) | Mergin Maps](#single-sign-on-sso-mergin-maps)
- [How to Share, Transfer or Delete Projects | Mergin Maps](#how-to-share-transfer-or-delete-projects-mergin-maps)
- [Supported Formats | Mergin Maps](#supported-formats-mergin-maps)
- [How to Deploy Revised Projects | Mergin Maps](#how-to-deploy-revised-projects-mergin-maps)
- [How to Install Mergin Maps QGIS Plugin | Mergin Maps](#how-to-install-mergin-maps-qgis-plugin-mergin-maps)
- [How to Delete Files | Mergin Maps](#how-to-delete-files-mergin-maps)
- [How to Recover Missing Data | Mergin Maps](#how-to-recover-missing-data-mergin-maps)
- [Member Roles and Permissions | Mergin Maps](#member-roles-and-permissions-mergin-maps)
- [Position Tracking | Mergin Maps](#position-tracking-mergin-maps)
- [Synchronisation | Mergin Maps](#synchronisation-mergin-maps)
- [User Account | Mergin Maps](#user-account-mergin-maps)
- [Mergin Maps QGIS Plugin Overview | Mergin Maps](#mergin-maps-qgis-plugin-overview-mergin-maps)
- [Mergin Maps Dashboard | Mergin Maps](#mergin-maps-dashboard-mergin-maps)
- [Selective Synchronisation | Mergin Maps](#selective-synchronisation-mergin-maps)
- [Webmaps | Mergin Maps](#webmaps-mergin-maps)
- [Project History and Versions | Mergin Maps](#project-history-and-versions-mergin-maps)
- [Sorting and Search Setup | Mergin Maps](#sorting-and-search-setup-mergin-maps)
- [Map Themes | Mergin Maps](#map-themes-mergin-maps)
- [How to Set Photo Names Format | Mergin Maps](#how-to-set-photo-names-format-mergin-maps)
- [How to Enable Digitising | Mergin Maps](#how-to-enable-digitising-mergin-maps)
- [How to Avoid Polygons Overlap | Mergin Maps](#how-to-avoid-polygons-overlap-mergin-maps)
- [How to Set Up Snapping for Mergin Maps Mobile App | Mergin Maps](#how-to-set-up-snapping-for-mergin-maps-mobile-app-mergin-maps)
- [Best Practice Tips for Layers and Forms | Mergin Maps](#best-practice-tips-for-layers-and-forms-mergin-maps)
- [Setting Up Widgets in Attributes Form | Mergin Maps](#setting-up-widgets-in-attributes-form-mergin-maps)
- [Capturing Photos | Mergin Maps](#capturing-photos-mergin-maps)
- [Custom Projections | Mergin Maps](#custom-projections-mergin-maps)
- [Exif Metadata | Mergin Maps](#exif-metadata-mergin-maps)
- [Attributes Form Configuration | Mergin Maps](#attributes-form-configuration-mergin-maps)
- [How to Use Hyperlinks | Mergin Maps](#how-to-use-hyperlinks-mergin-maps)
- [How to Attach Multiple Photos to Features | Mergin Maps](#how-to-attach-multiple-photos-to-features-mergin-maps)
- [How to Link Multiple Records to One Feature (1-N Relations) | Mergin Maps](#how-to-link-multiple-records-to-one-feature-1-n-relations-mergin-maps)
- [Extra Position Variables | Mergin Maps](#extra-position-variables-mergin-maps)
- [Extra QGIS Variables | Mergin Maps](#extra-qgis-variables-mergin-maps)
- [Working with Non-spatial Tables | Mergin Maps](#working-with-non-spatial-tables-mergin-maps)
- [GPS Accuracy | Mergin Maps](#gps-accuracy-mergin-maps)
- [Mergin Maps Mobile App Interface | Mergin Maps](#mergin-maps-mobile-app-interface-mergin-maps)
- [Offline Use of Mergin Maps Mobile App | Mergin Maps](#offline-use-of-mergin-maps-mobile-app-mergin-maps)
- [Measurement Tools | Mergin Maps](#measurement-tools-mergin-maps)
- [Layers in Mergin Maps Mobile App | Mergin Maps](#layers-in-mergin-maps-mobile-app-mergin-maps)
- [Synchronisation in Mergin Maps Mobile App | Mergin Maps](#synchronisation-in-mergin-maps-mobile-app-mergin-maps)
- [Photo Sketching | Mergin Maps](#photo-sketching-mergin-maps)
- [Map Sketching | Mergin Maps](#map-sketching-mergin-maps)
- [How to Add, Edit, Delete Features | Mergin Maps](#how-to-add-edit-delete-features-mergin-maps)
- [Custom Mobile App | Mergin Maps](#custom-mobile-app-mergin-maps)
- [How to Reuse Last Entered Values | Mergin Maps](#how-to-reuse-last-entered-values-mergin-maps)
- [Geodiff Library | Mergin Maps](#geodiff-library-mergin-maps)
- [Overview | Mergin Maps](#overview-mergin-maps)
- [C++ API Client | Mergin Maps](#c-api-client-mergin-maps)
- [How to Fix a Broken Project | Mergin Maps](#how-to-fix-a-broken-project-mergin-maps)
- [Single Sign-On Deployment | Mergin Maps](#single-sign-on-deployment-mergin-maps)
- [Secure Mergin Maps installation | Mergin Maps](#secure-mergin-maps-installation-mergin-maps)
- [Administer | Mergin Maps](#administer-mergin-maps)
- [Migrate from Fulcrum | Mergin Maps](#migrate-from-fulcrum-mergin-maps)
- [Using Mergin Maps Mobile App and QGIS Plugin with a Custom Server | Mergin Maps](#using-mergin-maps-mobile-app-and-qgis-plugin-with-a-custom-server-mergin-maps)
- [Migrate from QField | Mergin Maps](#migrate-from-qfield-mergin-maps)
- [Administration Panel | Mergin Maps](#administration-panel-mergin-maps)
- [Get Involved | Mergin Maps](#get-involved-mergin-maps)
- [Project fails to sync | Mergin Maps](#project-fails-to-sync-mergin-maps)
- [Licensing | Mergin Maps](#licensing-mergin-maps)
- [Install | Mergin Maps](#install-mergin-maps)
- [Troubleshoot Custom Servers | Mergin Maps](#troubleshoot-custom-servers-mergin-maps)
- [Troubleshoot | Mergin Maps](#troubleshoot-mergin-maps)
- [Download your Mergin Maps EE images | Mergin Maps](#download-your-mergin-maps-ee-images-mergin-maps)
- [Migrate from ArcGIS | Mergin Maps](#migrate-from-arcgis-mergin-maps)
- [Configure environment | Mergin Maps](#configure-environment-mergin-maps)
- [Write Documentation | Mergin Maps](#write-documentation-mergin-maps)
- [Upgrade | Mergin Maps](#upgrade-mergin-maps)
---
# Mergin Maps Documentation | Mergin Maps
[Skip to content](https://merginmaps.com/docs/?_gl=1*1ttvg0u*_up*MQ..*_gs*MQ..&gclid=CjwKCAiAt8bIBhBpEiwAzH1w6WvWiPMrwYMAZF4bRgWrybLA86KU6tAoIke2Rl0Ieh4z8Pof3GRurxoChVcQAvD_BwE&gbraid=0AAAAAC4pmVEjMm5b6UWBkiT-GAwJtJLUE#VPContent)
Return to top
Mergin Maps Documentation [](https://merginmaps.com/docs/?_gl=1*1ttvg0u*_up*MQ..*_gs*MQ..&gclid=CjwKCAiAt8bIBhBpEiwAzH1w6WvWiPMrwYMAZF4bRgWrybLA86KU6tAoIke2Rl0Ieh4z8Pof3GRurxoChVcQAvD_BwE&gbraid=0AAAAAC4pmVEjMm5b6UWBkiT-GAwJtJLUE#mergin-maps-documentation)
==================================================================================================================================================================================================================================================================
* Store and track changes to your geo-data with [Mergin Maps](https://merginmaps.com/)
💿
* Capture geo-info easily through your mobile or tablet with Mergin Maps mobile app 📱
* Setup and analyse the project on desktop with [QGIS](https://qgis.org/)
💻
* All open-source and easily integrated to your existing toolset 💡
 [Join our community chat](https://merginmaps.com/community/join)
and ask questions!
The ecosystem consist of various components:
* [QGIS](https://qgis.org/)
> Powerful GIS Desktop application
* [Mergin Maps QGIS plugin](https://plugins.qgis.org/plugins/Mergin/)
> QGIS plugin
* [Mergin Maps Cloud](https://merginmaps.com/)
> SaaS Cloud Service (available also as [Mergin Maps EE](https://merginmaps.com/pricing)
or [Mergin Maps CE](https://github.com/MerginMaps)
)
* [Mergin Maps mobile app](https://merginmaps.com/)
> iOS and Android mobile app
[](https://apps.apple.com/us/app/input/id1478603559?ls=1)
[](https://play.google.com/store/apps/details?id=uk.co.lutraconsulting)
[](https://github.com/MerginMaps/mobile/releases/latest)
Get started [](https://merginmaps.com/docs/?_gl=1*1ttvg0u*_up*MQ..*_gs*MQ..&gclid=CjwKCAiAt8bIBhBpEiwAzH1w6WvWiPMrwYMAZF4bRgWrybLA86KU6tAoIke2Rl0Ieh4z8Pof3GRurxoChVcQAvD_BwE&gbraid=0AAAAAC4pmVEjMm5b6UWBkiT-GAwJtJLUE#get-started)
--------------------------------------------------------------------------------------------------------------------------------------------------------------------------------------------------------------------------------------
* [Capturing Your First Field Data](https://merginmaps.com/docs/tutorials/capturing-first-data/)
* [Opening Surveyed Data on Your Computer](https://merginmaps.com/docs/tutorials/opening-surveyed-data-on-your-computer/)
* [Creating a Project in QGIS](https://merginmaps.com/docs/tutorials/creating-a-project-in-qgis/)
* [Using Mergin Maps mobile app](https://merginmaps.com/docs/tutorials/mobile/)
* [Further Project Customisation](https://merginmaps.com/docs/tutorials/further-project-customisation/)
* [Working Collaboratively](https://merginmaps.com/docs/tutorials/working-collaboratively/)
Install & Sign Up [](https://merginmaps.com/docs/?_gl=1*1ttvg0u*_up*MQ..*_gs*MQ..&gclid=CjwKCAiAt8bIBhBpEiwAzH1w6WvWiPMrwYMAZF4bRgWrybLA86KU6tAoIke2Rl0Ieh4z8Pof3GRurxoChVcQAvD_BwE&gbraid=0AAAAAC4pmVEjMm5b6UWBkiT-GAwJtJLUE#install-sign-up)
------------------------------------------------------------------------------------------------------------------------------------------------------------------------------------------------------------------------------------------------
* [How to Install Mergin Maps mobile app](https://merginmaps.com/docs/setup/install-mobile-app/)
* [How to Sign Up to Mergin Maps](https://merginmaps.com/docs/setup/sign-up-to-mergin-maps/)
* [How to Install QGIS](https://merginmaps.com/docs/setup/install-qgis/)
* [How to Install Mergin Maps QGIS plugin](https://merginmaps.com/docs/setup/install-mergin-maps-plugin-for-qgis/)
Manage Account & Project [](https://merginmaps.com/docs/?_gl=1*1ttvg0u*_up*MQ..*_gs*MQ..&gclid=CjwKCAiAt8bIBhBpEiwAzH1w6WvWiPMrwYMAZF4bRgWrybLA86KU6tAoIke2Rl0Ieh4z8Pof3GRurxoChVcQAvD_BwE&gbraid=0AAAAAC4pmVEjMm5b6UWBkiT-GAwJtJLUE#manage-account-project)
--------------------------------------------------------------------------------------------------------------------------------------------------------------------------------------------------------------------------------------------------------------
* [User Account](https://merginmaps.com/docs/manage/account/)
* [Single Sign-On (SSO)](https://merginmaps.com/docs/manage/sso/)
* [Workspaces](https://merginmaps.com/docs/manage/workspaces/)
* [Subscriptions and Invoicing](https://merginmaps.com/docs/manage/subscriptions/)
* [Member Roles and Permissions](https://merginmaps.com/docs/manage/permissions/)
* [Synchronisation](https://merginmaps.com/docs/manage/synchronisation/)
* [Mergin Maps Project](https://merginmaps.com/docs/manage/project/)
* [How to Create a New Project](https://merginmaps.com/docs/manage/create-project/)
* [How to Share, Transfer or Delete Projects](https://merginmaps.com/docs/manage/project-advanced/)
* [How to Delete Files](https://merginmaps.com/docs/manage/delete-files)
* [How to Deploy Revised Projects](https://merginmaps.com/docs/manage/deploy-new-project/)
* [How to Recover Missing Data](https://merginmaps.com/docs/manage/missing-data/)
* [Mergin Maps QGIS plugin Overview](https://merginmaps.com/docs/manage/plugin/)
* [Mergin Maps Dashboard](https://merginmaps.com/docs/manage/dashboard/)
* [Webmaps](https://merginmaps.com/docs/manage/dashboard-maps/)
* [Project History and Versions](https://merginmaps.com/docs/manage/project-history/)
* [Selective Synchronisation](https://merginmaps.com/docs/manage/selective_sync/)
Setup GIS Project [](https://merginmaps.com/docs/?_gl=1*1ttvg0u*_up*MQ..*_gs*MQ..&gclid=CjwKCAiAt8bIBhBpEiwAzH1w6WvWiPMrwYMAZF4bRgWrybLA86KU6tAoIke2Rl0Ieh4z8Pof3GRurxoChVcQAvD_BwE&gbraid=0AAAAAC4pmVEjMm5b6UWBkiT-GAwJtJLUE#setup-gis-project)
--------------------------------------------------------------------------------------------------------------------------------------------------------------------------------------------------------------------------------------------------
* [QGIS Project Preparation](https://merginmaps.com/docs/gis/features/)
* [Sorting and Search Setup](https://merginmaps.com/docs/gis/search_data/)
* [Background Maps](https://merginmaps.com/docs/gis/settingup_background_map/)
* [Map Themes](https://merginmaps.com/docs/gis/setup_themes/)
* [How to Set Photo Names Format](https://merginmaps.com/docs/gis/photo-names/)
* [How to Enable Digitising](https://merginmaps.com/docs/gis/enable_digitising/)
* [How to Set Up Snapping for Mergin Maps mobile app](https://merginmaps.com/docs/gis/snapping/)
* [How to Avoid Polygons Overlap](https://merginmaps.com/docs/gis/snapping/)
* [Custom Projections](https://merginmaps.com/docs/gis/proj/)
* [Supported Formats](https://merginmaps.com/docs/gis/supported_formats/)
Configure Survey Layer [](https://merginmaps.com/docs/?_gl=1*1ttvg0u*_up*MQ..*_gs*MQ..&gclid=CjwKCAiAt8bIBhBpEiwAzH1w6WvWiPMrwYMAZF4bRgWrybLA86KU6tAoIke2Rl0Ieh4z8Pof3GRurxoChVcQAvD_BwE&gbraid=0AAAAAC4pmVEjMm5b6UWBkiT-GAwJtJLUE#configure-survey-layer)
------------------------------------------------------------------------------------------------------------------------------------------------------------------------------------------------------------------------------------------------------------
* [Best Practice Tips for Layers and Forms](https://merginmaps.com/docs/layer/best-practice/)
* [Setting Up Widgets in Attributes Form](https://merginmaps.com/docs/layer/form-widgets/)
* [Attributes Form Configuration](https://merginmaps.com/docs/layer/form-configuration/)
* [Attributes Form Layout](https://merginmaps.com/docs/layer/form-layout/)
* [Capturing Photos](https://merginmaps.com/docs/layer/photos/)
* [How to Attach Multiple Photos to Features](https://merginmaps.com/docs/layer/attach-multiple-photos-to-features/)
* [How to Link Multiple Records to One Feature (1-N Relations)](https://merginmaps.com/docs/layer/one-to-n-relations/)
* [Exif Metadata](https://merginmaps.com/docs/layer/exif/)
* [How to Use Hyperlinks](https://merginmaps.com/docs/layer/external-link/)
* [Working with Non-spatial Tables](https://merginmaps.com/docs/layer/non-spatial-data/)
* [Extra Position Variables](https://merginmaps.com/docs/layer/position_variables/)
* [Extra QGIS Variables](https://merginmaps.com/docs/layer/plugin-variables/)
Fieldwork Tips [](https://merginmaps.com/docs/?_gl=1*1ttvg0u*_up*MQ..*_gs*MQ..&gclid=CjwKCAiAt8bIBhBpEiwAzH1w6WvWiPMrwYMAZF4bRgWrybLA86KU6tAoIke2Rl0Ieh4z8Pof3GRurxoChVcQAvD_BwE&gbraid=0AAAAAC4pmVEjMm5b6UWBkiT-GAwJtJLUE#fieldwork-tips)
--------------------------------------------------------------------------------------------------------------------------------------------------------------------------------------------------------------------------------------------
* [Mergin Maps mobile app Interface](https://merginmaps.com/docs/field/mobile-app-ui/)
* [Offline Use of Mergin Maps mobile app](https://merginmaps.com/docs/field/external_gps/)
* [External GPS](https://merginmaps.com/docs/field/external_gps/)
* [GPS Accuracy](https://merginmaps.com/docs/field/gps_accuracy/)
* [Position Tracking](https://merginmaps.com/docs/field/tracking/)
* [Synchronisation in Mergin Maps mobile app](https://merginmaps.com/docs/field/autosync/)
* [Measurement Tools](https://merginmaps.com/docs/field/measure/)
* [Layers in Mergin Maps mobile app](https://merginmaps.com/docs/field/layers/)
* [Map Sketching in Mergin Maps mobile app](https://merginmaps.com/docs/field/map-sketching/)
* [Photo Sketching in Mergin Maps mobile app](https://merginmaps.com/docs/field/photo-sketching/)
* [How to Add, Edit, Delete Features](https://merginmaps.com/docs/field/mobile-features/)
* [How to Reuse Last Entered Values](https://merginmaps.com/docs/field/reuse-last-values/)
* [How to Stake Out Points](https://merginmaps.com/docs/field/stake-out/)
* [How to Fix a Broken Project](https://merginmaps.com/docs/field/broken-project/)
For Developers [](https://merginmaps.com/docs/?_gl=1*1ttvg0u*_up*MQ..*_gs*MQ..&gclid=CjwKCAiAt8bIBhBpEiwAzH1w6WvWiPMrwYMAZF4bRgWrybLA86KU6tAoIke2Rl0Ieh4z8Pof3GRurxoChVcQAvD_BwE&gbraid=0AAAAAC4pmVEjMm5b6UWBkiT-GAwJtJLUE#for-developers)
--------------------------------------------------------------------------------------------------------------------------------------------------------------------------------------------------------------------------------------------
* [Custom Mobile App](https://merginmaps.com/docs/dev/customapp/)
* [Python Client Module Integration](https://merginmaps.com/docs/dev/integration/)
* [C++ Standalone Client Integration](https://merginmaps.com/docs/dev/integration-cpp/)
* [PostgreSQL DB Sync](https://merginmaps.com/docs/dev/dbsync/)
* [Media Sync](https://merginmaps.com/docs/dev/media-sync/)
* [Work Packages](https://merginmaps.com/docs/dev/work-packages/)
* [Geodiff Library](https://merginmaps.com/docs/dev/geodiff/)
Custom Server [](https://merginmaps.com/docs/?_gl=1*1ttvg0u*_up*MQ..*_gs*MQ..&gclid=CjwKCAiAt8bIBhBpEiwAzH1w6WvWiPMrwYMAZF4bRgWrybLA86KU6tAoIke2Rl0Ieh4z8Pof3GRurxoChVcQAvD_BwE&gbraid=0AAAAAC4pmVEjMm5b6UWBkiT-GAwJtJLUE#custom-server)
------------------------------------------------------------------------------------------------------------------------------------------------------------------------------------------------------------------------------------------
* [Overview](https://merginmaps.com/docs/server/)
* [Install](https://merginmaps.com/docs/server/install/)
* [Security](https://merginmaps.com/docs/server/security/)
* [Upgrade](https://merginmaps.com/docs/server/upgrade/)
* [Administer](https://merginmaps.com/docs/server/administer/)
* [Administration Panel](https://merginmaps.com/docs/server/dashboard/)
* [Troubleshoot Custom Servers](https://merginmaps.com/docs/server/troubleshoot/)
* [Using Mergin Maps Mobile App and QGIS Plugin with a Custom Server](https://merginmaps.com/docs/server/plugin-mobile-app/)
Migrate to Mergin Maps [](https://merginmaps.com/docs/?_gl=1*1ttvg0u*_up*MQ..*_gs*MQ..&gclid=CjwKCAiAt8bIBhBpEiwAzH1w6WvWiPMrwYMAZF4bRgWrybLA86KU6tAoIke2Rl0Ieh4z8Pof3GRurxoChVcQAvD_BwE&gbraid=0AAAAAC4pmVEjMm5b6UWBkiT-GAwJtJLUE#migrate-to-mergin-maps)
------------------------------------------------------------------------------------------------------------------------------------------------------------------------------------------------------------------------------------------------------------
* [From QField](https://merginmaps.com/docs/migrate/qfield/)
* [From ArcGIS](https://merginmaps.com/docs/migrate/arcgis/)
* [From Fulcrum](https://merginmaps.com/docs/migrate/fulcrumapp/)
Support & Legal [](https://merginmaps.com/docs/?_gl=1*1ttvg0u*_up*MQ..*_gs*MQ..&gclid=CjwKCAiAt8bIBhBpEiwAzH1w6WvWiPMrwYMAZF4bRgWrybLA86KU6tAoIke2Rl0Ieh4z8Pof3GRurxoChVcQAvD_BwE&gbraid=0AAAAAC4pmVEjMm5b6UWBkiT-GAwJtJLUE#support-legal)
--------------------------------------------------------------------------------------------------------------------------------------------------------------------------------------------------------------------------------------------
* [Licensing](https://merginmaps.com/docs/misc/licensing/)
* [Get Involved](https://merginmaps.com/docs/misc/get-involved/)
* [Troubleshoot](https://merginmaps.com/docs/misc/troubleshoot/)
* [Write Documentation](https://merginmaps.com/docs/misc/write-docs/)
---
# Background Maps | Mergin Maps
[Skip to content](https://merginmaps.com/docs/gis/settingup_background_map/#VPContent)
Return to top
Background Maps [](https://merginmaps.com/docs/gis/settingup_background_map/#background-maps)
===============================================================================================
When surveying in the field, it is essential to have appropriate background maps. There are several sources of background maps you can use in your QGIS project. Here, we will cover two types of background maps for online and offline use in Mergin Maps mobile app: raster and vector tiles.
Online maps need internet connection to be displayed during the field survey and can use up a lot of mobile data, especially if you are using online raster maps.
WARNING
Keep in mind that background maps services and data sources come with their own terms of use.
Although we show how to add online and offline background maps to your projects, it is your responsibility to comply with any terms and conditions of the services of your choice.
Raster tiles [](https://merginmaps.com/docs/gis/settingup_background_map/#raster-tiles)
-----------------------------------------------------------------------------------------
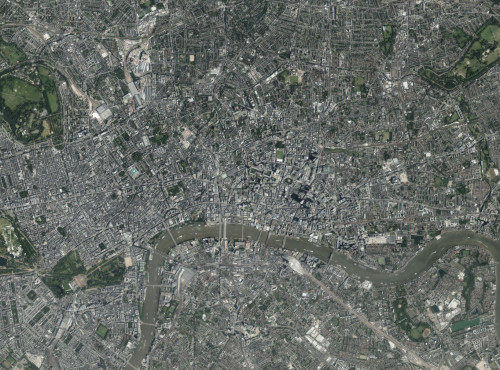
Raster tiles are ideal for aerial imagery or terrain visualisations. They can be large in size and can appear pixelated when zoomed in.
### Online services [](https://merginmaps.com/docs/gis/settingup_background_map/#online-services)
QGIS comes by default with the [OpenStreetMap online services for XYZ tiles](https://docs.qgis.org/3.22/en/docs/user_manual/managing_data_source/opening_data.html?highlight=xyz#using-xyz-tile-services)
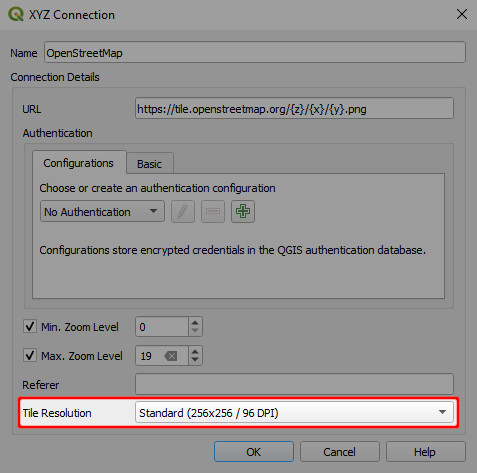
. When adding a cartographic basemap, ensure you set the tile size correctly, so that the texts and labels are readable on mobile devices with high resolution display.
WARNING
Online raster maps can use up a lot of mobile data during the field survey.
You can also add [other sources](https://gis.stackexchange.com/questions/20191/adding-basemaps-from-google-or-bing-in-qgis/217670#217670)
of XYZ tiles to your QGIS.
To add Bing aerial imagery to your QGIS project:
1. In QGIS, navigate to the **XYZ Tiles** in the **Browser** panel
2. Right-click on **XYZ Tiles** and select **New Connection**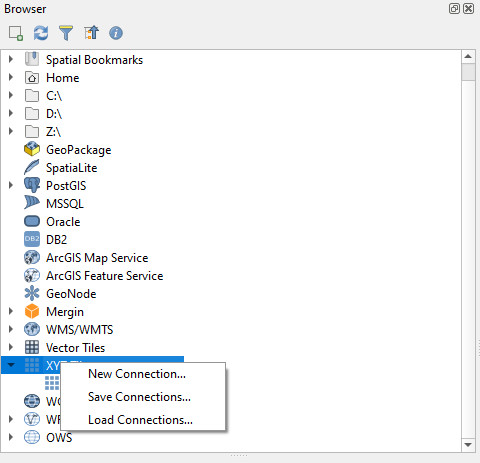
3. Set the parameters of the **XYZ connection**:
* **Name**: _Bing aerial imagery_
* **URL**: `http://ecn.t3.tiles.virtualearth.net/tiles/a{q}.jpeg?g=1` Press **OK**. 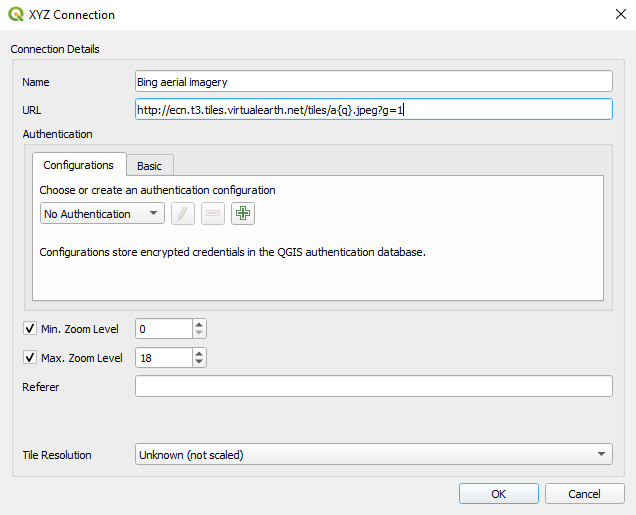
Now, the **XYZ Tiles** in the **Browser** panel should contain the _Bing aerial imagery_. Double click on it to add it to your project and zoom to your area of interest. 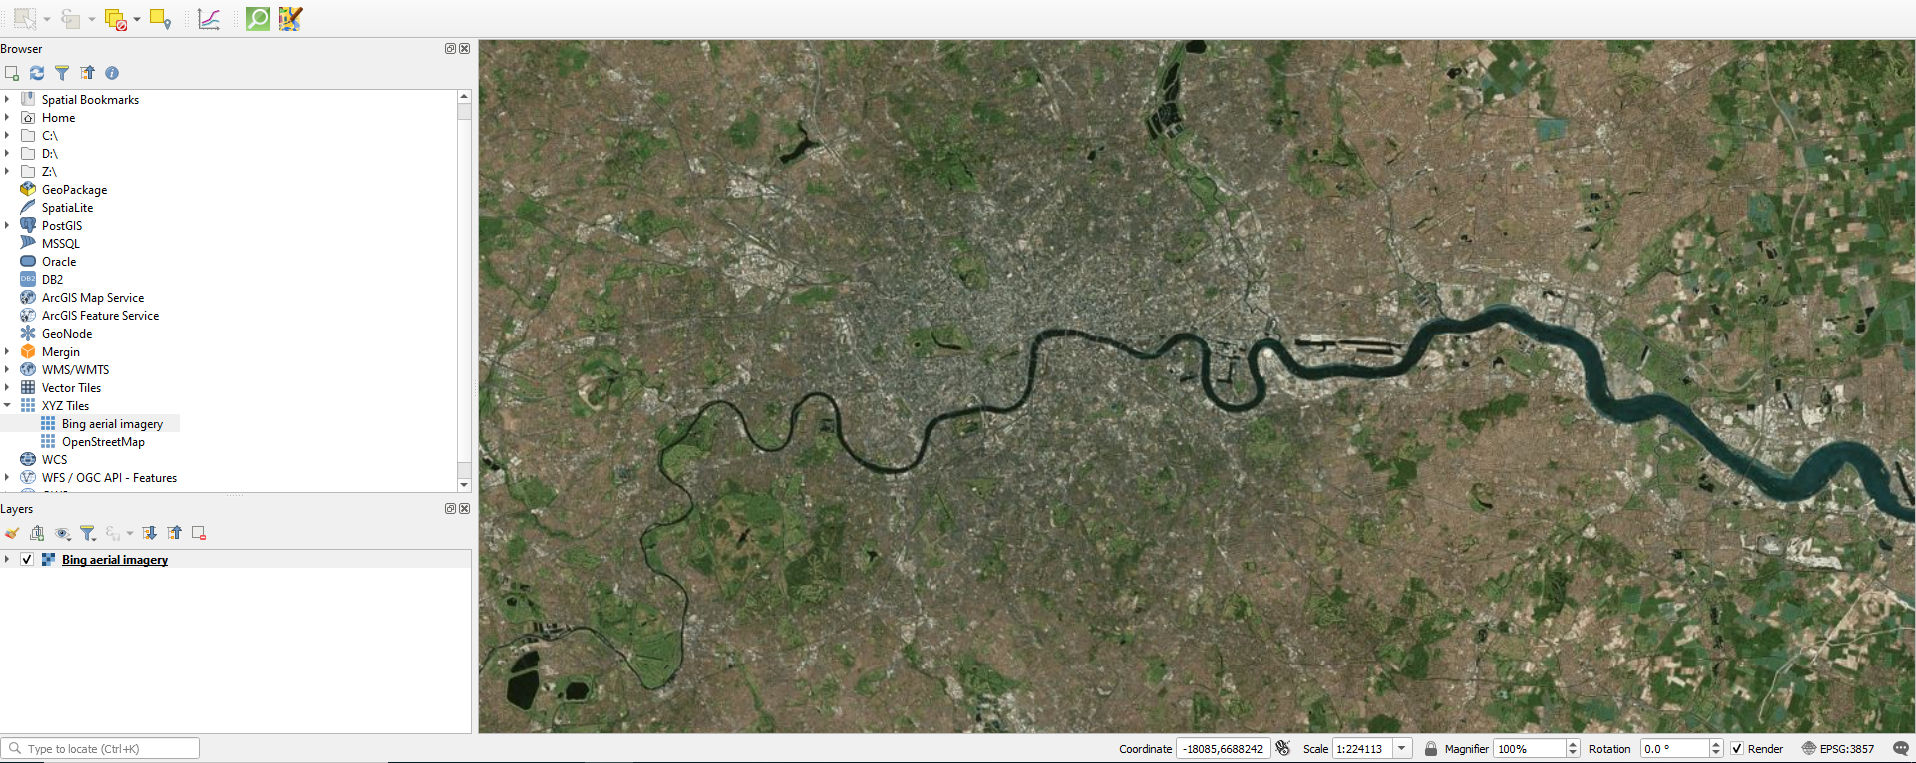
TIP
When using XYZ tiles that contain labels, ensure to set the tile resolution to _Standard_ in the connection settings. This will ensure the fonts are readable on the high resolution screens (the majority of the recent smartphones comes with high DPI screens).
### Generating XYZ/MBTiles raster tiles for offline use [](https://merginmaps.com/docs/gis/settingup_background_map/#generating-xyz-mbtiles-raster-tiles-for-offline-use)
QGIS also offers a [processing algorithm](https://docs.qgis.org/latest/en/docs/user_manual/processing_algs/qgis/rastertools.html)
to generate raster tiles for offline use.
Make sure that you:
* added the _Bing aerial imagery_ to the QGIS project
* zoomed to your area of interest
To generate an offline copy of the aerial imagery from your map view extent:
1. In QGIS, select **Processing** > **Toolbox** from the main menu. The **Processing** panel will appear on the right side of QGIS window.
2. In the search section on the top of the **Processing** panel, type _xyz_ to display relevant tools.
3. In **Raster tools**, double-click on **Generate XYZ tiles (MBTiles)**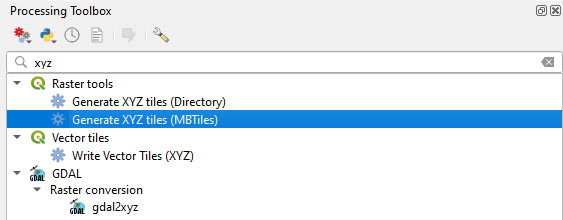
4. Set the parameters of **Generate XYZ tiles (MBTiles)** tool:
* **Extent**: click on the right-side drop-down menu and select **Use Map Canvas Extent**
* **Minimum zoom**: 10
* **Maximum zoom**: 15
* **Output file (for MBTiles)**: click on the right side drop-down menu and select **Save to file**. Browse to the folder where you want to save the MBTiles and name the file. Here: `offline_aerial_photo.mbtiles`
* Click **Run**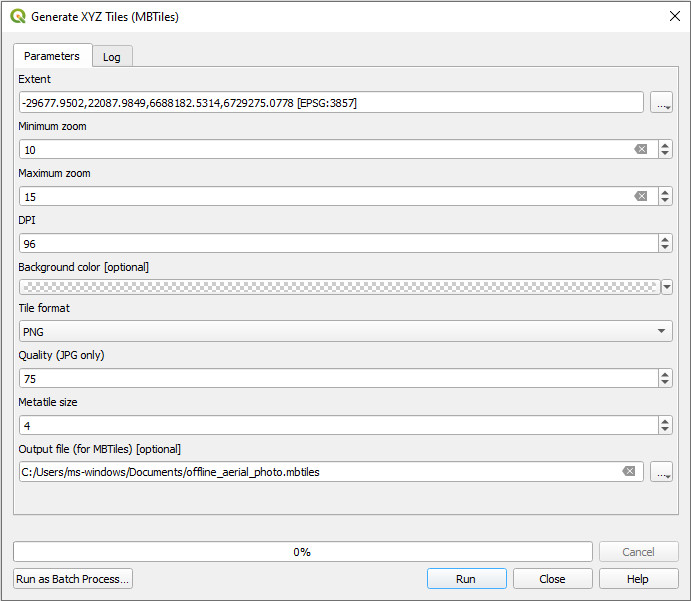
WARNING
Depending on the size of your study area and the zoom level, the output file can be very large. See how to [work with large files](https://merginmaps.com/docs/gis/settingup_background_map/#how-to-work-with-very-large-files-android)
in Mergin Maps mobile app.
Vector tiles [](https://merginmaps.com/docs/gis/settingup_background_map/#vector-tiles)
-----------------------------------------------------------------------------------------
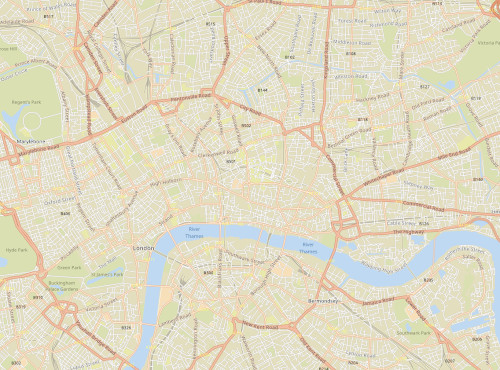
Vector tiles are a better alternative for cartographic maps as background data. They are smaller in size, have flexible styling and your maps will not be pixelated even when zoomed in.
There are several online services you can use in your projects, some of them are mentioned below.
### Online services [](https://merginmaps.com/docs/gis/settingup_background_map/#online-services-1)
When [creating a new Mergin Maps project](https://merginmaps.com/docs/manage/create-project/#create-a-project-in-qgis)
from scratch, the default background map uses Mergin Maps vector tile service. Other online vector tile services can be added to the project in QGIS, but keep in mind they come with their own terms of use.
To add a vector tile service:
1. In QGIS, navigate to the **Vector Tiles** in the **Browser** panel
2. Right-click on **Vector Tiles** and select **New Generic Connection**
3. Set the parameters of the **Vector Tiles connection** and press **OK**.
For Mergin Maps vector tile service, the parameters are as follows:
* **Name**: _OpenMapTiles (OSM)_
* **Style URL**: `https://tiles.merginmaps.com/styles/default.json`
* **Source URL**: `https://tiles.merginmaps.com/data/default/{z}/{x}/{y}.pbf`
* **Min. Zoom Level**: 0
* **Max. Zoom Level**: 14
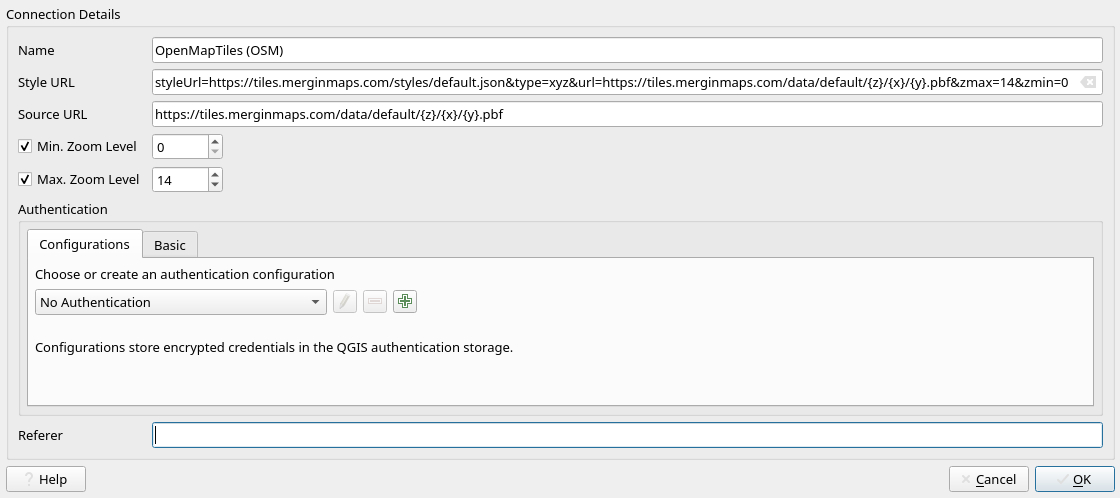
Usage details
Note that Mergin Maps vector tile service can be used by **[Mergin Maps](https://merginmaps.com/)
users only** .
Using the service is conditioned by the attribution:
`© OpenMapTiles © OpenStreetMap contributors`
### Generating vector tiles for offline use [](https://merginmaps.com/docs/gis/settingup_background_map/#generating-vector-tiles-for-offline-use)
Since QGIS 3.32, the easy-to-use **Download vector tiles** algorithm is present in the **Processing toolbox** in QGIS. With [Mergin Maps QGIS plugin](https://merginmaps.com/docs/gis/settingup_background_map/#downloading-vector-tiles-using-mergin-maps-qgis-plugin)
, it can be used also in older QGIS version (3.16+) and is readily available from the **Layers** panel.
There are also other ways how to get offline vector tiles, such as using OpenMapTiles and Docker:
Generate vector tiles using OpenMapTiles and Docker (Advanced)
In the example below, we walk through steps to generate a vector tile using OpenMapTiles for [Limpopo](https://www.openstreetmap.org/relation/349547#map=7/-24.367/29.982)
.
Note that instructions below require familiarity with the terminal. In addition, your operating system should support **docker**.
* Clone the OpenMapTiles repository: `git clone git@github.com:openmaptiles/openmaptiles.git`
* Download osm.pbf file for the country or region where your area falls in from [here](https://download.geofabrik.de/)
.
* Search for your area of interest and find the OSM relation ID (from [here](https://nominatim.openstreetmap.org/)
using method described [here](https://github.com/JamesChevalier/cities)
or alternatively download it [from this git repository](https://github.com/JamesChevalier/)
if available).
* Clip the _osm.pbf_ downloaded in step 2 using the poly downloaded in step 3: `osmconvert south-africa.osm.pbf -B=limpopo.poly --complete-ways --complete-multipolygons -o=my.osm.pbf`
* Place _my.osm.pbf_ under _openmaptiles/data/_
* Run `./quickstart.sh my` from _openmaptiles/_ folder (where you cloned your repository): this will generate the tiles with the default settings (i.e. low zoom level of max=7)
* Edit openmaptiles/data/my.dc-config.yml and change the Max\_Zoom to 14
* Re-run `./quickstart.sh my`
* The above process should produce an MBTiles for your clipped OSM file
* You can load the file and style it using one of the [OpenMapTiles styles](https://github.com/openmaptiles/osm-bright-gl-style)
#### Downloading vector tiles using Mergin Maps QGIS Plugin [](https://merginmaps.com/docs/gis/settingup_background_map/#downloading-vector-tiles-using-mergin-maps-qgis-plugin)
Vector tiles for offline use can be downloaded easily using Mergin Maps QGIS plugin.
1. Open your Mergin Maps project in QGIS.
2. In the **Layers** panel, right-click on the vector tile layer and choose the **Make available offline...** option 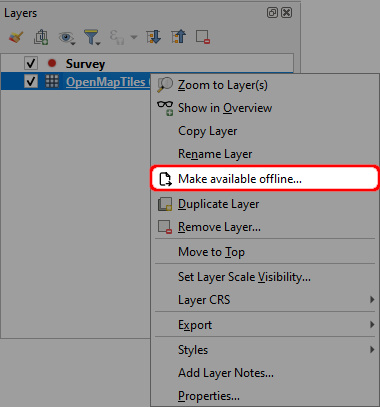
3. **Download Vector Tiles** dialog opens. Set the parameters as needed:
* **Extent** should be defined by your area of interest. You may calculate it from your survey layer, use the current map canvas extent (after zooming in), or other options that are provided.
* **Maximum zoom level to download** defines the detail that will be visible on the offline map. For more information about zoom levels, see, for instance [OpenStreetMap wiki](https://wiki.openstreetmap.org/wiki/Zoom_levels)
.
* **Tile limit** is the maximum number of tiles that you want to download.
* **Output** will be saved as a MBTiles file. Click on the right side drop-down menu, select **Save to file**, browse to the folder where you want to save the MBTiles and name the file.
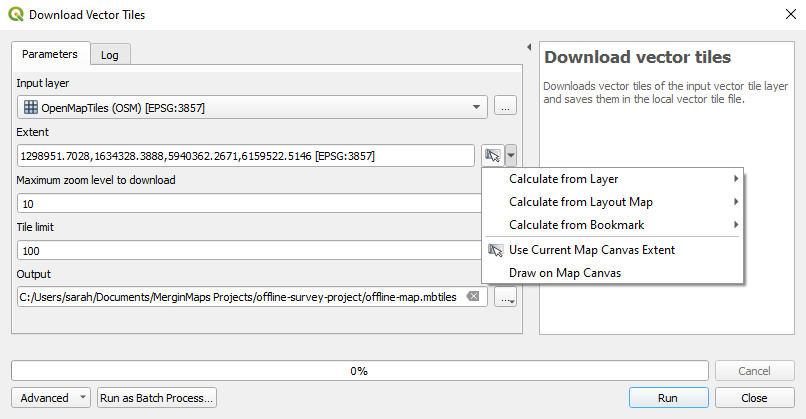
MBTiles can be stored in your [Mergin Maps project folder](https://merginmaps.com/docs/manage/project/#mergin-maps-project-folder)
and synchronised to [Mergin Maps](https://merginmaps.com/)
along with your project. If you find it impractical to synchronise them or if you want to use the same file in multiple projects, follow the steps on [How to work with large files](https://merginmaps.com/docs/gis/settingup_background_map/#how-to-work-with-very-large-files-android)
in Mergin Maps mobile app.
4. Click **Run**. After the vector tiles are generated and downloaded successfully, the MBTiles file will be added to the **Layers** panel. You may close the algorithm dialog window.
5. Save and synchronise the project.
TIP
Before taking your offline tiles to the field, we recommend checking in Mergin Maps mobile app that they have sufficient extent and zoom level.
How to work with very large files (Android) [](https://merginmaps.com/docs/gis/settingup_background_map/#how-to-work-with-very-large-files-android)
-----------------------------------------------------------------------------------------------------------------------------------------------------
Android only
Raster and vector tiles generated for offline use can be relatively large files, especially when using high resolution data or a large area of interest. It may be impractical to synchronise these large files through [Mergin Maps](https://merginmaps.com/)
or to have duplicate copies if they are used in multiple projects.
TIP
If you do not need to use your background maps offline, consider creating a WMS or WMTS server for online use.
QGIS uses relative paths to load the data. If your Mergin Maps project refers to files located in another folder, this project can be loaded just fine on another computer or in Mergin Maps mobile app - if the folder with the files can be found in its expected location.
1. On your computer, create a folder that will contain the large datasets (here: `_rasters`). It should be located in the same directory as your Mergin Maps projects. 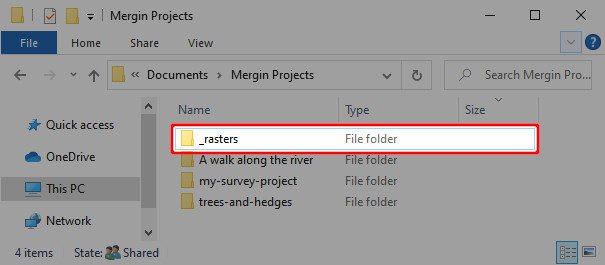
2. Open your Mergin Maps project in QGIS. Load the files from the `_rasters` folder to the project. Save and sync.
3. Connect your mobile device to the computer and copy the `_rasters` folder to the app's project folder `Internal storage/Android/data/uk.co.lutraconsulting/files/projects`.
See [Manual data transfer (Android)](https://merginmaps.com/docs/manage/missing-data/#manual-data-transfer-android)
for detailed steps.
4. Use the project in Mergin Maps mobile app as usual.
TIP
Files from the folder can be loaded into multiple Mergin Maps projects.
WARNING
Files located in the another folder are not synchronised. This saves your storage on [Mergin Maps Cloud](https://merginmaps.com/)
. However, if you want to update or modify these files, you have to connect the mobile device to your computer and do it manually.
---
# Attributes Form Layout | Mergin Maps
[Skip to content](https://merginmaps.com/docs/layer/form-layout/#VPContent)
Return to top
Attributes Form Layout [](https://merginmaps.com/docs/layer/form-layout/#attributes-form-layout)
==================================================================================================
Collecting and editing data in the field can be more efficient with forms that are easy to navigate. QGIS offers a lot of options for improving the layout of your forms, such as using groups and tabs to keep related fields together, displaying or hiding a group of fields based on conditional visibility, or displaying tips and instructions in the forms.
QGIS Drag and Drop Designer [](https://merginmaps.com/docs/layer/form-layout/#qgis-drag-and-drop-designer)
------------------------------------------------------------------------------------------------------------
By default, the form is automatically generated and contains all the fields in the layer. However, you might want to change the order of the fields. Also, there may be some fields that do not need to be displayed during the survey, such as fields with [default values](https://merginmaps.com/docs/layer/form-configuration/#default-values)
that are calculated from the geometry.
QGIS Drag and Drop designer is an easy tool for defining the form layouts:
1. Open your [Mergin Maps](https://merginmaps.com/)
project in QGIS
2. Right-click on a layer and select **Properties**
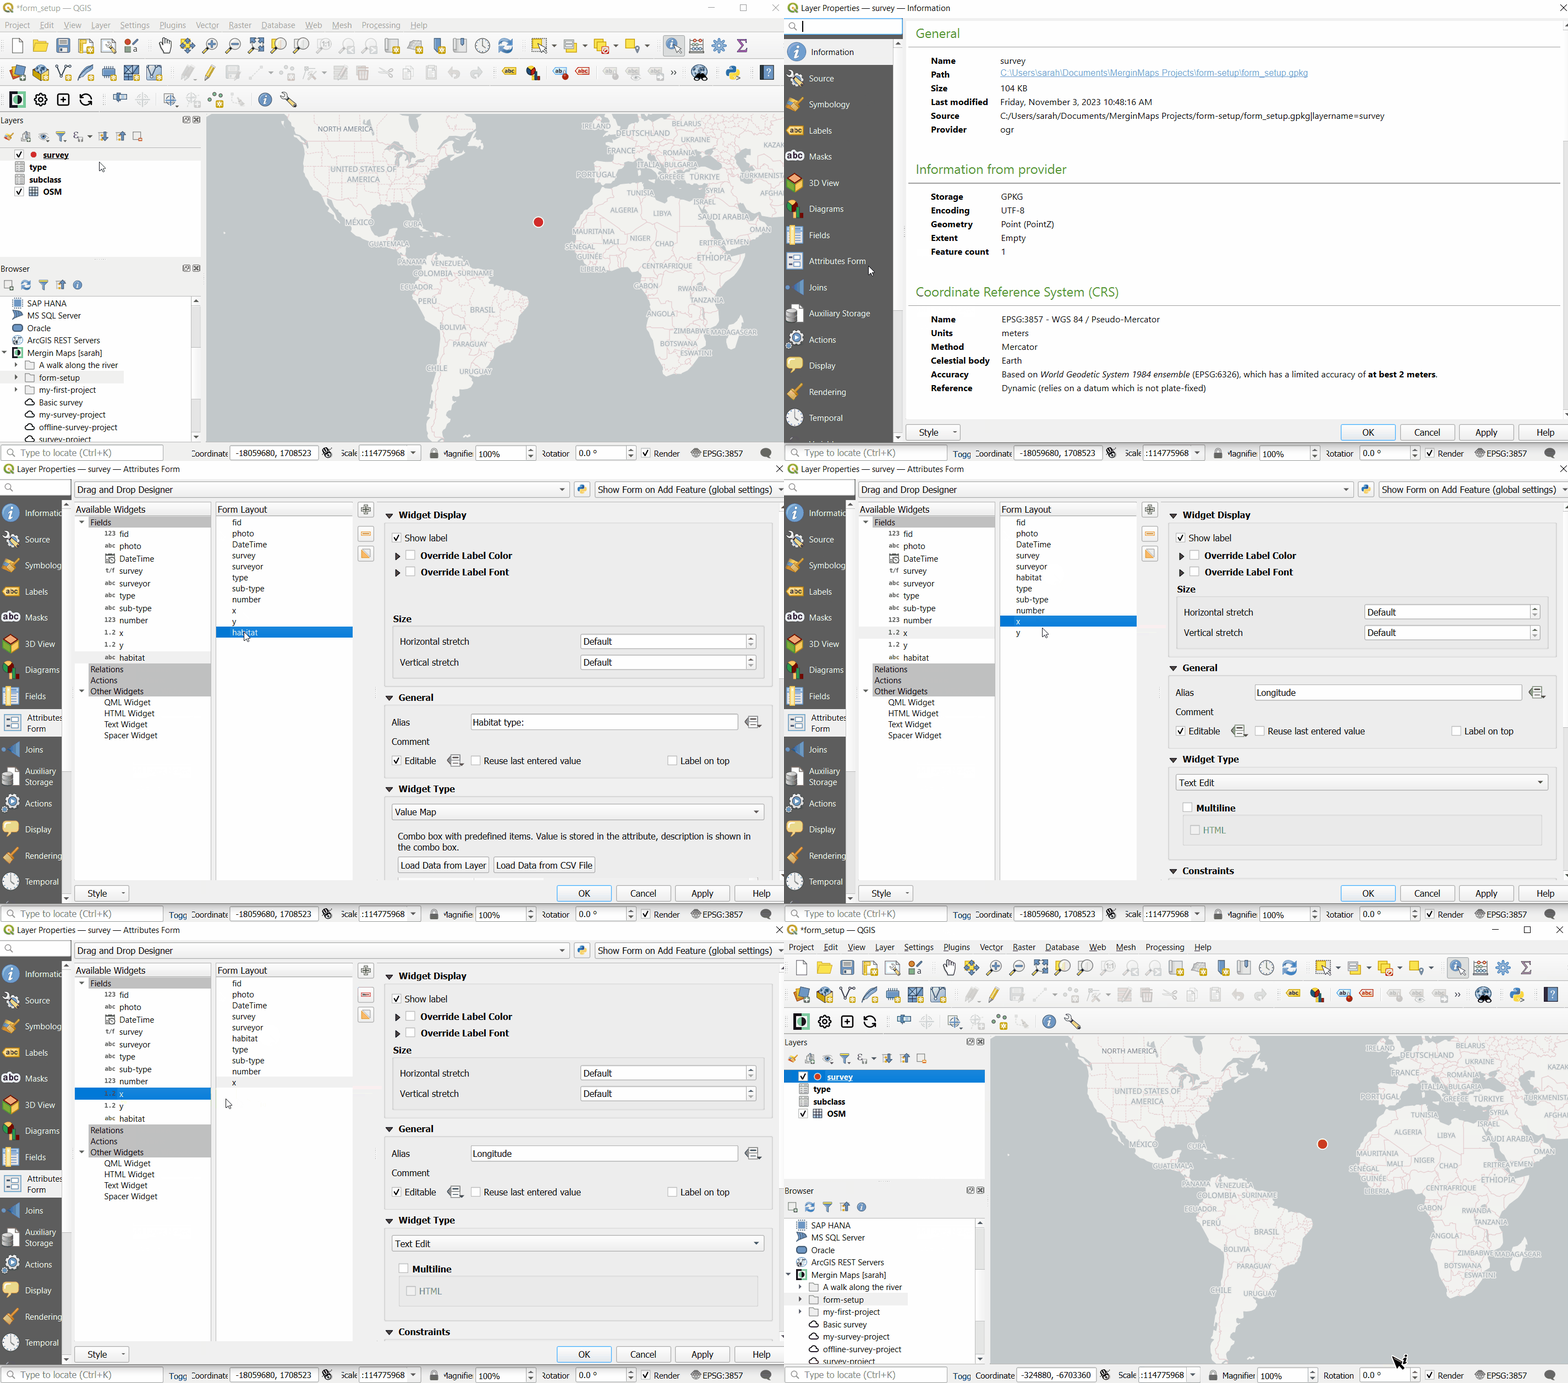
3. Navigate to the **Attributes form** tab. Here, switch to **Drag and Drop Designer**
4. Fields can be added and removed from the **Form Layout**. The order of the fields can be changed by simply dragging them higher or lower in the list.
Only fields that are in the **Form layout** will appear in the form.
5. Click **OK** to confirm your changes.
Tabs and groups [](https://merginmaps.com/docs/layer/form-layout/#tabs-and-groups)
------------------------------------------------------------------------------------
Using QGIS Drag and Drop designer, fields can be arranged into groups and tabs.
Example project available
To see an example of tabs and groups, you can clone [documentation/form\_setup](https://app.merginmaps.com/projects/documentation/form_setup/tree)
.
1. Click on the **+** button to add new group or a tab to the form layout 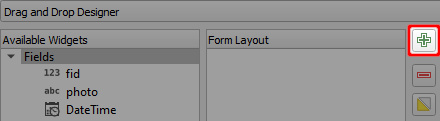
2. Choose the container type, add a label, and if needed, the number of columns.
A group can be placed within a tab or another group. 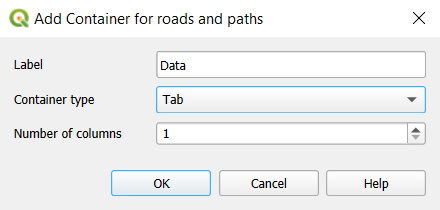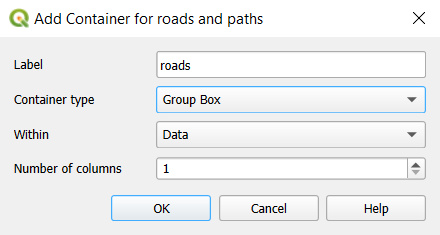
3. Drag and drop fields to tabs or groups as needed.
Here we have two tabs, _Data_ and _Changelog_. The _Data_ tab contains two groups: _roads_ and _paths_. 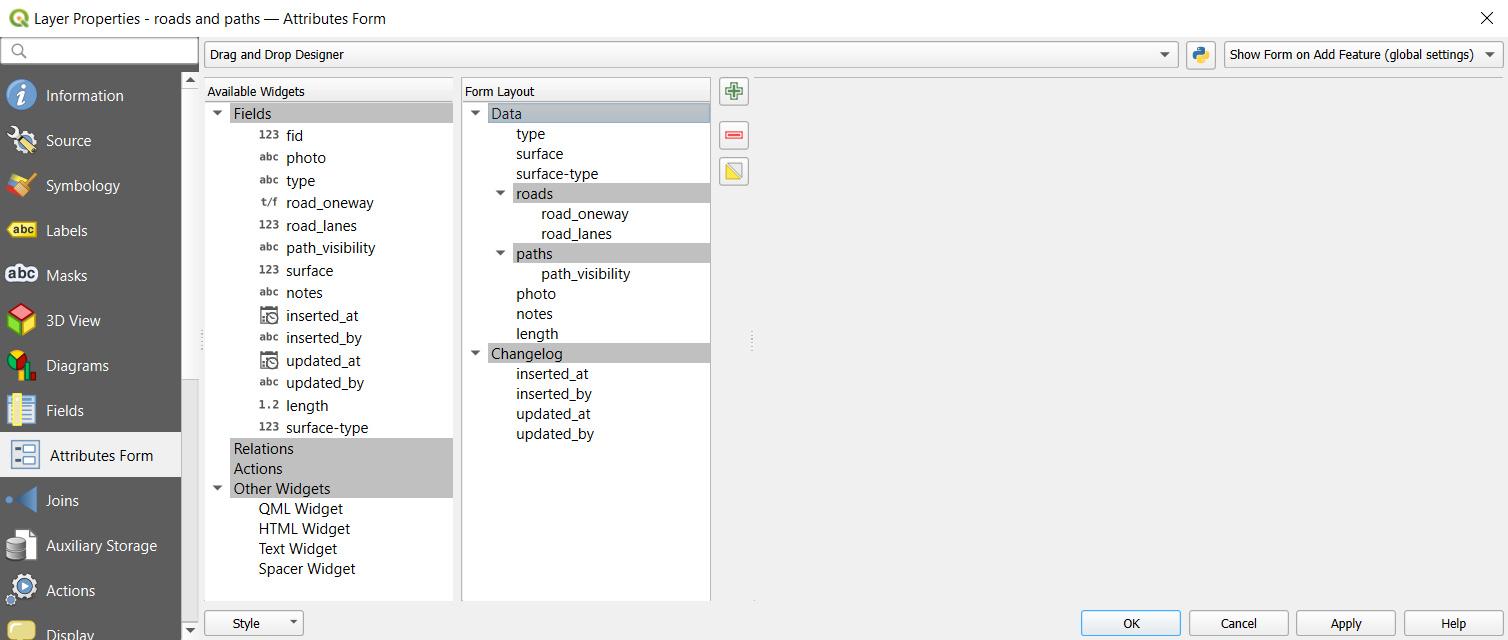
The form with tabs and groups will appear in QGIS like this: 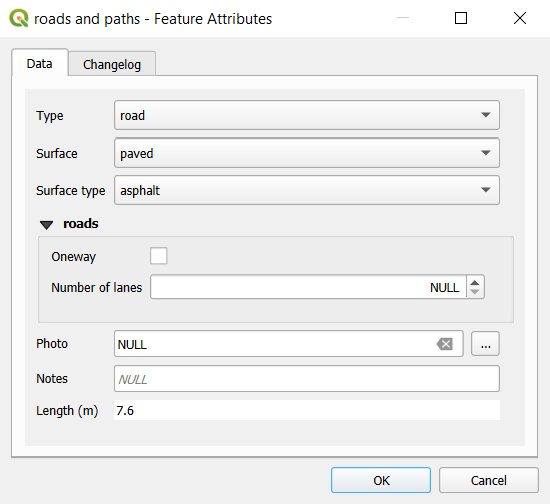
And this is how the same form looks like in the mobile app: 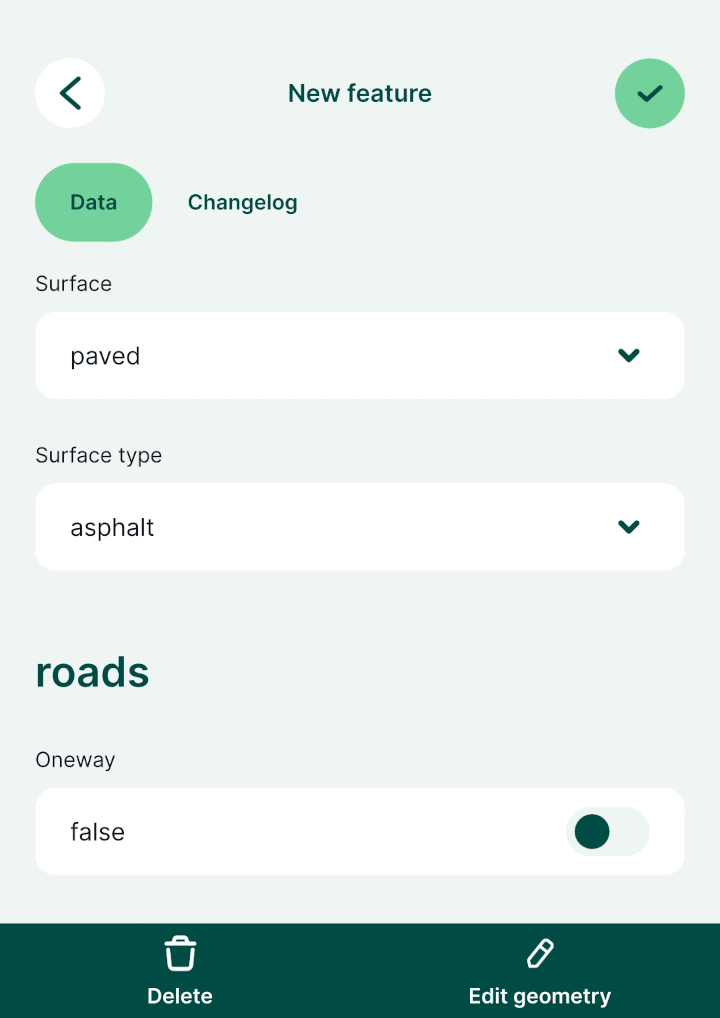
Show and hide fields depending on a field value (conditional visibility) [](https://merginmaps.com/docs/layer/form-layout/#show-and-hide-fields-depending-on-a-field-value-conditional-visibility)
----------------------------------------------------------------------------------------------------------------------------------------------------------------------------------------------------
Conditional visibility can be applied to groups and tabs, meaning they will be displayed or hidden depending on the value of a field.
Example project available
You can explore this functionality in [documentation/form\_setup](https://app.merginmaps.com/projects/documentation/form_setup/tree)
.
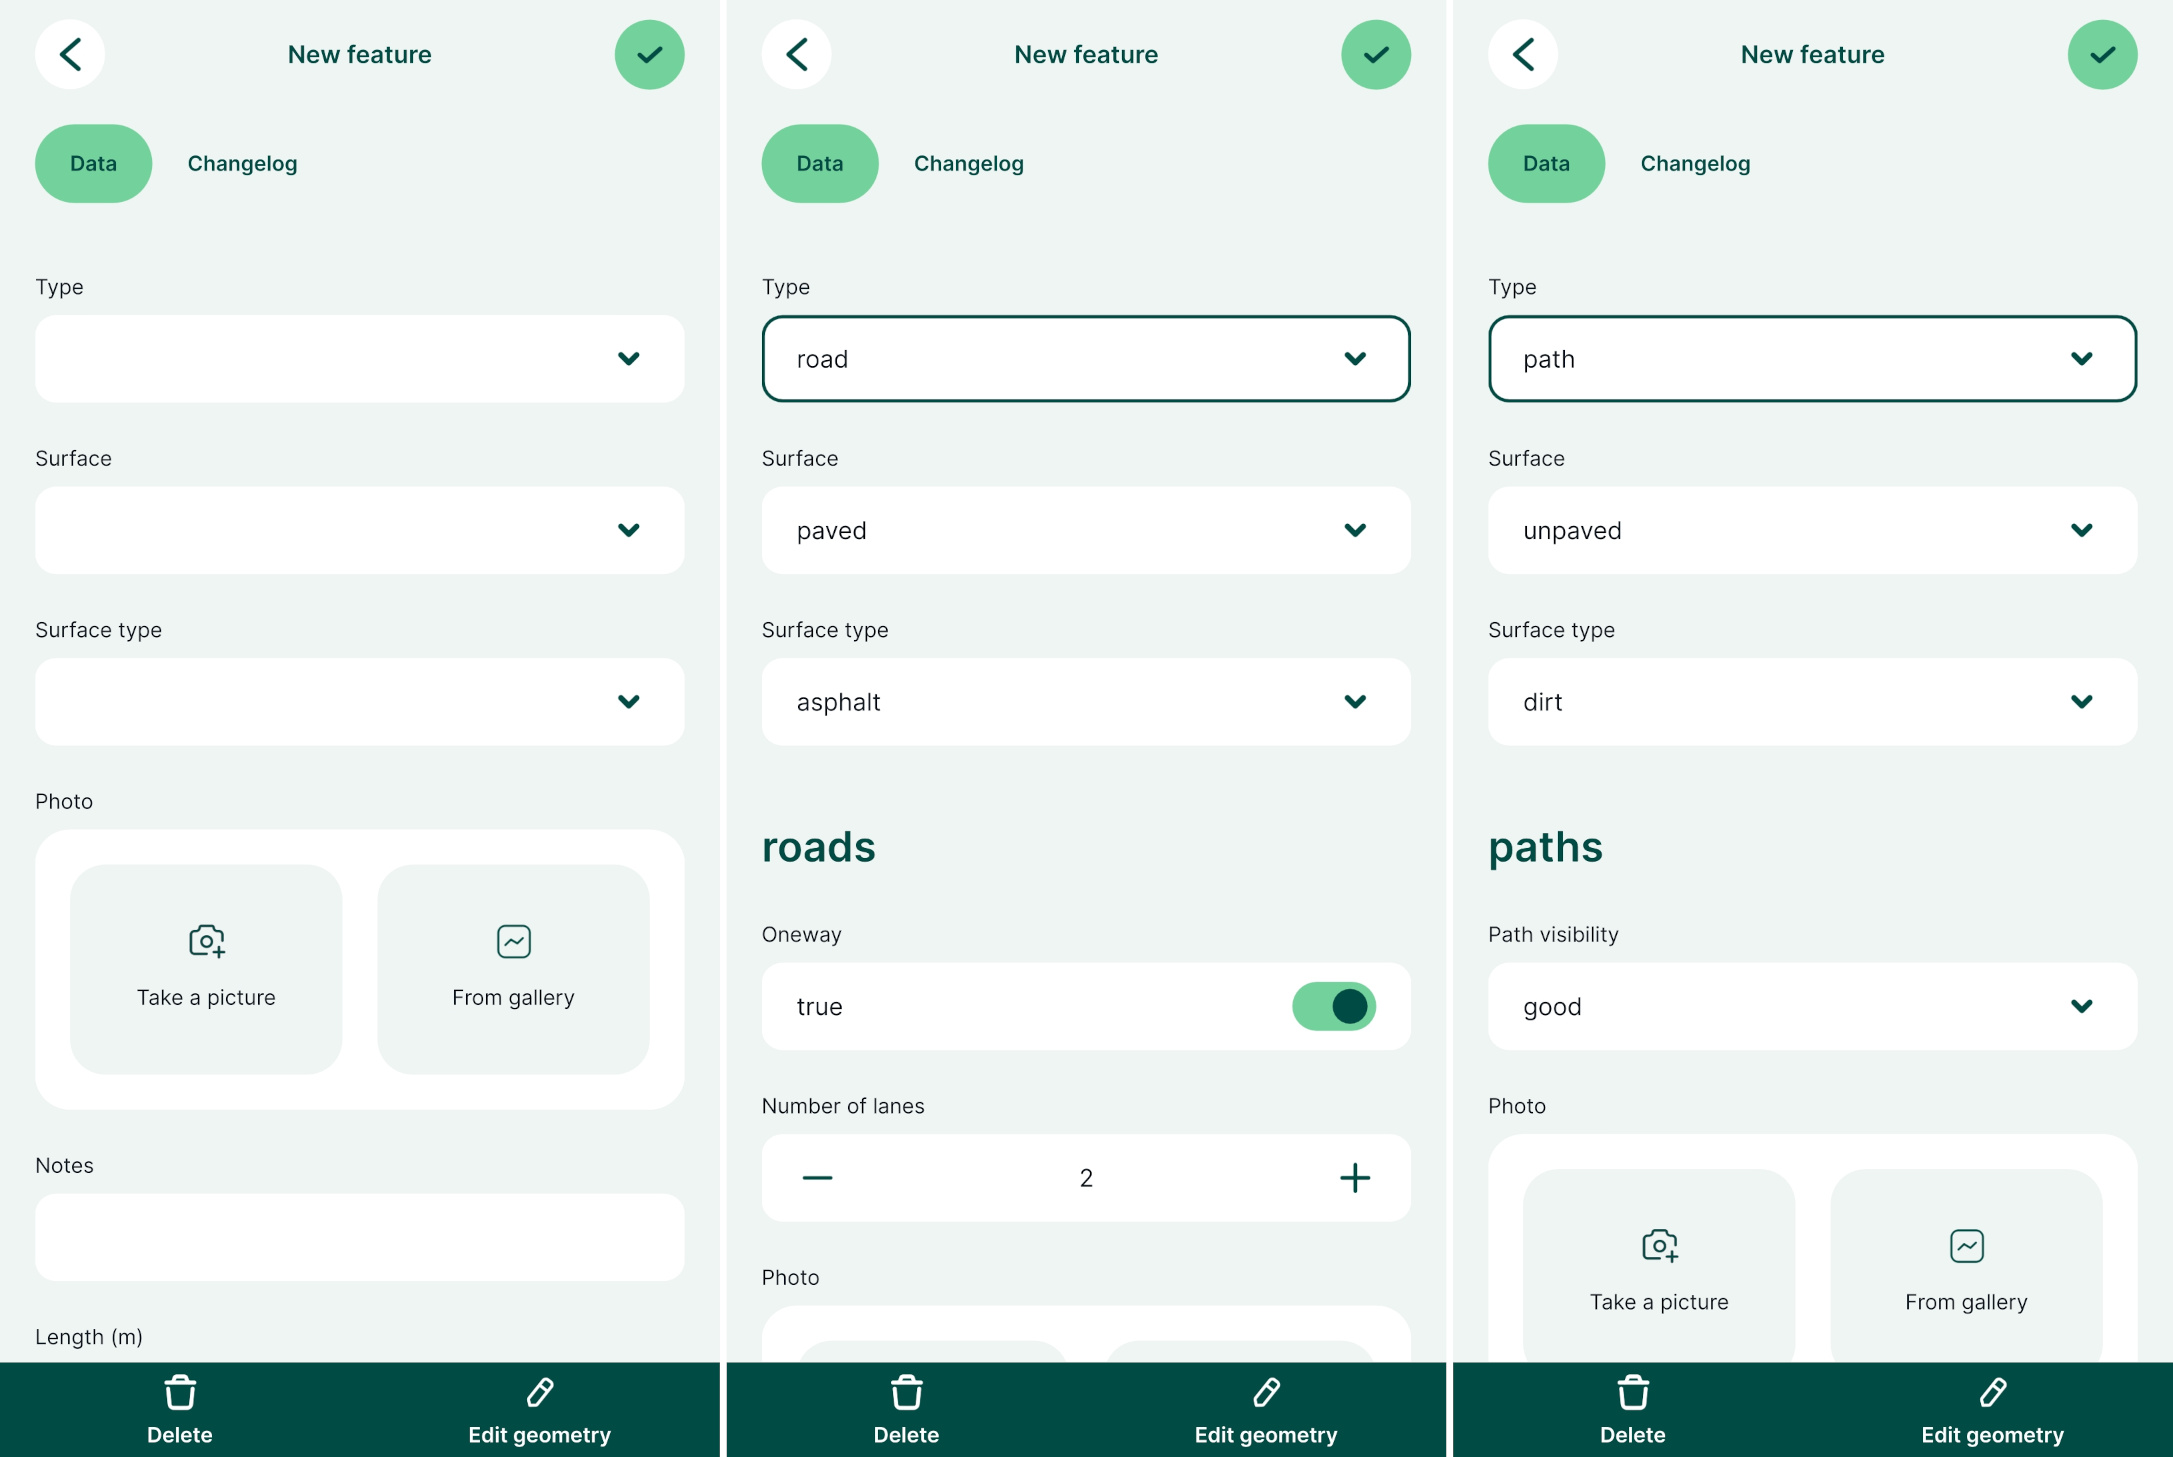
Here we will use a line layer named `roads and paths`. It is designed for surveying both roads and paths and most of the fields are relevant for every type of feature in this layer. However, there are some attributes that are specific for roads (e.g. the number of lanes) or for paths (e.g. the visibility of the path).
The form uses the value of the `type` field to display the relevant set of attributes. The `type` field is set up as [value map](https://merginmaps.com/docs/layer/form-widgets/#value-map)
with defined values `road` and `path`.
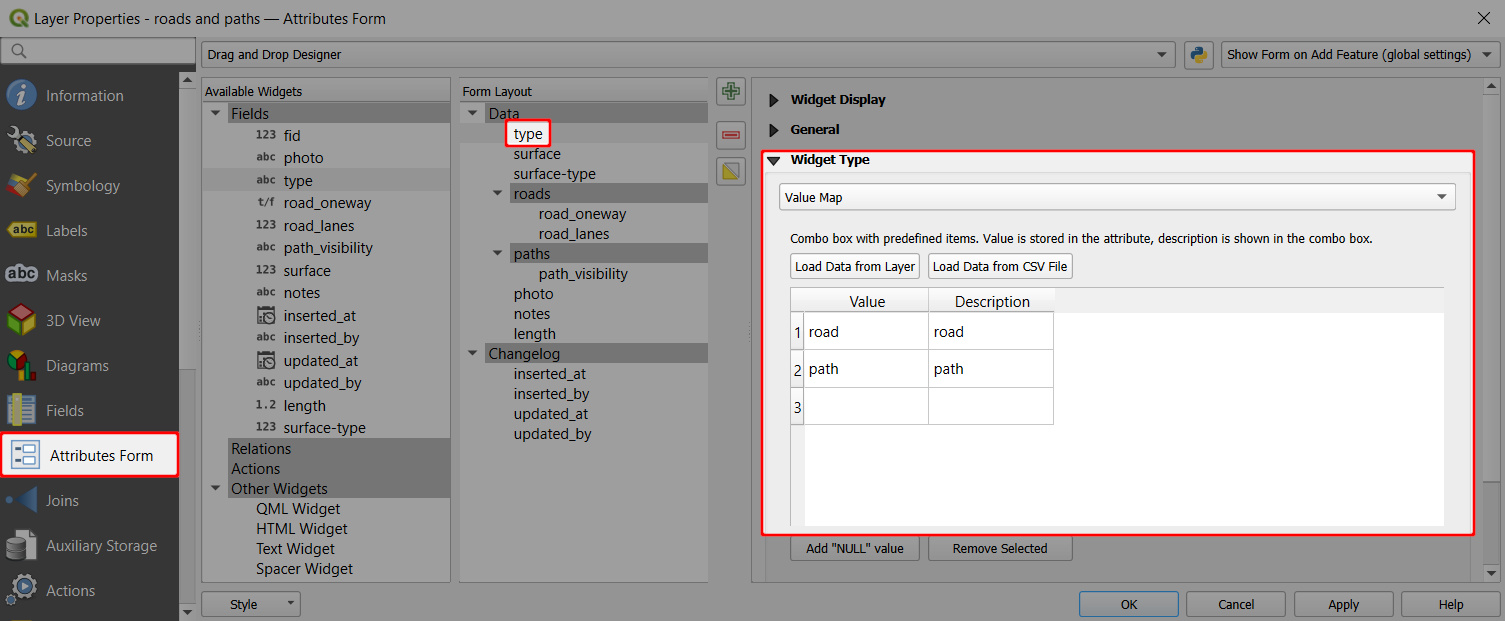
To set the visibility of groups in the attributes form:
1. Click on the **roads** group in the **Form Layout**
2. Check the **Control Visibility by Expression** option ✔️
3. Define the expression. Here we use: `"type" = "road"`
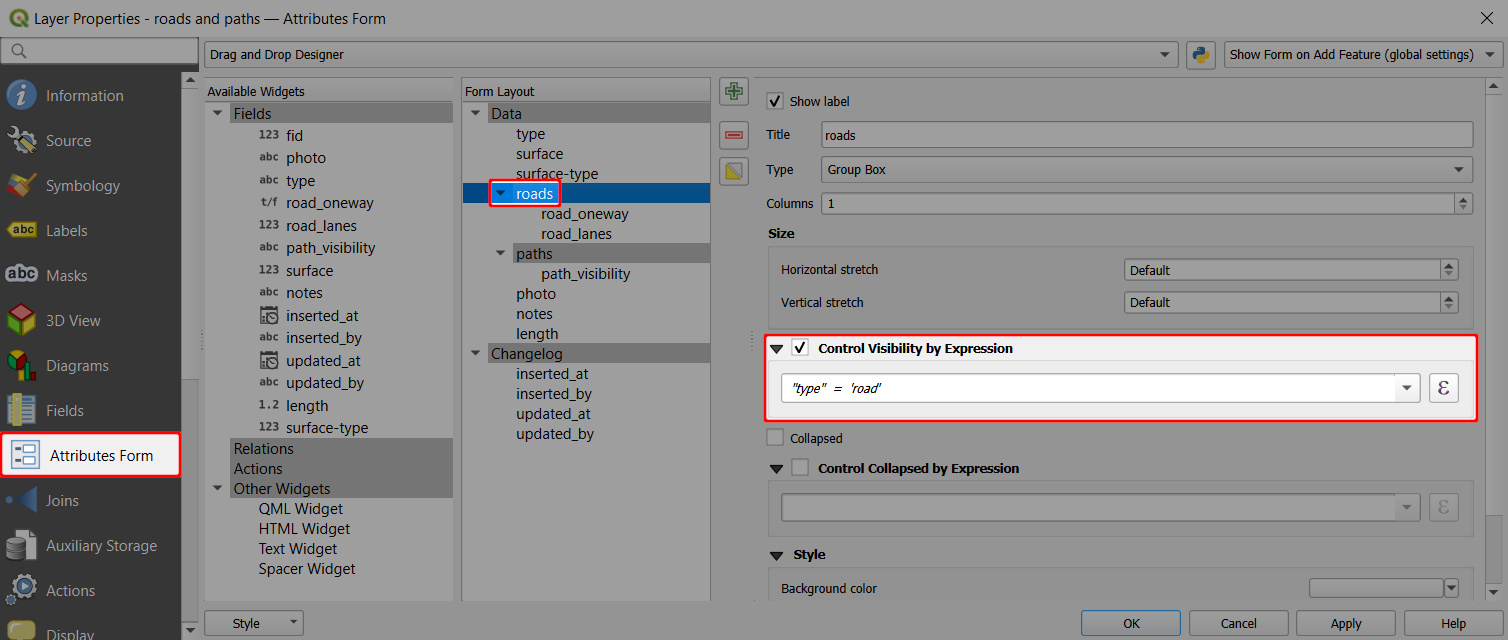
4. Same steps are used for the **path** group using the expression `"type" = "path"`
In the mobile app, the form displays these groups only when the condition is met. So, there are different sets of attributes depending on the value that is entered in the `type` field.
Display instructions in the form using Text and HTML widget [](https://merginmaps.com/docs/layer/form-layout/#display-instructions-in-the-form-using-text-and-html-widget)
----------------------------------------------------------------------------------------------------------------------------------------------------------------------------
Sometimes, you may want to include instructions or tips for surveyors in your forms. [QGIS](https://qgis.org/)
offers Text and HTML widgets that can be used for this purpose. Your text instructions can include [expressions and field values](https://merginmaps.com/docs/layer/form-layout/#using-expressions-in-text-and-html-widgets)
as well. The HTML widget supports various [HTML tags](https://doc.qt.io/qt-6/richtext-html-subset.html#supported-tags)
, so it can be also used, for instance, to display [online images](https://merginmaps.com/docs/layer/form-layout/#using-html-widget-to-display-online-images-and-other-online-resources)
.
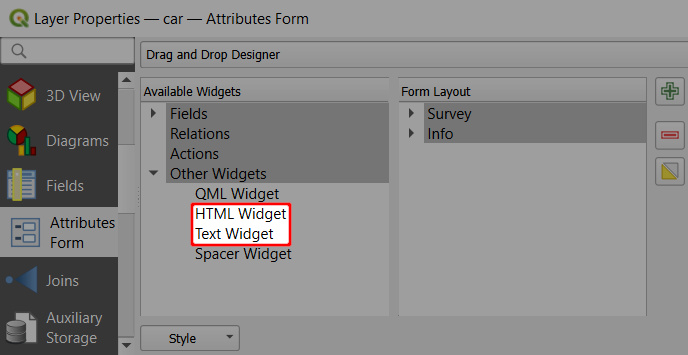
These widgets can be found in **Available Widgets** in the **Other Widgets** section when using the [Drag and Drop Designer](https://merginmaps.com/docs/layer/form-layout/#qgis-drag-and-drop-designer)
. 
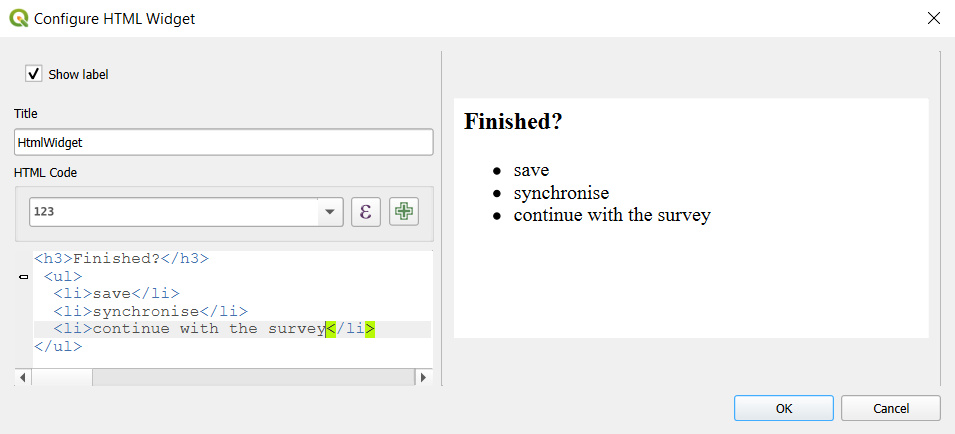
To configure the **Text** widget, enter the text you want to display in the form. On the right, you will see the preview. 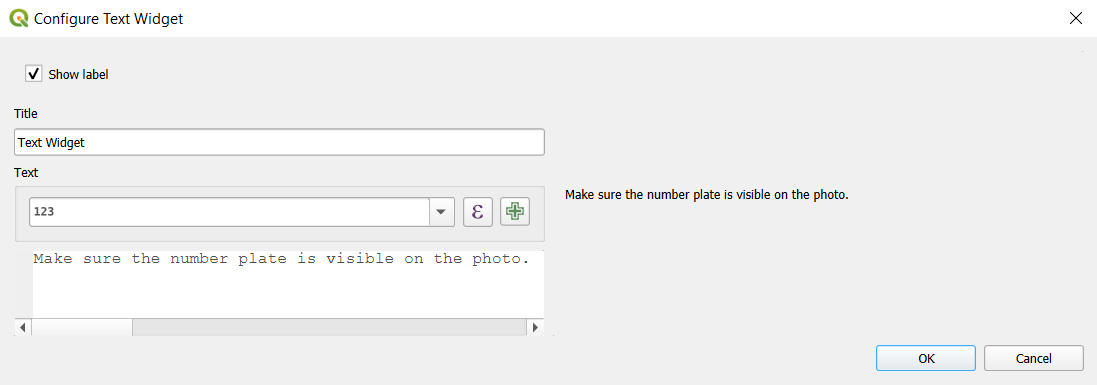
If you prefer your text to be formatted, you may do so in the **HTML** widget. HTML widget supports these [HTML tags](https://doc.qt.io/qt-6/richtext-html-subset.html#supported-tags)
. 
...and this is how the Text and HTML widgets look like in the form in QGIS (left) and in the mobile app (right). 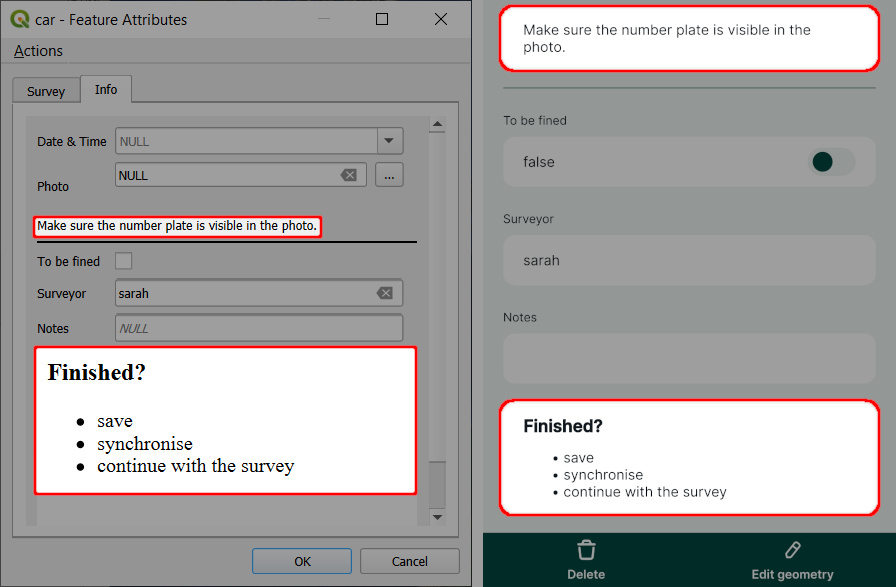
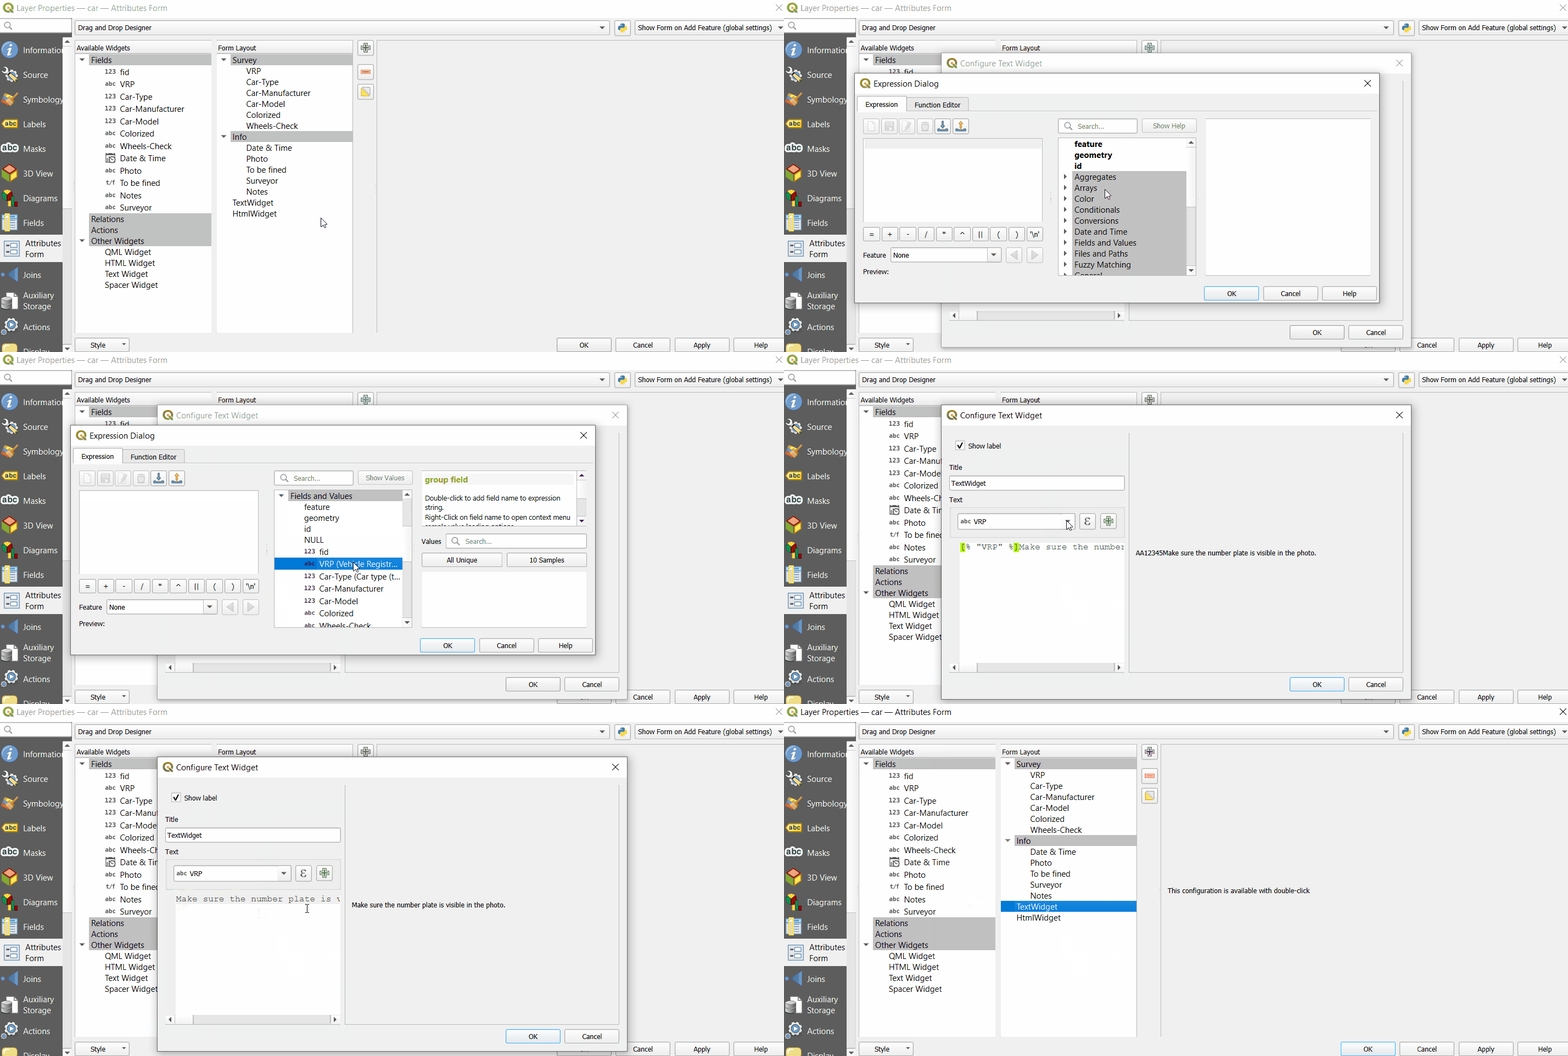
### Using expressions in Text and HTML widgets [](https://merginmaps.com/docs/layer/form-layout/#using-expressions-in-text-and-html-widgets)
Expressions and variables can be used both in the Text and the HTML widget.
TIP
Clone [documentation/form\_cascade](https://app.merginmaps.com/projects/documentation/form_cascade/tree)
to follow this example.
1. When configuring the Text or HTML widget, click on the **Expression Builder** button
2. Enter the expression that will be used in your text and click **OK**.
Field values can be selected from the **Fields and Values** list. There are other variables and expressions that can be used.
3. Click on the **+** button to add the expression to the text.
Here, we configured the widget with this text: `Make sure the number plate [% "VRP" %] is visible in the photo.`
In this case, `VRP` is the name of a field aliased as `Vehicle Registration Plate` in the form.
4. Save and synchronise your project.
... and this is how it works during the field survey. `[% "VRP" %]` expression displays the current value of the `Vehicle Registration Plate` field. 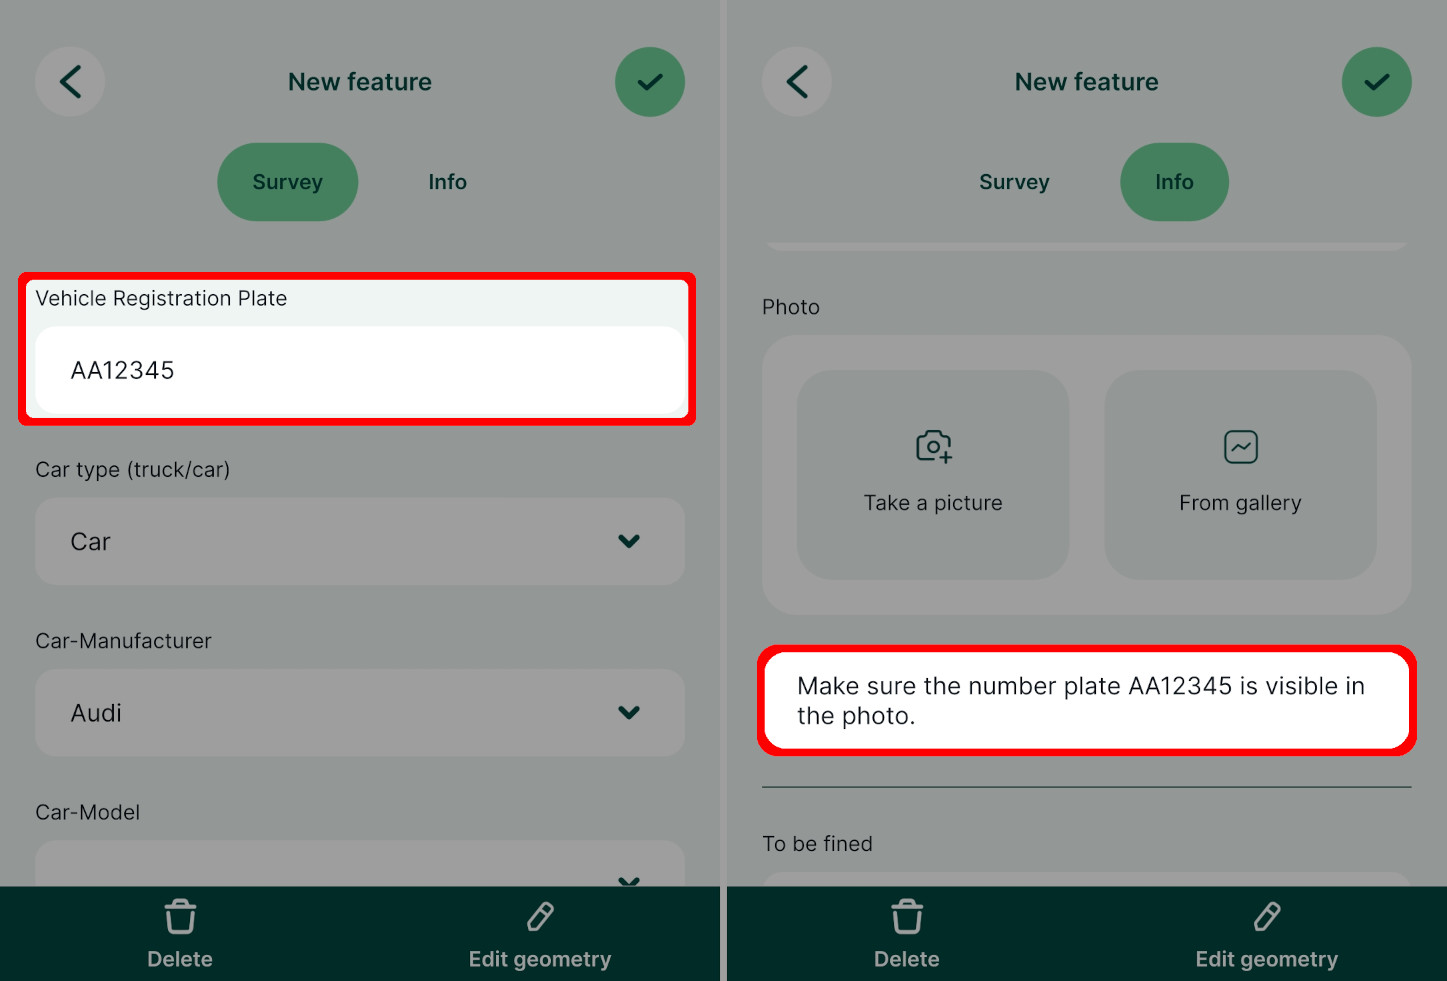
### Using HTML widget to display online images and other online resources [](https://merginmaps.com/docs/layer/form-layout/#using-html-widget-to-display-online-images-and-other-online-resources)
The **HTML widget** can be also used to display online images in the mobile app or open online resources, such as PDF files, videos or websites, in the browser of your device.
TIP
Clone [documentation/forms-display-images-and-files](https://app.merginmaps.com/projects/documentation/forms-display-images-and-files/tree)
to follow this example.
Here are HTML samples you can use to [configure the HTML widget](https://merginmaps.com/docs/layer/form-layout/#using-expressions-in-text-and-html-widgets)
. Your form should contain a text field for storing the full URL link (here: `link`).
To use these samples, replace `link` by the name of the appropriate field in your layer.
* show image in the form
html
* display a text (`here is your link`) with a link that can be opened in a browser
html
Make sure that the HTML widget works before taking it to the field by testing it in the mobile app. It should look something like this:
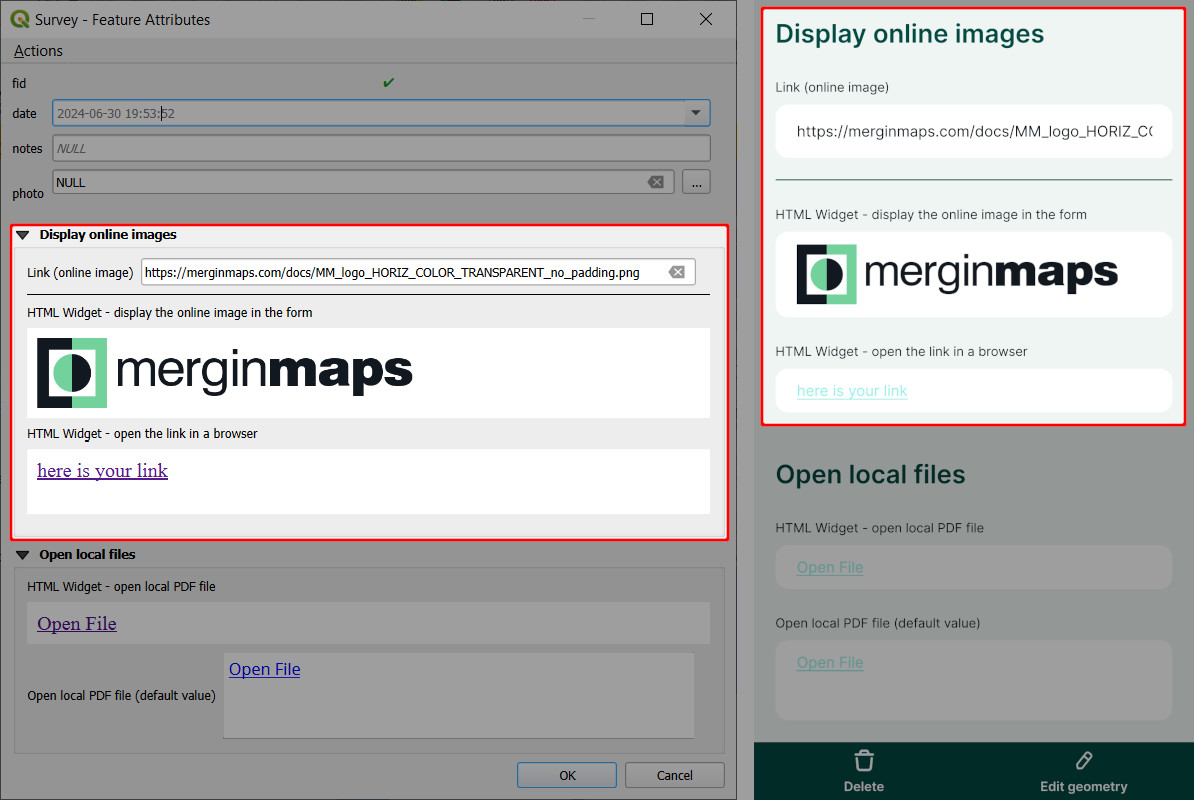
Image preview in QGIS 3.36+
QGIS may not display the preview of the online image if you use QGIS 3.36 or higher. Despite this behaviour, the mobile app displays it correctly. Therefore we recommend trying the setup by opening the form in the mobile app to make sure it works as intended.
### Using HTML widget to open local files [](https://merginmaps.com/docs/layer/form-layout/#using-html-widget-to-open-local-files)
The HTML widget can also be used to open local files: for instance, a locally stored PDF file can be opened from within the form during the survey.
TIP
Clone [documentation/forms-display-images-and-files](https://app.merginmaps.com/projects/documentation/forms-display-images-and-files/tree)
to how this works.
* A PDF file named `my-pdf.pdf` is stored in the main [project folder](https://merginmaps.com/docs/manage/project/#mergin-maps-project-folder)
as it needs to be packaged with the project.
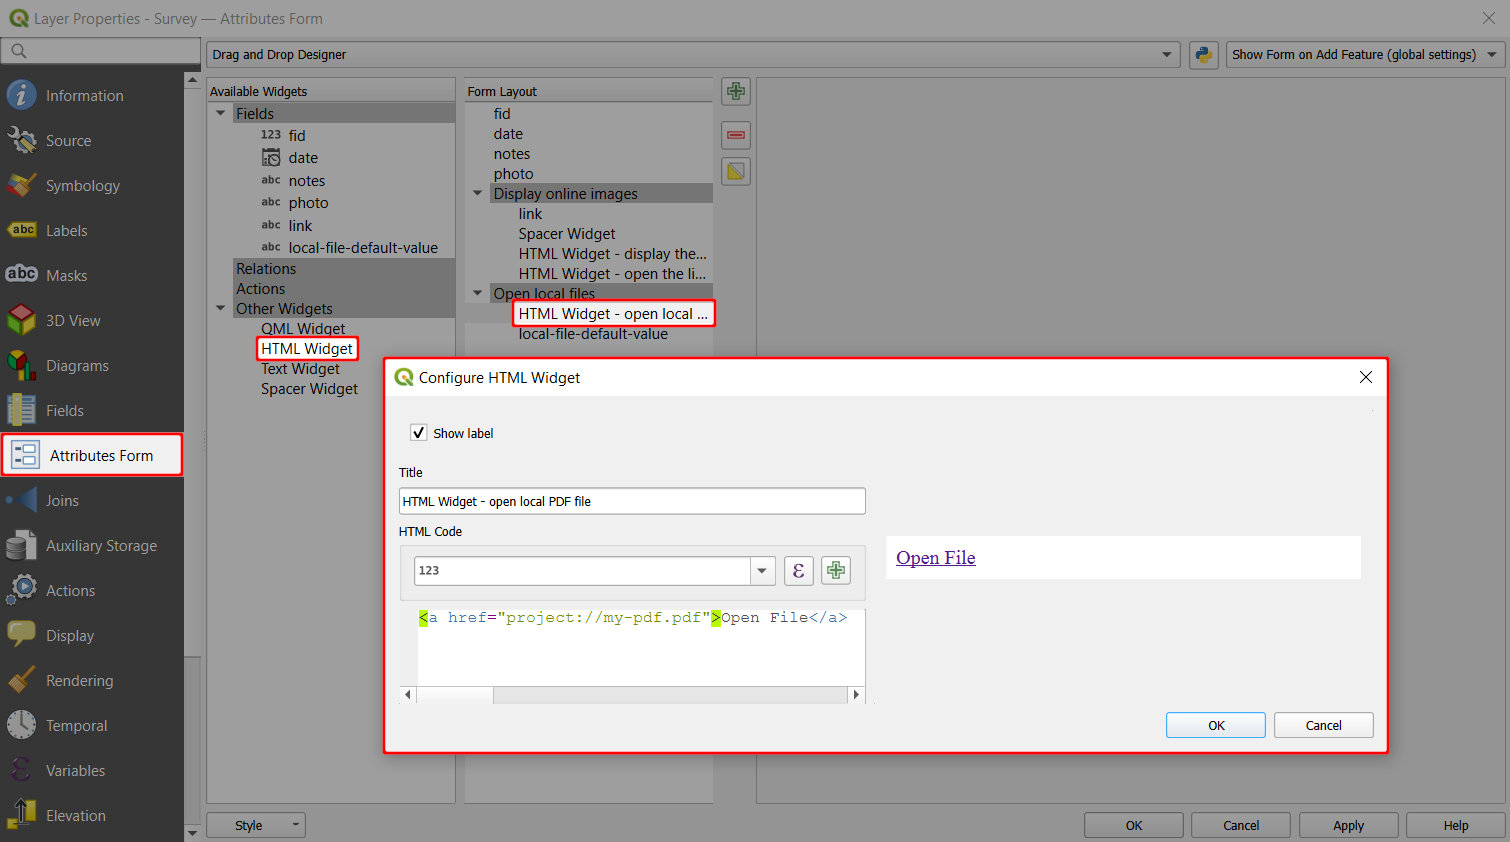
* The HTML Widget is added to the **Attributes Form** and configured as follows:
Open File
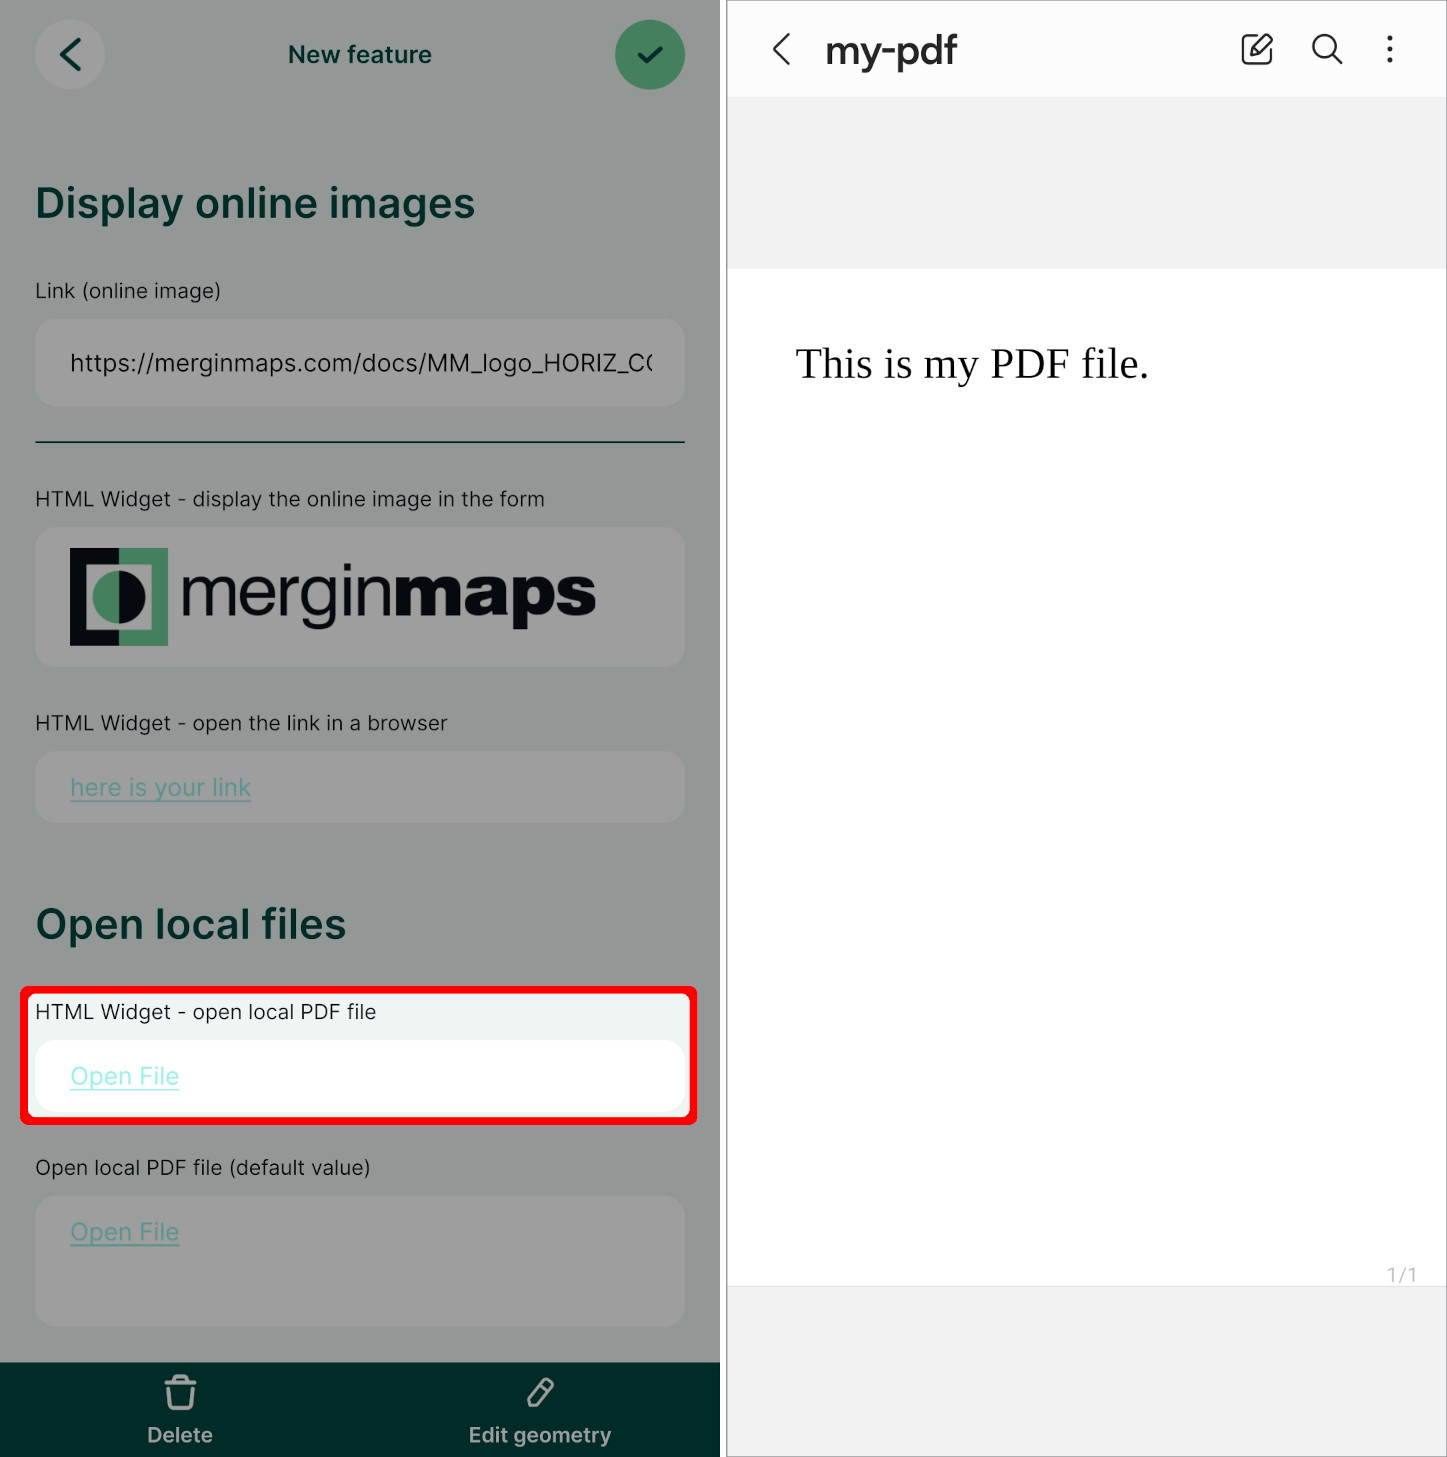
In the mobile app, you can tap the _Open File_ link to open the PDF file using the default application of your device.
Open local files using default values
Local files can be displayed in the form also using [default values](https://merginmaps.com/docs/layer/form-configuration/#open-local-files-using-default-values)
.
In the [documentation/forms-display-images-and-files](https://app.merginmaps.com/projects/documentation/forms-display-images-and-files/tree)
project, you can explore and compare both alternatives.
Spacer widget [](https://merginmaps.com/docs/layer/form-layout/#spacer-widget)
--------------------------------------------------------------------------------
since QGIS 3.30
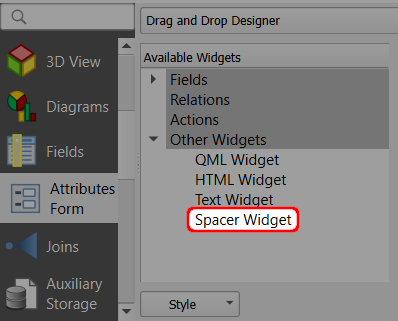
The Spacer widget can be useful if you want to have some space between the fields in your form or add a horizontal line.
It can be found in _Available Widgets_ in the _Other Widgets_ section when using the [Drag and Drop Designer](https://merginmaps.com/docs/layer/form-layout/#qgis-drag-and-drop-designer)
. 
When adding the spacer widget to the form, there is an option to check the **Draw horizontal line** option. Otherwise, a vertical space will be added to the form. 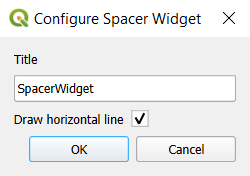
And this is how the spacer widget looks like in the form in QGIS (left) and in the mobile app (right). 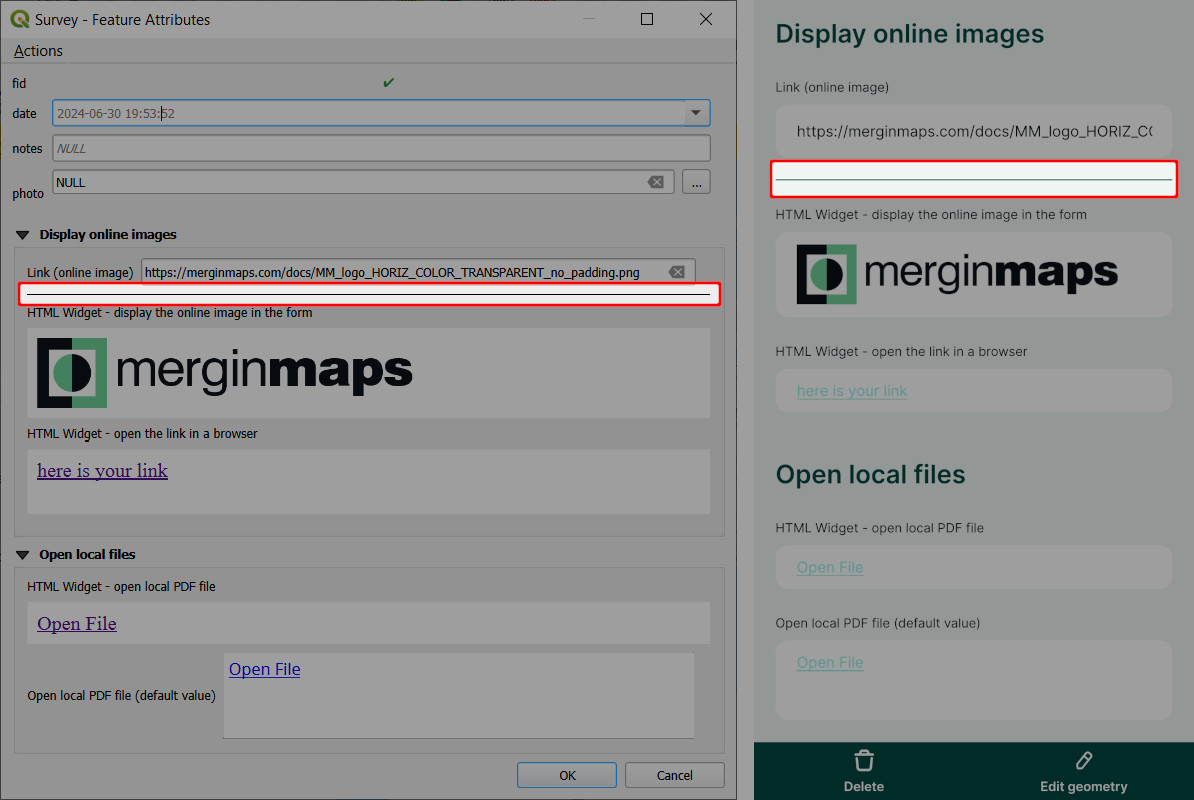
---
# Mergin Maps Documentation | Mergin Maps
[Skip to content](https://merginmaps.com/docs/#VPContent)
Return to top
Mergin Maps Documentation [](https://merginmaps.com/docs/#mergin-maps-documentation)
======================================================================================
* Store and track changes to your geo-data with [Mergin Maps](https://merginmaps.com/)
💿
* Capture geo-info easily through your mobile or tablet with Mergin Maps mobile app 📱
* Setup and analyse the project on desktop with [QGIS](https://qgis.org/)
💻
* All open-source and easily integrated to your existing toolset 💡
 [Join our community chat](https://merginmaps.com/community/join)
and ask questions!
The ecosystem consist of various components:
* [QGIS](https://qgis.org/)
> Powerful GIS Desktop application
* [Mergin Maps QGIS plugin](https://plugins.qgis.org/plugins/Mergin/)
> QGIS plugin
* [Mergin Maps Cloud](https://merginmaps.com/)
> SaaS Cloud Service (available also as [Mergin Maps EE](https://merginmaps.com/pricing)
or [Mergin Maps CE](https://github.com/MerginMaps)
)
* [Mergin Maps mobile app](https://merginmaps.com/)
> iOS and Android mobile app
[](https://apps.apple.com/us/app/input/id1478603559?ls=1)
[](https://play.google.com/store/apps/details?id=uk.co.lutraconsulting)
[](https://github.com/MerginMaps/mobile/releases/latest)
Get started [](https://merginmaps.com/docs/#get-started)
----------------------------------------------------------
* [Capturing Your First Field Data](https://merginmaps.com/docs/tutorials/capturing-first-data/)
* [Opening Surveyed Data on Your Computer](https://merginmaps.com/docs/tutorials/opening-surveyed-data-on-your-computer/)
* [Creating a Project in QGIS](https://merginmaps.com/docs/tutorials/creating-a-project-in-qgis/)
* [Using Mergin Maps mobile app](https://merginmaps.com/docs/tutorials/mobile/)
* [Further Project Customisation](https://merginmaps.com/docs/tutorials/further-project-customisation/)
* [Working Collaboratively](https://merginmaps.com/docs/tutorials/working-collaboratively/)
Install & Sign Up [](https://merginmaps.com/docs/#install-sign-up)
--------------------------------------------------------------------
* [How to Install Mergin Maps mobile app](https://merginmaps.com/docs/setup/install-mobile-app/)
* [How to Sign Up to Mergin Maps](https://merginmaps.com/docs/setup/sign-up-to-mergin-maps/)
* [How to Install QGIS](https://merginmaps.com/docs/setup/install-qgis/)
* [How to Install Mergin Maps QGIS plugin](https://merginmaps.com/docs/setup/install-mergin-maps-plugin-for-qgis/)
Manage Account & Project [](https://merginmaps.com/docs/#manage-account-project)
----------------------------------------------------------------------------------
* [User Account](https://merginmaps.com/docs/manage/account/)
* [Single Sign-On (SSO)](https://merginmaps.com/docs/manage/sso/)
* [Workspaces](https://merginmaps.com/docs/manage/workspaces/)
* [Subscriptions and Invoicing](https://merginmaps.com/docs/manage/subscriptions/)
* [Member Roles and Permissions](https://merginmaps.com/docs/manage/permissions/)
* [Synchronisation](https://merginmaps.com/docs/manage/synchronisation/)
* [Mergin Maps Project](https://merginmaps.com/docs/manage/project/)
* [How to Create a New Project](https://merginmaps.com/docs/manage/create-project/)
* [How to Share, Transfer or Delete Projects](https://merginmaps.com/docs/manage/project-advanced/)
* [How to Delete Files](https://merginmaps.com/docs/manage/delete-files)
* [How to Deploy Revised Projects](https://merginmaps.com/docs/manage/deploy-new-project/)
* [How to Recover Missing Data](https://merginmaps.com/docs/manage/missing-data/)
* [Mergin Maps QGIS plugin Overview](https://merginmaps.com/docs/manage/plugin/)
* [Mergin Maps Dashboard](https://merginmaps.com/docs/manage/dashboard/)
* [Webmaps](https://merginmaps.com/docs/manage/dashboard-maps/)
* [Project History and Versions](https://merginmaps.com/docs/manage/project-history/)
* [Selective Synchronisation](https://merginmaps.com/docs/manage/selective_sync/)
Setup GIS Project [](https://merginmaps.com/docs/#setup-gis-project)
----------------------------------------------------------------------
* [QGIS Project Preparation](https://merginmaps.com/docs/gis/features/)
* [Sorting and Search Setup](https://merginmaps.com/docs/gis/search_data/)
* [Background Maps](https://merginmaps.com/docs/gis/settingup_background_map/)
* [Map Themes](https://merginmaps.com/docs/gis/setup_themes/)
* [How to Set Photo Names Format](https://merginmaps.com/docs/gis/photo-names/)
* [How to Enable Digitising](https://merginmaps.com/docs/gis/enable_digitising/)
* [How to Set Up Snapping for Mergin Maps mobile app](https://merginmaps.com/docs/gis/snapping/)
* [How to Avoid Polygons Overlap](https://merginmaps.com/docs/gis/snapping/)
* [Custom Projections](https://merginmaps.com/docs/gis/proj/)
* [Supported Formats](https://merginmaps.com/docs/gis/supported_formats/)
Configure Survey Layer [](https://merginmaps.com/docs/#configure-survey-layer)
--------------------------------------------------------------------------------
* [Best Practice Tips for Layers and Forms](https://merginmaps.com/docs/layer/best-practice/)
* [Setting Up Widgets in Attributes Form](https://merginmaps.com/docs/layer/form-widgets/)
* [Attributes Form Configuration](https://merginmaps.com/docs/layer/form-configuration/)
* [Attributes Form Layout](https://merginmaps.com/docs/layer/form-layout/)
* [Capturing Photos](https://merginmaps.com/docs/layer/photos/)
* [How to Attach Multiple Photos to Features](https://merginmaps.com/docs/layer/attach-multiple-photos-to-features/)
* [How to Link Multiple Records to One Feature (1-N Relations)](https://merginmaps.com/docs/layer/one-to-n-relations/)
* [Exif Metadata](https://merginmaps.com/docs/layer/exif/)
* [How to Use Hyperlinks](https://merginmaps.com/docs/layer/external-link/)
* [Working with Non-spatial Tables](https://merginmaps.com/docs/layer/non-spatial-data/)
* [Extra Position Variables](https://merginmaps.com/docs/layer/position_variables/)
* [Extra QGIS Variables](https://merginmaps.com/docs/layer/plugin-variables/)
Fieldwork Tips [](https://merginmaps.com/docs/#fieldwork-tips)
----------------------------------------------------------------
* [Mergin Maps mobile app Interface](https://merginmaps.com/docs/field/mobile-app-ui/)
* [Offline Use of Mergin Maps mobile app](https://merginmaps.com/docs/field/external_gps/)
* [External GPS](https://merginmaps.com/docs/field/external_gps/)
* [GPS Accuracy](https://merginmaps.com/docs/field/gps_accuracy/)
* [Position Tracking](https://merginmaps.com/docs/field/tracking/)
* [Synchronisation in Mergin Maps mobile app](https://merginmaps.com/docs/field/autosync/)
* [Measurement Tools](https://merginmaps.com/docs/field/measure/)
* [Layers in Mergin Maps mobile app](https://merginmaps.com/docs/field/layers/)
* [Map Sketching in Mergin Maps mobile app](https://merginmaps.com/docs/field/map-sketching/)
* [Photo Sketching in Mergin Maps mobile app](https://merginmaps.com/docs/field/photo-sketching/)
* [How to Add, Edit, Delete Features](https://merginmaps.com/docs/field/mobile-features/)
* [How to Reuse Last Entered Values](https://merginmaps.com/docs/field/reuse-last-values/)
* [How to Stake Out Points](https://merginmaps.com/docs/field/stake-out/)
* [How to Fix a Broken Project](https://merginmaps.com/docs/field/broken-project/)
For Developers [](https://merginmaps.com/docs/#for-developers)
----------------------------------------------------------------
* [Custom Mobile App](https://merginmaps.com/docs/dev/customapp/)
* [Python Client Module Integration](https://merginmaps.com/docs/dev/integration/)
* [C++ Standalone Client Integration](https://merginmaps.com/docs/dev/integration-cpp/)
* [PostgreSQL DB Sync](https://merginmaps.com/docs/dev/dbsync/)
* [Media Sync](https://merginmaps.com/docs/dev/media-sync/)
* [Work Packages](https://merginmaps.com/docs/dev/work-packages/)
* [Geodiff Library](https://merginmaps.com/docs/dev/geodiff/)
Custom Server [](https://merginmaps.com/docs/#custom-server)
--------------------------------------------------------------
* [Overview](https://merginmaps.com/docs/server/)
* [Install](https://merginmaps.com/docs/server/install/)
* [Security](https://merginmaps.com/docs/server/security/)
* [Upgrade](https://merginmaps.com/docs/server/upgrade/)
* [Administer](https://merginmaps.com/docs/server/administer/)
* [Administration Panel](https://merginmaps.com/docs/server/dashboard/)
* [Troubleshoot Custom Servers](https://merginmaps.com/docs/server/troubleshoot/)
* [Using Mergin Maps Mobile App and QGIS Plugin with a Custom Server](https://merginmaps.com/docs/server/plugin-mobile-app/)
Migrate to Mergin Maps [](https://merginmaps.com/docs/#migrate-to-mergin-maps)
--------------------------------------------------------------------------------
* [From QField](https://merginmaps.com/docs/migrate/qfield/)
* [From ArcGIS](https://merginmaps.com/docs/migrate/arcgis/)
* [From Fulcrum](https://merginmaps.com/docs/migrate/fulcrumapp/)
Support & Legal [](https://merginmaps.com/docs/#support-legal)
----------------------------------------------------------------
* [Licensing](https://merginmaps.com/docs/misc/licensing/)
* [Get Involved](https://merginmaps.com/docs/misc/get-involved/)
* [Troubleshoot](https://merginmaps.com/docs/misc/troubleshoot/)
* [Write Documentation](https://merginmaps.com/docs/misc/write-docs/)
---
# How to Create a New Project | Mergin Maps
[Skip to content](https://merginmaps.com/docs/manage/create-project/#VPContent)
Return to top
How to Create a New Project [](https://merginmaps.com/docs/manage/create-project/#how-to-create-a-new-project)
================================================================================================================
There are several methods of creating a new Mergin Maps project:
* If you want to take full advantage of [Mergin Maps](https://merginmaps.com/)
, use [QGIS](https://merginmaps.com/docs/manage/create-project/#create-a-project-in-qgis)
to prepare new projects.
* [Mergin Maps mobile app](https://merginmaps.com/docs/manage/create-project/#create-a-project-in-mergin-maps-mobile-app)
offers the quickest (albeit limited) way of creating a Mergin Maps project.
* You can also use [Mergin Maps dashboard](https://app.merginmaps.com/)
, especially if your project files are already fully prepared and only need uploading.
If you want to make a copy of your projects or the ones shared with you, you can clone them in [QGIS](https://merginmaps.com/docs/manage/create-project/#clone-an-existing-project-in-qgis)
or the [dashboard](https://merginmaps.com/docs/manage/create-project/#clone-an-existing-project-through-mergin-maps-dashboard)
.
WARNING
When creating a project, keep in mind that its name cannot be changed later.
Create a project in QGIS [](https://merginmaps.com/docs/manage/create-project/#create-a-project-in-qgis)
----------------------------------------------------------------------------------------------------------
TIP
[Creating a Project in QGIS](https://merginmaps.com/docs/tutorials/creating-a-project-in-qgis/)
tutorial will show you how to create a new project in QGIS, add layers, configure attributes forms and save changes to [Mergin Maps](https://merginmaps.com/)
.
To work with Mergin Maps projects in QGIS, you will need to [install the Mergin Maps QGIS plugin](https://merginmaps.com/docs/setup/install-mergin-maps-plugin-for-qgis/)
first.
1. Open a blank or an existing project in QGIS.
2. Click on **Create Mergin Maps Project** from the toolbar. 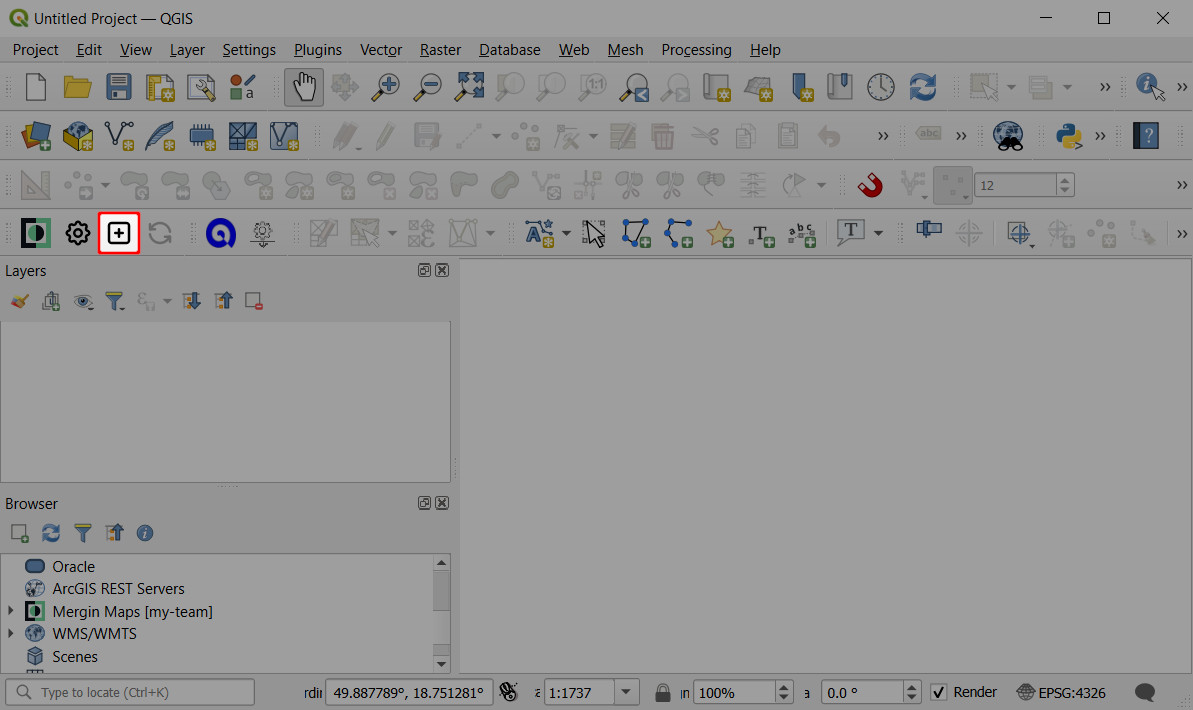
3. There are three options available (the last two options are available only if you have an existing project open): 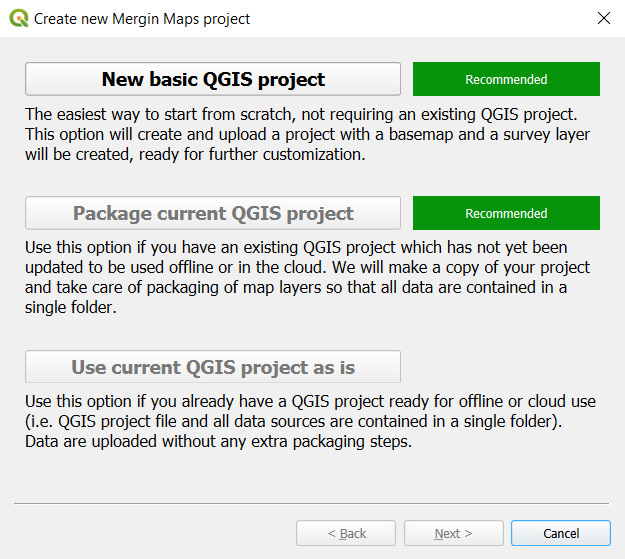
* **New basic QGIS project**. If you are new to QGIS, this is a good starting point. The new basic QGIS project will contain a survey layer (a point layer) and a background map (OpenStreetMap).
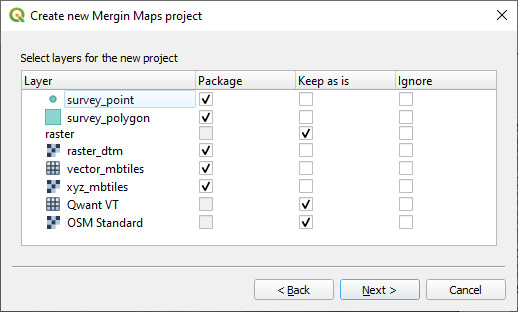
* **Package current QGIS project**. This option will create a copy of your project and all the files in a single folder. There are three options for handling layers: package, keep as is (the layer will be referenced as is in the new project) or ignore (the layer will not be included in the new project). For more details, see [Mergin Maps project](https://merginmaps.com/docs/manage/project/#packaging-qgis-project)
. 
* **Use current QGIS project as is**. This is for cases when you already have a stand-alone folder with your project packaged.
4. Change the workspace (if needed), name the project and select a path where your project folder and associated files will be generated.
Keep in mind that the project name cannot be changed later. 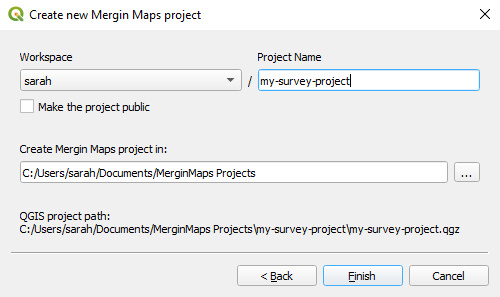
WARNING
Your project should be saved on a local drive. Using shared network drives and cloud storage (such as OneDrive or Google Drive) is **not supported**.
The new Mergin Maps project will be created locally on your computer and also on the [Mergin Maps](https://merginmaps.com/)
server.
### Clone an existing project in QGIS [](https://merginmaps.com/docs/manage/create-project/#clone-an-existing-project-in-qgis)
Using Mergin Maps QGIS plugin, you can make a copy of projects you have access to.
1. Navigate to **Mergin Maps** in the **Browser panel**.
2. Find the project you want to clone. Right-click on it and select **Clone**.
You might need to [switch to another workspace](https://merginmaps.com/docs/manage/workspaces/#switch-workspaces-in-qgis)
to locate the project. 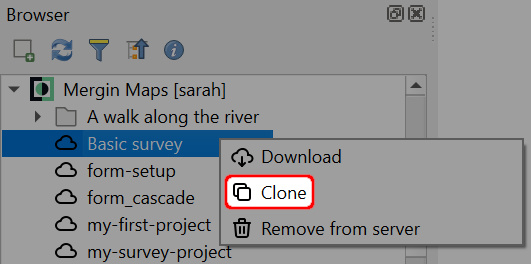
3. Select the **workspace** from the drop-down menu and enter your new **Project Name**. Click **OK**. 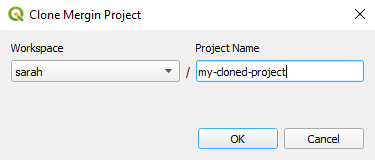
The project will be saved in the selected workspace.
Create a project in Mergin Maps mobile app [](https://merginmaps.com/docs/manage/create-project/#create-a-project-in-mergin-maps-mobile-app)
----------------------------------------------------------------------------------------------------------------------------------------------
TIP
[Capturing Your First Field Data](https://merginmaps.com/docs/tutorials/capturing-first-data/)
tutorial will show you how to create a new project and capture field data in Mergin Maps mobile app.
1. Open the mobile app on your mobile device
2. Navigate to the **Home** tab and tap **Create project**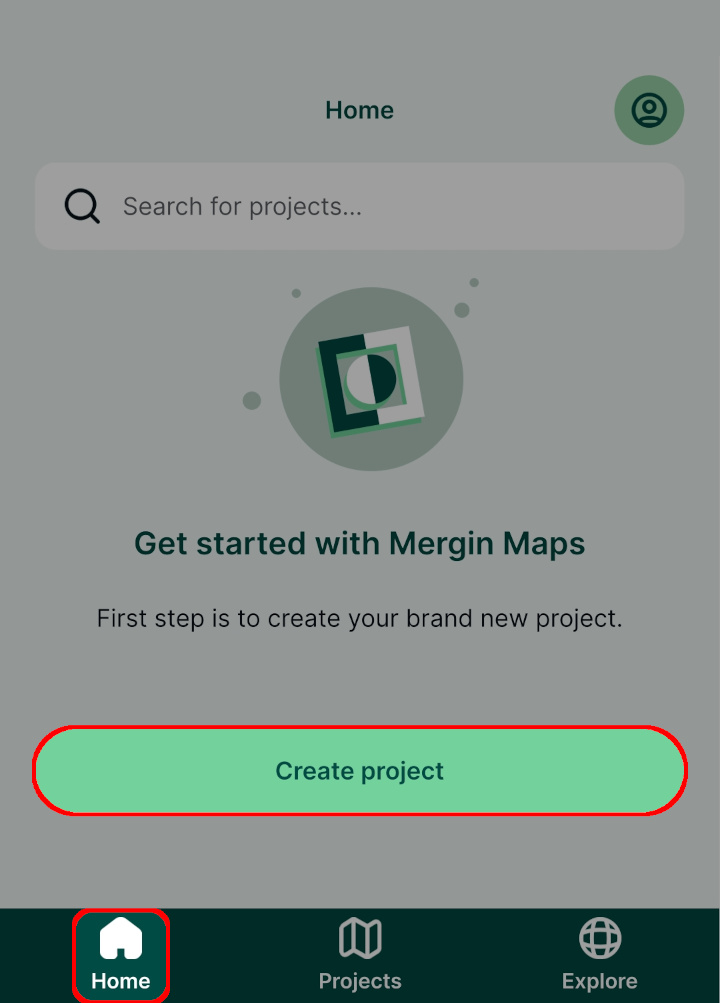
3. Give the project a name. Keep in mind that the name cannot be changed later.
Press **Create project**. 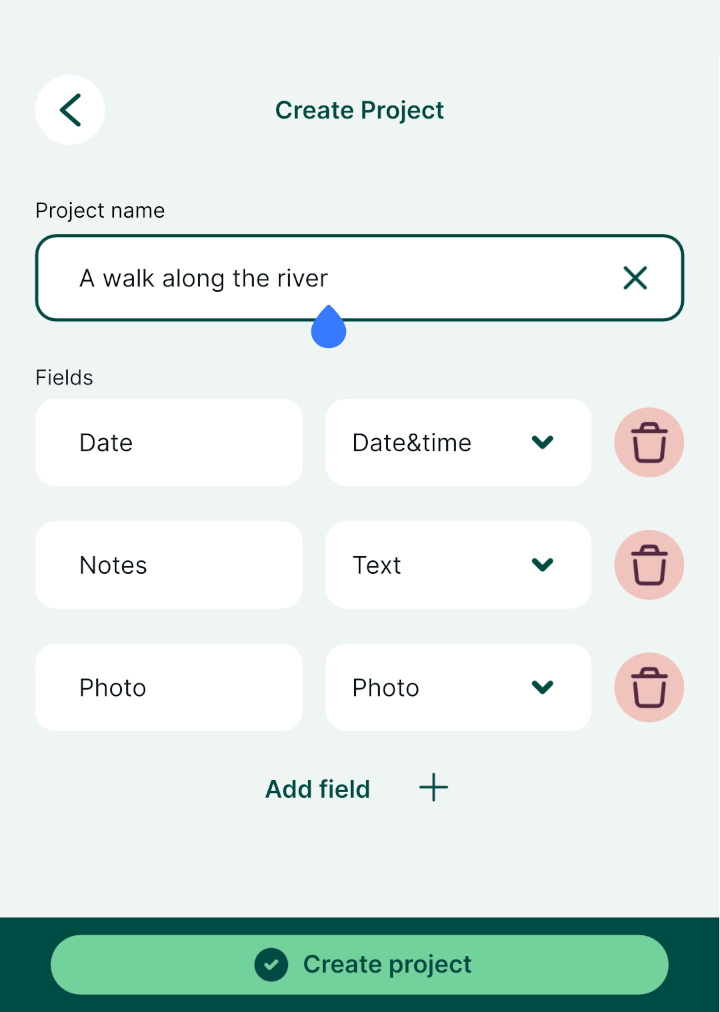
4. Your new project will be created locally on your mobile device 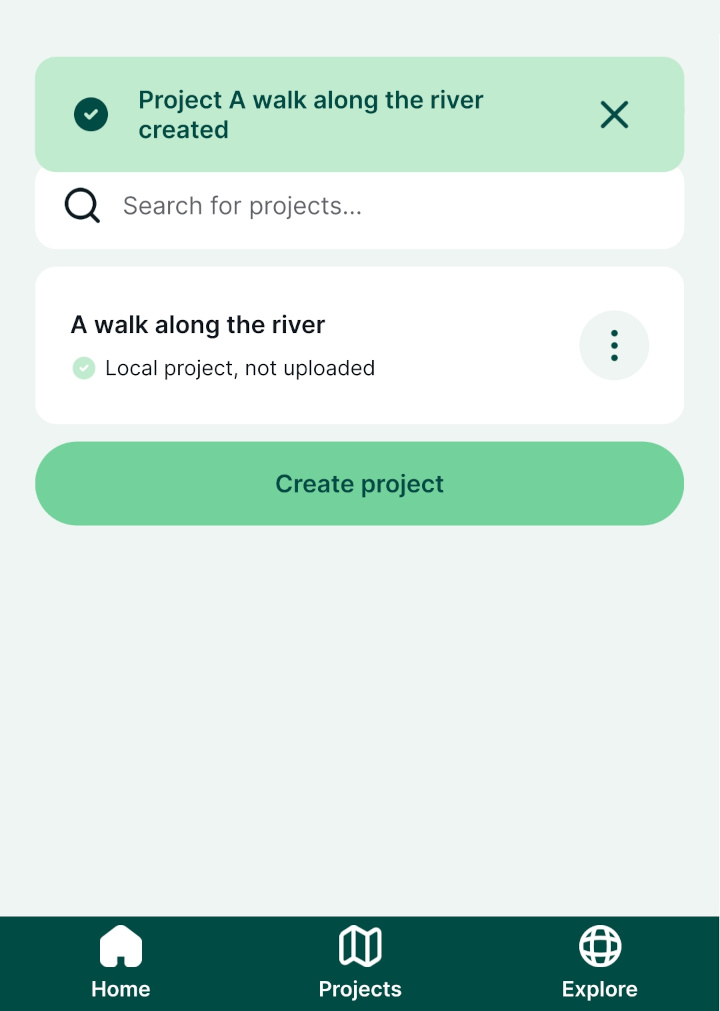
5. To save it to the [Mergin Maps](https://merginmaps.com/)
server, tap the **Upload** option 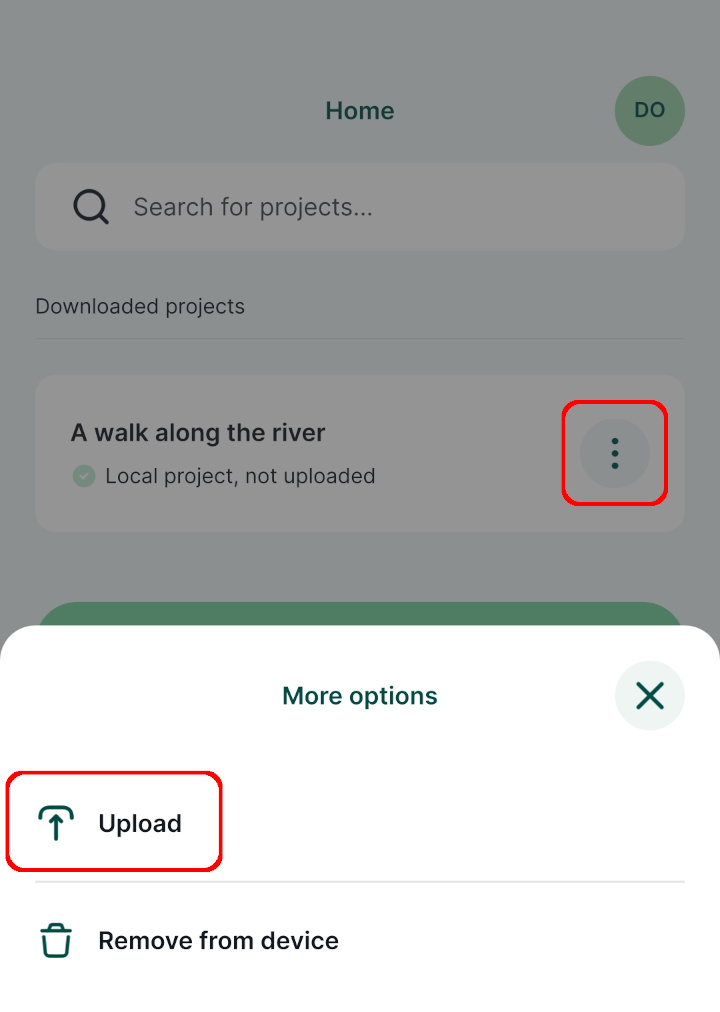
6. The project is now uploaded to your current workspace and can be shared across devices or with other users 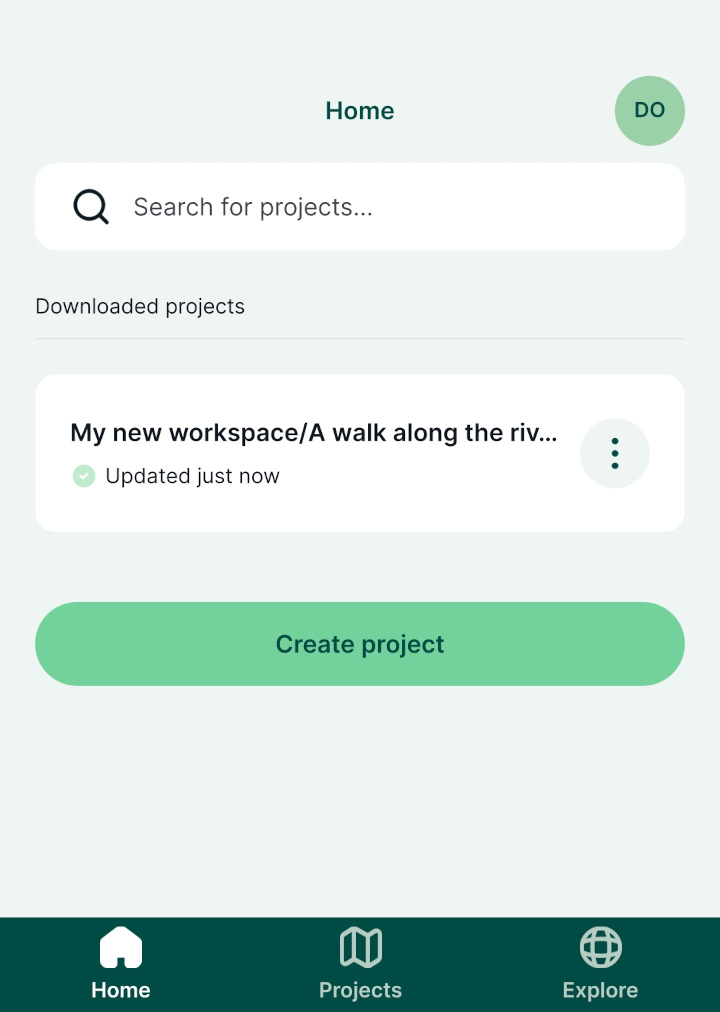
Create a project through Mergin Maps dashboard [](https://merginmaps.com/docs/manage/create-project/#create-a-project-through-mergin-maps-dashboard)
------------------------------------------------------------------------------------------------------------------------------------------------------
WARNING
The preferred way of creating a project is to use the QGIS plugin. This option is for advanced users.
1. Navigate to [app.merginmaps.com](https://app.merginmaps.com/)
and sign in.
2. In the **Projects** tab, click on **Create project**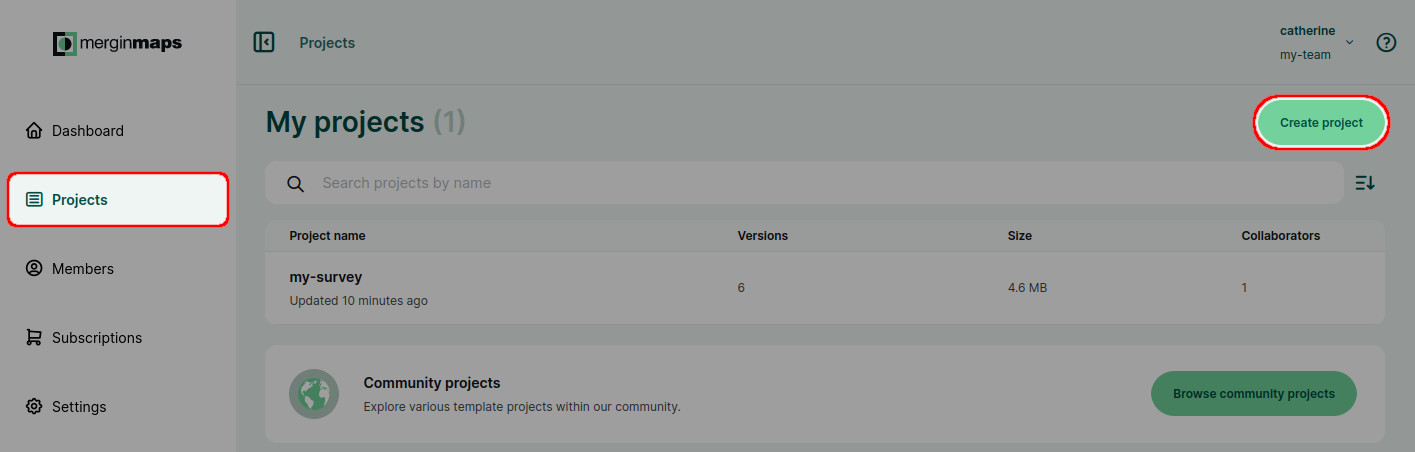
3. Enter a **Project name** and click **Create project**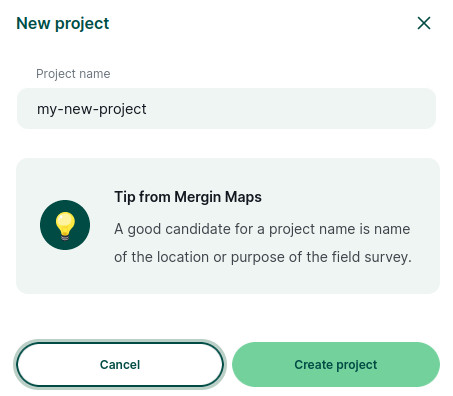
4. Now you will be directed to the project overview.
Files can be uploaded using the QGIS plugin or by **Drag and drop**.
If you are uploading files manually through the [dashboard](https://app.merginmaps.com/)
, do not forget to synchronise the changes by clicking **Update changes** in the **Data Sync**. 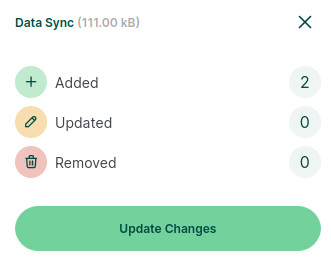
### Clone an existing project through Mergin Maps dashboard [](https://merginmaps.com/docs/manage/create-project/#clone-an-existing-project-through-mergin-maps-dashboard)
Projects you have access to and [public projects](https://merginmaps.com/docs/manage/permissions/#public-and-private-projects)
can be cloned. By cloning a project, you will create your own copy of this project. This way, you can use public projects as templates for your own work or easily create backups.
#### Clone a project from your workspace [](https://merginmaps.com/docs/manage/create-project/#clone-a-project-from-your-workspace)
1. In the **Projects** tab, find the project you want to clone, open it and click on **Clone**.
If needed, [switch to another workspace](https://merginmaps.com/docs/manage/workspaces/#switch-workspaces-in-qgis)
to locate the project. 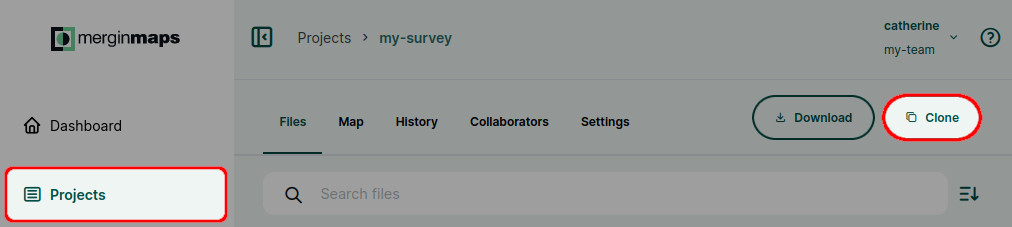
2. Enter the name of the cloned project. If needed, change the target workspace.
The cloned project will be saved to the workspace you have specified.
Confirm by clicking **Clone project**. 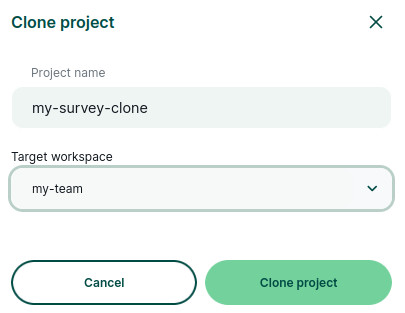
#### Clone a public project [](https://merginmaps.com/docs/manage/create-project/#clone-a-public-project)
You can also make a copy of a public project.
1. In the **Projects** tab, click on the **Browse community projects** button 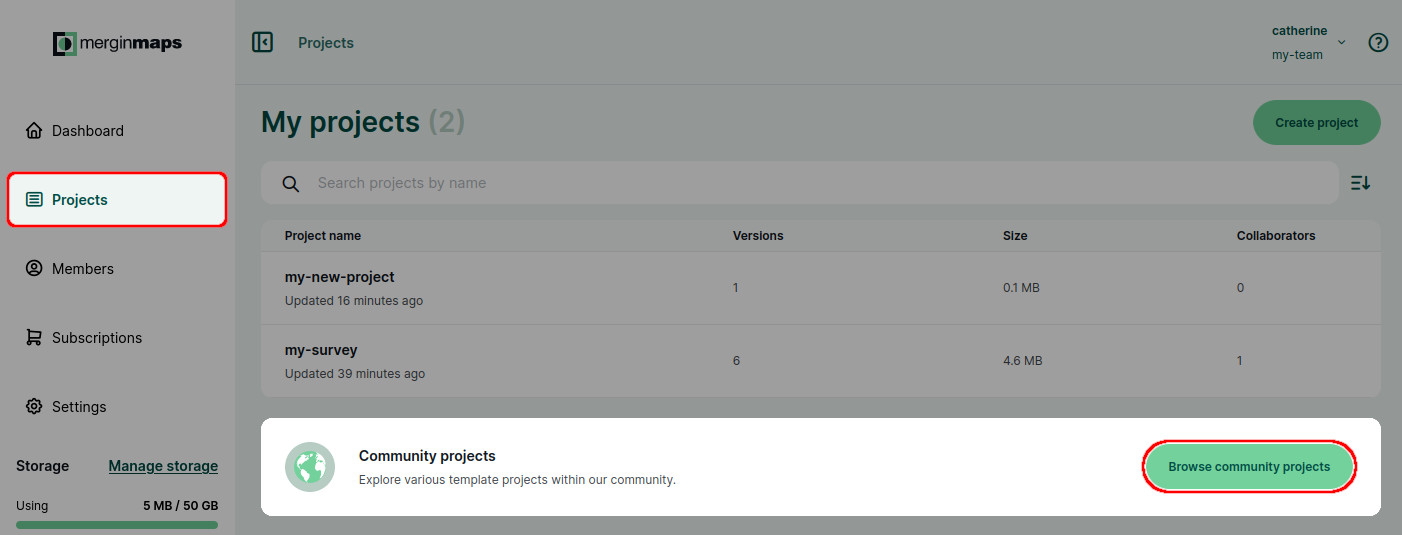
If a project was shared with you via link, open the project link in your web browser.
2. You will see a list of public projects. Use the search bar to find a project you would like to clone and click on it. 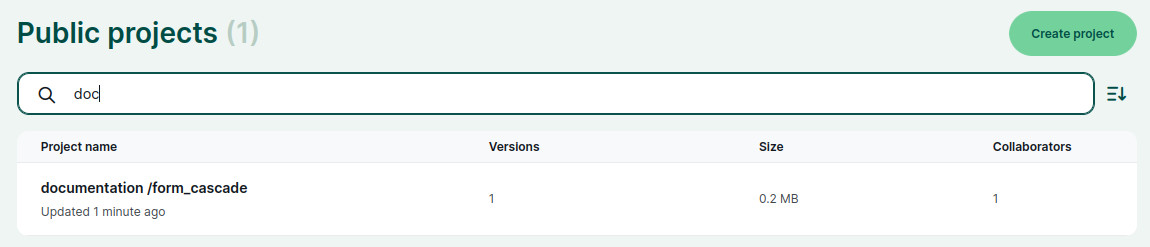
3. When the project's page opens, click on the **Clone** button to clone the project. 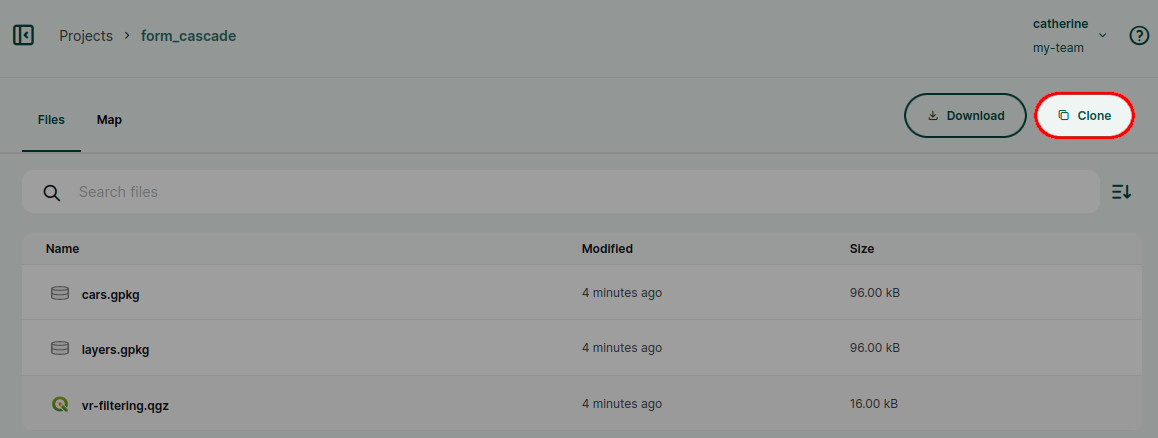
4. Now you can change the project's name and select the target workspace. Confirm by clicking **Clone project**.
The cloned project will be saved to the workspace you have specified. 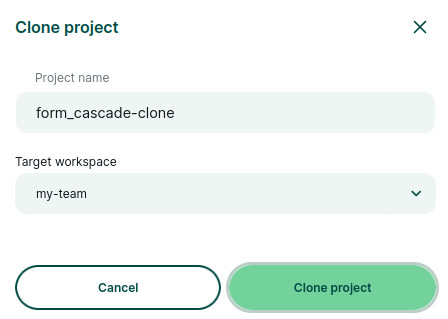
---
# How to Stake Out Points | Mergin Maps
[Skip to content](https://merginmaps.com/docs/field/stake-out/#VPContent)
Return to top
How to Stake Out Points [](https://merginmaps.com/docs/field/stake-out/#how-to-stake-out-points)
==================================================================================================
Points in your survey layers can be staked out. The mobile app will navigate you towards the selected point showing you the direction and distance.
There are two stake out modes _long navigation mode_ and _short navigation mode_ that is activated when you are less than 1 m away from the point.
TIP
Accurate stake out in short navigation mode may require an [external GPS receiver](https://merginmaps.com/docs/field/external_gps/)
with GPS corrections.
Stake out in Mergin Maps mobile app [](https://merginmaps.com/docs/field/stake-out/#stake-out-in-mergin-maps-mobile-app)
--------------------------------------------------------------------------------------------------------------------------
1. Select a point in your map window. From the form tap the **Stake out** option: 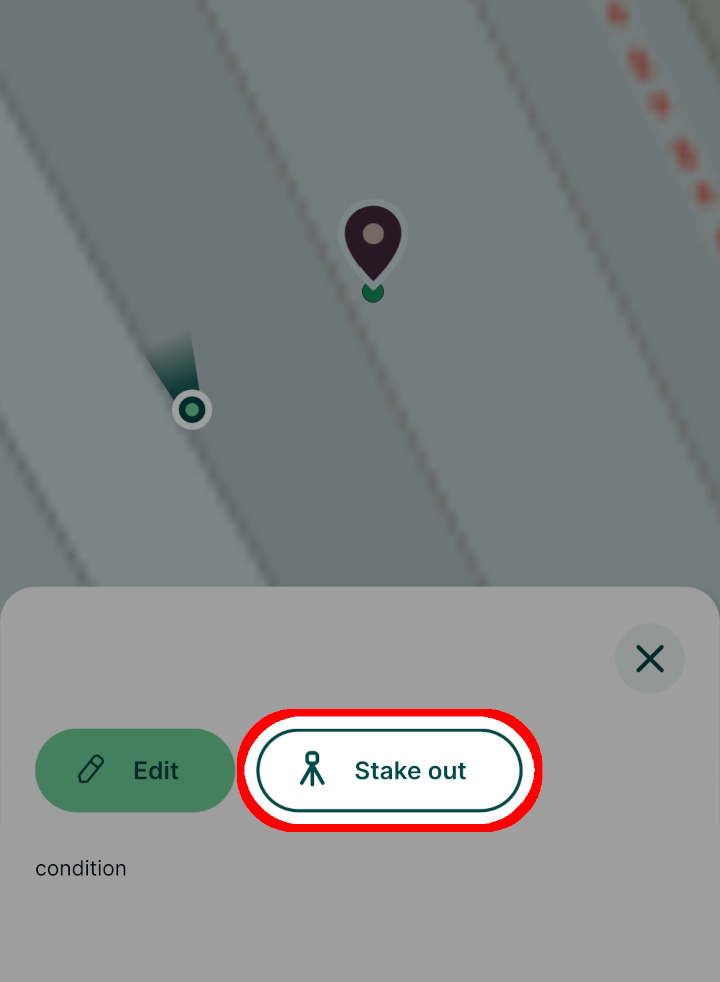
2. Stake out panel will display the current distance and a connecting line between your position and the point. 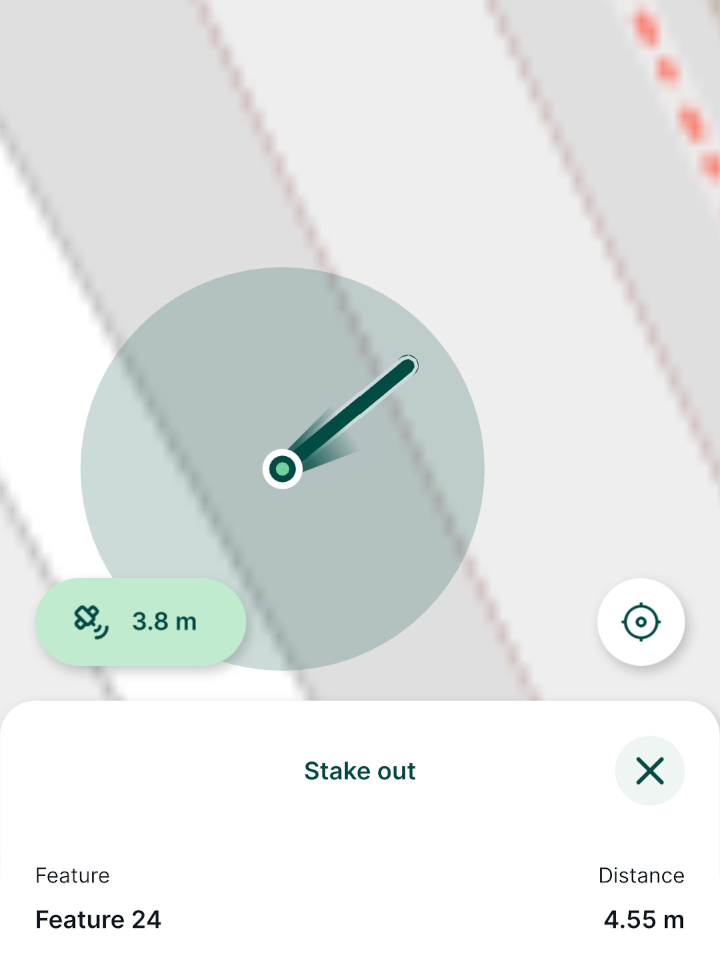
3. Once you are closer to the point (less than 1 m), the stake out panel will switch to the _short_ navigation mode. 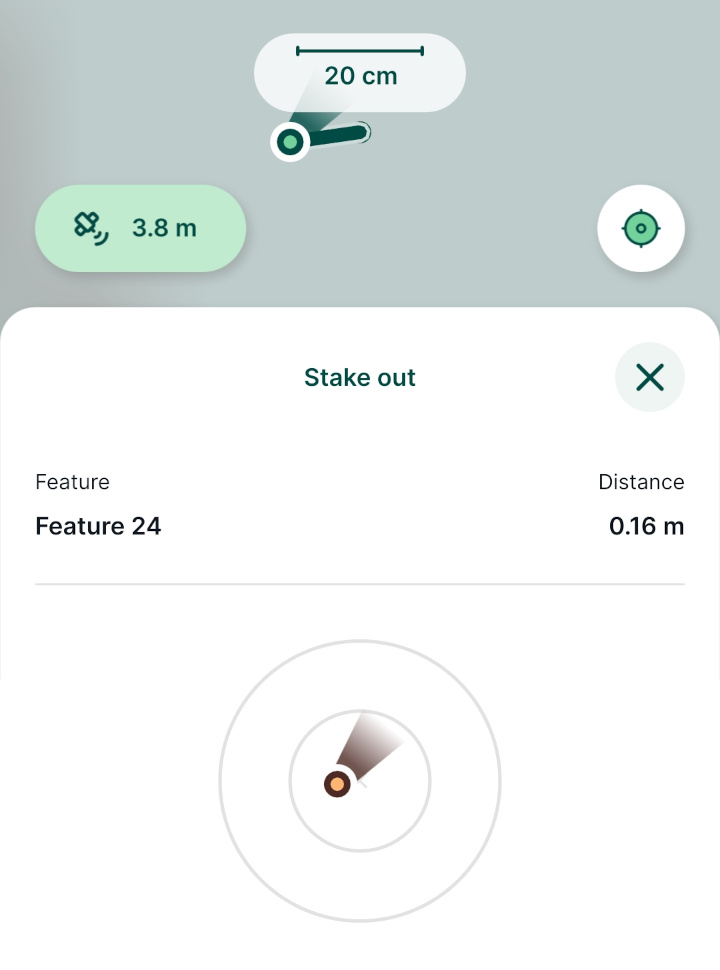
Precise stake out of the point (distance less than 10 cm) will be highlighted by green.
Changing stake out distance units in QGIS [](https://merginmaps.com/docs/field/stake-out/#changing-stake-out-distance-units-in-qgis)
--------------------------------------------------------------------------------------------------------------------------------------
Distance units displayed by the mobile app are defined in your project properties:
1. Open your [Mergin Maps](https://merginmaps.com/)
project in QGIS
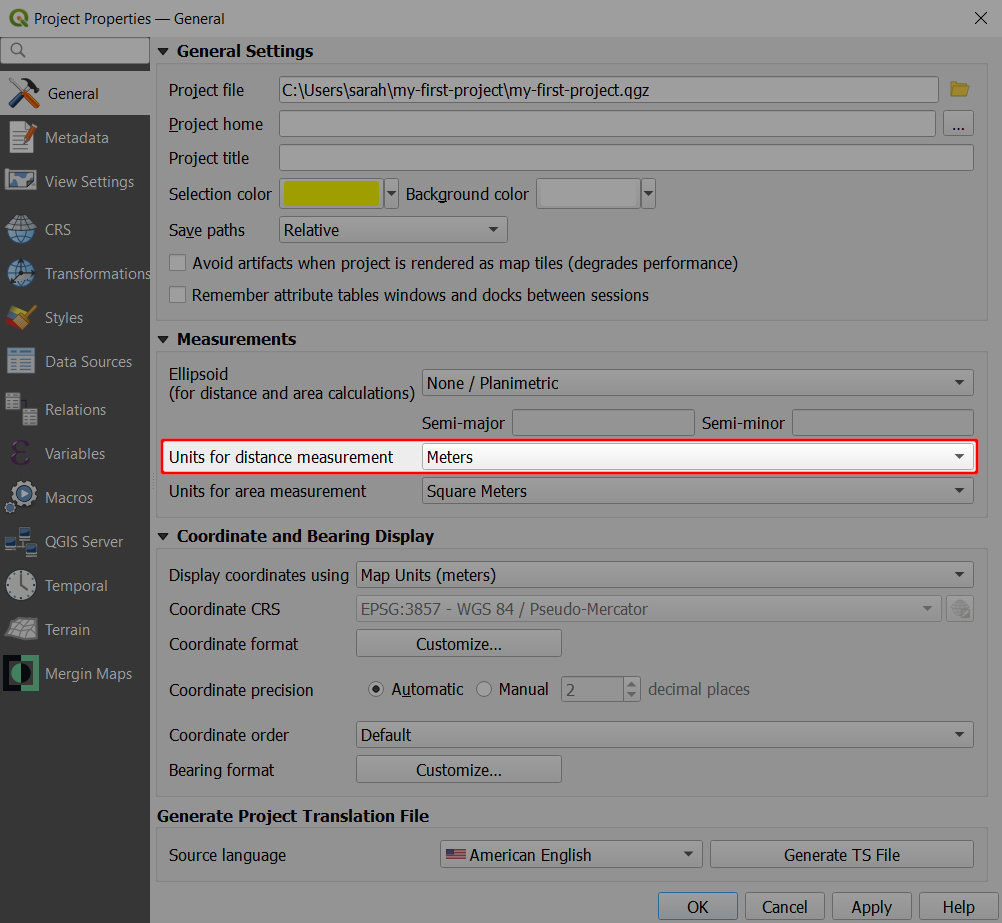
2. Navigate to **Project Properties**
3. In the **General** tab, you can define the **Units for distance measurement** by choosing from several options, such as metres, miles, yards or feet.
Units defined here are then used by default when measuring distances in QGIS, as well as during stake out in the mobile app
---
# QGIS Project Preparation | Mergin Maps
[Skip to content](https://merginmaps.com/docs/gis/features/#VPContent)
Return to top
QGIS Project Preparation [](https://merginmaps.com/docs/gis/features/#qgis-project-preparation)
=================================================================================================
Project preparation is done in QGIS. For more information about loading layers, styling the data and creating map themes, visit [QGIS documentation page](https://docs.qgis.org/3.22/en/docs/user_manual/index.html)
.
In addition, Mergin Maps mobile app uses some of the features within the project to help visualise, capture and browse the data. Here is an overview of the project preparations steps.
TIP
Our tutorials can guide you through QGIS project preparation step by step.
In [Creating a Project in QGIS](https://merginmaps.com/docs/tutorials/creating-a-project-in-qgis/)
you will learn how to create a project, add new layers and configure a basic form.
[Further Project Customisation](https://merginmaps.com/docs/tutorials/further-project-customisation/)
will show you how to style layers, add labels, customise the preview panel, define map themes and set up the project extent.
Background layers [](https://merginmaps.com/docs/gis/features/#background-layers)
-----------------------------------------------------------------------------------
Various online and offline maps can be used as background layers for navigation during the field survey. You can find more information in [Background Maps](https://merginmaps.com/docs/gis/settingup_background_map/)
.
Project settings [](https://merginmaps.com/docs/gis/features/#project-settings)
---------------------------------------------------------------------------------
* Ensure the paths are set to _Relative_ in the **General** tab in Project Properties. All paths to the project data in Mergin Maps mobile app are relative to the project location. 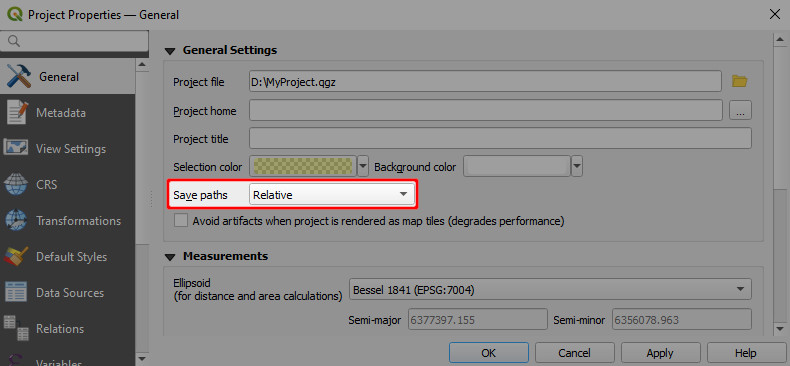
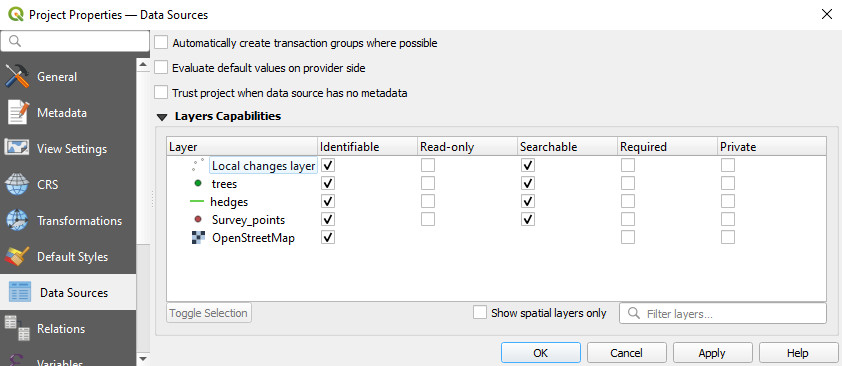
* Define the [layers capabilities](https://docs.qgis.org/3.22/en/docs/user_manual/introduction/qgis_configuration.html?highlight=properties#data-sources-properties)
in the **Data Sources** in Project Properties.
* [Identifiable](https://merginmaps.com/docs/gis/search_data/#setting-identifiable-layers-in-qgis-project)
layers can be queried in Mergin Maps mobile app. If you want to be able to search for attribute values in a layer, it needs to be identifiable and searchable.
* **read-only** layers cannot be modified. If a vector layer is not intended to be used as a survey layer, set it as read-only.
* [non-spatial](https://merginmaps.com/docs/layer/non-spatial-data/)
layers need to be set as searchable to enable browsing, searching, or editing.
### Project extent [](https://merginmaps.com/docs/gis/features/#project-extent)
In Mergin Maps mobile app, there is an option to [zoom to the project extent](https://merginmaps.com/docs/field/mobile-app-ui/#more-options-zoom-to-project-map-themes-position-tracking-measure-local-changes-settings)
.
If the project extent is not set, Mergin Maps mobile app zooms to all visible layers. This is not particularly convenient when you have a layer with a large/global extent (e.g. Open Street Map). Instead, you may want to set the project extent to the area of your interest.
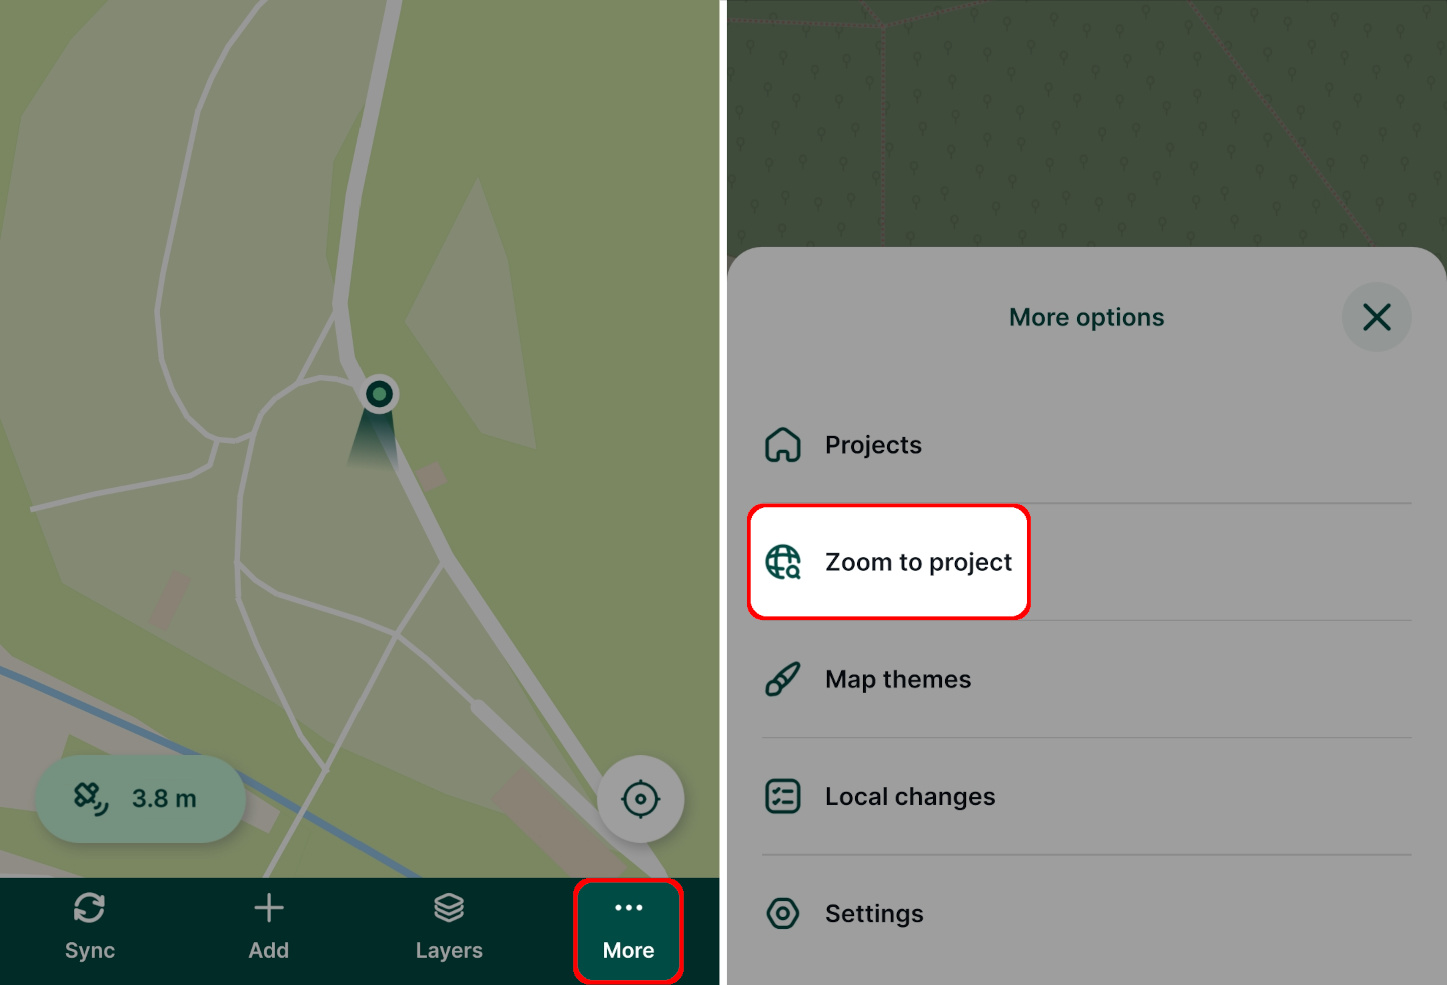
To set the project extent:
1. Navigate to **Project** > **Properties**. 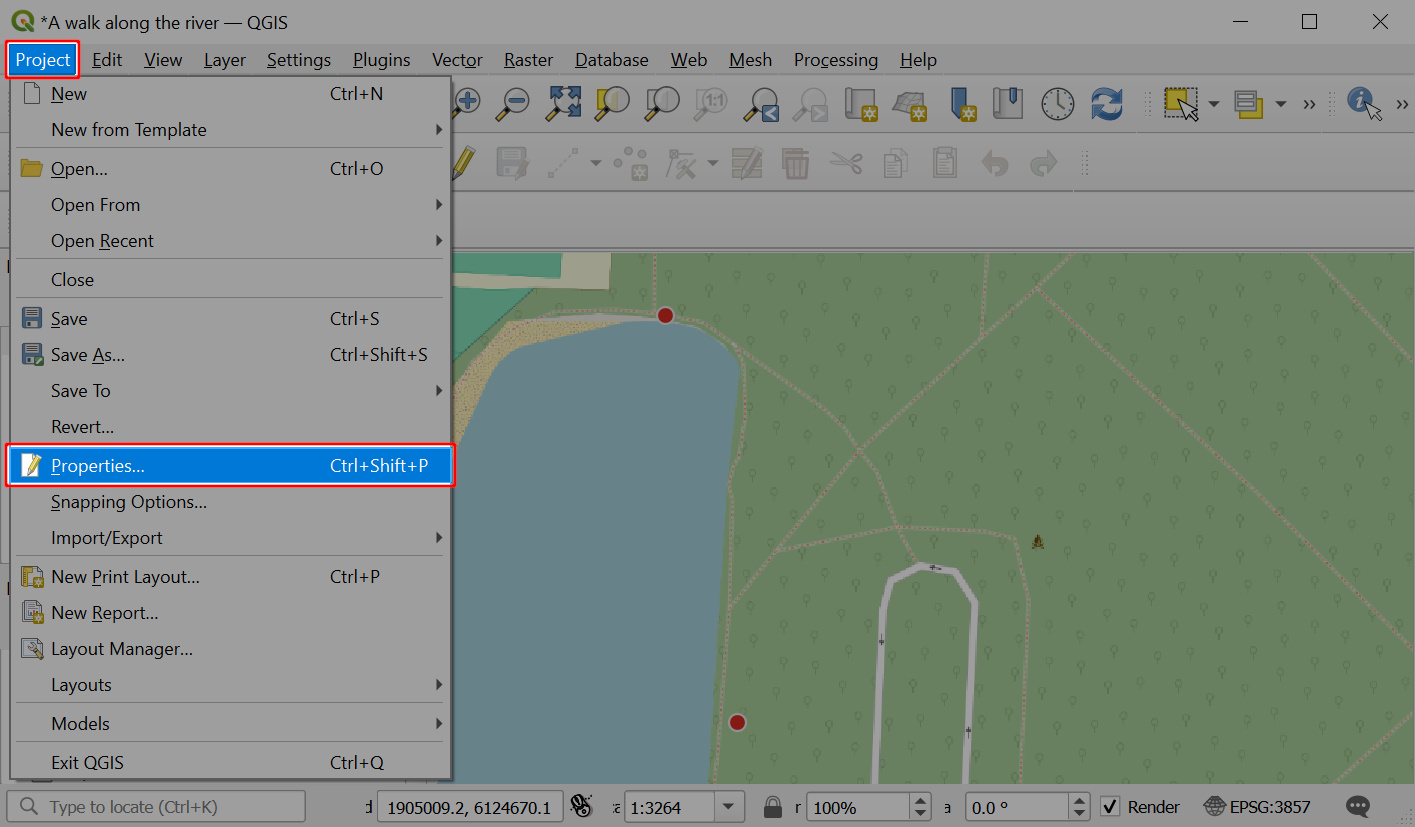
2. Select **View Settings** and check the **Set Project Full Extent** option.
Here, either enter the coordinate extent of your project bounding box or use the map canvas extent. The extent can be also calculated from a layer in your project.
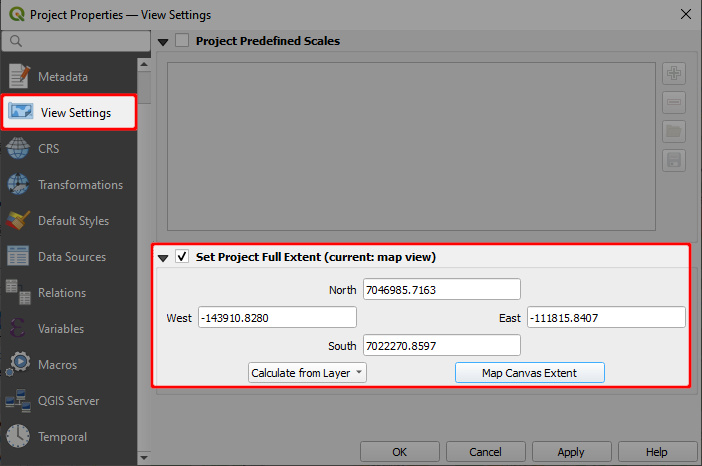
3. Click **Apply** to save the changes
4. Save and synchronise the project to [Mergin Maps](https://merginmaps.com/)
. Now you can use the **Zoom to project** option in the mobile app to zoom to the extent you have specified in QGIS.
### Photo quality [](https://merginmaps.com/docs/gis/features/#photo-quality)
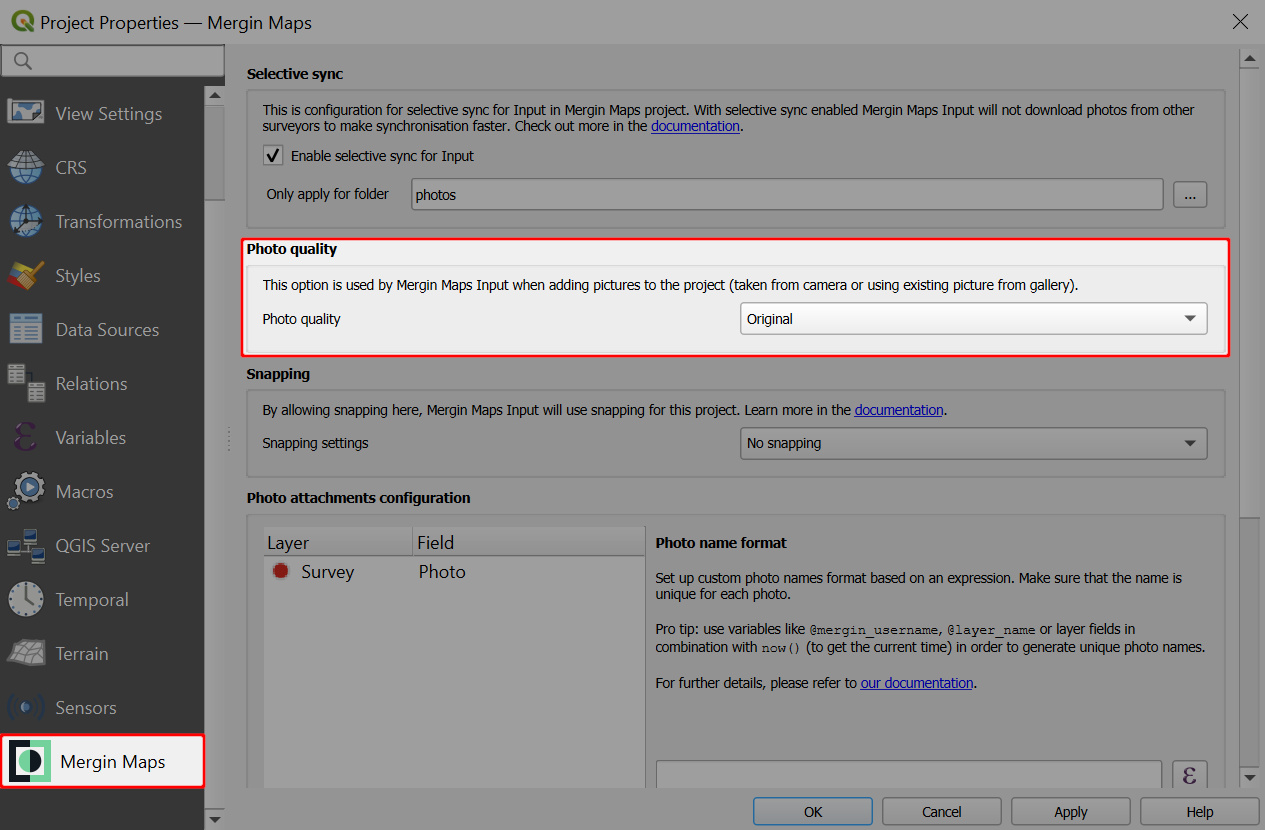
The quality of photographs and pictures that are saved in the Mergin Maps project can be set up in the **Mergin Maps** tab in **Project properties**. When pictures are added using Mergin Maps mobile app (uploaded or taken with the camera), they will be resized accordingly.
By default, the quality is set to _Original_ - the original pictures are stored. If you want to resize the pictures, you can choose from _High_, _Medium_, or _Low_ quality. The [EXIF metadata](https://merginmaps.com/docs/layer/exif/)
of the original files are kept.
Don't forget to save and sync your project!
### Photo names [](https://merginmaps.com/docs/gis/features/#photo-names)
Names of the photos that are captured in the field using Mergin Maps mobile app can be customised. The name format can be set in QGIS with Mergin Maps QGIS plugin.
TIP
[How to Set Photo Names Format](https://merginmaps.com/docs/gis/photo-names/)
will guide you through the setup and provide examples of expressions that can be used to name your photos.
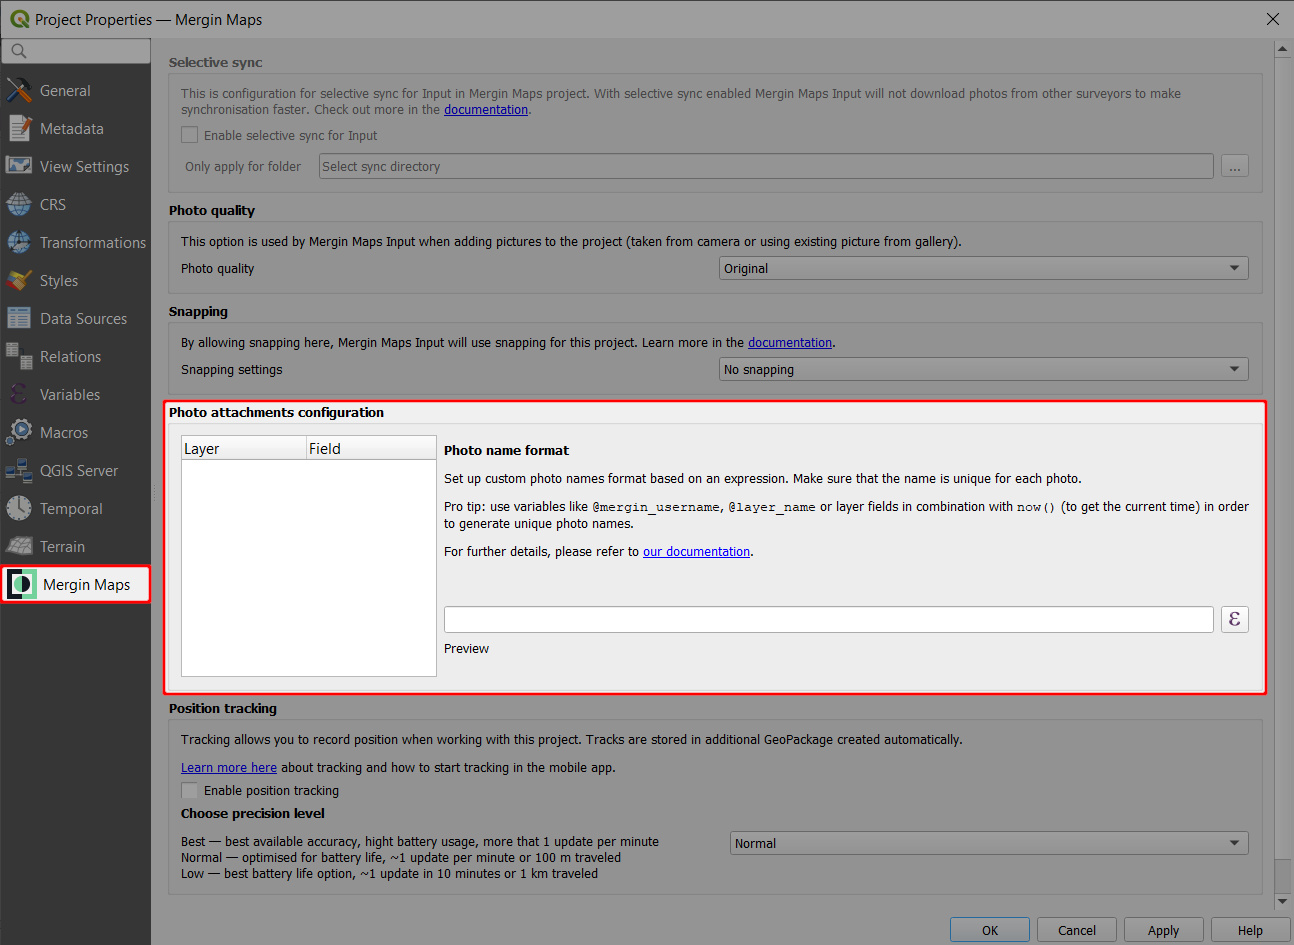
### Snapping [](https://merginmaps.com/docs/gis/features/#snapping)
If you want to use snapping in Mergin Maps mobile app during the field survey, you need to set it up in the **Mergin Maps** tab in **Project properties**.
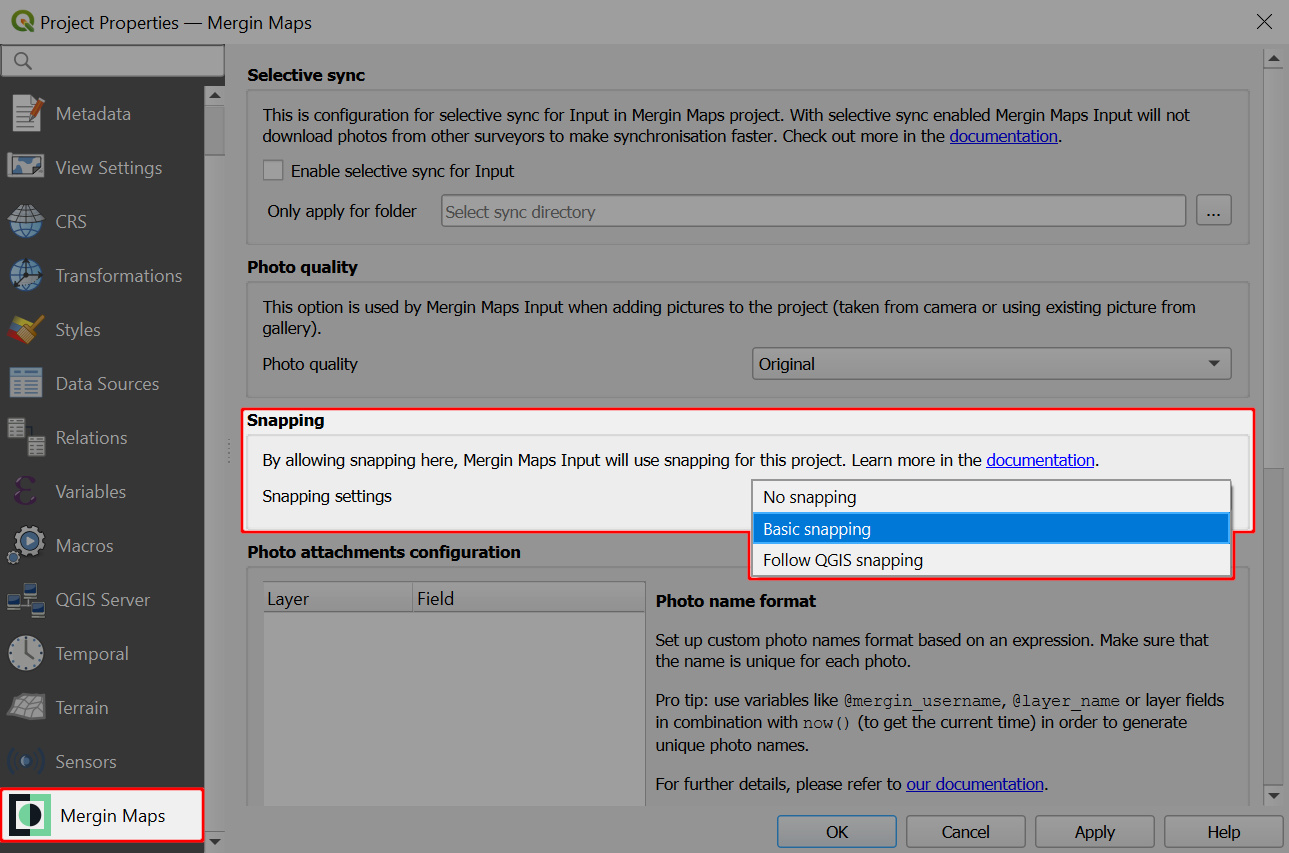
The snapping options are:
* _No snapping_ - snapping is not enabled (default)
* _Basic snapping_ - features are snapped to the vertices and segments of vector features in the project
* _Follow QGIS snapping_ - uses the snapping preferences defined in the Mergin Maps project in QGIS
TIP
[How to Set Up Snapping for Mergin Maps mobile app](https://merginmaps.com/docs/gis/snapping/)
contains detailed steps that may help you with the snapping setup.
### Tracking [](https://merginmaps.com/docs/gis/features/#tracking)
Tracking your position when doing the field survey with Mergin Maps mobile app can be enabled in the **Mergin Maps** tab in **Project properties**.
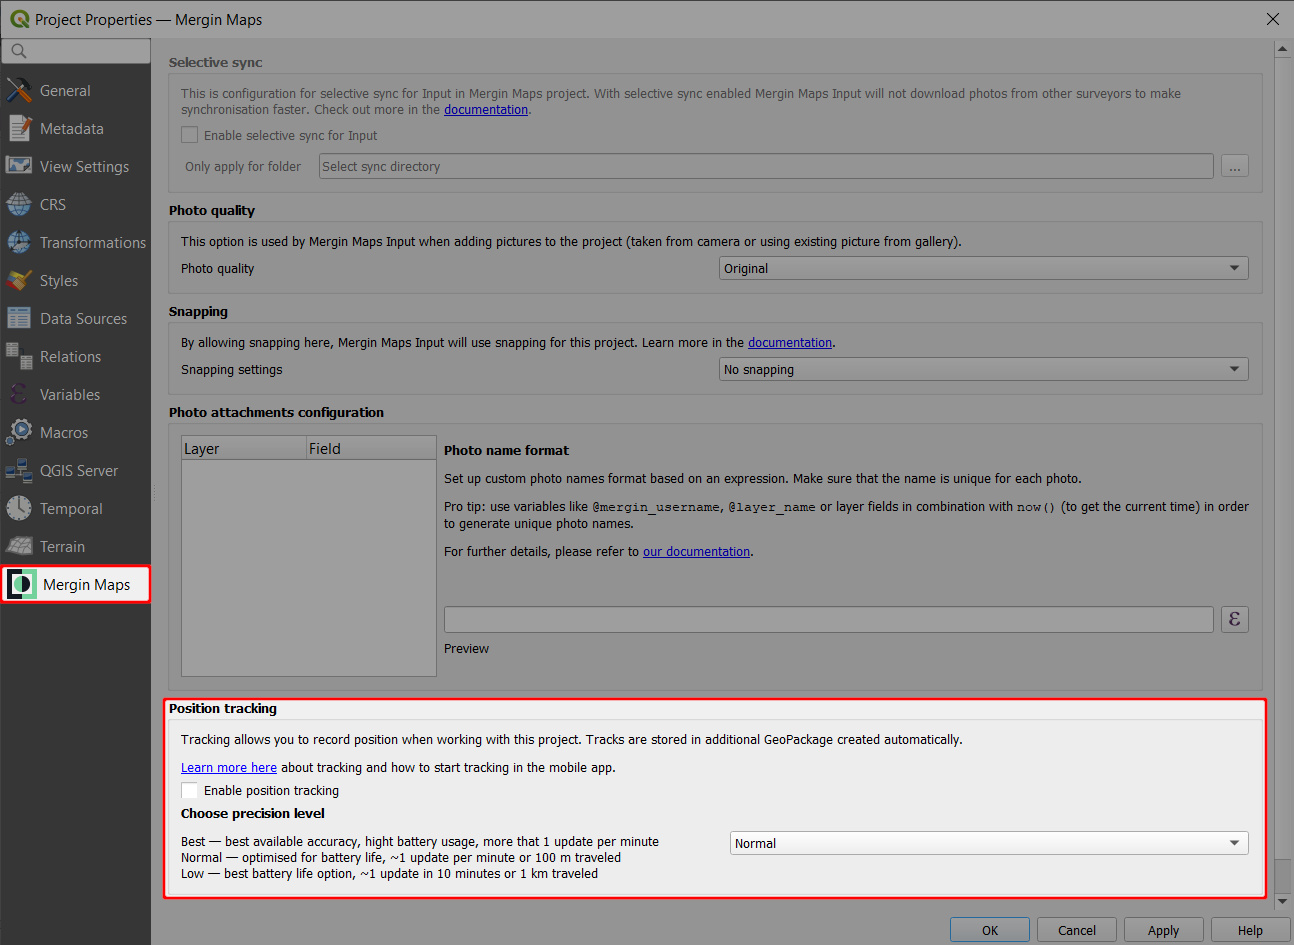
You can read more about this functionality in [How to Use Tracking in Mergin Maps mobile app](https://merginmaps.com/docs/field/tracking/)
.
### Map sketching [](https://merginmaps.com/docs/gis/features/#map-sketching)
Map sketching for the mobile app can be enabled in the **Mergin Maps** tab in **Project properties**. Here, you can also set the colours that will be available for sketches.
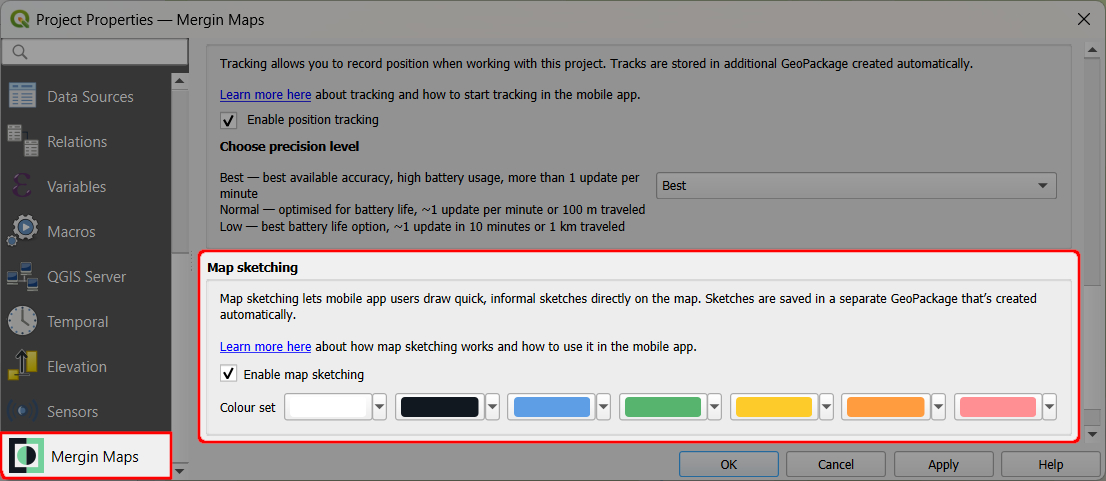
You can read more about this functionality in [Map Sketching](https://merginmaps.com/docs/field/map-sketching/)
.
### Photo sketching [](https://merginmaps.com/docs/gis/features/#photo-sketching)
Photo sketching for the mobile app can be enabled in the **Mergin Maps** tab in **Project properties**.
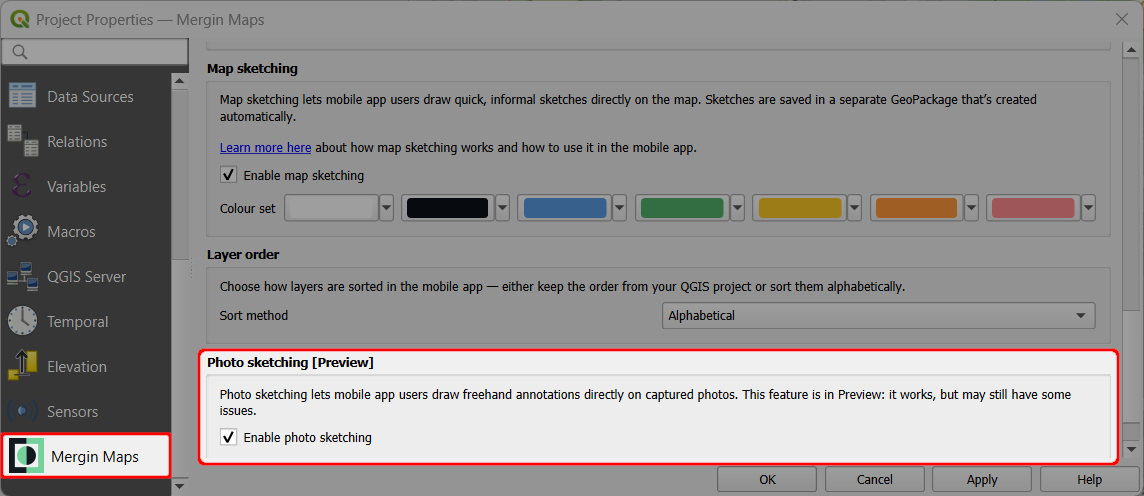
You can find out more about this functionality in [Photo Sketching](https://merginmaps.com/docs/field/photo-sketching/)
.
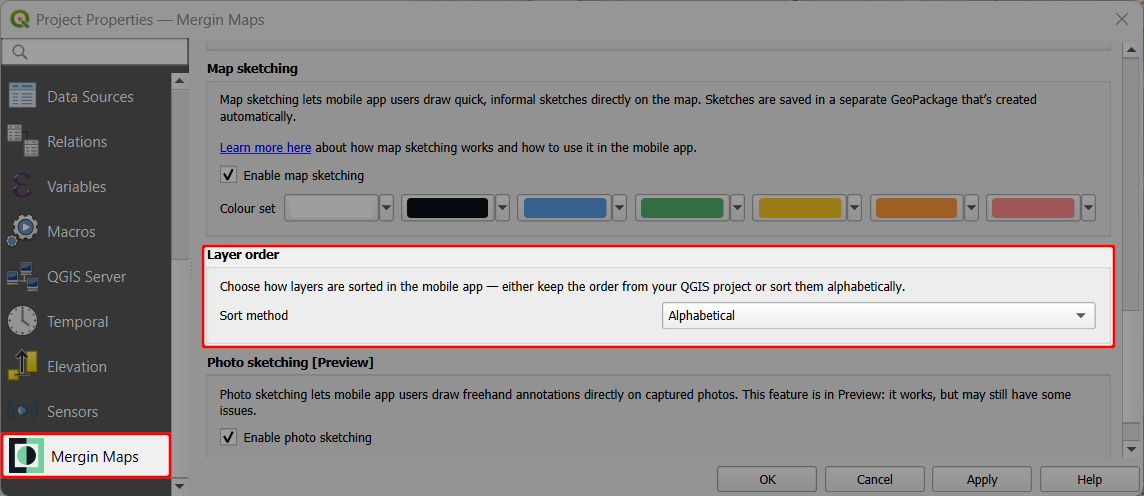
### Layer order [](https://merginmaps.com/docs/gis/features/#layer-order)
There is an option to define the order in which layers are displayed in the mobile app: _alphabetical_ or _QGIS layer order_. Detailed steps can be found [here](https://merginmaps.com/docs/field/layers/#layer-order)
.
### Map themes [](https://merginmaps.com/docs/gis/features/#map-themes)
[Map Themes](https://merginmaps.com/docs/gis/setup_themes/)
make possible to switch between different background maps in Mergin Maps mobile app (e.g. cartography maps and aerial imagery)
Survey layers [](https://merginmaps.com/docs/gis/features/#survey-layers)
---------------------------------------------------------------------------
Vector layers can be used as survey layers in Mergin Maps mobile app. You can apply styles and set up the forms to make your field survey easier.
### Layer symbology [](https://merginmaps.com/docs/gis/features/#layer-symbology)
The same symbology as defined in the QGIS project will be used in Mergin Maps mobile app. However, Mergin Maps mobile app does not include all the SVG markers that are available within QGIS. Therefore, if you are using SVG markers for your layer styling, ensure those are copied to the project folder.
### Forms [](https://merginmaps.com/docs/gis/features/#forms)
During the field survey, it is often necessary to fill out some attributes in the form to record the properties of surveyed features. Forms can make the survey easier, consistent and more effective. Detailed description of form widgets and form configuration can be found in [Setting Up Form Widgets](https://merginmaps.com/docs/layer/form-widgets/)
and [Advanced Form Configuration](https://merginmaps.com/docs/layer/form-configuration/)
.
### Settings for Mergin Maps mobile app preview panel [](https://merginmaps.com/docs/gis/features/#settings-for-mergin-maps-mobile-app-preview-panel)
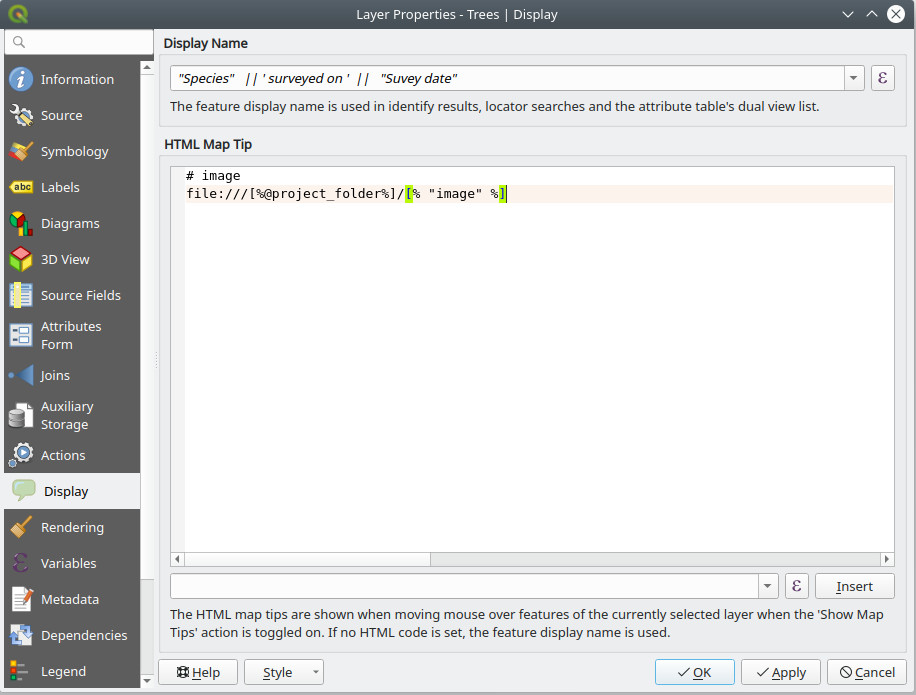
What appears in the Mergin Maps mobile app preview panel can be defined in the **Display** tab in **Layer Properties**:
* **Display Name**: a field name or an expression.
* **HTML Map Tip**: the content of the preview panel. While QGIS always interprets the content of map tip as being HTML, Mergin Maps mobile app extends the syntax to allow two more modes: field values and images. If the map tip is not specified, Mergin Maps mobile app will try to use the first three fields and show their attribute values.
#### HTML [](https://merginmaps.com/docs/gis/features/#html)
Sample map tip content that will show render as HTML page:
Notes:[% "notes" %]
If the map tip does not contain any special marker, it is assumed that the map tip is HTML content. Only a limited subset of HTML is supported - see [Qt documentation](https://doc.qt.io/qt-5/richtext-html-subset.html)
#### Field values [](https://merginmaps.com/docs/gis/features/#field-values)
Sample map tip content that will show "description" and "time" field values:
# fields
description
time
If the map tip content has `# fields` marker on the first line, the following lines will be understood as field names that should be listed in the preview. At most three fields will be shown. Expressions are not allowed.
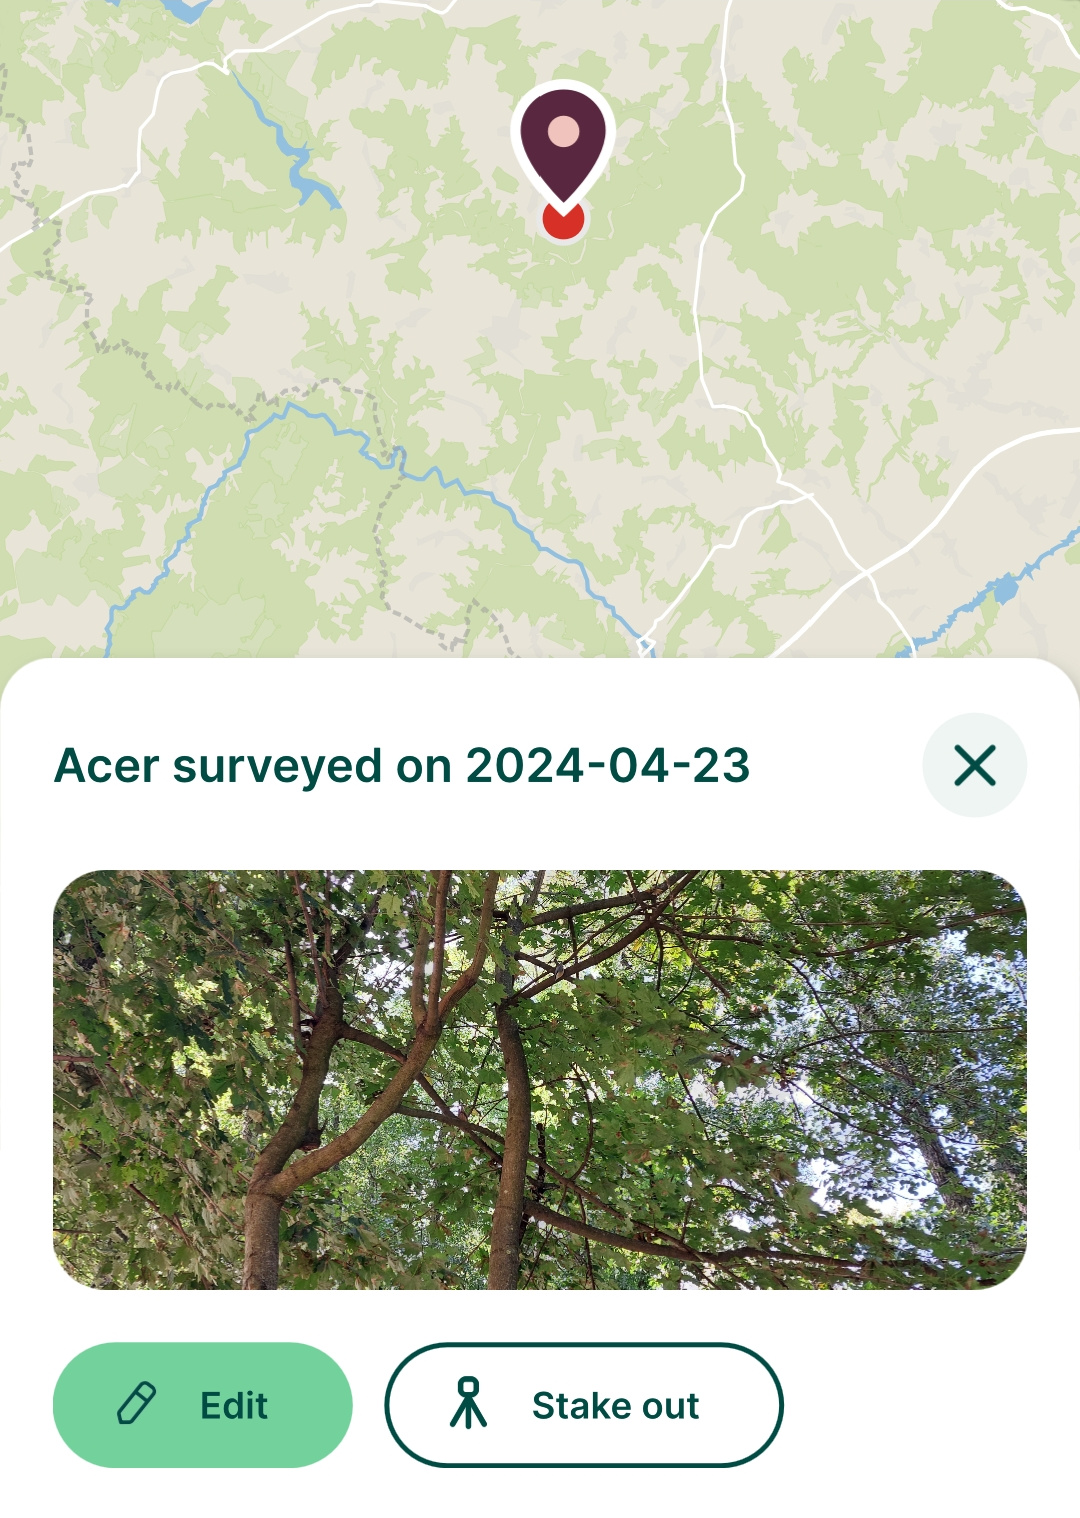
#### Image [](https://merginmaps.com/docs/gis/features/#image)
Sample map tip content that will cause an image to be show specified by file path in field "image\_1" (containing path relative to the project folder):
# image
file:///[%@project_folder%]/[% "image_1" %]
If the map tip has `# image` marker on the first line, the following line is understood as the URL for the image. It can be a regular file on the file system, but it could be even a remote image from the network. Expressions embedded in the image URL will be evaluated (enclosed in `[% 1+1 %]`).
---
# External GPS | Mergin Maps
[Skip to content](https://merginmaps.com/docs/field/external_gps/#VPContent)
Return to top
External GPS [](https://merginmaps.com/docs/field/external_gps/#external-gps)
===============================================================================
External GPS receivers can be connected to your mobile device via Bluetooth and used in Mergin Maps mobile app to achieve higher [GPS accuracy](https://merginmaps.com/docs/field/gps_accuracy/)
.
There are several [extra position variables](https://merginmaps.com/docs/layer/position_variables/)
that can be useful to record when doing the survey with external GPS, such as the GPS antenna height, GPS device name as well as metrics like horizontal, vertical or position dilution of precision (HDOP, VDOP, PDOP).
Note that external GPS devices usually return orthometric heights (ellipsoid with the geoid separation applied).
**Before you start**:
* Set up your device according to the instructions of its manufacturer. You should continue only when you are sure that the device is working and sending data.
* Make sure that your mobile device offers the functionality to pair with an external GPS device and that it communicates through a standard interface.
GPS and GNSS terminology
The term GPS, which stands for the Global Positioning System, is used in the mobile app and in this documentation in a broad sense as a synonym of the global navigation satellite systems (GNSS). We are aware that it is not exactly correct, but GPS is commonly used and understood in this context. If you have a device that can receive signals from other GNSS (such as BeiDou, Galileo, GLONASS), the mobile app can use them as well.
GPS antenna height [](https://merginmaps.com/docs/field/external_gps/#gps-antenna-height)
-------------------------------------------------------------------------------------------
External GPS antenna is often used on a surveying pole. To obtain the correct ground elevation, it is necessary to subtract the height of the GPS sensor above the ground from the measured elevation.
The height of the GPS antenna can be set in the [**GPS settings**](https://merginmaps.com/docs/field/mobile-app-ui/#gps-settings)
in the mobile app.
If GPS antenna height is set to a non-zero value, it is also displayed next to the GPS accuracy.
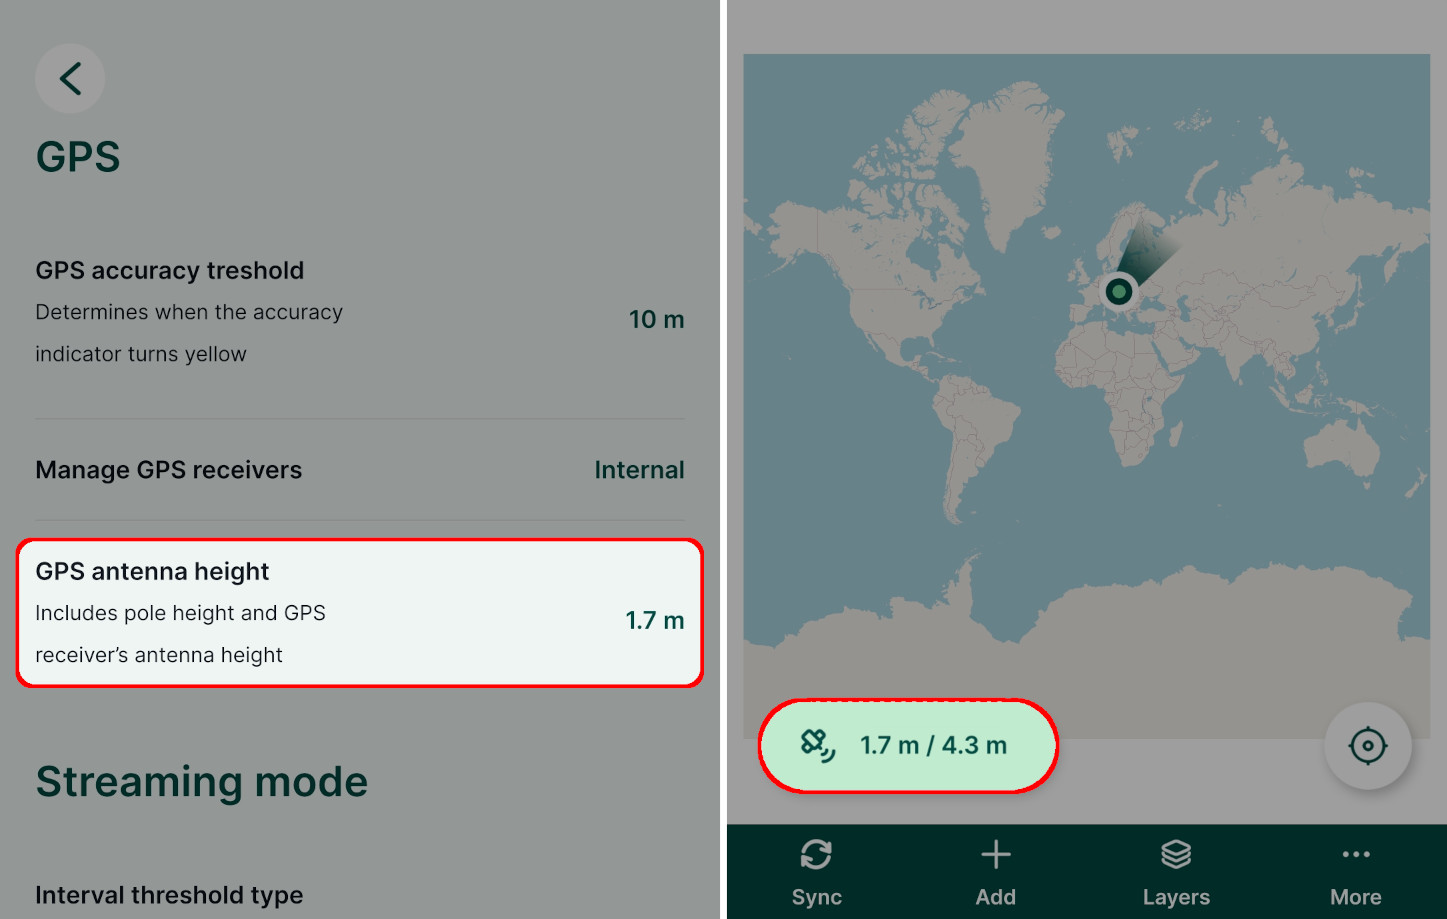
TIP
GPS antenna height can be recorded during the survey by using the [extra position variable](https://merginmaps.com/docs/layer/position_variables/)
`@position_gps_antenna_height` as a [default value](https://merginmaps.com/docs/layer/form-configuration/#default-values)
.
External GPS on Android [](https://merginmaps.com/docs/field/external_gps/#external-gps-on-android)
-----------------------------------------------------------------------------------------------------
In Android, there are two ways how to use an external GPS device in the mobile app :
* directly through the app as an external receiver
* connecting GPS receiver to your mobile device using an app that will provide mock location
It is strongly recommended to use the direct connection in the mobile app . It is easier, quicker, provides more data, such as HDOP and fix quality. The app will report which device is used and take care of reconnecting in case of lost connection. Using mock location should be used only when it is not possible to connect the GPS receiver directly via the mobile app .
### How to connect external GPS receiver in Android via Mergin Maps mobile app (recommended) [](https://merginmaps.com/docs/field/external_gps/#how-to-connect-external-gps-receiver-in-android-via-mergin-maps-mobile-app-recommended)
1. Connect the GPS receiver to your mobile device via Bluetooth
2. Open the mobile app and navigate to **Settings**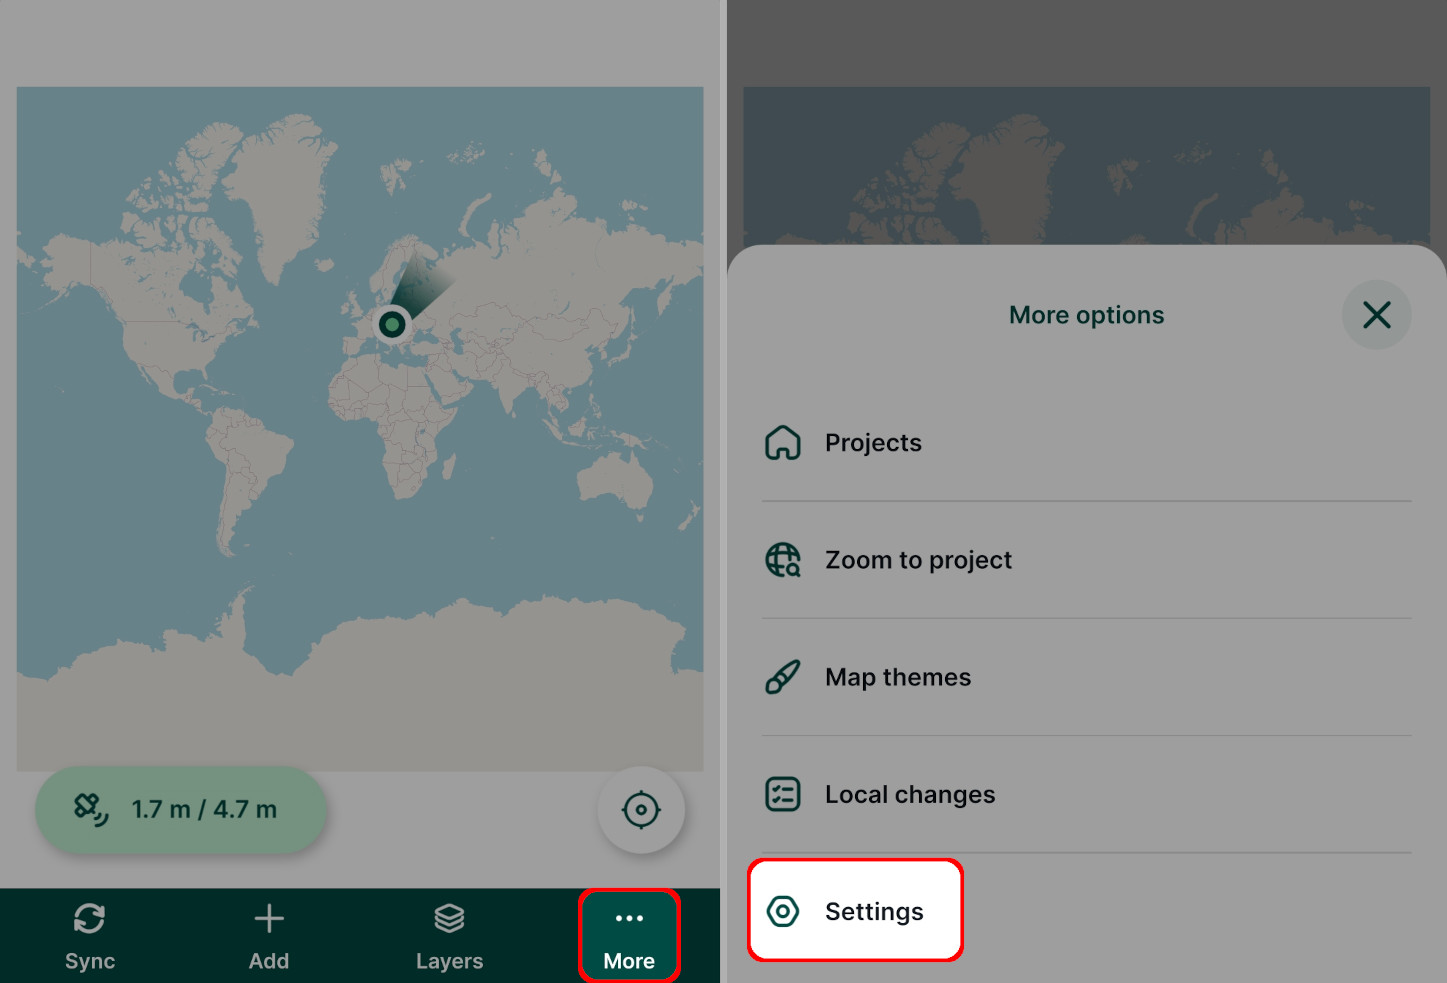
3. Tap on the **Manage GPS receivers** option. Here, you can see the currently used receiver.
Tap on the **Connect new receiver** button. 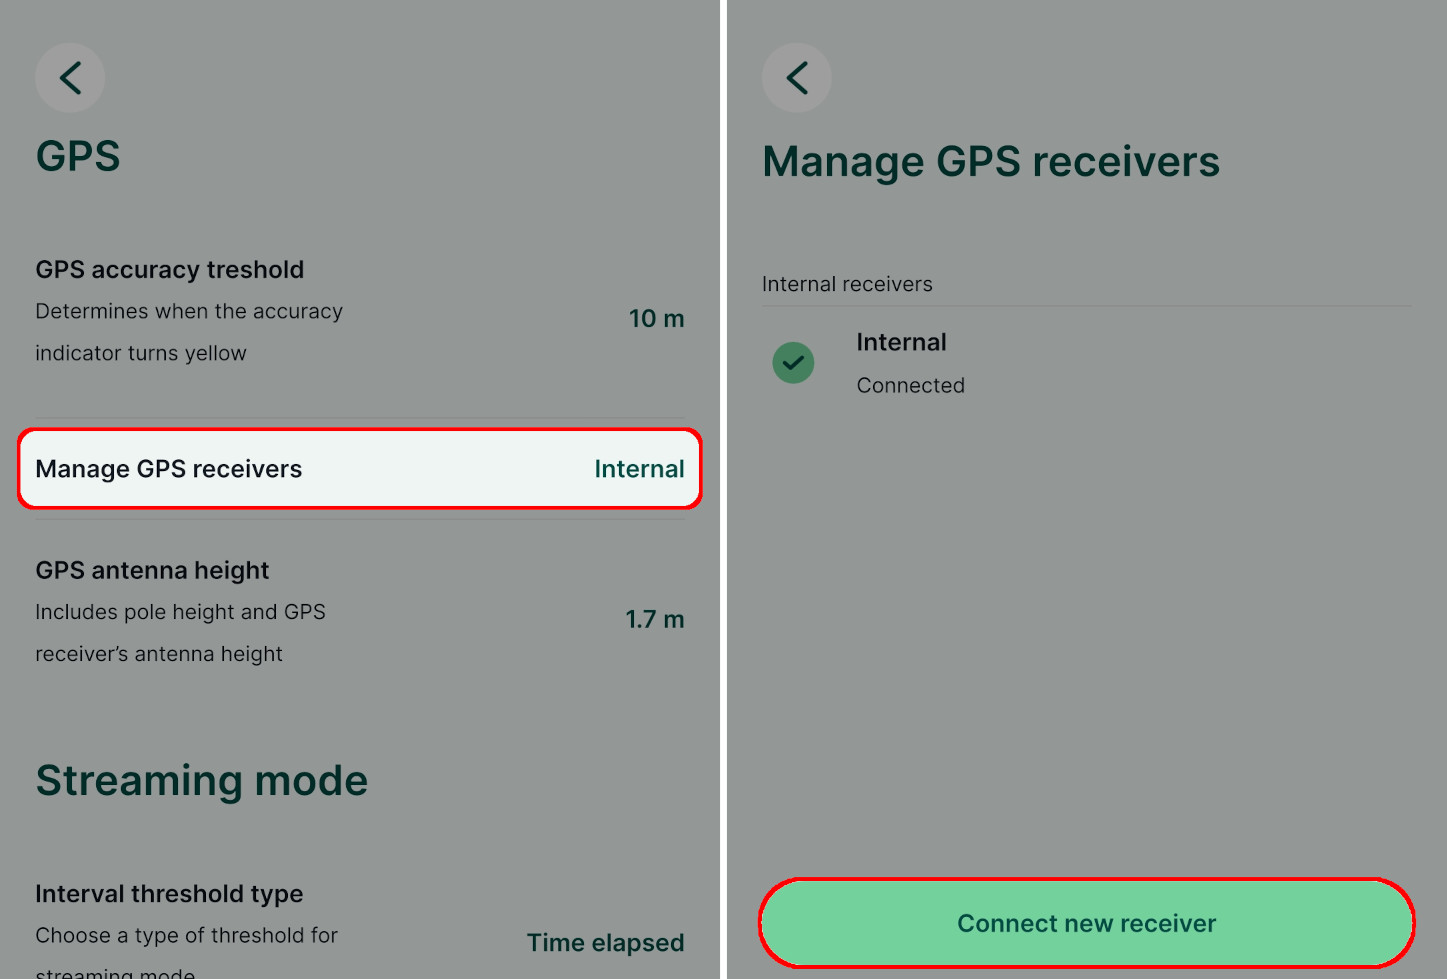
4. Choose your GPS receiver from the list of Bluetooth devices.
You might be asked to pair your device during this process.
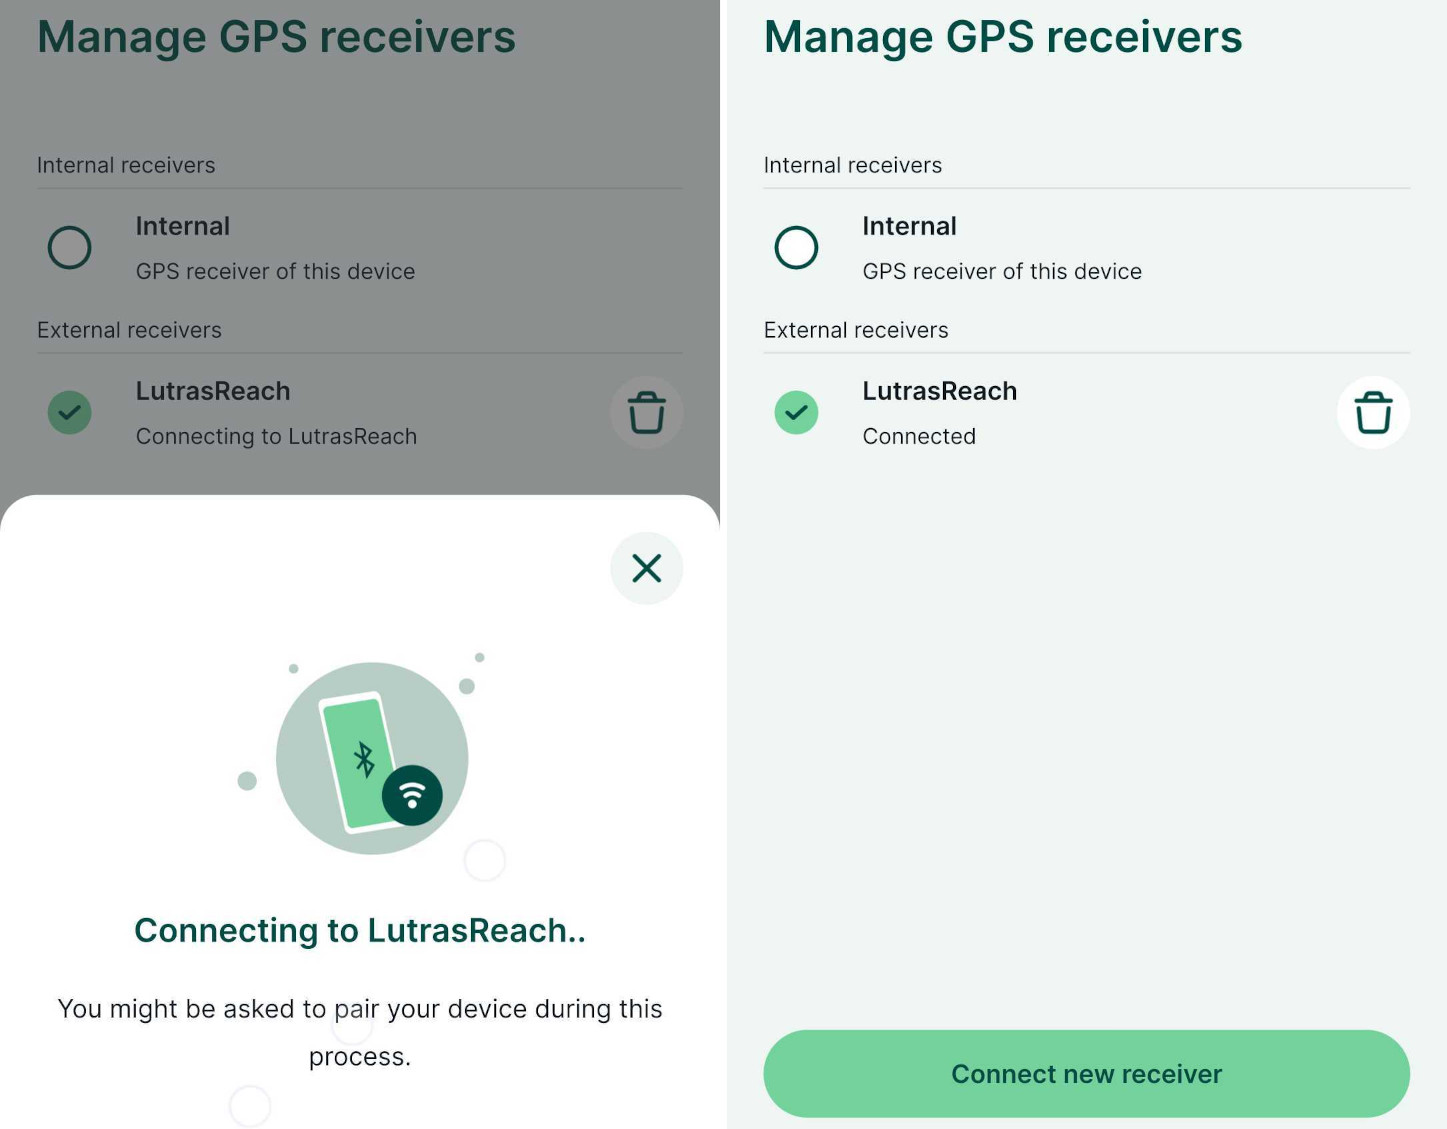
5. The mobile app will now use the external GPS receiver to display and record your position.
In **GPS info**, you will see additional data as reported by the external GPS.
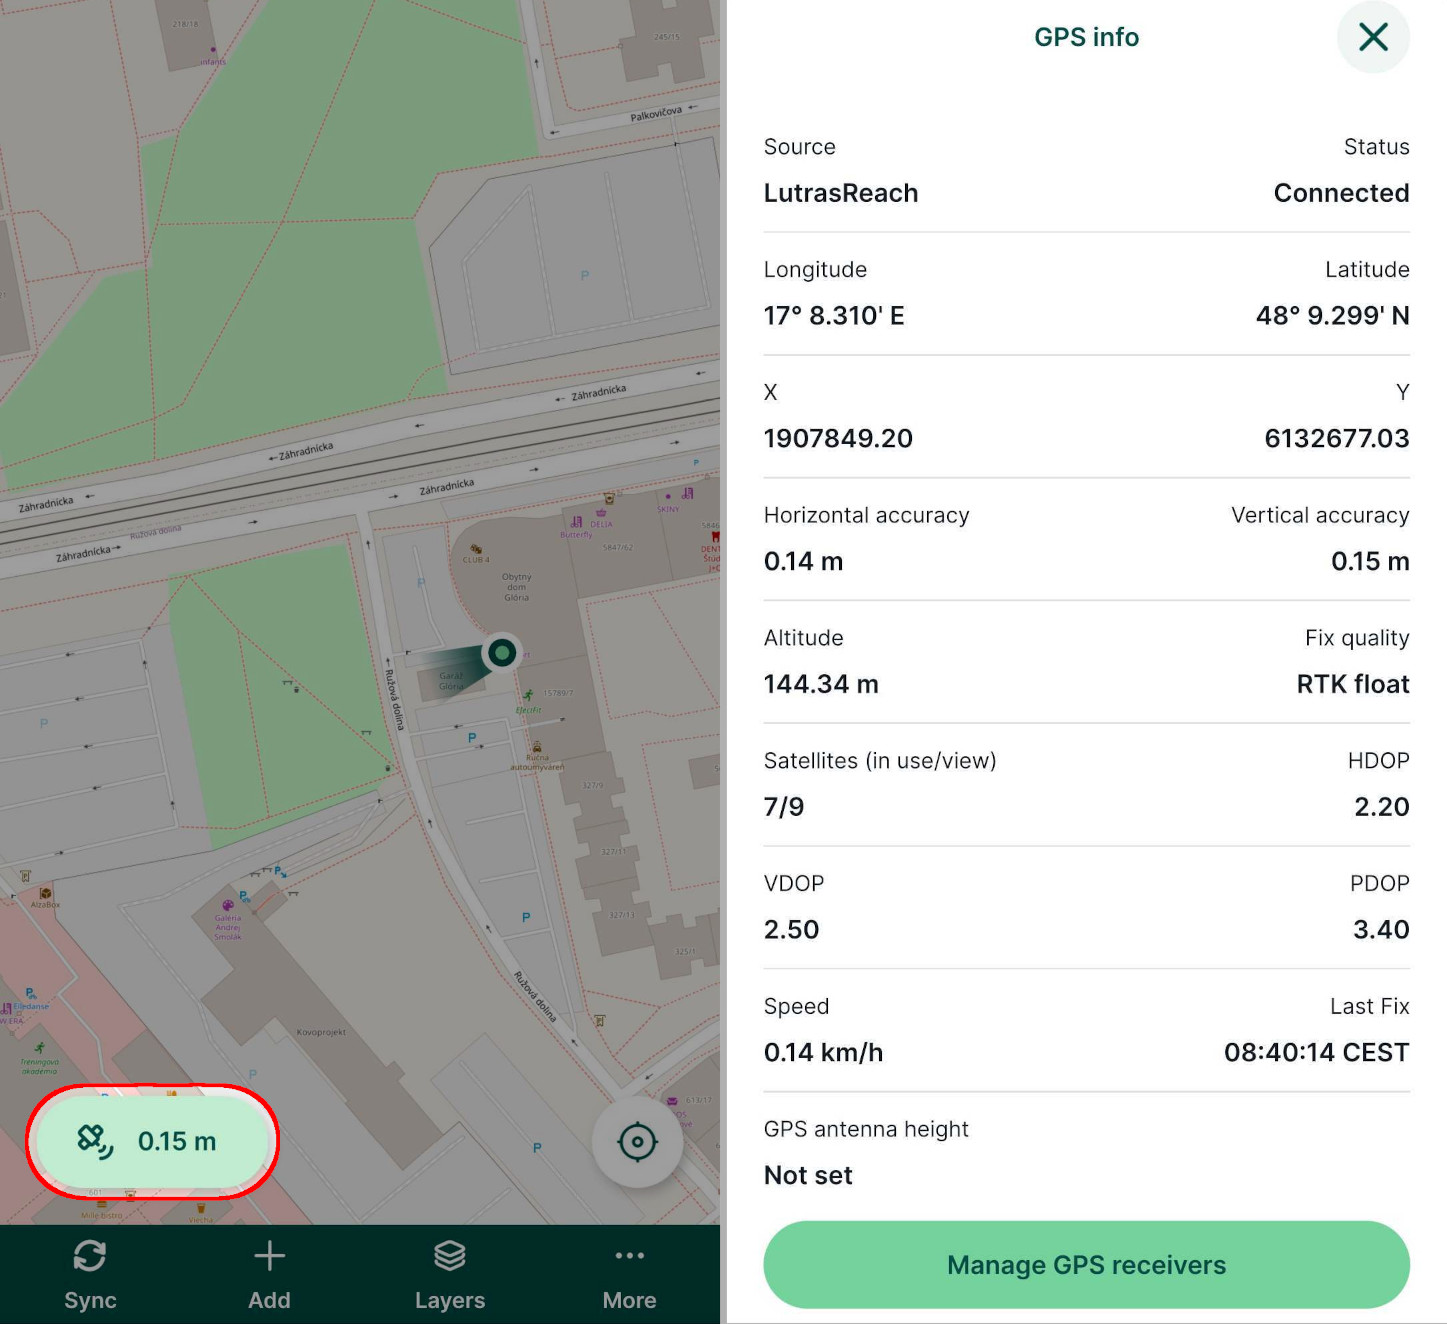
### How to connect external GPS receiver in Android via mock location [](https://merginmaps.com/docs/field/external_gps/#how-to-connect-external-gps-receiver-in-android-via-mock-location)
WARNING
Mock location should be only used if you are unable to connect the external GPS directly in the mobile app .
External GPS can be connected and configured in Android to provide mock location using GPS apps (e.g. [Bluetooth GPS](https://play.google.com/store/apps/details?id=de.pilablu.gpsconnector)
or apps from specific GPS manufacturers) as a source of GPS signal. the mobile app and other apps in your device will get the GPS position from the external GPS.
TIP
GPS manufacturer's apps often provide a setup for a NTRIP client, through which you are able to receive GPS corrections and achieve centimetre level accuracy.
To enable **Allow mock locations** in Android:
* enable **Developer options**, which are hidden by default:
* On newer Android versions, go to **Android Settings** > **About phone** and scroll down to find the **Build number**. Tap the build number 7 times. A message appears with a count-down until you **become a developer**.
* On older Android versions, the developer settings can be made visible under the **Android Settings** > **Applications** > **Development**.
* Once you have the developers option enabled, go to **System** > **Advanced** > **Developer options** > **Select mock location app** and select your GPS app.
The mock location will be used by the mobile app automatically as if received from the internal receiver.
External GPS on iOS [](https://merginmaps.com/docs/field/external_gps/#external-gps-on-ios)
---------------------------------------------------------------------------------------------
Direct connection via the mobile app is not possible on iOS devices.
External GPS can be connected to your iOS device via Bluetooth. Depending on the GPS manufacturer, there may be a custom app, which then provides position to your iOS device. The mobile app sees this as an internal GPS receiver automatically, without additional configuration.
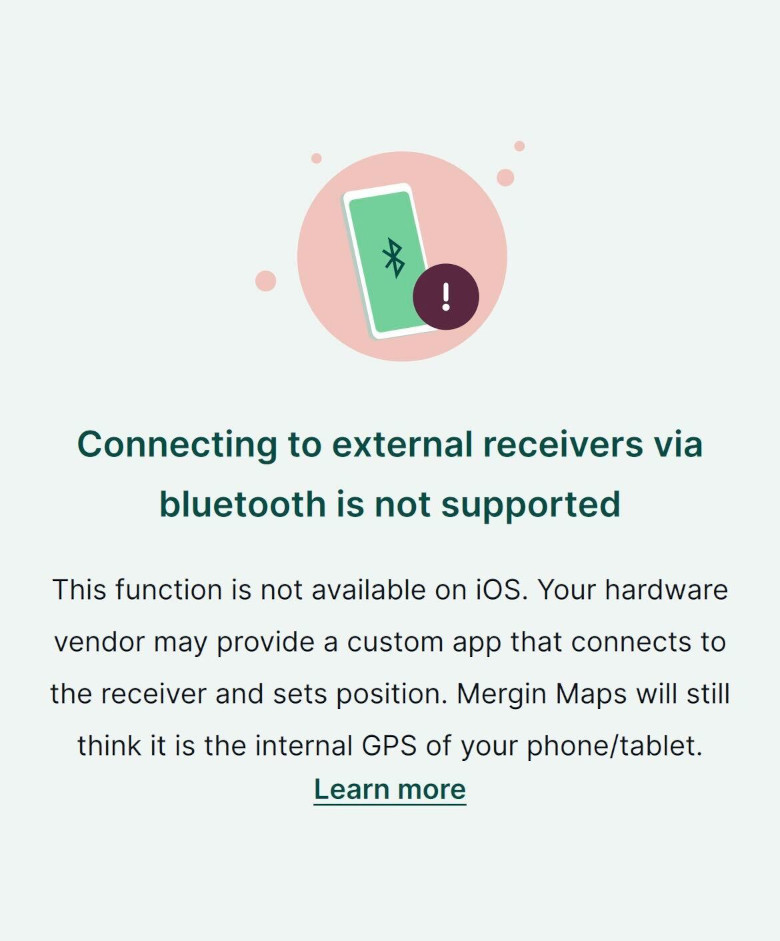
External GPS troubleshooting [](https://merginmaps.com/docs/field/external_gps/#external-gps-troubleshooting)
---------------------------------------------------------------------------------------------------------------
If you encounter issues with external GPS in the mobile app , make sure that:
* your Bluetooth is turned on
* GPS is paired with your mobile device
* your GPS receiver is turned on, has battery and is sending data in NMEA format, which is readable by the mobile app
* remove the device in the mobile app, and add it again from the mobile app
List of known supported GPS devices [](https://merginmaps.com/docs/field/external_gps/#list-of-known-supported-gps-devices)
-----------------------------------------------------------------------------------------------------------------------------
External GPS functionality depends on the manufacturer and on the specific model of your GPS device. These devices are currently known to work well:
| Manufacturer | Model | Android | iOS |
| --- | --- | --- | --- |
| ArduSimple | RTK Calibrated Surveyor Kit[9](https://merginmaps.com/docs/field/external_gps/#link-9) | yes | no |
| ArduSimple | RTK Handheld Surveyor Kit[9](https://merginmaps.com/docs/field/external_gps/#link-9) | yes | no |
| ArduSimple | RTK Portable Bluetooth Kit[9](https://merginmaps.com/docs/field/external_gps/#link-9) | yes | no |
| Bad Elf | GPS Pro | yes | yes |
| Bad Elf | GPS Pro+ | yes | yes |
| Bad Elf | GNSS Surveyor | yes | yes |
| Bad Elf | Flex Mini (standard or extreme) | yes | yes |
| Bad Elf | Flex (standard or extreme) | yes | yes |
| Carlson | Carlson Brx7[1](https://merginmaps.com/docs/field/external_gps/#link-1) | yes (mock location) | unknown |
| Carlson | Carlson xML2 [1](https://merginmaps.com/docs/field/external_gps/#link-1) | yes (mock location) | unknown |
| Emlid | Emlid Reach RX[2](https://merginmaps.com/docs/field/external_gps/#link-2) | yes | yes |
| Emlid | Emlid Reach RS+[2](https://merginmaps.com/docs/field/external_gps/#link-2) | yes | no |
| Emlid | Emlid Reach RS2/RS2+[2](https://merginmaps.com/docs/field/external_gps/#link-2) | yes | no |
| Emlid | Emlid Reach RS3[2](https://merginmaps.com/docs/field/external_gps/#link-2) | yes | no |
| Garmin | GLO 2 | yes | yes |
| Geomax | Zenith06[8](https://merginmaps.com/docs/field/external_gps/#link-8) | yes (mock location) | unknown |
| Geomax | Zenith60[8](https://merginmaps.com/docs/field/external_gps/#link-8) | yes (mock location) | unknown |
| Juniper Systems | Geode GNS3[3](https://merginmaps.com/docs/field/external_gps/#link-3) | yes | yes |
| Leica | Leica FLX100[4](https://merginmaps.com/docs/field/external_gps/#link-4) | yes (mock location) | no |
| Leica | Leica FLX100 plus[4](https://merginmaps.com/docs/field/external_gps/#link-4) | yes (mock location) | yes[\*\*](https://merginmaps.com/docs/field/external_gps/#link-**) |
| Leica | Leica Zeno GG04plus[4](https://merginmaps.com/docs/field/external_gps/#link-4) | yes (mock location) | yes[\*\*](https://merginmaps.com/docs/field/external_gps/#link-**) |
| marXact | UNI-GR1 | yes | no |
| marXact | UNI-GR2 | yes | no |
| proNIVO | PNR21[6](https://merginmaps.com/docs/field/external_gps/#link-6) | yes (mock location) | no |
| SingularXYZ | P1[7](https://merginmaps.com/docs/field/external_gps/#link-7) | yes | unknown |
| Trimble | Trimble Catalyst[5](https://merginmaps.com/docs/field/external_gps/#link-5) | yes (mock location) | unknown |
| Trimble | Trimble R1[5](https://merginmaps.com/docs/field/external_gps/#link-5) | yes (mock location) | unknown |
| Trimble | Trimble R2[5](https://merginmaps.com/docs/field/external_gps/#link-5) | yes (mock location) | unknown |
* 1: **Carlson Brx7**, **Carlson xML2** - through [Carlson Layout](https://www.carlsonsw.com/product/carlson-layout)
which will set a mock location in Android.
* 2: **Emlid Reach RX**, **Emlid Reach RS+**, **Emlid Reach RS2/RS2+**, **Emlid Reach RS3** - directly via Bluetooth connection, has an internal NTRIP client to receive corrections. Possible to set a mock location and connect the receiver via Bluetooth using [GPS Connector](https://play.google.com/store/apps/details?id=de.pilablu.gpsconnector)
or WiFi using [Lebefure NTRIP Client](https://play.google.com/store/apps/details?id=com.lefebure.ntripclient)
.
* 3: **Geode GNS3** - through _Geode Connect_ app on [Android](https://play.google.com/store/apps/details?id=com.juniper.geode2a&hl=en_NZ&gl=US)
or [iOS](https://apps.apple.com/us/app/geode-connect/id1446098695)
, which also acts as an NTRIP client and sends corrections to the device.
* 4: **Leica FLX100**, **Leica FLX100 plus**, **Leica Zeno GG04plus** - through _Leica Zeno Connect_ app on [Android](https://play.google.com/store/apps/details?id=com.leica.zenoconnect&hl=en&gl=US)
which also acts as a NTRIP client and sends the corrections to the device. The app will set a mock location in Android. It is also possible to connect directly via Bluetooth (even multiple phones can be connected at once), but if no phone has Zeno app running, there will be no corrections available. \*\* _Leica Zeno Connect_ is also available on [iOS](https://apps.apple.com/us/app/zeno-connect/id1310344749)
. It is known to support **Leica FLX100 plus** and **Leica Zeno GG04plus**. However, on iOS, the vertical accuracy information is not transferred to Mergin Maps mobile app through _Leica Zeno Connect_. The mobile app will not display the correct value of the vertical accuracy.
* 5: **Trimble R1**, **Trimble R2**, **Trimble Catalyst** - through [_Trimble Mobile Manager_ app](https://play.google.com/store/apps/details?id=com.trimble.trimblemobilemanager)
which also acts as a NTRIP client and sends the corrections to the device. The app will set a mock location in Android.
* 6: **proNIVO PNR21** - through _Attenberger Connector_ app on [Android](https://play.google.com/store/apps/details?id=eu.apglos.attenbergerapp1&hl=en&gl=US)
.
* 7: **SingularXYZ P1** - the device uses a SIM Card that can be configured for NTRIP. It can be connected to the mobile app via Bluetooth (without using a mock location).
* 8: **Geomax Zenith06, Zenith60** - through _Geomax X-PAD_ app on Android, using a GNSS Mock licence from Geomax and the _Mock GNSS_ option in the app.
* 9: **ArduSimple kits** - through [_GNSS Master_ app](https://play.google.com/store/apps/details?id=com.gnssmaster&hl=en&gl=US&pli=1)
which also acts as a NTRIP client and sends the corrections to the device. Detailed steps can be found in the tutorial [How to connect ArduSimple kit to Mergin Maps for centimetre-accurate mapping](https://www.ardusimple.com/how-to-connect-ardusimple-kit-to-mergin-maps-for-centimeter-accuracte-mapping/)
.
**Did you use a GPS that is not in this list?** [Share your experiences with us!](https://github.com/MerginMaps/docs/issues/124)
---
# PostgreSQL DB Sync | Mergin Maps
[Skip to content](https://merginmaps.com/docs/dev/dbsync/#VPContent)
Return to top
PostgreSQL DB Sync [](https://merginmaps.com/docs/dev/dbsync/#postgresql-db-sync)
===================================================================================
**DB Sync** is a tool that takes care of two-way synchronisation between [Mergin Maps](https://merginmaps.com/)
and PostGIS databases. The synchronisation works both ways: changes made in a PostGIS database are automatically pushed to a configured Mergin Maps project and changes made in a GeoPackage in the Mergin Maps project are pushed to the PostGIS database.
**Interested in using DB Sync?** Go to [MerginMaps/db-sync](https://github.com/MerginMaps/db-sync)
repository for the source code and a Quick start that will guide you through the steps to get DB Sync up and running.
Windows users may use a Windows executable for DB sync. On Linux/Mac users are advised to use a docker container. [DB Sync configuration wizard](https://merginmaps.com/docs/dev/dbsync/#db-sync-configuration-wizard)
can help you with creating the configuration file.
DB Sync configuration wizard [](https://merginmaps.com/docs/dev/dbsync/#db-sync-configuration-wizard)
-------------------------------------------------------------------------------------------------------
DB Sync configuration file can be generated in QGIS using Mergin Maps QGIS plugin:
1. Open your Mergin Maps project in QGIS
2. Using the **Plugin** menu bar, navigate to **Mergin Maps > Configure DB sync** tool 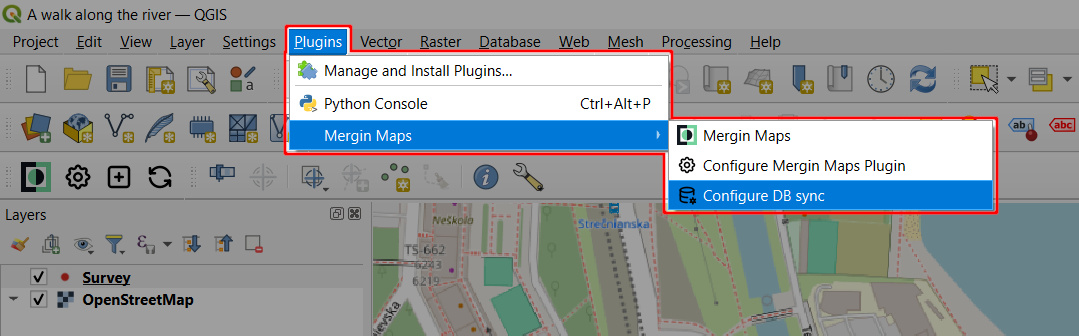
3. DB sync wizard opens.
Choose if you want to initialise the sync from Mergin Maps project or from the database and follow the steps. 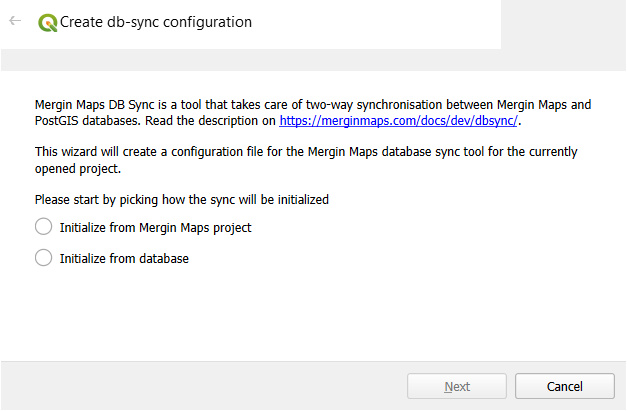
4. At the end, the wizard will generate a file that can be used as initial configuration file for this project to set up DB Sync 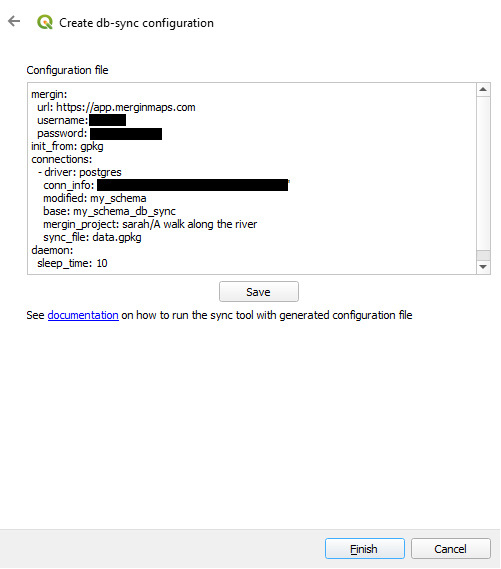
---
# Projections | Mergin Maps
[Skip to content](https://merginmaps.com/docs/gis/projections/#VPContent)
Return to top
Projections Expert [](https://merginmaps.com/docs/gis/projections/#projections)
=================================================================================
Map projections [](https://merginmaps.com/docs/gis/projections/#map-projections)
----------------------------------------------------------------------------------
**Map projection** is the operation defining how to show/display spatial data (your data with associated coordinate reference system) on 2D flat surface (QGIS map canvas or printed paper map). There are various types of projections that are used in cartography (planar projection, cylindrical projections, conic projections). Each type of projection could preserve some attribute of the 2d "flat" map. Some projections preserve distance, others areas, etc. For example Mercator Projection was created to display accurate compass bearings for sea travel.
You can read more about map projections in the [QGIS docs](https://docs.qgis.org/3.22/en/docs/gentle_gis_introduction/coordinate_reference_systems.html#map-projection-in-detail)
or [Wikipedia](https://en.wikipedia.org/wiki/Map_projection)
.
Coordinate reference systems [](https://merginmaps.com/docs/gis/projections/#coordinate-reference-systems)
------------------------------------------------------------------------------------------------------------
All your spatial data include information about where your data is located on earth. Let's say you to store the position of a heritage tree. You may stand next to it with GPS receiver and note down latitude and longitude and altitude of the place. Two numbers in degrees and one in meters. You think the three numbers will mark exactly the heritage tree position for your children. Not that easy. What if in 50 years the GPS will be replaced by some different technology not using the latitude and longitude? Or let's say the tree is in Australia. The continent sits on the world’s fastest-moving continental tectonic plate with speed around 7 centimetres per year. And your GPS position is related to the global/world coordinates. Ok, at least we should mark down to our notes the date when we captured the coordinates and which **coordinate reference system** (CRS) we used.
Sometimes the coordinates of spatial data are in meters or feet, sometimes in degrees and therefore you need also coordinate reference system which defines how your spatial data could be transformed to the position on the Earth. Each coordinate reference system could be geographic (e.g. for whole globe, using latitude and longitude in degrees) or projected (for example the Great Britain or part of the USA, using metric units as feet). So the coordinate reference system consists of:
* the mathematical **parameters** such as an origin and scale (e.g. prime meridian which specifies the location of 0° longitude)
* horizontal (and vertical) **units** (degrees, meters, feet, ...)
* **datum**, the ellipsoid/geoid which represents the Earth's shape and its position relative to the surface
The coordinate reference systems are not set in stone. Most of them are part of [EPSG registry](https://en.wikipedia.org/wiki/EPSG_Geodetic_Parameter_Dataset)
and they have associated the simple number that can be looked up and the precise definition could be found out. To elaborate on our example with the heritage tree in Australia, you could have used [GDA94](https://en.wikipedia.org/wiki/Geocentric_Datum_of_Australia_1994)
.
When we want to show the data stored in one coordinate reference system on a map in other coordinate reference system (e.g. when we have multiple layers each with different coordinate system), we need to do **transformation**. When two coordinate systems do not use the same datum, there are multiple ways how to transform from system one to another. This operation is typically only approximate and multiple operations may exist for different purposes, or depending on how the data was originally collected in the first place. Therefore as spatial data users we need to make an informed choice about which operation is fit for purpose and the correct one to use for your current project.
More detailed information about the coordinate reference systems and projections could be found in the [QGIS online documentation](https://docs.qgis.org/3.22/en/docs/gentle_gis_introduction/coordinate_reference_systems.html)
or [PROJ documentation](https://proj.org/operations/index.html)
.
How is it used in QGIS? [](https://merginmaps.com/docs/gis/projections/#how-is-it-used-in-qgis)
-------------------------------------------------------------------------------------------------
QGIS is FOSS (free and open source) software standing on the shoulders of other FOSS libraries. Notably projection support is handled by [PROJ](https://proj.org/)
. The version proj4 was used for decades, but in recent years it was recreated from scratch to reflect the recent modern ways for handling transformations and the increasing demand for high precision location. Different version of PROJ uses different set of resource files required to handle projections accurately. See [PROJ help](https://proj.org/resource_files.html)
for details. Most importantly, the recent release of QGIS 3.16 LTR and QGIS 3.18 for all platforms is on PROJ6+ version.
Your QGIS installation contains the basic set of PROJ resources required for most day-to-day work. But if you need some special coordinate reference systems, the required files for
[PROJ7](https://github.com/OSGeo/PROJ-data)
and for [PROJ6](https://github.com/OSGeo/proj-datumgrid)
are available online. Also note that QGIS can automatically download the required files for your when requested. Just follow the instructions when you see the QGIS warning in the transformation dialog:
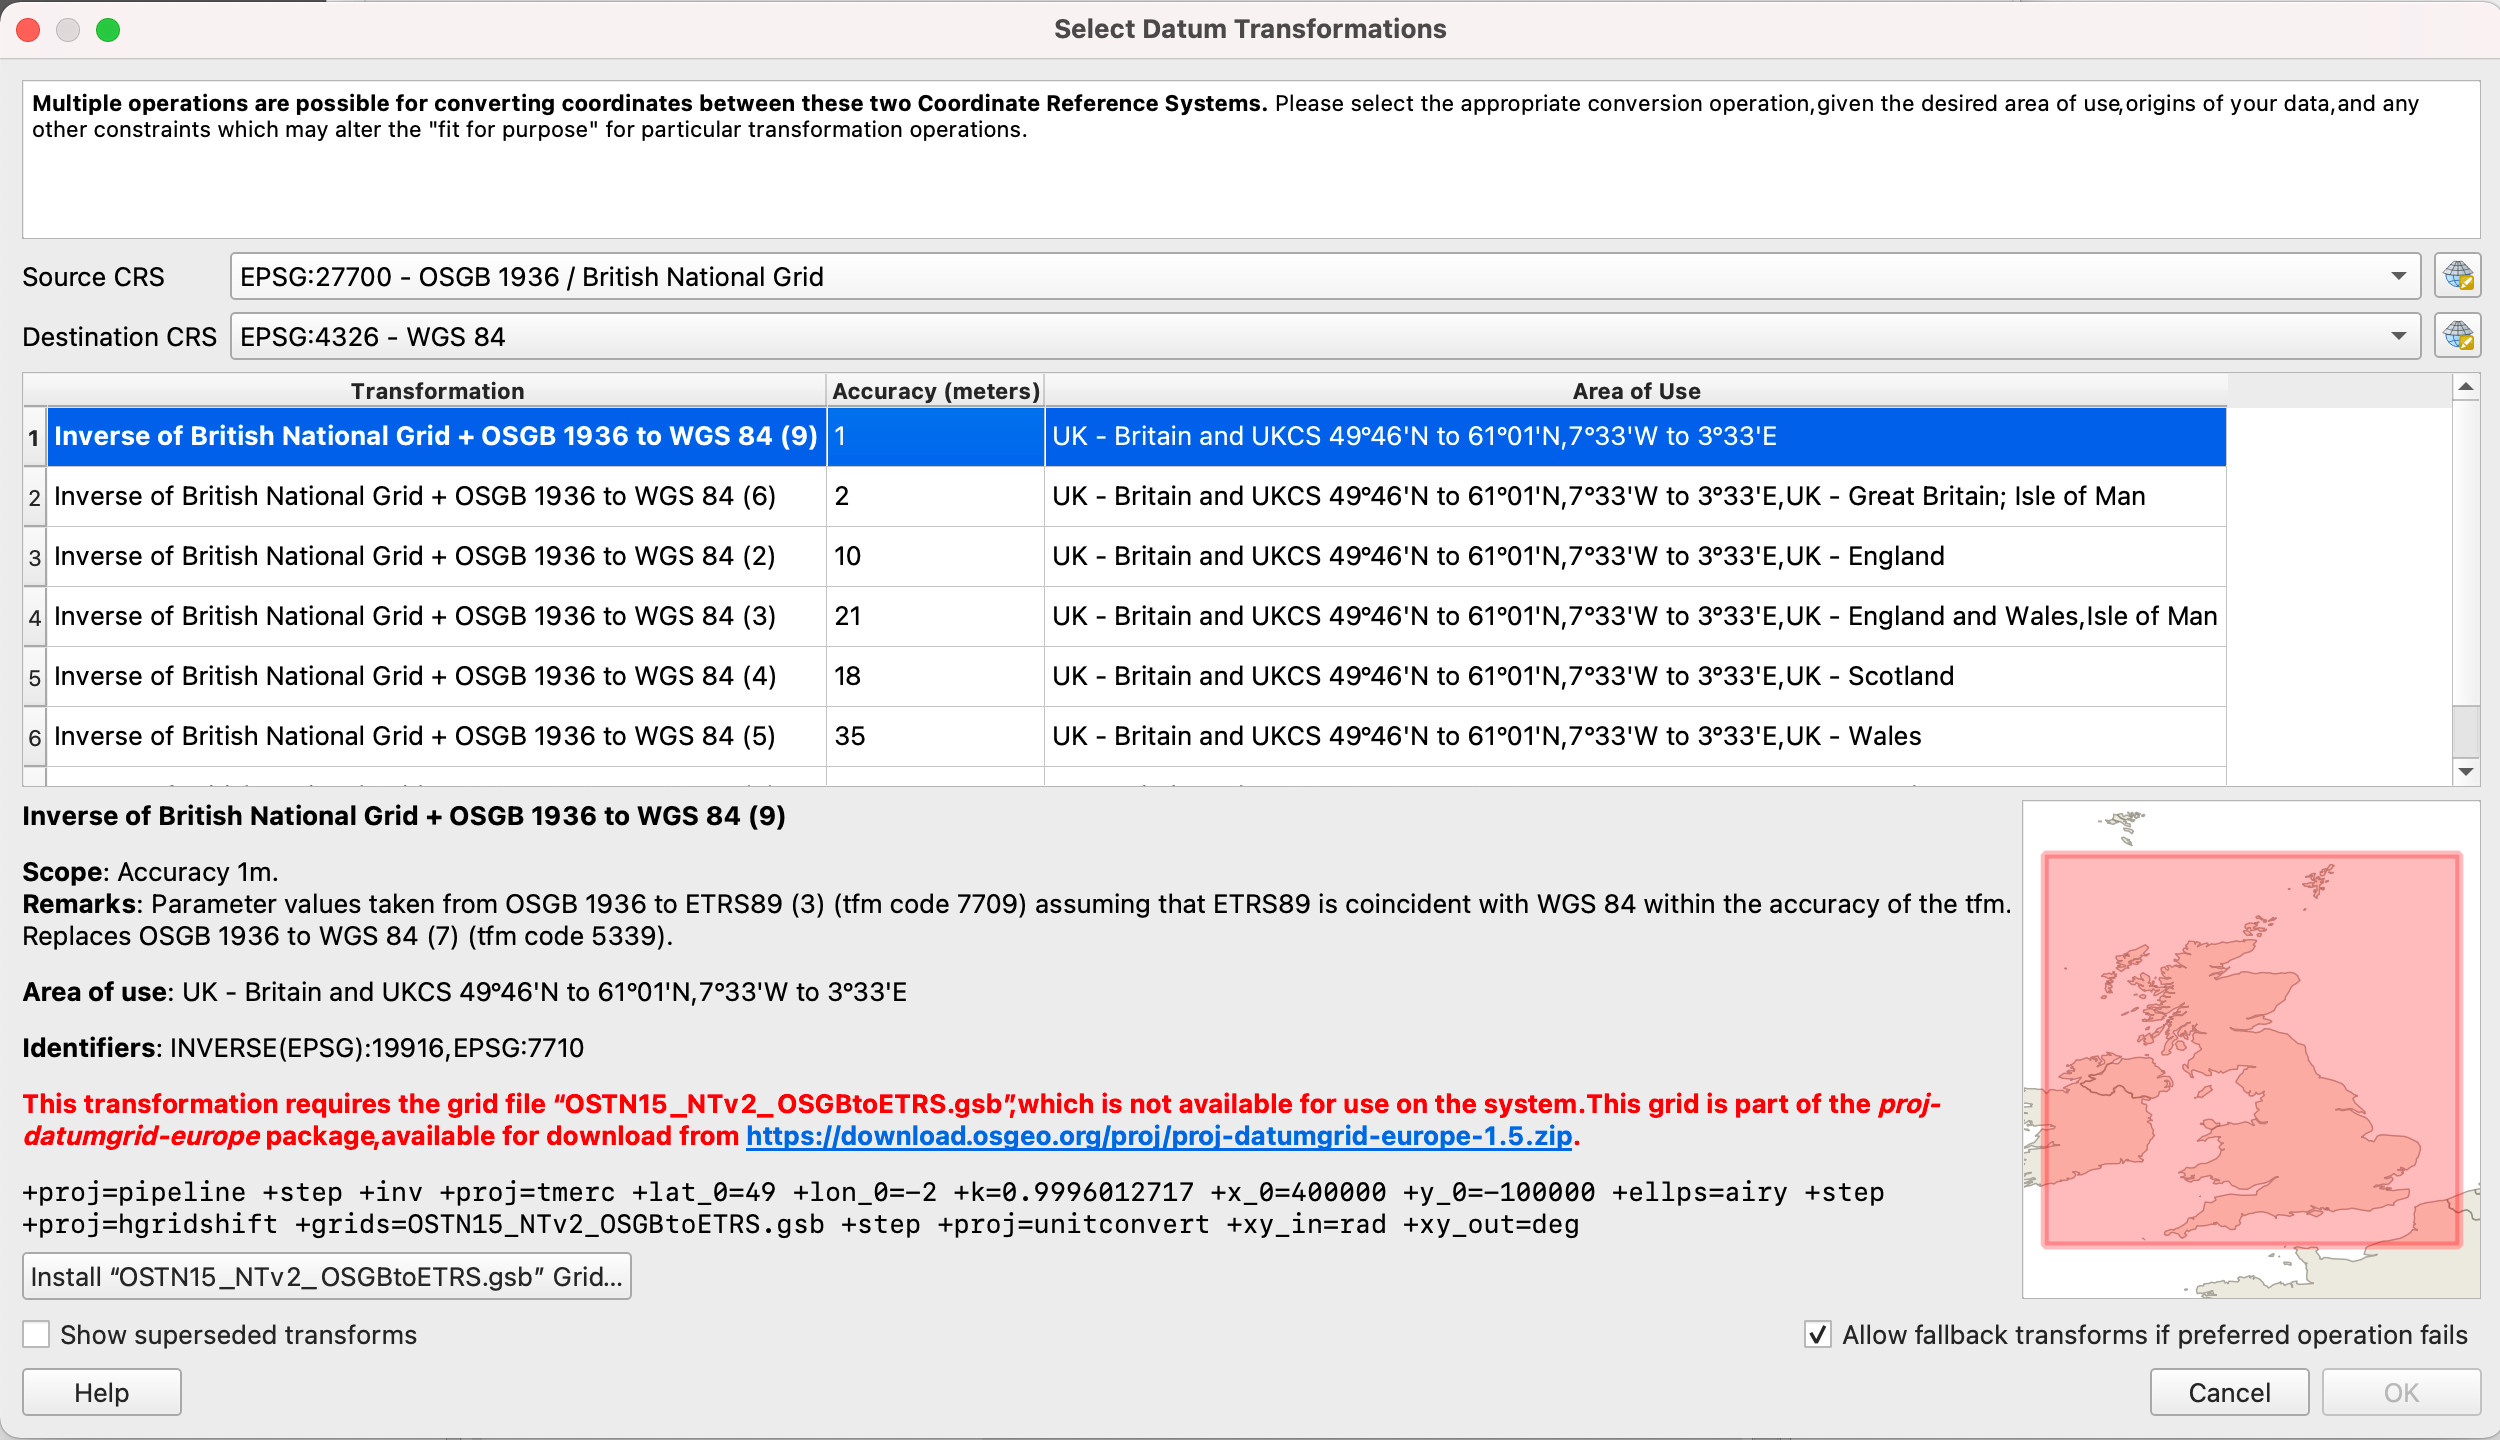
Example capture GPS point for Great Britain [](https://merginmaps.com/docs/gis/projections/#example-capture-gps-point-for-great-britain)
------------------------------------------------------------------------------------------------------------------------------------------
For example, imagine we have a project for the Great Britain, where we use map projection British National Grid (EPSG:27700) to display map. We have background map in the same coordinate reference system, so there is no datum transformation required to show it. However we want to capture point by GPS receiver in the field by Mergin Maps mobile app, and we add a point layer in WGS 84 coordinate reference system. When we add point to this point layer, we store the coordinate values (latitude and longitude received from GPS) as is in the data section of our layer. When we want to show the point on the QGIS map canvas, QGIS needs to first do datum transformation, following by map projection.
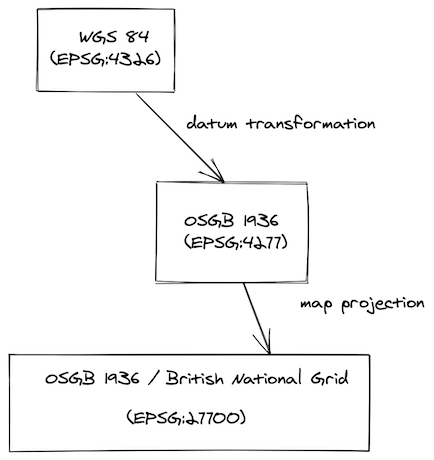
### 1\. Datum transformation [](https://merginmaps.com/docs/gis/projections/#_1-datum-transformation)
British National Grid (EPSG:27700) is based on datum OSGB 1936 which is different from WGS 84. QGIS recognises that there is possibility to do datum transformation in multiple ways so user is asked to select the one from the list:
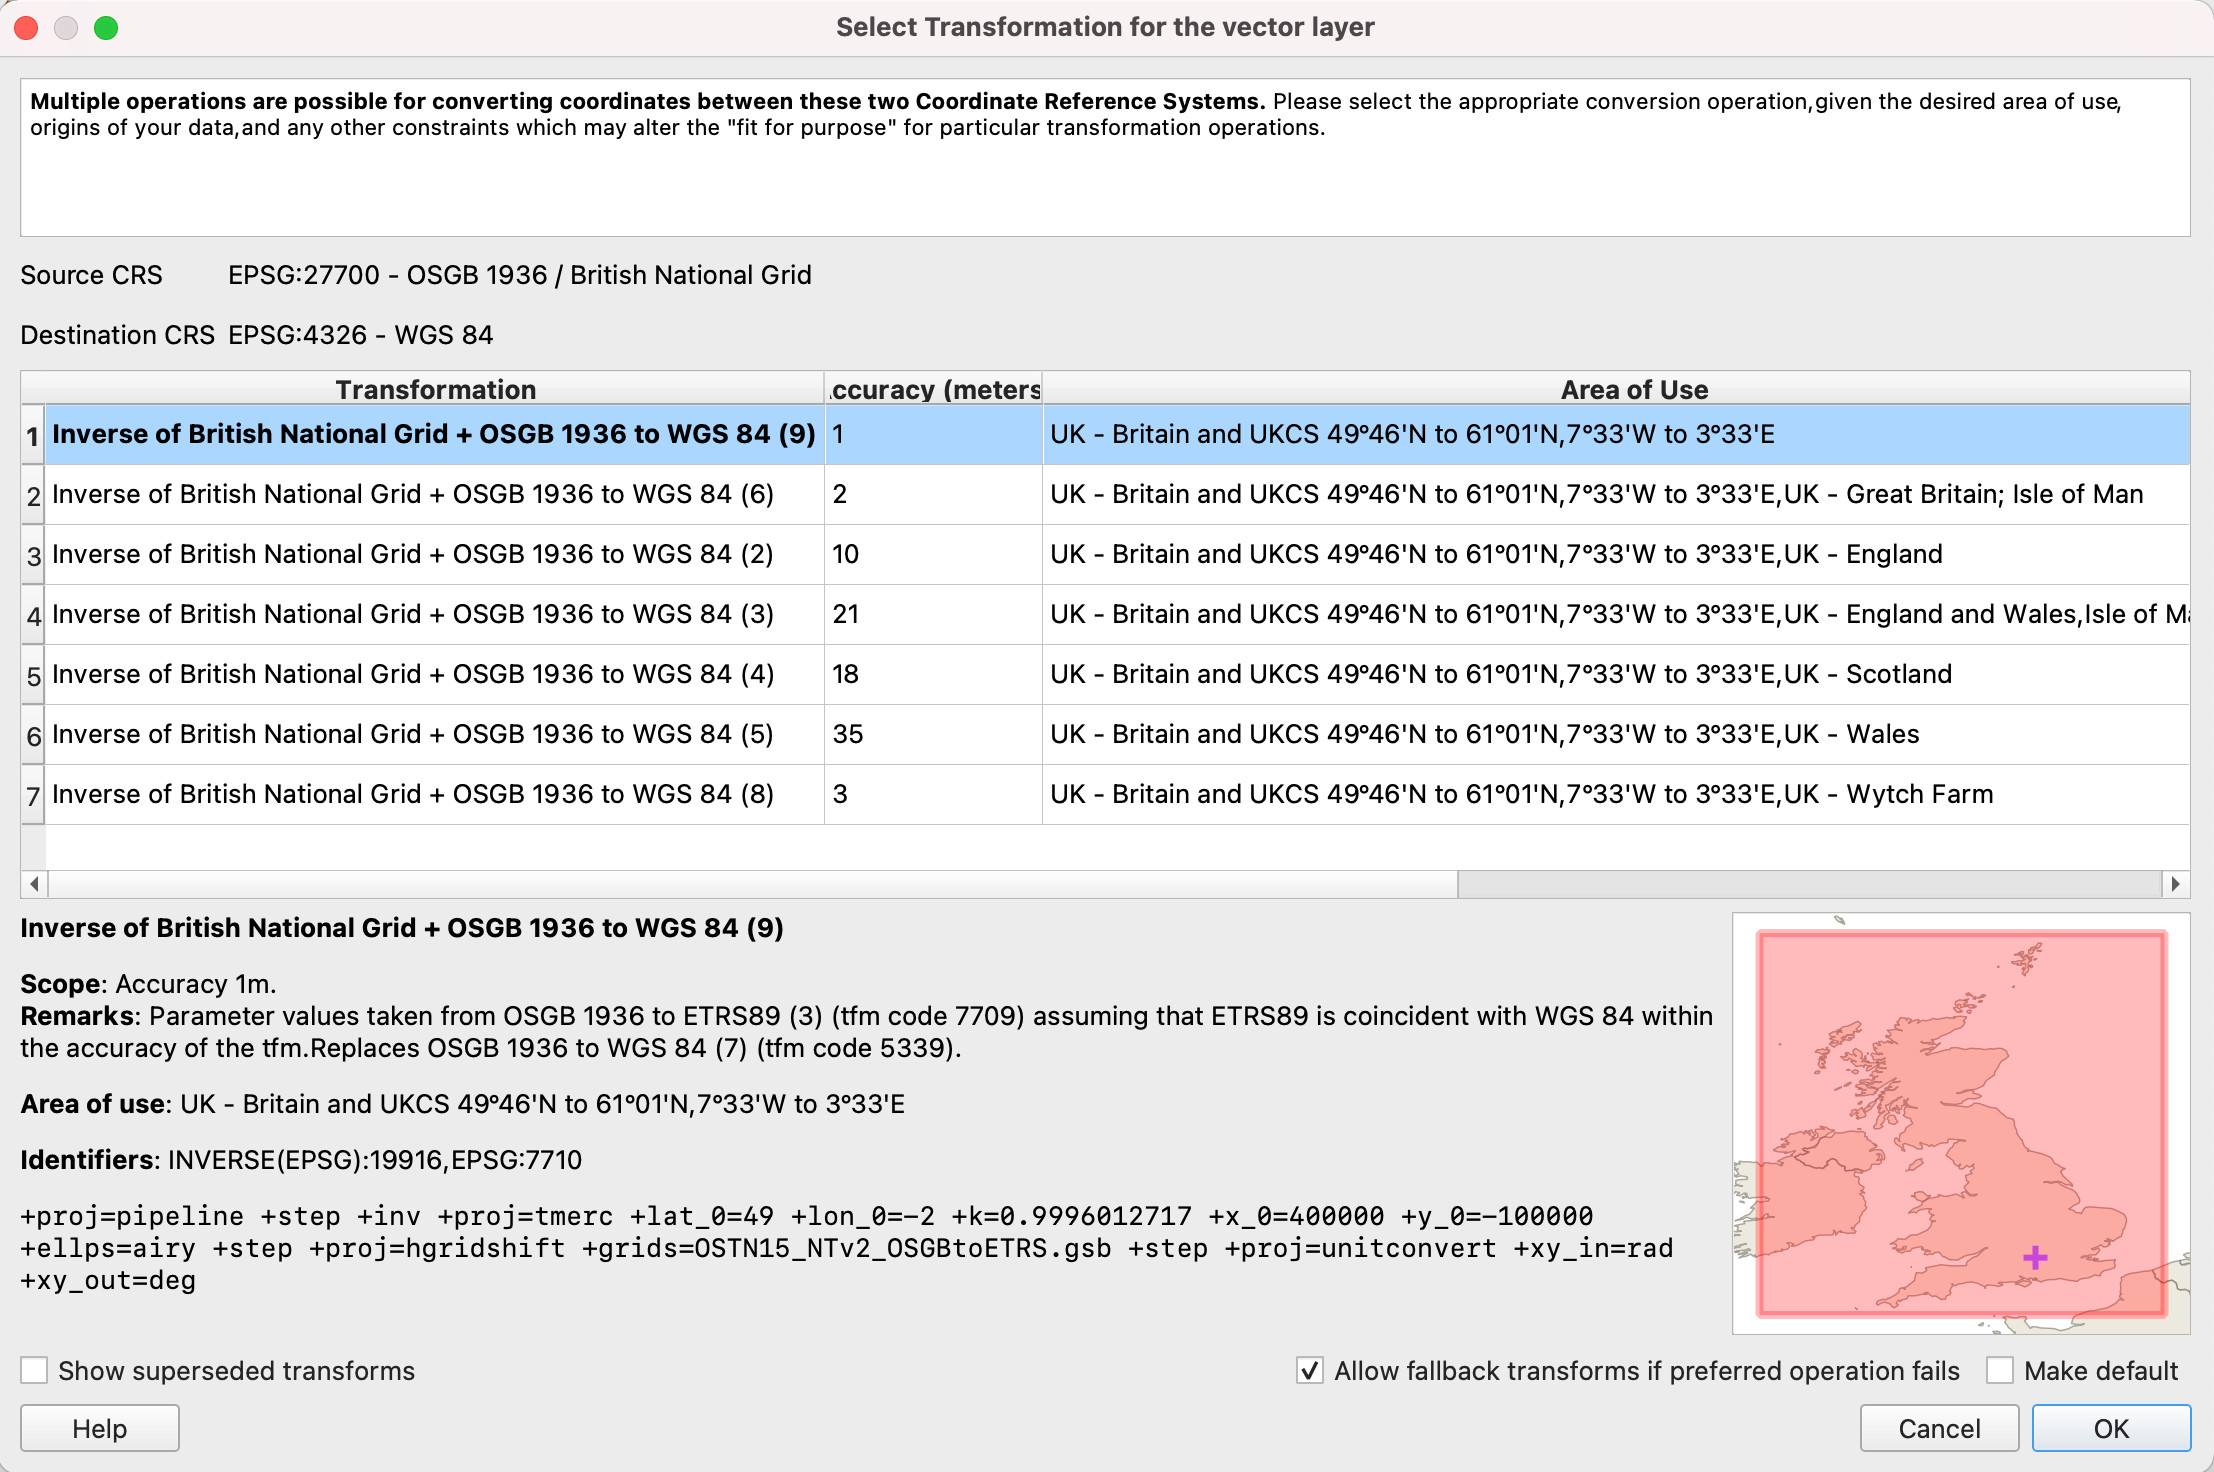
In this case, the recommended transform is the[OSTN15 transformation](https://www.ordnancesurvey.co.uk/business-government/tools-support/os-net/for-developers)
which uses a grid file to transform coordinates. Other transforms are using [Helmert transformation](https://en.wikipedia.org/wiki/Helmert_transformation)
method and offer lower accuracy. Grid files for transforms are usually not shipped with QGIS. But QGIS _offers to auto install_ these to the correct location for you! These files are then automatically used for all your projects if required. Once this is selected and ready, QGIS calls PROJ library to do datum transformation.
### 2\. Map projection [](https://merginmaps.com/docs/gis/projections/#_2-map-projection)
Once the data is in the same datum, they are projected to 2d flat space (map canvas) and rendered to the user in QGIS or Mergin Maps mobile app.
What could possibly go wrong? [](https://merginmaps.com/docs/gis/projections/#what-could-possibly-go-wrong)
-------------------------------------------------------------------------------------------------------------
There are multiple scenarios where you can end up with shifted or misplaced points on your map.
Probably most commonly the misplaced data are when the coordinate reference system of layers is not defined or assigned incorrectly.
Other issues are visible when:
1. datum transformation needs to be done during reprojection (i.e. GPS / survey layer / map do not have the same geodetic datum)
2. AND the datum transformation is not correct.
For example imagine that you digitised your point to be in the corner of the rectangle in QGIS desktop. But when opened in the Mergin Maps mobile app in the field it is obviously shifted by dozens of centimetres. Or other way around, you digitise the point in the field, and when opened in QGIS it is misplaced.
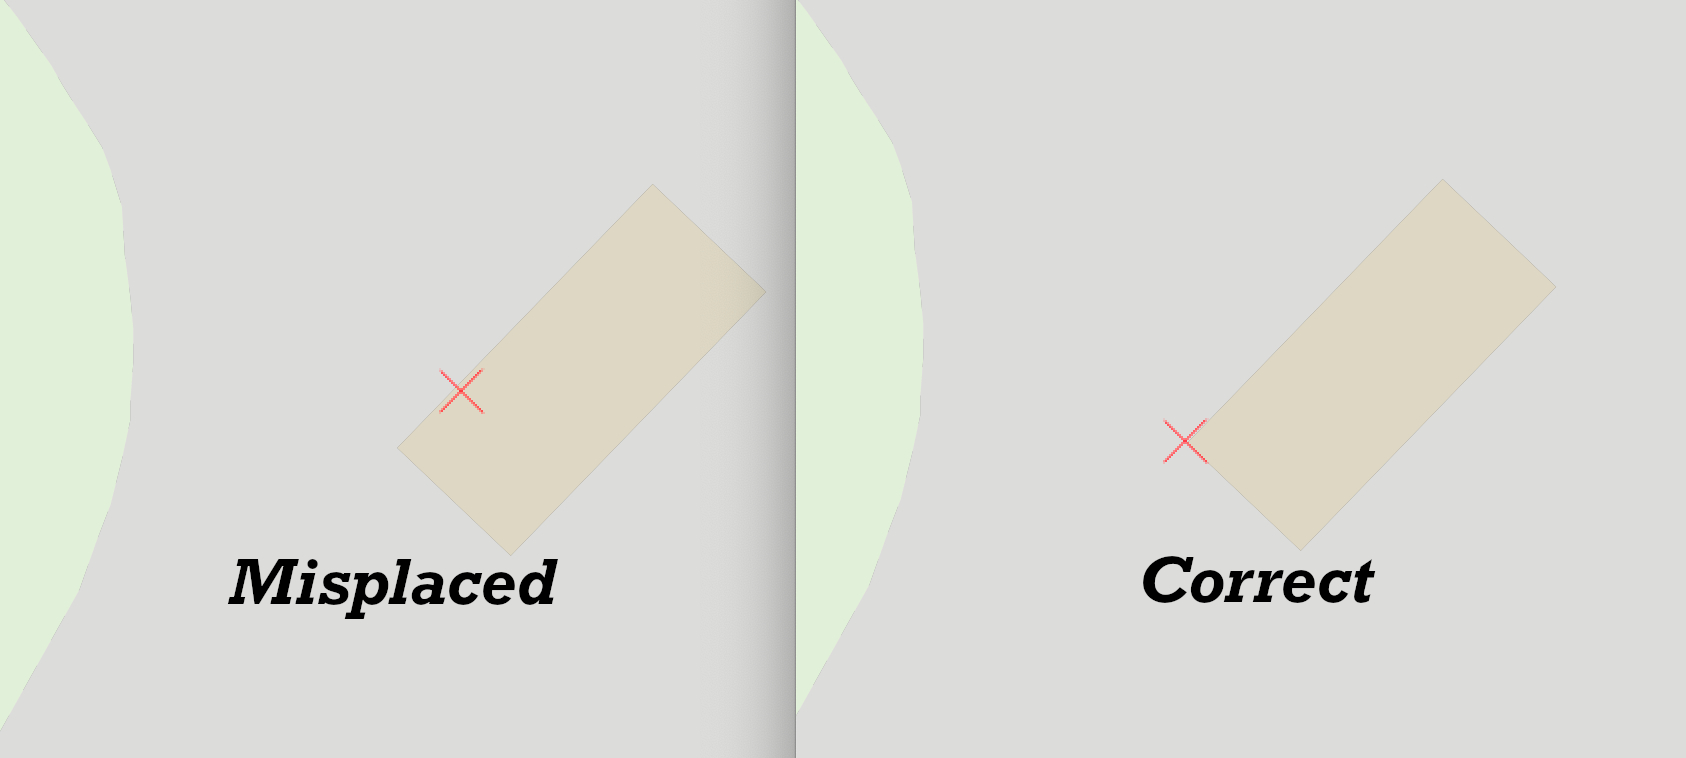
The likely reason is that there is correctly downloaded and used extra datum shift file in QGIS, but missing in Mergin Maps mobile app (more information in [this blog](https://www.lutraconsulting.co.uk/blog/2021/04/21/projections-field/)
)
QGIS transformation tab [](https://merginmaps.com/docs/gis/projections/#qgis-transformation-tab)
--------------------------------------------------------------------------------------------------
QGIS exposes a nice interface for coordinate reference systems through the Transformation tab in Settings. It is powered by [PROJ](https://proj.org/index.html)
, which tries to find the [best available](https://proj.org/operations/operations_computation.html)
transformation route from the source to the destination coordinate reference system.
Let's say we want to setup default transformation between British National Grid (EPSG:27700) and World Geodetic System used in GPS (EPSG:4326) for all our future QGIS projects.
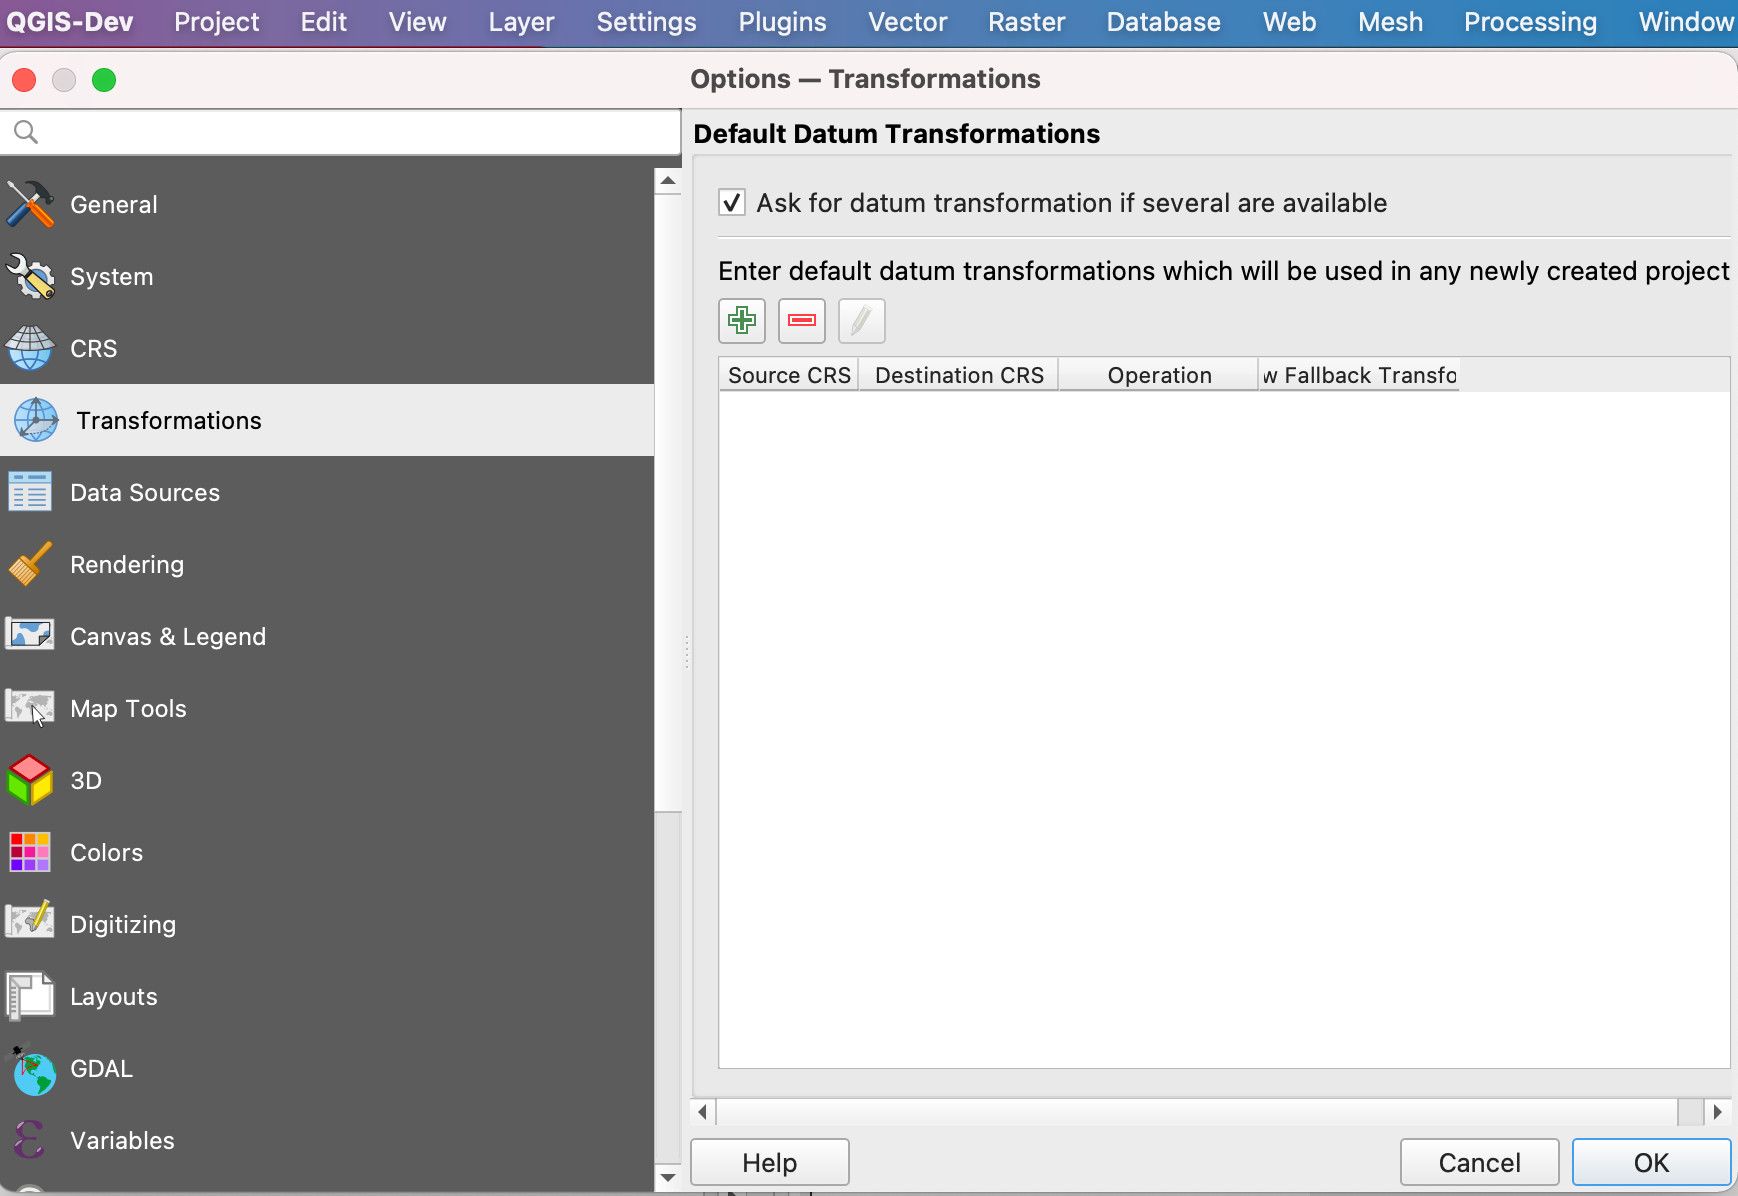
Using the "+" button we add a new entry and select EPSG:27700 and EPSG:4326. Let's examine the first transformation with the accuracy of 1 meter:

At the bottom there is an interesting PROJ description line with pipeline to be used by underlying PROJ library. You can read more about [PROJ pipeline](https://proj.org/operations/pipeline.html)
, but to start with it definition of several mathematical operations to be done:
+proj=pipeline
+step +inv +proj=tmerc +lat_0=49 +lon_0=-2 +k=0.9996012717 +x_0=400000 +y_0=-100000 +ellps=airy
+step +proj=hgridshift +grids=OSTN15_NTv2_OSGBtoETRS.gsb
+step +proj=unitconvert +xy_in=rad +xy_out=deg
Huh. Let's see if we can get at least some information from it by help of [PROJ documentation](https://proj.org/)
We see there are 3 steps:
* inversion `+inv` for the `tmerc`([Transverse Mercator](https://proj.org/operations/projections/tmerc.html)
) with [Airy](https://proj.org/operations/projections/airy.html?highlight=airy)
ellipsoid ("map projection")
* following by `hgridshift`([Horizontal grid shift](https://proj.org/operations/transformations/hgridshift.html?highlight=hgridshift)
) defined by **datum shift file** `OSTN15_NTv2_OSGBtoETRS.gsb` ("datum transformation")
* finally unit conversion from radians to degrees (GPS coordinates are in degrees)
Well, quite importantly for second step you have to have **datum shift file** `OSTN15_NTv2_OSGBtoETRS.gsb` on your computer. If you do not have it, this is why there is a big red warning in the dialog. But **QGIS is always nice to you** and offers you to automatically download and store it for later use!
You can check the downloaded PROJ files in these locations:
* For Windows users: `C:\Users\USER\AppData\Roaming\QGIS\QGIS3\profiles\default\proj` (replace USER with your username)
* For macOS users: `~/Library/Application\ Support/QGIS/QGIS3/profiles/default/proj`
* For Linux users: `~/.local/share/QGIS/QGIS3/profiles/default/proj`
---
# Python API Client | Mergin Maps
[Skip to content](https://merginmaps.com/docs/dev/integration/#VPContent)
Return to top
Python API Client [](https://merginmaps.com/docs/dev/integration/#python-api-client)
======================================================================================
Do you want to integrate [Mergin Maps](https://merginmaps.com/)
? Mergin Maps is an open platform that aims to be developer friendly and it has been designed to allow easy integration with other software.
Jupyter Notebooks examples gallery available
[Mergin Maps Python Client](https://github.com/MerginMaps/python-api-client/tree/master/examples)
repository offers short code examples on how to use the python client module for basic scenarios, such as users management, synchronisation or projects management.
Installation [](https://merginmaps.com/docs/dev/integration/#installation)
----------------------------------------------------------------------------
The Python client module is the easiest way to programmatically use [Mergin Maps](https://merginmaps.com/)
. You can use Python API or a command-line tool to easily work with your projects, such as to get project status, push and pull changes. You can also create user accounts and manage their roles.
Python client is available in the PyPI repository and can be installed with `pip`:
pip3 install mergin-client
Command line interface [](https://merginmaps.com/docs/dev/integration/#command-line-interface)
------------------------------------------------------------------------------------------------
For those who prefer using terminal, there is `mergin` command line tool shipped with the Python client. With several built-in commands, it is possible to download Mergin Maps projects, push/pull changes, create or delete projects and more.
For example, to download a Mergin Maps project to a local folder:
mergin download john/project1 ~/mergin/project1
For more details, visit [MerginMaps/python-api-client](https://github.com/MerginMaps/python-api-client)
.
Python module [](https://merginmaps.com/docs/dev/integration/#python-module)
------------------------------------------------------------------------------
To use [Mergin Maps](https://merginmaps.com/)
from Python, just create `MerginClient` object and then use it. Here, for instance, to download a project:
python
import mergin
client = mergin.MerginClient(login='john', password='T0p_secret')
client.download_project('lutraconsulting/Basic survey', '/tmp/basic-survey')
If you have Mergin Maps QGIS plugin installed and you want to use it from the QGIS' Python console
python
import Mergin.mergin as mergin
client = mergin.MerginClient(login='john', password='T0p_secret')
API reference - users [](https://merginmaps.com/docs/dev/integration/#api-reference-users)
--------------------------------------------------------------------------------------------
You can create new users and manage their roles using the following methods.
API availability
The following methods are available for Python API Client versions `0.10.0` or higher, using server versions `2025.2.0` or higher.
Some of the following methods require a `workspace_role` argument. This must be provided as a member of the `WorkspaceRole` enum. To use the enum, import it from the `common.py` module:
python
from mergin.common import WorkspaceRole
### Create a user [](https://merginmaps.com/docs/dev/integration/#create-a-user)
python
client.create_user(, , , , [username], [notify_user])
The caller must be a workspace admin, owner or server administrator.
Arguments:
`email` (string): Must be a unique email.
`password` (string): Must meet security requirements.
`workspace_id` (int) ℹ️ : The workspace ID where the user will be added.
`workspace_role` (`WorkspaceRole` enum) ℹ️ : The user’s role in the workspace. [See the roles options](https://merginmaps.com/docs/manage/permissions/#workspace-member-roles-overview)
.
`username` (string, optional): If not provided, it will be automatically generated from the email address.
`notify_user` (Boolean, optional): If true, confirmation email and other email communication will be sent to the email address (invitations, access requests etc.). Default is `False`.
Example:
python
from mergin.common import WorkspaceRole
client.create_user("jill@example.com", "T0p_secret", 1, WorkspaceRole.EDITOR, notify_user=True)
> ℹ️ `workspace_id` and `workspace_role` arguments are ignored on Community edition servers.
* * *
### Workspace members methods [](https://merginmaps.com/docs/dev/integration/#workspace-members-methods)
These methods are available for [Mergin Maps Cloud](https://merginmaps.com/)
and [Mergin Maps EE](https://merginmaps.com/pricing)
.
API availability
The following methods are available for Python API Client versions `0.10.0` or higher, using server versions `2025.2.0` or higher.
The caller of the following methods must be a workspace admin, owner or server administrator.
#### List members [](https://merginmaps.com/docs/dev/integration/#list-members)
python
client.list_workspace_members()
Arguments:
`workspace_id` (int): ID of the workspace.
#### Get member detail [](https://merginmaps.com/docs/dev/integration/#get-member-detail)
python
client.get_workspace_member(, )
Arguments:
`workspace_id` (int): ID of the workspace.
`user_id` (int): ID of the user.
#### Update member role [](https://merginmaps.com/docs/dev/integration/#update-member-role)
python
client.update_workspace_member(, , , [reset_projects_roles])
Arguments:
`workspace_id` (int): ID of the workspace.
`user_id` (int): ID of the user.
`workspace_role` (`WorkspaceRole` enum): New role. [See the roles options](https://merginmaps.com/docs/manage/permissions/#workspace-member-roles-overview)
.
`reset_projects_roles` (Boolean, optional): If true, overridden project roles (explicitly shared projects access) will be reset. Default is `False`.
#### Remove member [](https://merginmaps.com/docs/dev/integration/#remove-member)
python
client.remove_workspace_member(, )
Arguments:
`workspace_id` (int): ID of the workspace.
`user_id` (int): ID of the user.
> The user account is not removed. This method only removes their access to the workspace.
#### Invite user to workspace [](https://merginmaps.com/docs/dev/integration/#invite-user-to-workspace)
API availability
The following method is available for Python API Client versions `0.10.3` or higher, using server versions `2025.6.1` or higher.
python
client.create_invitation(, , )
Arguments:
`workspace_id` (int): The workspace ID where the user will be invited.
`email` (string): The email of an existing user.
`workspace_role` (`WorkspaceRole` enum): The user’s role in the workspace. [See the roles options](https://merginmaps.com/docs/manage/permissions/#workspace-member-roles-overview)
.
* * *
### Project collaborators methods [](https://merginmaps.com/docs/dev/integration/#project-collaborators-methods)
These methods are available for all server types.
API availability
The following methods are available for Python API Client versions `0.10.0` or higher, using server versions `2025.2.0` or higher.
The caller of the following methods must be a workspace admin, owner, project owner or server administrator.
The following methods accept project ids (of type `uuid`). You can find project id via [projects\_list](https://github.com/MerginMaps/python-api-client/blob/634237890afd9f28f03953e5a01376b56f5abf5c/mergin/client.py#L572)
and [project\_info](https://github.com/MerginMaps/python-api-client/blob/634237890afd9f28f03953e5a01376b56f5abf5c/mergin/client.py#L641)
methods.
Some of the following methods require a `project_role` argument. This must be provided as a member of the `ProjectRole` enum. To use the enum, import it from the `common.py` module:
python
from mergin.common import ProjectRole
#### List project collaborators [](https://merginmaps.com/docs/dev/integration/#list-project-collaborators)
python
client.list_project_collaborators()
Arguments:
`project_id` (string): ID of the project.
#### Add project collaborator [](https://merginmaps.com/docs/dev/integration/#add-project-collaborator)
Adds a user as project collaborator. This method is good for sharing projects with guests or upgrading roles of members for specific projects. On Cloud, the user must be a in the workspace where the project belongs.
python
client.add_project_collaborator(, , )
Arguments:
`project_id` (string): ID of the project.
`user` (string): Email or username of the user to be added to the project.
`project_role`: (`ProjectRole` enum): Role of the user in the project. [See the roles options](https://merginmaps.com/docs/manage/permissions/#project-permissions-overview)
#### Update project collaborator role [](https://merginmaps.com/docs/dev/integration/#update-project-collaborator-role)
python
client.update_project_collaborator(, , )
Arguments:
`project_id` (string): ID of the project.
`user_id` (int): ID of the user.
`project_role`: (`ProjectRole` enum): New role. [See the roles options](https://merginmaps.com/docs/manage/permissions/#project-permissions-overview)
> The user must be first added to the project (via [Add project collaborator](https://merginmaps.com/docs/dev/integration/#add-project-collaborator)
> ) before calling this method, even if he/she is already a workspace member or guest.
#### Remove project collaborator [](https://merginmaps.com/docs/dev/integration/#remove-project-collaborator)
python
client.remove_project_collaborator(, )
Arguments:
`project_id` (string): ID of the project.
`user_id` (int): ID of the user.
> The user account is not removed, only the project access.
Further details [](https://merginmaps.com/docs/dev/integration/#further-details)
----------------------------------------------------------------------------------
The [MerginMaps/python-api-client](https://github.com/MerginMaps/python-api-client)
repository contains the source code and more information on how to use it.
The repository also includes a Jupyter Notebooks examples gallery with short code examples on how to use the python client module for common use cases, such as users management, synchronisation or projects management.
---
# Media Sync | Mergin Maps
[Skip to content](https://merginmaps.com/docs/dev/media-sync/#VPContent)
Return to top
Media Sync [](https://merginmaps.com/docs/dev/media-sync/#media-sync)
=======================================================================
**Media Sync** enables to synchronise media files from [Mergin Maps](https://merginmaps.com/)
project to other storage back-ends, such as Google Drive, Amazon S3 or MinIO.
Media Sync has two sync modes: in copy mode, media files are only copied the external drive, while in the move mode, the files are copied and subsequently removed from Mergin Maps project.
**Interested in using Media Sync?** Go to [MerginMaps/media-sync](https://github.com/MerginMaps/media-sync)
repository for the source code and more details. Here, you will also find the Quick start guide that will show you how to set up one way synchronisation between a new Mergin Maps project and your existing bucket (MinIO or S3).
---
# Subscriptions and Invoicing | Mergin Maps
[Skip to content](https://merginmaps.com/docs/manage/subscriptions/#VPContent)
Return to top
Subscriptions and Invoicing [](https://merginmaps.com/docs/manage/subscriptions/#subscriptions-and-invoicing)
===============================================================================================================
Pricing, features, free trial
Subscription details and pricing are summarised on our [pricing page](https://merginmaps.com/pricing)
. After signing up to [Mergin Maps](https://merginmaps.com/)
, you can use your workspace for free during the **14 day trial**. After the trial, you can [choose a premium plan](https://merginmaps.com/docs/manage/subscriptions/#how-to-upgrade-a-subscription-from-the-trial-plan)
.
The current _Premium_ subscription system is explained in more detail in our blog [Unlocking premium features of Mergin Maps for all](https://merginmaps.com/blog/unlocking-premium-features-of-mergin-maps-for-all)
.
Legacy subscription plans: Individual, Professional and Team plan
The subscription plans of Mergin Maps may change over time as the platform evolves. You can decide to switch to a new plan anytime in the subscription management page.
Even if you still use a plan that is no longer offered, features included in this plan stay unaltered. For instance, previously-used _Individual_ or _Professional_ subscriptions did not include features such as [webmaps](https://merginmaps.com/docs/manage/dashboard-maps/)
or developer tools ([Python and C++ integrations](https://merginmaps.com/docs/dev/integration/)
, [DB Sync](https://merginmaps.com/docs/dev/dbsync/)
, [Media Sync](https://merginmaps.com/docs/dev/media-sync/)
, [Work Packages](https://merginmaps.com/docs/dev/work-packages/)
). To use these features, you will have to switch to a _Premium_ subscription.
Contributors [](https://merginmaps.com/docs/manage/subscriptions/#contributors)
---------------------------------------------------------------------------------
Subscriptions are based on the number of _contributors_ on the workspace. Per each contributor seat, you get 1 GB of storage. Storage is shared across the whole workspace. You can get even more storage, just reach out to our [sales team](mailto:sales@merginmaps.com)
and we will help you set it up.
_Contributors_ are workspace members or guests who have Writer, Editor, Admin or Owner [access rights](https://merginmaps.com/docs/manage/permissions/)
. The number of read-only users is unlimited: they do not count towards your workspace contributors.
[Owners](https://merginmaps.com/docs/manage/permissions/#workspace-member-roles-and-project-permissions)
of the workspace can find the overview of the subscription plan, such as storage usage, number of projects and number of contributors in the workspace in the [**Subscription**](https://merginmaps.com/docs/manage/dashboard/#subscriptions)
tab on the [dashboard](https://app.merginmaps.com/)
.
The overview of workspace users and their member type (contributor/read-only) can be found in the [**Members**](https://merginmaps.com/docs/manage/dashboard/#members)
tab on the [dashboard](https://app.merginmaps.com/)
. It is available to [owners and admins](https://merginmaps.com/docs/manage/permissions/#workspace-member-roles-and-project-permissions)
of a workspace.
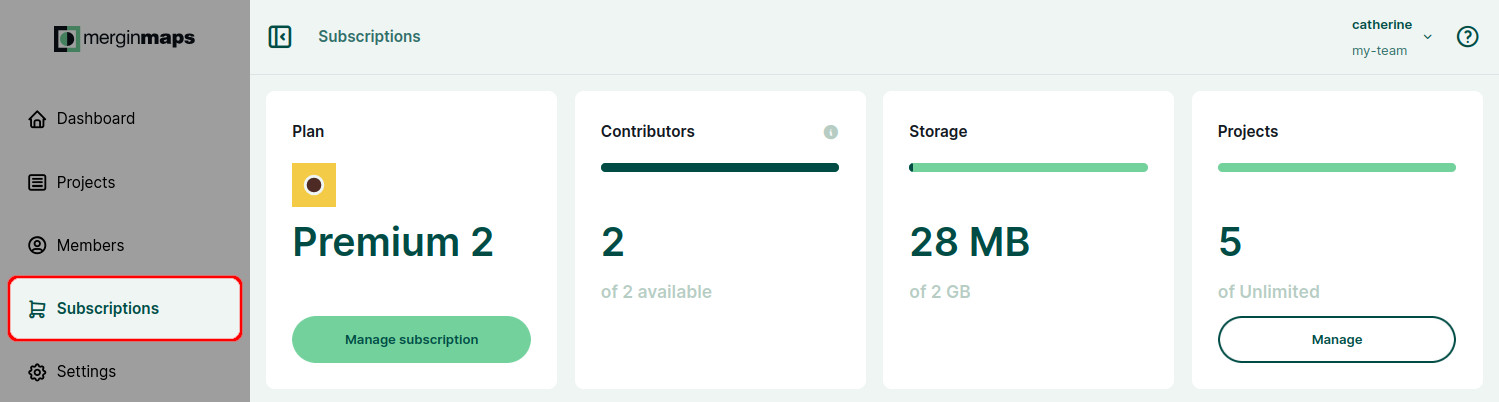
Subscriptions management portal [](https://merginmaps.com/docs/manage/subscriptions/#subscriptions-management-portal)
-----------------------------------------------------------------------------------------------------------------------
Subscriptions, payments and billing information are managed in our subscription management portal.
**There are two ways to access the portal**:
* from [Mergin Maps dashboard](https://merginmaps.com/docs/manage/subscriptions/#accessing-subscription-management-portal-from-mergin-maps-dashboard)
by owners of a workspace
* [using a link](https://merginmaps.com/docs/manage/subscriptions/#accessing-subscription-management-portal-directly-without-mergin-maps-account)
by a person that has access to the email used in billing information
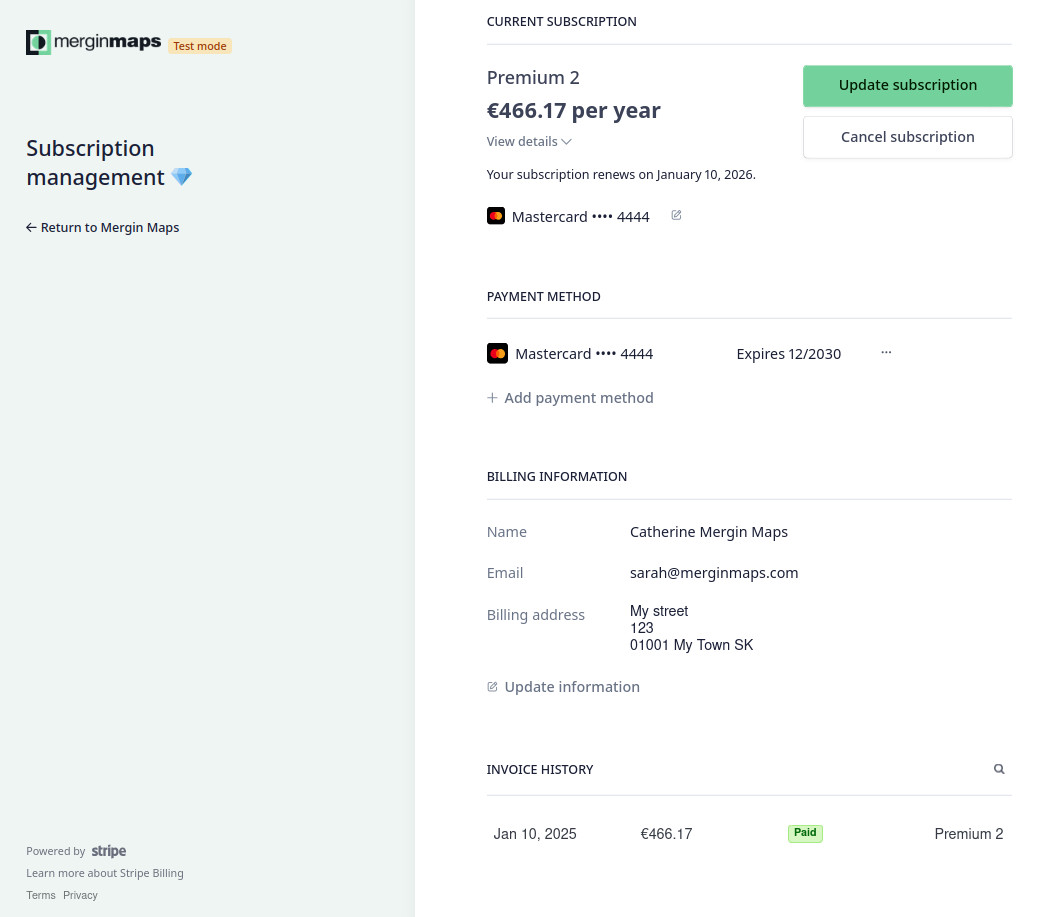
When logged into the portal, you can [update](https://merginmaps.com/docs/manage/subscriptions/#how-to-change-a-subscription)
or [cancel](https://merginmaps.com/docs/manage/subscriptions/#how-to-cancel-a-subscription)
your subscription, see upcoming charges, review your [billing and payment information](https://merginmaps.com/docs/manage/subscriptions/#billing-information-and-payment-method)
and access [payment history and invoices](https://merginmaps.com/docs/manage/subscriptions/#invoices-and-payment-history)
.
### Accessing subscription management portal from Mergin Maps dashboard [](https://merginmaps.com/docs/manage/subscriptions/#accessing-subscription-management-portal-from-mergin-maps-dashboard)
If you are the owner of a workspace, you can access the subscription management portal from the [dashboard](https://app.merginmaps.com/)
.
To access the portal, navigate to the **Subscription** tab and click on **Manage Subscription**.
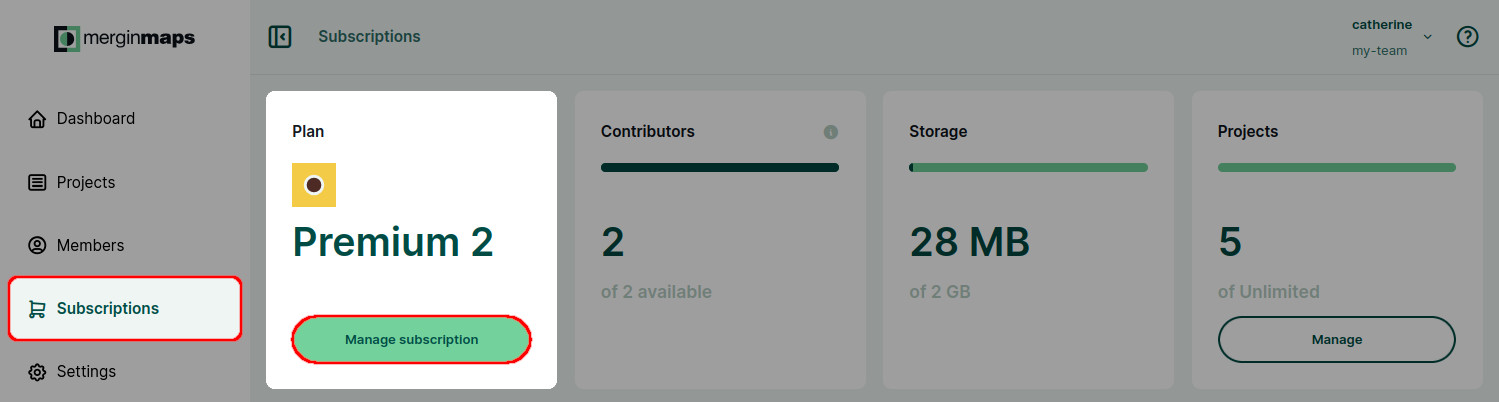
You will be redirected to the subscription management portal.
### Accessing subscription management portal directly (without Mergin Maps account) [](https://merginmaps.com/docs/manage/subscriptions/#accessing-subscription-management-portal-directly-without-mergin-maps-account)
The subscription management portal can also accessed directly, without going through the [dashboard](https://app.merginmaps.com/)
or having a Mergin Maps account. This option may be useful if the person taking care of the payments does not need access to the projects and data, such as someone from the accounting department of your organisation.
Note that the owner of the workspace needs to set up the appropriate email in the [billing information](https://merginmaps.com/docs/manage/subscriptions/#billing-information-and-payment-method)
. This email can then be used to access the portal.
To access the portal directly:
1. Navigate to the [**subscription management portal**](https://payments.merginmaps.com/p/login/14keYH711d32dz2144)
2. Enter the **email** that is used in your [billing information](https://merginmaps.com/docs/manage/subscriptions/#billing-information-and-payment-method)
and click on **Send**
3. You will get an email with a login link. Click on the link in the email and you will be redirected to the portal.
How to upgrade a subscription from the trial plan [](https://merginmaps.com/docs/manage/subscriptions/#how-to-upgrade-a-subscription-from-the-trial-plan)
-----------------------------------------------------------------------------------------------------------------------------------------------------------
1. Log into [app.merginmaps.com](https://app.merginmaps.com/)
2. Navigate to the **Subscription** tab.
Choose your _Premium_ plan by using the slider. You can also specify if you want to be billed yearly or monthly.
Click on the **Sign up now** button to confirm your new plan. 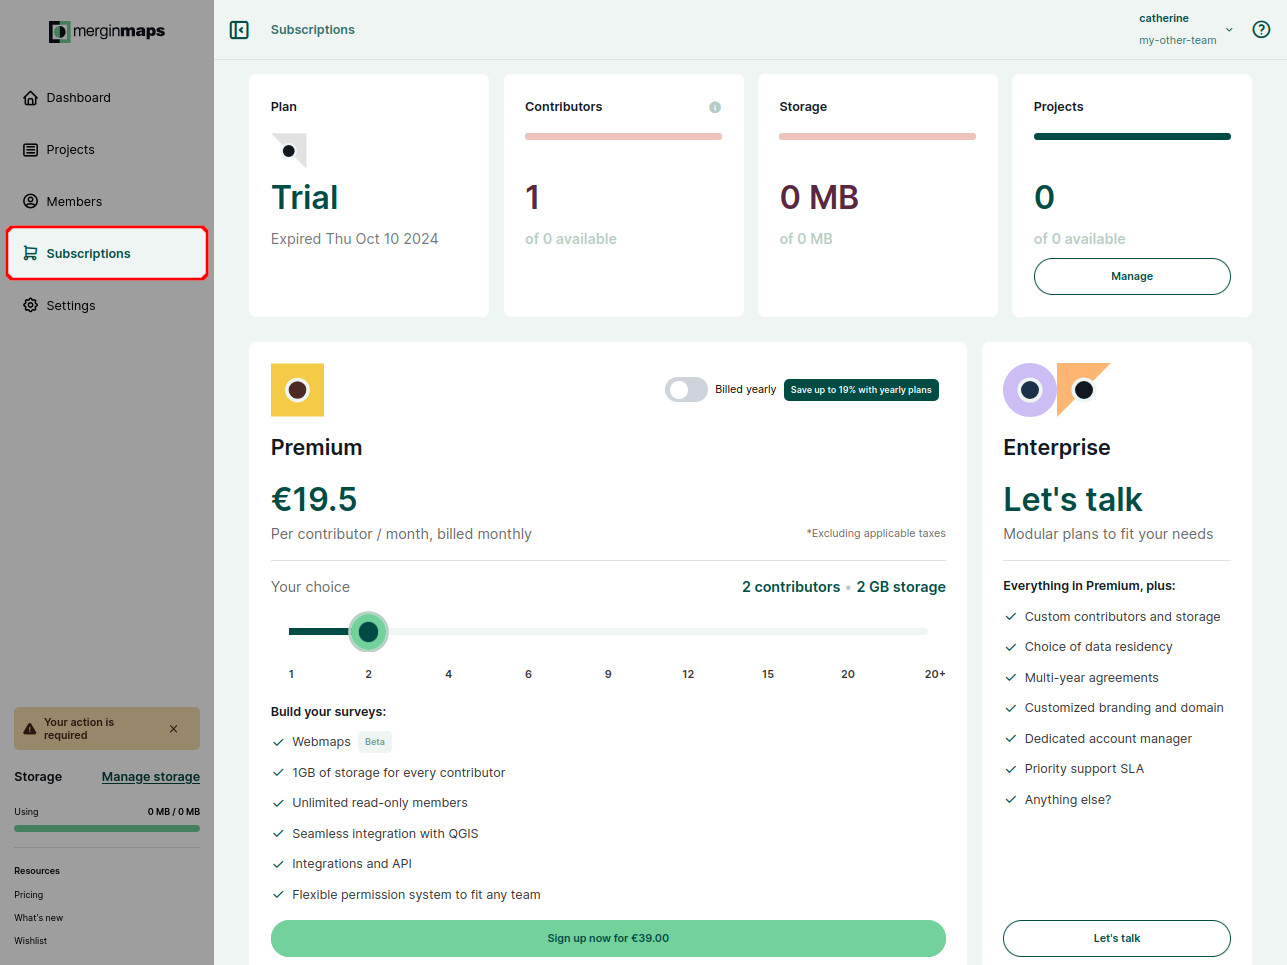
3. You will be redirected to a checkout page. Here, fill out the billing information.
The email you enter here will receive all billing-related information such as invoices or failed payments notifications.
If you are a business, check the **I'm purchasing as a business** ✔️ option and fill out your business name and VAT number.
* the VAT number has to be associated with the entered (VAT registered) address
* the address you enter has to match the address registered with your payment method
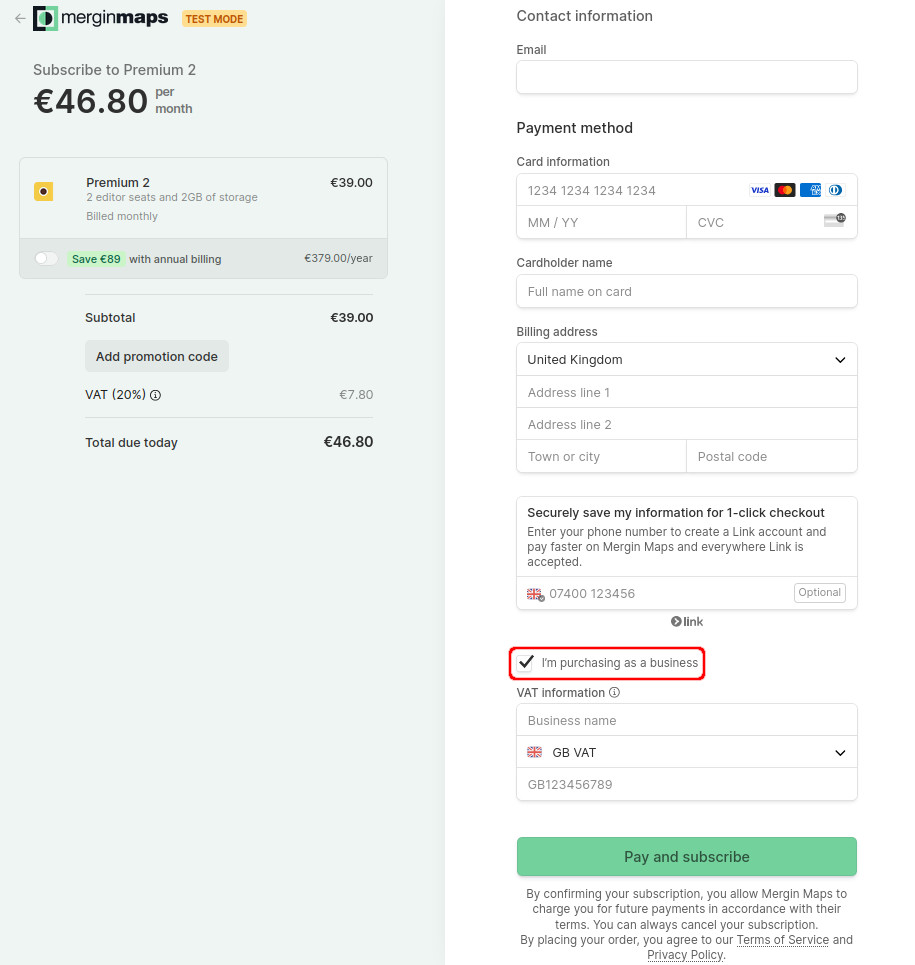
4. Click on **Pay and subscribe**
After the payment goes through, you will be redirected back to [Mergin Maps dashboard](https://app.merginmaps.com/)
where you can review the details of your new subscription
### How to request Academia or Non-profit plan [](https://merginmaps.com/docs/manage/subscriptions/#how-to-request-academia-or-non-profit-plan)
We support students, educators and registered non-profit organisations.
Visit [Mergin Maps pricing page](https://merginmaps.com/pricing)
, where you can request free _Academia_ plan or _Non-profit_ plan.

Click on the **Sign Up Now** button and fill out the form. We will review your application and if you meet our conditions, your workspace will get the Academia or Non-profit plan.
How to change a subscription [](https://merginmaps.com/docs/manage/subscriptions/#how-to-change-a-subscription)
-----------------------------------------------------------------------------------------------------------------
1. Navigate to the [subscription management portal](https://merginmaps.com/docs/manage/subscriptions/#subscriptions-management-portal)
2. In the _Current subscription_ section, click on the **Update subscription** button 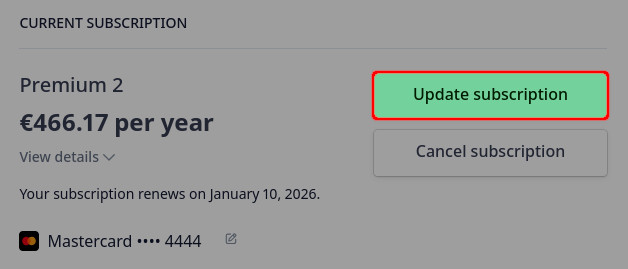
3. Choose a _Monthly_ or _Yearly_ billing, **Select** your new plan and **Continue**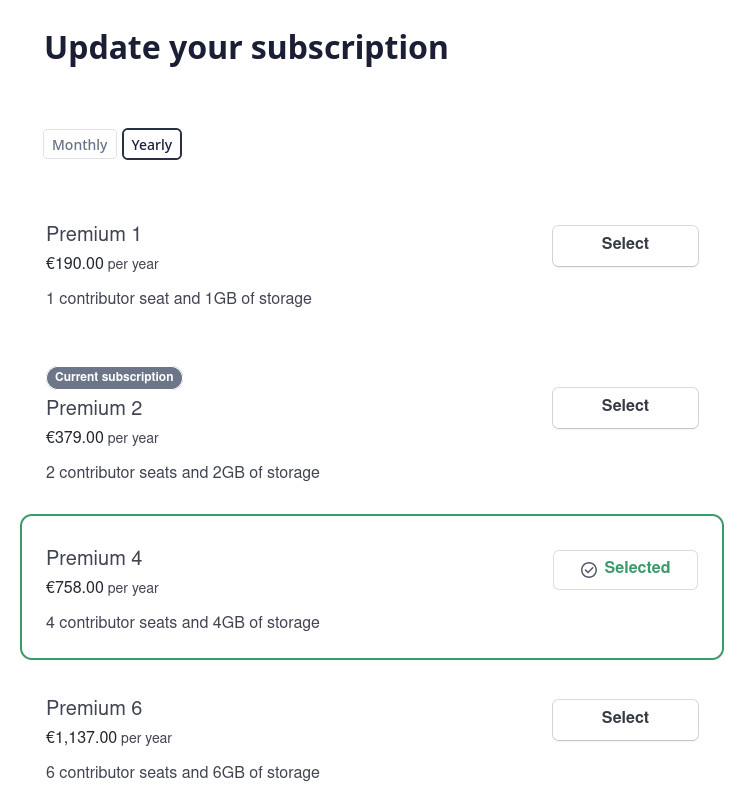
4. Confirm your updates and proceed by clicking on the **Subscribe and pay** button
How to cancel a subscription [](https://merginmaps.com/docs/manage/subscriptions/#how-to-cancel-a-subscription)
-----------------------------------------------------------------------------------------------------------------
1. Navigate to the [subscription management portal](https://merginmaps.com/docs/manage/subscriptions/#subscriptions-management-portal)
2. In the _Current subscription_ section, click on **Cancel subscription**
3. Review the details and confirm that you want to cancel the plan by clicking **Cancel subscription**.
Your subscription will be available to the end of your billing period.
Billing information and payment method [](https://merginmaps.com/docs/manage/subscriptions/#billing-information-and-payment-method)
-------------------------------------------------------------------------------------------------------------------------------------
1. Navigate to the [subscription management portal](https://merginmaps.com/docs/manage/subscriptions/#subscriptions-management-portal)
2. Here, you can see current billing information and payment method 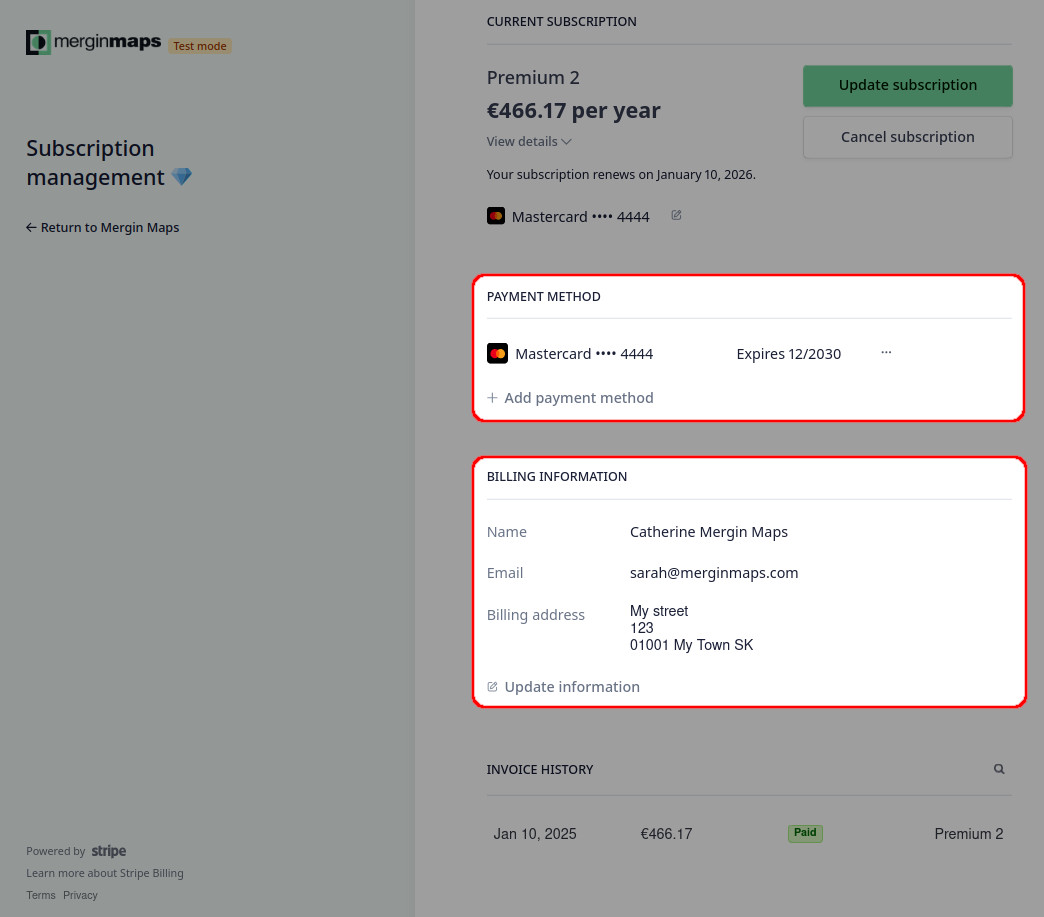
WARNING
All billing-related information such as invoices or failed payments notifications will be sent to the email that is entered in the billing information.
Billing information will be displayed in invoices or receipts, so make sure they are entered correctly.
### Updating billing information [](https://merginmaps.com/docs/manage/subscriptions/#updating-billing-information)
The billing details associated with your subscription can be changed through the subscription management platform. You might need to do this e.g. when [transferring ownership of a workspace](https://merginmaps.com/docs/manage/permissions/#how-to-transfer-ownership-of-a-workspace)
.
1. Navigate to the [subscription management portal](https://merginmaps.com/docs/manage/subscriptions/#subscriptions-management-portal)
2. Here, you can see your current billing details.
Click on **Update information** to change it. 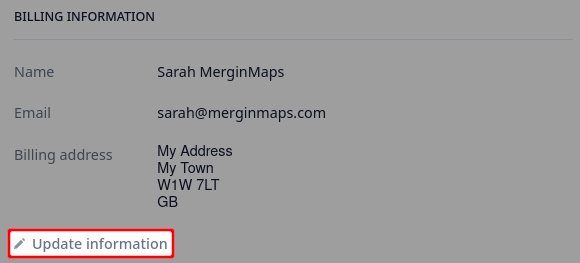
WARNING
All billing-related information such as invoices or failed payments notifications will be sent to the email that is entered in the billing information.
Billing information will be displayed in invoices or receipts, so make sure they are entered correctly.
### Adding and removing a payment method [](https://merginmaps.com/docs/manage/subscriptions/#adding-and-removing-a-payment-method)
When purchasing a subscription plan, you were asked to fill out your card information.
You might want to change it later, e.g. to use a different card or when [transferring the ownership of a workspace](https://merginmaps.com/docs/manage/permissions/#how-to-transfer-ownership-of-a-workspace)
. To add or remove a payment method associated with your [Mergin Maps](https://merginmaps.com/)
subscription:
1. Navigate to the [subscription management portal](https://merginmaps.com/docs/manage/subscriptions/#subscriptions-management-portal)
2. Here, you can see your current [payment methods](https://merginmaps.com/docs/manage/subscriptions/#billing-information-and-payment-method)
.
* to add a new card, click on **Add payment method** and fill out the details
* to remove a card from your profile, click on the button next to the card and click **Delete**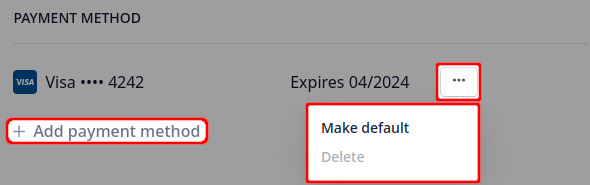
WARNING
Any active subscription requires a payment method.
A card can be deleted only if there is another payment method available. To replace a card, you have to add a new card before removing the old one.
Invoices and payment history [](https://merginmaps.com/docs/manage/subscriptions/#invoices-and-payment-history)
-----------------------------------------------------------------------------------------------------------------
1. Navigate to the [subscription management portal](https://merginmaps.com/docs/manage/subscriptions/#subscriptions-management-portal)
2. Here you can find the overview of payment history and invoices at the bottom of the page 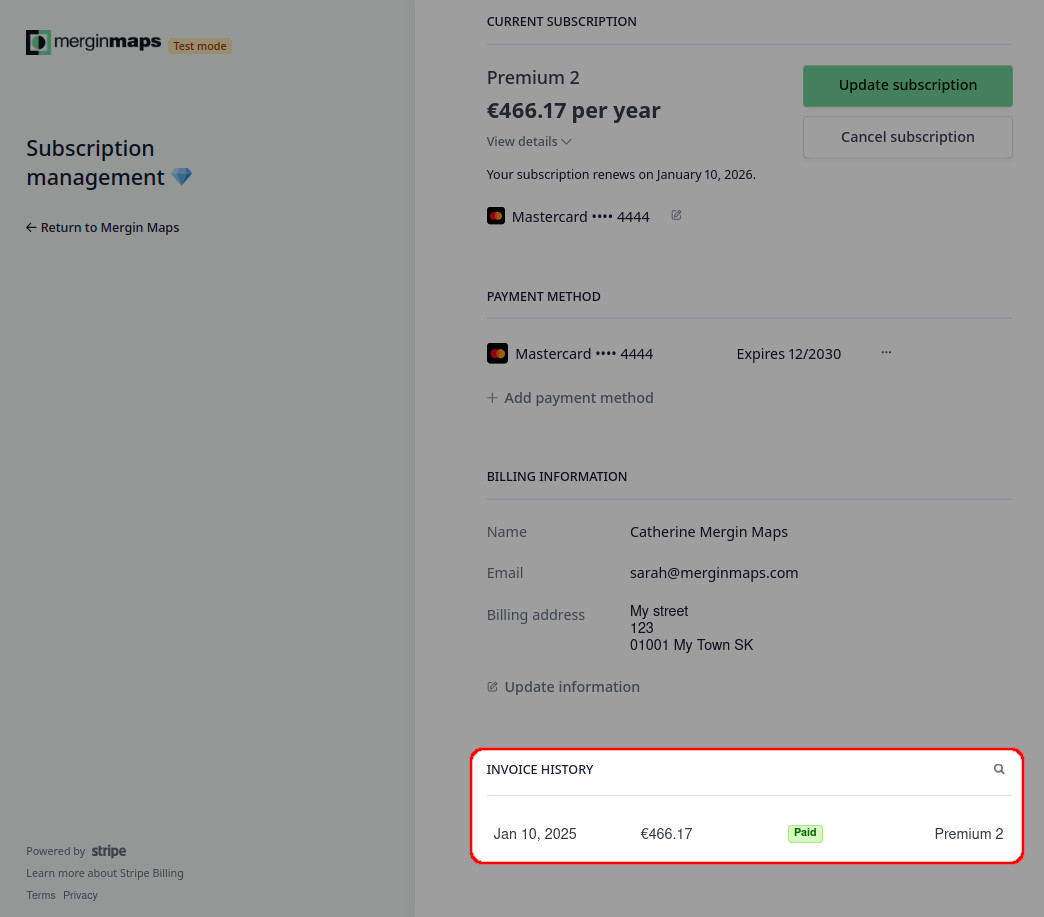
3. Click on a payment to download your invoice or receipt. 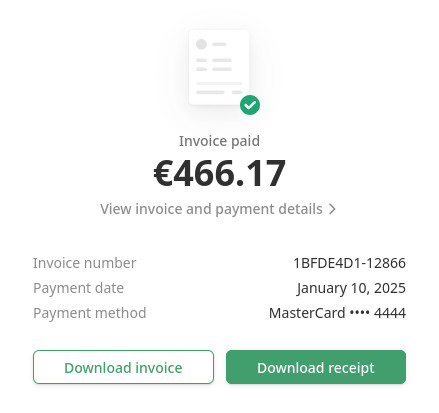
---
# Workspaces | Mergin Maps
[Skip to content](https://merginmaps.com/docs/manage/workspaces/#VPContent)
Return to top
Workspaces [](https://merginmaps.com/docs/manage/workspaces/#workspaces)
==========================================================================
Workspaces in Mergin Maps [](https://merginmaps.com/docs/manage/workspaces/#workspaces-in-mergin-maps)
--------------------------------------------------------------------------------------------------------
Workspaces are used to efficiently manage projects, users and subscriptions. Every workspace is tied to a [subscription](https://merginmaps.com/docs/manage/subscriptions/)
. The subscription plan defines the number of contributors and the amount of data storage for the workspace.
One workspace can contain multiple projects. The only limit is the storage quota (as defined by the subscription). If needed, projects can be transferred to another workspace.
Users can be invited to a workspace as [members or guests](https://merginmaps.com/docs/manage/permissions/)
. These users don't need to have their own subscription.
TIP
Want to read more about workspaces and why they were introduced to Mergin Maps? Visit our blog [Introducing Workspaces: Simplified Collaboration](https://merginmaps.com/blog/introducing-workspaces-simplified-collaboration)
.
Integrations and workspaces
Integrations like [PostgreSQL DB Sync](https://merginmaps.com/docs/dev/dbsync/)
, [Media Sync](https://merginmaps.com/docs/dev/media-sync/)
and [Work Packages](https://merginmaps.com/docs/dev/work-packages/)
do not share the concept of _active workspace_. They simply work with one specific project from any workspace.
How to switch between workspaces [](https://merginmaps.com/docs/manage/workspaces/#how-to-switch-between-workspaces)
----------------------------------------------------------------------------------------------------------------------
You may have access to multiple workspaces. For instance, you can have your personal workspace and be a member of the workspaces of other users.
### Switch workspaces in Mergin Maps dashboard [](https://merginmaps.com/docs/manage/workspaces/#switch-workspaces-in-mergin-maps-dashboard)
When logged in to the [dashboard](https://app.merginmaps.com/)
, you will see the current workspace under the account name in the right corner of the screen (here: `my-team`).
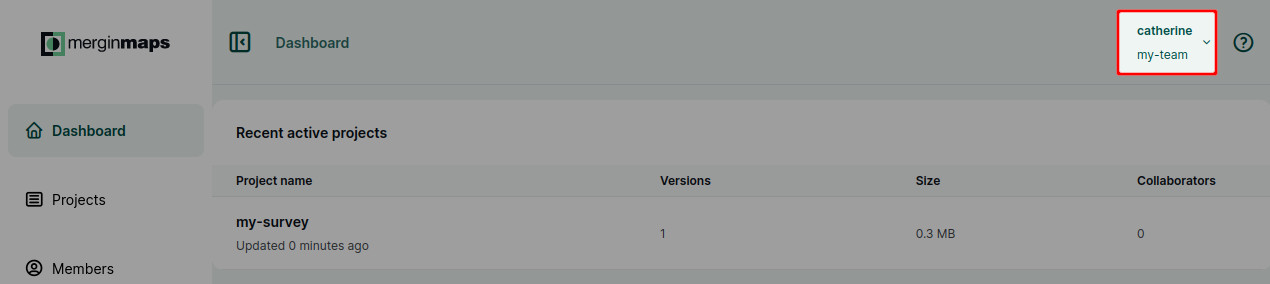
Click on the account to see the list of all workspaces that are available to you. The active workspace is highlighted. Switch to another workspace by simply clicking on its name in the list.
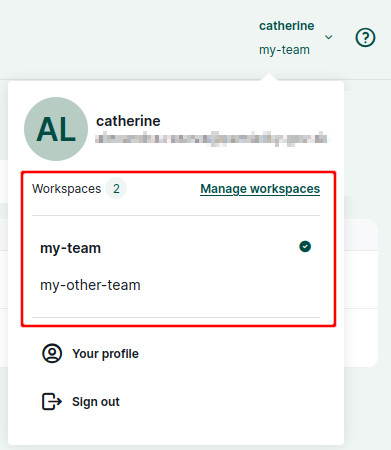
### Switch workspaces in Mergin Maps mobile app [](https://merginmaps.com/docs/manage/workspaces/#switch-workspaces-in-mergin-maps-mobile-app)
1. Navigate to **My Account** in Mergin Maps mobile app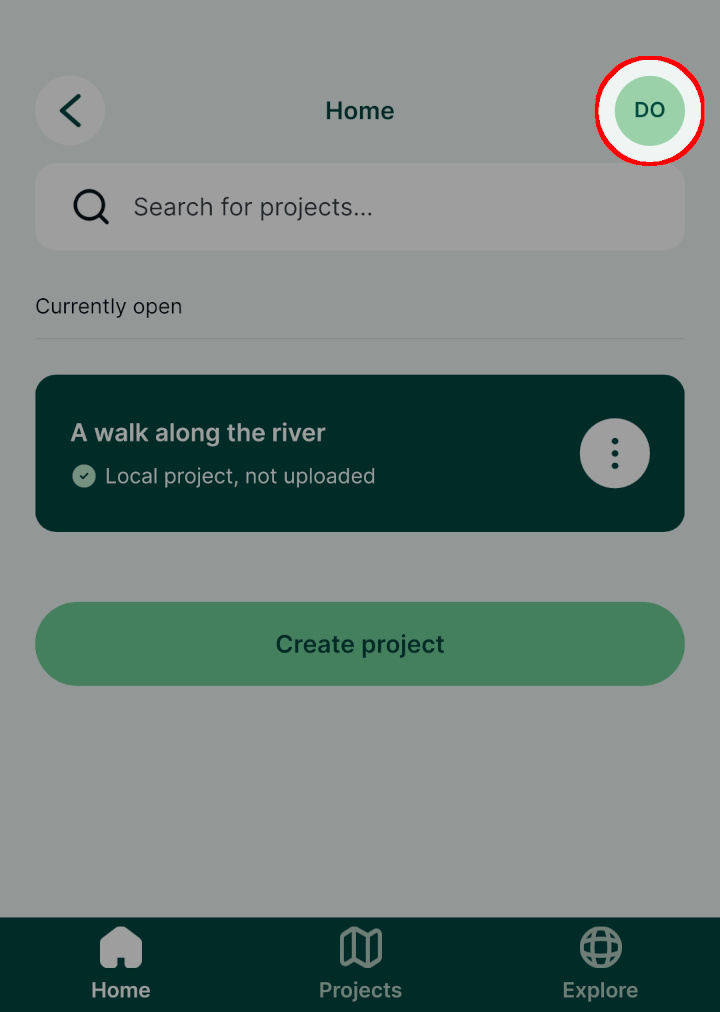
2. Here you will see your current workspace and your [role](https://merginmaps.com/docs/manage/permissions/)
in this workspace.
Tap on it to switch to another workspace. 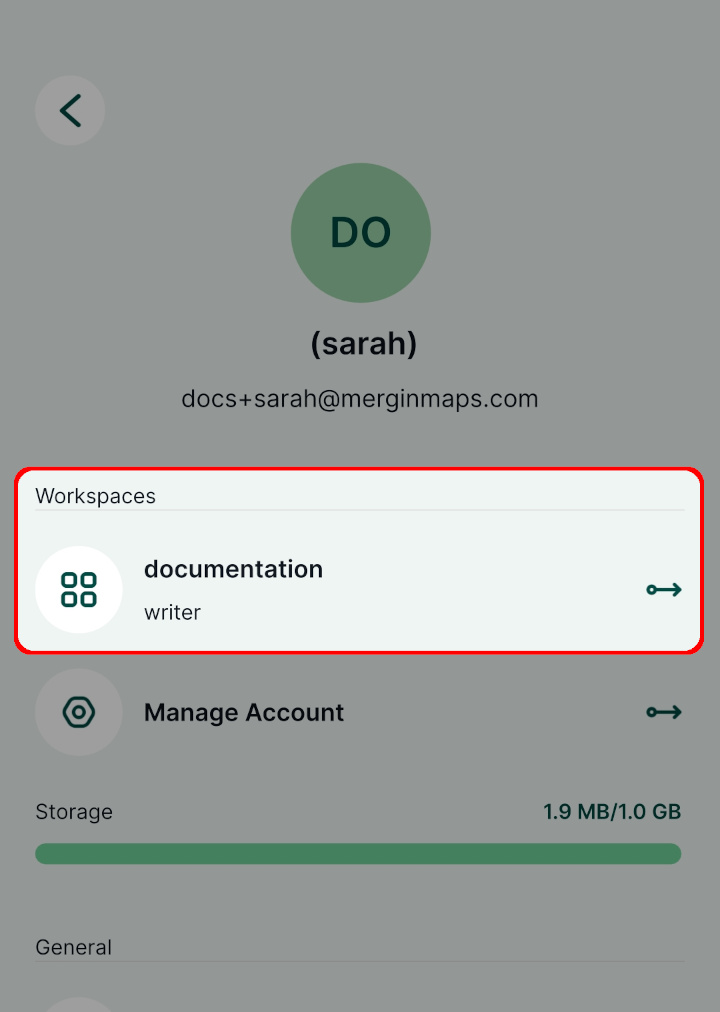
3. Now you will see a list of workspaces that are available to you.
Select the one you want to switch to. 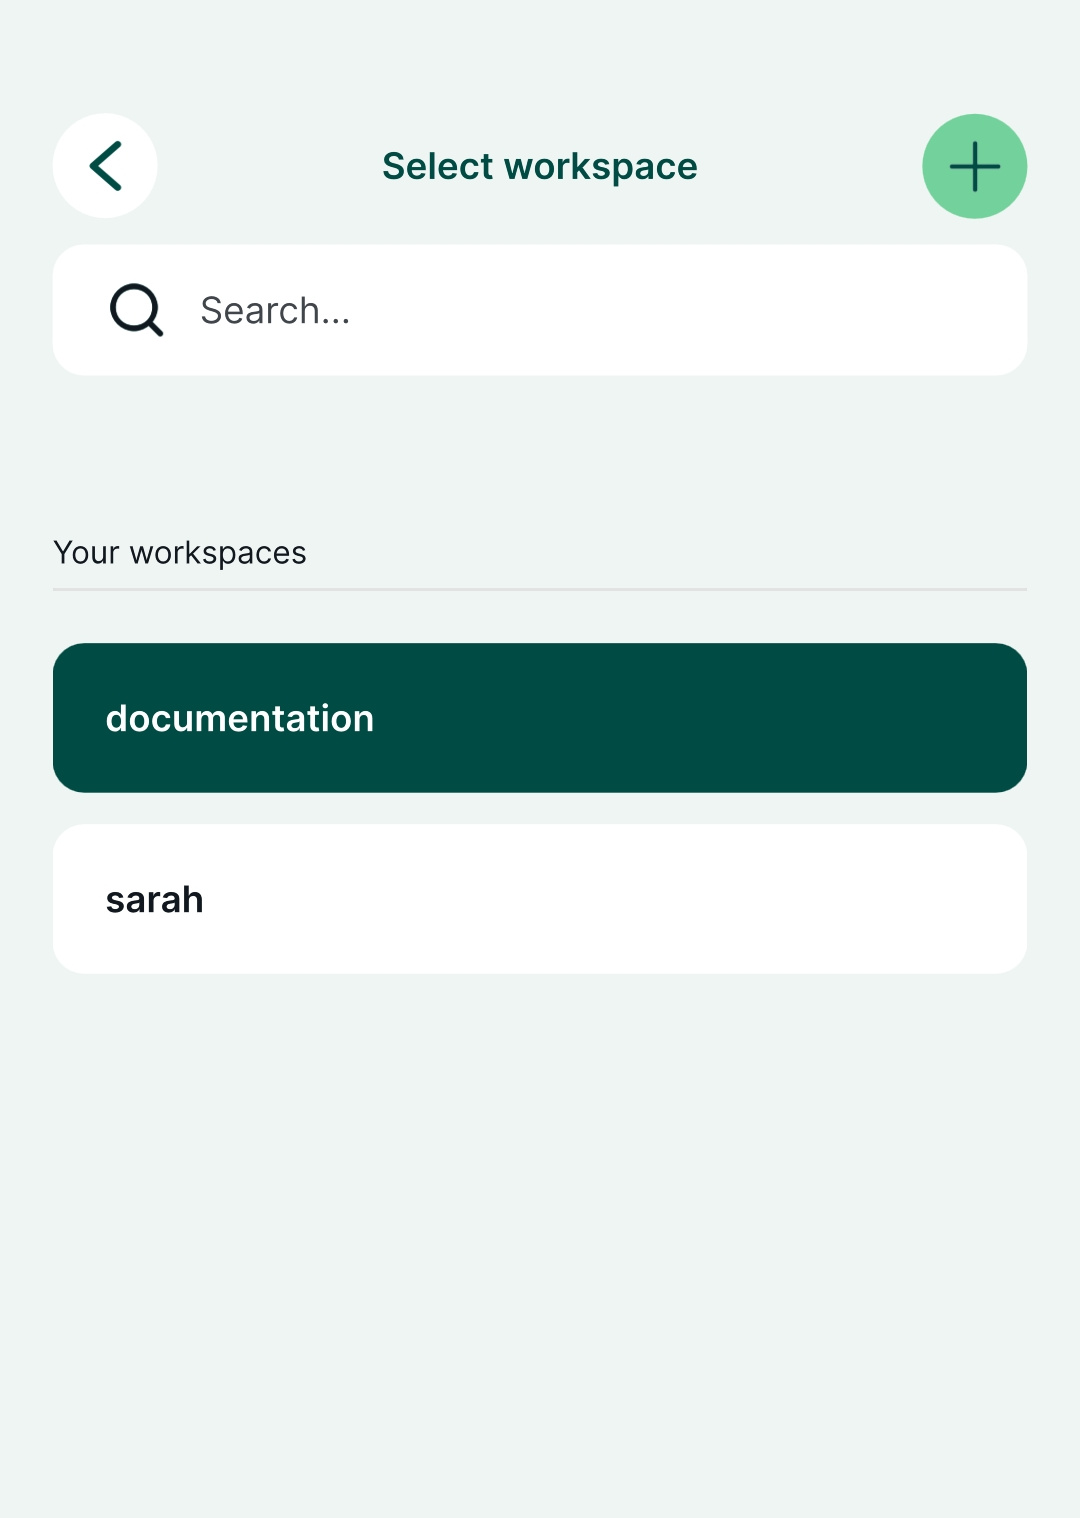
### Switch workspaces in QGIS [](https://merginmaps.com/docs/manage/workspaces/#switch-workspaces-in-qgis)
Navigate to Mergin Maps in the **Browser** panel. The name of the current workspace is displayed in square brackets.
Right click on the plugin's name and select **Switch workspace**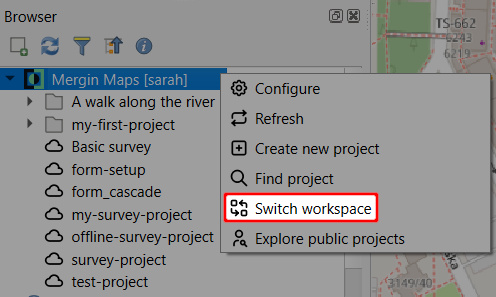
From the list of available workspaces, select the one you want to switch to: 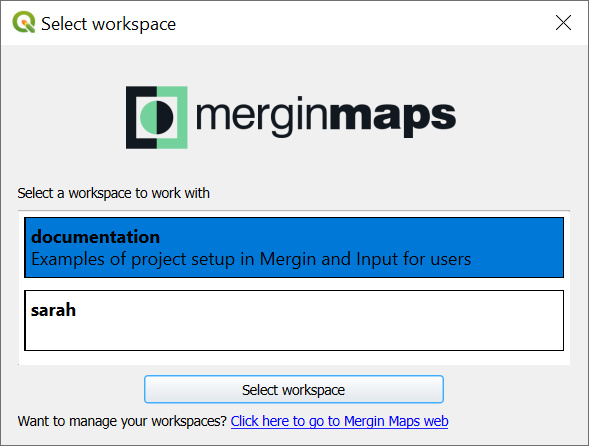
How to create a new workspace [](https://merginmaps.com/docs/manage/workspaces/#how-to-create-a-new-workspace)
----------------------------------------------------------------------------------------------------------------
A new workspace can be created through the [dashboard](https://app.merginmaps.com/)
or through the mobile app. Note that the name of a workspace cannot be changed later.
Every workspace has its own [subscription](https://merginmaps.com/docs/manage/subscriptions/)
. With your first workspace, you can use a free trial to try out Mergin Maps features. After the trial period, you will have to [switch to a paid subscription](https://merginmaps.com/docs/manage/subscriptions/#how-to-change-a-subscription)
. See our [pricing](https://merginmaps.com/pricing)
for more details.
### Create a workspace in Mergin Maps dashboard [](https://merginmaps.com/docs/manage/workspaces/#create-a-workspace-in-mergin-maps-dashboard)
1. Log in to [app.merginmaps.com](https://app.merginmaps.com/)
2. Click on your account and navigate to **Manage workspaces**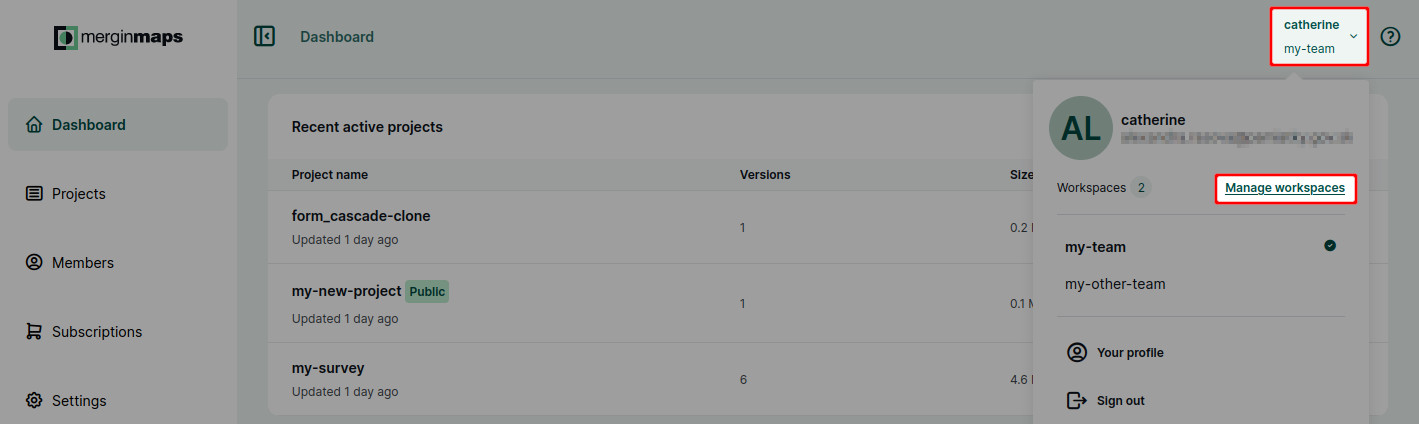
3. Here, you can see the overview of your workspaces. Click on **Create workspace**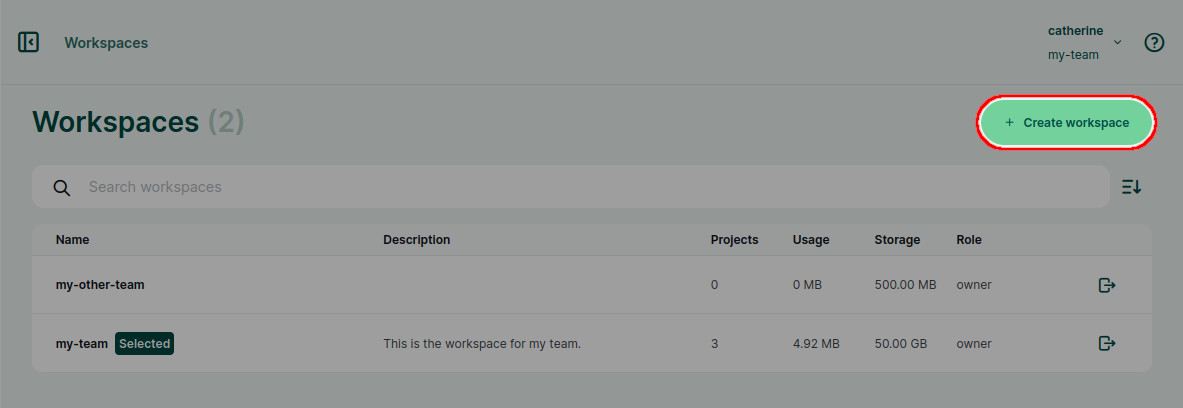
4. Fill in the name and description of your new workspace.
Note that **the name of a workspace cannot be changed later**. 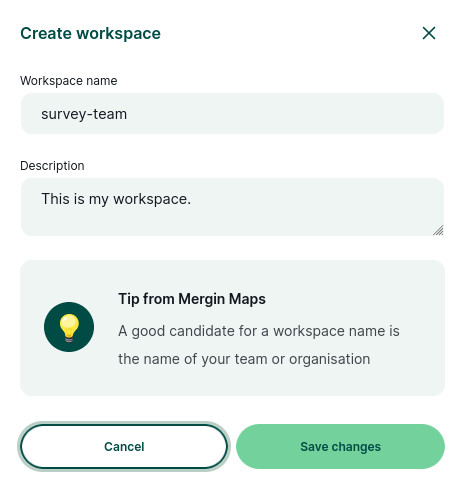
5. Now you have a new workspace! You can [create projects](https://merginmaps.com/docs/manage/create-project/)
in the workspace and [invite other users](https://merginmaps.com/docs/manage/project-advanced/#add-users-to-a-workspace)
to contribute. 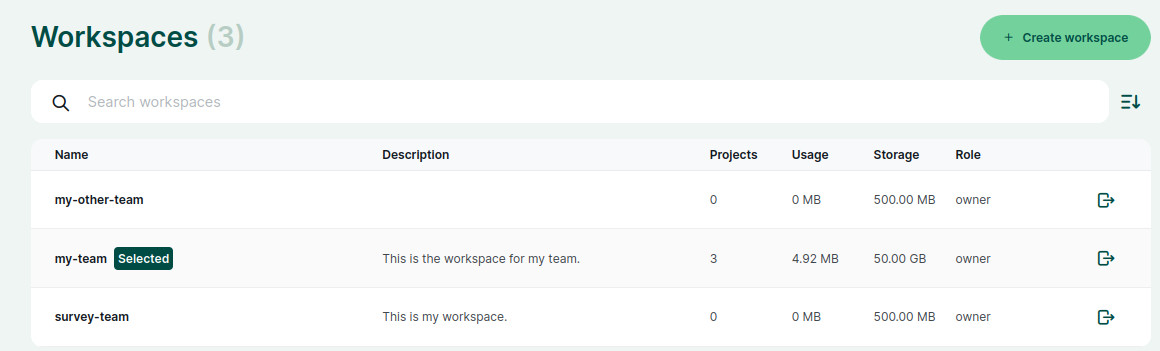
### Create a workspace in Mergin Maps mobile app [](https://merginmaps.com/docs/manage/workspaces/#create-a-workspace-in-mergin-maps-mobile-app)
1. Navigate to the list of available workspaces as described [here](https://merginmaps.com/docs/manage/workspaces/#switch-workspaces-in-mergin-maps-mobile-app)
and click on the **+** button in the right upper corner of the screen 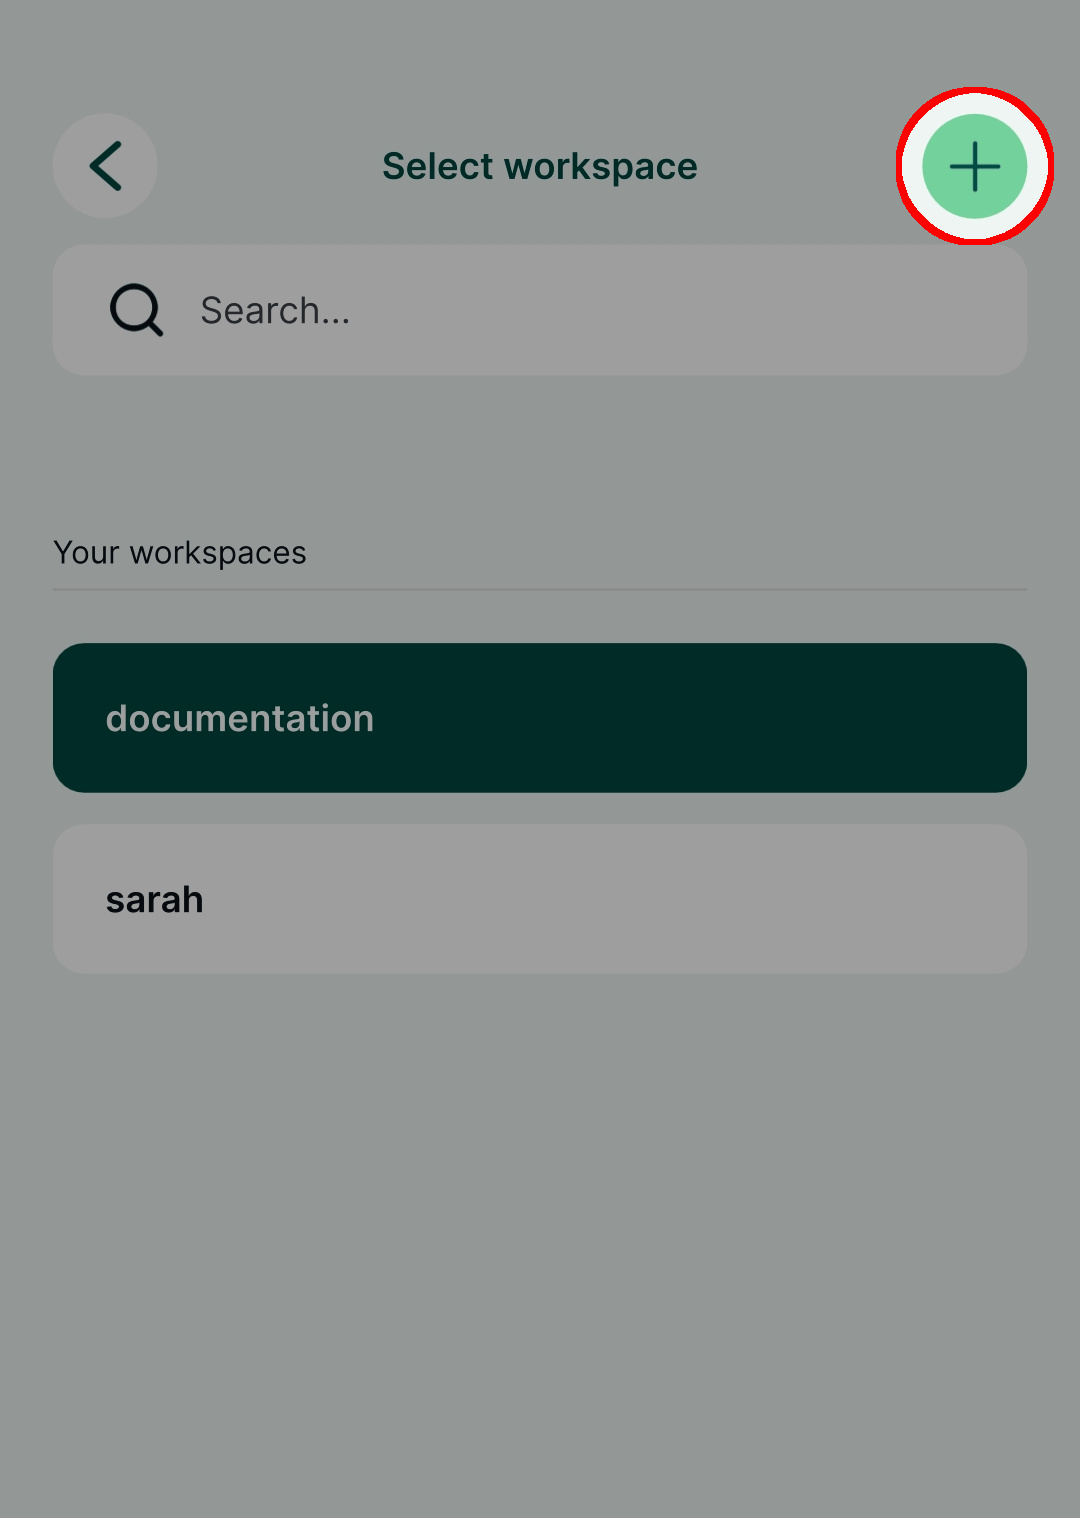
2. Fill in the name of your new workspace and tap **Create workspace**.
Keep in mind that **the name of a workspace cannot be changed later**. 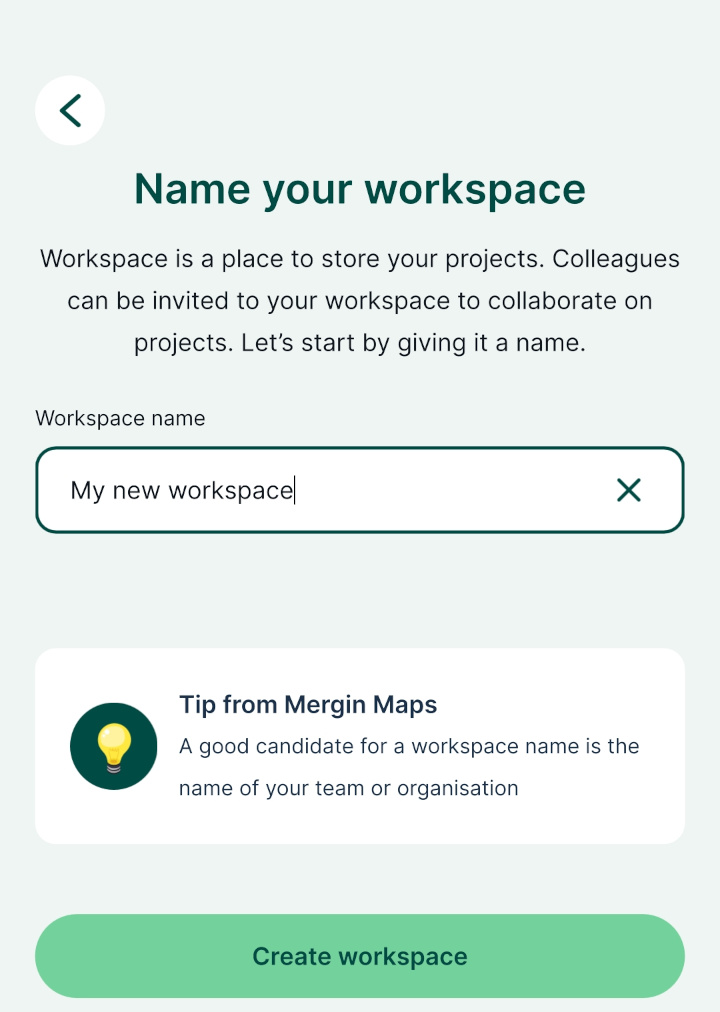
3. Now you have a new workspace!
You can [create projects](https://merginmaps.com/docs/manage/create-project/)
in the workspace and [invite other users](https://merginmaps.com/docs/manage/project-advanced/#add-users-to-a-workspace)
to contribute. 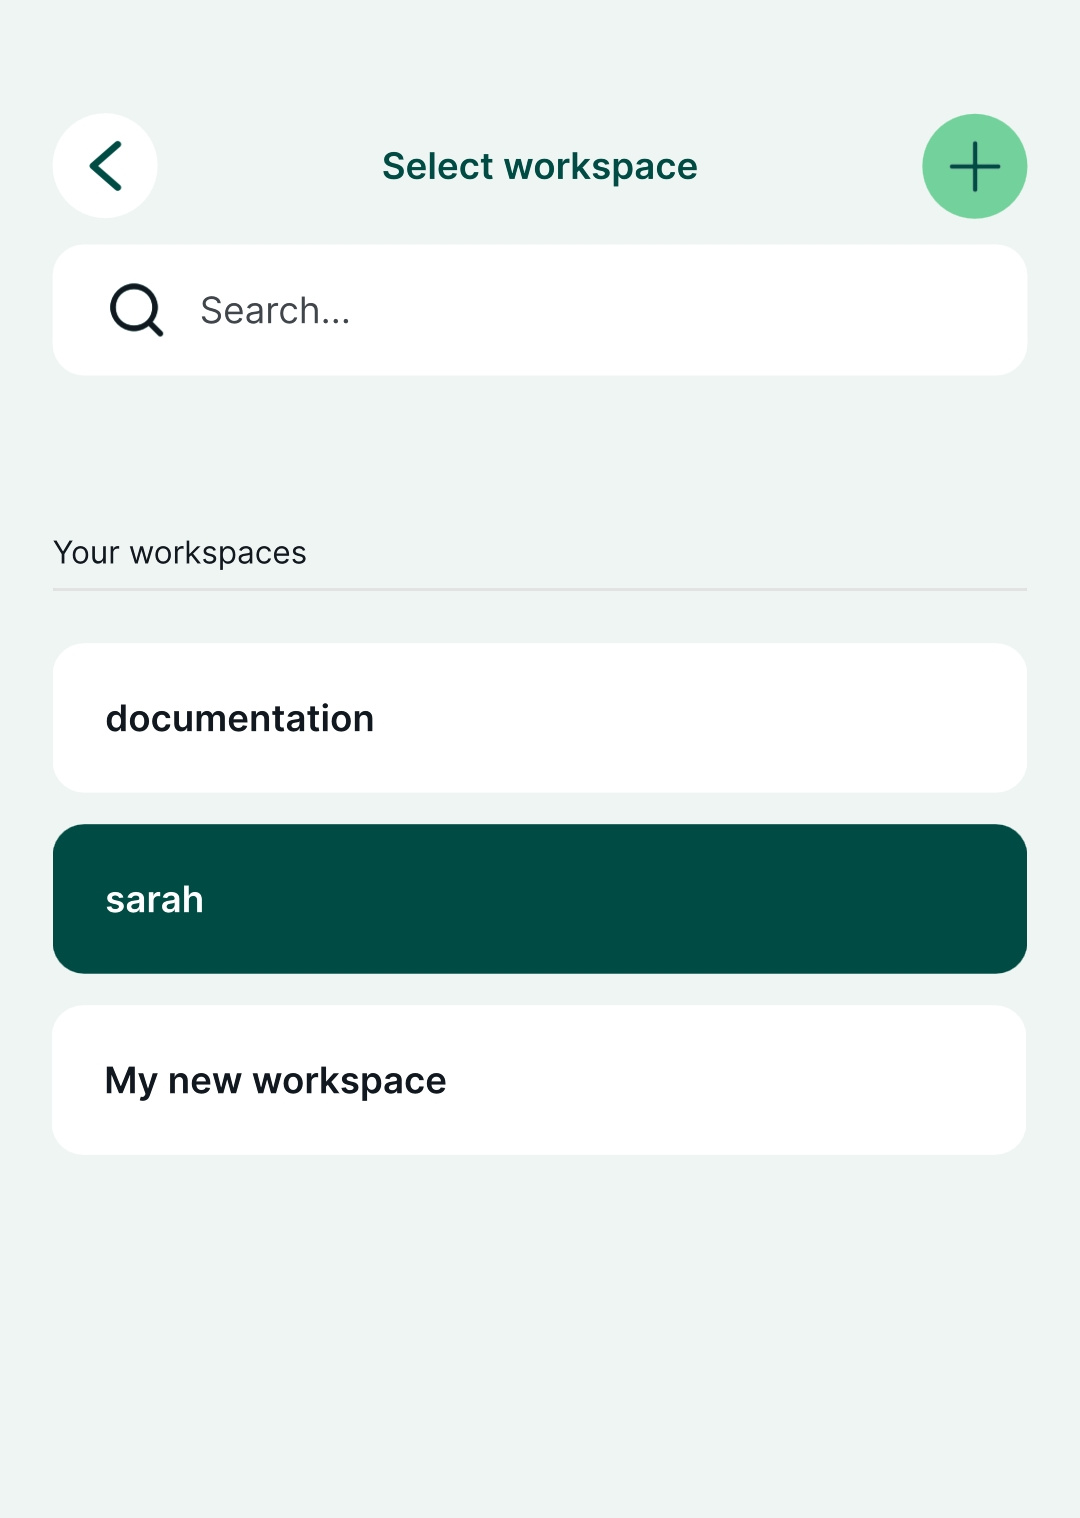
How to delete a workspace [](https://merginmaps.com/docs/manage/workspaces/#how-to-delete-a-workspace)
--------------------------------------------------------------------------------------------------------
Closing a workspace means that all projects in this workspace will be removed as well. Therefore we recommend going through the projects in the workspace and, if needed, downloading them to your computer or [transferring them to another workspace](https://merginmaps.com/docs/manage/project-advanced/#transfer-a-project)
so that you don't lose your work.
You have to be the workspace [owner](https://merginmaps.com/docs/manage/permissions/#workspace-member-roles-overview)
to be able to delete the workspace.
1. [Switch](https://merginmaps.com/docs/manage/workspaces/#how-to-switch-between-workspaces)
to the workspace you want to remove
2. Navigate to **Settings** and select **Close workspace**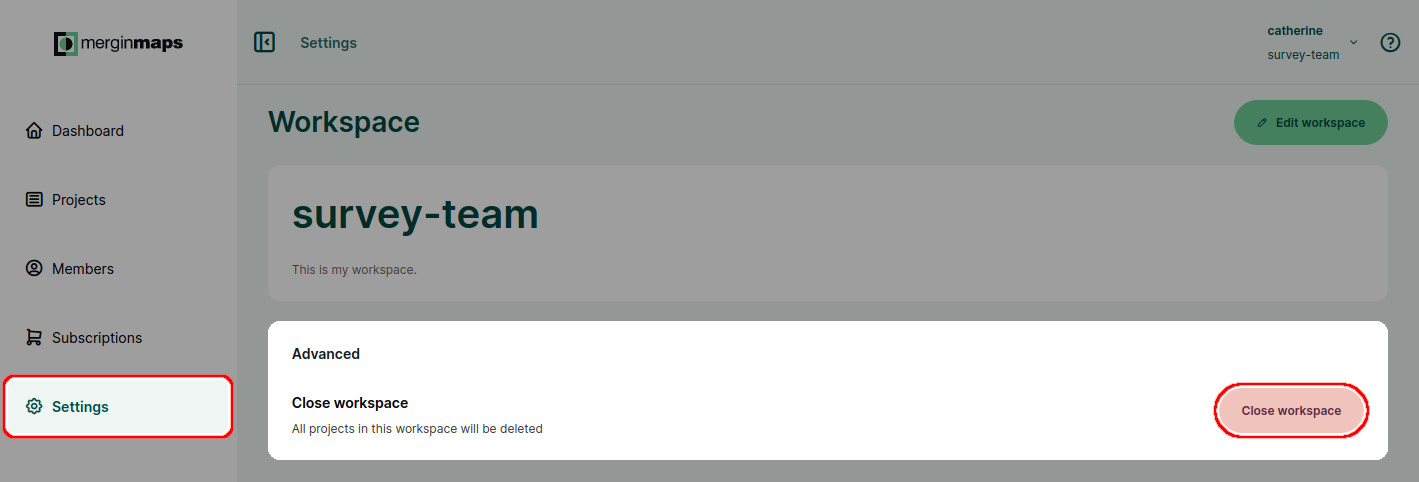
3. Confirm the closing of a workspace by typing the workspace name and click on **Yes**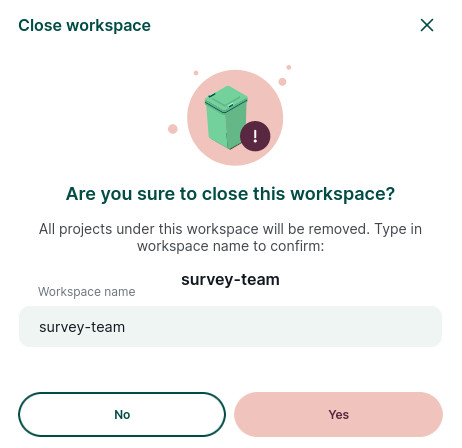
After closing a workspace, it is kept on [Mergin Maps](https://merginmaps.com/)
servers for 5 days before it is deleted permanently. During this period, it can be restored if you contact [support@merginmaps.com](mailto:support@merginmaps.com)
.
If you want to create a new workspace with the same name sooner, you can contact [support@merginmaps.com](mailto:support@merginmaps.com)
.
WARNING
If you want to reuse the name of a deleted workspace, make sure to remove all downloaded projects from the original workspace before it is deleted to avoid synchronisation issues.
---
# Capturing Your First Field Data | Mergin Maps
[Skip to content](https://merginmaps.com/docs/tutorials/capturing-first-data/#VPContent)
Return to top
Capturing Your First Field Data [](https://merginmaps.com/docs/tutorials/capturing-first-data/#capturing-your-first-field-data)
=================================================================================================================================
In this tutorial you will learn how to:
* See your location shown on background maps on your mobile device
* Capture field data with their locations, photos and notes
* Query and edit field data
Install Mergin Maps mobile app [](https://merginmaps.com/docs/tutorials/capturing-first-data/#install-mergin-maps-mobile-app)
-------------------------------------------------------------------------------------------------------------------------------
[Download Mergin Maps mobile app](https://merginmaps.com/docs/setup/install-mobile-app/)
to your Android device, iPhone or iPad. You can find it in the app store of your platform:
[](https://apps.apple.com/us/app/input/id1478603559?ls=1)
[](https://play.google.com/store/apps/details?id=uk.co.lutraconsulting)
[](https://github.com/MerginMaps/mobile/releases/latest)
Creating a project in Mergin Maps mobile app [](https://merginmaps.com/docs/tutorials/capturing-first-data/#creating-a-project-in-mergin-maps-mobile-app)
-----------------------------------------------------------------------------------------------------------------------------------------------------------
Data are stored within projects. We'll now create a new project to save our data into.
Using Mergin Maps mobile app is the quickest and easiest way of creating new projects. Alternative methods offering much greater flexibility are introduced in later tutorials.
1. Open Mergin Maps mobile app on your mobile device
2. Tap the **Create project** button in the **Home** tab 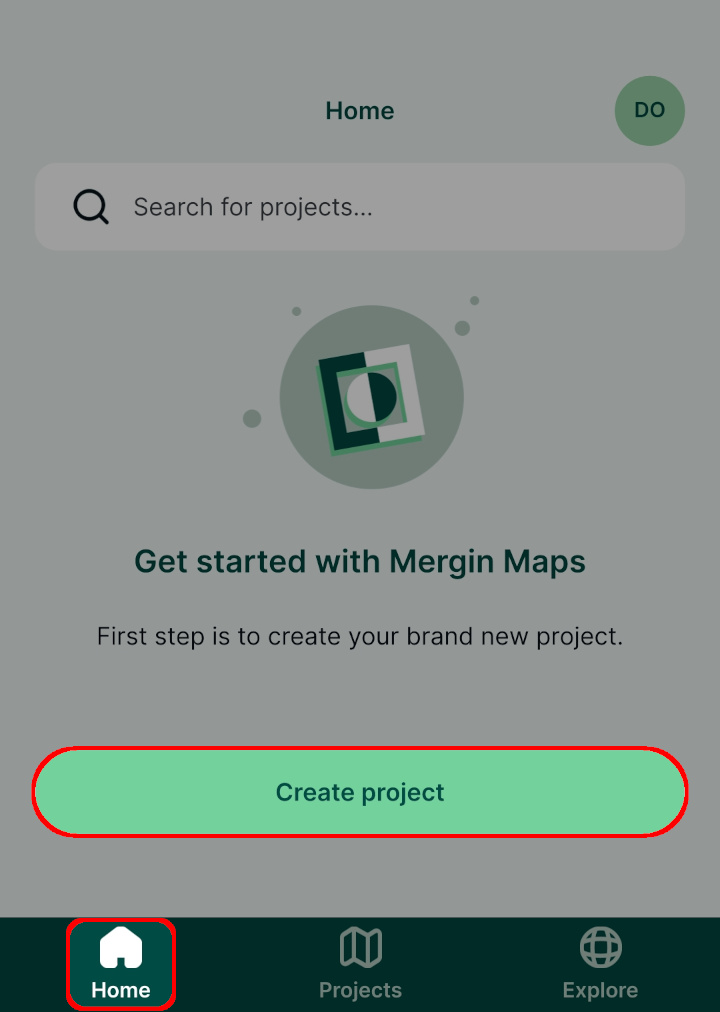
3. Enter the **name** of your project and press **Create project**. You might need to minimise the on-screen keyboard to see this button. 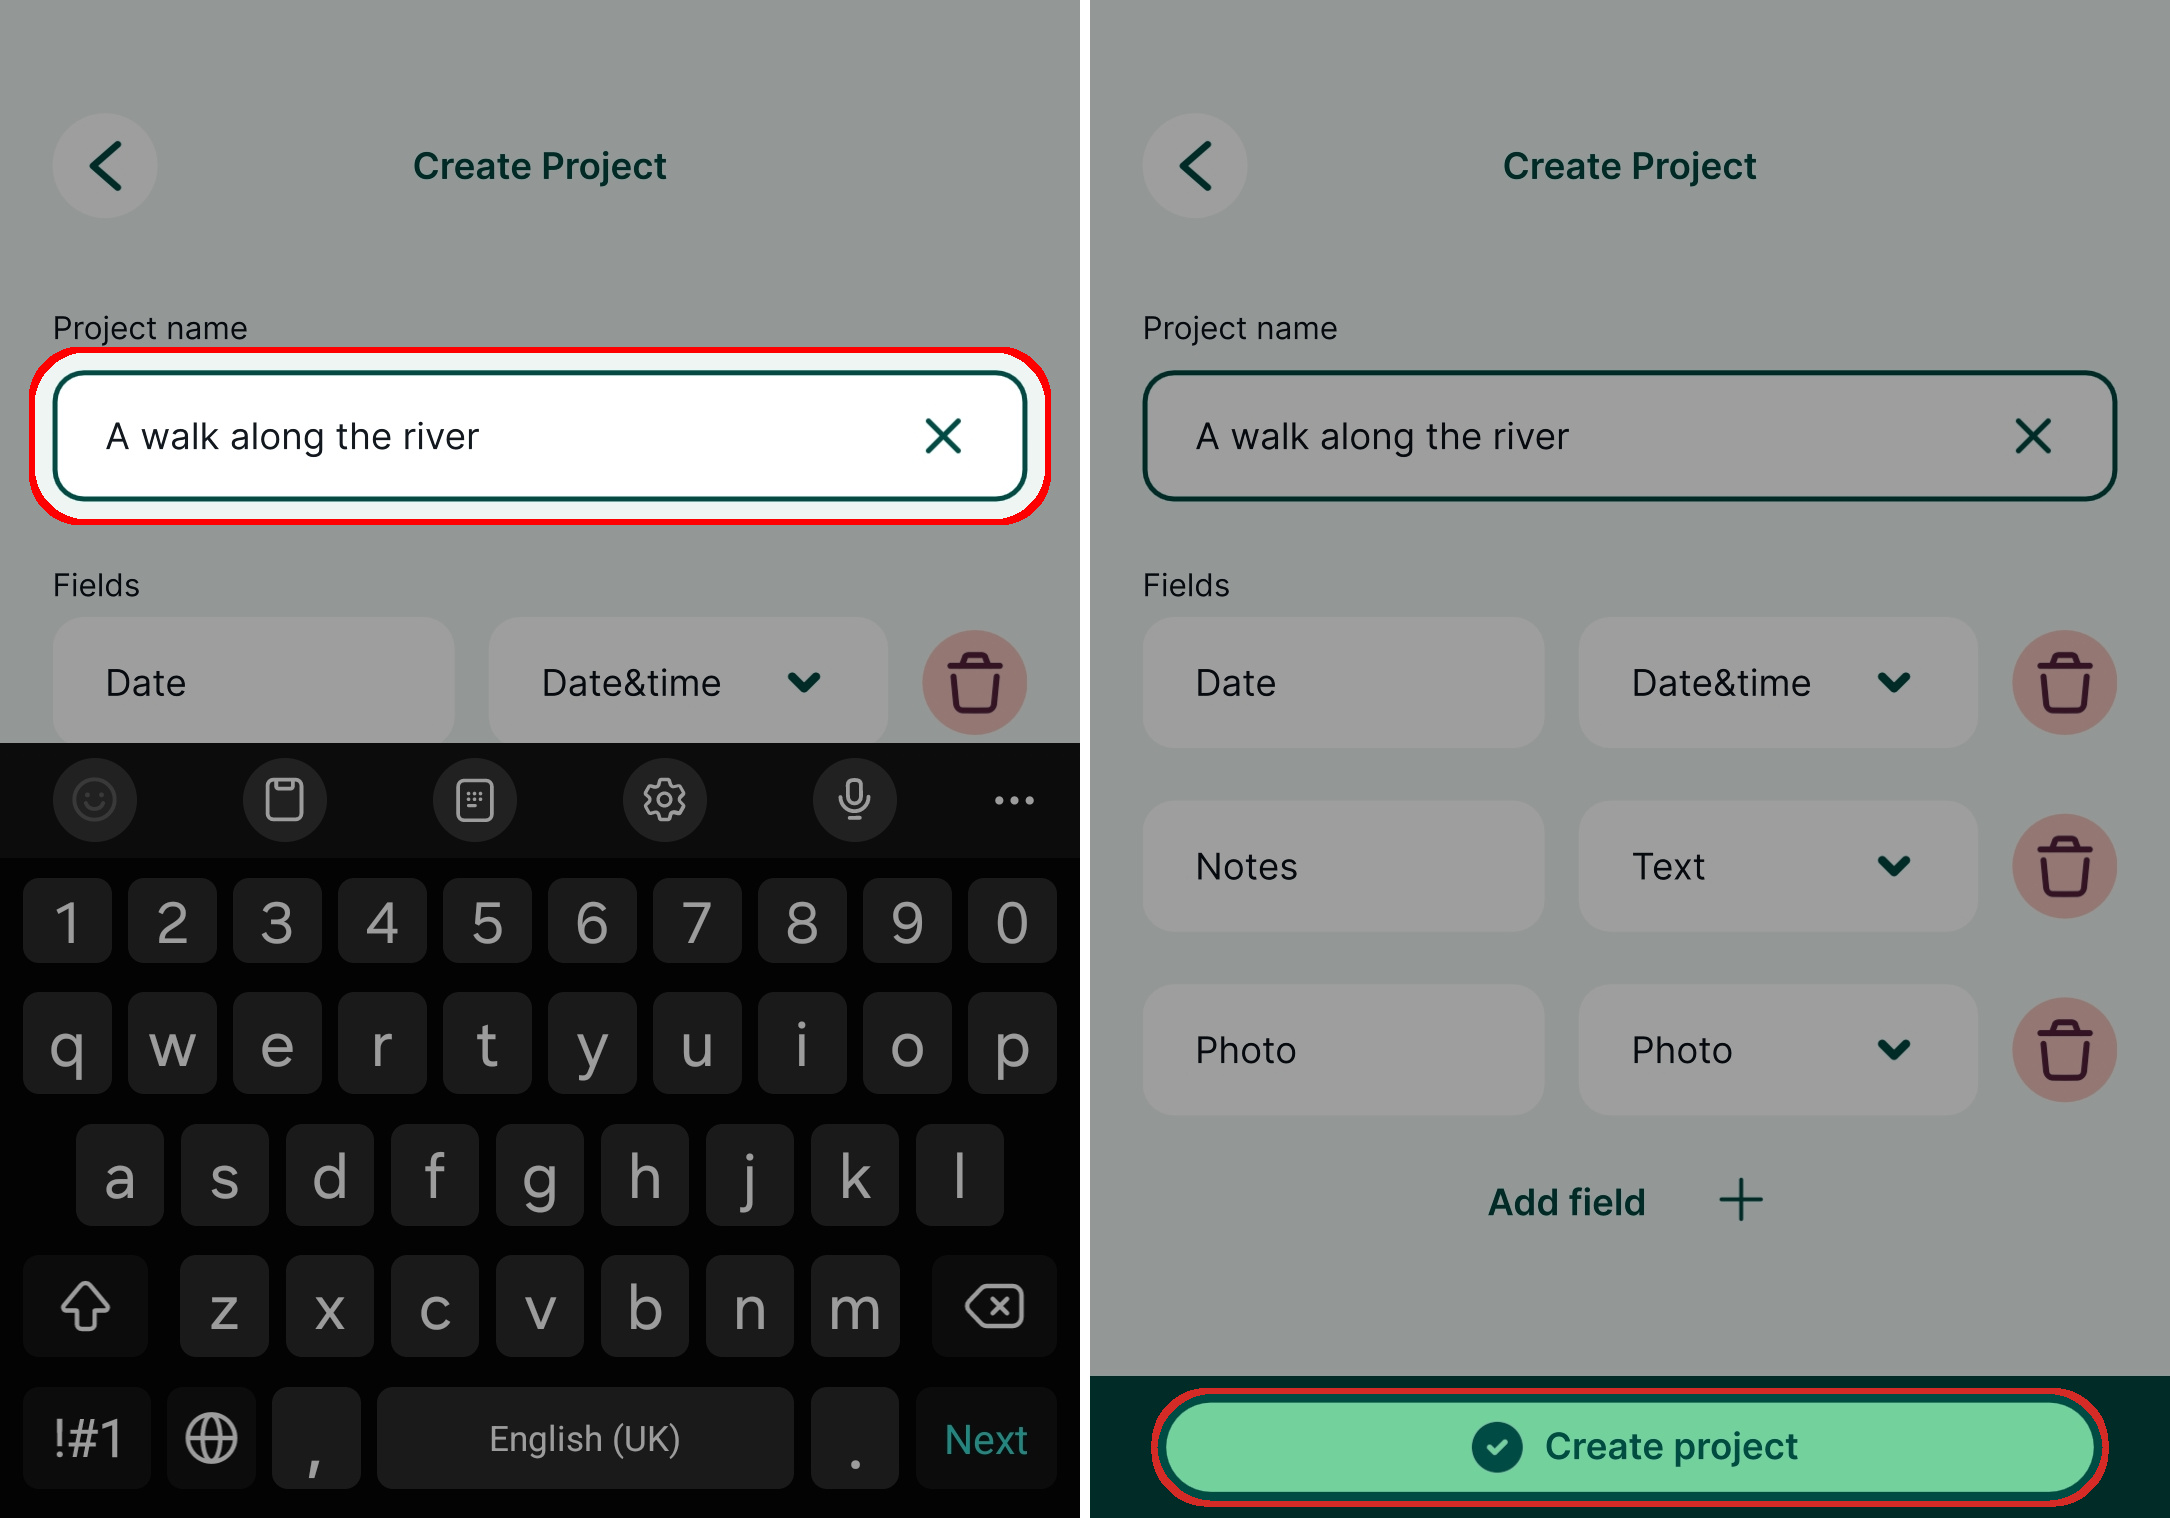
Your new project should now be visible on the **Home** tab of the **Projects** screen. It can be opened by tapping the project's name. 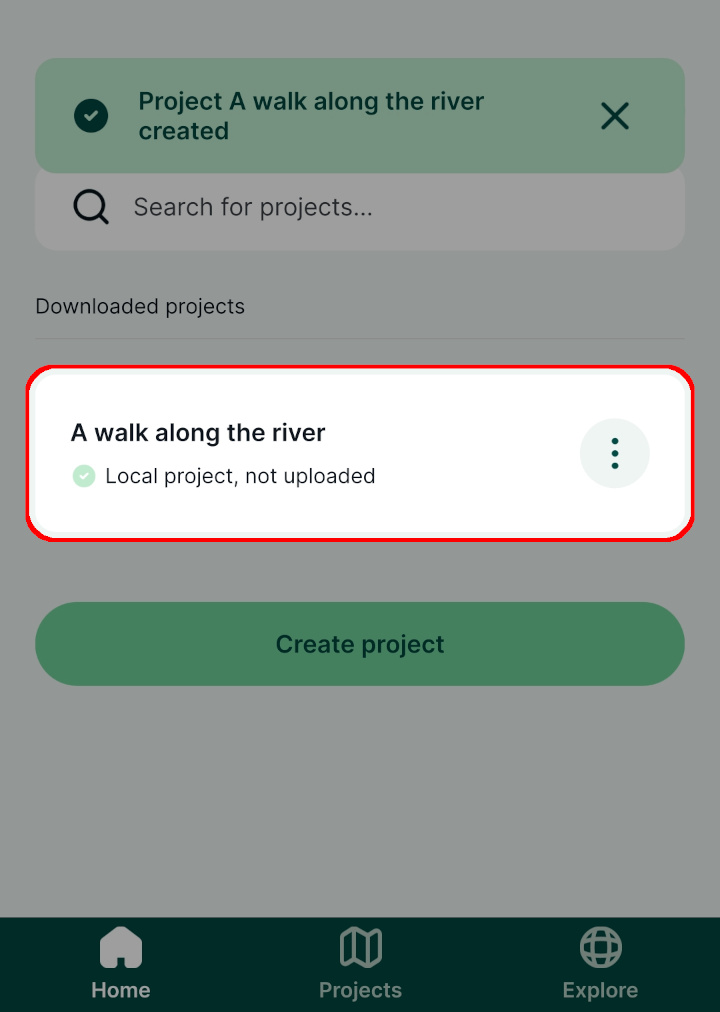
Capturing field data [](https://merginmaps.com/docs/tutorials/capturing-first-data/#capturing-field-data)
-----------------------------------------------------------------------------------------------------------
In the last step we created a project which will be used for our field survey. Let's now practise capturing some field data.
Note that the **background map used in this project requires network connectivity**. To display it outside, you need to be connected to the internet.
1. Open the project by tapping its row in the **Projects** screen.
You should see your location shown over the background map: 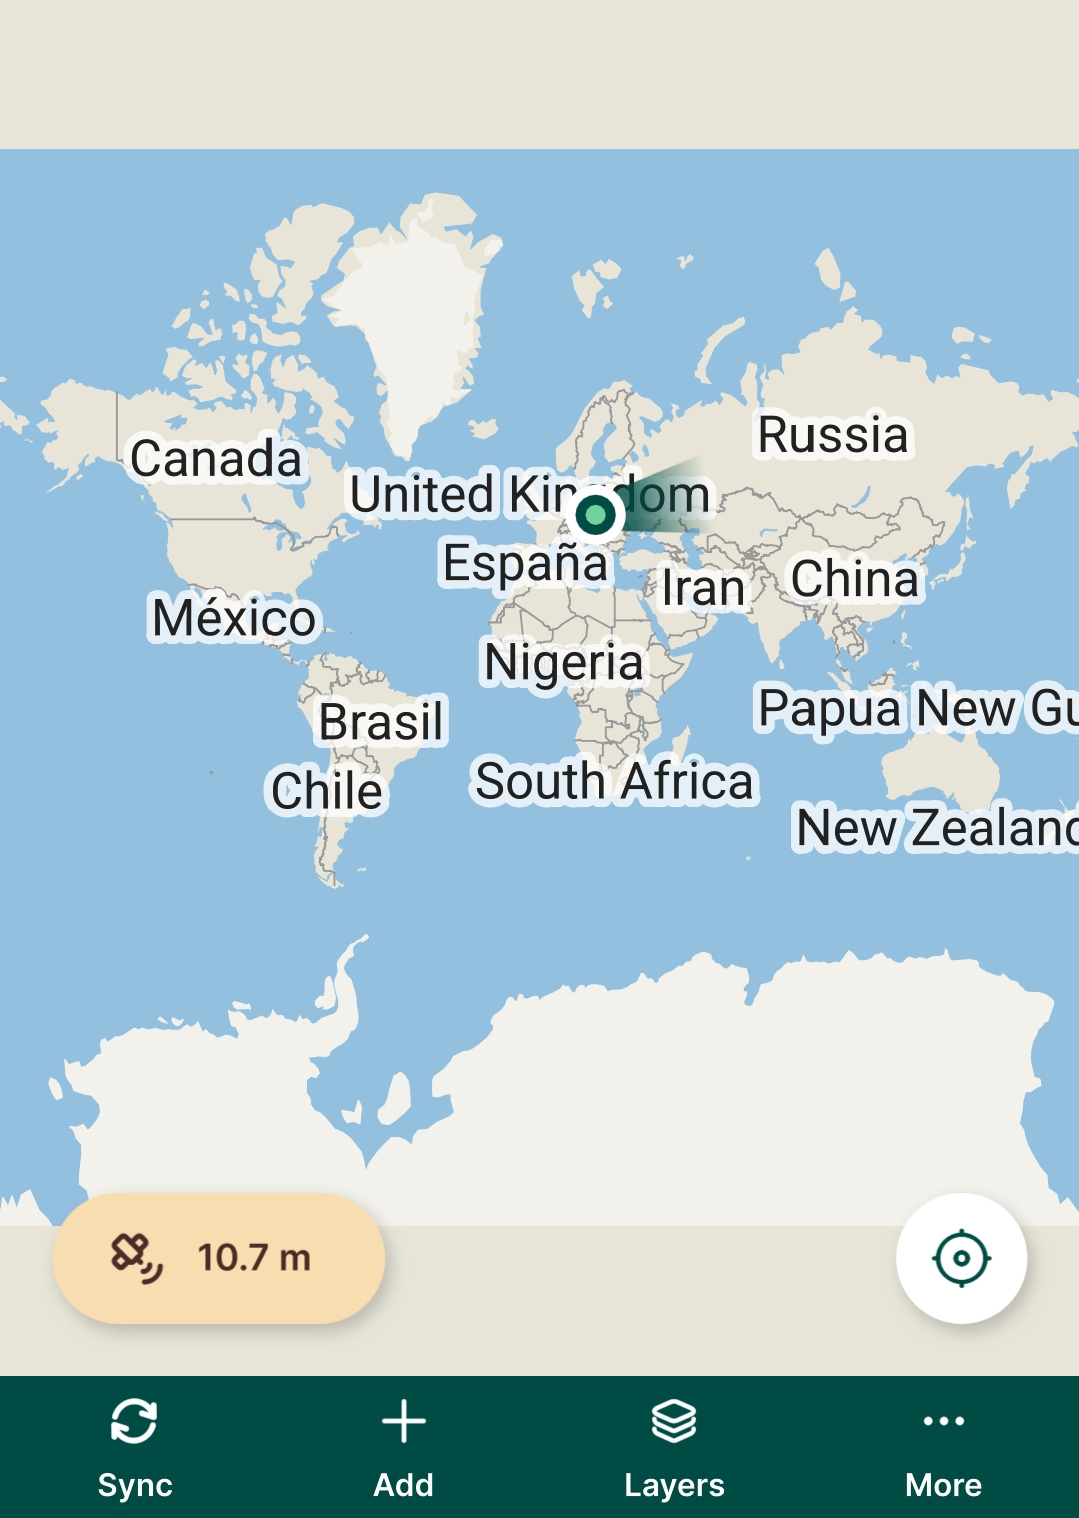
2. Pinch the map to zoom in to your current position. If needed, recentre the map using the **GPS** button in the bottom right corner of the screen. 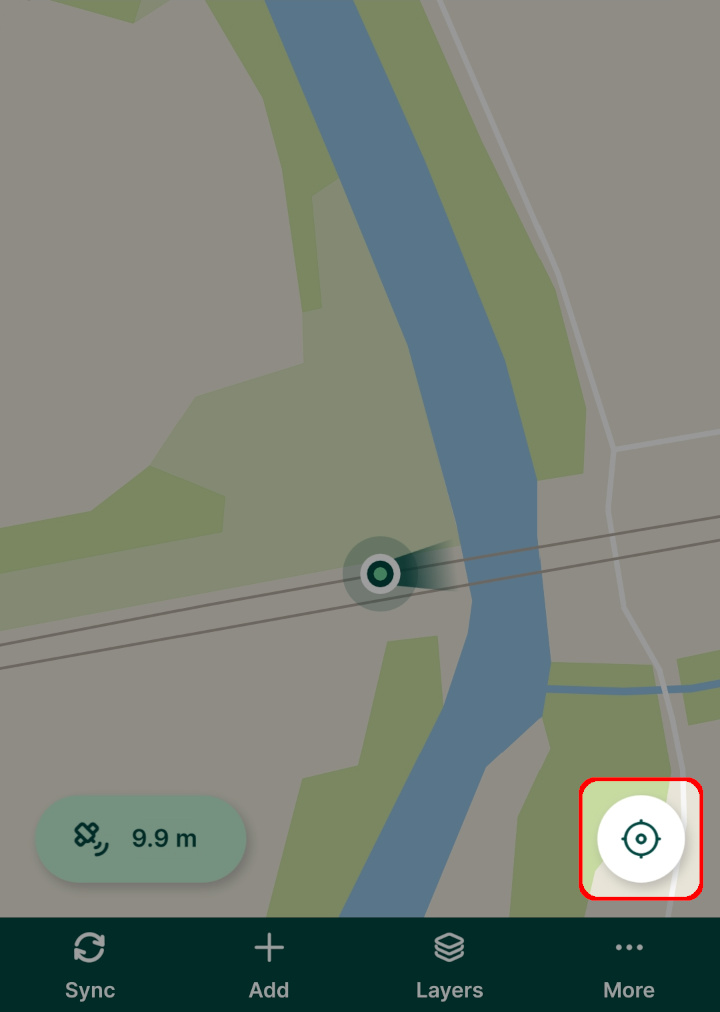
3. To add a new feature, press **Add**.
The position of the feature can be defined by pinching and dragging the background map or by pressing the **GPS** button to capture your current position.
Tap **Record** to capture the point. 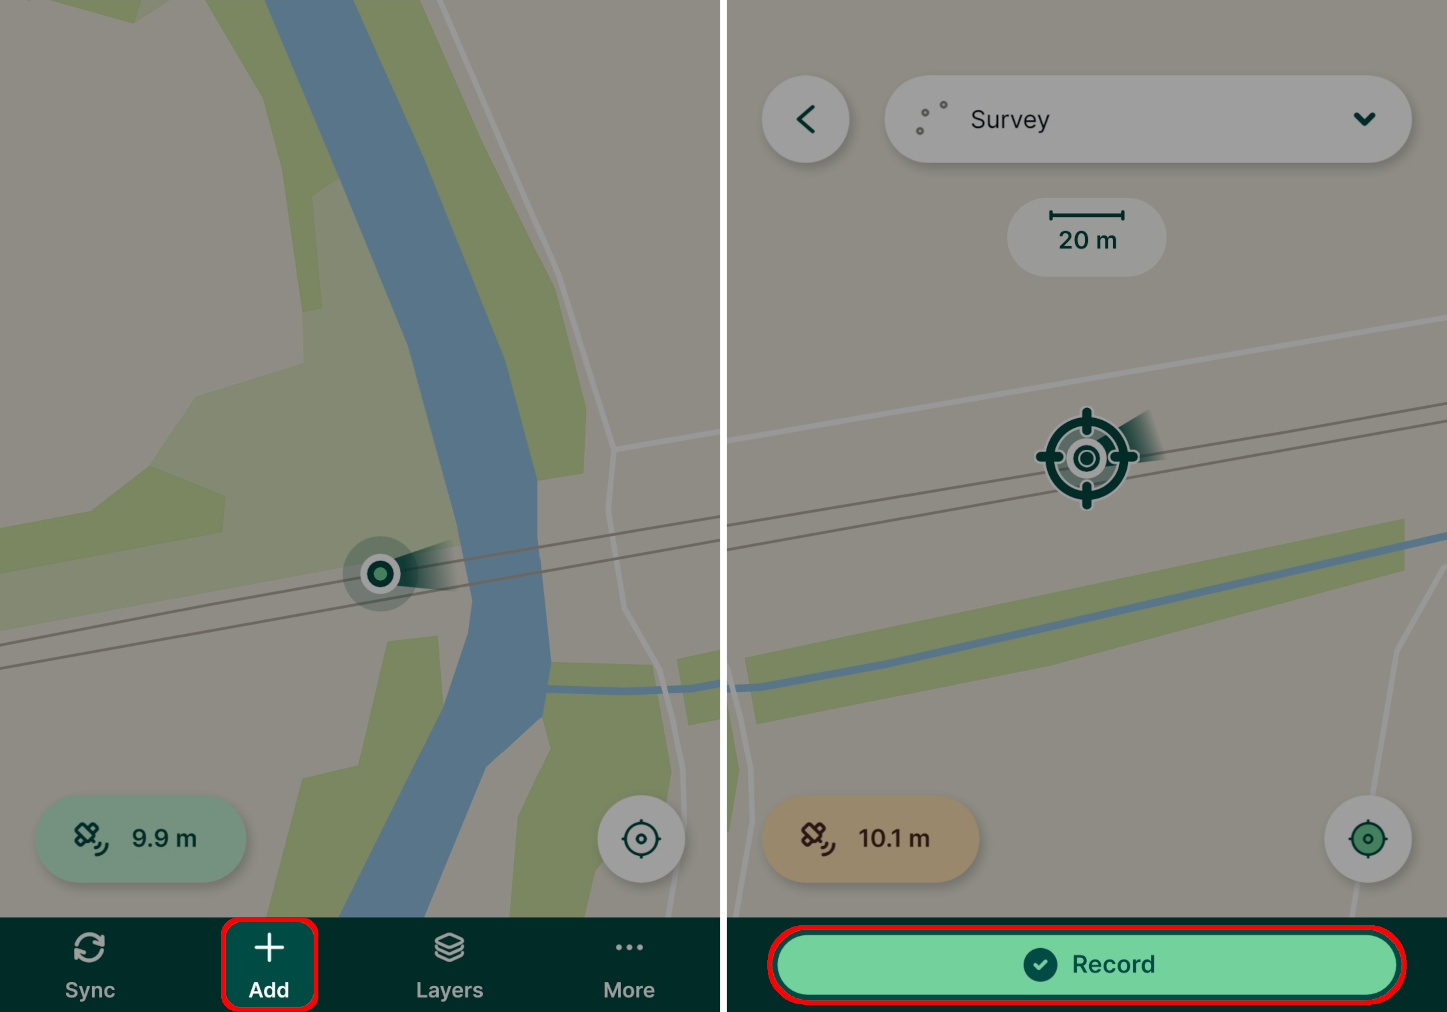
4. A survey form opens.
Enter the _date_ of your survey and _notes_ about the feature.
Tap **Take a picture** to attach a photo using your camera. 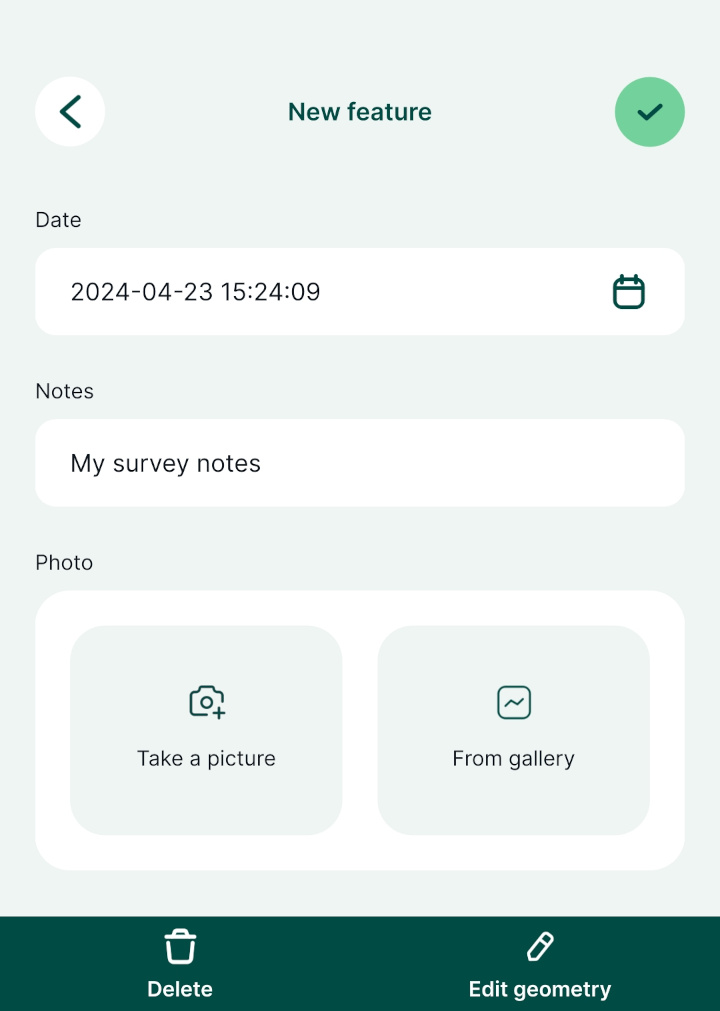
5. Press **Save** when you're happy with the details you've entered: 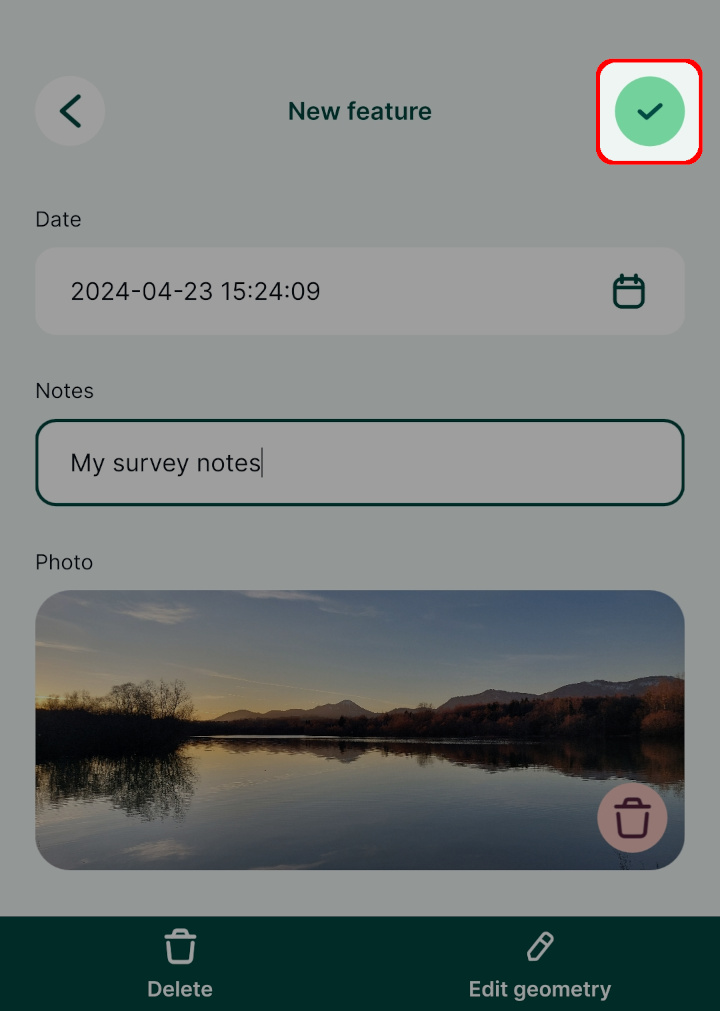
6. The feature you just captured should now be visible on the map.
Tap on the feature to see its details. If you want to change these details, such as rewrite the notes or take a new photo, tap the **Edit** button.
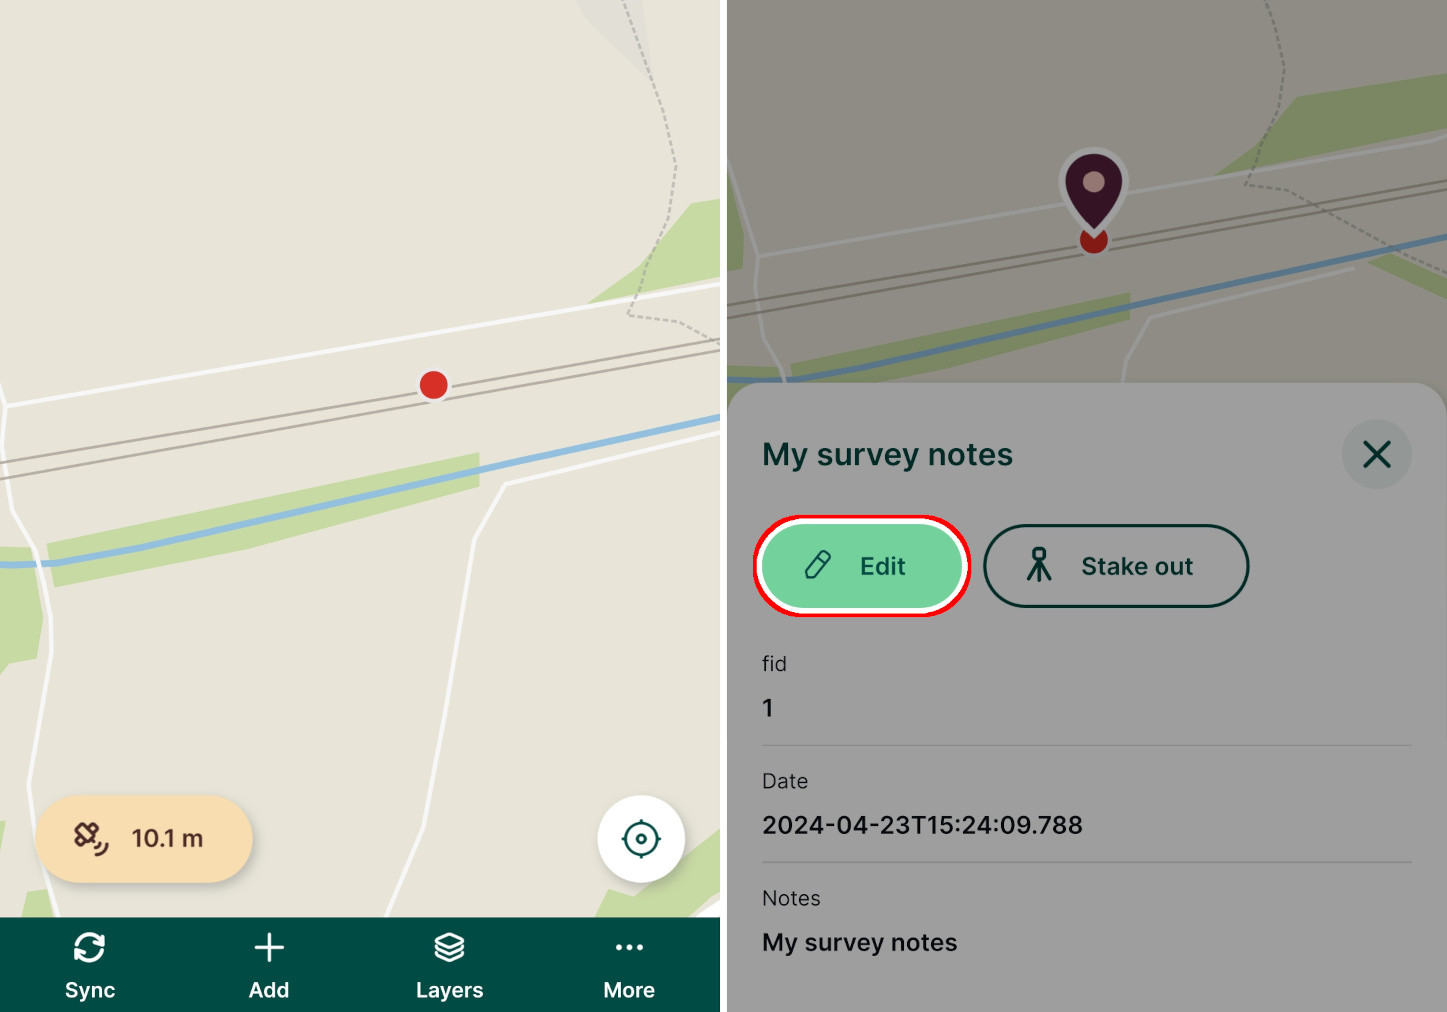
Summary [](https://merginmaps.com/docs/tutorials/capturing-first-data/#summary)
---------------------------------------------------------------------------------
In this tutorial you learnt how to start capturing field data with very little effort, entirely from within Mergin Maps mobile app.
You may be wondering how you can survey line and polygon features, use other background maps or define the forms. These things are all possible with [Mergin Maps](https://merginmaps.com/)
!
---
# Opening Surveyed Data on Your Computer | Mergin Maps
[Skip to content](https://merginmaps.com/docs/tutorials/opening-surveyed-data-on-your-computer/#VPContent)
Return to top
Opening Surveyed Data on Your Computer [](https://merginmaps.com/docs/tutorials/opening-surveyed-data-on-your-computer/#opening-surveyed-data-on-your-computer)
=================================================================================================================================================================
In the last tutorial you learnt how to capture field data using Mergin Maps mobile app.
In this tutorial you'll learn how to transfer your project and data from mobile device to computer in seconds using the powerful QGIS and [Mergin Maps](https://merginmaps.com/)
combination. [QGIS](https://qgis.org/)
is a free and open source desktop GIS package. The mobile app is based on QGIS, which means it's able to visualise and edit data in the same way QGIS can. This offers us great flexibility which we'll start to see in a moment.
Before we start [](https://merginmaps.com/docs/tutorials/opening-surveyed-data-on-your-computer/#before-we-start)
-------------------------------------------------------------------------------------------------------------------
To open the project and field data on the computer, we will need to do some setup. Before going to the next steps, please:
* [Sign up to Mergin Maps](https://merginmaps.com/docs/setup/sign-up-to-mergin-maps/#from-mergin-maps-mobile-app)
, as we will use Mergin Maps platform to transfer the data between the mobile app and QGIS
* [Install QGIS](https://merginmaps.com/docs/setup/install-qgis/)
on your computer
* [Install the Mergin Maps QGIS plugin](https://merginmaps.com/docs/setup/install-mergin-maps-plugin-for-qgis/)
and use your credential to [configure the plugin](https://merginmaps.com/docs/setup/install-mergin-maps-plugin-for-qgis/#plugin-configuration)
, so that QGIS knows how to communicate with Mergin Maps
Putting your project in the cloud [](https://merginmaps.com/docs/tutorials/opening-surveyed-data-on-your-computer/#putting-your-project-in-the-cloud)
-------------------------------------------------------------------------------------------------------------------------------------------------------
1. Open Mergin Maps mobile app and navigate to the **Home** tab. Tap the button next to the project's name and select the **Upload** option.
If you are logged in, the project will be uploaded to Mergin Maps Cloud and you can continue to the next step: [opening your project in QGIS](https://merginmaps.com/docs/tutorials/opening-surveyed-data-on-your-computer/#locating-and-opening-your-project)
. 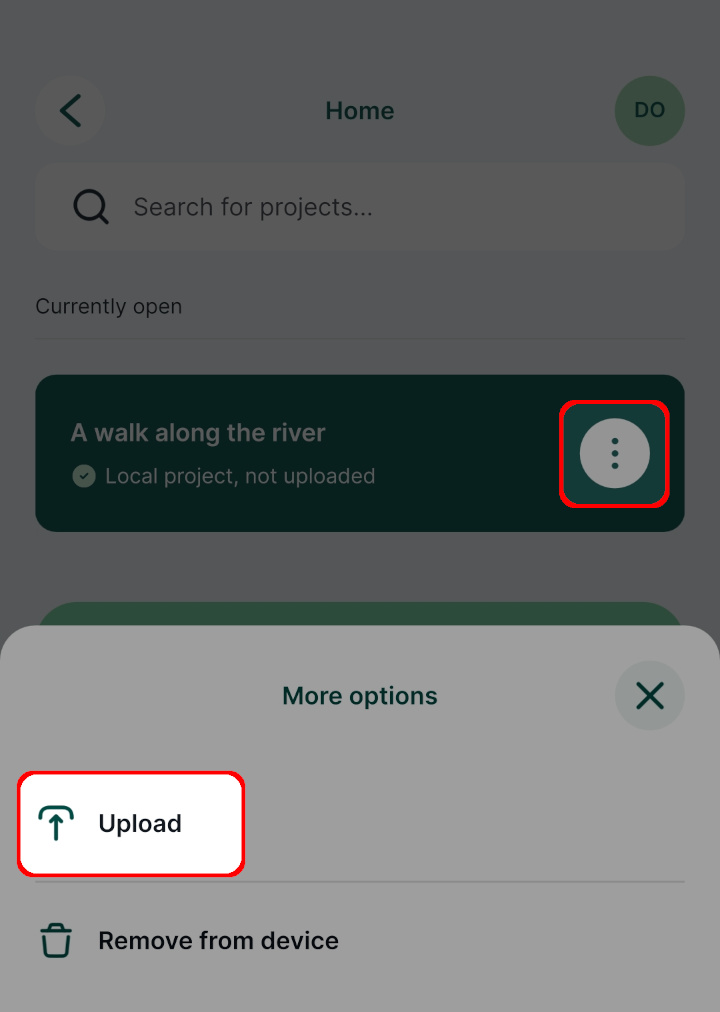
2. If you are not logged in, you will be asked to. Enter your Mergin Maps credentials and **Sign in**.
If you don't have an account yet, create one! Tap **Sign up** to [sign up to Mergin Maps](https://merginmaps.com/docs/setup/sign-up-to-mergin-maps/#from-mergin-maps-mobile-app)
.
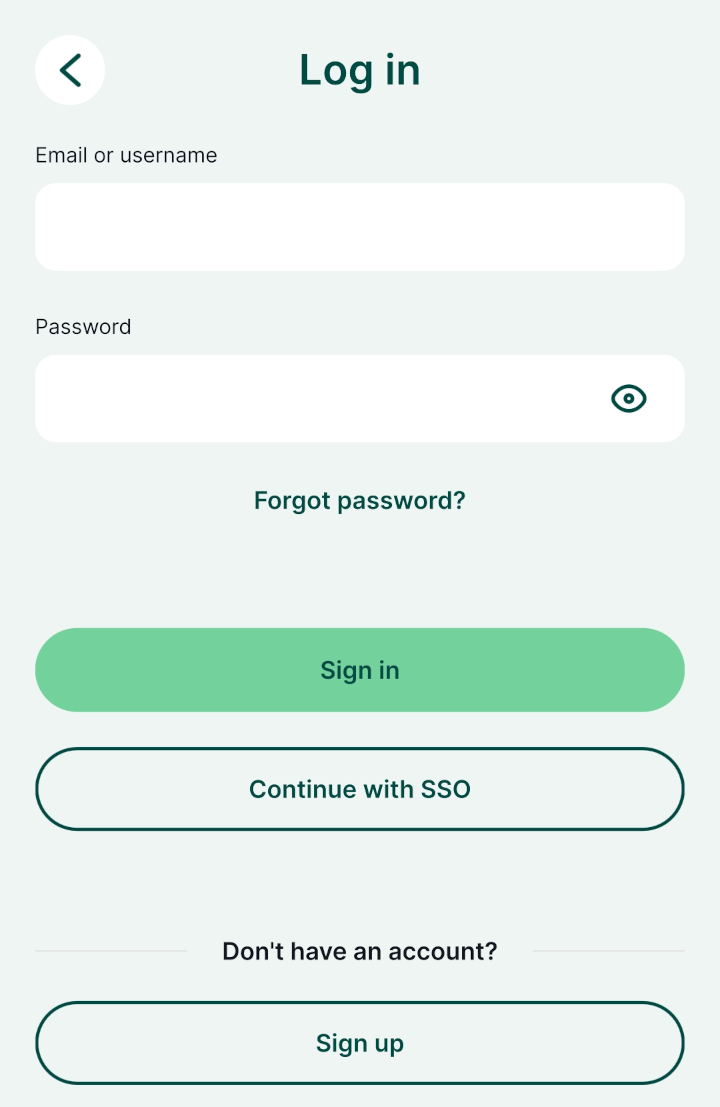
3. Once you are logged in, **Upload** your project to the Mergin Maps Cloud.
Notice that the name of your [workspace](https://merginmaps.com/docs/manage/workspaces/)
is displayed along with the project's name (here, the workspace is called `my-team`).
Now that your project is in the cloud, it can easily be shared with colleagues or downloaded to your computer.
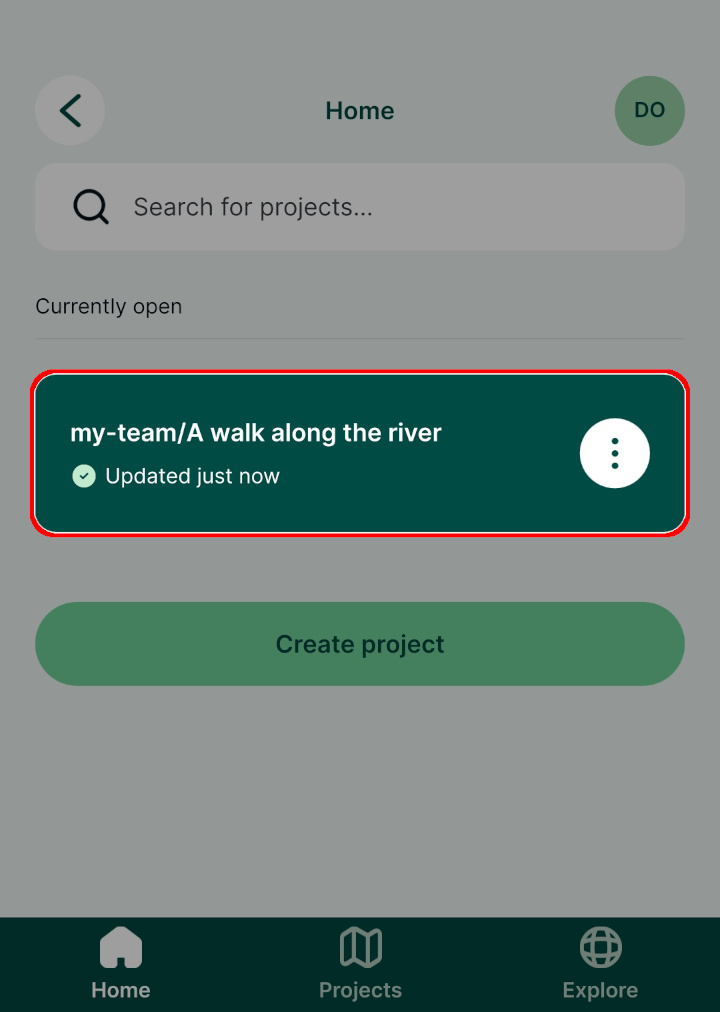
Locating and opening your project [](https://merginmaps.com/docs/tutorials/opening-surveyed-data-on-your-computer/#locating-and-opening-your-project)
-------------------------------------------------------------------------------------------------------------------------------------------------------
Now that the project is stored in Mergin Maps Cloud, we can open it in QGIS.
1. Open QGIS on your computer
2. Make sure you have already [installed](https://merginmaps.com/docs/setup/install-mergin-maps-plugin-for-qgis/)
and [configured](https://merginmaps.com/docs/setup/install-mergin-maps-plugin-for-qgis/#plugin-configuration)
Mergin Maps QGIS plugin
3. Find the Mergin Maps entry in the QGIS **Browser** panel 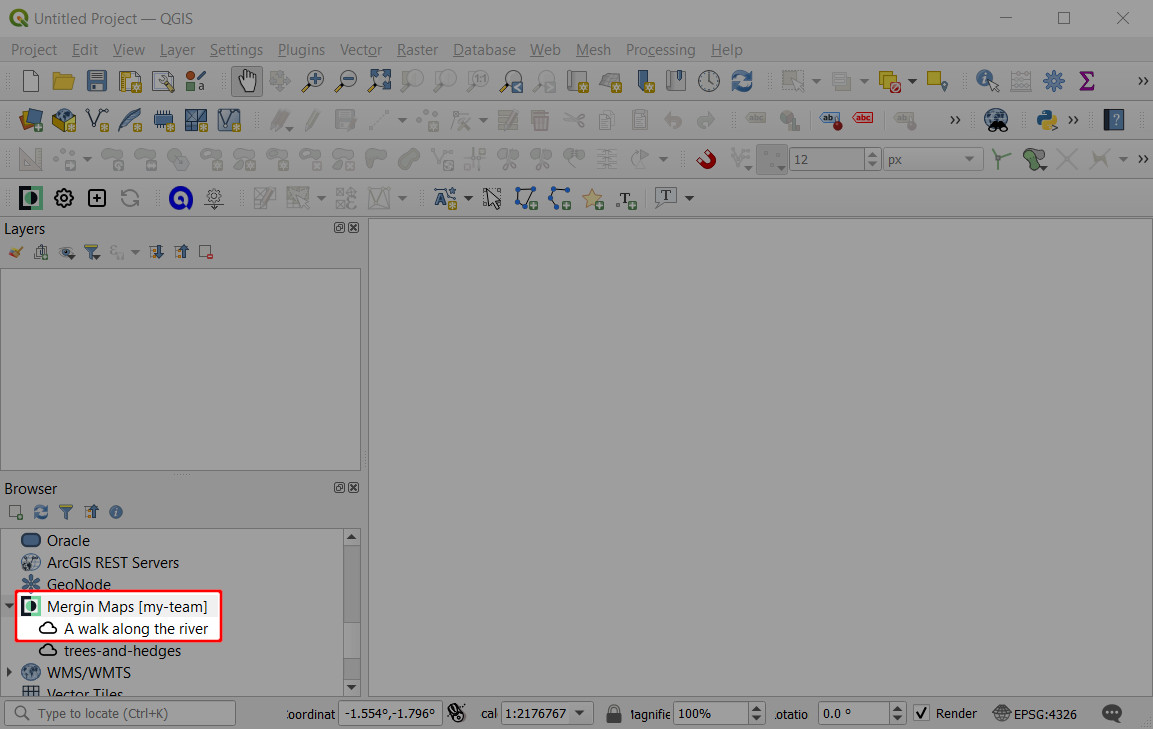
Notice that the name of the current workspace (here: `my-team`) is displayed next to Mergin Maps and the projects in this workspace are listed below.
TIP
If you cannot see the **Browser** panel, ensure it's enabled under **View (top-level menu) > Toolbars**.
4. Right-click on the project and select **Download**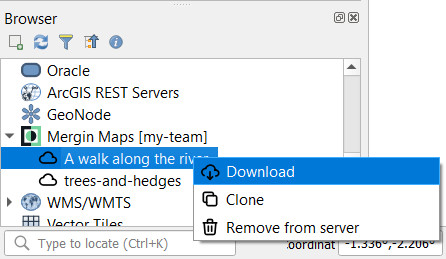
5. **Select a folder** where you want to store your project locally.
For example, here we will create a folder for storing Mergin Maps projects called `MerginMaps Projects`. It is also possible to select an existing folder.
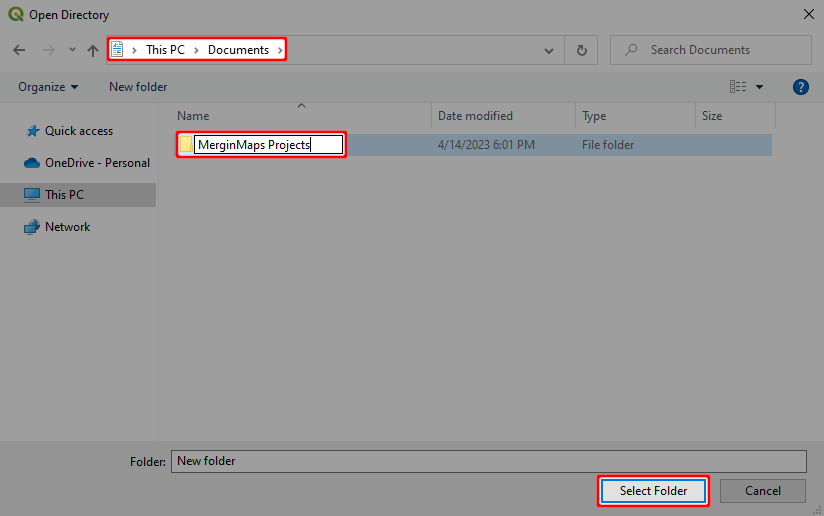
After selecting a folder, Mergin Maps QGIS plugin will automatically create a subfolder based on the project's name and download the project there. 
6. Open the project when prompted: 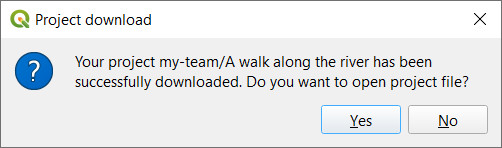
Your survey project is now open in QGIS and you can see the data you captured in the field.
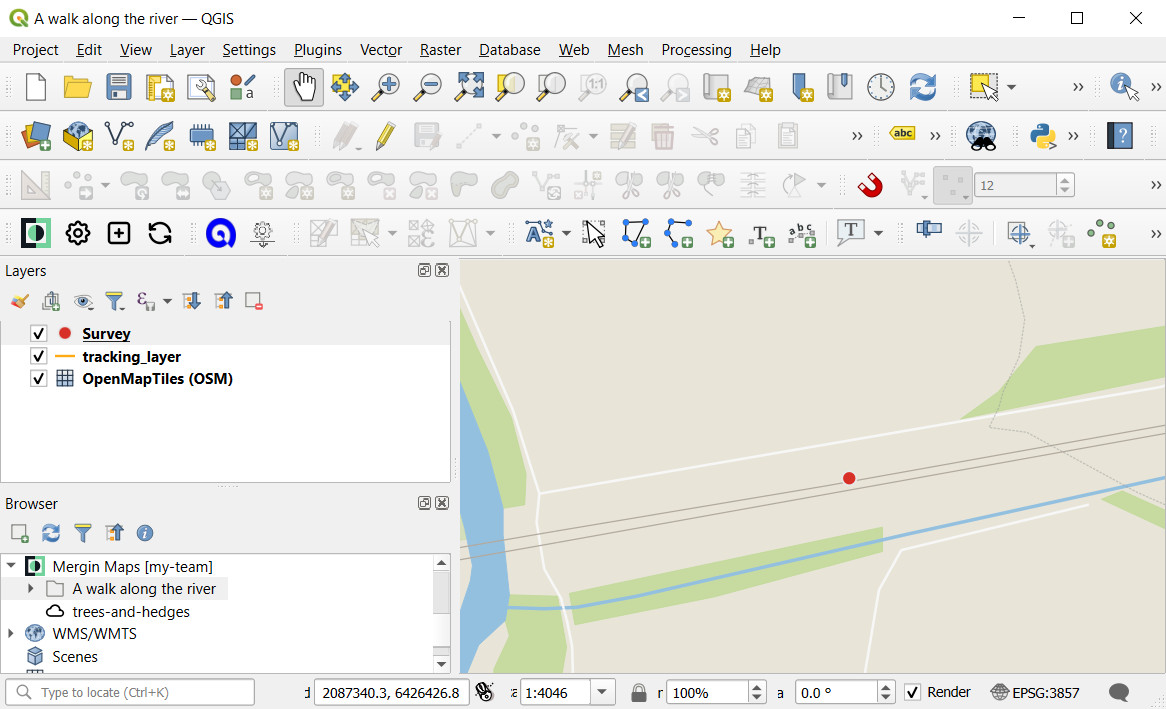
TIP
If you're new to QGIS we really recommend getting some basic familiarity with the software. [QGIS User Guide](https://docs.qgis.org/latest/en/docs/user_manual/index.html)
and [QGIS Training Manual](https://docs.qgis.org/latest/en/docs/training_manual/index.html)
are great resources to get acquainted with QGIS and its functionality.
QGIS is a powerful tool with a great community that can help you achieve a lot!
Extracting data from QGIS [](https://merginmaps.com/docs/tutorials/opening-surveyed-data-on-your-computer/#extracting-data-from-qgis)
---------------------------------------------------------------------------------------------------------------------------------------
Users who are not already familiar with GIS may be wondering how they can extract their data into familiar tools like MS Office and how to access their photographs.
There are many ways how you can extract the data. Here we'll just cover the basics.
1. Locate the `Survey` layer in the **Layers** panel: 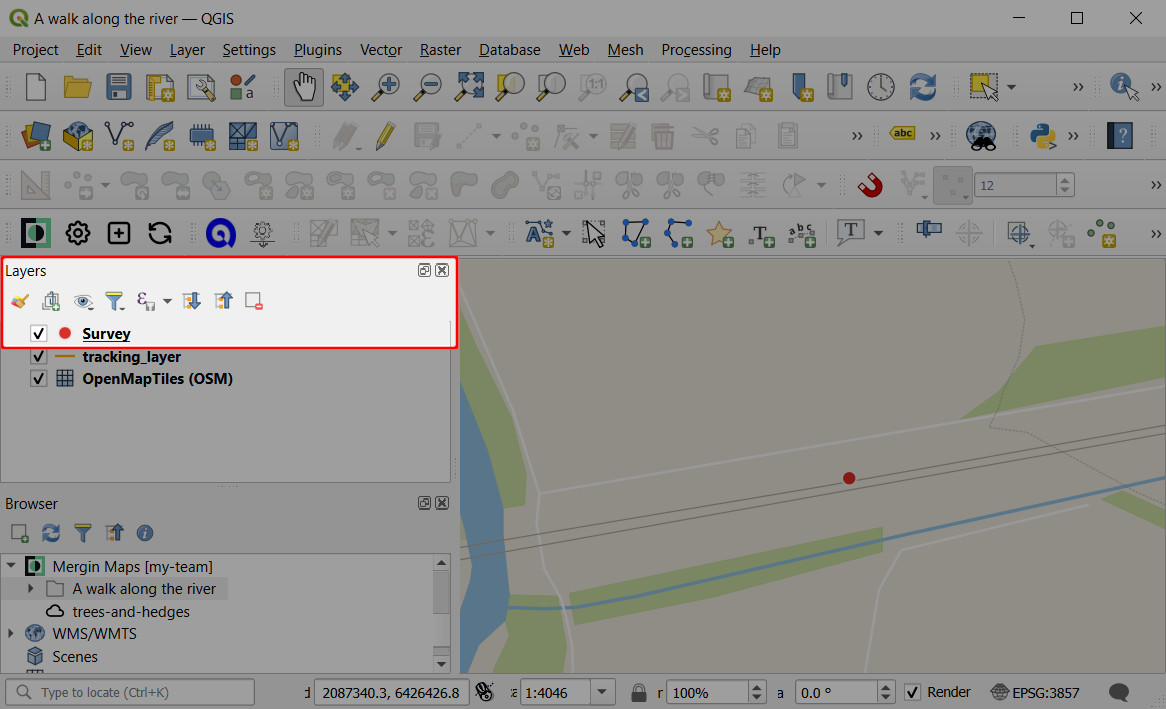
2. Right-click on the `Survey` layer and find the **Export** option. Here, select **Save Features As...**: 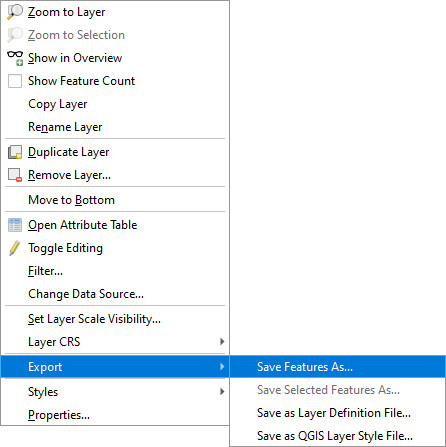
3. **Save Vector Layers as...** dialog opens. Here you can define the export parameters:
* Set **Format** to _**Comma Separated Value \[CSV\]**_
* Specify an output **File name**
* Uncheck **Add saved file to map**
Click **OK** to export the file. The resulting CSV file can be opened in various applications such as MS Excel or even in a common text editor. 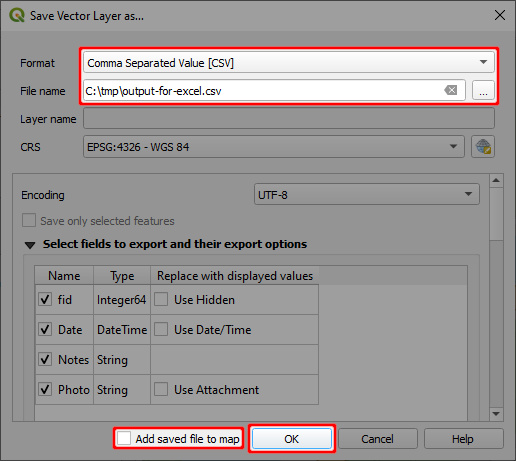
Locating captured photos [](https://merginmaps.com/docs/tutorials/opening-surveyed-data-on-your-computer/#locating-captured-photos)
-------------------------------------------------------------------------------------------------------------------------------------
**Photos** that you took as a part of your field survey are located in the Mergin Maps project folder. In this case, we saved our project in `Documents\MerginMaps Projects` so the photos can be found here.
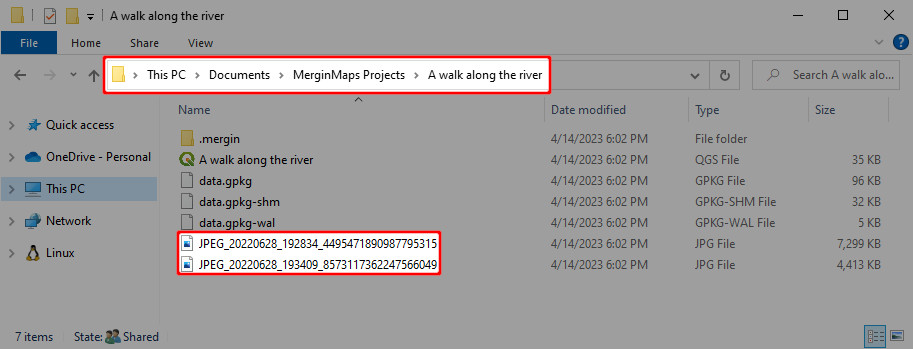
Identify features tool [](https://merginmaps.com/docs/tutorials/opening-surveyed-data-on-your-computer/#identify-features-tool)
---------------------------------------------------------------------------------------------------------------------------------
You can also use QGIS to explore the data you surveyed in the field.
1. Select the Survey layer in the **Layers** panel. The layer should be highlighted.
2. Select the **Identify Features** tool: 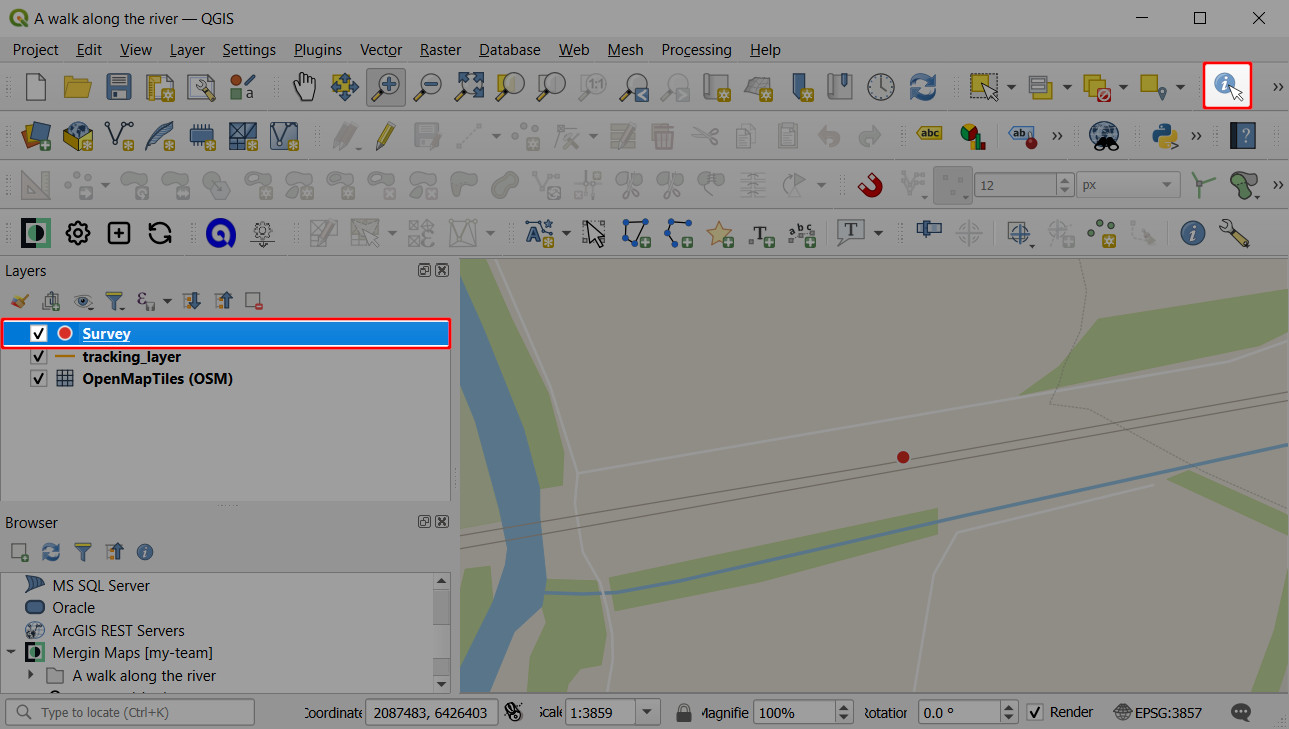
3. Click on a survey point. A form with feature's attribute should open: 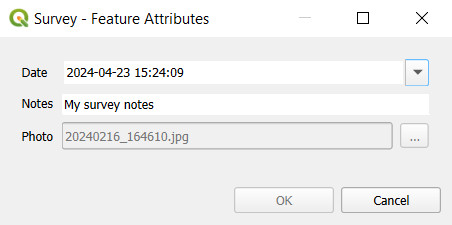
Summary [](https://merginmaps.com/docs/tutorials/opening-surveyed-data-on-your-computer/#summary)
---------------------------------------------------------------------------------------------------
In this tutorial you learnt how to view a survey project you created on your mobile device with Mergin Maps mobile app on your desktop computer using QGIS. You also learnt how to export captured data for use in spreadsheets and how to access photos you captured in the field.
QGIS offers many options to create and set up more complex projects than the basic project we have created in the mobile app - as you can see in the [next tutorial](https://merginmaps.com/docs/tutorials/creating-a-project-in-qgis/)
.
---
# Creating a Project in QGIS | Mergin Maps
[Skip to content](https://merginmaps.com/docs/tutorials/creating-a-project-in-qgis/#VPContent)
Return to top
Creating a Project in QGIS [](https://merginmaps.com/docs/tutorials/creating-a-project-in-qgis/#creating-a-project-in-qgis)
=============================================================================================================================
In earlier tutorials you created a new survey project from within Mergin Maps mobile app. That was a very fast (albeit limited) way of creating a [Mergin Maps](https://merginmaps.com/)
project. In QGIS, it is possible to create more complex projects and make the field survey more effective.
In this tutorial you will create a new project for surveying trees and hedges using QGIS.
Before we start [](https://merginmaps.com/docs/tutorials/creating-a-project-in-qgis/#before-we-start)
-------------------------------------------------------------------------------------------------------
Please ensure you have already:
* [Installed QGIS](https://merginmaps.com/docs/setup/install-qgis/)
* [Signed up to Mergin Maps](https://merginmaps.com/docs/setup/sign-up-to-mergin-maps/)
* [Installed the Mergin Maps QGIS plugin](https://merginmaps.com/docs/setup/install-mergin-maps-plugin-for-qgis/)
Create a minimal project [](https://merginmaps.com/docs/tutorials/creating-a-project-in-qgis/#create-a-minimal-project)
-------------------------------------------------------------------------------------------------------------------------
1. Open QGIS
2. Locate the Mergin Maps QGIS plugin toolbar in the upper navigation panel in QGIS. Click on the **Create Mergin Maps Project** button 
3. Choose the first option: **New basic QGIS project**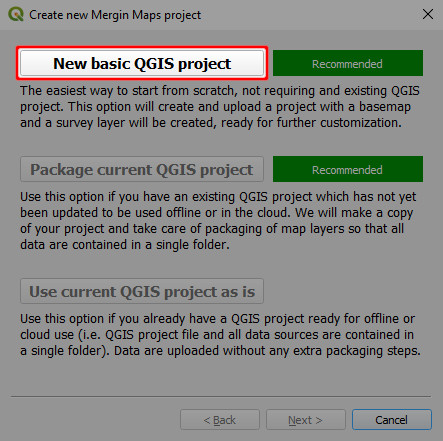
4. When creating a Mergin Maps project, we need to set:
* a [workspace](https://merginmaps.com/docs/manage/workspaces/)
(here: `sarah`). If you have multiple workspaces available, choose the one you want to use.
* **Project Name**
* The folder where the project should be created. Here, we use `Documents\MerginMaps Projects`
Press **Finish** to create the project. 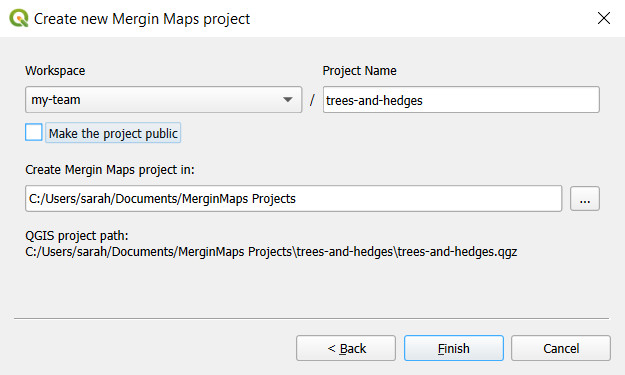
5. Your new project should now be created and uploaded to Mergin Maps Cloud.
**Close** the dialog window to continue working with this project in QGIS. 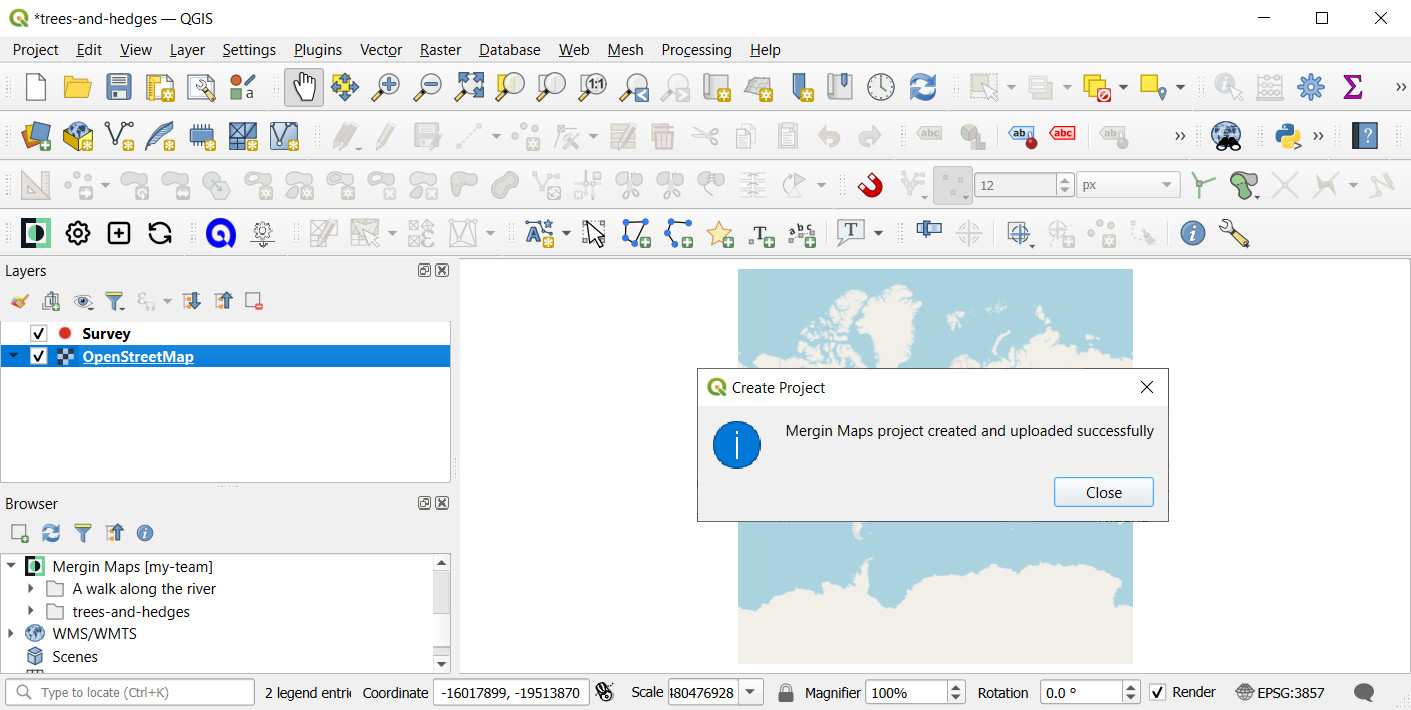
Add layers [](https://merginmaps.com/docs/tutorials/creating-a-project-in-qgis/#add-layers)
---------------------------------------------------------------------------------------------
You may have noticed that the project we have just created with Mergin Maps QGIS plugin is very similar to the project created in Mergin Maps mobile app in the previous [tutorial](https://merginmaps.com/docs/tutorials/capturing-first-data/)
. This basic project contains a single point layer called `Survey` and OpenStreetMap as a background map.
TIP
Various background maps can be used in Mergin Maps mobile app, if they are supported by QGIS. You can learn how to add offline and online background maps [here](https://merginmaps.com/docs/gis/settingup_background_map/)
.
We will now add two more survey layers - a point layer for surveying trees and a line layer for hedges.
1. Select **Layer > Create Layer > New GeoPackage Layer...**
2. Now we will create the `trees` layer:
* **Database**: navigate to the project's folder and save the GeoPackage as `trees.gpkg` Here: `Documents\MerginMaps Projects\trees-and-hedges\trees.gpkg`
* **Table name** will be set as `trees` by default
* **Geometry type**: _**Point**_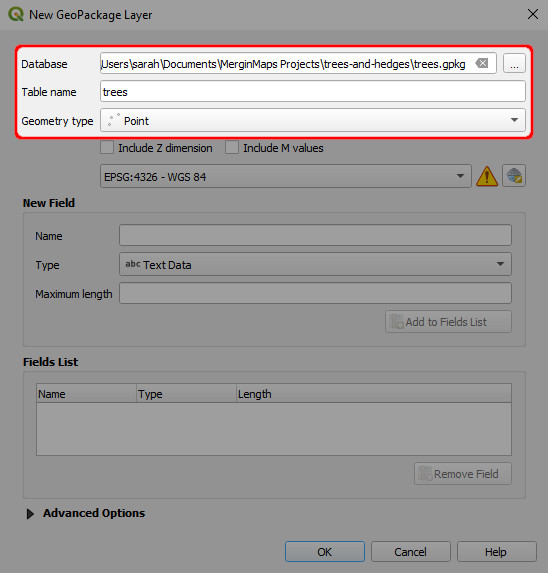
3. Add a **New Field** called `date` with the data type _**Date**_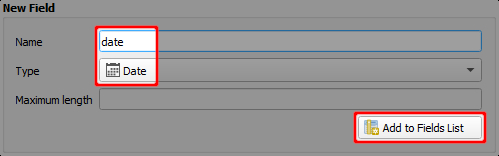
4. Add two more new fields called `species` and `conditions` with the data type _**Text Data**_.
In the **Fields List**, you can see the overview of added attributes and their respective data types. It should look like this: 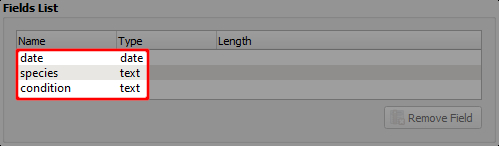
5. Click **OK**. A new layer called `trees` has now been added to the **Layers** panel. 
6. Repeat steps 1 to 5 above to add another new layer called `hedges` with these details:
* **Database**: `Documents\Mergin Projects\trees-and-hedges\hedges.gpkg`
* **Geometry type**: _**LineString**_
* **Fields**:
* `both_sides_surveyed`, data type _**Boolean**_
* `num_access_gates`, data type _**Whole Number (integer)**_
* `photo`, data type _**Text Data**_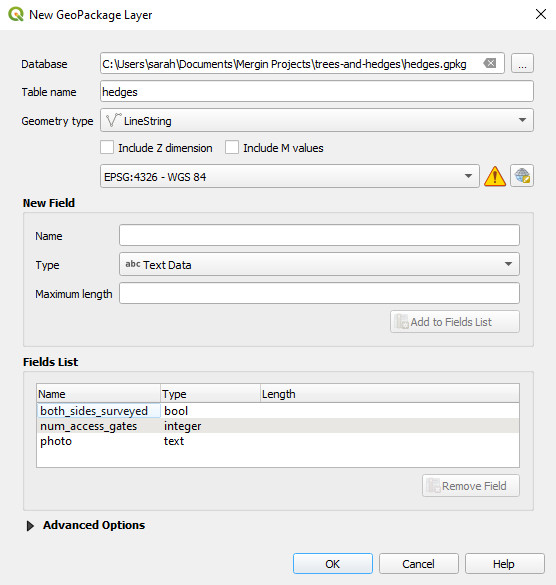
Once you are finished, there should be two new layers on the **Layers** panel: `trees` and `hedges`. 
Configure attributes forms [](https://merginmaps.com/docs/tutorials/creating-a-project-in-qgis/#configure-attributes-forms)
-----------------------------------------------------------------------------------------------------------------------------
Before we try out this new project in Mergin Maps mobile app we will make a couple of small changes to the layers' form settings. The forms define how users interact with feature attributes in the field.
To illustrate how the form setup can affect the field survey, notice on the example below how the tree species, _Black alder_, has been accidentally mistyped during the field survey. This can be avoided by setting up a drop-down list (right image). Attributes can also be aliased (renamed) for easier reading.
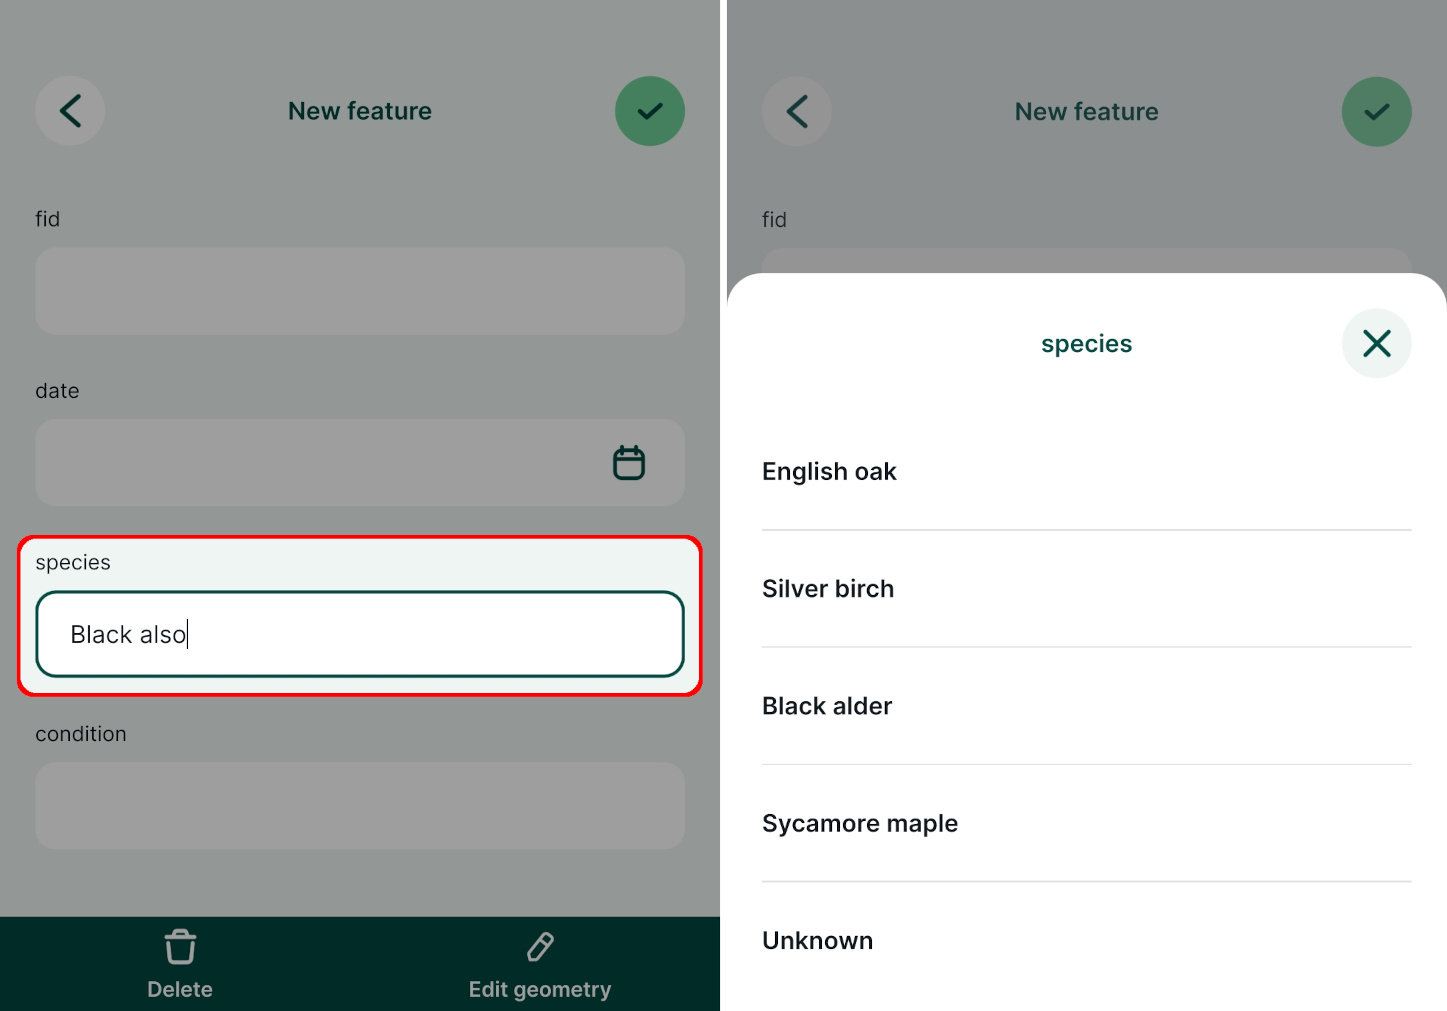
Now we will set up the drop-down list for the `trees` layer:
1. Double-click the `trees` layer in the **Layers** panel to open the **Layer properties**
2. Select **Attributes Form** on the left and click on the `species` attribute 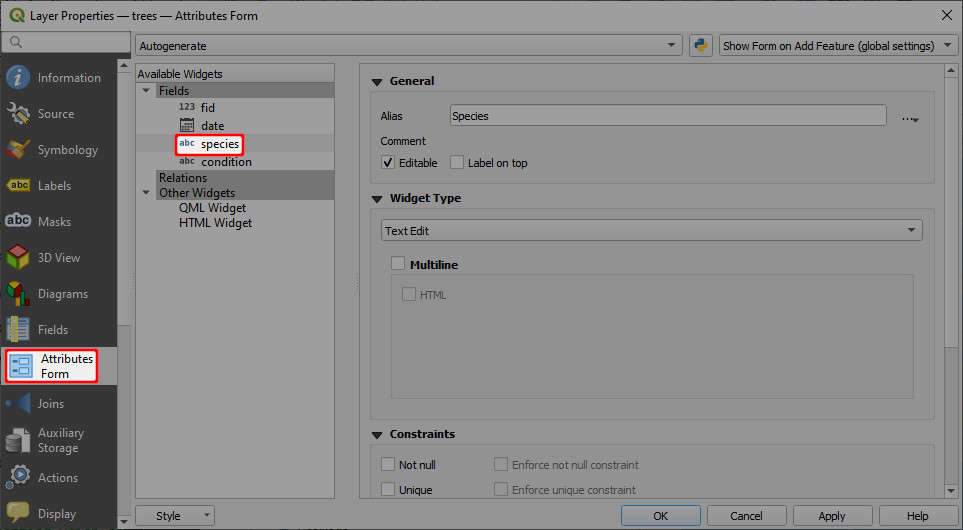
3. Make the following changes to the `species` attribute:
* Enter the **Alias** that defines how the attribute's name is displayed in the form.
* Change the **Widget Type** to _**Value Map**_
* Enter **Values** and **Descriptions** similar to these (both are set the same in this example): 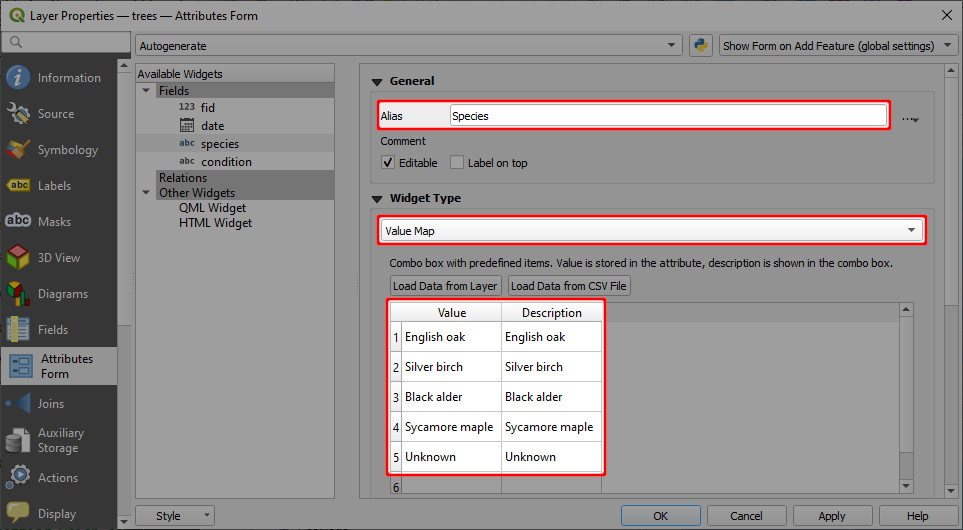
TIP
**Value** is how the data will be stored in the underlying dataset and **Description** is how it will be displayed in the form to the user.
4. Click on the `fid` attribute. Uncheck **Editable** option so that it can not be edited during the survey. 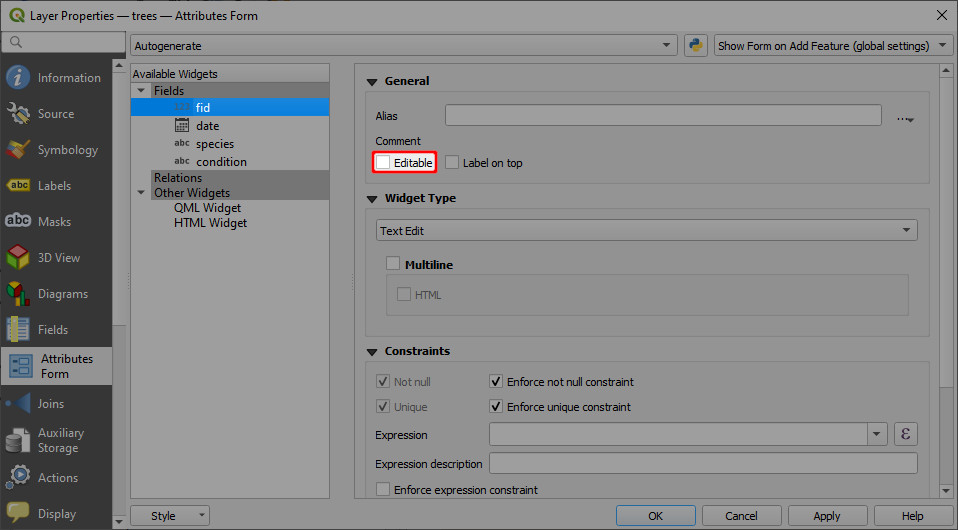
TIP
`fid` is a special attribute used to identify features. We recommend not allowing users to edit this attribute.
5. The setup of the `trees` layer is complete. Click **OK** to close the **Layer Properties** window.
Configuring photo attribute [](https://merginmaps.com/docs/tutorials/creating-a-project-in-qgis/#configuring-photo-attribute)
-------------------------------------------------------------------------------------------------------------------------------
The `hedges` layer has an attribute called `photo`. The attribute itself is stored as _**Text Data**_ and we will use it to attach photos to surveyed features. To achieve this, we need to configure the `photo` attribute's **Widget Type** as _**Attachment**_.
1. Double-click the `hedges` layer to open the **Layer properties**
2. Select **Attributes Form** on the left and click on the `photo` attribute
3. Set the form for the `photo` attribute as follows:
* **Widget Type** to _**Attachment**_
* **Path** defines where the photos will be stored. Set _Store path as_ **Relative to Project Path**: 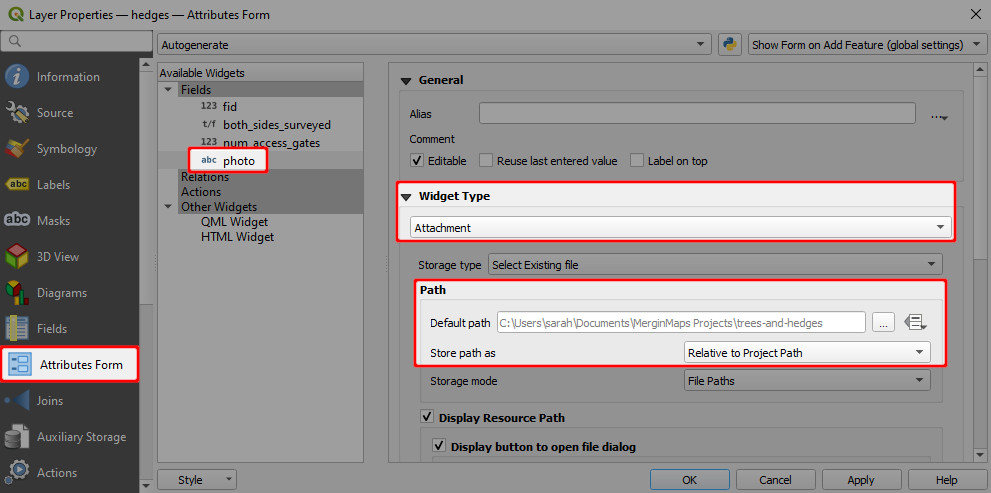
4. `fid` should not be editable. Click on the `fid` attribute and uncheck the **Editable** option.
5. Click **OK** to close the **Layer properties**.
TIP
There is much more that can be done with the Attributes Form in QGIS when preparing a [Mergin Maps](https://merginmaps.com/)
project! You can learn more about forms in [Setting Up Form Widgets](https://merginmaps.com/docs/layer/form-widgets/)
, [Advanced Form Configuration](https://merginmaps.com/docs/layer/form-configuration/)
or other pages in the _Configure Survey Layer_ part of this documentation.
Saving changes to Mergin Maps [](https://merginmaps.com/docs/tutorials/creating-a-project-in-qgis/#saving-changes-to-mergin-maps)
-----------------------------------------------------------------------------------------------------------------------------------
In the [next tutorial](https://merginmaps.com/docs/tutorials/mobile/)
we will see how this project looks on Mergin Maps mobile app. We'll now make some last changes, save them and sync the project back to the [Mergin Maps Cloud](https://merginmaps.com/)
.
1. Right click on the layer called `Survey` and find the **Rename Layer** option. Rename the layer to `Survey notes` (the name `Survey` is too general in this context).
2. **Save** the QGIS project 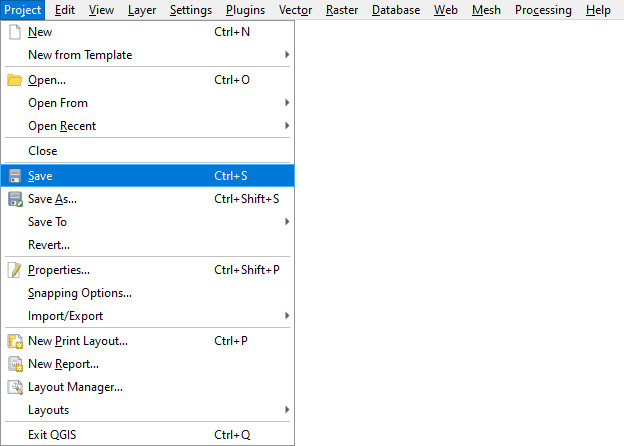
3. Use the **Synchronise Mergin Maps Project** button in the Mergin Maps QGIS plugin toolbar (it is located in the upper navigation panel) 
4. The **Project status** window will open. It contains the overview of [local changes](https://merginmaps.com/docs/manage/synchronisation/#local-changes)
that were made since the last synchronisation: two layers were added to the project (`hedges.gpkg` and `trees.gpkg`) and some changes were made in the QGIS project file (`trees-and-hedges.qgz`).
Click **Sync** to synchronise the project 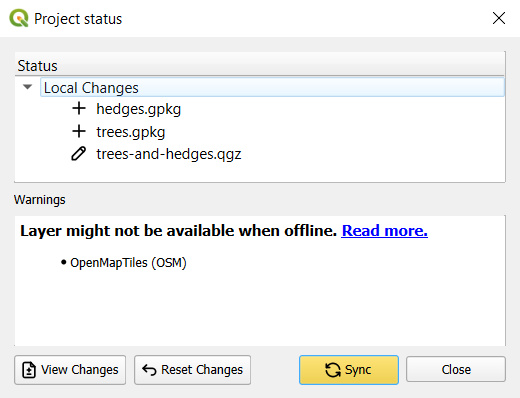
In a few moments your changes are safely stored in the Mergin Maps Cloud
Synchronising changes between users and devices is a core principle of [Mergin Maps](https://merginmaps.com/)
. When you sync a project, changes that have been made by other users and devices since you last synced are fetched and any changes you've made are pushed.
Changes are merged safely and easily from different users, even when they edit the same feature. [Mergin Maps](https://merginmaps.com/)
tracks project version history so you can download a previous version of a project if you need to.
Public project available
The project created in this tutorial [documentation/t3-trees-and-hedges](https://app.merginmaps.com/projects/documentation/t3-trees-and-hedges/tree)
is public. If needed, you can download it and compare it with your results.
---
# Working Collaboratively | Mergin Maps
[Skip to content](https://merginmaps.com/docs/tutorials/working-collaboratively/#VPContent)
Return to top
Working Collaboratively [](https://merginmaps.com/docs/tutorials/working-collaboratively/#working-collaboratively)
====================================================================================================================
The [Mergin Maps](https://merginmaps.com/)
platform makes working collaboratively safe and easy.
In this tutorial you'll learn a few different ways of sharing your project with your colleagues:
Share a project with a specific Mergin Maps user [](https://merginmaps.com/docs/tutorials/working-collaboratively/#share-a-project-with-a-specific-mergin-maps-user)
----------------------------------------------------------------------------------------------------------------------------------------------------------------------
Your projects are stored in your [workspace](https://merginmaps.com/docs/manage/workspaces/)
. If you want to share a project with someone else, they need to be invited to your workspace. There are different levels of access to a project or to a workspace you can guarantee to other users. They are described in detail in [Member Roles and Permissions](https://merginmaps.com/docs/manage/permissions/)
.
Here, we will share the _trees-and-hedges_ project with Henry.
1. Navigate to [app.merginmaps.com](https://app.merginmaps.com/)
and **Sign in**
2. You will see the Mergin Maps dashboard with recent active projects 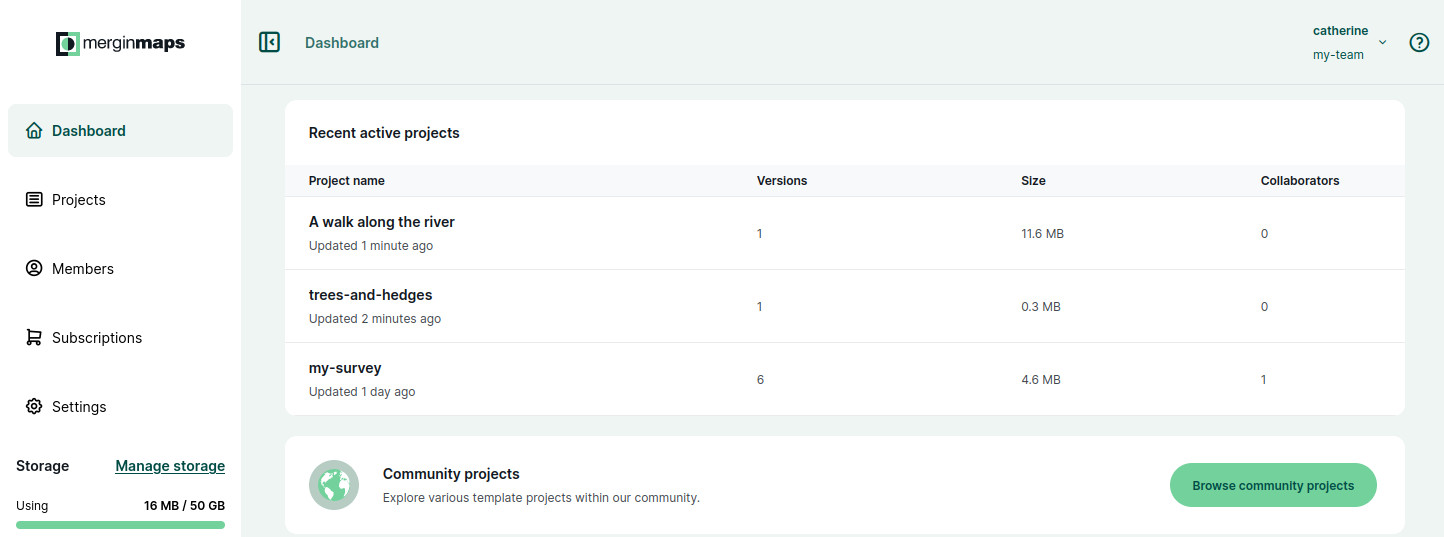
3. Navigate to the **Projects** tab in the left panel to get to the projects page with the list of your projects.
Select a project you want to share with someone from the list. Here we selected _trees-and-hedges_. 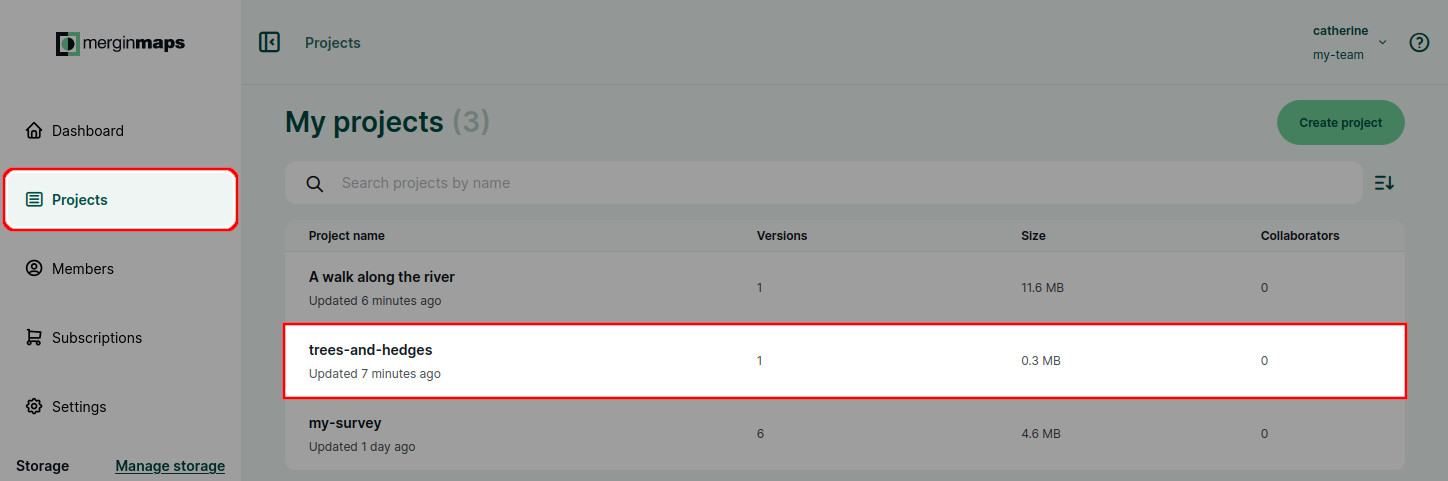
4. Now you will see project details. There is a **Collaborators** tab where you can find the list of people who have access to this specific project.
To invite a new collaborator, click on the **Share** button. 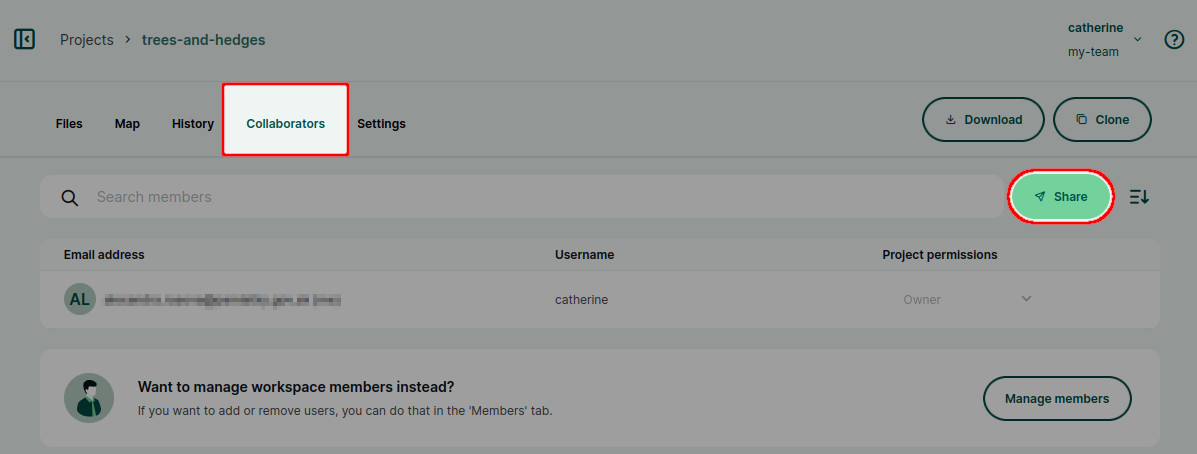
5. Enter the email or Mergin Maps username and specify **Project permission**.
You can enter multiple emails or usernames in the **Share with** field and invite multiple people at once.
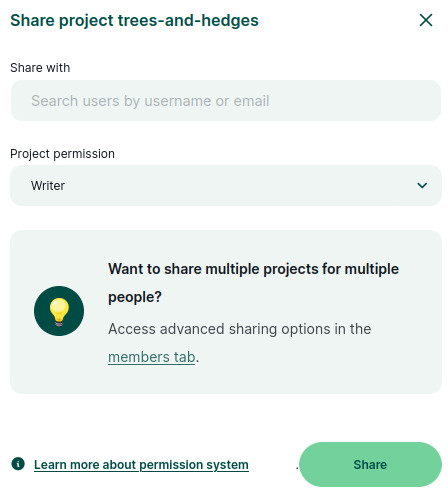
6. Click on the **Share** button to send the invitation. An email with a link will be sent to the recipients.
If they already have a account, they will be also notified through the [dashboard](https://app.merginmaps.com/)
and can accept the invitation here. 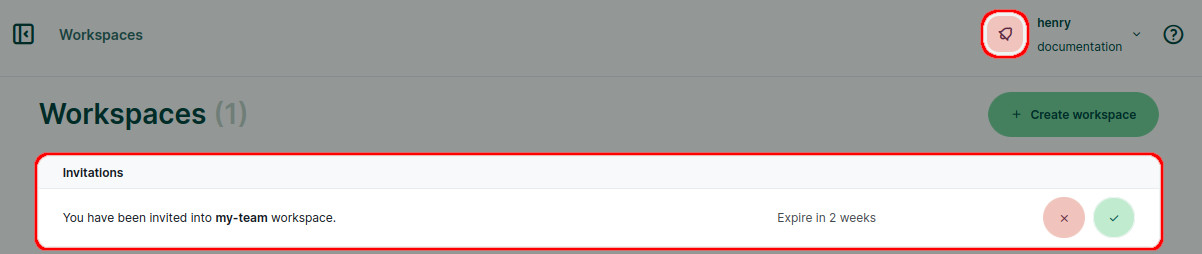
In this case, we invited Henry as a writer to the _trees-and-hedges_ project. By doing so, Henry became a _guest_ in our workspace. He can now add or edit features in the _trees-and-hedges_ project, but cannot access other projects.
List of users who have access to your projects as well as their role can be found in the **Members** tab in the left panel of the [dashboard](https://app.merginmaps.com/)
. 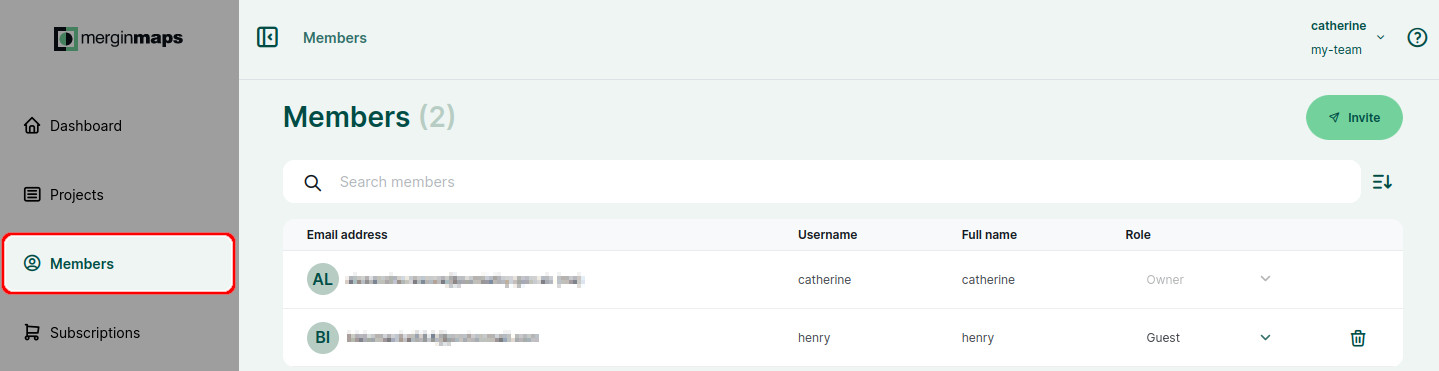
Share a project with many users [](https://merginmaps.com/docs/tutorials/working-collaboratively/#share-a-project-with-many-users)
------------------------------------------------------------------------------------------------------------------------------------
If you wish to share a project with more than a handful of users, this method may save you some time.
1. Go to [app.merginmaps.com](https://app.merginmaps.com/)
and **Sign in**
2. Navigate to the **Projects** tab in the left panel and select a project from the list of projects. Here we use _trees-and-hedges_. 
3. Select the URL in the browser and copy it 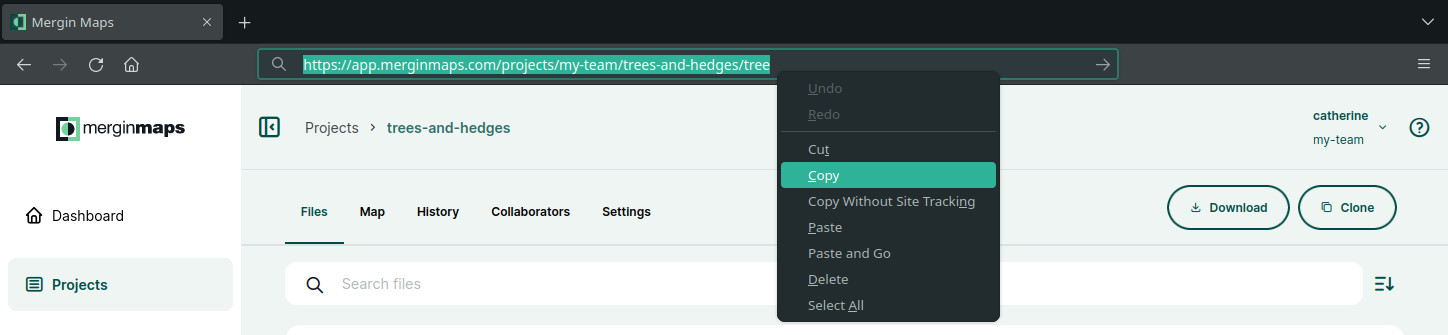
4. Send this link to the people you wish to share the project with.
When they use the link, they will initially be prompted to sign in or register with Mergin Maps. Once logged in, they will have the option to **Request access**: 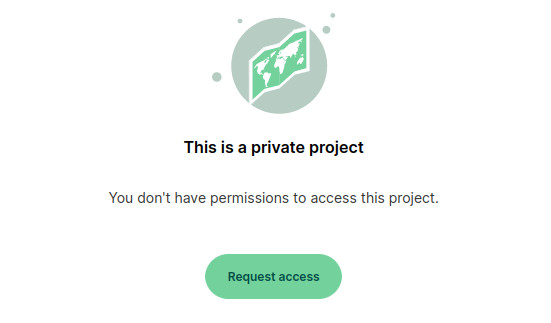
5. Project access requests will be displayed in the **Collaborators** tab of the project.
Accept or deny requests as needed. 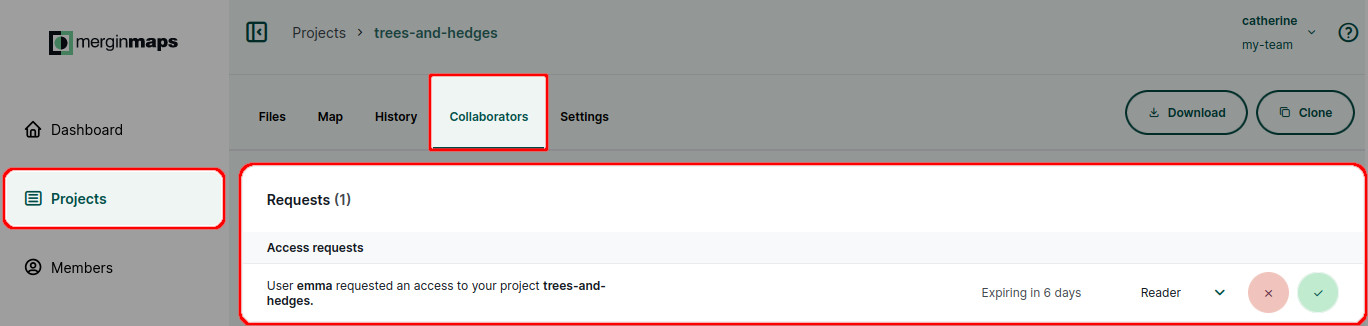
WARNING
We always recommend verifying the requester's Mergin Maps username before accepting access requests.
Learning more about collaboration [](https://merginmaps.com/docs/tutorials/working-collaboratively/#learning-more-about-collaboration)
----------------------------------------------------------------------------------------------------------------------------------------
This tutorial introduced basic ways of sharing your project. Whether you use [Mergin Maps](https://merginmaps.com/)
to share project with a few friends or collaborate on it with a larger group of coworkers, we recommend to get familiar with the basics about permissions, synchronisation and project management:
* in [Permissions](https://merginmaps.com/docs/manage/permissions/)
you can learn more about the level of access you can provide to other users
* [Behind Data Synchronisation](https://merginmaps.com/docs/manage/synchronisation/)
explains the synchronisation process and what happens when multiple users do the field survey in the same time. There is also an option to exclude some files from syncing by using [Selective Synchronisation](https://merginmaps.com/docs/manage/selective_sync/)
.
* [Project History and Versions](https://merginmaps.com/docs/manage/project-history/)
can help you see what was changed, by whom and when
* useful guides:
* [How to Share, Transfer or Delete Projects](https://merginmaps.com/docs/manage/project-advanced/#how-to-share-transfer-or-delete-projects)
* [How to Deploy Revised Projects](https://merginmaps.com/docs/manage/deploy-new-project/)
* [How to Recover Missing Data](https://merginmaps.com/docs/manage/missing-data/)
---
# Using Mergin Maps Mobile App | Mergin Maps
[Skip to content](https://merginmaps.com/docs/tutorials/mobile/#VPContent)
Return to top
Using Mergin Maps Mobile App [](https://merginmaps.com/docs/tutorials/mobile/#using-mergin-maps-mobile-app)
=============================================================================================================
In the last tutorial we created a new Mergin Maps project in QGIS with layers for surveying trees and hedges. You'll now learn how to:
* Open the QGIS project in Mergin Maps mobile app
* Switch between layers to capture new point and linear features
* Sync and save your data to [Mergin Maps Cloud](https://merginmaps.com/)
Need help navigating the mobile app?
[Mergin Maps mobile app interface](https://merginmaps.com/docs/field/mobile-app-ui/)
contains the overview of the features and functionality of the mobile app.
Opening the project on your mobile device [](https://merginmaps.com/docs/tutorials/mobile/#opening-the-project-on-your-mobile-device)
---------------------------------------------------------------------------------------------------------------------------------------
1. Open Mergin Maps mobile app on your mobile device
2. Go to the **Projects** tab. Here, you can see a list of projects in your workspace.
3. **Download** the _**trees-and-hedges**_ project. 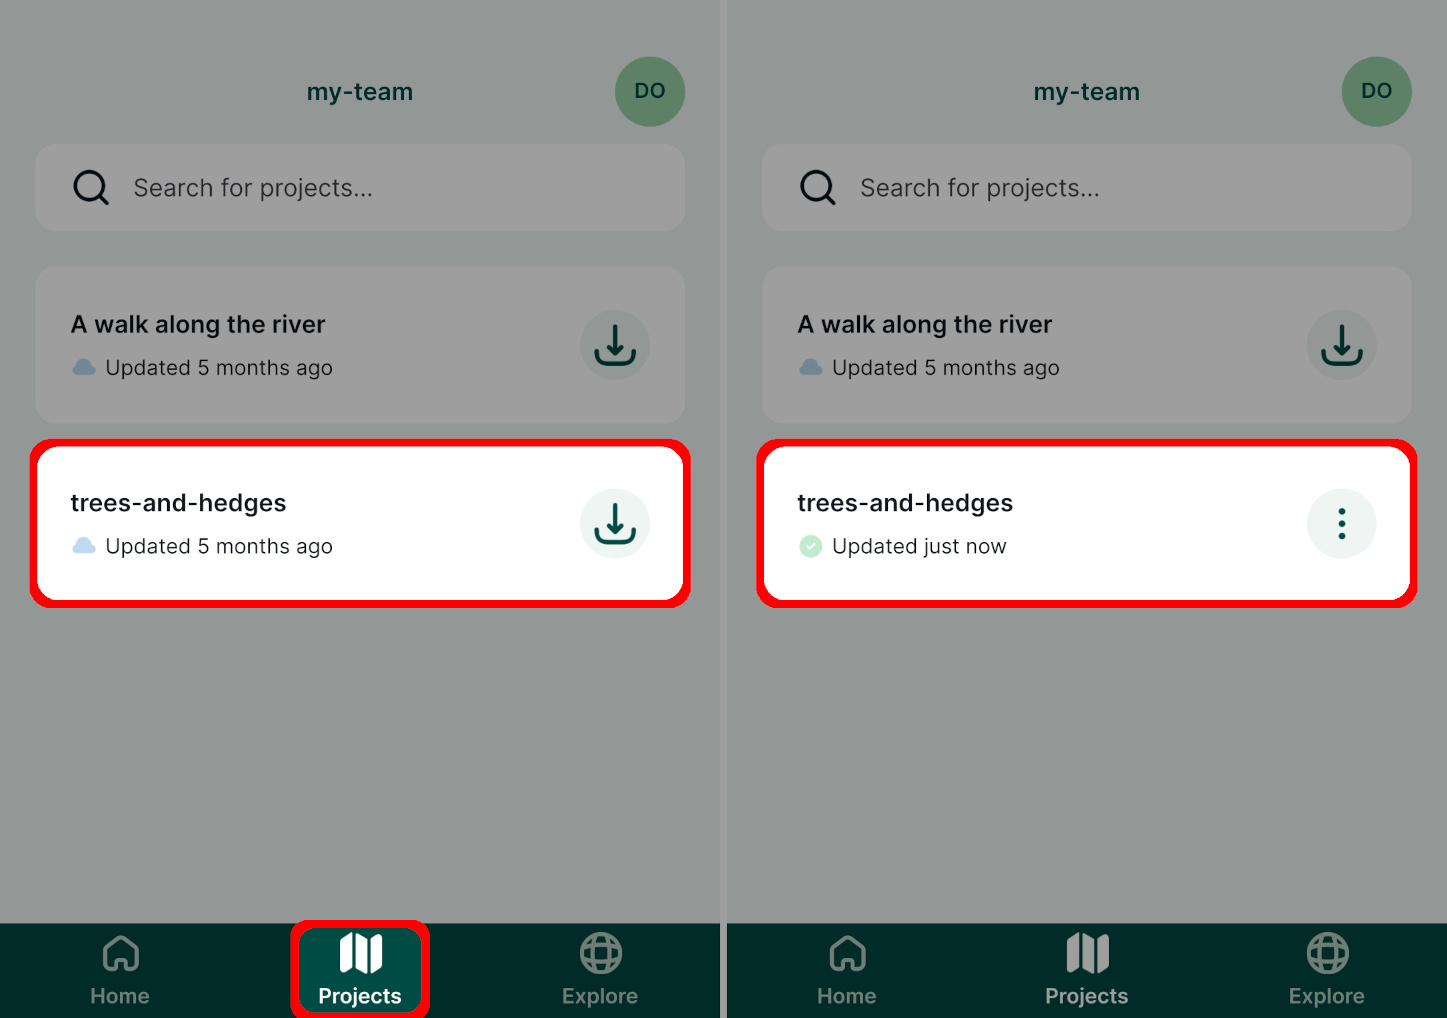
4. Projects that are downloaded to your mobile device are listed in the **Home** tab.
Tap the _**trees-and-hedges project**_ to open it in the mobile app. 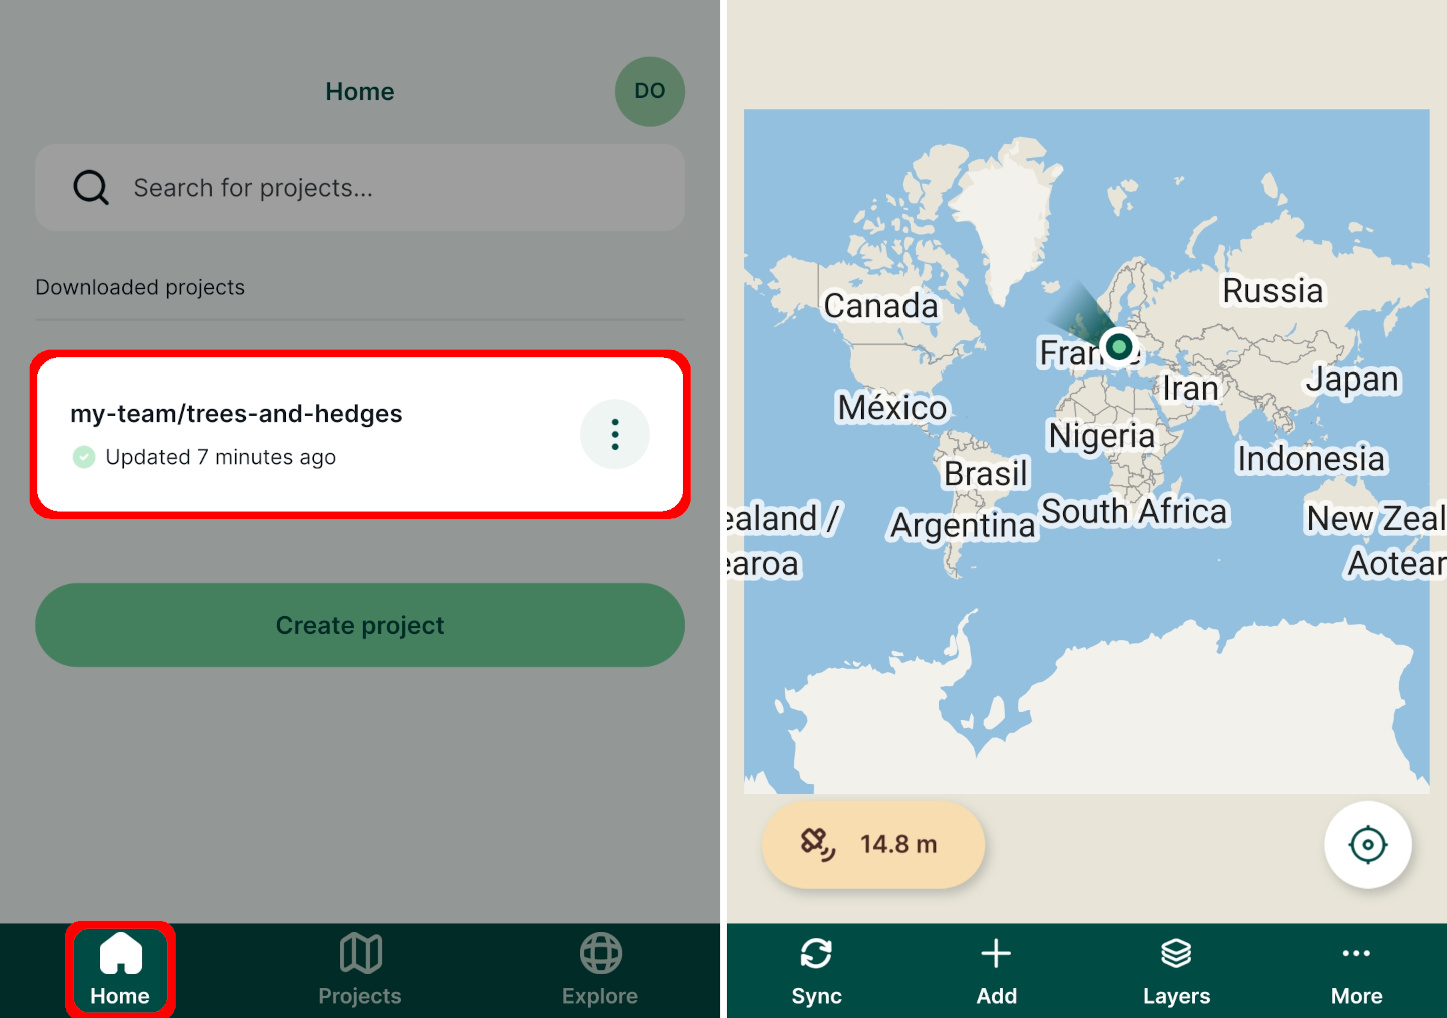
5. Pinch the screen to zoom in on your location. If you lose sight of your location, use the **GPS button** in the right corner of the map window to recentre the map on your position. 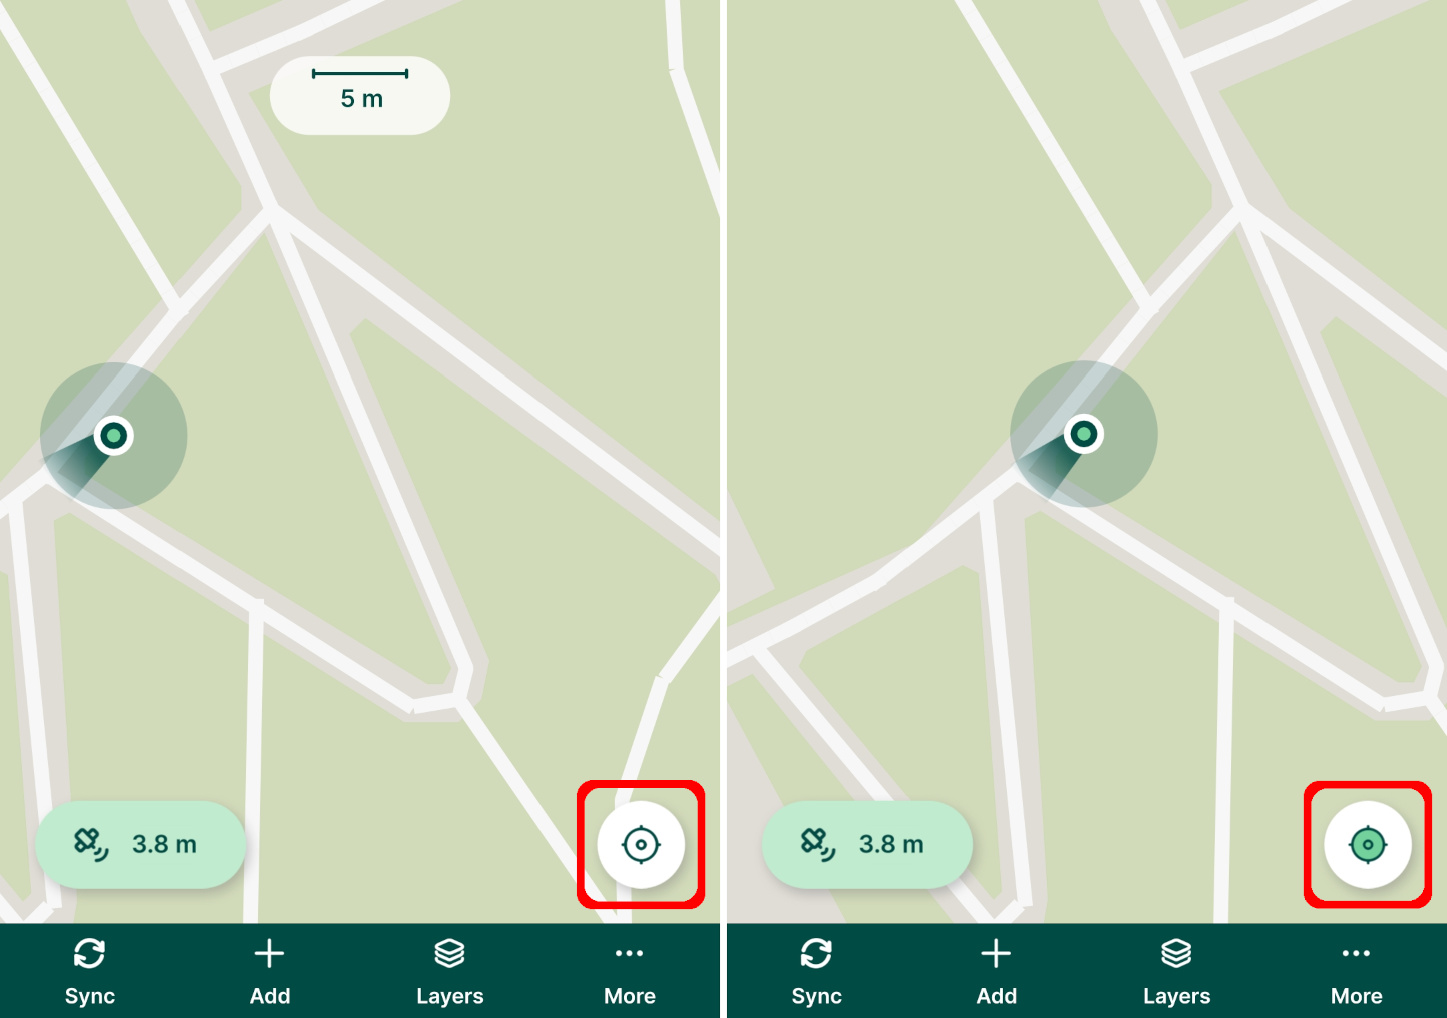
Location has to be enabled
To display your current position on the map, the location has to be enabled on your mobile device and the mobile app needs permission to use it.
GPS accuracy [](https://merginmaps.com/docs/tutorials/mobile/#gps-accuracy)
-----------------------------------------------------------------------------
Current GPS accuracy affects the quality of field data that you capture in the field and how accurately is your position displayed on the map.
The estimated uncertainty of your current position is displayed around the position marker. Current GPS accuracy is reported in the bottom left corner of the map window. Tap it to get more information about current GPS status.
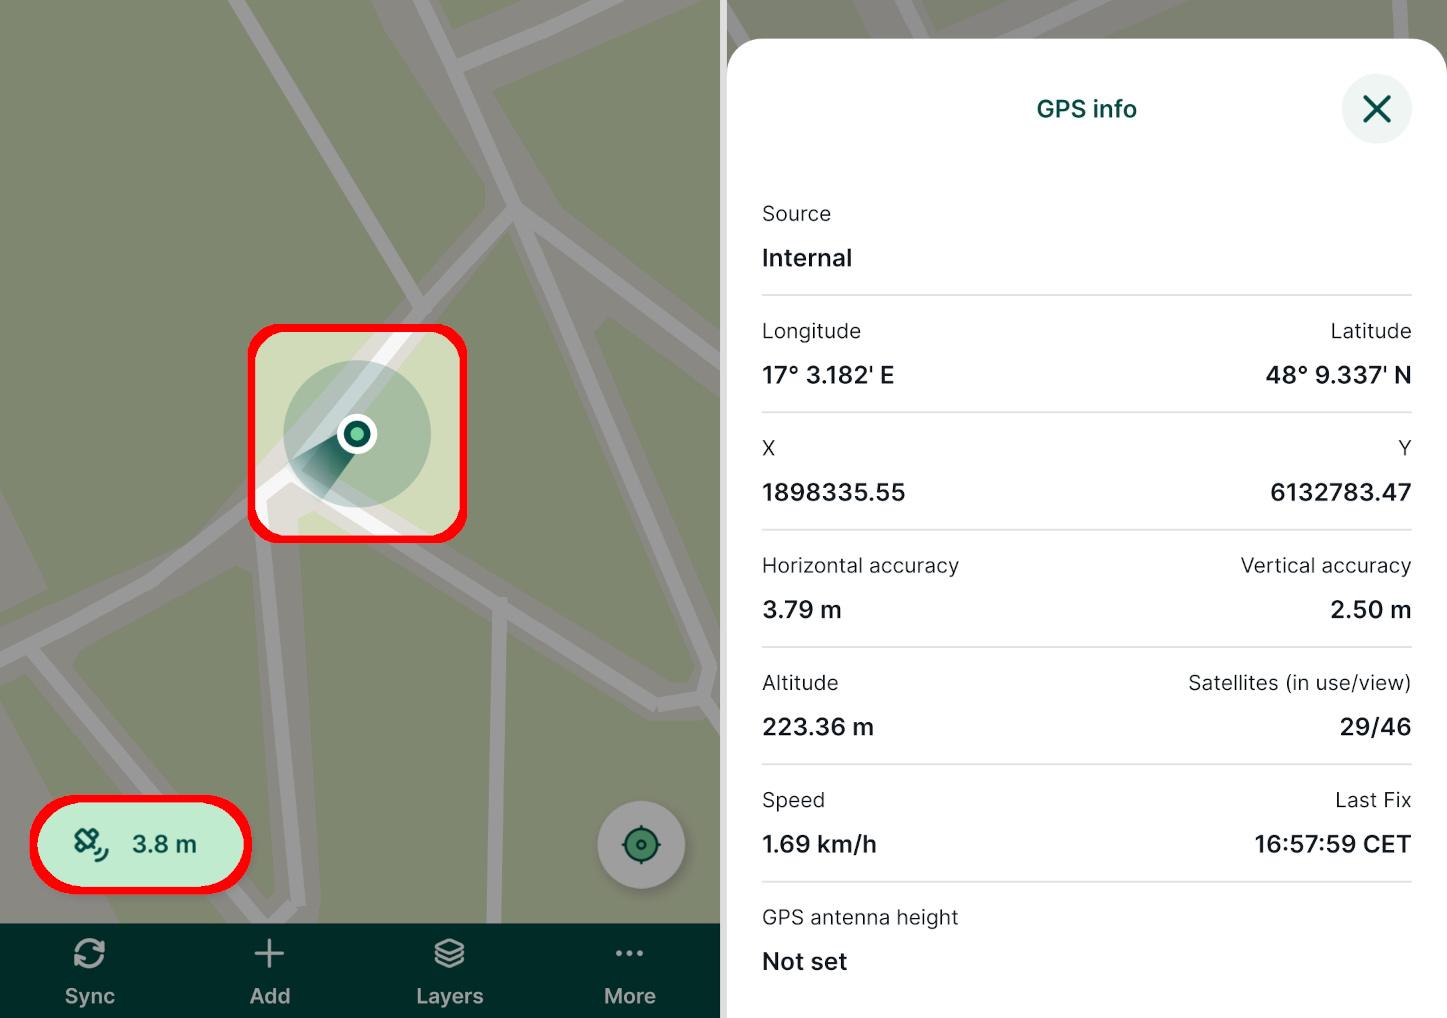
The mobile app uses colours to report whether the GPS accuracy falls within the defined threshold (green) or if it is outside of defined threshold and captured position can be inaccurate (orange). The threshold can be changed in the [Settings](https://merginmaps.com/docs/field/mobile-app-ui/#gps-settings)
.
Understanding GPS accuracy
[GPS accuracy](https://merginmaps.com/docs/field/gps_accuracy/)
provides more detail about this topic.
The active layer [](https://merginmaps.com/docs/tutorials/mobile/#the-active-layer)
-------------------------------------------------------------------------------------
In a moment we'll survey a tree. Surveyed features are added to the _**active layer**_. The project contains three different layers so we'll now ensure the _**trees**_ layer is set as the active layer.
1. Press the **Add** button to enter the _recording_ mode.
Current active layer is displayed on the top of the map window. 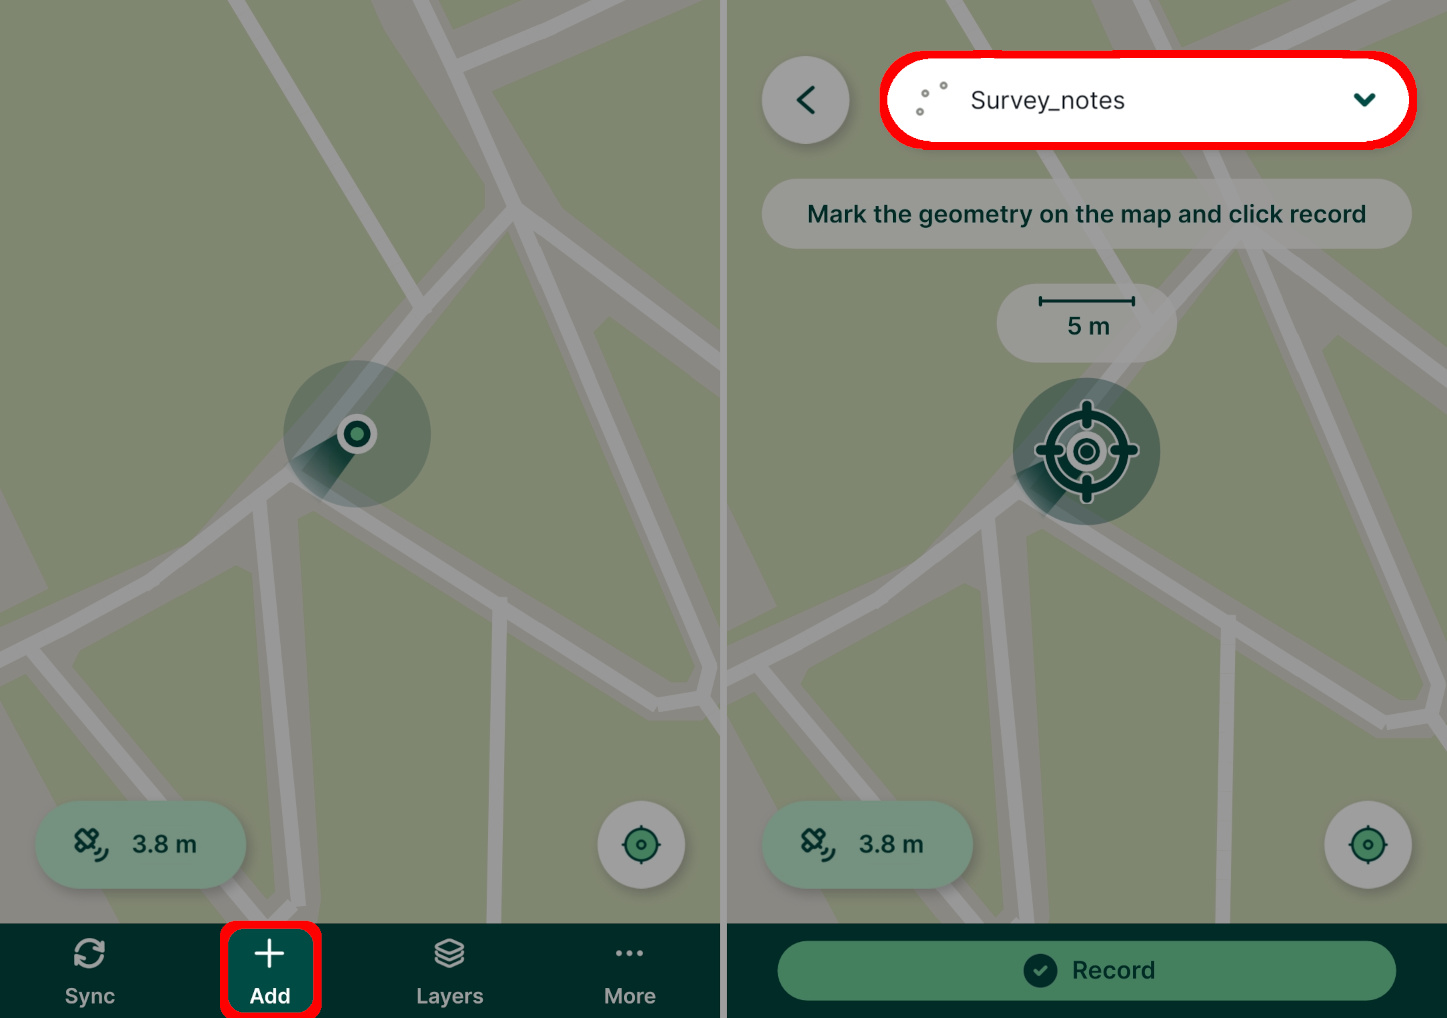
2. Tap the active layer and set it to _**trees**_. 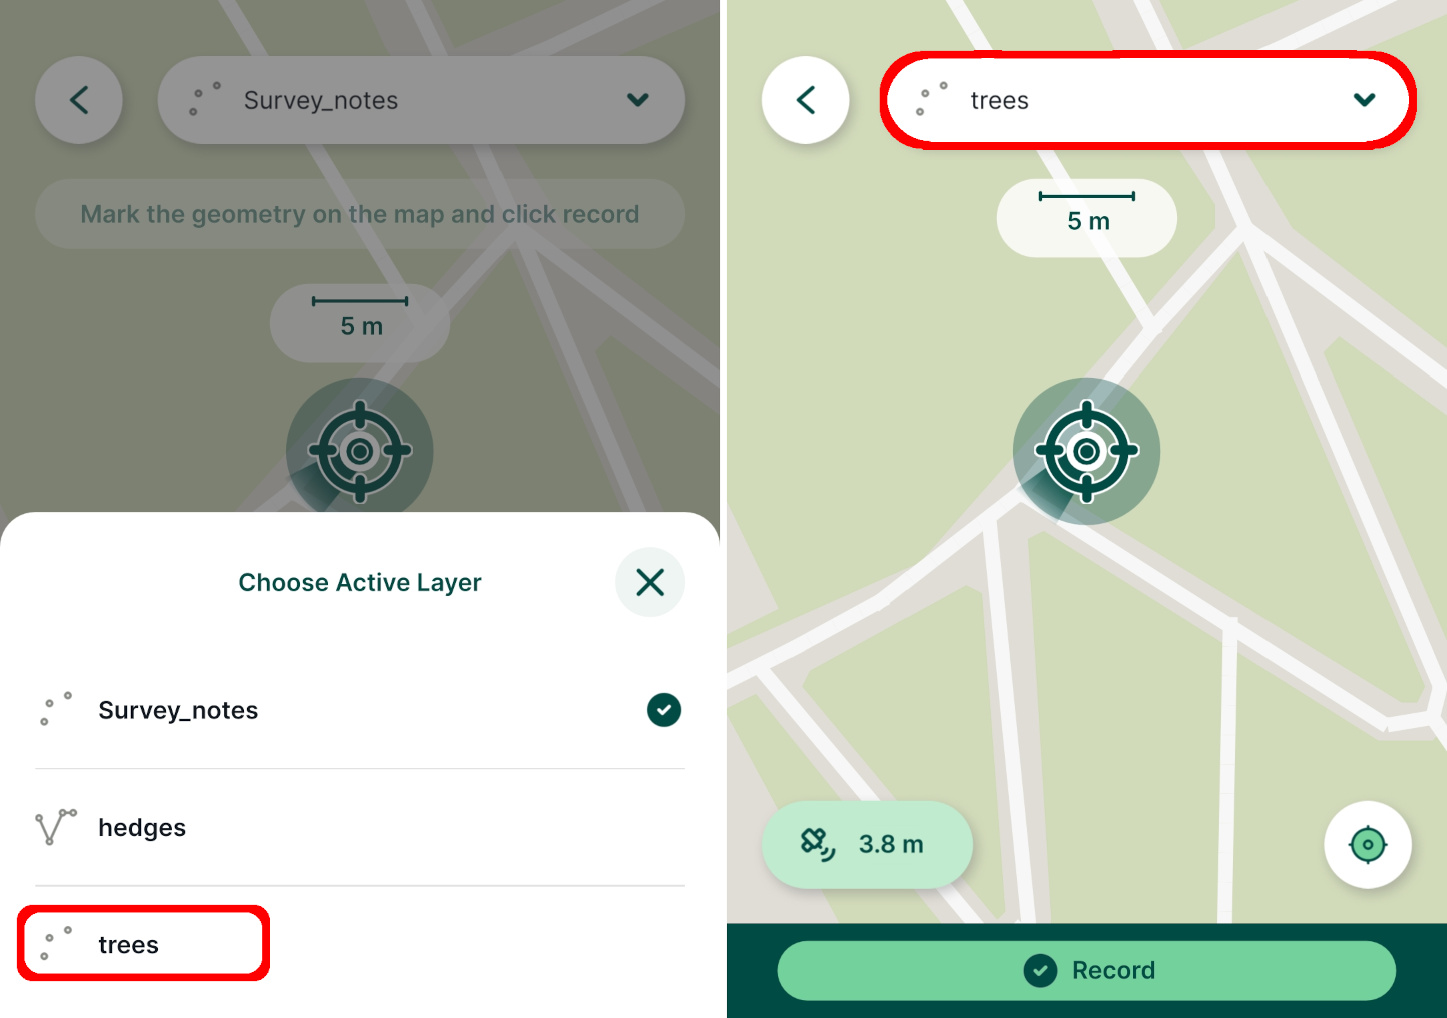
3. Now we can survey a new tree by tapping the **Record** button.
Notice how the form reflects how we configured the species drop-down list in QGIS: 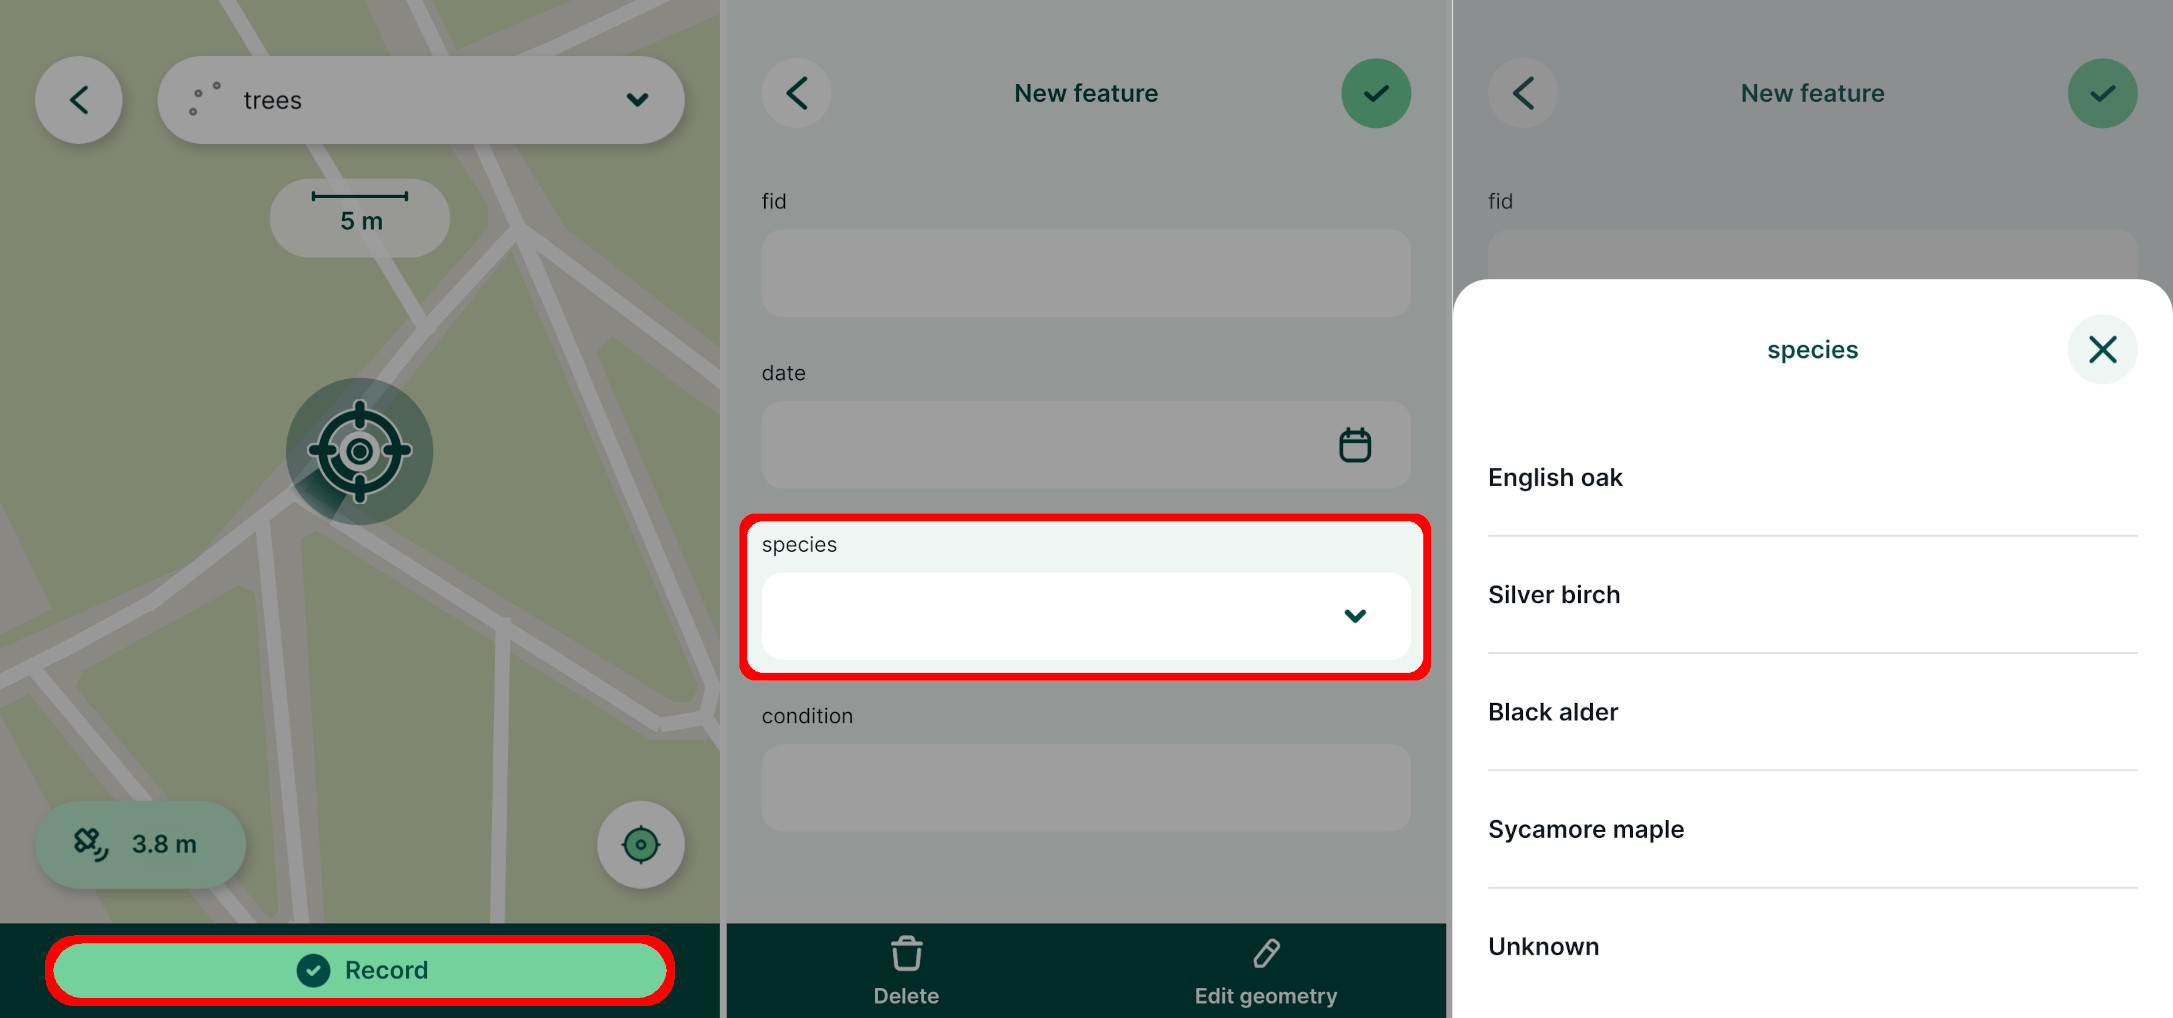
4. Fill in the form and **Save** ✔️ the new point 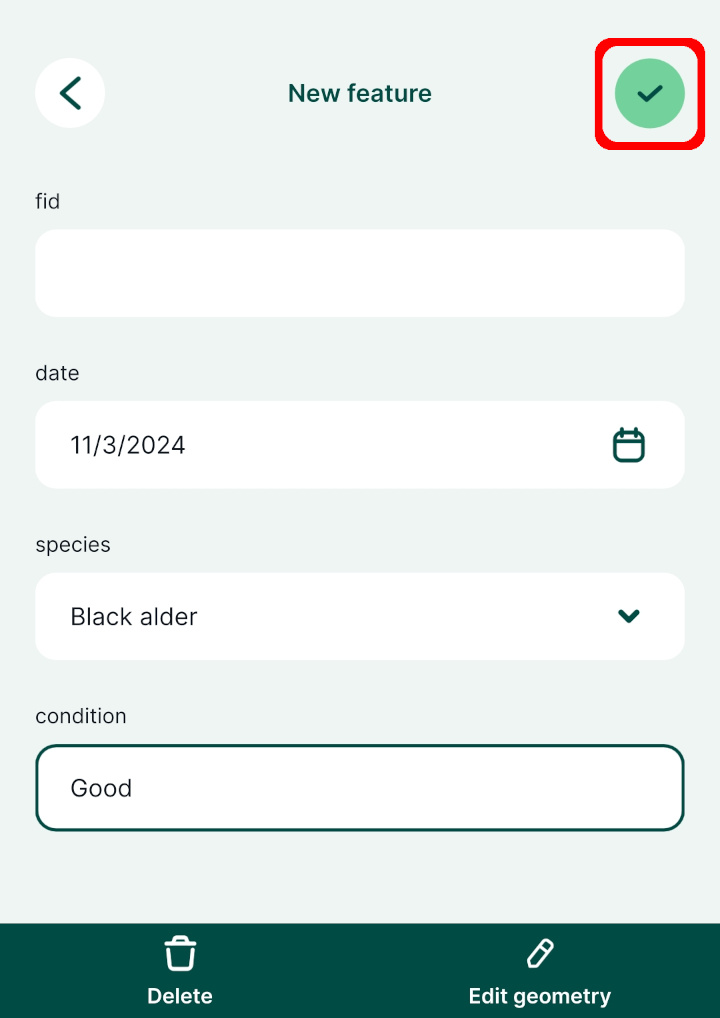
Editing features and the preview panel [](https://merginmaps.com/docs/tutorials/mobile/#editing-features-and-the-preview-panel)
---------------------------------------------------------------------------------------------------------------------------------
Tapping a map feature shows its preview panel.
1. Tap a feature on the map. 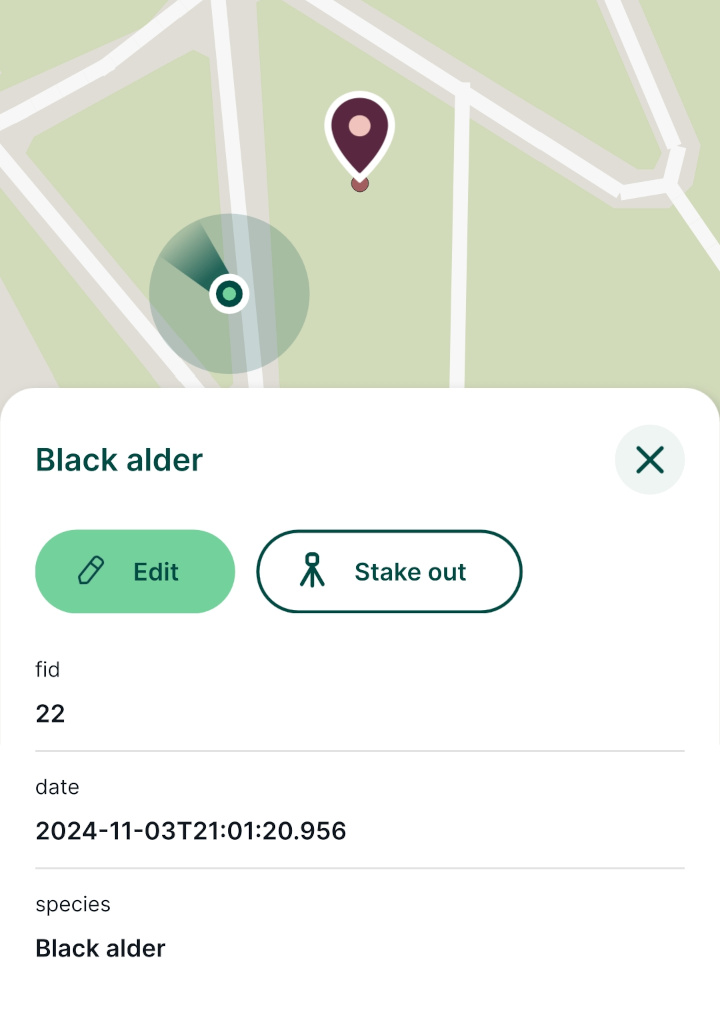
Information shown in the preview panel can be customised. We'll learn how in the next tutorial.
2. Experiment with editing the feature by tapping the **Edit** button.
Change the values in the form (e.g. the tree species) or use the **Edit geometry** button to modify the location of the feature. 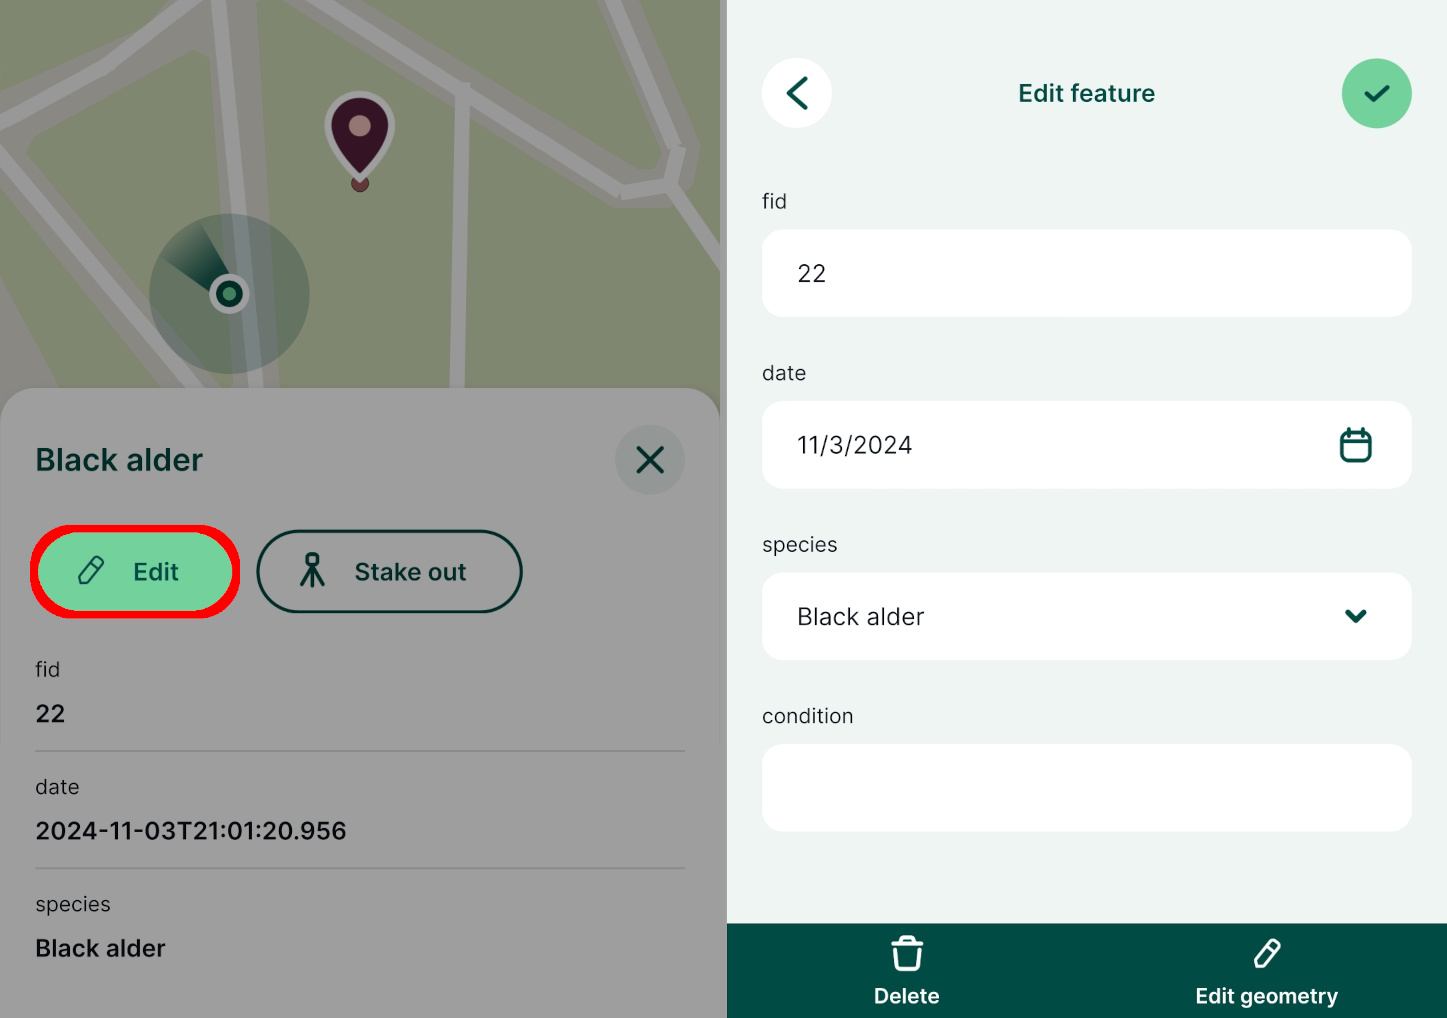
Survey linear features [](https://merginmaps.com/docs/tutorials/mobile/#survey-linear-features)
-------------------------------------------------------------------------------------------------
When creating the project in QGIS, we included a layer for linear features called _**hedges**_. We'll now learn how to survey lines in the mobile app. Areas can be captured in a similar way to lines if the project has editable polygon layers.
More about capturing features
[How to add, edit, delete features](https://merginmaps.com/docs/field/mobile-features/)
has more details about capturing and editing features in the mobile app.
1. We'll now survey a hedge feature.
Set _**hedges**_ as the **active layer** as described in [the active layer section](https://merginmaps.com/docs/tutorials/mobile/#the-active-layer)
.
2. Use tools in the bottom panel to survey the line: use **Add** to add vertices along the line and tab the **Record** button when finished.
If needed, use **Remove** or **Undo** to change the feature's geometry. 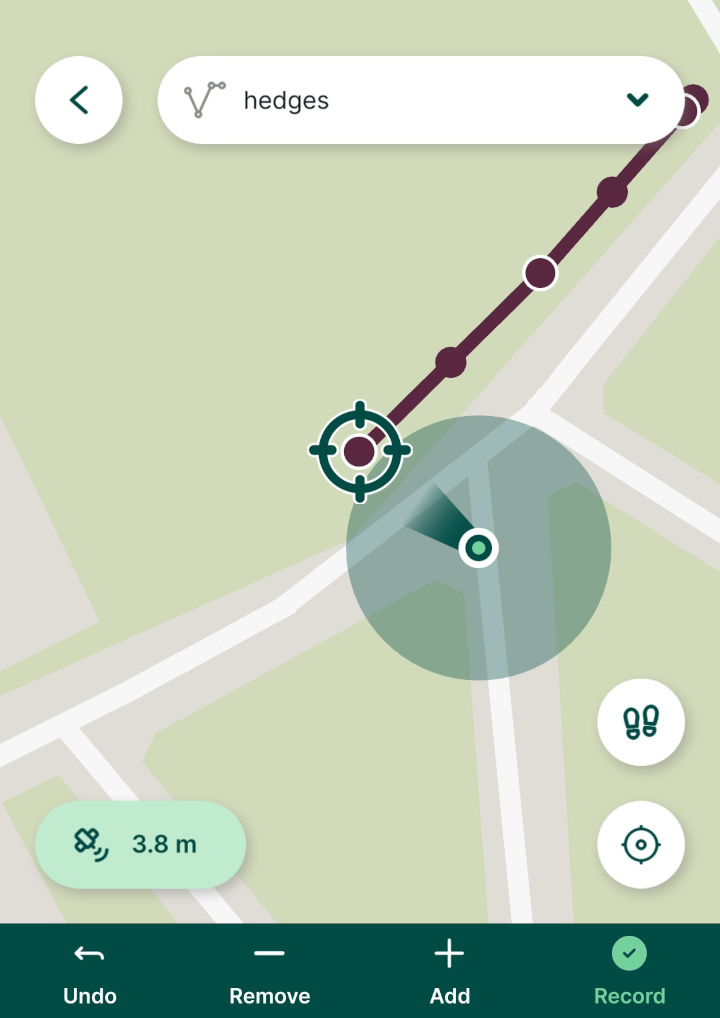
3. Enter some **attributes** and a **photo** for the hedge: 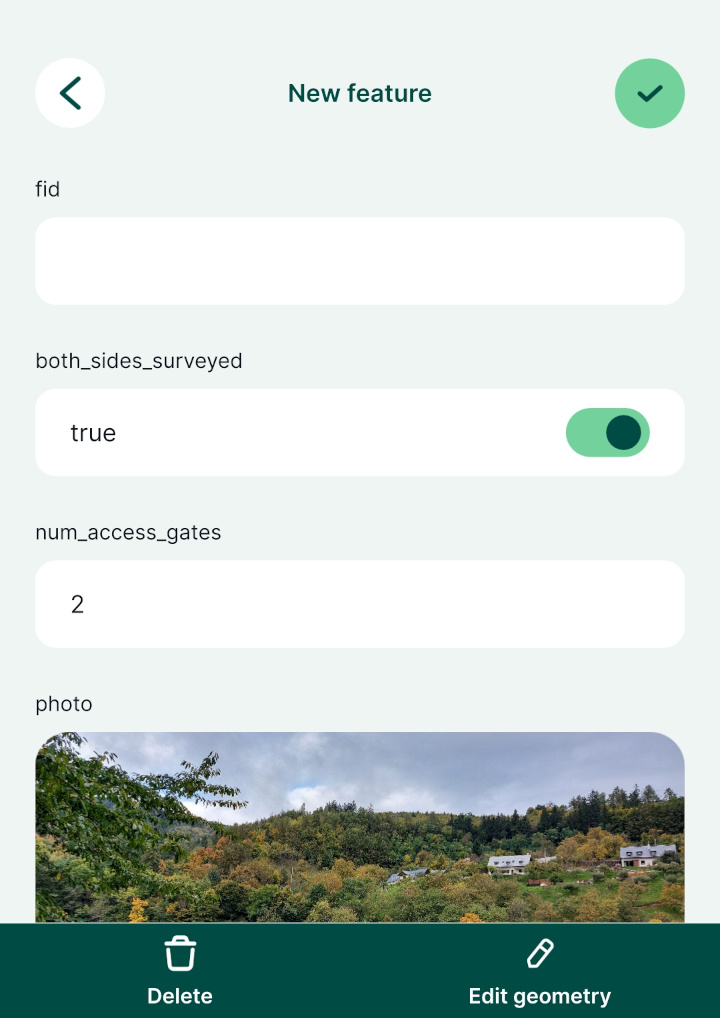
It may happen that the surveyed hedge can be quite difficult to distinguish from the background map. For instance here, the line is too thin and does not have the best colour.
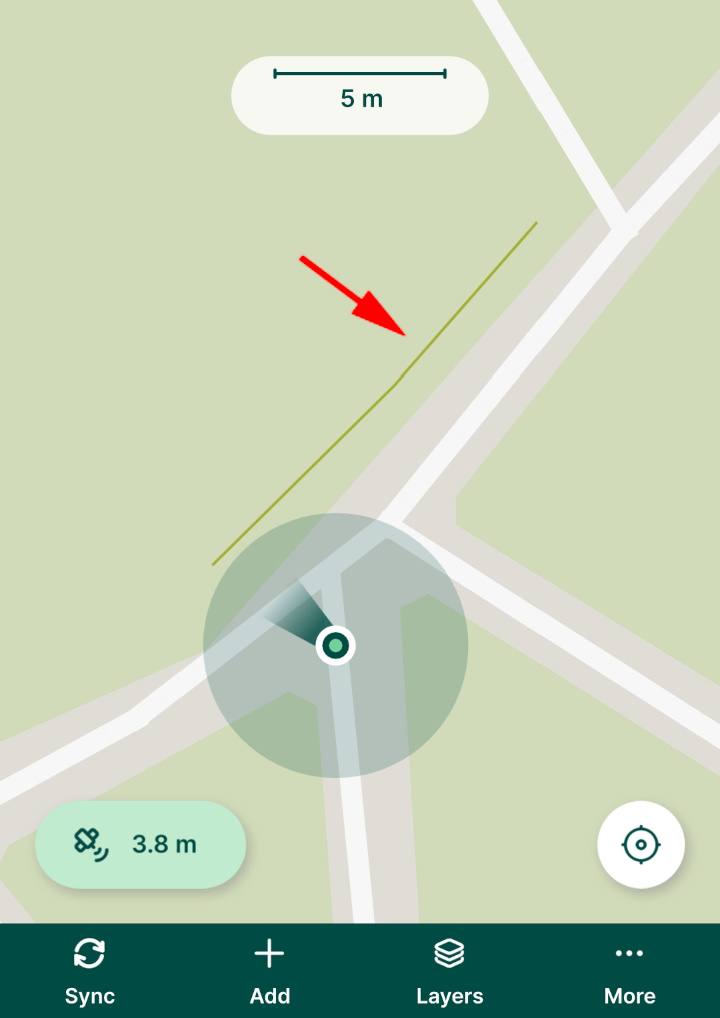
We will learn how to change layer styles in the [next tutorial](https://merginmaps.com/docs/tutorials/further-project-customisation/)
.
Saving data to the cloud [](https://merginmaps.com/docs/tutorials/mobile/#saving-data-to-the-cloud)
-----------------------------------------------------------------------------------------------------
To conclude this tutorial we will save the data we just collected back to [Mergin Maps](https://merginmaps.com/)
.
Tap the **Sync** button in the bottom navigation panel and wait for notification about successful synchronisation.
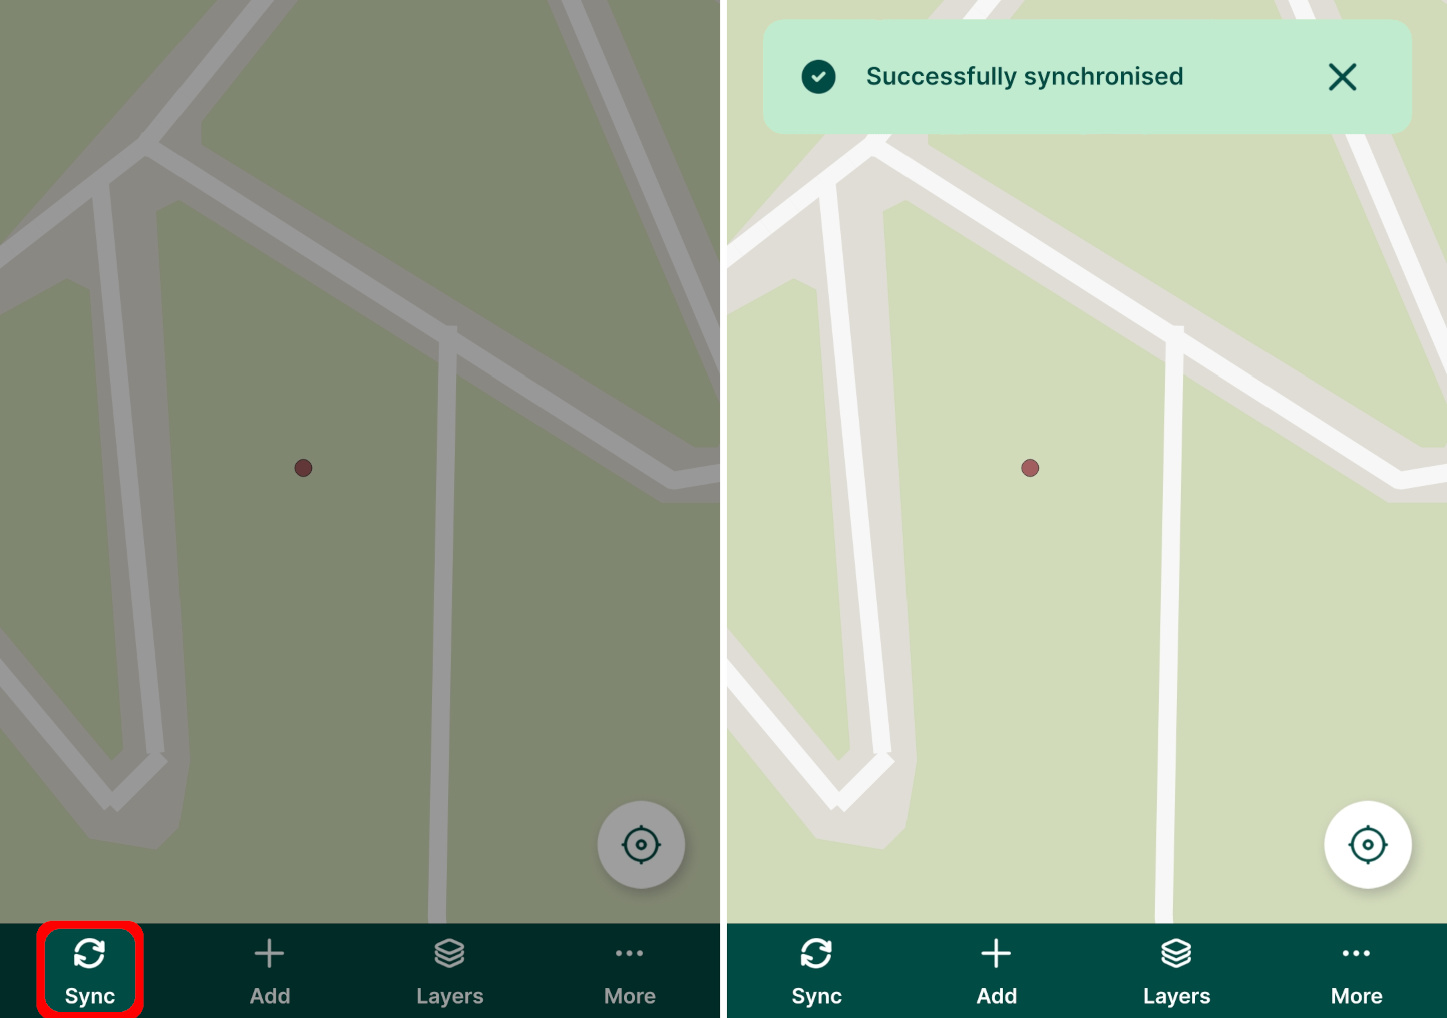
When the sync process has completed your data has been stored safely in the cloud.
---
# How to Install Mergin Maps Mobile App | Mergin Maps
[Skip to content](https://merginmaps.com/docs/setup/install-mobile-app/#VPContent)
Return to top
How to Install Mergin Maps Mobile App [](https://merginmaps.com/docs/setup/install-mobile-app/#how-to-install-mergin-maps-mobile-app)
=======================================================================================================================================
With the mobile app, you can view your data and location on the map, capture points, lines, areas, photos and much more.
Download Mergin Maps mobile app to your Android device, iPhone or iPad. You can find it in the app store of your platform:
[](https://apps.apple.com/us/app/input/id1478603559?ls=1)
[](https://play.google.com/store/apps/details?id=uk.co.lutraconsulting)
[](https://github.com/MerginMaps/mobile/releases/latest)
Supported OS versions
The minimum OS versions requirements for the mobile app are **Android 9** and **iOS 16**.
You can use the mobile app without having a Mergin Maps account. Our [Capturing Your First Field Data](https://merginmaps.com/docs/tutorials/capturing-first-data/)
tutorial will show you how to create a project and capture your first data in the field.
However, to make full use of [Mergin Maps](https://merginmaps.com/)
, we recommend you [signing up to Mergin Maps](https://merginmaps.com/docs/setup/sign-up-to-mergin-maps/)
. When sign in, you can use [Mergin Maps dashboard](https://app.merginmaps.com/)
to, e.g., manage your projects and share them with other users, or use our QGIS plugin to get your data and projects to [QGIS](https://qgis.org/en/site/forusers/download.html)
.
TIP
Do you want to learn more? Get up-to-speed quickly by following our [Quick Start tutorials](https://merginmaps.com/docs/tutorials/capturing-first-data/)
.
These tutorials cover all the basics from capturing data in the field, opening them on your computer in QGIS, improving the project settings in QGIS and going back to the field.
Mergin Maps mobile app on Windows [](https://merginmaps.com/docs/setup/install-mobile-app/#mergin-maps-mobile-app-on-windows)
-------------------------------------------------------------------------------------------------------------------------------
If you want to use the mobile app on Windows, you need to download the .exe installer from [MerginMaps/mobile](https://github.com/MerginMaps/mobile/releases/latest)
repository and install it on your computer.
The mobile app requires using Windows 10 or Windows 11.
---
# Further Project Customisation | Mergin Maps
[Skip to content](https://merginmaps.com/docs/tutorials/further-project-customisation/#VPContent)
Return to top
Further Project Customisation [](https://merginmaps.com/docs/tutorials/further-project-customisation/#further-project-customisation)
======================================================================================================================================
In this tutorial you will learn how to further customise your [Mergin Maps](https://merginmaps.com/)
project from the [previous tutorial](https://merginmaps.com/docs/tutorials/creating-a-project-in-qgis/)
, making it even more useful. The various changes we will make to the project will be made in [QGIS](https://merginmaps.com/docs/setup/install-qgis/)
and their effect observed and tested in Mergin Maps mobile app.
The topics covered here are:
TIP
Previous tutorials already covered the minimum concepts for data collection so feel free to skip ahead to the [Working Collaboratively](https://merginmaps.com/docs/tutorials/working-collaboratively/)
tutorial (and come back here later on) if you're super keen on collecting data right away.
Opening the project in QGIS [](https://merginmaps.com/docs/tutorials/further-project-customisation/#opening-the-project-in-qgis)
----------------------------------------------------------------------------------------------------------------------------------
If you already have the `trees-and-hedges` project open in QGIS, skip to [Layer styles](https://merginmaps.com/docs/tutorials/further-project-customisation/#layer-styles)
.
1. Open QGIS
2. Expand the **Mergin Maps** entry in the Browser panel to show projects in your workspace: 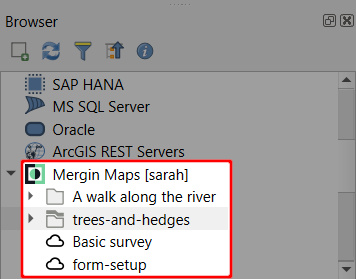
TIP
If you have access to multiple workspaces, you may need to [switch to the appropriate workspace](https://merginmaps.com/docs/manage/workspaces/#switch-workspaces-in-qgis)
in the QGIS browser to open your project.
3. Locate the `trees-and-hedges` project
4. **Right-click** it and select **Open QGIS project**: 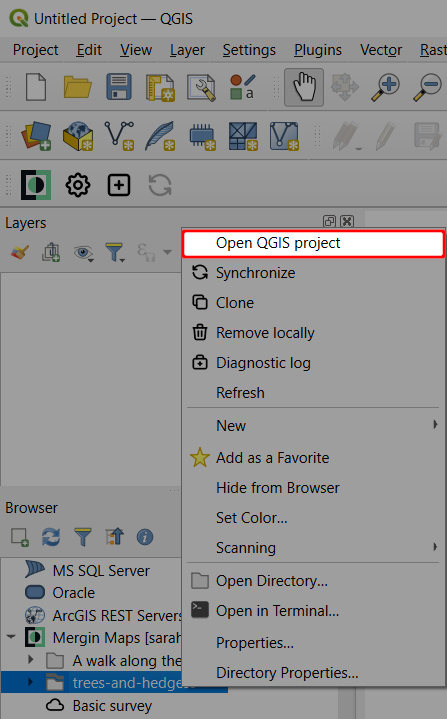
The project should now be loaded in QGIS. Don't worry if you cannot see the features you surveyed in the field - this is probably because you've not yet synchronised the project in QGIS.
If this is the case, click on the **Synchronise** icon from the Mergin Maps QGIS plugin toolbar to synchronise the changes 
Layer styles [](https://merginmaps.com/docs/tutorials/further-project-customisation/#layer-styles)
----------------------------------------------------------------------------------------------------
When using the mobile app in the field in the last tutorial, we noticed hedges were difficult to see against the background maps. We'll now fix that.
1. **Double-click** the `hedges` layer in QGIS to open its **Layer properties**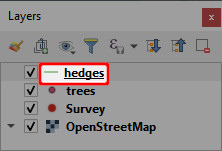
2. Select the **Symbology tab** on the left and click the current colour to change it: 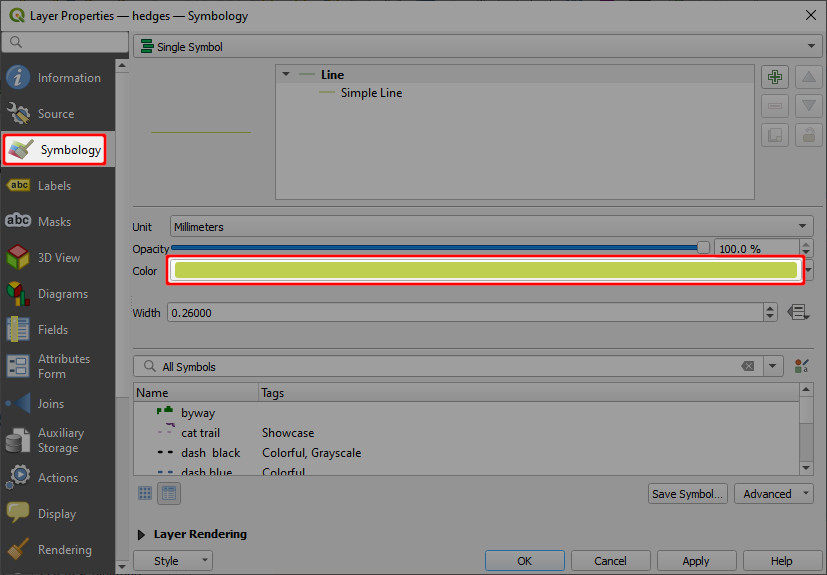
3. **Pick a new colour** for hedges which stands out better 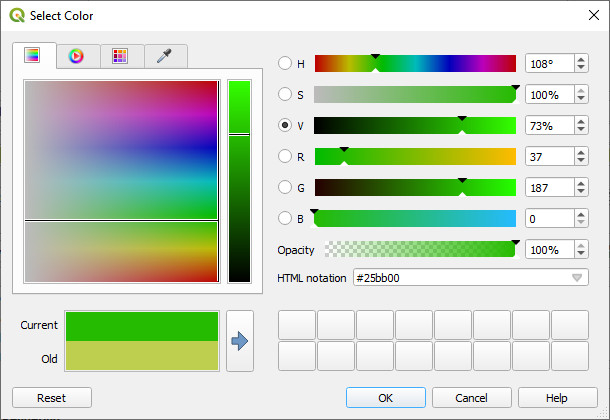
4. Click **OK**
5. Increase the **line width** to 0.46mm and click **OK**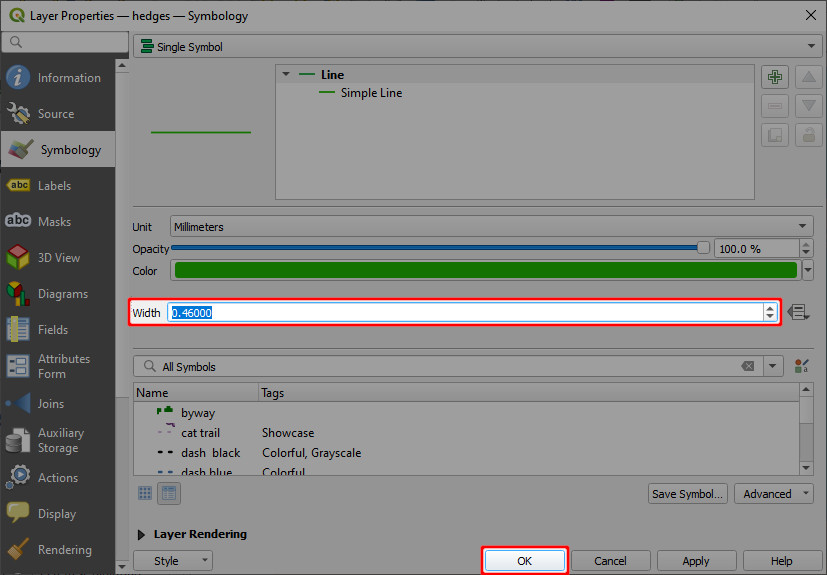
Lines in the `hedges` layer should now be drawn thicker and in a more prominent colour.
In the next section we'll see what these changes look like in the mobile app.
Trialling changes in Mergin Maps mobile app [](https://merginmaps.com/docs/tutorials/further-project-customisation/#trialling-changes-in-mergin-maps-mobile-app)
------------------------------------------------------------------------------------------------------------------------------------------------------------------
Seeing how the changes look like in the mobile app is easy:
1. In QGIS, save your project: 
2. Use the **Synchronise Mergin Maps Project** button: 
The **Project status** window will open with the overview of local changes. Click **Sync** to synchronise the project: 
QGIS and your project in the cloud should now be synchronised. 
3. Open the mobile app on your mobile device
4. On the **Home** tab, you should see that the `trees-and-hedges` project has _Pending changes to synchronise_.
Tap on the button next to the name of the project and **Synchronise project**. 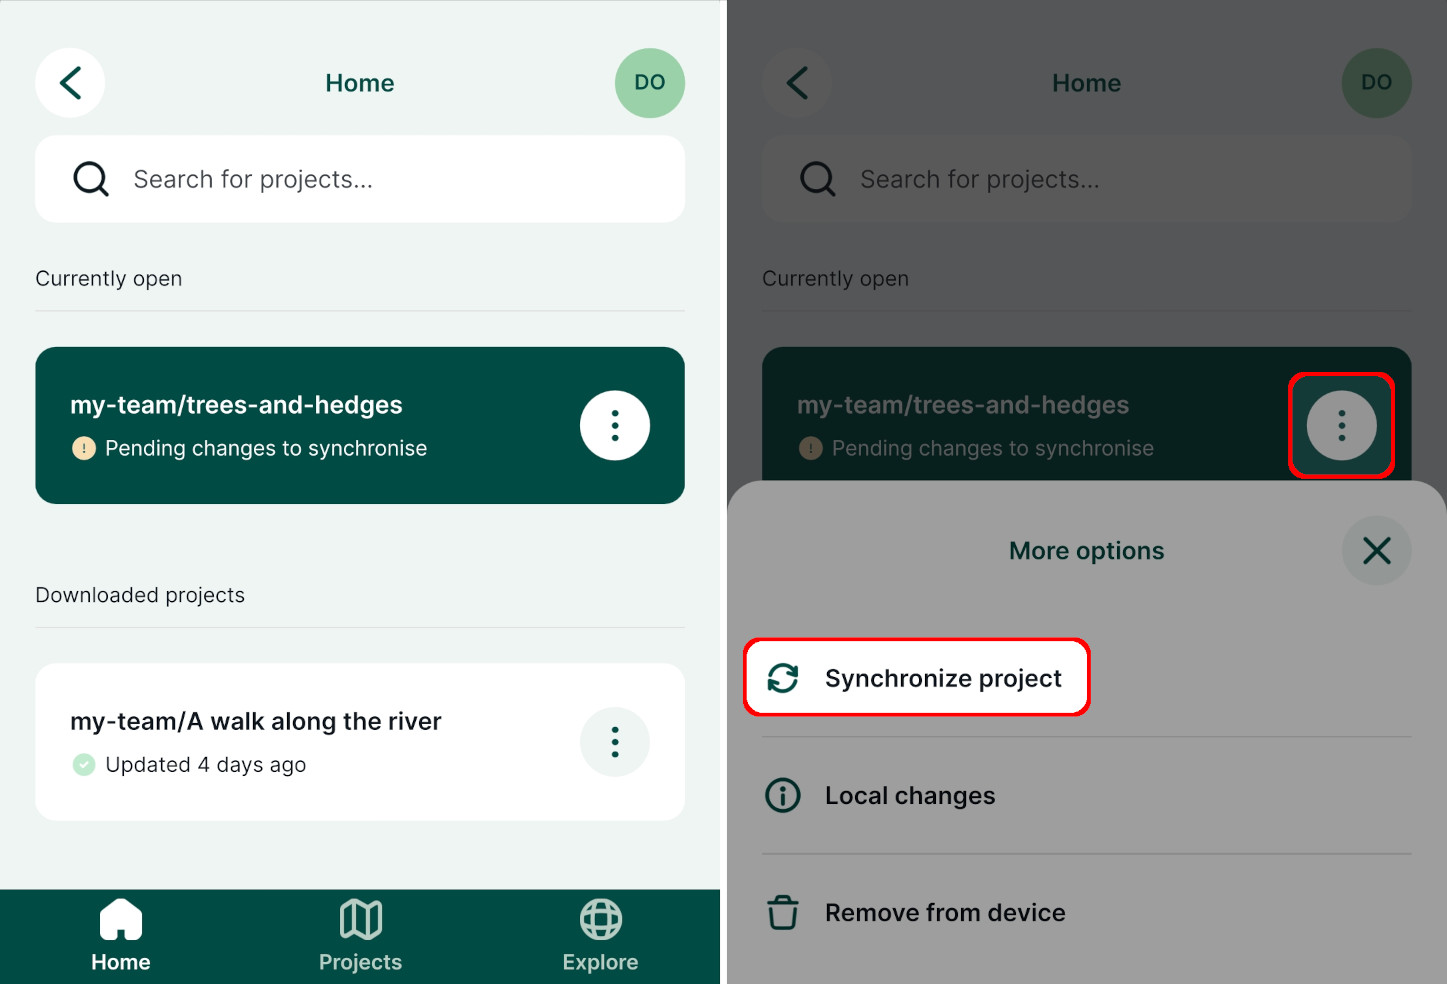
TIP
If you do not see the _Pending changes to synchronise_ message, switch to the **Projects** tab and back to the **Home** tab. This should force the mobile app to check again for project updates.
5. Tap the project to open it.
The surveyed hedges should now be displayed in the style we set up in the last section. 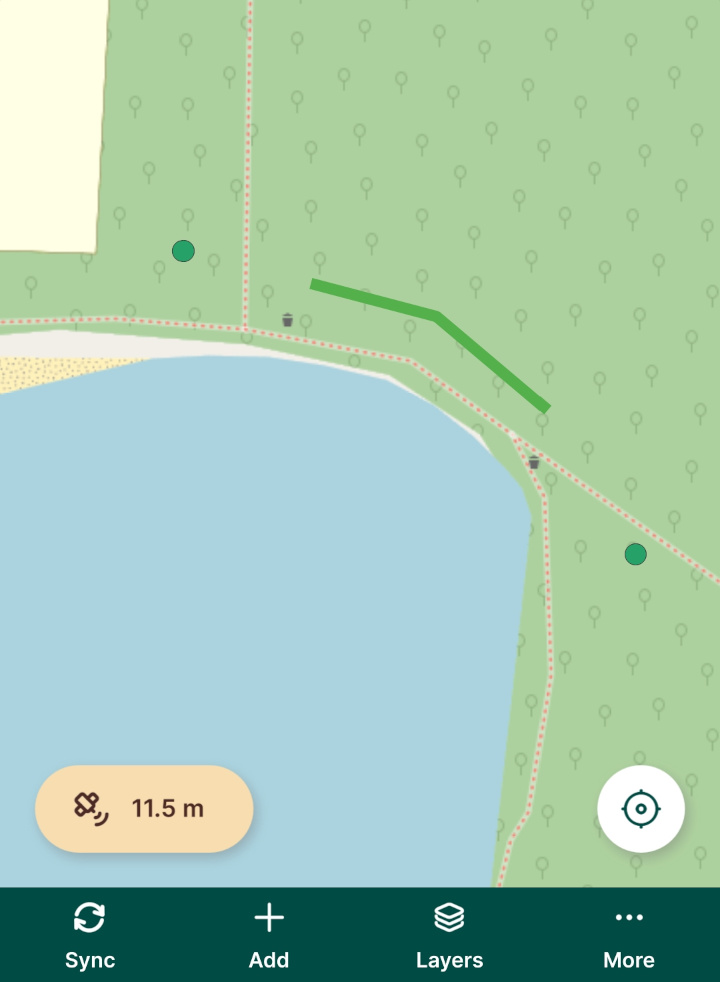
Labels [](https://merginmaps.com/docs/tutorials/further-project-customisation/#labels)
----------------------------------------------------------------------------------------
Labels can be useful for showing attribute data or other information directly on the map. We'll now add labels to the `trees` layer so we can see tree species without having to open each tree's attributes: 
1. Double-click the `trees` layer in QGIS: 
Its layer properties dialog should appear.
2. Select the **Labels tab** on the left hand side
3. Set the labelling mode to **Single Labels**: 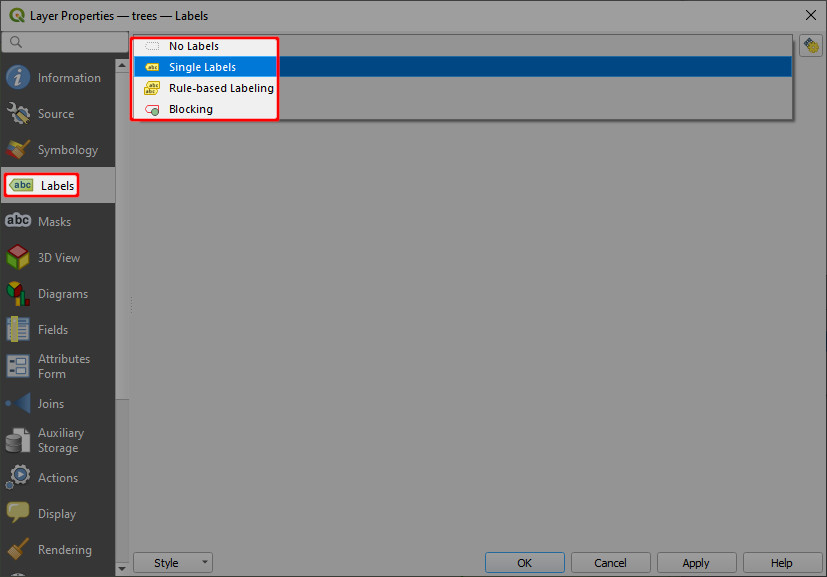
4. Set the **Value** to the `species` attribute 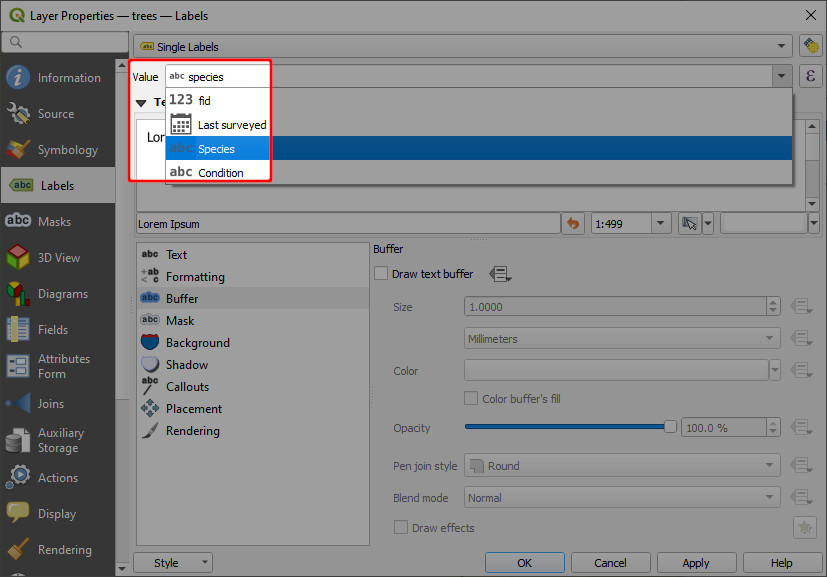
5. Enable **Draw text buffer** under **Buffer** settings and click **OK**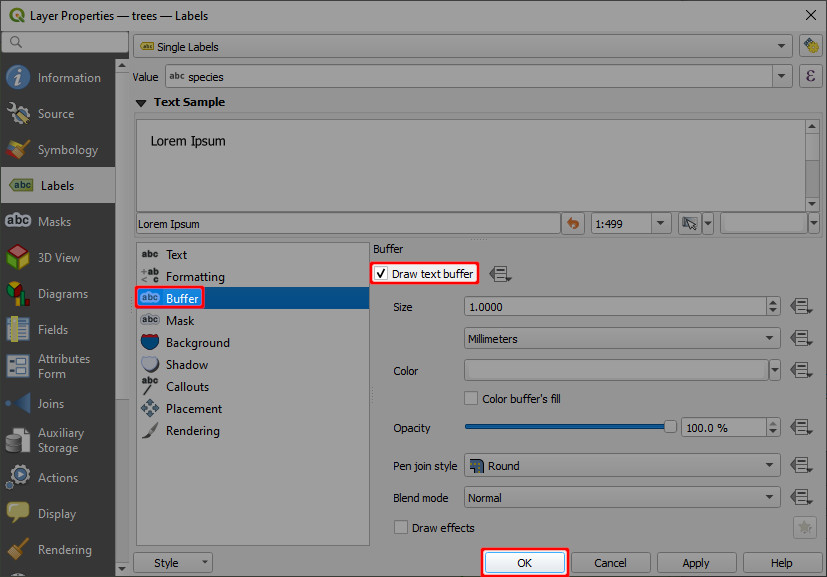
6. Test out these settings in the mobile app as described in the [Trialling changes](https://merginmaps.com/docs/tutorials/further-project-customisation/#trialling-changes-in-mergin-maps-mobile-app)
section above. 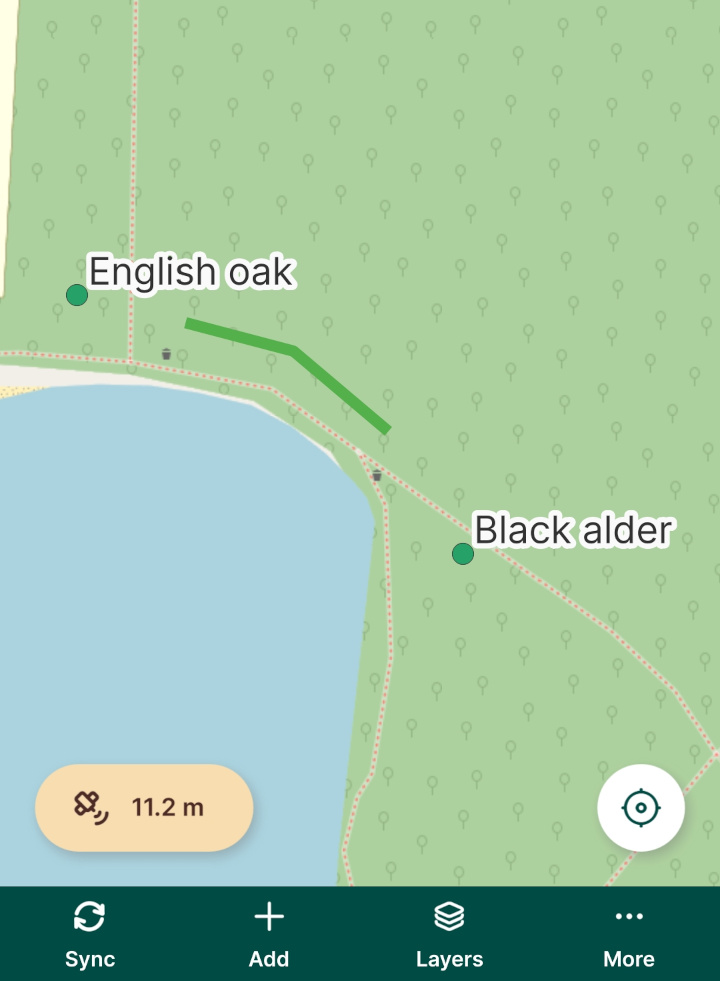
Customising the preview panel [](https://merginmaps.com/docs/tutorials/further-project-customisation/#customising-the-preview-panel)
--------------------------------------------------------------------------------------------------------------------------------------
We will now learn how to control the content of the preview panel which is shown when you tap a feature in the mobile app.
The panel for the `trees` layer looks like the left-hand image below. We will configure it to look like the right-hand image. 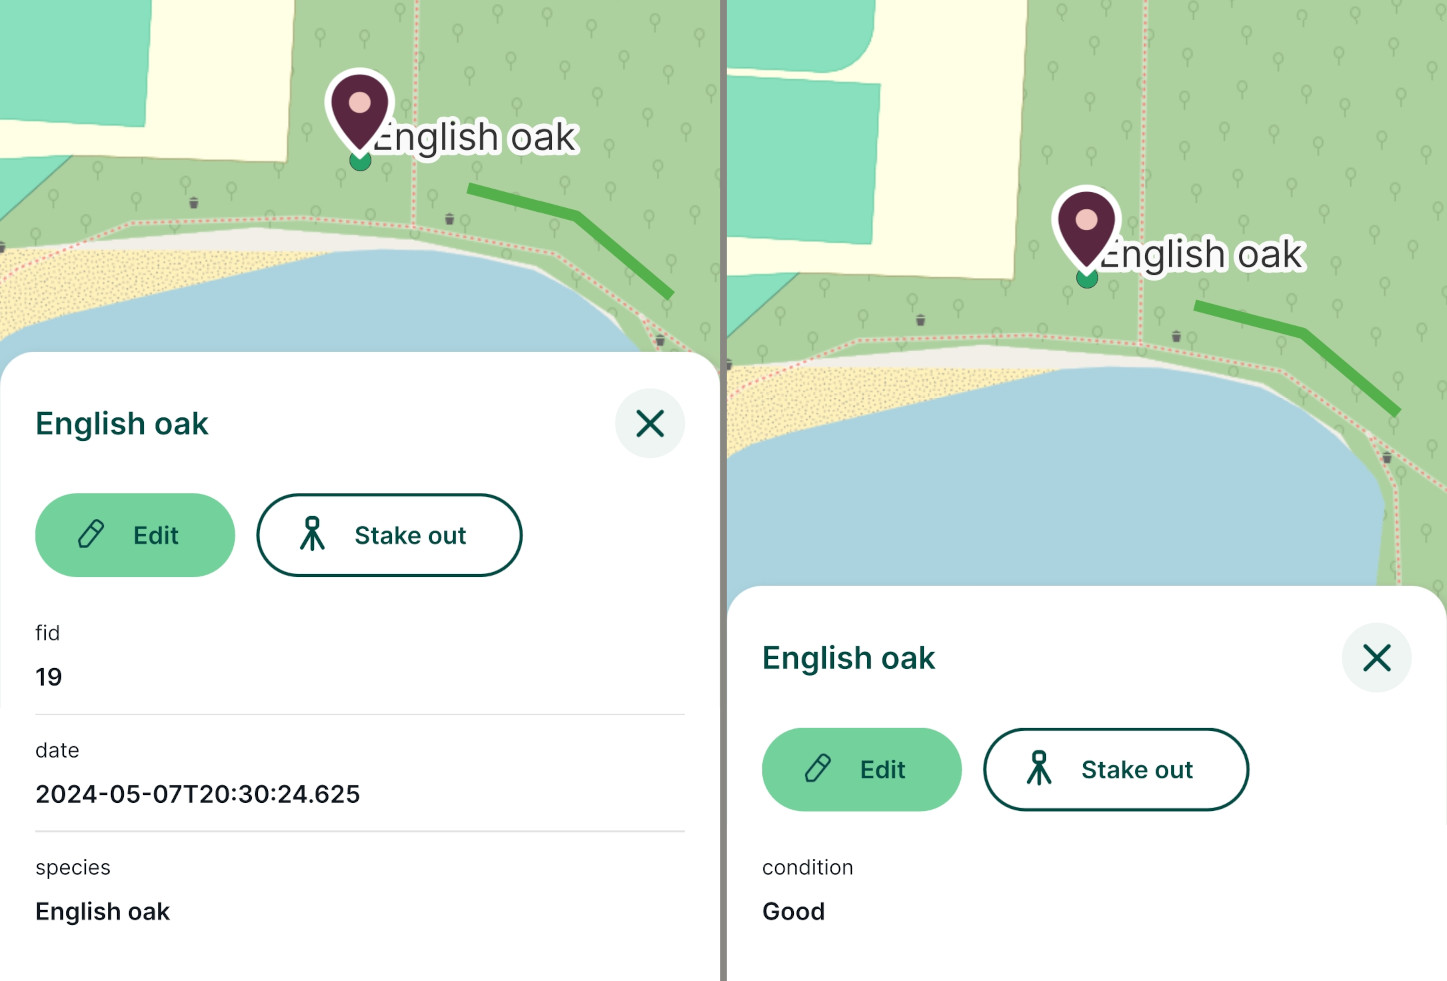
1. **Double-click** the **trees** layer in QGIS: 
Its layer properties dialog should appear.
2. Select the **Display tab** on the left hand side
3. Set the **Display Name** to `species`: 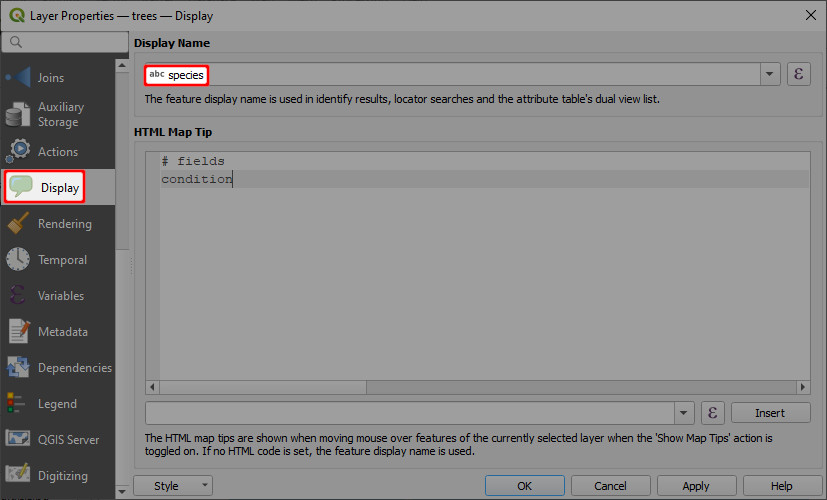
TIP
If you notice subtle differences in the name / spelling of the field when you select it in the drop-down list, this is due to the field having been aliased.
4. Set the HTML map tip to:
# fields
condition
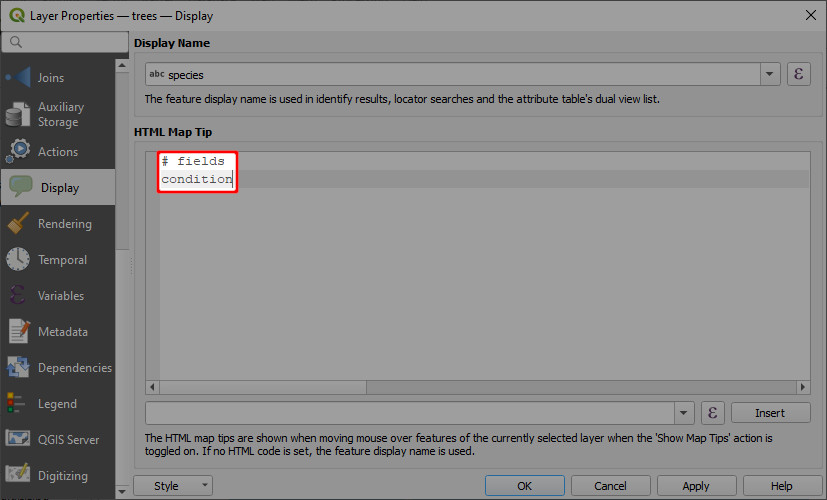
5. Click **OK**
6. Test out these settings in the mobile app as described in the [Trialling changes](https://merginmaps.com/docs/tutorials/further-project-customisation/#trialling-changes-in-mergin-maps-mobile-app)
section above.
Controlling layer visibility [](https://merginmaps.com/docs/tutorials/further-project-customisation/#controlling-layer-visibility)
------------------------------------------------------------------------------------------------------------------------------------
You might want to turn off some layers in the mobile app, e.g. when working with overlaying layers or to change the background map.
There are two ways how to change the layer visibility:
* [directly in the mobile app](https://merginmaps.com/docs/tutorials/further-project-customisation/#layers-in-mergin-maps-mobile-app)
* setting [map themes](https://merginmaps.com/docs/tutorials/further-project-customisation/#map-themes)
in QGIS
### Layers in Mergin Maps mobile app [](https://merginmaps.com/docs/tutorials/further-project-customisation/#layers-in-mergin-maps-mobile-app)
To control the visibility of layers in the mobile app, tap the **Layers** button to see the list of layers in the project.
Toggle the button next to layer's name to turn it on or off.
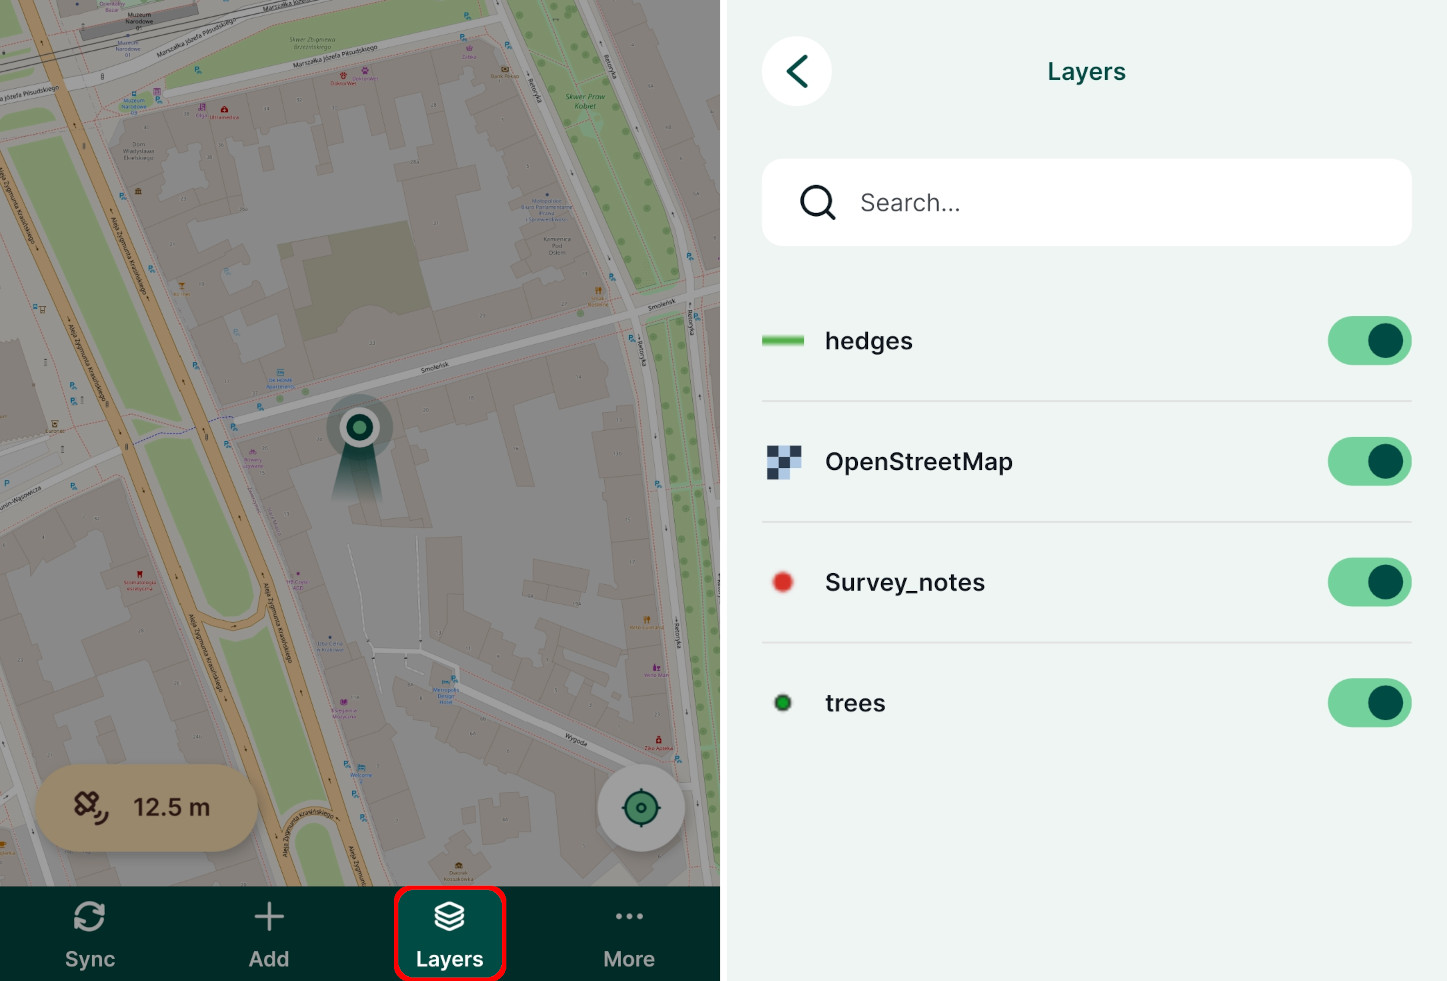
### Map themes [](https://merginmaps.com/docs/tutorials/further-project-customisation/#map-themes)
While the visibility of single layers can be controlled easily in the mobile app, it might be useful to set up map themes in QGIS. A map theme defines which layers will be displayed, so you can define useful combinations of layers and background maps and switch between them in the mobile app.
Here we'll define the following map themes:
* _**All layers**_ includes all map layers
* _**Hedges**_ contains just the `hedges` layer and the background map
1. In QGIS, click the **Manage Map Themes** button and select **Add Theme...**: 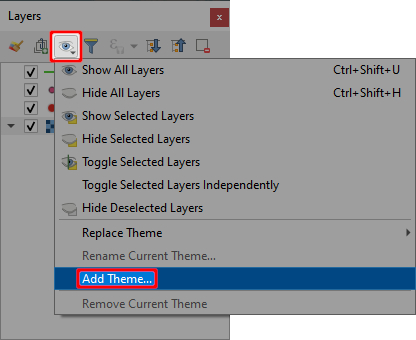
2. Call the theme **All layers** and click **OK**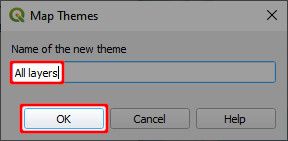
3. **Uncheck** the trees and Survey notes layers: 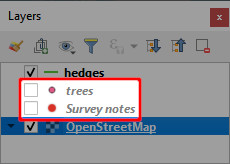
4. Add another theme like in step 1, calling it **Hedges** and click **OK**: 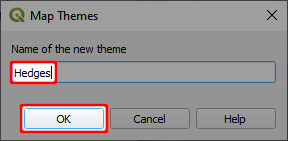
Switching between the two themes in QGIS causes the layer visibility to be updated accordingly. 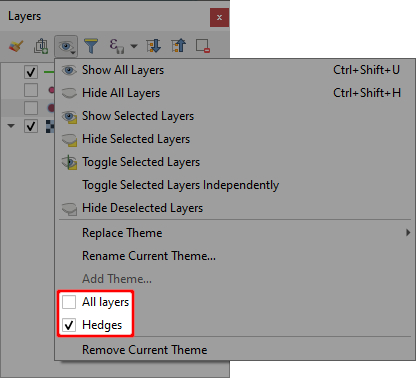
The themes have now been created. **Don't forget to save and sync your project!**
5. Test out these settings in the mobile app as described in the [Trialling changes](https://merginmaps.com/docs/tutorials/further-project-customisation/#trialling-changes-in-mergin-maps-mobile-app)
section above
Map themes can be accessed in the mobile app from the **More** menu: 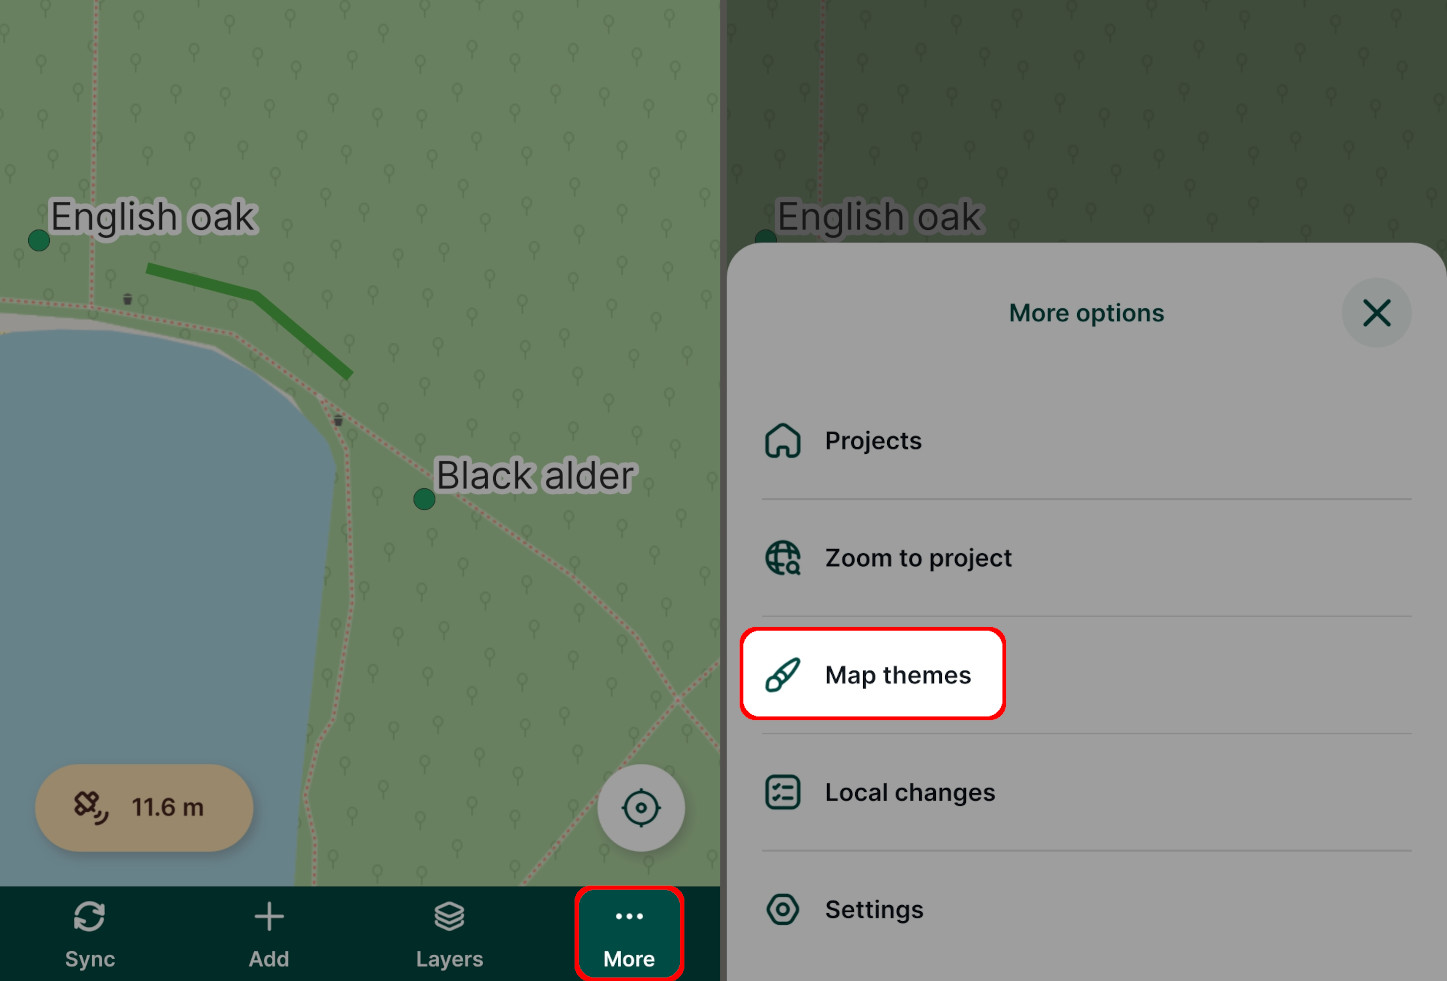
Simply switch between map themes in your project by tapping the one you want to use. 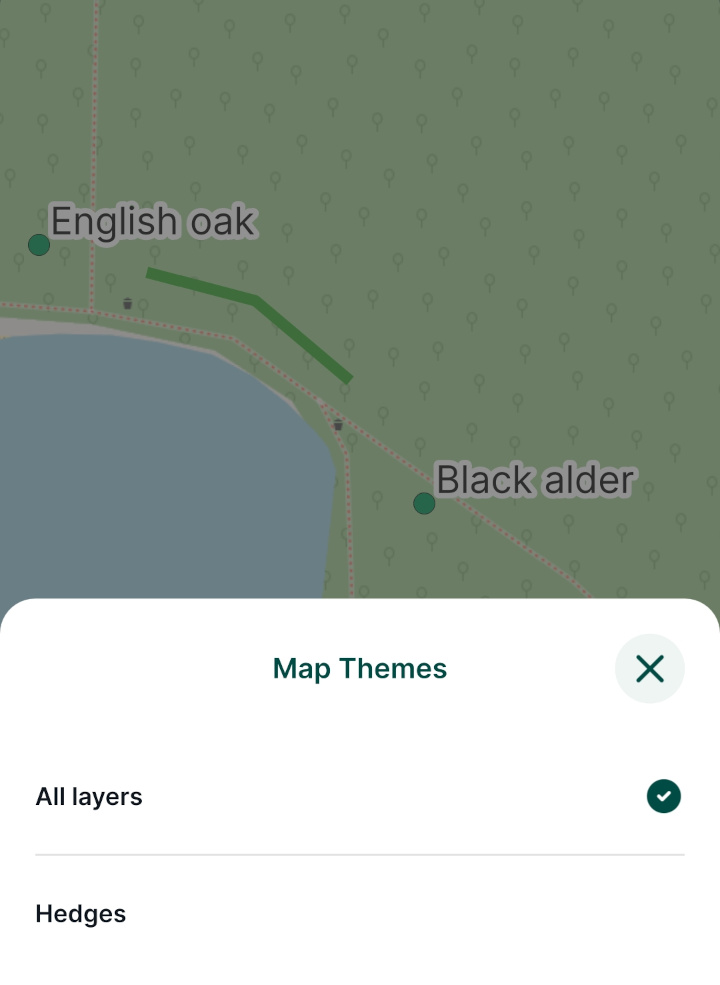
Zoom to project extent [](https://merginmaps.com/docs/tutorials/further-project-customisation/#zoom-to-project-extent)
------------------------------------------------------------------------------------------------------------------------
If you experimented with the **Zoom to project** button in the mobile app you'll have seen that by default, it zooms to the extent of the somewhat large background map:

This is not very useful so we will learn how to specify the extent that this button will zoom to.
1. In QGIS, zoom / pan the map to your desired default extent: 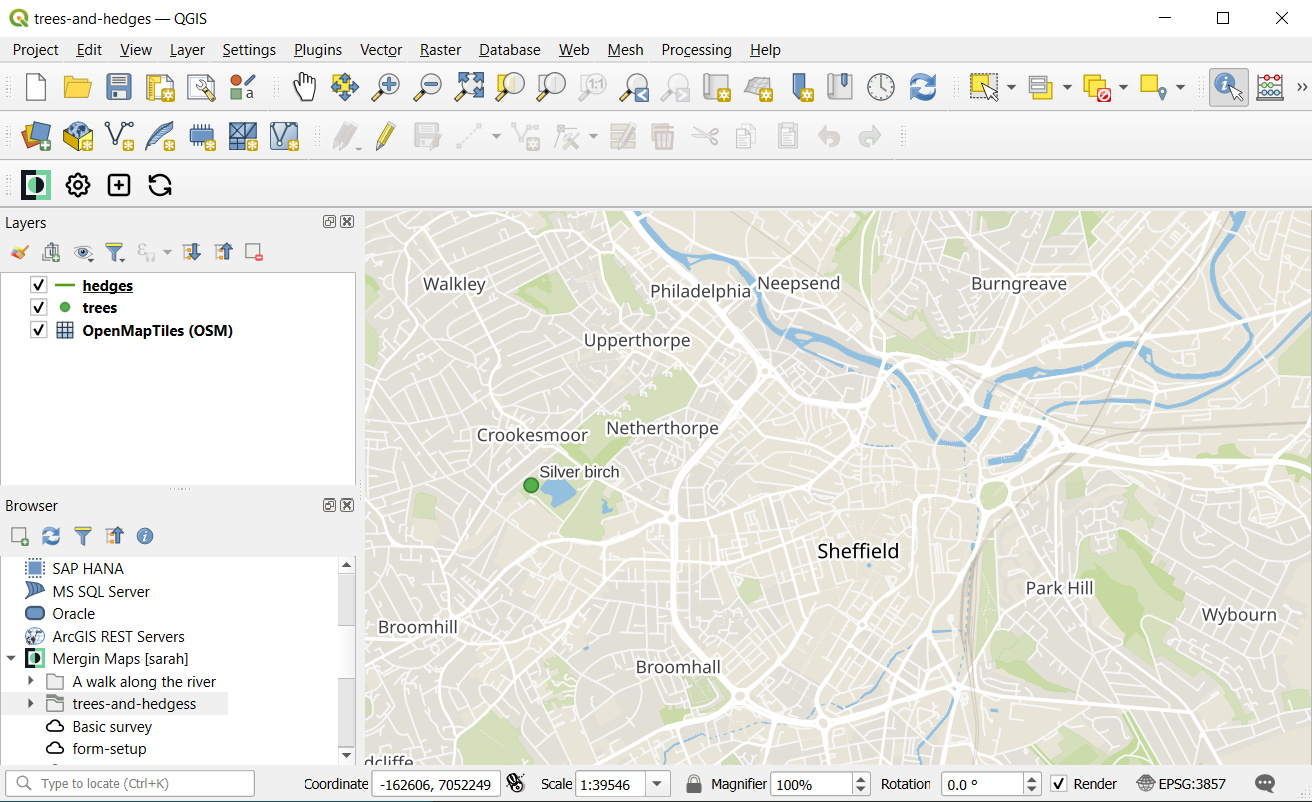
2. Select **Project > Properties...**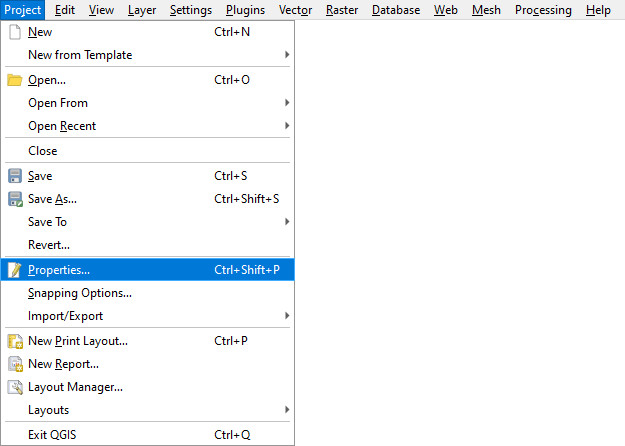
3. Select the **View Settings tab**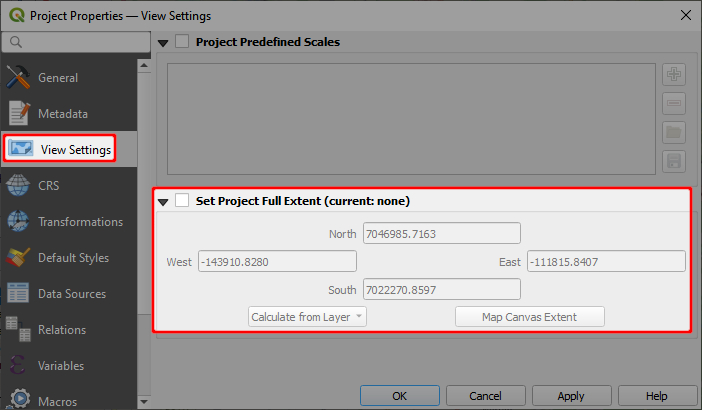
4. Check **Set Project Full Extent**
5. Click **Map Canvas Extent**: 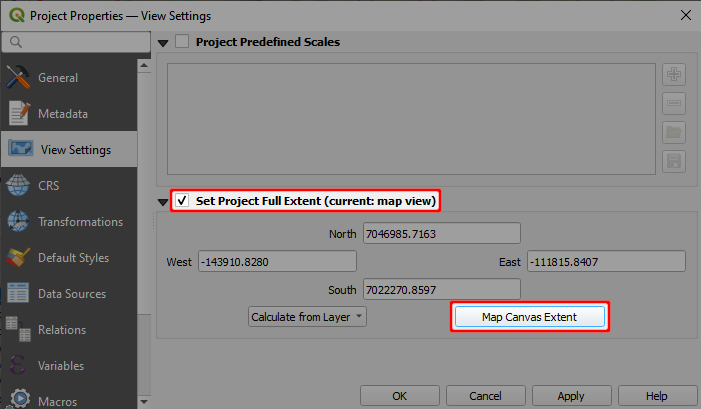
6. Click **OK**
7. Test out these settings in the mobile app as described in the [Trialling changes](https://merginmaps.com/docs/tutorials/further-project-customisation/#trialling-changes-in-mergin-maps-mobile-app)
section above
The **Zoom to project** button can be found in the mobile app by tapping the **More** button: 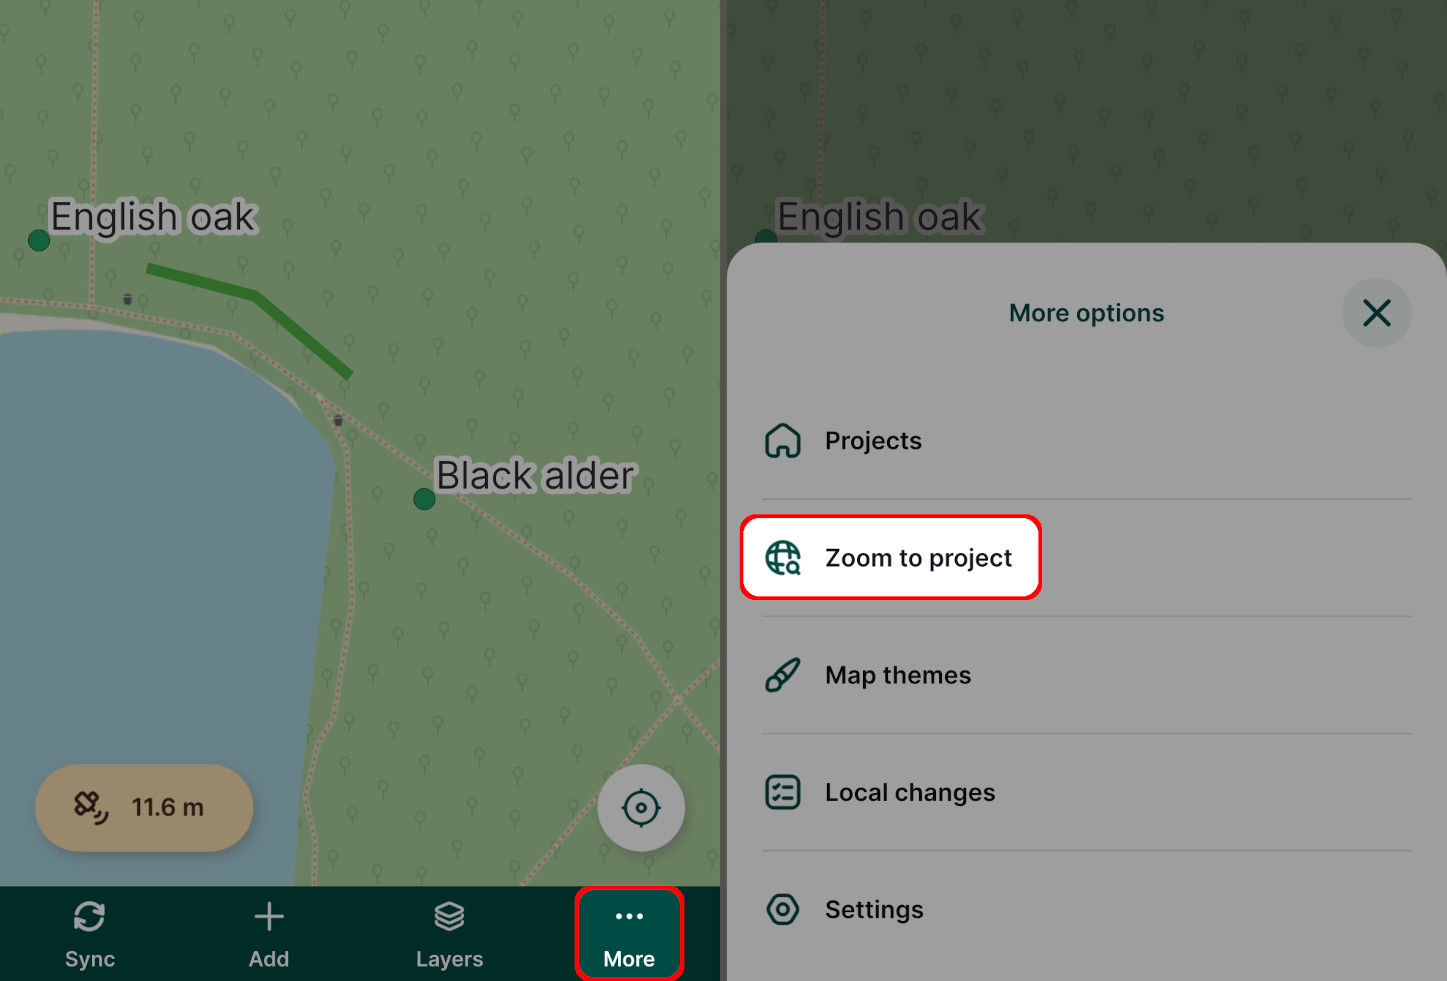
Learning more [](https://merginmaps.com/docs/tutorials/further-project-customisation/#learning-more)
------------------------------------------------------------------------------------------------------
The aim of this tutorial was to introduce you to the main concepts of customising Mergin Maps projects in QGIS and to cover common customisation workflows in a basic way.
You will find more tips on how to prepare your QGIS project in [Setup GIS Project](https://merginmaps.com/docs/gis/features/)
.
---
# How to Sign Up to Mergin Maps | Mergin Maps
[Skip to content](https://merginmaps.com/docs/setup/sign-up-to-mergin-maps/#VPContent)
Return to top
How to Sign Up to Mergin Maps [](https://merginmaps.com/docs/setup/sign-up-to-mergin-maps/#how-to-sign-up-to-mergin-maps)
===========================================================================================================================
To make full use of Mergin Maps, you need to sign up. You can sign up using:
* [Email and password](https://merginmaps.com/docs/setup/sign-up-to-mergin-maps/#email-and-password-sign-up)
* [Single sign-on (SSO)](https://merginmaps.com/docs/setup/sign-up-to-mergin-maps/#single-sign-on)
Manage your account
Do you want to delete your account or change your details? Go to [**User Account**](https://merginmaps.com/docs/manage/account/)
for detailed steps.
Account-less access
Public projects can be accessed and downloaded even without a Mergin Maps account. However, to manage, share or upload changes to projects, you need to be signed in.
Email and password sign up [](https://merginmaps.com/docs/setup/sign-up-to-mergin-maps/#email-and-password-sign-up)
---------------------------------------------------------------------------------------------------------------------
Password sign up to Mergin Maps is available via dashboard or mobile app.
### From dashboard [](https://merginmaps.com/docs/setup/sign-up-to-mergin-maps/#from-dashboard)
1. Navigate to [app.merginmaps.com](https://app.merginmaps.com/)
2. Use the **Sign Up** link to navigate to the registration form.
Fill in the details and **Sign Up**.
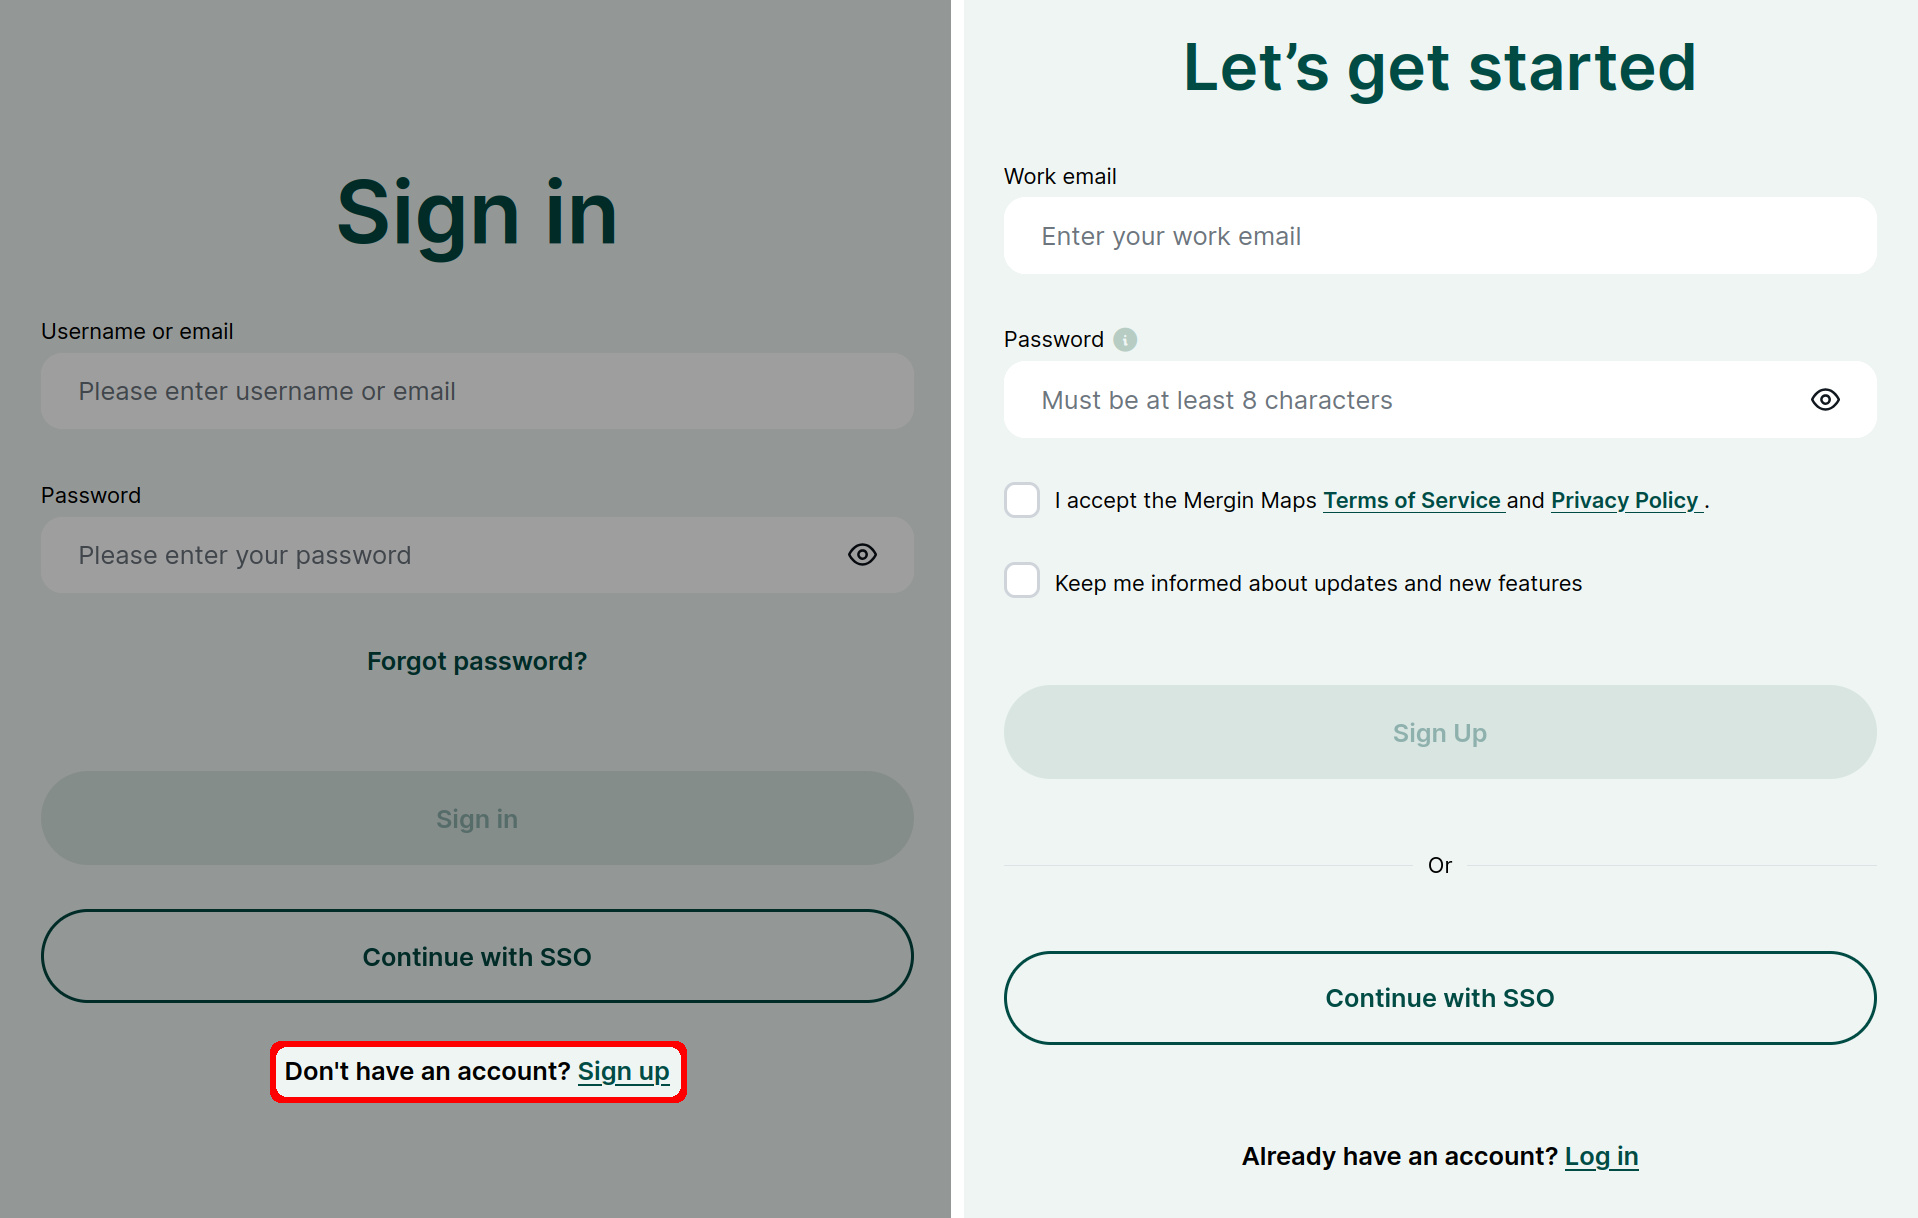
While signing up, you can choose to receive information about updates and new features. You can unsubscribe from the Mergin Maps newsletter anytime by clicking the **Unsubscribe** link at the bottom of the email.
3. You will receive a confirmation email with a link to verify your email.
Check your spam folder if the confirmation email does not appear in your inbox after 5 minutes.
4. Now your account needs a [workspace](https://merginmaps.com/docs/manage/workspaces/)
!
To create a workspace, choose an appropriate name and click on **Create workspace**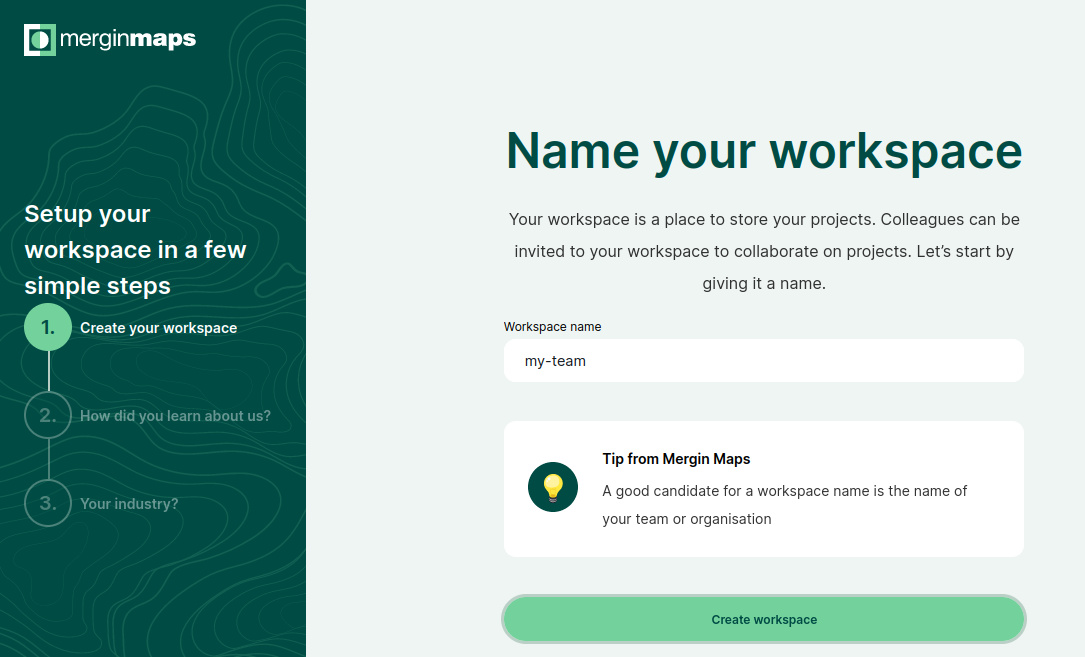
**Welcome to [Mergin Maps](https://merginmaps.com/)
!**
You can get up-to-speed quickly by following our [Quick Start tutorials](https://merginmaps.com/docs/tutorials/capturing-first-data/)
.
Workspaces and subscriptions
Projects, collaborations and subscriptions in [Mergin Maps](https://merginmaps.com/)
are tied to [workspaces](https://merginmaps.com/docs/manage/workspaces/)
. You can use your first workspace for free during the 14 day trial. After the trial, you can [upgrade to a premium plan](https://merginmaps.com/docs/manage/subscriptions/#how-to-upgrade-a-subscription-from-the-trial-plan)
.
[Subscriptions](https://merginmaps.com/docs/manage/subscriptions)
are based on the number of contributors on the workspace. Per each contributor seat, you get 1 GB of storage. Storage is shared across the whole workspace.
See our [pricing page](https://merginmaps.com/pricing)
for more details.
### From mobile app [](https://merginmaps.com/docs/setup/sign-up-to-mergin-maps/#from-mergin-maps-mobile-app)
You can also sign up from Mergin Maps mobile app.
1. Download the mobile app to your Android device, iPhone or iPad. You can find it in the app store of your platform:
[](https://apps.apple.com/us/app/input/id1478603559?ls=1)
[](https://play.google.com/store/apps/details?id=uk.co.lutraconsulting)
[](https://github.com/MerginMaps/mobile/releases/latest)
2. Open the mobile app. Tap the account icon in the upper right corner to go to the login page. 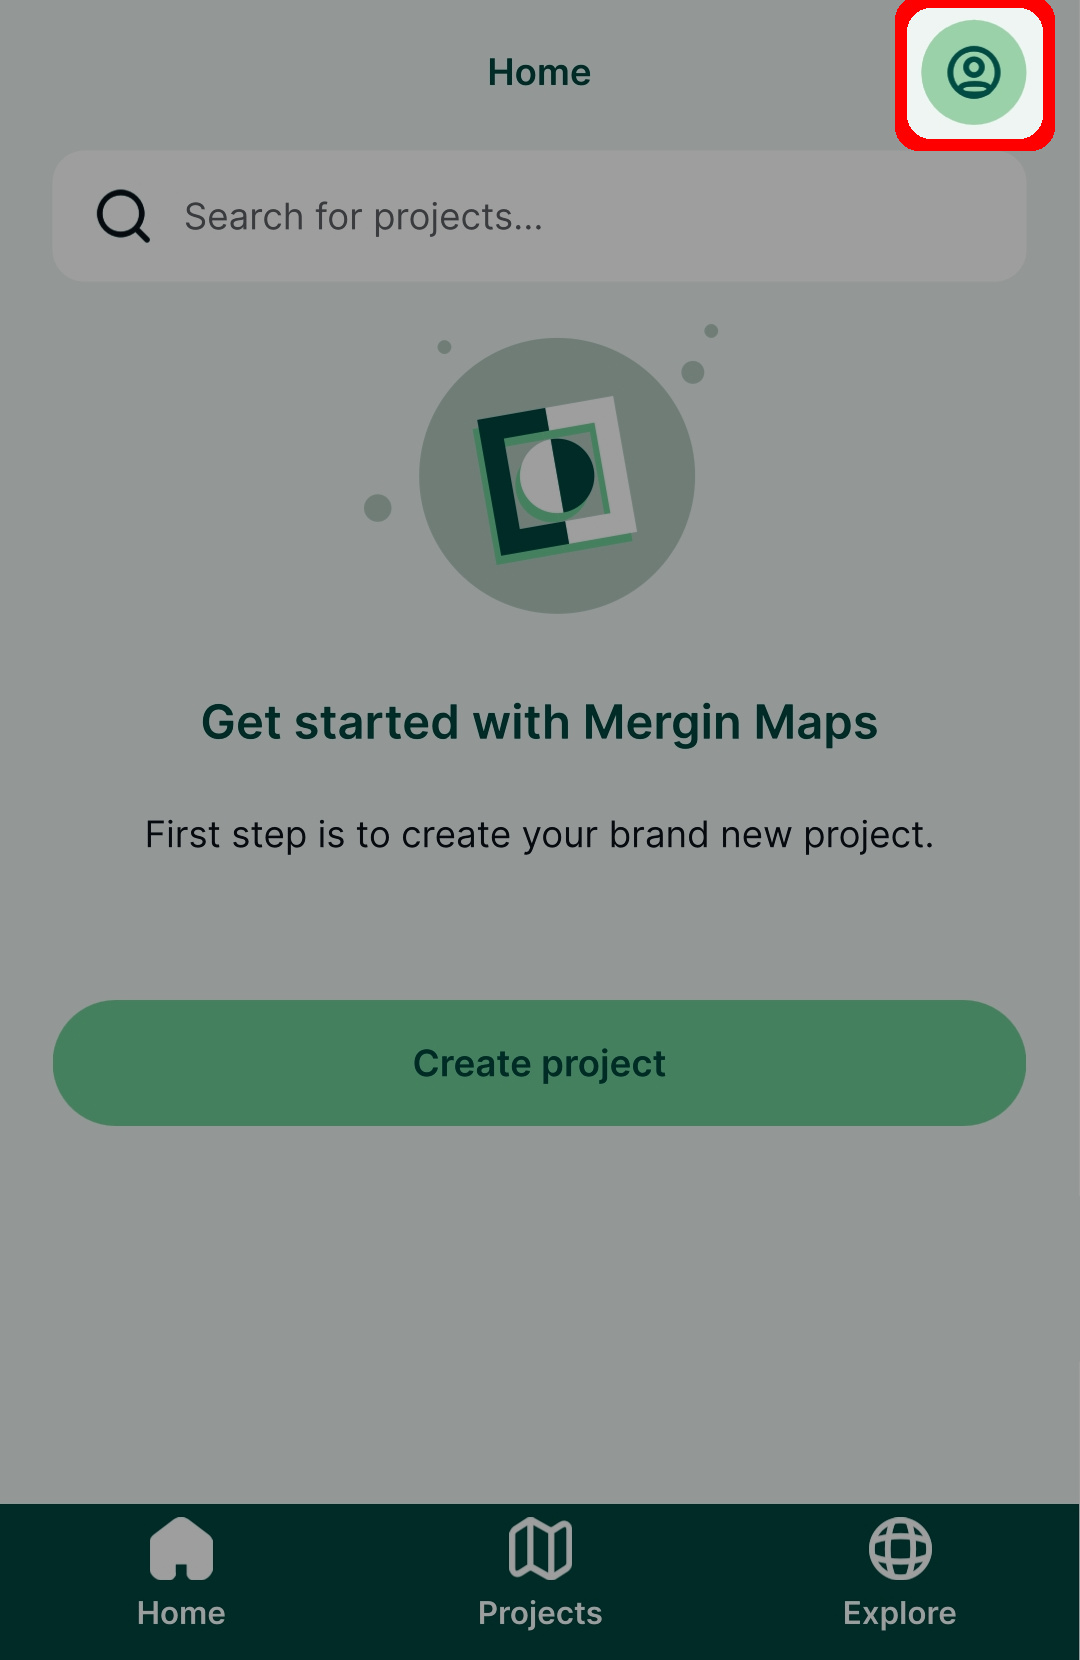
3. Tap on **Sign up**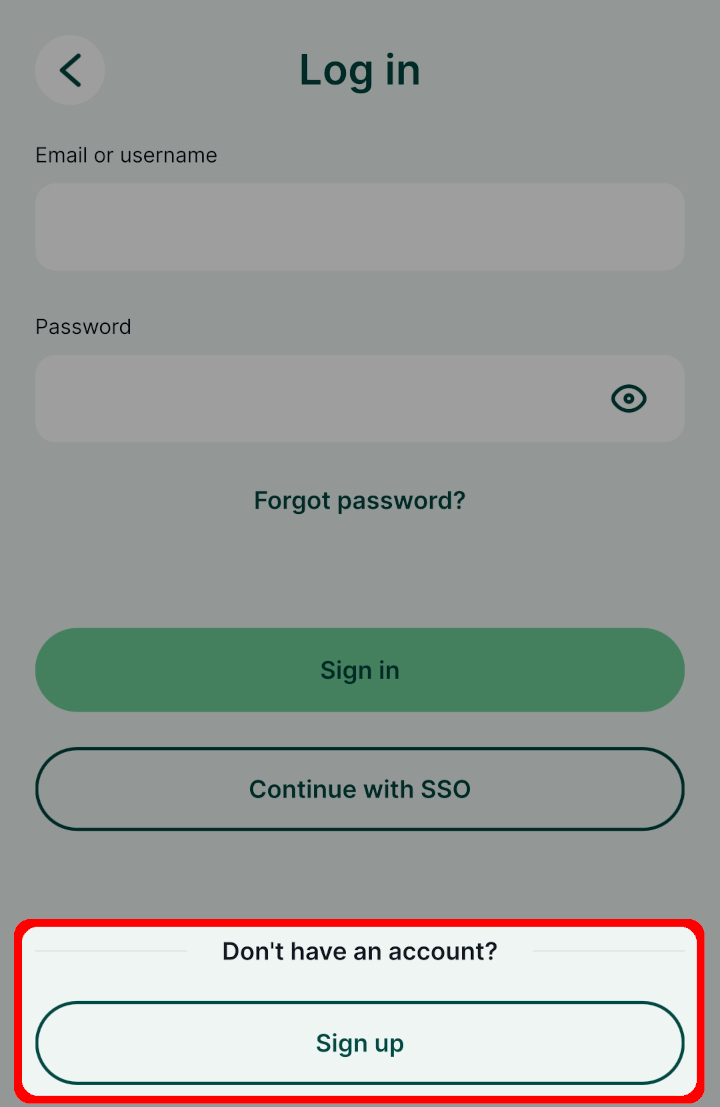
4. Fill up the form and tap on **Sign up** to create your account.
You will receive a confirmation email with a link to verify your email.
Check your spam folder if the confirmation email does not appear in your inbox after 5 minutes.
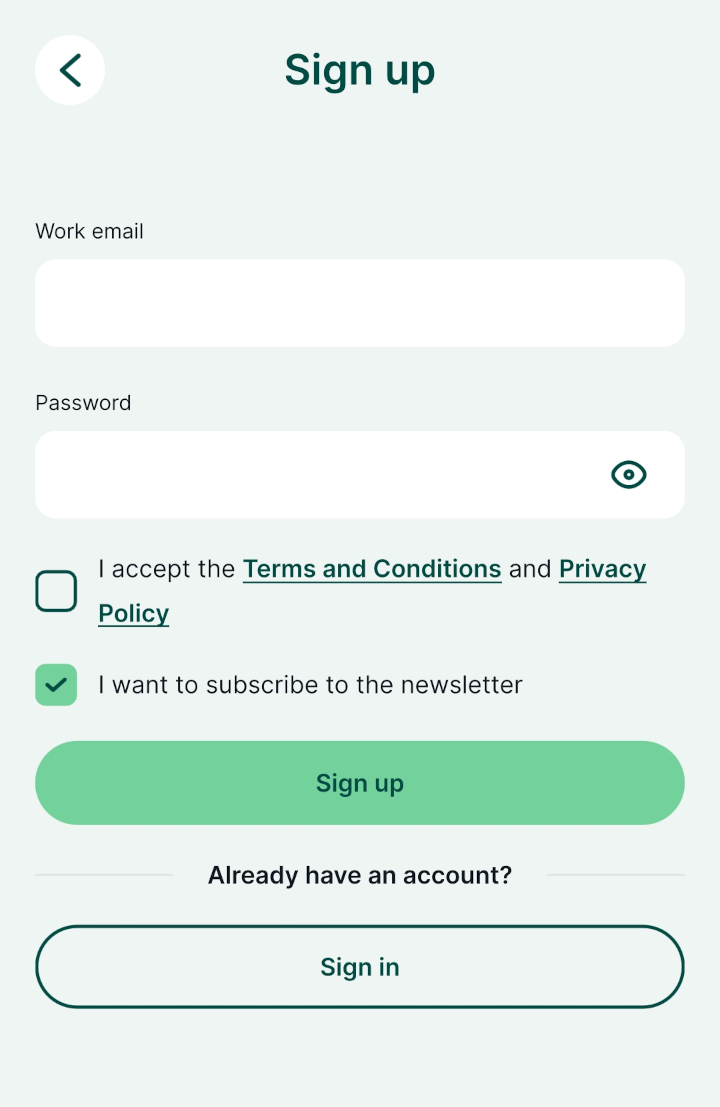
5. Every account needs to have a [workspace](https://merginmaps.com/docs/manage/workspaces/)
for storing projects. Choose an appropriate name for your workspace and tap on the **Create workspace** button.
Note that the name of a workspace cannot be changed later. 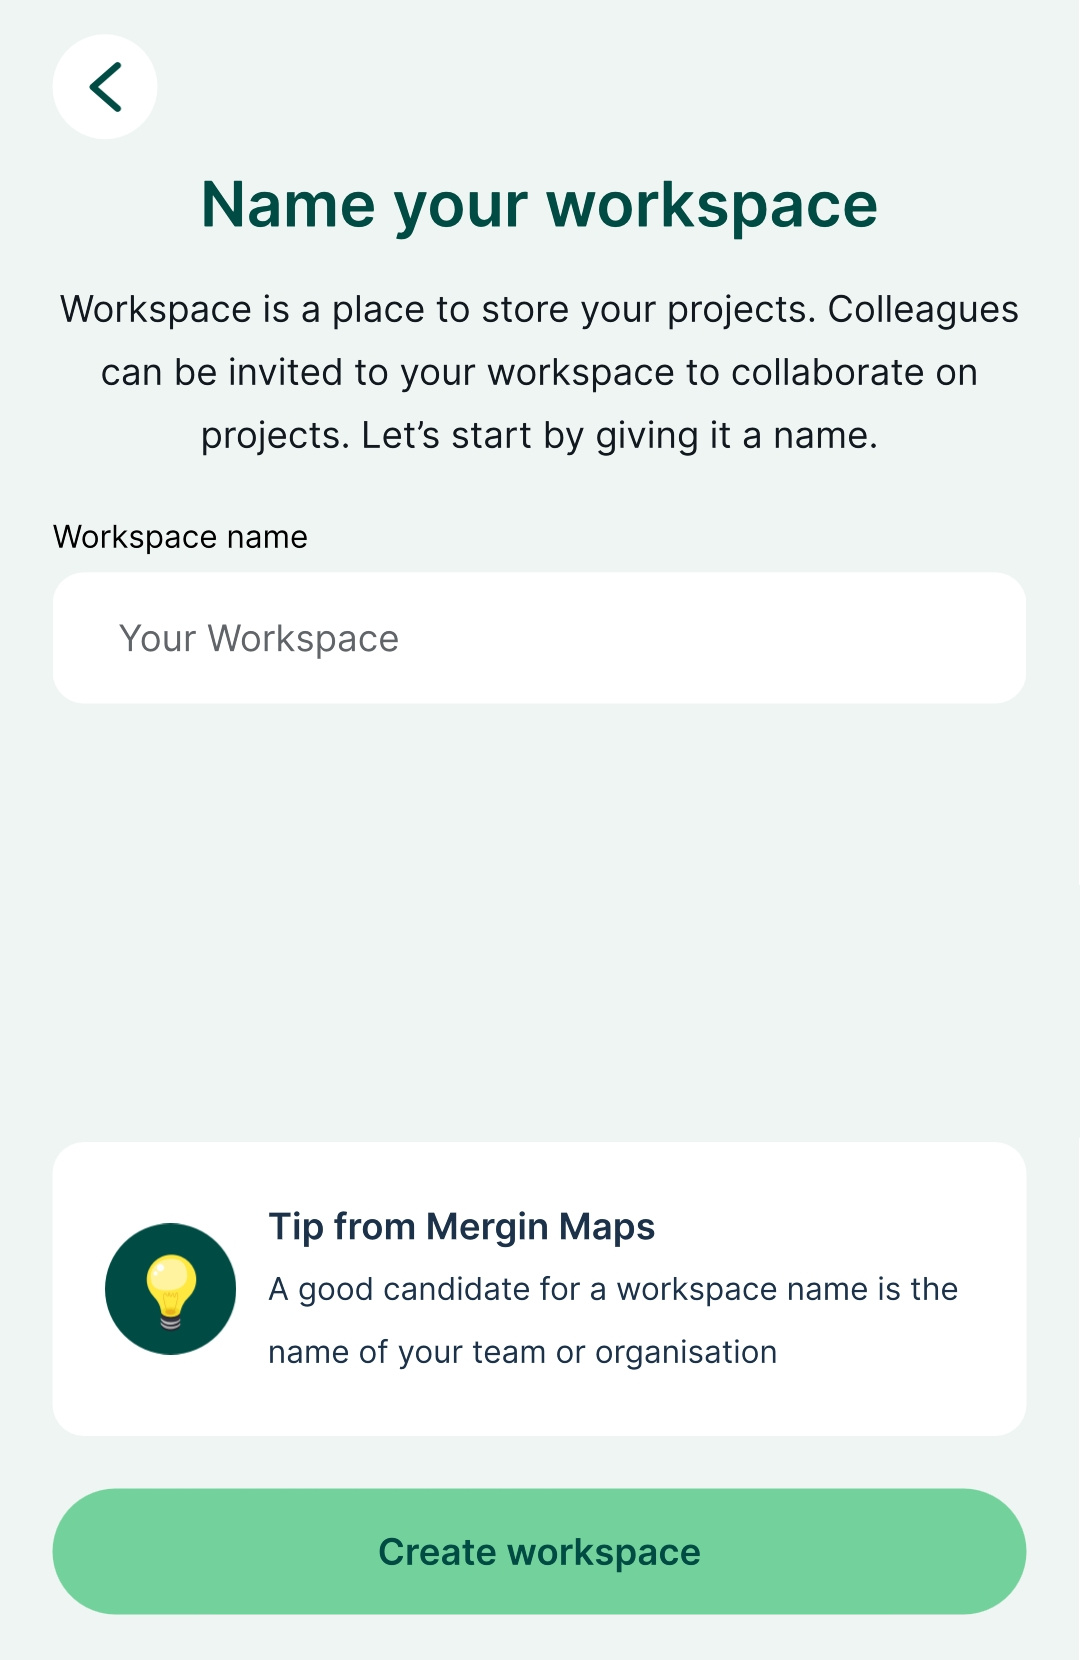
**Welcome to [Mergin Maps](https://merginmaps.com/)
!**
You can get up-to-speed quickly by following our [Quick Start tutorials](https://merginmaps.com/docs/tutorials/capturing-first-data/)
.
Workspaces and subscriptions
Projects, collaborations and subscriptions in [Mergin Maps](https://merginmaps.com/)
are tied to [workspaces](https://merginmaps.com/docs/manage/workspaces/)
. You can use your first workspace for free during the 14 day trial. After the trial, you can [upgrade to a premium plan](https://merginmaps.com/docs/manage/subscriptions/#how-to-upgrade-a-subscription-from-the-trial-plan)
.
[Subscriptions](https://merginmaps.com/docs/manage/subscriptions)
are based on the number of contributors on the workspace. Per each contributor seat, you get 1 GB of storage. Storage is shared across the whole workspace.
See our [pricing page](https://merginmaps.com/pricing)
for more details.
Single sign-on [](https://merginmaps.com/docs/setup/sign-up-to-mergin-maps/#single-sign-on)
---------------------------------------------------------------------------------------------
If your organisation set up [SSO](https://merginmaps.com/docs/manage/sso/)
for Mergin Maps, you can sign in using the same credentials as you use in your organisation.
TIP
You can find out more about this topic in [Single Sign-On (SSO)](https://merginmaps.com/docs/manage/sso/)
.
### From dashboard [](https://merginmaps.com/docs/setup/sign-up-to-mergin-maps/#from-dashboard-1)
To sign in or sign up to Mergin Maps using SSO on the [dashboard](https://app.merginmaps.com/)
:
1. Navigate to [app.merginmaps.com](https://app.merginmaps.com/)
2. Click on the **Continue with SSO** button
3. Enter your email address associated with your organisation and click **Sign in**
4. You will be redirected to an identity provider. Enter your credentials.
5. After being redirected back to the [dashboard](https://app.merginmaps.com/)
, you will be signed in.
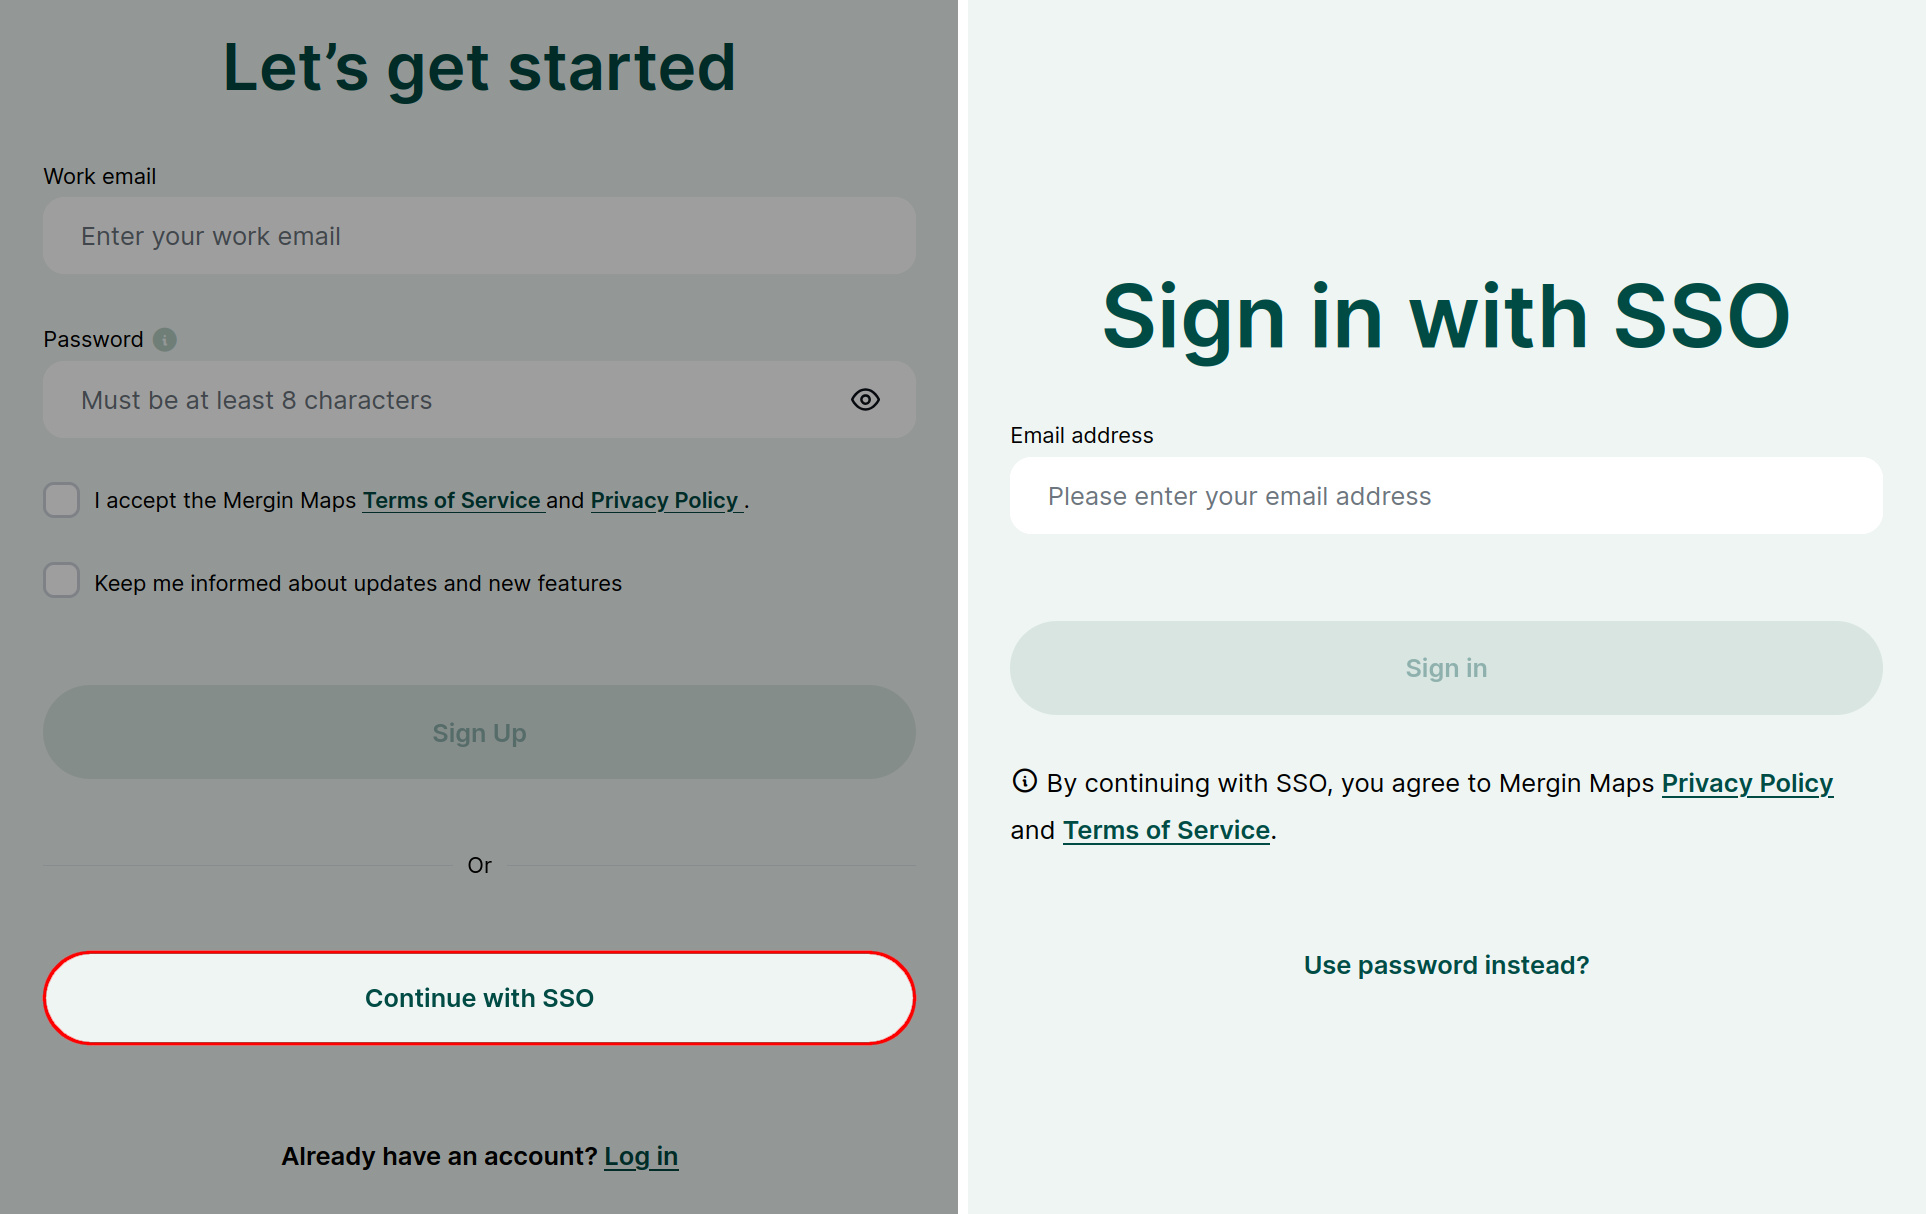
### From mobile app [](https://merginmaps.com/docs/setup/sign-up-to-mergin-maps/#from-mobile-app)
1. Open the mobile app. Tap the account icon in the upper right corner to go to the login page. 
2. Tap the **Continue with SSO** option 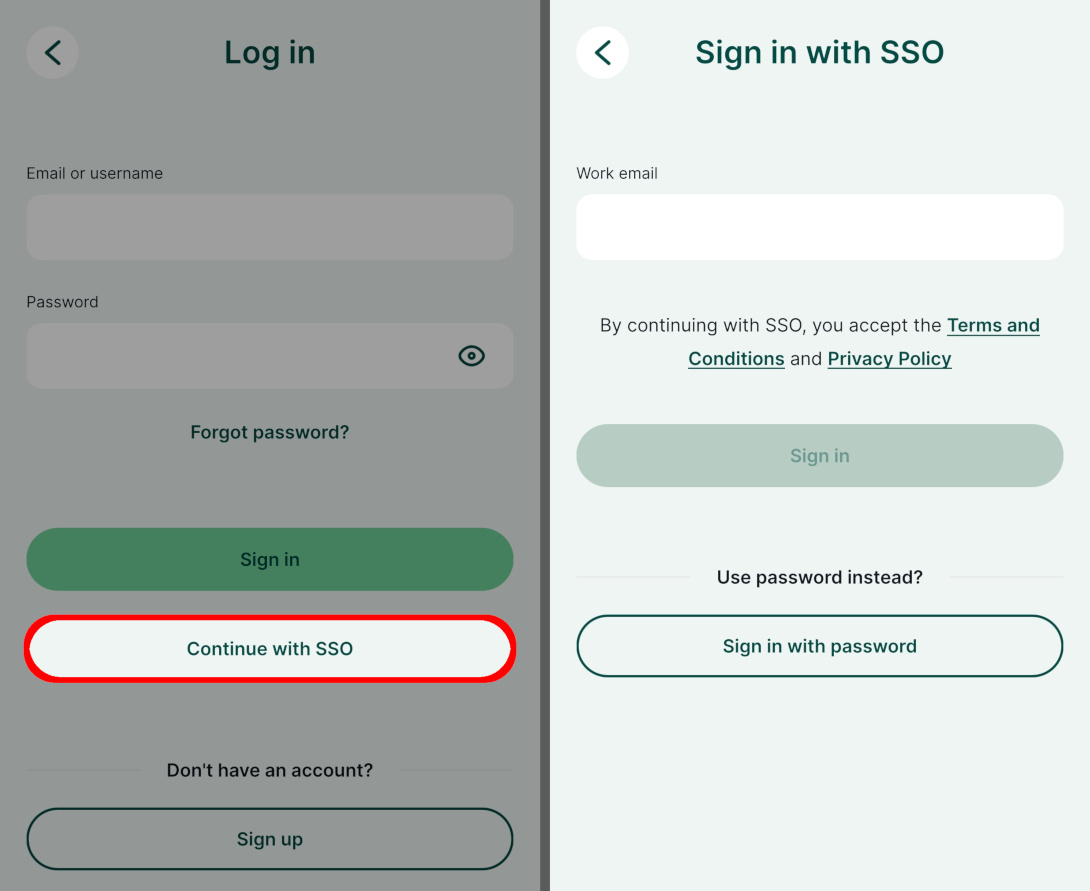
3. Enter your email address associated with your organisation and click **Sign in**.
You will be redirected to an identity provider. Enter your credentials.
4. After successful authentication, you will be signed in to Mergin Maps in the mobile app.
### From QGIS plugin [](https://merginmaps.com/docs/setup/sign-up-to-mergin-maps/#from-qgis-plugin)
QGIS version 3.40.0 or higher is required
Mergin Maps QGIS plugin installed on QGIS version lower than 3.40.0 will not have the option to sign in via SSO.
To use SSO in the QGIS plugin:
1. Open QGIS
2. On the toolbar, click on the **Configure Mergin Maps plugin** button 
3. Use the **Continue with SSO** option to open SSO sign in 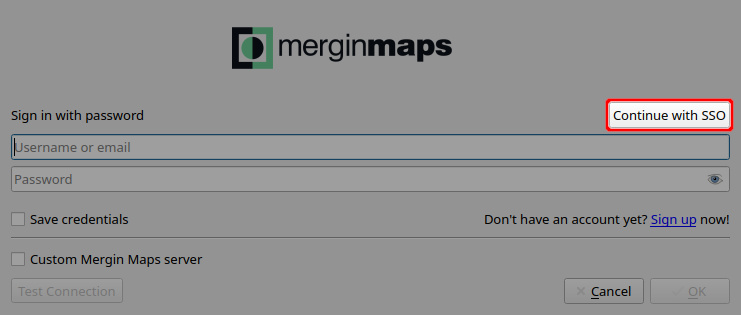
4. Enter your email address associated with your organisation and click **OK**.
You will be redirected to an identity provider. Enter your credentials.
5. After successful authentication, you will be signed in to Mergin Maps in QGIS plugin.
---
# How to Install QGIS | Mergin Maps
[Skip to content](https://merginmaps.com/docs/setup/install-qgis/#VPContent)
Return to top
How to Install QGIS [](https://merginmaps.com/docs/setup/install-qgis/#how-to-install-qgis)
=============================================================================================
1. Navigate to the [QGIS Download page](https://qgis.org/download/)
2. Find the appropriate installer for your operating system.
For Windows users, we recommend downloading a standalone MSI installer for the long term release. 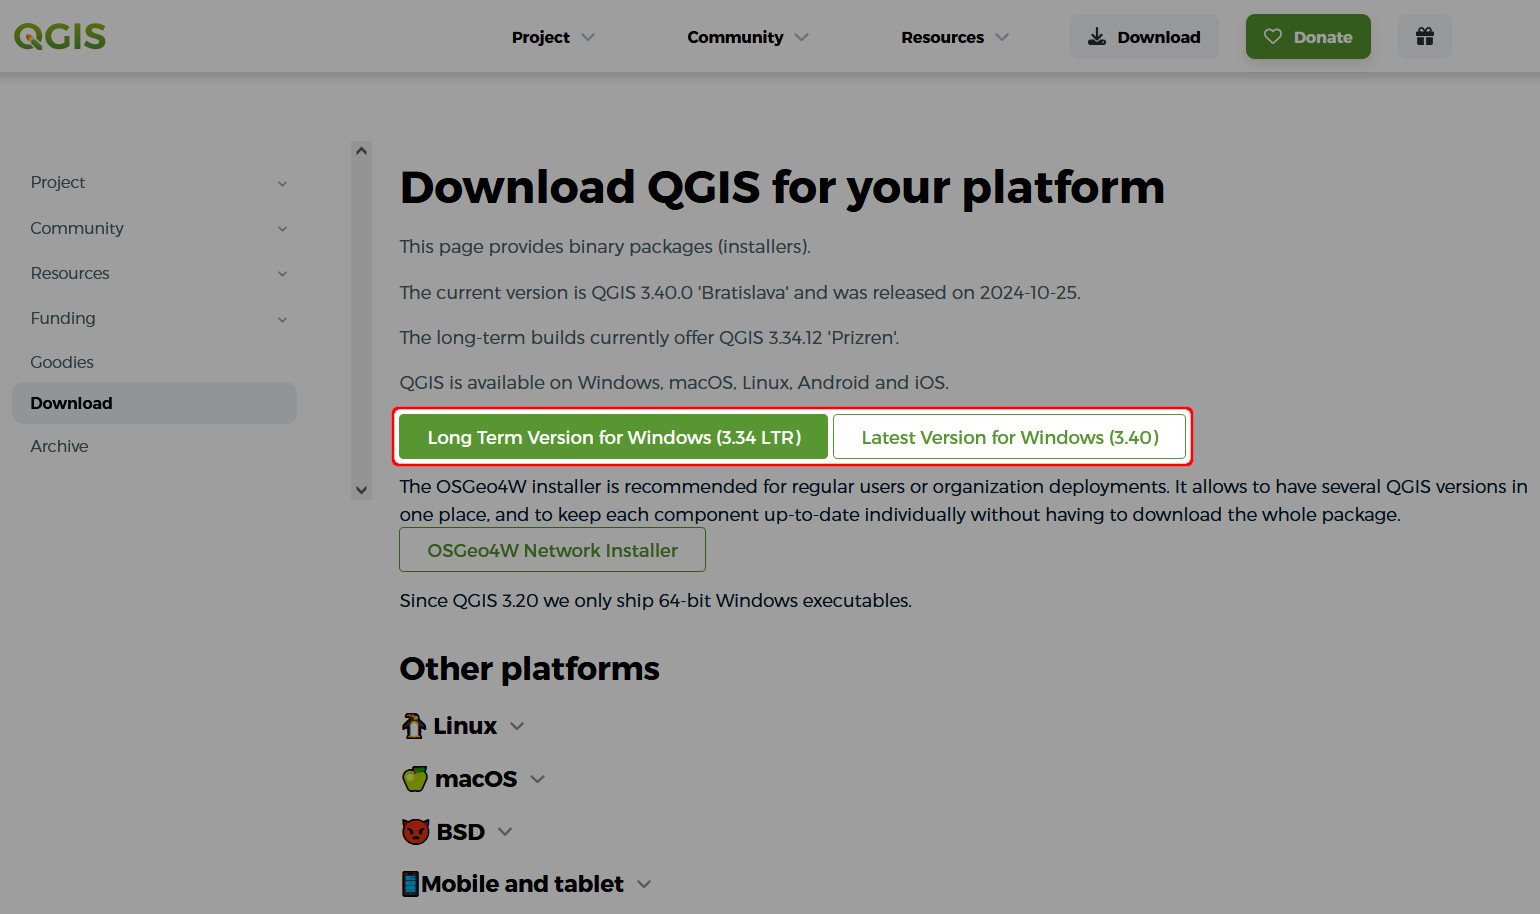
Choosing QGIS installer and version
The [Installation Guide](https://qgis.org/resources/installation-guide/)
contains more details about installation options for different platforms.
The download page offers two QGIS versions: _long term_ and _latest_. The _long term release_ (LTR) is more stable, while the _latest_ version can have more functionality.
3. Run the installer when it has finished downloading: 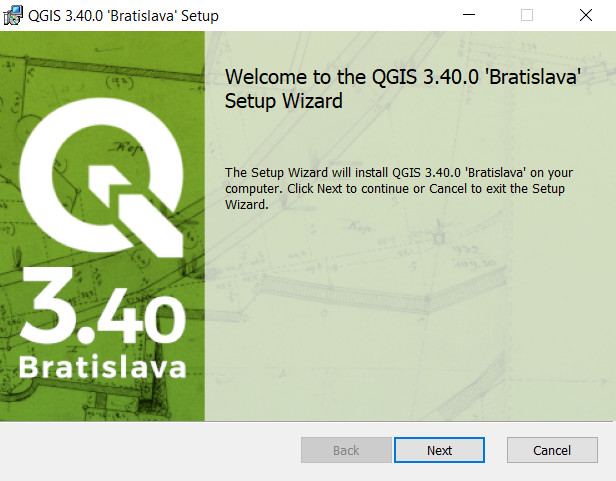
4. Continue the installation using the default installation options.
QGIS should now be installed on your computer.
TIP
QGIS is a powerful tool with a great community that can help you achieve a lot.
We recommend using [QGIS User Guide](https://docs.qgis.org/3.22/en/docs/user_manual/index.html)
and [QGIS Training Manual](https://docs.qgis.org/3.22/en/docs/training_manual/index.html)
to get familiar with QGIS and its functionality.
By clicking **“Accept All Cookies”**, you agree to the storing of cookies on your device to enhance site navigation, analyze site usage, and assist in our marketing efforts. View our [Cookie Policy](https://merginmaps.com/cookies)
for more information. [Deny cookies here](https://merginmaps.com/docs/setup/install-qgis/#)
.
[Preferences](https://merginmaps.com/docs/setup/install-qgis/#)
Accept all cookies
---
# Mergin Maps Project | Mergin Maps
[Skip to content](https://merginmaps.com/docs/manage/project/#VPContent)
On this page
Mergin Maps Project [](https://merginmaps.com/docs/manage/project/#mergin-maps-project)
=========================================================================================
What is a Mergin Maps project?
It is basically a folder that contains data (such as vector layers, tables, rasters or photos), a [QGIS project](https://merginmaps.com/docs/gis/features/)
, and some extra Mergin Maps files needed to ensure everything works.
When Mergin Maps project is created, it is saved to [Mergin Maps Cloud](https://merginmaps.com/)
. From the cloud, it can be downloaded to various devices, used by different team members in both QGIS and the mobile app. Changes they made are tracked and synchronised back to the cloud.
Creating project [](https://merginmaps.com/docs/manage/project/#creating-project)
-----------------------------------------------------------------------------------
TIP
Different ways of how a Mergin Maps project can be created are described in [How to Create a New Project](https://merginmaps.com/docs/manage/create-project/)
In general, projects are prepared and managed in [QGIS](https://merginmaps.com/docs/setup/install-qgis/)
, where you can get the most of the functionality, such as set up survey layers and their properties (symbology, forms, etc.), background maps, or other project settings.
Typically, especially if your project is rather complex, you would:
1. Create a QGIS project with all necessary datasets and settings to fit your needs
2. Package it using Mergin Maps QGIS plugin to create a Mergin Maps project that is saved to the cloud
3. Check that everything works as expected in the mobile app. If not, fix the issues in QGIS. Don't forget to save and sync the project. Repeat this step as necessary.
4. [Share the project](https://merginmaps.com/docs/manage/project-advanced/)
with your team members. Now you can collaborate safely and effectively.
TIP
[QGIS Project Preparation](https://merginmaps.com/docs/gis/features/)
will guide you the project preparation steps. We also recommend following our [Best Practice Tips for Layers and Forms](https://merginmaps.com/docs/layer/best-practice/)
.
If you need to make changes in the data schema of survey layers, please follow [How to Deploy Revised Projects](https://merginmaps.com/docs/manage/deploy-new-project/)
to avoid synchronisation issues.
Packaging QGIS project [](https://merginmaps.com/docs/manage/project/#packaging-qgis-project)
-----------------------------------------------------------------------------------------------
When using the QGIS plugin to [create a Mergin Maps project](https://merginmaps.com/docs/manage/create-project/#create-a-project-in-qgis)
, there is an option to **Package current project**. This is what you will choose if you want to transform your QGIS project into Mergin Maps project.
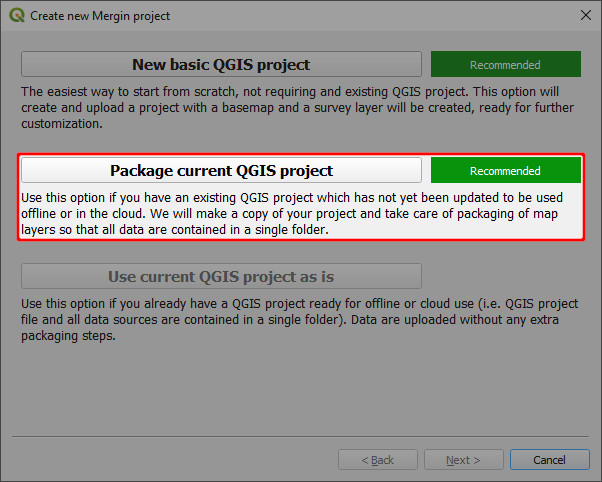
There are three options for handling layers:
* **package** - layers will be copied and saved in the new Mergin Maps project folder: by default, each vector layer will be saved as a GeoPackage, rasters (if possible) will be saved as GeoTIFF and local vector and raster MBTiles will be copied to the folder.
* **keep as is** - the layer will be referenced "as is" in the new project. The location of the file will stay the same, it will **not** be copied to the new Mergin Maps project folder. This is the default for some rasters and web services (e.g. WMS/WMTS, WFS, online vector and XYZ tiles).
* **ignore** - the layer will **not** be included in the new project.

After the layers for the new project are selected, you just need to enter the project's name and choose where to save it on your computer. It will also be saved on the [Mergin Maps](https://merginmaps.com/)
server in the selected workspace.

WARNING
Your project should be saved on a local drive. Using shared network drives and cloud storage (such as OneDrive or Google Drive) is **not supported**.
### Mergin Maps project folder [](https://merginmaps.com/docs/manage/project/#mergin-maps-project-folder)
The project folder on your computer will contain the **QGIS project** and all layers that were selected to be **packaged**. These are the files that are referenced in the project - and only they will be updated when the project is synchronised! The original data can be archived as they will not be used or needed by Mergin Maps project anymore.
Layers that were **kept as is** are not stored in the project folder.
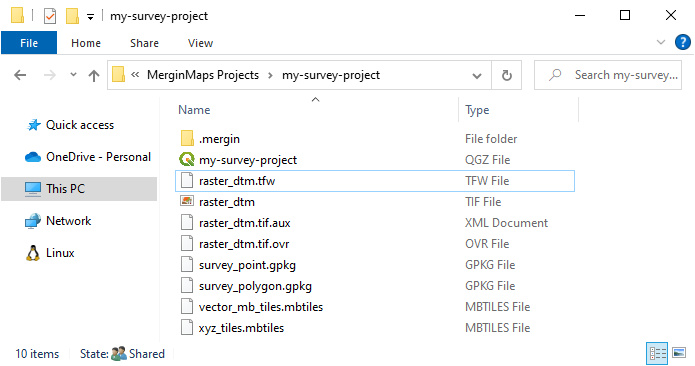
There are also some extra folders and files:
* **`.mergin`** folder contains the `Geodiff` files that are used to keep the [project history and versions](https://merginmaps.com/docs/manage/project-history/)
and [diagnostic log](https://merginmaps.com/docs/misc/troubleshoot/#diagnostic-logs)
in a file named `client-log.txt`
* **`proj`** folder contains, if needed, [custom projections](https://merginmaps.com/docs/gis/proj/)
files
* [conflict files](https://merginmaps.com/docs/manage/missing-data/#there-are-conflict-files-in-the-folder)
may appear if changes could not be properly synchronised
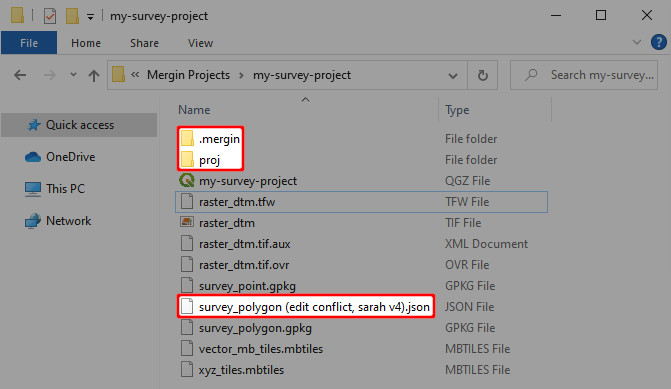
And this is how the same project looks in [app.merginmaps.com](https://app.merginmaps.com/)
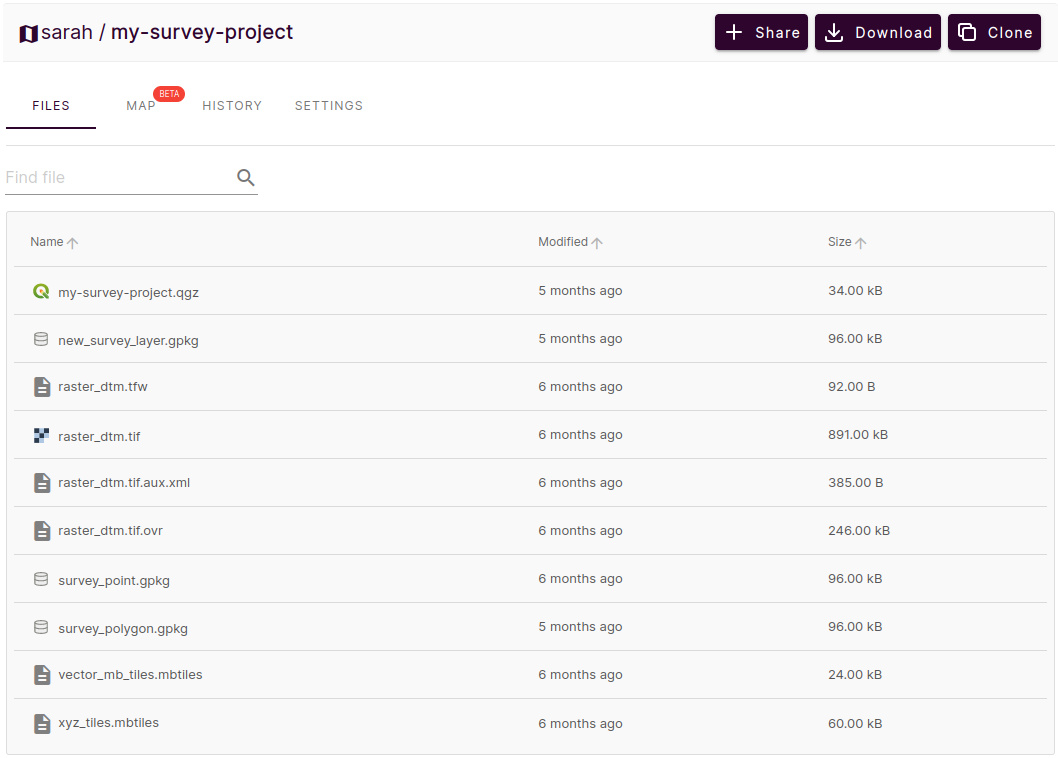
Adding a layer to the project [](https://merginmaps.com/docs/manage/project/#adding-a-layer-to-the-project)
-------------------------------------------------------------------------------------------------------------
If you want to add an additional layer to your existing Mergin Maps project:
* a new layer: create a new GeoPackage layer and save it to the project's folder
* an existing layer: copy the layer to the project's folder and **then** add it to the project
Save and sync the project. When syncing, you will see in the **Project status** that a new layer was added.
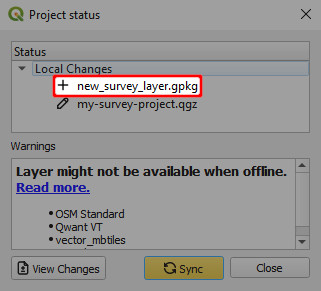
If you used **keep as is** option when [packaging the project](https://merginmaps.com/docs/manage/project/#packaging-qgis-project)
or add a layer that is not stored in the project's folder, the project will reference the relative path to its location. When opening the project on another computer, QGIS will try to load the file using the relative path. If this folder doesn't exist or is located elsewhere, the project will not be able to load the layer. The same applies for Mergin Maps mobile app.
Only the content in the project's folder is synchronised!
It is best to store all survey layers and relevant datasets in the project's folder to avoid issues with synchronisation or availability of the layers.
TIP
It is possible to use files that are stored in other folders in Mergin Maps mobile app. However, these folders have to be [manually transferred](https://merginmaps.com/docs/manage/missing-data/#manual-data-transfer-android)
.
This can be useful when working with [very large datasets](https://merginmaps.com/docs/gis/settingup_background_map/#how-to-work-with-very-large-files-android)
such as large rasters or background maps.
By clicking **“Accept All Cookies”**, you agree to the storing of cookies on your device to enhance site navigation, analyze site usage, and assist in our marketing efforts. View our [Cookie Policy](https://merginmaps.com/cookies)
for more information. [Deny cookies here](https://merginmaps.com/docs/manage/project/#)
.
[Preferences](https://merginmaps.com/docs/manage/project/#)
Accept all cookies
---
# Work Packages | Mergin Maps
[Skip to content](https://merginmaps.com/docs/dev/work-packages/#VPContent)
Return to top
Work Packages [](https://merginmaps.com/docs/dev/work-packages/#work-packages)
================================================================================
The **Work Packages** tool is designed to manage field surveys for multiple teams. This tool allows to create Mergin Maps _work packages projects_ that contain a subset of data of the main [Mergin Maps](https://merginmaps.com/)
project and set up two-way synchronisation between the main project and the dependent projects as illustrated here: 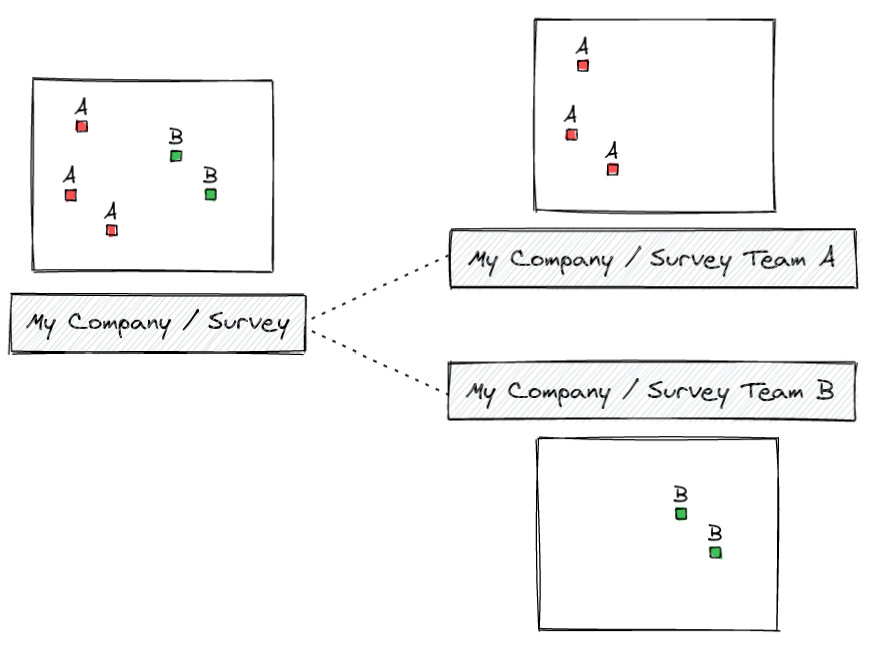
The main [Mergin Maps](https://merginmaps.com/)
project (_Survey_) contains all data. The admin of the main project can assign some of the data to working package projects (_Survey Team A_, _Survey Team B_). The teams can see and modify only the data that are assigned to them.
**Interested in using Work Packages?** Go to [MerginMaps/work-packages](https://github.com/MerginMaps/work-packages)
repository for the source code, more details and a quick start with a simple project.
By clicking **“Accept All Cookies”**, you agree to the storing of cookies on your device to enhance site navigation, analyze site usage, and assist in our marketing efforts. View our [Cookie Policy](https://merginmaps.com/cookies)
for more information. [Deny cookies here](https://merginmaps.com/docs/dev/work-packages/#)
.
[Preferences](https://merginmaps.com/docs/dev/work-packages/#)
Accept all cookies
---
# Single Sign-On (SSO) | Mergin Maps
[Skip to content](https://merginmaps.com/docs/manage/sso/#VPContent)
Return to top
Single Sign-On (SSO) [](https://merginmaps.com/docs/manage/sso/#single-sign-on-sso)
=====================================================================================
Single sign-on (SSO) is an authentication method that allows you to sign in to Mergin Maps using the same credentials as you use in your organisation. SSO is available on the dashboard, the mobile app and the QGIS plugin.
This means you don't have to create a new Mergin Maps account with a specific password: you can simply use your work email. The identity provider (e.g. Microsoft Entra ID or Auth0) used by your organisation will check your credential and redirect you back to Mergin Maps.
Mergin Maps account will be created automatically after the first sign in via SSO.
When a user signs in to Mergin Maps using SSO, they will stay signed in for a time period before they are asked to enter their credentials again. By default, this period is set to 14 days. If you use [Mergin Maps EE](https://merginmaps.com/pricing)
, you can set it to a different value.
Removing workspace users
If you remove a user from your Identity provider (you remove their account in your organisation), they will still be able to log into the Mergin Maps workspace for 14 days.
To cancel their access to the workspace immediately, you have to remove them manually through the [Members tab](https://merginmaps.com/docs/manage/dashboard/#members)
on the [dashboard](https://app.merginmaps.com/)
.
### Connection setup [](https://merginmaps.com/docs/manage/sso/#connection-setup)
If you are the admin or owner of a workspace and you want to set up SSO, please contact our [sales team](https://merginmaps.com/contact-sales)
.
You will receive a link with a step-by-step guide for your identity provider. Currently, we support **SAML** and **OIDC** SSO protocols. Directory sync is not supported.
SSO for self-hosted servers Enterprise Edition only
If you want to use SSO on your [Mergin Maps EE](https://merginmaps.com/pricing)
server, you can do so from the admin panel. See [Single Sign-On Deployment](https://merginmaps.com/docs/server/sso-deployment/)
for more details.
SSO is not available for Mergin Maps CE.
Once SSO is configured for your workspace, you will see the relevant information in the [workspace settings page](https://app.merginmaps.com/settings)
, under the _advanced_ section. If you need to make any changes to your SSO connection, please [contact our support team](mailto:support@merginmaps.com)
.
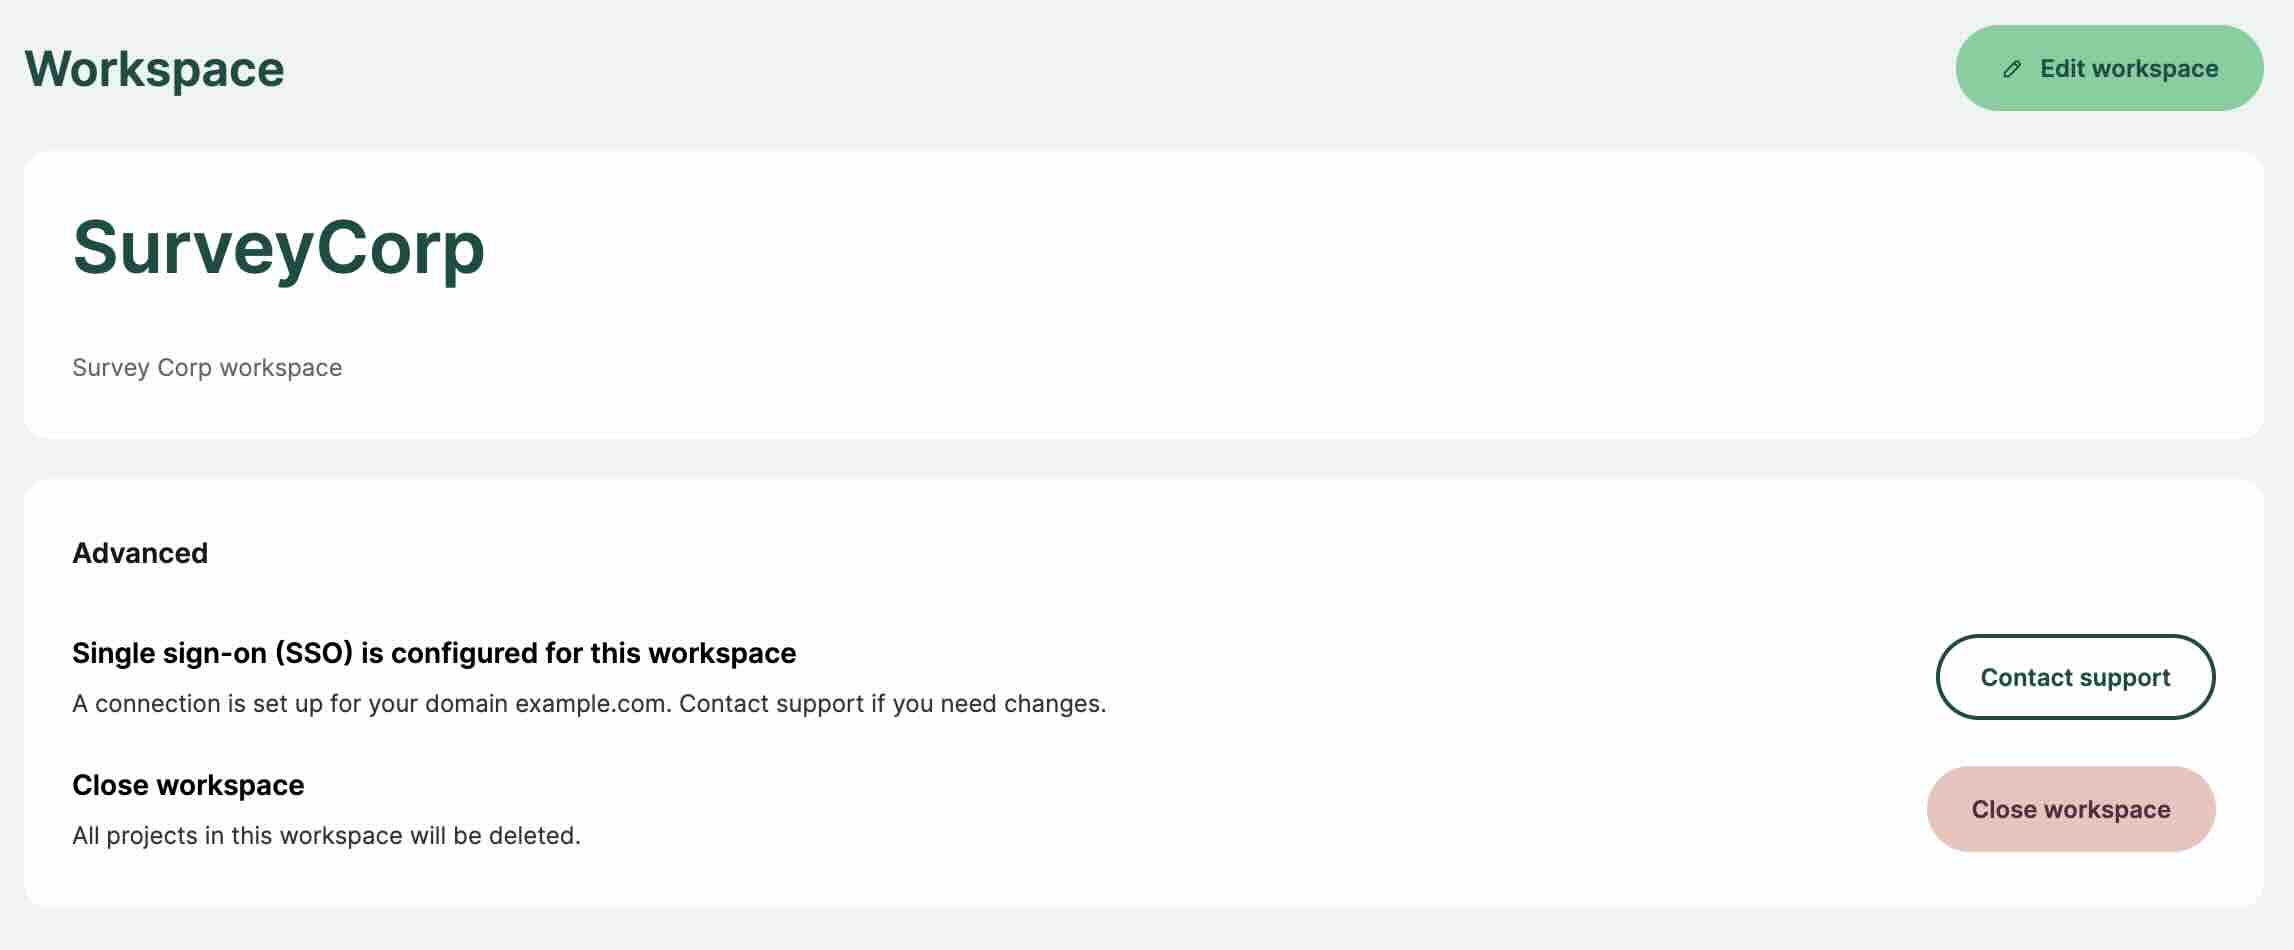
---
# How to Share, Transfer or Delete Projects | Mergin Maps
[Skip to content](https://merginmaps.com/docs/manage/project-advanced/#VPContent)
On this page
How to Share, Transfer or Delete Projects [](https://merginmaps.com/docs/manage/project-advanced/#how-to-share-transfer-or-delete-projects)
=============================================================================================================================================
Share projects and manage user access [](https://merginmaps.com/docs/manage/project-advanced/#share-projects-and-manage-user-access)
--------------------------------------------------------------------------------------------------------------------------------------
You can share your Mergin Maps project with others by inviting them to be [a member or a guest](https://merginmaps.com/docs/manage/permissions/#workspace-members-and-guests)
in your workspace. You can also make your Mergin Maps project accessible to everyone by making it [public](https://merginmaps.com/docs/manage/project-advanced/#make-your-project-public-private)
.
WARNING
When granting access to workspaces and projects, it is important to set appropriate [**permissions**](https://merginmaps.com/docs/manage/permissions/)
to your team members to avoid unwanted modifications of projects.
TIP
You can follow our [Working collaboratively](https://merginmaps.com/docs/tutorials/working-collaboratively/)
tutorial to see detailed instructions on how to share your project by inviting a user to your workspace as a guest or by sharing a link to your project with your teammates.
### Add users to a workspace [](https://merginmaps.com/docs/manage/project-advanced/#add-users-to-a-workspace)
If you want to share all projects in your workspace with a group of users, you can invite them to become members or guests of a workspace.
You have to be the **admin** or **owner** of the workspace to manage access to the workspace. See [Member Roles and Permissions](https://merginmaps.com/docs/manage/permissions/#workspace-member-roles-and-project-permissions)
for more details.
To add users to a workspace:
1. Log into [app.merginmaps.com](https://app.merginmaps.com/)
2. Go to the **Members** tab in the left panel and click on **Invite**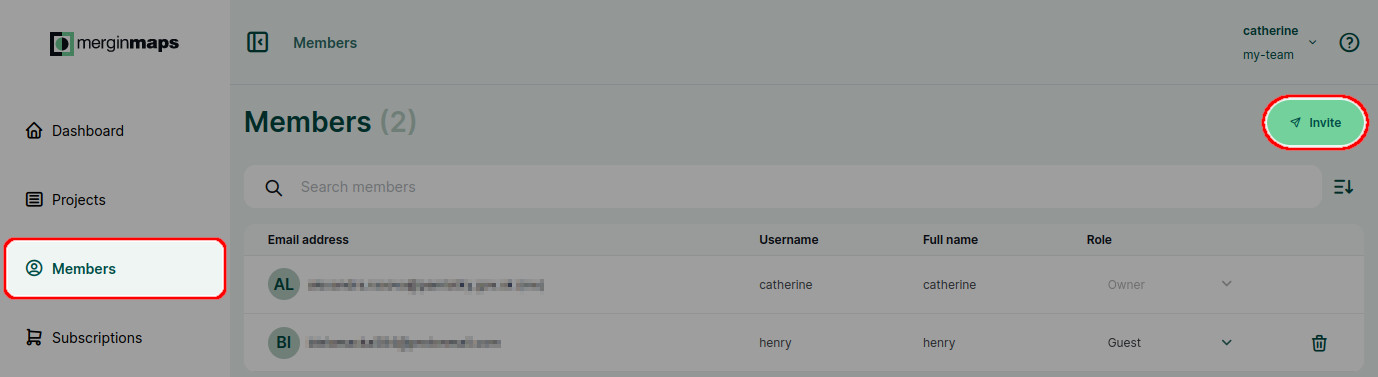
3. In the form, enter the email addresses of people you want to invite and choose their [**workspace role**](https://merginmaps.com/docs/manage/permissions/#workspace-member-roles-and-project-permissions)
from the list.
* If you want to grant them access to all projects in the workspace, select one of the member roles (_Reader_, _Writer_, _Admin_ or _Owner_).
* If you only want to invite them to some projects, select the _Guest_ option and specify which projects should be shared with them.
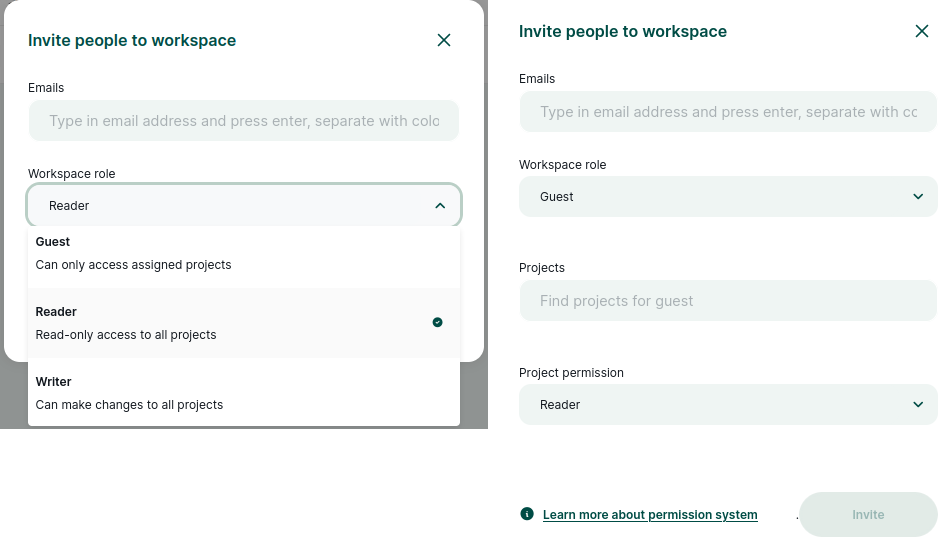
4. Click on the **Invite** button to send an invitation.
An email with a link will be sent to the recipients. If they already have a [Mergin Maps](https://merginmaps.com/)
account, they will also get a notification through the dashboard.
After accepting the invitation, the invited users will become members or guests of your workspace.
### Add users to a project [](https://merginmaps.com/docs/manage/project-advanced/#add-users-to-a-project)
Users can be invited to a specific project. Users with access to only some projects in the workspace are workspace **guests**.
1. Log into [app.merginmaps.com](https://app.merginmaps.com/)
2. In the **Projects** tab, select the project you want to manage and navigate to **Collaborators**.
Click on the **Share** button. 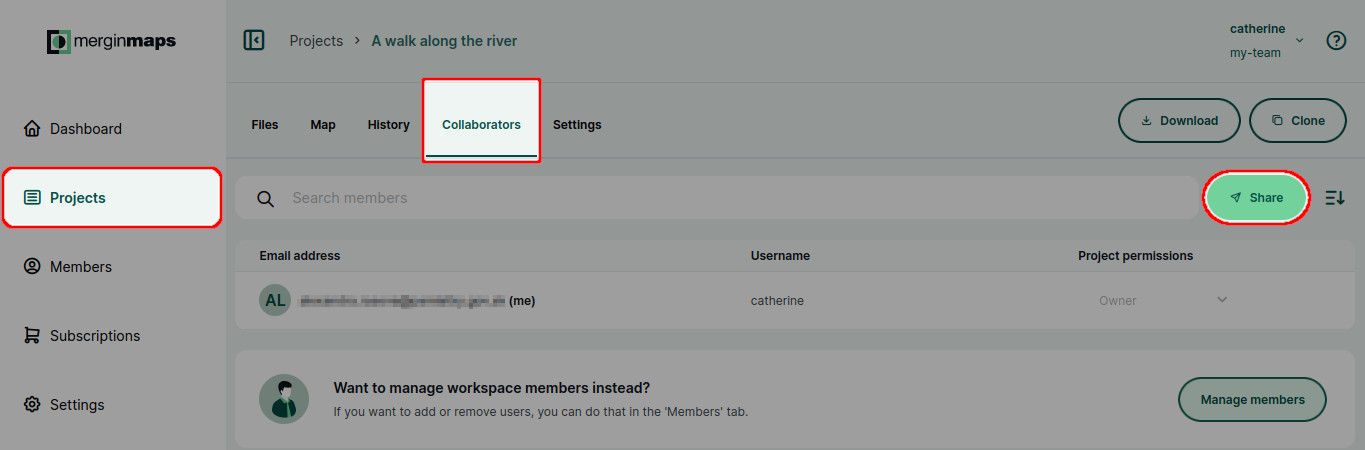
3. Enter the email addresses of the users you want to invite and select their **Project permission**.
Click **Share** to send the invitation. 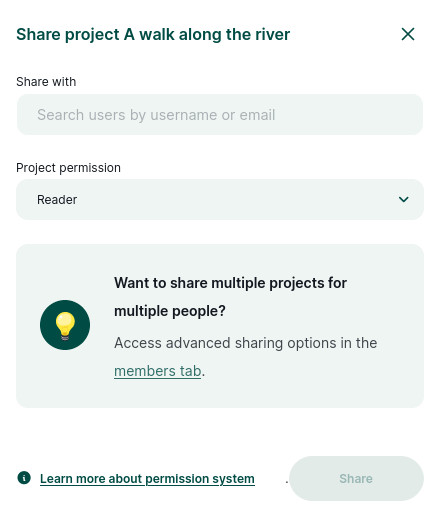
After accepting the invitation, the invited users will become guests in your workspace and will have access to this project.
### Send a link to your project [](https://merginmaps.com/docs/manage/project-advanced/#send-a-link-to-your-project)
Another method that is suitable for sharing a project with a large number of users is to send them a link to your project, such as [sarah/Basic survey/tree](https://app.merginmaps.com/projects/sarah/Basic%20survey/tree/tree)
.
1. Log into [app.merginmaps.com](https://app.merginmaps.com/)
2. Go to the project you want to share
3. Copy the link from your web browser and share it with your colleagues 
If you send a link to a [private](https://merginmaps.com/docs/manage/project-advanced/#make-your-project-public-private)
project, users can **request access** after logging into the [dashboard](https://app.merginmaps.com/)
. 
Once the user requests access, you (or another project owner) can grant them appropriate [permissions](https://merginmaps.com/docs/manage/permissions/)
and accept (or decline) their request. 
### Make your project public/private [](https://merginmaps.com/docs/manage/project-advanced/#make-your-project-public-private)
Your projects are private by default. If you make it [public](https://merginmaps.com/docs/manage/permissions/#public-and-private-projects)
, everyone can see your data and project history. However, they cannot contribute to your public project unless you grant them the write permission.
1. Log into [app.merginmaps.com](https://app.merginmaps.com/)
2. Go to the project you want to make public
3. In the **Settings** tab, click on **Make public**
If you change your mind, you can make your project private by clicking **Make private**.
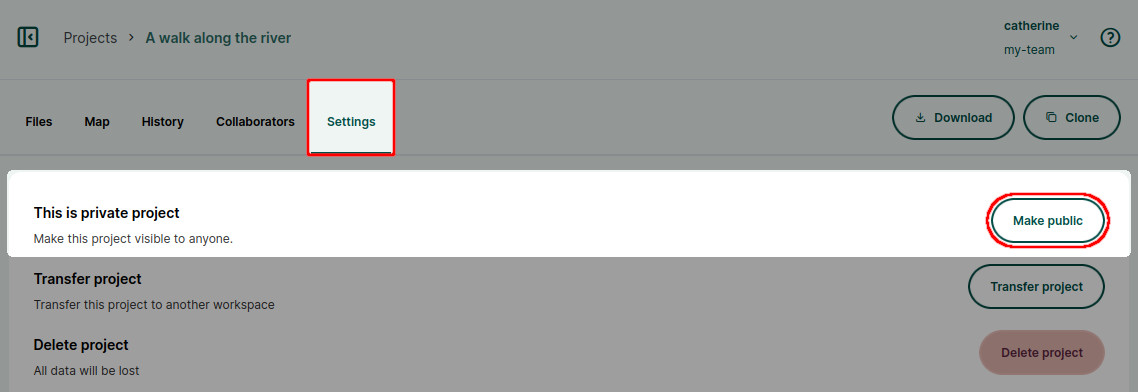
Transfer a project [](https://merginmaps.com/docs/manage/project-advanced/#transfer-a-project)
------------------------------------------------------------------------------------------------
A Mergin Maps project can be transferred to another workspace. This can be useful when there are personal changes in your team or if you have multiple workspaces and want to manage the storage between them.
1. Make sure to correctly synchronise all changes from your collaborators and devices. If you fail to do that, their local changes will be lost!
2. After synchronisation, all collaborators have to **remove** the project from their devices
3. Log in to [app.merginmaps.com](https://app.merginmaps.com/)
and choose the project you want to transfer
4. Go to **Settings** and click on **Transfer project**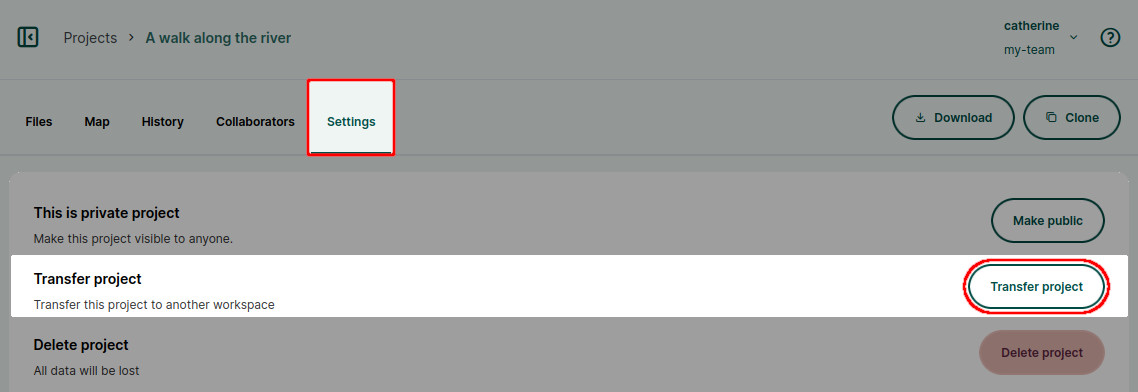
5. Enter the name of the workspace to which the project should be transferred and click on **Request transfer**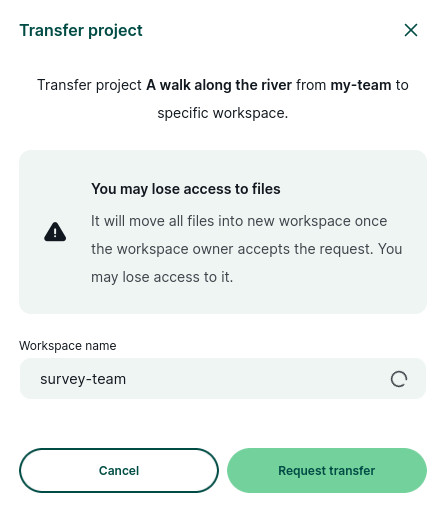
The owner of the new workspace will be notified and will be able to accept or deny the request through the [dashboard](https://app.merginmaps.com/)
. 
The request is valid for 6 days. If the request is not accepted after this period, the project will remain in the original workspace.
6. If the same team wants to continue contributing to the project, they need to **download the transferred project** from the new workspace.
Delete a project [](https://merginmaps.com/docs/manage/project-advanced/#delete-a-project)
--------------------------------------------------------------------------------------------
If you want to delete a project, you can do so through [app.merginmaps.com](https://app.merginmaps.com/)
or using the Mergin Maps QGIS plugin.
After deleting a project, it is kept on [Mergin Maps](https://merginmaps.com/)
servers for 14 days before it is deleted permanently. During this period, it can be restored if you contact [support@merginmaps.com](mailto:support@merginmaps.com)
.
If you want to create a new project with the same name sooner, you can contact [support@merginmaps.com](mailto:support@merginmaps.com)
.
WARNING
If you reuse the name of a deleted project, make sure to coordinate your team to follow the steps described in [How to Deploy Revised Projects](https://merginmaps.com/docs/manage/deploy-new-project/)
.
To avoid synchronisation issues, everyone should delete the old project from all devices and then download the new project.
### Delete a project through merginmaps.com [](https://merginmaps.com/docs/manage/project-advanced/#delete-a-project-through-merginmaps-com)
1. Log in to [app.merginmaps.com](https://app.merginmaps.com/)
and navigate to the project you want to delete
2. Go to **Settings** and click on **Delete project**
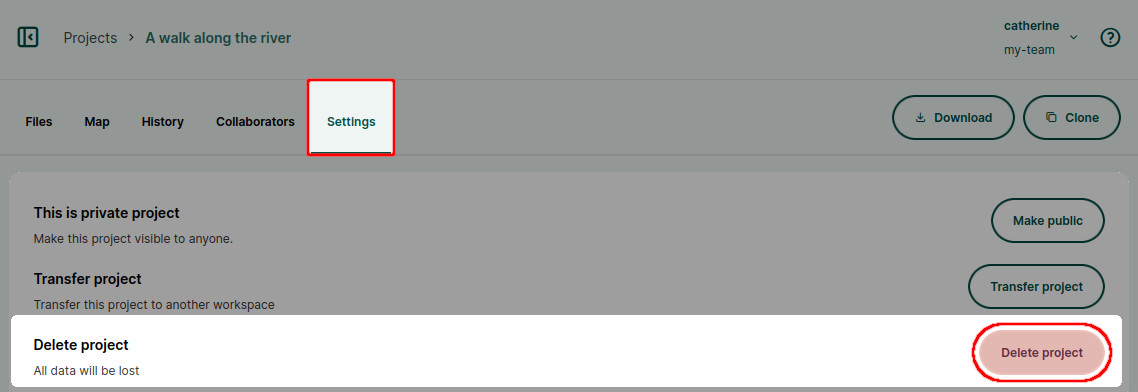
### Delete a project using the Mergin Maps QGIS plugin [](https://merginmaps.com/docs/manage/project-advanced/#delete-a-project-using-the-mergin-maps-qgis-plugin)
Using the Mergin Maps QGIS plugin, you can delete a Mergin Maps project either locally on your PC or on the Mergin Maps server. To be able to delete the project on the server, you need to first delete the files locally.
1. In QGIS, go to the **Mergin Maps** in the Browser panel
2. Right-click on the project name and select **Remove locally**. This will remove the project from your PC. The project will be still available on the Mergin Maps server. You will be able to download the project again. 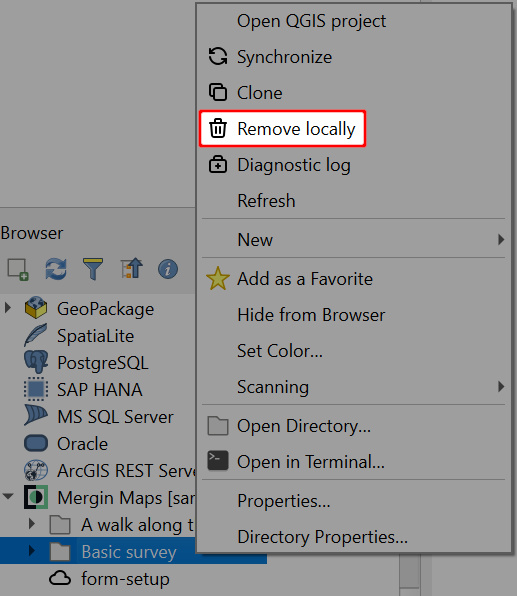
3. Right-click on the project name again and select **Remove from server** option. This will remove the Mergin Maps project completely. 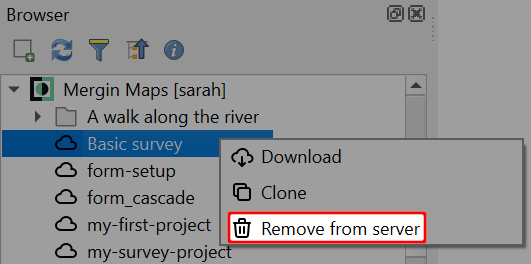
By clicking **“Accept All Cookies”**, you agree to the storing of cookies on your device to enhance site navigation, analyze site usage, and assist in our marketing efforts. View our [Cookie Policy](https://merginmaps.com/cookies)
for more information. [Deny cookies here](https://merginmaps.com/docs/manage/project-advanced/#)
.
[Preferences](https://merginmaps.com/docs/manage/project-advanced/#)
Accept all cookies
---
# Supported Formats | Mergin Maps
[Skip to content](https://merginmaps.com/docs/gis/supported_formats/#VPContent)
On this page
Supported Formats [](https://merginmaps.com/docs/gis/supported_formats/#supported-formats)
============================================================================================
When working with Mergin Maps mobile app, you can keep using standard data formats you are used to in QGIS. In general, most of the data formats that QGIS can load, can be also used in the mobile app. There are however some minor differences worth highlighting.
Vector data on Mergin Maps mobile app [](https://merginmaps.com/docs/gis/supported_formats/#vector-data-on-mergin-maps-mobile-app)
------------------------------------------------------------------------------------------------------------------------------------
For survey layers used on the field, we strongly recommend GeoPackage, to be able to work fully offline, benefit from automatic merging of data (collaborative editing) and versioning.
| Format | Android/iOS | Note |
| --- | --- | --- |
| GeoPackage | 😍 | collaborative editing and versioning by [geodiff](https://github.com/MerginMaps/geodiff) |
| Shapefile | ⚠️ | collaborative editing not supported |
| Delimited text | ⚠️ | collaborative editing not supported |
| Virtual layer | ⚠️ | collaborative editing not supported |
| [PostGIS](https://merginmaps.com/docs/gis/supported_formats/#postgresql-postgis) | 👍 | requires internet connection |
| WFS | ⚠️ | requires internet connection |
There are more formats supported, please see full list of supported [QGIS providers](https://merginmaps.com/docs/gis/supported_formats/#full-list-of-supported-qgis-providers)
and [OGR drivers](https://merginmaps.com/docs/gis/supported_formats/#full-list-of-supported-ogr-drivers)
TIP
Go to [Behind Data Synchronisation](https://merginmaps.com/docs/manage/synchronisation/)
to read more about how synchronisation works in [Mergin Maps](https://merginmaps.com/)
.
### PostgreSQL/PostGIS [](https://merginmaps.com/docs/gis/supported_formats/#postgresql-postgis)
PostgreSQL connection (username, password, host, port, etc.) can be set up:
* directly in QGIS PostgreSQL connection, if you want to reuse the same connection for everyone
* use a _Connection Service File_ `pg_service.conf`, if you want to have different PostgreSQL user for each surveyor
To use a _Connection Service File_, you have to:
* create a `pg_service.conf` file as described in [QGIS User Manual](https://docs.qgis.org/latest/en/docs/user_manual/managing_data_source/opening_data.html#postgresql-service-connection-file)
and test it in QGIS Desktop
* [manually transfer](https://merginmaps.com/docs/manage/missing-data/)
the `pg_service.conf` file to Mergin Maps mobile app data folder. The data folder is shown in the [Diagnostic Log](https://merginmaps.com/docs/misc/troubleshoot/#diagnostic-log-on-mergin-maps-mobile-app)
* restart the mobile app. Check the [Diagnostic Log](https://merginmaps.com/docs/misc/troubleshoot/#diagnostic-log-on-mergin-maps-mobile-app)
to see if the file is found and used after restart.
Raster data on Mergin Maps mobile app [](https://merginmaps.com/docs/gis/supported_formats/#raster-data-on-mergin-maps-mobile-app)
------------------------------------------------------------------------------------------------------------------------------------
| Format | Android/iOS | Note |
| --- | --- | --- |
| GeoTIFF | 👍 | jpg and webp compression |
| JPEG | 👍 | |
| PNG | 👍 | |
| COG (local) | 👍 | |
| MBTiles | 👍 | png, jpg compression |
| Geospatial PDF | 👍 | |
| WM(T)S | 👍 | requires internet connection |
| XYZ tiles | 👍 | requires internet connection (e.g. OpenStreetMap) |
| COG (online) | 👍 | requires internet connection |
| ECW | 🚫 | proprietary license |
| MrSID | 🚫 | proprietary license |
There are plenty of other raster formats we support through GDAL/OGR, please see [the full list](https://merginmaps.com/docs/gis/supported_formats/#full-list-of-supported-gdal-drivers)
TIP
See [our guide](https://merginmaps.com/docs/gis/settingup_background_map/)
for setting up background layers.
Vector tiles on Mergin Maps mobile app [](https://merginmaps.com/docs/gis/supported_formats/#vector-tiles-on-mergin-maps-mobile-app)
--------------------------------------------------------------------------------------------------------------------------------------
We support vector tiles just like QGIS does - in Mapbox Vector Tiles (MVT) format - and stored either in a MBTiles file (for offline use) or through a template URL (for online service) such as `http://example.com/{z}/{x}/{y}.pbf`.
TIP
See [our guide](https://merginmaps.com/docs/gis/settingup_background_map/)
for setting up background layers.
Full list of supported QGIS providers [](https://merginmaps.com/docs/gis/supported_formats/#full-list-of-supported-qgis-providers)
------------------------------------------------------------------------------------------------------------------------------------
The mobile app is based on the [MerginMaps/mobile-sdk](https://github.com/MerginMaps/mobile-sdk)
with custom QGIS core library build. The currently supported QGIS providers are
OGC API - Features data provider
WFS data provider
ArcGIS Feature Service data provider
ArcGIS Map Service data provider
Delimited text data provider
GDAL data provider
Memory provider
Mesh memory provider
OGR data provider
PostgreSQL/PostGIS data provider
SpatiaLite data provider
Vector tile provider
Virtual layer data provider
OGC Web Coverage Service version 1.0/1.1 data provider
OGC Web Map Service version 1.3 data provider
Full list of supported GDAL drivers [](https://merginmaps.com/docs/gis/supported_formats/#full-list-of-supported-gdal-drivers)
--------------------------------------------------------------------------------------------------------------------------------
The mobile app is based on the [MerginMaps/mobile-sdk](https://github.com/MerginMaps/mobile-sdk)
with custom GDAL build. The currently supported formats are
./gdalinfo --formats
Supported Formats:
VRT -raster,multidimensional raster- (rw+v): Virtual Raster (*.vrt)
DERIVED -raster- (ro): Derived datasets using VRT pixel functions
GTI -raster- (rov): GDAL Raster Tile Index (*.gti.gpkg, *.gti.fgb, *.gti)
SNAP_TIFF -raster- (rov): Sentinel Application Processing GeoTIFF
GTiff -raster- (rw+vs): GeoTIFF (*.tif, *.tiff)
COG -raster- (wv): Cloud optimized GeoTIFF generator (*.tif, *.tiff)
NITF -raster- (rw+vs): National Imagery Transmission Format (*.ntf)
RPFTOC -raster- (rovs): Raster Product Format TOC format (*.toc)
ECRGTOC -raster- (rovs): ECRG TOC format (*.xml)
HFA -raster- (rw+v): Erdas Imagine Images (.img) (*.img)
SAR_CEOS -raster- (rov): CEOS SAR Image
CEOS -raster- (rov): CEOS Image
JAXAPALSAR -raster- (rov): JAXA PALSAR Product Reader (Level 1.1/1.5)
GFF -raster- (rov): Ground-based SAR Applications Testbed File Format (.gff) (*.gff)
ELAS -raster- (rw+v): ELAS
ESRIC -raster- (rov): Esri Compact Cache (*.json, *.tpkx)
AIG -raster- (rov): Arc/Info Binary Grid
AAIGrid -raster- (rwv): Arc/Info ASCII Grid (*.asc)
GRASSASCIIGrid -raster- (rov): GRASS ASCII Grid
ISG -raster- (rov): International Service for the Geoid (*.isg)
SDTS -raster- (rov): SDTS Raster (*.ddf)
DTED -raster- (rwv): DTED Elevation Raster (*.dt0, *.dt1, *.dt2)
PNG -raster- (rwv): Portable Network Graphics (*.png)
JPEG -raster- (rwv): JPEG JFIF (*.jpg, *.jpeg)
MEM -raster,multidimensional raster- (rw+): In Memory Raster
JDEM -raster- (rov): Japanese DEM (.mem) (*.mem)
ESAT -raster- (rov): Envisat Image Format (*.n1)
BSB -raster- (rov): Maptech BSB Nautical Charts (*.kap)
XPM -raster- (rwv): X11 PixMap Format (*.xpm)
BMP -raster- (rw+v): MS Windows Device Independent Bitmap (*.bmp)
DIMAP -raster- (rovs): SPOT DIMAP
AirSAR -raster- (rov): AirSAR Polarimetric Image
RS2 -raster- (rovs): RadarSat 2 XML Product
SAFE -raster- (rov): Sentinel-1 SAR SAFE Product
PCIDSK -raster,vector- (rw+v): PCIDSK Database File (*.pix)
PCRaster -raster- (rw+): PCRaster Raster File (*.map)
ILWIS -raster- (rw+v): ILWIS Raster Map (*.mpr, *.mpl)
SGI -raster- (rw+v): SGI Image File Format 1.0 (*.rgb)
SRTMHGT -raster- (rwv): SRTMHGT File Format (*.hgt)
Leveller -raster- (rw+v): Leveller heightfield (*.ter)
Terragen -raster- (rw+v): Terragen heightfield (*.ter)
ISIS3 -raster- (rw+v): USGS Astrogeology ISIS cube (Version 3) (*.lbl, *.cub)
ISIS2 -raster- (rw+v): USGS Astrogeology ISIS cube (Version 2)
PDS -raster- (rov): NASA Planetary Data System
PDS4 -raster,vector- (rw+vs): NASA Planetary Data System 4 (*.xml)
VICAR -raster,vector- (rw+v): MIPL VICAR file
TIL -raster- (rov): EarthWatch .TIL
ERS -raster- (rw+v): ERMapper .ers Labelled (*.ers)
L1B -raster- (rovs): NOAA Polar Orbiter Level 1b Data Set
FIT -raster- (rwv): FIT Image
GRIB -raster,multidimensional raster- (rwv): GRIdded Binary (.grb, .grb2) (*.grb, *.grb2, *.grib2)
RMF -raster- (rw+v): Raster Matrix Format (*.rsw)
WCS -raster- (rovs): OGC Web Coverage Service
WMS -raster- (rwvs): OGC Web Map Service
MSGN -raster- (rov): EUMETSAT Archive native (.nat) (*.nat)
RST -raster- (rw+v): Idrisi Raster A.1 (*.rst)
GSAG -raster- (rwv): Golden Software ASCII Grid (.grd) (*.grd)
GSBG -raster- (rw+v): Golden Software Binary Grid (.grd) (*.grd)
GS7BG -raster- (rw+v): Golden Software 7 Binary Grid (.grd) (*.grd)
COSAR -raster- (rov): COSAR Annotated Binary Matrix (TerraSAR-X)
TSX -raster- (rov): TerraSAR-X Product
COASP -raster- (ro): DRDC COASP SAR Processor Raster (*.hdr)
R -raster- (rwv): R Object Data Store (*.rda)
MAP -raster- (rov): OziExplorer .MAP
KMLSUPEROVERLAY -raster- (rwv): Kml Super Overlay (*.kml, *.kmz)
WEBP -raster- (rwv): WEBP (*.webp)
PDF -raster,vector- (w+): Geospatial PDF (*.pdf)
Rasterlite -raster- (rwvs): Rasterlite (*.sqlite)
MBTiles -raster,vector- (rw+v): MBTiles (*.mbtiles)
PLMOSAIC -raster- (ro): Planet Labs Mosaics API
CALS -raster- (rwv): CALS (Type 1) (*.cal, *.ct1)
WMTS -raster- (rwv): OGC Web Map Tile Service
SENTINEL2 -raster- (rovs): Sentinel 2
MRF -raster- (rw+v): Meta Raster Format (*.mrf)
PNM -raster- (rw+v): Portable Pixmap Format (netpbm) (*.pgm, *.ppm, *.pnm)
DOQ1 -raster- (rov): USGS DOQ (Old Style)
DOQ2 -raster- (rov): USGS DOQ (New Style)
PAux -raster- (rw+v): PCI .aux Labelled
MFF -raster- (rw+v): Vexcel MFF Raster (*.hdr)
MFF2 -raster- (rw+): Vexcel MFF2 (HKV) Raster
GSC -raster- (rov): GSC Geogrid
FAST -raster- (rov): EOSAT FAST Format
BT -raster- (rw+v): VTP .bt (Binary Terrain) 1.3 Format (*.bt)
LAN -raster- (rw+v): Erdas .LAN/.GIS
CPG -raster- (rov): Convair PolGASP
NDF -raster- (rov): NLAPS Data Format
EIR -raster- (rov): Erdas Imagine Raw
DIPEx -raster- (rov): DIPEx
LCP -raster- (rwv): FARSITE v.4 Landscape File (.lcp) (*.lcp)
GTX -raster- (rw+v): NOAA Vertical Datum .GTX (*.gtx)
LOSLAS -raster- (rov): NADCON .los/.las Datum Grid Shift
NTv2 -raster- (rw+vs): NTv2 Datum Grid Shift (*.gsb, *.gvb)
CTable2 -raster- (rw+v): CTable2 Datum Grid Shift
ACE2 -raster- (rov): ACE2 (*.ACE2)
SNODAS -raster- (rov): Snow Data Assimilation System (*.hdr)
KRO -raster- (rw+v): KOLOR Raw (*.kro)
ROI_PAC -raster- (rw+v): ROI_PAC raster
RRASTER -raster- (rw+v): R Raster (*.grd)
BYN -raster- (rw+v): Natural Resources Canada's Geoid (*.byn, *.err)
NOAA_B -raster- (rov): NOAA GEOCON/NADCON5 .b format (*.b)
NSIDCbin -raster- (rov): NSIDC Sea Ice Concentrations binary (.bin) (*.bin)
RIK -raster- (rov): Swedish Grid RIK (.rik) (*.rik)
USGSDEM -raster- (rwv): USGS Optional ASCII DEM (and CDED) (*.dem)
GXF -raster- (rov): GeoSoft Grid Exchange Format (*.gxf)
NWT_GRD -raster- (rw+v): Northwood Numeric Grid Format .grd/.tab (*.grd)
NWT_GRC -raster- (rov): Northwood Classified Grid Format .grc/.tab (*.grc)
ADRG -raster- (rw+vs): ARC Digitized Raster Graphics (*.gen)
SRP -raster- (rovs): Standard Raster Product (ASRP/USRP) (*.img)
BLX -raster- (rwv): Magellan topo (.blx) (*.blx)
SAGA -raster- (rw+v): SAGA GIS Binary Grid (.sdat, .sg-grd-z) (*.sdat, *.sg-grd-z)
XYZ -raster- (rwv): ASCII Gridded XYZ (*.xyz)
HF2 -raster- (rwv): HF2/HFZ heightfield raster (*.hf2)
OZI -raster- (rov): OziExplorer Image File
CTG -raster- (rov): USGS LULC Composite Theme Grid
ZMap -raster- (rwv): ZMap Plus Grid (*.dat)
NGSGEOID -raster- (rov): NOAA NGS Geoid Height Grids (*.bin)
IRIS -raster- (rov): IRIS data (.PPI, .CAPPi etc) (*.ppi)
PRF -raster- (rov): Racurs PHOTOMOD PRF (*.prf)
EEDAI -raster- (ros): Earth Engine Data API Image
DAAS -raster- (ro): Airbus DS Intelligence Data As A Service driver
SIGDEM -raster- (rwv): Scaled Integer Gridded DEM .sigdem (*.sigdem)
TGA -raster- (rov): TGA/TARGA Image File Format (*.tga)
OGCAPI -raster,vector- (rov): OGCAPI
STACTA -raster- (rovs): Spatio-Temporal Asset Catalog Tiled Assets (*.json)
STACIT -raster- (rovs): Spatio-Temporal Asset Catalog Items
GPKG -raster,vector- (rw+vs): GeoPackage (*.gpkg, *.gpkg.zip)
OpenFileGDB -raster,vector- (rw+v): ESRI FileGDB (*.gdb)
PLSCENES -raster,vector- (ro): Planet Labs Scenes API
NGW -raster,vector- (rw+s): NextGIS Web
GenBin -raster- (rov): Generic Binary (.hdr Labelled)
ENVI -raster- (rw+v): ENVI .hdr Labelled
EHdr -raster- (rw+v): ESRI .hdr Labelled (*.bil)
ISCE -raster- (rw+v): ISCE raster
Zarr -raster,multidimensional raster- (rw+vs): Zarr
HTTP -raster,vector- (ro): HTTP Fetching Wrapper
Full list of supported OGR drivers [](https://merginmaps.com/docs/gis/supported_formats/#full-list-of-supported-ogr-drivers)
------------------------------------------------------------------------------------------------------------------------------
The mobile app is based on the [MerginMaps/mobile-sdk](https://github.com/MerginMaps/mobile-sdk)
with custom OGR build. The currently supported formats are
./ogrinfo --formats
Supported Formats:
PCIDSK -raster,vector- (rw+v): PCIDSK Database File (*.pix)
PDS4 -raster,vector- (rw+vs): NASA Planetary Data System 4 (*.xml)
VICAR -raster,vector- (rw+v): MIPL VICAR file
PDF -raster,vector- (w+): Geospatial PDF (*.pdf)
MBTiles -raster,vector- (rw+v): MBTiles (*.mbtiles)
EEDA -vector- (ro): Earth Engine Data API
OGCAPI -raster,vector- (rov): OGCAPI
ESRI Shapefile -vector- (rw+v): ESRI Shapefile (*.shp, *.dbf, *.shz, *.shp.zip)
MapInfo File -vector- (rw+v): MapInfo File (*.tab, *.mif, *.mid)
UK .NTF -vector- (rov): UK .NTF
LVBAG -vector- (rov): Kadaster LV BAG Extract 2.0 (*.xml)
OGR_SDTS -vector- (rov): SDTS
S57 -vector- (rw+v): IHO S-57 (ENC) (*.000)
DGN -vector- (rw+v): Microstation DGN (*.dgn)
OGR_VRT -vector- (rov): VRT - Virtual Datasource (*.vrt)
Memory -vector- (rw+): Memory
CSV -vector- (rw+v): Comma Separated Value (.csv) (*.csv, *.tsv, *.psv)
GML -vector- (rw+v): Geography Markup Language (GML) (*.gml, *.xml)
GPX -vector- (rw+v): GPX (*.gpx)
KML -vector- (rw+v): Keyhole Markup Language (KML) (*.kml)
GeoJSON -vector- (rw+v): GeoJSON (*.json, *.geojson)
GeoJSONSeq -vector- (rw+v): GeoJSON Sequence (*.geojsonl, *.geojsons)
ESRIJSON -vector- (rov): ESRIJSON (*.json)
TopoJSON -vector- (rov): TopoJSON (*.json, *.topojson)
OGR_GMT -vector- (rw+v): GMT ASCII Vectors (.gmt) (*.gmt)
GPKG -raster,vector- (rw+vs): GeoPackage (*.gpkg, *.gpkg.zip)
SQLite -vector- (rw+v): SQLite / Spatialite (*.sqlite, *.db)
WAsP -vector- (rw+v): WAsP .map format (*.map)
OpenFileGDB -raster,vector- (rw+v): ESRI FileGDB (*.gdb)
DXF -vector- (rw+v): AutoCAD DXF (*.dxf)
FlatGeobuf -vector- (rw+v): FlatGeobuf (*.fgb)
Geoconcept -vector- (rw+v): Geoconcept (*.gxt, *.txt)
GeoRSS -vector- (rw+v): GeoRSS
VFK -vector- (ro): Czech Cadastral Exchange Data Format (*.vfk)
PGDUMP -vector- (w+v): PostgreSQL SQL dump (*.sql)
OSM -vector- (rov): OpenStreetMap XML and PBF (*.osm, *.pbf)
GPSBabel -vector- (rw+): GPSBabel (*.mps, *.gdb, *.osm, *.tcx, *.igc)
OGR_PDS -vector- (rov): Planetary Data Systems TABLE
WFS -vector- (rov): OGC WFS (Web Feature Service)
OAPIF -vector- (ro): OGC API - Features
EDIGEO -vector- (rov): French EDIGEO exchange format (*.thf)
SVG -vector- (rov): Scalable Vector Graphics (*.svg)
Idrisi -vector- (rov): Idrisi Vector (.vct) (*.vct)
XLS -vector- (ro): MS Excel format (*.xls)
ODS -vector- (rw+v): Open Document/ LibreOffice / OpenOffice Spreadsheet (*.ods)
XLSX -vector- (rw+v): MS Office Open XML spreadsheet (*.xlsx, *.xlsm)
Elasticsearch -vector- (rw+): Elastic Search
Carto -vector- (rw+): Carto
AmigoCloud -vector- (rw+): AmigoCloud
SXF -vector- (rov): Storage and eXchange Format (*.sxf)
Selafin -vector- (rw+v): Selafin
JML -vector- (rw+v): OpenJUMP JML (*.jml)
PLSCENES -raster,vector- (ro): Planet Labs Scenes API
CSW -vector- (ro): OGC CSW (Catalog Service for the Web)
VDV -vector- (rw+v): VDV-451/VDV-452/INTREST Data Format (*.txt, *.x10)
MVT -vector- (rw+v): Mapbox Vector Tiles (*.mvt, *.mvt.gz, *.pbf)
NGW -raster,vector- (rw+s): NextGIS Web
MapML -vector- (rw+v): MapML
GTFS -vector- (rov): General Transit Feed Specification (*.zip)
PMTiles -vector- (rw+v): ProtoMap Tiles (*.pmtiles)
JSONFG -vector- (rw+v): OGC Features and Geometries JSON (*.json)
MiraMonVector -vector- (rw+v): MiraMon Vectors (.pol, .arc, .pnt) (*.pol, *.arc, *.pnt)
TIGER -vector- (rov): U.S. Census TIGER/Line
AVCBin -vector- (rov): Arc/Info Binary Coverage
AVCE00 -vector- (rov): Arc/Info E00 (ASCII) Coverage (*.e00)
HTTP -raster,vector- (ro): HTTP Fetching Wrapper
How to convert between GDAL/OGR formats [](https://merginmaps.com/docs/gis/supported_formats/#how-to-convert-between-gdal-ogr-formats)
----------------------------------------------------------------------------------------------------------------------------------------
To convert between various GDAL formats, you can use [gdal\_translate](https://gdal.org/programs/gdal_translate.html)
command-line utility.
Support for new formats [](https://merginmaps.com/docs/gis/supported_formats/#support-for-new-formats)
--------------------------------------------------------------------------------------------------------
If you find out that the Mergin Maps mobile app doesn't support your format, please open issue at [MerginMaps/mobile-sdk](https://github.com/MerginMaps/mobile-sdk)
.
If QGIS on desktop does not support the format of your choice, open issue at [qgis/QGIS-Mac-Packager](https://github.com/qgis/QGIS-Mac-Packager)
for macOS, or [qgis/QGIS](https://github.com/qgis/QGIS)
for other platforms.
For support of collaborative editing and versioning of vector data formats, please open issue at [MerginMaps/geodiff](https://github.com/MerginMaps/geodiff)
.
---
# How to Deploy Revised Projects | Mergin Maps
[Skip to content](https://merginmaps.com/docs/manage/deploy-new-project/#VPContent)
On this page
How to Deploy Revised Projects [](https://merginmaps.com/docs/manage/deploy-new-project/#how-to-deploy-revised-projects)
==========================================================================================================================
TIP
It is recommended to design your data schema carefully when creating a new layer. See [the best practice tips](https://merginmaps.com/docs/layer/best-practice/)
to make your work easier in the long run!
Sometimes you may need to make changes in your project. Changing **forms** by adding/removing existing fields or changing their aliases should not cause any issues and you can just synchronise your project as usual.
However, you should be extra careful, if you are **modifying the data schema** of your survey layer, such as adding new fields or changing data type of a field. Data schema changes can cause synchronisation issues - to avoid them, you need to deploy the revised project properly. Here, we provide two options on how to do it. Choose the one that fits better with your workflow and your ability to coordinate with your team.
WARNING
Always make sure that the project on [Mergin Maps](https://merginmaps.com/)
is up-to-date with all the changes before data admin proceeds with change in GeoPackage data schema.
Using a new project after revisions [](https://merginmaps.com/docs/manage/deploy-new-project/#using-a-new-project-after-revisions)
------------------------------------------------------------------------------------------------------------------------------------
One way how to make sure the modified project is distributed correctly is to create a new project after change in data schema:
1. Synchronise **all devices** before you change the schema and make sure there are no pending changes
2. After the synchronisation, the project needs to be **removed** from all devices
3. [Clone](https://merginmaps.com/docs/manage/create-project/#clone-an-existing-project-in-qgis)
your survey project
4. Modify the data schema
5. Push the revised project to [Mergin Maps](https://merginmaps.com/)
as a **new project**
6. Ask your team members to **use the new project**
Using the same project after change in database schema [](https://merginmaps.com/docs/manage/deploy-new-project/#using-the-same-project-after-change-in-database-schema)
--------------------------------------------------------------------------------------------------------------------------------------------------------------------------
If you want to use the same project after modifications of data schema, make sure to follow these steps:
1. Synchronise **all devices** before you change the schema
2. After the synchronisation, the project needs to be **removed** from all devices
3. Change the data schema in QGIS and synchronise the project to the cloud
4. **Fresh download of the revised project to all devices**
WARNING
If even one of your surveyors does not comply and forgets to get the project with the modified schema, they may not be able to synchronise their work correctly: features in the layer with modified schema may be missing. If this happens to you, see [how to recover missing data](https://merginmaps.com/docs/manage/missing-data/)
.
By clicking **“Accept All Cookies”**, you agree to the storing of cookies on your device to enhance site navigation, analyze site usage, and assist in our marketing efforts. View our [Cookie Policy](https://merginmaps.com/cookies)
for more information. [Deny cookies here](https://merginmaps.com/docs/manage/deploy-new-project/#)
.
[Preferences](https://merginmaps.com/docs/manage/deploy-new-project/#)
Accept all cookies
---
# How to Install Mergin Maps QGIS Plugin | Mergin Maps
[Skip to content](https://merginmaps.com/docs/setup/install-mergin-maps-plugin-for-qgis/#VPContent)
On this page
How to Install Mergin Maps QGIS Plugin [](https://merginmaps.com/docs/setup/install-mergin-maps-plugin-for-qgis/#how-to-install-mergin-maps-qgis-plugin)
==========================================================================================================================================================
Before the installation of Mergin Maps QGIS plugin, please ensure you have already:
* [Signed up to Mergin Maps](https://merginmaps.com/docs/setup/sign-up-to-mergin-maps/)
* [Installed QGIS](https://merginmaps.com/docs/setup/install-qgis/)
Plugin installation [](https://merginmaps.com/docs/setup/install-mergin-maps-plugin-for-qgis/#plugin-installation)
--------------------------------------------------------------------------------------------------------------------
1. Open QGIS on your computer
2. Select **Manage and Install Plugins...** in the **Plugins** tab: 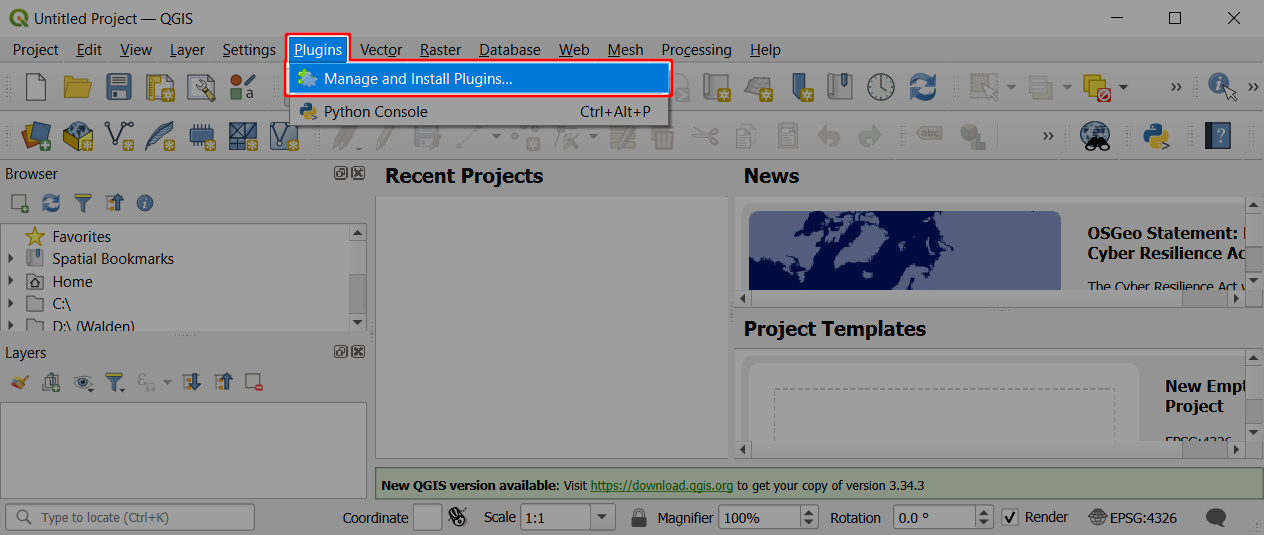
3. Find the **Mergin Maps** plugin and click **Install Plugin**: 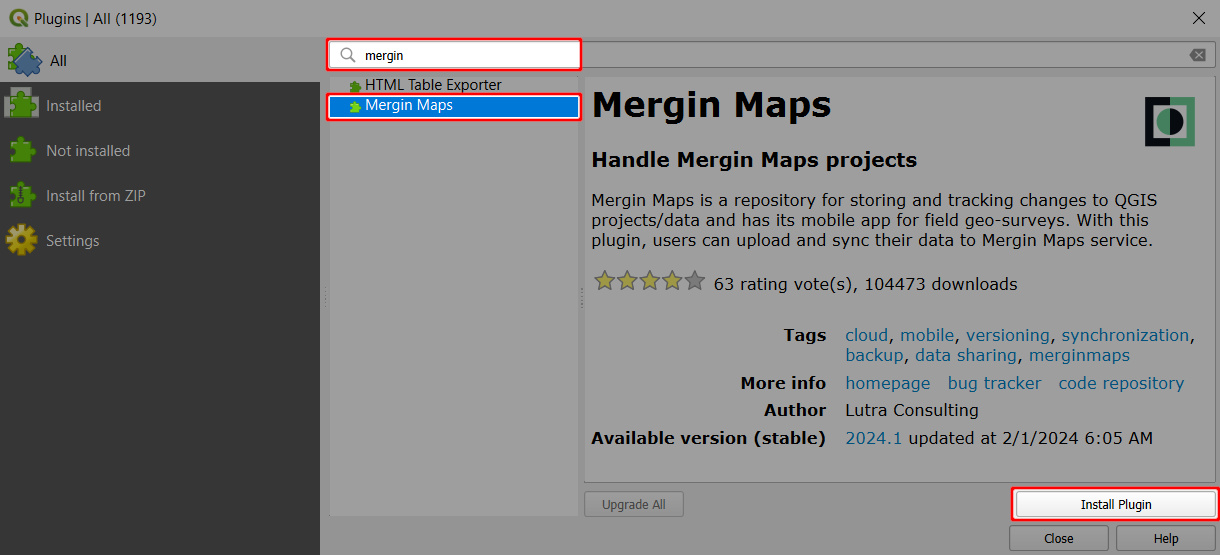
4. Close the Plugins dialog. The Mergin Maps QGIS plugin toolbar should appear in QGIS: 
TIP
If you cannot see the toolbar, ensure **Mergin Maps Toolbar** is checked under **View > Toolbars**.
Plugin configuration [](https://merginmaps.com/docs/setup/install-mergin-maps-plugin-for-qgis/#plugin-configuration)
----------------------------------------------------------------------------------------------------------------------
With the plugin installed, we'll now configure it with your [Mergin Maps](https://merginmaps.com/)
credentials.
1. Click the **Configure Mergin Maps QGIS plugin** icon on the **Mergin Maps Toolbar**: 
2. Enter your login credentials if these are blank
3. Click **Test Connection** to verify that everything works correctly. If so, click **OK**. 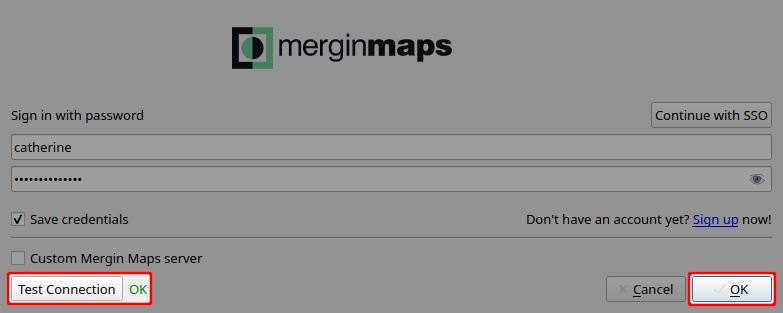
Mergin Maps QGIS plugin is now able to load projects from the cloud in QGIS.
The plugin has been installed and configured. You can learn more about its functionality in [Mergin Maps QGIS plugin Overview](https://merginmaps.com/docs/manage/plugin/)
.
Plugin upgrade [](https://merginmaps.com/docs/setup/install-mergin-maps-plugin-for-qgis/#plugin-upgrade)
----------------------------------------------------------------------------------------------------------
Upgrade the plugin periodically to ensure you can use the latest improvements.
1. In QGIS, navigate to **Manage and Install Plugins...** in the **Plugins** tab 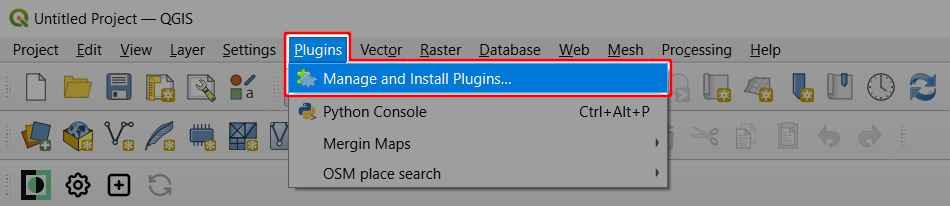
2. Find the **Mergin Maps** plugin. If there is a new version available, click **Upgrade Plugin**. 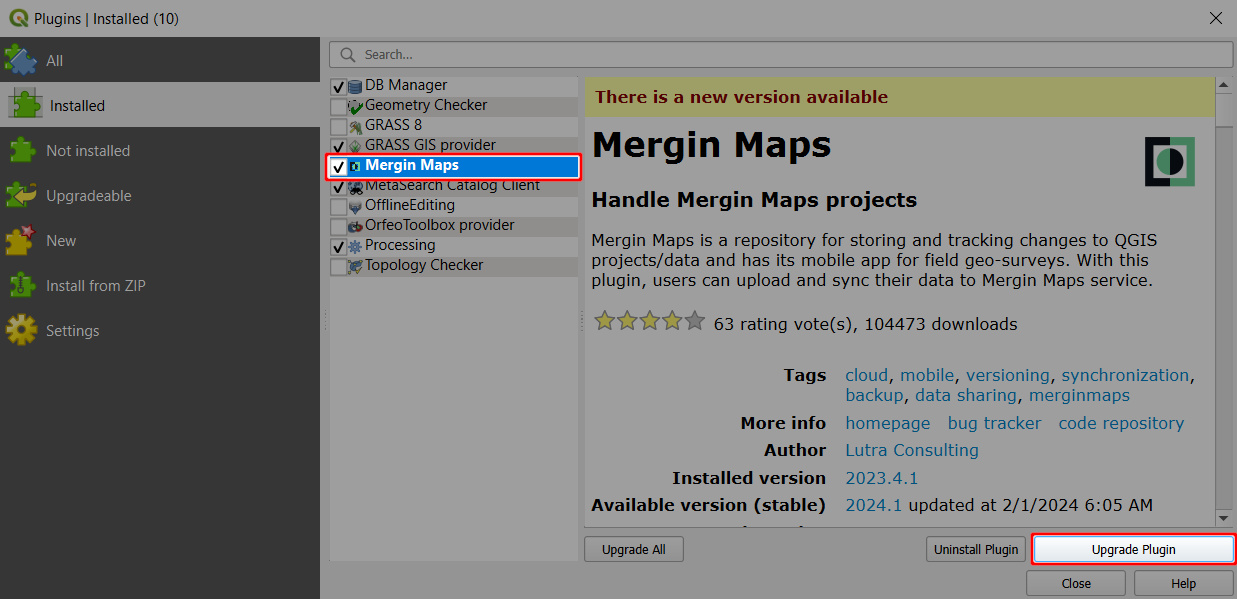
By clicking **“Accept All Cookies”**, you agree to the storing of cookies on your device to enhance site navigation, analyze site usage, and assist in our marketing efforts. View our [Cookie Policy](https://merginmaps.com/cookies)
for more information. [Deny cookies here](https://merginmaps.com/docs/setup/install-mergin-maps-plugin-for-qgis/#)
.
[Preferences](https://merginmaps.com/docs/setup/install-mergin-maps-plugin-for-qgis/#)
Accept all cookies
---
# How to Delete Files | Mergin Maps
[Skip to content](https://merginmaps.com/docs/manage/delete-files/#VPContent)
On this page
How to Delete Files [](https://merginmaps.com/docs/manage/delete-files/#how-to-delete-files)
==============================================================================================
Deleting files such as photos that are not needed anymore can help you free up storage on the [Mergin Maps Cloud](https://merginmaps.com/)
and keep your project organised.
Files can be deleted through [Mergin Maps dashboard](https://app.merginmaps.com/)
one by one. Deleting multiple files at once is possible on your computer using Mergin Maps QGIS plugin.
WARNING
Download and archive the data before deleting them if they may be needed in the future.
Delete files through Mergin Maps dashboard [](https://merginmaps.com/docs/manage/delete-files/#delete-files-through-mergin-maps-dashboard)
--------------------------------------------------------------------------------------------------------------------------------------------
Deleting files through merginmaps.com is simple. However, you can only delete one file at a time.
1. Log in to [app.merginmaps.com](https://app.merginmaps.com/)
and navigate to your project.
2. In the **Files** tab you will see the list of files that are stored in the project's folder.
Select the file you would like to delete. 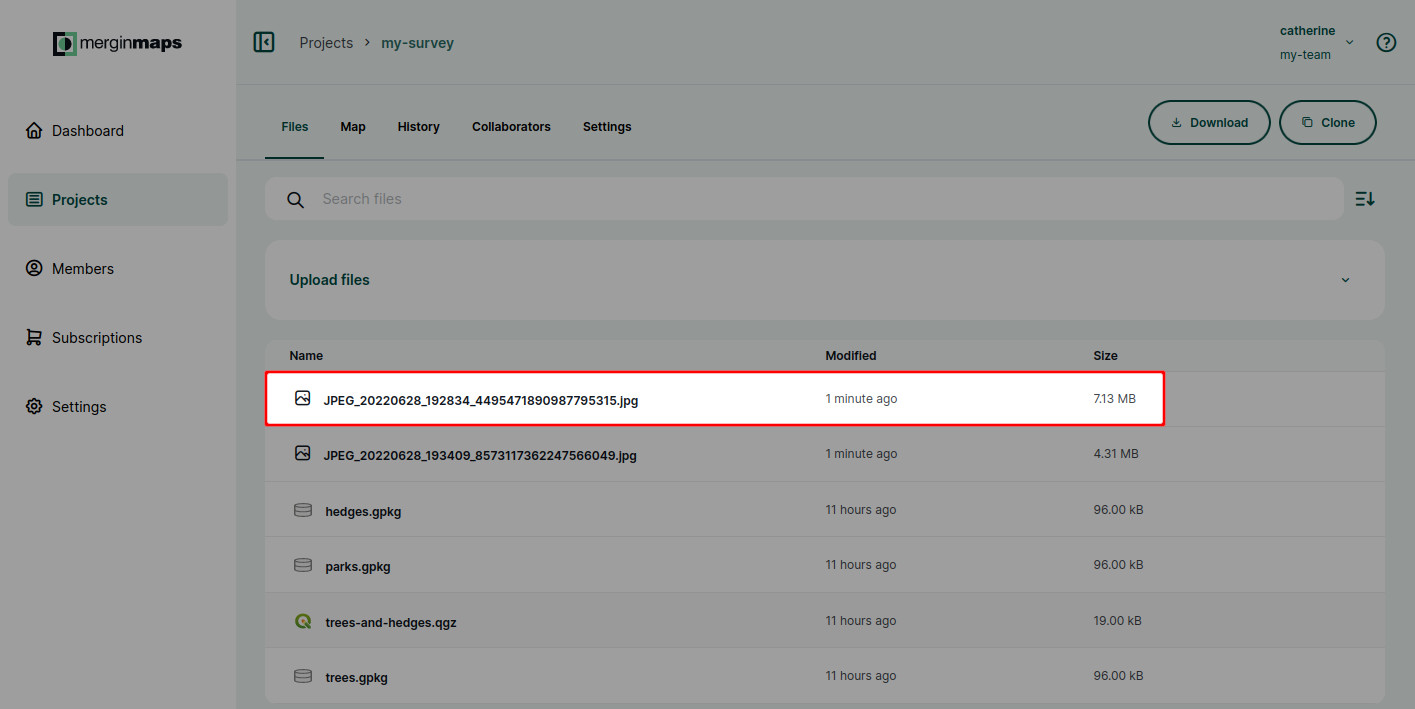
3. Review the details. If this is the file you want to remove, click on the **Delete file** button. 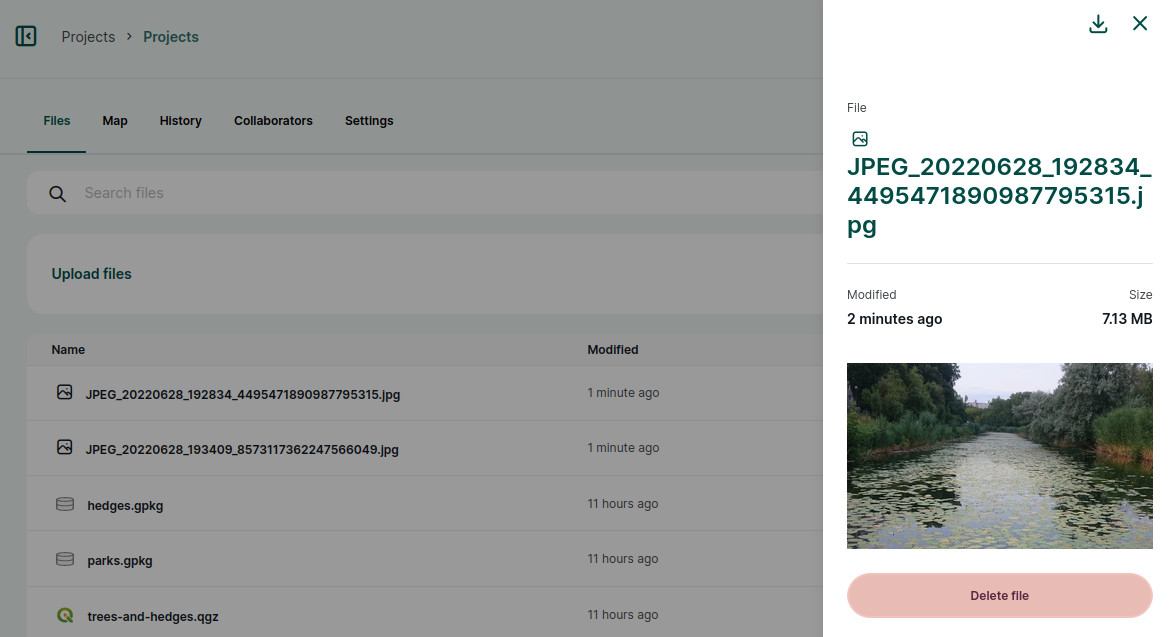
4. Use **Update Changes** in the **Data Sync** window to synchronise the changes. 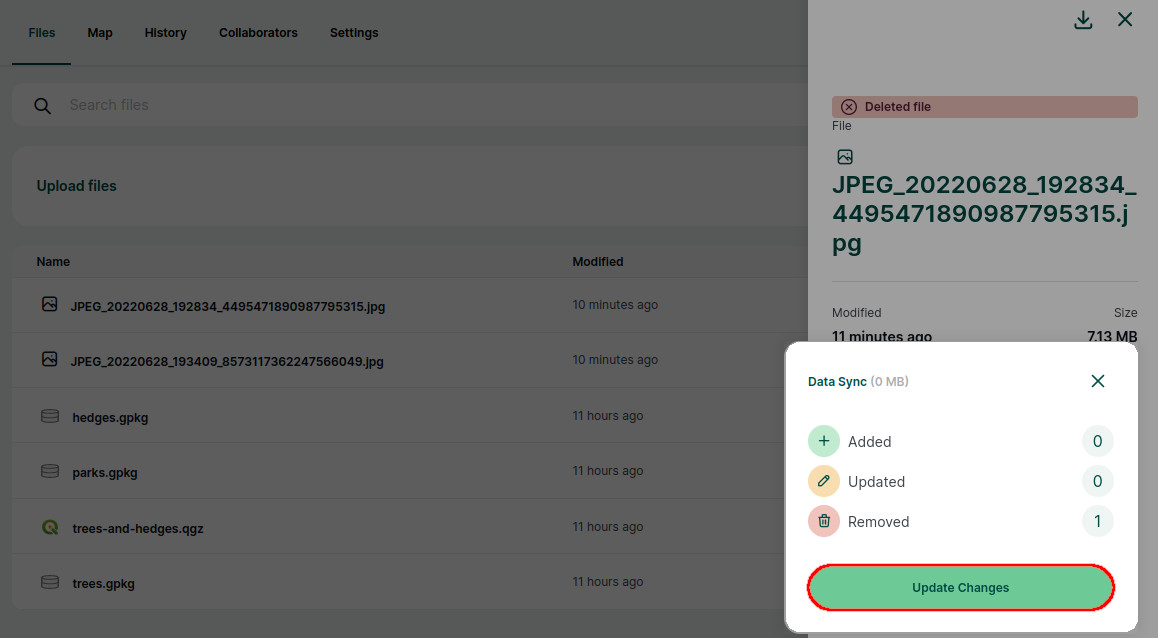
Delete multiple files at once [](https://merginmaps.com/docs/manage/delete-files/#delete-multiple-files-at-once)
------------------------------------------------------------------------------------------------------------------
If you want to delete multiple files, the best way to do this is on your computer.
1. [Download the project](https://merginmaps.com/docs/manage/plugin/#downloading-a-project-in-qgis)
to your computer using Mergin Maps QGIS plugin.
2. Navigate to the [project's folder](https://merginmaps.com/docs/manage/project/#mergin-maps-project-folder)
in your file browser and review the files inside the folder. There may be a [custom folder for photos](https://merginmaps.com/docs/layer/photos/#how-to-set-up-a-custom-folder-for-storing-photos)
if it was set up before.
Delete the files you do not want to keep anymore. 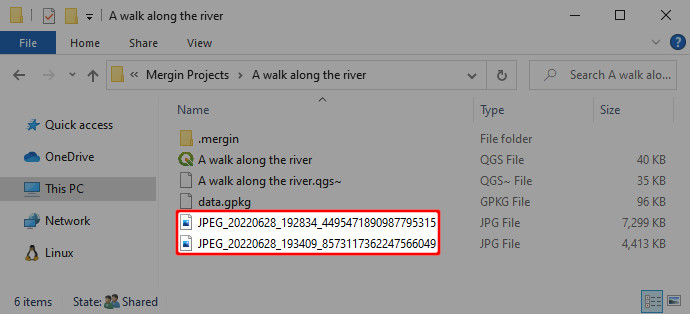
3. [Synchronise the changes](https://merginmaps.com/docs/manage/synchronisation/#synchronising-changes-in-qgis)
in QGIS using Mergin Maps QGIS plugin.
**Local changes** in **Project status** will show the list of deleted files. After synchronisation, the files will be also deleted from the cloud. 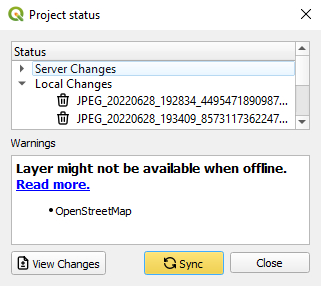
By clicking **“Accept All Cookies”**, you agree to the storing of cookies on your device to enhance site navigation, analyze site usage, and assist in our marketing efforts. View our [Cookie Policy](https://merginmaps.com/cookies)
for more information. [Deny cookies here](https://merginmaps.com/docs/manage/delete-files/#)
.
[Preferences](https://merginmaps.com/docs/manage/delete-files/#)
Accept all cookies
---
# How to Recover Missing Data | Mergin Maps
[Skip to content](https://merginmaps.com/docs/manage/missing-data/#VPContent)
On this page
How to Recover Missing Data [](https://merginmaps.com/docs/manage/missing-data/#how-to-recover-missing-data)
==============================================================================================================
Let's say you synchronise surveyed data from multiple devices (individual surveyors) and when you examine them, you find out there is something missing - new features that were captured in the field or changes made by one or more of your team members. The reasons why you didn't get all the data can vary. For instance, the data could not be synchronised correctly because of multiple surveyors editing the same feature or synchronisation of projects with different data schema. You can read more about this topic in [Behind Data Synchronisation](https://merginmaps.com/docs/manage/synchronisation/)
.
Here we will try to guide you through common techniques that can help you to retrieve your data.
WARNING
If you cannot synchronise changes, make sure you are connected to the internet and that you have not exceeded your storage limit.
Inspect your folder for conflict files [](https://merginmaps.com/docs/manage/missing-data/#inspect-your-folder-for-conflict-files)
------------------------------------------------------------------------------------------------------------------------------------
* Navigate to your project folder
* See if there are any files that contain `conf` or `conflict` in their names.
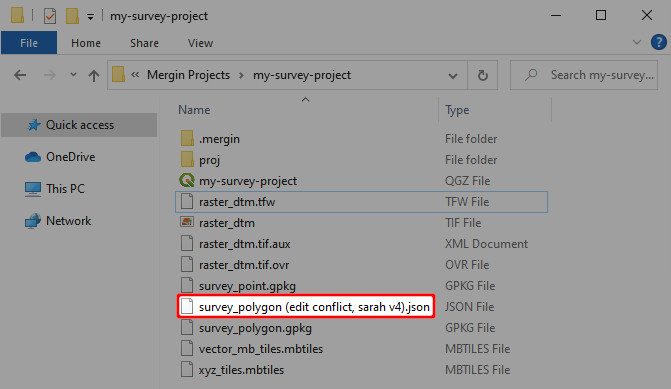
Depending on your data format, you can get something like `survey_polygon (edit conflict, sarah v4).json`, which is a conflict file for data from a user called `sarah`, project version 4.
There are conflict files in the folder [](https://merginmaps.com/docs/manage/missing-data/#there-are-conflict-files-in-the-folder)
------------------------------------------------------------------------------------------------------------------------------------
Conflict files can appear in your project when Mergin could not synchronise changes automatically and they indicate there may be some issues that should be fixed.
You can add conflict files to your QGIS project and check whether they contain the data you are missing. Then you can resolve them manually or semi-automatically, depending on the scope of your issue.
### Resolving conflict files manually [](https://merginmaps.com/docs/manage/missing-data/#resolving-conflict-files-manually)
If you can identify missing features visually, e.g. by finding out where the survey took place, you can copy and paste these features to the survey layer. Make sure the values have been transferred over correctly!
### Resolving conflict files semi-automatically [](https://merginmaps.com/docs/manage/missing-data/#resolving-conflict-files-semi-automatically)
Change the schema of the table in the conflict file to match the new schema and run the _Detect dataset changes_ algorithm from the _Processing toolbox_. You then need to go through the result and ensure the changes detected are the ones you expect for both attribute values and geometry.
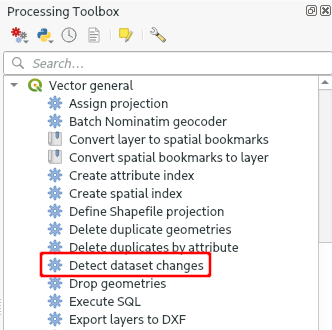
There are no conflict files in the folder [](https://merginmaps.com/docs/manage/missing-data/#there-are-no-conflict-files-in-the-folder)
------------------------------------------------------------------------------------------------------------------------------------------
If you don't see any conflict files in your folder, try to download them manually from the mobile device. Surveyed data are stored in the device that was to collect them. So, if you have access to this device, you can download data manually and process them in your computer.
### Manual data transfer (Android) [](https://merginmaps.com/docs/manage/missing-data/#manual-data-transfer-android)
Manual data transfer from an Android device can be done by connecting your device to a computer and copying data files to/from the device. Once your Android phone or tablet is recognised by the operating system after connecting it using USB cable, you can use file browser to copy files.
You can find the path to your Mergin Maps project folder in the [Diagnostic Log](https://merginmaps.com/docs/misc/troubleshoot/#diagnostic-log-on-mergin-maps-mobile-app)
. On Android devices, the path is something like `/Android/data/uk.co.lutraconsulting/files/projects`.
This folder is accessible only from a computer, so you might not see it in your mobile device.
### Manual data transfer (between iOS and Mac) [](https://merginmaps.com/docs/manage/missing-data/#manual-data-transfer-between-ios-and-mac)
The mobile app supports iTunes file sharing. Note that iTunes doesn't allow you to browse or edit data from the app data folder, only allows you to delete or copy the data folder to another location.
You can access your data by following these steps:
1. Plug iOS device to a computer
2. Open `Finder` file browser
3. Go to Locations and select your ``
4. Click on the tab named `files`
5. Select `Input` app from a list to see a data folder 
6. Drag-and-drop the `INPUT` folder to another location to see the content
### Manual data transfer (between iOS and Windows) [](https://merginmaps.com/docs/manage/missing-data/#manual-data-transfer-between-ios-and-windows)
Here are the steps to transfer the data from iPhone/iPad to a Windows PC.
1. Make sure you have installed [iTunes](https://support.apple.com/en-us/HT210384)
2. Sign into iTunes
3. [Connect your iOS device to the PC](https://support.apple.com/en-gb/guide/iphone/iph42d9b3178/15.0/ios/15.0)
and unlock the screen
4. In iTunes, click on the phone icon in the toolbar 
5. From the left panel, select **File Sharing**
6. Select **Input** in Apps tab
7. Under Input Documents, select **INPUT** folder
8. Press **Save...**
9. Select a path to save the folder on your computer.
Next steps [](https://merginmaps.com/docs/manage/missing-data/#next-steps)
----------------------------------------------------------------------------
If you were not able to solve your problem, you can contact the [support](https://merginmaps.com/docs/misc/troubleshoot/#support)
or get [diagnostic logs](https://merginmaps.com/docs/misc/troubleshoot/#diagnostic-logs)
to inspect the issues thoroughly.
 [Join our community chat](https://merginmaps.com/community/join)
and ask questions!
By clicking **“Accept All Cookies”**, you agree to the storing of cookies on your device to enhance site navigation, analyze site usage, and assist in our marketing efforts. View our [Cookie Policy](https://merginmaps.com/cookies)
for more information. [Deny cookies here](https://merginmaps.com/docs/manage/missing-data/#)
.
[Preferences](https://merginmaps.com/docs/manage/missing-data/#)
Accept all cookies
---
# Member Roles and Permissions | Mergin Maps
[Skip to content](https://merginmaps.com/docs/manage/permissions/#VPContent)
On this page
Member Roles and Permissions [](https://merginmaps.com/docs/manage/permissions/#member-roles-and-permissions)
===============================================================================================================
Permissions control access to your Mergin Maps projects. They can be defined for the whole workspace or for a specific project.
Workspace members and guests [](https://merginmaps.com/docs/manage/permissions/#workspace-members-and-guests)
---------------------------------------------------------------------------------------------------------------
People invited to a workspace can be invited as **members** or as **guests**. See [How to share projects and manage user access](https://merginmaps.com/docs/manage/project-advanced/#share-projects-and-manage-user-access)
for detailed step.
**Members** have access to _all_ projects in a workspace. If a new project is created, they will be able to access it immediately. This means you do not have to grant them permissions to new projects manually. The level of access to the workspace is defined by their member roles. There are 5 [member roles](https://merginmaps.com/docs/manage/permissions/#workspace-member-roles-and-project-permissions)
available: _reader_, _editor_, _writer_, _admin_ and _owner_.
**Guests** have access only to projects they are invited to. If you want to only share specific projects with someone, you should invite them to your workspace as a guest. The level of access to a project is defined by project permissions. There are 4 [permission](https://merginmaps.com/docs/manage/permissions/#workspace-member-roles-and-project-permissions)
levels: _reader_, _editor_, _writer_, and _owner_.
Members, guests and contributors
Subscriptions are based on the number of _contributors_ on the workspace. _Contributors_ are members or guests with writer, editor, admin or owner access.
_Readers_ do not count as contributors. The number of read-only users in your workspace does not affect your subscription.
Workspace member roles and project permissions [](https://merginmaps.com/docs/manage/permissions/#workspace-member-roles-and-project-permissions)
---------------------------------------------------------------------------------------------------------------------------------------------------
Member roles and project permissions present similar options in terms of what a user can or cannot do. The difference is whether these options are defined on a workspace or on a project level. Compare the overview of [workspace member roles](https://merginmaps.com/docs/manage/permissions/#workspace-member-roles-overview)
and of [project permissions](https://merginmaps.com/docs/manage/permissions/#project-permissions-overview)
for more details.
* **Reader**: Users with **Read** permission are able to see projects, projects data and [history](https://merginmaps.com/docs/manage/project-history/)
, but can not make any changes. _Readers_ do not count as [contributors](https://merginmaps.com/docs/manage/subscriptions/#contributors)
in your subscription.
* **Editor** (available on [Mergin Maps Cloud](https://merginmaps.com/)
and [Mergin Maps EE](https://merginmaps.com/pricing)
): In addition to the **Read** access, users can [add/remove/update features](https://merginmaps.com/docs/field/mobile-features/)
, but _cannot_ make changes in the project properties, add/remove fields in GeoPackage layers or remove GeoPackage files from the project. We recommend using this role for surveyors - users who collect data in the field. Editors can:
* _add_ files such as photos, shapefiles, GeoPackage files - any file except for `*.qgs`, `*.qgz`, `mergin-config.json`
* _edit_ files except for `*.qgs`, `*.qgz`, `mergin-config.json` and non-diff based `*.gpkg` changes
* _remove_ files except for `*.qgs`, `*.qgz`, `mergin-config.json` and `*.gpkg`
* **Writer**: In addition to the **Editor** access, users can also change [layer settings and project properties](https://merginmaps.com/docs/gis/features/)
. This role is appropriate for users who set up the QGIS project and manage data (GIS admins).
* **Admin**: This role is only available for workspace members. In addition to the **Write** access, admins can [delete the project](https://merginmaps.com/docs/manage/project-advanced/#delete-a-project)
or [transfer](https://merginmaps.com/docs/manage/project-advanced/#transfer-a-project)
it to another workspace. They can also create new projects and manage workspace members.
* **Owner**: In addition to the **Admin** access, owners can also access [invoicing and subscription](https://merginmaps.com/docs/manage/subscriptions/)
settings. **Owner** has full access to the project or workspace.
TIP
Invoices can be made accessible also to a person that is not a workspace member, such as someone from your accounting department. They can [access the subscription management portal using a link](https://merginmaps.com/docs/manage/subscriptions/#accessing-subscription-management-portal-directly-without-mergin-maps-account)
.
### Workspace member roles overview [](https://merginmaps.com/docs/manage/permissions/#workspace-member-roles-overview)
This is the overview of workspace member roles that are related to the whole workspace:
| | Reader | Editor | Writer | Admin | Owner |
| --- | --- | --- | --- | --- | --- |
| see the list of all projects in the workspace | ✅ | ✅ | ✅ | ✅ | ✅ |
| see project data | ✅ | ✅ | ✅ | ✅ | ✅ |
| see project history | ✅ | ✅ | ✅ | ✅ | ✅ |
| add/edit/delete features in all projects | 🚫 | ✅ | ✅ | ✅ | ✅ |
| add/remove layers in all projects | 🚫 | 🚫 | ✅ | ✅ | ✅ |
| change layer settings and project properties in QGIS | 🚫 | 🚫 | ✅ | ✅ | ✅ |
| create new projects | 🚫 | 🚫 | 🚫 | ✅ | ✅ |
| delete and transfer projects | 🚫 | 🚫 | 🚫 | ✅ | ✅ |
| manage access to projects | 🚫 | 🚫 | 🚫 | ✅ | ✅ |
| manage workspace members | 🚫 | 🚫 | 🚫 | ✅ | ✅ |
| set up and manage [SSO](https://merginmaps.com/docs/manage/sso/) | 🚫 | 🚫 | 🚫 | ✅ | ✅ |
| delete the workspace and change its description | 🚫 | 🚫 | 🚫 | 🚫 | ✅ |
| access to invoicing and subscription settings | 🚫 | 🚫 | 🚫 | 🚫 | ✅ |
### Project permissions overview [](https://merginmaps.com/docs/manage/permissions/#project-permissions-overview)
Permissions to specific projects can be defined for workspace guests as well as for workspace members in addition to their member roles.
This is the overview of Mergin Maps project permissions:
| | Reader | Editor | Writer | Owner |
| --- | --- | --- | --- | --- |
| see the project in the workspace | ✅ | ✅ | ✅ | ✅ |
| see project data | ✅ | ✅ | ✅ | ✅ |
| see project history | ✅ | ✅ | ✅ | ✅ |
| add/edit/delete features in the project | 🚫 | ✅ | ✅ | ✅ |
| add/remove layers in the project | 🚫 | 🚫 | ✅ | ✅ |
| change layer settings and project properties in QGIS | 🚫 | 🚫 | ✅ | ✅ |
| delete and transfer projects | 🚫 | 🚫 | 🚫 | ✅ |
| manage access to the project | 🚫 | 🚫 | 🚫 | ✅ |
Although the roles of workspace members define the level of access to projects in a workspace in general, it is possible to grant them _higher_ permissions to specific projects. For instance, a workspace member with a _Reader_ role can be a _Writer_ or _Owner_ of a project.
TIP
[How to add users to a project](https://merginmaps.com/docs/manage/project-advanced/#add-users-to-a-project)
will guide you through inviting a guest to a project. These steps can be also followed to change workspace member's permission to a project.
### Managing member roles and project permissions [](https://merginmaps.com/docs/manage/permissions/#managing-member-roles-and-project-permissions)
Users can be [added to a workspace](https://merginmaps.com/docs/manage/project-advanced/#add-users-to-a-workspace)
as guests and members through the [Members](https://merginmaps.com/docs/manage/dashboard/#members)
tab on the [dashboard](https://app.merginmaps.com/)
.
Here, you can also manage the member roles:
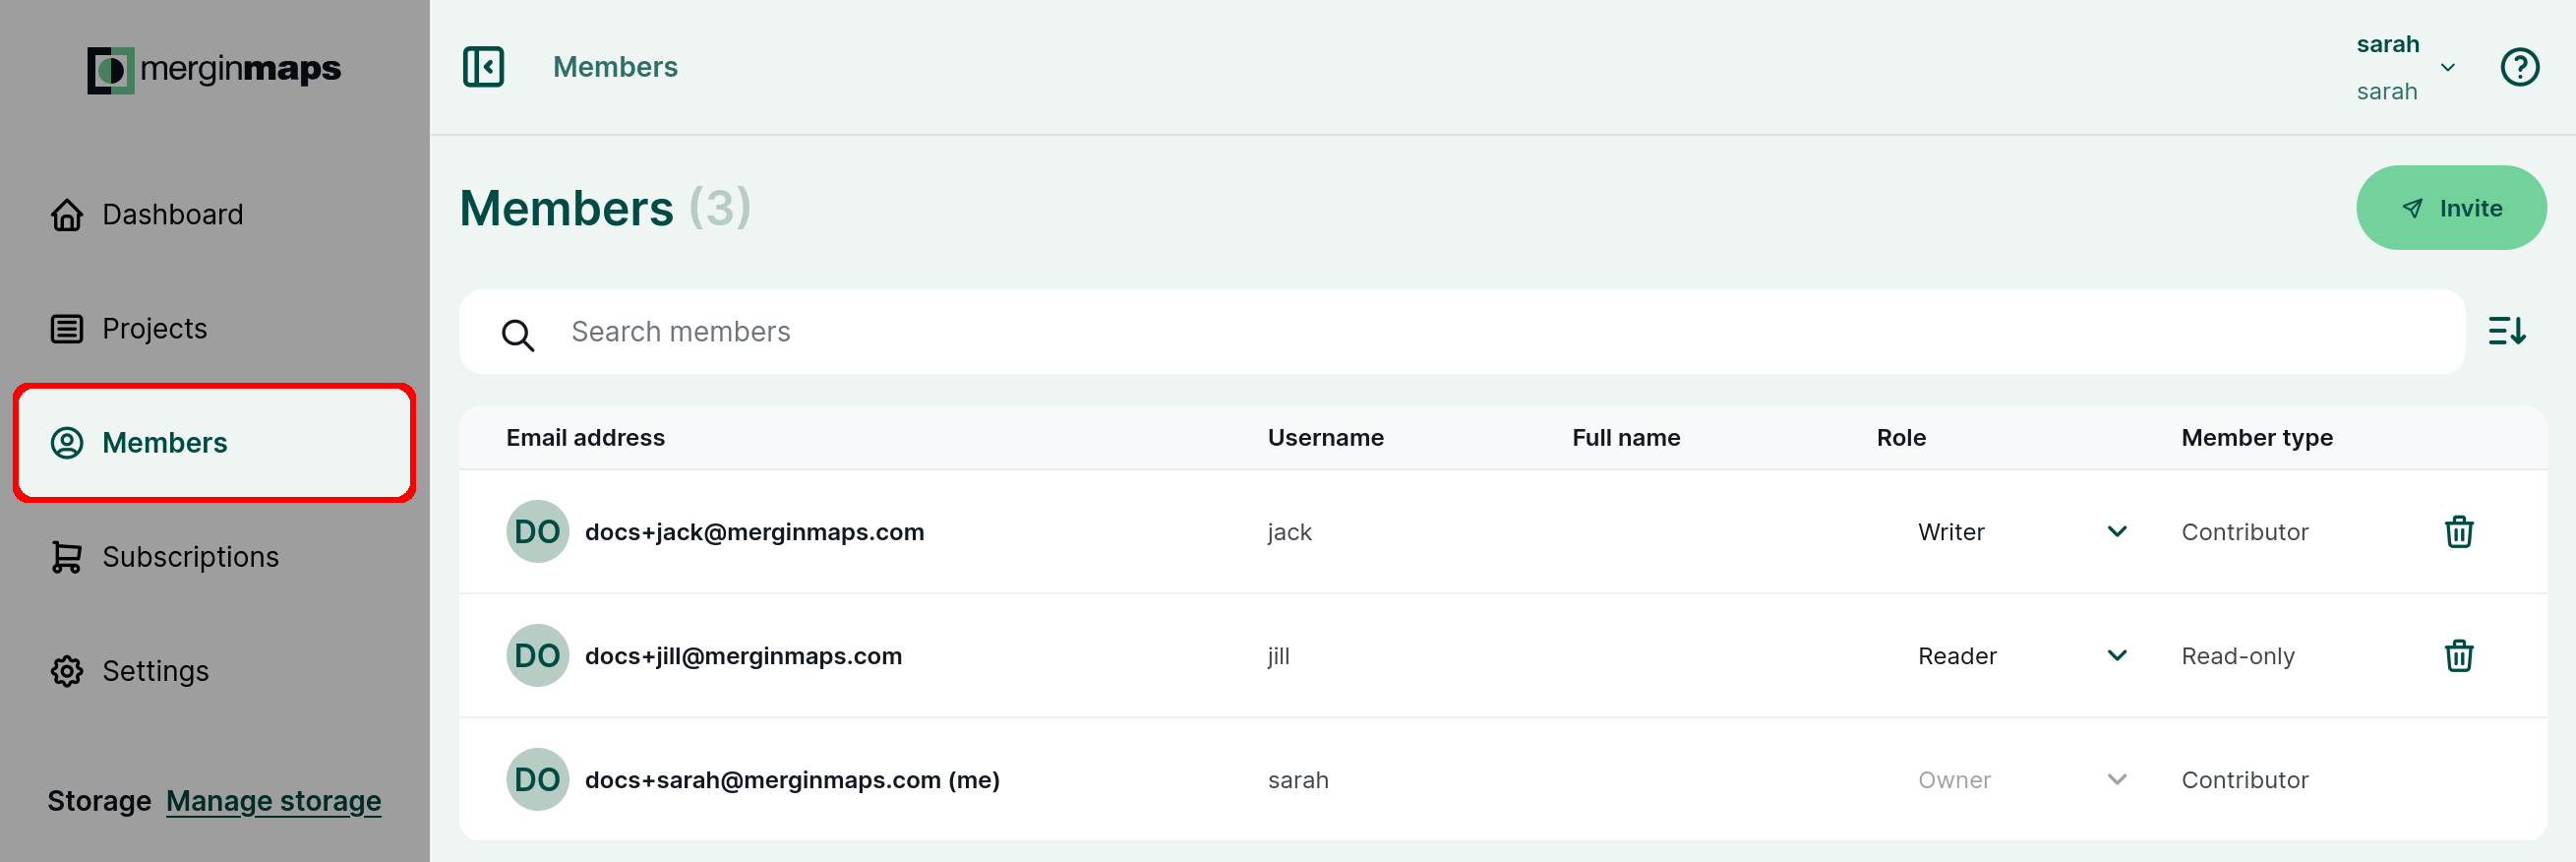
Project permissions can be reviewed in the details of a project in the **Collaborators** tab where you can find the list of users who can access the project and their project permissions.
If needed, the project permissions can be changed here:
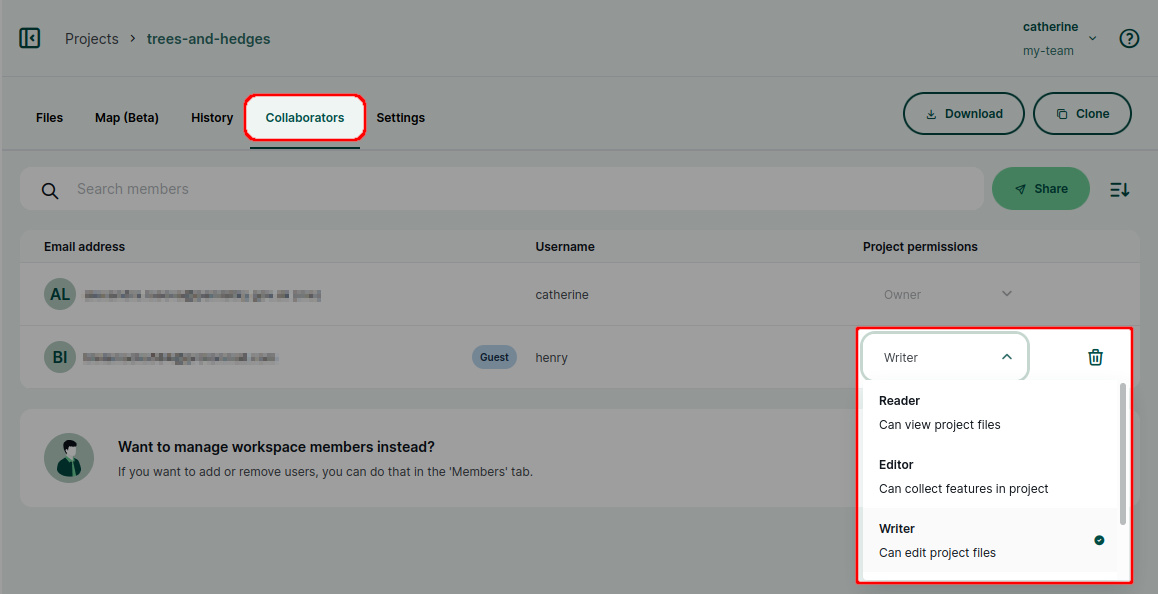
How to transfer ownership of a workspace [](https://merginmaps.com/docs/manage/permissions/#how-to-transfer-ownership-of-a-workspace)
---------------------------------------------------------------------------------------------------------------------------------------
Ownership of a workspace can be transferred to another **workspace member**.
Users with the **owner** member role have access to the **Subscriptions** page in the [dashboard](https://app.merginmaps.com/)
.
Every workspace has to have at least one owner, however, there can be multiple owners of one workspace.
WARNING
When transferring ownership of a workspace, you might also need to [update billing information](https://merginmaps.com/docs/manage/subscriptions/#billing-information-and-payment-method)
.
To transfer the ownership of a workspace to a user that is not yet a member of your workspace, follow the steps in [How to add users to a workspace](https://merginmaps.com/docs/manage/project-advanced/#add-users-to-a-workspace)
and set the **member role** to **Owner**. The new owner has to accept the invitation.
To transfer the ownership of a workspace to a user that is already a member of your workspace, you have to change their member role to **Owner**:
1. Log in to [app.merginmaps.com](https://app.merginmaps.com/)
2. Navigate to the **Members** tab. Here, you will see the list of current workspace members and their roles. 
3. Change the **member role** of the user who should become the new owner to **Owner**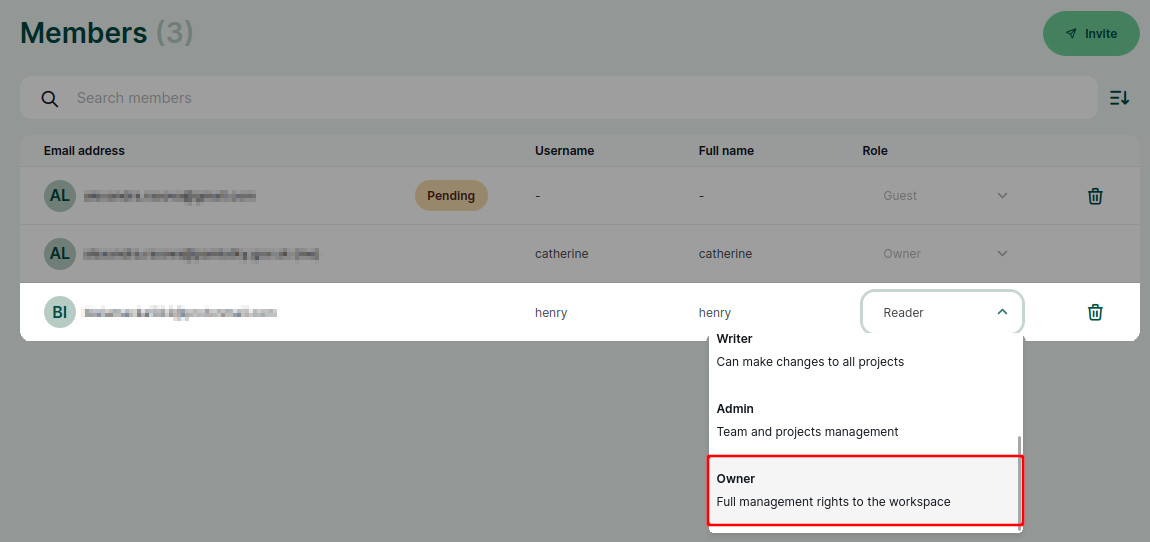
4. Now the member role of the original owner can be changed (if needed) or they can be removed from the workspace completely.
WARNING
Be careful when downgrading your own member role!
Only owners and admins can manage user roles so if you assign yourself the writer or reader role, you will not be able to change it back.
Public and private projects [](https://merginmaps.com/docs/manage/permissions/#public-and-private-projects)
-------------------------------------------------------------------------------------------------------------
A **private project** is a project that is accessible only to workspace members and to guests that were invited to this project. Projects are private by default.
A **public project** is a project that everyone (including those who are not registered with Mergin Maps) can see, including data and project history. Other users cannot contribute to your public project unless you give them writing permissions.
You can [make your project public or private](https://merginmaps.com/docs/manage/project-advanced/#make-your-project-public-private)
in the project's settings.
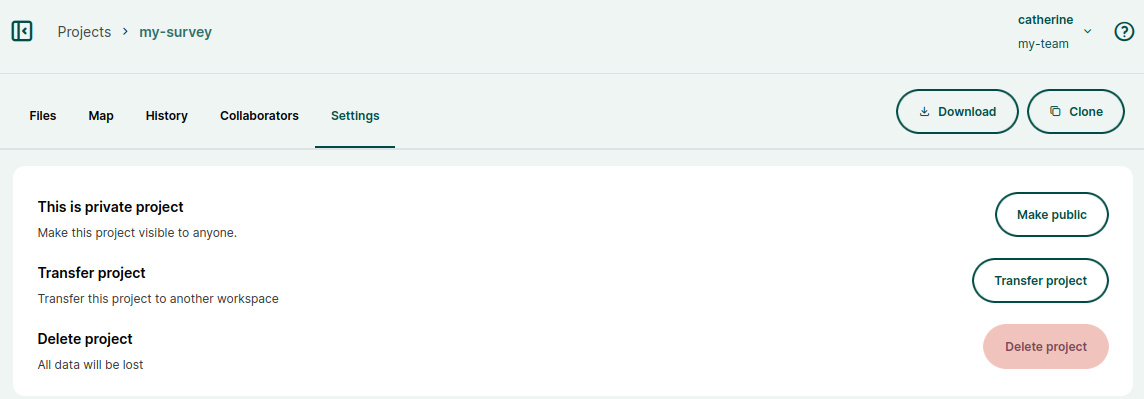
---
# Position Tracking | Mergin Maps
[Skip to content](https://merginmaps.com/docs/field/tracking/#VPContent)
On this page
Position Tracking [](https://merginmaps.com/docs/field/tracking/#position-tracking)
=====================================================================================
Position tracking is useful when you want to record your tracks during the field survey. This can help you know the extent of areas you have already surveyed in addition to the surveyed features.
Set up position tracking in QGIS project [](https://merginmaps.com/docs/field/tracking/#set-up-position-tracking-in-qgis-project)
-----------------------------------------------------------------------------------------------------------------------------------
Tracking needs to be enabled in QGIS when [preparing your Mergin Maps project](https://merginmaps.com/docs/gis/features/#tracking)
.
1. Open your Mergin Maps project in QGIS
2. Navigate to **Project** > **Properties**
3. In the Mergin Maps tab, check the **Enable tracking** option. 
You can also choose how often the position should be recorded.
This affects the accuracy of the tracking and it may affect the battery usage: for longer surveys that don't require high accuracy, you may want to choose the **Low** option. If you need to have more detailed tracking, choose **Best** available accuracy.
4. Don't forget to save and synchronise your project!
Enabled tracking means that a new line layer for tracking will be created in your Mergin Maps project called `tracking_layer.gpkg`. This layer is created with a set of fields with set up [default values](https://merginmaps.com/docs/layer/form-configuration/#default-values)
:
| Field name | Data Type | Default variable | Description |
| --- | --- | --- | --- |
| `tracking_start_time` | DateTime | `@tracking_start_time` | Date and time when tracking started |
| `tracking_end_time` | DateTime | `@tracking_end_time` | Date and time when tracking ended |
| `total_distance` | Real | `$length` | Tracked distance |
| `tracked_by` | String | `@mm_username` | Name of the current [Mergin Maps](https://merginmaps.com/)
user |
You can add new fields as needed, however, they should be set up with automatically generated [default values](https://merginmaps.com/docs/layer/form-configuration/#default-values)
as Mergin Maps mobile app will not open the form for manual inputs. You may use some of the QGIS functions, [extra position variables](https://merginmaps.com/docs/layer/position_variables/)
or [extra QGIS variables](https://merginmaps.com/docs/layer/plugin-variables/)
.
Using position tracking in Mergin Maps mobile app [](https://merginmaps.com/docs/field/tracking/#using-position-tracking-in-mergin-maps-mobile-app)
-----------------------------------------------------------------------------------------------------------------------------------------------------
To use tracking in the mobile app, make sure that you enabled tracking in the QGIS project's settings.
1. Tap **More** and select the **Position tracking** option. 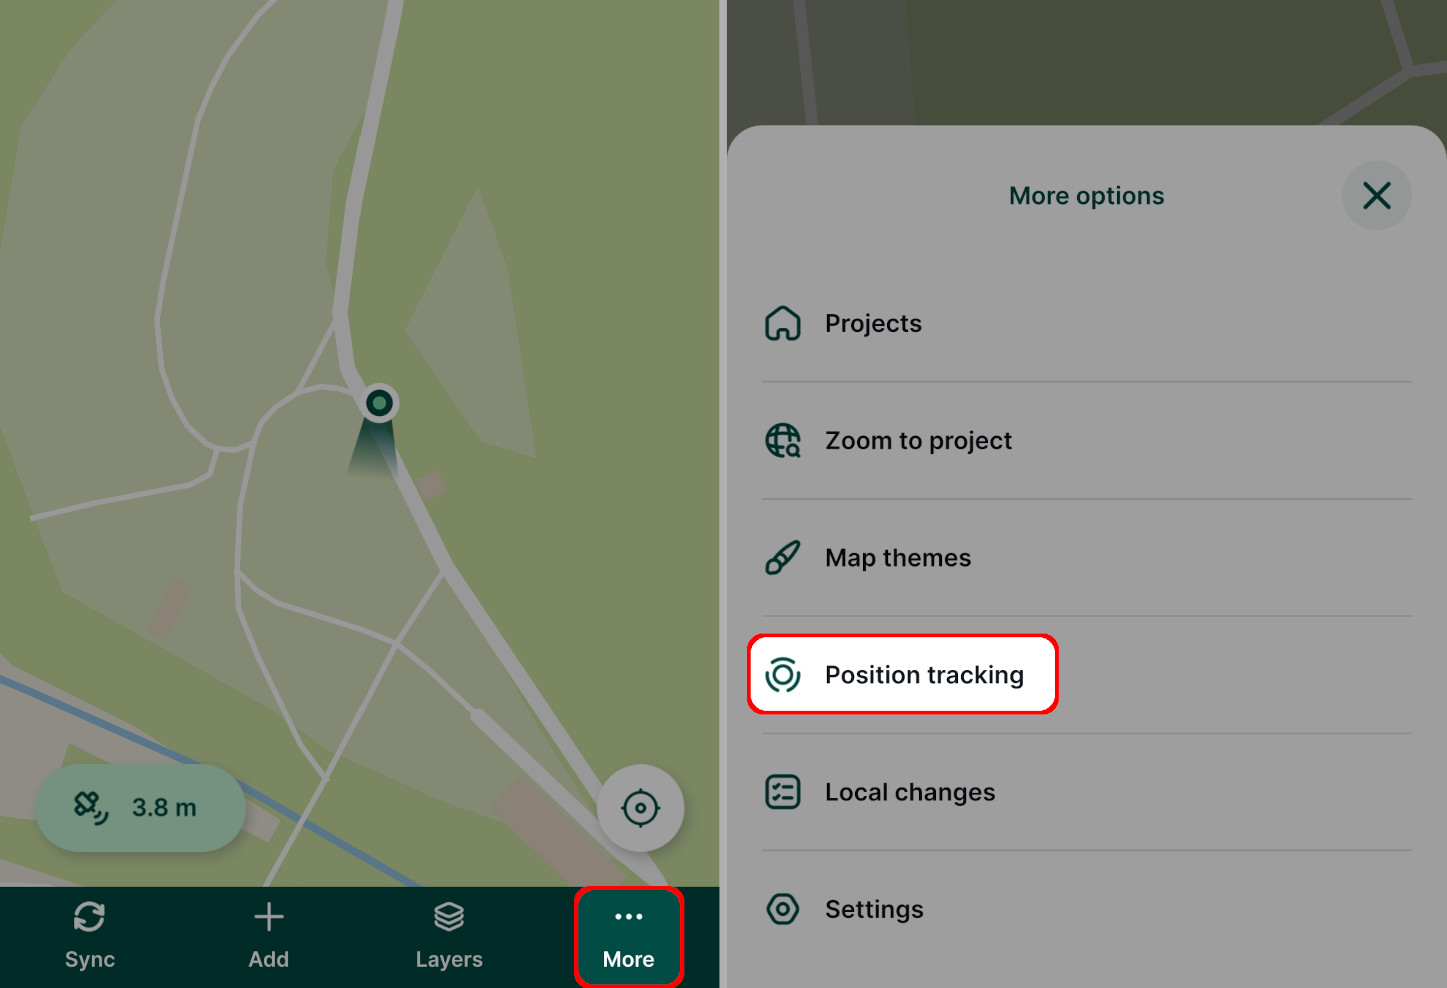
2. Tap **Start tracking**.
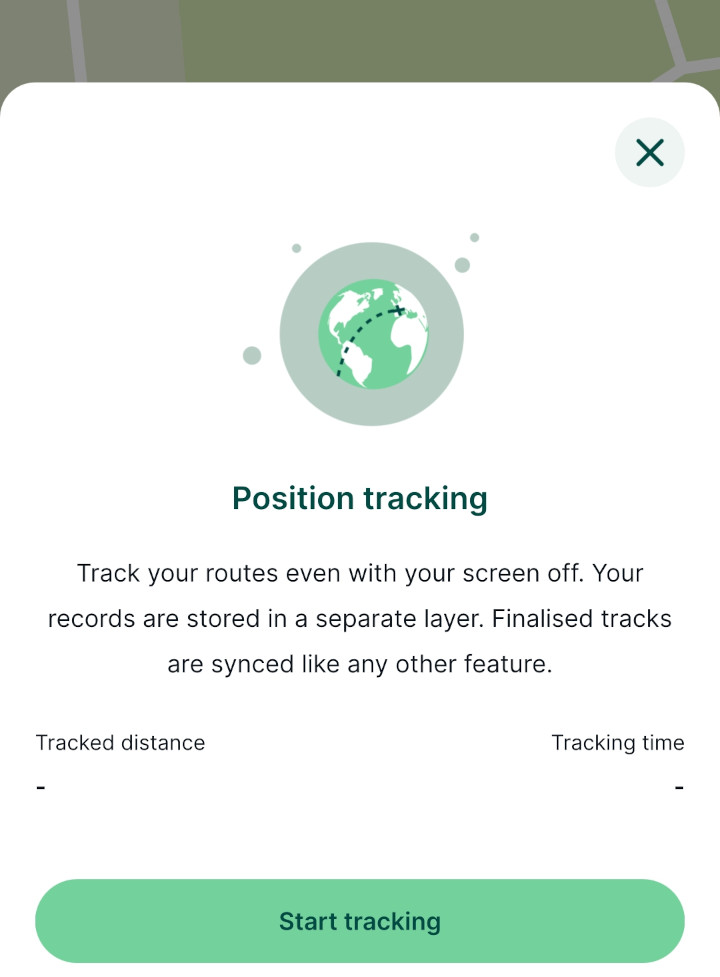
3. The mobile app will continuously record your position.
You can continue using the mobile app or other apps on your mobile device in the usual way. There will be an indicator that tracking is running in the status bar of your device.
To stop tracking, go to the **Position tracking** option and tap **Stop tracking**.
Your tracks are saved in the automatically created `tracking_layer` in your project.
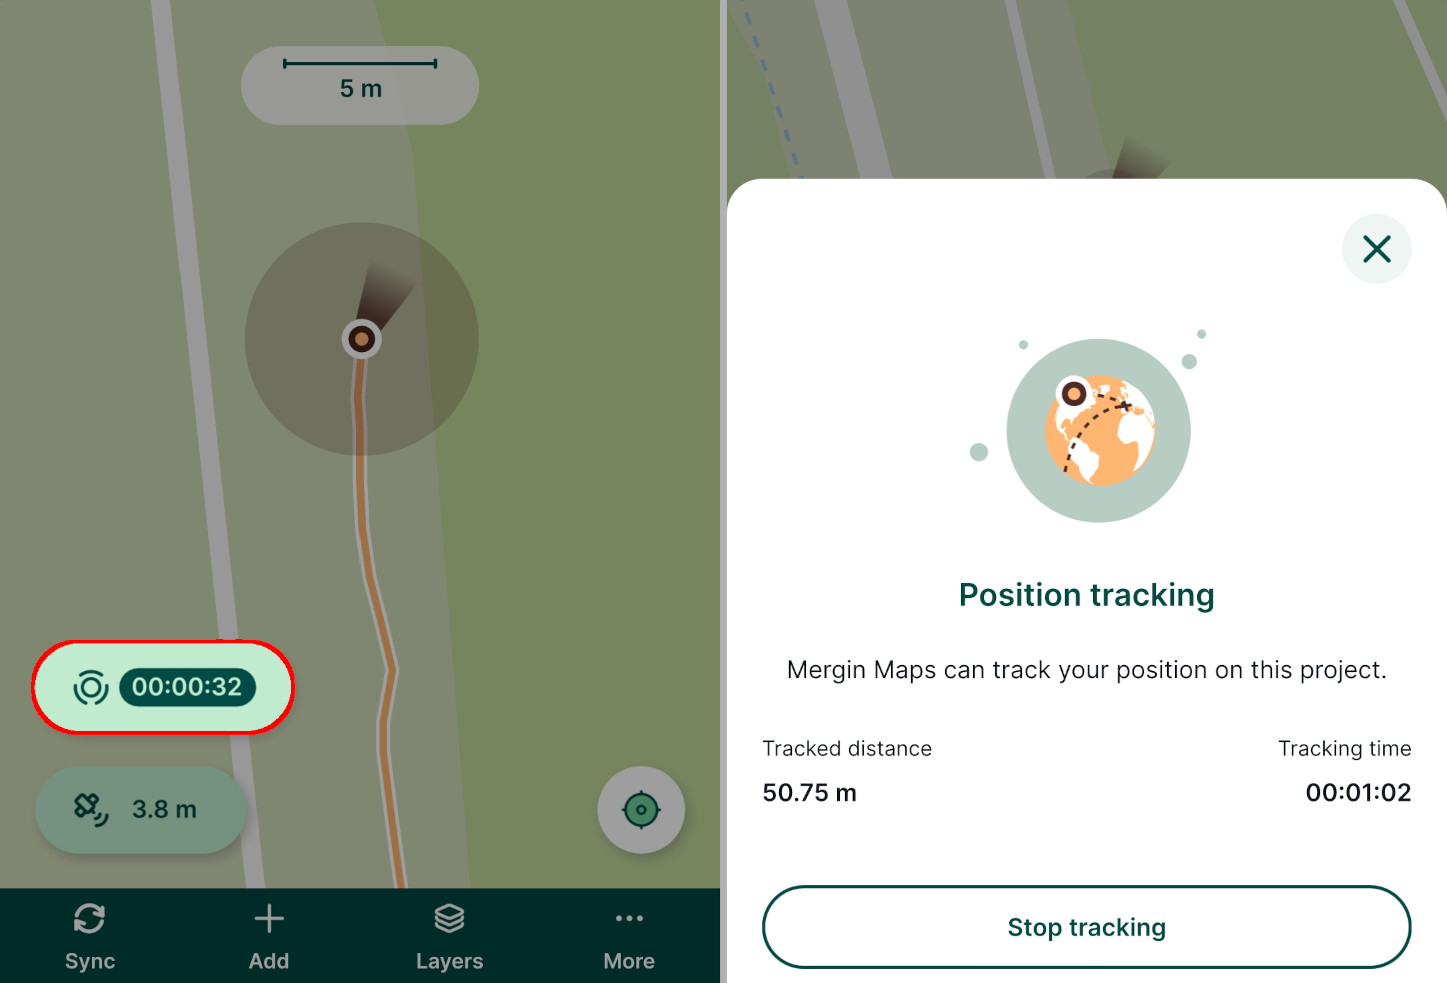
By clicking **“Accept All Cookies”**, you agree to the storing of cookies on your device to enhance site navigation, analyze site usage, and assist in our marketing efforts. View our [Cookie Policy](https://merginmaps.com/cookies)
for more information. [Deny cookies here](https://merginmaps.com/docs/field/tracking/#)
.
[Preferences](https://merginmaps.com/docs/field/tracking/#)
Accept all cookies
---
# Synchronisation | Mergin Maps
[Skip to content](https://merginmaps.com/docs/manage/synchronisation/#VPContent)
On this page
Synchronisation [](https://merginmaps.com/docs/manage/synchronisation/#synchronisation)
=========================================================================================
Mergin Maps workflow [](https://merginmaps.com/docs/manage/synchronisation/#mergin-maps-workflow)
---------------------------------------------------------------------------------------------------
Synchronisation is a key process that makes effective collaboration possible: you and your team members can contribute to the same project simultaneously, see each other's edits and also smoothly transfer data between mobile devices and computers.
Let's look at a typical workflow in [Mergin Maps](https://merginmaps.com/)
:
1. First, you [create](https://merginmaps.com/docs/manage/create-project/#create-a-project-in-qgis)
and [prepare](https://merginmaps.com/docs/gis/features/)
a Mergin Maps project in QGIS. This includes loading background and survey layers, setting up the forms, styling layers, setting up map themes and defining the layers to be used in a survey. The Mergin Maps project consists of the project file (\*.qgz) and data referenced in the project, such as GeoPackage layers, shapefiles, rasters or attachments. At this point, they are all saved in a project folder in your computer.
2. The Mergin Maps project is uploaded to Mergin Maps Cloud using [Mergin Maps QGIS plugin](https://merginmaps.com/docs/manage/plugin/)
. The project and data are now stored in the cloud.
3. Now you can work collaboratively! The project and data can be downloaded to a mobile device to do [the fieldwork using Mergin Maps mobile app](https://merginmaps.com/docs/tutorials/mobile/)
or to another computer with QGIS. Every collaborator works with their own local version of the project.
4. After finishing their work, the individual contributors synchronise their changes [to Mergin Maps Cloud](https://merginmaps.com/docs/tutorials/mobile/#saving-data-to-the-cloud)
, where they are put together.
As you can see, Mergin Maps Cloud acts as a link between individual contributors and also between PCs and mobile devices, synchronising the changes. When you make changes and upload them to the cloud, [Mergin Maps](https://merginmaps.com/)
will compare the content of GeoPackage layers and merge them, while copying attachments (such as photos), rasters and shapefiles as they are. That is why we recommend using GeoPackage format for your survey layer.
How to synchronise changes in Mergin Maps [](https://merginmaps.com/docs/manage/synchronisation/#how-to-synchronise-changes-in-mergin-maps)
---------------------------------------------------------------------------------------------------------------------------------------------
You and your team can use various devices to collect and edit data. Once you are happy with the changes to be uploaded, you can synchronise your project and data back to the cloud:
* when using QGIS, follow the steps [below](https://merginmaps.com/docs/manage/synchronisation/#synchronising-changes-in-qgis)
* in the mobile app, you can use manual or automatic synchronisation. Go to [Synchronisation in Mergin Maps Mobile App](https://merginmaps.com/docs/field/autosync/)
for more details.
### Synchronising changes in QGIS [](https://merginmaps.com/docs/manage/synchronisation/#synchronising-changes-in-qgis)
1. Click on the **Synchronise Mergin Maps project** icon from the Mergin Maps QGIS plugin toolbar or right-click on the project in the Browser panel and select **Synchronise**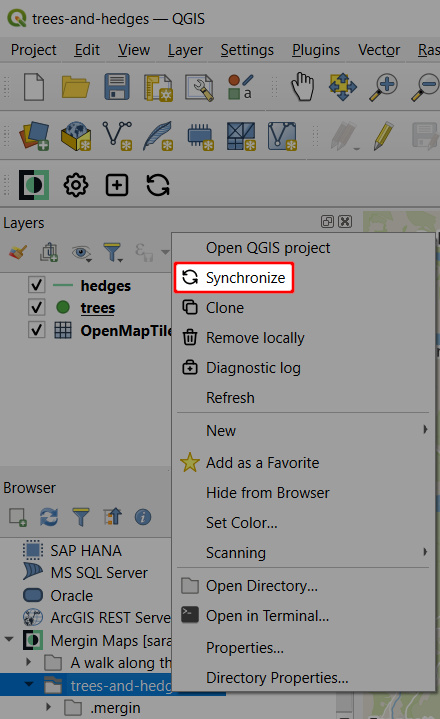
2. This will show the project status: a list of pending changes, warnings, and validation results of your project.
Here, you have the option to [**View changes**](https://merginmaps.com/docs/manage/synchronisation/#local-changes)
to inspect the pending changes in more detail.
You can also use **Reset changes** to revert the local changes. 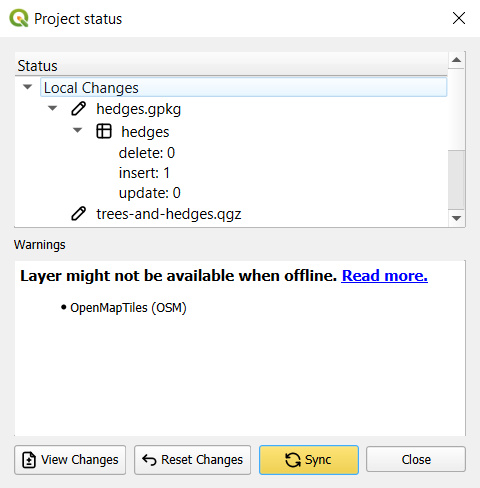
Warnings are related to restructuring of a GeoPackage layer (adding/removing a field, adding/removing a layer in a GeoPackage database). Validations can point out missing layers or availability of a layer when working offline.
3. If you want to proceed with the synchronisation, click on the **Sync** button to synchronise your project and data.
WARNING
Project and data synchronisation works in both ways.
All your changes will be uploaded to the server and any pending changes from the server edition of your files will be downloaded and appended to your local files.
When the synchronisation process is completed, your local files and the copy of files on the server will be identical.
### Local changes [](https://merginmaps.com/docs/manage/synchronisation/#local-changes)
The changes that you make in the project can be synchronised to the cloud and shared with your coworkers. Now these changes can also be visualised which is helpful when reviewing local changes to see what was actually modified and also to avoid unwanted edits.
TIP
Visit our blog [View and track changes in QGIS](https://www.lutraconsulting.co.uk/blog/2022/11/08/mergin-maps-local-changes/)
to read more about local changes.
To see local changes:
1. Right-click on a layer and select **Show Local Changes**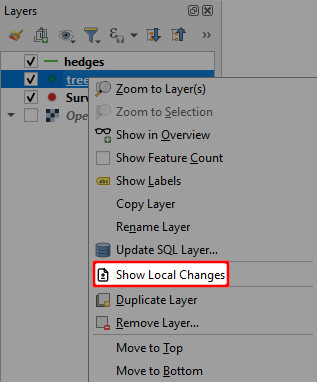
2. **Changes Viewer** opens. The colour-coded changes are listed in the table and shown in the map. Inserts are green, edits orange and deletions red.
If you want to zoom to specific changes, select them in the table and use **Zoom to Selection**. 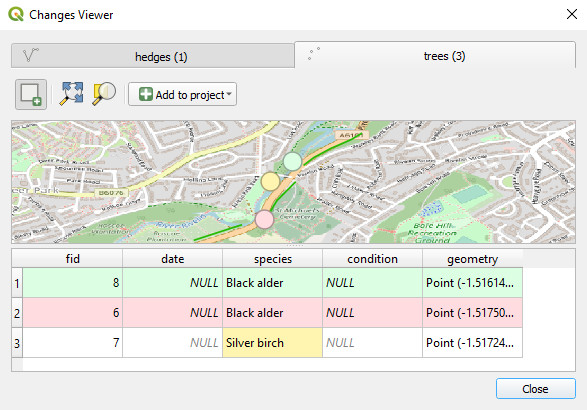
3. Changes can be added to the QGIS project as a new layer. Click **Add to project** and choose one of the options: 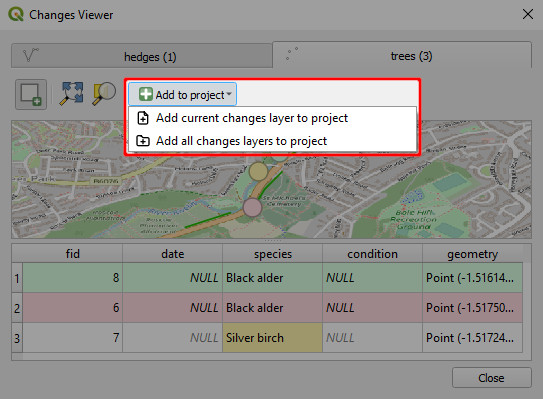
4. A temporary layer will be added to the **Layers** panel with colour-coded symbology 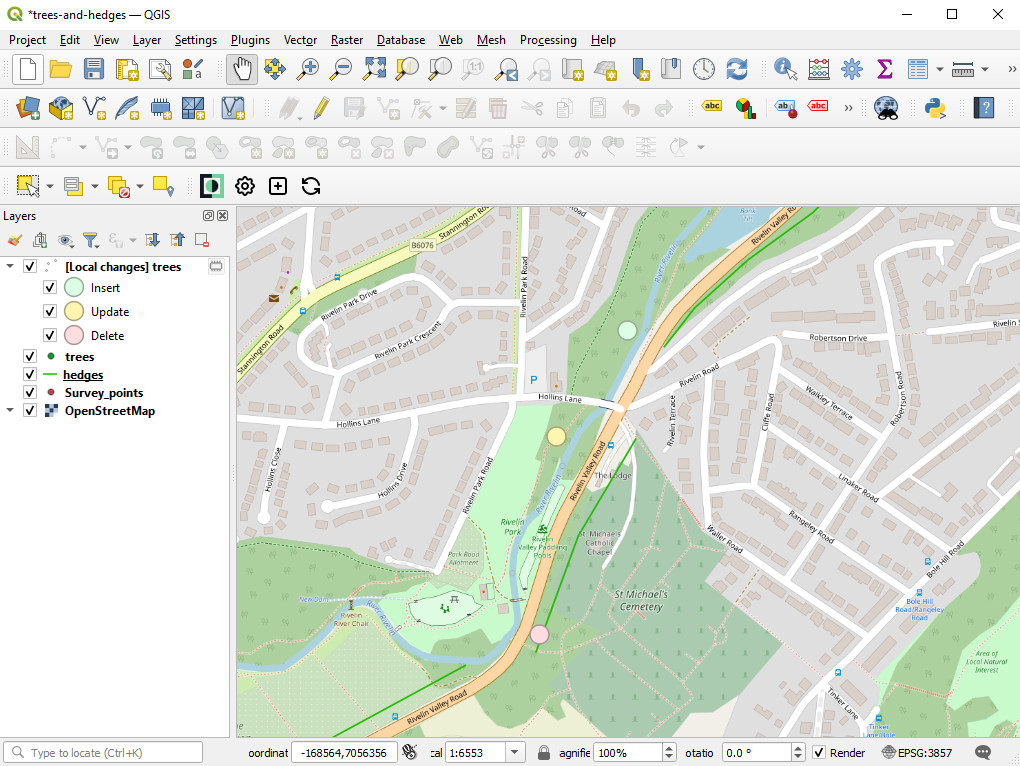
TIP
Unless you want to use these layers in your Mergin Maps project, remove them from the project before synchronisation.
Behind Data Synchronisation [](https://merginmaps.com/docs/manage/synchronisation/#behind-data-synchronisation)
-----------------------------------------------------------------------------------------------------------------
How does it work? When you use GeoPackage, [Mergin Maps](https://merginmaps.com/)
compares two datasets with the same data schema using [Geodiff library](https://merginmaps.com/docs/manage/synchronisation/#geodiff-library)
to create a list of entries that were inserted, updated, or deleted between the two datasets.
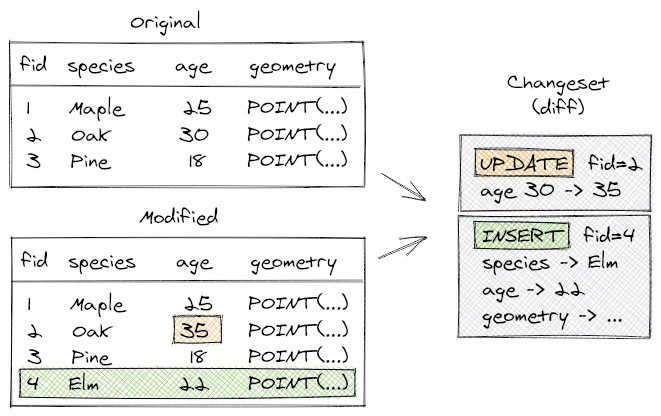
During field surveys, individual team members can change the same row of a table or add a new row with the same `ID`. If it is possible to solve these conflicts automatically, Mergin Maps will do so:
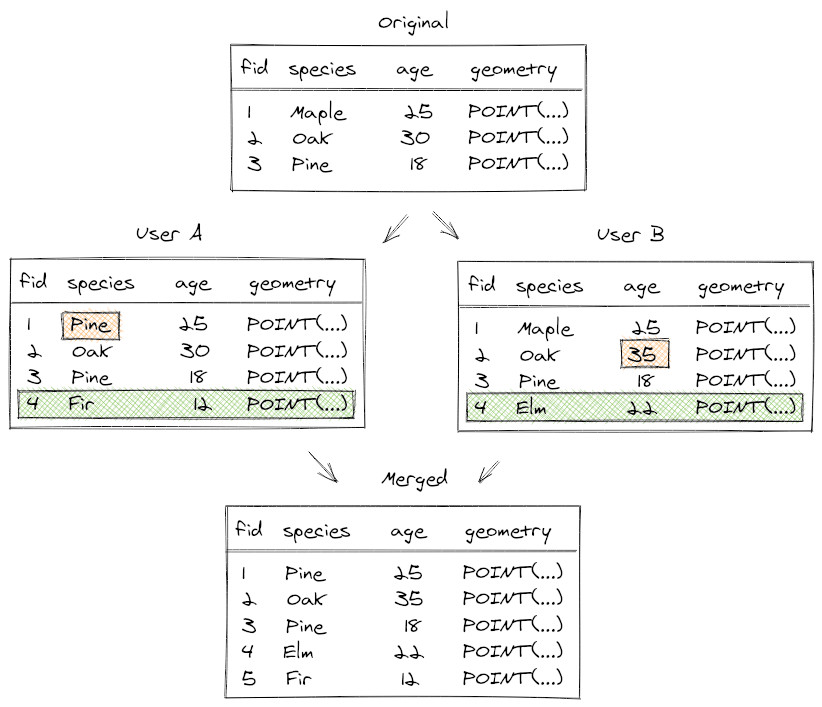
There may be conflicts that can't be resolved automatically, e.g. if the same value is modified in different copies. These rare cases are written to a conflict file that can be [resolved later](https://merginmaps.com/docs/manage/missing-data/#there-are-conflict-files-in-the-folder)
.
Conflict files [](https://merginmaps.com/docs/manage/synchronisation/#conflict-files)
---------------------------------------------------------------------------------------
Conflicts can happen when two users edit some files in a shared project at once. The technology behind [Mergin Maps](https://merginmaps.com/)
service makes an effort to merge changes from individual users automatically and therefore conflicts do not happen normally, even if multiple people edit a single data source (e.g. a GeoPackage). However, there are still some occasions when it is not possible to automatically resolve conflicts and Mergin Maps will create conflict files in projects.
TIP
Make your work easier and avoid unnecessary conflict files by following [these tips](https://merginmaps.com/docs/layer/best-practice/)
.
There are two types of conflicts:
* edit conflicts
* conflicted copies
### Edit conflicts [](https://merginmaps.com/docs/manage/synchronisation/#edit-conflicts)
Let's think of a survey of benches in a park conducted by Jack and Jill. They start with a vector layer of points with benches and they need to assess conditions of the benches by filling in a couple of attributes. They split the work into two halves and do the survey. By mistake, Jack also surveys a bench assigned to Jill - they both end up editing attributes of the same point, with slightly different values. How will Mergin Maps handle that?
If Jack is the first one to sync his changes and then Jill syncs her changes, at the time of Jill's sync Mergin Maps knows they have a conflict in edits for that one bench. The editor who syncs last "wins", so in this case Jill's changes would be kept and Jack's changes would be overwritten (of course, all his non-conflicting edits to other benches would be kept). Mergin Maps keeps a record about this, in case a project admin would want to investigate the edit conflict: if the survey is stored e.g. in `data.gpkg`, then a JSON file named data `(edit conflict, jack v123).json` would be created, containing list of conflicts. For each conflicting attribute value, the file lists the original value and the two different modified versions.
### Conflicted copy [](https://merginmaps.com/docs/manage/synchronisation/#conflicted-copy)
If you change the data schema, such as deleting or adding columns to your survey layer or changing the data type of a field, Mergin Maps cannot detect changes. If you try to synchronise a layer with modified data schema, you will get a conflict file.
If you need to change the data schema, [see how to deploy a revised project properly](https://merginmaps.com/docs/manage/deploy-new-project/)
.
Geodiff library [](https://merginmaps.com/docs/manage/synchronisation/#geodiff-library)
-----------------------------------------------------------------------------------------
A library called **Geodiff** is used by [Mergin Maps](https://merginmaps.com/)
to synchronise changes made by individual team members. You can find this library at [MerginMaps/geodiff](https://github.com/MerginMaps/geodiff)
.
By clicking **“Accept All Cookies”**, you agree to the storing of cookies on your device to enhance site navigation, analyze site usage, and assist in our marketing efforts. View our [Cookie Policy](https://merginmaps.com/cookies)
for more information. [Deny cookies here](https://merginmaps.com/docs/manage/synchronisation/#)
.
[Preferences](https://merginmaps.com/docs/manage/synchronisation/#)
Accept all cookies
---
# User Account | Mergin Maps
[Skip to content](https://merginmaps.com/docs/manage/account/#VPContent)
Return to top
User Account [](https://merginmaps.com/docs/manage/account/#user-account)
===========================================================================
When [signing up to Mergin Maps](https://merginmaps.com/docs/setup/sign-up-to-mergin-maps/)
, you have set the username, email and password that are associated with your account.
The [email](https://merginmaps.com/docs/manage/account/#changing-email-and-account-details)
and [password](https://merginmaps.com/docs/manage/account/#changing-password)
can be changed anytime through the [dashboard](https://app.merginmaps.com/)
.
It is not possible to change the username. If you wish to use a different username, follow [these steps](https://merginmaps.com/docs/manage/account/#changing-mergin-maps-username)
.
Changing email and account details [](https://merginmaps.com/docs/manage/account/#changing-email-and-account-details)
-----------------------------------------------------------------------------------------------------------------------
1. Log in to [app.merginmaps.com](https://app.merginmaps.com/)
.
In the upper right corner of the screen, click on your username and go to **Your profile**.
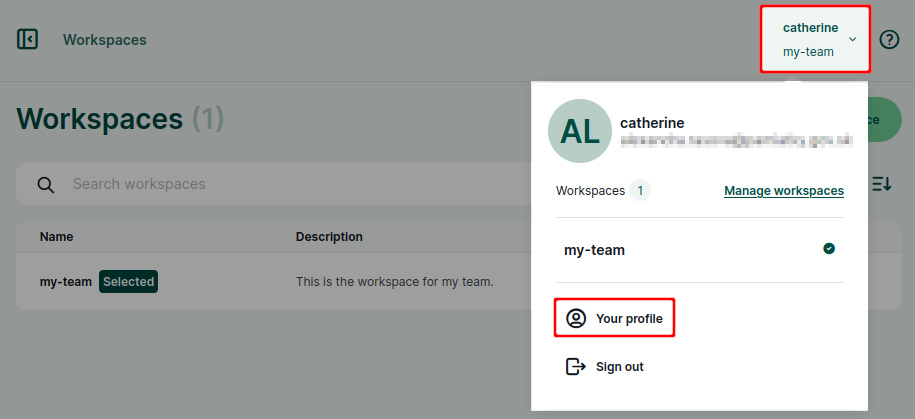
2. Click on the **Edit account** button. 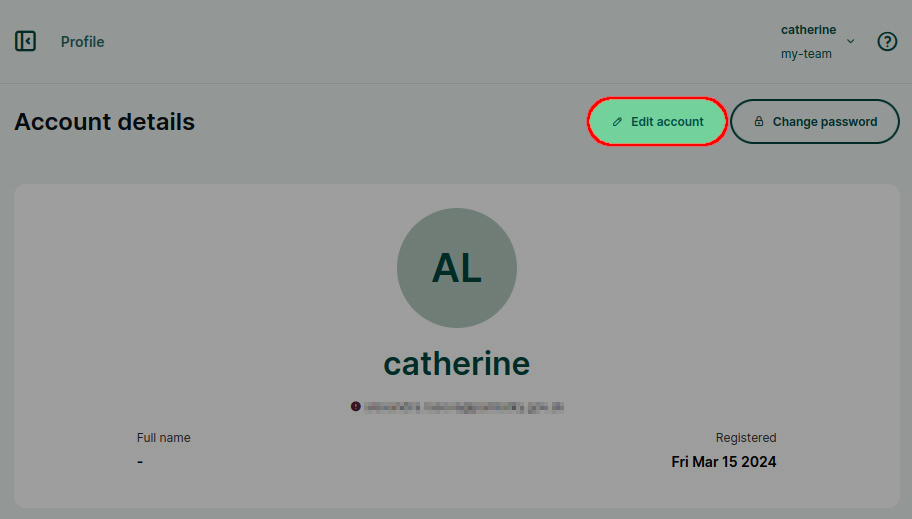
3. Here you can change your email and add or change your first name and last name. 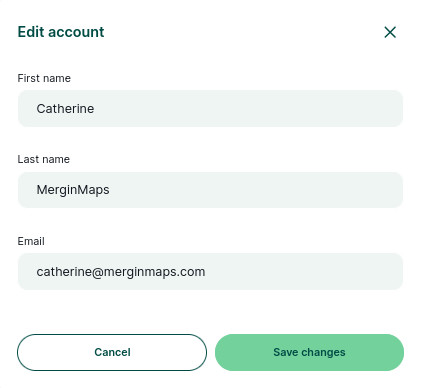
### Changing password [](https://merginmaps.com/docs/manage/account/#changing-password)
1. Log in to [app.merginmaps.com](https://app.merginmaps.com/)
.
In the upper right corner of the screen, click on your username and go to **Your profile**.

2. Click on the **Change password** button and set a new password. 
Changing Mergin Maps username [](https://merginmaps.com/docs/manage/account/#changing-mergin-maps-username)
-------------------------------------------------------------------------------------------------------------
The username cannot be changed. If you need to use a different username, you will have to create a new account.
**If you are a contributor to a workspace, but do not own a workspace:**
1. Create a new Mergin Maps account with the username of your choice
2. Make a list of workspaces/projects you have access to with your original account
3. Notify the _admins_ or _owners_ of the relevant workspaces about this change. They will have to [share the workspace or projects](https://merginmaps.com/docs/manage/project-advanced/#share-projects-and-manage-user-access)
with your new account.
4. Now your original account can be [deleted](https://merginmaps.com/docs/manage/account/#deleting-mergin-maps-account)
**If you own a workspace:**
1. Create a new Mergin Maps account with the username of your choice
2. [Transfer the ownership](https://merginmaps.com/docs/manage/permissions/#how-to-transfer-ownership-of-a-workspace)
of your workspace(s) to the new account and, if needed, [update the billing information](https://merginmaps.com/docs/manage/subscriptions/#billing-information-and-payment-method)
3. Now you can [delete](https://merginmaps.com/docs/manage/account/#deleting-mergin-maps-account)
the original account
Re-using email
The same email cannot be used for multiple accounts. If you want to reuse the same email that you have used in your original account, you will have to [close](https://merginmaps.com/docs/manage/account/#deleting-mergin-maps-account)
it and wait until it is deleted. Deleted accounts are kept on Mergin Maps servers for 5 days before they are deleted permanently.
To speed up the process, you can contact [support@merginmaps.com](mailto:support@merginmaps.com)
and ask them to delete your account so you can use the same email immediately.
Deleting Mergin Maps account [](https://merginmaps.com/docs/manage/account/#deleting-mergin-maps-account)
-----------------------------------------------------------------------------------------------------------
Your [Mergin Maps](https://merginmaps.com/)
account can be deleted in the [dashboard](https://app.merginmaps.com/)
.
Before closing the account, **make sure to** [**close your workspaces**](https://merginmaps.com/docs/manage/workspaces/#how-to-delete-a-workspace)
.
1. Log in to [app.merginmaps.com](https://app.merginmaps.com/)
. In the upper right corner of the screen, click on your username and go to **Your profile**. 
2. Click on the **Close account** button. 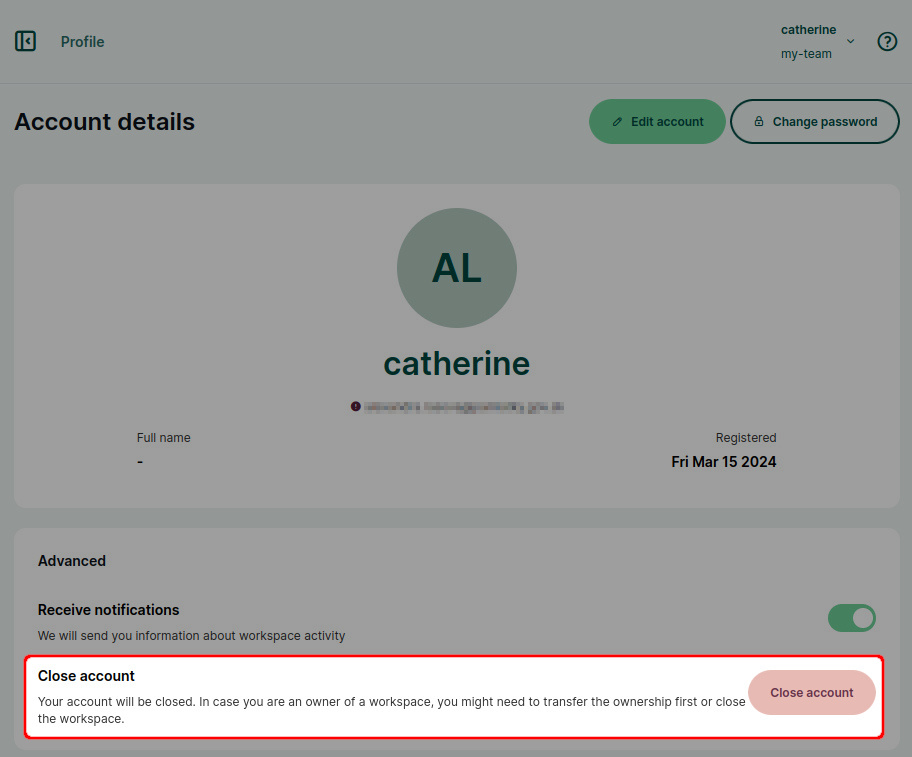
You will be prompted to confirm the closing of your account by typing the account name.
After you close the account, it is kept on [Mergin Maps](https://merginmaps.com/)
servers for 5 days before it is deleted permanently. During this period, it can be restored if you contact [support@merginmaps.com](mailto:support@merginmaps.com)
.
Forgotten password [](https://merginmaps.com/docs/manage/account/#forgotten-password)
---------------------------------------------------------------------------------------
If you forget your password, you can easily reset it.
You can find the **Forgot password?** option on the [dashboard](https://app.merginmaps.com/)
or the mobile app log in page. Email with password reset link will be sent to your email address.
TIP
Check your spam folder if the email with password reset link does not appear in your inbox after a few minutes.
If that's not the case, please contact [support@merginmaps.com](mailto:support@merginmaps.com)
to resolve this issue.
---
# Mergin Maps QGIS Plugin Overview | Mergin Maps
[Skip to content](https://merginmaps.com/docs/manage/plugin/#VPContent)
Return to top
Mergin Maps QGIS Plugin Overview [](https://merginmaps.com/docs/manage/plugin/#mergin-maps-qgis-plugin-overview)
==================================================================================================================
The Mergin Maps QGIS plugin allows you to work with your [Mergin Maps](https://merginmaps.com/)
projects in QGIS, whether it's downloading the project to your computer, making changes in the project, seeing the project's status or synchronising changes to the cloud.
To get started, you will need to [install and configure the plugin](https://merginmaps.com/docs/setup/install-mergin-maps-plugin-for-qgis/)
.
Once installed, plugin's entries will be added to the QGIS toolbar panel, Browser panel, Project properties and to the Processing toolbox.
Upgrade the plugin regularly
To ensure you can use the latest improvements, don't forget to [upgrade the plugin](https://merginmaps.com/docs/setup/install-mergin-maps-plugin-for-qgis/#plugin-upgrade)
whenever there is an update available!
Mergin Maps toolbar in QGIS [](https://merginmaps.com/docs/manage/plugin/#mergin-maps-toolbar-in-qgis)
--------------------------------------------------------------------------------------------------------
The Mergin Maps toolbar is added to the QGIS toolbars panel after installation.

If you don't see Mergin Maps toolbar, make sure it is enabled in QGIS toolbars panel

The toolbar contains following buttons:
* the Mergin Maps logo is a shortcut to [app.merginmaps.com](https://app.merginmaps.com/)

* **Configure Mergin Maps plugin** to [configure plugin](https://merginmaps.com/docs/setup/install-mergin-maps-plugin-for-qgis/#plugin-configuration)
to connect to Mergin Maps or [a custom server](https://merginmaps.com/docs/server/plugin-mobile-app/)
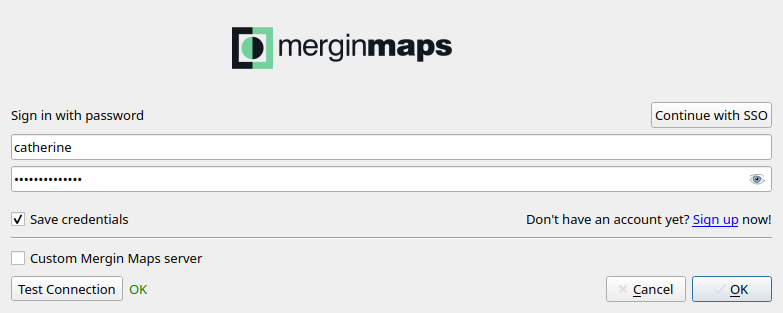
* **Create Mergin Maps project** to [create or package a QGIS project](https://merginmaps.com/docs/manage/create-project/#create-a-project-in-qgis)

* **Synchronise Mergin Maps project** to inspect and [synchronise](https://merginmaps.com/docs/manage/synchronisation/#synchronising-changes-in-qgis)
or reset changes made in the current project 
* **Project history** to inspect [project history and versions](https://merginmaps.com/docs/manage/project-history/)
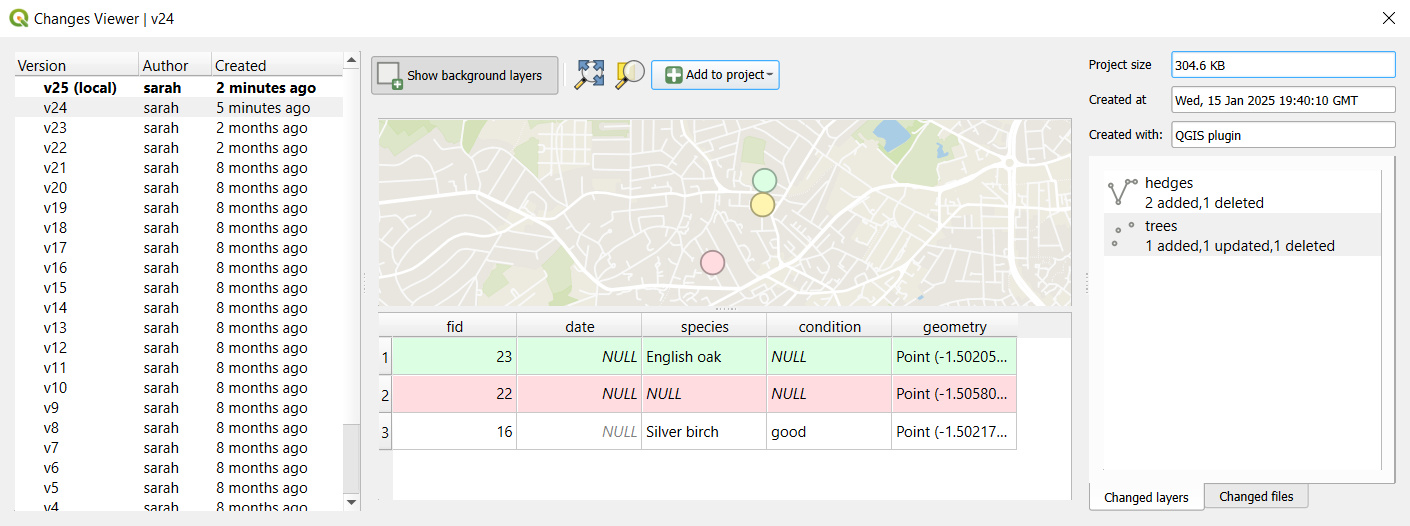
Mergin Maps plugin in QGIS Browser [](https://merginmaps.com/docs/manage/plugin/#mergin-maps-plugin-in-qgis-browser)
----------------------------------------------------------------------------------------------------------------------
Once you have installed the QGIS plugin and configured it with your [Mergin Maps](https://merginmaps.com/)
credentials, you should be able to see it in your QGIS Browser panel.
The name of the current [workspace](https://merginmaps.com/docs/manage/workspaces/)
is displayed in the square brackets (here: `sarah`) and available projects are listed underneath.
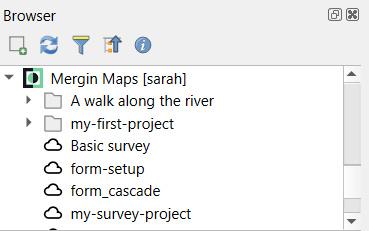
Right-click on the workspace name to easily access options to [configure the plugin](https://merginmaps.com/docs/setup/install-mergin-maps-plugin-for-qgis/#plugin-configuration)
, refresh, [create new project](https://merginmaps.com/docs/manage/create-project/#create-a-project-in-qgis)
, find a project in your workspace, [switch workspace](https://merginmaps.com/docs/manage/workspaces/#switch-workspaces-in-qgis)
or [explore public projects](https://merginmaps.com/docs/manage/plugin/#exploring-public-projects)
.
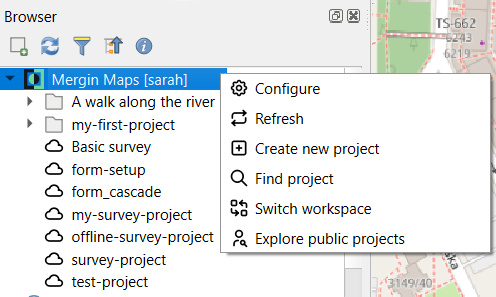
### Downloading a project in QGIS [](https://merginmaps.com/docs/manage/plugin/#downloading-a-project-in-qgis)
TIP
Detailed steps on how to download and open your [Mergin Maps](https://merginmaps.com/)
project are included in the [Opening Surveyed Data on Your Computer](https://merginmaps.com/docs/tutorials/opening-surveyed-data-on-your-computer/#locating-and-opening-your-project)
tutorial.
1. Right-click on a project in the Browser panel and select **Download**
2. Browse to the folder, where you want to save the project and click **Select folder**. The project will be downloaded here.
WARNING
Do not use shared network drives or cloud storage (such as OneDrive or Google Drive) to store your Mergin Maps projects. It is not supported and can cause errors.
3. Once the download is completed, you will have the option to open the project in QGIS.
### Exploring public projects [](https://merginmaps.com/docs/manage/plugin/#exploring-public-projects)
1. Right-click on the Mergin Maps entry in the QGIS Browser and select the **Explore public projects** option 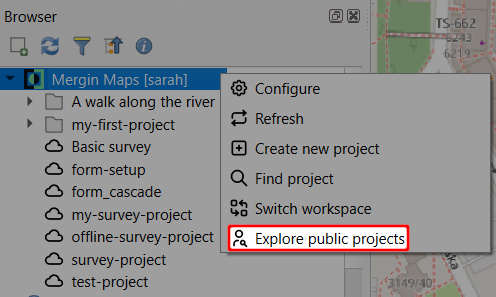
2. Find the project you are interested in. Use the search bar to limit the choices. 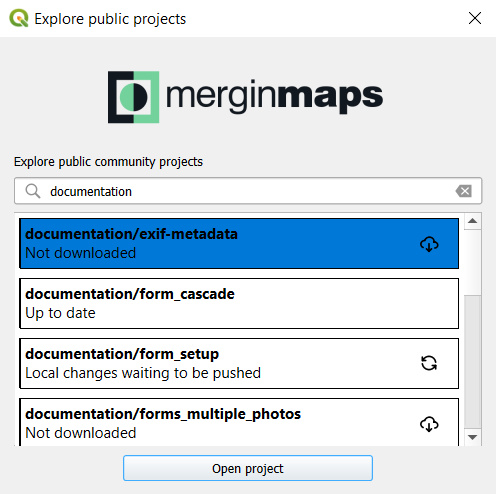
3. Select the project and click **Open project**. Browse to the folder where you want to save the project. The project will be downloaded here.
TIP
You can package this downloaded project using Mergin Maps QGIS plugin as described in [Create a project in QGIS](https://merginmaps.com/docs/manage/create-project/#create-a-project-in-qgis)
using the **Package current QGIS project** option and use it as your own [Mergin Maps](https://merginmaps.com/)
project.
Mergin Maps Project Properties [](https://merginmaps.com/docs/manage/plugin/#mergin-maps-project-properties)
--------------------------------------------------------------------------------------------------------------
Some settings of your [Mergin Maps project](https://merginmaps.com/docs/manage/project/)
can be done through [Project Properties](https://docs.qgis.org/latest/en/docs/user_manual/introduction/qgis_configuration.html#project-properties)
, such as:
* [**Selective sync**](https://merginmaps.com/docs/manage/selective_sync/)
to avoid synchronisation of unnecessary or large files
* [**Photo quality**](https://merginmaps.com/docs/gis/features/#photo-quality)
of pictures added to the project
* Enable [**snapping**](https://merginmaps.com/docs/field/mobile-features/#snapping-features)
in the mobile app
* [**Photo name format**](https://merginmaps.com/docs/gis/photo-names/)
for photo attachments fields
* Enable [**position tracking**](https://merginmaps.com/docs/field/tracking/)
and choose its precision level
* Enable [**Map sketching**](https://merginmaps.com/docs/field/map-sketching/)
* Set [**Layer order**](https://merginmaps.com/docs/field/layers/#layer-order)
for the mobile app
* Enable [**Photo sketching**](https://merginmaps.com/docs/field/photo-sketching/)
to annotate pictures in the mobile app
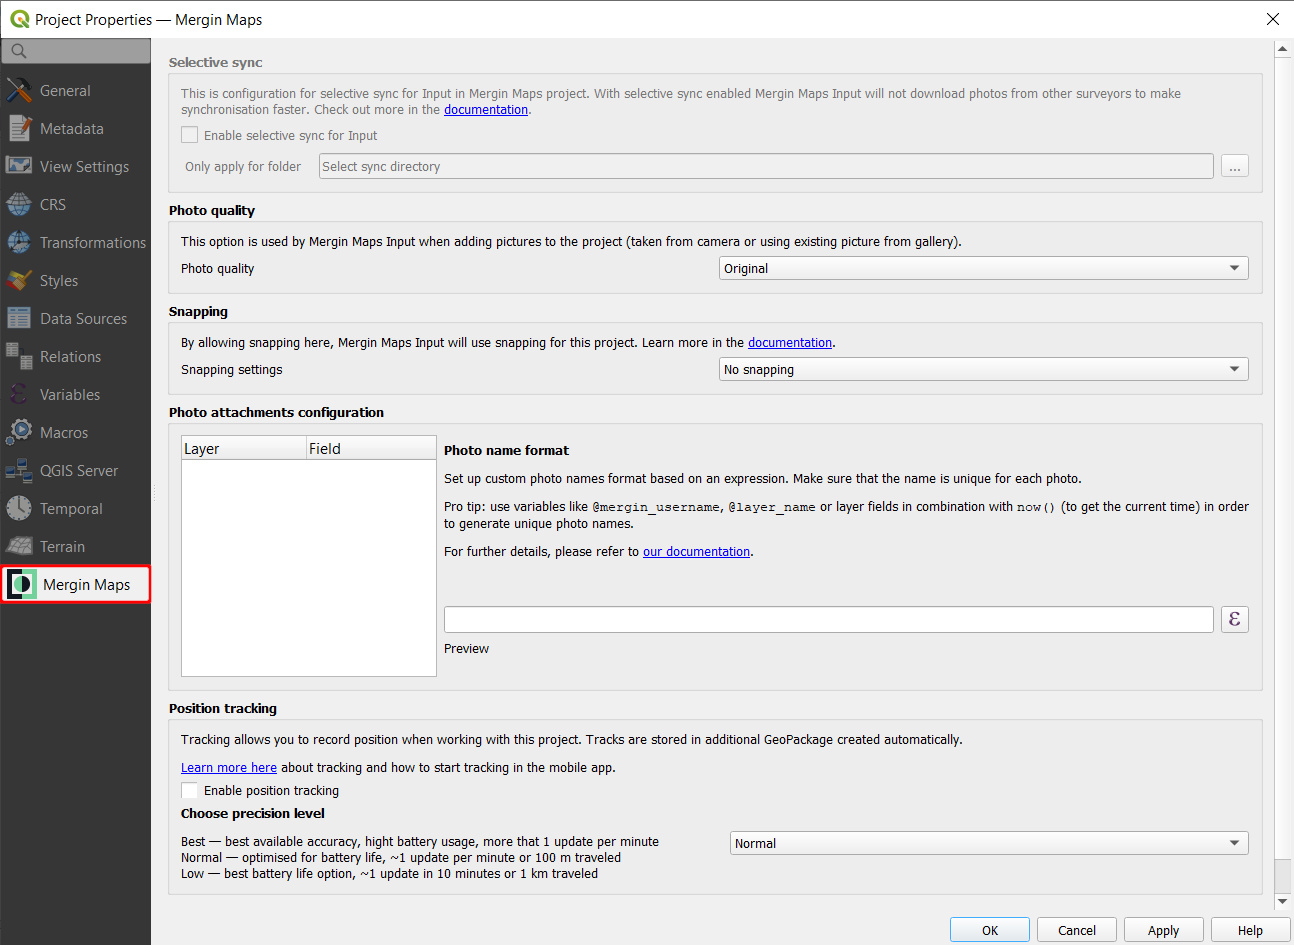
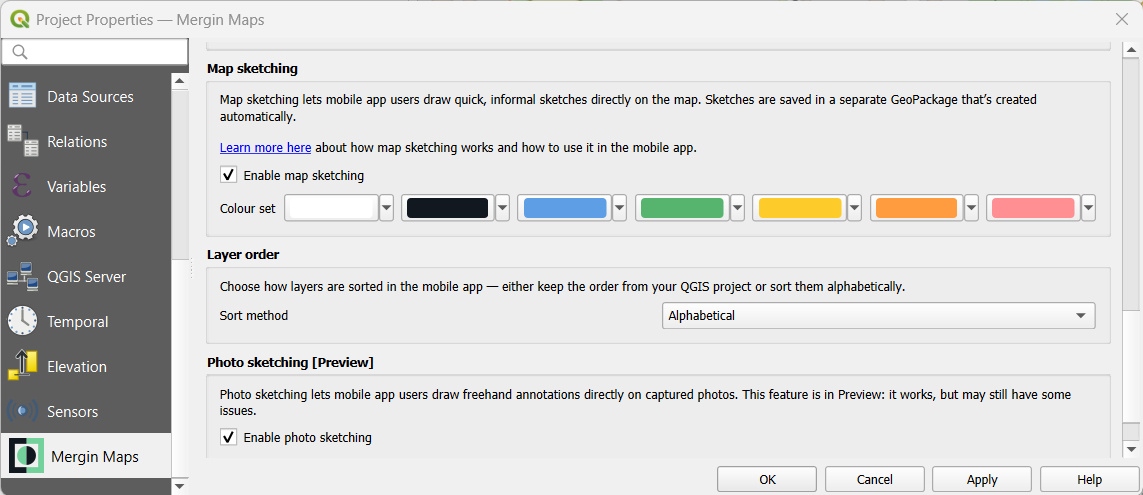
Mergin Maps Tools in QGIS Processing Toolbox [](https://merginmaps.com/docs/manage/plugin/#mergin-maps-tools-in-qgis-processing-toolbox)
------------------------------------------------------------------------------------------------------------------------------------------
Processing is a core plugin of QGIS. By installing Mergin Maps QGIS plugin, Mergin Maps tools are added to the [Processing Toolbox](https://docs.qgis.org/latest/en/docs/user_manual//processing/intro.html)
.
Use the **Toolbox** icon in the toolbar panel to display **Processing Toolbox** in QGIS.
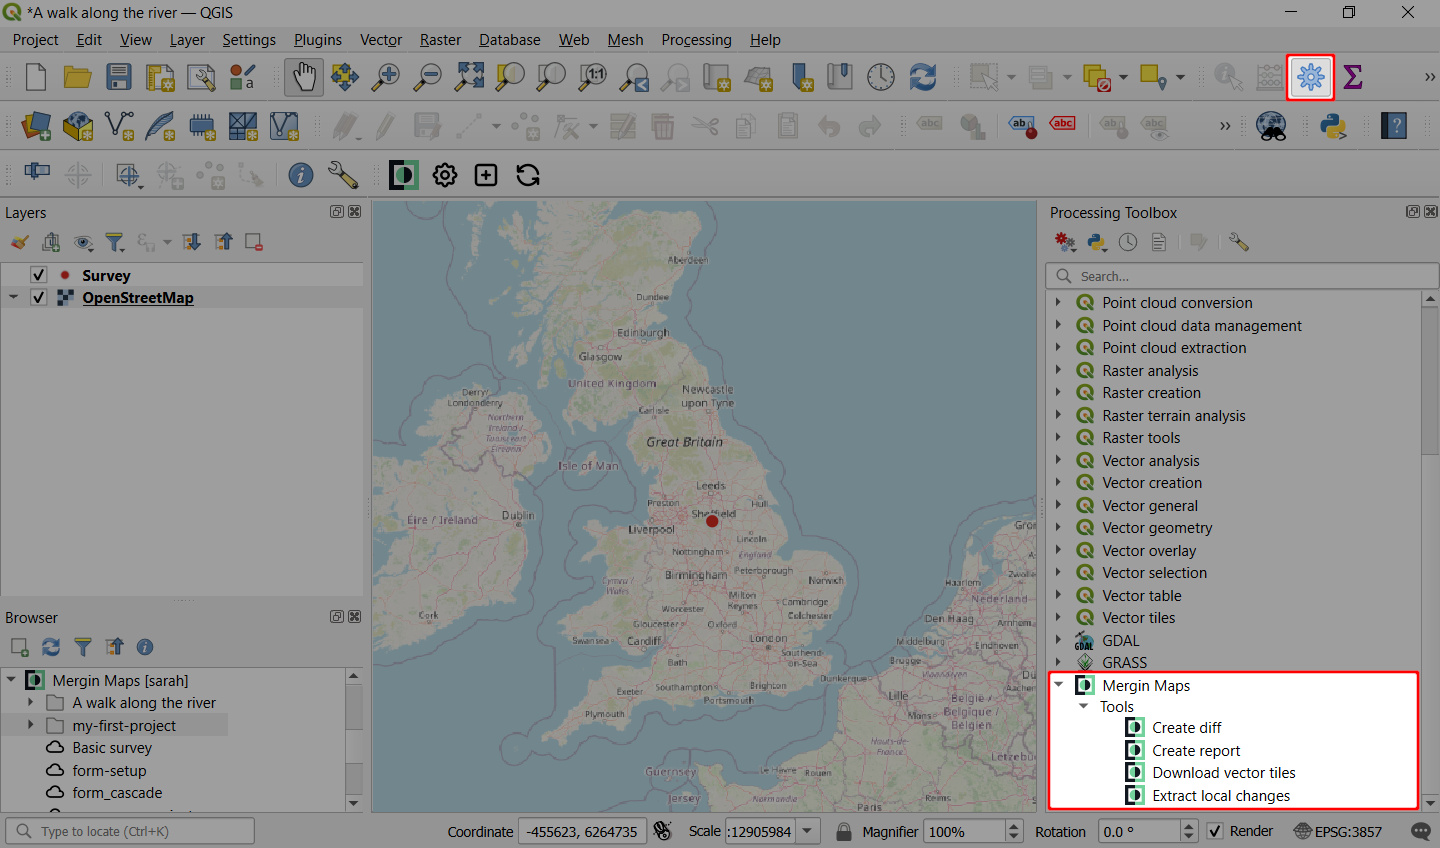
### Create diff (Processing toolbox) [](https://merginmaps.com/docs/manage/plugin/#create-diff-processing-toolbox)
**Create diff** is a tool that extracts changes made between two versions of a layer in your Mergin Maps project to make it easier to revise changes.
1. [Navigate to **Mergin Maps** tools](https://merginmaps.com/docs/manage/plugin/#mergin-maps-tools-in-qgis-processing-toolbox)
in the **Processing toolbox** in QGIS
2. Double click the **Create diff** tool and fill in the parameters in the dialog window. Click **Run**. 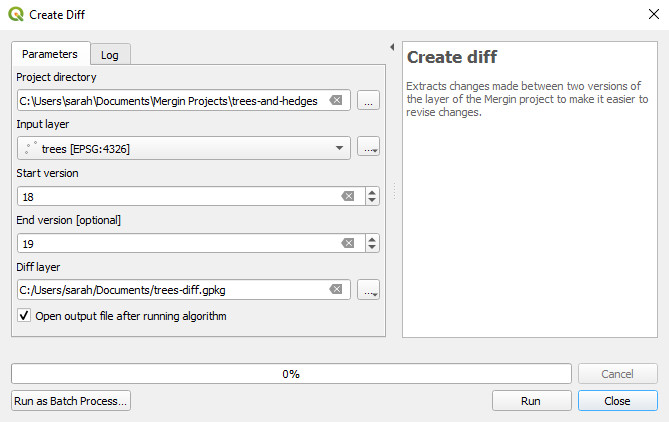
3. The diff layer is added to the **Layers** panel. Changes are visualised on the map and also in the attribute table of the layer. 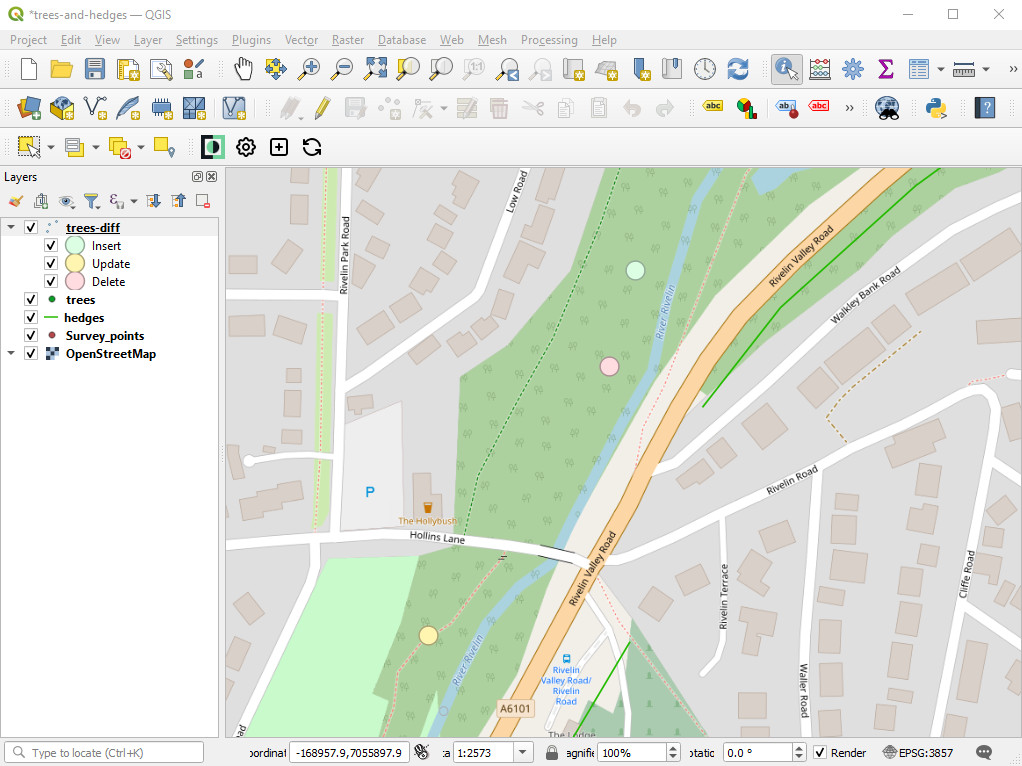
### Create report (Processing toolbox) [](https://merginmaps.com/docs/manage/plugin/#create-report-processing-toolbox)
**Create report** tool provides an overview of changes in your Mergin Maps project for a range of project versions. The output is a CSV file, which can be opened in QGIS and also in common text and spreadsheets programs.
1. [Navigate to **Mergin Maps** tools](https://merginmaps.com/docs/manage/plugin/#mergin-maps-tools-in-qgis-processing-toolbox)
in the **Processing toolbox** in QGIS
2. Double click the **Create report** tool.
Fill in the parameters in the dialog window. If you want to get the report for a specified range of [versions](https://merginmaps.com/docs/manage/project-history/)
, define also the start and end version.
Click **Run**. 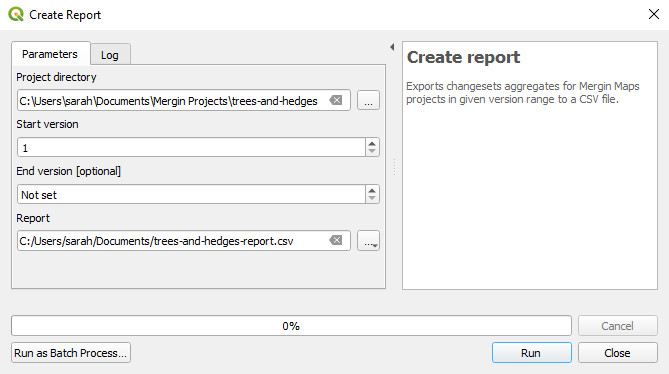
3. The report is added to the **Layers** panel. 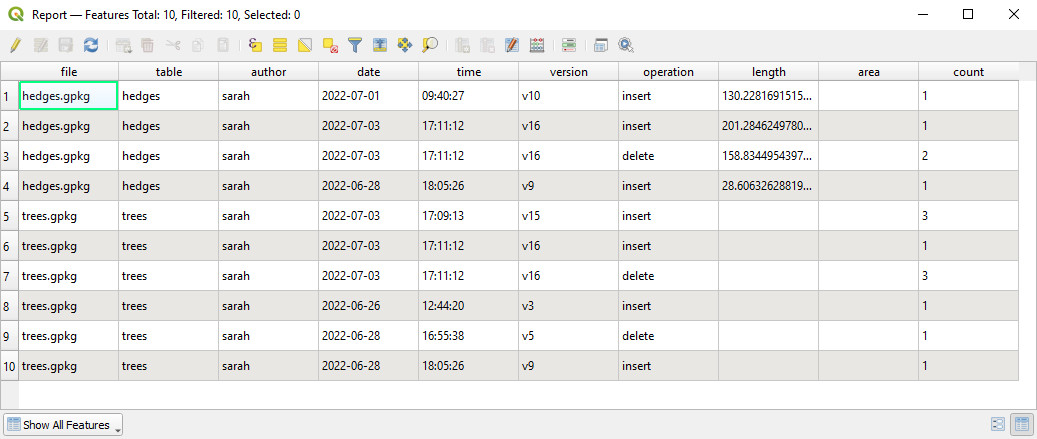
### Download vector tiles (Processing toolbox) [](https://merginmaps.com/docs/manage/plugin/#download-vector-tiles-processing-toolbox)
This tool can be used to easily download vector tiles for offline use. Go to [Downloading vector tiles using Mergin Maps QGIS plugin](https://merginmaps.com/docs/gis/settingup_background_map/#downloading-vector-tiles-using-mergin-maps-qgis-plugin)
to see how it works.
### Extract local changes (Processing toolbox) [](https://merginmaps.com/docs/manage/plugin/#extract-local-changes-processing-toolbox)
Local changes of a specific layer can also be extracted using the **Extract local changes** tool in the **Processing toolbox**.
1. [Navigate to **Mergin Maps** tools](https://merginmaps.com/docs/manage/plugin/#mergin-maps-tools-in-qgis-processing-toolbox)
in the **Processing toolbox** in QGIS
2. Double click the **Extract local changes** tool. In the dialog window, enter your project directory and select the input layer. The output local changes layer can be saved as a file or as a temporary file. Click **Run**. 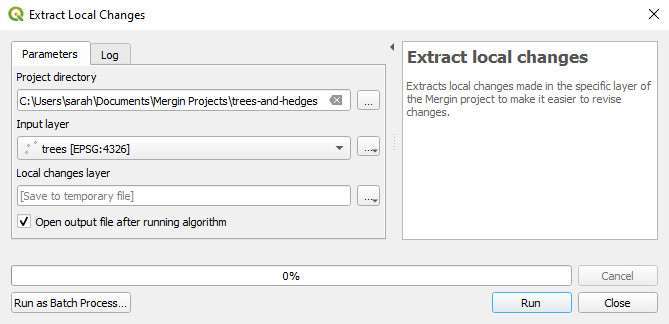
3. The local changes layer is added to the **Layers** panel 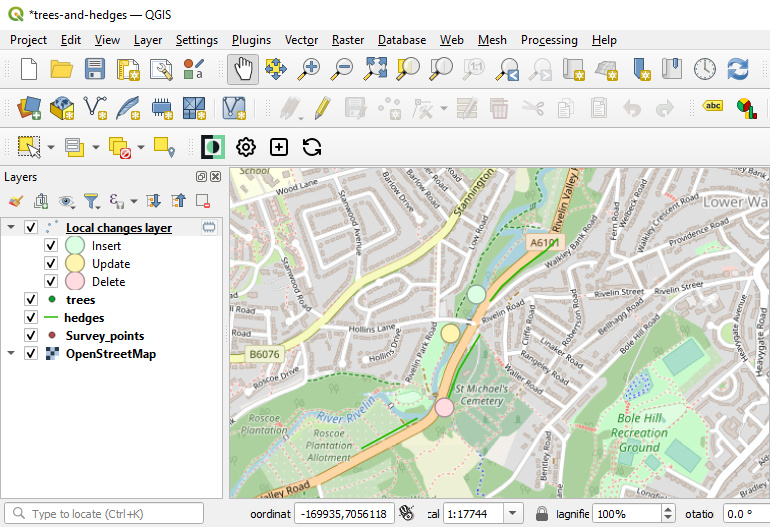
Mergin Maps in QGIS Plugins menu bar [](https://merginmaps.com/docs/manage/plugin/#mergin-maps-in-qgis-plugins-menu-bar)
--------------------------------------------------------------------------------------------------------------------------
**Plugins** menu bar in QGIS contains also Mergin Maps options:
* **Mergin Maps** is a shortcut to [app.merginmaps.com](https://app.merginmaps.com/)
* **Configure Mergin Maps plugin** can be used to [configure plugin](https://merginmaps.com/docs/setup/install-mergin-maps-plugin-for-qgis/#plugin-configuration)
to connect to Mergin Maps or [a custom server](https://merginmaps.com/docs/server/plugin-mobile-app/)
* **Configure DB sync** can help you generate a initial configuration file for [DB sync](https://merginmaps.com/docs/dev/dbsync/)
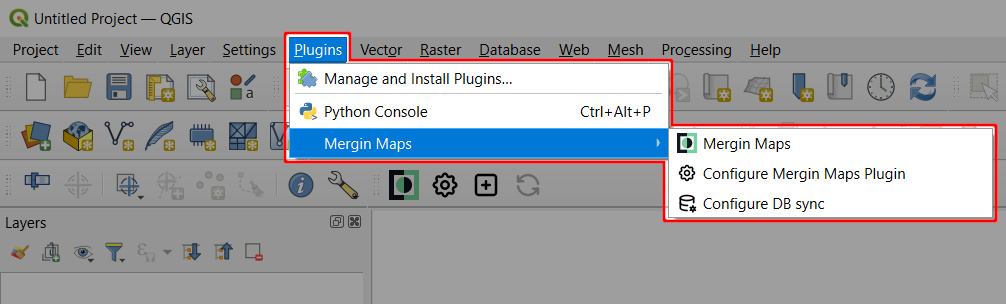
---
# Mergin Maps Dashboard | Mergin Maps
[Skip to content](https://merginmaps.com/docs/manage/dashboard/#VPContent)
Return to top
Mergin Maps Dashboard [](https://merginmaps.com/docs/manage/dashboard/#mergin-maps-dashboard)
===============================================================================================
When you log in to [Mergin Maps dashboard](https://app.merginmaps.com/)
, you will be presented with a quick overview of requests and recent active projects in your current workspace. Here, you can also manage your projects, [workspaces](https://merginmaps.com/docs/manage/workspaces/)
, profile and [subscriptions](https://merginmaps.com/docs/manage/subscriptions/)
.
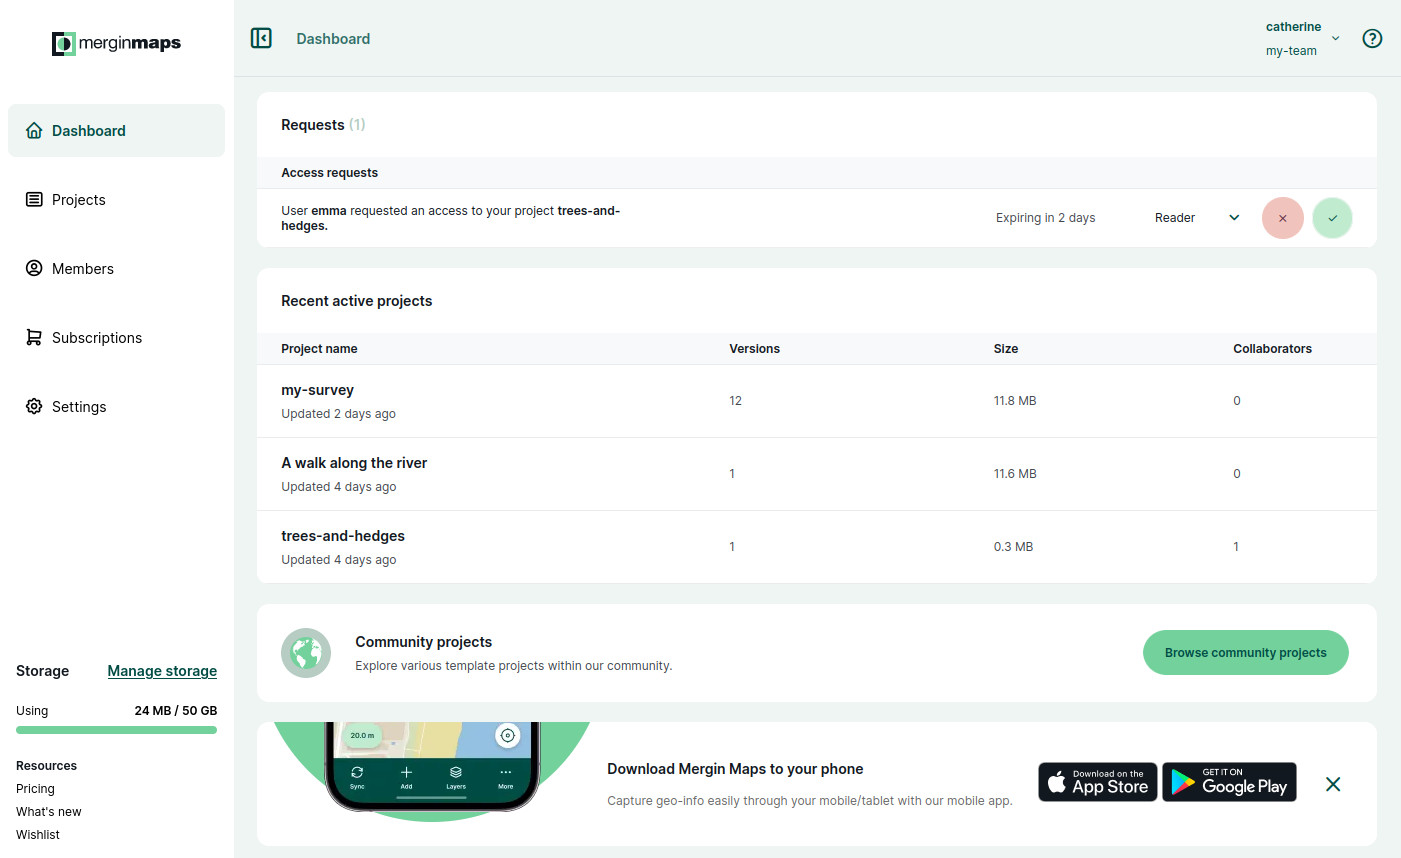
The current workspace and your username are displayed in the upper right corner of the screen.
Use **Dashboard** in the left panel to go back to the homepage
Projects [](https://merginmaps.com/docs/manage/dashboard/#projects)
---------------------------------------------------------------------
The **Projects** tab in the left panel displays the overview of the projects that are available to you in this workspace.
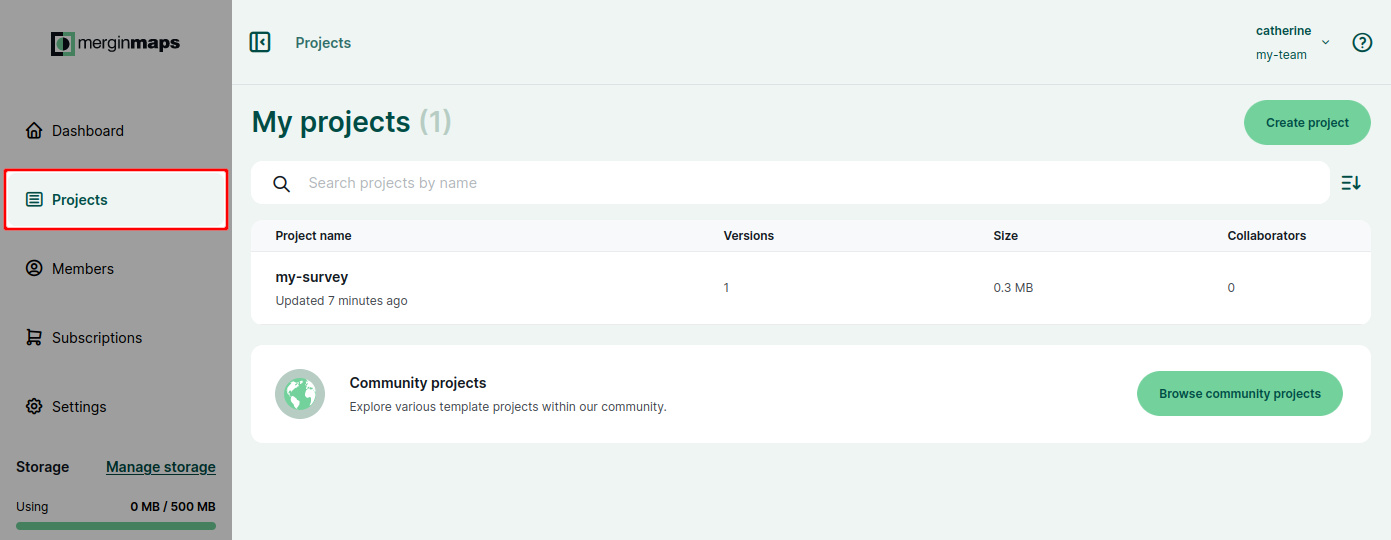
Here, you can:
* use the **Create project** button to [create a new project](https://merginmaps.com/docs/manage/create-project/#create-a-project-through-mergin-maps-dashboard)
* search for a project by name
* **Browse community projects** to explore public projects
* click on a project to see its details
When you click on a project, you will see the overview of its content. Files can simply be **uploaded** to the project using drag and drop.
In the right upper corner, you will find buttons to **download** and [**clone**](https://merginmaps.com/docs/manage/create-project/#clone-an-existing-project-through-mergin-maps-dashboard)
the project.
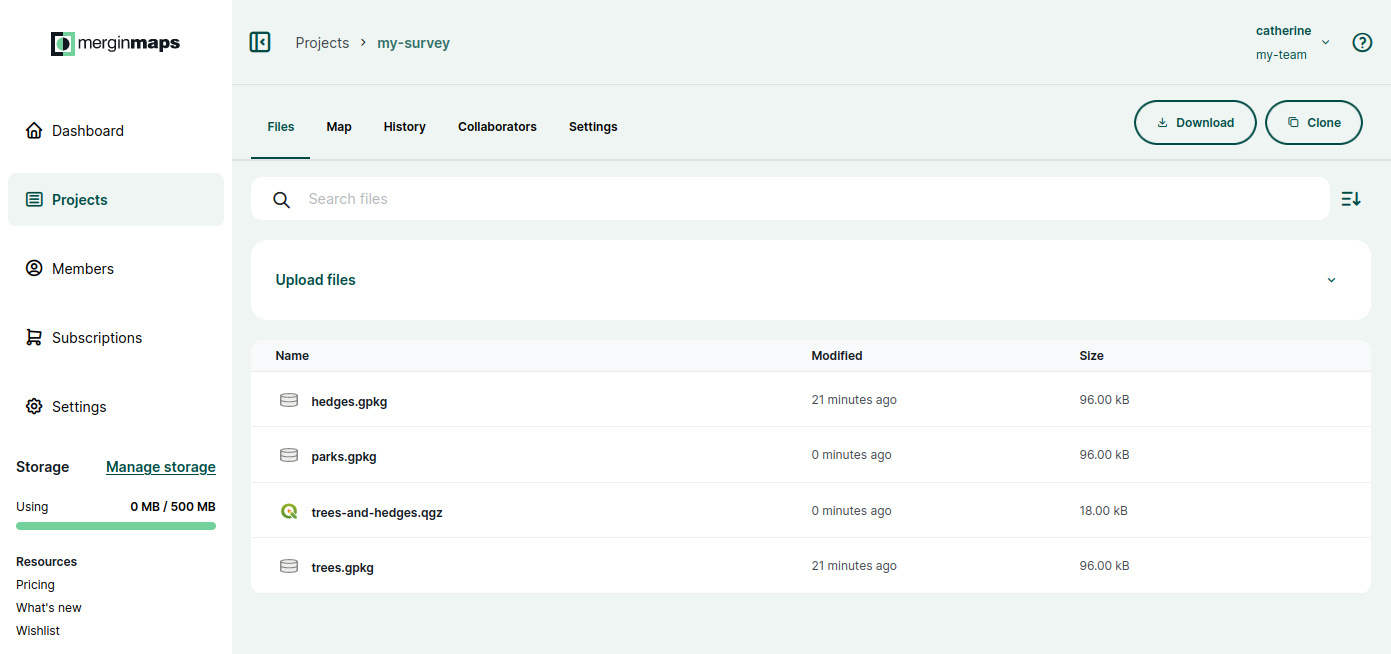
### Project files [](https://merginmaps.com/docs/manage/dashboard/#project-files)
In **Files**, you can see the list of all files associated with the project.
Click on a file to see when it was modified, its size, to download or delete it.
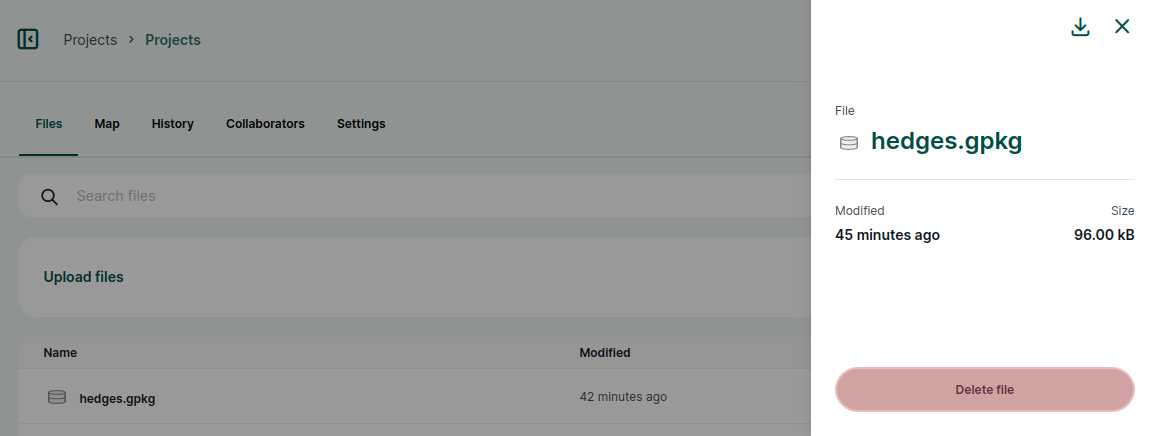
### Webmaps [](https://merginmaps.com/docs/manage/dashboard/#webmaps)
On the **Map** tab, your project is displayed directly on the [dashboard](https://app.merginmaps.com/)
without the need to open QGIS or the mobile app.
More details about this functionality can be found in the [Webmaps](https://merginmaps.com/docs/manage/dashboard-maps/)
section.
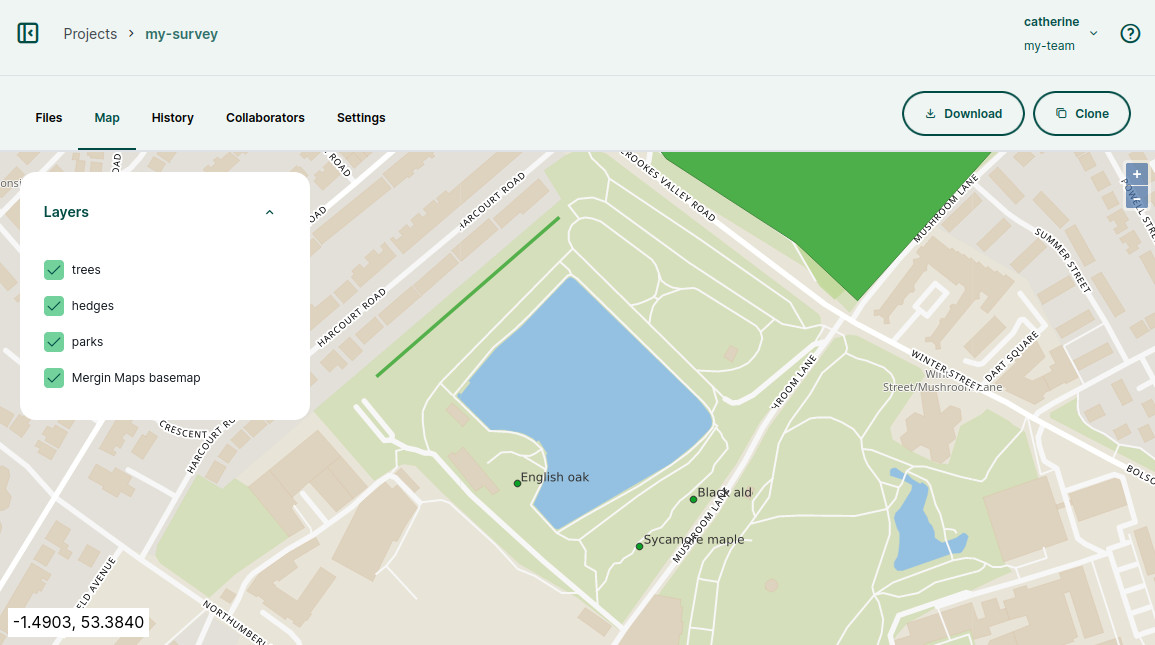
### History [](https://merginmaps.com/docs/manage/dashboard/#history)
The **History** tab contains an overview of available project versions that can be also downloaded to your computer.
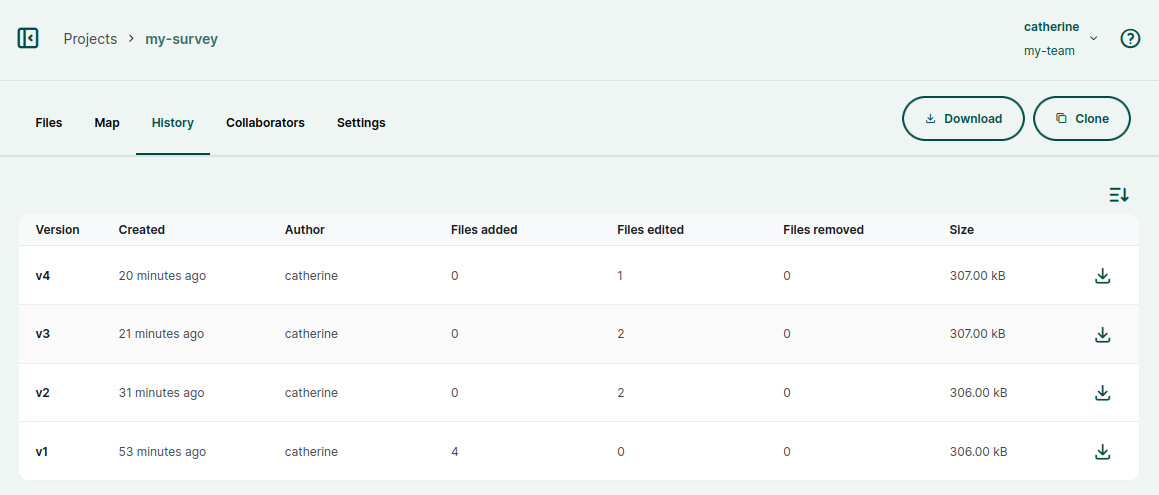
You can click on a specific version to see more details.
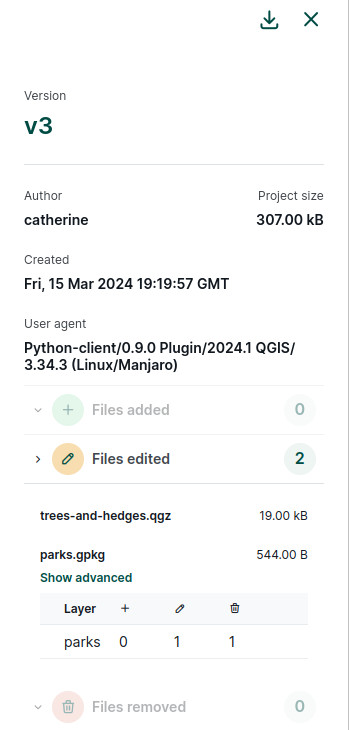
You can learn more about project history and how to revert to an older version in [Project History and Versions](https://merginmaps.com/docs/manage/project-history/)
.
### Collaborators [](https://merginmaps.com/docs/manage/dashboard/#collaborators)
The **Collaborators** tab provides the list of users who have access to the project as well as pending invitations. You can use the **Share** button to invite more people to contribute to your project.
Here, the [**project permissions**](https://merginmaps.com/docs/manage/permissions/#workspace-member-roles-and-project-permissions)
of current collaborators can be changed.
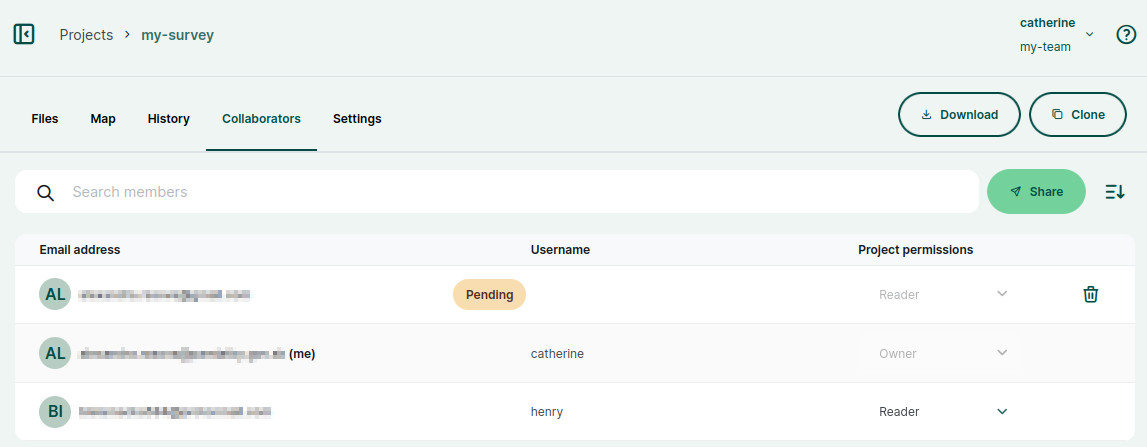
### Settings [](https://merginmaps.com/docs/manage/dashboard/#settings)
In **Settings**, you can:
* make the project [public or private](https://merginmaps.com/docs/manage/project-advanced/#make-your-project-public-private)
* [Transfer project](https://merginmaps.com/docs/manage/project-advanced/#transfer-a-project)
to another workspace
* [Delete project](https://merginmaps.com/docs/manage/project-advanced/#delete-a-project)

Members [](https://merginmaps.com/docs/manage/dashboard/#members)
-------------------------------------------------------------------
The **Members** tab provides the overview of the [members and guests](https://merginmaps.com/docs/manage/permissions/#workspace-members-and-guests)
of the workspace, as well as pending invitations. You can use the [**invite**](https://merginmaps.com/docs/manage/project-advanced/#add-users-to-a-workspace)
option to add users to the workspace.
This tab is only available to [owners and admins](https://merginmaps.com/docs/manage/permissions/#workspace-member-roles-and-project-permissions)
of a workspace.
Here, you can:
* see the email addresses, usernames and names of your workspace users
* see and change the [roles](https://merginmaps.com/docs/manage/permissions/#workspace-member-roles-and-project-permissions)
of your workspace members
* see the **Member type**, whether the user is a [contributor](https://merginmaps.com/docs/manage/subscriptions/#contributors)
or a read-only guest. Only contributors are counting towards your [subscription](https://merginmaps.com/docs/manage/subscriptions/)
.
* remove users from the workspace

Subscriptions [](https://merginmaps.com/docs/manage/dashboard/#subscriptions)
-------------------------------------------------------------------------------
The **Subscriptions** tab contains information about your [subscription plan](https://merginmaps.com/docs/manage/subscriptions/)
. This tab is only available to [owners](https://merginmaps.com/docs/manage/permissions/#workspace-member-roles-and-project-permissions)
of a workspace.
Here, you can find the current usage of storage, number of users (members and guests) and number of projects in your workspace.

Click on **Manage subscription** to visit the subscription management portal where you can update the subscription plan, billing information, and see invoices and upcoming payments.
The subscription management portal can also be accessed [using this link](https://merginmaps.com/docs/manage/subscriptions/#accessing-subscription-management-portal-directly-without-mergin-maps-account)
.

TIP
For details about different subscription plans visit our [pricing page](https://merginmaps.com/pricing)
.
Settings [](https://merginmaps.com/docs/manage/dashboard/#settings-1)
-----------------------------------------------------------------------
In the **Settings** tab, you will find information about the current workspace.
Here, [admins and owners](https://merginmaps.com/docs/manage/permissions/#workspace-member-roles-and-project-permissions)
of a workspace can set up or manage [Single sign-on (SSO)](https://merginmaps.com/docs/manage/sso/)
.
[Owners](https://merginmaps.com/docs/manage/permissions/#workspace-member-roles-and-project-permissions)
of a workspace can also:
* use **Edit Workspace** to add or change the description of the workspace
* use **Close Workspace** to [delete the workspace](https://merginmaps.com/docs/manage/workspaces/#how-to-delete-a-workspace)

User profile [](https://merginmaps.com/docs/manage/dashboard/#user-profile)
-----------------------------------------------------------------------------
**Your profile** can be accessed by clicking on the user name in the upper right corner.

Here you can edit your account details (such as name or e-mail address), change password, manage notifications about workspace activity and close your account.
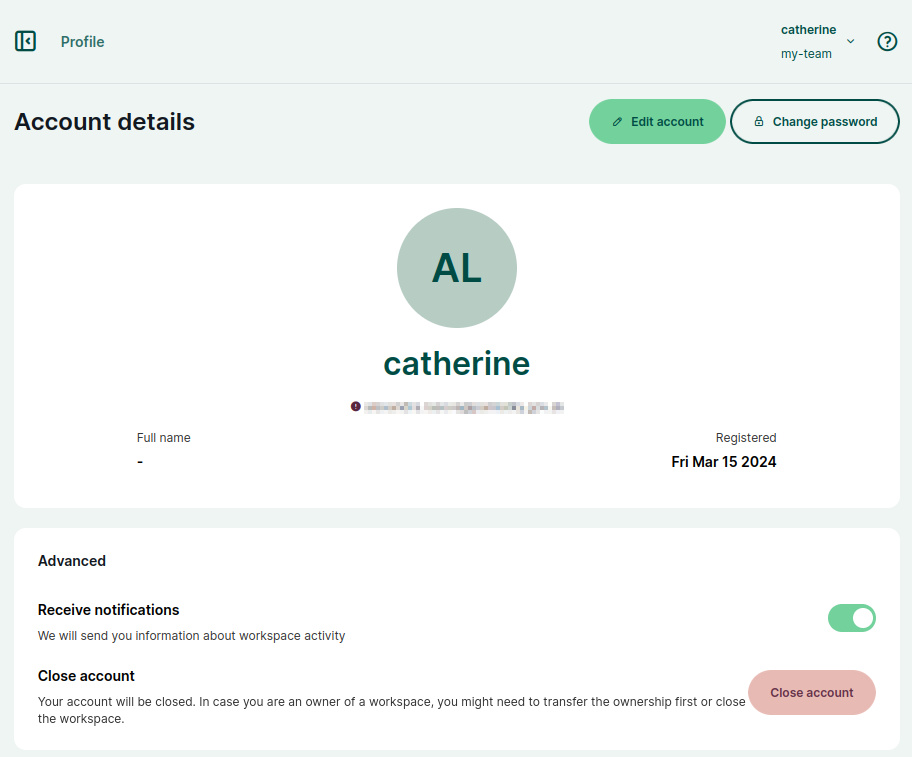
Manage workspaces [](https://merginmaps.com/docs/manage/dashboard/#manage-workspaces)
---------------------------------------------------------------------------------------
Click on the user name in the upper right corner and click on **Manage workspaces** to see the overview of workspaces to which you have access as a guest, member or owner.
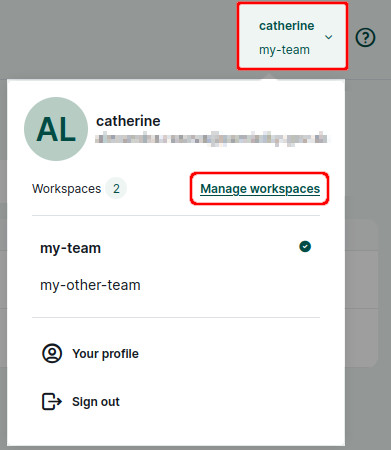
Here you can [**create a new workspace**](https://merginmaps.com/docs/manage/workspaces/#how-to-create-a-new-workspace)
, leave a workspace and accept/decline invitations to other users' workspaces.
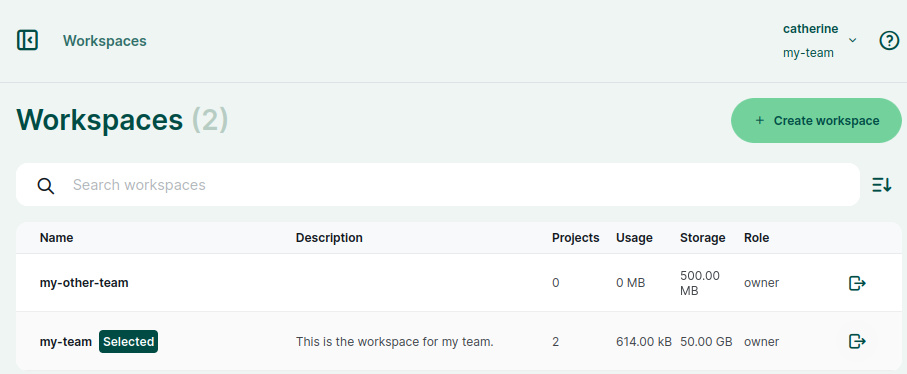
---
# Selective Synchronisation | Mergin Maps
[Skip to content](https://merginmaps.com/docs/manage/selective_sync/#VPContent)
Return to top
Selective Synchronisation [](https://merginmaps.com/docs/manage/selective_sync/#selective-synchronisation)
============================================================================================================
Selective sync feature adds a possibility to not download specified files on other devices in the synchronisation process. These files are only stored on the creator's device and server and can be accessed on [Mergin Maps](https://merginmaps.com/)
web or QGIS desktop. Other collaborators on different devices will not receive these files during synchronisation.
Selective sync is useful mainly when a project contains a lot of data (for example photos) and these data do not necessarily need to be stored on all devices. Another advantage is a significant reduction of synchronisation time.
TIP
If you want to use large files (e.g. background maps) in your Mergin Maps project without synchronisation, see [How to work with very large files](https://merginmaps.com/docs/gis/settingup_background_map/#how-to-work-with-very-large-files-android)
.
See the example in the picture below. Two surveyors Jim and Susan are capturing features in the field. When it comes to synchronisation, Jim hits the [arrow icon](https://merginmaps.com/docs/manage/plugin/)
to synchronise his changes. Features together with photos are now stored on the server. When Susan synchronises the project, synchronisation first downloads Jim's changes (including photos) and after that uploads Susan's changes to the server. However, selective sync can exclude photos from being downloaded.
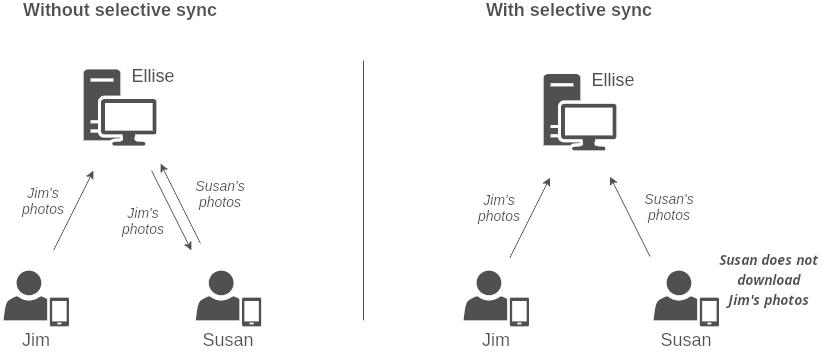
TIP
Features and other data are still being downloaded and both Jim and Susan will see them, only photos will be missing.
How to set up selective sync [](https://merginmaps.com/docs/manage/selective_sync/#how-to-set-up-selective-sync)
------------------------------------------------------------------------------------------------------------------
Selective sync can be set using Mergin Maps QGIS plugin.
1. Open your project in QGIS and go to **Project** > **Properties**
2. In **Mergin Maps** tab check the **Enable selective sync for Input**
3. Optionally, you can fill out **Only apply for folder**, if you want to use selective sync on a subfolder.
TIP
Do you want to set up a folder like this? Go to [How to set up a custom folder for storing photos](https://merginmaps.com/docs/layer/photos/#how-to-set-up-a-custom-folder-for-storing-photos)
.
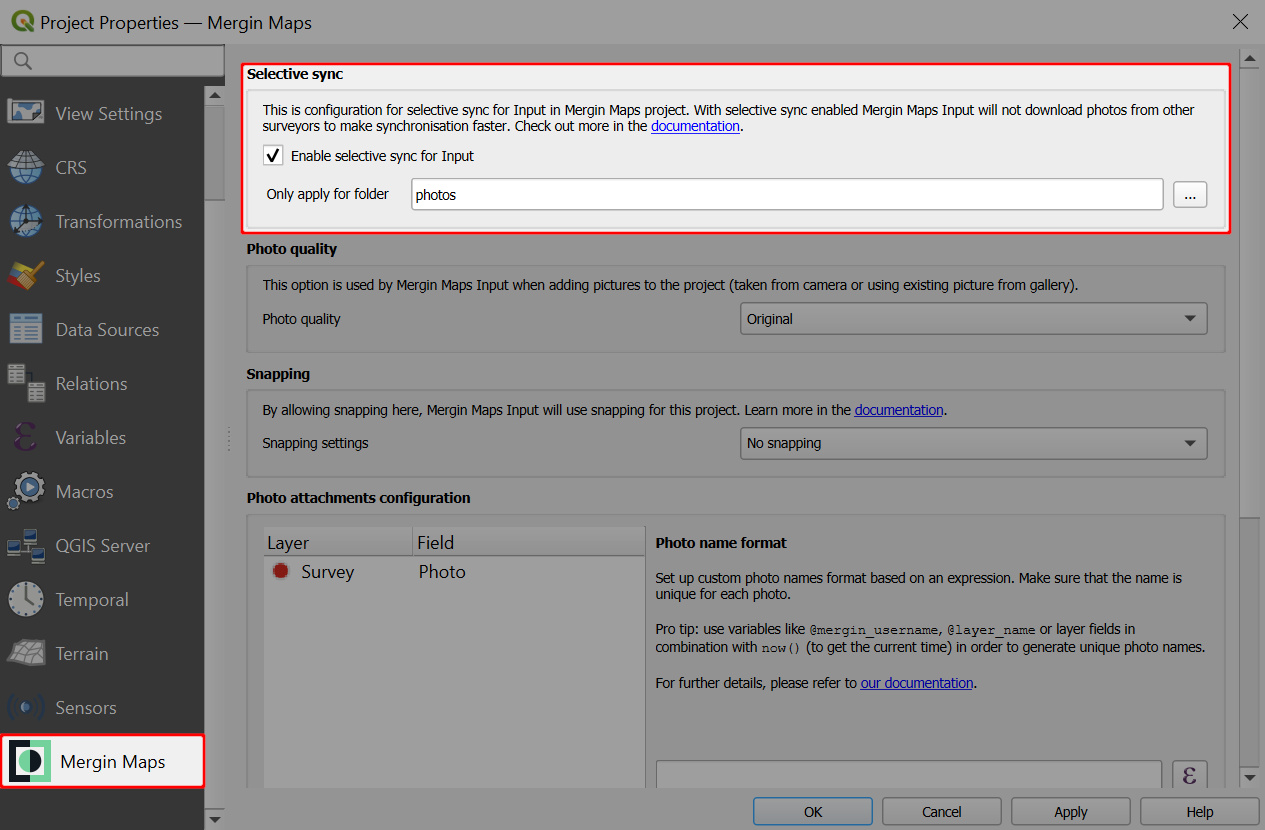
TIP
If **Selective sync** option is inactive in project properties, make sure you are working with a Mergin Maps project.
---
# Webmaps | Mergin Maps
[Skip to content](https://merginmaps.com/docs/manage/dashboard-maps/#VPContent)
Return to top
Webmaps [](https://merginmaps.com/docs/manage/dashboard-maps/#webmaps)
========================================================================
The spatial data of your project can be displayed in the **Map** tab of the project on the [dashboard](https://app.merginmaps.com/)
. You need to be logged in to see the maps.
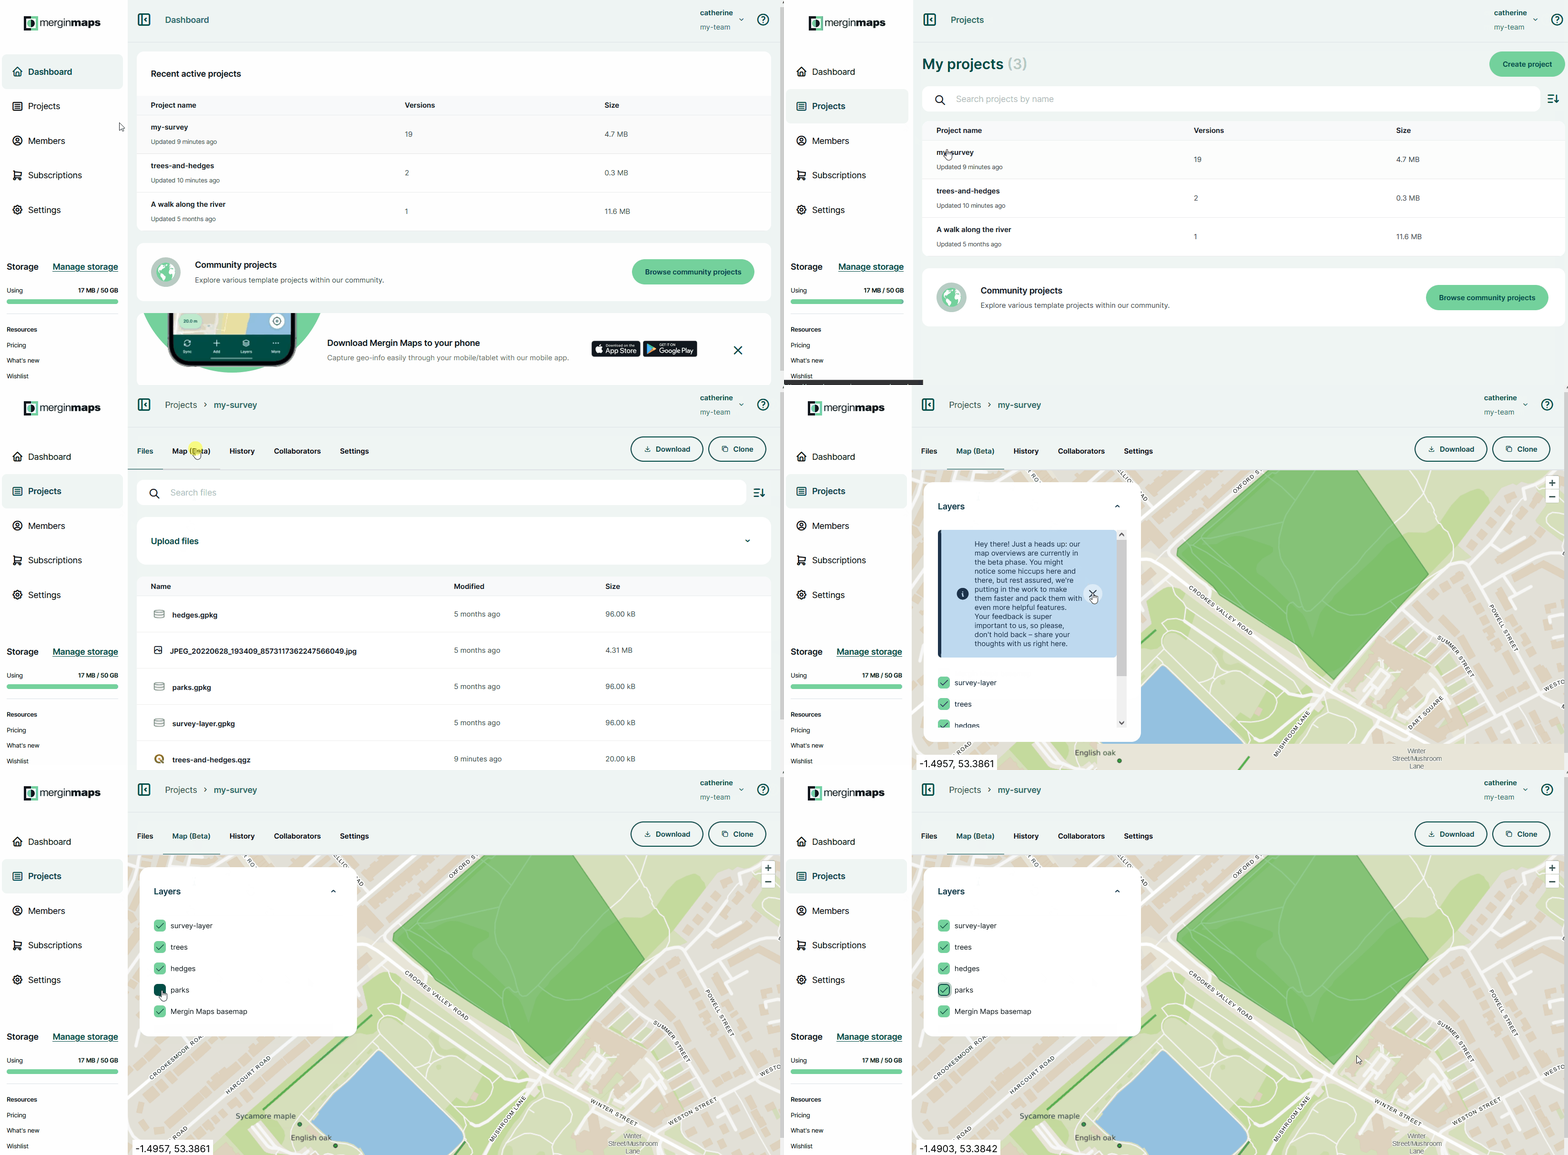
Usage details
Webmaps are available for [Mergin Maps](https://merginmaps.com/)
cloud and [Mergin Maps EE](https://merginmaps.com/pricing)
users.
Webmaps are **not** available for [Mergin Maps CE](https://github.com/MerginMaps)
.
Webmaps content [](https://merginmaps.com/docs/manage/dashboard-maps/#webmaps-content)
----------------------------------------------------------------------------------------
On the webmaps, you will see your survey layers or raster layers that are [packaged](https://merginmaps.com/docs/manage/project/#packaging-qgis-project)
with the project. Other layers, such as online [background maps](https://merginmaps.com/docs/gis/settingup_background_map/#background-maps)
or PostgreSQL layers are not displayed. The extent of maps is defined by the [extent set in the QGIS project](https://merginmaps.com/docs/gis/features/#project-extent)
.
All maps on the [dashboard](https://app.merginmaps.com/)
use [Mergin Maps vector tile service](https://merginmaps.com/docs/gis/settingup_background_map/#online-services-1)
as a background map.
The content of the maps and of the **Layers** panel is refreshed after every synchronisation of the project. This means you should always see your current spatial data here.
The **Layers** panel lists all layers displayed on the map. The check button ✅ controls the visibility of layers.

Webmaps extent [](https://merginmaps.com/docs/manage/dashboard-maps/#webmaps-extent)
--------------------------------------------------------------------------------------
The extent of webmaps is defined in QGIS in the **Project Properties**.
When displaying maps on the [dashboard](https://app.merginmaps.com/)
, Mergin Maps uses primarily the [project full extent](https://merginmaps.com/docs/gis/features/#project-extent)
defined in the **View Settings** tab.

If this parameter is not defined, the map extent will be set as the _Advertised extent_ from the **QGIS Server** tab.
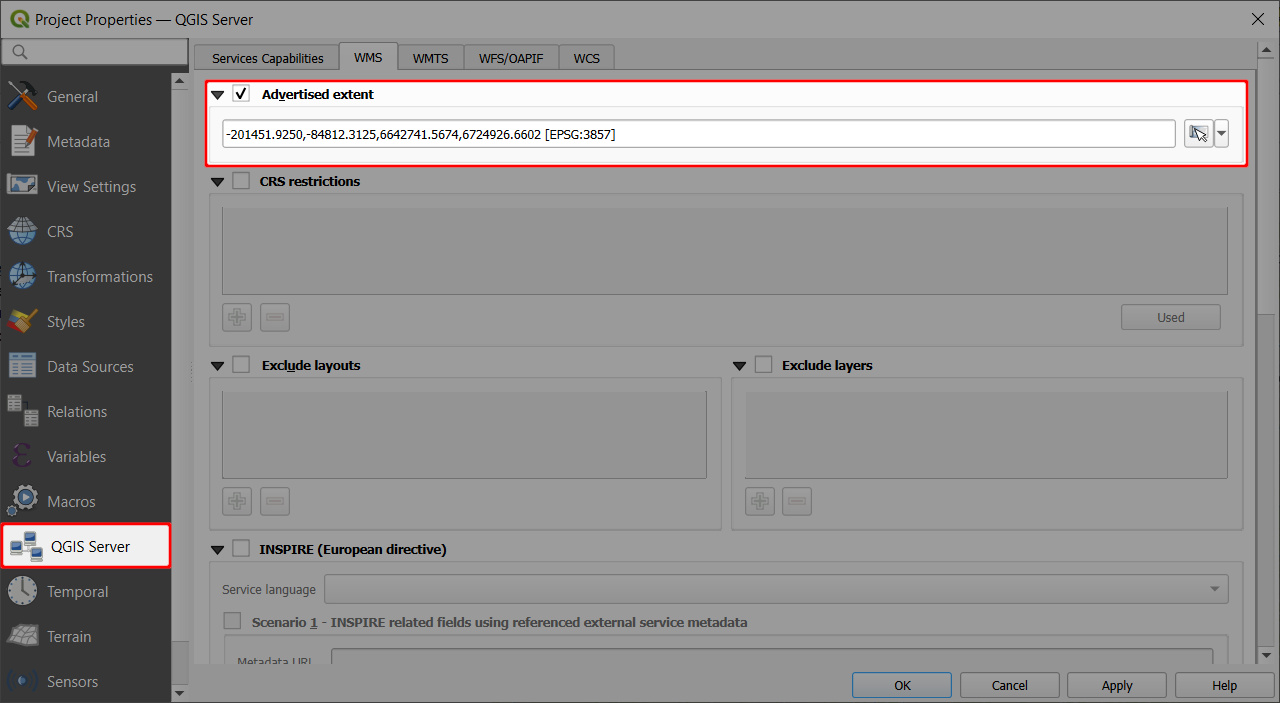
If there are no extent settings in the QGIS project, Mergin Maps will calculate the extent from layers in the project.
Troubleshooting [](https://merginmaps.com/docs/manage/dashboard-maps/#troubleshooting)
----------------------------------------------------------------------------------------
### Map config does not exist [](https://merginmaps.com/docs/manage/dashboard-maps/#map-config-does-not-exist)
The **Map** tab of a project on the [dashboard](https://app.merginmaps.com/)
may display this error message: `Map config does not exist, please try update the project`
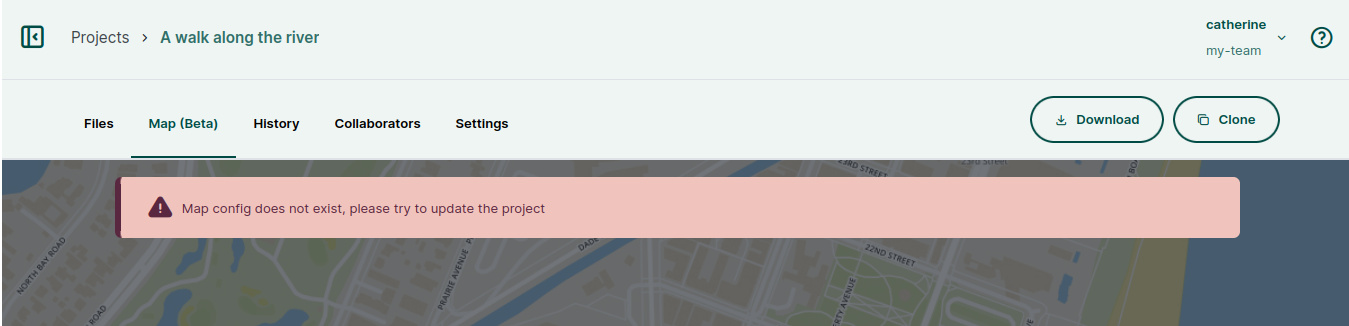
This usually happens when the map was not initiated. All you need to do is to create a new version of the project: synchronisation of the project will activate the map content.
---
# Project History and Versions | Mergin Maps
[Skip to content](https://merginmaps.com/docs/manage/project-history/#VPContent)
Return to top
Project History and Versions [](https://merginmaps.com/docs/manage/project-history/#project-history-and-versions)
===================================================================================================================
Each time someone synchronises the project from a mobile device or from QGIS through Mergin Maps QGIS plugin, a new project version will be created. Thus, it is possible to see the details of the changes made in [Mergin Maps](https://merginmaps.com/)
project by different users or devices.
Using the QGIS plugin or the [dashboard](https://app.merginmaps.com/)
, you can view what files have been added or removed. If you use GeoPackage for your survey, you can also see the list of the features which have been added, deleted or updated.
Project history in QGIS
Great tools to inspect the project history and compare changes between project versions can be found in the QGIS plugin:
* use [Project history](https://merginmaps.com/docs/manage/project-history/#project-history-in-qgis)
to explore changes in the **Changes Viewer**
* use [Create report](https://merginmaps.com/docs/manage/plugin/#create-report-processing-toolbox)
to get an overview of changes for a range of project versions.
* use [Create diff](https://merginmaps.com/docs/manage/plugin/#create-diff-processing-toolbox)
to extract changes made between two versions of a layer
Project history in QGIS [](https://merginmaps.com/docs/manage/project-history/#project-history-in-qgis)
---------------------------------------------------------------------------------------------------------
Project history and version can be inspected using the Mergin Maps QGIS plugin by clicking the **Project history** button of the toolbar.

The button opens the **Changes Viewer** window. Here, all available project versions are listed in the left panel. By selecting a version you can inspect the _changes_ between this and the previous project version (not the state of the project at that version). Note that older versions of your project can be [downloaded through the](https://merginmaps.com/docs/manage/dashboard/#history)
[dashboard](https://app.merginmaps.com/)
.
On the right, you can see some information about the currently selection version: the project size, date of creation and Mergin Maps component that was used to create it. You can switch between the _Changed layers_ and _Changed files_ tabs.

Select a layer from the list in the _Changed layers_ tab to display its changes on the map along with a colour-coded attributes table (green for insert, yellow for update, red for delete).
Changes layers can be added to the project to inspect them further or use them to restore deleted or modified data.
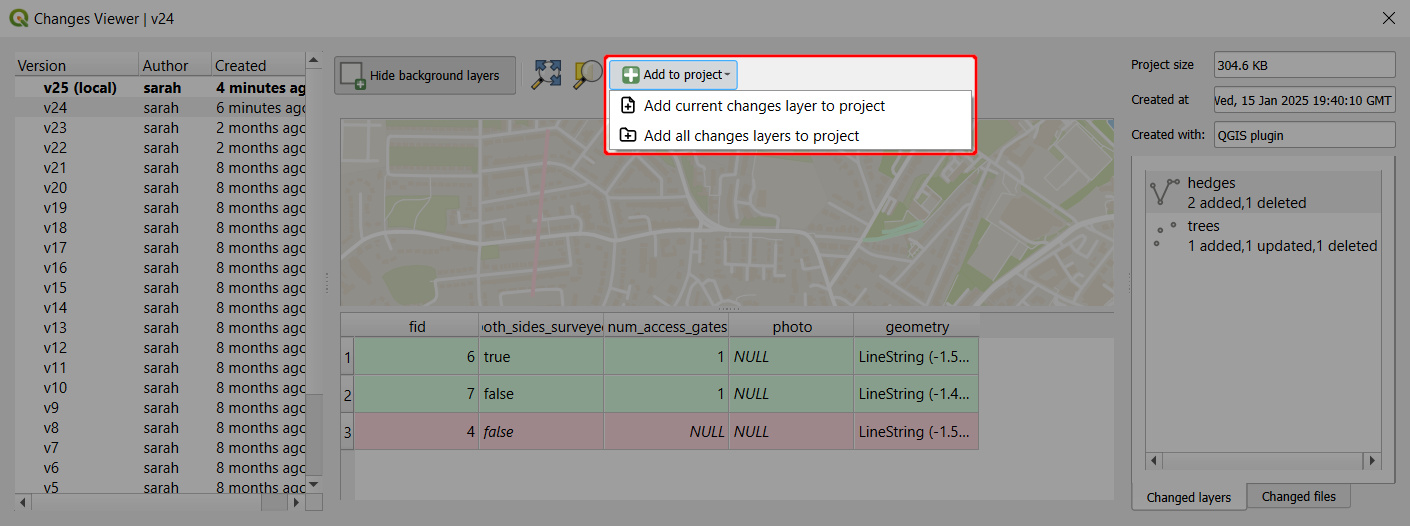
Project history and advanced changelog on the dashboard [](https://merginmaps.com/docs/manage/project-history/#project-history-and-advanced-changelog-on-the-dashboard)
-------------------------------------------------------------------------------------------------------------------------------------------------------------------------
To see the project history:
1. Log in [app.merginmaps.com](https://app.merginmaps.com/)
and go to your project
2. Navigate to the **History** tab.
Here you can find all available versions of the project. These versions can be downloaded to your computer which can be helpful if you need to create a backup or [restore previous version](https://merginmaps.com/docs/manage/project-history/#how-to-revert-to-an-older-version)
of the project. 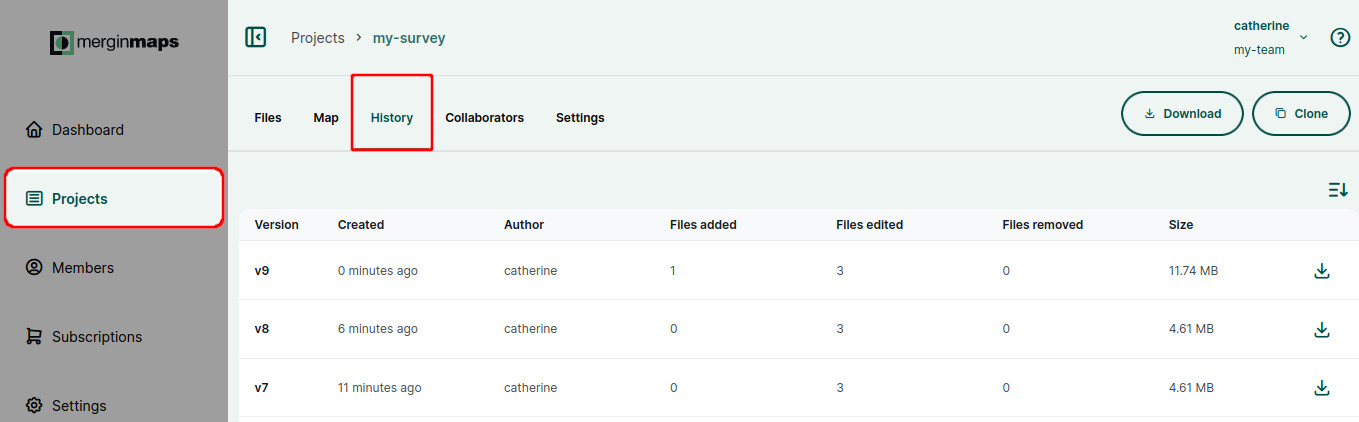
3. Click on a version to see more details about what was changed.
You can inspect the list of **added**, **edited** and **removed** files. 
4. For GeoPackage layers, there is an option to see even more. Click on **Show advanced**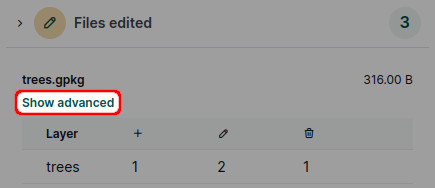
5. Now you can see the overview of feature changes in a specific layer across all attributes.
Here, there are multiple changes in the `trees` layer. One feature (`fid: 9`) was added, one feature (`fid: 6`) was deleted.
There are two modified features:
* `fid: 2` was moved to a new position
* For `fid: 8`, the value of attribute `species` was changed
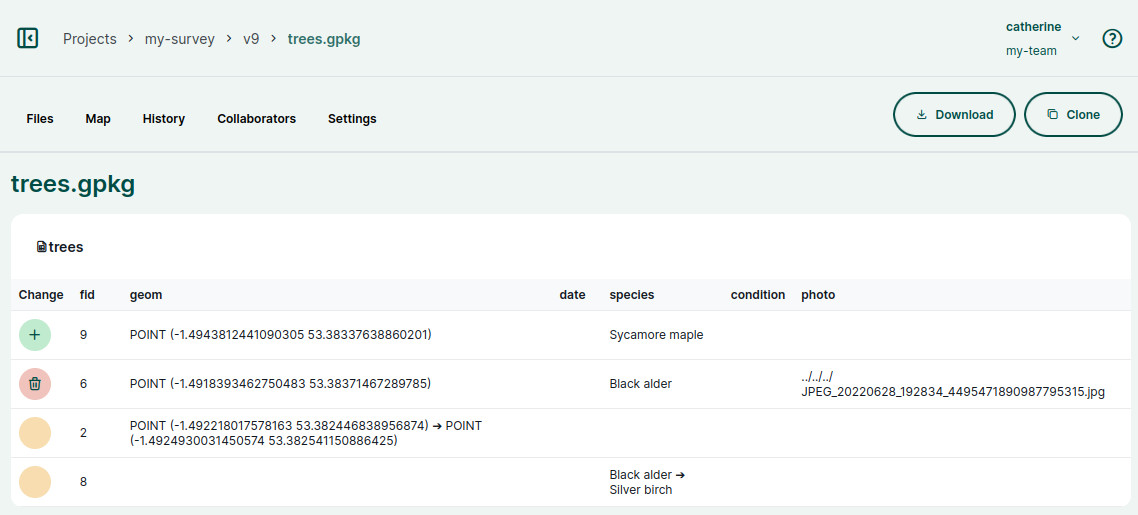
### How to revert to an older version [](https://merginmaps.com/docs/manage/project-history/#how-to-revert-to-an-older-version)
You may find yourself in a situation where you want to revert to an older version of the project.
Local changes made in QGIS (changes that were not synchronised yet) can be reverted by using the **Reset changes** option in [Project status](https://merginmaps.com/docs/manage/synchronisation/#synchronising-changes-in-qgis)
.
To revert to an older version of a project (already synchronised to the cloud), follow these steps:
1. Log in [app.merginmaps.com](https://app.merginmaps.com/)
and go to your project
2. Navigate to the [**project history**](https://merginmaps.com/docs/manage/project-history/#project-history-and-advanced-changelog-on-the-dashboard)
and find the version you want to use
3. **Download** the project version to your computer. Open the project in QGIS to make sure it is the version you want to restore.
TIP
Our blog [Downloading a previous version of your project](https://merginmaps.com/blog/support-tip-downloading-a-previous-version-of-your-project)
contains detailed steps on how to download projects that are too large to be downloaded from the [dashboard](https://app.merginmaps.com/)
.
Now you have multiple options:
* **[Package the downloaded project version](https://merginmaps.com/docs/manage/project/#packaging-qgis-project)
** as a new Mergin Maps project. You can keep both projects if needed or [delete](https://merginmaps.com/docs/manage/project-advanced/#delete-a-project)
the one you don't need anymore.
* or **Replace the specific files in your Mergin Maps project folder**:
1. Close QGIS
2. Copy the QGIS project (`.qgz`), the data (`.gpkg`) or both from the downloaded older version and paste them to your current [Mergin Maps project folder](https://merginmaps.com/docs/manage/project/#mergin-maps-project-folder)
.
Be careful when doing this!
If you changed the data schema between your versions, this might be a bit tricky. By replacing the QGIS project file, you will revert the project settings, such as symbology, forms settings, relations, etc. By replacing the data files, you will get the content that was saved in the downloaded version of the project.
3. Open the project in QGIS and check if you restored your project successfully. If needed, modify the project settings so that everything works as intended.
4. If you are happy with the result, synchronise the changes. The restored version is now the current version of your project.
---
# Sorting and Search Setup | Mergin Maps
[Skip to content](https://merginmaps.com/docs/gis/search_data/#VPContent)
Return to top
Sorting and Search Setup [](https://merginmaps.com/docs/gis/search_data/#sorting-and-search-setup)
====================================================================================================
There are some settings related to sorting, searching and browsing features in Mergin Maps mobile app that can be done in the QGIS project, such as define the order of features and values or include/exclude layers and fields from the search.
Working with layers in the mobile app, including browsing features and values, is described in [Layers in Mergin Maps mobile app](https://merginmaps.com/docs/field/layers/)
.
Sorting features and value list [](https://merginmaps.com/docs/gis/search_data/#sorting-features-and-value-list)
------------------------------------------------------------------------------------------------------------------
The mobile app follows the sorting of features in the attribute table and of values in the value relation widget as set in the QGIS project.
### Order value list by value [](https://merginmaps.com/docs/gis/search_data/#order-value-list-by-value)
The [Value relation](https://merginmaps.com/docs/layer/form-widgets/#value-relation)
widget has the option _Order by value_. When checked, values in the drop-down list will be listed in alphabetical or numerical order.
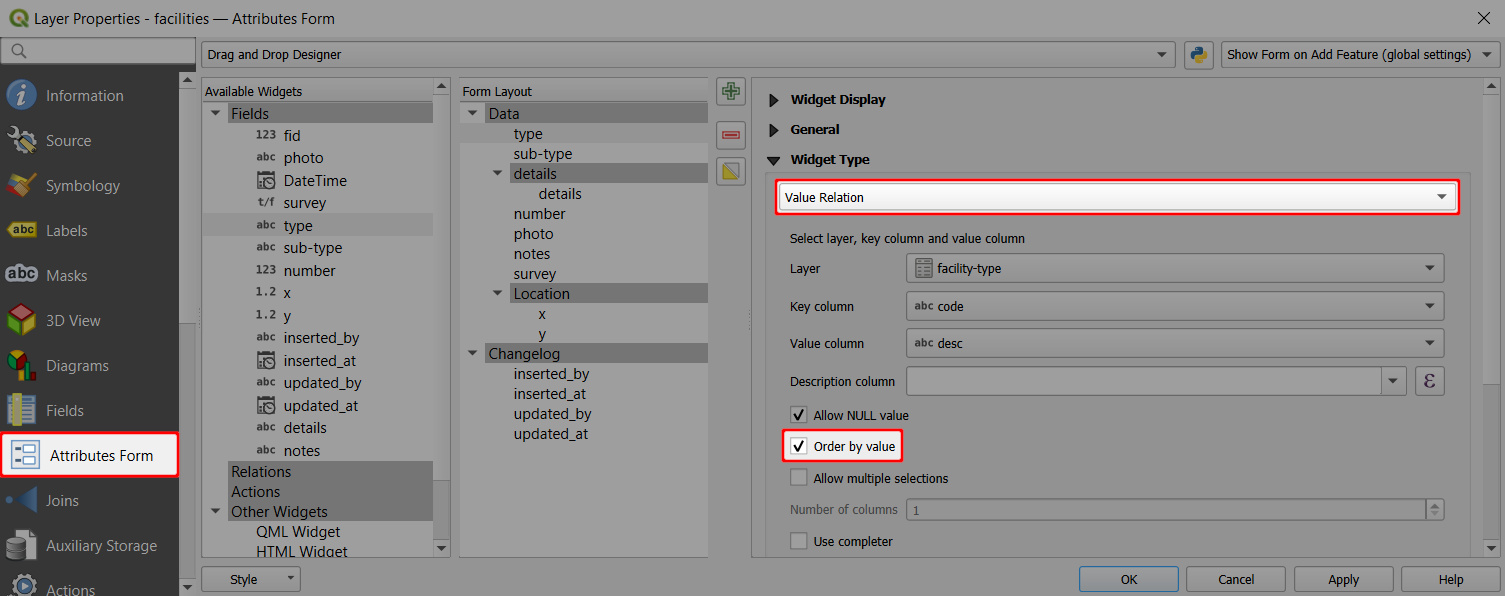
This setting is also followed by the mobile app.
On the left, you can see the default list of options in the drop-down menu. On the right, the option _Order by value_ is used and observed by the mobile app. 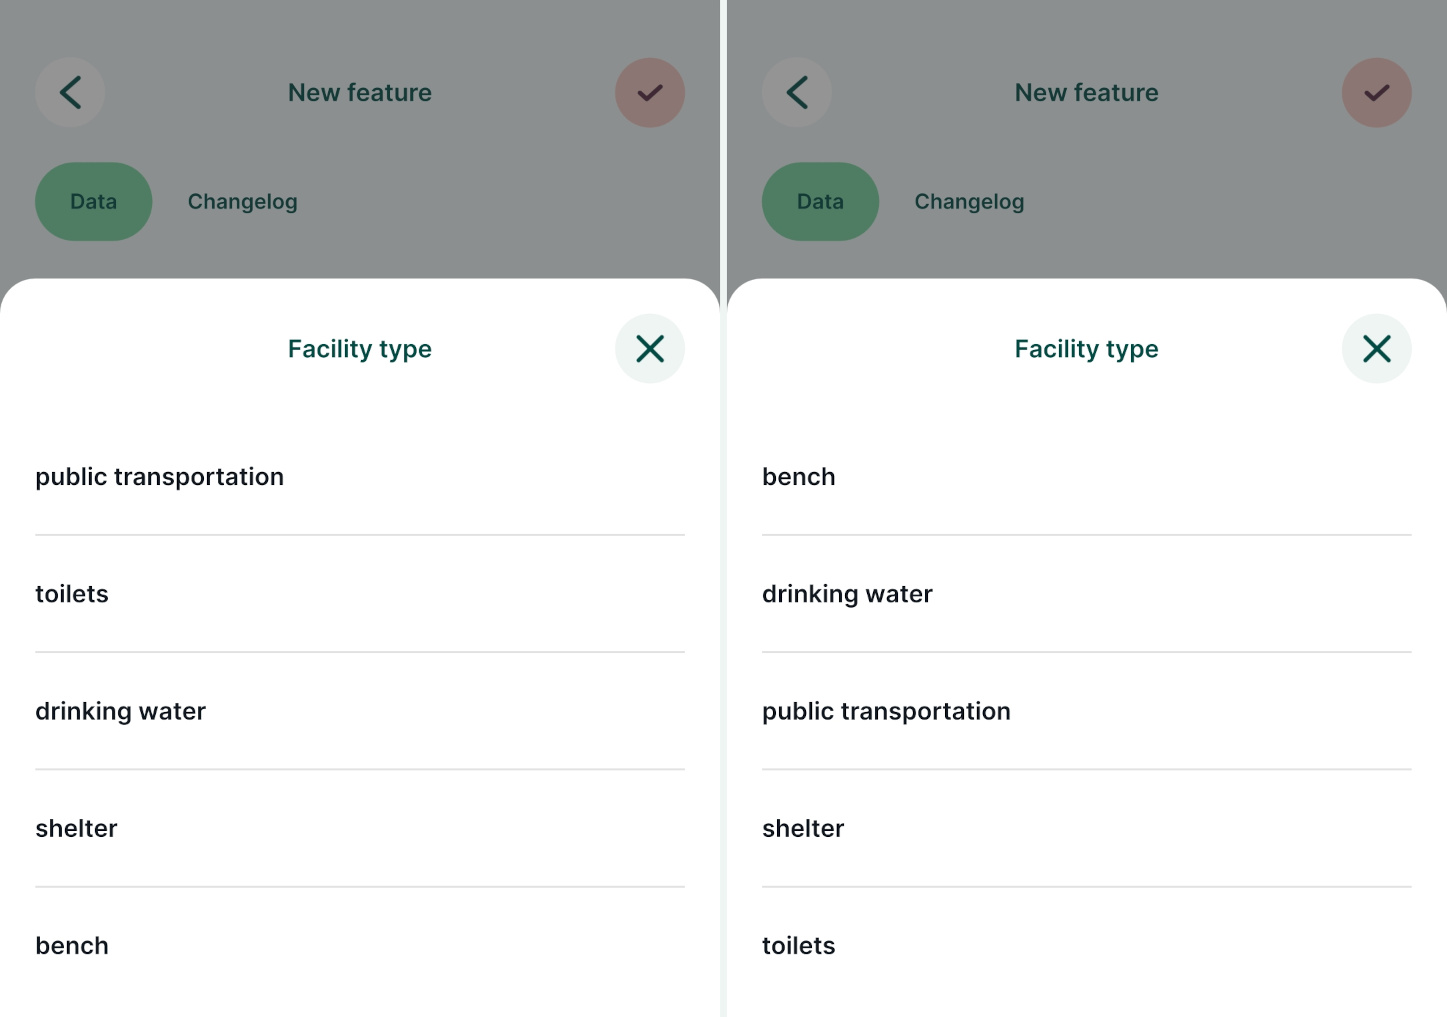
### Sorting features by field value [](https://merginmaps.com/docs/gis/search_data/#sorting-features-by-field-value)
By default, the mobile app orders features in a layer based on their `Feature ID`. The order of features can be defined in the Attribute table in QGIS.
Simple sorting based on ascending or descending value of the attributes can be used:
1. Open your project in QGIS
2. Right-click on a survey layer and open the **Attribute table**
3. In the **Attribute table**, click on the name of a field to sort the features according to the field values. Here, we use the `update_at` field to sort features by the last update. The feature that was updated last will be the first in the list. 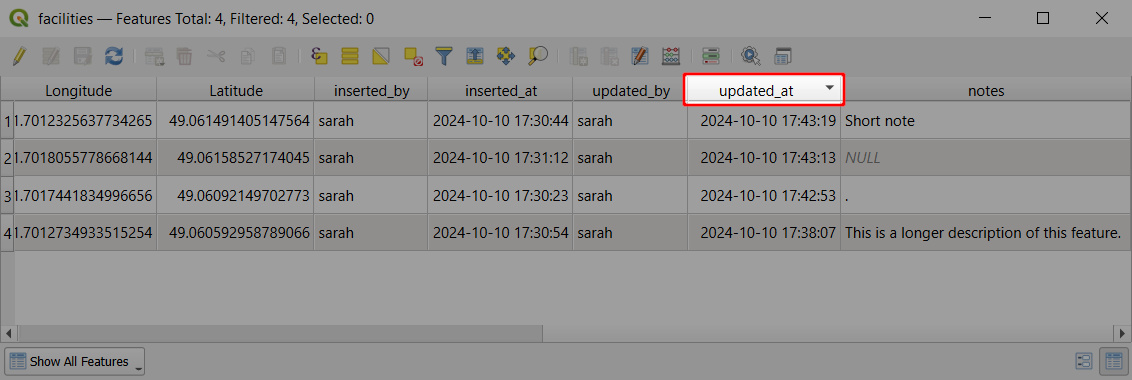
4. Save and synchronise the project.
In the mobile app, features in a layer can be browsed by tapping the **Layers** button and selecting the layer from the list. 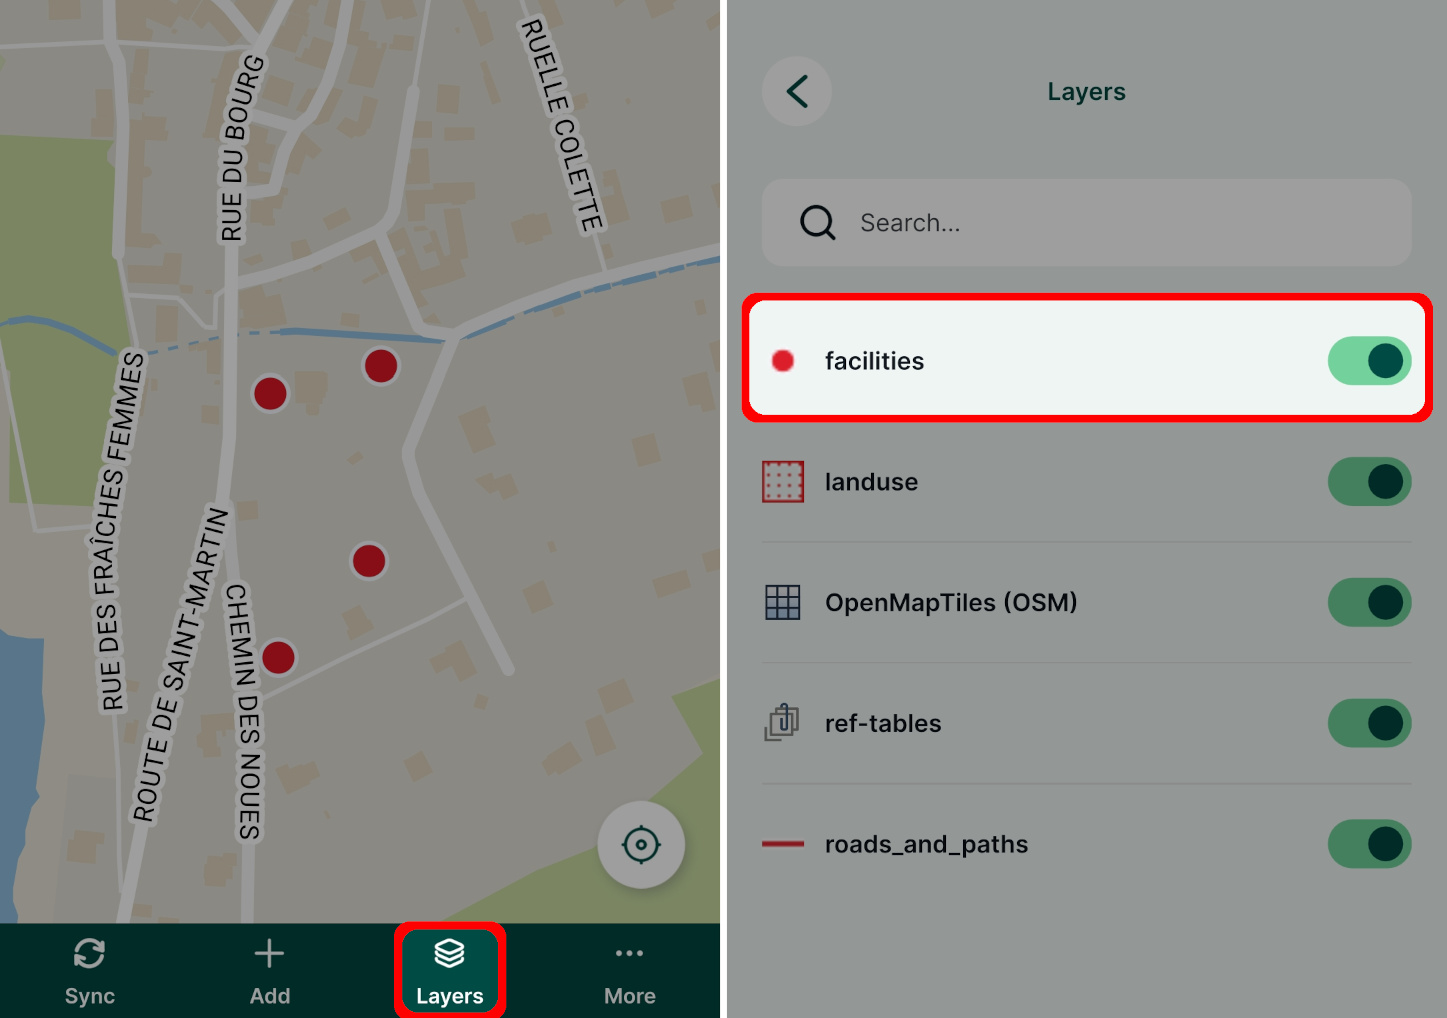
Features in this layer are sorted by the same field value as was defined in the QGIS project. So, instead of the default sorting by the `Feature ID`, the features are ordered by the date and time of their last update. 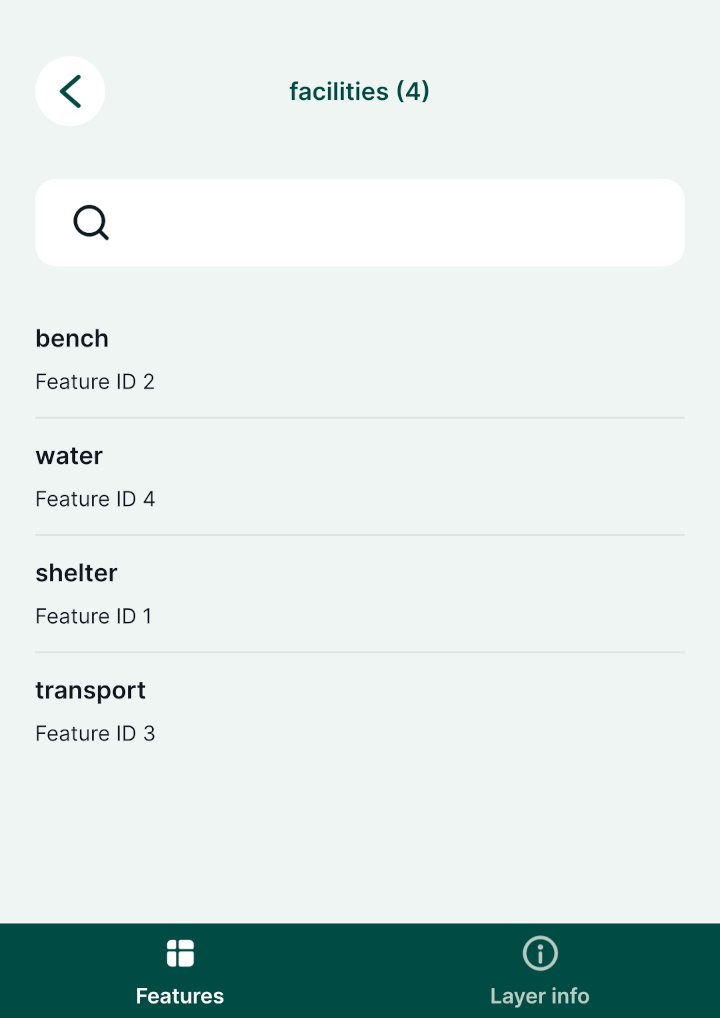
### Sorting features by expression [](https://merginmaps.com/docs/gis/search_data/#sorting-features-by-expression)
Similarly, an expression can be used to sort features in the Attribute table and subsequently in the mobile app.
1. Open your project in QGIS
2. Right-click on a survey layer and open the **Attribute table**
3. Right-click on a field name that you want to use for sorting features and use the **Sort...** option 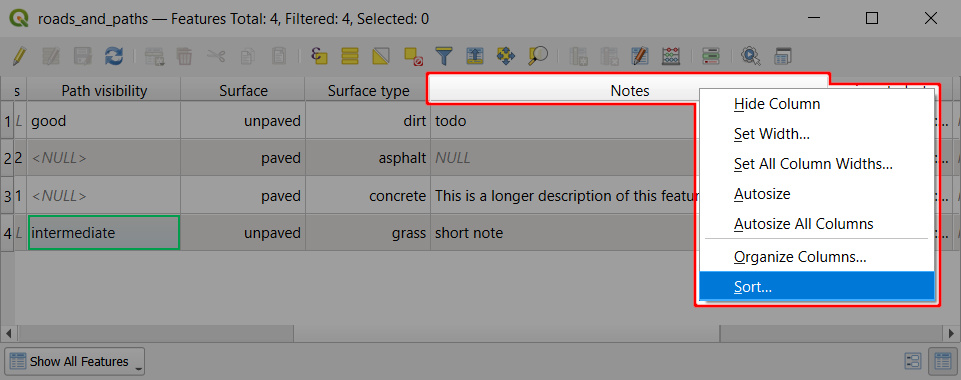
4. Enter the expression you want to use to sort this field. Here, we use `length( "notes" )` to sort features based on the length of the text in the `notes` field. 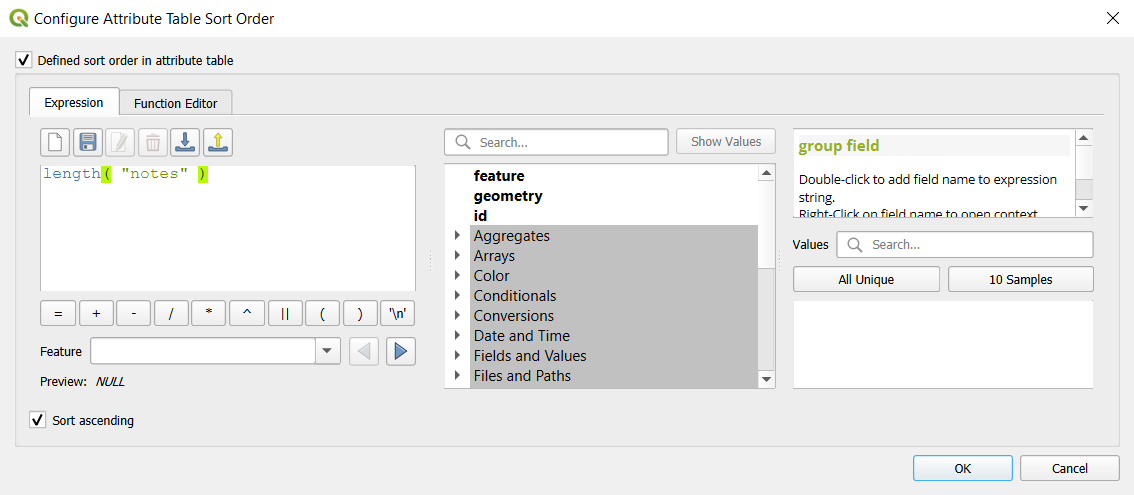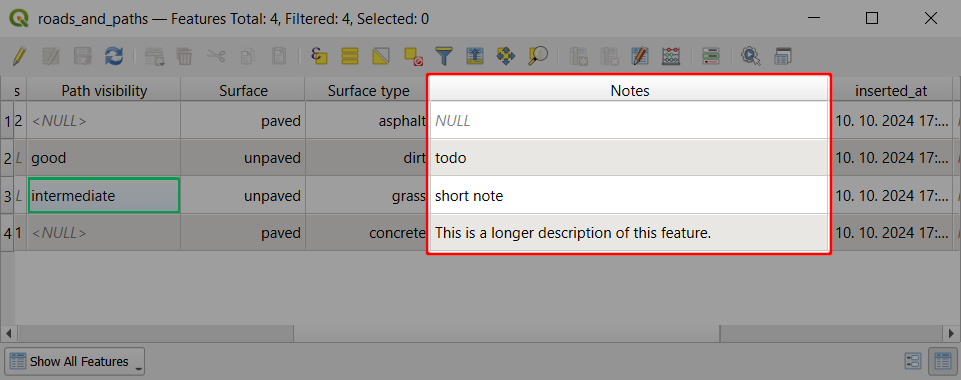
5. Save and synchronise the project.
When browsing features in the mobile app, they will be sorted by the text length. 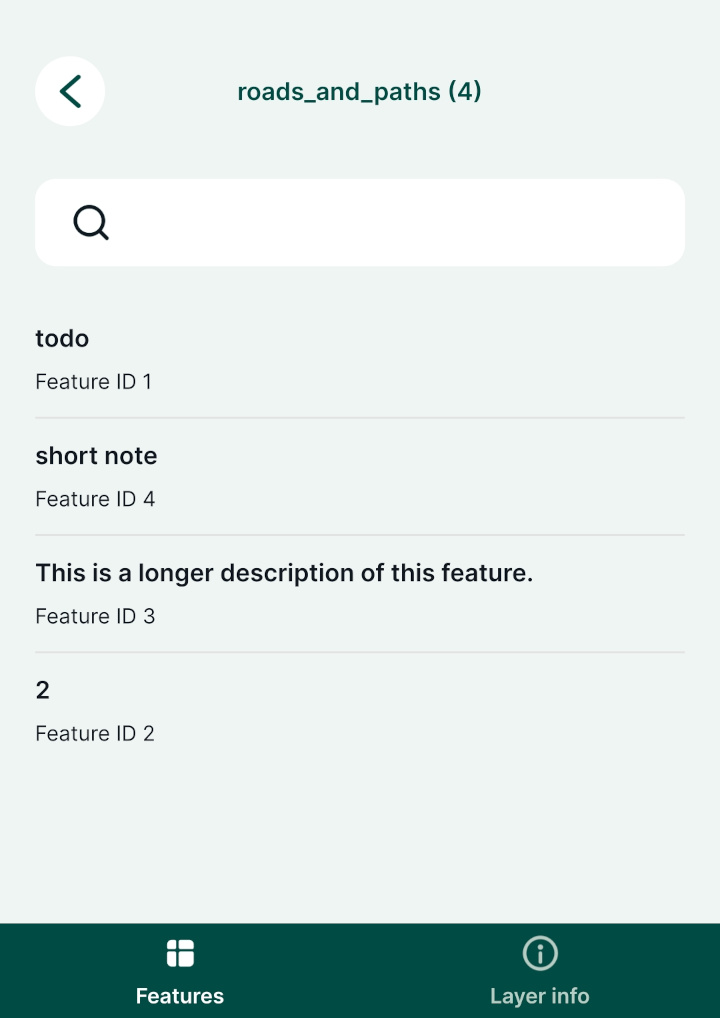
Setting identifiable layers in QGIS project [](https://merginmaps.com/docs/gis/search_data/#setting-identifiable-layers-in-qgis-project)
------------------------------------------------------------------------------------------------------------------------------------------
To be able to browse the attributes of a layer, it needs be _Identifiable_ in your [QGIS project](https://docs.qgis.org/latest/en/docs/user_manual/introduction/qgis_configuration.html?highlight=properties#data-sources-properties)
. Layers are _identifiable_ by default.
If you define a layer as **not identifiable**, you won't be able to tap it in the mobile app or use the **Identify tool** in QGIS to see its attribute form. This may be useful for layers that are only used as background layers.
1. Open your QGIS project
2. In the Menu > Project > Properties click on **Data Sources**
3. Check and uncheck layers in the **Identifiable** column to define which layers you want to be able to browse in your project.
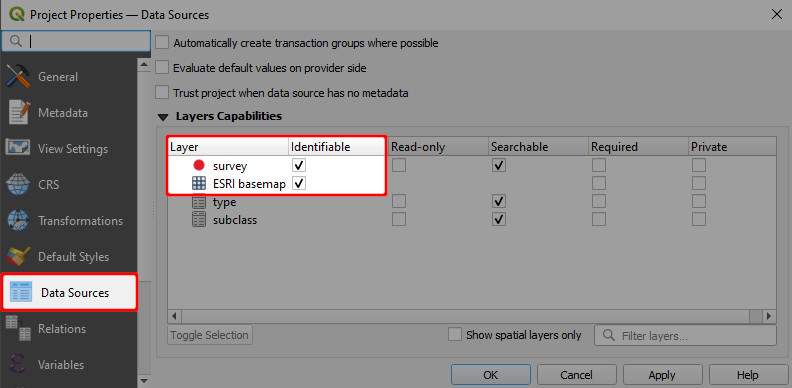
Exclude a field from the search [](https://merginmaps.com/docs/gis/search_data/#exclude-a-field-from-the-search)
------------------------------------------------------------------------------------------------------------------
By default, all attributes are searchable. You can exclude a field from the search in the **Layer properties**.
If a field is marked in a field configuration as **Not searchable**, it will be omitted from the search. There will be no search results, even if you search for a specific existing value of this field.
1. Navigate to the **Fields** tab
2. Check the **Not searchable** option in the **Configuration** column 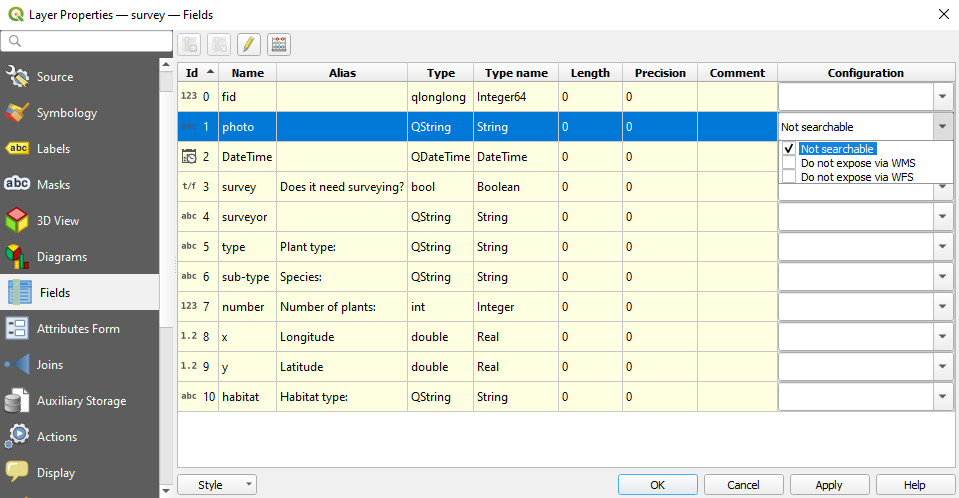
---
# Map Themes | Mergin Maps
[Skip to content](https://merginmaps.com/docs/gis/setup_themes/#VPContent)
Return to top
Map Themes [](https://merginmaps.com/docs/gis/setup_themes/#map-themes)
=========================================================================
In Mergin Maps mobile app, you can use different **map themes**. This is ideal for switching between different background maps (e.g. cartography map and aerial photography), combinations of visible layers or their styles. The map themes should be first set up in QGIS.
Setting up QGIS map themes [](https://merginmaps.com/docs/gis/setup_themes/#setting-up-qgis-map-themes)
---------------------------------------------------------------------------------------------------------
Read how to [set up a new map theme](https://docs.qgis.org/latest/en/docs/user_manual/introduction/general_tools.html#configuring-map-themes)
in QGIS.
* Open QGIS Desktop with your QGIS Project
* Define the visibility and/or styles of the layers in your project
* In the Layers Panel, click on "Manage Map Themes" (eye-icon) and add a new theme (or replace an existing one)
Here, we created two themes: `OSM` and `Aerial photos` to easily switch between two types of background maps. 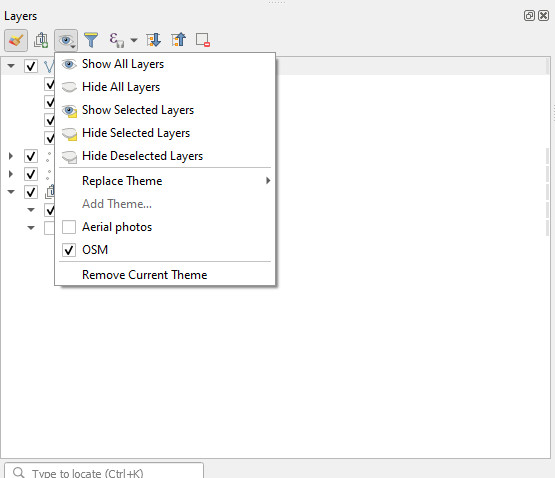
Map themes in Mergin Maps mobile app [](https://merginmaps.com/docs/gis/setup_themes/#map-themes-in-mergin-maps-mobile-app)
-----------------------------------------------------------------------------------------------------------------------------
In the mobile app, tap **More** and select the **Map themes** option.
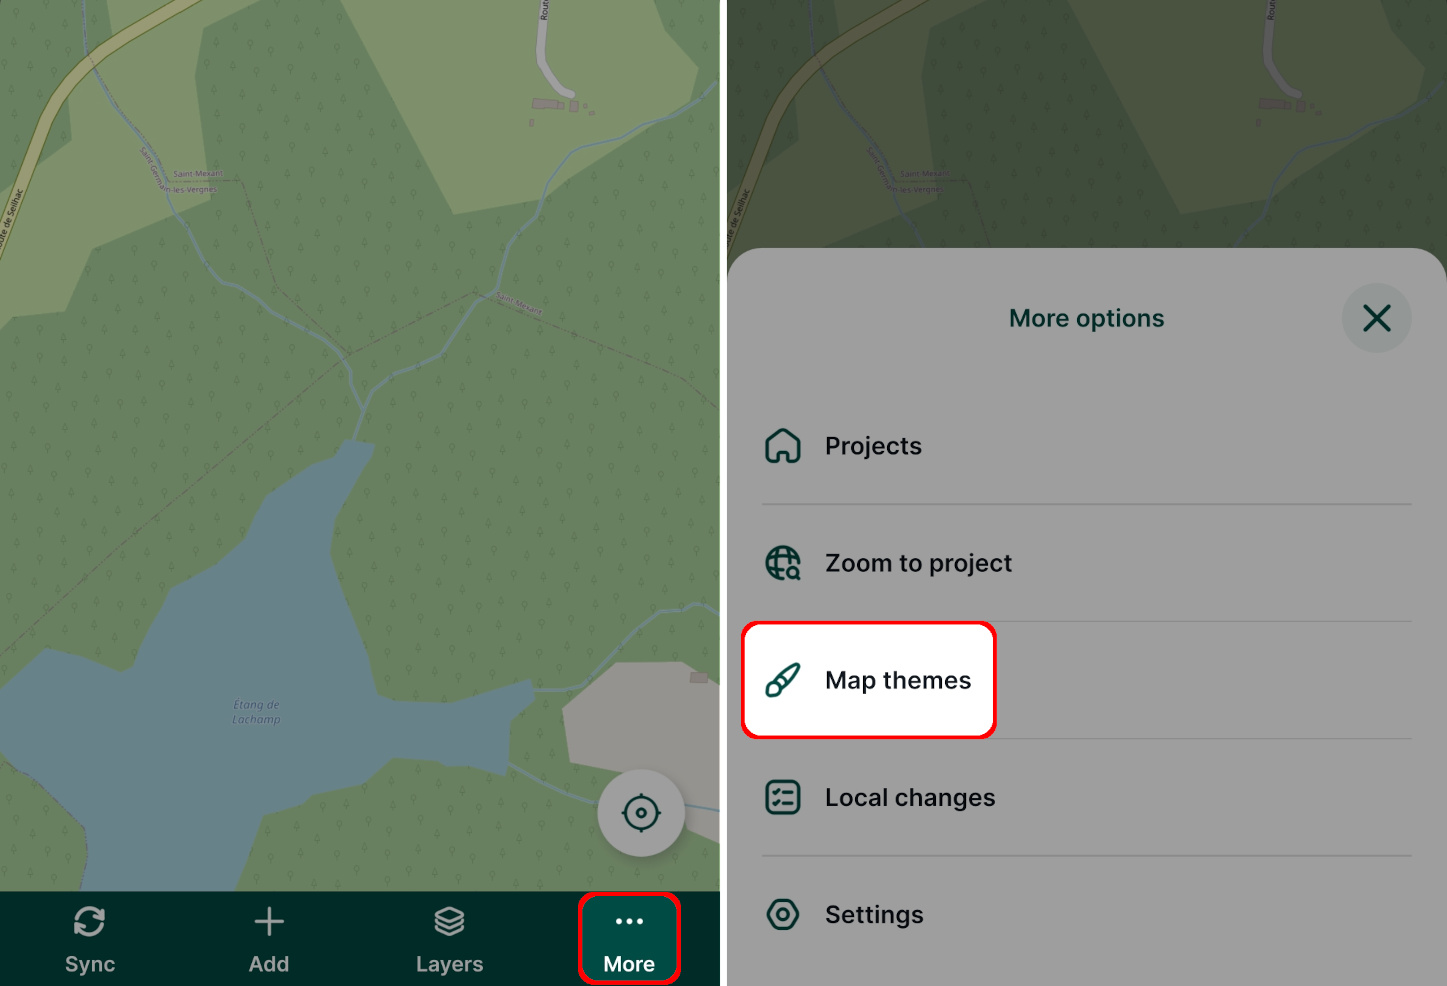
Now you will see the list of map themes that are available in your project. To switch the map theme, tap on it.
Here, we switched from `OSM` to `Aerial photos`.
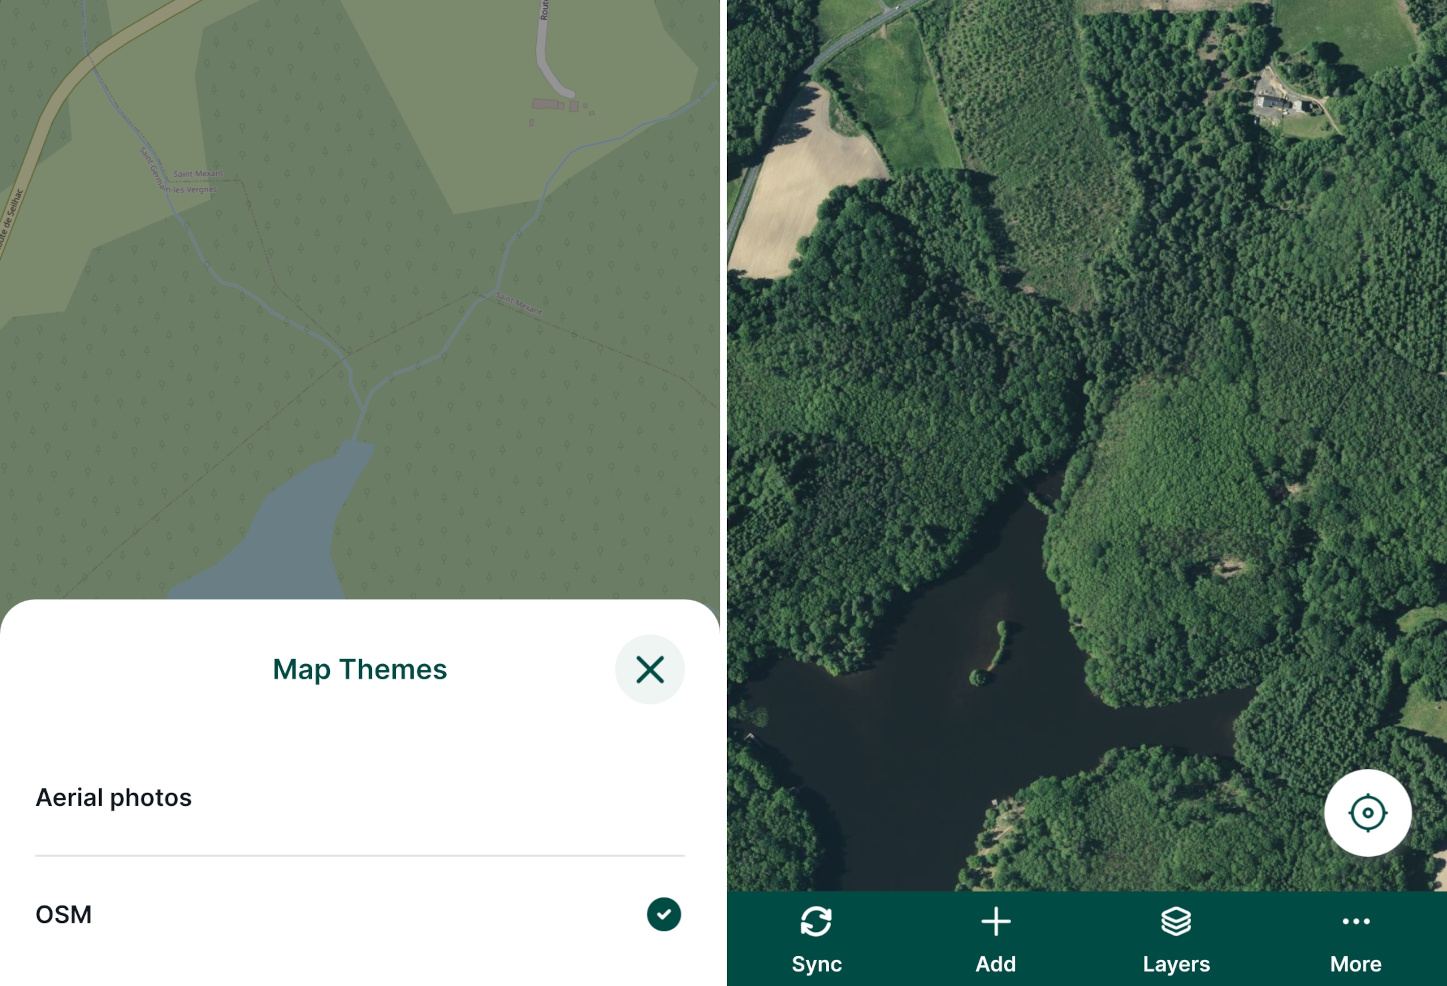
It may be useful to define a _default_ map theme for your project. Then, If you change the visibility of layers through the [**Layers**](https://merginmaps.com/docs/field/layers/)
option in the mobile app during the survey, you can use this map theme to get back to the default setup.
---
# How to Set Photo Names Format | Mergin Maps
[Skip to content](https://merginmaps.com/docs/gis/photo-names/#VPContent)
Return to top
How to Set Photo Names Format [](https://merginmaps.com/docs/gis/photo-names/#how-to-set-photo-names-format)
==============================================================================================================
Names of the photos that are captured in the field using Mergin Maps mobile app can be customised. The name format can be set in QGIS with Mergin Maps QGIS plugin.
To use this option, make sure that the [photo widget](https://merginmaps.com/docs/layer/photos/)
of the fields you use for taking pictures is set up correctly, i.e. using the attachment widget, storing relative paths and, if needed, with a [custom folder](https://merginmaps.com/docs/layer/photos/#how-to-set-up-a-custom-folder-for-storing-photos)
for storing photos.
Set up custom photo names [](https://merginmaps.com/docs/gis/photo-names/#set-up-custom-photo-names)
------------------------------------------------------------------------------------------------------
1. Open your [Mergin Maps](https://merginmaps.com/)
project in QGIS and navigate to **Project Properties**
2. In the **Mergin Maps** tab, you can see the list of layers and their fields with correctly configured photo attachment widgets.
Select a layer from the list and click on the **Expression builder** icon. 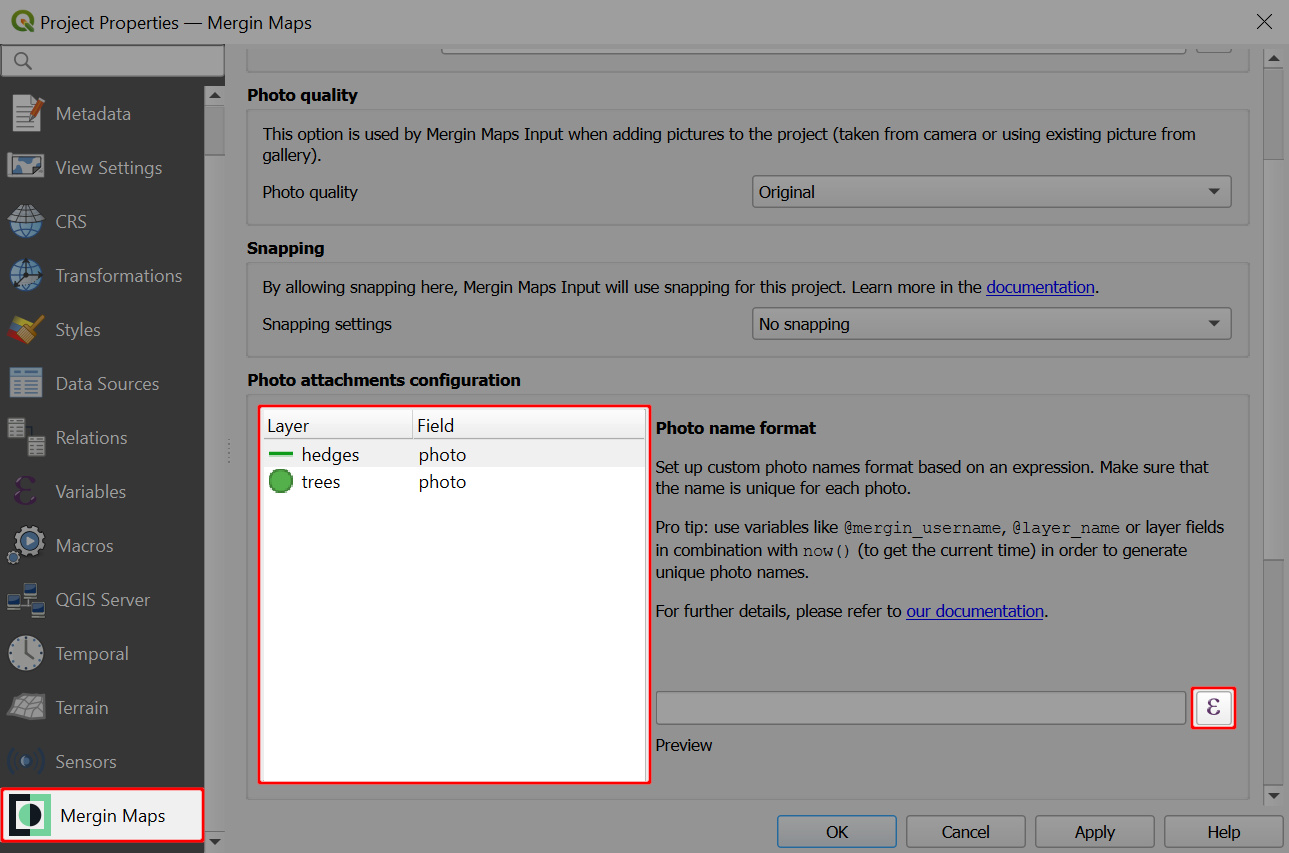
3. In the **Expression Dialog** window, enter the expression that should be used as the photo's name. Please, keep in mind [basic recommendations](https://merginmaps.com/docs/gis/photo-names/#best-practice-for-photo-name-expressions)
to make sure the naming works as intended.
Here we use a combination of the layer's name, Mergin Maps username and current timestamp (other examples are listed [below](https://merginmaps.com/docs/gis/photo-names/#examples-of-photo-names-expressions)
): `@layer_name + '-' + @mm_username + '-' + format_date(now(),'yyMMddhhmmss')`
Example result is displayed in the **Preview**: `hedges-sarah-230707194052`
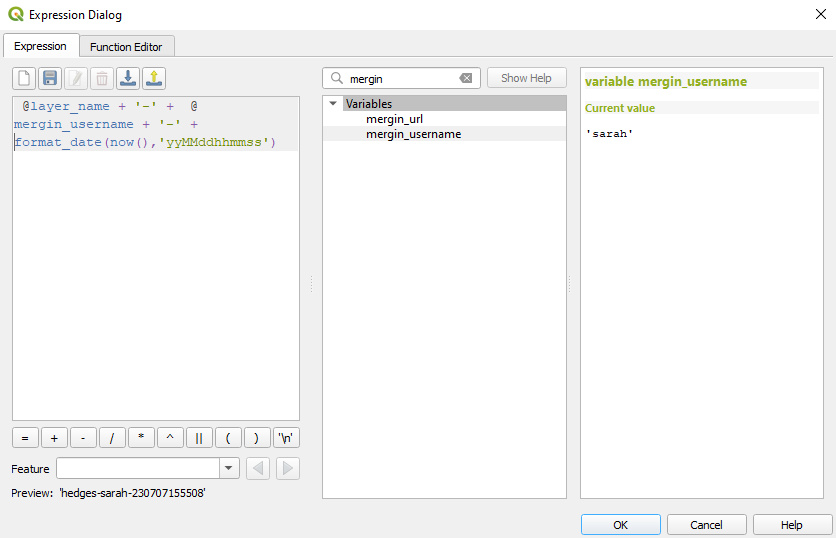
Do not use special characters in photo names
Special characters in photo names can cause synchronisation issues. Therefore, it is not allowed to use characters such as `|?*"<>`.
Click **OK** to confirm the expression.
4. Set up the photo name format for other fields and layers.
The **Preview** in **Mergin Maps** tab includes the [custom folder for photos](https://merginmaps.com/docs/layer/photos/#how-to-set-up-a-custom-folder-for-storing-photos)
, if you have set it up. Otherwise you will see only the sample name of a photo.
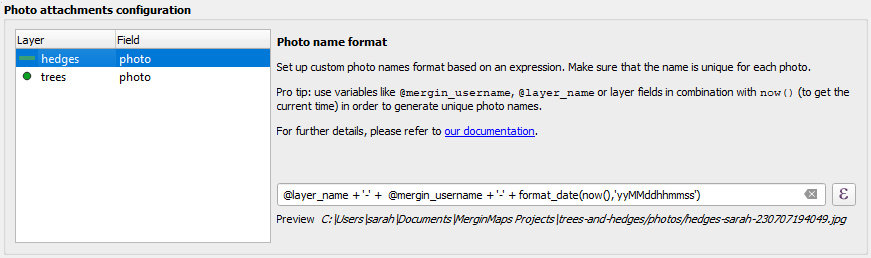
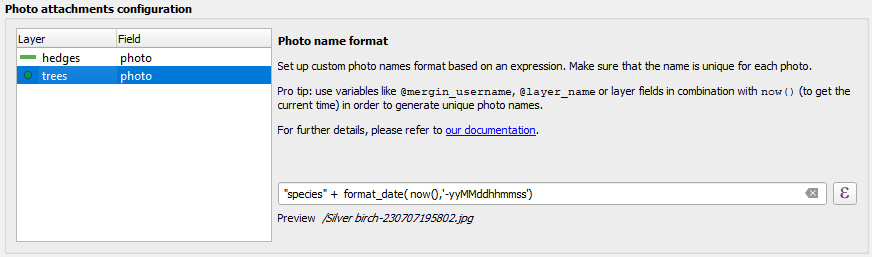
Best practice for photo name expressions [](https://merginmaps.com/docs/gis/photo-names/#best-practice-for-photo-name-expressions)
------------------------------------------------------------------------------------------------------------------------------------
There are some tips to keep in mind when creating the expression for your photo name:
✅ **Each photo needs to have a unique name** to avoid issues during synchronisation and ensure that photos and features are linked correctly.
Therefore, we recommend using combinations of variables that will ensure that there would not be multiple photos with the same name, such as the current date and time `now()`, Mergin Maps username `@mm_username`, layer name `@layer_name` or a field value.
🚫 Avoid using special characters such as `|?*"<>` in the photo name.
✅ The file extension (`.jpg`) is added automatically.
✅ When using a field value in the expression, make sure that it is a field that will be filled out during the survey, e.g. by using [constraints](https://merginmaps.com/docs/layer/form-configuration/#constraints)
. If the field is empty, the expression won't work!
✅ If you want to use a [numeric field](https://merginmaps.com/docs/layer/form-widgets/#numbers)
or other non-text fields in your expression, you need to convert it to a string first using the `to_string()` function
⚠️ The expression is evaluated with the **current** field values. The name of the photo will stay the same even if you change the value of the field later.
⚠️ The setup needs to be saved and synchronised. Only photos that are taken after synchronisation will have the name defined by the expressions. Existing photos will keep their original names.
In general, it is useful to use some of these variables:
* Current timestamp `now()` is a good starting point to ensure uniqueness of the name of the photo.
It can be variously reformatted using the `format_date()` function. See [See QGIS User manual](https://docs.qgis.org/latest/en/docs//user_manual/expressions/functions_list.html#format-date)
for more details.
* When working in a team, consider using Mergin Maps username `@mm_username`.
Even if multiple team members capture a photo at the same time, the name will be different. Also, it makes it easy to sort photos based on who took them.
* Layer name `@layer_name` or a field value.
Depending on the layers in your project and their fields, it can help create a unique photo name when taking multiple pictures in a row. It can also help to make it easier to browse pictures in your [Mergin Maps](https://merginmaps.com/)
project.
Examples of photo names expressions [](https://merginmaps.com/docs/gis/photo-names/#examples-of-photo-names-expressions)
--------------------------------------------------------------------------------------------------------------------------
Here are some example expressions that can be used or modified to fit your needs:
* Expression: `@layer_name + '-' + @mm_username + '-' + format_date(now(),'yyMMddhhmmss')`
* Preview: `hedges-sarah-230707154052.jpg`
* Description: This is a combination of the name of a layer (`hedges`), Mergin Maps username (`sarah`) and reformatted timestamp that starts with the year and ends with seconds.
* Expression: `"species" + format_date( now(),'-yyyyMMdd-hhmmss')`
* Preview: `Silver birch-20230707-154052.jpg`
* Description: `Silver birch` is a value of the `species` field. Current timestamp is reformatted with added hyphens to separate the date and time.
* Expression: `'photo-' + format_date( now(),'ssmmhhddMMyy')`
* Preview: `photo-520415070723.jpg`
* Description: A string can be added to the photo name (here: `photo-`). The order of the timestamp is reversed (compared to the previous examples), starting from seconds.
* Expression: `@layer_name + ' ' + to_string("house-number") + ' at ' + format_date( now(),'ssmmhh') + ' on '+ format_date( now(),'ddMMyy')`
* Preview: `house 41 at 520415 on 070723.jpg`
* Description: Here we use the name of a layer (`house`), followed by a string adding space. A numeric field (`house-number`) is converted to a string. The timestamp is divided to display the time and date separately, with added strings `at` and `on` to make the photo name more readable.
---
# How to Enable Digitising | Mergin Maps
[Skip to content](https://merginmaps.com/docs/gis/enable_digitising/#VPContent)
Return to top
How to Enable Digitising [](https://merginmaps.com/docs/gis/enable_digitising/#how-to-enable-digitising)
==========================================================================================================
1. Open your Mergin Maps Project in QGIS
2. Navigate to **Project Properties**
3. Inspect **Layers Capabilities** in the **Data Sources** tab.
At least one layer in your project needs to have no check in the **Read-only** column, otherwise it cannot be edited.
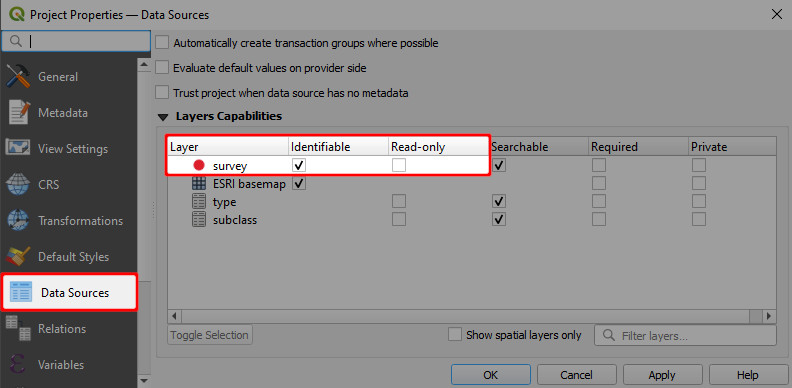
4. **Apply** the changes. Don't forget to save and sync your project!
---
# How to Avoid Polygons Overlap | Mergin Maps
[Skip to content](https://merginmaps.com/docs/gis/avoid-overlap/#VPContent)
Return to top
How to Avoid Polygons Overlap [](https://merginmaps.com/docs/gis/avoid-overlap/#how-to-avoid-polygons-overlap)
================================================================================================================
For polygon layers, [QGIS](https://docs.qgis.org/latest/en/docs/user_manual/working_with_vector/editing_geometry_attributes.html#overlapping-control)
offers options to control the overlapping. In the **Snapping toolbar**, you can set if you want to allow or avoid overlaps when digitising new features.
Mergin Maps mobile app follows this setting: if you create a polygon that overlaps existing geometries in the layer, the polygon will be cropped and snapped to the existing features.
You can apply this option for the [active layer](https://merginmaps.com/docs/gis/avoid-overlap/#avoid-overlap-on-active-layer)
or use [advanced configuration](https://merginmaps.com/docs/gis/avoid-overlap/#follow-advanced-configuration-to-control-overlapping)
to define which layers should be avoided when digitising new polygons.
Avoid overlap on active layer [](https://merginmaps.com/docs/gis/avoid-overlap/#avoid-overlap-on-active-layer)
----------------------------------------------------------------------------------------------------------------
To use the _Avoid overlap_ option in your Mergin Maps project:
1. Open your project in QGIS
2. Make sure that the **Snapping toolbar** is visible in the toolbar panel.
If not, click on the toolbar panel and activate the **Snapping** toolbar.
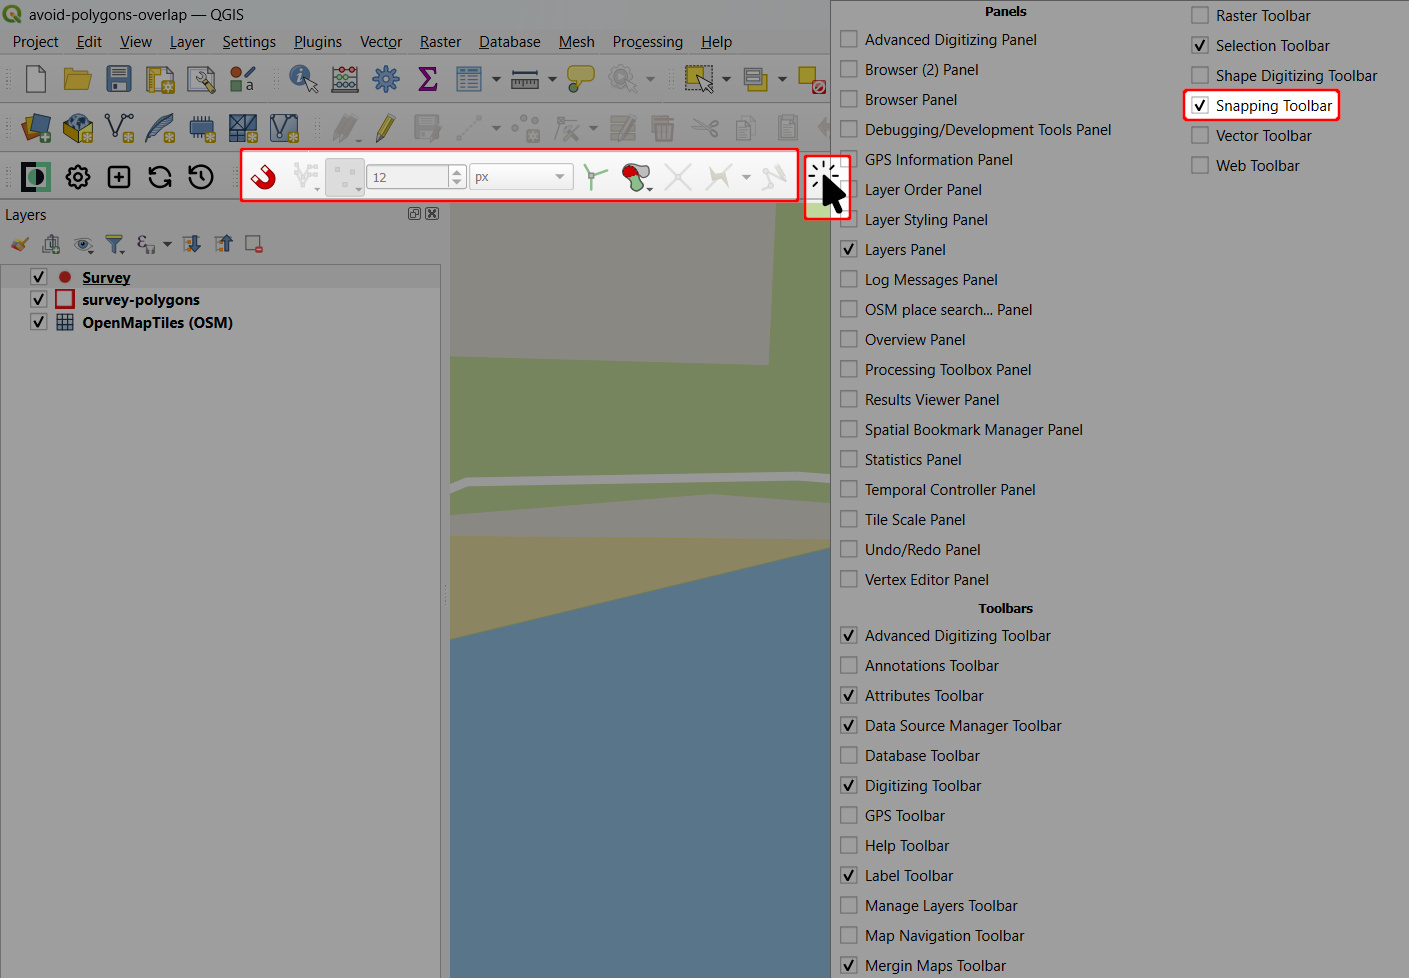
3. In the **Snapping toolbar**, select the _Avoid overlap on Active Layer_ option or [_Follow Advanced Configuration_](https://merginmaps.com/docs/gis/avoid-overlap/#follow-advanced-configuration-to-control-overlapping)
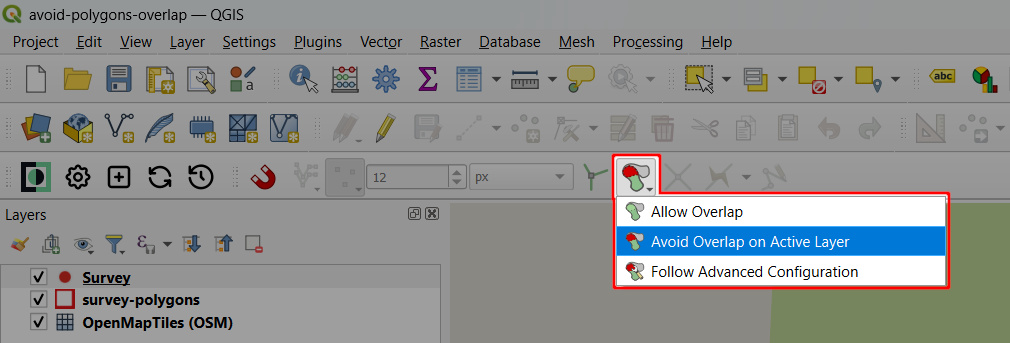
4. Save and synchronise your project.
Now this option will be used when digitising new polygons both in QGIS and the mobile app:

Follow advanced configuration to control overlapping [](https://merginmaps.com/docs/gis/avoid-overlap/#follow-advanced-configuration-to-control-overlapping)
--------------------------------------------------------------------------------------------------------------------------------------------------------------
It is also possible to set advanced configuration to control overlapping of multiple polygon layers. This is useful if you want to digitise polygons that will be cropped and snapped to existing features from _multiple_ layers.
1. Open your project in QGIS
2. In the **Snapping toolbar** use _Open Snapping Options..._ to open the **Project Snapping Settings**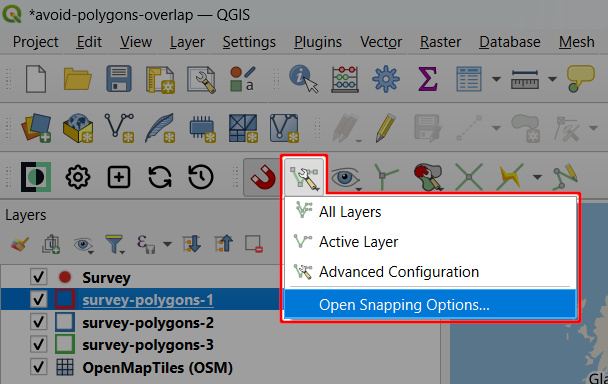
3. In **Project Snapping Settings**, switch to _Advanced Configuration_ and choose _Follow Advanced Configuration_ for overlap control.
Now select relevant layers in the _Layer_ column and tick the _Avoid Overlap_ option for those layers that should use this overlap control option.
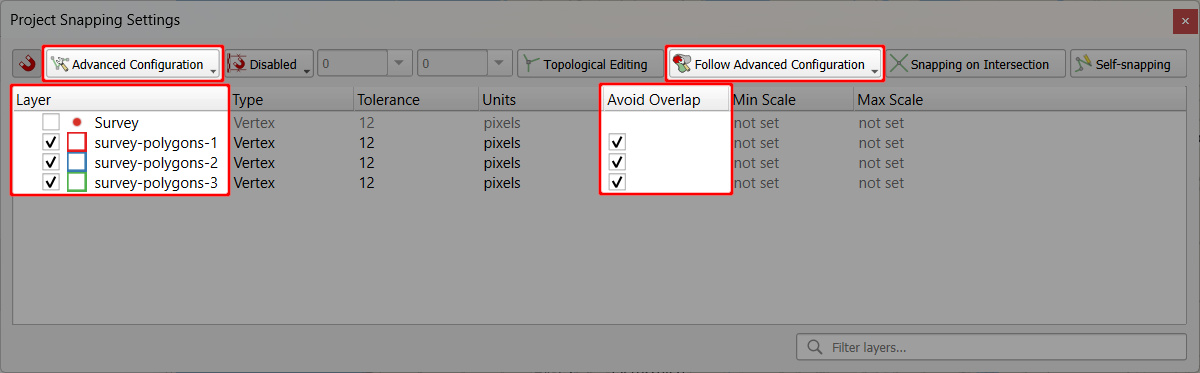
4. Save and synchronise your project
---
# How to Set Up Snapping for Mergin Maps Mobile App | Mergin Maps
[Skip to content](https://merginmaps.com/docs/gis/snapping/#VPContent)
Return to top
How to Set Up Snapping for Mergin Maps Mobile App [](https://merginmaps.com/docs/gis/snapping/#how-to-set-up-snapping-for-mergin-maps-mobile-app)
===================================================================================================================================================
Capturing data in the field using Mergin Maps mobile app can be easier, if you can snap the vertices of new features to existing geometries. Snapping can also help you avoid creating topological errors in your datasets.
[Mergin Maps QGIS plugin](https://merginmaps.com/docs/manage/plugin/)
provides three snapping options:
* _No snapping_ - snapping is not enabled (default)
* _Basic snapping_ - features are snapped to the vertices and segments of vector features in the project
* _Follow QGIS snapping_ - uses the snapping preferences defined in the QGIS project
**Prefer video?** Here is a [video tutorial](https://youtu.be/aFG0iDuZZuI?si=3lBMlGV2Oqw7A3gg)
on how to use snapping options in Mergin Maps:
Basic snapping [](https://merginmaps.com/docs/gis/snapping/#basic-snapping)
-----------------------------------------------------------------------------
To set up basic snapping:
1. Open your Mergin Maps project in QGIS
2. Go to the **Project Properties**
3. Navigate to the **Mergin Maps** tab and change the snapping settings to **Basic snapping**
4. Apply the changes, save and sync your project.
Don't forget to synchronise the project also in Mergin Maps mobile app before the fieldwork.
Now you can use basic snapping in Mergin Maps mobile app!
When capturing a new feature near an existing one, the crosshairs will turn purple and snap to its vertex (left) or to its segment (right). 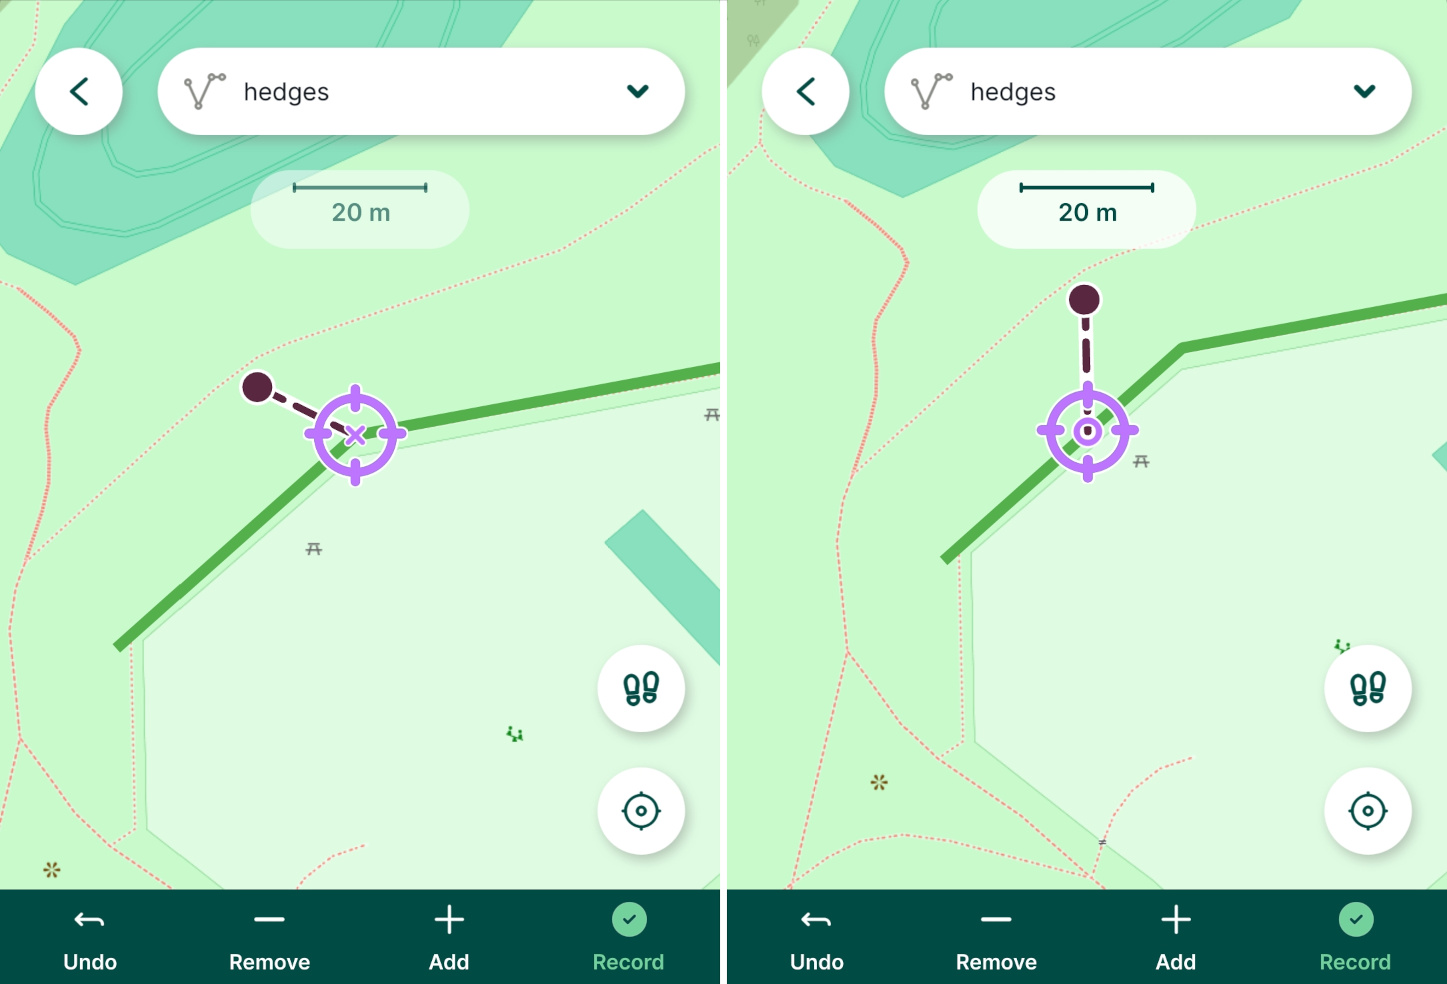
TIP
If you don't want the crosshairs to snap to a feature, try zooming in. The snapping threshold is 20 pixels, so the more you zoom in, the closer you can place the vertex to the existing geometry without snapping.
If you want to change the snapping threshold, use the _[Follow QGIS snapping](https://merginmaps.com/docs/gis/snapping/#follow-qgis-snapping)
_ option and define the snapping tolerance in your Mergin Maps project in QGIS.
Follow QGIS snapping [](https://merginmaps.com/docs/gis/snapping/#follow-qgis-snapping)
-----------------------------------------------------------------------------------------
The QGIS plugin gives you the option to use the snapping preferences defined in QGIS project. This means you can, for instance, exclude some layers from snapping, choose the snapping mode or change the snapping threshold.
1. Navigate to the **Mergin Maps** tab in the **Project Properties** and change the snapping settings to **Follow QGIS snapping**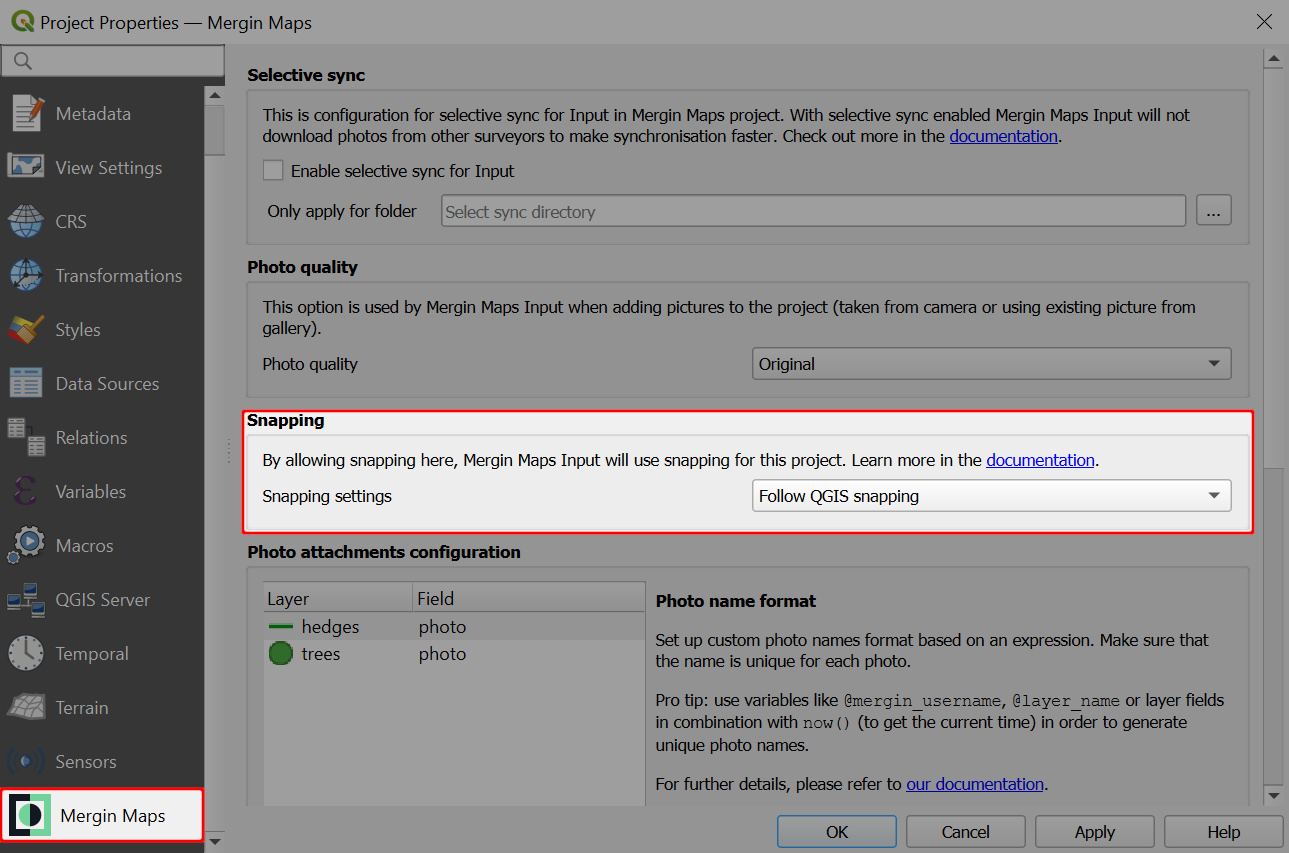
2. Enable snapping in the **Snapping toolbar** and set your snapping preferences. 
TIP
If you cannot see the **Snapping toolbar** in QGIS, ensure it's enabled under **View** (top-level menu) > **Toolbars**
3. Snapping preferences can also be set through the **Snapping Options** in the **Project** menu 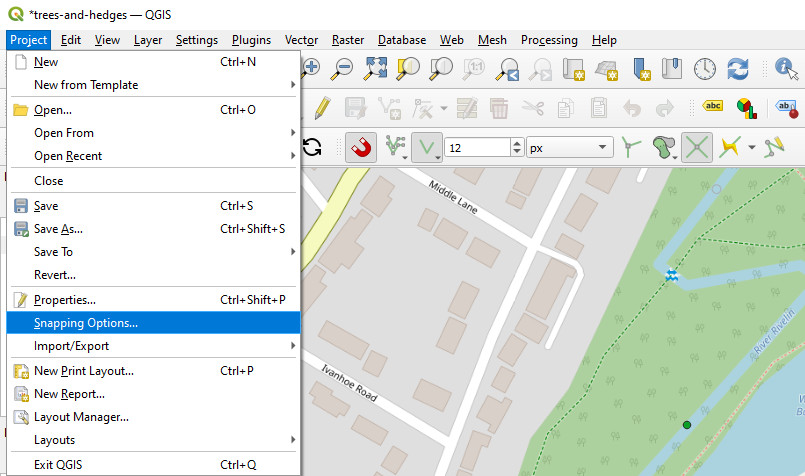
4. Switch to **Advanced Configuration**
5. Here, snapping settings can be defined for each layer individually:
* enable/disable snapping for specific layers. Layers that are not checked will not be used for snapping.
* in the _Type_ column, you can choose if you want to snap to vertices, segments or both
* set the _Tolerance_ (the snapping threshold). This defines how close the crosshairs need to be to an existing feature to snap to its geometry.
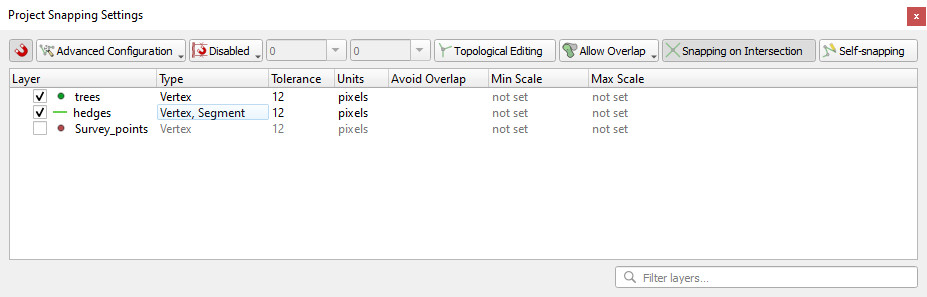
6. Save and sync your project.
Don't forget to synchronise the project also in the mobile app before the fieldwork.
Snapping in Mergin Maps mobile app will now follow the snapping settings as defined in the QGIS project.
TIP
You can learn more about snapping in QGIS in [QGIS User Guide](https://docs.qgis.org/3.22/en/docs/user_manual/working_with_vector/editing_geometry_attributes.html?highlight=snapping#snapping-and-digitizing-options)
.
---
# Best Practice Tips for Layers and Forms | Mergin Maps
[Skip to content](https://merginmaps.com/docs/layer/best-practice/#VPContent)
Return to top
Best Practice Tips for Layers and Forms [](https://merginmaps.com/docs/layer/best-practice/#best-practice-tips-for-layers-and-forms)
======================================================================================================================================
Here are some best practice tips to make your work easier in the long run.
Working with layers [](https://merginmaps.com/docs/layer/best-practice/#working-with-layers)
----------------------------------------------------------------------------------------------
* Making changes in the data schema of layers can lead to issues in the synchronisation process. Be careful to [**deploy the revised project properly**](https://merginmaps.com/docs/manage/deploy-new-project/)
. Design the data schema carefully when creating a layer to avoid the need to change it later.
* **Always use GeoPackage for survey layers**. If you use other formats, such as ESRI shapefile, it is not possible to detect changes from other users and they may be overwritten. Overwritten files are stored in a conflict file.
* **Add some extra back-up field attributes** when creating a survey layer with different types (e.g. a couple of texts, int, real, date/time) and hide them in the form design. These can serve as a backup: if you need extra fields later in the survey, just alias these extra fields and add them to form.
* If you do not need a field, **remove it from the form**. You don't need to delete it from the table.
* **Instead of renaming a field, change its alias**.
* **Add new layers to your project as separate GeoPackages**. Do not add a new table to your existing GeoPackage that contains a survey layer. Just to be safe, it is better to have one GeoPackage for each of your survey layers.
* use **GeoTIFF** format for your raster files or store them in a separate GeoPackage database
---
# Setting Up Widgets in Attributes Form | Mergin Maps
[Skip to content](https://merginmaps.com/docs/layer/form-widgets/#VPContent)
Return to top
Setting Up Widgets in Attributes Form [](https://merginmaps.com/docs/layer/form-widgets/#setting-up-widgets-in-attributes-form)
=================================================================================================================================
Capturing field data often requires filling some attributes in the form to record the properties of surveyed points, lines or polygons. Attribute forms can simplify the data entry and even ensure to some extent that the correct information is filled in. Here, we will explore the possibilities of various [QGIS widgets](https://docs.qgis.org/latest/en/docs/user_manual/working_with_vector/vector_properties.html#attributes-form-properties)
that can be used in Mergin Maps mobile app.
Extra configuration of attribute forms can be done to make data collection easier and more consistent, such as using default values, conditional visibility or constraint enforcement. These topics are covered in [Attributes Form Configuration](https://merginmaps.com/docs/layer/form-configuration/)
and [Attributes Form Layout](https://merginmaps.com/docs/layer/form-layout/)
.
Prefer video? Check out this tutorial on how to configure QGIS widgets for survey forms.
Widget gallery [](https://merginmaps.com/docs/layer/form-widgets/#widget-gallery)
-----------------------------------------------------------------------------------
Attributes forms can be configured using [QGIS widget types](https://docs.qgis.org/latest/en/docs/user_manual/working_with_vector/vector_properties.html#edit-widgets)
in the **Attributes Form** tab in the **Layer Properties**.
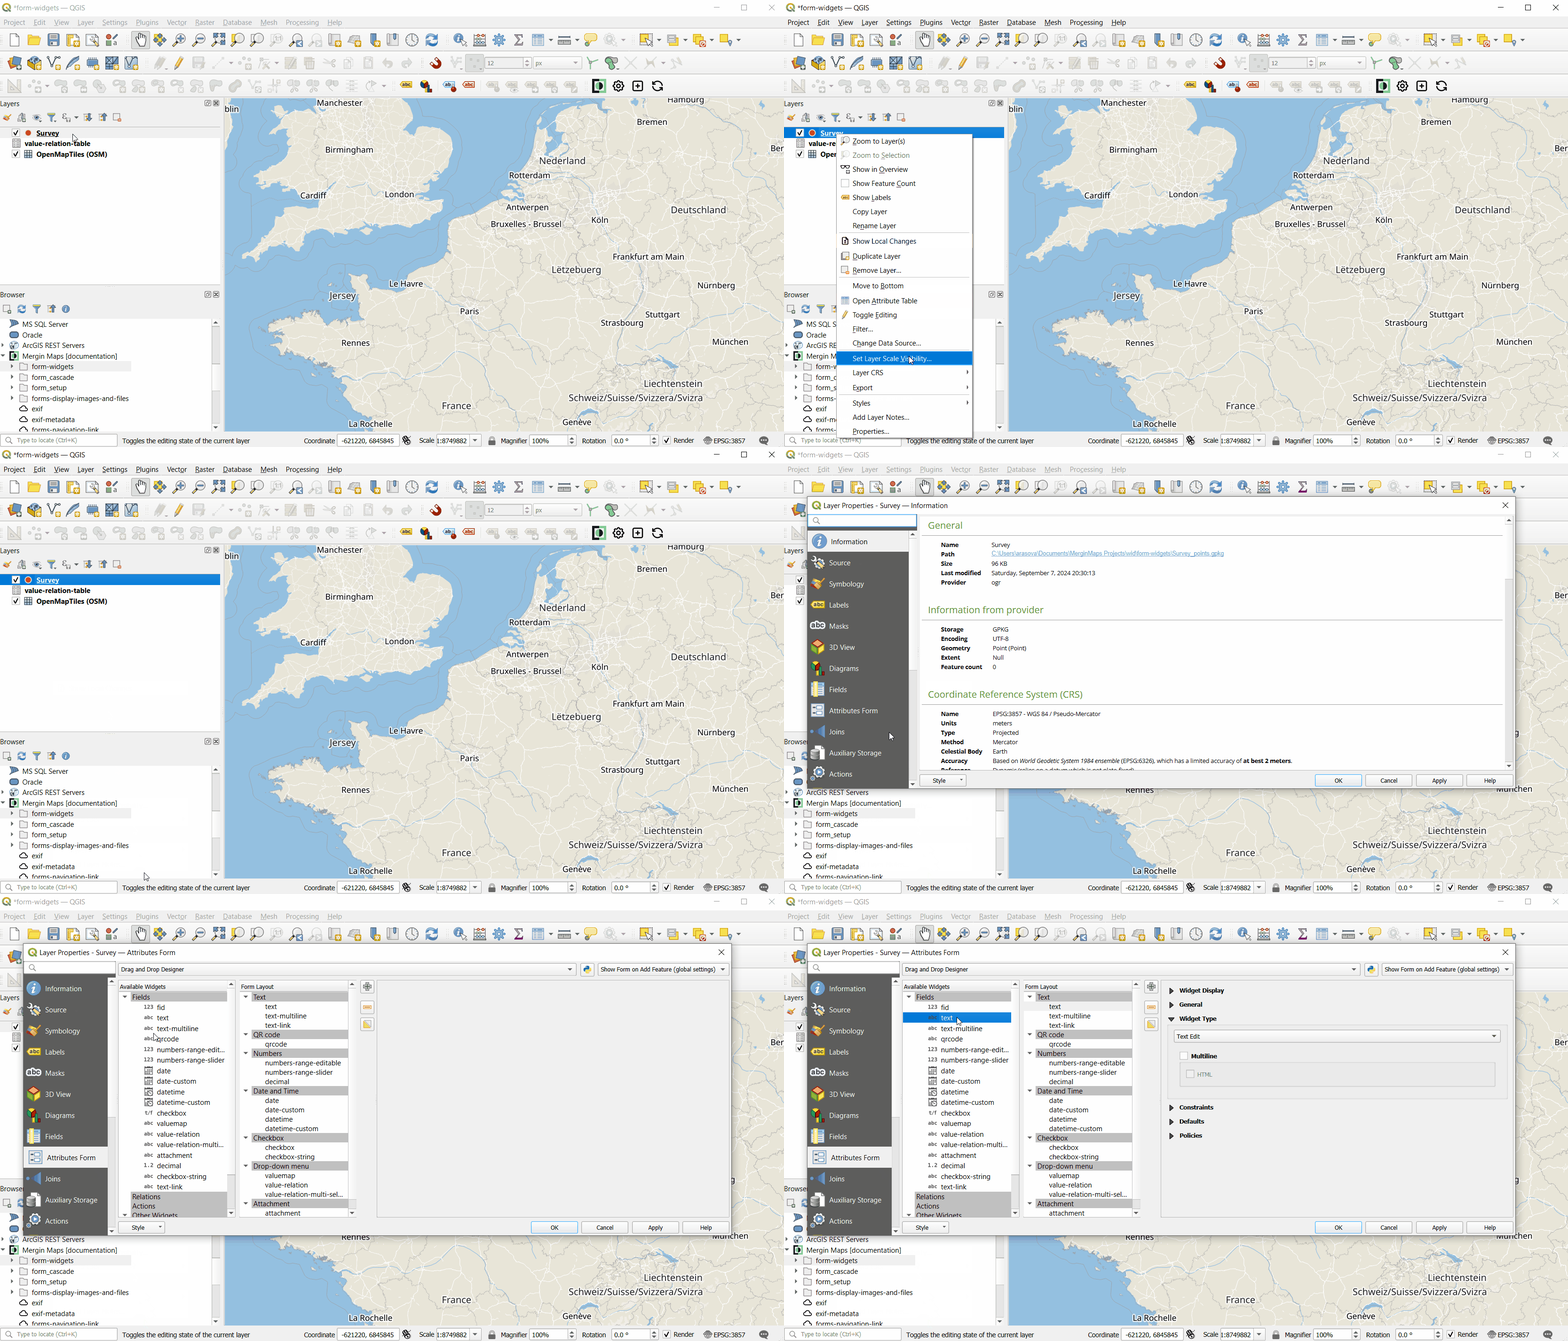
Here is an overview of widgets commonly used both in QGIS and the mobile app. Note that the widget has to be compatible with the data type of a field.
| QGIS widget | Description | Preview in Mergin Maps mobile app |
| --- | --- | --- |
| Text Edit | [Text](https://merginmaps.com/docs/layer/form-widgets/#text) |  |
| Text Edit | [Multiline Text](https://merginmaps.com/docs/layer/form-widgets/#multiline-text) | 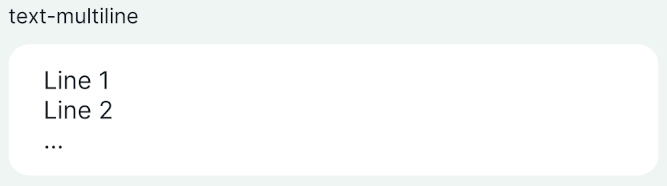 |
| QR & barcode scanner | [Camera to scan QR and barcode](https://merginmaps.com/docs/layer/form-widgets/#qr-code) | 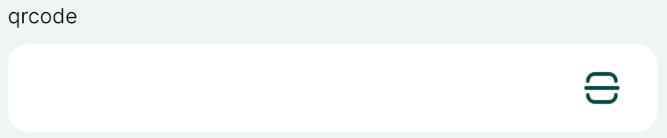 |
| Range - Editable | [Enter a number](https://merginmaps.com/docs/layer/form-widgets/#numbers) | 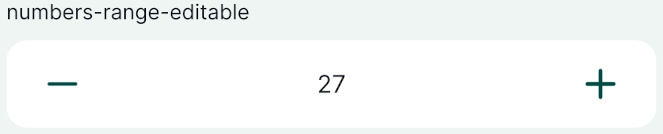 |
| Range - Slider | [Select a number using the slider](https://merginmaps.com/docs/layer/form-widgets/#slider) |  |
| Date/Time | [Calendar with time](https://merginmaps.com/docs/layer/form-widgets/#date-and-time) |  |
| Checkbox | [Checkbox](https://merginmaps.com/docs/layer/form-widgets/#checkbox) |  |
| Value Map | [Drop-down menu with predefined values](https://merginmaps.com/docs/layer/form-widgets/#value-map) |  |
| Value Relation | [Drop-down menu with values from another table](https://merginmaps.com/docs/layer/form-widgets/#value-relation) |  |
| Attachment | [Photos from device's camera or gallery](https://merginmaps.com/docs/layer/form-widgets/#attachment) |   |
| Relations - Gallery | [Multiple photos from device's camera or gallery](https://merginmaps.com/docs/layer/attach-multiple-photos-to-features/) |  |
| Relations | [Multiple records linked to one feature](https://merginmaps.com/docs/layer/one-to-n-relations/) | 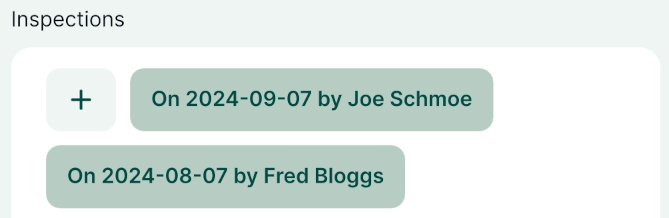 |
Public project available
💡 These widgets can be explored in this project: [documentation/form-widgets](https://app.merginmaps.com/projects/documentation/form-widgets/tree)
.
Text [](https://merginmaps.com/docs/layer/form-widgets/#text)
---------------------------------------------------------------
Adding or editing text is the most common method for inserting information within the forms. In QGIS, the default widget for most types of fields is the **Text Edit**. It can be used for single line or [multiline](https://merginmaps.com/docs/layer/form-widgets/#multiline-text)
text inputs.
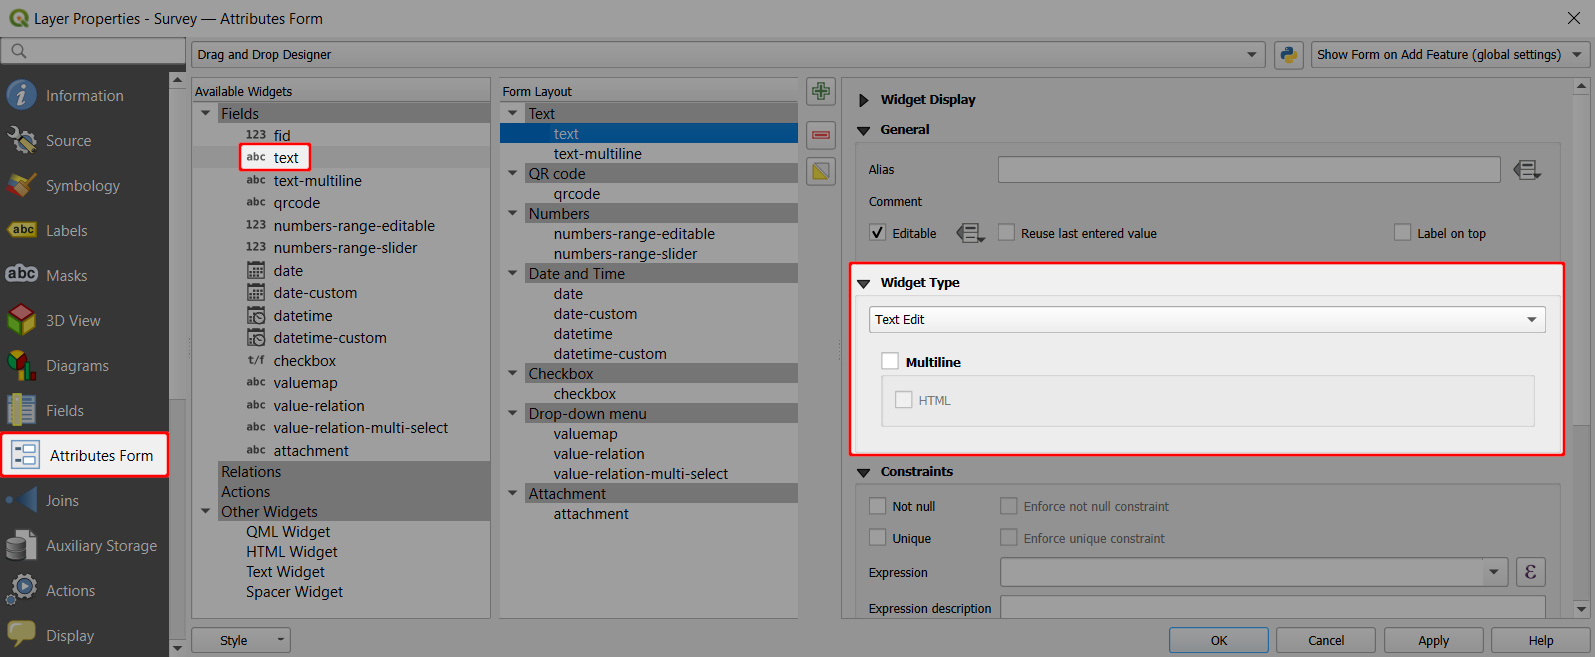
In the mobile app, the text can be entered manually or using voice-to-text (if your mobile device supports this feature).
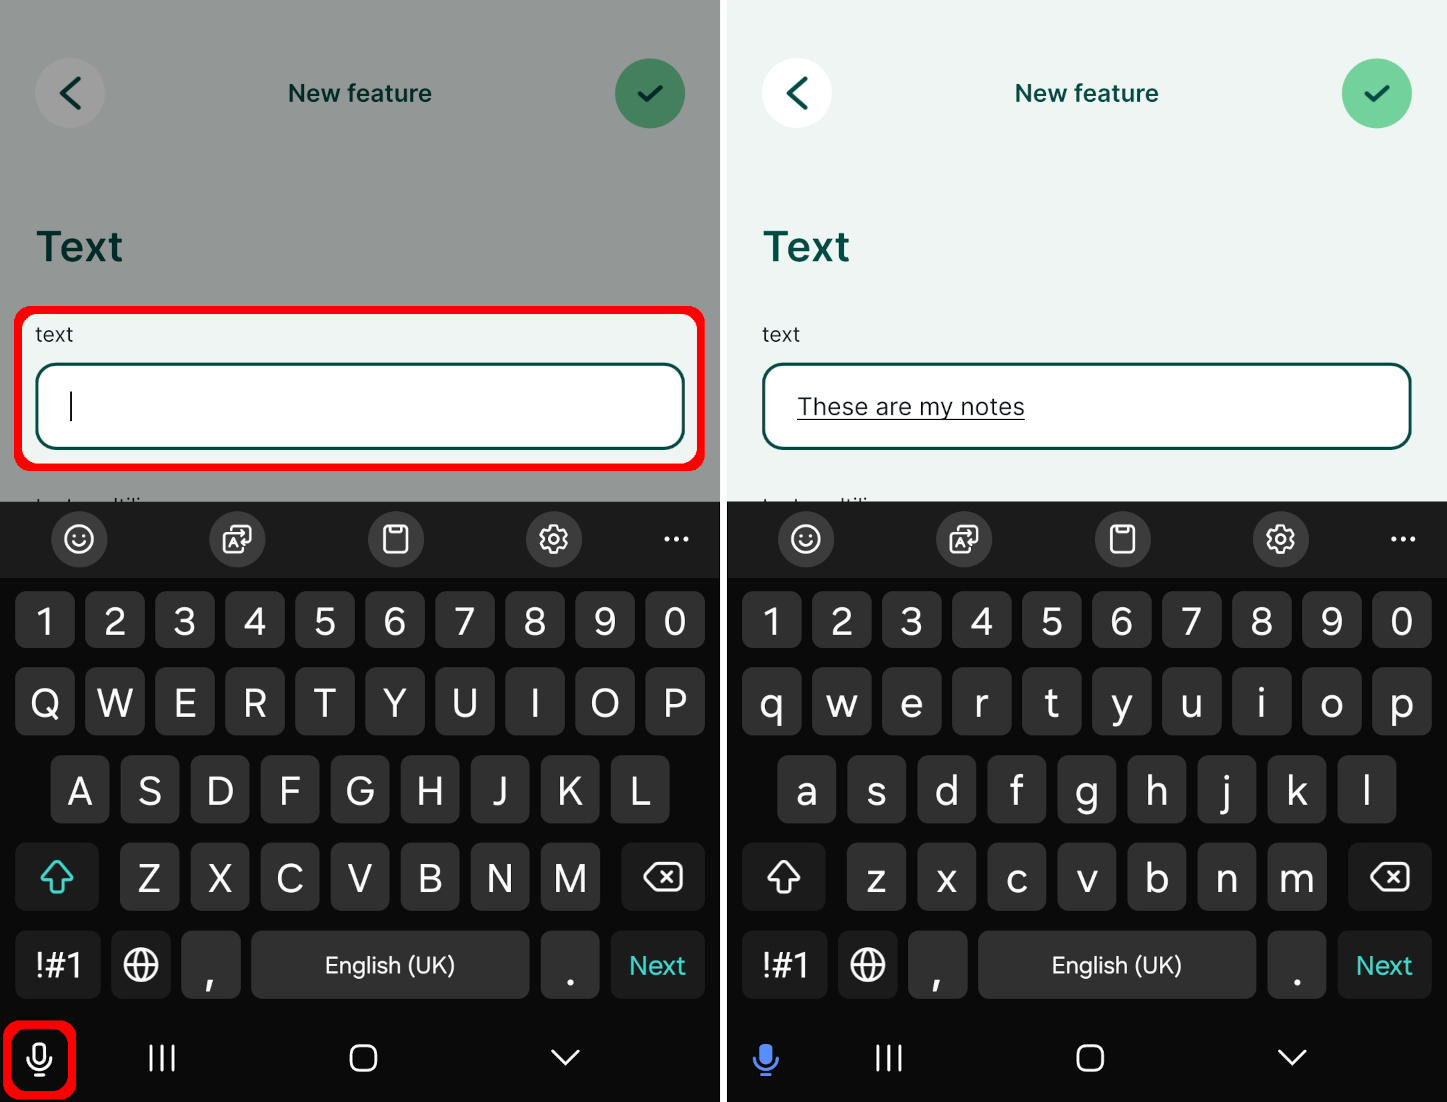
### Multiline text [](https://merginmaps.com/docs/layer/form-widgets/#multiline-text)
Example project available
Multiline text option is used in this public project: [documentation/form-widgets](https://app.merginmaps.com/projects/documentation/form-widgets/tree)
. Download or clone it to see this setup.
The **Text Edit** widget offers the option to store multiple lines within a single field.
1. Right-click on a layer, select **Properties** and go to the **Attributes form** tab.
2. In the list of **Available Widgets** select the field you want to work with (here: `text-multiline`)
3. In the **Widget Type** tab:
* Ensure that **Text Edit** is selected
* Check the **Multiline** option ✔️
4. **Apply** the changes. Don't forget to save and sync your project!
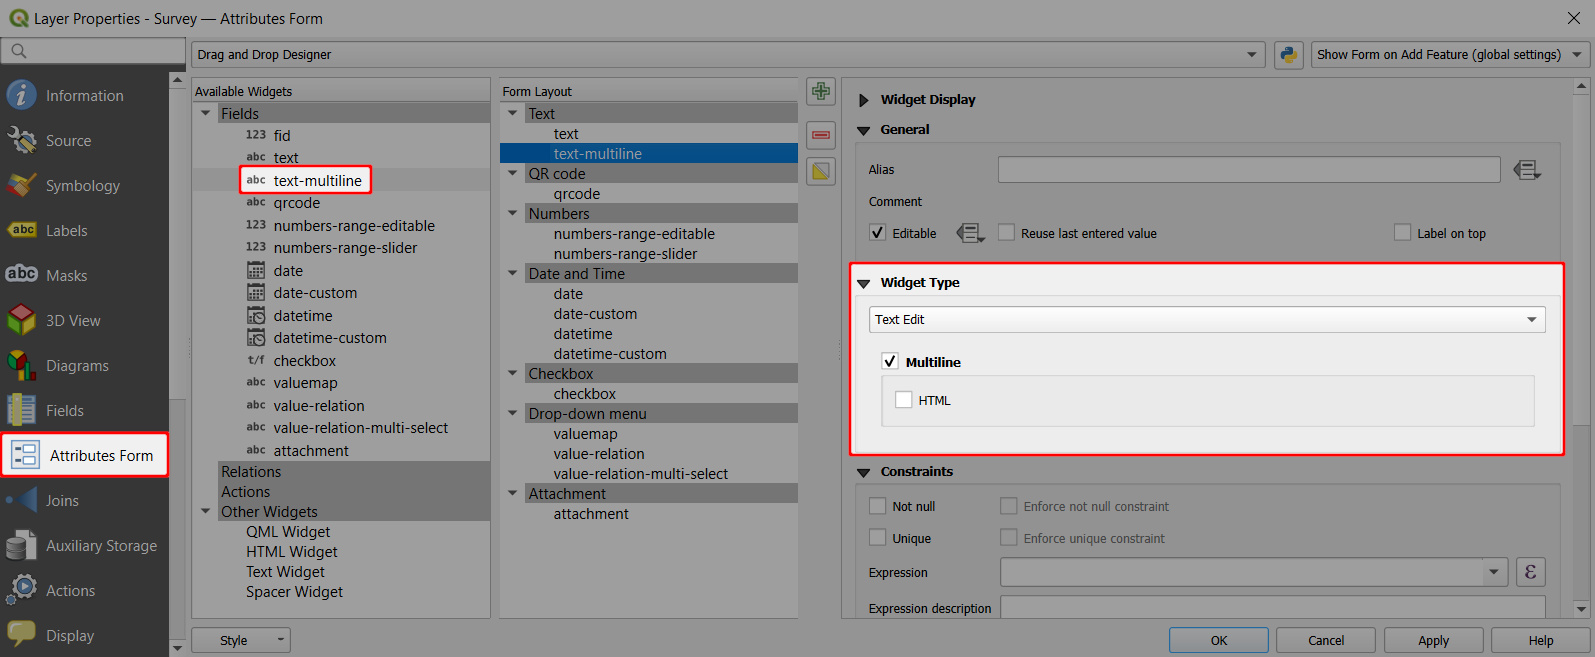
In the mobile app, the **multiline text edit widget** will look like this: 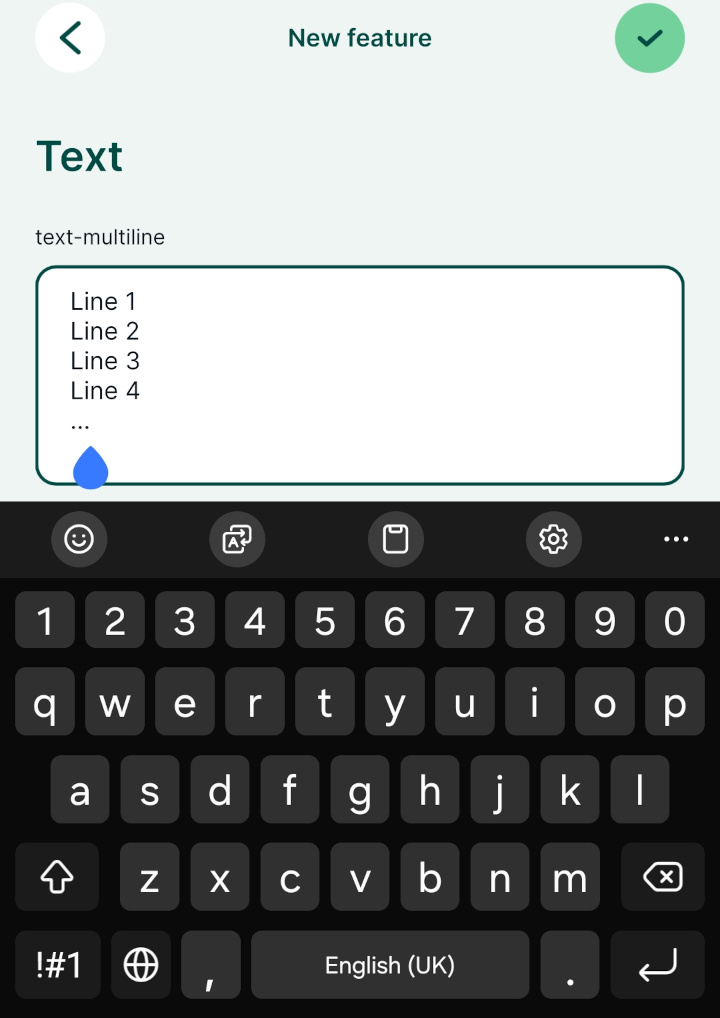
QR code [](https://merginmaps.com/docs/layer/form-widgets/#qr-code)
---------------------------------------------------------------------
Example project available
A QR code field is used in this public project: [documentation/form-widgets](https://app.merginmaps.com/projects/documentation/form-widgets/tree)
. Download or clone it to see this setup.
To be able to scan QR codes using your camera, the field name or the field alias has to contain the word `qrcode` (the text is not case sensitive, it can be in combination of lower or upper case letters).
In the mobile app, there will be a QR code icon next to the field. Tap on it to scan the QR code using your camera and the content (a number, text, link, etc.) will be filled in automatically to your field.
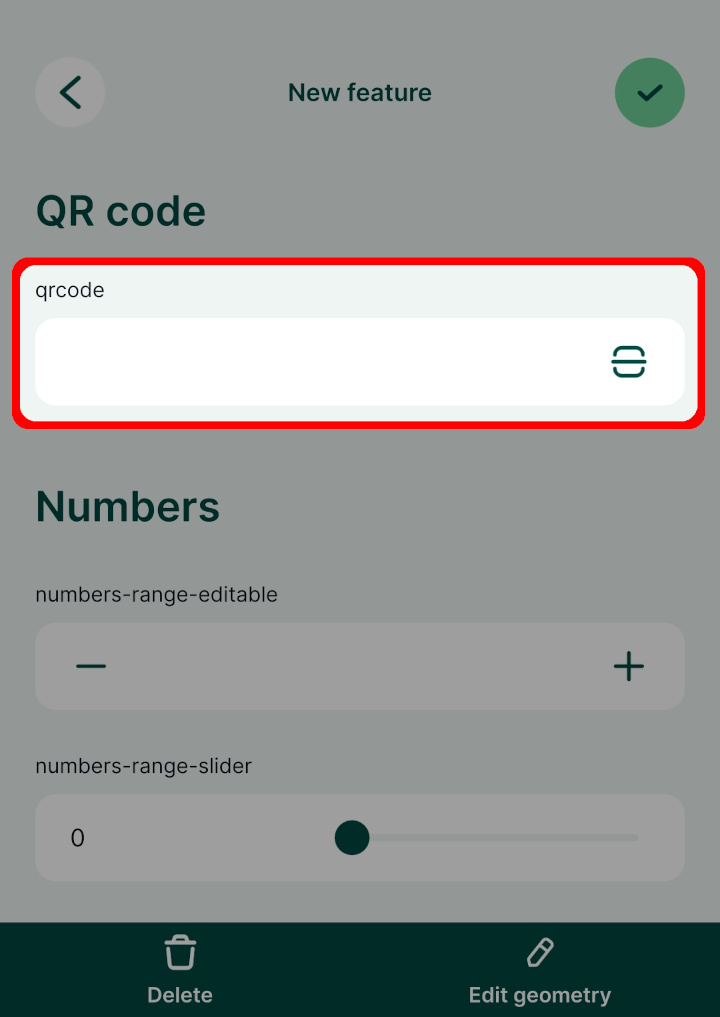
Numbers [](https://merginmaps.com/docs/layer/form-widgets/#numbers)
---------------------------------------------------------------------
Example project available
This public project: [documentation/form-widgets](https://app.merginmaps.com/projects/documentation/form-widgets/tree)
uses various options for entering numerical data. Download or clone it to see this setup.
Number fields can be handled by the **Range** widget. Two options are supported by the mobile app: [editable range](https://merginmaps.com/docs/layer/form-widgets/#range)
and [slider](https://merginmaps.com/docs/layer/form-widgets/#slider)
.
### Range [](https://merginmaps.com/docs/layer/form-widgets/#range)
To set up the **editable range widget**:
1. Right-click on a layer, select **Properties** and go to the **Attributes form** tab.
2. In the list of **Available Widgets** select the integer field you want to work with (here: `numbers-range-editable`).
3. In the **Widget Type** tab the **Range** widget and the **Editable** option should be selected by default. If this is not the case, select these options from the drop-down menus.
4. **Apply** the changes. Don't forget to save and sync your project!
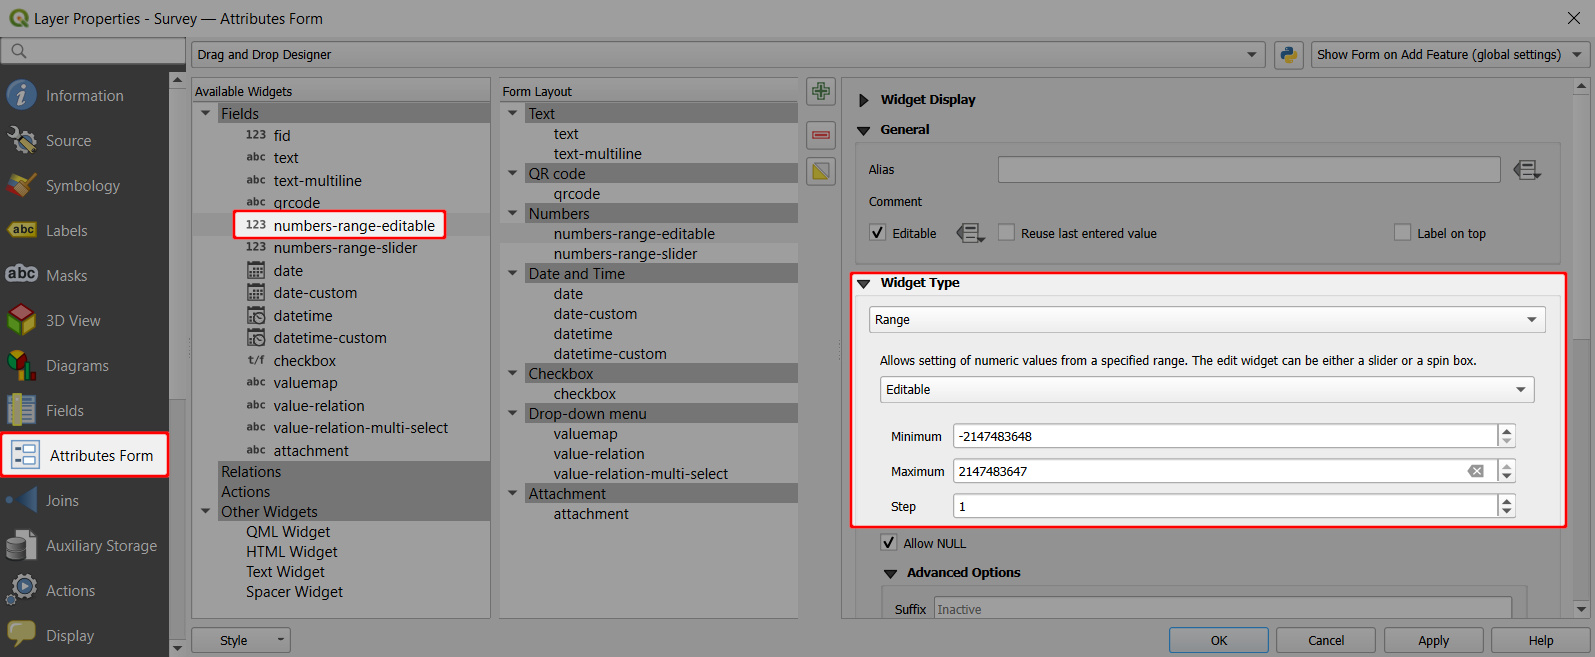
In the mobile app, the numbers can be entered manually or by using the +/- buttons:
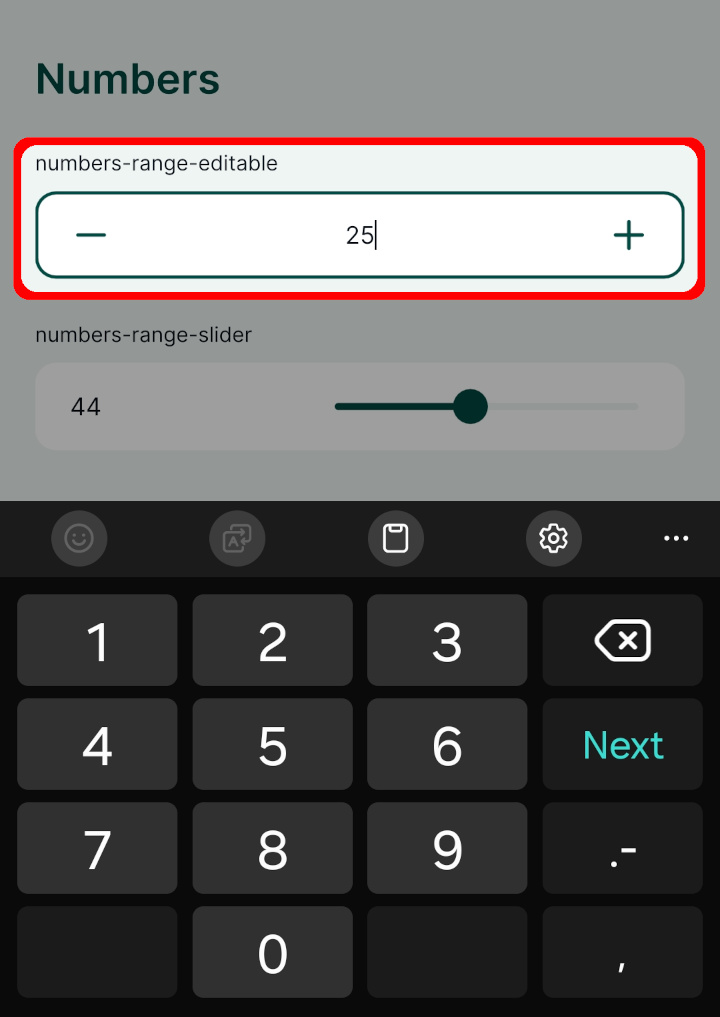
### Slider [](https://merginmaps.com/docs/layer/form-widgets/#slider)
To set up the **Slider**:
1. Right-click on a layer, select **Properties** and go to the **Attributes form** tab.
2. In the list of **Available Widgets** select the numeric field you want to work with (here: `numbers-range-slider`).
3. In the **Widget Type** tab:
* the **Range** widget should be selected by default (if not, select it from the menu)
* set the edit widget to **Slider**
* set the **Minimum**, **Maximum** and **Step** values of the slider
4. **Apply** the changes. Don't forget to save and sync your project!
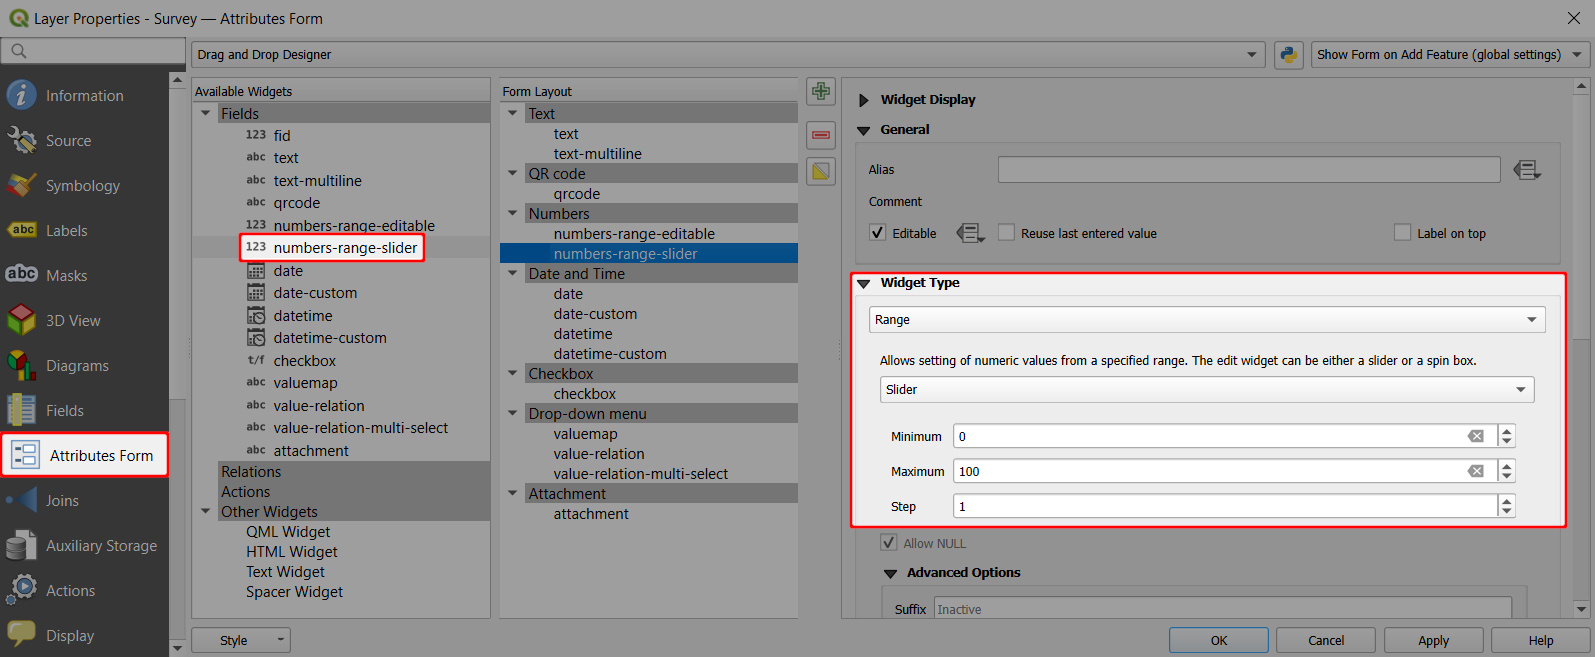
In the mobile app, the **Slider** looks like this. The number can be filled in by moving the slider:
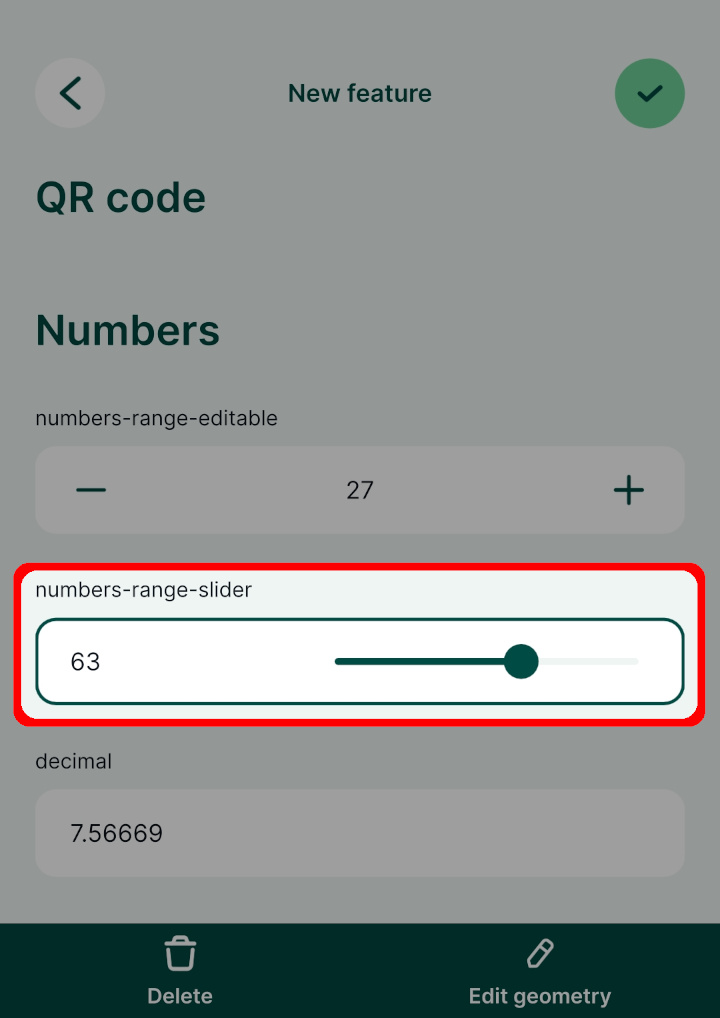
Date and time [](https://merginmaps.com/docs/layer/form-widgets/#date-and-time)
---------------------------------------------------------------------------------
Example project available
Various options of setting up Date and Date&Time fields are included in this public project: [documentation/form-widgets](https://app.merginmaps.com/projects/documentation/form-widgets/tree)
. Download or clone it to explore it in more detail.
**Date** or **Date and Time** fields can be used to record date and time. The most common use is to record when a feature was created or updated. This can be done manually or automatically by using [default values](https://merginmaps.com/docs/layer/form-configuration/#default-values)
.
To set up the **Date/Time** widget:
1. Right-click on a layer, select **Properties** and go to the **Attributes form** tab.
2. In the list of **Available Widgets** select the Date and Time field you want to work with (here: `datetime`).
3. In the **Widget Type** tab and select the **Date/Time** widget.
* use the default or custom **Display Format**
* check the **Calendar popup** option ✔️
* use the preview to confirm that this is the format you want to use to store your timestamps
4. If you want to automatically insert the date (or date and time) when the feature is created, use `now()` as a [default value](https://merginmaps.com/docs/layer/form-configuration/#default-values)
in the **Defaults** tab.
5. **Apply** the changes. Don't forget to save and sync your project!
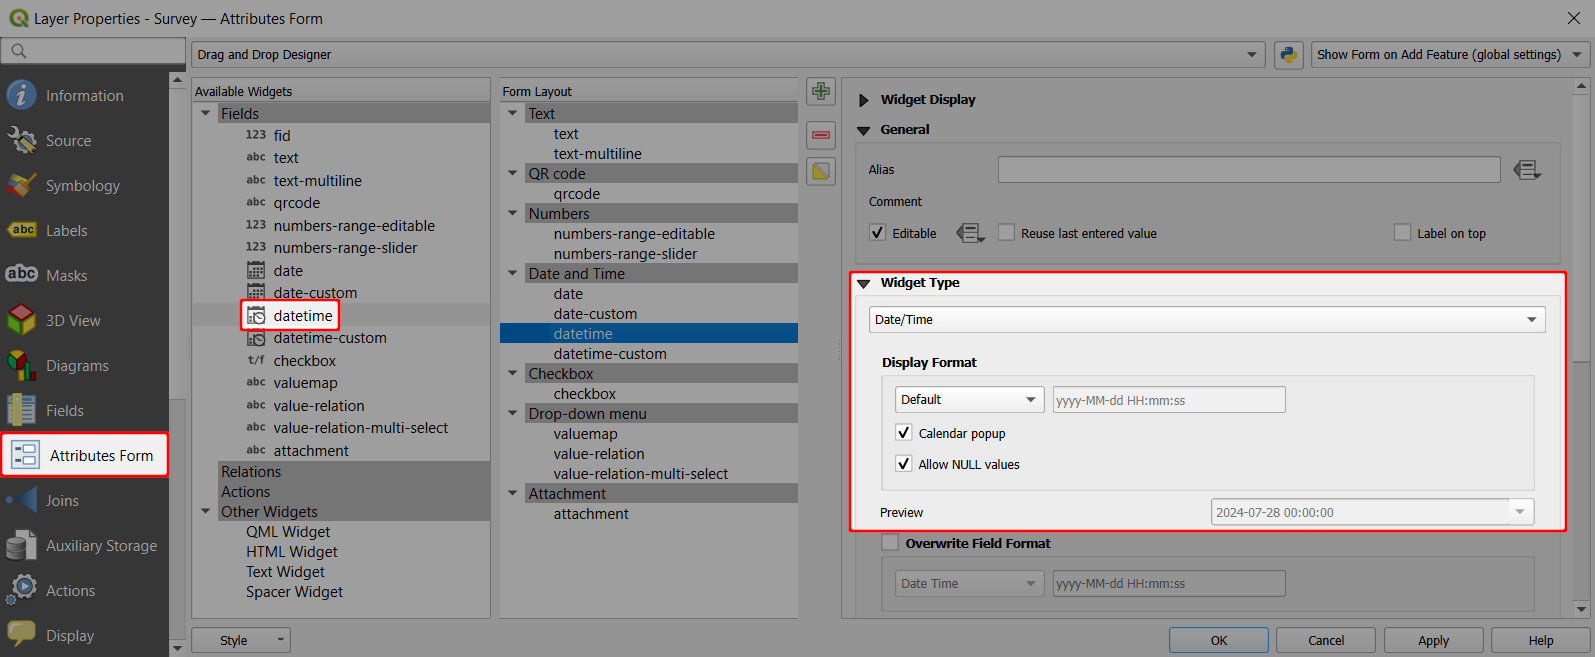
In the mobile app, the date can be edited using a calendar pop up. If you tap the icon next to field, the current date and time will be filled in.
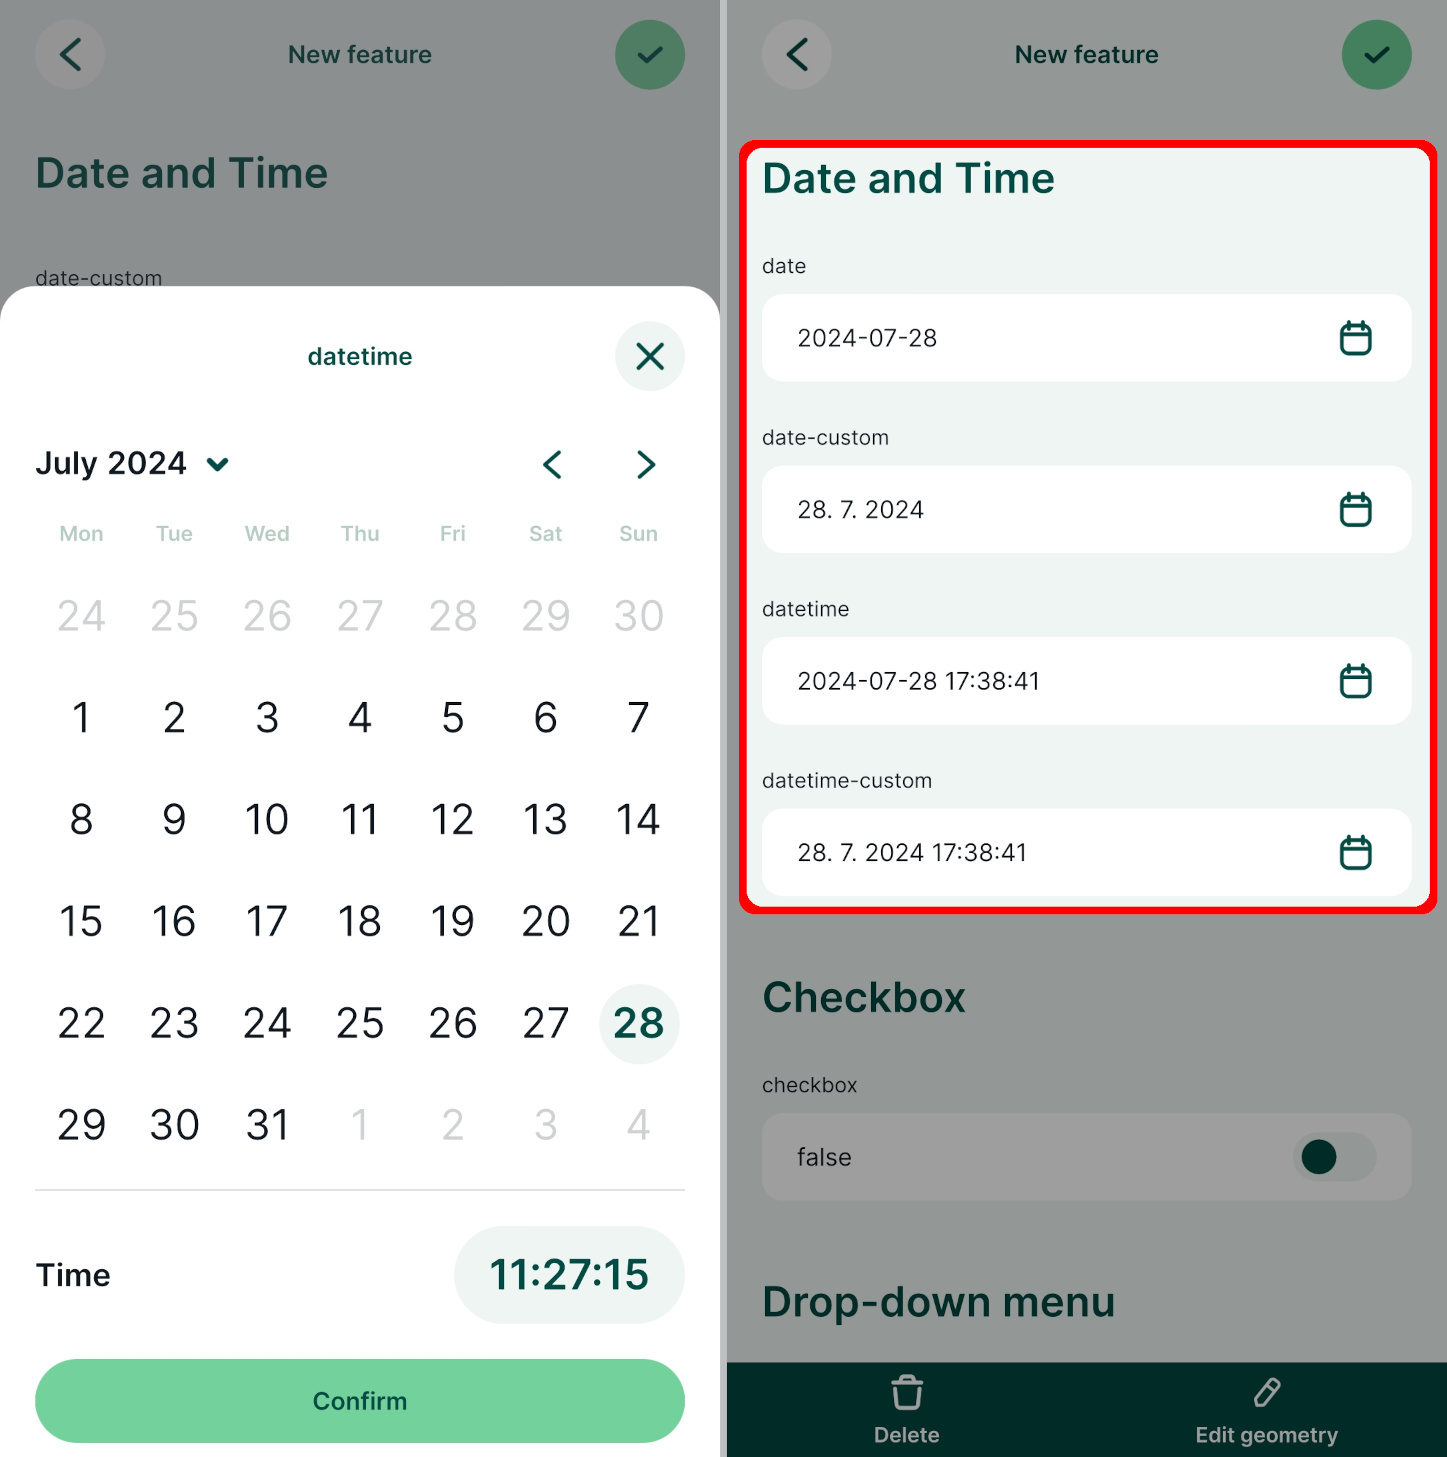
### Custom date and time formats [](https://merginmaps.com/docs/layer/form-widgets/#custom-date-and-time-formats)
Date and time fields can use custom display format.
Here are some examples:
| Custom Display Format | Preview |
| --- | --- |
| `dd.MM.yyyy` | 12.01.2024 |
| `MMMM d yyyy` | January 12 2024 |
| `HH:mm:ss` | 12:34:56 |
| `yyyy-MM-dd HH:mm:ss` | 2020-09-09 12:34:56 |
| `dd/MM/yyyy HH-mm-ss` | 09/09/2020 12-34-56 |
Checkbox [](https://merginmaps.com/docs/layer/form-widgets/#checkbox)
-----------------------------------------------------------------------
Example project available
Checkbox widget is used in this public project [documentation/form-widgets](https://app.merginmaps.com/projects/documentation/form-widgets/tree)
. Download or clone it to see the setup.
Checkbox field becomes handy when you want to set up a Yes/No, True/False or On/Off in your field.
If you have a field set as **Boolean** in your GeoPackage layer, QGIS assigns the checkbox widget type by default.
1. Right-click on a layer, select **Properties** and go to the **Attributes form** tab.
2. In the list of **Available Widgets** select the field you want to work with (here: `checkbox`).
3. In the **Widget Type** tab, the **Checkbox** widget should be set by default (if not, select it from the drop-down menu).
4. **Apply** the changes. Don't forget to save and sync your project!
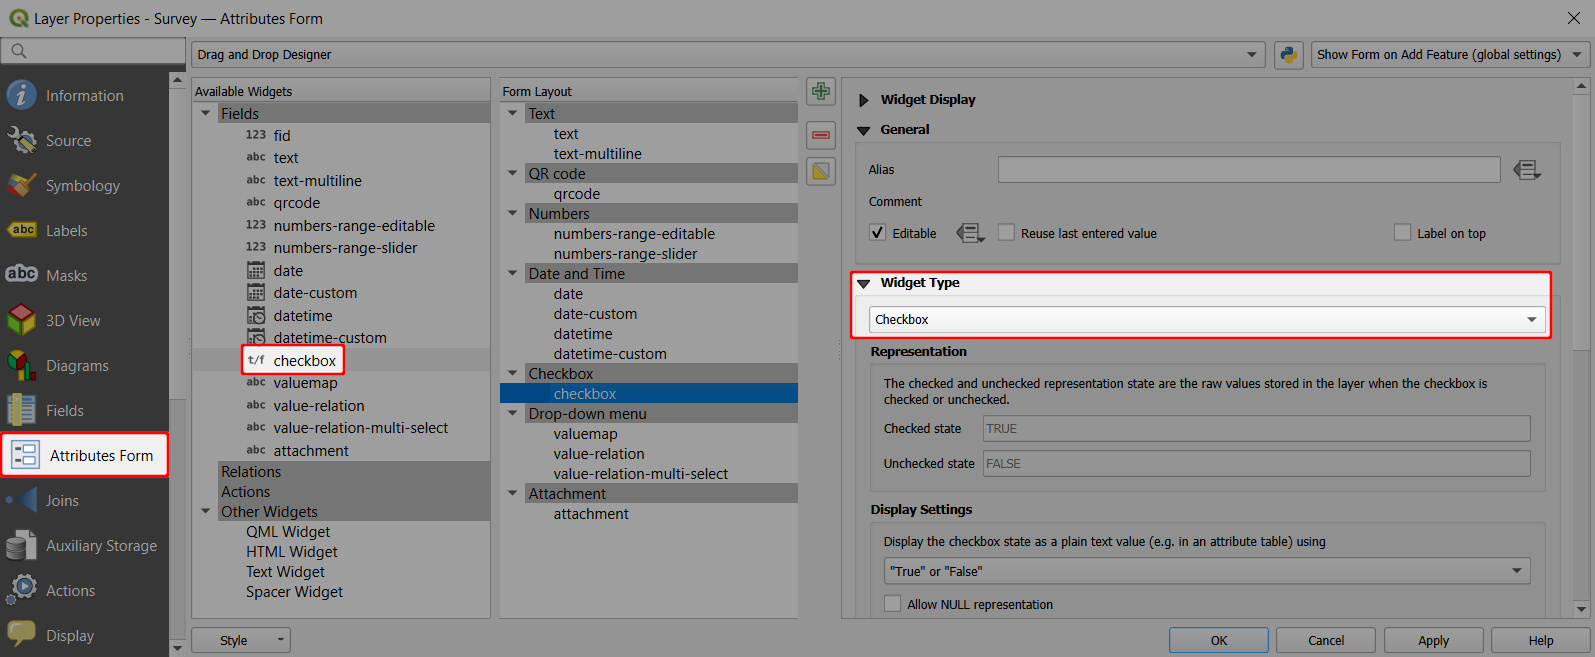
Checkbox widget can be also used for **Text** (string) fields:
1. Right-click on a layer, select **Properties** and go to the **Attributes form** tab.
2. In the list of **Available Widgets** select the field you want to work with (here: `checkbox-string`).
3. In the **Widget Type** tab, select the **Checkbox** widget and define values for the _Checked_ and for the _Unchecked_ state. Here we use `Yes` and `No`.
4. **Apply** the changes. Don't forget to save and sync your project!
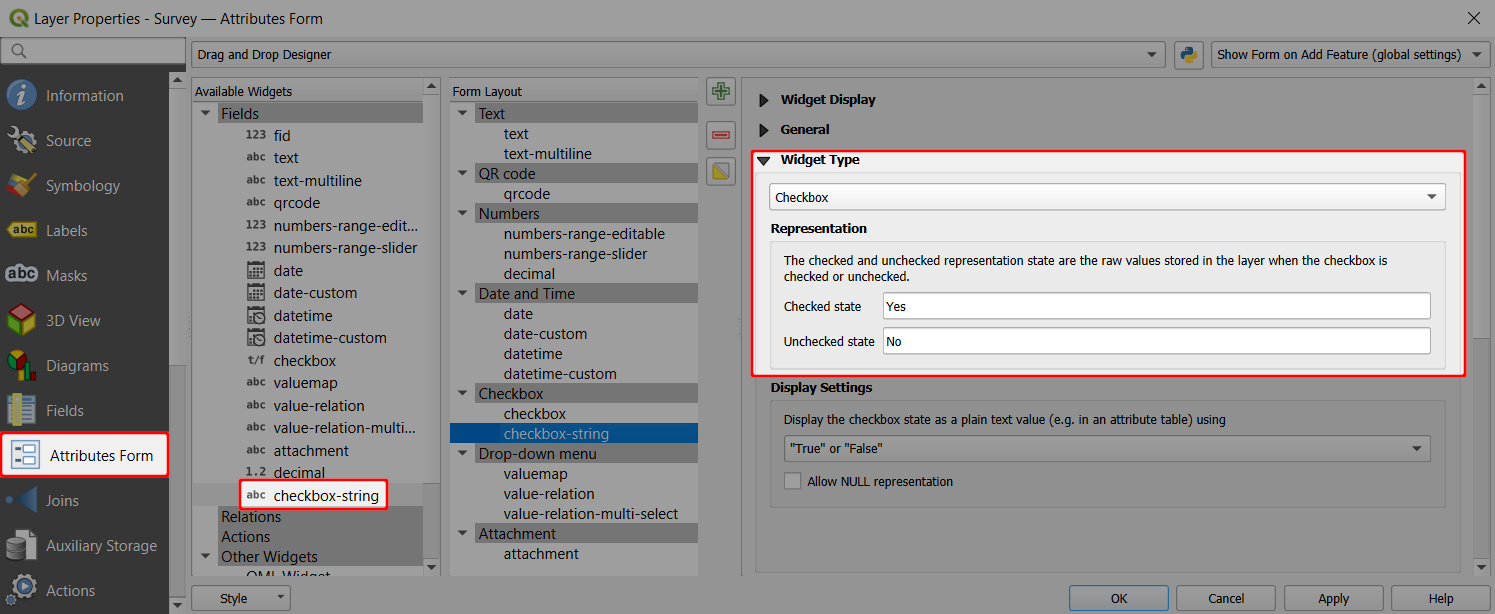
In the mobile app, the status of the checkbox field can be easily toggled on/off.
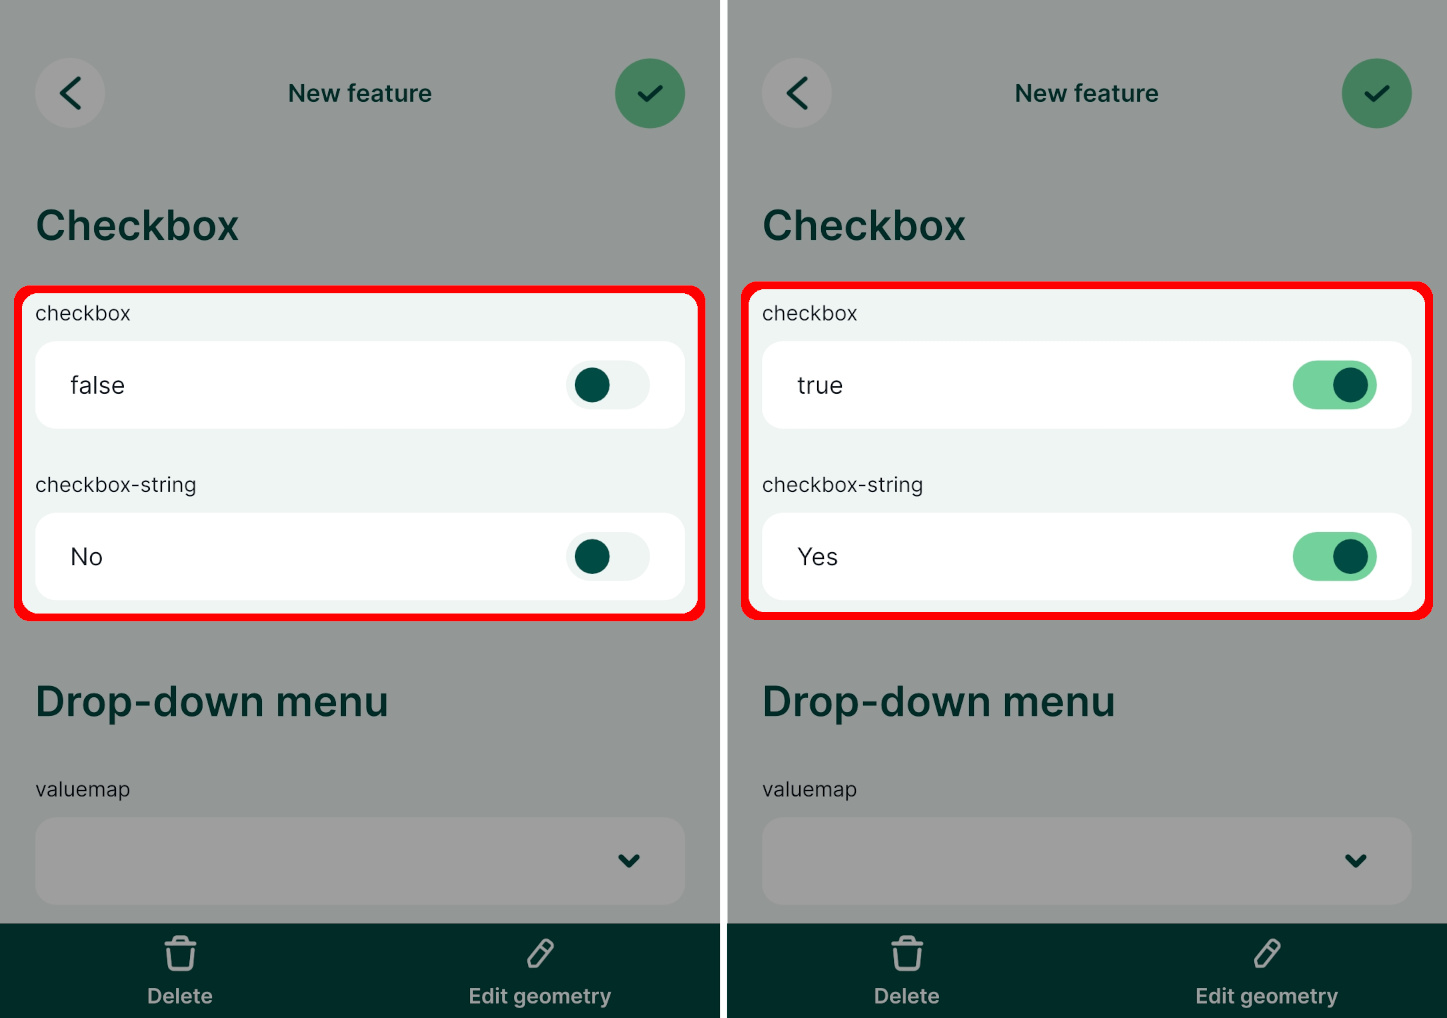
Select value from a drop-down menu [](https://merginmaps.com/docs/layer/form-widgets/#select-value-from-a-drop-down-menu)
---------------------------------------------------------------------------------------------------------------------------
Selecting values from a drop-down menu is faster then typing them in manually and it also ensures that there are no typos or spelling variations. To present the options as a drop-down menu in the form, you can use the [Value Map](https://merginmaps.com/docs/layer/form-widgets/#value-map)
or [Value Relation](https://merginmaps.com/docs/layer/form-widgets/#value-relation)
widgets in QGIS.
There are some benefits of using the Value Relation widget, such as:
* Option to select multiple values from the list (in this case, the field needs to be of `text` data type).
* The layer that contains values can be edited in the field. For example, if you have missed a value in your list for the drop-down menu, you can edit the table in the mobile app, add the value and use it during your survey. See [Working with non-spatial tables](https://merginmaps.com/docs/layer/non-spatial-data/)
for more details.
* Searching the values: if you have a large list of values, it will become cumbersome to find the right value. With Value Relation widget, you have the option to search for values in the list in the mobile app.
### Value Map [](https://merginmaps.com/docs/layer/form-widgets/#value-map)
Value map widget is used to select a value from a drop-down menu. Values are defined in the widget. They cannot be changed or added from the mobile app and only one value can be selected.
If you want to use multiple selections in a field or need to add new values during the survey, check out the [Value Relation](https://merginmaps.com/docs/layer/form-widgets/#value-relation)
widget.
Example project available
This public project [documentation/form-widgets](https://app.merginmaps.com/projects/documentation/form-widgets/tree)
contains a Value Map field. Download or clone it to see the setup.
1. Right-click on a layer, select **Properties** and go to the **Attributes form** tab.
2. In the list of **Available Widgets** select the field you want to work with (here: `valuemap`)
3. In the **Widget Type** tab, select the **Value Map** option from the drop-down menu and fill in the table below. **Value** is what will be stored in the field (these can be coded values or shortened names, here we use `1`, `2`, `3`). **Description** is what will be displayed in the form and in the attributes table (here: `value 1`, `value 2`, `value 3`).
4. **Apply** the changes. Don't forget to save and sync your project!
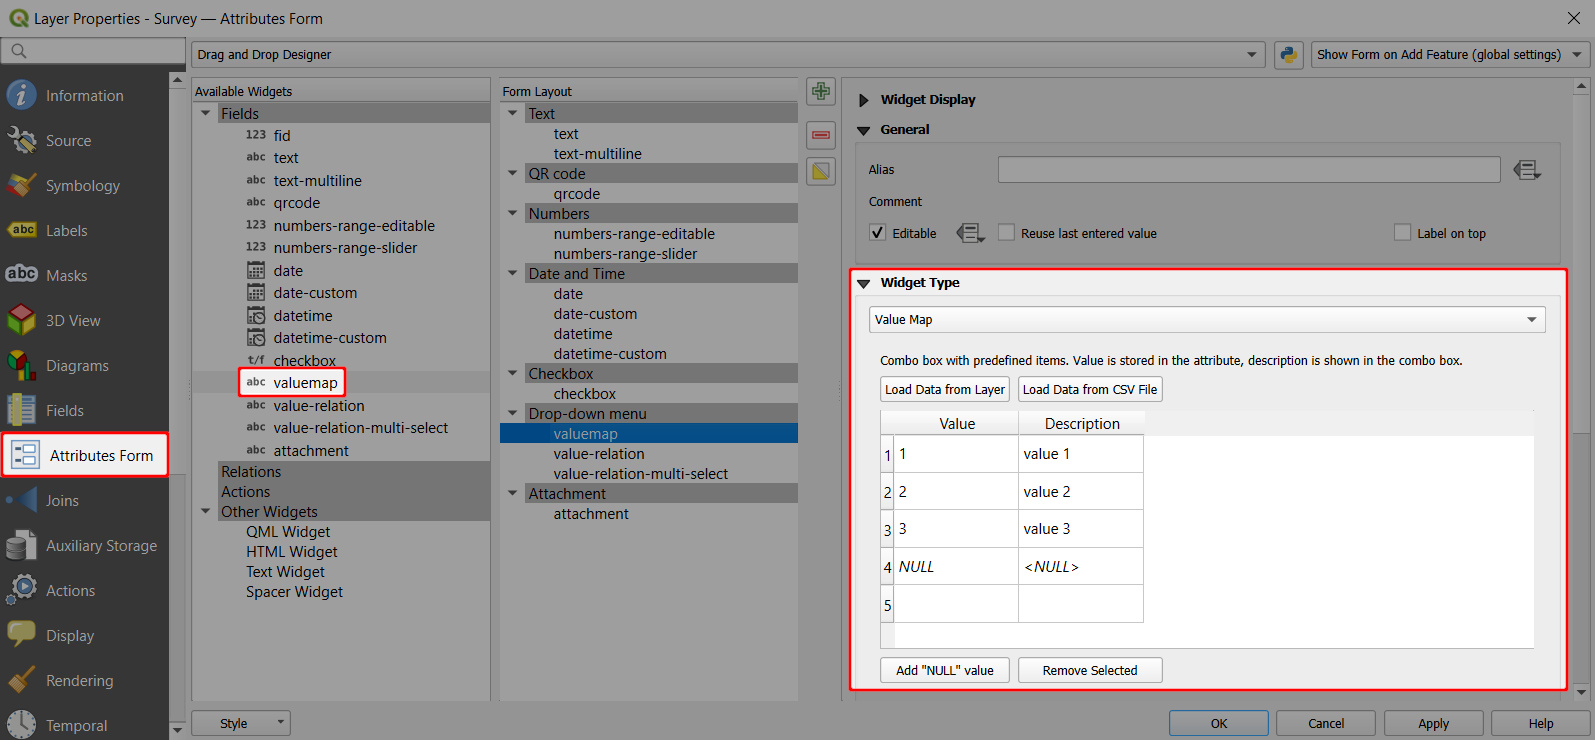
Now you can select the value from a drop-down menu in the mobile app: 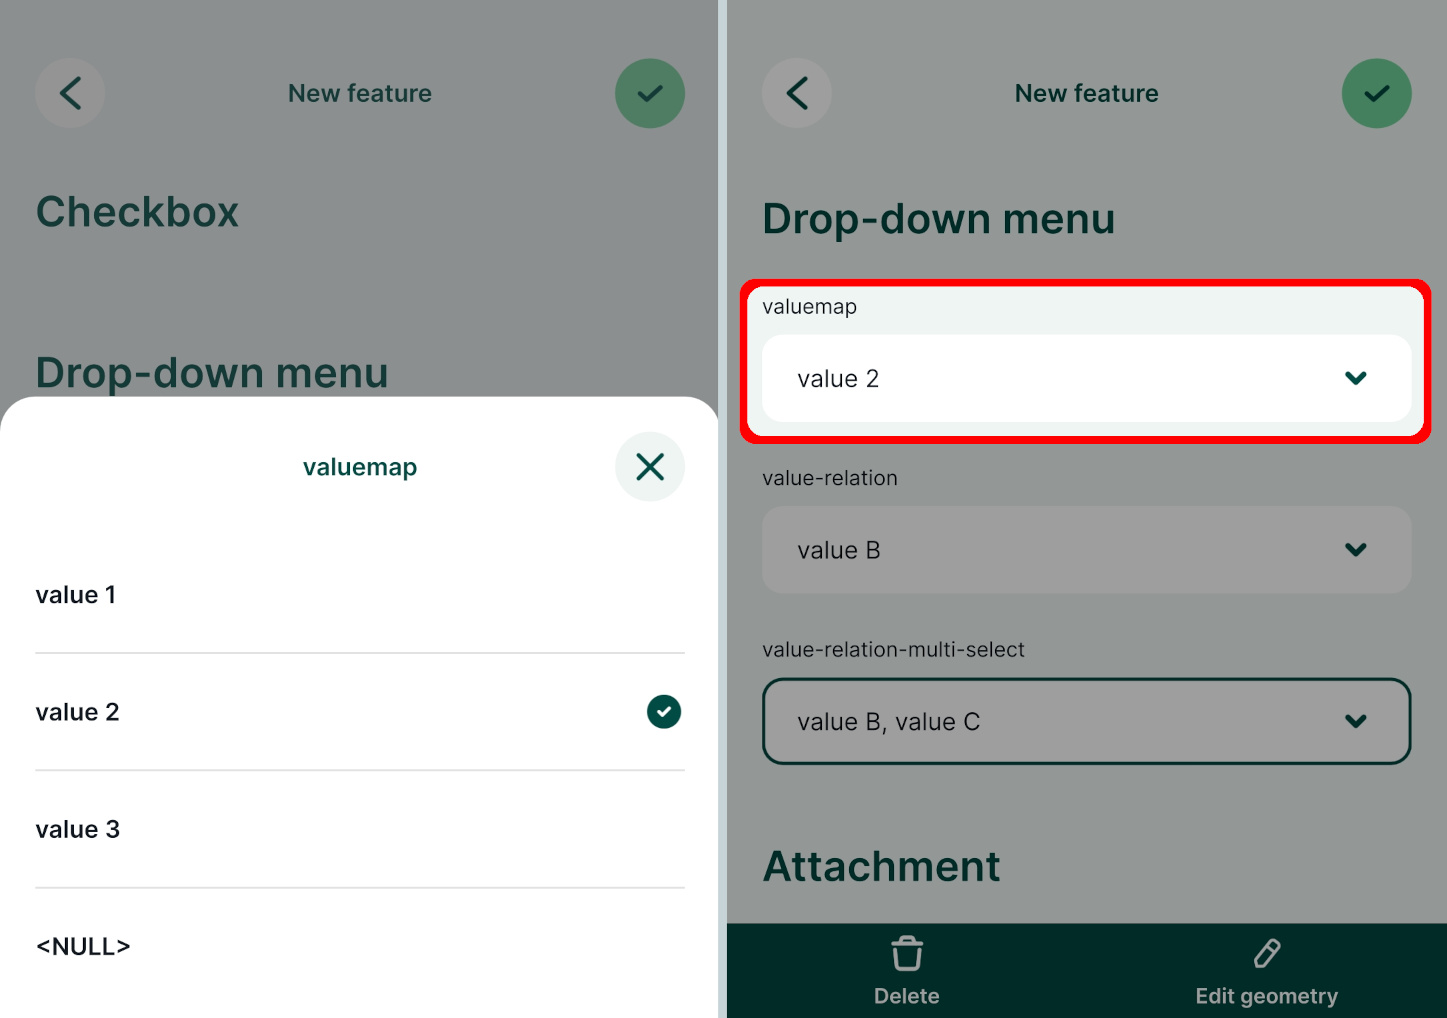
### Value Relation [](https://merginmaps.com/docs/layer/form-widgets/#value-relation)
Example project available
This public project [documentation/form-widgets](https://app.merginmaps.com/projects/documentation/form-widgets/tree)
contains a Value Relation setup. Download or clone it to explore it in more detail.
The **Value Relation** widget is similar to the [Value Map](https://merginmaps.com/docs/layer/form-widgets/#value-map)
widget, but the values for the drop-down menu come from another layer (usually a non-spatial table).
To have the option to safely add new values when working collaboratively, the value table should have a unique field with UUID values. This field should use the `uuid()` function as a [default value](https://merginmaps.com/docs/layer/attach-multiple-photos-to-features/)
, so that every new entry has its UUID.
To set up **Value Relation** in QGIS:
1. Right-click on a layer, select **Properties** and go to the **Attributes form** tab.
2. In the list of **Available Widgets** select the field you want to work with (here: `value-relation-multi-select`)
3. In the **Widget Type** tab, select **Value Relation** from the drop-down menu and set it up as follows:
* Select the **Layer** that contains the values (here: `value-relation-table`)
* **Key column** is the field that contains the values (here: `uuid`)
* **Value column** is the field that contains the alias (description) of the value (here: `value`)
* Check the **Allow multiple selections** option ✔️ if you want to have the option to select multiple values
4. **Apply** the changes. Don't forget to save and sync your project!
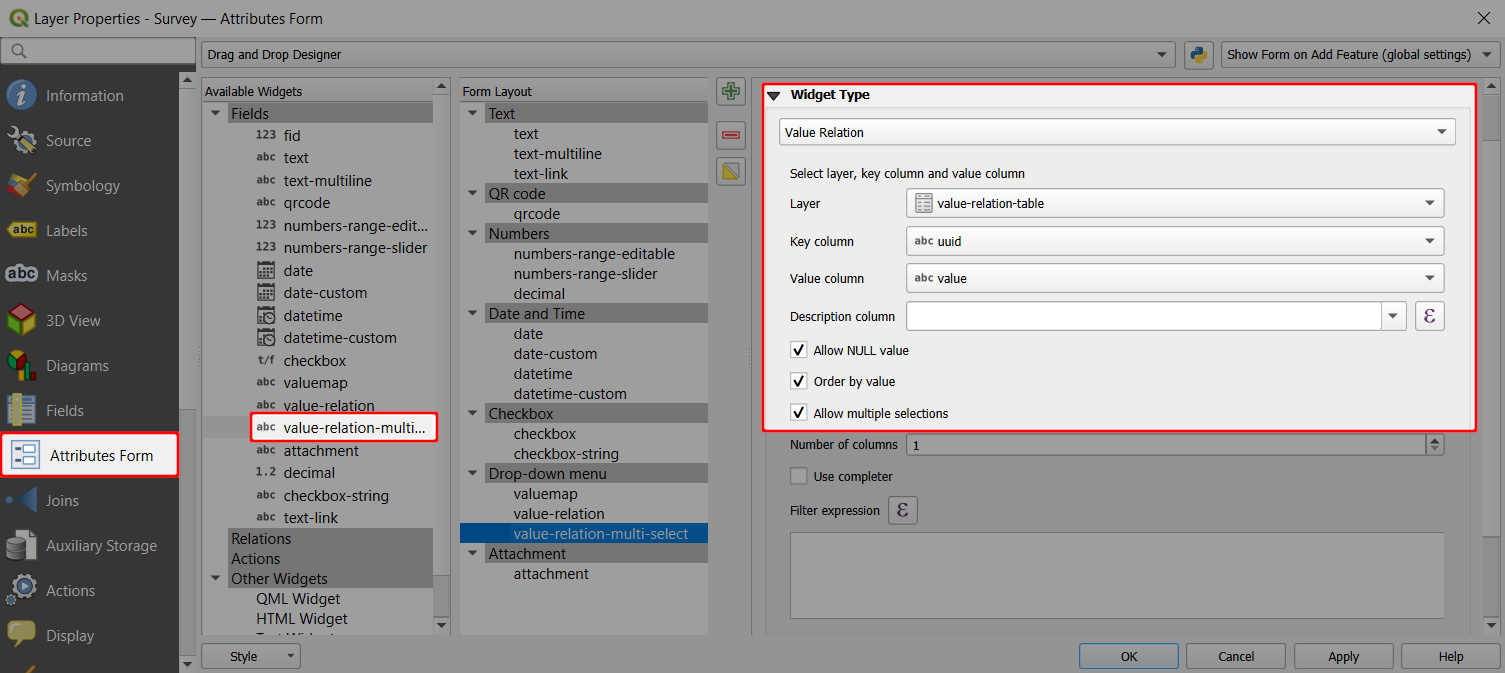
Using UUID as key field
**Why UUID?** FID can be changed during [synchronisation](https://merginmaps.com/docs/manage/synchronisation/)
. If multiple surveyors add new entries to the value table, features can end up with wrong values.
On the other hand, [UUID](https://docs.qgis.org/latest/en/docs/user_manual/expressions/functions_list.html#uuid)
(Universally Unique Identifier) is guaranteed to be unique and will not be changed when synced. Therefore, we recommend using UUID if you want to add new values during the survey.
When you open the field with **Value Relation** in the mobile app, you will be able to select values from the list.
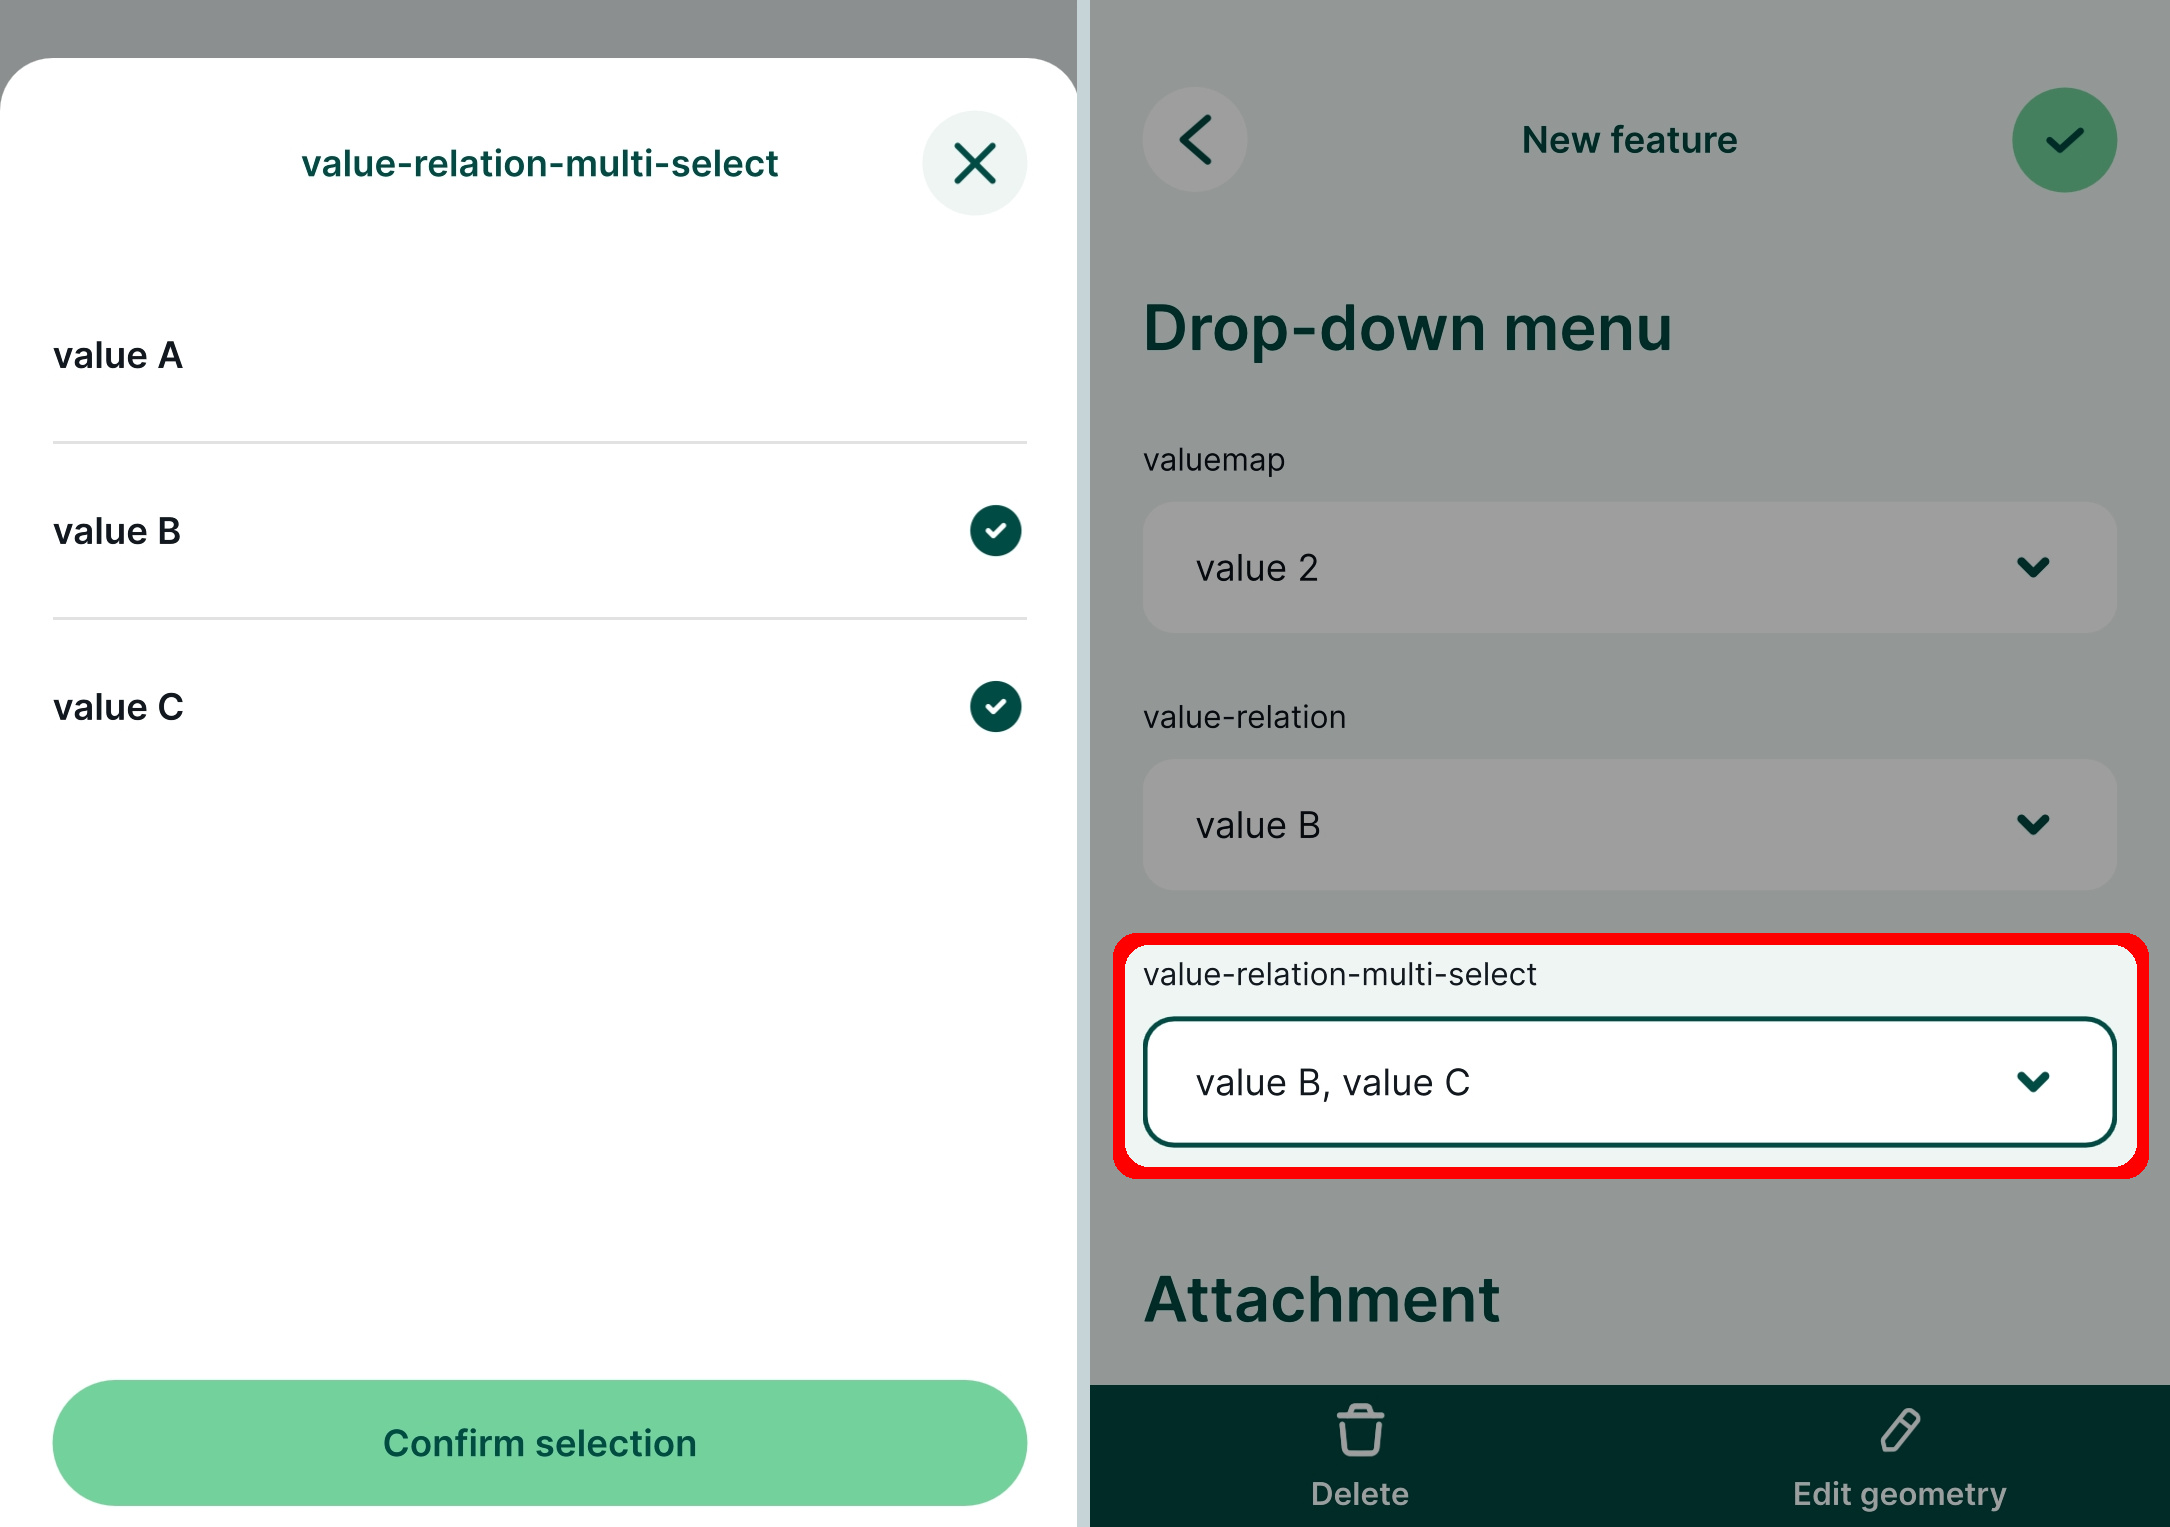
Attachment [](https://merginmaps.com/docs/layer/form-widgets/#attachment)
---------------------------------------------------------------------------
Example project available
Basic attachment widget is set up in the public project [documentation/form-widgets](https://app.merginmaps.com/projects/documentation/form-widgets/tree)
.
When there is a field with the **Attachment** widget type in a survey layer, the mobile app automatically sees it as a field to **capture photos**. Such field exists in a survey layer in the basic Mergin Maps project (created by using _New basic QGIS project_ option when [creating a project in QGIS](https://merginmaps.com/docs/manage/create-project/)
). If you create your survey layers manually, you will need to set it up.
1. Right-click on a layer, select **Properties** and go to the **Attributes form** tab.
2. In the list of **Available Widgets** select the text field you want to work with (here: `attachment`)
3. In the **Widget Type** tab, select **Attachment** from the drop-down menu:
* Default path defines where images will be saved. If it is not defined, the project home folder will be used.
* Store the path as **Relative to project path** or **Relative to default path** depending on how you want to store the paths.
4. **Apply** the changes. Don't forget to save and sync your project!
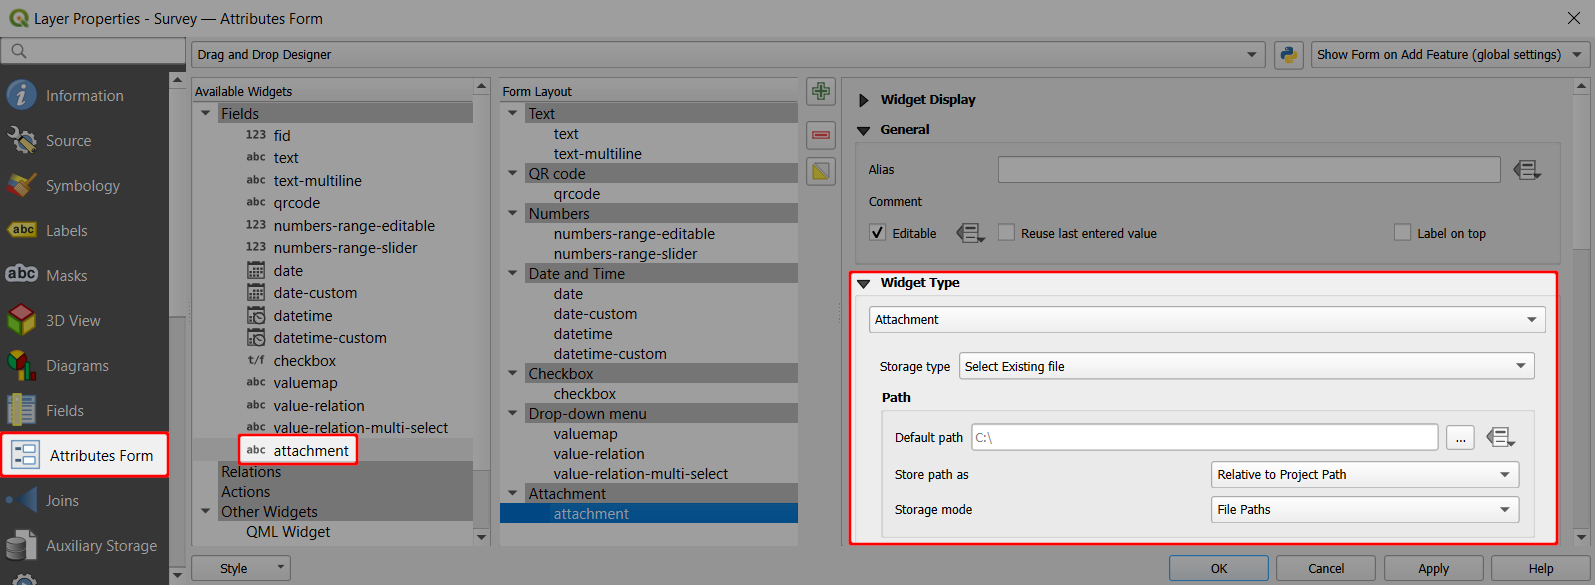
In the mobile app, you have the option to take a picture using the camera or upload a picture from the gallery of your mobile device: 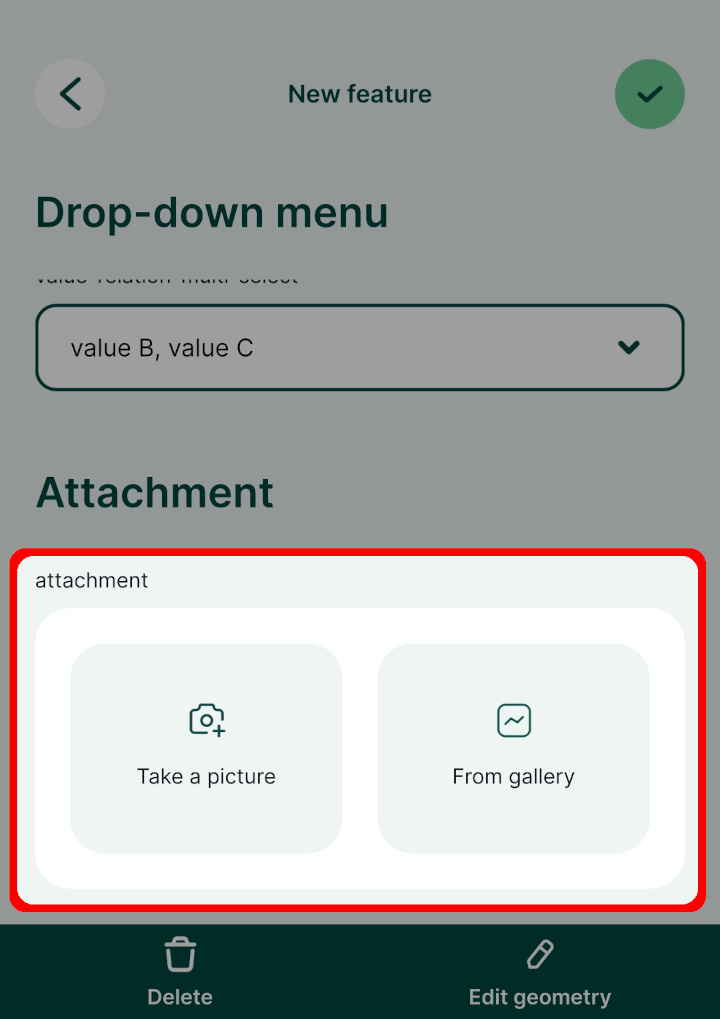
More about this topic
There are much more settings related to photos that can improve your workflow, such as storing them in a custom folder, resize them automatically or customise their name. Learn more about this topic in [Capturing Photos](https://merginmaps.com/docs/layer/photos/)
.
Cascade forms, 1-N relations, form layout,... [](https://merginmaps.com/docs/layer/form-widgets/#cascade-forms-1-n-relations-form-layout)
-------------------------------------------------------------------------------------------------------------------------------------------
There is much more you can do to set up your forms efficiently, such as:
* Create advanced forms with drill-down menu by setting up a [cascade form](https://merginmaps.com/docs/layer/form-configuration/#drill-down-forms)
.
* Use 1-N relations to [link multiple records to one feature](https://merginmaps.com/docs/layer/one-to-n-relations/)
or to [attach multiple photos to one feature](https://merginmaps.com/docs/layer/attach-multiple-photos-to-features/)
.
* Design an appropriate [form layout](https://merginmaps.com/docs/layer/form-layout/)
with groups and tabs, conditional visibility of fields or instructions for the fieldwork.
---
# Capturing Photos | Mergin Maps
[Skip to content](https://merginmaps.com/docs/layer/photos/#VPContent)
Return to top
Capturing Photos [](https://merginmaps.com/docs/layer/photos/#capturing-photos)
=================================================================================
When surveying, you might want to take a photo from your camera or attach an existing photo from the device gallery to your survey feature.
To capture and save photos using the mobile app, the survey layer needs to have a field configured with the [attachment widget](https://merginmaps.com/docs/layer/form-widgets/#attachment)
.
In the mobile app, this field will provide two options:
* **Take a picture** to use your camera app for taking a photos
* **From gallery** to attach an existing photo from your device

You can use [Photo sketching](https://merginmaps.com/docs/field/photo-sketching/)
to annotate the pictures attached to features.
Multiple pictures of one feature
Do you need to attach multiple pictures to one feature? [How to attach multiple photos to features](https://merginmaps.com/docs/layer/attach-multiple-photos-to-features/)
will guide you through the setup.
WARNING
Keep in mind that synchronising photos during the field survey can use up a lot of mobile data - depending on the amount of pictures taken and their size.
To reduce the data usage, you may consider using [selective synchronisation](https://merginmaps.com/docs/manage/selective_sync/)
, [resizing pictures automatically](https://merginmaps.com/docs/layer/photos/#resizing-pictures-automatically)
or following the [offline field survey workflow](https://merginmaps.com/docs/field/offline-use/#offline-field-survey-workflow)
.
Photo attachment widget in QGIS [](https://merginmaps.com/docs/layer/photos/#photo-attachment-widget-in-qgis)
---------------------------------------------------------------------------------------------------------------
Example project available
Clone [documentation/form\_setup](https://app.merginmaps.com/projects/documentation/form_setup/tree)
to follow this example!
In QGIS, the [attachment widget](https://merginmaps.com/docs/layer/form-widgets/#attachment)
is used to set up a field to capture photos.
To set up the attachment widget:
1. Right-click on a layer, select **Properties** and go to the **Attributes form** tab.
2. In the list of **Available Widgets** select the text field you want to work with.
3. In the **Widget Display** tab:
* From the drop-down menu, select **Attachment**
* **Default path** defines where images will be saved. If it is not defined, the project home folder will be used.
* Store the path as **Relative to project path** or **Relative to default path** depending on how you want to store the paths.
4. **Apply** the changes. Don't forget to save and sync your project! 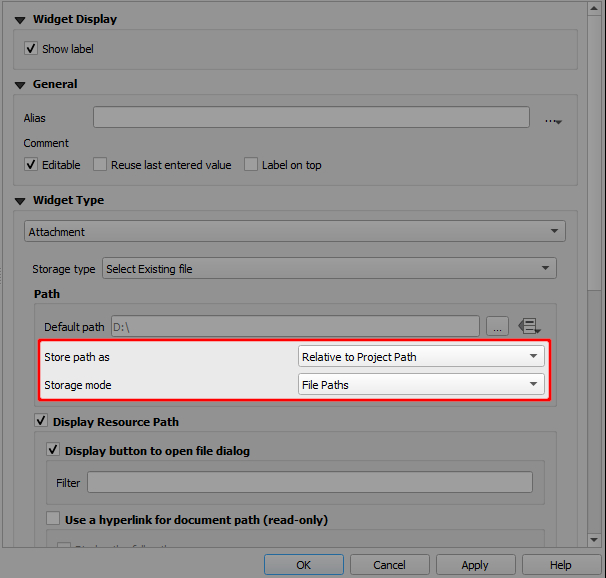
Here is an overview of paths that will be stored in various settings of the attachment widget. `path/to/project` represents the project home folder, where the project file is located.
| Default path | Store path as | Value |
| --- | --- | --- |
| \- | Relative to project path | `image.jpg` |
| \- | Relative to default path | `image.jpg` |
| `@project_folder` | Relative to project path | `image.jpg` |
| `@project_folder` | Relative to default path | `image.jpg` |
| `@project_home + '/photos'` | Relative to project path | `/photos/image.jpg` |
| `@project_home + '/photos'` | Relative to default path | `image.jpg` |
Avoid using absolute paths
Using _absolute paths_ causes issues when working with your projects on different devices or working in a team: as each device or team member can use different paths, they may be unable to display the attachments.
How to set up a custom folder for storing photos [](https://merginmaps.com/docs/layer/photos/#how-to-set-up-a-custom-folder-for-storing-photos)
-------------------------------------------------------------------------------------------------------------------------------------------------
It can be useful to set up a custom folder for photos, e.g. if you want to use [selective synchronisation](https://merginmaps.com/docs/manage/selective_sync/)
or if you simply want to have your data organised.
To set up a custom folder:
1. Create a subfolder in the project folder (here: `photos`)
2. Open your project in QGIS
3. Open the **Properties** of the survey layer and navigate to the **Attributes form** tab. Select the field, where photos are stored (here: `photo`) and make sure that the widget type is set to **Attachment**: 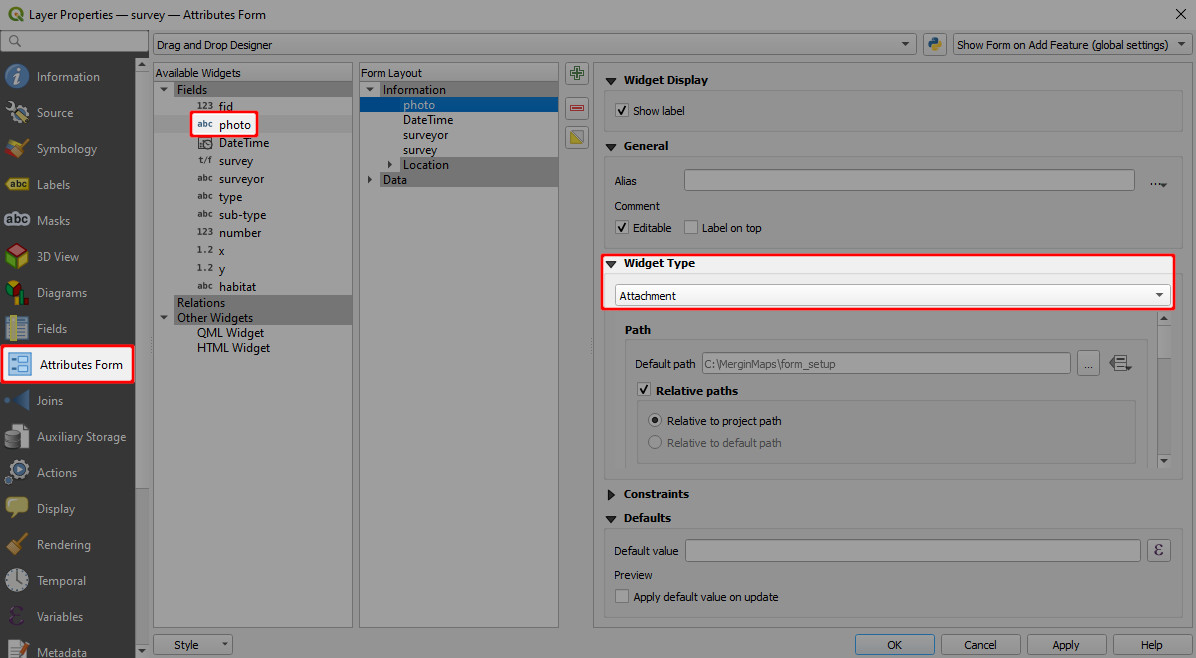
4. Now we need to change the **Default path** to the folder we have created. Click on the _Data defined override_ icon and choose **Edit...**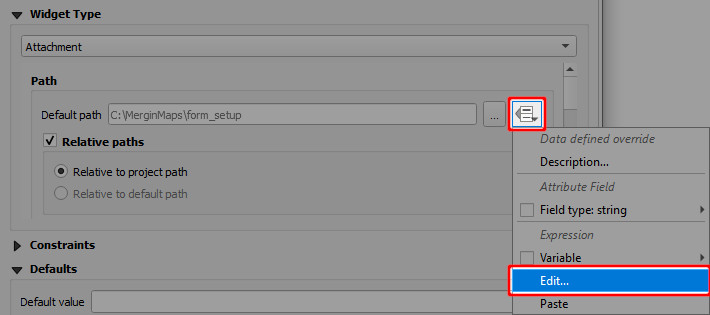
5. In **Expression String Builder** enter the expression `@project_folder + '/photos'` (replace `photos` by the name of your folder). Click **OK**. 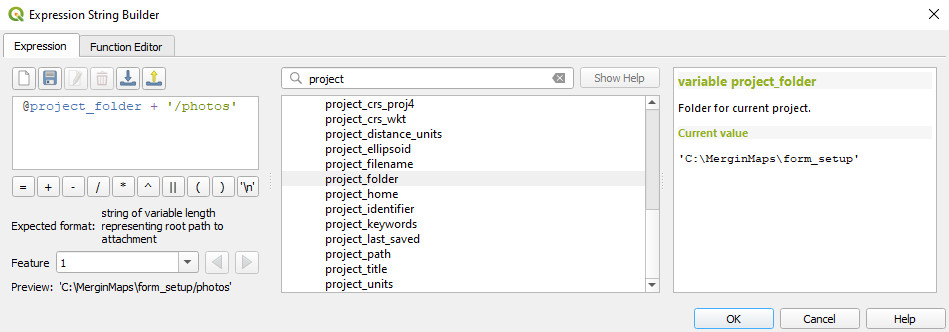
6. The **Default path** now refers to the custom folder. 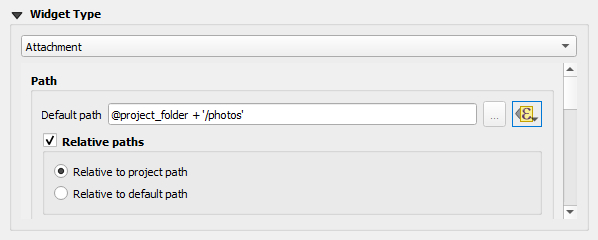
7. **Apply the changes**. Don't forget to save and sync your project!
Resizing pictures automatically [](https://merginmaps.com/docs/layer/photos/#resizing-pictures-automatically)
---------------------------------------------------------------------------------------------------------------
Photos that are captured during the field survey or uploaded using Mergin Maps mobile app can be automatically resized, e.g. to save up storage space. The quality of the photos can be set up in the [Mergin Maps project properties](https://merginmaps.com/docs/gis/features/#photo-quality)
using Mergin Maps QGIS plugin.
Customising photo name format with expressions [](https://merginmaps.com/docs/layer/photos/#customising-photo-name-format-with-expressions)
---------------------------------------------------------------------------------------------------------------------------------------------
Photos taken in the field using Mergin Maps mobile app can be automatically renamed. This can be useful when browsing pictures in your [Mergin Maps](https://merginmaps.com/)
project and keeping them organised.
[**How to Set Photo Names Format**](https://merginmaps.com/docs/gis/photo-names/)
will guide you through the setup and provide examples of expressions that can be used to name your photos.
Displaying photos in QGIS [](https://merginmaps.com/docs/layer/photos/#displaying-photos-in-qgis)
---------------------------------------------------------------------------------------------------
Photos taken using Mergin Maps mobile app during the survey can be displayed in the feature's form in QGIS.
1. In QGIS, double click on a survey layer to open **Layer Properties**
2. In the **Attributes Form** tab, select the field that contains the path to the photo.
Scroll to the **Integrated Document Viewer** in the panel on the right. Set the **Type** to _Image_. 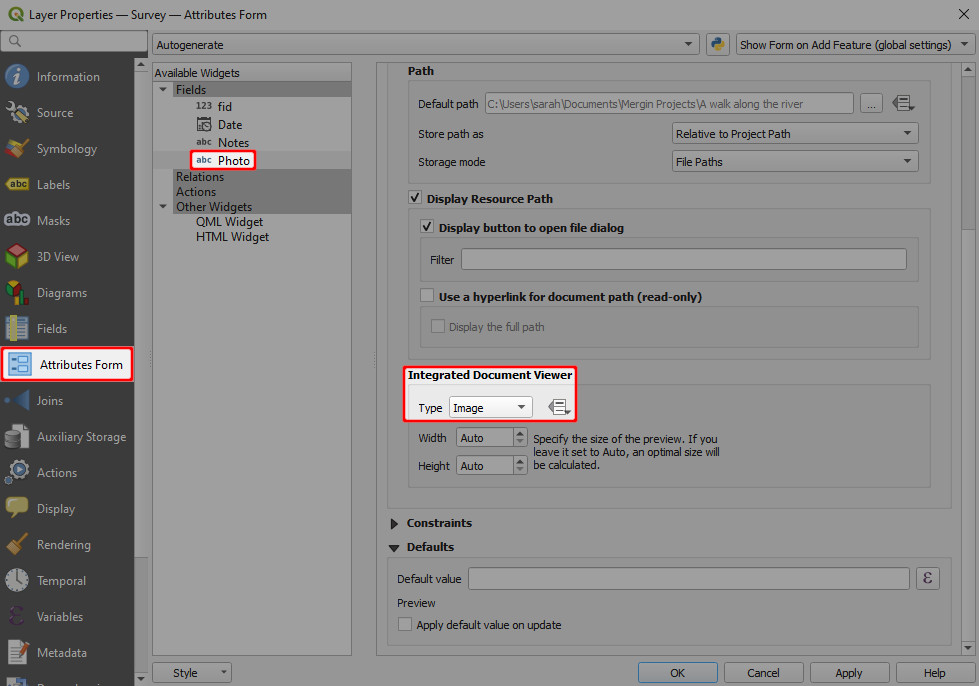
3. **Apply** the changes and click **OK**.
Now when you click on a feature that contains a photo, it will be displayed in the form.
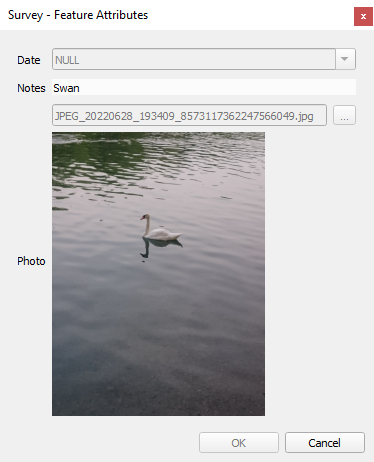
Image preview in QGIS 3.36+
QGIS may not display the preview of the image if you use QGIS 3.36 or higher. Despite this behaviour, the mobile app displays it correctly. Therefore we recommend trying the setup by opening the form in the mobile app to make sure it works as intended.
---
# Custom Projections | Mergin Maps
[Skip to content](https://merginmaps.com/docs/gis/proj/#VPContent)
Return to top
Custom Projections [](https://merginmaps.com/docs/gis/proj/#custom-projections)
=================================================================================
Custom projections in QGIS [](https://merginmaps.com/docs/gis/proj/#custom-projections-in-qgis)
-------------------------------------------------------------------------------------------------
It is common to have multiple layers with different coordinate reference systems in one QGIS project. To display these layers accurately, it is necessary to define the transformation between the coordinate reference systems.
QGIS on Windows and macOS comes with preinstalled projections and transformations that are handled by [PROJ](https://proj.org/)
, including a whole lot of grid shift files for accurate horizontal and vertical coordinate transformations. However, some specific projections that are not included in [PROJ data](https://github.com/OSGeo/PROJ-data)
may require you to install additional grid shift files manually. If this is the case, QGIS will show you a warning and will allow you to install the grid shift file from a folder.
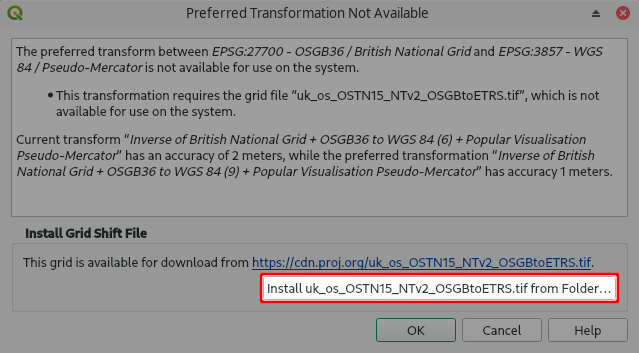
TIP
Grid shift files are usually provided by national geodetic authorities. Common formats are _Geodetic TIFF grids_ (.tiff) and _National Transformation version 2_ (.gsb) files.
[PROJ data](https://github.com/OSGeo/PROJ-data)
gathers _Geodetic TIFF grids_ from various sources, so you might be able to download your grid shift file from there.
You only need to do this setup once. After you install the grid files, they are automatically used by QGIS whenever needed.
WARNING
If you want to share your project with someone else, they also need to install the grid shift files in their QGIS in order to display the data correctly.
### Further reading about projections and transformations [](https://merginmaps.com/docs/gis/proj/#further-reading-about-projections-and-transformations)
This [extended article](https://merginmaps.com/docs/gis/projections/)
contains more information about map projections, coordinate reference systems and transformations.
If you want to learn more about this topic, we recommend to go through the [QGIS online documentation](https://docs.qgis.org/3.22/en/docs/gentle_gis_introduction/coordinate_reference_systems.html)
or [PROJ documentation](https://proj.org/operations/index.html)
.
Projections issues are one of the common causes of misplacement of your field data as mentioned in our blog [Why are my survey points shifted?](https://www.lutraconsulting.co.uk/blog/2021/04/21/projections-field/)
.
Custom projections in Mergin Maps mobile app [](https://merginmaps.com/docs/gis/proj/#custom-projections-in-mergin-maps-mobile-app)
-------------------------------------------------------------------------------------------------------------------------------------
If you had to install grid shift files in QGIS in order to display your layers correctly, it is also necessary to provide the same grid shift files to Mergin Maps mobile app.
Mergin Maps mobile app supports grid shift files formats:
* _National Transformation version 2_ (.gsb)
* _Geodetic TIFF grids_ (.tiff)
When the app starts, it searches for `proj` folders in all available projects on the disk. The grid shift files found in these folders can be then used in all projects.
### Adding grid shift files to Mergin Maps mobile app [](https://merginmaps.com/docs/gis/proj/#adding-grid-shift-files-to-mergin-maps-mobile-app)
It couldn't be easier! When [creating a new Mergin Maps project](https://merginmaps.com/docs/manage/create-project/#create-a-project-in-qgis)
by packaging current QGIS project or using current QGIS project as is, Mergin Maps QGIS plugin will copy all required datum shift grids to the appropriate project folder.
All you need to do is:
1. Define the coordinate systems, projections and transformations in your Mergin Maps project in QGIS as you need.
2. Synchronise the project using the QGIS plugin. If a shift grid file is missing, you will get a warning containing a link to **fix the issue**.
3. Download the project with the grid shift files to Mergin Maps mobile app. When the project is downloaded to the app for the first time, you will get a **PROJ Error** that will prompt you to **restart the app** to load the grid shift files. The error message should not appear after the restart of the app. 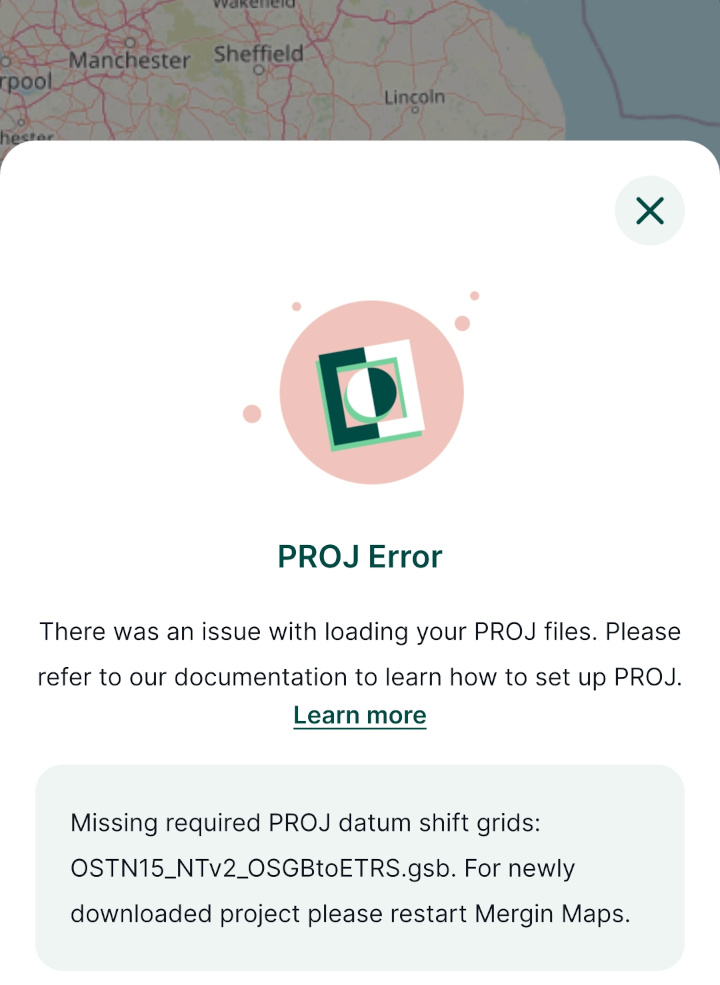
### Adding grid shift files manually [](https://merginmaps.com/docs/gis/proj/#adding-grid-shift-files-manually)
If you want to add grid shift files to the mobile app manually:
1. Create a folder called `proj` in your project folder 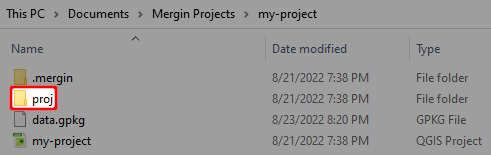
2. Copy the grid shift file to the `proj` folder 
TIP
Grid shift files installed in QGIS on your computer can be found in these locations:
* Windows users: `C:\Users\USER\AppData\Roaming\QGIS\QGIS3\profiles\default\proj` (USER is your username)
* macOS users: `~/Library/Application\Support/QGIS/QGIS3/profiles/default/proj`
* Linux users: `~/.local/share/QGIS/QGIS3/profiles/default/proj`
3. Synchronise the project using the QGIS plugin
4. Download the project with the grid shift files to Mergin Maps mobile app. When the project is downloaded to the app for the first time, you will get a **PROJ Error** that will prompt you to **restart the app** to load the grid shift files. The error message should not appear after the restart of the app.

---
# Exif Metadata | Mergin Maps
[Skip to content](https://merginmaps.com/docs/layer/exif/#VPContent)
Return to top
Exif Metadata [](https://merginmaps.com/docs/layer/exif/#exif-metadata)
=========================================================================
EXIF is a file format for storing metadata in image files, such as the camera settings, image metrics, date and time or location information (see, e.g., [Wikipedia](https://en.wikipedia.org/wiki/Exif)
).
The mobile app supports some default value expression functions that can be used to read EXIF metadata and store their values in the fields of your survey layer.
To store GPS EXIF metadata, both the mobile app and your camera app have [location permissions](https://merginmaps.com/docs/layer/exif/#allowing-location-tags)
allowed on your mobile device.
Allowing location tags [](https://merginmaps.com/docs/layer/exif/#allowing-location-tags)
-------------------------------------------------------------------------------------------
**Location tags have to be allowed** in the camera settings to store GPS EXIF metadata in the photos.
* **Android**: Open Camera app -> Camera settings -> Location tags. 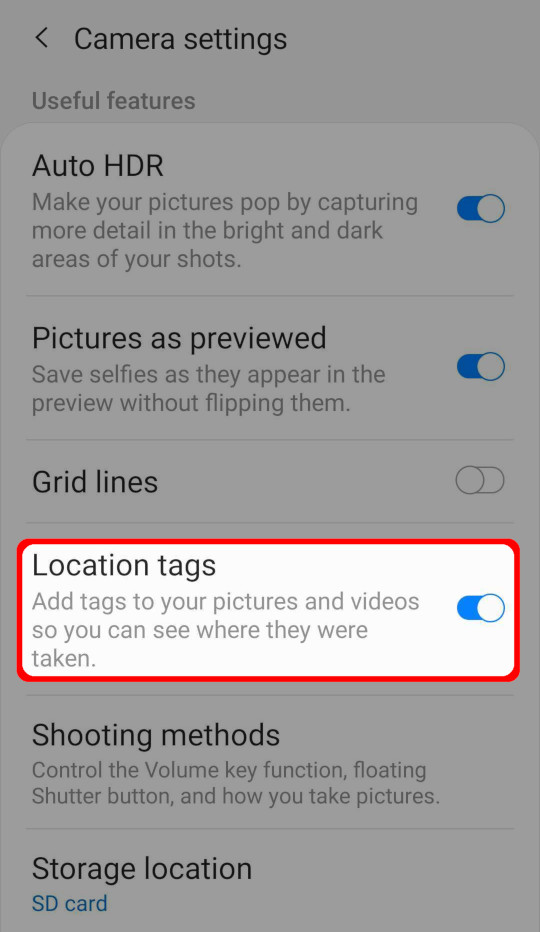
* **iOS**: Open Settings -> Privacy -> Location Services -> Camera (app). 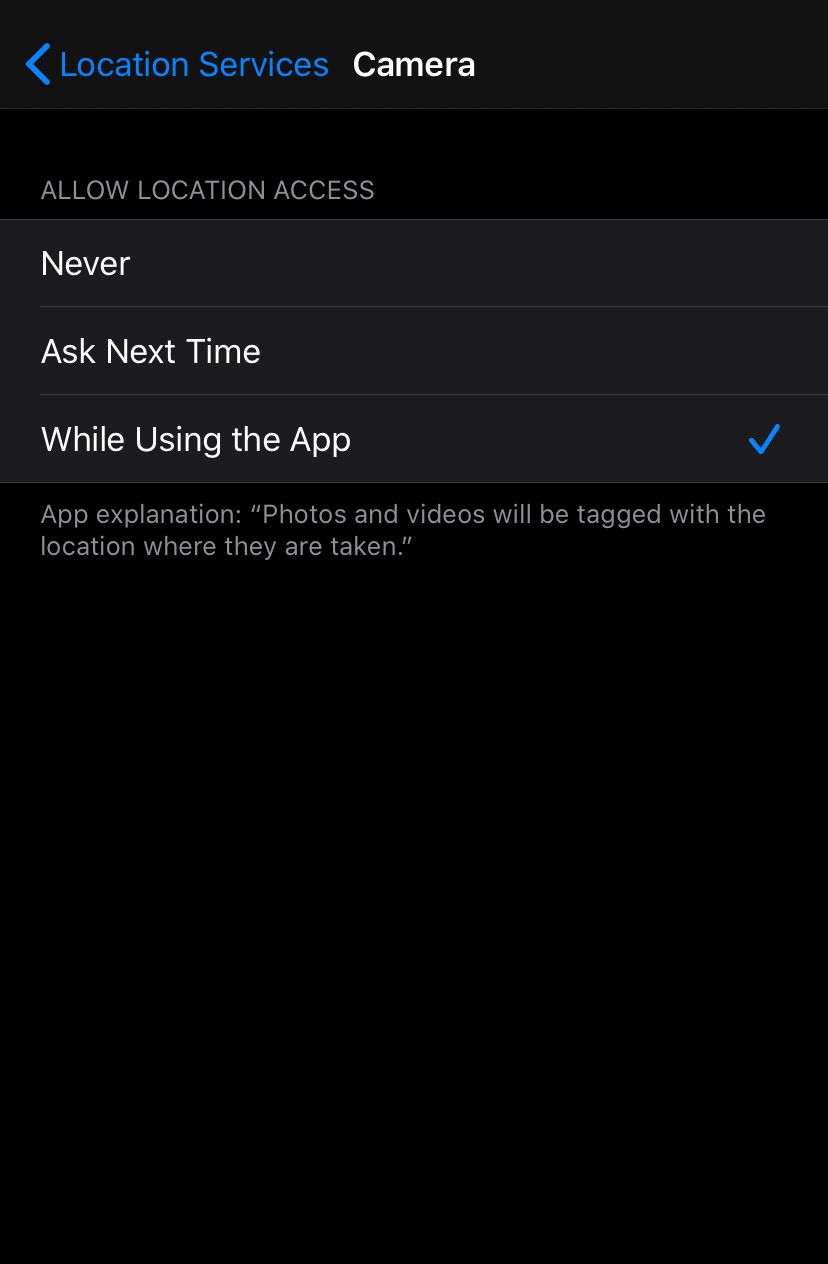
How to use EXIF metadata in Mergin Maps mobile app [](https://merginmaps.com/docs/layer/exif/#how-to-use-exif-metadata-in-mergin-maps-mobile-app)
---------------------------------------------------------------------------------------------------------------------------------------------------
Example project available
Clone [documentation/exif-metadata](https://app.merginmaps.com/projects/documentation/exif-metadata/tree)
to see how it works!
To store EXIF metadata values in the fields of your survey layer:
1. In QGIS, open the **Properties** of your survey layer and navigate to the **Attributes Form** tab.
2. Now we need to set the [default values](https://merginmaps.com/docs/layer/form-configuration/#default-values)
of fields that should store EXIF metadata.
[Supported EXIF functions](https://merginmaps.com/docs/layer/exif/#supported-exif-functions)
are listed below. In general, EXIF functions looks like this: `read_exif('', '')`
This expression requires the **absolute path** to an image. The absolute path can be defined using the field where the image is stored (here: `photo`, this is a [text field with attachment widget](https://merginmaps.com/docs/layer/photos/)
) and the `@project_home` variable that refers to the project home folder.
For example, the default value expression for the direction of the image (EXIF tag `GPSImgDirection`) can be defined as follows:
`read_exif(@project_home + '/' + "photo", 'GPSImgDirection')`
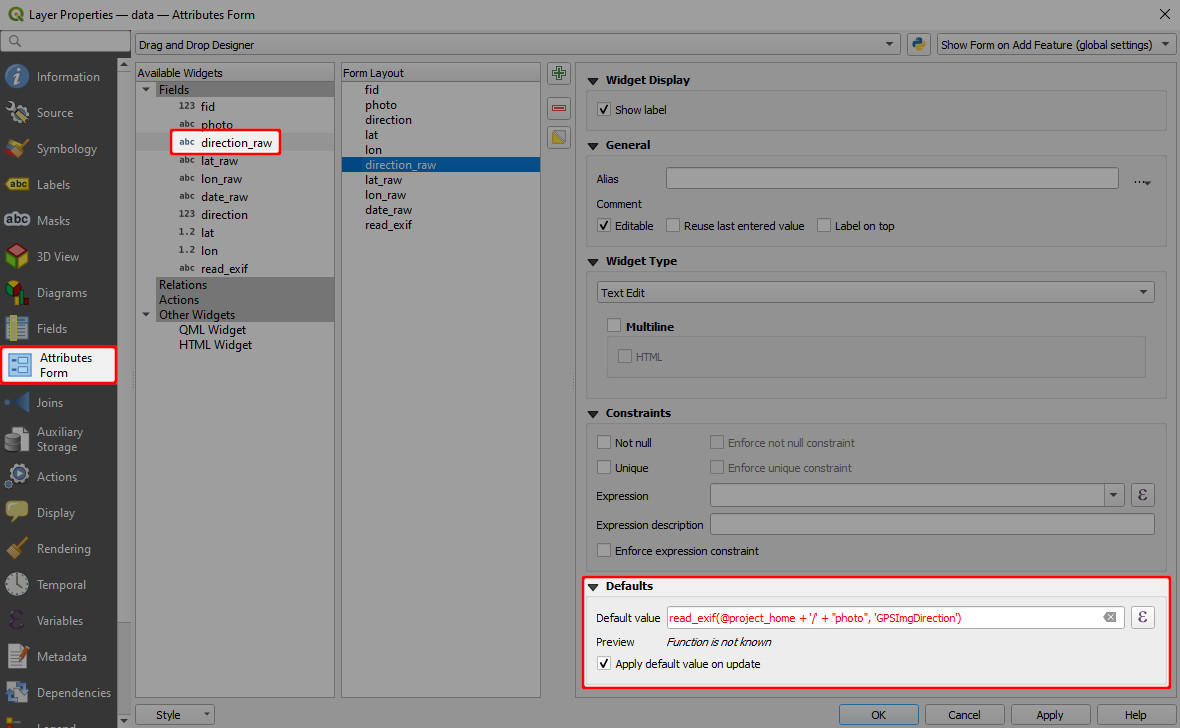
The preview shows a warning _Function is not known_. **This is OK, Mergin Maps mobile app will know what to do with it!**
3. Save and sync your project.
4. Open the project in Mergin Maps mobile app. Once you capture a photo during the field survey, the EXIF metadata values will be automatically filled in: 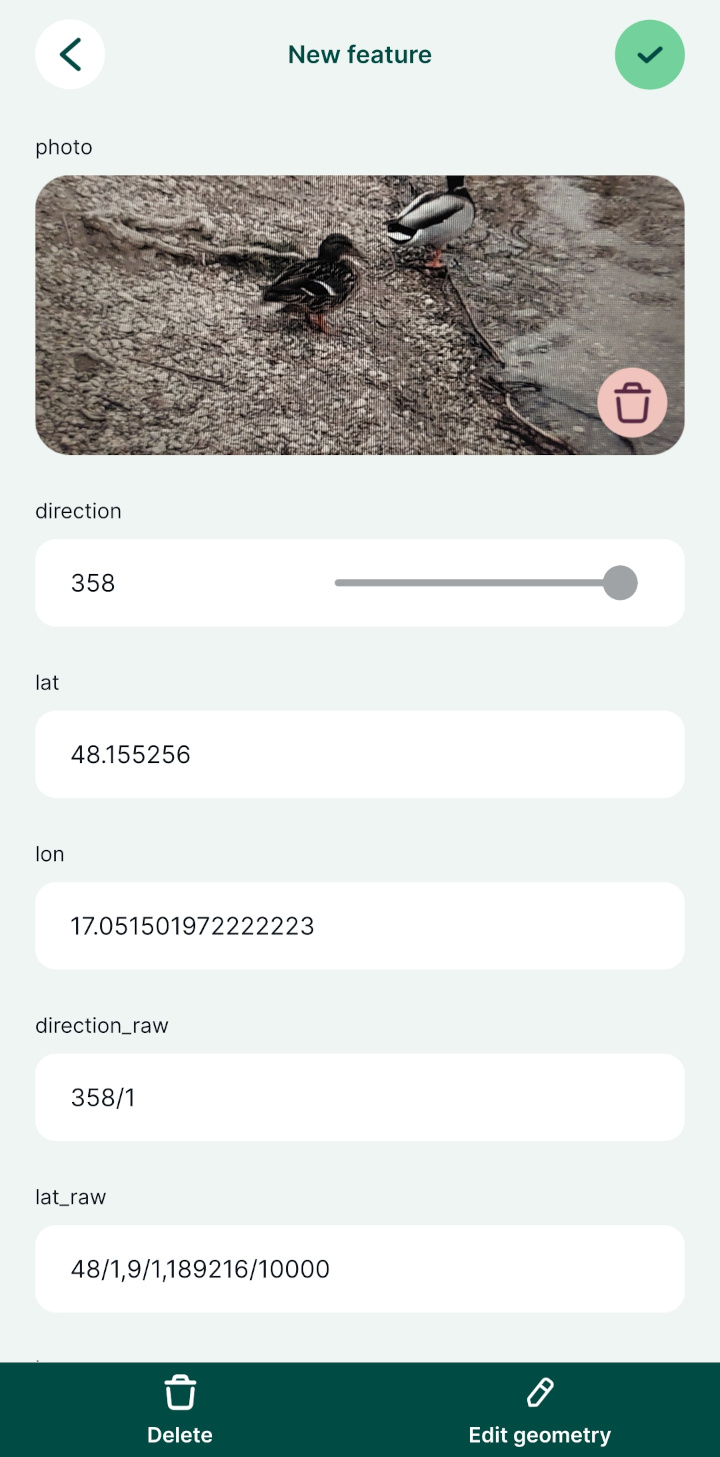
Supported EXIF functions [](https://merginmaps.com/docs/layer/exif/#supported-exif-functions)
-----------------------------------------------------------------------------------------------
EXIF function supported by Mergin Maps mobile app:
* `read_exif_img_direction('')` returns the direction of the image when captured. The direction is represented by a number.
* `read_exif_latitude('')` returns GPS Latitude as a decimal number.
* `read_exif_longitude('')` returns GPS Longitude as a decimal number.
* `read_exif('', '')`, where **EXIF tag string** defines the EXIF property, such as:
* `GPSImgDirection` returns the direction of the image when captured as a rational. The direction is represented by a rational, e.g. 350/1.
* `GPSLatitude` returns GPS Latitude as rationals, e.g. 48/1, 6/1, 309275/10000.
* `GPSLongitude` returns GPS Longitude as rationals, e.g. 17/1, 6/1, 244907/10000.
* `ImageWidth` returns the image width in pixels.
The list of **EXIF tags** can be found in the Android developer documentation for [ExifInterface](https://developer.android.com/reference/android/media/ExifInterface)
or in [ExifTool documentation](https://exiftool.org/TagNames/EXIF.html)
.
Note that some of the tag names listed in [ExifTool documentation](https://exiftool.org/TagNames/EXIF.html)
can differ from the EXIF specification. As an example, while `ImageWidth` tag is valid, `ImageHeight` is not and you have to use `ImageLength` tag name (defined by EXIF specification) when [recording EXIF metadata](https://merginmaps.com/docs/layer/exif/#how-to-use-exif-metadata-in-mergin-maps-mobile-app)
in Mergin Maps mobile app.
Details
EXIF tags that can be retrieved from your images can vary depending on how they were created (e.g. what type of device you used to capture photos). EXIF tags that are recorded in your image can be displayed, e.g., using [ExifTool](https://exiftool.org/)
:
exiftool -n -S
However, keep in mind that the EXIF tag names that you get from ExifTool can differ from EXIF specification. To store EXIF metadata using [Mergin Maps](https://merginmaps.com/)
, you have to use the latter.
---
# Attributes Form Configuration | Mergin Maps
[Skip to content](https://merginmaps.com/docs/layer/form-configuration/#VPContent)
Return to top
Attributes Form Configuration [](https://merginmaps.com/docs/layer/form-configuration/#attributes-form-configuration)
=======================================================================================================================
In addition to setting up [edit widgets](https://merginmaps.com/docs/layer/form-widgets/)
and designing the [form layout](https://merginmaps.com/docs/layer/form-layout/)
, extra configuration can be done to the fields in QGIS to make the data collection easier and more consistent.
Here is a tutorial video on how to configure forms that includes the usage of default values and constraints:
Default values [](https://merginmaps.com/docs/layer/form-configuration/#default-values)
-----------------------------------------------------------------------------------------
Default values can be used to automatically record, e.g, the name of the surveyor, date and time of the survey, latitude and longitude of a feature or to have frequently used values filled in advance (see [QGIS documentation](https://docs.qgis.org/latest/en/docs/user_manual/working_with_vector/vector_properties.html#default-values)
).
Fields with default values can be hidden from the attributes form if they are used to store data that are not expected to be modified manually.
The default value can be a text, number or a QGIS expression. The data format of the field has to match the result of the default value expression you want to use.
In QGIS, default values can be set up in the **Attributes Form** tab in **Layer Properties**. In the **Defaults** tab, you can enter the default value of the selected field (manually or using an expression).
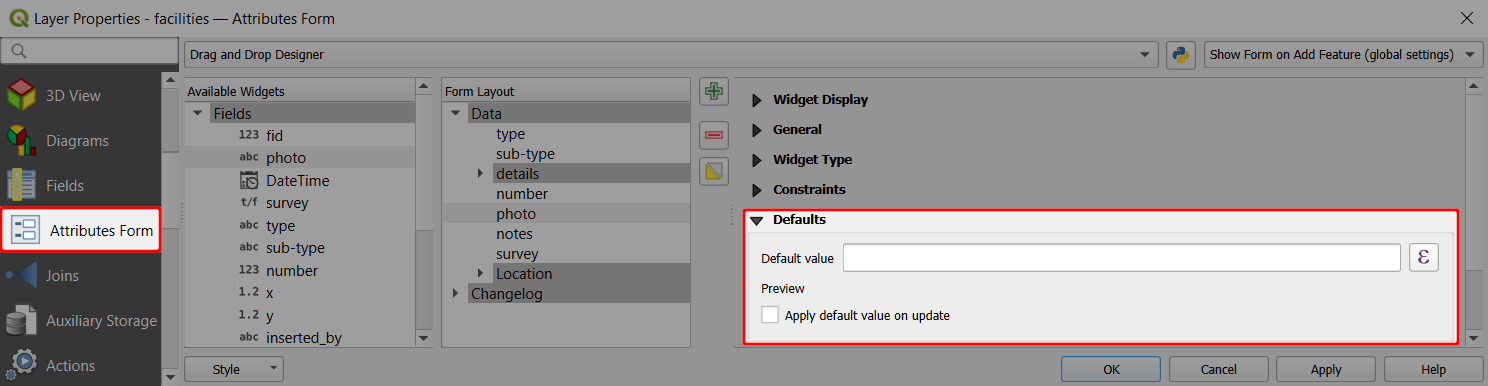
Check the option **Apply default value on update** ✔️ to update the field value after every change of a feature. Note that this means that the value of this field cannot be changed manually in QGIS or in the mobile app as any user input will be overwritten by the default value.
This option is therefore useful for fields that can be recorded automatically without the need of modification, such as parameters derived from geometry (e.g. [coordinates, length, area](https://merginmaps.com/docs/layer/form-configuration/#examples-of-useful-default-values)
) or [usernames, dates, times](https://merginmaps.com/docs/layer/form-configuration/#recording-usernames-dates-and-times-automatically)
.
Example project available
Various usage of default values can be explored in more detail by downloading or cloning this public project [documentation/form\_setup](https://app.merginmaps.com/projects/documentation/form_setup/tree)
.
### Recording usernames, dates and times automatically [](https://merginmaps.com/docs/layer/form-configuration/#recording-usernames-dates-and-times-automatically)
Let's set up an attributes to record the Mergin Maps username of the surveyor who _created_ a feature:
1. Right-click on a layer, select **Properties** and go to the **Attributes form** tab.
2. In the list of **Available Widgets** select the text field you want to use (here: `inserted_by`)
3. In the **Defaults** tab, define the **Default value** as `@mm_username`. Do not check the **Apply default value on update** option ⬜.
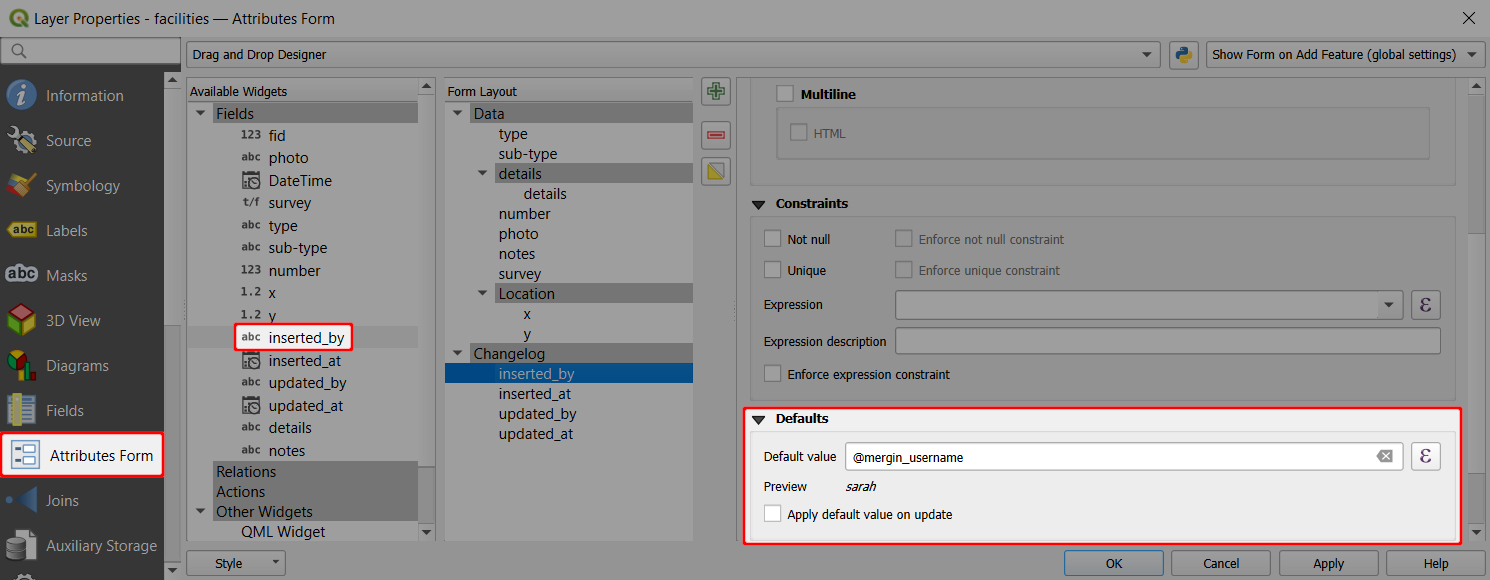
To save the Mergin Maps username of the surveyor who _modified_ this feature, the steps are similar:
1. In the list of **Available Widgets** select the text field you want to use (here: `updated_by`)
2. In the **Defaults** tab, define the **Default value** as `@mm_username`. Check the **Apply default value on update** option ✔️. The field will be updated anytime the feature is modified, saving the name of the surveyor who made the changes.
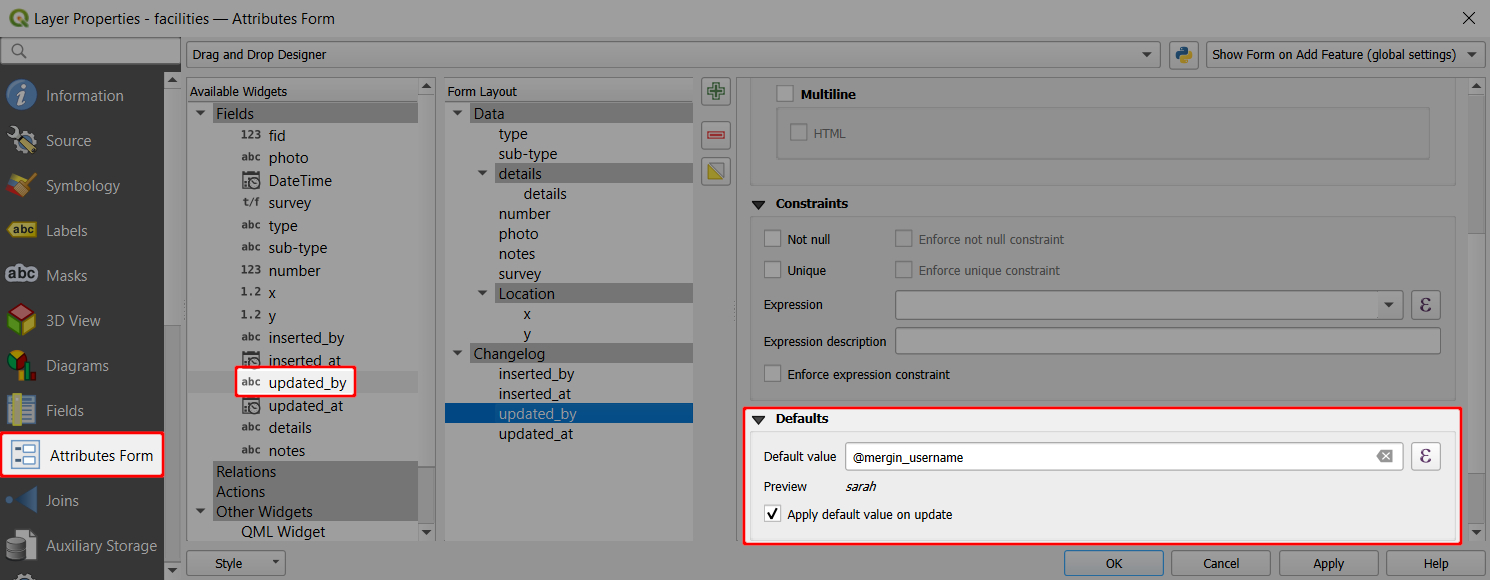
Follow the same steps for attributes to store the timestamps of when the feature was created and updated (here: `inserted_at`, `updated_at`), using the `now()` expression as **Default value**.
When the form is opened in the mobile app, the default values are automatically filled in:
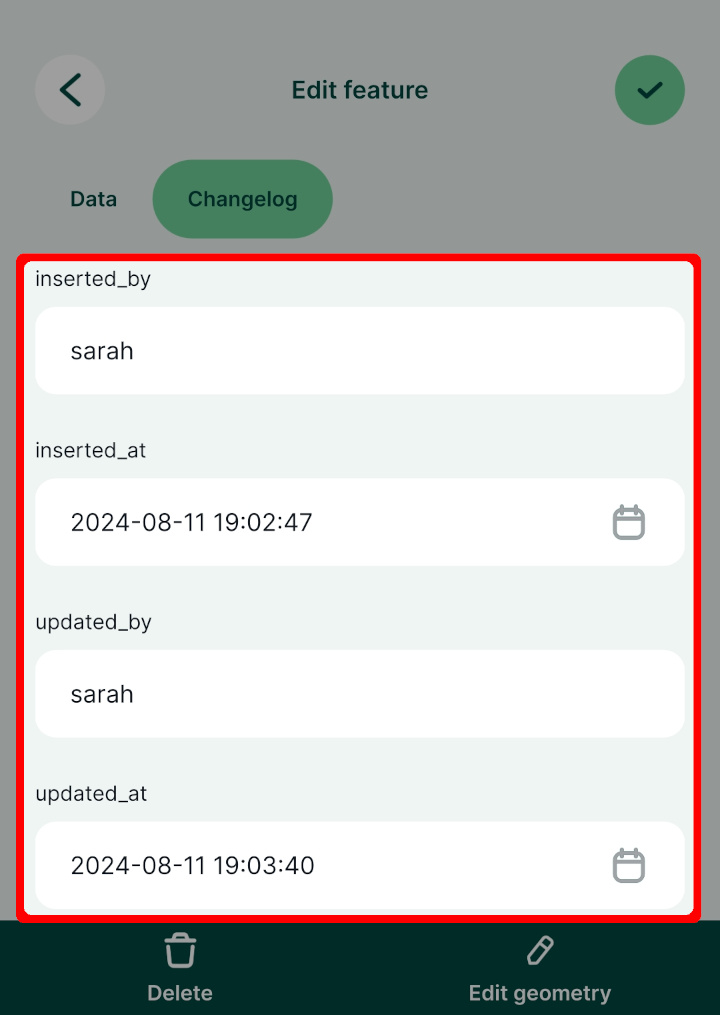
### Automatically transform and record coordinates of a point [](https://merginmaps.com/docs/layer/form-configuration/#automatically-transform-and-record-coordinates-of-a-point)
Here we are going to set the default values for `x` and `y` field to be longitude and latitude.
1. Right-click on the survey layer and select **Properties**
2. In the **Attributes form** tab, select the `x` field in the **Available Widgets** column on the left
3. In the **Widget Display**, set the **Alias** to _Longitude_
4. In **Defaults** tab, define the **Default value** as:
x( transform( $geometry, 'EPSG:3857', 'EPSG:4326'))
Note that the expression transforms the point from EPSG:3857 (map and layer coordinate reference system) to EPSG:4326.
5. Check the **Apply default value on update** option ✔️.
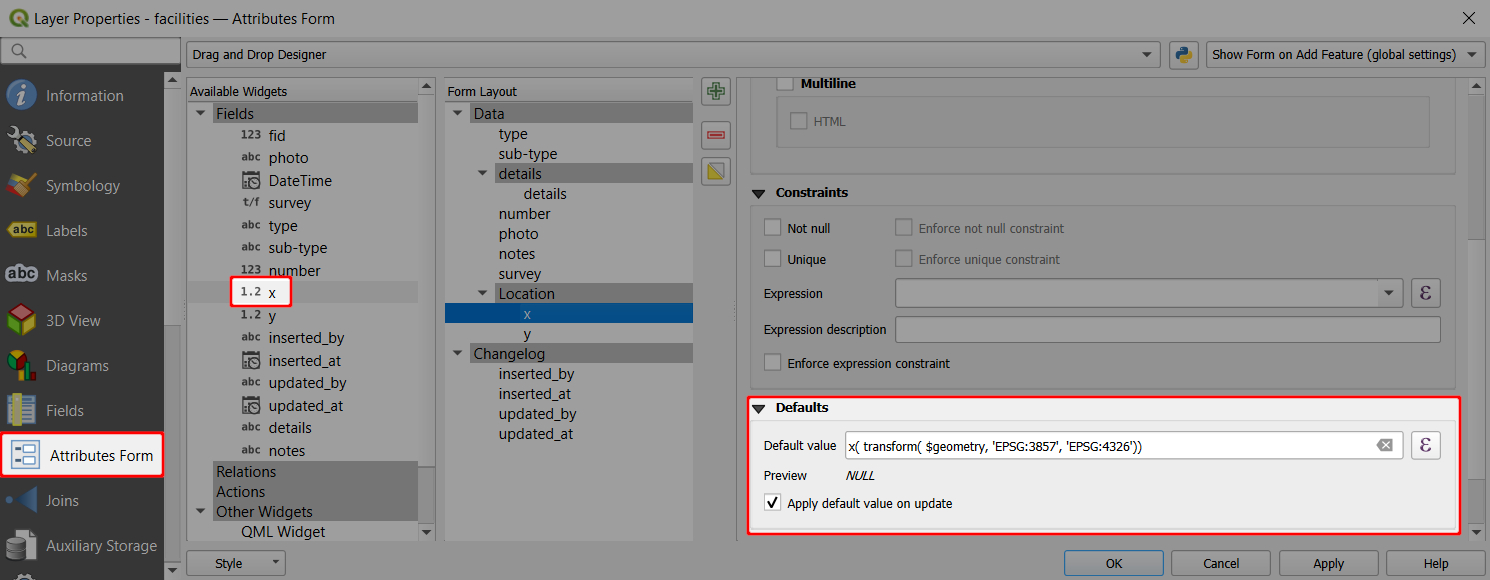
Repeat the same steps for `y` field and setting the **Alias** to _Latitude_ and the default value to
y( transform( $geometry, 'EPSG:3857', 'EPSG:4326'))
Don't forget to save and synchronise your project!
When adding or editing features in the mobile app, the coordinates are automatically filled in:
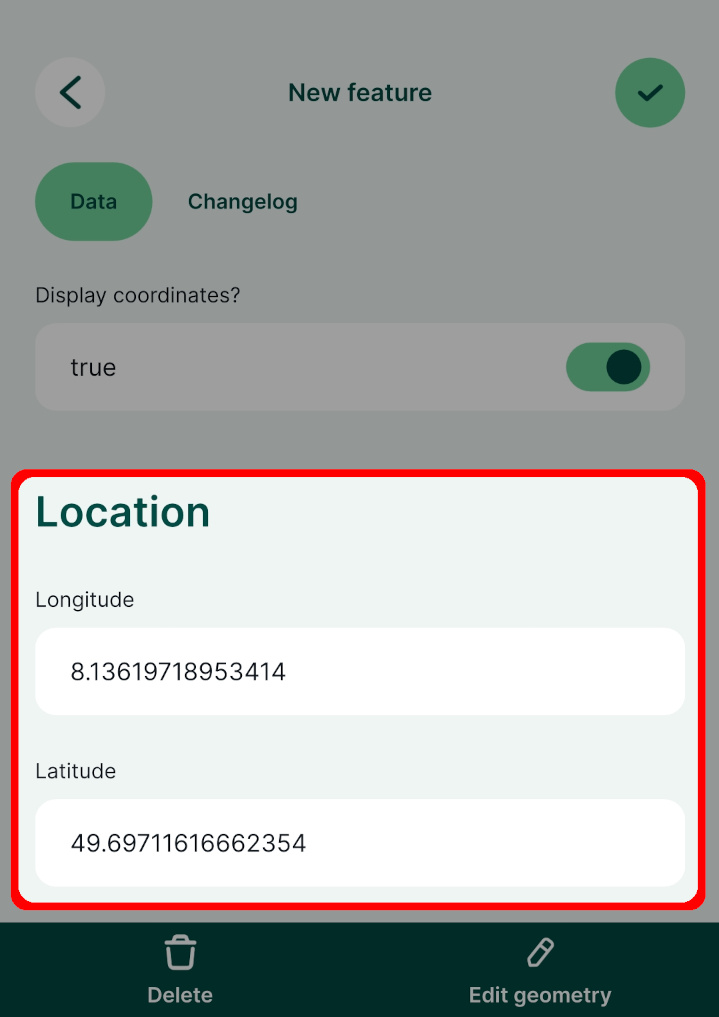
### Examples of useful default values [](https://merginmaps.com/docs/layer/form-configuration/#examples-of-useful-default-values)
There are some commonly used default values that can be useful in your field survey.
* It is convenient to know when a feature was created and when it was last updated. Use fields with **Date** or **Date&Time** data types with the `now()` function to record this information. You can change the formatting using the [Date/Time](https://merginmaps.com/docs/layer/form-widgets/#date-and-time)
widget.
* The name of the Mergin Maps user who created or modified the feature can be recorded using the `@mm_username` variable. These fields should use **Text (string)** data type. There are also other [extra QGIS variables](https://merginmaps.com/docs/layer/position_variables/)
related to your Mergin Maps account or service that can be used as default values.
* The coordinates of a point feature can be recorded as well using the `$x` and `$y` function in QGIS. To record the coordinate accurately, these fields should have the **Decimal number (real)** data type. If the coordinates are in metres, values can be rounded to, say, 2-3 decimal places. When working with geographic coordinates that use degrees, you may want to round the coordinates to 8 decimal places. Use the _apply default value on update_ option so that you have correct values when the position of the point feature changes.
* Parameters such as **length** of a line feature or **area** of a polygon feature can be calculated from the geometry. These fields should have the **Decimal number (real)** or **Integer** data type. Use the _apply default value on update_ option to update the field in case there is a change in the feature.
* [Extra Position Variables](https://merginmaps.com/docs/layer/position_variables/)
can be used to record GPS information from your mobile devices
Here are some examples:
| Variable name | Sample value | Apply default value on update | Description |
| --- | --- | --- | --- |
| `@now` | `2024-06-30 10:00:00` | **no** | The timestamp of when the feature was created. |
| `@now` | `2024-06-30 10:30:00` | **yes** | The timestamp of when the feature was last **updated**. |
| `@mm_username` | `sarah` | **no** | Name of the user who created this feature. |
| `@mm_username` | `jack` | **yes** | Name of the user who **updated** this feature last. |
| `round($x,2)` | `1898789.92` | **yes** | The X coordinate of a point feature, rounded to 2 decimal places. |
| `$length` | `123.45` | **yes** | The length of a line feature. |
| `$area` | `1234.56` | **yes** | The area of a polygon feature. |
| `uuid()` | `{9d0150eb-a36f-40f1-a768-540db8a36f7c}` | **no** | Generates [UUID](https://docs.qgis.org/latest/en/docs/user_manual/expressions/functions_list.html#uuid)
(Universally Unique Identifier). |
### Open local files using default values [](https://merginmaps.com/docs/layer/form-configuration/#open-local-files-using-default-values)
Default values can also be used to open local files (e.g. a PDF file) from within the form. This file needs to be packaged with the project, so it should be stored somewhere in the [project folder](https://merginmaps.com/docs/manage/project/#mergin-maps-project-folder)
.
There is a public project [documentation/forms-display-images-and-files](https://app.merginmaps.com/projects/documentation/forms-display-images-and-files/tree)
you can download or clone to see how the setup works.
* A PDF file named `my-pdf.pdf` is stored in the main project folder.
* The survey layer has a field named `local-file-default-value` with **Text (string)** data type.
* This field is set to _not editable_ (the form will refer to the same file for all features and does not need to be changed).
* This field uses the **Text Edit** widget with the _Multiline_ and _HTML_ options enabled.
* The **default value** is set to:
'Open File'
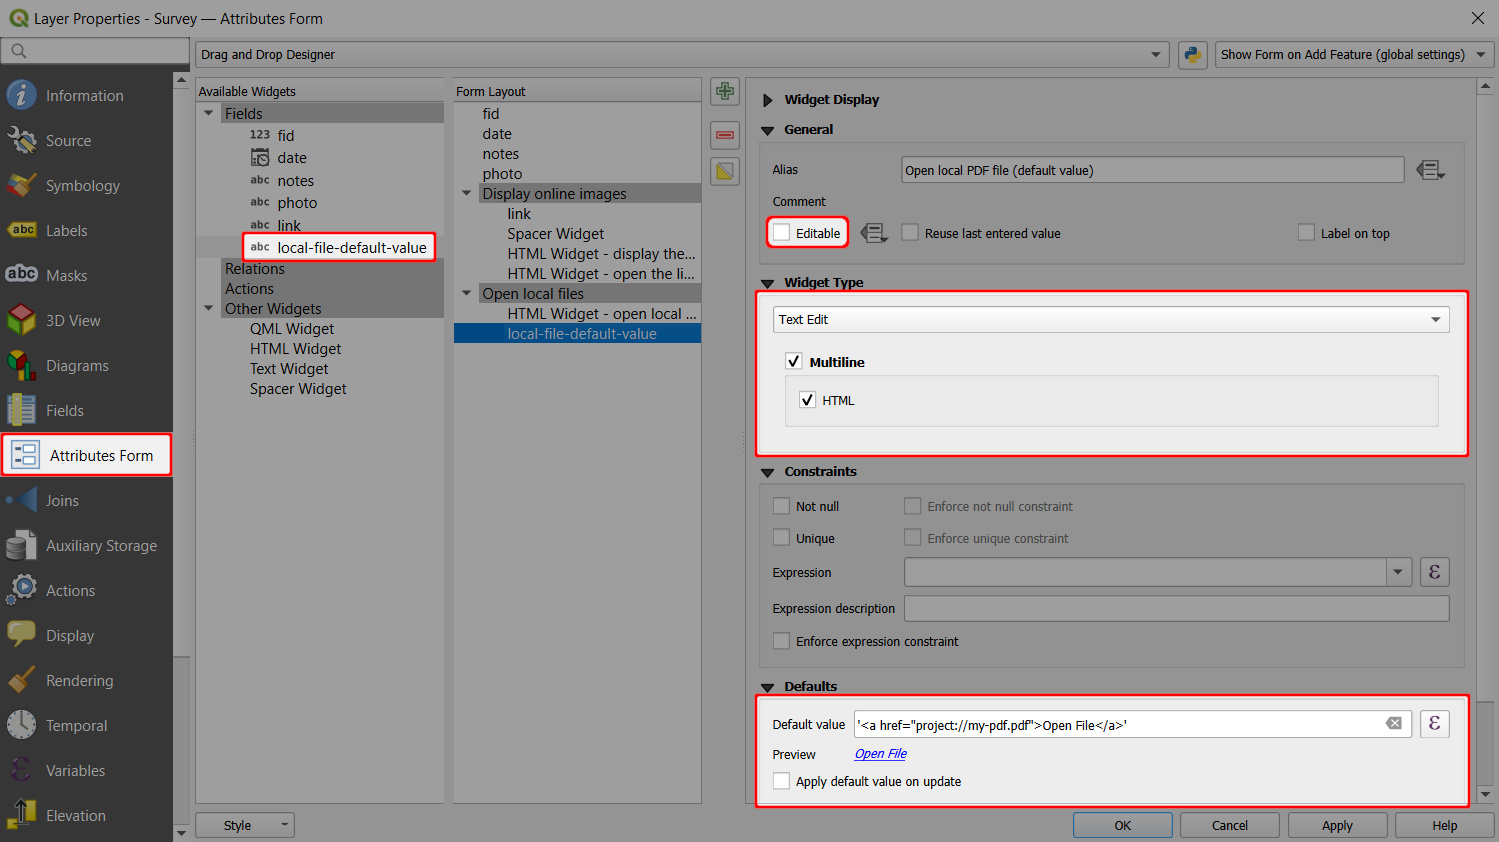
In the mobile app, you can tap the _Open File_ link to open the PDF file using the default application of your device.
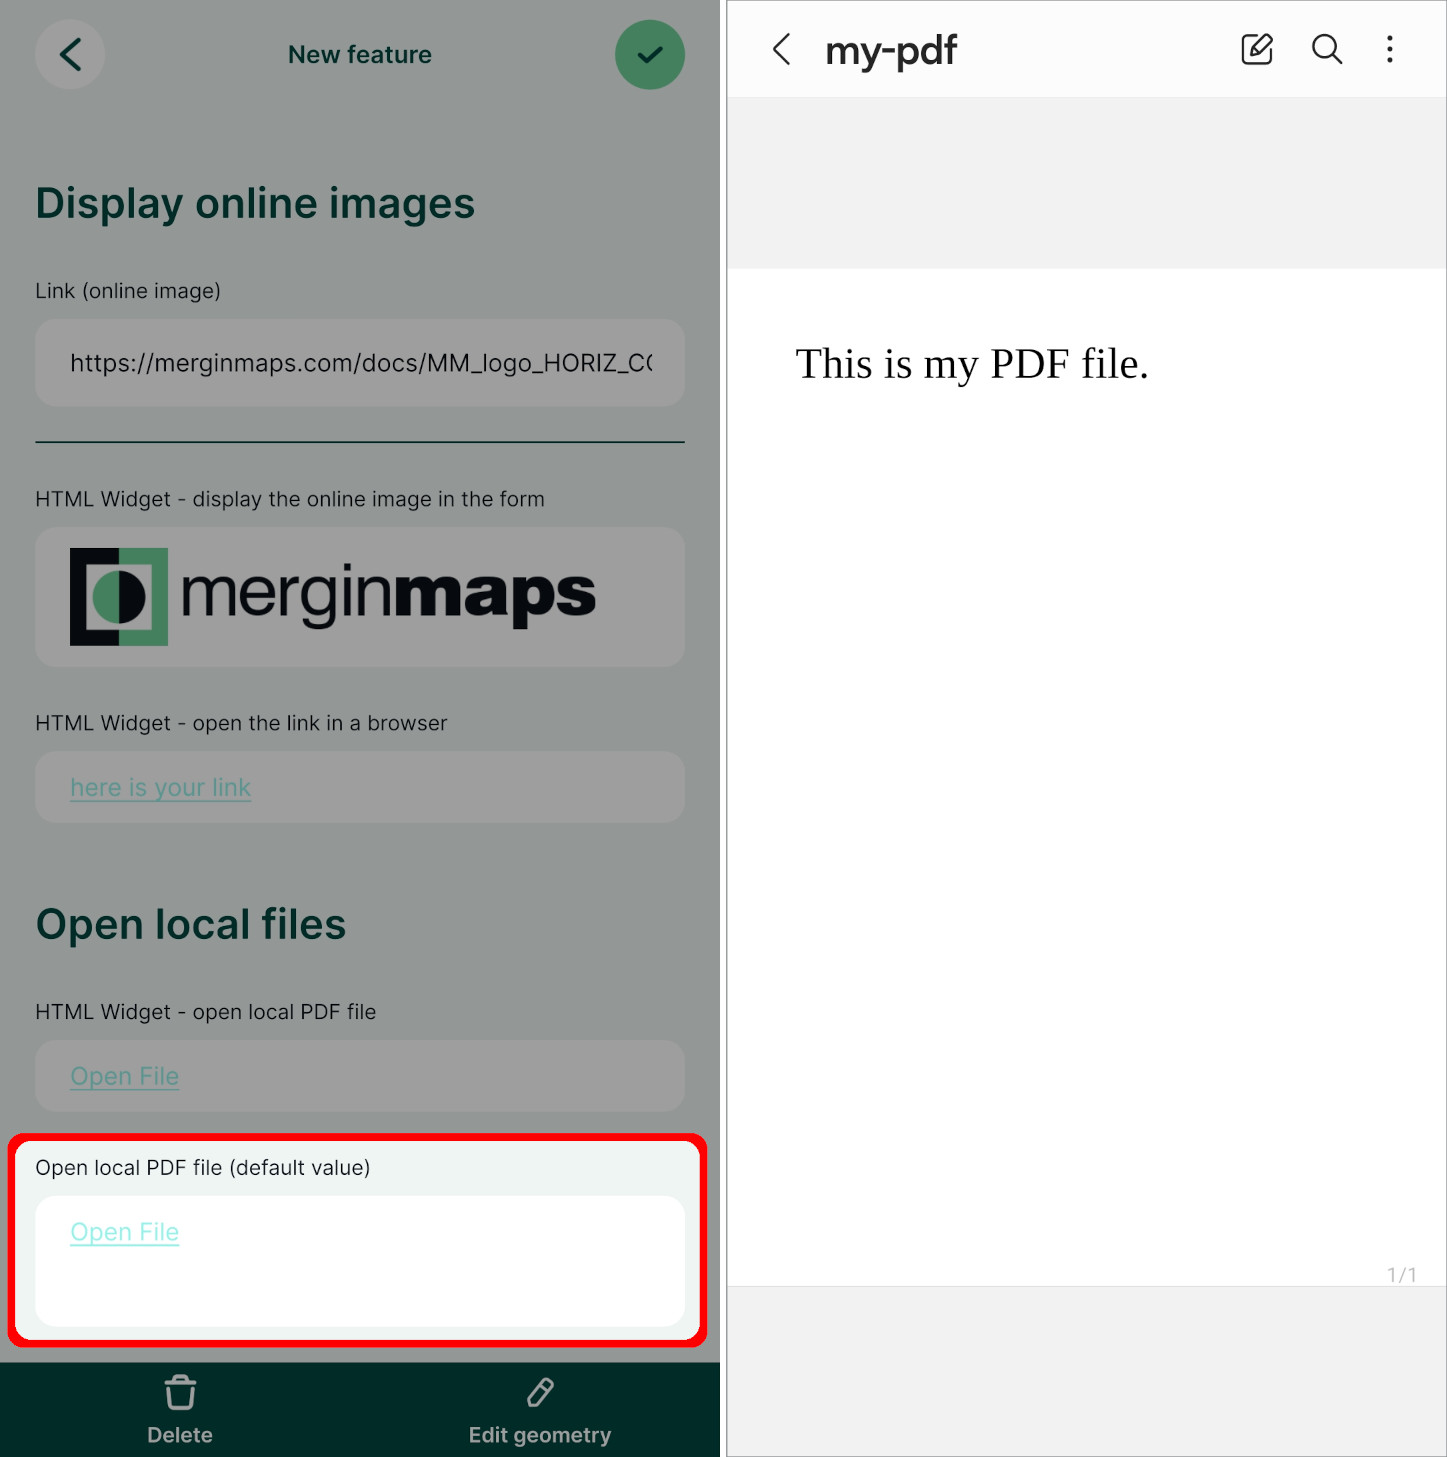
Open local files using the HTML widget
Local files can be displayed in the form also using [the HTML widget](https://merginmaps.com/docs/layer/form-layout/#using-html-widget-to-open-local-files)
.
In the [documentation/forms-display-images-and-files](https://app.merginmaps.com/projects/documentation/forms-display-images-and-files/tree)
project, you can explore and compare both alternatives.
Constraints [](https://merginmaps.com/docs/layer/form-configuration/#constraints)
-----------------------------------------------------------------------------------
Constraints help to avoid mistakes when filling in the values or to highlight mandatory fields. Fields with constraints have a warning displayed next to them in the form.
There are multiple options of setting up constraints in [QGIS](https://docs.qgis.org/latest/en/docs/user_manual/working_with_vector/vector_properties.html#constraints)
, such as _Not null_ (the field has to be filled in), _Unique_ (the field has to have a unique value), or using a custom _expression_.
Check the **enforce constraint** option ✔️ to use a hard constraint, meaning that the feature cannot be saved if the constraints are not met.
### Using hard and soft constraints in the form [](https://merginmaps.com/docs/layer/form-configuration/#using-hard-and-soft-constraints-in-the-form)
Example project available
Constraints are used in this project [documentation/form\_setup](https://app.merginmaps.com/projects/documentation/form_setup/tree)
. Clone or download it to try it to see how it works.
Here, we will first set up a constraint to a field that represents the facility capacity. The value has to be a number that is higher than 0. This will be a _hard_ constraint: if the value is not higher than 0, the feature cannot be saved.
1. Right-click on a survey layer and select **Properties**
2. In the **Attributes form** tab, select a numeric field in the **Available Widgets** column that you want to use (here: `number`)
3. In the **Constraints** tab:
* Use the following **Expression**: `"number" >= 1`
* Check the **Enforce expression constraint** option ✔️
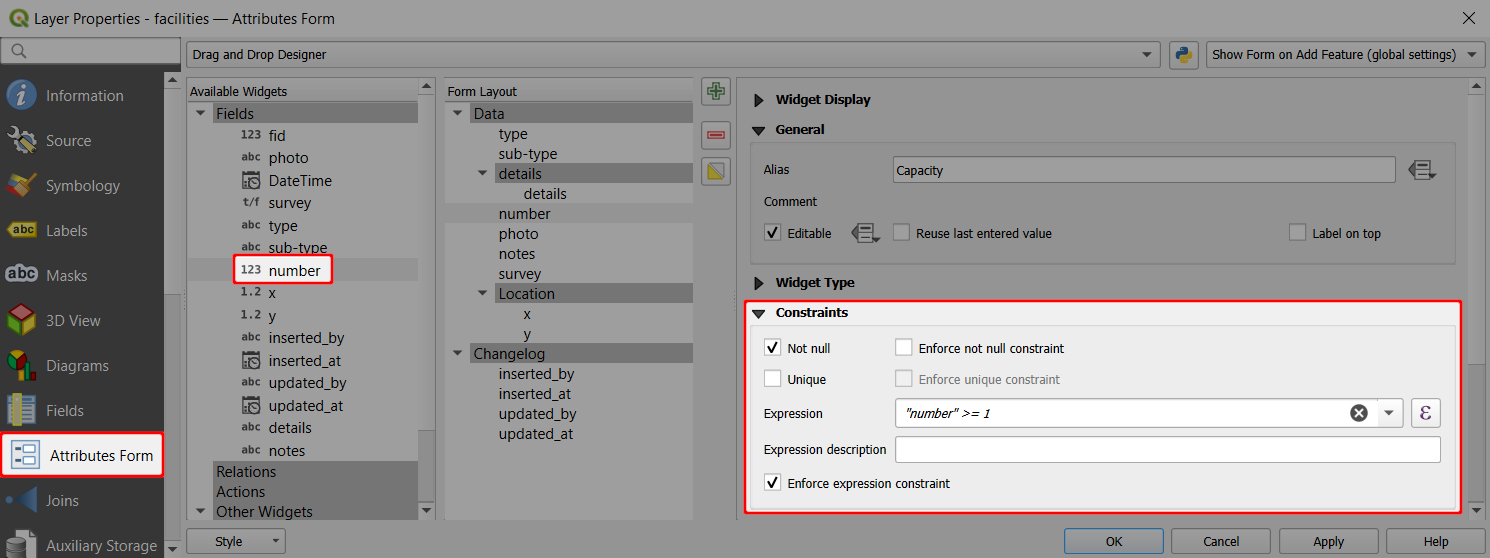
Now we will set up a _soft_ constraint to a photo field. A photo should be taken during the survey, but the feature can be saved without one.
1. In the **Attributes form** tab, select a photo field in the **Available Widgets** column (here: `photo`)
2. In the **Constraints** tab:
* Check the **Not null** constraint ✔️
In the mobile app, you will be unable to save a feature unless the field value meets the _enforced_ constraint (here: `Capacity`). If the constraint is _not enforced_ (here: `photo`), there will be a warning, but the feature can be saved regardless.
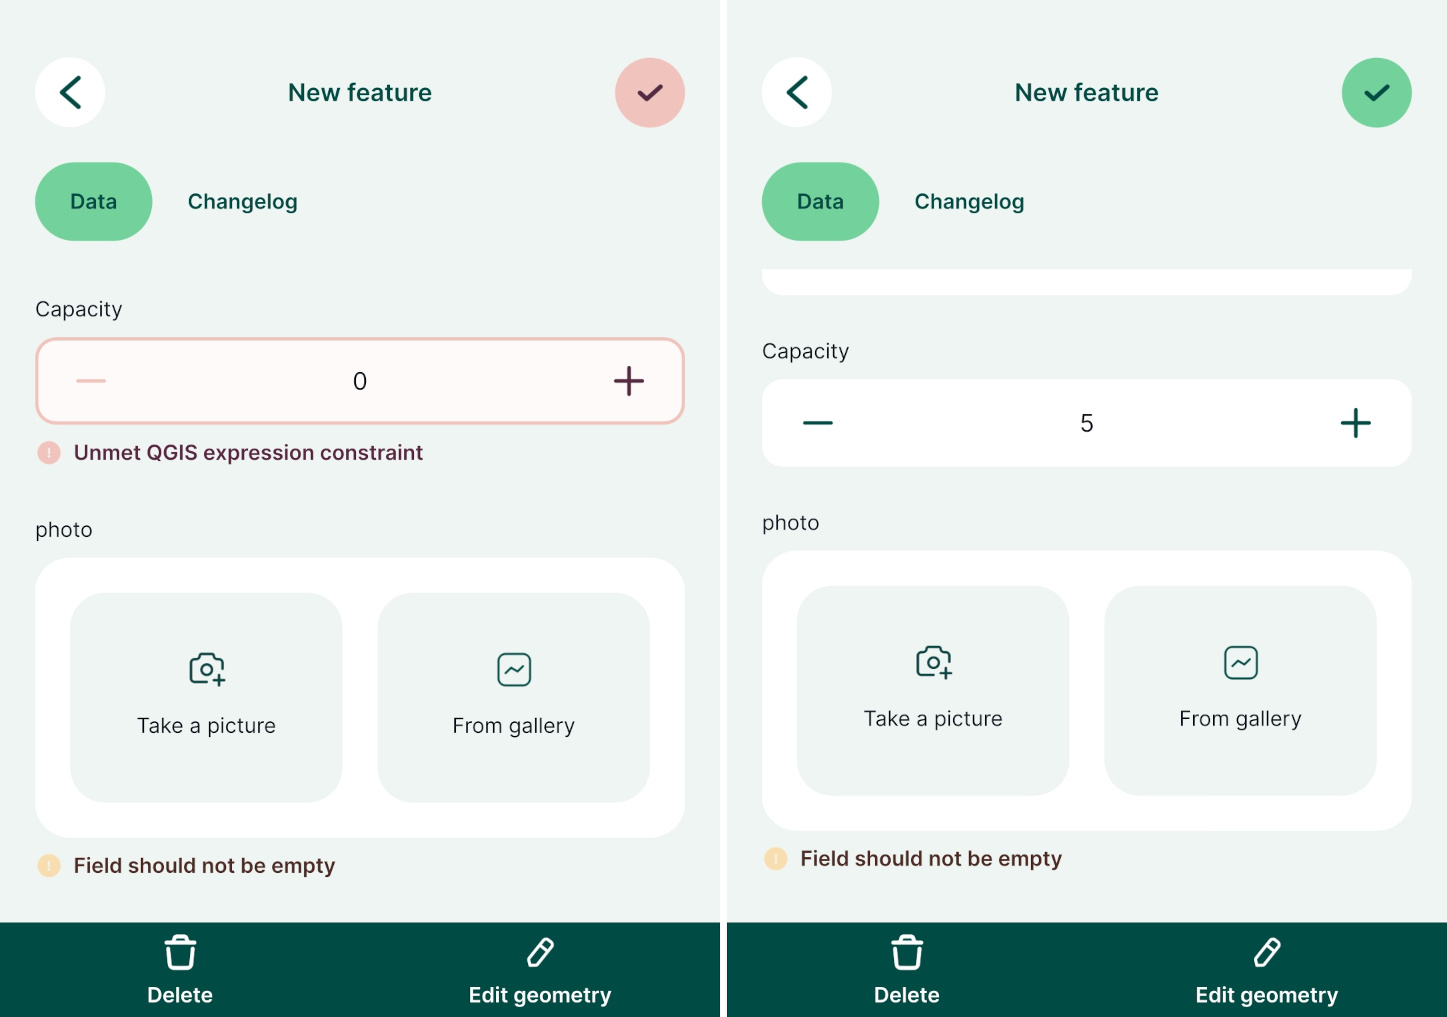
Drill-down forms [](https://merginmaps.com/docs/layer/form-configuration/#drill-down-forms)
---------------------------------------------------------------------------------------------
Drill-down or cascade forms enable to list values in a field depending on a value selected in another field.
Example project available
Clone [documentation/form\_setup](https://app.merginmaps.com/projects/documentation/form_setup/tree)
to explore drill-down forms.
Here, we have a layer named `landuse` that has fields such as _Land use_, _Type_, _Plant type_. Values that can be filled in these fields depend on the previous choices: if we select `Farmland` as the _Land use_, the _Type_ field drop-down menu offers options such as `Cereals`, `Oil plants` or `Vegetables`. Subsequently, the _Plant type_ field has only options that are relevant for the selected type of land use.
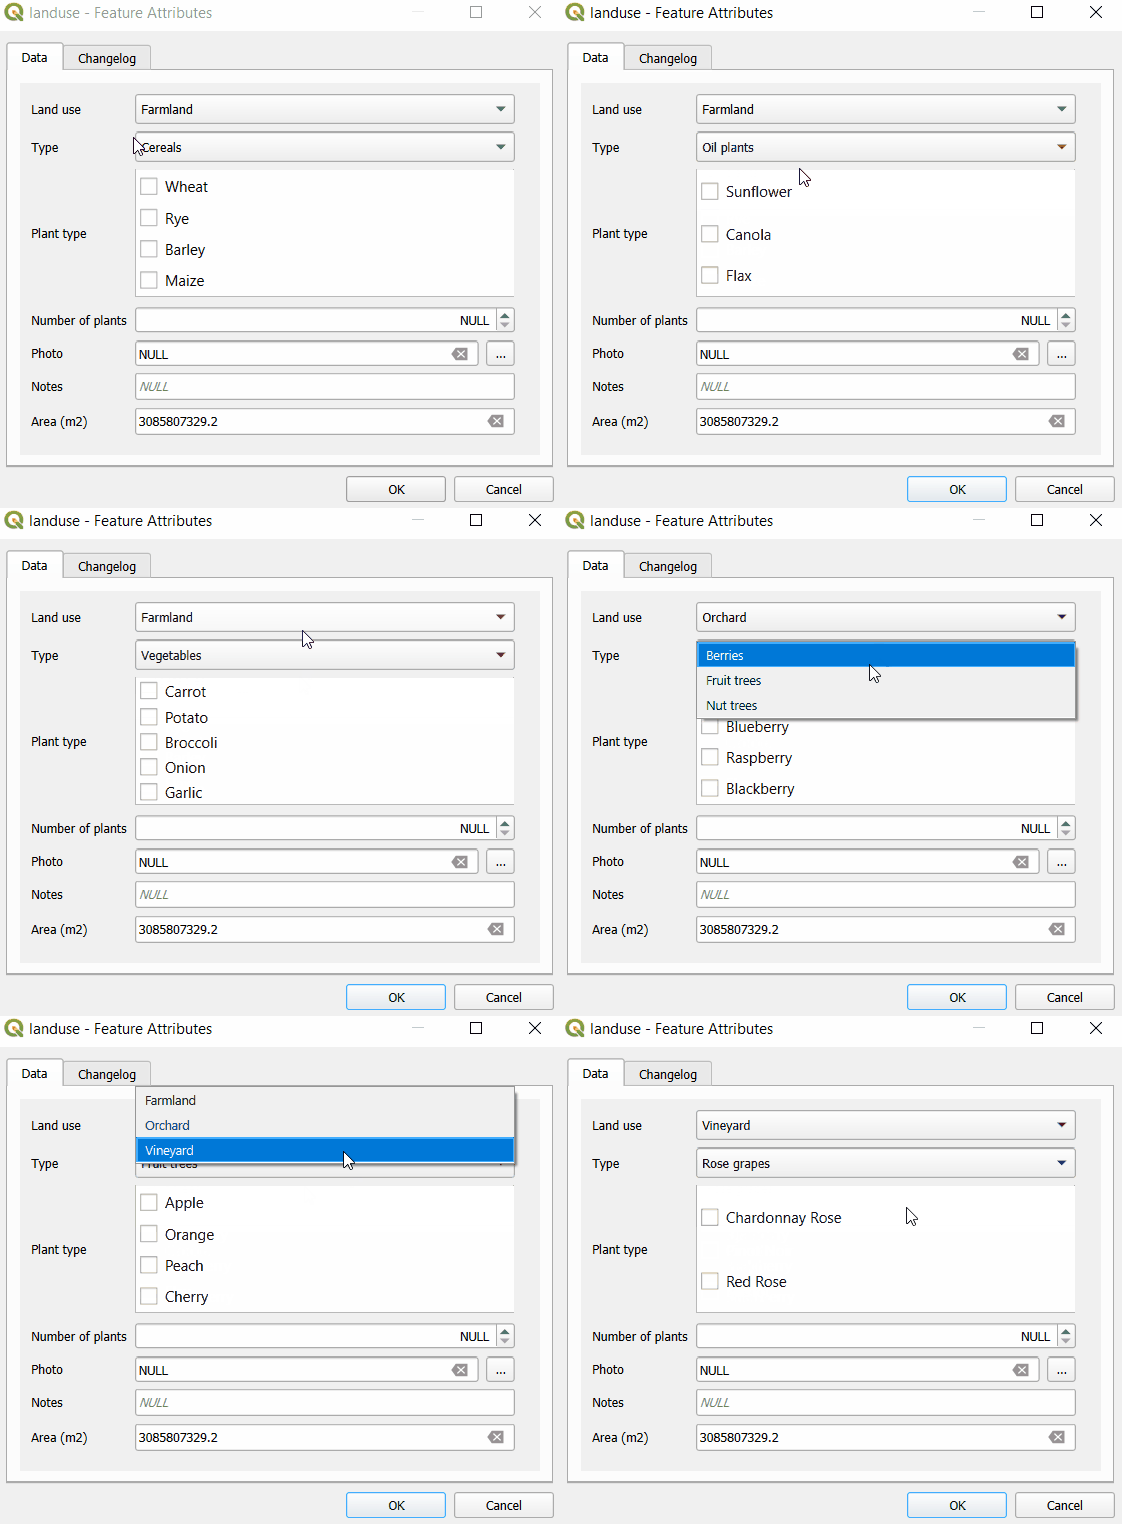
At first, let us explore the structure of value tables that are used to set up drill-down forms. In the example project, _Land use_ field uses `plant-habitat` value table that has following fields:
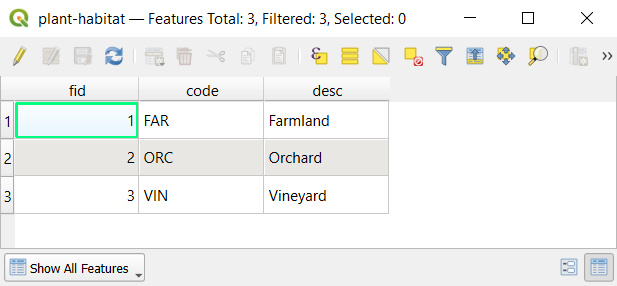
The _Type_ field refers to the `plant-type` value table. In this table, there is a field `habitat-code` that refers to a specific `code` value from the `plant-habitat` table. For instance, the `FAR` habitat code (standing for _Farmland_) is used as the `habitat-code` for _Cereals, Vegetables, Oil plants_ as these are applicable farmland types.
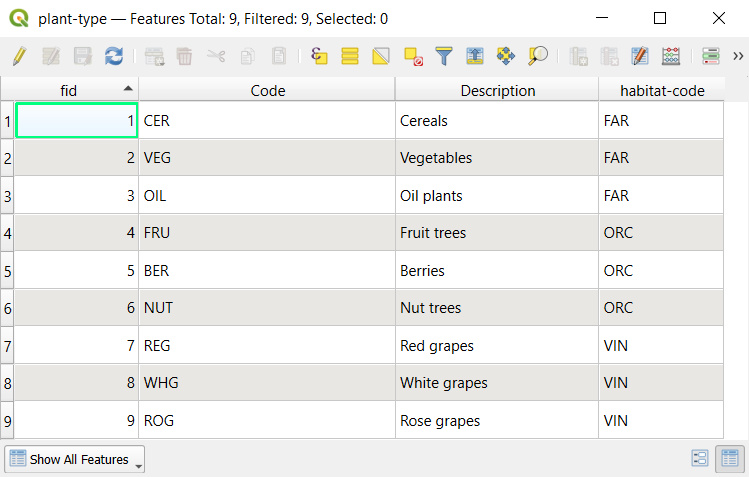
Similarly, the _Plant type_ field uses the `plant-sub-type` value table that contains a `Code` field that refers to specific types from the `plant-type` table. For instance, the `CER` type code is applied for _Wheat, Rye, Barley, Maize_, meaning these types of plants belong to the _Cereals_ category.
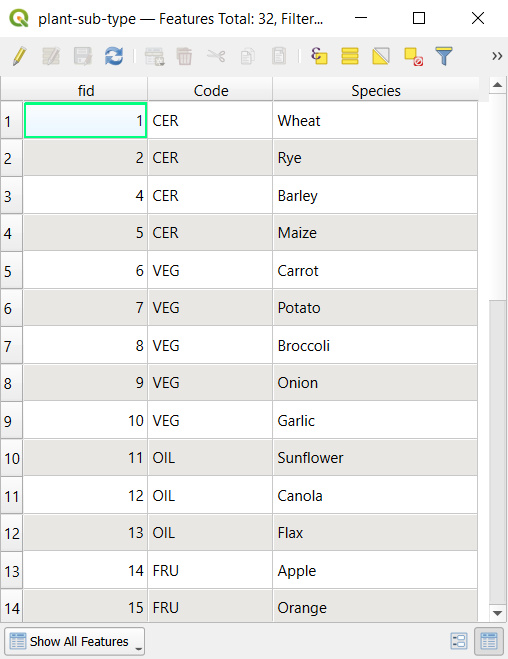
To set up drill-down forms:
1. Right-click on a survey layer, select **Properties** and go to the **Attributes form** tab
2. The `habitat` field aliased as _Land use_ is set up using the **Value relation** widget. Values are defined in the `plant-habitat` table:
* **Key column** is the field that contains the values (here: `code`)
* **Value column** is the field that contains the alias (description) of the value (here: `desc`)
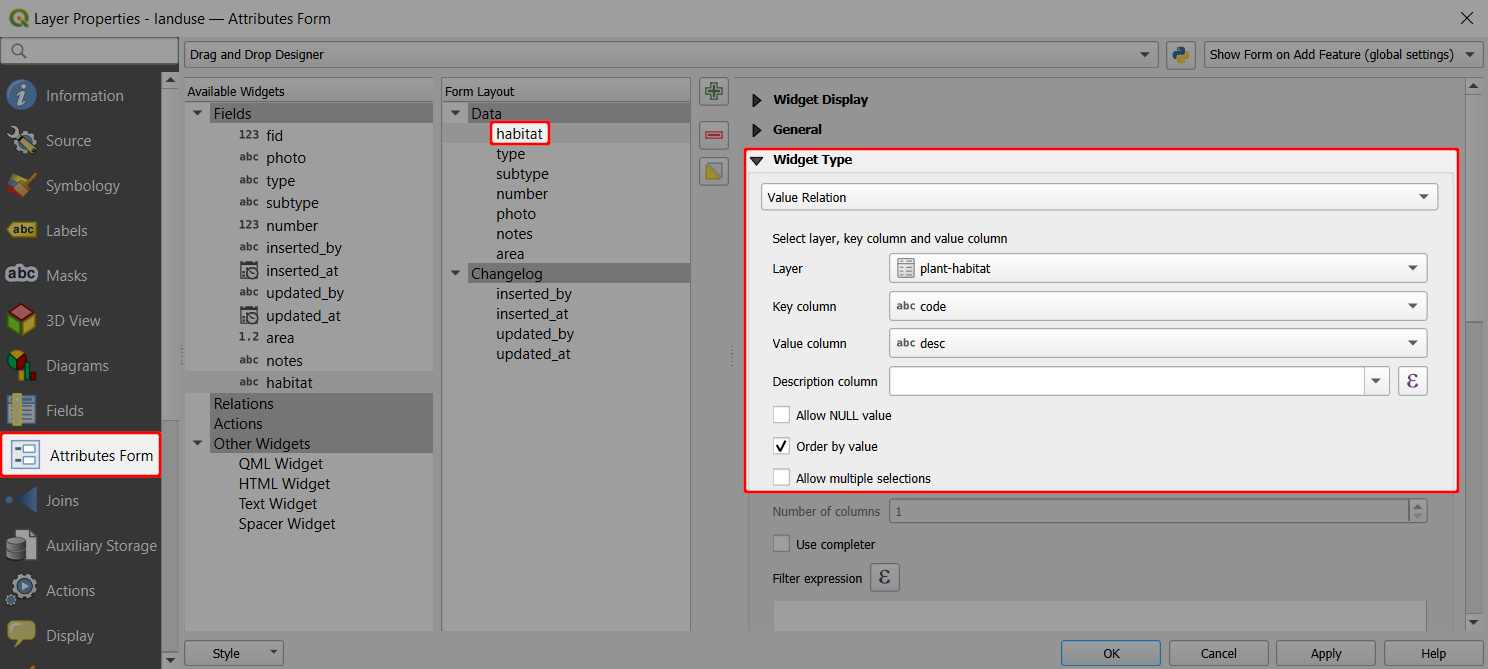
3. The `type` field (aliased as _Type_) uses the **Value relation** widget with values from the `plant-type` table:
* **Key column** is the field that contains the values (here: `Code`)
* **Value column** is the field that contains the alias (description) of the value (here: `Description`)
* **Filter expression**: `"habitat-code"= current_value('habitat')` is used to limit the options in the drop-down menu to values where the `habitat-code` of the value is the same as the current value of the `habitat` field. 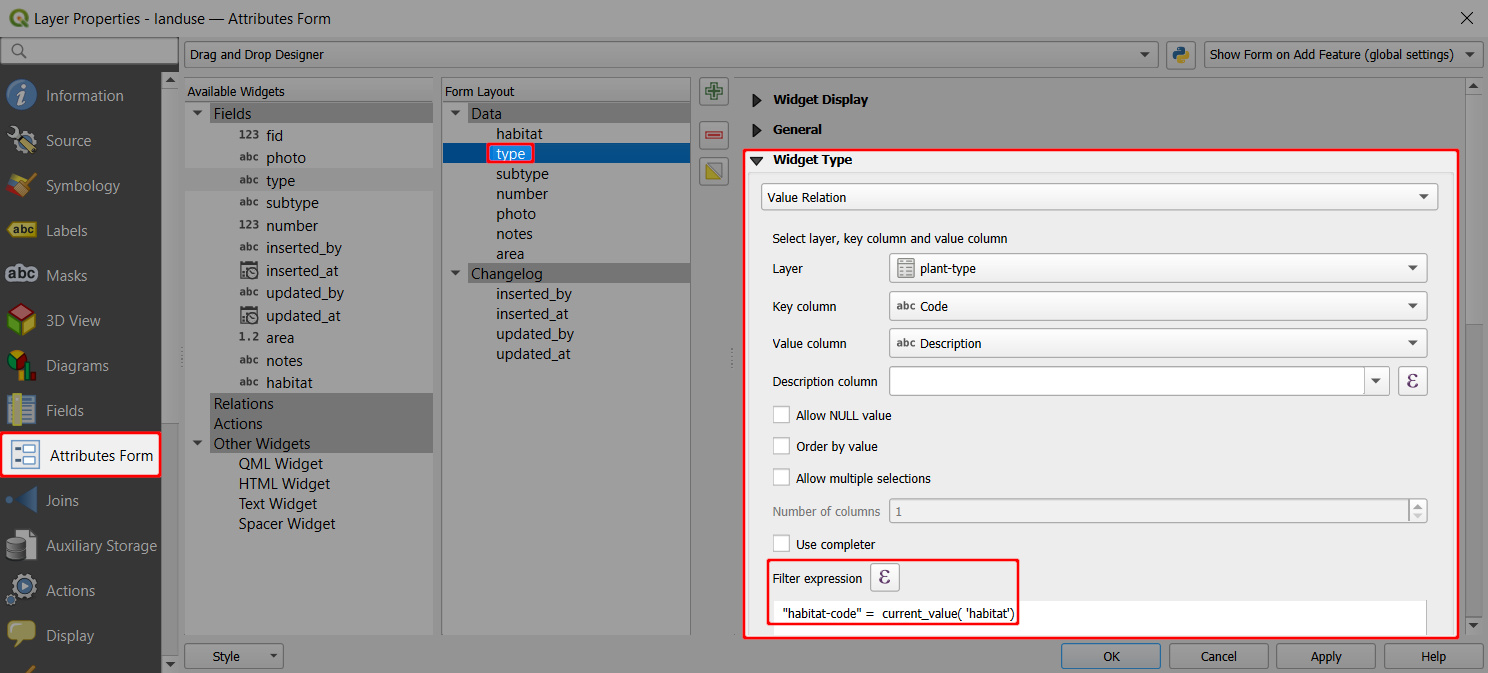
4. Likewise, the `subtype` field (aliased as _Plant type_) uses the **Value relation** widget with values defined in the `plant-sub-type` table:
* **Key column** is the field that contains the values (here: `id`)
* **Value column** is the field that contains the alias (description) of the value (here: `Species`)
* **Filter expression**: `"Code" = current_value('type')`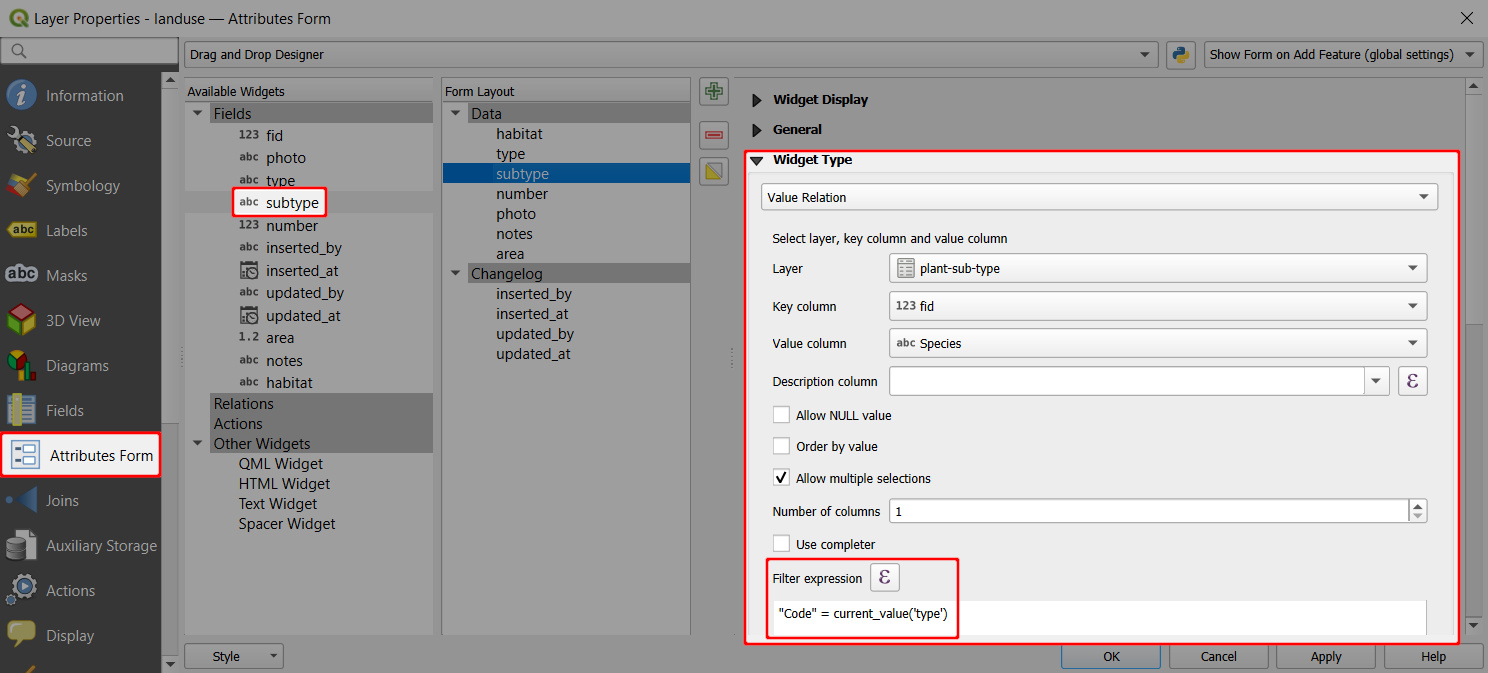
And this is how the drill-down form looks in the mobile app. After selecting _Land use: Farmland_, the _Type_ field only offers values `Cereals`, `Oil plants` or `Vegetables`. After selecting `Cereals`, the _Plant type_ offers only relevant options such as `Wheat`, `Rye` or `Barley`.
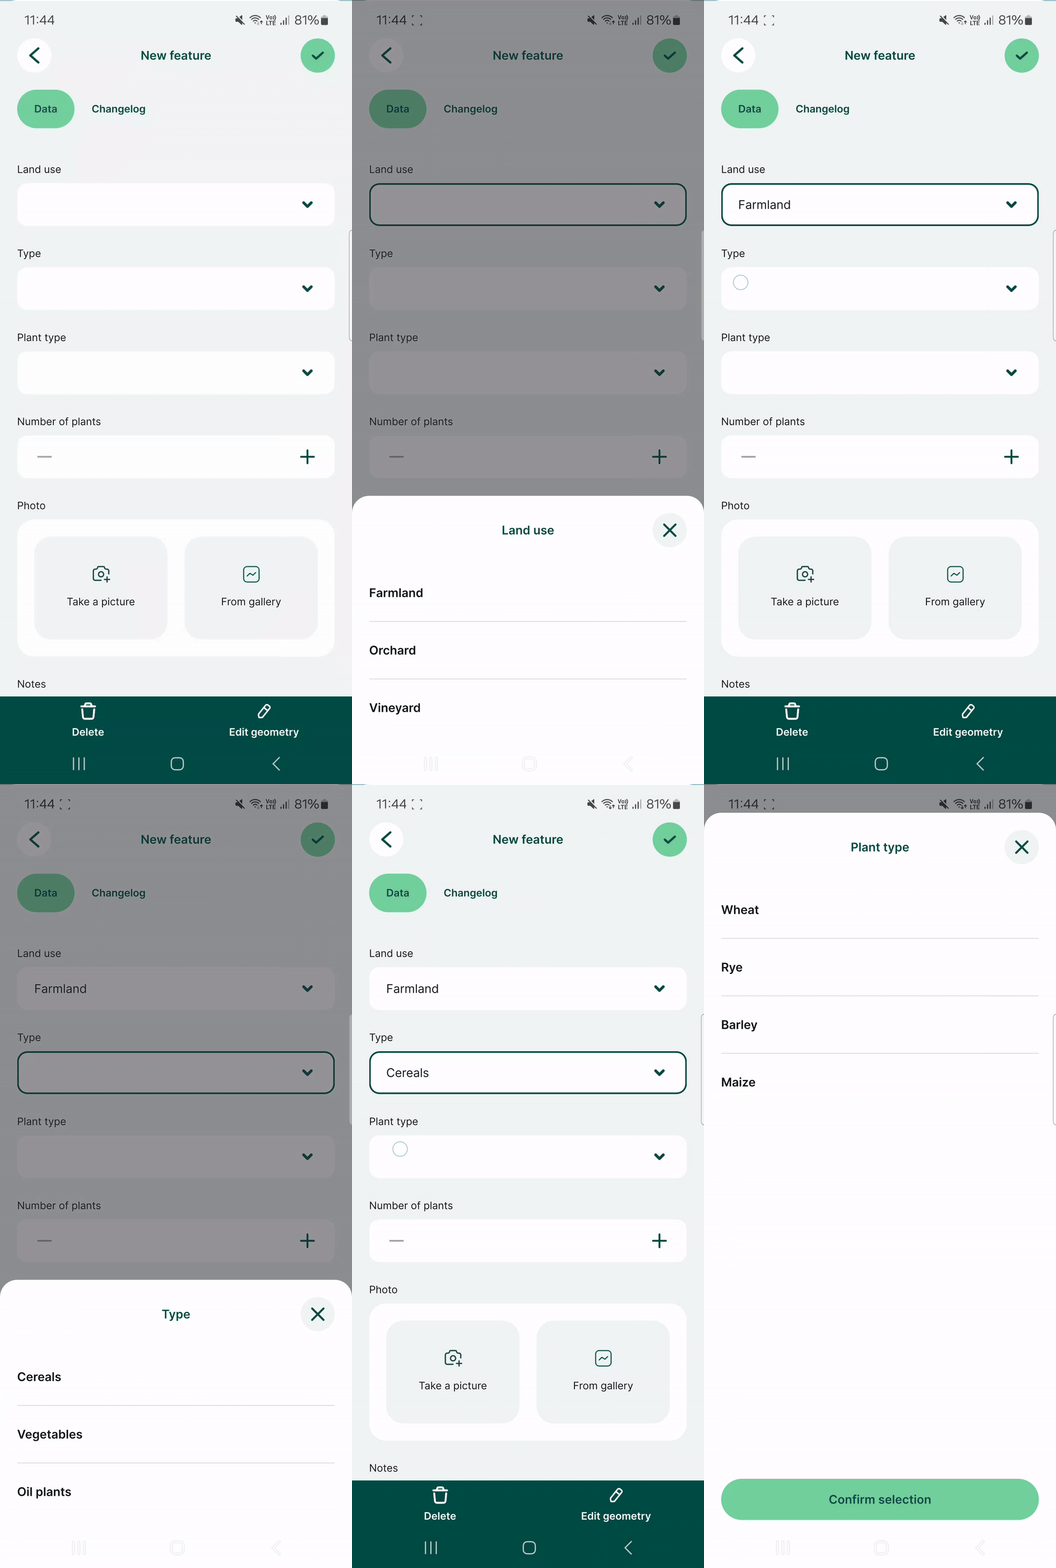
---
# How to Use Hyperlinks | Mergin Maps
[Skip to content](https://merginmaps.com/docs/layer/external-link/#VPContent)
Return to top
How to Use Hyperlinks [](https://merginmaps.com/docs/layer/external-link/#how-to-use-hyperlinks)
==================================================================================================
Open link in a browser [](https://merginmaps.com/docs/layer/external-link/#open-link-in-a-browser)
----------------------------------------------------------------------------------------------------
1. Right-click on a layer, select **Properties** and go to the **Attributes form** tab.
2. In the list of **Available Widgets** select the field you want to work with.
3. In the **Widget Type** tab:
* Ensure that **Text Edit** is selected
* Check the **Multiline** and **HTML** options
4. In the **Defaults** tab, use a string such as this as **Default value**: `'Open link'`Details
The default value defines the hyperlink and how it will be displayed in the form using HTML: `display text` Individual links can be generated for each feature based on a value from another field. Let's say there is a field called **name** with a sample value _my-page_: `'Open link'` will result in _www.web-page.com/my-page_.
5. If the link changes based on a value from a different field, check the **Apply default value on update** option.
6. **Apply** the changes. Don't forget to save and sync your project!
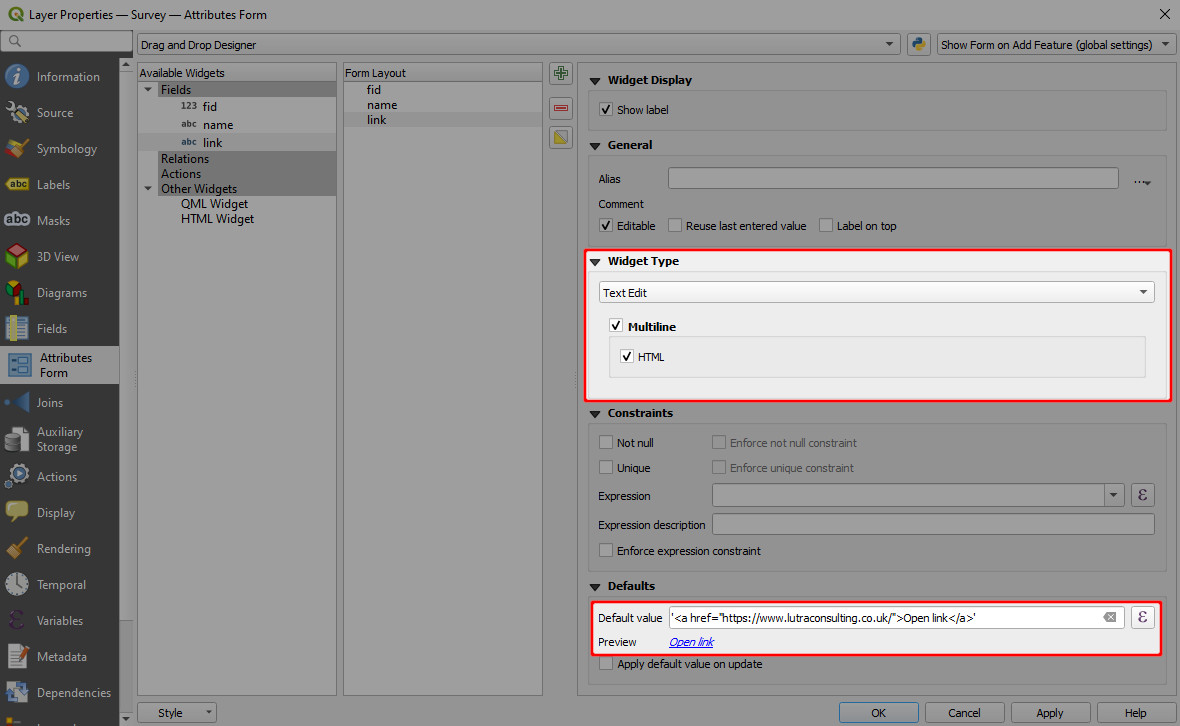
When you click on a feature in Mergin Maps mobile app, the form will contain a clickable link. 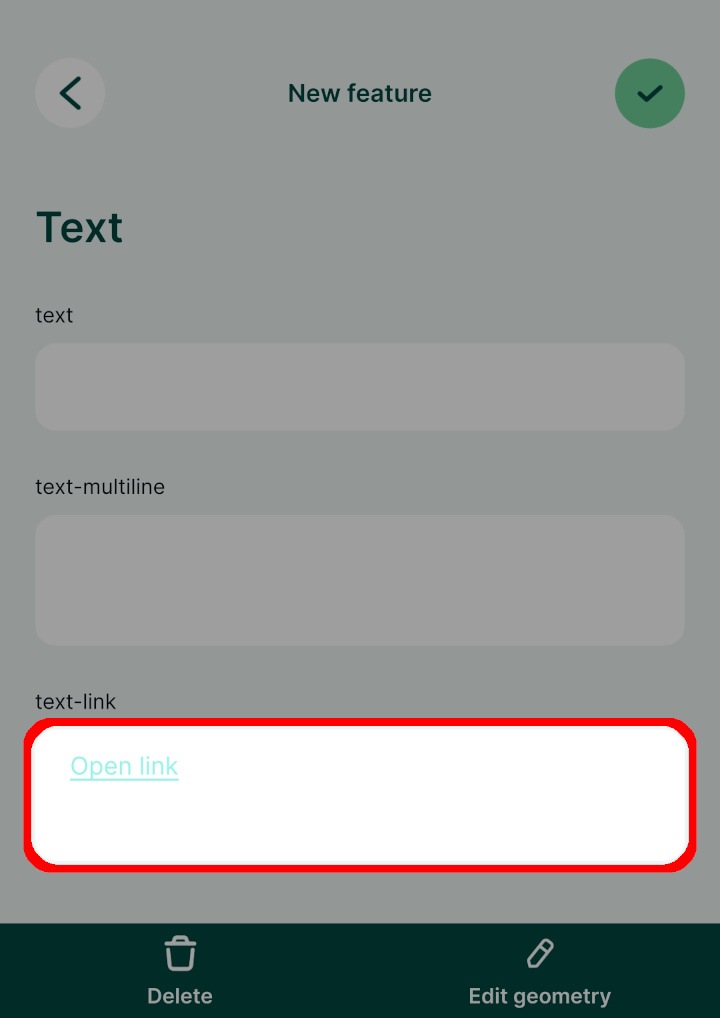
Open link to a navigation app [](https://merginmaps.com/docs/layer/external-link/#open-link-to-a-navigation-app)
------------------------------------------------------------------------------------------------------------------
TIP
Clone [documentation/forms-navigation-link](https://app.merginmaps.com/projects/documentation/forms-navigation-link/tree)
to follow this example!
Let's say you want to find your surveyed features on Google Maps. It is possible to do so directly from Mergin Maps mobile app, you just need to set up a **text field** that will open Google Maps and enter the coordinates of the feature to the Google Maps search bar.
1. Right-click on a layer, select **Properties** and go to the **Attributes form** tab.
2. In the list of **Available Widgets** select the field you want to work with.
3. In the **Widget Display** tab:
* Ensure that **Text Edit** is selected
* Check the **Multiline** and **HTML** options
4. In the **Defaults** tab, use this string as **Default value**: `'Open Google Map'`
5. Check the **Apply default value on update** option
6. **Apply** the changes. Don't forget to save and sync your project!
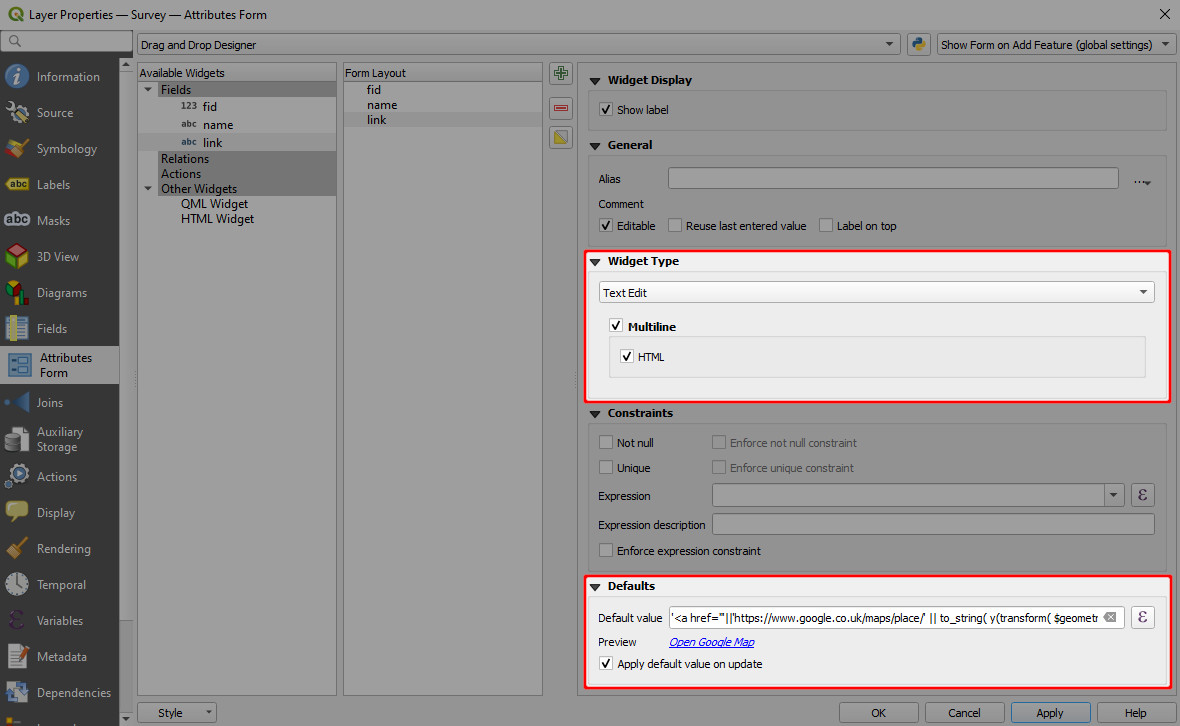
When you tap a feature in the mobile app, the form will display a clickable link **Open Google Map** that opens the Google Map app at the position of the feature.
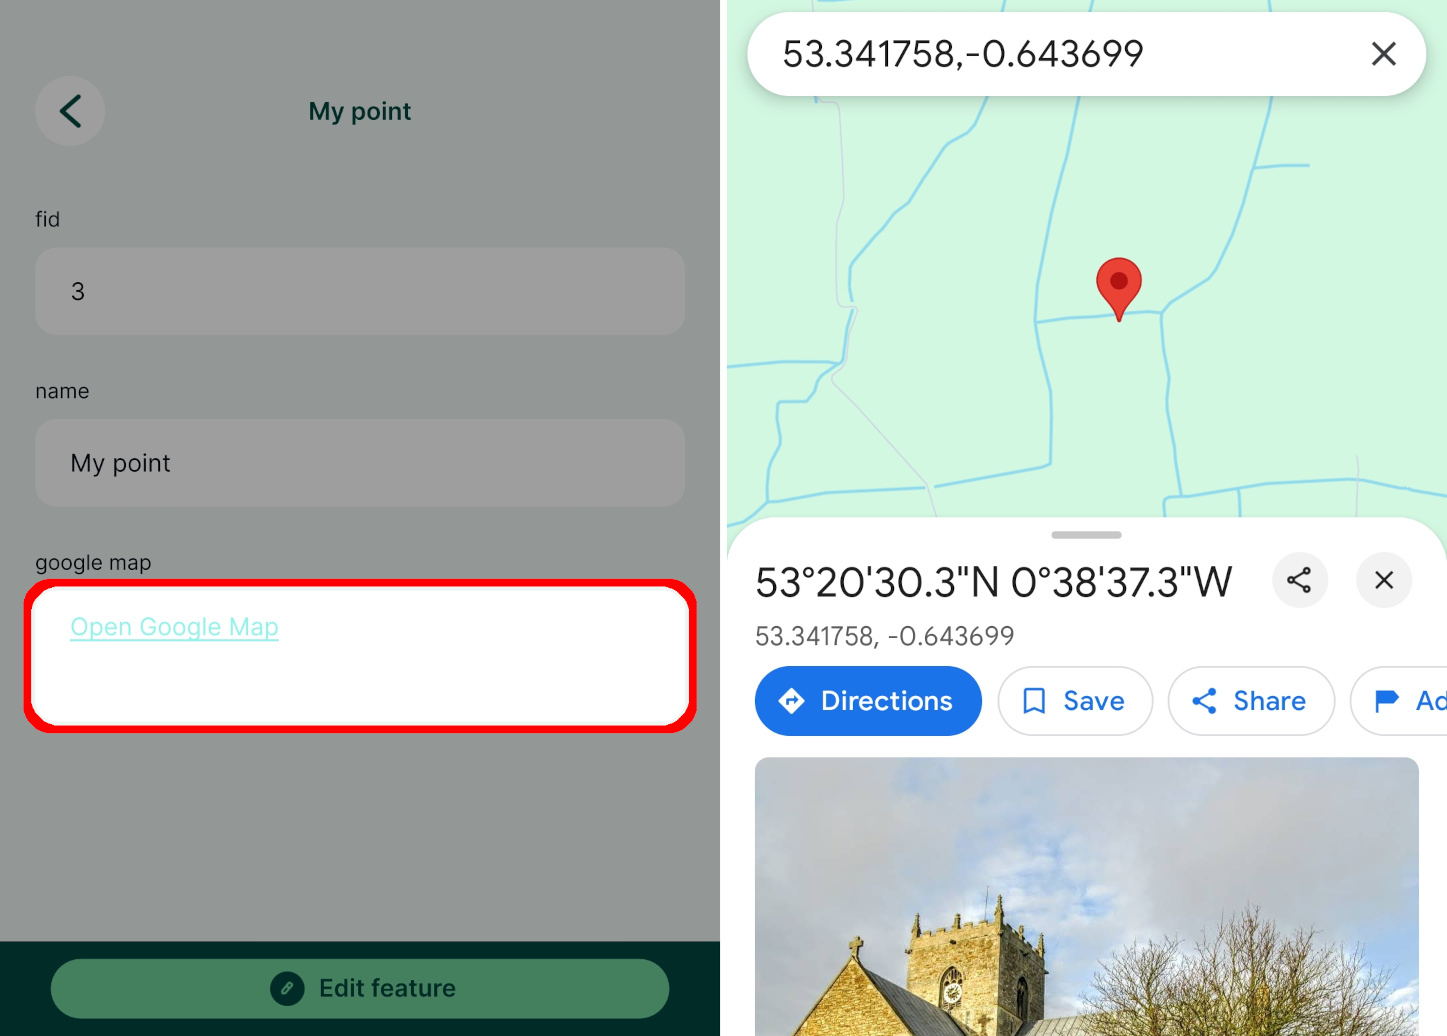
---
# How to Attach Multiple Photos to Features | Mergin Maps
[Skip to content](https://merginmaps.com/docs/layer/attach-multiple-photos-to-features/#VPContent)
Return to top
How to Attach Multiple Photos to Features [](https://merginmaps.com/docs/layer/attach-multiple-photos-to-features/#how-to-attach-multiple-photos-to-features)
===============================================================================================================================================================
In some situations, it might be useful to take more than one picture of a feature during the field survey. Attaching multiple photos to one feature is a 1-N relation. You can read more about 1-N relations and how they can be used in [Mergin Maps](https://merginmaps.com/)
in [How to link multiple records to one feature](https://merginmaps.com/docs/layer/one-to-n-relations/)
.
Example project available
To see this setup in practice, you can download the following project:
[documentation/forms\_multiple\_photos](https://app.merginmaps.com/projects/documentation/forms_multiple_photos/tree)
.
To link multiple photos to a single feature, we need a **unique field** to link following tables:
* Survey layer containing spatial information
* A non-spatial table containing path to the photos (see [how to setup simple photo forms](https://merginmaps.com/docs/layer/photos/)
)
WARNING
**Do not use the FID field to link these tables**. FIDs can be changed during synchronisation, which can result in having photos linked to the incorrect feature. You can learn more about synchronisation in [Behind Data Synchronisation](https://merginmaps.com/docs/manage/synchronisation/)
.
To set 1:N relation between these tables correctly:
1. Create a new text field in the survey layer, here: `unique-id`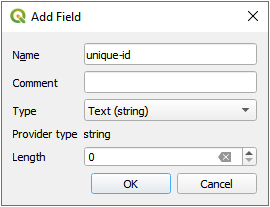
2. Use the `uuid()` as the **default value** for this field in **Layer Properties**. This function assigns a unique identifier to every created feature, even when different surveyors create features simultaneously. 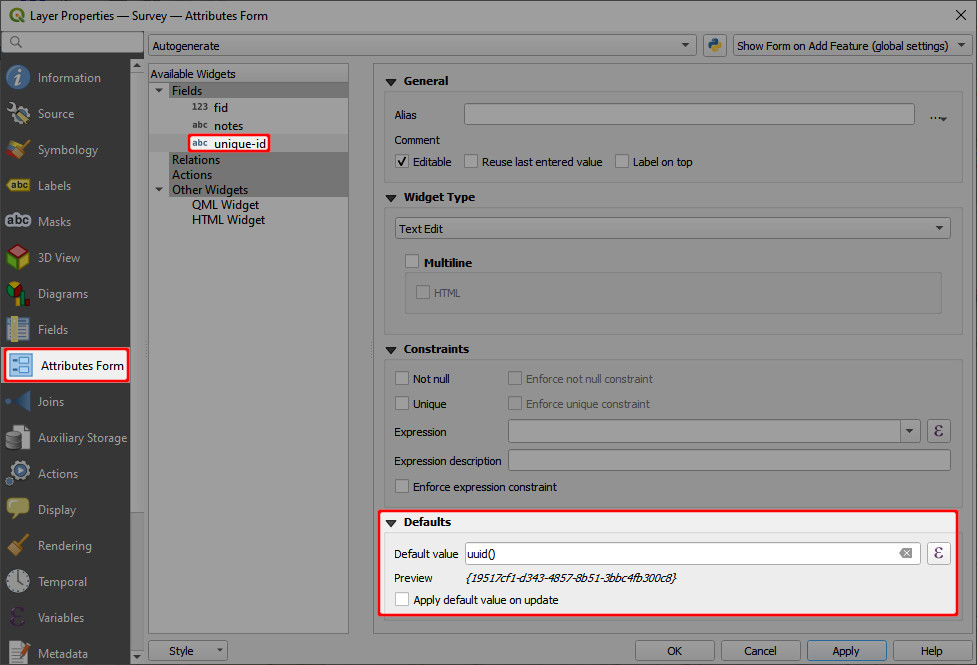
3. Create a new text field in the non-spatial table (here: `photos`) that will be used to store the UUID of features from the survey layer (the foreign key), here: `external-pk`.
Now we need to configure a [1-N relation](https://merginmaps.com/docs/layer/one-to-n-relations/)
: 4. From the main menu, select **Project** > **Properties ...** 5. In the **Relations** tab, select **Add Relation**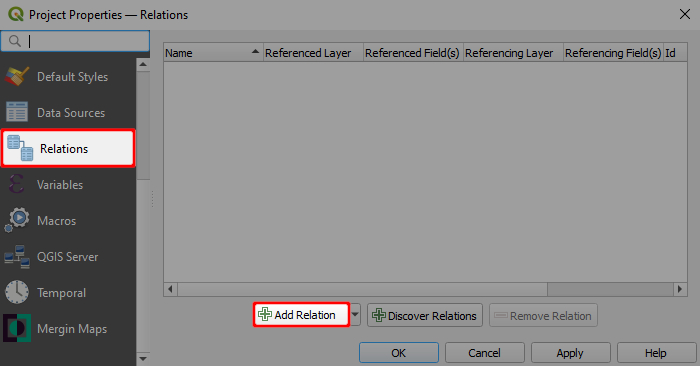
6. Define the parent and child layer and the fields to link these layers. Here:
* **Name** is the name of the relation, can be left blank
* **Referenced (parent)** is the spatial layer `Survey`
* **Field 1** of the **Referenced (parent)** is the field `unique-id` that contains the UUID
* **Referencing (child)** is the non-spatial layer `photos`
* **Field 1** of the **Referencing (child)** layer is the `external-pk` that contains the foreign key to link photos with surveyed features. 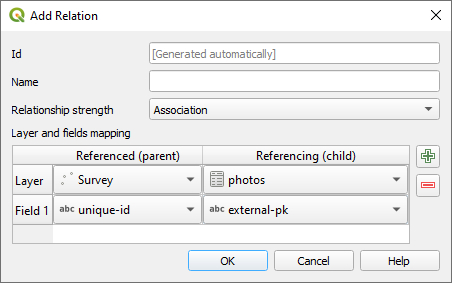
7. Navigate to the **Attributes Form** tab in the **Properties** of the `photos` layer. Set the **Widget Type** of the foreign key `external-pk` to **Relation Reference**: 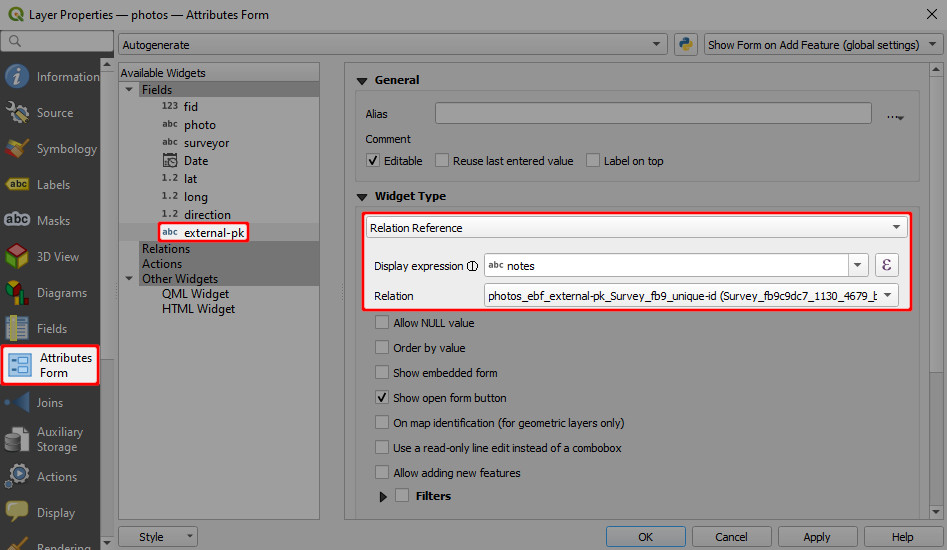
The mobile app detects the type of 1-N relation and displays the image viewer for the relations. 
---
# How to Link Multiple Records to One Feature (1-N Relations) | Mergin Maps
[Skip to content](https://merginmaps.com/docs/layer/one-to-n-relations/#VPContent)
Return to top
How to Link Multiple Records to One Feature (1-N Relations) [](https://merginmaps.com/docs/layer/one-to-n-relations/#how-to-link-multiple-records-to-one-feature-1-n-relations)
=================================================================================================================================================================================
Example project available
You can clone these projects to take a closer look on 1-N relations:
* Assigning multiple inspections to a single feature: [documentation/forms\_one-to-many-relations](https://app.merginmaps.com/projects/documentation/forms_one-to-many-relations/tree)
* Adding multiple photos to a single feature: [documentation/forms\_multiple\_photos](https://app.merginmaps.com/projects/documentation/forms_multiple_photos/tree)
It is often the case that you have a set of spatial features and you want to record their status every now and then. For example, there is a GIS layer representing the manholes and the surveyors carry out regular inspections of the manholes using [Mergin Maps](https://merginmaps.com/)
. Instead of duplicating the manhole layer and recording each inspection as a new feature, inspections can be recorded in a non-spatial table that is linked to the spatial layer. This way, multiple records can be linked to one feature.
The image below shows the manhole locations and a form with listed inspections in Mergin Maps mobile app.
The manhole point layer has the following attribute table:
| fid | Manhole | Manhole UUID |
| --- | --- | --- |
| 1 | 1 | `{70c59616-492e-4757-aa9a-ee61b207ce94}` |
| 2 | 2 | `{be01b98f-3585-49d4-be74-4cf3530a2989}` |
| 3 | 3 | `{03178264-0070-45c8-a981-b2474627d7e0}` |
This layer contains only information about the manholes. `Manhole UUID` values are generated using [`uuid()` function as a default value](https://merginmaps.com/docs/layer/attach-multiple-photos-to-features/)
when a feature is created. This ensures that these values are **unique** even when multiple surveyors capture new features at the same time. This field will be used to link inspections and manholes.
Using UUID
**Why UUID?** FID can be changed during [synchronisation](https://merginmaps.com/docs/manage/synchronisation/)
. As a result, records can end up being linked to wrong features.
On the other hand, [UUID](https://docs.qgis.org/latest/en/docs/user_manual/expressions/functions_list.html#uuid)
(Universally Unique Identifier) is generated to be unique and will not be changed when synced. Therefore, we recommend always using UUID to link layers.
Inspections are recorded in a separate [non-spatial table](https://merginmaps.com/docs/layer/non-spatial-data)
with attribute table such as:
| Inspection Date | Blocked? | Flooded? | Inspector | Manhole UUID |
| --- | --- | --- | --- | --- |
| 10/05/2022 | | | Joe Schmoe | `{70c59616-492e-4757-aa9a-ee61b207ce94}` |
| 10/05/2022 | | ✔️ | John Doe | `{03178264-0070-45c8-a981-b2474627d7e0}` |
| 12/05/2022 | ✔️ | | Fred Bloggs | `{70c59616-492e-4757-aa9a-ee61b207ce94}` |
| 14/05/2022 | ✔️ | ✔️ | Joe Schmoe | `{be01b98f-3585-49d4-be74-4cf3530a2989}` |
In this table, all information about the inspections are recorded. `Manhole UUID` is filled in automatically based on a 1-N relation that we will set up in QGIS.
The same principle can be used when you want to capture [multiple photos for a single feature](https://merginmaps.com/docs/layer/attach-multiple-photos-to-features/)
.
How to set up 1-N relations in QGIS project [](https://merginmaps.com/docs/layer/one-to-n-relations/#how-to-set-up-1-n-relations-in-qgis-project)
---------------------------------------------------------------------------------------------------------------------------------------------------
You can follow this example by cloning [documentation/forms\_one-to-many-relations](https://app.merginmaps.com/projects/documentation/forms_one-to-many-relations/tree)
.
TIP
Make sure that your survey layer has a **unique UUID** field to create the link correctly. You will find detailed steps how to set it up in [How to Attach Multiple Photos to Features](https://merginmaps.com/docs/layer/attach-multiple-photos-to-features/)
To configure 1-N relations in QGIS:
1. From the main menu, select **Projects** > **Properties ...**
2. In the **Relations** tab, select **Add Relation**
3. A new window will appear, where we can define the parent and child layers and the fields to link the two layers:
* **Name** is the name of the relation, e.g. `Inspection`
* **Referenced (parent)** is the spatial layer `manhole_locations`
* **Field 1** of the **Referenced (parent)** is the field `Manhole UUID` that contains the **unique** UUID
* **Referencing (child)** is the non-spatial layer `inspections`
* **Field 1** of the **Referencing (child)** layer is the `Manhole UUID`, which acts as a foreign key to link inspections to spatial features
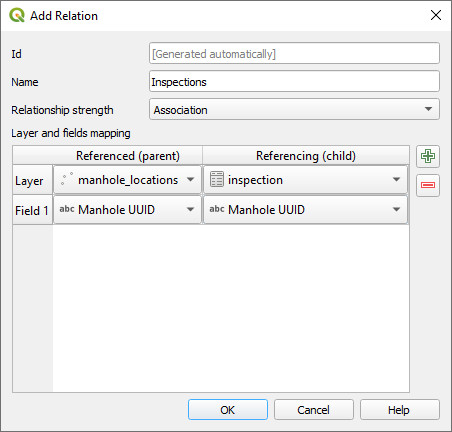
4. Right-click on the survey layer, select **Properties** and go to the **Attributes** form tab.
5. Drag and drop the **Inspections** relation to the **Form Layout**. 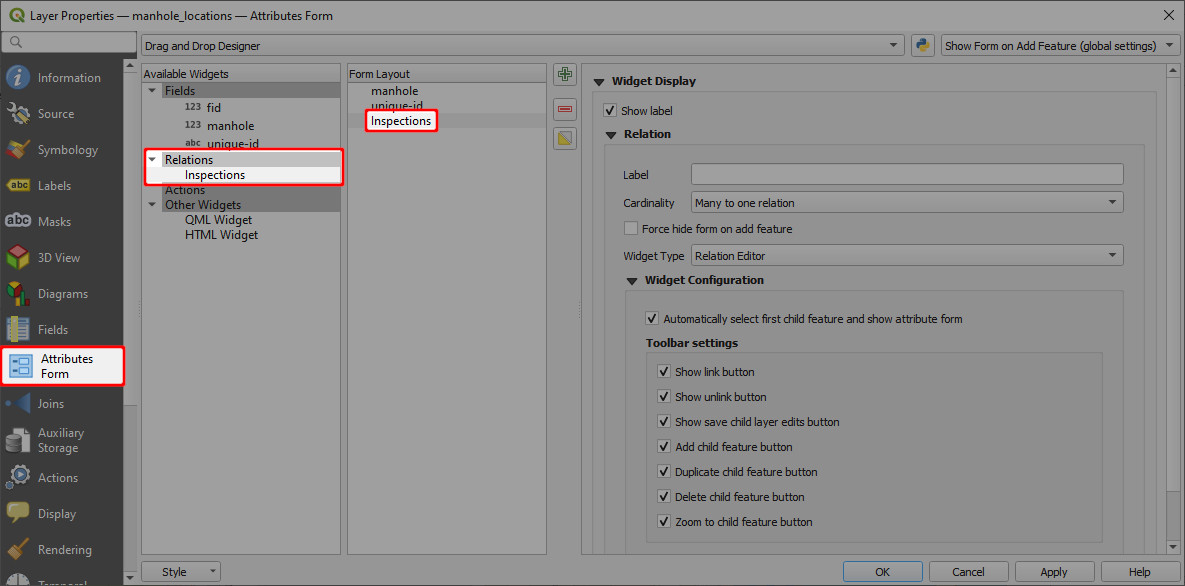
Now you can add multiple inspections for each manhole location. The inspections records will be stored in the `inspections` table.
When you open the form for an existing record in the `manhole_locations` point layer, it will display existing inspection records and you can also add, delete or edit the records: 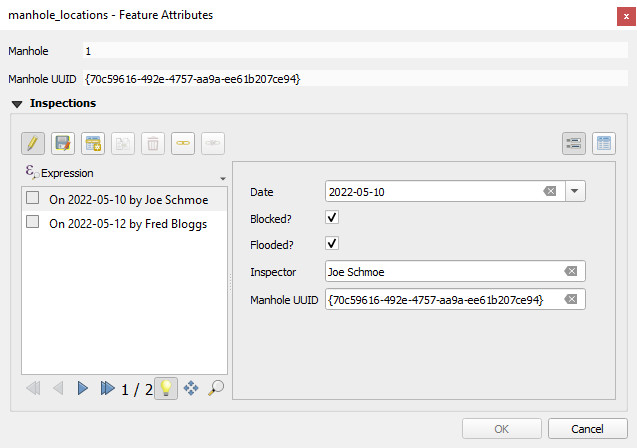
In the mobile app, the form will display all linked inspection records. Tapping the **+** button opens the inspection form and a new inspection record can be added.
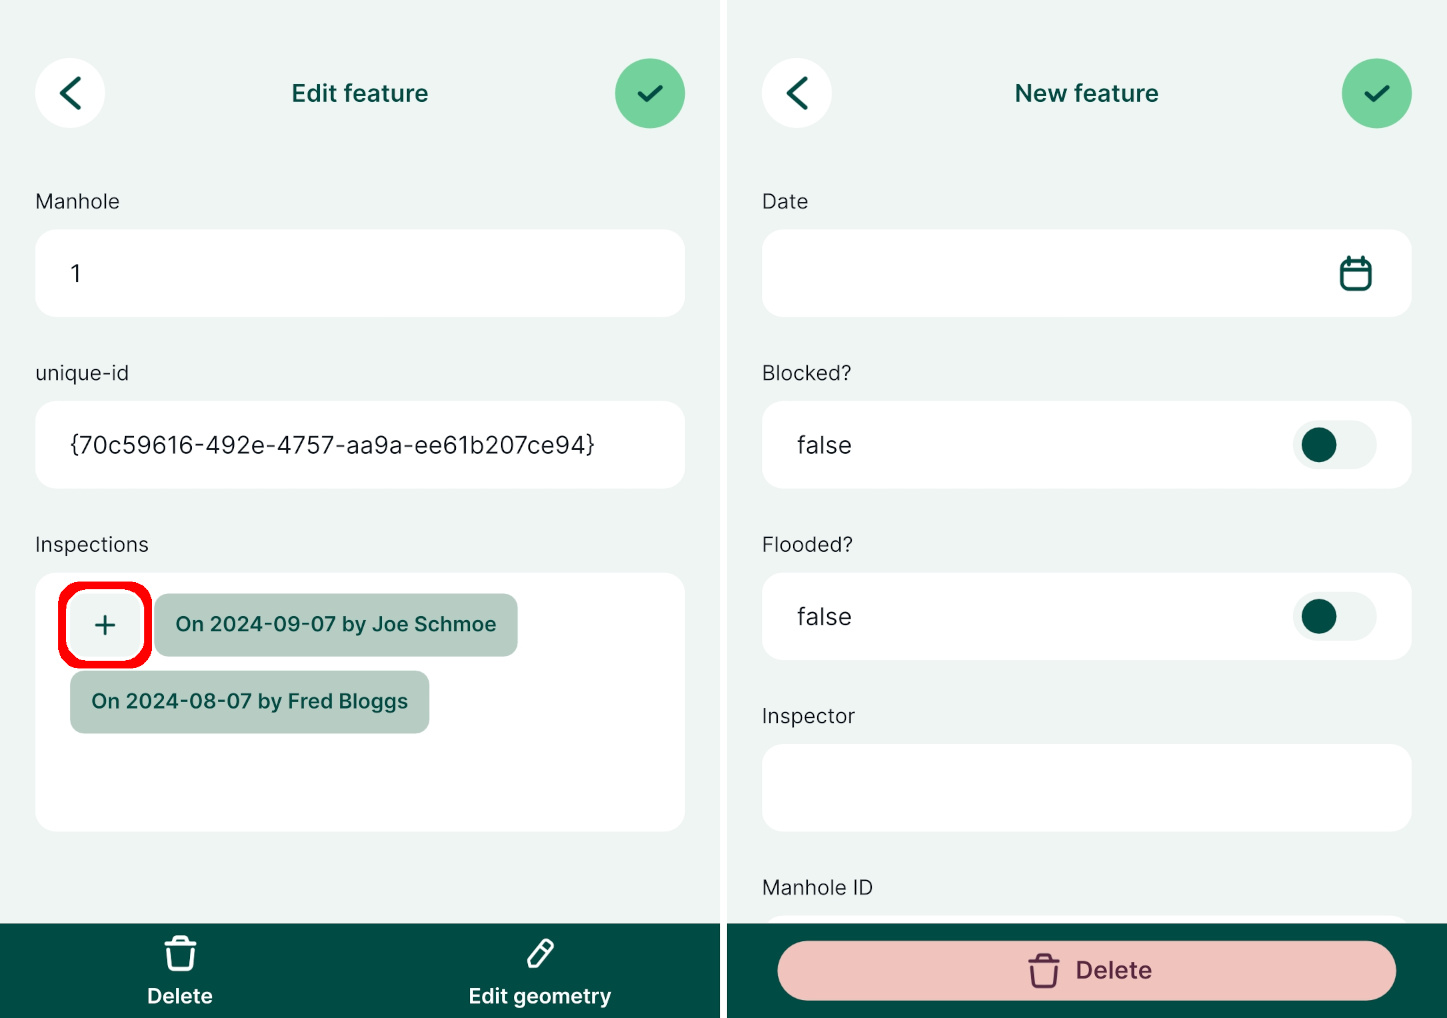
---
# Extra Position Variables | Mergin Maps
[Skip to content](https://merginmaps.com/docs/layer/position_variables/#VPContent)
Return to top
Extra Position Variables [](https://merginmaps.com/docs/layer/position_variables/#extra-position-variables)
=============================================================================================================
With Mergin Maps mobile app, it is possible to access GPS information using extra position variables. Note that location permission has to be allowed and location service enabled.
Extra position variables can be used as [default values in feature forms](https://merginmaps.com/docs/layer/form-configuration/#default-values)
.
Following variables are supported:
* `@position_coordinate` - A point with the coordinates in WGS84.
* `@position_latitude` - Latitude
* `@position_longitude` - Longitude
* `@position_altitude` - Altitude
* `@position_direction` - The bearing measured in degrees clockwise from true north to the direction of travel.
* `@position_ground_speed` - The ground speed, in meters/sec.
* `@position_vertical_speed` - The vertical speed, in meters/sec.
* `@position_magnetic_variation` - The angle between the horizontal component of the magnetic field and true north, in degrees. Also known as magnetic declination. A positive value indicates a clockwise direction from true north and a negative value indicates a counter-clockwise direction.
* `@position_horizontal_accuracy` - The accuracy of the provided latitude-longitude value, in meters.
* `@position_vertical_accuracy` - The accuracy of the provided altitude value, in meters.
* `@position_from_gps` - True, if recorder/edited feature's geometry correspond with current user's position (Position marker has the same location as the crosshairs marker).
* `@position_satellites_visible` - Number of visible satellites.
* `@position_satellites_used` - Number of satellites used to calculate the position.
* `@position_gps_fix` - GPS fix, e.g. "RTK float"
* `@position_gps_antenna_height` - Antenna height as defined in [GPS settings](https://merginmaps.com/docs/field/mobile-app-ui/#gps-settings)
* `@position_provider_type` - GPS device type.
* for internal GPS, returns "internal"
* for external GPS, returns "external"
* `@position_provider_name` - GPS device name.
* for internal GPS, returns "Internal"
* for external GPS, returns the name of the external device
* `@position_provider_address` - GPS device address.
* for internal GPS, returns "devicegps"
* for external GPS, returns the MAC address
* `@position_hdop` - Horizontal dilution of precision (HDOP)
* `@position_vdop` - Vertical dilution of precision (VDOP)
* `@position_pdop` - Position (3D) dilution of precision (PDOP)
TIP
**Dilution of precision** (DOP) is a useful value that reflects the confidence level of achieved position precision. In addition to the horizontal and vertical accuracy, the appropriate DOP value (horizontal, vertical, or 3D) can be used to assess the overall quality of your survey accuracy.
You can read more about this topic e.g. on [Wikipedia](https://en.wikipedia.org/wiki/Dilution_of_precision_(navigation))
.
---
# Extra QGIS Variables | Mergin Maps
[Skip to content](https://merginmaps.com/docs/layer/plugin-variables/#VPContent)
Return to top
Extra QGIS Variables [](https://merginmaps.com/docs/layer/plugin-variables/#extra-qgis-variables)
===================================================================================================
The Mergin Maps QGIS plugin adds several variables that can be used in QGIS expressions:
| Variable name | Sample value | Scope | Description |
| --- | --- | --- | --- |
| `@mm_full_name` | `martin second name` | global | Full name of the currently logged in user, blank if the full name is not set |
| `@mm_username` | `martin` | global | Username of the user currently logged in to [Mergin Maps](https://merginmaps.com/) |
| `@mm_user_email` | `martin@example.com` | global | Email of the user currently logged in to Mergin Maps |
| `@mm_url` | `https://app.merginmaps.com` | global | URL of the Mergin Maps service |
| `@mm_project_name` | `Tree survey` | project | Name of the active Mergin Maps project |
| `@mm_project_full_name` | `martin/Tree survey` | project | Workspace and project name joined with a forward slash |
| `@mm_project_version` | `42` | project | Current version of the active project |
A common use case is to use `@mm_username` or `@mm_user_email` as the [default value](https://merginmaps.com/docs/layer/form-configuration/#default-values)
for one of the fields in a survey layer to automatically track who has added (and/or modified) a particular record.
`mergin_` variable names still work!
QGIS variables listed here previously used the prefix `mergin_`. Now we use the prefix `mm_` standing for Mergin Maps.
Both naming options are functional and will continue to work in the future: `@mergin_user_email` and `@mm_user_email` provide the same value when used in QGIS expressions.
---
# Working with Non-spatial Tables | Mergin Maps
[Skip to content](https://merginmaps.com/docs/layer/non-spatial-data/#VPContent)
Return to top
Working with Non-spatial Tables [](https://merginmaps.com/docs/layer/non-spatial-data/#working-with-non-spatial-tables)
=========================================================================================================================
Non-spatial tables are often a key part of a survey project. The tables can be used either on their own to add new data or linked to a spatial layer, e.g. when linking multiple [photos](https://merginmaps.com/docs/layer/attach-multiple-photos-to-features/)
or [records](https://merginmaps.com/docs/layer/one-to-n-relations/)
. They can be also used in [value relation](https://merginmaps.com/docs/layer/form-widgets/#value-relation)
widgets.
We recommend using **GeoPackage** format to save your non-spatial table. With this format, you can collaboratively edit the data and track changes.
Enable editing and browsing of non-spatial layers [](https://merginmaps.com/docs/layer/non-spatial-data/#enable-editing-and-browsing-of-non-spatial-layers)
-------------------------------------------------------------------------------------------------------------------------------------------------------------
Ensure you have [enabled editing and browsing](https://merginmaps.com/docs/gis/search_data/)
of your non-spatial table in **Project Properties** in QGIS.
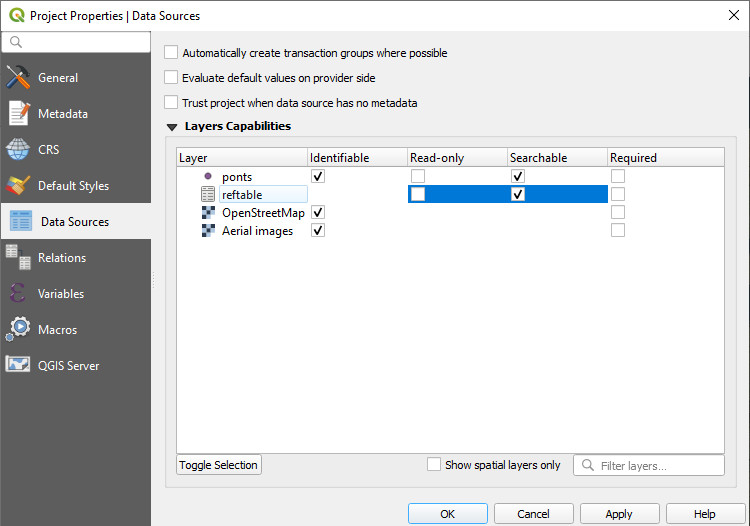
Non-spatial layers in Mergin Maps mobile app [](https://merginmaps.com/docs/layer/non-spatial-data/#non-spatial-layers-in-mergin-maps-mobile-app)
---------------------------------------------------------------------------------------------------------------------------------------------------
Non-spatial tables can be browsed, searched and edited in the mobile app.
Tap the [**Layers**](https://merginmaps.com/docs/field/layers/)
button to open the list of layers, including non-spatial tables, in the project.
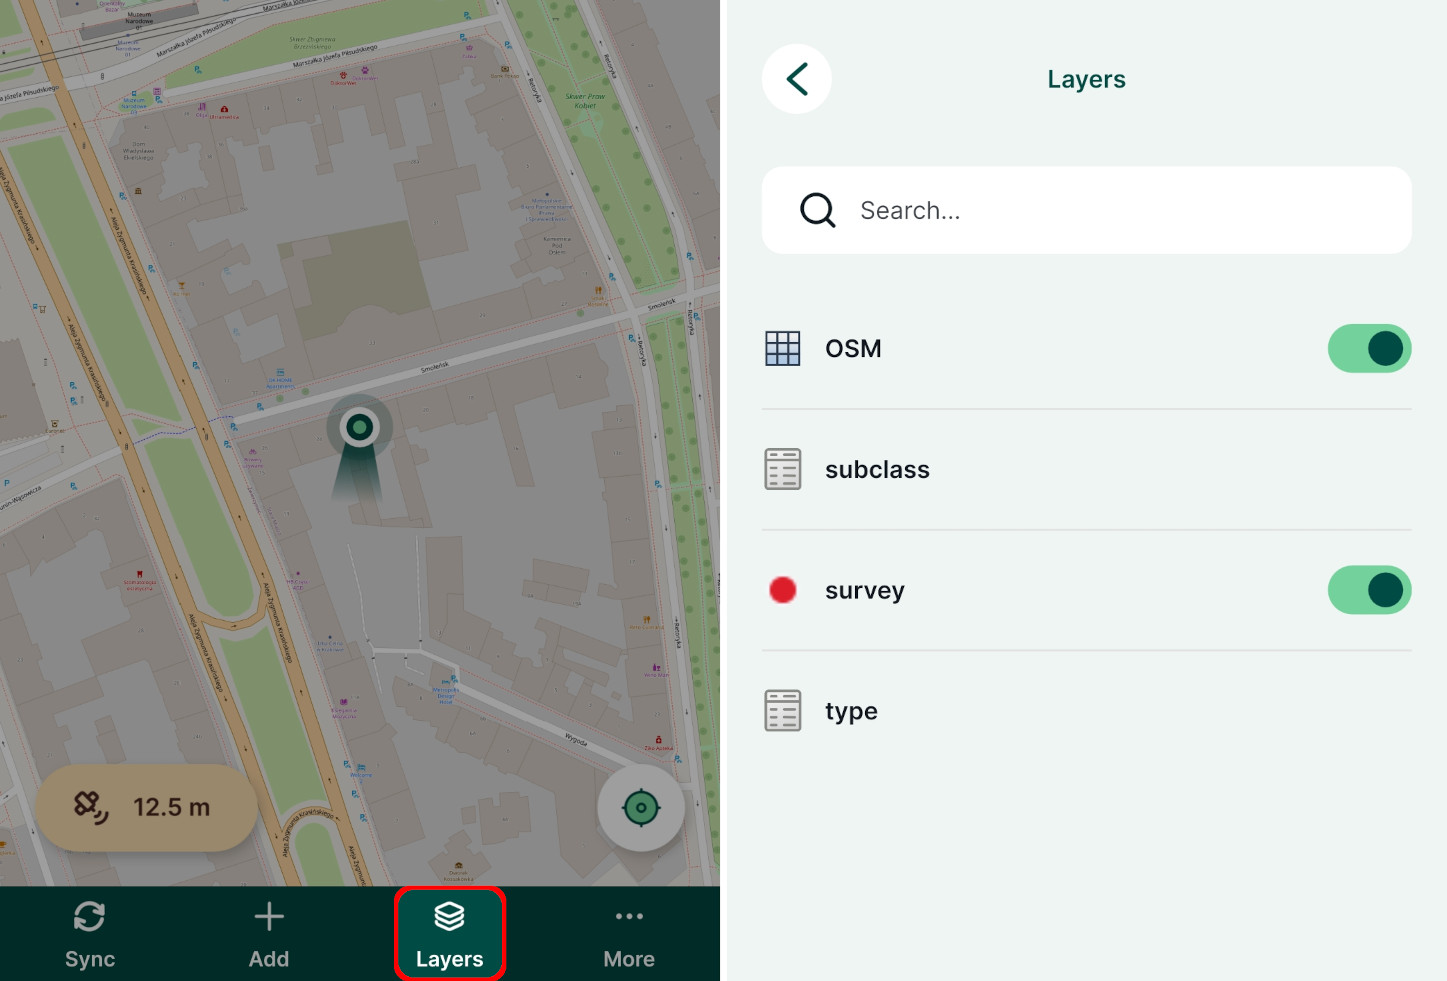
Tap on a layer to open its attributes table where you can browse the data and [search for values](https://merginmaps.com/docs/field/layers/#browsing-features)
. It is also possible to [add and edit](https://merginmaps.com/docs/field/mobile-features/#add-or-edit-non-spatial-features)
entries in the table.
---
# GPS Accuracy | Mergin Maps
[Skip to content](https://merginmaps.com/docs/field/gps_accuracy/#VPContent)
Return to top
GPS Accuracy [](https://merginmaps.com/docs/field/gps_accuracy/#gps-accuracy)
===============================================================================
Your GPS accuracy depends on several parameters, such as:
* Your GPS device. [External GPS](https://merginmaps.com/docs/field/external_gps/)
may be used to achieve higher accuracy.
* View of the clear sky that affects the number of satellites visible from your position
When doing the survey, it is essential to be aware of the limitations of your GPS accuracy at the time of recording.
Current GPS accuracy is displayed above the bottom navigation panel in the mobile app. Also, there is a circle with the estimated size of the accuracy value around the position marker.
The colour of the **GPS** button denotes the accuracy threshold that can be set in the [GPS settings](https://merginmaps.com/docs/field/mobile-app-ui/#gps-settings)
in the mobile app. By default, it is set to 10 m. The indicator is green when the accuracy threshold is met, otherwise it turns yellow.
Tapping the GPS button opens the [GPS info panel](https://merginmaps.com/docs/field/mobile-app-ui/#current-position-and-gps-info)
, which contains information about the horizontal and vertical accuracy, as well as number of satellites in use. 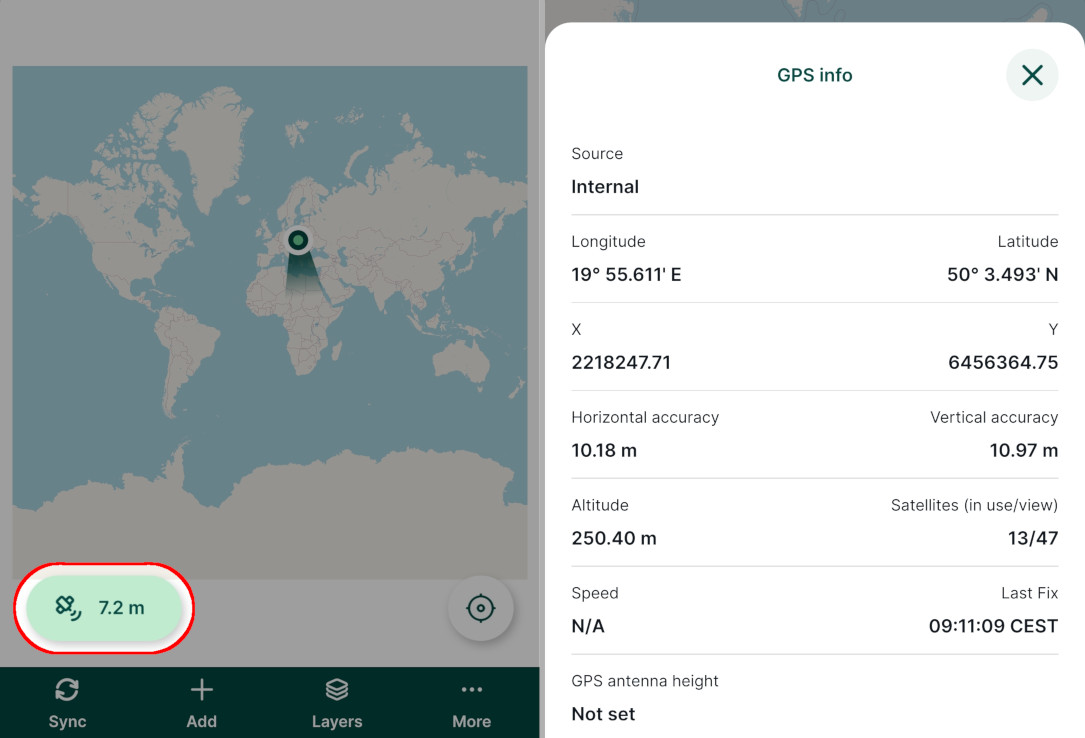
If you'd like to have higher accuracy, you can wait for your device to acquire a better GPS signal. For precise measurements, you may need to connect your device to an [external GPS](https://merginmaps.com/docs/field/external_gps/)
.
When assessing the overall quality of the survey, it may be beneficial to record some [extra position variables](https://merginmaps.com/docs/layer/position_variables/)
, such as type and name of the used GPS device, the horizontal and vertical accuracy or the horizontal, vertical or position dilution of precision (HDOP, VDOP, PDOP).
TIP
GPS accuracy can be one of the reasons for misplaced or shifted field data. Visit our blog [Why are my survey points shifted?](https://www.lutraconsulting.co.uk/blog/2021/04/21/projections-field/)
to read more about this topic.
---
# Mergin Maps Mobile App Interface | Mergin Maps
[Skip to content](https://merginmaps.com/docs/field/mobile-app-ui/#VPContent)
Return to top
Mergin Maps Mobile App Interface [](https://merginmaps.com/docs/field/mobile-app-ui/#mergin-maps-mobile-app-interface)
========================================================================================================================
Below is a description of various items within the user interface of Mergin Maps mobile app.
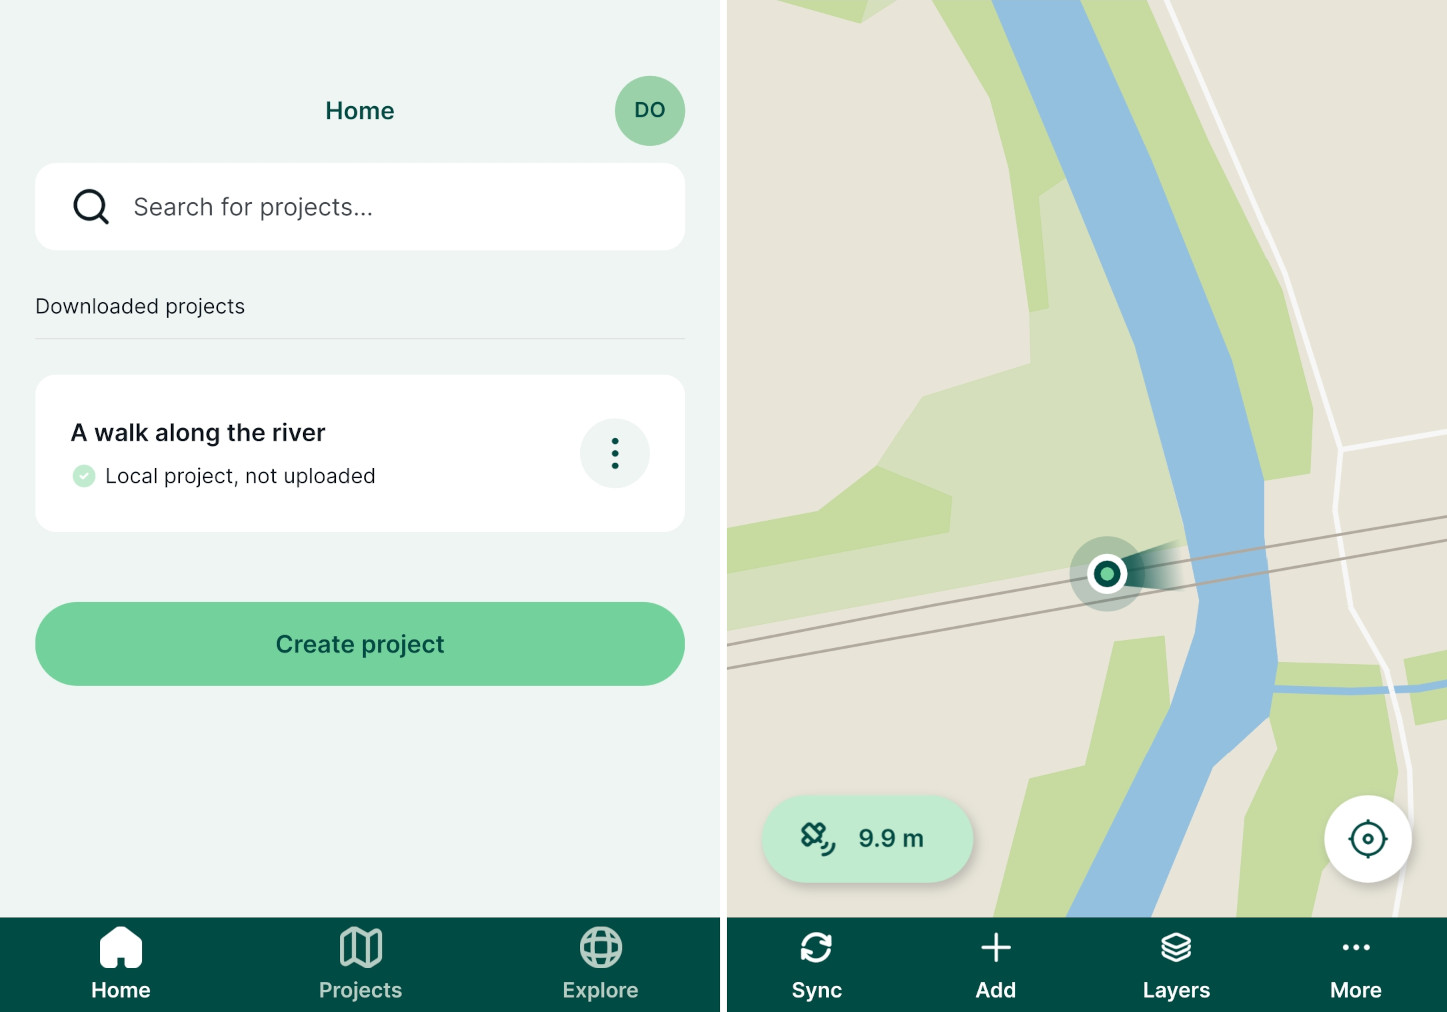
Mobile app tutorials available
To get familiar with the mobile app, we recommend going through our [Get Started tutorials](https://merginmaps.com/docs/tutorials/capturing-first-data/)
.
Main page, projects and account details [](https://merginmaps.com/docs/field/mobile-app-ui/#main-page-projects-and-account-details)
-------------------------------------------------------------------------------------------------------------------------------------
On the main page of the mobile app, there are three tabs in the bottom navigation bar:
* [**Home**](https://merginmaps.com/docs/field/mobile-app-ui/#home)
contains the overview of downloaded projects
* [**Projects**](https://merginmaps.com/docs/field/mobile-app-ui/#projects)
displays all projects in the current workspace available for download
* [**Explore**](https://merginmaps.com/docs/field/mobile-app-ui/#explore)
includes the list of all [public](https://merginmaps.com/docs/manage/project-advanced/#make-your-project-public-private)
projects
The account icon in the right upper corner of the screen can be used to [manage the account and workspaces](https://merginmaps.com/docs/field/mobile-app-ui/#workspaces-and-mergin-maps-account)
in the mobile app.
### Home [](https://merginmaps.com/docs/field/mobile-app-ui/#home)
In the **Home** tab, you can find the list of projects that are downloaded to your mobile device, including local projects that are yet to be synchronised to [Mergin Maps](https://merginmaps.com/)
.
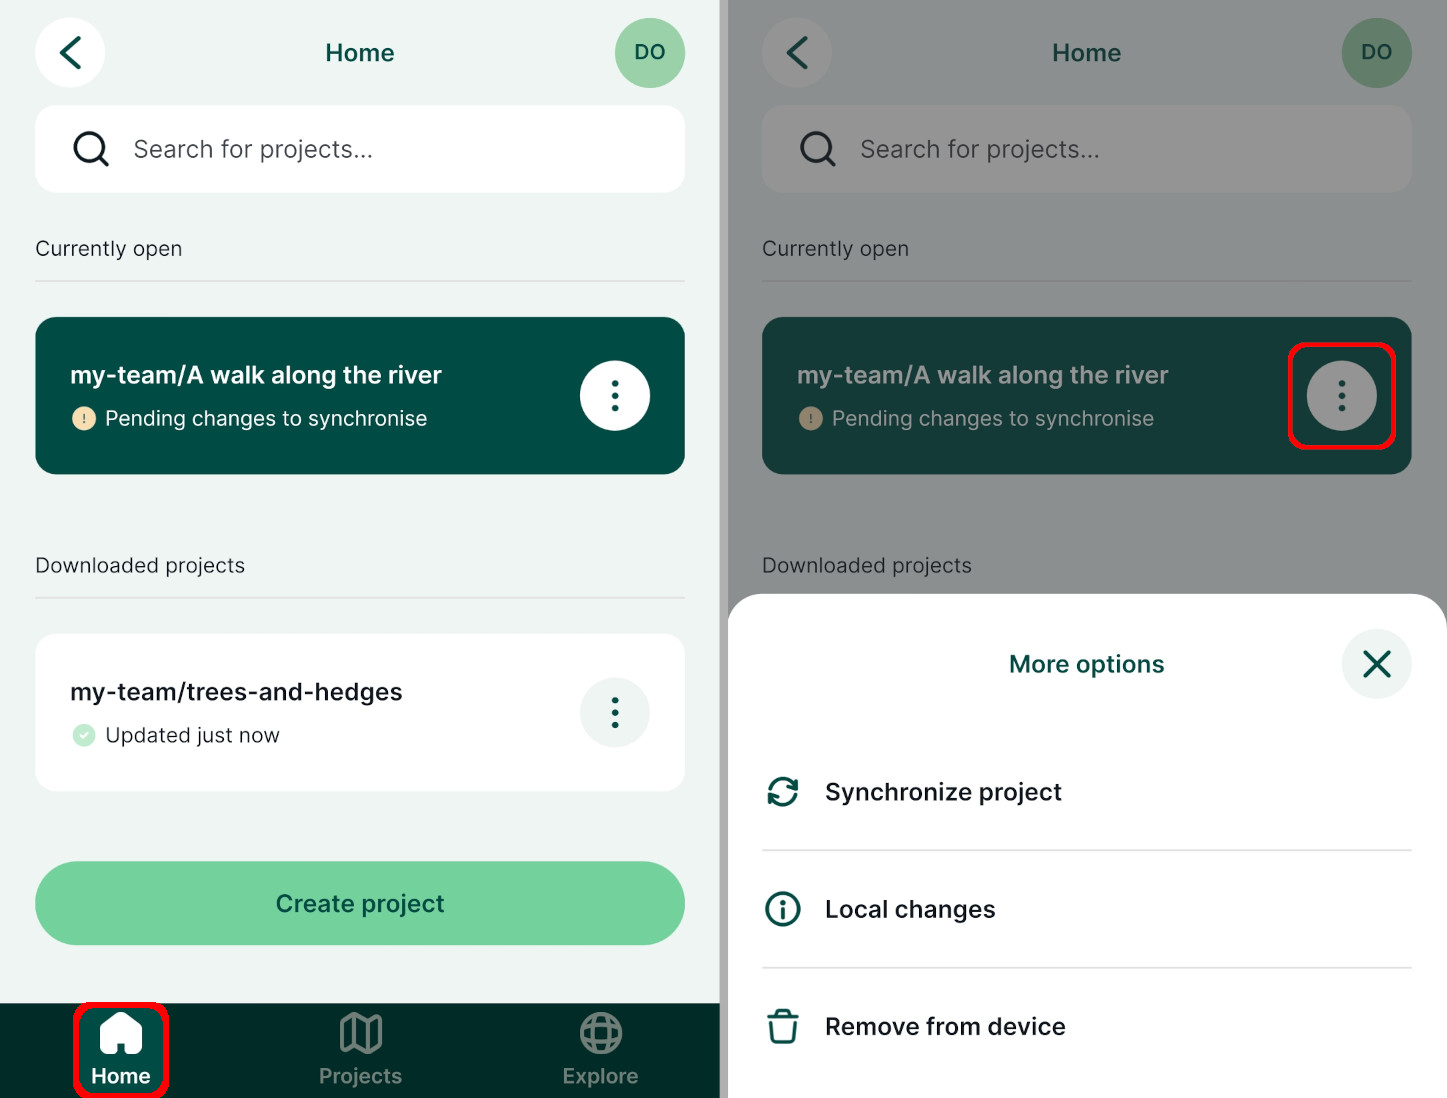
* Open a project by tapping on its name
* Use the **Create project** button to create a new project in the mobile app. For detailed steps, go to [Create a project in Mergin Maps mobile app](https://merginmaps.com/docs/manage/create-project/#create-a-project-in-mergin-maps-mobile-app)
.
* Use the button next to the project name to upload a local project to the cloud, synchronise the project, see local changes or remove the project from your device
### Projects [](https://merginmaps.com/docs/field/mobile-app-ui/#projects)
The **Projects** tab contains the list of all projects in your current [workspace](https://merginmaps.com/docs/manage/workspaces/)
. The workspace name is displayed on the top of the screen (here: `my-team`).
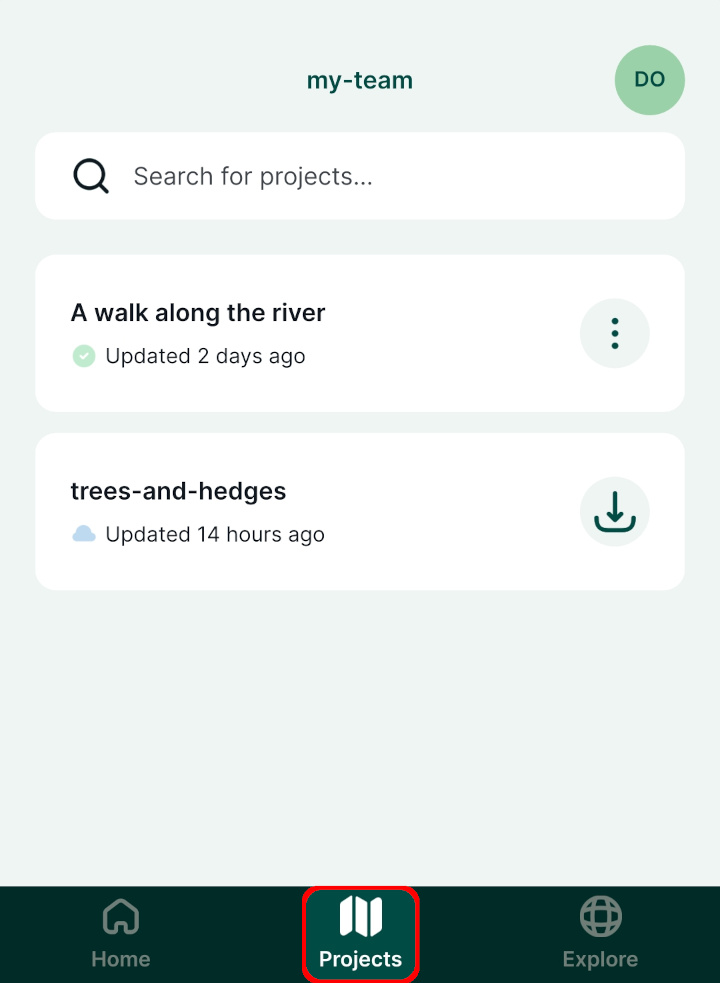
* Tap the **Download** button next to the project name to download it to your mobile device
* For projects that are already downloaded to your device, you can use the button next to the project name to synchronise the project, see local changes or remove the project from your device
TIP
If you need to download a project from another workspace, you need to [switch to this workspace in the mobile app](https://merginmaps.com/docs/manage/workspaces/#switch-workspaces-in-mergin-maps-mobile-app)
first.
### Explore [](https://merginmaps.com/docs/field/mobile-app-ui/#explore)
In the **Explore** tab, you can browse [public](https://merginmaps.com/docs/manage/project-advanced/#make-your-project-public-private)
projects.
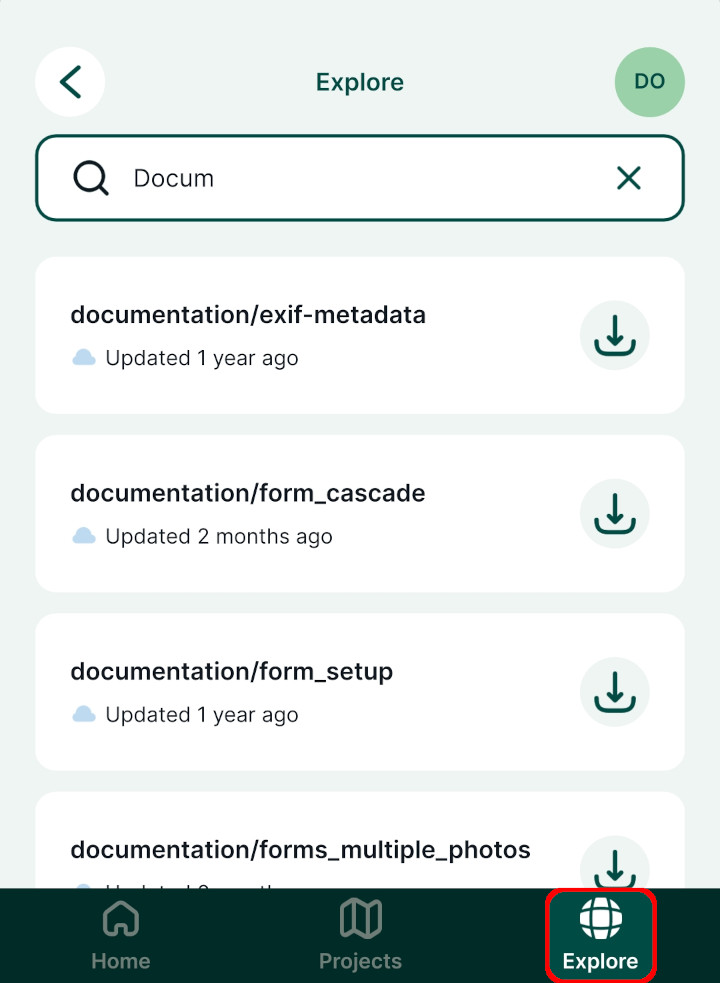
Use the search bar to narrow the results. Public projects can be downloaded and opened on your mobile device, however, you cannot synchronise your local changes unless you have appropriate [permissions](https://merginmaps.com/docs/manage/permissions/)
.
### Workspaces and Mergin Maps account [](https://merginmaps.com/docs/field/mobile-app-ui/#workspaces-and-mergin-maps-account)
Your [Mergin Maps](https://merginmaps.com/)
account can be accessed by tapping the icon on the top right of the main page.
Here, you can [sign up to Mergin Maps](https://merginmaps.com/docs/setup/sign-up-to-mergin-maps/#from-mergin-maps-mobile-app)
or sign in if you already have a [Mergin Maps](https://merginmaps.com/)
account. If you are already logged in, you will see your account details.
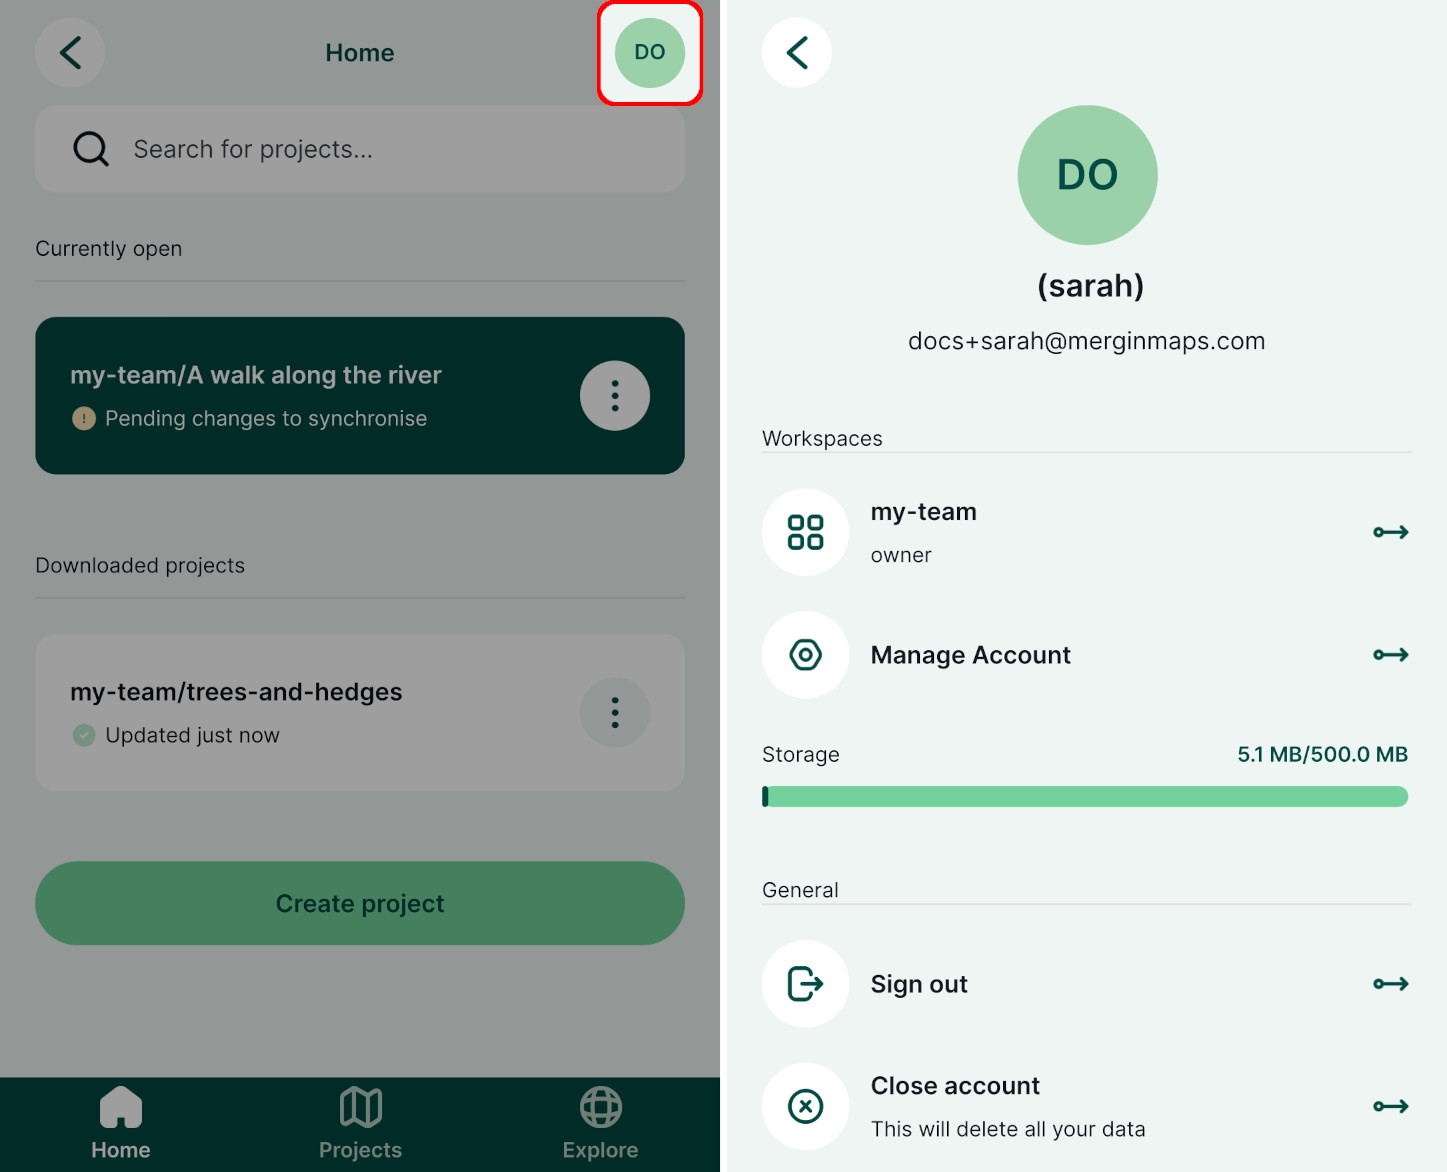
* The current workspace (here: `my team`) is displayed in the **Workspaces** section. Tap on it to [switch to another workspace](https://merginmaps.com/docs/manage/workspaces/#switch-workspaces-in-mergin-maps-mobile-app)
or to [create a new workspace](https://merginmaps.com/docs/manage/workspaces/#how-to-create-a-new-workspace)
. 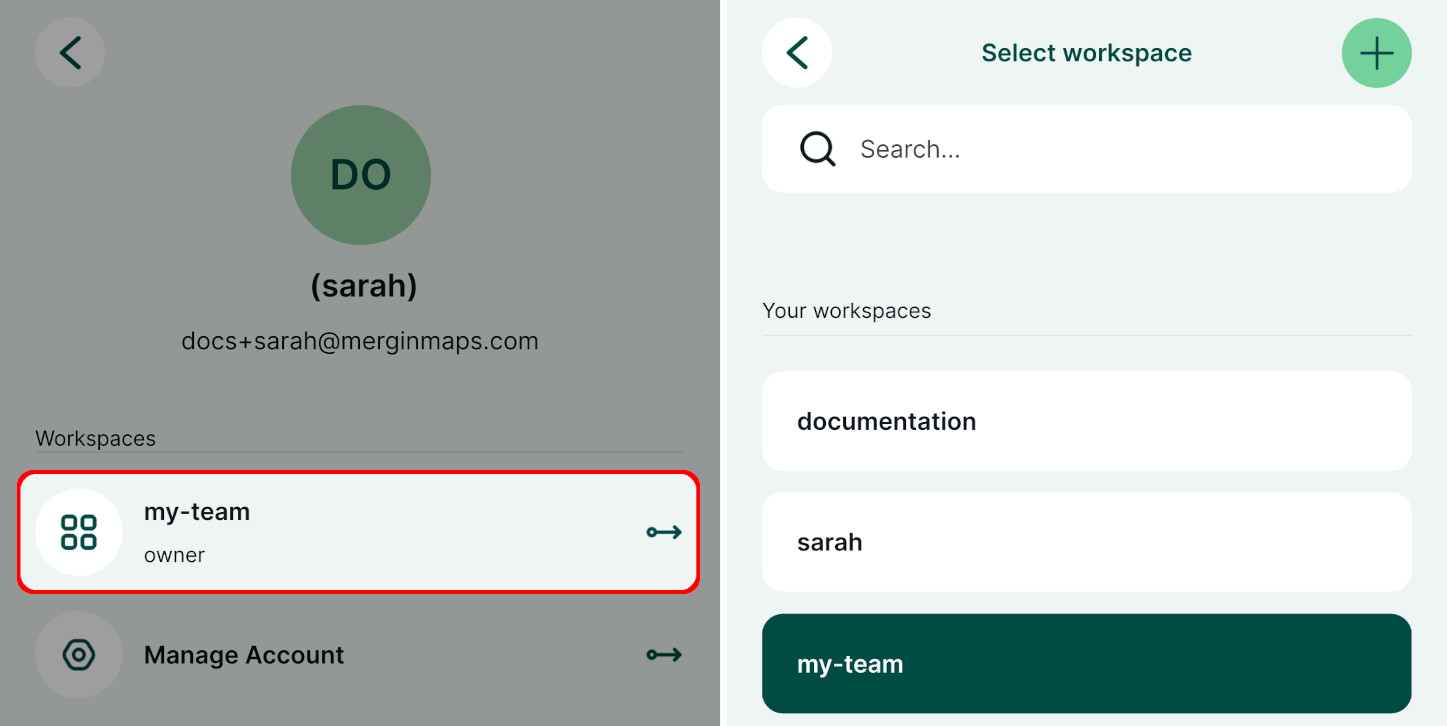
* **Manage Account** is a shortcut to the [dashboard](https://app.merginmaps.com/)
where you can manage your projects, workspaces and subscriptions
* **Sign out** to sign out or to switch to a different account
* **Close account** can be used to delete your account within the mobile app
WARNING
Be careful! If you delete your account, you will lose access to your Mergin Maps projects both on the mobile device and on the [dashboard](https://app.merginmaps.com/)
.
Working with a project [](https://merginmaps.com/docs/field/mobile-app-ui/#working-with-a-project)
----------------------------------------------------------------------------------------------------
A project is opened by tapping its name in the [Home](https://merginmaps.com/docs/field/mobile-app-ui/#home)
or in the [Projects](https://merginmaps.com/docs/field/mobile-app-ui/#projects)
tab. You have to download the project in order to be able to work with it.
Working with a project as a reader
This section describes the interface for users who can add or edit features based on their [permissions](https://merginmaps.com/docs/manage/permissions/)
. The reader's interface is described [below](https://merginmaps.com/docs/field/mobile-app-ui/#working-with-a-project-as-a-reader)
as they do not see buttons related to editing.
When a project is opened, you will see the map window. The map can be moved by dragging around and zoomed in/out by pinching open/close.
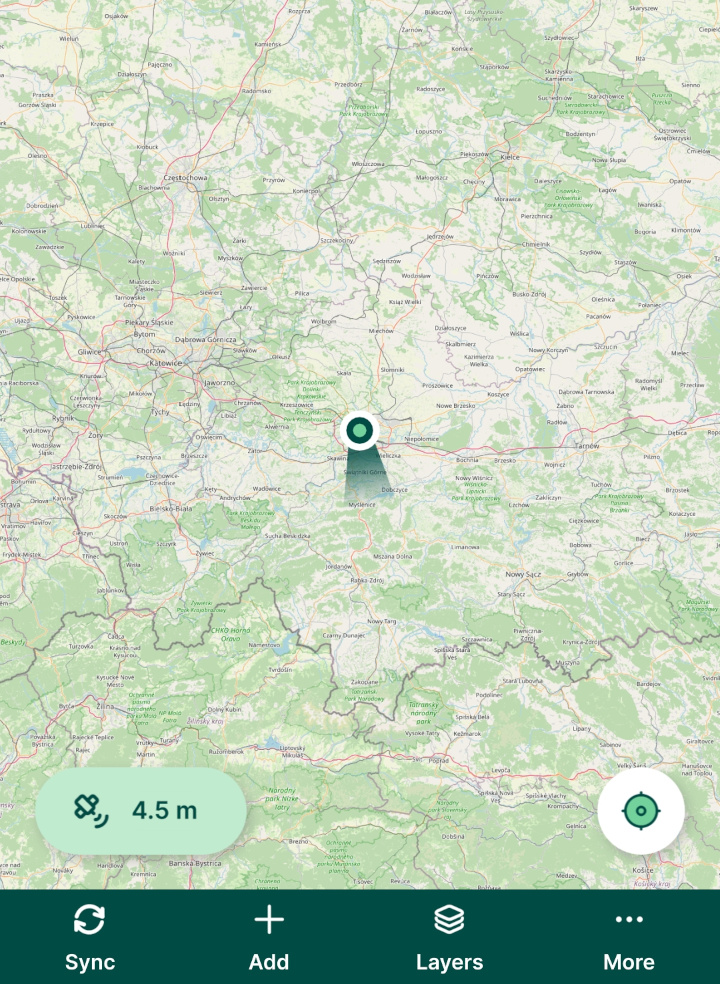
### Exploring features on a map [](https://merginmaps.com/docs/field/mobile-app-ui/#exploring-features-on-a-map)
Tapping on a feature on the map displays the attributes form.
For overlaying features, tap and hold to get a list of features. Select one from the list to open its attributes form.
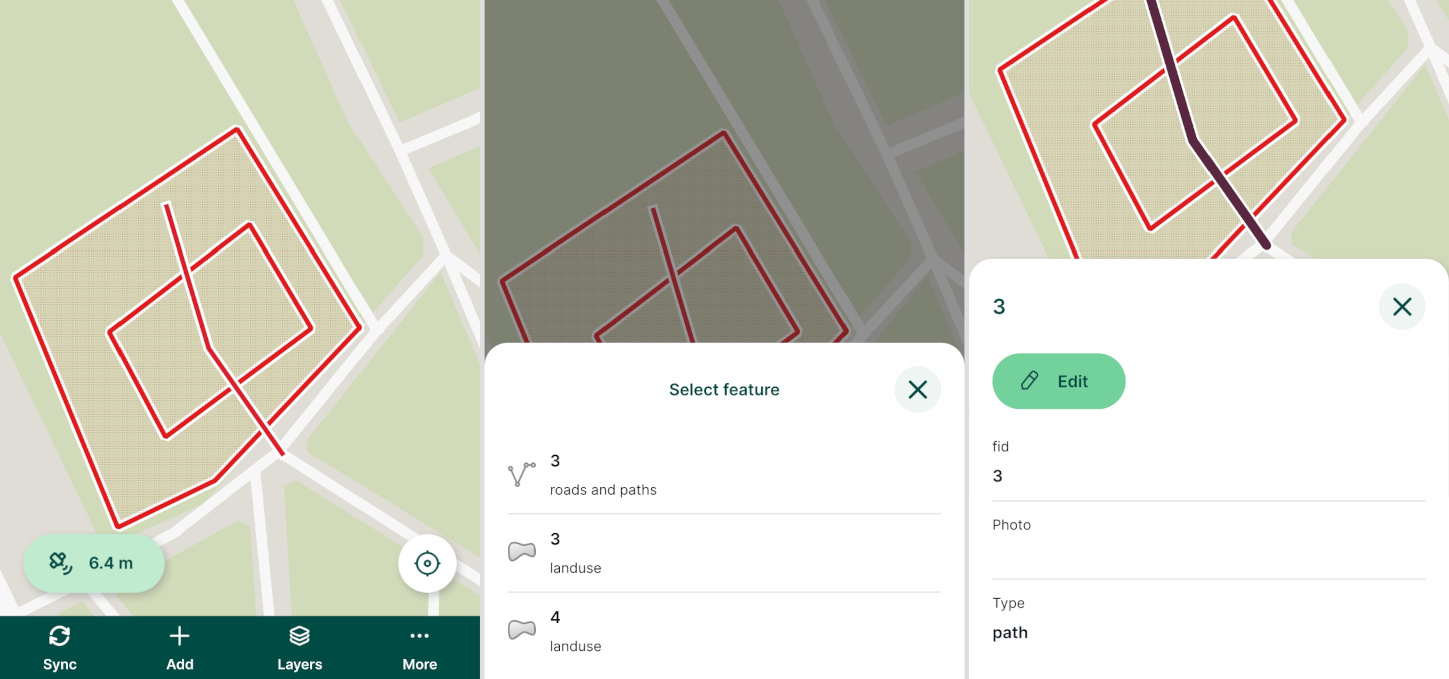
### Current position and GPS info [](https://merginmaps.com/docs/field/mobile-app-ui/#current-position-and-gps-info)
To see your current position and GPS info, you have to enable location services in your mobile device.
Tapping the **location button** in the right bottom corner of the screen centres the map to your current position and keeps it centred while you are moving. If you move the map manually, the auto-centre mode turns off automatically.
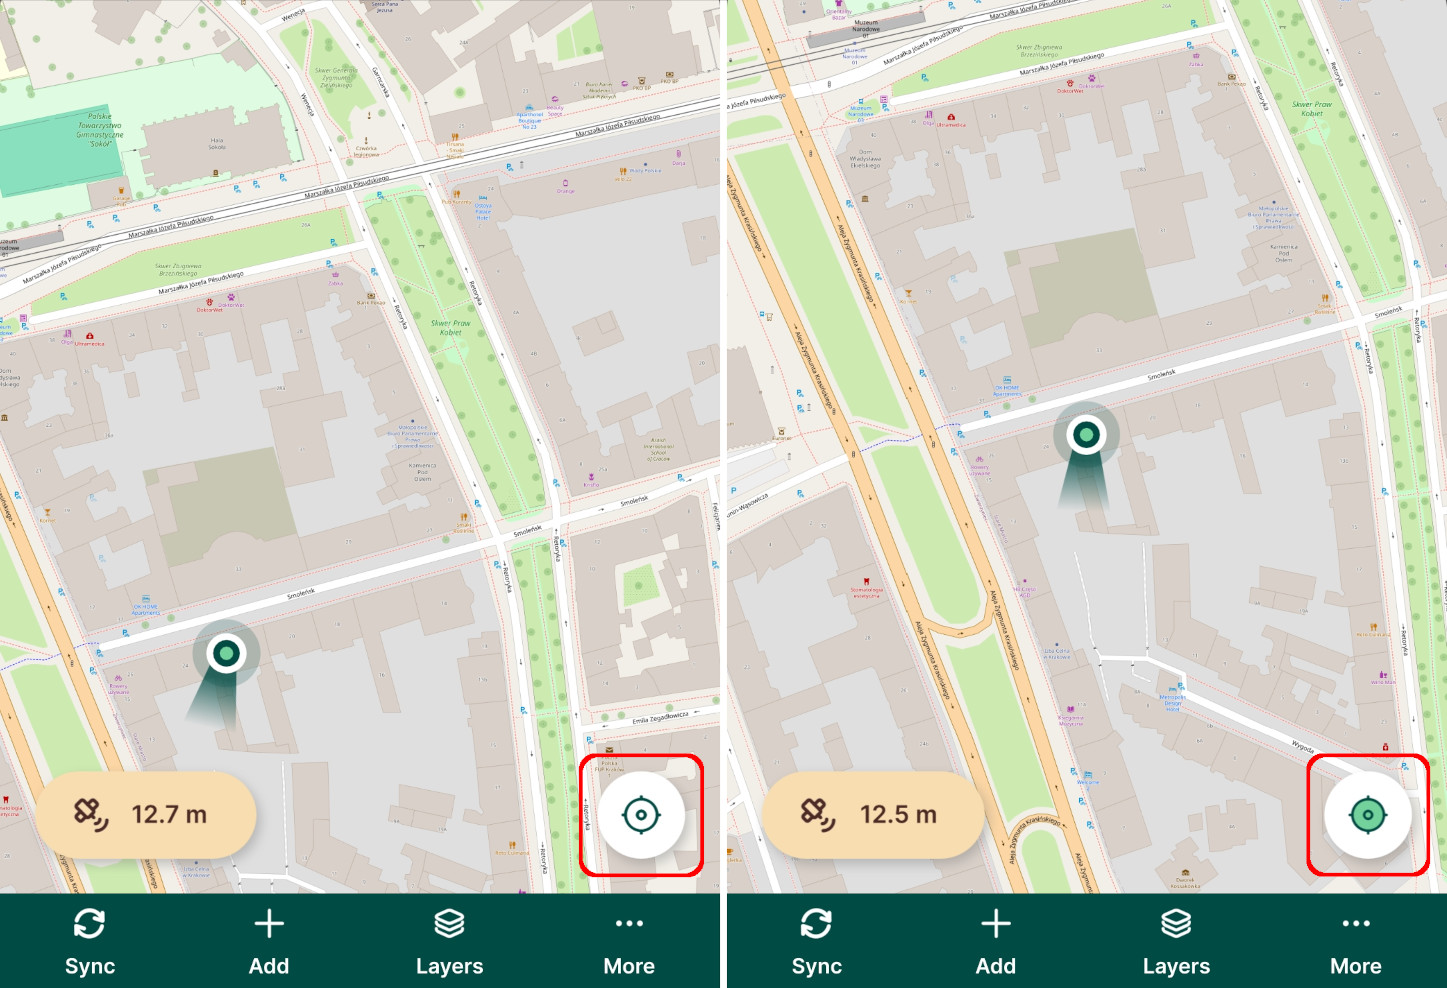
In the left bottom corner of the screen, there is a **GPS** button that displays the GPS accuracy as reported by your mobile device. The colour of the button denotes the accuracy threshold set in [GPS settings](https://merginmaps.com/docs/field/mobile-app-ui/#gps-settings)
in the mobile app.
Tapping the GPS accuracy button opens the GPS info panel: 
* **Source**: internal GPS of the mobile device or [external](https://merginmaps.com/docs/field/external_gps/)
GPS receiver connected via Bluetooth
* **Longitude, Latitude**: current position
* **X, Y**: current position in project's coordinate reference system
* **Horizontal** and **Vertical accuracy** of the GPS position
* **Altitude**: ellipsoidal height if internal GPS is used. [External GPS](https://merginmaps.com/docs/field/external_gps/)
devices usually return orthometric heights (ellipsoid with the geoid separation applied).
* **Satellites (in use/view)**: number of satellites
* **Speed**
* **Last fix**: time of the last received GPS position
* **GPS antenna height** that can be set in [GPS settings](https://merginmaps.com/docs/field/mobile-app-ui/#gps-settings)
### Sync [](https://merginmaps.com/docs/field/mobile-app-ui/#sync)
The **Sync** button can be used to synchronise changes during the field survey.
It also indicates that synchronisation is in progress.
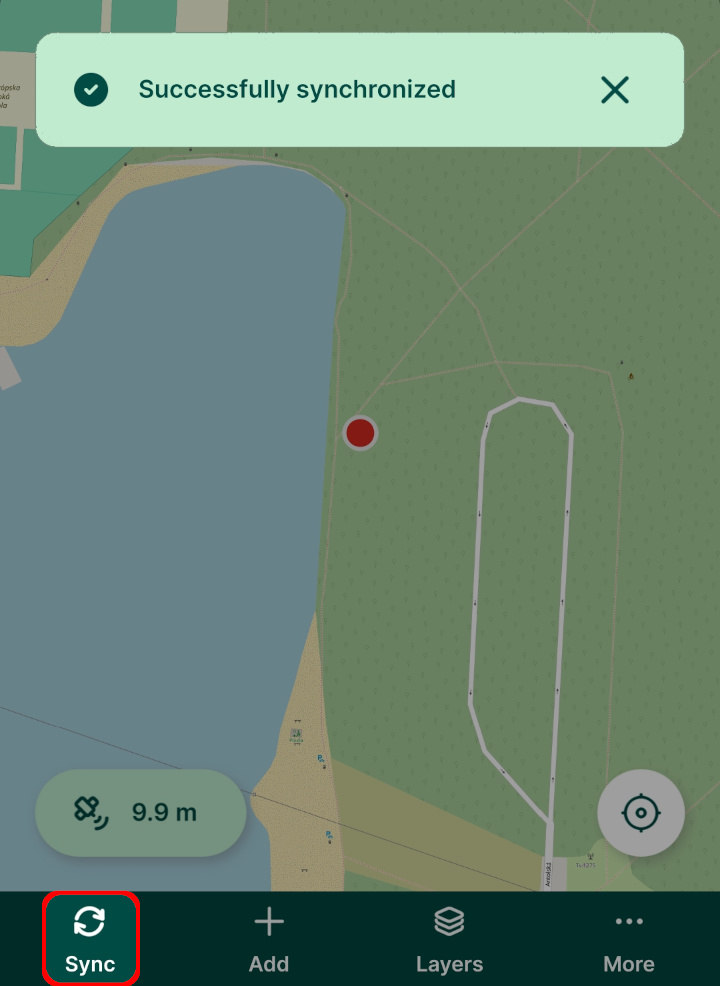
### Add [](https://merginmaps.com/docs/field/mobile-app-ui/#add)
Tap the **Add** button to enter the _recording mode_ so you are able to [survey new features](https://merginmaps.com/docs/field/mobile-features/)
. 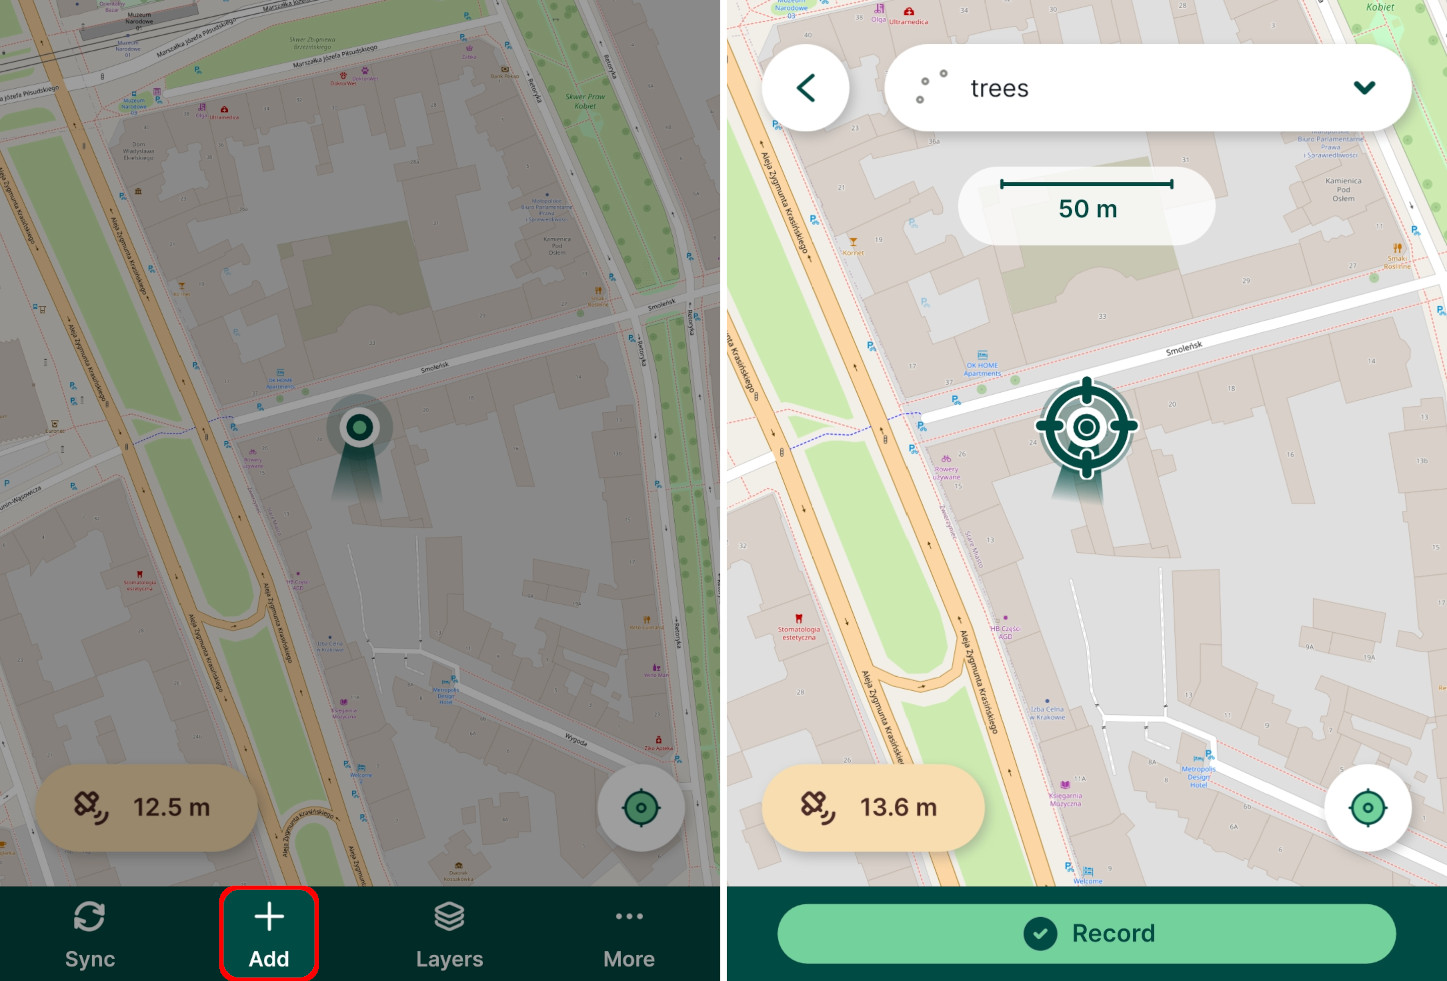
The **active layer** currently used for the survey is displayed on the top of the screen. Tap on it to choose another active layer from editable layers in the project. 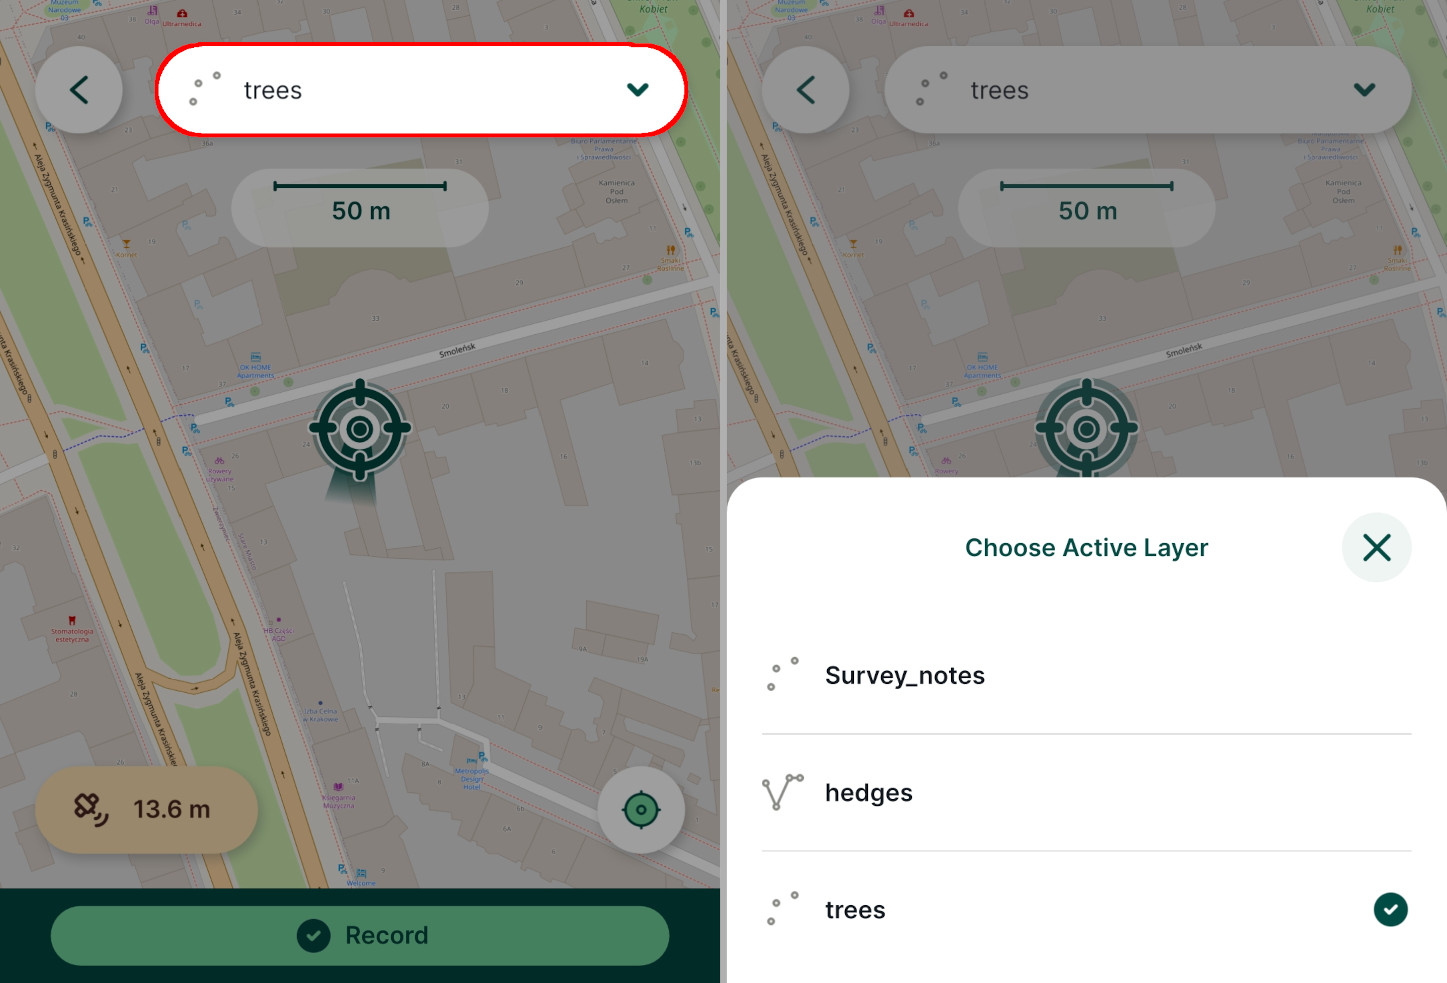
TIP
[How to Add, Edit, Delete Features](https://merginmaps.com/docs/field/mobile-features)
will show you how to capture points, lines and polygons in Mergin Maps mobile app as well as how to edit their geometry and attributes.
### Layers [](https://merginmaps.com/docs/field/mobile-app-ui/#layers)
Tap the **Layers** button to display the layers in your project.
Here, you can toggle specific layers on and off to change their visibility on the map, see layers legend, and browse features in the layers.
More details can be found in [Layers in Mergin Maps Mobile App](https://merginmaps.com/docs/field/layers/)
.

### More options: Zoom to project, Map themes, Position tracking, Measure, Local changes, Settings [](https://merginmaps.com/docs/field/mobile-app-ui/#more-options-zoom-to-project-map-themes-position-tracking-measure-local-changes-settings)
The **More** button opens a list of additional options
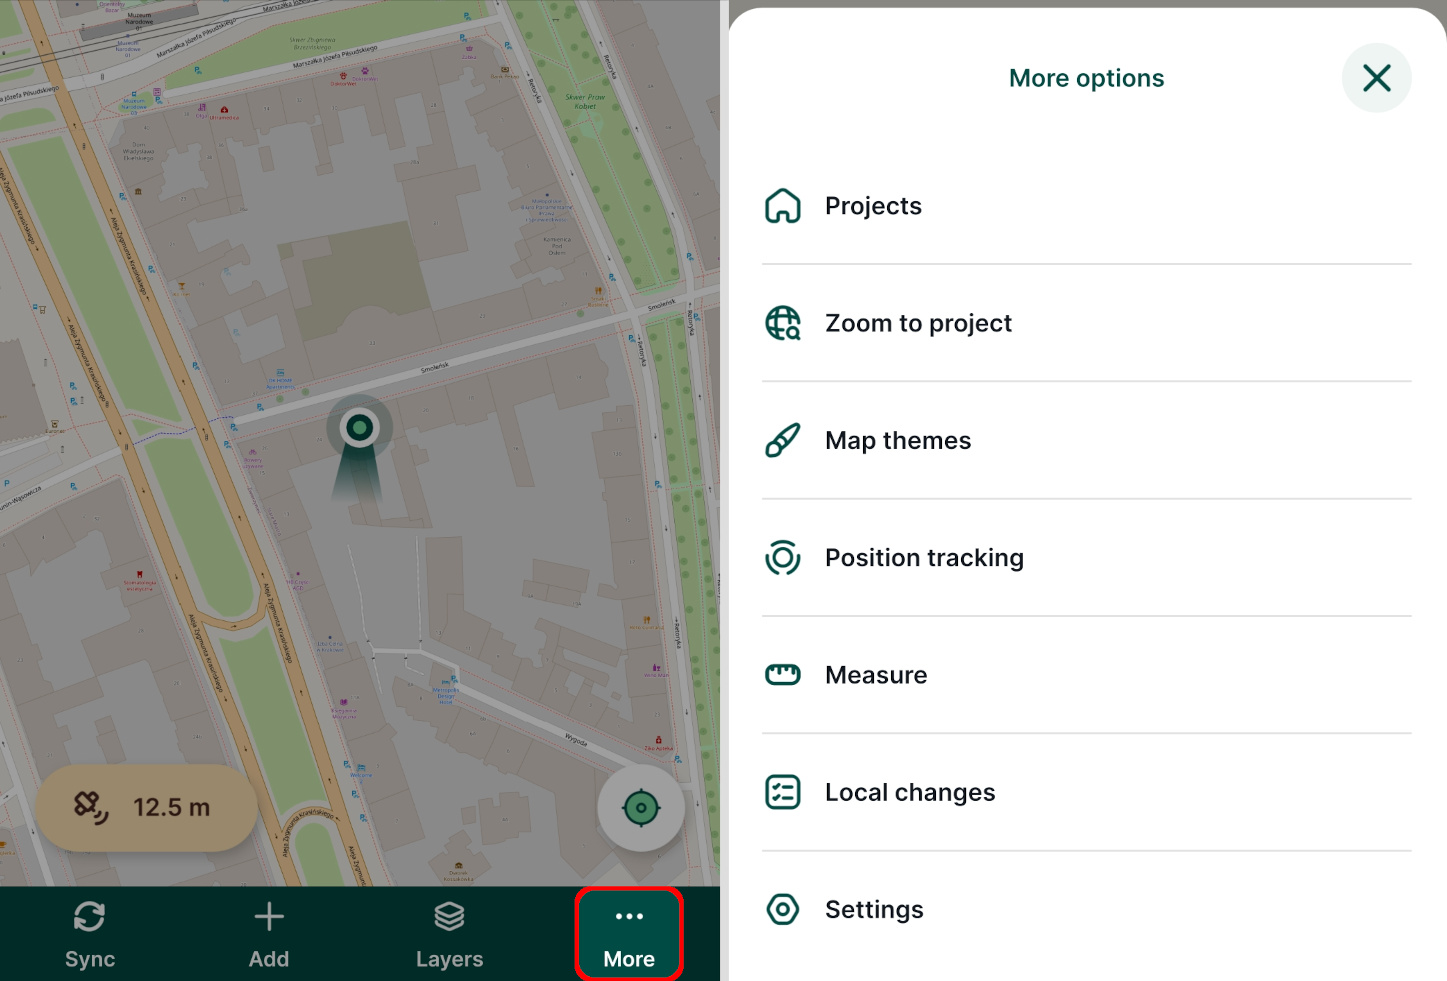
* **Projects**: a shortcut to the main page of the mobile app
* [**Zoom to project**](https://merginmaps.com/docs/gis/features/#project-extent)
: zoom to the extent of all visible layers within the project. The project extent can be set in [QGIS in Project Properties](https://merginmaps.com/docs/gis/features/#project-extent)
.
* [**Map themes**](https://merginmaps.com/docs/gis/setup_themes/)
: a list of map themes set up in a Mergin Maps project in QGIS
* [**Position tracking**](https://merginmaps.com/docs/field/tracking/)
: to start tracking of your tracks during the field survey
* [**Measure**](https://merginmaps.com/docs/field/measure/)
: measure length or area on the map
* **Local changes**: the overview of your local changes to be synchronised 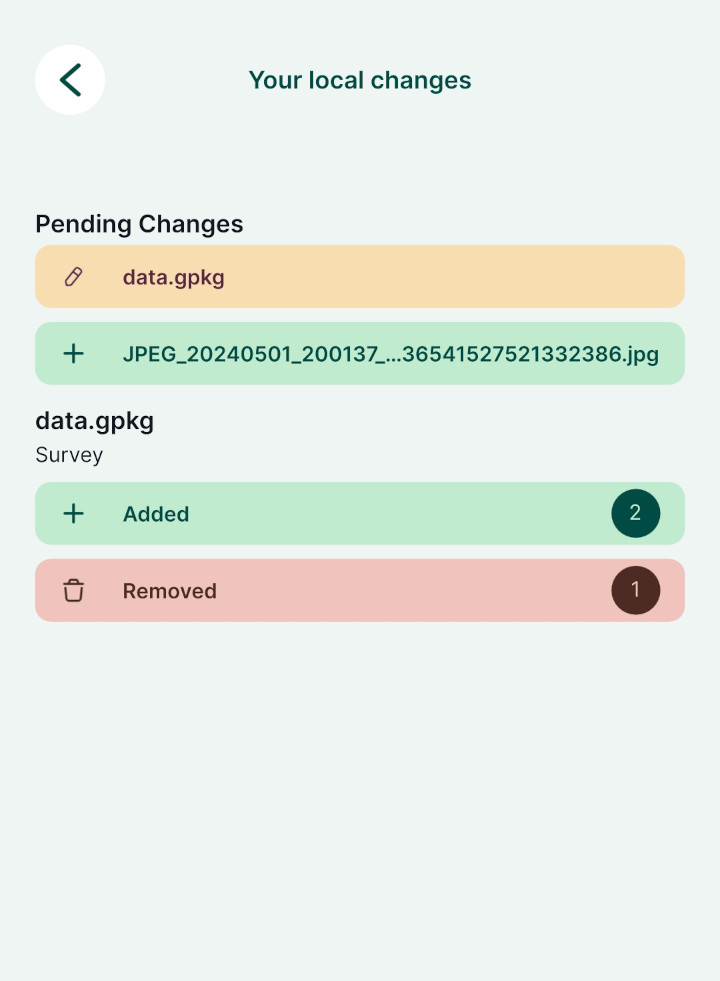
* [**Settings**](https://merginmaps.com/docs/field/mobile-app-ui/#settings)
: to set up the mobile app
Settings [](https://merginmaps.com/docs/field/mobile-app-ui/#settings)
------------------------------------------------------------------------
To open the **Settings**, tap the **More** button. In Settings, you can find [GPS](https://merginmaps.com/docs/field/mobile-app-ui/#gps-settings)
, [Streaming mode](https://merginmaps.com/docs/field/mobile-app-ui/#streaming-mode-settings)
and [Recording settings](https://merginmaps.com/docs/field/mobile-app-ui/#recording-settings)
as well as [General](https://merginmaps.com/docs/field/mobile-app-ui/#general)
information about the mobile app.
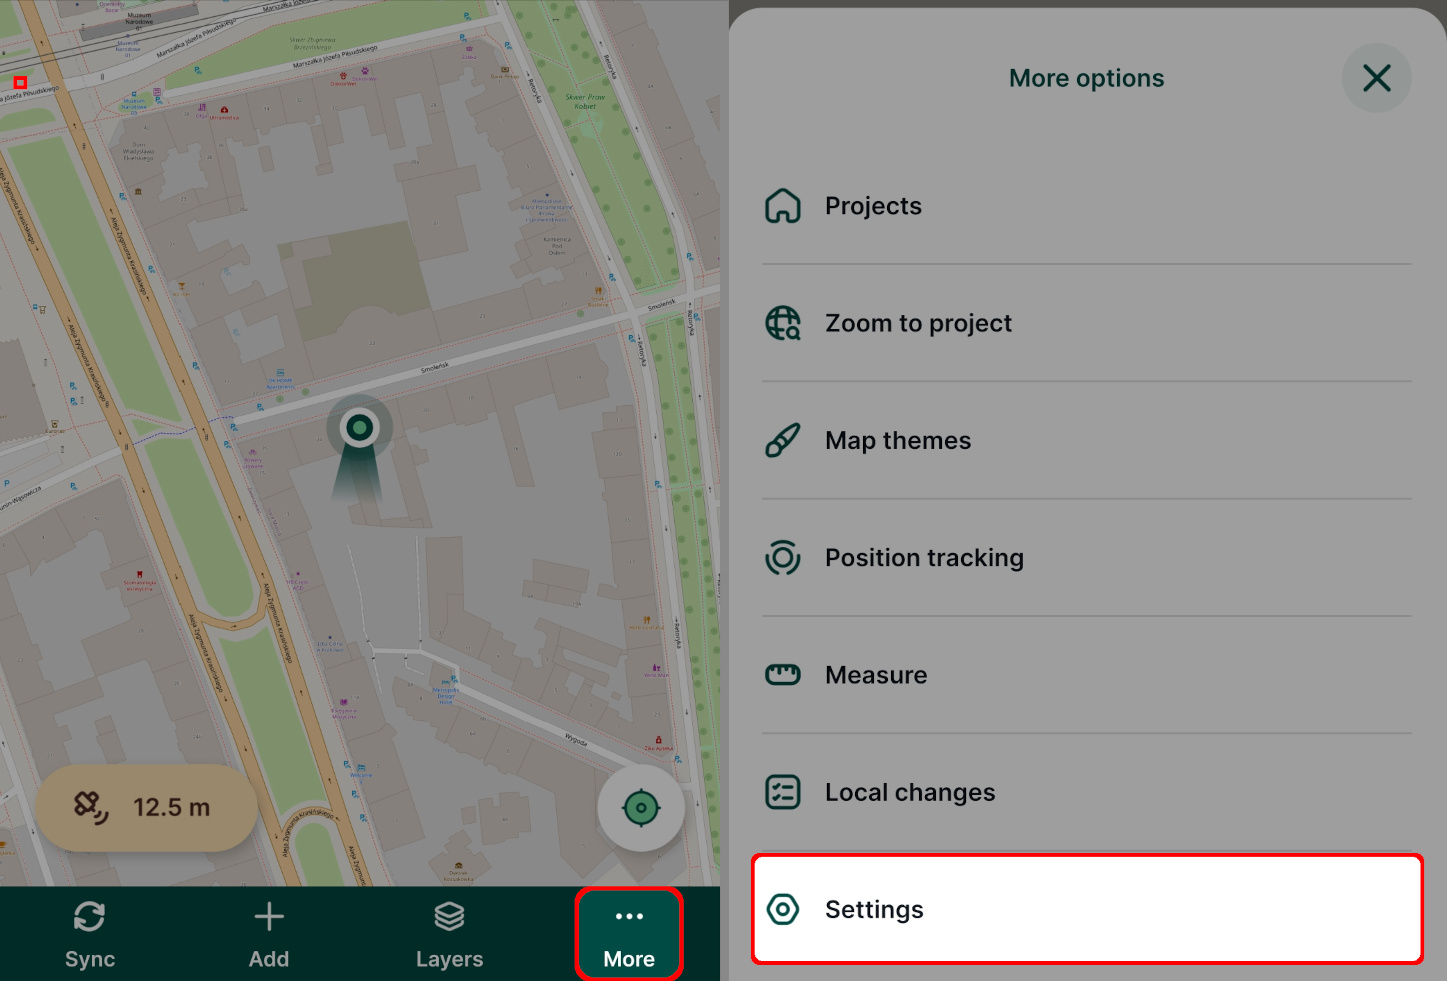
### GPS settings [](https://merginmaps.com/docs/field/mobile-app-ui/#gps-settings)
* **GPS accuracy threshold**: value used to change the colour of GPS accuracy indicator to yellow
* **Manage GPS receivers**: option to switch between internal GPS and external GPS receiver connected via Bluetooth. See [External GPS](https://merginmaps.com/docs/field/external_gps/)
for more details.
* **GPS antenna height**: option to enter the height of a GPS antenna (e.g. when a surveying pole is used)
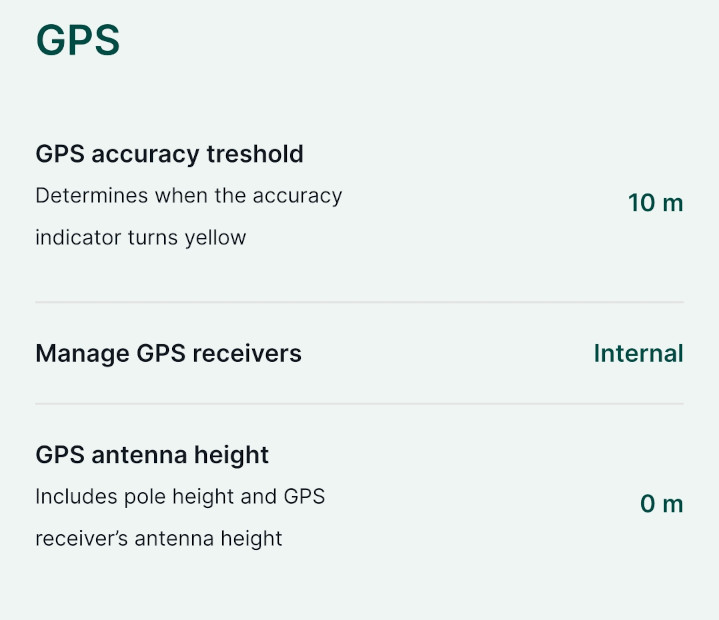
### Streaming mode settings [](https://merginmaps.com/docs/field/mobile-app-ui/#streaming-mode-settings)
[**Streaming mode**](https://merginmaps.com/docs/field/mobile-features/#streaming-mode-to-survey-lines-or-areas)
can be used when surveying lines or polygons to capture vertices based on the GPS location.
* **Interval threshold type**: the type of interval in streaming mode, can be set to _Time elapsed_ or _Distance travelled_ .
* **Threshold interval** the interval of recording vertices
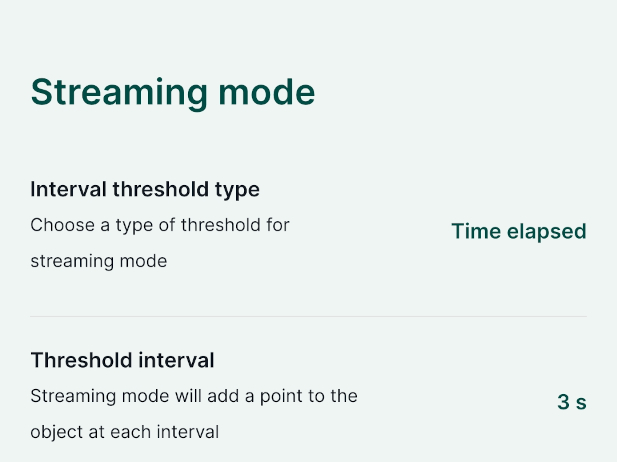
### Recording settings [](https://merginmaps.com/docs/field/mobile-app-ui/#recording-settings)
**Recording** setting provides these options:
* [**Reuse last value option**](https://merginmaps.com/docs/field/reuse-last-values/)
: if used, last entered values of selected attributes will be automatically filled in when creating a new feature
* **Automatically sync changes**: if used, local changes will be synchronised automatically
* **Auto-lock position**: if used, the mobile app will centre to your GPS position when you start the recording
* **Touch Feedback** can be set to sound, vibration or sound and vibration feedback when adding a feature. Note that the _haptic feedback_ (vibrations, sounds) needs to be enabled on your mobile device.

### General [](https://merginmaps.com/docs/field/mobile-app-ui/#general)
In **General**, you can find references to information about the mobile app, changelog, help, privacy policy, terms of service and [diagnostic log](https://merginmaps.com/docs/misc/troubleshoot/#diagnostic-log-on-mergin-maps-mobile-app)
.
Working with a project as a reader [](https://merginmaps.com/docs/field/mobile-app-ui/#working-with-a-project-as-a-reader)
----------------------------------------------------------------------------------------------------------------------------
Users who have read [permission](https://merginmaps.com/docs/manage/permissions/)
to a project do not see some of the editing options that were described in the [Working with a project](https://merginmaps.com/docs/field/mobile-app-ui/#working-with-a-project)
. Readers can open projects in the mobile app, [explore](https://merginmaps.com/docs/field/mobile-app-ui/#exploring-features-on-a-map)
features on the map, work with [layers](https://merginmaps.com/docs/field/mobile-app-ui/#layers)
and use most of the tools in the same manner as users with editing permission.
However, the bottom toolbar contains the **Projects** button that serves as a shortcut to the main page of the mobile app. For users with editing permission, this button is located in [More options](https://merginmaps.com/docs/field/mobile-app-ui/#more-options-zoom-to-project-map-themes-position-tracking-measure-local-changes-settings)
.
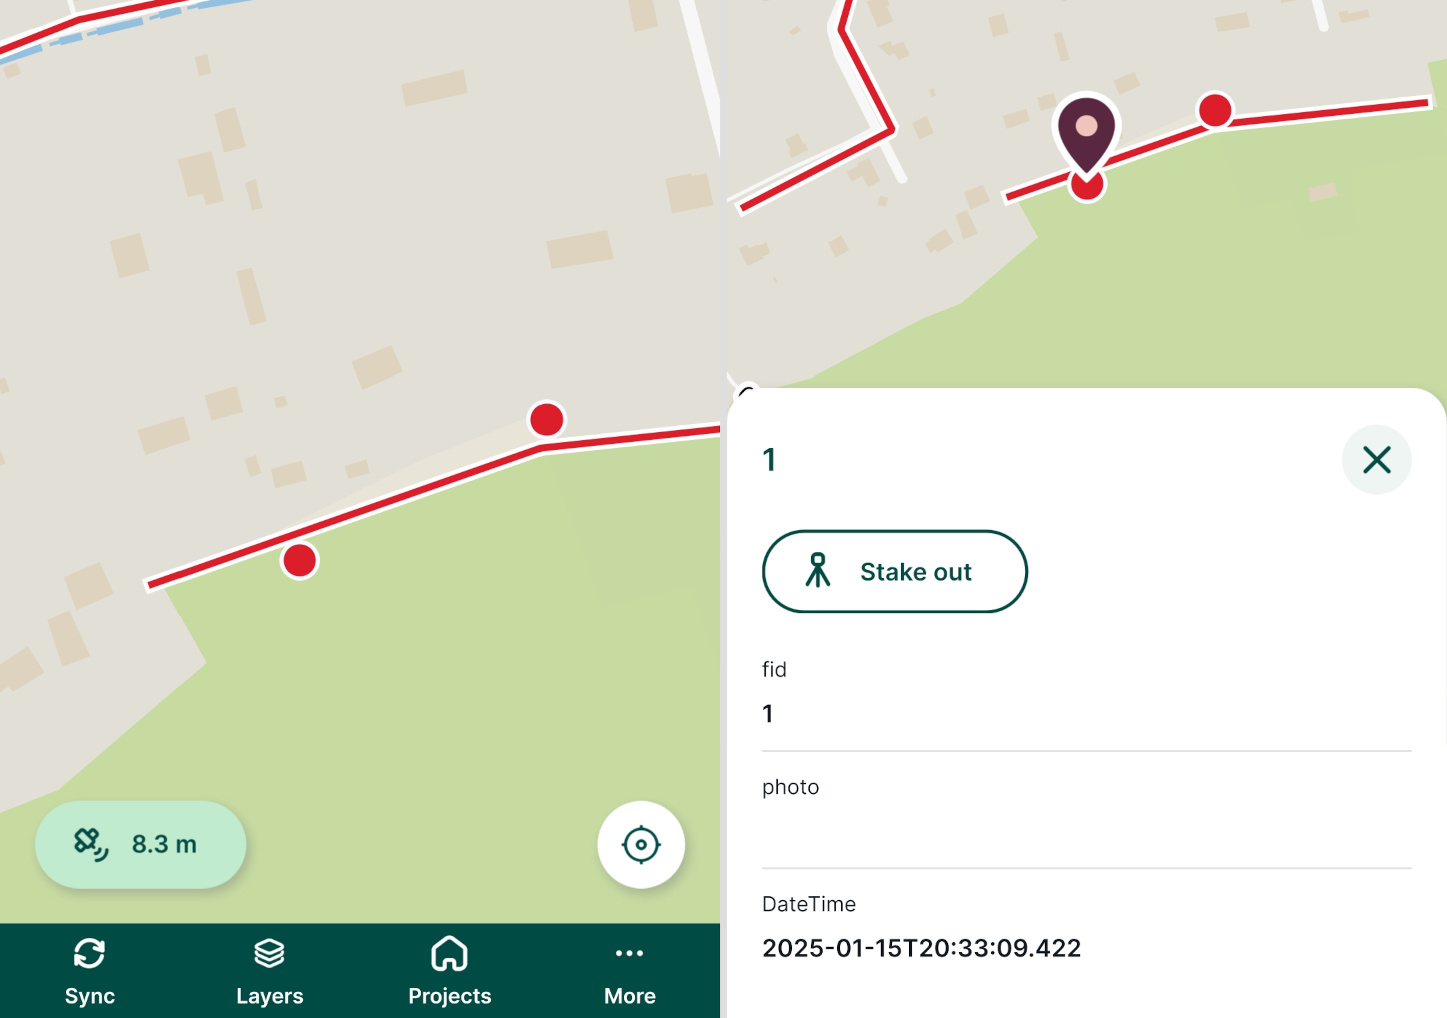
---
# Offline Use of Mergin Maps Mobile App | Mergin Maps
[Skip to content](https://merginmaps.com/docs/field/offline-use/#VPContent)
Return to top
Offline Use of Mergin Maps Mobile App [](https://merginmaps.com/docs/field/offline-use/#offline-use-of-mergin-maps-mobile-app)
================================================================================================================================
The Mergin Maps mobile app app can be used without internet connection, which is useful if you need to do the field survey in areas with poor cell phone signal or limited mobile internet. Collecting data in the field and synchronising them in the office using WiFi can be also more effective when working with large files.
However, there are some actions that require internet connection and cannot be done offline, such as [synchronising](https://merginmaps.com/docs/field/autosync/)
changes to the cloud, displaying online [background maps](https://merginmaps.com/docs/gis/settingup_background_map/)
or working with online PostGIS layers. Also, if you are offline, you will not be able to switch accounts or download projects from the cloud.
Offline field survey workflow [](https://merginmaps.com/docs/field/offline-use/#offline-field-survey-workflow)
----------------------------------------------------------------------------------------------------------------
Here is a typical workflow of offline data collection.
We assume that the field surveyors have already [installed the mobile app](https://merginmaps.com/docs/setup/install-mobile-app/)
and are signed in, as well as that the project used for field survey follows recommendations described in [How to set up an offline Mergin Maps project](https://merginmaps.com/docs/field/offline-use/#how-to-set-up-an-offline-mergin-maps-project)
.
1. Make sure that your project is [synchronised](https://merginmaps.com/docs/manage/synchronisation/#how-to-synchronise-changes-in-mergin-maps)
to the [Mergin Maps Cloud](https://merginmaps.com/)
2. While being online, field surveyors [download the project](https://merginmaps.com/docs/tutorials/mobile)
to their mobile device using Mergin Maps mobile app
3. Now they can go to do the field survey and collect data and photos while being offline
4. After finishing field survey and being back online in the office, all surveyors upload their changes back to the cloud
How to set up an offline Mergin Maps project [](https://merginmaps.com/docs/field/offline-use/#how-to-set-up-an-offline-mergin-maps-project)
----------------------------------------------------------------------------------------------------------------------------------------------
Let's see what needs to be done when preparing the Mergin Maps project in QGIS so that all data are available locally in your mobile device and the internet connection is not needed during the field survey.
Whether creating a new [Mergin Maps](https://merginmaps.com/)
project or editing an existing one, you have to see which layers in your project require internet connection.
Layers that were packaged when [creating a new Mergin Maps project](https://merginmaps.com/docs/manage/project/#packaging-qgis-project)
in QGIS are stored in the cloud. When the project is downloaded to Mergin Maps mobile app, they are automatically downloaded to your mobile device and can be used offline in the same way as if you were online.
In general, layers that do not work offline are:
* online [background maps](https://merginmaps.com/docs/gis/settingup_background_map/)
, such as WMS/WMTS, WFS or online XYZ tiles
* online PostGIS layers
#### Offline background maps [](https://merginmaps.com/docs/field/offline-use/#offline-background-maps)
Online background maps have to be prepared for offline use by generating **vector or raster tiles**. Detailed steps on how to do it can be found in [Background Maps](https://merginmaps.com/docs/gis/settingup_background_map/)
.
Vector and raster tiles can be packaged in the project. However, as these files can be rather large, it might be impractical to synchronise them trough [Mergin Maps](https://merginmaps.com/)
. [How to work with very large files](https://merginmaps.com/docs/gis/settingup_background_map/#how-to-work-with-very-large-files-android)
will show you how to get them in your mobile device.
#### Offline PostGIS layers [](https://merginmaps.com/docs/field/offline-use/#offline-postgis-layers)
If you use online PostGIS layers in your Mergin Maps project and need to do an offline survey in the field, we recommend using [DB Sync](https://merginmaps.com/docs/dev/dbsync/)
. DB Sync helps synchronising your PostGIS database and GeoPackage layers that can be edited offline using Mergin Maps mobile app.
TIP
After setting up an offline project, download it to Mergin Maps mobile app. Then close the app, turn off the internet and open the project in Mergin Maps mobile app again while being offline to make sure that everything works as intended.
---
# Measurement Tools | Mergin Maps
[Skip to content](https://merginmaps.com/docs/field/measure/#VPContent)
Return to top
Measurement Tools [](https://merginmaps.com/docs/field/measure/#measurement-tools)
====================================================================================
Measure length and area in Mergin Maps mobile app [](https://merginmaps.com/docs/field/measure/#measure-length-and-area-in-mergin-maps-mobile-app)
----------------------------------------------------------------------------------------------------------------------------------------------------
In the mobile app, it is possible to measure length and area on a map window. Measurement tools use the same units as are used by the QGIS project.
To open the measurement tools, tap the **More** button in the bottom navigation panel and use the **Measure** option. 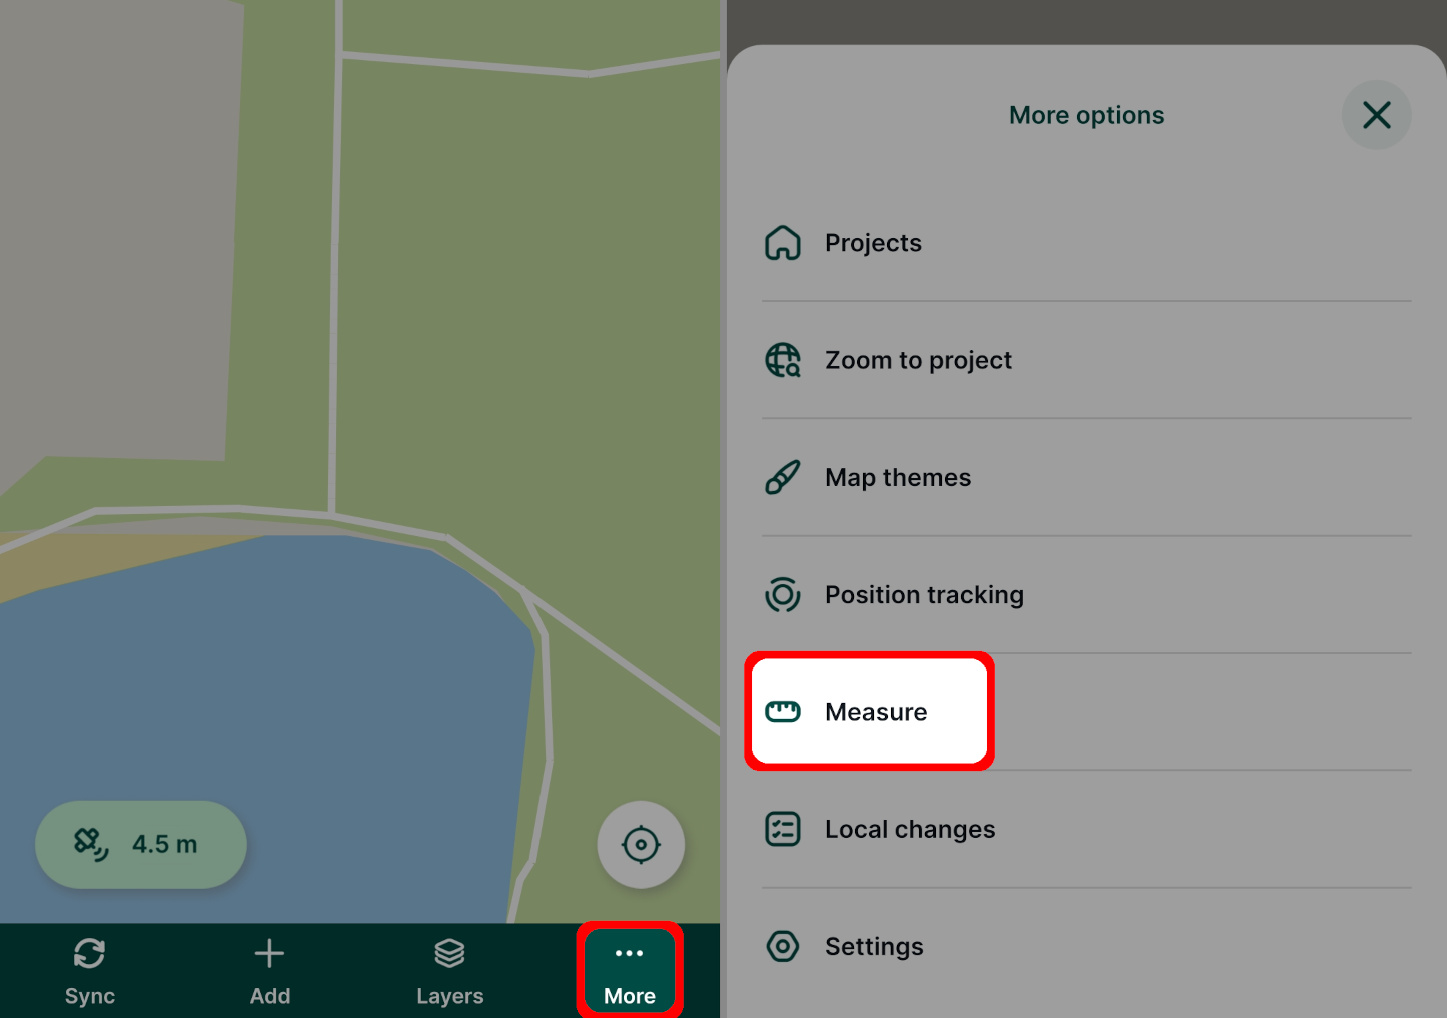
Use the **Add Point** button to add points along the line or area you want to measure
* The _length_ between added points is displayed in the **Measure** panel.
* The current length is displayed near the crosshairs as you move them.
* Use the **Undo** button to remove the last point.
* To get the area, add the points along the shape. When you move the crosshairs close to the first point, you will see the **Close shape** option.
When finished with the measurements, tap the **Done** for length measurement or **Close shape** for area measurement. The values of _perimeter_ and _area_ will be displayed in the **Measure** panel.
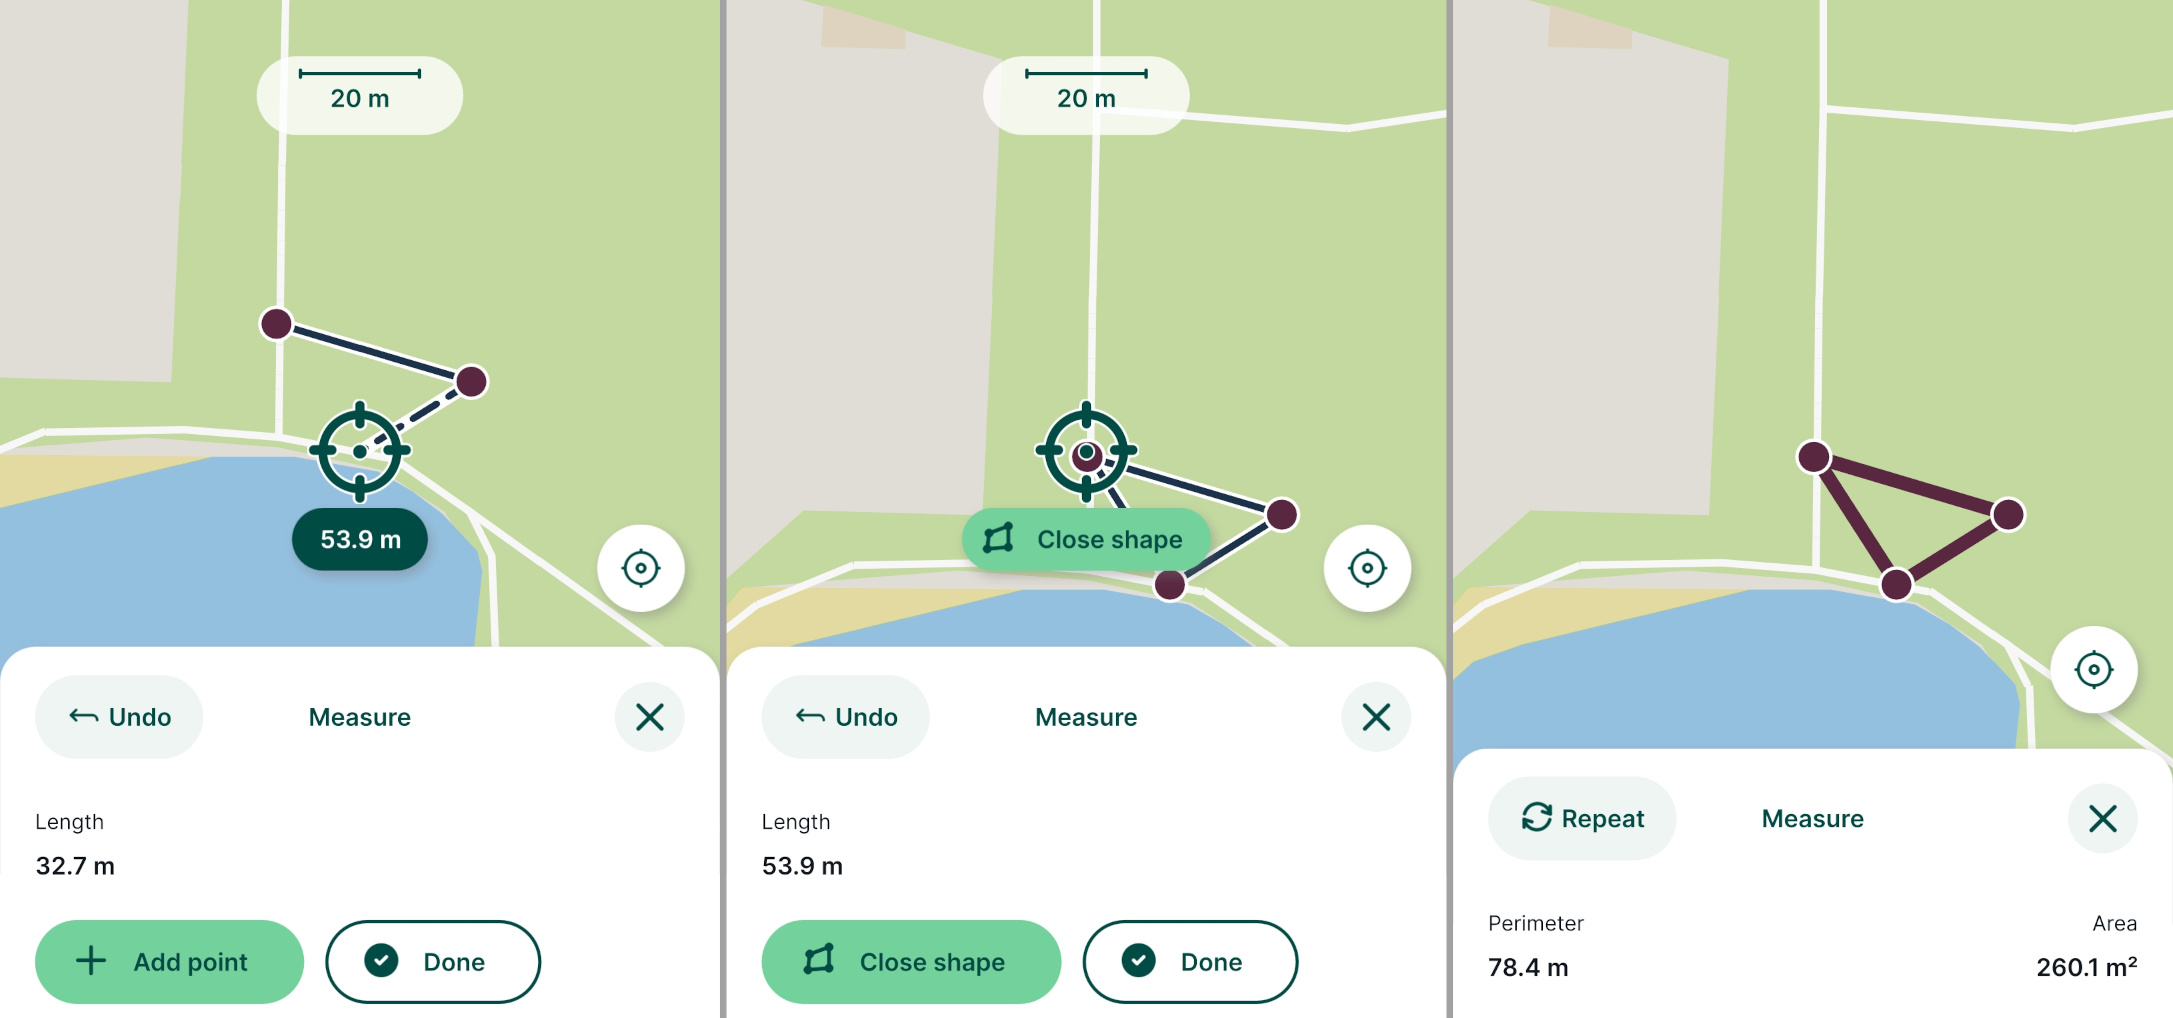
Tap **Repeat** to start a new measurement.
Measured values are not saved.
Changing measurement units in QGIS [](https://merginmaps.com/docs/field/measure/#changing-measurement-units-in-qgis)
----------------------------------------------------------------------------------------------------------------------
Units that are used when measuring in the mobile app are defined (and can be changed) in the project in QGIS:
1. Open your Mergin Maps project in QGIS
2. Navigate to the **General** tab in the **Project Properties**
3. In the **Measurements** section, change the _Units for distance measurement_ and _Units for area measurement_ to the units you want to use when measuring length and area in the mobile app
4. Save and synchronise your project
For example, here we switched to length units to feet and area units to acres.
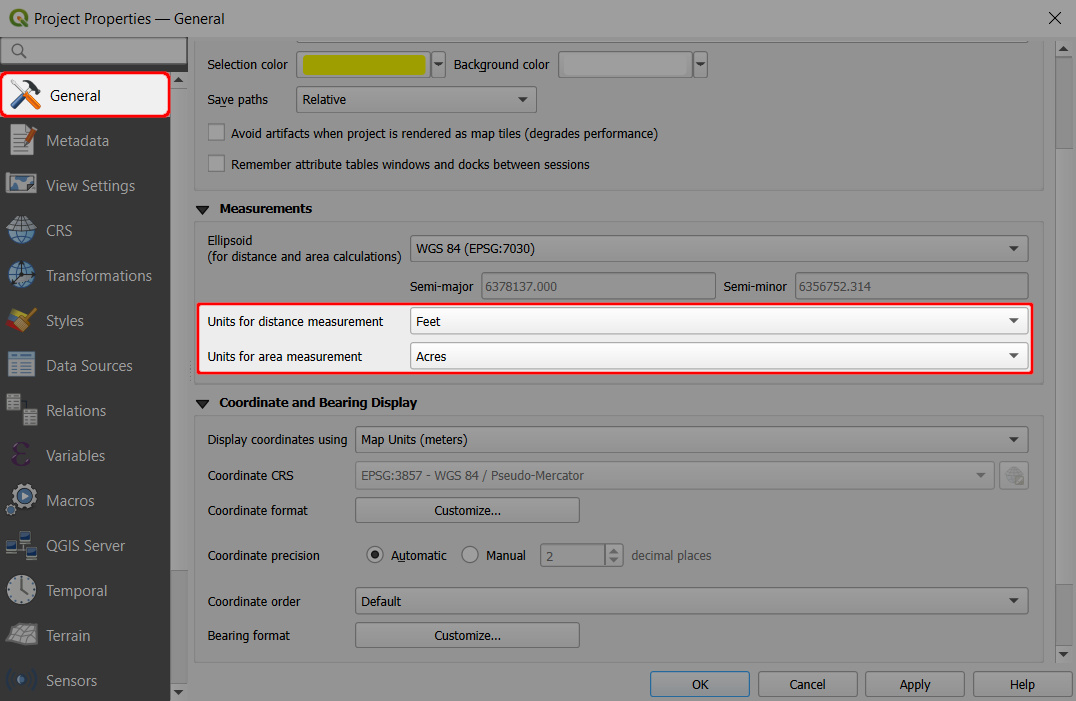
Now, the mobile app displays the length/the perimeter in feet and the area in acres. 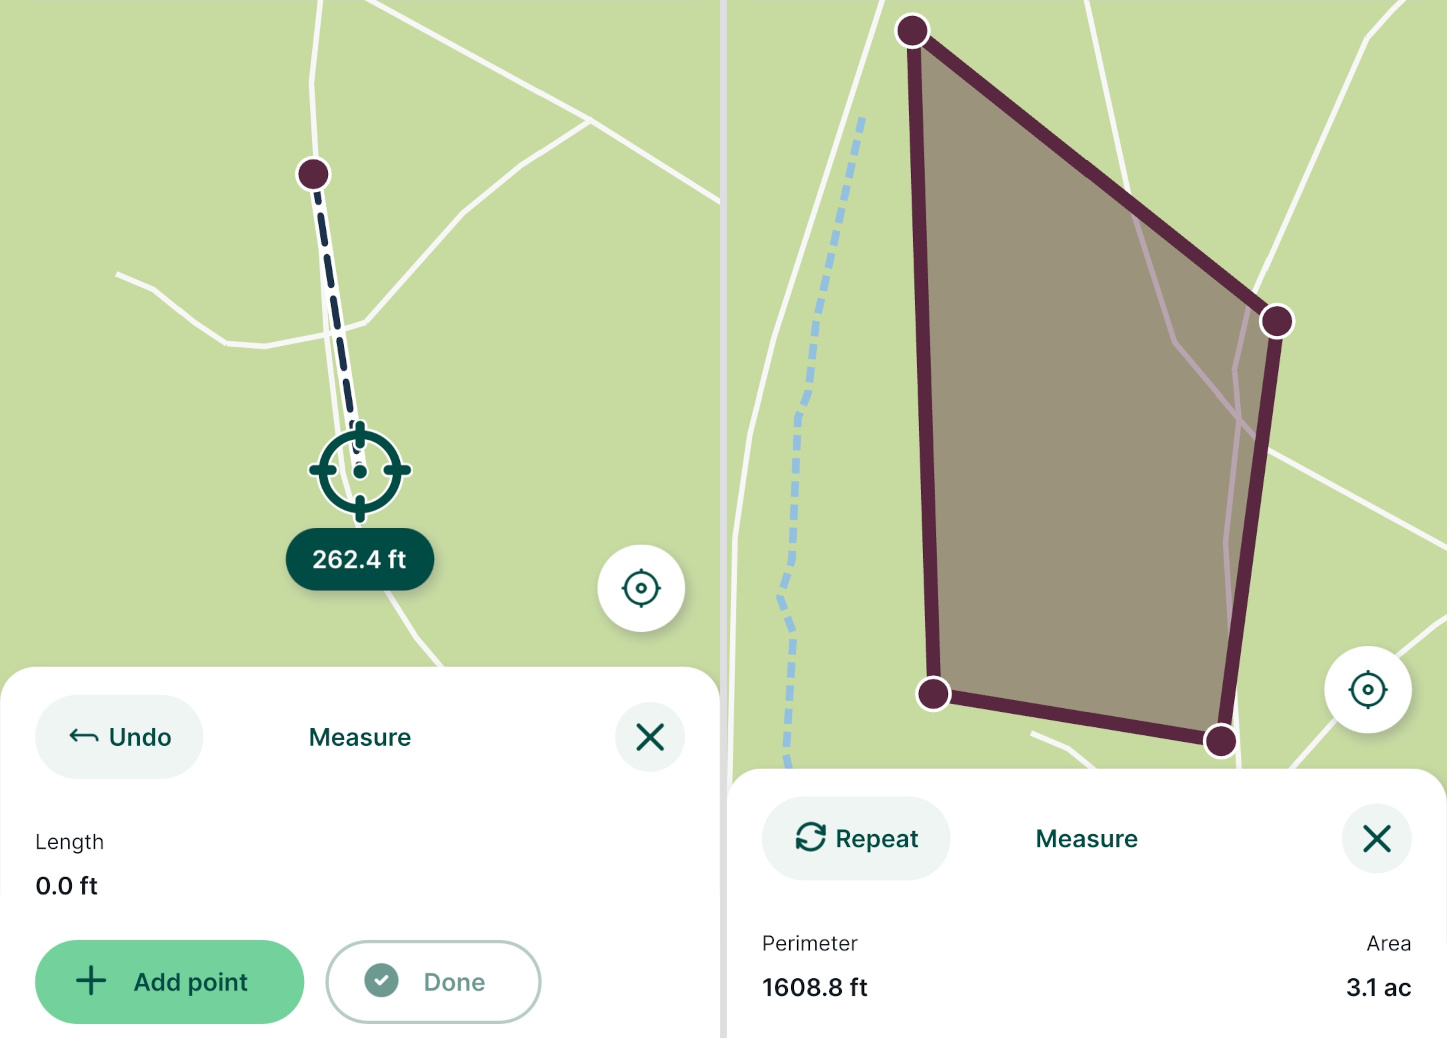
---
# Layers in Mergin Maps Mobile App | Mergin Maps
[Skip to content](https://merginmaps.com/docs/field/layers/#VPContent)
Return to top
Layers in Mergin Maps Mobile App [](https://merginmaps.com/docs/field/layers/#layers-in-mergin-maps-mobile-app)
=================================================================================================================
The **Layers** button is located in the bottom navigation panel.
It provides the overview of layers and features in your [Mergin Maps](https://merginmaps.com/)
project in Mergin Maps mobile app, as well as the option to turn the visibility of specific layers on/off or to see a layer's legend.

Layers visibility [](https://merginmaps.com/docs/field/layers/#layers-visibility)
-----------------------------------------------------------------------------------
Tap **Layers** to open a list of layers in the project.
The visibility of layers on the map can be easily turned on and off by toggling the button next to the layer's name.
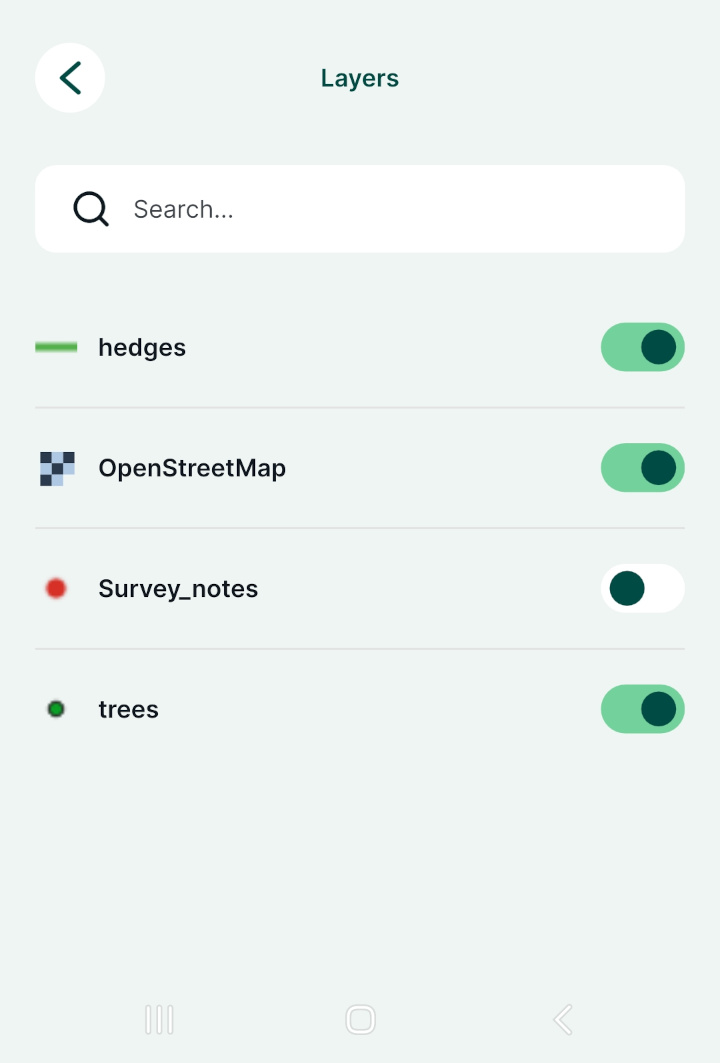
Layer order [](https://merginmaps.com/docs/field/layers/#layer-order)
-----------------------------------------------------------------------
By default, layers are listed in alphabetical order. If you want to follow the layer order of the QGIS project, you can do so in the [Project properties](https://merginmaps.com/docs/gis/features/#layer-order)
:
1. Open your Mergin Maps project in QGIS 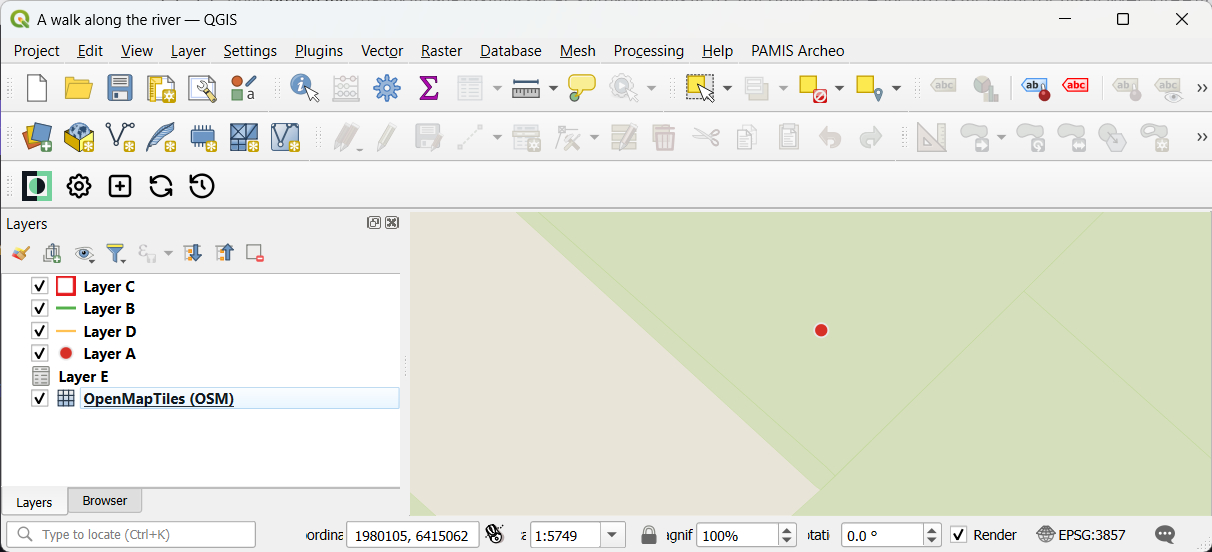
2. Navigate to **Project** > **Properties**
3. In the Mergin Maps tab, choose the sort method: _Alphabetical_ or _QGIS layer order_. 
4. **Apply** the changes, save and synchronise your project.
5. Open the project in the mobile app.
Depending on the setup, layers will be either listed alphabetically or based on the QGIS layer order:
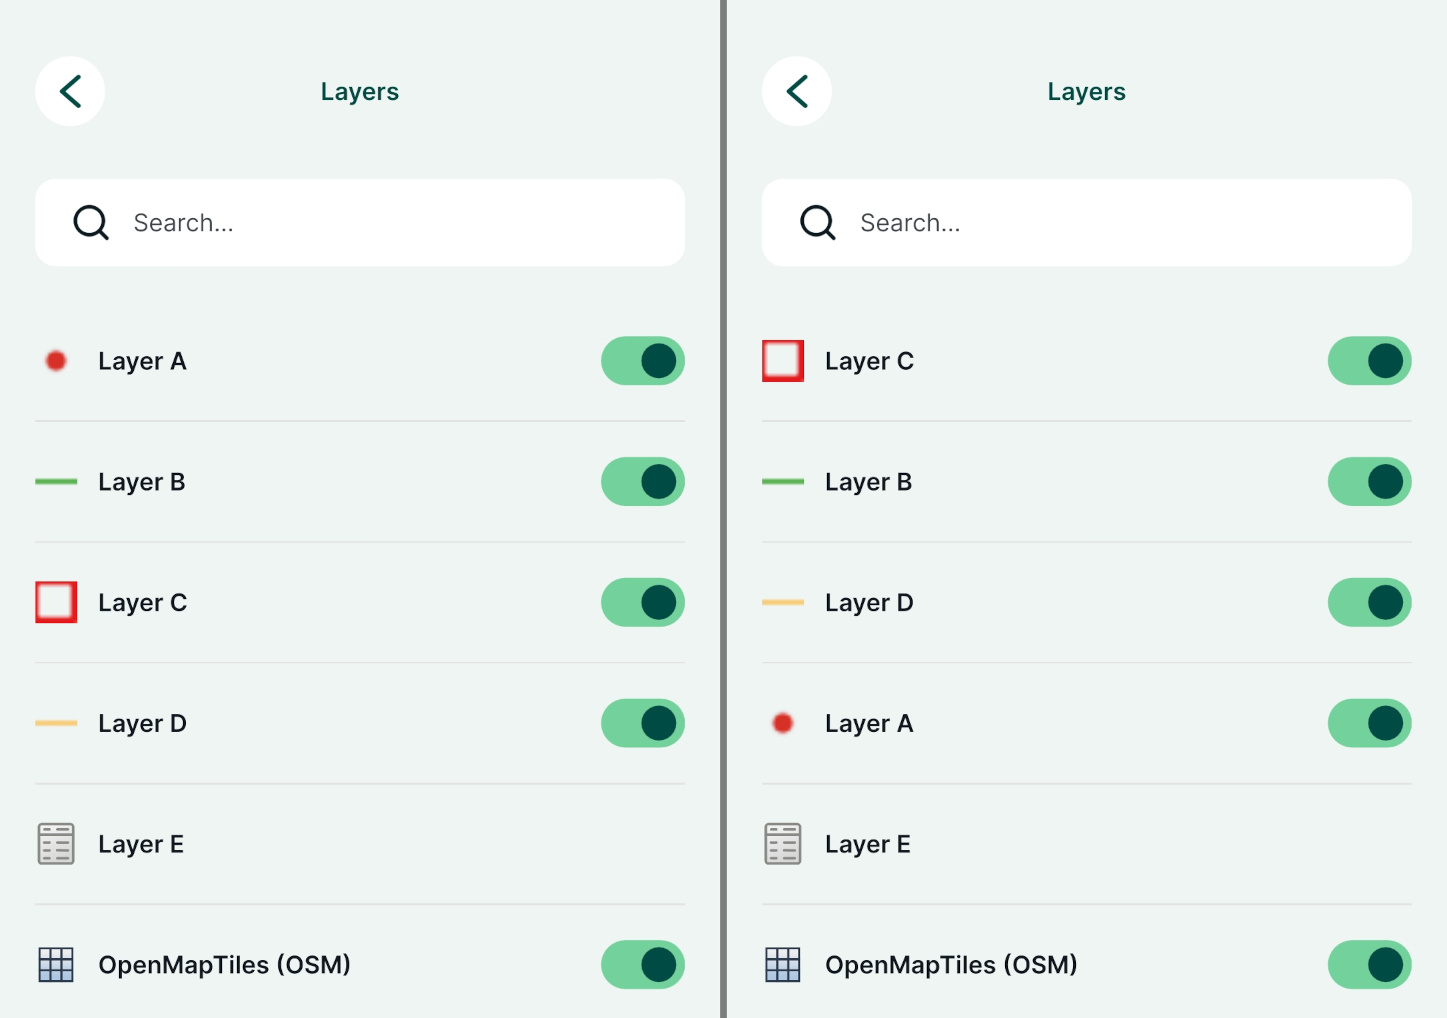
Layers legend and features [](https://merginmaps.com/docs/field/layers/#layers-legend-and-features)
-----------------------------------------------------------------------------------------------------
Select a layer in the **Layers** panel to browse features and [search for attributes values](https://merginmaps.com/docs/field/layers/#browsing-features)
. Tap on the record to zoom to the feature on the map and display its form.
Swipe right or tap **Layer info** to see the layer's legend and to toggle on/off its visibility on the map.
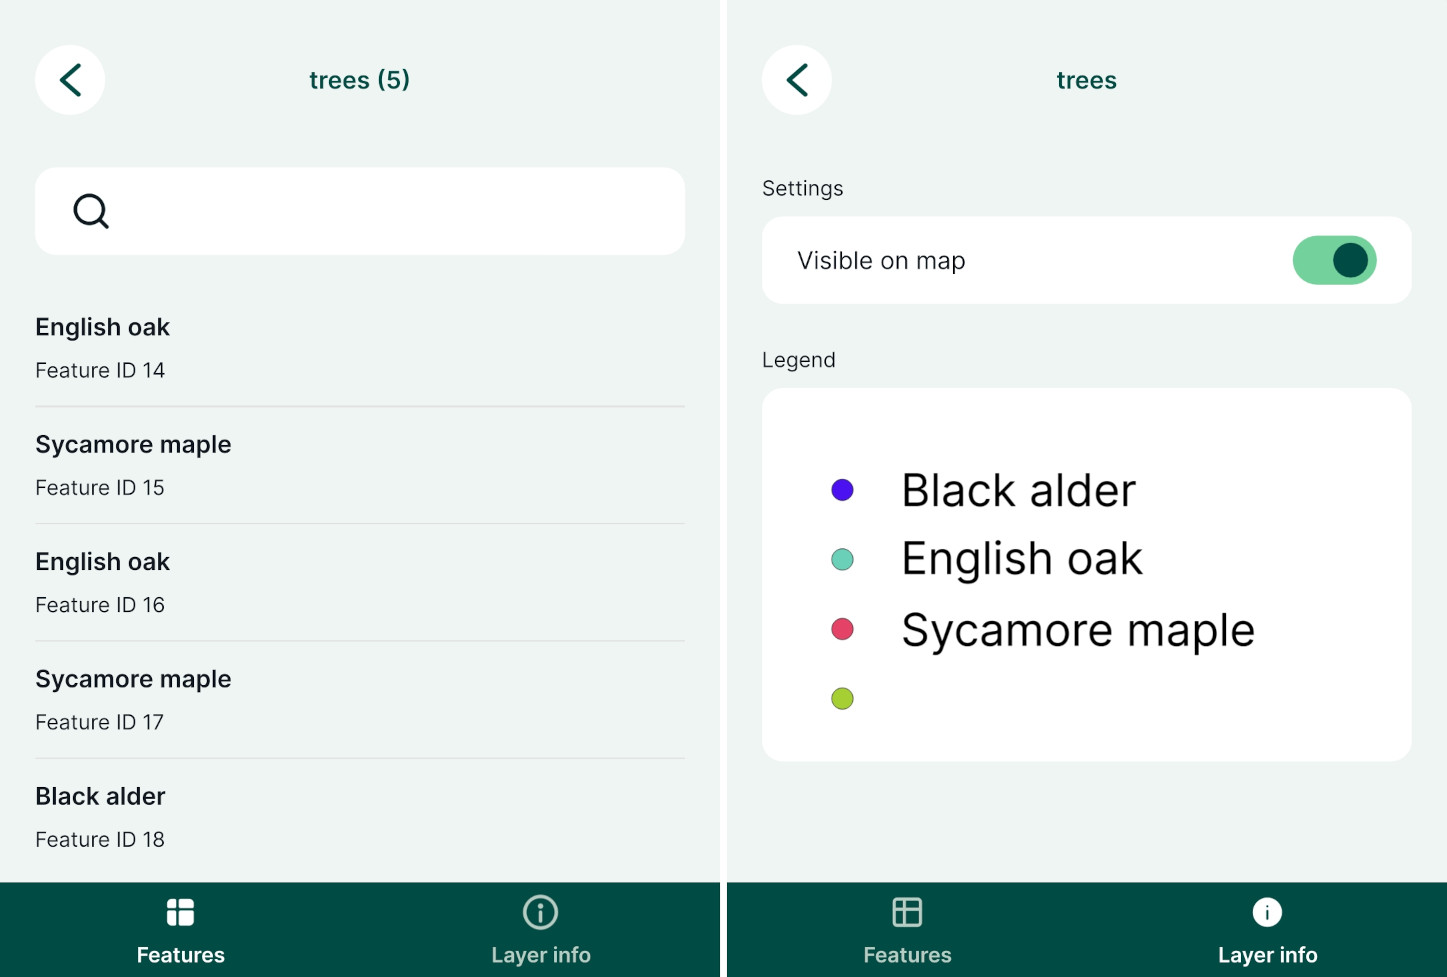
Browsing features [](https://merginmaps.com/docs/field/layers/#browsing-features)
-----------------------------------------------------------------------------------
Attribute data can be browsed in the mobile app by tapping **Layers**.
In the **Layers** window, choose a layer or a table from the list to open the list of features.

Here, you can browse the features. The search bar can be used to shortlist matching records. The search looks up for a match in all searchable attributes values and is not case sensitive.
Sorting features and searching for field values
The way how features are sorted in the mobile app can be affected by [settings in the QGIS project](https://merginmaps.com/docs/gis/search_data/)
.
Tap on the record to zoom to the feature on the map and display its form.
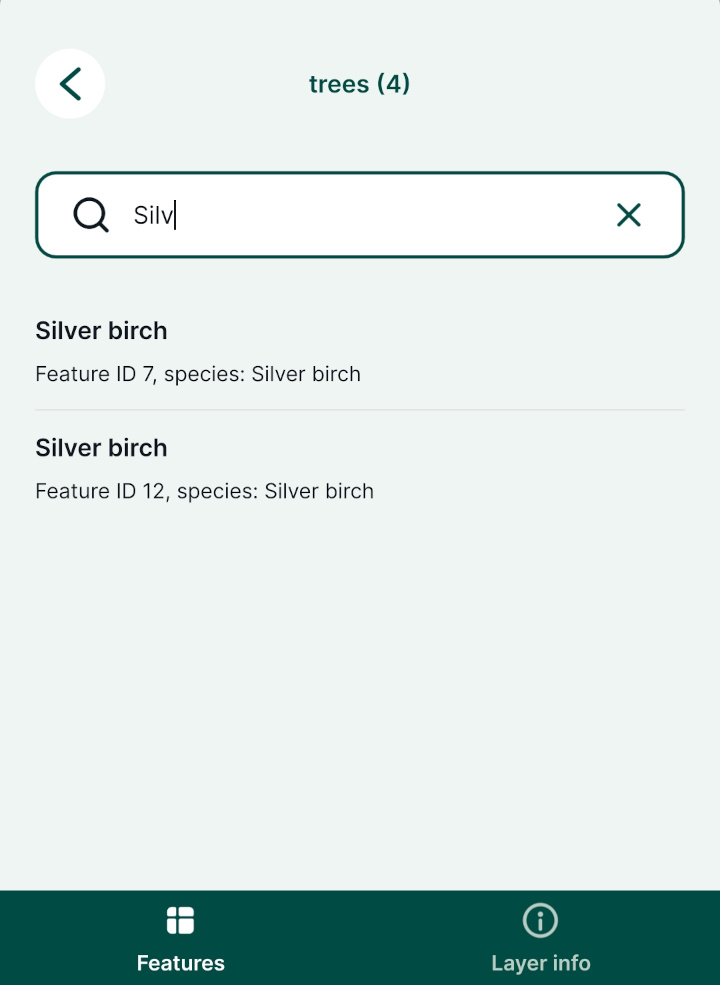
---
# Synchronisation in Mergin Maps Mobile App | Mergin Maps
[Skip to content](https://merginmaps.com/docs/field/autosync/#VPContent)
Return to top
Synchronisation in Mergin Maps Mobile App [](https://merginmaps.com/docs/field/autosync/#synchronisation-in-mergin-maps-mobile-app)
=====================================================================================================================================
Changes in your project can be synchronised by using **Synchronise project** option on the main page of the mobile app or during the survey:
* [manually](https://merginmaps.com/docs/field/autosync/#manual-synchronisation)
by clicking the **Sync** button
* [automatically](https://merginmaps.com/docs/field/autosync/#automatic-synchronisation)
by using the **Automatically sync changes** option
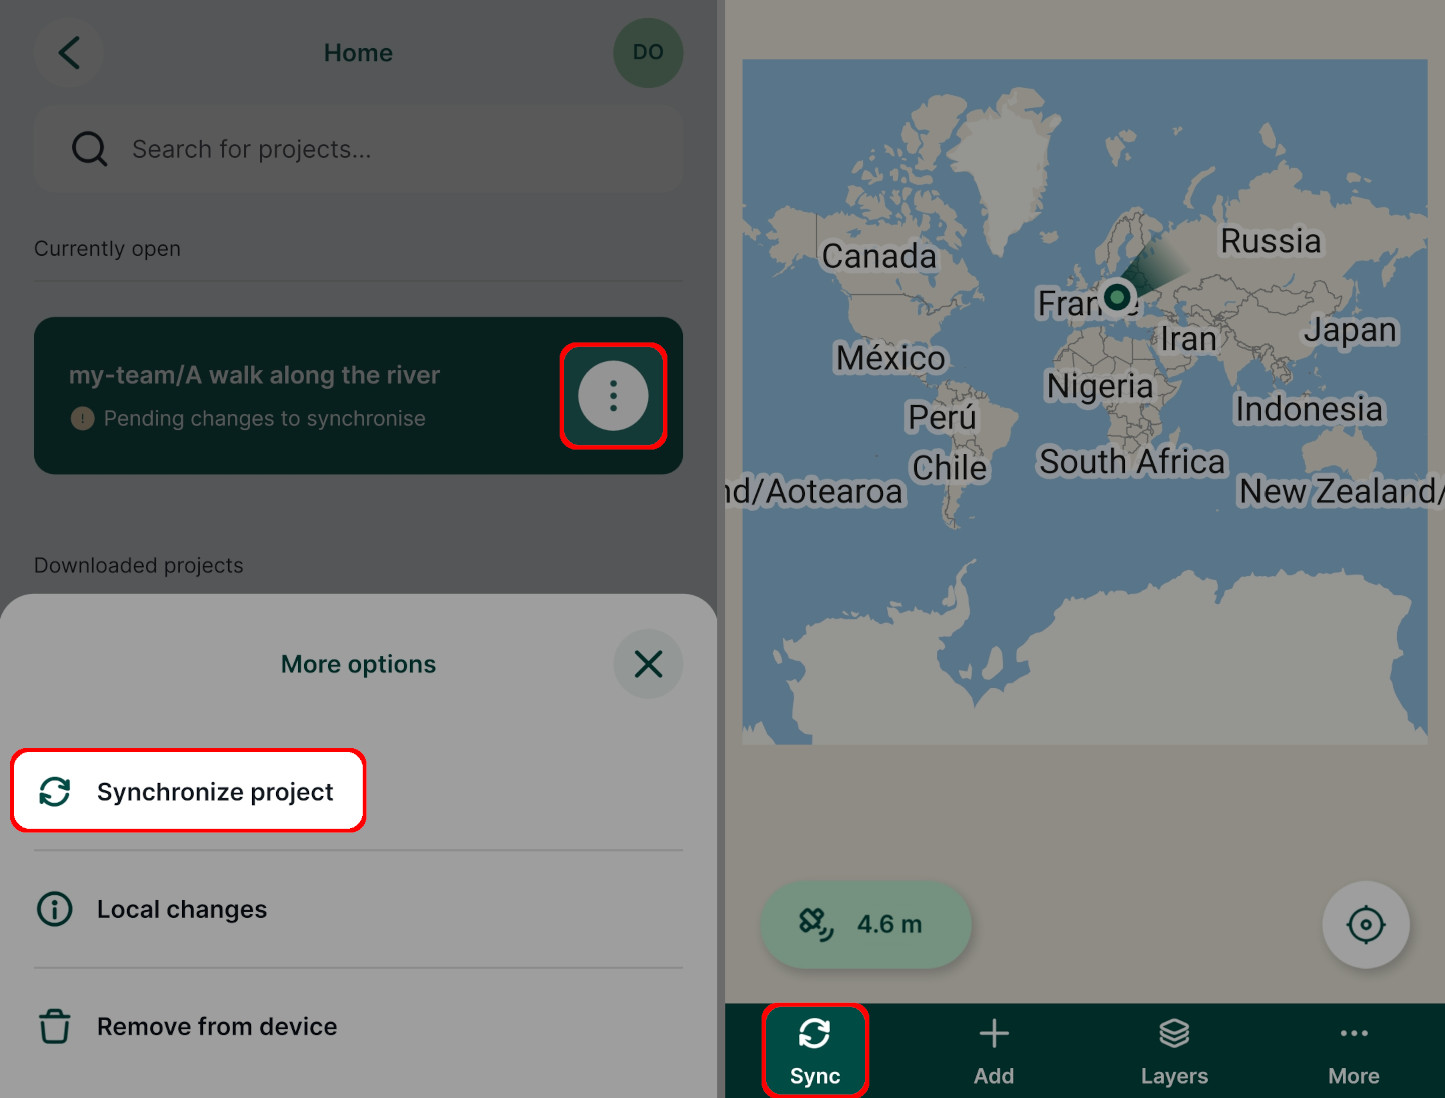
To be able to synchronise a project, you need to:
* be signed in to your [Mergin Maps](https://merginmaps.com/)
account
* be connected to the internet
* have write [permission](https://merginmaps.com/docs/manage/permissions/)
to the project
More about synchronisation
Want to learn more about synchronisation in [Mergin Maps](https://merginmaps.com/)
? Go to [**Synchronisation**](https://merginmaps.com/docs/manage/synchronisation/)
for more details.
Are you missing some data after synchronisation? [How to Recover Missing Data](https://merginmaps.com/docs/manage/missing-data/)
will show you how to deal with [conflict files](https://merginmaps.com/docs/manage/missing-data/#there-are-conflict-files-in-the-folder)
and how to [manually download](https://merginmaps.com/docs/manage/missing-data/#there-are-no-conflict-files-in-the-folder)
data from your mobile device.
Manual synchronisation [](https://merginmaps.com/docs/field/autosync/#manual-synchronisation)
-----------------------------------------------------------------------------------------------
You can synchronise local changes by tapping the sync button in the map window. The sync button will stop rotating once the synchronisation process is finished and the **Successfully synchronised** message will appear at the top of the window.

If you want to inspect what has changed before synchronising, tap on the **More** button and go to **Local changes**.
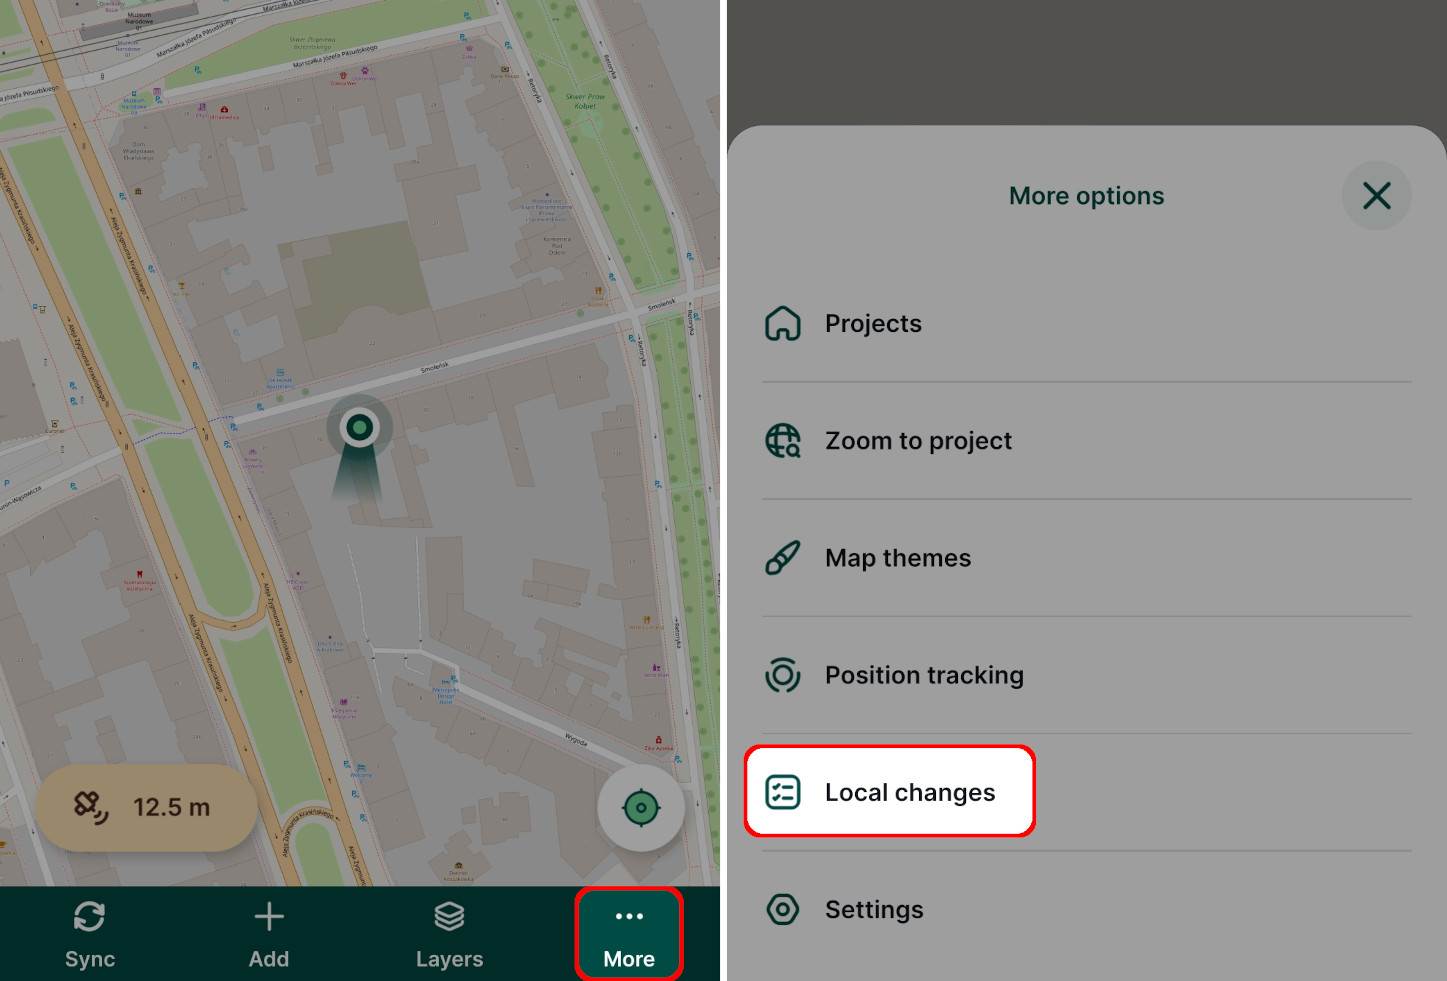
Here, you will see the overview of your local changes.

Automatic synchronisation [](https://merginmaps.com/docs/field/autosync/#automatic-synchronisation)
-----------------------------------------------------------------------------------------------------
To allow automatic synchronisation in Mergin Maps mobile app, navigate to [**Settings**](https://merginmaps.com/docs/field/mobile-app-ui/#settings)
and toggle on **Automatically sync changes**.
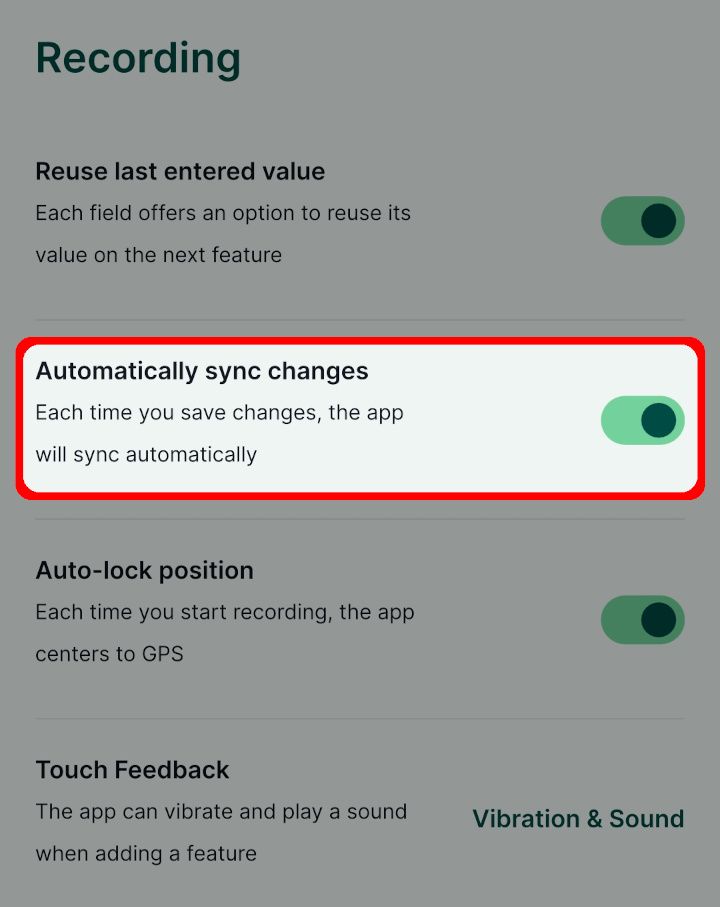
As changes will be done during the survey, such as adding new features or changing field values, the synchronisation will start automatically. The sync button will indicate that synchronisation is in progress and once it is done, the **Successfully synchronised** message will appear.
If changes can not be synchronised automatically, e.g. when internet connection is lost during the survey, the changes need to be synchronised manually after reconnecting to the internet.
---
# Photo Sketching | Mergin Maps
[Skip to content](https://merginmaps.com/docs/field/photo-sketching/#VPContent)
Return to top
Photo Sketching [](https://merginmaps.com/docs/field/photo-sketching/#photo-sketching)
========================================================================================
Photo sketches can be used to annotate photos or pictures added to a feature, in addition to the regular field collection of [features](https://merginmaps.com/docs/field/mobile-features/)
or [photos](https://merginmaps.com/docs/layer/photos/)
.
Preview feature
Photo sketching is a feature in preview. While it works for most devices and setups, you may encounter some issues.
Enable photo sketching [](https://merginmaps.com/docs/field/photo-sketching/#enable-photo-sketching)
------------------------------------------------------------------------------------------------------
Since QGIS plugin 2025.3.4
Photo sketching is disabled by default. To use it, it needs to be enabled in QGIS when [preparing your Mergin Maps project](https://merginmaps.com/docs/gis/features/#photo-sketching)
.
1. Open your Mergin Maps project in QGIS
2. Navigate to **Project** > **Properties**
3. In the Mergin Maps tab, check the **Enable photo sketching** option and **Apply** the changes. 
4. Save and synchronise your project!
TIP
If you do not see this option in the **Project properties**, check for [plugin upgrades](https://merginmaps.com/docs/setup/install-mergin-maps-plugin-for-qgis/#plugin-upgrade)
.
Photo sketching in the mobile app [](https://merginmaps.com/docs/field/photo-sketching/#photo-sketching-in-the-mobile-app)
----------------------------------------------------------------------------------------------------------------------------
To use photo sketching in the mobile app, make sure it is [enabled in the project](https://merginmaps.com/docs/field/photo-sketching/#enable-photo-sketching)
.
1. Open a form with a [photo widget](https://merginmaps.com/docs/layer/photos/)
for editing and tap the **Photo sketching** button.
* Draw your sketches on the photo by freehand or using a stylus. You choose from 7 annotation colours.
* Use the **Undo** button to revert the last changes.
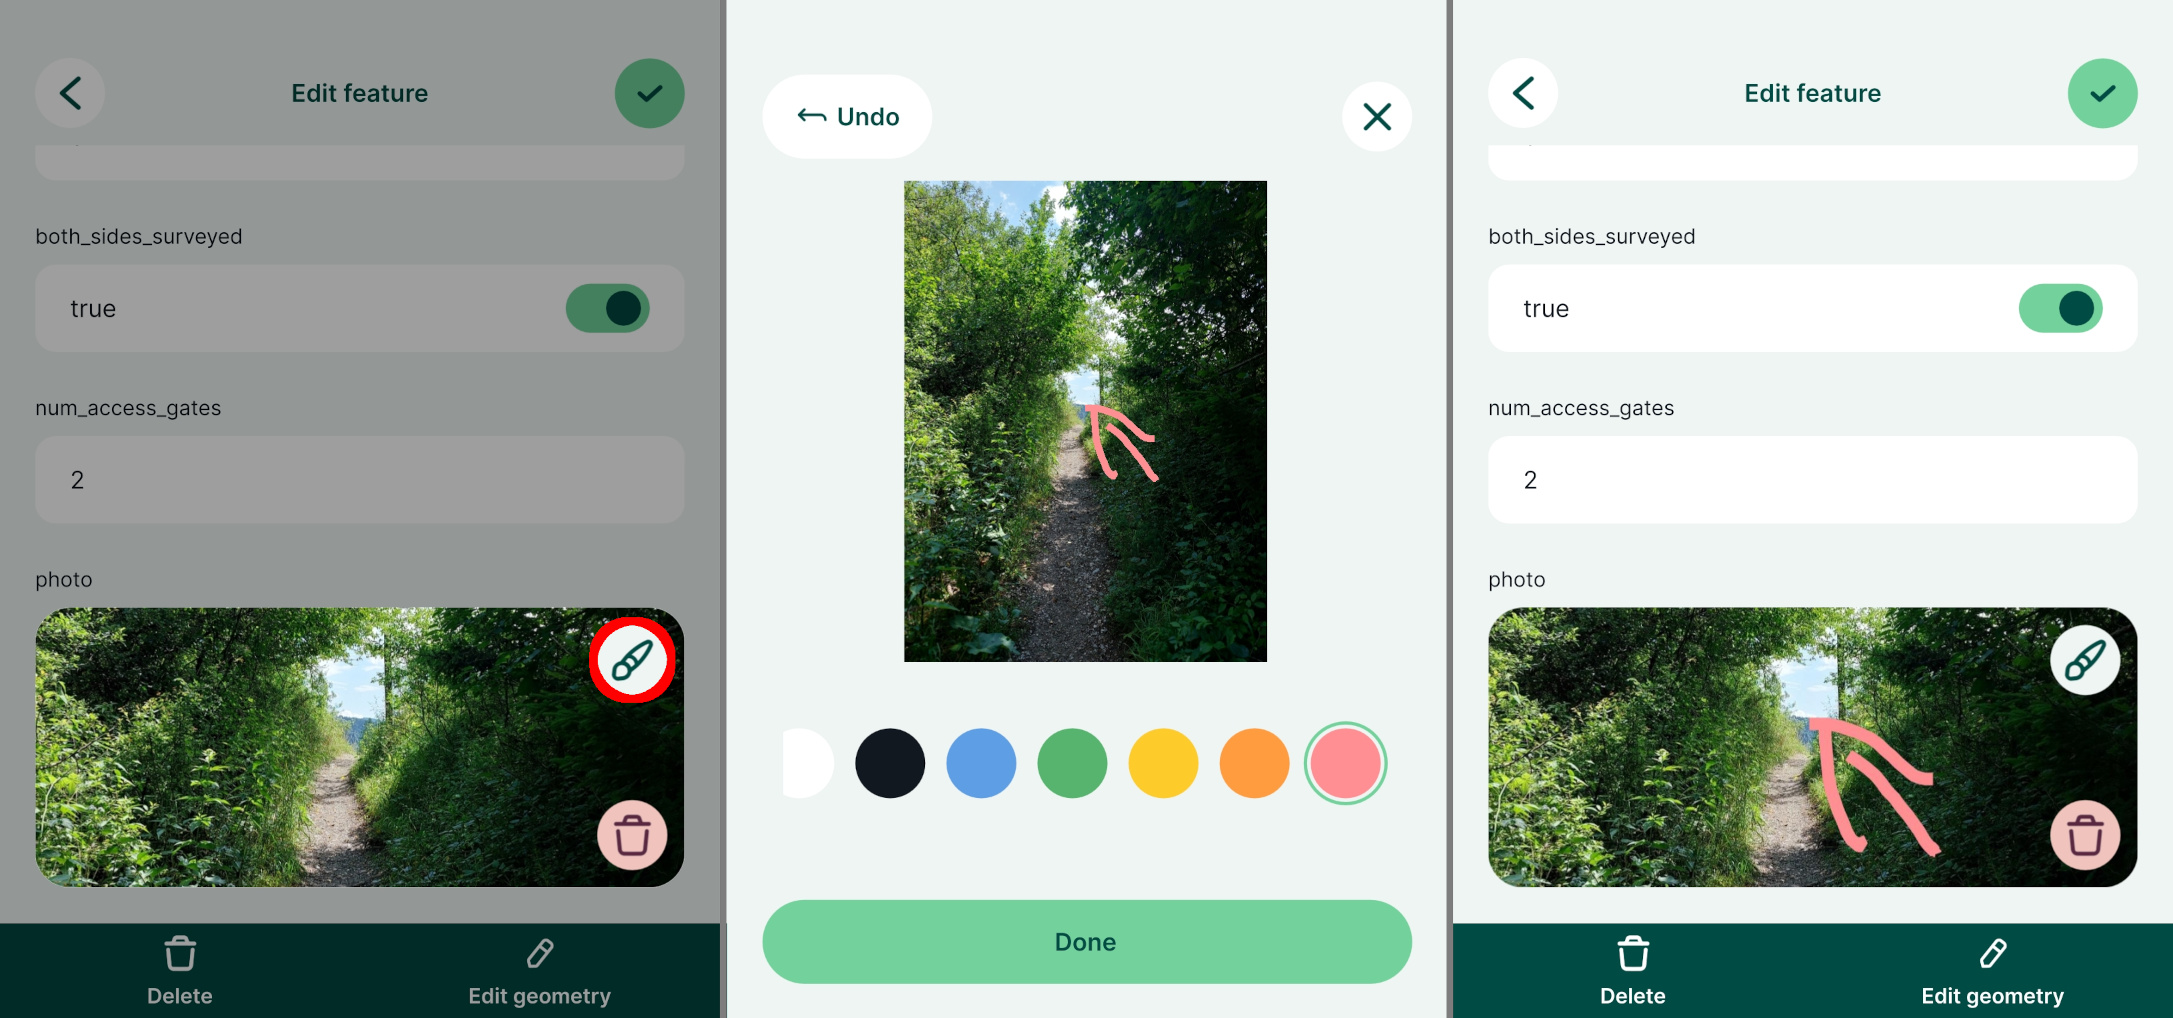
2. Use the **Done** button to finish sketching. The picture with sketches will be displayed in the form.
3. Save and synchronise the changes. A copy of the original picture with the sketches will be saved to Mergin Maps.
---
# Map Sketching | Mergin Maps
[Skip to content](https://merginmaps.com/docs/field/map-sketching/#VPContent)
Return to top
Map Sketching [](https://merginmaps.com/docs/field/map-sketching/#map-sketching)
==================================================================================
Map sketches can be used to draw something on the map, in addition to the regular field collection of [features](https://merginmaps.com/docs/field/mobile-features/)
.
Enable map sketching [](https://merginmaps.com/docs/field/map-sketching/#enable-map-sketching)
------------------------------------------------------------------------------------------------
Map sketching needs to be enabled in QGIS when [preparing your Mergin Maps project](https://merginmaps.com/docs/gis/features/#map-sketching)
.
1. Open your Mergin Maps project in QGIS
2. Navigate to **Project** > **Properties**
3. In the Mergin Maps tab, check the **Enable map sketching** option. 
You can also change the colour set to define the colours that will be available in the mobile app.
4. Save the changes.
A new layer named **Map sketches** (`map_sketches.gpkg`) will be added to the project. This layer is used to store the map sketches.
5. Save and synchronise your project!
TIP
If you do not see this option in the **Project properties**, check for [plugin upgrades](https://merginmaps.com/docs/setup/install-mergin-maps-plugin-for-qgis/#plugin-upgrade)
.
Map sketching in the mobile app [](https://merginmaps.com/docs/field/map-sketching/#map-sketching-in-the-mobile-app)
----------------------------------------------------------------------------------------------------------------------
To use map sketches in the mobile app, make sure they are [enabled in the project](https://merginmaps.com/docs/field/map-sketching/#enable-map-sketching)
.
1. Tap the **Map sketching** button 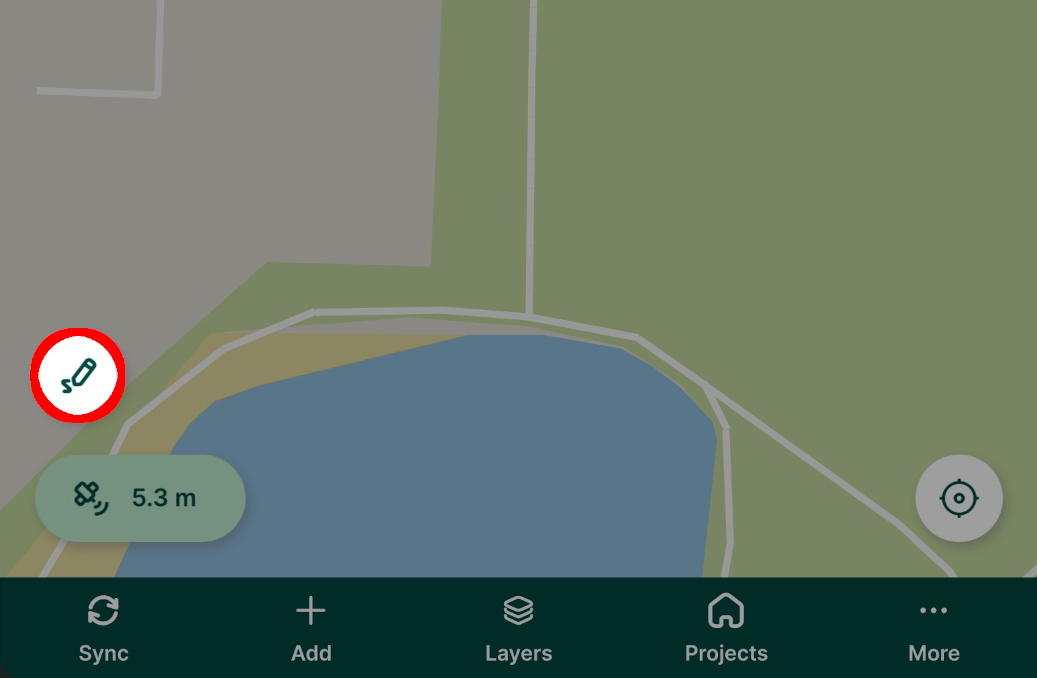
2. The **Sketch** bar appears.
* Draw your sketches on the map by freehand or using a stylus. You choose from 7 annotation colours. The colour set can be changed in the [project properties](https://merginmaps.com/docs/field/map-sketching/#enable-map-sketching)
in QGIS. 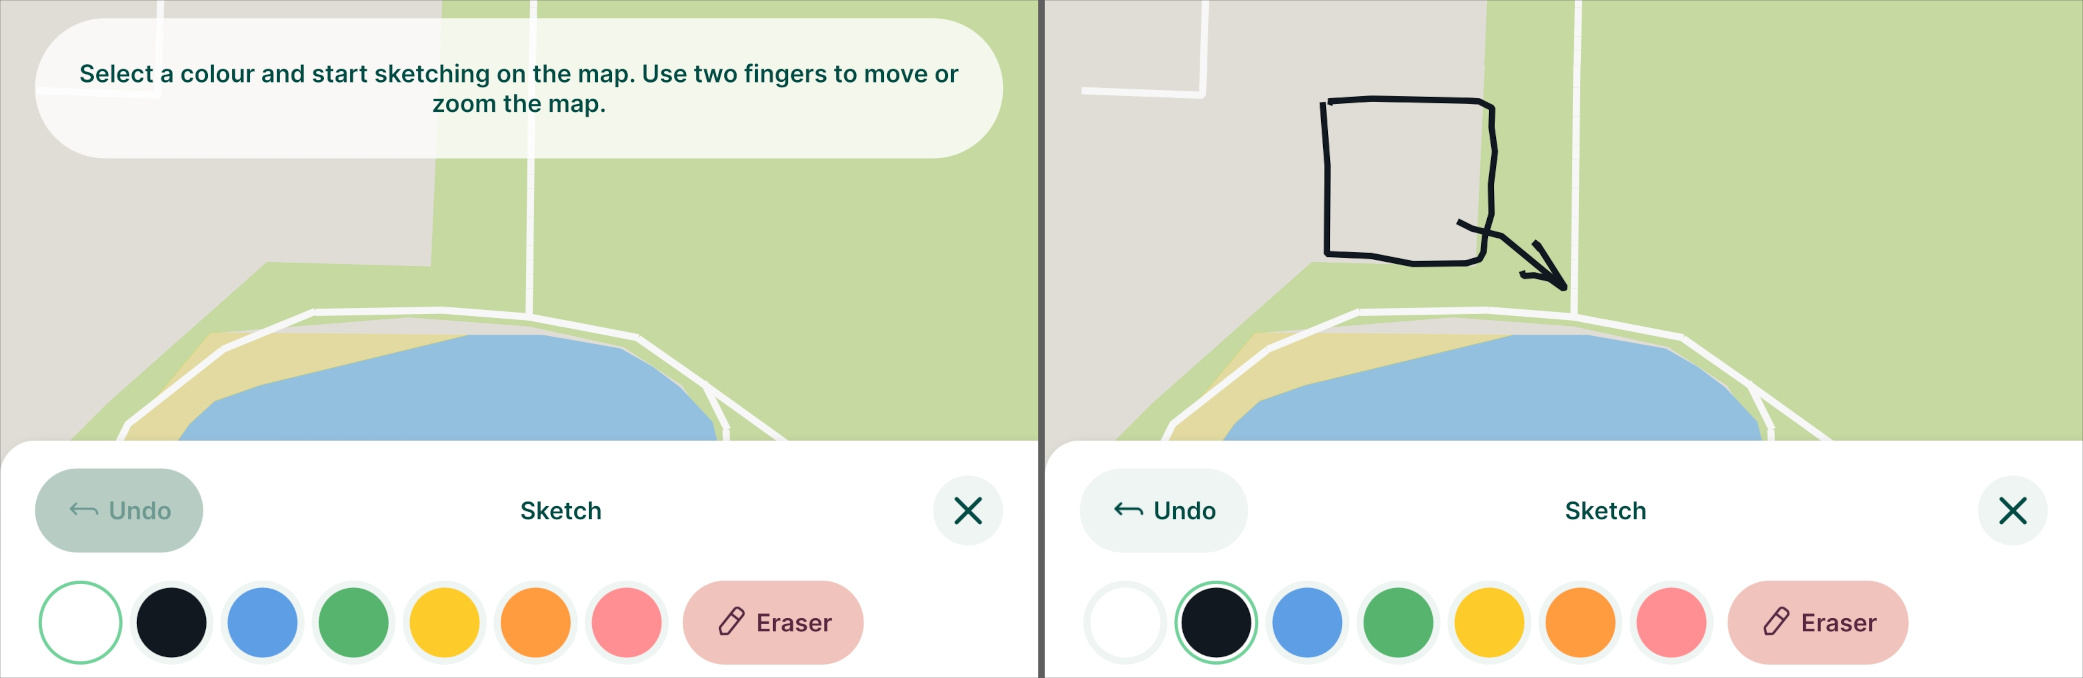
* Made a mistake? Use the **Eraser** button to remove your sketches. 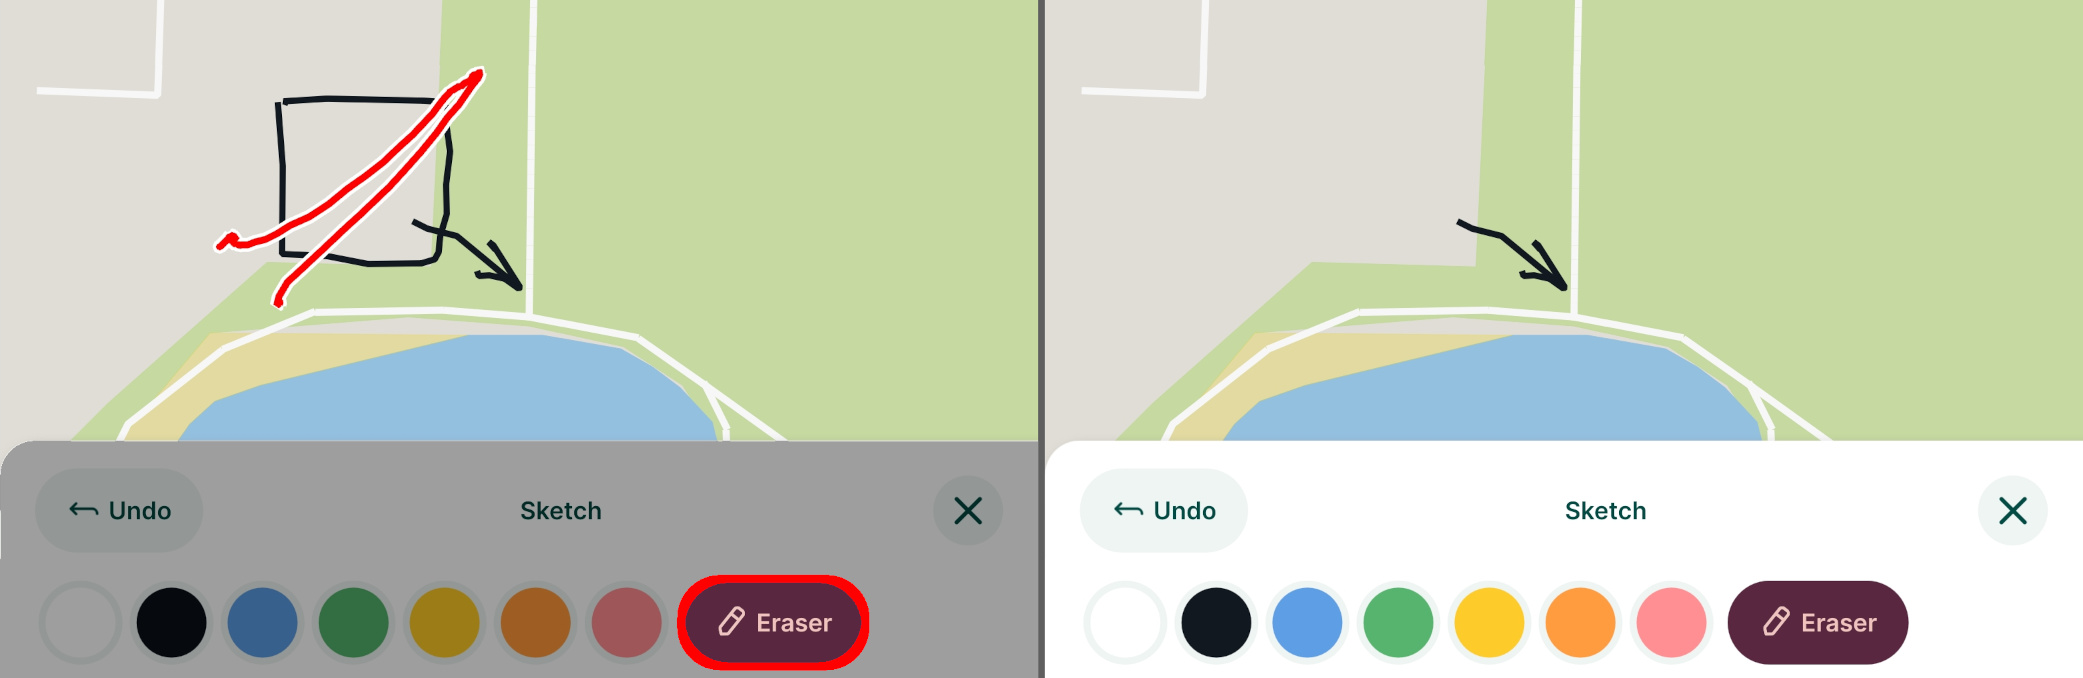
* Use the **Undo** button to revert the last changes.
3. Sync your changes to [Mergin Maps](https://merginmaps.com/)
.
In QGIS, the map sketches will be displayed in the **Map sketches** layer. 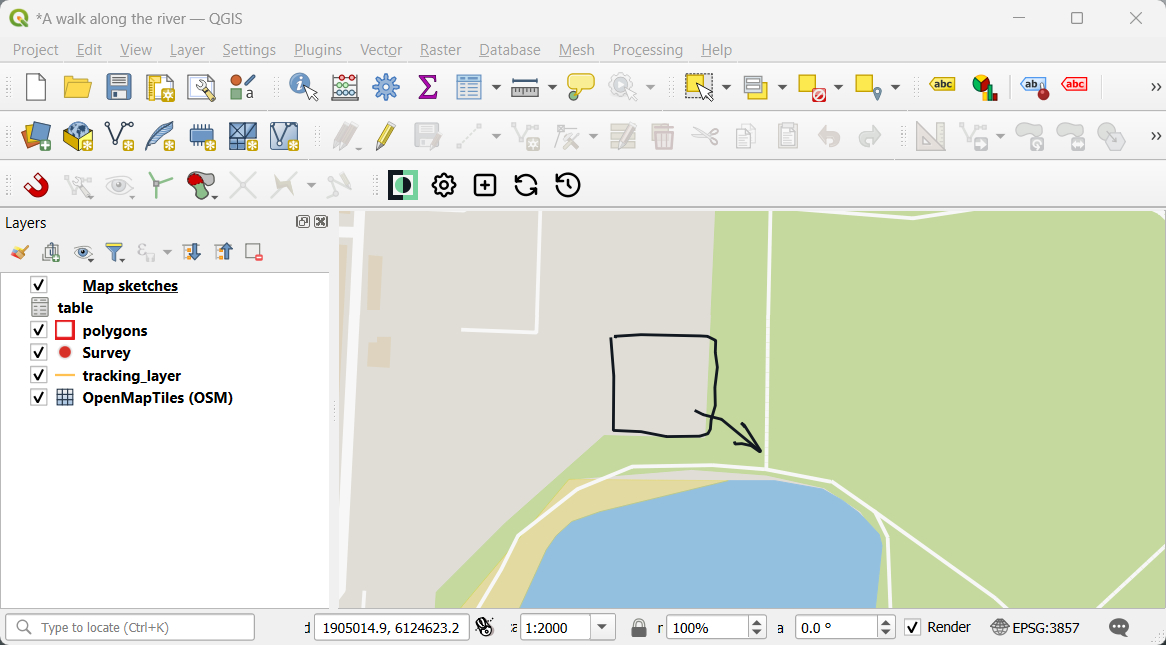
---
# How to Add, Edit, Delete Features | Mergin Maps
[Skip to content](https://merginmaps.com/docs/field/mobile-features/#VPContent)
Return to top
How to Add, Edit, Delete Features [](https://merginmaps.com/docs/field/mobile-features/#how-to-add-edit-delete-features)
==========================================================================================================================
The mobile app can be used to add, edit and delete features in the field by users with [writer or editor permission](https://merginmaps.com/docs/manage/permissions/)
to the Mergin Maps project.
Until the project is synchronised to [Mergin Maps](https://merginmaps.com/)
, all changes are local (stored only on your mobile device). Changes can be [synchronised](https://merginmaps.com/docs/field/autosync/)
manually or automatically.
New to Mergin Maps?
If you are new to the mobile app, it might be useful to get familiar with the [mobile app interface](https://merginmaps.com/docs/field/mobile-app-ui/)
or to explore our [tutorials](https://merginmaps.com/docs/tutorials/capturing-first-data/)
that provide step-by-step instructions for common use cases.
Recording settings
The mobile app offers interesting options that can make your field survey easier and effective, such as [reuse last entered value](https://merginmaps.com/docs/field/reuse-last-values/)
, [automatic synchronisation](https://merginmaps.com/docs/field/autosync/#automatic-synchronisation)
, [auto-lock](https://merginmaps.com/docs/field/mobile-app-ui/#recording-settings)
of your GPS position or [touch feedback](https://merginmaps.com/docs/field/mobile-app-ui/#recording-settings)
to get a sound or vibration confirmation when adding features.
Adding features [](https://merginmaps.com/docs/field/mobile-features/#adding-features)
----------------------------------------------------------------------------------------
1. In the mobile app, open a [project](https://merginmaps.com/docs/field/mobile-app-ui/#projects)
you want to use
2. Tap the **Add** button on the bottom navigation panel to enter the **recording mode**
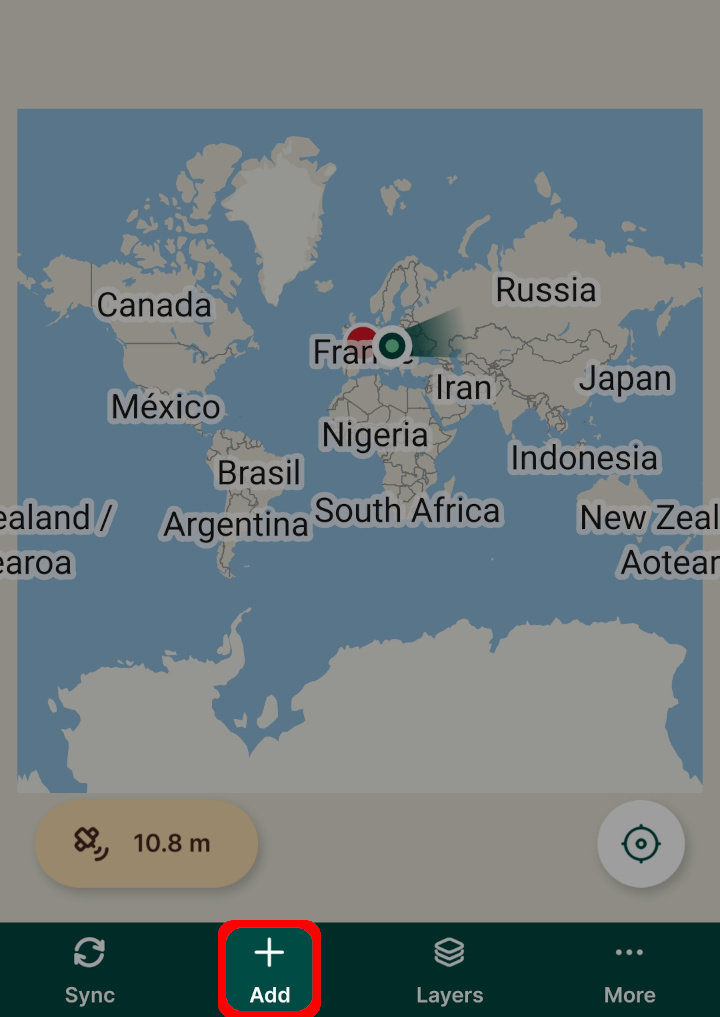
The crosshairs you will see on your map are used as the recorded location. You can change the position of your point by pinching and dragging the background map. If you want to recenter the map to your current position, tap the **GPS** icon.
The _active layer_ is displayed on the top of the map window. This layer is used for surveying new features. To switch to a different (editable) layer, tap on the active layer and select another one from the list. 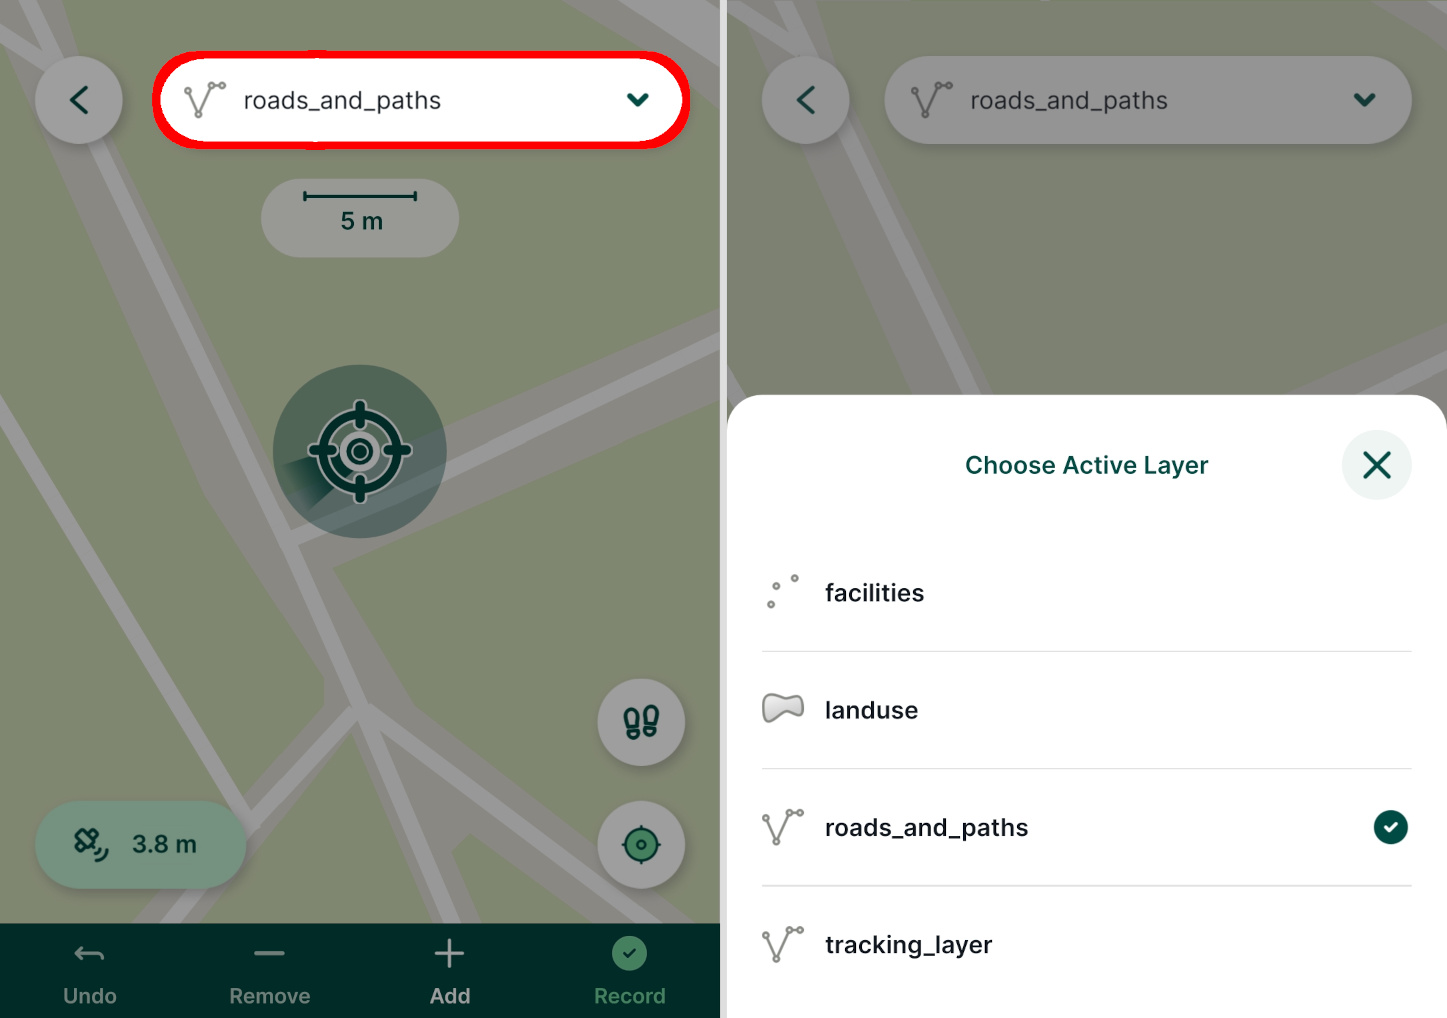
In the recording mode, the bottom panel contains tools to capture geometry. Once the geometry is recorded, you can fill in the attributes form and save the feature.
Below, we describe capturing [point features](https://merginmaps.com/docs/field/mobile-features/#capture-points)
, [lines and areas](https://merginmaps.com/docs/field/mobile-features/#capture-lines-or-areas)
as well as [non-spatial](https://merginmaps.com/docs/field/mobile-features/#add-or-edit-non-spatial-features)
records (e.g. adding a new entry to a table).
Attributes form make surveys easier!
Attributes forms can be set up in QGIS to make collecting data more efficient. For more details, see [Setting Up Widgets](https://merginmaps.com/docs/layer/form-widgets/)
, [Attributes Form Configuration](https://merginmaps.com/docs/layer/form-configuration/)
or [Attributes Form Layout](https://merginmaps.com/docs/layer/form-layout/)
.
### Capture points [](https://merginmaps.com/docs/field/mobile-features/#capture-points)
To record a new point feature, tap the **Record** button (you have to be in the [recording mode](https://merginmaps.com/docs/field/mobile-features/#adding-features)
).
Fill in the form as needed and tap the **Save** ✔️ button. A point is added to the survey layer and is displayed on the map.
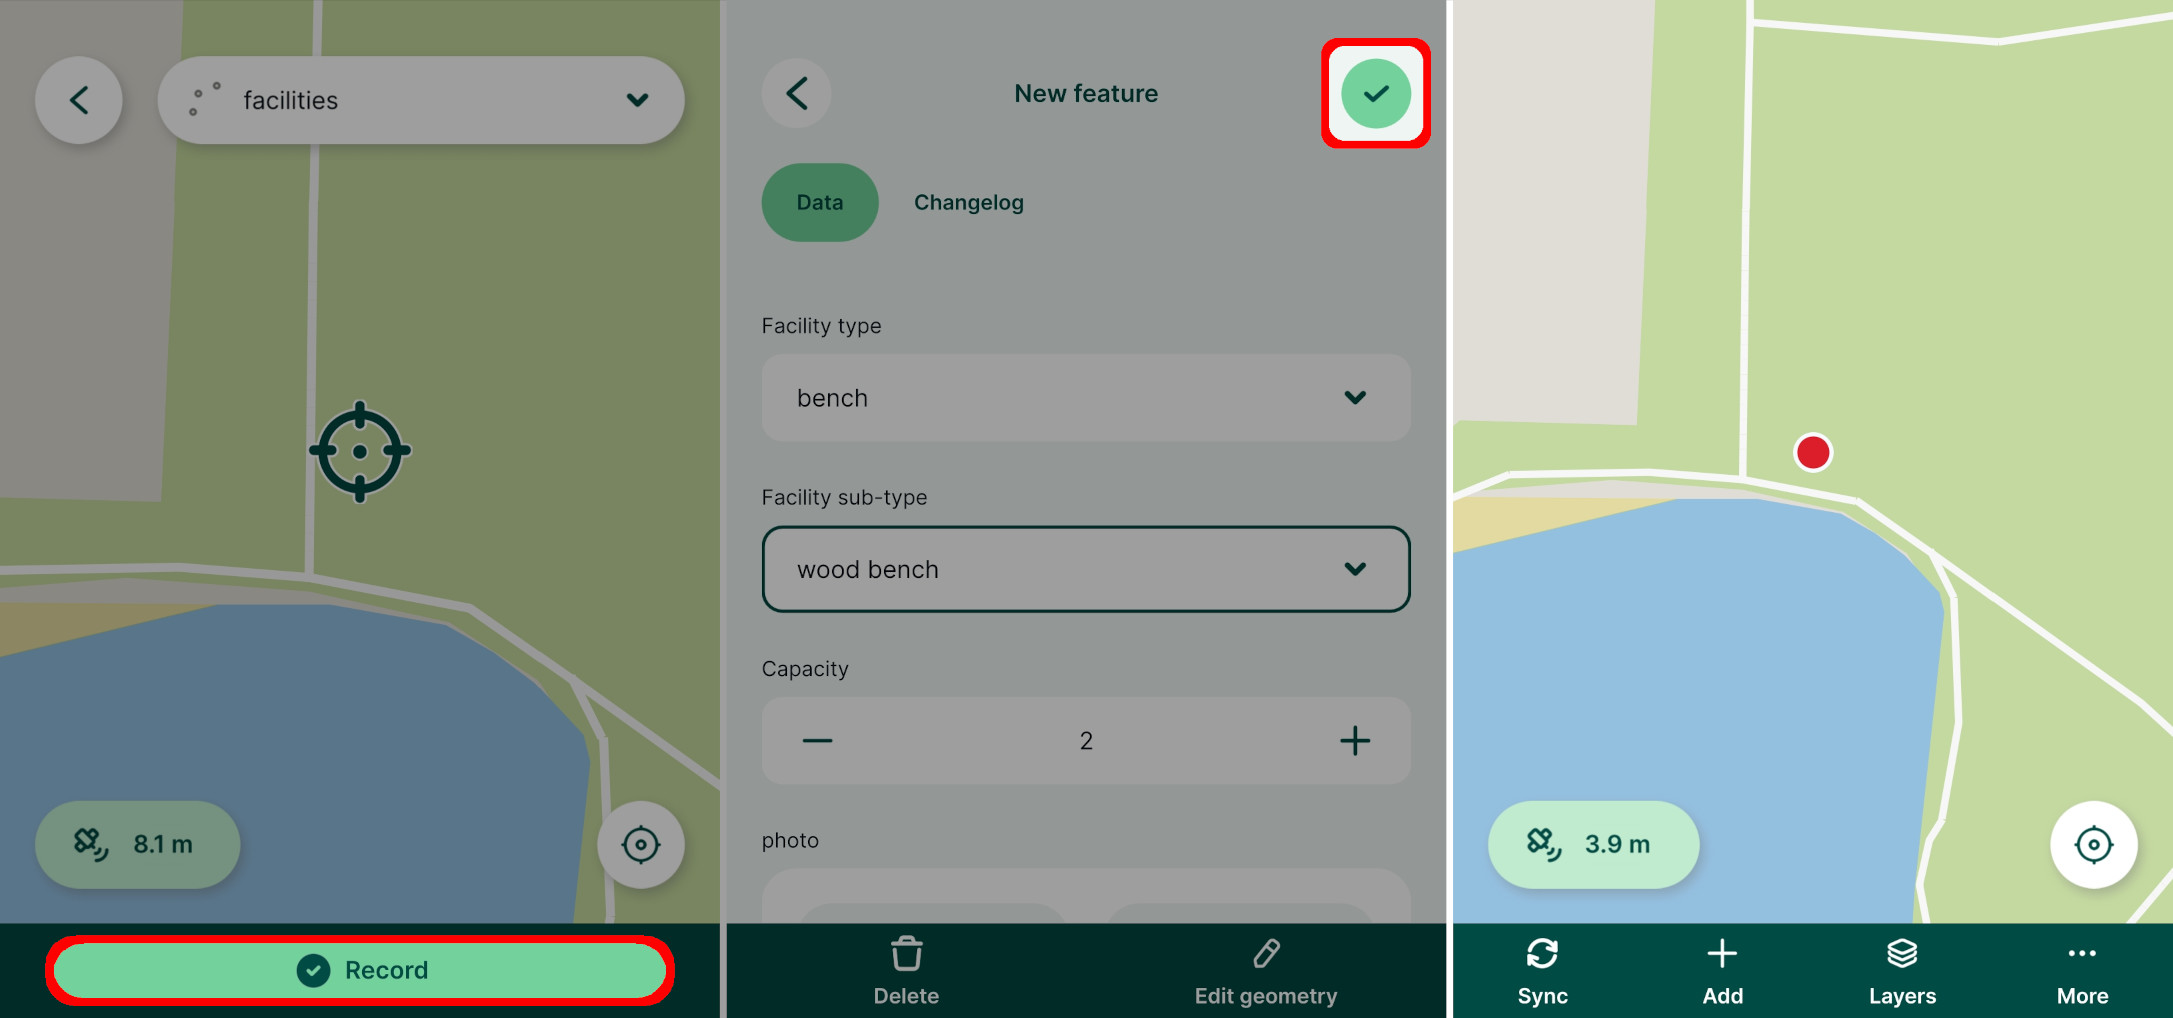
### Capture lines or areas [](https://merginmaps.com/docs/field/mobile-features/#capture-lines-or-areas)
There are two methods of capturing lines and areas: [adding vertices](https://merginmaps.com/docs/field/mobile-features/#adding-points-to-survey-vertices-of-lines-or-areas)
one by one or using the [_streaming mode_](https://merginmaps.com/docs/field/mobile-features/#streaming-mode-to-survey-lines-or-areas)
to capture features based on your position.
#### Adding points to survey vertices of lines or areas [](https://merginmaps.com/docs/field/mobile-features/#adding-points-to-survey-vertices-of-lines-or-areas)
Lines and areas can be captured by adding vertices one by one. When you are in the [**recording**](https://merginmaps.com/docs/field/mobile-features/#adding-features)
mode and your active layer is a line or polygon, you will see line and areas editing tools in the bottom panel.
Tap **Add** to capture vertices of your line or area. If you want to change the position of the last vertex, tap **Remove** and move the vertex to the correct place. **Undo** can be used to revert last changes.
Once the survey of the feature is completed, tap **Record** and fill in the form. 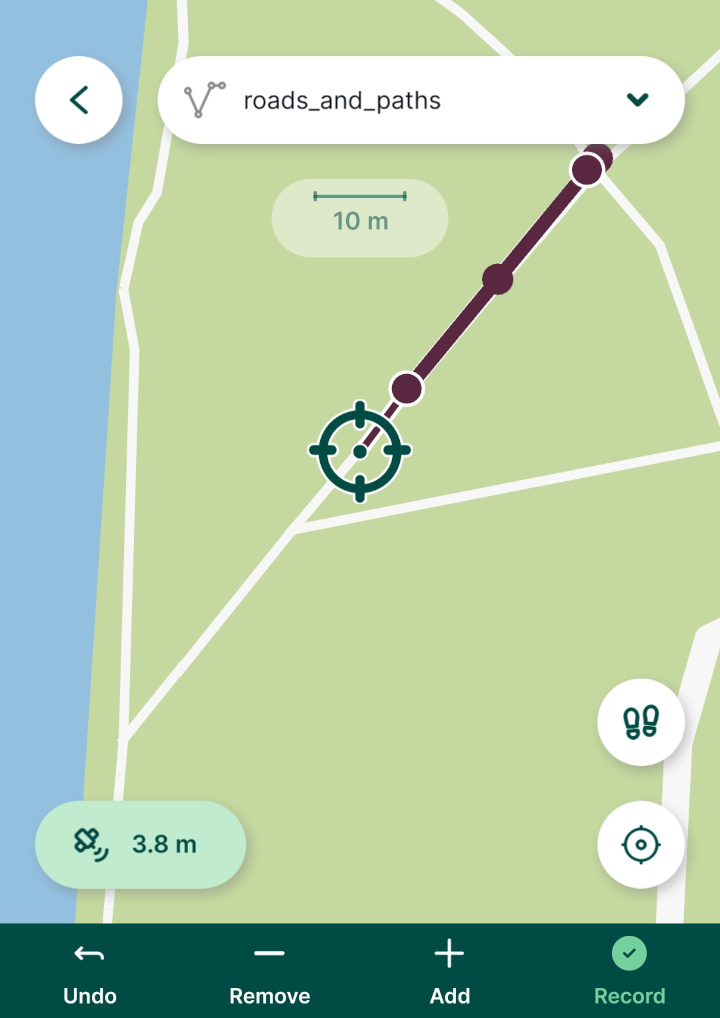
#### Streaming mode to survey lines or areas [](https://merginmaps.com/docs/field/mobile-features/#streaming-mode-to-survey-lines-or-areas)
Lines and areas can be also captured automatically based on your position. Make sure you are in the [**recording**](https://merginmaps.com/docs/field/mobile-features/#adding-features)
mode and that your active layer is a line or polygon.
Tap the **streaming** button and then **Start streaming mode**.
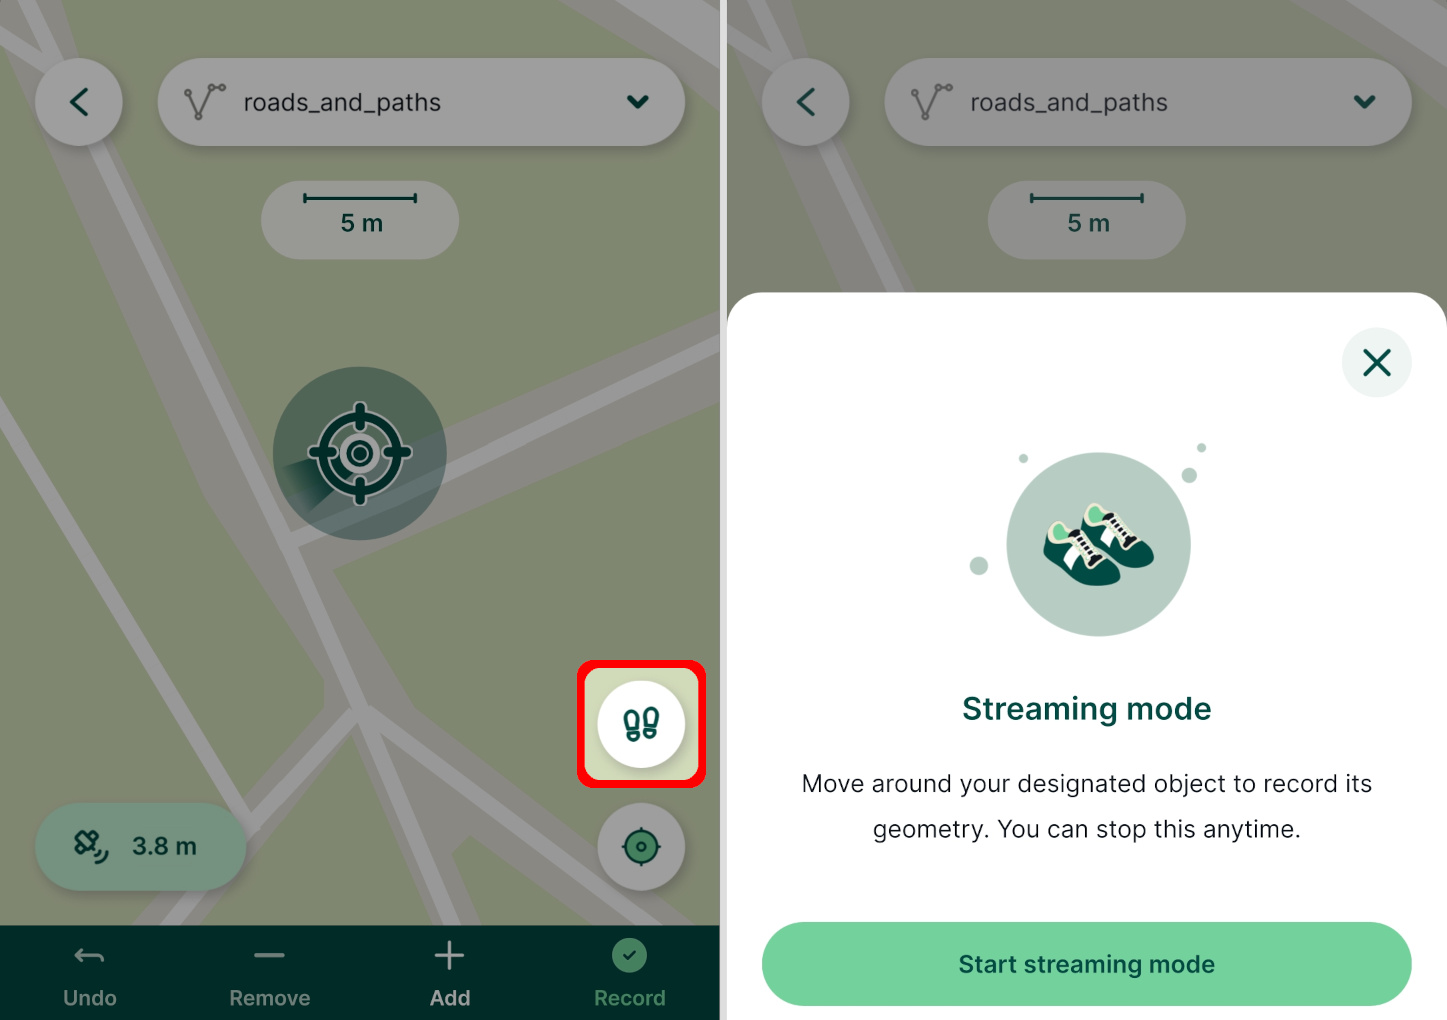
The vertices will be added automatically as you walk along the feature.
To stop the streaming mode, tap the **streaming** button and then **Stop streaming mode**.
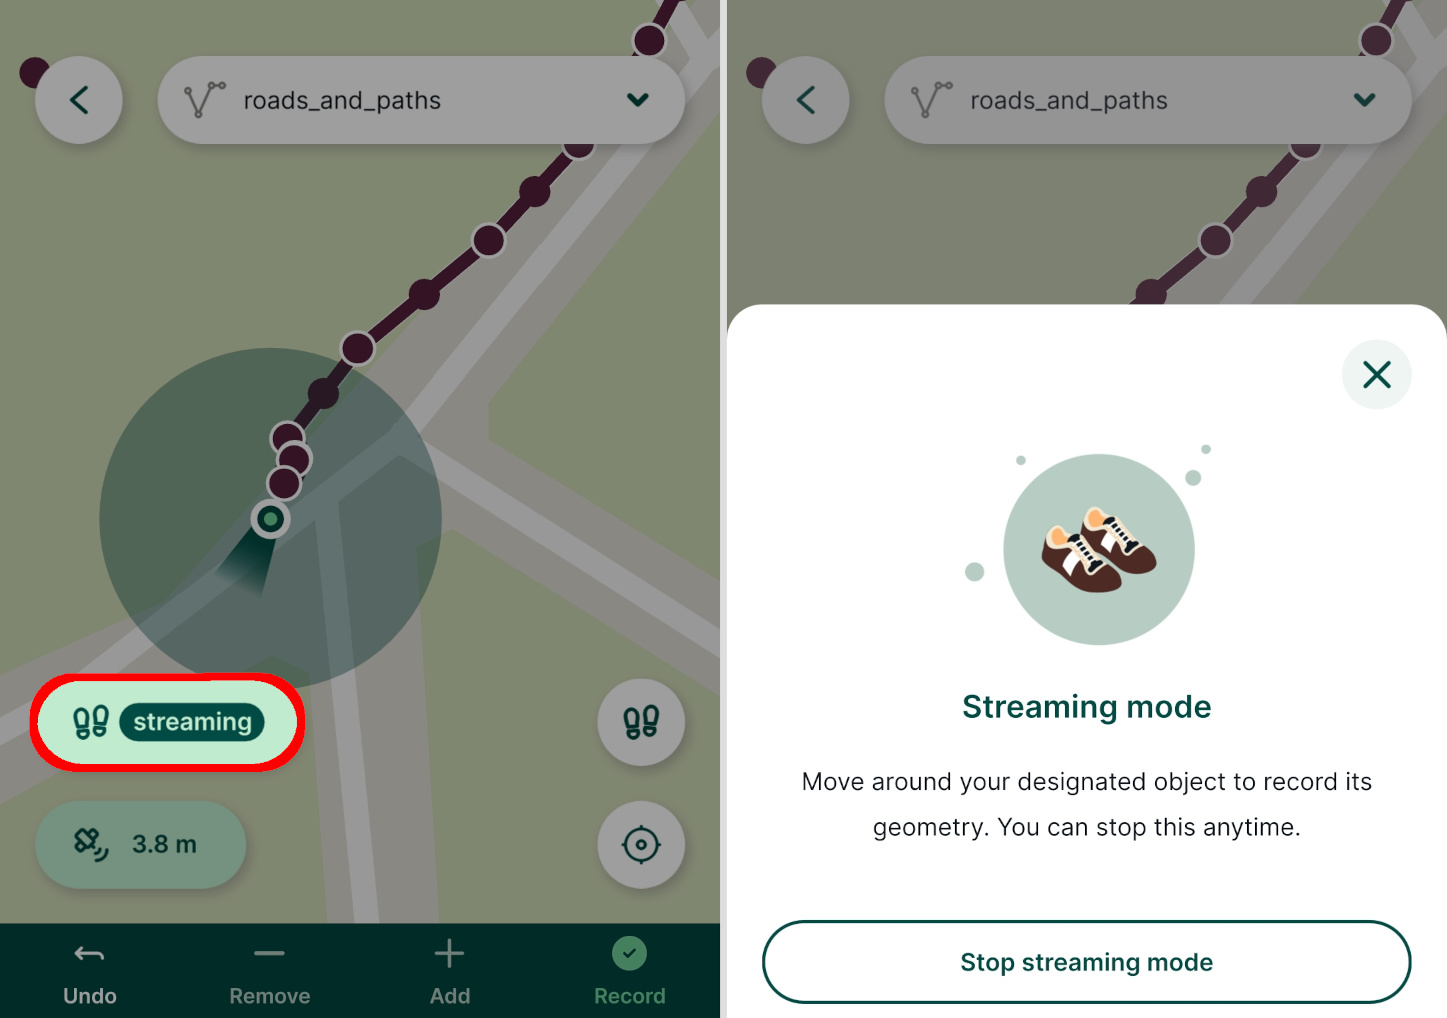
Once you finish surveying the feature, tap the **Record** button. If you are capturing an area, the shape will be automatically closed by connecting the last and the first vertex.
Threshold intervals for streaming mode
It is possible to set the **Threshold interval**, i.e. how often you want to capture a vertex when streaming, in [**Settings**](https://merginmaps.com/docs/field/mobile-app-ui/#streaming-mode-settings)
of the mobile app. The interval can be defined as _time elapsed_ in seconds or as _distance travelled_ in metres.
Editing features [](https://merginmaps.com/docs/field/mobile-features/#editing-features)
------------------------------------------------------------------------------------------
Features can be browsed, edited and deleted through the [Layers](https://merginmaps.com/docs/field/layers/)
panel in the mobile app. Note that layers that are set as [read-only](https://merginmaps.com/docs/gis/enable_digitising/)
in the project properties cannot be edited.
Tap the **Layers** button in the bottom navigation panel and select a layer to see the list of features it contains.
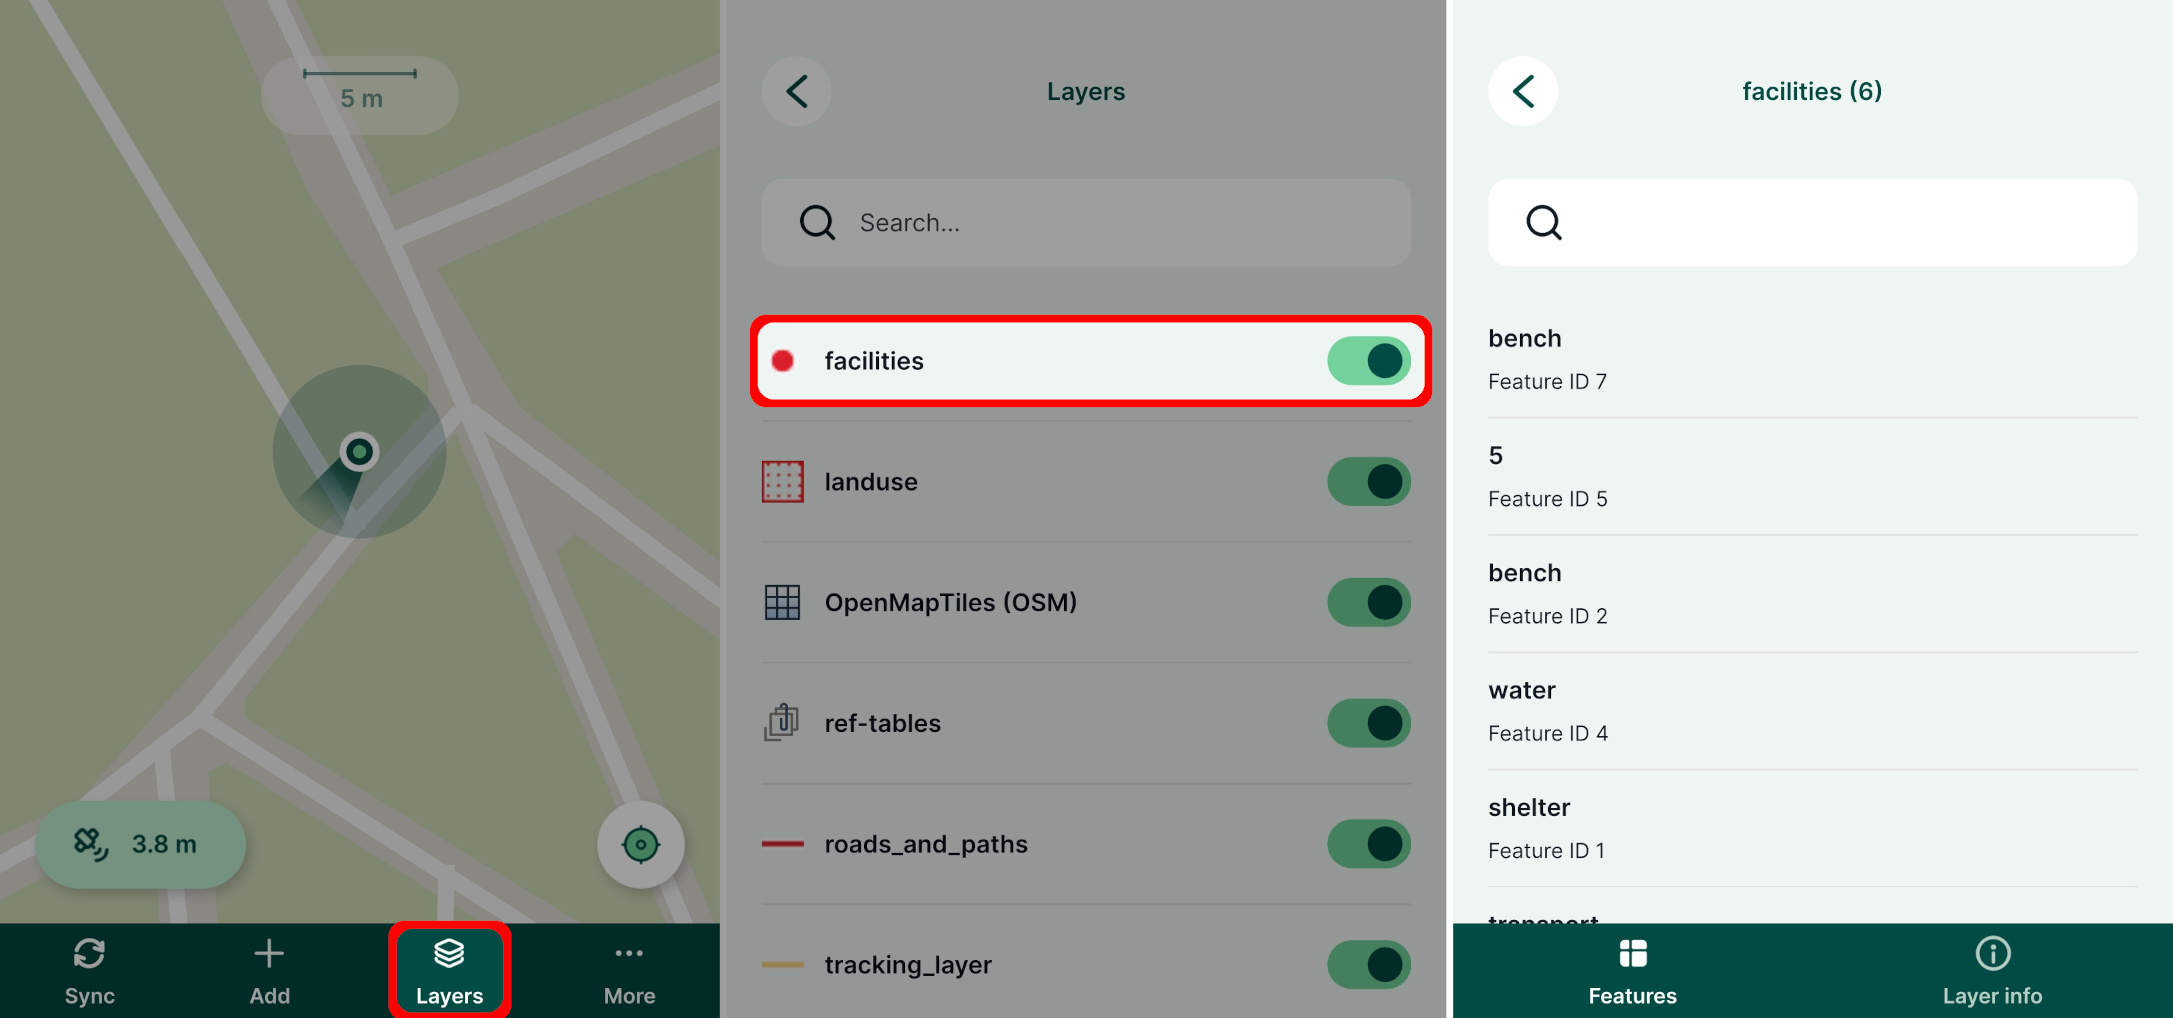
To edit the attributes or geometry of a feature, select it from the list in the **Layers** panel. It is also possible to simply tap a feature on the map or _tap and hold_ to select one from multiple overlaying features.
Use the **Edit** button to open the attributes form. Here you can change the values of attributes as needed. To edit the geometry of a feature, tap the **Edit geometry** button.
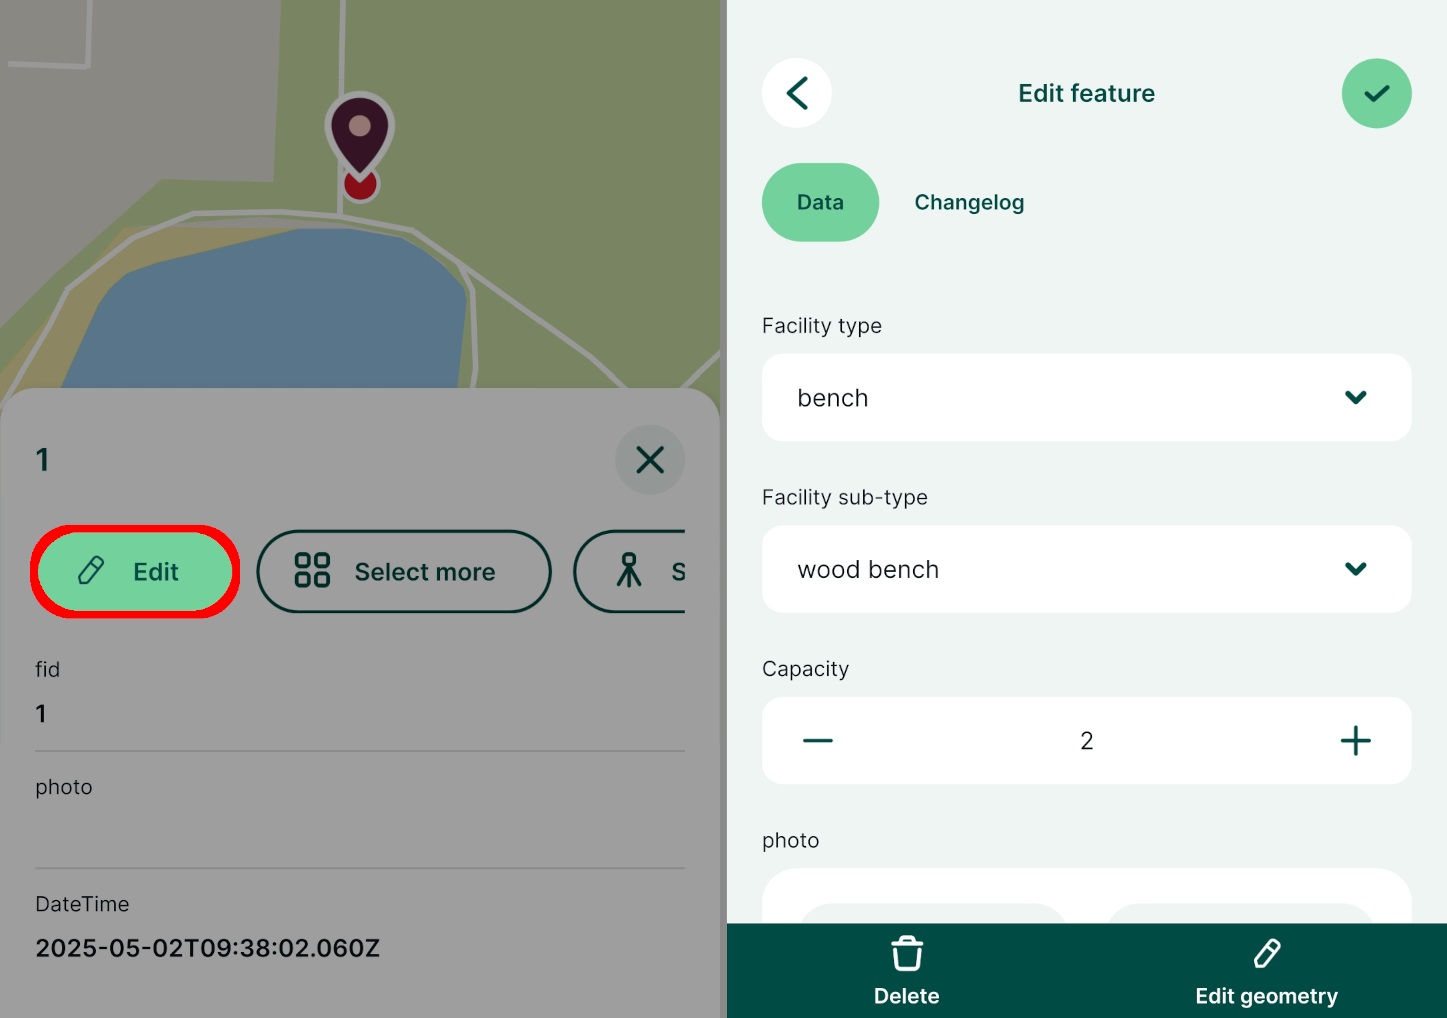
To edit geometry of a point feature simply adjust the location in the same manner as when [adding new features](https://merginmaps.com/docs/field/mobile-features/#capture-points)
.
Once you are finished with your changes, tap the **Save** ✔️ button.
### Edit geometry of lines or areas [](https://merginmaps.com/docs/field/mobile-features/#edit-geometry-of-lines-or-areas)
There are multiple options when it comes to editing the geometry of lines and polygons: editing the vertices, [redrawing](https://merginmaps.com/docs/field/mobile-features/#redraw-geometry-of-lines-or-areas)
or [splitting](https://merginmaps.com/docs/field/mobile-features/#split-geometry-of-lines-or-areas)
features.
Tap a line or polygon feature, press the **Edit** button and then use **Edit geometry**. The vertices of the feature will be highlighted. You can move, release or remove them as needed. Tap the **Record** button to save the modified geometry.
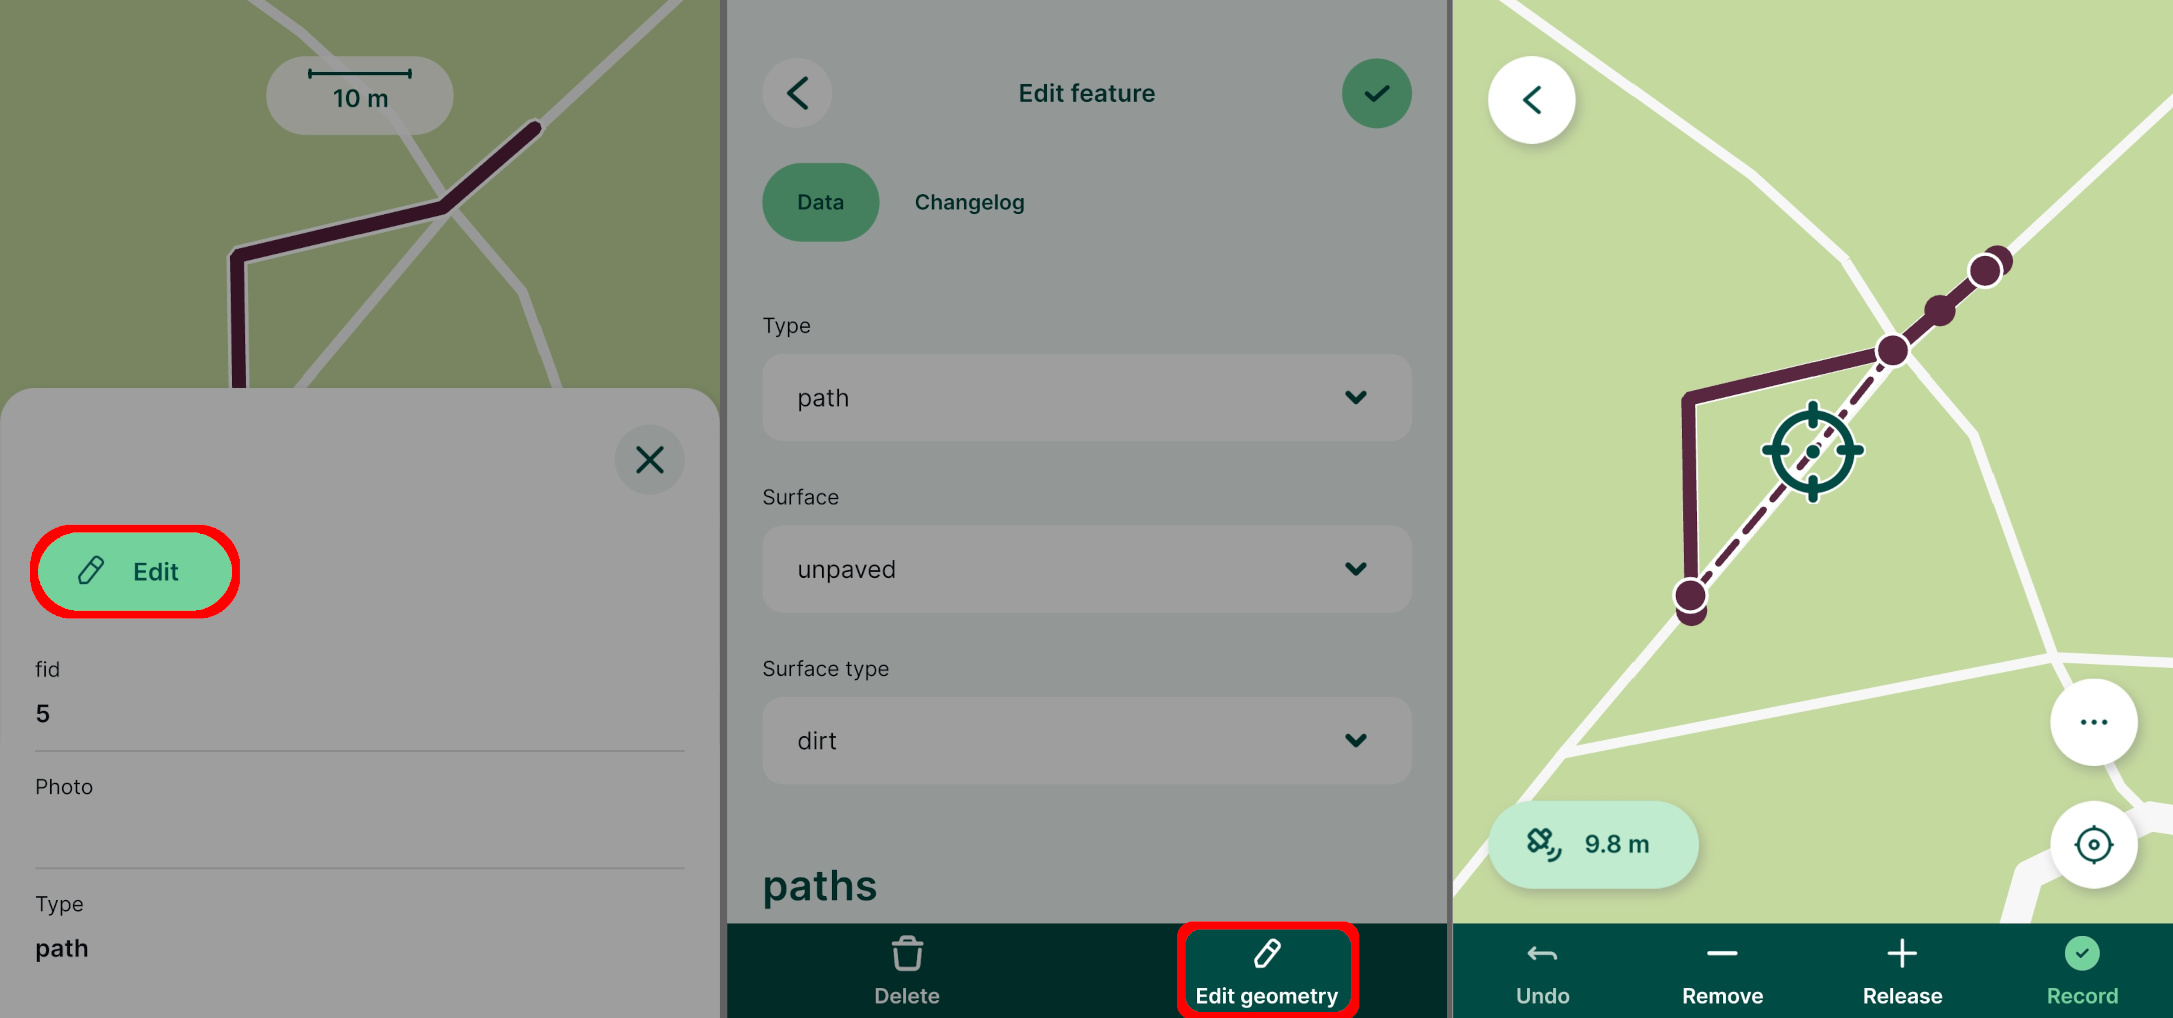
The [streaming mode](https://merginmaps.com/docs/field/mobile-features/#streaming-mode-to-survey-lines-or-areas)
can be also used while editing lines or areas. Tap the **More option** button and use the **Streaming mode**.
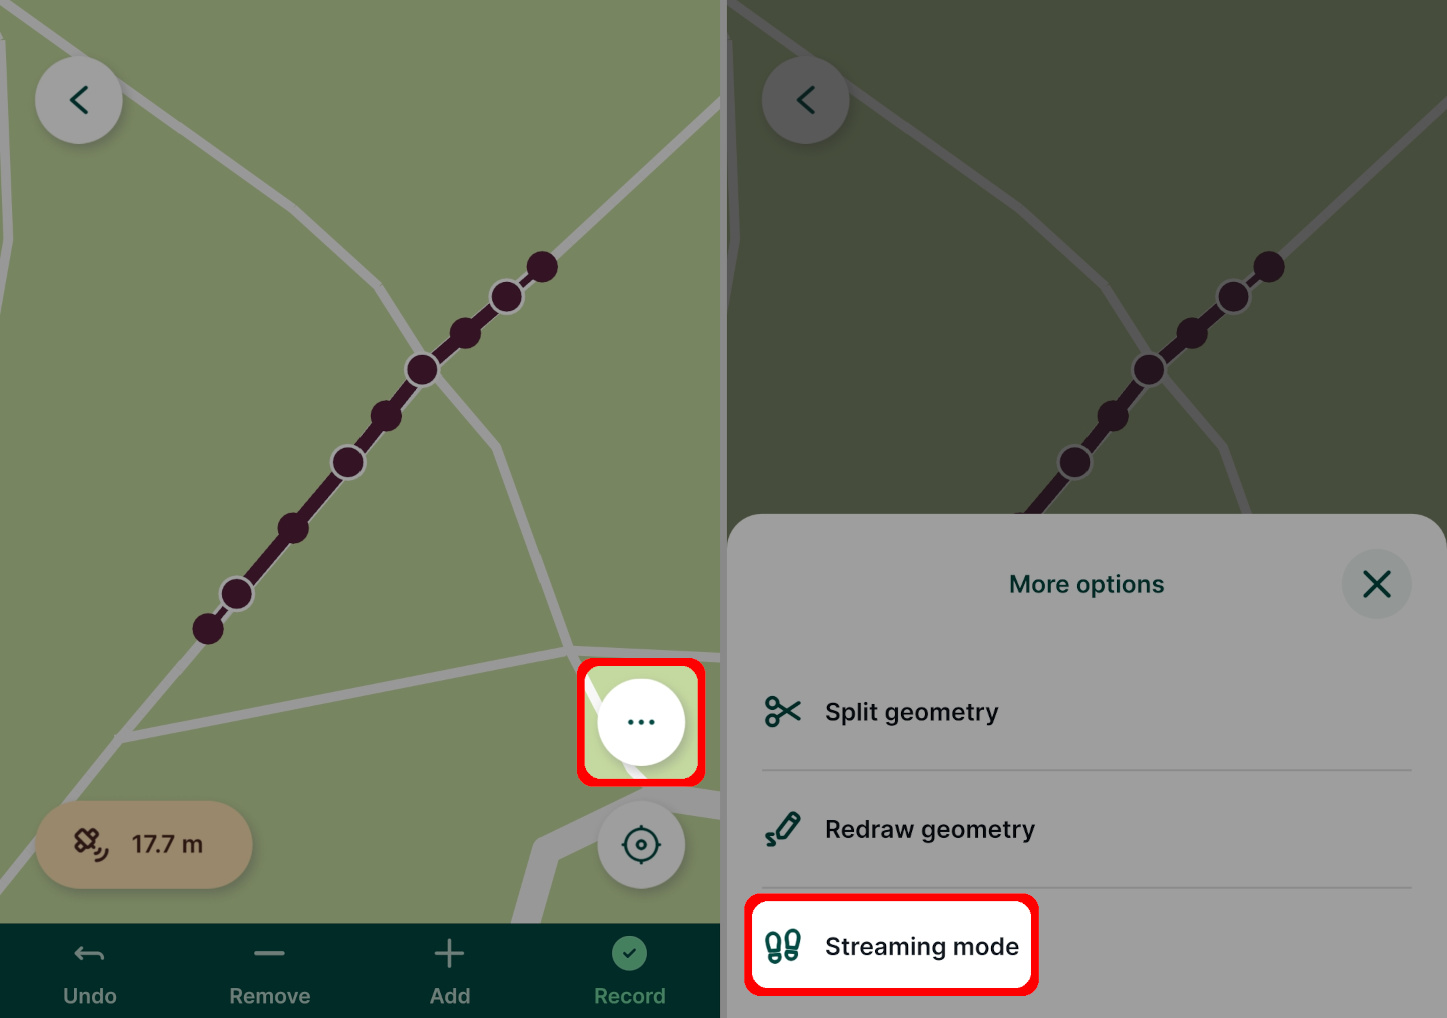
### Redraw geometry of lines or areas [](https://merginmaps.com/docs/field/mobile-features/#redraw-geometry-of-lines-or-areas)
The existing geometry of lines and areas can also be redrawn completely.
Tap the **More option** button and select the **Redraw geometry** option.
Capture the new geometry of the feature using the editing tools or streaming and use the **Record** button to save your changes.
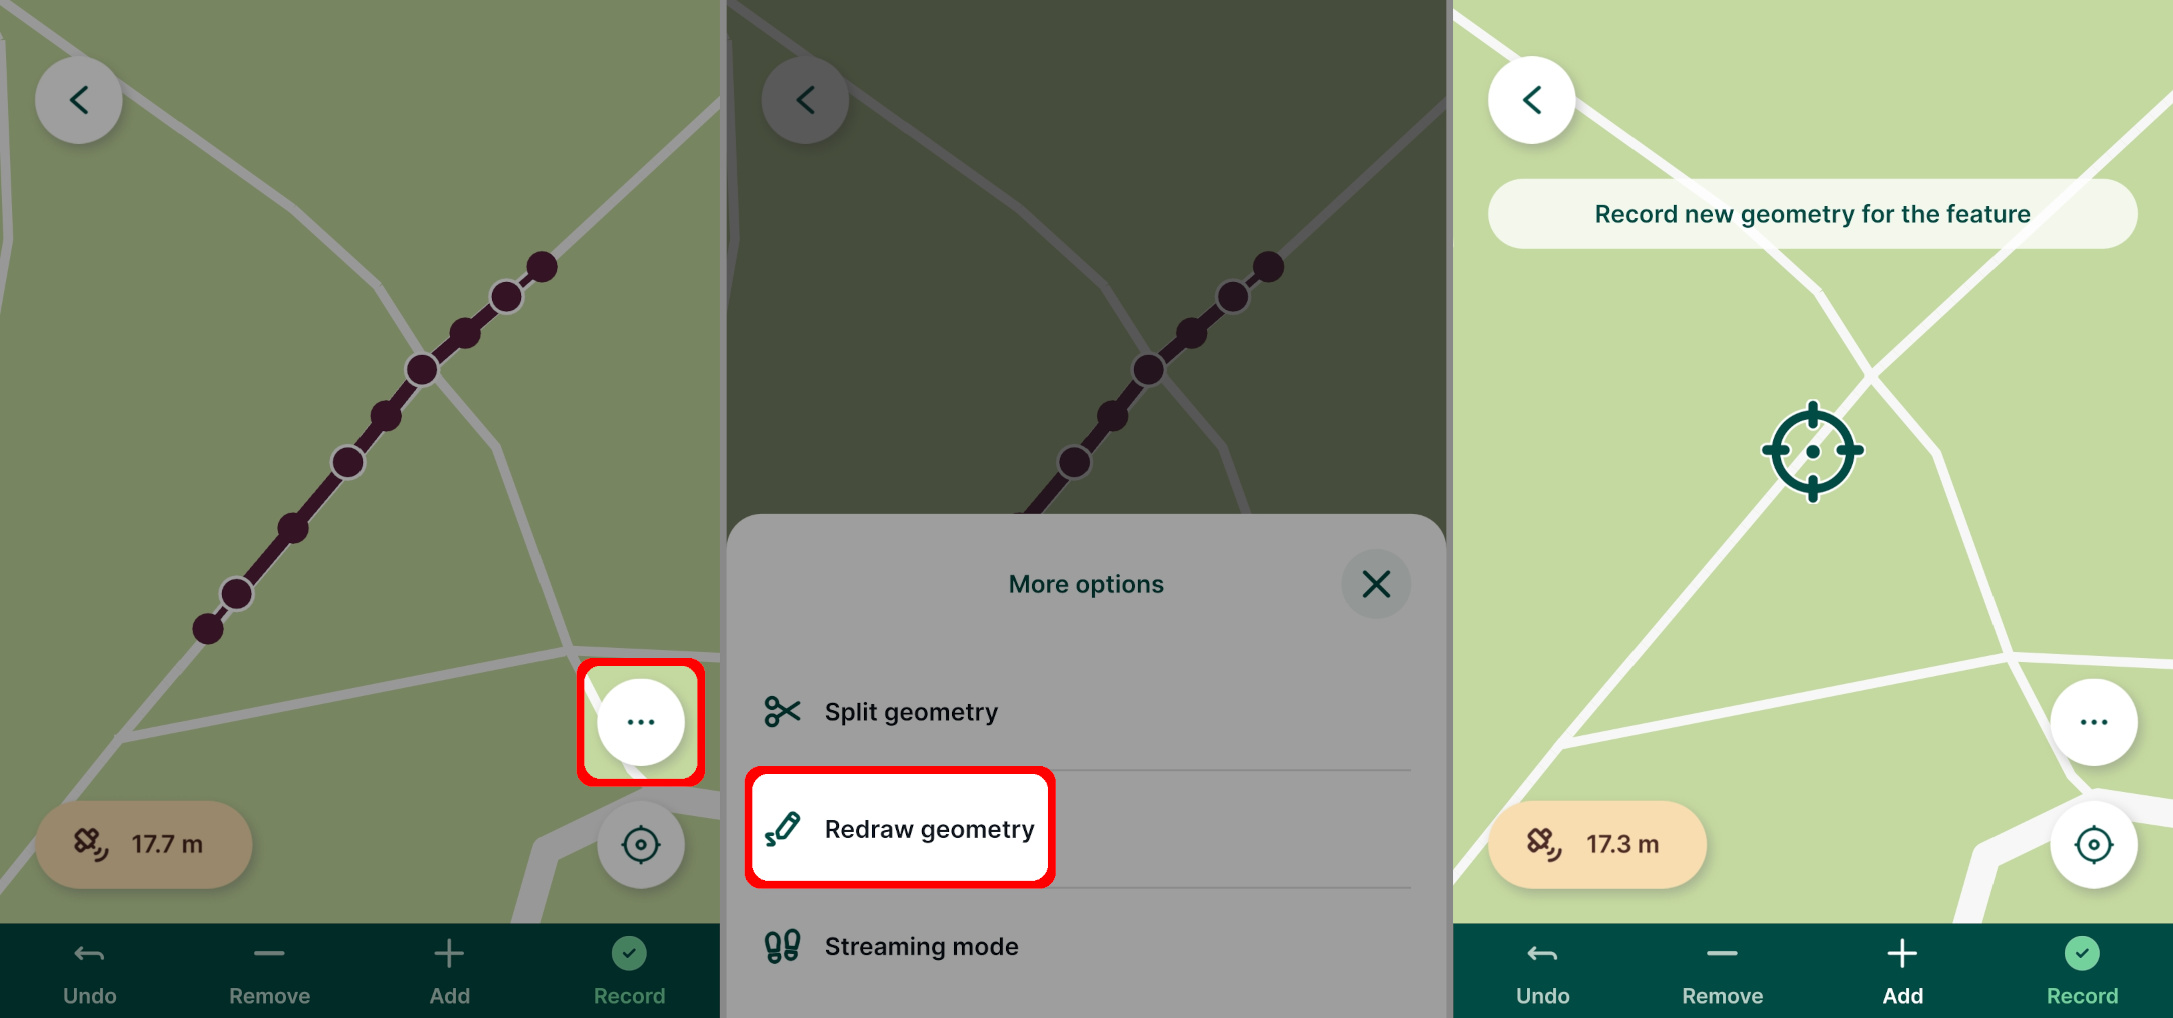
### Split geometry of lines or areas [](https://merginmaps.com/docs/field/mobile-features/#split-geometry-of-lines-or-areas)
Lines and areas can be split into two or more new features that will keep the same attributes as the original feature.
Tap the **More option** button and select the **Split geometry** option. Create the splitting line by using the **Add point** button.
When finished, tap **Done**. 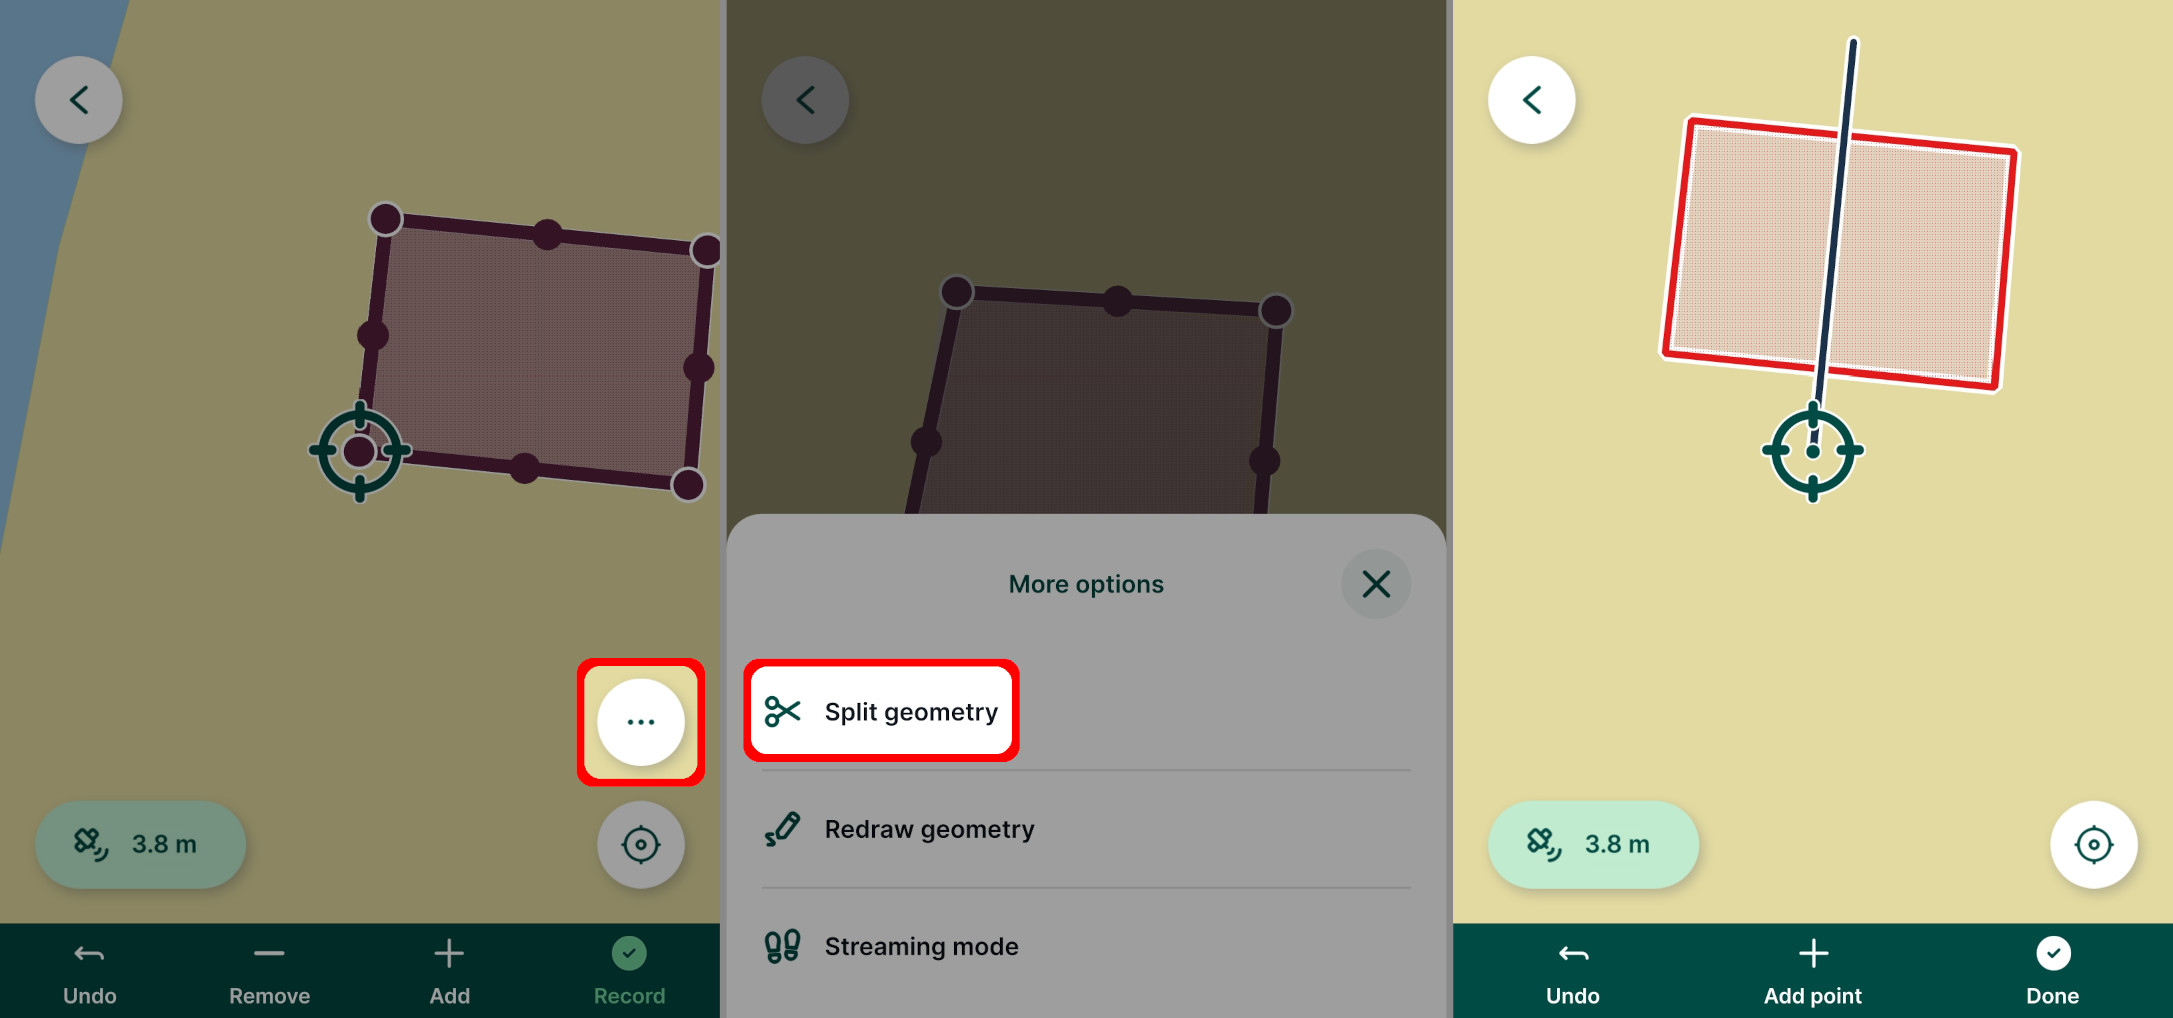
In this case, two individual features are created. Both have the same attributes, except for `Feature ID` (one feature keeps the original id, the other gets a new one). 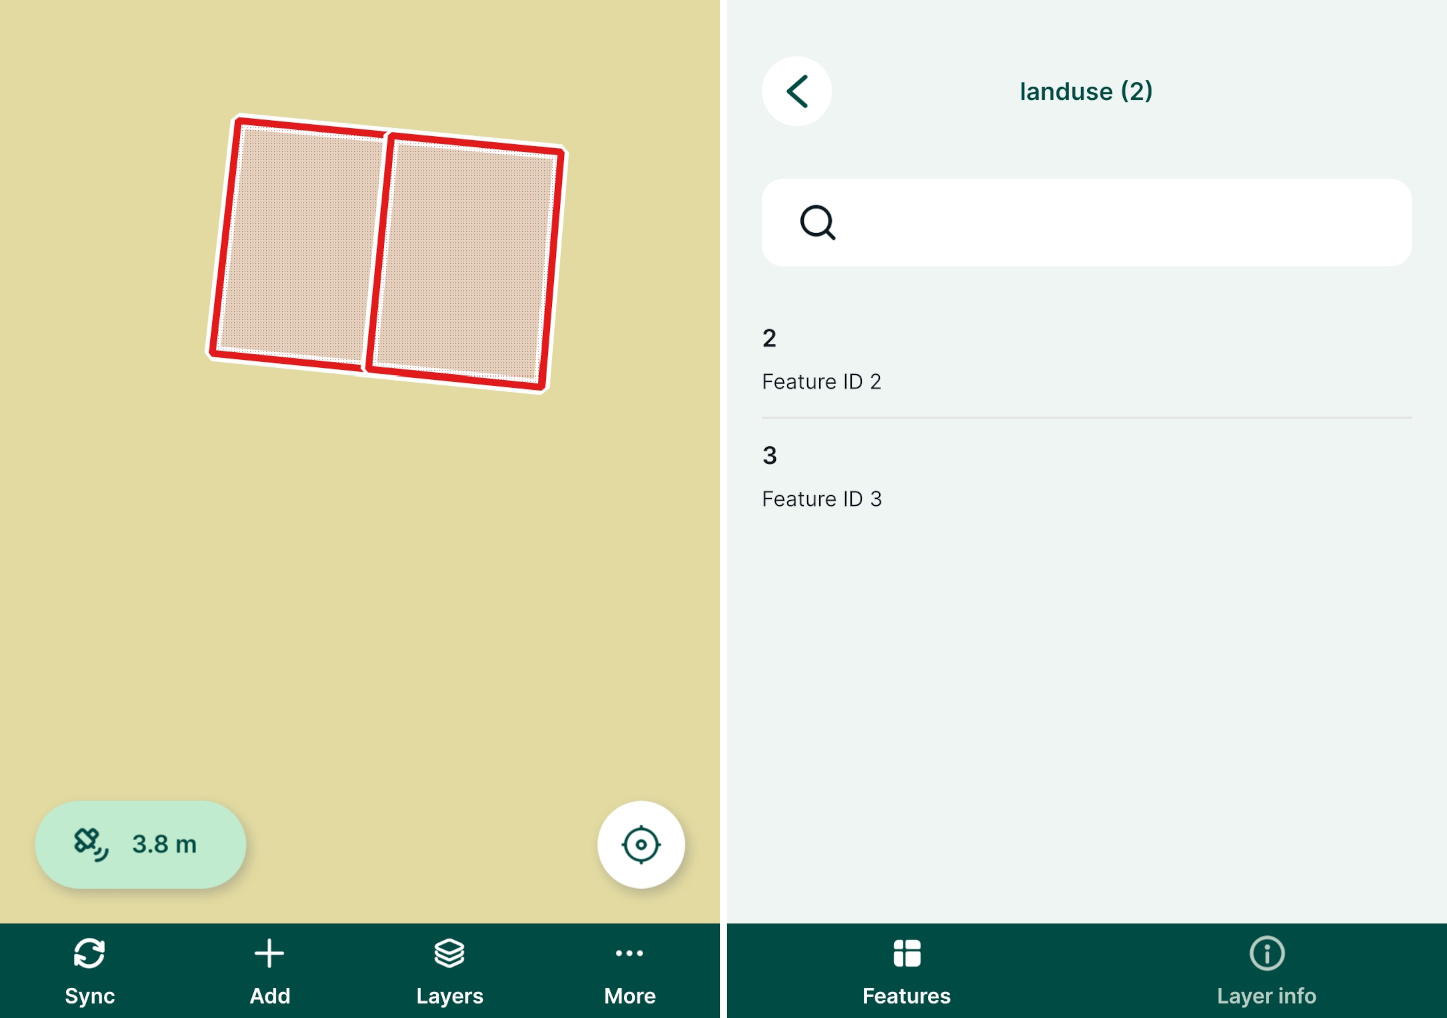
Multi-features editing [](https://merginmaps.com/docs/field/mobile-features/#multi-features-editing)
------------------------------------------------------------------------------------------------------
Attributes of multiple features from the same layer can be edited at once. 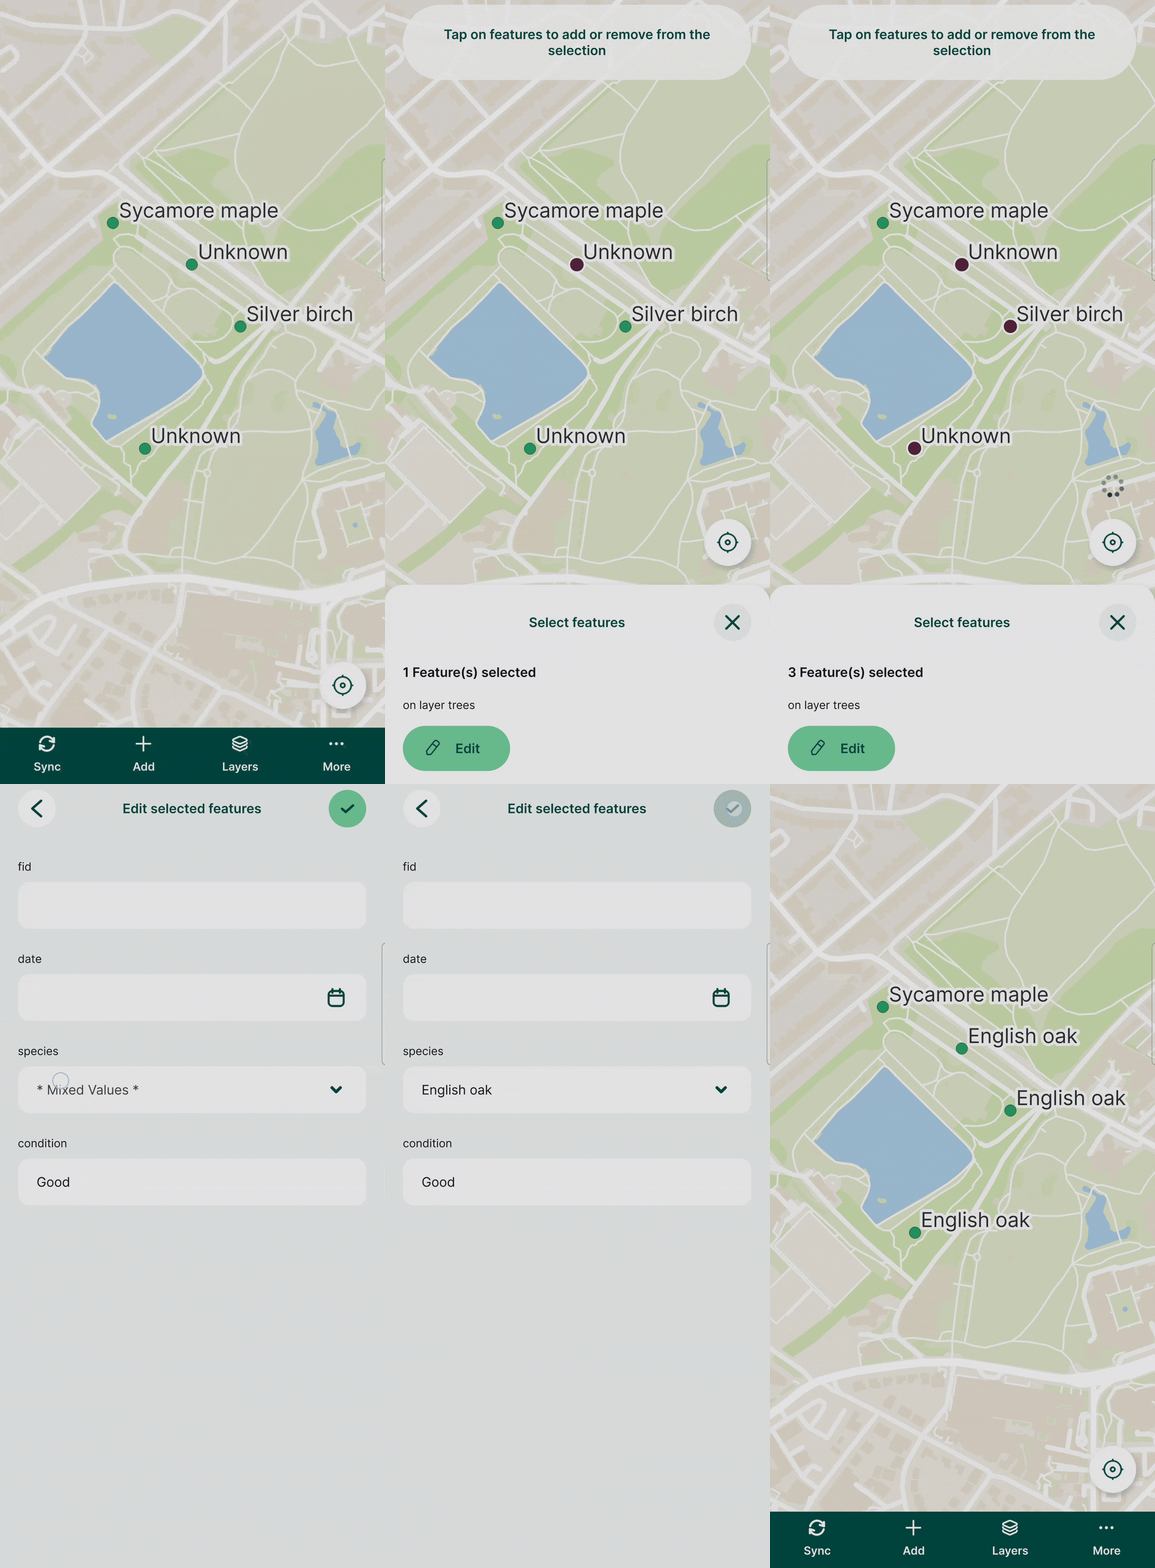
1. Tap on a feature on the map and select the **Select more** option. 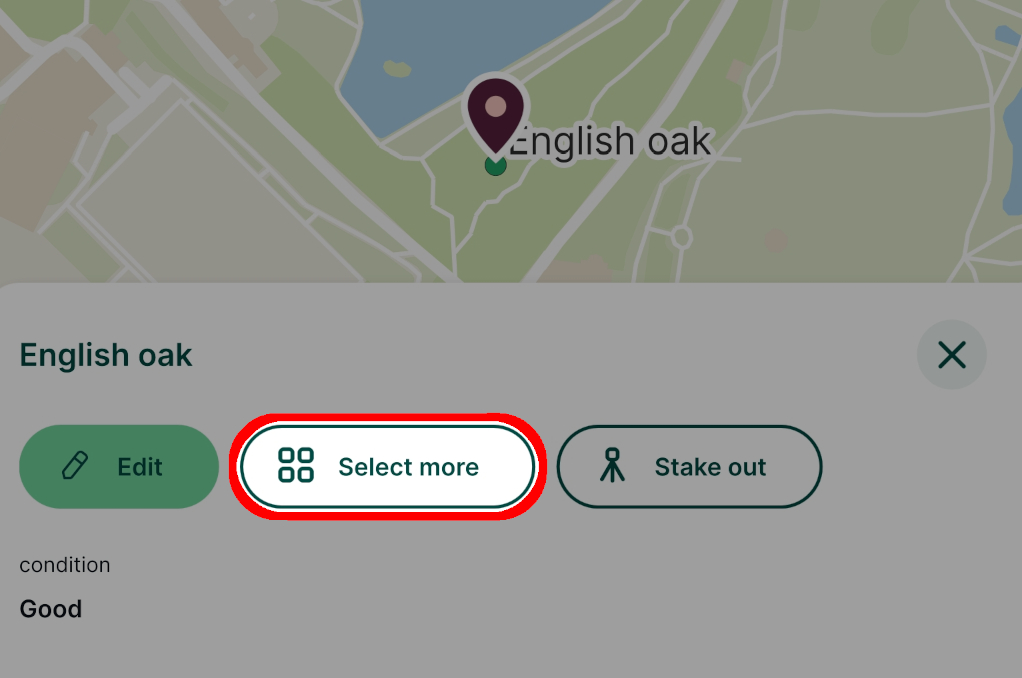
2. Select all features that should be edited.
3. In the attributes form, enter the new values of attributes and **Save**.
All selected features have been modified at once.
Snapping features [](https://merginmaps.com/docs/field/mobile-features/#snapping-features)
--------------------------------------------------------------------------------------------
Snapping can be enabled in your Mergin Maps project in QGIS to make the field survey easier. You can find the snapping options in [How to Set Up Snapping](https://merginmaps.com/docs/gis/snapping/)
.
If snapping is enabled, the crosshairs will turn purple and snap to vertices (left) or segments (right) of existing features when capturing new features or editing existing features. 
Add or edit non-spatial features [](https://merginmaps.com/docs/field/mobile-features/#add-or-edit-non-spatial-features)
--------------------------------------------------------------------------------------------------------------------------
[Non-spatial features](https://merginmaps.com/docs/layer/non-spatial-data/)
, such as tables for [value relations](https://merginmaps.com/docs/layer/form-widgets/#value-relation)
, can also be added or edited in the mobile app.
1. Tap the **Layers** button and select the layer you want to edit 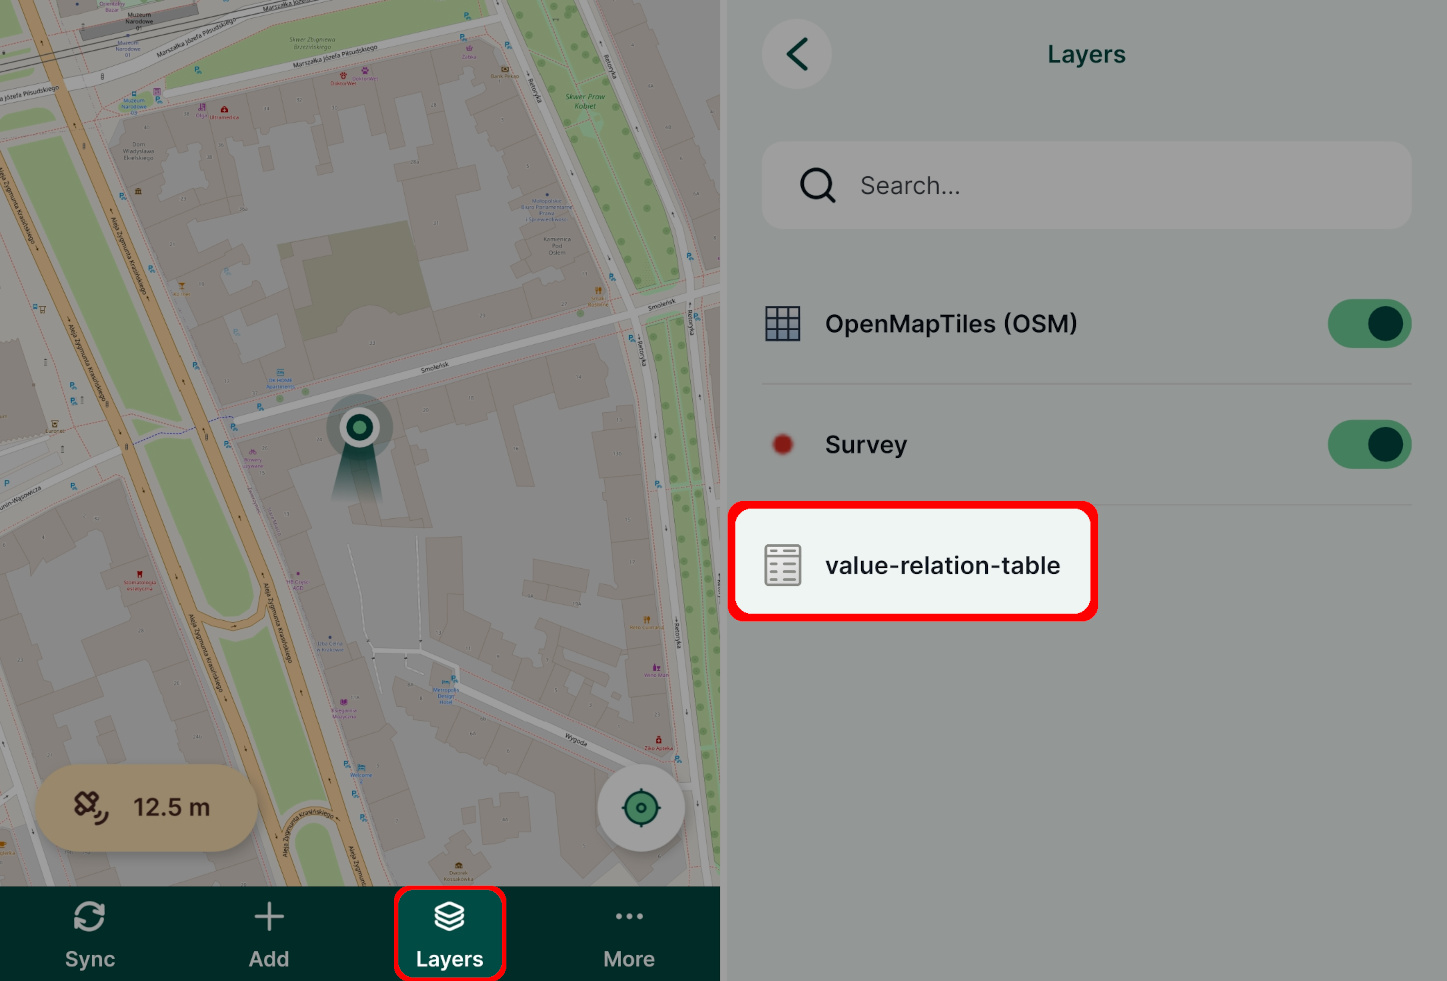
2. Tap an existing feature to change it or tap the **Add feature** button to create a new feature 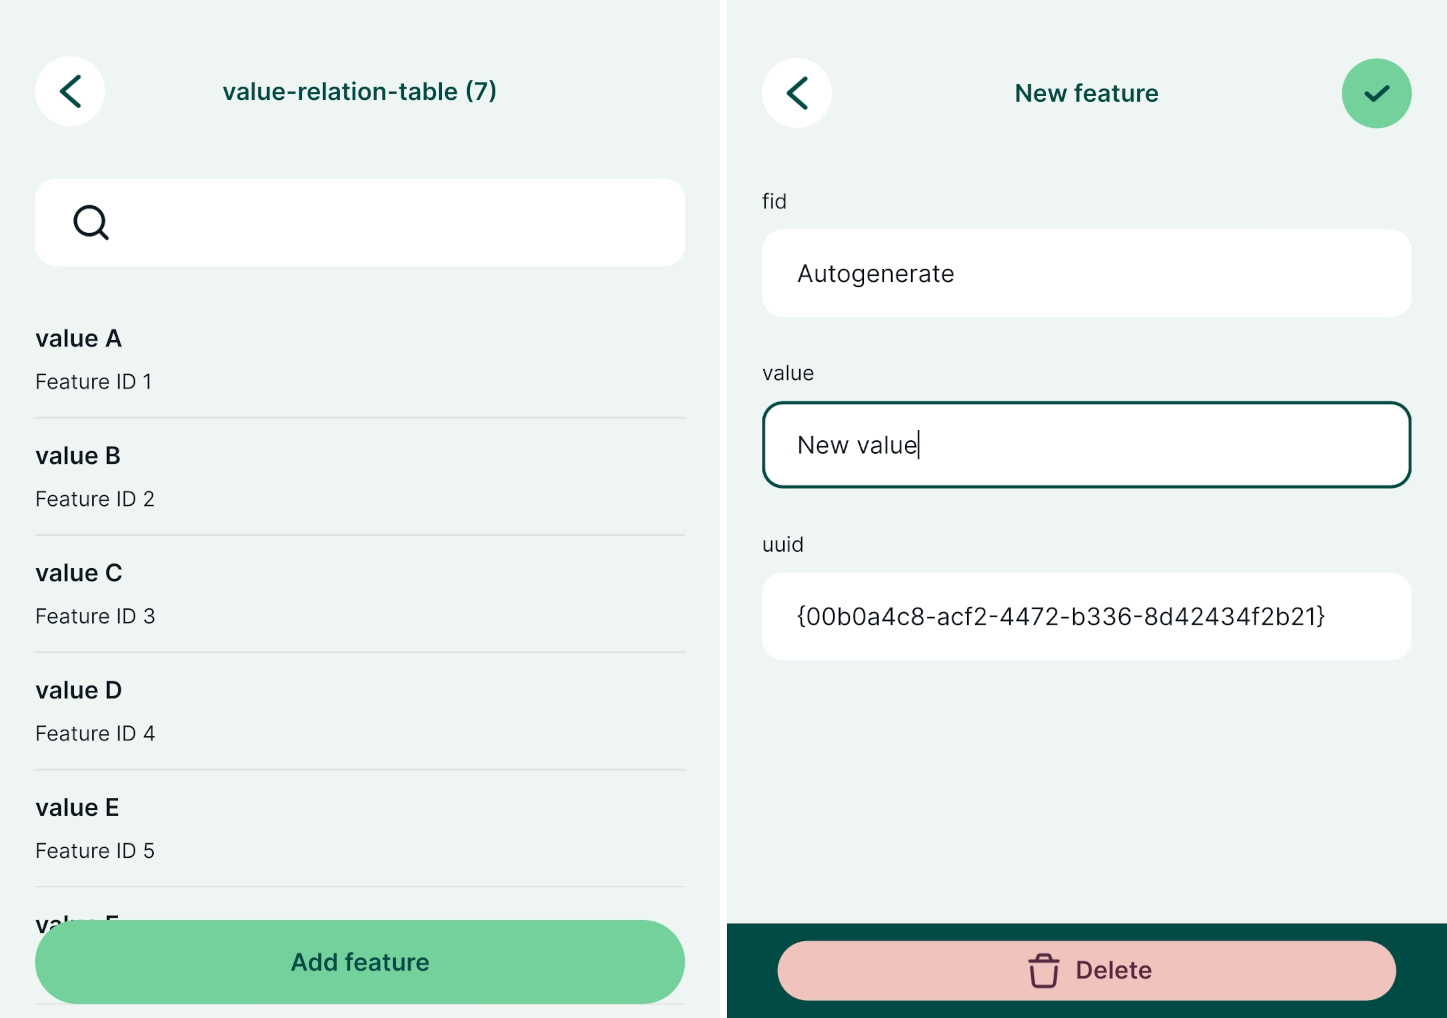
3. Fill in the attributes and **Save** ✔️ the changes
Avoid polygons overlap [](https://merginmaps.com/docs/field/mobile-features/#avoid-polygons-overlap)
------------------------------------------------------------------------------------------------------
In QGIS, you can set the option to avoid overlapping for polygons. This setting is stored in the Mergin Maps project and used when editing features both in QGIS and the mobile app.
See [How to Avoid Polygons Overlap](https://merginmaps.com/docs/gis/avoid-overlap/)
for more details.

Deleting features [](https://merginmaps.com/docs/field/mobile-features/#deleting-features)
--------------------------------------------------------------------------------------------
1. Tap on a feature on the map or find it through [**Layers**](https://merginmaps.com/docs/field/layers/)
2. Use the **Edit** button to open the attributes form
3. Tap the **Delete** button and confirm the deletion
After confirming that you want to delete the feature, it will be removed from the layer.
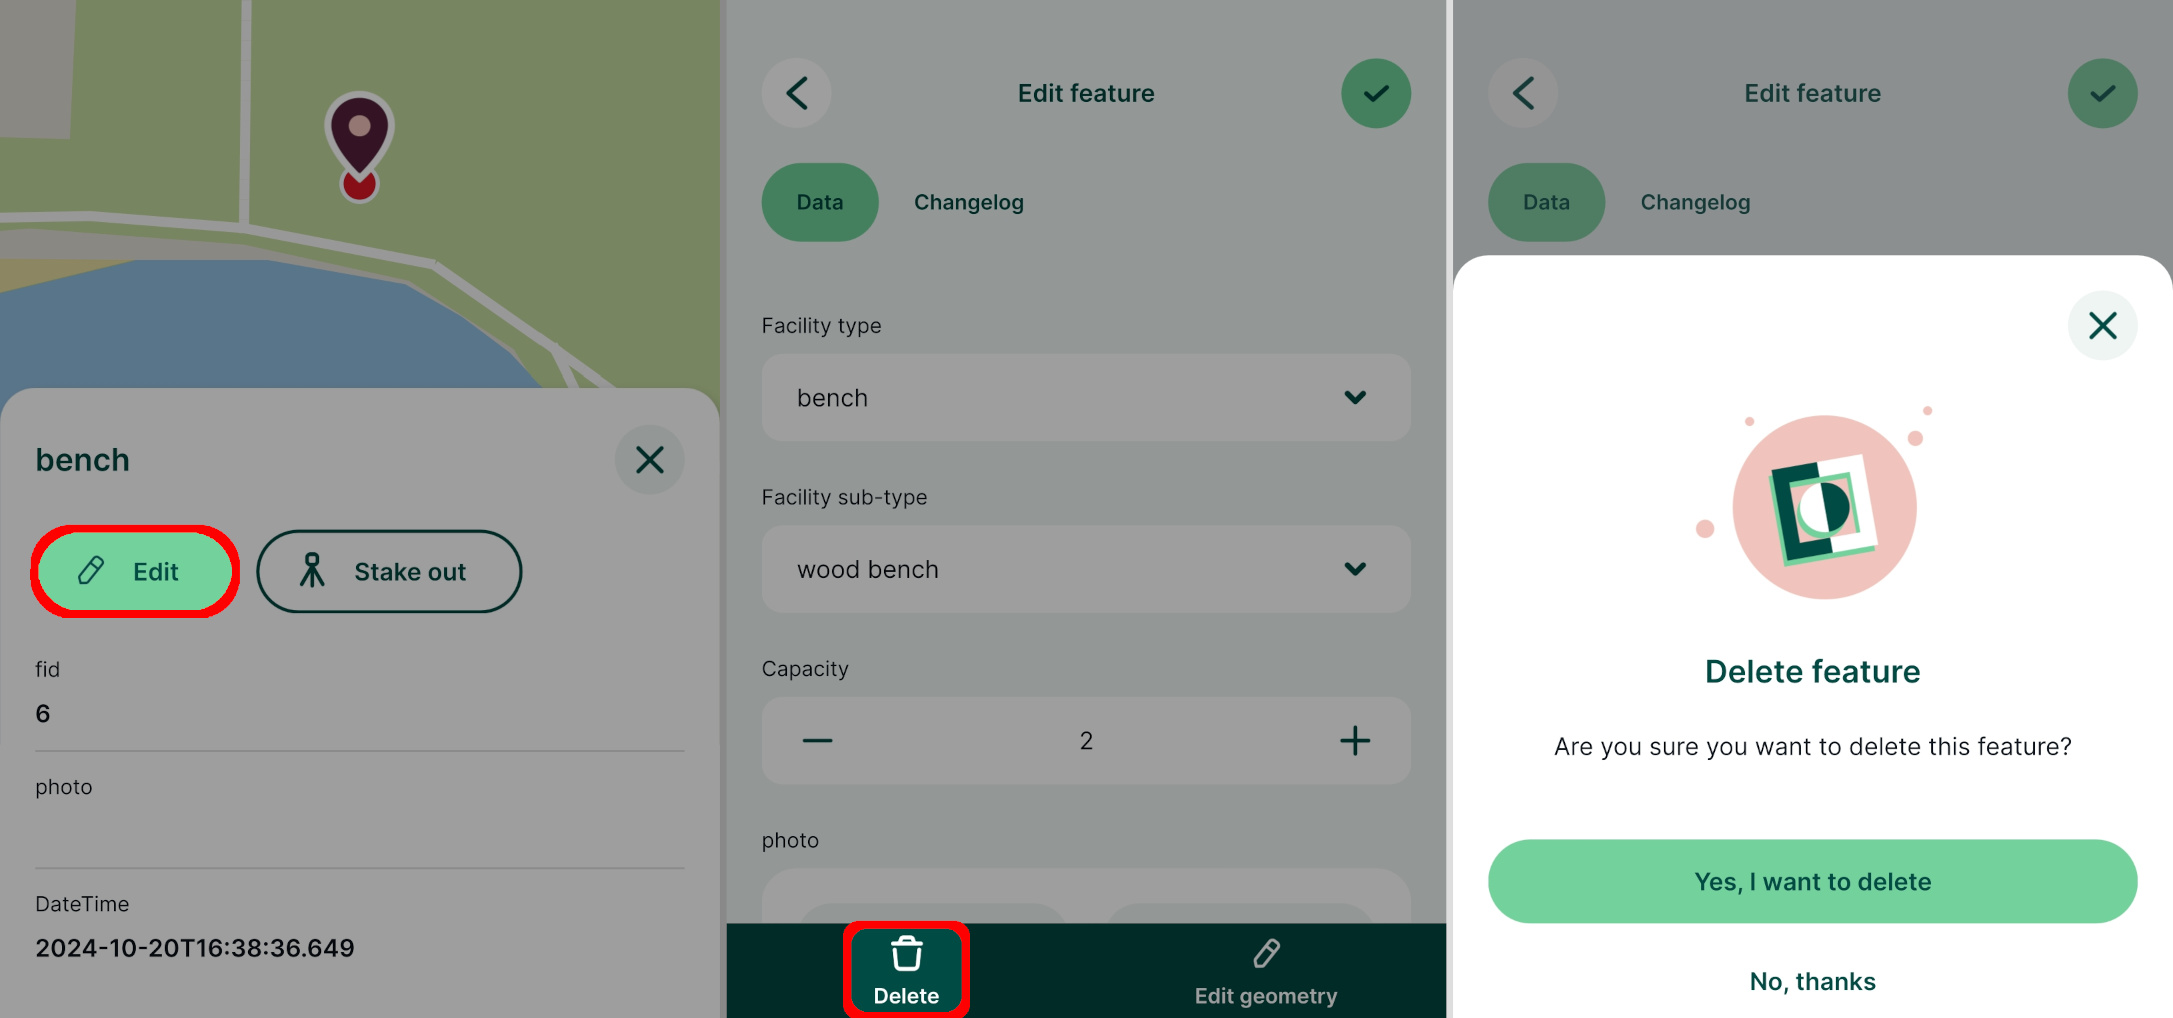
---
# Custom Mobile App | Mergin Maps
[Skip to content](https://merginmaps.com/docs/dev/customapp/#VPContent)
Return to top
Custom Mobile App [](https://merginmaps.com/docs/dev/customapp/#custom-mobile-app)
====================================================================================
Our mobile app Mergin Maps mobile app provides seamless synchronisation of field data between mobile devices and [Mergin Maps](https://merginmaps.com/)
service. However, we know that sometimes people want a mobile app optimised for a specific use case: maybe you just want to change the branding or disable some functionality - or maybe you want a bigger overhaul of the user interface.
The good news is that Mergin Maps mobile app is licensed as open source software, which means that anything is possible with a bit of development!
If you are interested in building a custom app, you can start by going to [MerginMaps/mobile](https://github.com/MerginMaps/mobile)
repository on GitHub and building it for your platform.
The [mobile app SDK repository](https://github.com/MerginMaps/mobile-sdk)
provides all the dependencies for various platforms (Android, iOS, macOS, Windows).
---
# How to Reuse Last Entered Values | Mergin Maps
[Skip to content](https://merginmaps.com/docs/field/reuse-last-values/#VPContent)
Return to top
How to Reuse Last Entered Values [](https://merginmaps.com/docs/field/reuse-last-values/#how-to-reuse-last-entered-values)
============================================================================================================================
Reusing last entered values of selected attributes can make digitising of similar features in the mobile app faster. When attributes are marked for reuse, the values from the last feature are already entered when a new feature is created.
Reuse last value option [](https://merginmaps.com/docs/field/reuse-last-values/#reuse-last-value-option)
----------------------------------------------------------------------------------------------------------
To allow this functionality, follow these steps:
1. Open your [Mergin Maps](https://merginmaps.com/)
project in the mobile app
2. Click on three dots to open a menu and navigate to **Settings**
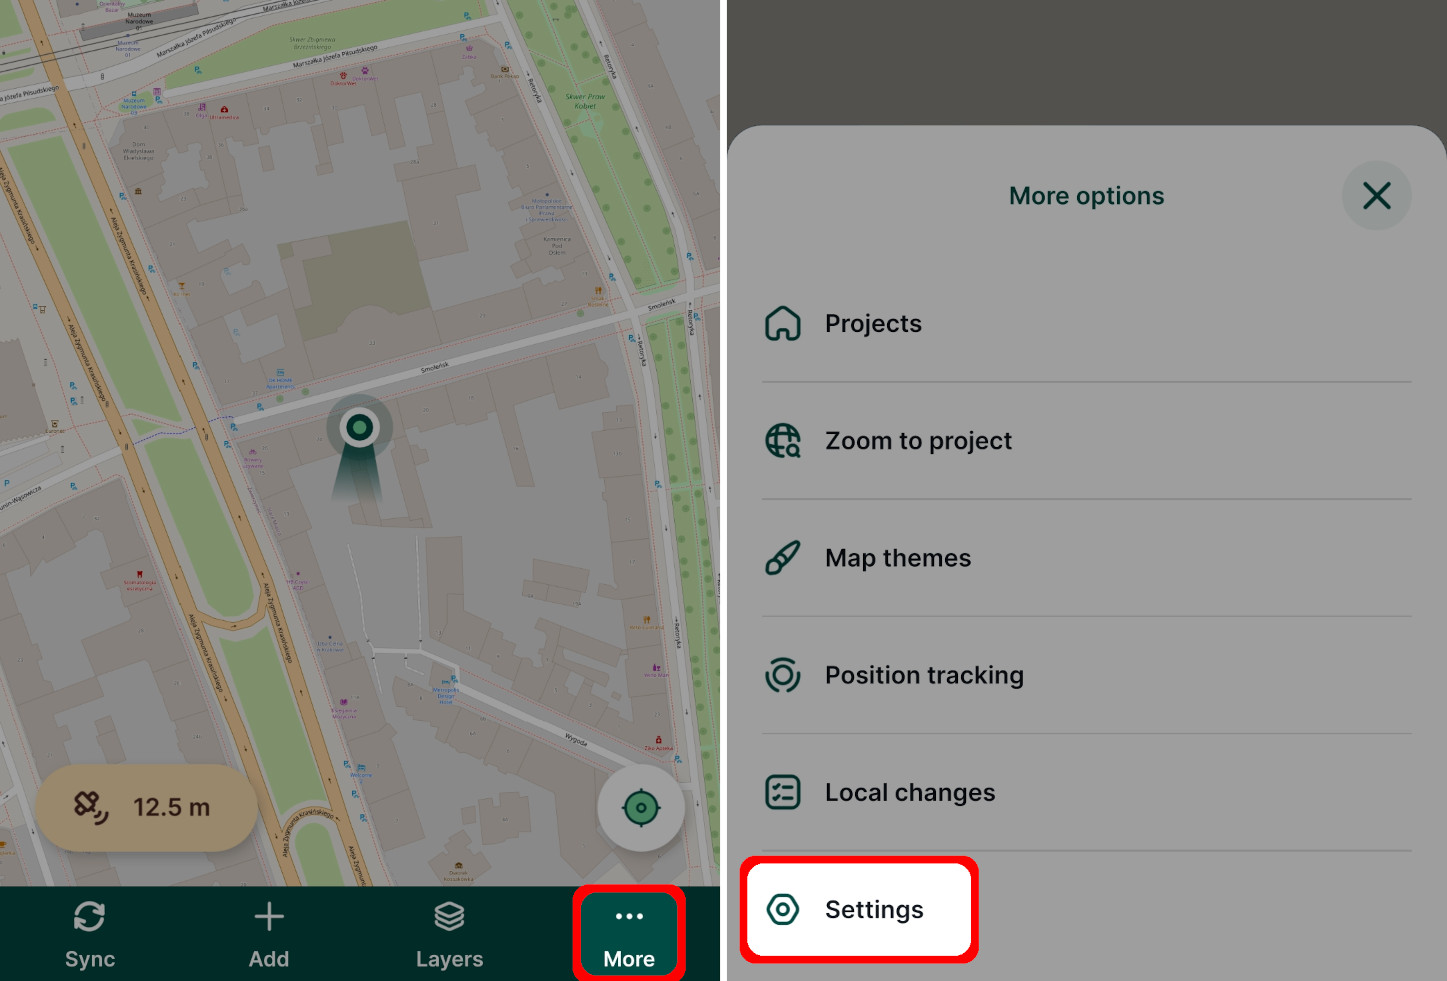
3. Toggle on the `Reuse last entered value` option
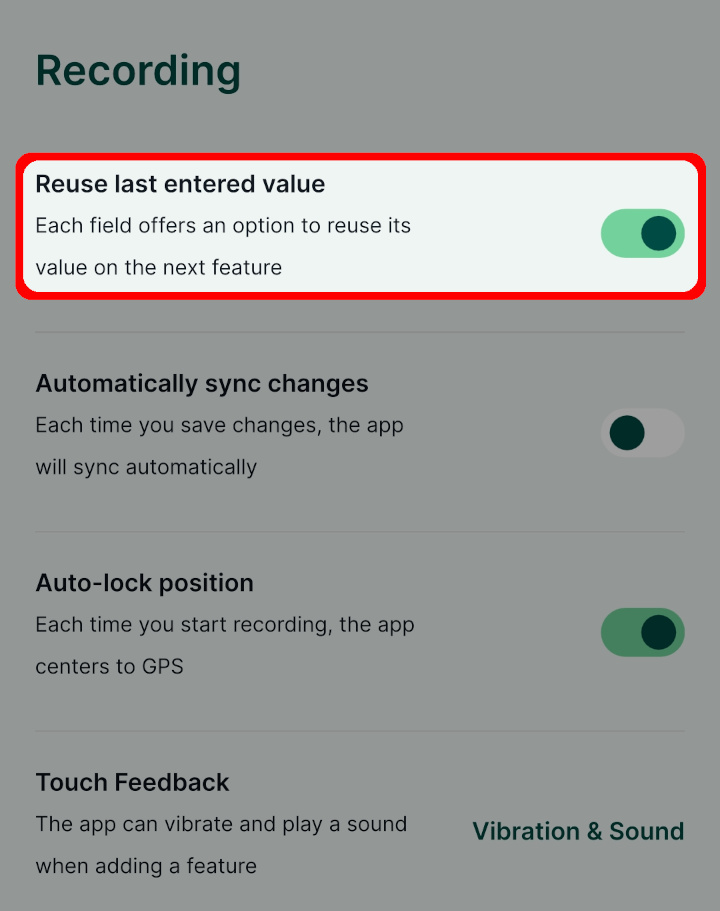
4. Go back to the map. When capturing a new feature, there will be check boxes next to attributes in the form.
Select the attributes which values you want to reuse (here, we checked the `Habitat type`) and **Save** the feature.
When recording another feature in this survey layer, the checked attributes in the form will contain the value that was entered in the last created feature.
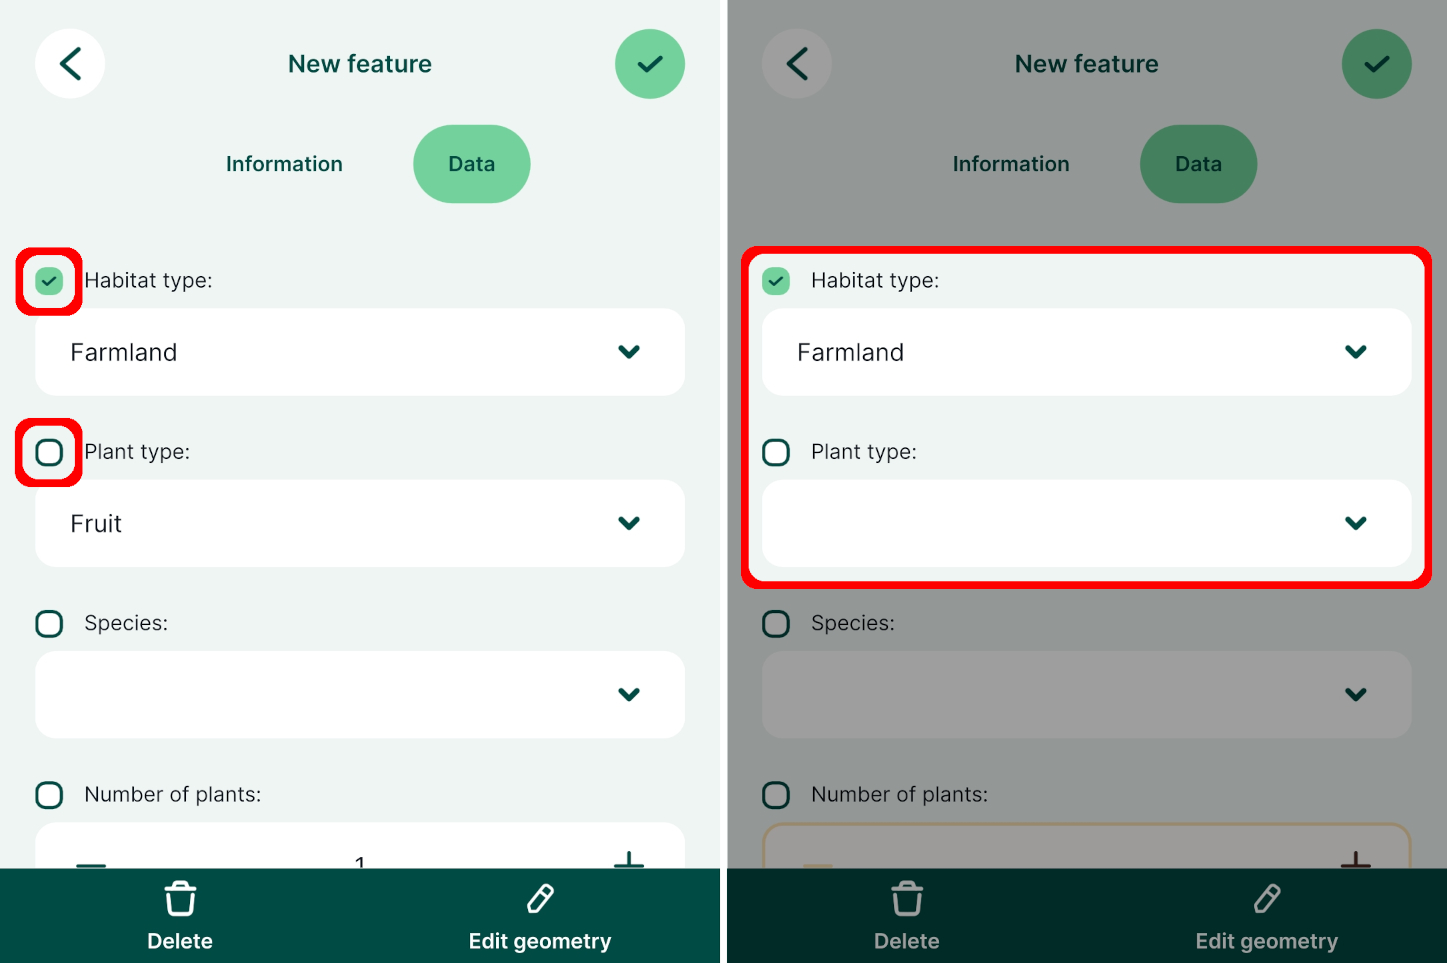
You can use the `Reuse last value option` across multiple layers. The mobile app will remember attributes for each layer separately.
This feature was inspired by QGIS functionality called _Reuse last entered attribute values_.
---
# Geodiff Library | Mergin Maps
[Skip to content](https://merginmaps.com/docs/dev/geodiff/#VPContent)
Return to top
Geodiff Library [](https://merginmaps.com/docs/dev/geodiff/#geodiff-library)
==============================================================================
Geodiff is a library for handling differences of spatial data. It can be used to compare two datasets to get and apply changesets or to merge changes from multiple sources. In [Mergin Maps](https://merginmaps.com/)
, Geodiff is used to synchronise changes made by individual team members, see [Behind Data Synchronisation](https://merginmaps.com/docs/manage/synchronisation/)
.
Geodiff works with GeoPackage files and PostGIS databases as well as with non-spatial SQLite and PostgreSQL databases. That means one can seamlessly find differences between tables of two schemas in a PostGIS database and apply the changes to a GeoPackage (or vice versa). Thanks to that, it is possible to keep data in sync even if the back-ends are completely different.
**Interested in using Geodiff?** [MerginMaps/geodiff](https://github.com/MerginMaps/geodiff)
repository contains the source code and more details on how to use it.
---
# Overview | Mergin Maps
[Skip to content](https://merginmaps.com/docs/server/#VPContent)
Return to top
Overview [](https://merginmaps.com/docs/server/#overview)
===========================================================
SaaS Mergin Maps service called [Mergin Maps Cloud](https://merginmaps.com/)
is a web platform for storage and synchronisation of data between mobile devices, [Mergin Maps](https://merginmaps.com/)
service and QGIS Desktop.
There are also custom server deployments:
You can read more about them in our blog [Mergin Maps Community and Enterprise Editions](https://merginmaps.com/blog/introducing-mergin-maps-community-and-enterprise-editions)
.
Mergin Maps CE [](https://merginmaps.com/docs/server/#mergin-maps-ce)
-----------------------------------------------------------------------
**Mergin Maps Community Edition** ([Mergin Maps CE](https://github.com/MerginMaps)
) is licensed as open source software. The source code for Mergin Maps CE can be modified and used for custom deployments. You can contribute your code to [MerginMaps/server](https://github.com/MerginMaps/server)
.
Mergin Maps EE [](https://merginmaps.com/docs/server/#mergin-maps-ee)
-----------------------------------------------------------------------
**Mergin Maps Enterprise Edition** ([Mergin Maps EE](https://merginmaps.com/pricing)
) provides an enterprise environment with additional features such as multiple [workspaces](https://merginmaps.com/docs/manage/workspaces/)
or [webmaps](https://merginmaps.com/docs/manage/dashboard-maps/)
. There are three types of [Mergin Maps EE](https://merginmaps.com/pricing)
:
* _Cloud_ that uses [app.merginmaps.com](https://app.merginmaps.com/)
(the same server as is used by other Mergin Maps users)
* _Private-Cloud_ where Mergin Maps is run on a different server hosted by us
* _On-Premises_ is a self-hosting option where you host your own server
This section of documentation is relevant for the **On-Premises Mergin Maps EE** and **Mergin Maps CE**.
Interested in using Mergin Maps EE?
Mergin Maps EE features and pricing can be found on our [website](https://merginmaps.com/pricing)
.
Contact our [sales team](mailto:sales@merginmaps.com)
for more details.
---
# C++ API Client | Mergin Maps
[Skip to content](https://merginmaps.com/docs/dev/integration-cpp/#VPContent)
Return to top
C++ API Client [](https://merginmaps.com/docs/dev/integration-cpp/#c-api-client)
==================================================================================
Do you want to integrate [Mergin Maps](https://merginmaps.com/)
? Mergin Maps is an open platform that aims to be developer friendly and it has been designed to allow easy integration with other software.
Installation [](https://merginmaps.com/docs/dev/integration-cpp/#installation)
--------------------------------------------------------------------------------
C++ API client is completely without any dependencies. To install the client, just download the binary for your platform from [MerginMaps/cpp-api-client/releases](https://github.com/MerginMaps/cpp-api-client/releases)
and use it from the command line.
The client uses Qt-based [Mergin Maps API core library](https://github.com/MerginMaps/mobile/tree/master/core)
used by the [mobile app](https://merginmaps.com/)
to sync the projects in the mobile application. Go to [MerginMaps/cpp-api-client](https://github.com/MerginMaps/cpp-api-client)
repository for more information on how to use it.
Command line interface [](https://merginmaps.com/docs/dev/integration-cpp/#command-line-interface)
----------------------------------------------------------------------------------------------------
When the client is installed, it comes with `mergin` command line tool.
bash
$ mergin --help
Usage: mergin [OPTIONS] COMMAND [ARGS]...
Options:
--help Show this message and exit.
--version Show the version information.
--username Mergin username (or MERGIN_USERNAME env. variable)
--password Mergin password (or MERGIN_PASSWORD env. variable)
--url Mergin url (defaults to app.merginmaps.com)
Commands:
create Create a new project on Mergin server
download Download last version of mergin project
sync Pull&Push the changes
remove Remove project from server.
---
# How to Fix a Broken Project | Mergin Maps
[Skip to content](https://merginmaps.com/docs/field/broken-project/#VPContent)
Return to top
How to Fix a Broken Project [](https://merginmaps.com/docs/field/broken-project/#how-to-fix-a-broken-project)
===============================================================================================================
Do you get an error message when trying to open a project or a form in Mergin Maps mobile app? There can be multiple reasons for what went wrong. Here we will try to guide you through some cases you may encounter.
Note that these issues may be related to an older version of the mobile app or [QGIS](https://qgis.org/)
so the content on this page may display outdated versions of Mergin Maps products.
Need more help with your issue?
The [Troubleshoot](https://merginmaps.com/docs/misc/troubleshoot/)
page has general troubleshooting tips and describes [support options](https://merginmaps.com/docs/misc/troubleshoot/#support)
that include commercial support, support for subscribed clients or community support.
 [Join our community chat](https://merginmaps.com/community/join)
and ask questions!
Saving of feature failed (vector layer) [](https://merginmaps.com/docs/field/broken-project/#saving-of-feature-failed-vector-layer)
-------------------------------------------------------------------------------------------------------------------------------------
The error is caused by a change of behaviour in QGIS versions 3.34.0 and higher as well as Mergin Maps mobile app 2.5.0 and higher.
Details
You can see the detailed upstream issue report [on this link](https://github.com/qgis/QGIS/issues/55517)
.
The error can be identified by notification _Failed to save changes_ in the Mergin Maps mobile app when a feature is added or modified. 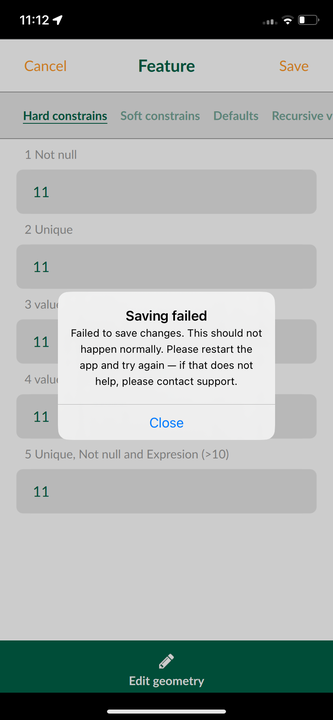 In the diagnostic log, you may find errors such as Failed to commit changes, or ... wrong data type for attribute ....
2023-12-05 09:04:25.058221+0100 Input[2593:32260] "2023-12-05T08:04:25.058Z CommitChanges: Failed to commit changes:\nERROR: 1 feature(s) not added.\n\n Provider errors:\n wrong data type for attribute 12 of feature -2: 10\n"
**To fix the project**:
1. Open your Mergin Maps project in QGIS.
2. Open problematic vector layer's properties in the project.
3. Find boolean fields that use Default values `'false'` or `'true'`. 
4. Replace string representation `'false'` or `'true'` by literal `false` or `true` (remove single quotation marks).
5. Save and sync the project.
Failed to read project issue (vector tiles) [](https://merginmaps.com/docs/field/broken-project/#failed-to-read-project-issue-vector-tiles)
---------------------------------------------------------------------------------------------------------------------------------------------
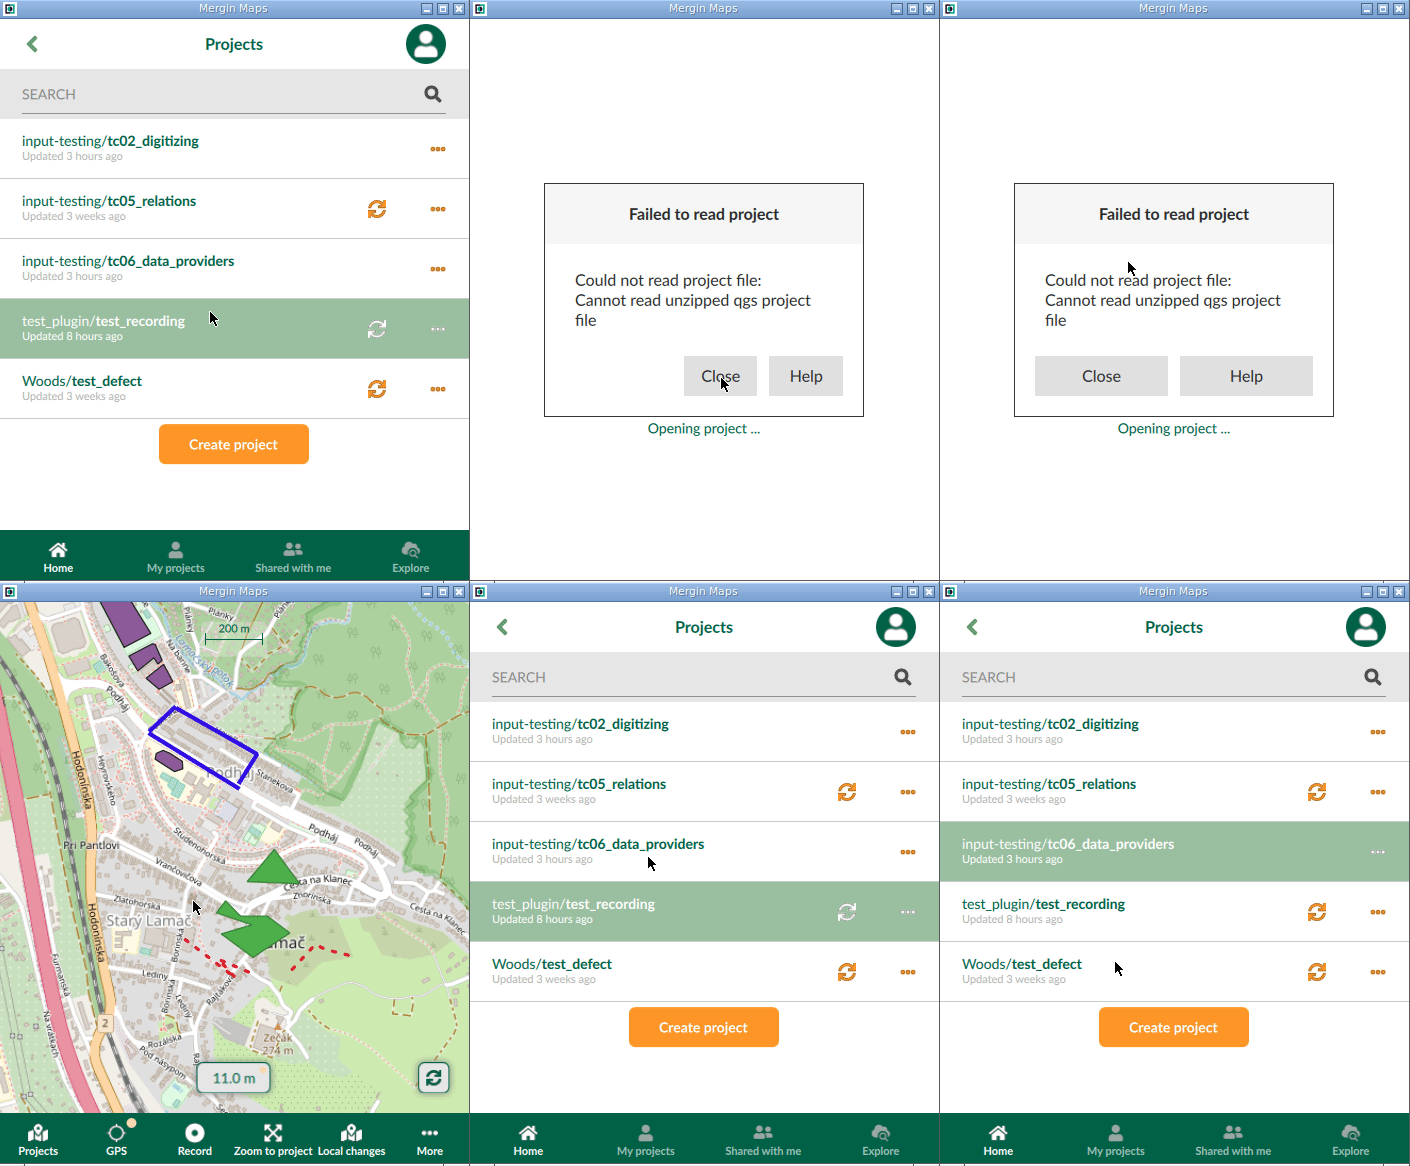
The error is caused by a bug, which should be fixed in QGIS versions 3.20, 3.18.3 and 3.16.7 and higher, so only projects created in older versions of QGIS are affected. Unfortunately, saving the project in a newer QGIS version is not enough to fix it.
Details
From a technical point of view, the issue is caused by a bug in parsing Mapbox GL style for vector tile layers that caused issues when loading Qt5-based QGIS projects from older QGIS versions in Qt6-based QGIS. This bug was fixed and should not appear in QGIS versions 3.20, 3.18.3 and 3.16.7 and higher.
Qt6 has been used in Mergin Maps mobile app since version 2.0.0. Thus, if you use a QGIS project that was created in older QGIS versions, you may encounter this error.
When trying to identify what to fix in your project, look for these:
* a [vector tile](https://merginmaps.com/docs/gis/settingup_background_map/#vector-tiles)
layer with JSON style
* when a rule has `text-size` with "stops"
* data-defined text size gets badly stored expression (as 0x01 character instead of the proper expression)
There is a high chance that these settings are the culprit behind the error!
**To fix the project**:
1. Open your Mergin Maps project in QGIS.
2. Remove problematic vector tile layers from the project. 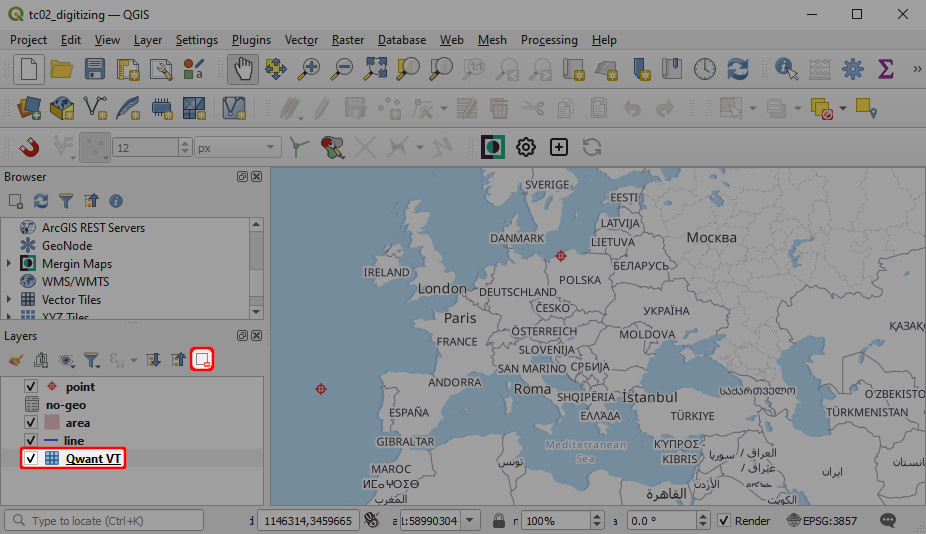
3. If you use online vector tiles, navigate to **Vector Tiles** in the **Browser** panel and create a new [vector tiles connection](https://merginmaps.com/docs/gis/settingup_background_map/#vector-tiles)
to the data source.
Details
You may also inspect the **Style URL** in the **Vector Tiles Connection**. 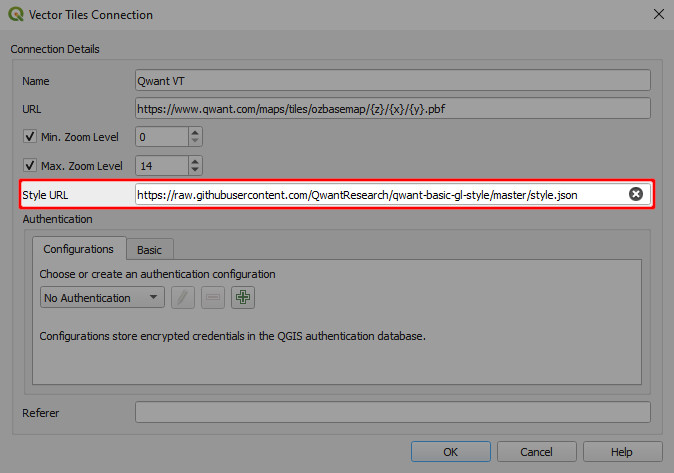
For instance, if the **Style URL** looks like this (Qwant Maps settings used here): `styleUrl=https://raw.githubusercontent.com/QwantResearch/qwant-basic-gl-style/master/style.json&type=xyz&url=https://www.qwant.com/maps/tiles/ozbasemap/%7Bz%7D/%7Bx%7D/%7By%7D.pbf&zmax=14&zmin=0` try removing the part of the link after `style.json` to get: `styleUrl=https://raw.githubusercontent.com/QwantResearch/qwant-basic-gl-style/master/style.json`
4. Add the layers back to the project. Offline vector tiles should be located in the project folder on your computer. Online vector tiles connections can be managed in **Vector Tiles** in the **Browser**. 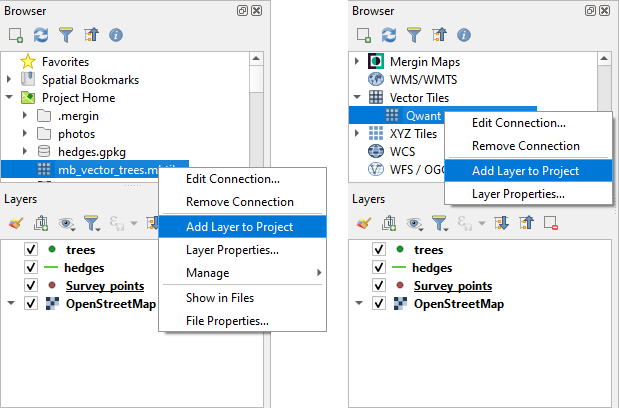
5. Save and sync the project.
WARNING
Copying styles from problematic layers and pasting them to other layers can cause the error to occur again. Unless you know what exactly causes the issues and are able to fix that, you might need to recreate the styles.
---
# Single Sign-On Deployment | Mergin Maps
[Skip to content](https://merginmaps.com/docs/server/sso-deployment/#VPContent)
Return to top
Single Sign-On Deployment [](https://merginmaps.com/docs/server/sso-deployment/#single-sign-on-deployment)
============================================================================================================
This installation guide will help you set up Single Sign-On (SSO) for Mergin Maps server. The Mergin Maps server is integrated with the most commonly used SAML and OIDC identity providers via the [Ory Polis](https://www.ory.sh/docs/polis)
service. SSO is available for Enterprise edition servers.
Configure server [](https://merginmaps.com/docs/server/sso-deployment/#configure-server)
------------------------------------------------------------------------------------------
To enable SSO in Mergin Maps, ensure that you have `SSO_ENABLED` environment variables set in your `.prod.env` file:
shell
SSO_ENABLED=True
To run the Ory Polis stack, you need to provide environment variables in the `.sso.env` file. In the [deployment folder for the enterprise edition](https://github.com/MerginMaps/server/blob/master/deployment/enterprise)
, you can find the `.sso.env.template` file with all the required variables and their default values. Use the provided script to automatically pre-generate the `.sso.env` file with all the necessary variables.
shell
cd deployment/enterprise/sso
./sso-init.sh
The script will also pre-generate the `SSO_SERVER_API_KEY` variable for the Mergin Maps server. This variable is used to authenticate the Mergin Maps server with Ory Polis. If you created the `.sso.env` file manually, you need to set this variable to match one of the `JACKSON_API_KEYS`.
Pay close attention to these environment variables and change their default values before using them in production:
* `NEXTAUTH_ADMIN_CREDENTIALS` - administrator credentials for Ory Polis admin portal. It is a comma separated string of pattern `email:password`, for example: `matthew@example.com:Pass123,james@example.com:Pass123`
* `DB_URL` - the PostgreSQL database connection URL (change this if you use a different database location for Ory Polis).
* `IDP_ENABLED` - set to `true` to enable the IDP-initiated authorisation flow.
More details about all available Ory Polis variables [here](https://www.ory.sh/docs/polis/deploy/env-variables)
.
Production deployment security
After successful initialisation of environment variables in `.sso.env`, we recommend double-checking the values or generating your own secrets and certificates.
Start the SSO stack [](https://merginmaps.com/docs/server/sso-deployment/#start-the-sso-stack)
------------------------------------------------------------------------------------------------
To run the SSO stack, you need to have a running Mergin Maps server - see previous section about [deployment](https://merginmaps.com/docs/server/install/)
.
Mount the `deployment/enterprise/sso/sso-nginx.conf` file to the `merginmaps-proxy` container in the `docker-compose.yml` file:
yaml
volumes:
- ./sso/sso-nginx.conf:/etc/nginx/templates/sso.conf.template
Then restart or reload the configuration in the `merginmaps-proxy` container and start the SSO stack:
shell
docker compose -f docker-compose.sso.yml up -d
The admin panel for Ory Polis will be available at `http://localhost:8081` (the value in `SSO_SERVER_URL`). You can sign in to the admin portal with the credentials you set in the variable `NEXTAUTH_ADMIN_CREDENTIALS`.
Domain for SSO Service
We recommend running the Ory Polis server on a separate domain or subdomain to make it accessible to your users. For your production deployment, use HTTPS to serve the SSO service. See the [ssl-sso-proxy.conf](https://github.com//MerginMaps/server/blob/master/deployment/enterprise/ssl-sso-proxy.conf)
file in the [deployment folder](https://github.com/MerginMaps/server/blob/master/deployment/)
. You also need to set the variable `SSO_SERVER_URL` to the publicly available URL of the Ory Polis service.
If you want to configure the Ory Polis service to run on its own domain in production (e.g., `sso.example.com`), you need to add this domain to the following variables:
* `EXTERNAL_URL=https://sso.example.com`
* `NEXTAUTH_URL=https://sso.example.com`
* `SSO_SERVER_URL=https://sso.example.com`
Mergin Maps and Ory Polis communication
If your Mergin Maps server is running without a connection to the publicly available Ory Polis `SSO_SERVER_URL`, you can set internal IP or domain names (e.g. `http://sso:5225`) in the following variables to ensure communication: `SSO_SERVER_INTERNAL_URL=http://sso:5225` and `SSO_SERVER_API_URL=http://sso:5225`.
Configure SSO connection [](https://merginmaps.com/docs/server/sso-deployment/#configure-sso-connection)
----------------------------------------------------------------------------------------------------------
You can now set up your first SSO (SAML or OIDC) connection in the Ory Polis admin panel.
Follow the steps below to create a new connection:
* Go to Mergin Maps admin panel and log in.
* In the left menu click **SSO Administration**.
* Log in to the Ory Polis admin panel using credentials from the `NEXTAUTH_ADMIN_CREDENTIALS` variable.
* Navigate to the **Enterprise SSO** tab and click **New Connection**.
* Choose **SAML** or **OIDC** as the connection type.
* Fill in the connection name and description (any value).
* Provide your domain name in the **Tenant** field - this is the domain for your users emails (e.g. you users emails will be `user@your.company.com`, then use `your.company.com` in the **Tenant** field).
* Enter the value `mergin-maps-product` in the **Product** field.
* Specify **Allowed redirect URLs** with the domain name of your Mergin Maps server (e.g. `https://merginmaps.example.com`) and the domain names used by Mergin Maps clients (`http://localhost:10042`, `http://127.0.0.1:10042`, `http://[::1]:10042` and `https://hello.merginmaps.com/mobile/sso-redirect`).
* Provide **Default redirect URL** with the domain name of your Mergin Maps server.
Your connection form will look like this for your users with `your.company.com` domain and Mergin Maps server running on `https://merginmaps.example.com`:
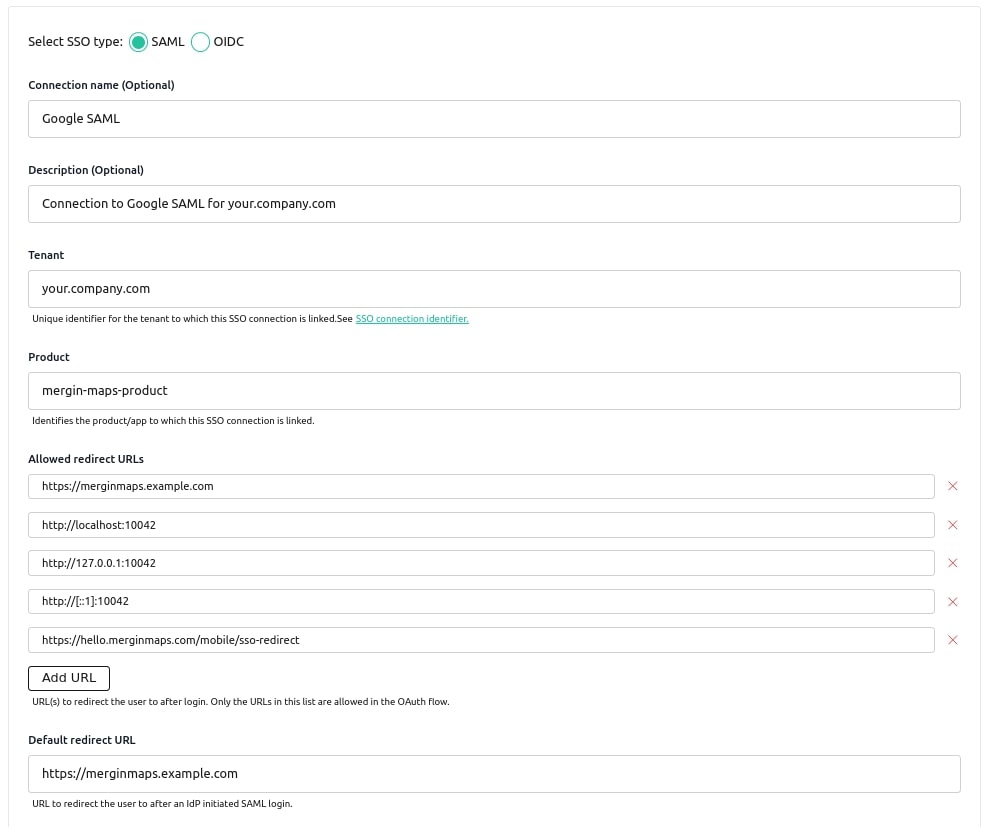
For the rest of the connection configuration parameters, refer to the [Ory Polis documentation](https://www.ory.sh/docs/polis/sso-providers/)
for your SAML or OIDC provider guide and follow the steps to configure your connection.
Once you have created the connection, go to your Mergin Maps dashboard and click **Continue with SSO**.
---
# Secure Mergin Maps installation | Mergin Maps
[Skip to content](https://merginmaps.com/docs/server/security/#VPContent)
Return to top
Secure Mergin Maps installation [](https://merginmaps.com/docs/server/security/#secure-mergin-maps-installation)
==================================================================================================================
WARNING
This sections aims to provide some guidelines and a minimalistic example on how to secure a Mergin Maps deployment.
Further security enhancements should be implemented by experts in accordance to cybersecurity policies in place.
For security and privacy reasons Mergin Maps deployments should enable HTTPS secured connection via certificate file.
We provide a template configuration file [ssl-proxy.conf](https://github.com/MerginMaps/server/blob/master/deployment/common/ssl-proxy.conf)
as base for your configuration.
Let's have a quick look at the main sections:
shell
server {
listen 443 ssl;
server_name merginmaps.company.com; # FIXME
client_max_body_size 4G;
...
Here we enable SSL via the default `443` port and configure name-based HTTPS server via `server_name`. Here you should change this according to your target server name.
We don't recommend setting a `client_max_body_size` higher than specified, because that might lead to timeouts while uploading your data to Mergin Maps.
Next, you need to point your certificate files to NGINX configuration. This is done on the next lines on the secured configuration:
shell
...
ssl_certificate_key /etc/letsencrypt/live/merginmaps.company.com/privkey.pem; # FIXME
ssl_certificate /etc/letsencrypt/live/merginmaps.company.com/fullchain.pem; # FIXME
...
The above example uses automated keys generated by CertBot. For more information, visit [CertBot](https://certbot.eff.org/instructions)
website and check how you can generate your own keys.
Some extra security settings for HTTP headers are provided. Please review them and update in accordance to your requirements.
shell
# Prevent crawlers from indexing and following links for all content served from the mergin app
add_header X-Robots-Tag "none";
# Protect against clickjacking iframe
add_header Content-Security-Policy "frame-ancestors 'self';" always;
# Add a HSTS policy to prevent plain http from browser
add_header Strict-Transport-Security "max-age=31536000; includeSubDomains" always;
# Set cookies security flags
proxy_cookie_flags ~ secure httponly samesite=strict;
location / {
root /var/www/html;
# The lines below were copied from application proxy
proxy_set_header X-Forwarded-For $proxy_add_x_forwarded_for;
proxy_set_header X-Forwarded-Proto $scheme;
proxy_set_header Host $http_host;
# we don't want nginx trying to do something clever with
# redirects, we set the Host: header above already.
proxy_redirect off;
proxy_pass http://app_server;
}
---
# Administer | Mergin Maps
[Skip to content](https://merginmaps.com/docs/server/administer/#VPContent)
Return to top
Administer [](https://merginmaps.com/docs/server/administer/#administer)
==========================================================================
Administration guide will help you to configure and maintain your [Mergin Maps CE](https://github.com/MerginMaps)
or [Mergin Maps EE](https://merginmaps.com/pricing)
. [Mergin Maps Cloud](https://merginmaps.com/)
is maintained for you by Mergin Maps team. Read more about server platforms in the [overview article](https://merginmaps.com/docs/server/)
.
Server environment [](https://merginmaps.com/docs/server/administer/#server-environment)
------------------------------------------------------------------------------------------
See the list of all [environment variables](https://merginmaps.com/docs/server/environment/)
that you can configure.
Telemetry Service [](https://merginmaps.com/docs/server/administer/#telemetry-service)
----------------------------------------------------------------------------------------
The telemetry service helps us gather some information about the usage of the platform, namely on-premise deployment.
This information is very valuable and help us improve Mergin Maps. The collected information is related with users seats, URL of installation and auto generated `uuid` of the installation. We keep this information for unlimited time for the purposes we previously provided.
Please consider enabling this functionality, even if you are using Mergin Maps CE edition. For Mergin Maps EE deployments, as you'll check down below, this is [**mandatory** (section 4.5)](https://merginmaps.com/licenses/license-ee)
.
The Mergin Maps telemetry service (`call-home`) requires https access to `https://api.merginmaps.com/monitoring` on `TCP` port `443`.
Enterprise Edition only Since Server 2023.2
WARNING
It is legally required by Mergin Maps EE servers to send usage information to monitor the usage of the License.
Double check your deployment. Make sure if `COLLECT_STATISTICS` environment variable is present, **it is set to `True`**.
COLLECT_STATISTICS=true # Or you can ommit, default is True
Community Edition only
By default, Mergin Maps CE collects anonymous usage information to make the service better. There is a variable named `COLLECT_STATISTICS` that controls if statistics are collected and sent.
If you do not want to provide these data, you can opt-out any time by setting this variable to _false_:
COLLECT_STATISTICS=false
---
# Migrate from Fulcrum | Mergin Maps
[Skip to content](https://merginmaps.com/docs/migrate/fulcrumapp/#VPContent)
Return to top
Migrate from Fulcrum [](https://merginmaps.com/docs/migrate/fulcrumapp/#migrate-from-fulcrum)
===============================================================================================
This guide is intended for current Fulcrum field data collection tool users who consider switching to [QGIS](https://qgis.org/)
and [Mergin Maps](https://merginmaps.com/)
. It might be helpful also to Mergin Maps users looking to transfer their data from the FulcrumApp ecosystem.
Getting familiar with Mergin Maps and QGIS
Switching to a new platform can be challenging. This documentation is here to help with the basics as well as some more advanced or specific settings.
To get familiar with [Mergin Maps](https://merginmaps.com/)
, we recommend starting with the [**tutorials**](https://merginmaps.com/docs/tutorials/capturing-first-data/)
. If there are specific topics that are crucial for your workflows, feel free to explore the documentation or contact our [sales team](mailto:sales@merginmaps.com)
or our [support team](mailto:support@merginmaps.com)
to get more details.
QGIS is a powerful tool that comes with great community and resources. We recommend using [QGIS User Guide](https://docs.qgis.org/latest/en/docs/user_manual/index.html)
and [QGIS Training Manual](https://docs.qgis.org/latest/en/docs/training_manual/index.html)
to explore its functionality.
FulcrumApp and Mergin Maps Ecosystems [](https://merginmaps.com/docs/migrate/fulcrumapp/#fulcrumapp-and-mergin-maps-ecosystems)
---------------------------------------------------------------------------------------------------------------------------------
[Mergin Maps](https://merginmaps.com/)
is a platform that seamlessly integrates [QGIS](https://qgis.org/)
projects, providing a familiar workflow for GIS professionals. This strong connection ensures that Mergin Maps users can benefit from the styling options, attributes form design, and data management capabilities provided by QGIS.
FulcrumApp features a drag-and-drop form builder. Users can start with a blank form or import data in CSV or Shapefile format to build their data collection forms. Field data collection then follows within the Fulcrum environment.
Key differences between the platforms include:
* **Layers, datasets, forms and widgets**
Mergin Maps follows the logic of a QGIS project: you can have multiple layers with their own attributes form set up with QGIS [widgets](https://merginmaps.com/docs/layer/form-widgets/)
within a single project. All survey layers in a project can be edited in the mobile app in one session.
Fulcrum usually works best at _one app per layer_: having separate apps for different datasets and switching between the apps during the field survey.
* **Supported formats of background maps**
Fulcrum supports a selection of common formats, such as XYZ Tiles, MBTiles, WMS, GeoJSON, and ArcGIS Feature Services.
All of these and some more are supported by Mergin Maps, including raster formats such as GeoTIFF (for more details, see the [list of supported formats](https://merginmaps.com/docs/gis/supported_formats/)
).
Migrating from Fulcrum to Mergin Maps [](https://merginmaps.com/docs/migrate/fulcrumapp/#migrating-from-fulcrum-to-mergin-maps)
---------------------------------------------------------------------------------------------------------------------------------
Data from Fulcrum can be exported to multiple formats that can be imported directly into QGIS, such as GeoJSON, KML or Shapefile. This enables users to display Fulcrum data in QGIS.
To migrate your data:
1. Export Data from Fulcrum as GeoJSON file (or other QGIS-supported format)
2. Open the GeoJSON file in QGIS. See [QGIS User guide](https://docs.qgis.org/latest/en/docs/user_manual/managing_data_source/opening_data.html)
for help.
3. Save the GeoJSON data as GeoPackage. GeoPackage is a great data format to use to visualise, edit and manage data in QGIS. It is the recommended data format for survey layers in Mergin Maps.
4. Now you can use your data to create a QGIS project: set the symbology for your layers, define their attributes forms using various widgets or add background maps as needed.
To use this QGIS project within the [Mergin Maps](https://merginmaps.com/)
platform:
1. [Sign up to Mergin Maps](https://merginmaps.com/docs/setup/sign-up-to-mergin-maps/)
2. [Install the Mergin Maps QGIS plugin](https://merginmaps.com/docs/setup/install-mergin-maps-plugin-for-qgis/)
3. [Install the Mergin Maps mobile app](https://merginmaps.com/docs/setup/install-mobile-app/)
4. [Synchronise the QGIS project to the mobile app](https://merginmaps.com/docs/manage/synchronisation/)
using the QGIS plugin. See how the settings done in QGIS translate to the mobile app.
Troubleshoot [](https://merginmaps.com/docs/migrate/fulcrumapp/#troubleshoot)
-------------------------------------------------------------------------------
Struggling to migrate your projects? We are happy to help you!
Book a short video call with our [sales team](mailto:sales@merginmaps.com)
or ask our [support team](mailto:support@merginmaps.com)
your technical questions. We also have an active open-source community:
 [Join our community chat](https://merginmaps.com/community/join)
and ask questions!
If you are looking for a professional partner to migrate your workflow, ask our [partners network](https://merginmaps.com/partners)
or [Lutra Consulting Ltd.](https://www.lutraconsulting.co.uk/)
, the developers of Mergin Maps.

Credits [](https://merginmaps.com/docs/migrate/fulcrumapp/#credits)
---------------------------------------------------------------------
Fulcrum, FulcrumApp are developed and corresponding trademarks are owned by Spatial Networks Inc.
---
# Using Mergin Maps Mobile App and QGIS Plugin with a Custom Server | Mergin Maps
[Skip to content](https://merginmaps.com/docs/server/plugin-mobile-app/#VPContent)
Return to top
Using Mergin Maps Mobile App and QGIS Plugin with a Custom Server [](https://merginmaps.com/docs/server/plugin-mobile-app/#using-mergin-maps-mobile-app-and-qgis-plugin-with-a-custom-server)
===============================================================================================================================================================================================
There is a default server [app.merginmaps.com](https://app.merginmaps.com/)
which is configured in Mergin Maps QGIS plugin and in the mobile app. However, you might want to use some custom server, e.g. when using [Mergin Maps Community Edition](https://merginmaps.com/docs/server/)
or [Mergin Maps Enterprise Edition](https://merginmaps.com/docs/server/)
.
To do this, we need to set up the custom server in the [plugin](https://merginmaps.com/docs/server/plugin-mobile-app/#custom-server-configuration-in-mergin-maps-qgis-plugin)
as well as in the [mobile app](https://merginmaps.com/docs/server/plugin-mobile-app/#custom-server-configuration-in-mergin-maps-mobile-app)
.
Server version compatibility
Please note that the Mergin Maps mobile app and Mergin Maps QGIS plugin require the server version 2023.2 or higher.
See how to [upgrade](https://merginmaps.com/docs/server/upgrade/)
your server if needed.
Diagnostic logs on custom servers
[Diagnostic logs](https://merginmaps.com/docs/misc/troubleshoot/#diagnostic-logs)
are by default saved to the `diagnostic_logs` folder on your server.
They contain detailed information about application run, so they may help you resolve issues you can encounter when using the mobile app and QGIS plugin with your custom server.
Custom server configuration in Mergin Maps QGIS plugin [](https://merginmaps.com/docs/server/plugin-mobile-app/#custom-server-configuration-in-mergin-maps-qgis-plugin)
-------------------------------------------------------------------------------------------------------------------------------------------------------------------------
To configure a custom Mergin Maps server in the QGIS plugin:
1. Click on the **Configure Mergin Maps plugin** icon to open the configuration dialog 
2. Check the **Custom Mergin Maps server** option and enter your custom server URL. 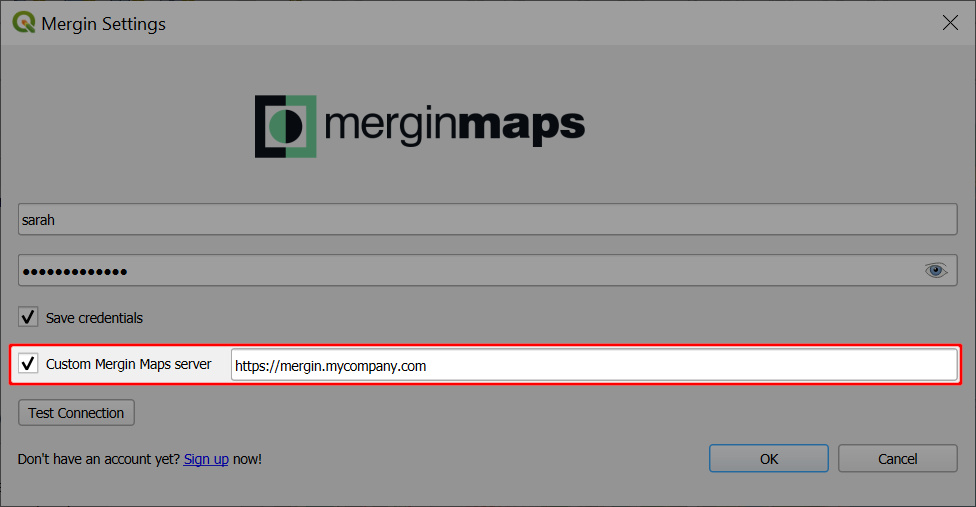
Now, the server URL is saved in current QGIS profile settings. So whenever you open QGIS with this profile, the Mergin Maps server is associated with this URL.
### Migration between Mergin Maps servers [](https://merginmaps.com/docs/server/plugin-mobile-app/#migration-between-mergin-maps-servers)
You might have started working on one server (e.g. staging server, official cloud) and then you decided to migrate to a different Mergin Maps server. If you change a server URL as in the config above, you will be connected to a different server and this option will hold in subsequent QGIS sessions until you change it again. This way you can switch between servers for a single QGIS profile. All projects for all your servers that you downloaded to your computer are still remembered.
WARNING
Plugin will not allow you to migrate projects from one server to another. Your local copies are already associated with the server they were downloaded from. If you really need to upload your local project from one server to another you will need to create a copy of that folder elsewhere (without hidden folder `.mergin`).
### Using multiple servers simultaneously [](https://merginmaps.com/docs/server/plugin-mobile-app/#using-multiple-servers-simultaneously)
If you need to handle two different servers at the same time, you will first need to create two user profiles in QGIS and download the QGIS plugin for both.
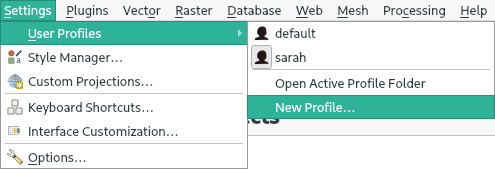
Then you can configure Mergin Maps QGIS plugin for each of them using different server URL. Each session for given user profile will be connected to its own Mergin Maps server as specified in the plugin configuration.
The limitation for transferring projects between servers still holds.
Custom server configuration in Mergin Maps mobile app [](https://merginmaps.com/docs/server/plugin-mobile-app/#custom-server-configuration-in-mergin-maps-mobile-app)
-----------------------------------------------------------------------------------------------------------------------------------------------------------------------
To configure a custom Mergin Maps server in Mergin Maps mobile app:
1. Navigate to the **Log in** page. Make sure you are signed out.
The current server URL is displayed at the bottom of the page.
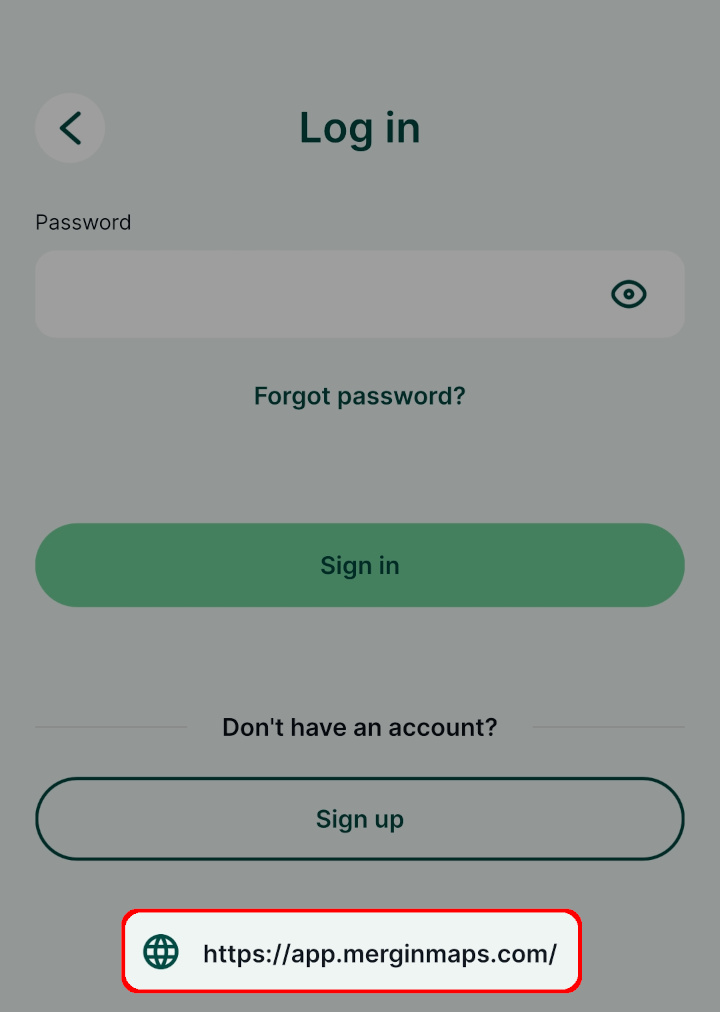
2. Tap on server URL to change the Mergin Maps server. Enter the URL of your server and tap **Confirm**.
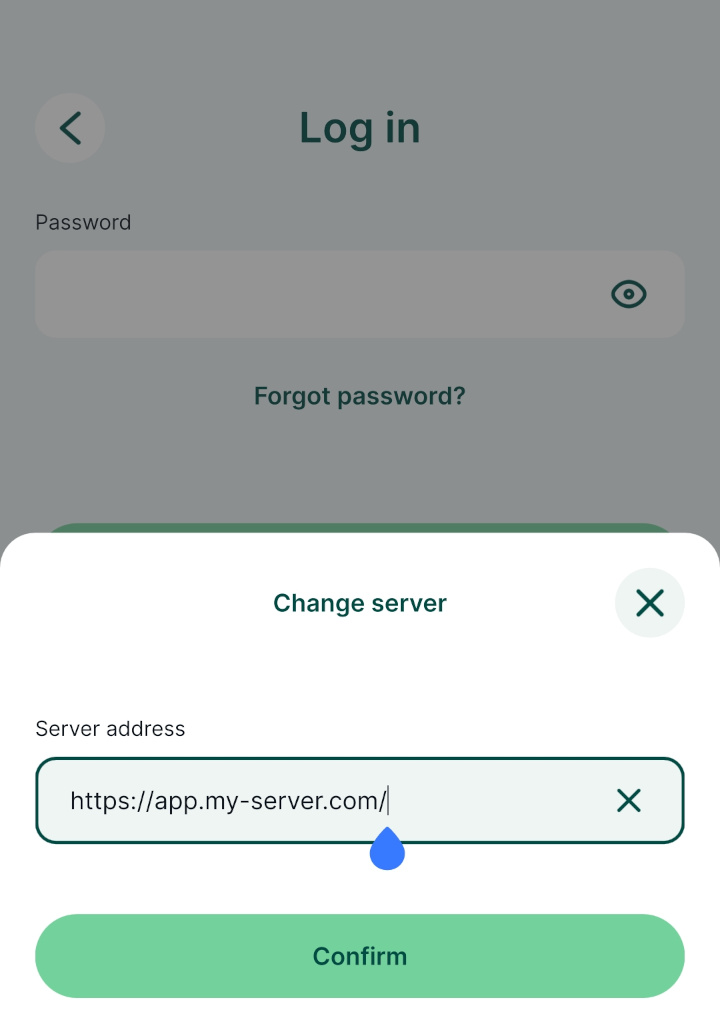
3. Use the username and password that is associated with this server and **Sign in**. 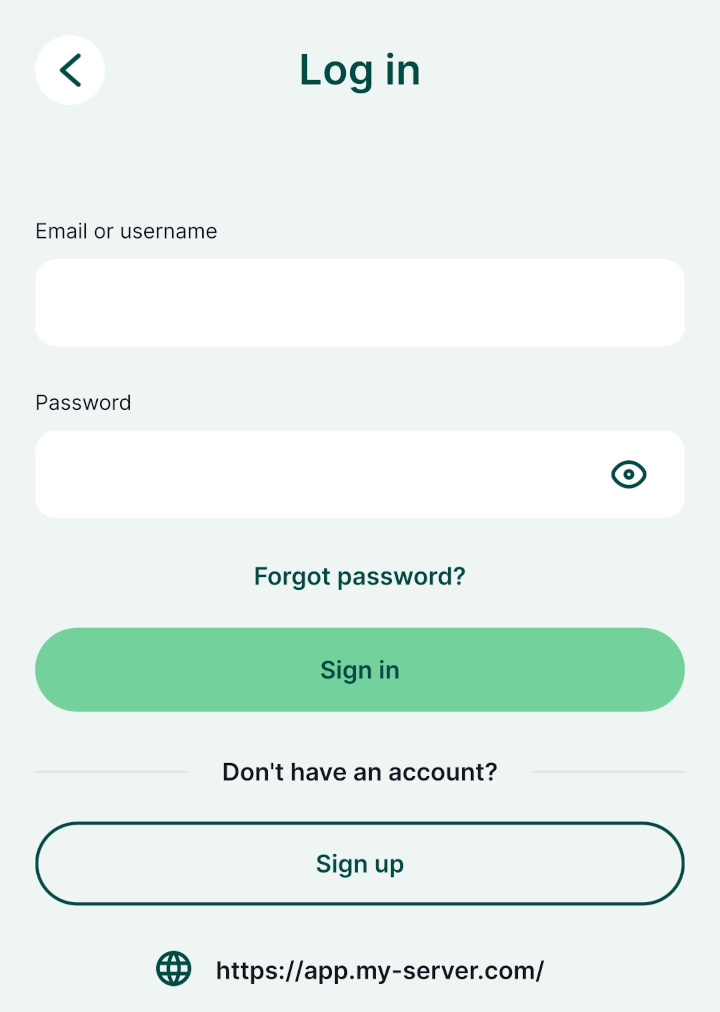
Now you are all set to use the mobile app with the custom server!
---
# Migrate from QField | Mergin Maps
[Skip to content](https://merginmaps.com/docs/migrate/qfield/#VPContent)
Return to top
Migrate from QField [](https://merginmaps.com/docs/migrate/qfield/#migrate-from-qfield)
=========================================================================================
This guide is intended for current QField and QFieldCloud users considering switching to Mergin Maps as well as for Mergin Maps users looking to transfer their data from the QField ecosystem.
Mergin Maps is the closest alternative to QField Ecosystem. Both QField and Mergin Maps are open-source projects powered by QGIS. Their respective mobile apps are both officially recommended for QGIS projects by [QGIS.org](https://qgis.org/en/site/forusers/download.html)
. Both platforms support almost the same set of [supported formats](https://merginmaps.com/docs/gis/supported_formats/)
via QGIS data providers and GDAL. Moreover, the mobile apps are based on the same open-source GIS stack and technology. As such their projects are almost fully interoperable.
QField and Mergin Maps ecosystems [](https://merginmaps.com/docs/migrate/qfield/#qfield-and-mergin-maps-ecosystems)
---------------------------------------------------------------------------------------------------------------------
The QField ecosystem consists of QField (mobile application), QFieldCloud (geo data collaboration server), QFieldSync (QGIS plugin) and QFieldCloud SDK (Python API client). Let's see the tools from Mergin Maps that are counterparts:
| QField Ecosystem | Mergin Maps | Note |
| --- | --- | --- |
| QField | Mergin Maps mobile app | Mobile application powered by QGIS |
| QFieldCloud | Mergin Maps | Web application (server) for sharing geo-data |
| QFieldSync | Mergin Maps QGIS plugin | QGIS Plugin for sync and manipulation of projects |
| QFieldCloud SDK and CLI | [Python client](https://github.com/MerginMaps/python-api-client) | Interaction with REST API via Python or console |
QFieldCloud is based on PostgreSQL and PostGIS database and there might be direct connection to these. Mergin Maps is fully based on a file-based system, so it is not possible to connect directly to a PostGIS database. However, you can use the [DB Sync](https://merginmaps.com/docs/dev/dbsync/)
tool to map your Mergin Maps project to a PostGIS database schema or vice versa.
On top of [Python client](https://github.com/MerginMaps/python-api-client)
, Mergin Maps offers also other developer tools to manage projects for larger teams, such as [Media Sync](https://merginmaps.com/docs/dev/media-sync/)
and [Work Packages](https://merginmaps.com/docs/dev/work-packages/)
.
You can also [customise](https://merginmaps.com/docs/dev/customapp/)
Mergin Maps mobile app and deploy your own Mergin Maps servers as the [Mergin Maps Community Edition](https://merginmaps.com/docs/server/)
or [Mergin Maps Enterprise Edition](https://merginmaps.com/docs/server/)
.
### Users, organisations, workspaces [](https://merginmaps.com/docs/migrate/qfield/#users-organisations-workspaces)
There are some similarities and differences in how QField and Mergin Maps manage their users and projects:
* a _user_ is a key management unit in both platforms. Each user needs to [have an account](https://merginmaps.com/docs/setup/sign-up-to-mergin-maps/)
.
* a [_project_](https://merginmaps.com/docs/manage/project/)
is basically the same concept in both platforms (a `.qgz` file with associated files)
* _organisations_ in QFieldCloud are similar to [_workspaces_](https://merginmaps.com/docs/manage/workspaces/)
in Mergin Maps
* _project collaborators_ in QFieldCloud are [_workspace members or guests_](https://merginmaps.com/docs/manage/permissions/)
that have access to a project in Mergin Maps
* _organisation members_ in QFieldCloud are [_workspace members_](https://merginmaps.com/docs/manage/permissions/)
in Mergin Maps
Before we start [](https://merginmaps.com/docs/migrate/qfield/#before-we-start)
---------------------------------------------------------------------------------
Before the start of migration, you need to have a Mergin Maps account and a workspace to manage your projects. If you are already registered, feel free to skip these steps.
* [Sign up to Mergin Maps](https://merginmaps.com/docs/setup/sign-up-to-mergin-maps/)
to create a Mergin Maps account and a workspace
* [Install QGIS](https://merginmaps.com/docs/setup/install-qgis/)
and [Mergin Maps QGIS plugin](https://merginmaps.com/docs/setup/install-mergin-maps-plugin-for-qgis/)
* [Install Mergin Maps mobile app](https://merginmaps.com/docs/setup/install-mobile-app/)
We also recommend going through the [Get Started tutorial](https://merginmaps.com/docs/tutorials/capturing-first-data/)
to get familiar with Mergin Maps.
Migrate QField project to Mergin Maps [](https://merginmaps.com/docs/migrate/qfield/#migrate-qfield-project-to-mergin-maps)
-----------------------------------------------------------------------------------------------------------------------------
Both platforms are using QGIS Projects (`.qgz` files) and associated online or offline geo-data sources.
Therefore, if you open the project in QGIS on your desktop, you will be able to upload it to Mergin Maps.
### Transfer QField project to the desktop [](https://merginmaps.com/docs/migrate/qfield/#transfer-qfield-project-to-the-desktop)
If you use a USB cable for synchronisation of your data, use your common workflow to transfer the project to your computer, e.g. by using the **Send compressed folder to** option in QField to send the compressed project to your email.
If you use QFieldCloud, use QFieldSync to synchronise the latest changes.
### Convert QField project to QGIS project [](https://merginmaps.com/docs/migrate/qfield/#convert-qfield-project-to-qgis-project)
Now that you have your QField project on your computer, you need to convert it to a regular QGIS project. Mergin Maps doesn't use offline editing, nor connections to QFieldCloud PostGIS databases, so we need to remove those.
1. Close QGIS
2. Find the project folder location on your computer (e.g. `C:\GIS\QField_MyProject`) and create a copy in a new location (e.g. `C:\GIS\MyProject`)
* this folder should contain a single QGIS project file (`.qgz` or `.qgs`), local data files (such as GeoPackages `.GPKG`, Shapefiles `.SHP` or rasters) and other necessary files (such as photos `.jpg` or `.png`).
* remove all hidden files and all files that are not strictly required by a regular plain QGIS project (such as QField configuration files, backups of the layers or offline synchronisation logs).
TIP
Depending on your project, it might be easier to just copy the QGIS project file (`.qgz` or `.qgs`) and other required data sources to the new folder one by one.
3. Open the project from the **new** folder (e.g. `C:\GIS\MyProject`) in QGIS.
For each layer, check its properties and verify that the sources do not point to any QFieldCloud databases.
Some layers in the project may appear unavailable. Make sure they were copied to the folder or fix their data source.
4. If you made changes, save the project and close QGIS.
Then, reopen the project in QGIS again to make sure that the project loads correctly.
TIP
Some Mergin Maps specific settings can be set up in the project, such as selective sync, default photo quality or custom photo names. Go to [QGIS Project Preparation](https://merginmaps.com/docs/gis/features/)
for inspiration.
### Upload QGIS project to Mergin Maps [](https://merginmaps.com/docs/migrate/qfield/#upload-qgis-project-to-mergin-maps)
1. Use Mergin Maps QGIS plugin to package and upload the project to Mergin Maps as explained [here](https://merginmaps.com/docs/manage/project/#packaging-qgis-project)
2. Log in to [app.merginmaps.com](https://app.merginmaps.com/)
to see that the project was successfully uploaded to the cloud
3. Open the project on Mergin Maps mobile app and check your project, especially feature forms and all the layers.
Migrate QFieldCloud Settings [](https://merginmaps.com/docs/migrate/qfield/#migrate-qfieldcloud-settings)
-----------------------------------------------------------------------------------------------------------
### Organisations and permissions [](https://merginmaps.com/docs/migrate/qfield/#organisations-and-permissions)
There is no automatic tool to extract your QFieldCloud organisations and users and migrate them to Mergin Maps.
Therefore, you will have to manually set up workspaces (if needed) and assign appropriate [permissions](https://merginmaps.com/docs/manage/permissions/)
to your team members in Mergin Maps.
For a smooth transition, it is best to read about [working collaboratively](https://merginmaps.com/docs/tutorials/working-collaboratively/)
in Mergin Maps.
### Billing, subscriptions and plans [](https://merginmaps.com/docs/migrate/qfield/#billing-subscriptions-and-plans)
Both QFieldCloud and Mergin Maps have per-seat models you can choose from to fit your needs. In Mergin Maps, each [workspace](https://merginmaps.com/docs/manage/workspaces/)
has its own [subscription](https://merginmaps.com/docs/manage/subscriptions/)
.
* If you own Organisation or Pro plan in QFieldCloud, you will likely need a Mergin Maps Premium subscription.
* If you are Community plan in QFieldCloud, you will likely need a Mergin Maps Premium subscription or deploy your own Mergin Maps Community Edition ([Mergin Maps CE](https://github.com/MerginMaps)
)
Known differences between QField and Mergin Maps platforms [](https://merginmaps.com/docs/migrate/qfield/#known-differences-between-qfield-and-mergin-maps-platforms)
-----------------------------------------------------------------------------------------------------------------------------------------------------------------------
Here are some key differences between QField and Mergin Maps.
* Mergin Maps mobile app is fully devoted to providing a no-training mobile application, operated even for users without any prior GIS knowledge. QField interface and workflows for various tools more resembles complex GIS applications like QGIS.
Therefore Mergin Maps mobile app is more intuitive for non-technical users, still keeping all tools for advanced workflows.
* synchronisation in Mergin Maps is conceptually based on ideas from Git. [Geodiff](https://github.com/MerginMaps/geodiff)
creates difference files from GeoPackages that are sent over the network and applied. QFieldCloud synchronisation uses a concept of storage of differences made in SQL format and this difference log is then transmitted and applied. In Mergin Maps, synchronisation is an inherent part of the platform. As such, it is already set up for end-users in a smart way and there are no extra steps needed for mobile users. All synchronisation on mobile devices is done by hitting a single button.
QField vs. Mergin Maps - blog post
In our blog [QField vs. Mergin Maps - App Comparison](https://merginmaps.com/blog/qfield-vs-mergin-maps)
, we compared QField and Mergin Maps in terms of the respective mobile apps, cloud sync options, pricing and customer support.
Here is a non-definitive list of other known differences:
* QField mobile app can work without QFieldCloud (server) via USB transfer of the projects. This is not available in Mergin Maps, but you can [manually download](https://merginmaps.com/docs/manage/missing-data/)
your data or [upload large files](https://merginmaps.com/docs/gis/settingup_background_map/#how-to-work-with-very-large-files-android)
to your mobile device if needed.
* _Organisation teams_ in QFieldCloud do not have any equivalent concept in Mergin Maps. On Mergin Maps can have different workspaces for different teams.
* There is no concept of _secrets_ in Mergin Maps. For `pg_service` configuration, you need to transfer it manually as described [here](https://merginmaps.com/docs/gis/supported_formats/)
.
* There is no concept of _managing ongoing jobs_ or _triggers_ in Mergin Maps accessible for users. Users see the results when jobs are finished (e.g. map rendering).
* It is not possible to connect directly to user accessible databases in Mergin Maps. Use [DB Sync](https://merginmaps.com/docs/dev/dbsync/)
to map your Mergin Maps to PostGIS database schema.
* QField is built around _modes_. There is not such concept in Mergin Maps
* You can use the [_preview panel_](https://merginmaps.com/docs/tutorials/further-project-customisation/#customising-the-preview-panel)
in Mergin Maps mobile app
If there is a feature missing in the Mergin Maps mobile app, check our [wishlist](https://wishlist.merginmaps.com/)
.
Troubleshoot [](https://merginmaps.com/docs/migrate/qfield/#troubleshoot)
---------------------------------------------------------------------------
Struggling to migrate your projects? We are happy to help you!
Book a short video call with our [sales team](mailto:sales@merginmaps.com)
or write your technical questions to our [support team](mailto:support@merginmaps.com)
. You can also chat with our open-source community.
 [Join our community chat](https://merginmaps.com/community/join)
and ask questions!
If you are looking for a professional partner to migrate your workflow, you can ask our [partners](https://merginmaps.com/partners)
network or [Lutra Consulting Ltd.](https://www.lutraconsulting.co.uk/)
, the developers of Mergin Maps.

Credits [](https://merginmaps.com/docs/migrate/qfield/#credits)
-----------------------------------------------------------------
QField, QFieldCloud and QFieldSync are developed by OPENGIS.ch. QField is EUIPO registered trademark 2363703 owned by OPENGIS.ch. QField is released under the GNU Public License (GPL) Version 2 or above.
---
# Administration Panel | Mergin Maps
[Skip to content](https://merginmaps.com/docs/server/dashboard/#VPContent)
Return to top
Administration Panel [](https://merginmaps.com/docs/server/dashboard/#administration-panel)
=============================================================================================
The server administration panel can be used to get an overview of the server usage, manage user access, projects and workspace.
It is accessible from the dashboard of your custom server. This option is available for super-users (server admins) or users who were [granted access](https://merginmaps.com/docs/server/dashboard/#accounts)
.
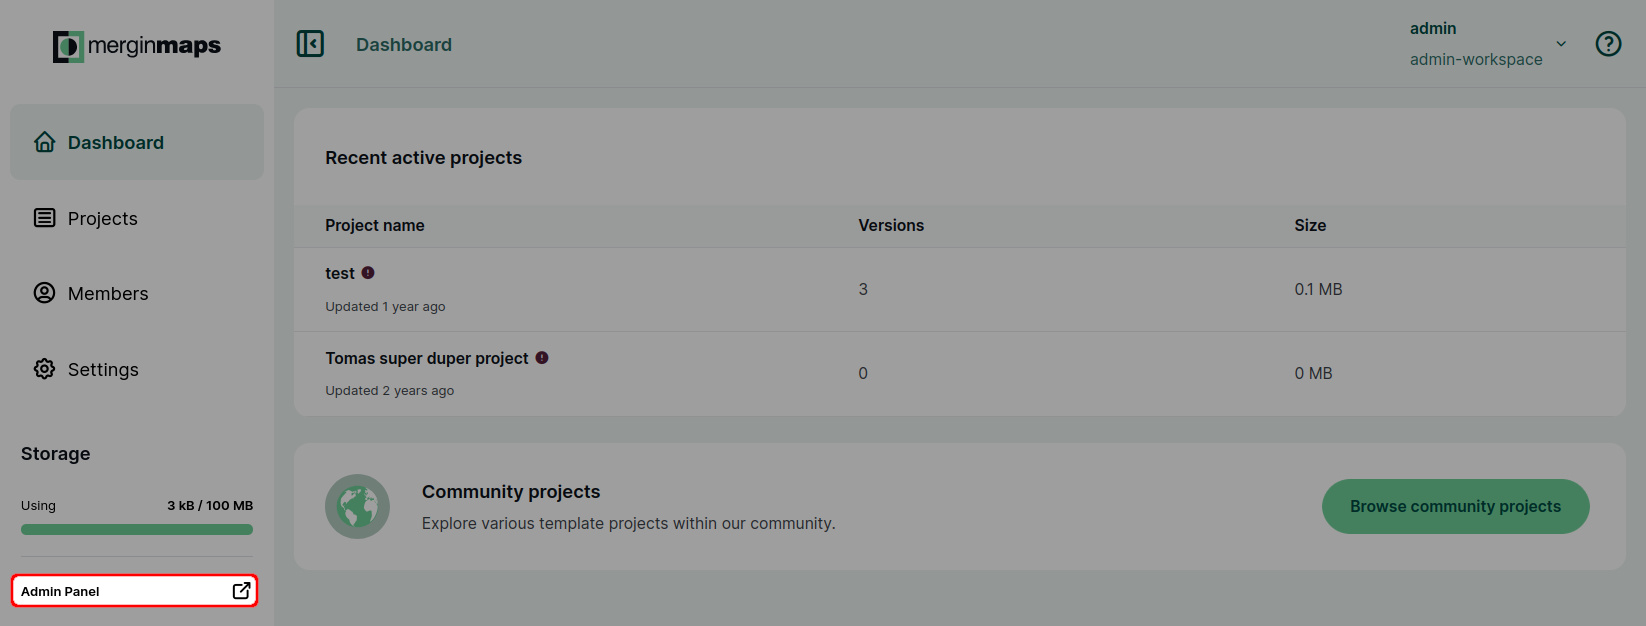
Overview [](https://merginmaps.com/docs/server/dashboard/#overview)
---------------------------------------------------------------------
The **Overview** provides a quick summary of the server: the number of editors, used storage, registered accounts, projects and workspaces. 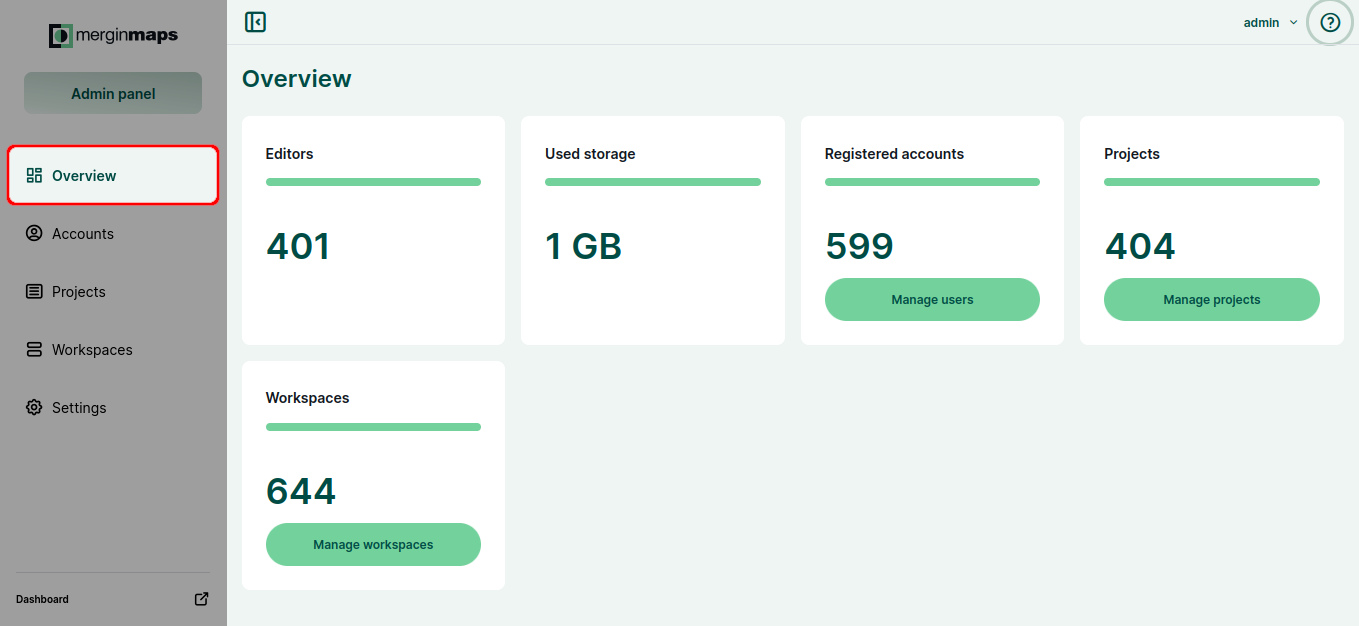
Accounts [](https://merginmaps.com/docs/server/dashboard/#accounts)
---------------------------------------------------------------------
The **Accounts** tab contains a list of all user accounts on the server.
Accounts can be sorted by usernames or emails. Use the search bar to find a specific account.
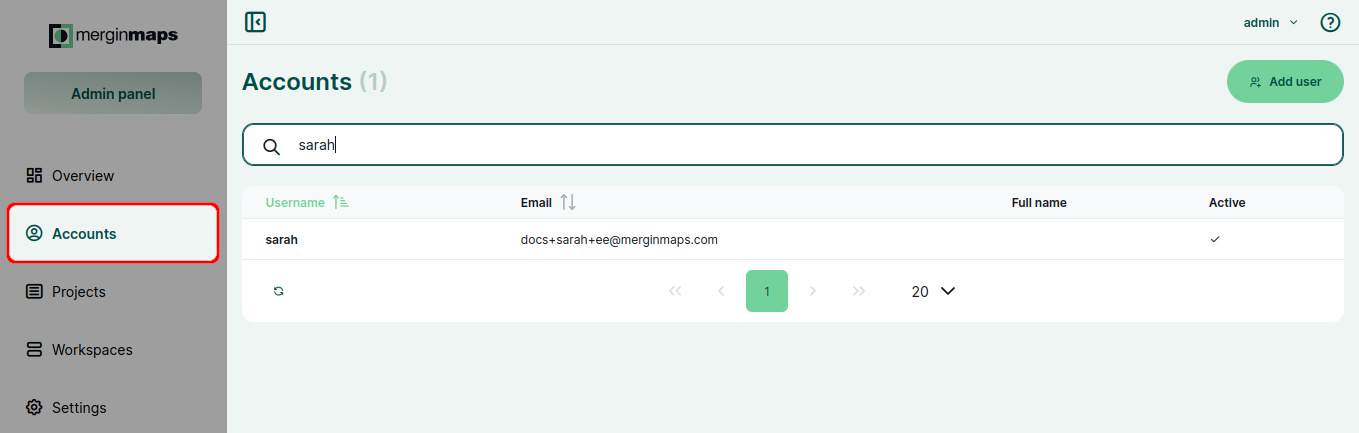
### Manage account [](https://merginmaps.com/docs/server/dashboard/#manage-account)
To manage accounts and see their details:
1. Navigate to the **Accounts** tab of the admin panel.
2. Click on an account to display its details.
Here, you can:
* **Grant admin access** or **Revoke** it. Users with admin access have full access to all data on the server. They see all users and projects and can update or remove them.
* **Deactivate** or **Activate** account. Deactivated accounts can not use the server. If needed, they can be activated later.
* **Delete account** to permanently remove the user and all their data.
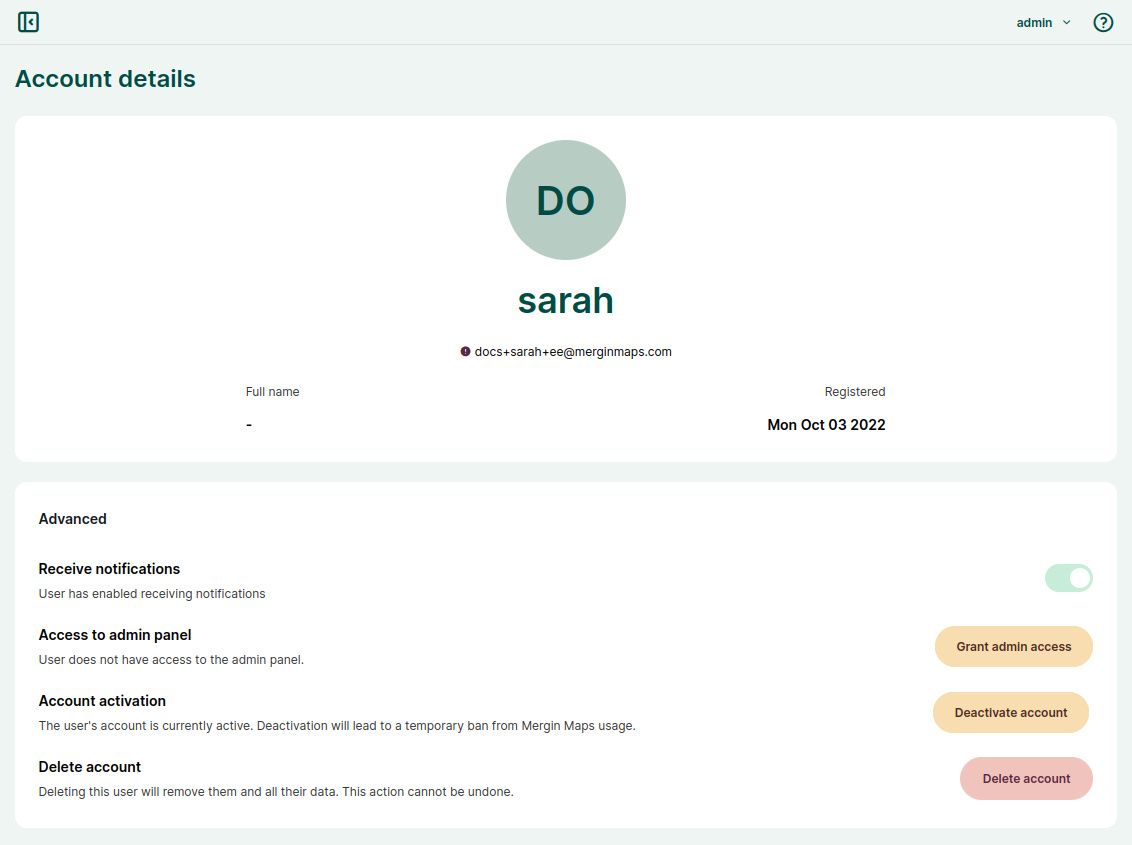
### How to add a new user to a custom server [](https://merginmaps.com/docs/server/dashboard/#how-to-add-a-new-user-to-a-custom-server)
To add a new user to your server:
1. Navigate to the **Accounts** tab of the admin panel.
2. Click on the **Add user** button. 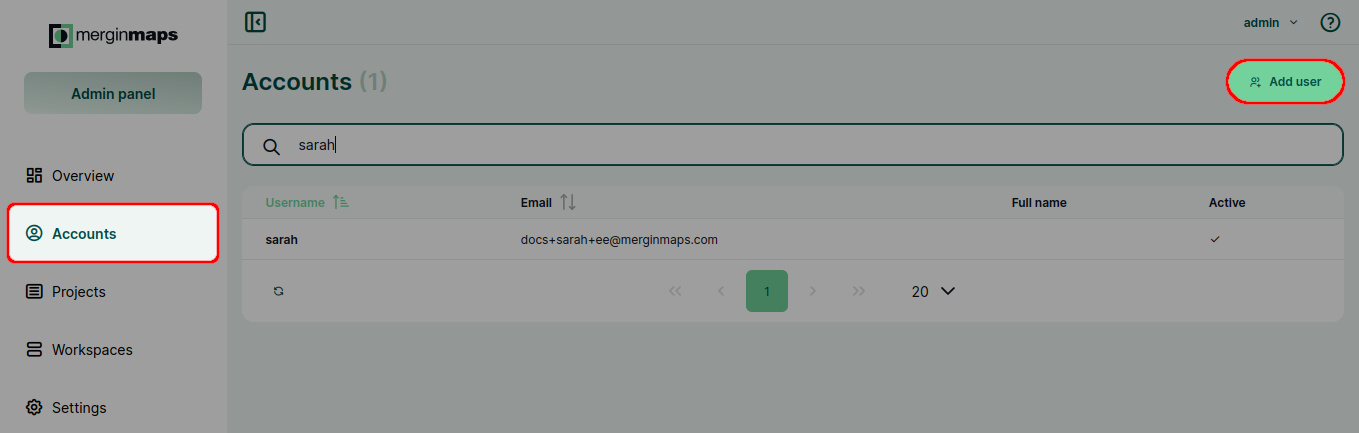
3. Fill in the details: first name, email and password. 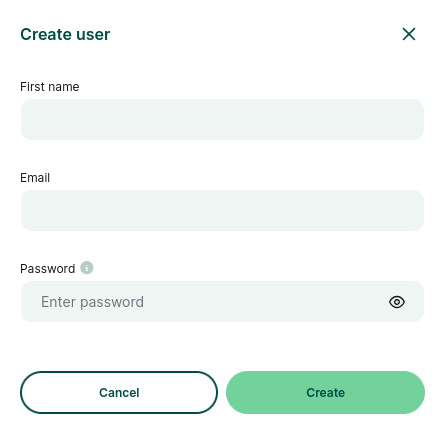
An email invitation with login details will be sent to the email address provided.
Projects [](https://merginmaps.com/docs/server/dashboard/#projects)
---------------------------------------------------------------------
In the **Projects** tab, all projects in all workspaces on the server can be found.
Use the search bar to find a specific project using its name or the name of the workspace. 
Click on a project to display its details. You can also **Download** the project or use the **Open in dashboard** button as a shortcut to the [dashboard](https://merginmaps.com/docs/manage/dashboard/)
.
Workspaces [](https://merginmaps.com/docs/server/dashboard/#workspaces)
-------------------------------------------------------------------------
Enterprise Edition only
The **Workspaces** tab provides the overview of all workspaces on the server.
Workspaces can be sorted by their name or description. Use the search bar to find a specific workspace.
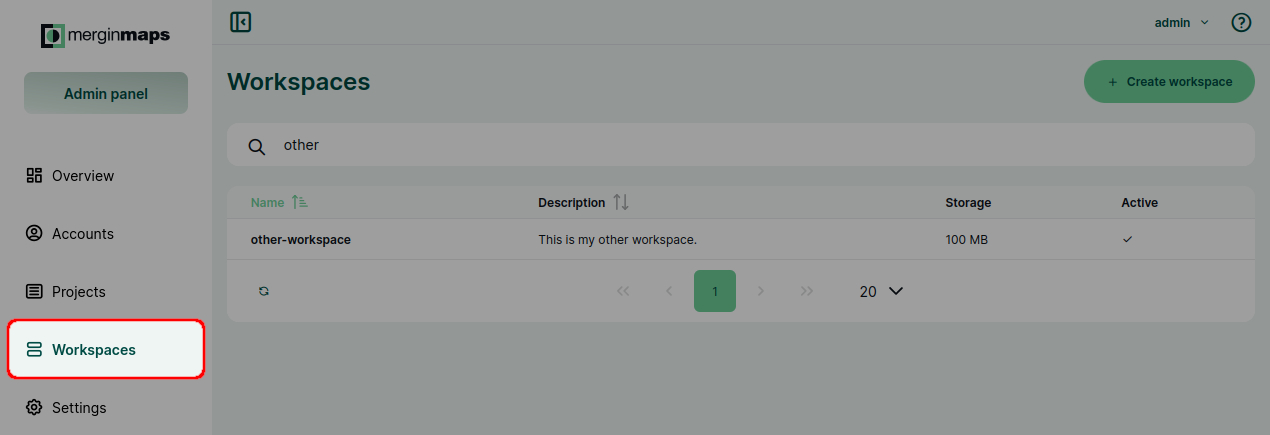
Click on a workspace to display its details. Here, you can also:
* **Update limits** of the workspace by setting a custom storage and contributors limit for the workspace
* **Deactivate** or **Activate** the workspace
* **Delete workspace** to schedule the removal of a workspace from the server
* see the list of workspace members
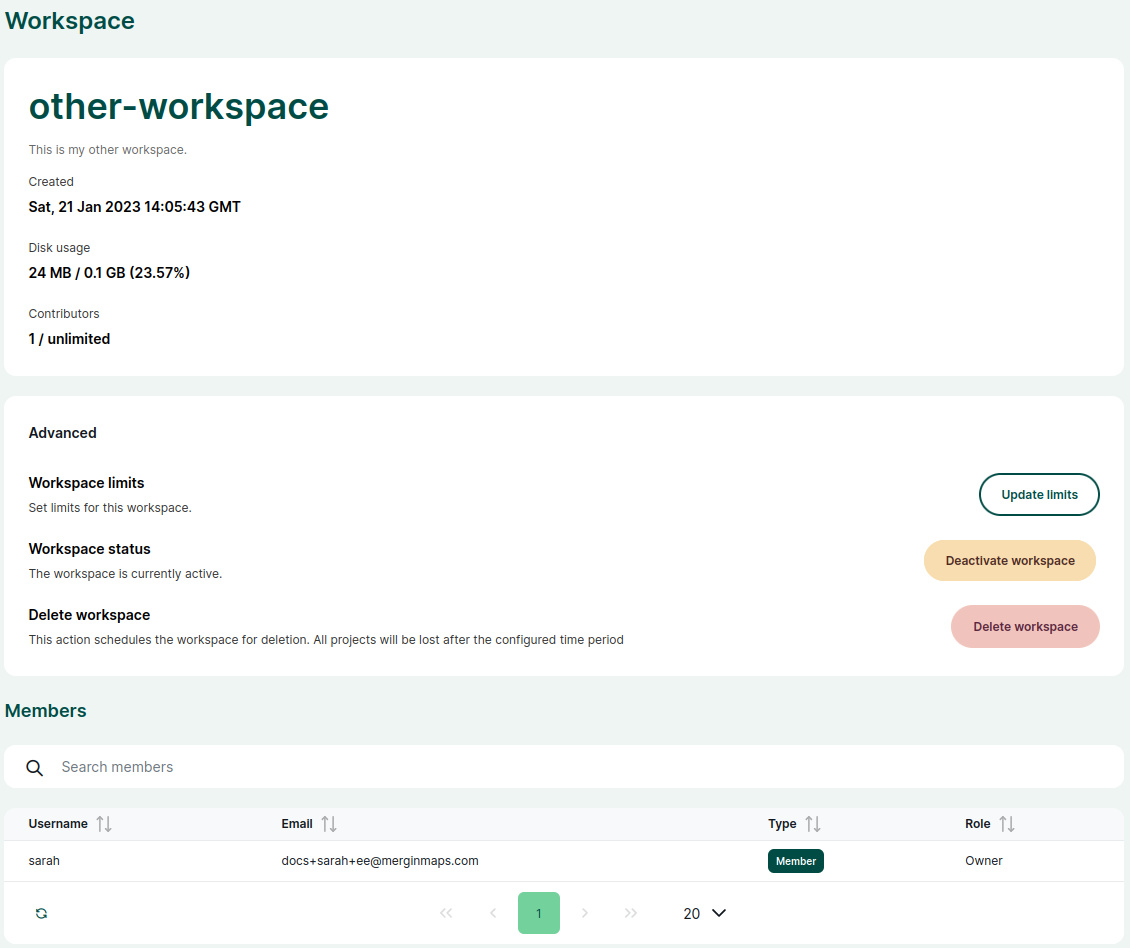
### How to create a new workspace [](https://merginmaps.com/docs/server/dashboard/#how-to-create-a-new-workspace)
1. Navigate to the **Workspaces** tab and click on the **Create workspace** button 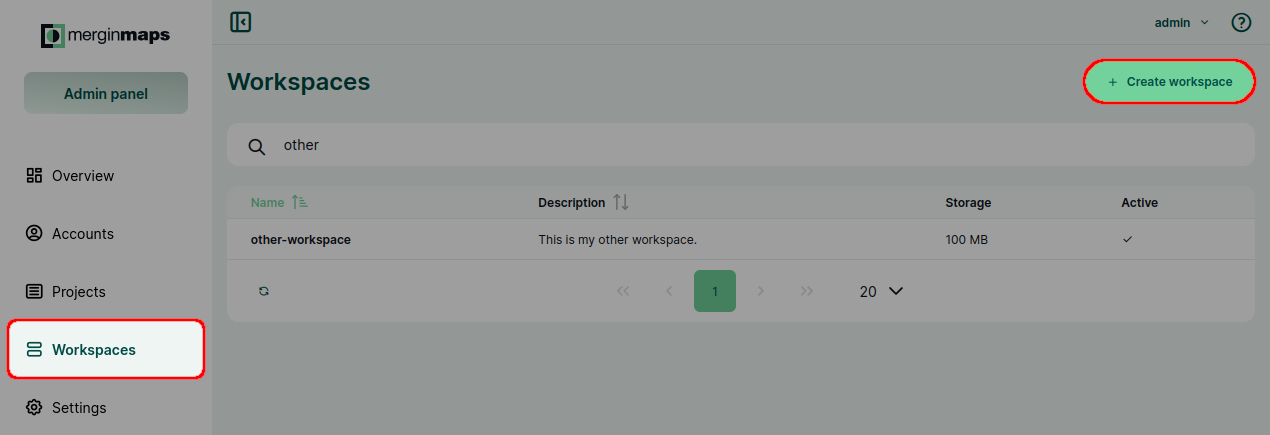
2. Fill in the name of the workspace and **Save changes**. 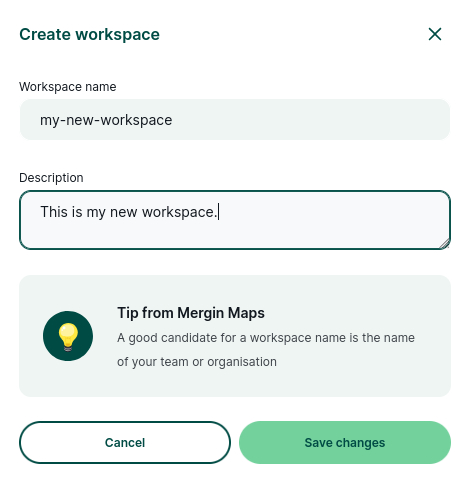
The new workspace is created.
Settings [](https://merginmaps.com/docs/server/dashboard/#settings)
---------------------------------------------------------------------
In the **Settings** tab, you can:
* enable/disable the **Check for updates** option
* **Download** the server usage report with statistics for your server deployment
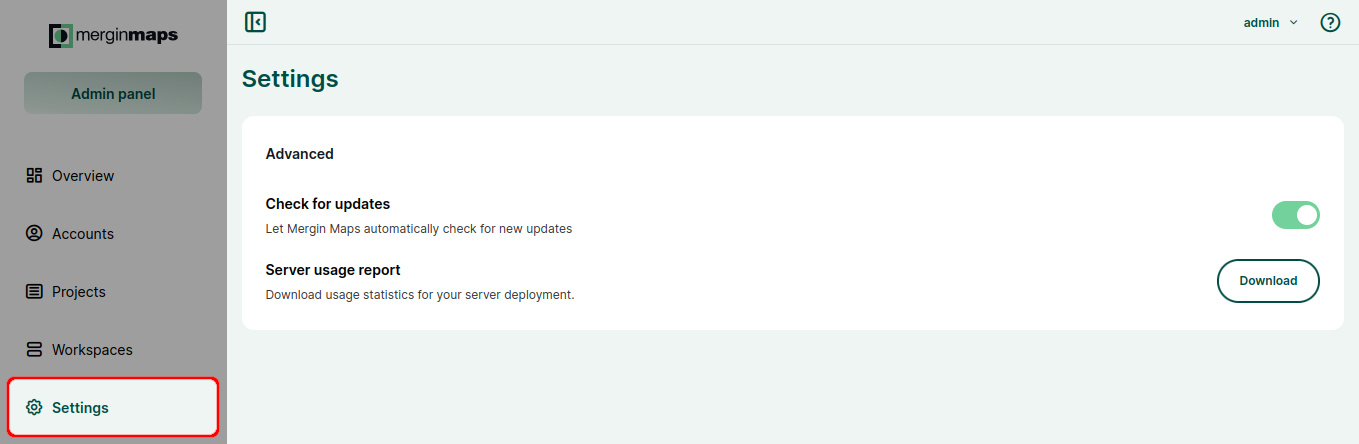
---
# Get Involved | Mergin Maps
[Skip to content](https://merginmaps.com/docs/misc/get-involved/#VPContent)
Return to top
Get Involved [](https://merginmaps.com/docs/misc/get-involved/#get-involved)
==============================================================================
How to contribute to the project?
We are happy to help to promote work or co-author and place on our websites or give special offer for [Mergin Maps Cloud](https://merginmaps.com/)
for project contributors.
 [Join our community chat](https://merginmaps.com/community/join)
and ask questions!
Use and review [](https://merginmaps.com/docs/misc/get-involved/#use-and-review)
----------------------------------------------------------------------------------
Write a review of the application on App Store or Android Google Play
[](https://apps.apple.com/us/app/input/id1478603559?ls=1)
[](https://play.google.com/store/apps/details?id=uk.co.lutraconsulting)
[](https://github.com/MerginMaps/mobile/releases/latest)
Translate [](https://merginmaps.com/docs/misc/get-involved/#translate)
------------------------------------------------------------------------
To help with translations, join [Mergin Maps Transifex team](https://www.transifex.com/lutra-consulting/mergin-maps-mobile/)
Write or talk about us [](https://merginmaps.com/docs/misc/get-involved/#write-or-talk-about-us)
--------------------------------------------------------------------------------------------------
* Publish a paper about the technology
* Write a blog post
* Write a case study
* Create a YouTube video and share
* Create tweets, Facebook posts
* Talk on conferences
Follow us on
* [LinkedIn](https://www.linkedin.com/company/mergin-maps/)
* [Facebook](https://www.facebook.com/lutraconsulting)
* [X](https://x.com/lutraconsulting)
Test [](https://merginmaps.com/docs/misc/get-involved/#test)
--------------------------------------------------------------
Test the mobile app, QGIS plugin, server or other tools and report bugs in the corresponding [Mergin Maps](https://github.com/MerginMaps/)
repositories:
* [Mergin Maps mobile app](https://github.com/MerginMaps/mobile/issues)
* [Mergin Maps server](https://github.com/MerginMaps/server/issues)
* [Mergin Maps QGIS Plugin](https://github.com/MerginMaps/qgis-plugin/issues)
Develop [](https://merginmaps.com/docs/misc/get-involved/#develop)
--------------------------------------------------------------------
Software developer? Code and prepare a pull request in [Mergin Maps](https://github.com/MerginMaps/)
repositories.
* [Mergin Maps mobile app](https://github.com/MerginMaps/mobile/issues)
* [Mergin Maps server](https://github.com/MerginMaps/server/issues)
* [Mergin Maps QGIS Plugin](https://github.com/MerginMaps/qgis-plugin/issues)
We will help you with the setup of the development environment and answer your questions.
Donate or subscribe [](https://merginmaps.com/docs/misc/get-involved/#donate-or-subscribe)
--------------------------------------------------------------------------------------------
* Subscribe to the [Mergin Maps](https://merginmaps.com/)
* Sponsor a bug-fixing sprint or a new feature. Contact our [sales team](mailto:sales@merginmaps.com)
team to discuss this option.
* Contribute to a [QGIS crowdfunding](https://www.lutraconsulting.co.uk/crowdfunding)
campaigns
---
# Project fails to sync | Mergin Maps
[Skip to content](https://merginmaps.com/docs/misc/troubleshoot/not_syncing/#VPContent)
Return to top
Project fails to sync [](https://merginmaps.com/docs/misc/troubleshoot/not_syncing/#project-fails-to-sync)
============================================================================================================
Gateway Timeout or 502 Bad Gateway [](https://merginmaps.com/docs/misc/troubleshoot/not_syncing/#gateway-timeout-or-502-bad-gateway)
--------------------------------------------------------------------------------------------------------------------------------------
The most common cause of a **Gateway Timeout** or **502 Bad Gateway** error is that there are more files to upload than can be processed before the server returns a timeout error. If this happens, this is the recommended workaround:
1. If the sync is from a mobile device, [transfer the project files](https://merginmaps.com/docs/manage/missing-data/#manual-data-transfer-android)
from the mobile device with the following exceptions:
* Only transfer the photo attachments from the mobile device project (if you are transferring from an iOS device, you can ignore this)
* Recreate the same folder structure in the destination folder as the photos are stored in the mobile device. For example, if all photos are in the project folder, then transfer them to the same folder on your PC/laptop. If there are subfolders, recreate the subfolders and transfer photos to the correct subfolder on the destination device.
2. If you have not already downloaded the project on the PC/laptop, do so now [using the Mergin Maps QGIS plugin](https://merginmaps.com/docs/tutorials/opening-surveyed-data-on-your-computer/#locating-and-opening-your-project)
, if you have downloaded the project already skip this step.
3. Open the project folder for the version downloaded from the QGIS plugin on your PC/laptop
4. Open the folder on your PC/laptop where you transferred the photos/project files from your mobile device
5. Cut and paste up to 100 photo attachments from the transferred project directory to the same location in your QGIS project directory (if photos are duplicates you can either overwrite or skip)
6. Open the project in QGIS and synchronise - if you get another Bad Gateway or Sever timeout error, remove the transferred photos from the QGIS project directory and try step 5 again but copy fewer photos
7. Repeat steps 5 and 6 until all photos have been moved from the transferred directory to the QGIS project directory
8. Open the project on the mobile device and synchronise
---
# Licensing | Mergin Maps
[Skip to content](https://merginmaps.com/docs/misc/licensing/#VPContent)
Return to top
Licensing [](https://merginmaps.com/docs/misc/licensing/#licensing)
=====================================================================
Mergin Maps Service [](https://merginmaps.com/docs/misc/licensing/#mergin-maps-service)
-----------------------------------------------------------------------------------------
* [Mergin Maps Cloud](https://app.merginmaps.com/)
, Cloud Mergin Maps service, has proprietary license held by Lutra Consulting Ltd.
* Mergin Maps EE (Enterprise Edition), on-premise Mergin Maps service, has Mergin Maps Commercial Licence held by Lutra Consulting Ltd.
* [Mergin Maps CE (Community Edition)](https://github.com/MerginMaps/server)
, on-premise Mergin Maps service, is dual licensed under AGPL-3.0 and Mergin Maps Commercial Licence
The application uses many open-source libraries, please see [this](https://github.com/MerginMaps/server/blob/master/server/Pipfile)
and [this](https://github.com/MerginMaps/server/blob/master/web-app/package.json)
list for versions and licenses of projects used.
You can find official text of licenses [on this link](https://merginmaps.com/licenses)
Mergin Maps mobile app [](https://merginmaps.com/docs/misc/licensing/#mergin-maps-mobile-app)
-----------------------------------------------------------------------------------------------
[Mergin Maps mobile app](https://github.com/MerginMaps/mobile)
is licensed under GPL-v2.
The application uses many open-source libraries, please [see this list](https://github.com/MerginMaps/mobile-sdk/blob/master/vcpkg.json)
for versions and licenses of projects.
Mergin Maps QGIS plugin [](https://merginmaps.com/docs/misc/licensing/#mergin-maps-qgis-plugin)
-------------------------------------------------------------------------------------------------
[Mergin Maps QGIS Plugin](https://github.com/MerginMaps/qgis-plugin)
is licensed under GPL-v3.
Integrations [](https://merginmaps.com/docs/misc/licensing/#integrations)
---------------------------------------------------------------------------
* [Mergin Maps Python Client/Module](https://github.com/MerginMaps/python-api-client)
is licensed under MIT.
* [Mergin Maps C++ Client/Module](https://github.com/MerginMaps/cpp-api-client)
is licensed under MIT.
* [Mergin Maps Media Synchronisation](https://github.com/MerginMaps/media-sync)
is licensed under MIT.
* [Mergin Maps Work Packages](https://github.com/MerginMaps/work-packages)
are licensed under MIT.
* [Mergin Maps Database Synchronisation](https://github.com/MerginMaps/db-sync)
is licensed under MIT.
---
# Install | Mergin Maps
[Skip to content](https://merginmaps.com/docs/server/install/#VPContent)
Return to top
Install [](https://merginmaps.com/docs/server/install/#install)
=================================================================
Installation guide will help you to install your [Mergin Maps CE](https://github.com/MerginMaps)
or [Mergin Maps EE](https://merginmaps.com/pricing)
to the latest server version. [Mergin Maps Cloud](https://merginmaps.com/)
is always up-to-date and managed by Mergin Maps team. Read more about server platforms in [overview article](https://merginmaps.com/docs/server/)
.
Installation System Requirements [](https://merginmaps.com/docs/server/install/#installation-system-requirements)
-------------------------------------------------------------------------------------------------------------------
For a typical deployment, we recommend using a dedicated host machine with **8 GB** of memory and **2 vCPUS** (similar to AWS `t3a.large` instances). The requirements for CPU and persistent storage depend largely on the frequency of project updates and the anticipated size of the data you expect to store respectively. A very conservative rule of thumb, regarding needed disk size would be `mergin maps project size * number of versions`. If you have a team size over 25 people and synchronise often your Mergin Maps projects, consider a host with **4 vCPUS**.
On OS level, we recommend to use a Linux distribution that has full compatibility with Docker, since Mergin Maps is deployed by default with `docker compose`.
A low-latency, high-bandwidth environment is preferred due to the volume of data needed to perform synchronisation with Mergin Maps. This is especially important on large projects with hundreds of megabytes in between syncs.
### Infrastructure overview [](https://merginmaps.com/docs/server/install/#infrastructure-overview)
* **PostgreSQL** - Database that holds application data. Can be external and therefore excluded from install orchestration with proper [configuration](https://merginmaps.com/docs/server/environment/#database-settings)
.
* **Redis** - The caching and asynchronous task engine running on top of Mergin Maps
* **Celery-Beat** - The Celery task orchestrator used by Mergin Maps
* **Celery-Worker** - The Celery container responsible for workers that perform tasks on Mergin Maps
* **Server** - The server backend instance of Mergin Maps
* **Web** - The frontend instance for Mergin Maps
* **Proxy** - NGINX instance serving Mergin Maps in reverse proxy configuration.
### Firewall ports [](https://merginmaps.com/docs/server/install/#firewall-ports)
By default, only HTTP port `8080` need to be open on firewall side. It is also recommended to open `443` port if SSL is enabled. All other infrastructure instances will work within the same docker network group, so no additional ports need to be managed on the firewall side.
Install Docker
Please, use the latest version of Docker and Docker Compose tools. Follow the [official](https://docs.docker.com/engine/install/)
guidelines in accordance with your OS system.
Mergin Maps CE Docker Images [](https://merginmaps.com/docs/server/install/#mergin-maps-ce-docker-images)
-----------------------------------------------------------------------------------------------------------
Community Edition only
The Mergin Maps CE images are stored on publicly accessible [Lutra Consulting's Docker](https://hub.docker.com/u/lutraconsulting)
.
Follow the deployment guidelines to install and configure it.
Mergin Maps EE Docker Images [](https://merginmaps.com/docs/server/install/#mergin-maps-ee-docker-images)
-----------------------------------------------------------------------------------------------------------
Enterprise Edition only
The Mergin Maps EE enhanced features are only available on specific Docker images stored on Lutra Consulting's private AWS repository. To get access, you need your contract and licence from our [sales team](mailto:sales@merginmaps.com)
.
Afterwards, you can follow [this guide](https://merginmaps.com/docs/server/install/ee/)
to retrieve your Mergin Maps EE images.
Enable Mergin Maps Telemetry
Make sure you follow deployment guidelines to **ensure any firewalls in your infrastructure are configured to allow the [`call-home`](https://merginmaps.com/docs/server/administer/#telemetry-service)
functionality to send usage data**.
Deployment [](https://merginmaps.com/docs/server/install/#deployment)
-----------------------------------------------------------------------
Follow these steps to run a local Mergin Maps instance.
Clone the Mergin Maps github repository locally or download [deployment folder](https://github.com/MerginMaps/server/blob/master/deployment/)
.
bash
$ git clone git@github.com:MerginMaps/server.git
Locate yourself on the proper Mergin Maps edition.
shell
# For community edition
cd deployment/community
# For enterprise edition
cd deployment/enterprise
### Setup environment [](https://merginmaps.com/docs/server/install/#setup-environment)
This step configures deployment settings by modifying environment variables.
Start by creating the `.prod.env` file (if it does not exist yet), by running:
shell
cp .env.template .prod.env
Then, edit the `.prod.env` file and provide values for all variables marked as required in the list of [environment variables](https://merginmaps.com/docs/server/environment/)
.
### Start docker containers [](https://merginmaps.com/docs/server/install/#start-docker-containers)
Before proceeding, ensure you have both `docker` and `docker compose` installed on your system.
Once your environment is configured, you can start the containers by running the following commands for the Community and Enterprise editions.
Community edition stack:
shell
$ mkdir -p mergin_db # database data directory
$ sh ../common/set_permissions.sh projects # application internal data directory
$ sh ../common/set_permissions.sh diagnostic_logs # directory to persist diagnostic logs (optional)
$ docker compose -f docker-compose.yml up -d
Enterprise edition stack:
shell
$ mkdir -p mergin-db-enterprise # database data directory
$ sh ../common/set_permissions.sh data # application internal data directory
$ sh ../common/set_permissions.sh map_data # maps data directory (neccessary for maps)
$ sh ../common/set_permissions.sh diagnostic_logs # directory to persist diagnostic logs (optional)
$ docker compose -f docker-compose.yml up -d
$ docker compose -f docker-compose.maps.yml up -d # Run maps stack separately
Diagnostic logs
Users of the Mergin Maps Mobile App and Mergin Maps QGIS plugin can send diagnostic logs from their devices. In custom deployments, logs are stored in the `diagnostic_logs` folder. If you do not want to persist these logs in a volume, remove the mount point for this folder in the [/MerginMaps/server/blob/master/deployment/enterprise/docker-compose.yml](https://github.com//MerginMaps/server/blob/master/deployment/enterprise/docker-compose.yml)
file.
If you want to send diagnostic logs from devices to Mergin Maps instead of storing them in a folder, set `DIAGNOSTIC_LOGS_URL` to `https://api.merginmaps.com/logs`.
### Initialise database [](https://merginmaps.com/docs/server/install/#initialise-database)
If server is started for the first time, database needs to be initialised and super-user created. Use the `init` command which will perform it automatically (the command generates password for the admin account):
shell
$ docker exec merginmaps-server flask init
If you don't have `CONTACT_EMAIL` variable set, you will be asked to provide a super user email using the `-e`/`--email` option. The `init` will also check your server setup (celery jobs, emails, etc.) and print out a list of missing variables. If you see any errors in the console output, you can run the command again as the database and super user will not be re-initialised.
TIP
If you want to create another users manually, you can use the following command:
shell
$ docker exec merginmaps-server flask user create --is-admin --email
Test deployment [](https://merginmaps.com/docs/server/install/#test-deployment)
---------------------------------------------------------------------------------
In order to test your deployment there are some utility commands to perform basic checks.
Overall basic check on server configuration:
shell
$ docker exec merginmaps-server flask server check
Output will be similar to the next snippet. The utility will try to provide some background information if some needed environment variable is missing or wrongly set (ex: `MERGIN_BASE_URL`)
shell
# Server health check
Mergin Maps edition: Enterprise Edition
Mergin Maps version: 2025.2.0
Error: No base URL set. Please set MERGIN_BASE_URL environment variable
Error: No contact email set. Please set CONTACT_EMAIL environment variable
Database initialized properly
Celery running properly
To test email configuration:
shell
$ docker exec merginmaps-server flask server send-check-email --email me@myorg.com
By default, email notifications are disabled, so output will be similar to this:
shell
# Sending check email to specified email address me@myorg.com.
Error: Sending emails is disabled. Please set MAIL_SUPPRESS_SEND=False to enable sending emails.
To enable them, set variable `MAIL_SUPPRESS_SEND` in accordance to above and fill all `MAIL_*` related variables with your company SMTP server configuration.
Some of the most common issues with custom deployments are listed in the [troubleshoot](https://merginmaps.com/docs/server/troubleshoot/)
section.
---
# Troubleshoot Custom Servers | Mergin Maps
[Skip to content](https://merginmaps.com/docs/server/troubleshoot/#VPContent)
Return to top
Troubleshoot Custom Servers [](https://merginmaps.com/docs/server/troubleshoot/#troubleshoot-custom-servers)
==============================================================================================================
This article will help you debug and resolve issues in your [Mergin Maps CE](https://github.com/MerginMaps)
or [Mergin Maps EE](https://merginmaps.com/pricing)
deployment. If you use the main [Mergin Maps Cloud](https://merginmaps.com/)
, it is always up-to-date and managed by Mergin Maps team, so report your problems to us as [described here](https://merginmaps.com/docs/misc/troubleshoot/)
. Read more about server platforms in [overview article](https://merginmaps.com/docs/server/)
.
To install your own server, follow our [installation guide](https://merginmaps.com/docs/server/install/)
. Documentation of environment variables and other configuration options can be found in [Configure environment](https://merginmaps.com/docs/server/environment/)
.
Mergin Maps support and troubleshooting
Haven't found a solution to your issue? Look at your other [troubleshooting options](https://merginmaps.com/docs/misc/troubleshoot/)
.
Diagnostic logs on custom servers
[Diagnostic logs](https://merginmaps.com/docs/misc/troubleshoot/#diagnostic-logs)
are by default saved to the `diagnostic_logs` folder on your server.
They contain detailed information about application run, so they may help you resolve issues you can encounter when using the [mobile app and QGIS plugin with your custom server](https://merginmaps.com/docs/server/plugin-mobile-app/)
.
Server is not properly configured [](https://merginmaps.com/docs/server/troubleshoot/#server-is-not-properly-configured)
--------------------------------------------------------------------------------------------------------------------------
Did you get an error that the server is not properly configured? 
1. Check if `MERGIN_BASE_URL` docker environment variable is assigned correctly. `MERGIN_BASE_URL` should contain the URL of your Mergin Maps CE server.
2. Restart the container with the `MERGIN_BASE_URL` variable
Emails are not sent [](https://merginmaps.com/docs/server/troubleshoot/#emails-are-not-sent)
----------------------------------------------------------------------------------------------
If you are not receiving emails, check that the following [environment variables](https://merginmaps.com/docs/server/environment/)
are set correctly:
* `MAIL_DEFAULT_SENDER` needs to be a valid email address
* `MAIL_SERVER` should be a valid URL to SMTP server
* `MAIL_PORT` SMTP mail server port is set to `587` by default. Change it to the correct value, if you use a different port.
* `MAIL_SUPPRESS_SEND` should be set to `false`
In some deployments, there may be SMTP servers that do not support authentication and TLS. In that case, you can disable authentication by not defining variables `MAIL_USERNAME` and `MAIL_PASSWORD` (which are set to `None` by default).
If your SMTP server does not support TLS or SSL, you can disable encryption by setting `MAIL_USE_TLS` and `MAIL_USE_SSL` to `false`. However, it is recommended to use authentication and TLS encryption.
Server is sending emails with a celery worker. If you are not receiving emails, check if celery worker is running. Check logs for sending emails in the `celery-worker` container:
shell
$ docker logs celery-worker
Logs should contain information about sending emails with task `mergin.celery.send_email_async` with success status:
shell
[2024-12-09 10:37:16,265: INFO/ForkPoolWorker-2] Task mergin.celery.send_email_async[3e50df69-90c1-49be-b31c-78f1fb417500] succeeded in 0.11469305199989321s: None
Celery settings [](https://merginmaps.com/docs/server/troubleshoot/#celery-settings)
--------------------------------------------------------------------------------------
Celery plays an important role on Mergin Maps hence the need to quickly diagnose its functionality.
* Make sure `BROKER_URL` is correct!
* Make sure `celery-beat` and `celery-worker` containers are up and running
If you perform a `docker compose logs -tf celery-worker` you should see on logs output a line like this:
shell
celery-worker | 2025-03-04T10:40:16.718182375Z [2025-03-04 10:40:16,718: INFO/MainProcess] Connected to redis://merginmaps-redis:6379/0
This means `celery-worker` is up and communicating with `redis`
* Make sure `redis` is up and receiving `celery-worker` tasks
If you perform a `docker compose exec redis redis-cli monitor` you should see the output information regarding `tasks` and `heartbeat` of the `celery-worker`node.
shell
1741085464.139904 [0 172.18.0.8:38054] "BRPOP" "celery" "celery\x06\x163" "celery\x06\x166" "celery\x06\x169" "1"
1741085464.578928 [0 172.18.0.8:38124] "PUBLISH" "/0.celeryev/worker.heartbeat" "{\"body\": \"eyJob3N0bmFtZSI6ICJjZWxlcnlAMmE2NTRiMzNiMzBjIiwgInV0Y29mZnNldCI6IDAsICJwaWQiOiA3LCAiY2xvY2siOiA2NDYsICJmcmVxIjogMi4wLCAiYWN0aXZlIjogMCwgInByb2Nlc3NlZCI6IDAsICJsb2FkYXZnIjogWzAuNzYsIDAuNzEsIDAuNzddLCAic3dfaWRlbnQiOiAicHktY2VsZXJ5IiwgInN3X3ZlciI6ICI1LjQuMCIsICJzd19zeXMiOiAiTGludXgiLCAidGltZXN0YW1wIjogMTc0MTA4NTQ2NC41NzgxMTUyLCAidHlwZSI6ICJ3b3JrZXItaGVhcnRiZWF0In0=\", \"content-encoding\": \"utf-8\", \"content-type\": \"application/json\", \"headers\": {\"hostname\": \"celery@2a654b33b30c\"}, \"properties\": {\"delivery_mode\": 1, \"delivery_info\": {\"exchange\": \"celeryev\", \"routing_key\": \"worker.heartbeat\"}, \"priority\": 0, \"body_encoding\": \"base64\", \"delivery_tag\": \"78d09f4f-5d84-498b-8b91-8823106df572\"}}"
1741085465.148149 [0 172.18.0.8:38054] "BRPOP" "celery" "celery\x06\x163" "celery\x06\x166" "celery\x06\x169" "1"
1741085466.158419 [0 172.18.0.8:38054] "BRPOP" "celery" "celery\x06\x163" "celery\x06\x166" "celery\x06\x169" "1"
Can't see background map on webmaps [](https://merginmaps.com/docs/server/troubleshoot/#can-t-see-background-map-on-webmaps)
------------------------------------------------------------------------------------------------------------------------------
If the background map is not showing on your self-hosted Enterprise server webmaps, check the following:
* Your [environment variables](https://merginmaps.com/docs/server/environment/#webmaps)
are correctly configured
* If you're using the default background map URL, make sure you’ve [contacted our support team](mailto:support@merginmaps.com?subject=Enable%20default%20background%20maps%20on%20Enterprise%20server&body=Dear%20support%2C%0A%0AI%27d%20like%20to%20request%20enabling%20background%20maps%20for%20our%20Enterprise%20edition%20server.%20%0AThe%20server%20is%20hosted%20at%3A%20%3Curl%3E)
to enable it
* If your server URL has changed recently, you’ll need to re-request access from support.
---
# Troubleshoot | Mergin Maps
[Skip to content](https://merginmaps.com/docs/misc/troubleshoot/#VPContent)
Return to top
Troubleshoot [](https://merginmaps.com/docs/misc/troubleshoot/#troubleshoot)
==============================================================================
Troubleshooting tips [](https://merginmaps.com/docs/misc/troubleshoot/#troubleshooting-tips)
----------------------------------------------------------------------------------------------
Did you encounter an issue when using [Mergin Maps](https://merginmaps.com/)
? Here are some troubleshooting tips and resources that can help:
* Do you have enough storage? Check your [subscription and data usage](https://merginmaps.com/docs/manage/dashboard/#subscriptions)
.
* Are you missing some data after synchronisation? [How to Recover Missing Data](https://merginmaps.com/docs/manage/missing-data/)
will show you how to deal with [**conflict files**](https://merginmaps.com/docs/manage/missing-data/#there-are-conflict-files-in-the-folder)
and how to [**manually download**](https://merginmaps.com/docs/manage/missing-data/#there-are-no-conflict-files-in-the-folder)
data from your mobile device.
* Modifying data schema of survey layers is a common source of synchronisation issues. [How to Deploy Revised Projects](https://merginmaps.com/docs/manage/missing-data/)
will instruct you how to do it correctly.
* Unable to install or update Mergin Maps mobile app? Check the [OS version](https://merginmaps.com/docs/misc/troubleshoot/#minimum-os-versions-for-mergin-maps-mobile-app)
of your mobile device.
* If Mergin Maps mobile app cannot open your project or form, see [How to Fix a Broken Project](https://merginmaps.com/docs/field/broken-project/)
.
* If Mergin Maps mobile app displays **PROJ error**, see [Custom Projections](https://merginmaps.com/docs/gis/proj/)
.
* For troubleshooting custom server deployments, look at [this dedicated page](https://merginmaps.com/docs/server/troubleshoot/)
.
Need more help with your issue? [Lutra Consulting Ltd.](https://www.lutraconsulting.co.uk/)
provides commercial support and free fair-use support for your workspaces with an active subscription on [support@merginmaps.com](mailto:support@merginmaps.com)
.
 [Join our community chat](https://merginmaps.com/community/join)
and ask questions!
Support [](https://merginmaps.com/docs/misc/troubleshoot/#support)
--------------------------------------------------------------------
You can also see all your options on our [support](https://merginmaps.com/support)
page.
### Commercial SLA support [](https://merginmaps.com/docs/misc/troubleshoot/#commercial-sla-support)
The commercial support or consultancy for your projects is carried by [Lutra Consulting Ltd.](https://www.lutraconsulting.co.uk/)

Please see the [support packages](https://merginmaps.com/support)
available. SLA support offers you the contracted response time, dedicated hotline as well as premium email support.
### Subscribed client support [](https://merginmaps.com/docs/misc/troubleshoot/#subscribed-client-support)
If you have an active [Mergin Maps](https://merginmaps.com/)
subscription or during the trial period, we also offer free fair-use support on [support@merginmaps.com](mailto:support@merginmaps.com)
.
### Community support [](https://merginmaps.com/docs/misc/troubleshoot/#community-support)
* Join our [community chat on Slack](https://merginmaps.com/community/join)
and ask questions!
* See [GIS Stack Exchange](https://gis.stackexchange.com/questions/tagged/mergin-maps)
with "mergin-maps" tag to ask questions and see other users' answers.
* See [QGIS documentation](https://docs.qgis.org/3.22/en/docs/user_manual/index.html)
for QGIS Desktop related problems.
Minimum OS versions for Mergin Maps mobile app [](https://merginmaps.com/docs/misc/troubleshoot/#minimum-os-versions-for-mergin-maps-mobile-app)
--------------------------------------------------------------------------------------------------------------------------------------------------
The mobile app currently supports following OS versions:
* **Android 9** or above
* **iOS 16** or above
* Windows 10 or Windows 11
If your mobile device uses an older version of OS, you may be unable to install or update the mobile app.
How to share your project with Mergin Maps support [](https://merginmaps.com/docs/misc/troubleshoot/#how-to-share-your-project-with-mergin-maps-support)
----------------------------------------------------------------------------------------------------------------------------------------------------------
Sometimes it is useful to share your project with our support team so that they can help you solve your issues.
To share your project with the support team:
1. Log in to [app.merginmaps.com](https://app.merginmaps.com/)
2. In the **Project** tab on the left panel, find the project that needs to be shared with the support team and click on it. 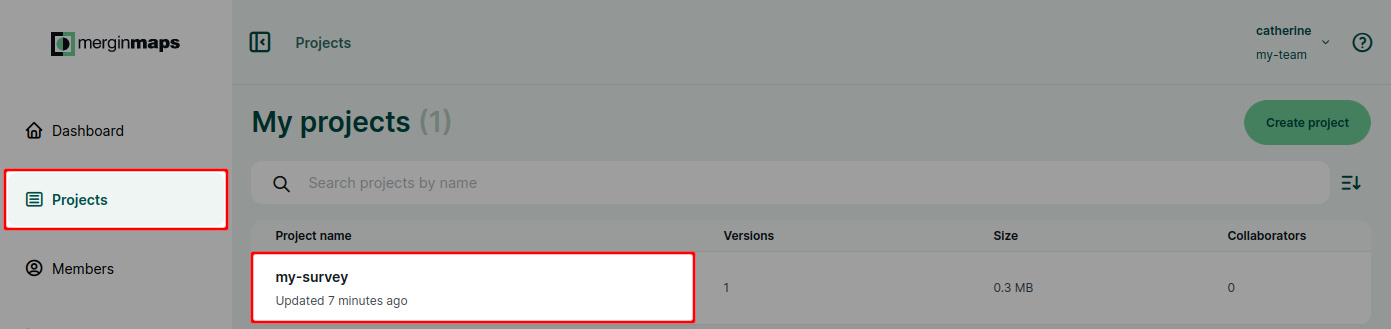
TIP
If you have access to multiple workspaces, you might need to [switch to another workspace](https://merginmaps.com/docs/manage/workspaces/#switch-workspaces-in-mergin-maps-dashboard)
first.
3. In the **Collaborators** tab, click on the **Share** button 
4. Use the email [support@merginmaps.com](mailto:support@merginmaps.com)
in the sharing form and click **Share** to send the invitation to the support team. 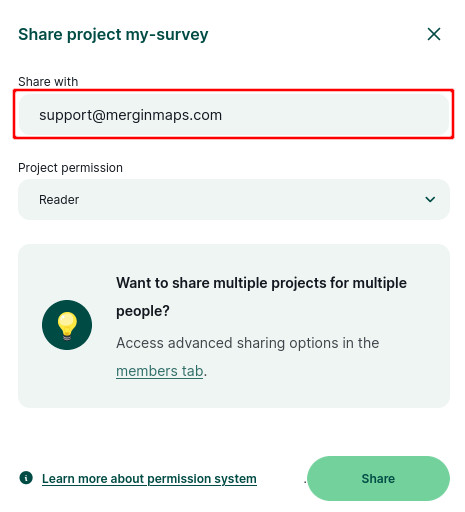
Our support team can now access your [Mergin Maps](https://merginmaps.com/)
project.
Diagnostic logs [](https://merginmaps.com/docs/misc/troubleshoot/#diagnostic-logs)
------------------------------------------------------------------------------------
If you experience any issues with syncing data, you can send diagnostic logs to the developers for debugging the issues. Logs contain detailed information about application run, so there may be hints for you on how to troubleshoot the problem.
Once you have uploaded the logs, please contact us on [support@merginmaps.com](mailto:support@merginmaps.com)
with your username/workspace and problem description so we can have a look into the issues.
Diagnostic logs on custom servers
If you use Mergin Maps EE or Mergin Maps CE, diagnostic logs are by default saved to the `diagnostic_logs` folder on your [custom server](https://merginmaps.com/docs/server/)
.
### Diagnostic log on Mergin Maps QGIS plugin [](https://merginmaps.com/docs/misc/troubleshoot/#diagnostic-log-on-mergin-maps-qgis-plugin)
The diagnostic log `client-log.txt` can be found in the `.mergin` folder located in the project folder on your computer.
To send the diagnostic log to the developers:
1. Navigate to your local project in Browser panel under Mergin Maps QGIS plugin
2. Right-click on the project and select **Diagnostic log**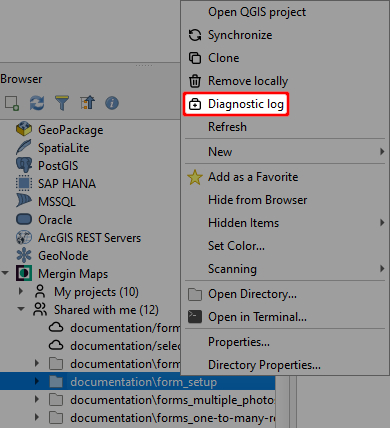
3. Click **OK** to proceed 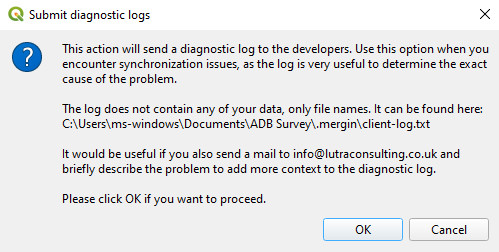
4. Contact our support team ([support@merginmaps.com](mailto:support@merginmaps.com)
) with your username/workspace and problem description so we can have a look into the issue.
### Diagnostic log on Mergin Maps mobile app [](https://merginmaps.com/docs/misc/troubleshoot/#diagnostic-log-on-mergin-maps-mobile-app)
In the mobile app:
1. Tap on the **More** button and go to **Settings**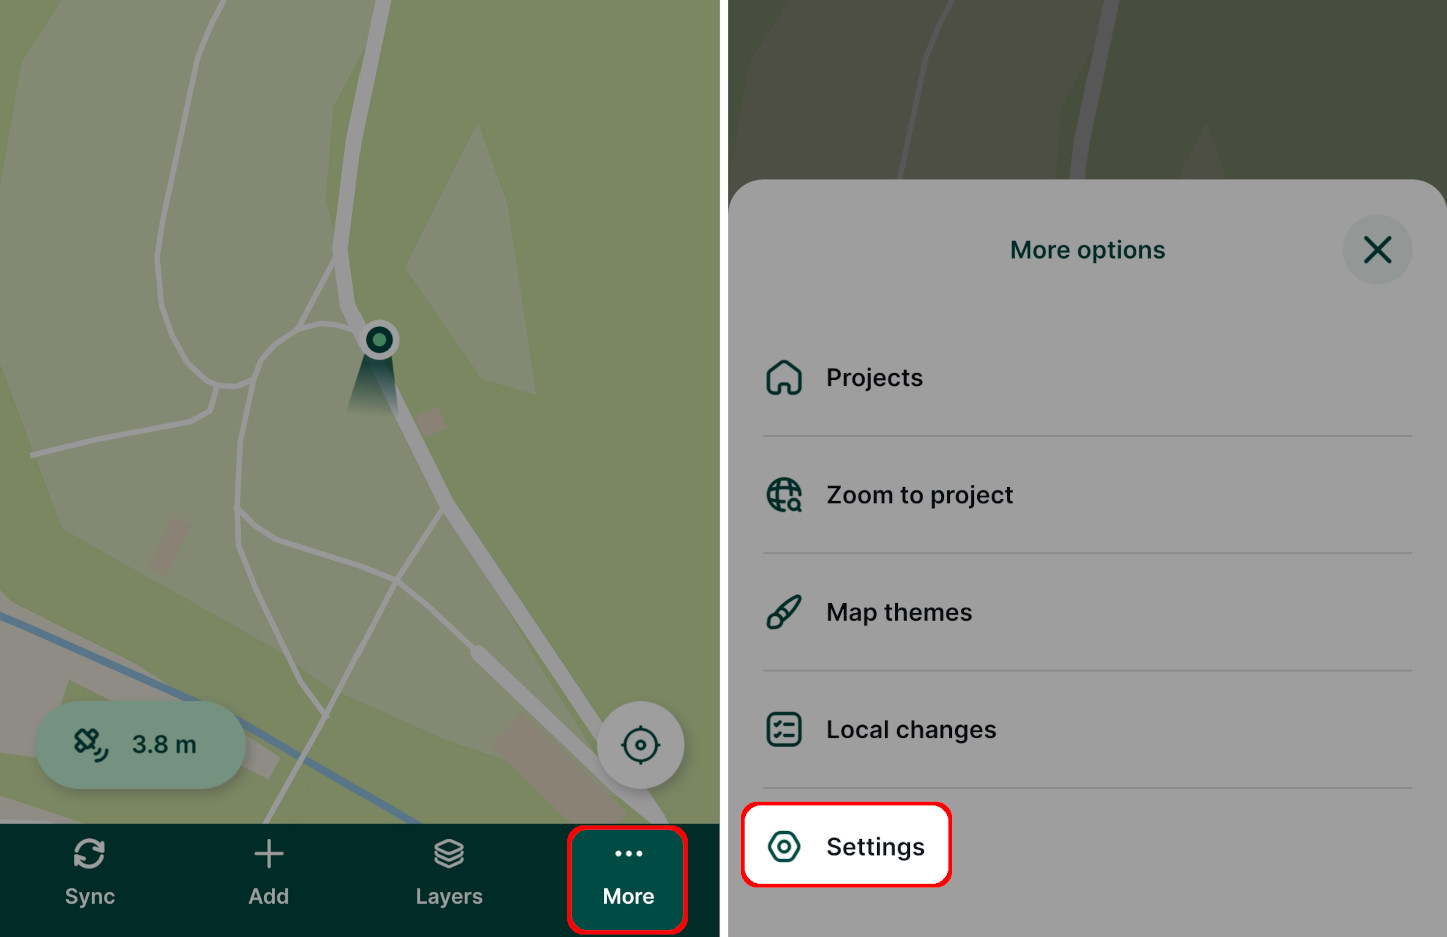
2. Scroll down to the **Diagnostic log** option and tap it to display the log 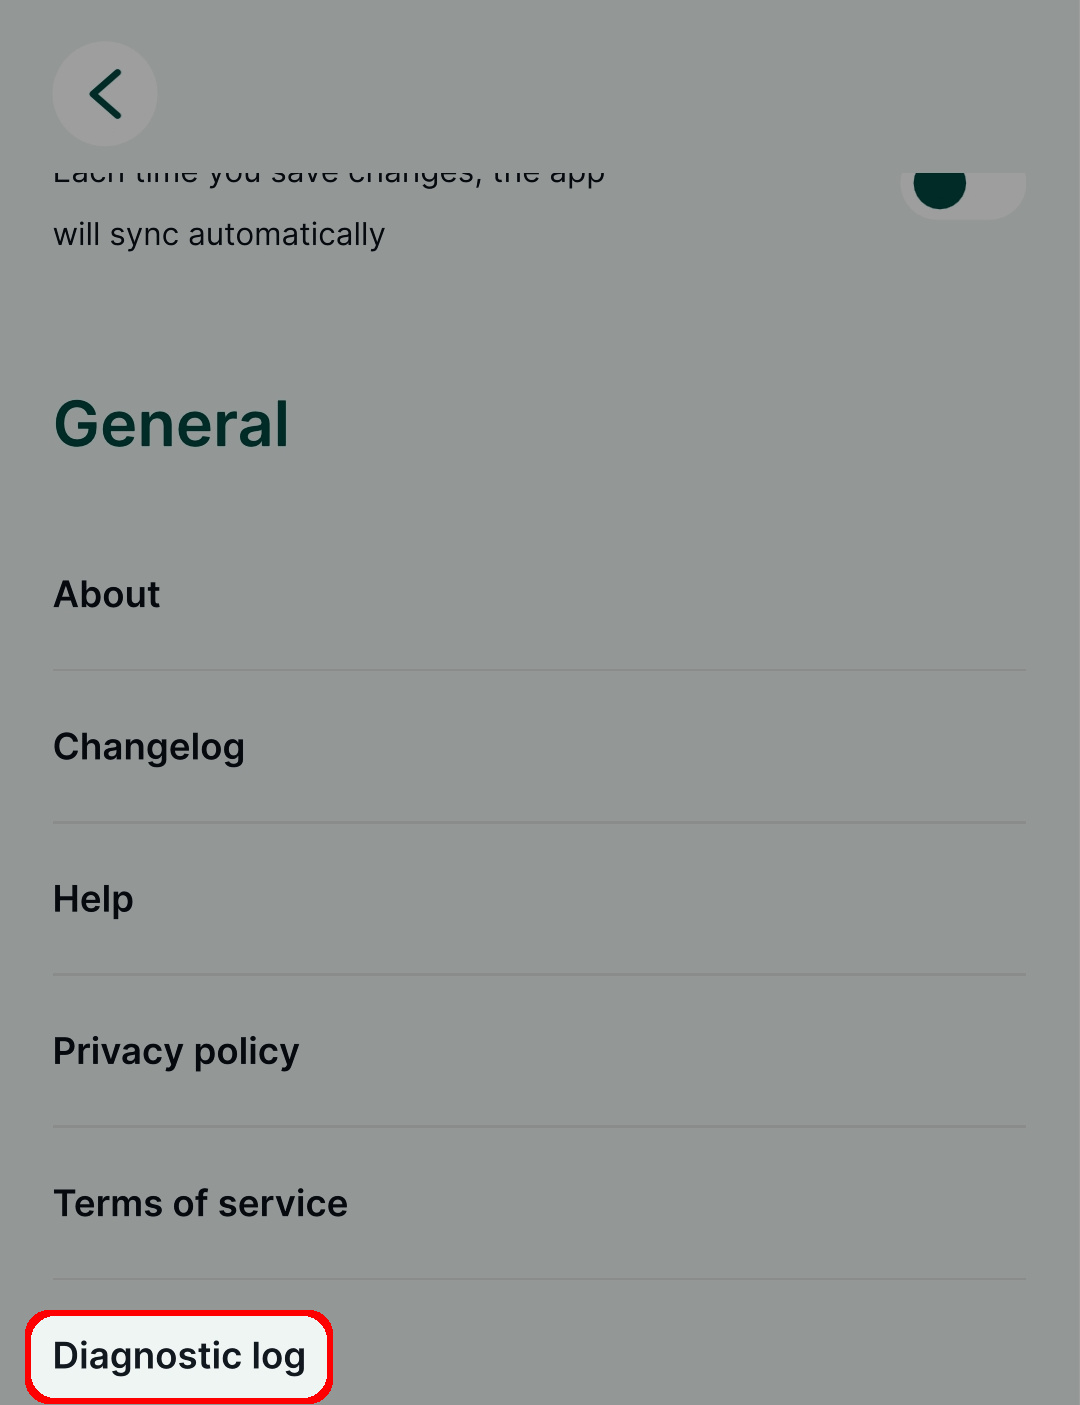
3. Tap the **Send to developers** button to proceed 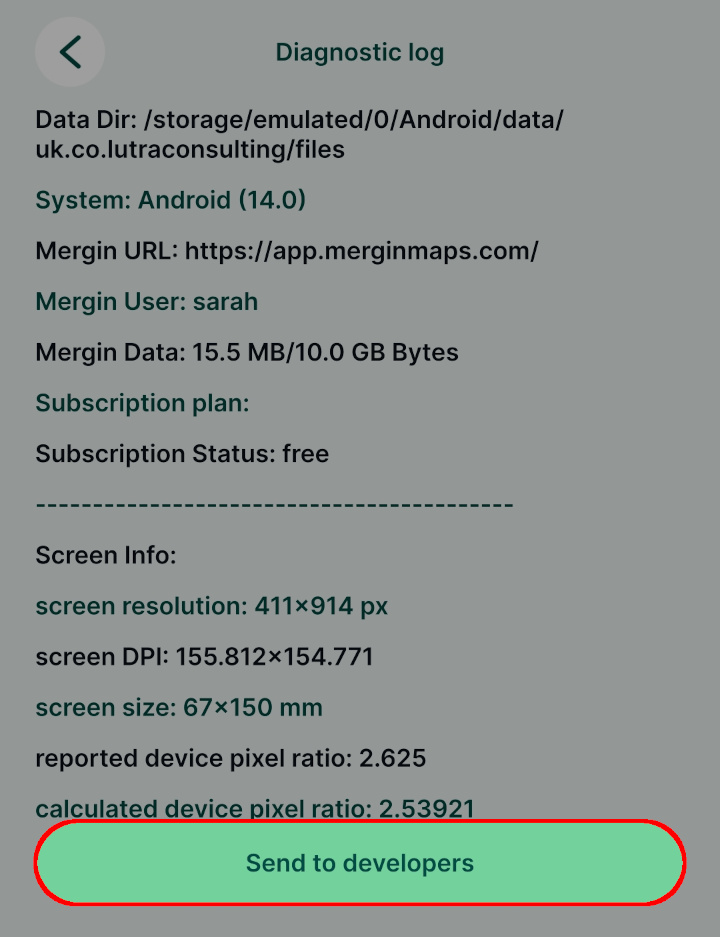
4. Contact our support team ([support@merginmaps.com](mailto:support@merginmaps.com)
) with your username/workspace and problem description so we can have a look into the issue.
Common issues [](https://merginmaps.com/docs/misc/troubleshoot/#common-issues)
--------------------------------------------------------------------------------
The following are some common issues encountered by users:
* [Project fails to sync and there is a _Gateway Timeout_ or _502 Bad Gateway_ error](https://merginmaps.com/docs/misc/troubleshoot/not_syncing/#gateway-timeout-or-502-bad-gateway)
---
# Download your Mergin Maps EE images | Mergin Maps
[Skip to content](https://merginmaps.com/docs/server/install/ee/#VPContent)
Return to top
Download your Mergin Maps EE images [](https://merginmaps.com/docs/server/install/ee/#download-your-mergin-maps-ee-images)
============================================================================================================================
Enterprise Edition only
To get access to your docker images, you need your contract and licence from our [sales team](mailto:sales@merginmaps.com)
. If you do not have them, please contact our team. The repository is private and our team needs to secure you the access to them so you are able to follow these steps.
Amazon Web Services (AWS) [](https://merginmaps.com/docs/server/install/ee/#amazon-web-services-aws)
------------------------------------------------------------------------------------------------------
### Create (root) AWS account [](https://merginmaps.com/docs/server/install/ee/#create-root-aws-account)
WARNING
If your organisation already uses AWS cloud services and has a root user, skip this step.
Maintenance of cloud accounts and security requires deep knowledge. Lutra Consulting Ltd. does not take responsibility for incorrectly set up accounts. The AWS account and its maintenance is the responsibility of your user.
* Go to [aws.amazon.com](https://aws.amazon.com/)
and create new root account
* Continue with all steps and verify your account
### Create IAM user [](https://merginmaps.com/docs/server/install/ee/#create-iam-user)
WARNING
If your organisation already uses AWS cloud services and has a root user, skip this step.
Maintenance of cloud accounts and security requires deep knowledge. Lutra Consulting Ltd. does not take responsibility for incorrectly set up accounts. The AWS account and its maintenance is the responsibility of your user.
* Login as the root user
* Create an IAM user by searching in the console “IAM” and creating a new user.
* Assign the IAM user administrator account permissions. Look for AdministratorAccess permission.
* Review and add it to your new IAM user account
* Logout from root AWS account
### Identify Account ID and IAM user name [](https://merginmaps.com/docs/server/install/ee/#identify-account-id-and-iam-user-name)
Account ID and IAM user names are needed for assigning the permissions to docker images by Lutra Consulting Ltd. operations team.
WARNING
Lutra Consulting Ltd. will never ask you to share an IAM or root login password or other access details to your accounts.
* Login to your IAM account
* Now create CLI access key
* Note down ACCESS\_ID and SECRET for AWS command line client
* Send Account ID and IAM user name to [sales team](mailto:sales@merginmaps.com)
* Wait for confirmation that we have shared the ECR repository with you. This can take up to 5 working days.
Download Docker Images [](https://merginmaps.com/docs/server/install/ee/#download-docker-images)
--------------------------------------------------------------------------------------------------
WARNING
To be able to download the images, you need to have permission to do so for your IAM user that is granted by Lutra Consulting Ltd.
* Open command line and write (you may need to change to your IAM account region). You will be asked for your id and secret to be used.
aws ecr get-login-password --region eu-west-1 | docker login --username AWS --password-stdin 433835555346.dkr.ecr.eu-west-1.amazonaws.com
* Now list docker images that are shared with you (`mergin-ee-front` is frontend application, `mergin-ee-back` is backend application)
aws ecr describe-images --repository-name mergin/mergin-ee-front --registry-id 433835555346 --region eu-west-1
aws ecr describe-images --repository-name mergin/mergin-ee-back --registry-id 433835555346 --region eu-west-1
* Select the tag you want to use and download image, e.g. `2023.6.1-ee` or any other from the list of images
docker pull 433835555346.dkr.ecr.eu-west-1.amazonaws.com/mergin/mergin-ee-back:2023.6.1-ee
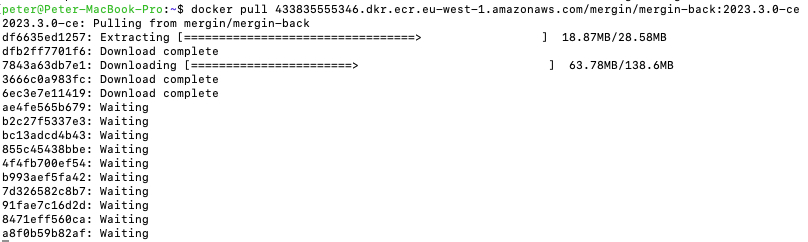
---
# Migrate from ArcGIS | Mergin Maps
[Skip to content](https://merginmaps.com/docs/migrate/arcgis/#VPContent)
Return to top
Migrate from ArcGIS [](https://merginmaps.com/docs/migrate/arcgis/#migrate-from-arcgis)
=========================================================================================
This guide is intended for current ArcGIS and ArcGIS field data collection tools users who consider switching to [QGIS](https://qgis.org/en/site/forusers/download.html)
and [Mergin Maps](https://merginmaps.com/)
. It might be helpful also to Mergin Maps users looking to transfer their data from the Esri ecosystem.
From our experience, users highlight cost savings, interoperability and flexibility when using QGIS and Mergin Maps in comparison with Esri's ArcGIS tools for field surveys such as Collector, Survey123, QuickCapture or Field Maps.
Getting familiar with Mergin Maps and QGIS
Switching to a new platform can be challenging. This documentation is here to help with the basics as well as some more advanced or specific settings.
To get familiar with [Mergin Maps](https://merginmaps.com/)
, we recommend starting with the [**tutorials**](https://merginmaps.com/docs/tutorials/capturing-first-data/)
. If there are specific topics that are crucial for your workflows, feel free to explore the documentation or contact our [sales team](mailto:sales@merginmaps.com)
or our [support team](mailto:support@merginmaps.com)
to get more details.
QGIS is a powerful tool that comes with great community and resources. We recommend using [QGIS User Guide](https://docs.qgis.org/latest/en/docs/user_manual/index.html)
and [QGIS Training Manual](https://docs.qgis.org/latest/en/docs/training_manual/index.html)
to explore its functionality.
ArcGIS and QGIS ecosystems [](https://merginmaps.com/docs/migrate/arcgis/#arcgis-and-qgis-ecosystems)
-------------------------------------------------------------------------------------------------------
In general, ArcGIS is a proprietary software platform while [QGIS](https://qgis.org/en/site/forusers/download.html)
is based on open-source philosophy. As such, it is usually not easy or straightforward to have a workflow that combines both environments. Nevertheless, there are, e.g., some common [data formats](https://merginmaps.com/docs/migrate/arcgis/#data-formats)
that can be used in both of them.
When it comes to field data collection, there are multiple applications in the ArcGIS ecosystem and also some that can be used with QGIS. One of the QGIS-based applications is Mergin Maps mobile app. In this case, QGIS is used to create and set up a project and the mobile app uses this project to collect, update or browse data in the field. The most similar app to Mergin Maps mobile app is the ArcGIS Field Maps.
Here is a comparison of the main components of both ecosystems:
| ArcGIS | Mergin Maps | Component |
| --- | --- | --- |
| ArcGIS Pro\* | [QGIS](https://qgis.org/en/site/forusers/download.html) | desktop GIS application |
| ArcGIS QuickCapture | Mergin Maps mobile app | field survey application |
| ArcGIS Survey123 | Mergin Maps mobile app | form-based field survey application |
| ArcGIS Field Maps\*\* | Mergin Maps mobile app | field survey application |
| ArcGIS Maps SDK | [Python client](https://merginmaps.com/docs/dev/integration/)
and QGIS API | developer SDK |
\*ArcGIS Pro replaced [ArcMap](https://en.wikipedia.org/wiki/ArcMap)
\*\*ArcGIS Field Maps replaced ArcGIS Collector since the end of [2021](https://www.esri.com/arcgis-blog/products/collector/field-mobility/arcgis-collector-on-windows-platform-is-retired/)
Migrate from ArcGIS to QGIS [](https://merginmaps.com/docs/migrate/arcgis/#migrate-from-arcgis-to-qgis)
---------------------------------------------------------------------------------------------------------
To migrate the project, we recommend to:
1. Use the [**SLYR**](https://merginmaps.com/docs/migrate/arcgis/#slyr)
plugin to transfer the ArcGIS project to QGIS project (including styling, etc.).
2. Convert your survey (vector) layers (e.g from Shapefile or File Geodatabase) to GeoPackage if not done already by SLYR.
3. Optionally, convert the rest of the data sources to formats [supported](https://merginmaps.com/docs/gis/supported_formats/)
by Mergin Maps
4. Fine-tune the styling and settings of the layers and QGIS project
If you consider one-time conversion to the open-source ecosystem, we recommend converting all data files you use in the project to formats with open standards. Read more about [**data formats**](https://merginmaps.com/docs/migrate/arcgis/#data-formats)
.
To use your QGIS project with the [Mergin Maps](https://merginmaps.com/)
platform:
1. [Sign up to Mergin Maps](https://merginmaps.com/docs/setup/sign-up-to-mergin-maps/)
2. [Install the Mergin Maps QGIS plugin](https://merginmaps.com/docs/setup/install-mergin-maps-plugin-for-qgis/)
3. [Install the Mergin Maps mobile app](https://merginmaps.com/docs/setup/install-mobile-app/)
4. [Synchronise the QGIS project to the mobile app](https://merginmaps.com/docs/manage/synchronisation/)
using the QGIS plugin. See how the settings done in QGIS translate to the mobile app.
### SLYR [](https://merginmaps.com/docs/migrate/arcgis/#slyr)
The [SLYR tool](https://north-road.com/slyr/)
by [North Road](https://north-road.com/)
facilitates the migration from ArcGIS to QGIS by automatically converting various proprietary Esri data formats, styles and project files to QGIS-compatible formats, such as the conversion of MXD (ArcMap) and APRX (ArcGIS Pro) files to QGIS project files.
This tool helps users transition smoothly by preserving complex symbology, layouts, and project structure. It simplifies the shift from Esri tools to the open-source QGIS environment, reducing the time and effort needed to replicate existing workflows.
SLYR tool offers Community and Licensed version:
* Community version is open-sourced on [GitHub](https://github.com/north-road/slyr)
and can be freely installed via QGIS Plugin Manager to extract, parse, and convert Esri `.lyr` and `.style` files to QGIS-compatible formats.
* Licensed version is closed-sourced and has features such as converting `MXD/MXT` project files to `QGS` or converting various data formats to GeoPackage, and support for exporting QGIS projects to APRX for use within ArcGIS Pro.
Full comparison of the version can be found on North Road's [SLYR project page](https://north-road.com/slyr/)
.

### Domains [](https://merginmaps.com/docs/migrate/arcgis/#domains)
ArcGIS Pro [domains](https://pro.arcgis.com/en/pro-app/latest/help/data/geodatabases/overview/create-modify-and-delete-domains.htm)
are used to restrict the valid values allowed in an attribute field.
Convert them manually to QGIS drop-down widgets - likely [Value Relation](https://merginmaps.com/docs/layer/form-widgets)
- could be time consuming. You can export the domains to CSV to be imported and set value relation widgets, along with its custom expression visibility to mimic cascading forms.
We recommend using QGIS, GDAL algorithms or [SLYR](https://merginmaps.com/docs/migrate/arcgis/#slyr)
to facilitate the conversion of domains without unnecessary manual work.
### Data Formats [](https://merginmaps.com/docs/migrate/arcgis/#data-formats)
**Always use GeoPackage for survey layers** in Mergin Maps. If you use other formats it is not possible to detect changes from other users and they may be overwritten. This is one of the [best practice](https://merginmaps.com/docs/layer/best-practice)
. The downside is the GeoPackage will have limited support in Esri software, e.g. some GeoPackages just cannot be opened within ArcGIS Pro. Specifically we do not recommended to keep using [Shapefile](http://switchfromshapefile.org/)
format.
For rest of the layers, both ArcGIS and QGIS can also handle Shapefile, GeoTIFF, GeoJSON, WMS, WFS, and PostGIS layers. See all [supported formats](https://merginmaps.com/docs/gis/supported_formats/)
.
There are multiple options for data conversion. We recommend using [SLYR](https://merginmaps.com/docs/migrate/arcgis/#slyr)
processing algorithms to convert project data to GeoPackage (GPKG). You can also use QGIS _Convert format_ or _Package layers_ processing algorithms. Alternatively, export your data to [formats supported by Mergin Maps](https://merginmaps.com/docs/gis/supported_formats/)
in ArcGIS Pro, if you feel more comfortable doing it there. Data conversion can be done also in the console using the `ogr2ogr` command line tool.
Hybrid setup: using Mergin Maps with ArcGIS [](https://merginmaps.com/docs/migrate/arcgis/#hybrid-setup-using-mergin-maps-with-arcgis)
----------------------------------------------------------------------------------------------------------------------------------------
It is possible to use ArcGIS and Mergin Maps in a hybrid setup. If you store your data in PostgreSQL/PostGIS database, you can use our [DB Sync](https://merginmaps.com/docs/dev/dbsync/)
tool to synchronise project data from PostgreSQL to Mergin Maps (i.e. storing data in GeoPackages on Mergin Maps server). You still need to have a QGIS project to style your GeoPackage data and set up the project (see the [Migrate section](https://merginmaps.com/docs/migrate/arcgis/#migrate-from-arcgis-to-qgis)
).
This way you can work with your data directly in ArcGIS Pro and also use Mergin Maps tools, such as Mergin Maps mobile app for data collection in the field. Field data can be synchronised to the Mergin Maps server and then to the PostgreSQL database via **DB Sync** tool for ArcGIS use.
Note that this requires using the PostGIS geometry standard (`ST_Geometry`) and not ArcSDE geometry.
Troubleshoot [](https://merginmaps.com/docs/migrate/arcgis/#troubleshoot)
---------------------------------------------------------------------------
Struggling to migrate your projects? We are happy to help you!
Book a short video call with our [sales team](mailto:sales@merginmaps.com)
or ask our [support team](mailto:support@merginmaps.com)
your technical questions. We also have an active open-source community:
 [Join our community chat](https://merginmaps.com/community/join)
and ask questions!
If you are looking for a professional partner to migrate your workflow, ask our [partners network](https://merginmaps.com/partners)
or [Lutra Consulting Ltd.](https://www.lutraconsulting.co.uk/)
, the developers of Mergin Maps.

Credits [](https://merginmaps.com/docs/migrate/arcgis/#credits)
-----------------------------------------------------------------
ArcMap, ArcGIS Pro, ArcGIS Enterprise, ArcGIS Online, ArcGIS Server, ArcSDE, ArcGIS Survey123, Collector for ArcGIS, ArcGIS QuickCapture, ArcGIS FieldMaps are developed and corresponding trademarks are owned by [Esri](https://www.esri.com/en-us/home)
.
---
# Configure environment | Mergin Maps
[Skip to content](https://merginmaps.com/docs/server/environment/#VPContent)
Return to top
Configure environment [](https://merginmaps.com/docs/server/environment/#configure-environment)
=================================================================================================
There are several application settings which can be changed via [enterprise edition config variables](https://github.com/MerginMaps/server/blob/master/deployment/enterprise/.env.template)
or [community edition config variables](https://github.com/MerginMaps/server/blob/master/deployment/enterprise/.env.template)
. Some of them have defaults and some of them need to be modified, particularly those with required placeholders (marked with ⭐️ below).
Server basics [](https://merginmaps.com/docs/server/environment/#server-basics)
---------------------------------------------------------------------------------
Variables marked with star ⭐️ need to be modified for production use.
| Variable name | Type | Default | Description |
| --- | --- | --- | --- |
| `MERGIN_BASE_URL`⭐️ | string | | Deployment URL where Mergin Maps is hosted. |
| `COLLECT_STATISTICS` | Boolean | `true` | Whether to send usage statistics for application improvements. For more information check this [page section](https://merginmaps.com/docs/server/administer#telemetry-service)
. |
| `CONTACT_EMAIL` | string | \`\` | Email contact for application administrator. |
| `SERVICE_ID` | string | | Deployment UUID. Auto-generated on the first run. |
| | | | |
Security settings (important for production use)🛡️ [](https://merginmaps.com/docs/server/environment/#security-settings-important-for-production-use-%F0%9F%9B%A1%EF%B8%8F)
------------------------------------------------------------------------------------------------------------------------------------------------------------------------------
Security settings are important for production use.
| Variable name | Type | Default | Description |
| --- | --- | --- | --- |
| `BEARER_TOKEN_EXPIRATION` | integer | `43200` | Lifetime of authorisation bearer token in seconds. When expired, users need to log in again. |
| `SECRET_KEY`⭐️ | string | | Secret key for authorisation, should be a generated strong string. |
| `SECURITY_EMAIL_SALT`⭐️ | string | | Token salt for sending verification email, should be a generated strong string. |
| `SECURITY_BEARER_SALT`⭐️ | string | | Bearer token salt for decode web token, should be a generated strong string. |
| `SECURITY_PASSWORD_SALT`⭐️ | string | | Password salt for hashing, should be a generated strong string. |
| `WTF_CSRF_ENABLED` | Boolean | `true` | Enable CSRF protection. It is strongly recommended to have this on. |
| `WTF_CSRF_TIME_LIMIT` | integer | `86400` | Lifetime of CSRF token in seconds. When expired, users need to refresh it. |
| | | | |
Database settings [](https://merginmaps.com/docs/server/environment/#database-settings)
-----------------------------------------------------------------------------------------
Mergin Maps uses PostgreSQL database to store its data.
| Variable name | Type | Default | Description |
| --- | --- | --- | --- |
| `DB_APPLICATION_NAME` | string | `mergin` | Comment in database connection string to better identify connection source. |
| `DB_DATABASE` ⭐️ | string | `postgres` | Database to store Mergin Maps tables. |
| `DB_HOST` | string | `db` | Database host. Mapped to docker-compose service name. |
| `DB_PASSWORD` ⭐️ | string | `postgres` | PostgreSQL user password. |
| `DB_PORT` | integer | `5432` | Database port. If non-default, it should match the port exposed in the docker-compose file. |
| `DB_POOL_MAX_OVERFLOW` | integer | `10` | Database `max_overflow` limit for [SQLAlchemy](https://docs.sqlalchemy.org/en/14/core/engines.html)
. |
| `DB_POOL_SIZE` | integer | `2` | Database pool size for SQLAlchemy. With overflow determines the maximum of concurrent connections to the database. |
| `DB_POOL_TIMEOUT` | integer | `300` | Database pool timeout for SQLAlchemy. |
| `DB_USER` ⭐️ | string | `postgres` | PostgreSQL user to connect to Mergin Maps database. |
| | | | |
User management [](https://merginmaps.com/docs/server/environment/#user-management)
-------------------------------------------------------------------------------------
Settings for managing users.
Enterprise Edition only
| Variable name | Type | Default | Description |
| --- | --- | --- | --- |
| `USER_SELF_REGISTRATION` | Boolean | `true` | Users can register themselves. If disabled, they must be invited or registered by superuser. |
| `ENABLE_SUPERADMIN_ASSIGNMENT` | Boolean | `true` | If set to false, you will not be able to assign super admin role to user from admin panel. |
Permission management [](https://merginmaps.com/docs/server/environment/#permission-management)
-------------------------------------------------------------------------------------------------
Community Edition only
To ease the process of permission (user) management, you can set the following global variables that apply to all registered users.
| Variable name | Type | Default | Description |
| --- | --- | --- | --- |
| `GLOBAL_ADMIN` | Boolean | `false` | All registered users can create/delete projects. |
| `GLOBAL_READ` | Boolean | `false` | All registered users have read access to all projects. If `false`, the application admin would need to grant project access to users manually. |
| `GLOBAL_WRITE` | Boolean | `false` | All registered users have write access (can sync) to all projects. |
Sending Emails [](https://merginmaps.com/docs/server/environment/#sending-emails)
-----------------------------------------------------------------------------------
Mergin Maps can connect to a SMTP server to send notifications and password recovery emails.
| Variable name | Type | Default | Description |
| --- | --- | --- | --- |
| `MAIL_SUPPRESS_SEND` | Boolean | `false` | Whether to suppress email sending. If set to `false`, you should define the following variables. |
| `MAIL_DEFAULT_SENDER`⭐️ | string | | Sender of Mergin Maps emails. Best to have some no-reply address. |
| `MAIL_SERVER`⭐️ | string | `localhost` | SMTP mail server host. |
| `MAIL_PORT`⭐️ | integer | `587` | SMTP mail server port. |
| `MAIL_USERNAME` | string | `None` | Username of user connecting to SMTP server. |
| `MAIL_PASSWORD` | string | `None` | Password for user connecting to SMTP server. |
| `MAIL_USE_TLS`🛡️ | Boolean | `true` | Use TLS encryption when connecting to SMTP server. |
| `MAIL_USE_SSL`🛡️ | Boolean | `false` | Whether to use SSL encryption when connecting to SMTP server. |
| `MAIL_BCC` | string | `None` | Email address to send copies of all sent emails. Should be system/application administrator. Mandatory in versions until 2024.4.0. |
| `MERGIN_LOGO_URL` | string | Mergin Maps logo | Link to logo in emails. |
If you have issues with sending emails, follow [troubleshooting](https://merginmaps.com/docs/server/troubleshoot/)
page.
Workspace management [](https://merginmaps.com/docs/server/environment/#workspace-management)
-----------------------------------------------------------------------------------------------
Workspace settings.
Community Edition only
| Variable name | Type | Default | Description |
| --- | --- | --- | --- |
| `GLOBAL_WORKSPACE` ⭐️ | string | `mergin` | Common workspace name for all projects. All projects belong to this single workspace with certain permissions. Projects are then referenced with this name as part of URL, e.g. `/mergin/projectA`, `/mergin/projectB`. |
| `GLOBAL_STORAGE` ⭐️ | integer | `10737418240` | Storage limit Mergin Maps can use to store projects (last version) in bytes (default is 10 GB). Should be reasonably large. |
Enterprise Edition only
| Variable name | Type | Default | Description |
| --- | --- | --- | --- |
| `WORKSPACE_STORAGE_SIZE` ⭐️ | integer | `524288000` | Storage limit workspace can use to store projects (last version) in bytes (default is 500 MB). |
| `WORKSPACE_INVITATION_EXPIRATION` | integer | `14` | Expiration limit for pending invitation in days. |
| `PROJECT_TRANSFER_EXPIRATION` | integer | `7` | Expiration limit for pending project transfer in days. |
| `WORKSPACE_EXPIRATION` | integer | `7` | Expiration time in days for deleted workspaces before removed completely. |
| `USER_WORKSPACES_ALLOWED` | Boolean | `true` | Allow users to create their own workspaces else it is available for superuser only |
Data synchronisation and management [](https://merginmaps.com/docs/server/environment/#data-synchronisation-and-management)
-----------------------------------------------------------------------------------------------------------------------------
Other settings related to data management.
| Variable name | Type | Default | Description |
| --- | --- | --- | --- |
| `LOCAL_PROJECTS` | string | `./projects` | Directory to store projects on a container. Please refer to volume mapping in docker-compose file. |
| `TEMP_DIR` | string | Result of `gettempdir()` call | Trash directory for temp files being cleaned regularly. Please refer to volume mapping in docker-compose file. |
| `MAINTENANCE_FILE` | string | `/data/MAINTENANCE` | File to indicate server is in maintenance - read only mode. Please refer to volume mapping in docker-compose file. |
| `BLACKLIST` | string | `.mergin/`, `.DS_Store`, `.directory` | Pattern to ignore when syncing files. |
| `FILE_EXPIRATION` | integer | `172800` | When the GeoPackage file was updated with "diffable" change, original data are being removed (as they can be reconstructed on demand) to save disk space. File lifetime in seconds. |
| `LOCKFILE_EXPIRATION` | integer | `300` | Time in seconds for a project being locked while updated. If no change happens to the project in such time, the lockfile is removed. |
| `MAX_CHUNK_SIZE` | integer | `10485760` | Maximum size of file chunk to be uploaded (and received by server) in bytes. |
| `MAX_DOWNLOAD_ARCHIVE_SIZE` | integer | `10737418240` | Maximum size of project or project version zip archive in bytes (10 GB by default) for download from dashboard. Too large projects may take too long to download. |
| `USE_X_ACCEL` ⭐️ | Boolean | `true` | Whether to use nginx to serve files. Should be enabled if used with nginx proxy for performance reasons. Read more [here](https://www.nginx.com/resources/wiki/start/topics/examples/x-accel/)
. |
| `ACCOUNT_EXPIRATION` | integer | `1` | Time in days after a user closed their account to all projects and files are permanently deleted. Please note that until the user is removed, the username/email is occupied. |
| `DELETED_PROJECT_EXPIRATION` | integer | `7` | Lifetime in days for deleted projects. Expired projects are removed permanently without possibility to restore afterwards. |
| `PROJECT_ACCESS_REQUEST` | integer | `604800` | Lifetime of active project access request in seconds. |
| `TEMP_EXPIRATION` | integer | `7` | Time in days after files in a temporary folder are permanently deleted. |
Celery asynchronous tasks [](https://merginmaps.com/docs/server/environment/#celery-asynchronous-tasks)
---------------------------------------------------------------------------------------------------------
Mergin Maps is using Celery and Redis to perform asynchronous tasks or doing regular jobs.
| Variable name | Type | Default | Description |
| --- | --- | --- | --- |
| `BROKER_URL` | string | `redis://merginmaps-redis:6379/0` | Connection details to celery message broker. If non-default, it should match definition in `docker-compose` file. |
| `CELERY_RESULT_BACKEND` | string | `redis://merginmaps-redis:6379/0` | Connection details to celery result back-end broker. If non-default, it should match definition in `docker-compose` file. |
Diagnostic logs [](https://merginmaps.com/docs/server/environment/#diagnostic-logs)
-------------------------------------------------------------------------------------
Users of Mergin Maps plugin and Mergin Maps mobile application are able to send diagnostic logs from their devices. In custom deployments, logs are stored in `diagnostic_logs` folder. If you want to send these logs to Mergin Maps instead of storing them locally, set the `DIAGNOSTIC_LOGS_URL` variable to `https://api.merginmaps.com/logs`.
| Variable name | Type | Default | Description |
| --- | --- | --- | --- |
| `DIAGNOSTIC_LOGS_URL` | string | \`\` | Enables sending diagnostic logs from clients to the specified URL instead of storing them in the deployment folder. Set to [https://api.merginmaps.com/logs](https://api.merginmaps.com/logs)
to send diagnostic logs to Mergin Maps. |
WebMaps [](https://merginmaps.com/docs/server/environment/#webmaps)
---------------------------------------------------------------------
Enterprise Edition only
| Variable name | Type | Default | Description |
| --- | --- | --- | --- |
| `MAPS_ENABLED` | boolean | `true` | Flag to enable webmaps |
| `VECTOR_TILES_URL` | string | `https://tiles-ee.merginmaps.com/data/default/{z}/{x}/{y}.pbf` | Vector tiles URL used as background map layer in webmaps |
| `VECTOR_TILES_STYLE_URL` | string | `https://tiles-ee.merginmaps.com/styles/default.json` | Vector tiles style URL used to style the background map layer in webmaps |
🗺️ Enable background map ⚠️
Your webmaps won’t display the default background map unless we enable them on our side. To do that, please [contact our support team](mailto:support@merginmaps.com?subject=Enable%20default%20background%20maps%20on%20Enterprise%20server&body=Dear%20support%2C%0A%0AI%27d%20like%20to%20request%20enabling%20background%20maps%20for%20our%20Enterprise%20edition%20server.%20%0AThe%20server%20is%20hosted%20at%3A%20%3Curl%3E)
and share your server’s URL.
Alternatively, you can set up your own background map.
Single Sign-On (SSO) [](https://merginmaps.com/docs/server/environment/#single-sign-on-sso)
---------------------------------------------------------------------------------------------
Enterprise Edition only
| Variable name | Type | Default | Description |
| --- | --- | --- | --- |
| `SSO_ENABLED` | boolean | `false` | Flag to enable SSO in Mergin Maps |
| `SSO_SERVER_URL` ⭐️ | string | `http://localhost:8081` | Public URL of the SSO server. This URL should be accessible from the internet. |
| `SSO_SERVER_API_KEY` ⭐️ | string | \`\` | This API key is used to authenticate requests to the SSO service. It must be one of the keys defined in the `JACKSON_API_KEYS` variable within the Ory Polis (for more details see [Single Sign-On deployment guide](https://merginmaps.com/docs/server/sso-deployment#configure-server)
). |
---
# Write Documentation | Mergin Maps
[Skip to content](https://merginmaps.com/docs/misc/write-docs/#VPContent)
Return to top
Write Documentation [](https://merginmaps.com/docs/misc/write-docs/#write-documentation)
==========================================================================================
Thank you for your interest in helping out with writing [Mergin Maps Documentation](https://merginmaps.com/docs)
. The documentation framework is based on [VitePress](https://vitepress.dev/)
. We welcome any contributions as [GitHub Pull Requests](https://github.com/MerginMaps/docs/pulls)
. If you are unsure how to contribute or what tasks are best to start with, join us on our [community chat](https://merginmaps.com/community/join)
and ask in the `#dev` channel. We are happy to get you up to speed!
The version of the documentation you see on [Mergin Maps Documentation](https://merginmaps.com/docs)
is the [latest tagged release](https://github.com/MerginMaps/docs/tags)
on the main branch. The latest commit on the main branch can be seen on [Mergin Maps Staging Documentation](https://dev.merginmaps.com/docs)
.
Quick start [](https://merginmaps.com/docs/misc/write-docs/#quick-start)
--------------------------------------------------------------------------
If you are about to do only _a tiny change_ in the documentation, you can skip this section and fast track to the instructions for [fixing a typo or doing small modifications](https://merginmaps.com/docs/misc/write-docs/#how-to-fix-typo-in-the-documentation)
in the docs.
If you are a (web) _developer_, you can skip all and just look at [Mergin Maps README](https://github.com/MerginMaps/docs)
.
Otherwise, it is best to run the local development on your machine. The similar steps as described can be done on (almost) any operation system with slight modifications (e.g. using `brew` or `apt` on macOS or Linux for installation).
If you are not a part of the Mergin Maps core documentation team, you will need to work with a [fork](https://docs.github.com/en/get-started/quickstart/fork-a-repo)
. Follow the instructions in the section [When fork is needed](https://merginmaps.com/docs/misc/write-docs/#when-fork-is-needed)
. We are happy to include more people into the team, so if you consider writing more documentation, let us know on our [community chat](https://merginmaps.com/community/join)
.
### Prepare local repository [](https://merginmaps.com/docs/misc/write-docs/#prepare-local-repository)
As a requirement, you need to [install git](https://github.com/git-guides/install-git)
.
Once installed, open command line/terminal and clone the repository locally (you can use HTTP or SSH)
cd MyProjects
git clone git@github.com:MerginMaps/docs.git
### Start local server [](https://merginmaps.com/docs/misc/write-docs/#start-local-server)
To be able to see your changes interactively, you have to run a local VitePress server. Also, you need to [install yarn](https://yarnpkg.com/getting-started/install)
.
Once installed, you can proceed by installing all dependent packages and starting the server:
cd MerginMaps/docs
yarn install
yarn dev
Now you can open `http://localhost:5173/docs/` in your browser and see the live version of the docs.
### Prepare pull requests [](https://merginmaps.com/docs/misc/write-docs/#prepare-pull-requests)
To commit your changes to the official documentation, you need to prepare a pull request.
Always begin with updating your repository to the latest version:
cd MerginMaps/docs
git checkout main
git pull origin main
The next step is to create a new branch for your work. Best to use a descriptive branch name:
git checkout -b my_docs_fix_branchname
Now you can modify the Markdowns in your favourite text editor. We recommend inspecting the changes as you go in the locally run version of the docs `http://localhost:5173/docs/`.
When done, commit your changes and push your branch to GitHub:
git status
git add .
git commit -m "Improved documentation of XXX"
git push origin my_docs_fix_branchname
Now go to [GitHub](https://github.com/MerginMaps/docs)
and create a pull request (from web or by using the link from the terminal).
Check the automatic tests in the pull requests for [spellcheck](https://merginmaps.com/docs/misc/write-docs/#spellcheck)
, [Markdown](https://merginmaps.com/docs/misc/write-docs/#using-markdown)
, broken links or [redirects](https://merginmaps.com/docs/misc/write-docs/#redirects)
and, if needed, fix the issues in your code.
To ensure your pull request will be reviewed and merged, it is nice to ping the Mergin Maps docs team on the [community chat](https://merginmaps.com/community/join)
in the `#dev` channel.
### When fork is needed [](https://merginmaps.com/docs/misc/write-docs/#when-fork-is-needed)
WARNING
You can skip this step if you are a member of the Mergin Maps docs team and you have write permissions to the repository.
To fork [MerginMaps/docs](https://github.com/MerginMaps/docs)
repository with the source code of documentation, follow the steps described in [GitHub docs](https://docs.github.com/en/get-started/quickstart/fork-a-repo)
.
You will end up with the fork of [MerginMaps/docs](https://github.com/MerginMaps/docs)
in your namespace.
If you use fork, you have to add both fork and upstream to your local namespace:
mkdir MerginMaps; cd MerginMaps
git clone git@github.com:.git
git remote add upstream git@github.com:MerginMaps/docs.git
You also have to update your remote fork before starting the work:
cd MerginMaps/docs
git checkout main
git pull upstream main
git push origin main
### How to fix typo in the documentation [](https://merginmaps.com/docs/misc/write-docs/#how-to-fix-typo-in-the-documentation)
If you see a typo or other issue on a page that can be easily fixed, you can scroll to the bottom of the page to see a footer similar to this

Use the **Help us improve this page** link to go to the editable Markdown source of the page. If you are not in the Mergin Maps core documentation team, you will also need to work on [fork](https://merginmaps.com/docs/misc/write-docs/#when-fork-is-needed)
to be able to proceed.
### Why the Markdown has different content as the public docs [](https://merginmaps.com/docs/misc/write-docs/#why-the-markdown-has-different-content-as-the-public-docs)
Occasionally, it can happen that the link in the footer is broken or the content in Markdown does not match the content on [Mergin Maps Documentation](https://merginmaps.com/docs)
.
This is due to the fact that the released version is the [latest tagged release](https://github.com/MerginMaps/docs/tags)
. The latest commit on the main branch can be seen on the staging server [Mergin Maps Staging Documentation](https://dev.merginmaps.com/docs)
.
The documentation system [](https://merginmaps.com/docs/misc/write-docs/#the-documentation-system)
----------------------------------------------------------------------------------------------------
Our documentation is inspired by this [documentation system](https://documentation.divio.com/)
. Each page should be written as one of the 4 basic types of documentation: tutorials, how-to guides, technical reference and concepts (explanation).
In general, _tutorials_ are located in the **Get Started** section.
The rest of the sections follow this logic:
* explain _concepts_ at the beginning of the section/subsection
* following with a bunch of _how to guides_ and use cases
* _technical reference_ is included at the end of the section/subsection
References to other articles, blog posts or resources should be linked where relevant, either as [tips](https://merginmaps.com/docs/misc/write-docs/#tip-warning-info-error-note-box)
or as _Further reading_ headers.
### Titles, headers, sidebar names [](https://merginmaps.com/docs/misc/write-docs/#titles-headers-sidebar-names)
Use [custom components](https://merginmaps.com/docs/misc/write-docs/#mergin-maps-components)
to reference names, allowing us to change them quickly if needed. Note that custom components do not work for things like URL component names, anchor links, titles or pages, sidebar.
In these situations:
* Filenames: mergin-maps-mobile
* Titles/Sidebar: Mergin Maps Mobile App
For **titles (`#`) and sidebar** capitalise the first letter in _all_ words and _never shorten the names of components_ (e.g. Mergin Maps Mobile App)
* Correct: "Opening Surveyed Data on Your Computer"
* Wrong: ~"Opening surveyed data on your computer"~
For **headers (`##`, `###`, `####` )** capitalise only the first letter in _first_ word and never shorten the names of components (e.g. Mergin Maps mobile app)
* Correct: "Putting your project in the cloud"
* Wrong: ~"Putting Your Project in the Cloud"~
Titles and headers should contain specific keywords to return relevant search results:
* Correct: "Further reading about projections and transformations"
* Wrong: ~"Further reading"~
### Sample projects, users and workspaces [](https://merginmaps.com/docs/misc/write-docs/#sample-projects-users-and-workspaces)
All projects referenced in the documentation use Mergin Maps workspace `documentation`. Make sure these projects are [public](https://merginmaps.com/docs/manage/project-advanced/#make-your-project-public-private)
.
For users that are referenced in the documentation (e.g. screenshots or in texts), it is best to use generic Mergin Maps users `jack`, `jill`, `sarah`, etc. and generic workspaces.
### Documentation folder structure [](https://merginmaps.com/docs/misc/write-docs/#documentation-folder-structure)
Every section of the docs (e.g. Get Started, Install & Sign Up, Manage Account & Project, ...) has its folder.
In the same manner, all pages have their subfolder within the sections. All Markdowns are stored as `index.md` files in the pages' subfolders.
WARNING
Every folder in the docs can contain only one Markdown file. This file needs to be named `index.md`. Please avoid creating Markdowns with other names (e.g. `page.md`).
### Adding a new page [](https://merginmaps.com/docs/misc/write-docs/#adding-a-new-page)
To add a new page, create a folder in the relevant section. This folder should contain relevant files, such as `index.md` and images.
This page should be then:
* added to the sidebar `src/.vitepress/sidebar/en.js` (note that the order of articles in the menu is always "concepts - how to - reference")
* added to the landing page `src/index.md`
If the page contains multiple headers, include the [Table of contents](https://merginmaps.com/docs/misc/write-docs/#table-of-contents-and-outline)
at the beginning using `[[toc]]`.
### Images [](https://merginmaps.com/docs/misc/write-docs/#images)
Images should be located in the same folder as the Markdown `index.md` file that references them.
Every image used in the docs should have an associated Gimp `.xcf` file containing the original, full resolution image.
Images should be exported to `webp` (preferable) or `jpg` format. Their size should not exceed 150kb. Only images where zoomed detail is important can have bigger size.
Screenshots of **QGIS** should:
* be taken with the window sized at 1024x768
* have consistent buttons / toolbars in QGIS
* Windows/macOS, not Linux
* have dialogs as small as possible without scrollbars or other bad visuals
Screenshots of the **mobile app** should:
* be taken without unnecessary empty spaces (say in a split screen mode) for the best readability
* be scaled down by 1.5 (depending on the resolution of the screen of the mobile device) before exporting to reduce the image size
#### Highlighting [](https://merginmaps.com/docs/misc/write-docs/#highlighting)
Relevant parts of images should be highlighted as follows:
* add a new layer called `Black` with 66% opacity, fill it using black colour
* add a new layer called `Red` with 100% opacity
* tightly select what you want to highlight and **Grow selection** by:
* Desktop: 3px
* Mobile: 24px
* delete the selection from `Black` layer
* stroke the selection with red colour in the `Red` layer, at width:
* Desktop: 3px
* Mobile: 12px
#### Title and alt texts [](https://merginmaps.com/docs/misc/write-docs/#title-and-alt-texts)
Every image used in the docs should have a title and alt text (except for decorative images like icons that are not part of docs):
``
The image _title_ attribute is visible on mouse-over. It displays the title over the image.
The _image alt text_ is used to describe images to users who can't see them. It is used when using a screen-reader or if the image fails to load.
For texts:
* in general, use the same for alt and titles
* be specific and succinct, it is best to use about 5-7 words and under 125 characters
* use keywords sparingly, describe it in simple words
* include text that is a part of the image
* never start with “Image of …” or “Picture of …”
Using Markdown [](https://merginmaps.com/docs/misc/write-docs/#using-markdown)
--------------------------------------------------------------------------------
If you are not familiar with Markdown, best to take some tutorial or use a [cheatsheet](https://www.markdownguide.org/cheat-sheet/)
.
On top of regular Markdown. you can use HTML tags as well as some extra components described in this section.
### Table of Contents and Outline [](https://merginmaps.com/docs/misc/write-docs/#table-of-contents-and-outline)
Use `[[toc]]` to generate the table of contents.
Use `outline` on the page front matter to define which header should appear in the Outline:
---
outline: deep
---
or
---
outline: [number, number]
---
### Links [](https://merginmaps.com/docs/misc/write-docs/#links)
Reference other Markdowns by a using relative path to the current file.
Reference the **folder**, not the `index.md` file itself.
To reference a page, the reference should end with a forward slash `/`, e.g.:
`[see this](../misc/write-docs/)`
To reference a header/anchor, use `#`, e.g.:
`[see this](../misc/write-docs/#links)`
### Referencing images [](https://merginmaps.com/docs/misc/write-docs/#referencing-images)
Images are referenced using relative paths, e.g.:
* `` if the image is in the same folder as the Markdown file
* `` if the image is in a different folder then the Markdown file
For global pictures/assets placed in `/src/public/` use custom component ``, e.g. ``:

### Tip/Warning/Info/Error/Note box [](https://merginmaps.com/docs/misc/write-docs/#tip-warning-info-error-note-box)
Use tip, warning, error or details note box when relevant. It is recommended to use a [custom title](https://merginmaps.com/docs/misc/write-docs/#custom-titles-for-info-boxes)
.
TIP
tip example
::: tip
tip example
:::
* * *
WARNING
warning example
::: warning
warning example
:::
* * *
DANGER
danger example
::: danger
danger example
:::
* * *
Details
details example
::: details
details example
:::
* * *
#### Custom titles for info boxes [](https://merginmaps.com/docs/misc/write-docs/#custom-titles-for-info-boxes)
The info boxes can have custom titles:
Custom title
Custom title example
::: warning Custom title
Custom title example
:::
### Emoji [](https://merginmaps.com/docs/misc/write-docs/#emoji)
You can use any of supported [supported emoji](https://github.com/markdown-it/markdown-it-emoji/blob/master/lib/data/full.mjs)
by markdown-it project, e.g.:
🎉 😀 🤣 😱 ❤️ 🙏 ✅ 🚫
:tada: :grinning: :rofl: :scream: :heart: :pray: :white_check_mark: :no_entry_sign:
### Labels/badges [](https://merginmaps.com/docs/misc/write-docs/#labels-badges)
Markdown supports using badges, such as:
tip badge
markdown
* * *
warning badge
markdown
* * *
error badge
markdown
For mentioning that some feature is available from specific version, use ``
markdown
Since Mobile app 2022.1.1
markdown
Since QGIS plugin 2023.2
markdown
Since Server 2024.3
To refer to Mergin Maps EE or Mergin Maps CE edition, use ``
markdown
Community Edition only
markdown
Enterprise Edition only
Custom components for Markdown [](https://merginmaps.com/docs/misc/write-docs/#custom-components-for-markdown)
----------------------------------------------------------------------------------------------------------------
see `src/.vitepress/components/` for list of all components
If you are adding new component:
* add your component to `src/.vitepress/components/MyComponent.vue`
* use in Markdown as `` or ``
* include it on this page in the relevant section (e.g. [Mergin Maps components](https://merginmaps.com/docs/misc/write-docs/#mergin-maps-components)
)
### Reference QGIS and QGIS Help pages [](https://merginmaps.com/docs/misc/write-docs/#reference-qgis-and-qgis-help-pages)
To reference QGIS website, use `` component, e.g.
``
transforms to
[QGIS Download page](https://qgis.org/en/site/forusers/download.html)
To reference QGIS documentation, use `` component, e.g.
``
transforms to
[See QGIS Help page](https://docs.qgis.org/3.22/en/docs/user_manual/index.html)
### Reference GitHub content [](https://merginmaps.com/docs/misc/write-docs/#reference-github-content)
Use `` component, e.g. `` transforms to [documentation](https://github.com/MerginMaps/docs/)
.
### Mergin Maps components [](https://merginmaps.com/docs/misc/write-docs/#mergin-maps-components)
#### General [](https://merginmaps.com/docs/misc/write-docs/#general)
Use `` component, transforms to merginmaps.com
Use `` component, transforms to [merginmaps.com](https://merginmaps.com/)
Use `` component, transforms to Mergin Maps
Use `` component, transforms to [Mergin Maps](https://merginmaps.com/)
Use `` component, transforms to Lutra Consulting Ltd.
Use `` component, transforms to [Lutra Consulting Ltd.](https://www.lutraconsulting.co.uk/)
Use `` component, transforms to [Mergin Maps docker repository](https://hub.docker.com/)
#### Mobile app [](https://merginmaps.com/docs/misc/write-docs/#mobile-app)
Use `` component, transforms to Mergin Maps mobile app
Use `` component, transforms to mobile app
#### QGIS plugin [](https://merginmaps.com/docs/misc/write-docs/#qgis-plugin)
Use `` component, transforms to Mergin Maps QGIS plugin
Use `` component, transforms to QGIS plugin
#### Server [](https://merginmaps.com/docs/misc/write-docs/#server)
Use `` component, transforms to [app.merginmaps.com](https://app.merginmaps.com/)
Use `` component, transforms to [Mergin Maps dashboard](https://app.merginmaps.com/)
Use `` component, transforms to [dashboard](https://app.merginmaps.com/)
Use `` component, transforms to Mergin Maps Cloud
Use `` component, transforms to [Mergin Maps Cloud](https://merginmaps.com/)
Use `` component, transforms to Mergin Maps CE
Use `` component, transforms to [Mergin Maps CE](https://github.com/MerginMaps)
Use `` component, transforms to Mergin Maps EE
Use `` component, transforms to [Mergin Maps EE](https://merginmaps.com/pricing)
### Reference Mergin Maps project [](https://merginmaps.com/docs/misc/write-docs/#reference-mergin-maps-project)
Use `` component, e.g. `` transforms to [documentation/test\_forms](https://app.merginmaps.com/projects/documentation/test_forms/tree)
.
For a short reference (e.g. in tables), use `` component, e.g. `` transforms to [](https://app.merginmaps.com/projects/documentation/test_forms/tree)
.
### Show Mergin Maps Mobile App Google/Apple badges for download [](https://merginmaps.com/docs/misc/write-docs/#show-mergin-maps-mobile-app-google-apple-badges-for-download)
Use `` component to display
[](https://apps.apple.com/us/app/input/id1478603559?ls=1)
[](https://play.google.com/store/apps/details?id=uk.co.lutraconsulting)
[](https://github.com/MerginMaps/mobile/releases/latest)
### Embed YouTube content [](https://merginmaps.com/docs/misc/write-docs/#embed-youtube-content)
Use `` component, e.g. `` transforms to
Spellcheck [](https://merginmaps.com/docs/misc/write-docs/#spellcheck)
------------------------------------------------------------------------
It might happen that you need to use a word/string that does not pass the spellcheck.
To omit spellcheck for a single word that is not expected to use more than a few times, use the following component:
`NoSpellcheck`, e.g. ``
Words that will be used multiple times can be added to the `/scripts/wordlist.txt` to be omitted from the spellcheck permanently.
Search in the docs [](https://merginmaps.com/docs/misc/write-docs/#search-in-the-docs)
----------------------------------------------------------------------------------------
Full-text search is used in the docs thanks to the [leo-buneev/vuepress-plugin-fulltext-search](https://github.com/leo-buneev/vuepress-plugin-fulltext-search)
plugin.
Translations [](https://merginmaps.com/docs/misc/write-docs/#translations)
----------------------------------------------------------------------------
Translations are not yet supported/implemented.
Redirects [](https://merginmaps.com/docs/misc/write-docs/#redirects)
----------------------------------------------------------------------
As documentation matures, pages get moved, renamed or deleted. As 3rd party sites may link the pages, it is important to maintain information on how to redirect the non-existent links to something useful.
This information is captured in the [REDIRECTS](https://github.com/MerginMaps/docs/blob/main/REDIRECTS)
file.
### Updating the REDIRECTS file [](https://merginmaps.com/docs/misc/write-docs/#updating-the-redirects-file)
The REDIRECTS file is a tab-separated list of old/new URL pairs. It describes how requests for old content should be redirected.
With a clear picture of how the structure of content will change in a given release (see above), update the REDIRECTS as follows:
* **Renamed pages** (`.md`) **or data files** (e.g. `.json`, `.zip`):
* Add a new line to the REDIRECTS file to reflect this
* Check if existing lines in the REDIRECTS file point to the page/data file that is being renamed
* If so, update those targets to point to the renamed page/data file's new path
* **Deleted pages** (`.md`):
* Add a new line to the REDIRECTS file to point requests somewhere sensible
* Check if existing lines in the REDIRECTS file point to the deleted page
* If so, update those targets to point somewhere sensible
* **Renamed images** (e.g. `.png`, `.jpg`) **and deleted data files** (e.g. `.json`, `.zip`):
* We ignore these for the time being
* **General checks**
* Ensure source and destination URLs are separated by a single tab, not spaces
* Ensure all target URLs end with a trailing `/` for example:
* `https://merginmaps.com/docs/howto/input_ui/` ✅
* `https://merginmaps.com/docs/howto/input_ui` 🚫
Seeing what's changed [](https://merginmaps.com/docs/misc/write-docs/#seeing-what-s-changed)
----------------------------------------------------------------------------------------------
When all authors have committed their changes to the _main_ branch and are ready for the site to be released we can easily generate a clear picture of what's changed.
We can do this by comparing the current state of the _main_ branch with the last released version of the docs site. Do this by:
1. [Comparing changes](https://github.com/MerginMaps/docs/compare)
* Use the latest tag on the left
* Use _main_ on the right
2. Scroll down a little and click where it says _**224 changed files**_ or similar
You should now see a nice summary below of files which have been added, renamed or deleted
You can now see which content has been changed.
---
# Upgrade | Mergin Maps
[Skip to content](https://merginmaps.com/docs/server/upgrade/#VPContent)
Return to top
Upgrade [](https://merginmaps.com/docs/server/upgrade/#upgrade)
=================================================================
Migration guides are here to help you migrate your [Mergin Maps CE](https://github.com/MerginMaps)
or [Mergin Maps EE](https://merginmaps.com/pricing)
to the latest server version. [Mergin Maps Cloud](https://merginmaps.com/)
is always migrated to latest version by Mergin Maps team. Read more about server platforms in [overview article](https://merginmaps.com/docs/server/)
.
WARNING
Migrations must be performed one by one and cannot be skipped.
Make sure to always back up your database data before doing a migration.
From 2025.5.x to 2025.7.x [](https://merginmaps.com/docs/server/upgrade/#migration-guide-from-2025-5-x-to-2025-7-x)
---------------------------------------------------------------------------------------------------------------------
Enterprise Edition
Perform the migration:
1. Stop your running docker containers
bash
$ docker compose -f docker-compose.yml down # or similarly, based on your previous deployment
2. Clone or pull the [server repository](https://github.com/MerginMaps/server/blob/master/)
or download [deployment folder](https://github.com/MerginMaps/server/blob/master/deployment)
and open `/enterprise` folder.
bash
$ cd server/deployment/enterprise
3. Adapt your existing `docker-compose.yml` and `docker-compose.maps.yml` file to the new version.
4. If you have installed maps stack, change `qgis_extractor` service image version to 2025.3.0 in `docker-compose.maps.yml`.
Version breaking change
Previously used image version for service `qgis_extractor` (2025.1.0) is not compatible with latest version of Mergin Maps server.
5. If you have installed maps stack, add new environment variables to `qgis_extractor` service in `docker-compose.maps.yaml`.
yaml
environment:
- OVERVIEWS_DATA_DIR=/data
- MM_WMS_TILE_BUFFER=100
- MM_WMS_AVOID_ARTIFACTS=1
- BROKER_URL=redis://mergin-redis:6379/0
- CELERY_RESULT_BACKEND=redis://mergin-redis:6379/0
You can also clean the following variables from `.prod.env`:
bash
QGIS_EXTRACTOR_TIMEOUT
QGIS_EXTRACTOR_API_URL
6. Start up your docker containers
bash
$ docker compose -f docker-compose.yml -d up # or similarly, based on your deployment
7. Check that you are on correct database migration versions (`6cb54659c1de`, `e95d051969ce`).
bash
$ docker exec merginmaps-server flask db current
INFO [alembic.runtime.migration] Context impl PostgresqlImpl.
INFO [alembic.runtime.migration] Will assume transactional DDL.
6cb54659c1de
e95d051969ce
* If you do not see the version numbers at all, run the following commands:
bash
$ docker exec merginmaps-server flask db stamp 6cb54659c1de
$ docker exec merginmaps-server flask db stamp e95d051969ce
8. Run the database migration:
bash
$ docker exec merginmaps-server flask db upgrade community@b9ec9ab6694f
$ docker exec merginmaps-server flask db upgrade enterprise@c40e5e645b57
From 2025.2.x to 2025.7.x (CE) [](https://merginmaps.com/docs/server/upgrade/#migration-guide-from-2025-2-x-to-2025-7-x-ce)
-----------------------------------------------------------------------------------------------------------------------------
Community Edition
Perform the migration:
1. Stop your running docker containers
bash
$ docker compose -f docker-compose.yml down # or similarly, based on your previous deployment
2. Clone or pull the [server repository](https://github.com/MerginMaps/server/blob/master/)
or download [deployment folder](https://github.com/MerginMaps/server/blob/master/deployment)
and open `/community` folder.
bash
$ cd server/deployment/community
3. Adapt your existing `docker-compose.yml` and `.prod.env` environment variables to the new version.
4. Upgrade your nginx proxy configuration file with the latest version available in the [nginx.conf](https://github.com/MerginMaps/server/blob/master/deployment/common/nginx.conf)
(This is a necessary step for improved downloading of zip files from the dashboard).
5. If you want to persist diagnostic logs from a mobile application and QGIS plugin, run the following command to set proper permissions for the folder `/diagnostic_logs` used for storing log files:
bash
$ sh ../common/set_permissions.sh diagnostic_logs
You can also disable this persistence in [docker-compose.yml](https://github.com/MerginMaps/server/blob/master/deployment/community/docker-compose.yml)
`server` service definition. 6. Start up your docker containers
bash
$ docker compose -f docker-compose.yml -d up # or similarly, based on your deployment
7. Check that you are on correct database migration versions (`ba5051218de4`).
bash
$ docker exec merginmaps-server flask db current
INFO [alembic.runtime.migration] Context impl PostgresqlImpl.
INFO [alembic.runtime.migration] Will assume transactional DDL.
35af0c8be41e (head)
ba5051218de4
* If you do not see the version numbers at all, run the following commands:
bash
$ docker exec merginmaps-server flask db stamp 35af0c8be41e
$ docker exec merginmaps-server flask db stamp ba5051218de4
8. Run the database migration:
bash
$ docker exec merginmaps-server flask db upgrade heads
# New head will be community@b9ec9ab6694f
From 2025.3.x to 2025.5.x [](https://merginmaps.com/docs/server/upgrade/#migration-guide-from-2025-3-x-to-2025-5-x)
---------------------------------------------------------------------------------------------------------------------
Enterprise Edition
Perform the migration:
1. Stop your running docker containers
bash
$ docker compose -f docker-compose.yml down # or similarly, based on your previous deployment
2. Please clone or pull the [server repository](https://github.com/MerginMaps/server/blob/master/)
or download [deployment folder](https://github.com/MerginMaps/server/blob/master/deployment)
bash
$ cd server/deployment/enterprise
3. Adapt your existing `docker-compose.yml` file to the new version.
4. Upgrade your nginx proxy configuration file with the latest version available in the [nginx.conf](https://github.com/MerginMaps/server/blob/master/deployment/common/nginx.conf)
(This is a necessary step for improved downloading of zip files from the dashboard).
5. If you want to persist diagnostic logs from a mobile application and QGIS plugin, run the following command to set proper permissions for the folder `/diagnostic_logs` used for storing log files:
bash
$ sh ../common/set_permissions.sh diagnostic_logs
You can also disable this persistence in [docker-compose.yml](https://github.com/MerginMaps/server/blob/master/deployment/enterprise/docker-compose.yml)
`server` service definition. 6. Start up your docker containers
bash
$ docker compose -f docker-compose.yml -d up # or similarly, based on your deployment
7. Check that you are on correct database migration versions (`5ad13be6f7ef`, `819e6b20ee93`).
bash
$ docker exec merginmaps-server flask db current
INFO [alembic.runtime.migration] Context impl PostgresqlImpl.
INFO [alembic.runtime.migration] Will assume transactional DDL.
5ad13be6f7ef
819e6b20ee93
* If you do not see the version numbers at all, run the following commands:
bash
$ docker exec merginmaps-server flask db stamp 5ad13be6f7ef
$ docker exec merginmaps-server flask db stamp 819e6b20ee93
8. Run the database migration:
bash
$ docker exec merginmaps-server flask db upgrade community@6cb54659c1de
$ docker exec merginmaps-server flask db upgrade enterprise@e95d051969ce
Downloading zip files from the dashboard
Zip files are now stored in temporary storage and are deleted after 7 days. This can increase the storage usage of Mergin Maps server. Make sure you have enough space on your server.
### Enable Single Sign-On [](https://merginmaps.com/docs/server/upgrade/#enable-single-sign-on)
To enable Single Sign-On for your server, follow the instructions in [Deployment of Single Sign On](https://merginmaps.com/docs/server/sso-deployment)
.
From 2025.2.x to 2025.3.x [](https://merginmaps.com/docs/server/upgrade/#migration-guide-from-2025-2-x-to-2025-3-x)
---------------------------------------------------------------------------------------------------------------------
Enterprise Edition
Changes on deployment behaviour
Release 2025.3.x brings some changes on Mergin Maps docker compose orchestration deployment procedure.
Get the latest [docker-compose file](https://github.com/MerginMaps/server/blob/master/deployment/enterprise/docker-compose.yml)
or update docker images manually to version `2025.3.0`. Perform the migration:
1. Stop your running docker containers
bash
$ docker compose -f docker-compose.yml down # or similarly, based on your previous deployment
# INFO: After shutdown update the docker-compose.yml file to latest release
2. Please clone the [server repository](https://github.com/MerginMaps/server/blob/master/)
or download [deployment folder](https://github.com/MerginMaps/server/blob/master/deployment/)
bash
$ cd server/deployment/enterprise
3. If you plan to use the new webmaps stacks, adapt your existing `.prod.env` and `docker-compose.yml` files. Move/copy them to the `enterprise` deployment folder
bash
$ cp /some/path/.prod.env . # assuming you are located in `server/deployment/enterprise`
$ cp /some/path/docker-compose.yml . # assuming you are located in `server/deployment/enterprise`
4. Start up your docker containers
bash
$ docker compose -f docker-compose.yml -d up # or similarly, based on your deployment
$ docker compose -f docker-compose.maps.yml -d up # If you want to deploy webmaps stack
5. Check that you are on correct versions (`ba5051218de4`, `ba5ae5972c4a`).
bash
$ docker exec merginmaps-server flask db current
INFO [alembic.runtime.migration] Context impl PostgresqlImpl.
INFO [alembic.runtime.migration] Will assume transactional DDL.
ba5051218de4
ba5ae5972c4a
* If you do not see the version numbers at all, run the following commands:
bash
$ docker exec merginmaps-server flask db stamp ba5051218de4
$ docker exec merginmaps-server flask db stamp ba5ae5972c4a
6. Run the database migration:
bash
$ docker exec merginmaps-server flask db upgrade community@5ad13be6f7ef
$ docker exec merginmaps-server flask db upgrade enterprise@819e6b20ee93
🗺️ Enable background map ⚠️
Your webmaps won’t display the default background map unless we enable them on our side. To do that, please [contact our support team](mailto:support@merginmaps.com?subject=Enable%20default%20background%20maps%20on%20Enterprise%20server&body=Dear%20support%2C%0A%0AI%27d%20like%20to%20request%20enabling%20background%20maps%20for%20our%20Enterprise%20edition%20server.%20%0AThe%20server%20is%20hosted%20at%3A%20%3Curl%3E)
and share your server’s URL.
Alternatively, you can set up your own background map using [environment variables](https://merginmaps.com/docs/server/environment/#webmaps)
.
From 2024.2.x to 2025.2.x (CE) [](https://merginmaps.com/docs/server/upgrade/#migration-guide-from-2024-2-x-to-2025-2-x-ce)
-----------------------------------------------------------------------------------------------------------------------------
Before you upgrade!
Release 2025.2.x brings significant changes on Mergin Maps docker compose orchestration infrastructure.
Previous individual `server` container is replaced by 3 service dedicated containers that split the core components of Mergin Maps, `server-gunicorn` the app, `celery-beat` Celery task scheduler and `celery-worker` a dedicated worker container for Celery tasks.
Community Edition
Get the latest [docker-compose file](https://github.com/MerginMaps/server/blob/master/deployment/community/docker-compose.yml)
or update docker images manually to version `2025.2.2`. Perform the migration:
1. Stop your running docker containers
bash
$ docker compose -f docker-compose.yml down # or similarly, based on your deployment
# INFO: After shutdown update the docker-compose.yml file to latest release
2. Double check if below environment variables are available and filled in `.prod.env` environment file. If not, add them.
bash
SECURITY_EMAIL_SALT=''
SECURITY_BEARER_SALT=''
PORT=5000
3. Start up your docker containers
* If you stopped the containers during step `1` with new version compose file, you need to manually stop and remove containers.
bash
$ docker stop merginmaps-db merginmaps-proxy merginmaps-redis merginmaps-server merginmaps-web
$ docker rm merginmaps-db merginmaps-proxy merginmaps-redis merginmaps-server merginmaps-web
* After this you can start the new containers
bash
$ docker compose -f docker-compose.yml -d up # or similarly, based on your deployment
4. Check that you are on correct versions (`35af0c8be41e`, `a5d4defded55`).
bash
$ docker exec merginmaps-server flask db current
INFO [alembic.runtime.migration] Context impl PostgresqlImpl.
INFO [alembic.runtime.migration] Will assume transactional DDL.
35af0c8be41e (head)
a5d4defded55
* If you do not see the version numbers at all, run the following commands:
bash
$ docker exec merginmaps-server flask db stamp 35af0c8be41e
$ docker exec merginmaps-server flask db stamp a5d4defded55
5. Run the database migration:
bash
$ docker exec merginmaps-server flask db upgrade heads
From 2024.4.x to 2025.2.x [](https://merginmaps.com/docs/server/upgrade/#migration-guide-from-2024-4-x-to-2025-2-x)
---------------------------------------------------------------------------------------------------------------------
Before you upgrade!
Release 2025.2.x brings significant changes on Mergin Maps docker compose orchestration infrastructure.
Previous individual `server` container is replaced by 3 service dedicated containers that split the core components of Mergin Maps, `server-gunicorn` the app, `celery-beat` Celery task scheduler and `celery-worker` a dedicated worker container for Celery tasks.
Enterprise Edition
Get the latest [docker-compose file](https://github.com/MerginMaps/server/blob/master/deployment/enterprise/docker-compose.yml)
or update docker images manually to version `2025.2.0`. Perform the migration:
1. Stop your running docker containers and build the new images
bash
$ docker compose -f docker-compose.yml down # or similarly, based on your deployment
# INFO: After shutdown update the docker-compose.yml file to latest release
2. Double check if below environment variables are available and filled in `.prod.env` environment file. If not, add them.
bash
SECURITY_EMAIL_SALT=''
SECURITY_BEARER_SALT=''
PORT=5000
3. Start up your docker containers
* If you stopped the containers during step `1` with new version compose file, you need to manually stop and remove containers.
bash
$ docker stop merginmaps-db merginmaps-proxy merginmaps-redis merginmaps-server merginmaps-web
$ docker rm merginmaps-db merginmaps-proxy merginmaps-redis merginmaps-server merginmaps-web
* After this you can start the new containers
bash
$ docker compose -f docker-compose.yml -d up # or similarly, based on your deployment
4. Check that you are on correct versions (`07f2185e2428`, `df5b4efdae7b`).
bash
$ docker exec merginmaps-server flask db current
INFO [alembic.runtime.migration] Context impl PostgresqlImpl.
INFO [alembic.runtime.migration] Will assume transactional DDL.
07f2185e2428
df5b4efdae7b
* If you do not see the version numbers at all, run the following commands:
bash
$ docker exec merginmaps-server flask db stamp 07f2185e2428
$ docker exec merginmaps-server flask db stamp df5b4efdae7b
5. Run the database migration:
bash
$ docker exec merginmaps-server flask db upgrade community@ba5051218de4
$ docker exec merginmaps-server flask db upgrade enterprise@ba5ae5972c4a
From 2024.3.x to 2024.4.x [](https://merginmaps.com/docs/server/upgrade/#migration-guide-from-2024-3-x-to-2024-4-x)
---------------------------------------------------------------------------------------------------------------------
Get the latest [docker-compose file](https://github.com/MerginMaps/server/blob/master/deployment/enterprise/docker-compose.yml)
or update docker images manually to version `2024.4.0`. Perform the migration:
Enterprise Edition
1. Start up your docker containers
bash
$ docker compose -f docker-compose.yml up # or similarly, based on your deployment
2. Check that you are on correct versions (`0e3fc92aeaaa`, `223e3be99e92`).
bash
$ docker exec merginmaps-server flask db current
INFO [alembic.runtime.migration] Context impl PostgresqlImpl.
INFO [alembic.runtime.migration] Will assume transactional DDL.
0e3fc92aeaaa
223e3be99e92
* If you do not see the version numbers at all, run the following commands:
bash
$ docker exec merginmaps-server flask db stamp 0e3fc92aeaaa
$ docker exec merginmaps-server flask db stamp 223e3be99e92
3. Run the database migration:
bash
$ docker exec merginmaps-server flask db upgrade community@07f2185e2428
$ docker exec merginmaps-server flask db upgrade enterprise@df5b4efdae7b
From 2024.2.x to 2024.3.x [](https://merginmaps.com/docs/server/upgrade/#migration-guide-from-2024-2-x-to-2024-3-x)
---------------------------------------------------------------------------------------------------------------------
Get the latest [docker-compose file](https://github.com/MerginMaps/server/blob/master/deployment/enterprise/docker-compose.yml)
or update docker images manually to version `2024.3.0`. Perform the migration:
Enterprise Edition
1. Start up your docker containers
bash
$ docker compose -f docker-compose.yml up # or similarly, based on your deployment
2. Check that you are on correct versions (`a5d4defded55`, `223e3be99e92`).
bash
$ docker exec merginmaps-server flask db current
INFO [alembic.runtime.migration] Context impl PostgresqlImpl.
INFO [alembic.runtime.migration] Will assume transactional DDL.
a5d4defded55
223e3be99e92 (head)
* If you do not see the version numbers at all, run the following commands:
bash
$ docker exec merginmaps-server flask db stamp a5d4defded55
$ docker exec merginmaps-server flask db stamp 223e3be99e92
3. Run the database migration:
bash
$ docker exec merginmaps-server flask db upgrade community@0e3fc92aeaaa
From 2023.6.1 to 2024.2.x (CE) [](https://merginmaps.com/docs/server/upgrade/#migration-guide-from-2023-6-1-to-2024-2-x-ce)
-----------------------------------------------------------------------------------------------------------------------------
Get the latest [docker-compose file](https://github.com/MerginMaps/server/blob/master/deployment/community/docker-compose.yml)
or update docker images manually.
Community Edition
Update image to `2024.2.2` and perform the migration:
1. Start up your docker containers
bash
$ docker compose -f docker-compose.yml up # or similarly, based on your deployment
2. Check that you are on correct versions (`35af0c8be41e`, `3a77058a2fd7`).
bash
$ docker exec merginmaps-server flask db current
INFO [alembic.runtime.migration] Context impl PostgresqlImpl.
INFO [alembic.runtime.migration] Will assume transactional DDL.
3a77058a2fd7
35af0c8be41e
* If you do not see the version numbers at all, run the following commands:
bash
$ docker exec merginmaps-server flask db stamp 35af0c8be41e
$ docker exec merginmaps-server flask db stamp 3a77058a2fd7
3. Run the database migration, there will be several updates:
bash
$ docker exec merginmaps-server flask db upgrade heads
Enterprise Edition
Update image to `2024.2.1` and perform the migration:
1. Start up your docker containers
bash
$ docker compose -f docker-compose.yml up # or similarly, based on your deployment
2. Check that you are on correct versions (`3a77058a2fd7`, `0d867687ab64`).
bash
$ docker exec merginmaps-server flask db current
INFO [alembic.runtime.migration] Context impl PostgresqlImpl.
INFO [alembic.runtime.migration] Will assume transactional DDL.
3a77058a2fd7
0d867687ab64
* If you do not see the version numbers at all, run the following command:
bash
$ docker exec merginmaps-server flask db stamp 3a77058a2fd7
$ docker exec merginmaps-server flask db stamp 0d867687ab64
3. Run the database migration, there will be several updates running in each script:
bash
$ docker exec merginmaps-server flask db upgrade community@a5d4defded55
$ docker exec merginmaps-server flask db upgrade enterprise@head
From 2023.2.0+ to 2023.6.1 [](https://merginmaps.com/docs/server/upgrade/#migration-guide-from-2023-2-0-to-2023-6-1)
----------------------------------------------------------------------------------------------------------------------
⚠️ If you are on a server version lower than `2023.2.0`, it is important to first [upgrade to `2023.2.0`](https://merginmaps.com/docs/server/upgrade/#migration-guide-from-any-previous-version-to-2023-2-0)
before continuing with this migration.
* * *
Get the latest [docker-compose file](https://github.com/MerginMaps/server/blob/master/deployment/community/docker-compose.yml)
or update docker images manually to version `2023.6.1`. Perform the migration:
Community Edition
1. Start up your docker containers
bash
$ docker compose -f docker-compose.yml up # or similarly, based on your deployment
2. Check that you are on a correct version (`b6cb0a98ce20`)
bash
$ docker exec merginmaps-server flask db current
INFO [alembic.runtime.migration] Context impl PostgresqlImpl.
INFO [alembic.runtime.migration] Will assume transactional DDL.
b6cb0a98ce20 # <--- important
* If you do not see the version number on the last line, run the following command:
bash
$ docker exec merginmaps-server flask db stamp b6cb0a98ce20
3. Run the database migration
bash
$ docker exec merginmaps-server flask db upgrade 3a77058a2fd7
Enterprise Edition
1. Start up your docker containers
bash
$ docker compose -f docker-compose.yml up # or similarly, based on your deployment
2. Check that you are on correct versions (`b6cb0a98ce20`, `0d867687ab64`)
bash
$ docker exec merginmaps-server flask db current
INFO [alembic.runtime.migration] Context impl PostgresqlImpl.
INFO [alembic.runtime.migration] Will assume transactional DDL.
b6cb0a98ce20
0d867687ab64
* If you do not see the version numbers, run the following command:
bash
$ docker exec merginmaps-server flask db stamp b6cb0a98ce20
$ docker exec merginmaps-server flask db stamp 0d867687ab64
3. Run the database migration
bash
$ docker exec merginmaps-server flask db upgrade community@3a77058a2fd7
Any previous version to 2023.2.0 [](https://merginmaps.com/docs/server/upgrade/#migration-guide-from-any-previous-version-to-2023-2-0)
----------------------------------------------------------------------------------------------------------------------------------------
Besides various fixes, enhancements and performance improvements the most notable change recently introduced is the concept of workspaces. For Community Edition it means there is a **common shared workspace (global workspace)** for all users where all projects are stored, instead of having a personal or organisational namespace for projects.
TIP
In case you do not need your previous data, we advise to start with [clean deployment](https://merginmaps.com/docs/server/install/)
without the need to follow this migration guide.
**Upgrading to 2023.2**
1. Synchronise **all your projects and devices** using Mergin Maps mobile app and Mergin Maps QGIS plugin. Make sure there are no pending changes.
2. After synchronisation, all downloaded projects need to be **removed** from all devices using Mergin Maps mobile app and Mergin Maps QGIS plugin
3. Backup your database ⚠️
bash
$ docker exec mergin-db pg_dump -U postgres -Fc postgres > pg_backup.dump
4. Stop all running Mergin Maps services (from project root folder)
bash
$ docker compose -f docker-compose.yml stop
5. Pull the latest changes
bash
$ git pull
6. Set environment variables `.prod.env`. **Important** ⚠️
Community Edition
As mentioned earlier, Mergin Maps CE operates with one global workspace. We will set it up now. Specify its name with the following environment variable:
* `GLOBAL_WORKSPACE=ShinyWorkspace` - name of your workspace. A good fit is the name of your company or team. This value _should not be changed_ later.
TIP
You can find all available environment variables [here](https://merginmaps.com/docs/server/environment/)
together with a tutorial on how to set them up.
Further, you need to set a default role for people in your workspace _(learn more about our [permissions and roles system here](https://merginmaps.com/docs/manage/permissions/)
)_. **Pick one** of these options :
* `GLOBAL_READ=0` everyone will have guest role (without access to any project unless explicitly granted)
* `GLOBAL_READ=1` everyone will have reader role (they can read/download all projects in the workspace)
* `GLOBAL_WRITE=1` everyone will have writer role (they can contribute to all projects in the workspace, e.g. upload files)
* `GLOBAL_ADMIN=1` everyone will have admin role (they can create new projects and share projects with others)
You can specify the maximum storage for your shiny new workspace 🌟 with the following variable:
* `GLOBAL_STORAGE=10737418240` - workspace storage in bytes (10 GB in the example)
TIP
New users can be created from Mergin Maps administration panel, by navigating to `/admin`.
Enterprise Edition
There are few settings you may want to change values for:
* `WORKSPACE_STORAGE_SIZE=104857600` - workspace storage in bytes (100 MB in the example)
* `WORKSPACE_INVITATION_EXPIRATION=7` - days for valid invitation to expire
* `WORKSPACE_EXPIRATION=7` - days for deleted workspace to be cleaned up
* `USER_WORKSPACES_ALLOWED=1` - whether users can create their own workspaces
* `USER_SELF_REGISTRATION=1` - whether users can register themselves, if set to 0, new users can be only added by admin
7. Make sure projects volume mounts in `docker-compose` file still match (You can set up new volumes by following the [quick start guide](https://merginmaps.com/docs/server/install/)
). Switch to new server version and PostgreSQL to at least version 12 (14 recommended) by running new docker containers:
bash
$ docker compose -f docker-compose.yml up
8. Restore backup from older PostgreSQL version, e.g.:
bash
$ docker cp pg_backup.dump merginmaps-db:/tmp
$ docker exec -it merginmaps-db bash
root@merginmaps-db$ pg_restore -U postgres -Fc -d postgres < /tmp/pg_backup.dump
_You might see some warnings about using public schema, you can safely ignore those._
WARNING
If your PostgreSQL settings were custom, you might need to follow official instructions for upgrading the PostgreSQL cluster.
### Database migration [](https://merginmaps.com/docs/server/upgrade/#database-migration)
Community Edition
In this step we will select a global workspace (e.g. my-company) where all your projects will be merged. Your projects are migrated as follows: former namespace is prepended to project name and whole project is moved to new global workspace, for example:
john.doe/survey -> my-company/john.doe_survey
my-org/projectA -> my-company/my-org_projectA
Run DB migration scripts in `merginmaps-server` container:
bash
$ docker exec -it merginmaps-server bash
# stamp database to state of release 2021.6.1,
# if there is existing alembic record you might need to patch it manually
$ flask db stamp 2686074eff45 # ← state of 2021.6.1
$ flask db upgrade dbd428cda965 # sync with pre-2023 releases
$ flask db upgrade 0ab6a1fbf974
$ echo $GLOBAL_WORKSPACE # make sure the GLOBAL_WORKSPACE variable is set and has the desired value
$ flask db upgrade 35af0c8be41e
$ flask db upgrade 1fcbea2a0f2c
$ flask db upgrade 3daefa84ce67
$ flask db upgrade b6cb0a98ce20
If all goes well your database should end up in the following state
bash
$ flask db current
INFO [alembic.runtime.migration] Context impl PostgresqlImpl.
INFO [alembic.runtime.migration] Will assume transactional DDL.
b6cb0a98ce20 (head)
35af0c8be41e (head)
Enterprise Edition
In this step all your user and organisation namespaces will be migrated to workspaces keeping their original names. From now on there won't be any difference between user and organisation namespace.
Run DB migration scripts in `merginmaps-server` container:
bash
$ docker exec -it merginmaps-server bash
# stamp database to state of release 2021.6.1,
# if there is existing alembic record you might need to patch it manually
$ flask db stamp 2686074eff45 # ← state of 2021.6.1
$ flask db stamp f2f038cbae06 # ← state of 2021.6.1 (enterprise branch)
$ flask db upgrade community@dbd428cda965 # sync with pre-2023 releases
# run bunch of workspace related updates
$ flask db upgrade community@0ab6a1fbf974
$ flask db upgrade enterprise@92a63acb7973
$ flask db upgrade community@1fcbea2a0f2c
$ flask db upgrade community@3daefa84ce67
$ flask db upgrade community@b6cb0a98ce20
$ flask db upgrade enterprise@0d867687ab64
If all goes well your database should end up in the following state
bash
$ flask db current
INFO [alembic.runtime.migration] Context impl PostgresqlImpl.
INFO [alembic.runtime.migration] Will assume transactional DDL.
0d867687ab64 (head)
b6cb0a98ce20 (head)
Your should be successfully migrated. Please note that files on your disk were not touched, only project names (namespaces) were changed.
You can now download and continue working with your projects.
---