# Table of Contents
- [Studio](#studio)
- [Startup Guide for LiveU Studio – Studio](#startup-guide-for-liveu-studio-studio)
- [LiveU Studio V35 Release Notes (PDF) – Studio](#liveu-studio-v35-release-notes-pdf-studio)
- [Push feeds from Matrix to Studio – Studio](#push-feeds-from-matrix-to-studio-studio)
- [Network prerequisites – Studio](#network-prerequisites-studio)
- [Multicam to multi Channel – Studio](#multicam-to-multi-channel-studio)
- [Live Captions – Studio](#live-captions-studio)
- [Free trial – Studio](#free-trial-studio)
- [Multiple Languages workflows – Studio](#multiple-languages-workflows-studio)
- [Publishing from one Studio project to another one – Studio](#publishing-from-one-studio-project-to-another-one-studio)
- [Real time translation with an interpreter – Studio](#real-time-translation-with-an-interpreter-studio)
- [Qualities & Formats – Studio](#qualities-formats-studio)
- [The page you were looking for doesn't exist – Studio](#the-page-you-were-looking-for-doesn-t-exist-studio)
- [API Documentation – Studio](#api-documentation-studio)
- [LiveU field Unit to Studio LRT flow – Studio](#liveu-field-unit-to-studio-lrt-flow-studio)
- [Understanding SCTE 35 Ad Insertion/Marker: A Technical Guide – Studio](#understanding-scte-35-ad-insertion-marker-a-technical-guide-studio)
- [Settings on each input – Studio](#settings-on-each-input-studio)
- [LiveU Field Units (SRT) – Studio](#liveu-field-units-srt-studio)
- [Streaming protocols – Studio](#streaming-protocols-studio)
- [Layers – Studio](#layers-studio)
- [YouTube API Terms – Studio](#youtube-api-terms-studio)
- [LiveU Solo (RTMP) – Studio](#liveu-solo-rtmp-studio)
- [Audio Mixer – Studio](#audio-mixer-studio)
- [Pull live source – Studio](#pull-live-source-studio)
- [Project / Sub-account – Studio](#project-sub-account-studio)
- [Push vs. Pull – Studio](#push-vs-pull-studio)
- [Calendar, Projects and events – Studio](#calendar-projects-and-events-studio)
- [Solo Pro (SRT) – Studio](#solo-pro-srt-studio)
- [LiveU Field Units (RTMP) – Studio](#liveu-field-units-rtmp-studio)
- [Local screen share – Studio](#local-screen-share-studio)
- [Web Page – Studio](#web-page-studio)
- [Guest advanced audio parameters – Studio](#guest-advanced-audio-parameters-studio)
- [Broadcasters – Studio](#broadcasters-studio)
- [Multi-format (transcoding) – Studio](#multi-format-transcoding-studio)
- [Remote capture & screensharing – Studio](#remote-capture-screensharing-studio)
- [Preview/program and monitoring – Studio](#preview-program-and-monitoring-studio)
- [Isolation URL – Studio](#isolation-url-studio)
- [Local video devices – Studio](#local-video-devices-studio)
- [Delay – Studio](#delay-studio)
- [Push live source – Studio](#push-live-source-studio)
- [Remote Capture – Studio](#remote-capture-studio)
- [LiveU Receiver/Decoder: LRT Output – Studio](#liveu-receiver-decoder-lrt-output-studio)
- [Flowics – Studio](#flowics-studio)
- [Streamlabs – Studio](#streamlabs-studio)
- [Usage and consumption – Studio](#usage-and-consumption-studio)
- [Framesync – Studio](#framesync-studio)
- [Multiview – Studio](#multiview-studio)
- [Manage user account – Studio](#manage-user-account-studio)
- [Interlaced & Progressive – Studio](#interlaced-progressive-studio)
- [StreamElements – Studio](#streamelements-studio)
- [Advanced Audio Options – Studio](#advanced-audio-options-studio)
- [Close caption & Subtitle tracks – Studio](#close-caption-subtitle-tracks-studio)
- [Monitoring – Studio](#monitoring-studio)
- [How to reset your password – Studio](#how-to-reset-your-password-studio)
- [Supervise my projects – Studio](#supervise-my-projects-studio)
- [Event history – Studio](#event-history-studio)
- [Cheat sheet for your remote guests – Studio](#cheat-sheet-for-your-remote-guests-studio)
- [Tagboard – Studio](#tagboard-studio)
- [Embedded Webpages – Studio](#embedded-webpages-studio)
- [Crop & Aspect ratio – Studio](#crop-aspect-ratio-studio)
- [Remote screen sharing – Studio](#remote-screen-sharing-studio)
- [Automated guest – Studio](#automated-guest-studio)
- [Singular.live – Studio](#singular-live-studio)
- [Fallback – Studio](#fallback-studio)
- [IFB – Studio](#ifb-studio)
- [Hotkeys and shortcuts – Studio](#hotkeys-and-shortcuts-studio)
- [Troubleshooting your Studio event – Studio](#troubleshooting-your-studio-event-studio)
- [Dizplai – Studio](#dizplai-studio)
- [LiveU Ingest : LRT Output – Studio](#liveu-ingest-lrt-output-studio)
- [Template – Studio](#template-studio)
- [Program/Preview areas on Inputs (red/green) – Studio](#program-preview-areas-on-inputs-red-green-studio)
- [Stinger – Studio](#stinger-studio)
- [Live Controls – Studio](#live-controls-studio)
- [Chat and collaboration – Studio](#chat-and-collaboration-studio)
- [Element Editor – Studio](#element-editor-studio)
- [Emotions – Studio](#emotions-studio)
- [Transition – Studio](#transition-studio)
- [Advanced hotkeys management – Studio](#advanced-hotkeys-management-studio)
- [Custom background template – Studio](#custom-background-template-studio)
- [Recordings – Studio](#recordings-studio)
- [Metadata – Studio](#metadata-studio)
- [The page you were looking for doesn't exist – Studio](#the-page-you-were-looking-for-doesn-t-exist-studio)
- [The page you were looking for doesn't exist – Studio](#the-page-you-were-looking-for-doesn-t-exist-studio)
- [Custom template (beginners) – Studio](#custom-template-beginners-studio)
- [Creating & Scheduling live – Studio](#creating-scheduling-live-studio)
- [The page you were looking for doesn't exist – Studio](#the-page-you-were-looking-for-doesn-t-exist-studio)
- [APNG – Studio](#apng-studio)
- [PGM Segments – Studio](#pgm-segments-studio)
- [PGM Clipping – Studio](#pgm-clipping-studio)
- [Picture (image, logo,..) – Studio](#picture-image-logo-studio)
- [Upload PGM Clip & Segments – Studio](#upload-pgm-clip-segments-studio)
- [AWS S3 Storage – Studio](#aws-s3-storage-studio)
- [Program Backup/Recording – Studio](#program-backup-recording-studio)
- [FLV Backup to MP4 – Studio](#flv-backup-to-mp4-studio)
---
# Studio
[Skip to main content](#main-content)
Studio
======
Search
------
Hi. How can we help?
====================
Categories
----------
* [Getting Started Everything you need to know to get started with Studio.](/hc/en-us/categories/17858758662555-Getting-Started)
* [Tutorials Learning Studio made easy: tutorials, videos and tips for producing and publishing.](/hc/en-us/categories/16180553447835-Tutorials)
* [Release Notes Discover what's new in the latest Studio releases.](/hc/en-us/categories/17184925769499-Release-Notes)
Promoted articles
-----------------
* [Startup Guide for LiveU Studio](/hc/en-us/articles/17073335901083-Startup-Guide-for-LiveU-Studio)
* [Push feeds from Matrix to Studio](/hc/en-us/articles/27505858646555-Push-feeds-from-Matrix-to-Studio)
* [LiveU Studio V35 Release Notes (PDF)](/hc/en-us/articles/35033741144859-LiveU-Studio-V35-Release-Notes-PDF)
---
# Startup Guide for LiveU Studio – Studio
[Skip to main content](#main-content)
Search
------
Hi. How can we help?
====================
LiveU Studio is the all-in-one live streaming production studio fully cloud-based which will give you the possibility to create any kind of live stream you want! Come and discover our studio!
Using LiveU Studio to broadcast your live streams will give you the opportunity to:
\- Multicast your streams on mutliples destinations at once, from a single location: our studio.
\- Choose the broadcast protocols you want (RTMP, SRT...).
\- Add remote guests to your digital event.
\- Create a custom live stream to match with your brand identity.
And many more features!
Just starting out with LiveU Studio? Let us guide you to set up and broadcast the first live of a long serie!
You can watch this short video on how to access LiveU Studio from LiveU Central:
LiveU Studio is super easy to use! Let's dive into the first steps:
STEP BY STEP Guide with screenshots
* We strongly recommend the use of the latest version of the [Google Chrome browser.](https://www.google.com/chrome/)
Thank you to check also in your Chrome settings that cookies are accepted on all sites.
* Have a look at our [Network requirements](/hc/en-us/articles/17094630482971)
if your network is restricted.
* First, create a new live stream by hitting the "**Create new live stream**" button or select a time slot in the calendar (1&2):

* Set your event Title/Start time/use a past layout (if you already did some events).
* Click on "Create and go to control room".

* You'll arrive in the Production menu (3) -> From here you can set up your [media](/hc/en-us/articles/17094666673051)
and/or [Live sources](https://studiosupport.liveu.tv/hc/en-us/sections/17306801860123-Production-Visual-mixer)
(3).
* Click the **\[Add an input\]** button (4).

The list of all of our supported inputs will be displayed (5) (have a look at our [knowledge base](/hc/en-us)
for more details -> Production section).
Once the desired inputs are selected, **start the test phase on** **LiveU Studio** with the **\[Start Test\]** button (6).
**The hourly rate will be charged starting from now (except during the trial period).**

* Go to the **Publication section** and check your [Formats & Qualities](/hc/en-us/articles/17094645001243)
(1): it is the quality that will be used by the publishing points.
* Add the desired [Publishing points](https://studiosupport.liveu.tv/hc/en-us/sections/17039181942683-Publishing-Output-destinations)
(2): the destinations of your live stream.

Once you're ready to go live, simply hit **\[Start Publishing and Record\]** (7) and confirm to start streaming to the configured Publishing points!

Don't forget to **stop the live** with the \[**END**\] button!
Quick interface overview in Video
[To go further watch our demo videos!](https://studiosupport.liveu.tv/hc/en-us/sections/23693248937499-Demo-material)
We hope this has helped you in your start with LiveU Studio, if you have any questions please feel free to contact us!
---
# LiveU Studio V35 Release Notes (PDF) – Studio
[Skip to main content](#main-content)
Search
------
Hi. How can we help?
====================
[Updated tutorials](https://studiosupport.liveu.tv/hc/en-us/sections/35300287326235-ISO-Recording-Clipping-Replay)
-------------------------------------------------------------------------------------------------------------------
* [LiveU Studio V1.35 Release Notes (2).pdf](/hc/en-us/article_attachments/35033790118043)
400 KB [Download](/hc/en-us/article_attachments/35033790118043)
---
# Push feeds from Matrix to Studio – Studio
[Skip to main content](#main-content)
Search
------
Hi. How can we help?
====================
Introducing "**Matrix to Studio Flow**" – our latest feature lets you seamlessly push feeds from LiveU Matrix directly into Studio (local receivers). Enhance your workflow with effortless, real-time content integration.
### Follow these steps to push feeds from LiveU Matrix into Studio LRT channels (local receivers)
#### Add an LRT Input in the Studio _**Production**_ Section
* Log into your LiveU Studio account.
* Navigate to the **Production** section (A) and add a new input (B) & start the testing phase.

* * In the **Live Source** section, select **Add LRT Input ->** select an LRT Channel.

* Copy the channel name.

#### Grab a feed from Matrix to Studio
* Go to LiveU **Matrix**.
* Click on **Local Receivers.**
* Look for the **Studio Channel Name** you created in the previous steps.

* * Grab a _**Feed**_ into the _**Studio Channel (Local Receiver).**_
_****_
#### Verify the Received Feed in Studio
* Verify the feed quality and connection stability.
---
# Network prerequisites – Studio
[Skip to main content](#main-content)
Search
------
Hi. How can we help?
====================
It is important that you make sure that your network is configured to use LiveU Studio so you don't have to worry about the device on which you manage your feed.
TO USE LIVEU STUDIO SERVICES, THERE ARE SOME NETWORK PREREQUISITES.
-------------------------------------------------------------------
We use **HTTP, HTTPS, RTMP, and WebRTC protocols**, please check with your IT department to ensure that these protocols are not blocked.
LiveU Studio uses sending and receiving on the following ports to allow live broadcasting:
■ 80/TCP (HTTP)
■ 443/TCP (HTTPS)
■ 1935/TCP+UDP (RTMP)
■ 8080/TCP+UDP (SRT)
■ 1024-65535/UDP (WebRTC)
In addition, there must **not** be any **_firewalls_** installed that block HTTP, HTTPS, RTMP, or WebRTC protocols.
These ports must be **open** to any public IP address.
If this is not doable, it is necessary to **allow AWS servers** to work with your network, as our services are cloud-based on AWS.
#### Reserved Bandwidth
* Per operator in the Control Room: 2Mb/s download per source + about 5Mb/s upload (If the operator is NOT a source or have sources to upload to LiveU Studio).
* Per operator in the Multiview: 2Mb/s download per source + 5Mb/s upload
If you still can't visualize your feed, we invite you to contact your LiveU sales representative.
* We strongly recommend the use of the latest version of the [Google Chrome browser.](https://www.google.com/chrome/)
Thank you to check also in your Chrome settings that cookies are accepted on all sites.
If your network is very restricted please have a look at the following network rules needed to use and acces the Studio:
| | | | | | | |
| --- | --- | --- | --- | --- | --- | --- |
| **Rule** | **Direction** | **Protocol** | **FQDN** | **List of IPS** | **ports** | **Remark** |
| Studio Backend | outbound | TCP (HTTPS) | studio.liveu.tv | | 443 | Mandatory |
| Studio Backend API | outbound | TCP (HTTPS+WSS) | \*.studio.liveu.tv | | 443 | Mandatory |
| WebRTC | outbound | UDP (RTC) | \*.studio.liveu.tv | Project IPs (By default change for each event, can be fixed {Add-Ons}) | 1024-65535 | Mandatory |
| Google STUN (used in WebRTC) | outbound | UDP | [stun.l.g](http://stun.l.google.com:19302/)
oogle.com
stun1.l.google.com:
stun2.l.google.com
stun3.l.google.com stun4.l.google.com | Don’t have it\*
\*We will have it when we will move to LiveU STUN | 19302 | |
| SRT | outbound | **UDP**+TCP (SRT) | \*.easy.live
\*.studio.liveu.tv | 13.234.62.194
52.79.80.44
52.77.80.37
13.210.252.177
54.64.30.128
52.51.217.241
52.67.60.65
52.39.10.142
52.203.37.103 | 8080 | Recommended (to publish to a studio SRT url INPUT) |
| RTMP | outbound | UDP+**TCP** (RTMP) | \*.easy.live
\*.studio.liveu.tv | 13.234.62.194
52.79.80.44
52.77.80.37
13.210.252.177
54.64.30.128
52.51.217.241
52.67.60.65
52.39.10.142
52.203.37.103 | 1935 | Recommended (to publish to a studio RTMP url INPUT) |
| RTMP/SRT | inbound | UDP+TCP | \*.studio.liveu.tv | Project IPs (By default change for each event, can be fixed) | | Recommended if you want to whitelist the studio IP emitting to a private destination server. |
| LRT | outbound | UDP + TCP (LRT) | | | 1935 | To publish from Studio into a physical receiver |
**Hardware specifications:**
----------------------------
### **🔹****Minimum Requirements**
* **CPU:** Intel Core i5-10th Gen / AMD Ryzen 5 3600 or better
* **RAM:** 8GB
* **GPU:** Integrated graphics (Intel UHD 630 or better)
* * *
### **🔹 Recommended Specs (For Smooth Multi-Stream Performance)**
* **CPU:** Intel Core i7-13th Gen / AMD Ryzen 7 7800X
* **RAM:** 32GB DDR5
* **GPU:** NVIDIA RTX 3060 / AMD RX 6700 XT
---
# Multicam to multi Channel – Studio
[Skip to main content](#main-content)
Search
------
Hi. How can we help?
====================
How to publish multiple cameras to multiple Studio channels using a LU800 (LRT)
-------------------------------------------------------------------------------
From Version 10 the LU800 supports custom channel selection! The new "**Custom Channels**" feature is available on some Units who already have the [Multi-Cam feature](https://get.liveu.tv/lu800-multi-cam/)
(LU800 in our case\*). It allows you to publish up to 4 cameras to 4 different channels (using LRT), whether to Studio Channel or to one of your physical servers.
In our example, we'll publish 1 camera (duplicated 4x) to 4 [Studio channels](/hc/en-us/articles/17094653138971)
.
* To begin, go to Studio, _**Production**_ section (1).
* Add a new Input (2).
* In the _**Live Sources**_ section (3).
* Click on "Assign LRT flow" (4).


* Add the desired number of LRT Channels (5&6).
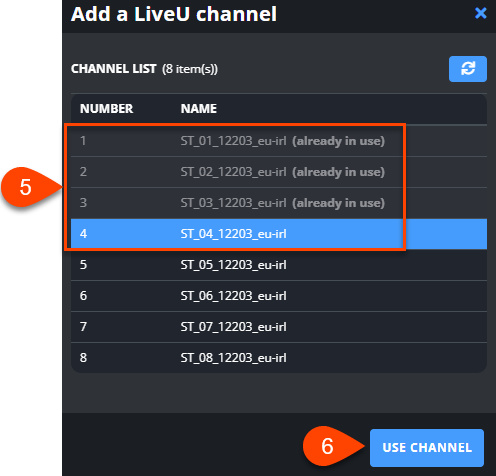
* If ready, start the testing phase to preview your feeds and start the LRT Channels.

* Then go to LUC -> Unit(s) -> LU800 (version 10.0 or above) =-> Multi-Cam -> enable custom channels -> assign the desired channels and start streaming.

That's it! Your feeds are well received into Studio, if ready you can start publishing and recording from Studio.

\* from Version 10 the LU800 supports custom channel selection
Related article:
* [LiveU field Unit to Studio LRT flow](https://studiosupport.liveu.tv/hc/en-us/articles/17094653138971-LiveU-field-Unit-to-Studio-LRT-flow)
---
# Live Captions – Studio
[Skip to main content](#main-content)
Search
------
Hi. How can we help?
====================
How to set up a show with live captions?
----------------------------------------
You want to set up a real-time translation of your live event but you don't have an interpreter? Live captions are for you!
Set up a live show with live captions will allow you to:
\- Simultaneously translate your live event even if you don't have an interpreter.
\- Maximize your audience by offering a translation of your live show in several languages.
In order to set up your LiveU Studio with live captions:
* [Add a push clean feed](/hc/en-us/articles/17094645646107)
and copy the RTMP _**View** **URL (or the [isolated URL](/hc/en-us/articles/17094667341339)
)**_

* Provide this URL to your live caption provider so that it can read the stream. (if you don't have a live caption provider we can put you in touch with some of them, just contact us by chat/mail).
* Add a [_**Webpage**_](/hc/en-us/articles/17094646501659)
input and paste the URL provided by your live caption provider to display the live captions.
* Add some [delay](/hc/en-us/articles/17094590556571)
to your input if needed. Depending on the encoder used, you will need to set a delay of 8 to 30 seconds so that the translator is synchronized with the output stream.

Your live caption banner appears, you can test the good reception of the captions and start the publication and recording.
**Can't find the right answer?**
Contact the LiveU Studio Support team via our Live Chat.
---
# Free trial – Studio
[Skip to main content](#main-content)
Search
------
Hi. How can we help?
====================
We provide a free trial period of 2 weeks (14 days) to let you discover and test our platform. The following conditions apply:
1. Mandatory LiveU Studio watermark displayed on the published feed
2. Max. 12-hour long live streams
3. One event running at a time
4. **Core package** by default, ask your sales rep if you want to try our Pro or Elite features.
Enjoy your free trial, free of charge, and without any credit card required!
Do not hesitate to ask for our free support as well during your time testing our platform! One of our experts will be happy to assist you and your team to ensure that you get the most of our platform!
---
# Multiple Languages workflows – Studio
[Skip to main content](#main-content)
Search
------
Hi. How can we help?
====================
How to set up a Multiple Languages event with LiveU Studio?
-----------------------------------------------------------
A Multiple Language event is the fact of simultaneously broadcasting your live event on all your broadcasting points, but in different languages so that the whole of your community can take part in the broadcast whatever the language they speak.
Set up a Multiple Languages event with LiveU Studio will allow you to:
\- Broadcast your event in any language you choose (FR, EN, ES...).
\- Give foreign audiences the opportunity to follow your event live.
\- Increase the amount of interactions on your digital event : more people can understand the topic of your live broadcast.
Follow the tips below to set up a Multiples Languages event with LiveU Studio:
**First**, you need a clean feed, locally created or not, but you need a clean feed, a clean feed is a show without any comment in any language.
#### Example: Language 1 / Project 1
* [Add a push clean feed.](/hc/en-us/articles/17094645646107)
* Copy the RTMP Push _**View** **URL ( you will need it for your other projects ).**_

* Add a [remote capture](/hc/en-us/articles/17094653682715)
input (remote commentator).
* Go to the remote guest settings (A & B).

* Select a template with one asset.
* Select the Push clean feed.
* Apply the changes.

* Create a [new project](/hc/en-us/articles/17094632349851)
for each languages.
Please note that you need to be an Admin on the account to create new projects / sub-projects.
* Repeat the same operations.
**Can't find the right answer?**
Contact the LiveU Studio Support team via our Live Chat.
---
# Publishing from one Studio project to another one – Studio
[Skip to main content](#main-content)
Search
------
Hi. How can we help?
====================
Publishing the PGM feed from one studio to another can be beneficial for various reasons, including multilanguage broadcasting, 24/7 News Channels, cost efficiency, adding different graphics and extending content reach.
How?
----
**Depending on the protocol you want to use :**
* [LRT](#tab1)
* [SRT](#tab2)
* [RTMP](#tab3)
* Open your sub-project (second studio account from where you want to receive the main PGM feed) (1).
* In the Production (2) -> Add a new Input (3).

* In the Live Sources section (4) -> Select "Assign LRT flow" (5).

* Select one channel in the list.
* **Enable the ST (LRT) Channel** in the Studio & **Start the Test phase** to inititate the LRT Channel creation.

* **Go to your main project** from where you want to send the PGM stream from.
* Check that you're in testing phase.
* In the _**Publish**_ menu (6) -> Add a new destination point (7).

* In the LRT section -> select the ST LRT Channel added ealier on your sub account from the list or by clicking on "add publishing point".

------------------------------------------------------------------
* Start publishing & recording.

* Open you sub-account in another tab to see the feed coming in from the main control room using LRT.

SRT
* Open your sub-project (second studio account from where you want to receive the main PGM feed) (1).
* In the Production (2) -> Add a new Input (3).

* In the Live Sources section (4) -> Encoder (Push) SRT (5).

* Copy the provided URL & Stream key.

* **Go to your main project** from where you want to send the PGM stream from.
* Check that you're in **Testing** phase.
* In the _**Publish**_ menu (6) -> Add a new destination point (7).

* SRT Section -> Add a publishing point.

-------------------------------------------
* Paste the Server URL & Stream key provided earlier.

* Select the destination point & Start publishing.

That's it, your feed is received in the sub-account in SRT.

RTMP
* Open your sub-project (second studio account from where you want to receive the main PGM feed) (1).
* In the Production (2) -> Add a new Input (3).

* In the Live Sources section (4) -> Encoder (Push) RTMP(5).

* Copy the provided URL & Stream key.

* **Go to your main project** from where you want to send the PGM stream from.
* Check that you're in **Testing** phase.
* In the _**Publish**_ menu (6) -> Add a new destination point (7).

* Custom RTMP Section -> Add a publishing point.

-------------------------------------------
* Paste your server URL & Stream Key.

* Select the destination point and Start publishing & record.

That's it! You're streaming from your main project to Studio 1 subproject.

---
# Real time translation with an interpreter – Studio
[Skip to main content](#main-content)
Search
------
Hi. How can we help?
====================
Set up a live show including Real time translation with an interpreter
----------------------------------------------------------------------
Want to extend the reach of your live videos? Think to the Real time translation with an interpreter!
Set up a live show including Real time translation with an interpreter will allow you to:
\- Give your community the opportunity to understand the language in which your live event takes place even if they are not native speakers.
\- Enable people with hearing loss to enjoy your live show.
\- Internationalize your live more easily.
To set up a live show including Real time translation with an interpreter, follow the steps bellow:
### Create the source in original language (Push)
* [Add a push clean feed (for audience)](/hc/en-us/articles/17094645646107)
* Copy the RTMP Push **Preview** _**URL.**_
_Please note that if it's an LiveU Studio **SRT** URL you need to contact LiveU Studio by chat in order to receive the specific procedure._

### Create the pull input to share with the interpreter
* Add a [RTMP Pull input (for interpreter)](/hc/en-us/articles/17094653172123)
* Paste the RTMP _**Preview URL**_ copied previously.

* Add a [remote capture](/hc/en-us/articles/17094653682715)
input (remote commentator).
### Set up the interpreter's video return
* Go to the remote guest settings

* Select a template with one asset.
* Select the pull input return (for interpreter).
* If necessary, disable the interpreter's video return.
* Apply the changes.

### Configure the audio levels of the different inputs
* In the [Audio Mixer](/hc/en-us/articles/17094588655899)
(1).
Please use the following audio recommendations:
* For the audience (2), the volume of the audio in the original language is very low, so that the audience can hear very well in the translated language.
* For the interpreter, the volume is at 100% so that he can translate in real time with the volume loud enough.
* If you want you can force the interpreter audio to go out in the program by clicking on (3).

Your event is ready, you can start the test phase and check that everything is fine.
If needed, adjust the delay of the "clean feed" input in order to be fully in sync with your translator.
**Go Further:**
* [My guest has a professional audio setup and I want to be able to set his audio parameters manually (echo cancellation, noise cancellation...)](/hc/en-us/articles/17094590064283)
**Can't find the right answer?**
Contact the LiveU Studio Support team via our Live Chat.
---
# Qualities & Formats – Studio
[Skip to main content](#main-content)
Search
------
Hi. How can we help?
====================
Did you know that 67% of people say the quality of the video they're watching is the most important factor of a live stream. Having an optimized video quality will give your event participants an even more immersive experience.
Each social destination has its own recommended encoding profile to maximize the audience and its associated retention rate. Depending on the destination media please refer to their recommendations to fine-tune your encoding settings.
To broadcast your feed in multiple formats at the same time, have a look at our [multi-format/transcoding article.](/hc/en-us/articles/17094652616859)

**FORMATS**
-----------
#### **FPS**
Number of Frames Per Second: 5 to 60.
For example, Films/TV is at 25 fps in Europe and 30 in the US, 15 fps is for Visio and 60 is for video games.
#### **Resolution**
Set the maximum resolution of the video stream here, from 640x360 pixels to 1920x1080 pixels.
* It is best to either match your original video source or scale it down. For example, capture your feed at 720p (HD) and stream it at 720p (HD). Or capture at 720p (HD) and stream at 540p (HD).
* You should never be scaling up and streaming at a higher resolution than your original video source. For example, it is not recommended to capture at 720p and stream it at 1080p.
#### **Sample Rate**
The sample rate is the number of audio samples carried per second.
* 48000 is the sample rate recommended since 1994 (MPEG-2).
* 44100 is the sample rate used by technology before 1994 (audio CDs, MPEG-1) -> (is not compatible with LRT output).
Most production equipment will work at either 44100Hz or 48000Hz. It is recommended you match the sample rate of your stream with the output of your production equipment. A mismatch in sample rates can cause audio artifacts including dropouts, clicking, pitch changes, or other issues.
### **Qualities**
#### **Video & audio Bit Rates**
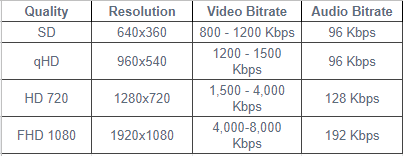
Set the video & audio encoding bitrate in Kbps (kilobits per second), depending on the selected resolution.
Higher motion content requires a higher bitrate to achieve the same perceived quality video stream.
It is important that you use the guidelines provided in the chart below to appropriately match your bitrate to the resolution you are using. Using too high or low of a bitrate can lead to poor image quality or buffering for your viewers.
#### **Preset Video**
**medium** is the recommended setting that provides the best balance of CPU usage and quality.
The name of the preset is intended to indicate how "fast" the encoder should run. Faster presets will use less CPU at the cost of quality computations. Slower presets will use more computations for quality but will use much more CPU.
For example, if you would like to try to reduce CPU usage without modifying your resolution or FPS, you can reduce your CPU usage by changing your video preset to superfast or ultrafast. The image may look a bit blockier or pixelated, but you will be able to retain your resolution/fps.
**Be very careful with this setting**, because even one step faster or slower can have a huge impact on CPU usage. For example, the preset named "faster" can use twice the amount of CPU as "veryfast", the one right above it. Always set it back to **medium** if you're not sure what to set this to.
#### **Profile Video**
Select the H.264 encoding profile to use. **Baseline** is lower quality, but uses less CPU. **Main** is higher quality at the expense of higher CPU usage, **Main** is selected by default.
#### **Scan Type**
* **Progressive by default for the main quality/recording**
* **Interlaced\***
* **BFF: Bottom Field first**
* **TFF: Top Field first**
**\* Interlaced output is not compatible with LRT Outputs.**
#### **Keyframe Interval**
Select the number of seconds between each keyframe in the video stream. Higher numbers generally result in better video quality. **2 seconds** is recommended by some streaming providers and is the default here.
**IMPORTANT**: Sending a stream with a keyframe interval greater than 2 seconds or with irregular intervals can result in stream or recording failures. Please ensure you have a proper keyframe setting to avoid this.
**Can't find the right answer?**
Contact the LiveU Studio Support team via our Live Chat.
---
# The page you were looking for doesn't exist – Studio
[Skip to main content](#main-content)
oops!
=====
### 404
The page you were looking for doesn't exist
-------------------------------------------
You may have mistyped the address or the page may have moved
[Take me back to the home page](/hc/en-us "Home")
---
# API Documentation – Studio
[Skip to main content](#main-content)
Search
------
Hi. How can we help?
====================
* [Introduction](#tab1)
* [OAuth 2.0](#tab2)
* [Rest API](#tab3)
* [WebSocket API](#tab4)
* [WebRTC library](#tab5)
* [Last release changes](#tab6)
Introduction
------------
This is the documentation of the LiveU Studio APIs (REST and WebSocket).
Contact [support@liveu.tv](mailto:support@liveu.tv)
for any question related to this documentation.
* [the REST API](#rest-api)
: LiveU Studio methods for ingest streams management + user information.
* [the WebSocket API](#websocket-api)
: All the actions/methods used by the LiveU Studio platform.
_Use case examples:_
* REST API should be used by encoding or/and streaming software that would want to set up LiveU Studio ingest points automatically.
* WebSocket API should be used by any other external applications whishing to automate actions within the LiveU Studio services (graphics/videos insertion, DVR, simulcast, ingest fallback mechanism, etc...).
**PRE-REQUIRED:**
LiveU Studio Oauth client ID & secret key. E-mail [support@liveu.tv](mailto:support@liveu.tv)
to obtain your keys to the API.
OAuth 2.0
---------
The following describes a two-step process where an LiveU Studio customer will grant your application access to its LiveU Studio account. A permanent access token is obtained on the completion of step 2.
1 - Invoking the login dialog and defining the redirect URL
Your app must initiate a redirection to an endpoint which will display the login dialog. Make sure to fill the [scope](#oauth-scopes)
appropriately according to which API/Methods are to be used.
**HTTP Request**
GEThttps://studio.liveu.tv/auth/dialog/?client_id={client_id}
&redirect_uri={redirect_uri}
&scope={scope}
&state={state}
**Query Parameters**
| | | |
| --- | --- | --- |
| | **Parameter** | **Description** |
| REQUIRED | client\_id | Your app ID, sent by LiveU Studio. |
| REQUIRED | redirect\_uri | The URL where you want to redirect the person logging in back to. This URL will capture the response from the login dialog. |
| REQUIRED | scope | A comma separated list of permissions requested to the person using your app. [more information](#oauth-scopes) |
| OPTIONAL | state | A 100 characters (or less) long arbitrary string created for your app to identify requests. LiveU Studio's authorization server will return it unaltered as a query parameter. |
**Success Response**
The user will be redirected to {redirect\_uri} with the query parameters {code} and {state}:
| | Parameter | Description |
| --- | --- | --- |
| REQUIRED | code | A 100 characters (or less) string. "a-Z", "0-9" and "-" characters only. |
| OPTIONAL | state | Parameter set as "state" in the query. |
{redirect_uri}?code={code}
Example:
https://your.website/callback.html?code=CharsHere&state=
**Error Response**
{redirect_uri}?error={error}
Example:
https://your.website/callback.html?code=user%20canceled
"User canceled": The user clicked on the 'Cancel' button.
2 - Generating an OAuth access token
To get an access token, send a HTTP GET request to the following OAuth endpoint:
**HTTP Request**
GET https:/studio.studio.liveu.tv/api/v1/oauth/access_token/?client_id={client_id}
&client_secret={client_secret}
&redirect_uri={redirect_uri}
&code={code}
**Query Parameters**
| Parameter | Description |
| --- | --- |
| client\_id | Your app ID, sent by LiveU Studio. |
| client\_secret | Your app Secret ID, sent by LiveU Studio. |
| redirect\_uri | Must be the same as [step 1](#1-invoking-the-login-dialog-and-setting-the-redirect-url)
. |
| code | Response code of [step 1](#1-invoking-the-login-dialog-and-setting-the-redirect-url)
. |
**JSON Response**
A successful response will be a JSON dictionary:
{
"access_token" : ###,
"token_type" : "permanently",
"scope" : ###,
"state" : ###
}
| Name | Description |
| --- | --- |
| access\_token | 64 characters long token, "a-Z" & "0-9" only. Valid as long as the user doesn't revoke the authorization. |
| token\_type | Always “permanently”. |
| scope | Allowed scope, same as [step 1](#1-invoking-the-login-dialog-and-setting-the-redirect-url)
. |
| state | Same as [step 1](#1-invoking-the-login-dialog-and-setting-the-redirect-url)
. |
**JSON Response ERROR**
An error response will be a JSON dictionary.
`{ "error" : “###” }`
Where "error" can be:
* "A required GET parameter is missing (client\_id)"
* "A required GET parameter is missing (client\_secret)"
* "A required GET parameter is missing (code)"
* "A required GET parameter is missing (redirect\_uri)"
* "Bad client\_id": client\_id {client\_id\_passed} not found
* "Bad code": {code\_passed} not found
* "Redirect\_uri doesn't match"
* "client\_id doesn't match"
* "client\_secret doesn't match"
OAuth scopes
When requesting authorization from users, the scope parameter allows you to specify which permissions your app requires. These scopes are tied to the access token you receive upon a successful authorization. Without specifying scopes, your app only has access to basic information about the authenticated user. You may specify any or all of the following scopes:
| Scope Name | Description |
| --- | --- |
| input\_list | Can list inputs. |
| input\_create | Can add an input. |
| user\_about\_me | Provides access to:
* Organisation name
* Language
* Time zone
* First and last name
* Allowed customer's LiveU Studio zones
(doesn't include e-mail address, address & phone number) |
| websocket | Allows to manage control rooms with the WebSocket API. |
Scopes are specified as a `+` separated list in the `scope` query parameter when requesting authorization: `&scope=input_list+input_create`
Rest API
--------
User about me
**HTTP Request**
GEThttps://studio.liveu.tv/api/v1/user/about_me/?access_token={access_token}
**Query Parameters**
| Parameter | Description |
| --- | --- |
| access\_token | LiveU Studio OAuth access token. |
**JSON Response**
{
"zones": [\
{\
"id": "xxxxx",\
"name": "USA East - Virginia"\
}, {\
"id": "yyyyy",\
"name": "USA West - Oregon"\
}, {\
"id": "zzzzz",\
"name": "Europe - Ireland"\
}\
],
"organisation_name": "Customer company",
"lang": {
"name": "English",
"iso": "en"
},
"time_zone": "America/New_York",
"user": {
"first_name": "John",
"last_name": "Do"
}
}
| Name | Description |
| --- | --- |
| zones | List with at least one element. |
| zones > id | String (40 characters max). |
| zones > name | String (64 characters max). |
| organisation\_name | String (64 characters max). |
| lang > iso | String (2 characters max) ISO code of the language (i.e.: "en"). |
| lang > name | String (64 characters max). |
| time\_zone | String - The [canonical name of the time zone](https://en.wikipedia.org/wiki/Tz_database)
. |
| user > first\_name | String (30 characters max). |
| user > last\_name | String (30 characters max). |
**JSON Response ERROR**
An error response will be a JSON dictionary.
{
"error" : “###”
}
Where "error" can be:
* "A required GET parameter is missing (access\_token)"
* "Invalid access\_token"
* "Scope error: access token doesn't have access to the scope “user\_about\_me”"
Input List
**HTTP Request**
GEThttps://studio.liveu.tv/api/v1/input/list/?access_token={access_token}
&zone_id={zone_id}
&type_id={type_id}
**Query Parameters**
| | Parameter | Description |
| --- | --- | --- |
| REQUIRED | access\_token | LiveU Studio OAuth access token. “input\_list” [scope required](#oauth-scopes)
. |
| REQUIRED | zone\_id | Customer's zone ID, see [user\_about\_me](#user-about-me)
. |
| OPTIONAL | type\_id | To filter by type. Default: all inputs are returned. See the [list of type\_id](#list-of-type_id)
. |
**JSON Response**
{
"list": [\
{\
"type": {\
"name": "Other encoder",\
"id": "other_push"\
},\
"title": "My Encoder",\
"rtmp": {\
"application": "live",\
"server": "XXXX.studio.liveu.tv",\
"stream_name": "encoder_XXX_XXXXXX",\
"port": 1935,\
"url": "rtmp://XXXX.studio.liveu.tv/live/encoder_XXXXXX"\
},\
"thumbnail_url": "https://s3-eu-west-1.amazonaws.com/eu-irl.el.static/camera/other_push.png"\
},\
...\
]
}
| Name | Description |
| --- | --- |
| list | List with at least one element. |
| type > id | String (10 characters max). |
| type > name | String (64 characters max). |
| title | String (64 characters max). |
| rtmp > application | String (16 characters max). |
| rtmp > server | String (32 characters max). |
| rtmp > stream\_name | String (64 characters max). |
| rtmp > port | Integer. |
| rtmp > url | String (254 characters max). |
| thumbnail\_url | String (254 characters max). |
**JSON Response ERROR**
An error response will be a JSON dictionary.
{
"error" : “###”
}
Where "error" can be:
* "A required GET parameter is missing (access\_token)"
* "A required GET parameter is missing (zone\_id)"
* "Scope error: access token doesn't have access to the scope “input\_list”"
Input Create
**HTTP Request**
GEThttps://studio.liveu.tv/api/v1/input/create/?access_token={access_token}
&zone_id={zone_id}
&type_id={type_id}
&title={title}
**Query Parameters**
| | Parameter | Description |
| --- | --- | --- |
| REQUIRED | access\_token | LiveU Studio OAuth access token. “input\_create” [scope required](#oauth-scopes)
. |
| REQUIRED | zone\_id | Customer's zone ID, see [user\_about\_me](#user-about-me)
. |
| REQUIRED | type\_id | One of the types, see the [list of type\_id](#list-of-type_id)
. |
| OPTIONAL | title | String (64 characters max). |
**JSON Response**
{
"create": “ok”
}
**JSON Response ERROR**
An error response will be a JSON dictionary.
{
"error" : “###”
}
Where "error" can be:
* "A required GET parameter is missing (access\_token)"
* "A required GET parameter is missing (zone\_id)"
* "A required GET parameter is missing (type\_id)"
* "type\_id forbidden: type\_id not in list of valid type\_id"
* "Invalid access\_token"
* "Title too long"
* "Account must have already created an event to add an entry"
* "limit\_assets"
* "Scope error: access token doesn't have access to the scope “input\_create”"
List of type\_id
This list may be subject of changes.
**Push inputs**
| id | Type |
| --- | --- |
| elStreamer | LiveU Studio streamer |
| fmle | Flash Media Live Encoder |
| obs | OBS - Open Broadcaster Software |
| other\_push | Other encoders |
| teradek | Teradek |
| wirecast | Wirecast |
| vmix | vMix |
| xsplit | Xsplit |
| liveu | LiveU |
**Pull inputs**
| id | Type |
| --- | --- |
| hdmi | HDMI |
| sdi | SDI |
| composite | Composite |
| component | Component |
| axis | Axis IP Camera |
| web | Web streams (RTMP, M3U8...) |
**WebRTC inputs**
| id | Type |
| --- | --- |
| rtc\_pc\_cam | WebRTC webcam |
| rtc\_pc\_win | Screen sharing |
| rtc\_invite | Remote capture/Phone camera |
WebSocket API
-------------
> **EXAMPLE - MANUAL REQUEST WITH WEBSOCKET API:**
>
> You can use the following [LiveU Studio - Example](https://static-us-vir.studio.liveu.tv/front/api_explorer_ws/index.html)
> as both a working example of the full Oauth process and a WebSocket live connection manual request test page.
>
> Fill in both the client ID & Secret, click on the GET button to obtain the access token. Follow the process and wait to be redirected to the LiveU Studio example page. Once you have the access token, click on the CONNECT button. You can then proceed with manual requests sending by copy-pasting JSON data from each request. The first request that has to be send is the [INIT](#init)
> request.
>
> To access the code of [LiveU Studio - Example](https://static-us-vir.studio.liveu.tv/front/api_explorer_ws/index.html)
> , send an e-mail to [support@liveu.tv](mailto:support@liveu.tv)
> . You will then be able to open [the Google Drive code folder](https://drive.google.com/drive/folders/1BhLRL7pPynV0my5-e0ajFWUU77TKvghK)
> .
**Opening the API Websocket:**
1. Get the WebSocket access token using [Oauth Doc](#oauth-2-0-authentication-login-and-access)
. **N.B:** Token are permanents so you can do the operation manually once for your main account and store the token afterward.
2. Open a WebSocket to the following URL:
wss://ws-.studio.liveu.tv/websocket/public/client/?access_token=
The zone parameter should be one of the zone the LiveU Studio client account has access to. If needed, use [User About Me](#user-about-me)
to list the zones.
3. Once opened, all the requests detailed in this document can be sent through the WebSocket as JSON strings.
Be very careful about your \`zone\`! If you don't know which one to use, contact LiveU Studio. Be sure to tick the correct zone on the example page! Selecting a wrong zone will end up with using the wrong WebSocket path with the wrong options.
Init
The WebSocket requests can be done within two differents contexts. To switch context, the init message must be send
### General init
_Request_
{
"init": false
}
Note: Use the general context to create/list/delete control rooms.
### Control Room init
_Request_
{
"init":
}
To get the control room ID use [List control rooms](#list-control-rooms)
. Use the control room context to handle inputs, encoding presets, broadcaster output points, control room publishing status, etc….
Control Room
All the method in the control room section should be used within the [general context](#general-init)
. Exceptions are start test, start publish and stop publish.
### List control rooms
Usable in a general context.
_Request_
| Field | Description |
| --- | --- |
| name | `scheduled` or `ended`, to get the scheduled/ended lives information. |
| page | Page number of the response (cf. `page_count` of the response). |
{
"website": {
"scope": 729709039,
"home": {
"action": "scheduled_ended",
"values": {
"name": "scheduled",
"page": 0
}
}
}
}
_Success_
| Field | Description |
| --- | --- |
| count | Total number of control rooms scheduled or ended. |
| page\_count | Number of pages available for that request. |
| boxs | Set of boxes. |
| created | Control room's creation date. |
| can\_delete | Boolean to state whether it's possible to delete this live or not. |
| start | State of the live stream, `0`: inactive/ended, `1`: test, `2`: publishing. |
| archive\_when\_deleting | Former archive module, now useless. |
| title | Name of the live stream. |
| id | Control room ID. |
| encrust\_lan\_id | Intern management field. |
| preview | Preview image URL used on a wide range of broadcasters. |
| ended | Live stream's end date. |
{
"customer": {
"error": null,
"scope": 729709039,
"home": {
"response": {
"count": {
"scheduled": 13,
"ended": 17
},
"page_count": 10,
"boxs": [\
{\
"created": "2018-05-28 06:43:00.000000",\
"can_delete": true,\
"start": 0,\
"archive_when_deleting": false,\
"title": "My wonderful stream",\
"id": 4221,\
"encrust_lan_id": false,\
"preview": "https://tinyurl.com/y59so46l",\
"ended": null\
}\
]
},
"action": "scheduled_ended"
}
}
}
### Get default info
Used to create the default info for a control room. To be used in the control room creation method.
The get response and the creation request both have the same fields:
| Field | Description |
| --- | --- |
| date | UTC datetime of the live stream. Format `YYYY-MM-DD-HH-MM`. Now if unset. |
| description | Description of the live stream. |
| facebook\_sponsor\_id | Sponsor ID if the live is sponsored on Facebook, empty string if not. |
| facebook\_stream\_type | `REGULAR`: 4-hours max + VOD (on Facebook) / `AMBIENT`: no time limitation but no VOD. |
| layout\_id | Load a previous live stream layout if an ID is specified, `-1` for a blank one (as a string). |
| preview | Preview image URL used on a wide range of broadcasters. |
| title | Name of the live stream. |
| visibility | Visibility of the stream: `public`, `private` or `no-list`. |
Scheduled live stream works best when scheduled approximately 30 minutes before the due date. If a live stream isn't scheduled, a server will be created on the fly, taking 3 minutes, more or less. A live stream scheduled at 1PM for 2PM can be started whenever between 1.33Pm and 2.30PM. A live stream created on the fly at 2.00PM can be started at 2.03PM.
_Request_
{
"website": {
"scope": 44840674,
"infos_init": true
}
}
_Success_
{
"customer": {
"infos_init": {
"visibility": "private",
"facebook_stream_type": "AMBIENT",
"facebook_sponsor_id": "",
"description": "Powered by LiveU Studio - LiveU Studio",
"date": "2018-02-07 15:23:32.206864",
"preview": "https://tinyurl.com/y59so46l",
"title": "Quick test"
"layout_id": "1604"
},
"scope": 44840674
}
}
### Create a control room
_Request_
{
"website": {
"scope": 649729901,
"live_manager": {
"action": "create",
"values": {
"description": "My super description of my live event",
"visibility": "public",
"preview": "https://tinyurl.com/y59so46l",
"facebook_sponsor_id": "",
"facebook_stream_type": "Regular",
"title": "This is my live stream name!",
"date": "2019-02-18-16-00",
"layout_id": "-1"
}
}
}
}
_Success_
{
"customer": {
"error": null,
"scope": 649729901,
"live_manager": {
"id": 545
}
}
}
To create a control room at the \`now\` time and date, simply remove both \`date\` and \`hour\` fields from the \`values\` object.
### Edit the control room
_Request_
{
"website": {
"scope": 632772208,
"infos_set": {
"facebook_sponsor_id": "",
"title": "Meow",
"date": "2019-10-11-07-20",
"preview": "https://tinyurl.com/y59so46l",
"facebook_stream_type": "AMBIENT",
"description": "Powered by LiveU Studio - https://studio.liveu.tv",
"visibility": "public",
"hour": "9:20 AM",
"id": 27820
}
}
}
_Success_
{
"27820": {
"infos": {
"facebook_sponsor_id": "",
"title": "Meow",
"date": "2019-10-11 07:20:00.000000",
"preview": "https://tinyurl.com/y59so46l",
"facebook_stream_type": "AMBIENT",
"description": "Powered by LiveU Studio - https://studio.liveu.tv",
"visibility": "public"
},
"scope": 632772208,
"can_start_in": {
"duration": 0,
"date": "2019-10-11 07:20:00.000000"
}
}
}
The key \`can\_start\_in\` indicates whether the control room can be started or if a waiting time is required. If \`duration\` is 0, a waiting time is required until a correct duration.
You have to be in the control room context by sending an init with the control room ID.
### Delete a control room
_Request_
| Field | Description |
| --- | --- |
| id | Control room ID. |
{
"website": {
"scope": 779164690,
"home": {
"action": "scheduled_ended_delete",
"values": {
"id": 1234
}
}
}
}
_Success_
{
"customer": {
"home": {
"response": {},
"action": "scheduled_ended_delete"
},
"error": null,
"scope": 779164690
}
}
"Error: Live stream not found" if the control room ID specified doesn't exist
The following start/stop requests only work within a control room context. Cf. [context switching](#init)
### Start the testing phase
{
"website": {
"scope": 100508691,
"send_publish": {}
}
### Stop the testing phase
{
"website": {
"scope": 304598169,
"send_stop": {}
}
}
### Start the publishing phase
{
"website": {
"scope": 304598169,
"send_start": {}
}
}
### Stop the publishing phase
{
"website": {
"scope": 304598169,
"send_stop": {}
}
}
Inputs
### List the inputs
_Request_
To get all the inputs, you have to specify `camera` as the model. Images, texts, videos and other assets are in the
{
"website": {
"scope": 552568526,
"objs": {
"action": "list",
"model": "camera"
}
}
}
_Success_
{
"customer": {
"input_list": [\
{\
"id": 88,\
"title": "IP Axis",\
"thumbnail": "https://s3-eu-west-1.amazonaws.com/eu-irl.el.static/camera/axis.png",\
"description": "1280x720 HD READY (16/9)
IP: 192.168.0.13",\
"image_url": "",\
"is_type_push": false,\
"stream_name": null\
}\
],
"scope": 552568526
}
}
Error: "Unknown action or model"
### Get an input's information
_Request_
{
"website": {
"scope": 48276231,
"objs": {
"action": "descriptor",
"model": "camera",
"object_id": 88
}
}
}
_Success (Pull Input)_
{
"customer": {
"box_id": 1234,
"objs": {
"action": "descriptor",
"model": "camera",
"box": 1234,
"values": [\
{\
"name": "axis",\
"fields": [\
{\
"name": "name",\
"label": "Name",\
"default": "IP Axis"\
},\
{\
"name": "input_custom",\
"label": "Ip",\
"default": "192.168.0.13"\
},\
{\
"name": "input_size",\
"label": "Video Capture",\
"choices": [\
["1280x720 HD READY (16/9)", "1280x720 HD READY (16/9)"],\
["1920x1080 FULL HD (16/9)", "1920x1080 FULL HD (16/9)"]\
],\
"default": "1280x720 HD READY (16/9)"\
}\
],\
"input": {},\
"thumbnail": "https://s3-eu-west-1.amazonaws.com/eu-irl.el.static/camera/axis.png",\
"label": "IP Axis",\
"can_delete": false\
}\
]
},
"error": null,
"scope": 48276231
}
}
_Success (Push Input)_
| Field | Description |
| --- | --- |
| server | The RTMP link used by the publishing phase. |
| preview\_server | The RTMP link used by the test phase. |
{
"customer": {
"box_id": 1234,
"objs": {
"action": "descriptor",
"model": "camera",
"box": 1234,
"values": [\
{\
"name": "obs",\
"fields": [\
{\
"name": "name",\
"label": "Name",\
"default": "OBS - Open Broadcaster Software"\
}\
],\
"input": {\
"server": "rtmp://p.studio.liveu.tv/live/",\
"preview_server": "rtmp://eu-irl.studio.liveu.tv/live/",\
"type": "push",\
"stream": "obs_randomKeyAndNumbers1234"\
},\
"thumbnail": "https://s3-eu-west-1.amazonaws.com/eu-irl.el.static/camera/obs.png",\
"label": "OBS - Open Broadcaster Software",\
"can_delete": false\
}\
]
},
"error": null,
"scope": 48276231
}
}
Possible errors:
\- "Unknown action or model"
\- "Camera matching query does not exist"
### Add a new input
Adding an input means to add it to the list of the usable inputs.
Please refer to the section [activate an input](#activate-an-input)
to see how to add it to a line as a media asset.
_List of input\_type_
This list may be subject of changes.
**Push inputs**
| id | Type |
| --- | --- |
| elStreamer | LiveU Studio streamer |
| fmle | Flash Media Live Encoder |
| obs | OBS - Open Broadcaster Software |
| other\_push | Other encoders |
| teradek | Teradek |
| wirecast | Wirecast |
| vmix | vMix |
| xsplit | Xsplit |
| liveu | LiveU |
**Pull inputs**
| id | Type |
| --- | --- |
| hdmi | HDMI |
| sdi | SDI |
| composite | Composite |
| component | Component |
| axis | Axis IP Camera |
| web | Web streams (RTMP, M3U8...) |
**WebRTC inputs**
| id | Type |
| --- | --- |
| rtc\_pc\_cam | WebRTC webcam |
| rtc\_pc\_win | Screen sharing |
| rtc\_invite | Remote capture/Phone camera |
_Get default info_
{
"website": {
"scope": 95988892,
"objs": {
"action": "descriptor",
"model": "camera"
}
}
}
_Add a pull input_
{
"website": {
"scope": 315761439,
"objs": {
"action": "edit",
"model": "camera",
"values": {
"input_type": "web",
"name": "My awesome RTMP",
"input_custom": "thertmplinkgoeshere"
s }
}
}
}
_Add a push input_
{
"website": {
"scope": 457989692,
"objs": {
"action": "edit",
"model": "camera",
"values": {
"input_type": "xsplit",
"name": "My fabulous Xsplit"
}
}
}
}
_Success_
{
"customer": {
"input_list": [\
{\
"id": 655,\
"title": "My fabulous Xsplit",\
"thumbnail": "https://s3-eu-west-1.amazonaws.com/eu-irl.el.static/camera/xsplit.png",\
"description": " ",\
"image_url": "",\
"is_type_push": true,\
"stream_name": "xsplit_655_War94m"\
}\
],
"scope": 457989692
}
}
Possible error:
\- Unknown action or model
\- Camera matching query does not exist
\- Bad RTMP link (input\_custom)
\- Input type or size error
### Activate an input
Once added, the input will not be automatically added to the media assets. To achieve so, simply send the following request. It might be useful to take a loot at the [lines section](#lines-display_settings)
and the [inputs information section](#list-the-inputs)
before.
_Request_
| Field | Description |
| --- | --- |
| action | Always `unarchive`. |
| model | Always `camera`. |
| object\_id | The ID of the input that should be activated. |
| line\_id | The desired line where to activate the input. |
{
"website": {
"scope": 123456,
"objs": {
"action": "unarchive",
"model": "camera",
"object_id": 456,
"line_id": 123456789
}
}
}
_Success_
As a success, two different messages will be sent. One containing the scope used in the request, the second with all the draft display settings.
Scoped response:
{
"customer": {
"box_id": 987654,
"scope": 123456,
"error": null,
"objs": {
"action": "",
"box": 987654,
"model": "camera"
}
}
}
The \`model\` value may vary depending on the input, even be an empty string ("").
Generic response:
{
"1234": {
"draft_display_settings": [\
\
]
}
}
### Archive an input
Archiving an input put it in the Archives section and can be re-used later on.
_Request_
| Field | Description |
| --- | --- |
| action | Always `archive`. |
| model | Always `camera`. |
| object\_id | The ID of the input that should be archived. |
{
"website": {
"scope": 140466141,
"objs": {
"action": "archive",
"model": "camera",
"object_id": 277
}
}
}
_Success_
{
"customer": {
"box_id": 1234,
"objs": {
"action": "archive",
"model": "camera",
"box": 1234
},
"error": null,
"scope": 140466141
}
}
### Delete an input
You must first archive an input before being able to delete it! All references of said input must be archived, even in other Control Rooms.
_Request_
| Field | Description |
| --- | --- |
| action | Always `delete`. |
| model | Always `camera`. |
| object\_id | The ID of the input that should be deleted. |
{
"website": {
"scope": 140466141,
"objs": {
"action": "delete",
"model": "camera",
"object_id": 277
}
}
}
_Success_
{
"customer": {
"box_id": 1234,
"objs": {
"action": "delete",
"model": "camera",
"box": 1234
},
"error": null,
"scope": 140466141
}
}
_Error_
The input is not archived in a Control Room or more.
{
"customer": {
"box_id": 1767,
"objs": {
"action": "delete",
"model": "camera",
"box": 1767,
"error": "ERROR_ALREADY_IN_USED"
},
"error": "ERROR_ALREADY_IN_USED",
"scope": 765549192
}
}
It is not possible to delete an input while the Control Room is active (\`Testing\` or \`Publishing\` modes).
{
"customer": {
"box_id": 1767,
"objs": {
"action": "delete",
"model": "camera",
"box": 1767,
"error": "ERROR_LIVE_RUNNING"
},
"error": "ERROR_LIVE_RUNNING",
"scope": 765549192
}
}
Possible error:
\- Unknown action or model
\- Unknown object\_id
Media assets
### Files upload
The LiveU Studio platform offers an upload service on Amazon Web Services servers. To do so, an URL must be created from the LiveU Studio API and then be used as a regular PUT request to Amazon. Although the service doesn't clearly state whether an upload is done or not, it is possible to send a recurrent GET request which will respond by `403` as long as the upload is going on.
_Request_
| Field | Description |
| --- | --- |
| bucket | Upload bucket depending on the type. `animation` for videos, `image` for pictures, else (font, ...): `static`. |
| directory | Directory of the upload: `display` for images, `v2` for animations, `font` for fonts. |
| width | The desired width of the picture (will be resized), `0` if no resize is required. |
| height | The desired height of the picture (will be resized), `0` if no resize is required. |
| alpha | Boolean, to precise if a picture has alpha or not (PNG). |
| mime\_type | MIME type, as `{type}/{filetype}`, see list below and [IANA Media Types](https://www.iana.org/assignments/media-types/media-types.xhtml)
. |
Supported MIME types:
\- "video/mp4",
\- "image/png",
\- "image/jpeg",
\- "image/gif".
{
"website": {
"scope": 954394435,
"uploads3_get": {
"directory": "display",
"bucket": "image",
"width": 0,
"height": 0,
"alpha": true,
"mime_type": "image/png"
}
}
}
_Success_
Through the response, `signed_request` shall be used as a PUT request with the `Content-Type`: `image/{imagetype}`.
{
"customer": {
"uploads3_get": {
"signed_request": "https://www.some.url/complicated",
"url": "https://www.some.url/leading/to/a.picture",
"name": "path/to/a.picture"
},
"scope": 954394435
}
}
_GET_
As stated, there is no way to know if the upload is done or not. Thus, a GET request to the following link will response with a `403 Forbidden` for as long as the upload is still going on. `` being the field `url` from the success response described above.
`.json`
### Manage media assets
Media assets are managed by a system called `display_settings`. Two types exist: the `draft_display_settings`, used by the preview, and the `display_settings`, used by the production/program. The latter cannot be directly called, since everything done through the API first interacts with the preview which will then be applied on the production.
To edit the `draft_display_settings` media assets, the current media assets list must be stored beforehand. To achieve so, it can be first found in the `init` response message, path: `init.customer.current_live.draft_display_settings`. This array shall be modify and set through the request to update the `draft_display_settings`: if a media asset should be removed, just remove it from the list. Same goes for edition. To add one, just add the media object within it (more information below).
Only sending an element to add or edit will REMOVE all the other elements, be very careful! Always send a list with all your elements (if you have more than one element).
Only sending a \`set\_display\_settings\` request will not apply it to production, only to the preview. A \`goto\_prod\` is needed afterwards or can be sent with the \`display\_settings\`.
The object with the \`name\` field value \`bg\` musn't be deleted. Further information on \`placeholder\_x\` below.
Videos (\`animation\`) cannot be added through the same process, see its own section. Edit and delete are still done through regular media assets management.
### Archive a video (`animation`)
Archiving a video put it in the Archives section and can be re-used later on.
_Request_
| Field | Description |
| --- | --- |
| action | Always `archive`. |
| model | Always `animation`. |
| object\_id | The ID of the video that should be archived. |
{
"website": {
"scope": 123456789,
"objs": {
"action": "archive",
"model": "animation",
"object_id": 3801
},
"goto_prod": [\
"display"\
]
}
}
_Success_
{
"customer": {
"scope": 123456789,
"box_id": 29320,
"objs": {
"action": "",
"box": 29320,
"model": "animation"
},
"error": null
}
}
### Delete a video (`animation`)
You must first archive a video before being able to delete it! All references of said video must be archived, even in other Control Rooms.
_Request_
| Field | Description |
| --- | --- |
| action | Always `delete`. |
| values | Integer. The ID of the video that should be deleted. |
{
"website": {
"scope": 123456789,
"animation": {
"action": "delete",
"values": 3667
}
}
}
_Success_
{
"customer": {
"animation": {
"delete": true
},
"scope": 123456789
}
}
_Error_
The video is not archived in a Control Room or more.
{
"customer": {
"error": "ERROR_ALREADY_IN_USED",
"scope": 123456789
}
}
It is not possible to delete a video while the Control Room is active (\`Testing\` or \`Publishing\` modes).
{
"customer": {
"error": "ERROR_LIVE_RUNNING",
"scope": 123456789
}
}
### Media types
Find below a complete explanation of each media asset type. The table of this section gives a description of the common fields, as listed in the `draft_display_settings` and in both the **request** and **response** messages (response only for `animation`).
Even if inputs are managed as media assets, please refer to the specific [input section](#inputs)
for details, especially about how to create them.
For layers management and order, see the [lines section](#lines-display_settings)
.
About how toggle media assets, see the [display section](#display-display_active)
More options are available, see [optional fields](#optional-fields)
.
_Generic media types_
| Field | Description |
| --- | --- |
| id | The media asset's ID (`animation` only, response only). |
| transparency | Opacity of the element, integer as percentage. |
| typename | Type of media asset, within: `animation`, `iframe`, `image`, `text`, `playlist` or `placeholder`. |
| y | Position on the y-axis (vertical) of the element within the video. |
| x | Position on the x-axis (horizontal) of the element within the video. |
| name | LiveU Studio name (auto-generated for `animation`), as `{typename}_{id}`, see notice below. |
| nice\_name | Label of the media asset (field `name` for `animation`). |
| line\_id | The line where to put the element, see [lines section](#lines)
. |
| img\_zoom | Zoom to be applied on the media, float as percentage. |
\`{typename}\_{id}\` with \`id\` being the ID of the last element of that type created plus one (\`1\` if no previous/existing element).
Resizing must be to done through the \`img\_zoom\` field only! The following calculation must be done: ((desired\_width / natural\_width) \* 100). Works with height too.
_Media type `input`_
| Field | Description |
| --- | --- |
| caching | A induced delay to play the feed on the LiveU Studio platform. Value in milliseconds, from `0` to `60000`. |
| lcl | The media to be activated if the input were to stop (fallback). Supported media types are `input`, `animation`, `image`, `iframe` and `twitter`. To specify an element, use its `name` field (see above) or `default_40970969627` for the default image. If an input is chosen, it also can be linked with a fail-safe media. Set `none_40970969627` for none. **The desired fallback media must be on the same line**. |
_Media type `animation`_
| Field | Description |
| --- | --- |
| loop | Auto-loop the animation. Values are `true` or `false`. |
| rate | The speed of the playback. Value in range `33` to `200`. **Must be sent as a string** |
_Media type `bg`_
| Field | Description |
| --- | --- |
| name | Always `bg`. |
| autoplay | Boolean stating whether videos autoplays or not. |
| typename | Always `bg`. |
| effects | Always `null` for now. Undergoing development about animations - available soon. |
| mask | Visual help for the preview area, regarding screen ratios within: `16/9`, `1/1`, `4/5`, `2/3` and `9/16`. |
_Generic success (apart from `animation`)_
{
"1234": {
"draft_display_settings": [\
\
],
"draft_messages_list": [\
\
],
"display_active": {
},
"font_list": [\
\
],
"scope": 699251016
}
}
### Videos (`animation`)
_Request_
The table below explains the properties within the `values` field.
Videos have to be uploaded on Amazon.
| Field | Description |
| --- | --- |
| url | Video URL. |
| height | Video height (pixels). |
| width | Video width (pixels). |
| display\_aspect\_ratio | String array of size 2 containing the display aspect ratio. |
| sample\_aspect\_ratio | String array of size 2 containing the sample aspect ratio. |
| duration | Duration of the video in milliseconds |
| size | Video size (bytes). |
| name | The video name, a label. |
{
"website": {
"scope": 209404193,
"animation": {
"action": "add",
"values": {
"url": "https://www.some.url/leading/to/a.video",
"height": 1080,
"width": 1920,
"display_aspect_ratio": [\
"16",\
"9"\
],
"sample_aspect_ratio": [\
"1",\
"1"\
],
"duration": 180000,
"size": 1234,
"name": "Video"
}
}
}
}
_Success_
The table below explains the property that weren't set through the `values` object of the request.
| Field | Description |
| --- | --- |
| thumbnail | Auto-generated thumbnail of the video. |
| animation\_url | Video link set through the `url` field. |
| natural\_height | Video height (pixels) set through the `height` field. |
| natural\_width | Video width (pixels) set through the `width` field. |
| loop | Boolean stating whether the video is looping (infinite play) or played once. |
| volume | Volume level, default: `256`. Range `0` to `12800`. |
{
"1612": {
"draft_display_settings": [\
{\
"name": "placeholder_1",\
"typename": "placeholder",\
},\
{\
"id": 205,\
"transparency": 100,\
"typename": "animation",\
"size": 3497428,\
"thumbnail": "https://www.some.url/leading/to/a.image",\
"animation_url": "https://www.some.url/leading/to/a.video",\
"natural_height": 1080,\
"natural_width": 1920,\
"duration": 5360,\
"name": "animation_205",\
"nice_name": "Video",\
"loop": true,\
"volume": 256,\
"img_zoom": 50,\
"y": 270,\
"x": 480,\
},\
{\
"name": "bg",\
"autoplay": true,\
"typename": "bg",\
"effects": null,\
"mask": "16/9"\
}\
]
}
}
### Clip player
**Create a new clip player**
The table below explains the **mandatory unmutable default properties** to init the playlist object with.
The properties \`id\` and \`name\` differ from the generic media assets.
| Field | Description |
| --- | --- |
| id | Integer. A random number between 0 and 100000000, just like a [scope](https://studio.liveu.tv/en/api/#websocket-scope)
. |
| name | String. Always `playlist_{id}`. |
| typename | String. Always `playlist`. |
| thumbnail | String. Always `https://static-us-vir.studio.liveu.tv/front/img/poster/notavailable-en-2020.gif`. |
| instagram-name | String. Always `default`. |
| fit | String. Always `cover`. |
| fitx | Integer. Always `1`. |
| fity | Integer. Always `1`. |
| rate | Integer. Always `1`. |
| duration | Integer. Always `1`. |
| size | Integer. Always `1`. |
| natural\_height | Integer. Always `1080`. |
| natural\_width | Integer. Always `1920`. |
| volume-mute | Integer. Always `1`. |
| gs | Integer. Always `0`. |
| blur | Integer. Always `0`. |
| br | Integer. Always `100`. |
| ct | Integer. Always `100`. |
| huer | Integer. Always `0`. |
| invert | Integer. Always `0`. |
| saturate | Integer. Always `100`. |
| sepia | Integer. Always `0`. |
| rotationX | Integer. Always `0`. |
| rotationY | Integer. Always `0`. |
| rotationZ | Integer. Always `0`. |
| opacity | Integer. Always `100`. |
| startDate | None. Always `null`. |
| endDate | None. Always `null`. |
| totalDuration | None. Always `null`. |
The table below explains the **mandatory cutomizable properties** to init the playlist object with.
| Field | Description |
| --- | --- |
| elements | Array. Contains the media elements of the playlist. More info in the **Playlist elements** section. |
| loop | Integer. Infinite loop is `0`. A positive integer will be used as the amount of iterations the playlist will be played. For example, `1` will play the whole playlist once then stop. |
_Request_
{
"website": {
"scope": 13121997,
"set_display_settings": [\
{\
"name": "playlist_23136798",\
"id": 23136798,\
"nice_name": "Player 1",\
"typename": "playlist",\
"transparency": 100,\
"size": 1,\
"thumbnail": "https://static-us-vir.studio.liveu.tv/front/img/poster/notavailable-en-2020.gif",\
"natural_height": 1080,\
"natural_width": 1920,\
"duration": 1,\
"loop": true,\
"volume": 256,\
"img_zoom": 100,\
"y": 0,\
"x": 0,\
"fit": "cover",\
"fitx": 50,\
"fity": 50,\
"rotationX": 0,\
"rotationY": 0,\
"rotationZ": 0,\
"rate": 100,\
"gs": 0,\
"blur": 0,\
"br": 100,\
"ct": 100,\
"huer": 0,\
"opacity": 100,\
"invert": 0,\
"saturate": 100,\
"sepia": 0,\
"effect_end_delay": 0,\
"effect_init": "static",\
"effect_begin": "static",\
"effect_begin_duration": 0,\
"effect_begin_delay": 0,\
"effect_end": "static",\
"effect_end_duration": 0,\
"instagram-name": "default",\
"startDate": null,\
"endDate": null,\
"totalDuration": null,\
"volume-mute": -1,\
"elements": [],\
"line_id": 88471340\
},\
{\
"effects": null,\
"autoplay": true,\
"typename": "bg",\
"name": "bg",\
"mask": "16/9"\
}\
],
"goto_prod": [\
"scoring",\
"display"\
]
}
}
**Upload a media**
_Request_
Media \`elements\` must be uploaded on a public URL beforehand.
First, you need a AWS URL to share your file to. To get one, simply send the following request through the WebSocket:
{
"website": {
"scope": 558136060,
"uploads3_get": {
"directory": "v2",
"bucket": "animation",
"mime_type": "text/plain"
}
}
}
_Response_
The response will provide you with a link to be used to share your file, the `signed_request` key:
\`{ "customer": { "scope": 558136060, "uploads3\_get": { "signed\_request": "https://www.some.url/complicated", "url": "https://www.some.url/leading/to/smth", "name": "path/to/smth/complicated.ext" } }
}\`
One the response obtained, store the `url` & `signed_request` keys. The `url` will be your new file URL.
Now, send over your video link through a XHR PUT request to the `signed_request` with the following information:
_Header_
`x-amz-acl`: `public-read`
_File_
`type`: `text/plain` `name`: `nameOfYourVideo` `file`: `[videoUrl]` - A string array containing the video url
// JS Example
// First, let's create the File with the video's URL you wish to add
var file = new File(["https://www.some.url/leading/to/video.ext"], "MyVideoFile", {type: "text/plain"});
// Now, the XHR object is initiated and configured to send the data
var xhr = $.ajaxSettings.xhr();
xhr.open("PUT", signed_request);
xhr.setRequestHeader("x-amz-acl", "public-read");
xhr.send(file);
_Success_
The uploading final step may take some time to be processed: to check whether the upload is over or not, send a GET request to the `url` key from the step before. As long as you get a `403` error code, the file isn't ready. Once the file is ready, you will receive the following response:
{
"original": {
"url": "https://www.some.url/leading/to/video.ext",
"width": 1280,
"height": 720,
"duration": 22344,
"probe": {
"streams": [\
...\
],
"format": {
...
}
},
"sample_aspect_ratio": [\
"1",\
"1"\
],
"display_aspect_ratio": [\
"16",\
"9"\
]
},
"png": {
"url": "https://www.some.url/leading/to/a.image",
"width": 1280,
"height": 720,
"duration": 0
},
"mini": {
"url": "https://www.some.url/leading/to/a_smaller.image",
"width": 96,
"height": 54,
"duration": 0
}
}
**Add a new media**
You can therefore now add the previously uploaded media to the playlist using the following request. Please keep in mind that most of the required fields expected are the one coming from the response request above.
_Request_
| Field | Description |
| --- | --- |
| action | String. Always `add`. |
| url | String. Response's `original.url` value. |
| width | Integer. Response's `original.width` value. |
| height | Integer. Response's `original.height` value. |
| duration | Integer. Response's `original.duration` value. |
| probe | Object. Response's `original.probe` value. |
| sample\_aspect\_ratio | Array. Response's `original.sample_aspect_ratio` value. |
| display\_aspect\_ratio | Array. Response's `original.display_aspect_ratio` value. |
| size | Integer. Always `1`. |
| thumbnail\_url | String. Response's `png.url` value. |
| name | String. The name you set in the XHR request. |
| playlist\_id | Integer. The playlist's ID to add the media to. |
{
"website": {
"scope": 252108532,
"animation": {
"action": "add",
"values": {
"url": "https://www.some.url/leading/to/video.ext",
"width": 1280,
"height": 720,
"duration": 22344,
"probe": {
...
},
"sample_aspect_ratio": [\
"1",\
"1"\
],
"display_aspect_ratio": [\
"16",\
"9"\
],
"size": 7650392,
"playlist_id": 23136798,
"name": "MyVideoFile",
"thumbnail_url": "https://www.some.url/leading/to/a.image"
}
}
}
}
_Success_
| Field | Description |
| --- | --- |
| id | Integer. The media ID. |
{
"customer": {
"scope": 252108532,
"animation": {
"new_addition": {
"id": 13121997
}
}
}
}
**Add a media from Media Bin**
Media bin animations' are listed in the `init` message response under the following key: `init.customer.animations`.
To add a media from your Media Bin to a playlist, simply use the following request:
_Request_
| Field | Description |
| --- | --- |
| object\_id | Integer. The media ID. |
| playlist\_id | Integer. The Playlist ID. |
{
"website": {
"scope": 286389283,
"objs": {
"action": "unarchive",
"model": "animation",
"object_id": 13121997,
"playlist_id": 23136798
}
}
}
_Success_
{
"customer": {
"scope": 286389283,
"objs": {
"model": "animation",
"box": 1234,
"action": ""
},
"error": null,
"box_id": 1234
}
}
**Media player elements**
The table below explains the **`elements` media properties** once added within the playlist.
The following keys will not be explained because they already have been described above: `id`, `typename`, `name`, `nice_name`, `x`, `y`, `natural_height`, `natural_width`, `img_zoom`, `transparency`, `duration`, `size`, `thumbnail`, `animation_url`, `volume`, `volume-mute`.
| Field | Description |
| --- | --- |
| hash | String. A unique identifier per media player per media. Contains letters uppercase & lowercase & numbers. Do not edit. |
| timestamp\_start | Integer. Start time of the media. Cannot be higher than `timestamp_stop` or `duration`. Cannot be lower than `0`. Default: `0`. |
| timestamp\_stop | Integer. Stop time of the media. Cannot be higher than `duration`. Cannot be lower than `timestamp_start` or `0`. Default: `duration`. |
| loop | Integer. Infinite loop is `0`. A positive integer will be used as the amount of iterations the playlist will be played. For example, `3` will play the media three times in a row and then skip to the next media. |
| rate | Integer. Percentage of play rate, default is `100`. A lower value will slow the speed of the playback. A higher value will play it faster. Min: `33`, max: `200`. |
| preferred\_tracks | Object. Each key is a track type: `video`, `audio` and `text`. The value can be `null`, which means no track of said type, or an ID from the `tracks` key below. Only set an ID from the correct type of track. if `1` is a video track, it cannot be set as an audio track. |
| probe | Object. Probe response from the upload request. |
| tracks.video | Array. Contains the available tracks objects of the media's `video` tracks. |
| tracks.audio | Array. Contains the available tracks objects of the media's `audio` tracks. |
| tracks.text | Array. Contains the available tracks objects of the media's `text` tracks. |
The tracks object are built from the media `probe`, which means the available tracks depend on the file metadata. If you need a media to have multiple audio/video/subtitle tracks, you need to encode your video with the needed tracks beforehand.
| Field | Description |
| --- | --- |
| id | Integer. A unique identifier per track. Which means that there is no `audio` track `1` and `video` track `1`, IDs are not type-related. |
| name | String. Built with the metadata available: "`{trackName}`\- \[`{trackLang}`\]" if there is a track name, else "Track #`{trackId}` - \[`{trackLang}`\]". `trackLang` is deduced from the metadata, if unknown, will be set at `und`. |
{
"elements": [\
{\
"id": 5337,\
"typename": "animation",\
"name": "animation_5337",\
"nice_name": "video_banner.mp4",\
"x": 480,\
"y": 270,\
"natural_height": 720,\
"natural_width": 1280,\
"img_zoom": 75,\
"transparency": 100,\
"duration": 22344,\
"size": 7650392,\
"thumbnail": "https://www.some.url/leading/to/video.ext",\
"animation_url": "https://www.some.url/leading/to/a.image",\
"volume": 256,\
"volume-mute": -1,\
"hash": "nYHXxqedj3",\
"timestamp_start": 0\
"timestamp_stop": 22344,\
"loop": "2",\
"rate": 100,\
"tracks": {\
"video": [\
{\
"id": 0,\
"name": "Track #0 - [und]"\
}\
],\
"audio": [\
{\
"id": 1,\
"name": "Track #1 - [French]"\
}\
],\
"text": []\
},\
"preferred_tracks": {\
"video": 0,\
"audio": 1,\
"text": null\
},\
"probe": {\
...\
},\
}\
]
}
**Remove elements & empty media player**
To remove an element or many, use the `draft_display_settings` object and remove from the array all the desired elements.
To keep the playlist object but get rid of all its elements, simply set the `elements` key to the empty array value: `[]`.
**Controls**
_Edit_
To edit the playlist's or elements' `loop`, `preferred_tracks`, `rate`, `timestamp_start`, `timestamp_stop` values, use the `draft_display_settings` object: set the desired values and send it as usual.
Aside from the edit control, the play, pause, seek, rewind & stop controls can only be used if the Control Room is running (Testing or Publishing phase).
_Play_
To start a playlist implicitly (without specifying a media), the following request must be sent.
This request will play the first media of the playlist after an init if no other elements has been played or is actually being played.
| Field | Description |
| --- | --- |
| action | String. Always `play`. |
| identifier | String. Always `playlist_{playlistId}`, `{playlistId}` being the ID sent back from the `init` request. |
{
"website": {
"scope": 96295433,
"player": {
"action": "play",
"identifier": "playlist_735882349"
}
}
}
To start a media player explicitly (with a specific media), the following request must be sent.
| Field | Description |
| --- | --- |
| action | String. Always `play`. |
| identifier | String. The string `playlist_{playlistId}`, `{playlistId}` being the ID sent back from the `init` request. |
| playlist\_seek.hash | String. The hash of the media to be played. |
{
"website": {
"scope": 610097237,
"player": {
"playlist_seek": {
"hash": "nYHXxqedj3"
},
"action": "play",
"identifier": "playlist_735882349"
}
}
}
_Pause_
To pause a media player, the following request must be sent.
| Field | Description |
| --- | --- |
| action | String. Always `pause`. |
| identifier | String. The string `playlist_{playlistId}`, `{playlistId}` being the ID sent back from the `init` request. |
{
"website": {
"scope": 434360662,
"player": {
"action": "pause",
"identifier": "playlist_735882349"
}
}
}
_Seek_
Seeking is a helpful way to switch to another media from the media player. You can seek forward, seek backward, seek to the first media of the player or seek to the last media of the list.
Only one key \`playlist\_seek\_action\` must be sent at a time!
| Field | Description |
| --- | --- |
| identifier | String. The string `playlist_{playlistId}`, `{playlistId}` being the ID sent back from the `init` request. |
| playlist\_seek\_next | Always `null`. Will seek to the next media in the playlist. If the current media is the last media, it will seek back to the first media of the playlist. |
| playlist\_seek\_prev | Always `null`. Will seek to the previous media in the playlist. If the current media is the first media, it will seek back to the last media of the playlist. |
| playlist\_seek\_first | Always `null`. Will seek to the first media in the playlist. If the current media is the first media, it will rewind the media (play it back from beginning). |
| playlist\_seek\_last | Always `null`. Will seek to the last media in the playlist. If the current media is the last media, it will rewind the media (play it back from beginning). |
{ "website": { "scope": 463741979, "player": { "playlist\_seek\_next": null, "identifier": "playlist\_735882349" } } }
_Rewind_
To rewind the current media, the following request must be sent. It will play the media back from its beginning, being the `timestamp_start` value.
| Field | Description |
| --- | --- |
| action | String. Always `media_rewind`. |
| identifier | String. The string `playlist_{playlistId}`, `{playlistId}` being the ID sent back from the `init` request. |
{
"website": {
"scope": 274023108,
"player": {
"action": "media_rewind",
"identifier": "playlist_735882349"
}
}
}
_Stop_
To stop the media player , the following request must be sent. It will pause the media currently being played and seek back to the first media of the player , in a paused state.
| Field | Description |
| --- | --- |
| action | String. Always `playlist_stop`. |
| identifier | String. The string `playlist_{playlistId}`, `{playlistId}` being the ID sent back from the `init` request. |
{
"website": {
"scope": 650030784,
"player": {
"action": "playlist_stop",
"identifier": "playlist_735882349"
}
}
}
### Images (`image`)
_Request_
| Field | Description |
| --- | --- |
| url | The image's URl. |
| natural\_height | The real height of the given picture (**not** the desired size!). |
| natural\_width | The real width of the given picture (**not** the desired size!). |
{
"website": {
"scope": 615476078,
"set_display_settings": [\
{\
"name": "image_3",\
"typename": "image",\
"img_zoom": 100,\
"transparency": 100,\
"y": 390,\
"x": 460,\
"url": "https://www.some.url/leading/to/a.image"\
"natural_height": 108,\
"natural_width": 90,\
"line_id": 56789\
},\
...\
]
}
}
### Webpages (`iframe`)
_Request_
| Field | Description |
| --- | --- |
| url | The webpage's URl. |
| natural\_height | The **desired** height of the webpage. |
| natural\_width | The **desired** width of the webpage. |
{
"website": {
"scope": 615476078,
"set_display_settings": [\
{\
"name": "iframe_1",\
"typename": "iframe",\
"x": 854,\
"y": 434,\
"img_zoom": 30,\
"transparency": 100,\
"natural_width": 1000,\
"natural_height": 1000,\
"url": "https://www.some.url/leading/to/a/webpage",\
"line_id": 56789\
},\
...\
]
}
}
### Texts (`text`)
Two text modes exist: unicolor and image. On unicolor mode, a colored background is used behind the text. On image mode, a picture can be used instead. The following table describe the generic fields for each mode, see below for specific changes.
| Field | Description |
| --- | --- |
| group | Usually the `id` set in the name. Must be unique per `text` type assets. |
| color | Text color, hexadecimal without `#`. |
| marginTop | Top margin between the text and its background, expressed in pixels |
| marginLeft | Left margin between the text and its background, expressed in pixels |
| marginBottom | Bottom margin between the text and its background, expressed in pixels |
| marginRight | Right margin between the text and its background, expressed in pixels |
| text\_align\_x | Horizontal alignment of the text, values: `left`, `center` and `right`. |
| text\_align\_y | Vertical alignment of the text, values: `flex-start` (top), `center` and `flex-end` (bottom). |
| text\_transparency | Opacity of the text, integer as percentage. |
| fontfamily | The desired font identifier, found in any media assets response, `font_list` field `name`. |
| text\_x | Now useless. |
| text\_y | Now useless. |
| size | Font size, default: `42`, because, well, it's [_The Answer to the Ultimate Question of Life, The Universe, and Everything_](https://en.wikipedia.org/wiki/42_(number)#The_Hitchhiker's_Guide_to_the_Galaxy)
. |
| bgType | Type of background, between `unicolor` and `image`. |
| message\_type | Display type for the messages: `single` or `loop_inf`. |
| time\_display | Number of seconds for each message on `loop_inf` mode, `-1` (infinite) on `single` mode. |
| width | Width of the background division, integer as pixels. |
| height | Height of the background division, integer as pixels. |
| cbWidth | Boolean stating if the `width` value should be use as width, else auto-fitting the text. |
| cbHeight | Boolean stating if the `height` value should be use as height, else auto-fitting the text. |
| messages | Array containing the messages, see table below. |
_`messages`_
| Field | Description |
| --- | --- |
| id | A random number between 0 and 100000000, just like a [scope](https://studio.liveu.tv/en/api/#websocket-scope)
. |
| text | Text message. |
| display | Boolean stating whether the message is activated or not. |
If the message type is \`single\`, only one message should be active (\`display\`) at a time! If none of them is selected, in both modes, nothing will be displayed.
_Request (unicolor)_
| Field | Description |
| --- | --- |
| typename | `text`. |
| bg | Background color, hexadecimal without `#`. |
| only\_text | Always `true`. |
{
"website": {
"scope": 615476078,
"set_display_settings": [\
{\
"name": "title_11",\
"group": 11,\
"color": "FFFFFF",\
"marginTop": 30,\
"marginLeft": 50,\
"marginBottom": 30,\
"marginRight": 50,\
"only_text": true,\
"text_align_x": "left",\
"text_align_y": "flex-start",\
"text_transparency": 100,\
"fontfamily": "magicNumbers&Letters13121997isMyBirthday",\
"text_x": 0,\
"text_y": 0,\
"size": 42,\
"bg": "131313",\
"typename": "text",\
"img_zoom": 100,\
"params": [],\
"transparency": 100,\
"y": 840,\
"x": 60,\
"bgType": "unicolor",\
"message_type": "single",\
"time_display": -1,\
"messages": [\
{\
"id": 123456789,\
"text": "Put your text here!",\
"display": true\
}\
],\
"width": 960,\
"height": 540,\
"cbHeight": false,\
"cbWidth": false,\
"effect_begin": "fadeInRight",\
"effect_begin_delay": 0,\
"effect_begin_duration": 1500,\
"effect_end": "fadeOutLeft",\
"effect_end_delay": 0,\
"effect_end_duration": 1500,\
"effect_init": "static",\
"line_id": 575730951\
},\
...\
]
}
}
_Request (image)_
| Field | Description |
| --- | --- |
| typename | `image`. |
| url | The URL of the image to be used. |
| natural\_height | The real height of the given picture (**not** the desired size!). |
| natural\_width | The real width of the given picture (**not** the desired size!). |
All the optional parameters regarding image filters are also available.
{
"website": {
"scope": 615476078,
"set_display_settings": [\
{\
"name": "title_12",\
"group": 12,\
"typename": "image",\
"color": "FFFFFF",\
"text_align_x": "left",\
"text_align_y": "flex-start",\
"text_transparency": 100,\
"fontfamily": "magicNumbers&Letters13121997isMyBirthday",\
"text_x": 0,\
"text_y": 0,\
"size": 50,\
"img_zoom": 100,\
"transparency": 100,\
"y": 400,\
"x": 300,\
"bgType": "image",\
"message_type": "loop_inf",\
"time_display": 3,\
"messages": [\
{\
"id": 123456789,\
"text": "My amazing title!",\
"display": true\
},\
{\
"id": 987654321,\
"text": "And its little brother!",\
"display": true\
}\
],\
"effect_begin": "fadeInRight",\
"effect_end": "fadeOutLeft",\
"marginTop": 35,\
"marginLeft": 50,\
"marginBottom": 30,\
"marginRight": 50,\
"bg": "131313",\
"line_id": 575730951,\
"cbWidth": true,\
"width": 960,\
"cbHeight": false,\
"height": 540,\
"rotationX": 0,\
"rotationY": 0,\
"rotationZ": 0,\
"effect_begin_duration": 1400,\
"effect_begin_delay": 0,\
"effect_end_duration": 1500,\
"effect_end_delay": 0,\
"effect_init": "static",\
"gs": 0,\
"blur": 0,\
"br": 125,\
"ct": 80,\
"huer": 0,\
"opacity": 100,\
"invert": 0,\
"saturate": 140,\
"sepia": 35,\
"url": "https://www.some.url/leading/to/a.image",\
"natural_height": 110,\
"natural_width": 90,\
"instagram-name": "walden"\
},\
...\
]
}
}
### Lines (`display_settings`)
Lines are a main component of the LiveU Studio platform's logic. Lines are ordered following a layer principle, such as [CSS `z-index`](https://developer.mozilla.org/en-US/docs/Web/CSS/z-index)
, which means that elements are on top of each others, so that some will hide others.
Thus, the order is found within the `draft_display_settings`: the first elements are on the **background** and the last elements of the array are the ones on the **foreground**. Each line is first indicated by a `placeholder` before the elements contained in the said line. Elements are listed from left to right: first elements following the `placeholder` are on the right, then it goes to the left.
On the LiveU Studio platform, media assets and lines would be sorted as in the following. Only the position of each line is an indicator: line `2` the closest to the **foreground**, while line `4` os the closest to the **background** (reverse order in the `draft_display_settings`). Bold media assets are the ones selected (displayed).
| Line | Placeholder | Media assets |
| --- | --- | --- |
| 2 | 6 | **A** |
| 6 | 1 | B - **C** - D |
| 1 | 4 | F - G |
| 4 | 2 | **E** |
In this configuration, element **A** will be displayed in front of element **C**, which will be displayed in front of element **E**. There is no selected element on line 1. This will produce following `draft_display_settings` list:
{
"1234": {
"draft_display_settings": [\
{\
"name": "placeholder_2",\
"typename": "placeholder",\
"line_id": 4\
},\
{\
"name": "element_E",\
"typename": "whatever",\
"line_id": 4\
},\
{\
"name": "placeholder_4",\
"typename": "placeholder",\
"line_id": 1\
},\
{\
"name": "element_F",\
"typename": "whatever",\
"line_id": 1\
},\
{\
"name": "element_G",\
"typename": "whatever",\
"line_id": 1\
},\
{\
"name": "placeholder_1",\
"typename": "placeholder",\
"line_id": 6\
},\
{\
"name": "element_B",\
"typename": "whatever",\
"line_id": 6\
},\
{\
"name": "element_C",\
"typename": "whatever",\
"line_id": 6\
},\
{\
"name": "element_D",\
"typename": "whatever",\
"line_id": 6\
},\
{\
"name": "placeholder_6",\
"typename": "placeholder",\
"line_id": 2\
},\
{\
"name": "element_A",\
"typename": "whatever",\
"line_id": 2\
},\
{\
"name": "bg",\
"autoplay": true,\
"typename": "bg",\
"effects": null,\
"mask": "16/9"\
}\
]
}
}
The \`bg\` element is always the last one in the array (first one on the plaftorm, even though it is not displayable).
As shown in this example, neither the \`placeholder\` ID nor the \`line\_id\` have something to do with their positions within the list! Same goes for the media assets.
Non-selected media assets are still listed in the \`draft\_display\_settings\`.
_Request_
Send the following to add a new line.
| Field | Description |
| --- | --- |
| name | LiveU Studio name, as `placeholder_{id}`, see [the 1st warning of media types](#media-types)
. |
| typename | Always `placeholder`. |
| line\_id | A random number between 0 and 100000000, just like a [scope](#websocket-scope) |
{
"website": {
"scope": 880655100,
"set_display_settings": [\
{\
"name": "placeholder_2",\
"typename": "placeholder",\
"line_id": 123456789\
},\
...\
]
}
}
Remove/switch all the items linked to a line (\`placeholder\`) before deleting it!
### Display (`display_active`)
The `display_active` works closely with the `display_settings`: where the latter state what are the available media assets and where are they displayed, the first one states which ones are active or not.
The `display_active` also uses a `draft_display_active`, which is applied as `display_active` once a `goto_prod` has been set. Hence, a `set_display_active` and a `goto_prod` can also be grouped in the same message, just like `draft_display_settings`.
The `draft_display_active` is found in the `init` message response, path: `init.customer.current_live.draft_display_active`, or in any response of a `set_display_active`.
It works as a key/value list, where the key is the `name` of the related media asset and the value is either `False` (hidden) or a random number between 1 and 100000000 (shown).
_Request_
{
"website": {
"scope": 725016544,
"set_display_active": {
"image_1": 154511110,
...
},
"goto_prod": [\
"scoring",\
"display"\
]
}
}
### Optional fields
_Rotation_
| Field | Description |
| --- | --- |
| rotationX | Rotation the x-axis, integer as degrees, range: `0` to `360`. |
| rotationY | Rotation the y-axis, integer as degrees, range: `0` to `360`. |
| rotationZ | Rotation the z-axis, integer as degrees, range: `0` to `360`. |
_Filters (`image`)_
| Field | Description |
| --- | --- |
| instagram-name | Filter preset, named after Instagram ones. Values: `default` (none), `1977`, `aden`, `amaro`, `ashby`, `brannan`, `brooklyn`, `charmes`, `clarendon`, `crema`, `dogpatch`, `earlybird`, `gingham`, `ginza`, `hefe`, `helena`, `hudson`, `inkwell`, `juno`, `kelvin`, `lark`, `lofi`, `ludwig`, `maven`, `mayfair`, `moon`, `nashville`, `perpetua`, `poprocket`, `reyes`, `rise`, `sierra`, `skyline`, `slumber`, `stinson`, `sutro`, `toaster`, `valencia`, `vesper`, `walden`, `willow` and `xpro-ii`. See [example page](https://picturepan2.github.io/instagram.css/)
. |
| gs | Grayscale, integer as percentage, range: `0` to `100`. |
| blur | Blur, integer as percentage, range: `0` to `10` (each step count for x10, so `1` is 10%, `7` is 70%, so on). |
| br | Brightness, integer as percentage, range: `0` to `200`. |
| ct | Contrast, integer as percentage, range: `0` to `200`. |
| huer | Hue rotation, integer as degrees, range: `0` to `360`. |
| invert | Color inversion, integer as percentage, range: `0` to `100`. |
| saturate | Saturation, integer as percentage, range: `0` to `500`. |
| sepia | Sepia, integer as percentage, range: `0` to `100`. |
| opacity | Opacity, integer as percentage, range: `0` to `100`. |
### Scenes & Transitions
The studio is now working with a new transition system, based on scenes. Each layer in your control room creates a dedicated scene and you can apply a transition to them when displayed in the program.
| Field | Description |
| --- | --- |
| method | String: the transition method you want to apply. It can be "fade", "slide\_left", "slide\_right", "slide\_up", "slide\_down", "flip\_vertical", "flip\_horizontal" or "graphic". If you want to apply a cut, use "fade" with 0 duration. |
| delay | Int: from 0 to 3000. Delay of your transition in milliseconds |
| duration | Int: from 0 to 3000. Duration of your transition in milliseconds. A transition with duration at 0 will result as a cut. |
| timing-function | String: always "ease-in-out". |
| trigger-out | String: always "after". |
| url | String: the url of the APNG image you want to use as a graphic transition. Only for graphic transition. |
| format | String: format of your graphic transiton file. For now, always "image/png" or "image/apng". Only for graphic transition. |
To apply a transition, you just need to apply your settings inside the PROGRAM as usual with a goto\_prod call and add the transition settings you want:
{
website: {
scope: 63288740,
goto_prod: ["display", "scoring"],
transition: {
method: "fade",
delay: 0,
duration: 1000,
format: null,
timing-function: "ease-in-out",
trigger-out: "after",
url: null
}
}
}
### Scenes
The transition scene system is plugged into your layers. To be able to create a scene, you must be sure to create lines with a name respecting the nomenclature by "placeholder\_{number}". Example: "placeholder\_4". Here is the correct structure of a layer:
| Field | Description |
| --- | --- |
| name | String: always “placeholder\_{number}” |
| typename | String: always “placeholder” |
| locked\_scene | Boolean: always true |
| line\_id | String: layer unique ID |
{
"name": "placeholder\_3",
"typename": "placeholder",
"locked\_scene": true,
"line\_id": 00000001
}
### Hotkeys
You can assign a transition to your hotkey. To do this, simply add the desired transition to your call.
{
website: {
scope: 970821418,
goto_prod: ["scoring", "display"],
set_display_active: {…},
set_display_settings: […],
transition: transition: {
method: "fade",
delay: 0,
duration: 0,
format: null,
timing-function: "ease-in-out",
trigger-out: "after",
url: null
}
}
}
The apply hotkey is now replaced by 4 default transitions hotkeys. This will simply send the elements of your preview into the program and works the same as a go\_to\_prod call.
{
website: {
scope: 63288740,
goto_prod: ["display", "scoring"],
transition: {
method: "fade",
delay: 0,
duration: 500,
format: null,
timing-function: "ease-in-out",
trigger-out: "after",
url: null
}
}
}
### Encoding presets
### Get current encoding presets
You'll receive all the encoding presets in the `init` request, fields `init.customer.current_live.raw_to_raw` and `init.customer.current_live.raw_to_encoded`. It's important to distinguish `raw_to_raw` to `raw_to_encoded`. Once your encoding presets are set, [add Publishing points and configure them](#publishing-points)
.
`raw_to_raw` correspond to the `Format` field on the platform (`Publish` panel) while the `raw_to_encoded` correspond to the `Quality` field. Both fields are linked by the `source` field only in the `raw_to_encoded` array, where the concerned `raw_to_raw` ID is set.
Furthermore, and this is quite important, the elements with the \`main\` ID and \`mixer\_in\` label (usually the 1st ones) of both arrays are the main encoding presets of your live. The values set within them will be used as the maximum values for the other encoding presets. In other words, you cannot create another encoding preset with higher properties than the main encoding preset.
I.E.: 720p 30 FPS as the main encoding preset and a second encoding preset at 1080p 60 FPS - the second encoding will produce a distorted output! You have to set the main encoding preset at 1080p 60 FPS and the second one at 720p 30 FPS.
_Description_
The set and get requests has the same body. Please find below the description of each field.
### Formats - `raw_to_raw`
| Field | Description |
| --- | --- |
| id | Format's ID. It's not recommanded to change the `main` one (default: `mixer`). |
| source | `main`: always `mixer_in`, others: always `mixer`. |
| label | Format's label, usually `main` for `main` and `Program feed` with the resolution's details: `Resolution {width}x{height} - {fps} fps - {resize_method} - {sample_rate} - {channels}` for the other formats. No specific value required. |
| audio | Always `allow`. |
| video | Always `allow`. |
| closed\_captions | Always `allow`. |
| size\_method | `main`: `resolution`, for the other formats: see table below. |
| resize\_method | `main`: `stretch`, for the other formats: see table below. |
| width | Width without unit, depending on the `size_method`, see table below. Pixels for `main`. Must be higher than `0`. See table below for `main` possible values. |
| height | Height without unit, depending on the `size_method`, see table below. Pixels for `main`. Must be higher than `0`. See table below for `main` possible values. |
| fps | Frame rate multiplied by 1000 (some questions don't have answers), i.e.: 60 fps = 60000. Can also be `copy` for other formats (will take the main format's value). Must be in range `5000` - `60000`. |
| sample\_rate | Audio sample rate, `44100` or `48000`. Can also be `copy` for other formats (will take the main format's value). |
| channels | Audio channels, `stereo` (also `2`) or `mono` (also `1`). Can also be `copy` for other formats (will take the main format's value). |
| enable | Boolean stating whether the format is active or not, only for non-main formats. |
| scan | **progressive**: **interlaced\_bff** : **interlaced\_tff** |
`main width/height`
| Width | Height |
| --- | --- |
| 640 | 360 |
| 800 | 450 |
| 1024 | 576 |
| 1280 | 720 |
| 1920 | 1080 |
`size_method`
| Option | Size unit | Description |
| --- | --- | --- |
| copy | Main | Copy the main encoding preset's `size_method`, `width` and `height`. |
| resolution | Pixels | Classic resolution expressed with pixels. |
| aspect\_ratio | Ratio | Ratio as `width`:`height`. Common ratios: `16:9`, `1:1`, `4:5`, `2:3` and `9:16`. |
| max\_resolution | Pixels | The video will not be resized if it's small enough but will be stretched if too big. |
`resize_method`
If the \`size\_method\` is set to \`max\_resolution\`, the following will not be applied
| Option | Description |
| --- | --- |
| crop | The video will be cropped vertically or horizontally to fit the specified resolution. |
| letterbox | Black lines will be added vertically or horizontally to fit the specified resolution. |
| stretch | The video will be stretched to fit the specified resolution. |
_Success_
{
"1234": {
"raw_to_raw": [\
{\
"id": "mixer",\
"source": "mixer_in",\
"label": "main",\
"audio": "allow",\
"video": "allow",\
"closed_captions": "allow",\
"size_method": "resolution",\
"resize_method": "stretch",\
"width": 1280,\
"height": 720,\
"fps": 60000,\
"sample_rate": 44100,\
"channels": 2\
},\
{\
"source": "mixer",\
"audio": "allow",\
"video": "allow",\
"closed_captions": "allow",\
"enable": true,\
"size_method": "resolution",\
"width": 1080,\
"height": 720,\
"resize_method": "crop",\
"fps": 30000,\
"sample_rate": "44100",\
"channels": "stereo",\
"id": "format_3",\
"label": "Program feed - Resolution 1080x720 - 30 fps - Crop - 44100 - stereo"\
},\
{\
"source": "mixer",\
"audio": "allow",\
"video": "allow",\
"closed_captions": "allow",\
"enable": true,\
"size_method": "aspect_ratio",\
"width": 1,\
"height": 1,\
"resize_method": "crop",\
"fps": 60000,\
"sample_rate": "copy",\
"channels": "copy",\
"id": "format_4",\
"label": "Program feed - Aspect Ratio 1:1 - 60 fps - Crop"\
}\
],
"scope": 715825245
}
}
### Qualities - `raw_to_encoded`
| Field | Description |
| --- | --- |
| run\_start | Always `test`. |
| id | Quality's ID. `main`: `main`. |
| label | Quality's label. `main`: `main`. |
| outputs | Only for `main` - outputs linked to that quality, as a JSON array. Only one output is supported. See default value below. |
| params | Quality's parameters as a JSON object. See table below. |
| source | The format linked to that quality, as the format's ID. |
`outputs`
The value should **always** be the one below. Don't forget to set your zone within: `eu-irl`, `us-vir` and `us-ore`. Do **not** edit the `output_link` part!
"outputs": [\
{\
"label": "default save rtmp",\
"id": "save",\
"type": "rtmp",\
"params": {\
"url": "rtmp://.studio.liveu.tv/live/%(output_link)s"\
},\
"run_start": "test"\
}\
]
`params`
JSON Object with two objects within: `audio` and `video`.
| Field | Description |
| --- | --- |
| audio.codec | Always `aac`. |
| audio.bitrate | Audio's bitrate. Range `16` to `384`. |
| video.profile | Video's profile within: `main` and `baseline`. |
| video.bitrate | Video's bitrate. Range `16` to `40960`. |
| video.preset | Video's preset within: `ultrafast`, `superfast`, `veryfast`, `faster`, `fast`, `medium` and `slow`. |
| video.codec | Awlays `h624`. |
_Success_
{
"1234": {
"raw_to_encoded": [\
{\
"id": "main",\
"source": "mixer",\
"label": "main",\
"run_start": "test",\
"params": {\
"video": {\
"bitrate": "20480",\
"codec": "h264",\
"preset": "medium",\
"profile": "main"\
},\
"audio": {\
"codec": "aac",\
"bitrate": "128"\
}\
},\
"outputs": [\
{\
"id": "save",\
"label": "save",\
"type": "rtmp",\
"run_start": "test",\
"params": {\
"url": "rtmp:/eu-irl.studio.liveu.tv/live/%(output_link)s"\
}\
}\
]\
},\
{\
"source": "format_3",\
"run_start": "test",\
"label": "encoded_3",\
"enable": true,\
"params": {\
"video": {\
"bitrate": "800",\
"preset": "medium",\
"profile": "main",\
"codec": "h264"\
},\
"audio": {\
"bitrate": "64",\
"codec": "aac"\
}\
},\
"outputs": [],\
"id": "encoded_3"\
},\
{\
"source": "format_3",\
"run_start": "test",\
"label": "encoded_4",\
"enable": false,\
"params": {\
"video": {\
"bitrate": 2048,\
"preset": "ultrafast",\
"profile": "main",\
"codec": "h264"\
},\
"audio": {\
"bitrate": 128,\
"codec": "aac"\
}\
},\
"outputs": [],\
"id": "encoded_4"\
},\
{\
"source": "format_4",\
"run_start": "test",\
"label": "encoded_5",\
"enable": true,\
"params": {\
"video": {\
"bitrate": 2048,\
"preset": "ultrafast",\
"profile": "main",\
"codec": "h264"\
},\
"audio": {\
"bitrate": 128,\
"codec": "aac"\
}\
},\
"outputs": [],\
"id": "encoded_5"\
}\
],
"scope": 109075449
}
}
### Manage encoding presets
To add, edit or remove an encoding preset, it's quite simple: just send your new configuration! The body is the same as the one received, a JSON Array with JSON objects. To add a new one, add an object within the array. To remove it, remove the preset from the array. To edit it, change its values.
Heads up! If you want to add or edit a preset, you still have to send the whole current configuration! In other words, if you only set one preset in order to update it, you will actually remove all the other ones!
_Requests_
{
"website": {
"scope": 602845136,
"set_raw_to_raw": [\
\
]
}
}
{
"website": {
"scope": 602845136,
"set_raw_to_encoded_": [\
\
]
}
}
_Success_
The success message will be the list of the `raw_to_raw`/`raw_to_encoded` presets, depending on which one has been updated.
Requirements
\`raw\_to\_encoded\`:
\- To disable a quality, it has to be unlinked from its publishing points first.
\- To remove a quality, it has to be disabled.
\`raw\_to\_raw\`:
\- To disable a format, the linked qualities must be removed first.
\- To remove a format, it has to be disabled.
\- To add a new format and its quality, the format must always be created first.
\- A preset cannot have a higher configuration than the main one!
Publishing points
### List the external services
_Request_
{
"website": {
"scope": 878575860,
"external_services": {
"list": true
}
}
}
_Success_
The list of all your linked social media accounts and personnal publishing points (Custom RTMP, ...). Useful data are in the `broadcaster` array of each service.
{
"1234": {
"external_services": {
"services": {
"awss3": {
"auth_method": "awss3",
"status": {
"error": null,
"connected": true
},
"about": {
"description": "some.name.like.this",
"image_url": null,
"url": null,
"credentials": {
"api_key": "magicNumbers&Letters13121997isMyBirthday",
"secret_key": "magicNumbers&Letters13121997isMyBirthday",
"region": "eu-west-1",
"bucket_name": "some.name.like.this"
}
}
},
"facebook": {
"auth_method": "oauth",
"status": {
"error": null,
"connected": true
},
"about": {
"description": "Your Name",
"image_url": "https://www.some.url/complicated",
"url": null
},
"broadcasters": [\
{\
"identifier": "123456789",\
"description": "Your Name",\
"image_url": "https://www.some.url/complicated",\
"status": null,\
"error": null,\
"facebook_type": "user",\
"url": null,\
"fields": []\
},\
{\
"identifier": "123456789",\
"description": "Consommer Juste",\
"image_url": "https://www.some.url/complicated",\
"status": null,\
"error": null,\
"url": "https://www.some.url/with/your/account/name",\
"facebook_type": "page",\
"facebook_perms": [\
"ADMINISTER",\
"EDIT_PROFILE",\
"CREATE_CONTENT",\
"MODERATE_CONTENT",\
"CREATE_ADS",\
"BASIC_ADMIN"\
],\
"fields": []\
}\
]
},
"twitch": {
"auth_method": "oauth",
"status": {
"error": null,
"connected": true
},
"about": {
"description": "Your Name",
"image_url": "https://www.some.url/complicated",
"url": "https://www.some.url/with/your/account/name"
},
"broadcasters": [\
{\
"identifier": "123456789",\
"description": "Your Name",\
"image_url": "https://www.some.url/complicated",\
"status": {\
"video": {\
"id": null,\
"url_publish": null,\
"source": "encoded_3",\
"session_id": "magicNumbers&Letters13121997isMyBirthday",\
"need_publish": false,\
"stream_key": null,\
"url_preview": null,\
"private_data": {},\
"embed_html": null,\
"dash_preview_url": null,\
"embed_url": null,\
"access_token": null\
},\
"state": "init",\
"source": "encoded_3",\
"session_id": "magicNumbers&Letters13121997isMyBirthday"\
},\
"error": null,\
"url": "https://www.some.url/with/your/account/name",\
"fields": []\
}\
]
},
"twitter": {
"auth_method": "oauth",
"status": {
"error": null,
"connected": true
},
"about": {
"description": "Support_LiveU Studio",
"image_url": "https://www.some.url/complicated",
"url": "https://www.some.url/with/your/account/name"
}
},
"periscope": {
"auth_method": "oauth",
"status": {
"error": null,
"connected": true
},
"about": {
"description": "Your Name",
"image_url": "https://www.some.url/complicated",
"url": "https://www.some.url/with/your/account/name"
},
"broadcasters": [\
{\
"identifier": "magicNumbers&Letters13121997isMyBirthday",\
"description": "Your Name",\
"image_url": "https://www.some.url/complicated",\
"status": null,\
"error": null,\
"url": "https://www.some.url/with/your/account/name",\
"fields": []\
}\
]
},
"dailymotion": {
"auth_method": "oauth",
"status": {
"error": null,
"connected": true
},
"about": {
"description": "Your name",
"image_url": "https://www.some.url/complicated",
"url": "https://www.some.url/with/your/account/name"
},
"broadcasters": [\
{\
"identifier": "magicNumbers&Letters13121997isMyBirthday",\
"identifier": 1234,\
"description": "Your Name",\
"image_url": "https://www.some.url/complicated",\
"status": {\
"video": {\
"id": "magicNumbers&Letters13121997isMyBirthday",\
"url_publish": null,\
"source": "encoded_3",\
"session_id": "magicNumbers&Letters13121997isMyBirthday",\
"need_publish": false,\
"stream_key": null,\
"url_preview": null,\
"private_data": {},\
"embed_html": null,\
"dash_preview_url": null,\
"embed_url": "https://www.some.url/with/your/video/name"\
"access_token": null\
},\
"state": "created",\
"source": "encoded_3",\
"session_id": "magicNumbers&Letters13121997isMyBirthday"\
},\
"error": null,\
"url": "https://www.some.url/with/your/video/name"\
"fields": []\
}\
]
},
"youtube": {
"auth_method": "oauth",
"status": {
"error": null,
"connected": true
},
"about": {
"description": "Your Name",
"image_url": "https://www.some.url/complicated",
"url": "https://www.some.url/with/your/account/name"
},
"broadcasters": [\
{\
"identifier": "magicNumbers&Letters13121997isMyBirthday",\
"description": "Your Name",\
"image_url": "https://www.some.url/complicated",\
"status": null,\
"error": null,\
"url": "https://www.some.url/with/your/video/name"\
"fields": []\
}\
]
},
"liveu Studio": {
"auth_method": null,
"status": {
"error": null,
"connected": true
},
"about": {
"description": null,
"image_url": null,
"url": null
},
"streams": {
"1": "Some Name"
},
"broadcasters": [\
{\
"identifier": "output_save",\
"description": "",\
"image_url": null,\
"easylive_type": "save",\
"status": {\
"video": {\
"id": null,\
"url_publish": null,\
"source": "main",\
"session_id": "output_save",\
"need_publish": false,\
"stream_key": null,\
"url_preview": null,\
"private_data": {},\
"embed_html": null,\
"dash_preview_url": null,\
"embed_url": null,\
"access_token": null\
},\
"state": "created",\
"source": "main",\
"session_id": "output_save"\
},\
"error": null,\
"url": null,\
"fields": []\
},\
{\
"identifier": 1234,\
"description": "Some Name",\
"image_url": null,\
"easylive_type": "other",\
"status": {\
"video": {\
"id": null,\
"url_publish": null,\
"source": "encoded_3",\
"session_id": "magicNumbers&Letters13121997isMyBirthday",\
"need_publish": false,\
"stream_key": null,\
"url_preview": null,\
"private_data": {},\
"embed_html": null,\
"dash_preview_url": null,\
"embed_url": null,\
"access_token": null\
},\
"state": "created",\
"source": "encoded_3",\
"session_id": "magicNumbers&Letters13121997isMyBirthday"\
},\
"error": null,\
"url": null,\
"fields": {\
"nick_name": "Some Name",\
"stream_name": "Some Name",\
"path": "rtmp://some.ip.v4.address/live"\
}\
}\
]
},
"dropbox": {
"auth_method": "oauth",
"status": {
"error": null,
"connected": true
},
"about": {
"description": "Your Name",
"image_url": "https://www.some.url/complicated",
"url": null
}
}
},
"live_id": 1234
},
"error": "success"
}
}
### Authorize a new service
This simply cannot be done through the websocket API. To authorize a specific service, a human interaction is needed and cannot be faked (OAuth token). Also, this would require to handle personnal and sensitive information. A customer can log into social media services through the LiveU Studio platform.
In order to broadcast to a specific service, a custom RTMP publishing point can be used. This solution implies that the authorization with the service is handled beforehand on the customer's side and not by the LiveU Studio API itself. The stream's name and key being then provided by the said service.
### Add a publishing point
Only the `values` field may change depending on the type of publishing point you're trying to add.
| Field | Description |
| --- | --- |
| input\_type | Don't be mislead by its name: it's the type of the publishing point to be created. Options are: `other`, `akamai` and `multistreams`. |
| nick\_name | The publishing point label. |
| path | The URL to publish to. Only for `other` & `akamai`. |
| stream\_name | The stream name or stream key. Only for `other` & `akamai`. |
| stream | The video stream ID to be broadcasted. Only for `multistreams`. |
_Request type `other`_
{
"website": {
"scope": 95787873,
"objs": {
"action": "edit",
"model": "broadcast",
"values": {
"input_type": "other",
"nick_name": "My brand new custom RTMP",
"stream_name": "yourAwesomeStreamnNameOrKey",
"path": "rtmp://192.168.0.1"
}
}
}
}
_Request type `akamai`_
{
"website": {
"scope": 668818267,
"objs": {
"action": "edit",
"model": "broadcast",
"values": {
"input_type": "akamai",
"nick_name": "My Akamai publishing point",
"stream_name": "something_like_this@randomNumbers",
"path": "rtmp://some.letters.and.digits.akamaientrypoint.net/EntryPoint"
}
}
}
}
_Request type `multistreams`_
{
"website": {
"scope": 678452895,
"objs": {
"action": "edit",
"model": "broadcast",
"values": {
"input_type": "multistreams",
"stream": "5678"
}
}
}
}
_Success_
{
"1234": {
"external_services": {
"services": {
},
"live_id": 1234
},
"error": "success"
}
}
### Select a publishing point
The request to select a publishing point is quite the same for all the services available. The main differences are within the `infos` field.
`broadcast_select`
| Field | Description |
| --- | --- |
| identifier | The identifier of the desired publishing point as an integer, found within the `external_services` list, path: `services.MY_SERVICE.broadcasters[MY_BROADCASTER].identifier`. |
| service | Type of service within: `facebook`, `twitch`, `periscope`, `dailymotion`, `youtube` and `studio.liveu.tv` (Custom RTMP). |
| source | Video source, the ID of the desired `quality`, see [Encoding preset](#encoding-preset)
. |
| infos | Infos needed by the service, see table below. Custom RTMP (`studio.liveu.tv`) is always `{}` (empty object). |
`infos`
The `Service` column specifies which services need the referred field. Legend: `FB` - Facebook, `YT` - YouTube, `DM` - Dailymotion, `P` - Periscope, `T` - Twitch.
| Field | Service | Description |
| --- | --- | --- |
| preview | `FB`, `YT`, `DM` | Image URL used as a preview cover. |
| title | `FB`, `YT`, `DM`, `P`, `T` | Name of the live stream as shown on the service. |
| description | `FB`, `YT`, `DM` | A description of the live stream. |
| visibility | `FB`, `YT`, `DM` | Visibility within: `private`, `public` and `no-list`. |
| facebook\_sponsor\_id | `FB` | Sponsor ID in case of a sponsored live. |
| facebook\_stream\_type | `FB` | Type of Facebook Live, see [Control Room info](#get-default-info)
. |
_Request_
{
"website": {
"scope": 653489811,
"broadcast_select": {
"identifier": 123456,
"service": "youtube",
"source": "encoded_3",
"infos": {
"preview": "https://www.some.url/complicated",
"title": "My live stream",
"description": "My description",
"visibility": "public"
}
}
}
}
_Success_
{
"1234": {
"external_services": {
"services": {
},
"live_id": 1234
},
"error": "success"
}
}
### Unselect a publishing point
_Request_
The value of `session_id` is found within the concerned `broadcaster` in the `external_services` list. Path: `services.MY_SERVICE.broadcasters[MY_BROADCASTER].status.session_id`. This value is indeed only available if the said publishing point has been previously selected.
{
"website": {
"scope": 838423480,
"external_services": {
"broadcaster": {
"terminate": {
"session_id": "magicNumbers&Letters13121997isMyBirthday"
}
}
}
}
}
_Success_
{
"1234": {
"error": "success",
"scope": 838423480
}
}
### Delete a publishing point
Once a publishing point has been unselected, it can be removed if not used anylonger. The value of `object_id` is the `identifier` field in the `external_services` list, path:
services.MY_SERVICE.broadcasters[MY_BROADCASTER].identifier
_Request_
{
"website": {
"scope": 589117168,
"objs": {
"action": "delete",
"model": "broadcast",
"object_id": 1234
}
}
}
_Success_
{
"1234": {
"external_services": {
"services": {
},
"live_id": 1234
},
"error": "success"
}
}
WebRTC
### Manage WebRTC inputs
External modules can use our generic API to exchange WebRTC data, by using the following signaling protocol.
### Signaling protocol
To initiate a WebRTC communication, the following request must be sent.
| Field | Description |
| --- | --- |
| peerid | A generic name (label). Usually the current date and a random number between `0` and `100000000` separated by a `_`. |
| stream | The WebRTC name. Found in the `draft_display_settings`, under the desired WebRTC element, field `stream_name`. |
| video | Always `true`. |
| audio | Always `true`. |
| max\_size | An array describing the **max** size of the video. Syntax \[`width`, `height`\]. |
{
"webrtc_publish": {
"peerid": "061920191557_13121997",
"stream": "rtc_pc_cam_1312_97hello",
"video": true,
"audio": true,
"max_size":[640,360]
}
}
The following **success** callback will be then sent by the API.
{
"webrtc_publish_ready": {
"peerid": "061920191557_13121997",
"stream": "rtc_pc_cam_1312_97hello",
"pid": 1234
}
}
The following **error** callback will be then sent by the API.
{
"webrtc_publish_error": {
"peerid": "061920191557_13121997",
"stream": "rtc_pc_cam_1312_97hello",
"code": 1,
"error": "Error reason here"
}
}
If a **success** callback has been received, send the SDP offer.
{
"webrtc_input_to_camping_1234": {
"peerid": "061920191557_13121997",
"type": "offer",
"sdp": "The SDP data here"
}
}
As well as the ICE candidates.
{
"webrtc_input_to_camping_1234":{
"type":"candidate",
"peerid":"061920191557_13121997",
"candidate":{
"candidate":"candidate:131297...",
"sdpMid": "audio",
"sdpMLineIndex": 0
},
...
}
}
Once everything has been received and processed, the WebRTC will send back its SDP answer.
{
"webrtc_input_from_camping_1234": {
"peerid": "061920191557_13121997",
"sdp": "v=0\r\no=- 13121997....\r\n",
"type": "answer"
}
}
The ICE candidates are sent too.
{
"webrtc_input_from_camping_1234": {
"signaling_candidate": {
"candidate": "candidate:19971312....",
"peerid": "061920191557_13121997",
"sdpMLineIndex": 0,
"sdpMid": "audio"
}
}
}
### Manage WebRTC outputs
Coming soon!
Scoring
### Add a scoring
First, the scoring app must be added to the control room. To achieve so, just send a `set_display_settings` with a `scoring` object as described below.
Only one scoring can exist at a time.
_Request_
| Field | Description |
| --- | --- |
| name | Always `scoring`. |
| typename | Always `scoring`. |
| layout | Display layout, either `inline` or `col`. |
| size | Text size of the team names. |
| size\_score | Text size of the scores. |
| with\_bg | Boolean stating wether the scoring has a colored background or not. |
| fg\_logo | Integer in range `1` to `6`, can also be `auto`. See explanation below. |
| fg\_team | Integer in range `1` to `6`, can also be `auto`. See explanation below. |
| fg\_player1 | Integer in range `1` to `6`, can also be `auto`. See explanation below. |
| fg\_player2 | Integer in range `1` to `6`, can also be `auto`. See explanation below. |
| fg\_player | Integer in range `1` to `6`, can also be `auto`. See explanation below. |
| fg\_game | Integer in range `1` to `6`, can also be `auto`. See explanation below. |
| fg\_set | Integer in range `1` to `6`, can also be `auto`. See explanation below. |
| fg\_point | Integer in range `1` to `6`, can also be `auto`. See explanation below. |
| fg\_sub\_game | Integer in range `1` to `6`, can also be `auto`. See explanation below. |
| bg\_color\_team | Background color of the teams name. Hexadecimal color as a string, without `#`. Only used with `with_bg` at `true`. |
| color\_team | Color of the teams name. Hexadecimal color as a string, without `#`. Only used with `with_bg` at `true`. |
| bg\_color\_point | Background color of the points. Hexadecimal color as a string, without `#`. Only used with `with_bg` at `true`. |
| color\_point | Color of the points. Hexadecimal color as a string, without `#`. Only used with `with_bg` at `true`. |
| bg\_color\_set | Background color of the sets. Hexadecimal color as a string, without `#`. Only used with `with_bg` at `true`. |
| color\_set | Color of the sets. Hexadecimal color as a string, without `#`. Only used with `with_bg` at `true`. |
| bg\_color\_game | Background color of the games. Hexadecimal color as a string, without `#`. Only used with `with_bg` at `true`. |
| color\_game | Color of the games. Hexadecimal color as a string, without `#`. Only used with `with_bg` at `true`. |
All of the `fg` fields represent the space taken by each visual element. Not all elements are used at the same time, for instance `fg_set` is used only in tennis mode. The value given works as a CSS `flex-grow` value, which means that for a given space, the element will take a specific ratio of space, according to the space taken by its siblings. The `auto` mode will auto-adjust the space taken accordingly to the content inside.
If element **A** has a `fg` specified at `1` and element **B** has a `fg` specified at `3`, **B** will take 3 times more space than **A**. See this [page for more information](https://css-tricks.com/almanac/properties/f/flex-grow/)
.
{
"website": {
"scope": 334644321,
"set_display_settings": [\
{\
"name": "scoring",\
"typename": "scoring",\
"img_zoom": 100,\
"x": 100,\
"y": 100,\
"natural_width": 400,\
"natural_height": 130,\
"marginRight": 20,\
"marginLeft": 20,\
"fontfamily": "magicNumbers&Letters13121997isMyBirthday",\
"size": 30,\
"with_bg": true,\
"fg_logo": "auto",\
"fg_team": "4",\
"fg_player1": "4",\
"fg_player2": "4",\
"fg_player": "4",\
"fg_game": "1",\
"fg_set": "1",\
"fg_point": "1",\
"fg_sub_game": "1",\
"layout": "col",\
"size_score": 30,\
"bg_color_team": "000000",\
"color_team": "ffffff",\
"bg_color_point": "000000",\
"color_point": "ffffff",\
"bg_color_set": "000000",\
"color_set": "ffffff",\
"bg_color_game": "000000",\
"color_game": "ffffff",\
"line_id": 602854010\
}\
],
"goto_prod": [\
"scoring",\
"display"\
]
}
}
_Success_
The following table describes the fields of an object within the `scoring` object. This differs from one sport type to another, see [sports section](#sports)
| Field | Description |
| --- | --- |
| config | String containing the sport type, within: `foot`, `rugby`, `basket`, `volley`, `tabletennis`, `tabletennismatch`, `padel2players`, `karate` and `other`. |
| goto\_prod | Boolean stating if a modification should be directly cut to production or not. |
| score.point.value | Number of points. |
| score.point.size | Maximum value length (number of units). |
| name.team.value | Team's name. |
| name.team.size | Maximum team's name length. |
| logo | Image URL used as team logo. |
{
"1234": {
"scoring": {
"teams": [\
{\
"score": {\
"point": {\
"value": 0,\
"size": 3\
}\
},\
"name": {\
"team": {\
"value": "Team 1",\
"size": 12\
}\
},\
"logo": ""\
},\
{\
"score": {\
"point": {\
"value": 0,\
"size": 3\
}\
},\
"name": {\
"team": {\
"value": "Team 2",\
"size": 12\
}\
},\
"logo": ""\
}\
],
"config": "rugby",
"goto_prod": false
},
"scope": 886098813
}
}
### Edit a scoring
To add a goal, retrieve a goal, change a team's name or anything else, the whole `scoring` object must be sent **as a string**, with the said modifications. The best way to achieve so, is to store the object and keep it updated. A [JSON stringify](https://developer.mozilla.org/en-US/docs/Web/JavaScript/Reference/Global_Objects/JSON/stringify)
method must be used.
_Request_
{ "website": { "scope": 799560411, "scoring": "{}" } }
Do not send the scoring with a \`scoring\` key! Simply put the object, containing the \`teams\`, \`config\` and \`goto\_prod\` keys and values.
_Success_
Will return the same response as the [scoring addition](#add-a-scoring)
request.
### Sports
Different kind of scorings are available. Please find below each configuration for each sport.
The best way to find out which layout would answer the best to your needs, and see all the available configurations, is to try it out on the platform.
_`foot`, `rugby`, `basket`, `karate` and `other`_
{
"teams": [\
{\
"score": {\
"point": {\
"value": 0,\
"size": 3\
}\
},\
"name": {\
"team": {\
"value": "Team 1",\
"size": 12\
}\
},\
"logo": ""\
},\
{\
"score": {\
"point": {\
"value": 0,\
"size": 3\
}\
},\
"name": {\
"team": {\
"value": "Team 2",\
"size": 12\
}\
},\
"logo": ""\
}\
]
}
_`volley`_
{
"teams": [\
{\
"score": {\
"set": {\
"value": 0,\
"size": 1\
},\
"point": {\
"value": 0,\
"size": 2\
}\
},\
"name": {\
"team": {\
"value": "Team 1",\
"size": 12\
}\
},\
"logo": ""\
},\
{\
"score": {\
"set": {\
"value": 0,\
"size": 1\
},\
"point": {\
"value": 0,\
"size": 2\
}\
},\
"name": {\
"team": {\
"value": "Team 2",\
"size": 12\
}\
},\
"logo": ""\
}\
]
}
_`tabletennis`_
{
"teams": [\
{\
"score": {\
"set": {\
"value": 0,\
"size": 1\
},\
"point": {\
"value": 0,\
"size": 2\
}\
},\
"name": {\
"team": {\
"value": "Team 1",\
"size": 12\
},\
"player": {\
"value": "Player 1",\
"size": 20\
}\
},\
"logo": ""\
},\
{\
"score": {\
"set": {\
"value": 0,\
"size": 1\
},\
"point": {\
"value": 0,\
"size": 2\
}\
},\
"name": {\
"team": {\
"value": "Team 2",\
"size": 12\
},\
"player": {\
"value": "Player 2",\
"size": 20\
}\
},\
"logo": ""\
}\
]
}
_`padel2players`_
{
"teams": [\
{\
"score": {\
"set": {\
"value": 0,\
"size": 1\
},\
"sub_game": {\
"value": 0,\
"size": 2\
}\
},\
"name": {\
"player1": {\
"value": "First Player 1",\
"size": 20\
},\
"player2": {\
"value": "Second Player 1",\
"size": 20\
}\
},\
"logo": ""\
},\
{\
"score": {\
"set": {\
"value": 0,\
"size": 1\
},\
"sub_game": {\
"value": 0,\
"size": 2\
}\
},\
"name": {\
"player1": {\
"value": "First Player 2",\
"size": 20\
},\
"player2": {\
"value": "Second Player 2",\
"size": 20\
}\
},\
"logo": ""\
}\
]
}
_`tabletennismatch`_
{
"teams": [\
{\
"score": {\
"game": {\
"value": 0,\
"size": 2\
},\
"set": {\
"value": 0,\
"size": 1\
},\
"point": {\
"value": 0,\
"size": 2\
}\
},\
"name": {\
"team": {\
"value": "Team 1",\
"size": 12\
},\
"player": {\
"value": "Player 1",\
"size": 20\
}\
},\
"logo": ""\
},\
{\
"score": {\
"game": {\
"value": 0,\
"size": 2\
},\
"set": {\
"value": 0,\
"size": 1\
},\
"point": {\
"value": 0,\
"size": 2\
}\
},\
"name": {\
"team": {\
"value": "Team 2",\
"size": 12\
},\
"player": {\
"value": "Player 2",\
"size": 20\
}\
},\
"logo": ""\
}\
]
}
Audio
### Modify the audio settings
The studio audio mixer is now in decibels. Make sure that the volume value sent is compatible with the new system. The calls to our API are the same, only the volume value changes.
For example, if you want 5db, you need to send 50 to our API.
* 11.7db (117 for API) is the maximum value.
* 0db is the default value.
* \-75db (-755 for API) is the minimum value. In that case, audio is muted.
There are 200 allowed values -> go to [V30 changes section](#h_01HNWFF1JEM48B5ZSMVWCBX2N1)
to know more.
_Request_
| Field | Description |
| --- | --- |
| volume | Int: volume in decibel\*10. |
{
"website":{
"scope":4918743,
"audio_temp":{
"name":"master",
"volume":-48
}
}
}
_Success_
{
"website":{
"scope":869851899,
"set_volume":-48,
"goto_prod":["volume"]
}
}
Possible errors:
\- Scope required
\- Volume must be an integer
\- Volume must be between 117 and -755.
Account management
### Create an account
_Request_
The following table describes the fields within the `customer_append` object.
| Field | Description |
| --- | --- |
| lang | Account language, `en` (English) or `fr` (French). If not specified, will inherit the parent's account language. |
| zone | LiveU Studio zone: `eu-irl-1`, `us-vir-1`, `us-ore-1`, `eu-irl-4`, `us-vir-4` or `us-ore-4`. Contact LiveU Studio if needed. |
| name | Account name. |
{
"website": {
"scope": 123456,
"customer_append": {
"lang": "en",
"zone": "eu-irl-4",
"name": "Project Name"
}
}
}
_Error_
{
"customer": {
"error": "empty_name",
"scope": 123456
}
}
Possible errors:
\- \`empty\_name\`
\- \`empty\_zone\`
\- \`bad\_region\`
\- \`user\_not\_allowed\`
_Success_
{
"customer": {
"customer_append": {
"id": 654321,
"zone": "eu-irl-4"
},
"scope": 123456
}
}
### Edit account users
| Field | Description |
| --- | --- |
| field | Rank to be edited. Either `is_active` (user) or `is_manager` (admin). |
| value | Boolean value, `true` or `false`. |
| user\_id | User to be affected, the ID can be found in the `init` general context response, `init.user.id`. |
Those requests must be sent in a generic context (\`init: false\`).
_Request to set user rights (`editor`)_
{
"website": {
"scope": 191558316,
"people": {
"set": {
"field": "is_active",
"value": false,
"user_id": "someLettersAndNumbers13121997"
}
}
}
}
_Success_
{
"customer": {
"customer_remove": {
"id": "654321"
},
"scope": 123456
}
}
_Request to set manager rights (`admin`)_
{
"website": {
"scope": 191558316,
"people": {
"set": {
"field": "is_manager",
"value": false,
"user_id": "someLettersAndNumbers13121997"
}
}
}
}
_Success_
{
"customer": {
"customer_remove": {
"id": "654321"
},
"scope": 123456
}
}
### Delete an account
_Request_
{
"website": {
"customer_remove": {
"id": 654321
},
"scope": 123456
}
}
_Success_
{
"customer": {
"customer_remove": {
"id": "654321"
},
"scope": 123456
}
}
### List accounts
_Request (without search pattern)_
{
"website": {
"customer_list": {
page: 0,
search:""
},
"scope": 123456
}
}
_Request (with search pattern)_
| Field | Description |
| --- | --- |
| search | An approximate search pattern, such as an account name or its ID. |
{
"website": {
"customer_list": {
page: 0,
search: "yoursearchpattern"
},
"scope": 123456
}
}
_Success_
{
"customer": {
"customer_list": {
"more": true,
"list": [\
{\
"id": 123,\
"name": "LiveU Studio - 1",\
"zone": "eu-irl-4"\
},\
{\
"id": 456,\
"name": "LiveU Studio - 2",\
"zone": "us-vir-4"\
},\
{\
"id": 789,\
"name": "LiveU Studio - 3",\
"zone": "us-ore-4"\
},\
{\
"id": 987,\
"name": "LiveU Studio - 4",\
"zone": "eu-irl-1"\
},\
{\
"id": 654,\
"name": "LiveU Studio - 5",\
"zone": "us-vir-1"\
}\
]
},
"scope": 123456
}
}
The field \`more\` state whether the request has more results than the ones retrieved. The same request can be sent with the \`page\` field being incremented by 1, and so on.
_Request (more results)_
{
"website": {
"customer_list": {
page: 1,
search: "yoursearchpattern"
},
"scope": 123456
}
}
### List the users of a project (`account`)
_Request_
| Field | Description |
| --- | --- |
| email | Always `true`. |
{
"website": {
"scope": 721527072,
"people": {
"get": true
}
}
}
_Success_
| Field | Description |
| --- | --- |
| id | The user id. |
| email | The email address of the user. |
| name | The name of the user. |
| is\_active | Boolean. If `true`, the user can access the said account (manage control rooms and access calendar). |
| is\_manager | Boolean. If `true`, the user can manage the said account (add/remove users, edit account information, manage billing and payment methods). |
{
"customer": {
"people": [\
{\
"is_manager": true,\
"name": "User One",\
"is_active": true,\
"email": "usermail@domainname.ext",\
"id": "0102030405azeRTY"\
},\
{\
"is_manager": false,\
"name": "Player Two",\
"is_active": true,\
"email": "otheremail@example.com",\
"id": "0102030405azeRTY"\
}\
]
}
}
### Add a user to a project (`account`)
_Request_
| Field | Description |
| --- | --- |
| email | The email address of the user to be added. An email will be sent as an account creation request if the user doesn't exists. |
{
"website": {
"scope": 123456,
"people": {
"add": {
"email": "usermail@domainname.ext"
}
}
}
}
_Success_
| Field | Description |
| --- | --- |
| id | The user id. |
| email | The email address of the user. |
| name | The name of the user. |
| is\_active | Boolean. If `true`, the user can access the said account (manage control rooms and access calendar). |
| is\_manager | Boolean. If `true`, the user can manage the said account (add/remove users, edit account information, manage billing and payment methods). |
{
"customer": {
"people": [\
{\
"is_manager": true,\
"name": "User One",\
"is_active": true,\
"email": "usermail@domainname.ext",\
"id": "0102030405azeRTY"\
},\
{\
"is_manager": false,\
"name": "Player Two",\
"is_active": true,\
"email": "otheremail@example.com",\
"id": "0102030405RTYaze"\
}\
]
}
}
### Edit users rights
_Request_
| Field | Description |
| --- | --- |
| field | The role to be edited. `is_active`: can access the project. `is_manager`: can manage the billing and personnal information. |
| value | Boolean. Either `true` (will activate) or `false` (will deactivate). |
| user\_id | The user ID. Can be found in the [list of users](#)
. |
{
"website": {
"scope": 255067344,
"people": {
"set": {
"field": "is_manager",
"value": true,
"user_id": "0102030405aBcDeF"
}
}
}
}
_Success_
{
"customer": {
"people": [\
{\
"is_manager": true,\
"name": "User One",\
"is_active": true,\
"email": "usermail@domainname.ext",\
"id": "0102030405azeRTY"\
},\
{\
"is_manager": true,\
"name": "Harry Potter",\
"is_active": true,\
"email": "harry.potter@hedwige.owl",\
"id": "0102030405aBcDeF"\
}\
]
}
}
WebSocket - Scope
The WebSocket request scope is a random number between `0` and `100000000`. This can be considered as the unique ID of a request.
It should be uniquely generated for each request sent to the server and expected to be returned in the server's response. Requests and responses are linked this way.
The mandatoriness of the scope depends of each request.
WebRTC library
--------------
You can you can take advantage of the power of our webRTC management system without dealing with the full API. You just need our web RTC library !
Library implementation
To be able to use the WEBRTC library, you must implement the corresponding script tag at the end of your HTML code. Don't forget to implement this script on each page requiring the library functions.Once the script tag is set up, you just need to call the library functions thanks to "window.webRTLib._functionName_".
E-mail [support@liveu.tv](mailto:support@liveu.tv)
to obtain your webRTC library script tag.
Functions list
### Init Connection
Our solution is based on Selective Forwarding Unit (SFU), which is one of the most popular architectures for WebRTC. To get or create connection, you can use `webRTCLib.init`. It requires a single object containing two keys :
| Parameter | Type | Status | Description |
| --- | --- | --- | --- |
| ws | `Object` | (REQUIRED) | Websocket. |
| id | `Integer` | (REQUIRED) | Your live number. |
| withData | `Boolean` | (OPTIONAL) - Default: false | Allows you to retrieve the monitoring data or not. |
| update | `Function` | (REQUIRED) | Refers to each stream that arrives. It returns in parameter a stream with two elements : settings (quality) a srcObject object, and stream name. |
| isRunning | `Function` | (REQUIRED) | Allows to know if a feed should be launched by your page. It takes the stream name and the settings as parameters. |
You can call the function as in the example below, while initializing a websocket :
window.webRTCLib.init({
ws : window.websocket,
id : 55930,
withData: false,
isRunning: isRunning,
update: playerUpdate
});
### Update SFU Connection
You can update an existing connection with your server infos. The function `webRTCLib.updateSfu` will check if the server returns webrtc\_server or webrtc\_data\_server info. If it's the case, each available peer will be updated according to the information returned (participants, update, etc.)
| Parameter | Type | Status | Description |
| --- | --- | --- | --- |
| serverInfos | `Object` | (REQUIRED) | Server infos. |
You can use this function while updating you current live infos, for example :
window.webRTCLib.updateSfu(serverInfos);
### Stop connection
Thanks to the `webRTCLib.stopAndRefresh`function, you can stop and delete all active peer connections, then automatically update your stream infos. It requires only one argument :
| Parameter | Type | Status | Description |
| --- | --- | --- | --- |
| streamId | `Integer` | (REQUIRED) | Stream id for update after stopping peer connections. |
window.webRTCLib.stopAndRefresh(streamId);
### Add listener on data
You can add a listener on your data thanks to `webRTCLib.addDataListener`. It requires two parameters :
| Parameter | Type | Status | Description |
| --- | --- | --- | --- |
| name | `String` | (REQUIRED) | Listener target. |
| callback | `Function` | (REQUIRED) | Custom callback function. |
For example, if you need to add a listener on your encoder store, you can proceed like this :
window.webRTCLib.addDataListener( "encoderStore", encoderStore.update );
### Add a new stream
The `webRTCLib.add` function will create a new stream based on the arguments passed :
| Parameter | Type | Status | Description |
| --- | --- | --- | --- |
| videoContainer | `Object` | (REQUIRED) | DOM element containing your video. |
| videoName | `String` | (REQUIRED) | Video name in the stream store. |
| settingsName | `String` | (REQUIRED) | Settings name in WebRTC settings, same as videoName. |
| boxId | `Integer` | (REQUIRED) | Your live number. |
| output | `Boolean` | (OPTIONAL) - Default : false | Video output status. |
| settings | `Object` | (OPTIONAL) - Default : {} | Video settings. |
| withStatus | `Boolean` | (OPTIONAL) - Default : true | Show video status |
| container | `Object` | (OPTIONAL) - Default : videoContainer parent | videoContainer parent. |
| websocket | `Object` | (OPTIONAL) - Default : window.websocket | Websocket. |
Make sure the videoContainer is available in DOM before calling the function.
The settings parameters will mainly contain the desired quality for your stream. Several options are available :
| Quality | Description |
| --- | --- |
| fake | No video, only audio |
| mobile | 256 15fps (video bitrate = max 300kbps) |
| sd | max 640 15fps (video bitrate = max 1000kbps) |
| hd | max 1280 30fps (video bitrate = max 3000kbps) |
| fhd | max 1920 30fps (video bitrate = max 6000kbps) |
If the quality you've chosen is not available in your pack, then the library will take the best quality available by default.
window.webRTCLib.add({
videoContainer: this.videoContainer,
videoName: "video_01",
settingsName: "video_01",
output: false,
settings: { quality : "hd" },
withStatus: false,
container : null,
boxId : 55930,
websocket : this.websocket
});
### Remove a stream
For each stream contained in the specified container, you'll delete it from stream store. After removing, the stream list will be automatically updated thanks to the given identifier. The `webRTCLib.remove` function will run based on these parameters :
| Parameter | Type | Status | Description |
| --- | --- | --- | --- |
| container | `Object` | (REQUIRED) | Object containing your streams. |
| identifier | `Integer` | (REQUIRED) | Your live number. |
| callback | `Function` | (OPTIONAL) | Custom callback function. |
The callback function will be applied on each stream in the specified container.
window.webRTCLib.remove(
this.container,
this.liveNumber,
function(name){
audioMaster.releaseStream( name );
}
);
### Set or update stream settings
If you want to set or update the parameters of a stream, for example your stream quality, you just need to use the `webRTCLib.setSettings` function.
If your stream does not yet have its own settings, the function will assign the settings in parameters. Otherwise, the settings will simply be updated.
If the settings change, then the stream will be automatically restarted.
| Parameter | Type | Status | Description |
| --- | --- | --- | --- |
| streamName | `String` | (REQUIRED) | Stream name in the stream store. |
| settings | `Object` | (REQUIRED) | New stream parameters. |
The settings parameters will mainly contain the desired quality for your stream. Several options are available :
| Quality | Description |
| --- | --- |
| fake | No video, only audio |
| mobile | 256 15fps (video bitrate = max 300kbps) |
| sd | max 640 15fps (video bitrate = max 1000kbps) |
| hd | max 1280 30fps (video bitrate = max 3000kbps) |
| fhd | max 1920 30fps (video bitrate = max 6000kbps) |
If the quality you've chosen is not available in your pack, then the library will take the best quality available by default.
window.webRTCLib.setSettings("stream-2021", {quality: "hd"});
### Get streams from stream store
With `webRTCLib.getFromStreamStore`, you can retrieve all the streams available in the stream store, or retrieve only one thanks to its name
| Parameter | Type | Status | Description |
| --- | --- | --- | --- |
| streamName | `String` | (OPTIONAL) | Stream name in the stream store. |
//Get all streams available in stream store
window.webRTCLib.getFromStreamStore();//Get a specific stream window.webRTCLib.getFromStreamStore("stream-2021");
### Delete a stream from stream store
You can easily delete a specific stream from the stream store with the `webRTCLib.deleteFromStreamStore` function.
You cannot delete all of the streams contained in the stream store. You must target a stream to use this function.
| Parameter | Type | Status | Description |
| --- | --- | --- | --- |
| streamName | `String` | (REQUIRED) | Stream name in the stream store. |
| callback | `Function` | (OPTIONAL) | Custom callback function. |
const callback = audioMaster.releaseStream( streamName );
window.webRTCLib.deleteFromStreamStore(streamName, callback);
### Refresh a stream in the stream list
You can easily refresh a specific stream with the `webRTCLib.updateStream` function.
| Parameter | Type | Status | Description |
| --- | --- | --- | --- |
| streamId | `String` | (REQUIRED) | Stream identifier in the stream list. |
window.webRTCLib.updateStream(streamName);
### Get a specific stream and its peer connection
With the `webRTCLib.getStreamAndPeer` function, you'll be able to get SFU connection and stream infos.
| Parameter | Type | Status | Description |
| --- | --- | --- | --- |
| identifier | `String` | (REQUIRED) | Your live number. |
| streamName | `String` | (REQUIRED) | Stream identifier in the stream list. |
| settings | `String` | (REQUIRED) | Stream settings. |
window.webRTCLib.getStreamAndPeer(currentLiveId, streamName, settings);
This function will return and object with two keys :
| Parameter | Type | Description |
| --- | --- | --- |
| peer | `Object` | Peer linked to the given identifier. |
| srcObject | `Object` | Stream infos. |
### Get ICE servers
You can get ICE servers list with the `webRTCLib.getIceServers` function. It does not require any parameters.
const ices = window.webRTCLib.getIceServers();
### WebRTCLib error message
Our library may sometimes returns error messages, especially when creating a peer connection.
These errors are handled by the `webRTCLib.onErrorMessage` function, which performs a console.error of the returned message by default.
It's possible to override this function to process the message differently.
The following messages you might encounter are :
| Error code | Description |
| --- | --- |
| network-issue | You have lost the network connection. An attempt to reconnect is in progress |
| url-already-in-use | This URL is already in use by another element in your project. |
Last update & changes
---------------------
### V32 (coming soon)
Media Assets
Create or update an Ad break:
{
"website": {
"scope": 409847978,
"set\_display\_settings": \[\
\
{\
\
"name": "adbreak\_139424259",\
\
"id": 139424259,\
\
"nice\_name": "Ad break 5",\
\
"typename": "adbreak",\
\
"transparency": 100,\
\
"size": 1,\
\
"thumbnail": "https://static-us-vir.studio.liveu.tv/front/img/poster/not-available-en-orange.png",\
\
"natural\_height": 1080,\
\
"natural\_width": 1920,\
\
"duration": 10000,\
\
"loop": false,\
\
"volume": 0,\
\
"audio-pan": 0,\
\
"img\_zoom": 100,\
\
"y": 0,\
\
"x": 0,\
\
"fit": "contain",\
\
"fitx": 50,\
\
"fity": 50,\
\
"rotationX": 0,\
\
"rotationY": 0,\
\
"rotationZ": 0,\
\
"rate": 100,\
\
"gs": 0,\
\
"blur": 0,\
\
"br": 100,\
\
"ct": 100,\
\
"huer": 0,\
\
"opacity": 100,\
\
"invert": 0,\
\
"saturate": 100,\
\
"sepia": 0,\
\
"effect\_end\_delay": 0,\
\
"effect\_init": "static",\
\
"effect\_begin": "fadeIn",\
\
"effect\_begin\_duration": 0,\
\
"effect\_begin\_delay": 0,\
\
"effect\_end": "fadeOut",\
\
"effect\_end\_duration": 0,\
\
"instagram-name": "default",\
\
"totalDuration": 0,\
\
"offset": 0,\
\
"countdown": 5000,\
\
"volume-mute": \-1,\
\
"elements": \[\],\
\
"pendingMedia": \[\],\
\
"player\_mode": "playlist",\
\
"player\_stop": "backto",\
\
"backto": "blank",\
\
"expandRightPanelOnCreate": true,\
\
"type": "adbreak",\
\
"line\_id": 122332925\
\
}\
\
\],
"goto\_prod": \[\
\
"scoring",\
\
"display"\
\
\]
}
}
Get Ad break duration
{
"website": {
"scope": 515752649,
"ad\_break\_info": {
"id": "adbreak\_139424259"
}
}
}
response:
{
"18996": {
"ad\_break\_info": {
"id": "adbreak\_139424259",
"duration": "46000",
"countdown": "2000"
},
"scope": 515752649
}
}
Webpages (Iframe) update
_Request_
| Field | Description |
| --- | --- |
| url | The webpage's URl. |
| natural\_height | The **desired** height of the webpage. |
| natural\_width | The **desired** width of the webpage. |
| refresh\_in\_pgm | True or False - refresh the webpage each time it's loaded in the PGM. |
{
"website": {
"scope": 615476078,
"set_display_settings": [\
{\
"name": "iframe_1",\
"typename": "iframe",\
"x": 854,\
"y": 434,\
"img_zoom": 30,\
"transparency": 100,\
"natural_width": 1000,\
"natural_height": 1000, "refresh_in_pgm" : false,\
"url": "https://www.some.url/leading/to/a/webpage",\
"line_id": 56789\
},\
...\
]
}
}
### V30/31
### **Transition**
The studio is now working with a new transition system, based on scenes. Each layer in your control room creates a dedicated scene and you can apply a transition to them when displayed in the program.
| Field | Description |
| --- | --- |
| method | String: the transition method you want to apply. It can be "fade", "slide\_left", "slide\_right", "slide\_up", "slide\_down", "flip\_vertical", "flip\_horizontal" or "graphic". If you want to apply a use, use "fade" with 0 duration. |
| delay | Int: from 0 to 3000. Delay of your transition in milliseconds |
| duration | Int: from 0 to 3000. Duration of your transition in milliseconds. A transition with duration at 0 will result as a cut. |
| timing-function | String: always "ease-in-out". |
| trigger-out | String: always "after". |
| url | String: the url of the APNG image you want to use as a graphic transition. Only for graphic transition. |
| format | String: format of your graphic transiton file. For now, always "image/png" or "image/apng". Only for graphic transition. |
To apply a transition, you just need to apply your settings inside the PROGRAM as usual with a goto\_prod call and add the transition settings you want:
{
website: {
scope: 63288740,
goto\_prod: \["display", "scoring"\],
transition: {
method: "fade",
delay: 0,
duration: 1000,
format: null,
timing-function: "ease-in-out",
trigger-out: "after",
url: null
}
}
}
### **Scenes**
The transition scene system is plugged into your layers. To be able to create a scene, you must be sure to create lines with a name respecting the nomenclature by "placeholder\_{number}". Example: "placeholder\_4". Here is the correct structure of a layer:
| Field | Description |
| --- | --- |
| name | String: always “placeholder\_{number}” |
| typename | String: always “placeholder” |
| locked\_scene | Boolean: always true |
| line\_id | String: layer unique ID |
{
"name": "placeholder\_3",
"typename": "placeholder",
"locked\_scene": true,
"line\_id": 00000001
}
### **Hotkeys**
You can assign a transition to your hotkey. To do this, simply add the desired transition to your call.
{
website: {
scope: 970821418,
goto\_prod: \["scoring", "display"\],
set\_display\_active: {…},
set\_display\_settings: \[…\],
transition: transition: {
method: "fade",
delay: 0,
duration: 0,
format: null,
timing-function: "ease-in-out",
trigger-out: "after",
url: null
}
}
}
The apply hotkey is now replaced by 4 default transitions hotkeys. This will simply send the elements of your preview into the program and works the same as a go\_to\_prod call.
{
website: {
scope: 63288740,
goto\_prod: \["display", "scoring"\],
transition: {
method: "fade",
delay: 0,
duration: 500,
format: null,
timing-function: "ease-in-out",
trigger-out: "after",
url: null
}
}
}
### **LUC Groups**
#### Retrieve the project LUC groups
{
website: {
scope: 175796336,
groups: {
get: true
}
}
}
#### Update the LUC groups list
| Field | Description |
| --- | --- |
| groups | Array: list of group\_id, contains all the group ids you want to save in your project. |
{
website: {
scope: 791193310,
groups: {
set: {
groups: \[1506, 8886\]
}
}
}
}
#### Retrieve project users:
{
website: {
scope: 860695012,
account\_users: {
get: true
}
}
}
This will retrieve all the LUC and non-LUC users who have access to your project.
**If you’re not using the LUC group system and still have access to the old people system, please use the old method:**
**{
website:{
scope: 860695058,
"people": {
"get": true
}
}
}**
### **Media player/clip/playlist changes:**
* In Videos (animation) section
* remove “line\_id“:
{
"website": {
"scope": 209404193,
"animation": {
"action": "add",
"values": {
"url": "https://www.some.url/leading/to/a.video",
"height": 1080,
"width": 1920,
"display\_aspect\_ratio": \[ \
"16", \
"9" \
\],
"sample\_aspect\_ratio": \[ \
"1", \
"1" \
\],
"duration": 180000,
"size": 1234,
"line\_id": 56789, // remove
"name": "Video"
}
}
}
}
* replace the nice\_name in the request
{
"website": {
"scope": 13121997,
"set\_display\_settings": \[ \
{ \
"name": "playlist\_23136798", \
"id": 23136798, \
"nice\_name": "Playlist 1", -> \
"nice\_name": "Player 2",\
\
### **Audio Mixer**\
\
The studio audio mixer is now in decibels. Make sure that the volume value sent is compatible with the new system. The calls to our API are the same, only the volume value changes.\
\
| Field | Description |\
| --- | --- |\
| volume | Int: volume in decibel\*10. |\
\
For example, if you want 5db, you need to send 50 to our API.\
\
11.7db (117 for API) is the maximum value. \
0db is the default value. \
\-75db (-755 for API) is the minimum value. In that case, audio is muted.\
\
There are 200 allowed values:\
\
| |\
| --- |\
| 117 |\
| 115 |\
| 114 |\
| 112 |\
| 111 |\
| 109 |\
| 107 |\
| 106 |\
| 104 |\
| 102 |\
| 101 |\
| 99 |\
| 97 |\
| 96 |\
| 94 |\
| 92 |\
| 90 |\
| 89 |\
| 87 |\
| 85 |\
| 83 |\
| 82 |\
| 80 |\
| 78 |\
| 76 |\
| 74 |\
| 73 |\
| 71 |\
| 69 |\
| 67 |\
| 65 |\
| 63 |\
| 62 |\
| 60 |\
| 58 |\
| 56 |\
| 54 |\
| 52 |\
| 50 |\
| 48 |\
| 46 |\
| 44 |\
| 42 |\
| 40 |\
| 38 |\
| 36 |\
| 34 |\
| 32 |\
| 30 |\
| 28 |\
| 26 |\
| 24 |\
| 22 |\
| 20 |\
| 17 |\
| 15 |\
| 13 |\
| 11 |\
| 9 |\
| 7 |\
| 4 |\
| 2 |\
| 0 |\
| \-2 |\
| \-5 |\
| \-7 |\
| \-9 |\
| \-11 |\
| \-14 |\
| \-16 |\
| \-18 |\
| \-21 |\
| \-23 |\
| \-26 |\
| \-28 |\
| \-30 |\
| \-33 |\
| \-35 |\
| \-38 |\
| \-40 |\
| \-43 |\
| \-45 |\
| \-48 |\
| \-51 |\
| \-53 |\
| \-56 |\
| \-58 |\
| \-61 |\
| \-64 |\
| \-66 |\
| \-69 |\
| \-72 |\
| \-75 |\
| \-77 |\
| \-80 |\
| \-83 |\
| \-86 |\
| \-89 |\
| \-92 |\
| \-95 |\
| \-98 |\
| \-101 |\
| \-104 |\
| \-107 |\
| \-110 |\
| \-113 |\
| \-116 |\
| \-119 |\
| \-122 |\
| \-125 |\
| \-129 |\
| \-132 |\
| \-135 |\
| \-138 |\
| \-142 |\
| \-145 |\
| \-149 |\
| \-152 |\
| \-156 |\
| \-159 |\
| \-163 |\
| \-166 |\
| \-170 |\
| \-173 |\
| \-177 |\
| \-181 |\
| \-185 |\
| \-189 |\
| \-192 |\
| \-196 |\
| \-200 |\
| \-204 |\
| \-208 |\
| \-212 |\
| \-217 |\
| \-221 |\
| \-225 |\
| \-229 |\
| \-234 |\
| \-238 |\
| \-242 |\
| \-247 |\
| \-252 |\
| \-256 |\
| \-261 |\
| \-266 |\
| \-270 |\
| \-275 |\
| \-280 |\
| \-285 |\
| \-290 |\
| \-296 |\
| \-301 |\
| \-306 |\
| \-312 |\
| \-317 |\
| \-323 |\
| \-328 |\
| \-334 |\
| \-340 |\
| \-346 |\
| \-352 |\
| \-358 |\
| \-365 |\
| \-371 |\
| \-378 |\
| \-384 |\
| \-391 |\
| \-398 |\
| \-405 |\
| \-412 |\
| \-420 |\
| \-427 |\
| \-435 |\
| \-443 |\
| \-451 |\
| \-459 |\
| \-467 |\
| \-476 |\
| \-485 |\
| \-494 |\
| \-503 |\
| \-513 |\
| \-523 |\
| \-533 |\
| \-543 |\
| \-554 |\
| \-565 |\
| \-577 |\
| \-589 |\
| \-601 |\
| \-614 |\
| \-627 |\
| \-640 |\
| \-655 |\
| \-670 |\
| \-685 |\
| \-701 |\
| \-719 |\
| \-736 |\
| \-755 |
---
# LiveU field Unit to Studio LRT flow – Studio
[Skip to main content](#main-content)
Search
------
Hi. How can we help?
====================
How to use and manage my LiveU Channels (LRT)?
----------------------------------------------
**Using LiveU Studio channels will allow you to:**
* Feed up to 8 LRT\* at the same time in Studio.
* Make a quick link between Studio and LiveU Central -> no need to worry about channels or their configuration, everything is automatic.
**To add a new LiveU LRT input/channel in Studio:**
* Enter the **_Production_** Studio (1).
* _**Start the test**_ phase (2).
* _**Add an input**_ (3).

* In the _**Live Source**_ tab (4).
* Select **LiveU Channel** (5).

A list of 8 channels will appear, you can add 1 at a time.
* Select a channel in the list.
* click on "**Use channel**".

If you want to receive more streams from LiveU Central, repeat the operation.
* Your channel is now added in the **Studio Production** tab -> Open it's settings panel (6).

* You can now select a LiveU unit to stream from.

Streaming from LUC to Studio (for a user that do not have acces to both services for example).
* Go to your **LiveU Central tab** and click on the **Unit** you want to send the feed from (7).
* Open the list of available channels (8).
* You will see that the channel you added earlier on Studio has just been added to the list of available channels. **Wait until the channel is running (green) and select it.**
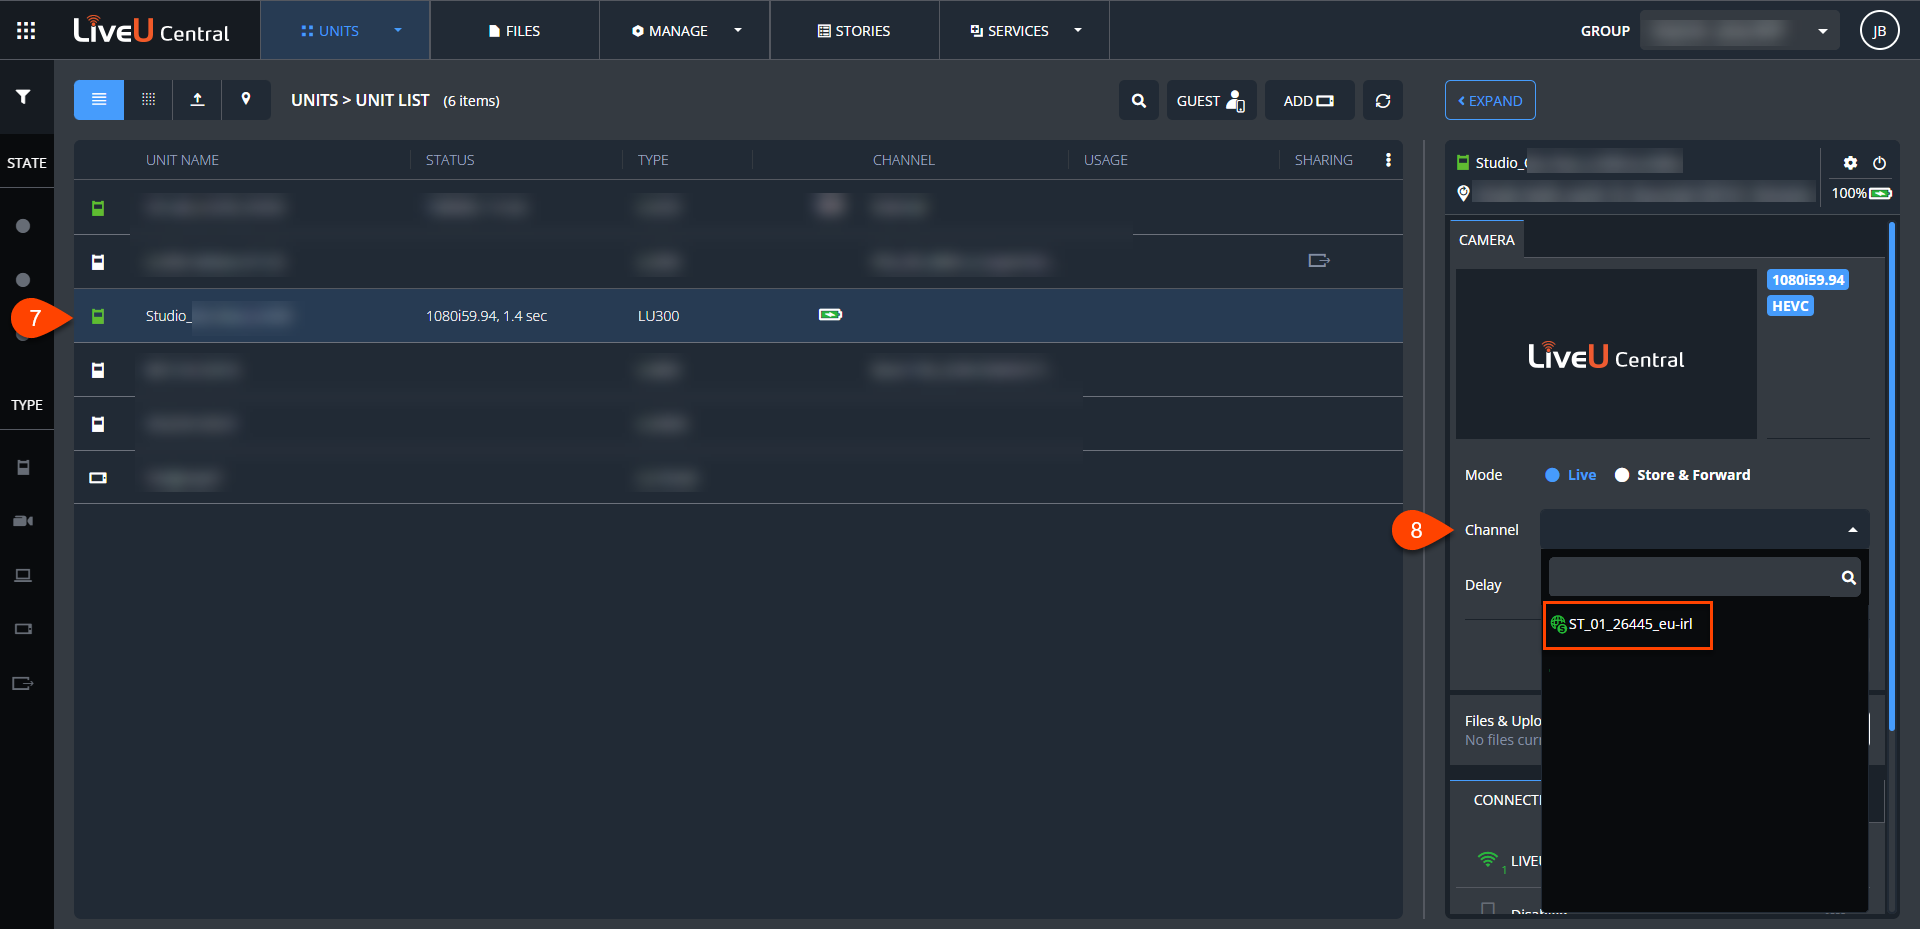
* Click on Start (9) to send your stream from your LiveU Unit to your Studio.
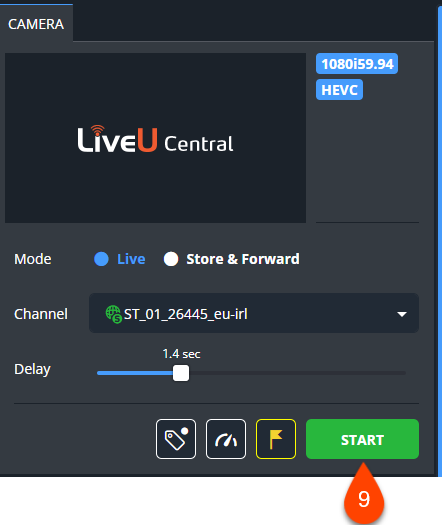
Go back to your Studio. Your stream is received.
Note: _**Adaptive resolution**_ settings should always be DISABLED when streaming to Studio.
If all is good and your feed is correctly received, click on **Start publishing** to publish your stream on all configured [broadcasters and output points](/hc/en-us/articles/17094645097883)
.

When your live is over please remind to click on the "**end**" button. That will stop the server running your event and will disable the LiveU Channel available from LUC a few minutes after stopping your event.
If you have added a LiveU Channel input in the Studio but you don't see it in your LiveU Central account:
* Check that your event is sheduled to start in less than 15min or is in testing or publishing phase (else you will not be able to see your Studio channel in LUC).
* Contact your LiveU sales engineer.
If you don't see an unit/server in the unit list please check that this one is available in the correct inventory (one studio account is linked to one LUC inventory).
**Are you looking for Comms / IFB with your LU Encoder operators / camera operators and/or your decoder operator, back to a physical studio?**
* Please see [this video tutorial about Web Audio Connect](https://www.liveu.tv/resources/tv/how-to-use-audio-and-communications-with-liveu-studio "https://www.liveu.tv/resources/tv/how-to-use-audio-and-communications-with-liveu-studio")
, part of the LU Ecosystem to solve this.
Go further :
* [How to publish multiple cameras to multiple Studio channels using a LU800 (LRT)](https://studiosupport.liveu.tv/hc/en-us/articles/17094667422619-Multicam-to-multi-Channel)
If you have any other question please ask our live support.
\* ask your sales representative to add more LRT Channels.
---
# Understanding SCTE 35 Ad Insertion/Marker: A Technical Guide – Studio
[Skip to main content](#main-content)
Search
------
Hi. How can we help?
====================
### Introduction
In the realm of digital television broadcasting, dynamic ad insertion (DAI) is a cornerstone for content monetization. SCTE 35 (Society of Cable Telecommunications Engineers) is a standard that provides a robust framework for signaling ad insertion and other events in video streams. This technical guide delves into the intricacies of SCTE 35, explaining the necessary components to trigger and utilize SCTE 35 markers effectively, and integrates concepts like Origin Server, Content Delivery Network (CDN), and Server-Side Ad Insertion (SSAI).
### Table of Contents
1. **What is SCTE 35?**
2. **Key Components of SCTE 35**
* Splice Insert Command
* Time Signal Command
* Segmentation Descriptors
3. **Triggering SCTE 35 Markers**
* Encoder Configuration
* Splice Information Table (SIT)
4. **Utilizing SCTE 35 Markers for Ad Insertion**
* Ad Decision Service (ADS)
* Server-Side Ad Insertion (SSAI)
* Origin Server and CDN
5. **Conclusion**
### 1\. What is SCTE 35?
SCTE 35 is a standard protocol used to signal the insertion of ads, program segments, or other events in video streams. It facilitates the delivery of targeted advertisements to viewers, thereby enhancing monetization potential for broadcasters and content providers. The SCTE 35 message is embedded in the MPEG transport stream, allowing real-time control over ad insertion points.
### 2\. Key Components of SCTE 35
Understanding the key components of SCTE 35 is essential for effectively leveraging this standard. Here are the primary elements:
#### Splice Insert Command
The Splice Insert Command is a fundamental part of SCTE 35, indicating a point in the video stream where an ad or another segment should be inserted. It includes:
* **Splice Event ID:** A unique identifier for the splice event.
* **Splice Time:** The exact time when the splice should occur.
* **Break Duration:** The duration of the break (optional).
#### Time Signal Command
The Time Signal Command is used to indicate an absolute time for an event. It is particularly useful for synchronizing ad insertions across multiple streams.
* **PTS Time:** Presentation Time Stamp indicating the exact moment for the event.
#### Segmentation Descriptors
Segmentation Descriptors provide additional information about the content being inserted, such as the type of event (e.g., advertisement, program start/end) and its duration.
* **Segmentation Event ID:** Unique identifier for the segmentation event.
* **Segmentation Type ID:** Specifies the type of segment (e.g., ad break, program start).
### 3\. Triggering SCTE 35 Markers
To trigger SCTE 35 markers, several steps and components are required:
#### Encoder Configuration
The video encoder must be configured to recognize and insert SCTE 35 markers into the transport stream. This involves setting up the encoder to listen for splice commands and embedding the SCTE 35 messages at the appropriate points.
#### Splice Information Table (SIT)
The Splice Information Table (SIT) contains the SCTE 35 messages and is transmitted in the MPEG transport stream. It includes details about the splice events and is used by downstream equipment to execute the ad insertions.
### 4\. Utilizing SCTE 35 Markers for Ad Insertion
**Once you have triggered an ad break, LiveU Studio will send the marker downstream to pass through to a playout system\*.**
**Depending on your configuration, these playout platforms will recognize the ad trigger, then either serve a pre-loaded advert or, more commonly, deliver a server-side ad from a 3rd party ad server (SSAI).**
**This workflow allows you to personalize ad breaks depending on the viewer identity, geography or platform your stream is being viewed on, whether linear broadcast, OTT or FAST channels.**
#### Ad Decision Service (ADS)
The Ad Decision Service (ADS) is responsible for selecting the appropriate ads to insert based on the SCTE 35 markers. It considers factors such as viewer demographics, ad inventory, and campaign goals.
* **Ad Selection:** The ADS chooses the best ad for the insertion point.
* **Ad Delivery:** The selected ad is delivered to the video playout system.
#### Server-Side Ad Insertion (SSAI)
SSAI is a technique where ad insertion occurs on the server side, allowing for seamless ad stitching directly into the video stream before delivery to the viewer. It leverages SCTE 35 markers to ensure precise ad placement.
* **Ad Stitching:** The SSAI system stitches the ad into the stream at the exact moment indicated by the SCTE 35 marker.
* **Seamless Experience:** Ensures a seamless viewing experience without noticeable transitions between content and ads.
#### Origin Server and CDN
The Origin Server is the primary source of the video stream, including the SCTE 35 markers, while the Content Delivery Network (CDN) distributes the video content to end-users.
* **Origin Server:** Hosts the original video content and SCTE 35 markers.
* **CDN (Akamai, Dacast, Brightcove,...):** Distributes the content globally, ensuring low latency and high availability. The CDN must support the transmission of SCTE 35 markers to maintain the integrity of ad insertion points.
### 5\. Conclusion
SCTE 35 is a powerful standard for enabling dynamic ad insertion in digital television broadcasting. By understanding and leveraging its key components—such as Splice Insert Commands, Time Signal Commands, and Segmentation Descriptors—broadcasters and content providers can enhance their monetization strategies. Proper configuration of encoders, use of the Splice Information Table, and integration with Ad Decision Services, Server-Side Ad Insertion, Origin Servers, and CDNs are crucial for the effective use of SCTE 35 markers.
As the demand for targeted advertising continues to grow, mastering SCTE 35 will become increasingly important for staying competitive in the broadcasting industry.
\* Playout system supporting Ads insertion example:
#### 1\. **Harmonic Spectrum X**
* **Overview:** Harmonic Spectrum X is a highly reliable, scalable, and flexible media server that supports advanced broadcast and OTT workflows.
#### 2\. **Imagine Communications Versio**
* **Overview:** Versio is a cloud-native playout and master control solution from Imagine Communications, designed to simplify complex broadcast workflows.
#### 3\. **Evertz OvertureRT**
* **Overview:** Evertz OvertureRT is a comprehensive playout solution known for its reliability and rich feature set, suitable for both traditional and IP-based workflows.
#### 4\. **Grass Valley iTX**
* **Overview:** iTX from Grass Valley is a highly versatile and scalable playout system that caters to both linear and nonlinear broadcast operations.
#### 5\. **BroadStream OASYS**
* **Overview:** OASYS by BroadStream is a software-based playout solution that offers flexible and efficient playout capabilities for broadcasters.
#### 6\. **Vanguard Video VidiPlay**
* **Overview:** VidiPlay by Vanguard Video is an advanced playout system designed to handle complex broadcast workflows, including live and recorded content.
#### 7\. **Pebble Beach Systems Marina**
* **Overview:** Marina by Pebble Beach Systems is a powerful automation and playout solution that delivers reliable and flexible broadcasting capabilities.
**Video Tutorial about SCTE-35 markers to monetize your content downstream**
We invite you to watch [this video](https://www.liveu.tv/resources/tv/how-to-monetize-content-in-liveu-studio)
to learn more about how to monetize your content with SCTE 35 markers in LiveU Studio.
---
# Settings on each input – Studio
[Skip to main content](#main-content)
Search
------
Hi. How can we help?
====================
An input is a element which can take several formats: image, sound, video... that you can add to your live event configuration
Intensify the personalization of your live by managing all your inputs in the way you want (their position, size, audio...)
Setup your input position, size and audio will give you the opportunity to make a live show that looks like you want it to.
To edit an input setting, just **click on the blue pen from the wished input** (A).
Depending on the type of input you can (B) :
\-Modify his size and position (include cropping)
\-Add animations
\-Add filters
\-Modify its audio/video parameters/tracks
\-Change its content (text input)
\-enable iso record/replay (only for live sources)
And many other things

**Can't find the right answer?**
Contact the LiveU Studio Support team via our Live Chat.
---
# LiveU Field Units (SRT) – Studio
[Skip to main content](#main-content)
Search
------
Hi. How can we help?
====================
Live Streaming With the LiveU LU300(S)/600/800 (SRT)
----------------------------------------------------
**GETTING STARTED WITH THE** **LU FIELD UNITS** **IS SUPER-EASY. TO BEGIN:**
----------------------------------------------------------------------------
* Go to **[LiveU Central](https://lu-central.liveu.tv/luc/luc-webui/login.jsp)
** and sign in with your credential provided by LiveU.
* Connect your LU300(S)/600/800 to the internet using the method of your choice.
* Confirm that you have a LiveU reception server (cloud or physical), if you're not sure, please get in touch with LiveU support. Above 720p you must inform the LiveU support to check if your server is powerful enough.
**STREAMING TO LIVEU STUDIO**
-----------------------------
* Go to the LiveU Studio _**Production**_ studio (1) and _**Add an input (2)**_.

* Select _**Live source**_ (3)-> _**Encoder**_ (push) (4)-> _**Other SRT encoder**_.


* Copy the provided SRT URL and enable the LiveU input in the [LiveU Studio](https://studio.liveu%20studio/)
layers by clicking on it.

* Go to LiveU Central -> **_Manage_ (A)** -> _**Channel (B)**_ -> Select an available channel.
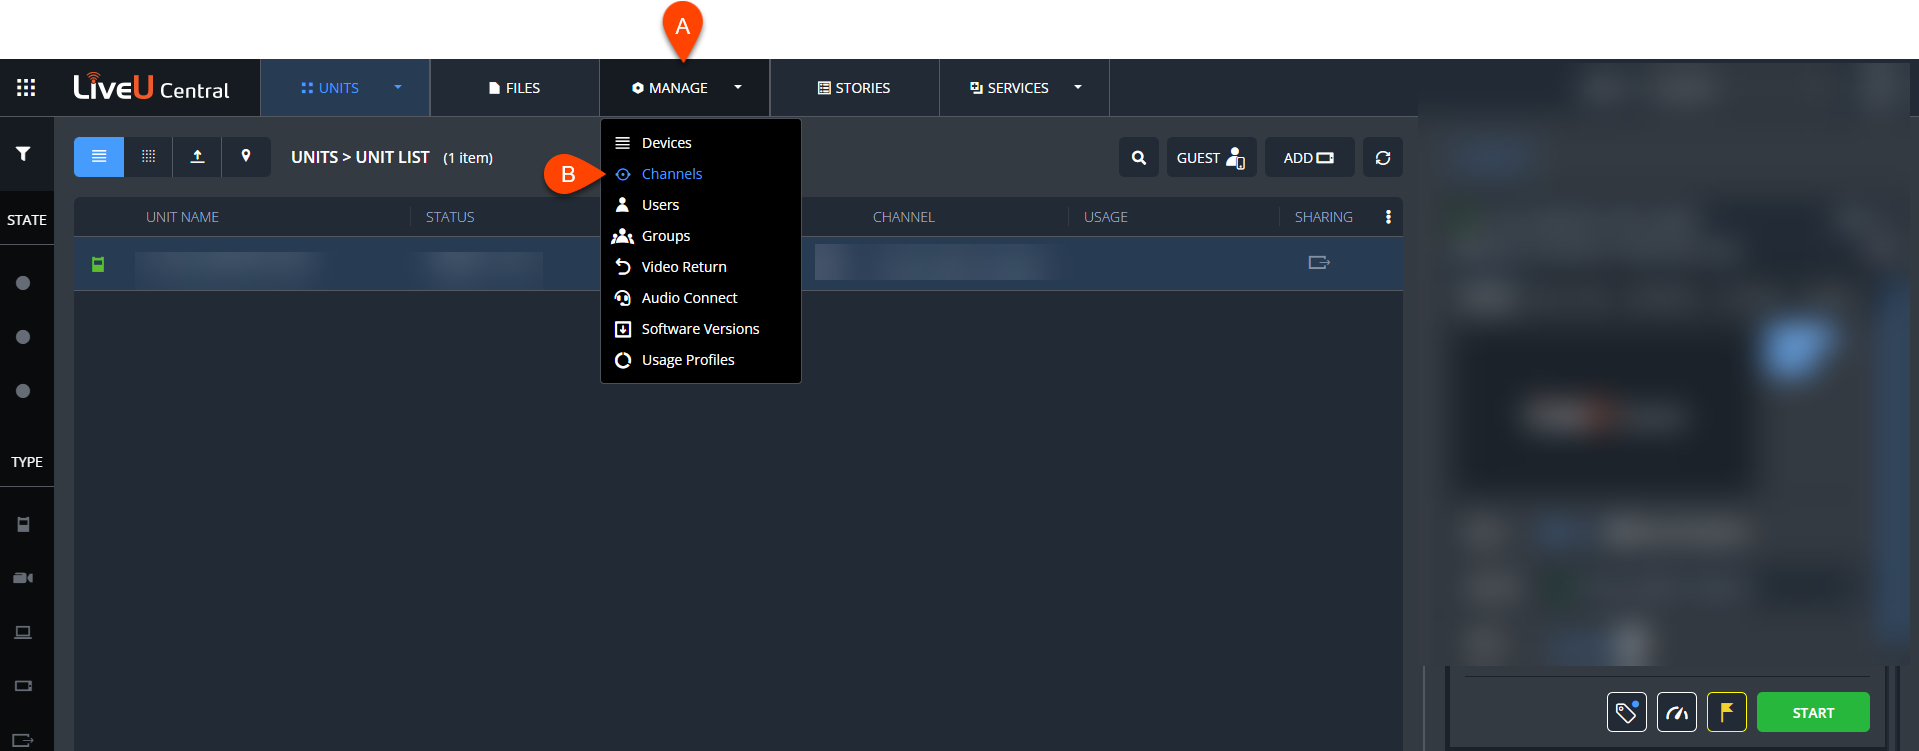
* In the **Streaming menu** of this channel, select :
* **Stream Type:** SRT
* **SRT Mode**: Caller
* NO Passphrase
* Copy/paste theprovided **Stream URL** into the field "**URL**" and "**Stream ID**".
Make sure to remove **"?stream\_id="** from the provided URL. You have to separate the url in 2 parts, the **URL** and the **Stream ID**.

Example, for the following provided URL :
* srt://eu-irl.studio.liveu.tv:8080_**?streamid=**_eu-irl/other\_push\_48581\_suFv3a
* **URL**: srt://eu-irl.studio.liveu.tv:8080
* **Stream ID**: eu-irl/other\_push\_48581\_suFv3a
* Start the _**test phase**_ on LiveU Studio and **Go Live** on your LU Field Units/LiveU Central.

If you're ready to stream you can :
* _**Start publishing & record**_ on LiveU Studio.
Don't forget to **stop the live** with the \[**END**\] button!
### Next steps
* [A step-by-step guide to starting with LiveU Studio](/hc/en-us/articles/17073335901083)
**Are you looking for Comms / IFB with your LU Encoder operators / camera operators and/or your decoder operator, back to a physical studio?**
* Please see [this video tutorial about Web Audio Connect](https://www.liveu.tv/resources/tv/how-to-use-audio-and-communications-with-liveu-studio "https://www.liveu.tv/resources/tv/how-to-use-audio-and-communications-with-liveu-studio")
, part of the LU Ecosystem to solve this.
**Can't find the right answer?**
Contact the LiveU Studio Support team via our Live Chat.
---
# Streaming protocols – Studio
[Skip to main content](#main-content)
Search
------
Hi. How can we help?
====================

By choosing the right protocol to broadcast your live stream you will be able to:
\- Optimize latency according to your event type and needs
\- Match with the broadcast standards of each destination points.
To find out everything you need to know about broadcasting your live stream with the protocol that suits you best, scroll down the page!
MOST-USED STREAMING PROTOCOLS
-----------------------------
### [LRT](https://www.liveu.tv/solutions/lrt)
LiveU Reliable Transport, or LRT™, is the video and audio delivery protocol developed over the last decade by LiveU, the inventor and patent holder of cellular bonding. The LRT™ protocol supports low latency, high resiliency video and audio transmission and was built from the ground up to accommodate the special properties of 4G/5G cellular as well as more traditional wireless and wired networks. In particular, LRT™ is optimized to support the bonding of multiple IP connections.
### RTMP (Real-Time Messaging Protocol): TCP
Developed by Macromedia and [acquired by Adobe](https://www.nytimes.com/2005/04/19/technology/adobe-buys-macromedia-for-34-billion.html)
in 2005, RTMP remains the most-used protocol. It maintains a persistent, stable connection and allows for low-latency communication. RTMP transfers stream data that is split into small packets between Flash Player and a server to ensure minimal interruptions and artifacts. Also, because of the legacy factor, RTMP is supported by most streaming platforms and software.
* Video codecs: H.264
* Audio codecs: AAC
* Latency: 3 - 30 seconds
**➕ Pros:** Multicast support, low buffering, wide platform support
**➖ Cons:** Old codecs, somewhat low security, relatively high latency
### WebRTC (Web Real-Time Communication protocol): both UDP and TCP
WebRTC is an open-source standard for real-time communications. WebRTC supports high-quality VP8 and VP9 (besides the old H.264), as well as the Opus audio codec.
One of the biggest advantages of WebRTC is that it transforms millions of browsers into streaming terminals without any additional plugins needing to be installed. Moreover, WebRTC supports sub-second latency, which means no more delays! Lastly, the protocol uses an adaptable bit rate technology, which allows it to automatically adjust video quality and prevent any drops and interruptions.
* Video codecs: VP8, VP9, H.264 (H.265+ AV1 in progress)
* Audio codecs: Opus
* Latency: Less than one second
**➕ Pros:** No plugins needed, sub-second latency, supported codecs
**➖ Cons:** Instability due to sub-second latency
### SRT (Secure Reliable Transport): UDP
SRT is an open-source video streaming protocol developed by Haivision and Wowza. It is widely considered to be a substitute for RTMP soon. Sharing the same advantages, [SRT](https://www.srtalliance.org/)
is taking the next step and making the dream of stable live streams with a sub-second latency a reality. It allows you to live-stream your content over suboptimal networks.
The developers state that SRT protects your live videos from jitters, bandwidth fluctuation, and packet loss. Moreover, SRT is similar to FTL and WebRTC in terms of sub-second latency, which allows for nearly real-time communication. Additionally, it is also stated that the protocol is codec-agnostic, meaning it supports any modern video and audio codec. Unfortunately, considering it is still an emerging technology, SRT is not widely supported.
* Latency: Less than one second
**➕ Pros:** High quality, stability, sub-second latency, strong codec support
**➖ Cons:** Weak platform support
**APPLE HTTP LIVE STREAMING (HLS)**
-----------------------------------
HLS streaming protocol is an alternative protocol developed by Apple. Today, HLS is the most widely used streaming protocol on the internet.
HLS is an adaptive bitrate protocol and also uses HTTP servers. This protocol is an evolving specification, as Apple adds features regularly.
**Can't find the right answer?**
Contact the LiveU Studio Support team via our Live Chat.
---
# Layers – Studio
[Skip to main content](#main-content)
Search
------
Hi. How can we help?
====================
* A layer corresponds to a program plan:
* The top layer corresponds to an element/input displayed in the front plane (A).
* The lowest layer will correspond to an element/input in the background (B).
* You can only have one active element/input at a time on each layer (except the lines including a "_**Template**_" input).
**LiveU Studio recommendations**: To keep things as simple as possible do not use too many layers and try to group the elements that can.

* You can change the position of your inputs in the layers via Drag & Drop.
* You can lock an input in fullscreen or fix an element in a specific position by doing a right click on the input.

### **Layer features & options**
* #### Delete/Lock/Hide/group by input type/change the tile sizes are options available when clicking on the 3 dot on the left of the layers. (1&2)

#### Drag & Drop your layer from the right:

#### Production display -> center my tiles/lock layer/hide my inputs fallbacks:

* [Would you like to prepare ready-made scenes in one click? -> check out our Hotkey/macro feature!](/hc/en-us/articles/17094632267035)
**Can't find the right answer?**
Contact the LiveU Studio Support team via our Live Chat.
---
# YouTube API Terms – Studio
[Skip to main content](#main-content)
Search
------
Hi. How can we help?
====================
**Users are required to agree to the [LiveU privacy policy](https://www.liveu.tv/privacy-policy)
and [API terms](https://www.liveu.tv/terms-of-use)
, before accessing the API Client for YouTube.**
A. These API Terms (“API Terms”) form a binding contract between you and LiveU and explain your rights and obligations when using LiveU’s API Client for YouTube (“API Client”). The API Client uses YouTube API Services and YouTube terms and policies apply to your use of the API Client, as set forth below.
B. “We”, “our” and “us” refers to LiveU and “you” and “your” refers to the individual, or company or other legal entity, on behalf of which the API Client is used.
C. If you are using the API Client on behalf of a company or other legal entity, you represent that you have the authority to bind such entity to these API Terms. If you do not have such authority, or do not agree with these API Terms, you must not use the API Client.
D. These API Terms do not apply to your use of the other products and services made available by LiveU. Your use of LiveU products and services is subject to separate written agreement(s) between you and LiveU or one of its affiliates entered into prior to such use.
E. We may revise these API Terms from time to time at our sole discretion. All changes are effective immediately when posted. Your continued use of the API Client following the posting of revised API Terms signifies your acceptance of the revised API Terms.
F. In the event of an inconsistency between these API Terms and those of an agreement governing (i) your use of LiveU Studio; or (ii) your partnership with LiveU, the provisions of such other agreement(s) will prevail to the extent of such inconsistency.
**1\. License and Use**
1.1. Provided that you comply with (i) these API Terms and documentation relating to the API Client; (ii) YouTube’s Terms of Service (https://www.youtube.com/terms); and (iii) all applicable laws, we grant you a non-exclusive, non-transferable, non-sublicensable, revocable, limited right to access and use the API Client solely to publish content that you produce in LiveU Studio. There are no implied licenses granted under these API Terms and we reserve all rights not expressly granted.
1.2. When using, or attempting to use, the API Client, you agree: (i) to be bound by the YouTube Terms of Service (https://www.youtube.com/terms); (ii) to adhere to the applicable access requirements set out in the API documentation; (iii) to keep API keys or authentication tokens secure and not to share them with any third party; (iv) not to misrepresent or mask your identity; (v) not to remove any proprietary notices from the API Client; (vi) that LiveU may place limits on use of the API Client and you will not use, or attempt to use, the API Client in a manner that exceeds such limitations, including rate limits, or in a manner that constitutes excessive or abusive usage; (vii) not to use the API Client in a manner that poses a security risk or tests our systems or networks or those of any third party; and (viii) not to use the API Client in any manner or for any purpose that infringes, misappropriates, or otherwise violates the rights of any third party.
**2\. Intellectual Property**. You are being granted a license to use the API Client and you obtain no other right, title, or interest. By using the API Client, you do not acquire ownership of any rights in the API Client or LiveU Studio. Subject to the foregoing, you retain all rights, title, and interest in your content.
**3\. Processing of Personal Data.** Any personal data processed related to your use of the API Client will be processed in accordance with LiveU’s Privacy Policy (https://www.liveu.tv/privacy-policy). Any user data that we store is stored on databases at AWS and Salesforce. Please review the Privacy Policy. You must agree to the Privacy Policy to use the API Client and your use of the API Client will indicate and be deemed to be such agreement. Any personal data processed by YouTube will be processed in accordance with Google’s Privacy Policy (http://www.google.com/policies/privacy). You may delete all your data and information from the API Client at any time. You may revoke the API Client’s access to your data via the Google security settings page at [https://security.google.com/settings/](https://security.google.com/settings/)
.
**4\. Export.** The API Client is subject to US global trade control laws and regulations, including the U.S. Export Administration Regulations and various sanctions programs administered by the U.S. Office of Foreign Assets Control. You will not, directly or indirectly, export, re-export, release, or make the APIs available for use, in contravention with these laws and regulations.
**5\. Warranty and Indemnification**
5.1. ANYTHING PROVIDED IN CONNECTION WITH THESE API TERMS, INCLUDING, WITHOUT LIMITATION, THE API CLIENT, IS PROVIDED “AS-IS”, WITHOUT ANY WARRANTIES OF ANY KIND. EACH PARTY DISCLAIMS ANY IMPLIED WARRANTIES, INCLUDING, WITHOUT LIMITATION, ANY IMPLIED WARRANTIES OF MERCHANTABILITY OR FITNESS FOR A PARTICULAR PURPOSE.
5.2. You will indemnify, defend (at LiveU’s request) and hold harmless LiveU and its affiliates and their respective directors, officers, employees, agents, contractors, end users, and licensees from and against any claims, losses, costs, expenses (including reasonable attorneys’ fees), damages or liabilities based on or arising from (a) your use of the API Client (b) your relationships or interactions with YouTube, any end users, or any distributors of your content, or (c) your infringement of LiveU’s or any third party’s intellectual property rights. LiveU may at its own expense participate in the defense and settlement of any claim with its own counsel, and you may not settle a claim without LiveU’s prior written consent (not to be unreasonably withheld).
**6\. Limitation of Liability.** WITH THE EXCEPTION OF YOUR (A) INDEMNIFICATION OBLIGATIONS UNDER SECTION 5.2; AND (B) OBLIGATIONS UNDER SECTION 4 (EXPORT), TO THE MAXIMUM EXTENT PERMITTED BY LAW: (i) IN NO EVENT SHALL EITHER PARTY BE LIABLE TO THE OTHER FOR LOST PROFITS OR REVENUE OR LOSS OF USE OR DATA, COSTS OF COVER OR SUBSTITUTE GOODS OR SERVICES, OR FOR INCIDENTAL, CONSEQUENTIAL, PUNITIVE, SPECIAL OR EXEMPLARY DAMAGES, OR INDIRECT DAMAGES OF ANY TYPE OR KIND, HOWEVER CAUSED, RELATED TO OR ARISING OUT OF THESE API TERMS OR THE RIGHTS, LICENSES, PRODUCTS OR SERVICES PROVIDED UNDER THESE API TERMS WHETHER BY BREACH OF WARRANTY, BREACH OF CONTRACT, NEGLIGENCE, TORT, OR ANY OTHER LEGAL THEORY, AND WHETHER OR NOT THE PARTY HAS BEEN ADVISED OF THE POSSIBILITY OF SUCH DAMAGES; AND (ii) THE TOTAL, CUMULATIVE LIABILITY OF LIVEU ARISING OUT OF OR RELATED TO THESE API TERMS OR THE RIGHTS, LICENSES, PRODUCTS OR SERVICES PROVIDED UNDER THESE API TERMS, WHETHER BASED ON CONTRACT, TORT (INCLUDING NEGLIGENCE), OR ANY OTHER LEGAL THEORY, SHALL BE LIMITED TO FIVE HUNDRED U.S. DOLLARS ($500.00). This clause shall survive the expiration or termination of the API Terms for any cause.
FOR THE AVOIDANCE OF DOUBT, THE LIMITATION OF LIABILITY SET FORTH HEREIN SHALL NOT LIMIT YOUR LIABILITY TO YOUTUBE, INCLUDING, WITHOUT LIMITATION, UNDER THE YOUTUBE TERMS OF SERVICE OR GOOGLE PRIVACY POLICY.
7\. Term and Termination. These API Terms shall remain in effect until terminated. You may terminate these API Terms at any time by ceasing all use of the API Client and any relevant credentials. LiveU may terminate these API Terms or your use of the API Client with immediate effect for any reason and at any time without liability or other obligation to you. These API Terms and use of the API Client will terminate automatically if your authorization to use LiveU Studio ends. Upon termination, all licenses granted herein immediately expire and you must cease use of the API Client; and the terms of these API Terms that by their nature are intended to continue indefinitely will continue to apply.
8\. Governing Law. These API Terms shall be construed and enforced in accordance with the laws applicable to your use of LiveU Studio, and you and LiveU submit to the exclusive jurisdiction of the courts with jurisdiction over your LiveU Studio use and the associated agreement, without giving effect to any conflicts of laws principles.
---
# LiveU Solo (RTMP) – Studio
[Skip to main content](#main-content)
Search
------
Hi. How can we help?
====================
One-Touch Live Streaming With the LiveU Solo
--------------------------------------------
**GETTING STARTED WITH THE SOLO IS SUPER-EASY. TO BEGIN:**
----------------------------------------------------------
* Go to [LiveU’s dedicated Solo page](https://solo.liveu.tv/#/login)
and create your free account. Connect your Solo to the internet using the method of your choice.
* Enter the serial number of your Solo to associate it with your account. Once it’s registered, you can configure it to your needs.
**STREAMING TO LIVEU STUDIO**
-----------------------------
* Choose what service to stream to.
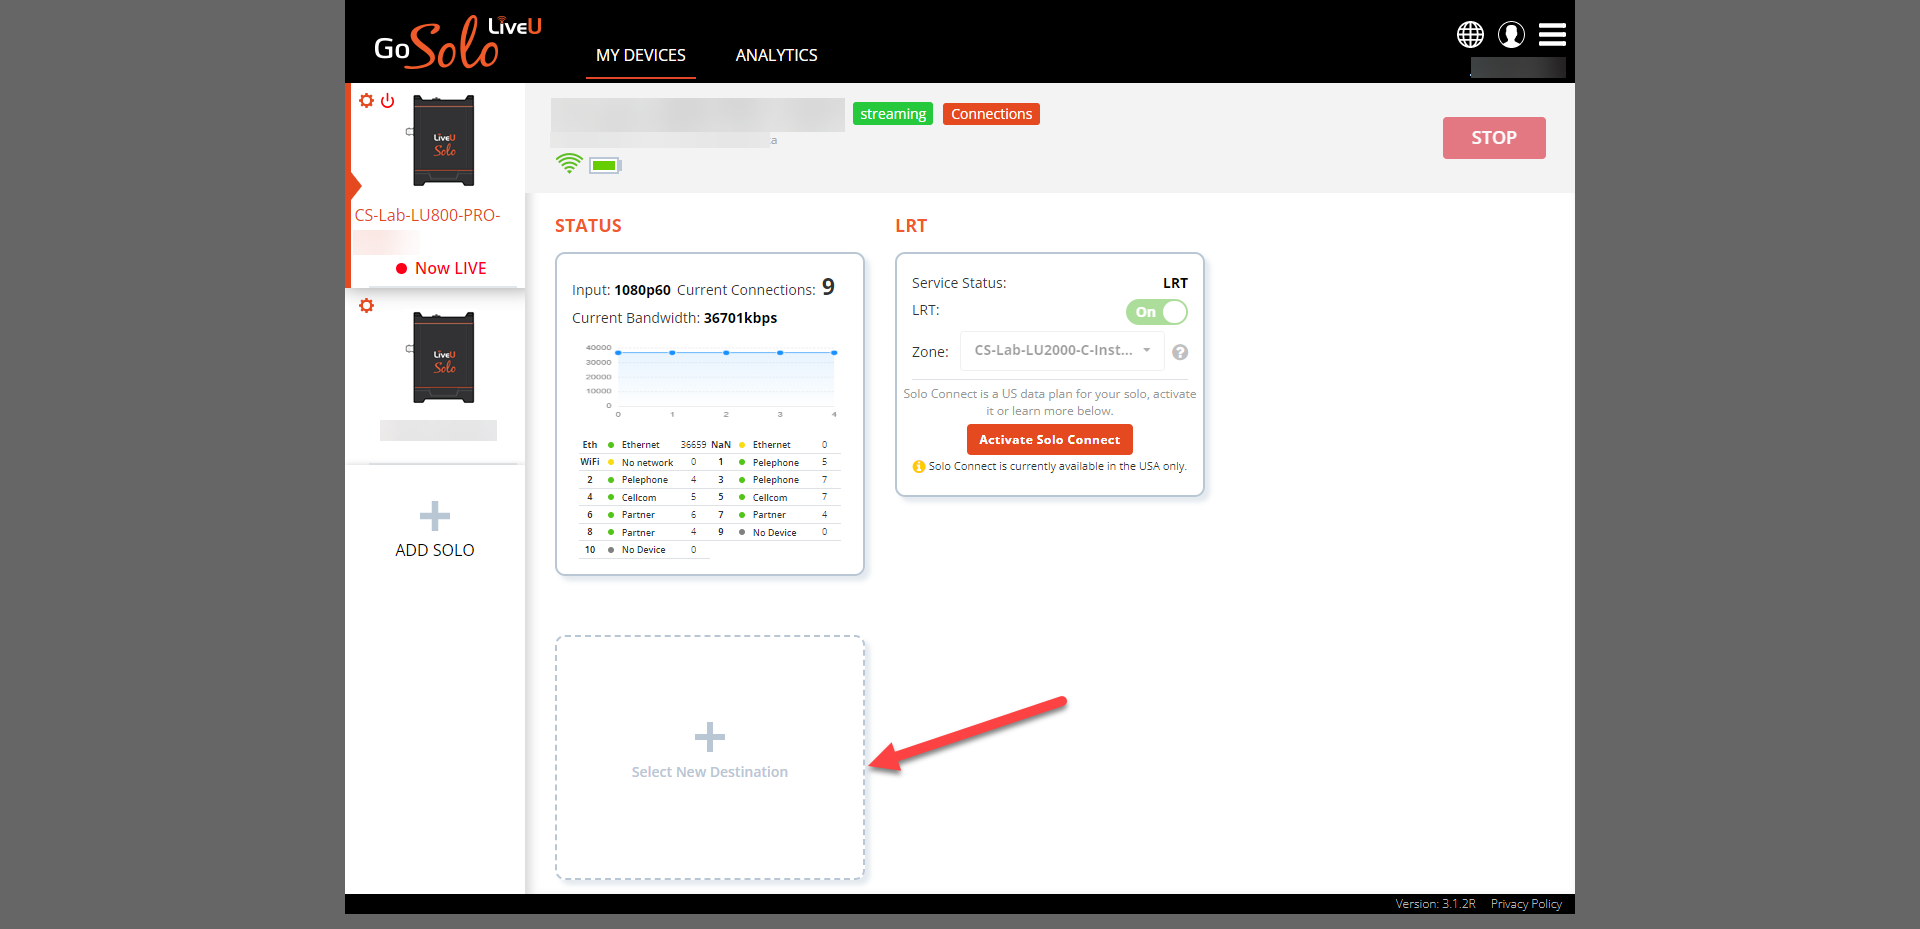
* Select **RTMP (Generic)** in the **destinations list.**

Open LiveU Studio
-----------------
* Create a live event in LiveU Studio and Start the Testing phase (1).
* Add an input (2)
****
* Select "_**Encoder push**_" -> RTMP

****
**Copy the provided stream URL & Key.**

Back in your Solo configuration, paste the provided Stream URL & Key

Be sure your Solo is online and connected to your video source. Then click on Go live from the Solo portal.

If your preview looks correct on LiveU Studio, everything is ready to go. Simply hit the “**Start publishing & record**” button on **LiveU Studio**.

**Don't forget to stop the stream after your live event (in Solo AND LiveU Studio).**
**In case of trouble,** set the following publication values on your LiveU Solo unit:
* **Override resolution enable** = 720p
* **Bit rate enable** = 2500 Kbps
* **Frame rate enable** = 30 fps
**Can't find the right answer?**
Contact the LiveU Studio Support team via our Live Chat.
---
# Audio Mixer – Studio
[Skip to main content](#main-content)
Search
------
Hi. How can we help?
====================
The audio mixer is the audio controller of your entire production.
The audio mixer is useful where there is a need to modify the audio coming from multiple sources to create a clear, solid mix.
You have the possibility to centralise the audio management of each live source you are ingesting in LiveU Studio and organize each of them independently
A **red ligh**t will appear at the top of each input to indicate if selected on the program/on air.
The different signals are summed to produce the combined output signal, which can then be broadcast.
In the audio mixer you are able to control :
* Your **output** : the program (always in Stereo)
* Your **inputs** : all the live sources ( Guests, clips, live feeds, etc.)
By default, the audio return of your inputs/program is disabled.
In order to enable them you have 2 options:
1. Using the [Multiview (1).](/hc/en-us/articles/17094654183323)
2. Using the Audio Mixer (2)

A. Mute/Unmute an audio input from the program
**For streaming purposes, by default, all audio inputs and the actual mix for the program are activated so that your audience will hear everything that is selected on air (on the program).**
B. Enable local audio return on the headphones for this input
**For monitoring purposes, by default, all audio returns of your inputs and program are disabled so that you, as the operator/producer can choose exactly what you want to listen to.**
You can create your own local mix on your local device. On a second device you would need to create another mix.
C. Force the audio return of an input in the program
**For streaming and / or monitoring purposes** you can add an input to the program, even if its video is not active on the program.
D. Use the L/R Fader/Pan to adjust any irregularity between L and R channel
Go further:
* [More advanced audio options (mono to stereo, etc).](/hc/en-us/articles/17094682876443)
**Can't find the right answer?**
Contact the LiveU Studio Support team via our Live Chat.
---
# Pull live source – Studio
[Skip to main content](#main-content)
Search
------
Hi. How can we help?
====================
Manage pull live source (SRT, Web feed,RTMP/M3U8, MPEG, RTSP,...)
-----------------------------------------------------------------
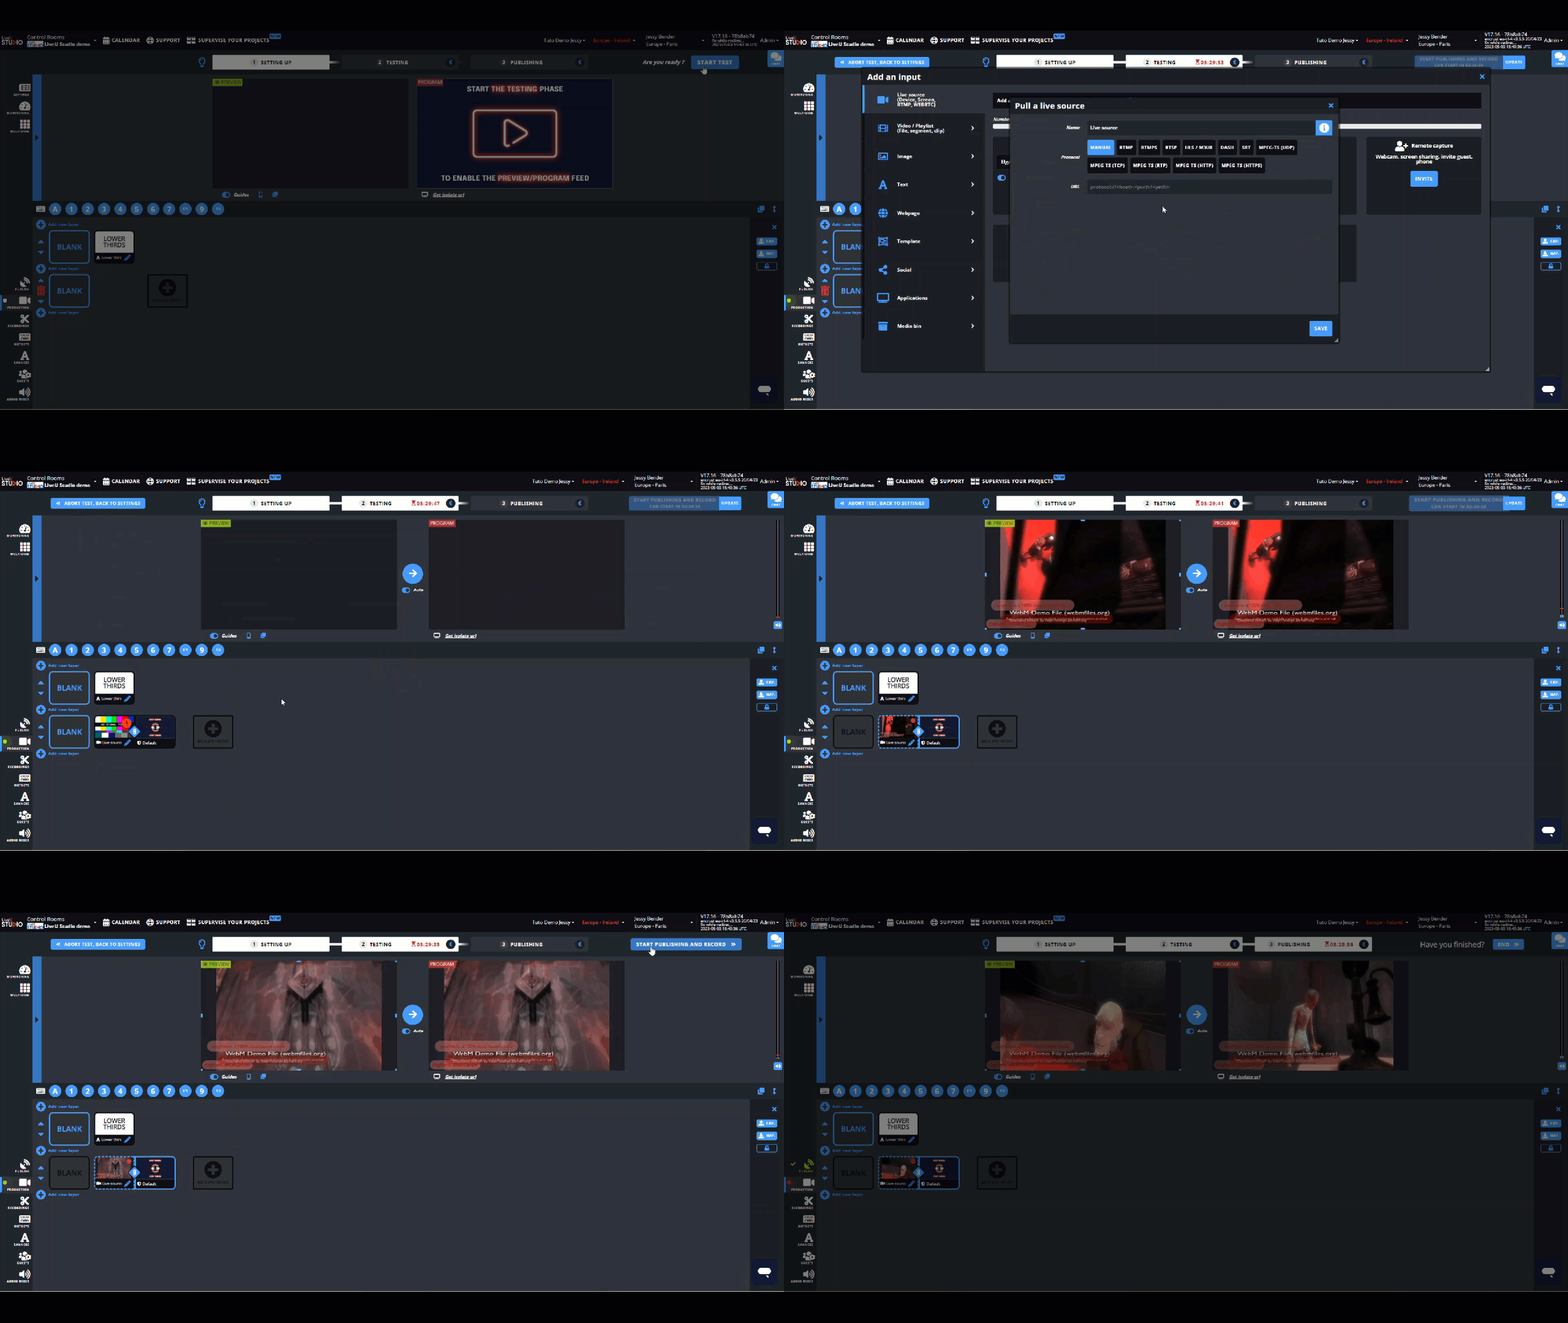
In order to pull a live feed (RTMP/SRT/RTSP/M3U8/etc):
* Go to the **_Production_** Studio (1) and _**Add an input**_ (2).

* In the _**Live Source**_ tab (3).
* Select _**Pull a live source**_ (4).

* Select the wished Protocol (5).
* Setup the Pull URL (RTMP(S), SRT, RTSP, MPEG-TS (UDP, TCP, HTTP), HLS, DASH) (6).

* Now your live source is displayed in the control room, you just have to **enable it with a left-click** on it (7).
* In order to have the preview of your live source, please check that you are in the _**Testing**_ or **_Publishing_** phase (8).

* If everything is fine you can _**Start publishing & record**_ to the selected publishing points (if it's not already the case).

### Next steps
* [A step-by-step guide to starting with LiveU Studio](/hc/en-us/articles/17073335901083)
* [How to troubleshoot a live feed?](/hc/en-us/articles/17094658055451)
**Can't find the right answer?**
Contact the LiveU Studio Support team via our Live Chat.
---
# Project / Sub-account – Studio
[Skip to main content](#main-content)
Search
------
Hi. How can we help?
====================
Add a sub account (project) to my main account
----------------------------------------------
A sub-account/project is only useful in 2 cases, if you want to:
* **Perform several live events at the same time**
* **Manage several different workflows**
Adding a sub-project will allow you to have separate spaces in which you can create custom workflows and reuse them whenever you want.

Please note that you need to be an Admin on the account to create new projects / sub-projects.
If you are not an admin, you have the editor privileges only, you can't see the "+" button, please contact your account administrator.
To add a new sub-project:
* Open the **_Account Management_** tab (1).
* Click on the "**+**" button (2).

* Enter a name for your sub-account
* Select its language
* Assign the LUC Groups that will have access to it

* You will be automatically redirected to the newly created project (sub-account).
**To return to your main account** (or go to another sub-account) simply click on your account name (1) and select the wished account.
### Next steps
* [Add your collaborators to this sub-account](/hc/en-us/articles/17094590511259)
.
* [Learn more about calendar and projects](https://studiosupport.liveu.tv/hc/en-us/articles/33769666079515-Calendar-Projects-and-events)
**Can't find the right answer?**
Contact the LiveU Studio Support team via our Live Chat.
---
# Push vs. Pull – Studio
[Skip to main content](#main-content)
Search
------
Hi. How can we help?
====================
**To make the article uniform, we use the following nomenclature.**
* **Producer** A stream always has a starting point, which we call a _producer_. This is the process that is generating values continuously. It might stop producing values at some point, or produce them indefinitely. Only the producer knows this.
* **Consumer** A _consumer_ is a type of process that relies on a _producer_ to generate values. Any consumer depends on a producer for input data. Each datum of this stream is then transformed according to the specific behavior of the consumer.

* In **pull** protocols, consumers ask periodically their producers for values. The consumers signal their producers to send values. If there is a value waiting, the producer will send it down, or else it will block and wait to fulfill the demand.
* In **push** protocols, the consumers open a connection to the server and keep it constantly active. The producer will send (push) all-new events to the consumers using that single always-on connection. In other words, the producer PUSHes the new events to the consumers.
**LiveU Studio Push RTMP ingest points**
----------------------------------------
### **Automatic ingest Endpoint (choose the best server)**
* rtmp://p.studio.liveu.tv/live/{{stream\_name}}
### **Specific server location**
* rtmp://{{server}}.studio.liveu.tv/live/{{stream\_name}}
{{server}}: You can either use our automatic server p, which will pick the closest server to your location, or you can use a specific server from the following list:
* * **US West - Oregon: us-ore**
* **US East - Virginia: us-vir**
* **LATAM - Brazil: sa-sao**
* **EU - Ireland: eu-irl**
* **Asia Pacific - Mumbai: ap-mum**
* **Asia Pacific - Singapore: ap-sin**
* **Asia Pacific - Seoul: ap-seo**
* **Asia Pacific - Tokyo: ap-tok**
* **Asia Pacific - Sydney: ap-syd**
### Next steps
* [Push a live feed to Studio](https://studiosupport.liveu.tv/hc/en-us/articles/17094645646107)
* [Pull a live feed in Studio](https://studiosupport.liveu.tv/hc/en-us/articles/17094653172123)
**Can't find the right answer?**
Contact the LiveU Studio Support team via our Live Chat.
---
# Calendar, Projects and events – Studio
[Skip to main content](#main-content)
Search
------
Hi. How can we help?
====================
In the following video, we’d like to introduce you to the key concepts of:
* The calendar
* Projects
* Live streaming events

**A project** represents a template for a show with its dedicated cloud environment and its calendar. It contains the inputs (live sources, graphics, templates), the hotkeys, transitions, and the destinations you configured (publishing points).
**A live streaming event** represents one occurrence of that show.
**On the calendar** of a specific project, you can repeat the same show on a regular basis, because all your assets and configurations are saved for you in the cloud.
### **Next Step:**
* [How to create a new project](https://studiosupport.liveu.tv/hc/en-us/articles/17094632349851-Sub-account)
---
# Solo Pro (SRT) – Studio
[Skip to main content](#main-content)
Search
------
Hi. How can we help?
====================
**To publish in SRT from LiveU Solo, you need to:**
* **have a Solo (on firmware 7.2) or Solo PRO**
* **select the right zone where SRT is active (see [LiveU Solo Pro documentation](https://solohelp.liveu.tv/hc/en-us/articles/13933642078235)
)**
**You can find all this information in the [Solo tutorial.](https://solohelp.liveu.tv/hc/en-us/articles/13933926074395-How-Can-I-Setup-An-SRT-Destination-)
**
Create a new SRT ingest point in Studio
---------------------------------------
* From the Production (1) -> Add an input (2).

* In the **Live Source** section (3) -> **Encoders** (push) (4) -> Select LiveU SRT (5).

* Copy the provided URL & StreamID

In the Solo Portal
------------------
* Select The SRT Caller Destination Type
* Add a new destination to your unit, and select SRT-OUT-Caller-Solo as your destination type:

Set Your SRT Information
------------------------
Once you select that, you will get some SRT options to set:

* Destination name: put whatever you want.
* URL & Port: paste the URL provided earlier on Studio.
* Stream ID: paste the Stream ID provided earlier on Studio.
* Latency: This is the SRT latency to set. It should be about twice the round trip time between the LiveU Cloud and your destination - but its hard to know what that number is! for Most destinations on the internet, the default of 500ms should be just fine. If you know your destination is for any reason hard to reach, or you find the stream unstable, try a higher value here.
* Codec: here you can choose, on Solo PRO only between H.264 (the default) or HEVC.
Go live on Solo.

Start streaming to Studio -> check that you are in Testing or Publishing phase in Studio as well.
-------------------------------------------------------------------------------------------------

---
# LiveU Field Units (RTMP) – Studio
[Skip to main content](#main-content)
Search
------
Hi. How can we help?
====================
Live Streaming With the LiveU LU300(S)/600/800 (RTMP)
-----------------------------------------------------
**GETTING STARTED WITH THE LU FIELD UNITS IS SUPER-EASY. TO BEGIN:**
--------------------------------------------------------------------
* Go to **[LiveU Central](https://lu-central.liveu.tv/luc/luc-webui/login.jsp)
** and sign in with your credential provided by LiveU.
* Connect your LiveU Unit to the internet using the method of your choice.
* Confirm that you have a LiveU reception server (cloud or physical), if you're not sure, please get in touch with LiveU support. Above 720p you must inform the LiveU support to check if your server is powerful enough.
**STREAMING TO LIVEU STUDIO**
-----------------------------
* Go to the LiveU Studio _**Production**_ studio (1) and _**Add an input (2)**_.

* Select _**Live source**_ (3)-> _**Encoder**_ (push) (4)-> _**LiveU RTMP**_ (5).

* Copy the provided **_Primary URL_** and _**Stream ID**_.

* Enable the LiveU input in the [LiveU Studio](https://studio.liveu%20studio/)
layers by clicking on it.

* Go to LiveU Central -> **_Manage_ (A)** -> _**Channel (B)**_ -> Select an available channel.

* In the **Streaming menu** of this channel, select :
* Select **RTMP** as Stream Type.
* Select **Basic** as Provider.
* Paste the **Primary URL** and the **Stream ID** into the associated fields.

* Start the _**test phase**_ on LiveU Studio and **Go Live** on your LU Field Units/LiveU Central.

If you're ready to stream you can :
* _**Start publishing & record**_ on LiveU Studio.
Don't forget to **stop the live** with the \[**END**\] button!
**Are you looking for Comms / IFB with your LU Encoder operators / camera operators and/or your decoder operator, back to a physical studio?**
* Please see [this video tutorial about Web Audio Connect](https://www.liveu.tv/resources/tv/how-to-use-audio-and-communications-with-liveu-studio "https://www.liveu.tv/resources/tv/how-to-use-audio-and-communications-with-liveu-studio")
, part of the LU Ecosystem to solve this.
**Can't find the right answer?**
Contact the LiveU Studio Support team via our Live Chat.
---
# Local screen share – Studio
[Skip to main content](#main-content)
Search
------
Hi. How can we help?
====================
Add a screen capture live source (local-screen, game,..)
--------------------------------------------------------
* In the **_Production_** Studio (1).
* _**Start the test**_ phase (2).
* _**Add an input**_ (3).

* In the _**Live Source**_ tab (4).
* Select _**Screen capture**_ (5).

* Select the screen/tab/app to display
* Enable audio
* Share

* Enable the input by clicking on it.

* _**Start publishing & record**_.

**Can't find the right answer?**
Contact the LiveU Studio Support team via our Live Chat.
### **Possible Issue**:
If the following message is displayed in the audio tab "**Please invoke getUserMedia once**", this means that you have not allowed LiveU Studio to access your camera and/or microphone.
To solve the problem click on "**Secure**" in the search bar when you are on the Remote capture live source management page and allow LiveU Studio to access your camera and microphone.

The problem should be solved, otherwise please contact LiveU Studio Support.
---
# Web Page – Studio
[Skip to main content](#main-content)
Search
------
Hi. How can we help?
====================
Embed a web page on LiveU Studio
--------------------------------
* Enter a live control room.
* Go to the **_Production_** studio (1) and click on _**Add an input**_ (2).

* Then select the **_HTML Overlays_** (3) and click on _**Add a Webpage**_ (4).

* Enter the URL of the web page to display and click "**Save**".
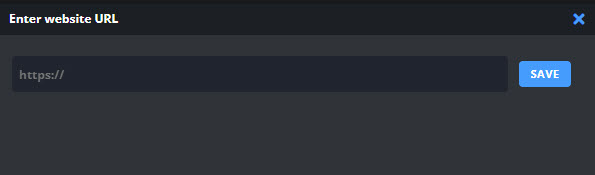
Congratulations! Your web page is now available in your control room.
To edit it, you just have to double click on the input (5), you will be able to :
* Change his position
* Modify the URL, zoom, format settings
* Rename the input

LiveU Studio allows the integration of HTML Web pages as well as **Streamlabs**, **StreamElement,** **Dizplai, Tagboard, UNO**, **Singular.live, LIGR** in your Livestream.
**_Refresh in program_** button **\- Forced refresh :** If your HTML overlay has an intro/launch animation that you'd like to play every time you display the overlay on the PGM, you can enable the "**_Refresh in program_**" button.

### Next steps
* [A step-by-step guide to starting with LiveU Studio](/hc/en-us/articles/17073335901083)
* [Add a custom webpage (development recommendations)](/hc/en-us/articles/17094638237723)
**Can't find the right answer?**
Contact the LiveU Studio Support team via our Live Chat.
---
# Guest advanced audio parameters – Studio
[Skip to main content](#main-content)
Search
------
Hi. How can we help?
====================
Enable or disable some remote guest features
--------------------------------------------
If your guest is using a pro microphone setup, it is possible that it encounters problems. If this is the case, he may have to disable some audio options such as noise suppression, etc. to find the ideal configuration for his setup.
**To enable/disable some of the settings/functionality of the remote guest, you can use "Audio advanced settings" section.**
* **Automatic gain control**
* Enabled by default, the Automatic gain control is a feature in which a sound source automatically manages changes in the volume of its source media to maintain a steady overall volume level. This feature is typically used on microphones, although it can be provided by other input sources as well.
* **Echo cancellation**
* Enabled by default, Echo cancellation remove echo but alter the audio, disabling this feature can create echo but the sound will be more faithful.
* **Noise suppression**
* Enabled by default, Noise suppression automatically filters audio to remove background noise caused by equipment, etc.
* **Stereo**
* Force same audio on left and right (for change mono to stereo).

**Can't find the right answer?**
Contact the LiveU Studio Support team via our Live Chat.
---
# Broadcasters – Studio
[Skip to main content](#main-content)
Search
------
Hi. How can we help?
====================
ADD OR EDIT A PUBLISHING POINT
* Create a live or join the Control Room of an existing live (1).

* In the _**Publish**_ tab (2).
* Click on _**Add or edit publishing points**_ (3).

* Select the wished destination output in the list.
Some destinations require you to allow LiveU Studio to use your account in order to be able to publish live on them. Please find more info about each publishing point [here](/hc/en-us/sections/17039181942683-Publishing-Output-destinations)
.

After selecting a publishing point, it will be added to the destination list.

[Want to add some input(s) to your live stream?](/hc/en-us/sections/17306801860123-Production-Visual-mixer)
Otherwise, click on the **_Start Test_** button to preview your feed.
When ready to go live on the selected publishing points, just click on **_Start publishing_**.

**Can't find the right answer?**
Contact the LiveU Studio Support team via our Live Chat.
---
# Multi-format (transcoding) – Studio
[Skip to main content](#main-content)
Search
------
Hi. How can we help?
====================
SEND MY FEED IN MULTIPLE FORMAT/RESOLUTION
Sending a live stream with LiveU Studio on multiple destinations at once and in different formats will allow you to meet the broadcasting requirements of all platforms you want to broadcast on.
Broadcasting your live event in different formats and to different destinations will allow you to:
\- Reach a maximum number of people with your live event regardless of their preferred live platform.
\- Create multiple live streams for each destination from an all-in-one tool.
\- Transcode your feed regarding the live standards asked by each destination points.
\- Improve your position on social media' feeds and your referencing on Google search.
With the LiveU Studio cloud production studio, it's easy to send your feed in multiple qualities to different broadcasters (transcoding).
For example, If you want to send your feed to **Twitch in** **60 FPS 1920x1080** and the same feed to **Facebook** **in 1280x720 30FPS** just follow the instructions below:
* Create a live or join the Control Room of an existing live.
* In the "**Publish**" section (1).
* Edit the "**Program feed**" setup (2). Please note that the settings applied to the "**program feed**" determine the maximum quality/format/resolution of your live.

* **Set up** the highest desired quality in the **Program Feed** menu and save it (3). Please note that you can't create another format higher than this one, another way the output of the said format will not be optimal.
* **Add a publishing point** (4).


* Your **first feed** (**1920x1080 60FPS**) is now set up (5).
* Set up the **second feed** (**1080x720 30FPS**) with the "**Add Format**" button (6).

* Set up the desired format and save it.

* Select the "**Add** **Qualities**" button .

* Set up your output qualities and save it.

* Add your second publishing point.

**Congratulations!** You have set up the two following publish points:
1. **1920x1080 60fps to Twitch**
2. **1280x720 30fps to Facebook**
**Now you can start the test and/or start publishing your live.**

**Can't find the right answer?**
Contact the LiveU Studio Support team via our Live Chat.
---
# Remote capture & screensharing – Studio
[Skip to main content](#main-content)
Search
------
Hi. How can we help?
====================
Use the feed from a remote guest and customize his video return experience
--------------------------------------------------------------------------
A remote guest is someone that you invite on your live stream session, he is not necesseraly based on the same location that yours. Inviting him to the show, you can retrieve his camera and/or his audio to display them in you live feed. He can interact with you or with your host during the live stream as with participants.
The advantage of adding remote guests to your live show are to:
\- Interact live with people all over the world.
\- Reduce your production and travel costs.
\- Allow you to be more flexible.
With LiveU Studio, you have a feature that allows you to add your remote guest's live stream with just a few clicks. Discover more about our remote guest feature in the "remote guest management" section.
---
# Preview/program and monitoring – Studio
[Skip to main content](#main-content)
Search
------
Hi. How can we help?
====================
**Differences between preview and program:**
**Preview** is used to show the next scene, while **Program** displays your output.
It is important to note that the return of the program/preview is done in **360p 15 fps** by default and this voluntarily to limit the resources used by the machine
**You have different possibilities to see your feed as it comes out on your destination points:**
* [Multiview](/hc/en-us/articles/17094654183323)
(a multiview panel where you can manage the quality of your videos feedback)
* RTMP link to open on VLC (See below)
* Advanced parameters (contact the sales)
**Check the stream on VLC**
* In the LiveU Studio **_Publish_** tab (A), click on the **RTMP** **recording button** (B) and **copy the provided URL**.
* Paste this URL in [VLC](https://www.videolan.org/vlc/)
(Open network stream).


* You can now look at the quality we are currently delivering.
**Can't find the right answer?**
Contact the LiveU Studio Support team via our Live Chat.
---
# Isolation URL – Studio
[Skip to main content](#main-content)
Search
------
Hi. How can we help?
====================
Isolate an input or the program in a separate window (WebRTC)
-------------------------------------------------------------
Isolation URL allow you to open a specific input in another tab or device.
With the isolation URL you can do :
\- ISO Recording of a remote capture input locally
\- ISO recording of a remote capture input in LiveU Studio (in another control room)
\- Display a remote guest on a TV / screen in Studio mode in front of the artist / Host
Please note that this URL is only available in the **testing** or **publishing** phase.
**This is not a link intended for the audience. In order not to overload the server, the link cannot be opened more than 3 times simultaneously.**
To find the Isolation URL of an input:
* Open the control panel of the wished input (A).
* Copy the provided isolation URL (B).

You can find the same Isolation URL below the Program feed (C).

AUDIO
-----
To enable the audio from the isolated input/program. You only need to interact with the page and click on “**M**”.
ISOLATION URL PARAMETERS
------------------------
You can add one or several parameters to the viewer URL depending on your needs.
At the end of the provided URL, you simply need to add
?first\_parameter=value&second-parameter=value, etc.
The order of the parameters does not matter.
PARAMETER “LABEL”
-----------------
This parameter allows you to display the name of the input you are isolating.
label=20,2,1,000000AA
* 20: size of the label in pixels
* 2: X margin (left and right) between 0 and 5
* 1: Y margin (top and bottom) between 0 and 5
* RGB Alpha in hexadecimal (red, green blue and alpha optional)
* RGB: from 00 to FF for each (black to white)
* Alpha: 00= not visible or fully transparent, FF = full opacity
PARAMETER “BACKGROUND”
----------------------
The background color or image of the web page which displays the isolated input/program.
bg=hexadecimal color code or image url
**Note:** all standard image formats are accepted, even animated ones like GIF, but videos are not supported. We recommend using a 1920p x 1080p image resolution.
Examples:
* bg=F333FF
* bg=https://s3.amazonaws.com/myfile.png
PARAMETER “RADIUS”
------------------
Radius allows you to round the corners of a label.
Radius in px
exemple : ?label=20,2,1,000000AA**&****radius=5**
PARAMETER “WEBRTCQUALITY”
-------------------------
This parameter allow you to change the display quality
webrtcquality=
* fhd (1080p)
* hd (720p)
* sd (360p)
* mobile (240p)
* thumbnail (144p 3fps)
PARAMETER “LIGHTEMOJIS”
-----------------------
To display emojis animations in a light way, so each emoji just appears one time but bigger than with the default animation mode (only available for the LiveU Studio remote guests in WebRTC).
lightemojis=true
To use this parameter, you need to enable the "Emotions" feature on your project first: [https://studiosupport.liveu.tv/hc/en-us/articles/17094631859227-Emotions](https://studiosupport.liveu.tv/hc/en-us/articles/17094631859227-Emotions)
Else, this parameter will be ignored.
**Can't find the right answer?**
Contact the LiveU Studio Support team via our Live Chat.
---
# Local video devices – Studio
[Skip to main content](#main-content)
Search
------
Hi. How can we help?
====================
Add a local video devices (USB cam,...)
---------------------------------------
* Go to the _**Production**_ Studio **(1).**
* **_Start test_ (2).**
* **_Add an input_ (3).**
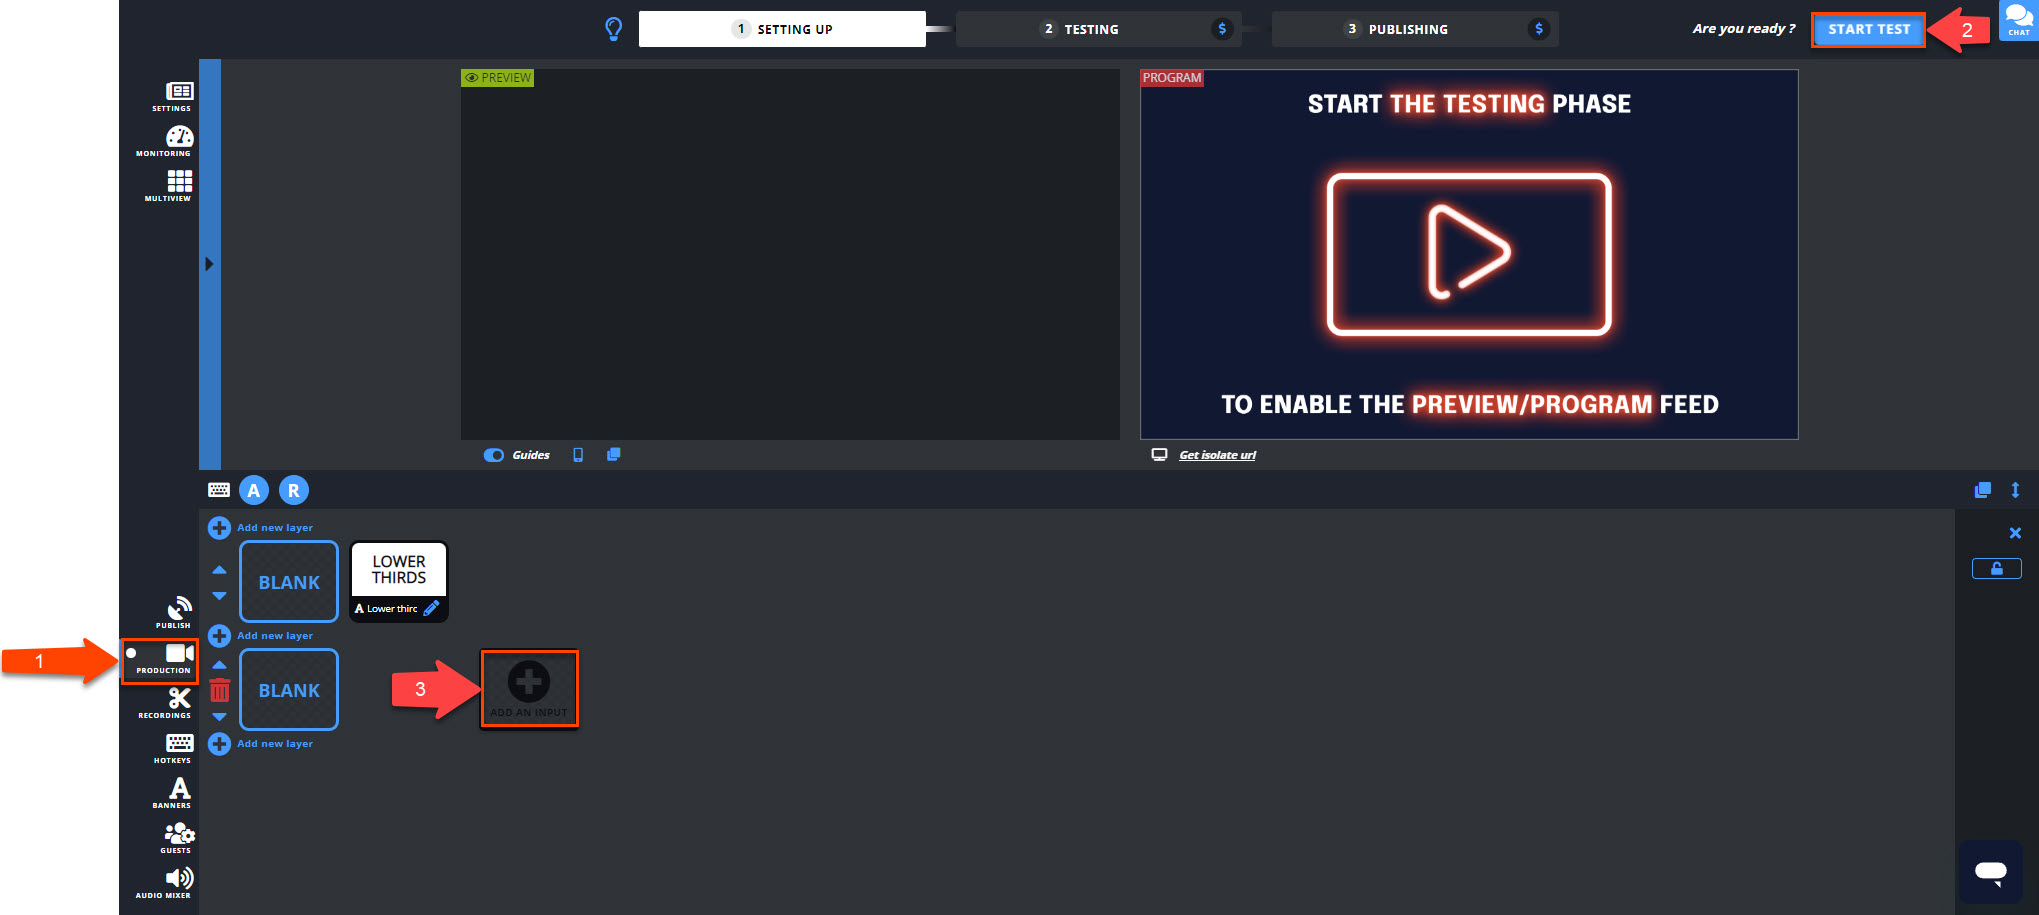
* In the _**Live Source**_ tab (4).
* Select _**Add video devices**_ (5), select the wished video device with the drop-down menu, and _**Choose**_.

* Enable the video input by **clicking on it** in the Control room (6).
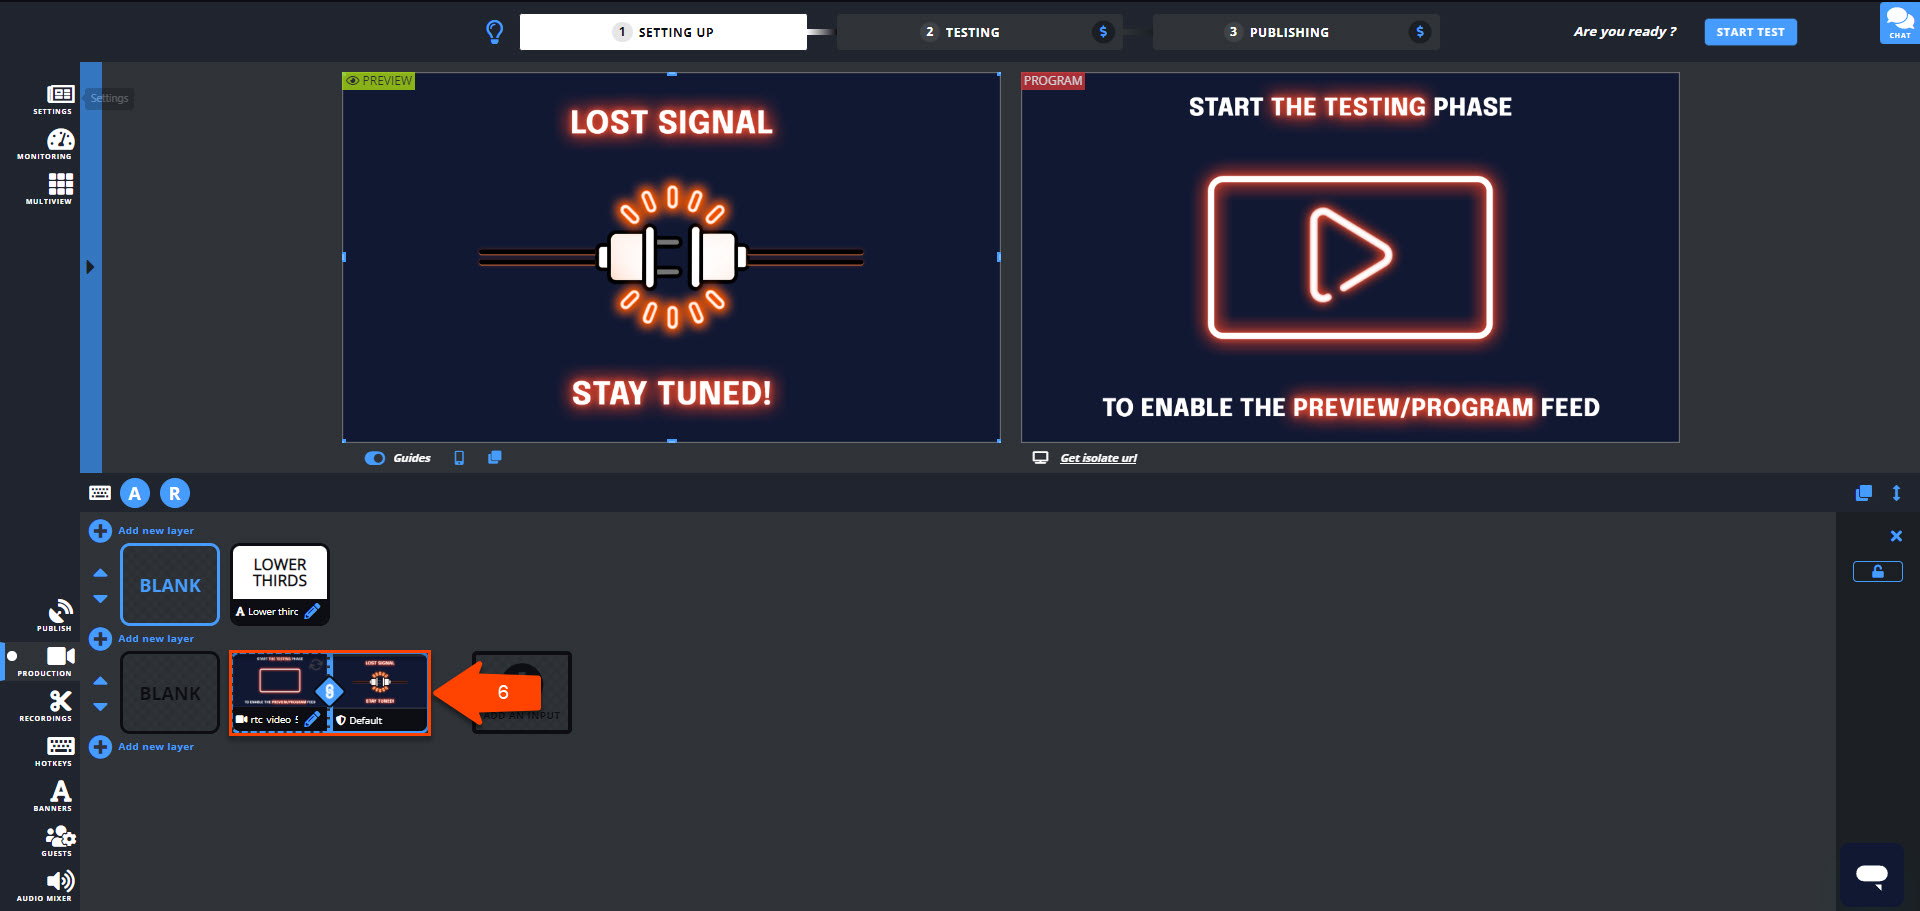
When ready, _**Start publishing & record**_!

**Can't find the right answer?**
Contact the LiveU Studio Support team via our Live Chat.
---
# Delay – Studio
[Skip to main content](#main-content)
Search
------
Hi. How can we help?
====================
How to sync multiple live sources?
\-Use our [Framesync](/hc/en-us/articles/25823257332123)
feature if your input are having SEI Timecode.
\-Use our delay feature.
* In the _**Production**_ section (1 ).
* Open the settings panel of the desired input (2).
* Set up the desired value in the _**Delay**_ field (3).

**Please note that :**
1. **The applied parameters will only be visible if the input is at least enabled in the preview and/or program.**
2. You may encounter problems displaying your sources if the configured delay is too low (<2sec). In case of display problem, please switch your source delay to auto or increase the delay until your input is displayed correctly.
3. The delay value "auto" allows your source to adapt to the input stream received, with an average delay of 1 to 2 seconds.
4. In order to synchronize several sources together, a delay value other than>**auto** must be selected on **_all_** the inputs to be synchronized.
**Can't find the right answer?**
Contact the LiveU Studio Support team via our Live Chat.
---
# Push live source – Studio
[Skip to main content](#main-content)
Search
------
Hi. How can we help?
====================
Manage Push live sources (OBS, Xsplit, Wirecast,...)
----------------------------------------------------
[More info about difference between push and pull live source here!](/hc/en-us/articles/17094588746523)
Using a Push live source will allow to:
\- Send a single connection to the live server to your participants.
\- Have the most efficient bandwidth possible for an optimized live stream quality.
* In the _**Production**_ Studio (1).
* _**Add an input**_ (2).

* In the _**Live Source**_ tab (3).
* Select _**Encoder (Push)**_ (4).

* Select your encoder and protocol in the list, otherwise, select _**Other Encoder (SRT or RTMP).**_

* Copy the provided Server URL & Stream name.
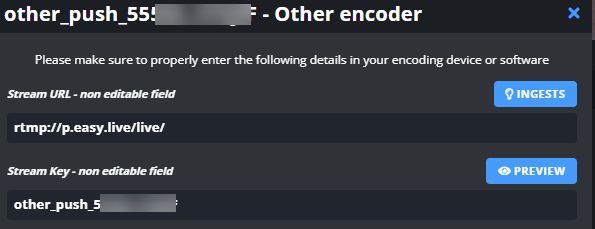
### **Send to LiveU Studio**
* Enable the _**O****ther Encoder**_ input by clicking on it (5).
Please note that to preview a live source you need to be in _**Testing**_ or _**Publishing**_ phase (6).

* The default RTMP URL provided by LiveU Studio "**rtmp://p.studio.liveu.tv/live/**" will **automatically** choose the closest server to your encoder (lowest latency).
You also have the possibility to select a specific server location via the "**ingest**" button.
* Copy/paste the **server URL & Stream name (Stream Key)** into your streaming software (OBS/Xsplit/Other encoders) and start streaming.

* Check that your feed is received by LiveU Studio.
### **Next steps**
* [How to troubleshoot a live feed?](/hc/en-us/articles/17094658055451)
**Can't find the right answer?**
Contact the LiveU Studio Support team via our Live Chat.
---
# Remote Capture – Studio
[Skip to main content](#main-content)
Search
------
Hi. How can we help?
====================
Use the feed from a remote guest and customize his video return experience
--------------------------------------------------------------------------
A remote guest is someone that you invite on your live stream session, he is not necesseraly based on the same location that yours. Inviting him to the show, you can retrieve his camera and/or his audio to display them in you live feed. He can interact with you or with your host during the live stream as with participants.
The advantage of adding remote guests to your live show are to:
\- Interact live with people all over the world.
\- Reduce your production and travel costs.
\- Allow you to be more flexible.
With LiveU Studio, you have a feature that allows you to add your remote guest's live stream with just a few clicks. Discover the steps right here:
#### Use the feed from a remote guest
* In the **Production Studio** (1).
* Start the Test phase (2) (only when you want to preview the feed of your remote guest).
* Add an input (3).

* In the _**Live source**_ tab (4)
* Select _**Remote capture**_ (5).

* Share the provided link with your remote guest.

* Enable the Remote capture live source in the control room by clicking on it.
By default, your guest will see his video return as well as the return of the program feed as below.
The "_**Group**_" chat on the right gathers messages from other remote guests as well as live comments received on YouTube/Twitch and Facebook (if the live is published to one of these platforms with the native integration and if the feature is enabled on this account).
Note that the guest audio return is disabled by default to avoid any echo problems.
From the guest View you will be able to apply some effect on your camera such as light blur, blur, and green screen.


### Customize his video return experience
* Enter the remote guest settings panel (A & B).

On the left side of the interface (C) you can :
* Manage the audio/video settings of your guest (quality, format, fps of the stream your guest will send you).
* Enable the screen sharing option for the remote guest **(this will create an entry named "Name\_of\_the\_guest-screenshare" in the LiveU Studio production studio). Please change the upload quality of the guest to 720p or 1080p so that the screenshare is optimal.**
On the central part (D) it is possible to :
* Manage your guest's video returns by selecting a template from the list and assigning video returns to it. Your guest will see the template that you have assigned to him/her as well as the feeds that you have authorized him/her to see.

* After editing your guest video return -> Save the remote settings.
REMOTE GUEST
------------
### [Send this cheat sheet to your remote guests](/hc/en-us/articles/17094647442459)
* Open the previously sent link
PC, Mac, Linux, Android users, please use [**Google Chrome**.](https://www.google.com/chrome/)
iPhone/Ipad (IOS) users, please only use [**Safari**](https://www.apple.com/safari/)
.
For Huawei mobile users, please use only [**Mozilla Firefox**](https://play.google.com/store/apps/details?id=org.mozilla.firefox&hl=fr&gl=US)
.
Please note that we recommend the following bandwidths depending on the desired sending quality:
* 0.5 Mb/s to stream in the minimum required quality.
* 1.5 Mb/s to stream in 480p SD.
* 2.5 Mb/s to stream in 720p HD.
* 4 Mb/s to stream in 1080p HD.
If needed, allow LiveU Studio to use the devices' microphone/camera.

* When ready to stream, simply click on "**Start & join**".

* Return to the LiveU Studio platform to check if the stream is received (if not, check the status of your internet connection, the bandwidth on your device may be too low).
\* If you get a gray screen or a sound problem -> check that you have no Bluetooth speakers or other audio devices that could conflict with the LiveU Studio system.
Please note that in case of problems connecting with a remote guest (opening the link, displaying the video, etc.) we recommend to:
\-Check if the recommanded browser is used and update it to the latest version
\-Open the remote guest link in a private window
CHECKLIST FOR YOUR REMOTE SPEAKERS WORKFLOW
-------------------------------------------
Before the rehearsal, share and go through [this cheat sheet](/hc/en-us/articles/17094647442459)
with all your remote speakers.
* Start the test on LiveU Studio. We even recommend recording your session as a reference.
* Then, share the correct link to each remote speaker.
**Now test everything that matters**
1. connect one by one your speakers and put them on the program.
2. listen to each of them in the Control Room AND on the output of the control room.
Check the stream on VLC.
* In the LiveU Studio _**Publish**_ tab (1), click on the _**RTMP recording**_ button (2) and copy the provided URL.
* Paste this URL in VLC (Open network stream).

* You can now look at the quality we are currently delivering.
* Make sure that each speaker is sending stereo audio (on both sides).
1. test all your hotkeys / scenes to make sure everyone is sitting correctly for all hotkeys.
2. Make everyone talk with each other and tell everyone to use the exact same device in the same conditions for the real show!
Ready to go live? **Start publishing & record**. Enjoy.

#### Next steps
* [How the automated guests feature works?](/hc/en-us/articles/17094590075291)
* [How to create an IFB (Interruptible foldback)?](/hc/en-us/articles/17094590045595)
* [Enable the screensharing feature for my remote guest](/hc/en-us/articles/17094653703323)
* [You want to disable some remote guest features like echo cancellation, auto gain control,...?](/hc/en-us/articles/17094590064283)
#### Keep exploring
* [Monitor my live source(s)](/hc/en-us/articles/17094654266523)
* [Setup a Fail-Safe Stream Backup (Fallback)](/hc/en-us/articles/17094683105435)
**Can't find the right answer?**
Contact the LiveU Studio Support team via our Live Chat.
---
# LiveU Receiver/Decoder: LRT Output – Studio
[Skip to main content](#main-content)
Search
------
Hi. How can we help?
====================
How to output LRT from Studio to my LiveU Channel?
--------------------------------------------------
Please note that you can publish in LRT to your own channel (physical or cloud) OR to one of the LiveU Channel (mmh) included in your Studio subscription.
To send your program feed in LRT to your channel please follow this steps:
* Once in Studio, go to the Publish panel (1).
* Add or edit a publishing points (2).

* Go to **LRT** (3) (only visible for the main/recording quality, on the top if you have multy quality or format).
* Add a publishing point (4).

* Select in the list the channel to which you would like to publish:
* your own channel
* a dedicated Studio Channel included in your subscription \[by adding an [LRT input](/hc/en-us/articles/17094653138971)\
to your production beforehand\]

* When you're ready to publish your program out, click on start publishing and record.

Please note that if you publish in LRT on a physical channel located on your premises, your company's network parameters may be relevant and this may require you to open some network ports needed to send and receive this type of stream.
Please refer to our [network prerequisites](/hc/en-us/articles/17094630482971)
in case of problems publishing in LRT to a physical channel.
**Are you looking for Comms / IFB with your LU Encoder operators / camera operators and/or your decoder operator, back to a physical studio?**
* Please see [this video tutorial about Web Audio Connect](https://www.liveu.tv/resources/tv/how-to-use-audio-and-communications-with-liveu-studio "https://www.liveu.tv/resources/tv/how-to-use-audio-and-communications-with-liveu-studio")
, part of the LU Ecosystem to solve this.
---
# Flowics – Studio
[Skip to main content](#main-content)
Search
------
Hi. How can we help?
====================
How to add a Flowics overlay into LiveU Studio?
-----------------------------------------------
* Enter a live control room.
* Go to the _**Production**_ studio (1) and click on _**Add an input**_ (2).

* Then select the **_HTML Overlays_** (3) and click on _**Add Flowics**_ (4).

* Paste your Flowics **_Output URL_** and "_**Save**_".

* Go to Flowics and publish the desired content. It will appear immediately on LiveU Studio.

If you want to find out more about using Flowics with LiveU Studio, contact your LiveU sales representative for a demo or go to the [Flowics knowledge base](https://engage.flowics.com/support#/)
.
### Next steps
* [A step-by-step guide to starting with LiveU Studio](/hc/en-us/articles/17073335901083)
**Can't find the right answer?**
Contact the LiveU Studio Support team via our Live Chat.
---
# Streamlabs – Studio
[Skip to main content](#main-content)
Search
------
Hi. How can we help?
====================
Add a Streamlabs overlay to my live stream (social media chat, etc)
-------------------------------------------------------------------
* Login to [**Streamlabs**](https://streamlabs.com/)
* Select "**Alert Box**" (1) and copy the provided "**Widget URL**" (2)
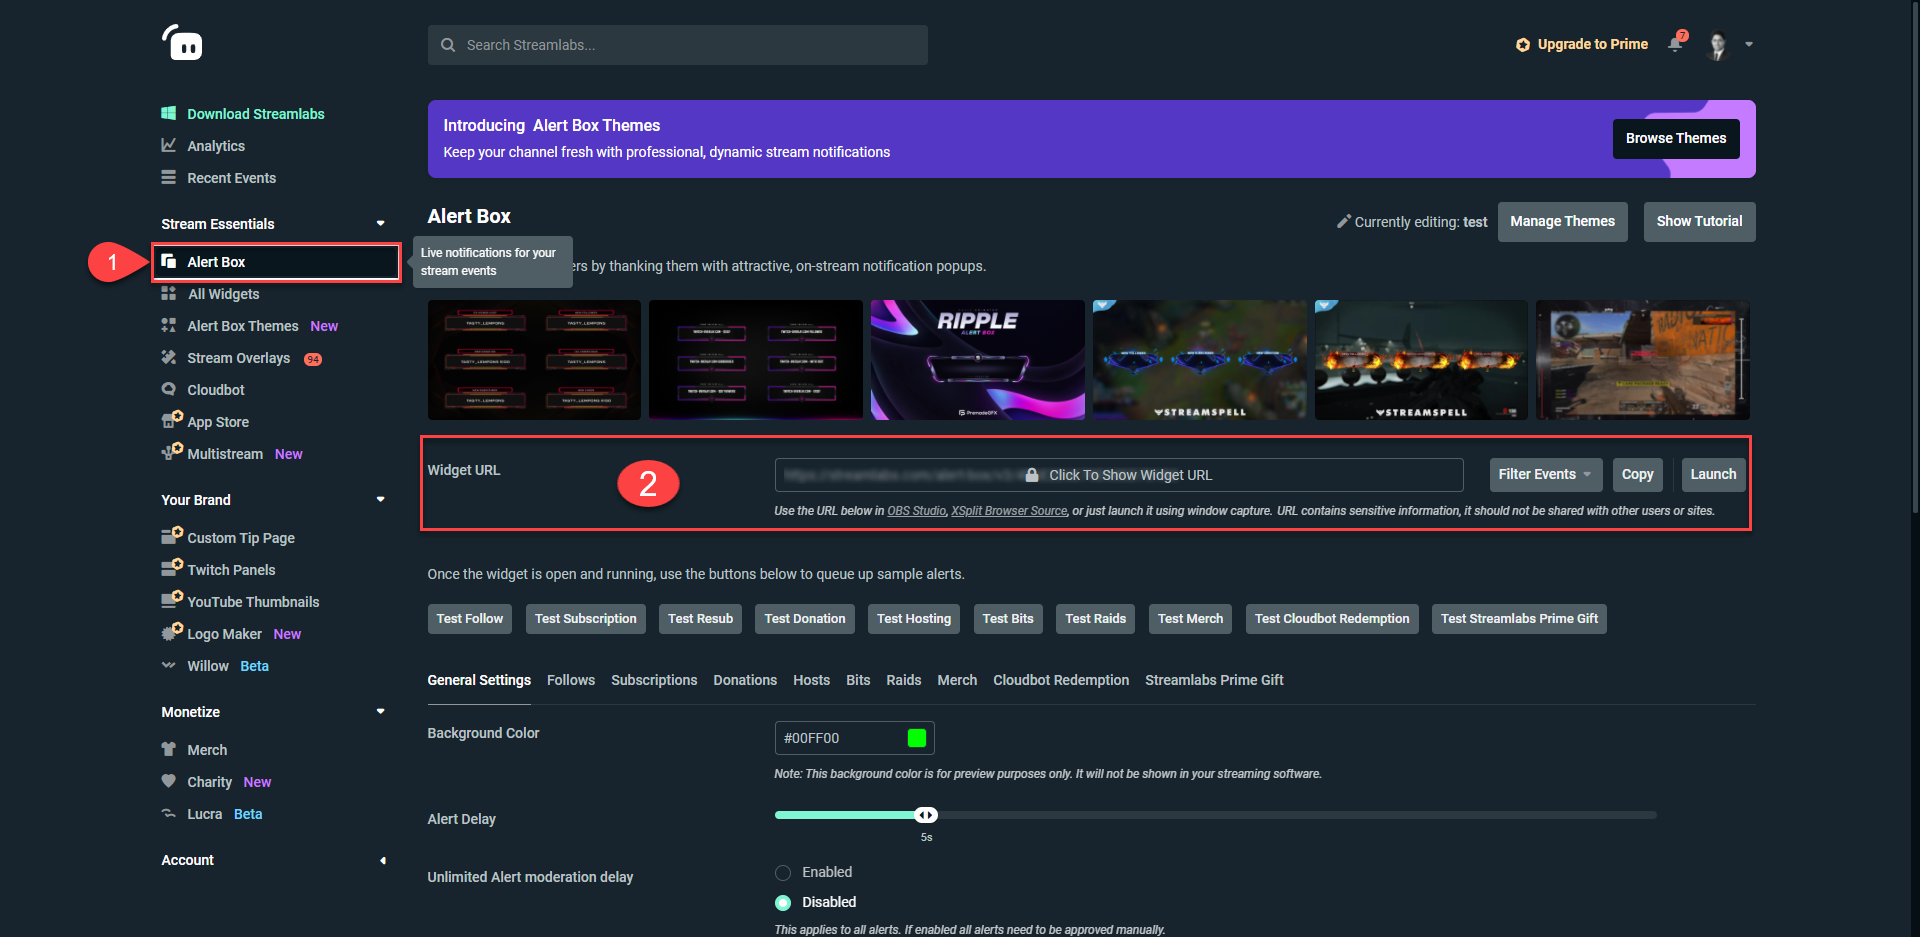
* Go to the **_Production_** studio (3) on LiveU Studio and click on _**Add an input**_ (4).

* Then select the **_HTML Overlays_** (5) and click on _**Add Streamlabs**_ (6).

* Enter the _**Widget URL**_ provided previously on [Streamlabs](https://streamlabs.com/)
and "**Save**".
Streamlabs is now integrated with your LiveU Studio account, to confirm that the integration is effective you can run various tests on Streamlabs (follow test, subscription test,..) and start your live on LiveU Studio.
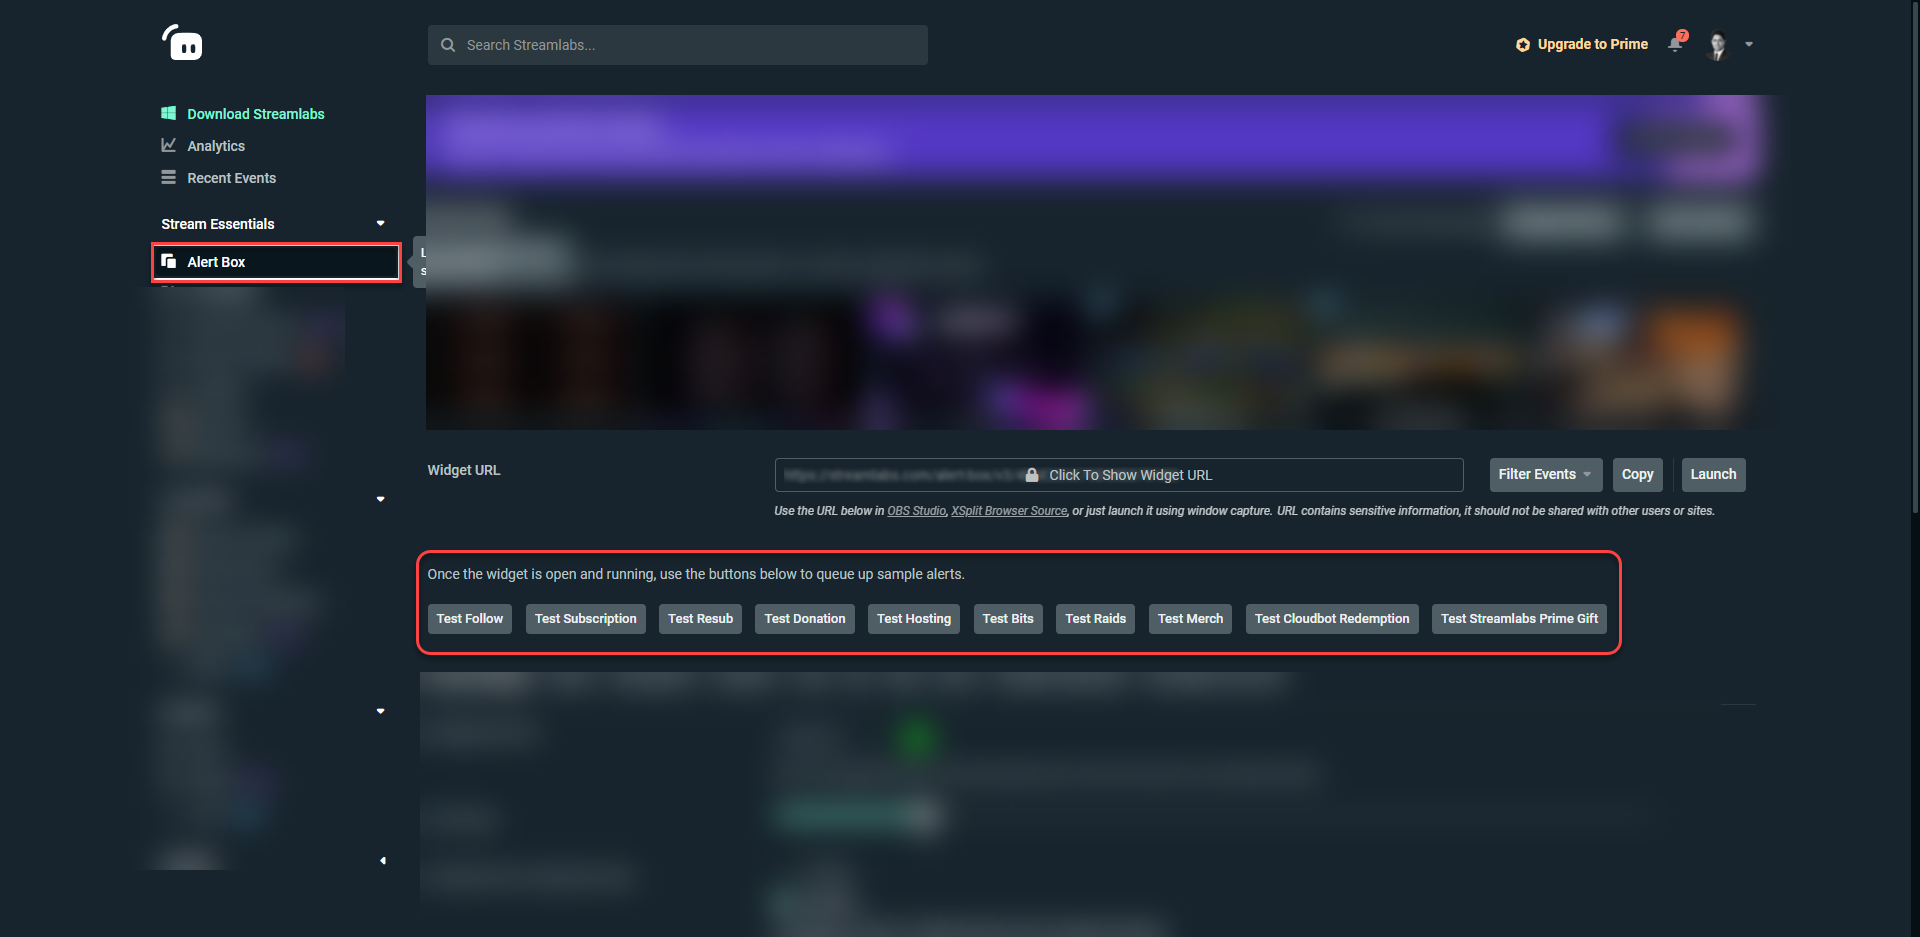
* You should immediately see an animation that will launch on your LiveU Studio Livestream when you launch a follow test, donation test,...

### Next steps
* [A step-by-step guide to starting with LiveU Studio](/hc/en-us/articles/17073335901083)
**Can't find the right answer?**
Contact the LiveU Studio Support team via our Live Chat.
---
# Usage and consumption – Studio
[Skip to main content](#main-content)
Search
------
Hi. How can we help?
====================
* Login to [LiveU Studio.](https://studio.liveu.tv/)
* In the search field (1), check that you are on the main account/project.
* Then, click on "_**Manage \[main account name\]**_" (2).
If the "_**Manage\[main account name\]**_" button does not appear, it is either :
* That you are not an administrator of the main account.
* That you have not selected the right main account (the one that is billed).

#### To view your consumption details:
You have acces to the "_**Projects & Consumption**_" section which details your consumption statement (billed hours, remaining hours, remaining to be billed).

* If you want the detail of the hours by event, just click on "_**details**_".

**Can't find the right answer?**
Contact the LiveU Studio Support team via our Live Chat.
---
# Framesync – Studio
[Skip to main content](#main-content)
Search
------
Hi. How can we help?
====================
Synchronizing streams by timecodes Multi-camera production requires all streams to be in sync
---------------------------------------------------------------------------------------------
### SEI metadata NTP time sync support
Remote production often uses multiple cameras and encoders. Each camera delivers the stream with its own delay relative to other sources. So when they are combined together, the same object is shown at a different point in time from different angles. Thus all sources must be synchronized in a single time scale before being used further.
An industry-proven solution for this problem requires the following approach on both sender and receiver sides. All sources are set to use the same reference time, e.g. use the same NTP server.
* Each source inserts SEI timecode metadata into the content frames.
* Media server is set to have a certain delay for frames alignment.
* Server takes SEI timecode of each received frame and puts it on hold.
* All frames with the same SEI timecode are then sent out at the same time. This approach allows getting all frames from different sources and align then with each other by absolute time scale.
Both **H.264/AVC** and **H.265/HEVC** video codecs are supported for SEI metadata extraction.
**Supported protocols:** **LRT/SRT/RTMP**
**Supported Formats:**Timecode in the pic\_timing field (MISB Standard 0604 - commercial timecode)
### Enabling the frame sync

* From the settings icon (1) -> Production (2)
* Enable the frame sync and assign a buffer (3).
### Enable SEI timecode on a specific input
This is usefull if you're receiving multiple feeds with SEI timecode but some of them are wrong or you do not want them all to be in sync. Some incorrect timecodes may also induce an input restart in loop on the Studio production.
Please only enable this option on the Input you know are sending correct SEI timecodes.

### Enable the NTP Timecodes on LiveU Central
* Open LiveU Central -> Unit/Server "_**Advanced**_" panel.
* Enable "_**U****_se_ NTP Timecode**_"
* To ensure proper synchronization, switch to **_manual_ Server type** for the NTP Server and use the **same server** for all units. (We used Google’s NTP server: **216.239.35.0**.)
This adjustment helps maintain stable timing across all units and prevents inconsistencies in data processing.

---
# Multiview – Studio
[Skip to main content](#main-content)
Search
------
Hi. How can we help?
====================
View all your inputs at the same time
-------------------------------------
The multiview feature allows you to:
* Have a look at all your assets\* and program at the same time.
* Listen to the audio of one feed and the program.
To access the multiview feature:
* Check that you're in the **Testing** or **Publishing** Phase (1).
* Open the multiview module (2).

* A new window will open. Many templates are available, select one in the list. [(More info about the Automated Guest template here)](/hc/en-us/articles/17094590075291)
* Edit the displayed assets with the blue "**...**" button.

Once your assets have been configured, you can go further with the following settings. Keep in mind that the Multiviews' configurations **only impact** **your own** computer: the other members of your team will be able to pick a different template and assets.
* A. Delete the current asset.
* B. List all available assets. Select one to set it to this tile (will replace the previous asset).
* C. Manage the audio volume of the input.
* D. Enable the audio feedback of this input on the headphones. (Only available if live input or video asset).
* E. Manage local video feedback (No video, mobile, SD, HD, FHD). (Only available if live input or video asset).
* F. Enter this asset's fullscreen mode. (Only available if live input or video asset).
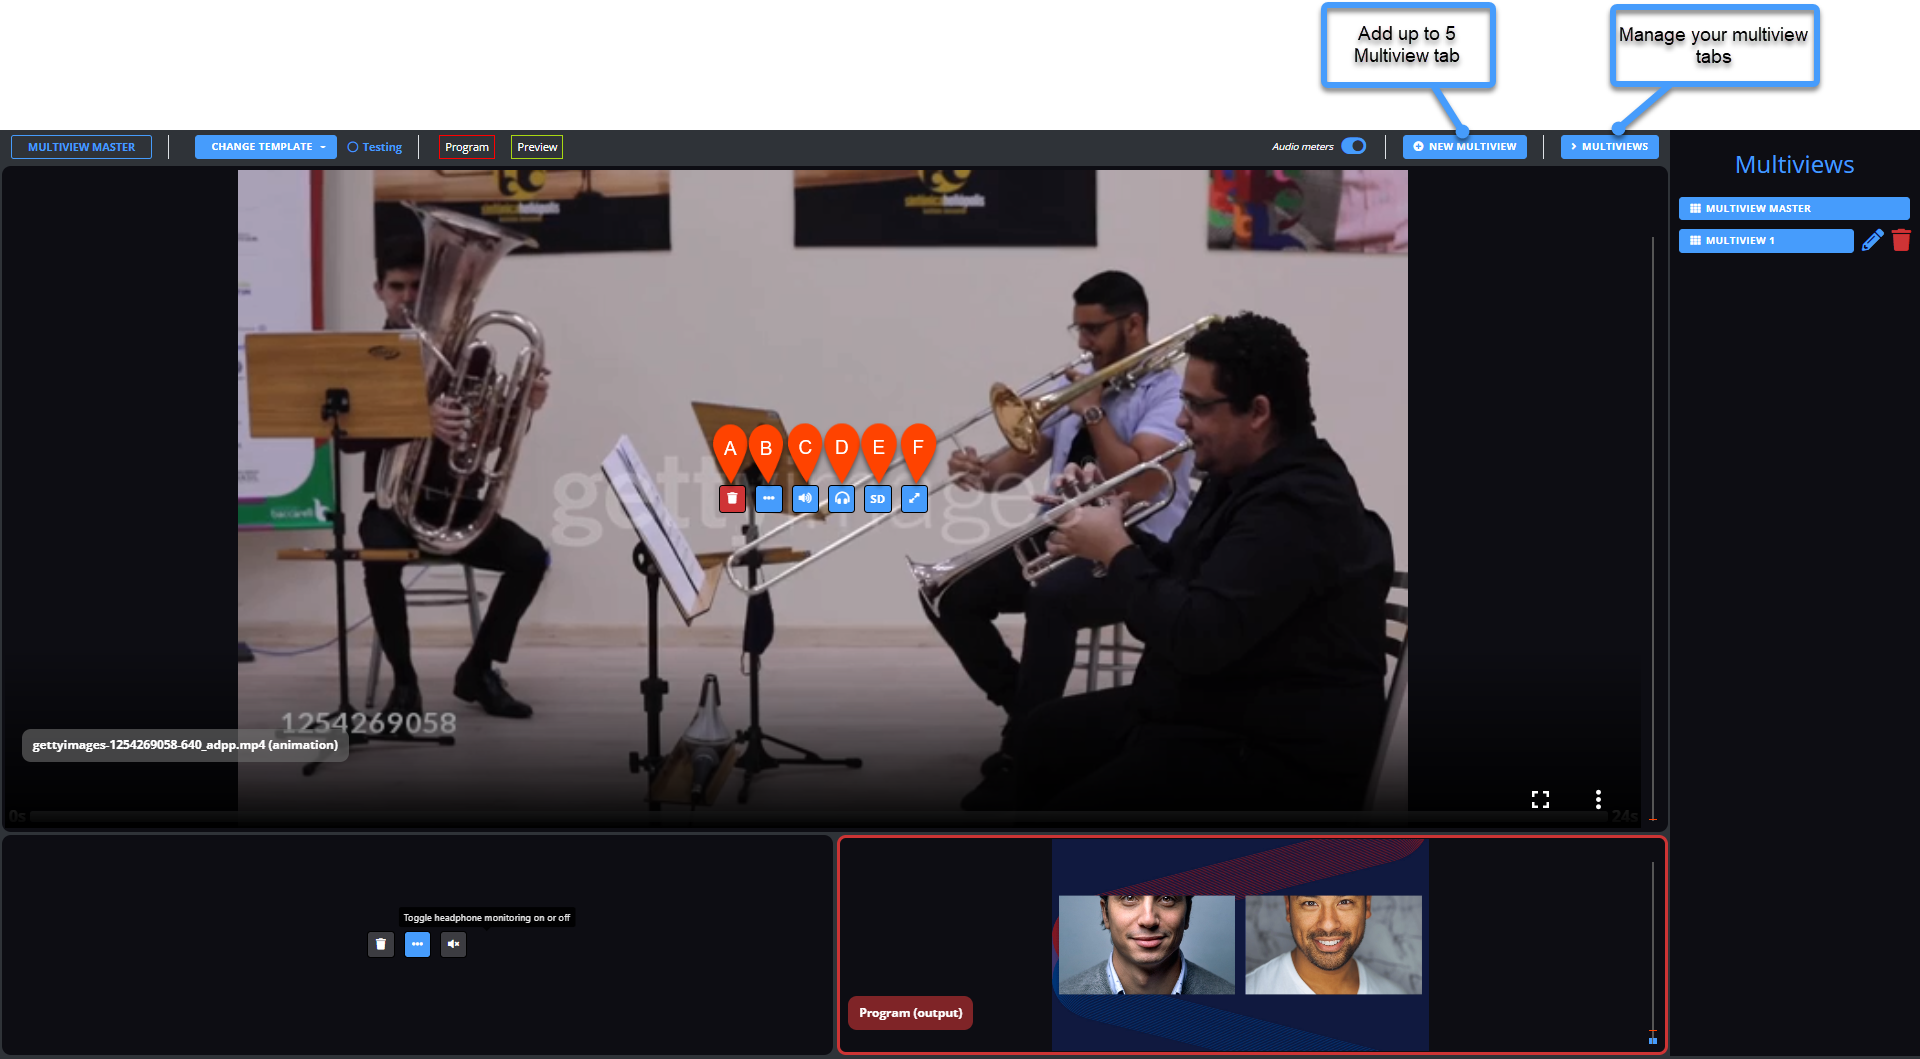
(You are limited to 5 multiview per computer)
\*Please note that you can only preview the following types of input in the multiview:
* Live sources
* media players
* Images
### Next steps
* [A step-by-step guide to starting with LiveU Studio](/hc/en-us/articles/17073335901083)
### Keep exploring
* [Monitor my live source(s)](/hc/en-us/articles/17094654266523)
* [Set up a Fail-Safe Stream Backup (Fallback)](/hc/en-us/articles/17094683105435)
* [Automated Guests template](/hc/en-us/articles/17094590075291)
**Can't find the right answer?**
Contact the LiveU Studio Support team via our Live Chat.
---
# Manage user account – Studio
[Skip to main content](#main-content)
Search
------
Hi. How can we help?
====================
Customers can now use LiveU Central Inventory & Groups as a user management tool for LiveU Studio projects. Each LiveU Studio project can be assigned a LiveU Central group (or multiple groups). When a project has LiveU Groups associated with it, only users within that group may access the the project.
Users and encoders/decoders are managed via the LiveU Central Groups associated to a Studio project.
Give a LUC user access to my studio
Please note that you need to be an Admin on the account to manage your account.
If you are not an admin, please contact your LUC account administrator.
* Go to your LiveU Studio account management tab (1&2).
* In the _**Groups**_ section you can add any LUC groups you belong to (onlypossible with groups from the same inventory).

Please note that all users from this LUC group will be able to connect to your Studio project.
Give a non-LUC user access to my studio
Please note that you need to be an Admin on the account to manage your account.
If you are not an admin, please contact your account administrator.
* Go to your LiveU Studio account management tab (1&2).
* In the **_Groups_** section -> Show users (3) -> Add a non-LUC user (4) -> fill in the mail address you want to add and save (5).


* An email has been sent and the collaborator who has been invited, he needs to accept the invitation.

* He will then be able to connect to Studio from LiveU Central.
You won't see any feedback from the platform as long as the collaborator hasn't validated his email address.
Show all my studio users
Please note that you need to be an Admin on the account to manage your account.
If you are not an admin, please contact your account administrator.
* Go to your LiveU Studio account management tab (1&2).
* Click on _**Show users**_ (3).


Manage my users' authorizations/rights.
**To manage their permissions you need to change them directly in LUC.**
****
* **Change the User Type to Admin or Regular**
* **Admin: Will be able to manage people, add Users and/or LUC Groups, can see the usage tracking.**
* **Regular: Will not have acces to the users/Groups and Usage tracking management panel.**
* **Studio: Will only have access to Studio service from LUC.**
****
**Please note that giving access to a project (even as administrator) does not mean giving access to all sub-accounts.**
**Can't find the right answer?**
Contact the LiveU Studio Support team via our Live Chat.
---
# Interlaced & Progressive – Studio
[Skip to main content](#main-content)
Search
------
Hi. How can we help?
====================
Does LiveU Studio support interlaced feeds?
-------------------------------------------
**By default, LiveU Studio supports both progressive and interlaced incoming feeds.** However, some interlaced feeds may have parameters that are not supported by default, which may result in a decrease in quality.
If a drop in quality from an interlaced feed is detected, please contact us so that we can find the ideal setting to play your interlaced feed in LiveU Studio.

**Can't find the right answer?**
Contact the LiveU Studio Support team via our Live Chat.
---
# StreamElements – Studio
[Skip to main content](#main-content)
Search
------
Hi. How can we help?
====================
Add a StreamElements overlay to my live stream
----------------------------------------------
StreamElements is a platform which allow you to create specific overlays for your live streams.
An overlay is an element that you can add to your live stream to custom it. (Example : templates, HTML pages...)
If you don't use overlays for your live streams yet you need to start because:
\- They allow you to customize your live session.
\- You will have the opportunity to do a live stream with a lot of interactivity between you and your community.
\- Thanks to them, your audience will easily recognize your live event.
As a bonus... with LiveU Studio, you can re-use your previous setting up including custom overlays for your next live streams.
Want to customize your LiveU Studio live with StreamElements overlays? You are at the right place!
* Login to [StreamElements](https://streamelements.com/)

On the left side:
* Go to "_**Themes gallery**_" (1) and select the overlay of your choice or go directly to "_**My overlays**_" (2)
* Copy the wished overlay URL (3 & 4).

* On LiveU Studio, go to the **_Production_** (1) and _**Add an input**_ (2).

* **_HTML Overlays_** section on the left (3).
* Select _**StreamElements**_ (4).

* Paste the URL link provided previously by StreamElements and _**Save.**_
* Enable your StreamElements overlay by clicking on it.

Congratulation! Your StreamElements overlay is well displayed on LiveU Studio.
### Next steps
* [A step-by-step guide to starting with LiveU Studio](/hc/en-us/articles/17073335901083)
**Can't find the right answer?**
Contact the LiveU Studio Support team via our Live Chat.
---
# Advanced Audio Options – Studio
[Skip to main content](#main-content)
Search
------
Hi. How can we help?
====================
How to use the advanced audio options?
--------------------------------------
**Please note that the advanced audio option is only available on request to one of our sales representatives.**
**Note:** LiveU Studio output is always in Stereo (2 audio channels); if there is are more than two audio channels sent, the operator must still choose one track representing the Stereo output.
Once enabled you will have access to an advanced audio panel for your RTMP/SRT input, etc.
In order to access the audio options you just have to:
* Go to the _**Production**_ (1)
* Open a live input editor panel (2)
* Go to the _**Tracks**_ section (3)
You can now select an audio track (4) and apply the advanced audio settings (details below).
Please also note that if you don't select an audio track on the inputs on which you want to use these options, this one will not be taken into consideration.

Please note that **an audio track must be selected**. If the audio track is set to "auto" the advanced options will not be taken into consideration.
The following audio options are available:
* **stereo** (default)
* **rstereo** (switch left and right)
* **left** (left to stereo)
* **right** (right to stereo)
5\. Please note that you can now **add (or reduce in some cases) audio delays**, for example if your source is not fully in sync between audio and video.
**Can't find the right answer?**
Contact the LiveU Studio Support team via our Live Chat.
---
# Close caption & Subtitle tracks – Studio
[Skip to main content](#main-content)
Search
------
Hi. How can we help?
====================
LiveU Studio support Subtitles & Close Caption tracks as input. The track selected will be burned-in the output.
Subtitles support: EIA-608/CEA-608 and EIA-708/CEA-708 Closed Captions, DVB Subtitles.
In order to select which subtitle/close caption track will be displayed for a:
### VOD and pre-recorded content
* Go to the _**Production**_ (1).
* Open a _**media player**_ editor panel (2).
* Open the additional settings (3).
* Select the Subtitle track you want (4).

### Live source
* Go to the _**Production**_ (1).
* Open a Live source editor panel (2).
* Open the "_**Tracks**_" settings (3).
* Select the Subtitle/Close caption track you want (4).

---
# Monitoring – Studio
[Skip to main content](#main-content)
Search
------
Hi. How can we help?
====================
Monitor the state of my instance and of my feeds
------------------------------------------------
Via the LiveU Studio _**Monitoring**_ (1) you can check the status of several things during the _**testing**_ and _**publishing**_ process:

##### Inputs status
Via the _**Inputs**_ drop-down menu (2), select the live source you wish to monitor.
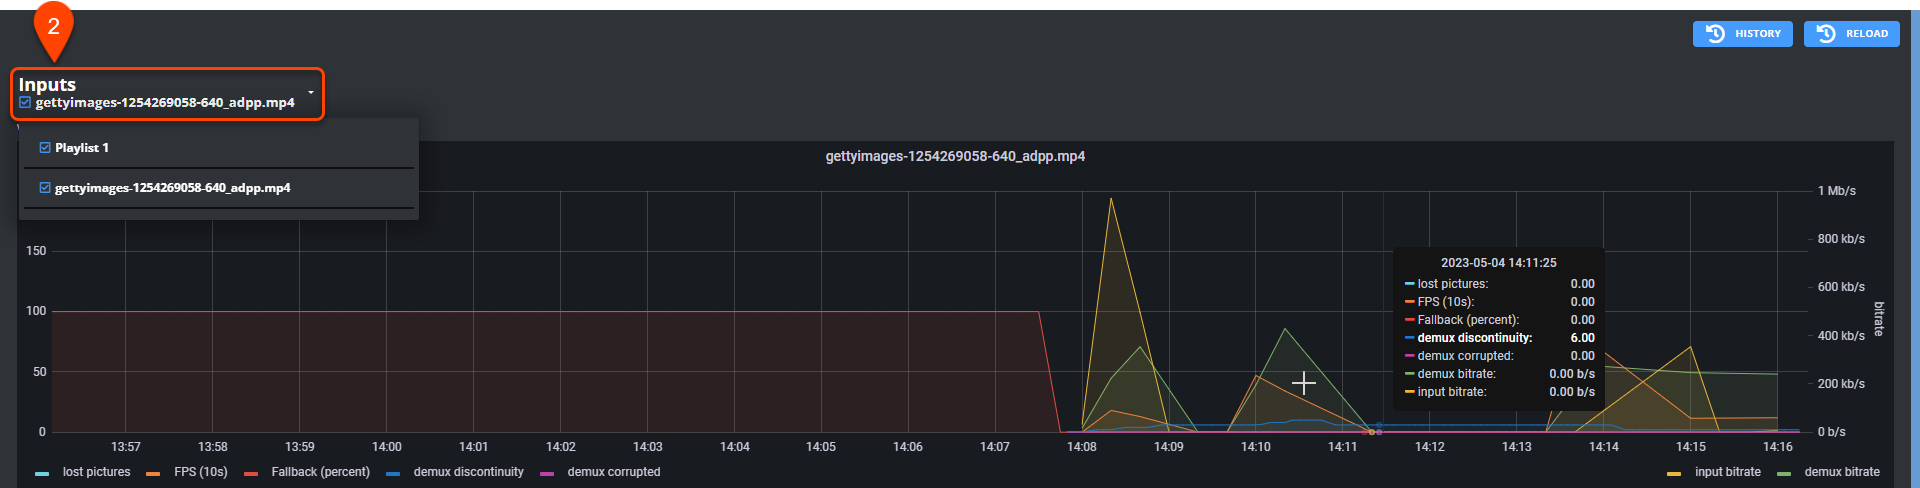
The graphs displayed give you detailed information on each of your input streams:
* **Lost pictures** : lost pictures since the feed started.
* **FPS (10sec)** : Frame per second (in the last 10 seconds).
* **Fallback (percent)** : if the feed is interrupted for more than 2 seconds the fallback/backup is enabled.
* **demux discontinuity**: an audio and/or video packet does not follow the previous one that we already know, it can be a clock reset or a breakage of the encoder, it does not necessarily mean that a packet is missing.
* **demux corrupted**: number of corrupted packets since the feed started.
* **demux bitrate**: the (undecoded) bitrate of the recevied input.
* **Input bitrate**: bitrate received by LiveU Studio for a specific stream.
##### Instance status
* The state/usage of _**memory**_ and _**CPU**_ from your encoder via the following graphs.
Please note that if the _**CPU**_ or _**Ram**_ usage exceeds 70% your instance may experience problems, in this case we invite you to reduce the number of inputs present in your **_Production_** studio and/or to modify the **_Publish_** settings (reduce the quality/modify the encoding profile, etc).

##### Encoder/Publishing points status
* The output bitrate/fps stats from LiveU Studio via the _**Encoder**_ tab (example below).
* The activity time of this output point (**_total_** at the bottom right of the screen).
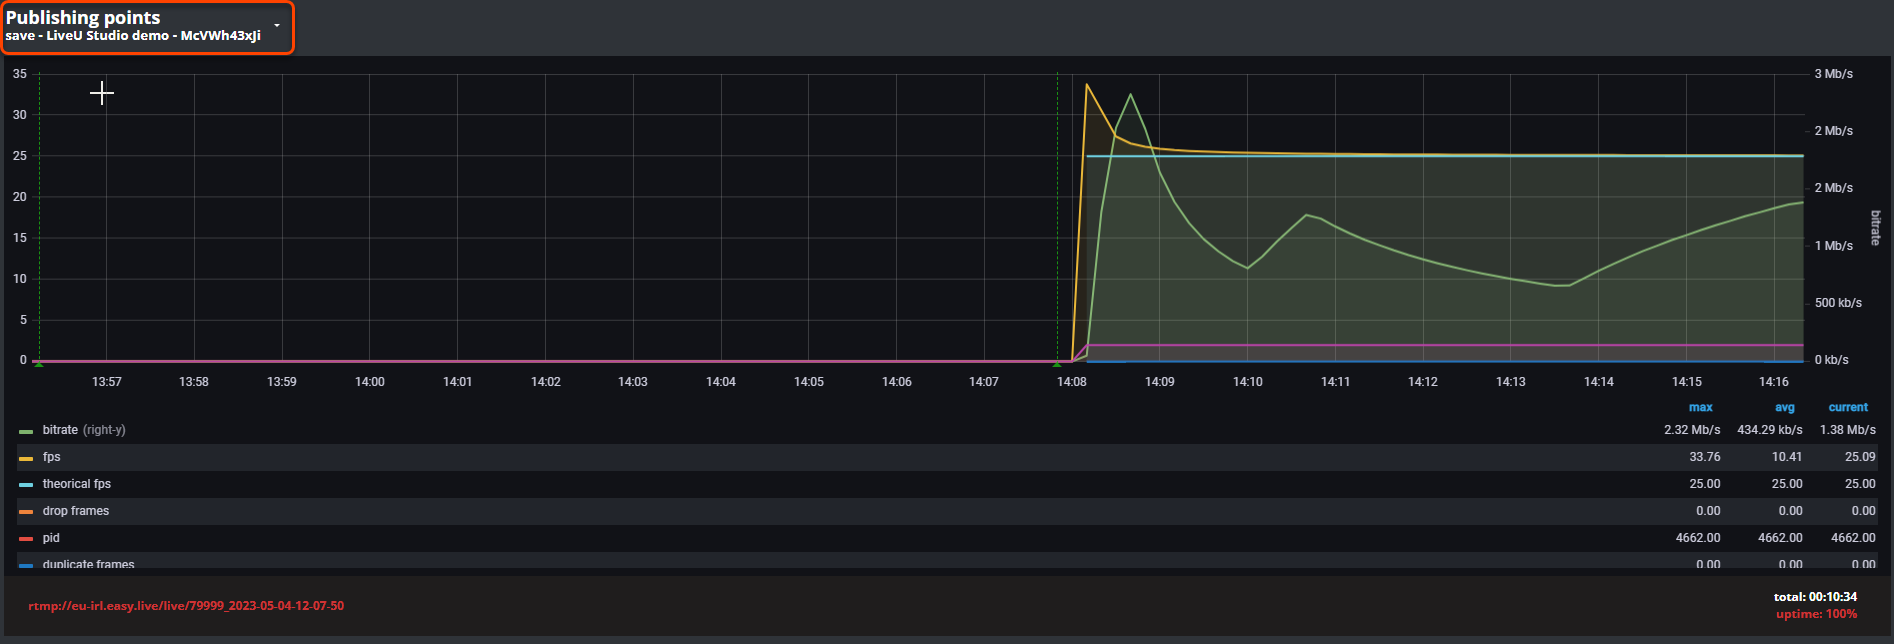
Congratulations! Now you know how to monitor your LiveU Studio event.
### **Next steps**
* [A step-by-step guide to starting with LiveU Studio](/hc/en-us/articles/17073335901083)
### **Keep exploring**
* [View all your inputs at the same time (multiview)](/hc/en-us/articles/17094654183323)
* [Set up a Fail-Safe Stream Backup (Fallback)](/hc/en-us/articles/17094683105435)
**Can't find the right answer?**
Contact the LiveU Studio Support team via our Live Chat.
---
# How to reset your password – Studio
[Skip to main content](#main-content)
Search
------
Hi. How can we help?
====================
**If you've already been connected to LiveU Studio using Liveu central (SSO), you'll need to change your password on the LiveU Central side and the bellow method will not work.**
* From the [LiveU Studio login page](https://studio.liveu.tv/)
, click on "_**Reset my password**_".
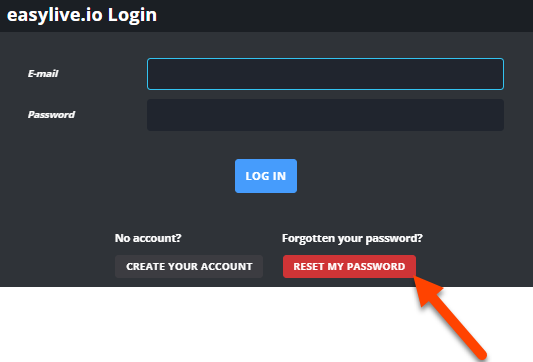
* Type in the email for your account and click on "_**Get your password**_".

An email with further steps on resetting your password will be sent to the email address you inserted.
**Can't find the right answer?**
Contact the LiveU Studio Support team via our Live Chat.
---
# Supervise my projects – Studio
[Skip to main content](#main-content)
Search
------
Hi. How can we help?
====================
Supervise all my sub-accounts (projects) in one page
----------------------------------------------------
LiveU Studio provides now a new feature giving you the possibility to supervise simultaneously all your accounts via a single web page.
This tool is useful when you have several live shows at the same time.
**To access this feature you need to chat with a sales representative as it requires manual activation.**
Once the option will be activated follow the steps below to access your new projects monitoring page:

This gives you access to a page with all your accounts and their status.

**Can't find the right answer?**
Contact the LiveU Studio Support team via our Live Chat.
---
# Event history – Studio
[Skip to main content](#main-content)
Search
------
Hi. How can we help?
====================
Here's how to find a few logs of the actions taken by all the users who have access to the Studio.
* Open a Studio event (1).

* Open the _**Monitoring**_ (2).

* Go to _**History**_ (3).

* Here you'll find all the event history and the user associated to each of it.

---
# Cheat sheet for your remote guests – Studio
[Skip to main content](#main-content)
Search
------
Hi. How can we help?
====================
Share the good practices with your remote guests
------------------------------------------------
**You Just received an invitation to stream your feed on LiveU Studio**
**Here are a few things to check before you begin:**
**Network:**
* Make sure you are not behind a VPN and/or a Firewall [(more information here).](/hc/en-us/articles/17094630482971)
* Make sure you don't have any plug-in installed that prevents WebRTC protocol to work.
* Check that you have enough upload bandwidth to send in the required quality (**Speedtest**).
PC, Mac, Linux, Android users, please use [**Google Chrome**.](https://www.google.com/chrome/)
iPhone/Ipad (IOS) users, please only use [**Safari**.](https://www.apple.com/safari/)
For Huawei mobile users, please use only [**Mozilla Firefox**](https://play.google.com/store/apps/details?id=org.mozilla.firefox&hl=fr&gl=US)
.
Please note that we recommend the following bandwidths depending on the desired sending quality:
* **0.5 Mb/s** to stream in the minimum required quality.
* **1.5 Mb/s** to stream in 480p SD.
* **2.5 Mb/s** to stream in 720p HD.
* **4 Mb/s** to stream in 1080p HD.
* The use of a wired connection is highly recommended.
**Device:**
* We strongly recommend using a computer or a laptop connected to the Internet by wire.
* Close all unnecessary apps.
* **Up-to-date browser. We recommend using Chrome.** Make sure you have no pending updates in your browser, as it's recommended to use the latest versions.
* Minimum browser extensions, as some of them may interrupt service and may block the stream.
* If you're using a mobile device:
* Keep the auto-rotate feature enabled.
* Being on LTE might a better option than your Wi-Fi.
**Miscellaneous**:
* Check that the camera is properly retrieved (A). Else, go to (B) to select another camera/mic device.
* Check that the audio is properly retrieved (C).
* Do not forget to click on "**Start & join**" (D), else your device will not be streaming your video and/or sound.
You can apply some the following efect on your camera return such as : light blur/blur/green screen.
You are also able to rename yourself nor add a profile picture (will be visible by the other remote guests connected).

* You should always hold your mobile device horizontally (landscape mode).
* Sit in a place with a nice light (in a darker environment, the quality will be lower).
* Show up on time, at least 30 mins prior to your event to ensure you have enough time to test everything with your remote producer.
#### Once in live you can:
1. Watch an input in full screen.
2. Resize the windows (PIP).
3. The "_**Group**_" chat on the right allow you to chat with your collaborators. And also gathers live comments received on YouTube/Twitch and Facebook (if the live is published to one of these platforms).
4. Mute your audio.
5. Stop the broadcast of your stream/camera.
6. Edit/change the camera/microphone

You can also share your screen if your producer has enabled the option in the remote guest interface.

**Can't find the right answer?**
Contact the LiveU Studio Support team via our Live Chat.
---
# Tagboard – Studio
[Skip to main content](#main-content)
Search
------
Hi. How can we help?
====================
Add a Tagboard overlay to my live stream
----------------------------------------
First, go to your **Tagboard Producer** panel and copy your "**output display URL**"
* Open your LiveU Studio _**Production panel**_(1).
* Select **_Add an input_** (2).

* in the **_HTML Overlays_** section (3).
* Select _**Add a Webpage** (_4).

* Paste the Output display URL provided by Tagboard and **save**.

* Enable the Website input by clicking on it.
That's it! Your Tagboard overlay is now displayed in your LiveU Studio production.

My overlay is not displayed on LiveU Studio? -> check that the Website input is on the top layer in the _**Production**_ Studio and well enabled.
**Can't find the right answer?**
Contact the LiveU Studio Support team via our Live Chat.
---
# Embedded Webpages – Studio
[Skip to main content](#main-content)
Search
------
Hi. How can we help?
====================
How to develop embedded webpages for LiveU Studio layers
--------------------------------------------------------
Here are some technical details when creating a web page to be embedded in the LiveU Studio layer editor:
#### 1\. Have a transparent background
Transparency should not be handled with a green alpha channel (or chroma key) but rather have the CSS transparency enabled and applied to the body of the HTML page.
Either add the following CSS rule:
body `{ background-color:rgba(0,0,0,0); }`
or define it inline:
#### 2\. When embedding the web page on LiveU Studio, user interactions are not allowed. (Think of it as the web page being opened on a browser on the server-side)
This has two consequences:
* The page embedded on LiveU Studio can't be clicked or interacted with in any way
* Settings can't be chosen nor memorized with any local data storing method (e.g. no settings saved with cookies)
Specific settings for the embedded page have to be inserted inside the URL query string or path structure, e.g. [https://yourpagetoembed?setting1=test&setting2=option](https://yourpagetoembed/?setting1=test&setting2=option)
**Regarding the "X-Frame-Options" error**
**You should not have any "X-Frame options" header parameters in your webpage.**
More info:
• [https://developer.mozilla.org/en-US/docs/Web/HTTP/Headers/X-Frame-Options](https://developer.mozilla.org/en-US/docs/Web/HTTP/Headers/X-Frame-Options)
• [https://developer.mozilla.org/en-US/docs/Web/HTTP/Headers/Access-Control-Allow-Origin](https://developer.mozilla.org/en-US/docs/Web/HTTP/Headers/Access-Control-Allow-Origin)
**Time zone**: you must have a fixed time zone (the time on your machine and on our servers is not identical).
We recommend using the latest version of the **Chrome** browser, thank you to check also in your Chrome settings that **cookies are accepted on all sites** (otherwise you will have problems displaying the LiveU Studio control panel).
**Can't find the right answer?**
Contact the LiveU Studio Support team via our Live Chat.
---
# Crop & Aspect ratio – Studio
[Skip to main content](#main-content)
Search
------
Hi. How can we help?
====================
How to crop or change the aspect ratio from one of my inputs (VOD/Live source/..)?
----------------------------------------------------------------------------------
* **To access the cropping/aspect ratio feature, please follow steps 1 to 4.**

### Fit
* **contain** (default): The image keeps its original aspect ratio but resized so that the longest of either the height or width can fit in the given dimensions.
* **cover**: The image keeps its original aspect ratio and the image area is completely covered.
* **fill**: The replaced contents are sized to fill the box with contents. The actual size of the object is determined by the height and width of the element. It is therefore stretched to fill the box.

The "**Fit x**" & "**Fit y**" property is used to specify how an image or video should be positioned with x/y coordinates inside its “own content-box”.
The default value it takes is "**Fit x: 50% Fit y: 50%**". This is the reason when we apply "**Fit: cover**" the image is positioned in the **center** by default.

**Can't find the right answer?**
Contact the LiveU Studio Support team via our Live Chat.
---
# Remote screen sharing – Studio
[Skip to main content](#main-content)
Search
------
Hi. How can we help?
====================
How to enable the screen sharing for my remote guests?
------------------------------------------------------
The screen sharing mode will give you the ability to share what you are displaying on your screen with the audience or host during a presentation.
It is very useful when you are planning to do a remote presentation during a live event or webinar.
Also to teach for student or pro.
By default the screen sharing option is not enabled for your remote guests.
In order to enable it you have to :
* If not already done, in the _**Production**_, add the number of [remote guests](https://knowledge-base.studio.liveu.tv/en/remote-guest-management/remote-capture)
desired.
* Go to the guest configuration interface (A&B).

* Select from the list the guest to which you want to enable the screenshare option (C).
* Check the _**Allow screensharing**_ button (D).
Please note that the template inputs are in 360p by default, which can affect the screensharing display. For optimal screensharing we recommend to select 720p.
* Don't forget to _**Apply new changes**_ (E).

* This will create an input named "**Name\_of\_guest-screenshare**" in your Production studio (F), so you can choose to display the webcam and/or the screen share of your guest.

### Remote guest
### [Send this cheat sheet to your remote guests](/hc/en-us/articles/17094647442459)
* Open the previously sent link
PC, Mac, Linux users, please use [**Google Chrome**.](https://www.google.com/chrome/)
Ipad (IOS) users, please only use [**Safari**.](https://www.apple.com/safari/)
Please note that we recommend the following bandwidths depending on the desired sending quality:
* 0.5 Mb/s to stream in the minimum required quality.
* 1.5 Mb/s to stream in 480p SD.
* 2.5 Mb/s to stream in 720p HD.
* 4 Mb/s to stream in 1080p HD.
If needed, allow LiveU Studio to use the devices' microphone/camera.
* When ready to stream, simply click on _**Start & join**_.

* Once connected, your guest will be able to share his screen via the screenshare button (7).

* Return to the LiveU Studio platform to check if the stream is received.
**Can't find the right answer?**
Contact the LiveU Studio Support team via our Live Chat
---
# Automated guest – Studio
[Skip to main content](#main-content)
Search
------
Hi. How can we help?
====================
How the automated guest feature works?
--------------------------------------
The auto guest feature present in the return template of your guests (or in your multiview) allows to display the remote guests automatically according to their number.
The auto guest section will behave like a Hangout/Meet/Zoom window, i.e. as soon as a guest is added or disappeared from the studio the display of all the guests will be updated automatically according to the guests present.
**Once enabled you have no action to take in the template section if a guest is added or removed.**
This feature is useful during a conference/interview or during an exchange between several people.
#### Enable an automated guests template
* Once a remote guest is added you can select the template that your guest will see in the _**Guests**_ section (1 & 2).

Please note that you have several possibilities for the _**Automated Guests**_ template (3) :
* _**All guests**_ : return all the guests present in the studio (they can all see and hear each other).
* **On Air / Waiting in Green Room** : separates the guests in 2 groups:>
* Those whose return is enabled in the program (on air) can see and talk to each other (but they can not see/hear the guests who are in the Green Room).
* And those who are waiting in the green room can see and talk to each other (but they can not see/hear the guests on air unless the program is also returned to them).

This feature is very usefull for workflow like Show, interview,... Let's see some example of workflow using the automated guest template.
SHOW example with 6 invited guests:
**1\. Program : ON AIR (3 guests can hear and chat between each other)**
\-> Those 3 guests are live
\-> They do not see or and hear the other 3 in the waiting room
**2. GREEN Room : (waiting room before going live and be prepared once the will be in the show and so on air)**
\-> Those 3 Guests are chatting and hearing each other but not on AIR ( so the guest live do not hear them)
\-> Those Guests can see what is going on in the Program/On Air (if the program is also returned to them)
**ADVICE For the producer setting up the show on LiveU Studio:**
If during a show you have a producer managing all the guests, be sure to select the template "Automated guest" with the Program (on air) + Producer.
Doing that the producer will be in contact all the time with all guests ( ON Air and in the Waiting room ) and the Guests will be able to discuss with the producer of the show)
**To set up a show like this please follow this steps:**
* Add 6 remote capture inputs in your production studio.
* Enter the guest management section (1).
* Choose "_**Setup for all**_" (you want to apply the same template to all guest) (2).
* Select the desired template in the Basic templates, then add the Program & Producer input. (3).
* For the automated guest input, please select "_**On Air/ Waiting in the Green Room**_" (3).
* Apply the new changes (4).

**Can't find the right answer?**
Contact the LiveU Studio Support team via our Live Chat.
---
# Singular.live – Studio
[Skip to main content](#main-content)
Search
------
Hi. How can we help?
====================
Add a singular.live overlay to my live stream
---------------------------------------------
* In the LiveU Studio _**Production**_ Studio (1).
* Select **_Add an input_** (2).

* in the **_HTML Overlays_** section (3).
* Select _**Add singular.live** (_4).

* Take the opportunity to add any other potential input you wish to add.
* Log into your [singular.live](https://app.singular.live/users/login)
account (5).
* Navigate to your "**App**" section and copy your overlay's output URL.
* Paste it in LiveU Studio and enable the singular.live element by clicking on it.

* If ready, _**Start publishing and record**_.

My overlay is not displayed on LiveU Studio? -> check that the singular.live input is on the top layer in the _**Production**_ Studio and well enabled.
**Can't find the right answer?**
Contact the LiveU Studio Support team via our Live Chat.
---
# Fallback – Studio
[Skip to main content](#main-content)
Search
------
Hi. How can we help?
====================
The **Fail-safe stream backup (Fallback)** is an LiveU Studio system that automatically triggers the associated input (live source, video, or image) in case of any troubles with your mainstream source without interrupting the stream for your viewers.
HOW TO SETUP A FAIL SAFE STREAM BACKUP (FALLBACK)?

N.B:
* The inputs (primary & fallback) has to be in the same line
* Live source can be chained together (fallback)
* An input can only be used once within its line
* When triggered, the input is overlayed on top of the associated live source
* You can have more than one Fallback input
**A fallback can be set on any "_live source"_ type, to set it up you must:**
* Create a live (1) or join an existing live (2).

* In the **Production** Studio.
* Add your the fallback input you want to be displayed in case you primary input breaks on the same layer as your primary live source with the "**Add an input**" button.

* Access to the live source settings (blue pen) (3).
* Then select in the list the media to display if your live source stream disconnects (4). Please note that there's a default fallback picture provided by LiveU Studio.

* Your live is now secure! If your source is broken, the fallback (backup) will automatically start.
* Please note that you can link multiple fallback together if they're live sources.

**Next steps**
* [A step-by-step guide to starting with LiveU Studio](/hc/en-us/articles/17073335901083)
**Can't find the right answer?**
Contact the LiveU Studio Support team via our Live Chat.
---
# IFB – Studio
[Skip to main content](#main-content)
Search
------
Hi. How can we help?
====================
How to create a IFB (Interruptible foldback)?
=============================================
### Add your technical director audio input
* In the LiveU Studio **Production Studio** (1), **add an input** (2).

* In the "**Live source**" tab (3), and select "**Capture audio device**" (4).

### Add your remote guest input
* Add a _**new input**_ (5).

* In the Live source tab, add a _**Remote capture**_ input(6).

* Share the provided link to your remote guest(7).
* Enable the remote capture input by clicking on it (8).
* To enable the audio/video return, _**Start the test phase**_ (9).

### Start the Technical director audio return
* Click on the Technical Director (TD) blue pen (10).
* Select the desired microphone and click on "**Start & Join**".

### Set up the remote guest
* Open the remote capture settings panel.
* Edit the displayed assets with the blue "**...**" button.
* Select the guest displayed assets (Operator + Program) for example.

Once the guest configuration is saved, close the page, your IFB is now configured.
### [Send this cheat sheet to your remote guests](/hc/en-us/articles/17094647442459)
### On the remote guest device
* Open the link previously send by LiveU Studio.
* Select the video/audio device.
* Start & Join.

* Your remote guest can now hear the TD on their device.

**A****re you looking for Comms / IFB with your LU Encoder operators / camera operators and/or your decoder operator, back to a physical studio?**
* Please see [this video tutorial about Web Audio Connect](https://www.liveu.tv/resources/tv/how-to-use-audio-and-communications-with-liveu-studio "https://www.liveu.tv/resources/tv/how-to-use-audio-and-communications-with-liveu-studio")
, part of the LU Ecosystem to solve this.
**Can't find the right answer?**
Contact the LiveU Studio Support team via our Live Chat.
---
# Hotkeys and shortcuts – Studio
[Skip to main content](#main-content)
Search
------
Hi. How can we help?
====================
LiveU Studio allows you to streamline your live production by creating scenes or macros that control multiple inputs across different layers with a single hotkey. Here’s how to do it:
#### [1\. Setting Up a Scene or Macro](#01J6YF13K45DEQVED2SMCFS8BE)
* **Configure Layers**: Arrange your inputs on different layers.
* **Assign a Hotkey**: Go to the hotkey settings, and create a hotkey to trigger these inputs.
#### 2\. **Benefits of Hotkeys**
* **Quick Setup**: Manage all your inputs with one button press.
* **Save and Reuse**: Save your configuration, including input positions, volumes, and template settings, for future sessions.
#### [3\. **Assigning Transitions to Hotkeys**](#h_01HFY7D34MXPQENGV13Z9V5T89)
* **Transitions**: Assign a transition, even graphic transitions, to a hotkey. This allows you to execute a transition and switch inputs simultaneously.
#### [4\. **Using Hotkeys During Live Production**](#h_01HCWGMRVD0CPE4C0C0RJSPC06)
Simply press the assigned hotkey to activate your pre-configured inputs and transitions across multiple layers. This enhances efficiency and ensures a seamless live broadcast.
### [1\. **Setting Up a Scene or Macro**](#h_01HCWGMRVDH281EZ2BF2HYXXX5)
* Go to a control room **Production Studio** (1).
* **Add your inputs** (2), set up and enable them you want.
* Click on "**Hotkeys**" to open the hotkey editor (3)
* There are 4 default transition shortcut keys, F1 to F4, which you can change by following [this tutorial.](/hc/en-us/articles/21719043832987)

* Click on "**Add**" (4).
* Your first hotkeys have been created! By clicking on 0 you will trigger this scene.

Taking shortcut key configuration a step further
* If needed, adjust each line by clicking on:
* **Blank**: When the hotkey is activated, the line will be emptied (every input in the line will be hidden).
* **Inherit**: When the hotkey is activated, the line settings are ignored (e.g. if an input is shown it will stay visible but if there's nothing, no change will occur).
* You can also set the parameters that will be saved for each type of input by clicking on the buttons below (available depending on the input type):
* **Position**: Save the current position settings.
* **Audio**: Save the current audio settings.
* **Content**: Save the current content.
* **Show name:** Save the current "**Show name**" settings for a specific input.
* _**Lower thirds inputs**_:
* **Content** (=save the current lower thirds messages and size).
* **Style** (=save the current lower thirds theme).
* **Template inputs:**
* **Template** (=Save the current template settings \[including the current selected inputs\]).
* Please note that the last line dedicated to audio allows you to enable the audio feedback of an input without displaying it in the program (audio only).
### Select HOW you want to apply this hotkey
1. Use auto-apply: the scene will be applied in the preview and program directly using a cut transition.
2. Only in preview first -> manual [transition](/hc/en-us/articles/21719043832987)
later to apply in PGM.
3. Directly in PGM using a predefined [transition.](/hc/en-us/articles/21719043832987)

### THEN YOU CAN ADD MORE HOTKEYS TO SWITCH FROM
* Edit and prepare each input of the display for the new hotkey in the **Production** (or directly from the Hotkeys menu).
* Add one more hotkey section ("**+ Add**" button in the hotkey editor) (5).
* If needed, adjust each input/line settings.
**Please note that you can drag & drop your hotkeys in the list at the left side.**
### DISPLAY A HOTKEY
Please note that the hotkeys function is linked to the type of keyboard used (AZERTY/QWERTY), so be careful not to have an incompatibility problem in the shortcuts.
* Close the hotkey editor.
* Then you have 2 buttons in your control room corresponding to hotkey 0 and 1.
* Simply click on the button corresponding to the macro of input you wish to display in your live.

Congratulations! Now you know how to use the LiveU Studio hotkeys!
### Next steps
* [A step-by-step guide to starting with LiveU Studio](/hc/en-us/articles/17073335901083)
* [Use the Elgato Streamdeck to manage my hotkeys more easily (advanced users)](/hc/en-us/articles/17094632435355)
### **Keep exploring**
* [Add some animations to my input(s)](/hc/en-us/articles/21719043832987)
* [Add a playlist to my live stream](/hc/en-us/articles/21718974215963)
**Can't find the right answer?**
Contact the LiveU Studio Support team via our Live Chat.
---
# Troubleshooting your Studio event – Studio
[Skip to main content](#main-content)
Search
------
Hi. How can we help?
====================
This little guide is here to help you to troubleshoot using the tools we provide.
**DO NOT PANIC**: Technical problems arrive and panicking won’t help. You must remain calm to troubleshoot effectively.
The troubles can come from:
\- Your Internet connection.
\- The network lock.
\- A wrong encoder configuration.
* [Input(s)](#tab1)
* [Output(s)](#tab2)
* [Unsynchronized input(s)](#tab3)
Input(s)
--------
### I can't retrieve my live feed on LiveU Studio
* Check that you're in the _**Testing**_ or _**Publishing**_ phase on LiveU Studio.
* Check if the feed is correctly sent:
* In the LiveU Studio _**Production**_ section (1).
* Click on the problematic input (2).

Depending on the input/protocol type:
LRT
* Use the [isolated URL](/hc/en-us/articles/17094667341339)
to preview the [LRT](/hc/en-us/articles/17094653138971)
feed.
_⇒ Do you receive the stream?_
**Yes** ⇒ The feed should be visible in the LiveU Studio, if this is not the case please contact us via chat or mail.
**No** ⇒ This indicates you have a local problem (internet connection/network lock/bad encoder configuration) -> Your feed is not reaching our server.
**Please check :**
* Your internet connection (see our [network requiremment](/hc/en-us/articles/17094630482971)
).
* Check that your encoder is sending the feed and that the encoding profile is as follows :
* **Video profile:** H264 or H265
* **Audio profile**: AAC, 48Khz
* **Key Frame interval**: 2 sec
* **Bitrate recommendations**

**Audio track** : If more than 2 audio channels you may need to select one specific track in Studio. -> [More information here.](/hc/en-us/articles/17094682876443)
#### What to do in case of a problem with the feed received by LiveU Studio?
* Contact your network technician.
* If the bandwidth is used by other devices -> setup a [QoS](https://www.dnsstuff.com/what-is-qos)
on the device emitting the feed.
* Use a second internet connection to publish a backup feed.
* If the minimum local **delay** is:
* **Less or equal to 2s** **\->** set the LU Studio input delay value to **auto**.
* **Greater than 2s ->** **increase** the [latency](/hc/en-us/articles/17094590556571)
(put the **same delay value** in your encoder than in LiveU Studio).
* Your bandwidth is too low/unstable:
1. Setup a [QoS](https://www.dnsstuff.com/what-is-qos)
on the device emitting the feed.
2. Decrease the encoders output bitrate
3. Increase the [latency](/hc/en-us/articles/17094590556571)
(put the **same delay value** in your encoder than in LiveU Studio).
4. Decrease the encoder's output resolution
* In case of slow down/fps problem in 1080p 60 fps:
* Reduce the number of layers and/or sources to the minimum (you can use hotkeys to optimize the number of input/layers).
**Can't find the right answer?**
Contact the LiveU Studio Support team via our Live Chat.
Remote capture (WebRTC)
* Use the [isolated URL](/hc/en-us/articles/17094667341339)
to preview the LRT feed.
_⇒ Do you receive the stream?_
**Yes** ⇒ The feed should be visible in the LiveU Studio, if this is not the case please contact us via chat or mail.
**No** ⇒ This indicates your guest is not connected to the remote guest link or he's having a local problem (internet connection/network lock/wrong browser) -> The feed is not reaching our server.
* Send your guest our [Cheat sheet for remote guest input.](/hc/en-us/articles/17094647442459)
RTMP
* * Download [VLC](https://www.videolan.org/vlc/index.html)
.
* Click on _**View**_ (3).
* **Copy the provided URL** (4).

* Paste this URL in VLC (Open network stream).
_⇒ Do you receive the stream in VLC?_
**Yes** ⇒ The feed should be visible in the LiveU Studio, if this is not the case please contact us via chat or mail.
**No** ⇒ This indicates you have a local problem (internet connection/network lock/bad encoder configuration) -> Your feed is not reaching our server.
**Please check :**
* Your internet connection (see our [network requiremment](/hc/en-us/articles/17094630482971)
), as well as the RTMP URL, defined in the encoder.
* Check that your encoder is sending the feed and that the encoding profile is as follows :
* **Video profile:** H264 or H265
* **Audio profile**: AAC, 48Khz
* **Key Frame interval**: 2 sec
* **Bitrate recommendations**

#### What to do in case of a problem with the feed received by LiveU Studio?
* Contact your network technician.
* If the bandwidth is used by other devices -> setup a [QoS](https://www.dnsstuff.com/what-is-qos)
on the device emitting the feed.
* Use a second internet connection to publish a backup feed.
* If the minimum local **delay** is:
* **Less or equal to 2s** **\->** set the LU Studio input delay value to **auto**.
* **Greater than 2s ->** **increase** the [latency](/hc/en-us/articles/17094590556571)
(put the **same delay value** in your encoder than in LiveU Studio).
* Your bandwidth is too low/unstable:
1. Setup a [QoS](https://www.dnsstuff.com/what-is-qos)
on the device emitting the feed.
2. Decrease the encoders output bitrate
3. Increase the [latency](/hc/en-us/articles/17094590556571)
(put the **same delay value** in your encoder than in LiveU Studio).
4. Decrease the encoder's output resolution
* In case of slow down/fps problem in 1080p 60 fps:
* Reduce the number of layers and/or sources to the minimum (you can use hotkeys to optimize the number of input/layers).
**Can't find the right answer?**
Contact the LiveU Studio Support team via our Live Chat.
SRT
* **Example**: srt://us-vir.easy.live:8080?streamid=us-vir/other\_push\_19738\_LXXXX
* Download VLC Media player.
* Take the complete SRT URL from the UI

* Create the pull URL by adding **“srtpull/”** between **streamid=** and the streamid itself.
Example: srt://us-vir.easy.live:8080?streamid=**srtpull/**us-vir/other\_push\_19738\_LXXXX
* Paste this URL in VLC (Open network stream).
Please DO NOT pull one specific SRT more than 3 times.
_⇒ Do you receive the stream in VLC?_
**Yes** ⇒ The feed should be visible in the LiveU Studio, if this is not the case please contact us via chat or mail.
**No** ⇒ This indicates you have a local problem (internet connection/network lock/bad encoder configuration) -> Your feed is not reaching our server.
**Please check :**
* Your internet connection (see our [network requiremment](/hc/en-us/articles/17094630482971)
), as well as the SRT URL, defined in the encoder.
* Check that your encoder is sending the feed and that the encoding profile is as follows :
* **Video profile:** H264 or H265
* **Audio profile**: AAC, 48Khz
* **Key Frame interval**: 2 sec
* **Bitrate recommendations**

#### What to do in case of a problem with the feed received by LiveU Studio?
* Contact your network technician.
* If the bandwidth is used by other devices -> setup a [QoS](https://www.dnsstuff.com/what-is-qos)
on the device emitting the feed.
* Use a second internet connection to publish a backup feed.
* If the minimum local **delay** is:
* **Less or equal to 2s** **\->** set the LU Studio input delay value to **auto**.
* **Greater than 2s ->** **increase** the [latency](/hc/en-us/articles/17094590556571)
(put the **same delay value** in your encoder than in LiveU Studio).
* Your bandwidth is too low/unstable:
1. Setup a [QoS](https://www.dnsstuff.com/what-is-qos)
on the device emitting the feed.
2. Decrease the encoders output bitrate
3. Increase the [latency](/hc/en-us/articles/17094590556571)
(put the **same delay value** in your encoder than in LiveU Studio).
4. Decrease the encoder's output resolution
* In case of slow down/fps problem in 1080p 60 fps:
* Reduce the number of layers and/or sources to the minimum (you can use hotkeys to optimize the number of input/layers).
**Can't find the right answer?**
Contact the LiveU Studio Support team via our Live Chat.
Output(s)
### Viewers are complaining about the stream
**Check the stream on VLC**
* Download [VLC](https://www.videolan.org/vlc/index.html)
.
* In the LiveU Studio **_Publish_** tab (1), click on the **RTMP** **recording button** (2) and **copy the provided URL**.
* Paste this URL in VLC (Open network stream).

You can now look at the quality we are currently delivering.
_⇒ Is the quality of the live feed as expected?_
**Yes** ⇒ It's a local problem (on the viewer side) or a problem on the server of the social network you are sending to, there is nothing to do.
**No** ⇒ go to the next step and let's check the received feed (input).
**Open the [monitoring](/hc/en-us/articles/17094654266523)
(left vertical bar)**

* **Bitrate variations**
Too many variations imply an issue with the live source you are ingesting.

* **Profiles you might get:**


[For more information on how to troublehsoot your input(s).](/hc/en-us/articles/18963283728795#h_01HAVCY2Y5F3TRPZ698RDQB6XB)
**Can't find the right answer?**
Contact the LiveU Studio Support team via our Live Chat.
Unsynchronized input(s)
-----------------------
The feeds in or out of the studio is out of sync between audio and video?
* Open the [Isolated URL](/hc/en-us/articles/17094667341339)
of the unsync input.
* Confirm that the unsync come from the source/encoder.
* Confirm that your audio and video sources are properly configured and connected.
* Check for audio/video delays in the source devices.
* if the issue persist, please note that you can adjust the [audio delay using the + or - 50ms button.](/hc/en-us/articles/17094682876443)
If you want to sync several sources together, you can also use the [delay](/hc/en-us/articles/17094590556571)
function provided by Studio to set a specific delay for each input if required.
If your inputs is having NTP timecode in the metadata you can use our [FrameSync](/hc/en-us/articles/25823257332123)
feature.
**Can't find the right answer?**
Contact the LiveU Studio Support team via our Live Chat.
Related to
* [Hotkeys](/hc/en-us/search?content_tags=01HAVER0FJRYTJQBJ08BG0SZYA&utf8=%E2%9C%93 "Search results")
* [Multiview](/hc/en-us/search?content_tags=01HAVER6JBMXAFEMN527QGE7DW&utf8=%E2%9C%93 "Search results")
* [Isolation URL](/hc/en-us/search?content_tags=01HAVERPSGW26HFT7S14V3MYA4&utf8=%E2%9C%93 "Search results")
* [Monitoring](/hc/en-us/search?content_tags=01HAVES4HX92WJNMR118V99XWN&utf8=%E2%9C%93 "Search results")
---
# Dizplai – Studio
[Skip to main content](#main-content)
Search
------
Hi. How can we help?
====================
How to add a Dizplai overlay into LiveU Studio?
-----------------------------------------------
* Enter a live control room.
* Go to the _**Production**_ studio (1) and click on _**Add an input**_ (2).

* Then select the **_HTML Overlays_** (3) and click on _**Dizplai**_ (4).

* Paste your **_Dizplai output URL_** and "_**Save**_".
* Go to Dizplai and publish the desired content. It will appear immediately on LiveU Studio.

If you want to find out more about using Dizplai with LiveU Studio, contact your LiveU sales representative for a demo or go to the [Dizplai knowledge base](https://support.dizplai.com/portal/en/signin)
.
### Next steps
* [A step-by-step guide to starting with LiveU Studio](/hc/en-us/articles/17073335901083)
**Can't find the right answer?**
Contact the LiveU Studio Support team via our Live Chat.
---
# LiveU Ingest : LRT Output – Studio
[Skip to main content](#main-content)
Search
------
Hi. How can we help?
====================
How to Publish from Studio to LiveU Ingest
------------------------------------------
### Prerequisites:
\-Valid **Ingest server** and service enabled
\-LiveU decoder (LU2000/LU4000) used as **Multipoint**
### Turn the decoder into Multipoint

### Assign the destination channel from LiveU Central & Assign an ingest server
In LiveU Central -> **Units** section -> Select from the **Multipoint** all destination channels (including the one linked to the **Ingest server**).

### Output LRT from Studio
* Once in Studio, go to the Publish panel (1).
* Add or edit a publishing points (2).

* Go to **LRT** (only visible for the main/recording quality, on the top if you have multy quality or format).
* Add a publishing point.
* Select in the list the **Multipoint** channel:

Please note that if you publish in LRT on a physical channel located on your premises, your company's network parameters may be relevant and this may require you to open some network ports needed to send and receive this type of stream.
Please refer to our [network prerequisites](/hc/en-us/articles/17094630482971)
in case of problems publishing in LRT to a physical channel.
### Your LiveU Studio feed is now received in Ingest.

---
# Template – Studio
[Skip to main content](#main-content)
Search
------
Hi. How can we help?
====================
Add a template with one to 9 inputs
-----------------------------------
A template is a pre-designed graphic that you can use as you wish during your live streams.
It allows you to custom your live session matching with your graphic charter and your brand image in a simple and effective way.
Using templates for your live events will allow you to:
\- Reduce the amount of time.
\- Stand out from the competition with new formats.
\- Protect your content by adding your logo.
\- Monetize your content by having "sponsored by" appear in your template with the mention of your partner.
\- With a template, you can have all the elements on the same line (layer) on your LiveU Studio .
It is very easy to add a template on your LiveU Studio . All you have to do is:
1. In the _**Production**_.
2. Add and position your desired inputs on the same layer.
3. Add a _**Template**_ type input on the same layer.


* Select a template in the list, the available inputs on the line (2) will be added by default on the selected template.

You can now edit the parameters of your _**Template**_ input such as:
* Modify the displayed sources.
* Change the template (from 1 to 9 inputs).
* Change the default background of the template.
NOTE : If you’re using [remote capture](/hc/en-us/articles/17094653682715)
input, remember to check your guests set up ( video + audio return).
### Next steps
* [Use the feed from a remote guest and customize his video return experience](/hc/en-us/articles/17094653682715)
* [Audio Mixer](/hc/en-us/articles/17094588655899)
* [Create your own template](/hc/en-us/articles/17094655000219)
### Keep exploring
* [Monitor my live source(s)](/hc/en-us/articles/17094654266523)
* [Setup a Fail-Safe Stream Backup (Fallback)](/hc/en-us/articles/17094683105435)
**Can't find the right answer?**
Contact the LiveU Studio Support team via our Live Chat.
---
# Program/Preview areas on Inputs (red/green) – Studio
[Skip to main content](#main-content)
Search
------
Hi. How can we help?
====================
LiveU Studio has recently introduced a powerful feature designed to streamline your workflow: **Red/Green Areas for Input Management**. This feature allows you to assign inputs directly to the preview or program with just one click, right from the input tiles. Additionally, you can assign a transition to a specific input and execute both the transition and the input switch simultaneously. Here’s how to make the most of this new capability.
#### **Enable the Porgram/Preview areas on Inputs**

#### 1\. **Switching Inputs Using the Red/Green Areas**
To switch an input using the Red/Green Areas:
1. **Hover** over the desired input tile. You'll see that the tile is split into two distinct color-coded halves.
2. **Click on the Green Area** (left side) to send the input to the preview window.
3. **Click on the Red Area** (right side) to send the input directly to the program output, making it live instantly.
This setup allows for swift input management, ideal for dynamic live productions where quick decisions are critical.

#### 2\. **Assigning Transitions to Input Switches**
One of the key advantages of this feature is the ability to combine input switching with transitions:
1. **Select an Input Tile**: Identify the input you want to transition to.
2. **Assign a Transition**: Righ click on the input, assign a transition (like a fade, cut, etc) that you want to apply when switching.
3. **Click on the Red Area**: When you click on the red area of the input tile, the assigned transition will automatically play as the input switches to the program output.
This means you can execute a smooth transition and an input switch with a single click, simplifying the process and ensuring professional-quality transitions during live broadcasts.

#### 3\. **Benefits of Using Red/Green Areas and Transitions**
* **Quick Access**: Manage input switching directly from the tiles without needing additional steps.
* **Enhanced Control**: Easily differentiate between preview and program states, reducing the risk of errors.
* **Seamless Transitions**: Assign and trigger transitions automatically during input switches for a polished production.
This guide should help you take full advantage of the new Red/Green Areas feature in LiveU Studio. If you need more detailed guidance or run into any issues please reach out to our support team for help.
---
# Stinger – Studio
[Skip to main content](#main-content)
Search
------
Hi. How can we help?
====================
How to use a custom stinger transition?
---------------------------------------
Pre-requisites:
* Create and upload your APNG Stinger with 1 loop (no loop) with alpha transparency -> [How to do it with After Effects?](https://studiosupport.liveu.tv/hc/en-us/articles/17094590374939)
* Understand the [transition block feature](https://studiosupport.liveu.tv/hc/en-us/articles/21719043832987-Transition)
.
**Can't find the right answer?**
Contact the LiveU Studio Support team via our Live Chat.
---
# Live Controls – Studio
[Skip to main content](#main-content)
Search
------
Hi. How can we help?
====================
What are the different Control Room states ?
--------------------------------------------
Your control room can be in one of three states:
#### **Phase 1. "Setting Up"**
This phase is not invoiced.

Take advantage of this moment to:
* [Prepare your live event quality/format](/hc/en-us/articles/17094652616859)
.
* [Add some media.](/hc/en-us/articles/17094666673051)
* [Set up your live sources](/hc/en-us/sections/17306801860123-Production-visual-mixer)
.
* [Prepare your hotkeys.](/hc/en-us/articles/17094632267035)
* [Set up your publishing points.](/hc/en-us/sections/17039181942683-Publishing-destinations)
#### **Phase 2. "Testing"**
The invoicing starts here and until the live stream is ended (back to the "**Setting Up**" phase or ended after the "**Publishing**" phase).

**Take advantage of this moment to check if you receive your live feed correctly.**
#### **Phase 3. "Publishing"**
This phase is charged just like the "**Testing**" phase. Proceed to this phase when you want to publish your feeds to the chosen publishing points.

**Important**:
1. **Once your event is over, and you want to stop your live stream, don't forget to actually stop** it via the **"End"** button, located in the top-right corner of the live stream panel.
2. Closing the browser or the tab **will not stop** a live stream from being published. You will continue to be billed until the **"End"** button is clicked (automatic shutdown after 24 hours).
**Can't find the right answer?**
Contact the LiveU Studio Support team via our Live Chat.
---
# Chat and collaboration – Studio
[Skip to main content](#main-content)
Search
------
Hi. How can we help?
====================
Welcome to LiveU Studio's Chat Feature — your dedicated space for seamless collaboration, whether you're working with fellow operators in the same control room or engaging with remote guests. In this tutorial, we'll explore how to leverage the chat tool effectively to enhance communication during your events.
**Getting Started**
-------------------
To access the Chat Feature, ensure that your event is in either the "**testing**" or "**publishing**" phase, and there are already some guests or operators connected.
**Group vs Discussion Chat**
----------------------------
**Group:** Group chat is a shared space where all operators and remote guests connected to the event can communicate. It's a dynamic hub for real-time discussions, updates, and coordination. To participate, simply type your message in the group chat, fostering a collaborative environment for everyone involved.
**Discussions:** This allows you to initiate private conversations with a specific guest or operator. Think of it as having a private chat room within the broader event, enabling focused discussions without noise from the group chat.
**Steps to Use**
----------------
1. **Accessing the Chat Feature:**
* Navigate to the _**Chat**_ (1) tab within LiveU Studio (top right corner).
* Ensure your event is in "**testing**" or "**publishing**" mode with connected guests/operators (2).
2. **Group Chat:**
* Type your message in the "**Group**" chat box.
* All connected operators and remote guests will see and can participate in the group discussion.

1. **Private Discussions:**
* Click on the "**Discussion**" tab (1).
* Select the guest or operator you want to engage with privately (2).

* Start typing your message, initiating a private, focused conversation.
**Best Practices**
------------------
* **Stay Updated:** Keep an eye on the group chat for real-time event updates and general communication.
* **Use Private Discussions Strategically:** When you need to have a focused conversation with a specific participant, utilize the "Discussion" feature.
**Go further with the chat feature**
------------------------------------
**Trigger a chat message from a remote guest/operator or social media (Twitch/YouTube) in the lower third banner.**
* Navigate to the Chat tab within LiveU Studio (top right corner).

* Select the chat message you want to display in your live event.
* Click on "**Show as lowerthird**" and trigger a **transition** to apply it on Program output when ready.

**Conclusion**
--------------
LiveU Studio's Chat Feature is designed to elevate your collaborative experience during events. From group discussions to private conversations, this tool ensures effective communication, fostering a seamless and engaging production environment.
Ready to chat your way to success? Dive into LiveU Studio's Chat Feature and unlock a new level of collaboration!
Related to
* [emotion](/hc/en-us/search?content_tags=01HFE9JZYV0DJVTWH3Z29X9WCC&utf8=%E2%9C%93 "Search results")
* [emoji](/hc/en-us/search?content_tags=01HFE9KAQEDWF7GCH1F88C0V0E&utf8=%E2%9C%93 "Search results")
---
# Element Editor – Studio
[Skip to main content](#main-content)
Search
------
Hi. How can we help?
====================

### Next steps
* [My first livestream with LiveU Studio](https://liveustudio.zendesk.com/hc/en-us/articles/17073335901083)
* [Check out our Core Concepts](/hc/en-us/sections/17039793459099-Core-Concepts)
* [Add a live source/media](/hc/en-us/sections/17306801860123-Production-visual-mixer)
### Keep exploring
* [How to set up a Fail-Safe Stream Backup (Fallback)?](https://liveustudio.zendesk.com/hc/en-us/articles/17094683105435)
**Can't find the right answer?**
Contact the LiveU Studio Support team via our Live Chat.
---
# Emotions – Studio
[Skip to main content](#main-content)
Search
------
Hi. How can we help?
====================
Enable the emotions for your remote guests
------------------------------------------
At LiveU Studio, we believe that emojis are a great way to communicate emotions, quickly and effectively.
That's why we've developed a feature on our remote guest interface that allows people participating in the live event to post their reactions using emojis visible to the audience. This feature gives participants the opportunity to get even more involved in the live event!
Once activated, the emoticons sent in the "_**Groups**_" chat of your remote guests are directly displayed on their webcam feed with an animation.
**Note**: Emojis are only displayed to other remote guest + in the Isolated URL.

To enable the emoticon/emotion option please follow these steps:
* Go to "_**Manage my account**_" (1&2).

* Check the _**Emotions**_ box (3).

Congratulations, you have enabled emoji animations for your remote guests! Each time a guest sends an emoticon in the group chat, he will receive an emoticon animation on his webcam.
#### Disable some emoji for your remote guest
* You can disable specific emojis manually via the edit button (4).

**Can't find the right answer?**
Contact the LiveU Studio Support team via our Live Chat.
---
# Transition – Studio
[Skip to main content](#main-content)
Search
------
Hi. How can we help?
====================
Setting up transitions for my show
----------------------------------
LiveU Studio allow you to choose between multiple scene switching workflows.
To apply a new scene to the output program your could :
* Use our default transitions
* Upload your own graphics transition asset
* Use our auto-apply feature
* Link your hotkey to a specific transition -> more information on the [dedicated tutorial](/hc/en-us/articles/17094632267035)
### To manage your transition
* Open the transition setting box from the **_Production_**

Setting up my transitions
For each transition, you can edit :
* the animation type
* its duration
* the delay before the transition starts
* the hotkey linked to this transition

Setting up a graphic transition -> apng
Please note that only APNG files are supported as graphic transition at the moment. The animation should have **no loop and the last frame transparent.**
### Adding the graphics transition

For each transition, you can edit :
* its duration
* the delay before the transition starts
* the hotkey linked to this transition
Auto apply
Default instantaneous cut without animations.
How to trigger my transition
Using the Transistion hotkeys

Using the transition button

From now on, when you activate this Transition hotkey, a Transition will play for the predefined duration instead of the default instantaneous cut without animations (auto-apply).
Please note that if you are using the **red/green option (program/preview areas on inputs)** you can assign a transition to a specific input by using the right click on the Input:


### **Next steps**
* [A step-by-step guide to starting with LiveU Studio](/hc/en-us/articles/17073335901083)
### **Keep exploring**
* [Add a playlist to my live stream -> Media player](/hc/en-us/articles/21718974215963)
**Can't find the right answer?**
Contact the LiveU Studio Support team via our Live Chat.
---
# Advanced hotkeys management – Studio
[Skip to main content](#main-content)
Search
------
Hi. How can we help?
====================
Use the Elgato Streamdeck to manage my hotkeys more easily (advanced users)
---------------------------------------------------------------------------
To simplify the launch of your hotkeys and to get visual feedback of the hotkeys you launch, you can use an **Elgato Streamdeck controller**.
(Please note that you still need to have the LiveU Studio tab open on your computer).
To configure the StreamDeck for a use with the LiveU Studio hotkeys, please go to the StreamDeck configuration interface.
You can now :
* Group your hotkeys by folders
* Associate a picture as well as a personalized text to each of your hotkeys.
* Create an automatic hotkey succession system with a timer
### Group your hotkeys by folders
### Associate a picture as well as a personalized text to each of your hotkeys
### Create an automatic hotkey succession system with a timer
**Can't find the right answer?**
Contact the LiveU Studio Support team via our Live Chat.
---
# Custom background template – Studio
[Skip to main content](#main-content)
Search
------
Hi. How can we help?
====================
Upload a custom template background
-----------------------------------
Upload your own background template allow you to increase your brand image.
Please note that you need to upload a 1920x1080 image in PNG format.

Once you have a template that suits you, save it and find it in your custom template list.
Select it and check that everything is well placed.

_**NOTE : If you’re using [remote capture](/hc/en-us/articles/17094653682715)
input, remember to check your guests set up (video + audio return).**_
### Next steps
* [Use the feed from a remote guest and customize his video return experience](/hc/en-us/articles/17094653682715)
* [Audio Mixer](/hc/en-us/articles/17094588655899)
### Keep exploring
* [Monitor my live source(s)](/hc/en-us/articles/17094654266523)
* [Setup a Fail-Safe Stream Backup (Fallback)](/hc/en-us/articles/17094683105435)
**Can't find the right answer?**
Contact the LiveU Studio Support team via our Live Chat.
---
# Recordings – Studio
[Skip to main content](#main-content)
Search
------
Hi. How can we help?
====================
Once live, you will find three different recordings of your live streams
------------------------------------------------------------------------
1. [Main Back-Up:](/hc/en-us/articles/17094657946139)
The whole live stream is recorded automatically.
2. [Segments](/hc/en-us/articles/17094654629915)
: Recorded Sessions within your live stream. Multiple sessions can be recorded simultaneously.
3. [Clips](/hc/en-us/articles/17094638765339)
: Clip list for the ongoing live stream. Clips can be adjusted and then shared on every social or video network.
**N.B:** The video files are kept on LiveU Studio servers for up to 48 hours.

MAIN BACK-UP ACTIONS
--------------------
* **Create a clip**: Extract a video clip from the main back-up. This clip will then be in the event list.
* **Edit metadata**: Edit the metadata associated with this video (used when publishing to partners).
* **Download**: Download the file to your hard drive when the live stream is ended.
CLIP ACTIONS
------------
* **Edit event:** Opens the clipping tool to adjust the starting time and duration of the segment.
* **Copy to layers**: Copy the file to your layers in the Production Studio.
* **Copy to Media Bin**: Copy the file into your media bin (Add an input -> Media Bin). (no duration/size storage limit).
* **Edit Metadata:** Edit the metadata associated with this video (used when publishing to external services).
* **Download**: Download the file to your hard drive.
* **Delete**: Delete the video clip from the list.
PUBLISH TO EXTERNAL PLATFORM
----------------------------

CLIP EDITOR
-----------

**Can't find the right answer?**
Contact the LiveU Studio Support team via our Live Chat.
---
# Metadata – Studio
[Skip to main content](#main-content)
Search
------
Hi. How can we help?
====================
About Your Live
---------------
**Destinations' metadata is filled using this information panel.**
Title and Description are the fields you should pay extra attention to.
**N.B:**
* The information entered on LiveU Studio update external metadata when your live stream goes to preview mode
* LiveU Studio uses the "**Start Time**" to create the server associated with the control room. Schedule your live stream in advance and you won't experience waiting times

**Can't find the right answer?**
Contact the LiveU Studio Support team via our Live Chat.
---
# The page you were looking for doesn't exist – Studio
[Skip to main content](#main-content)
oops!
=====
### 404
The page you were looking for doesn't exist
-------------------------------------------
You may have mistyped the address or the page may have moved
[Take me back to the home page](/hc/en-us "Home")
---
# The page you were looking for doesn't exist – Studio
[Skip to main content](#main-content)
oops!
=====
### 404
The page you were looking for doesn't exist
-------------------------------------------
You may have mistyped the address or the page may have moved
[Take me back to the home page](/hc/en-us "Home")
---
# Custom template (beginners) – Studio
[Skip to main content](#main-content)
Search
------
Hi. How can we help?
====================
Add a custom template
---------------------
If you are new to template creation, this is for you.
* Select the number of input you want to display in your template.

You can now add/adjust/resize your inputs if necessary.
* You can also change your background/template from the list at the left.
**Don't forget to save your new custom template.**
NOTE : If you’re using [remote capture](/hc/en-us/articles/17094653682715)
input, remember to check your guests set up ( video + audio return).
### Next steps
* [Use the feed from a remote guest and customize his video return experience](/hc/en-us/articles/17094653682715)
* [Audio Mixer](/hc/en-us/articles/17094588655899)
### Keep exploring
* [Monitor my live source(s)](/hc/en-us/articles/17094654266523)
* [Setup a Fail-Safe Stream Backup (Fallback)](/hc/en-us/articles/17094683105435)
**Can't find the right answer?**
Contact the LiveU Studio Support team via our Live Chat.
---
# Creating & Scheduling live – Studio
[Skip to main content](#main-content)
Search
------
Hi. How can we help?
====================
Create and manage my control rooms
----------------------------------
On this page, you can manage existing control rooms.
1. Create a control room for a new live event.
2. Switch to the calendar visualization.
3. List all control rooms for scheduled or current live streams.
4. List all ended live streams.

**N.B**:
* Video clip recordings & back up can be found in ended control rooms.
**How to delete an event?**
* You can't delete an event because of the monitoring and billing associated with it.
* You can cancel an event though to make it inactive when you don't need it anymore.

**Can't find the right answer?**
Contact the LiveU Studio Support team via our Live Chat.
---
# The page you were looking for doesn't exist – Studio
[Skip to main content](#main-content)
oops!
=====
### 404
The page you were looking for doesn't exist
-------------------------------------------
You may have mistyped the address or the page may have moved
[Take me back to the home page](/hc/en-us "Home")
---
# APNG – Studio
[Skip to main content](#main-content)
Search
------
Hi. How can we help?
====================
How to create an apng file and play it in LiveU Studio?
-------------------------------------------------------
APNG Specifications:
* Format: 1920x1080
* No loop
* Max duration: 10 sec
* Size of the file: less than 80 MB
* With alpha transparent background to create a Stinger
In order to create an apng file you will need **Adobe After Effect** or other editing software.
Please note that with After Effect the **[MOBO\_Utils plugin](https://aescripts.com/mobo_utils/)
** is required.
Once the plugin is installed please follow the steps in this video to create the apng file:
Once your file is created you can download it to LiveU Studio and use it as a [graphic transition](/hc/en-us/articles/17094638396315)
.

**Can't find the right answer?**
Contact the LiveU Studio Support team via our Live Chat.
---
# PGM Segments – Studio
[Skip to main content](#main-content)
Search
------
Hi. How can we help?
====================
Clips and segments are short extracts from your live that you can cut during the live or in post-production.
Your clips and segments can also be published instantly to all your social networks.
Making clips and segments will allow you to:
\- Highlight the best moments of your live session.
\- Share short video format on social media.
\- Make your community want to attend your next live event (teasing).
\- Re-use your clips and segments in your LiveU Studio production studio.
To know how to make your clips and segments it's very simple, just follow the instructions below:
* Create a new live or enter a control room (1 or 2).

* Check that you currently **_publishing & recording (3)_.**
* Go to the _**Recording** (4)_ section on the left of your control room, you will be redirected to the _Clip and Segments management interface_.

Now you can see the current live preview on the right side of the screen, on the left side you can start and manage your clips and Segments.
SEGMENTS
--------
A segment is a cut part of a live, made via the _**Add a segment**_ button.

* Enter a segment name.
* **Start** your segment and click **Stop** once you are done.
* Your segment will automatically be added to the events list.

You can then:
* Edit the event to change its duration, etc.
* Publish the event on the broadcasters of your choice
* Add the event to your Media Bin/layers so you can use it as a live source
* Download/delete the event (important note: backups, as well as clips and segments, are saved for a maximum duration of 48 hours).
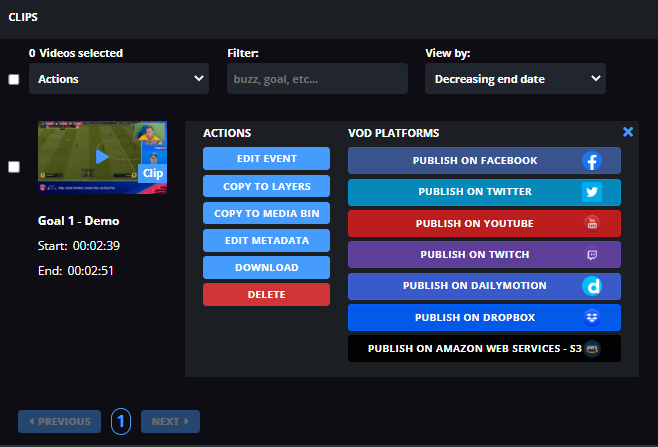
If you want to edit a segment duration after his creation, just click on "**edit event**", the editor will open and you can adjust the duration of it.

Congratulations! You now know how to use the LiveU Studio segment function.
**Keep exploring**
* [Convert my .flv Backup into an editable .mp4](/hc/en-us/articles/17094683048987)
* [How to create an auto 25 sec clip of my recording?](/hc/en-us/articles/17094638765339)
**Can't find the right answer?**
Contact the LiveU Studio Support team via our Live Chat.
---
# PGM Clipping – Studio
[Skip to main content](#main-content)
Search
------
Hi. How can we help?
====================
Clips and segments are short extracts from your live that you can cut during the live or in post-production.
Your clips and segments can also be published instantly to all your social networks.
Making clips and segments will allow you to:
\- Highlight the best moments of your live session.
\- Share short video format on social media.
\- Make your community want to attend your next live event (teasing).
\- Re-use your clips and segments in your LiveU Studio production studio.
To know how to make your clips and segments it's very simple, just follow the instructions below:
* Create a new live or enter a control room (1 or 2).

* Check that you currently **_publishing & recording (3)._**
* Go to the _**Recording** (4)_ section on the left of your control room, you will be redirected to the _Clip and Segments management interface_.

Now you can see the current live preview on the right side of the screen, on the left side you can start and manage your clips and DVR.
CLIPS
-----
A clip is a cutout of the last 25 seconds of the live, achievable via the button below.

Your clip will automatically be added to the event list, you can then:
* Edit the clip(s) to change its duration, etc.
* Publish the event(s) on the broadcasters of your choice.
* Add the event(s) to your Media Bin/layers so you can use it as a live source.
* Download/delete the clip(s) (important note: backups, as well as clips and segments, are saved for a maximum duration of 48 hours).

If you want to edit a segment duration after his creation, just click on "**edit event**", the editor will open and you can adjust the duration of it.

Congratulations! You now know how to use the LiveU Studio clipping function.
**Keep exploring**
* [Convert my .flv Backup into an editable .mp4](/hc/en-us/articles/17094683048987)
* [How to create a segment of my recording?](/hc/en-us/articles/17094654629915)
**Can't find the right answer?**
Contact the LiveU Studio Support team via our Live Chat.
---
# Picture (image, logo,..) – Studio
[Skip to main content](#main-content)
Search
------
Hi. How can we help?
====================
Add a picture, logo, graphic overlay to my livestream
-----------------------------------------------------
* Access the **_Production_** Studio of a live (1) and _**Add an input**_ (2).

* Ine the "Image" section (3).
* Select from the list the type of media you want to import (from local files or per URL).
### The supported formats are :
* JPG
* PNG with or without alpha
* GIF with or without alpha up to 1920x1080
* AVIF with or without alpha up to 1920x1080
* WEBP with or without alpha up to 1920x1080
* APNG (up to 1920x1080, after that it is converted to PNG without animation)

* Select the desired file from your local files or an URL and enable it in the _**Production**_ studio with a left-click.
Congratulations! Your picture is now available.
You can resize it, edit it, apply some Instagram filter,...

**Can't find the right answer?**
Contact the LiveU Studio Support team via our Live Chat.
---
# Upload PGM Clip & Segments – Studio
[Skip to main content](#main-content)
Search
------
Hi. How can we help?
====================
UPLOAD MY CLIP & SEGMENTS TO SEVERAL PLATFORM
---------------------------------------------
In order to upload your clip to social media you will need to :
* Be in Publishing phase (1) or enter an ended live event (less than 48h old).
* In the "Recording" section (2).
* Create some clips or segments (3).

* When you have some clips & segments to upload, click on their "**show action**" button.

* From here you just need to select the wished publishing point, link your account to it and click on **Upload**.
* You can also download the clip locally or import it in a media player(layer) or even in the media bin for later use.
**Please note that you may encounter problems with playback/modification of clips/backup in case it exceeds 2 hours.**
**Can't find the right answer?**
Contact the LiveU Studio Support team via our Live Chat.
---
# AWS S3 Storage – Studio
[Skip to main content](#main-content)
Search
------
Hi. How can we help?
====================
Import file(s) from my AWS S3 bucket into LiveU Studio
------------------------------------------------------
1. **Create a new AWS S3 Bucket.**
2. **Set the S3 Bucket permissions to public access.**
3. **Find the public URL of an S3 Bucket Object**
4. **Import file(s) from my AWS S3 Bucket to LiveU Studio.**
1\. CREATE A NEW AWS S3 BUCKET
------------------------------
* Sign in to Amazon Web Services and go to your [**S3 Management Console**](https://console.aws.amazon.com/s3/)
.
* Create a new bucket.
* New buckets' permissions are set to “**Block all public access**”. You can **uncheck** that option and create the bucket.
2. **SET THE S3 BUCKET PERMISSIONS TO PUBLIC ACCESS**
-----------------------------------------------------
Once back to the S3 Bucket's list, you’ll see that the access for that bucket has now been changed to “**Objects can be public"**.
It is possible to go further by setting the entire content of a Bucket (existing and new) public.
If you proceed, everyone with the link and an Internet connection will be able to read and download your files.
* From the bucket list, click on the bucket name. Select the **Permissions** tab.

* Edit the **Acces control list (ACL)** and allow everyone to access the object.
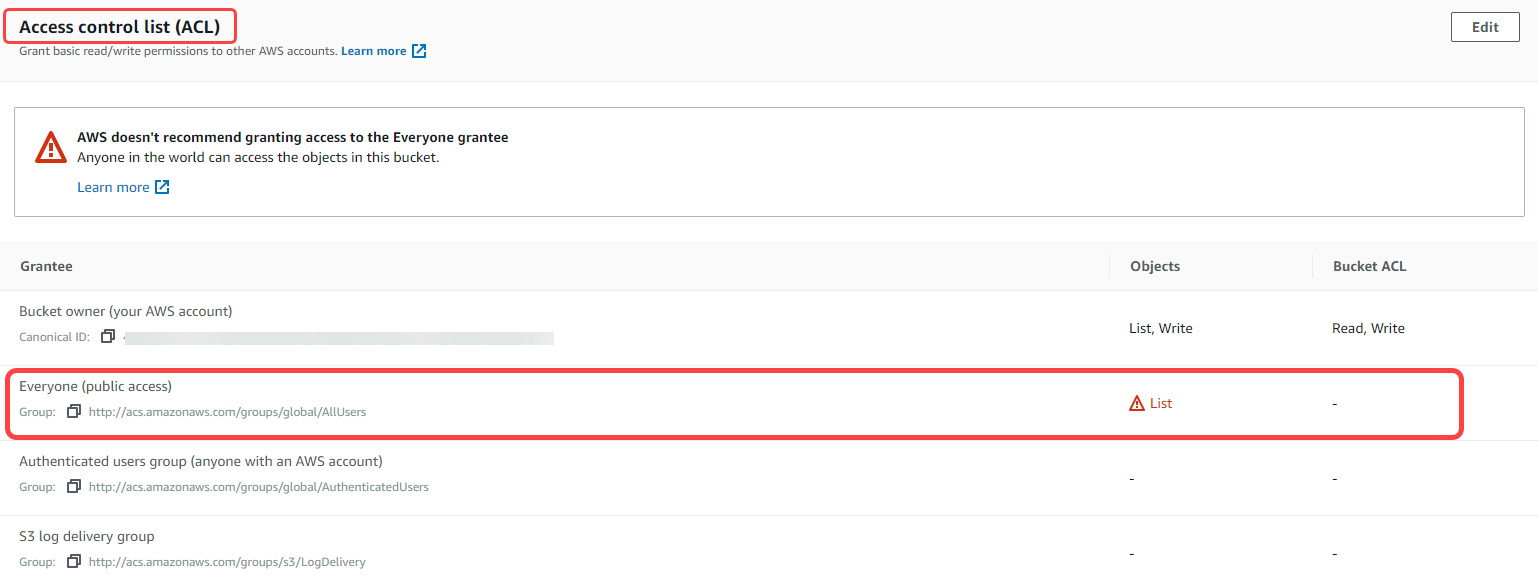Now, when you go back to the bucket list, you’ll see that the entry in the access column has changed to **Public**

3.**FIND THE PUBLIC URL OF AN S3 BUCKET OBJECT**
------------------------------------------------
If you need to find the URL of a specific S3 Object, please follow these steps:
* From the bucket list, click on the name of the bucket. Then choose a file and click on its name.
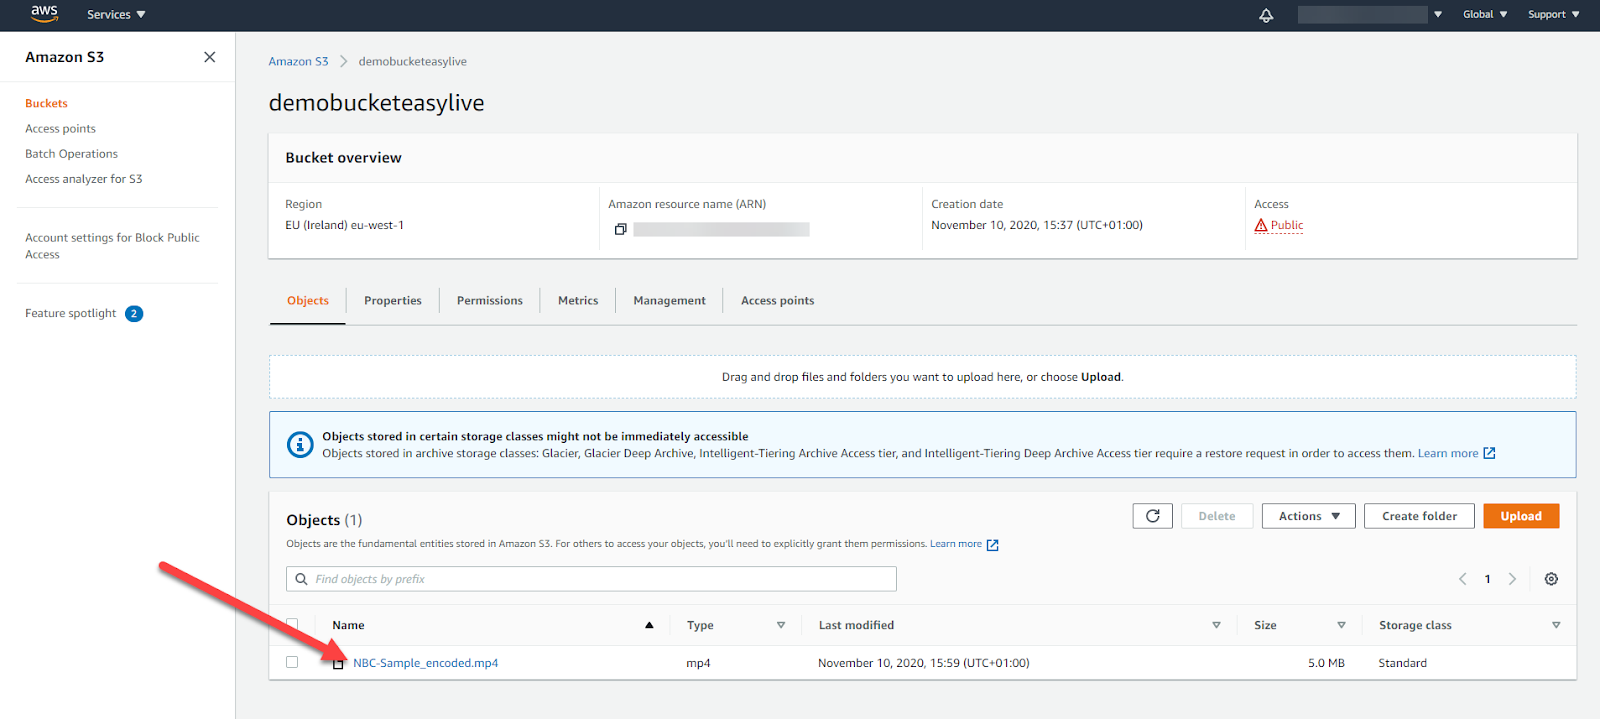
* Copy its **Object URL.** Make sure that public permissions have been granted.

4\. IMPORT FILE(S) FROM MY AWS S3 BUCKET TO LIVEU STUDIO
--------------------------------------------------------
* Add a new input from URL (image and/or VOD) & paste the objects' URLs or the buckets' URLs. You can paste one or many URLs at the same time, depending on your needs.

If a file cannot be loaded on LiveU Studio, please check if the object's permissions have been settled to "**public**".
**Can't find the right answer?**
Contact the LiveU Studio Support team via our Live Chat.
---
# Program Backup/Recording – Studio
[Skip to main content](#main-content)
Search
------
Hi. How can we help?
====================
HOW CAN I ACCESS MY LIVE BACKUP/RECORDING AS WELL AS MY CLIPS&DVRS?
**Important note:** backups as well as clips and segments are saved for a maximum duration of 48 hours.
* Log in to the LiveU Studio platform and click on "**Ended live streams**" (1) at the top right of your calendar.

* The list of the ended lives will be displayed, select the live from which you want to access the backup/clips and click on it.

**Next steps**
* View/Download the complete live backup as well as the clips and DVRs
* Modify metadata
* [Create a clip (25-sec cutting)](/hc/en-us/articles/17094638765339)
* Publish the full backup (or just a clip/DVR) to the broadcaster(s) of your choice
**Keep exploring**
* [Convert my .flv Backup into an editable .mp4](/hc/en-us/articles/17094683048987)
**Can't find the right answer?**
Contact the LiveU Studio Support team via our Live Chat.
---
# FLV Backup to MP4 – Studio
[Skip to main content](#main-content)
Search
------
Hi. How can we help?
====================
Convert my .flv Backup into an editable .mp4
To be able to edit a global backup file in software such as Adobe Premiere Pro or DaVinci Resolve you need to convert your FLV file to MP4 beforehand.
**If the duration is less than 2 hours, create a clip then download it in mp4 format**

**OR**
**Download the .flv backup file**
* Log in to the LiveU Studio platform and click on "**Ended live streams**" (1) at the top right of your screen.

The list of the ended lives will be displayed, select the live from which you want to access the backup, and click on it (or on the blue pen).

* Download the live backup.

Convert the .flv file into .mp4 to make it editable in Video editing software
**Windows User**
* Download [**Format Factory**](http://www.pcfreetime.com/formatfactory/index.php?language=en)
or any other conversion software and convert your .flv file into .mp4.
* Import your .mp4 backup file into your editing software.
**MAC User**
### How to Convert FLV to MP4 on Mac with Free MP4 Converter
Step 1: Add a FLV video on Mac computer
* Download and install [Free MP4 Converter](https://www.anymp4.com/app-store/free-mp4-converter/)
on Mac. Launch it and then hit **"Add File"** button to import your FLV video. There is a preview window on the right panel, with which you can preview the real-time video effects.
****
Step 2: Convert FLV to MP4 free on Mac
* Choose "**MP4**" from "Profile" menu, and select an output folder from "Destination" below. Hit "**Convert**" button to convert FLV to MP4 on Mac for free.
****
**Can't find the right answer?**
Contact the LiveU Studio Support team via our Live Chat.
---