# Table of Contents
- [Welcome to OSWorld! — OSWorld](#welcome-to-osworld-osworld)
- [Installation — OSWorld](#installation-osworld)
- [User Guides — OSWorld](#user-guides-osworld)
- [Unknown](#unknown)
- [Community — OSWorld](#community-osworld)
- [Reference — OSWorld](#reference-osworld)
- [Overview — OSWorld](#overview-osworld)
- [Quick Start — OSWorld](#quick-start-osworld)
- [Install Provider — OSWorld](#install-provider-osworld)
- [DesktopEnv Interface Documentation — OSWorld](#desktopenv-interface-documentation-osworld)
- [Overview — OSWorld](#overview-osworld)
- [Adding New Agents to OSWorld — OSWorld](#adding-new-agents-to-osworld-osworld)
- [OSWorld Task Examples Explanation — OSWorld](#osworld-task-examples-explanation-osworld)
- [Proxy Guideline — OSWorld](#proxy-guideline-osworld)
- [Adding New Tasks to OSWorld — OSWorld](#adding-new-tasks-to-osworld-osworld)
- [Run OSWorld — OSWorld](#run-osworld-osworld)
- [Google Account Guideline — OSWorld](#google-account-guideline-osworld)
- [FAQ — OSWorld](#faq-osworld)
- [OSWorld Authors — OSWorld](#osworld-authors-osworld)
- [To Contribute — OSWorld](#to-contribute-osworld)
- [Reference Paper — OSWorld](#reference-paper-osworld)
- [Vision and Roadmap — OSWorld](#vision-and-roadmap-osworld)
- [Projects using OSWorld — OSWorld](#projects-using-osworld-osworld)
- [Public Evaluation Platform User Guide — OSWorld](#public-evaluation-platform-user-guide-osworld)
- [Server setup — OSWorld](#server-setup-osworld)
- [Unknown](#unknown)
- [Unknown](#unknown)
- [Unknown](#unknown)
- [VMware Workstation Pro — OSWorld](#vmware-workstation-pro-osworld)
- [Docker — OSWorld](#docker-osworld)
- [☁ Configuration of AWS — OSWorld](#-configuration-of-aws-osworld)
- [Unknown](#unknown)
- [VirtualBox — OSWorld](#virtualbox-osworld)
- [Unknown](#unknown)
- [Mobile — OSWorld](#mobile-osworld)
- [Web — OSWorld](#web-osworld)
- [Unknown](#unknown)
- [Computer — OSWorld](#computer-osworld)
- [General — OSWorld](#general-osworld)
- [Unknown](#unknown)
- [Unknown](#unknown)
- [Unknown](#unknown)
- [Unknown](#unknown)
- [Unknown](#unknown)
- [Unknown](#unknown)
- [Unknown](#unknown)
- [Unknown](#unknown)
- [Unknown](#unknown)
- [Unknown](#unknown)
- [Unknown](#unknown)
- [Unknown](#unknown)
- [Unknown](#unknown)
- [Unknown](#unknown)
- [Unknown](#unknown)
- [Unknown](#unknown)
- [Unknown](#unknown)
- [Unknown](#unknown)
- [Unknown](#unknown)
- [Unknown](#unknown)
- [Unknown](#unknown)
- [Unknown](#unknown)
- [Unknown](#unknown)
- [Unknown](#unknown)
- [Unknown](#unknown)
- [Page not found · GitHub Pages](#page-not-found-github-pages)
- [Site not found · GitHub Pages](#site-not-found-github-pages)
---
# Welcome to OSWorld! — OSWorld
* [](https://timothyxxx.github.io/OSWorld/#)
* Welcome to OSWorld!
* [View page source](https://timothyxxx.github.io/OSWorld/_sources/index.rst.txt)
* * *
Welcome to OSWorld
=============================================================================================================
**2025-07-28: Upgrade!** Introducing **OSWorld-Verified** with **comprehensive improvements**: fixed **community-reported examples**, **AWS support** reducing evaluation time to **within 1 hour**, and **updated benchmark results**. Please compare your OSWorld results with the new benchmark results when running the latest version.
[Website](https://os-world.github.io/)
| [Paper](https://arxiv.org/abs/2404.07972)
| [Code](https://github.com/xlang-ai/OSWorld)
| [Data](https://github.com/xlang-ai/OSWorld/tree/main/evaluation_examples)
| [Data Viewer](https://os-world.github.io/explorer.html)
| [Slides](https://docs.google.com/presentation/d/1-r889Nb9n7SeZqrj-ryNqJLoMzp7aGNU2ihO8nUdEcE/edit?usp=sharing)
| [Twitter](https://twitter.com/TianbaoX/status/1778781521253667267)
| [Discord](https://discord.gg/4Gnw7eTEZR)
* [Installation](https://timothyxxx.github.io/OSWorld/installation/index.html)
* [Overview](https://timothyxxx.github.io/OSWorld/installation/overview.html)
* [Install Provider](https://timothyxxx.github.io/OSWorld/installation/install_provider/index.html)
* [Quick Start](https://timothyxxx.github.io/OSWorld/installation/quickstart.html)
* [Proxy Guideline](https://timothyxxx.github.io/OSWorld/installation/proxy.html)
* [Google Account Guideline](https://timothyxxx.github.io/OSWorld/installation/google_account_guideline.html)
* [User Guides](https://timothyxxx.github.io/OSWorld/user_guides/index.html)
* [Overview](https://timothyxxx.github.io/OSWorld/user_guides/overview.html)
* [DesktopEnv Interface Documentation](https://timothyxxx.github.io/OSWorld/user_guides/environment_explanation.html)
* [OSWorld Task Examples Explanation](https://timothyxxx.github.io/OSWorld/user_guides/task_example_explanation.html)
* [Adding New Agents to OSWorld](https://timothyxxx.github.io/OSWorld/user_guides/add_new_agent.html)
* [Adding New Tasks to OSWorld](https://timothyxxx.github.io/OSWorld/user_guides/add_new_task.html)
* [Run OSWorld](https://timothyxxx.github.io/OSWorld/user_guides/run_evaluation.html)
* [Public Evaluation Platform User Guide](https://timothyxxx.github.io/OSWorld/user_guides/run_public_evaluation.html)
* [Server setup](https://timothyxxx.github.io/OSWorld/user_guides/replicate_client_server.html)
* [Community](https://timothyxxx.github.io/OSWorld/community/index.html)
* [FAQ](https://timothyxxx.github.io/OSWorld/community/faq.html)
* [To Contribute](https://timothyxxx.github.io/OSWorld/community/contribute.html)
* [OSWorld Authors](https://timothyxxx.github.io/OSWorld/community/authors.html)
* [Vision and Roadmap](https://timothyxxx.github.io/OSWorld/community/vision_and_roadmap.html)
* [Projects using OSWorld](https://timothyxxx.github.io/OSWorld/community/projects_using_osworld.html)
* [Reference](https://timothyxxx.github.io/OSWorld/reference/index.html)
* [Reference Paper](https://timothyxxx.github.io/OSWorld/reference/digital_agent_collection/index.html)
[Join Discord](https://discord.gg/4Gnw7eTEZR "Join our Discord community for discussions!")
---
# Installation — OSWorld
* [](https://timothyxxx.github.io/OSWorld/index.html)
* Installation
* [View page source](https://timothyxxx.github.io/OSWorld/_sources/installation/index.rst.txt)
* * *
Installation[](https://timothyxxx.github.io/OSWorld/installation/index.html#installation "Permalink to this heading")
=======================================================================================================================
* [Overview](https://timothyxxx.github.io/OSWorld/installation/overview.html)
* [Install Provider](https://timothyxxx.github.io/OSWorld/installation/install_provider/index.html)
* [Docker](https://timothyxxx.github.io/OSWorld/installation/install_provider/docker.html)
* [Prerequisite Check](https://timothyxxx.github.io/OSWorld/installation/install_provider/docker.html#prerequisite-check)
* [Docker Installation](https://timothyxxx.github.io/OSWorld/installation/install_provider/docker.html#docker-installation)
* [Verification](https://timothyxxx.github.io/OSWorld/installation/install_provider/docker.html#verification)
* [Usage Example](https://timothyxxx.github.io/OSWorld/installation/install_provider/docker.html#usage-example)
* [Customizing the VM Image](https://timothyxxx.github.io/OSWorld/installation/install_provider/docker.html#customizing-the-vm-image)
* [Clean-up Note](https://timothyxxx.github.io/OSWorld/installation/install_provider/docker.html#clean-up-note)
* [VMware Workstation Pro](https://timothyxxx.github.io/OSWorld/installation/install_provider/vmware.html)
* [Installation of VMware Workstation Pro](https://timothyxxx.github.io/OSWorld/installation/install_provider/vmware.html#installation-of-vmware-workstation-pro)
* [Troubleshooting](https://timothyxxx.github.io/OSWorld/installation/install_provider/vmware.html#troubleshooting)
* [Customizing the VM Image](https://timothyxxx.github.io/OSWorld/installation/install_provider/vmware.html#customizing-the-vm-image)
* [VirtualBox](https://timothyxxx.github.io/OSWorld/installation/install_provider/virtualbox.html)
* [Installation of VirtualBox](https://timothyxxx.github.io/OSWorld/installation/install_provider/virtualbox.html#installation-of-virtualbox)
* [☁ Configuration of AWS](https://timothyxxx.github.io/OSWorld/installation/install_provider/aws.html)
* [Overview](https://timothyxxx.github.io/OSWorld/installation/install_provider/aws.html#overview)
* [Security Group Configuration](https://timothyxxx.github.io/OSWorld/installation/install_provider/aws.html#security-group-configuration)
* [Security Group for OSWorld Virtual Machines](https://timothyxxx.github.io/OSWorld/installation/install_provider/aws.html#security-group-for-osworld-virtual-machines)
* [Host Machine Security Group Configuration](https://timothyxxx.github.io/OSWorld/installation/install_provider/aws.html#host-machine-security-group-configuration)
* [VPC Configuration](https://timothyxxx.github.io/OSWorld/installation/install_provider/aws.html#vpc-configuration)
* [Configuration Variables](https://timothyxxx.github.io/OSWorld/installation/install_provider/aws.html#configuration-variables)
* [AWS CLI Configuration](https://timothyxxx.github.io/OSWorld/installation/install_provider/aws.html#aws-cli-configuration)
* [Disclaimer](https://timothyxxx.github.io/OSWorld/installation/install_provider/aws.html#disclaimer)
* [Quick Start](https://timothyxxx.github.io/OSWorld/installation/quickstart.html)
* [Proxy Guideline](https://timothyxxx.github.io/OSWorld/installation/proxy.html)
* [Quick Setup with DataImpulse (Recommended)](https://timothyxxx.github.io/OSWorld/installation/proxy.html#quick-setup-with-dataimpulse-recommended)
* [2.2 Proxy Setup](https://timothyxxx.github.io/OSWorld/installation/proxy.html#proxy-setup)
* [Manual Proxy Configuration](https://timothyxxx.github.io/OSWorld/installation/proxy.html#manual-proxy-configuration)
* [1\. Configure Your Proxy on the Host Machine](https://timothyxxx.github.io/OSWorld/installation/proxy.html#configure-your-proxy-on-the-host-machine)
* [2\. Configure in the VM Machine](https://timothyxxx.github.io/OSWorld/installation/proxy.html#configure-in-the-vm-machine)
* [For the Ubuntu Image](https://timothyxxx.github.io/OSWorld/installation/proxy.html#for-the-ubuntu-image)
* [Configuration by GUI](https://timothyxxx.github.io/OSWorld/installation/proxy.html#configuration-by-gui)
* [Configuration by Command Line](https://timothyxxx.github.io/OSWorld/installation/proxy.html#configuration-by-command-line)
* [For Window Image](https://timothyxxx.github.io/OSWorld/installation/proxy.html#for-window-image)
* [Configuration by GUI](https://timothyxxx.github.io/OSWorld/installation/proxy.html#id1)
* [3\. Create a New Snapshot](https://timothyxxx.github.io/OSWorld/installation/proxy.html#create-a-new-snapshot)
* [4\. Modify chrome startup command](https://timothyxxx.github.io/OSWorld/installation/proxy.html#modify-chrome-startup-command)
* [See Also](https://timothyxxx.github.io/OSWorld/installation/proxy.html#see-also)
* [Google Account Guideline](https://timothyxxx.github.io/OSWorld/installation/google_account_guideline.html)
* [Real Accounts](https://timothyxxx.github.io/OSWorld/installation/google_account_guideline.html#real-accounts)
* [Register A Blank Google Account](https://timothyxxx.github.io/OSWorld/installation/google_account_guideline.html#register-a-blank-google-account)
* [Create A Google Cloud Project](https://timothyxxx.github.io/OSWorld/installation/google_account_guideline.html#create-a-google-cloud-project)
* [Configure OAuth Consent Screen](https://timothyxxx.github.io/OSWorld/installation/google_account_guideline.html#configure-oauth-consent-screen)
* [Create OAuth2.0 Credentials](https://timothyxxx.github.io/OSWorld/installation/google_account_guideline.html#create-oauth2-0-credentials)
* [Potential Issues](https://timothyxxx.github.io/OSWorld/installation/google_account_guideline.html#potential-issues)
* [Phone Verification Code Required](https://timothyxxx.github.io/OSWorld/installation/google_account_guideline.html#phone-verification-code-required)
* [Identity Verification](https://timothyxxx.github.io/OSWorld/installation/google_account_guideline.html#identity-verification)
* [Task Count and Evaluation Options](https://timothyxxx.github.io/OSWorld/installation/google_account_guideline.html#task-count-and-evaluation-options)
[Join Discord](https://discord.gg/4Gnw7eTEZR "Join our Discord community for discussions!")
---
# User Guides — OSWorld
* [](https://timothyxxx.github.io/OSWorld/index.html)
* User Guides
* [View page source](https://timothyxxx.github.io/OSWorld/_sources/user_guides/index.rst.txt)
* * *
User Guides[](https://timothyxxx.github.io/OSWorld/user_guides/index.html#user-guides "Permalink to this heading")
====================================================================================================================
* [Overview](https://timothyxxx.github.io/OSWorld/user_guides/overview.html)
* [DesktopEnv Interface Documentation](https://timothyxxx.github.io/OSWorld/user_guides/environment_explanation.html)
* [Overview](https://timothyxxx.github.io/OSWorld/user_guides/environment_explanation.html#overview)
* [Class Definition](https://timothyxxx.github.io/OSWorld/user_guides/environment_explanation.html#class-definition)
* [Initialization Parameters](https://timothyxxx.github.io/OSWorld/user_guides/environment_explanation.html#initialization-parameters)
* [Key Methods](https://timothyxxx.github.io/OSWorld/user_guides/environment_explanation.html#key-methods)
* [Usage Examples](https://timothyxxx.github.io/OSWorld/user_guides/environment_explanation.html#usage-examples)
* [See Also](https://timothyxxx.github.io/OSWorld/user_guides/environment_explanation.html#see-also)
* [OSWorld Task Examples Explanation](https://timothyxxx.github.io/OSWorld/user_guides/task_example_explanation.html)
* [Overview](https://timothyxxx.github.io/OSWorld/user_guides/task_example_explanation.html#overview)
* [JSON Schema Structure](https://timothyxxx.github.io/OSWorld/user_guides/task_example_explanation.html#json-schema-structure)
* [Detailed Example Analysis](https://timothyxxx.github.io/OSWorld/user_guides/task_example_explanation.html#detailed-example-analysis)
* [Advanced Configuration and Evaluation](https://timothyxxx.github.io/OSWorld/user_guides/task_example_explanation.html#advanced-configuration-and-evaluation)
* [Config Types Reference](https://timothyxxx.github.io/OSWorld/user_guides/task_example_explanation.html#config-types-reference)
* [See Also](https://timothyxxx.github.io/OSWorld/user_guides/task_example_explanation.html#see-also)
* [Adding New Agents to OSWorld](https://timothyxxx.github.io/OSWorld/user_guides/add_new_agent.html)
* [Core Agent Interface](https://timothyxxx.github.io/OSWorld/user_guides/add_new_agent.html#core-agent-interface)
* [Integration and Usage](https://timothyxxx.github.io/OSWorld/user_guides/add_new_agent.html#integration-and-usage)
* [See Also](https://timothyxxx.github.io/OSWorld/user_guides/add_new_agent.html#see-also)
* [Adding New Tasks to OSWorld](https://timothyxxx.github.io/OSWorld/user_guides/add_new_task.html)
* [Run OSWorld](https://timothyxxx.github.io/OSWorld/user_guides/run_evaluation.html)
* [Agent Baselines](https://timothyxxx.github.io/OSWorld/user_guides/run_evaluation.html#agent-baselines)
* [Evaluation](https://timothyxxx.github.io/OSWorld/user_guides/run_evaluation.html#evaluation)
* [See Also](https://timothyxxx.github.io/OSWorld/user_guides/run_evaluation.html#see-also)
* [Public Evaluation Platform User Guide](https://timothyxxx.github.io/OSWorld/user_guides/run_public_evaluation.html)
* [1\. Platform Deployment & Connection](https://timothyxxx.github.io/OSWorld/user_guides/run_public_evaluation.html#platform-deployment-connection)
* [2\. Environment Setup](https://timothyxxx.github.io/OSWorld/user_guides/run_public_evaluation.html#environment-setup)
* [3\. Running Evaluations](https://timothyxxx.github.io/OSWorld/user_guides/run_public_evaluation.html#running-evaluations)
* [4\. Viewing Results](https://timothyxxx.github.io/OSWorld/user_guides/run_public_evaluation.html#viewing-results)
* [5\. Contact the team to update leaderboard and fix errors (optional)](https://timothyxxx.github.io/OSWorld/user_guides/run_public_evaluation.html#contact-the-team-to-update-leaderboard-and-fix-errors-optional)
* [See Also](https://timothyxxx.github.io/OSWorld/user_guides/run_public_evaluation.html#see-also)
* [Server setup](https://timothyxxx.github.io/OSWorld/user_guides/replicate_client_server.html)
* [Configuration Overview](https://timothyxxx.github.io/OSWorld/user_guides/replicate_client_server.html#configuration-overview)
* [Ubuntu](https://timothyxxx.github.io/OSWorld/user_guides/replicate_client_server.html#ubuntu)
* [MacOS](https://timothyxxx.github.io/OSWorld/user_guides/replicate_client_server.html#macos)
* [See Also](https://timothyxxx.github.io/OSWorld/user_guides/replicate_client_server.html#see-also)
[Join Discord](https://discord.gg/4Gnw7eTEZR "Join our Discord community for discussions!")
---
# Unknown
Welcome to OSWorld!
======================================
.. raw:: html
2025-07-28: Upgrade! Introducing OSWorld-Verified with comprehensive improvements: fixed community-reported examples, AWS support reducing evaluation time to within 1 hour, and updated benchmark results. Please compare your OSWorld results with the new benchmark results when running the latest version.
.. \_Website: https://os-world.github.io/
.. \_Paper: https://arxiv.org/abs/2404.07972
.. \_Code: https://github.com/xlang-ai/OSWorld
.. \_Data: https://github.com/xlang-ai/OSWorld/tree/main/evaluation\_examples
.. \_Data Viewer: https://os-world.github.io/explorer.html
.. \_Slides: https://docs.google.com/presentation/d/1-r889Nb9n7SeZqrj-ryNqJLoMzp7aGNU2ihO8nUdEcE/edit?usp=sharing
.. \_Twitter: https://twitter.com/TianbaoX/status/1778781521253667267
.. \_Discord: https://discord.gg/4Gnw7eTEZR
\`Website\`\_ | \`Paper\`\_ | \`Code\`\_ | \`Data\`\_ | \`Data Viewer\`\_ | \`Slides\`\_ | \`Twitter\`\_ | \`Discord\`\_
.. toctree::
:maxdepth: 2
installation/index.rst
user\_guides/index.rst
community/index.rst
reference/index.rst
---
# Community — OSWorld
* [](https://timothyxxx.github.io/OSWorld/index.html)
* Community
* [View page source](https://timothyxxx.github.io/OSWorld/_sources/community/index.rst.txt)
* * *
Community[](https://timothyxxx.github.io/OSWorld/community/index.html#community "Permalink to this heading")
==============================================================================================================
* [FAQ](https://timothyxxx.github.io/OSWorld/community/faq.html)
* [What is the username and password for the virtual machines?](https://timothyxxx.github.io/OSWorld/community/faq.html#what-is-the-username-and-password-for-the-virtual-machines)
* [How to setup the account and credentials for Google and Google Drive?](https://timothyxxx.github.io/OSWorld/community/faq.html#how-to-setup-the-account-and-credentials-for-google-and-google-drive)
* [How can I configure a proxy for the VM (if I’m behind the GFW, or I don’t want some of my tasks to be identified as bot and get lower scores)?](https://timothyxxx.github.io/OSWorld/community/faq.html#how-can-i-configure-a-proxy-for-the-vm-if-i-m-behind-the-gfw-or-i-don-t-want-some-of-my-tasks-to-be-identified-as-bot-and-get-lower-scores)
* [How to submit Evaluation?](https://timothyxxx.github.io/OSWorld/community/faq.html#how-to-submit-evaluation)
* [What about the Google Drive tasks? Can I skip them?](https://timothyxxx.github.io/OSWorld/community/faq.html#what-about-the-google-drive-tasks-can-i-skip-them)
* [What are the running times and costs under different settings? (Deprecated)](https://timothyxxx.github.io/OSWorld/community/faq.html#what-are-the-running-times-and-costs-under-different-settings-deprecated)
* [To Contribute](https://timothyxxx.github.io/OSWorld/community/contribute.html)
* [OSWorld Authors](https://timothyxxx.github.io/OSWorld/community/authors.html)
* [Initiators](https://timothyxxx.github.io/OSWorld/community/authors.html#initiators)
* [Contributors](https://timothyxxx.github.io/OSWorld/community/authors.html#contributors)
* [Special Acknowledgement](https://timothyxxx.github.io/OSWorld/community/authors.html#special-acknowledgement)
* [Vision and Roadmap](https://timothyxxx.github.io/OSWorld/community/vision_and_roadmap.html)
* [Vision](https://timothyxxx.github.io/OSWorld/community/vision_and_roadmap.html#vision)
* [Roadmap](https://timothyxxx.github.io/OSWorld/community/vision_and_roadmap.html#roadmap)
* [Projects using OSWorld](https://timothyxxx.github.io/OSWorld/community/projects_using_osworld.html)
[Join Discord](https://discord.gg/4Gnw7eTEZR "Join our Discord community for discussions!")
---
# Reference — OSWorld
* [](https://timothyxxx.github.io/OSWorld/index.html)
* Reference
* [View page source](https://timothyxxx.github.io/OSWorld/_sources/reference/index.rst.txt)
* * *
Reference[](https://timothyxxx.github.io/OSWorld/reference/index.html#reference "Permalink to this heading")
==============================================================================================================
* [Reference Paper](https://timothyxxx.github.io/OSWorld/reference/digital_agent_collection/index.html)
* [Mobile](https://timothyxxx.github.io/OSWorld/reference/digital_agent_collection/mobile.html)
* [Web](https://timothyxxx.github.io/OSWorld/reference/digital_agent_collection/web.html)
* [Computer](https://timothyxxx.github.io/OSWorld/reference/digital_agent_collection/computer.html)
* [General](https://timothyxxx.github.io/OSWorld/reference/digital_agent_collection/general.html)
[Join Discord](https://discord.gg/4Gnw7eTEZR "Join our Discord community for discussions!")
---
# Overview — OSWorld
* [](https://timothyxxx.github.io/OSWorld/index.html)
* [Installation](https://timothyxxx.github.io/OSWorld/installation/index.html)
* Overview
* [View page source](https://timothyxxx.github.io/OSWorld/_sources/installation/overview.rst.txt)
* * *
Overview[](https://timothyxxx.github.io/OSWorld/installation/overview.html#overview "Permalink to this heading")
==================================================================================================================
[Join Discord](https://discord.gg/4Gnw7eTEZR "Join our Discord community for discussions!")
---
# Quick Start — OSWorld
* [](https://timothyxxx.github.io/OSWorld/index.html)
* [Installation](https://timothyxxx.github.io/OSWorld/installation/index.html)
* Quick Start
* [View page source](https://timothyxxx.github.io/OSWorld/_sources/installation/quickstart.rst.txt)
* * *
Quick Start[](https://timothyxxx.github.io/OSWorld/installation/quickstart.html#quick-start "Permalink to this heading")
==========================================================================================================================
After you finish the setup for your provider (installation and configuration of vmware/virtualbox/aws…). Run the following minimal example to interact with the environment and verify if everything is okay. When running for the first time, the following code will start a process of environment installation. It involves downloading (a zip file), unzipping, renaming, starting the machine, and then taking a snapshot (which we name init\_state) after the startup, and will takes some time ☕️.
from desktop\_env.desktop\_env import DesktopEnv
example \= {
"id": "94d95f96-9699-4208-98ba-3c3119edf9c2",
"instruction": "I want to install Spotify on my current system. Could you please help me?",
"config": \[\
{\
"type": "execute",\
"parameters": {\
"command": \[\
"python",\
"-c",\
"import pyautogui; import time; pyautogui.click(960, 540); time.sleep(0.5);"\
\]\
}\
}\
\],
"evaluator": {
"func": "check\_include\_exclude",
"result": {
"type": "vm\_command\_line",
"command": "which spotify"
},
"expected": {
"type": "rule",
"rules": {
"include": \["spotify"\],
"exclude": \["not found"\]
}
}
}
}
env \= DesktopEnv(action\_space\="pyautogui")
obs \= env.reset(task\_config\=example)
obs, reward, done, info \= env.step("pyautogui.rightClick()")
Copy to clipboard
Hope everything goes smooth. You will see all the logs of the system running normally, including the successful creation of the environment, completion of setup, and successful execution of actions. In the end, you will observe a successful right-click on the screen, which means you are ready to go.
[Join Discord](https://discord.gg/4Gnw7eTEZR "Join our Discord community for discussions!")
---
# Install Provider — OSWorld
* [](https://timothyxxx.github.io/OSWorld/index.html)
* [Installation](https://timothyxxx.github.io/OSWorld/installation/index.html)
* Install Provider
* [View page source](https://timothyxxx.github.io/OSWorld/_sources/installation/install_provider/index.rst.txt)
* * *
Install Provider[](https://timothyxxx.github.io/OSWorld/installation/install_provider/index.html#install-provider "Permalink to this heading")
================================================================================================================================================
Due to machine virtualization and some copyright issues, we support various platforms including VMWare, VirtualBox, AWS, etc., which we refer to as “providers”. Please refer to the documentation to complete the advanced configuration of different providers according to the situation. Also, when initializing the DesktopEnv variable, enter your choice into the `provider_name` parameter, which defaults to `vmware`, as follows:
env \= DesktopEnv(provider\_name \= "aws")
...
Copy to clipboard
We will continue our efforts to support more platforms in the future.
* [Docker](https://timothyxxx.github.io/OSWorld/installation/install_provider/docker.html)
* [Prerequisite Check](https://timothyxxx.github.io/OSWorld/installation/install_provider/docker.html#prerequisite-check)
* [Docker Installation](https://timothyxxx.github.io/OSWorld/installation/install_provider/docker.html#docker-installation)
* [Verification](https://timothyxxx.github.io/OSWorld/installation/install_provider/docker.html#verification)
* [Usage Example](https://timothyxxx.github.io/OSWorld/installation/install_provider/docker.html#usage-example)
* [Customizing the VM Image](https://timothyxxx.github.io/OSWorld/installation/install_provider/docker.html#customizing-the-vm-image)
* [Clean-up Note](https://timothyxxx.github.io/OSWorld/installation/install_provider/docker.html#clean-up-note)
* [VMware Workstation Pro](https://timothyxxx.github.io/OSWorld/installation/install_provider/vmware.html)
* [Installation of VMware Workstation Pro](https://timothyxxx.github.io/OSWorld/installation/install_provider/vmware.html#installation-of-vmware-workstation-pro)
* [Troubleshooting](https://timothyxxx.github.io/OSWorld/installation/install_provider/vmware.html#troubleshooting)
* [Customizing the VM Image](https://timothyxxx.github.io/OSWorld/installation/install_provider/vmware.html#customizing-the-vm-image)
* [VirtualBox](https://timothyxxx.github.io/OSWorld/installation/install_provider/virtualbox.html)
* [Installation of VirtualBox](https://timothyxxx.github.io/OSWorld/installation/install_provider/virtualbox.html#installation-of-virtualbox)
* [☁ Configuration of AWS](https://timothyxxx.github.io/OSWorld/installation/install_provider/aws.html)
* [Overview](https://timothyxxx.github.io/OSWorld/installation/install_provider/aws.html#overview)
* [Security Group Configuration](https://timothyxxx.github.io/OSWorld/installation/install_provider/aws.html#security-group-configuration)
* [Security Group for OSWorld Virtual Machines](https://timothyxxx.github.io/OSWorld/installation/install_provider/aws.html#security-group-for-osworld-virtual-machines)
* [Inbound Rules (8 rules required)](https://timothyxxx.github.io/OSWorld/installation/install_provider/aws.html#inbound-rules-8-rules-required)
* [Outbound Rules (1 rule required)](https://timothyxxx.github.io/OSWorld/installation/install_provider/aws.html#outbound-rules-1-rule-required)
* [Host Machine Security Group Configuration](https://timothyxxx.github.io/OSWorld/installation/install_provider/aws.html#host-machine-security-group-configuration)
* [VPC Configuration](https://timothyxxx.github.io/OSWorld/installation/install_provider/aws.html#vpc-configuration)
* [Configuration Variables](https://timothyxxx.github.io/OSWorld/installation/install_provider/aws.html#configuration-variables)
* [AWS CLI Configuration](https://timothyxxx.github.io/OSWorld/installation/install_provider/aws.html#aws-cli-configuration)
* [Disclaimer](https://timothyxxx.github.io/OSWorld/installation/install_provider/aws.html#disclaimer)
[Join Discord](https://discord.gg/4Gnw7eTEZR "Join our Discord community for discussions!")
---
# DesktopEnv Interface Documentation — OSWorld
* [](https://timothyxxx.github.io/OSWorld/index.html)
* [User Guides](https://timothyxxx.github.io/OSWorld/user_guides/index.html)
* DesktopEnv Interface Documentation
* [View page source](https://timothyxxx.github.io/OSWorld/_sources/user_guides/environment_explanation.rst.txt)
* * *
DesktopEnv Interface Documentation[](https://timothyxxx.github.io/OSWorld/user_guides/environment_explanation.html#desktopenv-interface-documentation "Permalink to this heading")
====================================================================================================================================================================================
Overview[](https://timothyxxx.github.io/OSWorld/user_guides/environment_explanation.html#overview "Permalink to this heading")
--------------------------------------------------------------------------------------------------------------------------------
The `DesktopEnv` class is the core interface for interacting with virtual desktop environments in OSWorld. It provides a standardized way to control virtual machines across different providers (VMware, VirtualBox, Docker, AWS, etc.) and execute actions on desktop environments through various action spaces.
This class serves as the main entry point for agents to interact with real computer environments, enabling tasks such as:
* Making observations by taking screenshots and/or capturing accessibility trees
* Executing mouse and keyboard actions
* Managing virtual machine states
* Evaluating task completion
* Setting up and tearing down task environments
Class Definition[](https://timothyxxx.github.io/OSWorld/user_guides/environment_explanation.html#class-definition "Permalink to this heading")
------------------------------------------------------------------------------------------------------------------------------------------------
class DesktopEnv:
def \_\_init\_\_(self,
provider\_name: str \= "vmware",
region: str \= None,
path\_to\_vm: str \= None,
snapshot\_name: str \= "init\_state",
action\_space: str \= "pyautogui",
cache\_dir: str \= "cache",
screen\_size: Tuple\[int\] \= (int(os.environ.get("SCREEN\_WIDTH", 1920)), int(os.environ.get("SCREEN\_HEIGHT", 1080))),
headless: bool \= False,
require\_a11y\_tree: bool \= True,
require\_terminal: bool \= False,
os\_type: str \= "Ubuntu",
enable\_proxy: bool \= False,
client\_password: str \= "",
\*\*kwargs)
Copy to clipboard
Initialization Parameters[](https://timothyxxx.github.io/OSWorld/user_guides/environment_explanation.html#initialization-parameters "Permalink to this heading")
------------------------------------------------------------------------------------------------------------------------------------------------------------------
### Core Parameters[](https://timothyxxx.github.io/OSWorld/user_guides/environment_explanation.html#core-parameters "Permalink to this heading")
**provider\_name**str, default=”vmware”
The virtualization provider to use. Supported options:
* `"vmware"`: VMware Workstation Pro/Fusion
* `"virtualbox"`: Oracle VirtualBox
* `"docker"`: Docker containers with GUI support
* `"aws"`: Amazon Web Services EC2 instances
Each provider has different capabilities and requirements. See provider-specific documentation for details.
**region**str, optional
The region of the virtual machine. The meaning varies for different providers. For AWS provider, this parameter should be the region of the virtual machine. For others, this parameter is ignored.
**path\_to\_vm**str, optional
For VMware/VirtualBox providers, the file path to the virtual machine configuration file (e.g., .vmx file for VMware).
**snapshot\_name**str, default=”init\_state”
For VMware provider, ‘init\_state’ is the default name of snapshot we set for the client virtual machine. For cloud provider such as AWS, this parameter should be the AMI ID of the virtual machine. This allows the environment to return to a known clean state for each task.
**action\_space**str, default=”pyautogui”
Defines the action interface for agent interactions. Supported action spaces:
* `"pyautogui"`: Python automation using PyAutoGUI library
* `"computer_13"`: The action space we designed for our agent to use, contains 13 actions, including click, drag, scroll, type, etc.
* `"claude_computer_use"`: The action space from Claude Computer Use.
**cache\_dir**str, default=”cache”
The directory to cache the files from cloud (initial files and ground-truth files for environment setup and evaluation) and client machine (for example, the files modified by the agent).
Note
Cloud files are automatically downloaded on first use, then the system will check this directory first before downloading. Important: If you modify task files without changing their names, they may not be overwritten. You need to manually delete them to ensure updates.
**screen\_size**Tuple\[int\], default=(1920, 1080)
The screen size of the virtual machine you refer to. Currently we don’t support modifying resolution based on this parameter - it’s only used as an index. On AWS, machines without corresponding resolution will report errors; on VMware and Docker, this parameter is ignored.
**headless**bool, default=False
Whether to run the virtual machine in headless mode (without GUI display). Useful for batch processing and server deployments.
**require\_a11y\_tree**bool, default=False
Whether accessibility tree capture is required. When enabled, the environment will extract and provide accessibility information alongside screenshots.
Warning
The quality and speed of obtaining accessibility tree content is strongly correlated with the software provider. When enabled, each observation acquisition may take much longer than simply taking screenshots (~10 seconds on average, for some software it may take several minutes or more). Use with caution.
Our vision is that accessibility trees will be phased out in the future.
**require\_terminal**bool, default=False
Whether to require terminal information for the virtual machine. When enabled, the environment will attempt to extract terminal information from the virtual machine to help agents make potential decisions.
**os\_type**str, default=”Ubuntu”
Operating system type of the target virtual machine:
* `"Ubuntu"`: Ubuntu Linux distributions
* `"Windows"`: Microsoft Windows
* \[PLACEHOLDER: Add other supported OS types\]
**enable\_proxy**bool, default=False
Whether to enable proxy for the virtual machine. If enabled, the environment will use dataimpulse proxy server to access the internet.
Important
Please ensure you have configured the dataimpulse proxy server according to our instructions and guaranteed sufficient balance, and have copied the username and password to [dataimpulse.json](https://github.com/xlang-ai/OSWorld/blob/main/evaluation_examples/settings/proxy/dataimpulse.json)
, otherwise network disconnection will occur.
**client\_password**str, optional
Password for the guest operating system user account. Required for:
* Proxy configuration setup
* Tasks requiring sudo privileges
* Administrative operations within the VM
Default credentials vary by provider (e.g., “password” for vmware/virtualbox, “osworld-public-evaluation” for aws).
### Additional Configuration Notes[](https://timothyxxx.github.io/OSWorld/user_guides/environment_explanation.html#additional-configuration-notes "Permalink to this heading")
#### Port Configuration[](https://timothyxxx.github.io/OSWorld/user_guides/environment_explanation.html#port-configuration "Permalink to this heading")
In the initialization function, several ports are configured for client-server communication. These ports are pre-configured in our provided client machines. If you need to reconfigure machines, please pay attention to these port settings:
\# Default port configuration
self.server\_port \= 5000
self.chromium\_port \= 9222
self.vnc\_port \= 8006
self.vlc\_port \= 8080
Copy to clipboard
#### Docker Provider Special Handling[](https://timothyxxx.github.io/OSWorld/user_guides/environment_explanation.html#docker-provider-special-handling "Permalink to this heading")
For Docker, our implementation is special because Docker containers from the same machine share the same IP address. Therefore, we need to control different ports to support multiple parallel environments. A port allocation mechanism is implemented in the provider, with special handling as shown below:
\# Get the ip from the virtual machine, and setup the controller
vm\_ip\_ports \= self.provider.get\_ip\_address(self.path\_to\_vm).split(':')
self.vm\_ip \= vm\_ip\_ports\[0\]
\# Get the ports from the virtual machine (for Docker provider only)
if len(vm\_ip\_ports) \> 1:
self.server\_port \= int(vm\_ip\_ports\[1\])
self.chromium\_port \= int(vm\_ip\_ports\[2\])
self.vnc\_port \= int(vm\_ip\_ports\[3\])
self.vlc\_port \= int(vm\_ip\_ports\[4\])
Copy to clipboard
#### Proxy Configuration[](https://timothyxxx.github.io/OSWorld/user_guides/environment_explanation.html#proxy-configuration "Permalink to this heading")
When you set `enable_proxy` to `True`, please ensure you have configured the dataimpulse proxy server according to our [proxy setup instructions](https://github.com/xlang-ai/OSWorld/blob/main/PUBLIC_EVALUATION_GUIDELINE.md#22-proxy-setup)
and guaranteed sufficient balance. You must also copy the username and password to the [dataimpulse.json](https://github.com/xlang-ai/OSWorld/blob/main/evaluation_examples/settings/proxy/dataimpulse.json)
file, otherwise network disconnection will occur.
Key Methods[](https://timothyxxx.github.io/OSWorld/user_guides/environment_explanation.html#key-methods "Permalink to this heading")
--------------------------------------------------------------------------------------------------------------------------------------
### reset()[](https://timothyxxx.github.io/OSWorld/user_guides/environment_explanation.html#reset "Permalink to this heading")
def reset(self, task\_config: Dict) \-> observation
Copy to clipboard
Resets the environment to an initial state and sets up the task configuration.
**Parameters:**
* **task\_config**Dict
Task configuration dictionary containing:
* `"id"`: Unique task identifier
* `"instruction"`: Natural language task description for the agent
* `"config"`: List of setup commands and scripts for task initialization
* `"evaluator"`: Evaluation criteria and success conditions
* `"trajectory"`: (Optional) Reference trajectory for task completion
* `"snapshot"`: (Optional) VM snapshot to restore before task execution
* `"proxy"`: (Optional) Boolean indicating if proxy is required for the task
**Returns:**
* **observation** : The initial observation after environment reset
### step()[](https://timothyxxx.github.io/OSWorld/user_guides/environment_explanation.html#step "Permalink to this heading")
def step(self, action: str, pause: Optional\[float\] \= None) \-> Tuple\[observation, reward, done, info\]
Copy to clipboard
Executes an action in the environment and returns the resulting state.
**Parameters:**
* **action**str
Action string formatted according to the specified action\_space. Examples:
* PyAutoGUI: `"pyautogui.click(100, 200)"`
* Computer 13: `{"action": "click", "coordinate": [100, 200]}`
* **pause**float, optional
**CRITICAL PARAMETER**: Time to sleep after action execution before capturing observation.
Warning
The `pause` parameter (often set via the `sleep_after_execution` parameter in run\_multienv functions) is **extremely important** for reliable agent performance. In our practical experience, this parameter significantly affects the quality of observations captured after action execution.
**Why this matters:**
* If the sleep time is too short, the agent may capture observations before the action has fully taken effect
* GUI applications need time to process commands and update their interfaces
* Web pages require time to load and render new content
* Network delays can cause UI state changes to be delayed
* Without adequate pause time, agents may observe the pre-action state instead of the post-action state, leading to confusion and poor performance
**As of 2024-07-29, current AI models and agents are already quite fragile, and inadequate pause timing makes them even more unstable and confused.**
**Returns:**
* **observation** : Current environment observation (screenshot, a11y tree, or both)
* **reward** : Task completion reward (typically 0 during execution, 1 on success)
* **done** : Boolean indicating if the task/episode has ended
* **info** : Additional information dictionary with metadata
### close()[](https://timothyxxx.github.io/OSWorld/user_guides/environment_explanation.html#close "Permalink to this heading")
def close()
Copy to clipboard
Closes the environment and cleans up resources. This method should be called when the environment is no longer needed.
**Parameters:**
None
**Returns:**
None
### get\_observation()[](https://timothyxxx.github.io/OSWorld/user_guides/environment_explanation.html#get-observation "Permalink to this heading")
def get\_observation() \-> Dict
Copy to clipboard
Captures the current state observation from the virtual machine.
**Returns:**
* **observation**Dict
Dictionary containing observation data:
* `"screenshot"`: Base64-encoded screenshot image
* `"accessibility_tree"`: Accessibility tree structure (if enabled)
* `"terminal"`: Terminal information (if enabled)
* `"timestamp"`: Observation timestamp
### evaluate()[](https://timothyxxx.github.io/OSWorld/user_guides/environment_explanation.html#evaluate "Permalink to this heading")
def evaluate() \-> float
Copy to clipboard
Evaluates the current task completion status using the configured evaluator.
The evaluation process involves three main components:
1. **Result Getters**: Extract current state from various sources (screenshots, files, command outputs, etc.)
2. **Expected Getters**: Extract expected/reference state for comparison (optional)
3. **Metrics**: Compare result and expected states to compute success scores
**Evaluation Flow:**
1. **Post-configuration Setup**: Executes any post-configuration commands defined in evaluator. Some tasks require additional operations to facilitate verification, such as saving files, activating modification synchronization, etc.
2. **Special Case Handling**: - For “infeasible” tasks: Returns 1 if last action was “FAIL”, otherwise 0 - For regular tasks: Returns 0 if last action was “FAIL”
3. **Result Extraction**: Uses result\_getter to extract current state based on evaluator\[“result”\] configuration
4. **Expected State Extraction**: Uses expected\_getter to extract reference state (if evaluator\[“expected”\] exists)
5. **Metric Computation**: Applies metric function to compare states and compute score
**Single vs Multiple Metrics:**
_Single Metric (most common):_
\# Example: Check if screenshot contains specific text
evaluator \= {
"func": "check\_include\_exclude",
"result": {"type": ...},
"expected": {"type": ...}
}
\# Returns: float score (0.0 to 1.0)
Copy to clipboard
_Multiple Metrics with AND/OR logic:_
\# Example: All conditions must be met
example \=
{
"id": "example-task",
"instruction": "Clear rubbish bin",
"config": \[\],
"evaluator": {
"func": \[\
"metric\_1",\
"metric\_2"\
\],
"conj": "and", \# Return positive reward if all metrics succeed
\# "conj": "or" # Return positive reward if any metric succeeds
"result": \[\
{"type": "xxx", ...},\
{"type": "xxx", ...},\
\],
"expected": \[\
{"type": "xxx", ...},\
{"type": "xxx", ...},\
\],
"options":\[\
{"xxx": ..},\
{"xxx": ..}\
\]
}
}
\# Returns: 0 if any metric fails, otherwise average of all scores
Copy to clipboard
_Multiple Metrics with OR logic:_
\# Example: Any condition can satisfy the task
evaluator \= {
"func": "check\_alternative\_outcomes",
"conj": "or", \# Any metric can succeed
"result": \[\
{"type": "screenshot"},\
{"type": "vm\_command\_line", "command": "ls /tmp/"}\
\]
}
\# Returns: 1 if any metric succeeds, otherwise maximum score
Copy to clipboard
**Returns:**
* **score** : float - Numerical score (0.0 = failure, 1.0 = complete success, intermediate values possible)
### get\_info()[](https://timothyxxx.github.io/OSWorld/user_guides/environment_explanation.html#get-info "Permalink to this heading")
def get\_info() \-> Dict
Copy to clipboard
Returns information about the current environment state and configuration.
**Returns:**
* **info**Dict
Environment information including:
* `"vm_ip"`: Virtual machine IP address
* `"server_port"`: Communication server port
* `"action_space"`: Current action space configuration
* `"provider"`: Provider information
Usage Examples[](https://timothyxxx.github.io/OSWorld/user_guides/environment_explanation.html#usage-examples "Permalink to this heading")
--------------------------------------------------------------------------------------------------------------------------------------------
### Basic Usage[](https://timothyxxx.github.io/OSWorld/user_guides/environment_explanation.html#basic-usage "Permalink to this heading")
from desktop\_env.desktop\_env import DesktopEnv
\# Initialize environment with VMware provider
env \= DesktopEnv(
provider\_name\="vmware",
action\_space\="pyautogui"
)
\# Define a simple task
task\_config \= {
"id": "example-task",
"instruction": "Clear rubbish bin",
"config": \[\],
"evaluator": {
"func": "check\_include\_exclude",
"result": {"type": "screenshot"},
"expected": {"type": "rule", "rules": {"include": \["desktop"\]}}
}
}
\# Reset environment and execute action
obs \= env.reset(task\_config\=task\_config)
obs, reward, done, info \= env.step("pyautogui.click(500, 300)", pause\=2.0)
\# Clean up when finished
env.close()
Copy to clipboard
### Docker Provider Example[](https://timothyxxx.github.io/OSWorld/user_guides/environment_explanation.html#docker-provider-example "Permalink to this heading")
\# Initialize with Docker provider
env \= DesktopEnv(
provider\_name\="docker",
os\_type\="Ubuntu",
headless\=True,
client\_password\="password"
)
Copy to clipboard
### AWS Provider Example[](https://timothyxxx.github.io/OSWorld/user_guides/environment_explanation.html#aws-provider-example "Permalink to this heading")
\# Initialize with AWS provider for large-scale evaluation
env \= DesktopEnv(
provider\_name\="aws",
os\_type\="Ubuntu",
client\_password\="osworld-public-evaluation"
)
Copy to clipboard
### With Accessibility Tree[](https://timothyxxx.github.io/OSWorld/user_guides/environment_explanation.html#with-accessibility-tree "Permalink to this heading")
\# Environment with accessibility tree support
env \= DesktopEnv(
provider\_name\="vmware",
require\_a11y\_tree\=True
)
Copy to clipboard
### Provider-Specific Considerations[](https://timothyxxx.github.io/OSWorld/user_guides/environment_explanation.html#provider-specific-considerations "Permalink to this heading")
**VMware Provider**
* Requires VMware Workstation Pro or VMware Fusion
* Supports snapshots for quick environment reset
* Best performance on bare metal machines
* Supports macOS on Apple Silicon chips (via VMware Fusion)
**Docker Provider**
* Recommended for cloud/server deployments
* Supports parallel environments with automatic port allocation
* Requires KVM support for optimal performance
* May have limitations on GUI applications
**AWS Provider**
* Enables large-scale parallel evaluation
* Region-specific instance types and AMI requirements
* Network latency considerations for interactive tasks
* Cost optimization through spot instances and scheduled termination
**VirtualBox Provider**
* Free alternative to VMware
* Limited parallelism support
* May have performance limitations on some systems
### Security and Credentials[](https://timothyxxx.github.io/OSWorld/user_guides/environment_explanation.html#security-and-credentials "Permalink to this heading")
* **Default Credentials**: Use secure passwords and change defaults in production
* **Network Security**: Configure firewalls appropriately for the communication ports
* **Cloud Security**: Use IAM roles and security groups for AWS deployments
* **Proxy Configuration**: Ensure proxy credentials are securely stored and rotated
### Troubleshooting[](https://timothyxxx.github.io/OSWorld/user_guides/environment_explanation.html#troubleshooting "Permalink to this heading")
**Common Issues:**
* **Port Conflicts**: Ensure communication ports (5000, 9222, 8006, 8080) are available
* **Network Connectivity**: Verify VM can reach external networks if required
* **Performance Issues**: Check sleep\_after\_execution timing and VM resource allocation
* **Provider Errors**: Consult provider-specific logs and documentation
See Also[](https://timothyxxx.github.io/OSWorld/user_guides/environment_explanation.html#see-also "Permalink to this heading")
--------------------------------------------------------------------------------------------------------------------------------
* [OSWorld Task Examples Explanation](https://timothyxxx.github.io/OSWorld/user_guides/task_example_explanation.html)
- Task configuration format
* run\_experiment - Running experiments with DesktopEnv
* [Install Provider](https://timothyxxx.github.io/OSWorld/installation/install_provider/index.html)
- Provider-specific setup guides
* [Quick Start](https://timothyxxx.github.io/OSWorld/installation/quickstart.html)
- Quick start guide
* [Proxy Guideline](https://timothyxxx.github.io/OSWorld/installation/proxy.html)
- Proxy configuration guide
[Join Discord](https://discord.gg/4Gnw7eTEZR "Join our Discord community for discussions!")
---
# Overview — OSWorld
* [](https://timothyxxx.github.io/OSWorld/index.html)
* [User Guides](https://timothyxxx.github.io/OSWorld/user_guides/index.html)
* Overview
* [View page source](https://timothyxxx.github.io/OSWorld/_sources/user_guides/overview.rst.txt)
* * *
Overview[](https://timothyxxx.github.io/OSWorld/user_guides/overview.html#overview "Permalink to this heading")
=================================================================================================================
[Join Discord](https://discord.gg/4Gnw7eTEZR "Join our Discord community for discussions!")
---
# Adding New Agents to OSWorld — OSWorld
* [](https://timothyxxx.github.io/OSWorld/index.html)
* [User Guides](https://timothyxxx.github.io/OSWorld/user_guides/index.html)
* Adding New Agents to OSWorld
* [View page source](https://timothyxxx.github.io/OSWorld/_sources/user_guides/add_new_agent.rst.txt)
* * *
Adding New Agents to OSWorld[](https://timothyxxx.github.io/OSWorld/user_guides/add_new_agent.html#adding-new-agents-to-osworld "Permalink to this heading")
==============================================================================================================================================================
This guide explains how to extend OSWorld’s agent interface to integrate your custom agent for evaluation on the OSWorld benchmark. The agent interface is located in the `mm_agents/` directory and provides a standardized framework for multimodal agent implementations.
Core Agent Interface[](https://timothyxxx.github.io/OSWorld/user_guides/add_new_agent.html#core-agent-interface "Permalink to this heading")
----------------------------------------------------------------------------------------------------------------------------------------------
### Base Agent Class[](https://timothyxxx.github.io/OSWorld/user_guides/add_new_agent.html#base-agent-class "Permalink to this heading")
The foundation of OSWorld’s agent system is the base agent class. We don’t have strict requirements for your agent implementation - you can define all parameters according to your needs. The following example can be modified as needed:
class YourCustomAgent:
def \_\_init\_\_(self, model\_name, observation\_type\="screenshot", max\_steps\=15, client\_password\=None):
"""
Initialize the agent with configuration parameters
Args:
model\_name (str): Name/identifier of the underlying model
observation\_type (str): Type of observation ("screenshot", "a11y\_tree", "som")
max\_steps (int): Maximum number of steps for task execution
client\_password (str, optional): VM password for sudo operations, depends on your agent implementation
"""
def predict(self, observation, instruction, \*\*kwargs):
"""
Core prediction method - main agent decision-making logic
Args:
observation: Current environment state
instruction: Task instruction string
\*\*kwargs: step\_count, history, etc.
Returns:
action: Action string in OSWorld format
"""
def reset(self, task\_config):
"""Reset agent state for a new task"""
Copy to clipboard
### Essential Methods[](https://timothyxxx.github.io/OSWorld/user_guides/add_new_agent.html#essential-methods "Permalink to this heading")
**predict() Method**
The `predict()` method is the core interface where your agent’s decision-making logic resides:
def predict(self, instruction, obs, \*\*kwargs):
"""Main prediction logic"""
\# Your agent logic here
return action
Copy to clipboard
**Parameters:** - `instruction`: Natural language task description - `obs`: Current environment state (screenshot, accessibility tree, etc.) - `**kwargs`: You custom parameters
**Returns:** - `response`: Raw response from your model, you can use it to debug your agent or make some print to user - `action`: A list of actions, all actions in OSWorld action formatted (either payutogui or computer\_13)
**reset() Method**
The `reset()` method is also essential for your agent implementation. This method is called at the beginning of each new task to initialize your agent’s state:
def reset(self, \_logger\=None):
"""Reset agent state for a new task"""
global logger
logger \= \_logger if \_logger is not None else logging.getLogger("desktopenv.agent")
\# Clear agent history
self.thoughts \= \[\]
self.actions \= \[\]
self.observations \= \[\]
\# You can add more reset logic here based on your agent's needs
Copy to clipboard
**Parameters:** - `_logger` (optional): Logger instance for the agent to use during task execution
**Purpose:** Initialize your agent’s internal state, clear history (thoughts, actions, observations), set up logging, and prepare for a new task execution. This ensures your agent starts fresh for each evaluation task.
Integration and Usage[](https://timothyxxx.github.io/OSWorld/user_guides/add_new_agent.html#integration-and-usage "Permalink to this heading")
------------------------------------------------------------------------------------------------------------------------------------------------
### Final Agent Placement[](https://timothyxxx.github.io/OSWorld/user_guides/add_new_agent.html#final-agent-placement "Permalink to this heading")
Your agent implementation will ultimately be integrated into OSWorld’s execution pipeline through the `lib_run_single.py` module. This file contains the core task execution logic that coordinates between your agent and the OSWorld environment.
The integration flow works as follows:
1. **Agent Implementation**: Your agent class (with `predict()` and `reset()` methods)
2. **lib\_run\_single.py**: Core execution logic that calls your agent methods
3. **run.py/run\_multienv.py/run\_multienv\_xxx.py**: Entry points that import and use lib\_run\_single
**Coordination Requirements:**
* Your agent’s `predict()` method will be called by the execution pipeline in `lib_run_single.py`
* The `reset()` method will be called at the start of each task
* Your agent should handle the observation formats and return valid actions
* Error handling should be robust as your agent will run in automated evaluation pipelines
**File Structure:**
OSWorld/
├── mm\_agents/
│ ├── your\_agent.py # Your agent implementation
│ └── \_\_init\_\_.py
├── lib\_run\_single.py # Core execution logic (calls your agent)
├── run.py # Single-environment entry point
├── run\_multienv.py # Multi-environment entry point
├── run\_multienv\_xxx.py # Multi-environment entry point added by you if needed
└── ...
Copy to clipboard
This architecture ensures your agent integrates seamlessly with OSWorld’s evaluation pipeline while maintaining flexibility in your implementation approach.
### Running Evaluation[](https://timothyxxx.github.io/OSWorld/user_guides/add_new_agent.html#running-evaluation "Permalink to this heading")
\# Single-threaded evaluation
python run.py \\
\--provider\_name vmware \\
\--observation\_type screenshot \\
\--model your-custom-agent \\
\--max\_steps 15 \\
\--client\_password password \\
\--result\_dir ./results
\# Multi-environment parallel evaluation
python run\_multienv.py \\
\--provider\_name docker \\
\--observation\_type screenshot \\
\--model your-custom-agent \\
\--num\_envs 4 \\
\--max\_steps 15 \\
\--client\_password password
Copy to clipboard
Noted here again different VM providers have different default credentials:
* **VMware/VirtualBox/Docker**: username `user`, password `password`
* **AWS**: username `osworld-public-evaluation`, auto-generated password
See Also[](https://timothyxxx.github.io/OSWorld/user_guides/add_new_agent.html#see-also "Permalink to this heading")
----------------------------------------------------------------------------------------------------------------------
* [DesktopEnv Interface Documentation](https://timothyxxx.github.io/OSWorld/user_guides/environment_explanation.html)
- Detailed explanation of the OSWorld environment architecture and components
* [OSWorld Task Examples Explanation](https://timothyxxx.github.io/OSWorld/user_guides/task_example_explanation.html)
- Comprehensive guide to understanding and working with OSWorld tasks
* [Public Evaluation Platform User Guide](https://timothyxxx.github.io/OSWorld/user_guides/run_public_evaluation.html)
- Requirements and process for verified leaderboard submission
[Join Discord](https://discord.gg/4Gnw7eTEZR "Join our Discord community for discussions!")
---
# OSWorld Task Examples Explanation — OSWorld
* [](https://timothyxxx.github.io/OSWorld/index.html)
* [User Guides](https://timothyxxx.github.io/OSWorld/user_guides/index.html)
* OSWorld Task Examples Explanation
* [View page source](https://timothyxxx.github.io/OSWorld/_sources/user_guides/task_example_explanation.rst.txt)
* * *
OSWorld Task Examples Explanation[](https://timothyxxx.github.io/OSWorld/user_guides/task_example_explanation.html#osworld-task-examples-explanation "Permalink to this heading")
===================================================================================================================================================================================
This document explains the structure and meaning of task example JSON files in OSWorld, which is crucial for understanding and extending the benchmark.
Overview[](https://timothyxxx.github.io/OSWorld/user_guides/task_example_explanation.html#overview "Permalink to this heading")
---------------------------------------------------------------------------------------------------------------------------------
OSWorld tasks are designed to benchmark agents’ abilities when interacting with GUI environments. Each task is defined as a JSON file containing all necessary information to set up, execute, and evaluate the task.
Task examples are stored in the `./examples` directory, where each data item follows a standardized JSON format that defines the task setup, execution context, and evaluation criteria.
JSON Schema Structure[](https://timothyxxx.github.io/OSWorld/user_guides/task_example_explanation.html#json-schema-structure "Permalink to this heading")
-----------------------------------------------------------------------------------------------------------------------------------------------------------
Each task example JSON file contains the following fields:
### Core Fields[](https://timothyxxx.github.io/OSWorld/user_guides/task_example_explanation.html#core-fields "Permalink to this heading")
**id** (string, required)
A unique identifier for the task. This is typically a UUID that distinguishes this task from all others in the dataset.
**instruction** (string, required)
The natural language instruction describing what the agent should accomplish. This is the primary task description that guides the agent’s behavior.
**source** (string, optional)
The origin or reference for this task example. This could be:
* A website URL where the task was inspired from
* A forum discussion
* A research paper
* Manual creation by the dataset authors
**related\_apps** (array of strings, required)
List of applications that are involved in completing this task. These apps may be:
* Pre-opened as part of the initial setup
* Required to be opened during task execution
* Used for evaluation purposes
### Setup and Configuration[](https://timothyxxx.github.io/OSWorld/user_guides/task_example_explanation.html#setup-and-configuration "Permalink to this heading")
**config** (array of objects, required)
Scripts and commands to set up the initial state of the task environment. This includes:
* Launching applications
* Opening specific files or URLs
* Setting up network proxies or debugging connections
* Configuring system states
Each config item has a `type` field that determines the setup action, and `parameters` that specify the action details.
**snapshot** (string, deprecated)
Previously used to specify a pre-configured environment snapshot. This field is deprecated in favor of the more flexible `config` system.
### Evaluation[](https://timothyxxx.github.io/OSWorld/user_guides/task_example_explanation.html#evaluation "Permalink to this heading")
**evaluator** (object, required)
Defines how the task completion should be evaluated. Contains:
* `func`: The evaluation function to use
* `result`: Expected output location and format
* `expected`: Ground truth or reference for comparison
**trajectory** (string, deprecated)
Previously pointed to annotated human demonstration trajectories. This is being phased out in favor of more robust evaluation methods.
### Environment Settings[](https://timothyxxx.github.io/OSWorld/user_guides/task_example_explanation.html#environment-settings "Permalink to this heading")
**proxy** (boolean, optional)
Indicates whether the task requires network proxy configuration. When `true`:
* Network traffic may need to be routed through specific proxies
* Useful for tasks requiring specific network conditions
* May affect how web-based applications behave
Note
If you turn on the proxy, make sure you always:
* have enough balance for the proxy service, otherwise this will cause internet connection failure
* provide the correct client machine password to DesktopEnv, otherwise proxy settings will fail
**fixed\_ip** (boolean, optional)
Specifies whether the task requires a fixed IP address configuration:
* `true`: Task needs consistent IP addressing
* `false`: Task can work with dynamic IP assignment
* Important for tasks involving network-dependent applications, or have detection on IP changes to protect from bot
**possibility\_of\_env\_change** (string, optional)
Indicates the likelihood that the environment state may change during task execution:
* `"low"`: Environment is static and almost impossible to change, e.g. a tasks on local slides
* `"medium"`: Some environmental changes may occur but unlikely, e.g. a widely adapted blog, some old website that is not updated
* `"high"`: Significant environmental changes are found and expected, e.g. a website that is updated frequently about the elements, layout, or content
This helps in planning task execution strategies and evaluation approaches.
Note
You can add additional fields to the JSON as notes or comments, as long as you don’t break the original structure.
Detailed Example Analysis[](https://timothyxxx.github.io/OSWorld/user_guides/task_example_explanation.html#detailed-example-analysis "Permalink to this heading")
-------------------------------------------------------------------------------------------------------------------------------------------------------------------
### Chrome PDF Download Task[](https://timothyxxx.github.io/OSWorld/user_guides/task_example_explanation.html#chrome-pdf-download-task "Permalink to this heading")
Let’s examine a comprehensive example that demonstrates how to convert a webpage to PDF using Chrome:
{
"id": "e1e75309-3ddb-4d09-92ec-de869c928143",
"instruction": "Computer, can you turn the webpage I'm looking at into a PDF file, save it to my Desktop with the default filename and set the margins to none?",
"source": "https://in5stepstutorials.com/google-chrome/save-web-page-as-pdf-in-chrome.php",
"config": \[\
{\
"type": "launch",\
"parameters": {\
"command": \[\
"google-chrome",\
"--remote-debugging-port=1337"\
\]\
}\
},\
{\
"type": "launch",\
"parameters": {\
"command": \[\
"socat",\
"tcp-listen:9222,fork",\
"tcp:localhost:1337"\
\]\
}\
},\
{\
"type": "chrome\_open\_tabs",\
"parameters": {\
"urls\_to\_open": \[\
"https://lilianweng.github.io/posts/2023-06-23-agent/"\
\]\
}\
}\
\],
"related\_apps": \["chrome"\],
"evaluator": {
"func": "compare\_pdfs",
"result": {
"type": "vm\_file",
"path": "/home/user/Desktop/LLM Powered Autonomous Agents \_ Lil'Log.pdf",
"dest": "LLM Powered Autonomous Agents \_ Lil'Log.pdf"
},
"expected": {
"type": "pdf\_from\_url",
"path": "https://lilianweng.github.io/posts/2023-06-23-agent/",
"dest": "LLM Powered Autonomous Agents \_ Lil'Log\_gold.pdf"
}
},
"proxy": true,
"fixed\_ip": false,
"possibility\_of\_env\_change": "medium"
}
Copy to clipboard
### Field-by-Field Analysis[](https://timothyxxx.github.io/OSWorld/user_guides/task_example_explanation.html#field-by-field-analysis "Permalink to this heading")
**Task Identity and Purpose**
* `id`: Unique identifier for this specific Chrome PDF task
* `instruction`: Clear natural language description of the desired action
* `source`: Reference to the tutorial that inspired this task
**Initial Setup Configuration**
The `config` array sets up the testing environment:
1. **Chrome Launch**: Starts Google Chrome with remote debugging enabled on port 1337
2. **Proxy Setup**: Uses `socat` to create a proxy from port 9222 to the Chrome debugging port
3. **Page Loading**: Opens the target webpage that needs to be converted to PDF
**Application Context**
* `related_apps`: Only Chrome is needed for this task
**Evaluation Strategy**
* `func`: Uses `compare_pdfs` to verify the generated PDF matches expectations
* `result`: Specifies where the agent should save the PDF file
* `expected`: Defines the ground truth PDF generated from the same URL
**Environment Configuration**
* `proxy: true`: Task requires proxy setup since the website may ban your IP
* `fixed_ip: false`: Dynamic IP addressing is acceptable since the website is not sensitive to IP changes
* `possibility_of_env_change: "medium"`: Some changes may occur since Lilian Weng could modify her blog, though this is unlikely
Advanced Configuration and Evaluation[](https://timothyxxx.github.io/OSWorld/user_guides/task_example_explanation.html#advanced-configuration-and-evaluation "Permalink to this heading")
-------------------------------------------------------------------------------------------------------------------------------------------------------------------------------------------
### Understanding Config and Evaluator Functions[](https://timothyxxx.github.io/OSWorld/user_guides/task_example_explanation.html#understanding-config-and-evaluator-functions "Permalink to this heading")
Note
For detailed information about available setup configurations, post-configurations, and evaluation functions, we recommend reading the source code to understand function signatures and how they are used by DesktopEnv:
* **Setup configurations**: [desktop\_env/controllers/setup.py](https://github.com/xlang-ai/OSWorld/tree/main/desktop_env/controllers/setup.py)
* **Evaluation functions**: [desktop\_env/evaluators](https://github.com/xlang-ai/OSWorld/tree/main/desktop_env/evaluators)
* **Desktop environment**: [desktop\_env/desktop\_env.py](https://github.com/xlang-ai/OSWorld/tree/main/desktop_env/desktop_env.py)
> The evaluation system consists of two main components:
>
> * **Getters** ([desktop\_env/evaluators/getters](https://github.com/xlang-ai/OSWorld/tree/main/desktop_env/evaluators/getters)
> ): Functions that retrieve information from various sources (VM files, VM states, cloud files, webpage information, etc.) to gather data for task completion assessment.
>
> * **Metrics** ([desktop\_env/evaluators/metrics](https://github.com/xlang-ai/OSWorld/tree/main/desktop_env/evaluators/metrics)
> ): Functions that process the retrieved data to determine whether a task has been successfully completed.
>
### Available Getter Functions[](https://timothyxxx.github.io/OSWorld/user_guides/task_example_explanation.html#available-getter-functions "Permalink to this heading")
### Available Metric Functions[](https://timothyxxx.github.io/OSWorld/user_guides/task_example_explanation.html#available-metric-functions "Permalink to this heading")
from .basic\_os import (
check\_gnome\_favorite\_apps,
is\_utc\_0,
check\_text\_enlarged,
check\_moved\_jpgs,
is\_in\_vm\_clickboard
)
from .chrome import (
is\_expected\_tabs,
is\_expected\_bookmarks,
compare\_pdfs,
compare\_htmls,
compare\_archive,
is\_cookie\_deleted,
is\_shortcut\_on\_desktop,
check\_font\_size,
check\_enabled\_experiments,
check\_history\_deleted,
is\_expected\_search\_query,
is\_expected\_active\_tab,
is\_expected\_url\_pattern\_match,
is\_added\_to\_steam\_cart,
is\_expected\_installed\_extensions,
compare\_pdf\_images,
is\_expected\_active\_tab\_approximate
)
from .docs import (
compare\_font\_names,
compare\_subscript\_contains,
has\_page\_numbers\_in\_footers,
compare\_docx\_lines,
evaluate\_colored\_words\_in\_tables,
check\_highlighted\_words,
evaluate\_strike\_through\_last\_paragraph,
evaluate\_conversion,
evaluate\_spacing,
check\_italic\_font\_size\_14,
evaluate\_alignment,
get\_unique\_train\_ids,
check\_no\_duplicates,
compare\_init\_lines,
find\_default\_font,
contains\_page\_break,
compare\_docx\_files,
compare\_docx\_tables,
compare\_line\_spacing,
compare\_insert\_equation,
compare\_highlighted\_text,
is\_first\_line\_centered,
check\_file\_exists,
check\_tabstops,
compare\_contains\_image,
compare\_docx\_files\_and\_ignore\_new\_lines,
compare\_docx\_images,
compare\_image\_text,
compare\_references,
compare\_unique\_train\_records
)
from .general import (
check\_csv,
check\_accessibility\_tree,
run\_sqlite3,
check\_json,
check\_list,
exact\_match,
match\_in\_list,
is\_in\_list,
fuzzy\_match,
check\_include\_exclude,
check\_direct\_json\_object,
compare\_time\_in\_speedtest\_results,
is\_included\_all\_json\_objects,
is\_gold\_text\_included\_in\_pdf,
check\_line\_number,
file\_contains,
compare\_terminal\_and\_txt,
fuzzy\_place\_math,
compare\_python\_pure\_text,
diff\_text\_file,
literal\_match
)
from .gimp import (
check\_structure\_sim\_resized,
check\_brightness\_decrease\_and\_structure\_sim,
check\_contrast\_increase\_and\_structure\_sim,
check\_saturation\_increase\_and\_structure\_sim,
check\_image\_size,
check\_image\_mirror,
check\_palette\_and\_structure\_sim,
check\_textbox\_on\_leftside,
check\_green\_background,
check\_file\_exists\_and\_structure\_sim,
check\_triangle\_position,
check\_structure\_sim,
check\_config\_status,
compare\_image\_list,
increase\_saturation,
decrease\_brightness,
check\_file\_exists,
compare\_triangle\_positions,
check\_sharper,
check\_image\_file\_size
)
from .libreoffice import check\_libre\_locale
from .others import compare\_epub, check\_mp3\_meta
from .pdf import check\_pdf\_pages
from .slides import (
check\_presenter\_console\_disable,
check\_image\_stretch\_and\_center,
check\_slide\_numbers\_color,
compare\_pptx\_files,
check\_strikethrough,
check\_slide\_orientation\_Portrait,
evaluate\_presentation\_fill\_to\_rgb\_distance,
check\_left\_panel,
check\_transition,
check\_page\_number\_colors,
check\_auto\_saving\_time
)
from .table import (
compare\_table,
compare\_csv,
compare\_conference\_city\_in\_order
)
from .thunderbird import (
check\_thunderbird\_prefs,
check\_thunderbird\_filter,
check\_thunderbird\_folder
)
from .vlc import (
is\_vlc\_playing,
is\_vlc\_recordings\_folder,
is\_vlc\_fullscreen,
compare\_images,
compare\_audios,
compare\_videos,
check\_qt\_bgcone,
check\_one\_instance\_when\_started\_from\_file,
check\_qt\_minimal\_view,
check\_qt\_max\_volume,
check\_qt\_slider\_colours,
check\_global\_key\_play\_pause
)
from .vscode import (
compare\_text\_file,
compare\_config,
compare\_answer,
compare\_result\_files,
is\_extension\_installed,
check\_json\_settings,
check\_json\_keybindings,
check\_python\_file\_by\_test\_suite,
check\_python\_file\_by\_gold\_file,
check\_html\_background\_image,
compare\_zip\_files
)
def infeasible():
pass
Copy to clipboard
Note
When reusing existing functions to create new tasks, we recommend carefully reading our implementations to ensure you fully understand the characteristics and requirements of these functions.
### Multiple Answer Evaluation with OR Logic[](https://timothyxxx.github.io/OSWorld/user_guides/task_example_explanation.html#multiple-answer-evaluation-with-or-logic "Permalink to this heading")
When a task has multiple acceptable answers, you can use the `"conj": "or"` connector. For tasks requiring all conditions to be met simultaneously, use `"conj": "and"`.
**Example: LibreOffice Writer Task with Multiple Valid Outcomes**
This example demonstrates how the `"conj": "or"` field allows any one of the three evaluation functions to pass for the task to be considered successful. Each evaluation compares the same result file against different expected outcomes.
### Multi-Parameter File Handling with Selective Input[](https://timothyxxx.github.io/OSWorld/user_guides/task_example_explanation.html#multi-parameter-file-handling-with-selective-input "Permalink to this heading")
When dealing with multiple file parameters, you can use the `"gives"` field to control which files are actually passed to the evaluation function. This is useful when you want to download multiple files but only provide specific ones to the evaluator.
**Example: Selective File Input with the “gives” Field**
In this example:
* **Multiple Files**: Two files are downloaded from cloud storage (`HK_train_record_Gold.docx` and `HK_train_record.docx`)
* **Selective Input**: The `"gives": [0, 1]` field specifies that both files (indices 0 and 1) should be passed to the evaluation function
* **Multi-parameter Support**: The `"multi": true` flag enables handling multiple file parameters
* **Controlled Evaluation**: Only the specified files are provided to the `compare_unique_train_records` function, even though more files could be available
This pattern is particularly useful when you need reference files for evaluation but don’t want to include all downloaded files in the actual comparison.
Config Types Reference[](https://timothyxxx.github.io/OSWorld/user_guides/task_example_explanation.html#config-types-reference "Permalink to this heading")
-------------------------------------------------------------------------------------------------------------------------------------------------------------
Common configuration types used in task setup:
**launch**
Executes system commands to start applications or services.
Example:
{
"type": "launch",
"parameters": {
"command": \["application-name", "--option1", "--option2"\]
}
}
Copy to clipboard
**chrome\_open\_tabs**
Opens specific URLs in Chrome browser tabs.
Example:
{
"type": "chrome\_open\_tabs",
"parameters": {
"urls\_to\_open": \["https://example.com", "https://another-site.com"\]
}
}
Copy to clipboard
**activate\_window**
Brings a specific application window to focus.
Example:
{
"type": "activate\_window",
"parameters": {
"window\_name": "Document.docx - LibreOffice Writer",
"strict": true
}
}
Copy to clipboard
**execute**
Runs arbitrary commands or scripts within the environment.
Example:
{
"type": "execute",
"parameters": {
"command": \["python", "-c", "import pyautogui; pyautogui.hotkey('ctrl', 's');"\]
}
}
Copy to clipboard
**sleep**
Introduces delays between operations.
Example:
{
"type": "sleep",
"parameters": {
"seconds": 0.5
}
}
Copy to clipboard
See Also[](https://timothyxxx.github.io/OSWorld/user_guides/task_example_explanation.html#see-also "Permalink to this heading")
---------------------------------------------------------------------------------------------------------------------------------
* [DesktopEnv Interface Documentation](https://timothyxxx.github.io/OSWorld/user_guides/environment_explanation.html)
- Detailed explanation of the OSWorld environment architecture and components
* [Adding New Agents to OSWorld](https://timothyxxx.github.io/OSWorld/user_guides/add_new_agent.html)
- Instructions for implementing and integrating custom agents into the OSWorld framework
* [Public Evaluation Platform User Guide](https://timothyxxx.github.io/OSWorld/user_guides/run_public_evaluation.html)
- Requirements and process for verified leaderboard submission
[Join Discord](https://discord.gg/4Gnw7eTEZR "Join our Discord community for discussions!")
---
# Proxy Guideline — OSWorld
* [](https://timothyxxx.github.io/OSWorld/index.html)
* [Installation](https://timothyxxx.github.io/OSWorld/installation/index.html)
* Proxy Guideline
* [View page source](https://timothyxxx.github.io/OSWorld/_sources/installation/proxy.rst.txt)
* * *
Proxy Guideline[](https://timothyxxx.github.io/OSWorld/installation/proxy.html#proxy-guideline "Permalink to this heading")
=============================================================================================================================
OSWorld provides multiple proxy configuration options for users who need to access the internet through proxy servers, whether behind the 🇨🇳 [GFW](https://en.wikipedia.org/wiki/Great_Firewall)
or for other network requirements.
Quick Setup with DataImpulse (Recommended)[](https://timothyxxx.github.io/OSWorld/installation/proxy.html#quick-setup-with-dataimpulse-recommended "Permalink to this heading")
---------------------------------------------------------------------------------------------------------------------------------------------------------------------------------
For users who prefer a ready-to-use proxy solution, we recommend using our pre-configured DataImpulse proxy infrastructure:
### 2.2 Proxy Setup[](https://timothyxxx.github.io/OSWorld/installation/proxy.html#proxy-setup "Permalink to this heading")
1. **Register at DataImpulse**
Visit [DataImpulse](https://dataimpulse.com/)
and create an account.
2. **Purchase a US Residential IP Package**
Purchase a US residential IP package (approximately $1 per 1GB). DataImpulse offers pay-as-you-go pricing with no expiration dates.
3. **Configure Your Credentials**
Configure your credentials in `OSWorld/evaluation_examples/settings/proxy/dataimpulse.json`:
\[\
{\
"host": "gw.dataimpulse.com",\
"port": 823,\
"username": "your\_username",\
"password": "your\_password",\
"protocol": "http",\
"provider": "dataimpulse",\
"type": "residential",\
"country": "US",\
"note": "Dataimpulse Residential Proxy"\
}\
\]
Copy to clipboard
4. **Enable Proxy in OSWorld**
We have set proxy to `True` in the config JSON files for those proxy-sensitive tasks. OSWorld will automatically wrap these tasks with a proxy when `DesktopEnv`’s `enable_proxy=True`, while other tasks will not be affected. We recommend using a proxy.
If you don’t need proxy at all, please set `enable_proxy=False` in the experiment’s .py file:
env \= DesktopEnv(
...
enable\_proxy\=False,
...
)
Copy to clipboard
Note
For detailed information about the DesktopEnv interface, please refer to [DesktopEnv Interface Documentation](https://timothyxxx.github.io/OSWorld/user_guides/environment_explanation.html)
.
Warning
Disabling the proxy will cause some tasks under the Chrome domain to fail.
Manual Proxy Configuration[](https://timothyxxx.github.io/OSWorld/installation/proxy.html#manual-proxy-configuration "Permalink to this heading")
---------------------------------------------------------------------------------------------------------------------------------------------------
If you prefer to configure your own proxy server, you can follow the steps below.
1\. Configure Your Proxy on the Host Machine[](https://timothyxxx.github.io/OSWorld/installation/proxy.html#configure-your-proxy-on-the-host-machine "Permalink to this heading")
-----------------------------------------------------------------------------------------------------------------------------------------------------------------------------------
By default, proxy software usually listens only to the local loopback address (127.0.0.1), which cannot be reached from other machine (including the virtual machine). Hence, firstly make your local proxy software listen to the IP address of the VMWare network card, or simply 0.0.0.0 for all the IP addresses. The VMWare network card are usually named vmnetX like vmnet8. Make sure to use the IP address within the identical network segment. For example, 192.168.108.1/24 and 192.268.108.130/24 are within the same network segment, _i.e._, the same subnet mask (24) and the same prefix (192.168.108, 24-bit length). Usually, different VM instances share the same network segment, and so, the effective host IPs are the same.
After launching the VM, you can use
\# run this command on host
\# change ws to fusion if you use VMWare Fusion
vmrun \-T ws getGuestIPAddress /path/to/vmx/file
Copy to clipboard
to get the IP of the VM. As for host IPs, on Ubuntu (Linux) machine, you can use ip a command to check the IP addresses of each network card. On Windows machine, you can use ipconfig command to check the IP addresses of each network card. Recognize the correct IP and note it for later use.
Then you should configure the listening address of your proxy software:
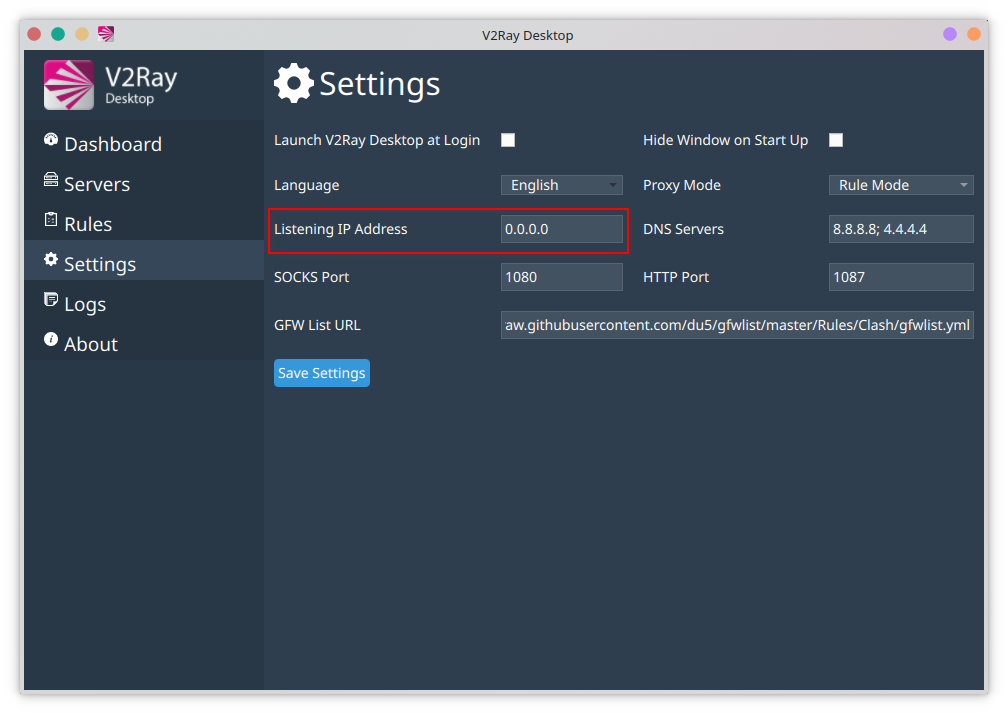
If you cannot change the listening address of your proxy software, you can set up port forwarding. Suppose your proxy software is listening to 1080 port of localhost (127.0.0.1), and the effective host IP address is 192.168.108.1. On Ubuntu (Linux), you can use socat to forward 192.168.108.1:1080 to 127.0.0.1:1080:
socat TCP-LISTEN:1080,bind\=192.168.108.1,fork TCP:127.0.0.1:1080
Copy to clipboard
On Windows, if you have administrative privilege, you can simply run the following command in a cmd window with admin privilege.
netsh interface portproxy add v4tov4 listenaddress=192.168.108.1 listenport=1080 connectaddress=127.0.0.1 connectport=1080
Copy to clipboard
Or if you haven’t got administrative privilege, you can use ncat bundled in [Nmap](https://nmap.org/)
to forward the port:
ncat -k -l 192.168.108.1 1080 --sh-exec 'ncat 127.0.0.1 1080'
Copy to clipboard
2\. Configure in the VM Machine[](https://timothyxxx.github.io/OSWorld/installation/proxy.html#configure-in-the-vm-machine "Permalink to this heading")
---------------------------------------------------------------------------------------------------------------------------------------------------------
### For the Ubuntu Image[](https://timothyxxx.github.io/OSWorld/installation/proxy.html#for-the-ubuntu-image "Permalink to this heading")
#### Configuration by GUI[](https://timothyxxx.github.io/OSWorld/installation/proxy.html#configuration-by-gui "Permalink to this heading")
Open system network setting in the VM.
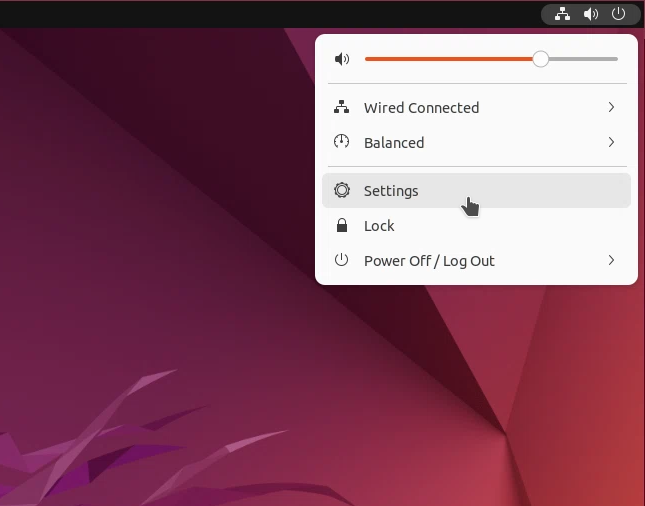 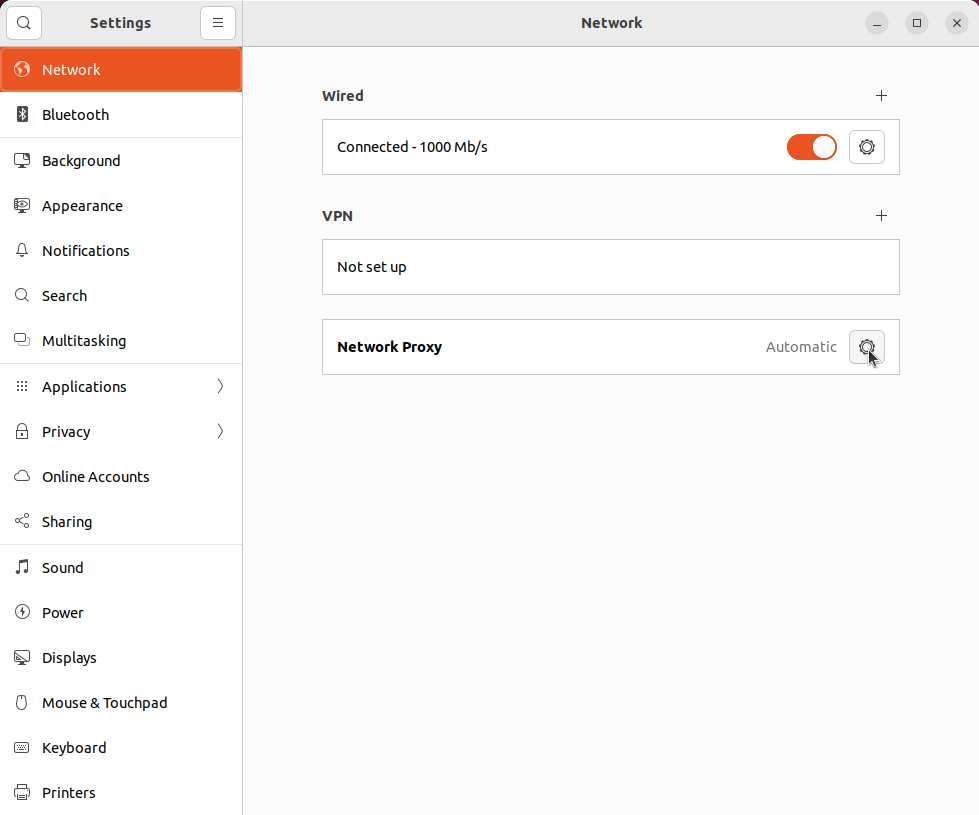
Then, click on “Network Proxy”.
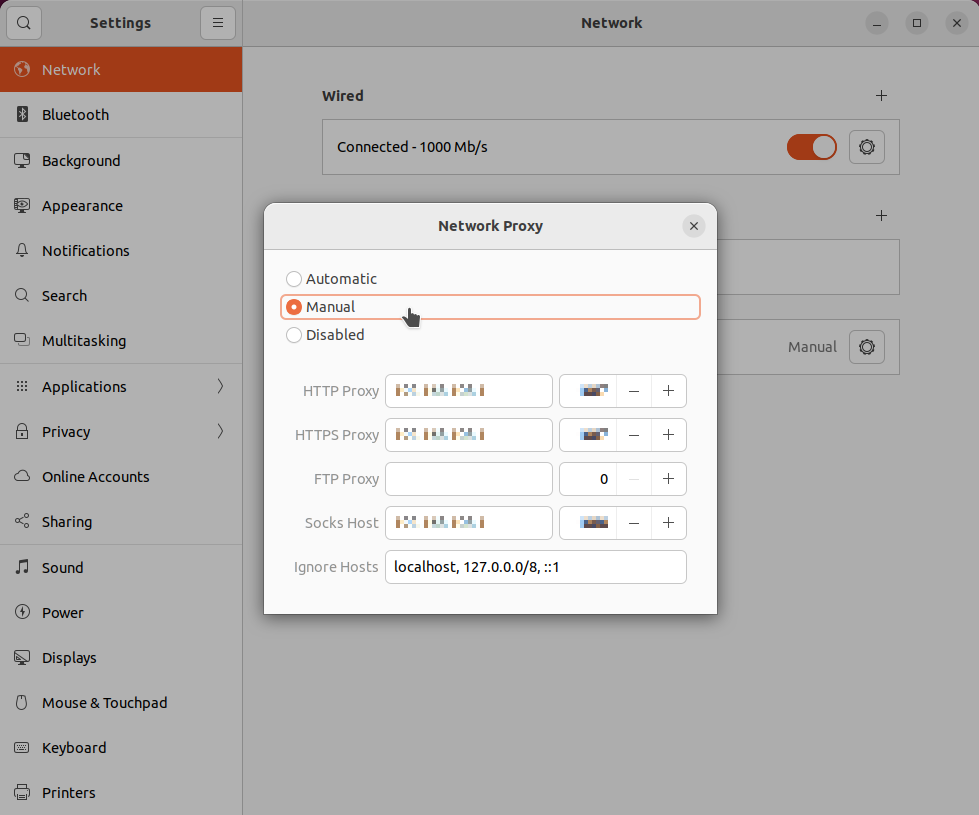
Set an appropriate proxy mode. Usually, use “Manual” mode, and set the correct IP addresses and ports. The IP address should be the host machine IP noted in the previous step.
Then you can open a chrome page to check if the proxy works well.
#### Configuration by Command Line[](https://timothyxxx.github.io/OSWorld/installation/proxy.html#configuration-by-command-line "Permalink to this heading")
If configuration by GUI is not suitable for you, you can instead execute the following commands in the VM to configure proxy on the Ubuntu image:
\# run these command in the VM
gsettings set org.gnome.system.proxy mode 'manual'
gsettings set org.gnome.system.proxy.http host 'xxx.xxx.xxx.xxx'
gsettings set org.gnome.system.proxy.http port xxxx
gsettings set org.gnome.system.proxy.https host 'xxx.xxx.xxx.xxx'
gsettings set org.gnome.system.proxy.https port xxxx
gsettings set org.gnome.system.proxy.socks host 'xxx.xxx.xxx.xxx'
gsettings set org.gnome.system.proxy.socks port xxxx
Copy to clipboard
If there isn’t a physical or virtual screen available for you to direct operate on the VM, you can run these commands with the help of vmrun. For instance,
\# run this command on host
\# change ws to fusion if you use VMWare Fusion
vmrun \-T ws runProgramInGuest /path/to/vmx/file /usr/bin/gsettings set org.gnome.system.proxy mode 'manual'
Copy to clipboard
### For Window Image[](https://timothyxxx.github.io/OSWorld/installation/proxy.html#for-window-image "Permalink to this heading")
#### Configuration by GUI[](https://timothyxxx.github.io/OSWorld/installation/proxy.html#id1 "Permalink to this heading")
Open system network setting in the VM.
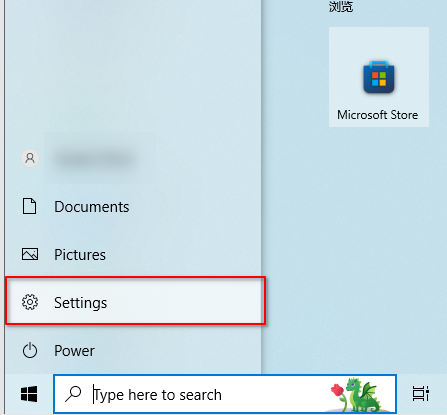 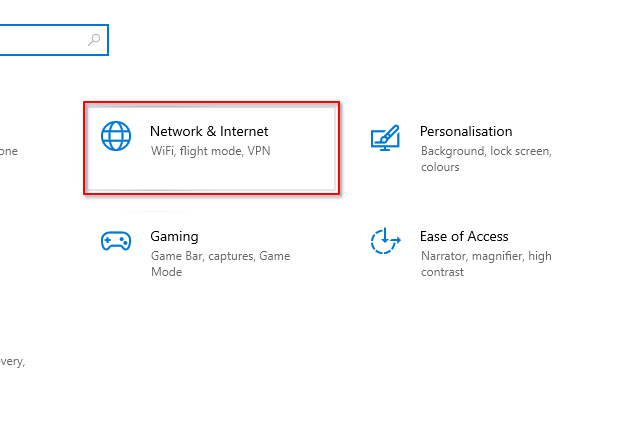
Then, click on “Proxy”.
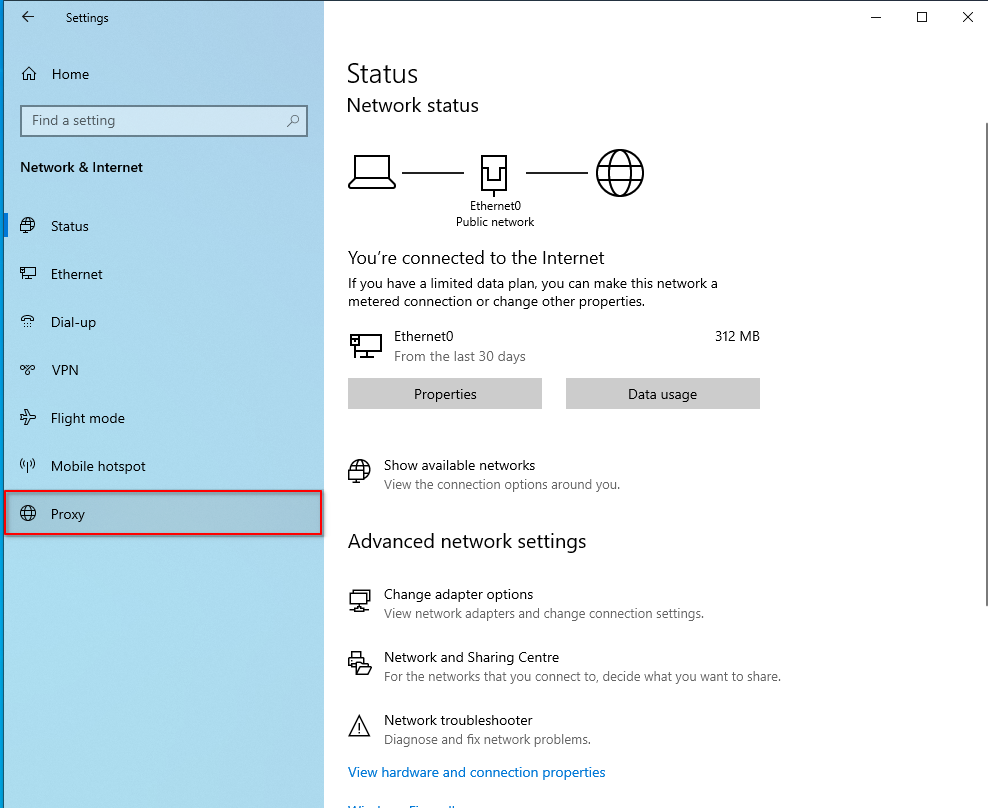
Switch on “Use a proxy server” and type in the correct proxy configurations.
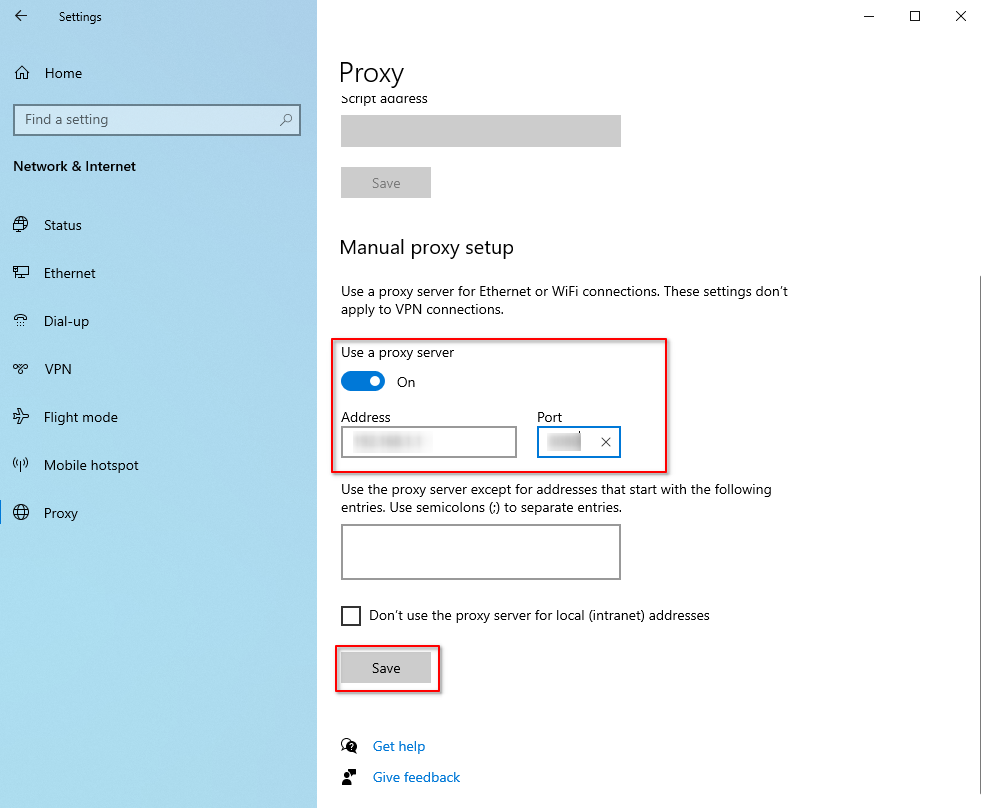
Finally, remember to click on “Save”.
Note that only HTTP proxy is supported. Subsequently, you can open a chrome page to check if the proxy works well.
3\. Create a New Snapshot[](https://timothyxxx.github.io/OSWorld/installation/proxy.html#create-a-new-snapshot "Permalink to this heading")
---------------------------------------------------------------------------------------------------------------------------------------------
After modifying the virtual machine, remember to create a new snapshot and start from this new snapshot at experiments.
\# change ws to fusion if you use VMWare Fusion
vmrun \-T ws snapshot /path/to/vmx/file snapshot\_name
Copy to clipboard
\# Modify snapshot\_name in "desktop\_env/envs/desktop\_env.py", line 50
snapshot\_name: str \= "snapshot\_name",
Copy to clipboard
4\. Modify chrome startup command[](https://timothyxxx.github.io/OSWorld/installation/proxy.html#modify-chrome-startup-command "Permalink to this heading")
-------------------------------------------------------------------------------------------------------------------------------------------------------------
By searching “–remote-debugging-port=1337”, you can find all the places that involve Chrome startup commands, and add the parameter –proxy-server=host\_IP:port
\# example
\# before
"command": \["google-chrome", "--remote-debugging-port=1337"\]
\# after (add proxy parameter)
"command": \["google-chrome", "--remote-debugging-port=1337", "--proxy-server=192.168.108.1:1080"\]
Copy to clipboard
Replace `192.168.108.1:1080` with your actual host IP and proxy port.
See Also[](https://timothyxxx.github.io/OSWorld/installation/proxy.html#see-also "Permalink to this heading")
---------------------------------------------------------------------------------------------------------------
* [DataImpulse Official Website](https://dataimpulse.com/)
- Residential proxy service provider
* [DesktopEnv Interface Documentation](https://timothyxxx.github.io/OSWorld/user_guides/environment_explanation.html)
- DesktopEnv interface documentation with enable\_proxy parameter
* [Quick Start](https://timothyxxx.github.io/OSWorld/installation/quickstart.html)
- Quick start guide for OSWorld
* [Install Provider](https://timothyxxx.github.io/OSWorld/installation/install_provider/index.html)
- Provider-specific installation guides
[Join Discord](https://discord.gg/4Gnw7eTEZR "Join our Discord community for discussions!")
---
# Adding New Tasks to OSWorld — OSWorld
* [](https://timothyxxx.github.io/OSWorld/index.html)
* [User Guides](https://timothyxxx.github.io/OSWorld/user_guides/index.html)
* Adding New Tasks to OSWorld
* [View page source](https://timothyxxx.github.io/OSWorld/_sources/user_guides/add_new_task.rst.txt)
* * *
Adding New Tasks to OSWorld[](https://timothyxxx.github.io/OSWorld/user_guides/add_new_task.html#adding-new-tasks-to-osworld "Permalink to this heading")
===========================================================================================================================================================
If you want to extend the evaluation and use OSWorld as a training environment to construct training tasks, the following sections will teach you how to quickly build similar and completely new tasks based on OSWorld.
Coming soon…
[Join Discord](https://discord.gg/4Gnw7eTEZR "Join our Discord community for discussions!")
---
# Run OSWorld — OSWorld
* [](https://timothyxxx.github.io/OSWorld/index.html)
* [User Guides](https://timothyxxx.github.io/OSWorld/user_guides/index.html)
* Run OSWorld
* [View page source](https://timothyxxx.github.io/OSWorld/_sources/user_guides/run_evaluation.rst.txt)
* * *
Run OSWorld[](https://timothyxxx.github.io/OSWorld/user_guides/run_evaluation.html#run-osworld "Permalink to this heading")
=============================================================================================================================
Agent Baselines[](https://timothyxxx.github.io/OSWorld/user_guides/run_evaluation.html#agent-baselines "Permalink to this heading")
-------------------------------------------------------------------------------------------------------------------------------------
Attention
**Important Configuration Requirements:**
* **Google Account Tasks**: Some tasks require Google account access and OAuth2.0 configuration. Please refer to google\_account\_guideline for detailed setup instructions.
* **Proxy Configuration**: Some tasks may require proxy settings to function properly (this depends on the strength of website defenses against your network location). Please refer to your system’s proxy configuration documentation.
* **Impact of Missing Configuration**: If these configurations are not properly set up, the corresponding tasks will fail to execute correctly, leading to lower evaluation scores.
If you wish to run the baseline agent used in our paper, you can execute the following command as an example under the GPT-4o pure-screenshot setting:
Set **OPENAI\_API\_KEY** environment variable with your API key
export OPENAI\_API\_KEY\='changeme'
Copy to clipboard
Optionally, set **OPENAI\_BASE\_URL** to use a custom OpenAI-compatible API endpoint
export OPENAI\_BASE\_URL\='http://your-custom-endpoint.com/v1' \# Optional: defaults to https://api.openai.com
Copy to clipboard
Single-threaded execution (deprecated, using `vmware` provider as example)
python run.py \\
\--provider\_name vmware \\
\--path\_to\_vm Ubuntu/Ubuntu.vmx \\
\--headless \\
\--observation\_type screenshot \\
\--model gpt-4o \\
\--sleep\_after\_execution 3 \\
\--max\_steps 15 \\
\--result\_dir ./results \\
\--client\_password password
Copy to clipboard
Parallel execution (example showing switching provider to `docker`)
python run\_multienv.py \\
\--provider\_name docker \\
\--headless \\
\--observation\_type screenshot \\
\--model gpt-4o \\
\--sleep\_after\_execution 3 \\
\--max\_steps 15 \\
\--num\_envs 10 \\
\--client\_password password
Copy to clipboard
The results, which include screenshots, actions, and video recordings of the agent’s task completion, will be saved in the `./results` (or other `result_dir` you specified) directory in this case. You can then run the following command to obtain the result:
python show\_result.py
Copy to clipboard
### Result Calculation and Google Drive Tasks[](https://timothyxxx.github.io/OSWorld/user_guides/run_evaluation.html#result-calculation-and-google-drive-tasks "Permalink to this heading")
OSWorld contains a total of **369 tasks**, including **8 Google Drive tasks** that require special configuration. Due to Google’s strict security policies and IP-based restrictions, these Google Drive tasks may fail to initialize properly even when following the configuration guidelines in google\_account\_guideline.
**Common Issues with Google Drive Tasks:**
* IP address changes triggering additional verification
* OAuth2.0 authentication failures in virtual environments
* Google’s automated bot detection systems
* Account security restrictions for new devices/locations
**Recommended Solutions:**
You have two acceptable approaches when encountering Google Drive task setup issues:
1. **Manual Configuration (Recommended)**: Manually configure the 8 Google Drive tasks following the troubleshooting steps in google\_account\_guideline. This allows you to evaluate all 369 tasks.
2. **Exclude Google Drive Tasks (Acceptable)**: Skip the 8 Google Drive tasks and evaluate the remaining **361 tasks**. This approach is officially supported and acceptable for benchmark comparisons.
Attention
**Important**: Both approaches (369 tasks or 361 tasks) are valid for evaluation purposes. When reporting results, please clearly specify which task set was used to ensure fair comparisons with other submissions.
The `show_result.py` script will automatically calculate success rates based on the tasks that were actually attempted, so excluding the Google Drive tasks will not affect the calculation methodology.
Evaluation[](https://timothyxxx.github.io/OSWorld/user_guides/run_evaluation.html#evaluation "Permalink to this heading")
---------------------------------------------------------------------------------------------------------------------------
### Local Evaluation[](https://timothyxxx.github.io/OSWorld/user_guides/run_evaluation.html#local-evaluation "Permalink to this heading")
Please start by reading through the [agent interface](https://github.com/xlang-ai/OSWorld/blob/main/mm_agents/README.md)
and the [environment interface](https://github.com/xlang-ai/OSWorld/blob/main/desktop_env/README.md)
. Correctly implement the agent interface and import your customized version in the `run.py` or `run_multienv.py` file. Afterward, you can execute a command similar to the one in the previous section to run the benchmark on your agent.
### Public Evaluation[](https://timothyxxx.github.io/OSWorld/user_guides/run_evaluation.html#public-evaluation "Permalink to this heading")
If you want your results to be verified and displayed on the verified leaderboard, you need to schedule a meeting with us (current maintainer: [tianbaoxiexxx@gmail.com](mailto:tianbaoxiexxx%40gmail.com)
, [yuanmengqi732@gmail.com](mailto:yuanmengqi732%40gmail.com)
) to run your agent code on our side and have us report the results. You need to upload and allow us to disclose your agent implementation under the OSWorld framework (you may choose not to expose your model API to the public), along with a report that allows the public to understand what’s happening behind the scenes. Alternatively, if you are from a trusted institution, you can share your monitoring data and trajectories with us. Please carefully follow the [Public Evaluation Platform User Guide](https://timothyxxx.github.io/OSWorld/user_guides/run_public_evaluation.html)
to get results.
See Also[](https://timothyxxx.github.io/OSWorld/user_guides/run_evaluation.html#see-also "Permalink to this heading")
-----------------------------------------------------------------------------------------------------------------------
For additional setup and configuration guidance:
* google\_account\_guideline - Step-by-step guide for setting up Google accounts and OAuth2.0 credentials for Google Drive tasks
* [DesktopEnv Interface Documentation](https://timothyxxx.github.io/OSWorld/user_guides/environment_explanation.html)
- Detailed explanation of the OSWorld environment architecture and components
* [OSWorld Task Examples Explanation](https://timothyxxx.github.io/OSWorld/user_guides/task_example_explanation.html)
- Comprehensive guide to understanding and working with OSWorld tasks
* [Adding New Agents to OSWorld](https://timothyxxx.github.io/OSWorld/user_guides/add_new_agent.html)
- Instructions for implementing and integrating custom agents into the OSWorld framework
* [Public Evaluation Platform User Guide](https://timothyxxx.github.io/OSWorld/user_guides/run_public_evaluation.html)
- Requirements and process for verified leaderboard submission
* [Installation](https://timothyxxx.github.io/OSWorld/installation/index.html)
- Complete installation instructions
* [FAQ](https://timothyxxx.github.io/OSWorld/community/faq.html)
- Frequently asked questions and troubleshooting
[Join Discord](https://discord.gg/4Gnw7eTEZR "Join our Discord community for discussions!")
---
# Google Account Guideline — OSWorld
* [](https://timothyxxx.github.io/OSWorld/index.html)
* [Installation](https://timothyxxx.github.io/OSWorld/installation/index.html)
* Google Account Guideline
* [View page source](https://timothyxxx.github.io/OSWorld/_sources/installation/google_account_guideline.rst.txt)
* * *
Google Account Guideline[](https://timothyxxx.github.io/OSWorld/installation/google_account_guideline.html#google-account-guideline "Permalink to this heading")
==================================================================================================================================================================
Run some OSWorld examples requiring a Google account by following these steps:
Real Accounts[](https://timothyxxx.github.io/OSWorld/installation/google_account_guideline.html#real-accounts "Permalink to this heading")
--------------------------------------------------------------------------------------------------------------------------------------------
For tasks including Google or Google Drive, we need a real Google account as well as configured OAuth2.0 secrets.
Attention
To prevent environment reset and result evaluation conflicts caused by multiple people using the same Google account simultaneously, we will not provide the public test accounts available. Please register a private Google account.
### Register A Blank Google Account[](https://timothyxxx.github.io/OSWorld/installation/google_account_guideline.html#register-a-blank-google-account "Permalink to this heading")
1. Go to Google web site and register a blank new account
> * In this testbed, you do not need to provide any recovery email or phone, since we only use it for testing cases
>
> * Just **IGNORE** any security recommendations
>
> * Shut **OFF** the [2-Step Verification](https://support.google.com/accounts/answer/1064203?hl=en&co=GENIE.Platform%3DDesktop#:~:text=Open%20your%20Google%20Account.,Select%20Turn%20off.)
> to avoid failure in environment setup (requesting phone verification code)
>
[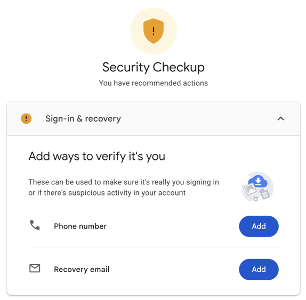](https://timothyxxx.github.io/OSWorld/_images/googleshutoff.png)
Shut Off 2-Step Verification[](https://timothyxxx.github.io/OSWorld/installation/google_account_guideline.html#id2 "Permalink to this image")
Attention
We strongly recommend that you register a new blank account instead of using an existing one, in order to avoid messing up your personal workspace.
2. Next, copy and rename the template file `settings.json.template` into `settings.json` under folder `evaluation_examples/settings/google/`. Remember to replace the two fields `email` and `password`:
> * these two fields are used to simulate real people login to Chrome browser during environment setup for relevant examples in the virtual machine
>
{
"email": "your\_google\_account@gmail.com",
"password": "your\_google\_account\_password"
}
Copy to clipboard
### Create A Google Cloud Project[](https://timothyxxx.github.io/OSWorld/installation/google_account_guideline.html#create-a-google-cloud-project "Permalink to this heading")
1. Navigate to [Google Cloud Project Creation](https://console.cloud.google.com/projectcreate)
page and create a new GCP (see [Create a Google Cloud Project](https://developers.google.com/workspace/guides/create-project)
for detailed steps). You can use any project name.
2. Go to the [Google Drive API console](https://console.cloud.google.com/apis/library/drive.googleapis.com?)
and enable the GoogleDrive API for the created project (see [Enable and disable APIs](https://support.google.com/googleapi/answer/6158841?hl=en)
for detailed steps)
[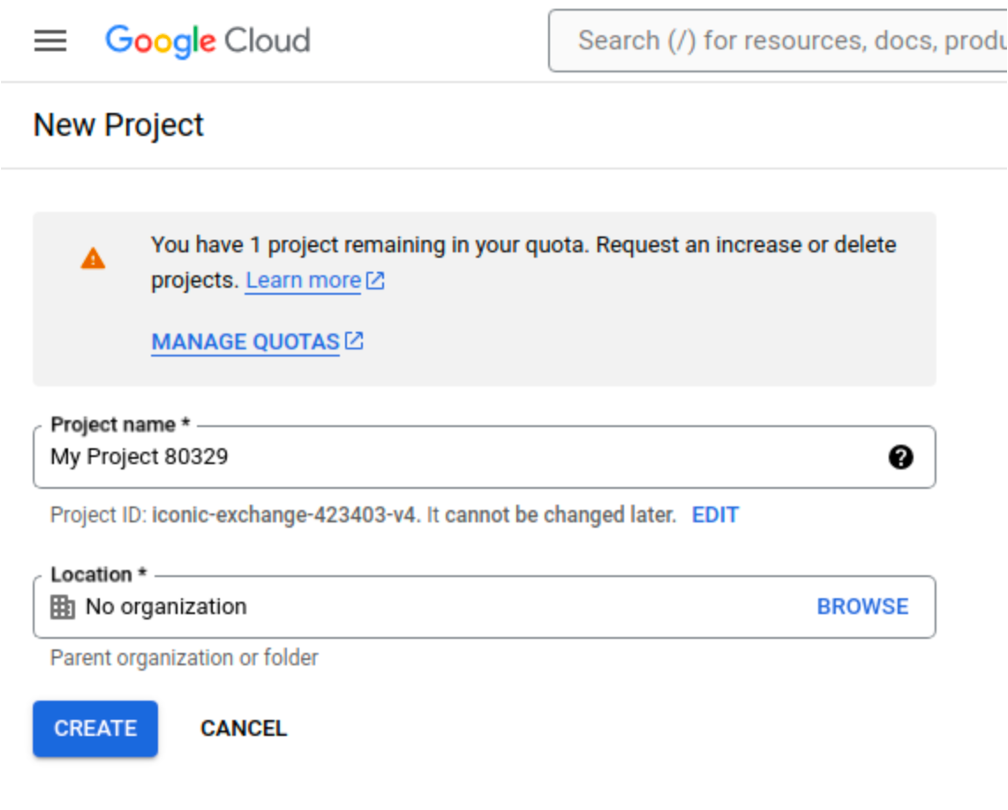](https://timothyxxx.github.io/OSWorld/_images/creategcp.png)
[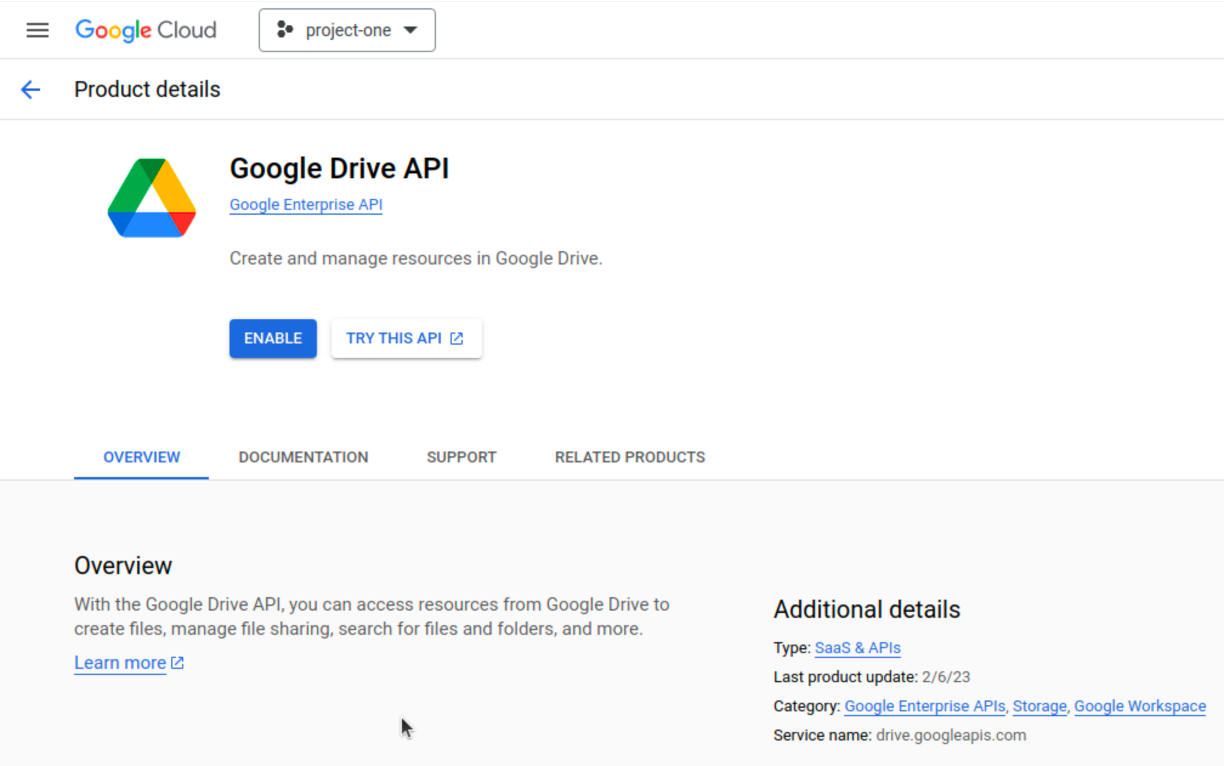](https://timothyxxx.github.io/OSWorld/_images/enableapi.png)
### Configure OAuth Consent Screen[](https://timothyxxx.github.io/OSWorld/installation/google_account_guideline.html#configure-oauth-consent-screen "Permalink to this heading")
To configure the OAuth2.0 screen for the created GCP, go to page [OAuth consent screen](https://console.cloud.google.com/apis/credentials/consent?)
:
1. For User Type, choose “External” and click “Create”
[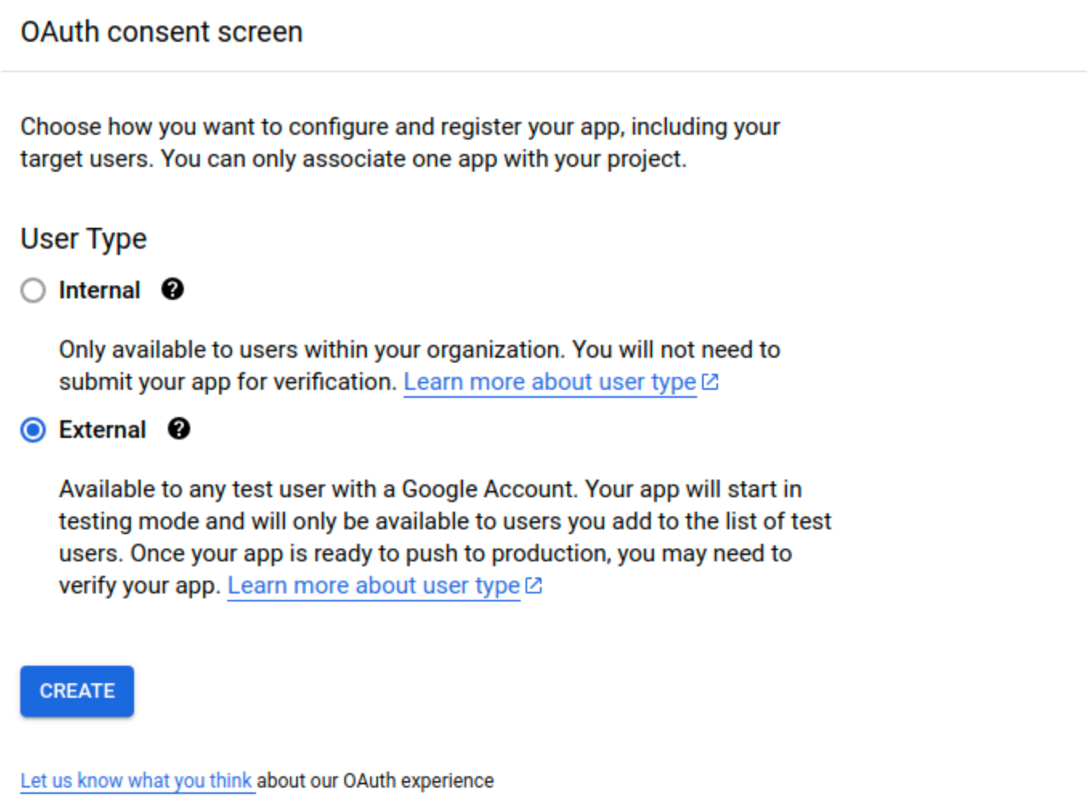](https://timothyxxx.github.io/OSWorld/_images/usertype.png)
2. For App information, type in any App name you like (e.g., DataAccess), and choose the current Google Gmail into the field `User support email`.
[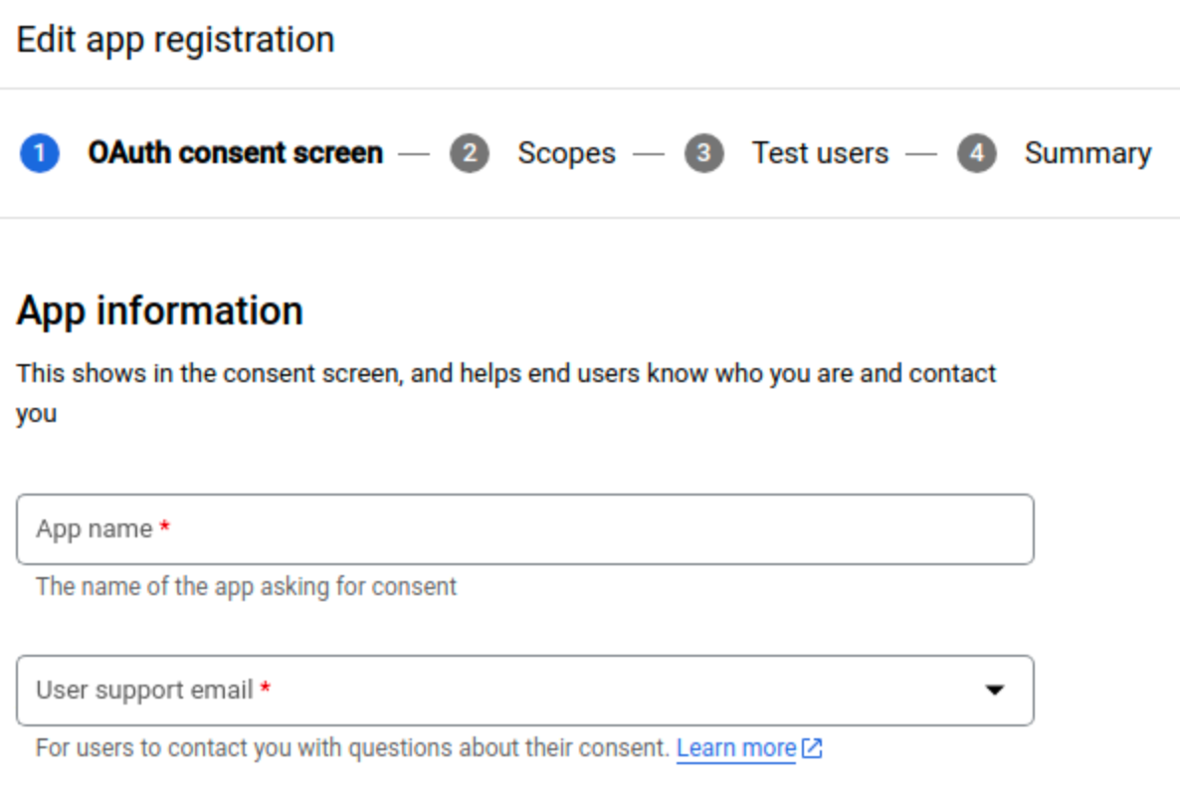](https://timothyxxx.github.io/OSWorld/_images/oauthapp.png)
3. For Developer information, also fill in the current Gmail account. Leave other fields blank and click the button “SAVE AND CONTINUE”.
[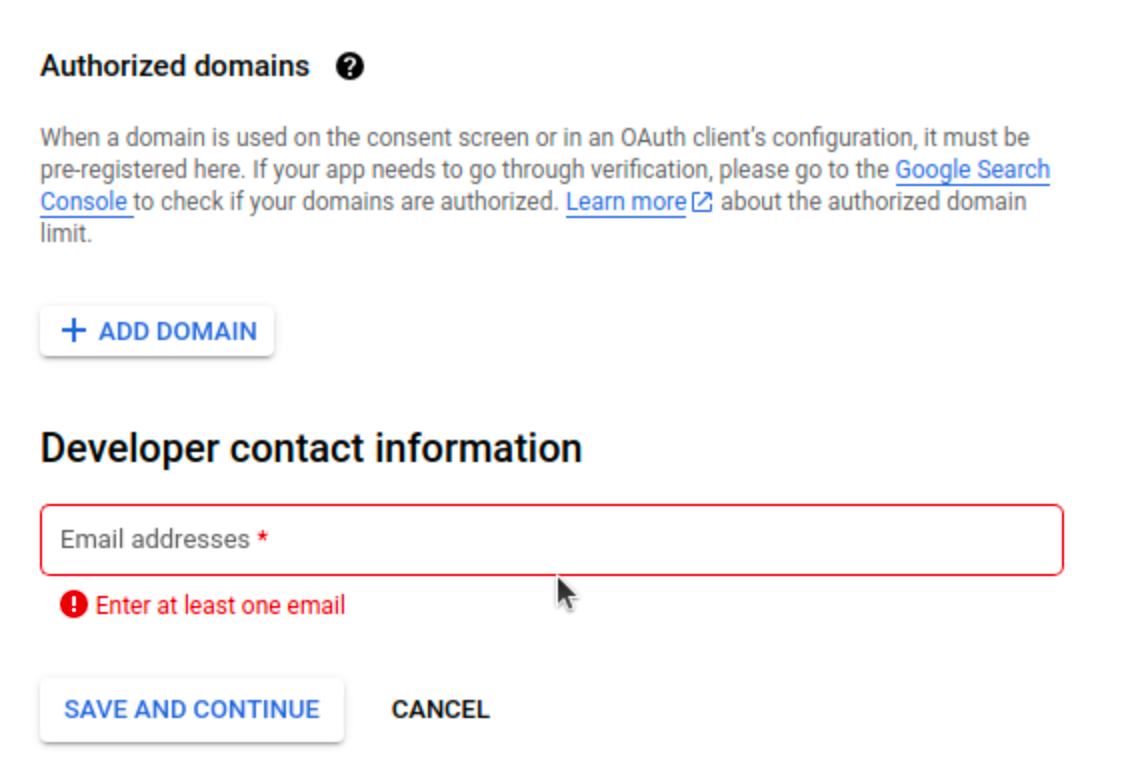](https://timothyxxx.github.io/OSWorld/_images/developer.png)
4. Leave fields blank for `Scopes` and continue to `Test Users`. Add the current Gmail account via clicking button “+ ADD USERS”.
[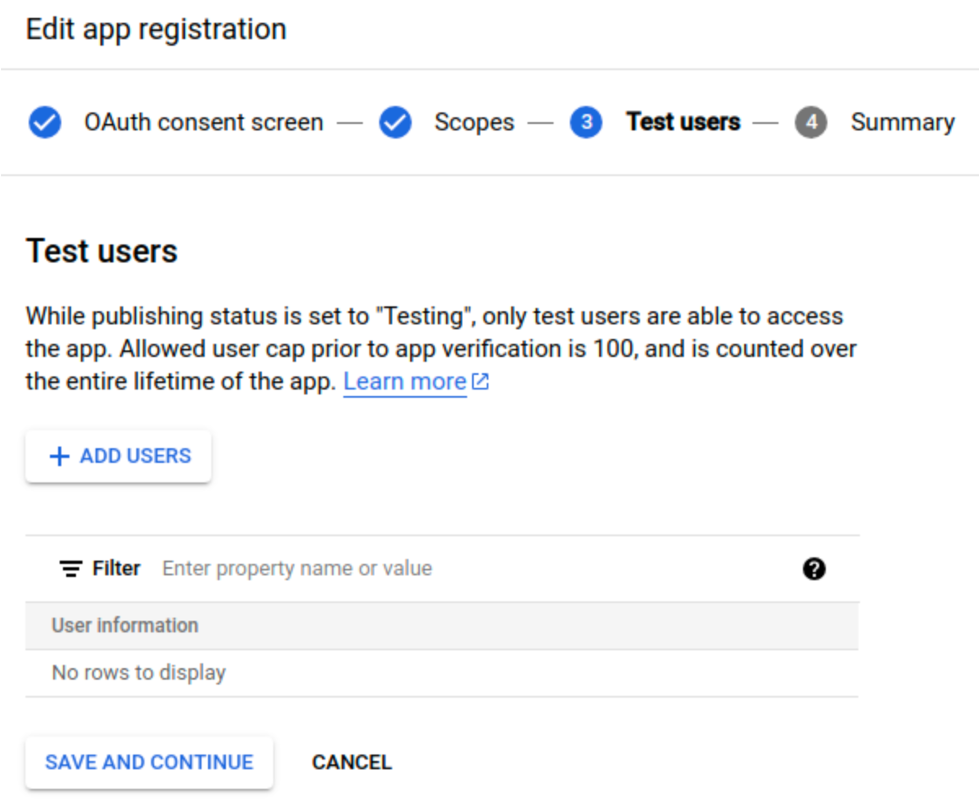](https://timothyxxx.github.io/OSWorld/_images/testusers.png)
5. Finish all configuration and we will come to the configured OAuth consent screen. There is another thing, PUBLISH APP to extend the lifecycle of credentials. Otherwise, the refresh token is only valid in 7 days (refer to [google official doc](https://developers.google.com/identity/protocols/oauth2#expiration)
and [stackoverflow post](https://stackoverflow.com/questions/74659774/google-oauth-2-0-refresh-token-expiry-how-many-days)
for details).
[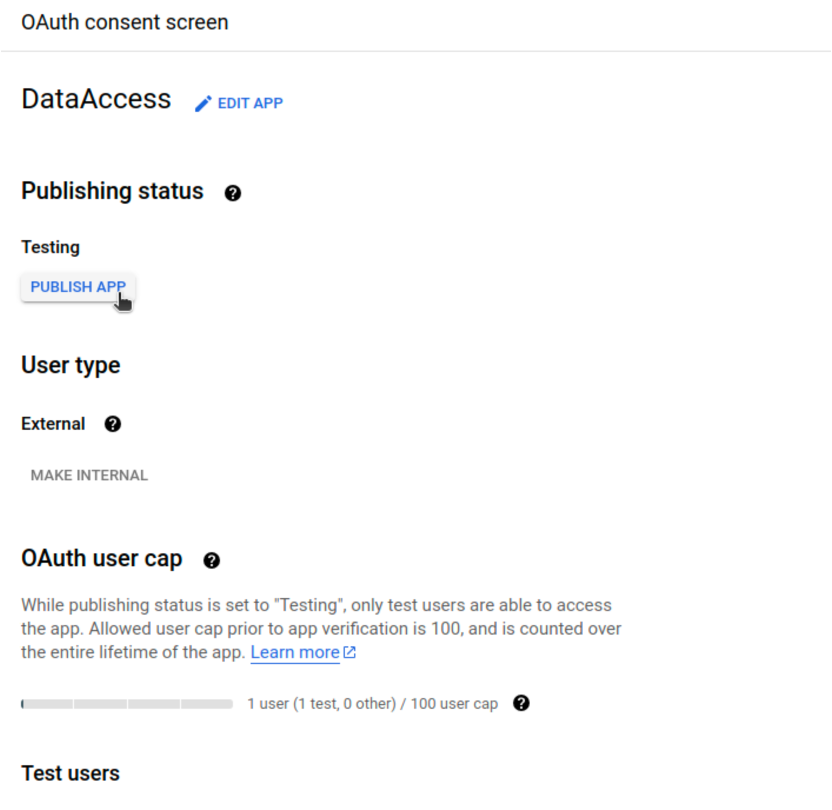](https://timothyxxx.github.io/OSWorld/_images/publishapp.png)
### Create OAuth2.0 Credentials[](https://timothyxxx.github.io/OSWorld/installation/google_account_guideline.html#create-oauth2-0-credentials "Permalink to this heading")
1. Go to the [credentials page](https://console.cloud.google.com/apis/credentials?)
, click “CREATE CREDENTIALS -> OAuth client ID”
[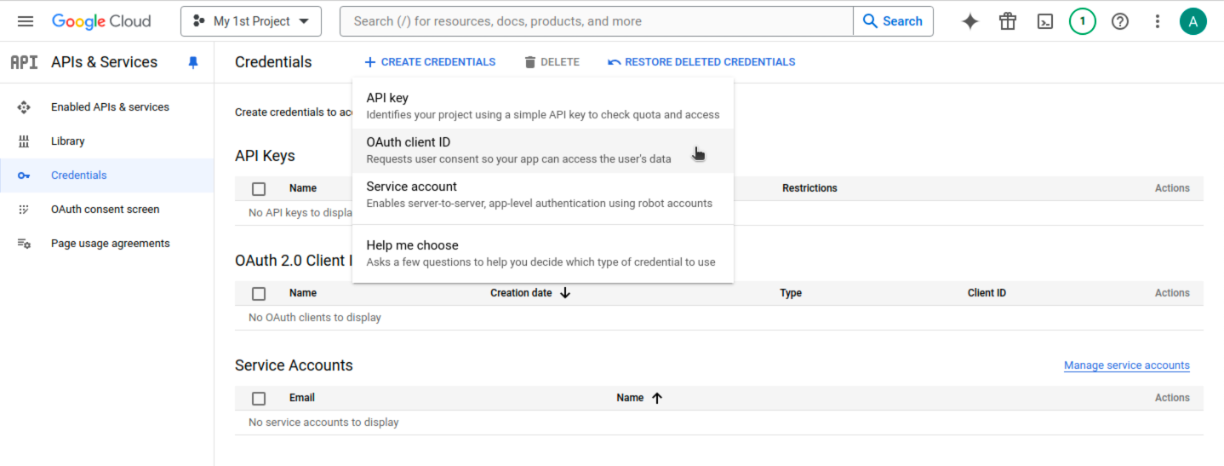](https://timothyxxx.github.io/OSWorld/_images/oauth2.0.png)
2. For Application type, please choose “Desktop app”. You can use any Name. And click “CREATE”.
[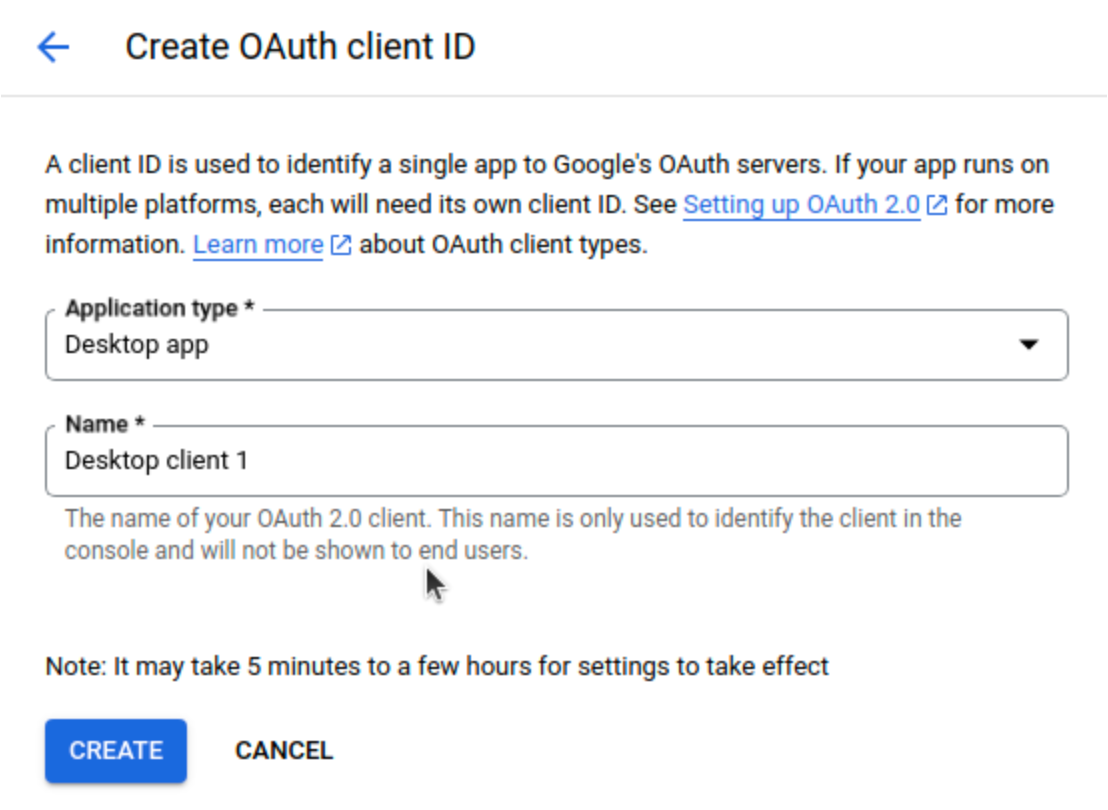](https://timothyxxx.github.io/OSWorld/_images/desktopapp.png)
3. Now, in the pop-up window, you can download the JSON file `client_secret_xxxxx.json`. Move and rename this .json file to file path `evaluation_examples/settings/googledrive/client_secrets.json` in the OSWorld project. The folder should look like:
\- evaluation\_examples/
- settings/
- google/
- settings.json
- settings.json.template
- googledrive/
- settings.yml
- client\_secrets.json
Copy to clipboard
4. Note that, when you first run a task including Google Drive, there will be a URL requesting your permission. Open the link in unsafe mode using the Gmail you filled in `evaluation_examples/settings/google/settings.json`, authorize, and confirm your choice once for all. Eventually, you will see a prompt message “The authentication flow has completed.” on a blank web page.
[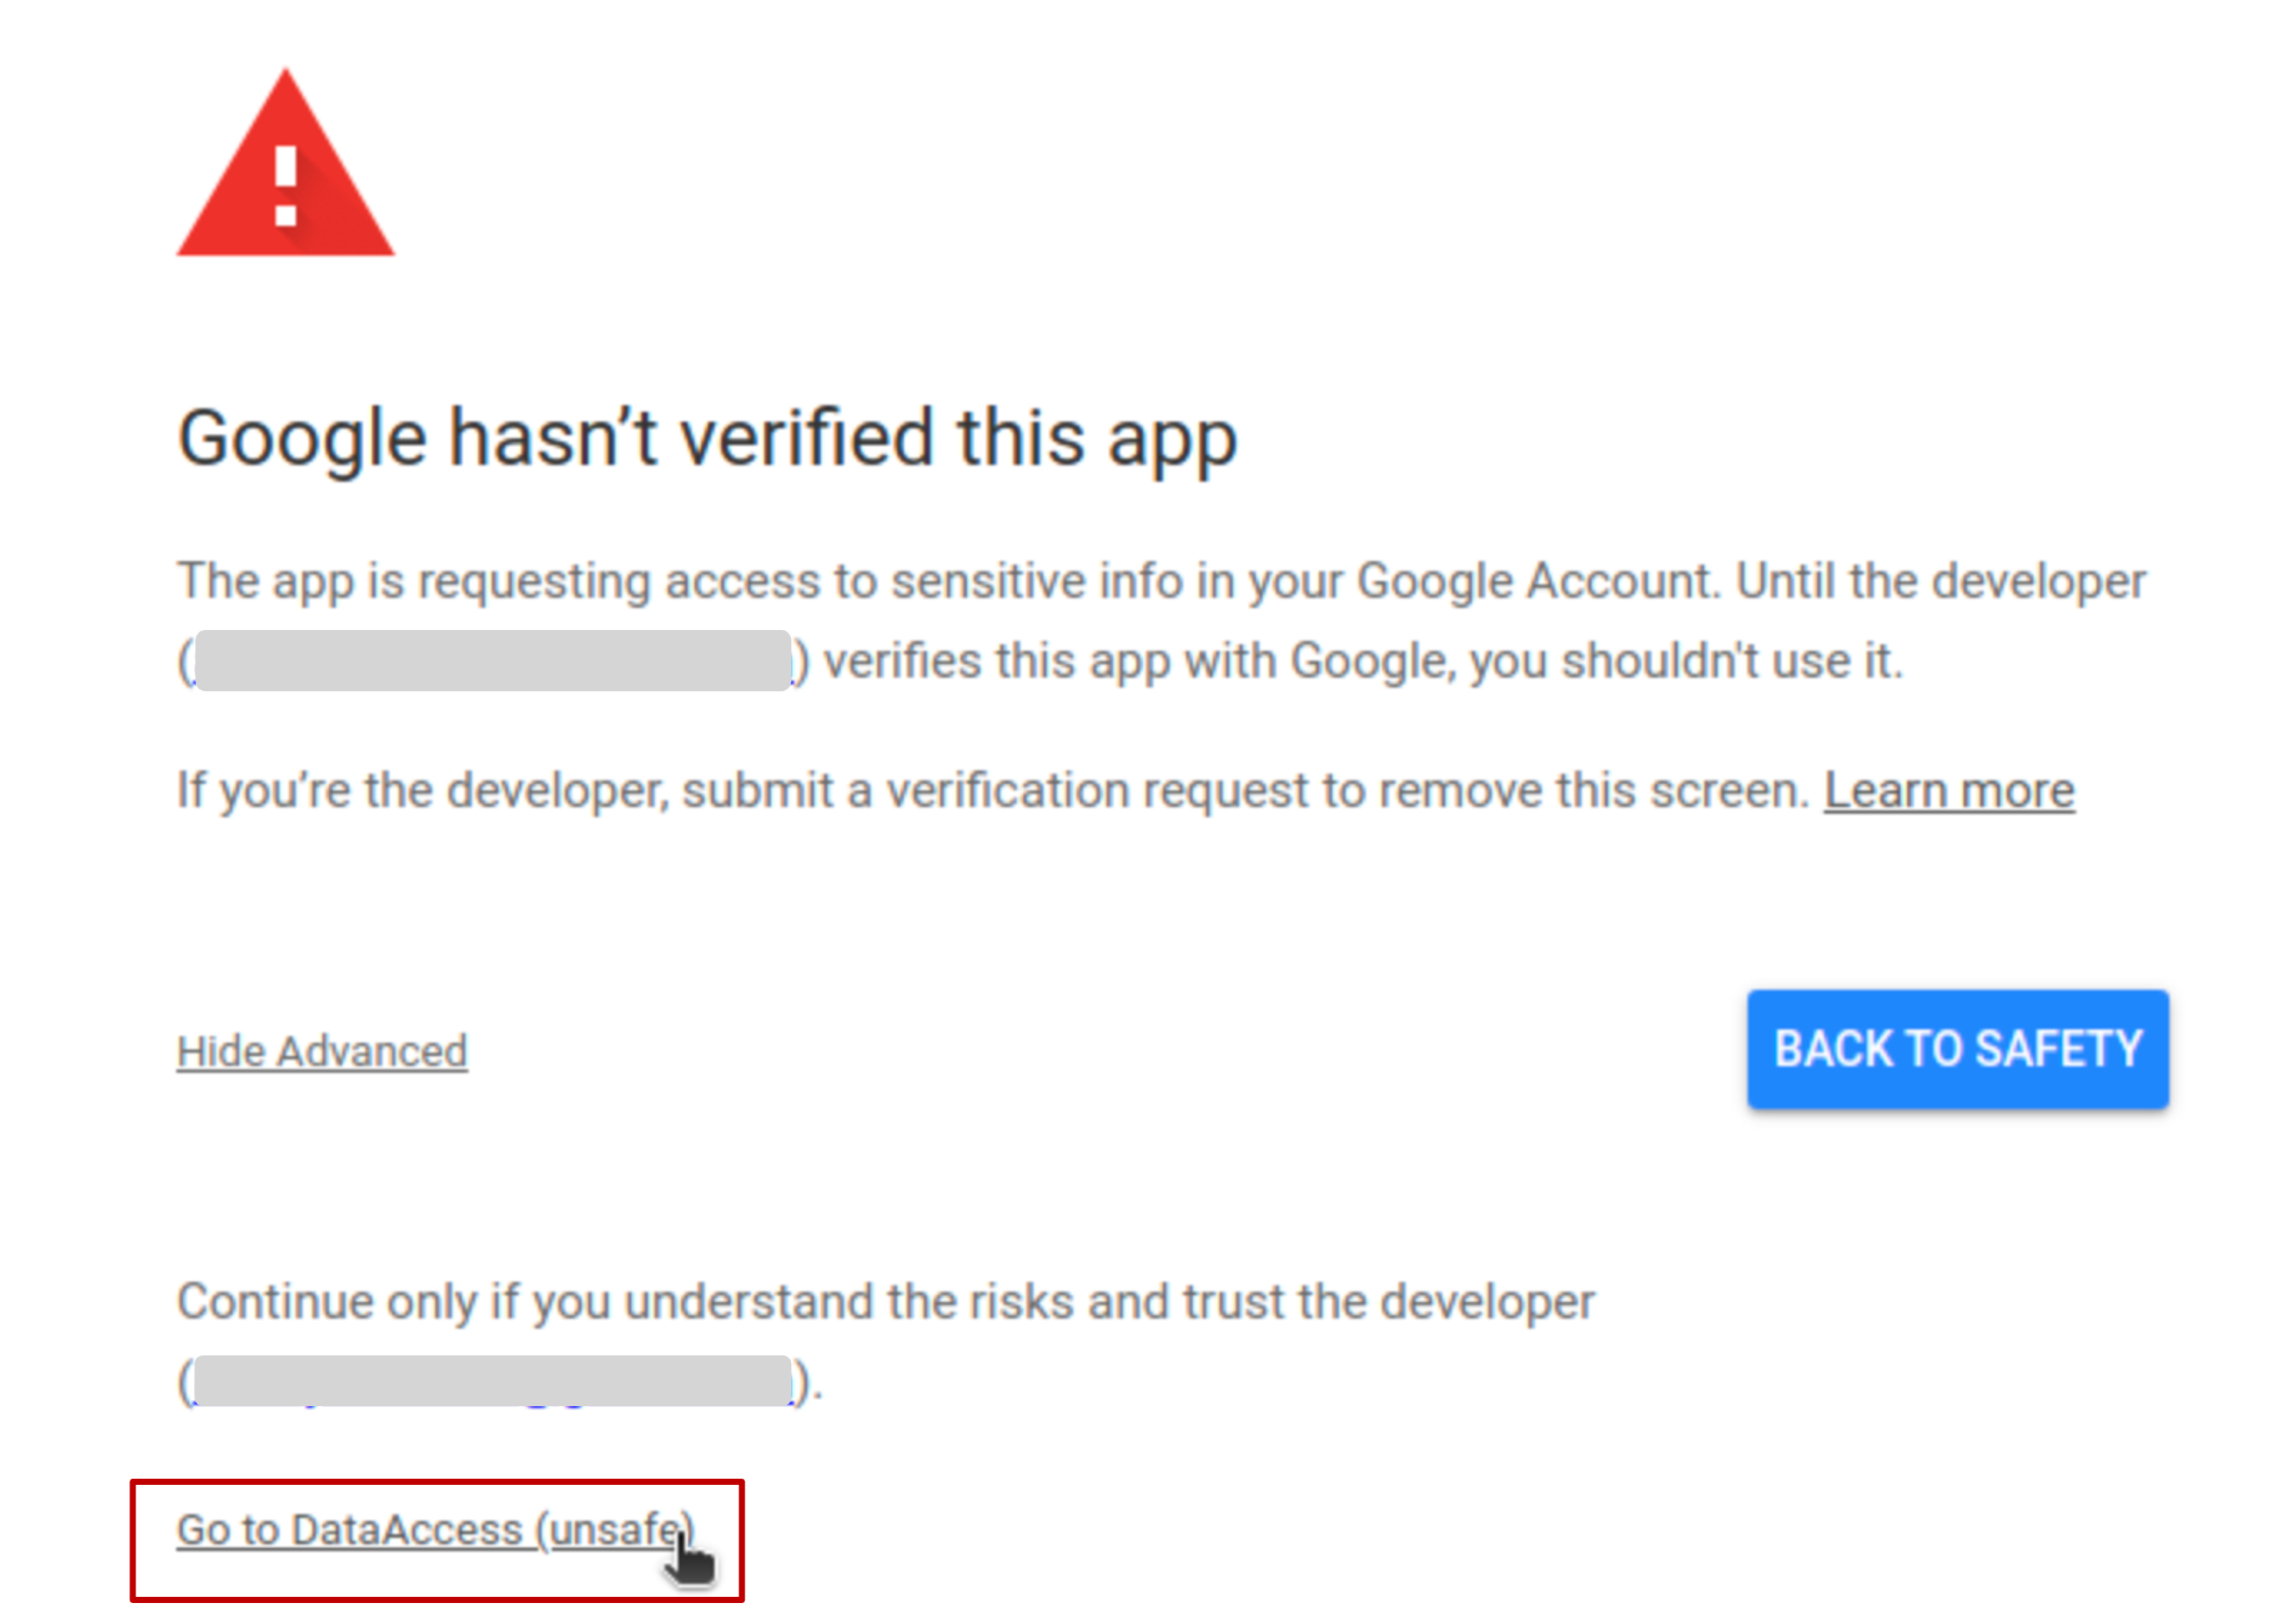](https://timothyxxx.github.io/OSWorld/_images/unsafemode.png)
[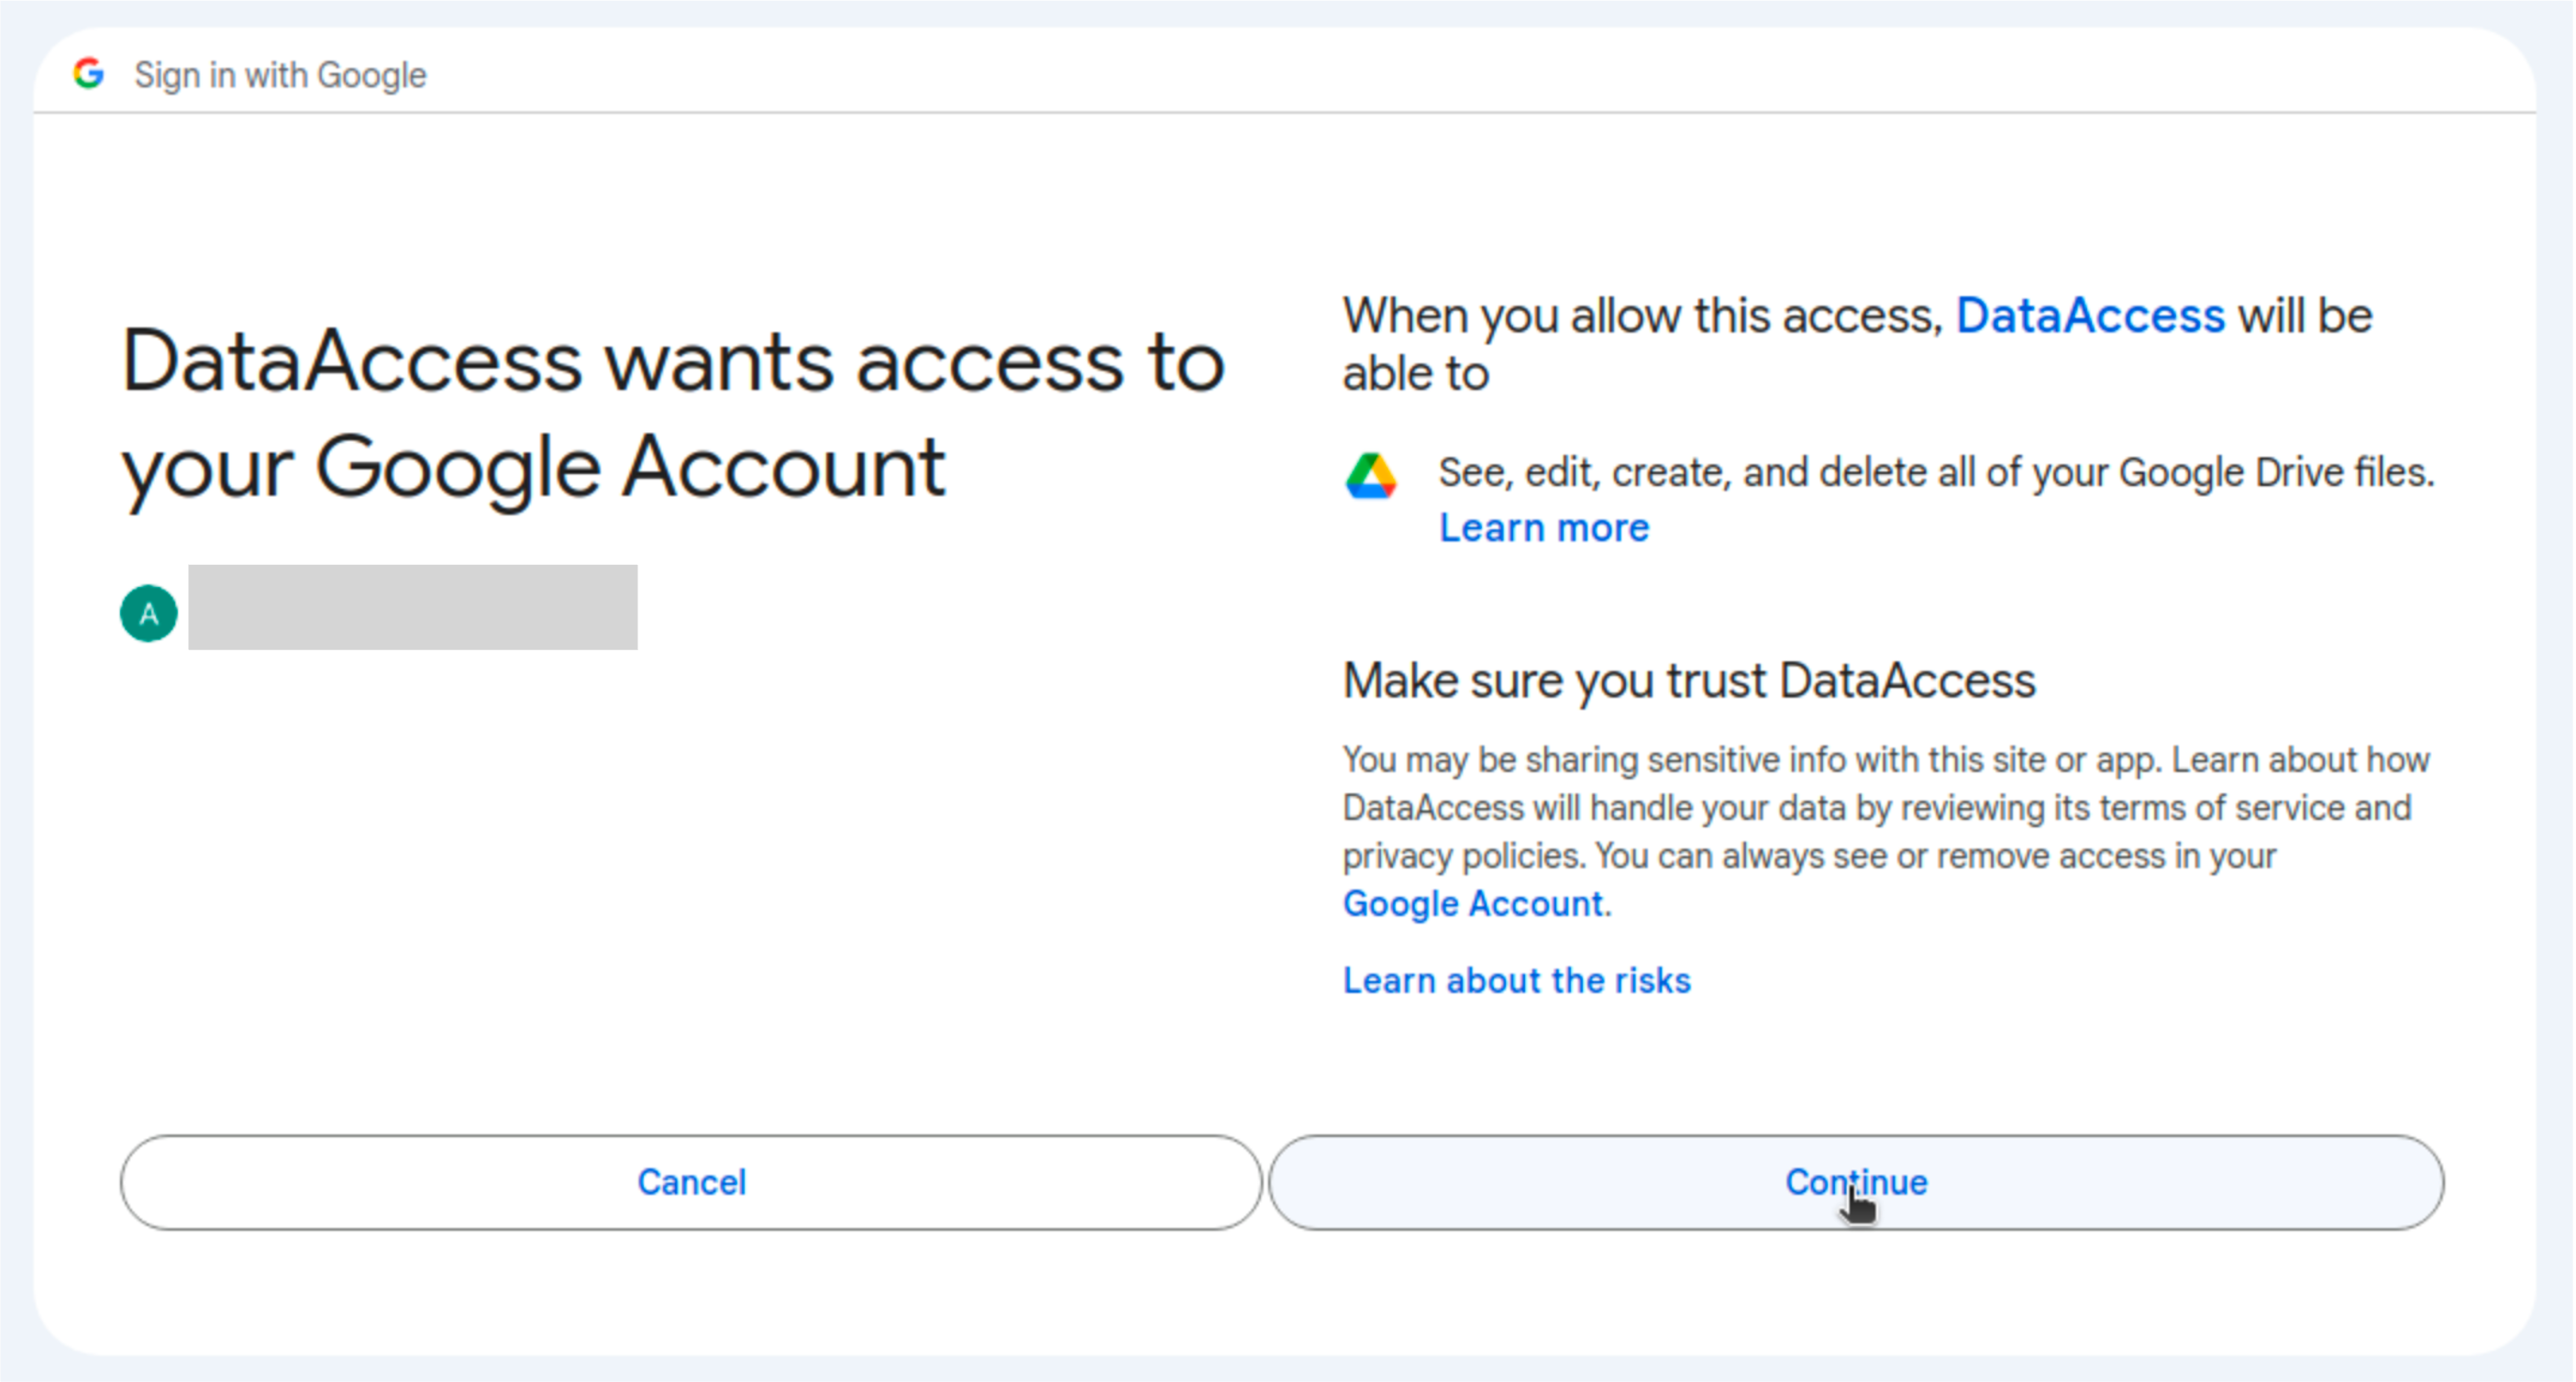](https://timothyxxx.github.io/OSWorld/_images/authorization.png)
### Potential Issues[](https://timothyxxx.github.io/OSWorld/installation/google_account_guideline.html#potential-issues "Permalink to this heading")
Due to strict checks by Google safety teams, even if we shut down the 2-step verification, Google still detects potential risks of your account, especially **when you frequently change the login device**. You may encounter the following issues:
#### Phone Verification Code Required[](https://timothyxxx.github.io/OSWorld/installation/google_account_guideline.html#phone-verification-code-required "Permalink to this heading")
When the VM tries to log into the Google Drive page, Google requests you to provide a phone number and verification code. This may occur when you change your IP or device for the first time.
[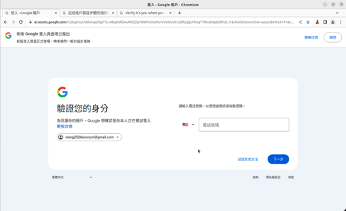](https://timothyxxx.github.io/OSWorld/_images/googlephonecode.png)
To solve it, typing any phone number is adequate (since we shut off the 2-step verification and do not provide any recovery phone number). And fill in the received verification code. After that, hopefully, Google will remember this new login IP or device. Now, you can restart the task, and this time, it should work.
#### Identity Verification[](https://timothyxxx.github.io/OSWorld/installation/google_account_guideline.html#identity-verification "Permalink to this heading")
[](https://timothyxxx.github.io/OSWorld/_images/googleidentity.png)
In this case, Google does not give you the chance to use a phone verification code. Since we do not provide any recovery email/phone and shut down the 2-step verification, we are unable to log in from the new device. We hypothesize that this problem may occur when you frequently change the login IPs or devices, such that Google detects the unusual usages. The only solution is to reset the password from the device in which you register this Google account.
Attention
Sadly, we do not have a permanent solution. The only suggestion is not to frequently change your login IP or device. If you encounter any problem above, Google may urge you to change the password. Also, remember to update the password in `evaluation_examples/settings/google/settings.json`.
### Task Count and Evaluation Options[](https://timothyxxx.github.io/OSWorld/installation/google_account_guideline.html#task-count-and-evaluation-options "Permalink to this heading")
**Total Task Overview**: OSWorld benchmark contains **369 total tasks**, including **8 tasks** that specifically require Google Drive integration and the OAuth2.0 setup described in this guide.
**Impact of Google Drive Configuration Issues**:
Due to Google’s increasingly strict security policies, you may encounter persistent setup issues that prevent the 8 Google Drive tasks from running properly, even after following all configuration steps. This is a known limitation, particularly when:
* Running evaluations from different IP addresses or geographic locations
* Using virtual machines or cloud infrastructure
* Encountering Google’s automated bot detection systems
* Facing account security restrictions for new devices
**Acceptable Evaluation Approaches**:
The OSWorld benchmark officially supports two evaluation methodologies:
1. **Full Evaluation (369 tasks)**: Complete the Google Drive setup successfully and evaluate all tasks
2. **Standard Evaluation (361 tasks)**: Skip the 8 Google Drive tasks and evaluate the remaining tasks
Attention
**Both approaches are acceptable** for benchmark evaluation and result reporting. The choice between 369 vs 361 tasks does not invalidate your evaluation - simply specify which approach you used when reporting results.
**Recommendation**: If you encounter persistent Google Drive setup issues after following this guide, consider using the 361-task evaluation approach rather than spending excessive time on these 8 tasks, especially during initial development and testing phases.
[Join Discord](https://discord.gg/4Gnw7eTEZR "Join our Discord community for discussions!")
---
# FAQ — OSWorld
* [](https://timothyxxx.github.io/OSWorld/index.html)
* [Community](https://timothyxxx.github.io/OSWorld/community/index.html)
* FAQ
* [View page source](https://timothyxxx.github.io/OSWorld/_sources/community/faq.rst.txt)
* * *
FAQ[](https://timothyxxx.github.io/OSWorld/community/faq.html#faq "Permalink to this heading")
================================================================================================
What is the username and password for the virtual machines?[](https://timothyxxx.github.io/OSWorld/community/faq.html#what-is-the-username-and-password-for-the-virtual-machines "Permalink to this heading")
---------------------------------------------------------------------------------------------------------------------------------------------------------------------------------------------------------------
The username and password for the virtual machines are as follows (for provider `vmware`, `virtualbox` and `docker`): we set the account credentials for Ubuntu as `user` / `password`. For cloud service providers like `aws`, to prevent attacks due to weak passwords, we default to `osworld-public-evaluation`. If you make further modifications, remember to set the client\_password variable and pass it to DesktopEnv and Agent (if supported) when running experiments. Some features like setting up proxy require the environment to have the client VM password to obtain sudo privileges, and for some OSWorld tasks, the agent needs the password to obtain sudo privileges to complete them.
* **Windows:** TBD
How to setup the account and credentials for Google and Google Drive?[](https://timothyxxx.github.io/OSWorld/community/faq.html#how-to-setup-the-account-and-credentials-for-google-and-google-drive "Permalink to this heading")
-----------------------------------------------------------------------------------------------------------------------------------------------------------------------------------------------------------------------------------
See [Account Guideline](https://github.com/xlang-ai/OSWorld/blob/main/ACCOUNT_GUIDELINE.md)
.
How can I configure a proxy for the VM (if I’m behind the GFW, or I don’t want some of my tasks to be identified as bot and get lower scores)?[](https://timothyxxx.github.io/OSWorld/community/faq.html#how-can-i-configure-a-proxy-for-the-vm-if-i-m-behind-the-gfw-or-i-don-t-want-some-of-my-tasks-to-be-identified-as-bot-and-get-lower-scores "Permalink to this heading")
----------------------------------------------------------------------------------------------------------------------------------------------------------------------------------------------------------------------------------------------------------------------------------------------------------------------------------------------------------------------------------
If you want to set it up yourself, please refer to [Proxy Guideline](https://github.com/xlang-ai/OSWorld/blob/main/PROXY_GUIDELINE.md)
. We also provide a pre-configured solution based on dataimpulse, please refer to [proxy-setup section in PUBLIC\_EVALUATION\_GUIDELINE](https://github.com/xlang-ai/OSWorld/blob/main/PUBLIC_EVALUATION_GUIDELINE.md#22-proxy-setup)
.
How to submit Evaluation?[](https://timothyxxx.github.io/OSWorld/community/faq.html#how-to-submit-evaluation "Permalink to this heading")
-------------------------------------------------------------------------------------------------------------------------------------------
### Local Evaluation[](https://timothyxxx.github.io/OSWorld/community/faq.html#local-evaluation "Permalink to this heading")
Please start by reading through the [agent interface](https://timothyxxx.github.io/OSWorld/user_guides/add_new_agent.html)
and the [environment interface](https://timothyxxx.github.io/OSWorld/user_guides/environment_explanation.html)
. Correctly implement the agent interface and import your customized version in the `run.py` or `run_multienv.py` file. Afterward, you can execute a command similar to the one in the previous section to run the benchmark on your agent.
### Public Evaluation[](https://timothyxxx.github.io/OSWorld/community/faq.html#public-evaluation "Permalink to this heading")
If you want your results to be verified and displayed on the verified leaderboard, you need to schedule a meeting with us (current maintainer: [tianbaoxiexxx@gmail.com](mailto:tianbaoxiexxx%40gmail.com)
, [yuanmengqi732@gmail.com](mailto:yuanmengqi732%40gmail.com)
) to run your agent code on our side and have us report the results. You need to upload and allow us to disclose your agent implementation under the OSWorld framework (you may choose not to expose your model API to the public), along with a report that allows the public to understand what’s happening behind the scenes. Alternatively, if you are from a trusted institution, you can share your monitoring data and trajectories with us. Please carefully follow the [Public Evaluation Guideline](https://github.com/xlang-ai/OSWorld/blob/main/PUBLIC_EVALUATION_GUIDELINE.md)
to get results.
What about the Google Drive tasks? Can I skip them?[](https://timothyxxx.github.io/OSWorld/community/faq.html#what-about-the-google-drive-tasks-can-i-skip-them "Permalink to this heading")
----------------------------------------------------------------------------------------------------------------------------------------------------------------------------------------------
**Task Overview**: OSWorld contains **369 total tasks**, including **8 Google Drive tasks** that require Google account setup and OAuth2.0 configuration.
**Common Issues**: Due to Google’s strict security policies and IP-based restrictions, these 8 Google Drive tasks may fail to initialize properly even with correct configuration, especially when:
* Running from different IP addresses or cloud environments
* Using virtual machines or automated evaluation systems
* Encountering Google’s bot detection mechanisms
* Facing account security restrictions
**Acceptable Solutions**:
1. **Complete Setup (369 tasks)**: Follow the detailed setup guide in [Google Account Guideline](https://timothyxxx.github.io/OSWorld/installation/google_account_guideline.html)
and troubleshoot until all Google Drive tasks work properly.
2. **Skip Google Drive Tasks (361 tasks)**: Exclude the 8 problematic Google Drive tasks and evaluate the remaining 361 tasks. This approach is **officially supported and acceptable**.
**For Result Reporting**: When submitting or comparing results, clearly specify whether you evaluated 369 tasks (with Google Drive) or 361 tasks (without Google Drive). Both approaches are valid for benchmark evaluation purposes.
What are the running times and costs under different settings? (Deprecated)[](https://timothyxxx.github.io/OSWorld/community/faq.html#what-are-the-running-times-and-costs-under-different-settings-deprecated "Permalink to this heading")
---------------------------------------------------------------------------------------------------------------------------------------------------------------------------------------------------------------------------------------------
| Setting | Expected Time\* | Budget Cost (Full Test Set/Small Test Set) |
| --- | --- | --- |
| GPT-4V (screenshot) | 10h | $100 ($10) |
| Gemini-ProV (screenshot) | 15h | $0 ($0) |
| Claude-3 Opus (screenshot) | 15h | $150 ($15) |
| GPT-4V (a11y tree, SoM, etc.) | 30h | $500 ($50) |
[\*](https://timothyxxx.github.io/OSWorld/community/faq.html#id1)
No environment parallelism. Calculated in April 2024.
[Join Discord](https://discord.gg/4Gnw7eTEZR "Join our Discord community for discussions!")
---
# OSWorld Authors — OSWorld
* [](https://timothyxxx.github.io/OSWorld/index.html)
* [Community](https://timothyxxx.github.io/OSWorld/community/index.html)
* OSWorld Authors
* [View page source](https://timothyxxx.github.io/OSWorld/_sources/community/authors.rst.txt)
* * *
OSWorld Authors[](https://timothyxxx.github.io/OSWorld/community/authors.html#osworld-authors "Permalink to this heading")
============================================================================================================================
Initiators[](https://timothyxxx.github.io/OSWorld/community/authors.html#initiators "Permalink to this heading")
------------------------------------------------------------------------------------------------------------------
* [Tianbao Xie](https://tianbaoxie.com/)
(maintainer)
* [Danyang Zhang](https://zdy023.github.io/)
* [Jixuan Chen](https://chenjix.github.io/)
(maintainer)
* [Xiaochuan Li](https://xiaochuanli.com/)
* [Siheng Zhao](https://sihengz02.github.io/)
* [Ruisheng Cao](https://rhythmcao.github.io/)
* [Toh Jing Hua](https://me.tjh.sg/)
* [Zhoujun Cheng](https://blankcheng.github.io/)
* [Dongchan Shin](https://github.com/thomasshin)
* [Fangyu Lei](https://lfy79001.github.io/)
* [Yitao Liu](https://yitaoliu17.com/)
* [Yiheng Xu](https://yihengxu.com/)
* [Shuyan Zhou](https://shuyanzhou.github.io/)
* [Silvio Savarese](https://aicenter.stanford.edu/people/silvio-savarese)
* [Caiming Xiong](http://cmxiong.com/)
* [Victor Zhong](https://www.victorzhong.com/)
* [Tao Yu](https://taoyds.github.io/)
Contributors[](https://timothyxxx.github.io/OSWorld/community/authors.html#contributors "Permalink to this heading")
----------------------------------------------------------------------------------------------------------------------
* [Jiaqi Deng](https://www.linkedin.com/in/jiaqideng/)
(maintainer)
* [Mengqi Yuan](https://yuanmengqi.github.io/)
(maintainer)
* [Xinzhuang Xiong](https://scholar.google.com/citations?user=0t158J4AAAAJ&hl=zh-CN)
* [Zilong Zhou](https://orcid.org/0009-0003-8146-3209)
* [Zhennan Shen](https://scholar.google.com/citations?user=JPwg5MwAAAAJ&hl=en)
* Yanxu Chen
* [Bowen Wang](https://bowenbryanwang.github.io/)
* Junda Chen
* Haoyuan Wu
* Peihang Li
* [Junli Wang](https://junliwang.tech/)
* Chengyou Jia
* Junlei Zhang
* [Xinyuan Wang](https://xinyuanwangcs.github.io/)
* Changyu Pang
* Zaur Magamednebiev
* [Hongjin Su](https://hongjin-su.github.io/)
Special Acknowledgement[](https://timothyxxx.github.io/OSWorld/community/authors.html#special-acknowledgement "Permalink to this heading")
--------------------------------------------------------------------------------------------------------------------------------------------
* [Sida Wang](https://www.sidaw.xyz/)
* [Peter Shaw](https://www.ptshaw.com/)
* [Alane Suhr](https://www.alanesuhr.com/)
* [Luke Zettlemoyer](https://www.cs.washington.edu/people/faculty/lsz)
* [Chen Henry Wu](https://chenwu.io/)
* [Pengcheng Yin](https://pengcheng.in/)
* [Shunyu Yao](https://ysymyth.github.io/)
* [Zhiyong Wu](https://lividwo.github.io/zywu.github.io/)
* [Xing Han Lu](https://xinghanlu.com/)
* [Siva Reddy](https://sivareddy.in/)
* [Ruoxi Sun](https://www.linkedin.com/in/ruoxi-sun-84a85457/)
* [Zhiyuan Zeng](https://zhiyuan-zeng.github.io/)
* [Lei Li](https://lilei-nlp.github.io/)
* [Human Data](https://www.hud.so/)
* [MoonShot AI](https://www.moonshot.ai/)
* [OpenAI](https://openai.com/)
* [ByteDance Seed TARS](https://seed-tars.com/)
* [Anthropic](https://www.anthropic.com/)
* [Simular](https://www.simular.ai/)
* [HKU Data Intelligence Lab](https://sites.google.com/view/chaoh)
Many thanks for all contributions!
[Join Discord](https://discord.gg/4Gnw7eTEZR "Join our Discord community for discussions!")
---
# To Contribute — OSWorld
* [](https://timothyxxx.github.io/OSWorld/index.html)
* [Community](https://timothyxxx.github.io/OSWorld/community/index.html)
* To Contribute
* [View page source](https://timothyxxx.github.io/OSWorld/_sources/community/contribute.rst.txt)
* * *
To Contribute[](https://timothyxxx.github.io/OSWorld/community/contribute.html#to-contribute "Permalink to this heading")
===========================================================================================================================
[Join Discord](https://discord.gg/4Gnw7eTEZR "Join our Discord community for discussions!")
---
# Reference Paper — OSWorld
* [](https://timothyxxx.github.io/OSWorld/index.html)
* [Reference](https://timothyxxx.github.io/OSWorld/reference/index.html)
* Reference Paper
* [View page source](https://timothyxxx.github.io/OSWorld/_sources/reference/digital_agent_collection/index.rst.txt)
* * *
Reference Paper[](https://timothyxxx.github.io/OSWorld/reference/digital_agent_collection/index.html#reference-paper "Permalink to this heading")
===================================================================================================================================================
Here we collect a set of papers for your reference on the progress in the digital agents direction.
* [Mobile](https://timothyxxx.github.io/OSWorld/reference/digital_agent_collection/mobile.html)
* [Web](https://timothyxxx.github.io/OSWorld/reference/digital_agent_collection/web.html)
* [Computer](https://timothyxxx.github.io/OSWorld/reference/digital_agent_collection/computer.html)
* [General](https://timothyxxx.github.io/OSWorld/reference/digital_agent_collection/general.html)
[Join Discord](https://discord.gg/4Gnw7eTEZR "Join our Discord community for discussions!")
---
# Vision and Roadmap — OSWorld
* [](https://timothyxxx.github.io/OSWorld/index.html)
* [Community](https://timothyxxx.github.io/OSWorld/community/index.html)
* Vision and Roadmap
* [View page source](https://timothyxxx.github.io/OSWorld/_sources/community/vision_and_roadmap.rst.txt)
* * *
Vision and Roadmap[](https://timothyxxx.github.io/OSWorld/community/vision_and_roadmap.html#vision-and-roadmap "Permalink to this heading")
=============================================================================================================================================
Vision[](https://timothyxxx.github.io/OSWorld/community/vision_and_roadmap.html#vision "Permalink to this heading")
---------------------------------------------------------------------------------------------------------------------
Roadmap[](https://timothyxxx.github.io/OSWorld/community/vision_and_roadmap.html#roadmap "Permalink to this heading")
-----------------------------------------------------------------------------------------------------------------------
Here we provide a high-level road map for the project. We will update this road map as we make progress. If you are interested in contributing to the project, please check the CONTRIBUTING.md for more details.
### Road Map for Environment Infrastructure[](https://timothyxxx.github.io/OSWorld/community/vision_and_roadmap.html#road-map-for-environment-infrastructure "Permalink to this heading")
* ✓ Explore VMWare, and whether it can be connected and controlled through the mouse package
* ✓ Explore Windows and MacOS, whether they can be installed - MacOS is closed source and cannot be legally installed - Windows is available legally and can be installed
* ✓ Build a gym-like Python interface for controlling the VM
* ✓ Recording of actions (mouse movement, click, keyboard) for humans to annotate, and we can replay it and compress it
* ✓ Build a simple task, e.g. open a browser, open a website, click on a button, and close the browser
* ✓ Set up a pipeline and build agent implementation (zero-shot) for the task
* ✓ Start to design which tasks inside the DesktopENv to focus on, start to wrap up the environment to be public
* ✓ Start to annotate the examples for ~~training~~ and testing
* ✓ Error handling during file passing and file opening, etc.
* ✓ Add accessibility tree from the OS into the observation space
* ✓ Add pre-process and post-process action support for benchmarking setup and evaluation
* ✓ Experiment logging and visualization system
* ✓ Add more tasks, maybe scale to 300 for v1.0.0, and create a dynamic leaderboard
* ✓ Multiprocess support, can enable reinforcement learning to be more efficient
* ✓ Add support for automatic VM download and configuration, enable auto-scaling management
* ✓ VPN setup doc for those who need it
* ✓ Support running on platforms that have nested virtualization, AWS
* ✓ Be able to run without virtual machine platform VMware Pro, e.g. VirtualBox, or other platforms
* ✓ Scale dataset to 20K+ tasks across diverse applications and websites (achieved via OpenCUA AgentNet with 21K tasks)
* ✓ Develop cross-platform annotation infrastructure supporting Windows, macOS, and Ubuntu (achieved via AgentNet Tool)
* ✓ Build data processing pipeline to convert raw demonstrations into clean trajectories (achieved via AgentNet Method)
* ☐ Add VNC-based video streaming as observation/actions for potential online-video understanding models to tackle tasks (achieved via AgentNet Tool screen recording)
* ☐ Support running on platforms that have nested virtualization, GCP
* ☐ Prepare for the first release of Windows vm image for the environment
### Road Map of Annotation Tool[](https://timothyxxx.github.io/OSWorld/community/vision_and_roadmap.html#road-map-of-annotation-tool "Permalink to this heading")
* ✓ Improve the annotation tool base on DuckTrack/OpenAdapt, and make it more robust which aligns on accessibility tree (achieved via AgentNet Tool)
* ✓ Annotate the steps of doing the task (achieved via 21K human-annotated tasks in AgentNet Dataset)
* ✓ Crawl all resources we explored from the internet, and make it easy to access (achieved via AgentNet Dataset covering 140+ applications and 190+ websites)
* ✓ Set up ways for the crowdsourcing/community to contribute new examples (achieved via open-source AgentNet Tool and dataset release)
* ✓ Develop reflective Chain-of-Thought reasoning augmentation for training data (achieved via OpenCUA pipeline)
* ✓ Create offline evaluation benchmark for stable and fast assessment (achieved via AgentNetBench)
### Road Map of Foundation Models[](https://timothyxxx.github.io/OSWorld/community/vision_and_roadmap.html#road-map-of-foundation-models "Permalink to this heading")
* ✓ Train and release open-source computer-use agent models (achieved via OpenCUA-7B and OpenCUA-32B)
* ✓ Achieve competitive performance with proprietary models on OSWorld benchmark (OpenCUA-32B achieves 32.5% on OSWorld-Verified)
* ✓ Support multi-image history and mixed-domain training for robust performance
* ✓ Demonstrate effective scaling with increased training data and test-time computation
* ☐ Explore reinforcement learning and self-improvement techniques for agent training
* ☐ Develop specialized models for specific domains or applications
[Join Discord](https://discord.gg/4Gnw7eTEZR "Join our Discord community for discussions!")
---
# Projects using OSWorld — OSWorld
* [](https://timothyxxx.github.io/OSWorld/index.html)
* [Community](https://timothyxxx.github.io/OSWorld/community/index.html)
* Projects using OSWorld
* [View page source](https://timothyxxx.github.io/OSWorld/_sources/community/projects_using_osworld.rst.txt)
* * *
Projects using OSWorld[](https://timothyxxx.github.io/OSWorld/community/projects_using_osworld.html#projects-using-osworld "Permalink to this heading")
=========================================================================================================================================================
We thank the trust from following projects for using OSWorld to accelerate the progress of multimodal agents!
* [Cradle: Empowering Foundation Agents Towards General Computer Control](https://baai-agents.github.io/Cradle/)
* [Spider2-V: How Far Are Multimodal Agents From Automating Data Science and Engineering Workflows?](https://spider2-v.github.io/)
* [Read Anywhere Pointed: Layout-aware GUI Screen Reading with Tree-of-Lens Grounding](https://screen-point-and-read.github.io/)
* [CRAB: Cross-environment Agent Benchmark for Multimodal Language Model Agents](https://crab.camel-ai.org/)
* [Windows Agent Arena: a benchmark for AI agents acting on your computer](https://www.microsoft.com/applied-sciences/projects/windows-agent-arena)
* [Agent S: An Open Agentic Framework that Uses Computers Like a Human](https://www.simular.ai/agent-s)
* [Model Card Addendum: Claude 3.5 Haiku and Upgraded Claude 3.5 Sonnet](https://assets.anthropic.com/m/1cd9d098ac3e6467/original/Claude-3-Model-Card-October-Addendum.pdf)
* [OS-ATLAS: A Foundation Action Model For Generalist GUI Agents](https://osatlas.github.io/)
* [Aguvis: Unified Pure Vision Agents for Autonomous GUI Interaction](https://arxiv.org/abs/2412.04454?)
* [Ponder & Press: Advancing Visual GUI Agent towards General Computer Control](https://arxiv.org/abs/2412.01268)
* [Aria-UI: Visual Grounding for GUI Instructions](https://ariaui.github.io/)
…
[Join Discord](https://discord.gg/4Gnw7eTEZR "Join our Discord community for discussions!")
---
# Public Evaluation Platform User Guide — OSWorld
* [](https://timothyxxx.github.io/OSWorld/index.html)
* [User Guides](https://timothyxxx.github.io/OSWorld/user_guides/index.html)
* Public Evaluation Platform User Guide
* [View page source](https://timothyxxx.github.io/OSWorld/_sources/user_guides/run_public_evaluation.rst.txt)
* * *
Public Evaluation Platform User Guide[](https://timothyxxx.github.io/OSWorld/user_guides/run_public_evaluation.html#public-evaluation-platform-user-guide "Permalink to this heading")
========================================================================================================================================================================================
We have built an AWS-based platform for large-scale parallel evaluation of OSWorld tasks. The system follows a Host-Client architecture:
* **Host Instance**: The central controller that stores code, configurations, and manages task execution.
* **Client Instances**: Worker nodes automatically launched to perform tasks in parallel.
The architecture consists of a host machine (where you git clone and set up the OSWorld host environment) that controls multiple virtual machines for testing and potential training purposes. Each virtual machine serves as an OSWorld client environment using pre-configured AMI images and runs `osworld.service` to execute actions and commands from the host machine. To prevent security breaches, proper security groups and subnets must be configured for both the host and virtual machines.
1\. Platform Deployment & Connection[](https://timothyxxx.github.io/OSWorld/user_guides/run_public_evaluation.html#platform-deployment-connection "Permalink to this heading")
--------------------------------------------------------------------------------------------------------------------------------------------------------------------------------
Below, we assume you have no prior AWS configuration experience. You may freely skip or replace any graphical operations with API calls if you know how to do so.
### 1.1 Launch the Host Instance[](https://timothyxxx.github.io/OSWorld/user_guides/run_public_evaluation.html#launch-the-host-instance "Permalink to this heading")
Please create an instance in the AWS EC2 graphical interface to build the Host Machine.
Our recommended instance type settings are as follows: if you want to run fewer than 5 VM environments in parallel (`--num_envs` < 5), `t3.medium` will be sufficient; if you want to run fewer than 15 VM environments in parallel (`--num_envs` < 15), `t3.large` will be sufficient; however, if you want to use more than 15 VM environments in parallel, it’s better to choose a machine with more vCPUs and memory, such as `c4.8xlarge`.
For the AMI, we recommend using Ubuntu Server 24.04 LTS (HVM), SSD Volume Type, though other options will also work since the host machine doesn’t have strict requirements.
For storage space, please consider the number of experiments you plan to run. We recommend at least 50GB or more.
For security group configuration, please configure according to your specific requirements. We provides a monitor service that runs on port 8080 by default. You need to open this port to use this functionality.
Set the VPC as default, and we will return to it later to configure the virtual machines with the same setting.
### 1.2 Connect to the Host Instance[](https://timothyxxx.github.io/OSWorld/user_guides/run_public_evaluation.html#connect-to-the-host-instance "Permalink to this heading")
#### Step 1: Prepare Your SSH Key[](https://timothyxxx.github.io/OSWorld/user_guides/run_public_evaluation.html#step-1-prepare-your-ssh-key "Permalink to this heading")
* When launching the instance, choose “Create new key pair” and download the `.pem` file (e.g. `osworld-host-key.pem`). Save it locally.
[](https://timothyxxx.github.io/OSWorld/_images/pubeval1.png)
* Set appropriate permissions:
chmod 400
Copy to clipboard
* Find your instance’s **public IP** and **DNS**:
* Go to the EC2 **Instances** page on the AWS Console.
* Locate your Host instance by its ID.
#### Step 2: Connect via SSH or VSCode[](https://timothyxxx.github.io/OSWorld/user_guides/run_public_evaluation.html#step-2-connect-via-ssh-or-vscode "Permalink to this heading")
* SSH:
ssh \-i ubuntu@
Copy to clipboard
* VSCode/Cursor Remote SSH configuration:
Host host\_example
HostName
User ubuntu
IdentityFile
Copy to clipboard
#### Step 3: Set up the host machine[](https://timothyxxx.github.io/OSWorld/user_guides/run_public_evaluation.html#step-3-set-up-the-host-machine "Permalink to this heading")
After you connect the host machine, clone the latest OSWorld and set up the environment. Please ensure that the version of Python is >= 3.10.
\# Clone the OSWorld repository
git clone https://github.com/xlang\-ai/OSWorld
\# Change directory into the cloned repository
cd OSWorld
\# Optional: Create a Conda environment for OSWorld
\# conda create -n osworld python=3.10
\# conda activate osworld
\# Install required dependencies
pip install \-r requirements.txt
Copy to clipboard
When installing requirements, you may encounter general environment issues, but these are solvable. You’ll need to use `apt install` to install and configure some dependencies. These issues can be quickly fixed with the help of AI tools like Claude Code.
Then it is almost done for the host machine part!
### 1.3 Set up the virtual machine[](https://timothyxxx.github.io/OSWorld/user_guides/run_public_evaluation.html#set-up-the-virtual-machine "Permalink to this heading")
We need to programmatically scale virtual machines. Therefore, we will use the graphical interface to configure and obtain the necessary environment variables, then set these environment variables on the host machine so that the OSWorld code can read them to automatically scale and run experiments.
For the client machine environments, we have already prepared pre-configured client machine environments in different regions, stored in [https://github.com/xlang-ai/OSWorld/blob/main/desktop\_env/providers/aws/manager.py](https://github.com/xlang-ai/OSWorld/blob/main/desktop_env/providers/aws/manager.py)
:
IMAGE\_ID\_MAP \= {
"us-east-1": {
(1920, 1080): "ami-0d23263edb96951d8"
},
"ap-east-1": {
(1920, 1080): "ami-0c092a5b8be4116f5"
}
}
\# Tell us if you need more, we can make immigration from one place to another.
Copy to clipboard
Therefore, you don’t need to configure the virtual machine environments and related variables. If you need to add additional functionality, you can configure it based on these images. If you want to reconfigure from scratch, please refer to the files and instructions under [https://github.com/xlang-ai/OSWorld/tree/main/desktop\_env/server](https://github.com/xlang-ai/OSWorld/tree/main/desktop_env/server)
.
#### Step 1: Security Group for OSWorld Virtual Machines[](https://timothyxxx.github.io/OSWorld/user_guides/run_public_evaluation.html#step-1-security-group-for-osworld-virtual-machines "Permalink to this heading")
OSWorld requires certain ports to be open, such as port 5000 for backend connections to OSWorld services, port 5910 for VNC visualization, port 9222 for Chrome control, etc. The `AWS_SECURITY_GROUP_ID` variable represents the security group configuration for virtual machines serving as OSWorld environments. Please complete the configuration and set this environment variable to the ID of the configured security group.
**⚠️ Important**: Please strictly follow the port settings below to prevent OSWorld tasks from failing due to connection issues:
##### Inbound Rules (8 rules required)[](https://timothyxxx.github.io/OSWorld/user_guides/run_public_evaluation.html#inbound-rules-8-rules-required "Permalink to this heading")
| Type | Protocol | Port Range | Source | Description |
| --- | --- | --- | --- | --- |
| SSH | TCP | 22 | 0.0.0.0/0 | SSH access |
| HTTP | TCP | 80 | 172.31.0.0/16 | HTTP traffic |
| Custom TCP | TCP | 5000 | 172.31.0.0/16 | OSWorld backend service |
| Custom TCP | TCP | 5910 | 0.0.0.0/0 | NoVNC visualization port |
| Custom TCP | TCP | 8006 | 172.31.0.0/16 | VNC service port |
| Custom TCP | TCP | 8080 | 172.31.0.0/16 | VLC service port |
| Custom TCP | TCP | 8081 | 172.31.0.0/16 | Additional service port |
| Custom TCP | TCP | 9222 | 172.31.0.0/16 | Chrome control port |
Once finished, record the `AWS_SECURITY_GROUP_ID` as you will need to set it as the environment variable `AWS_SECURITY_GROUP_ID` on the host machine before starting the client code.
##### Outbound Rules (1 rule required)[](https://timothyxxx.github.io/OSWorld/user_guides/run_public_evaluation.html#outbound-rules-1-rule-required "Permalink to this heading")
| Type | Protocol | Port Range | Destination | Description |
| --- | --- | --- | --- | --- |
| All traffic | All | All | 0.0.0.0/0 | Allow all outbound traffic |
#### Step 2: Record VPC Configuration for Client Machines from Host Machine[](https://timothyxxx.github.io/OSWorld/user_guides/run_public_evaluation.html#step-2-record-vpc-configuration-for-client-machines-from-host-machine "Permalink to this heading")
To isolate the entire evaluation stack, we run both the host machine and all client virtual machines inside a dedicated VPC.
The setup is straightforward:
1. Launch the host instance in the EC2 console via the AWS console and note the **VPC ID** and **Subnet ID** shown in its network settings.
2. Record the **Subnet ID** as you will need to set it as the environment variable `AWS_SUBNET_ID` on the host machine before starting the client code.
[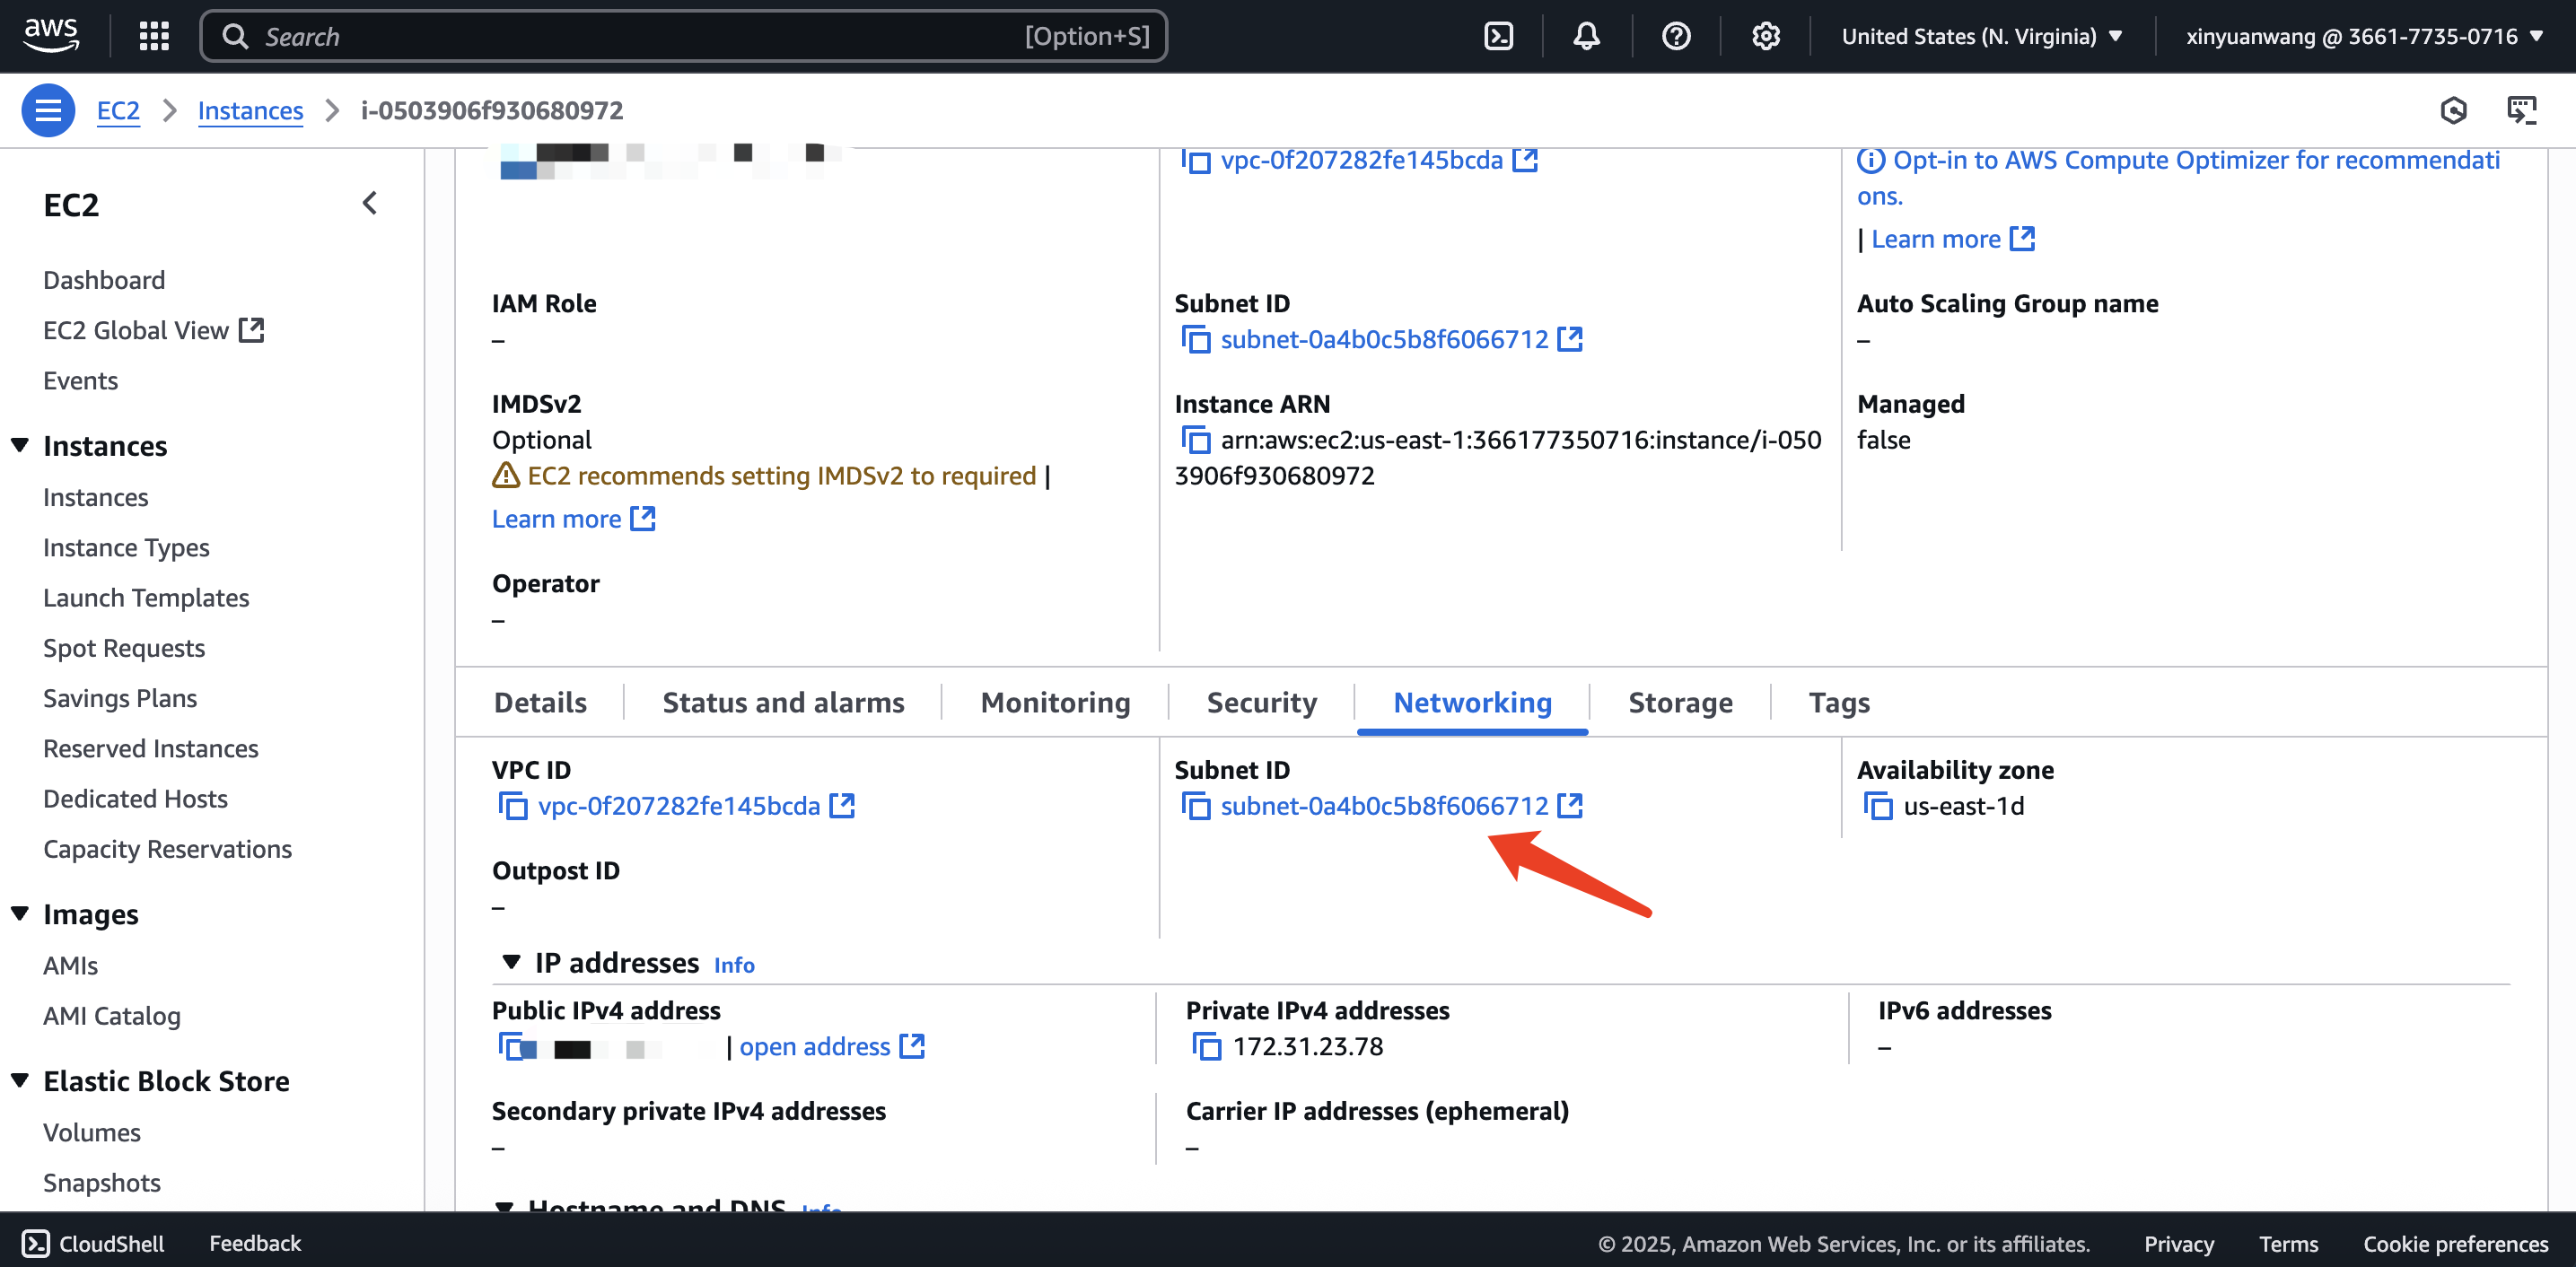](https://timothyxxx.github.io/OSWorld/_images/pubeval_subnet.png)
### 1.3 Get AWS Access Keys & Secret Access Key[](https://timothyxxx.github.io/OSWorld/user_guides/run_public_evaluation.html#get-aws-access-keys-secret-access-key "Permalink to this heading")
Click on **Security Credentials** from the drop-down menu under your account in the top-right corner.
[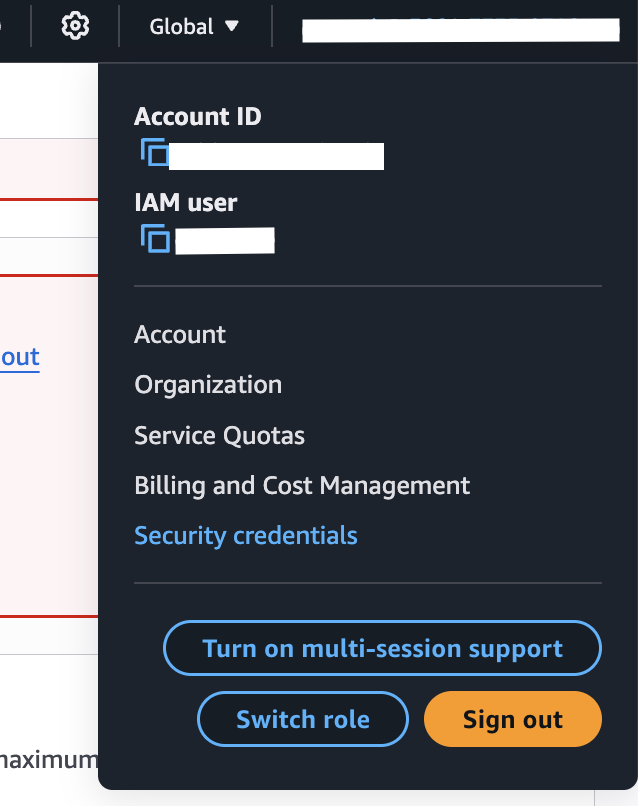](https://timothyxxx.github.io/OSWorld/_images/pubeval4.png)
In the **Access keys** section, click **“Create access key”** to generate your own key.
[](https://timothyxxx.github.io/OSWorld/_images/pubeval5.png)
If this method doesn’t work, please go to **IAM** → **Users** → select your username → **Security credentials** tab → **Create access key**.
Alternatively, you can create access keys through IAM for better security practices:
1. Navigate to **IAM** in the AWS Console
2. Click on **Users** in the left sidebar
3. Select your username or create a new IAM user
4. Go to the **Security credentials** tab
5. Click **Create access key**
6. Choose the appropriate use case (e.g., “Command Line Interface (CLI)”)
7. Download or copy the Access Key ID and Secret Access Key
**Note**: For production environments, it’s recommended to use IAM roles instead of access keys when possible, or create dedicated IAM users with minimal required permissions rather than using root account credentials.
Similarly, later you will need to set them as the environment variables on the host machine.
2\. Environment Setup[](https://timothyxxx.github.io/OSWorld/user_guides/run_public_evaluation.html#environment-setup "Permalink to this heading")
----------------------------------------------------------------------------------------------------------------------------------------------------
Great! Now back to the **host machine**, we can start running experiments! All the following operations are performed on the host machine environment, under the OSWorld path.
### 2.1 Google Drive Integration (Optional)[](https://timothyxxx.github.io/OSWorld/user_guides/run_public_evaluation.html#google-drive-integration-optional "Permalink to this heading")
**Task Overview**: OSWorld includes **8 Google Drive tasks** out of a total of **369 tasks**. Due to Google’s increasingly strict security policies, these tasks often encounter initialization and setup issues.
**Common Setup Problems:**
* IP address changes triggering verification requests
* OAuth2.0 authentication failures in virtualized environments
* Google’s automated detection of unusual access patterns
* Account lockouts due to security policy violations
**Configuration Instructions:**
Follow the instructions in [Google Account Guideline](https://timothyxxx.github.io/OSWorld/installation/google_account_guideline.html)
, specifically the section “Generating `credentials.json` for Public Eval”. This configuration is necessary if you want to evaluate all 369 tasks.
**Alternative Approaches:**
If you encounter persistent setup issues with Google Drive tasks, you have two acceptable options:
1. **Complete Setup (369 tasks)**: Continue troubleshooting following the detailed guide in [Google Account Guideline](https://timothyxxx.github.io/OSWorld/installation/google_account_guideline.html)
until all Google Drive tasks work properly.
2. **Skip Google Drive Tasks (361 tasks)**: Exclude the 8 Google Drive tasks and evaluate the remaining 361 tasks. This approach is officially supported and acceptable for benchmark evaluation.
[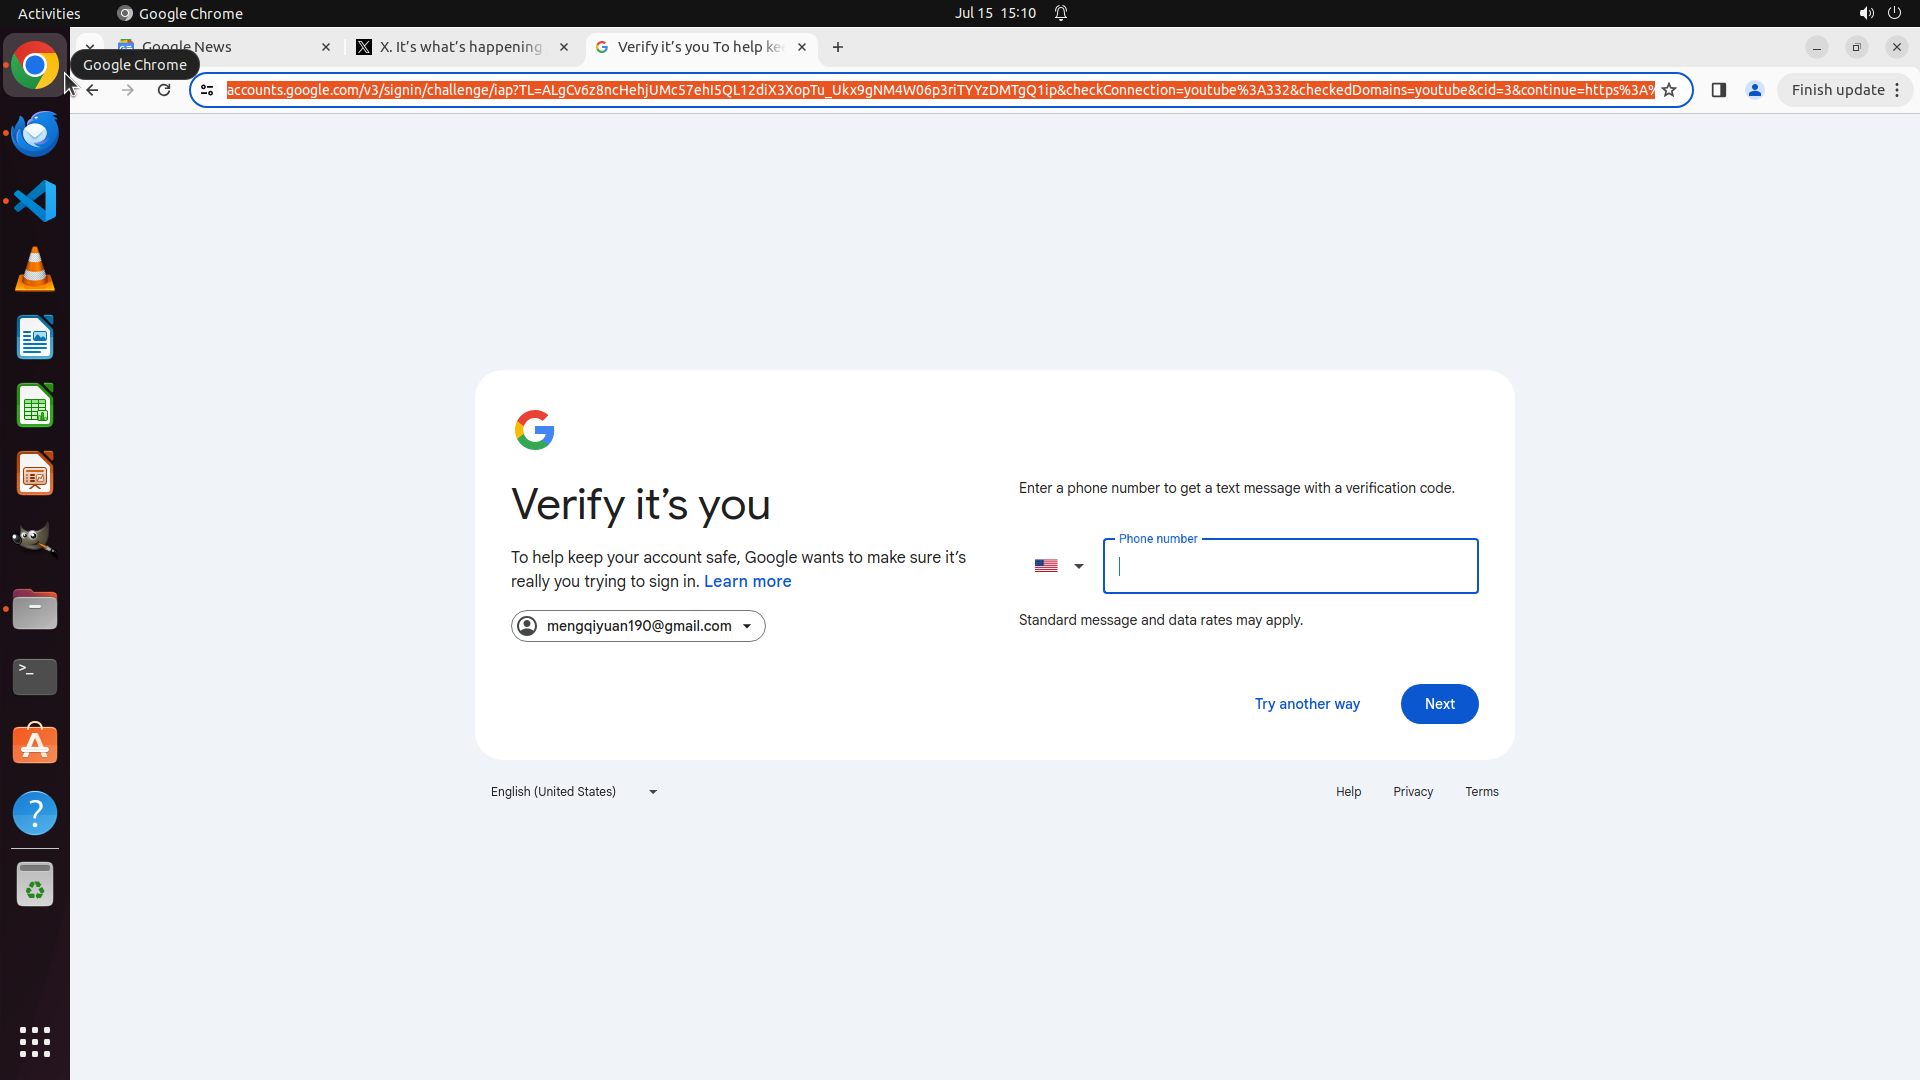](https://timothyxxx.github.io/OSWorld/_images/pubeval_gdrive_auth.jpg)
Note
**For Evaluation Submissions**: When reporting your results, please clearly specify whether you evaluated all 369 tasks or excluded the 8 Google Drive tasks (361 tasks). Both approaches are valid, but this information is essential for fair comparison with other submissions.
You can skip this step during the debugging stage, as the Google Drive tasks represent only a small portion of the total benchmark and their setup complexity often outweighs their contribution during initial development phases.
### 2.2 Proxy Setup[](https://timothyxxx.github.io/OSWorld/user_guides/run_public_evaluation.html#proxy-setup "Permalink to this heading")
* Register at [DataImpulse](https://dataimpulse.com/)
.
* Purchase a US residential IP package (approximately $1 per 1GB).
* Configure your credentials in `OSWorld/evaluation_examples/settings/proxy/dataimpulse.json`:
\[\
{\
"host": "gw.dataimpulse.com",\
"port": 823,\
"username": "your\_username",\
"password": "your\_password",\
"protocol": "http",\
"provider": "dataimpulse",\
"type": "residential",\
"country": "US",\
"note": "Dataimpulse Residential Proxy"\
}\
\]
Copy to clipboard
We have set proxy to True in the config JSON files for those proxy-sensitive tasks. OSWorld will automatically wrap these tasks with a proxy when DesktopEnv’s `enable_proxy=True`, while other tasks will not be affected. We recommend using a proxy. If you don’t need it at all, please set `enable_proxy=False` in the experiment’s `.py` file:
env \= DesktopEnv(
...
enable\_proxy\=False,
...
)
Copy to clipboard
(We didn’t make too much explanantion on the DesktopEnv interface, please read theough the code to get to understand here.)
Note that disabling the proxy will cause some tasks under the Chrome domain to fail.
### 2.3 Set Environment Variables[](https://timothyxxx.github.io/OSWorld/user_guides/run_public_evaluation.html#set-environment-variables "Permalink to this heading")
\# export OPENAI\_API\_KEY\_CUA="your\_openai\_api\_key" # if you use openai API
\# export ANTHROPIC\_API\_KEY="your\_anthropic\_api\_key" # if you use anthropic API
\# export DASHSCOPE\_API\_KEY="your\_dashscope\_api\_key" # if you use dashscope API from alibaba qwen
\# export DOUBAO\_API\_KEY, DOUBAO\_API\_URL = "", "" # if you use doubao seed API from bytedance ui\_tars
export AWS\_ACCESS\_KEY\_ID\="your\_access\_key" \# key we mentioned before
export AWS\_SECRET\_ACCESS\_KEY\="your\_security\_access\_key" \# key we mentioned before
export AWS\_REGION\="your\_aws\_region" \# eg. us-east-1, or leave it, it will be set default to us-east-1
export AWS\_SECURITY\_GROUP\_ID\="sg-xxxx" \# the security group we mentioned before
export AWS\_SUBNET\_ID\="subnet-xxxx" \# the subnet we mentioned before
Copy to clipboard
3\. Running Evaluations[](https://timothyxxx.github.io/OSWorld/user_guides/run_public_evaluation.html#running-evaluations "Permalink to this heading")
--------------------------------------------------------------------------------------------------------------------------------------------------------
Use the `run_multienv_xxx.py` scripts to launch tasks in parallel.
Example (with the OpenAI CUA agent):
\# --client\_password set to the one you set to the client machine
\# Run OpenAI CUA
python run\_multienv\_openaicua.py \\
--headless \\
--observation\_type screenshot \\
--model computer-use-preview \\
--result\_dir ./results\_operator \\
--test\_all\_meta\_path evaluation\_examples/test\_all.json \\
--region us-east-1 \\
--max\_steps 50 \\
--num\_envs 5 \\
--client\_password osworld-public-evaluation
\# Run Anthropic (via AWS Bedrock), please modify agent if you want Anthropic endpoint
python run\_multienv\_claude.py \\
--headless \\
--observation\_type screenshot \\
--action\_space claude\_computer\_use \\
--model claude-4-sonnet-20250514 \\
--result\_dir ./results\_claude \\
--test\_all\_meta\_path evaluation\_examples/test\_all.json \\
--max\_steps 50 \\
--num\_envs 5 \\
--provider\_name aws \\
--client\_password osworld-public-evaluation
Copy to clipboard
Key Parameters:
* `--num_envs`: Number of parallel environments
* `--max_steps`: Max steps per task
* `--result_dir`: Output directory for results
* `--test_all_meta_path`: Path to the test set metadata
* `--region`: AWS region
Usually the running code is named with `run_multi_env_xxx.py` under main folder, and the agent implementation is under `mm_agents` folder. Add according to your needs.
4\. Viewing Results[](https://timothyxxx.github.io/OSWorld/user_guides/run_public_evaluation.html#viewing-results "Permalink to this heading")
------------------------------------------------------------------------------------------------------------------------------------------------
### 4.1 Web Monitoring Tool[](https://timothyxxx.github.io/OSWorld/user_guides/run_public_evaluation.html#web-monitoring-tool "Permalink to this heading")
cd monitor
pip install \-r requirements.txt
python main.py
Copy to clipboard
Then, open your Host’s **public IP** on port `8080` in a browser. (eg. `http://:8080`)
For more, see: [MONITOR\_README](https://timothyxxx.github.io/OSWorld/user_guides/monitor/README.md)
[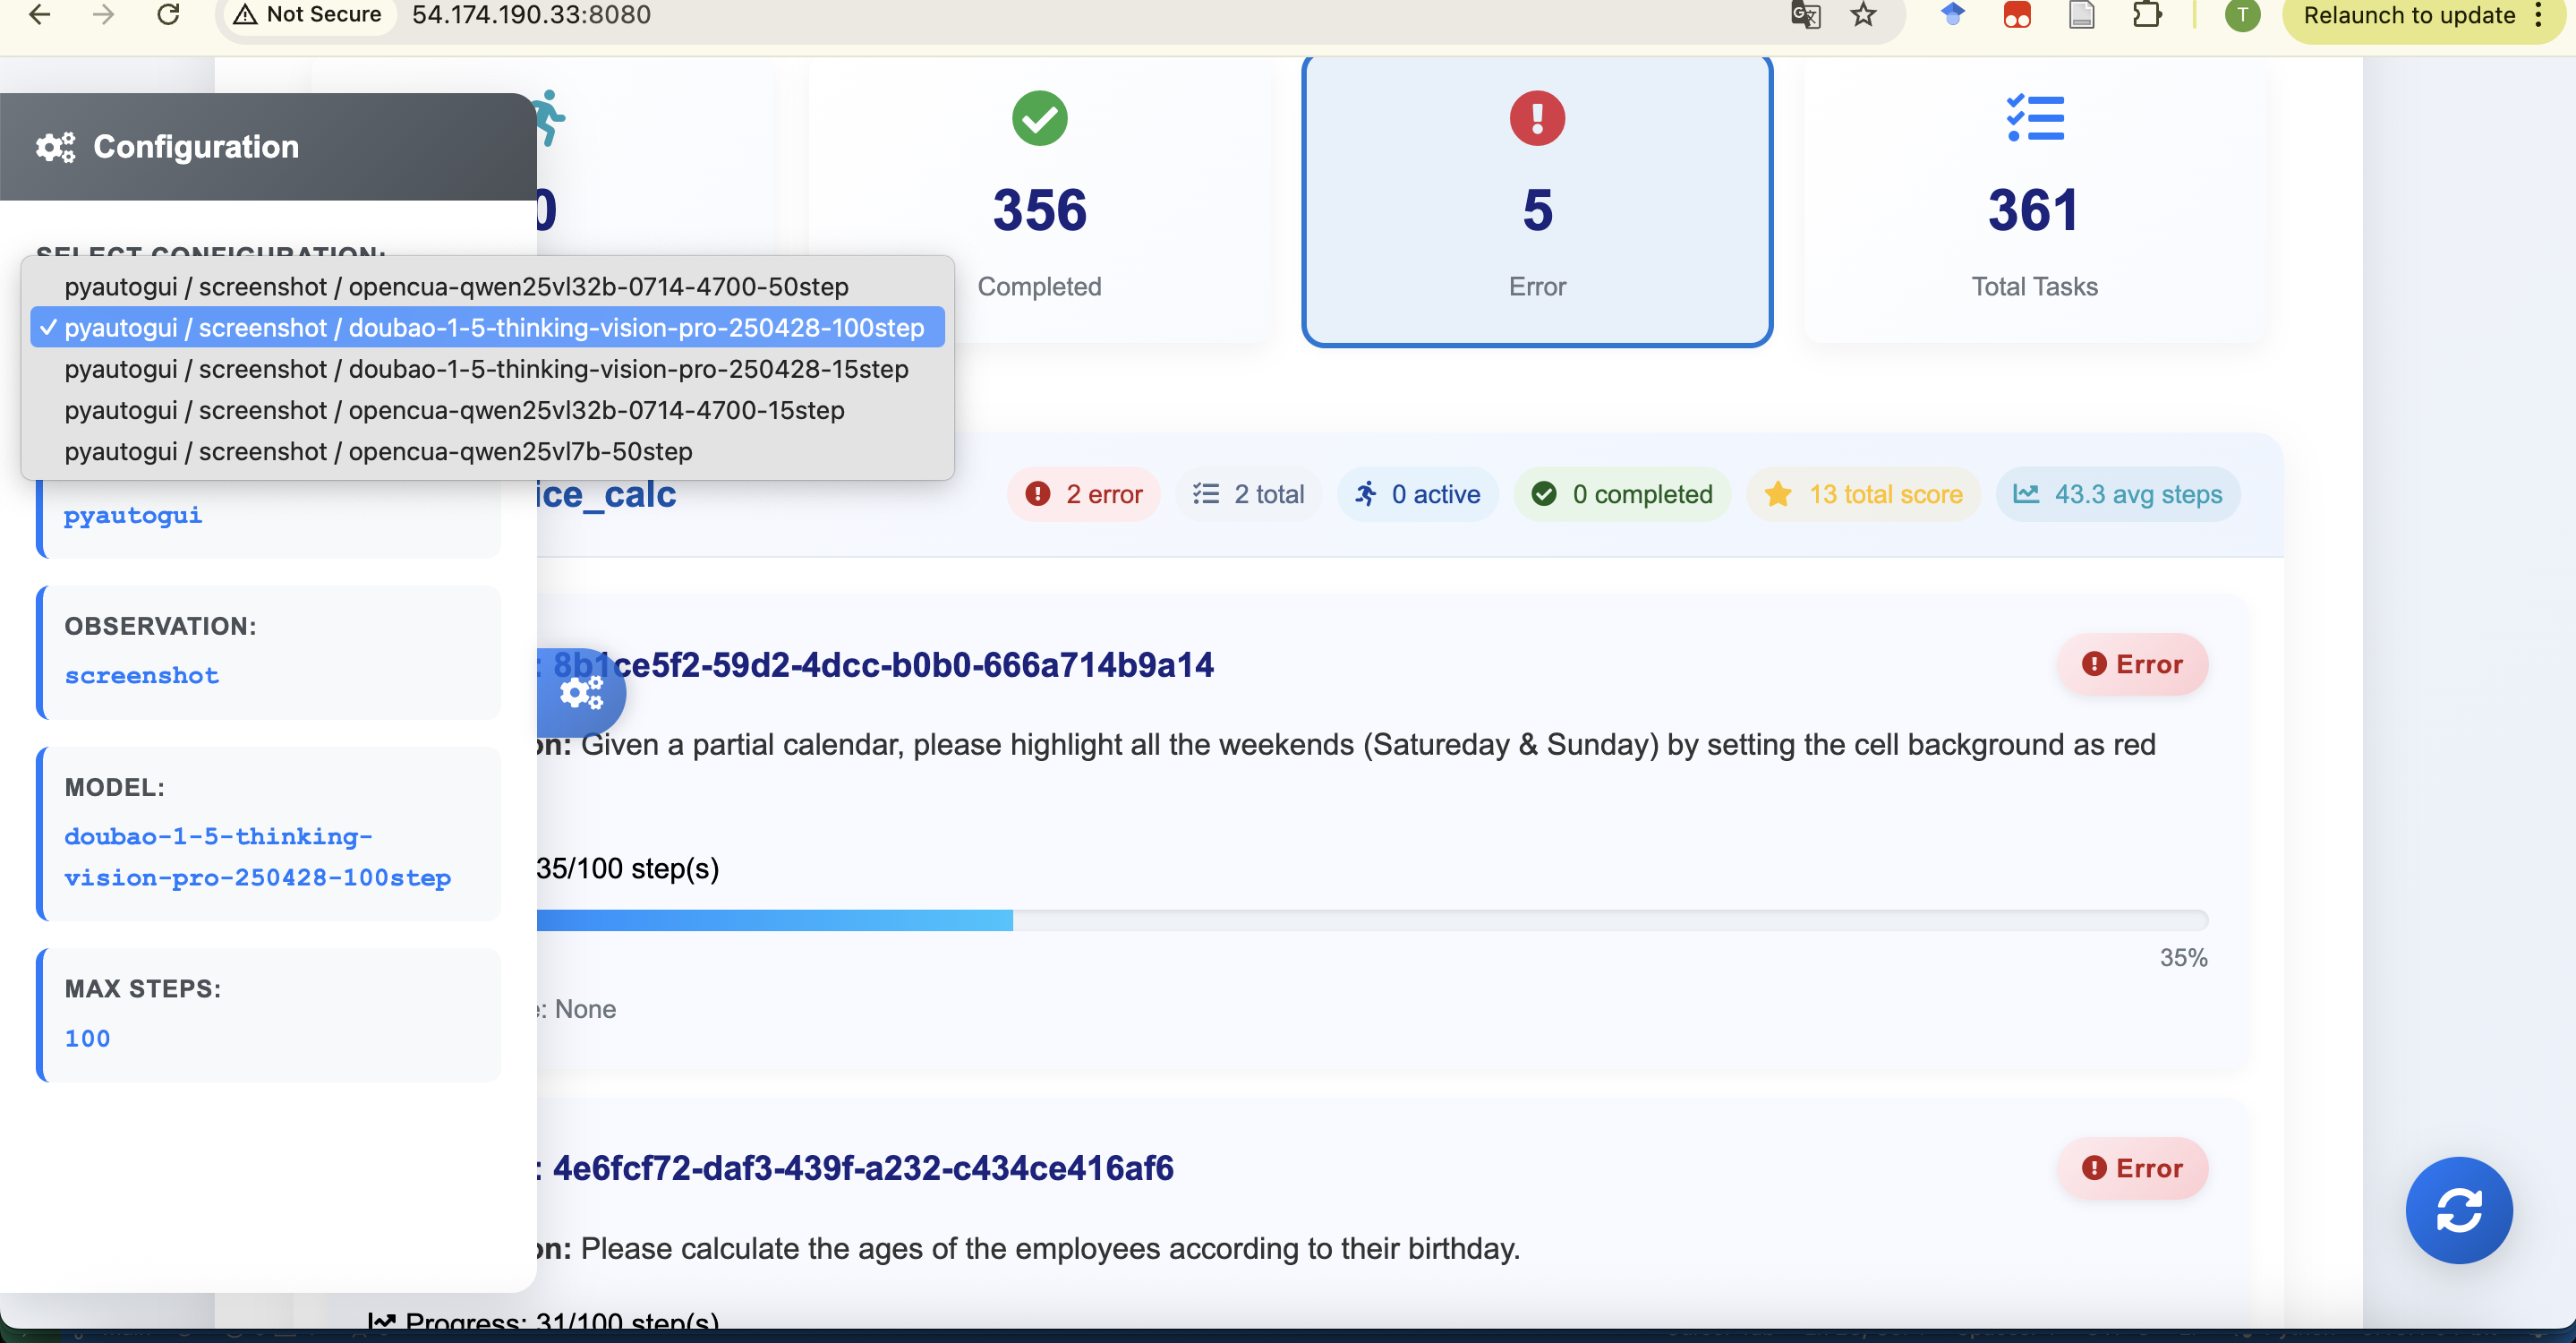](https://timothyxxx.github.io/OSWorld/_images/pubeval_monitor1.jpg)
[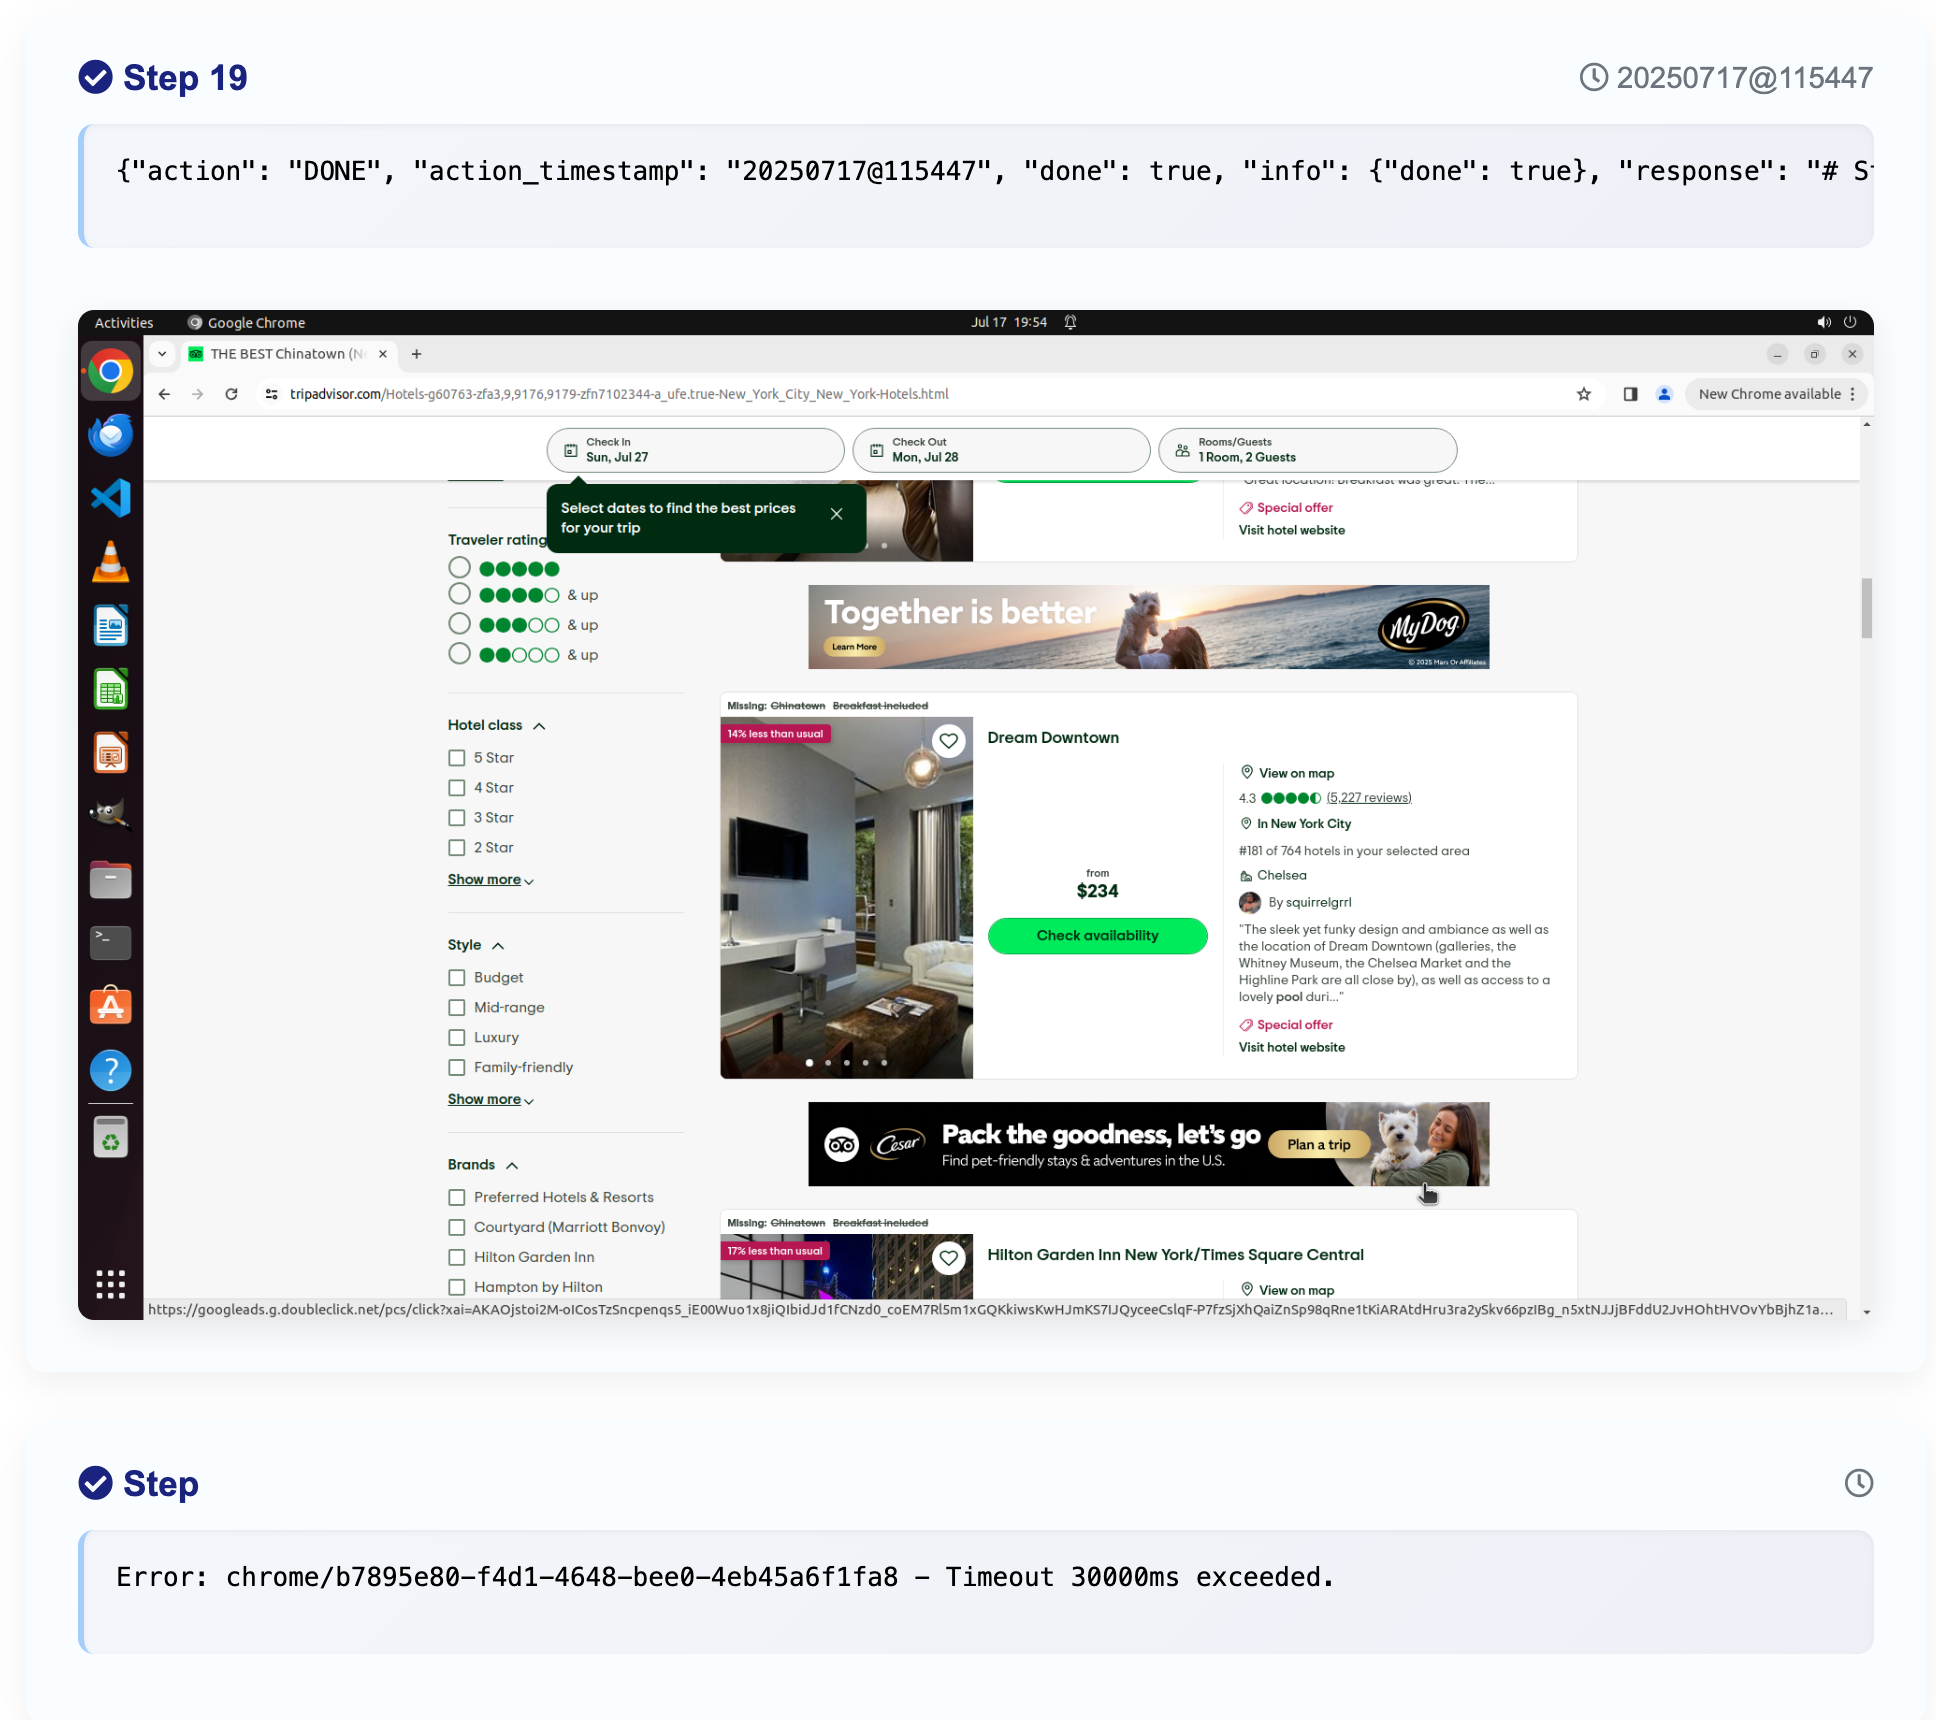](https://timothyxxx.github.io/OSWorld/_images/pubeval_monitor2.jpg)
### 4.2 VNC Remote Desktop Access[](https://timothyxxx.github.io/OSWorld/user_guides/run_public_evaluation.html#vnc-remote-desktop-access "Permalink to this heading")
We pre-install vnc for every virtual machine so you can have a look on it during the running. You can access via VNC at `http://:5910/vnc.html` The password set default is `osworld-public-evaluation` in our AMI to prevent attack.
5\. Contact the team to update leaderboard and fix errors (optional)[](https://timothyxxx.github.io/OSWorld/user_guides/run_public_evaluation.html#contact-the-team-to-update-leaderboard-and-fix-errors-optional "Permalink to this heading")
------------------------------------------------------------------------------------------------------------------------------------------------------------------------------------------------------------------------------------------------
If you want your results to be displayed on the leaderboard, please send a message to the OSWorld leaderboard maintainers ([tianbaoxiexxx@gmail.com](mailto:tianbaoxiexxx%40gmail.com)
, [yuanmengqi732@gmail.com](mailto:yuanmengqi732%40gmail.com)
) and open a pull request. We can update the results in the self-reported section.
If you want your results to be verified and displayed in the verified leaderboard section, we need you to schedule a meeting with us to run your agent code on our side to obtain results and have us report them. Alternatively, if you are from a trusted institution, you can share your monitor and trajectories with us.
If you discover new errors or the environment has undergone some changes, please contact us via GitHub issues or email.
See Also[](https://timothyxxx.github.io/OSWorld/user_guides/run_public_evaluation.html#see-also "Permalink to this heading")
------------------------------------------------------------------------------------------------------------------------------
* [Run OSWorld](https://timothyxxx.github.io/OSWorld/user_guides/run_evaluation.html)
- Basic evaluation guide for local environment setup
* [Google Account Guideline](https://timothyxxx.github.io/OSWorld/installation/google_account_guideline.html)
- Google account setup and OAuth2.0 configuration
* [Installation](https://timothyxxx.github.io/OSWorld/installation/index.html)
- Complete installation instructions
* [FAQ](https://timothyxxx.github.io/OSWorld/community/faq.html)
- Frequently asked questions and troubleshooting
[Join Discord](https://discord.gg/4Gnw7eTEZR "Join our Discord community for discussions!")
---
# Server setup — OSWorld
* [](https://timothyxxx.github.io/OSWorld/index.html)
* [User Guides](https://timothyxxx.github.io/OSWorld/user_guides/index.html)
* Server setup
* [View page source](https://timothyxxx.github.io/OSWorld/_sources/user_guides/replicate_client_server.rst.txt)
* * *
Server setup[](https://timothyxxx.github.io/OSWorld/user_guides/replicate_client_server.html#server-setup "Permalink to this heading")
========================================================================================================================================
This README is useful if you want to set up your own machine for the environment. This README is not yet finished. Please contact the author if you need any assistance.
Configuration Overview[](https://timothyxxx.github.io/OSWorld/user_guides/replicate_client_server.html#configuration-overview "Permalink to this heading")
------------------------------------------------------------------------------------------------------------------------------------------------------------
The following sections contain guidelines for configuring the system image to ensure benchmark examples can run properly.
Note
**For Docker and VMware Users**: If you are using Docker or VMware as your provider, you can customize the VM image by following the instructions in the respective installation guides:
* [Docker](https://timothyxxx.github.io/OSWorld/installation/install_provider/docker.html)
for Docker users
* [VMware Workstation Pro](https://timothyxxx.github.io/OSWorld/installation/install_provider/vmware.html)
for VMware users
This allows you to add custom tools and configurations to your environment.
The main configuration requirements include:
1. **Account Credentials**: Our benchmark configurations are based on specific username and password settings (with username user and password password). Please ensure these settings remain consistent or update the corresponding configuration files.
2. **Service Setup**: Our environment operates through a service that automatically starts at boot time, as shown in the figure below. The service needs to be properly configured and placed.
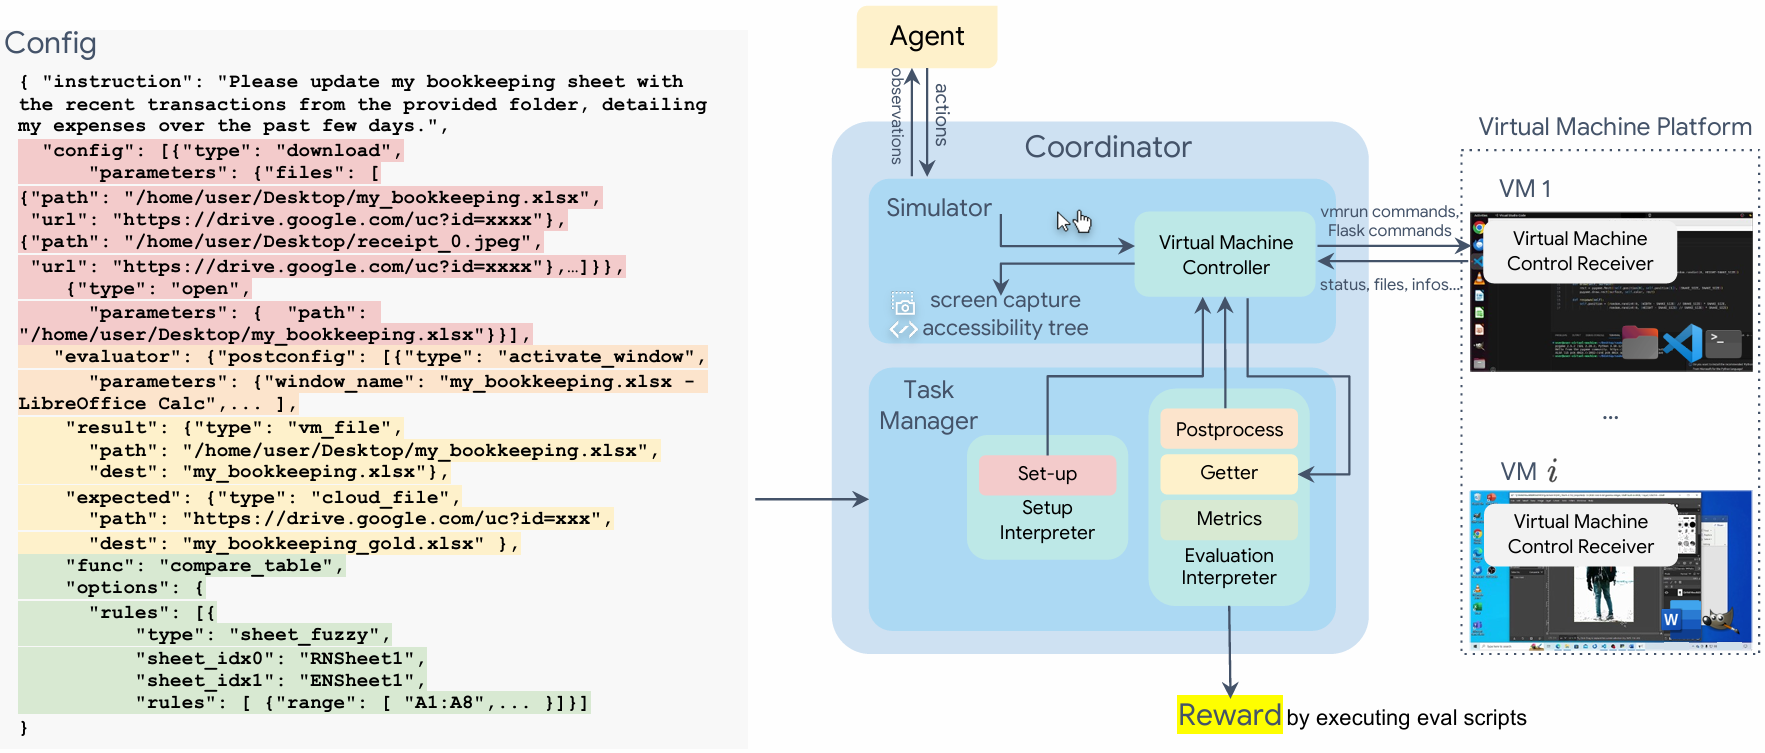
3. **Accessibility Tree Support**: Benchmark examples rely on accessibility tree functionality. The necessary support packages need to be installed.
4. **System Service Management**: Certain system services that may cause interference need to be disabled, such as automatic updates and notification pop-ups.
5. **Required Software Installation**: Ensure all necessary software packages required by the benchmark examples are properly installed.
6. **Software Configuration**: Various software packages require specific configurations, such as disabling certain auto-save features or installing additional plugins.
7. **Port Configuration**: To monitor and control software states from the host machine, specific port configurations are needed for various applications.
8. **Miscellaneous Settings**: Additional system-specific settings need to be configured, such as desktop environment settings and display resolution.
Detailed instructions for each of these requirements will be provided in the following sections.
Ubuntu[](https://timothyxxx.github.io/OSWorld/user_guides/replicate_client_server.html#ubuntu "Permalink to this heading")
----------------------------------------------------------------------------------------------------------------------------
Make a new VM with the Ubuntu 20.04 LTS image.
You can find the official Ubuntu OSWorld image at: [https://huggingface.co/datasets/xlangai/ubuntu\_osworld](https://huggingface.co/datasets/xlangai/ubuntu_osworld)
### How to install Ubuntu Desktop (package: ubuntu-desktop) with GNOME desktop environment on Ubuntu 22.04 system[](https://timothyxxx.github.io/OSWorld/user_guides/replicate_client_server.html#how-to-install-ubuntu-desktop-package-ubuntu-desktop-with-gnome-desktop-environment-on-ubuntu-22-04-system "Permalink to this heading")
sudo apt update
sudo apt install ubuntu-desktop
sudo systemctl set-default graphical.target
Copy to clipboard
### Account Credentials[](https://timothyxxx.github.io/OSWorld/user_guides/replicate_client_server.html#account-credentials "Permalink to this heading")
Download the iso file from the [Ubuntu website](https://ubuntu.com/download/alternative-downloads)
and install it in the VM.
Using GUI: The default username should be user and the password should be password when you are asked to set up the account. Give the user sudo permission.
Using Command Line:
sudo adduser user
usermod \-aG sudo user
Copy to clipboard
### Installation and Auto-login Setup[](https://timothyxxx.github.io/OSWorld/user_guides/replicate_client_server.html#installation-and-auto-login-setup "Permalink to this heading")
1. Download the iso file from the [Ubuntu website](https://ubuntu.com/download/alternative-downloads)
and install it in the VM. The default username should be user and the password should be password when you are asked to set up the account.
2. To enable automatic login:
Using GUI:
\# Open Settings -> Users
\# Click Unlock button and enter password
\# Toggle "Automatic Login" to ON for user 'user'
Copy to clipboard
Or using Command Line:
\# Edit the custom configuration file
sudo nano /etc/gdm3/custom.conf
\# Under \[daemon\] section, add or modify these lines:
AutomaticLoginEnable\=true
AutomaticLogin\=user
\# Save the file and restart the system
sudo systemctl restart gdm3
Copy to clipboard
After setting up automatic login, the system will boot directly into the desktop environment without requiring password input, which enables seamless startup experience for automated testing environments.
### VNC Configuration[](https://timothyxxx.github.io/OSWorld/user_guides/replicate_client_server.html#vnc-configuration "Permalink to this heading")
1. Install x11vnc
sudo apt update
sudo apt install x11vnc
Copy to clipboard
2. Install noVNC
sudo snap install novnc
Copy to clipboard
3. Create system services for x11vnc and novnc:
* Go to directory cd /etc/systemd/user/
* Write a file novnc.service with the following content:
\[Unit\]
Description\=noVNC Service
After\=x11vnc.service network.target snap.novnc.daemon.service
Wants\=x11vnc.service
\[Service\]
Type\=simple
ExecStart\=/snap/bin/novnc --vnc localhost:5900 --listen 5910
Restart\=on-failure
RestartSec\=3
Environment\=DISPLAY=:0
Environment\=XAUTHORITY=/home/user/.Xauthority
Environment\=SNAP\_COOKIE=/run/snap.cookie
Environment\=SNAP\_NAME=novnc
Environment\=SNAP\_REVISION=current
\[Install\]
WantedBy\=default.target
Copy to clipboard
Write a file x11vnc.service with the following content:
\[Unit\]
Description\=X11 VNC Server
After\=display-manager.service network.target
Wants\=display-manager.service
\[Service\]
Type\=simple
ExecStart\=x11vnc -display :0 -rfbport 5900 -forever
Restart\=on-failure
RestartSec\=3
Environment\=DISPLAY=:0
Environment\=XAUTHORITY=/home/user/.Xauthority
\[Install\]
WantedBy\=default.target
Copy to clipboard
4. Enable both services:
systemctl \--user daemon-reload
systemctl \--user enable novnc.service
systemctl \--user enable x11vnc.service
systemctl \--user start x11vnc.service
systemctl \--user start novnc.service
Copy to clipboard
5. Allow VNC port: Expose 5910 port in the firewall and any other security tools you are using.
6. Access the VNC server: Connect to the VNC via http://\[Instance IP\]:5910/vnc.html
### Display Configuration[](https://timothyxxx.github.io/OSWorld/user_guides/replicate_client_server.html#display-configuration "Permalink to this heading")
Warning
**⚠️ IMPORTANT NOTE**: The display configuration is critical for proper system operation. Incorrect settings can prevent the graphical environment from starting and potentially crash the X server. Make sure to follow these steps carefully and verify each configuration file. If you encounter any issues, check the X server logs at /var/log/Xorg.0.log for troubleshooting. Backup your existing X11 configuration before making any changes.
1. Install dummy video driver:
sudo apt-get install xserver-xorg-video-dummy
Copy to clipboard
Go to /etc/X11/ and create a file named xorg.conf with the following content:
Section "ServerLayout"
Identifier "X.org Configured"
Screen 0 "Screen0" 0 0
InputDevice "Mouse0" "CorePointer"
InputDevice "Keyboard0" "CoreKeyboard"
EndSection
Section "Files"
ModulePath "/usr/lib/xorg/modules"
FontPath "/usr/share/fonts/X11/misc"
FontPath "/usr/share/fonts/X11/cyrillic"
FontPath "/usr/share/fonts/X11/100dpi/:unscaled"
FontPath "/usr/share/fonts/X11/75dpi/:unscaled"
FontPath "/usr/share/fonts/X11/Type1"
FontPath "/usr/share/fonts/X11/100dpi"
FontPath "/usr/share/fonts/X11/75dpi"
FontPath "built-ins"
EndSection
Section "Module"
Load "glx"
EndSection
Section "InputDevice"
Identifier "Keyboard0"
Driver "kbd"
EndSection
Section "InputDevice"
Identifier "Mouse0"
Driver "mouse"
Option "Protocol" "auto"
Option "Device" "/dev/input/mice"
Option "ZAxisMapping" "4 5 6 7"
EndSection
Section "Monitor"
Identifier "Monitor0"
VendorName "Monitor Vendor"
ModelName "Monitor Model"
HorizSync 28.0-80.0
VertRefresh 48.0-75.0
EndSection
Section "Device"
\### Available Driver options are:-
\### Values: : integer, : float, : "True"/"False",
\### : "String", : " Hz/kHz/MHz",
\### : "%"
\### \[arg\]: arg optional
#Option "SWcursor" # \[\]
#Option "kmsdev" #
#Option "ShadowFB" # \[\]
#Option "AccelMethod" #
#Option "PageFlip" # \[\]
#Option "ZaphodHeads" #
#Option "DoubleShadow" # \[\]
#Option "Atomic" # \[\]
#Option "VariableRefresh" # \[\]
#Option "UseGammaLUT" # \[\]
#Option "AsyncFlipSecondaries" # \[\]
Identifier "Card0"
Driver "modesetting"
BusID "PCI:0:30:0"
VideoRam 256000
EndSection
Section "Screen"
Identifier "Screen0"
Device "Device0"
Monitor "Monitor0"
DefaultDepth 24
SubSection "Display"
Depth 24
Modes "1920x1080"
EndSubSection
EndSection
Copy to clipboard
2. In the same directory as the previous step, go to its sub-directory xorg.conf.d , create a file named 10-dummy.conf with the following content:
Section "Device"
Identifier "DummyDevice"
Driver "dummy"
VideoRam 32768
EndSection
Section "Monitor"
Identifier "DummyMonitor"
HorizSync 28.0-80.0
VertRefresh 48.0-75.0
Modeline "1920x1080" 172.80 1920 2048 2248 2576 1080 1083 1088 1120
EndSection
Section "Screen"
Identifier "DummyScreen"
Device "DummyDevice"
Monitor "DummyMonitor"
DefaultDepth 24
SubSection "Display"
Depth 24
Modes "1920x1080"
EndSubSection
EndSection
Copy to clipboard
3. Reload the display manager:
sudo systemctl restart display-manager
Copy to clipboard
### Set up the OSWorld server service in VM[](https://timothyxxx.github.io/OSWorld/user_guides/replicate_client_server.html#set-up-the-osworld-server-service-in-vm "Permalink to this heading")
Upload the OSWorld server to the home directory (/home/user) of user (via scp or git clone).
1. Copy the main.py and pyxcursor.py and to the /home/user-name where the user-name is your username of the ubuntu, here we make it user as default. If you customize the path of placing these files in this step, you should change the parameters in the service file we will mention later accordingly.
2. First please set up the environment:
sudo apt install python3
pip3 install \-r requirements.txt
sudo apt-get install python3-tk python3-dev
sudo apt install gnome-screenshot
sudo apt install wmctrl
sudo apt install ffmpeg
sudo apt install socat
sudo apt install xclip
Copy to clipboard
If you encounter an error about python not being found, run:
sudo ln \-s /usr/bin/python3 /usr/bin/python
Copy to clipboard
if you customize the environment in this step, you should change the parameters in the service file we will mention later accordingly.
3. Due to some configuration issues, you need to modify the osworld\_server.service file:
1. In our released version, the X server is set to :1, but the default X server is actually :0. You need to modify the osworld\_server.service file to change the DISPLAY variable from :1 to :0.
Change the following line:
Environment\="DISPLAY=:1"
Copy to clipboard
to
Environment\="DISPLAY=:0"
Copy to clipboard
2. Need to add environment variables to enable DBUS to change wallpaper.
Change the following line:
Environment\="DISPLAY=:0"
Copy to clipboard
to
Environment\="DISPLAY=:0;DBUS\_SESSION\_BUS\_ADDRESS=unix:path=/run/user/1000/bus"
Copy to clipboard
4. Copy the osworld\_server.service to the systemd configuration directory at /etc/systemd/system/:
sudo cp osworld\_server.service /etc/systemd/system/
Copy to clipboard
Reload the systemd daemon to recognize the new service:
sudo systemctl daemon-reload
Copy to clipboard
Enable the service to start on boot:
sudo systemctl enable osworld\_server.service
Copy to clipboard
Start the service:
sudo systemctl start osworld\_server.service
Copy to clipboard
Verify the service is running correctly:
sudo systemctl status osworld\_server.service
Copy to clipboard
You should see output indicating the service is active and running. If there are errors, review the logs with journalctl -xe for further troubleshooting.
If you need to make adjustments to the service configuration, you can edit the /etc/systemd/system/osworld\_server.service file:
sudo nano /etc/systemd/system/osworld\_server.service
Copy to clipboard
After making changes, reload the daemon and restart the service:
sudo systemctl daemon-reload
sudo systemctl enable osworld\_server.service
sudo systemctl start osworld\_server.service
Copy to clipboard
### Accessibility Tree Support[](https://timothyxxx.github.io/OSWorld/user_guides/replicate_client_server.html#accessibility-tree-support "Permalink to this heading")
To support the accessibility tree functionality, you’ll need to install pyastpi2 in your Ubuntu environment. This package enables access to accessibility information and tree structures.
Installation steps:
\# Update package list and ensure pip is installed
sudo apt-get update
sudo apt-get install python3-pip
\# Install pyastpi2 using pip
pip3 install pyastpi2
Copy to clipboard
### Xorg Configuration[](https://timothyxxx.github.io/OSWorld/user_guides/replicate_client_server.html#xorg-configuration "Permalink to this heading")
Regarding the graphics display system, we need to ensure that Ubuntu displays images using the **Xorg** protocol instead of **Wayland**. Since **Wayland** is typically the default setting for Ubuntu, we will need to manually change the settings.
1. Click the user menu in the upper right corner and select “Log Out” or “Sign Off.”
2. On the login screen, click on the username.
3. Before entering the password, click the gear icon in the lower right or upper right corner of the screen (it may need to be displayed after clicking the username first).
4. Select “Ubuntu on Xorg” from the pop-up menu.
You can run the following command to check if **Xorg** is being used:
echo $XDG\_SESSION\_TYPE
Copy to clipboard
### System Service Management (Optional)[](https://timothyxxx.github.io/OSWorld/user_guides/replicate_client_server.html#system-service-management-optional "Permalink to this heading")
The automatic software update service can interfere with benchmark examples. To disable this service, you can refer to the [https://www.makeuseof.com/disable-automatic-updates-in-ubuntu/](https://www.makeuseof.com/disable-automatic-updates-in-ubuntu/)
for the solution.
You can check and manage system services using systemctl commands. For example, to verify if a service like unattended-upgrades is installed and running on your system:
\# Check service status
sudo systemctl status unattended-upgrades.service
Copy to clipboard
If the output is x11, it means you have switched to **Xorg**.
To disable a system service:
\# Disable and stop the service
sudo systemctl disable unattended-upgrades
sudo systemctl stop unattended-upgrades
Copy to clipboard
To verify service configurations, you can use apt-config:
\# Check current configurations
apt-config dump APT::Periodic::Update-Package-Lists
apt-config dump APT::Periodic::Unattended-Upgrade
Copy to clipboard
### Software Installation[](https://timothyxxx.github.io/OSWorld/user_guides/replicate_client_server.html#software-installation "Permalink to this heading")
#### Software Installation Source[](https://timothyxxx.github.io/OSWorld/user_guides/replicate_client_server.html#software-installation-source "Permalink to this heading")
Since for some examples like change the settings of certain software, we hardcode some paths in our evaluation file, which means you need to install the software to the specific path. Here we provide a list of software that you need to install and the certain source which default the path you should install them to.
1. Chrome: If you are using ARM System, download the chromium using sudo snap install chromium and make sure your Chromium config files are under ~/snap/chromium; otherwise, download the chrome from the [Chromium](https://www.chromium.org/Home)
and make sure your Chromium config files are under ~/.config/google-chrome.
2. LibreOffice: Go to [LibreOffice Website](https://www.libreoffice.org/)
, select “Download Libreoffice”, select “older versions” in the bottom of the page, and download 7.3.7.2 version.
3. GIMP: Search “GIMP” in “Ubuntu Software” and install it. Our GIMP version is 2.10.30.
4. VLC: Search “VLC” in “Ubuntu Software” and install it. Our VLC version is 3.0.16.
5. VSCode: Go to [VSCode Website](https://code.visualstudio.com/download)
, download the .deb file, and install it. Our VSCode version is 1.91.1.
#### Additional Inner Software Installation[](https://timothyxxx.github.io/OSWorld/user_guides/replicate_client_server.html#additional-inner-software-installation "Permalink to this heading")
Warning
**⚠️ IMPORTANT NOTE**: The software installation and configuration steps described in this section are crucial for maintaining consistent task execution and performance. Skipping or incorrectly configuring these components may lead to task failures or degraded performance. Please follow the installation instructions carefully and verify each component is properly set up before proceeding.
##### LibreOffice font installation[](https://timothyxxx.github.io/OSWorld/user_guides/replicate_client_server.html#libreoffice-font-installation "Permalink to this heading")
Some examples in LibreOffice Impress use non-default system fonts, and you need to download the corresponding **TTF files** and put them in the system fonts directory. [Here](https://huggingface.co/datasets/xlangai/ubuntu_osworld_file_cache/resolve/main/fonts_20250608_fixed.zip)
we provides all the fonts downloaded, just download it, and unzip to the system fonts directory (which usually usr/share/fonts/).
unzip fonts.zip \-d /usr/share/fonts/
Copy to clipboard
And then run the following command to refresh the font cache:
sudo fc-cache \-fv
Copy to clipboard
##### Customized Plugin Installation[](https://timothyxxx.github.io/OSWorld/user_guides/replicate_client_server.html#customized-plugin-installation "Permalink to this heading")
**VS Code plugin installation:**
To extract relevant internal information and configurations from the VS Code environment, we principally leverage the capabilities offered by the VS Code Extension API. Here’s how to install the extension developed by ourselves:
1. Download the extension from: https://github.com/xlang-ai/OSWorld/blob/04a9df627c7033fab991806200877a655e895bfd/vscodeEvalExtension/eval-0.0.1.vsix
2. Open VS Code
3. Go to Extensions \-> ... \-> Install from VSIX... \-> choose the downloaded eval-0.0.1.vsix file
Copy to clipboard
### Software Configuration[](https://timothyxxx.github.io/OSWorld/user_guides/replicate_client_server.html#software-configuration "Permalink to this heading")
1. LibreOffice Default Format Settings:
\# Open LibreOffice Writer/Calc/Impress
\# Go to Tools -> Options -> Load/Save -> General
\# Under "Default file format and ODF settings":
\# Change "Document type" to "Text document"
\# Set "Always save as" to "Word 2007-365 (.docx)"
\# Change "Document type" to "Spreadsheet"
\# Set "Always save as" to "Excel 2007-365 (.xlsx)"
\# Change "Document type" to "Presentation"
\# Set "Always save as" to "PowerPoint 2007-365 (.pptx)"
Copy to clipboard
2. Chrome password requirement removal:
Chrome requests a password input when first opened after system startup, which can interfere with our experiments. Here’s how to disable this feature:
\# Prevent Chrome from using keyring
mkdir \-p ~/.local/share/keyrings
touch ~/.local/share/keyrings/login.keyring
Copy to clipboard
Or you can use any ways to disable the keyring service, which will prevent Chrome from requesting a password input.
3. VSCode Trust Settings:
To prevent VSCode from showing “Do you trust this workspace?” dialog when opening projects, configure the following setting:
\# Open VSCode
\# Go to File -> Preferences -> Settings (or press Ctrl+,)
\# In the search bar, type "workspace trust"
\# Find "Security: Workspace Trust Enabled" and uncheck it
\# Find "Security: Workspace Trust Banner" and set to "never"
\# Find "Security: Workspace Trust Empty Window" and uncheck it
\# Find "Security: Workspace Trust Startup Prompt" and set to "never"
Copy to clipboard
This disables the workspace trust feature and prevents trust dialog prompts when opening projects.
### Network Configuration[](https://timothyxxx.github.io/OSWorld/user_guides/replicate_client_server.html#network-configuration "Permalink to this heading")
#### Firewall Configuration[](https://timothyxxx.github.io/OSWorld/user_guides/replicate_client_server.html#firewall-configuration "Permalink to this heading")
In OSWorld, we need the following ports to be open:
server\_port \= 5000
chromium\_port \= 9222
vnc\_port \= 8006
vlc\_port \= 8080
novnc\_port \= 5910
Copy to clipboard
Please open the corresponding ports in the firewall and any other security tools you are using.
#### socat Installation[](https://timothyxxx.github.io/OSWorld/user_guides/replicate_client_server.html#socat-installation "Permalink to this heading")
Ensure socat is installed to enable port forwarding.
sudo apt install socat
Copy to clipboard
#### Network Configuration for Remote Control[](https://timothyxxx.github.io/OSWorld/user_guides/replicate_client_server.html#network-configuration-for-remote-control "Permalink to this heading")
##### VLC Configuration[](https://timothyxxx.github.io/OSWorld/user_guides/replicate_client_server.html#vlc-configuration "Permalink to this heading")
To enable remote control of VLC media player, follow these configuration steps:
1. Enable HTTP interface:
\# Open VLC
\# Go to Tools -> Preferences
\# Show Settings: All (bottom left)
\# Navigate to Interface -> Main interfaces
\# Check 'Web' option
Copy to clipboard
2. Configure HTTP interface settings:
\# Still in Preferences
\# Navigate to Interface -> Main interfaces -> Lua
\# Under Lua HTTP:
\# - Set Password to 'password'
Copy to clipboard
The following is the screenshot of the VLC configuration:
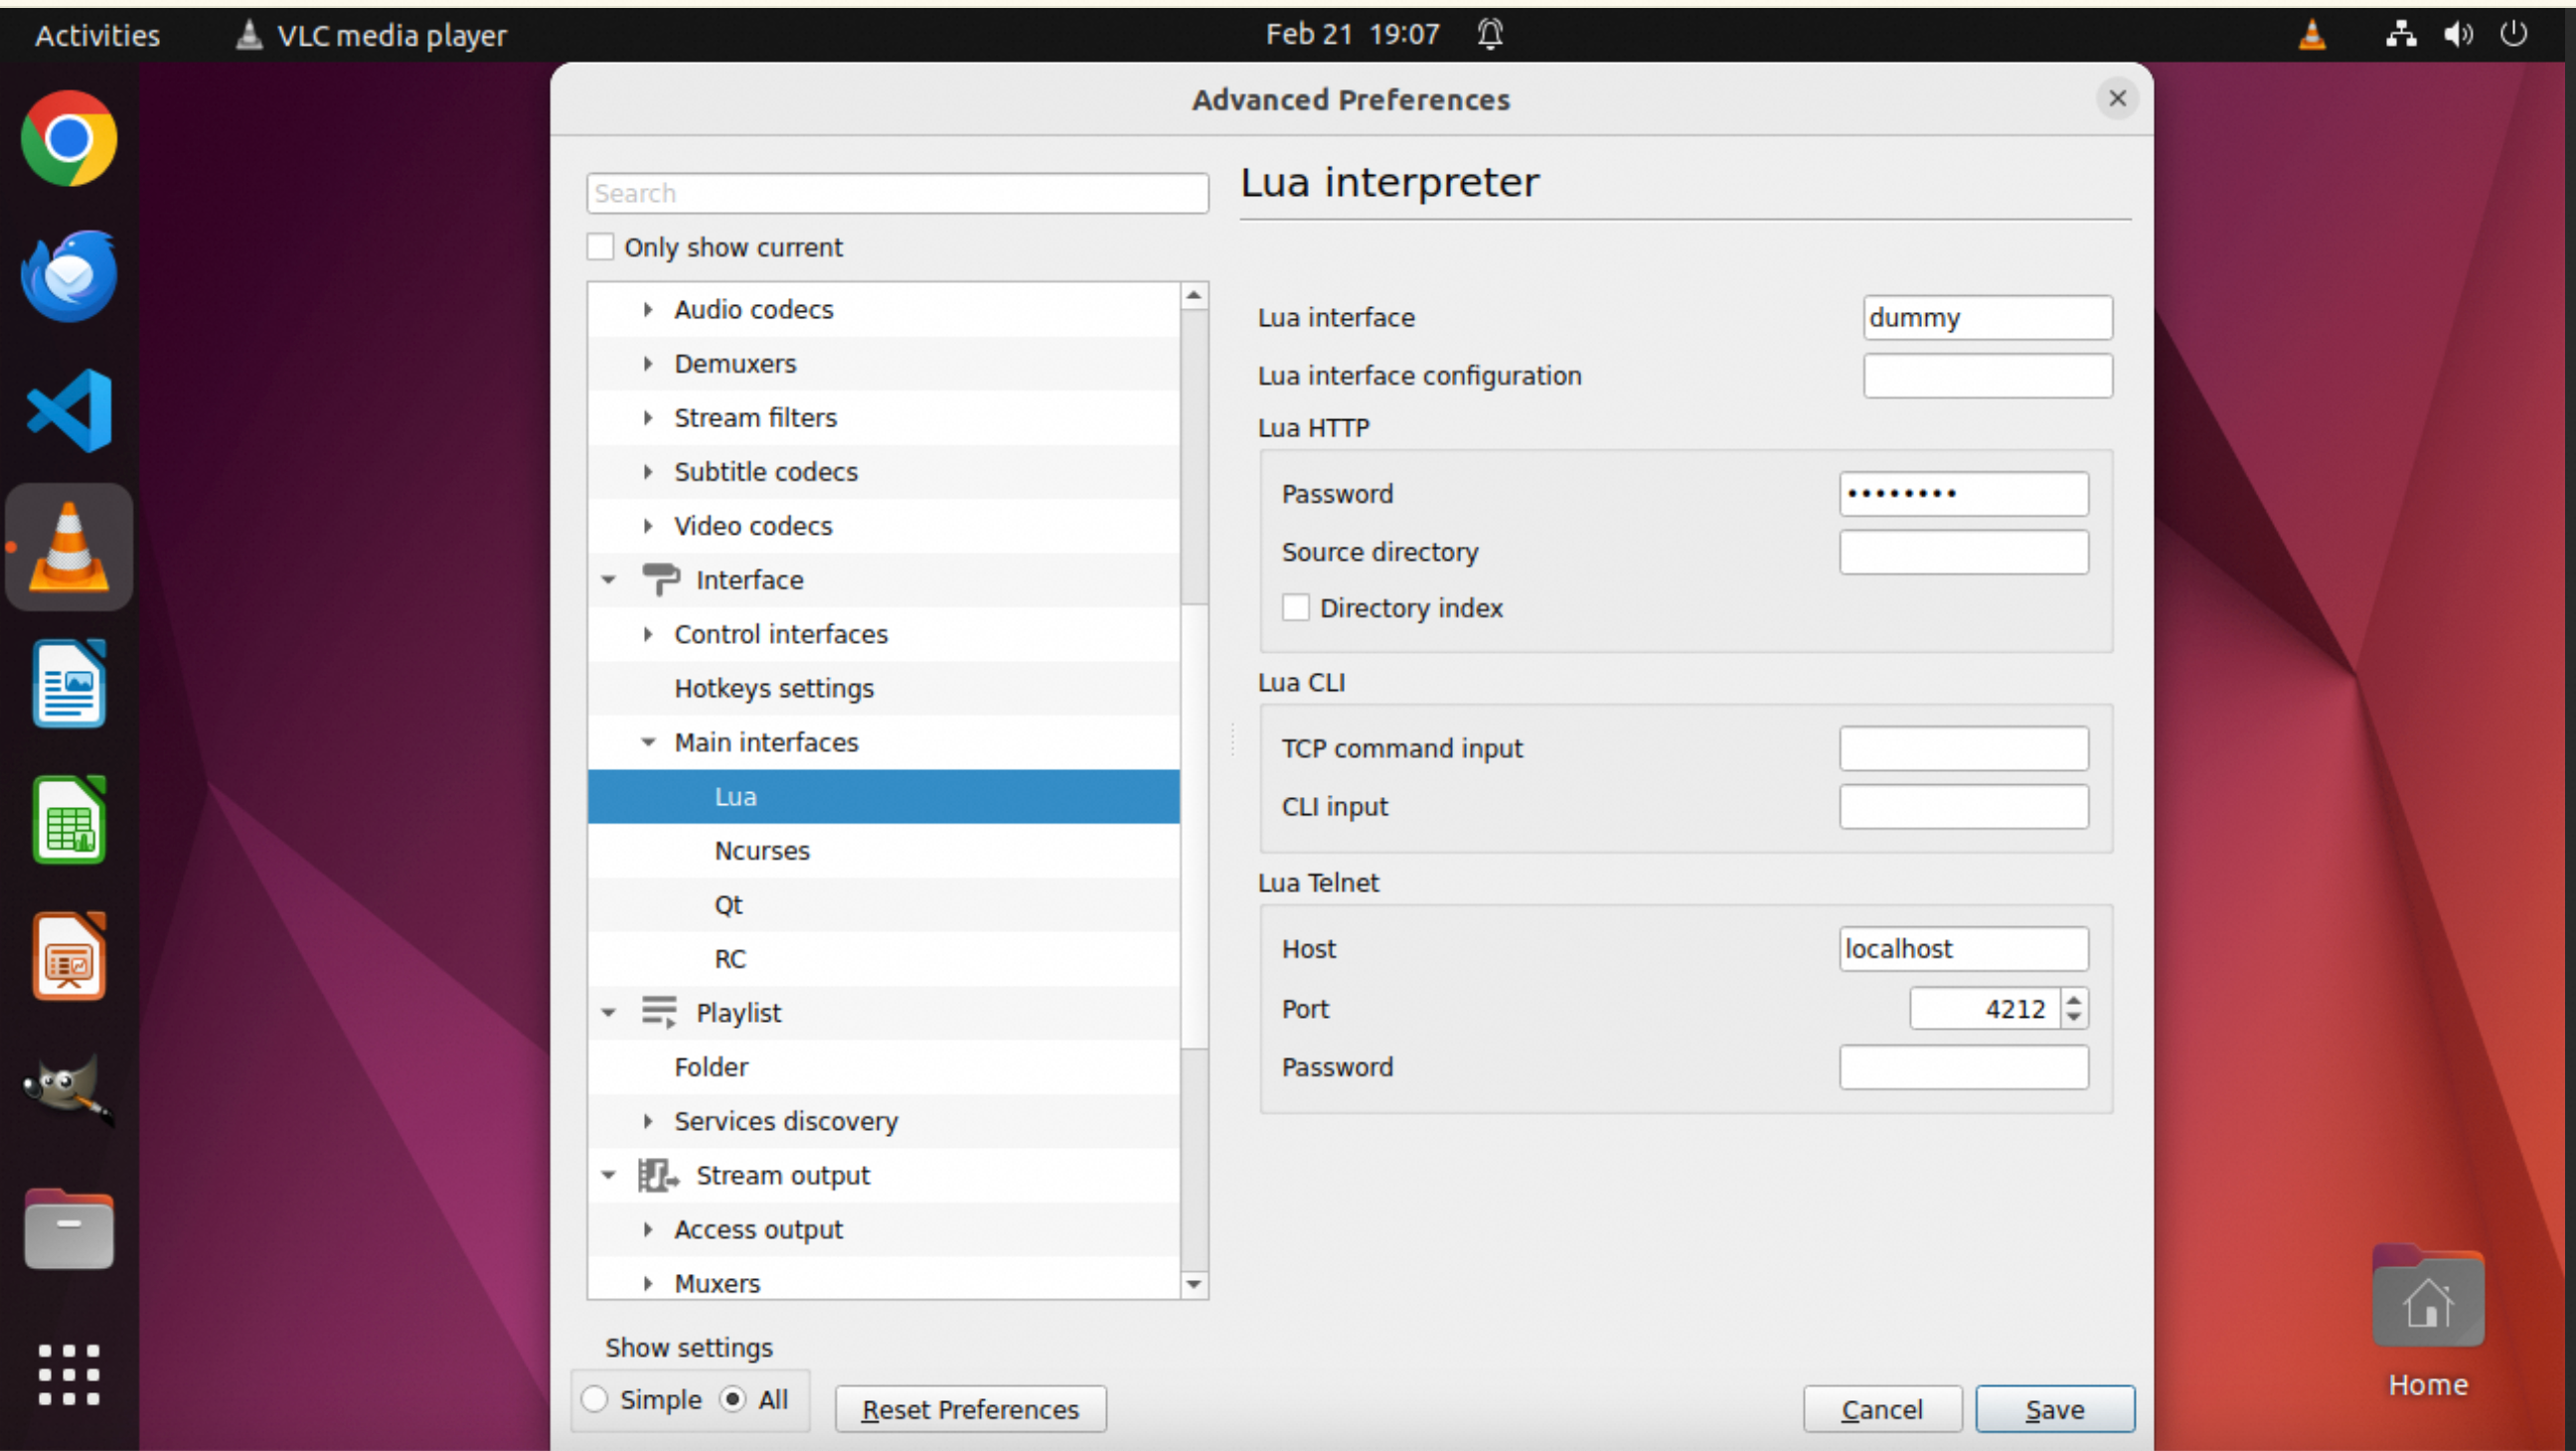
When VLC is open, the service will be running on port 8080.
##### Chrome Configuration[](https://timothyxxx.github.io/OSWorld/user_guides/replicate_client_server.html#chrome-configuration "Permalink to this heading")
When you open Chrome through the GUI interface, it doesn’t automatically enable remote debugging port 1337 (the port we set for controlling the client machine’s Chrome through the host, which gets forwarded to 9222). This is because GUI startup and command-line startup use different parameters. The consequence is that once Chrome is closed and reopened, it will fail to connect. To ensure Chrome uses consistent debugging ports even after being closed and reopened, follow these steps:
1. Create or edit Chrome desktop entry:
sudo vim ~/.local/share/applications/google-chrome.desktop
Copy to clipboard
If that doesn’t work, try:
sudo vim /usr/share/applications/google-chrome.desktop
Copy to clipboard
2. Modify **all** the Exec lines to include debugging port, for example, change:
Exec\=/usr/bin/google-chrome-stable %U
Copy to clipboard
into:
Exec\=/usr/bin/google-chrome-stable \--remote-debugging-port\=1337 \--remote-debugging-address\=0.0.0.0 %U
Copy to clipboard
In cases where Chrome is needed, the 1337 will be forwarded to 9222 in the virtual machine via socat.
### Miscellaneous Settings[](https://timothyxxx.github.io/OSWorld/user_guides/replicate_client_server.html#miscellaneous-settings "Permalink to this heading")
#### Screen Resolution[](https://timothyxxx.github.io/OSWorld/user_guides/replicate_client_server.html#screen-resolution "Permalink to this heading")
The required screen resolution for the virtual machine is 1920x1080 in OSWorld and we did make some hardcode related to this resolution in our configuration file in some examples, but only a few. So please set the screen resolution to 1920x1080 in the virtual machine settings.
#### Automatic Suspend[](https://timothyxxx.github.io/OSWorld/user_guides/replicate_client_server.html#automatic-suspend "Permalink to this heading")
To close automatic suspend, open Setting app and enter “Power” section. Switch “Screen Blank” to “Never” and “Automatic Suspend” to “Off”.
#### Additional Installation[](https://timothyxxx.github.io/OSWorld/user_guides/replicate_client_server.html#additional-installation "Permalink to this heading")
Activating the window manager control requires the installation of wmctrl:
sudo apt install wmctrl
Copy to clipboard
Otherwise, you cannot control the window manager in the virtual machine when running the experiments. Some cases will be effected.
To enable recording in the virtual machine, you need to install ffmpeg:
sudo apt install ffmpeg
Copy to clipboard
Otherwise you cannot get the video recording of the virtual machine when running the experiments.
### Others Information[](https://timothyxxx.github.io/OSWorld/user_guides/replicate_client_server.html#others-information "Permalink to this heading")
#### About the Converted Accessibility Tree[](https://timothyxxx.github.io/OSWorld/user_guides/replicate_client_server.html#about-the-converted-accessibility-tree "Permalink to this heading")
For several applications like Firefox or Thunderbird, you should first enable
gsettings set org.gnome.desktop.interface toolkit-accessibility true
Copy to clipboard
to see their accessibility tree.
##### Example of AT[](https://timothyxxx.github.io/OSWorld/user_guides/replicate_client_server.html#example-of-at "Permalink to this heading")
An example of a node:
Copy to clipboard
An example of a tree:
...
...
Copy to clipboard
##### Useful attributes[](https://timothyxxx.github.io/OSWorld/user_guides/replicate_client_server.html#useful-attributes "Permalink to this heading")
1. name - shows the name of application, title of window, or name of some component
2. attr:class - somewhat the same role as class in HTML
3. attr:id - somewhat the same role as id in HTML
4. cp:screencoord - absolute coordinator on the screen
5. cp:windowcoord - relative coordinator in the window
6. cp:size - the size
Also several states like st:enabled and st:visible can be indicated. A full state list is available at [https://gitlab.gnome.org/GNOME/pyatspi2/-/blob/master/pyatspi/state.py?ref\_type=heads](https://gitlab.gnome.org/GNOME/pyatspi2/-/blob/master/pyatspi/state.py?ref_type=heads)
.
##### How to use it in evaluation[](https://timothyxxx.github.io/OSWorld/user_guides/replicate_client_server.html#how-to-use-it-in-evaluation "Permalink to this heading")
See example thunderbird/12086550-11c0-466b-b367-1d9e75b3910e.json and function check\_accessibility\_tree in metrics/general.py. You can use CSS selector or XPath to reference a target nodes. You can also check its text contents.
An example of a CSS selector:
application\[name\=Thunderbird\] page-tab-list\[attr|id\="tabmail-tabs"\]>page-tab\[name\="About Profiles"\]
Copy to clipboard
This selector will select the page tab of profile manager in Thunderbird (if open).
For usage of CSS selector: [https://www.w3.org/TR/selectors-3/](https://www.w3.org/TR/selectors-3/)
. For usage of XPath: [https://www.w3.org/TR/xpath-31/](https://www.w3.org/TR/xpath-31/)
.
##### Manual check[](https://timothyxxx.github.io/OSWorld/user_guides/replicate_client_server.html#manual-check "Permalink to this heading")
You can use accerciser to check the accessibility tree on GNOME VM.
sudo apt install accerciser
Copy to clipboard
MacOS[](https://timothyxxx.github.io/OSWorld/user_guides/replicate_client_server.html#macos "Permalink to this heading")
--------------------------------------------------------------------------------------------------------------------------
Coming soon…
See Also[](https://timothyxxx.github.io/OSWorld/user_guides/replicate_client_server.html#see-also "Permalink to this heading")
--------------------------------------------------------------------------------------------------------------------------------
* [DesktopEnv Interface Documentation](https://timothyxxx.github.io/OSWorld/user_guides/environment_explanation.html)
- DesktopEnv interface and environment setup guide
* run\_experiment - Running experiments with the configured environment
* [Install Provider](https://timothyxxx.github.io/OSWorld/installation/install_provider/index.html)
- Provider-specific installation guides
* [Quick Start](https://timothyxxx.github.io/OSWorld/installation/quickstart.html)
- Quick start guide for OSWorld
* [Proxy Guideline](https://timothyxxx.github.io/OSWorld/installation/proxy.html)
- Proxy configuration for VMs
* [FAQ](https://timothyxxx.github.io/OSWorld/community/faq.html)
- Frequently asked questions and troubleshooting
[Join Discord](https://discord.gg/4Gnw7eTEZR "Join our Discord community for discussions!")
---
# Unknown
Installation
============
.. toctree::
:maxdepth: 4
overview
install\_provider/index
quickstart
proxy
google\_account\_guideline
---
# Unknown
User Guides
============
.. toctree::
:maxdepth: 2
overview
environment\_explanation
task\_example\_explanation
add\_new\_agent
add\_new\_task
run\_evaluation
run\_public\_evaluation
replicate\_client\_server
---
# Unknown
Community
=========
.. toctree::
:maxdepth: 2
faq
contribute
authors
vision\_and\_roadmap
projects\_using\_osworld
---
# VMware Workstation Pro — OSWorld
* [](https://timothyxxx.github.io/OSWorld/index.html)
* [Installation](https://timothyxxx.github.io/OSWorld/installation/index.html)
* [Install Provider](https://timothyxxx.github.io/OSWorld/installation/install_provider/index.html)
* VMware Workstation Pro
* [View page source](https://timothyxxx.github.io/OSWorld/_sources/installation/install_provider/vmware.rst.txt)
* * *
VMware Workstation Pro[](https://timothyxxx.github.io/OSWorld/installation/install_provider/vmware.html#vmware-workstation-pro "Permalink to this heading")
=============================================================================================================================================================
Note
Please note first: since VMware/VirtualBox is a type-2 hypervisor, it needs to run on top of an operating system and requires access to hardware virtualization extensions, such as Intel VT-x or AMD-V. Therefore, your computer needs to be bare metal. Before using VMware/VirtualBox, please check whether your computer/server has been virtualized. For methods, please refer to [https://www.narenvadapalli.com/blog/finding-linux-machine-vm-or-baremetal/](https://www.narenvadapalli.com/blog/finding-linux-machine-vm-or-baremetal/)
.
Installation of VMware Workstation Pro[](https://timothyxxx.github.io/OSWorld/installation/install_provider/vmware.html#installation-of-vmware-workstation-pro "Permalink to this heading")
---------------------------------------------------------------------------------------------------------------------------------------------------------------------------------------------
1. Download VMware Workstation Pro from the [official website](https://www.vmware.com/products/workstation-pro/workstation-pro-evaluation.html)
. The version we are using is 17.5.1. For systems with Apple chips, you should install [VMware Fusion](https://www.vmware.com/go/getfusion)
.
2. Install VMware Workstation Pro
* [On Linux](https://docs.vmware.com/en/VMware-Workstation-Pro/17/com.vmware.ws.using.doc/GUID-1F5B1F14-A586-4A56-83FA-2E7D8333D5CA.html)
:
Run the following command in your terminal, where `xxxx-xxxxxxx` represents the version number and internal version number.
sudo sh VMware-Workstation-xxxx-xxxxxxx.architecture.bundle \--console
Copy to clipboard
Note
You need to fill the activation key during the installation process when prompted.
* [On Windows](https://docs.vmware.com/en/VMware-Workstation-Pro/17/com.vmware.ws.using.doc/GUID-F5A7B3CB-9141-458B-A256-E0C3EA805AAA.html)
:
Ensure that you’re logged in as either the Administrator user or as a user who belongs to the local Administrators group. If you’re logging in to a domain, make sure your domain account has local administrator privileges. Proceed by double-clicking the `VMware-workstation-xxxx-xxxxxxx.exe` file. Be aware that you might need to reboot your host system to finalize the installation.
Note
You need to fill the activation key during the installation process when prompted.
* [For systems with Apple chips](https://docs.vmware.com/en/VMware-Fusion/13/com.vmware.fusion.using.doc/GUID-ACC3A019-93D3-442C-A34E-F7755DF6733B.html)
:
Double-click the `VMware-Fusion-xxxx-xxxxxxx.dmg` file to open it. In the Finder window that appears, double-click the ‘Install Fusion’ icon. When prompted, enter your administrator username and password.
Note
You need to fill the activation key during the installation process when prompted.
3. Verify the successful installation by running the following:
vmrun \-T ws list
Copy to clipboard
If the installation along with the environment variable set is successful, you will see the message showing the current running virtual machines.
Troubleshooting[](https://timothyxxx.github.io/OSWorld/installation/install_provider/vmware.html#troubleshooting "Permalink to this heading")
-----------------------------------------------------------------------------------------------------------------------------------------------
If after installing VMware you still cannot use it (e.g., the vmrun command fails as indicated by an error, similar to [Issue 42](https://github.com/xlang-ai/OSWorld/issues/42)
), please try installing open-vm-tools on your host machine.
To install open-vm-tools, follow these steps:
**On Ubuntu/Debian for example:**
sudo apt update
sudo apt install open-vm-tools open-vm-tools-desktop
Copy to clipboard
After installing open-vm-tools, restart your system and try using VMware again.
As a final solution, consider reading the [code of auto-installation](https://github.com/xlang-ai/OSWorld/blob/main/desktop_env/providers/vmware/manager.py)
and debug to find the specific line.
Customizing the VM Image[](https://timothyxxx.github.io/OSWorld/installation/install_provider/vmware.html#customizing-the-vm-image "Permalink to this heading")
-----------------------------------------------------------------------------------------------------------------------------------------------------------------
If you want to customize the client machine image (e.g., adding additional tools, software, or configurations), you can modify the VM image directly using VMware:
1. **Configure for GUI access**: Set `headless=False` when initializing the DesktopEnv to enable the VMware GUI interface.
2. **Access the VM**: The VM will open in VMware’s graphical interface on your local computer, allowing you to interact with it directly.
3. **Make your customizations**: - Install additional software packages - Configure applications - Add custom tools or scripts - Modify system settings
4. **Save changes**: After completing your modifications, properly shut down the VM from within the guest OS.
5. **Prepare for reuse**: - Create a new `init_state` snapshot to save your customized configuration as the new initial state
Note
Make sure the VM is properly shut down (not force-stopped) and complete the cleanup steps to ensure your customized image can be reused properly.
[Join Discord](https://discord.gg/4Gnw7eTEZR "Join our Discord community for discussions!")
---
# Docker — OSWorld
* [](https://timothyxxx.github.io/OSWorld/index.html)
* [Installation](https://timothyxxx.github.io/OSWorld/installation/index.html)
* [Install Provider](https://timothyxxx.github.io/OSWorld/installation/install_provider/index.html)
* Docker
* [View page source](https://timothyxxx.github.io/OSWorld/_sources/installation/install_provider/docker.rst.txt)
* * *
Docker[](https://timothyxxx.github.io/OSWorld/installation/install_provider/docker.html#docker "Permalink to this heading")
=============================================================================================================================
Note
If you are running on a non-bare metal server, or prefer not to use VMware and VirtualBox platforms, Docker is the recommended option. For optimal performance, KVM support is recommended.
Prerequisite Check[](https://timothyxxx.github.io/OSWorld/installation/install_provider/docker.html#prerequisite-check "Permalink to this heading")
-----------------------------------------------------------------------------------------------------------------------------------------------------
Before installing Docker, check if your machine supports KVM (recommended for better performance):
On Linux, run:
egrep \-c '(vmx|svm)' /proc/cpuinfo
Copy to clipboard
If the return value is greater than zero, your processor supports KVM.
Note
macOS hosts generally do not support KVM. For macOS users, we recommend using VMware instead.
Docker Installation[](https://timothyxxx.github.io/OSWorld/installation/install_provider/docker.html#docker-installation "Permalink to this heading")
-------------------------------------------------------------------------------------------------------------------------------------------------------
Choose the appropriate installation method based on your system:
1. **For systems with GUI**:
* For Linux: Follow the [Docker Desktop for Linux](https://docs.docker.com/desktop/install/linux-install/)
installation guide
* For Windows: Follow the [Docker Desktop for Windows](https://docs.docker.com/desktop/install/windows-install/)
installation guide
2. **For systems without GUI**:
Follow the [Docker Engine installation guide](https://docs.docker.com/engine/install/)
Verification[](https://timothyxxx.github.io/OSWorld/installation/install_provider/docker.html#verification "Permalink to this heading")
-----------------------------------------------------------------------------------------------------------------------------------------
Verify the installation by running:
docker \--version
Copy to clipboard
Usage Example[](https://timothyxxx.github.io/OSWorld/installation/install_provider/docker.html#usage-example "Permalink to this heading")
-------------------------------------------------------------------------------------------------------------------------------------------
To use Docker as your provider, initialize the DesktopEnv with the following parameters:
\# Initialize environment with Docker provider
env \= DesktopEnv(
provider\_name\="docker",
os\_type\="Ubuntu" \# or "Windows" if you want to create a Windows VM
)
Copy to clipboard
Customizing the VM Image[](https://timothyxxx.github.io/OSWorld/installation/install_provider/docker.html#customizing-the-vm-image "Permalink to this heading")
-----------------------------------------------------------------------------------------------------------------------------------------------------------------
If you want to customize the client machine image (e.g., adding additional tools, software, or configurations), you can modify the VM image directly using Docker:
1. **Start the VM with persistent storage**:
docker run \-it \--rm \\
\-e "DISK\_SIZE=64G" \\
\-e "RAM\_SIZE=8G" \\
\-e "CPU\_CORES=8" \\
\--volume "$(pwd)/docker\_vm\_data/Ubuntu.qcow2:/boot.qcow2" \\
\--cap-add NET\_ADMIN \\
\--device /dev/kvm \\
\-p 8006:8006 \\
\-p 5000:5000 \\
happysixd/osworld-docker
Copy to clipboard
2. **Access the VM**: Connect to the VNC interface at http://localhost:8006 to access the VM desktop.
3. **Make your customizations**: - Install additional software packages - Configure applications - Add custom tools or scripts - Modify system settings
4. **Save changes**: Properly shut down the VM from within the guest OS. All changes will be automatically persisted to the Ubuntu.qcow2 file.
Note
Make sure the VM is properly shut down (not force-stopped) to ensure all changes are saved to the disk image.
Clean-up Note[](https://timothyxxx.github.io/OSWorld/installation/install_provider/docker.html#clean-up-note "Permalink to this heading")
-------------------------------------------------------------------------------------------------------------------------------------------
Important
If experiments are interrupted abnormally, there may be residual docker containers. To clean up, run:
docker stop $(docker ps \-q) && docker rm $(docker ps \-a \-q)
Copy to clipboard
[Join Discord](https://discord.gg/4Gnw7eTEZR "Join our Discord community for discussions!")
---
# ☁ Configuration of AWS — OSWorld
* [](https://timothyxxx.github.io/OSWorld/index.html)
* [Installation](https://timothyxxx.github.io/OSWorld/installation/index.html)
* [Install Provider](https://timothyxxx.github.io/OSWorld/installation/install_provider/index.html)
* ☁ Configuration of AWS
* [View page source](https://timothyxxx.github.io/OSWorld/_sources/installation/install_provider/aws.rst.txt)
* * *
☁ Configuration of AWS[](https://timothyxxx.github.io/OSWorld/installation/install_provider/aws.html#configuration-of-aws "Permalink to this heading")
========================================================================================================================================================
—
Welcome to the AWS VM Management documentation. Before you proceed with using the code to manage AWS services, please ensure the following variables are set correctly according to your AWS environment.
Overview[](https://timothyxxx.github.io/OSWorld/installation/install_provider/aws.html#overview "Permalink to this heading")
------------------------------------------------------------------------------------------------------------------------------
The AWS cloud service architecture consists of a host machine that controls multiple virtual machines (each virtual machine serves as an OSWorld environment, for which we provide AMI images) for testing and potential training purposes. To prevent security breaches, we need to properly configure security groups for both the host machine and virtual machines, as well as configure appropriate subnets.
Security Group Configuration[](https://timothyxxx.github.io/OSWorld/installation/install_provider/aws.html#security-group-configuration "Permalink to this heading")
----------------------------------------------------------------------------------------------------------------------------------------------------------------------
### Security Group for OSWorld Virtual Machines[](https://timothyxxx.github.io/OSWorld/installation/install_provider/aws.html#security-group-for-osworld-virtual-machines "Permalink to this heading")
OSWorld requires certain ports to be open, such as port 5000 for backend connections to OSWorld services, port 5910 for VNC visualization, port 9222 for Chrome control, etc. The `AWS_SECURITY_GROUP_ID` variable represents the security group configuration for virtual machines serving as OSWorld environments. Please complete the configuration and set this environment variable to the ID of the configured security group.
**⚠️ Important**: Please strictly follow the port settings below to prevent OSWorld tasks from failing due to connection issues:
#### Inbound Rules (8 rules required)[](https://timothyxxx.github.io/OSWorld/installation/install_provider/aws.html#inbound-rules-8-rules-required "Permalink to this heading")
| Type | Protocol | Port Range | Source | Description |
| --- | --- | --- | --- | --- |
| SSH | TCP | 22 | 0.0.0.0/0 | SSH access |
| HTTP | TCP | 80 | 172.31.0.0/16 | HTTP traffic |
| Custom TCP | TCP | 5000 | 172.31.0.0/16 | OSWorld backend service |
| Custom TCP | TCP | 5910 | 0.0.0.0/0 | NoVNC visualization port |
| Custom TCP | TCP | 8006 | 172.31.0.0/16 | VNC service port |
| Custom TCP | TCP | 8080 | 172.31.0.0/16 | VLC service port |
| Custom TCP | TCP | 8081 | 172.31.0.0/16 | Additional service port |
| Custom TCP | TCP | 9222 | 172.31.0.0/16 | Chrome control port |
#### Outbound Rules (1 rule required)[](https://timothyxxx.github.io/OSWorld/installation/install_provider/aws.html#outbound-rules-1-rule-required "Permalink to this heading")
| Type | Protocol | Port Range | Destination | Description |
| --- | --- | --- | --- | --- |
| All traffic | All | All | 0.0.0.0/0 | Allow all outbound traffic |
### Host Machine Security Group Configuration[](https://timothyxxx.github.io/OSWorld/installation/install_provider/aws.html#host-machine-security-group-configuration "Permalink to this heading")
Configure according to your specific requirements. This project provides a monitor service that runs on port 8080 by default. You need to open this port to use this functionality.
VPC Configuration[](https://timothyxxx.github.io/OSWorld/installation/install_provider/aws.html#vpc-configuration "Permalink to this heading")
------------------------------------------------------------------------------------------------------------------------------------------------
To isolate the entire evaluation stack, we run both the host machine and all client virtual machines inside a dedicated VPC. The setup is straightforward:
1. Launch the host instance via the AWS console and note the **VPC ID** and **Subnet ID** shown in its network settings.
2. Export the same **Subnet ID** as the environment variable `AWS_SUBNET_ID` before starting the client code.
export AWS\_SUBNET\_ID\=subnet-xxxxxxxxxxxxxxxxx
Copy to clipboard
(Both the client and host must reside in this subnet for the evaluation to work.)
Configuration Variables[](https://timothyxxx.github.io/OSWorld/installation/install_provider/aws.html#configuration-variables "Permalink to this heading")
------------------------------------------------------------------------------------------------------------------------------------------------------------
That’s essentially all the setup you need to perform. From here on, you only have to supply a few extra details and environment variables—just make sure they’re all present in your environment.
You need to assign values to several variables crucial for the operation of these scripts on AWS:
* **\`\`DEFAULT\_REGION\`\`**: Default AWS region where your instances will be launched.
* Example: `"us-east-1"`
* **\`\`IMAGE\_ID\_MAP\`\`**: Dictionary mapping regions to specific AMI IDs that should be used for instance creation. Here we already set the AMI id to the official OSWorld image of Ubuntu supported by us.
* Formatted as follows:
IMAGE\_ID\_MAP \= {
"us-east-1": "ami-0d23263edb96951d8"
\# Add other regions and corresponding AMIs
}
Copy to clipboard
* **\`\`INSTANCE\_TYPE\`\`**: Specifies the type of EC2 instance to be launched.
* Example: `"t3.medium"`
* **\`\`KEY\_NAME\`\`**: Specifies the name of the key pair to be used for the instances.
* Example: `"osworld_key"`
* **\`\`NETWORK\_INTERFACES\`\`**: Configuration settings for network interfaces, which include subnet IDs, security group IDs, and public IP addressing.
* Example:
AWS\_REGION\=us-east-1
AWS\_SUBNET\_ID\=subnet-xxxx
AWS\_SECURITY\_GROUP\_ID\=sg-xxxx
Copy to clipboard
AWS CLI Configuration[](https://timothyxxx.github.io/OSWorld/installation/install_provider/aws.html#aws-cli-configuration "Permalink to this heading")
--------------------------------------------------------------------------------------------------------------------------------------------------------
Before using these scripts, you must configure your AWS CLI with your credentials. This can be done via the following commands:
aws configure
Copy to clipboard
This command will prompt you for:
* AWS Access Key ID
* AWS Secret Access Key
* Default region name (Optional, you can press enter)
Enter your credentials as required. This setup will allow you to interact with AWS services using the credentials provided.
Disclaimer[](https://timothyxxx.github.io/OSWorld/installation/install_provider/aws.html#disclaimer "Permalink to this heading")
----------------------------------------------------------------------------------------------------------------------------------
Use the provided scripts and configurations at your own risk. Ensure that you understand the AWS pricing model and potential costs associated with deploying instances, as using these scripts might result in charges on your AWS account.
Note
Ensure all AMI images used in `IMAGE_ID_MAP` are accessible and permissioned correctly for your AWS account, and that they are available in the specified region.
[Join Discord](https://discord.gg/4Gnw7eTEZR "Join our Discord community for discussions!")
---
# Unknown
Reference
============
.. toctree::
:maxdepth: 2
digital\_agent\_collection/index
---
# VirtualBox — OSWorld
* [](https://timothyxxx.github.io/OSWorld/index.html)
* [Installation](https://timothyxxx.github.io/OSWorld/installation/index.html)
* [Install Provider](https://timothyxxx.github.io/OSWorld/installation/install_provider/index.html)
* VirtualBox
* [View page source](https://timothyxxx.github.io/OSWorld/_sources/installation/install_provider/virtualbox.rst.txt)
* * *
VirtualBox[](https://timothyxxx.github.io/OSWorld/installation/install_provider/virtualbox.html#virtualbox "Permalink to this heading")
=========================================================================================================================================
Note
Please note first: since VMware/VirtualBox is a type-2 hypervisor, it needs to run on top of an operating system and requires access to hardware virtualization extensions, such as Intel VT-x or AMD-V. Therefore, your computer needs to be bare metal. Before using VMware/VirtualBox, please check whether your computer/server has been virtualized. For methods, please refer to [https://www.narenvadapalli.com/blog/finding-linux-machine-vm-or-baremetal/](https://www.narenvadapalli.com/blog/finding-linux-machine-vm-or-baremetal/)
.
Installation of VirtualBox[](https://timothyxxx.github.io/OSWorld/installation/install_provider/virtualbox.html#installation-of-virtualbox "Permalink to this heading")
-------------------------------------------------------------------------------------------------------------------------------------------------------------------------
1. Download VirtualBox from the [official website](https://www.virtualbox.org/wiki/Downloads)
. Unfortunately, for Apple chips (M1 chips, M2 chips, etc.), VirtualBox is not supported. You can only use VMware Fusion instead.
2. Install VirtualBox. Just follow the instructions provided by the installer. For Windows, you also need to append the installation path to the environment variable `PATH` for enabling the `VBoxManage` command. The default installation path is `C:\Program Files\Oracle\VirtualBox`.
3. Verify the successful installation by running the following:
VBoxManage \--version
Copy to clipboard
If the installation along with the environment variable set is successful, you will see the version of VirtualBox installed on your system.
[Join Discord](https://discord.gg/4Gnw7eTEZR "Join our Discord community for discussions!")
---
# Unknown
Overview
===========
---
# Mobile — OSWorld
* [](https://timothyxxx.github.io/OSWorld/index.html)
* [Reference](https://timothyxxx.github.io/OSWorld/reference/index.html)
* [Reference Paper](https://timothyxxx.github.io/OSWorld/reference/digital_agent_collection/index.html)
* Mobile
* [View page source](https://timothyxxx.github.io/OSWorld/_sources/reference/digital_agent_collection/mobile.rst.txt)
* * *
Mobile[](https://timothyxxx.github.io/OSWorld/reference/digital_agent_collection/mobile.html#mobile "Permalink to this heading")
==================================================================================================================================
1. **Rico: A Mobile App Dataset for Building Data-Driven Design Applications** 2017
_Biplab Deka, Zifeng Huang, Chad Franzen, Joshua Hibschman, Daniel Afergan, Yang Li, Jeffrey Nichols, Ranjitha Kumar_ [pdf](https://dl.acm.org/doi/pdf/10.1145/3126594.3126651)
, 2017
2. **Mapping Natural Language Instructions to Mobile UI Action Sequences.** ACL 2020
_Yang Li, Jiacong He, Xin Zhou, Yuan Zhang, Jason Baldridge_ [pdf](https://arxiv.org/abs/2005.03776)
, 2020.5
3. **AndroidEnv: A Reinforcement Learning Platform for Android.** ViGIL at NAACL 2021
_Daniel Toyama, Philippe Hamel, Anita Gergely, Gheorghe Comanici, Amelia Glaese, Zafarali Ahmed, Tyler Jackson, Shibl Mourad, Doina Precup_ [pdf](https://arxiv.org/abs/2105.13231)
, 2021.5
4. **Mobile App Tasks with Iterative Feedback (MoTIF): Addressing Task Feasibility in Interactive Visual Environments.** ViGIL at NAACL 2021
_Andrea Burns, Deniz Arsan, Sanjna Agrawal, Ranjitha Kumar, Kate Saenko, Bryan A. Plummer_ [pdf](https://arxiv.org/abs/2104.08560)
, 2021.4
5. **META-GUI: Towards Multi-modal Conversational Agents on Mobile GUI.** Arxiv
_Liangtai Sun, Xingyu Chen, Lu Chen, Tianle Dai, Zichen Zhu, Kai Yu_ [pdf](https://arxiv.org/abs/2205.11029)
, 2022.5
6. **Enabling Conversational Interaction with Mobile UI using Large Language Models.** CHI 2023
_Bryan Wang, Gang Li, Yang Li_ [pdf](https://arxiv.org/abs/2209.08655)
, 2022.9
7. **UGIF: UI Grounded Instruction Following.** Arxiv
_Sagar Gubbi Venkatesh, Partha Talukdar, Srini Narayanan_ [pdf](https://arxiv.org/abs/2211.07615)
, 2022.11
8. **From Pixels to UI Actions: Learning to Follow Instructions via Graphical User Interfaces.** Arxiv
_Peter Shaw, Mandar Joshi, James Cohan, Jonathan Berant, Panupong Pasupat, Hexiang Hu, Urvashi Khandelwal, Kenton Lee, Kristina Toutanova_ [pdf](https://arxiv.org/abs/2306.00245)
, 2023.6
9. **Empowering LLM to use Smartphone for Intelligent Task Automation** Arxiv
_Hao Wen, Yuanchun Li, Guohong Liu, Shanhui Zhao, Tao Yu, Toby Jia-Jun Li, Shiqi Jiang, Yunhao Liu, Yaqin Zhang, Yunxin Liu_ [pdf](https://arxiv.org/abs/2308.15272)
, 2023.8
10. **Empowering LLM to use Smartphone for Intelligent Task Automation** Arxiv _Hao Wen, Yuanchun Li, Guohong Liu, Shanhui Zhao, Tao Yu, Toby Jia-Jun Li, Shiqi Jiang, Yunhao Liu, Yaqin Zhang, Yunxin Liu_ [pdf](https://arxiv.org/abs/2308.15272)
, 2023.8
11. **Android in the Wild: A Large-Scale Dataset for Android Device Control** Arxiv
_Christopher Rawles, Alice Li, Daniel Rodriguez, Oriana Riva, Timothy Lillicrap_ [pdf](https://arxiv.org/abs/2307.10088)
, 2023.7
12. **You Only Look at Screens: Multimodal Chain-of-Action Agents** Arxiv _Zhuosheng Zhang, Aston Zhang_ [pdf](https://arxiv.org/abs/2309.11436)
, 2023.9
13. **DigiRL: Training In-The-Wild Device-Control Agents with Autonomous Reinforcement Learning** Arxiv _Hao Bai, Yifei Zhou, Mert Cemri, Jiayi Pan, Alane Suhr, Sergey Levine, Aviral Kumar_ [pdf](http://arxiv.org/abs/2406.11896)
, 2024.6
[Join Discord](https://discord.gg/4Gnw7eTEZR "Join our Discord community for discussions!")
---
# Web — OSWorld
* [](https://timothyxxx.github.io/OSWorld/index.html)
* [Reference](https://timothyxxx.github.io/OSWorld/reference/index.html)
* [Reference Paper](https://timothyxxx.github.io/OSWorld/reference/digital_agent_collection/index.html)
* Web
* [View page source](https://timothyxxx.github.io/OSWorld/_sources/reference/digital_agent_collection/web.rst.txt)
* * *
Web[](https://timothyxxx.github.io/OSWorld/reference/digital_agent_collection/web.html#web "Permalink to this heading")
=========================================================================================================================
1. **World of Bits: An Open-Domain Platform for Web-Based Agents.** ICML 2017
_Tianlin (Tim) Shi, Andrej Karpathy, Linxi (Jim) Fan, Jonathan Hernandez, Percy Liang_ [pdf](http://proceedings.mlr.press/v70/shi17a/shi17a.pdf)
, 2017
2. **Reinforcement Learning on Web Interfaces Using Workflow-Guided Exploration.** ICLR 2018
_Evan Zheran Liu, Kelvin Guu, Panupong Pasupat, Tianlin Shi, Percy Liang_ [pdf](https://arxiv.org/abs/1802.08802)
, 2018.2
3. **WebNav: A New Large-Scale Task for Natural Language based Sequential Decision Making.** Arxiv 2018
_Daniel Khashabi, Tushar Khot, Ashish Sabharwal, Peter Clark, Oyvind Tafjord, Eric Gribko, Michal Guerquin, Aniruddha T. Kembhavi_ [pdf](https://arxiv.org/abs/1812.08055)
, 2018.12
4. **WebGPT: Large-Scale Web Navigation with Reinforcement Learning.** Arxiv _Kelvin Guu, Michael Tung, Panupong Pasupat, Ming-Wei Chang_ [pdf](https://arxiv.org/abs/2107.00632)
, 2021.7
5. **MINOS: Multimodal Intelligence for Navigation in Open Spaces.** Arxiv _Barbara Menta, Amos Storkey, Artur d’Avila Garcez, Jeffery Kinnison, Judy Hoffman_ [pd](https://arxiv.org/abs/2010.12131)
, 2022.1
6. **A data-driven approach for learning to control computers.** PLMR
_Peter C Humphreys, David Raposo, Toby Pohlen, Gregory Thornton, Rachita Chhaparia, Alistair Muldal, Josh Abramson, Petko Georgiev, Alex Goldin, Adam Santoro, Timothy Lillicrap_ [pdf](https://arxiv.org/abs/2202.08137)
, 2022.2
7. **WebShop: Towards Scalable Real-World Web Interaction with Grounded Language Agents.** Arxiv
_Shunyu Yao, Howard Chen, John Yang, Karthik Narasimhan_ [pdf](https://arxiv.org/abs/2207.01206)
, 2022.7
8. **Multimodal Web Navigation with Instruction-Finetuned Foundation Models.** ICLR 2023 Workshop ME-FoMo
_Hiroki Furuta, Ofir Nachum, Kuang-Huei Lee, Yutaka Matsuo, Shixiang Shane Gu, Izzeddin Gur_ [pdf](https://arxiv.org/abs/2305.11854)
, 2023.5
9. **Hierarchical Prompting Assists Large Language Model on Web Navigation.** ACL 2023 NLRSE workshop
_Abishek Sridhar, Robert Lo, Frank F. Xu, Hao Zhu, Shuyan Zhou_ [pdf](https://arxiv.org/abs/2305.14257)
, 2023.5
10. **Mind2Web: Towards a Generalist Agent for the Web.** Arxiv _Xiang Deng, Yu Gu, Boyuan Zheng, Shijie Chen, Samuel Stevens, Boshi Wang, Huan Sun, Yu Su_ [pdf](https://arxiv.org/abs/2306.06070)
, 2023.6
11. **A Real-World WebAgent with Planning, Long Context Understanding, and Program Synthesis** Arxiv _Izzeddin Gur, Hiroki Furuta, Austin Huang, Mustafa Safdari, Yutaka Matsuo, Douglas Eck, Aleksandra Faust_ [pdf](https://arxiv.org/abs/2307.12856)
, 2023.7
12. **WebArena: A Realistic Web Environment for Building Autonomous Agents** Arxiv _Shuyan Zhou, Frank F. Xu, Hao Zh+, Xuhui Zhou, Robert Lo, Abishek Sridhar, Xianyi Cheng, Yonatan Bisk, Daniel Fried, Uri Alon, Graham Neubig_ [pdf](https://webarena.dev/static/paper.pdf)
, 2023.7
13. **LASER: LLM Agent with State-Space Exploration for Web Navigation** Arxiv _Kaixin Ma, Hongming Zhang, Hongwei Wang, Xiaoman Pan, Dong Yu_ [pdf](https://arxiv.org/abs/2309.08172)
, 2023.9
14. **GPT-4V(ision) is a Generalist Web Agent, if Grounded** Arxiv _Boyuan Zheng, Boyu Gou, Jihyung Kil, Huan Sun, Yu Su_ [pdf](https://arxiv.org/abs/2401.01614)
, 2024.1
15. **WebLINX: Real-World Website Navigation with Multi-Turn Dialogue** Arxiv _Xing Han Lù, Zdeněk Kasner, Siva Reddy_ [pdf](https://arxiv.org/abs/2402.05930)
, 2024.2
16. **VisualWebBench: How Far Have Multimodal LLMs Evolved in Web Page Understanding and Grounding?** Arxiv _Junpeng Liu, Yifan Song, Bill Yuchen Lin, Wai Lam, Graham Neubig, Yuanzhi Li, Xiang Yue_ [pdf](https://arxiv.org/abs/2404.05955)
, 2024.4
17. **SteP: Stacked LLM Policies for Web Actions** Arxiv
_Paloma Sodhi, S.R.K. Branavan, Yoav Artzi, Ryan McDonald_ [pdf](https://arxiv.org/abs/2310.03720)
, 2024.4
18. **WILBUR: Adaptive In-Context Learning for Robust and Accurate Web Agents** Arxiv _Michael Lutz, Arth Bohra, Manvel Saroyan, Artem Harutyunyan, Giovanni Campagna_ [pdf](https://arxiv.org/abs/2404.05902)
, 2024.4
19. **MMInA: Benchmarking Multihop Multimodal Internet Agents** Arxiv _Ziniu Zhang, Shulin Tian, Liangyu Chen, Ziwei Liu_ [pdf](https://arxiv.org/abs/2404.09992)
, 2024.4
20. **WebCanvas: Benchmarking Web Agents in Online Environments** Arxiv _Yichen Pan, Dehan Kong, Sida Zhou, Cheng Cui, Yifei Leng, Bing Jiang, Hangyu Liu, Yanyi Shang, Shuyan Zhou, Tongshuang Wu, Zhengyang Wu_ [pdf](https://arxiv.org/abs/2406.12373)
, 2024.6
[Join Discord](https://discord.gg/4Gnw7eTEZR "Join our Discord community for discussions!")
---
# Unknown
Quick Start
===========
After you finish the setup for your \`provider\` (installation and configuration of vmware/virtualbox/aws...).
Run the following minimal example to interact with the environment and verify if everything is okay.
When running for the first time, the following code will start a process of environment installation.
It involves downloading (a zip file), unzipping, renaming, starting the machine, and then taking a snapshot (which we name \`init\_state\`) after the startup, and will takes some time ☕️.
.. code-block:: python
from desktop\_env.desktop\_env import DesktopEnv
example = {
"id": "94d95f96-9699-4208-98ba-3c3119edf9c2",
"instruction": "I want to install Spotify on my current system. Could you please help me?",
"config": \[\
{\
"type": "execute",\
"parameters": {\
"command": \[\
"python",\
"-c",\
"import pyautogui; import time; pyautogui.click(960, 540); time.sleep(0.5);"\
\]\
}\
}\
\],
"evaluator": {
"func": "check\_include\_exclude",
"result": {
"type": "vm\_command\_line",
"command": "which spotify"
},
"expected": {
"type": "rule",
"rules": {
"include": \["spotify"\],
"exclude": \["not found"\]
}
}
}
}
env = DesktopEnv(action\_space="pyautogui")
obs = env.reset(task\_config=example)
obs, reward, done, info = env.step("pyautogui.rightClick()")
Hope everything goes smooth. You will see all the logs of the system running normally, including the successful creation of the environment, completion of setup, and successful execution of actions. In the end, you will observe a successful right-click on the screen, which means you are ready to go.
---
# Computer — OSWorld
* [](https://timothyxxx.github.io/OSWorld/index.html)
* [Reference](https://timothyxxx.github.io/OSWorld/reference/index.html)
* [Reference Paper](https://timothyxxx.github.io/OSWorld/reference/digital_agent_collection/index.html)
* Computer
* [View page source](https://timothyxxx.github.io/OSWorld/_sources/reference/digital_agent_collection/computer.rst.txt)
* * *
Computer[](https://timothyxxx.github.io/OSWorld/reference/digital_agent_collection/computer.html#computer "Permalink to this heading")
========================================================================================================================================
1. **ASSISTGUI: Task-Oriented Desktop Graphical User Interface Automation** Arxiv
> _Difei Gao, Lei Ji, Zechen Bai, Mingyu Ouyang, Peiran Li, Dongxing Mao, Qinchen Wu, Weichen Zhang, Peiyi Wang, Xiangwu Guo, Hengxu Wang, Luowei Zhou, Mike Zheng Shou_ [pdf](https://arxiv.org/abs/2312.13108)
> , 2023.12
2. **SeeClick: Harnessing GUI Grounding for Advanced Visual GUI Agents** Arxiv
> _Kanzhi Cheng, Qiushi Sun, Yougang Chu, Fangzhi Xu, Yantao Li, Jianbing Zhang, Zhiyong Wu_ [pdf](https://arxiv.org/abs/2401.10935)
> , 2024.1
3. **OS-Copilot: Towards Generalist Computer Agents with Self-Improvement** Arxiv
> _Zhiyong Wu, Chengcheng Han, Zichen Ding, Zhenmin Weng, Zhoumianze Liu, Shunyu Yao, Tao Yu, Lingpeng Kong_ [pdf](https://arxiv.org/abs/2402.07456)
> , 2024.2
4. **ScreenAgent: A Vision Language Model-driven Computer Control Agent** Arxiv
> _Runliang Niu, Jindong Li, Shiqi Wang, Yali Fu, Xiyu Hu, Xueyuan Leng, He Kong, Yi Chang, Qi Wang_ [pdf](https://arxiv.org/abs/2402.07945)
> , 2024.2
5. **OmniACT: A Dataset and Benchmark for Enabling Multimodal Generalist Autonomous Agents for Desktop and Web** Arxiv
> _Raghav Kapoor, Yash Parag Butala, Melisa Russak, Jing Yu Koh, Kiran Kamble, Waseem Alshikh, Ruslan Salakhutdinov_ [pdf](https://arxiv.org/abs/2402.17553)
> , 2024.2
6. **Cradle: Empowering Foundation Agents Towards General Computer Control** Arxiv
> _Weihao Tan, Wentao Zhang, Xinrun Xu, Haochong Xia, Ziluo Ding, Boyu Li, Bohan Zhou, Junpeng Yue, Jiechuan Jiang, Yewen Li, Ruyi An, Molei Qin, Chuqiao Zong, Longtao Zheng, Yujie Wu, Xiaoqiang Chai, Yifei Bi, Tianbao Xie, Pengjie Gu, Xiyun Li, Ceyao Zhang, Long Tian, Chaojie Wang, Xinrun Wang, Börje F. Karlsson, Bo An, Shuicheng Yan, Zongqing Lu_ [pdf](https://arxiv.org/abs/2403.03186)
> , 2024.3
7. **AgentStudio: A Toolkit for Building General Virtual Agents** Arxiv
> _Longtao Zheng, Zhiyuan Huang, Zhenghai Xue, Xinrun Wang, Bo An, Shuicheng Yan_ [pdf](https://arxiv.org/abs/2403.17918)
> , 2024.3
8. **OSWorld: Benchmarking Multimodal Agents for Open-Ended Tasks in Real Computer Environments** Arxiv
> _Tianbao Xie, Danyang Zhang, Jixuan Chen, Xiaochuan Li, Siheng Zhao, Ruisheng Cao, Toh Jing Hua, Zhoujun Cheng, Dongchan Shin, Fangyu Lei, Yitao Liu, Yiheng Xu, Shuyan Zhou, Silvio Savarese, Caiming Xiong, Victor Zhong, Tao Yu_ [pdf](https://arxiv.org/abs/2404.07972)
> , 2024.4
9. **GUI-WORLD: A Dataset for GUI-oriented Multimodal LLM-based Agents** Arxiv
> _Dongping Chen, Yue Huang, Siyuan Wu, Jingyu Tang, Liuyi Chen, Yilin Bai, Zhigang He, Chenlong Wang, Huichi Zhou, Yiqiang Li, Tianshuo Zhou, Yue Yu, Chujie Gao, Qihui Zhang, Yi Gui, Zhen Li, Yao Wan, Pan Zhou, Jianfeng Gao, Lichao Sun_ [pdf](https://arxiv.org/abs/2406.10819)
> , 2024.6
10. **VideoGUI: A Benchmark for GUI Automation from Instructional Videos** Arxiv
> _Kevin Qinghong Lin, Linjie Li, Difei Gao, Qinchen WU, Mingyi Yan, Zhengyuan Yang, Lijuan Wang, Mike Zheng Shou_ [pdf](https://arxiv.org/abs/2406.10227)
> , 2024.6
11. **Read Anywhere Pointed: Layout-aware GUI Screen Reading with Tree-of-Lens Grounding** Arxiv
> _Yue Fan, Lei Ding, Ching-Chen Kuo, Shan Jiang, Yang Zhao, Xinze Guan, Jie Yang, Yi Zhang, Xin Eric Wang_ [pdf](https://arxiv.org/abs/2406.19263)
> , 2024.6
12. **GUI Action Narrator: Where and When Did That Action Take Place?** Arxiv
> _Qinchen Wu, Difei Gao, Kevin Qinghong Lin, Zhuoyu Wu, Xiangwu Guo, Peiran Li, Weichen Zhang, Hengxu Wang, Mike Zheng Shou_ [pdf](https://arxiv.org/abs/2406.13719v1)
> , 2024.6
[Join Discord](https://discord.gg/4Gnw7eTEZR "Join our Discord community for discussions!")
---
# General — OSWorld
* [](https://timothyxxx.github.io/OSWorld/index.html)
* [Reference](https://timothyxxx.github.io/OSWorld/reference/index.html)
* [Reference Paper](https://timothyxxx.github.io/OSWorld/reference/digital_agent_collection/index.html)
* General
* [View page source](https://timothyxxx.github.io/OSWorld/_sources/reference/digital_agent_collection/general.rst.txt)
* * *
General[](https://timothyxxx.github.io/OSWorld/reference/digital_agent_collection/general.html#general "Permalink to this heading")
=====================================================================================================================================
1. **An Empirical Study & Evaluation of Modern CAPTCHAs** Arxiv
> _Andrew Searles, Yoshimichi Nakatsuka, Ercan Ozturk, Andrew Paverd, Gene Tsudik, Ai Enkoji_ [pdf](https://arxiv.org/abs/2307.12108)
> , 2023.7
2. **The Unsolved Challenges of LLMs as Generalist Web Agents: A Case Study** Arxiv
> _Rim\_Assouel1, Tom Marty, Massimo Caccia, Issam H. Laradji, Alexandre Drouin, Sai Rajeswar, Hector Palacios, Quentin Cappart, David Vazquez, Nicolas Chapados, Maxime Gasse, Alexandre Lacoste_ [pdf](https://openreview.net/forum?id=jt3il4fC5B)
> , 2023.12
3. **“What’s important here?”: Opportunities and Challenges of Using LLMs in Retrieving Information from Web Interfaces** Arxiv
> _Faria Huq, Jeffrey P. Bigham, Nikolas Martelaro_ [pdf](https://arxiv.org/abs/2312.06147)
> , 2023.12
4. **Autonomous Evaluation and Refinement of Digital Agents** Arxiv
> _Jiayi Pan, Yichi Zhang, Nicholas Tomlin, Yifei Zhou, Sergey Levine, Alane Suhr_ [pdf](https://arxiv.org/abs/2404.06474)
> , 2024.4
5. **IDs for AI Systems** Arxiv
> _Alan Chan, Noam Kolt, Peter Wills, Usman Anwar, Christian Schroeder de Witt, Nitarshan Rajkumar, Lewis Hammond, David Krueger, Lennart Heim, Markus Anderljung_ [pdf](https://arxiv.org/abs/2406.12137)
> , 2024.6
6. **OS-ATLAS: A Foundation Action Model For Generalist GUI Agents** Arxiv
> _Zhiyong Wu, Zhenyu Wu, Fangzhi Xu, Yian Wang, Qiushi Sun, Chengyou Jia, Kanzhi Cheng, Zichen Ding, Liheng Chen, Paul Pu Liang, Yu Qiao_ [pdf](https://arxiv.org/abs/2410.23218)
> , 2024.10
7. **Aguvis: Unified Pure Vision Agents for Autonomous GUI Interaction** Arxiv
> _Yiheng Xu, Zekun Wang, Junli Wang, Dunjie Lu, Tianbao Xie, Amrita Saha, Doyen Sahoo, Tao Yu, Caiming Xiong_ [pdf](https://arxiv.org/abs/2412.04454)
> , 2024.12
8. **AgentTrek: Agent Trajectory Synthesis via Guiding Replay with Web Tutorials** Arxiv
> _Yiheng Xu, Dunjie Lu, Zhennan Shen, Junli Wang, Zekun Wang, Yuchen Mao, Caiming Xiong, Tao Yu_ [pdf](https://arxiv.org/abs/2412.09605)
> , 2024.12
9. **Aria-UI: Visual Grounding for GUI Instructions** Arxiv
> _Yuhao Yang, Yue Wang, Dongxu Li, Ziyang Luo, Bei Chen, Chao Huang, Junnan Li_ [pdf](https://arxiv.org/abs/2412.16256)
> , 2024.12
[Join Discord](https://discord.gg/4Gnw7eTEZR "Join our Discord community for discussions!")
---
# Unknown
Install Provider
================
Due to machine virtualization and some copyright issues, we support various platforms including VMWare, VirtualBox, AWS, etc., which we refer to as "providers". Please refer to the documentation to complete the advanced configuration of different providers according to the situation. Also, when initializing the DesktopEnv variable, enter your choice into the \`\`provider\_name\`\` parameter, which defaults to \`\`vmware\`\`, as follows:
.. code-block:: python
env = DesktopEnv(provider\_name = "aws")
...
We will continue our efforts to support more platforms in the future.
.. toctree::
:maxdepth: 4
docker
vmware
virtualbox
aws
---
# Unknown
Overview
===========
---
# Unknown
DesktopEnv Interface Documentation
==================================
Overview
--------
The \`\`DesktopEnv\`\` class is the core interface for interacting with virtual desktop environments in OSWorld.
It provides a standardized way to control virtual machines across different providers (VMware, VirtualBox, Docker, AWS, etc.) and execute actions on desktop environments through various action spaces.
This class serves as the main entry point for agents to interact with real computer environments, enabling tasks such as:
- Making observations by taking screenshots and/or capturing accessibility trees
- Executing mouse and keyboard actions
- Managing virtual machine states
- Evaluating task completion
- Setting up and tearing down task environments
Class Definition
----------------
.. code-block:: python
class DesktopEnv:
def \_\_init\_\_(self,
provider\_name: str = "vmware",
region: str = None,
path\_to\_vm: str = None,
snapshot\_name: str = "init\_state",
action\_space: str = "pyautogui",
cache\_dir: str = "cache",
screen\_size: Tuple\[int\] = (int(os.environ.get("SCREEN\_WIDTH", 1920)), int(os.environ.get("SCREEN\_HEIGHT", 1080))),
headless: bool = False,
require\_a11y\_tree: bool = True,
require\_terminal: bool = False,
os\_type: str = "Ubuntu",
enable\_proxy: bool = False,
client\_password: str = "",
\*\*kwargs)
Initialization Parameters
-------------------------
Core Parameters
~~~~~~~~~~~~~~~
\*\*provider\_name\*\* : str, default="vmware"
The virtualization provider to use. Supported options:
- \`\`"vmware"\`\`: VMware Workstation Pro/Fusion
- \`\`"virtualbox"\`\`: Oracle VirtualBox
- \`\`"docker"\`\`: Docker containers with GUI support
- \`\`"aws"\`\`: Amazon Web Services EC2 instances
Each provider has different capabilities and requirements. See provider-specific documentation for details.
\*\*region\*\* : str, optional
The region of the virtual machine.
The meaning varies for different providers.
For AWS provider, this parameter should be the region of the virtual machine.
For others, this parameter is ignored.
\*\*path\_to\_vm\*\* : str, optional
For VMware/VirtualBox providers, the file path to the virtual machine configuration file (e.g., .vmx file for VMware).
\*\*snapshot\_name\*\* : str, default="init\_state"
For VMware provider, 'init\_state' is the default name of snapshot we set for the client virtual machine.
For cloud provider such as AWS, this parameter should be the AMI ID of the virtual machine.
This allows the environment to return to a known clean state for each task.
\*\*action\_space\*\* : str, default="pyautogui"
Defines the action interface for agent interactions. Supported action spaces:
- \`\`"pyautogui"\`\`: Python automation using PyAutoGUI library
- \`\`"computer\_13"\`\`: The action space we designed for our agent to use, contains 13 actions, including click, drag, scroll, type, etc.
- \`\`"claude\_computer\_use"\`\`: The action space from Claude Computer Use.
\*\*cache\_dir\*\* : str, default="cache"
The directory to cache the files from cloud (initial files and ground-truth files for environment setup and evaluation) and client machine (for example, the files modified by the agent).
.. note::
Cloud files are automatically downloaded on first use, then the system will check this directory first before downloading.
Important: If you modify task files without changing their names, they may not be overwritten. You need to manually delete them to ensure updates.
\*\*screen\_size\*\* : Tuple\[int\], default=(1920, 1080)
The screen size of the virtual machine you refer to. Currently we don't support modifying resolution based on this parameter - it's only used as an index.
On AWS, machines without corresponding resolution will report errors; on VMware and Docker, this parameter is ignored.
\*\*headless\*\* : bool, default=False
Whether to run the virtual machine in headless mode (without GUI display). Useful for batch processing and server deployments.
\*\*require\_a11y\_tree\*\* : bool, default=False
Whether accessibility tree capture is required. When enabled, the environment will extract and provide accessibility information alongside screenshots.
.. warning::
The quality and speed of obtaining accessibility tree content is strongly correlated with the software provider.
When enabled, each observation acquisition may take much longer than simply taking screenshots (~10 seconds on average,
for some software it may take several minutes or more). Use with caution.
Our vision is that accessibility trees will be phased out in the future.
\*\*require\_terminal\*\* : bool, default=False
Whether to require terminal information for the virtual machine. When enabled, the environment will attempt to extract
terminal information from the virtual machine to help agents make potential decisions.
\*\*os\_type\*\* : str, default="Ubuntu"
Operating system type of the target virtual machine:
- \`\`"Ubuntu"\`\`: Ubuntu Linux distributions
- \`\`"Windows"\`\`: Microsoft Windows
- \[PLACEHOLDER: Add other supported OS types\]
\*\*enable\_proxy\*\* : bool, default=False
Whether to enable proxy for the virtual machine. If enabled, the environment will use dataimpulse proxy server to access the internet.
.. important::
Please ensure you have configured the dataimpulse proxy server according to our instructions and guaranteed sufficient balance,
and have copied the username and password to \`dataimpulse.json \`\_,
otherwise network disconnection will occur.
\*\*client\_password\*\* : str, optional
Password for the guest operating system user account. Required for:
- Proxy configuration setup
- Tasks requiring sudo privileges
- Administrative operations within the VM
Default credentials vary by provider (e.g., "password" for vmware/virtualbox, "osworld-public-evaluation" for aws).
Additional Configuration Notes
~~~~~~~~~~~~~~~~~~~~~~~~~~~~
Port Configuration
^^^^^^^^^^^^^^^^^^^
In the initialization function, several ports are configured for client-server communication. These ports are pre-configured
in our provided client machines. If you need to reconfigure machines, please pay attention to these port settings:
.. code-block:: python
# Default port configuration
self.server\_port = 5000
self.chromium\_port = 9222
self.vnc\_port = 8006
self.vlc\_port = 8080
Docker Provider Special Handling
^^^^^^^^^^^^^^^^^^^^^^^^^^^^^^^^^
For Docker, our implementation is special because Docker containers from the same machine share the same IP address.
Therefore, we need to control different ports to support multiple parallel environments. A port allocation mechanism
is implemented in the provider, with special handling as shown below:
.. code-block:: python
# Get the ip from the virtual machine, and setup the controller
vm\_ip\_ports = self.provider.get\_ip\_address(self.path\_to\_vm).split(':')
self.vm\_ip = vm\_ip\_ports\[0\]
# Get the ports from the virtual machine (for Docker provider only)
if len(vm\_ip\_ports) > 1:
self.server\_port = int(vm\_ip\_ports\[1\])
self.chromium\_port = int(vm\_ip\_ports\[2\])
self.vnc\_port = int(vm\_ip\_ports\[3\])
self.vlc\_port = int(vm\_ip\_ports\[4\])
Proxy Configuration
^^^^^^^^^^^^^^^^^^^
When you set \`\`enable\_proxy\`\` to \`\`True\`\`, please ensure you have configured the dataimpulse proxy server according to
our \`proxy setup instructions \`\_
and guaranteed sufficient balance. You must also copy the username and password to the
\`dataimpulse.json \`\_ file,
otherwise network disconnection will occur.
Key Methods
-----------
reset()
~~~~~~~
.. code-block:: python
def reset(self, task\_config: Dict) -> observation
Resets the environment to an initial state and sets up the task configuration.
\*\*Parameters:\*\*
- \*\*task\_config\*\* : Dict
Task configuration dictionary containing:
- \`\`"id"\`\`: Unique task identifier
- \`\`"instruction"\`\`: Natural language task description for the agent
- \`\`"config"\`\`: List of setup commands and scripts for task initialization
- \`\`"evaluator"\`\`: Evaluation criteria and success conditions
- \`\`"trajectory"\`\`: (Optional) Reference trajectory for task completion
- \`\`"snapshot"\`\`: (Optional) VM snapshot to restore before task execution
- \`\`"proxy"\`\`: (Optional) Boolean indicating if proxy is required for the task
\*\*Returns:\*\*
- \*\*observation\*\* : The initial observation after environment reset
step()
~~~~~~
.. code-block:: python
def step(self, action: str, pause: Optional\[float\] = None) -> Tuple\[observation, reward, done, info\]
Executes an action in the environment and returns the resulting state.
\*\*Parameters:\*\*
- \*\*action\*\* : str
Action string formatted according to the specified action\_space. Examples:
- PyAutoGUI: \`\`"pyautogui.click(100, 200)"\`\`
- Computer 13: \`\`{"action": "click", "coordinate": \[100, 200\]}\`\`
- \*\*pause\*\* : float, optional
\*\*CRITICAL PARAMETER\*\*: Time to sleep after action execution before capturing observation.
.. warning::
The \`\`pause\`\` parameter (often set via the \`\`sleep\_after\_execution\`\` parameter in run\_multienv functions) is
\*\*extremely important\*\* for reliable agent performance. In our practical experience, this
parameter significantly affects the quality of observations captured after action execution.
\*\*Why this matters:\*\*
- If the sleep time is too short, the agent may capture observations before the action has
fully taken effect
- GUI applications need time to process commands and update their interfaces
- Web pages require time to load and render new content
- Network delays can cause UI state changes to be delayed
- Without adequate pause time, agents may observe the pre-action state instead of the
post-action state, leading to confusion and poor performance
\*\*As of 2024-07-29, current AI models and agents are already quite fragile, and inadequate
pause timing makes them even more unstable and confused.\*\*
\*\*Returns:\*\*
- \*\*observation\*\* : Current environment observation (screenshot, a11y tree, or both)
- \*\*reward\*\* : Task completion reward (typically 0 during execution, 1 on success)
- \*\*done\*\* : Boolean indicating if the task/episode has ended
- \*\*info\*\* : Additional information dictionary with metadata
close()
~~~~~~~
.. code-block:: python
def close()
Closes the environment and cleans up resources. This method should be called when the environment is no longer needed.
\*\*Parameters:\*\*
None
\*\*Returns:\*\*
None
get\_observation()
~~~~~~~~~~~~~~~~~
.. code-block:: python
def get\_observation() -> Dict
Captures the current state observation from the virtual machine.
\*\*Returns:\*\*
- \*\*observation\*\* : Dict
Dictionary containing observation data:
- \`\`"screenshot"\`\`: Base64-encoded screenshot image
- \`\`"accessibility\_tree"\`\`: Accessibility tree structure (if enabled)
- \`\`"terminal"\`\`: Terminal information (if enabled)
- \`\`"timestamp"\`\`: Observation timestamp
evaluate()
~~~~~~~~~~
.. code-block:: python
def evaluate() -> float
Evaluates the current task completion status using the configured evaluator.
The evaluation process involves three main components:
1. \*\*Result Getters\*\*: Extract current state from various sources (screenshots, files, command outputs, etc.)
2. \*\*Expected Getters\*\*: Extract expected/reference state for comparison (optional)
3. \*\*Metrics\*\*: Compare result and expected states to compute success scores
\*\*Evaluation Flow:\*\*
1. \*\*Post-configuration Setup\*\*: Executes any post-configuration commands defined in evaluator. Some tasks require additional operations to facilitate verification, such as saving files, activating modification synchronization, etc.
2. \*\*Special Case Handling\*\*:
- For "infeasible" tasks: Returns 1 if last action was "FAIL", otherwise 0
- For regular tasks: Returns 0 if last action was "FAIL"
3. \*\*Result Extraction\*\*: Uses result\_getter to extract current state based on evaluator\["result"\] configuration
4. \*\*Expected State Extraction\*\*: Uses expected\_getter to extract reference state (if evaluator\["expected"\] exists)
5. \*\*Metric Computation\*\*: Applies metric function to compare states and compute score
\*\*Single vs Multiple Metrics:\*\*
\*Single Metric (most common):\*
.. code-block:: python
# Example: Check if screenshot contains specific text
evaluator = {
"func": "check\_include\_exclude",
"result": {"type": ...},
"expected": {"type": ...}
}
# Returns: float score (0.0 to 1.0)
\*Multiple Metrics with AND/OR logic:\*
.. code-block:: python
# Example: All conditions must be met
example =
{
"id": "example-task",
"instruction": "Clear rubbish bin",
"config": \[\],
"evaluator": {
"func": \[\
"metric\_1",\
"metric\_2"\
\],
"conj": "and", # Return positive reward if all metrics succeed
# "conj": "or" # Return positive reward if any metric succeeds
"result": \[\
{"type": "xxx", ...},\
{"type": "xxx", ...},\
\],
"expected": \[\
{"type": "xxx", ...},\
{"type": "xxx", ...},\
\],
"options":\[\
{"xxx": ..},\
{"xxx": ..}\
\]
}
}
# Returns: 0 if any metric fails, otherwise average of all scores
\*Multiple Metrics with OR logic:\*
.. code-block:: python
# Example: Any condition can satisfy the task
evaluator = {
"func": "check\_alternative\_outcomes",
"conj": "or", # Any metric can succeed
"result": \[\
{"type": "screenshot"},\
{"type": "vm\_command\_line", "command": "ls /tmp/"}\
\]
}
# Returns: 1 if any metric succeeds, otherwise maximum score
\*\*Returns:\*\*
- \*\*score\*\* : float - Numerical score (0.0 = failure, 1.0 = complete success, intermediate values possible)
get\_info()
~~~~~~~~~~
.. code-block:: python
def get\_info() -> Dict
Returns information about the current environment state and configuration.
\*\*Returns:\*\*
- \*\*info\*\* : Dict
Environment information including:
- \`\`"vm\_ip"\`\`: Virtual machine IP address
- \`\`"server\_port"\`\`: Communication server port
- \`\`"action\_space"\`\`: Current action space configuration
- \`\`"provider"\`\`: Provider information
Usage Examples
--------------
Basic Usage
~~~~~~~~~~~
.. code-block:: python
from desktop\_env.desktop\_env import DesktopEnv
# Initialize environment with VMware provider
env = DesktopEnv(
provider\_name="vmware",
action\_space="pyautogui"
)
# Define a simple task
task\_config = {
"id": "example-task",
"instruction": "Clear rubbish bin",
"config": \[\],
"evaluator": {
"func": "check\_include\_exclude",
"result": {"type": "screenshot"},
"expected": {"type": "rule", "rules": {"include": \["desktop"\]}}
}
}
# Reset environment and execute action
obs = env.reset(task\_config=task\_config)
obs, reward, done, info = env.step("pyautogui.click(500, 300)", pause=2.0)
# Clean up when finished
env.close()
Docker Provider Example
~~~~~~~~~~~~~~~~~~~~~~~
.. code-block:: python
# Initialize with Docker provider
env = DesktopEnv(
provider\_name="docker",
os\_type="Ubuntu",
headless=True,
client\_password="password"
)
AWS Provider Example
~~~~~~~~~~~~~~~~~~~~
.. code-block:: python
# Initialize with AWS provider for large-scale evaluation
env = DesktopEnv(
provider\_name="aws",
os\_type="Ubuntu",
client\_password="osworld-public-evaluation"
)
With Accessibility Tree
~~~~~~~~~~~~~~~~~~~~~~~
.. code-block:: python
# Environment with accessibility tree support
env = DesktopEnv(
provider\_name="vmware",
require\_a11y\_tree=True
)
Provider-Specific Considerations
~~~~~~~~~~~~~~~~~~~~~~~~~~~~~~~~
\*\*VMware Provider\*\*
- Requires VMware Workstation Pro or VMware Fusion
- Supports snapshots for quick environment reset
- Best performance on bare metal machines
- Supports macOS on Apple Silicon chips (via VMware Fusion)
\*\*Docker Provider\*\*
- Recommended for cloud/server deployments
- Supports parallel environments with automatic port allocation
- Requires KVM support for optimal performance
- May have limitations on GUI applications
\*\*AWS Provider\*\*
- Enables large-scale parallel evaluation
- Region-specific instance types and AMI requirements
- Network latency considerations for interactive tasks
- Cost optimization through spot instances and scheduled termination
\*\*VirtualBox Provider\*\*
- Free alternative to VMware
- Limited parallelism support
- May have performance limitations on some systems
Security and Credentials
~~~~~~~~~~~~~~~~~~~~~~~~~
- \*\*Default Credentials\*\*: Use secure passwords and change defaults in production
- \*\*Network Security\*\*: Configure firewalls appropriately for the communication ports
- \*\*Cloud Security\*\*: Use IAM roles and security groups for AWS deployments
- \*\*Proxy Configuration\*\*: Ensure proxy credentials are securely stored and rotated
Troubleshooting
~~~~~~~~~~~~~~~
\*\*Common Issues:\*\*
- \*\*Port Conflicts\*\*: Ensure communication ports (5000, 9222, 8006, 8080) are available
- \*\*Network Connectivity\*\*: Verify VM can reach external networks if required
- \*\*Performance Issues\*\*: Check sleep\_after\_execution timing and VM resource allocation
- \*\*Provider Errors\*\*: Consult provider-specific logs and documentation
See Also
--------
- :doc:\`task\_example\_explanation\` - Task configuration format
- :doc:\`run\_experiment\` - Running experiments with DesktopEnv
- :doc:\`../installation/install\_provider/index\` - Provider-specific setup guides
- :doc:\`../installation/quickstart\` - Quick start guide
- :doc:\`../installation/proxy\` - Proxy configuration guide
---
# Unknown
Adding New Agents to OSWorld
=============================
This guide explains how to extend OSWorld's agent interface to integrate your custom agent for evaluation on the OSWorld benchmark.
The agent interface is located in the \`\`mm\_agents/\`\` directory and provides a standardized framework for multimodal agent implementations.
Core Agent Interface
--------------------
Base Agent Class
~~~~~~~~~~~~~~~~~
The foundation of OSWorld's agent system is the base agent class.
We don't have strict requirements for your agent implementation - you can define all parameters according to your needs. The following example can be modified as needed:
.. code-block:: python
class YourCustomAgent:
def \_\_init\_\_(self, model\_name, observation\_type="screenshot", max\_steps=15, client\_password=None):
"""
Initialize the agent with configuration parameters
Args:
model\_name (str): Name/identifier of the underlying model
observation\_type (str): Type of observation ("screenshot", "a11y\_tree", "som")
max\_steps (int): Maximum number of steps for task execution
client\_password (str, optional): VM password for sudo operations, depends on your agent implementation
"""
def predict(self, observation, instruction, \*\*kwargs):
"""
Core prediction method - main agent decision-making logic
Args:
observation: Current environment state
instruction: Task instruction string
\*\*kwargs: step\_count, history, etc.
Returns:
action: Action string in OSWorld format
"""
def reset(self, task\_config):
"""Reset agent state for a new task"""
Essential Methods
~~~~~~~~~~~~~~~~~
\*\*predict() Method\*\*
The \`\`predict()\`\` method is the core interface where your agent's decision-making logic resides:
.. code-block:: python
def predict(self, instruction, obs, \*\*kwargs):
"""Main prediction logic"""
# Your agent logic here
return action
\*\*Parameters:\*\*
- \`\`instruction\`\`: Natural language task description
- \`\`obs\`\`: Current environment state (screenshot, accessibility tree, etc.)
- \`\`\*\*kwargs\`\`: You custom parameters
\*\*Returns:\*\*
- \`\`response\`\`: Raw response from your model, you can use it to debug your agent or make some print to user
- \`\`action\`\`: A list of actions, all actions in OSWorld action formatted (either \`payutogui\` or \`computer\_13\`)
\*\*reset() Method\*\*
The \`\`reset()\`\` method is also essential for your agent implementation.
This method is called at the beginning of each new task to initialize your agent's state:
.. code-block:: python
def reset(self, \_logger=None):
"""Reset agent state for a new task"""
global logger
logger = \_logger if \_logger is not None else logging.getLogger("desktopenv.agent")
# Clear agent history
self.thoughts = \[\]
self.actions = \[\]
self.observations = \[\]
# You can add more reset logic here based on your agent's needs
\*\*Parameters:\*\*
- \`\`\_logger\`\` (optional): Logger instance for the agent to use during task execution
\*\*Purpose:\*\* Initialize your agent's internal state, clear history (thoughts, actions, observations), set up logging, and prepare for a new task execution.
This ensures your agent starts fresh for each evaluation task.
Integration and Usage
---------------------
Final Agent Placement
~~~~~~~~~~~~~~~~~~~~~
Your agent implementation will ultimately be integrated into OSWorld's execution pipeline through the \`\`lib\_run\_single.py\`\` module.
This file contains the core task execution logic that coordinates between your agent and the OSWorld environment.
The integration flow works as follows:
1. \*\*Agent Implementation\*\*: Your agent class (with \`\`predict()\`\` and \`\`reset()\`\` methods)
2. \*\*lib\_run\_single.py\*\*: Core execution logic that calls your agent methods
3. \*\*run.py/run\_multienv.py/run\_multienv\_xxx.py\*\*: Entry points that import and use lib\_run\_single
\*\*Coordination Requirements:\*\*
- Your agent's \`\`predict()\`\` method will be called by the execution pipeline in \`\`lib\_run\_single.py\`\`
- The \`\`reset()\`\` method will be called at the start of each task
- Your agent should handle the observation formats and return valid actions
- Error handling should be robust as your agent will run in automated evaluation pipelines
\*\*File Structure:\*\*
::
OSWorld/
├── mm\_agents/
│ ├── your\_agent.py # Your agent implementation
│ └── \_\_init\_\_.py
├── lib\_run\_single.py # Core execution logic (calls your agent)
├── run.py # Single-environment entry point
├── run\_multienv.py # Multi-environment entry point
├── run\_multienv\_xxx.py # Multi-environment entry point added by you if needed
└── ...
This architecture ensures your agent integrates seamlessly with OSWorld's evaluation pipeline while maintaining flexibility in your implementation approach.
Running Evaluation
~~~~~~~~~~~~~~~~~~
.. code-block:: bash
# Single-threaded evaluation
python run.py \\
--provider\_name vmware \\
--observation\_type screenshot \\
--model your-custom-agent \\
--max\_steps 15 \\
--client\_password password \\
--result\_dir ./results
# Multi-environment parallel evaluation
python run\_multienv.py \\
--provider\_name docker \\
--observation\_type screenshot \\
--model your-custom-agent \\
--num\_envs 4 \\
--max\_steps 15 \\
--client\_password password
Noted here again different VM providers have different default credentials:
\* \*\*VMware/VirtualBox/Docker\*\*: username \`\`user\`\`, password \`\`password\`\`
\* \*\*AWS\*\*: username \`\`osworld-public-evaluation\`\`, auto-generated password
See Also
--------
\* :doc:\`environment\_explanation\` - Detailed explanation of the OSWorld environment architecture and components
\* :doc:\`task\_example\_explanation\` - Comprehensive guide to understanding and working with OSWorld tasks
\* :doc:\`run\_public\_evaluation\` - Requirements and process for verified leaderboard submission
---
# Unknown
Proxy Guideline
===============
OSWorld provides multiple proxy configuration options for users who need to access the internet through proxy servers, whether behind the 🇨🇳 \`GFW \`\_ or for other network requirements.
Quick Setup with DataImpulse (Recommended)
-------------------------------------------
For users who prefer a ready-to-use proxy solution, we recommend using our pre-configured DataImpulse proxy infrastructure:
2.2 Proxy Setup
~~~~~~~~~~~~~~~~
1. \*\*Register at DataImpulse\*\*
Visit \`DataImpulse \`\_ and create an account.
2. \*\*Purchase a US Residential IP Package\*\*
Purchase a US residential IP package (approximately $1 per 1GB). DataImpulse offers pay-as-you-go pricing with no expiration dates.
3. \*\*Configure Your Credentials\*\*
Configure your credentials in \`\`OSWorld/evaluation\_examples/settings/proxy/dataimpulse.json\`\`:
.. code-block:: json
\[\
{\
"host": "gw.dataimpulse.com",\
"port": 823,\
"username": "your\_username",\
"password": "your\_password",\
"protocol": "http",\
"provider": "dataimpulse",\
"type": "residential",\
"country": "US",\
"note": "Dataimpulse Residential Proxy"\
}\
\]
4. \*\*Enable Proxy in OSWorld\*\*
We have set proxy to \`\`True\`\` in the config JSON files for those proxy-sensitive tasks. OSWorld will automatically wrap these tasks with a proxy when \`\`DesktopEnv\`\`'s \`\`enable\_proxy=True\`\`, while other tasks will not be affected. We recommend using a proxy.
If you don't need proxy at all, please set \`\`enable\_proxy=False\`\` in the experiment's .py file:
.. code-block:: python
env = DesktopEnv(
...
enable\_proxy=False,
...
)
.. note::
For detailed information about the DesktopEnv interface, please refer to :doc:\`../user\_guides/environment\_explanation\`.
.. warning::
Disabling the proxy will cause some tasks under the Chrome domain to fail.
Manual Proxy Configuration
---------------------------
If you prefer to configure your own proxy server, you can follow the steps below.
1. Configure Your Proxy on the Host Machine
-------------------------------------------
By default, proxy software usually listens only to the local loopback address (\`127.0.0.1\`), which cannot be reached from other machine (including the virtual machine). Hence, firstly make your local proxy software listen to the IP address of the VMWare network card, or simply \`0.0.0.0\` for all the IP addresses. The VMWare network card are usually named \`vmnetX\` like \`vmnet8\`. Make sure to use the IP address within the identical network segment. For example, \`192.168.108.1/24\` and \`192.268.108.130/24\` are within the same network segment, \*i.e.\*, the same subnet mask (24) and the same prefix (\`192.168.108\`, 24-bit length). Usually, different VM instances share the same network segment, and so, the effective host IPs are the same.
After launching the VM, you can use
.. code-block:: sh
# run this command on host
# change ws to fusion if you use VMWare Fusion
vmrun -T ws getGuestIPAddress /path/to/vmx/file
to get the IP of the VM. As for host IPs, on Ubuntu (Linux) machine, you can use \`ip a\` command to check the IP addresses of each network card. On Windows machine, you can use \`ipconfig\` command to check the IP addresses of each network card. Recognize the correct IP and note it for later use.
Then you should configure the listening address of your proxy software:
.. image:: /\_static/assets/proxysetup.png
If you cannot change the listening address of your proxy software, you can set up port forwarding. Suppose your proxy software is listening to 1080 port of localhost (\`127.0.0.1\`), and the effective host IP address is \`192.168.108.1\`. On Ubuntu (Linux), you can use \`socat\` to forward \`192.168.108.1:1080\` to \`127.0.0.1:1080\`:
.. code-block:: sh
socat TCP-LISTEN:1080,bind=192.168.108.1,fork TCP:127.0.0.1:1080
On Windows, if you have administrative privilege, you can simply run the following command in a \`cmd\` window with admin privilege.
.. code-block:: dosbatch
netsh interface portproxy add v4tov4 listenaddress=192.168.108.1 listenport=1080 connectaddress=127.0.0.1 connectport=1080
Or if you haven't got administrative privilege, you can use \`ncat\` bundled in \`Nmap \`\_\_ to forward the port:
.. code-block:: dosbatch
ncat -k -l 192.168.108.1 1080 --sh-exec 'ncat 127.0.0.1 1080'
2. Configure in the VM Machine
------------------------------
For the Ubuntu Image
~~~~~~~~~~~~~~~~~~~~
Configuration by GUI
^^^^^^^^^^^^^^^^^^^^
Open system network setting in the VM.
.. image:: /\_static/assets/netsetting1.png
.. image:: /\_static/assets/netsetting3.png
Then, click on "Network Proxy".
.. image:: /\_static/assets/netsetting4.png
Set an appropriate proxy mode. Usually, use "Manual" mode, and set the correct IP addresses and ports. The IP address should be the host machine IP noted in the previous step.
Then you can open a chrome page to check if the proxy works well.
Configuration by Command Line
^^^^^^^^^^^^^^^^^^^^^^^^^^^^^
If configuration by GUI is not suitable for you, you can instead execute the following commands in the VM to configure proxy on the Ubuntu image:
.. code-block:: sh
# run these command in the VM
gsettings set org.gnome.system.proxy mode 'manual'
gsettings set org.gnome.system.proxy.http host 'xxx.xxx.xxx.xxx'
gsettings set org.gnome.system.proxy.http port xxxx
gsettings set org.gnome.system.proxy.https host 'xxx.xxx.xxx.xxx'
gsettings set org.gnome.system.proxy.https port xxxx
gsettings set org.gnome.system.proxy.socks host 'xxx.xxx.xxx.xxx'
gsettings set org.gnome.system.proxy.socks port xxxx
If there isn't a physical or virtual screen available for you to direct operate on the VM, you can run these commands with the help of \`vmrun\`. For instance,
.. code-block:: sh
# run this command on host
# change ws to fusion if you use VMWare Fusion
vmrun -T ws runProgramInGuest /path/to/vmx/file /usr/bin/gsettings set org.gnome.system.proxy mode 'manual'
For Window Image
~~~~~~~~~~~~~~~~
Configuration by GUI
^^^^^^^^^^^^^^^^^^^^
Open system network setting in the VM.
.. image:: /\_static/assets/winnetsetting1.png
.. image:: /\_static/assets/winnetsetting2.png
Then, click on "Proxy".
.. image:: /\_static/assets/winnetsetting3.png
Switch on "Use a proxy server" and type in the correct proxy configurations.
.. image:: /\_static/assets/winnetsetting4.png
Finally, remember to click on "Save".
Note that only HTTP proxy is supported. Subsequently, you can open a chrome page to check if the proxy works well.
3. Create a New Snapshot
------------------------
After modifying the virtual machine, remember to create a new snapshot and start from this new snapshot at experiments.
.. code-block:: sh
# change ws to fusion if you use VMWare Fusion
vmrun -T ws snapshot /path/to/vmx/file snapshot\_name
.. code-block:: python
# Modify snapshot\_name in "desktop\_env/envs/desktop\_env.py", line 50
snapshot\_name: str = "snapshot\_name",
4. Modify chrome startup command
--------------------------------
By searching \`"--remote-debugging-port=1337"\`, you can find all the places that involve Chrome startup commands, and add the parameter \`--proxy-server=host\_IP:port\`
.. code-block:: python
# example
# before
"command": \["google-chrome", "--remote-debugging-port=1337"\]
# after (add proxy parameter)
"command": \["google-chrome", "--remote-debugging-port=1337", "--proxy-server=192.168.108.1:1080"\]
Replace \`\`192.168.108.1:1080\`\` with your actual host IP and proxy port.
See Also
--------
- \`DataImpulse Official Website \`\_ - Residential proxy service provider
- :doc:\`../user\_guides/environment\_explanation\` - DesktopEnv interface documentation with enable\_proxy parameter
- :doc:\`quickstart\` - Quick start guide for OSWorld
- :doc:\`install\_provider/index\` - Provider-specific installation guides
---
# Unknown
OSWorld Task Examples Explanation
====================================
This document explains the structure and meaning of task example JSON files in OSWorld, which is crucial for understanding and extending the benchmark.
Overview
--------
OSWorld tasks are designed to benchmark agents' abilities when interacting with GUI environments. Each task is defined as a JSON file containing all necessary information to set up, execute, and evaluate the task.
Task examples are stored in the \`\`./examples\`\` directory, where each data item follows a standardized JSON format that defines the task setup, execution context, and evaluation criteria.
JSON Schema Structure
---------------------
Each task example JSON file contains the following fields:
Core Fields
~~~~~~~~~~~
\*\*id\*\* (string, required)
A unique identifier for the task. This is typically a UUID that distinguishes this task from all others in the dataset.
\*\*instruction\*\* (string, required)
The natural language instruction describing what the agent should accomplish. This is the primary task description that guides the agent's behavior.
\*\*source\*\* (string, optional)
The origin or reference for this task example. This could be:
- A website URL where the task was inspired from
- A forum discussion
- A research paper
- Manual creation by the dataset authors
\*\*related\_apps\*\* (array of strings, required)
List of applications that are involved in completing this task. These apps may be:
- Pre-opened as part of the initial setup
- Required to be opened during task execution
- Used for evaluation purposes
Setup and Configuration
~~~~~~~~~~~~~~~~~~~~~~~
\*\*config\*\* (array of objects, required)
Scripts and commands to set up the initial state of the task environment. This includes:
- Launching applications
- Opening specific files or URLs
- Setting up network proxies or debugging connections
- Configuring system states
Each config item has a \`\`type\`\` field that determines the setup action, and \`\`parameters\`\` that specify the action details.
\*\*snapshot\*\* (string, deprecated)
Previously used to specify a pre-configured environment snapshot. This field is deprecated in favor of the more flexible \`\`config\`\` system.
Evaluation
~~~~~~~~~~
\*\*evaluator\*\* (object, required)
Defines how the task completion should be evaluated. Contains:
- \`\`func\`\`: The evaluation function to use
- \`\`result\`\`: Expected output location and format
- \`\`expected\`\`: Ground truth or reference for comparison
\*\*trajectory\*\* (string, deprecated)
Previously pointed to annotated human demonstration trajectories. This is being phased out in favor of more robust evaluation methods.
Environment Settings
~~~~~~~~~~~~~~~~~~~~
\*\*proxy\*\* (boolean, optional)
Indicates whether the task requires network proxy configuration. When \`\`true\`\`:
- Network traffic may need to be routed through specific proxies
- Useful for tasks requiring specific network conditions
- May affect how web-based applications behave
.. note::
If you turn on the proxy, make sure you always:
- have enough balance for the proxy service, otherwise this will cause internet connection failure
- provide the correct client machine password to DesktopEnv, otherwise proxy settings will fail
\*\*fixed\_ip\*\* (boolean, optional)
Specifies whether the task requires a fixed IP address configuration:
- \`\`true\`\`: Task needs consistent IP addressing
- \`\`false\`\`: Task can work with dynamic IP assignment
- Important for tasks involving network-dependent applications, or have detection on IP changes to protect from bot
\*\*possibility\_of\_env\_change\*\* (string, optional)
Indicates the likelihood that the environment state may change during task execution:
- \`\`"low"\`\`: Environment is static and almost impossible to change, e.g. a tasks on local slides
- \`\`"medium"\`\`: Some environmental changes may occur but unlikely, e.g. a widely adapted blog, some old website that is not updated
- \`\`"high"\`\`: Significant environmental changes are found and expected, e.g. a website that is updated frequently about the elements, layout, or content
This helps in planning task execution strategies and evaluation approaches.
.. note::
You can add additional fields to the JSON as notes or comments, as long as you don't break the original structure.
Detailed Example Analysis
-------------------------
Chrome PDF Download Task
~~~~~~~~~~~~~~~~~~~~~~~~~
Let's examine a comprehensive example that demonstrates how to convert a webpage to PDF using Chrome:
.. code-block:: json
{
"id": "e1e75309-3ddb-4d09-92ec-de869c928143",
"instruction": "Computer, can you turn the webpage I'm looking at into a PDF file, save it to my Desktop with the default filename and set the margins to none?",
"source": "https://in5stepstutorials.com/google-chrome/save-web-page-as-pdf-in-chrome.php",
"config": \[\
{\
"type": "launch",\
"parameters": {\
"command": \[\
"google-chrome",\
"--remote-debugging-port=1337"\
\]\
}\
},\
{\
"type": "launch", \
"parameters": {\
"command": \[\
"socat",\
"tcp-listen:9222,fork",\
"tcp:localhost:1337"\
\]\
}\
},\
{\
"type": "chrome\_open\_tabs",\
"parameters": {\
"urls\_to\_open": \[\
"https://lilianweng.github.io/posts/2023-06-23-agent/"\
\]\
}\
}\
\],
"related\_apps": \["chrome"\],
"evaluator": {
"func": "compare\_pdfs",
"result": {
"type": "vm\_file",
"path": "/home/user/Desktop/LLM Powered Autonomous Agents \_ Lil'Log.pdf",
"dest": "LLM Powered Autonomous Agents \_ Lil'Log.pdf"
},
"expected": {
"type": "pdf\_from\_url",
"path": "https://lilianweng.github.io/posts/2023-06-23-agent/",
"dest": "LLM Powered Autonomous Agents \_ Lil'Log\_gold.pdf"
}
},
"proxy": true,
"fixed\_ip": false,
"possibility\_of\_env\_change": "medium"
}
Field-by-Field Analysis
~~~~~~~~~~~~~~~~~~~~~~~
\*\*Task Identity and Purpose\*\*
- \`\`id\`\`: Unique identifier for this specific Chrome PDF task
- \`\`instruction\`\`: Clear natural language description of the desired action
- \`\`source\`\`: Reference to the tutorial that inspired this task
\*\*Initial Setup Configuration\*\*
The \`\`config\`\` array sets up the testing environment:
1. \*\*Chrome Launch\*\*: Starts Google Chrome with remote debugging enabled on port 1337
2. \*\*Proxy Setup\*\*: Uses \`\`socat\`\` to create a proxy from port 9222 to the Chrome debugging port
3. \*\*Page Loading\*\*: Opens the target webpage that needs to be converted to PDF
\*\*Application Context\*\*
- \`\`related\_apps\`\`: Only Chrome is needed for this task
\*\*Evaluation Strategy\*\*
- \`\`func\`\`: Uses \`\`compare\_pdfs\`\` to verify the generated PDF matches expectations
- \`\`result\`\`: Specifies where the agent should save the PDF file
- \`\`expected\`\`: Defines the ground truth PDF generated from the same URL
\*\*Environment Configuration\*\*
- \`\`proxy: true\`\`: Task requires proxy setup since the website may ban your IP
- \`\`fixed\_ip: false\`\`: Dynamic IP addressing is acceptable since the website is not sensitive to IP changes
- \`\`possibility\_of\_env\_change: "medium"\`\`: Some changes may occur since Lilian Weng could modify her blog, though this is unlikely
Advanced Configuration and Evaluation
--------------------------------------
Understanding Config and Evaluator Functions
~~~~~~~~~~~~~~~~~~~~~~~~~~~~~~~~~~~~~~~~~~~~~
.. note::
For detailed information about available setup configurations, post-configurations, and evaluation functions, we recommend reading the source code to understand function signatures and how they are used by DesktopEnv:
- \*\*Setup configurations\*\*: \`desktop\_env/controllers/setup.py \`\_
- \*\*Evaluation functions\*\*: \`desktop\_env/evaluators \`\_
- \*\*Desktop environment\*\*: \`desktop\_env/desktop\_env.py \`\_
The evaluation system consists of two main components:
- \*\*Getters\*\* (\`desktop\_env/evaluators/getters \`\_): Functions that retrieve information from various sources (VM files, VM states, cloud files, webpage information, etc.) to gather data for task completion assessment.
- \*\*Metrics\*\* (\`desktop\_env/evaluators/metrics \`\_): Functions that process the retrieved data to determine whether a task has been successfully completed.
Available Getter Functions
~~~~~~~~~~~~~~~~~~~~~~~~~~~
.. code-block:: python
from .chrome import (
get\_default\_search\_engine,
get\_cookie\_data,
get\_bookmarks,
get\_open\_tabs\_info,
get\_pdf\_from\_url,
get\_shortcuts\_on\_desktop,
get\_history,
get\_page\_info,
get\_enabled\_experiments,
get\_chrome\_language,
get\_chrome\_font\_size,
get\_profile\_name,
get\_number\_of\_search\_results,
get\_googledrive\_file,
get\_active\_tab\_info,
get\_enable\_do\_not\_track,
get\_enable\_enhanced\_safety\_browsing,
get\_new\_startup\_page,
get\_find\_unpacked\_extension\_path,
get\_data\_delete\_automacally,
get\_active\_tab\_html\_parse,
get\_active\_tab\_url\_parse,
get\_gotoRecreationPage\_and\_get\_html\_content,
get\_url\_dashPart,
get\_active\_url\_from\_accessTree,
get\_find\_installed\_extension\_name,
get\_info\_from\_website,
get\_macys\_product\_url\_parse,
get\_url\_path\_parse # Alias for backward compatibility
)
from .file import get\_cloud\_file, get\_vm\_file, get\_cache\_file, get\_content\_from\_vm\_file
from .general import get\_vm\_command\_line, get\_vm\_terminal\_output, get\_vm\_command\_error
from .gimp import get\_gimp\_config\_file
from .impress import get\_audio\_in\_slide, get\_background\_image\_in\_slide
from .info import get\_vm\_screen\_size, get\_vm\_window\_size, get\_vm\_wallpaper, get\_list\_directory
from .misc import get\_rule, get\_accessibility\_tree, get\_rule\_relativeTime, get\_time\_diff\_range
from .replay import get\_replay
from .vlc import get\_vlc\_playing\_info, get\_vlc\_config, get\_default\_video\_player
from .vscode import get\_vscode\_config
from .calc import get\_conference\_city\_in\_order
Available Metric Functions
~~~~~~~~~~~~~~~~~~~~~~~~~~~
.. code-block:: python
from .basic\_os import (
check\_gnome\_favorite\_apps,
is\_utc\_0,
check\_text\_enlarged,
check\_moved\_jpgs,
is\_in\_vm\_clickboard
)
from .chrome import (
is\_expected\_tabs,
is\_expected\_bookmarks,
compare\_pdfs,
compare\_htmls,
compare\_archive,
is\_cookie\_deleted,
is\_shortcut\_on\_desktop,
check\_font\_size,
check\_enabled\_experiments,
check\_history\_deleted,
is\_expected\_search\_query,
is\_expected\_active\_tab,
is\_expected\_url\_pattern\_match,
is\_added\_to\_steam\_cart,
is\_expected\_installed\_extensions,
compare\_pdf\_images,
is\_expected\_active\_tab\_approximate
)
from .docs import (
compare\_font\_names,
compare\_subscript\_contains,
has\_page\_numbers\_in\_footers,
compare\_docx\_lines,
evaluate\_colored\_words\_in\_tables,
check\_highlighted\_words,
evaluate\_strike\_through\_last\_paragraph,
evaluate\_conversion,
evaluate\_spacing,
check\_italic\_font\_size\_14,
evaluate\_alignment,
get\_unique\_train\_ids,
check\_no\_duplicates,
compare\_init\_lines,
find\_default\_font,
contains\_page\_break,
compare\_docx\_files,
compare\_docx\_tables,
compare\_line\_spacing,
compare\_insert\_equation,
compare\_highlighted\_text,
is\_first\_line\_centered,
check\_file\_exists,
check\_tabstops,
compare\_contains\_image,
compare\_docx\_files\_and\_ignore\_new\_lines,
compare\_docx\_images,
compare\_image\_text,
compare\_references,
compare\_unique\_train\_records
)
from .general import (
check\_csv,
check\_accessibility\_tree,
run\_sqlite3,
check\_json,
check\_list,
exact\_match,
match\_in\_list,
is\_in\_list,
fuzzy\_match,
check\_include\_exclude,
check\_direct\_json\_object,
compare\_time\_in\_speedtest\_results,
is\_included\_all\_json\_objects,
is\_gold\_text\_included\_in\_pdf,
check\_line\_number,
file\_contains,
compare\_terminal\_and\_txt,
fuzzy\_place\_math,
compare\_python\_pure\_text,
diff\_text\_file,
literal\_match
)
from .gimp import (
check\_structure\_sim\_resized,
check\_brightness\_decrease\_and\_structure\_sim,
check\_contrast\_increase\_and\_structure\_sim,
check\_saturation\_increase\_and\_structure\_sim,
check\_image\_size,
check\_image\_mirror,
check\_palette\_and\_structure\_sim,
check\_textbox\_on\_leftside,
check\_green\_background,
check\_file\_exists\_and\_structure\_sim,
check\_triangle\_position,
check\_structure\_sim,
check\_config\_status,
compare\_image\_list,
increase\_saturation,
decrease\_brightness,
check\_file\_exists,
compare\_triangle\_positions,
check\_sharper,
check\_image\_file\_size
)
from .libreoffice import check\_libre\_locale
from .others import compare\_epub, check\_mp3\_meta
from .pdf import check\_pdf\_pages
from .slides import (
check\_presenter\_console\_disable,
check\_image\_stretch\_and\_center,
check\_slide\_numbers\_color,
compare\_pptx\_files,
check\_strikethrough,
check\_slide\_orientation\_Portrait,
evaluate\_presentation\_fill\_to\_rgb\_distance,
check\_left\_panel,
check\_transition,
check\_page\_number\_colors,
check\_auto\_saving\_time
)
from .table import (
compare\_table,
compare\_csv,
compare\_conference\_city\_in\_order
)
from .thunderbird import (
check\_thunderbird\_prefs,
check\_thunderbird\_filter,
check\_thunderbird\_folder
)
from .vlc import (
is\_vlc\_playing,
is\_vlc\_recordings\_folder,
is\_vlc\_fullscreen,
compare\_images,
compare\_audios,
compare\_videos,
check\_qt\_bgcone,
check\_one\_instance\_when\_started\_from\_file,
check\_qt\_minimal\_view,
check\_qt\_max\_volume,
check\_qt\_slider\_colours,
check\_global\_key\_play\_pause
)
from .vscode import (
compare\_text\_file,
compare\_config,
compare\_answer,
compare\_result\_files,
is\_extension\_installed,
check\_json\_settings,
check\_json\_keybindings,
check\_python\_file\_by\_test\_suite,
check\_python\_file\_by\_gold\_file,
check\_html\_background\_image,
compare\_zip\_files
)
def infeasible():
pass
.. note::
When reusing existing functions to create new tasks, we recommend carefully reading our implementations to ensure you fully understand the characteristics and requirements of these functions.
Multiple Answer Evaluation with OR Logic
~~~~~~~~~~~~~~~~~~~~~~~~~~~~~~~~~~~~~~~~~
When a task has multiple acceptable answers, you can use the \`\`"conj": "or"\`\` connector. For tasks requiring all conditions to be met simultaneously, use \`\`"conj": "and"\`\`.
\*\*Example: LibreOffice Writer Task with Multiple Valid Outcomes\*\*
.. code-block:: json
{
...
"evaluator": {
"postconfig": \[\
{\
"type": "activate\_window",\
"parameters": {\
"window\_name": "CCCH9003\_Tutorial\_guidelines.docx - LibreOffice Writer",\
"strict": true\
}\
},\
{\
"type": "sleep",\
"parameters": {\
"seconds": 0.5\
}\
},\
{\
"type": "execute",\
"parameters": {\
"command": \[\
"python",\
"-c",\
"import pyautogui; import time; pyautogui.hotkey('ctrl', 's'); time.sleep(0.5); "\
\]\
}\
}\
\],
"func": \[\
"compare\_docx\_files",\
"compare\_docx\_files",\
"compare\_docx\_files"\
\],
"conj": "or",
"expected": \[\
{\
"type": "cloud\_file",\
"path": "https://huggingface.co/datasets/xlangai/ubuntu\_osworld\_file\_cache/resolve/main/libreoffice\_writer/88fe4b2d-3040-4c70-9a70-546a47764b48/CCCH9003\_Tutorial\_guidelines\_Gold\_1.docx",\
"dest": "CCCH9003\_Tutorial\_guidelines\_Gold\_1.docx"\
},\
{\
"type": "cloud\_file",\
"path": "https://huggingface.co/datasets/xlangai/ubuntu\_osworld\_file\_cache/resolve/main/libreoffice\_writer/88fe4b2d-3040-4c70-9a70-546a47764b48/CCCH9003\_Tutorial\_guidelines\_Gold\_2.docx",\
"dest": "CCCH9003\_Tutorial\_guidelines\_Gold\_2.docx"\
},\
{\
"type": "cloud\_file",\
"path": "https://huggingface.co/datasets/xlangai/ubuntu\_osworld\_file\_cache/resolve/main/libreoffice\_writer/88fe4b2d-3040-4c70-9a70-546a47764b48/CCCH9003\_Tutorial\_guidelines\_Gold\_3.docx",\
"dest": "CCCH9003\_Tutorial\_guidelines\_Gold\_3.docx"\
}\
\],
"result": \[\
{\
"type": "vm\_file",\
"path": "/home/user/Desktop/CCCH9003\_Tutorial\_guidelines.docx",\
"dest": "CCCH9003\_Tutorial\_guidelines.docx"\
},\
{\
"type": "vm\_file",\
"path": "/home/user/Desktop/CCCH9003\_Tutorial\_guidelines.docx",\
"dest": "CCCH9003\_Tutorial\_guidelines.docx"\
},\
{\
"type": "vm\_file",\
"path": "/home/user/Desktop/CCCH9003\_Tutorial\_guidelines.docx",\
"dest": "CCCH9003\_Tutorial\_guidelines.docx"\
}\
\],
"options": \[\
{\
"ignore\_blanks": false\
},\
{\
"ignore\_blanks": false\
},\
{\
"ignore\_blanks": false\
}\
\]
},
...
}
This example demonstrates how the \`\`"conj": "or"\`\` field allows any one of the three evaluation functions to pass for the task to be considered successful. Each evaluation compares the same result file against different expected outcomes.
Multi-Parameter File Handling with Selective Input
~~~~~~~~~~~~~~~~~~~~~~~~~~~~~~~~~~~~~~~~~~~~~~~~~~~
When dealing with multiple file parameters, you can use the \`\`"gives"\`\` field to control which files are actually passed to the evaluation function. This is useful when you want to download multiple files but only provide specific ones to the evaluator.
\*\*Example: Selective File Input with the "gives" Field\*\*
.. code-block:: json
{
...
"evaluator": {
"postconfig": \[\
{\
"type": "activate\_window",\
"parameters": {\
"window\_name": "HK\_train\_record.docx - LibreOffice Writer",\
"strict": true\
}\
},\
{\
"type": "sleep",\
"parameters": {\
"seconds": 0.5\
}\
},\
{\
"type": "execute",\
"parameters": {\
"command": \[\
"python",\
"-c",\
"import pyautogui; import time; pyautogui.hotkey('ctrl', 's'); time.sleep(0.5); "\
\]\
}\
}\
\],
"func": "compare\_unique\_train\_records",
"result": {
"type": "vm\_file",
"path": "/home/user/Desktop/HK\_train\_record.docx",
"dest": "HK\_train\_record.docx"
},
"expected": {
"type": "cloud\_file",
"path": \[\
"https://huggingface.co/datasets/xlangai/ubuntu\_osworld\_file\_cache/resolve/main/libreoffice\_writer/6f81754e-285d-4ce0-b59e-af7edb02d108/HK\_train\_record\_Gold.docx",\
"https://huggingface.co/datasets/xlangai/ubuntu\_osworld\_file\_cache/resolve/main/libreoffice\_writer/6f81754e-285d-4ce0-b59e-af7edb02d108/HK\_train\_record.docx"\
\],
"dest": \[\
"HK\_train\_record\_Gold.docx",\
"HK\_train\_record\_Original.docx"\
\],
"multi": true,
"gives": \[\
0,\
1\
\]
}
},
...
}
In this example:
- \*\*Multiple Files\*\*: Two files are downloaded from cloud storage (\`\`HK\_train\_record\_Gold.docx\`\` and \`\`HK\_train\_record.docx\`\`)
- \*\*Selective Input\*\*: The \`\`"gives": \[0, 1\]\`\` field specifies that both files (indices 0 and 1) should be passed to the evaluation function
- \*\*Multi-parameter Support\*\*: The \`\`"multi": true\`\` flag enables handling multiple file parameters
- \*\*Controlled Evaluation\*\*: Only the specified files are provided to the \`\`compare\_unique\_train\_records\`\` function, even though more files could be available
This pattern is particularly useful when you need reference files for evaluation but don't want to include all downloaded files in the actual comparison.
Config Types Reference
----------------------
Common configuration types used in task setup:
\*\*launch\*\*
Executes system commands to start applications or services.
Example:
.. code-block:: json
{
"type": "launch",
"parameters": {
"command": \["application-name", "--option1", "--option2"\]
}
}
\*\*chrome\_open\_tabs\*\*
Opens specific URLs in Chrome browser tabs.
Example:
.. code-block:: json
{
"type": "chrome\_open\_tabs",
"parameters": {
"urls\_to\_open": \["https://example.com", "https://another-site.com"\]
}
}
\*\*activate\_window\*\*
Brings a specific application window to focus.
Example:
.. code-block:: json
{
"type": "activate\_window",
"parameters": {
"window\_name": "Document.docx - LibreOffice Writer",
"strict": true
}
}
\*\*execute\*\*
Runs arbitrary commands or scripts within the environment.
Example:
.. code-block:: json
{
"type": "execute",
"parameters": {
"command": \["python", "-c", "import pyautogui; pyautogui.hotkey('ctrl', 's');"\]
}
}
\*\*sleep\*\*
Introduces delays between operations.
Example:
.. code-block:: json
{
"type": "sleep",
"parameters": {
"seconds": 0.5
}
}
See Also
--------
\* :doc:\`environment\_explanation\` - Detailed explanation of the OSWorld environment architecture and components
\* :doc:\`add\_new\_agent\` - Instructions for implementing and integrating custom agents into the OSWorld framework
\* :doc:\`run\_public\_evaluation\` - Requirements and process for verified leaderboard submission
---
# Unknown
Adding New Tasks to OSWorld
=============================
If you want to extend the evaluation and use OSWorld as a training environment to construct training tasks, the following sections will teach you how to quickly build similar and completely new tasks based on OSWorld.
Coming soon...
---
# Unknown
Run OSWorld
===========
Agent Baselines
---------------
.. attention::
\*\*Important Configuration Requirements:\*\*
\* \*\*Google Account Tasks\*\*: Some tasks require Google account access and OAuth2.0 configuration. Please refer to :doc:\`google\_account\_guideline\` for detailed setup instructions.
\* \*\*Proxy Configuration\*\*: Some tasks may require proxy settings to function properly (this depends on the strength of website defenses against your network location). Please refer to your system's proxy configuration documentation.
\* \*\*Impact of Missing Configuration\*\*: If these configurations are not properly set up, the corresponding tasks will fail to execute correctly, leading to lower evaluation scores.
If you wish to run the baseline agent used in our paper, you can execute the following command as an example under the GPT-4o pure-screenshot setting:
Set \*\*OPENAI\_API\_KEY\*\* environment variable with your API key
.. code-block:: bash
export OPENAI\_API\_KEY='changeme'
Optionally, set \*\*OPENAI\_BASE\_URL\*\* to use a custom OpenAI-compatible API endpoint
.. code-block:: bash
export OPENAI\_BASE\_URL='http://your-custom-endpoint.com/v1' # Optional: defaults to https://api.openai.com
Single-threaded execution (deprecated, using \`\`vmware\`\` provider as example)
.. code-block:: bash
python run.py \\
--provider\_name vmware \\
--path\_to\_vm Ubuntu/Ubuntu.vmx \\
--headless \\
--observation\_type screenshot \\
--model gpt-4o \\
--sleep\_after\_execution 3 \\
--max\_steps 15 \\
--result\_dir ./results \\
--client\_password password
Parallel execution (example showing switching provider to \`\`docker\`\`)
.. code-block:: bash
python run\_multienv.py \\
--provider\_name docker \\
--headless \\
--observation\_type screenshot \\
--model gpt-4o \\
--sleep\_after\_execution 3 \\
--max\_steps 15 \\
--num\_envs 10 \\
--client\_password password
The results, which include screenshots, actions, and video recordings of the agent's task completion, will be saved in the \`\`./results\`\` (or other \`\`result\_dir\`\` you specified) directory in this case. You can then run the following command to obtain the result:
.. code-block:: bash
python show\_result.py
Result Calculation and Google Drive Tasks
^^^^^^^^^^^^^^^^^^^^^^^^^^^^^^^^^^^^^^^^^^
OSWorld contains a total of \*\*369 tasks\*\*, including \*\*8 Google Drive tasks\*\* that require special configuration. Due to Google's strict security policies and IP-based restrictions, these Google Drive tasks may fail to initialize properly even when following the configuration guidelines in :doc:\`google\_account\_guideline\`.
\*\*Common Issues with Google Drive Tasks:\*\*
\* IP address changes triggering additional verification
\* OAuth2.0 authentication failures in virtual environments
\* Google's automated bot detection systems
\* Account security restrictions for new devices/locations
\*\*Recommended Solutions:\*\*
You have two acceptable approaches when encountering Google Drive task setup issues:
1. \*\*Manual Configuration (Recommended)\*\*: Manually configure the 8 Google Drive tasks following the troubleshooting steps in :doc:\`google\_account\_guideline\`. This allows you to evaluate all 369 tasks.
2. \*\*Exclude Google Drive Tasks (Acceptable)\*\*: Skip the 8 Google Drive tasks and evaluate the remaining \*\*361 tasks\*\*. This approach is officially supported and acceptable for benchmark comparisons.
.. attention::
\*\*Important\*\*: Both approaches (369 tasks or 361 tasks) are valid for evaluation purposes. When reporting results, please clearly specify which task set was used to ensure fair comparisons with other submissions.
The \`\`show\_result.py\`\` script will automatically calculate success rates based on the tasks that were actually attempted, so excluding the Google Drive tasks will not affect the calculation methodology.
Evaluation
----------
Local Evaluation
^^^^^^^^^^^^^^^^^
Please start by reading through the \`agent interface \`\_ and the \`environment interface \`\_.
Correctly implement the agent interface and import your customized version in the \`\`run.py\`\` or \`\`run\_multienv.py\`\` file.
Afterward, you can execute a command similar to the one in the previous section to run the benchmark on your agent.
Public Evaluation
^^^^^^^^^^^^^^^^^^
If you want your results to be verified and displayed on the verified leaderboard, you need to schedule a meeting with us (current maintainer: tianbaoxiexxx@gmail.com, yuanmengqi732@gmail.com) to run your agent code on our side and have us report the results.
You need to upload and allow us to disclose your agent implementation under the OSWorld framework (you may choose not to expose your model API to the public), along with a report that allows the public to understand what's happening behind the scenes.
Alternatively, if you are from a trusted institution, you can share your monitoring data and trajectories with us.
Please carefully follow the :doc:\`run\_public\_evaluation\` to get results.
See Also
--------
For additional setup and configuration guidance:
\* :doc:\`google\_account\_guideline\` - Step-by-step guide for setting up Google accounts and OAuth2.0 credentials for Google Drive tasks
\* :doc:\`environment\_explanation\` - Detailed explanation of the OSWorld environment architecture and components
\* :doc:\`task\_example\_explanation\` - Comprehensive guide to understanding and working with OSWorld tasks
\* :doc:\`add\_new\_agent\` - Instructions for implementing and integrating custom agents into the OSWorld framework
\* :doc:\`run\_public\_evaluation\` - Requirements and process for verified leaderboard submission
\* :doc:\`../installation/index\` - Complete installation instructions
\* :doc:\`../community/faq\` - Frequently asked questions and troubleshooting
---
# Unknown
Google Account Guideline
========================
Run some OSWorld examples requiring a Google account by following these steps:
Real Accounts
-------------
For tasks including Google or Google Drive, we need a real Google account as well as configured OAuth2.0 secrets.
.. attention::
To prevent environment reset and result evaluation conflicts caused by multiple people using the same Google account simultaneously, we will not provide the public test accounts available. Please register a private Google account.
Register A Blank Google Account
^^^^^^^^^^^^^^^^^^^^^^^^^^^^^^
1. Go to Google web site and register a blank new account
- In this testbed, you do not need to provide any recovery email or phone, since we only use it for testing cases
- Just \*\*IGNORE\*\* any security recommendations
- Shut \*\*OFF\*\* the \`2-Step Verification \`\_ to avoid failure in environment setup (requesting phone verification code)
.. figure:: /\_static/assets/googleshutoff.png
:width: 80%
:align: center
:alt: Shut Off 2-Step Verification
Shut Off 2-Step Verification
.. attention::
We strongly recommend that you register a new blank account instead of using an existing one, in order to avoid messing up your personal workspace.
2. Next, copy and rename the template file \`\`settings.json.template\`\` into \`\`settings.json\`\` under folder \`\`evaluation\_examples/settings/google/\`\`. Remember to replace the two fields \`\`email\`\` and \`\`password\`\`:
- these two fields are used to simulate real people login to Chrome browser during environment setup for relevant examples in the virtual machine
.. code-block:: json
{
"email": "your\_google\_account@gmail.com",
"password": "your\_google\_account\_password"
}
Create A Google Cloud Project
^^^^^^^^^^^^^^^^^^^^^^^^^^^^^
1. Navigate to \`Google Cloud Project Creation \`\_ page and create a new GCP (see \`Create a Google Cloud Project \`\_ for detailed steps). You can use any project name.
2. Go to the \`Google Drive API console \`\_ and enable the GoogleDrive API for the created project (see \`Enable and disable APIs \`\_ for detailed steps)
.. figure:: /\_static/assets/creategcp.png
:width: 80%
:align: center
:alt: Create GCP
.. figure:: /\_static/assets/enableapi.png
:width: 100%
:align: center
:alt: Google Drive API
Configure OAuth Consent Screen
^^^^^^^^^^^^^^^^^^^^^^^^^^^^^^
To configure the OAuth2.0 screen for the created GCP, go to page \`OAuth consent screen \`\_:
1. For User Type, choose "External" and click "Create"
.. figure:: /\_static/assets/usertype.png
:width: 80%
:align: center
:alt: User Type
2. For App information, type in any App name you like (e.g., DataAccess), and choose the current Google Gmail into the field \`\`User support email\`\`.
.. figure:: /\_static/assets/oauthapp.png
:width: 80%
:align: center
:alt: App Info
3. For Developer information, also fill in the current Gmail account. Leave other fields blank and click the button "SAVE AND CONTINUE".
.. figure:: /\_static/assets/developer.png
:width: 80%
:align: center
:alt: Developer information
4. Leave fields blank for \`\`Scopes\`\` and continue to \`\`Test Users\`\`. Add the current Gmail account via clicking button "+ ADD USERS".
.. figure:: /\_static/assets/testusers.png
:width: 80%
:align: center
:alt: Test Users
5. Finish all configuration and we will come to the configured OAuth consent screen. There is another thing, PUBLISH APP to extend the lifecycle of credentials. Otherwise, the refresh token is only valid in 7 days (refer to \`google official doc \`\_ and \`stackoverflow post \`\_ for details).
.. figure:: /\_static/assets/publishapp.png
:width: 80%
:align: center
:alt: Publish APP
Create OAuth2.0 Credentials
^^^^^^^^^^^^^^^^^^^^^^^^^^^
1. Go to the \`credentials page \`\_, click "CREATE CREDENTIALS -> OAuth client ID"
.. figure:: /\_static/assets/oauth2.0.png
:width: 100%
:align: center
:alt: Create OAuth client ID
2. For Application type, please choose "Desktop app". You can use any Name. And click "CREATE".
.. figure:: /\_static/assets/desktopapp.png
:width: 100%
:align: center
:alt: Desktop App
3. Now, in the pop-up window, you can download the JSON file \`\`client\_secret\_xxxxx.json\`\`. Move and rename this .json file to file path \`\`evaluation\_examples/settings/googledrive/client\_secrets.json\`\` in the OSWorld project. The folder should look like:
.. code-block:: text
- evaluation\_examples/
- settings/
- google/
- settings.json
- settings.json.template
- googledrive/
- settings.yml
- client\_secrets.json
4. Note that, when you first run a task including Google Drive, there will be a URL requesting your permission. Open the link in unsafe mode using the Gmail you filled in \`\`evaluation\_examples/settings/google/settings.json\`\`, authorize, and confirm your choice once for all. Eventually, you will see a prompt message "The authentication flow has completed." on a blank web page.
.. figure:: /\_static/assets/unsafemode.png
:width: 100%
:align: center
:alt: Unsafe mode
.. figure:: /\_static/assets/authorization.png
:width: 100%
:align: center
:alt: Authorization
Potential Issues
^^^^^^^^^^^^^^^^
Due to strict checks by Google safety teams, even if we shut down the 2-step verification, Google still detects potential risks of your account, especially \*\*when you frequently change the login device\*\*. You may encounter the following issues:
Phone Verification Code Required
""""""""""""""""""""""""""""""""
When the VM tries to log into the Google Drive page, Google requests you to provide a phone number and verification code. This may occur when you change your IP or device for the first time.
.. figure:: /\_static/assets/googlephonecode.png
:width: 100%
:align: center
:alt: Phone Verification Code Required
To solve it, typing any phone number is adequate (since we shut off the 2-step verification and do not provide any recovery phone number). And fill in the received verification code. After that, hopefully, Google will remember this new login IP or device. Now, you can restart the task, and this time, it should work.
Identity Verification
"""""""""""""""""""""
.. figure:: /\_static/assets/googleidentity.png
:width: 100%
:align: center
:alt: Identity Verification
In this case, Google does not give you the chance to use a phone verification code. Since we do not provide any recovery email/phone and shut down the 2-step verification, we are unable to log in from the new device. We hypothesize that this problem may occur when you frequently change the login IPs or devices, such that Google detects the unusual usages. The only solution is to reset the password from the device in which you register this Google account.
.. attention::
Sadly, we do not have a permanent solution. The only suggestion is not to frequently change your login IP or device. If you encounter any problem above, Google may urge you to change the password. Also, remember to update the password in \`\`evaluation\_examples/settings/google/settings.json\`\`.
Task Count and Evaluation Options
^^^^^^^^^^^^^^^^^^^^^^^^^^^^^^^^^^
\*\*Total Task Overview\*\*: OSWorld benchmark contains \*\*369 total tasks\*\*, including \*\*8 tasks\*\* that specifically require Google Drive integration and the OAuth2.0 setup described in this guide.
\*\*Impact of Google Drive Configuration Issues\*\*:
Due to Google's increasingly strict security policies, you may encounter persistent setup issues that prevent the 8 Google Drive tasks from running properly, even after following all configuration steps. This is a known limitation, particularly when:
\* Running evaluations from different IP addresses or geographic locations
\* Using virtual machines or cloud infrastructure
\* Encountering Google's automated bot detection systems
\* Facing account security restrictions for new devices
\*\*Acceptable Evaluation Approaches\*\*:
The OSWorld benchmark officially supports two evaluation methodologies:
1. \*\*Full Evaluation (369 tasks)\*\*: Complete the Google Drive setup successfully and evaluate all tasks
2. \*\*Standard Evaluation (361 tasks)\*\*: Skip the 8 Google Drive tasks and evaluate the remaining tasks
.. attention::
\*\*Both approaches are acceptable\*\* for benchmark evaluation and result reporting. The choice between 369 vs 361 tasks does not invalidate your evaluation - simply specify which approach you used when reporting results.
\*\*Recommendation\*\*: If you encounter persistent Google Drive setup issues after following this guide, consider using the 361-task evaluation approach rather than spending excessive time on these 8 tasks, especially during initial development and testing phases.
---
# Unknown
FAQ
===
What is the username and password for the virtual machines?
------------------------------------------------------------
The username and password for the virtual machines are as follows (for provider \`\`vmware\`\`, \`\`virtualbox\`\` and \`\`docker\`\`): we set the account credentials for Ubuntu as \`\`user\`\` / \`\`password\`\`.
For cloud service providers like \`\`aws\`\`, to prevent attacks due to weak passwords, we default to \`\`osworld-public-evaluation\`\`.
If you make further modifications, remember to set the client\_password variable and pass it to DesktopEnv and Agent (if supported) when running experiments.
Some features like setting up proxy require the environment to have the client VM password to obtain sudo privileges, and for some OSWorld tasks, the agent needs the password to obtain sudo privileges to complete them.
- \*\*Windows:\*\* TBD
How to setup the account and credentials for Google and Google Drive?
---------------------------------------------------------------------
See \`Account Guideline \`\_.
How can I configure a proxy for the VM (if I'm behind the GFW, or I don't want some of my tasks to be identified as bot and get lower scores)?
----------------------------------------------------------------------------------------------------------------------------------------------
If you want to set it up yourself, please refer to \`Proxy Guideline \`\_.
We also provide a pre-configured solution based on dataimpulse, please refer to \`proxy-setup section in PUBLIC\_EVALUATION\_GUIDELINE \`\_.
How to submit Evaluation?
-------------------------
Local Evaluation
~~~~~~~~~~~~~~~~~
Please start by reading through the \`agent interface \`\_ and the \`environment interface \`\_.
Correctly implement the agent interface and import your customized version in the \`\`run.py\`\` or \`\`run\_multienv.py\`\` file.
Afterward, you can execute a command similar to the one in the previous section to run the benchmark on your agent.
Public Evaluation
~~~~~~~~~~~~~~~~~~
If you want your results to be verified and displayed on the verified leaderboard, you need to schedule a meeting with us (current maintainer: tianbaoxiexxx@gmail.com, yuanmengqi732@gmail.com) to run your agent code on our side and have us report the results.
You need to upload and allow us to disclose your agent implementation under the OSWorld framework (you may choose not to expose your model API to the public), along with a report that allows the public to understand what's happening behind the scenes.
Alternatively, if you are from a trusted institution, you can share your monitoring data and trajectories with us.
Please carefully follow the \`Public Evaluation Guideline \`\_ to get results.
What about the Google Drive tasks? Can I skip them?
----------------------------------------------------
\*\*Task Overview\*\*: OSWorld contains \*\*369 total tasks\*\*, including \*\*8 Google Drive tasks\*\* that require Google account setup and OAuth2.0 configuration.
\*\*Common Issues\*\*: Due to Google's strict security policies and IP-based restrictions, these 8 Google Drive tasks may fail to initialize properly even with correct configuration, especially when:
\* Running from different IP addresses or cloud environments
\* Using virtual machines or automated evaluation systems
\* Encountering Google's bot detection mechanisms
\* Facing account security restrictions
\*\*Acceptable Solutions\*\*:
1. \*\*Complete Setup (369 tasks)\*\*: Follow the detailed setup guide in :doc:\`../installation/google\_account\_guideline\` and troubleshoot until all Google Drive tasks work properly.
2. \*\*Skip Google Drive Tasks (361 tasks)\*\*: Exclude the 8 problematic Google Drive tasks and evaluate the remaining 361 tasks. This approach is \*\*officially supported and acceptable\*\*.
\*\*For Result Reporting\*\*: When submitting or comparing results, clearly specify whether you evaluated 369 tasks (with Google Drive) or 361 tasks (without Google Drive). Both approaches are valid for benchmark evaluation purposes.
What are the running times and costs under different settings? (Deprecated)
----------------------------------------------------------------------------
.. list-table::
:header-rows: 1
\* - Setting
- Expected Time\*
- Budget Cost (Full Test Set/Small Test Set)
\* - GPT-4V (screenshot)
- 10h
- $100 ($10)
\* - Gemini-ProV (screenshot)
- 15h
- $0 ($0)
\* - Claude-3 Opus (screenshot)
- 15h
- $150 ($15)
\* - GPT-4V (a11y tree, SoM, etc.)
- 30h
- $500 ($50)
\*No environment parallelism. Calculated in April 2024.
---
# Unknown
OSWorld Authors
===============
Initiators
----------
- \`Tianbao Xie \`\_ (maintainer)
- \`Danyang Zhang \`\_
- \`Jixuan Chen \`\_ (maintainer)
- \`Xiaochuan Li \`\_
- \`Siheng Zhao \`\_
- \`Ruisheng Cao \`\_
- \`Toh Jing Hua \`\_
- \`Zhoujun Cheng \`\_
- \`Dongchan Shin \`\_
- \`Fangyu Lei \`\_
- \`Yitao Liu \`\_
- \`Yiheng Xu \`\_
- \`Shuyan Zhou \`\_
- \`Silvio Savarese \`\_
- \`Caiming Xiong \`\_
- \`Victor Zhong \`\_
- \`Tao Yu \`\_
Contributors
-----------
- \`Jiaqi Deng \`\_ (maintainer)
- \`Mengqi Yuan \`\_ (maintainer)
- \`Xinzhuang Xiong \`\_
- \`Zilong Zhou \`\_
- \`Zhennan Shen \`\_
- Yanxu Chen
- \`Bowen Wang \`\_
- Junda Chen
- Haoyuan Wu
- Peihang Li
- \`Junli Wang \`\_
- Chengyou Jia
- Junlei Zhang
- \`Xinyuan Wang \`\_
- Changyu Pang
- Zaur Magamednebiev
- \`Hongjin Su \`\_
Special Acknowledgement
-----------------------
- \`Sida Wang \`\_
- \`Peter Shaw \`\_
- \`Alane Suhr \`\_
- \`Luke Zettlemoyer \`\_
- \`Chen Henry Wu \`\_
- \`Pengcheng Yin \`\_
- \`Shunyu Yao \`\_
- \`Zhiyong Wu \`\_
- \`Xing Han Lu \`\_
- \`Siva Reddy \`\_
- \`Ruoxi Sun \`\_
- \`Zhiyuan Zeng \`\_
- \`Lei Li \`\_
- \`Human Data \`\_
- \`MoonShot AI \`\_
- \`OpenAI \`\_
- \`ByteDance Seed TARS \`\_
- \`Anthropic \`\_
- \`Simular \`\_
- \`HKU Data Intelligence Lab \`\_
Many thanks for all contributions!
---
# Unknown
To Contribute
=============
---
# Unknown
Reference Paper
===============
Here we collect a set of papers for your reference on the progress in the digital agents direction.
.. toctree::
:maxdepth: 2
mobile
web
computer
general
---
# Unknown
Vision and Roadmap
==================
Vision
------
Roadmap
-------
Here we provide a high-level road map for the project. We will update this road map as we make progress.
If you are interested in contributing to the project, please check the \`CONTRIBUTING.md\` for more details.
Road Map for Environment Infrastructure
^^^^^^^^^^^^^^^^^^^^^^^^^^^^^^^^^^^^^^^
- ✓ Explore VMWare, and whether it can be connected and controlled through the mouse package
- ✓ Explore Windows and MacOS, whether they can be installed
- MacOS is closed source and cannot be legally installed
- Windows is available legally and can be installed
- ✓ Build a gym-like Python interface for controlling the VM
- ✓ Recording of actions (mouse movement, click, keyboard) for humans to annotate, and we can replay it and compress it
- ✓ Build a simple task, e.g. open a browser, open a website, click on a button, and close the browser
- ✓ Set up a pipeline and build agent implementation (zero-shot) for the task
- ✓ Start to design which tasks inside the DesktopENv to focus on, start to wrap up the environment to be public
- ✓ Start to annotate the examples for ~~training~~ and testing
- ✓ Error handling during file passing and file opening, etc.
- ✓ Add accessibility tree from the OS into the observation space
- ✓ Add pre-process and post-process action support for benchmarking setup and evaluation
- ✓ Experiment logging and visualization system
- ✓ Add more tasks, maybe scale to 300 for v1.0.0, and create a dynamic leaderboard
- ✓ Multiprocess support, can enable reinforcement learning to be more efficient
- ✓ Add support for automatic VM download and configuration, enable auto-scaling management
- ✓ VPN setup doc for those who need it
- ✓ Support running on platforms that have nested virtualization, AWS
- ✓ Be able to run without virtual machine platform VMware Pro, e.g. VirtualBox, or other platforms
- ✓ Scale dataset to 20K+ tasks across diverse applications and websites (achieved via OpenCUA AgentNet with 21K tasks)
- ✓ Develop cross-platform annotation infrastructure supporting Windows, macOS, and Ubuntu (achieved via AgentNet Tool)
- ✓ Build data processing pipeline to convert raw demonstrations into clean trajectories (achieved via AgentNet Method)
- ☐ Add VNC-based video streaming as observation/actions for potential online-video understanding models to tackle tasks (achieved via AgentNet Tool screen recording)
- ☐ Support running on platforms that have nested virtualization, GCP
- ☐ Prepare for the first release of Windows vm image for the environment
Road Map of Annotation Tool
^^^^^^^^^^^^^^^^^^^^^^^^^^^
- ✓ Improve the annotation tool base on DuckTrack/OpenAdapt, and make it more robust which aligns on accessibility tree (achieved via AgentNet Tool)
- ✓ Annotate the steps of doing the task (achieved via 21K human-annotated tasks in AgentNet Dataset)
- ✓ Crawl all resources we explored from the internet, and make it easy to access (achieved via AgentNet Dataset covering 140+ applications and 190+ websites)
- ✓ Set up ways for the crowdsourcing/community to contribute new examples (achieved via open-source AgentNet Tool and dataset release)
- ✓ Develop reflective Chain-of-Thought reasoning augmentation for training data (achieved via OpenCUA pipeline)
- ✓ Create offline evaluation benchmark for stable and fast assessment (achieved via AgentNetBench)
Road Map of Foundation Models
^^^^^^^^^^^^^^^^^^^^^^^^^^^^^
- ✓ Train and release open-source computer-use agent models (achieved via OpenCUA-7B and OpenCUA-32B)
- ✓ Achieve competitive performance with proprietary models on OSWorld benchmark (OpenCUA-32B achieves 32.5% on OSWorld-Verified)
- ✓ Support multi-image history and mixed-domain training for robust performance
- ✓ Demonstrate effective scaling with increased training data and test-time computation
- ☐ Explore reinforcement learning and self-improvement techniques for agent training
- ☐ Develop specialized models for specific domains or applications
---
# Unknown
Projects using OSWorld
=====================
We thank the trust from following projects for using OSWorld to accelerate the progress of multimodal agents!
- \`Cradle: Empowering Foundation Agents Towards General Computer Control \`\_
- \`Spider2-V: How Far Are Multimodal Agents From Automating Data Science and Engineering Workflows? \`\_
- \`Read Anywhere Pointed: Layout-aware GUI Screen Reading with Tree-of-Lens Grounding \`\_
- \`CRAB: Cross-environment Agent Benchmark for Multimodal Language Model Agents \`\_
- \`Windows Agent Arena: a benchmark for AI agents acting on your computer \`\_
- \`Agent S: An Open Agentic Framework that Uses Computers Like a Human \`\_
- \`Model Card Addendum: Claude 3.5 Haiku and Upgraded Claude 3.5 Sonnet \`\_
- \`OS-ATLAS: A Foundation Action Model For Generalist GUI Agents \`\_
- \`Aguvis: Unified Pure Vision Agents for Autonomous GUI Interaction \`\_
- \`Ponder & Press: Advancing Visual GUI Agent towards General Computer Control \`\_
- \`Aria-UI: Visual Grounding for GUI Instructions \`\_
...
---
# Unknown
Public Evaluation Platform User Guide
==========================================
We have built an AWS-based platform for large-scale parallel evaluation of OSWorld tasks.
The system follows a Host-Client architecture:
- \*\*Host Instance\*\*: The central controller that stores code, configurations, and manages task execution.
- \*\*Client Instances\*\*: Worker nodes automatically launched to perform tasks in parallel.
The architecture consists of a host machine (where you git clone and set up the OSWorld host environment) that controls multiple virtual machines for testing and potential training purposes.
Each virtual machine serves as an OSWorld client environment using pre-configured AMI images and runs \`\`osworld.service\`\` to execute actions and commands from the host machine.
To prevent security breaches, proper security groups and subnets must be configured for both the host and virtual machines.
1. Platform Deployment & Connection
-----------------------------------
Below, we assume you have no prior AWS configuration experience.
You may freely skip or replace any graphical operations with API calls if you know how to do so.
1.1 Launch the Host Instance
^^^^^^^^^^^^^^^^^^^^^^^^^^^^
Please create an instance in the AWS EC2 graphical interface to build the Host Machine.
Our recommended instance type settings are as follows: if you want to run fewer than 5 VM environments in parallel (\`\`--num\_envs\`\` < 5), \`\`t3.medium\`\` will be sufficient; if you want to run fewer than 15 VM environments in parallel (\`\`--num\_envs\`\` < 15), \`\`t3.large\`\` will be sufficient; however, if you want to use more than 15 VM environments in parallel, it's better to choose a machine with more vCPUs and memory, such as \`\`c4.8xlarge\`\`.
For the AMI, we recommend using Ubuntu Server 24.04 LTS (HVM), SSD Volume Type, though other options will also work since the host machine doesn't have strict requirements.
For storage space, please consider the number of experiments you plan to run.
We recommend at least 50GB or more.
For security group configuration, please configure according to your specific requirements.
We provides a monitor service that runs on port 8080 by default.
You need to open this port to use this functionality.
Set the VPC as default, and we will return to it later to configure the virtual machines with the same setting.
1.2 Connect to the Host Instance
^^^^^^^^^^^^^^^^^^^^^^^^^^^^^^^^
Step 1: Prepare Your SSH Key
"""""""""""""""""""""""""""""
\* When launching the instance, choose "Create new key pair" and download the \`\`.pem\`\` file (e.g. \`\`osworld-host-key.pem\`\`). Save it locally.
.. image:: /\_static/assets/pubeval1.png
:alt: pubeval1
:width: 80%
:align: center
\* Set appropriate permissions:
.. code-block:: bash
chmod 400
\* Find your instance's \*\*public IP\*\* and \*\*DNS\*\*:
- Go to the EC2 \*\*Instances\*\* page on the AWS Console.
- Locate your Host instance by its ID.
.. image:: /\_static/assets/pubeval2.png
:alt: pubeval2
:width: 80%
:align: center
\* On the instance detail page:
- \*\*Public IP/DNS\*\*: used for browser/VNC access and SSH connection
- \*\*Instance metadata\*\*: e.g. storage, can be adjusted post-launch
.. image:: /\_static/assets/pubeval3.png
:alt: pubeval3
:width: 80%
:align: center
Step 2: Connect via SSH or VSCode
""""""""""""""""""""""""""""""""""
\* SSH:
.. code-block:: bash
ssh -i ubuntu@
\* VSCode/Cursor Remote SSH configuration:
.. code-block::
Host host\_example
HostName
User ubuntu
IdentityFile
Step 3: Set up the host machine
"""""""""""""""""""""""""""""""
After you connect the host machine, clone the latest OSWorld and set up the environment.
Please ensure that the version of Python is >= 3.10.
.. code-block::
# Clone the OSWorld repository
git clone https://github.com/xlang-ai/OSWorld
# Change directory into the cloned repository
cd OSWorld
# Optional: Create a Conda environment for OSWorld
# conda create -n osworld python=3.10
# conda activate osworld
# Install required dependencies
pip install -r requirements.txt
When installing requirements, you may encounter general environment issues, but these are solvable.
You'll need to use \`\`apt install\`\` to install and configure some dependencies.
These issues can be quickly fixed with the help of AI tools like Claude Code.
Then it is almost done for the host machine part!
1.3 Set up the virtual machine
^^^^^^^^^^^^^^^^^^^^^^^^^^^^^^
We need to programmatically scale virtual machines.
Therefore, we will use the graphical interface to configure and obtain the necessary environment variables, then set these environment variables on the host machine so that the OSWorld code can read them to automatically scale and run experiments.
For the client machine environments, we have already prepared pre-configured client machine environments in different regions, stored in https://github.com/xlang-ai/OSWorld/blob/main/desktop\_env/providers/aws/manager.py:
.. code-block::
IMAGE\_ID\_MAP = {
"us-east-1": {
(1920, 1080): "ami-0d23263edb96951d8"
},
"ap-east-1": {
(1920, 1080): "ami-0c092a5b8be4116f5"
}
}
# Tell us if you need more, we can make immigration from one place to another.
Therefore, you don't need to configure the virtual machine environments and related variables.
If you need to add additional functionality, you can configure it based on these images.
If you want to reconfigure from scratch, please refer to the files and instructions under https://github.com/xlang-ai/OSWorld/tree/main/desktop\_env/server.
Step 1: Security Group for OSWorld Virtual Machines
""""""""""""""""""""""""""""""""""""""""""""""""""""
OSWorld requires certain ports to be open, such as port 5000 for backend connections to OSWorld services, port 5910 for VNC visualization, port 9222 for Chrome control, etc.
The \`\`AWS\_SECURITY\_GROUP\_ID\`\` variable represents the security group configuration for virtual machines serving as OSWorld environments.
Please complete the configuration and set this environment variable to the ID of the configured security group.
\*\*⚠️ Important\*\*: Please strictly follow the port settings below to prevent OSWorld tasks from failing due to connection issues:
Inbound Rules (8 rules required)
'''''''''''''''''''''''''''''''''
+-------------+----------+------------+----------------+---------------------------+
| Type | Protocol | Port Range | Source | Description |
+=============+==========+============+================+===========================+
| SSH | TCP | 22 | 0.0.0.0/0 | SSH access |
+-------------+----------+------------+----------------+---------------------------+
| HTTP | TCP | 80 | 172.31.0.0/16 | HTTP traffic |
+-------------+----------+------------+----------------+---------------------------+
| Custom TCP | TCP | 5000 | 172.31.0.0/16 | OSWorld backend service |
+-------------+----------+------------+----------------+---------------------------+
| Custom TCP | TCP | 5910 | 0.0.0.0/0 | NoVNC visualization port |
+-------------+----------+------------+----------------+---------------------------+
| Custom TCP | TCP | 8006 | 172.31.0.0/16 | VNC service port |
+-------------+----------+------------+----------------+---------------------------+
| Custom TCP | TCP | 8080 | 172.31.0.0/16 | VLC service port |
+-------------+----------+------------+----------------+---------------------------+
| Custom TCP | TCP | 8081 | 172.31.0.0/16 | Additional service port |
+-------------+----------+------------+----------------+---------------------------+
| Custom TCP | TCP | 9222 | 172.31.0.0/16 | Chrome control port |
+-------------+----------+------------+----------------+---------------------------+
Once finished, record the \`\`AWS\_SECURITY\_GROUP\_ID\`\` as you will need to set it as the environment variable \`\`AWS\_SECURITY\_GROUP\_ID\`\` on the host machine before starting the client code.
Outbound Rules (1 rule required)
'''''''''''''''''''''''''''''''''
+-------------+----------+------------+-------------+---------------------------+
| Type | Protocol | Port Range | Destination | Description |
+=============+==========+============+=============+===========================+
| All traffic | All | All | 0.0.0.0/0 | Allow all outbound traffic|
+-------------+----------+------------+-------------+---------------------------+
Step 2: Record VPC Configuration for Client Machines from Host Machine
"""""""""""""""""""""""""""""""""""""""""""""""""""""""""""""""""""""""
To isolate the entire evaluation stack, we run both the host machine and all client virtual machines inside a dedicated VPC.
The setup is straightforward:
1. Launch the host instance in the EC2 console via the AWS console and note the \*\*VPC ID\*\* and \*\*Subnet ID\*\* shown in its network settings.
2. Record the \*\*Subnet ID\*\* as you will need to set it as the environment variable \`\`AWS\_SUBNET\_ID\`\` on the host machine before starting the client code.
.. image:: /\_static/assets/pubeval\_subnet.png
:alt: pubeval\_subnet
:width: 80%
:align: center
1.3 Get AWS Access Keys & Secret Access Key
^^^^^^^^^^^^^^^^^^^^^^^^^^^^^^^^^^^^^^^^^^^^
Click on \*\*Security Credentials\*\* from the drop-down menu under your account in the top-right corner.
.. image:: /\_static/assets/pubeval4.png
:alt: pubeval4
:width: 25%
:align: center
In the \*\*Access keys\*\* section, click \*\*"Create access key"\*\* to generate your own key.
.. image:: /\_static/assets/pubeval5.png
:alt: pubeval5
:width: 100%
:align: center
If this method doesn't work, please go to \*\*IAM\*\* → \*\*Users\*\* → select your username → \*\*Security credentials\*\* tab → \*\*Create access key\*\*.
Alternatively, you can create access keys through IAM for better security practices:
1. Navigate to \*\*IAM\*\* in the AWS Console
2. Click on \*\*Users\*\* in the left sidebar
3. Select your username or create a new IAM user
4. Go to the \*\*Security credentials\*\* tab
5. Click \*\*Create access key\*\*
6. Choose the appropriate use case (e.g., "Command Line Interface (CLI)")
7. Download or copy the Access Key ID and Secret Access Key
\*\*Note\*\*: For production environments, it's recommended to use IAM roles instead of access keys when possible, or create dedicated IAM users with minimal required permissions rather than using root account credentials.
Similarly, later you will need to set them as the environment variables on the host machine.
2. Environment Setup
--------------------
Great! Now back to the \*\*host machine\*\*, we can start running experiments!
All the following operations are performed on the host machine environment, under the OSWorld path.
2.1 Google Drive Integration (Optional)
^^^^^^^^^^^^^^^^^^^^^^^^^^^^^^^^^^^^^^^^
\*\*Task Overview\*\*: OSWorld includes \*\*8 Google Drive tasks\*\* out of a total of \*\*369 tasks\*\*. Due to Google's increasingly strict security policies, these tasks often encounter initialization and setup issues.
\*\*Common Setup Problems:\*\*
\* IP address changes triggering verification requests
\* OAuth2.0 authentication failures in virtualized environments
\* Google's automated detection of unusual access patterns
\* Account lockouts due to security policy violations
\*\*Configuration Instructions:\*\*
Follow the instructions in :doc:\`../installation/google\_account\_guideline\`, specifically the section "Generating \`\`credentials.json\`\` for Public Eval". This configuration is necessary if you want to evaluate all 369 tasks.
\*\*Alternative Approaches:\*\*
If you encounter persistent setup issues with Google Drive tasks, you have two acceptable options:
1. \*\*Complete Setup (369 tasks)\*\*: Continue troubleshooting following the detailed guide in :doc:\`../installation/google\_account\_guideline\` until all Google Drive tasks work properly.
2. \*\*Skip Google Drive Tasks (361 tasks)\*\*: Exclude the 8 Google Drive tasks and evaluate the remaining 361 tasks. This approach is officially supported and acceptable for benchmark evaluation.
.. image:: /\_static/assets/pubeval\_gdrive\_auth.jpg
:alt: pubeval\_gdrive\_auth
:width: 80%
:align: center
.. note::
\*\*For Evaluation Submissions\*\*: When reporting your results, please clearly specify whether you evaluated all 369 tasks or excluded the 8 Google Drive tasks (361 tasks). Both approaches are valid, but this information is essential for fair comparison with other submissions.
You can skip this step during the debugging stage, as the Google Drive tasks represent only a small portion of the total benchmark and their setup complexity often outweighs their contribution during initial development phases.
2.2 Proxy Setup
^^^^^^^^^^^^^^^
- Register at \`DataImpulse \`\_.
- Purchase a US residential IP package (approximately $1 per 1GB).
- Configure your credentials in \`\`OSWorld/evaluation\_examples/settings/proxy/dataimpulse.json\`\`:
.. code-block:: json
\[\
{\
"host": "gw.dataimpulse.com",\
"port": 823,\
"username": "your\_username",\
"password": "your\_password",\
"protocol": "http",\
"provider": "dataimpulse",\
"type": "residential",\
"country": "US",\
"note": "Dataimpulse Residential Proxy"\
}\
\]
We have set proxy to True in the config JSON files for those proxy-sensitive tasks. OSWorld will automatically wrap these tasks with a proxy when DesktopEnv's \`\`enable\_proxy=True\`\`, while other tasks will not be affected.
We recommend using a proxy.
If you don't need it at all, please set \`\`enable\_proxy=False\`\` in the experiment's \`\`.py\`\` file:
.. code-block::
env = DesktopEnv(
...
enable\_proxy=False,
...
)
(We didn't make too much explanantion on the DesktopEnv interface, please read theough the code to get to understand here.)
Note that disabling the proxy will cause some tasks under the Chrome domain to fail.
2.3 Set Environment Variables
^^^^^^^^^^^^^^^^^^^^^^^^^^^^^
.. code-block:: bash
# export OPENAI\_API\_KEY\_CUA="your\_openai\_api\_key" # if you use openai API
# export ANTHROPIC\_API\_KEY="your\_anthropic\_api\_key" # if you use anthropic API
# export DASHSCOPE\_API\_KEY="your\_dashscope\_api\_key" # if you use dashscope API from alibaba qwen
# export DOUBAO\_API\_KEY, DOUBAO\_API\_URL = "", "" # if you use doubao seed API from bytedance ui\_tars
export AWS\_ACCESS\_KEY\_ID="your\_access\_key" # key we mentioned before
export AWS\_SECRET\_ACCESS\_KEY="your\_security\_access\_key" # key we mentioned before
export AWS\_REGION="your\_aws\_region" # eg. us-east-1, or leave it, it will be set default to us-east-1
export AWS\_SECURITY\_GROUP\_ID="sg-xxxx" # the security group we mentioned before
export AWS\_SUBNET\_ID="subnet-xxxx" # the subnet we mentioned before
3. Running Evaluations
----------------------
Use the \`\`run\_multienv\_xxx.py\`\` scripts to launch tasks in parallel.
Example (with the OpenAI CUA agent):
.. code-block:: bash
# --client\_password set to the one you set to the client machine
# Run OpenAI CUA
python run\_multienv\_openaicua.py \\
--headless \\
--observation\_type screenshot \\
--model computer-use-preview \\
--result\_dir ./results\_operator \\
--test\_all\_meta\_path evaluation\_examples/test\_all.json \\
--region us-east-1 \\
--max\_steps 50 \\
--num\_envs 5 \\
--client\_password osworld-public-evaluation
# Run Anthropic (via AWS Bedrock), please modify agent if you want Anthropic endpoint
python run\_multienv\_claude.py \\
--headless \\
--observation\_type screenshot \\
--action\_space claude\_computer\_use \\
--model claude-4-sonnet-20250514 \\
--result\_dir ./results\_claude \\
--test\_all\_meta\_path evaluation\_examples/test\_all.json \\
--max\_steps 50 \\
--num\_envs 5 \\
--provider\_name aws \\
--client\_password osworld-public-evaluation
Key Parameters:
- \`\`--num\_envs\`\`: Number of parallel environments
- \`\`--max\_steps\`\`: Max steps per task
- \`\`--result\_dir\`\`: Output directory for results
- \`\`--test\_all\_meta\_path\`\`: Path to the test set metadata
- \`\`--region\`\`: AWS region
Usually the running code is named with \`\`run\_multi\_env\_xxx.py\`\` under main folder, and the agent implementation is under \`\`mm\_agents\`\` folder.
Add according to your needs.
4. Viewing Results
------------------
4.1 Web Monitoring Tool
^^^^^^^^^^^^^^^^^^^^^^^
.. code-block:: bash
cd monitor
pip install -r requirements.txt
python main.py
Then, open your Host's \*\*public IP\*\* on port \`\`8080\`\` in a browser. (eg. \`\`http://:8080\`\`)
For more, see: \`MONITOR\_README <./monitor/README.md>\`\_
.. image:: /\_static/assets/pubeval\_monitor1.jpg
:alt: pubeval\_monitor
:width: 80%
:align: center
.. image:: /\_static/assets/pubeval\_monitor2.jpg
:alt: pubeval\_monitor
:width: 80%
:align: center
4.2 VNC Remote Desktop Access
^^^^^^^^^^^^^^^^^^^^^^^^^^^^^
We pre-install vnc for every virtual machine so you can have a look on it during the running.
You can access via VNC at \`\`http://:5910/vnc.html\`\`
The password set default is \`\`osworld-public-evaluation\`\` in our AMI to prevent attack.
5. Contact the team to update leaderboard and fix errors (optional)
--------------------------------------------------------------------
If you want your results to be displayed on the leaderboard, please send a message to the OSWorld leaderboard maintainers (tianbaoxiexxx@gmail.com, yuanmengqi732@gmail.com) and open a pull request. We can update the results in the self-reported section.
If you want your results to be verified and displayed in the verified leaderboard section, we need you to schedule a meeting with us to run your agent code on our side to obtain results and have us report them. Alternatively, if you are from a trusted institution, you can share your monitor and trajectories with us.
If you discover new errors or the environment has undergone some changes, please contact us via GitHub issues or email.
See Also
--------
\* :doc:\`run\_evaluation\` - Basic evaluation guide for local environment setup
\* :doc:\`../installation/google\_account\_guideline\` - Google account setup and OAuth2.0 configuration
\* :doc:\`../installation/index\` - Complete installation instructions
\* :doc:\`../community/faq\` - Frequently asked questions and troubleshooting
---
# Unknown
Server setup
============
This README is useful if you want to set up your own machine for the environment. This README is not yet finished. Please contact the author if you need any assistance.
Configuration Overview
----------------------
The following sections contain guidelines for configuring the system image to ensure benchmark examples can run properly.
.. note::
\*\*For Docker and VMware Users\*\*: If you are using Docker or VMware as your provider, you can customize the VM image by following the instructions in the respective installation guides:
- :doc:\`../installation/install\_provider/docker\` for Docker users
- :doc:\`../installation/install\_provider/vmware\` for VMware users
This allows you to add custom tools and configurations to your environment.
The main configuration requirements include:
1. \*\*Account Credentials\*\*:
Our benchmark configurations are based on specific username and password settings (with username \`user\` and password \`password\`).
Please ensure these settings remain consistent or update the corresponding configuration files.
2. \*\*Service Setup\*\*:
Our environment operates through a service that automatically starts at boot time, as shown in the figure below. The service needs to be properly configured and placed.
.. image:: https://os-world.github.io/static/images/env.png
3. \*\*Accessibility Tree Support\*\*:
Benchmark examples rely on accessibility tree functionality. The necessary support packages need to be installed.
4. \*\*System Service Management\*\*:
Certain system services that may cause interference need to be disabled, such as automatic updates and notification pop-ups.
5. \*\*Required Software Installation\*\*:
Ensure all necessary software packages required by the benchmark examples are properly installed.
6. \*\*Software Configuration\*\*:
Various software packages require specific configurations, such as disabling certain auto-save features or installing additional plugins.
7. \*\*Port Configuration\*\*:
To monitor and control software states from the host machine, specific port configurations are needed for various applications.
8. \*\*Miscellaneous Settings\*\*:
Additional system-specific settings need to be configured, such as desktop environment settings and display resolution.
Detailed instructions for each of these requirements will be provided in the following sections.
Ubuntu
------
Make a new VM with the Ubuntu 20.04 LTS image.
You can find the official Ubuntu OSWorld image at: https://huggingface.co/datasets/xlangai/ubuntu\_osworld
How to install Ubuntu Desktop (package: ubuntu-desktop) with GNOME desktop environment on Ubuntu 22.04 system
~~~~~~~~~~~~~~~~~~~~~~~~~~~~~~~~~~~~~~~~~~~~~~~~~~~~~~~~~~~~~~~~~~~~~~~~~~~~~~~~~~~~~~~~~~~~~~~~~~~~~~~~~~~~~~
.. code-block:: bash
sudo apt update
sudo apt install ubuntu-desktop
sudo systemctl set-default graphical.target
Account Credentials
~~~~~~~~~~~~~~~~~~~
Download the iso file from the \`Ubuntu website \`\_ and install it in the VM.
Using GUI:
The default username should be \`user\` and the password should be \`password\` when you are asked to set up the account. Give the user sudo permission.
Using Command Line:
.. code-block:: bash
sudo adduser user
usermod -aG sudo user
Installation and Auto-login Setup
~~~~~~~~~~~~~~~~~~~~~~~~~~~~~~~~~~
1. Download the iso file from the \`Ubuntu website \`\_ and install it in the VM.
The default username should be \`user\` and the password should be \`password\` when you are asked to set up the account.
2. To enable automatic login:
Using GUI:
.. code-block:: bash
# Open Settings -> Users
# Click Unlock button and enter password
# Toggle "Automatic Login" to ON for user 'user'
Or using Command Line:
.. code-block:: bash
# Edit the custom configuration file
sudo nano /etc/gdm3/custom.conf
# Under \[daemon\] section, add or modify these lines:
AutomaticLoginEnable=true
AutomaticLogin=user
# Save the file and restart the system
sudo systemctl restart gdm3
After setting up automatic login, the system will boot directly into the desktop environment without requiring password input, which enables seamless startup experience for automated testing environments.
VNC Configuration
~~~~~~~~~~~~~~~~~
1. Install x11vnc
.. code-block:: bash
sudo apt update
sudo apt install x11vnc
2. Install noVNC
.. code-block:: bash
sudo snap install novnc
3. Create system services for x11vnc and novnc:
- Go to directory cd \`/etc/systemd/user/\`
- Write a file \`novnc.service\` with the following content:
.. code-block:: ini
\[Unit\]
Description=noVNC Service
After=x11vnc.service network.target snap.novnc.daemon.service
Wants=x11vnc.service
\[Service\]
Type=simple
ExecStart=/snap/bin/novnc --vnc localhost:5900 --listen 5910
Restart=on-failure
RestartSec=3
Environment=DISPLAY=:0
Environment=XAUTHORITY=/home/user/.Xauthority
Environment=SNAP\_COOKIE=/run/snap.cookie
Environment=SNAP\_NAME=novnc
Environment=SNAP\_REVISION=current
\[Install\]
WantedBy=default.target
Write a file \`x11vnc.service\` with the following content:
.. code-block:: ini
\[Unit\]
Description=X11 VNC Server
After=display-manager.service network.target
Wants=display-manager.service
\[Service\]
Type=simple
ExecStart=x11vnc -display :0 -rfbport 5900 -forever
Restart=on-failure
RestartSec=3
Environment=DISPLAY=:0
Environment=XAUTHORITY=/home/user/.Xauthority
\[Install\]
WantedBy=default.target
4. Enable both services:
.. code-block:: bash
systemctl --user daemon-reload
systemctl --user enable novnc.service
systemctl --user enable x11vnc.service
systemctl --user start x11vnc.service
systemctl --user start novnc.service
5. Allow VNC port:
Expose 5910 port in the firewall and any other security tools you are using.
6. Access the VNC server:
Connect to the VNC via \`http://\[Instance IP\]:5910/vnc.html\`
Display Configuration
~~~~~~~~~~~~~~~~~~~~~
.. warning::
\*\*⚠️ IMPORTANT NOTE\*\*: The display configuration is critical for proper system operation. Incorrect settings can prevent the graphical environment from starting and potentially crash the X server. Make sure to follow these steps carefully and verify each configuration file. If you encounter any issues, check the X server logs at \`/var/log/Xorg.0.log\` for troubleshooting. Backup your existing X11 configuration before making any changes.
1. Install dummy video driver:
.. code-block:: bash
sudo apt-get install xserver-xorg-video-dummy
Go to \`/etc/X11/\` and create a file named \`xorg.conf\` with the following content:
.. code-block:: ini
Section "ServerLayout"
Identifier "X.org Configured"
Screen 0 "Screen0" 0 0
InputDevice "Mouse0" "CorePointer"
InputDevice "Keyboard0" "CoreKeyboard"
EndSection
Section "Files"
ModulePath "/usr/lib/xorg/modules"
FontPath "/usr/share/fonts/X11/misc"
FontPath "/usr/share/fonts/X11/cyrillic"
FontPath "/usr/share/fonts/X11/100dpi/:unscaled"
FontPath "/usr/share/fonts/X11/75dpi/:unscaled"
FontPath "/usr/share/fonts/X11/Type1"
FontPath "/usr/share/fonts/X11/100dpi"
FontPath "/usr/share/fonts/X11/75dpi"
FontPath "built-ins"
EndSection
Section "Module"
Load "glx"
EndSection
Section "InputDevice"
Identifier "Keyboard0"
Driver "kbd"
EndSection
Section "InputDevice"
Identifier "Mouse0"
Driver "mouse"
Option "Protocol" "auto"
Option "Device" "/dev/input/mice"
Option "ZAxisMapping" "4 5 6 7"
EndSection
Section "Monitor"
Identifier "Monitor0"
VendorName "Monitor Vendor"
ModelName "Monitor Model"
HorizSync 28.0-80.0
VertRefresh 48.0-75.0
EndSection
Section "Device"
### Available Driver options are:-
### Values: : integer, : float, : "True"/"False",
### : "String", : " Hz/kHz/MHz",
### : "%"
### \[arg\]: arg optional
#Option "SWcursor" # \[\]
#Option "kmsdev" #
#Option "ShadowFB" # \[\]
#Option "AccelMethod" #
#Option "PageFlip" # \[\]
#Option "ZaphodHeads" #
#Option "DoubleShadow" # \[\]
#Option "Atomic" # \[\]
#Option "VariableRefresh" # \[\]
#Option "UseGammaLUT" # \[\]
#Option "AsyncFlipSecondaries" # \[\]
Identifier "Card0"
Driver "modesetting"
BusID "PCI:0:30:0"
VideoRam 256000
EndSection
Section "Screen"
Identifier "Screen0"
Device "Device0"
Monitor "Monitor0"
DefaultDepth 24
SubSection "Display"
Depth 24
Modes "1920x1080"
EndSubSection
EndSection
2. In the same directory as the previous step, go to its sub-directory \`xorg.conf.d\` , create a file named \`10-dummy.conf\` with the following content:
.. code-block:: ini
Section "Device"
Identifier "DummyDevice"
Driver "dummy"
VideoRam 32768
EndSection
Section "Monitor"
Identifier "DummyMonitor"
HorizSync 28.0-80.0
VertRefresh 48.0-75.0
Modeline "1920x1080" 172.80 1920 2048 2248 2576 1080 1083 1088 1120
EndSection
Section "Screen"
Identifier "DummyScreen"
Device "DummyDevice"
Monitor "DummyMonitor"
DefaultDepth 24
SubSection "Display"
Depth 24
Modes "1920x1080"
EndSubSection
EndSection
3. Reload the display manager:
.. code-block:: bash
sudo systemctl restart display-manager
Set up the OSWorld server service in VM
~~~~~~~~~~~~~~~~~~~~~~~~~~~~~~~~~~~~~~~~
Upload the OSWorld server to the home directory (/home/user) of user (via scp or git clone).
1. Copy the \`main.py\` and \`pyxcursor.py\` and to the \`/home/user-name\` where the \`user-name\` is your username of the ubuntu, here we make it \`user\` as default. If you customize the path of placing these files in this step, you should change the parameters in the service file we will mention later accordingly.
2. First please set up the environment:
.. code-block:: bash
sudo apt install python3
pip3 install -r requirements.txt
sudo apt-get install python3-tk python3-dev
sudo apt install gnome-screenshot
sudo apt install wmctrl
sudo apt install ffmpeg
sudo apt install socat
sudo apt install xclip
If you encounter an error about python not being found, run:
.. code-block:: bash
sudo ln -s /usr/bin/python3 /usr/bin/python
if you customize the environment in this step, you should change the parameters in the service file we will mention later accordingly.
3. Due to some configuration issues, you need to modify the \`osworld\_server.service\` file:
1) In our released version, the X server is set to :1, but the default X server is actually :0. You need to modify the \`osworld\_server.service\` file to change the \`DISPLAY\` variable from \`:1\` to \`:0\`.
Change the following line:
.. code-block:: ini
Environment="DISPLAY=:1"
to
.. code-block:: ini
Environment="DISPLAY=:0"
2) Need to add environment variables to enable DBUS to change wallpaper.
Change the following line:
.. code-block:: ini
Environment="DISPLAY=:0"
to
.. code-block:: ini
Environment="DISPLAY=:0;DBUS\_SESSION\_BUS\_ADDRESS=unix:path=/run/user/1000/bus"
4. Copy the \`osworld\_server.service\` to the systemd configuration directory at \`/etc/systemd/system/\`:
.. code-block:: bash
sudo cp osworld\_server.service /etc/systemd/system/
Reload the systemd daemon to recognize the new service:
.. code-block:: bash
sudo systemctl daemon-reload
Enable the service to start on boot:
.. code-block:: bash
sudo systemctl enable osworld\_server.service
Start the service:
.. code-block:: bash
sudo systemctl start osworld\_server.service
Verify the service is running correctly:
.. code-block:: bash
sudo systemctl status osworld\_server.service
You should see output indicating the service is active and running. If there are errors, review the logs with \`journalctl -xe\` for further troubleshooting.
If you need to make adjustments to the service configuration, you can edit the \`/etc/systemd/system/osworld\_server.service\` file:
.. code-block:: bash
sudo nano /etc/systemd/system/osworld\_server.service
After making changes, reload the daemon and restart the service:
.. code-block:: bash
sudo systemctl daemon-reload
sudo systemctl enable osworld\_server.service
sudo systemctl start osworld\_server.service
Accessibility Tree Support
~~~~~~~~~~~~~~~~~~~~~~~~~~~
To support the accessibility tree functionality, you'll need to install pyastpi2 in your Ubuntu environment. This package enables access to accessibility information and tree structures.
Installation steps:
.. code-block:: bash
# Update package list and ensure pip is installed
sudo apt-get update
sudo apt-get install python3-pip
# Install pyastpi2 using pip
pip3 install pyastpi2
Xorg Configuration
~~~~~~~~~~~~~~~~~~
Regarding the graphics display system, we need to ensure that Ubuntu displays images using the \*\*Xorg\*\* protocol instead of \*\*Wayland\*\*. Since \*\*Wayland\*\* is typically the default setting for Ubuntu, we will need to manually change the settings.
1. Click the user menu in the upper right corner and select "Log Out" or "Sign Off."
2. On the login screen, click on the username.
3. Before entering the password, click the gear icon in the lower right or upper right corner of the screen (it may need to be displayed after clicking the username first).
4. Select "Ubuntu on Xorg" from the pop-up menu.
You can run the following command to check if \*\*Xorg\*\* is being used:
.. code-block:: bash
echo $XDG\_SESSION\_TYPE
System Service Management (Optional)
~~~~~~~~~~~~~~~~~~~~~~~~~~~~~~~~~~~~~
The automatic software update service can interfere with benchmark examples. To disable this service, you can refer to the https://www.makeuseof.com/disable-automatic-updates-in-ubuntu/ for the solution.
You can check and manage system services using systemctl commands. For example, to verify if a service like unattended-upgrades is installed and running on your system:
.. code-block:: bash
# Check service status
sudo systemctl status unattended-upgrades.service
If the output is \`x11\`, it means you have switched to \*\*Xorg\*\*.
To disable a system service:
.. code-block:: bash
# Disable and stop the service
sudo systemctl disable unattended-upgrades
sudo systemctl stop unattended-upgrades
To verify service configurations, you can use apt-config:
.. code-block:: bash
# Check current configurations
apt-config dump APT::Periodic::Update-Package-Lists
apt-config dump APT::Periodic::Unattended-Upgrade
Software Installation
~~~~~~~~~~~~~~~~~~~~~
Software Installation Source
^^^^^^^^^^^^^^^^^^^^^^^^^^^^^
Since for some examples like change the settings of certain software, we hardcode some paths in our evaluation file, which means you need to install the software to the specific path. Here we provide a list of software that you need to install and the certain source which default the path you should install them to.
1. Chrome: If you are using ARM System, download the chromium using \`sudo snap install chromium\` and make sure your Chromium config files are under \`~/snap/chromium\`; otherwise, download the chrome from the \`Chromium \`\_ and make sure your Chromium config files are under \`~/.config/google-chrome\`.
2. LibreOffice: Go to \`LibreOffice Website \`\_, select "Download Libreoffice", select "older versions" in the bottom of the page, and download \`7.3.7.2\` version.
3. GIMP: Search "GIMP" in "Ubuntu Software" and install it. Our GIMP version is \`2.10.30\`.
4. VLC: Search "VLC" in "Ubuntu Software" and install it. Our VLC version is \`3.0.16\`.
5. VSCode: Go to \`VSCode Website \`\_, download the \`.deb\` file, and install it. Our VSCode version is \`1.91.1\`.
Additional Inner Software Installation
^^^^^^^^^^^^^^^^^^^^^^^^^^^^^^^^^^^^^^
.. warning::
\*\*⚠️ IMPORTANT NOTE\*\*: The software installation and configuration steps described in this section are crucial for maintaining consistent task execution and performance. Skipping or incorrectly configuring these components may lead to task failures or degraded performance. Please follow the installation instructions carefully and verify each component is properly set up before proceeding.
LibreOffice font installation
'''''''''''''''''''''''''''''
Some examples in LibreOffice Impress use non-default system fonts, and you need to download the corresponding \*\*TTF files\*\* and put them in the system fonts directory.
\`Here \`\_ we provides all the fonts downloaded, just download it, and unzip to the system fonts directory (which usually \`usr/share/fonts/\`).
.. code-block:: bash
unzip fonts.zip -d /usr/share/fonts/
And then run the following command to refresh the font cache:
.. code-block:: bash
sudo fc-cache -fv
Customized Plugin Installation
''''''''''''''''''''''''''''''
\*\*VS Code plugin installation:\*\*
To extract relevant internal information and configurations from the VS Code environment, we principally leverage the capabilities offered by the VS Code Extension API. Here's how to install the extension developed by ourselves:
.. code-block:: bash
1. Download the extension from: https://github.com/xlang-ai/OSWorld/blob/04a9df627c7033fab991806200877a655e895bfd/vscodeEvalExtension/eval-0.0.1.vsix
2. Open VS Code
3. Go to Extensions -> ... -> Install from VSIX... -> choose the downloaded eval-0.0.1.vsix file
Software Configuration
~~~~~~~~~~~~~~~~~~~~~~
1. LibreOffice Default Format Settings:
.. code-block:: bash
# Open LibreOffice Writer/Calc/Impress
# Go to Tools -> Options -> Load/Save -> General
# Under "Default file format and ODF settings":
# Change "Document type" to "Text document"
# Set "Always save as" to "Word 2007-365 (.docx)"
# Change "Document type" to "Spreadsheet"
# Set "Always save as" to "Excel 2007-365 (.xlsx)"
# Change "Document type" to "Presentation"
# Set "Always save as" to "PowerPoint 2007-365 (.pptx)"
2. Chrome password requirement removal:
Chrome requests a password input when first opened after system startup, which can interfere with our experiments. Here's how to disable this feature:
.. code-block:: bash
# Prevent Chrome from using keyring
mkdir -p ~/.local/share/keyrings
touch ~/.local/share/keyrings/login.keyring
Or you can use any ways to disable the keyring service, which will prevent Chrome from requesting a password input.
3. VSCode Trust Settings:
To prevent VSCode from showing "Do you trust this workspace?" dialog when opening projects, configure the following setting:
.. code-block:: bash
# Open VSCode
# Go to File -> Preferences -> Settings (or press Ctrl+,)
# In the search bar, type "workspace trust"
# Find "Security: Workspace Trust Enabled" and uncheck it
# Find "Security: Workspace Trust Banner" and set to "never"
# Find "Security: Workspace Trust Empty Window" and uncheck it
# Find "Security: Workspace Trust Startup Prompt" and set to "never"
This disables the workspace trust feature and prevents trust dialog prompts when opening projects.
Network Configuration
~~~~~~~~~~~~~~~~~~~~~
Firewall Configuration
^^^^^^^^^^^^^^^^^^^^^^
In OSWorld, we need the following ports to be open:
.. code-block:: bash
server\_port = 5000
chromium\_port = 9222
vnc\_port = 8006
vlc\_port = 8080
novnc\_port = 5910
Please open the corresponding ports in the firewall and any other security tools you are using.
socat Installation
^^^^^^^^^^^^^^^^^^
Ensure \`socat\` is installed to enable port forwarding.
.. code-block:: bash
sudo apt install socat
Network Configuration for Remote Control
^^^^^^^^^^^^^^^^^^^^^^^^^^^^^^^^^^^^^^^^^
VLC Configuration
'''''''''''''''''
To enable remote control of VLC media player, follow these configuration steps:
1. Enable HTTP interface:
.. code-block:: bash
# Open VLC
# Go to Tools -> Preferences
# Show Settings: All (bottom left)
# Navigate to Interface -> Main interfaces
# Check 'Web' option
2. Configure HTTP interface settings:
.. code-block:: bash
# Still in Preferences
# Navigate to Interface -> Main interfaces -> Lua
# Under Lua HTTP:
# - Set Password to 'password'
The following is the screenshot of the VLC configuration:
.. image:: https://os-world.github.io/static/images/vlc\_configuration.png
When VLC is open, the service will be running on port 8080.
Chrome Configuration
''''''''''''''''''''
When you open Chrome through the GUI interface, it doesn't automatically enable remote debugging port 1337 (the port we set for controlling the client machine's Chrome through the host, which gets forwarded to 9222).
This is because GUI startup and command-line startup use different parameters.
The consequence is that once Chrome is closed and reopened, it will fail to connect.
To ensure Chrome uses consistent debugging ports even after being closed and reopened, follow these steps:
1. Create or edit Chrome desktop entry:
.. code-block:: bash
sudo vim ~/.local/share/applications/google-chrome.desktop
If that doesn't work, try:
.. code-block:: bash
sudo vim /usr/share/applications/google-chrome.desktop
2. Modify \*\*all\*\* the \`Exec\` lines to include debugging port, for example, change:
.. code-block:: bash
Exec=/usr/bin/google-chrome-stable %U
into:
.. code-block:: bash
Exec=/usr/bin/google-chrome-stable --remote-debugging-port=1337 --remote-debugging-address=0.0.0.0 %U
In cases where Chrome is needed, the 1337 will be forwarded to 9222 in the virtual machine via socat.
Miscellaneous Settings
~~~~~~~~~~~~~~~~~~~~~~
Screen Resolution
^^^^^^^^^^^^^^^^^
The required screen resolution for the virtual machine is 1920x1080 in OSWorld and we did make some hardcode related to this resolution in our configuration file in some examples, but only a few.
So please set the screen resolution to 1920x1080 in the virtual machine settings.
Automatic Suspend
^^^^^^^^^^^^^^^^^
To close automatic suspend, open Setting app and enter "Power" section. Switch "Screen Blank" to "Never" and "Automatic Suspend" to "Off".
Additional Installation
^^^^^^^^^^^^^^^^^^^^^^^
Activating the window manager control requires the installation of \`wmctrl\`:
.. code-block:: bash
sudo apt install wmctrl
Otherwise, you cannot control the window manager in the virtual machine when running the experiments. Some cases will be effected.
To enable recording in the virtual machine, you need to install \`ffmpeg\`:
.. code-block:: bash
sudo apt install ffmpeg
Otherwise you cannot get the video recording of the virtual machine when running the experiments.
Others Information
~~~~~~~~~~~~~~~~~~
About the Converted Accessibility Tree
^^^^^^^^^^^^^^^^^^^^^^^^^^^^^^^^^^^^^^^
For several applications like Firefox or Thunderbird, you should first enable
.. code-block:: bash
gsettings set org.gnome.desktop.interface toolkit-accessibility true
to see their accessibility tree.
Example of AT
'''''''''''''
An example of a node:
.. code-block:: xml
An example of a tree:
.. code-block:: xml
...
...
Useful attributes
'''''''''''''''''
1. \`name\` - shows the name of application, title of window, or name of some component
2. \`attr:class\` - somewhat the same role as \`class\` in HTML
3. \`attr:id\` - somewhat the same role as \`id\` in HTML
4. \`cp:screencoord\` - absolute coordinator on the screen
5. \`cp:windowcoord\` - relative coordinator in the window
6. \`cp:size\` - the size
Also several states like \`st:enabled\` and \`st:visible\` can be indicated. A full state list is available at https://gitlab.gnome.org/GNOME/pyatspi2/-/blob/master/pyatspi/state.py?ref\_type=heads.
How to use it in evaluation
'''''''''''''''''''''''''''
See example \`thunderbird/12086550-11c0-466b-b367-1d9e75b3910e.json\` and function \`check\_accessibility\_tree\` in \`metrics/general.py\`. You can use CSS selector or XPath to reference a target nodes. You can also check its text contents.
An example of a CSS selector:
.. code-block:: css
application\[name=Thunderbird\] page-tab-list\[attr|id="tabmail-tabs"\]>page-tab\[name="About Profiles"\]
This selector will select the page tab of profile manager in Thunderbird (if open).
For usage of CSS selector: https://www.w3.org/TR/selectors-3/. For usage of XPath: https://www.w3.org/TR/xpath-31/.
Manual check
''''''''''''
You can use accerciser to check the accessibility tree on GNOME VM.
.. code-block:: bash
sudo apt install accerciser
MacOS
-----
Coming soon...
See Also
--------
- :doc:\`environment\_explanation\` - DesktopEnv interface and environment setup guide
- :doc:\`run\_experiment\` - Running experiments with the configured environment
- :doc:\`../installation/install\_provider/index\` - Provider-specific installation guides
- :doc:\`../installation/quickstart\` - Quick start guide for OSWorld
- :doc:\`../installation/proxy\` - Proxy configuration for VMs
- :doc:\`../community/faq\` - Frequently asked questions and troubleshooting
---
# Unknown
Docker
==========
.. note::
If you are running on a non-bare metal server, or prefer not to use VMware and VirtualBox platforms, Docker is the recommended option. For optimal performance, KVM support is recommended.
Prerequisite Check
-----------------
Before installing Docker, check if your machine supports KVM (recommended for better performance):
On Linux, run:
.. code-block:: bash
egrep -c '(vmx|svm)' /proc/cpuinfo
If the return value is greater than zero, your processor supports KVM.
.. note::
macOS hosts generally do not support KVM. For macOS users, we recommend using VMware instead.
Docker Installation
------------------
Choose the appropriate installation method based on your system:
1. \*\*For systems with GUI\*\*:
- For Linux: Follow the \`Docker Desktop for Linux \`\_ installation guide
- For Windows: Follow the \`Docker Desktop for Windows \`\_ installation guide
2. \*\*For systems without GUI\*\*:
Follow the \`Docker Engine installation guide \`\_
Verification
-----------
Verify the installation by running:
.. code-block:: bash
docker --version
Usage Example
------------
To use Docker as your provider, initialize the DesktopEnv with the following parameters:
.. code-block:: python
# Initialize environment with Docker provider
env = DesktopEnv(
provider\_name="docker",
os\_type="Ubuntu" # or "Windows" if you want to create a Windows VM
)
Customizing the VM Image
------------------------
If you want to customize the client machine image (e.g., adding additional tools, software, or configurations), you can modify the VM image directly using Docker:
1. \*\*Start the VM with persistent storage\*\*:
.. code-block:: bash
docker run -it --rm \\
-e "DISK\_SIZE=64G" \\
-e "RAM\_SIZE=8G" \\
-e "CPU\_CORES=8" \\
--volume "$(pwd)/docker\_vm\_data/Ubuntu.qcow2:/boot.qcow2" \\
--cap-add NET\_ADMIN \\
--device /dev/kvm \\
-p 8006:8006 \\
-p 5000:5000 \\
happysixd/osworld-docker
2. \*\*Access the VM\*\*:
Connect to the VNC interface at \`http://localhost:8006\` to access the VM desktop.
3. \*\*Make your customizations\*\*:
- Install additional software packages
- Configure applications
- Add custom tools or scripts
- Modify system settings
4. \*\*Save changes\*\*:
Properly shut down the VM from within the guest OS. All changes will be automatically persisted to the \`Ubuntu.qcow2\` file.
.. note::
Make sure the VM is properly shut down (not force-stopped) to ensure all changes are saved to the disk image.
Clean-up Note
------------
.. important::
If experiments are interrupted abnormally, there may be residual docker containers. To clean up, run:
.. code-block:: bash
docker stop $(docker ps -q) && docker rm $(docker ps -a -q)
---
# Unknown
.. |product| replace:: VMware Workstation Pro
VMware Workstation Pro
======================
.. note::
Please note first: since VMware/VirtualBox is a type-2 hypervisor, it needs to run on top of an operating system and requires access to hardware virtualization extensions, such as Intel VT-x or AMD-V. Therefore, your computer needs to be bare metal. Before using VMware/VirtualBox, please check whether your computer/server has been virtualized. For methods, please refer to https://www.narenvadapalli.com/blog/finding-linux-machine-vm-or-baremetal/ .
Installation of VMware Workstation Pro
--------------------------------------
1. Download |product| from the \`official website \`\_. The version we are using is 17.5.1. For systems with Apple chips, you should install \`VMware Fusion \`\_.
2. Install |product|
- \`On Linux \`\_ :
Run the following command in your terminal, where \`\`xxxx-xxxxxxx\`\` represents the version number and internal version number.
.. code-block:: sh
sudo sh VMware-Workstation-xxxx-xxxxxxx.architecture.bundle --console
.. note::
You need to fill the activation key during the installation process when prompted.
- \`On Windows \`\_ :
Ensure that you're logged in as either the Administrator user or as a user who belongs to the local Administrators group. If you're logging in to a domain, make sure your domain account has local administrator privileges. Proceed by double-clicking the \`\`VMware-workstation-xxxx-xxxxxxx.exe\`\` file. Be aware that you might need to reboot your host system to finalize the installation.
.. note::
You need to fill the activation key during the installation process when prompted.
- \`For systems with Apple chips \`\_ :
Double-click the \`\`VMware-Fusion-xxxx-xxxxxxx.dmg\`\` file to open it. In the Finder window that appears, double-click the 'Install Fusion' icon. When prompted, enter your administrator username and password.
.. note::
You need to fill the activation key during the installation process when prompted.
3. Verify the successful installation by running the following:
.. code-block:: sh
vmrun -T ws list
If the installation along with the environment variable set is successful, you will see the message showing the current running virtual machines.
Troubleshooting
---------------
If after installing VMware you still cannot use it (e.g., the \`vmrun\` command fails as indicated by an error, similar to \`Issue 42 \`\_ ), please try installing \`open-vm-tools\` on your host machine.
To install \`open-vm-tools\`, follow these steps:
\*\*On Ubuntu/Debian for example:\*\*
.. code-block:: sh
sudo apt update
sudo apt install open-vm-tools open-vm-tools-desktop
After installing \`open-vm-tools\`, restart your system and try using VMware again.
As a final solution, consider reading the \`code of auto-installation \`\_ and debug to find the specific line.
Customizing the VM Image
------------------------
If you want to customize the client machine image (e.g., adding additional tools, software, or configurations), you can modify the VM image directly using VMware:
1. \*\*Configure for GUI access\*\*:
Set \`\`headless=False\`\` when initializing the DesktopEnv to enable the VMware GUI interface.
2. \*\*Access the VM\*\*:
The VM will open in VMware's graphical interface on your local computer, allowing you to interact with it directly.
3. \*\*Make your customizations\*\*:
- Install additional software packages
- Configure applications
- Add custom tools or scripts
- Modify system settings
4. \*\*Save changes\*\*:
After completing your modifications, properly shut down the VM from within the guest OS.
5. \*\*Prepare for reuse\*\*:
- Create a new \`\`init\_state\`\` snapshot to save your customized configuration as the new initial state
.. note::
Make sure the VM is properly shut down (not force-stopped) and complete the cleanup steps to ensure your customized image can be reused properly.
---
# Unknown
VirtualBox
==========
.. note::
Please note first: since VMware/VirtualBox is a type-2 hypervisor, it needs to run on top of an operating system and requires access to hardware virtualization extensions, such as Intel VT-x or AMD-V. Therefore, your computer needs to be bare metal. Before using VMware/VirtualBox, please check whether your computer/server has been virtualized. For methods, please refer to https://www.narenvadapalli.com/blog/finding-linux-machine-vm-or-baremetal/ .
Installation of VirtualBox
--------------------------
1. Download VirtualBox from the \`official website \`\_. Unfortunately, for Apple chips (M1 chips, M2 chips, etc.), VirtualBox is not supported. You can only use VMware Fusion instead.
2. Install VirtualBox. Just follow the instructions provided by the installer.
For Windows, you also need to append the installation path to the environment variable \`\`PATH\`\` for enabling the \`\`VBoxManage\`\` command. The default installation path is \`\`C:\\Program Files\\Oracle\\VirtualBox\`\`.
3. Verify the successful installation by running the following:
.. code-block:: bash
VBoxManage --version
If the installation along with the environment variable set is successful, you will see the version of VirtualBox installed on your system.
---
# Unknown
\=====================================
☁ Configuration of AWS
=====================================
---
Welcome to the AWS VM Management documentation. Before you proceed with using the code to manage AWS services, please ensure the following variables are set correctly according to your AWS environment.
Overview
========
The AWS cloud service architecture consists of a host machine that controls multiple virtual machines (each virtual machine serves as an OSWorld environment, for which we provide AMI images) for testing and potential training purposes. To prevent security breaches, we need to properly configure security groups for both the host machine and virtual machines, as well as configure appropriate subnets.
Security Group Configuration
============================
Security Group for OSWorld Virtual Machines
--------------------------------------------
OSWorld requires certain ports to be open, such as port 5000 for backend connections to OSWorld services, port 5910 for VNC visualization, port 9222 for Chrome control, etc. The \`\`AWS\_SECURITY\_GROUP\_ID\`\` variable represents the security group configuration for virtual machines serving as OSWorld environments. Please complete the configuration and set this environment variable to the ID of the configured security group.
\*\*⚠️ Important\*\*: Please strictly follow the port settings below to prevent OSWorld tasks from failing due to connection issues:
Inbound Rules (8 rules required)
~~~~~~~~~~~~~~~~~~~~~~~~~~~~~~~~~
+-------------+----------+------------+----------------+---------------------------+
| Type | Protocol | Port Range | Source | Description |
+=============+==========+============+================+===========================+
| SSH | TCP | 22 | 0.0.0.0/0 | SSH access |
+-------------+----------+------------+----------------+---------------------------+
| HTTP | TCP | 80 | 172.31.0.0/16 | HTTP traffic |
+-------------+----------+------------+----------------+---------------------------+
| Custom TCP | TCP | 5000 | 172.31.0.0/16 | OSWorld backend service |
+-------------+----------+------------+----------------+---------------------------+
| Custom TCP | TCP | 5910 | 0.0.0.0/0 | NoVNC visualization port |
+-------------+----------+------------+----------------+---------------------------+
| Custom TCP | TCP | 8006 | 172.31.0.0/16 | VNC service port |
+-------------+----------+------------+----------------+---------------------------+
| Custom TCP | TCP | 8080 | 172.31.0.0/16 | VLC service port |
+-------------+----------+------------+----------------+---------------------------+
| Custom TCP | TCP | 8081 | 172.31.0.0/16 | Additional service port |
+-------------+----------+------------+----------------+---------------------------+
| Custom TCP | TCP | 9222 | 172.31.0.0/16 | Chrome control port |
+-------------+----------+------------+----------------+---------------------------+
Outbound Rules (1 rule required)
~~~~~~~~~~~~~~~~~~~~~~~~~~~~~~~~~
+-------------+----------+------------+-------------+---------------------------+
| Type | Protocol | Port Range | Destination | Description |
+=============+==========+============+=============+===========================+
| All traffic | All | All | 0.0.0.0/0 | Allow all outbound traffic|
+-------------+----------+------------+-------------+---------------------------+
Host Machine Security Group Configuration
------------------------------------------
Configure according to your specific requirements. This project provides a monitor service that runs on port 8080 by default. You need to open this port to use this functionality.
VPC Configuration
=================
To isolate the entire evaluation stack, we run both the host machine and all client virtual machines inside a dedicated VPC. The setup is straightforward:
1. Launch the host instance via the AWS console and note the \*\*VPC ID\*\* and \*\*Subnet ID\*\* shown in its network settings.
2. Export the same \*\*Subnet ID\*\* as the environment variable \`\`AWS\_SUBNET\_ID\`\` before starting the client code.
.. code-block:: bash
export AWS\_SUBNET\_ID=subnet-xxxxxxxxxxxxxxxxx
(Both the client and host must reside in this subnet for the evaluation to work.)
Configuration Variables
=======================
That's essentially all the setup you need to perform. From here on, you only have to supply a few extra details and environment variables—just make sure they're all present in your environment.
You need to assign values to several variables crucial for the operation of these scripts on AWS:
- \*\*\`\`DEFAULT\_REGION\`\`\*\*: Default AWS region where your instances will be launched.
- Example: \`\`"us-east-1"\`\`
- \*\*\`\`IMAGE\_ID\_MAP\`\`\*\*: Dictionary mapping regions to specific AMI IDs that should be used for instance creation. Here we already set the AMI id to the official OSWorld image of Ubuntu supported by us.
- Formatted as follows:
.. code-block:: python
IMAGE\_ID\_MAP = {
"us-east-1": "ami-0d23263edb96951d8"
# Add other regions and corresponding AMIs
}
- \*\*\`\`INSTANCE\_TYPE\`\`\*\*: Specifies the type of EC2 instance to be launched.
- Example: \`\`"t3.medium"\`\`
- \*\*\`\`KEY\_NAME\`\`\*\*: Specifies the name of the key pair to be used for the instances.
- Example: \`\`"osworld\_key"\`\`
- \*\*\`\`NETWORK\_INTERFACES\`\`\*\*: Configuration settings for network interfaces, which include subnet IDs, security group IDs, and public IP addressing.
- Example:
.. code-block:: bash
AWS\_REGION=us-east-1
AWS\_SUBNET\_ID=subnet-xxxx
AWS\_SECURITY\_GROUP\_ID=sg-xxxx
AWS CLI Configuration
=====================
Before using these scripts, you must configure your AWS CLI with your credentials. This can be done via the following commands:
.. code-block:: bash
aws configure
This command will prompt you for:
- AWS Access Key ID
- AWS Secret Access Key
- Default region name (Optional, you can press enter)
Enter your credentials as required. This setup will allow you to interact with AWS services using the credentials provided.
Disclaimer
==========
Use the provided scripts and configurations at your own risk. Ensure that you understand the AWS pricing model and potential costs associated with deploying instances, as using these scripts might result in charges on your AWS account.
.. note:: Ensure all AMI images used in \`\`IMAGE\_ID\_MAP\`\` are accessible and permissioned correctly for your AWS account, and that they are available in the specified region.
---
# Unknown
Mobile
=======================
1. \*\*Rico: A Mobile App Dataset for Building Data-Driven Design Applications\*\* 2017
\*Biplab Deka, Zifeng Huang, Chad Franzen, Joshua Hibschman, Daniel Afergan, Yang Li, Jeffrey Nichols, Ranjitha Kumar\* \`pdf \`\_, 2017
2. \*\*Mapping Natural Language Instructions to Mobile UI Action Sequences.\*\* ACL 2020
\*Yang Li, Jiacong He, Xin Zhou, Yuan Zhang, Jason Baldridge\* \`pdf \`\_, 2020.5
3. \*\*AndroidEnv: A Reinforcement Learning Platform for Android.\*\* ViGIL at NAACL 2021
\*Daniel Toyama, Philippe Hamel, Anita Gergely, Gheorghe Comanici, Amelia Glaese, Zafarali Ahmed, Tyler Jackson, Shibl Mourad, Doina Precup\* \`pdf \`\_, 2021.5
4. \*\*Mobile App Tasks with Iterative Feedback (MoTIF): Addressing Task Feasibility in Interactive Visual Environments.\*\* ViGIL at NAACL 2021
\*Andrea Burns, Deniz Arsan, Sanjna Agrawal, Ranjitha Kumar, Kate Saenko, Bryan A. Plummer\* \`pdf \`\_, 2021.4
5. \*\*META-GUI: Towards Multi-modal Conversational Agents on Mobile GUI.\*\* Arxiv
\*Liangtai Sun, Xingyu Chen, Lu Chen, Tianle Dai, Zichen Zhu, Kai Yu\* \`pdf \`\_, 2022.5
6. \*\*Enabling Conversational Interaction with Mobile UI using Large Language Models.\*\* CHI 2023
\*Bryan Wang, Gang Li, Yang Li\* \`pdf \`\_, 2022.9
7. \*\*UGIF: UI Grounded Instruction Following.\*\* Arxiv
\*Sagar Gubbi Venkatesh, Partha Talukdar, Srini Narayanan\* \`pdf \`\_, 2022.11
8. \*\*From Pixels to UI Actions: Learning to Follow Instructions via Graphical User Interfaces.\*\* Arxiv
\*Peter Shaw, Mandar Joshi, James Cohan, Jonathan Berant, Panupong Pasupat, Hexiang Hu, Urvashi Khandelwal, Kenton Lee, Kristina Toutanova\* \`pdf \`\_, 2023.6
9. \*\*Empowering LLM to use Smartphone for Intelligent Task Automation\*\* Arxiv
\*Hao Wen, Yuanchun Li, Guohong Liu, Shanhui Zhao, Tao Yu, Toby Jia-Jun Li, Shiqi Jiang, Yunhao Liu, Yaqin Zhang, Yunxin Liu\* \`pdf \`\_, 2023.8
10. \*\*Empowering LLM to use Smartphone for Intelligent Task Automation\*\* Arxiv
\*Hao Wen, Yuanchun Li, Guohong Liu, Shanhui Zhao, Tao Yu, Toby Jia-Jun Li, Shiqi Jiang, Yunhao Liu, Yaqin Zhang, Yunxin Liu\* \`pdf \`\_, 2023.8
11. \*\*Android in the Wild: A Large-Scale Dataset for Android Device Control\*\* Arxiv
\*Christopher Rawles, Alice Li, Daniel Rodriguez, Oriana Riva, Timothy Lillicrap\* \`pdf \`\_, 2023.7
12. \*\*You Only Look at Screens: Multimodal Chain-of-Action Agents\*\* Arxiv
\*Zhuosheng Zhang, Aston Zhang\* \`pdf \`\_, 2023.9
13. \*\*DigiRL: Training In-The-Wild Device-Control Agents with Autonomous Reinforcement Learning\*\* Arxiv
\*Hao Bai, Yifei Zhou, Mert Cemri, Jiayi Pan, Alane Suhr, Sergey Levine, Aviral Kumar\* \`pdf \`\_, 2024.6
---
# Unknown
Web
====================
1. \*\*World of Bits: An Open-Domain Platform for Web-Based Agents.\*\* ICML 2017
\*Tianlin (Tim) Shi, Andrej Karpathy, Linxi (Jim) Fan, Jonathan Hernandez, Percy Liang\* \`pdf \`\_, 2017
2. \*\*Reinforcement Learning on Web Interfaces Using Workflow-Guided Exploration.\*\* ICLR 2018
\*Evan Zheran Liu, Kelvin Guu, Panupong Pasupat, Tianlin Shi, Percy Liang\* \`pdf \`\_, 2018.2
3. \*\*WebNav: A New Large-Scale Task for Natural Language based Sequential Decision Making.\*\* Arxiv 2018
\*Daniel Khashabi, Tushar Khot, Ashish Sabharwal, Peter Clark, Oyvind Tafjord, Eric Gribko, Michal Guerquin, Aniruddha T. Kembhavi\* \`pdf \`\_, 2018.12
4. \*\*WebGPT: Large-Scale Web Navigation with Reinforcement Learning.\*\* Arxiv
\*Kelvin Guu, Michael Tung, Panupong Pasupat, Ming-Wei Chang\* \`pdf \`\_, 2021.7
5. \*\*MINOS: Multimodal Intelligence for Navigation in Open Spaces.\*\* Arxiv
\*Barbara Menta, Amos Storkey, Artur d'Avila Garcez, Jeffery Kinnison, Judy Hoffman\* \`pd \`\_, 2022.1
6. \*\*A data-driven approach for learning to control computers.\*\* PLMR
\*Peter C Humphreys, David Raposo, Toby Pohlen, Gregory Thornton, Rachita Chhaparia, Alistair Muldal, Josh Abramson, Petko Georgiev, Alex Goldin, Adam Santoro, Timothy Lillicrap\* \`pdf \`\_, 2022.2
7. \*\*WebShop: Towards Scalable Real-World Web Interaction with Grounded Language Agents.\*\* Arxiv
\*Shunyu Yao, Howard Chen, John Yang, Karthik Narasimhan\* \`pdf \`\_, 2022.7
8. \*\*Multimodal Web Navigation with Instruction-Finetuned Foundation Models.\*\* ICLR 2023 Workshop ME-FoMo
\*Hiroki Furuta, Ofir Nachum, Kuang-Huei Lee, Yutaka Matsuo, Shixiang Shane Gu, Izzeddin Gur\* \`pdf \`\_, 2023.5
9. \*\*Hierarchical Prompting Assists Large Language Model on Web Navigation.\*\* ACL 2023 NLRSE workshop
\*Abishek Sridhar, Robert Lo, Frank F. Xu, Hao Zhu, Shuyan Zhou\* \`pdf \`\_, 2023.5
10. \*\*Mind2Web: Towards a Generalist Agent for the Web.\*\* Arxiv
\*Xiang Deng, Yu Gu, Boyuan Zheng, Shijie Chen, Samuel Stevens, Boshi Wang, Huan Sun, Yu Su\* \`pdf \`\_, 2023.6
11. \*\*A Real-World WebAgent with Planning, Long Context Understanding, and Program Synthesis\*\* Arxiv
\*Izzeddin Gur, Hiroki Furuta, Austin Huang, Mustafa Safdari, Yutaka Matsuo, Douglas Eck, Aleksandra Faust\* \`pdf \`\_, 2023.7
12. \*\*WebArena: A Realistic Web Environment for Building Autonomous Agents\*\* Arxiv
\*Shuyan Zhou, Frank F. Xu, Hao Zh+, Xuhui Zhou, Robert Lo, Abishek Sridhar, Xianyi Cheng, Yonatan Bisk, Daniel Fried, Uri Alon, Graham Neubig\* \`pdf \`\_, 2023.7
13. \*\*LASER: LLM Agent with State-Space Exploration for Web Navigation\*\* Arxiv
\*Kaixin Ma, Hongming Zhang, Hongwei Wang, Xiaoman Pan, Dong Yu\* \`pdf \`\_, 2023.9
14. \*\*GPT-4V(ision) is a Generalist Web Agent, if Grounded\*\* Arxiv
\*Boyuan Zheng, Boyu Gou, Jihyung Kil, Huan Sun, Yu Su\* \`pdf \`\_, 2024.1
15. \*\*WebLINX: Real-World Website Navigation with Multi-Turn Dialogue\*\* Arxiv
\*Xing Han Lù, Zdeněk Kasner, Siva Reddy\* \`pdf \`\_, 2024.2
16. \*\*VisualWebBench: How Far Have Multimodal LLMs Evolved in Web Page Understanding and Grounding?\*\* Arxiv
\*Junpeng Liu, Yifan Song, Bill Yuchen Lin, Wai Lam, Graham Neubig, Yuanzhi Li, Xiang Yue\* \`pdf \`\_, 2024.4
17. \*\*SteP: Stacked LLM Policies for Web Actions\*\* Arxiv
\*Paloma Sodhi, S.R.K. Branavan, Yoav Artzi, Ryan McDonald\* \`pdf \`\_, 2024.4
18. \*\*WILBUR: Adaptive In-Context Learning for Robust and Accurate Web Agents\*\* Arxiv
\*Michael Lutz, Arth Bohra, Manvel Saroyan, Artem Harutyunyan, Giovanni Campagna\* \`pdf \`\_, 2024.4
19. \*\*MMInA: Benchmarking Multihop Multimodal Internet Agents\*\* Arxiv
\*Ziniu Zhang, Shulin Tian, Liangyu Chen, Ziwei Liu\* \`pdf \`\_, 2024.4
20. \*\*WebCanvas: Benchmarking Web Agents in Online Environments\*\* Arxiv
\*Yichen Pan, Dehan Kong, Sida Zhou, Cheng Cui, Yifei Leng, Bing Jiang, Hangyu Liu, Yanyi Shang, Shuyan Zhou, Tongshuang Wu, Zhengyang Wu\* \`pdf \`\_, 2024.6
---
# Unknown
General
=====================
1. \*\*An Empirical Study & Evaluation of Modern CAPTCHAs\*\* Arxiv
\*Andrew Searles, Yoshimichi Nakatsuka, Ercan Ozturk, Andrew Paverd, Gene Tsudik, Ai Enkoji\* \`pdf \`\_, 2023.7
2. \*\*The Unsolved Challenges of LLMs as Generalist Web Agents: A Case Study\*\* Arxiv
\*Rim\_Assouel1, Tom Marty, Massimo Caccia, Issam H. Laradji, Alexandre Drouin, Sai Rajeswar, Hector Palacios, Quentin Cappart, David Vazquez, Nicolas Chapados, Maxime Gasse, Alexandre Lacoste\* \`pdf \`\_, 2023.12
3. \*\*"What's important here?": Opportunities and Challenges of Using LLMs in Retrieving Information from Web Interfaces\*\* Arxiv
\*Faria Huq, Jeffrey P. Bigham, Nikolas Martelaro\* \`pdf \`\_, 2023.12
4. \*\*Autonomous Evaluation and Refinement of Digital Agents\*\* Arxiv
\*Jiayi Pan, Yichi Zhang, Nicholas Tomlin, Yifei Zhou, Sergey Levine, Alane Suhr\* \`pdf \`\_, 2024.4
5. \*\*IDs for AI Systems\*\* Arxiv
\*Alan Chan, Noam Kolt, Peter Wills, Usman Anwar, Christian Schroeder de Witt, Nitarshan Rajkumar, Lewis Hammond, David Krueger, Lennart Heim, Markus Anderljung\* \`pdf \`\_, 2024.6
6. \*\*OS-ATLAS: A Foundation Action Model For Generalist GUI Agents\*\* Arxiv
\*Zhiyong Wu, Zhenyu Wu, Fangzhi Xu, Yian Wang, Qiushi Sun, Chengyou Jia, Kanzhi Cheng, Zichen Ding, Liheng Chen, Paul Pu Liang, Yu Qiao\* \`pdf \`\_, 2024.10
7. \*\*Aguvis: Unified Pure Vision Agents for Autonomous GUI Interaction\*\* Arxiv
\*Yiheng Xu, Zekun Wang, Junli Wang, Dunjie Lu, Tianbao Xie, Amrita Saha, Doyen Sahoo, Tao Yu, Caiming Xiong\* \`pdf \`\_, 2024.12
8. \*\*AgentTrek: Agent Trajectory Synthesis via Guiding Replay with Web Tutorials\*\* Arxiv
\*Yiheng Xu, Dunjie Lu, Zhennan Shen, Junli Wang, Zekun Wang, Yuchen Mao, Caiming Xiong, Tao Yu\* \`pdf \`\_, 2024.12
9. \*\*Aria-UI: Visual Grounding for GUI Instructions\*\* Arxiv
\*Yuhao Yang, Yue Wang, Dongxu Li, Ziyang Luo, Bei Chen, Chao Huang, Junnan Li\* \`pdf \`\_, 2024.12
---
# Unknown
Computer
=====================
1. \*\*ASSISTGUI: Task-Oriented Desktop Graphical User Interface Automation\*\* Arxiv
\*Difei Gao, Lei Ji, Zechen Bai, Mingyu Ouyang, Peiran Li, Dongxing Mao, Qinchen Wu, Weichen Zhang, Peiyi Wang, Xiangwu Guo, Hengxu Wang, Luowei Zhou, Mike Zheng Shou\* \`pdf \`\_, 2023.12
2. \*\*SeeClick: Harnessing GUI Grounding for Advanced Visual GUI Agents\*\* Arxiv
\*Kanzhi Cheng, Qiushi Sun, Yougang Chu, Fangzhi Xu, Yantao Li, Jianbing Zhang, Zhiyong Wu\* \`pdf \`\_, 2024.1
3. \*\*OS-Copilot: Towards Generalist Computer Agents with Self-Improvement\*\* Arxiv
\*Zhiyong Wu, Chengcheng Han, Zichen Ding, Zhenmin Weng, Zhoumianze Liu, Shunyu Yao, Tao Yu, Lingpeng Kong\* \`pdf \`\_, 2024.2
4. \*\*ScreenAgent: A Vision Language Model-driven Computer Control Agent\*\* Arxiv
\*Runliang Niu, Jindong Li, Shiqi Wang, Yali Fu, Xiyu Hu, Xueyuan Leng, He Kong, Yi Chang, Qi Wang\* \`pdf \`\_, 2024.2
5. \*\*OmniACT: A Dataset and Benchmark for Enabling Multimodal Generalist Autonomous Agents for Desktop and Web\*\* Arxiv
\*Raghav Kapoor, Yash Parag Butala, Melisa Russak, Jing Yu Koh, Kiran Kamble, Waseem Alshikh, Ruslan Salakhutdinov\* \`pdf \`\_, 2024.2
6. \*\*Cradle: Empowering Foundation Agents Towards General Computer Control\*\* Arxiv
\*Weihao Tan, Wentao Zhang, Xinrun Xu, Haochong Xia, Ziluo Ding, Boyu Li, Bohan Zhou, Junpeng Yue, Jiechuan Jiang, Yewen Li, Ruyi An, Molei Qin, Chuqiao Zong, Longtao Zheng, Yujie Wu, Xiaoqiang Chai, Yifei Bi, Tianbao Xie, Pengjie Gu, Xiyun Li, Ceyao Zhang, Long Tian, Chaojie Wang, Xinrun Wang, Börje F. Karlsson, Bo An, Shuicheng Yan, Zongqing Lu\* \`pdf \`\_, 2024.3
7. \*\*AgentStudio: A Toolkit for Building General Virtual Agents\*\* Arxiv
\*Longtao Zheng, Zhiyuan Huang, Zhenghai Xue, Xinrun Wang, Bo An, Shuicheng Yan\* \`pdf \`\_, 2024.3
8. \*\*OSWorld: Benchmarking Multimodal Agents for Open-Ended Tasks in Real Computer Environments\*\* Arxiv
\*Tianbao Xie, Danyang Zhang, Jixuan Chen, Xiaochuan Li, Siheng Zhao, Ruisheng Cao, Toh Jing Hua, Zhoujun Cheng, Dongchan Shin, Fangyu Lei, Yitao Liu, Yiheng Xu, Shuyan Zhou, Silvio Savarese, Caiming Xiong, Victor Zhong, Tao Yu\* \`pdf \`\_, 2024.4
9. \*\*GUI-WORLD: A Dataset for GUI-oriented Multimodal LLM-based Agents\*\* Arxiv
\*Dongping Chen, Yue Huang, Siyuan Wu, Jingyu Tang, Liuyi Chen, Yilin Bai, Zhigang He, Chenlong Wang, Huichi Zhou, Yiqiang Li, Tianshuo Zhou, Yue Yu, Chujie Gao, Qihui Zhang, Yi Gui, Zhen Li, Yao Wan, Pan Zhou, Jianfeng Gao, Lichao Sun\* \`pdf \`\_, 2024.6
10. \*\*VideoGUI: A Benchmark for GUI Automation from Instructional Videos\*\* Arxiv
\*Kevin Qinghong Lin, Linjie Li, Difei Gao, Qinchen WU, Mingyi Yan, Zhengyuan Yang, Lijuan Wang, Mike Zheng Shou\* \`pdf \`\_, 2024.6
11. \*\*Read Anywhere Pointed: Layout-aware GUI Screen Reading with Tree-of-Lens Grounding\*\* Arxiv
\*Yue Fan, Lei Ding, Ching-Chen Kuo, Shan Jiang, Yang Zhao, Xinze Guan, Jie Yang, Yi Zhang, Xin Eric Wang\* \`pdf \`\_, 2024.6
12. \*\*GUI Action Narrator: Where and When Did That Action Take Place?\*\* Arxiv
\*Qinchen Wu, Difei Gao, Kevin Qinghong Lin, Zhuoyu Wu, Xiangwu Guo, Peiran Li, Weichen Zhang, Hengxu Wang, Mike Zheng Shou\* \`pdf \`\_, 2024.6
---
# Page not found · GitHub Pages
404
===
**File not found**
The site configured at this address does not contain the requested file.
If this is your site, make sure that the filename case matches the URL as well as any file permissions.
For root URLs (like `http://example.com/`) you must provide an `index.html` file.
[Read the full documentation](https://help.github.com/pages/)
for more information about using **GitHub Pages**.
[GitHub Status](https://githubstatus.com/)
— [@githubstatus](https://twitter.com/githubstatus)
[](https://timothyxxx.github.io/)
[](https://timothyxxx.github.io/)
---
# Site not found · GitHub Pages
404
===
**There isn't a GitHub Pages site here.**
If you're trying to publish one, [read the full documentation](https://help.github.com/pages/)
to learn how to set up **GitHub Pages** for your repository, organization, or user account.
[GitHub Status](https://githubstatus.com/)
— [@githubstatus](https://twitter.com/githubstatus)
[](https://timothyxxx.github.io/)
[](https://timothyxxx.github.io/)
---